When baking there is one disposable item that I use very frequently, baking parchment. So when GOLDENSPOON sent me 2 Premium Silicone Non Stick Baking Mats I was interested as to how they would perform. Also, carrying out a Silicone Baking Mat Review was going to be interesting and fun!
Silicone Baking Mat Review would my gooey cookies come off easily?
Setting Out The Silicone Mat Review
After some research as to how hot Silicone bakeware can be cooked at. Since they are safe to bake up to 250C, I decided to test these vibrant green edged mats in three ways.
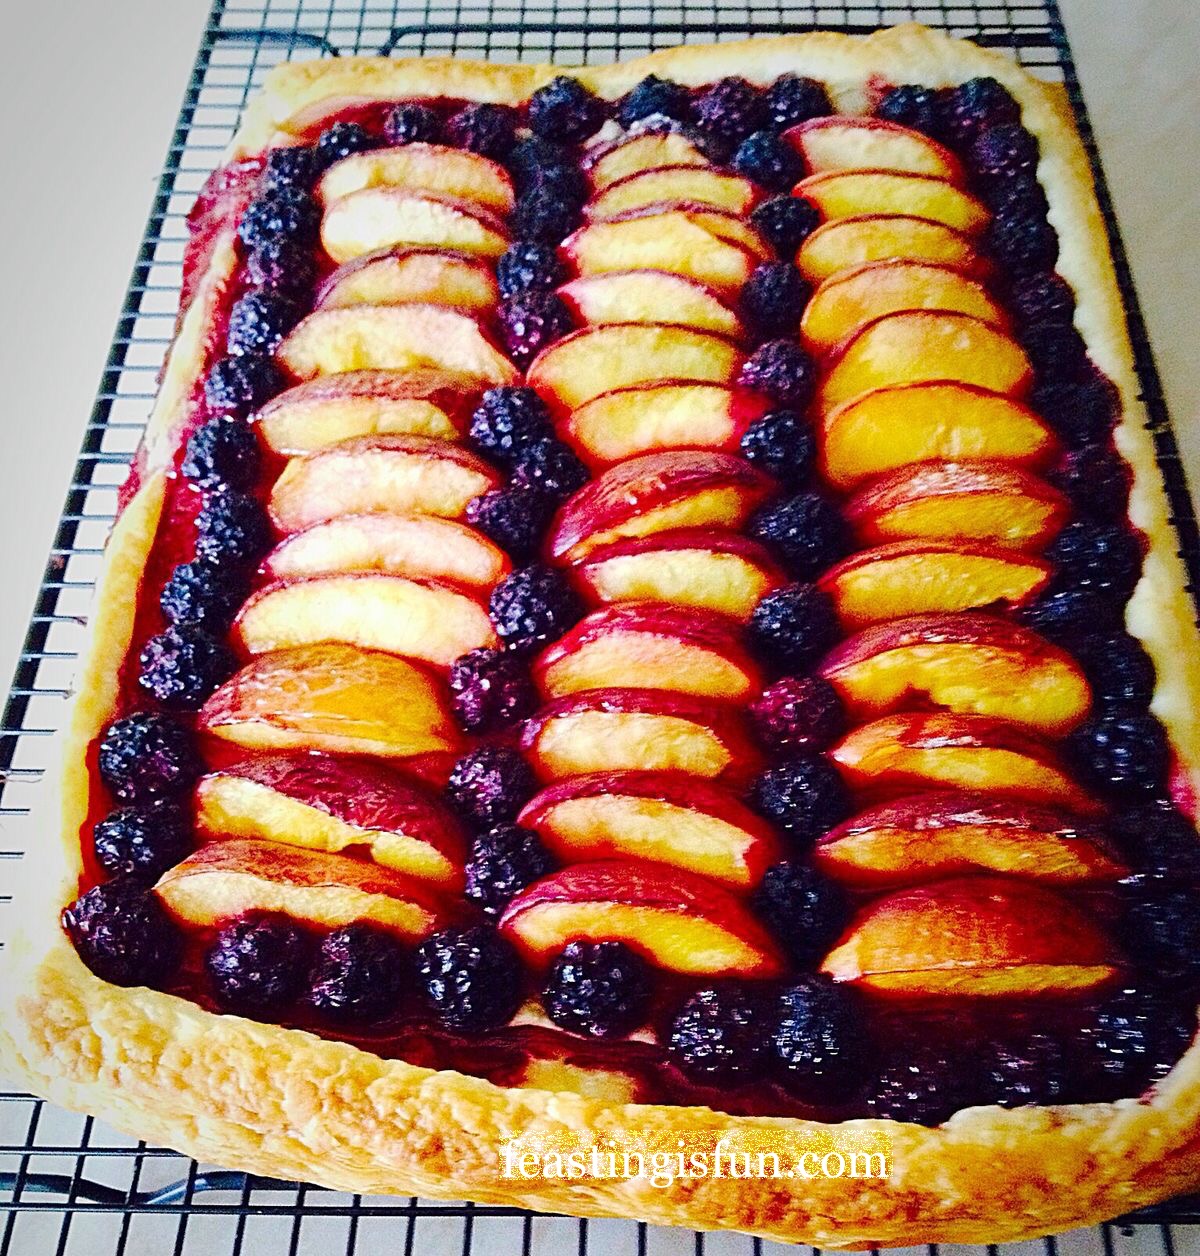
First of all, bake at a high temperature – for this I choose to bake a puff pastry tart.
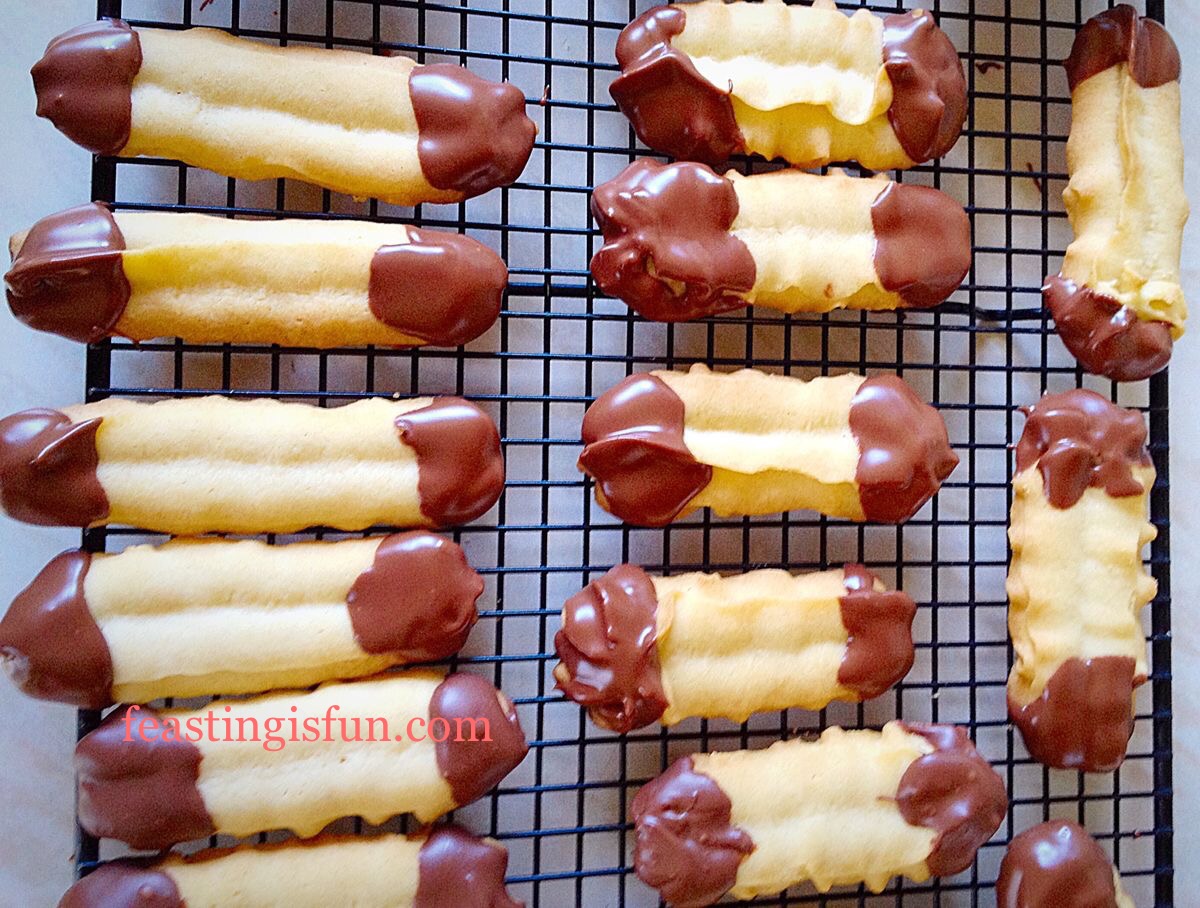
Also, bake my most gooey and sticky recipe – for this I choose my Rolo ChocolateCookies.
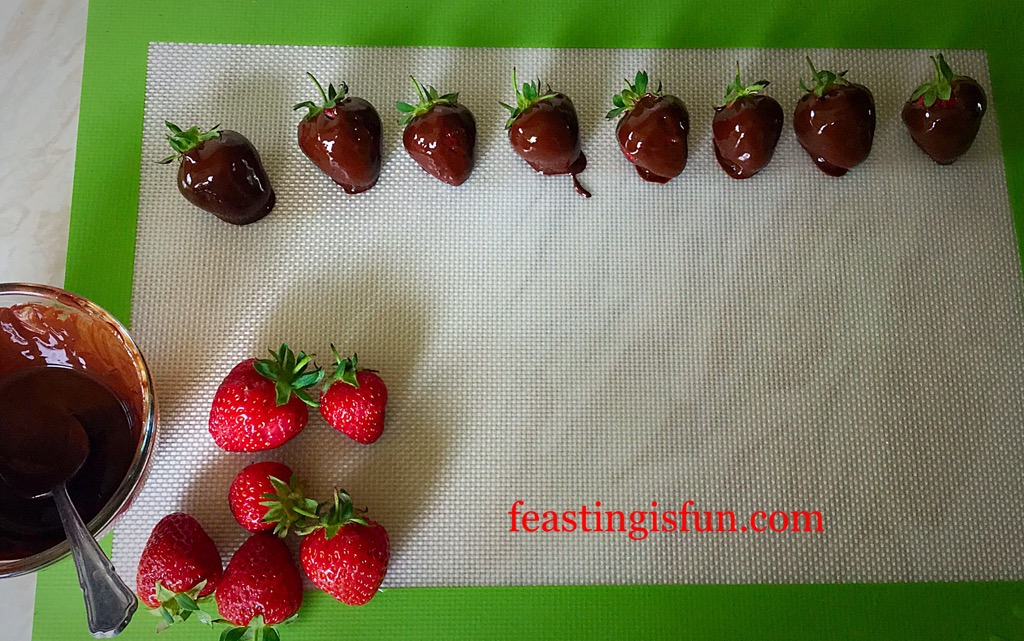
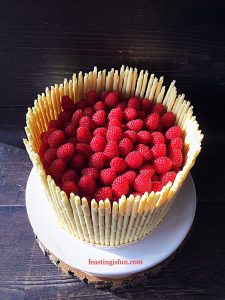
And finally, use in place of baking parchment for setting messy melted chocolate – for this I covered some strawberries in chocolate to decorate a cake.
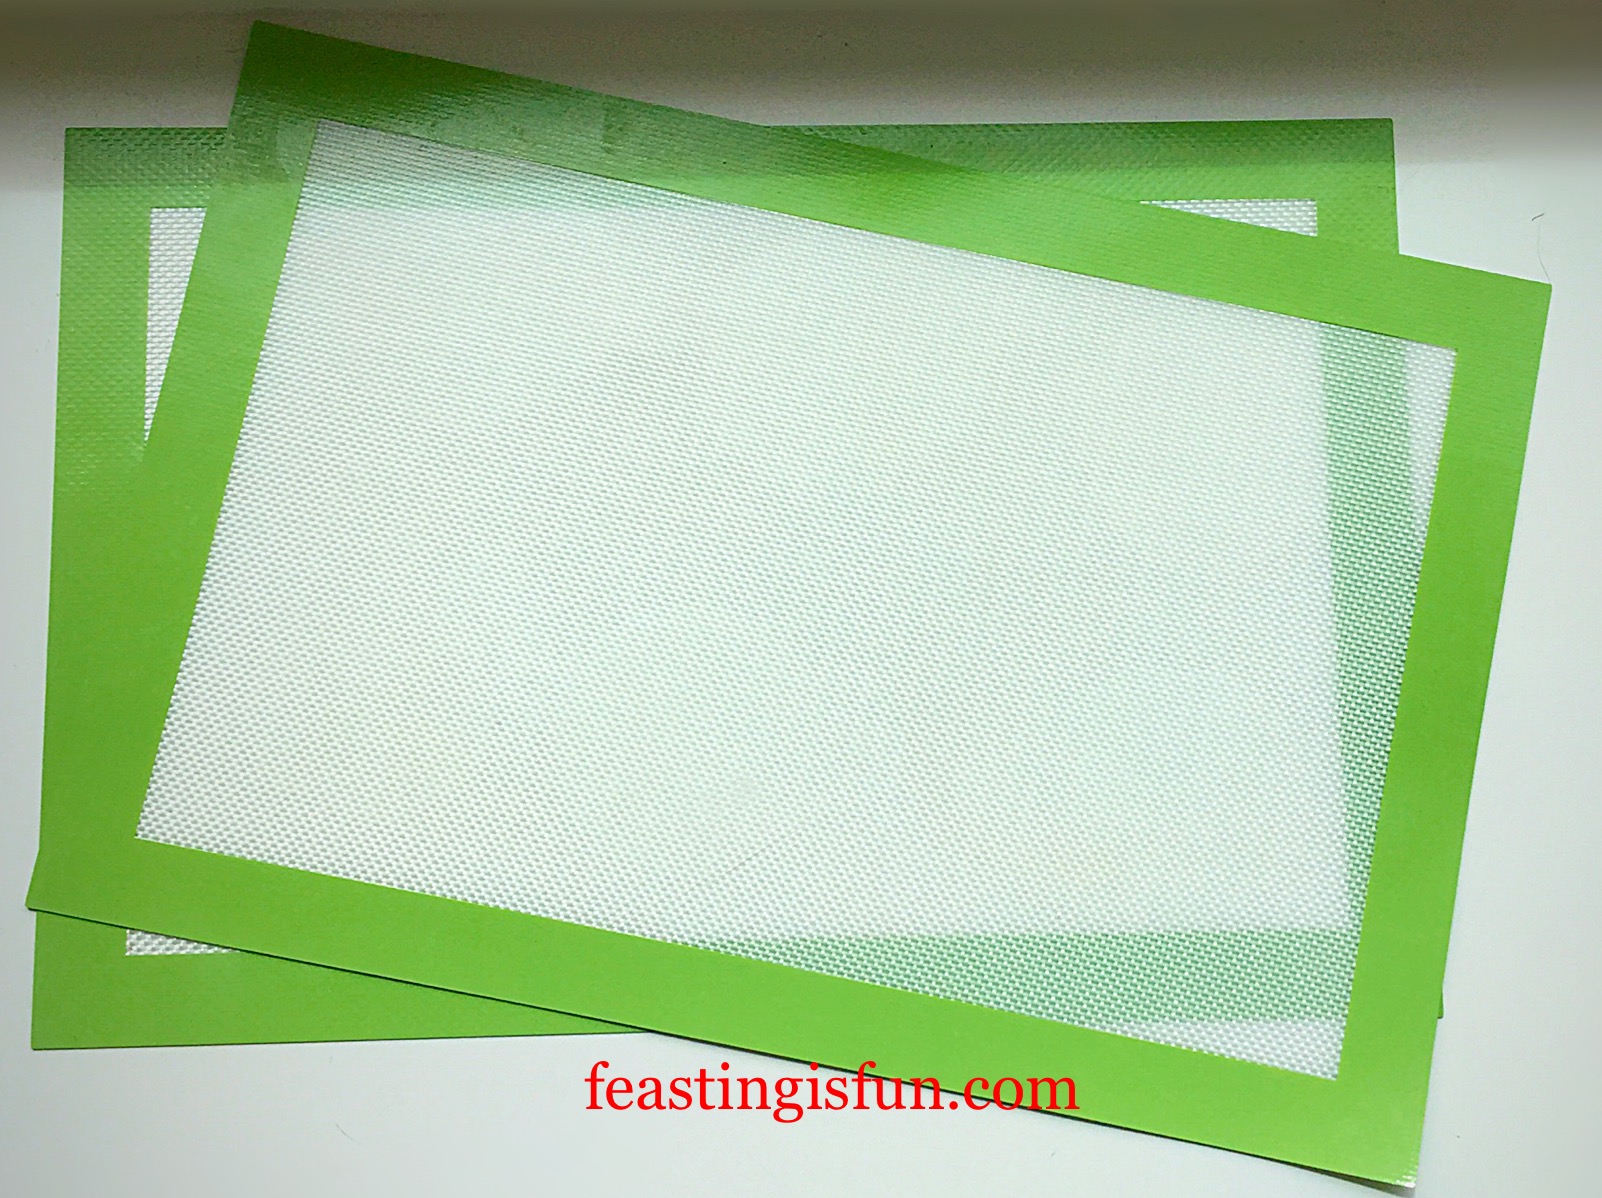
Silicone Baking Mat Review 2 mats.
I received 2 Premium Silicone Non Stick Baking Mats, dimensions 27cm x 40cm. Following a quick wash in warm, soapy water, a quick dry and they were ready to use. And I was very pleased to find that they fitted nicely inside my two biggest, most used, baking trays.
First Test – Baking The Silicone Mat In A Hot Oven
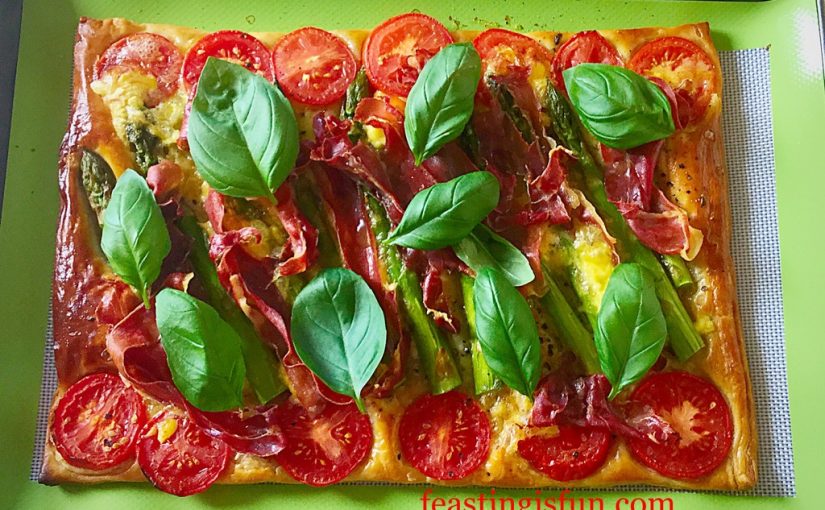
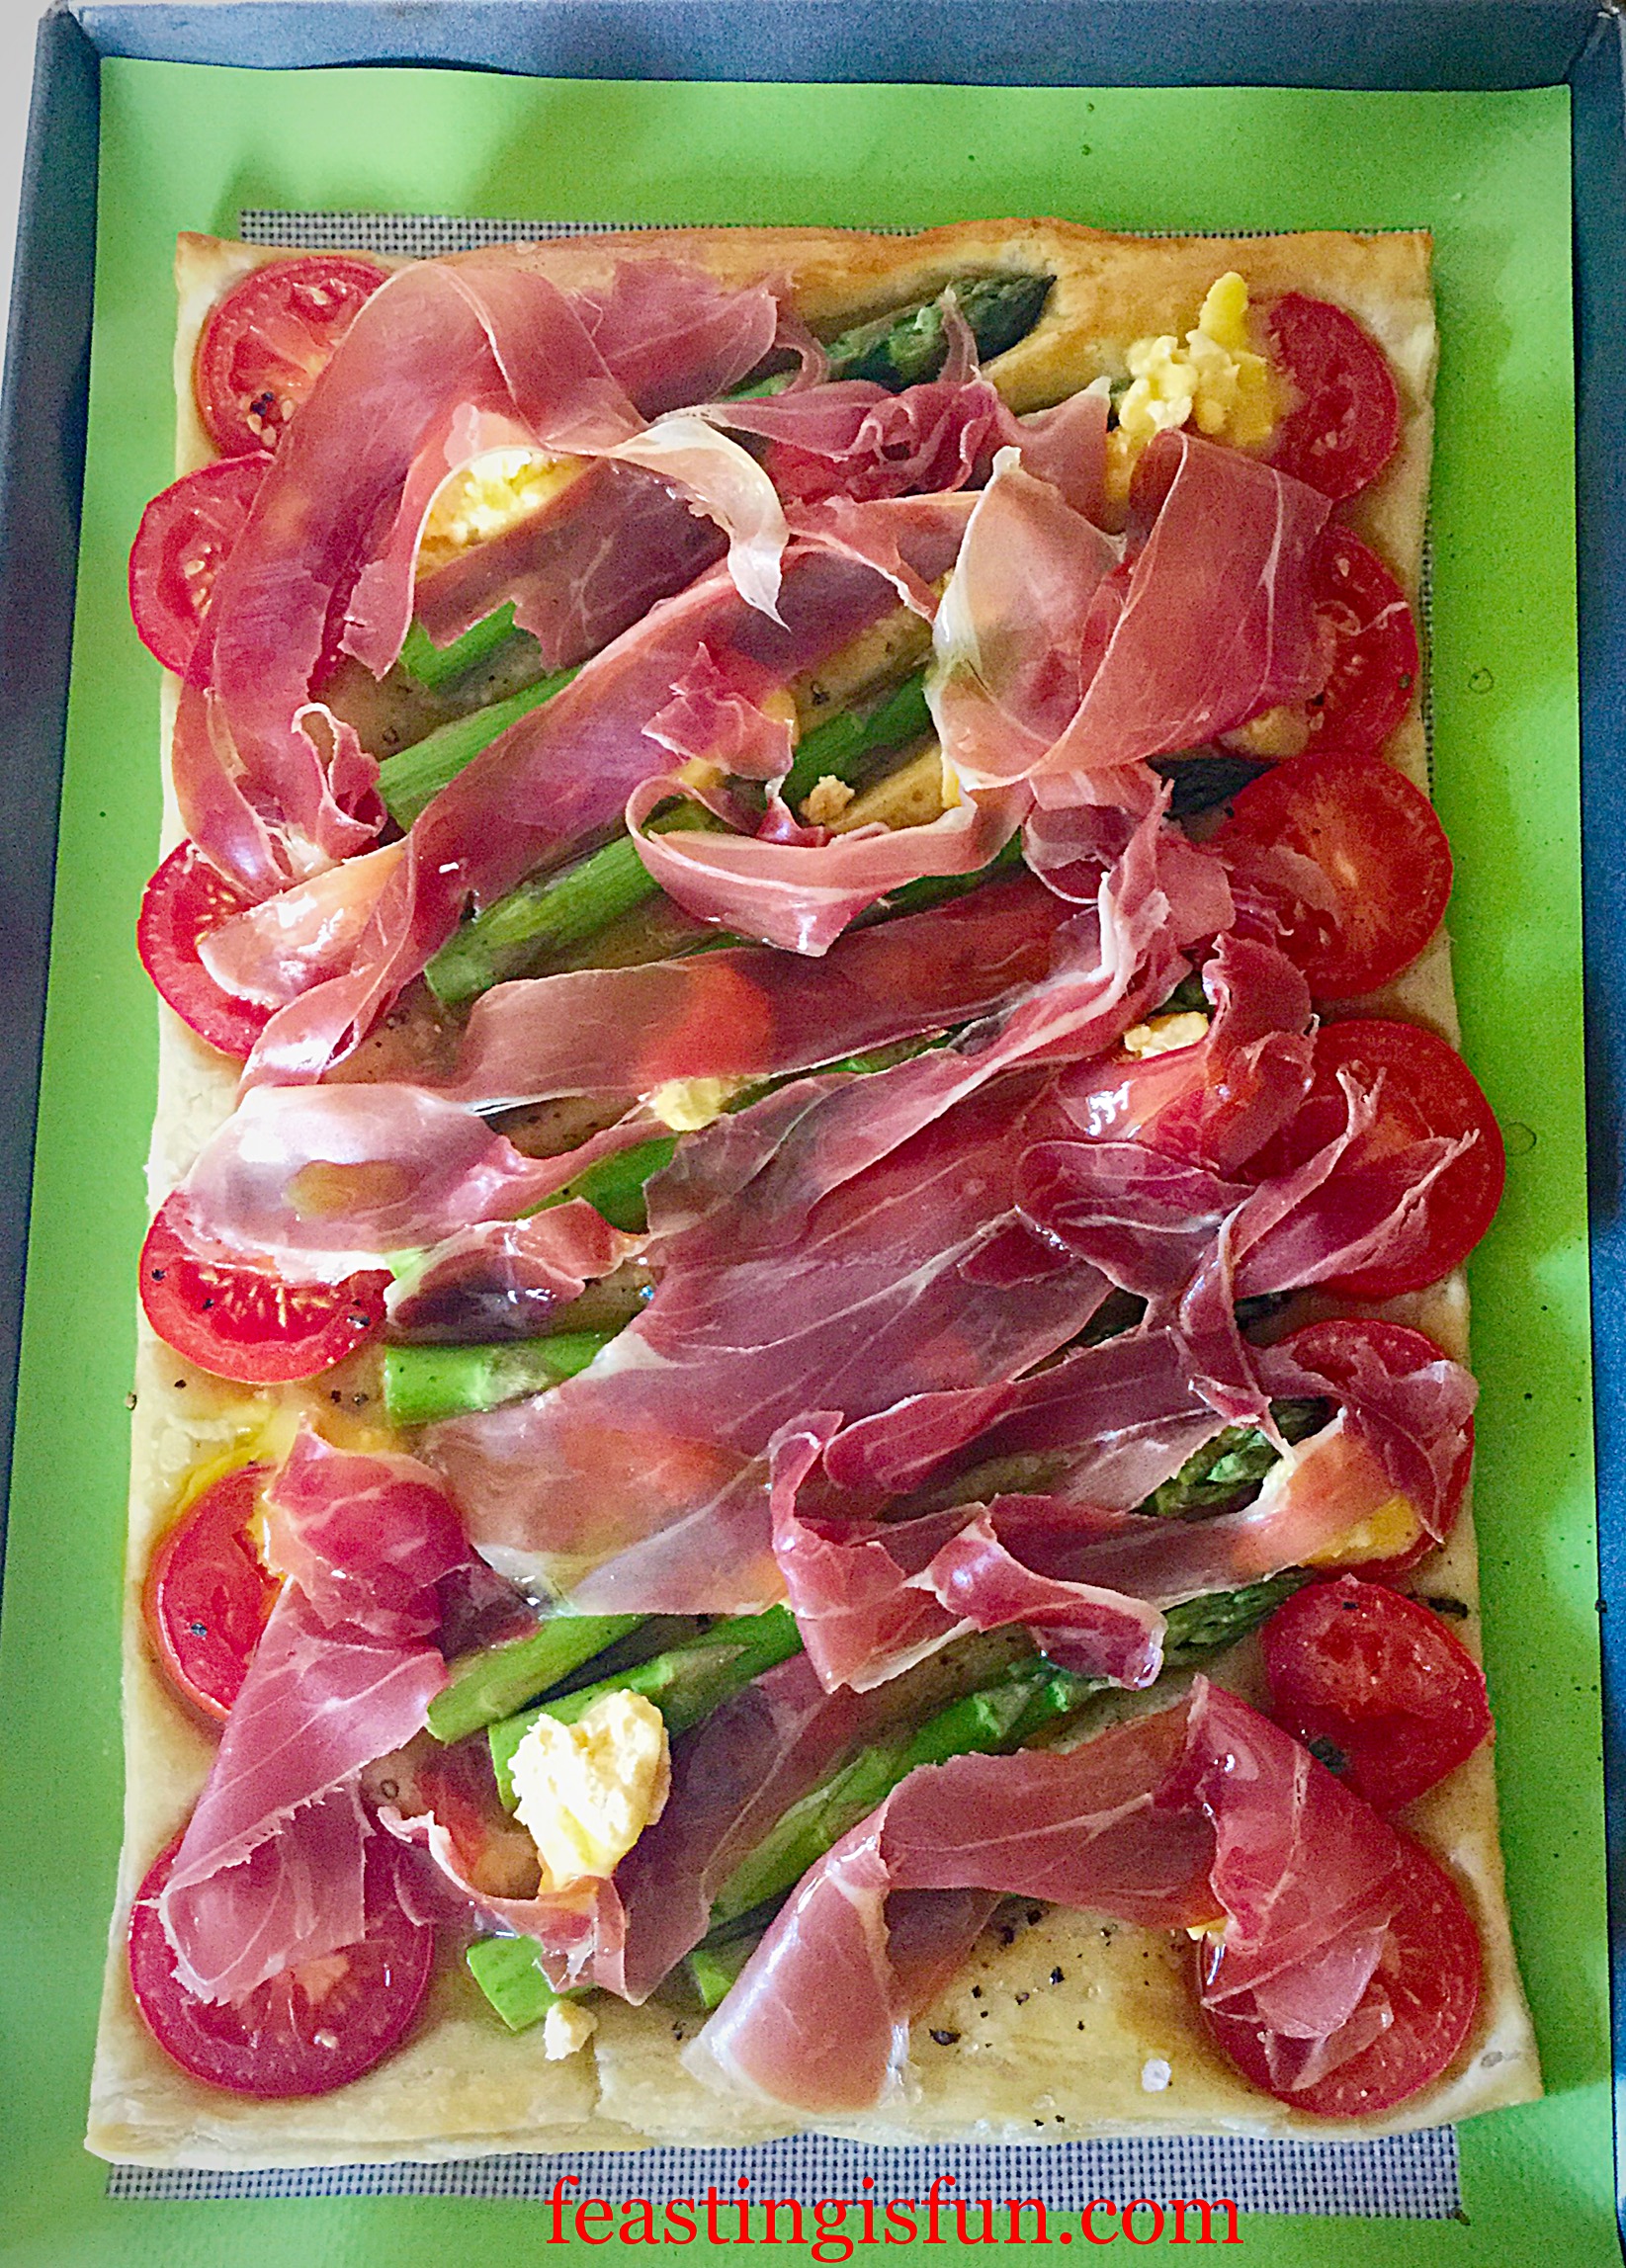
Because puff pastry is baked at a high temperature, I decided to make a quick Asparagus Prosciutto Ham Tart.
Recipe: Asparagus Prosciutto Ham Tart serves 4
320g Ready Rolled Puff Pastry
10-12 Asparagus Spears – washed and trimmed
1 Medium Egg – whisked with a teaspoon of milk fit the egg wash
3 Medium Tomatoes – sliced
6 Slices Prosciutto Ham
Approx 50g Soft Cheese – I used Goddess Cheese from Pong Cheese. Alternatively you could use Brie, or mozzarella cheese.
Sea Salt and Freshly Ground Black Pepper.
1tbsp Olive Oil
Basil leaves to garnish
Assembling and baking the tart:
First of all, preheat the oven to 220C/200C fan, gas mark 7, 425F.
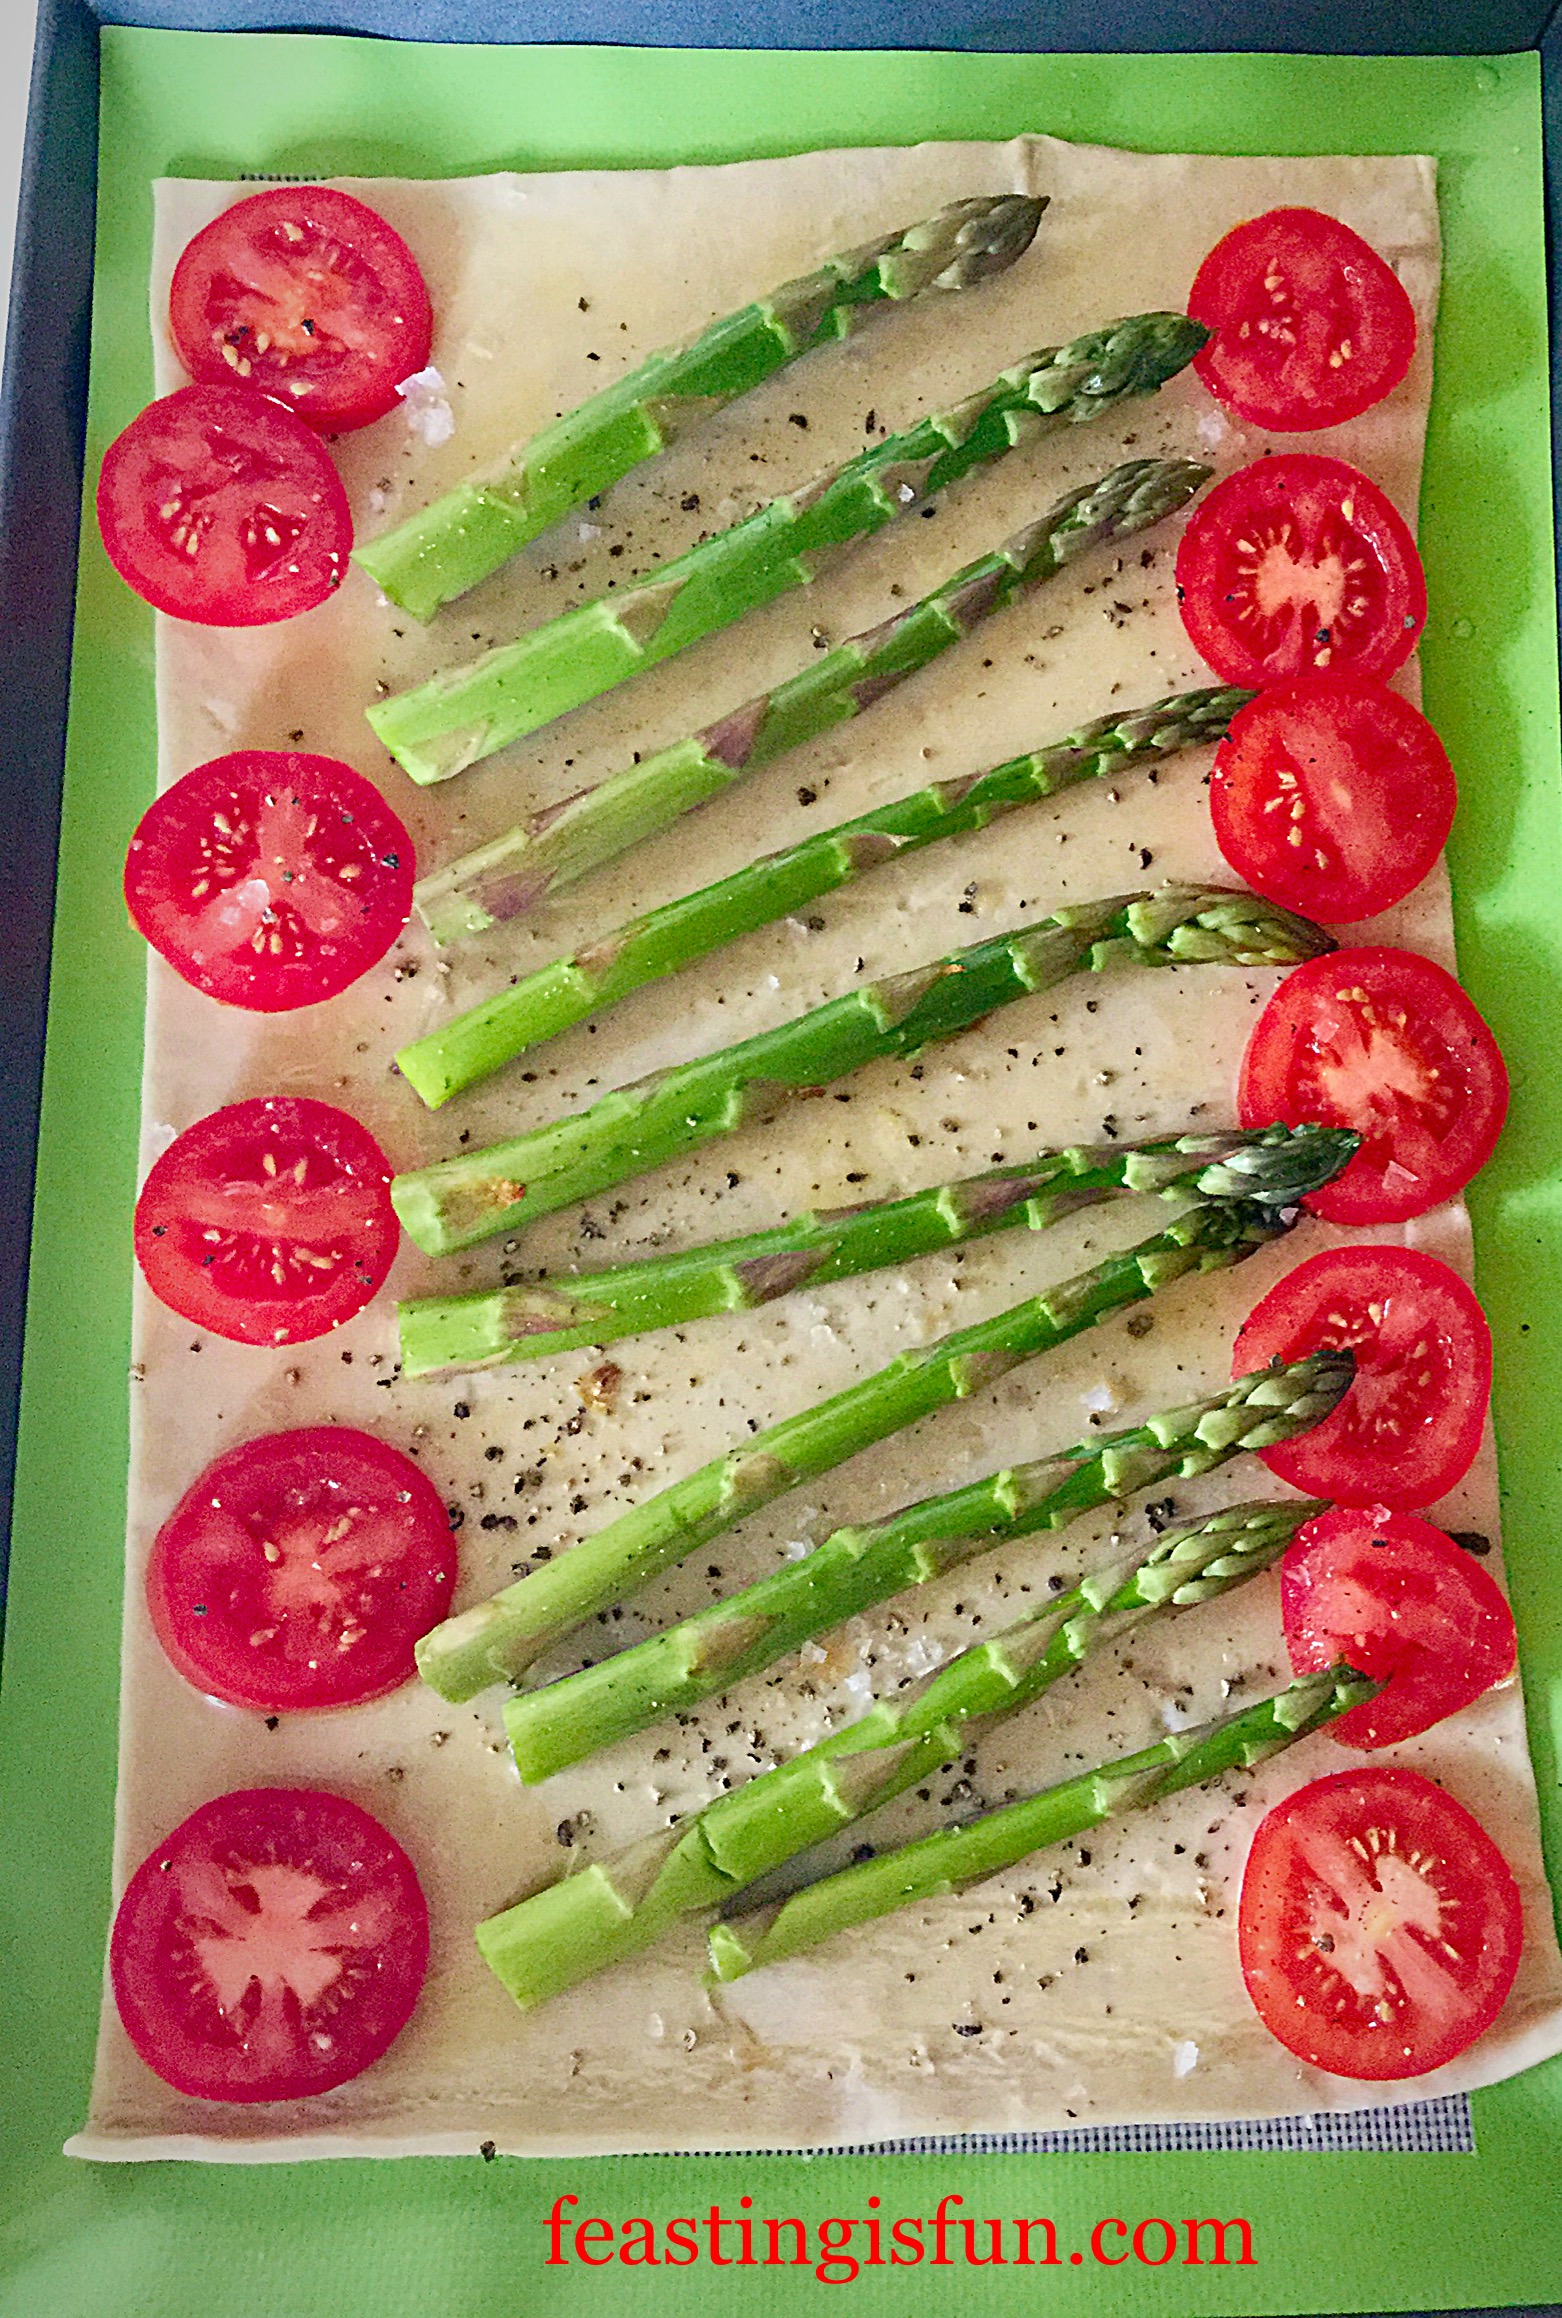
Place one Premium Silicone Non Stick Baking Mat on to a baking tray.
Un roll the pastry and place directly on to the mat – removing the paper it is rolled in.
Use a pastry brush to lightly cover the pastry in egg wash.
Place the asparagus and sliced tomatoes on to the pastry and season with salt and pepper.
Silicone Baking Mat Review see how perfectly the pastry fits on the mat.
Place the baking tray in the top of the oven for 15 minutes.
After the baking time has elapsed remove the tray from the oven.
Break off small chunks of the cheese and scatter around the tart. Then lay the Prosciutto ham over the tart, in the same direction as the asparagus. Add a small drizzle of olive oil.
Asparagus Prosciutto Ham Tart easily assembled on the silicone baking mat.
Place the tart back in the oven for 10 minutes to crisp the ham and finish baking.
Asparagus Prosciutto Ham Tart
As soon as the tart is baked remove, from the oven and scatter over some whole basil leaves.
Remove the tart from the silicone baking mat before cutting.
The finished result is a delicious tart, that baked beautifully on the non stick silicone baking mat. It slid off the mat easily. The mat had a quick wash in warm soapy water and was as good as new.
Fantastic! These Premium Silicone Non Stick Baking Mats cook at a high temperature with no affect on taste and no change in appearance to the mat 10/10.
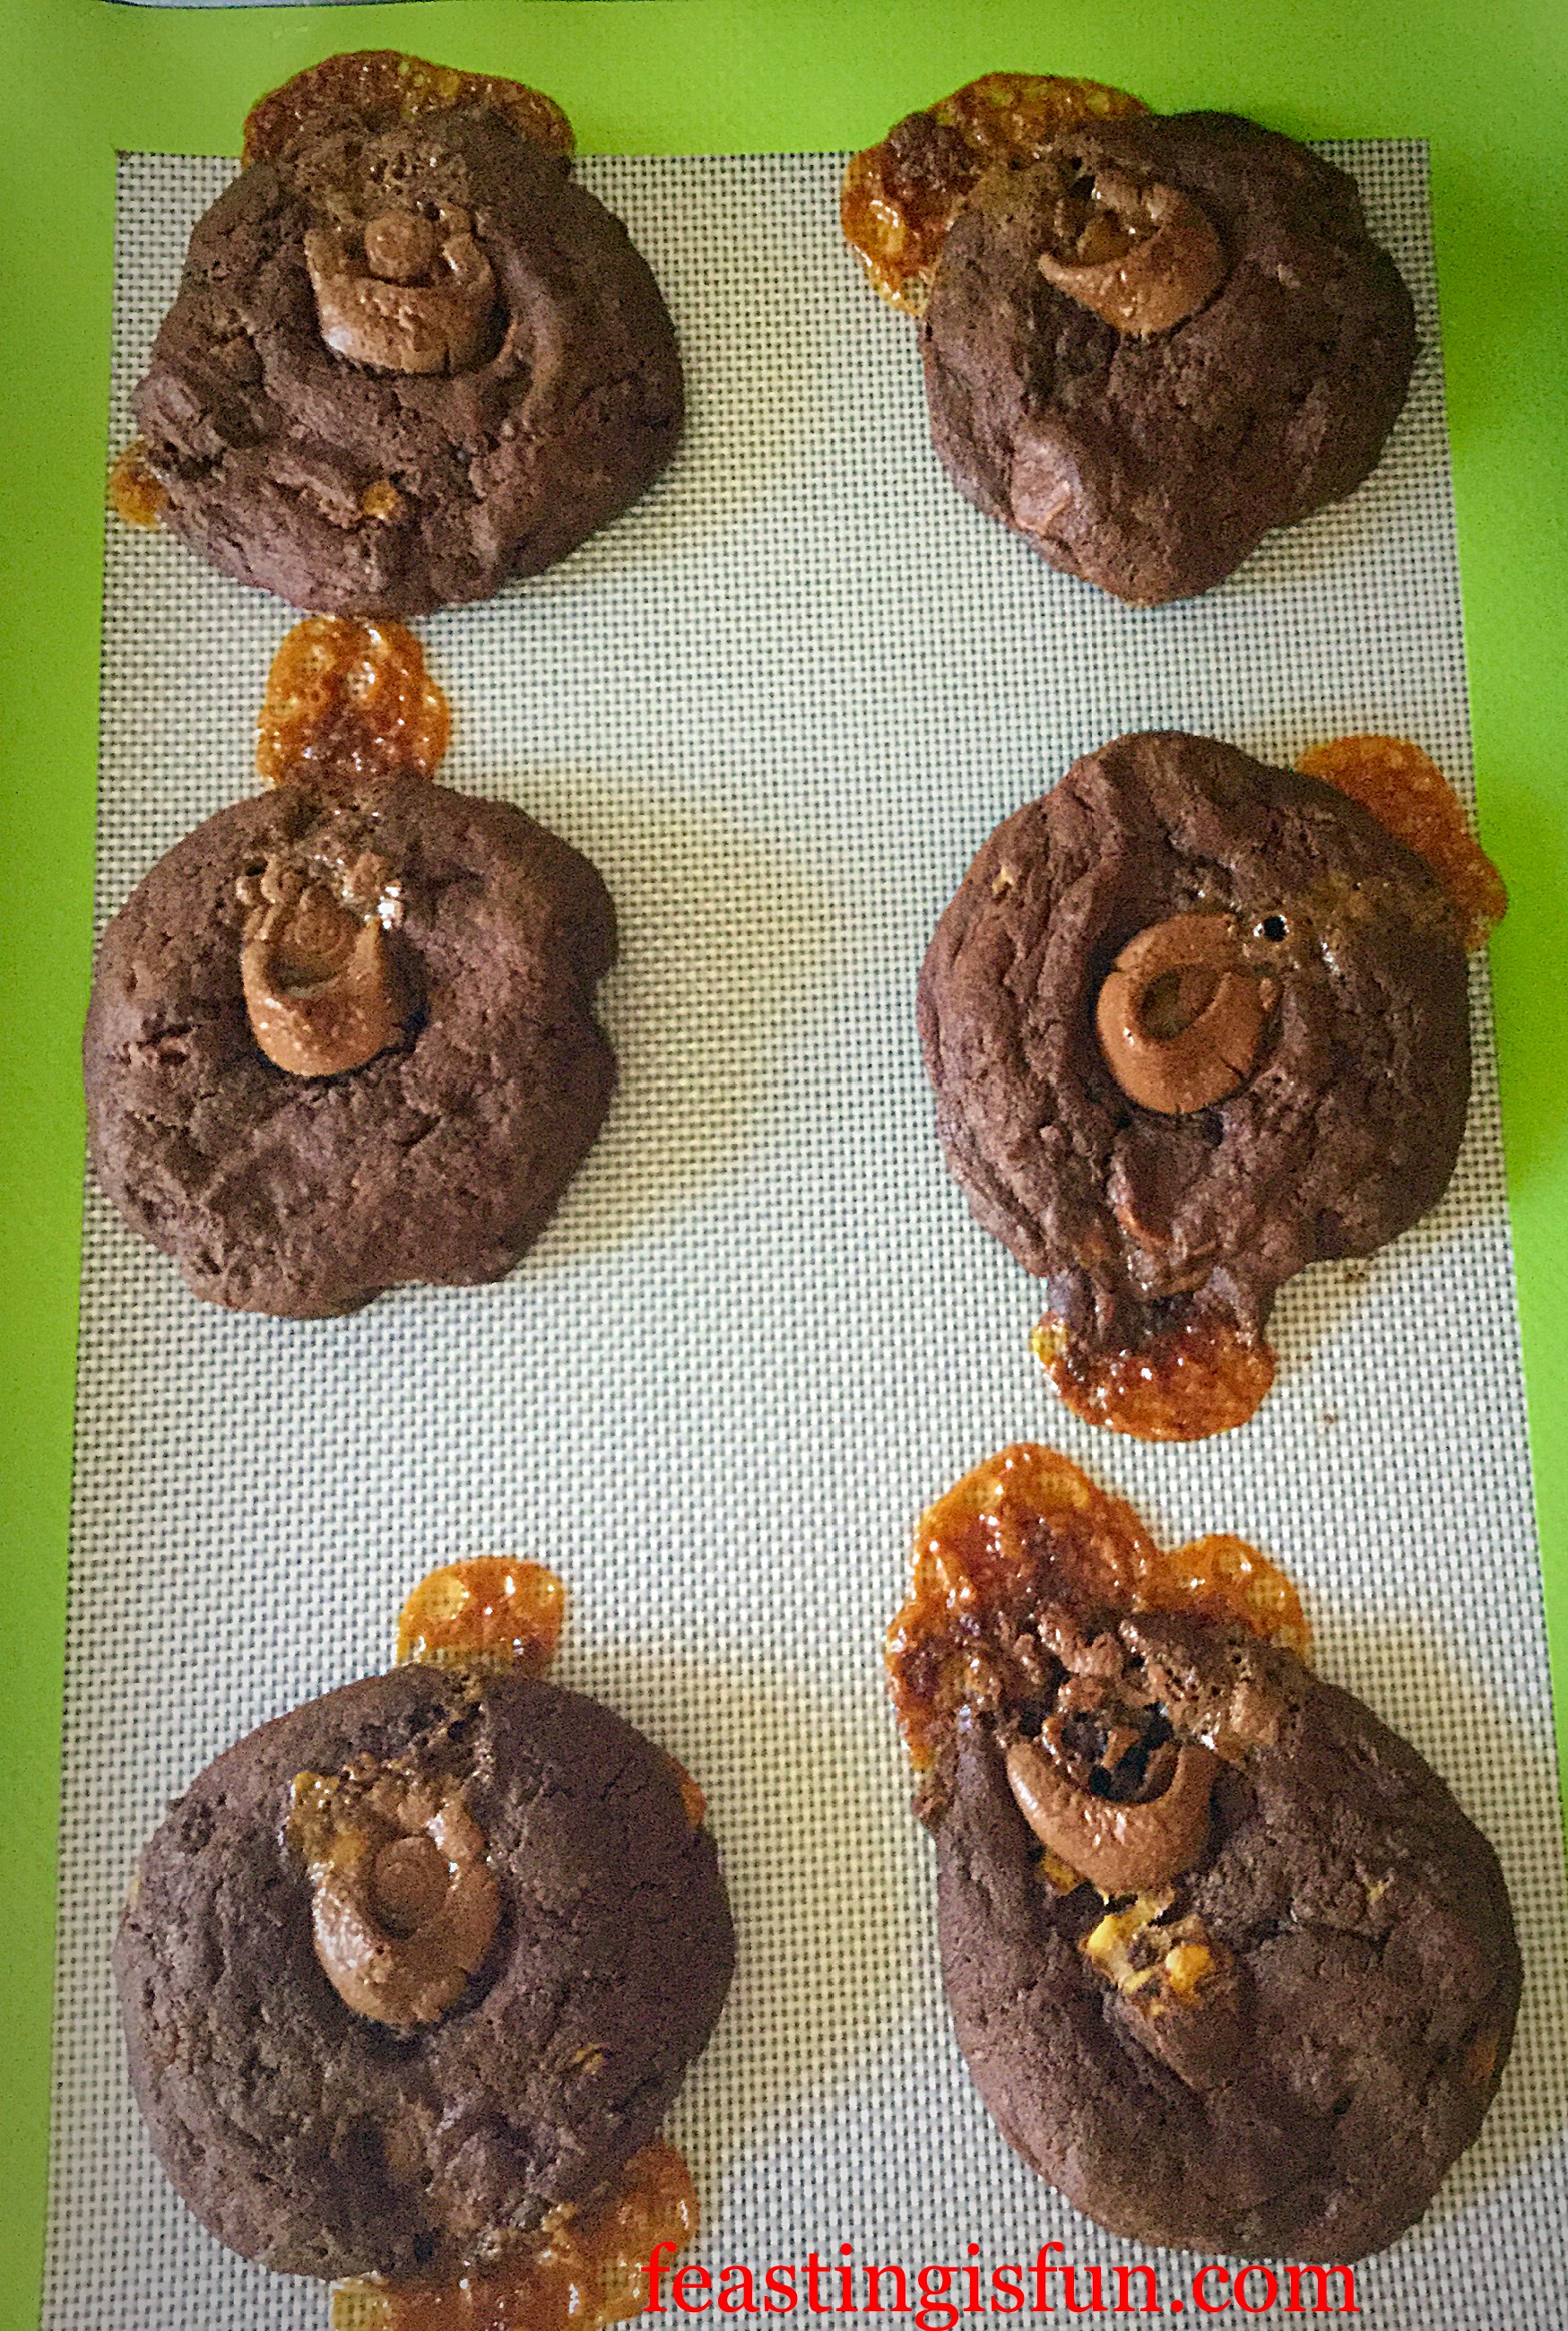
Baking Rolo Cookies
Next the gooey, sticky test. I used my Rolo recipe for this test. The cookies were prepared according to the recipe and baked using both mats, instead of baking parchment, as instructed.
This recipe requires the cookies to cool on the baking trays before removing.
Once cooled the cookies removed easily, with only a little of the melted caramel staying on the mat. This is usual with baking parchment too so I had expected it. A quick wash and the mats were clean and ready to use. A firm 9/10.
Finally Test As A Baking Parchment Substitute
Now for the melted chocolate test!
Silicone Baking Mat Review with messy melted chocolate.
The strawberries were dipped in chocolate and left to set on the silicone baking mat. Once set they removed easily and were used to decorate a beautiful cake. Another quick wash in warm soapy water and again as good as new! A firm 10/10.
In conclusion I am thrilled with these Premium Silicone Non Stick Mats and thoroughly recommend them. Since they are so easy to use for a variety of baking and cooking purposes. Also they take up very little space, I store them flat in the bag they came in on top of some tins in a cupboard.
While also reusable and in my opinion better than baking parchment, these have to be a great choice, not only for our kitchens but also our planet!
If you have enjoyed this Silicone Baking Mat Review you may like these recipes to bake with your mats:
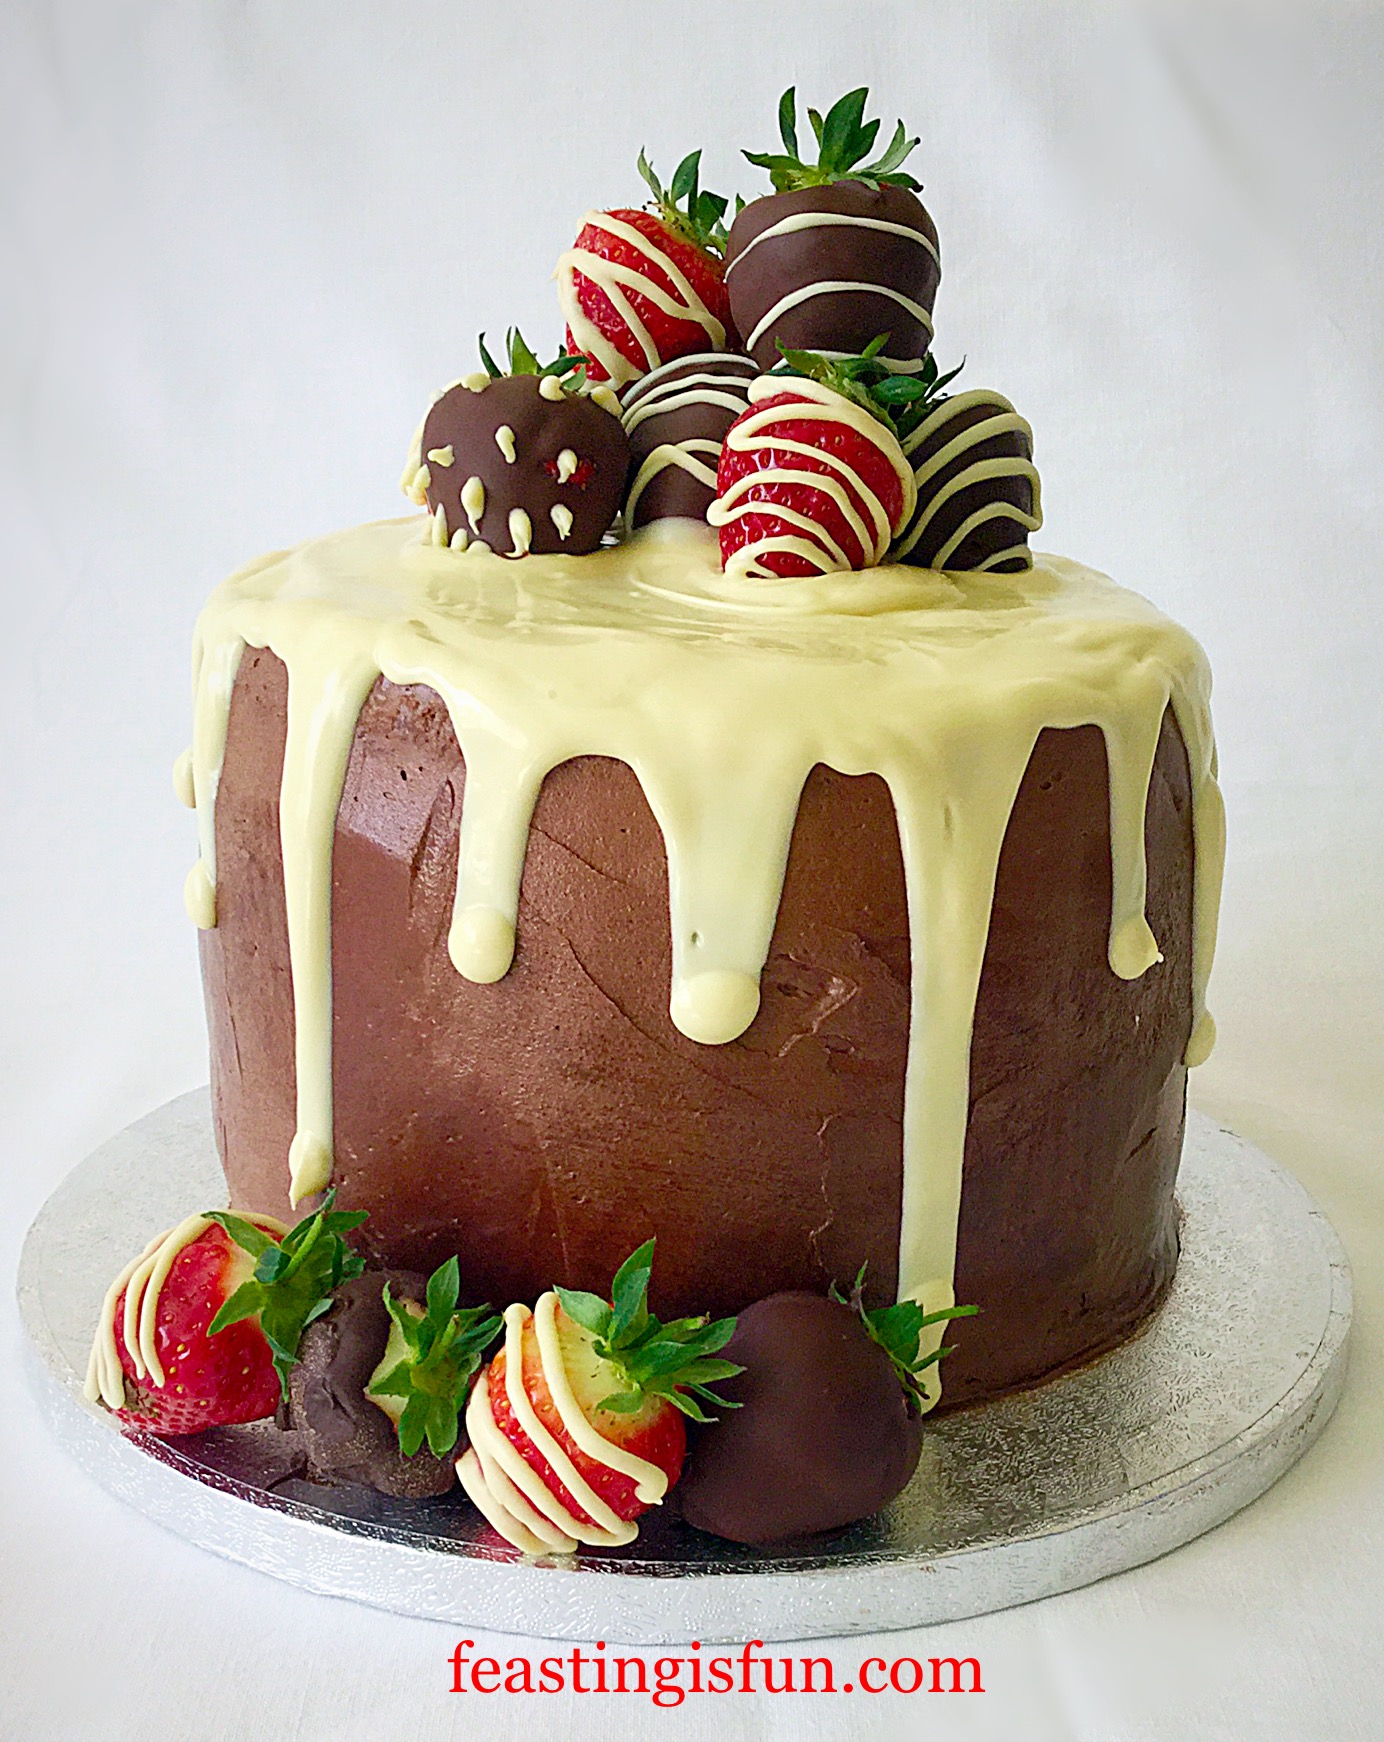
Strawberry Chocolate Vanilla DripCake are what the chocolate covered strawberries decorated.
Having carried out this Silicone Baking Mat Review I am now a complete convert to baking with silicone. I wholeheartedly recommend every kitchen, where baking takes place, to switch to these silicone baking mats. Over time they will pay for themselves and are more environmentally friendly than using baking parchment.
So, whatever you are making, baking and creating in your kitchen, have fun preparing and sharing your feast.
Sammie xx
GOLDENSPOON provided me with the 2 Premium Silicone Non Stick Baking Mats for the purpose of a review. All views and opinions are my own, as are the recipes, photographs and content of this post. I was not paid to review this product. Please see my Disclosure Policy.
Hello, I have an exciting recipe to share today. Since I first admiring the variety of Drip Cakes on Pinterest I have wanted to make one. This past weekend with the help of 2 Wright’s Baking cake mix kits, I did it (full recipe instructions for making this cake from scratch are included). Finally, I have now made this Strawberry Chocolate Vanilla Drip Cake.
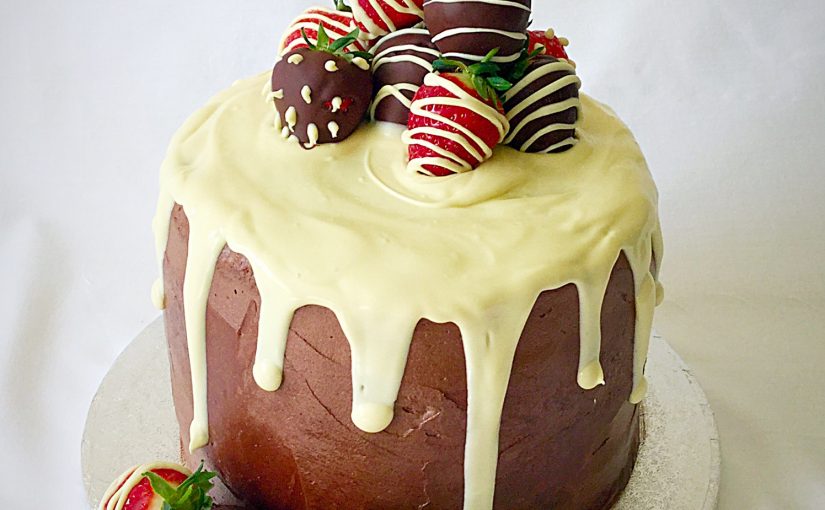
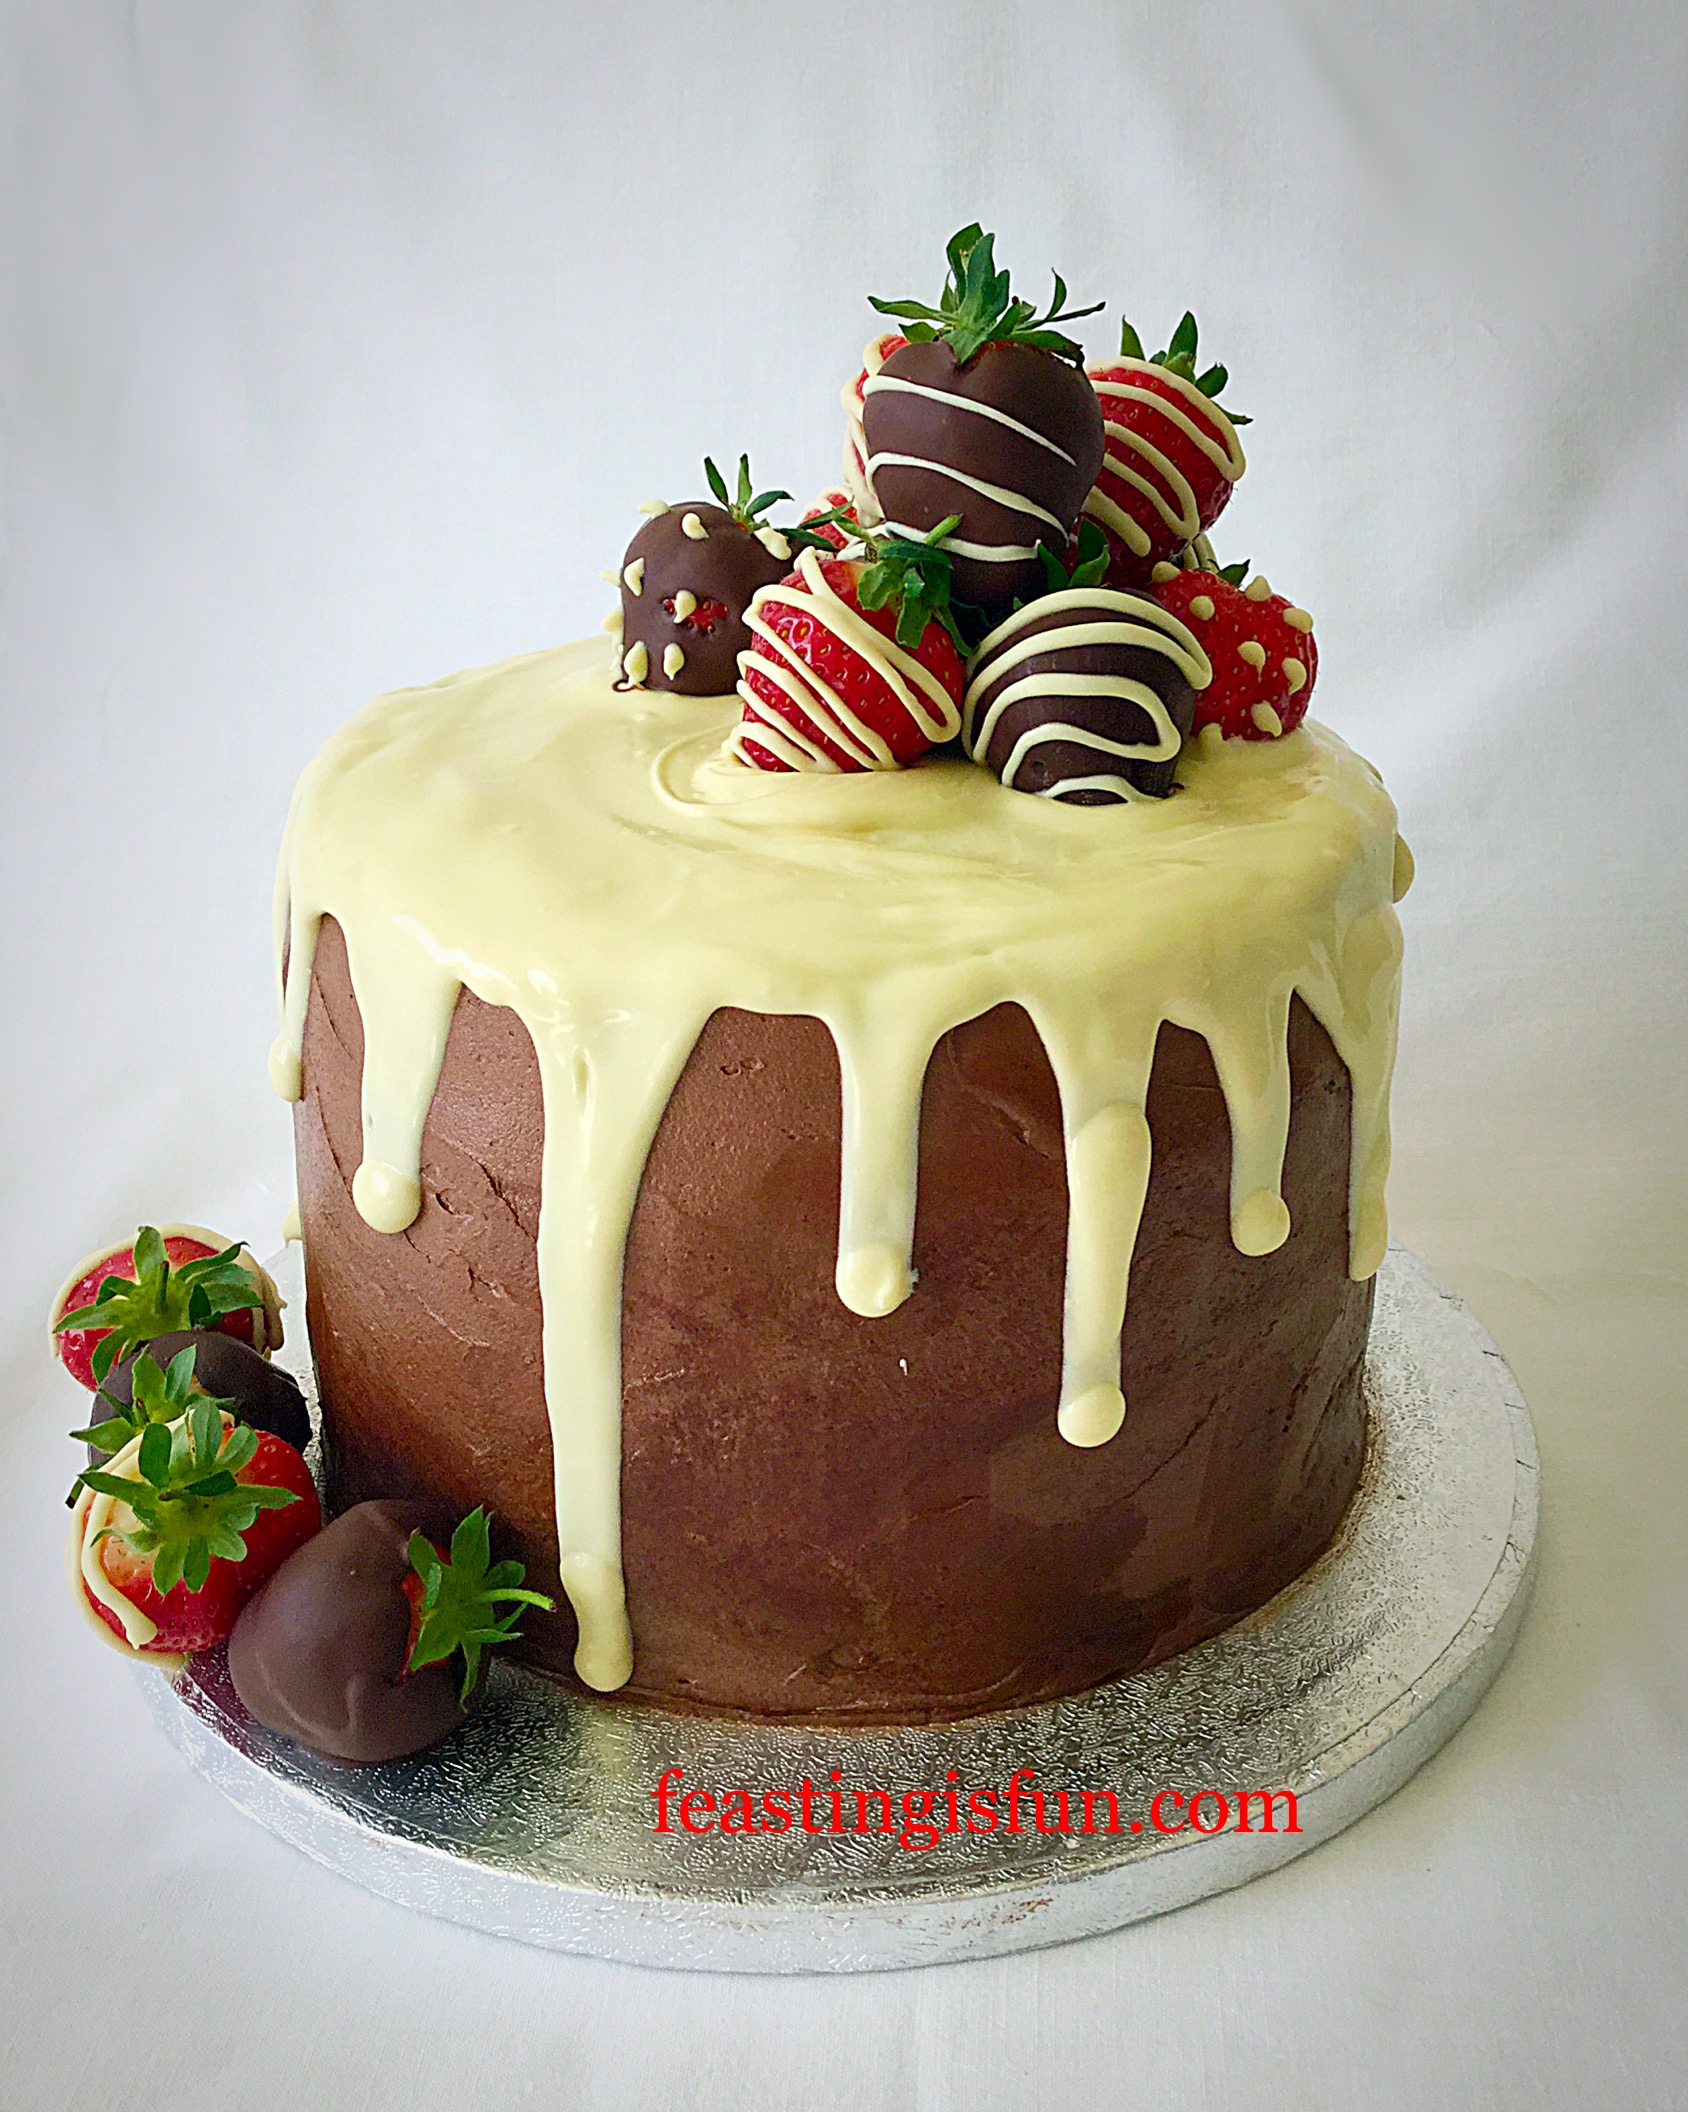
Strawberry Chocolate Vanilla Drip Cake
Had it not been for the cake mixes from Wright’s I honestly would not have had the energy to make this cake. Yet, I proved that with a little bit of patience and guidance anyone can make a drip cake using great packet mixes, plus some extra chocolate and strawberries.
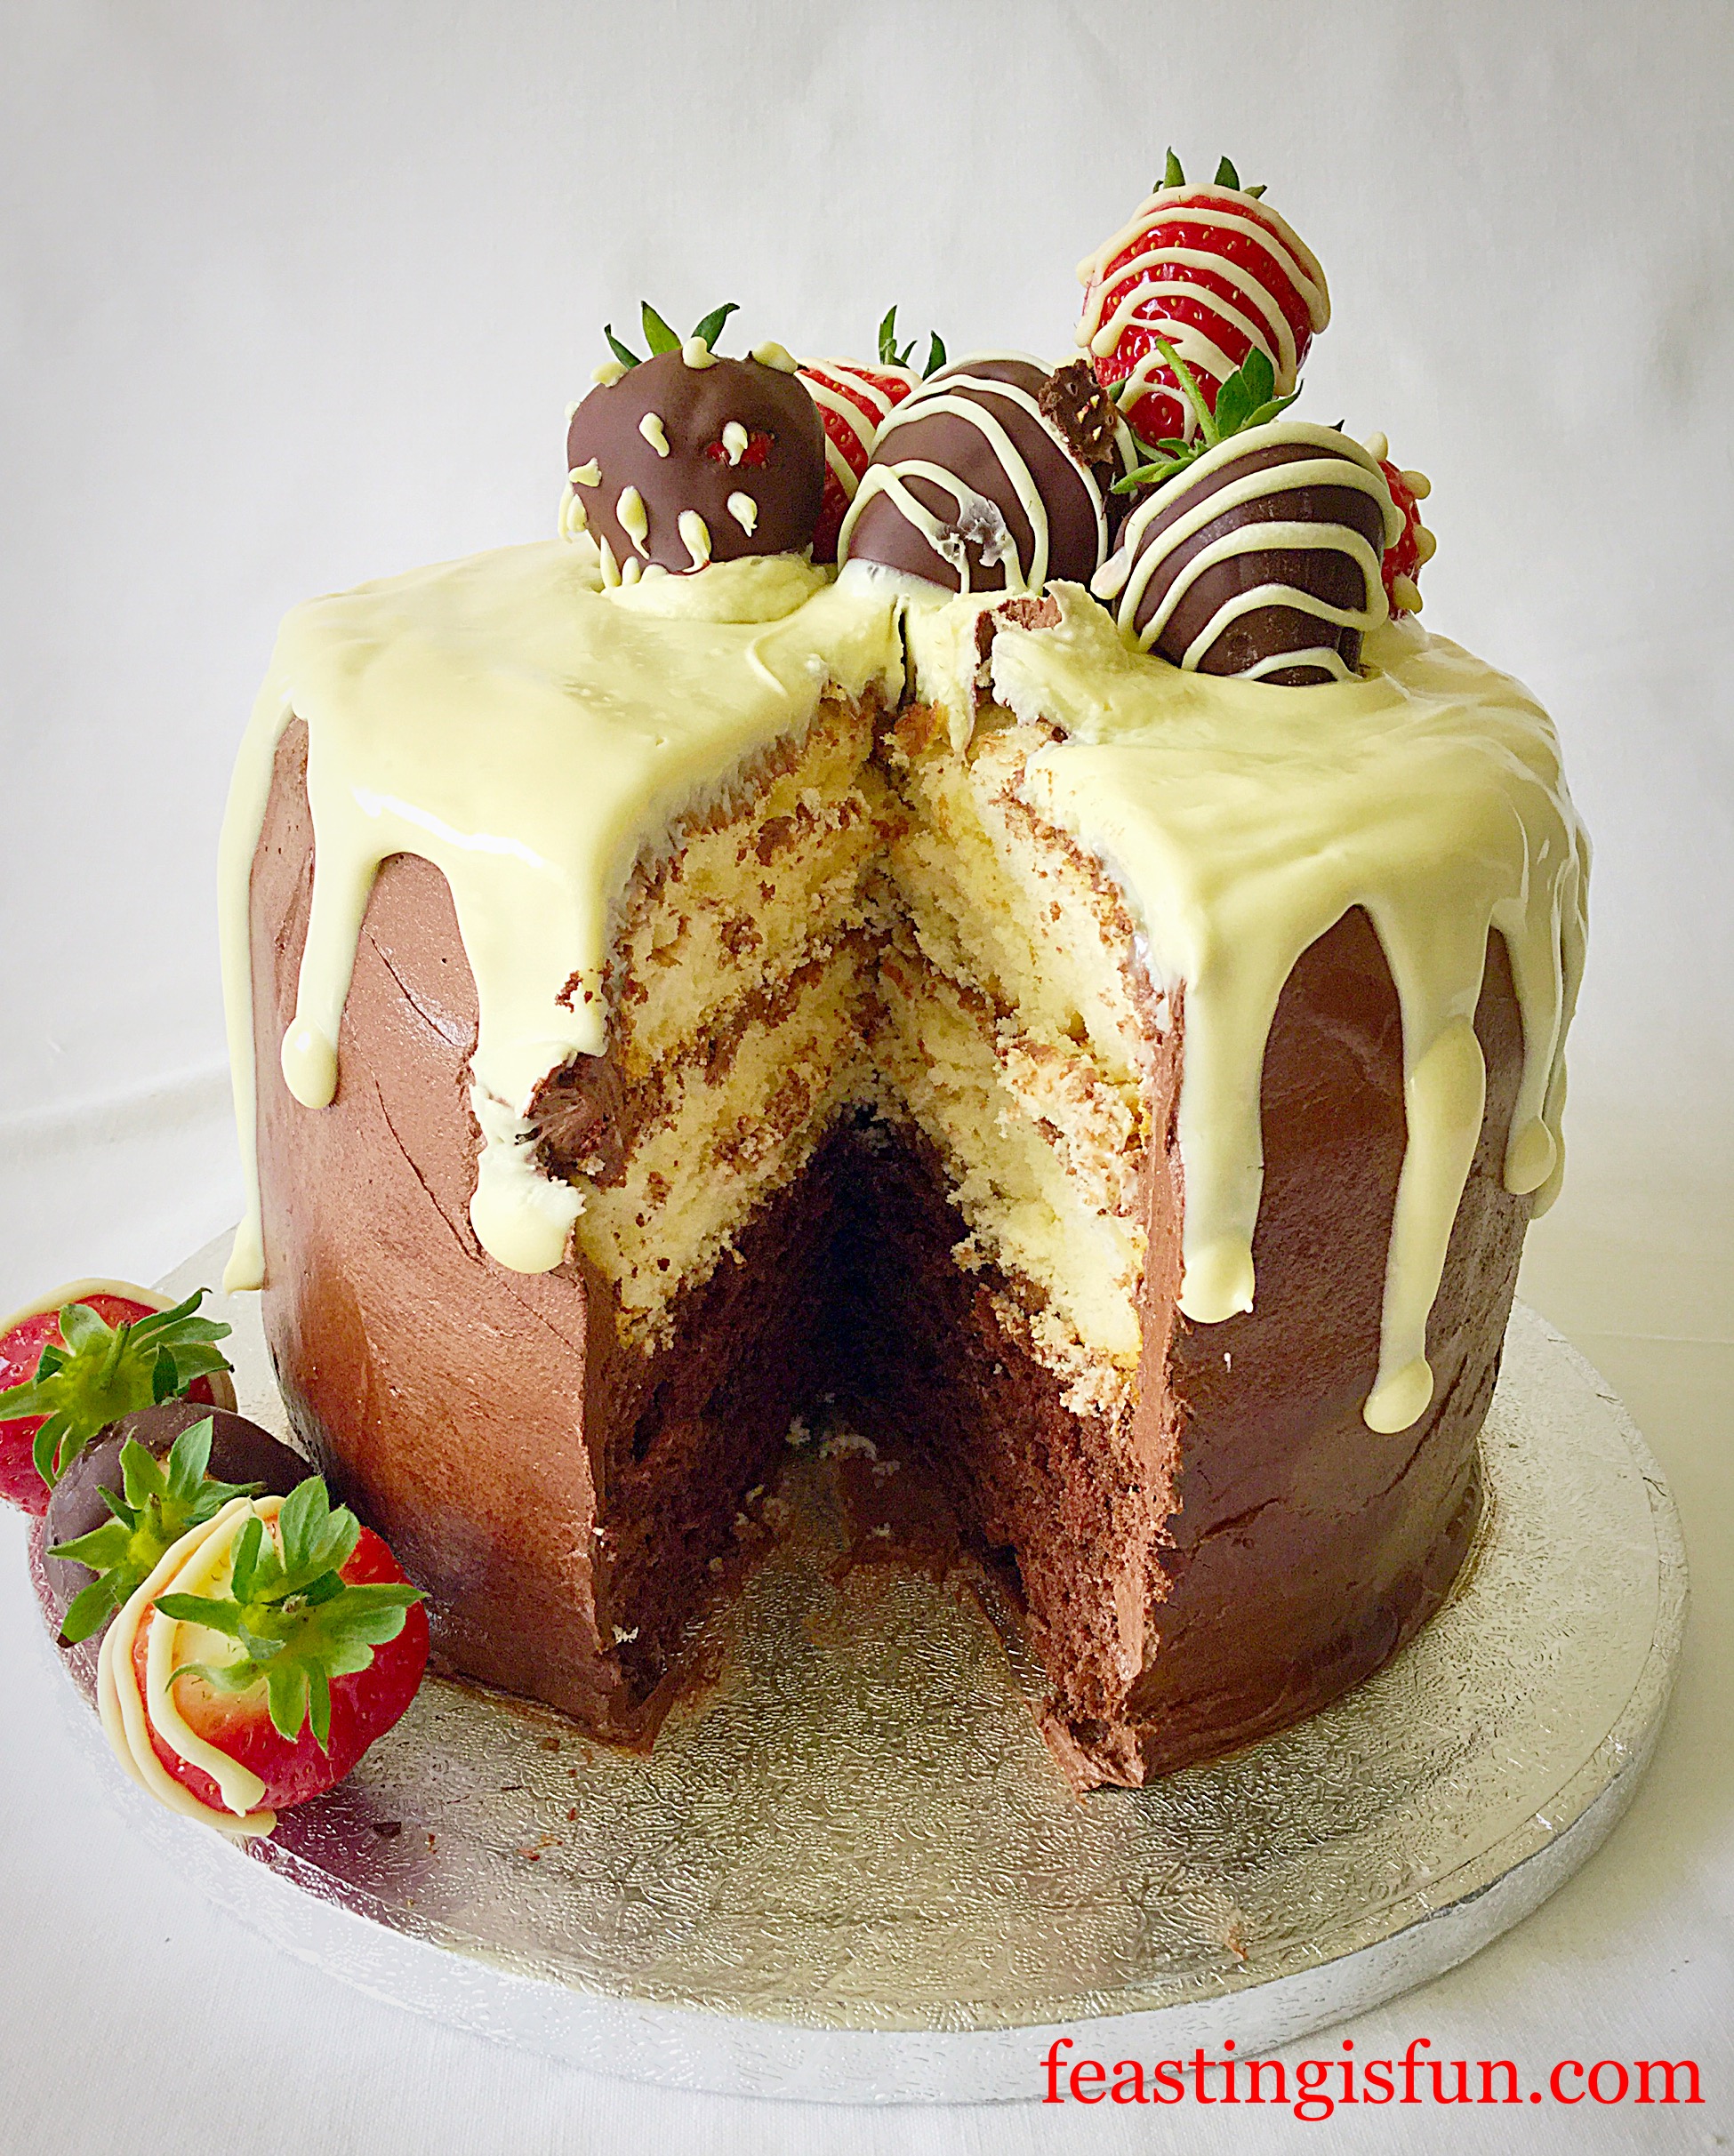
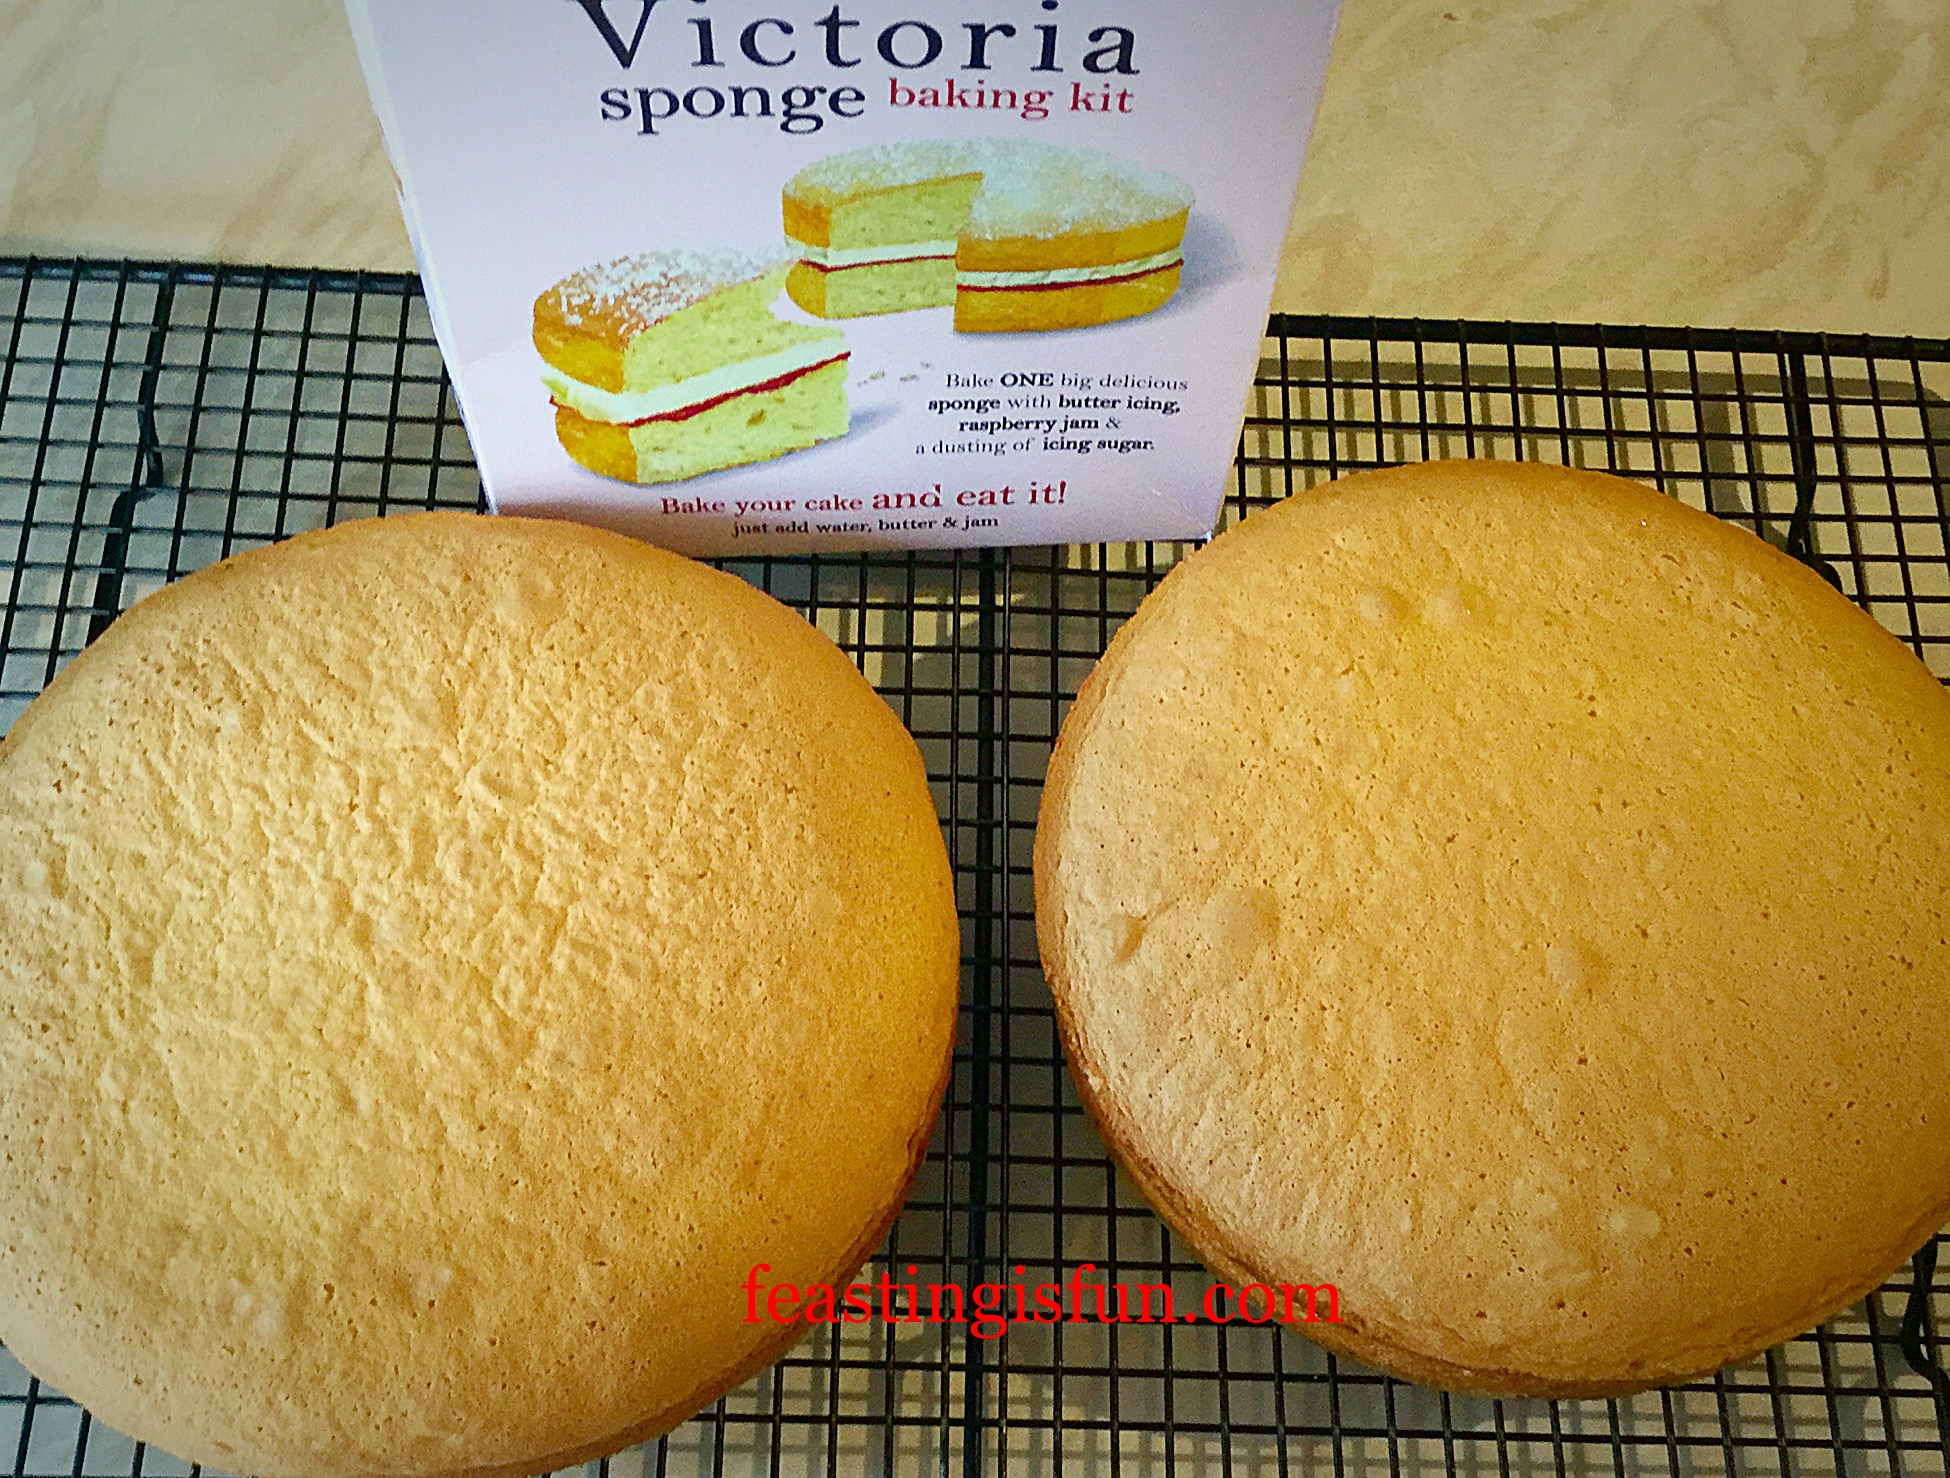
The Chocolate and Victoria sponge mixes create cakes that are as light as clouds. I baked the cakes on Saturday and then assembled and decorated this gorgeous Strawberry Chocolate Vanilla Drip Cake on the Sunday.
Strawberry Chocolate Vanilla Drip Cake
You Too Can Make This Drip Cake :
If you have ever wanted to make a drip cake, yet been too scared or overwhelmed to try? Use the following step by step photographs and instructions to show you how. You need not be a proficient baker or cake decorator, yet you CAN make this Strawberry Chocolate Vanilla Drip Cake.
Taking you through every stage, you will learn how to achieve a stunning drip cake. Once you have learnt the basics you can create all different kinds of drip cakes. I wanted to keep my cake simple, yet elegant. The chocolate dipped strawberries add height and a pop of colour.
Strawberry Chocolate Vanilla Drip Cake
Above all, I never dreamt that my Strawberry Chocolate VanillaDrip Cake would turn out so well.
Pushing Out Of My Cake Decorating Comfort Zone:
Because cake decorating isn’t my strongest skill, learning new techniques can be challenging. Also sometimes my hands can be really shaky, resulting fewer cake recipes making it on to the blog.
What I’m trying to say is, I’m just like you. Yes I’ve learnt to pipe roses with buttercream, but that really is the extent of my cake decorating knowledge. So my hope is to teach you how to create a show stopping cake and that, with a little patience you too can create one!
Strawberry Chocolate Vanilla Drip Cake
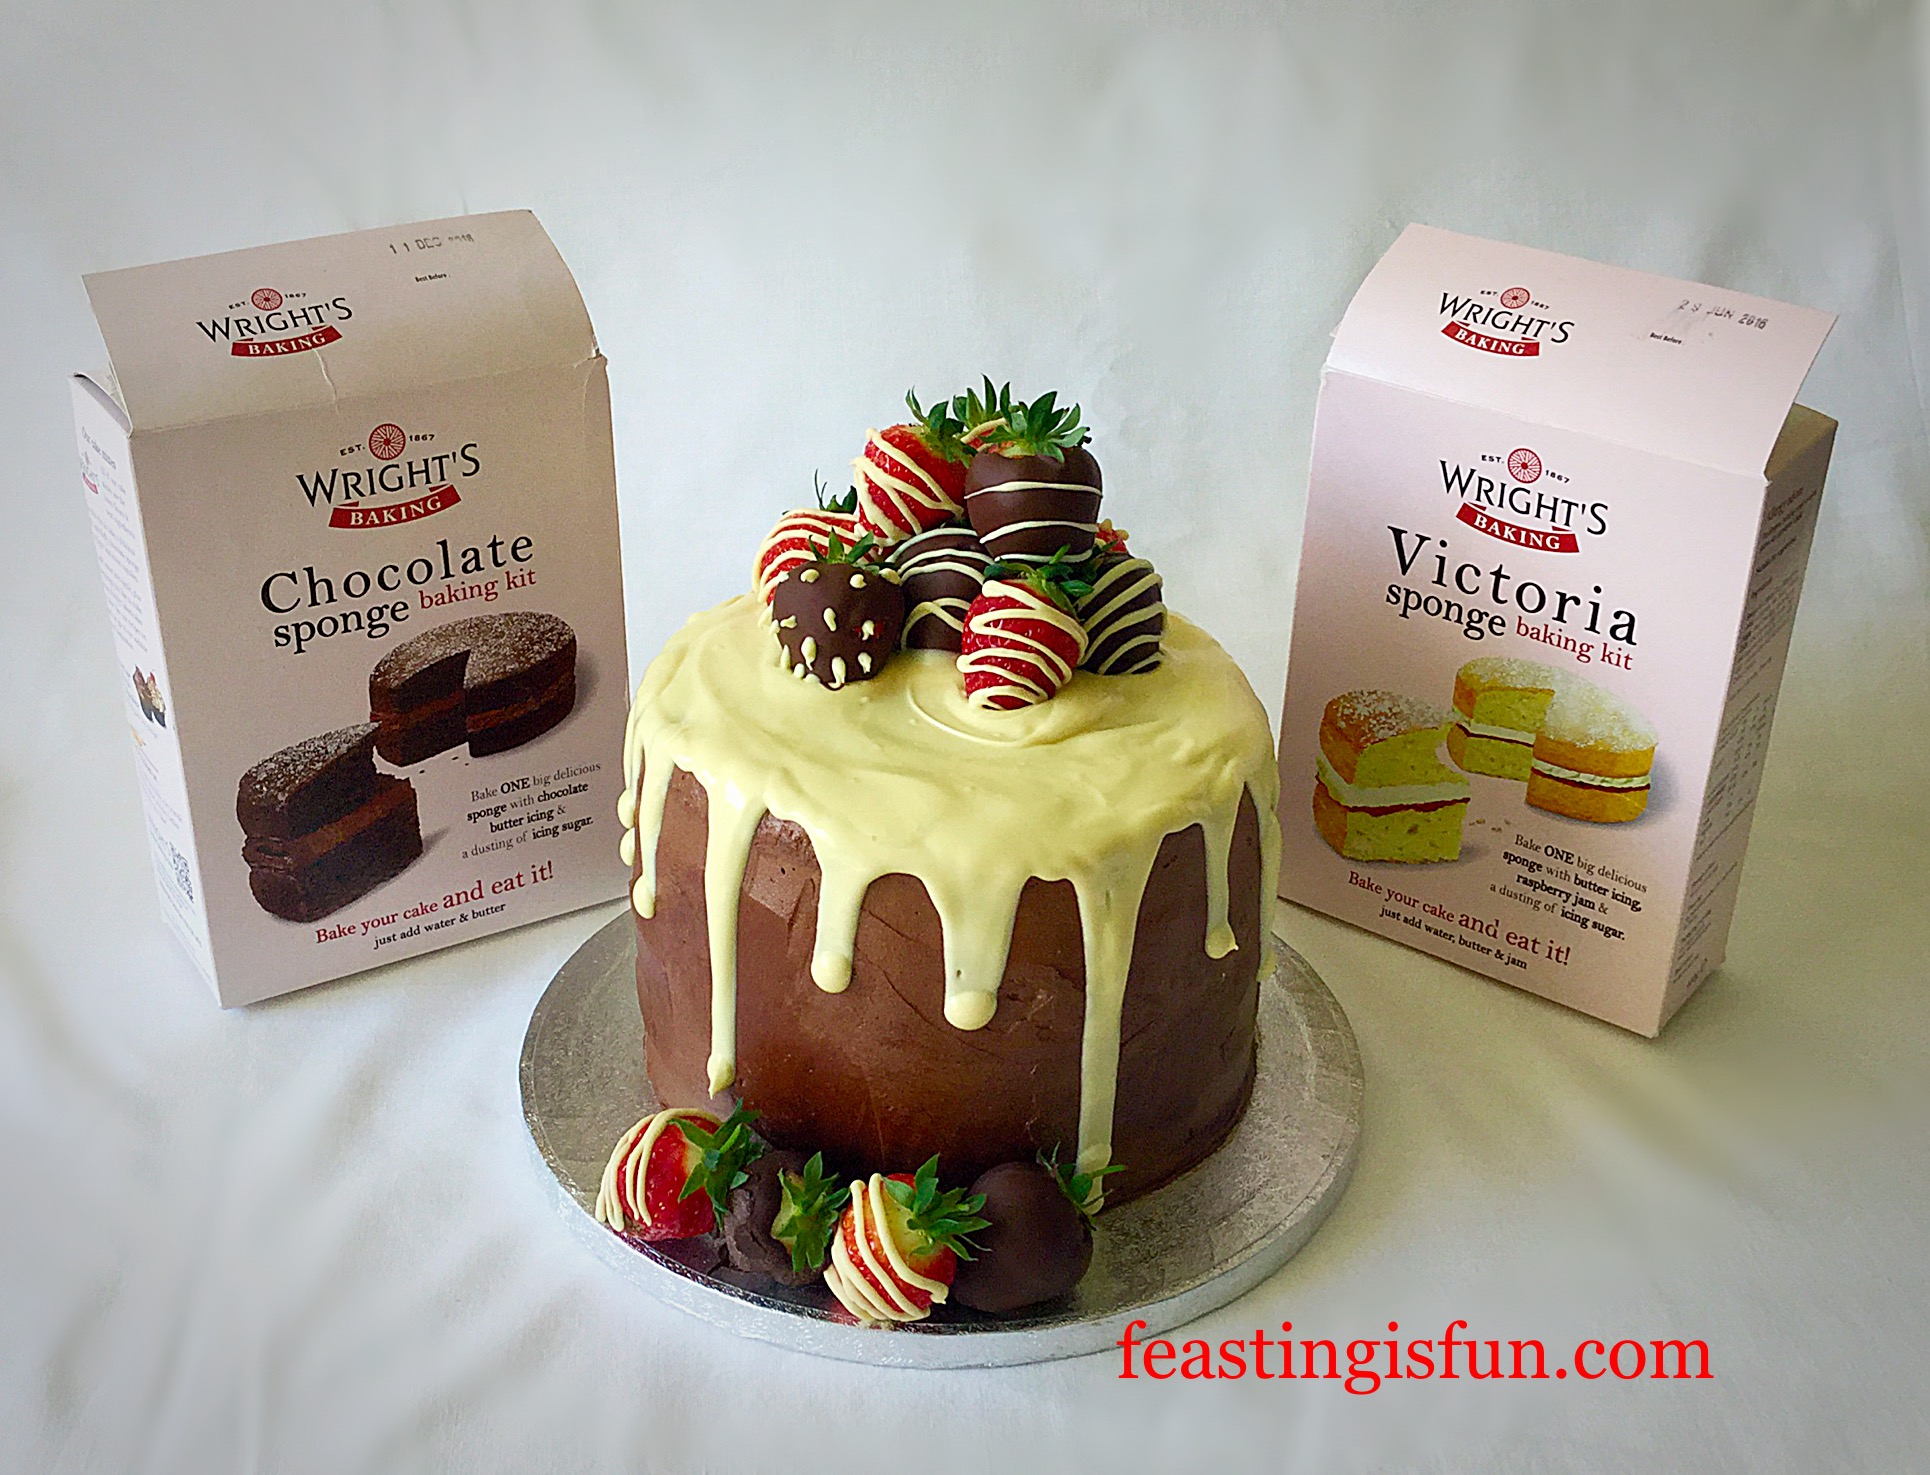
There’s No Shame In Using Great Quality Cake Mixes:
Starting with a good quality boxed cake mix from Wright’s meant that all my concentration could be used decorating the cake. I will be creating recipes with different flavours, colours and toppings in the future, but for my first drip cake, all I wanted to concentrate on was creating that iconic ‘drip’!
Chocolate and vanilla were chosen simply because the inside of the cake would then reflect the beautiful outside. The cake mixes are so easy to whip up and bake, plus the buttercream mixture is included in the box. All I needed to add was butter.
Strawberry Chocolate Vanilla Drip Cake
Note: in order to decorate this cake successfully you will need a large palette knife (not a small offset one – that I mention in some of my recipes). Also if making the cake using my recipes you will have ire than you need. Perhaps you could bake an extra layer?
( Make the cake batter as instructed in the recipe. Use half of the vanilla batter to bake 2 plain sponges. Add 75g Cocoa powder and 2tbsp milk to the remaining batter, stir gently until the ingredients are fully incorporated. Bake the chocolate sponges as instructed.)
2tbsp Butter for greasing the sandwich cake tins
240g Unsalted Butter- softened to room temperature
200g White Chocolate – I use Waitrose Belgian white chocolate
100g Dark Chocolate minimum 70% Cocoa Solids
15 Good Quality Fresh Strawberries medium/large in size – if only very large strawberries are available you may want to use fewer.
Note: if making your own buttercream you will need 250g unsalted butter, 100g good quality cocoa powder (sifted) and 400g icing sugar (sifted), prepare as for the buttercream including the 2tbsp very hot water.
Method: Preheat the oven to 180C/160C fan, gas mark 4, 350F
Making And Baking The Sponge Cakes:
Grease 2 x 7″ (17.5cm) sandwich cake tins and line the base with baking parchment.
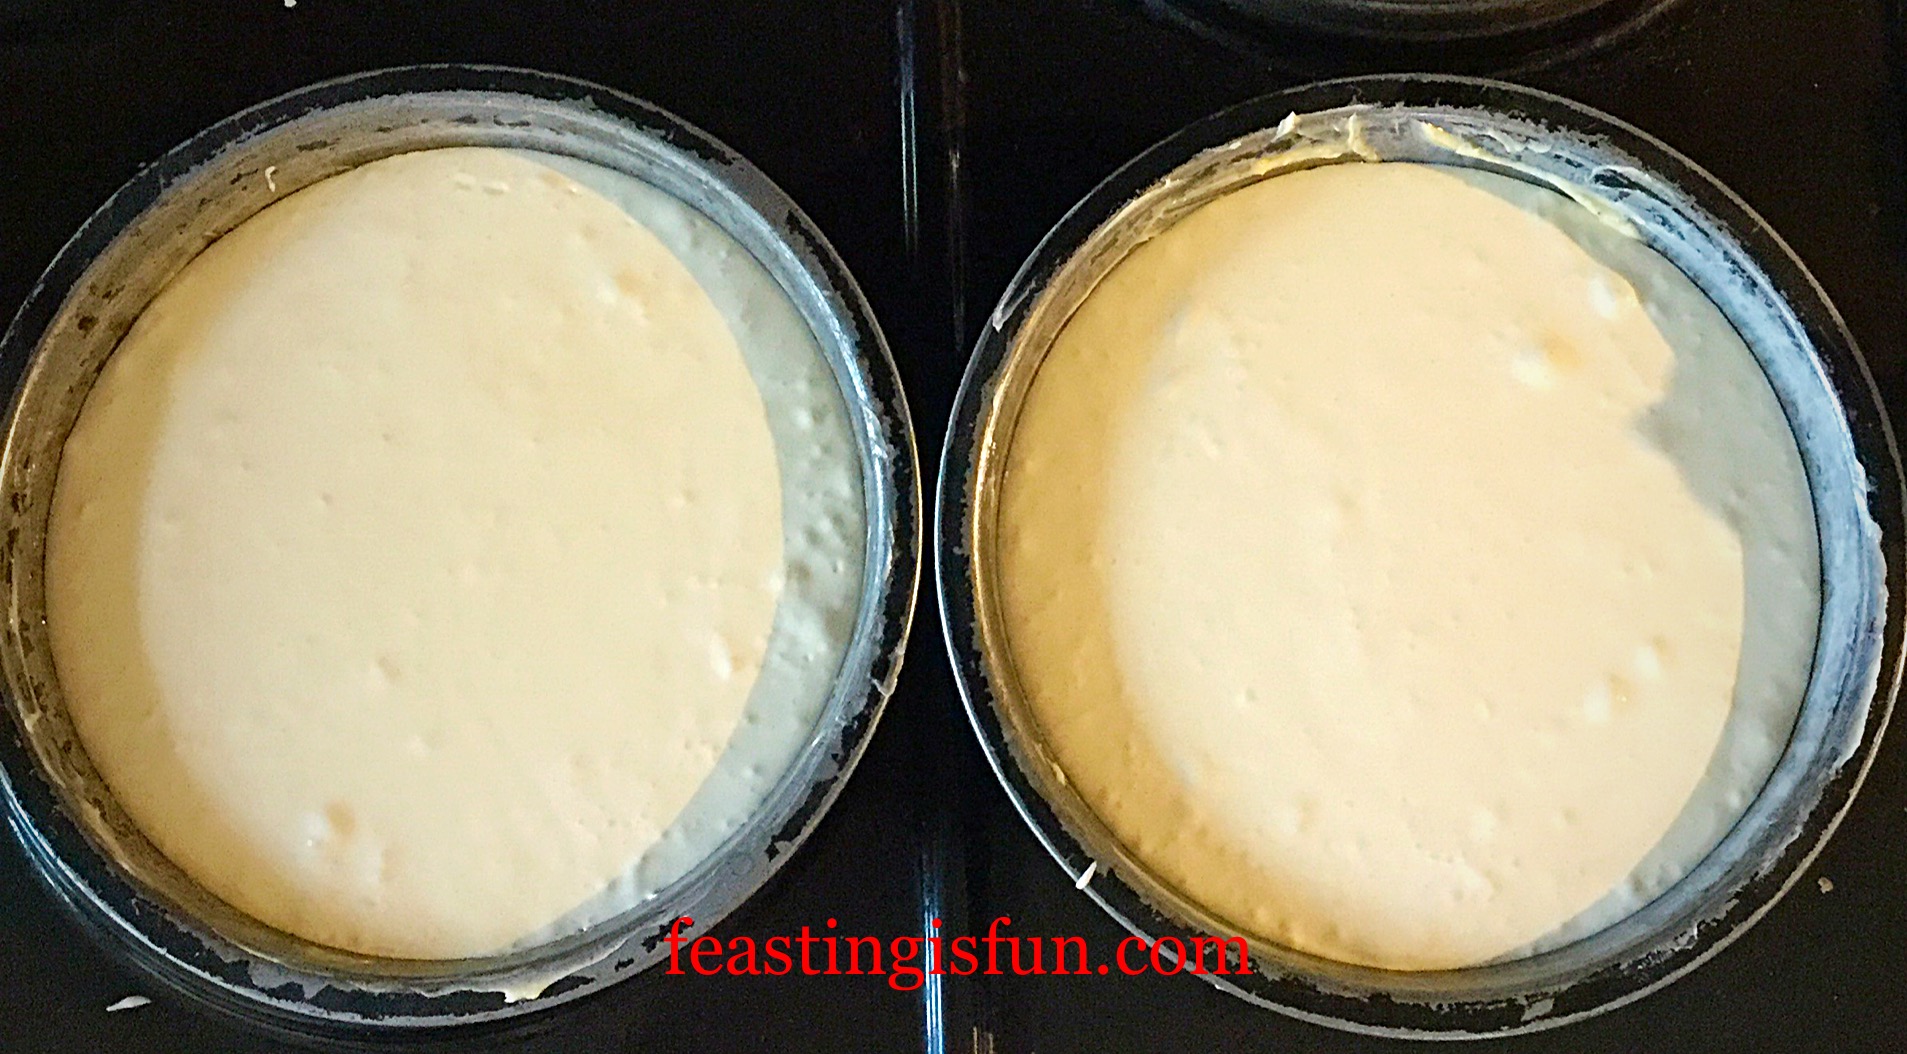
Make up one packet – I used the Victoria sponge mix first – according to the instructions on the box.
Divide the cake batter equally between the 2 tins.
Place the sponge tins in the centre of the oven and bake for 15- 20 minutes. The sponges are baked when they are a golden colour and spring back from a light touch. Mine took just under 20 minutes to bake. Also, baking times may vary slightly if making from scratch*.
As soon as the cakes are baked remove from the oven.
Allow the sponges to cool for 5 minutes, then run a palette knife around the outside rim of the cake.
Turn the cake out gently and place right side up on a cooling rack.
Wash up the sponge tins in warm soapy water, dry, grease and line the bases as before.
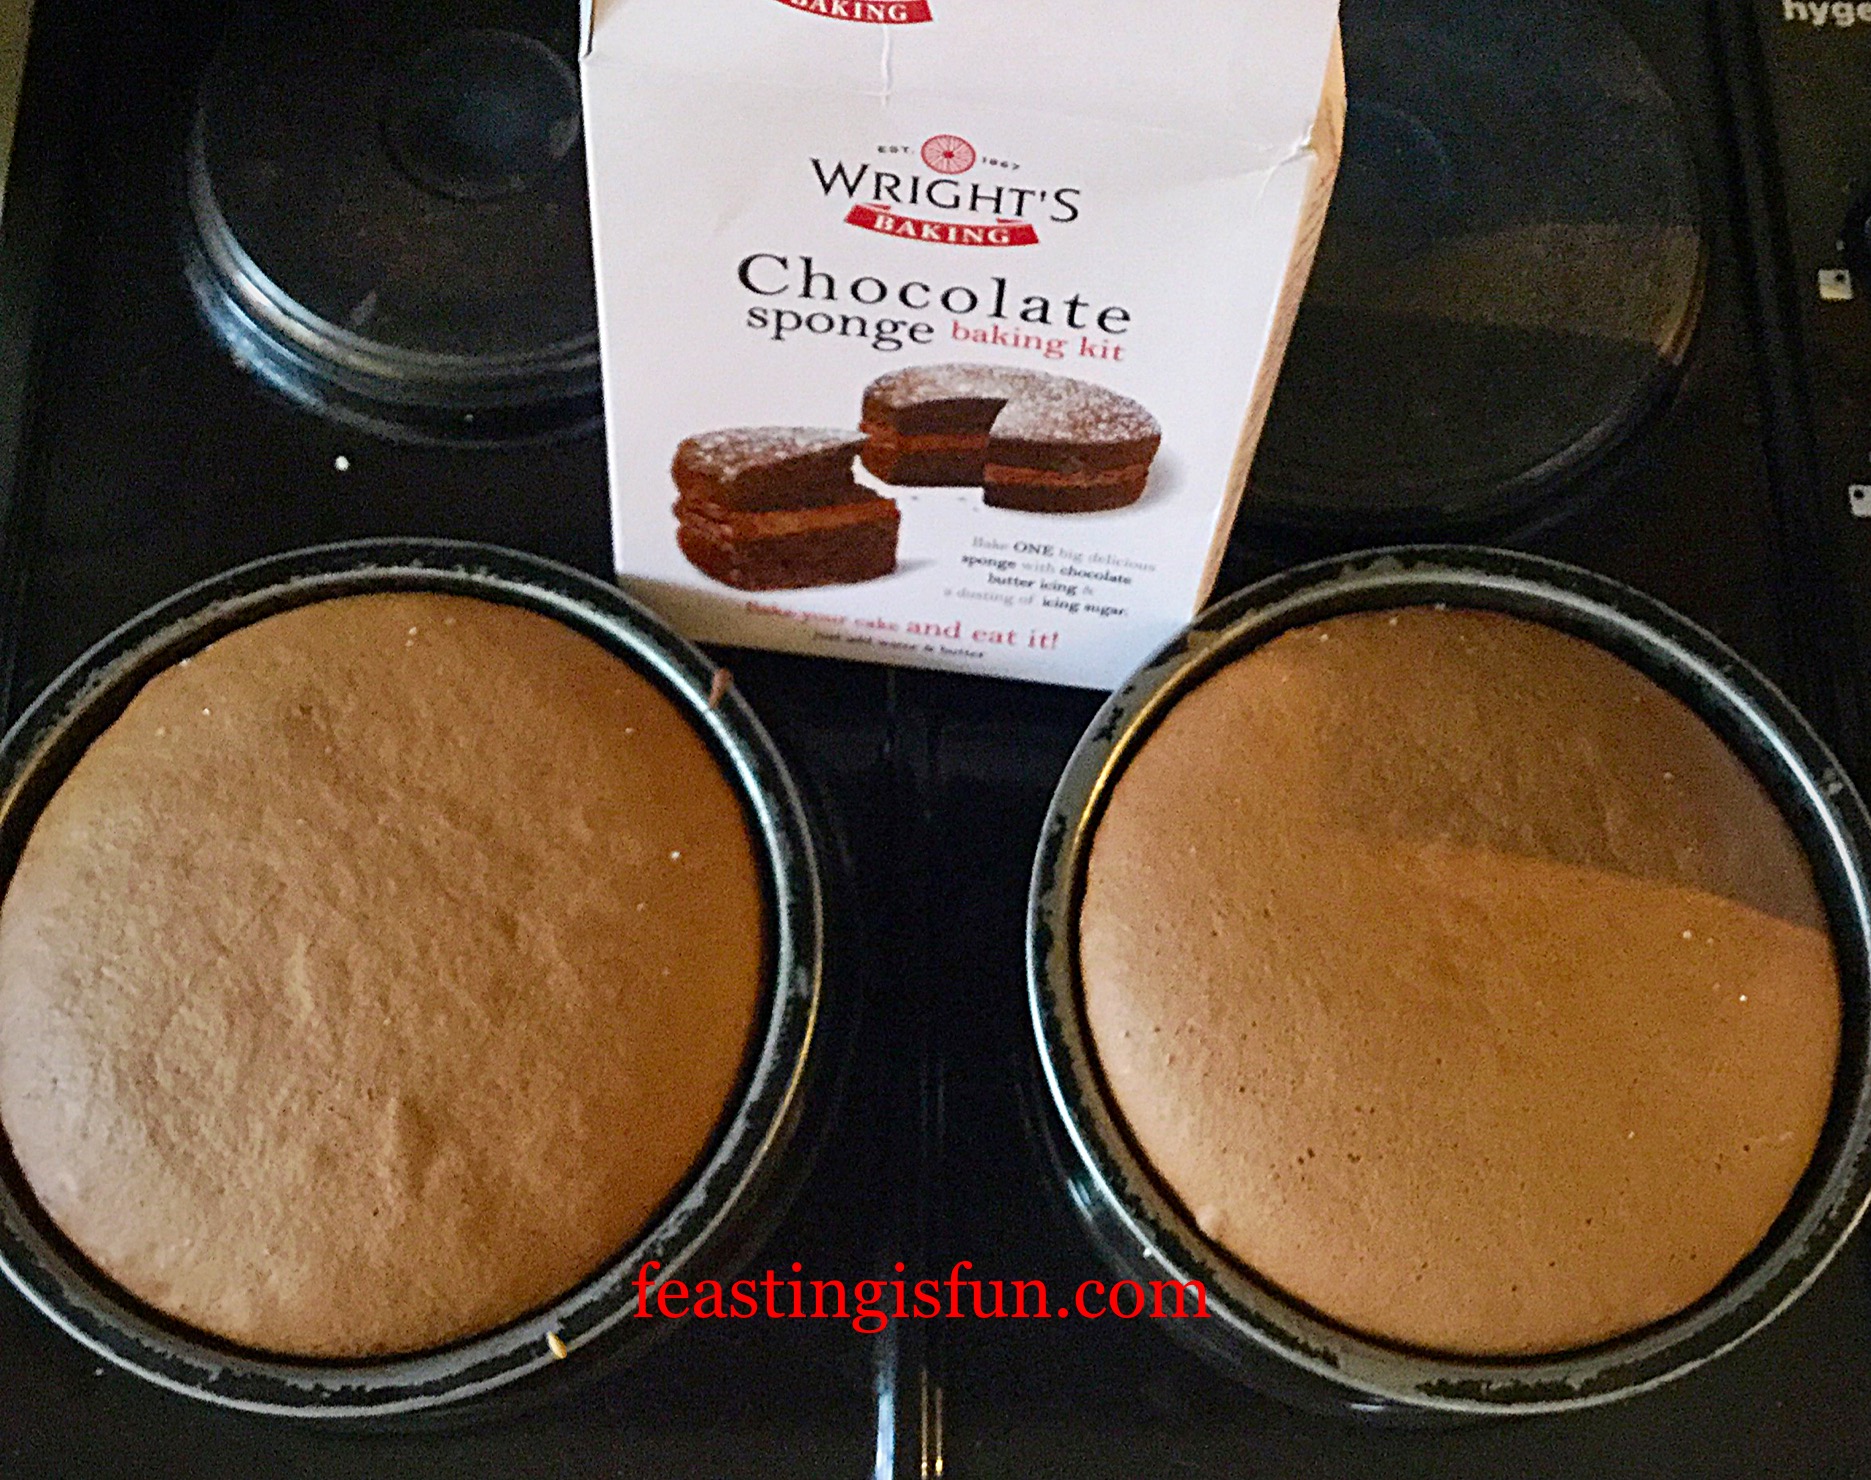
Make up the chocolate sponge mix according to the packet instructions.
Divide the cake batter equally between the 2 tins and bake in the middle of the oven, as before for 15 – 20 minutes. Mine were baked at 15 minutes.
As soon as the chocolate sponges are baked remove from the oven. See note * above.
After 5 minutes cooling run a palette knife around the outside of the cake, turn out gently and allow to cool on a rack.
Once cool your cake is ready to assemble and decorate.
Making The Frosting And Assembling The Cake:
Gently peel the parchment paper away from the base of each sponge.
Whisk/beat 240g of softened butter in a large bowl.
Add both packets of buttercream mix – chocolate and vanilla.
Slowly whisk until they are incorporated into the butter.
OPTIONAL – I always add 1-2 tablespoons of very hot water to any buttercream that I make. I added 2 tablespoons to the buttercream mixture. I would not advise adding water if you are using stork or other margarines.
Continue whisking until you have a smooth, glossy, chocolate buttercream.
I recommend using either a cake board or a flat plate placed on a cake stand, or cake decorating turntable. I used a cake board on top of my cake stand. This is so that once covered in buttercream, the cake, will fit into the fridge to chill.
First of all add a generous tablespoon of buttercream to the cake board, this helps anchor the cake whilst it is being assembled and decorated.
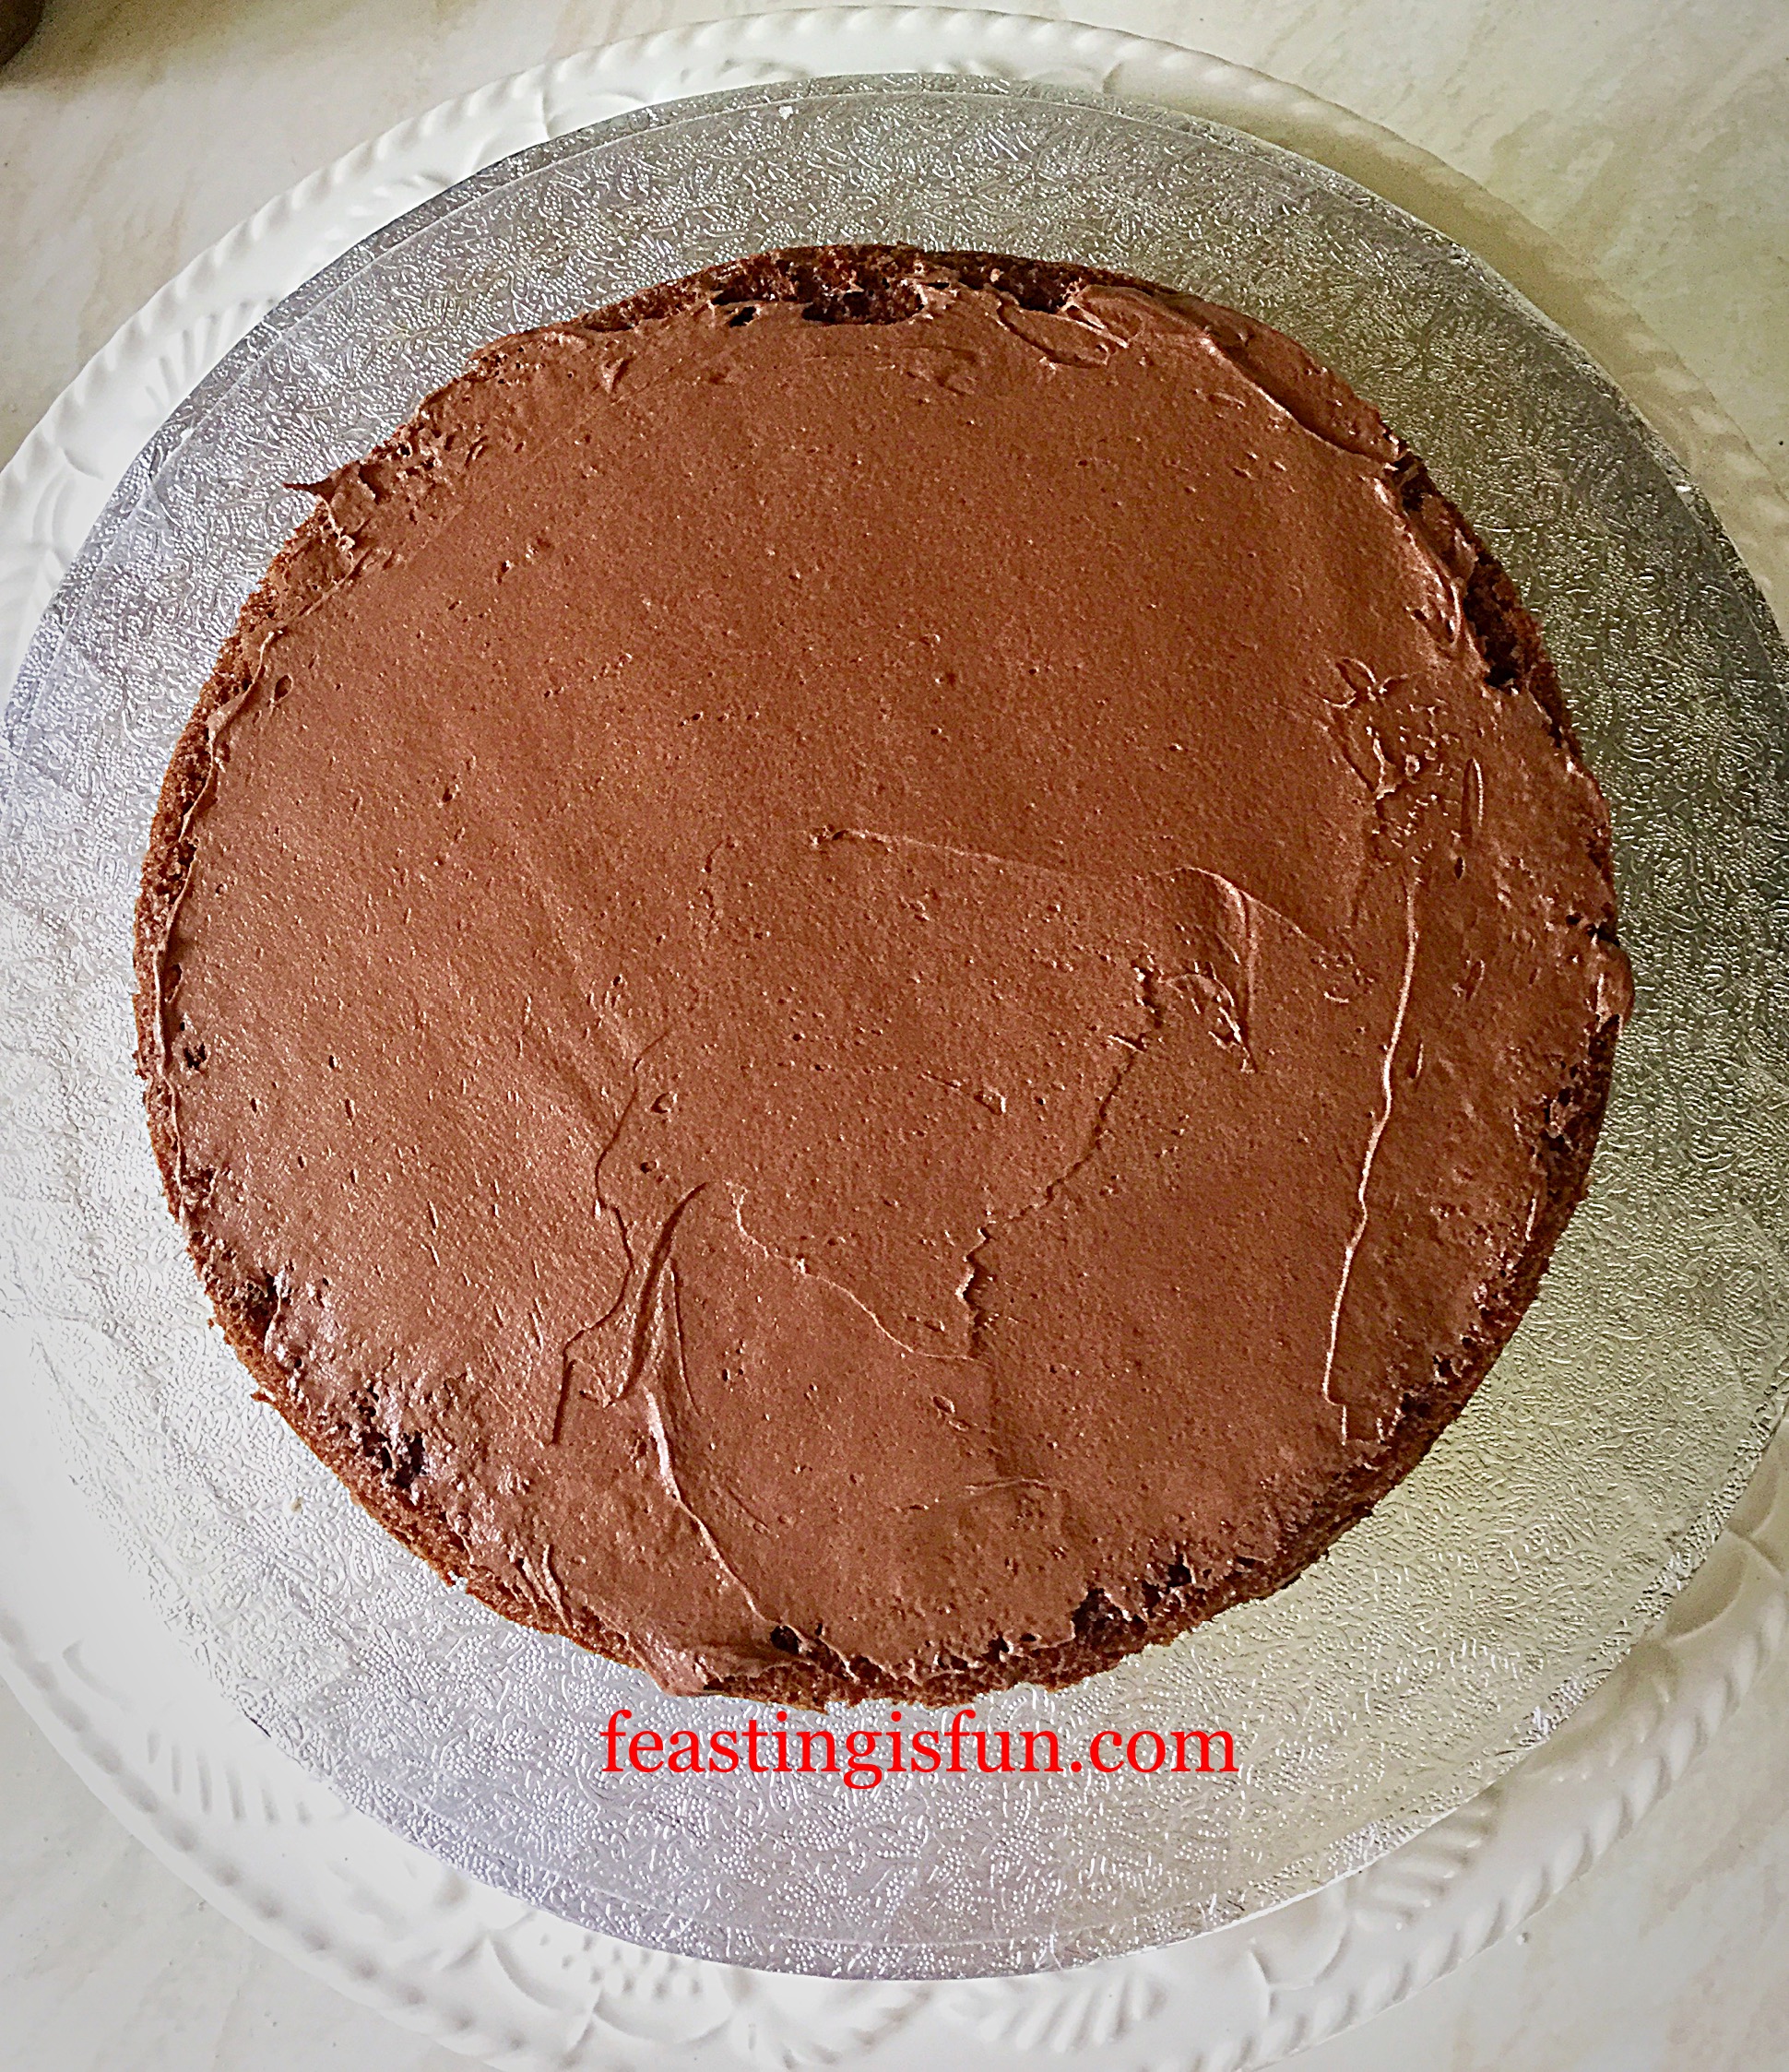
Place the first sponge flat side up on the centre of the board.
Using a palette knife thinly coat the upper, flat side of the sponge in buttercream.
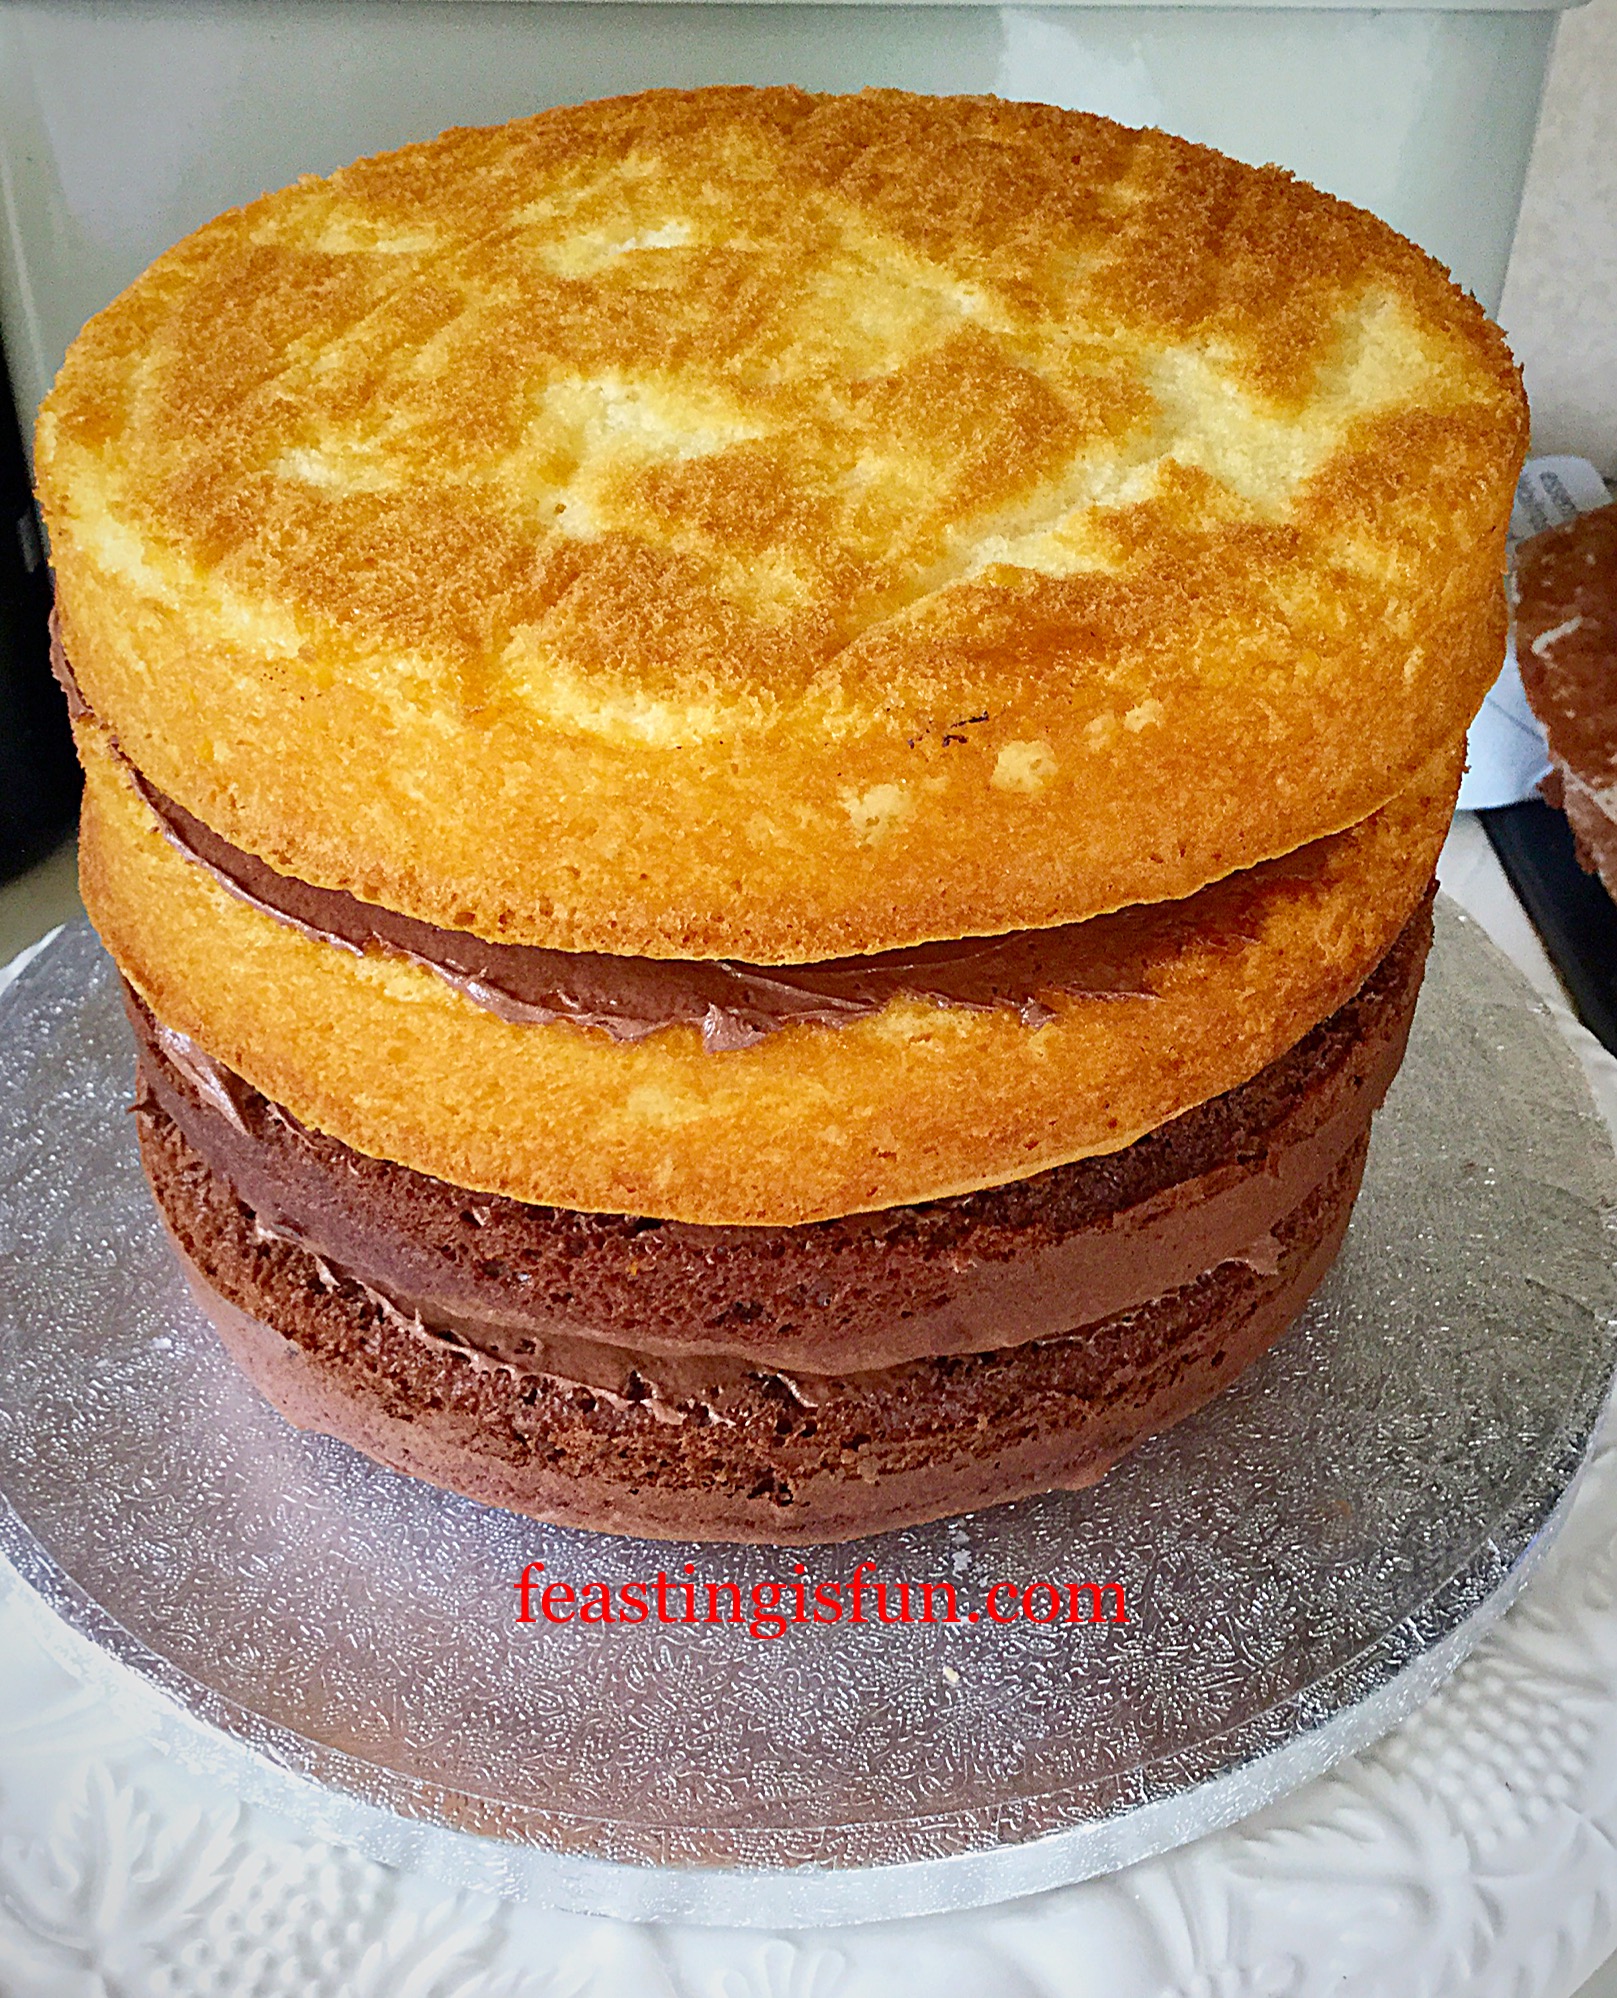
Next add the second chocolate sponge, again flat side up and cover with a thin layer of buttercream.
Continue in the same manner with the vanilla sponges, leaving the last sponge without a covering of buttercream.
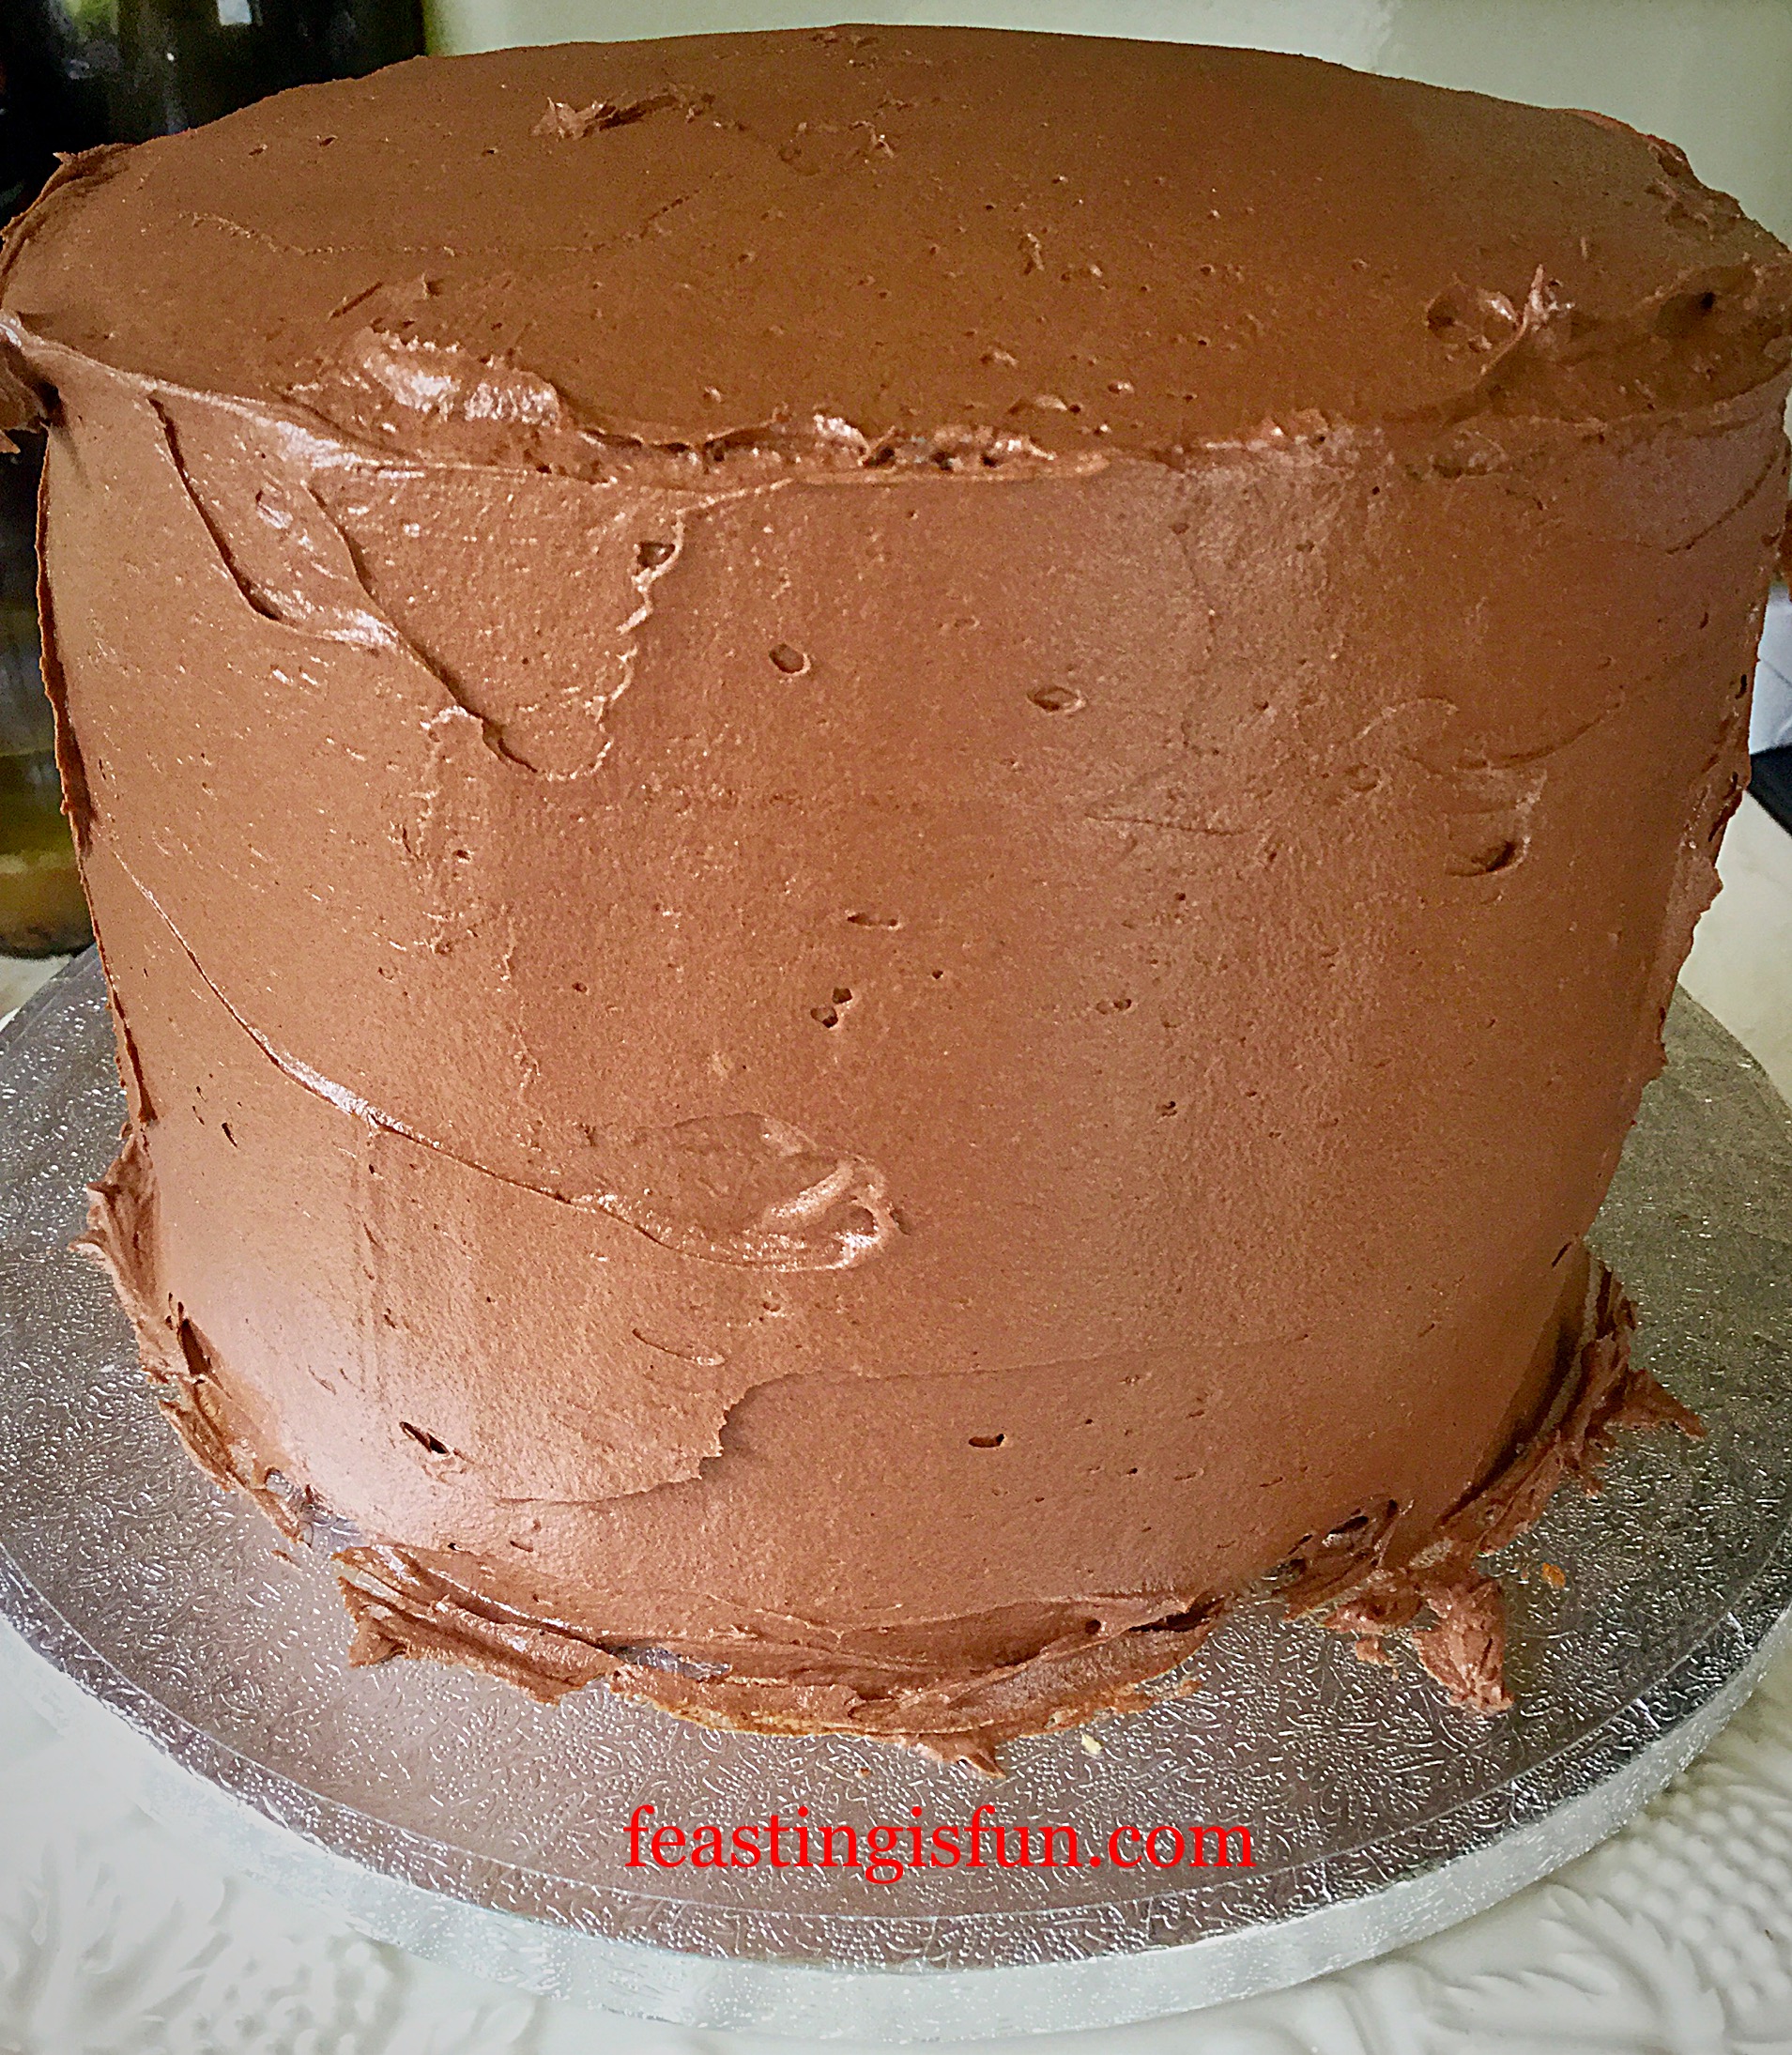
Covering The Cake With Buttercream Frosting:
Ensure that you have plenty of space to work around the cake. I moved mine to the dining room table where I was able to sit (better for my back) and cover the cake.
Add enough buttercream to cover the top of the cake evenly – approximately 0.5-1cm deep. Run the palette knife across the top to roughly smooth it.
Next add buttercream to the side of the cake near the top. Spread it with the palette knife so that it fills in the gaps between the sponges. I started at the top and rotated the cake stand, working my way down to the bottom of the cake as each sponge layer was covered. Always aim to keep the buttercream as even and smooth as possible, using a palette knife.
The whole cake is now covered in buttercream with a roughly smoothed top and sides.
Fill a large jug with very hot water and have some pieces of kitchen paper to hand.
Clean the palette knife and let it sit, immersed in the hot water for a minute.
Remove the palette knife and wipe dry with the kitchen paper.
Hold the flat side of the palette knife to the side of the cake and smooth the buttercream. Repeat by dipping the palette knife back into the hot water, drying and smoothing, rotating the cake stand as you do so. This may take a little practice but you’ll soon get the hang of it.
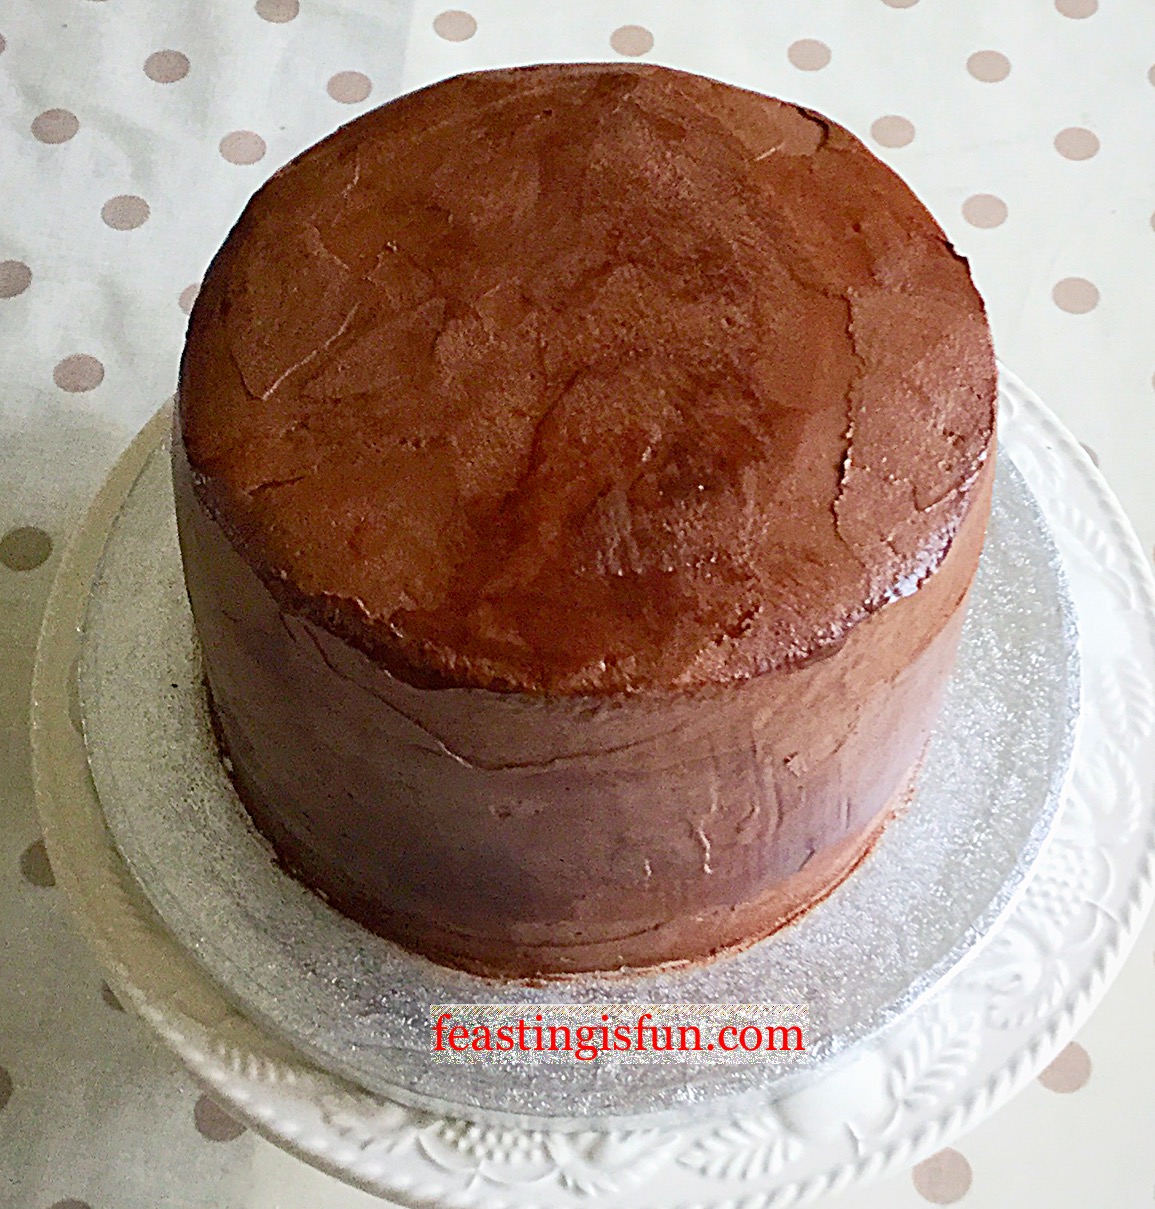
The buttercream becomes very glossy and smooth. Continue until the sides are as smooth as you can get them.
Next smooth the top of the cake in exactly the same way.
Use kitchen paper to gently go around the base of the cake and remove excess buttercream from the board. I remove any big lumps and then hold the kitchen paper to the board as I rotate the cake, gradually getting closer and closer to the cake.
Place the covered cake into the fridge to chill and set for 30 minutes.
When it is touch dry you may start to decorate it.
Decorating The Strawberries With Chocolate:
Break up the white chocolate into a heatproof microwaveable bowl.
Zap in the microwave for 30 seconds at a time, stirring in between each heating session. When the chocolate has half melted remove the bowl from the microwave and continue stirring until all of the chocolate is melted.
Set to one side to cool.
Meanwhile break up the dark chocolate and melt in exactly the same way as for the white chocolate.
Dip half of the strawberries into the dark chocolate, ensuring they are completely covered with only the green showing, use a teaspoon to pour the chocolate near the top of the strawberry. Set the strawberries on to a silicone mat or some baking parchment.
Remove 2 tablespoons of the melted white chocolate and place in a small, disposable piping bag. Snip the very end off leaving a small hole.
Pipe lines across the uncovered strawberries and over the chocolate covered strawberries. You can also experiment with piping little dots on to the strawberries. Leave the strawberries to set.
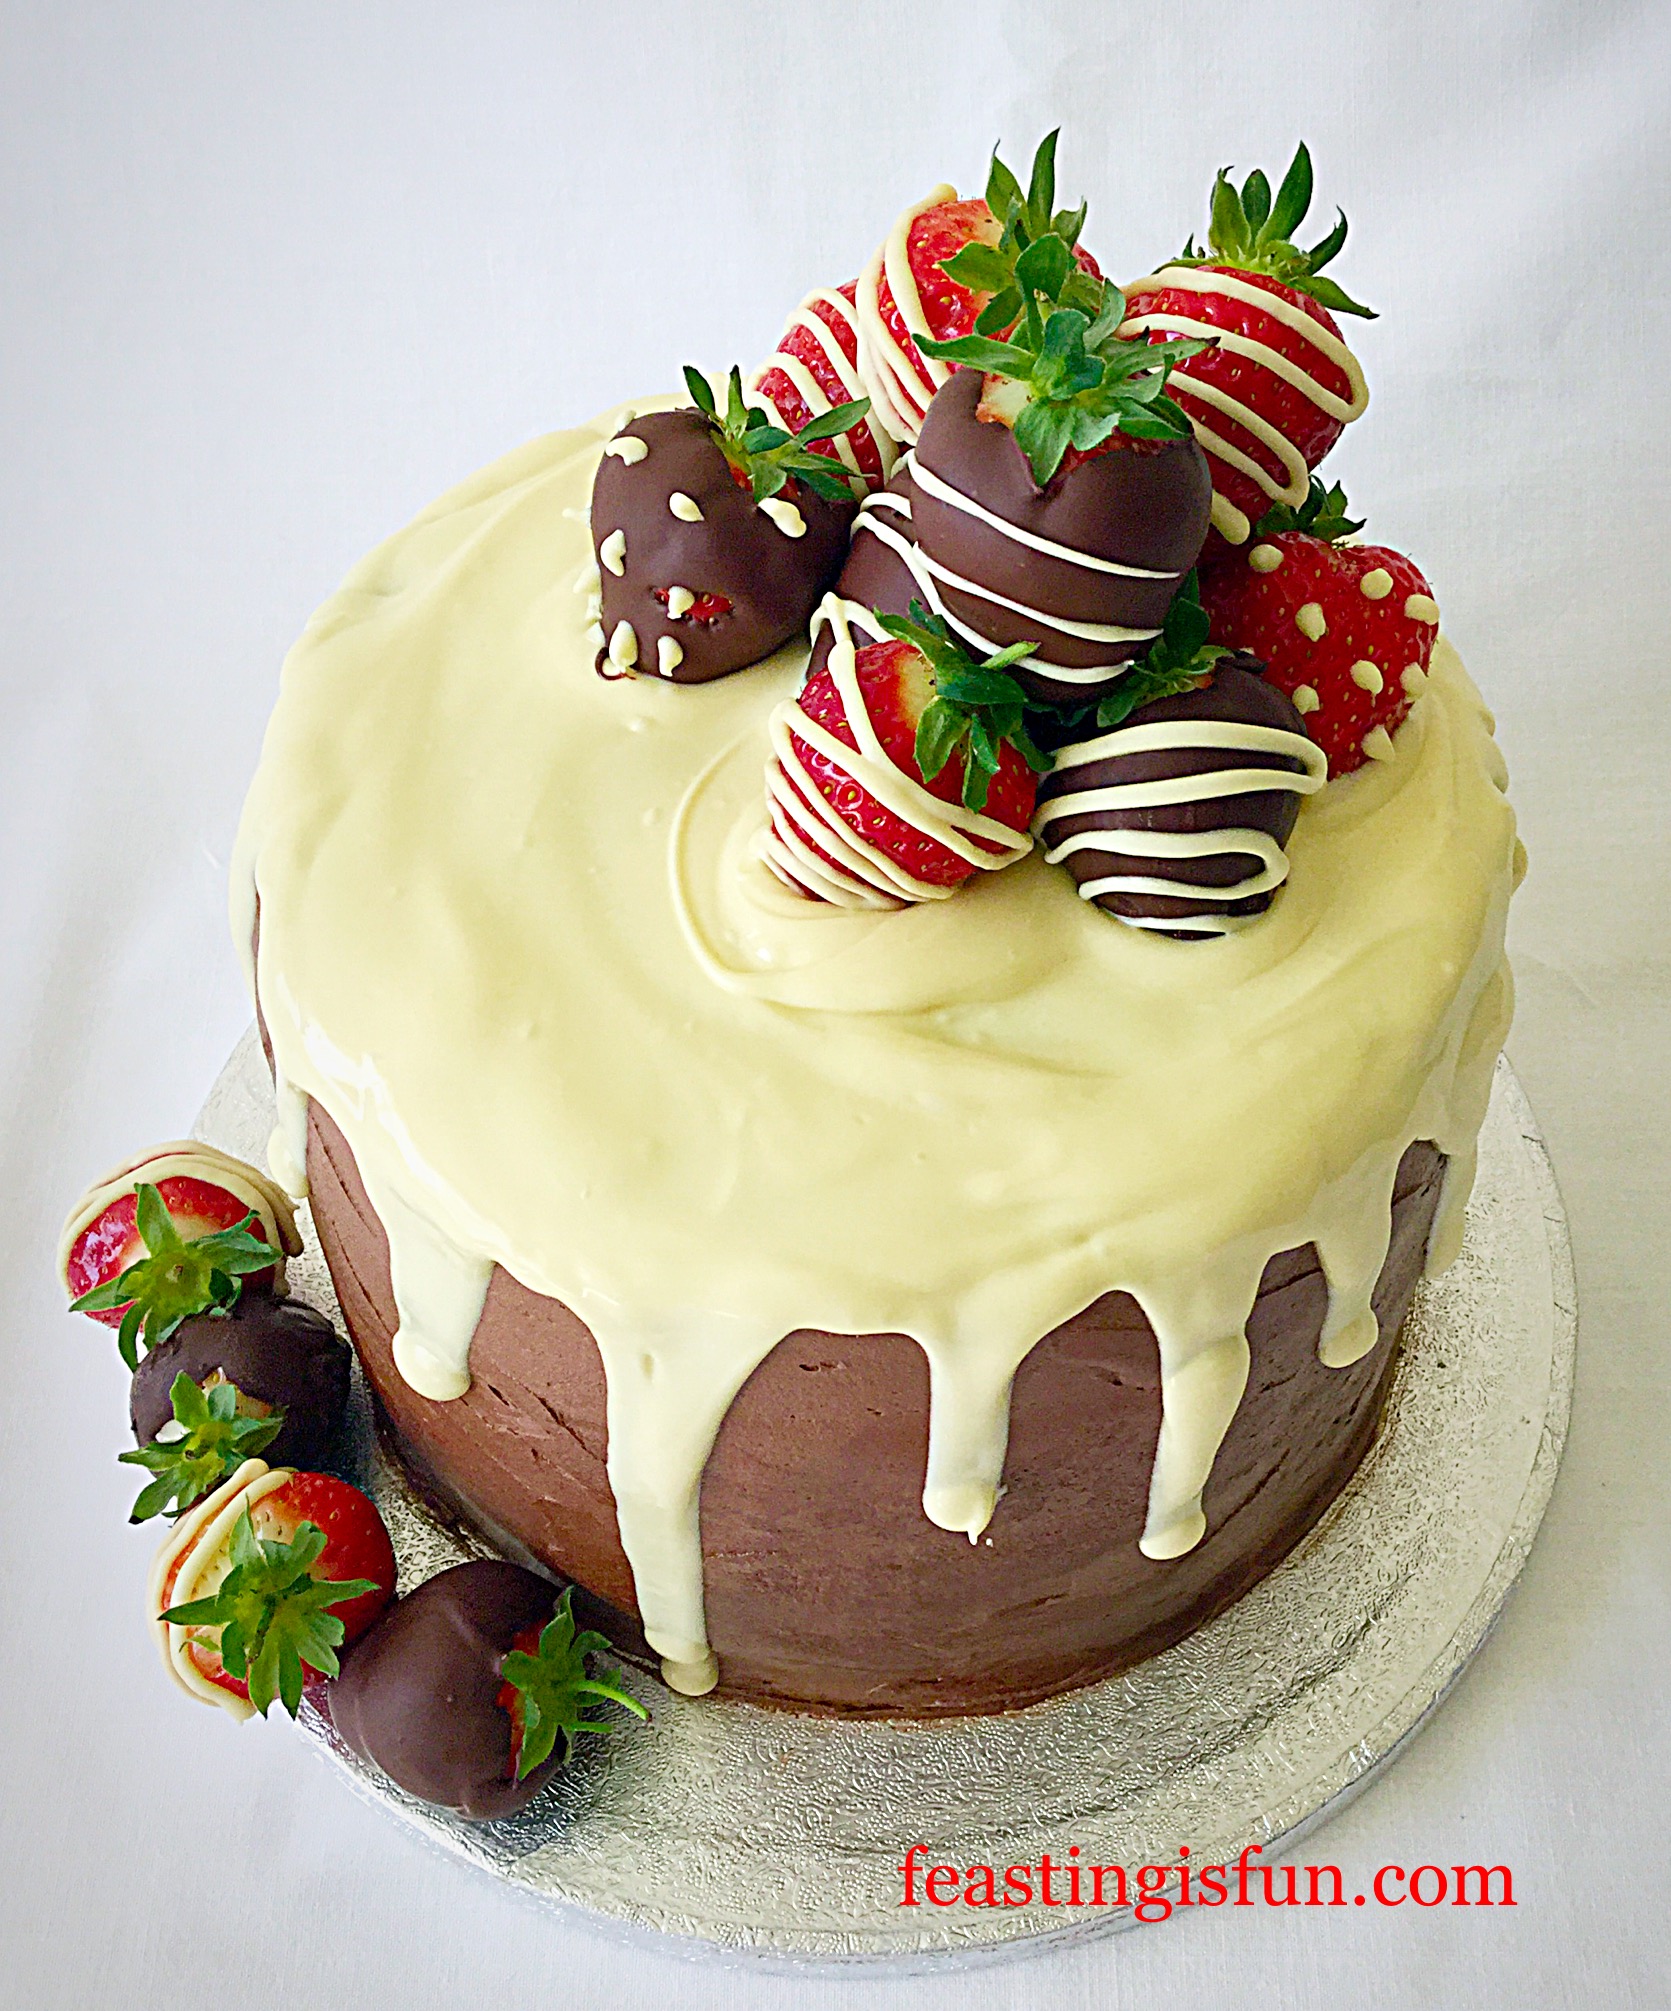
Creating The Drip Effect:
Finally, while the white chocolate is still pourable but cooled you can start creating your drips.
Using a spoon pour the cooled, melted chocolate around the edge of the cake encouraging drips to form by adding a little more chocolate in places. Aim for a variety of drip lengths around the outside of the cake.
Next spoon the remaining white chocolate on to the centre of the top of the cake. Use the spoon to spread it to meet the rim formed by the drips and then swirl with your spoon to give an attractive finish.
Adding Chocolate Strawberries For A Spectacular Finish:
Gently add some strawberries to the back of the cake, building height by laying them on top of each other. Also add a few strawberries around the base to create a stunning, professional finish.
Strawberry Chocolate Vanilla Drip Cake
Place the cake back into the fridge, especially during warmer weather, until it has set.
Strawberry Chocolate Vanilla Drip Cake
Now take lots of photographs as it is great to have a visual reminder that you have accomplished something so stunning.
Importantly, keeping some of the strawberries red, with just a little piped white chocolate really makes the whole cake pop. Having a burst of colour stops the cake from being all brown and cream, which is definitely not as fun as a spot of red here and there!
If you have enjoyed the recipe and tutorial for making this Strawberry Chocolate Vanilla Drip Cake here are others you may also like:
Fluted Chocolate Lemon Marble Cake a great cheat at making an amazing looking cake.
Finally, while not being the world’s best cake decorator means I can learn. Baking and decorating cakes should be fun. And it can be with instructions and photos to guide you through the process. Above all, cakes are made for sharing with friends, family and even the Post Lady!
Have I inspired you to try a new cake decorating technique?
Have fun decorating, making and baking your feasts.
Sammie xx
Wright’s Baking provided me with the cake mix kits to try. All content, opinions, views and photographs are my own. Please see my Disclosure Policy. I am not a professional baker or cake decorator, any advice given is purely for guidance.
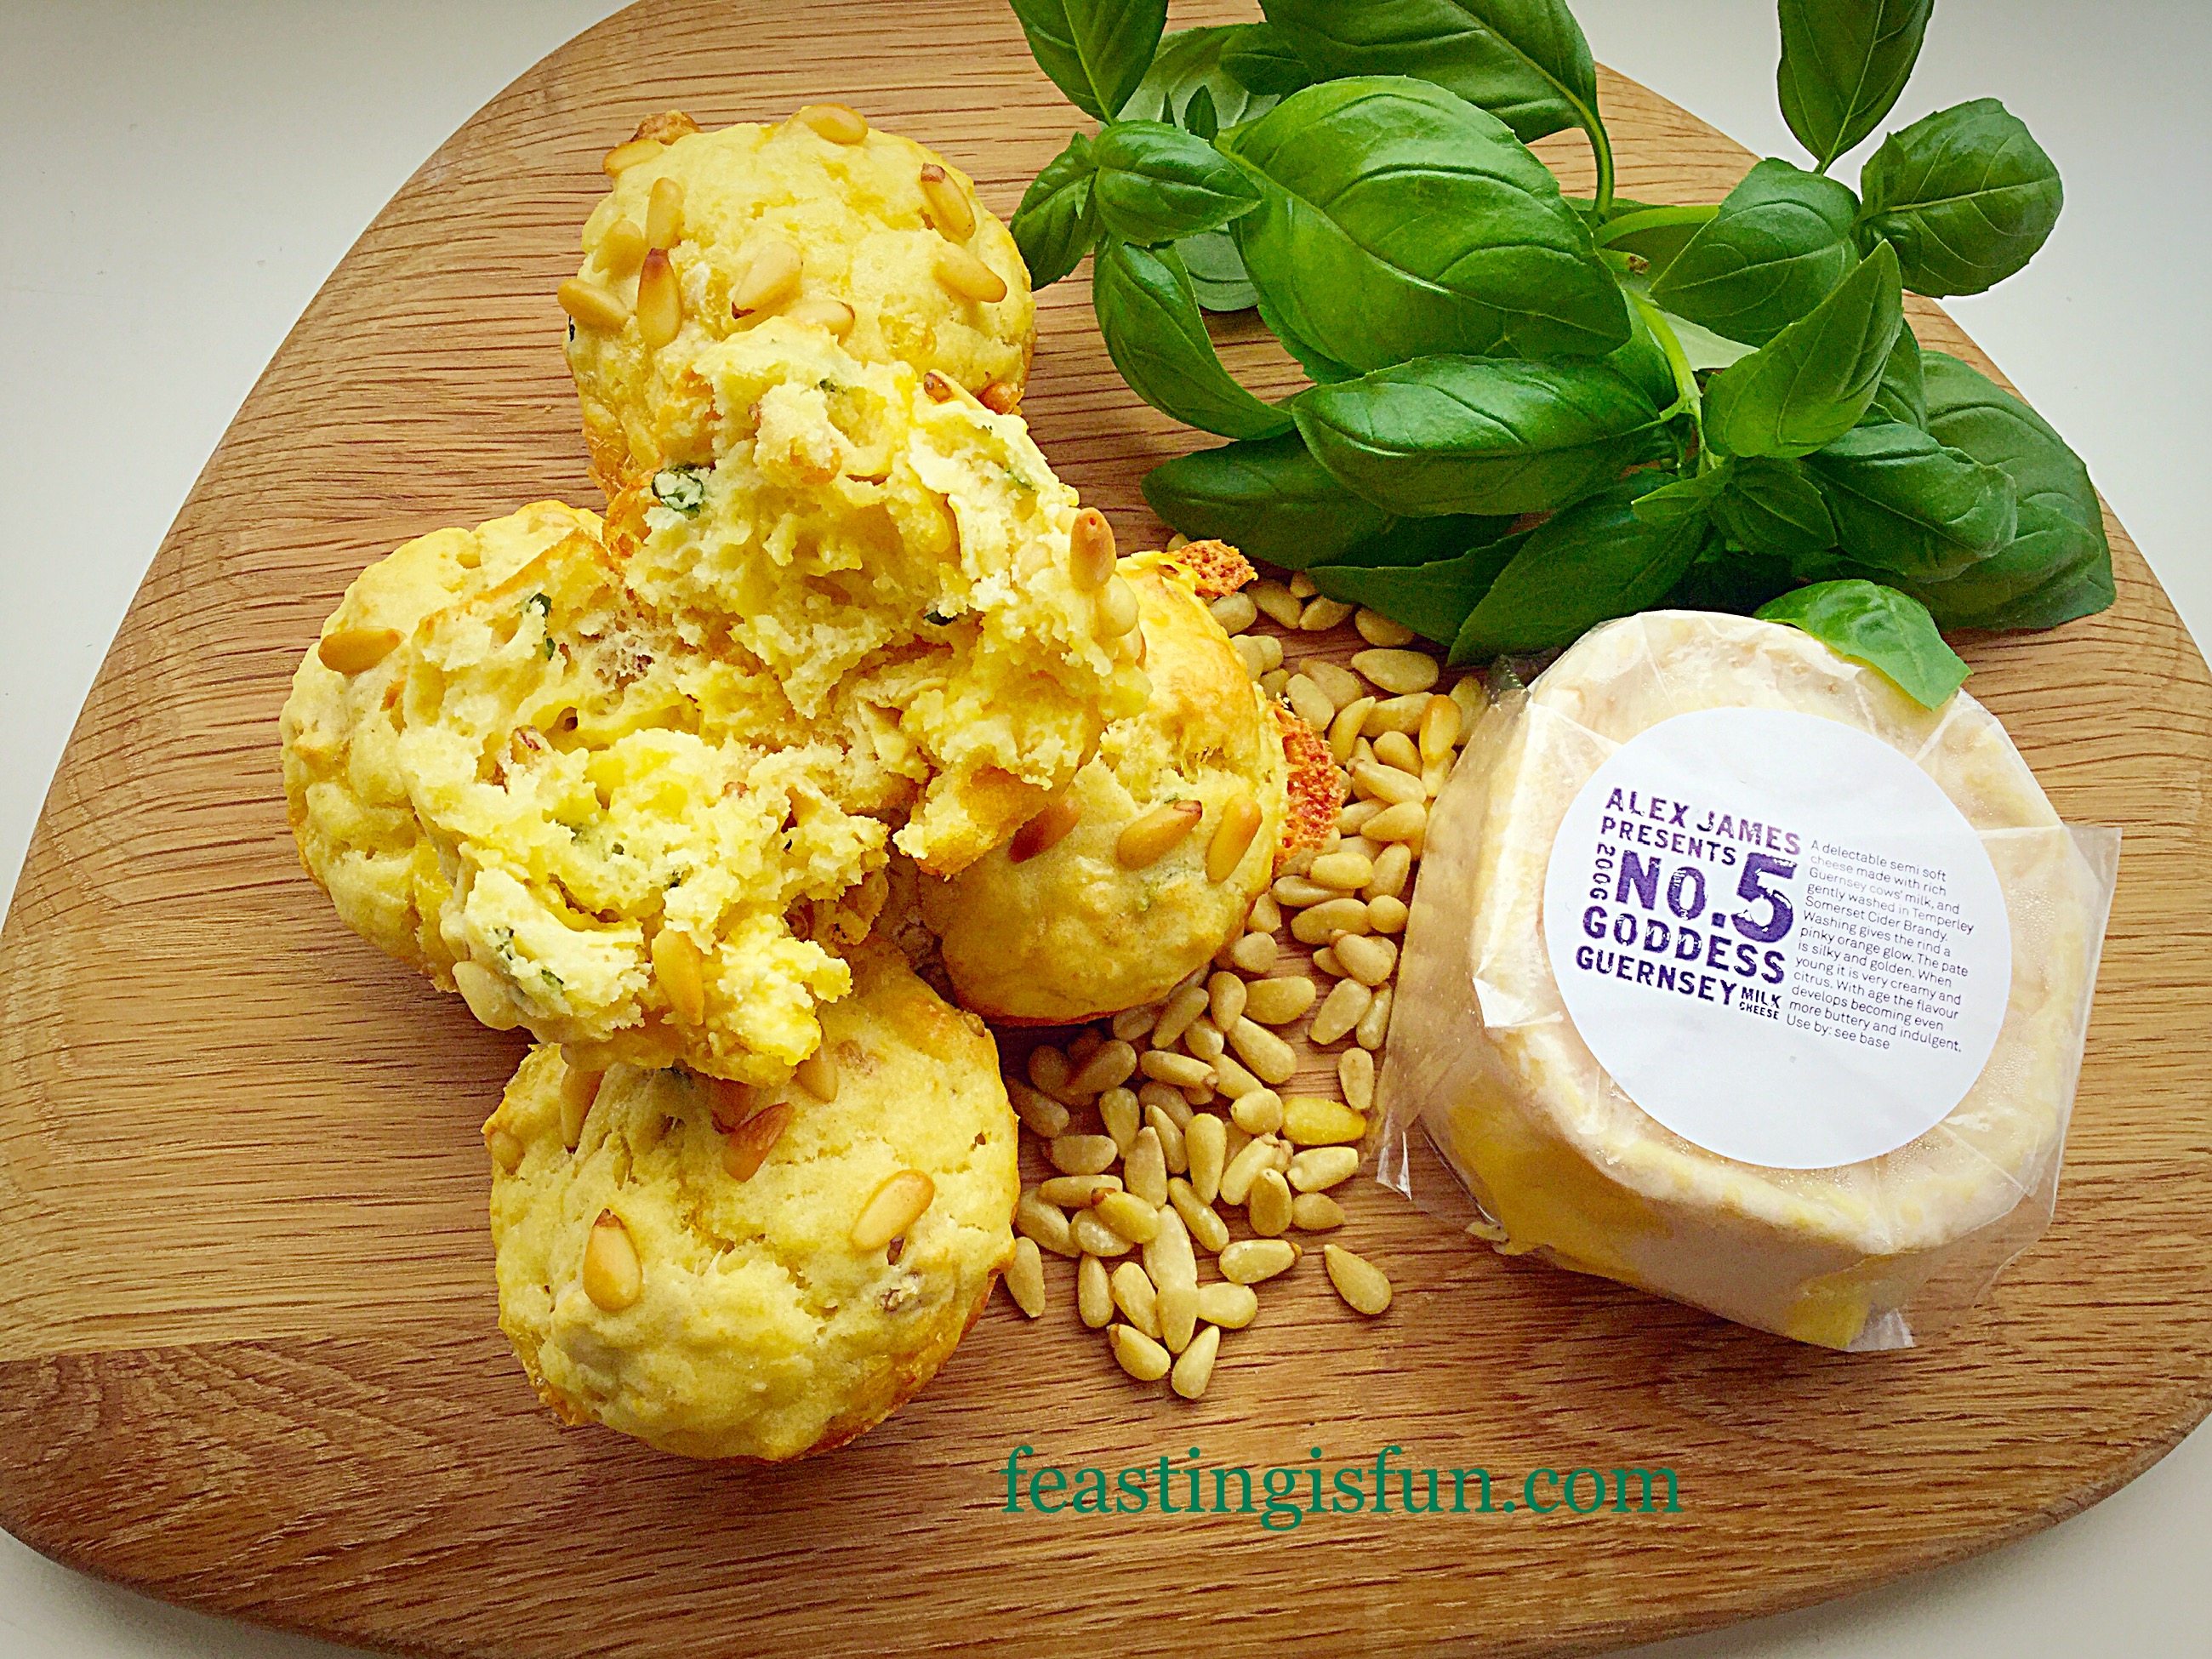
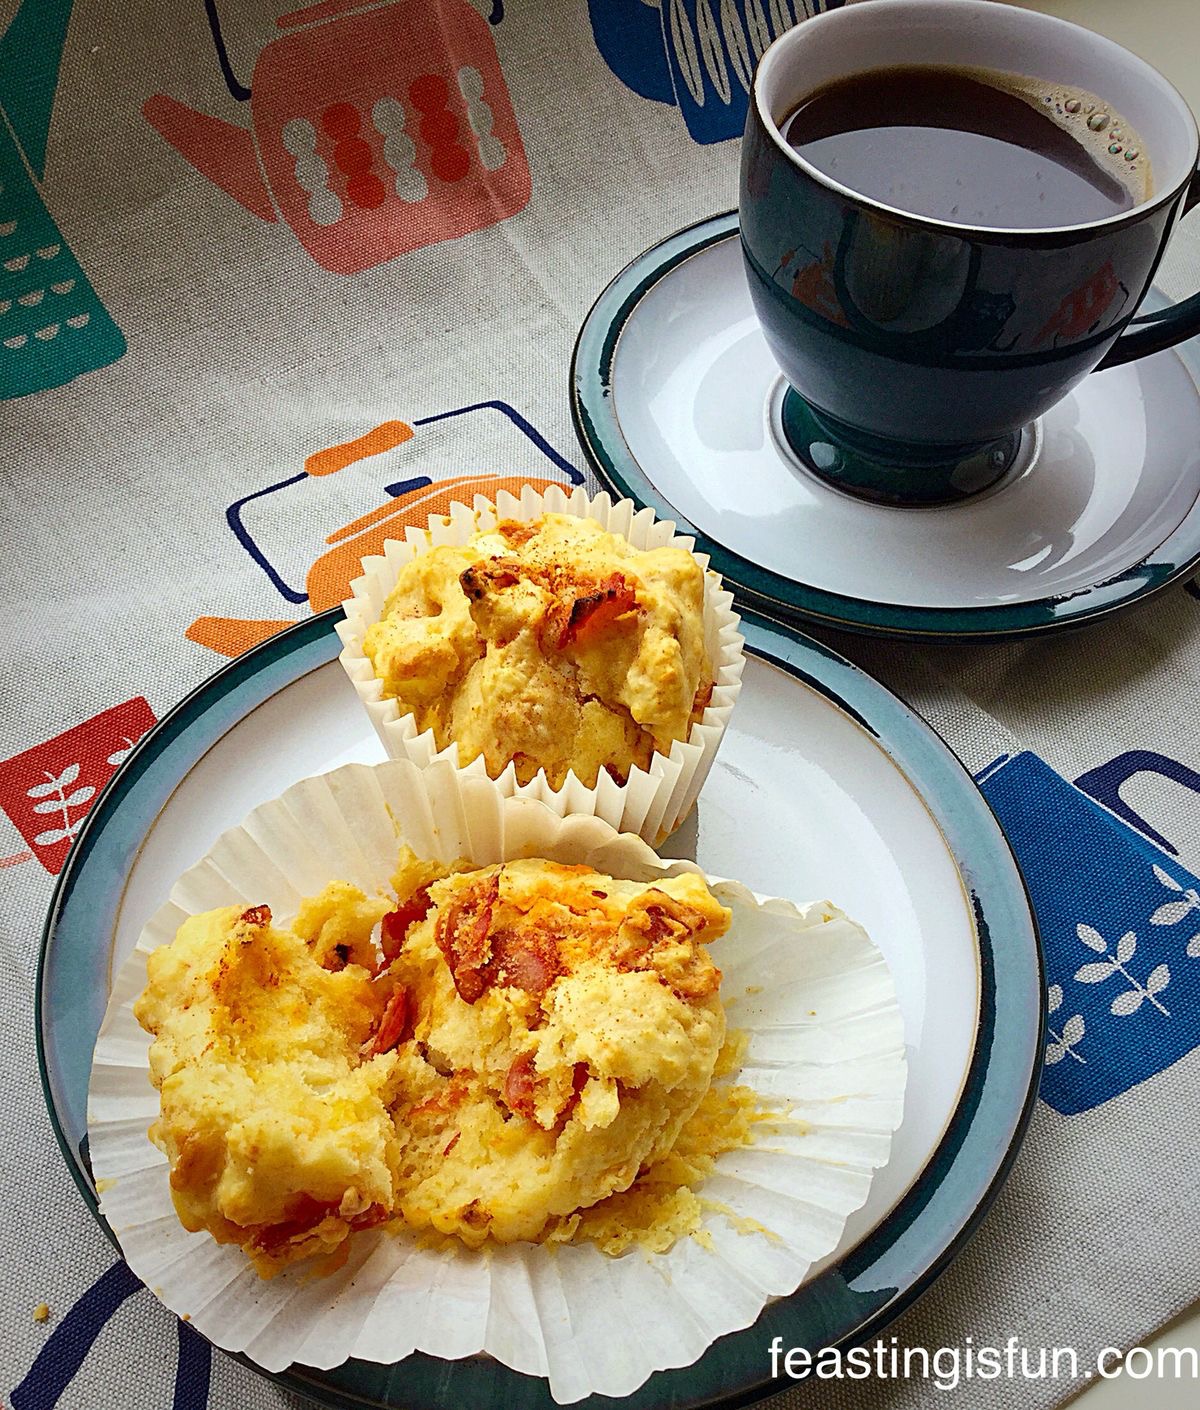
Goddess Cheese Pine Nut Muffins vibrant strips of aromatic basil run through these delicious buttery cheese, pine nut studded muffins.
Goddess Cheese Pine Nut Muffins a delightful flavour combination.
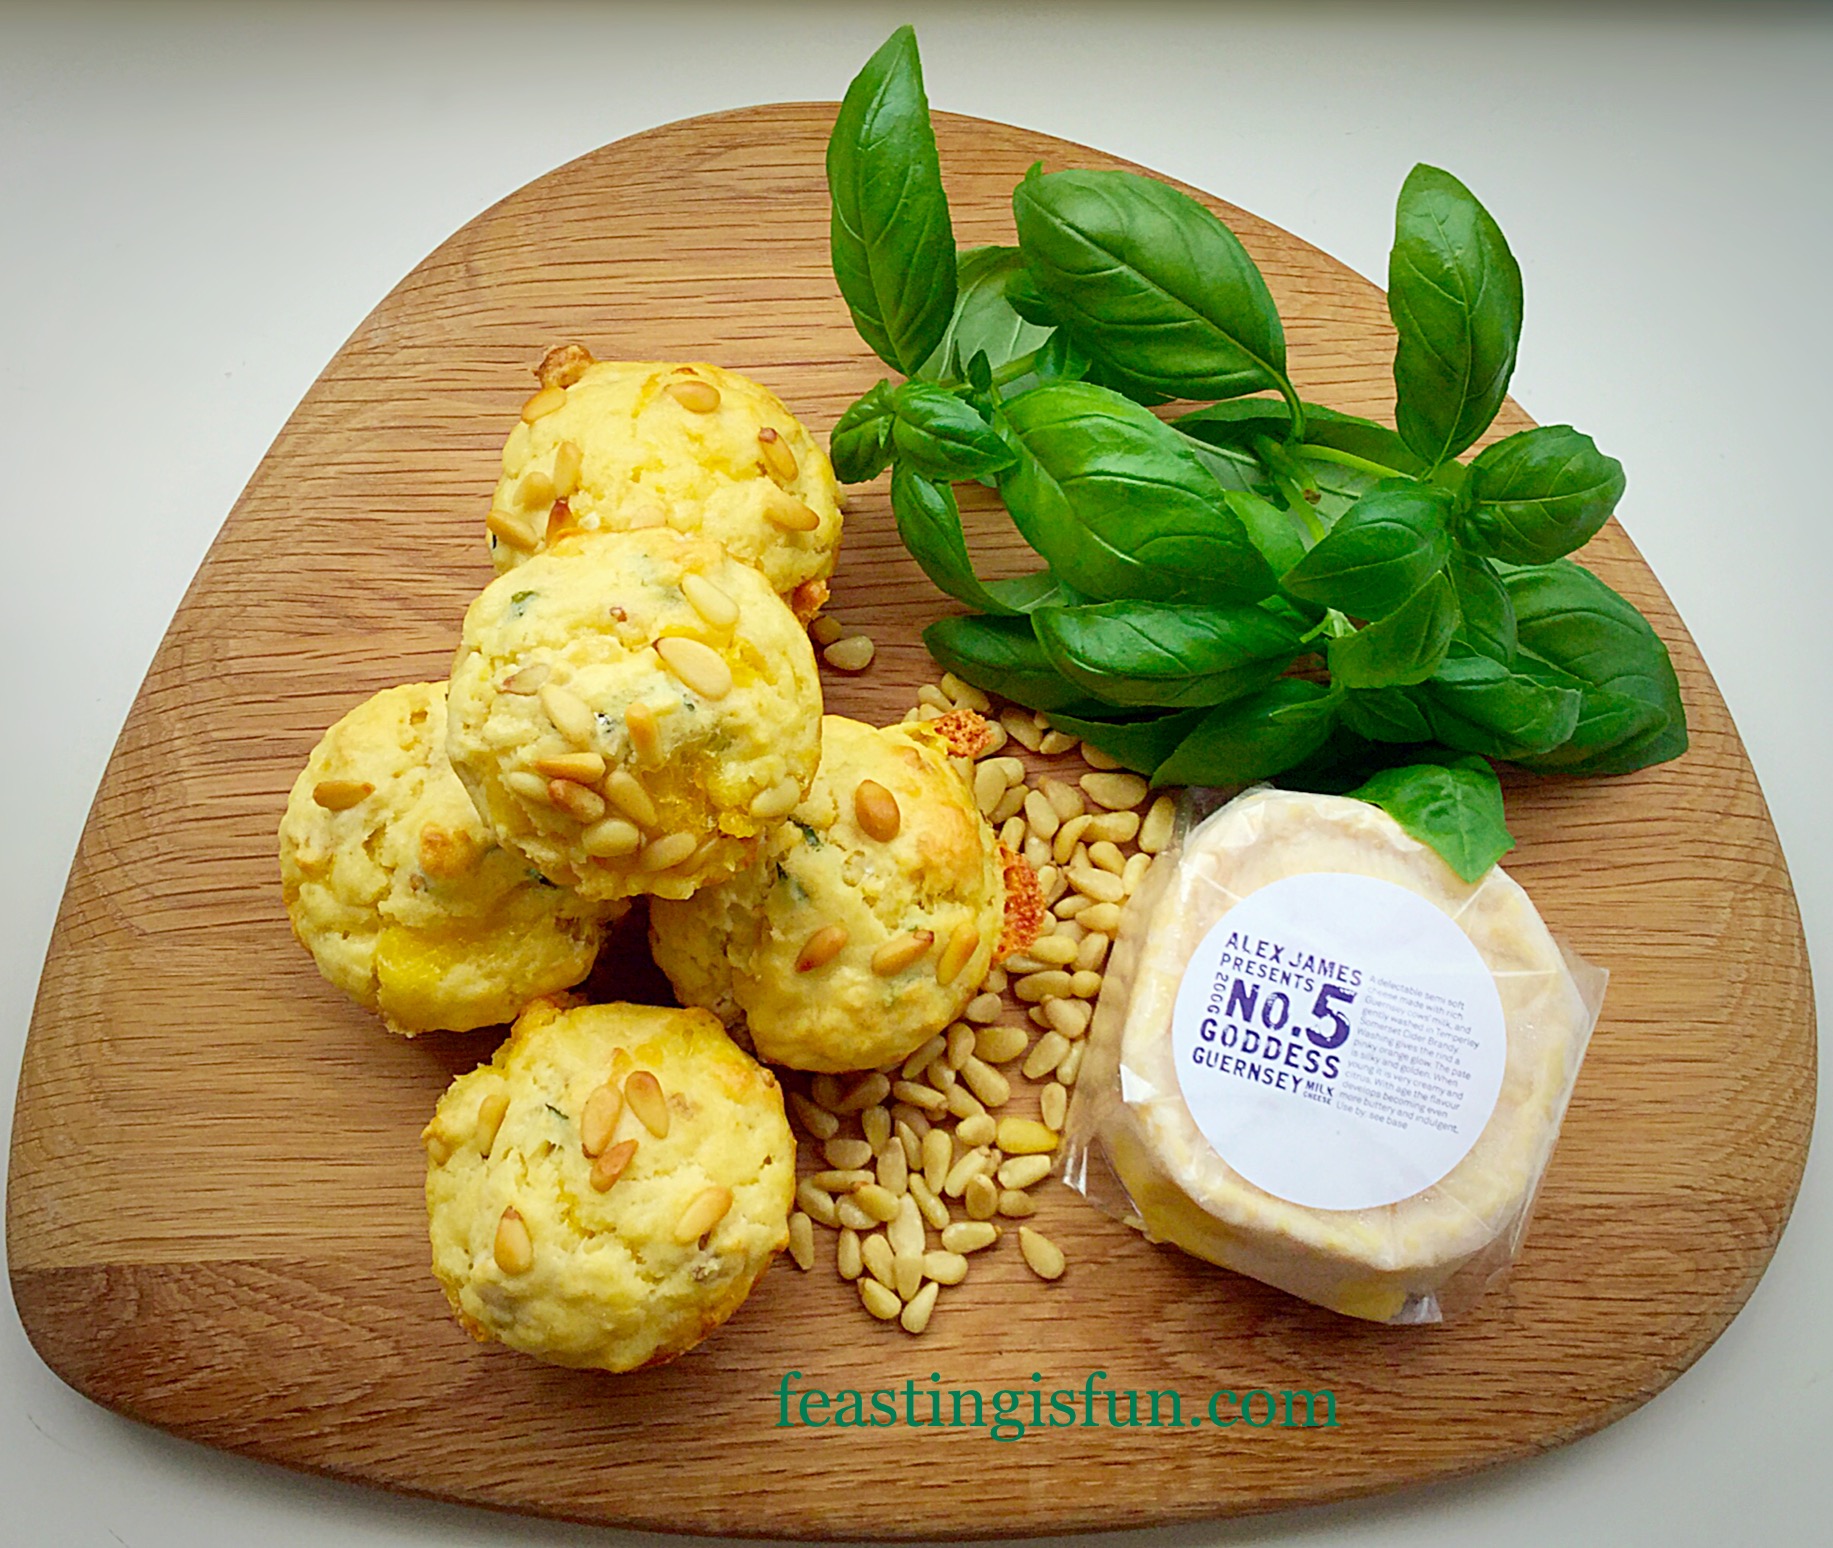
Also these delightful muffins are so easy to make, quick to bake and perfect for breakfast, packed lunches, picnics……
Goddess Cheese Pine Nut Muffins perfect for picnics.
Whenever we have friends and family round, I always provide a cheese board. Since I have more of a savoury palette, I generally choose cheese and crackers over dessert on most occasions. While I adore all cheeses, this Goddess Cheese, sent to me to try byPong Cheese is beautifully buttery and creamy.
A cider washed edible rind conceals the most gorgeous, gooey, buttery cheese, perfect for spreading on crackers, with a glass of something chilled to go alongside. The initial buttery flavour is layered with a nutty taste that is perfectly paired with the pine nuts in these Goddess Cheese Pine Nut Muffins.
Goddess Cheese Pine Nut Muffins a great way to use up left over cheese.
Whilst spreading this cheese on crackers is a perfectly acceptable way to indulge your senses, my creative side knew that it would taste so good baked in a muffin. After a party or family gathering I am quite often left with cheese and other delectables. I avoid waste as much as I can, so incorporating this beautiful cheese into a bake gives it a second life in these delicious muffins.
Goddess Cheese Pine Nut Muffins are incredibly easy to whip up and bake. In fact these took less than 30 minutes from start to eating!
Oh boy, these muffins are fabulous warm out of the oven.
Recipe: Makes 12 Goddess Cheese Pine Nut Muffins
50g/2oz Pine Nuts
300g/11oz Plain White Flour (self raising can be substituted – leave out the baking powder)
2tsp Baking Powder
2 Whole Free Range Eggs
200ml Semi-Skimmed or Whole Milk
4tbsp Vegetable/Sunflower Oil
Goddess Cheese 150g/5oz – mine was from Pong Cheese
Method: Preheat the oven to 200C/180C fan, gas mark 6
First of all place the pine nuts into a dry skillet or frying pan and toast over a medium heat until golden. Remove from the pan and place on to a plate to cool. Reseve some pine nuts for topping the muffins.
Sift the flour and baking powder into a large bowl.
Pile the basil leaves on top of each other and cut into fine strips.
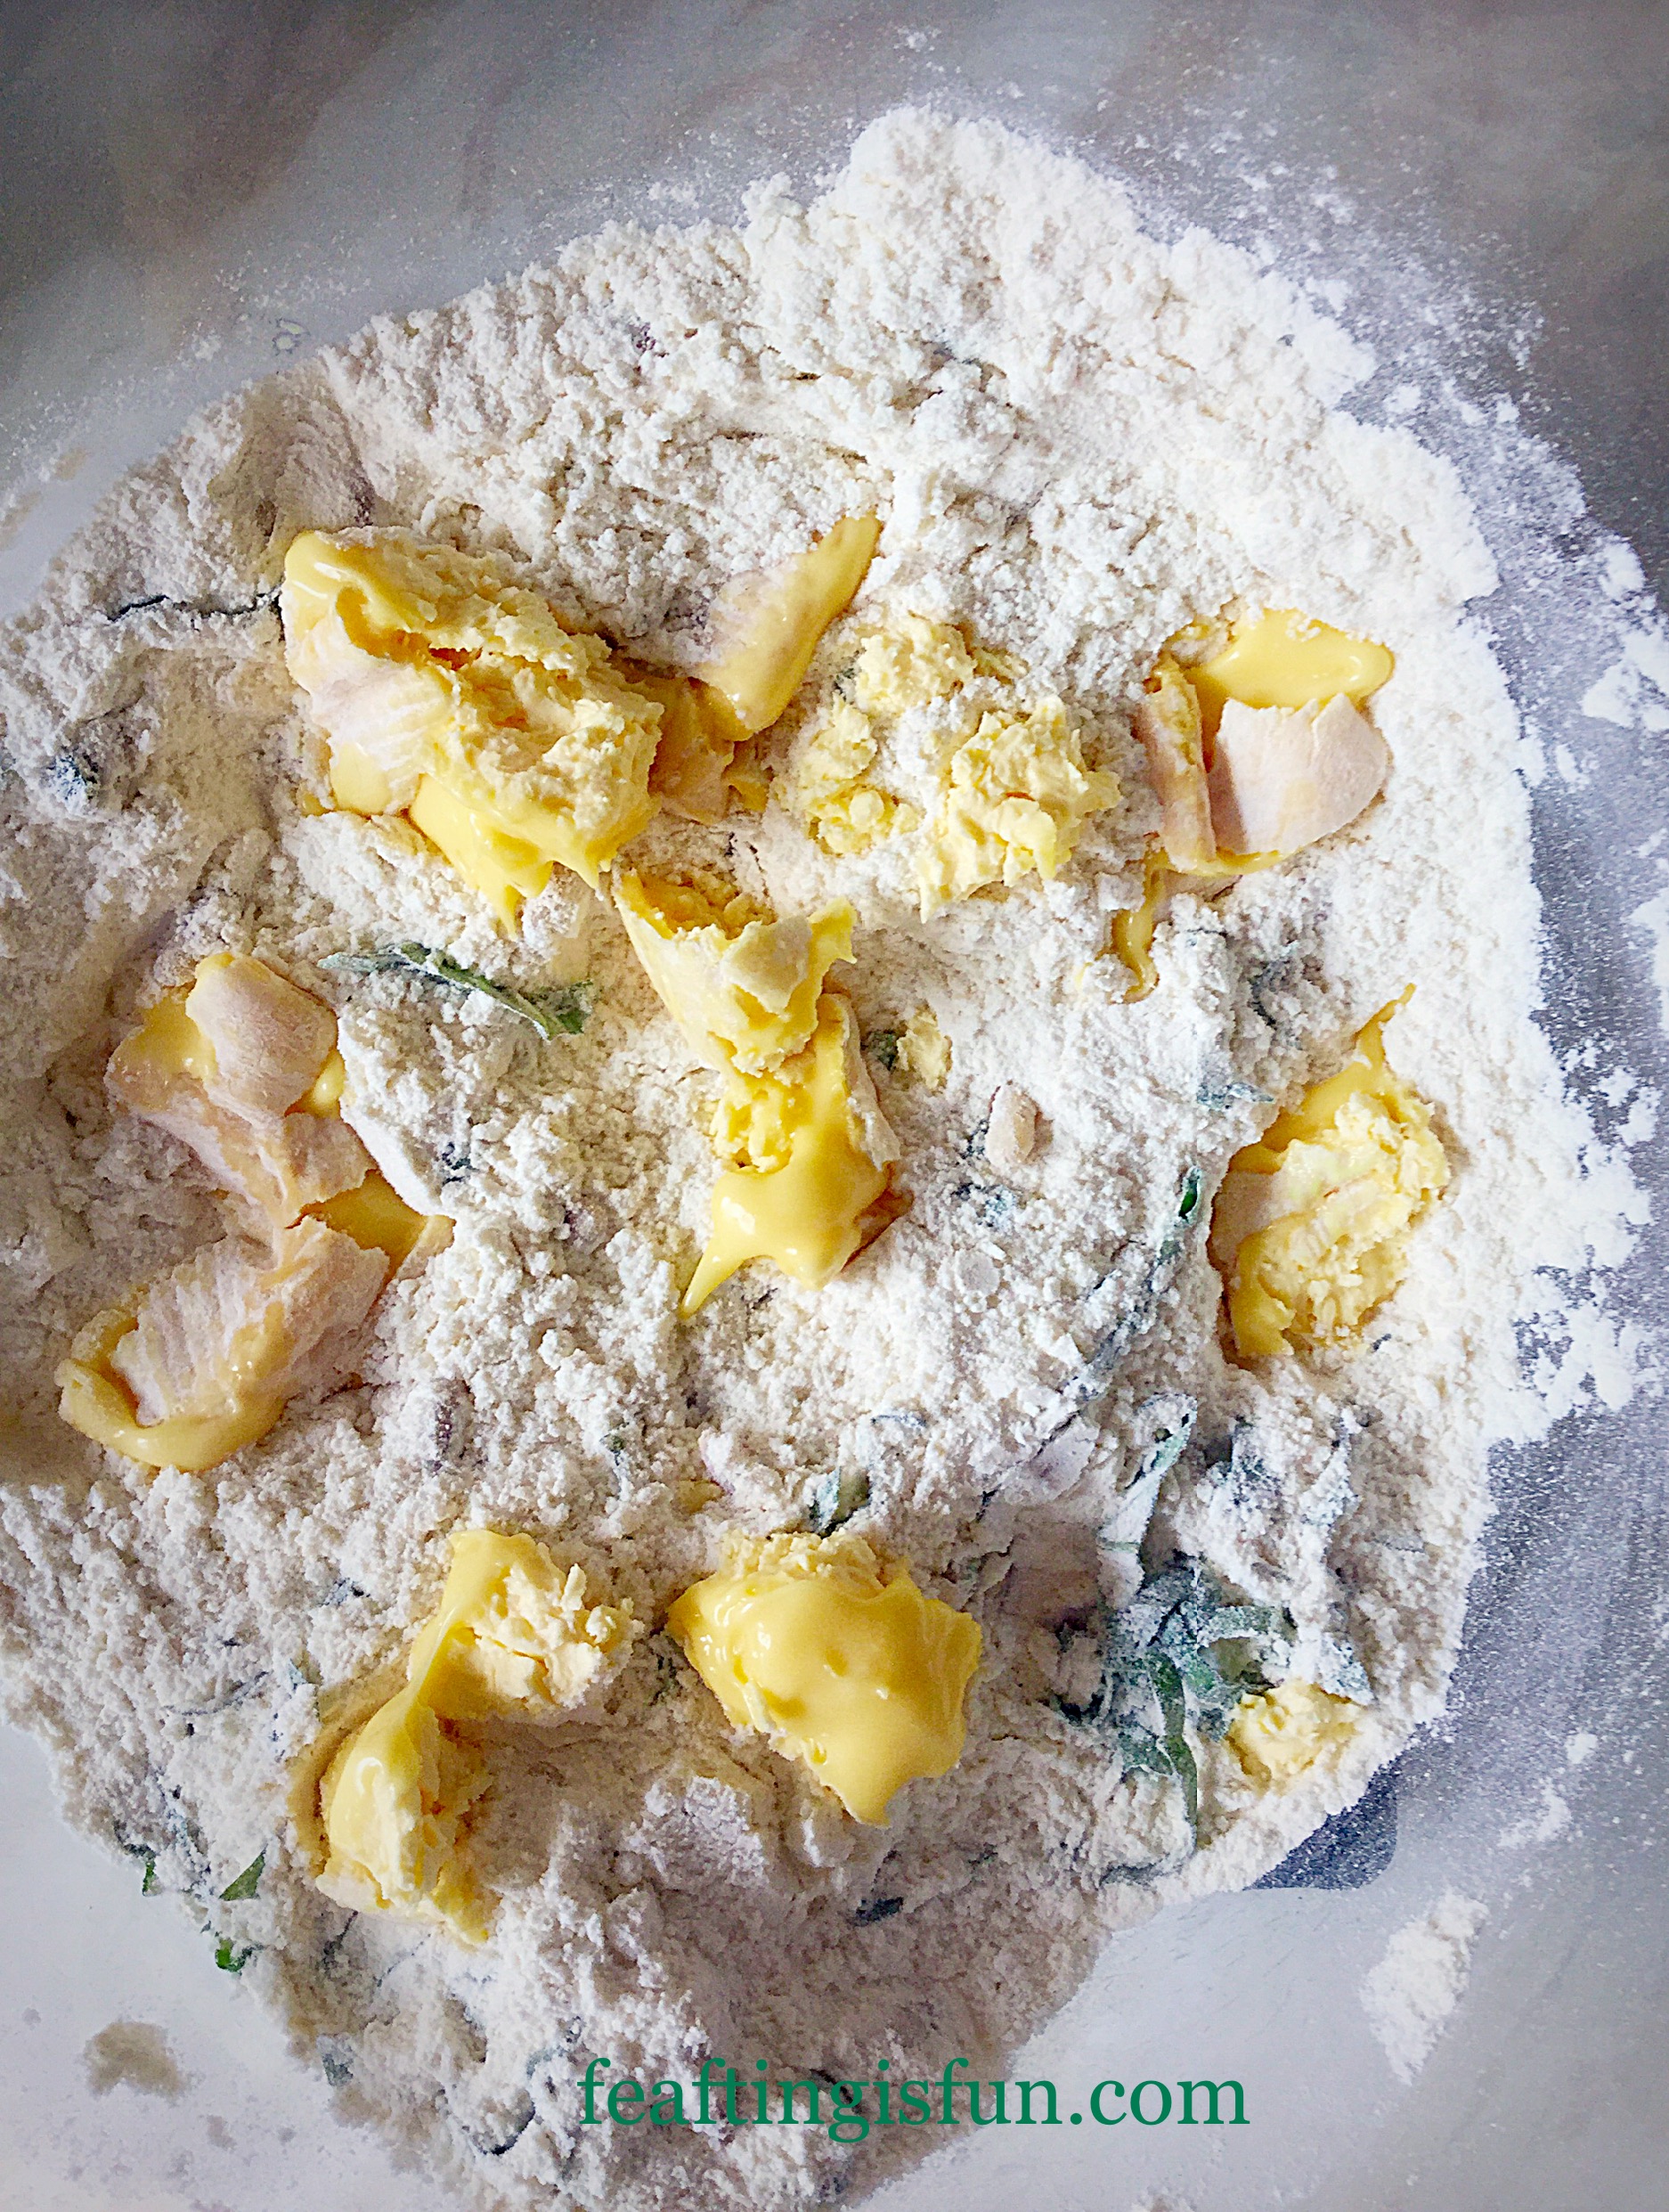
Add the cooled pine nuts, basil, and seasonings to the bowl.
Stir with a fork to incorporate.
Break the Goddess Cheese into lumps and add half to the flour mixture – I found it easier to have the bowl on the scales.
Gorgeously gooey Goddess Cheese.
Cover the cheese in the bowl with the flour mixture. This will stop it clumping together.
Add the other half of the cheese, again pinching off gooey lumps and dropping them into the bowl. Cover in the flour mixture as before – dry mixture.
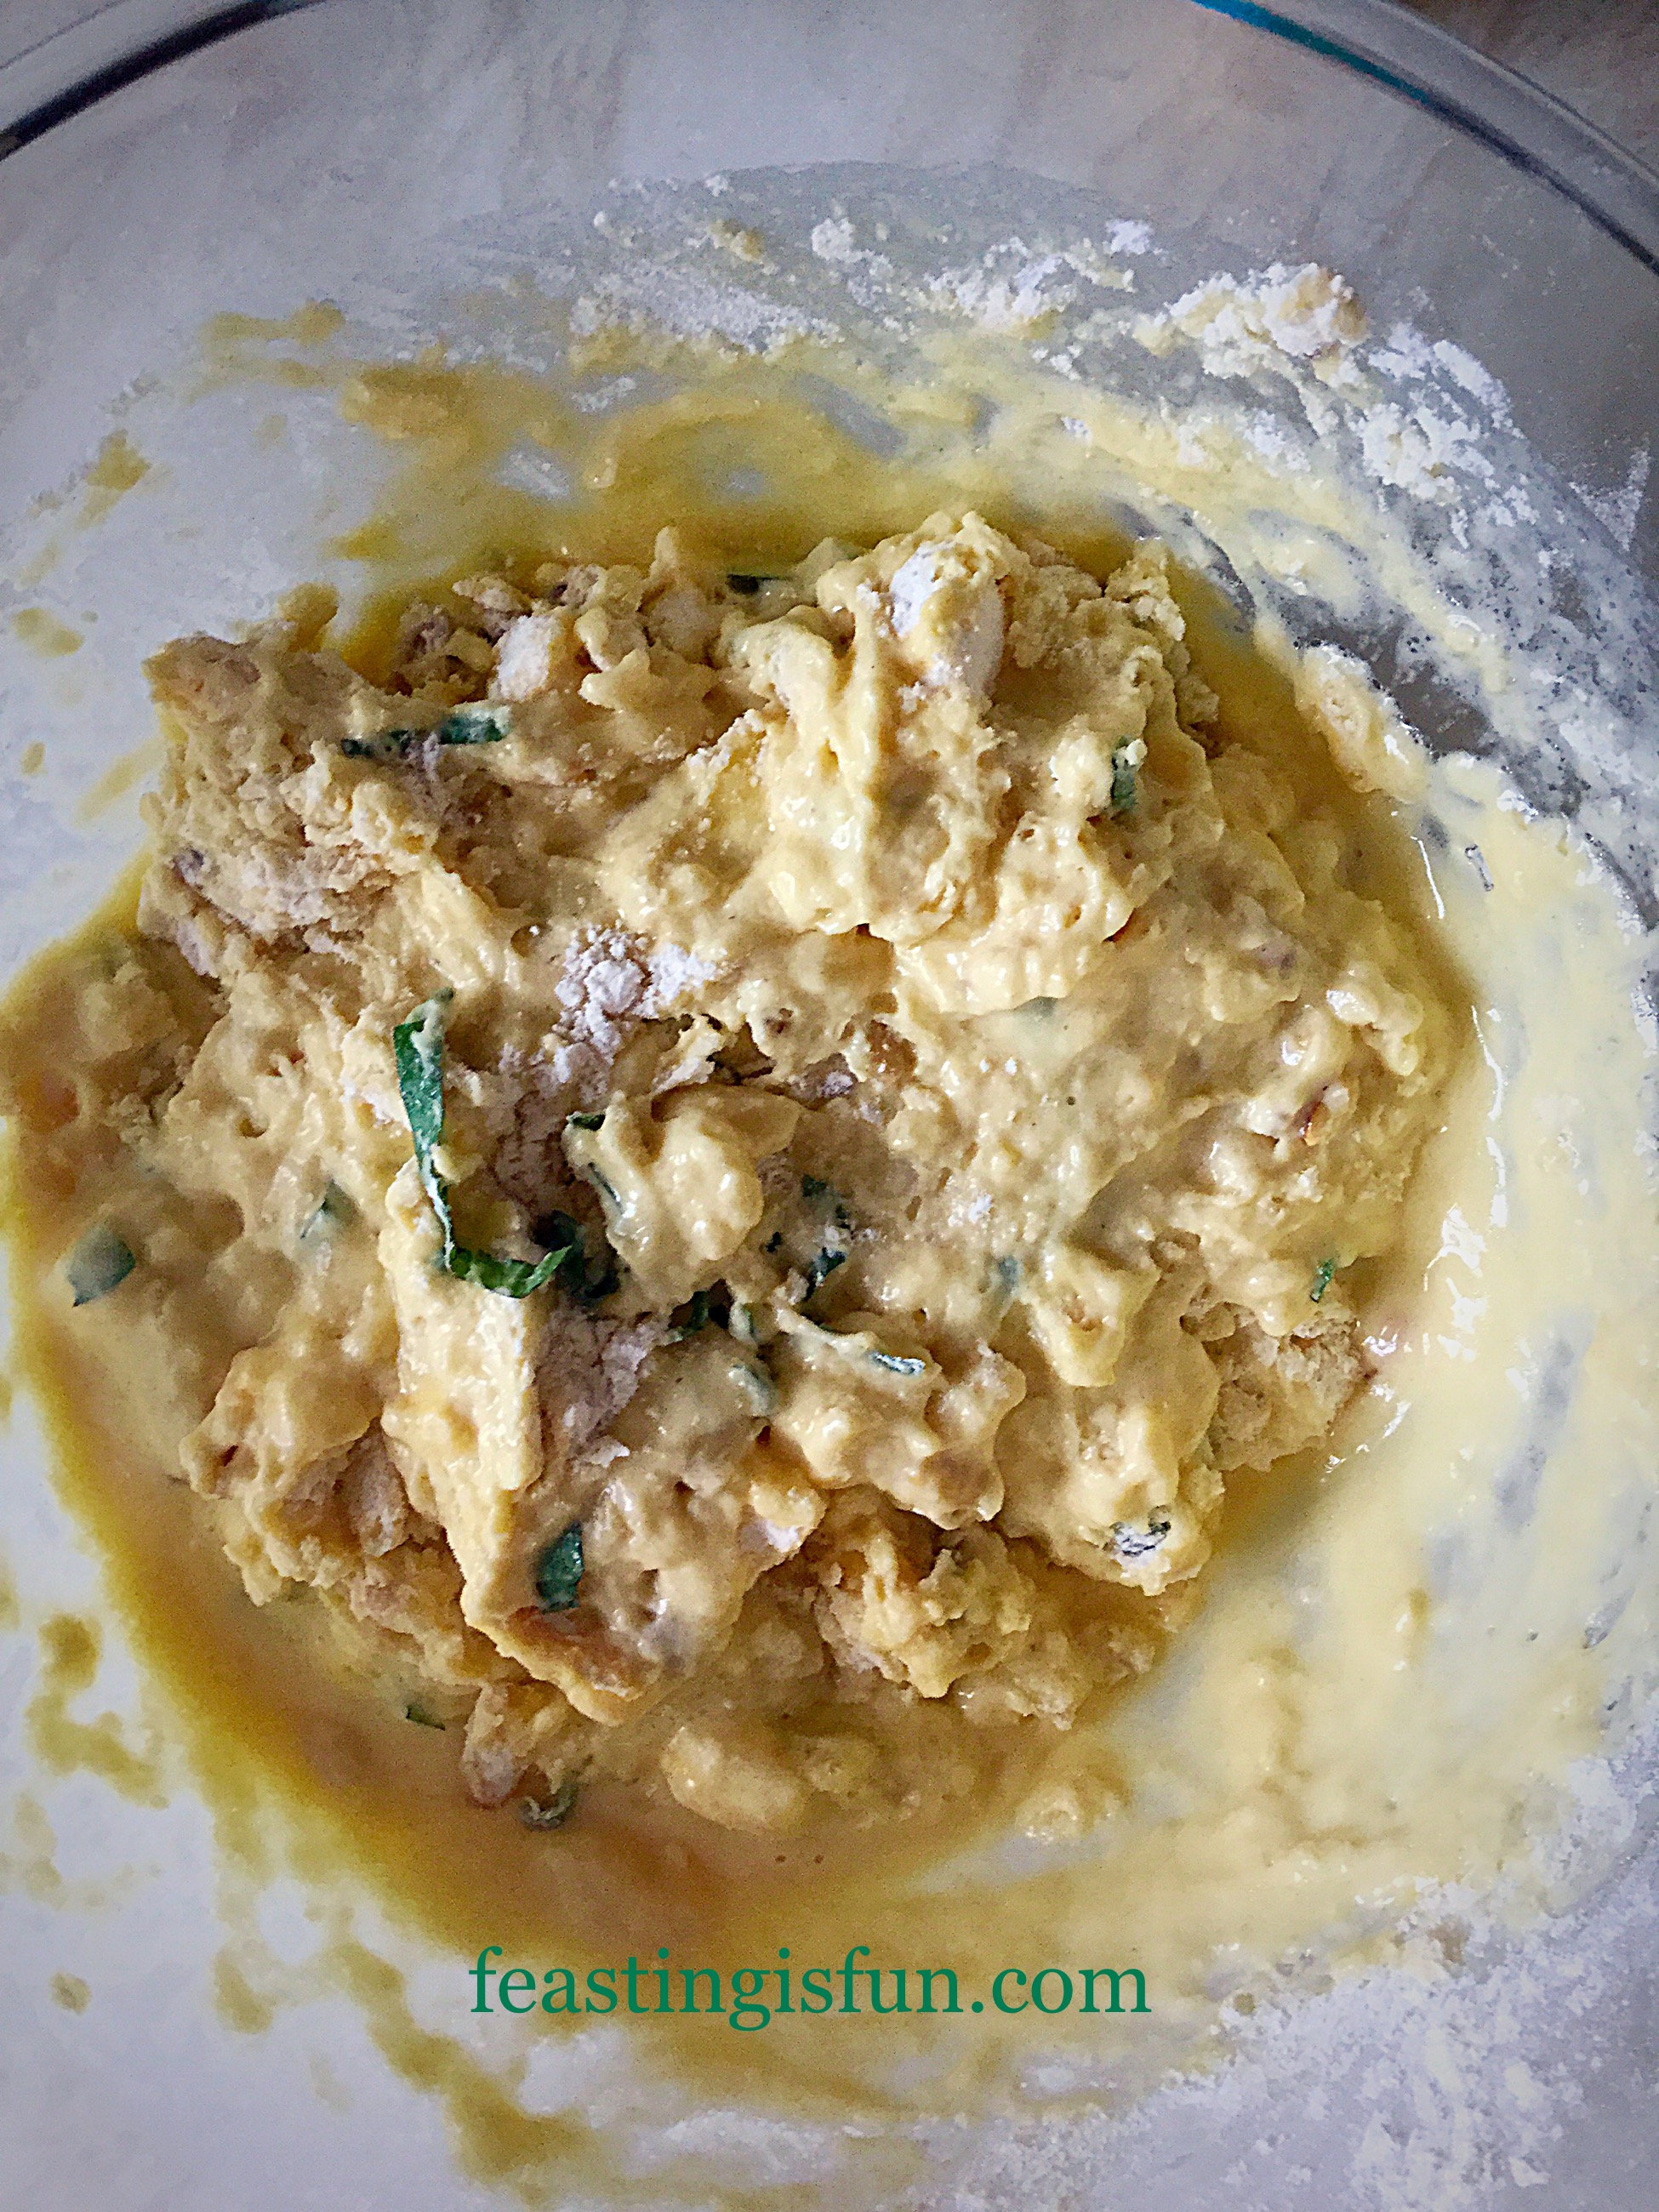
Into a jug add the milk, oil and eggs. Lightly mix with a fork – wet mixture.
Make a well in the centre of the dry mixture and pour in the wet mixture.
Stir with a fork approximately 10-12 times until the ingredients are just mixed.
A few flour streaks are fine.
Note: Over mixed muffins will be tough!
Place muffin liners in a muffin tin – I didn’t but would advise you to as it does make the muffins easier to remove.
Divide the muffin mix between the 12 cases.
Top with the reserved pine nuts – if you have forgotten to reserve any don’t worry they will still look and taste delicious.
Goddess Cheese Pine Nut Muffins ready for the oven.
Place the tin in the top of the oven and bake for approximately 15 minutes.
The muffins are cooked when they are just firm to touch and golden brown.
As soon as the muffins are baked remove from the oven.
Beautifully golden Goddess Cheese Pine Nut Muffins.
Transfer the Goddess Cheese Pine Nut Muffins to a cooling rack until warm and then devour!
Enjoy these muffins at their absolute best, warm straight from the oven. While the cheese is still slightly melted and the flavours of the toasted pine nuts and basil come through.
Look how moist and delicious these muffins are.
Having had to split a muffin for the photographs, I also really enjoyed them cold. All the buttery, nutty cheese, pine nut and basil flavours are still present which I am really pleased with. This makes the GoddessCheese Pine Nut Muffins perfect as portable food.
I will definitely be making more of these for picnics, packed lunches and just for eating warm from the oven!
Muffins are always best on the day made, however, stored in an airtight container they are good for 3 days, or frozen for up to a month. To refresh just pop in a moderate oven for 10 minutes and they’ll taste like they’ve just been baked.
If you have enjoyed this recipe for Goddess Cheese Pine Nut Muffins you may also like these:
Chorizo Goats Cheese Muffins a fantastic blend of flavours.
No longer do you need to look at an oozing, gooey leftover Goddess Cheese and wonder what to do with it. Instead you can make Goddess Cheese Pine NutMuffins and as they don’t use a whole packet of cheese, leave you enough for your cheese and crackers.
This recipe started in my mind with the intent of using up leftover cheese. Oh no! These are so good I would happily buy the cheese to make them.
Whatever you are making and baking in your kitchens, have fun and enjoy sharing the feast you are preparing.
Sammie xx
Pong Cheese provided me with the cheese to make this recipe. All content, views, opinions, recipes and photographs are my own. Please see myDisclosure Policy.
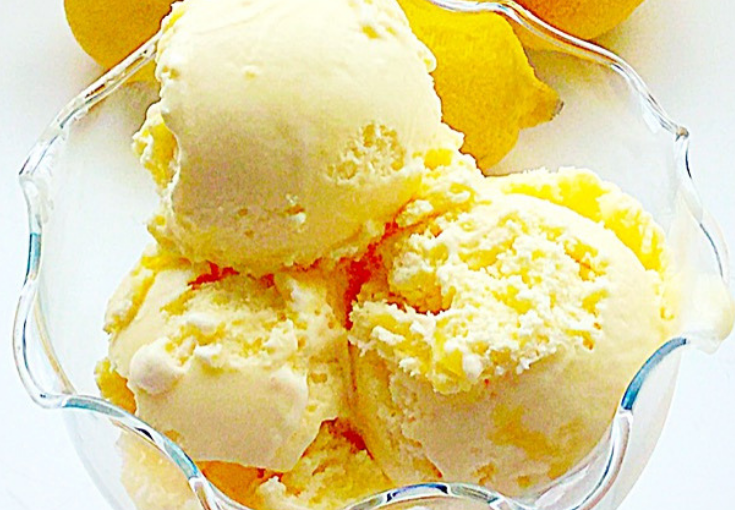
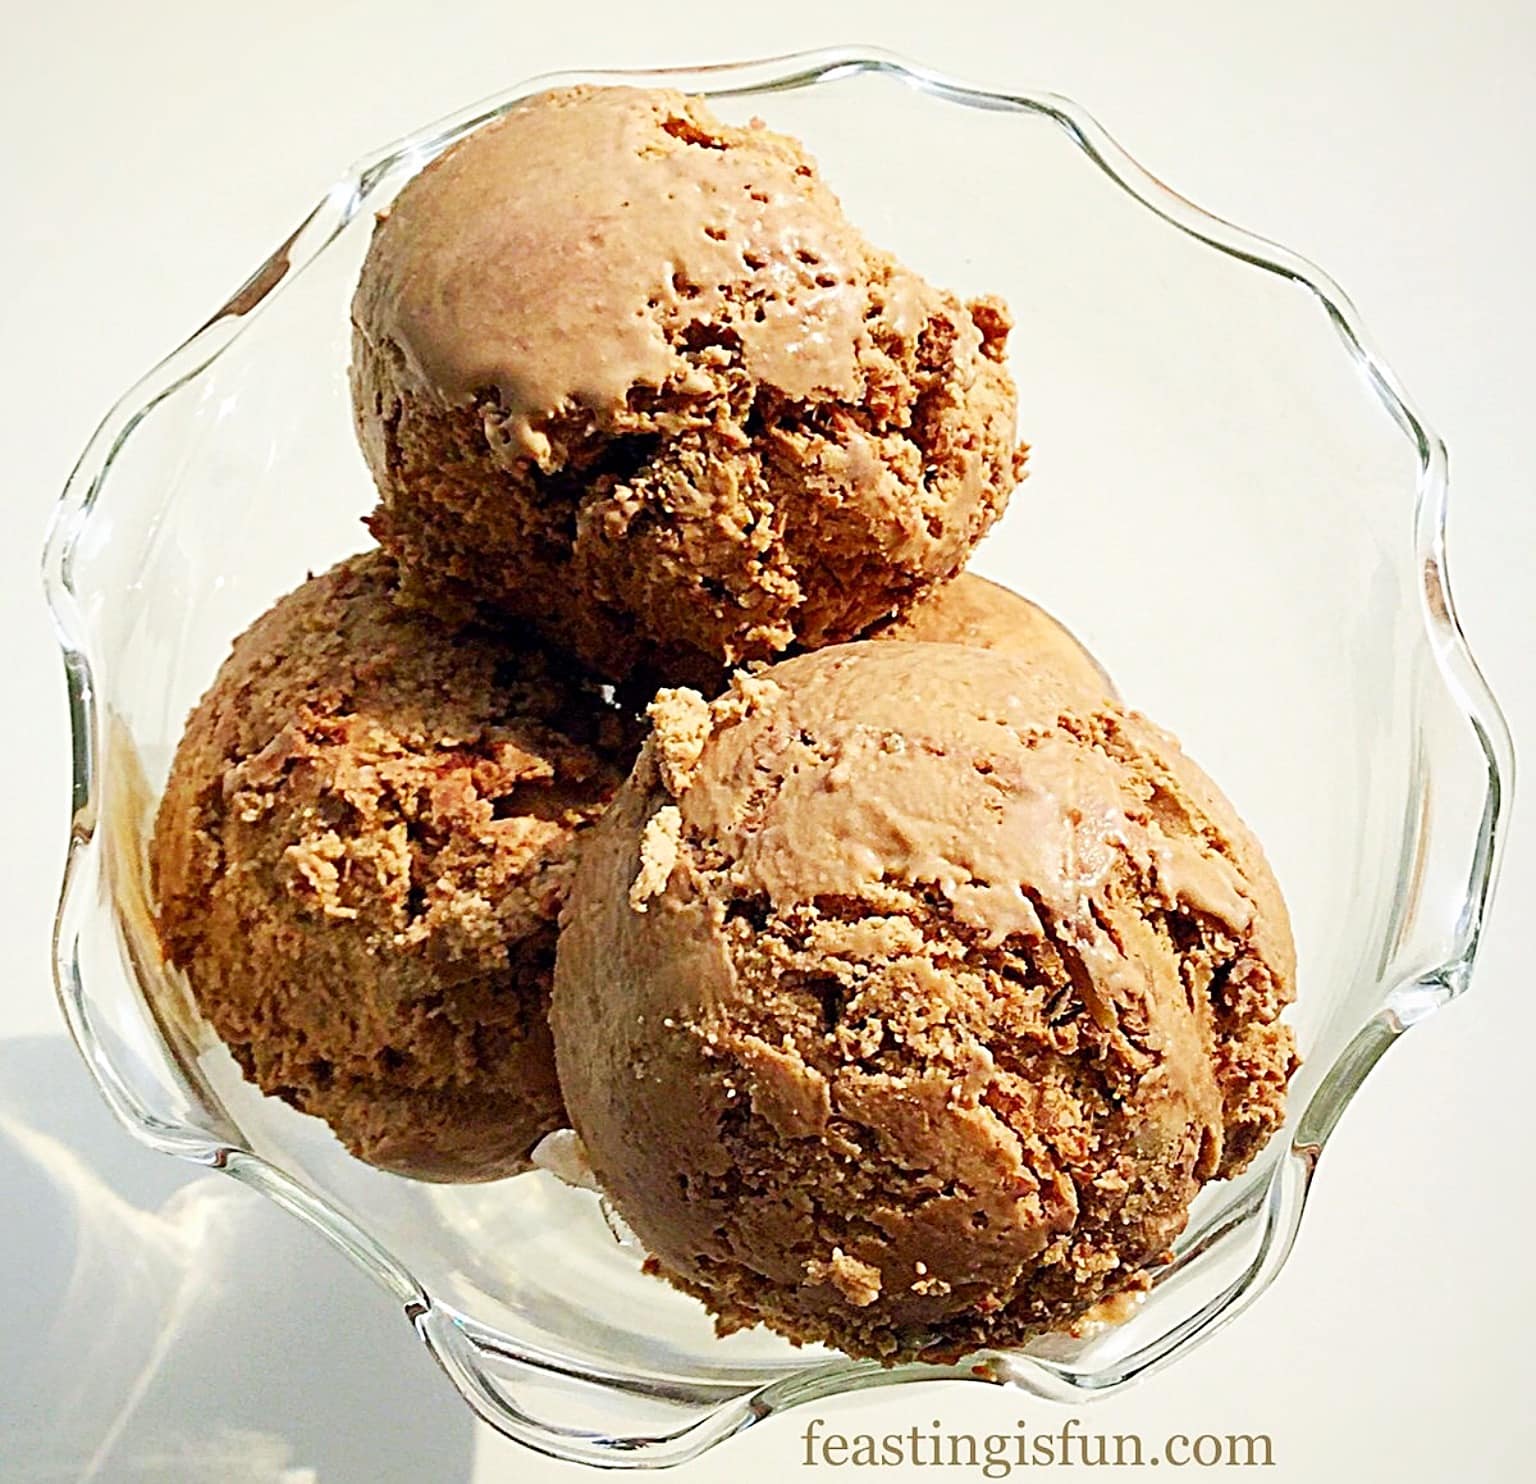
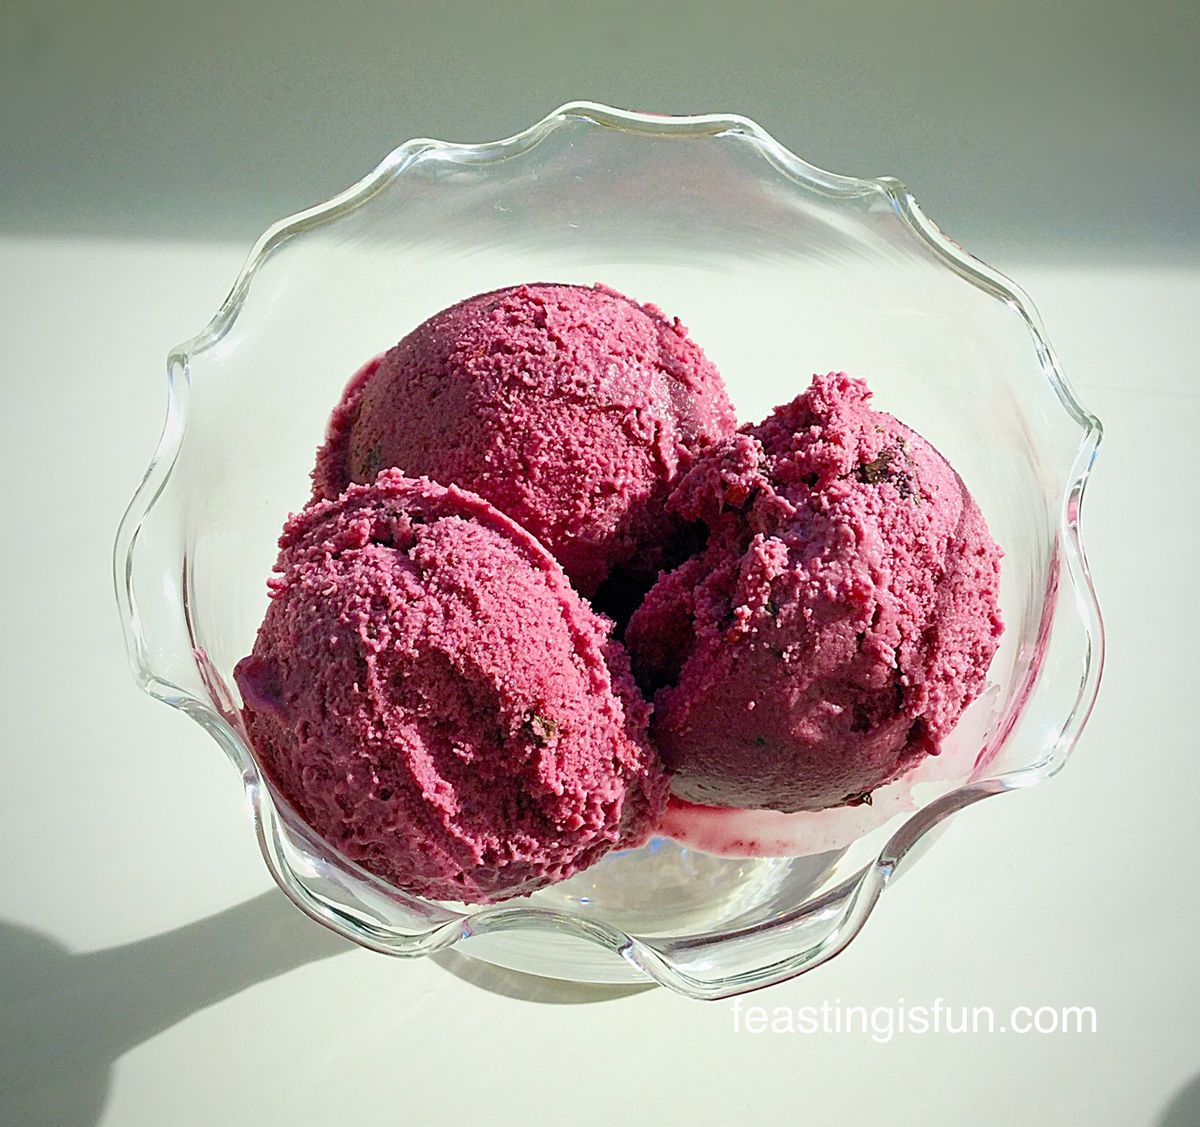
Lemon Ripple Ice Cream, this is THE ice cream I have wanted to make throughout my entire life. Creamy with tart lemon curd rippled through. If you love lemon, like I do, then trust me when I say you need to make this luscious ice cream.
This luscious Lemon Ripple Ice Cream really is a dream come true for me. I adore lemons. Also, I heard Jamie Oliver once say that if there weren’t lemons in his kitchen he’d give up cooking. I doubt he meant it quite to that extreme, but I do understand his passion for them.
Happily I use them in savoury recipes such as my Tangy Lemon Potato Salad and sweet recipes such as this delightful Lemony Strawberry Pavlova. Their flavour is so transferable between both sweet and savoury dishes.
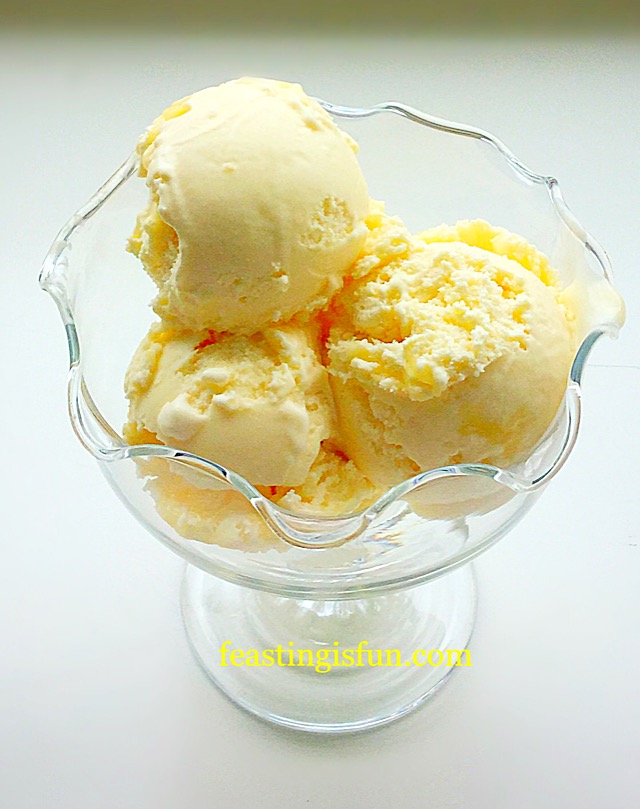
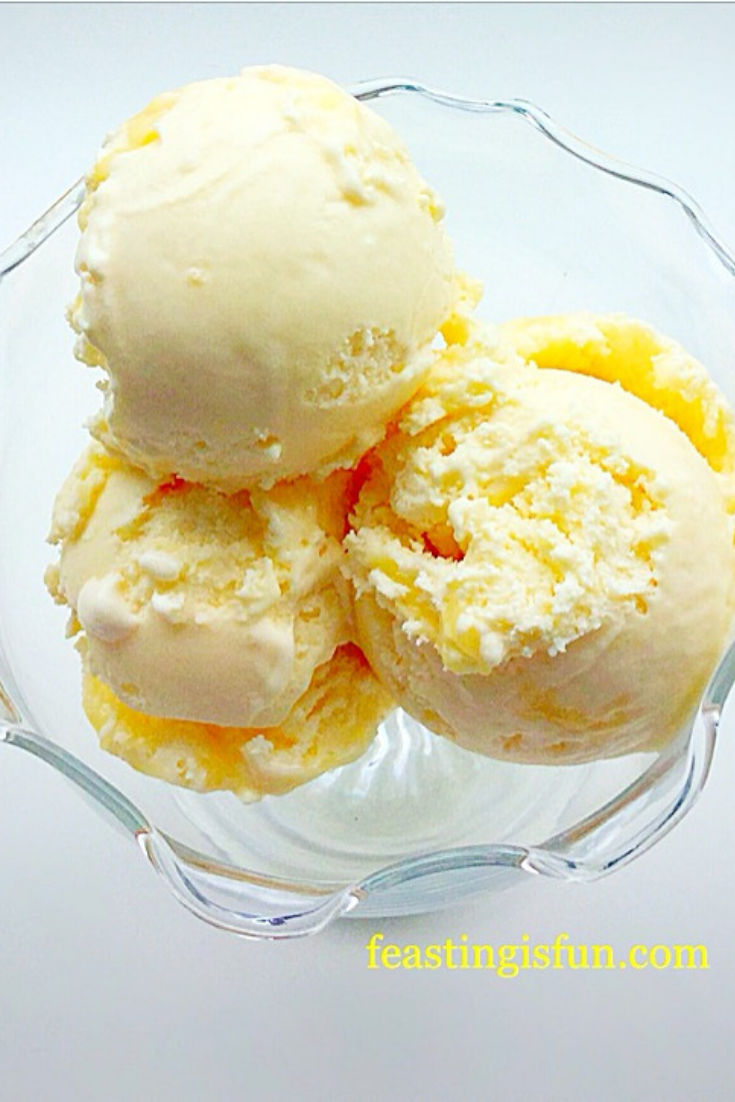
Lemon Ripple Ice Cream
Here, in this Lemon Ripple Ice Cream, there is a wonderful soft, creamy lemon background flavour, with bursts of tart, intense citrus lemon. The combination of both the subtle and vibrant creates a tastebud sensation that draws you into a dreamy world of lemony loveliness.
Lemon Ripple Ice Cream all you need is a soon.
The Benefit Of Homemade Ice Cream
While you absolutely could eat this ice cream in a cone, for me, I wanted nothing to interrupt the pure creamy sensation of eating it with just a spoon. I wasn’t disappointed!
This Lemon Ripple Ice Cream is deceptively yummy. I feared whilst churning it yesterday in my new Andrew James Ice Cream Maker, that none would actually make it to the freezer. Happily I restrained myself. I am so glad that I did. Tasting it today, frozen, yet softened enough to scoop, was reward for my patience and restraint!
Just a quick note on ingredients; if you don’t have lemon extract, which is available online and in good supermarkets, don’t worry, the lemon curd added during the churning process will still provide a great lemon flavour. As for the lemon curd, use a good quality tart one, without bits. I love lemon curd with real peel in it, but this is not the place to use it.
300g Best Quality Lemon Curd – I used Waitrose new waitrose 1 lemon curd, it is beautifully tart
Method: Ensure the frozen ‘bowl’ of your ice cream maker has been in the freezer for 24 hours or according to the manufacturers instructions.
Note – For step by step photos of the custard base cooking process please see Very Vanilla Ice Cream
Making The Ice Cream Base
First of all pour the cream and milk into a large saucepan on a medium heat.
Heat until just before the liquid boils, you will see little bubbles form around the outside rim – this is known as the scalding point, once reached remove from the heat.
In a large bowl whisk together the egg yolks, sugar, extracts and corn flour until pale and thickened.
With the whisk still running on low, slowly pour the hot cream into the egg mixture.
Tip the entire mixture back into the saucepan, place over a medium/low heat stirring constantly until it thickens and coats the back of a wooden spoon.
Remove from the heat.
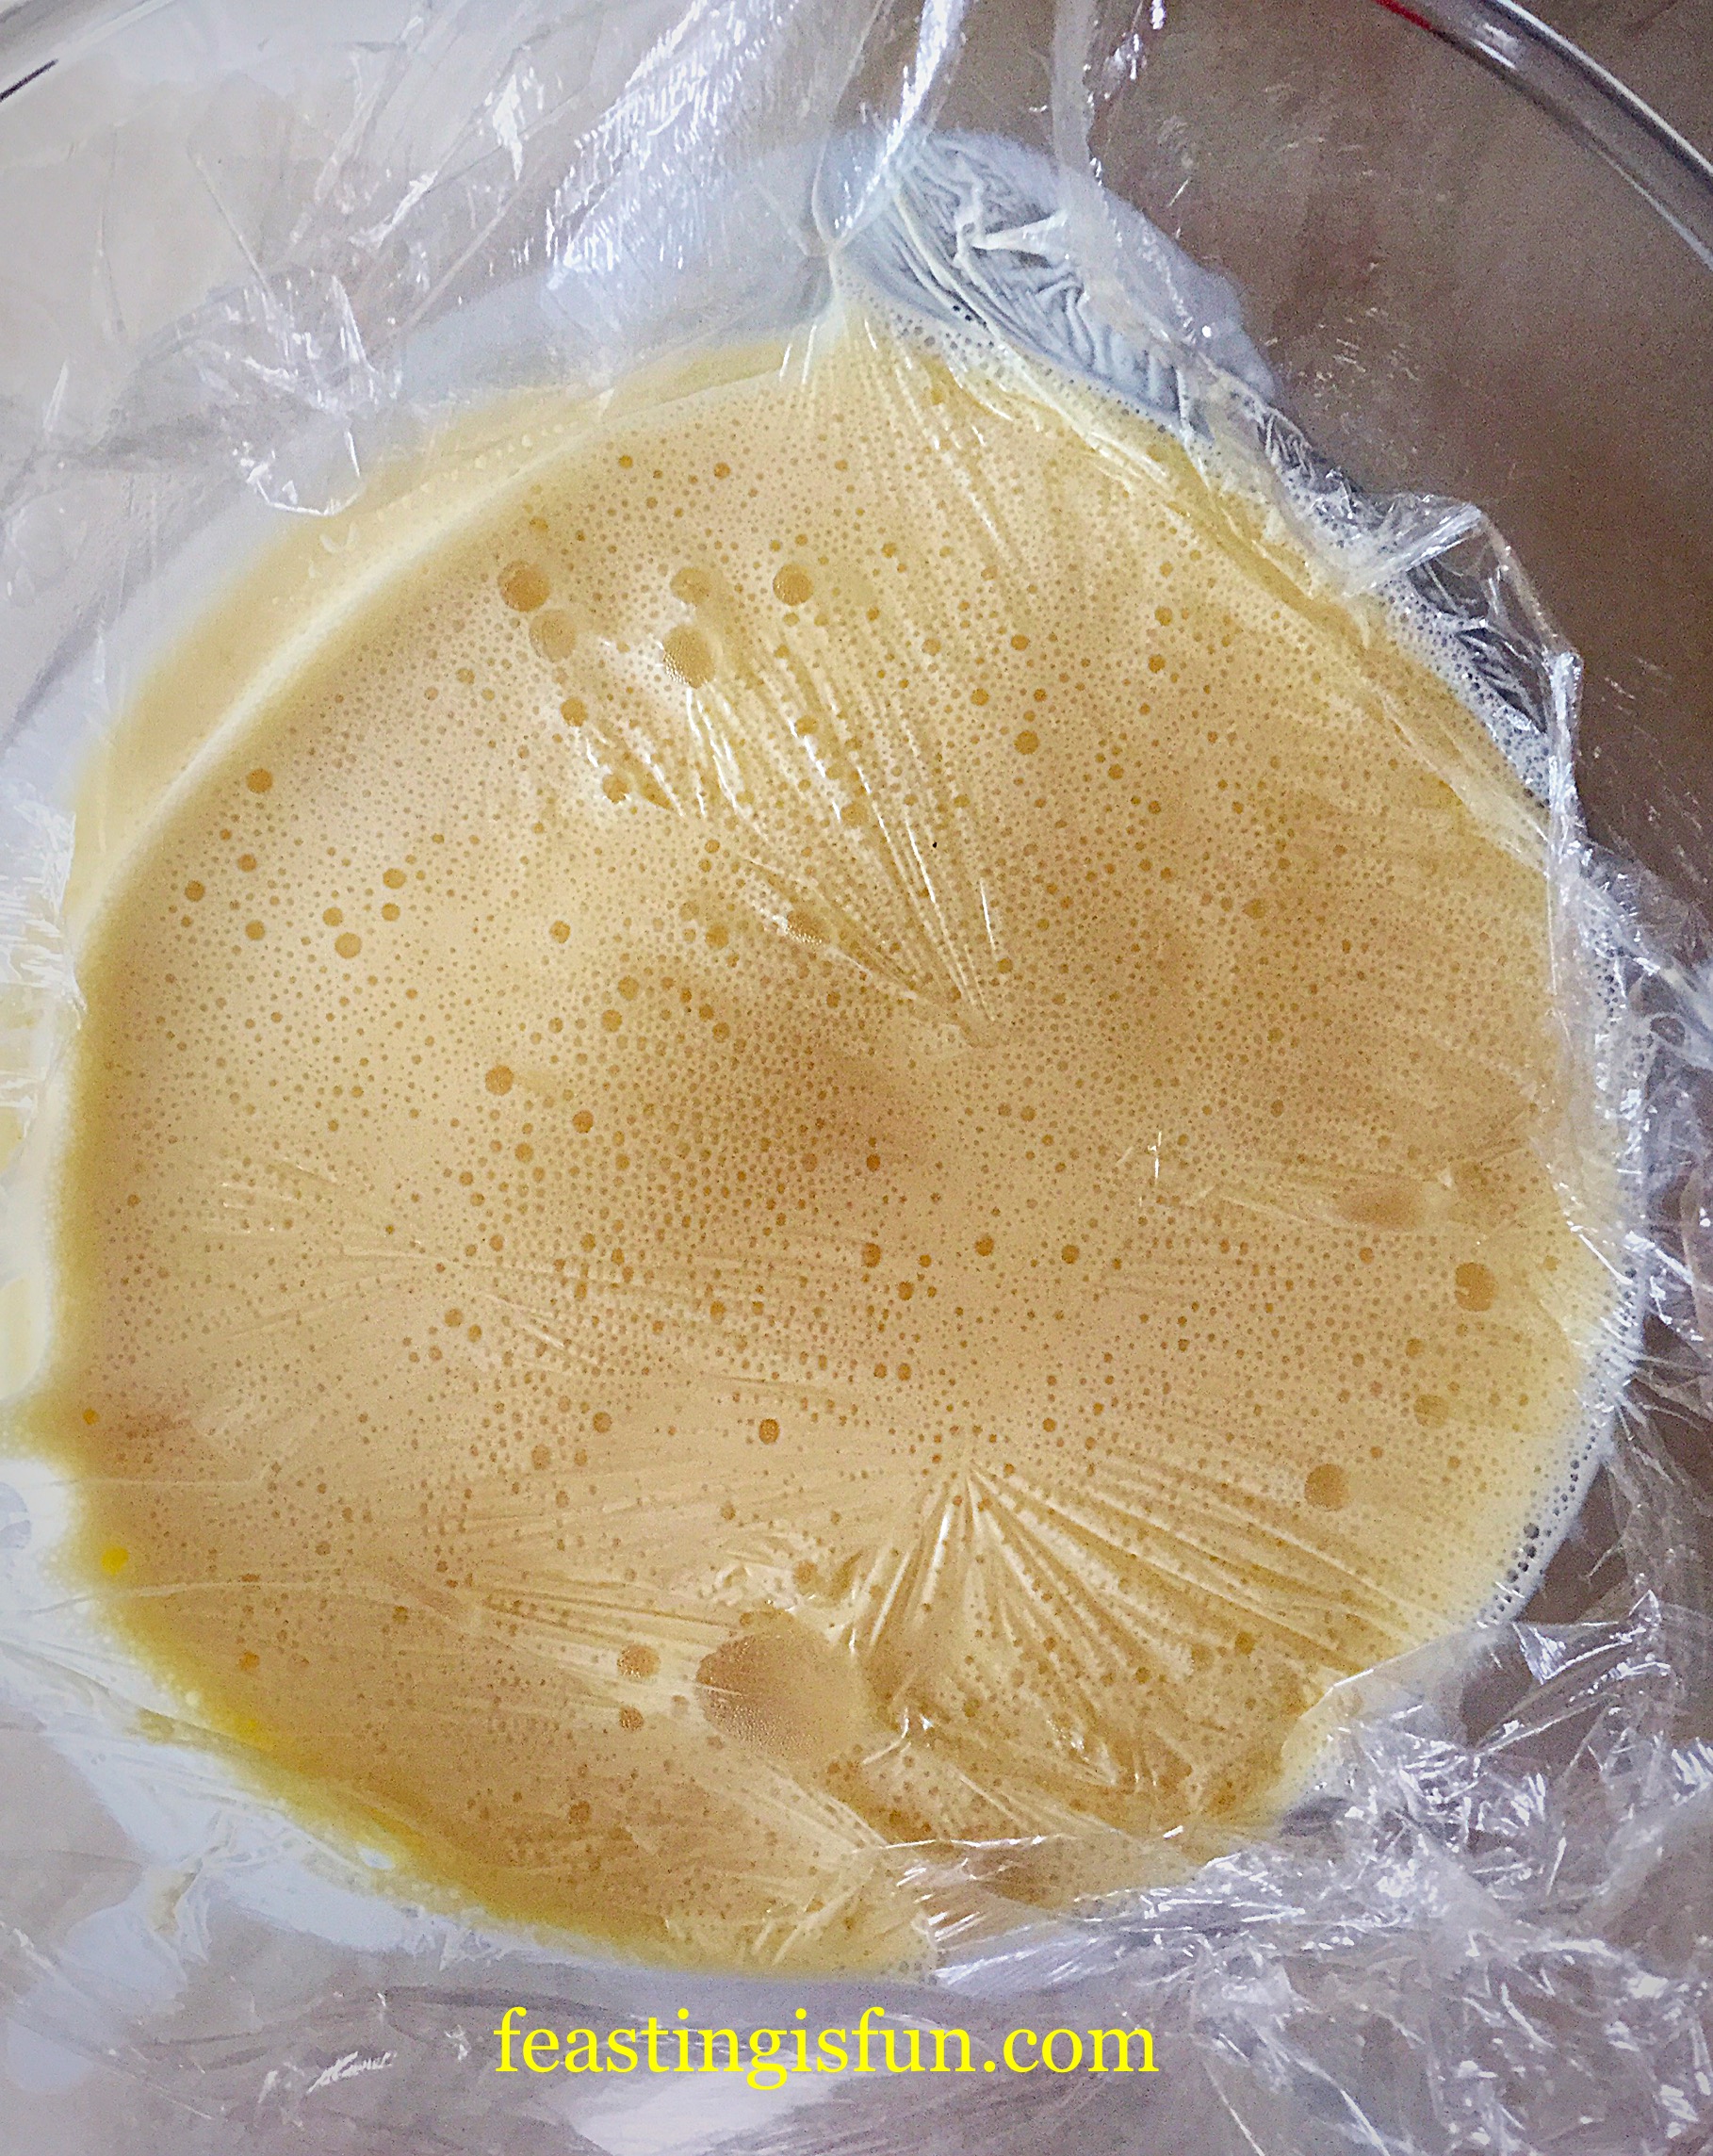
Pour the hot custard through a sieve into a large bowl.
Place cling film directly on to the surface of the custard to prevent a skin from forming.
Leave the custard base to cool.
Leave to cool and then chill in the fridge. Once chilled transfer to a jug.
Churning The Ice Cream Base And Adding The Lemon Ripple
Set up your ice cream maker and if it is like mine, it will need to be switched on and churning before pouring in the custard.
Pour in the custard through the shoot and leave to churn until softly frozen.
Add half of the lemon curd, I use a teaspoon and added it one teaspoon at a time, through the hole, so that it slowly becomes incorporated within the ice cream.
When the ice cream is soft but can hold its shape stop the ice cream maker.
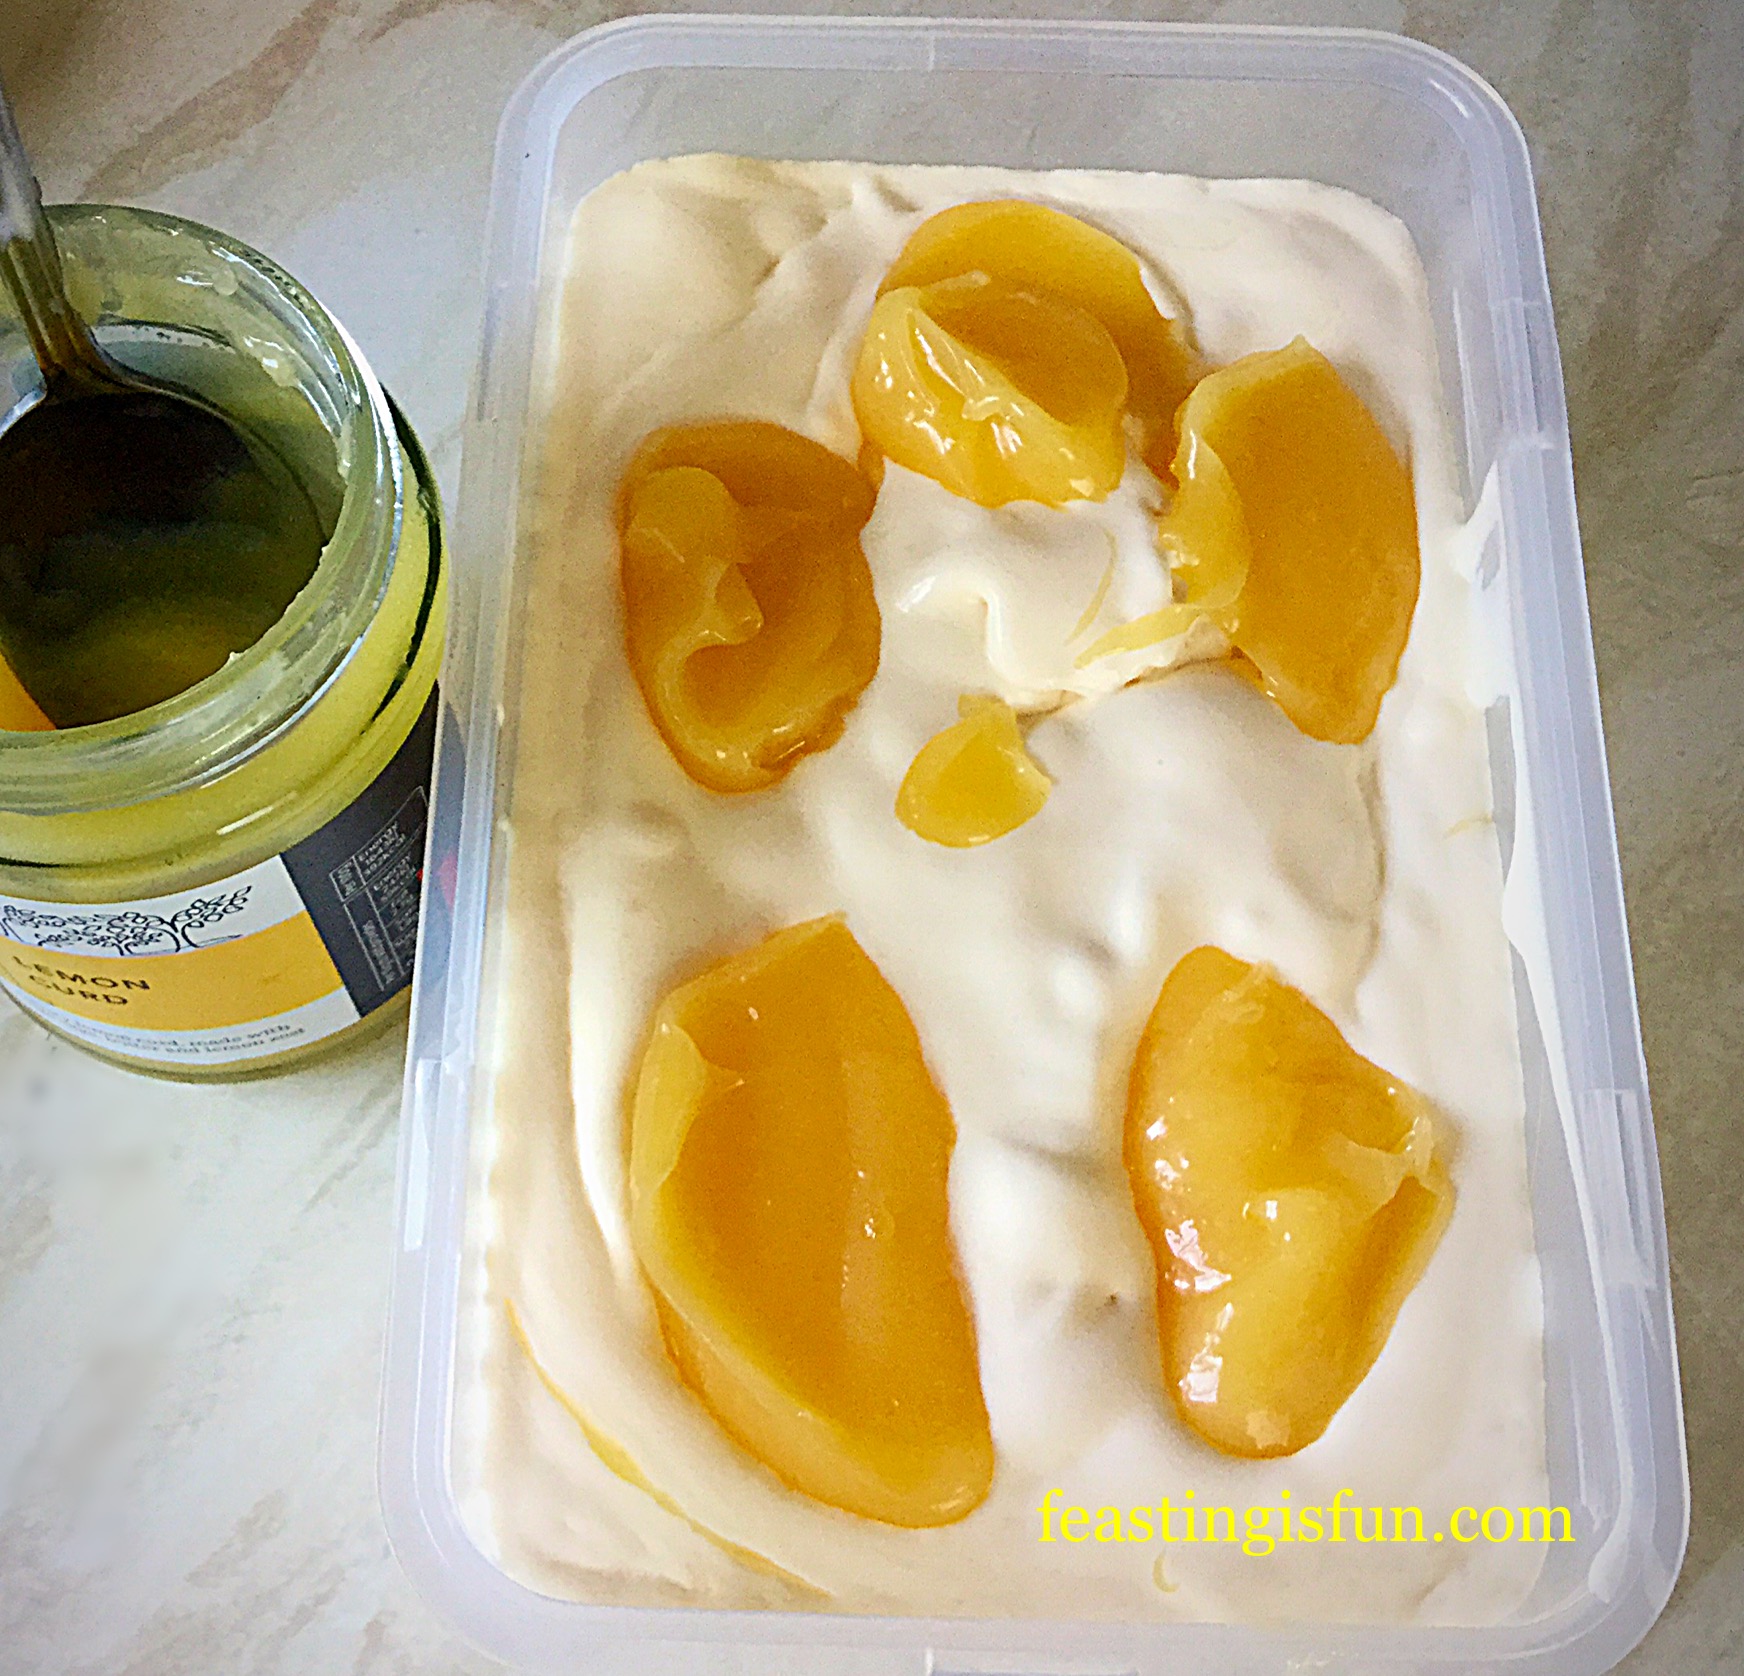
Transfer the ice cream to a freezer proof tub.
Spoon the remaining lemon curd on to the ice cream.
Lemon Ripple Ice Cream ready to be rippled.
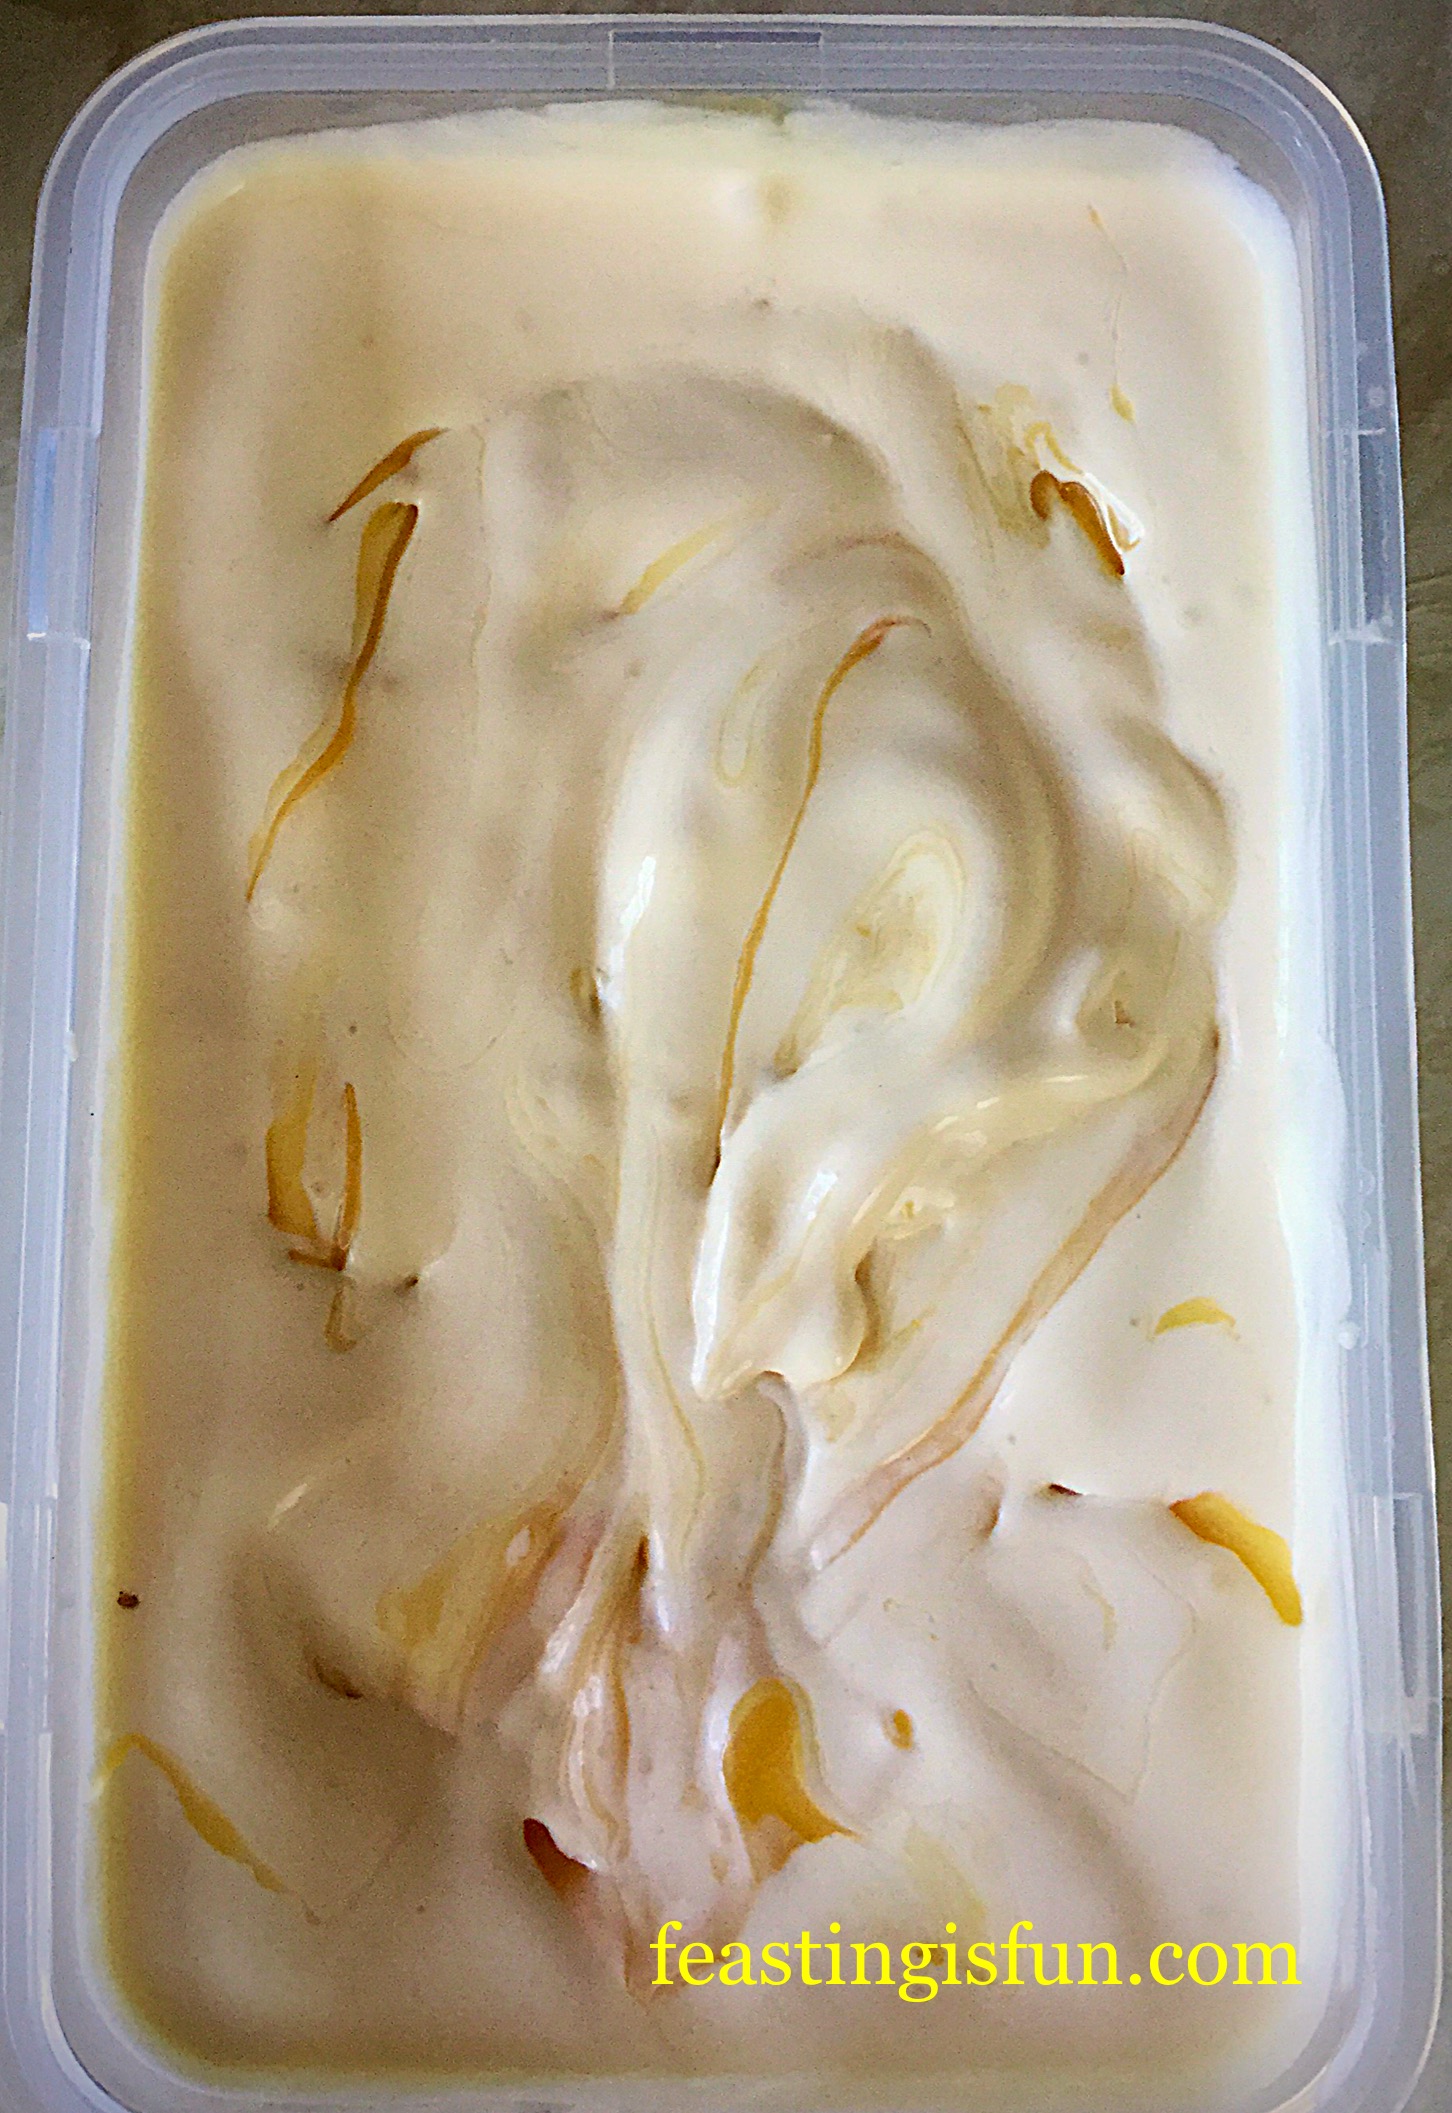
Use a spoon to gently ripple the lemon curd through the ice cream.
Lemon Ripple Ice Cream ready for the freezer.
Resist the urge to just dive in with a spoon, as this really tastes better once it is properly frozen.
Pop the lid on and place in the freezer for 12 hours or ideally overnight. Why ideally? Because then you’ll be asleep and not thinking about the ice cream.
To serve, remove the tub from the freezer 15 minutes before scooping to allow it to soften.
Serving And Enjoying Homemade Ice Cream
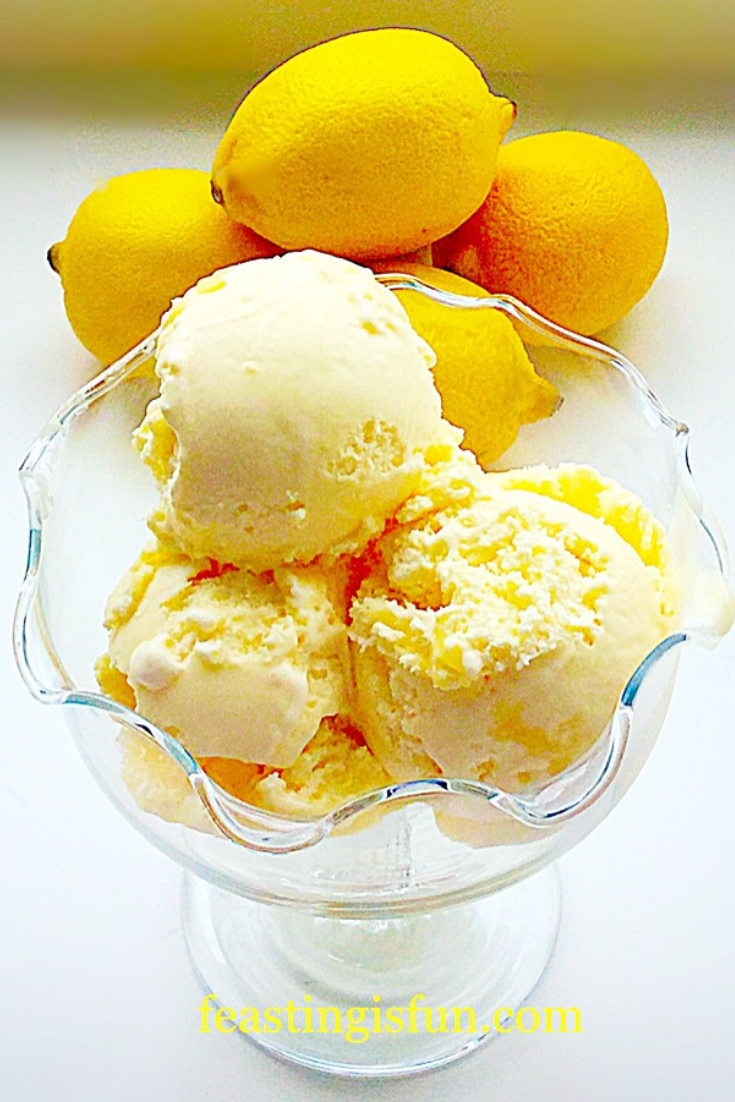
Serve scooped into elegant dessert bowls or enjoy in an ice cream cone. Either way prepare yourself to fall completely, head over heels in love, with a new flavour of ice cream – Lemon Ripple Ice Cream.
Lemon Ripple Ice Cream is very much a dreamily, creamy ice cream, not in any way a sorbet – which by the way I love and am working on a recipe.
This ice cream would make the perfect dessert after a spicy, hot meal. Refreshing, creamy and palette cleansing, yet you still feel like you’ve had dessert.
However and whenever you eat this delicious ice cream, be sure to enjoy it with others. Listen to the oohs and aahs of your loved ones enjoying something really, really good. It will make you smile 😀
If you have enjoyed this Lemon Ripple Ice Cream recipe here are some others that you may also want to try:
I love being able to create my own ice cream flavours at home. Having an ice cream maker makes it so easy. Preparing the custard takes 15 minutes, then the custard is left to cool. Churning takes about 20 minutes and you can eat the ice cream scooped from the ice cream maker, if you want a soft set ice cream. Otherwise overnight in the freezer and you have any flavour ice cream you like!
That can never be a bad thing eh???
Thank you for your comments, photos on social media, I absolutely love seeing your makes and bakes. It still thrills me every time someone uses one of my recipes.
Have fun feasting, sharing and making people smile.
Sammie xx
Andrew Jamesprovided me with an ice cream maker to review. All views, opinions, content, recipes and photographs are my own. Please see my Disclosure Policy.
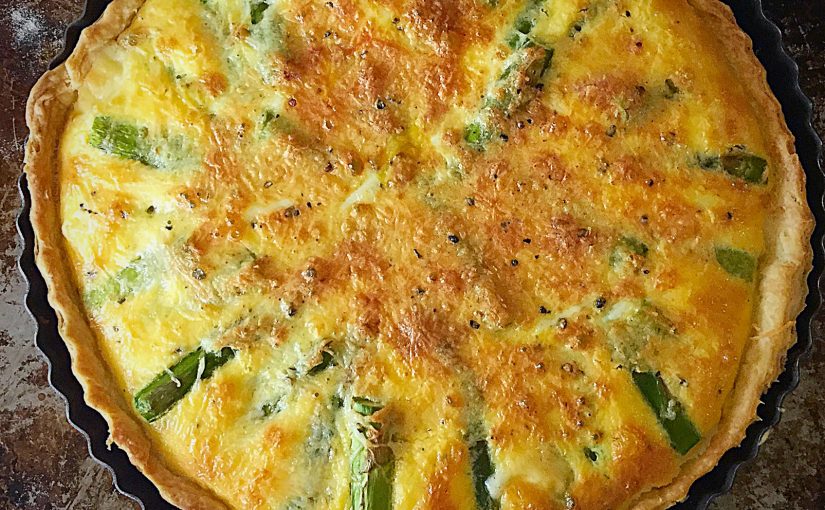
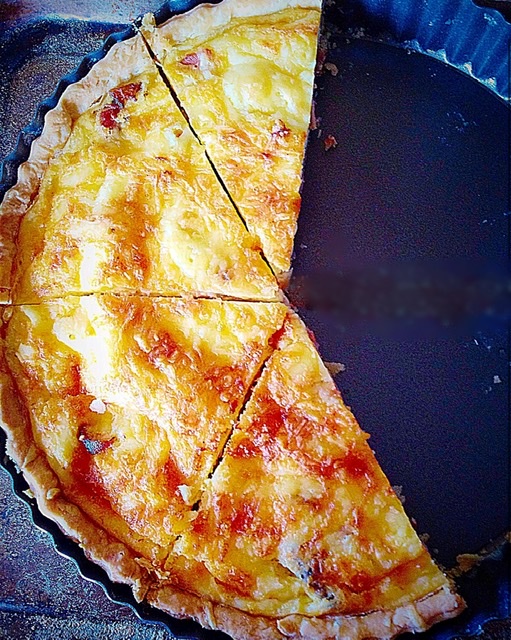
June is Asparagus season, here in the U.K. Such a vibrant, distinct colour and flavour when cooked. So I decided to incorporate it into this utterly delicious Smoked Bacon Asparagus Quiche.
Smoked Bacon Asparagus Quiche such a delicious flavour combination.
Making the best use of seasonal vegetables is so important to me. Also, it makes me appreciate them more. While strawberries always taste better in the summer, because that’s when they grow in this country. Asparagus is the same. Vibrant, green shoots that can be enjoyed in any number of recipes.
And one of my favourite ways to enjoy them is in this Smoked Bacon Asparagus Quiche!
Smoked Bacon Asparagus Quiche perfect with salad.
Easy Baking Using Seasonal Produce
I have made this quiche twice now, in as many weeks and believe me when I say, I’ll probably make it next week too. In fact I should probably make two, so that I can stash one away in the freezer for when asparagus is no longer available.
Using good quality, outside reared bacon makes all the difference to this dish. Because it is not pumped full of water and who knows what, when placed in a hot, dry skillet the bacon sizzles. There wasn’t any liquid leaching from it and oh, it tastes so good!
Smoked Bacon Asparagus Quiche a tantalising bite 😉
Making this Smoked Bacon Asparagus Quiche is easy. So is making your own pastry, there’s a link in the recipe. It doesn’t take long and is a tried and tested recipe that creates the most delicious buttery crust for it’s eggy filling.
I like to get the pastry made first thing in the morning. I always make double as it takes hardly any extra time and stores really well in the freezer. If using frozen pastry defrost it overnight in the fridge.
Recipe: Smoked Bacon Asparagus Quiche – serves 6
500g/1lb 2oz All Butter Shortcrust Pastry see Perfect All Butter ShortcrustPastry the recipe will also give you tips on how to line a tart tin, blind bake and there’s another quiche recipe as well
12 Rashers Smoked Streaky Bacon – take off any rind and cut into 2.5cm/1″ chunks
6-8 Asparagus Spears – washed trimmed and cut into 5cm/2″ pieces
6 Large Free Range Eggs – note if making to freeze add an extra egg and leave out the cream – my eggs were from Waitrose
50ml/2fl oz Double Cream
Freshly Ground Black Pepper
Making The Shortcrust Pastry Tart Case
Preheat the oven to 220C/200C fan, gas mark 7, 425F.
Note – the filling can be prepared whilst the pastry case is baking.
Make the pastry, wrap and leave to rest in the fridge for 30 minutes.
Place your quiche tin on a baking tray.
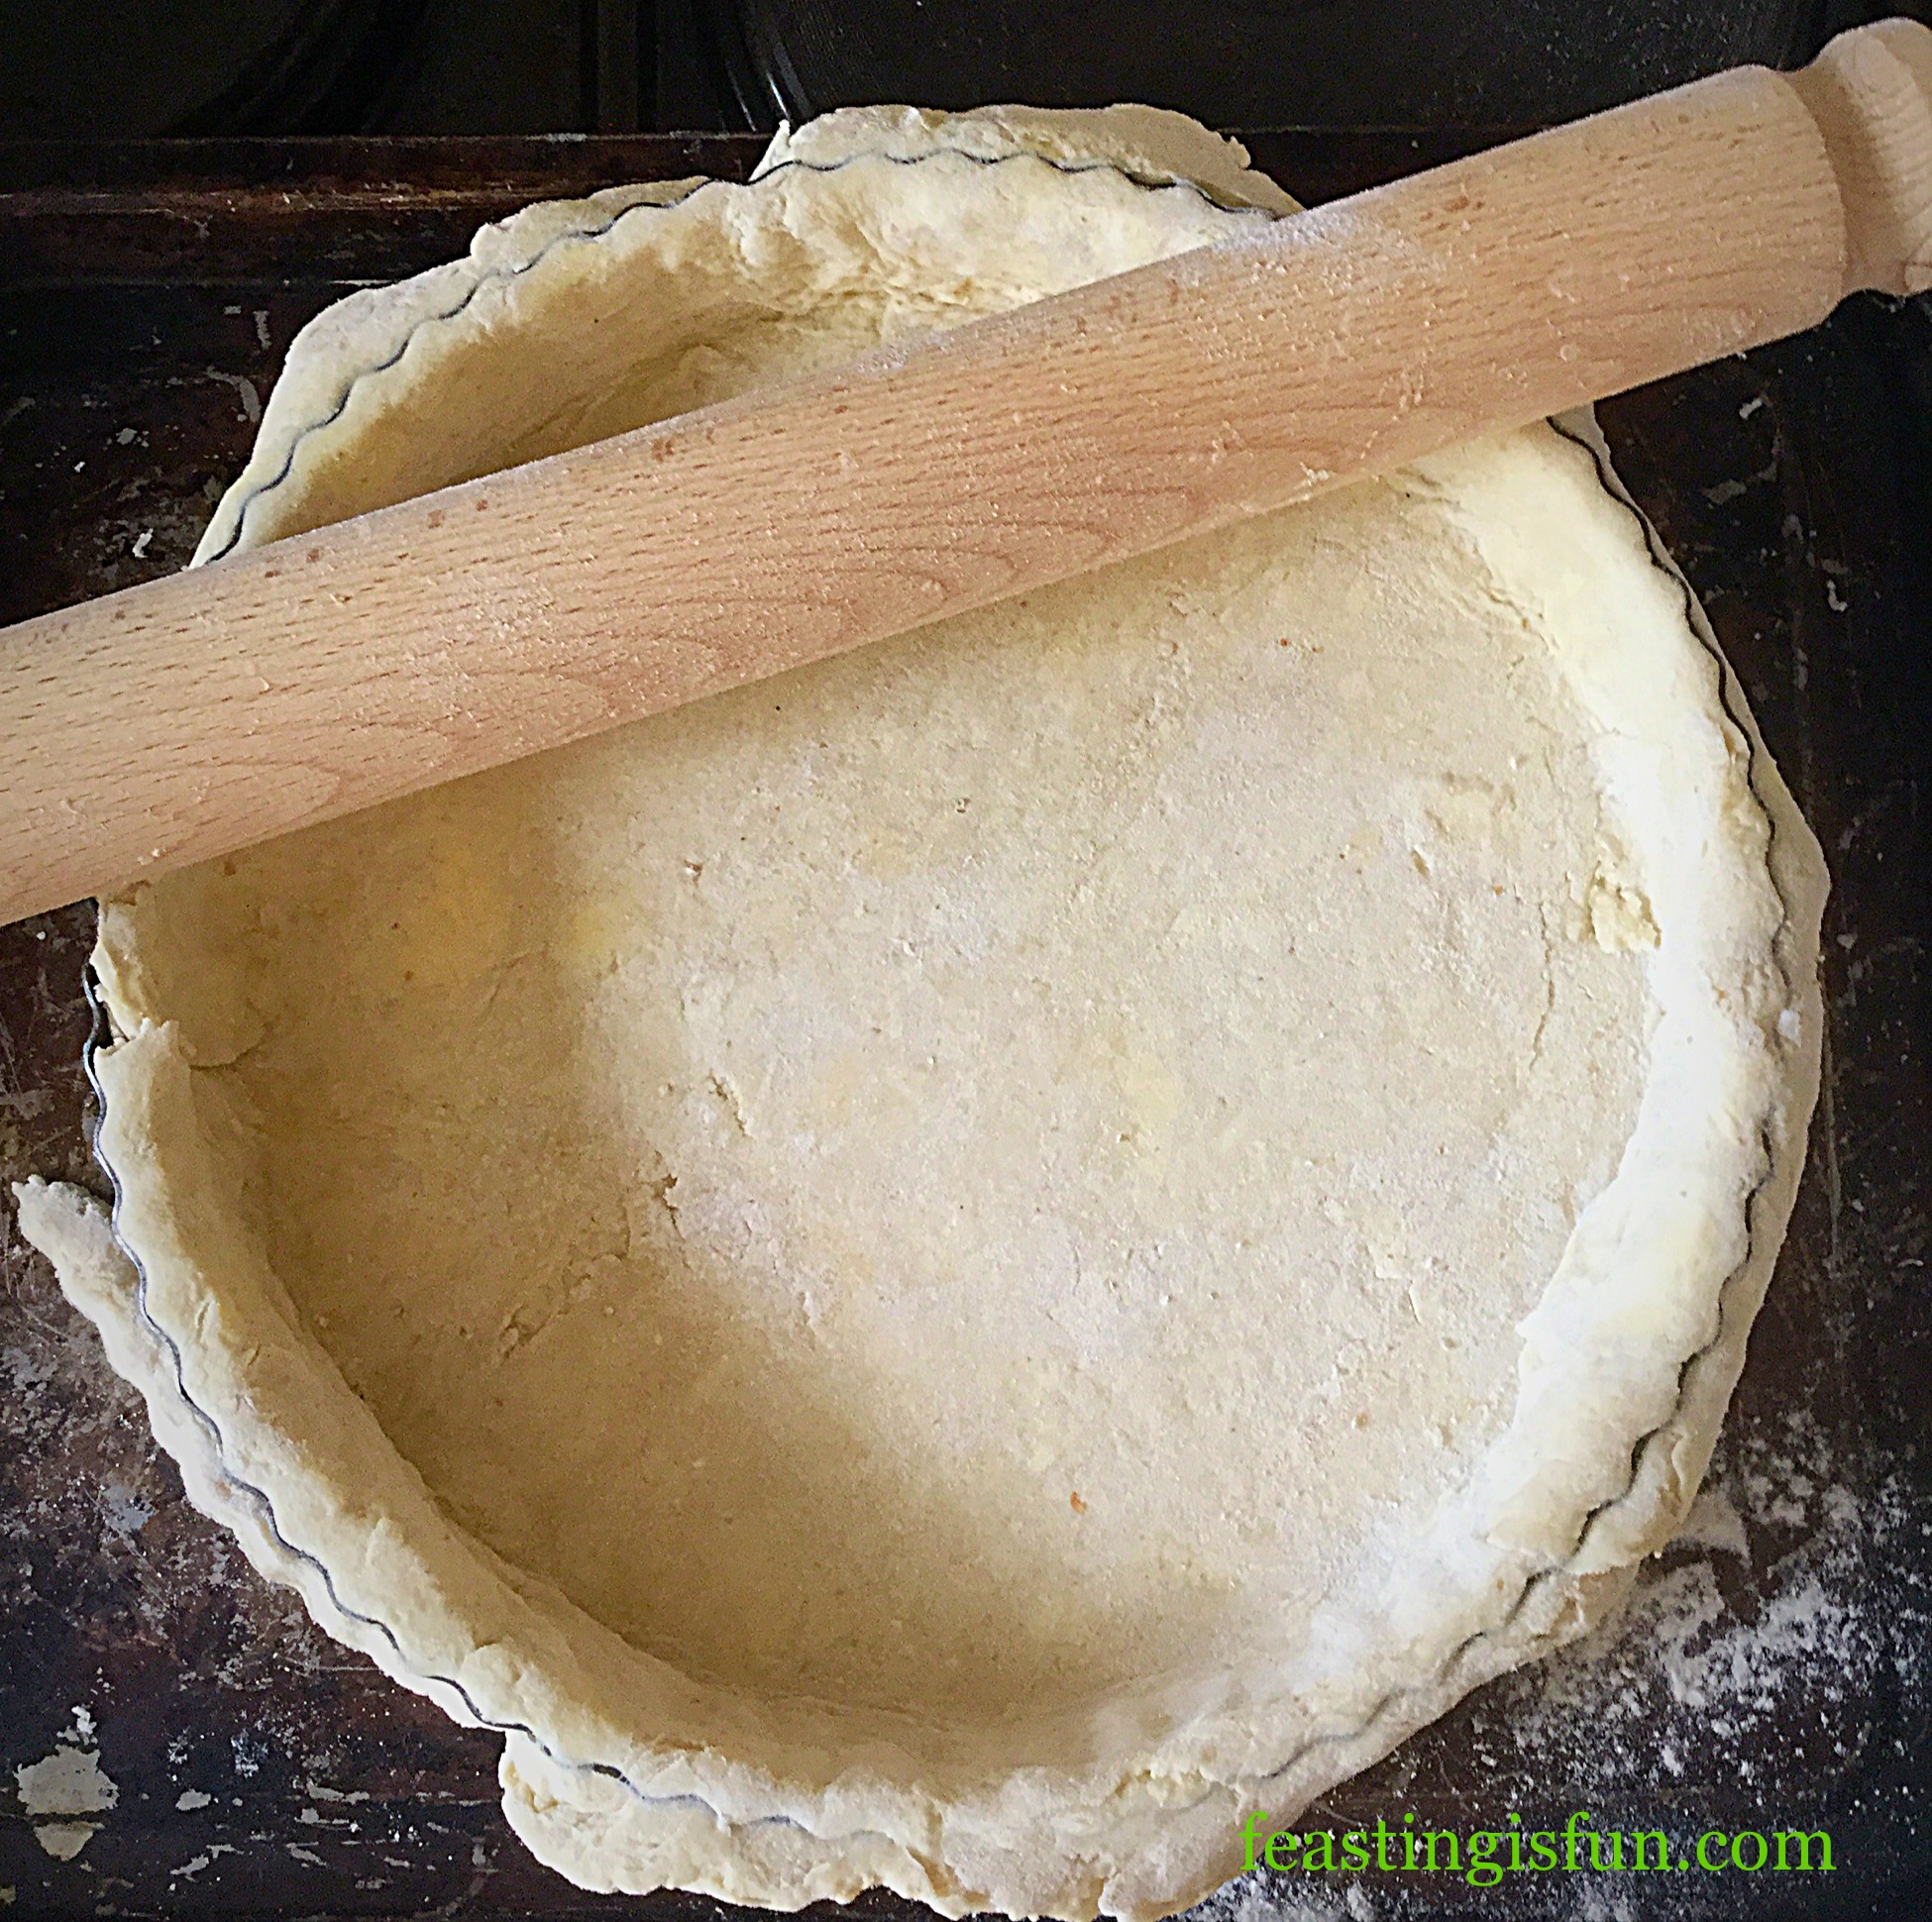
Lighty dust the work top with flour and roll out the pastry, from the centre outwards. Move the pastry around to ensure that it isn’t sticking to the work top.
Use the rolling pin to transfer the pastry, lay it gently into the quiche tin.
Gently push the pastry into place, if you stretch it, it’ll shrink during baking. I know trust me!!
Nicely finished pastry case.
Roll the rolling pin over the top of the quiche tin and it will trim the pastry, leaving a lovely clean edge.
Use a fork to dock the bottom of the pastry, it allows steam to escape during baking.
Cut a piece of baking parchment slightly bigger than the tin, scrunch up, line the pastry case and fill with baking beans.
Place in the top of a preheated oven for 15 minutes. Remove from the oven, lift out the baking beans and return for a further 5 minutes until golden in colour. Remove from the oven and set to one side.
Assembling The Smoked Bacon Asparagus Quiche
Reduce the oven temperature to 200C/180C fan, gas mark 6, 400F.
In a dry skillet/frying pan, over a medium heat dry fry the bacon until cooked, but not crispy. Off the heat add the asparagus and allow to sit for 5 minutes or a bit longer.
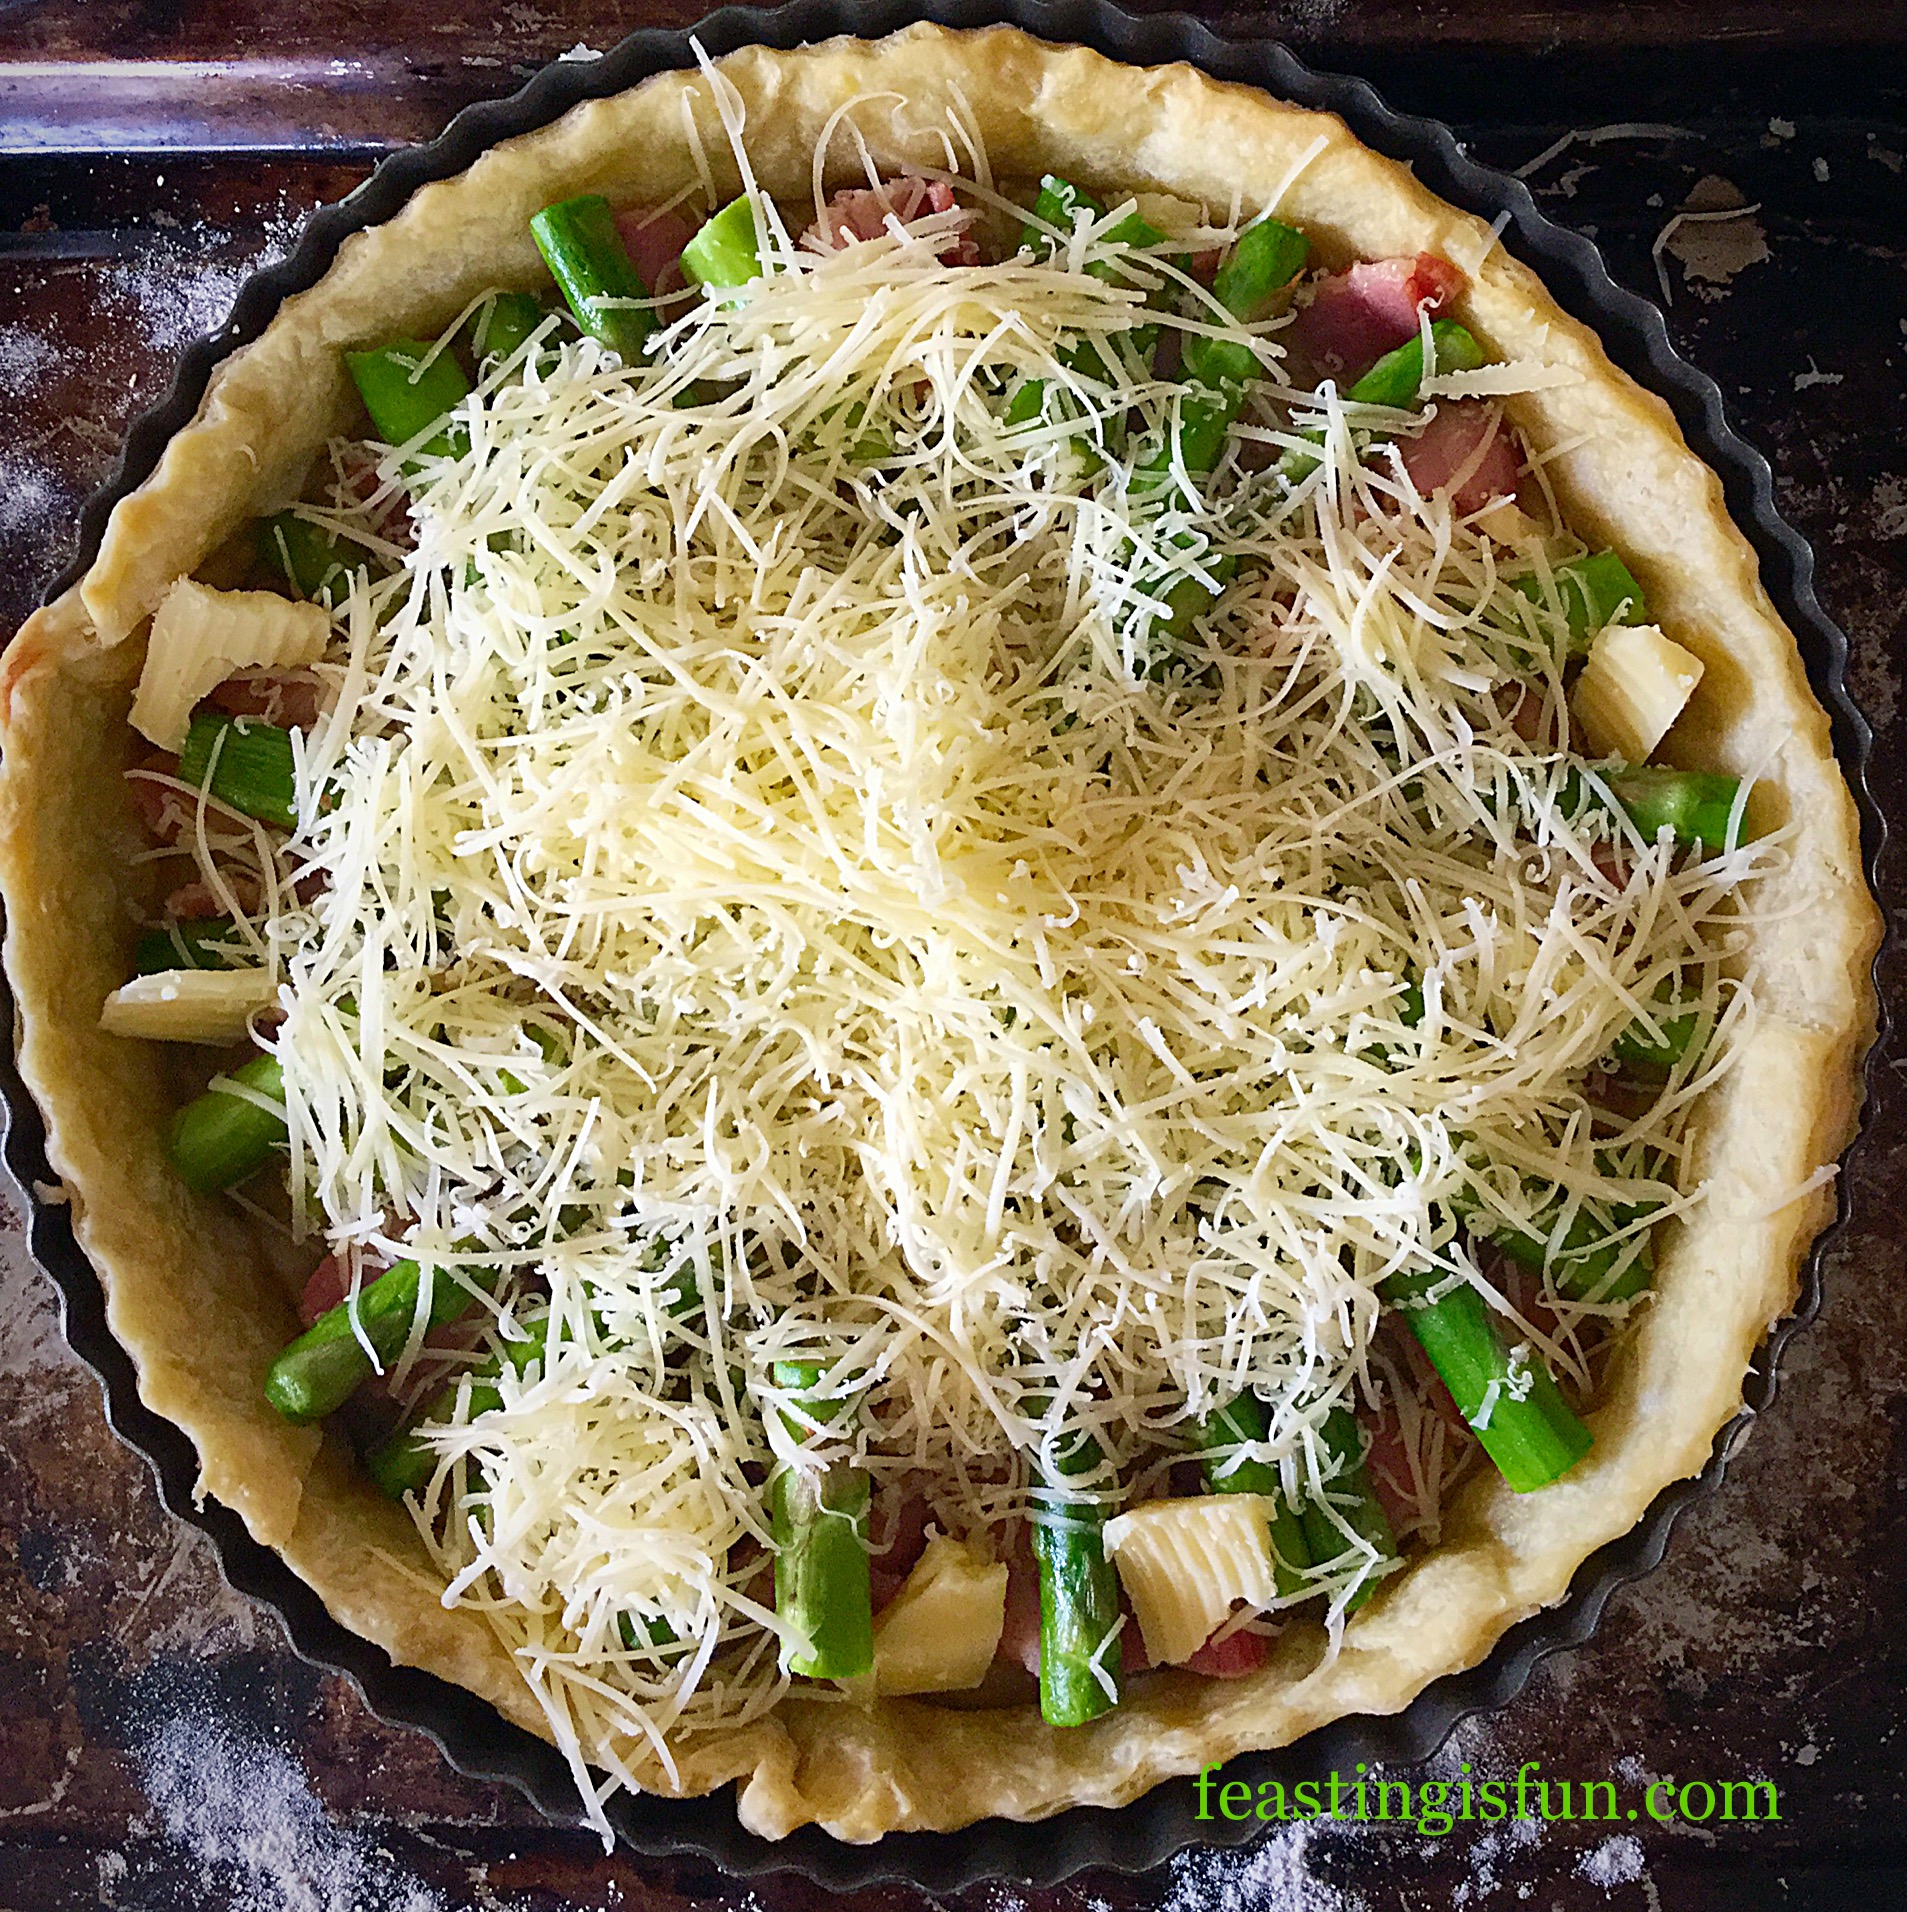
When the bacon is cool enough to handle arrange in the base of the pastry case.
Then arrange the asparagus spears however you like.
Top with the finely grated cheese.
Smoked Bacon Asparagus Quiche ready for the egg custard.
Crack the eggs into a jug – I always crack mine separately into a small bowl first.
Add the cream, if using and a good season of black pepper.
Whisk with a fork to combine and then pour carefully over the pastry tart.
Leave a gap between the pastry rim and the custard. The quiche will rise whilst baking and it’s not the end of the world if it leaks, but prevention is better than cure. Gosh I sound like my Grandma, what a wise woman she was.
Smoked Bacon Asparagus Quiche ready for the oven.
Baking The Quiche
Place the quiche into the centre of the oven and bake for 30 minutes, or until it is puffed and golden without a wobble in the centre.
Once baked remove from the oven and allow to sit for at least 15 minutes.
Smoked Bacon Asparagus Quiche it’s freshly baked smell is tantalising.
Serving And Storing The Quiche
This delicious tasting Smoked Bacon Asparagus Quiche can be served hot, warm or cold, making it perfect for buffets, picnics, easy dinners, packed lunches.
I had the last piece of quiche, cold from the fridge today, for lunch. It was absolutely yummy and as it is quite muggy, it was refreshing as well as filling.
Smoked Bacon Asparagus Quiche a delicious summer meal.
Smoked Bacon Asparagus Quiche will keep well wrapped in cling film, in the fridge for up to 3 days and successfully freeze for one month. In fact I have a lovely friend on Twitter – Lou – who baked this yesterday, without the cream and popped it in the freezer for a party in a few weeks time.
Make the most of the asparagus season, it is all too short!
If you have enjoyed the recipe for this Smoked Bacon Asparagus Quiche you may also want to try these:
Pastry is such a versatile medium to bake with, see my TwistedFruity Jam Tarts . It lends itself very well to portable food, which means it’s great for family and friend get together’s. Since the heart of Feasting is Fun is sharing. I share my recipes, as do some of you. We share our makes and bakes with neighbours, unsuspecting delivery men – oh that’s just me on that one then. Most of all we have fun enjoying the smile a homemade dish can bring to another’s face.
So, whatever you are making, baking and creating in your kitchens, have fun preparing and sharing your feast.
Sammie xx
No part of this post may be reproduced or duplicated without the written permission of the owner. Please see my Disclosure Policy.
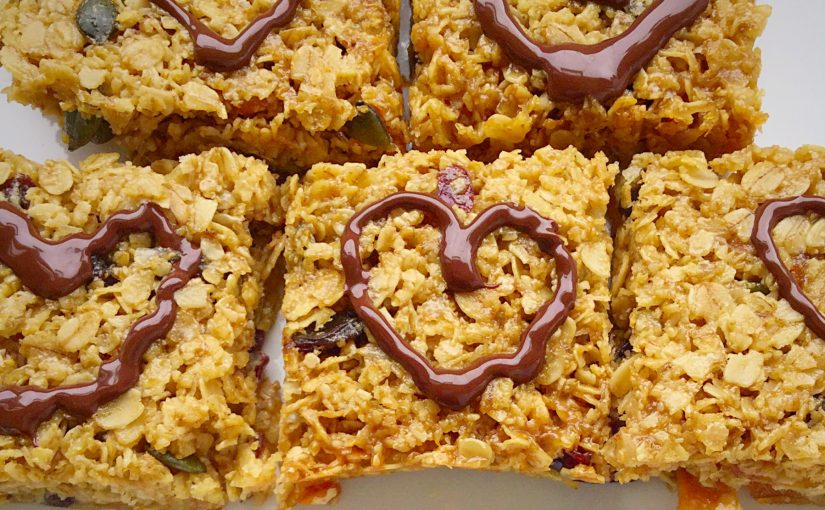
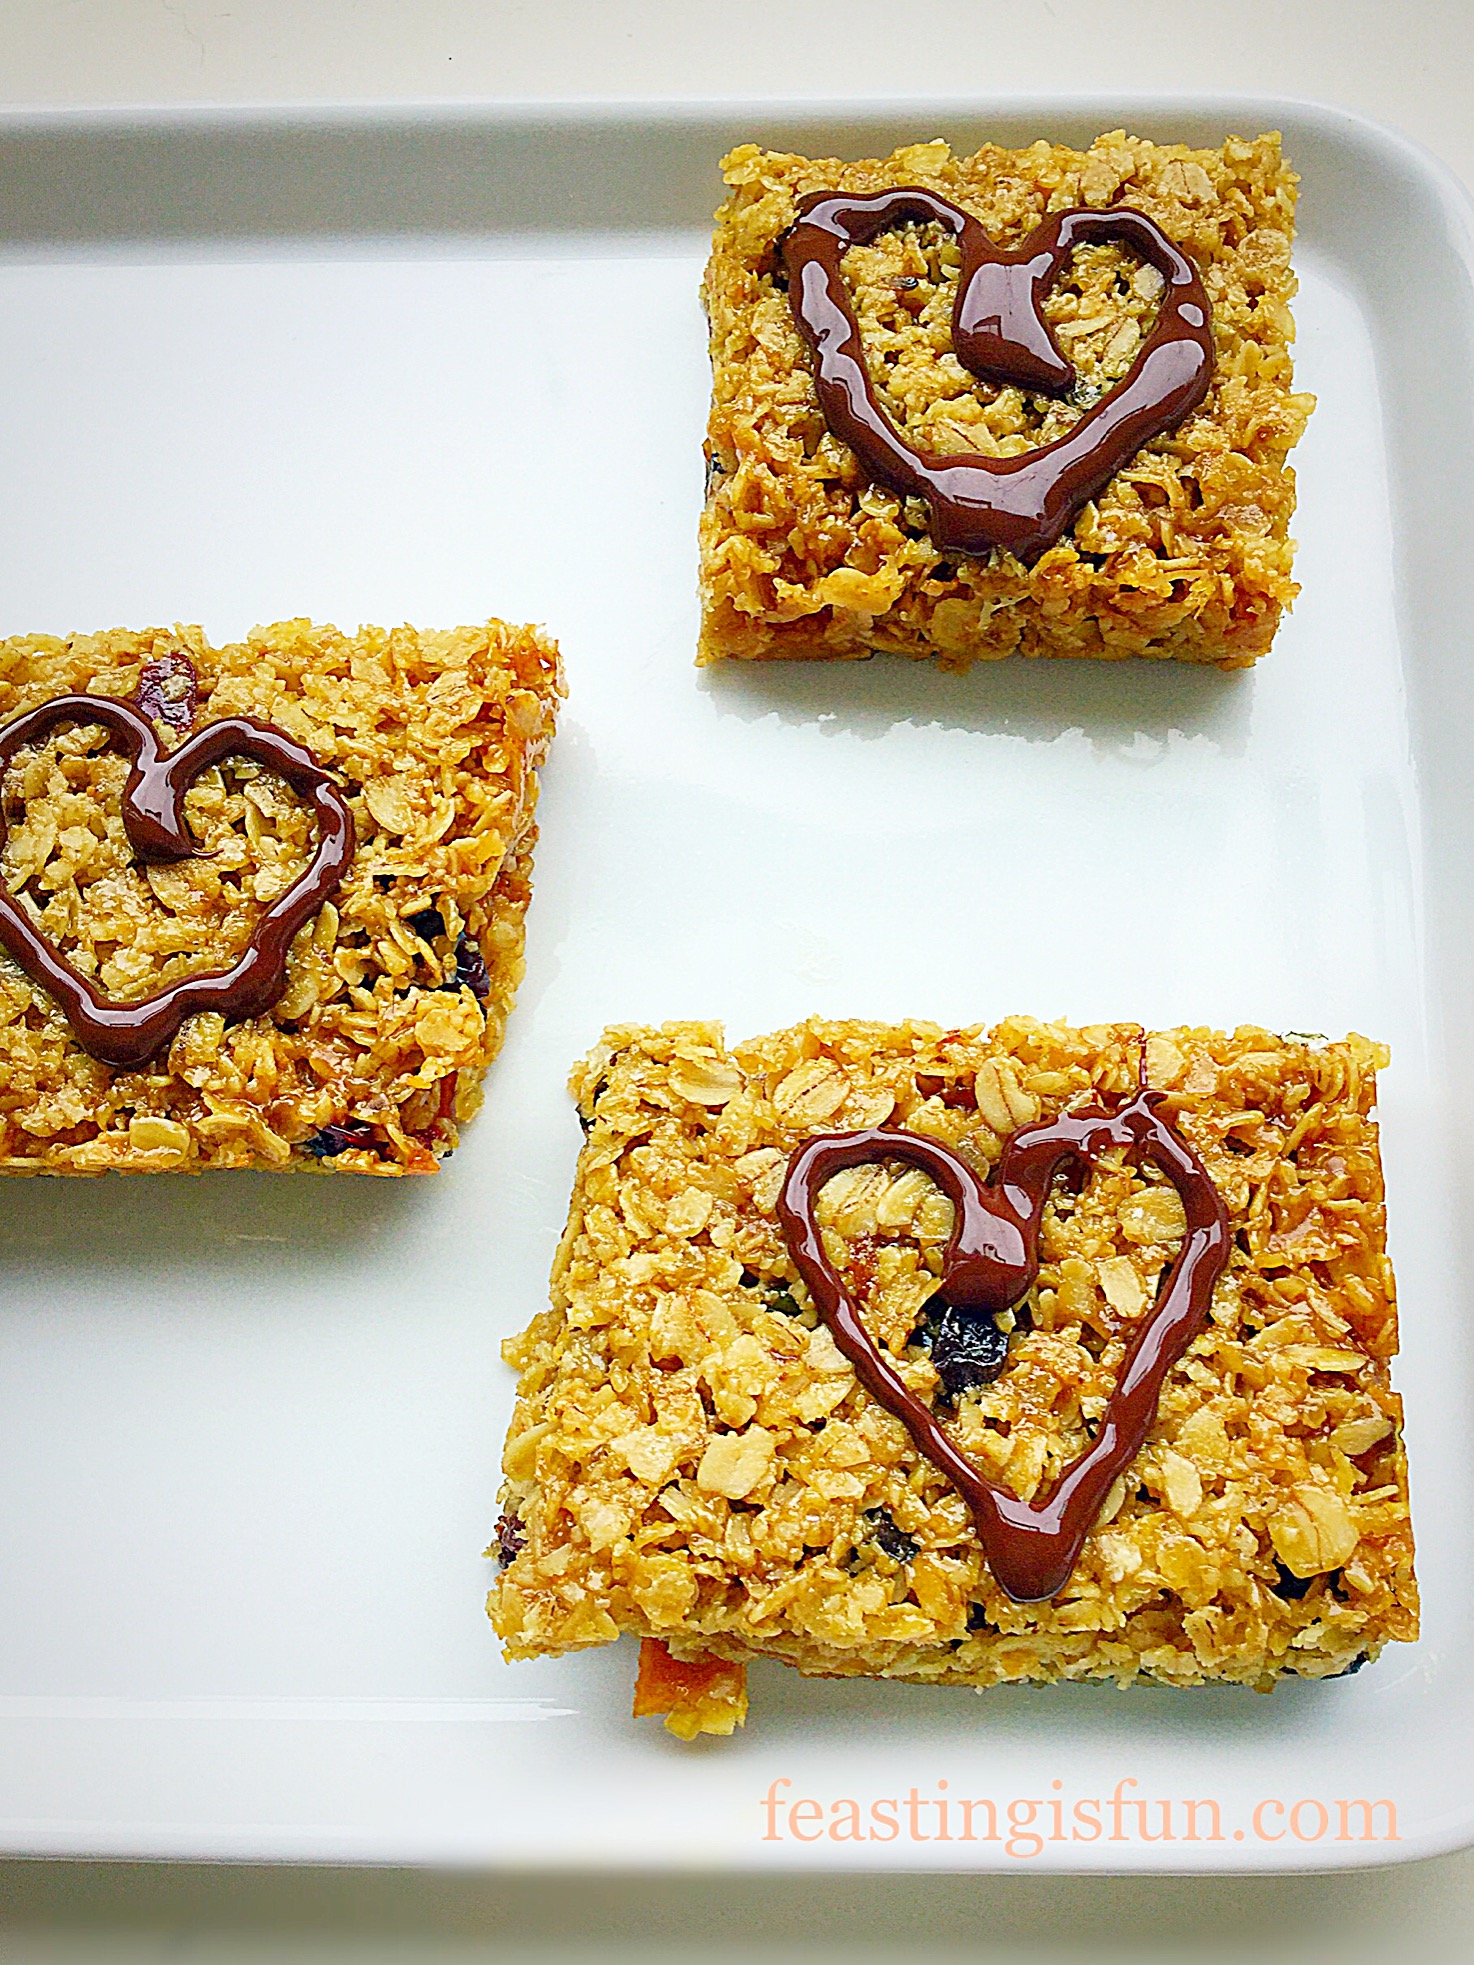
Muesli Flapjack Squares are THE answer to rushed mornings and missed breakfasts. Make these at the weekend and you’ve got brekkie covered for the whole week. Ooh and did I mention they’re gluten free too!
Muesli Flapjack Squares
Most people I know don’t have hours of time to spare in the mornings, during the week. They know breakfast is THE most important meal of the day, so in a bid to give their body something they grab a latte and coffee shop choccie muffin on the way to work. Then wonder why they are starving again by 10am if not sooner.
One of these Muesli Flapjack Squares will keep you going until lunchtime!
Breakfast – The Most Important Meal
Now eating one of these delicious Muesli Flapjack Squares isn’t the same as sitting down with a bowl of muesli, or a plate of wholemeal toast and homemade jam and a cup of coffee. But, they are a whole lot better both for your body and you wallet, than the take out option.
Muesli Flapjack Squares
Flapjacks do contain both sugar and butter, as do the take out muffins. I have tried to reduce both and even tried to switch to honey, but, unfortunately I haven’t cracked that recipe code yet.
What I have done is taken a fabulous gluten free, muesli mix made by Delicious Alchemy and turned it into the gluten free MuesliFlapjack Squares. So yes you’ll get the initial sugar hit and a wee bit of caffeine from the dark chocolate, but instead of the post sugar slump, the oats, seeds and dried fruit will start slowly releasing their energy – sustaining you until lunch.
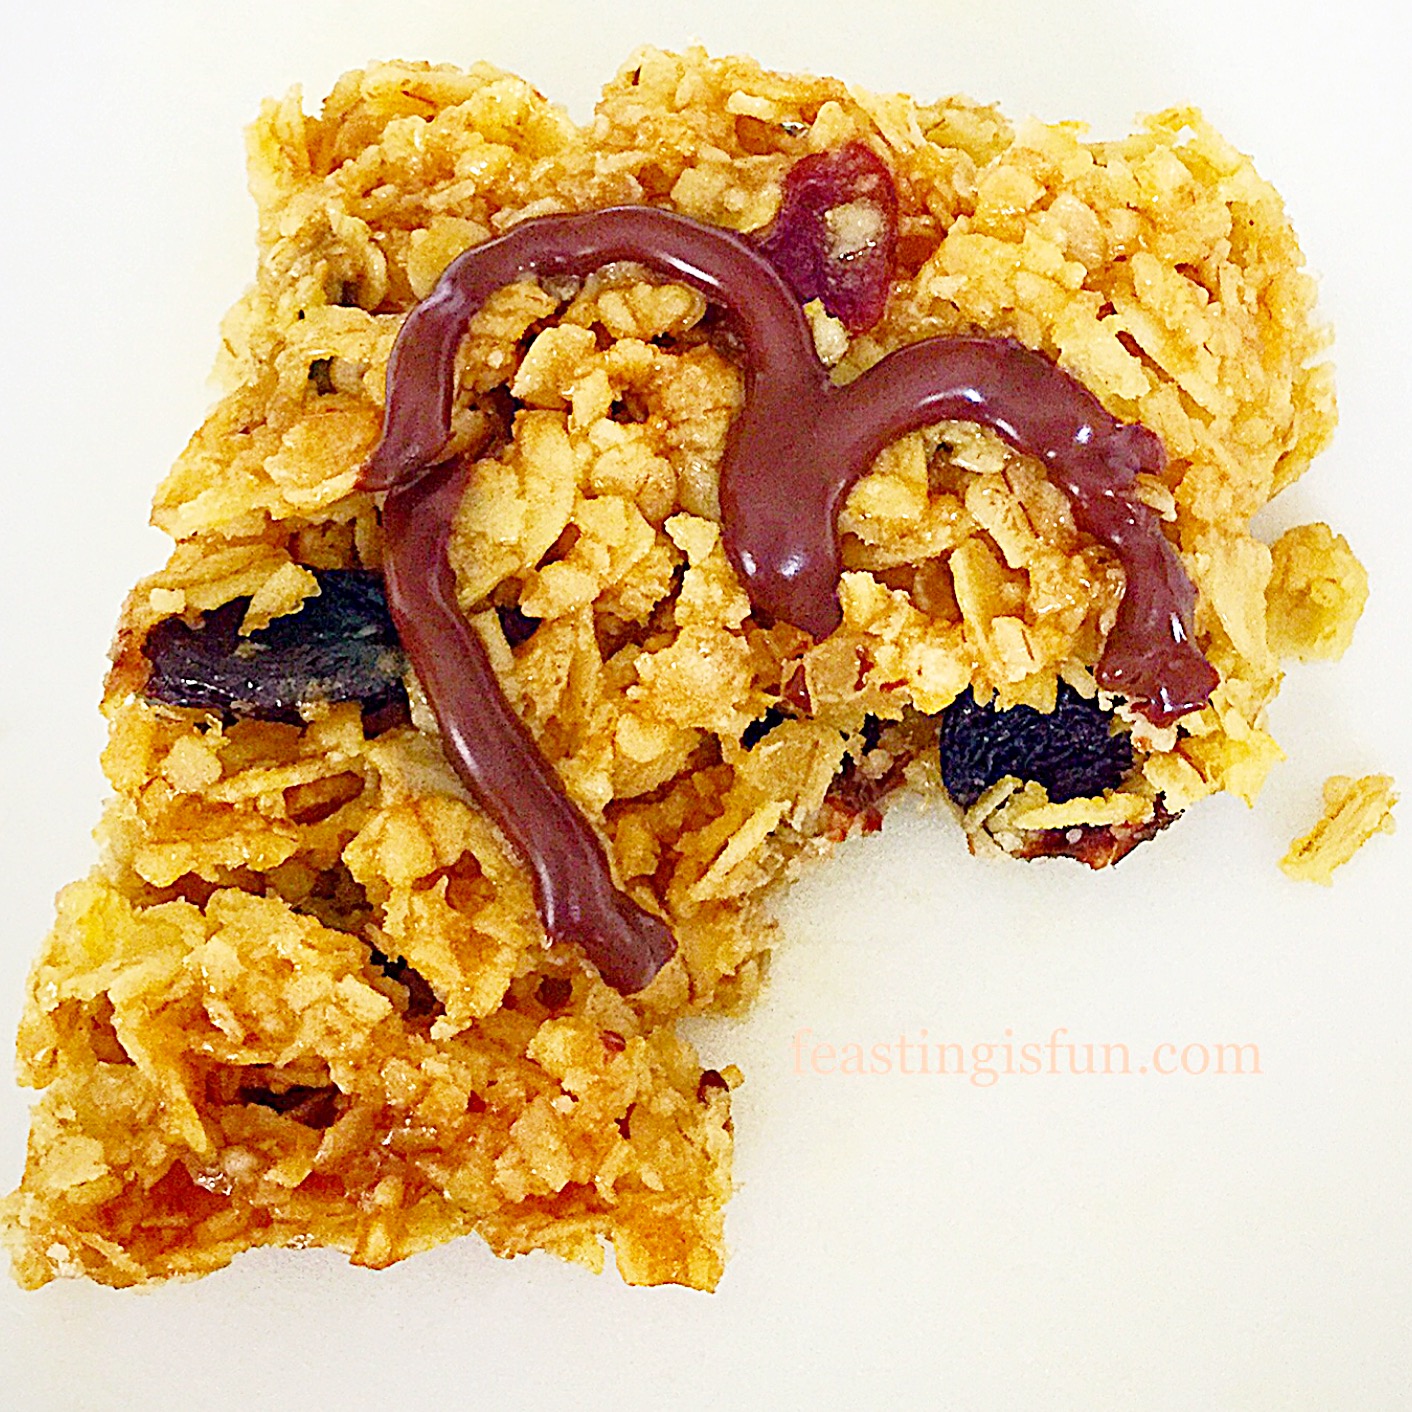
Too good not to take a bite!
With everything made in one bowl, a little mixing, 20 minutes in the oven, cool then swirl on some chocolate, these can easily made by anyone.
If buying a different muesli from the one suggested ensure that it has no added sugar, salt or fat and of course, that it’s gluten free if you have dietary intolerances.
100g/4oz Chopped Dried Fruit – I used mango and apricots (dried)
Method: Preheat the oven to 180C/160C fan, gas mark 4, 350F
Making The Muesli Flapjack Mixture
First of all, line a 8″ x 11″ 20cm x 28cm Swiss roll, or 2″ deep baking tin with baking parchment. I have found it unnecessary to grease my tin prior to lining, however, using a little butter in the corners, should help the parchment to stick without fully greasing the tin.
In a large heatproof and microwaveable bowl add the butter and then sugar.
Place in the microwave a heat on low until the butter is just melted.
Once melted remove from the microwave and add the golden syrup. Stir with a wooden spoon until everything is well mixed.
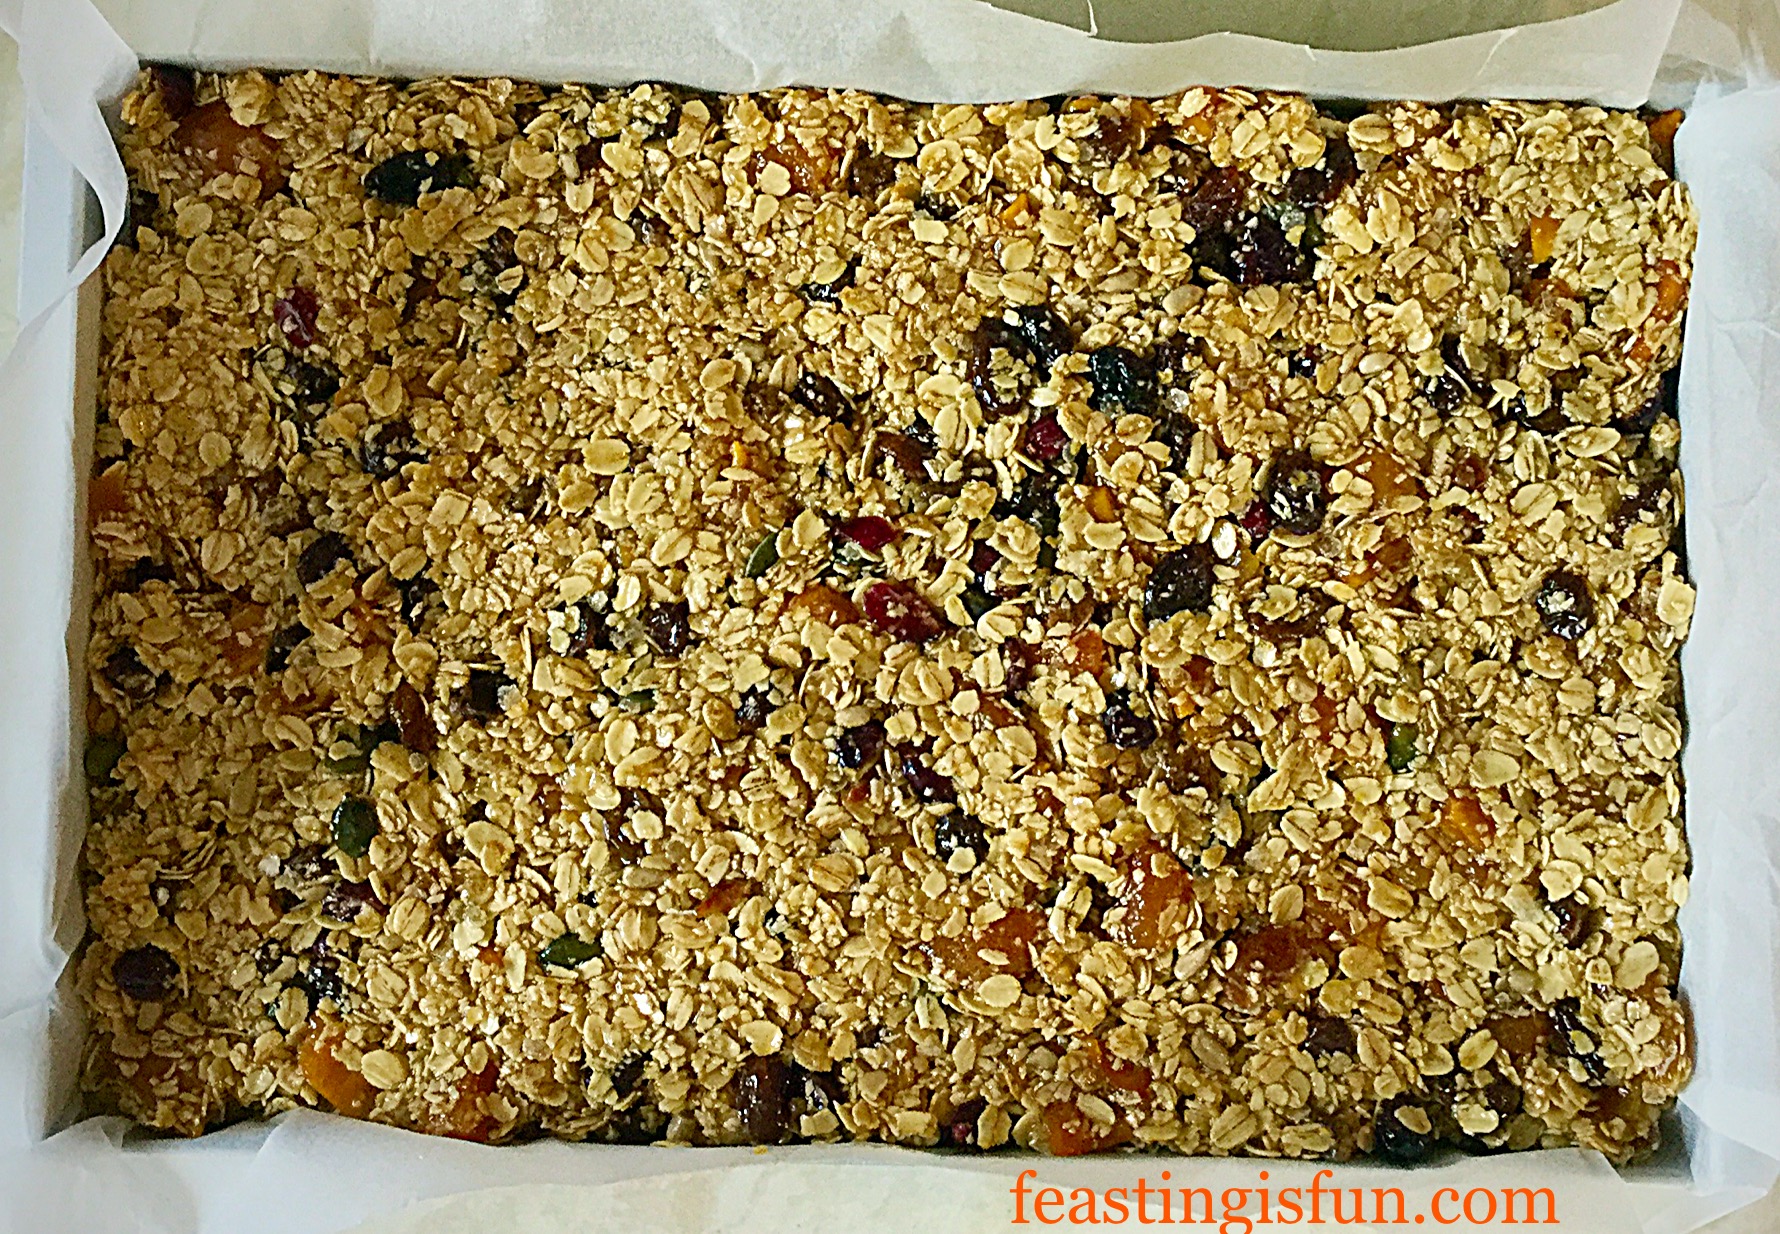
Add the muesli, salt and chopped, dried fruit.
Now to get mixing!
Next stir everything together until it is all covered in the glossy butter mixture.
Tip the mixture into the prepared pan and press flat and even using the back of a dessert spoon.
Pressed evenly into the tin, ready for the oven.
Baking The Flapjacks
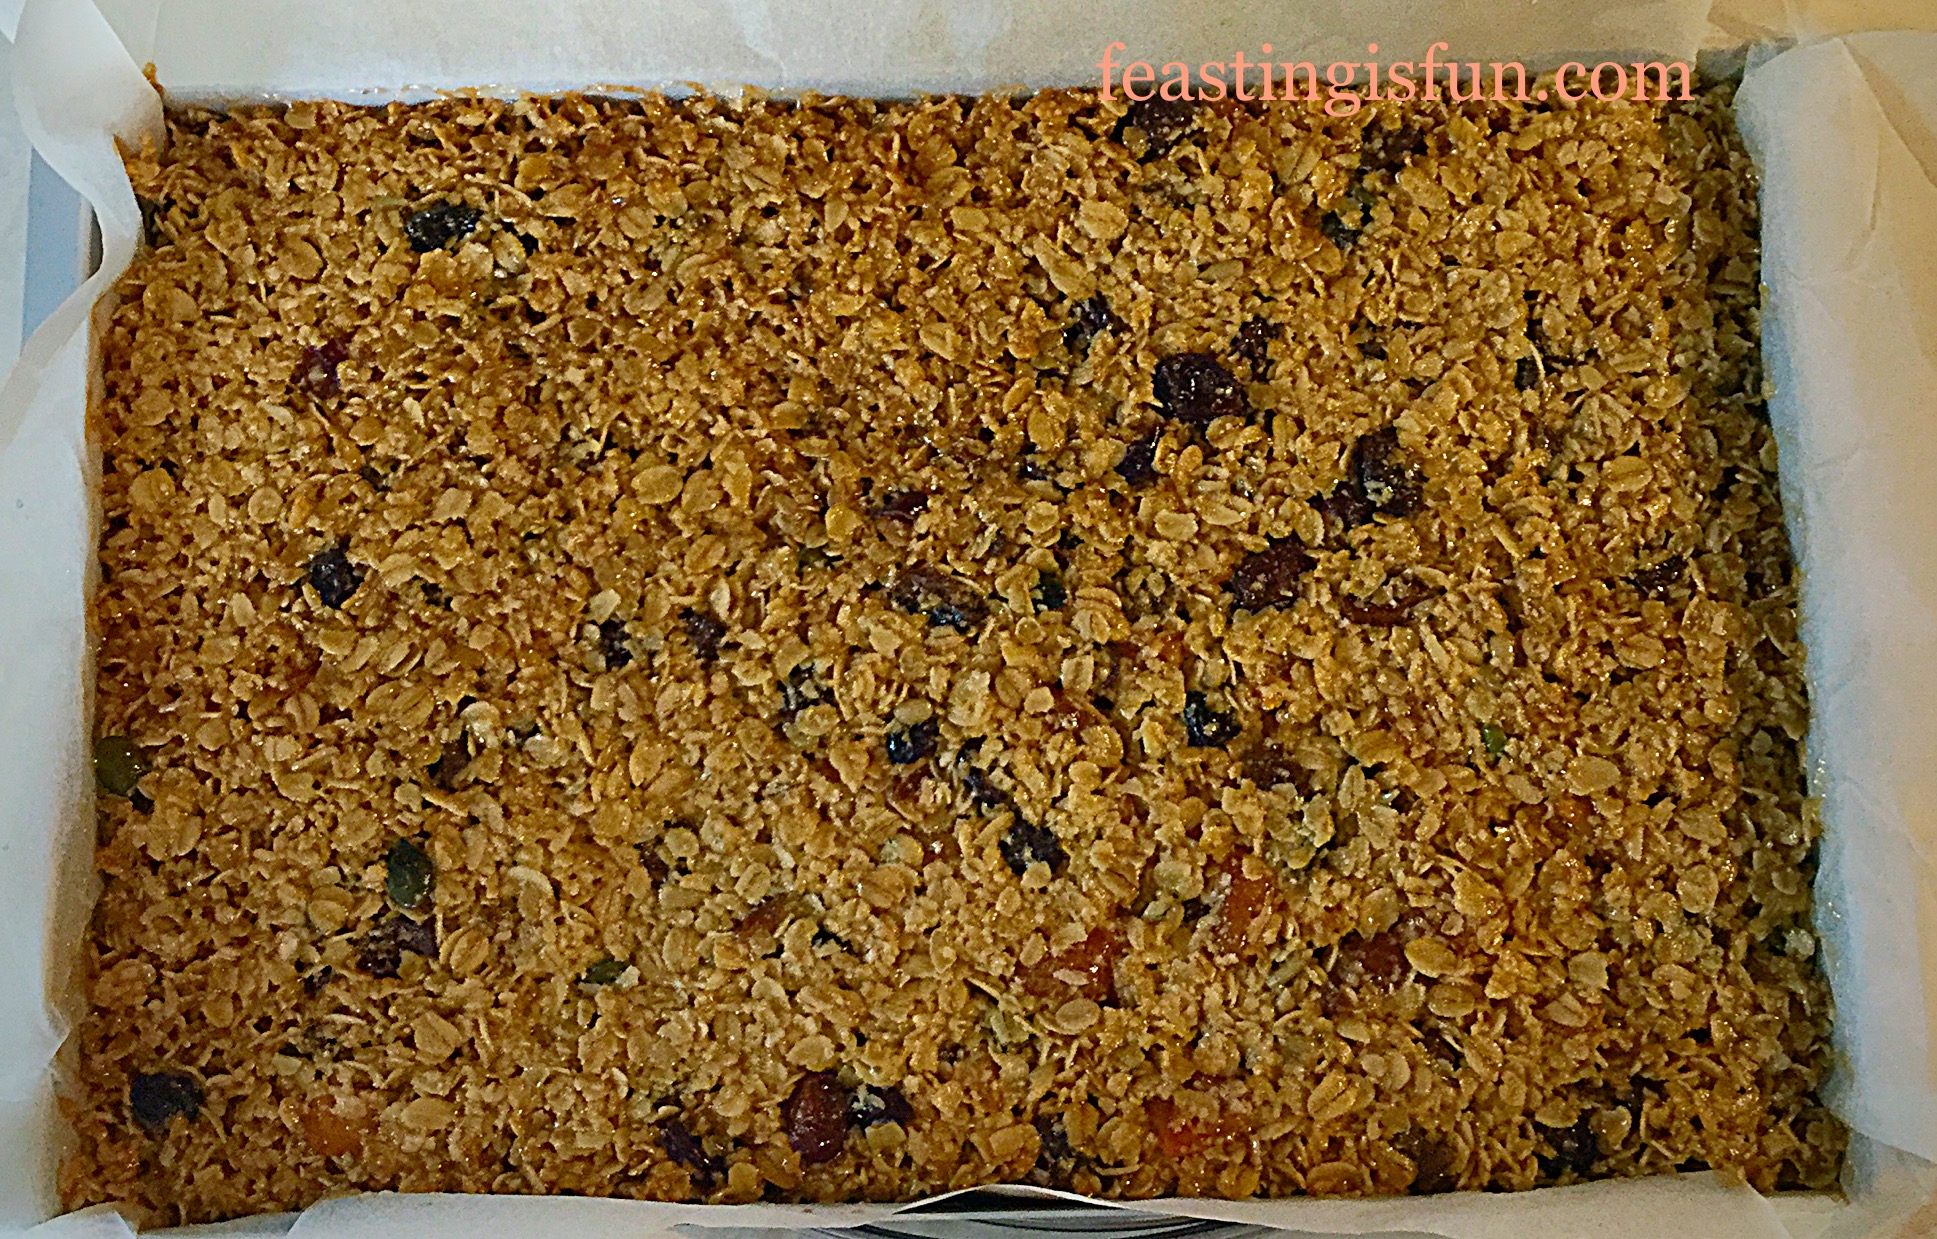
Place in the centre of the oven and bake for exactly 20 minutes.
As soon as the baking time is up remove from the oven and allow to cool completely in the tin.
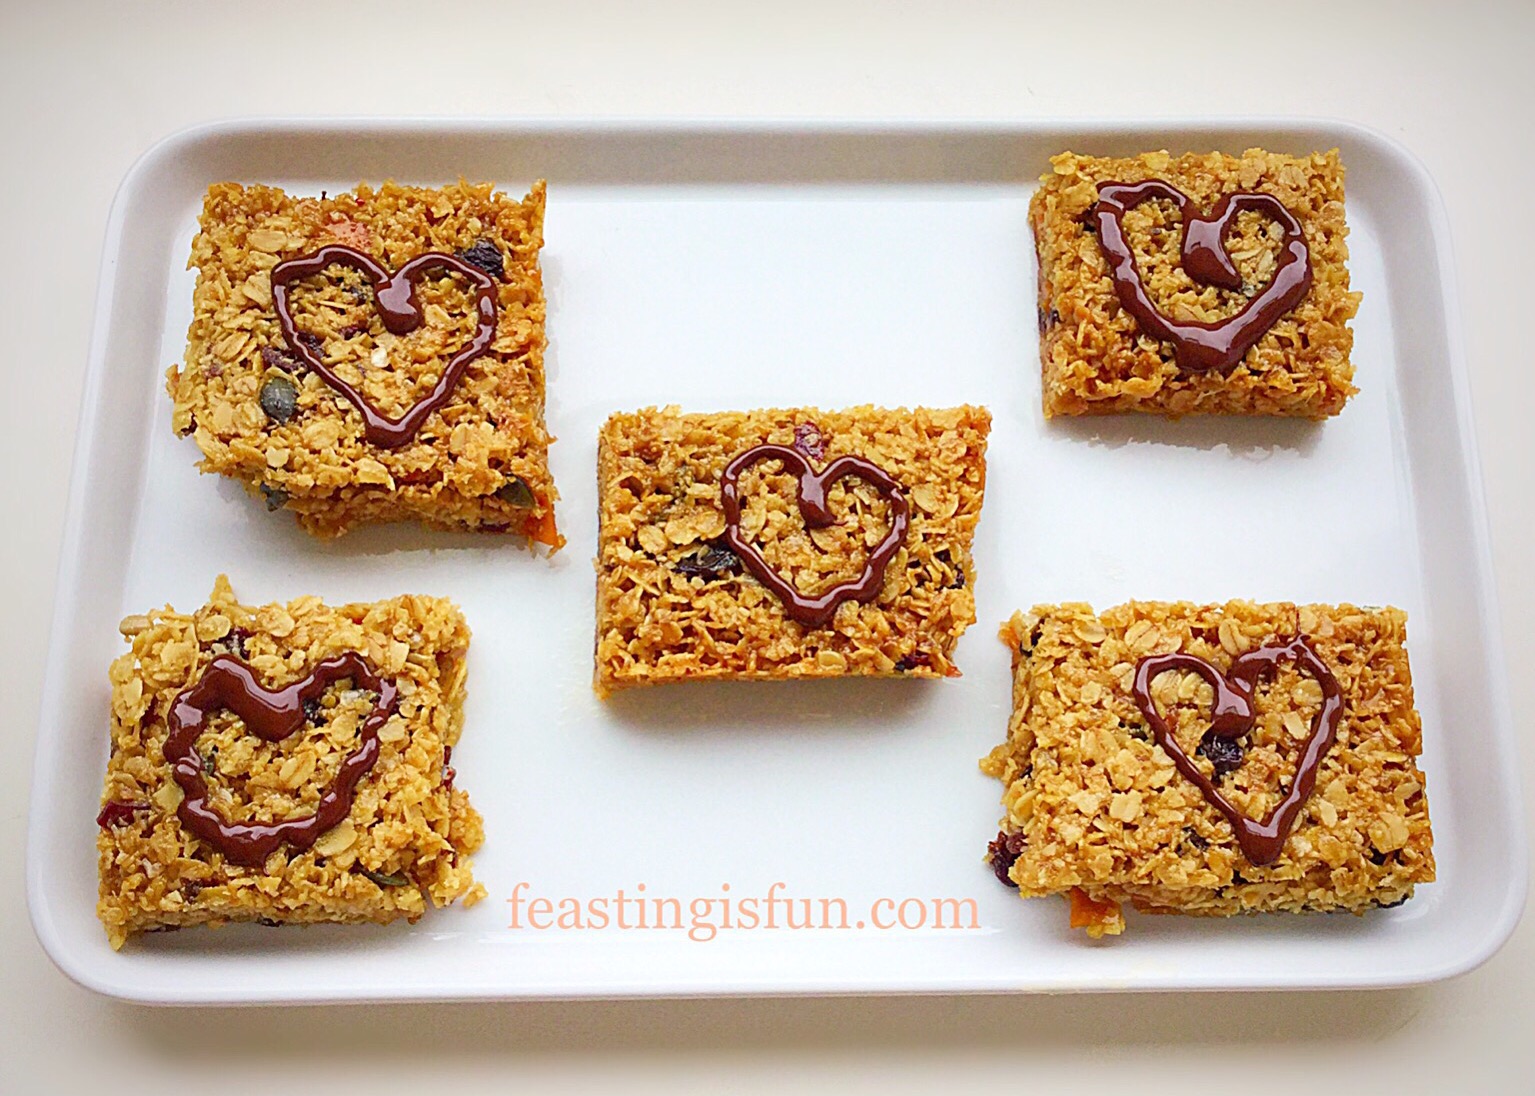
Muesli Flapjack Squares beautifully baked and golden.
When cooled lift the flapjack slab from the tin on to a board.
Cut into 12 even squares (if you look mine aren’t that even – oops)!
Melt the dark chocolate in a heatproof, microwaveable bowl until almost melted. Remove and stir until completely melted.
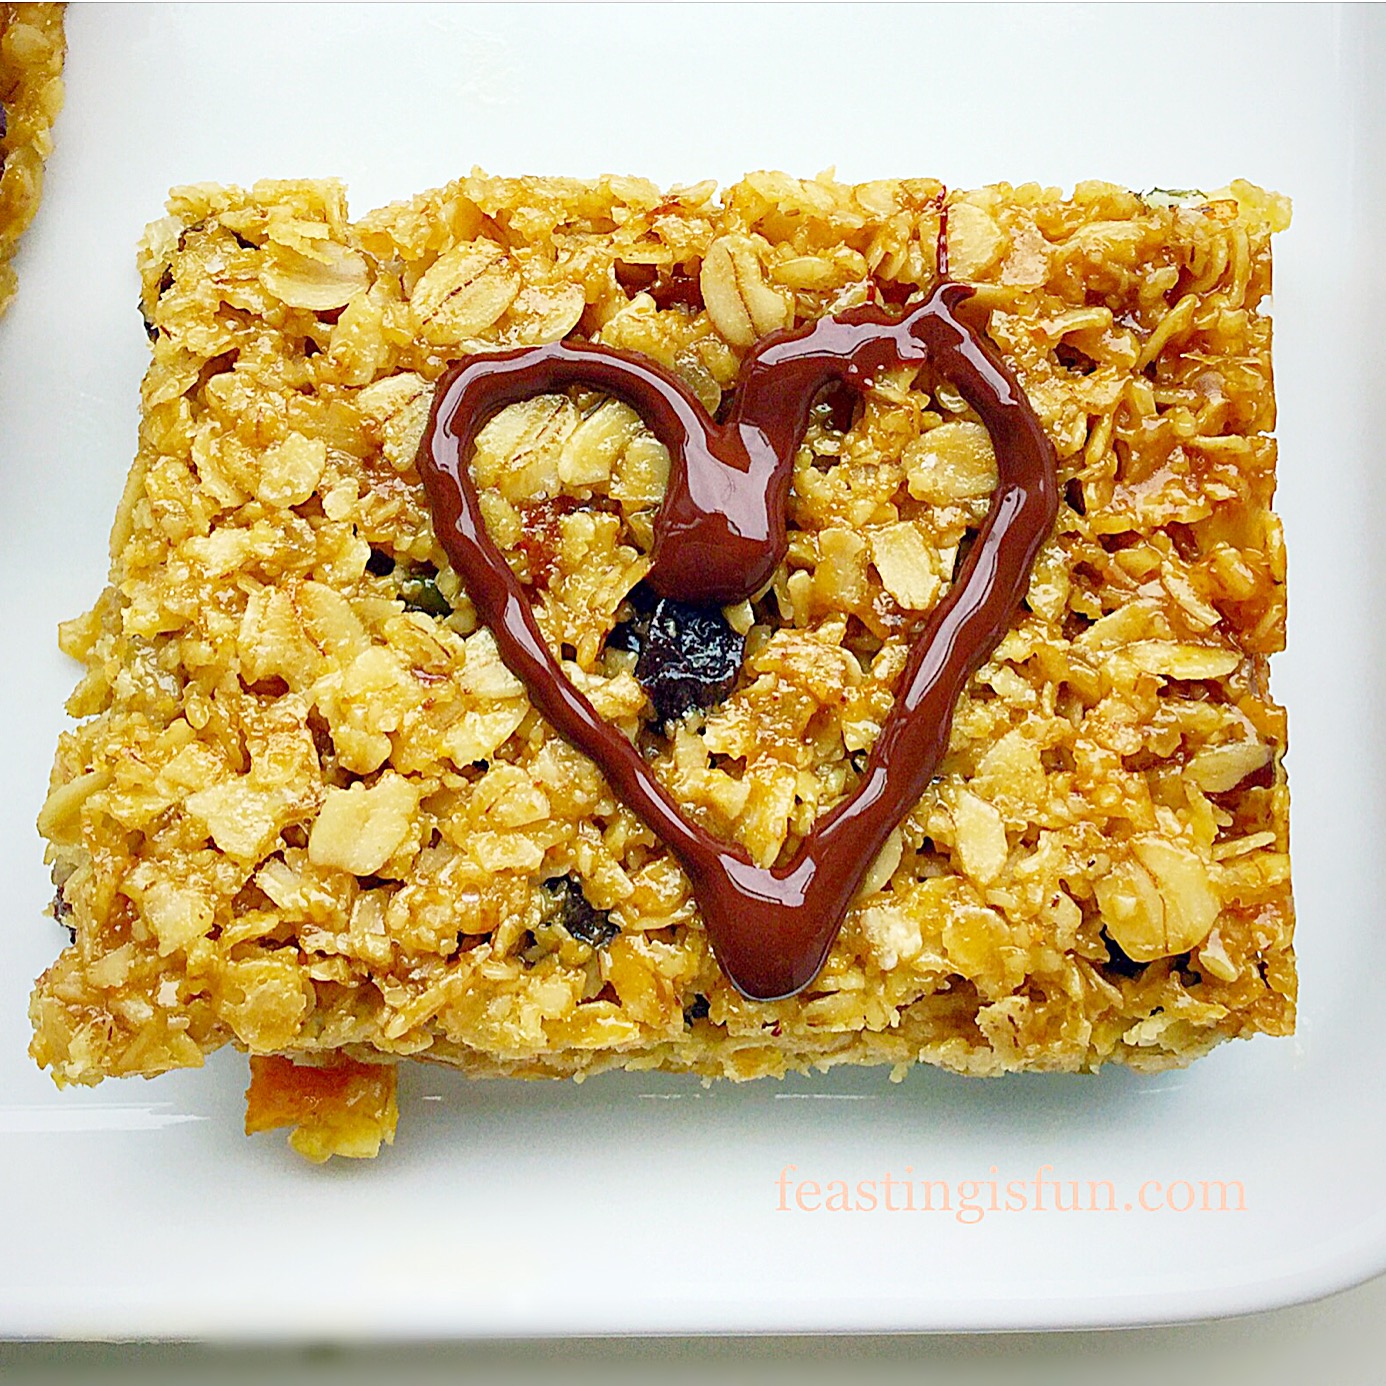
Drizzle over the squares, or fill a small piping bag and pipe hearts on each square.
Beautifully decorated with a heart.
During hot weather it might be worth popping the Muesli FlapjackSquares into the fridge for an hour. This will set the chocolate and really firm up the bars.
I like to wrap them in baking parchment for packed lunches, cling film and foil work well too.
Store them in an airtight container. I use an old biscuit tin and separate layers with baking parchment.
Muesli Flapjack Squares a great solution to breakfast.
Give yourself a pat on the back knowing you have breakfast sorted for the week!!
If you have enjoyed these Muesli Flapjack Squares you may also like these:
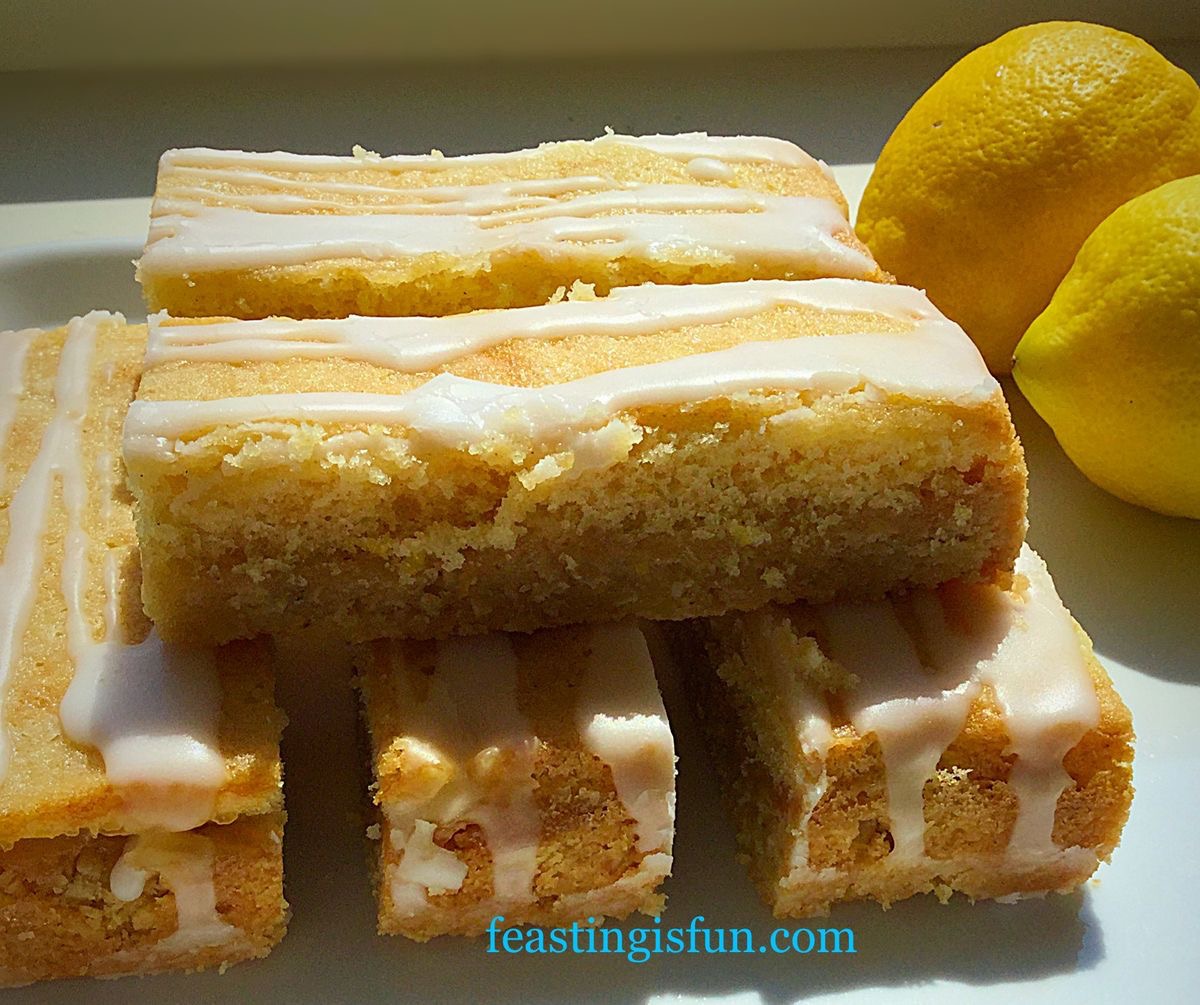
Lemon Drizzle Cake Bars with a layer of lemon curd on top of an oat biscuit base.
All of the recipes above are easy to make and are fabulous food on the go. Ideal for packed lunches, picnics, or simply having something on hand at home that easily fits in a tin.
I deliberately left nuts out of this recipe so that more people on a restricted diet can enjoy it. I’ve also successfully switched butter for coconut oil in myCoconut Almond Date Flapjacks, which would make this recipe suitable for those with lactose intolerance.
It is my intention to make as many recipes as possible versatile, so that those with dietary restrictions can also have fun feasting!
Sammie xx
Delicious Alchemy provided the muesli mix for me to try. All opinions, views, content and photographs are my own. Please see my Disclosure Policy.
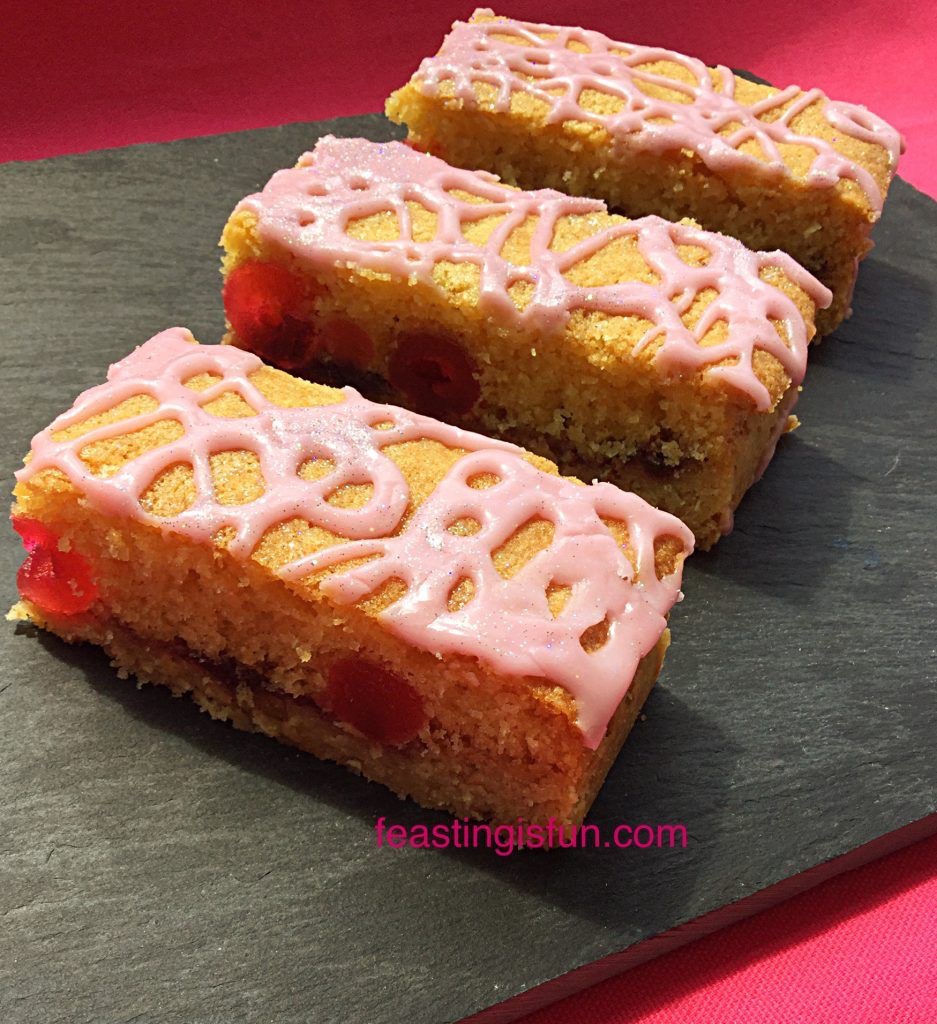
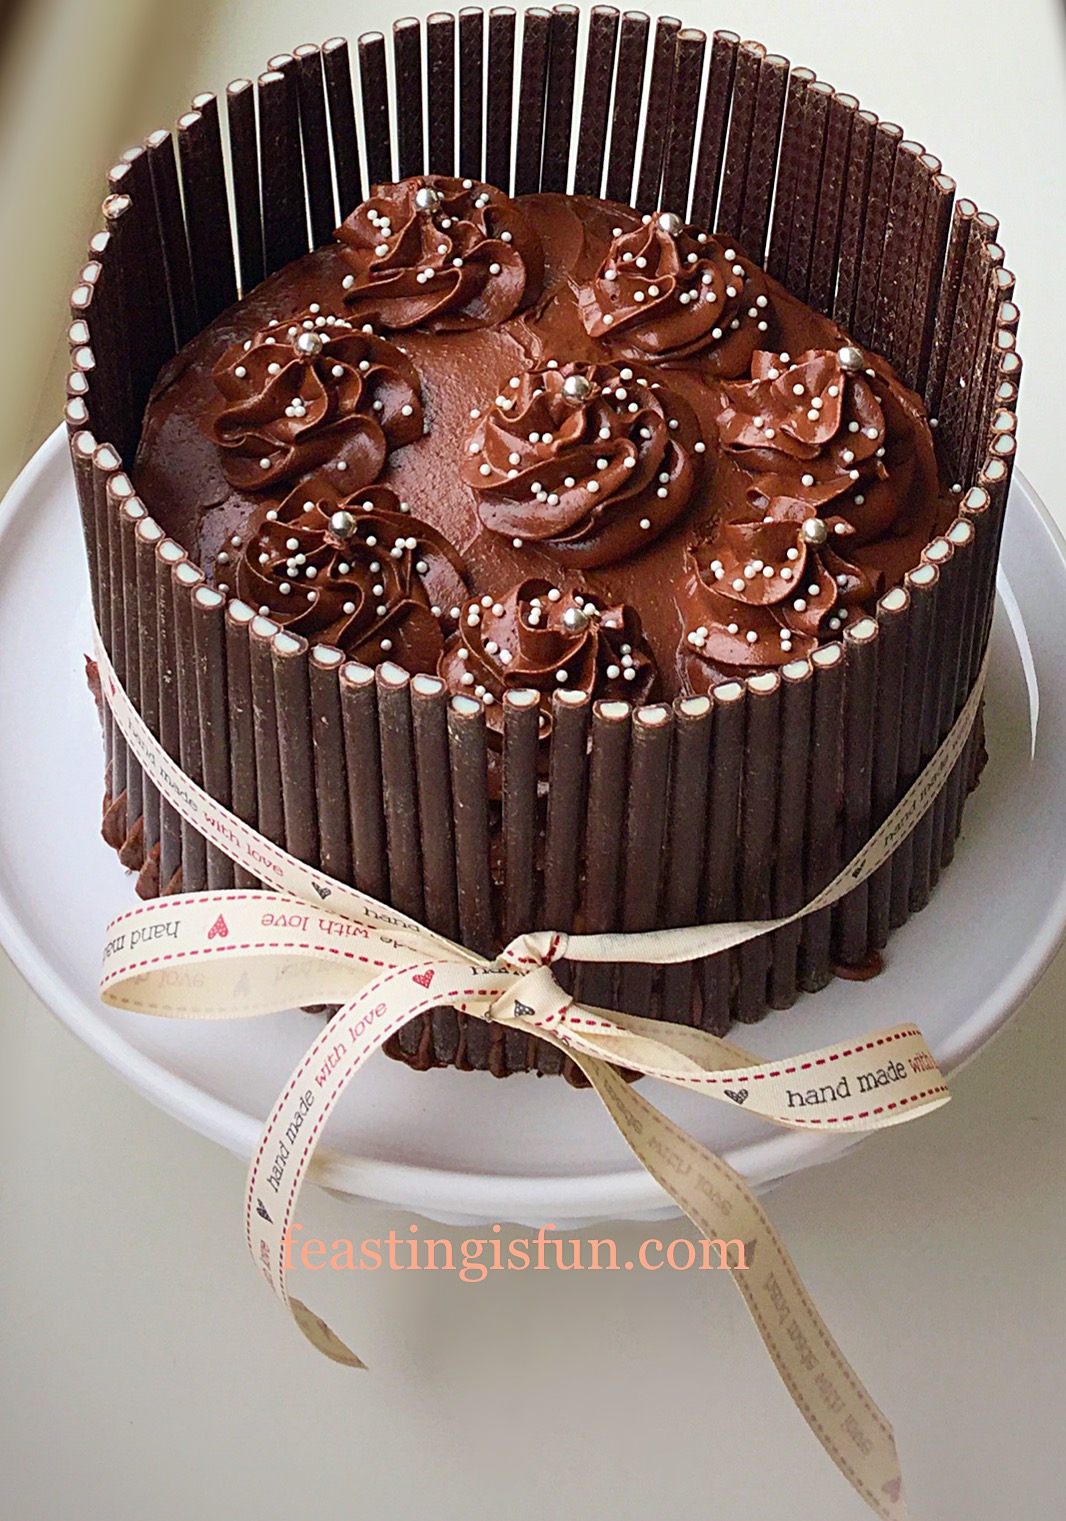
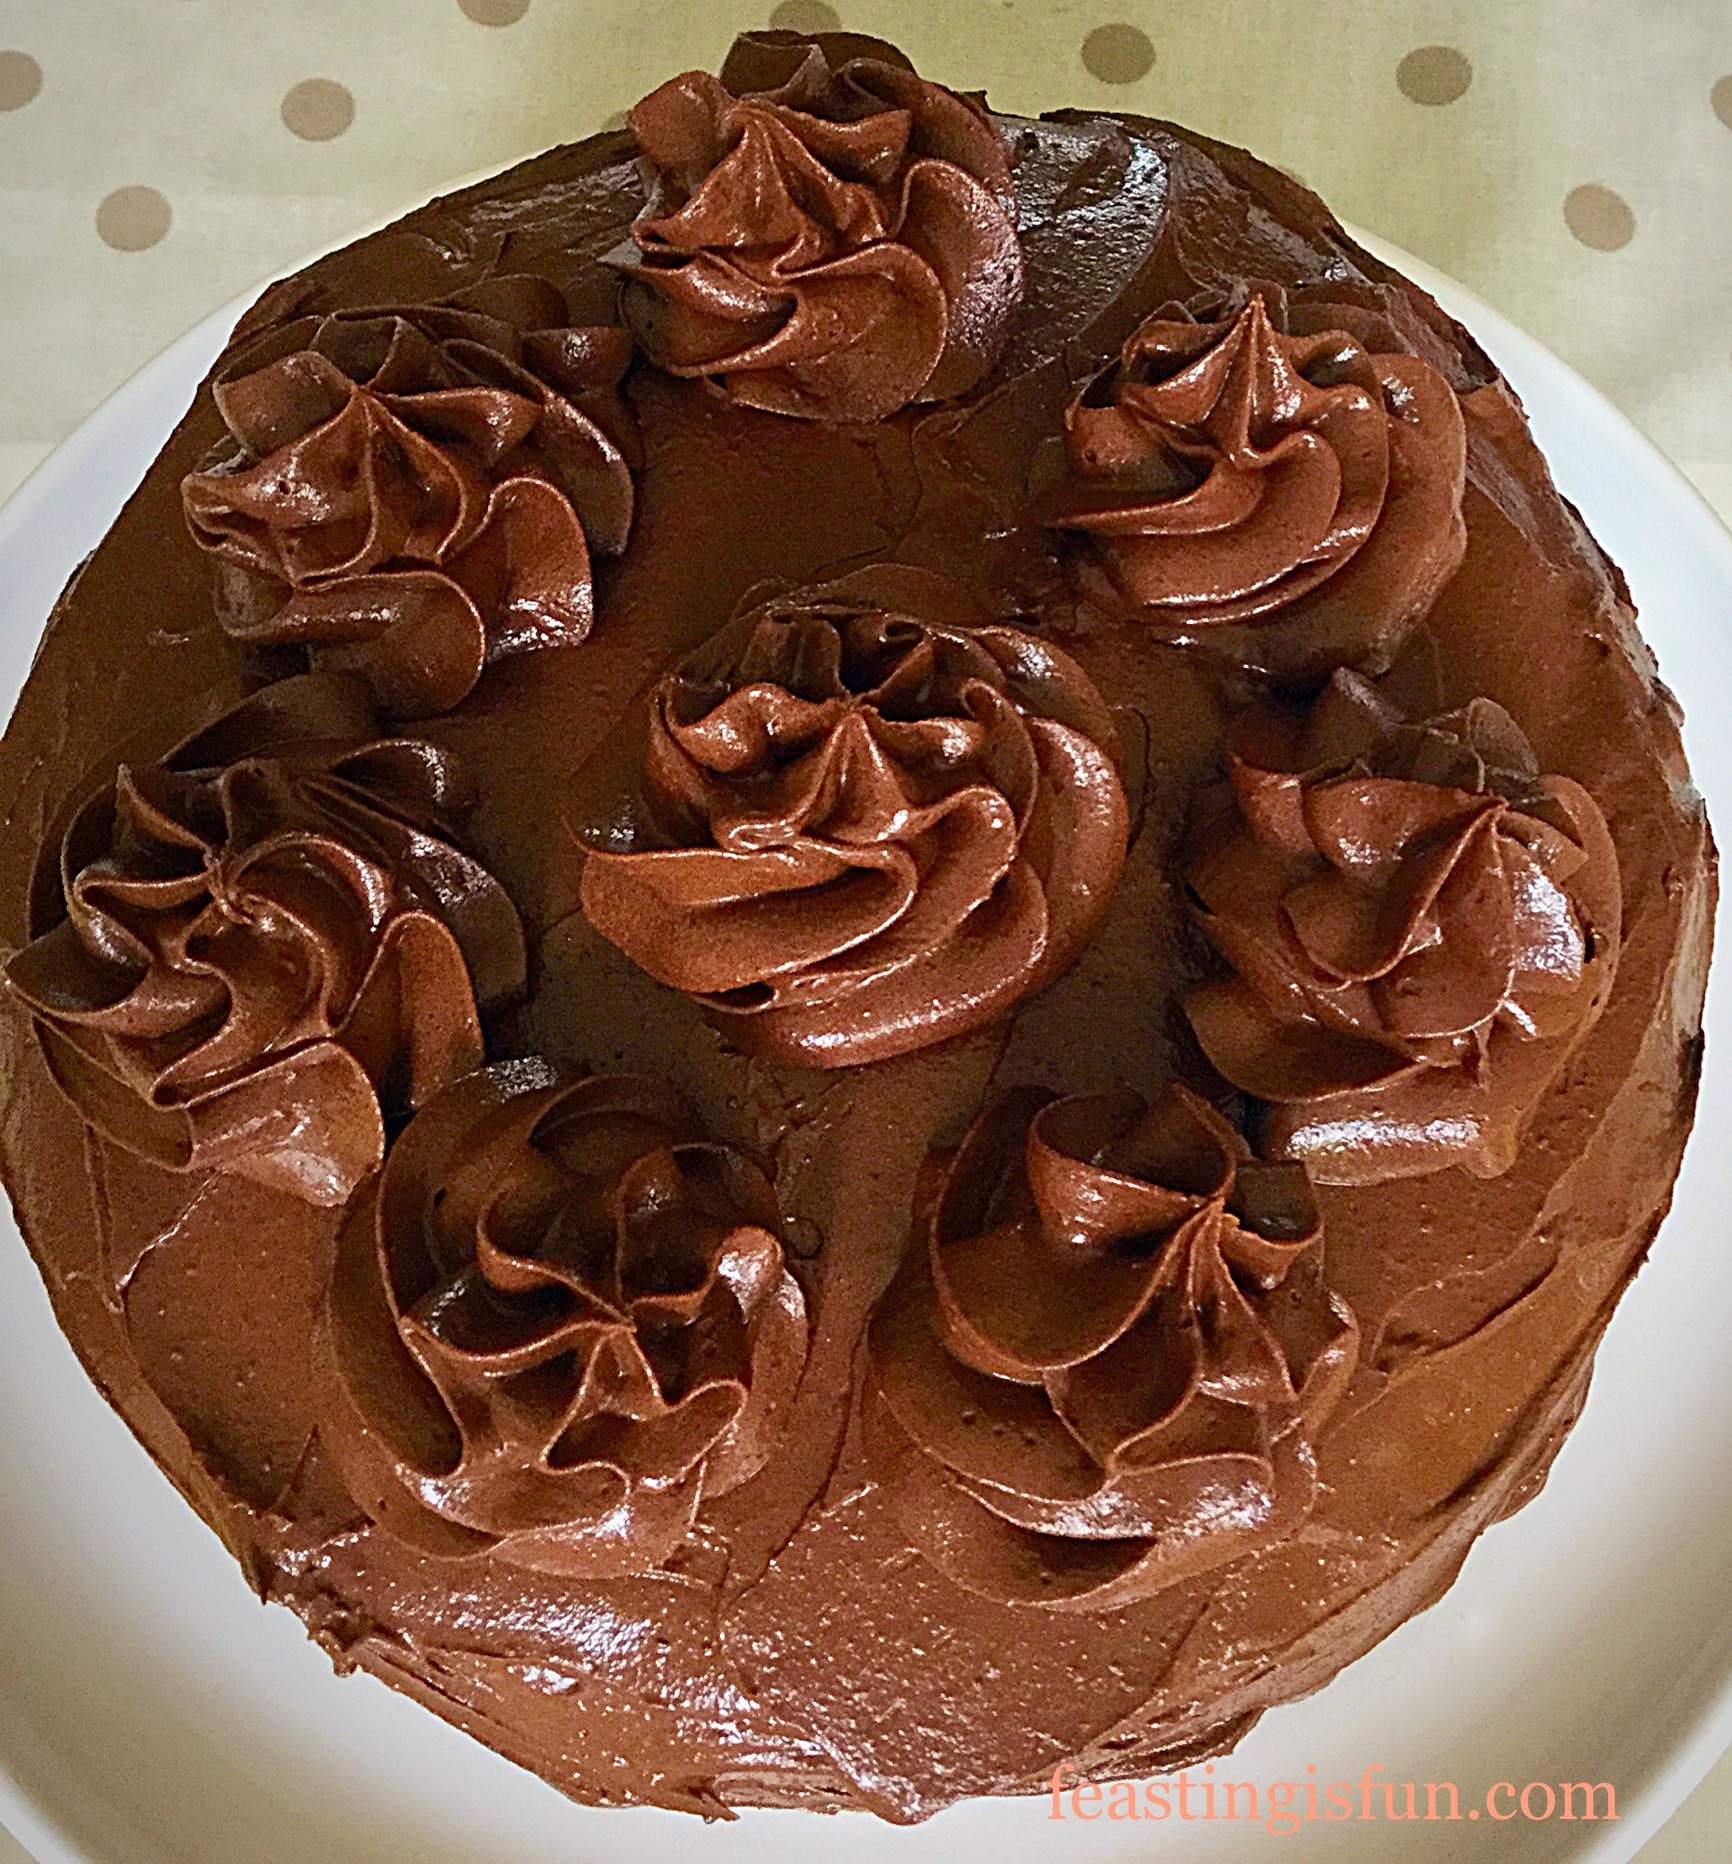
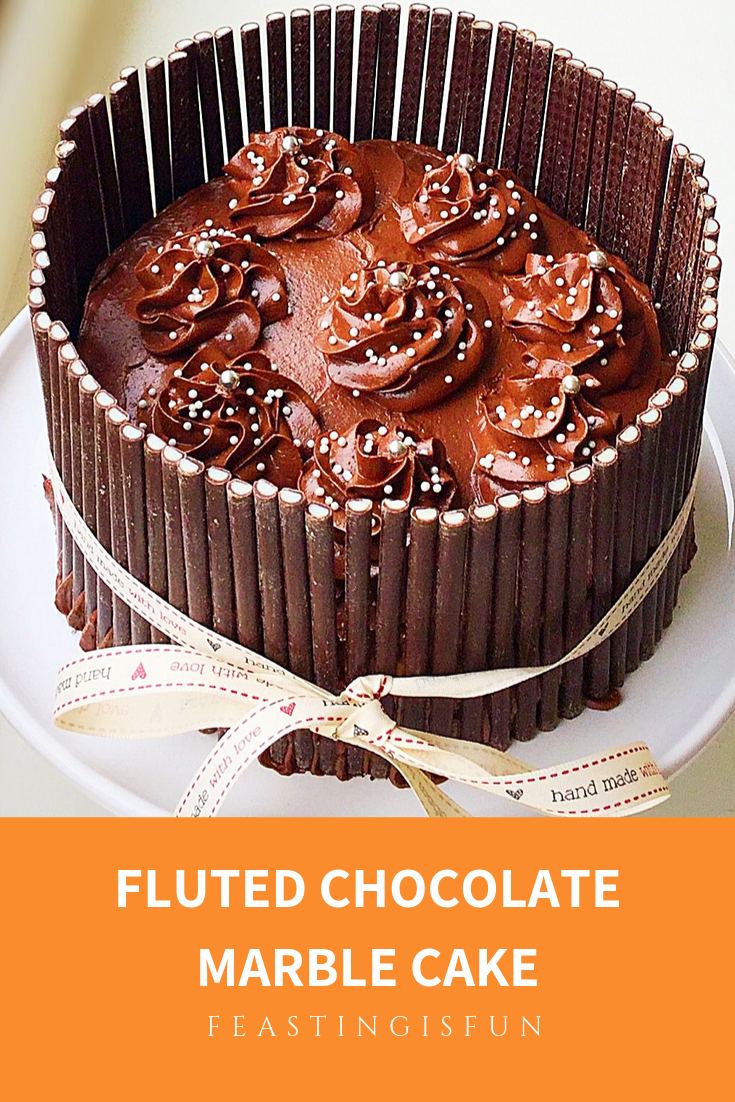
Since Father’s Day coming up this Sunday, here is an easy to make and decorate treat for Dad. Lemon and chocolate intertwined within every part of this stunning Fluted Chocolate Lemon Marble Cake. While I am using lemon in this cake, other flavours such as orange, coffee or perhaps a liqueur could also be considered.
Fluted Chocolate Marble Cake perfect for any celebration.
You can make this cake for Father’s Day, or as a special celebration cake. Since the blend of chocolate and lemon throughout every part of this cake is a taste sensation. And if you have never tried the two together then you need to trust me and make this cake.
Fluted Chocolate Lemon Marble Cake whoever receives this will be thrilled.
While orange and chocolate is a more common flavour pairing, I was inspired to make this cake when I discovered that Elizabeth Shaw Chocolates made Chocolate a Lemon Flutes. And having used the Amaretto flutes for my ChocolateAmaretto Cake I knew how stunning and yet simple they were to use.
Fluted Chocolate Lemon Marble Cake made with love.
So if you want to make this cake for your Dad this coming Sunday, or a special birthday cake I am right here to show you how to make this stunning Fluted Chocolate Lemon Marble Cake.
Homemade Gifts That Are Baked With Love
Nothing is quite as special as something that you have made yourself for someone. Putting the time, energy and love into baking a cake, for me truly shows someone that I love them. Especially if it is centered around their favourite flavours.
Elizabeth Shaw sell a range of flavoured flutes and you can easily tweak this recipe to fit the flavour of your choice. And adding the flutes around the edge, with the extra touch of a beautiful ribbon transforms a nice cake to a wow cake.
Fluted Chocolate Lemon Marble Cake plenty for sharing.
Method: Preheat the oven to 180C/160C fan, gas mark 3, 350F.
Making The Marble Cake Batter
First of all, grease and line with baking parchment an 8″ or 18cm cake tin – that is also fairly deep – at least 4″/10cm. Ensure that the baking parchment is at least 2″/5cm higher than the sides of the cake. This will ensure a nice even rise and moist cake.
In a large bowl add the softened, room temperature butter and caster sugar.
Whisk/beat until pale and creamy.
Sift the flour into a medium sized bowl – you will need the bowl later.
Add 1/3 of the flour and 2 eggs to the butter mixture, mix slowly until just incorporated.
Repeat the last step.
Add the last 2 eggs, remaining flour and the zest of 2 lemons.
Use a large spoon or spatula to fold in all of the ingredients until combined – be careful not to overmix.
In the spare bowl (which had the flour in it) place half of the lemon flavoured cake mixture – I do this by eye but, use scales if you want to be exact.
Sift the cocoa into the mixture in the spare bowl and add the 2 tablespoons of milk. Fold in the cocoa powder until the mixture is combined. It will be a gorgeous chocolate colour.
In the othe bowl squeeze in the juice from half of a lemon. Stir until fully combined.
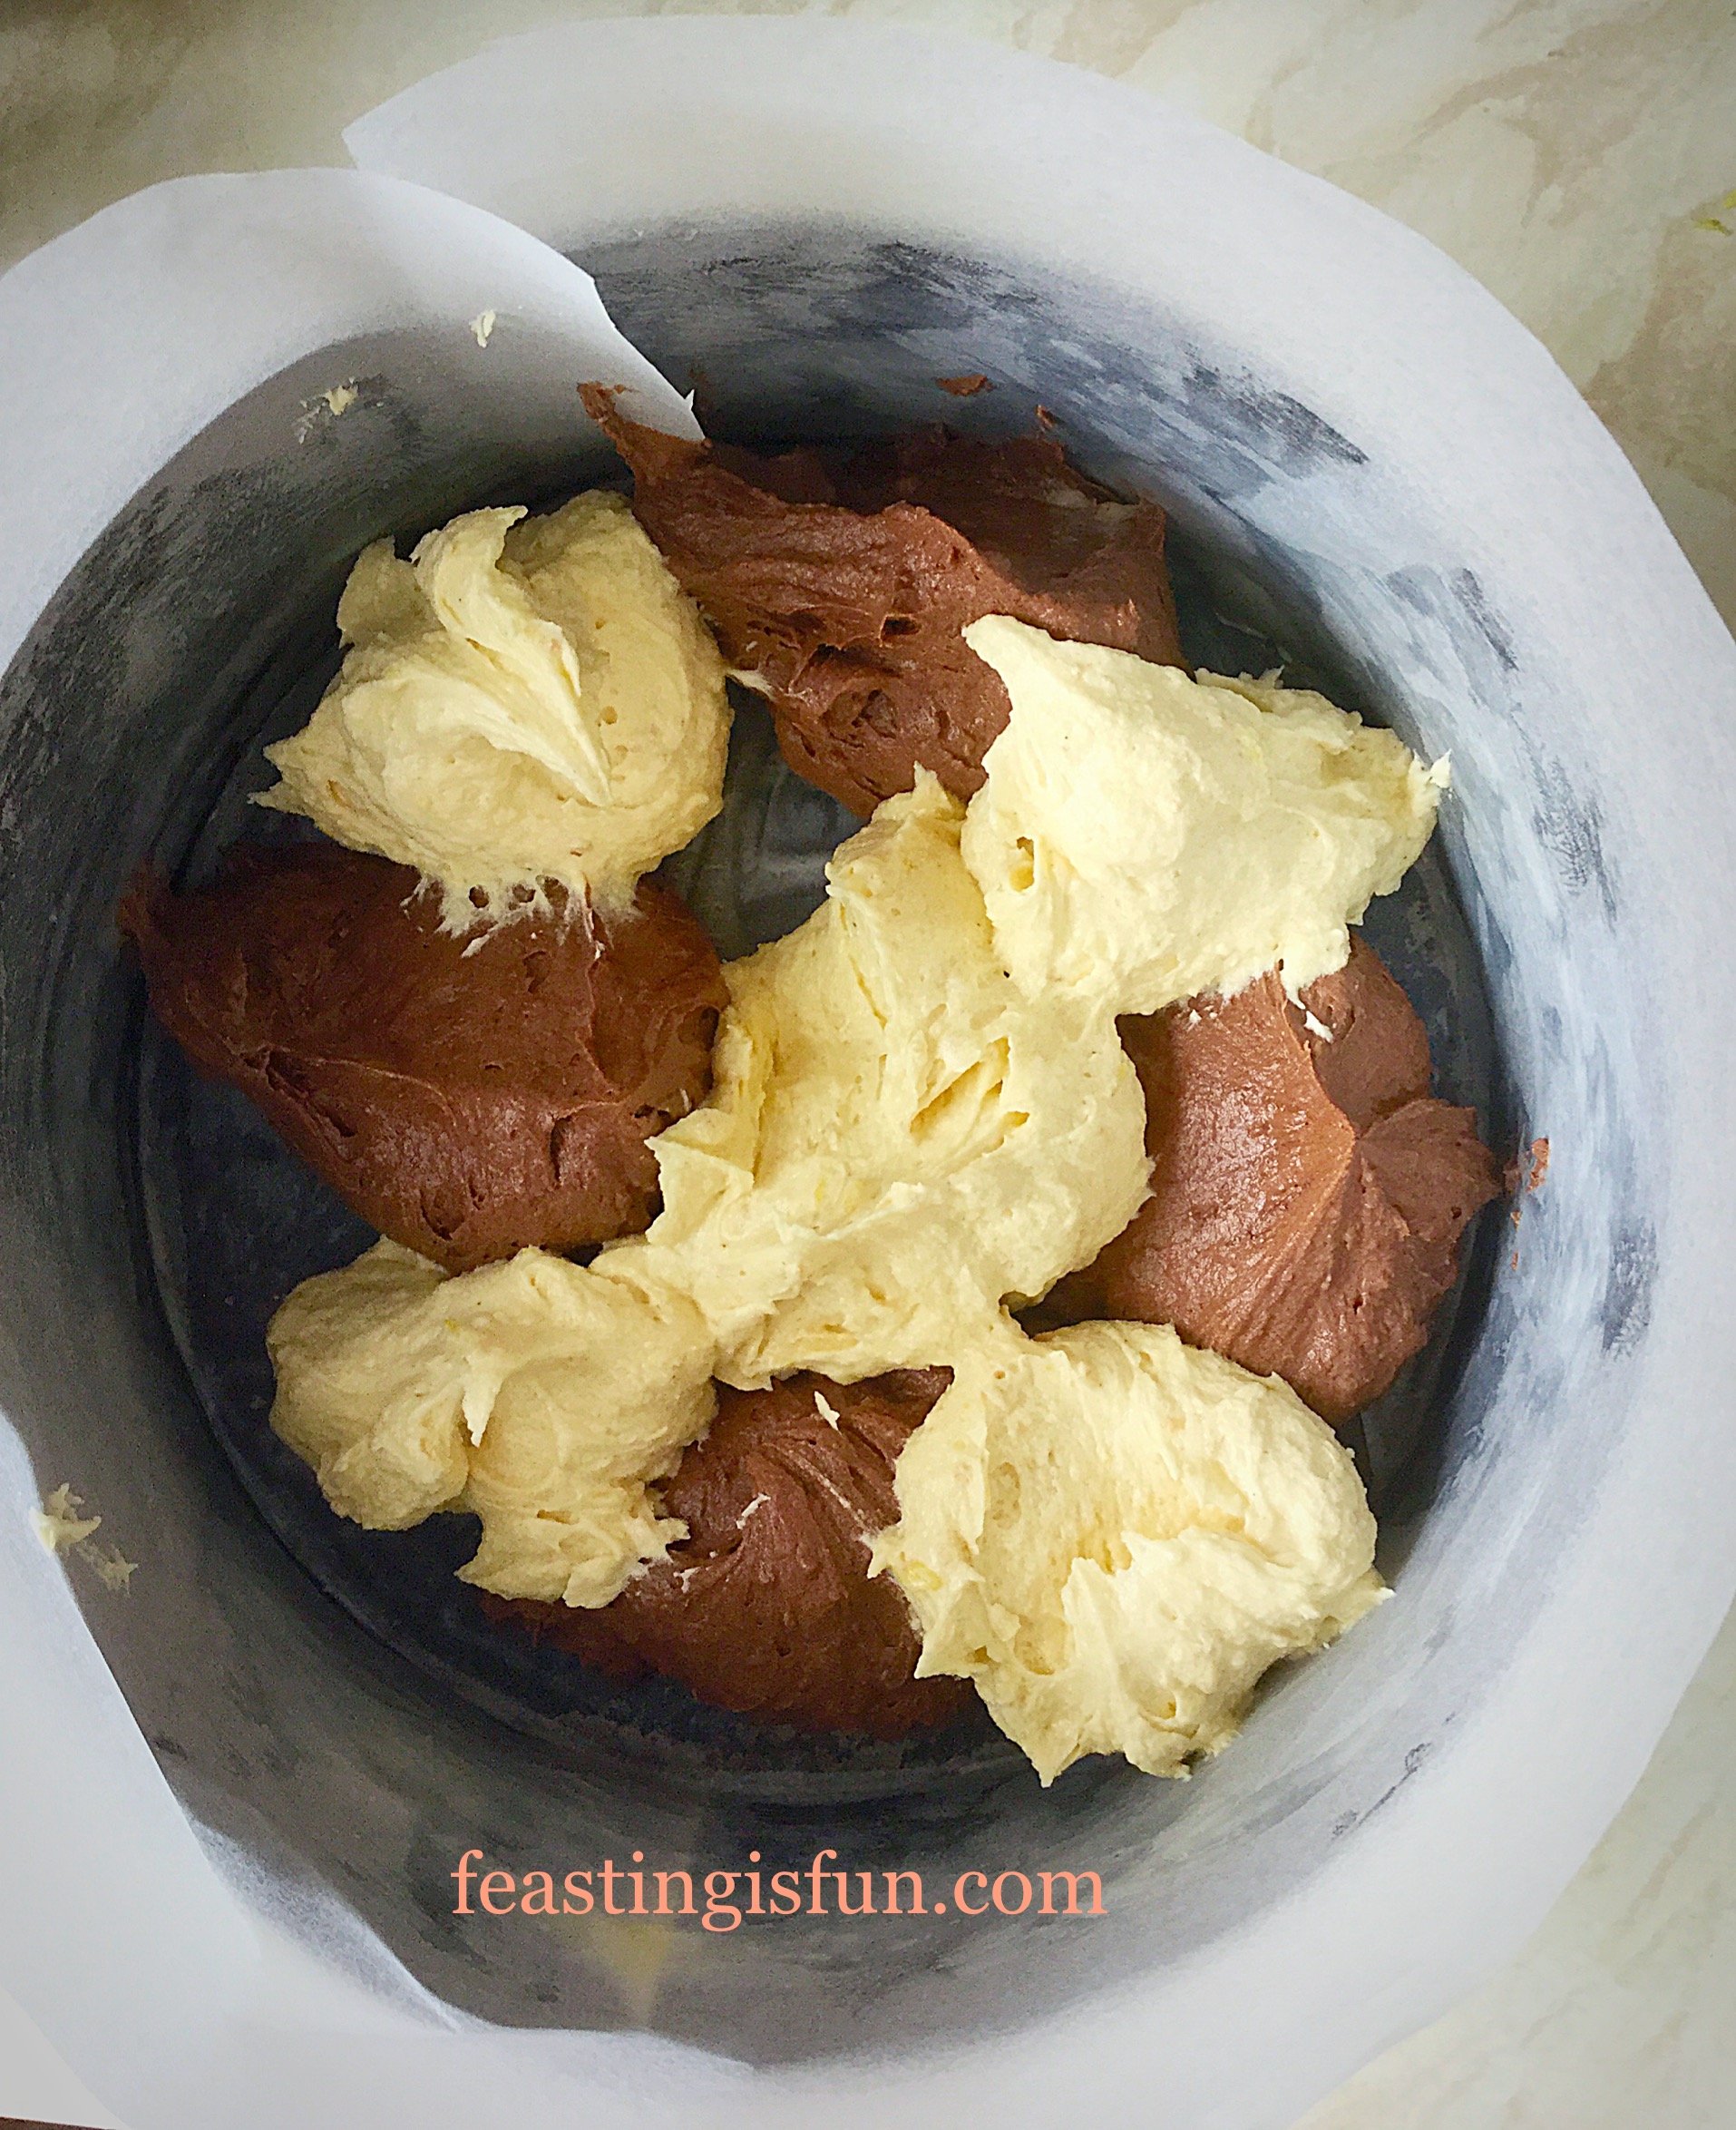
Begin by alternating the cake mixes.
Spoon dollops of the chocolate cake mixture around the base of the tin, leaving a gap in between.
In the gaps spoon dollops (sorry but I love that word 😉) of the lemon cake mix.
Continue by layering spoonfuls of the chocolate cake mixture on top of the lemon and vice versa.
This is how the cake tin looks with all the cake batter added.
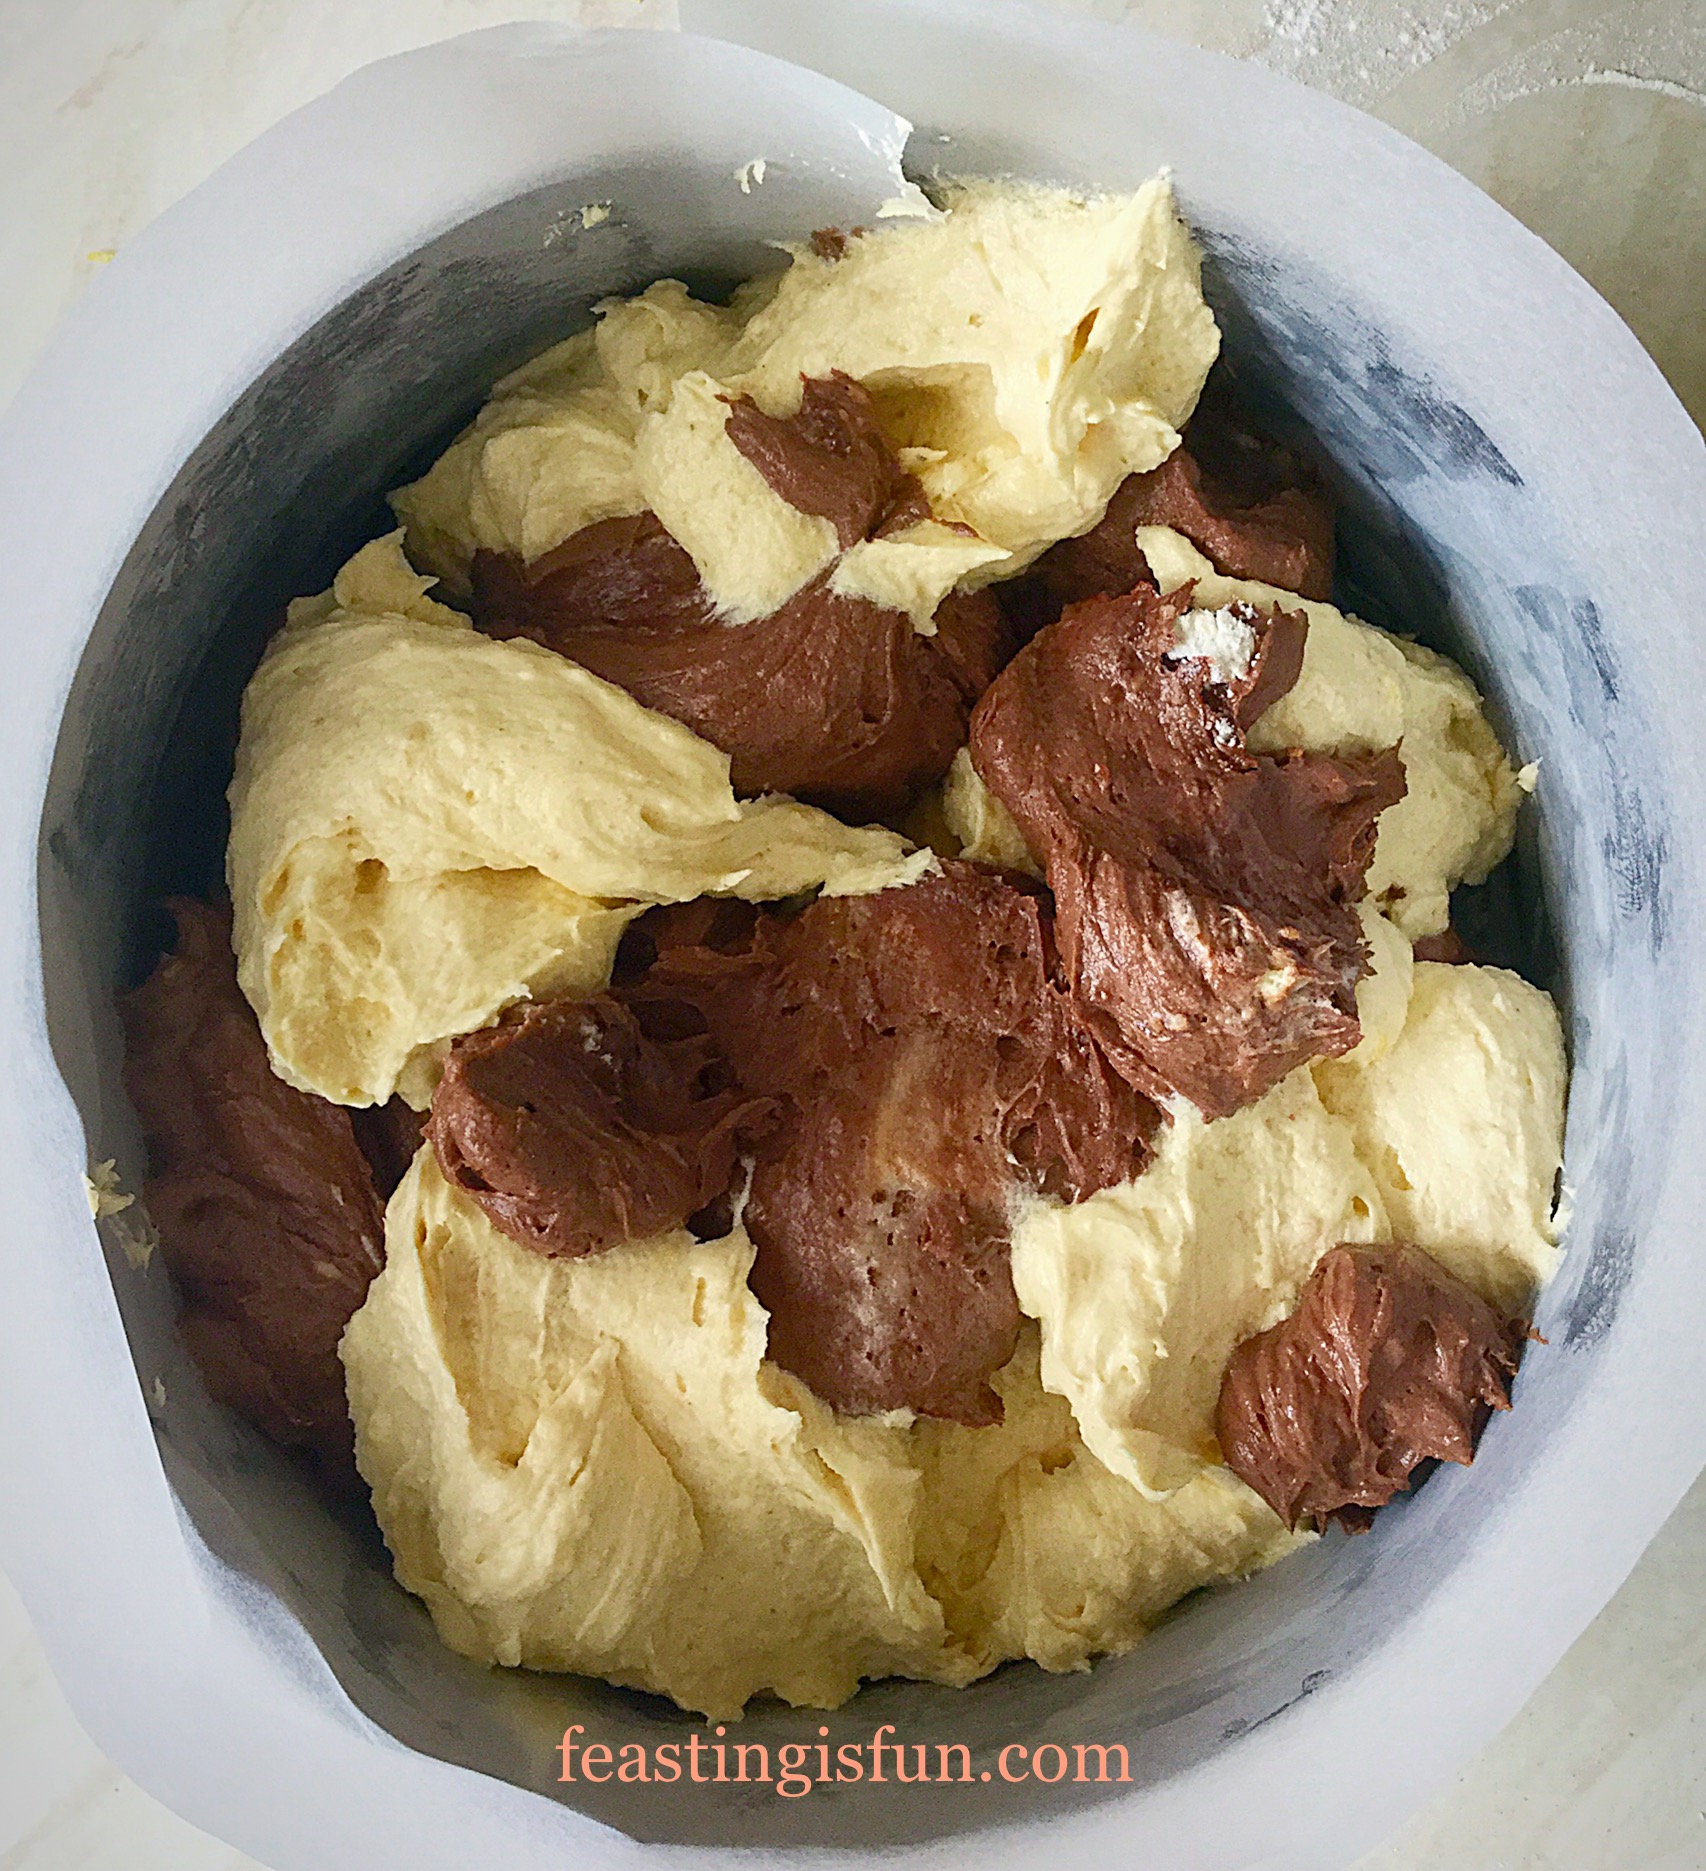
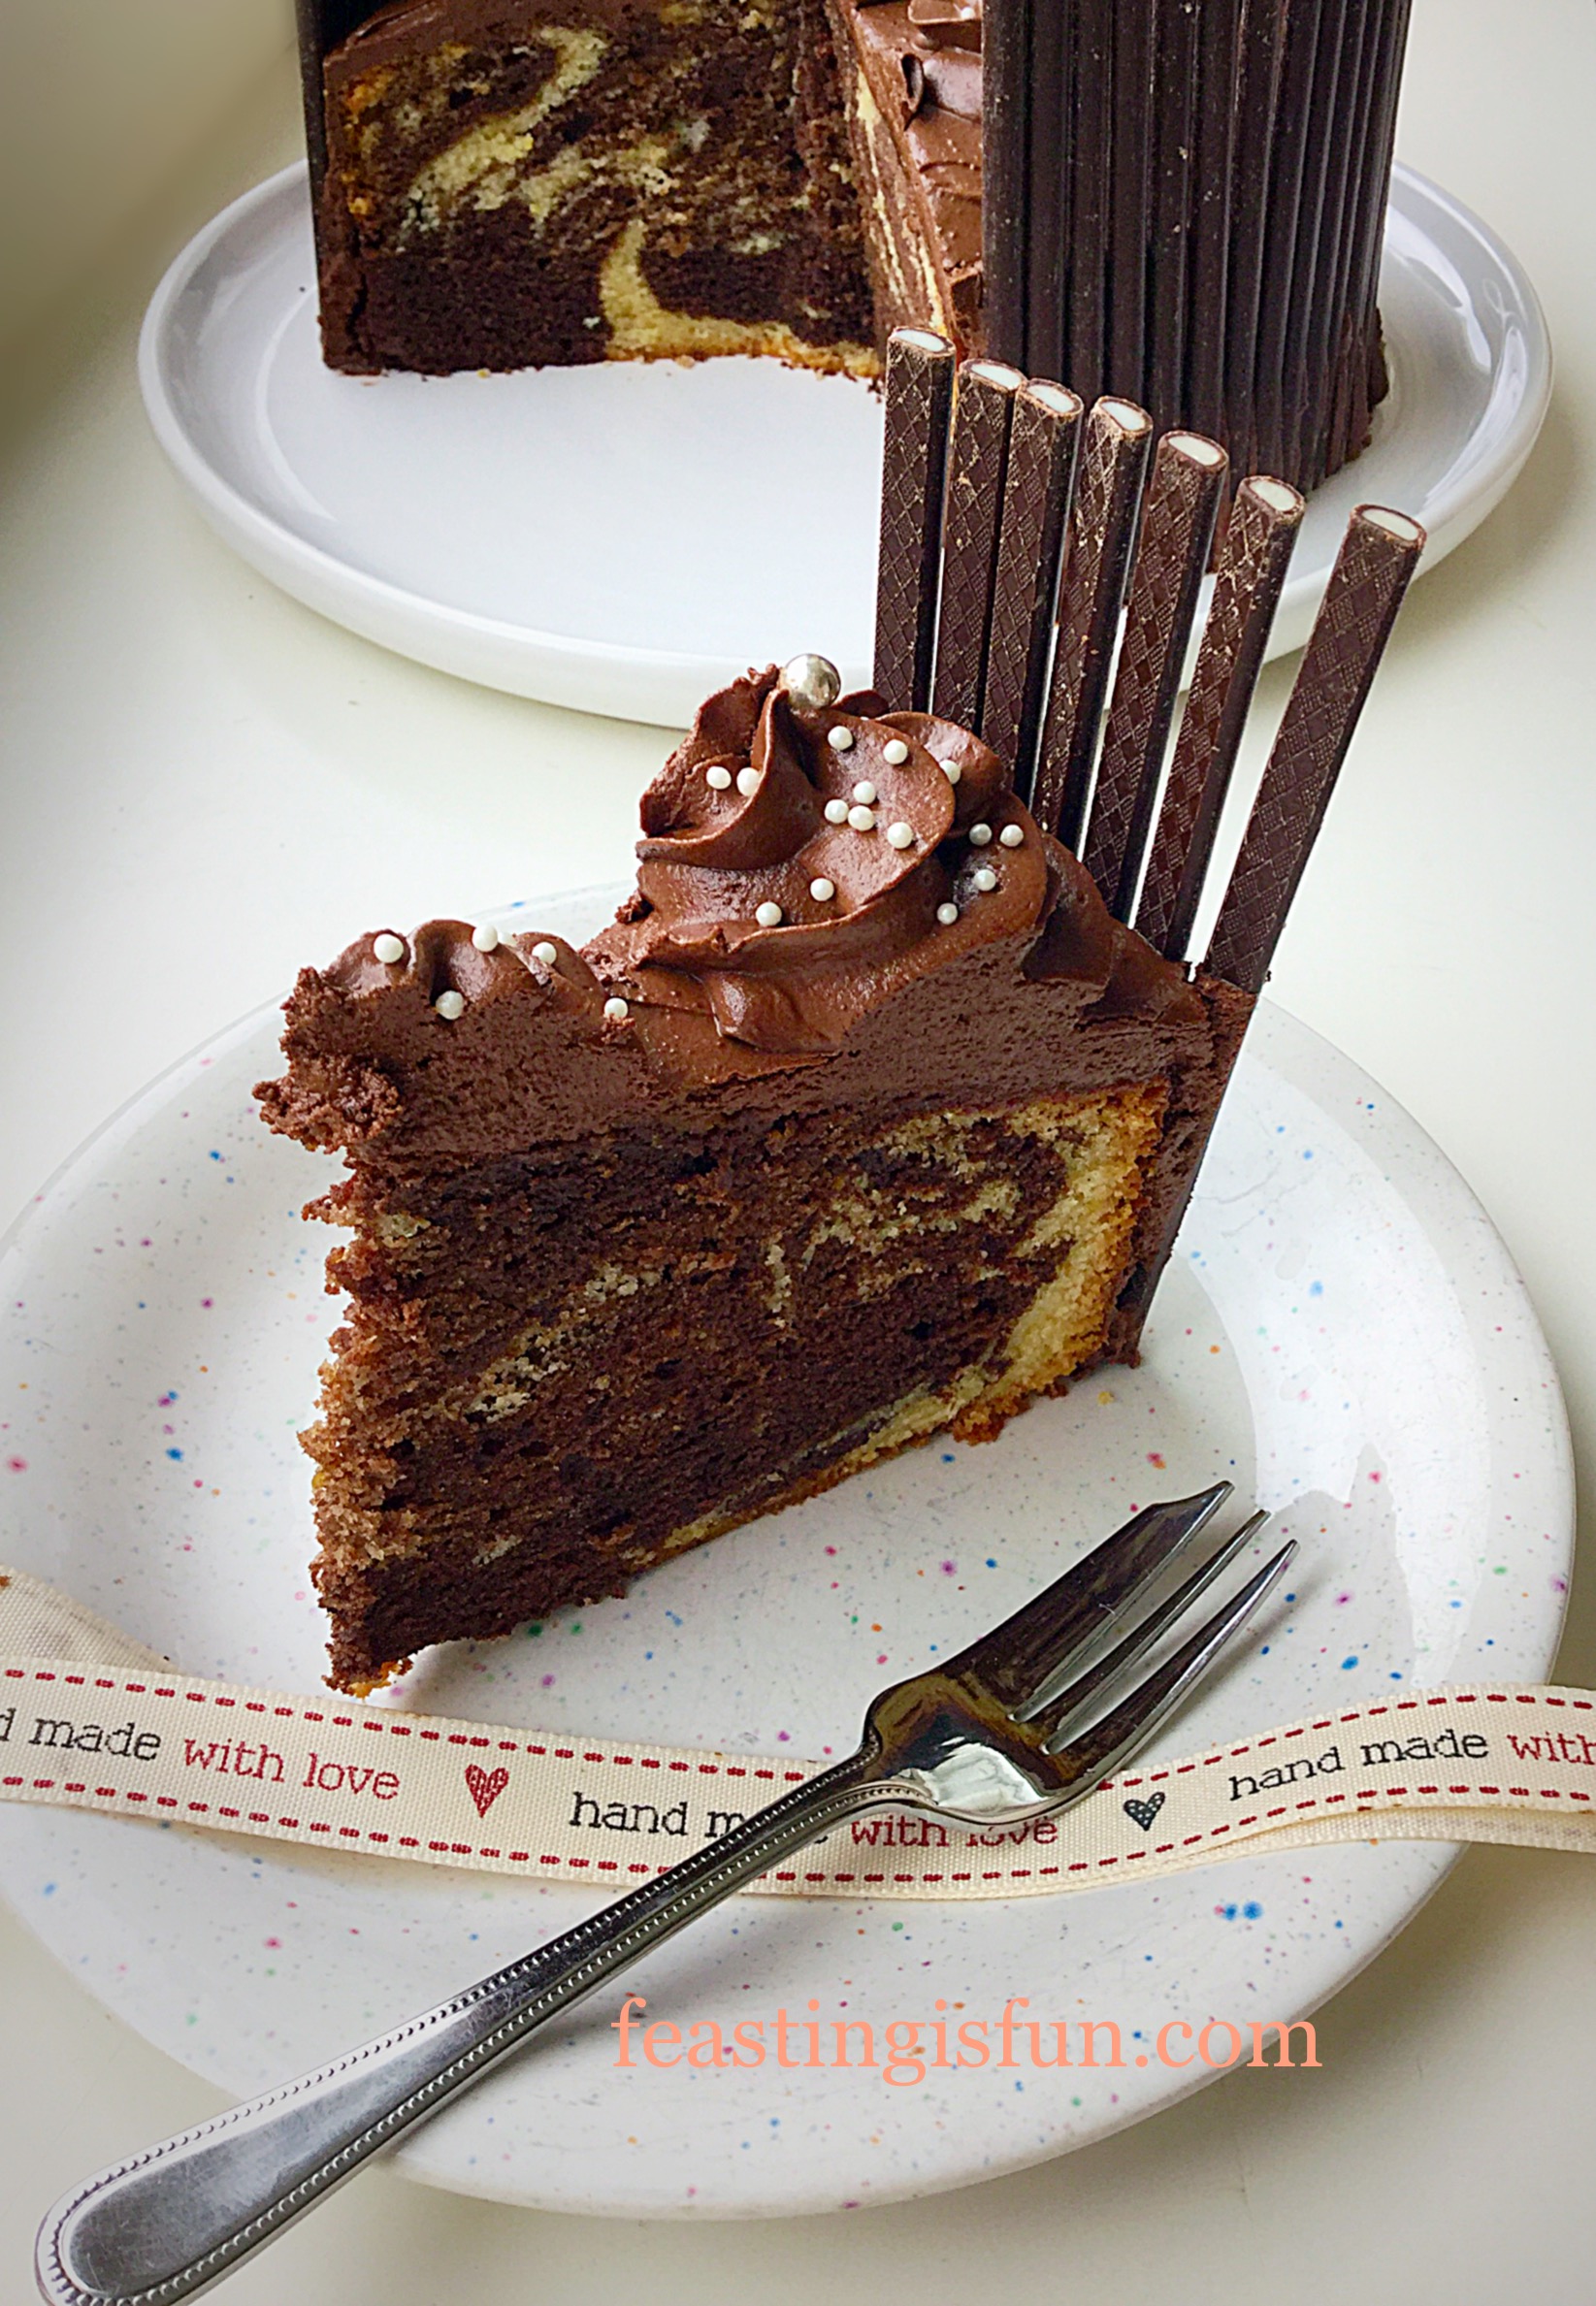
Creating The Classic Chocolate Marble Swirl With The Cake Batter
Now to get swirling! I always use the handle of a wooden spoon, as it won’t rip through the baking parchment.
With the upturned spoon in hand swirl through the cake mixture. I like making figures of eight!
You need the whole cake mix to be marbled NOT mixed.
One beautifully swirled marble cake and I stuck the overlapping parchment together with cake batter!
Please don’t worry if you think you’ve over or under swirled your cake. This is a gift for someone. They will love that you’ve taken the time to bake them a cake.
Baking The Marble Cake
Place the cake in the middle part of the oven and bake for 1 hour 30 minutes – 1 hour 45 minutes.
This is a long slow bake that ensures a moist, evenly coloured cake. Please trust me. If you cook at a higher temperature the outside will be baked before the middle and you are likely to end up with a dry cake.
The cake is baked when an inserted skewer comes out clean.
As soon as the cake is baked remove from the oven and place the tin on a cooling rack and allow the cake to cool in the tin. I made this cake the day before I decorated it, however, as long as it is cold it can be decorated on the same day.
Beautifully baked, don’t worry about any cracks they will settle and close as the cake cools.
If leaving overnight before decorating, remove the cooled cake from its tin and wrap in cling film.
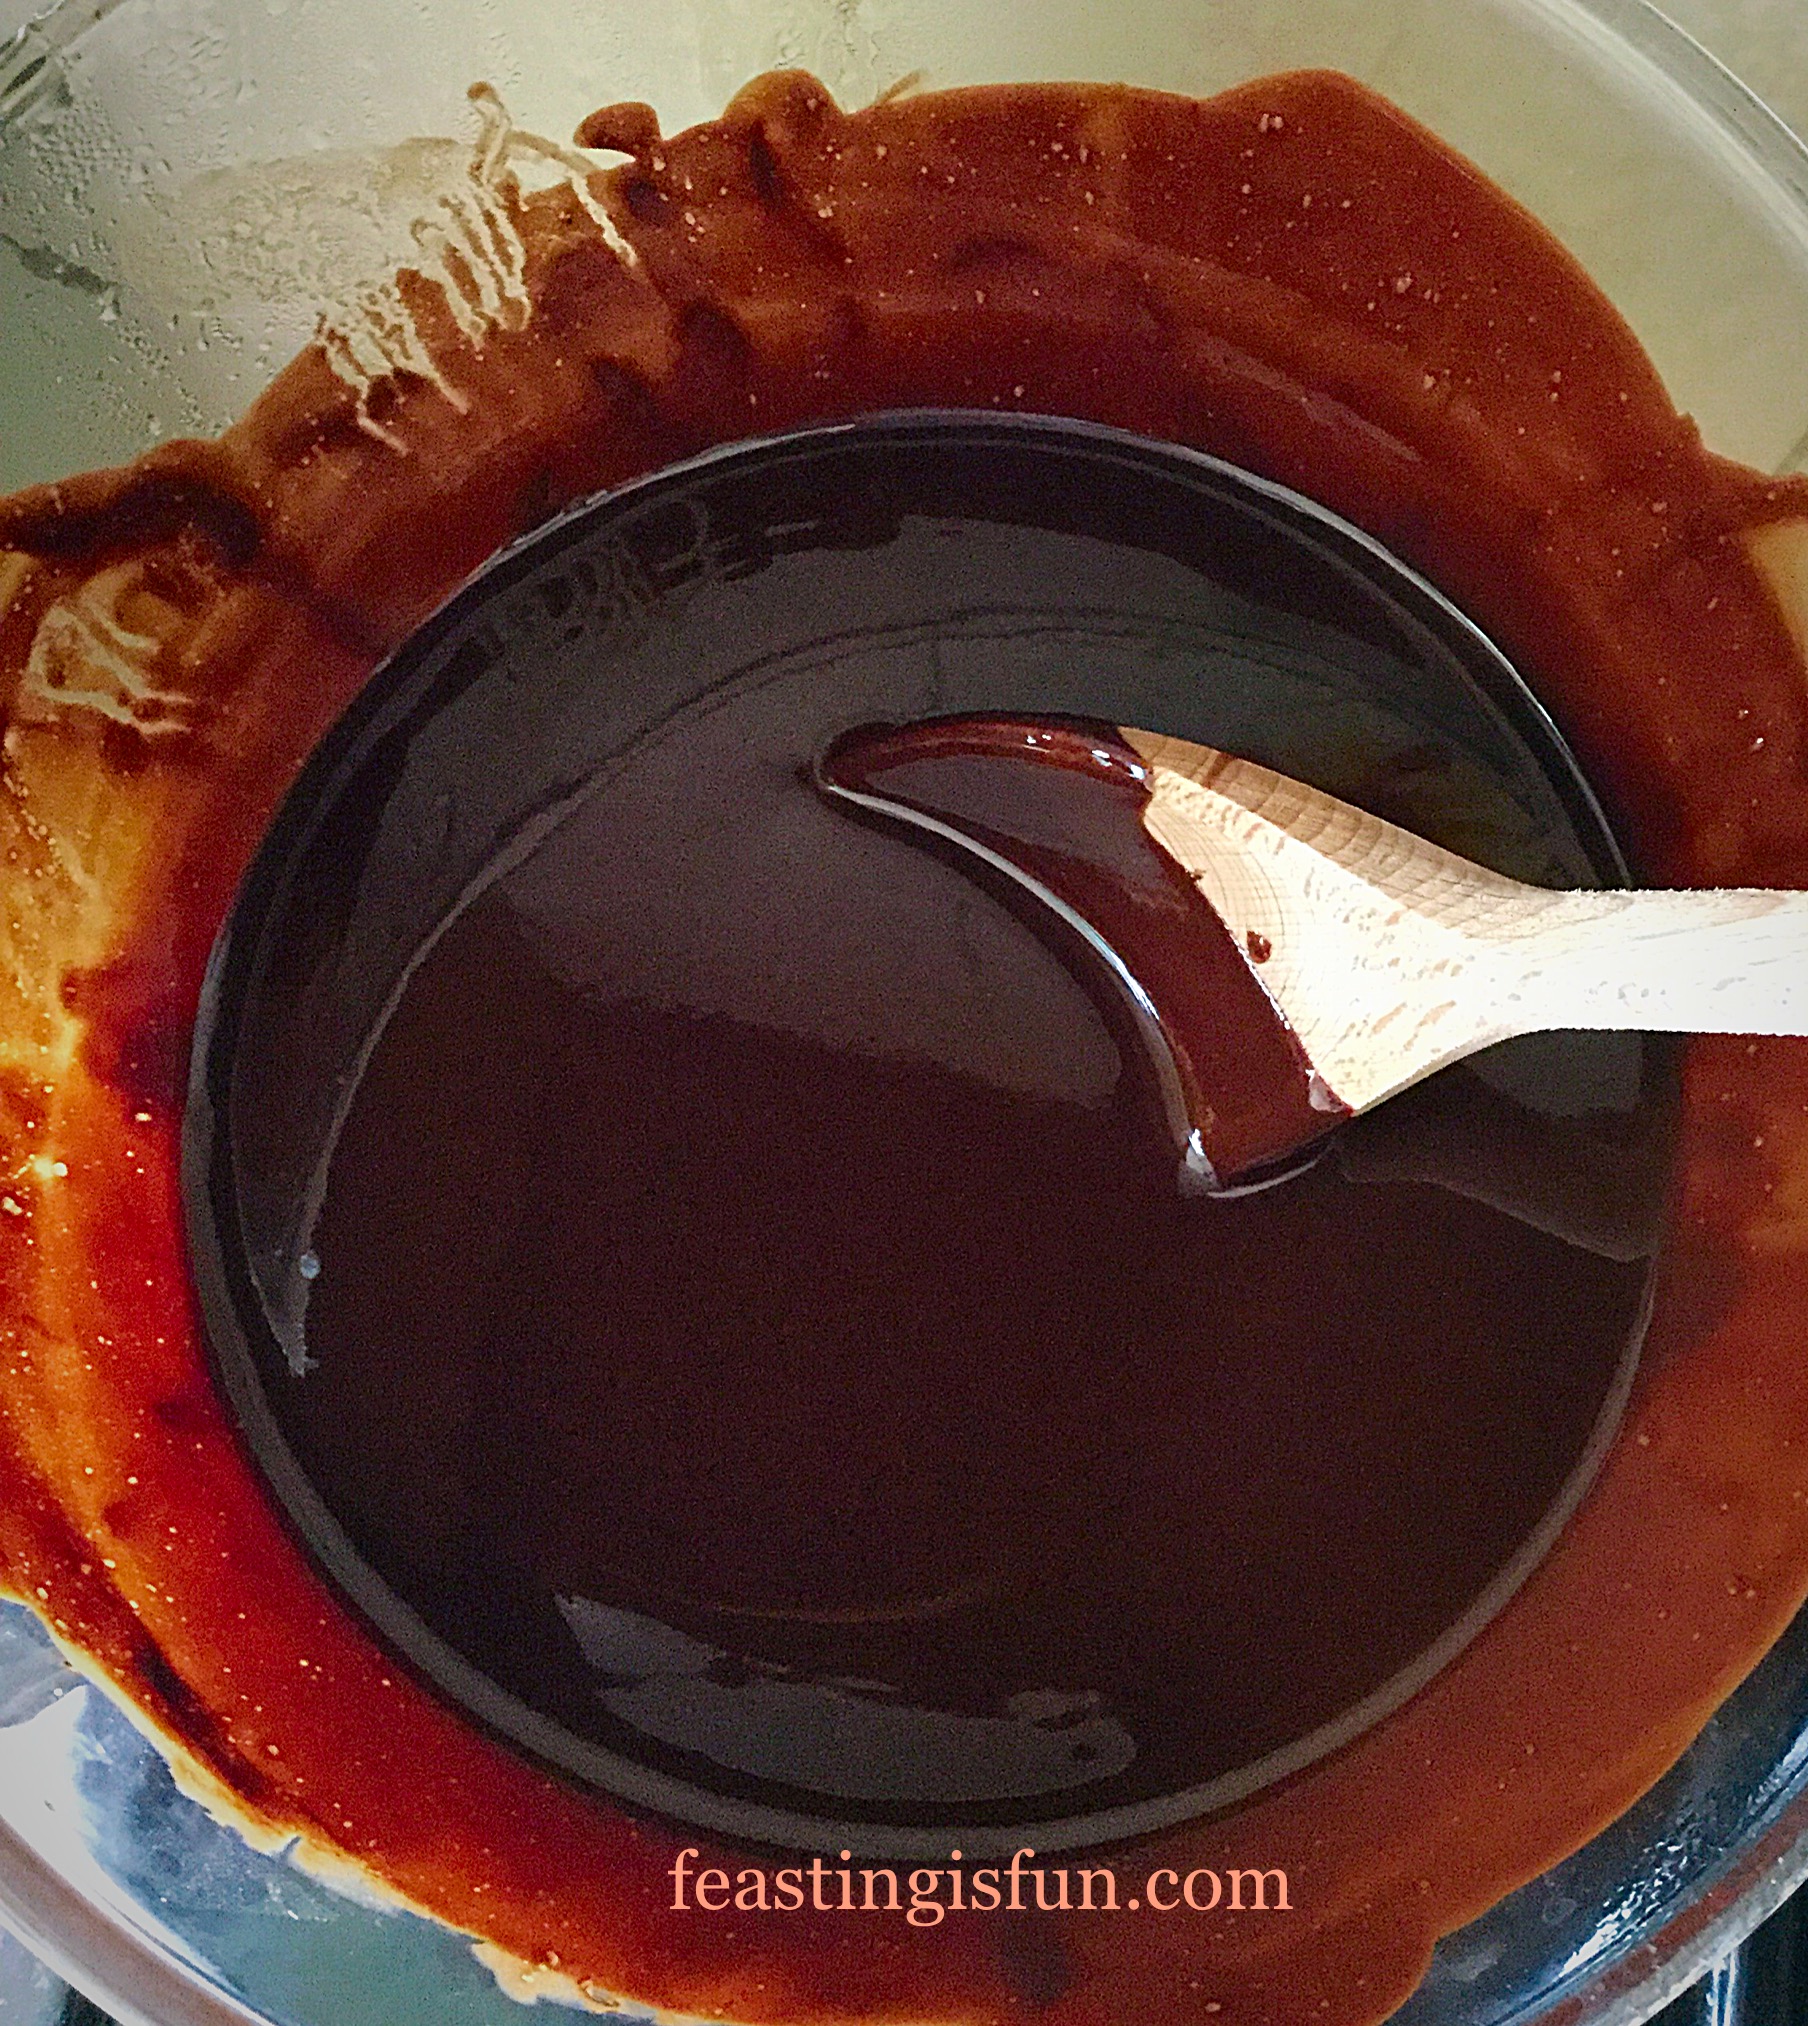
Preparing the Chocolate Ganache Icing:
Break up the 250g of dark chocolate and add to a heatproof bowl that fits on top of a small saucepan. Add the butter to the chocolate.
Place 1-2 inches of water in the base of the saucepan and heat until just bubbling.
Place the bowl containing the chocolate/butter on top of the saucepan, ensuring the base of the bowl does not touch the water – this is called a double boiler.
Stir continuously until both the butter and chocolate have melted.
Glossy chocolate ganache.
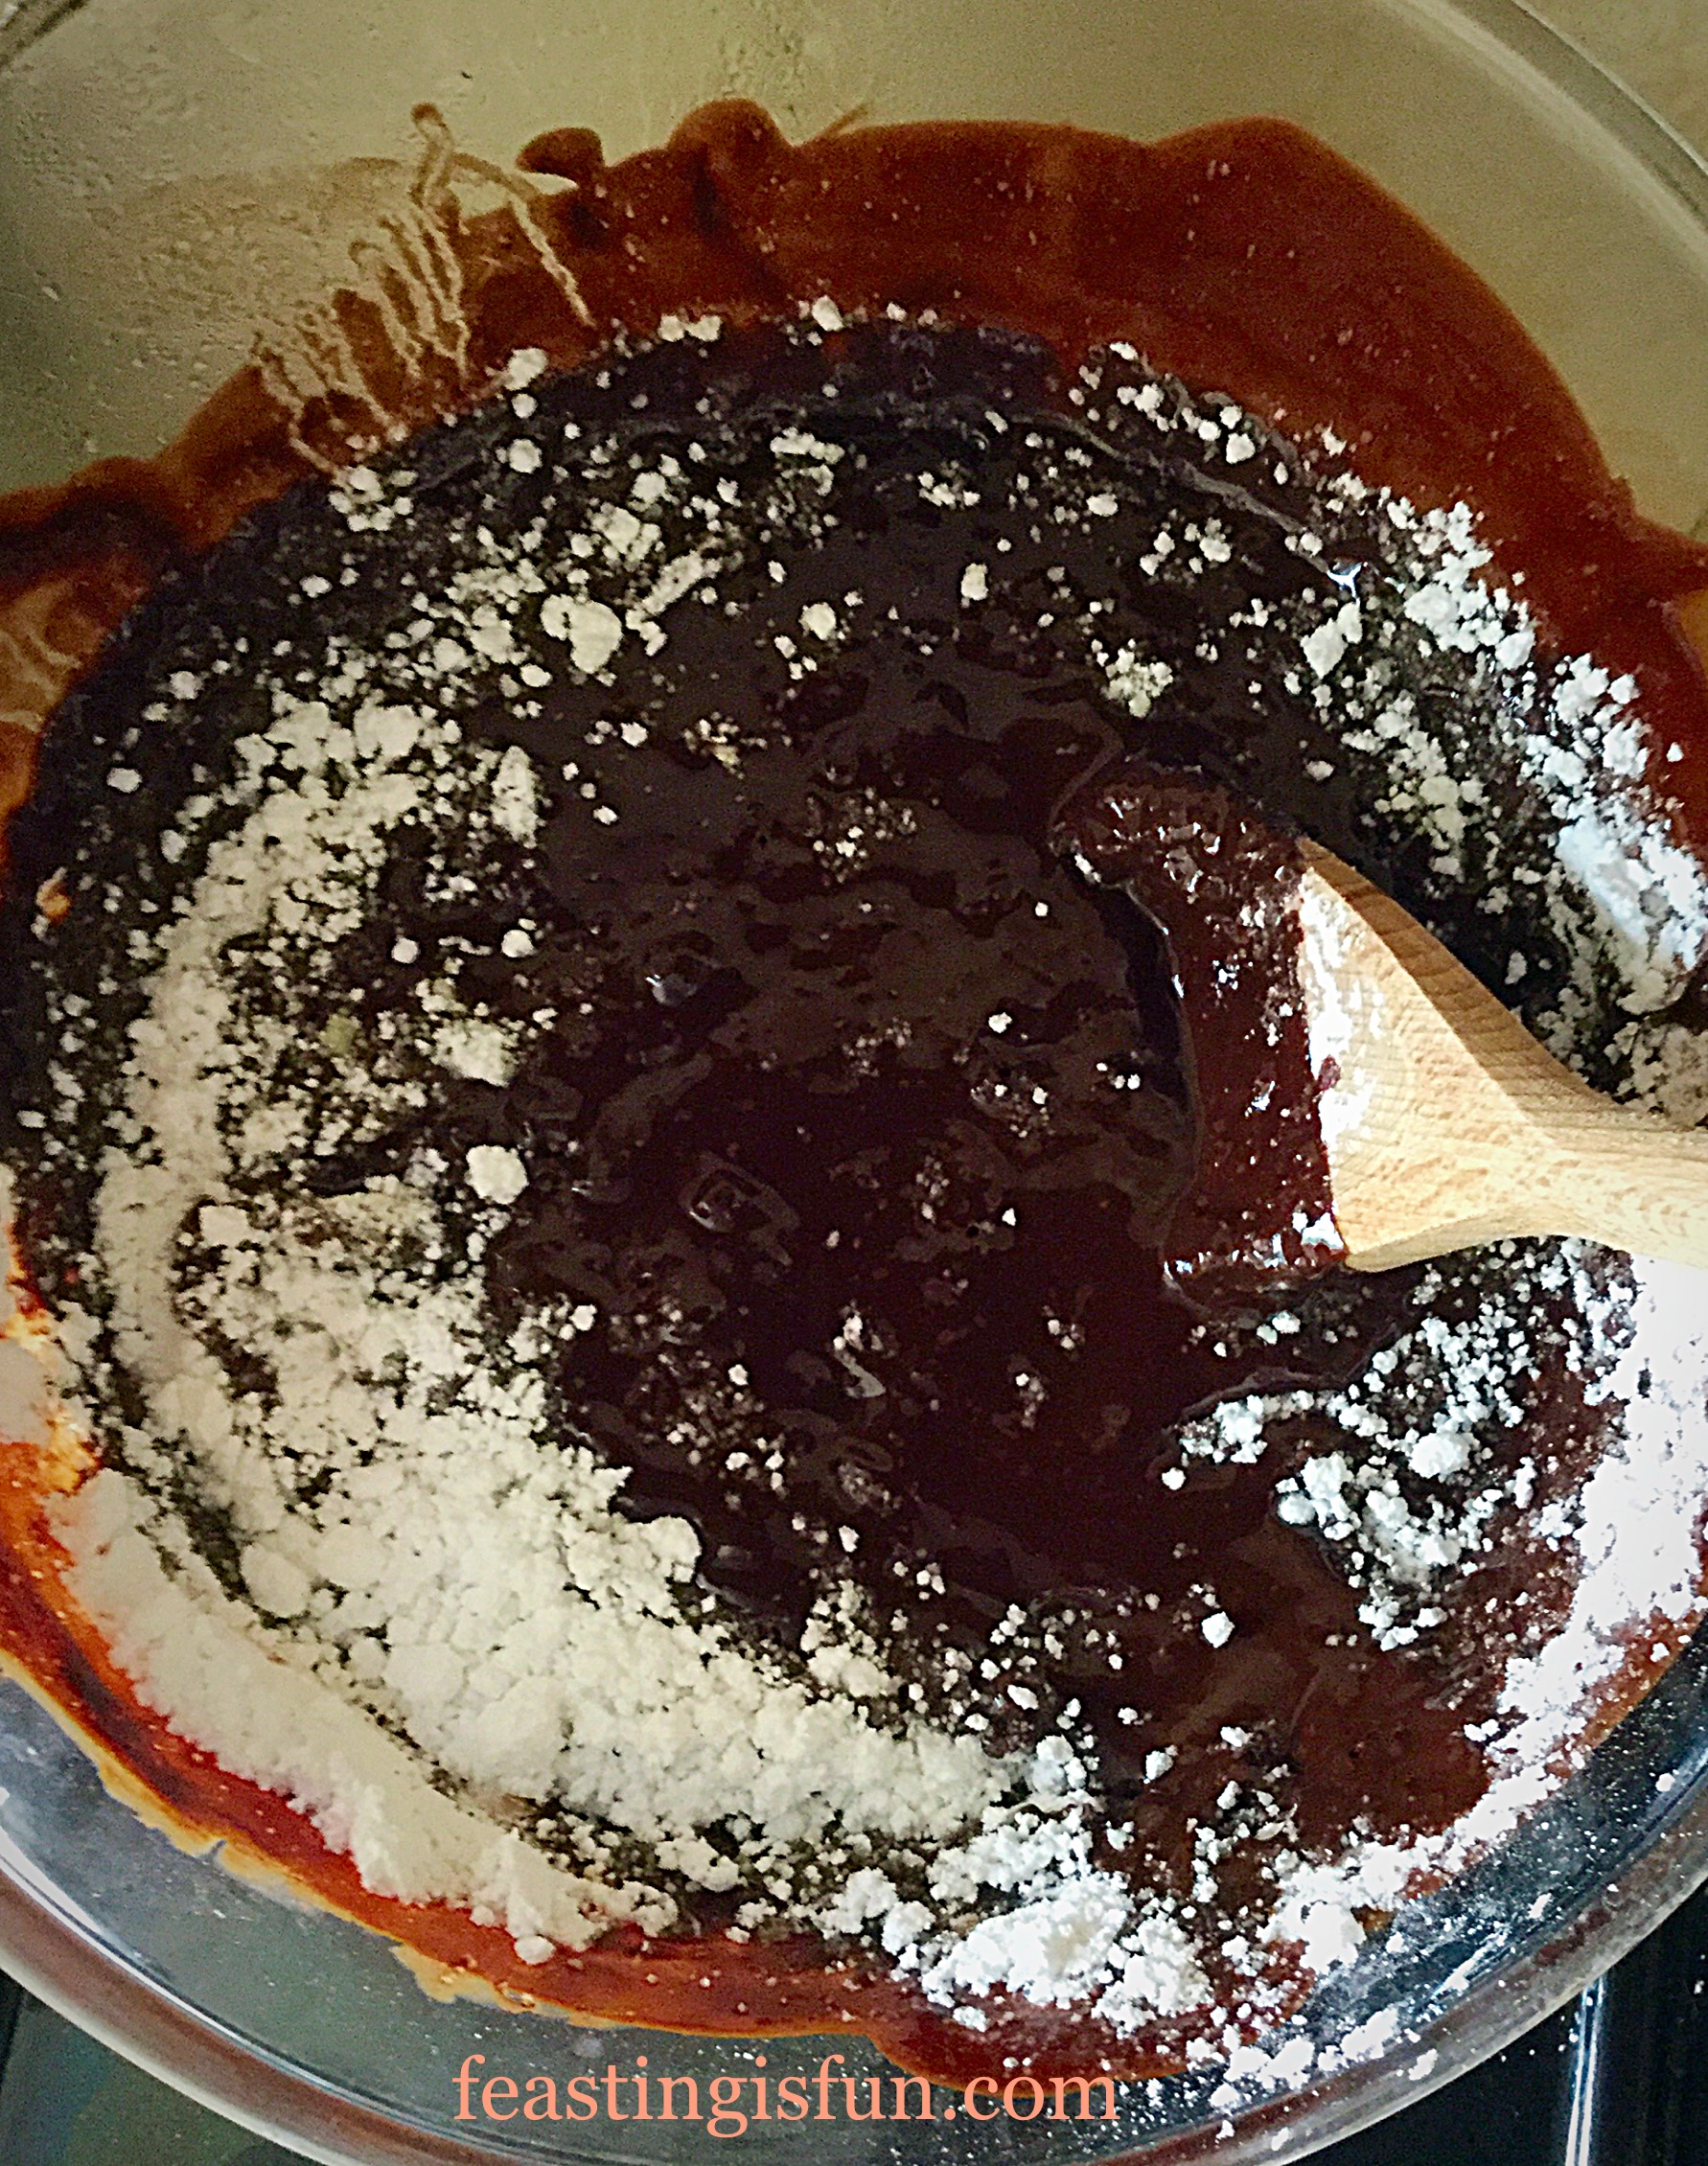
Next add 1 teaspoon of lemon extract (if using) and the sifted icing sugar.
Stir in the icing sugar.
When the icing sugar is no longer visible remove the bowl from the heat and very gently, as this mixture will be hot, switch to a balloon whisk and stir, then whisk as the mixture cools, until all icing sugar has dissolved.
The best way to tell if the mixture is smooth is to rub a little between your finger and thumb, if it still feels gritty keep whisking – it took 5 minutes of gentle whisking until my ganache was smooth again.
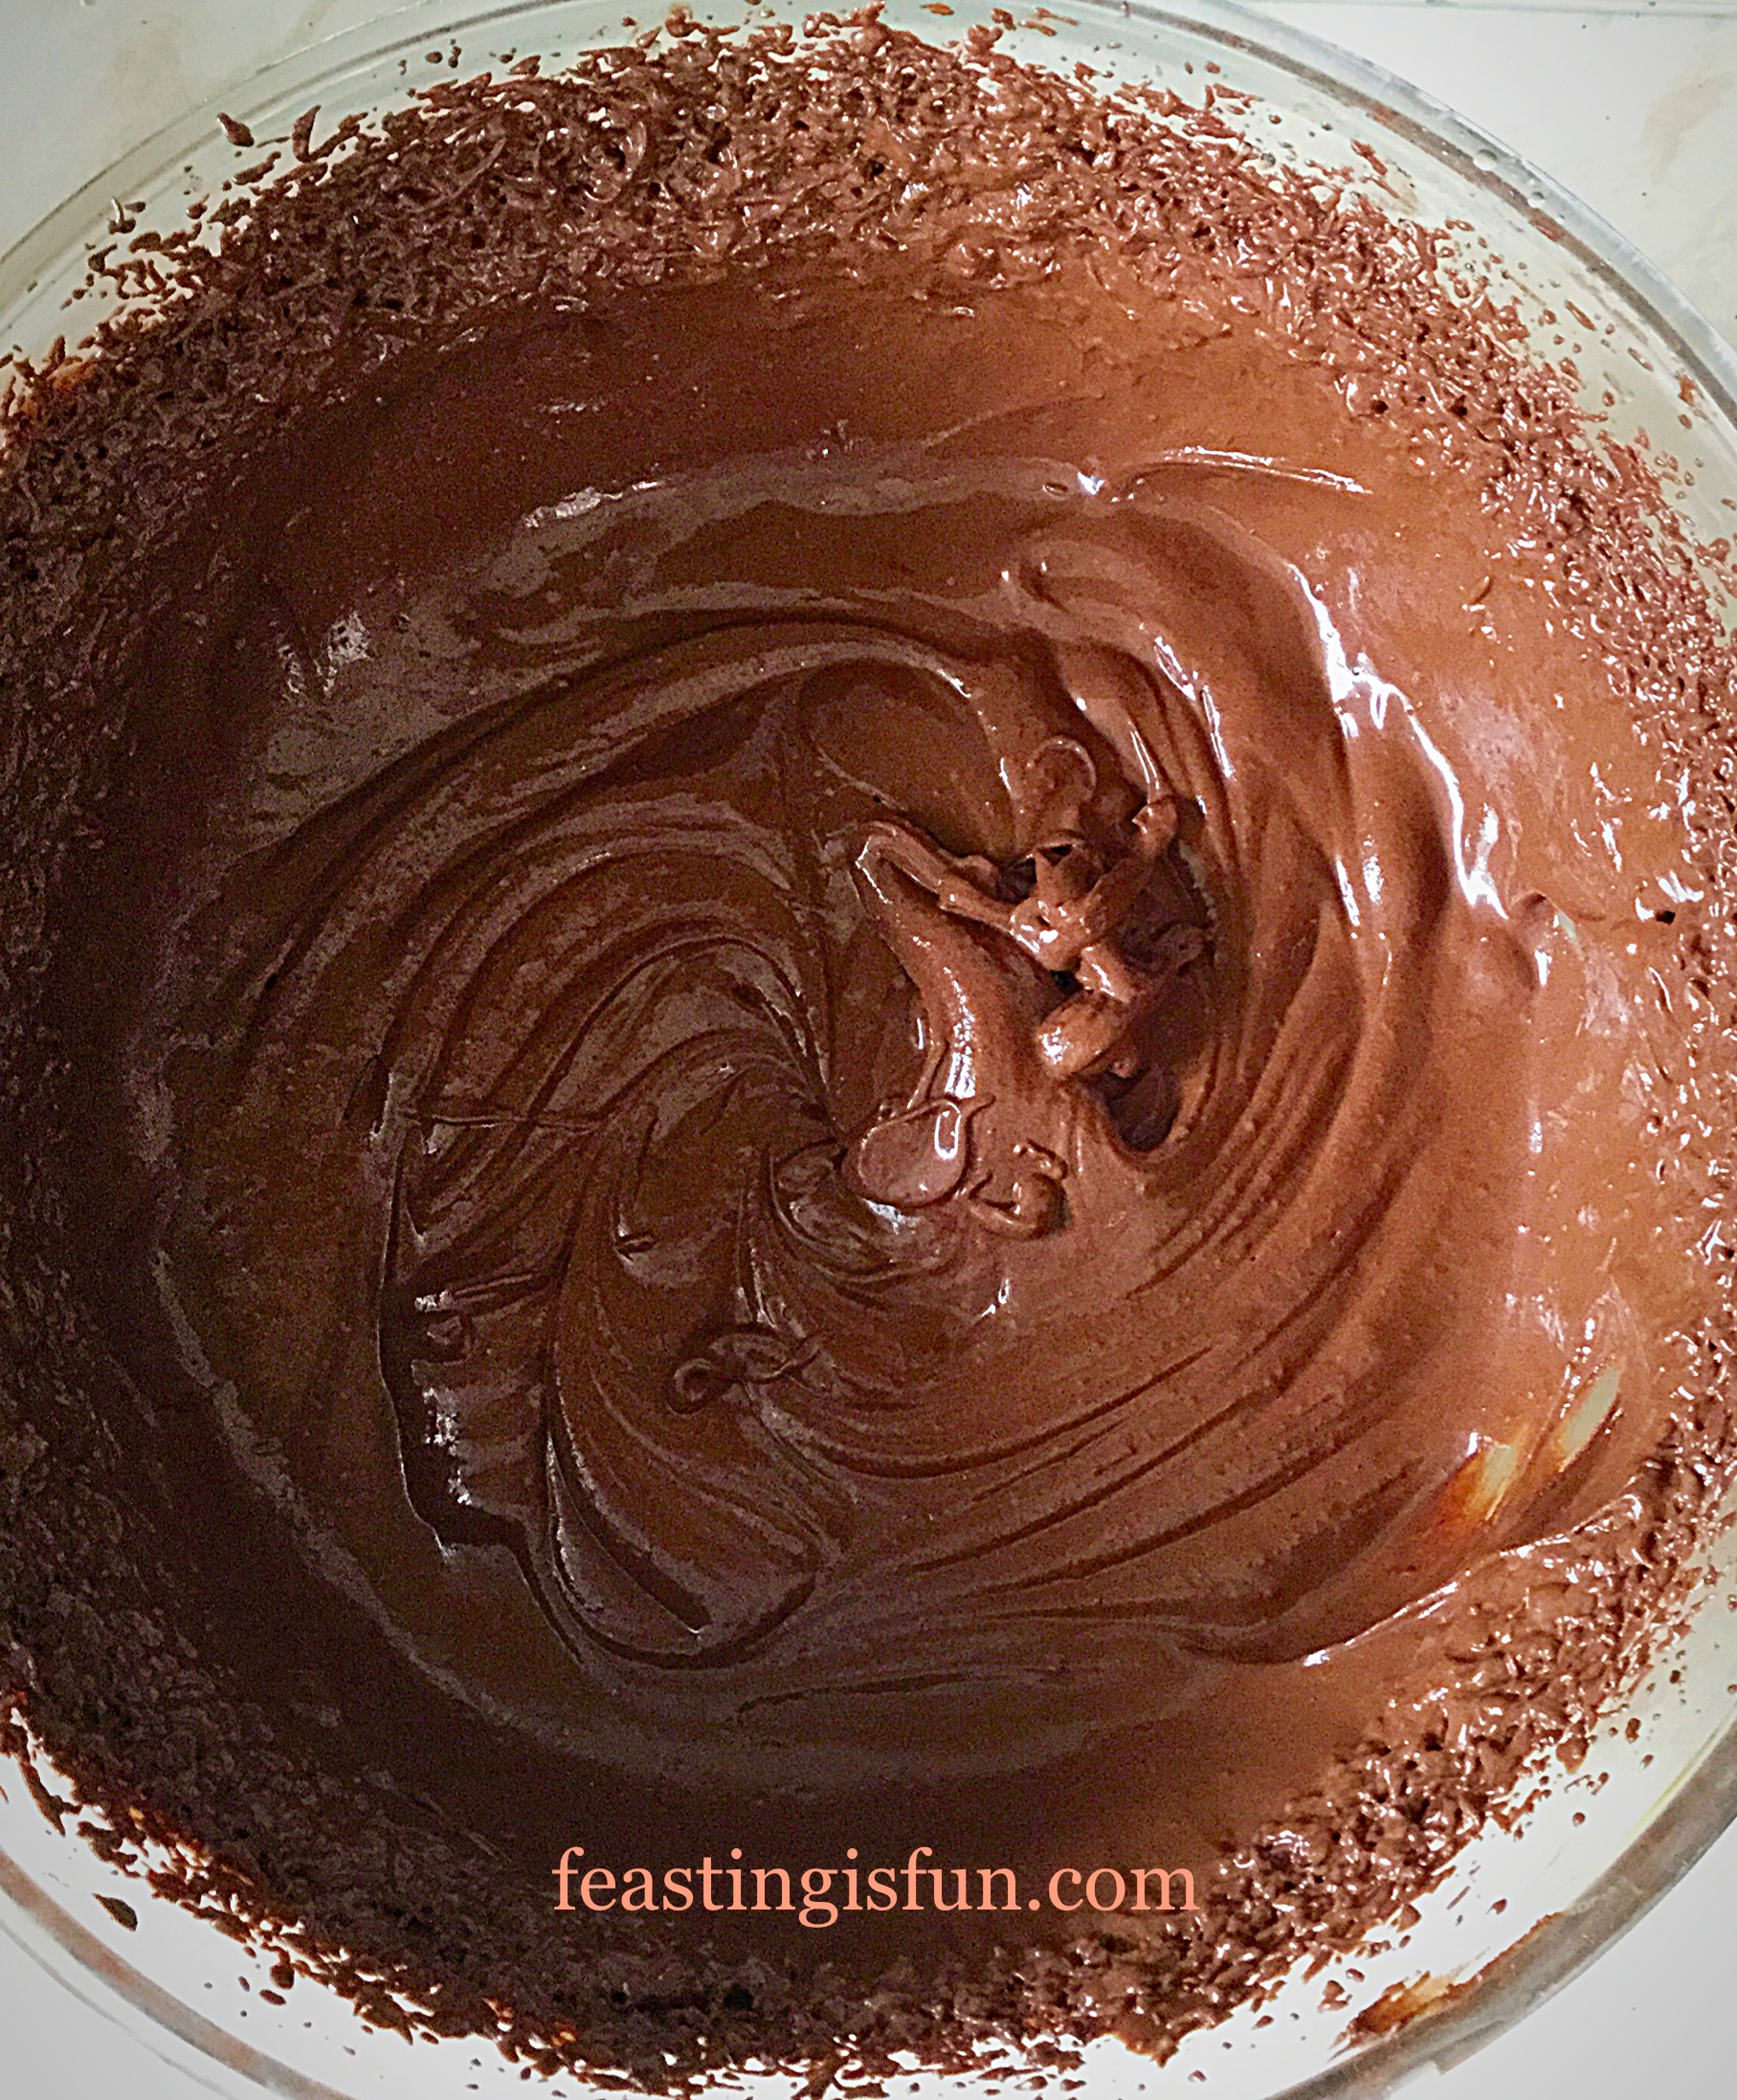
Glossy, silky smooth chocolate lemon ganache.
Next switch to an electric mix and whisk gently, increasing in speed as the ganache starts to thicken.
Keep whisking until the mixture is still soft but will hold a figure of eight.
Thickened ganache that can hold its shape – but not stiff.
Covering The Marble Cake With Chocolate Ganache And Piping The Swirl Decorations
Place half of the ganache into a piping bag fitted with a large star. If it is a hot day cover the nozzle with cling film and place in the fridge.
Place your cake on a board or cake stand. I suggest placing the board on a cake stand as it makes the cake easier to decorate.
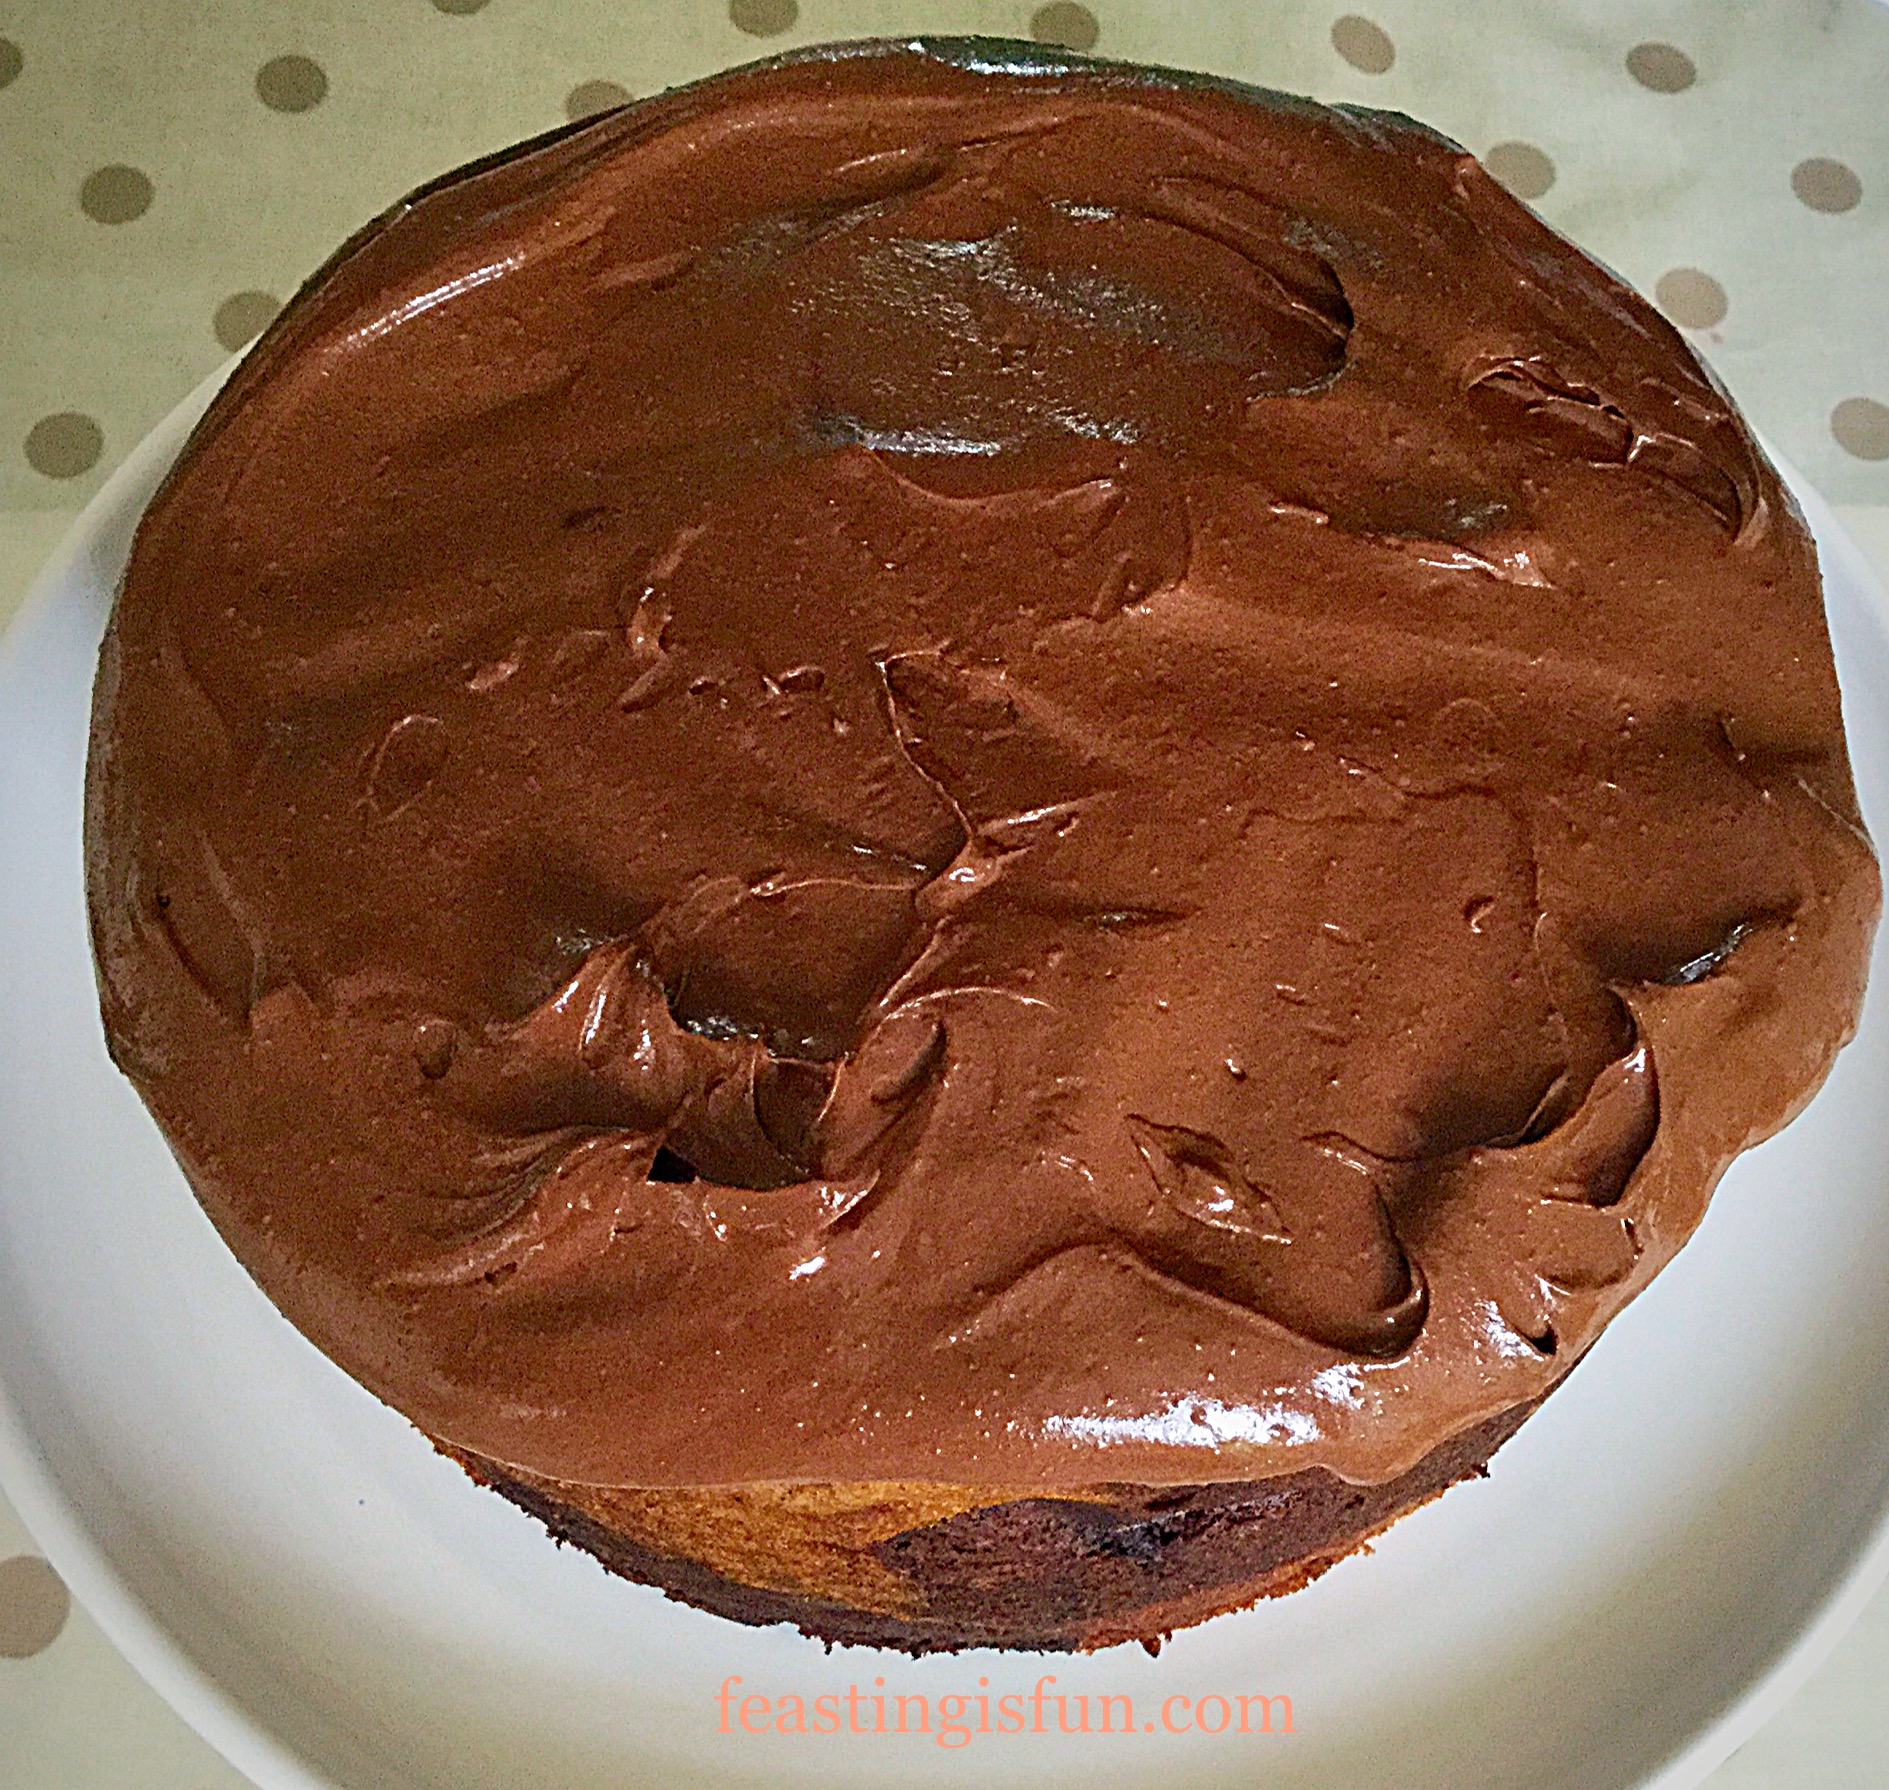
Spoon 3/4 of the remaining ganache on to the top of the cake.
Using an off set palette knife spread the mixture so that it covers the top of the cake.
It’s a thick coating don’t worry!
Spoon the rest of the ganache around the outside edge of the top of the cake.
Gently, with your palette knife encourage the icing to cover the side of the cake. Turning the cake stand as you go, working round until the sides are covered.
Hold your palette knife flat against the side of the cake and rotate the stand. This will give your sides a nice even edge.
Run your palette knife flat across the surface of the cake to achieve the same effect. Don’t worry if it’s not perfectly flat, as long as the icing is even it will look great.
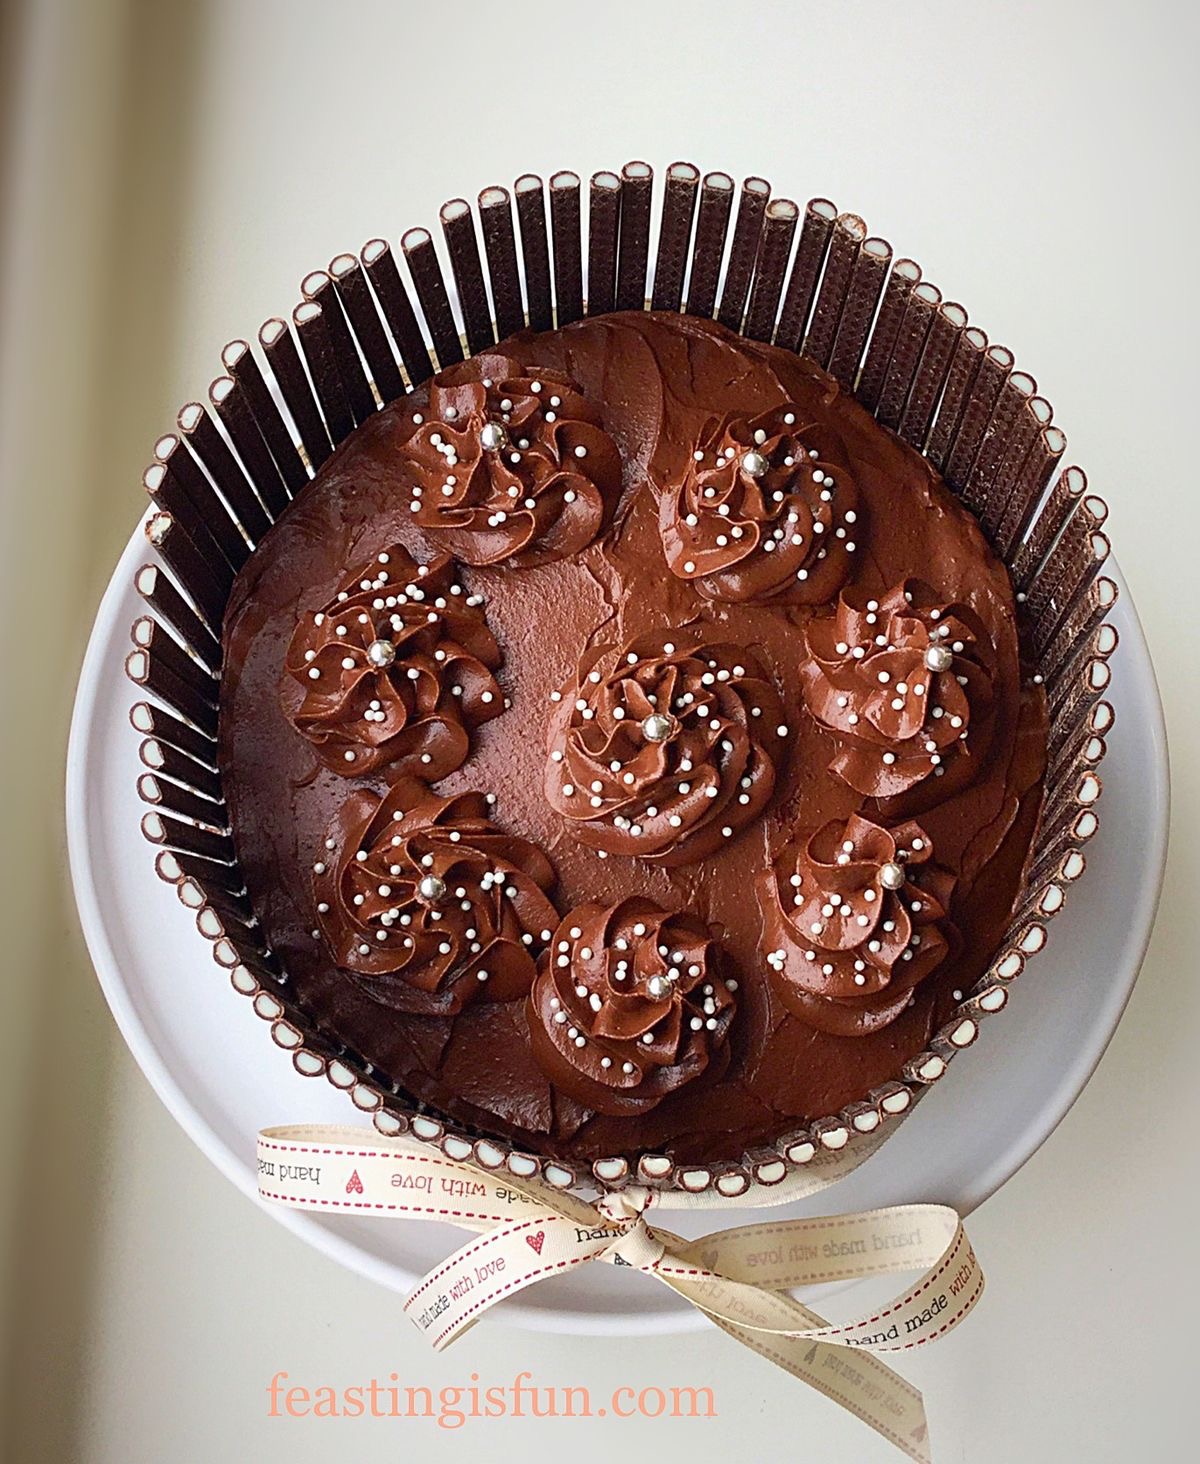
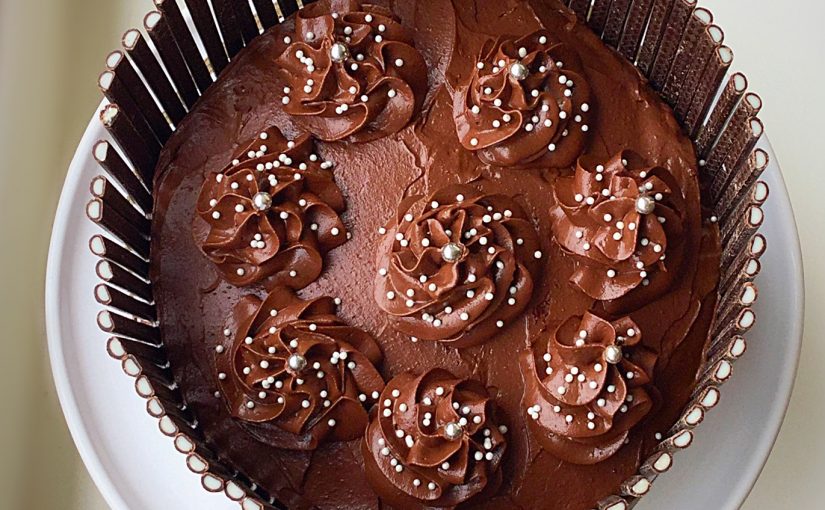
Next pipe swirls around the edge of the cake and finish with one in the centre.
Look how beautiful your cake is!
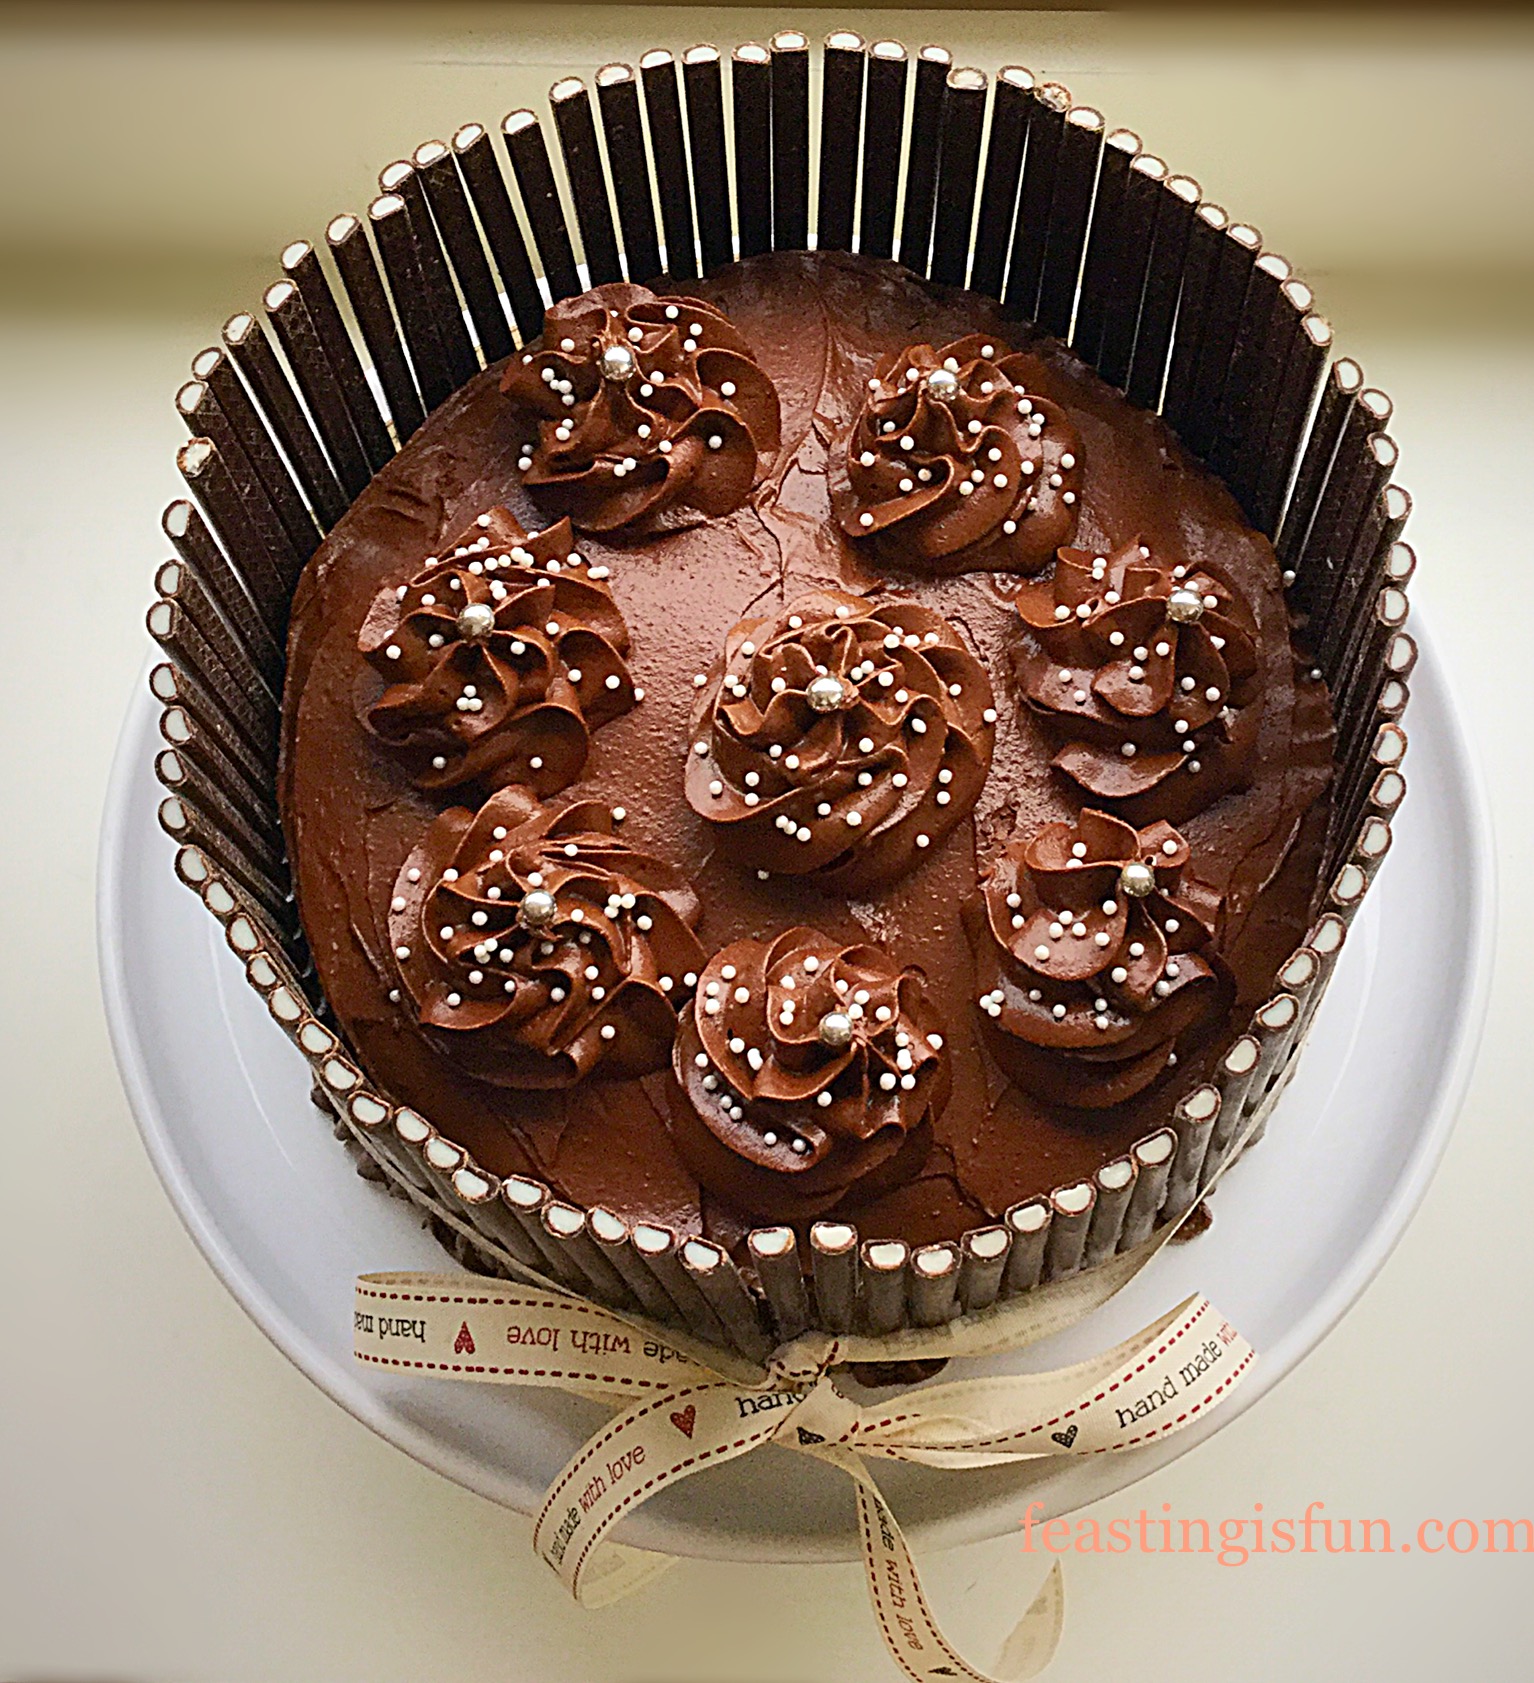
Adding The Chocolate Flutes And Final Decoration
Have the flutes opened and ready. You will see that one side of the flute is flat.
Press the flat side of the flute against the base of the cake, the ganache will hold it in place.
Continue, placing one flute next to another, taking care to ensure they are straight, until the whole cake is surrounded.
Take your ribbon, place it halfway up the flutes – it is helpful if you have a spare pair of hands to hold it in place, if not use a pin to secure it at the back of the cake – wrap it around the cake and tie a bow at the front.
Place a silver dragee ball on the top of each swirl and add extra small, edible pearls to the swirls.
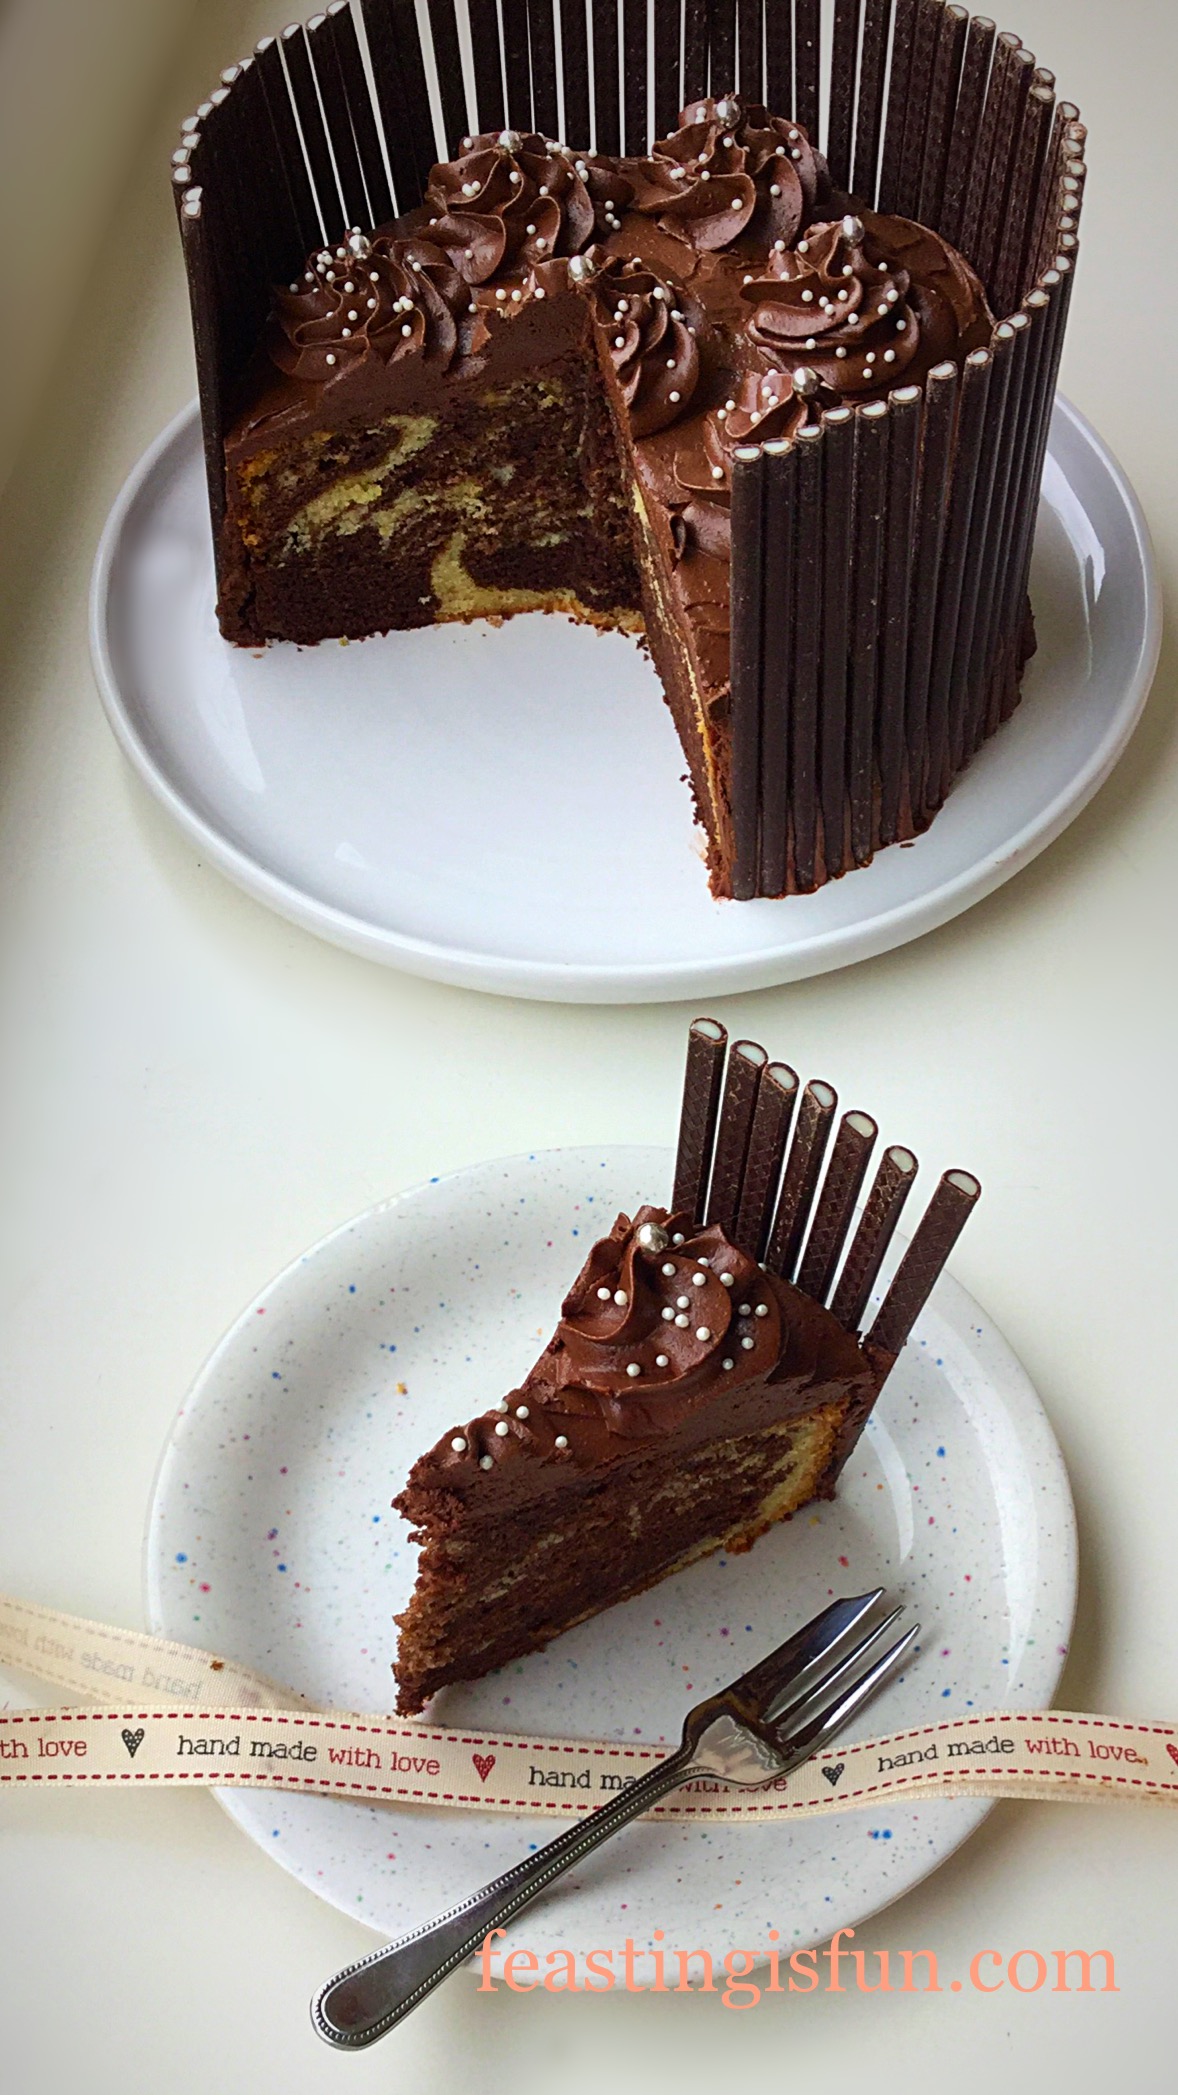
Serve your stunning Fluted Chocolate Lemon Marble Cake sliced with a cup of tea or coffee and a big smile.
Fluted Chocolate Lemon Marble Cake made with love.
This beautiful Fluted Chocolate Lemon Marble Cake, made with love and shared with your Dad, or friends and family for a special celebration is sure to wow and impress them with the delicious flavour combination!
If you have enjoyed the recipe for this Fluted Chocolate Lemon Marble Cake here are some others you may enjoy:
CLICK ON THE PHOTOS FOR LINK
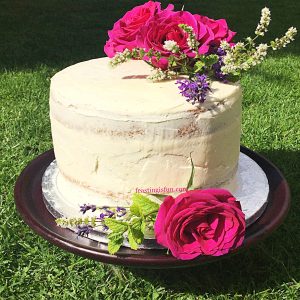
Raspberry Vanilla Naked Celebration Cake
Raspberry Vanilla Naked Celebration Cake
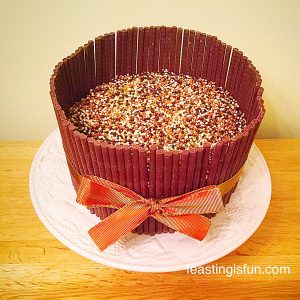
Chocolate Amaretto Cake
Chocolate Amaretto Cake
Raspberry Lemon Celebration Layer Cake
Raspberry Lemon Celebration Layer Cake
This Fluted Chocolate Lemon Marble Cake is beautifully rich, decadent, full of flavour and so easy to make. So I hope that you enjoy the calming practise of baking and then decorating a cake. While I was not having the best of days yesterday yet, sitting decorating this cake, I became totally immersed in what I was doing. As a result, I felt a lot better and had accomplished something that I hadn’t done before. So I thoroughly recommend baking and cake decorating as a very therapeutic, calming practise. And even if you don’t feel any better at the end, your time will have been well spent.
So, whatever you are making, baking and creating in your kitchens, have fun preparing and sharing your feast.
Sammie xx
Although Elizabeth Shaw Chocolates gifted me the flutes to decorate this cake. I did not receive any payment for writing this post. So, all content, recipes, photographs and opinions are my own. Please see my Disclosure Policy.
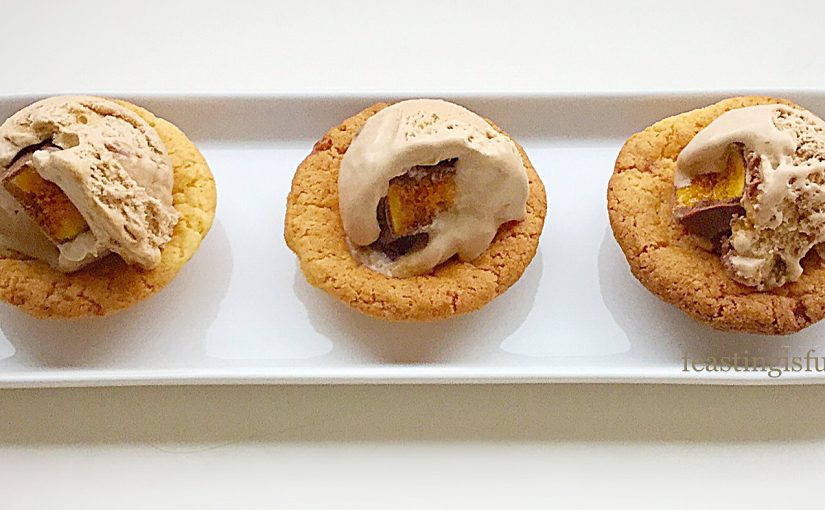
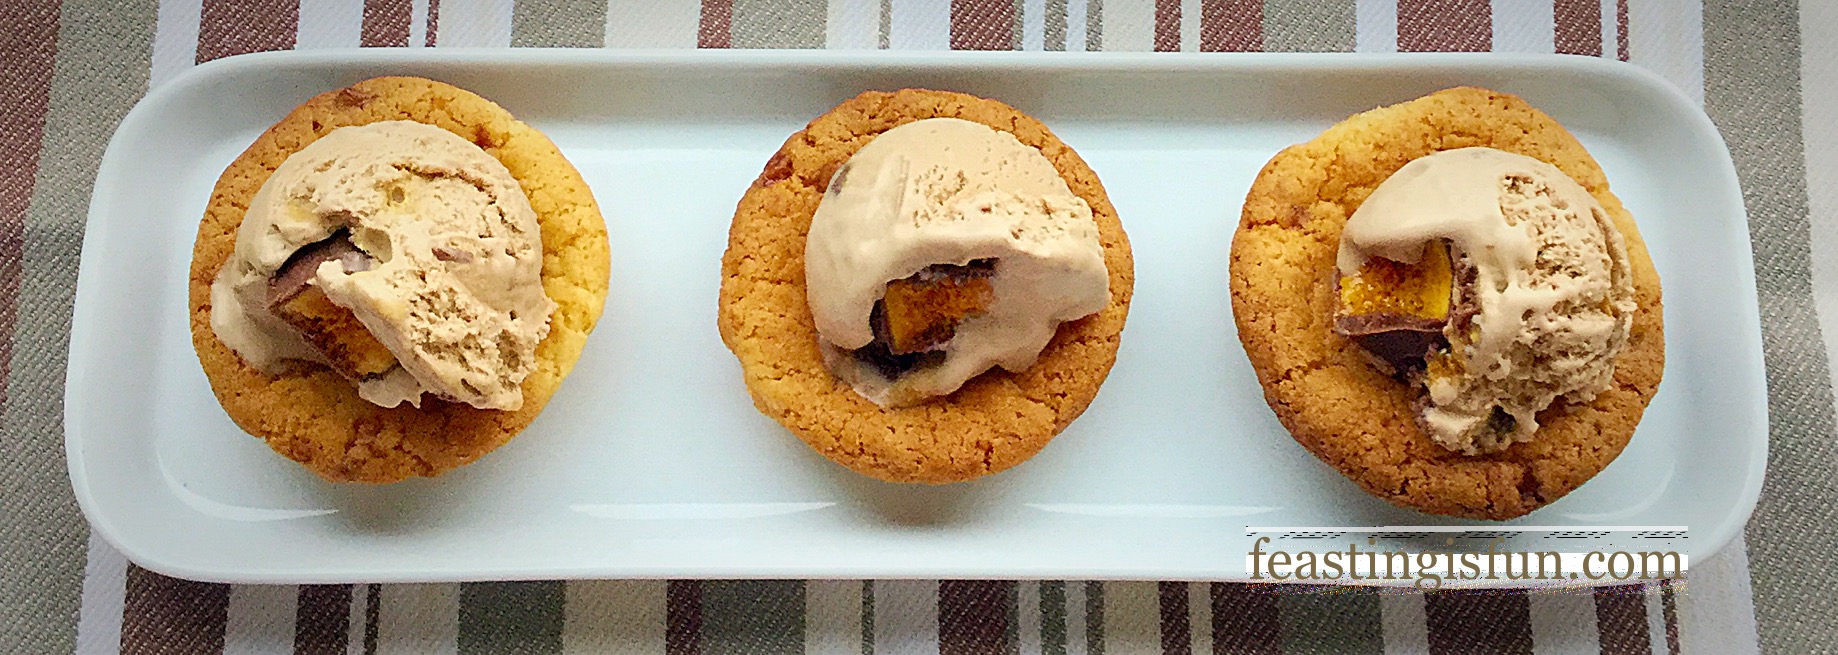
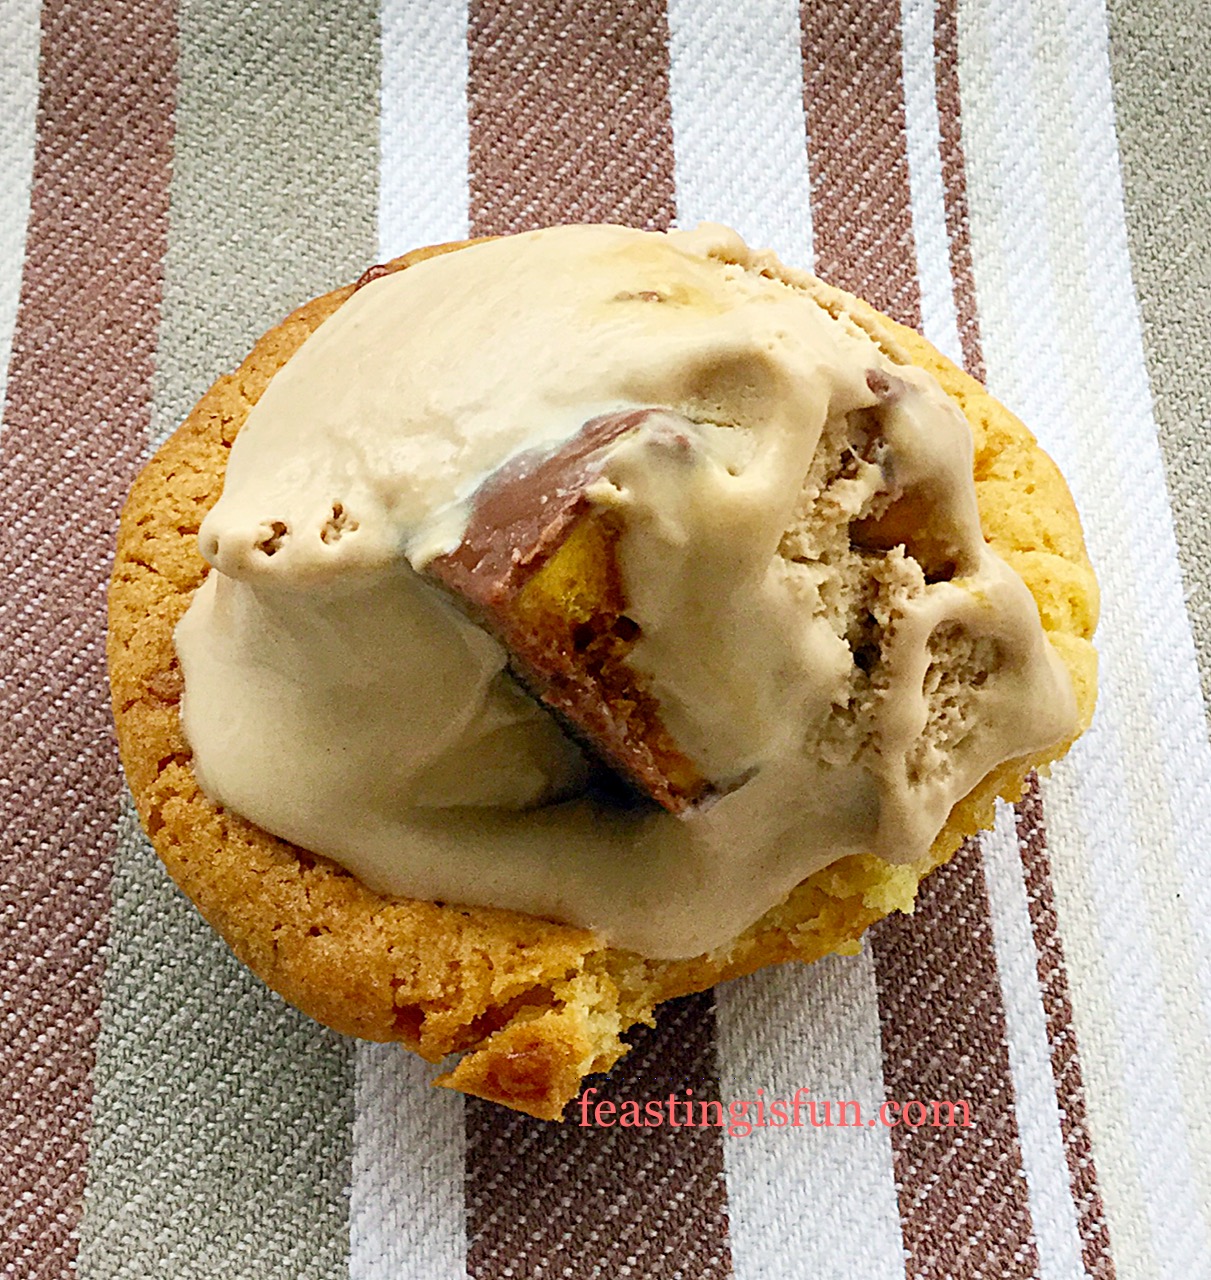
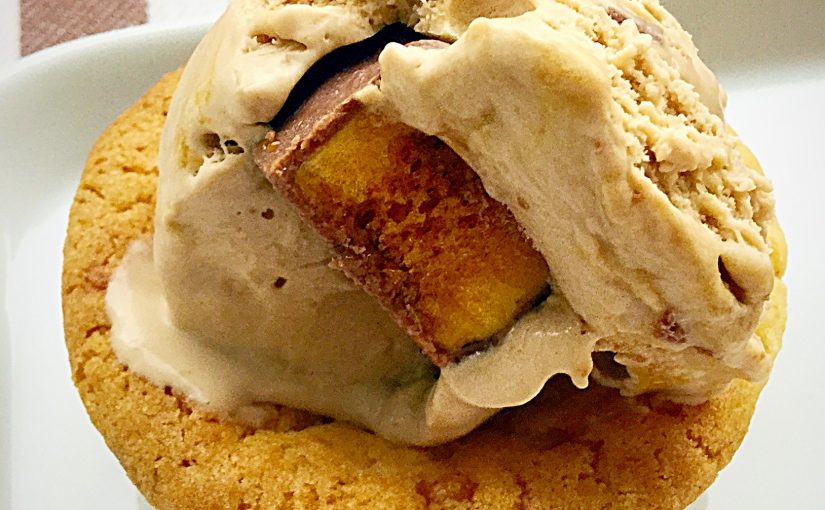
Toffee Cookie Cups easily made from Wright’sBaking new cookie mix. Tasty toffee flavoured cookies, with pieces of real toffee in the dough, shaped into cups for you to add a scoop of your favourite ice cream!
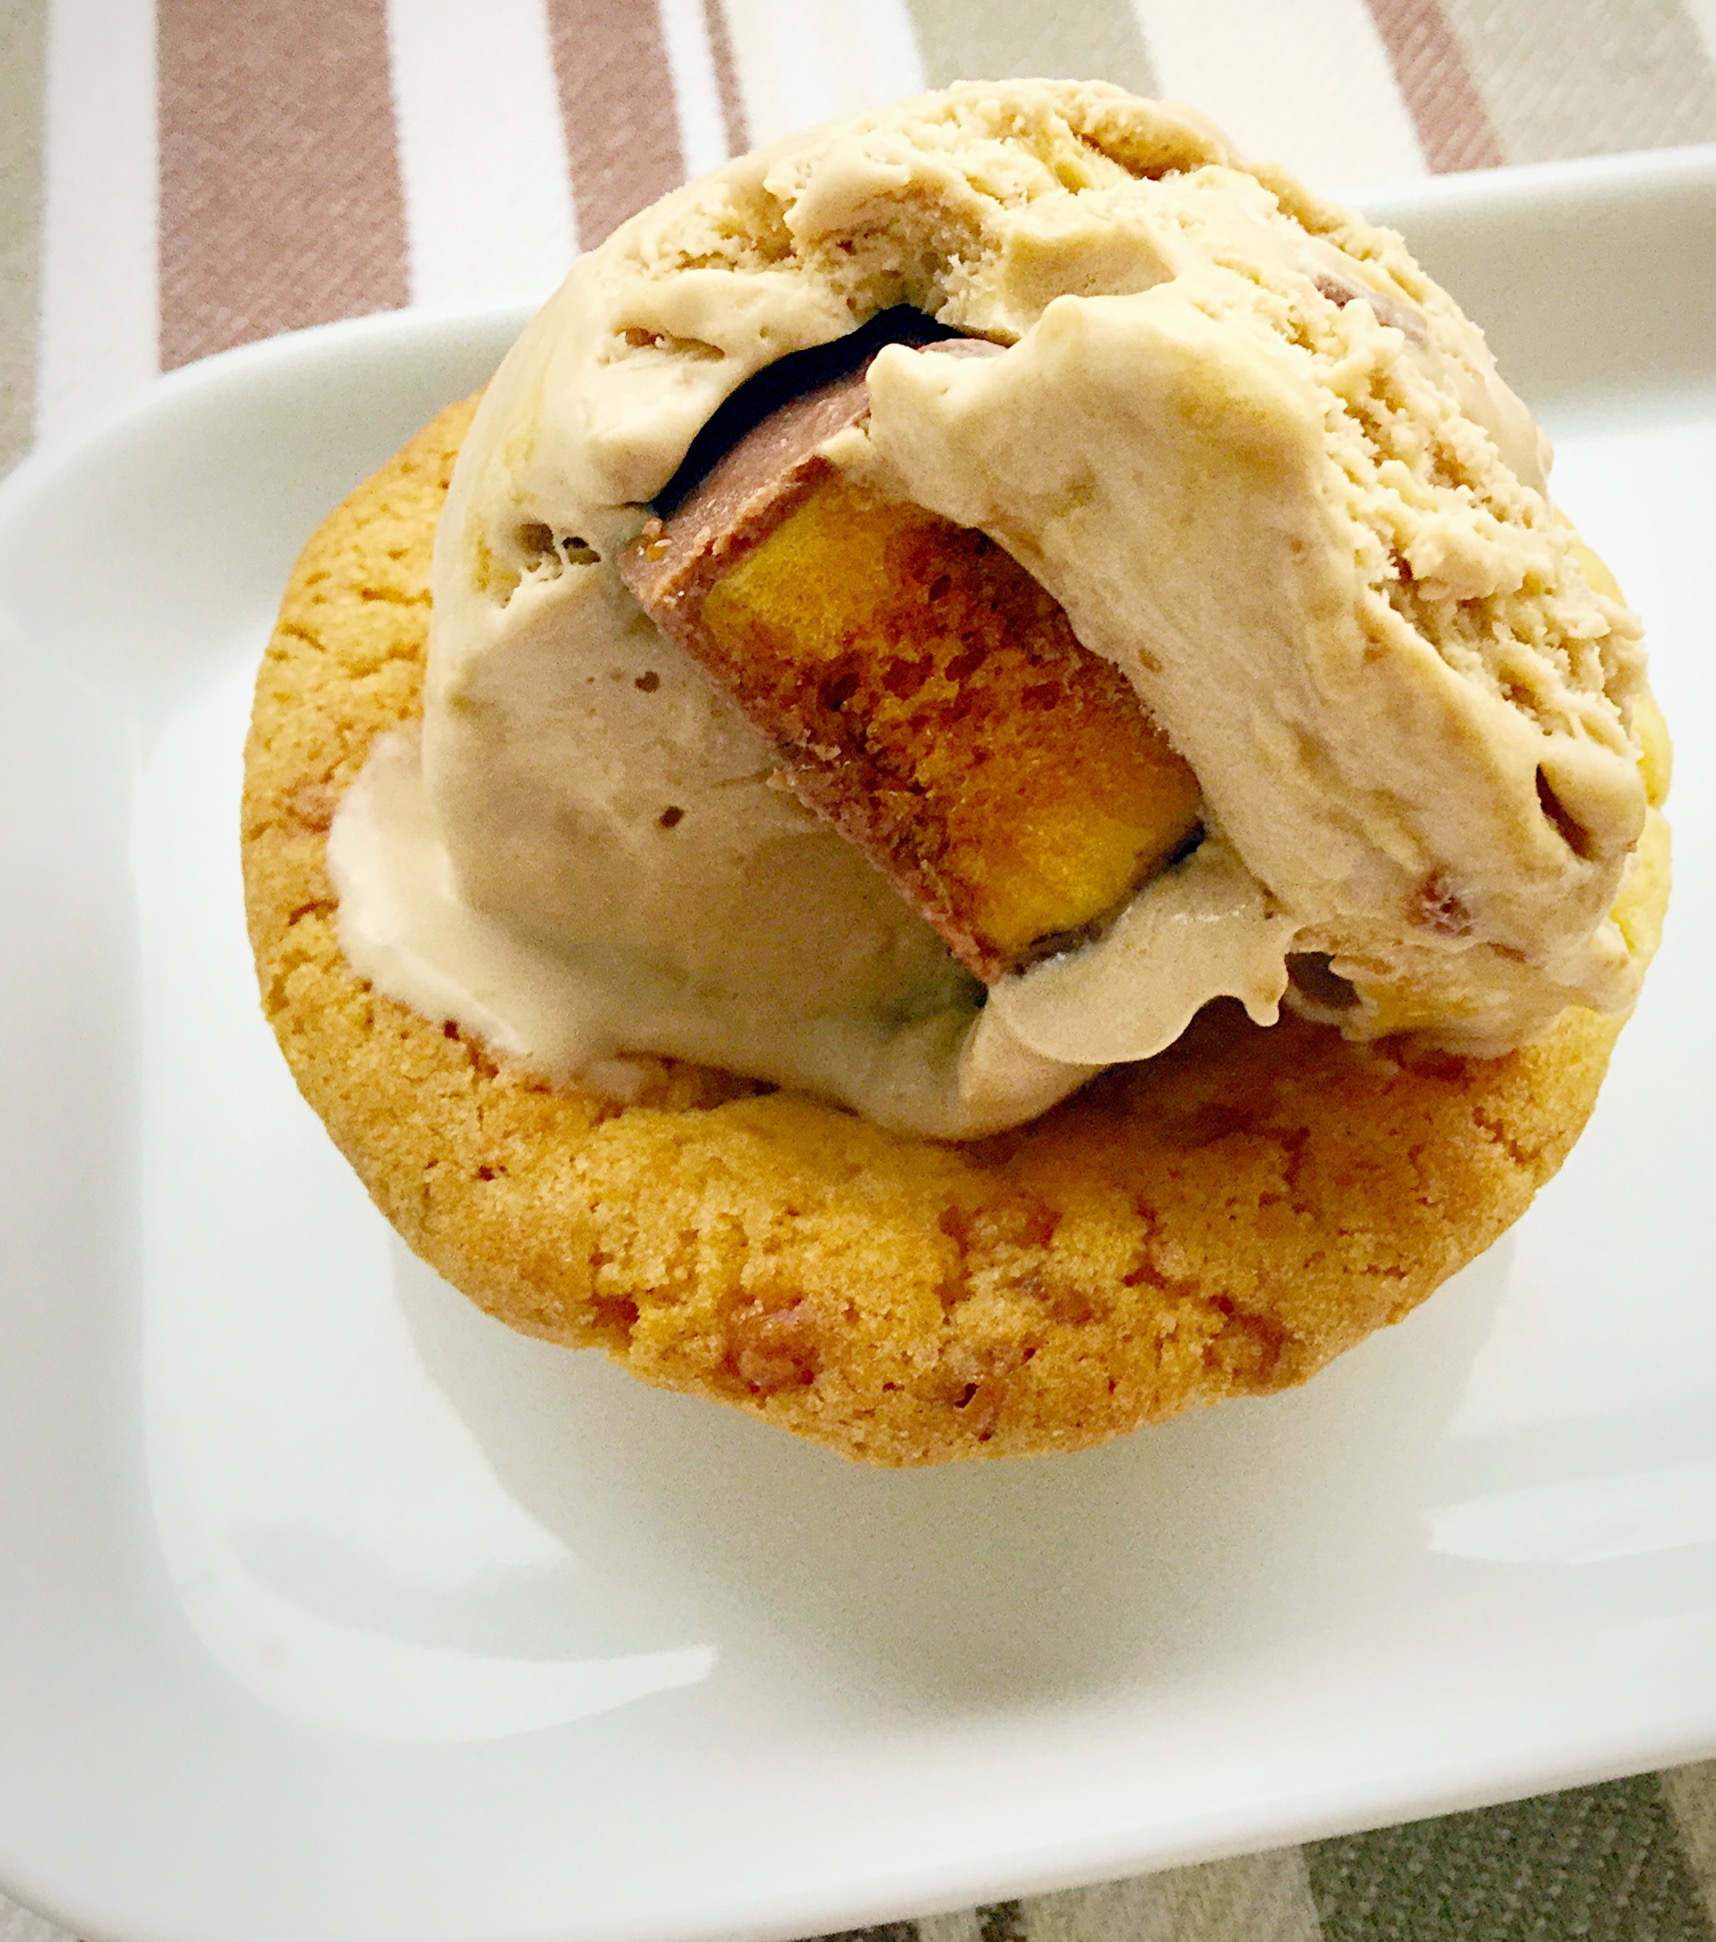
Toffee Cookie Cups great with Chocolate Honeycomb Ice Cream.
It is a well established fact here on Feasting is Fun that there are two things I am passionate about. Sharing is integral to who I am as a person and I genuinely believe that food really does taste better when shared. Also I love cookies. Not just – oh ok I’ll bake a batch – I really love cookies. I start almost everyday with a cup of tea and a cookie or two, so when Wright’s sent me their new Toffee CookieMix, well I was ridiculously excited!
Toffee Cookie Cups – what will you fill yours with 😉
After a little discussion with Deb-the-bread, Wright’s very own jewel in their crown, I decided to have a go at making the new cookie mix into cookie cups. Let’s just be clear on something, I had never baked these cookies before. Never having attempted to bake cookie cups before this was a first. Since I had never baked a Wright’s cookie mix before – because I couldn’t, this IS their first cookie mix.
Due to the Toffee Cookie Mix only just having been released, stocks were super low and there wasn’t a spare mix for me to practise with! Ok so we all know I love a challenge. Time to put my trust in Wright’s reputation for making fabulous mixes and my ability to ‘wing it’! I mean I have baked a fair few thousand cookies in my lifetime.
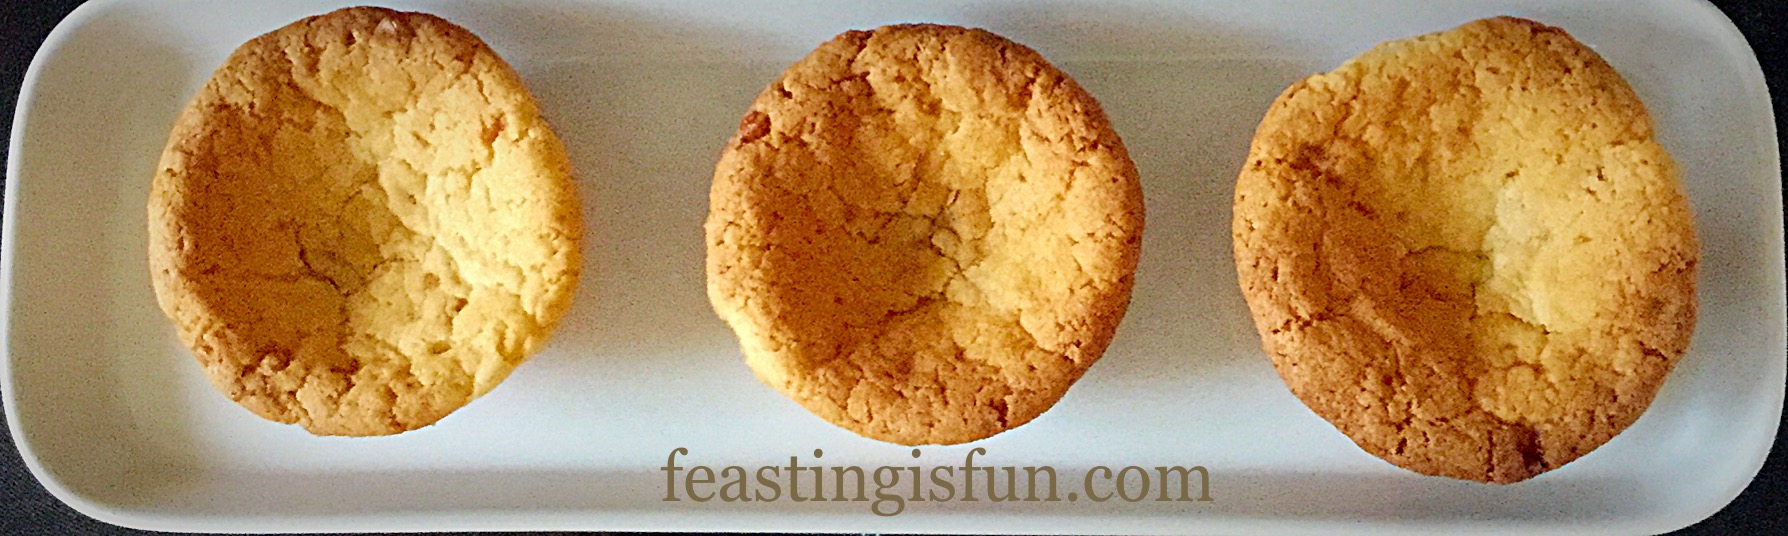
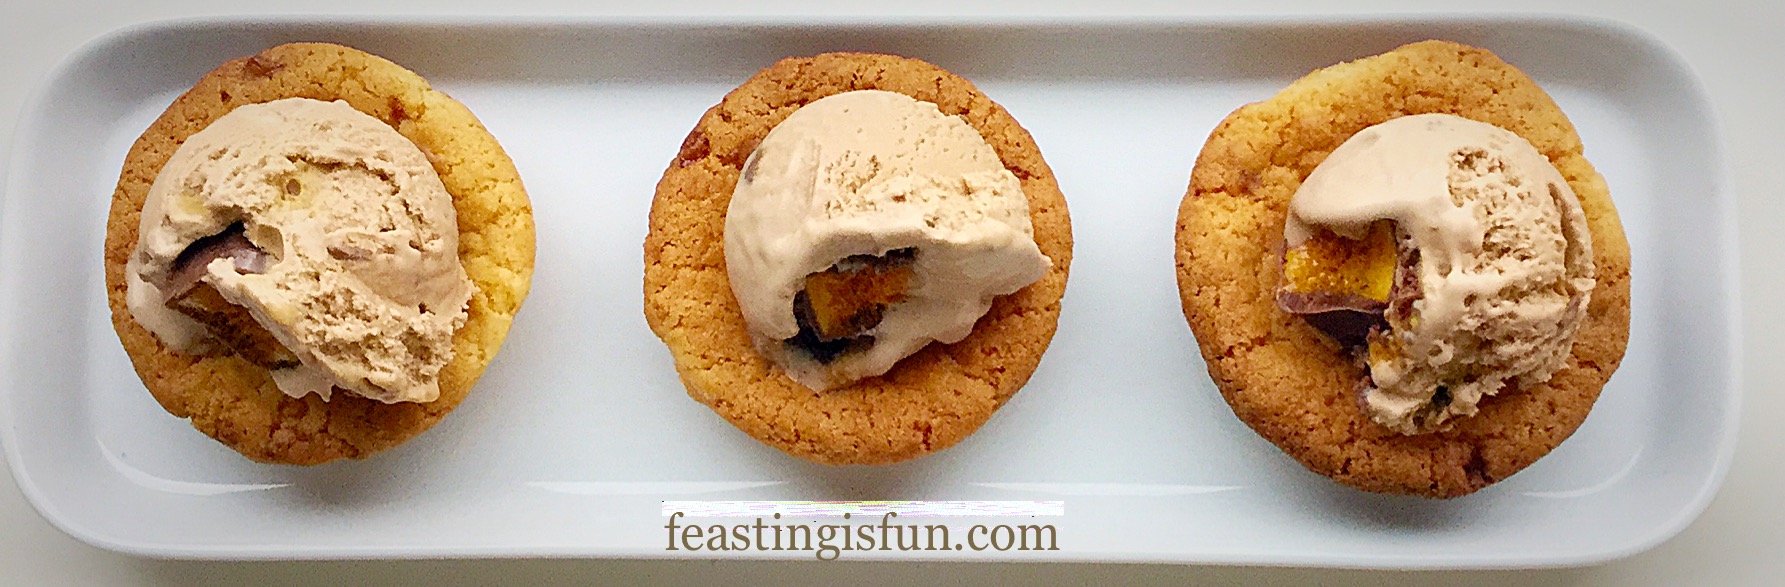
Toffee Cookie Cups – a resounding success.
As you can see from the photos, I not only managed to make Toffee Cookie Cups, using Wright’s new Toffee Cookie Mix, they are also the perfect size for one scoop of ice cream. Easy to pick up with your hands and eat. Similar to an ice cream cone, except if the ice cream drips it is caught in the cup shape.
I cannot begin to explain how thrilled I was that I’d made cookie cups. Ridiculously so. More than that though, they taste ooh so good. I filled ours with Chocolate Honeycomb Ice Cream.
However, you could use coffee, caramel, chocolate, banoffee, in fact any flavour that pairs well with toffee would work well in these gorgeous cookie cups.
Enough waffling you want to know how they’re made and I’m desperate to share how I made them with you!
Vegetable Oil or Butter – I used butter & would recommend it for making the cookies into cups, simply because it firms up on coolinf, helping to give the cups rigidity,
Cake release spray, oil or butter for greasing the bun tin.
Method: Preheat the oven to the temperature recommended on the packet.
To make these Toffee Cookie Cups you will need a regular 12 hole fairy cake – NOT MUFFIN – tin.
I find it is always better to have everything I need to hand before I start baking.
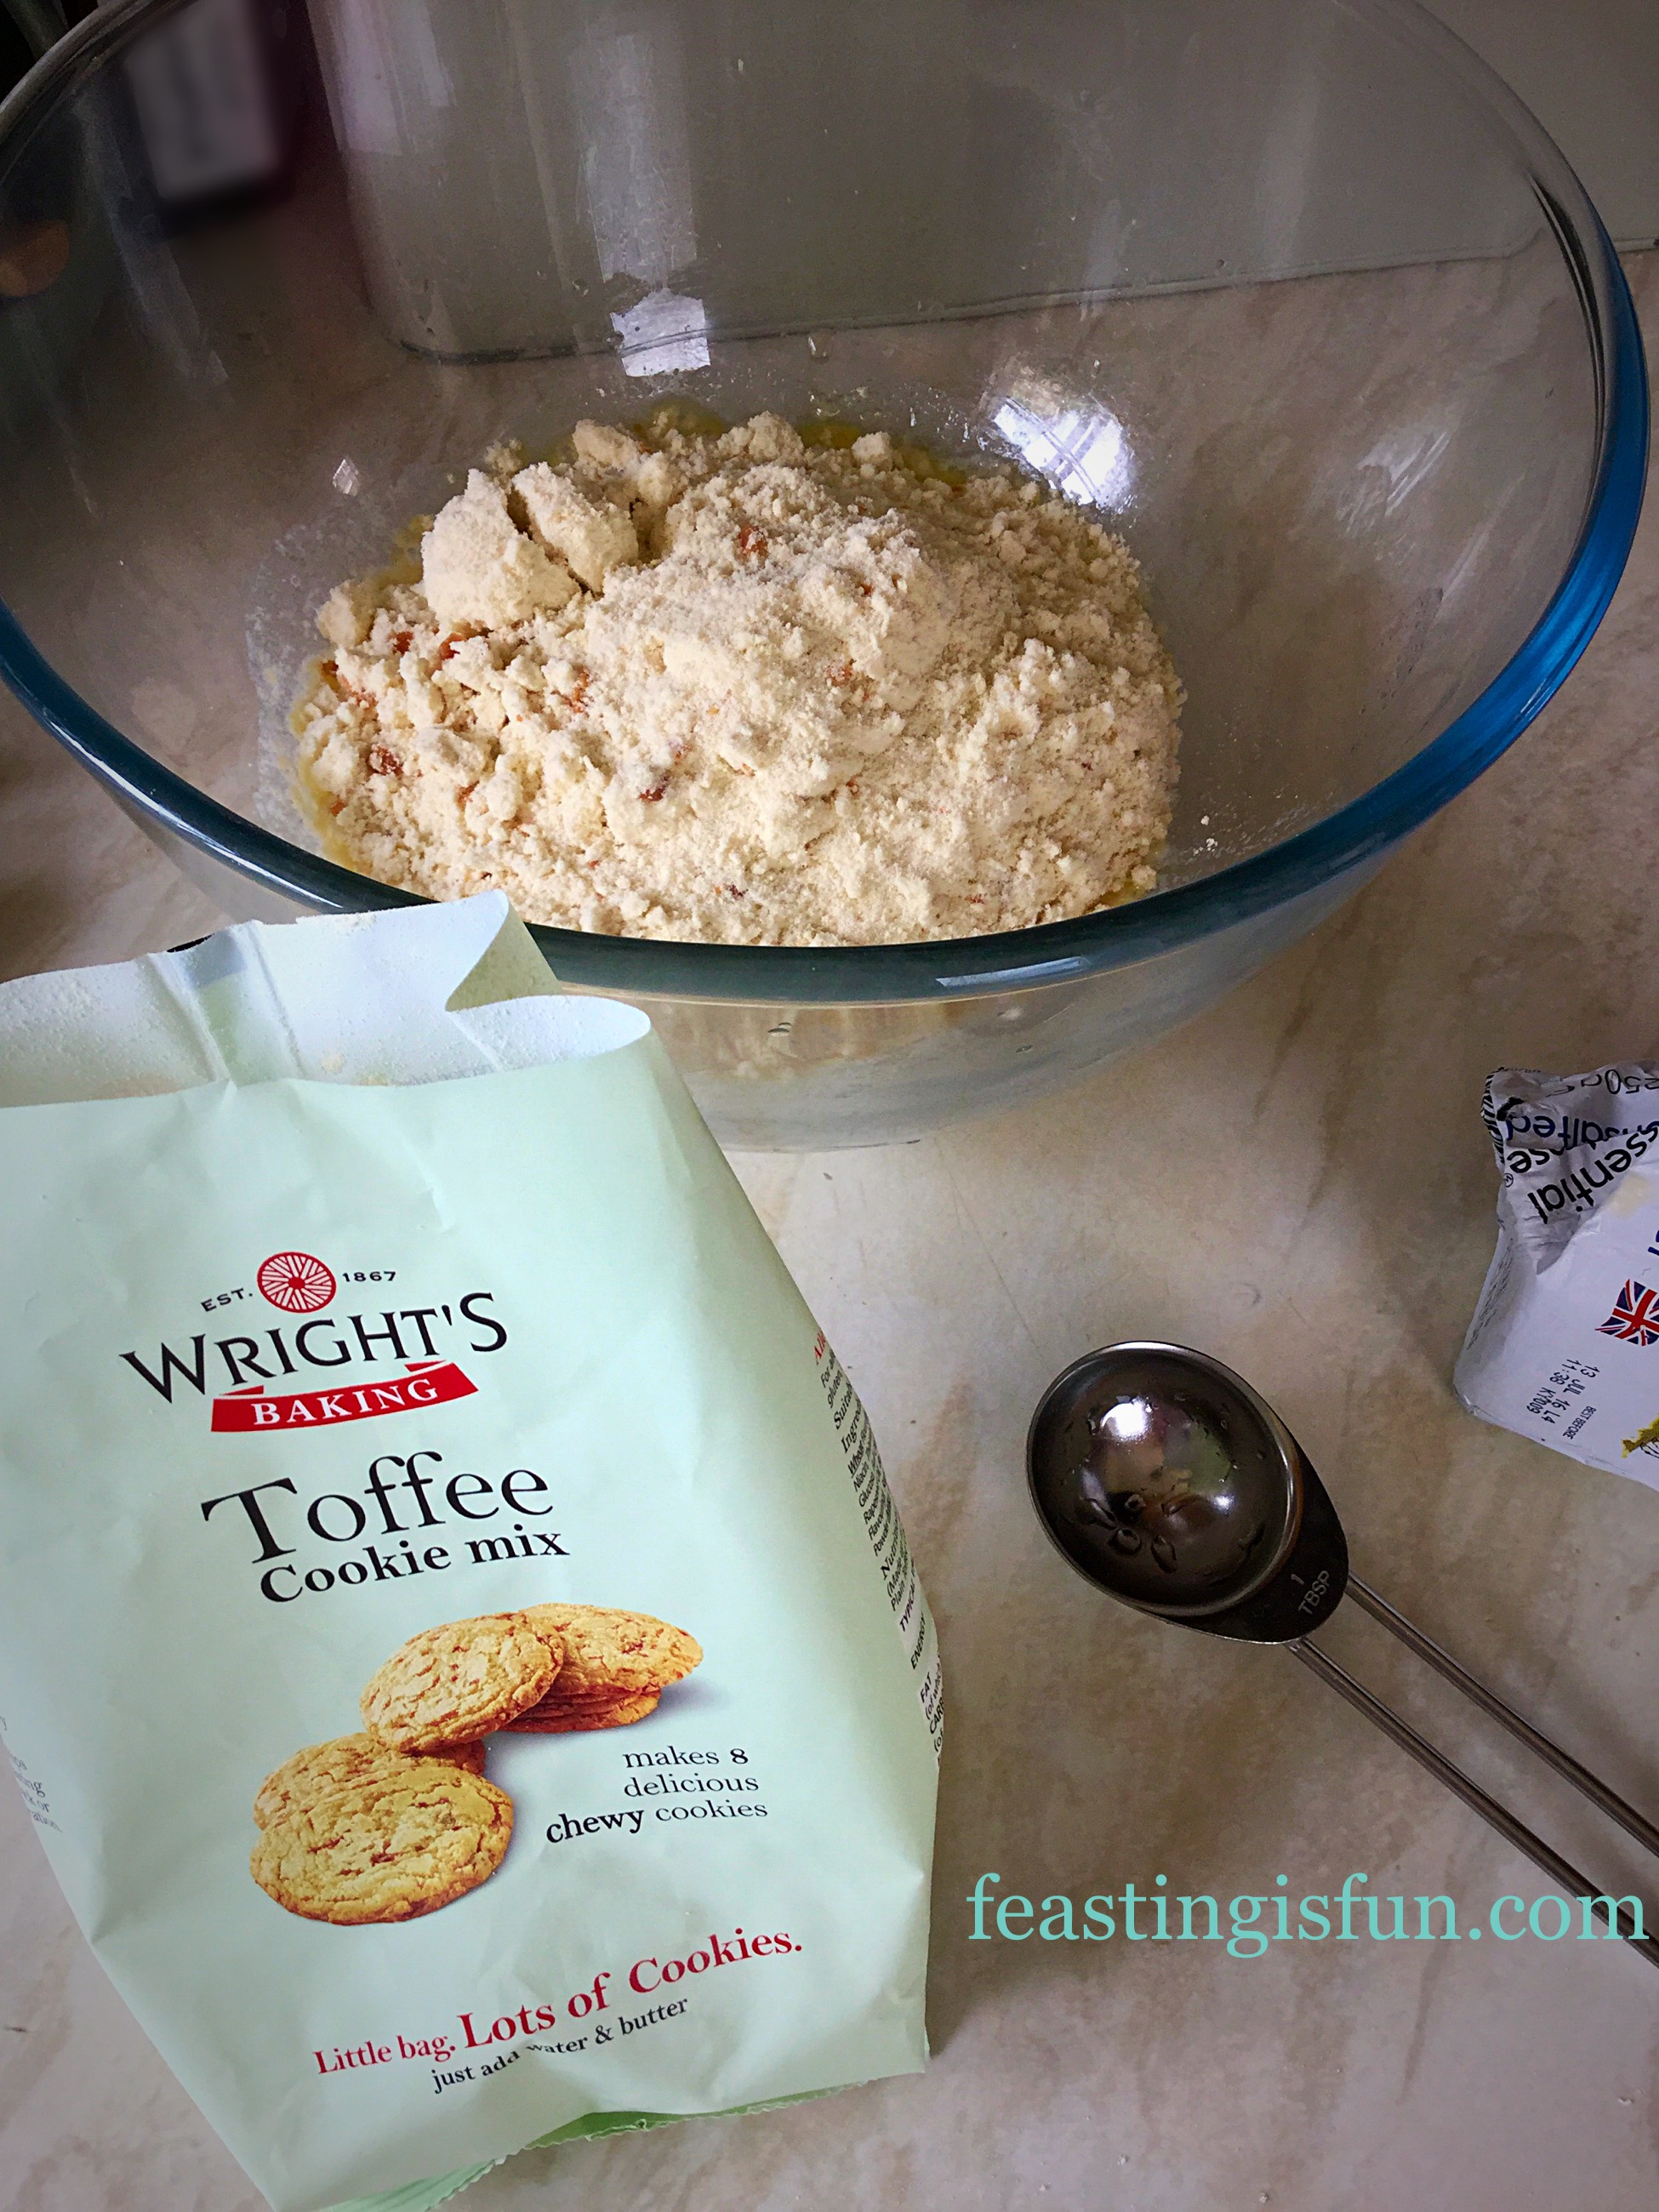
Make up the Toffee Cookie Mix according to the packet instructions – I actually melted the butter.
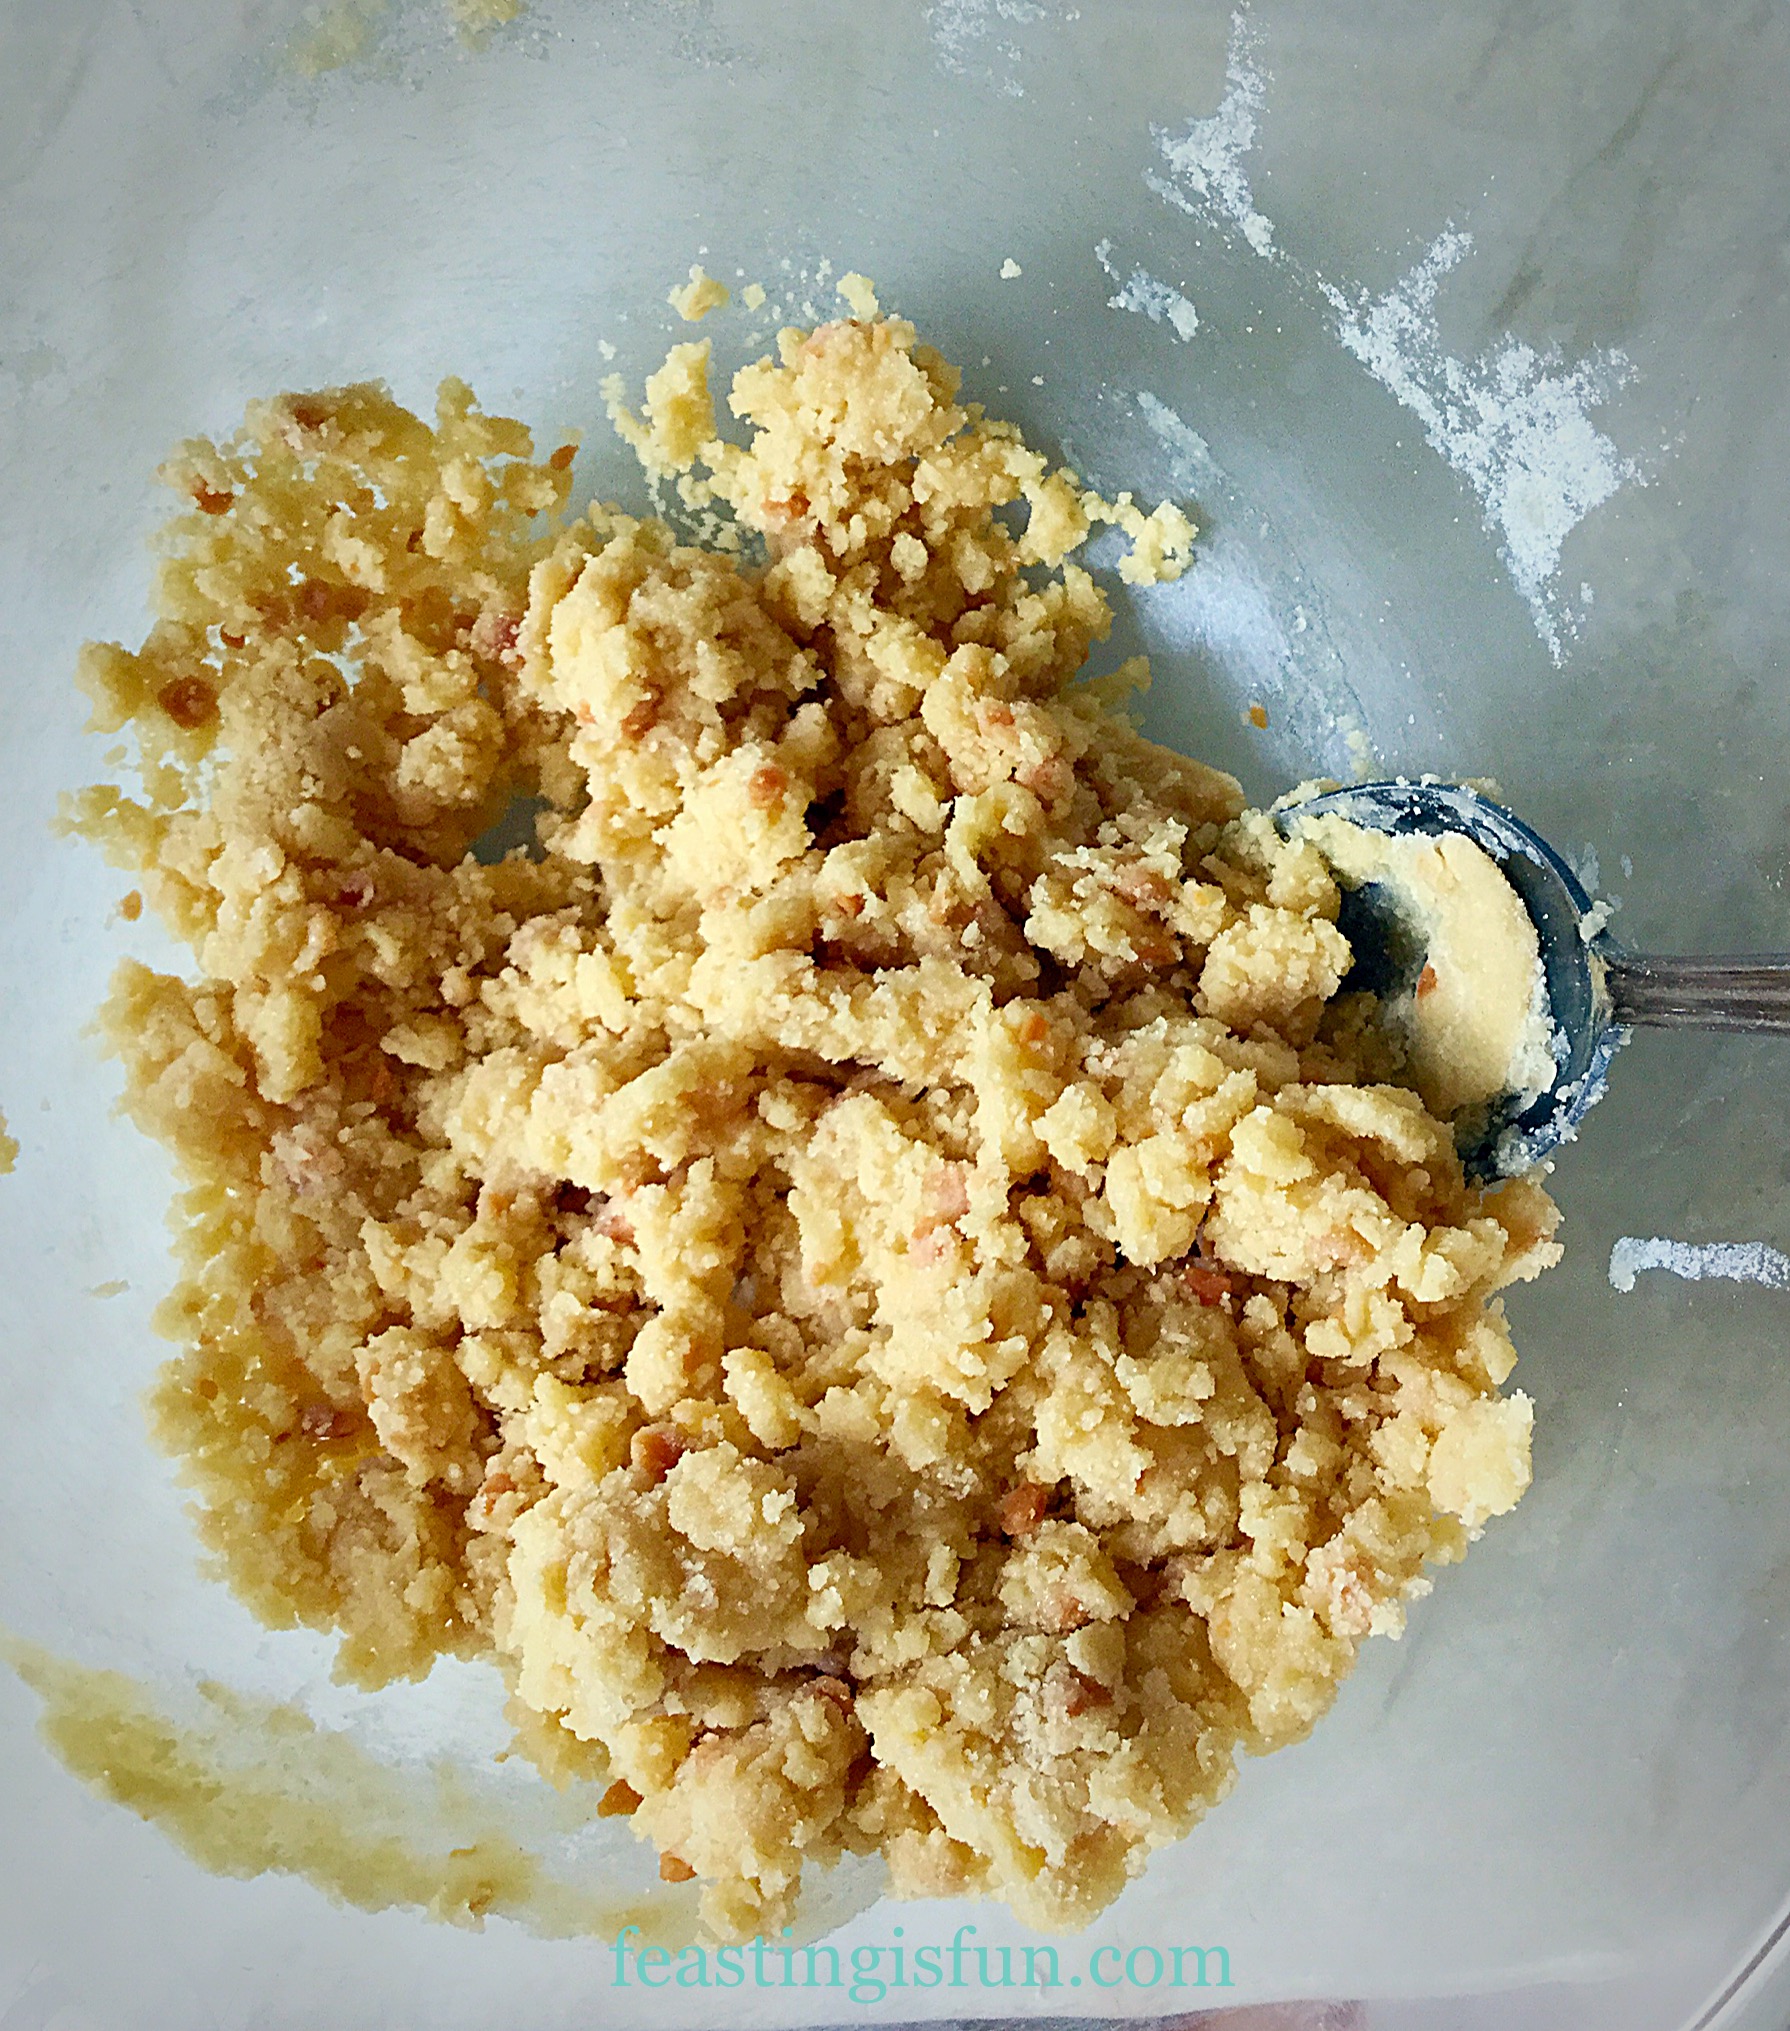
Stir to combine the cookie mixture.
The Toffee Cookie dough.
Grease all of your fairy cake tin, not just the holes – I used cake release spray as I wanted to be sure these wouldn’t stick, I would advise brushing the whole tin lightly with vegetable oil.
Divide the cookie dough into 10 equal-ish sized balls.
The dough ball size and pressed out cookie cups.
Place a cookie dough ball into one of the fairy tin holes. Gently with your fingers press it into the hole and sides so that it is equal thickness all the way around. Ensure that you press the dough into the bottom of the tin so that it has a definite base.
Continue for the remaining cookie dough balls.
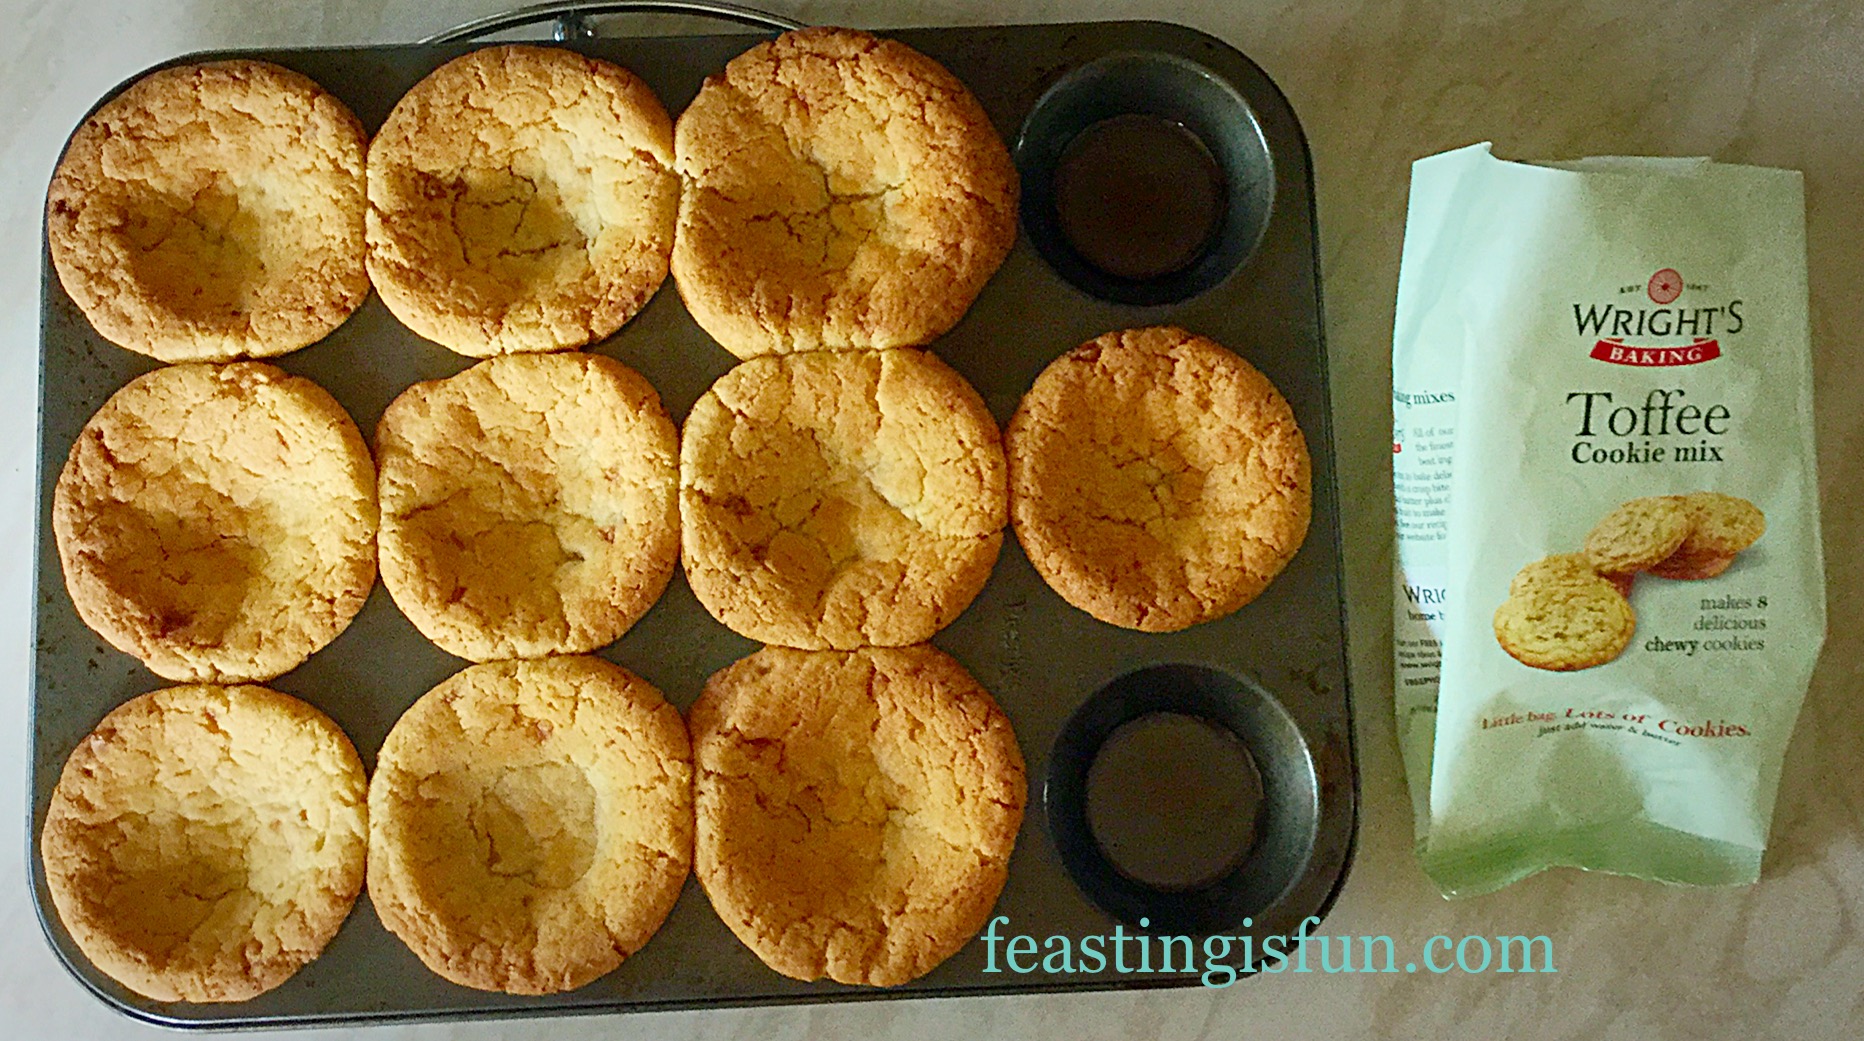
When all the cookie cups have been moulded place the tin in the middle of the oven and bake for 12-14 minutes. Mine took 14 minutes.
The Cookie Cups will puff up whist cooking DON’T PANIC!!
When golden brown and baked remove the tin from the oven.
Beautifully golden with a wonderful toffee smell, Toffee Cookie Cups.
Place the tin on a cooling rack and allow the cookie cups to cool in the tin as the cookies/cookie cups harden on cooling.
As the cookie cups cool slightly, very gently press the slightly puffed up base down.
Once the cookie cups are cooled remove them from the pan – mine came away easily, if yours are proving stubborn use a small palette knife to run between the top of the cookie cup and where it lays flat on the tin, this should loosen them.
Congratulations you have made 10 fantastic Toffee Cookie Cups!
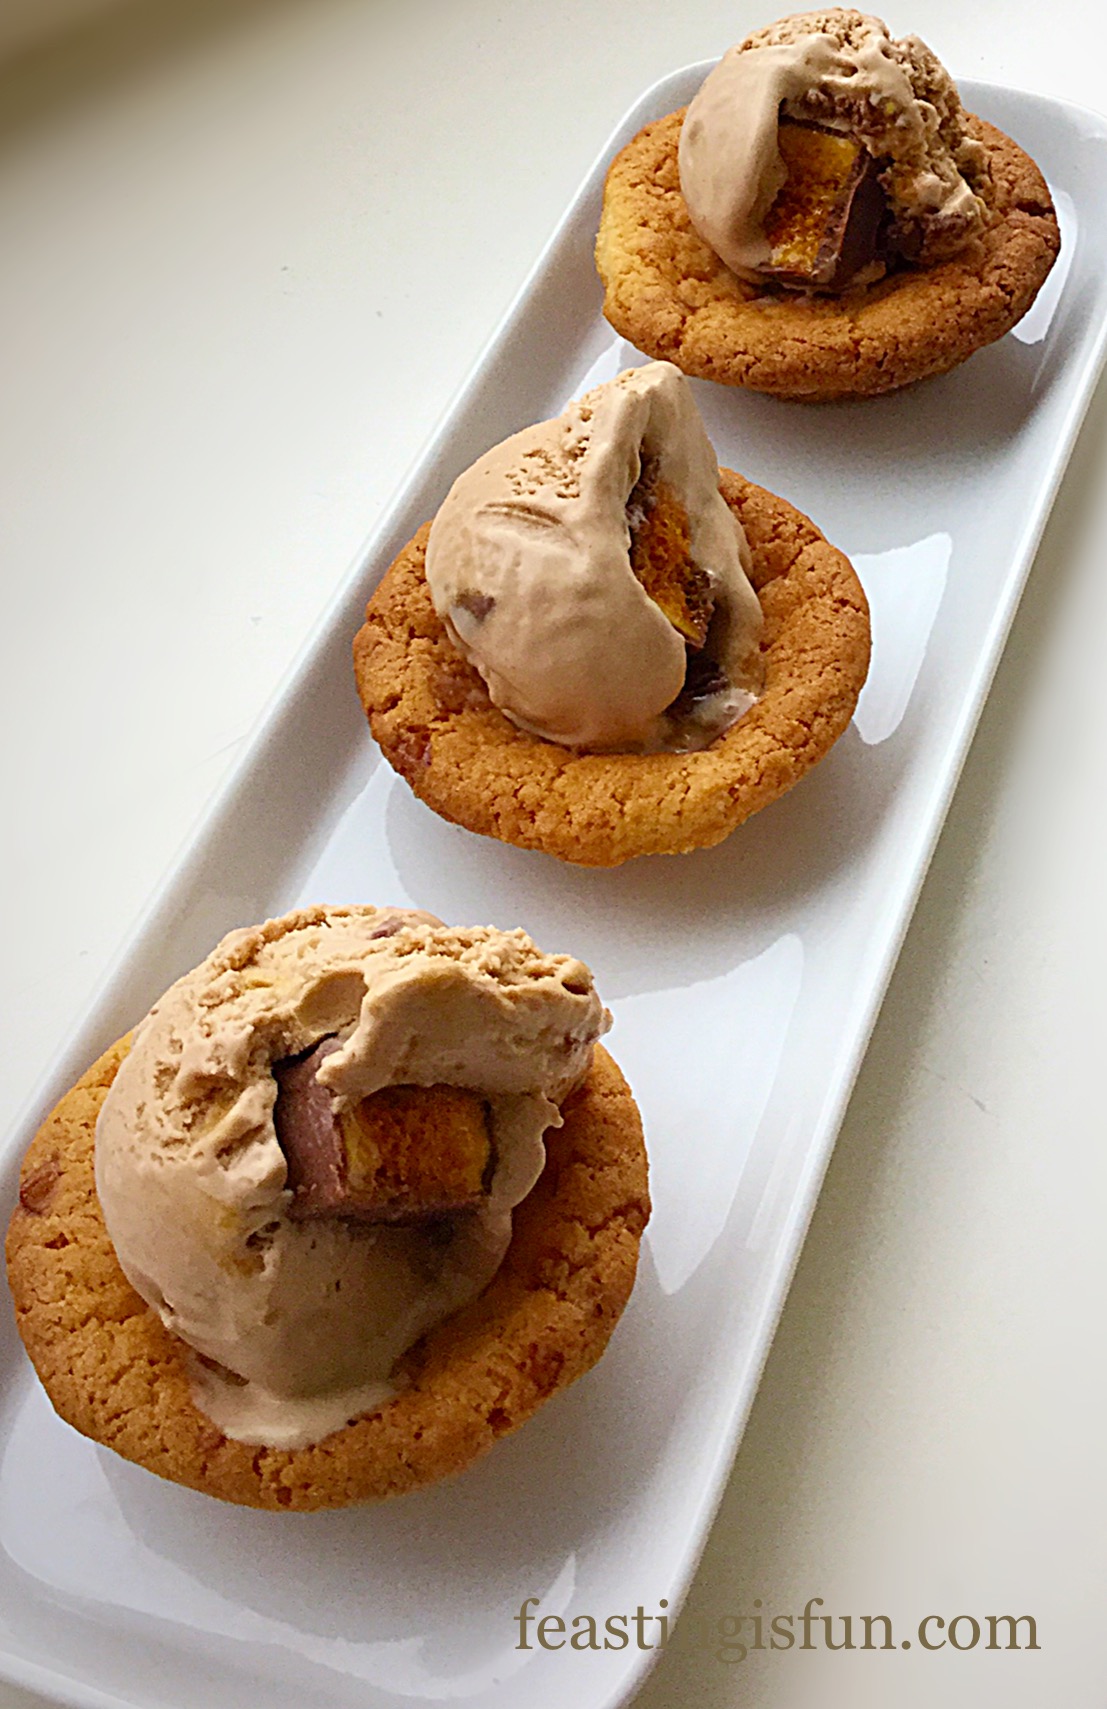
To serve, add a scoop of your favourite ice cream, share and enjoy.
Toffee Cookie Cups already tasted by me!!!
Such an easy yet fantastic way to enjoy Wright’s new Toffee Cookie Mix. I have a couple more ideas but I will have to wait for more stock.
The Toffee Cookie Cups keep for up to 5 days in an airtight container.
If you have enjoyed this recipe for Toffee Cookie Cups you may also like these:
These Toffee Cookie Cups are a fun and delicious way to eat ice cream anytime of the year, but especially when it’s hot and we all need a little cooling down.
Whatever you are making and baking in your kitchens I hope you are having fun and remember to stash a couple of packets of Wright’s Toffee Cookie Mix in the cupboard. They take under 20 minutes to make and bake and are perfect for unexpected guests, or for when the urge for great cookies hits!
Sammie xx
Wright’s Bakingsent me a packet of their new Toffee Cookie Mix to try. I was not paid, or even asked to write this post. All opinions, views, content and photographs are my own. Please see my Disclosure Policy.
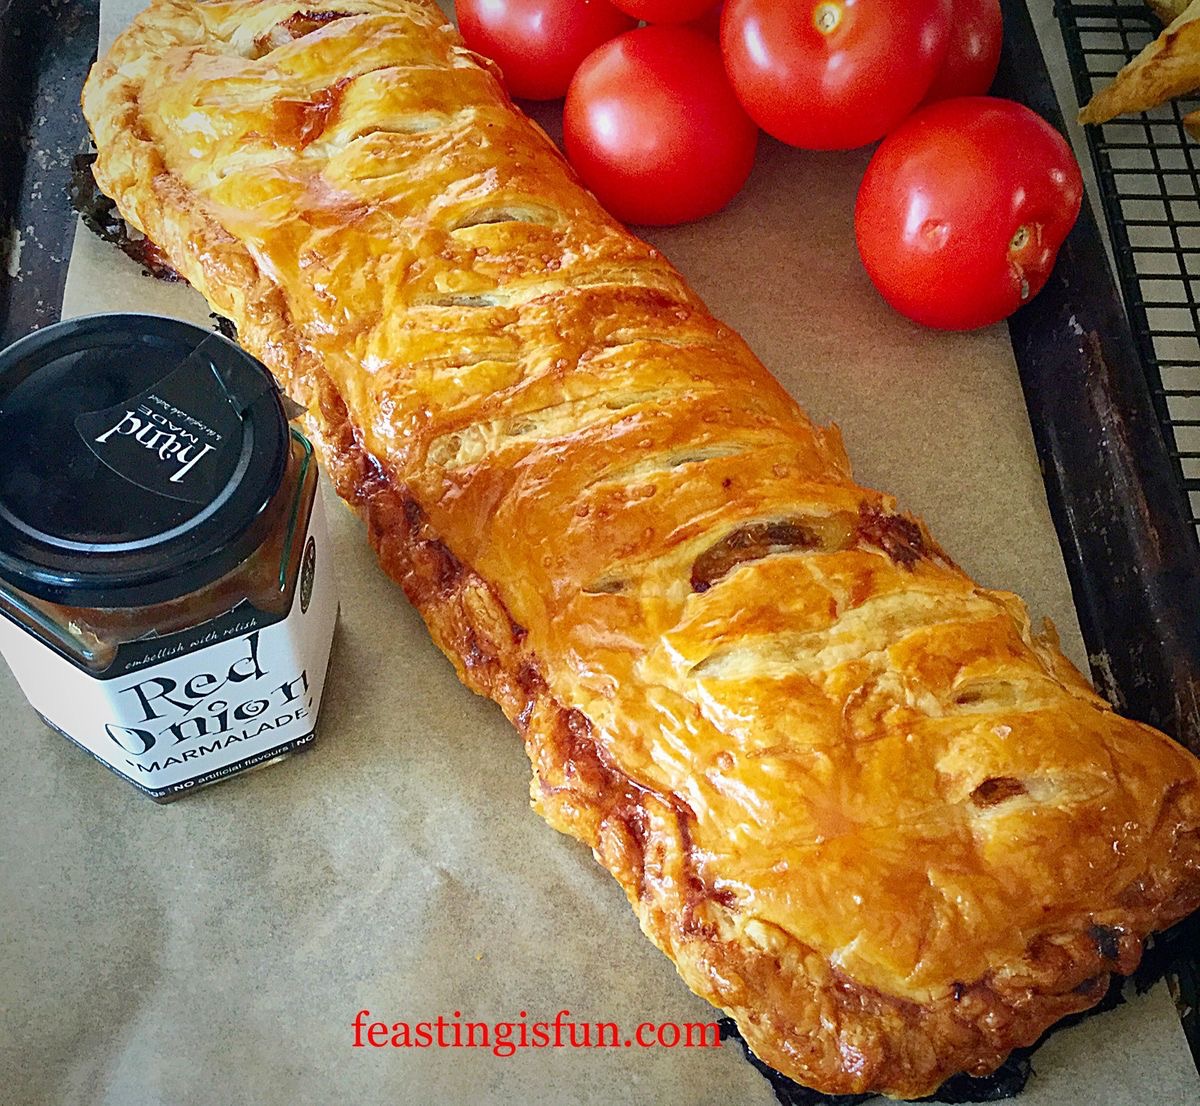
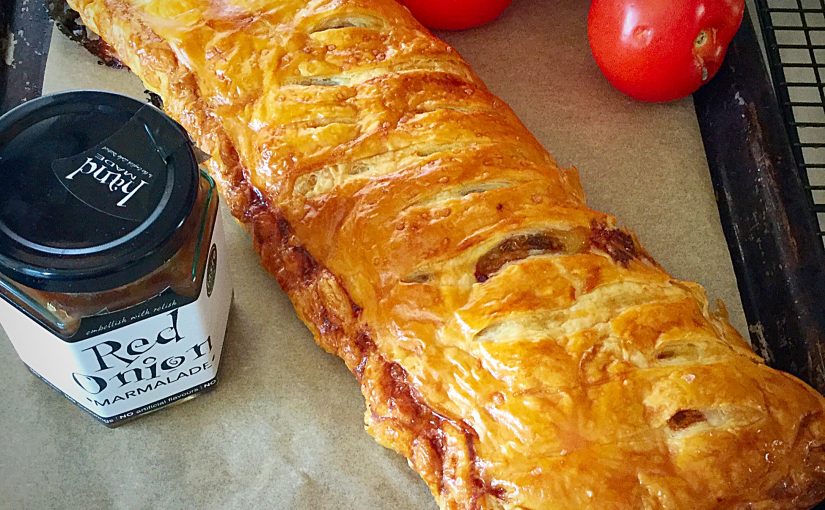
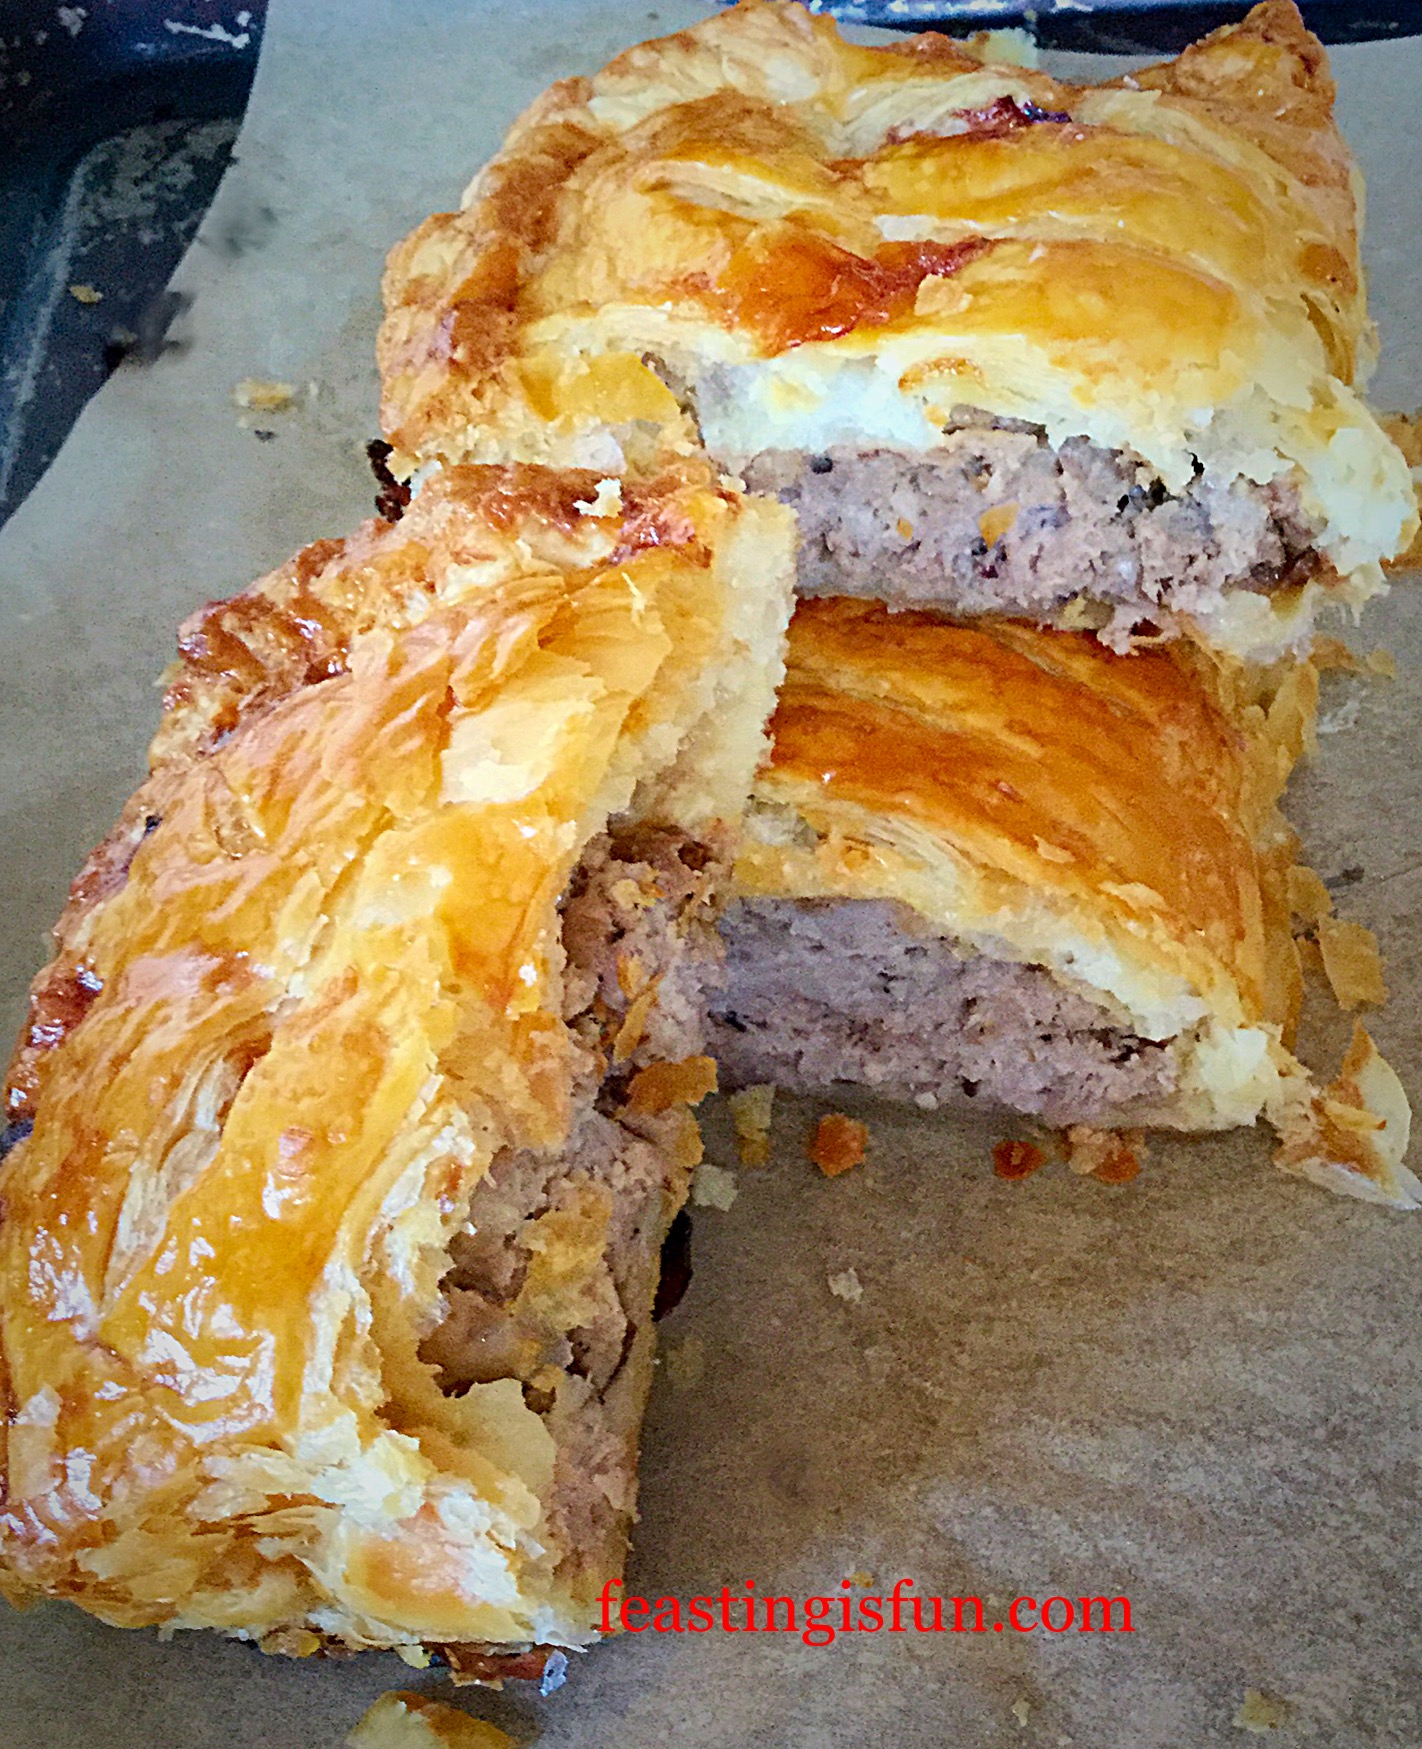
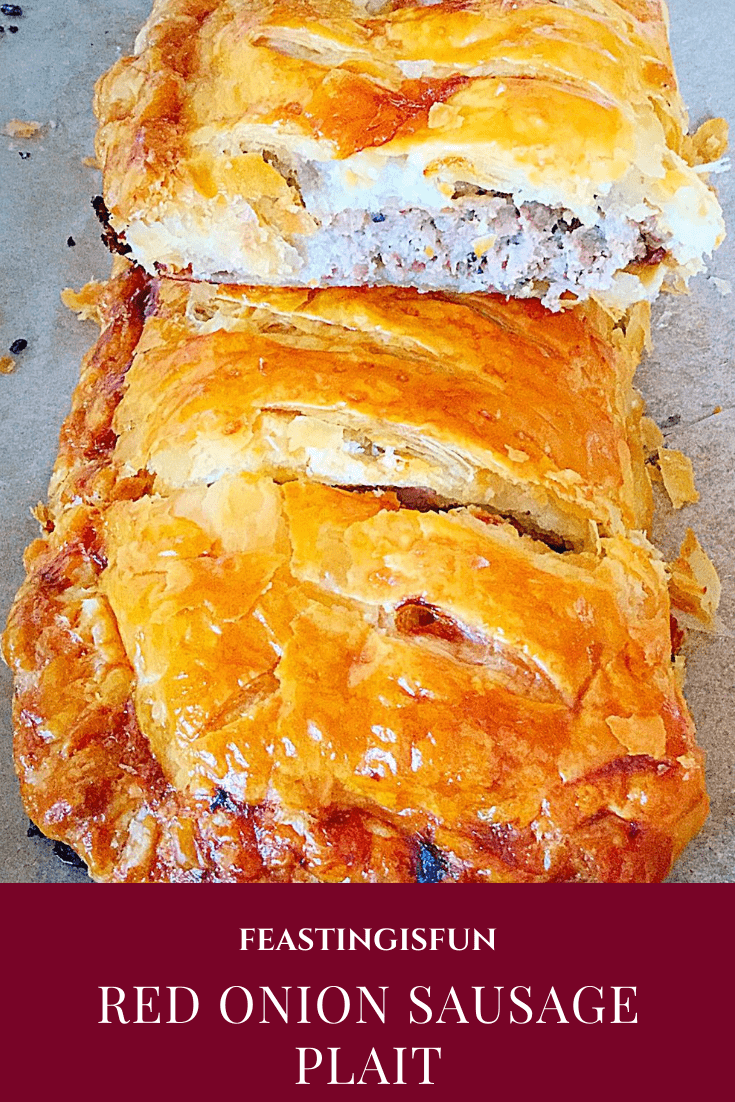
This week happens to be National Picnic Week and as you’ve probably realised by now, I’m a big fan of outdoor eating. So, my Red Onion Sausage Plait is not only perfect for picnics, it’s also delicious served for dinner too! Great quality sausage meat mixed with red onion marmalade, encased in golden, all butter puff pastry. Utterly delicious.
Red Onion Sausage Plait full of flavour and texture.
Using Condiments As Ingredients
The lovely people at Hawkshead Relish sent me some savoury relishes and marmalade to try out. I am a huge chutney fan, everything from jellies, to chutneys, relishes and marmalades. However, with this review, I wanted to use them as ingredients and see just how well they worked being in a dish. While also serving alongside as accompaniments.
I made this Red Onion Sausage Plait twice, as unfortunately I wasn’t able to get good pictures the first time round. Although, nobody in our house complained that I had to make this again. Since we all enjoyed the flavour and added texture from the red onion marmalade that contains raisins and crunchy pine kernels.
Red Onion Sausage Plait, juicy, crispy with incredible flavour.
So, I set about making another Red Onion Sausage Plait, with great enthusiasm. Because, I love, I mean absolutely, completely, adore this Red Onion Marmalade and I knew this would use the last of it. Still I cheered myself with the fact that it makes such a knockout recipe and that I’d be eating it for dinner!
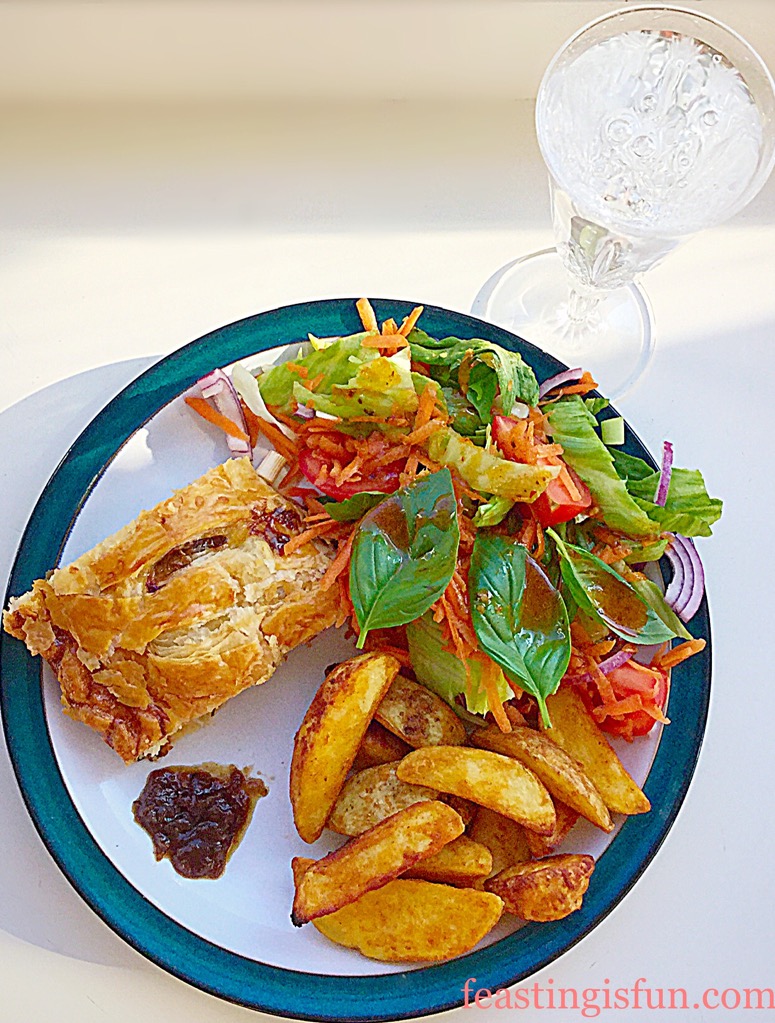
Red Onion Sausage Plait also great as a mid week meal with salad and potato wedges.
Not Only For Picnics!
Warmed and served with a huge pile of salad and some potato wedges that I had in the freezer, this Red Onion Sausage Plait really does make a tasty, weekday meal. Also, it’s easily made ahead, left uncooked, wrapped in cling film and kept in the fridge until dinner time. Since it only takes 40 minutes to cook, which is why, seeing as the oven was already on I whacked in some potato wedges from the freezer.
The huge bowl of salad I made to accompany the meal also had thinly sliced red onions in it which echoed the flavours in the sausage plait.
The caramelised onion flavour works so well with the meaty pork sausage. This is definitely a firm, family favourite now and is made frequently. I always look forward to eating this Red Onion Sausage Plait, whetheron picnics and for dinner many times in future.
Recipe: Makes one Red Onion Sausage Plait serves 4 – 6 people
450g/1lb Good Quality Pork Sausagemeat – free range or organic for preference
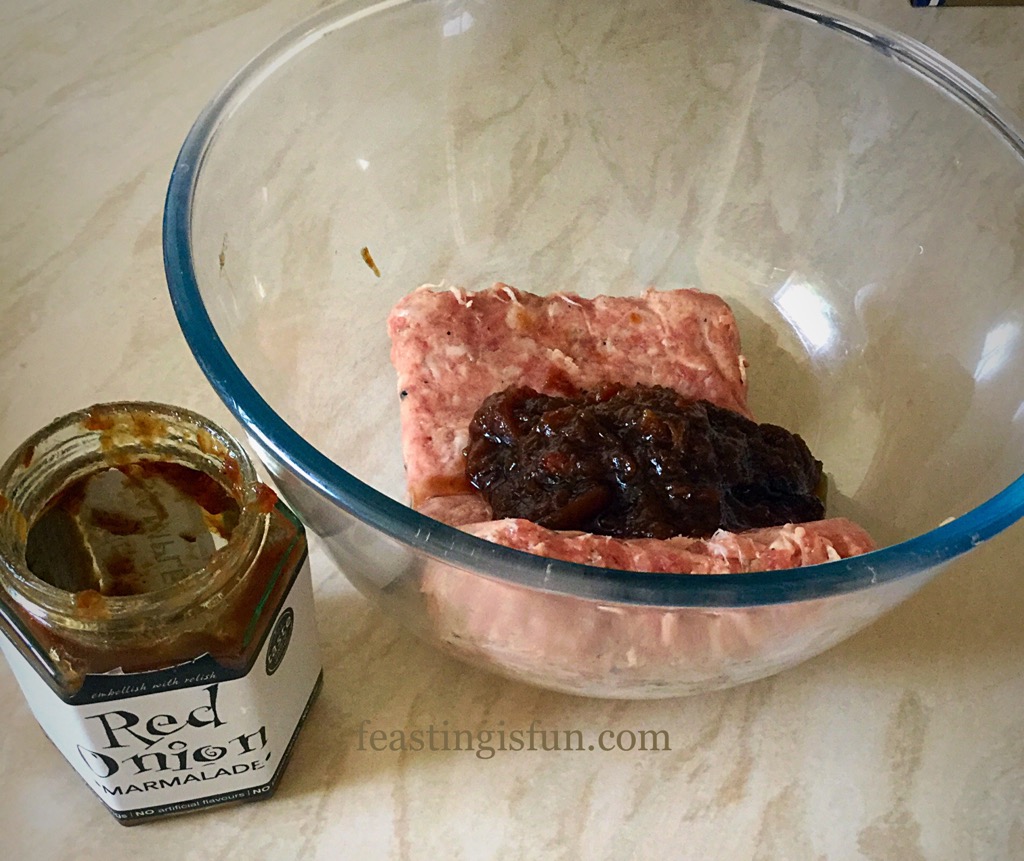
3 heaped tablespoons of Red Onion Marmalade from Hawkshead Relish
320g Ready Rolled All Butter Pastry Sheet – I used JusRoll
Preheat the oven to 220C/200C fan, gas mark 7, 425F.
First of all, line a large baking tray with baking parchment.
Place the sausage meat in a bowl with the red onion marmalade.
I enjoyed smooshing the mixture together with my hands!
Using clean hands smoosh the mixture together, through your fingers, until it is fully combined (a tack I particularly enjoy)! Set to one side and wash your hands.
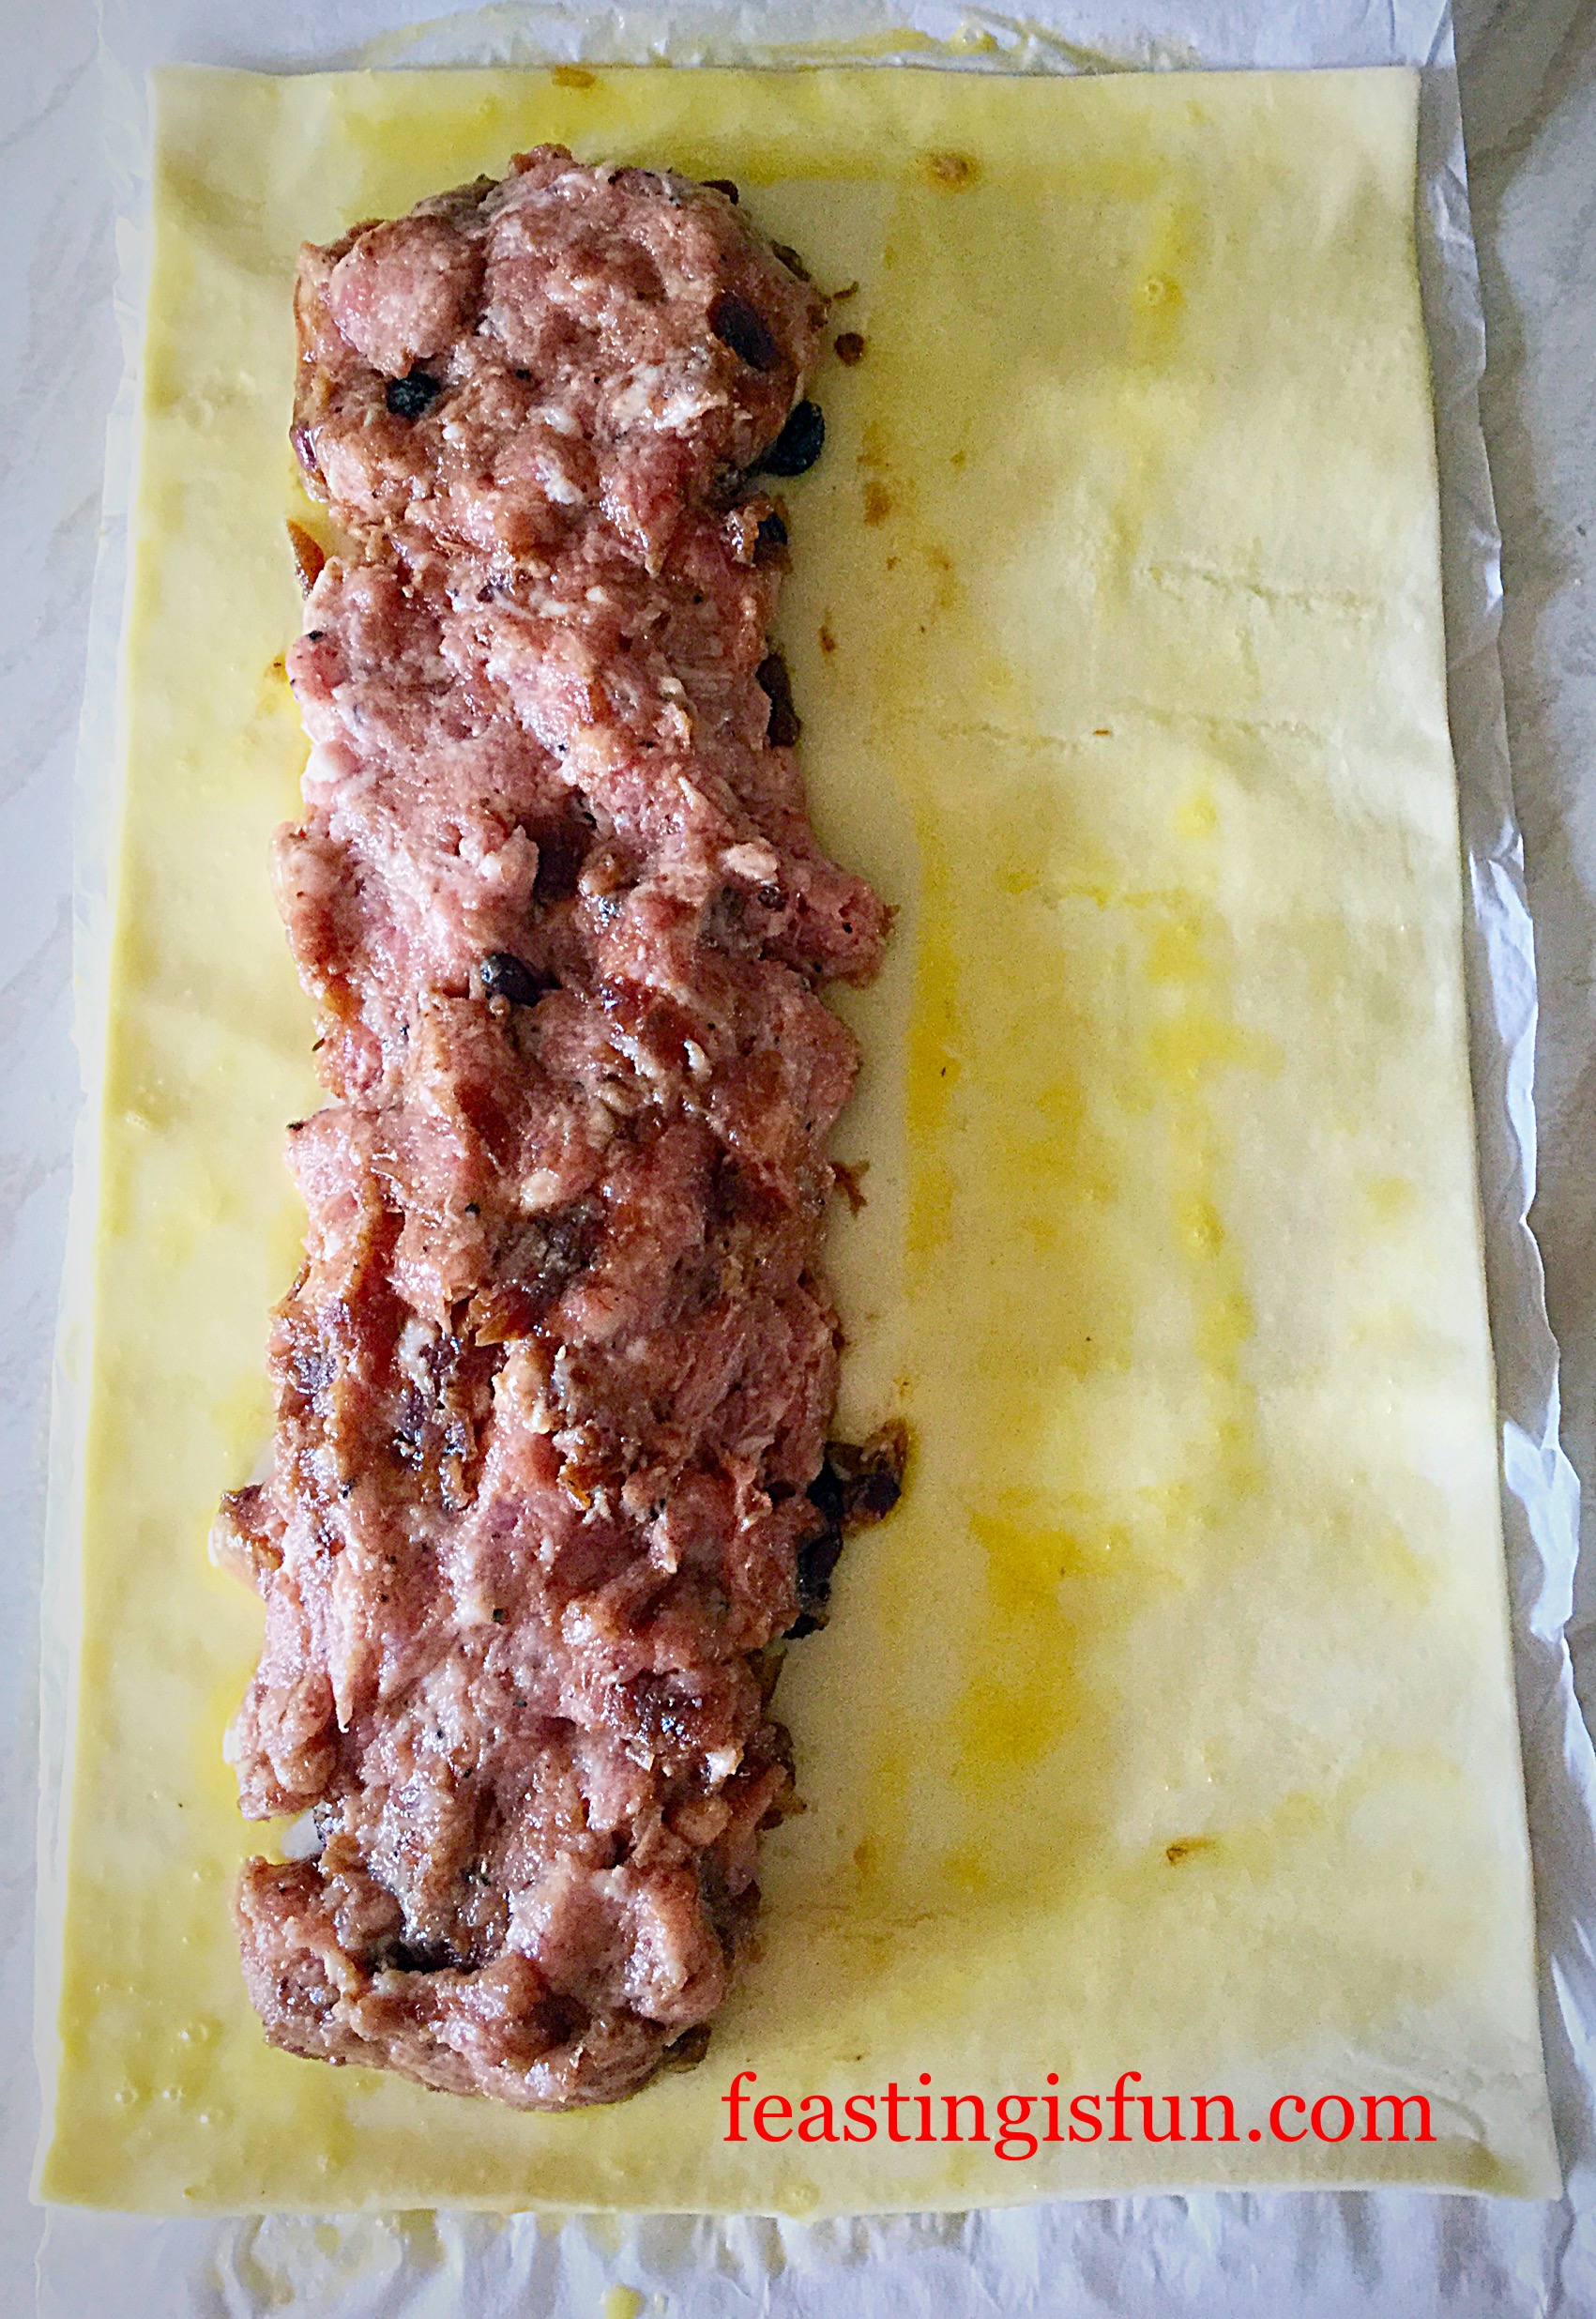
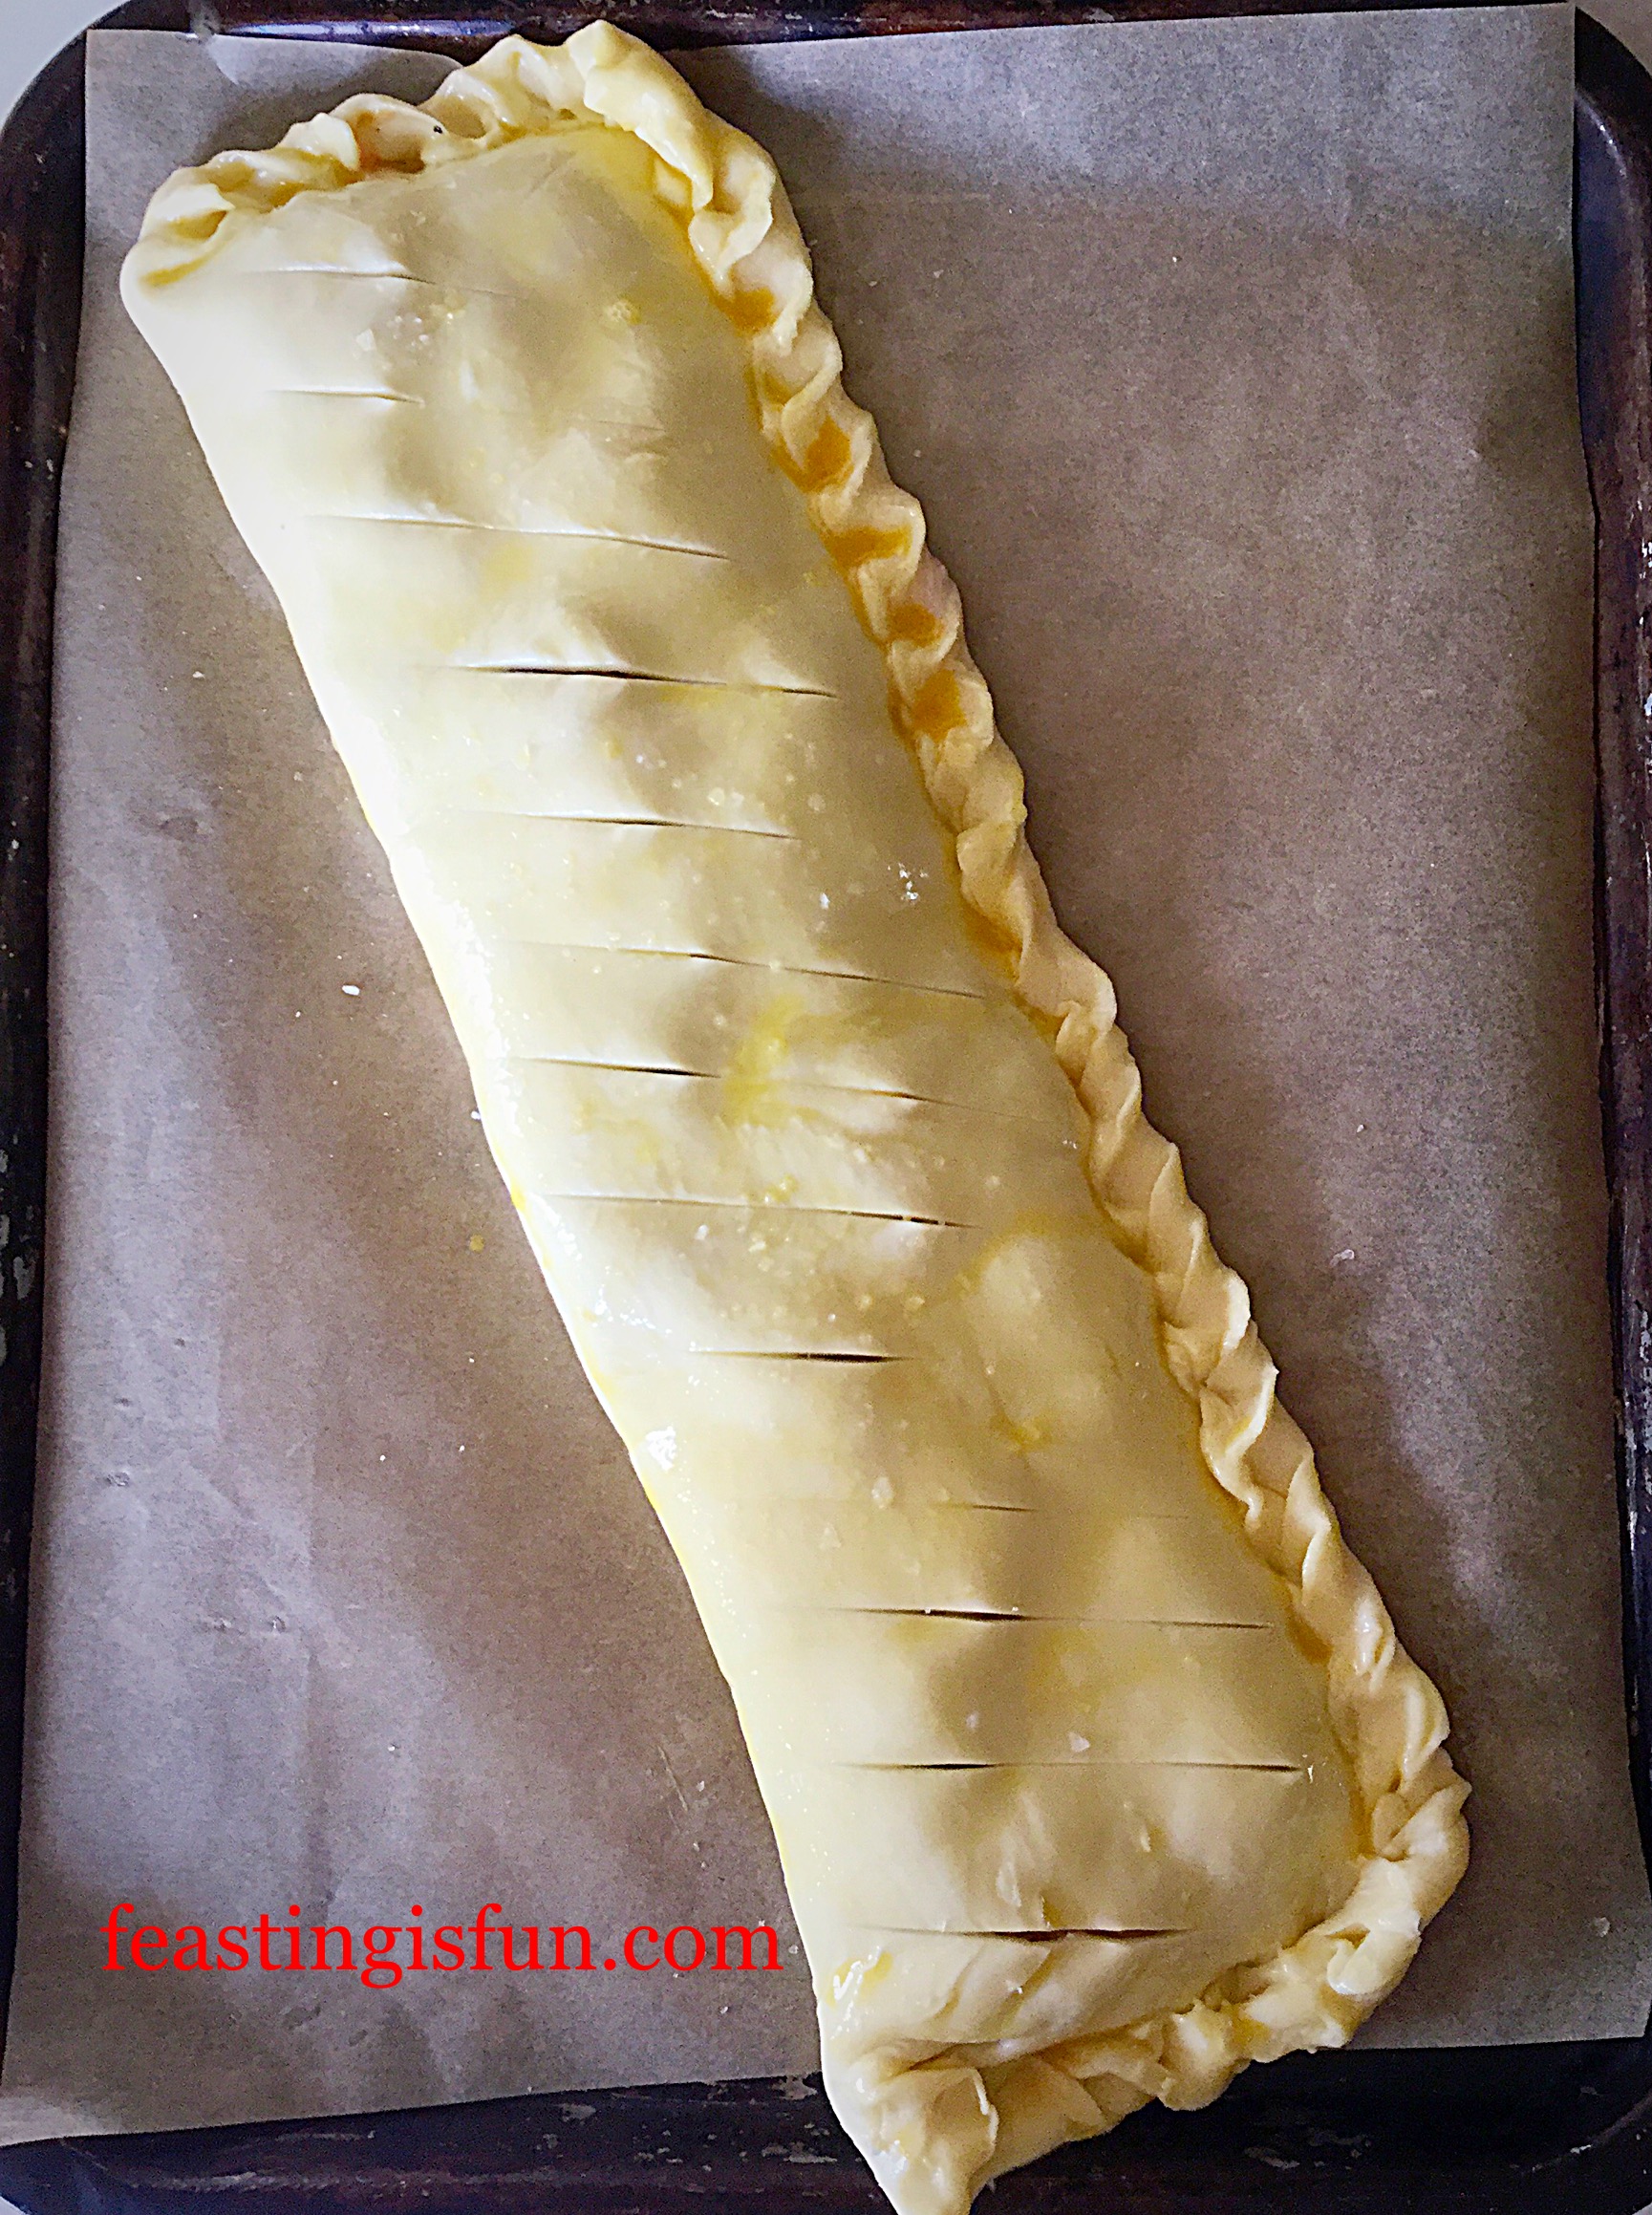
On a clean work top unwrap the pastry sheet.
Place the sausage meat mixture down one side of the pastry, rather like a huge sausage roll, leaving a gap at each end and the side of at least 2.5cm.
The right side of the pastry will fold over the sausage meat.
Crack the egg into a small bowl and whisk with a fork until well mixed. This is known as an egg wash.
Dip a pastry brushing into the egg wash and brush all of the visible pastry (not the sausage meat) with egg wash.
Bring the right side of the pastry over the sausage meat so that both side edges are together.
Crimp with a fork or twist all the pastry layers together, where they overlap to seal them.
Transfer the Red Onion Sausage Plait to the baking tray. Mine fits only when placed at an angle!
Brush over the entire outside of the sausage plait with egg wash. Finally sprinkle with a little sea salt.
Red onion Sausage Plait with diagonal slits.
Using a sharp knife cut light diagonal slits through the pastry. This allows steam to escape and enhances the look of the finished bake.
Baking The Sausage Plait
If not baking straight away, wrap the entire tray and sausage plait in cling film and store in the fridge. For best results, bake within 24 hours.
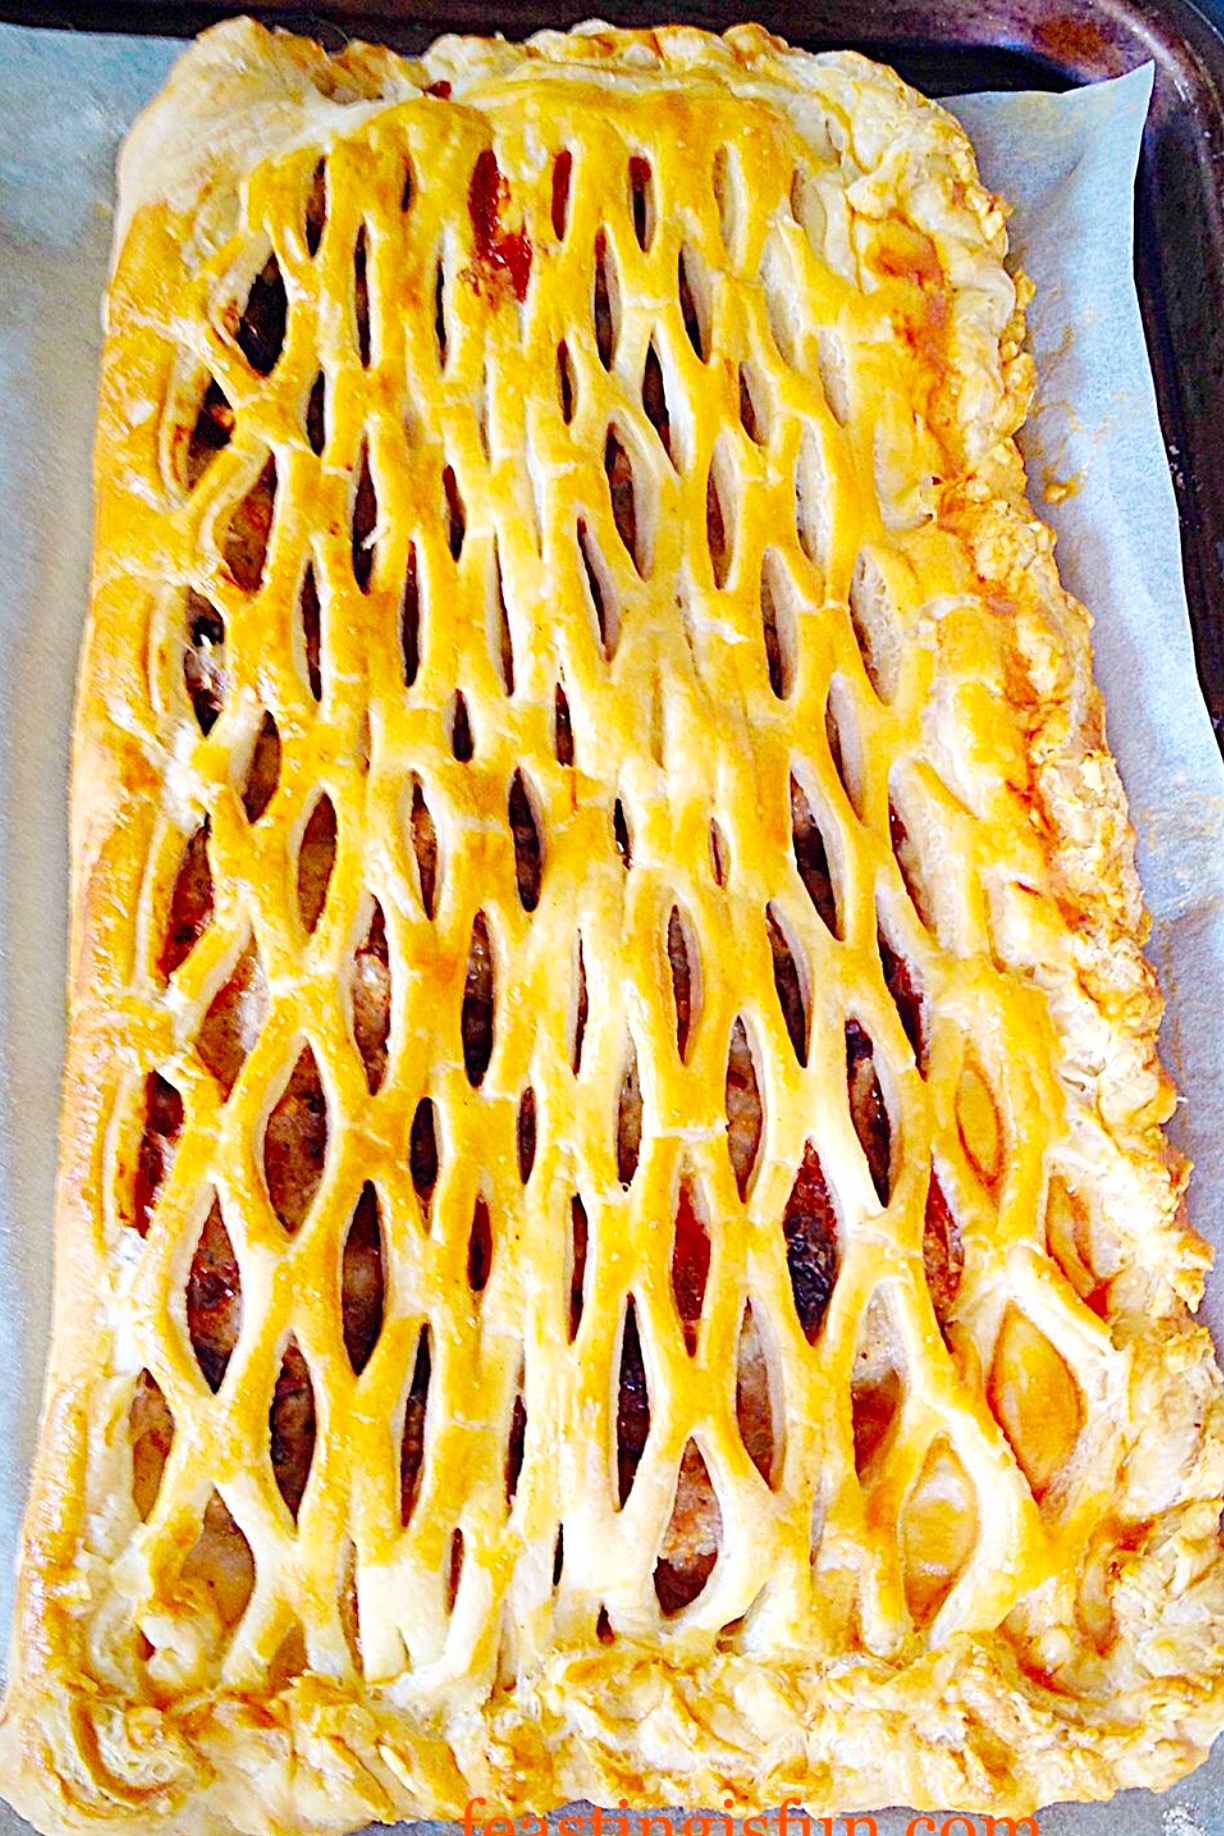
When baking immediately, place the baking tray in the middle of a hot, preheated oven and bake for 40-45 minutes. The sausage plait should be a deep golden colour and any juices must run clear. If there is any doubt slice a portion of the plait off of the end and check. There should be absolutely no pinkness to the sausage meat, if there is pop back into the oven for 15 minutes and reduce the heat by 20C.
As soon as Red Onion Sausage Plait is baked, remove from the oven and leave to cool slightly on the tray.
To serve, allow the Red Onion Sausage Plait to cool for at least 15 minutes, longer if possible. Slice into portions and serve with salad, or my Crunchy Homemade Coleslaw, new potatoes, or for ease potato wedges. Serving with my Tangy Lemon Potato Salad also compliments the sausage plait well.
Golden pastry and sausage meat with caremelised red onion.
To store and for packing up for a picnic, allow the sausage plait to cool. Cut into slices, I find a serrated knife is best when it’s cold. Pack the slices into an airtight container, or wrap in cling film. Store in the fridge for up to 3 days.
Delighfully savoury and full of texture, slices of this Red Onion Sausage Plait also make a welcome change to packed lunches!
If you have enjoyed this recipe for Red Onion Sausage Plait then here are some others you may also want to try:
Using the Red Onion Marmalade as an ingredient, rather than just as a condiment has opened up a whole world full of flavours. I have so many more idea, from pasta dishes to soups, stews and many more.
Do you ever use condiments in your cooking? Let me know in the comments section. I’m always interested to here and learn about new recipes and cooking methods.
So, whatever you are making, baking and creating in your kitchens, have fun preparing and sharing your feast.
Sammie xx
Hawkshead Relishprovided me with a sample jar of their red onion marmalade. All views and opinions are my own. All content, recipes and photographs are my own and covered by copyright law of the land. Please see my Disclosure Policy.
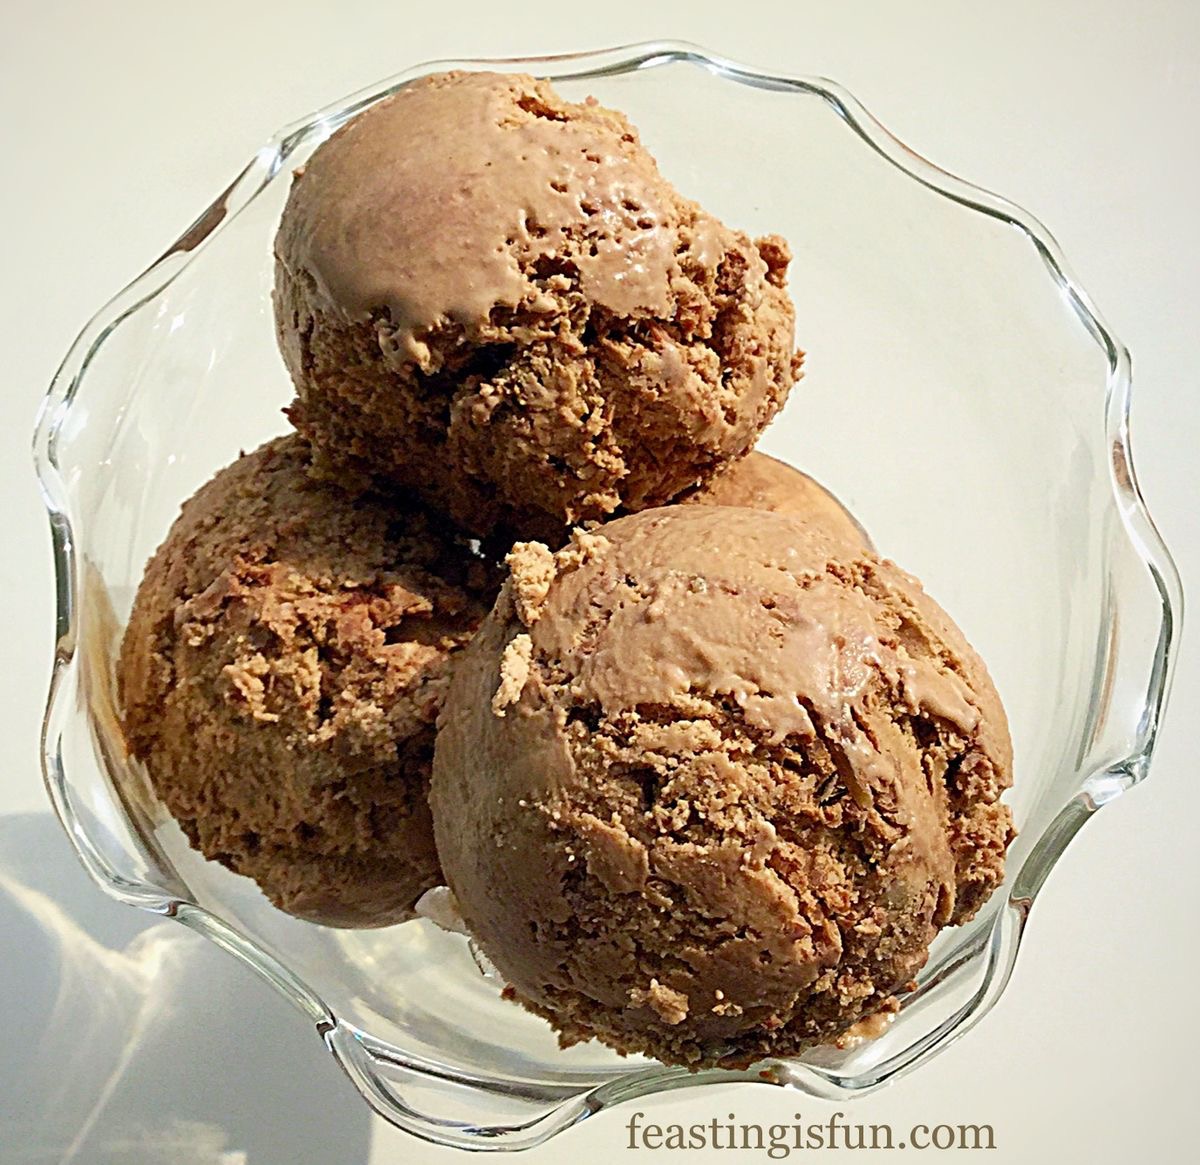
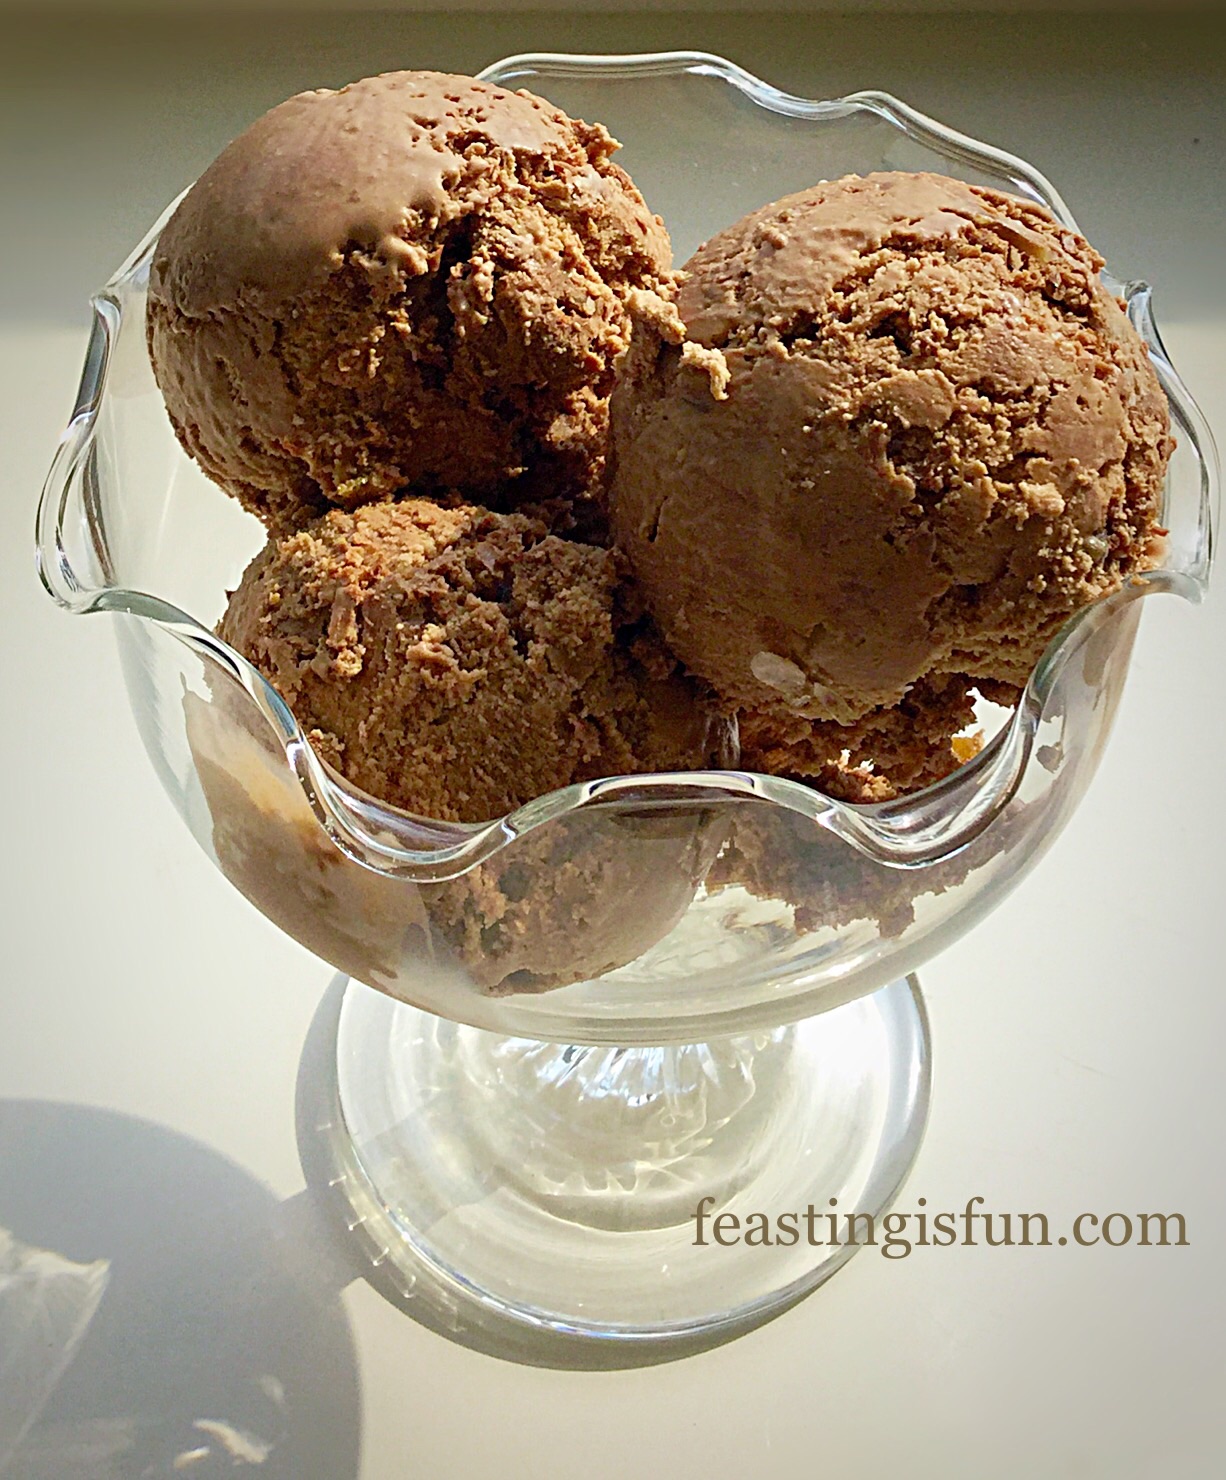
This delicious Chocolate Honeycomb Ice Cream is increadible. Creamy chocolate ice cream with crumbled chunks and golden dust from Cadbury’s Crunchie Bars.
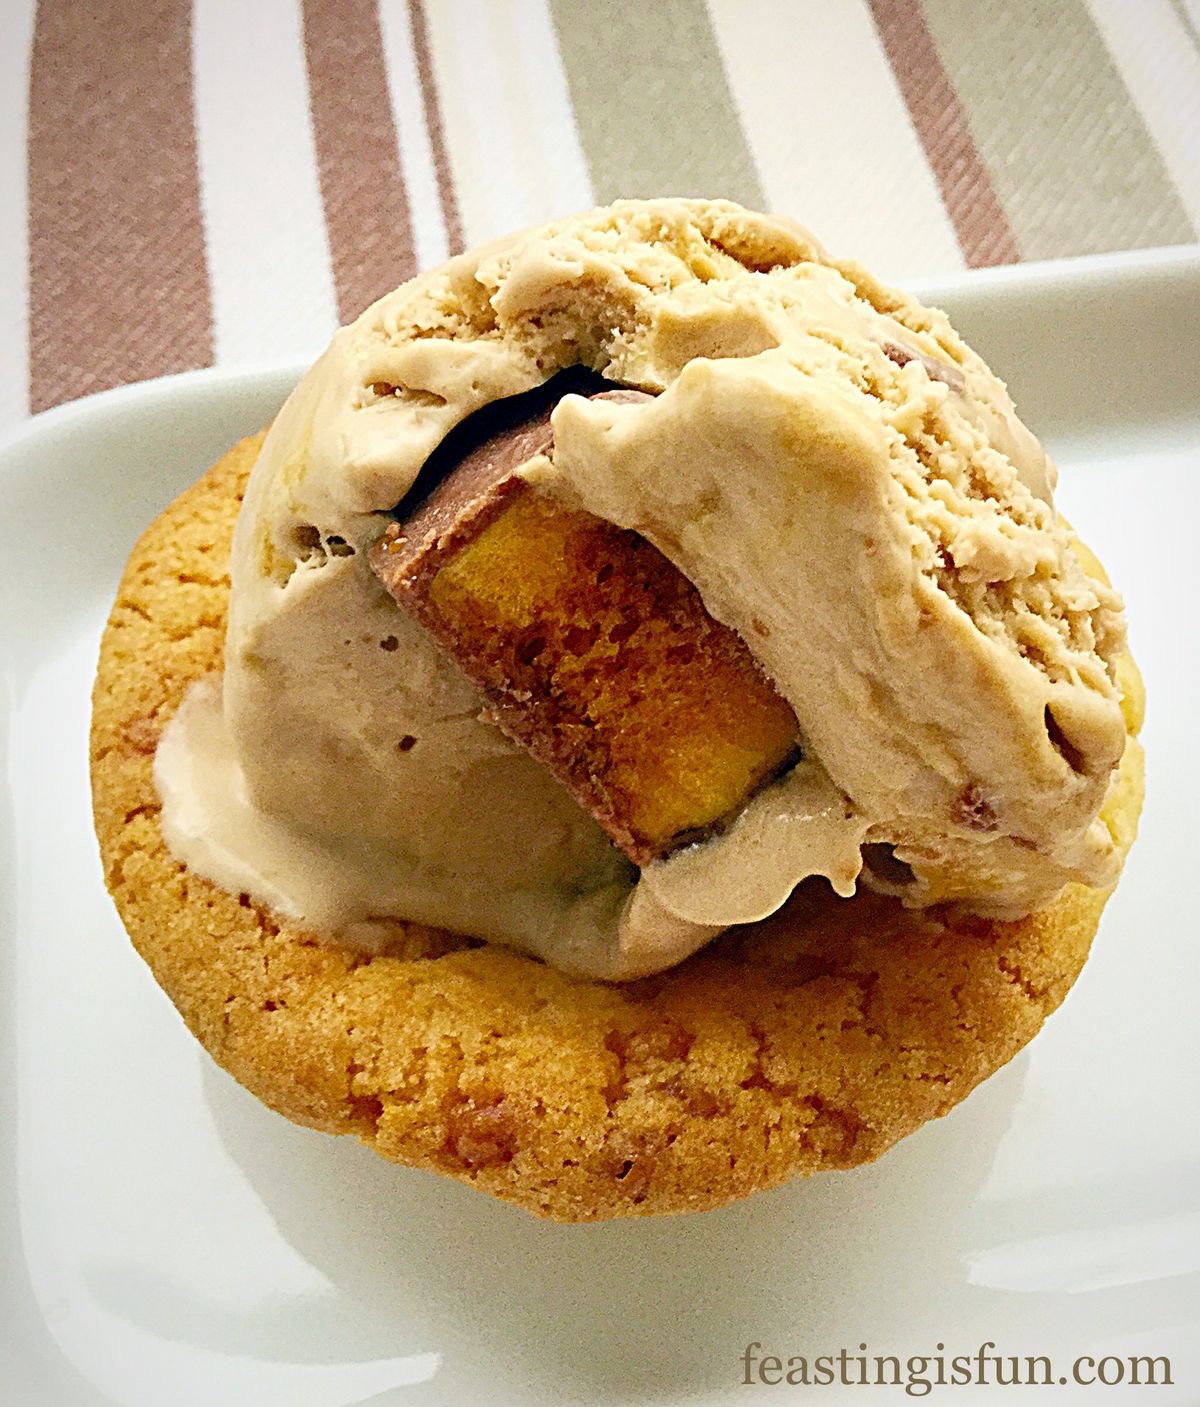
Chocolate Honeycomb Ice Cream in delicious Toffee Cookie Cups
Chocolate Honeycomb Ice Cream enjoyed in delicious Toffee Cookie Cups.
This chocolate based ice cream is incredibly smooth, punctuated by delicious, toffee flavoured honeycomb pieces of different sizes. Perfect in cones, scooped into bowls or even Cookie Cups (watch out for the upcoming post).
Chocolate Honeycomb Ice Cream a delightful treat.
Truthfully I find Crunchie bars just a bit too sweet for my tastebuds, yet in this dreamy ice cream their flavour is dulled, by being frozen and the result is a stronger toffee, less sweet, flavour. Scooped into these Toffee Cookie Cups using Wright’s Baking new mix and the flavours work incredibly well together.
Summer is definitely the season for ice cream. True it can be eaten throughout the year, in fact hot custard and cold ice cream served with a warming dessert is one of my favourite ways to enjoy it, especially in the Winter. There’s something about the hot and cold together that I love. It is not unusual for me to enjoy a cup of tea or coffee with ice cream in a cone!
Chocolate Honeycomb Ice Cream delicious however you enjoy it.
This Chocolate Honeycomb Ice Cream took less time than usual, approximately 15 minutes, to soften once removed from the freezer.
Homemade ice creams, in general, freeze more firmly than the mass produced version. Without additives to soften them, you may have to wait a few minutes, but I think homemade ice cream is definitely worth the wait. Knowing what goes into our food helps us make healthier choices. I am not for one moment saying that eating a whole tub full of ice cream is good for you, far from it, simply that having made it yourself, you are more likely to be satisfied with a smaller portion.
One scoop of this Chocolate Honeycomb Ice Cream in these Cookie Cups was plenty. The ice cream was savoured – as were the Cookie Cups!
Recipe: Makes 750ml Chocolate Honeycomb Ice Cream
300ml Double Cream
300ml Whole or Semi Skimmed Milk
4 Large Free Range Egg Yolks – the egg whites can be frozen for up to one month – I use zip lock freezer bags
Place the cream and milk into a large, heavy bottomed saucepan. Place over a medium heat until bubbles form around the outside rim, before the liquid boils. This is called the scalding point. Remove from the heat.
In a large bowl add the egg yolks, caster sugar, corn flour and vanilla extract.
Whisk until pale and thickened.
With the whisk on low, pour the scalded cream mixture slowly into the whisked eggs. This is called the custard base.
Pour the custard base back into the saucepan and cook over a medium heat until the custard thickens and coats the back of a wooden spoon.
Remove the custard from the heat.
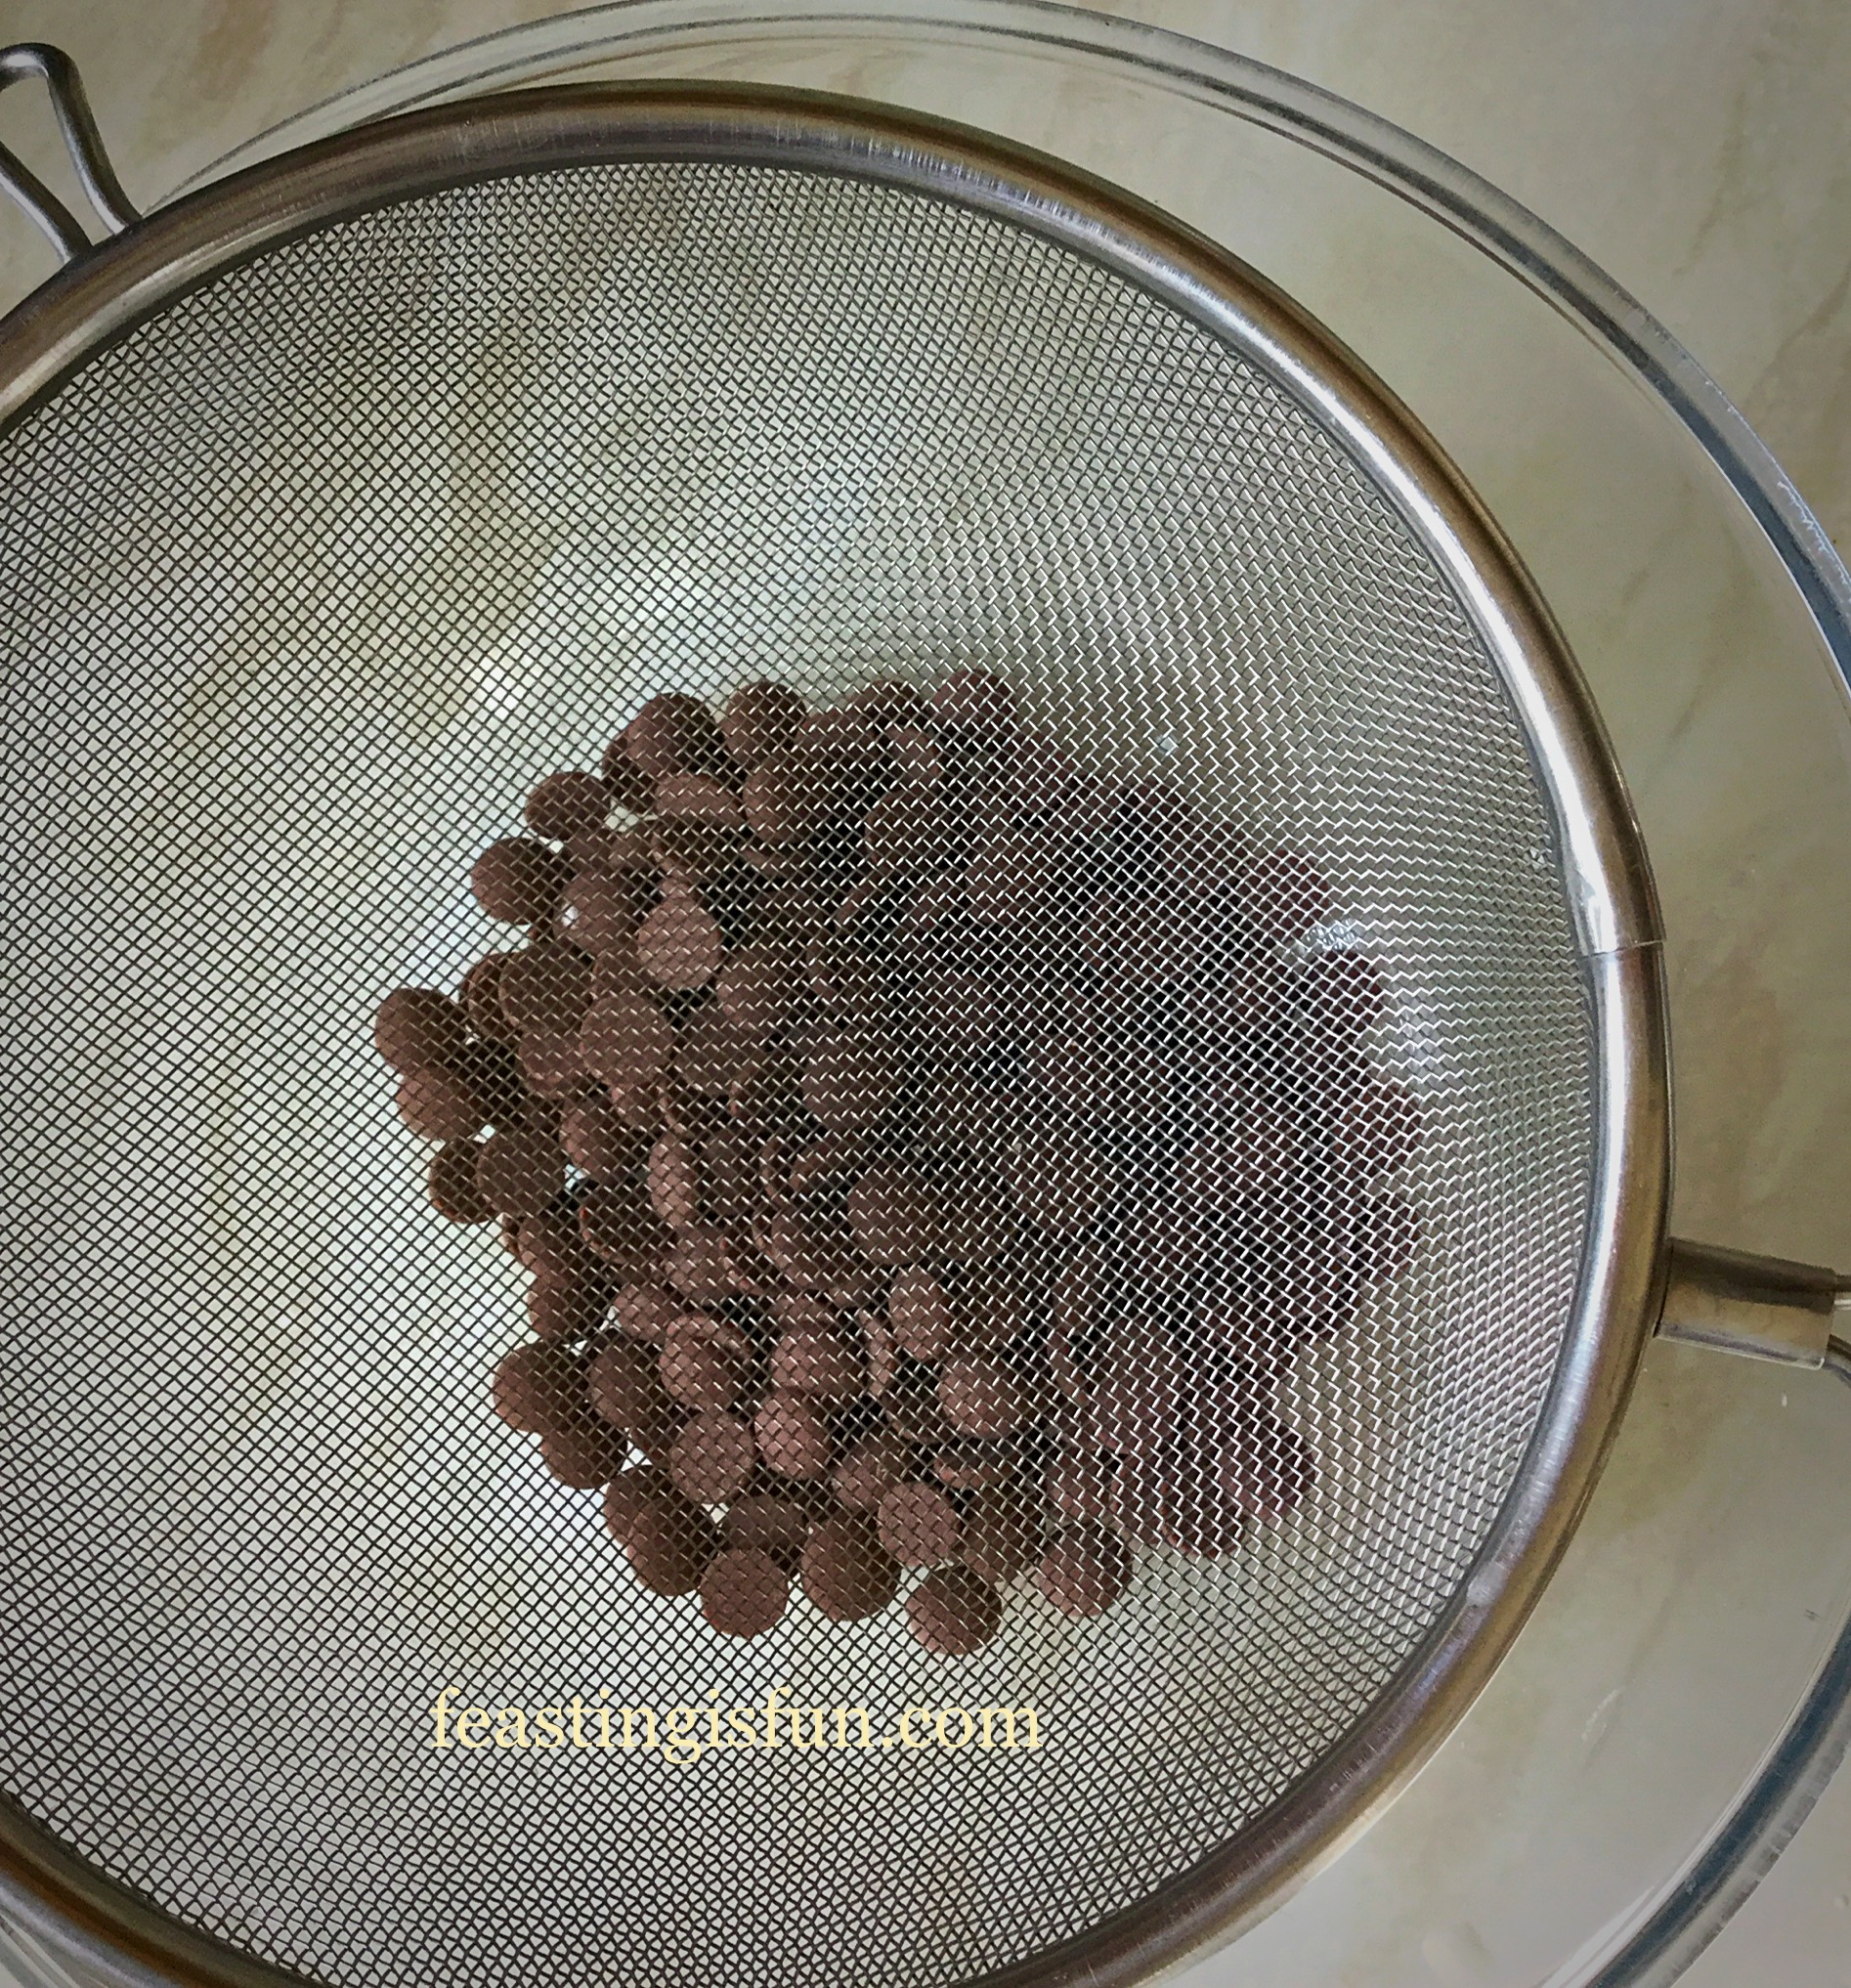
In a clean bowl add the milk chocolate.
Pour the custard base through a sieve on top of the milk chocolate.
The custard base will gently melt the chocolate.
Once the custard is in the bowl, remove the sieve and stir the custard so that the melted chocolate incorporates and melts into the custard.
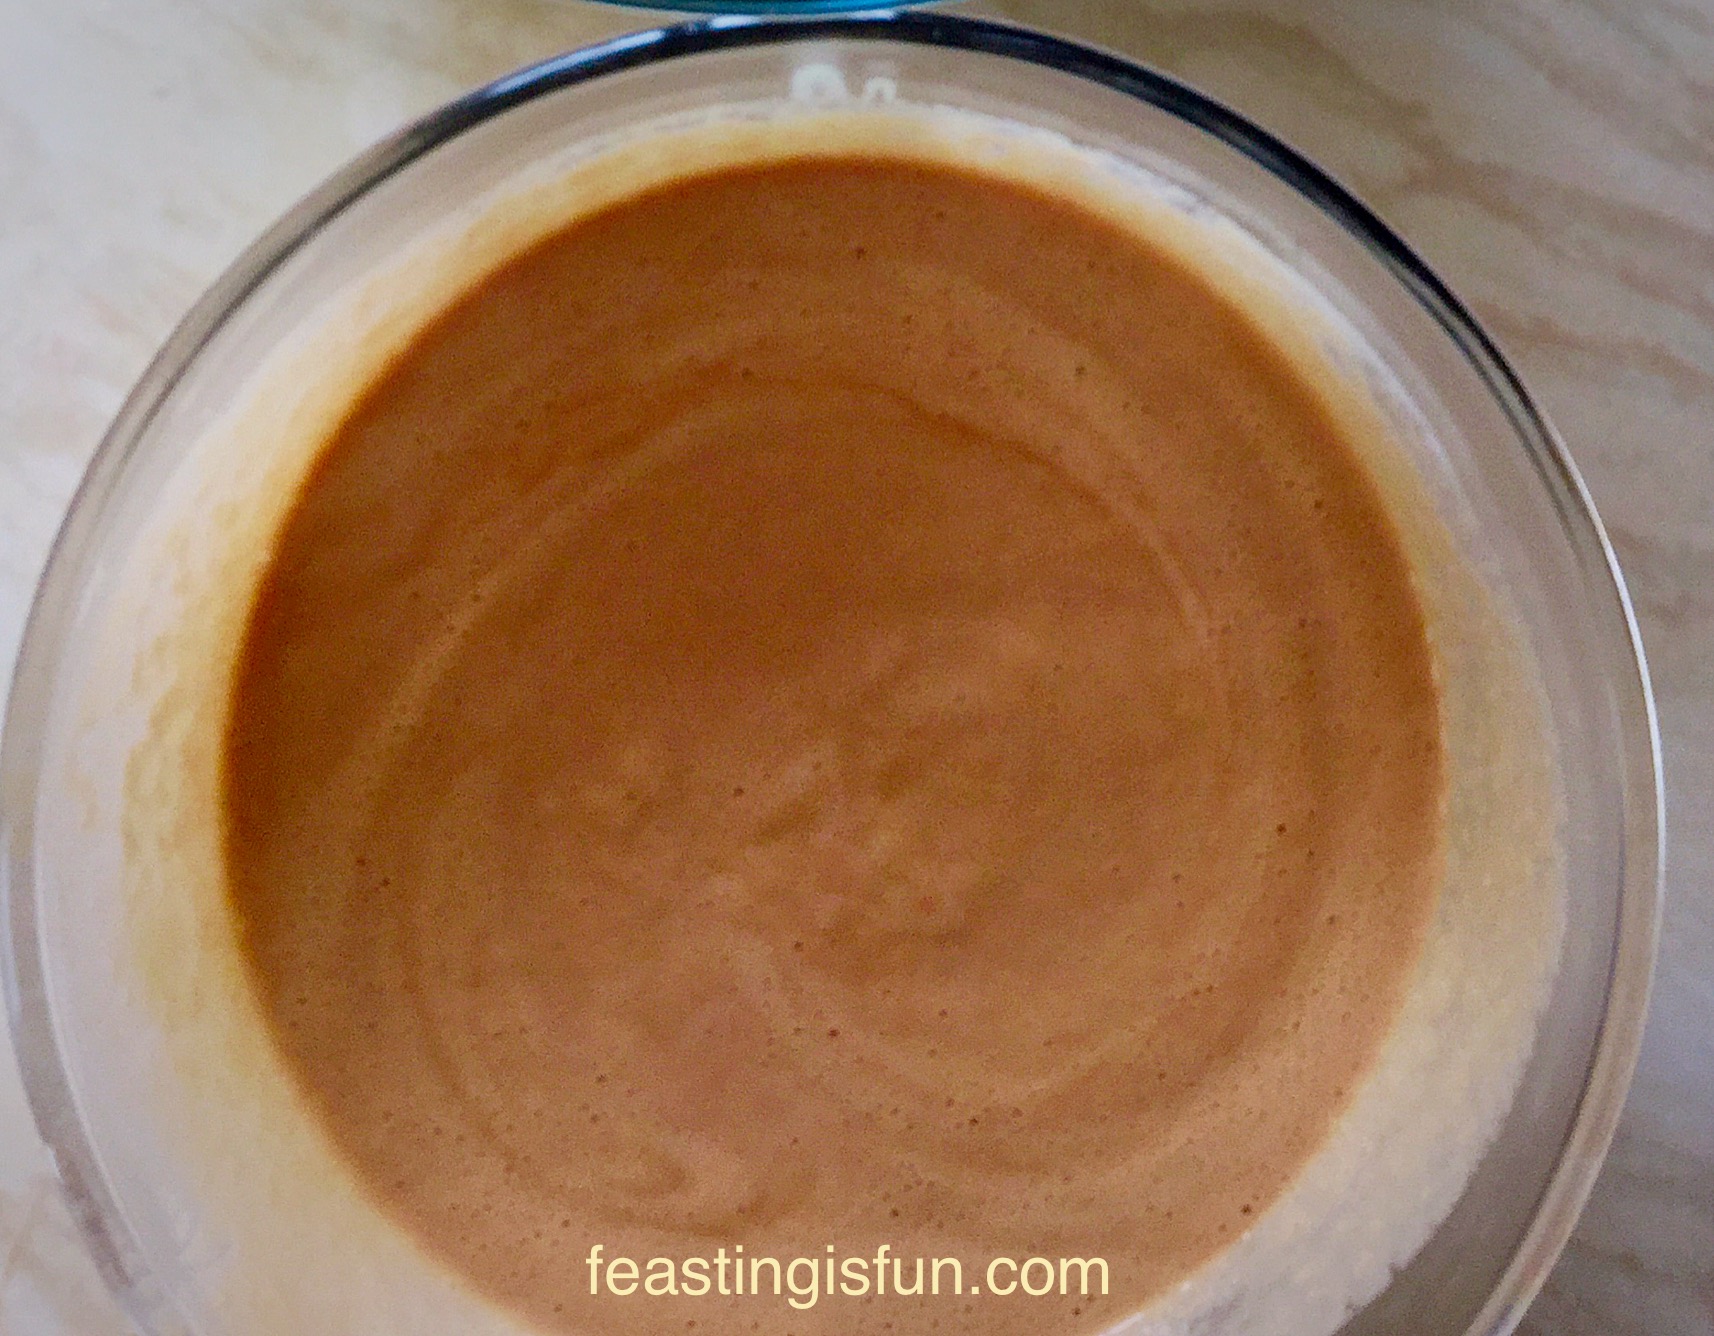
Chocolate Honeycomb Ice Cream custard ready to be cooled and churned.
Cover the top of the custard with cling film, so that is is in contact with the liquid. This will stop a skin from forming.
Once cooled slightly chill the custard in the fridge.
Once chilled, set up your ice cream maker according to the manufacturers instructions.
Churn the chocolate ice cream until it is softly frozen.
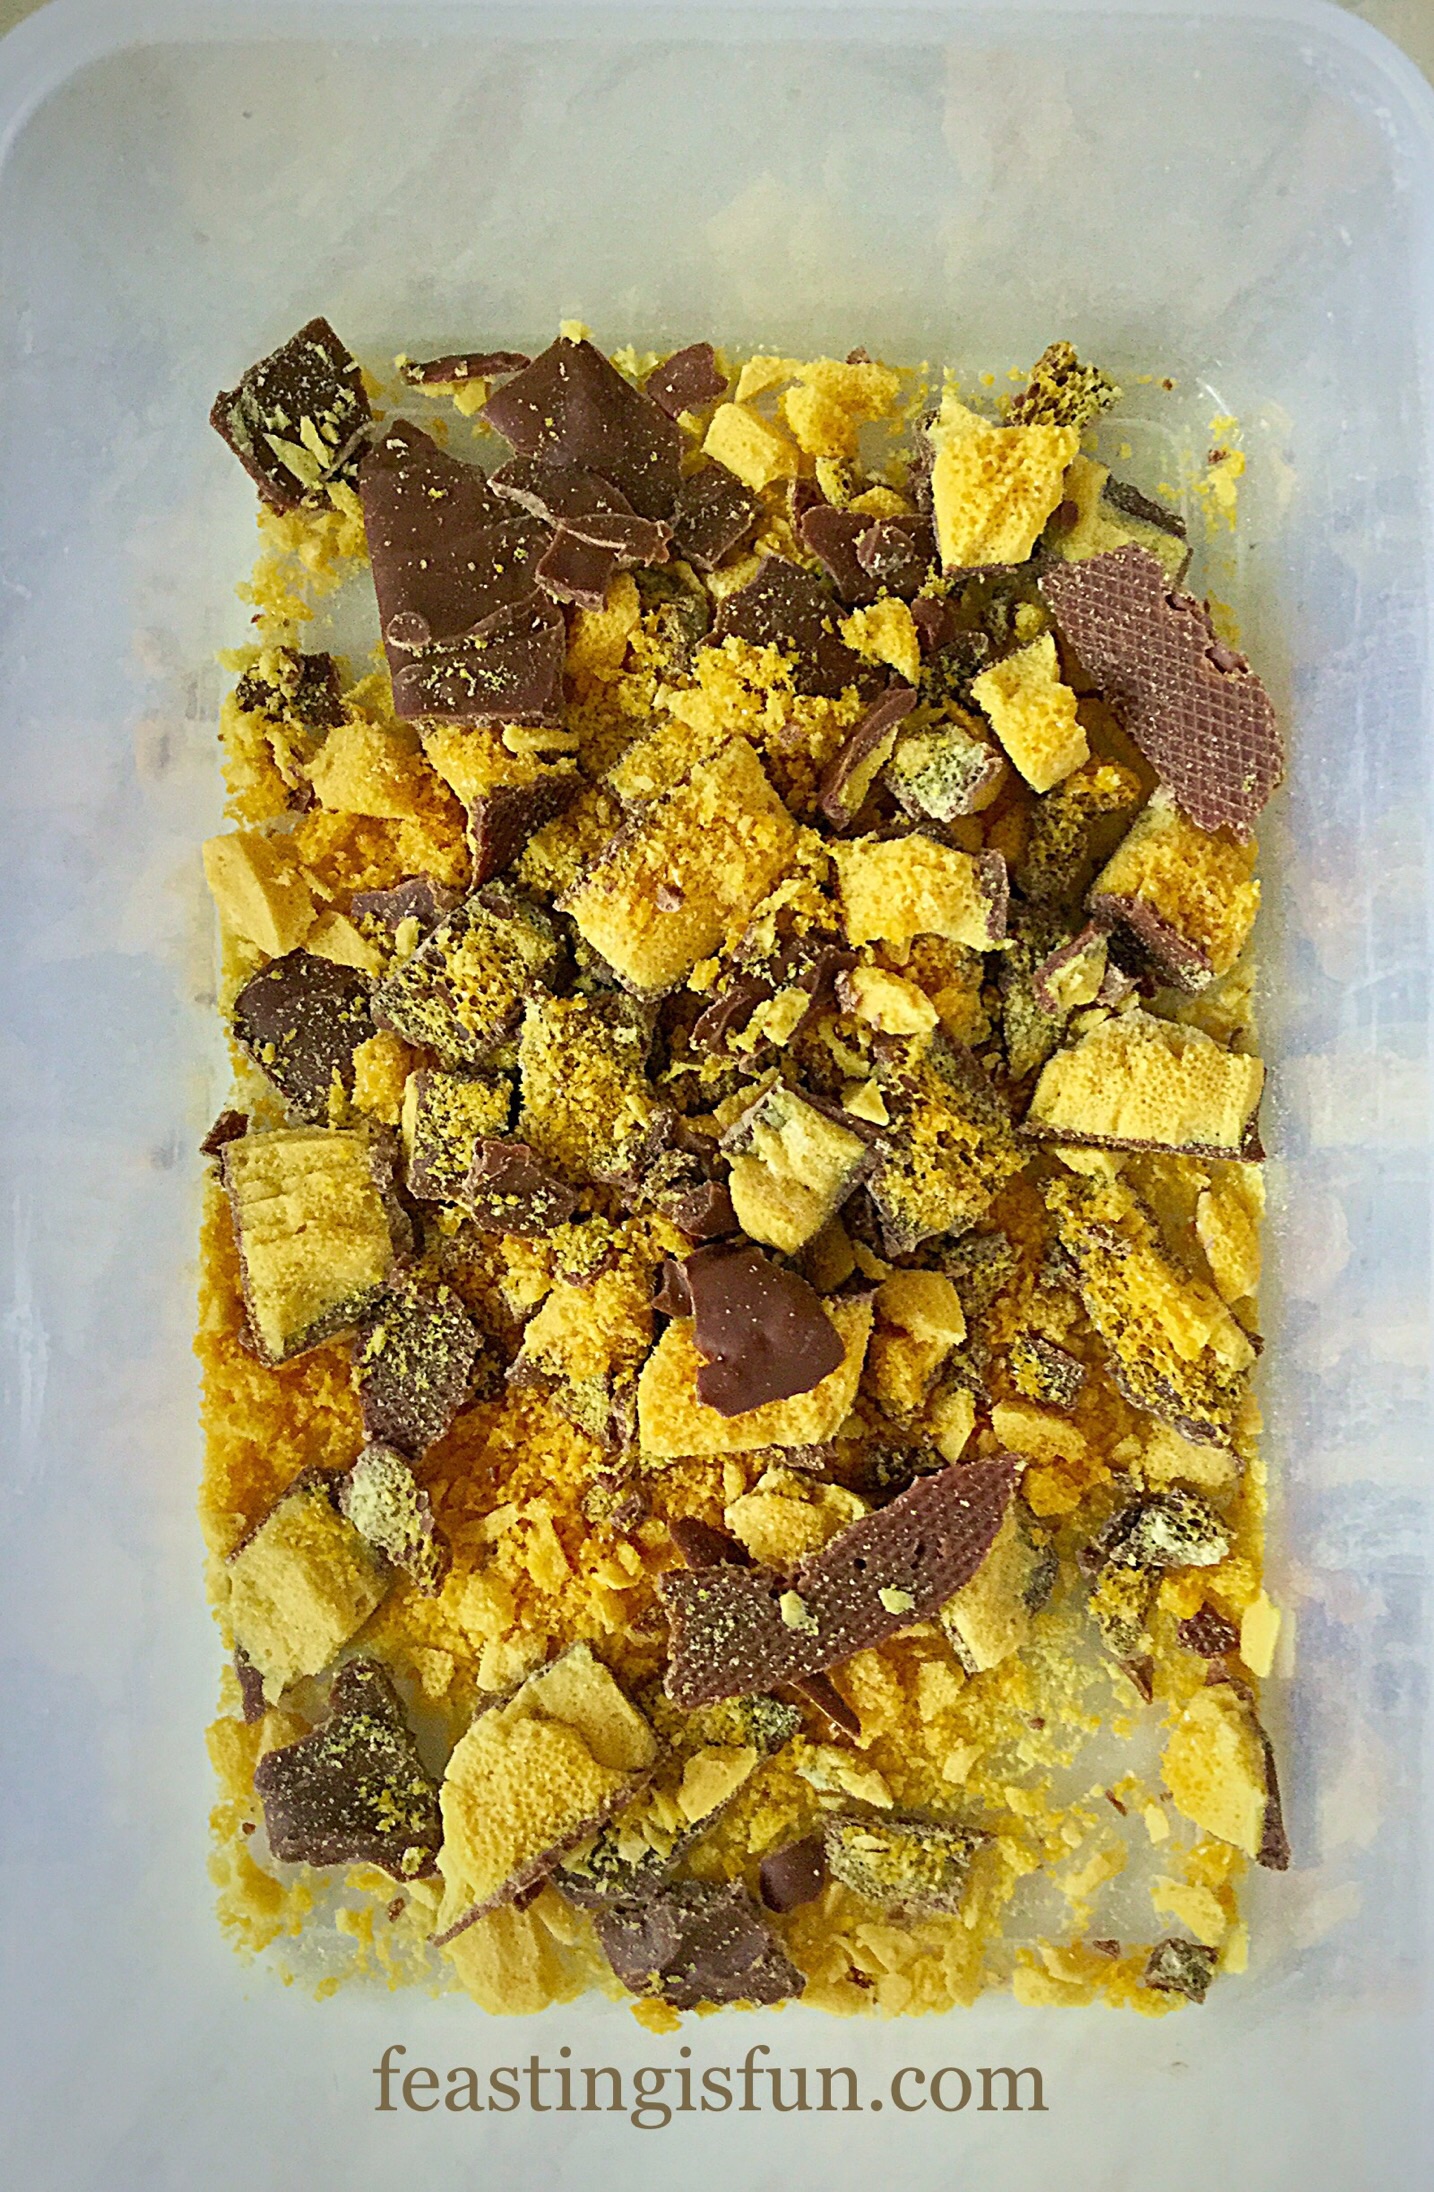
Crumble up 2 Crunchie bars and place in the bottom of the freezer proof tub to be used for the ice cream.
Crumbled up Crunchie bars in the base of the container.
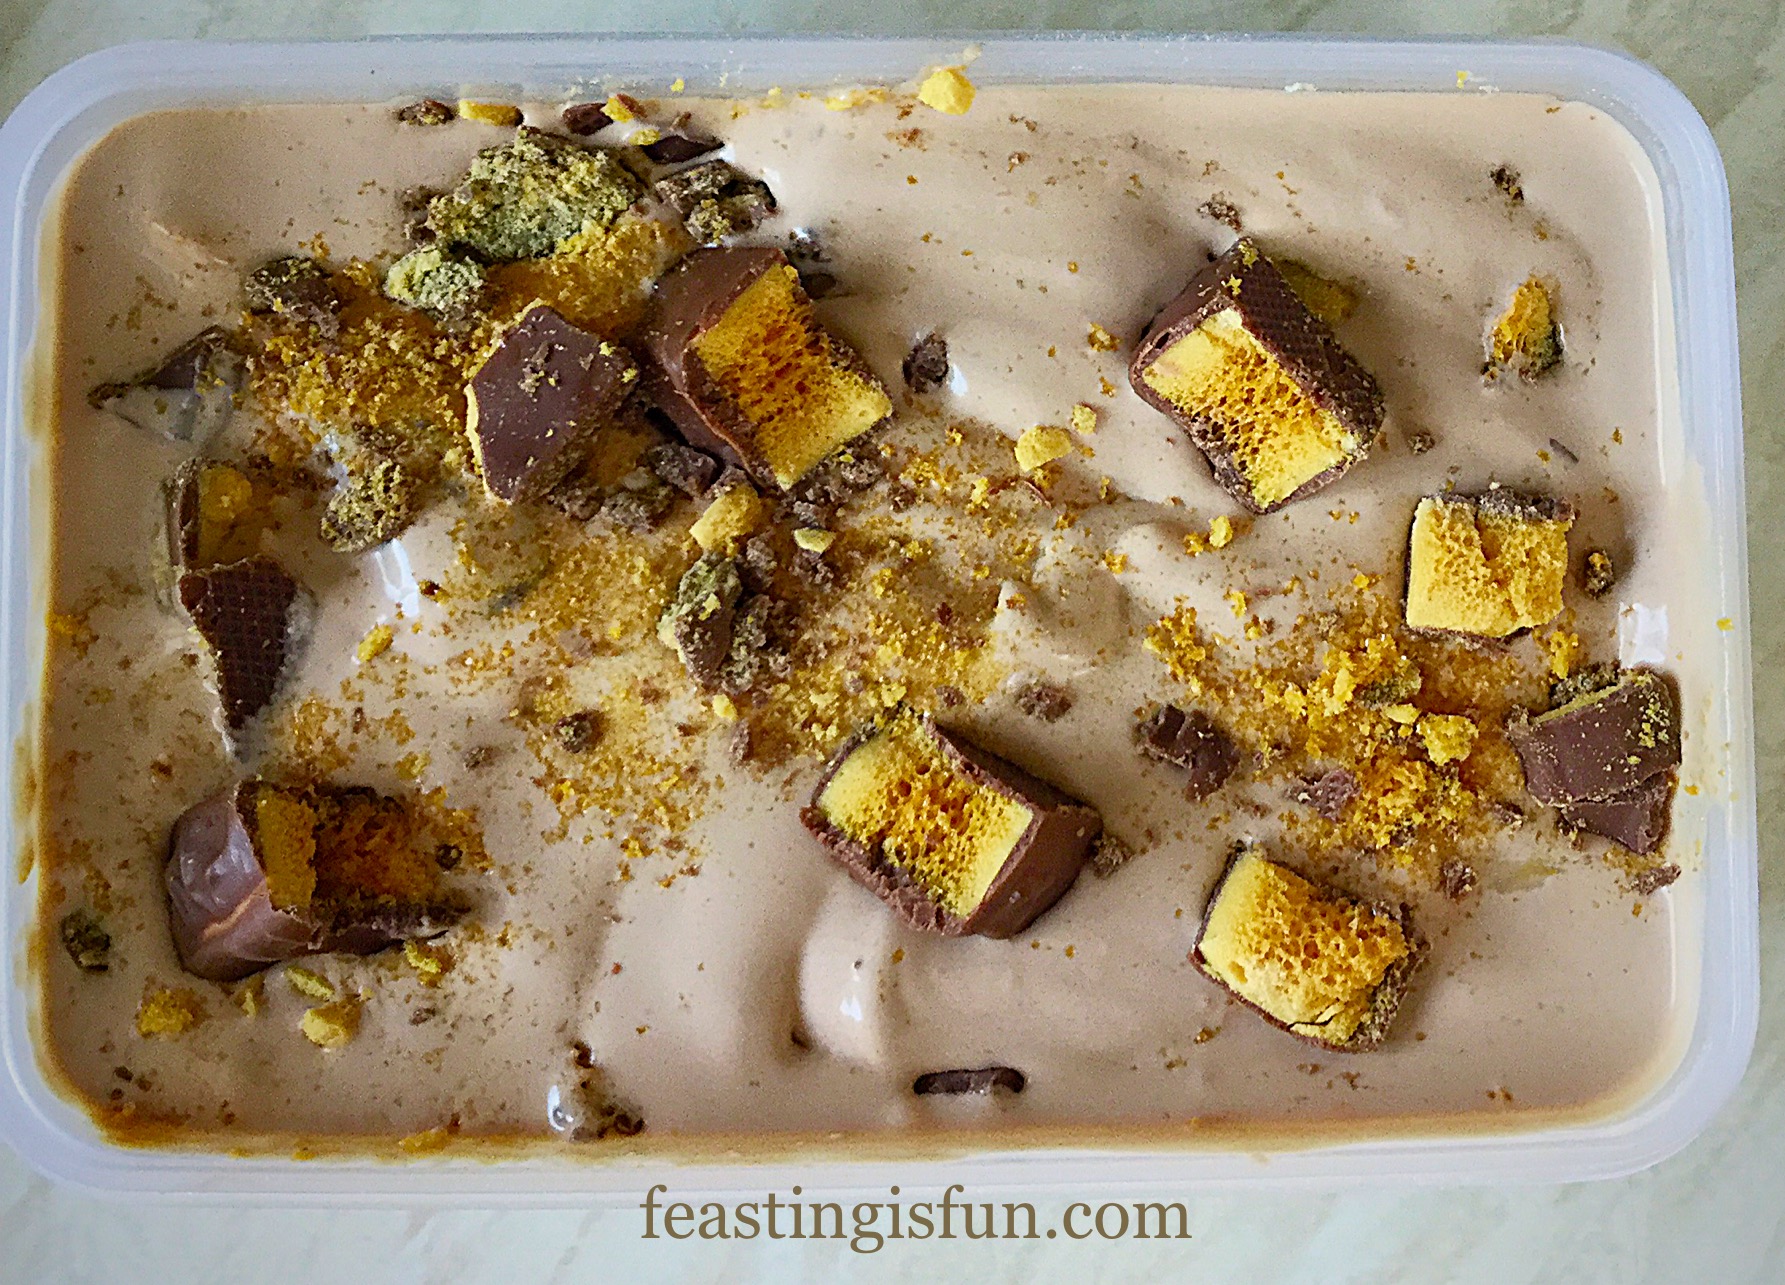
Scoop the soft chocolate ice cream into the freezer tub.
Break up another 2 Crunchie bars. Add one to the tub and stir to mix, then crumble the second on to the top of the ChocolateHoneycomb Ice Cream.
Chocolate Honeycomb Ice Cream with extra chocolate honeycomb on top.
Pop on an airtight lid and place the ice cream in the freezer to firm up.
Remove the container from the freezer 15 minutes prior to serving.
Ice Creams are a great barbecue dessert, when it’s hot and everyone needs cooling down. I have also be known to serve up ice cream smoothies such as Raspberry and Banana Ice CreamSmoothies, for breakfast, after a sleepover, in the middle of August when the weather is hot and stuffy.
If you have enjoyed this recipe for Chocolate Honeycomb Ice Cream then you may also like these:
Strawberry Ripple Ice Cream making the best of British strawberries.
Life for me and us as a family is all about balance. I am unwilling, although I did try for a why, to eat entirely local, organic, free from additives food. I appreciate that for some people, this is not a choice they have. Rather our meat and fish is organic, we are attempting to grow some vegetables this year at home – without the use of pesticides and our meals are generally cooked from scratch.
This is a personal choice and I absolutely do not stand in judgement of others that choose differently. Baking our own bread is a pleasure and after the smell of ‘plastic bread’ I’m not sure I could go back to shop bought. Yet when out and about we will eat at cafes without always thinking of the food’s origins.
Personally I know from experience that my body functions and feels better when it is fuelled with plenty of fruit and veg. On holiday one year when I was younger I craved salad! Travelling across Europe with a vegetarian friend proved extremely difficult to eat regularly, let alone healthily.
Making one small change can have a massive impact. Ours was to eat only additive free, organic if possible, meat and fish. We eat meat, yet we want the animals we consume to live a good, healthy, happy life. Since being diagnosed with Fibromyalgia I have also become increasing aware of how medicated some farm animals can be. So I’m also looking after my health and the health of our family.
A recent report (sorry I’ve lost its origins) suggested that people who cook for themselves tend to not diet and generally have stable weight. I can attest to having had relatively stable weight over the years and I have always cooked dinner, even when I lived on my own. I hope this doesn’t sound preachy? It isn’t meant to.
Feasting is Fun is just that. Making every meal count – a feast and having fun whilst preparing and enjoying your meal/dessert/drink.