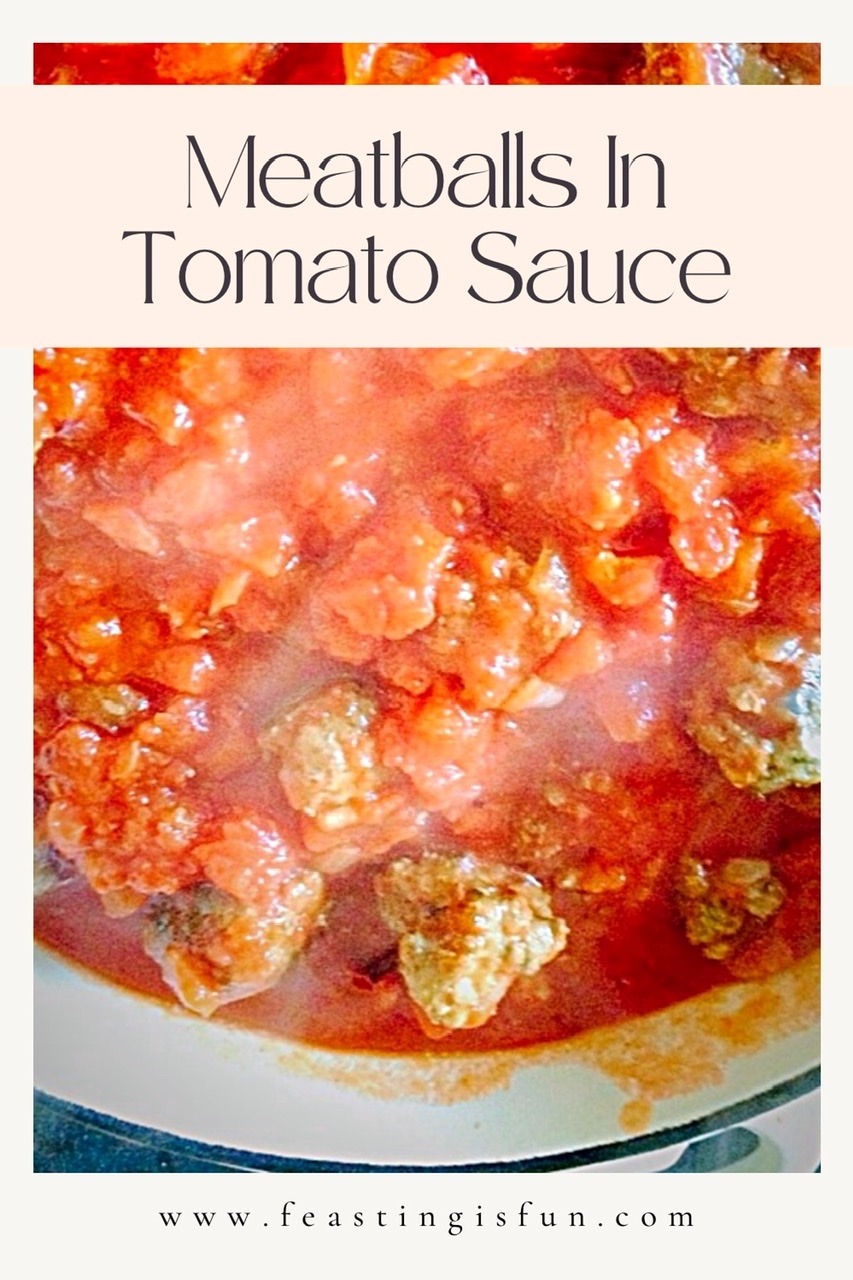
Hello, I have the most delicious and comforting recipe to share with you today, Meatballs In Tomato Sauce. Flavour packed ‘meaty’ meatballs made with both beef and pork and lots of herbs, cooked in the easiest tomato sauce you will ever make.
Meatballs are always a hit with my family, especially when served with spaghetti. It’s a classic combination for a reason. Alternatively you can serve them with mashed potato, baked potato, rice and even in baguette. And I suggest, if serving in baguette or rolls, top with lots of grated cheddar, pop under the grill to melt for ultimate gooeyness!
Since I use a combination of beef mince and pork sausage meat for these l meatballs as it gives them a rich, meaty flavour. While I do make them using all beef, they can be a little heavy. So, in my opinion the mix of pork and beef gives a better flavour and texture.
A quick note: Although there’s a bit of prep work involved in making these meatballs, the tomato sauce is so quick to make. Also, it really takes no longer than making a bolognaise sauce. And the meatballs really do make a delicious change so I think it’s worth it.
Recipe : Meatballs In Tomato Sauce
For the Meatballs
1 Large Onion
1 tbsp Olive Oil
675g/1.5lb Beef Mince – preferably with less than 10% fat content
450g/1lb Pork Sausage Meat – use the best quality you can afford
First of all, peel and chop the onion as finely as possible. Add the oil to a frying pan and sauté over a low-medium heat for 5-10 minutes until the onion is soft and translucent, but not browned.
Set the pan aside and allow the onion to cool down. While the onion cools strip the fresh thyme leaves from the sprigs and finely chop the sage.
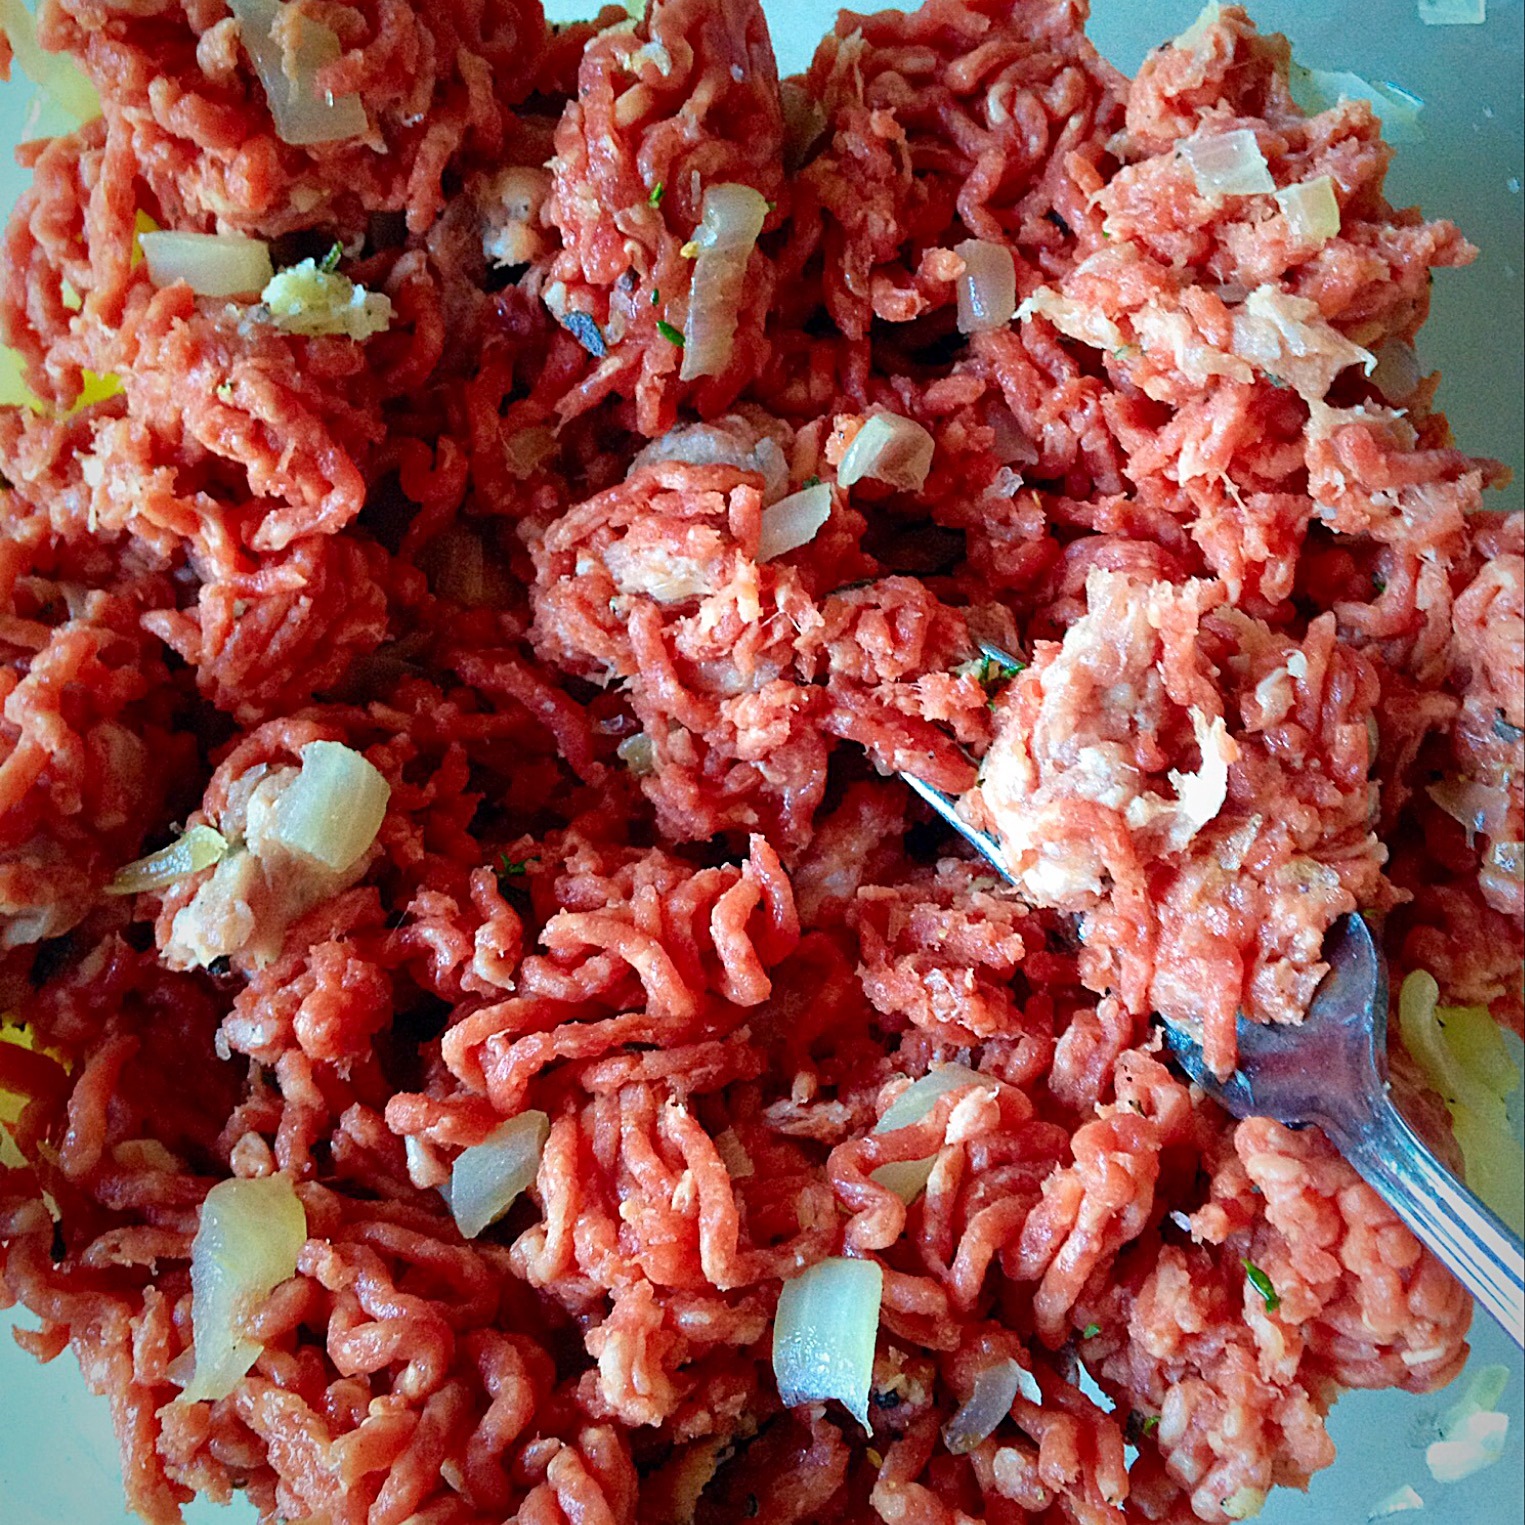
Next, place the minced beef, sausage meat, cooled onion, seasoning, minced garlic and herbs into a bowl.
Using a fork, gently combine all the ingredients together. I’ve found, if I squish them together using my hands the meatballs end up too dense.
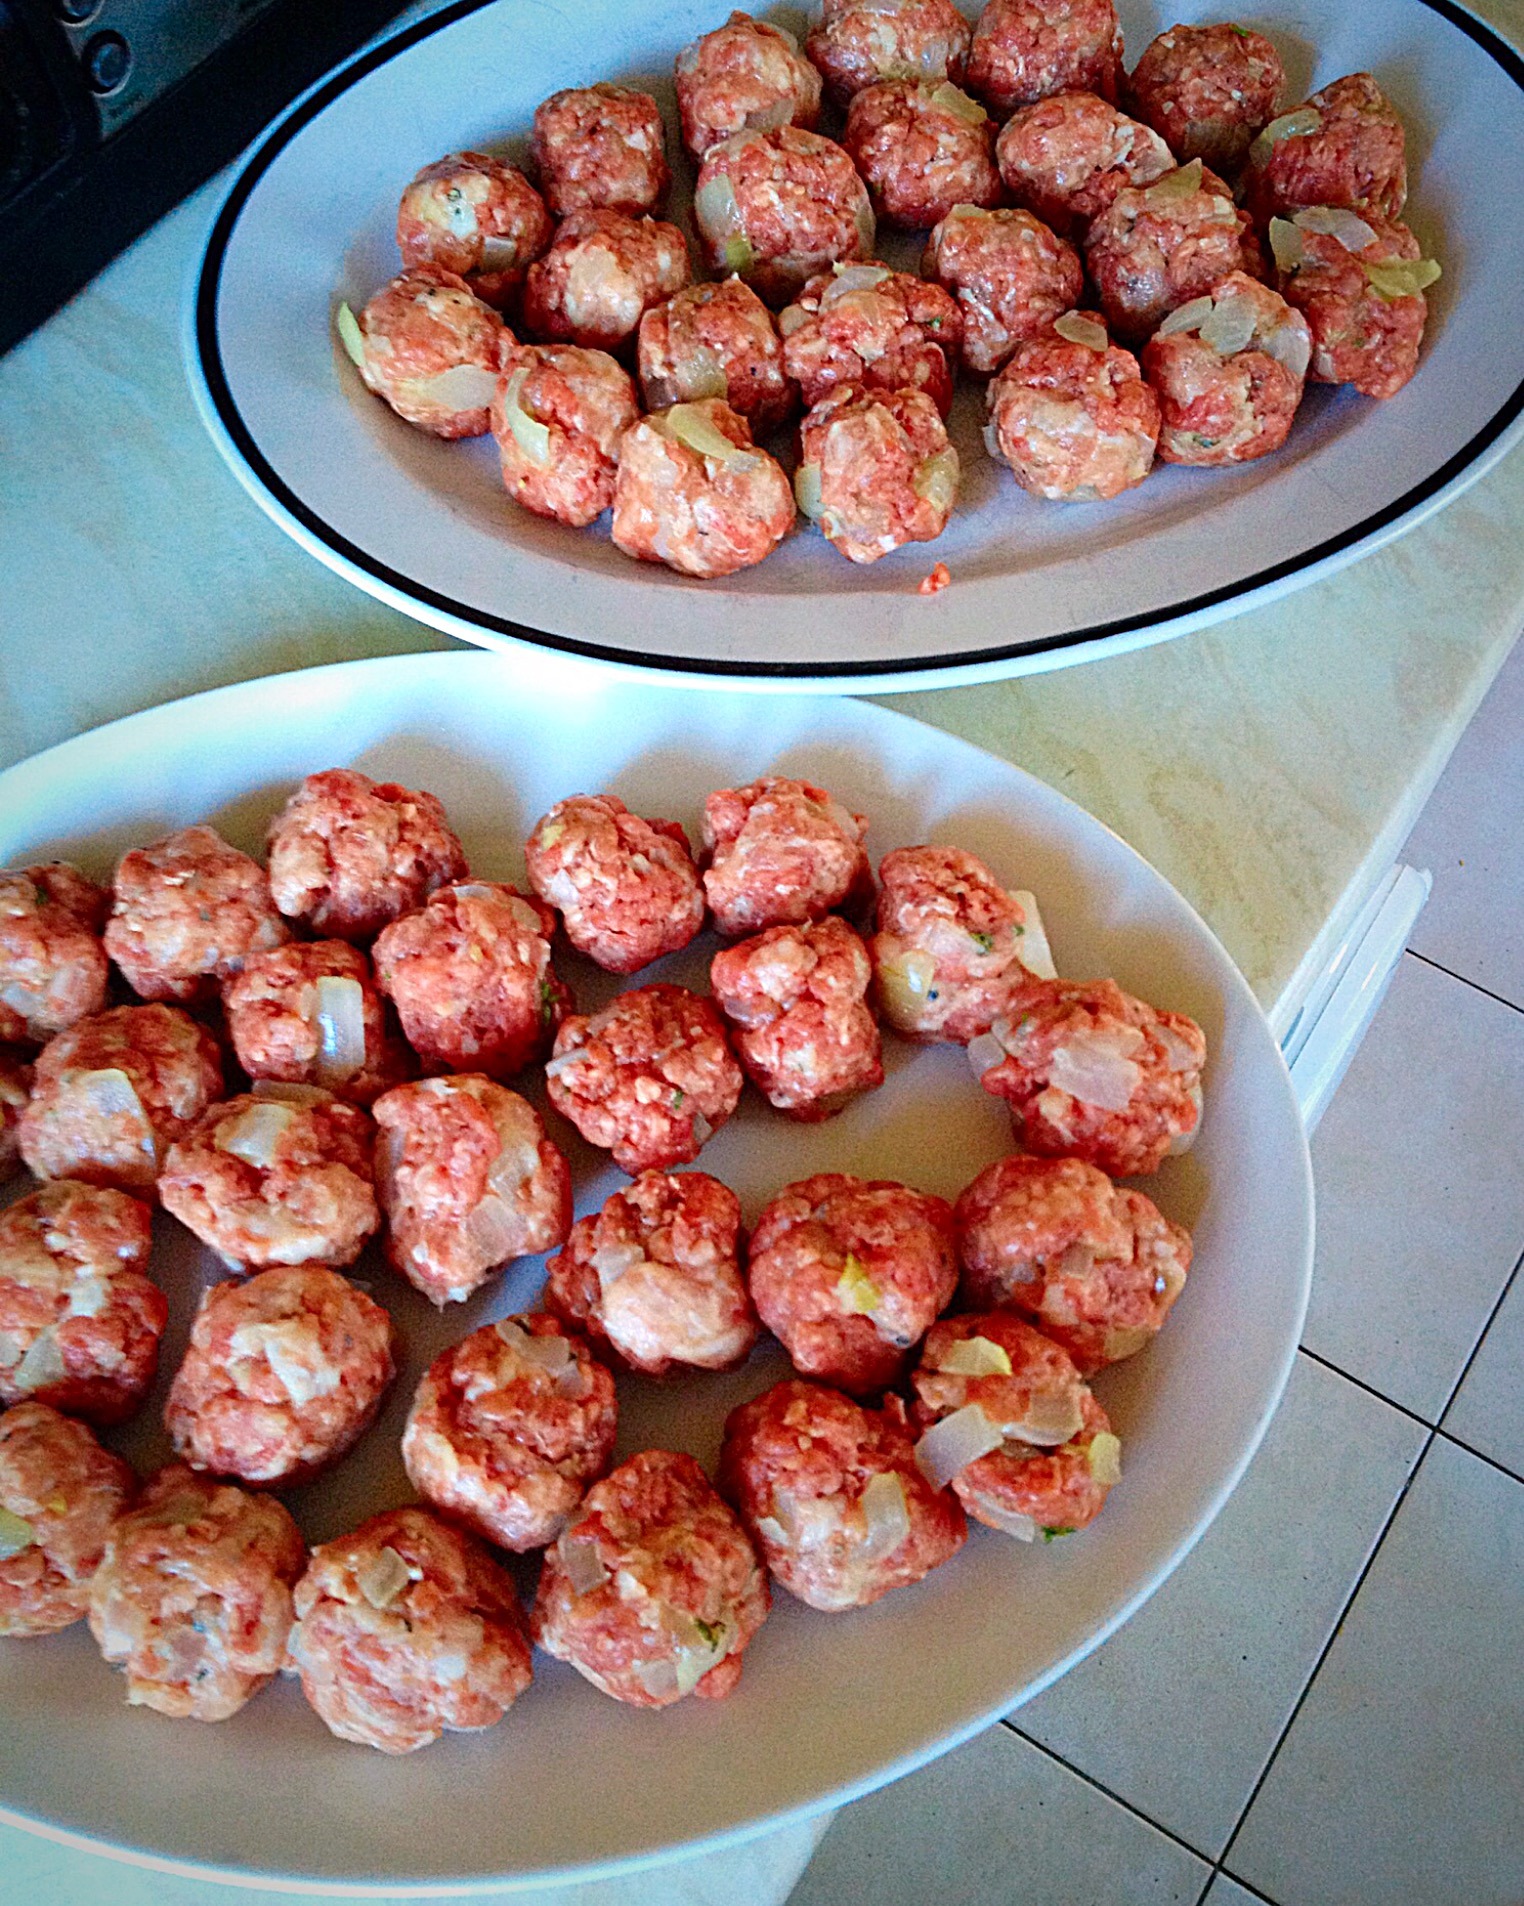
Next, scoop about a teaspoonful of mixture and lightly roll into a ball in between your hands – wet hands make the job easier! Continue until all of the meatball mixture is used up. I managed 54 meatballs!
Heat the pan that you used for sautéing the onions on a medium heat – I didn’t add any more oil, but feel free if yours isn’t non stick. Add the meatballs so they only form one layer in the pan (overcrowding the pan means the meatballs won’t have contact with direct heat and won’t brown properly). Leave them for 1-2 minutes and then gently turn, repeating the process until the meatballs are nicely browned all over (as they were so small I found it easier to turn them in the pan using 2 desert spoons instead of tongs). Remove from the pan and place on a clean plate.
Making the Tomato Sauce
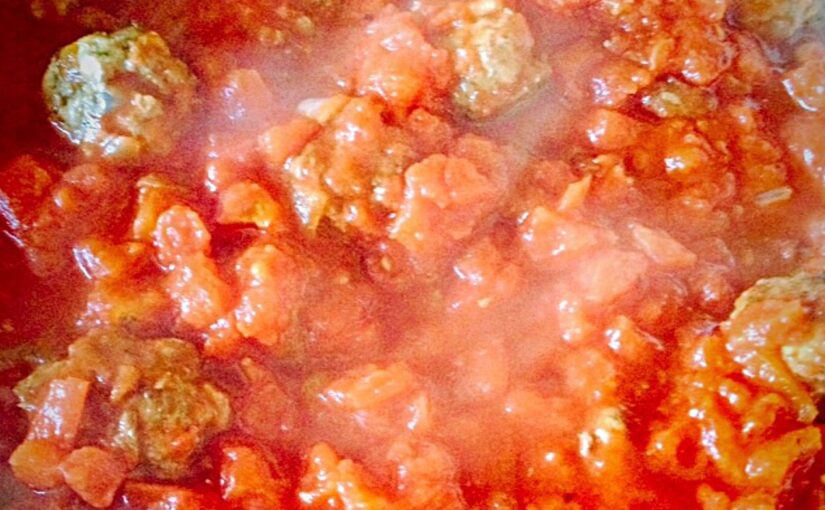
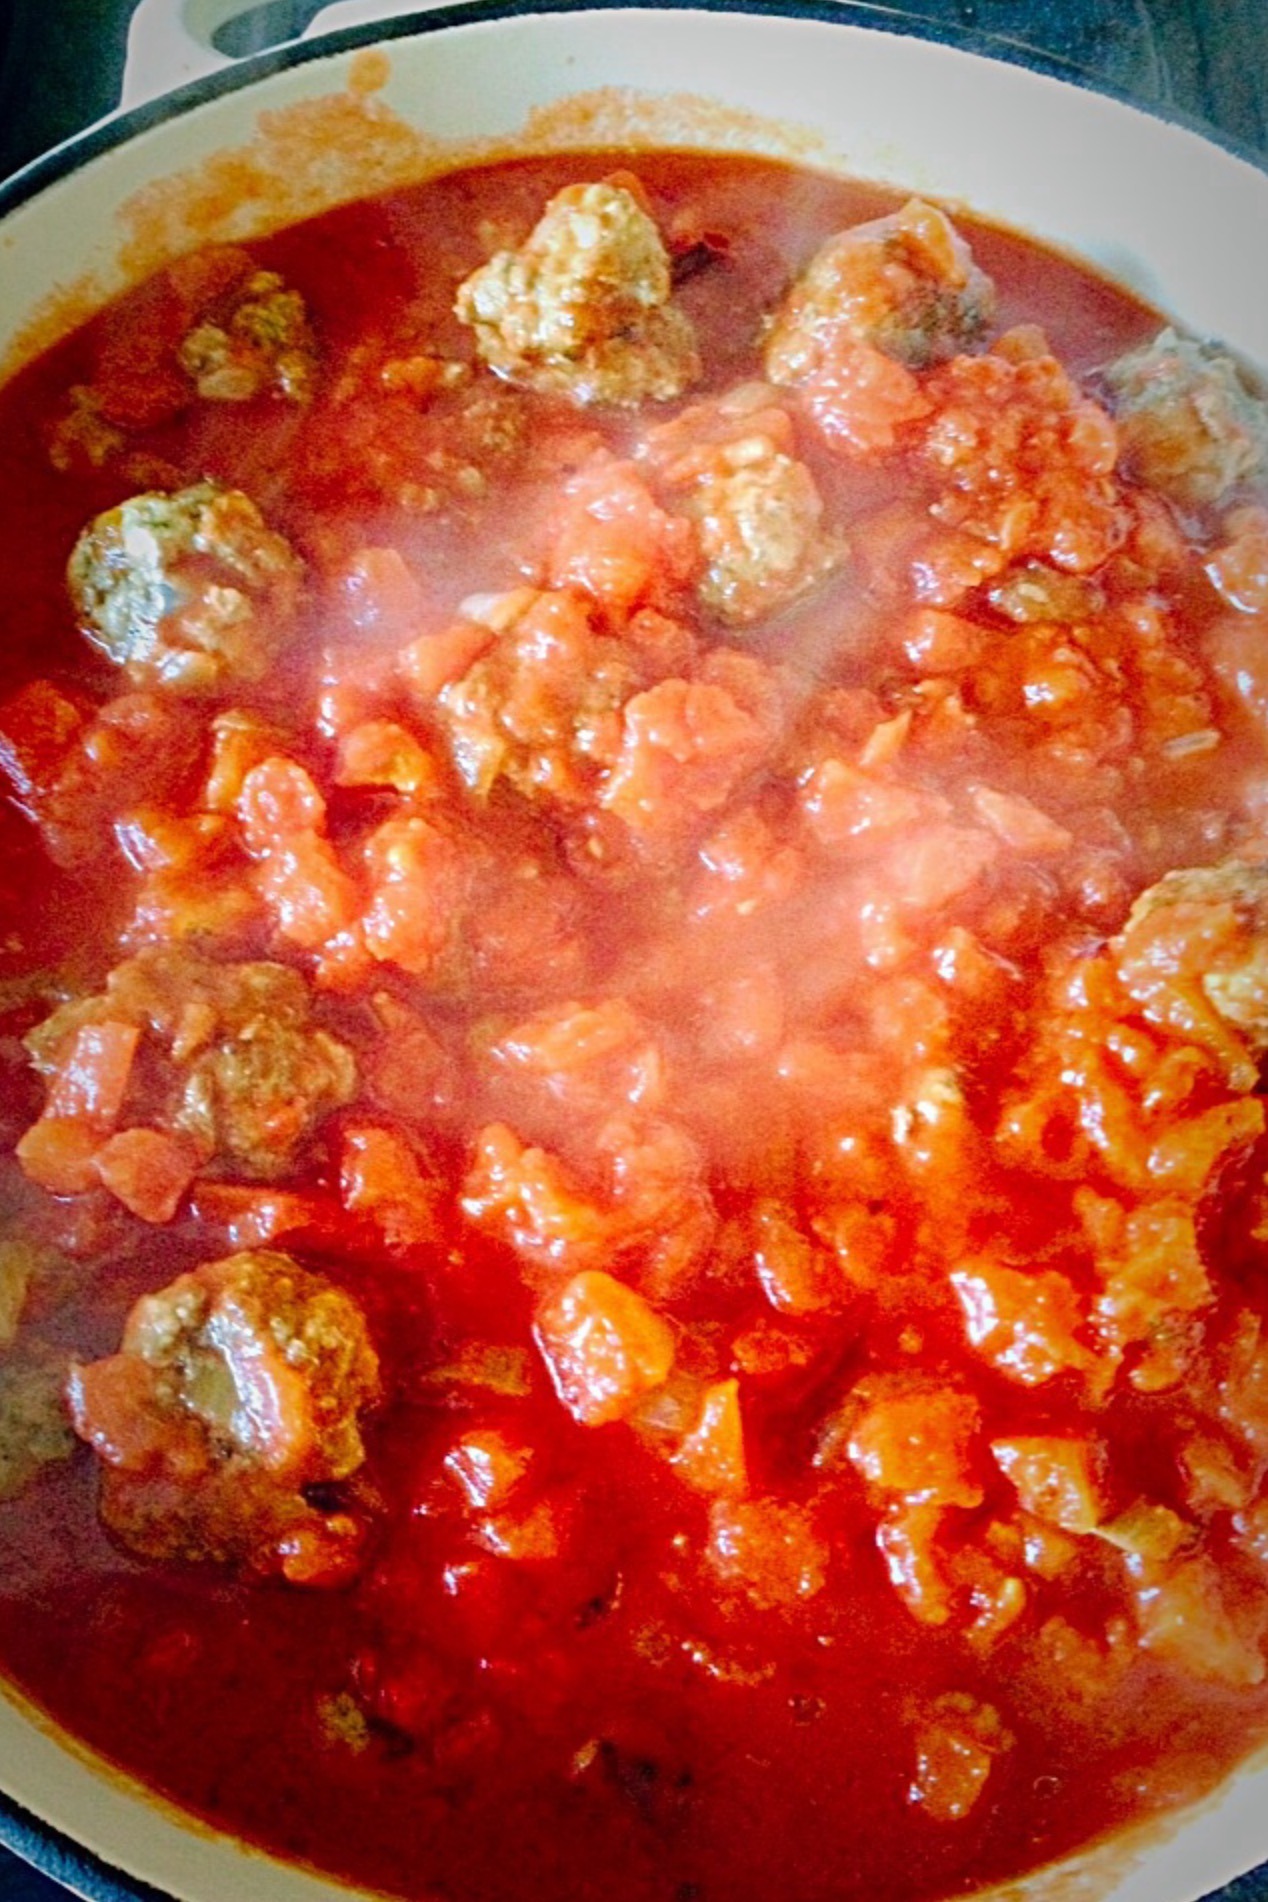
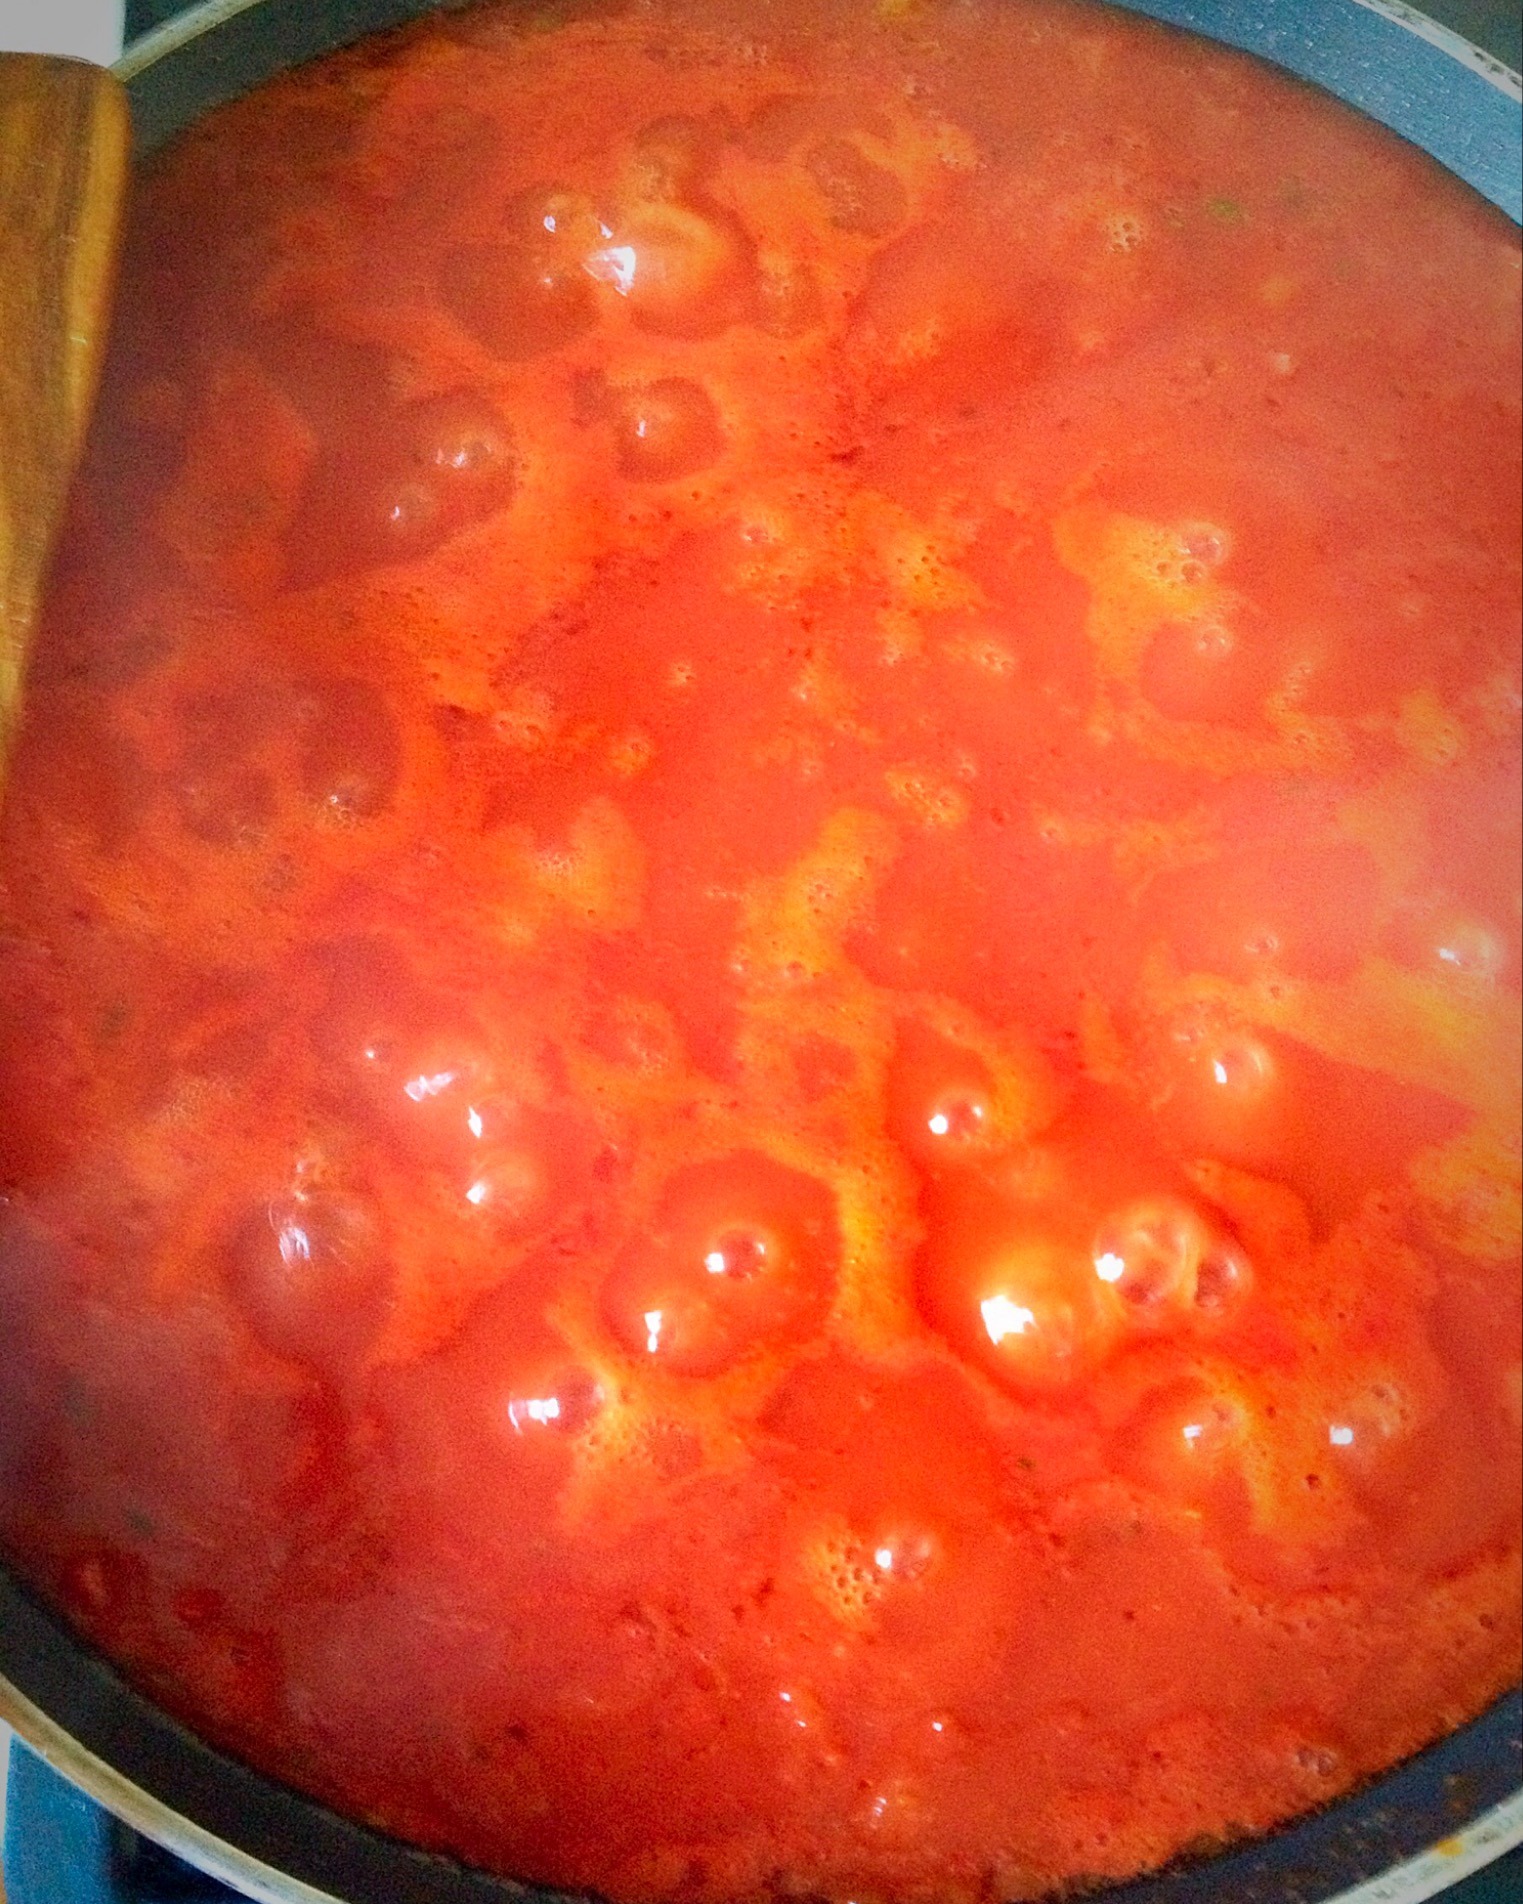
Using the same pan as before, discard any remaining oil safely – it will be hot so allow to cool and wipe the pan with a handful of kitchen roll. Now add 2 tins of chopped tomatoes, refilling each tin, roughly halfway with water, swill around to catch every bit of juice a pour into the pan. Add the tomato purée, herbs, sugar,salt and pepper. Bring to a simmer and leave to bubble away gently for 30-40 minute. The Tomato Sauce is done!!
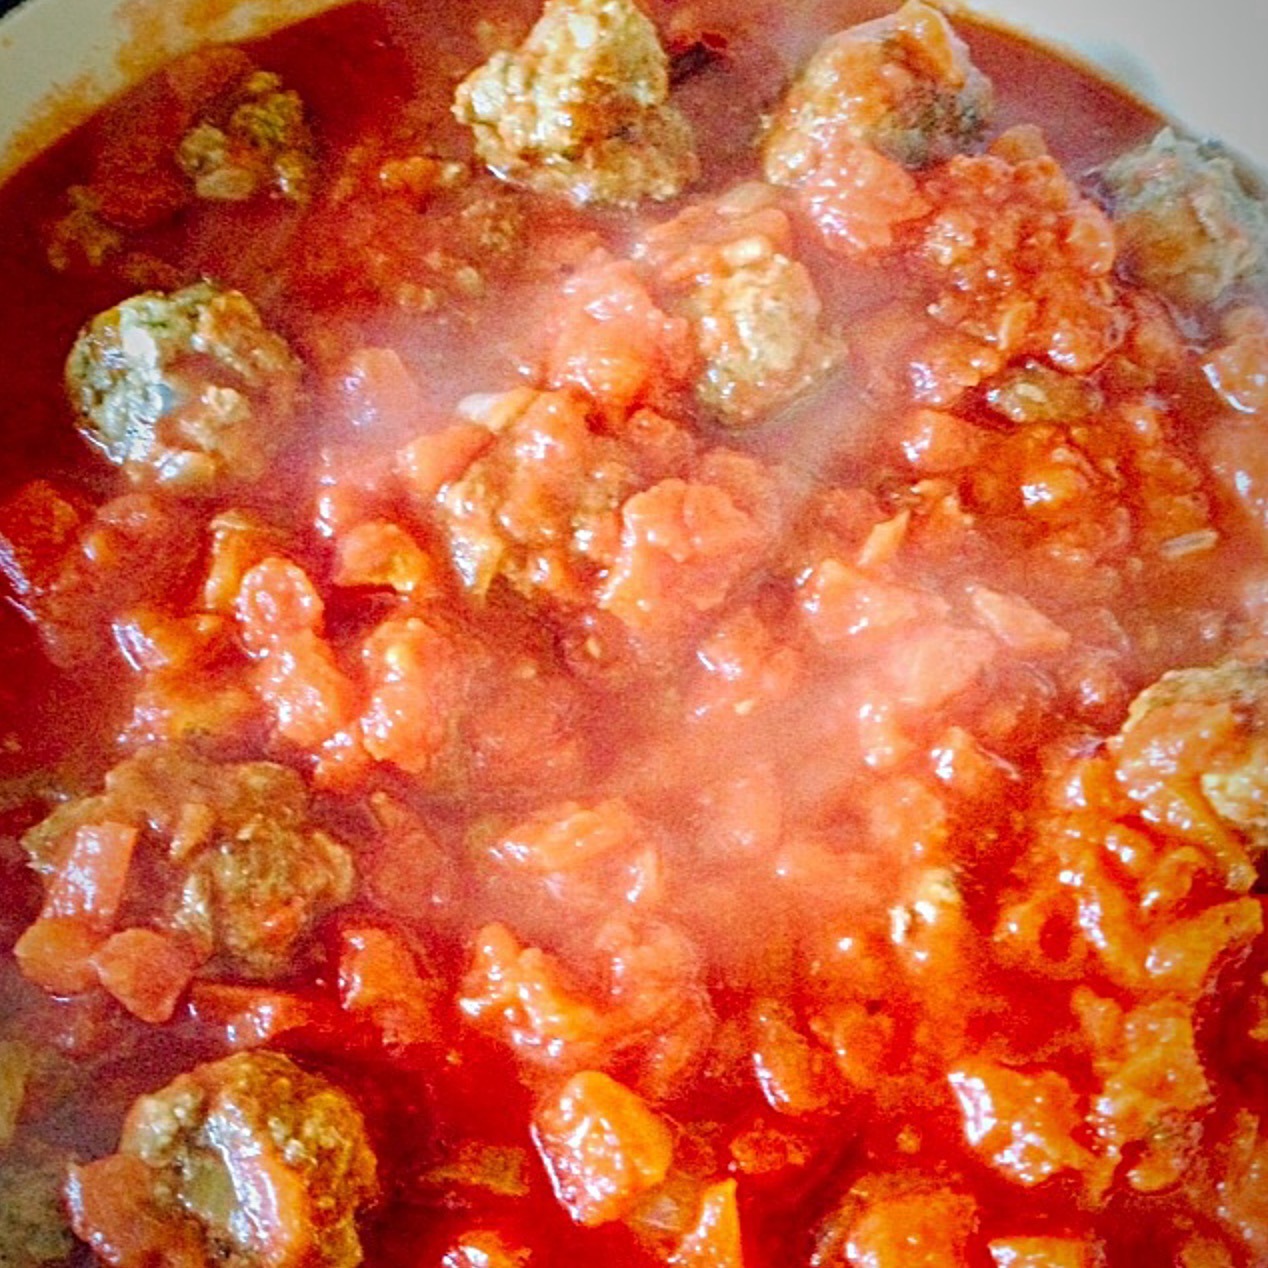
Finally, place the meatballs in a large, ovenproof dish and pour over the tomato sauce. Heat through for 30-40 minutes, until piping hot and then serve with pasta, rice, or chunks of crusty bread.
Also, this recipe can easily be a gluten and dairy free dish. Instead of sausage meat use pork mince as this will be free from rusk. Ensure any cheese as a topping is dairy free, there a lots of alternatives available.
If you have enjoyed this recipe for Meatballs In Tomato Sauce you may also like these:
Creating recipes that my family love and that I can share here on my blog is such fun. And you can trust the recipe because they are well tested. Since I’m aware of the cost of ingredients, it’s extremely important to me that they work every single time. Also they must be easy to make and delicious to eat. So that you can make them will full confidence. Resulting in a delicious dish that everyone that can be shared and feasted on by friends and family!
So whatever you are making, baking and creating in your kitchens, have fun preparing and sharing your feast.
Sammie x
No part of this post may be reproduced or duplicated without the written permission of the owner. Please see my Disclosure Policy.
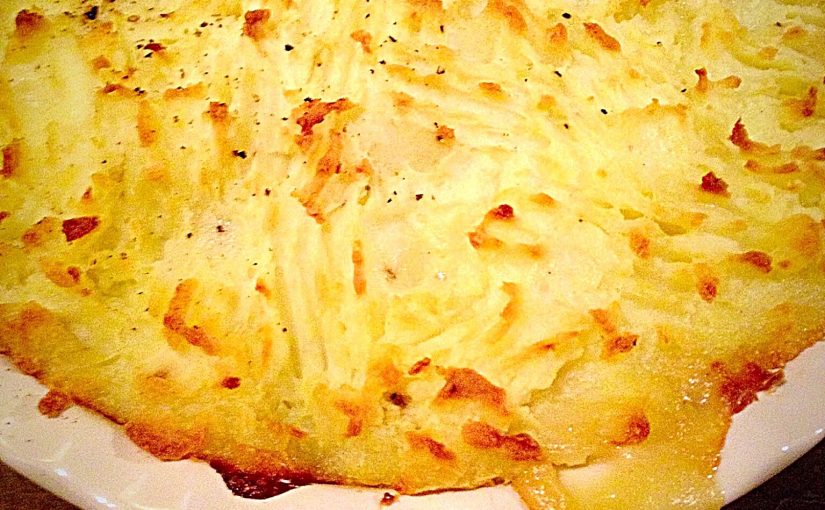
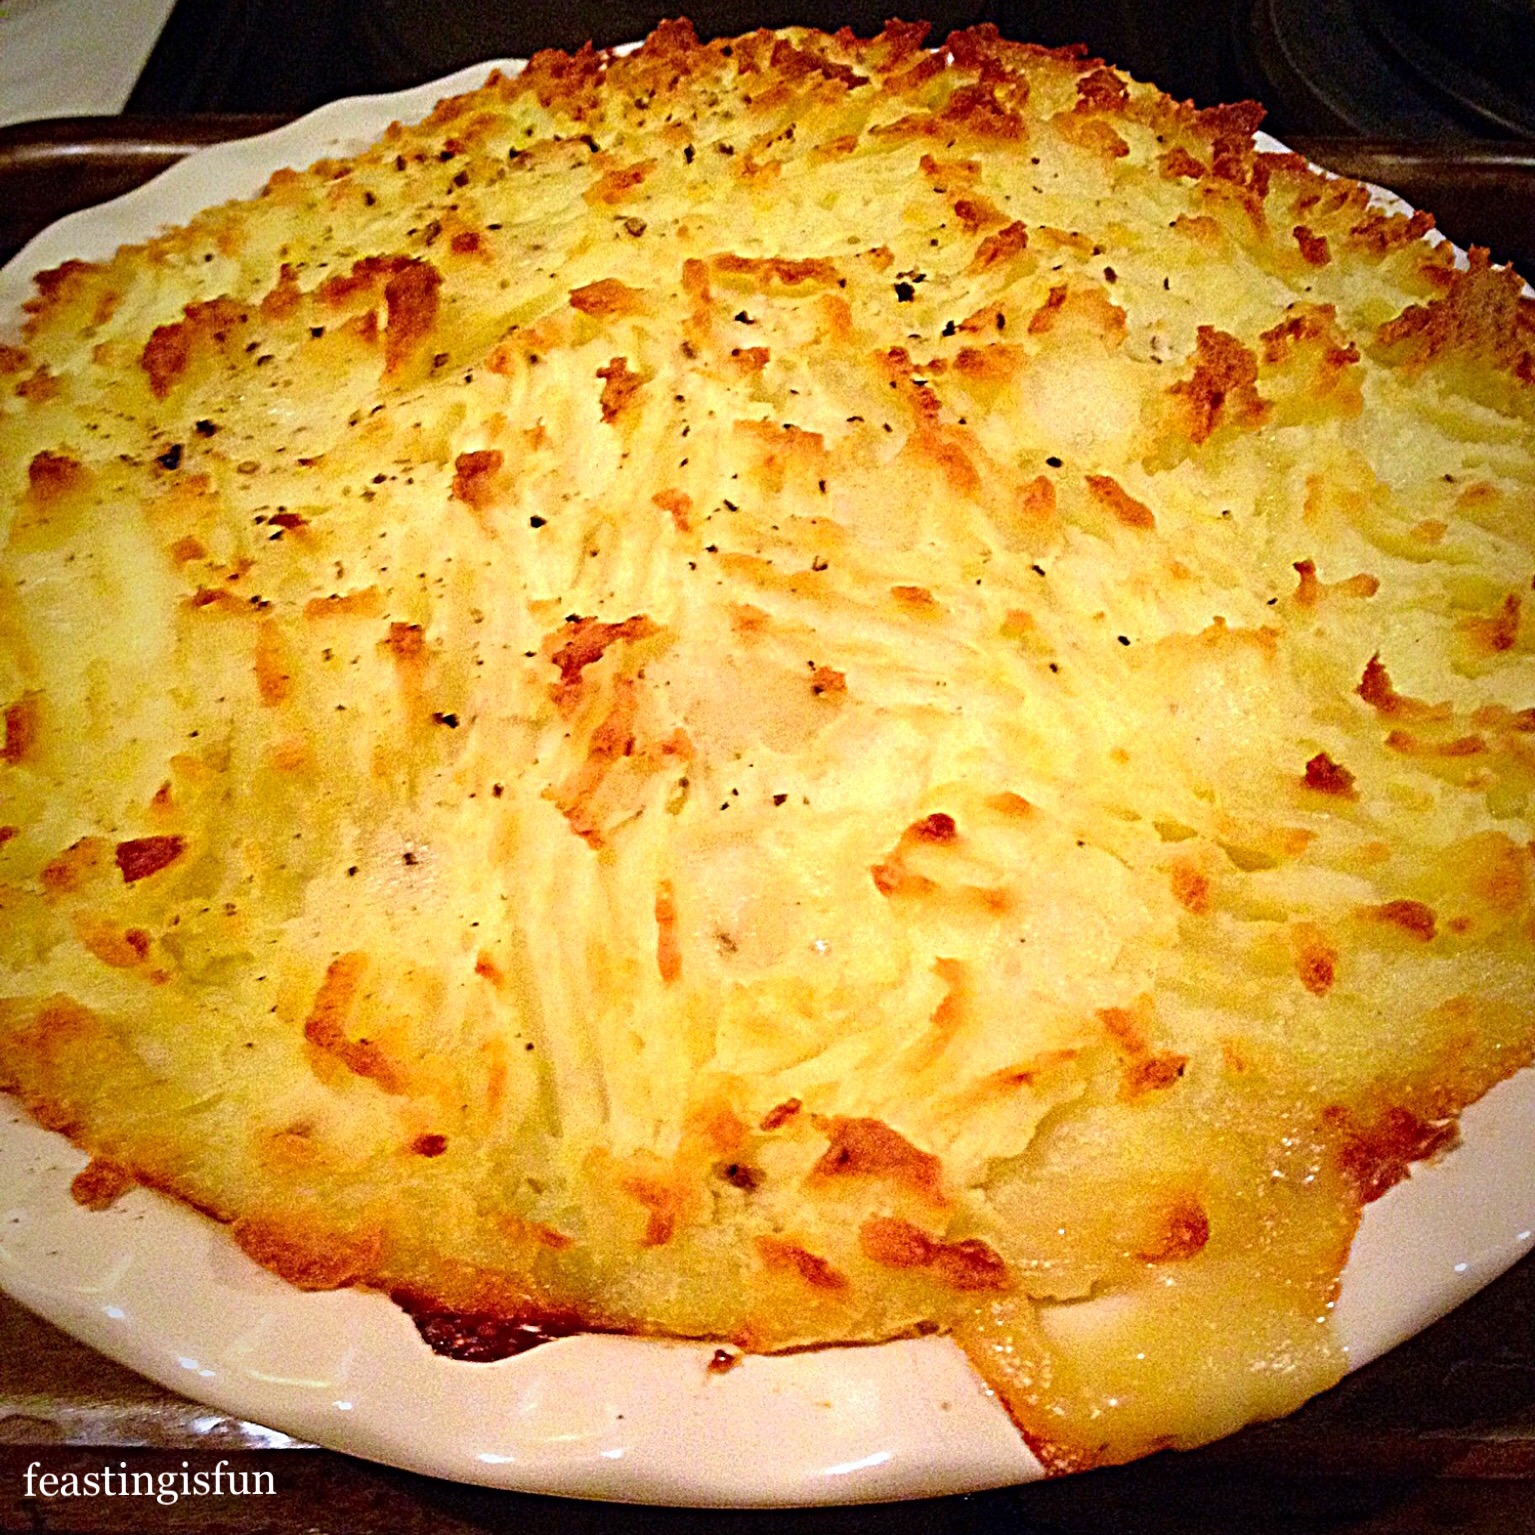
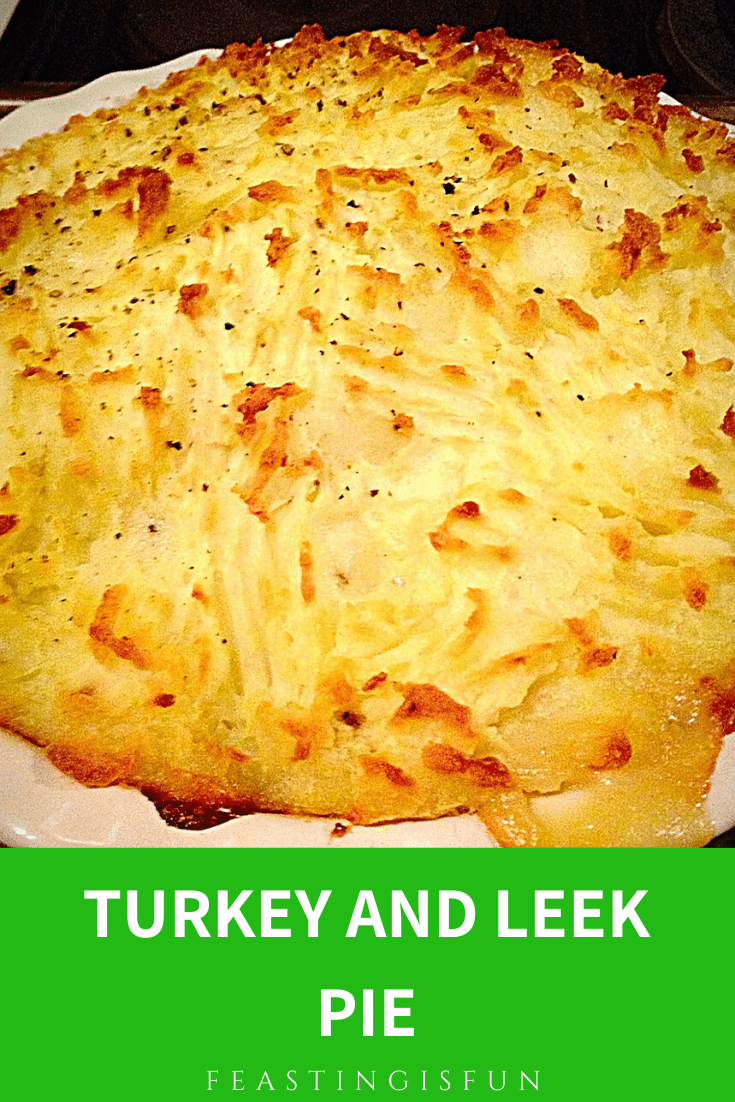
Hello, thank you for stopping by to take a look at my recipe for Turkey and Leek Pie, topped with mountains of mashed potato. Because, this is a fantastic recipe for using up leftover Turkey after Christmas or Thanksgiving. Alternatively you could use cooked chicken such as my Lemon Thyme Roast Chicken.
Turkey And Leek Pie
Waste Not, Want Not:
Since the news if filled with statistics and reports of how much food we throw away and waste as a nation, creating recipes using up leftovers is a priority for me. While I am not suggesting you try to make a pie out of the gooey apple, fermenting at the bottom of the fruit bowl, there are ways that we can use up leftovers. And, as many of us eat turkey over the Christmas period and roast chicken throughout the rest of the year, there can be leftover meat. So, having delicious, easy recipes that use up leftovers, makes both practical and economical sense.
While we had a delicious, roasted turkey crown for Sunday dinner yesterday, I was left with a complete, cooked turkey breast. Although I enjoy cold turkey and chutney sandwiches, my aim was to create a meal out of the leftovers.
So, today I decided to make this turkey and leek pie, topped with creamy mashed potatoes. Alternative toppings for this pie could include; sliced potatoes, flaky pastry, savoury crumble topping, herbed breadcrumbs. If you do try any of these suggestions, please let me know how you get on?
Recipe : Turkey and Leek Pie serves 6
1 1/2 – 2 lb (750g/1Kg) Cooked Turkey – or chicken, cut into 1 inch/2.5cm chunks note: if the turkey or chicken has been frozen AFTER cooking the pie cannot be re-frozen
2 Medium Leeks
100g/4 oz Butter (split in two)
1 tbsp Olive Oil
2 tbsp Vermouth or White Wine – use Martini Extra Dry
1 tbsp Plain White Flour – *alternatively to make this gluten free add 1tbsp cornflour mixed with 2tbsp water after adding the milk to the sautéed leeks.
1/2 of a Chicken/Vegetable Stock Cube – I use Knorr
6tbsp Whole Milk – alternatively you can use double cream (heavy cream)
1.5 Kg/3.5lb Peeled Potatoes (Maris Piper/Desiree or any floury potato suitable for mashing)
2 Sprigs Fresh Thyme
Salt and Freshly Ground Black Pepper
Method :
Preparing the mashed potato topping:
First of all peel and chop the potatoes, place in a saucepan and cover with water.
Add a pinch of salt, bring to the boil and then simmer until tender when pierced with a knife.
Drain the potatoes, place them back into the saucepan with 2 tbsp of butter and a splash (3tbsp) of milk. Clamp on the lid and leave off the heat for 5 minutes.
Next, adding a good grinding of black pepper, mash the potatoes, set aside to cool.
Creating the pie filling:
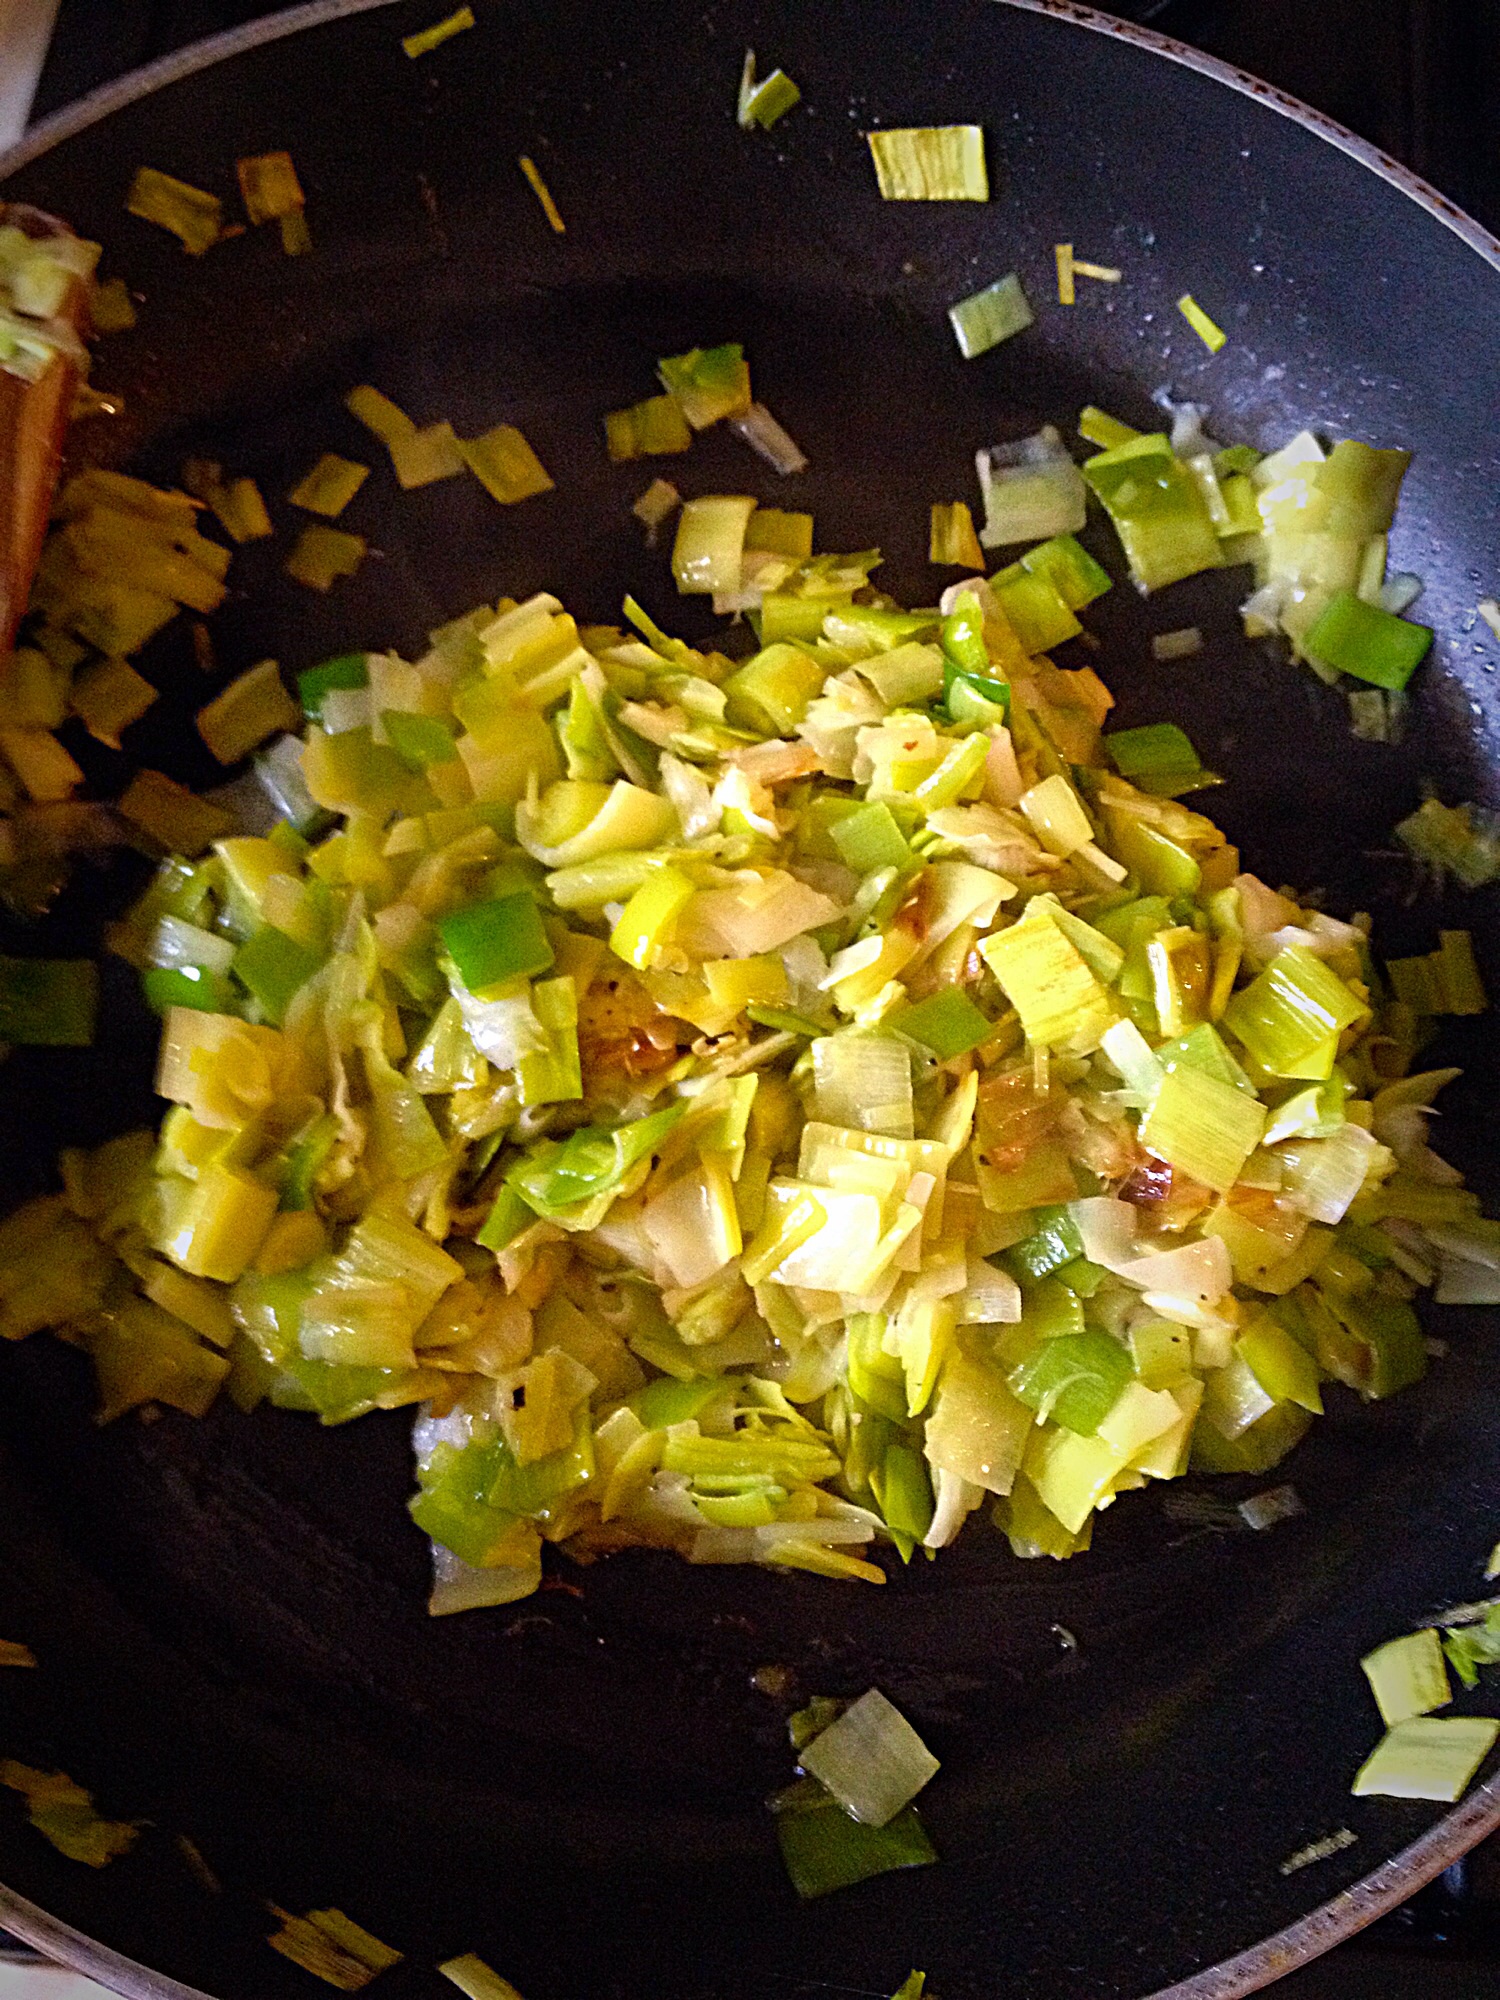
Chop the leeks into small dice, rinse thoroughly and pat dry with a clean kitchen towel.
Place 2 tablespoons of butter and 1 tablespoon of olive oil into a frying pan over a medium heat.
As soon as the butter melts add the leek to the pan.
Add a pinch of salt and sauté over a low heat until they become soft and slightly translucent.
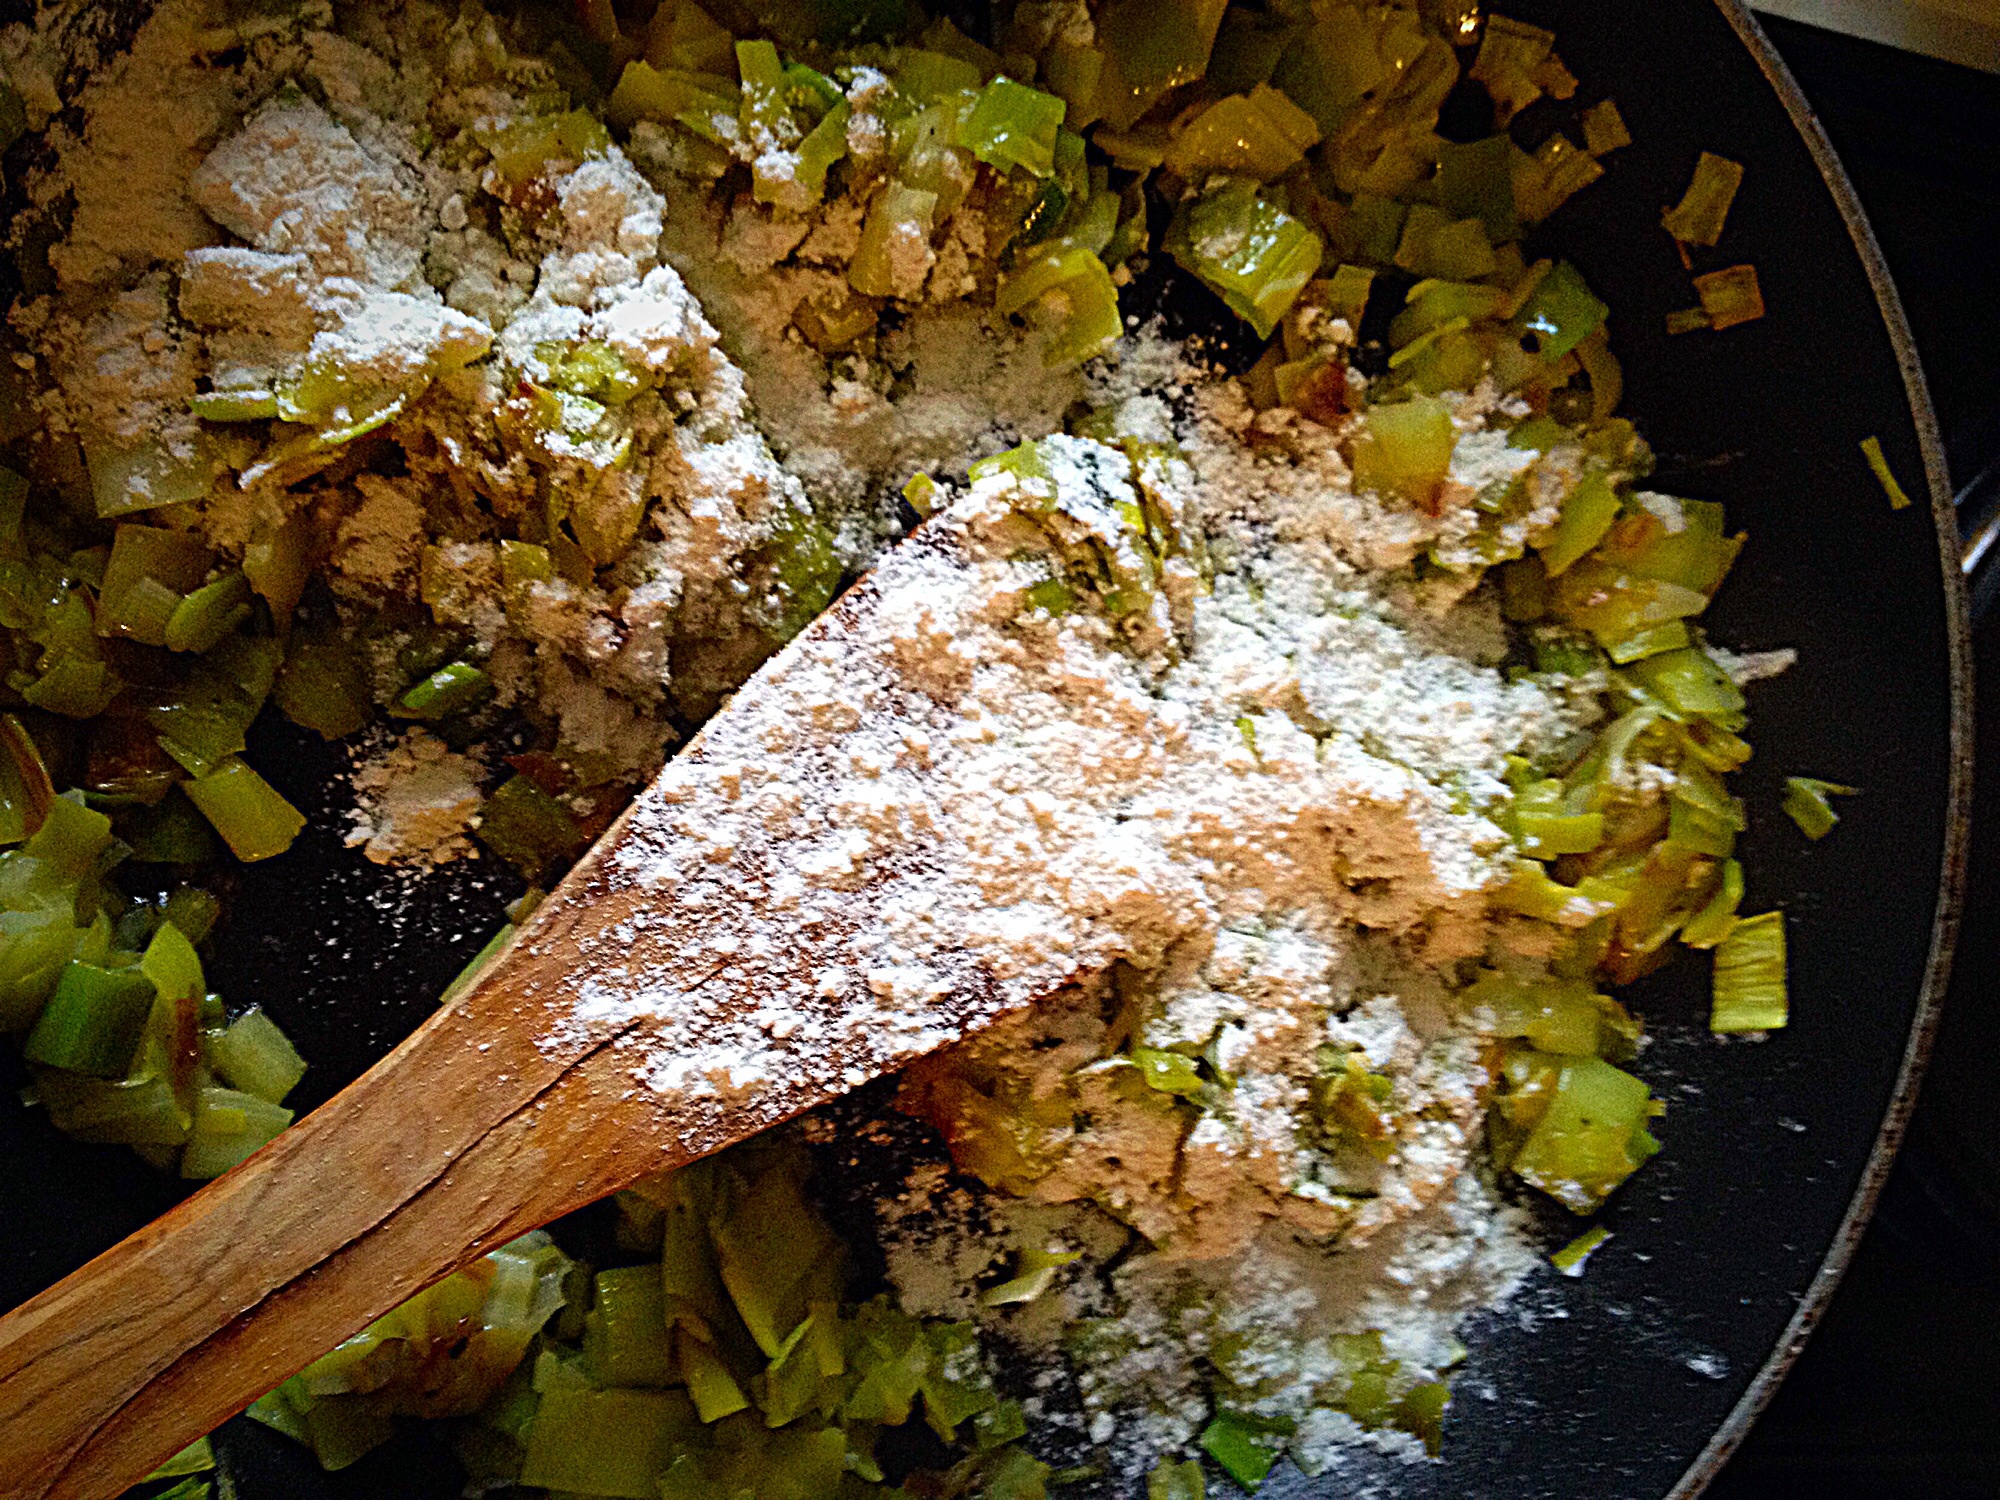
Next add 1 tablespoon of flour, stirring so the chopped leeks are covered in the flour. Continue to cook for a couple of minutes. *see recipe for gluten free option.
Add a splash of Vermouth or white wine. Mix thoroughly over a low heat, cooking for a couple of minutes.
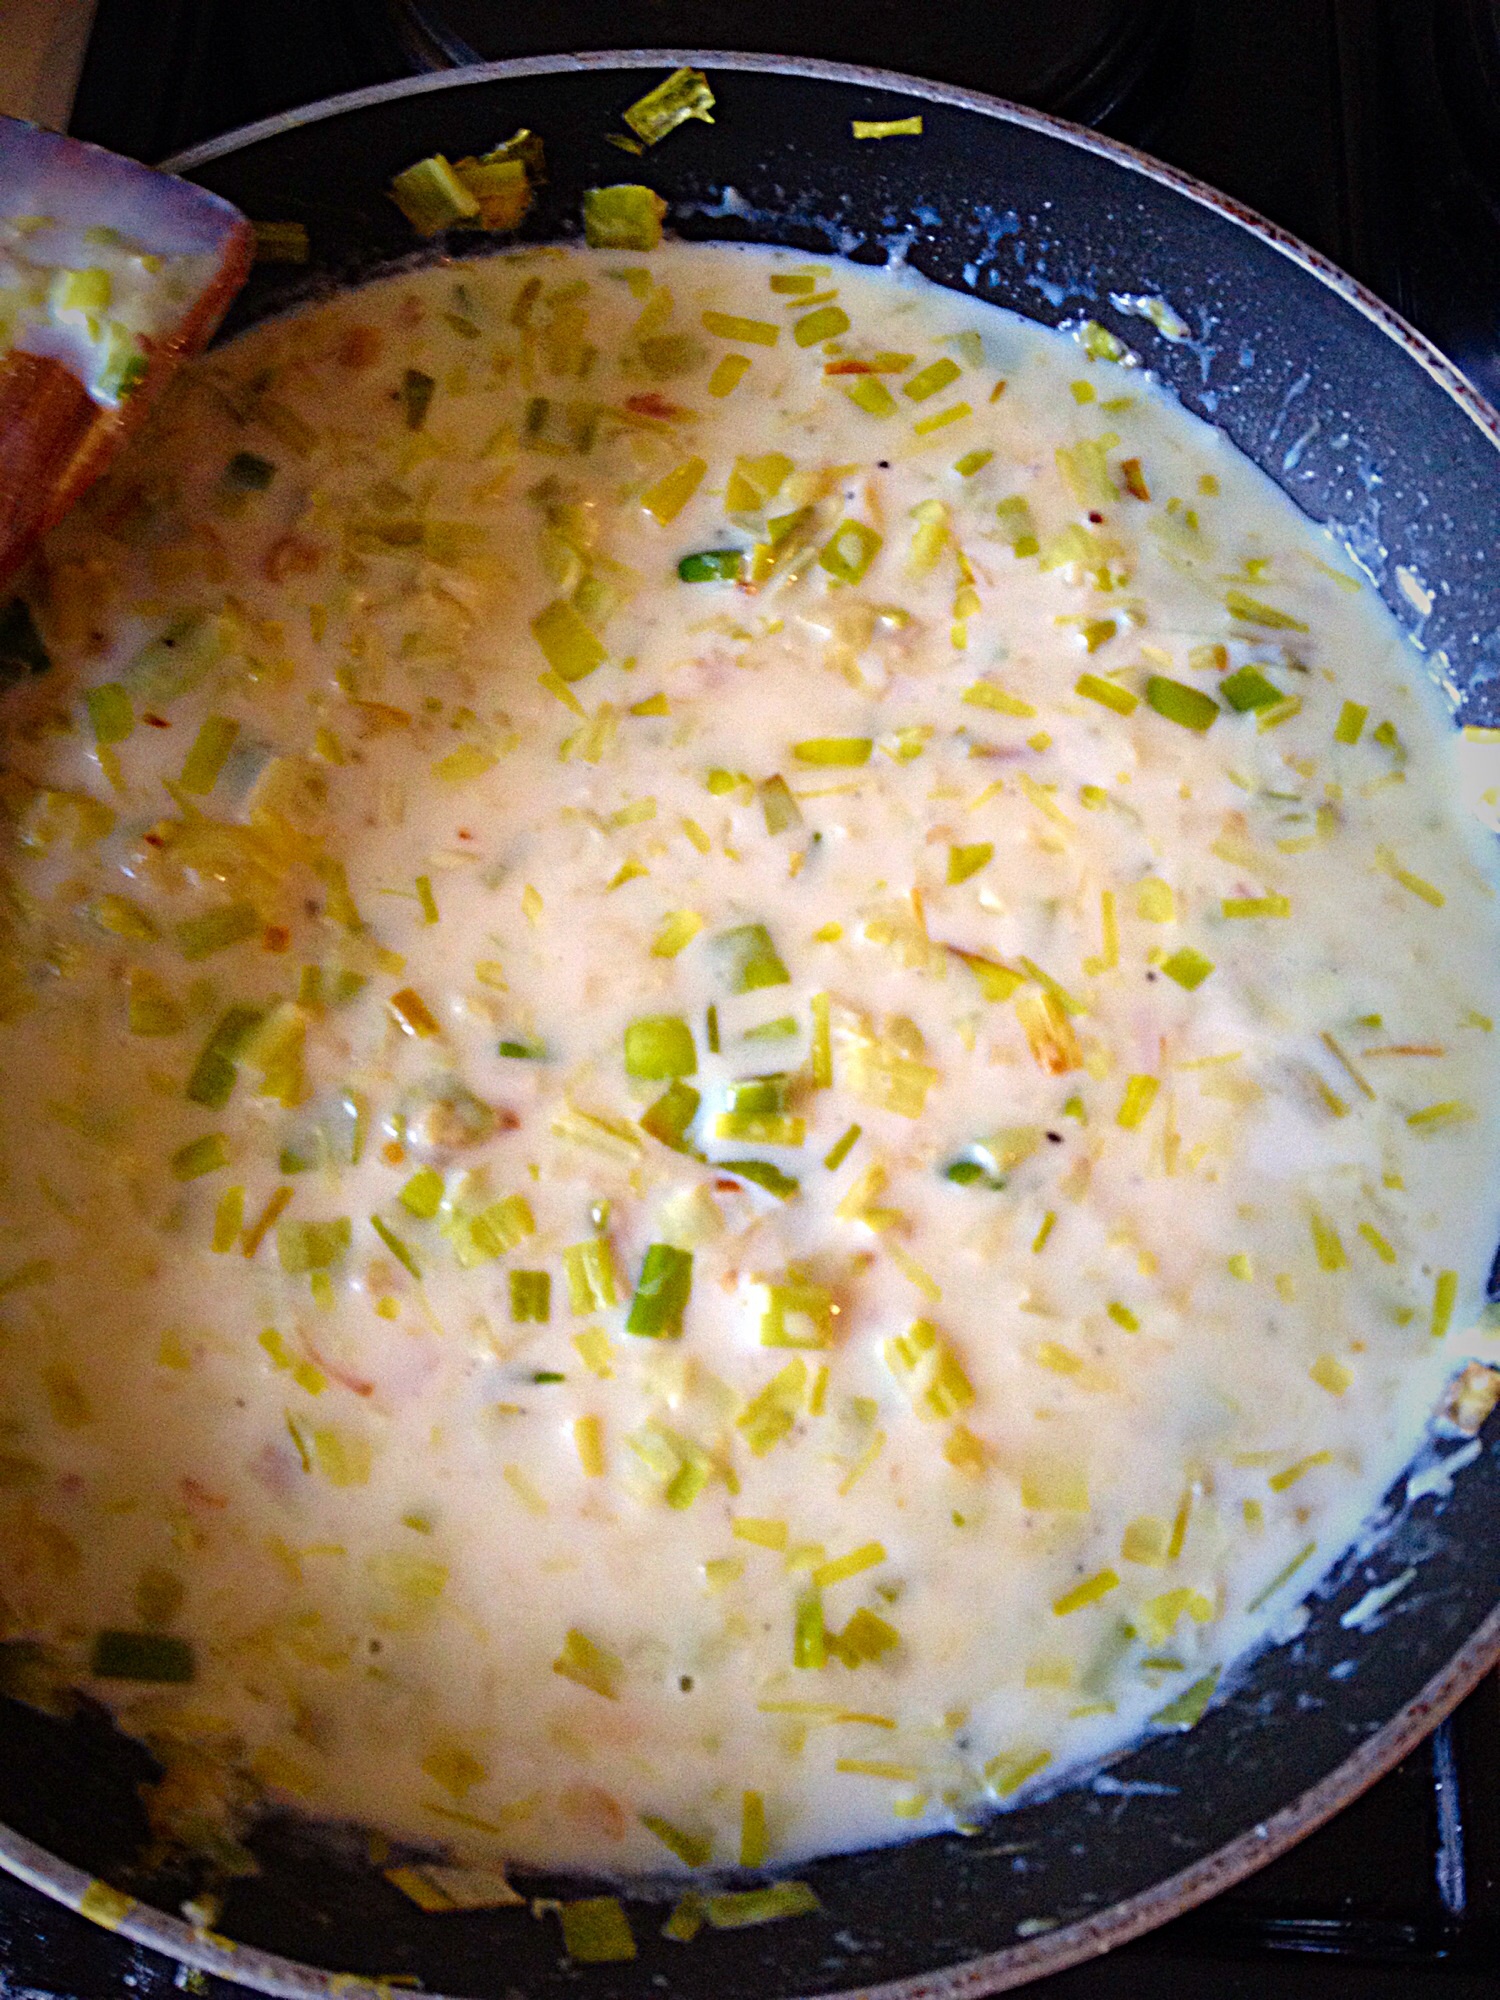
Next add 3-4 tablespoons of milk and stir continuously.
The sauce will still be thin at this stage. Continue stirring. After a few minutes the sauce will thicken.
Crumble in half of a chicken stock cube. Alternatively dissolve the stock cube in a couple of tablespoons of hot water, then add to the pan.
As soon as the stock is incorporated have a quick taste and season to taste.
Strip 2 fresh Thyme sprigs and add the leaves to the sauce.
Set to one side and allow to cool.
Cut the cold, cooked turkey (or chicken) into 1 inch chunks and place into a pie dish. Cover with the cold leek sauce.
Spoon the mashed potatoes around the outside edge of the pie, working towards the centre.
Using a fork, ensure the mash seals the pie around the edge to stop any sauce leaking out during baking. Likewise ensure the potato topping covers the pie evenly with no gaps.
Drag the fork across the surface of the mashed potato. As doing so will ensure an extra crunchy topping once baked.
Storing, baking and serving the pie
At this stage the Turkey and Leek Pie can be wrapped in cling film and placed in the fridge for a couple of days until needed.
Alternatively, double wrap in cling and popinto the freezer for up to one month – defrost overnight in the fridge before reheating.
To bake the pie, preheat the oven to 190C/170C fan, 350F, gas mark 4.
Place the pie dish on to a baking sheet and place in the middle of the oven.
Bake for 1 hour until bubbling around the sides, golden and crunchy on top and piping hot all the way through.
The ultimate comfort food. I like to serve this turkey and leek pie with steamed savoy cabbage.
If you have enjoyed this recipe for Turkey And Leek Pie you may also like these:
When I am creating a meal using leftovers, it gives me an extra buzz. Because not only am I reducing waste, an entirely new dish is being made. Especially over the holiday period, when large joints of meat are cooked there can be a temptation to simply bin any leftovers. Whereas having a few, simple recipes on hand can actually make it easy and fun preparing meals.
So, whatever you are making, baking and creating in your kitchens, have fun preparing and sharing your feast.
Sammie xx
No part of this post may be reproduced or duplicated without the written permission of the owner. Please see my Disclosure Policy.
Hello, I hope you are having a good day. Why do I love baking?
The BEST Carrot Cake with Cream Cheese Frosting.
Firstly and above all other reasons, I find it really relaxing. I’m constantly amazed that I really can have a batch of cookies, a cake or loaf of breadbaking in the oven in literally minutes!
Secondly I’m always surprised when recipes turn out well. I’m not sure why this is – as I do have a tendancy to ‘interprete’ recipes, as opposed to following them strictly.
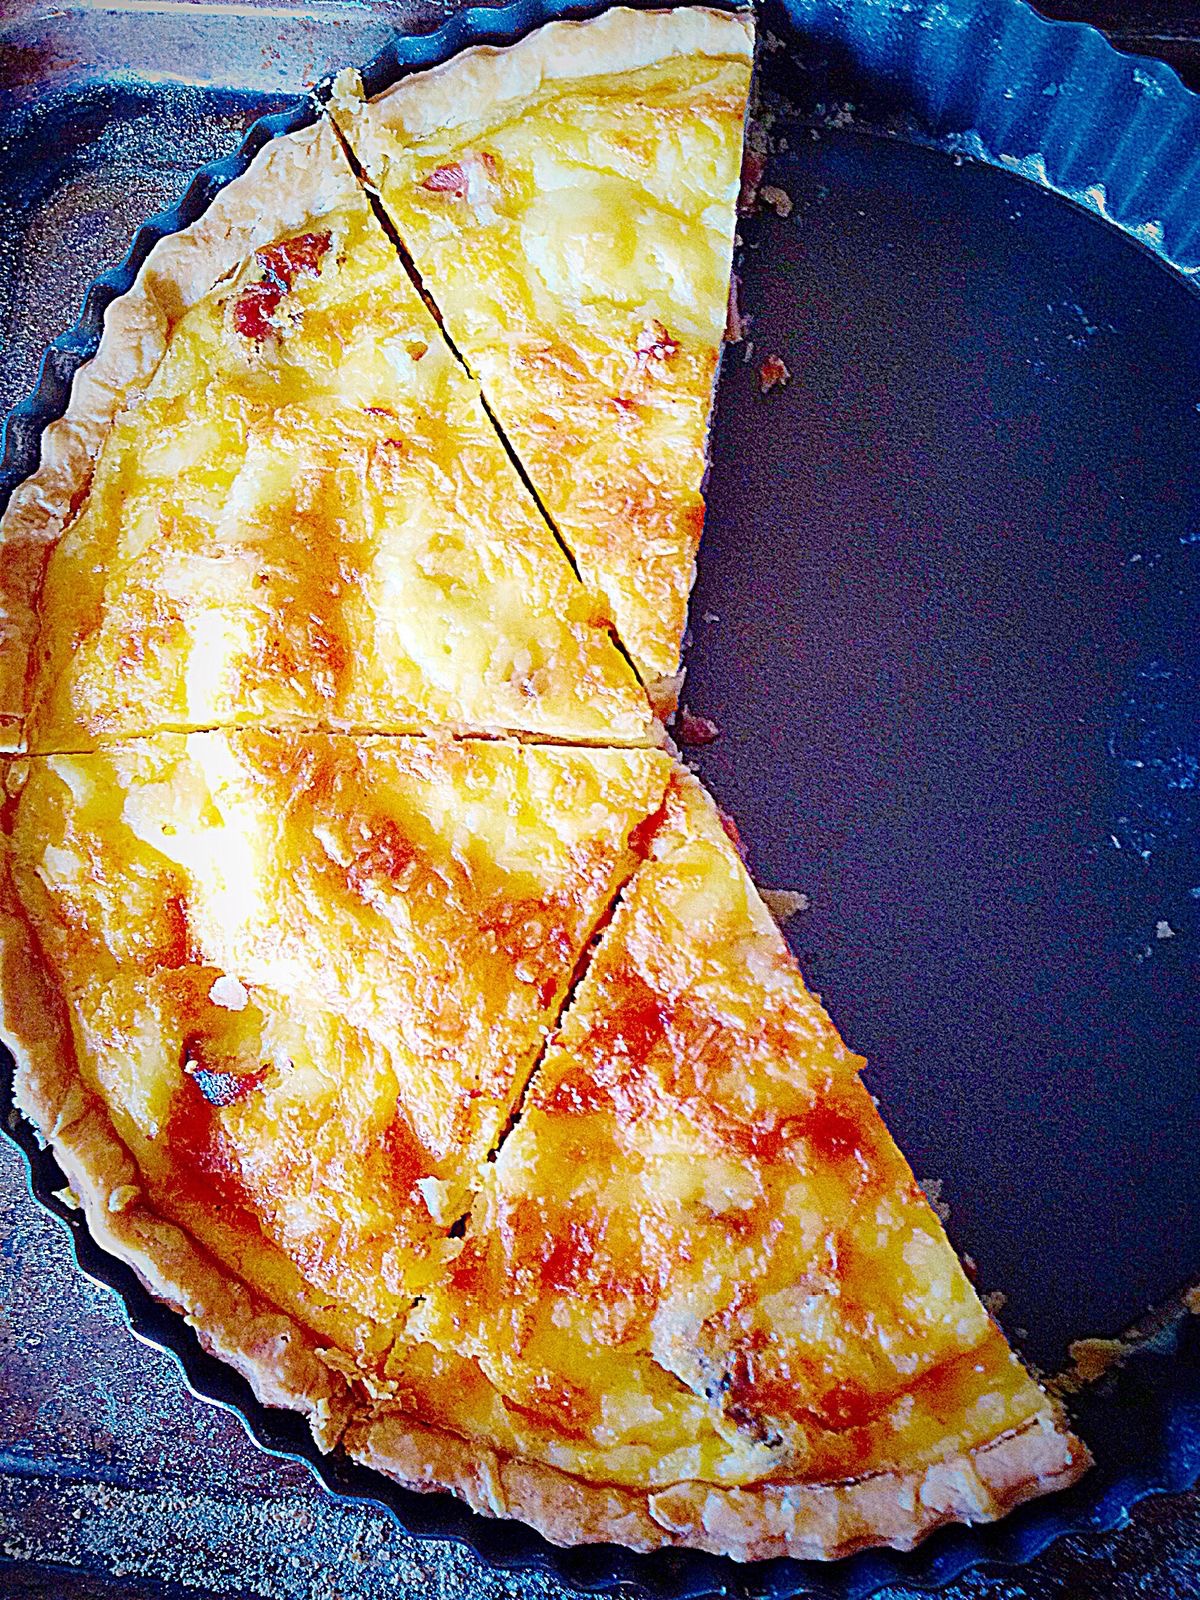
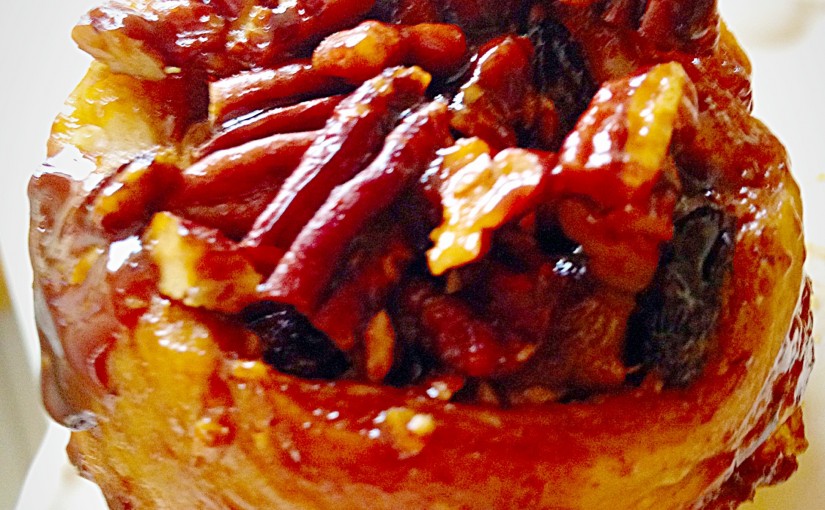
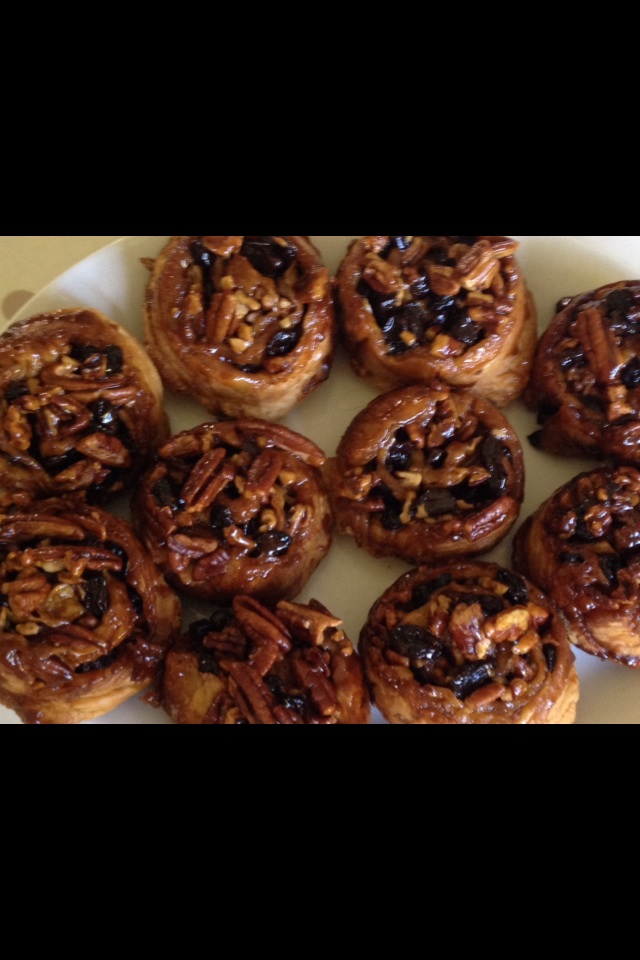
I’m amazed every time I’ve baked these Pecan & Sultana sticky buns. They are scrummy!
Thirdly, I have learnt, over the many years of baking and cooking to trust my nose. Following on from my bad habit if not entirely following recipes to the letter, I also very rarely time things as they are baking or cooking! I know, sooo bad. But, since I’ve started my blog I’m getting better. It’s a work in progress!!!!
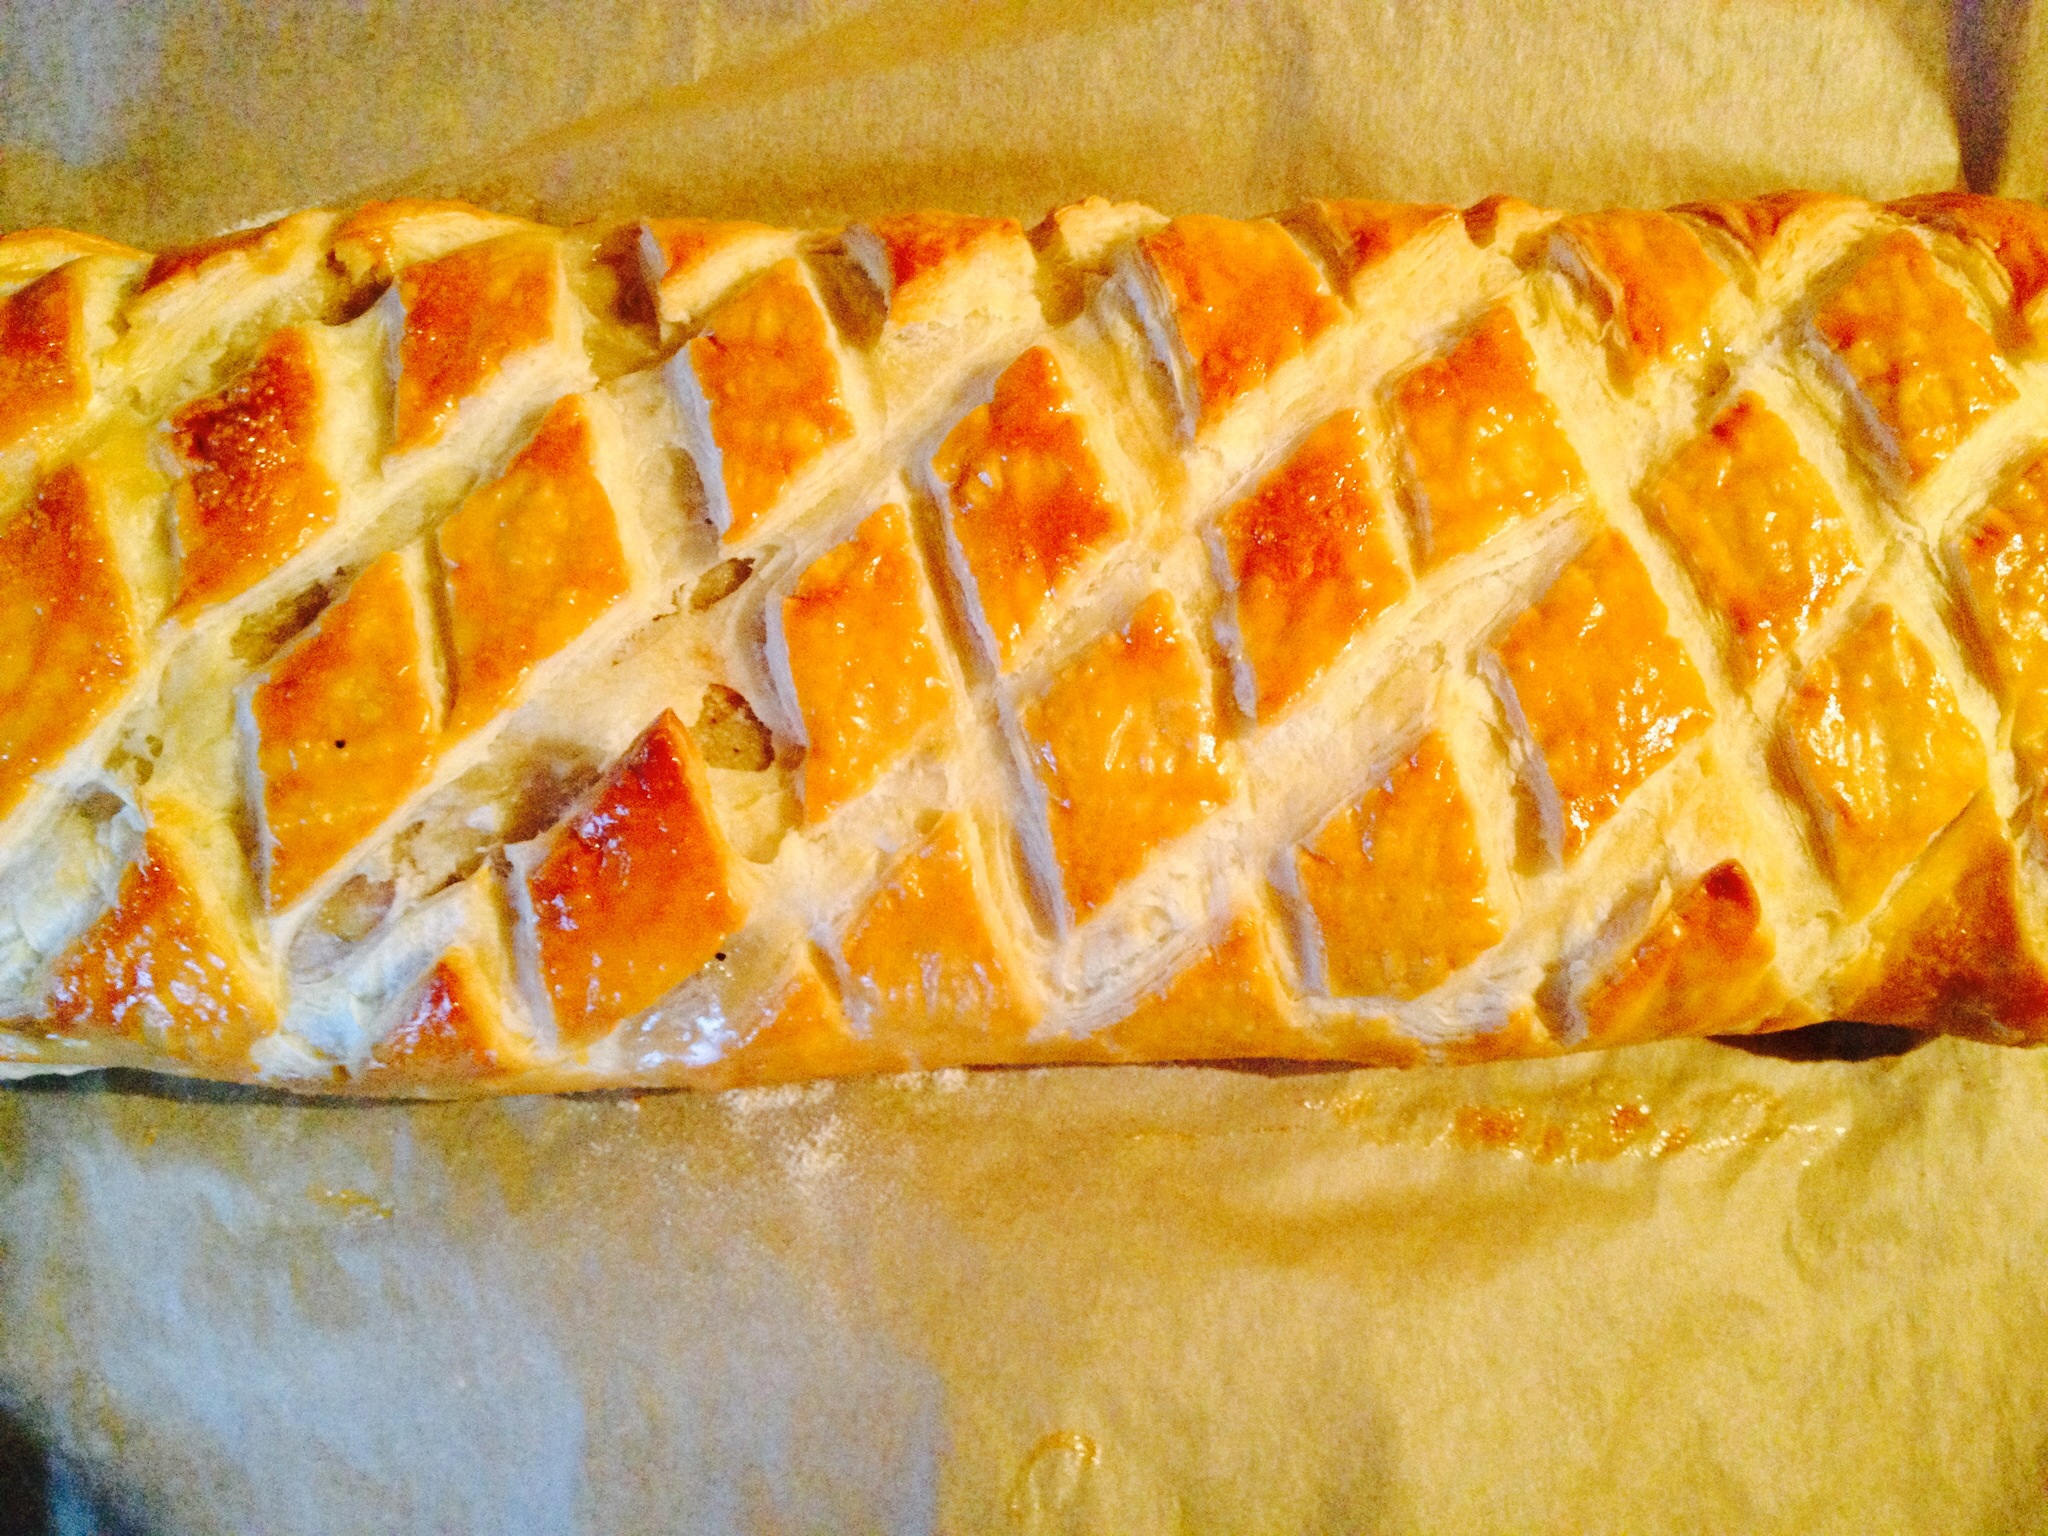
Not enough pastry for a Sausage Plait, so made a huge Sausage Roll a cut a diamond pattern to make it look pretty once baked!!
Next (fourthly didn’t sound quite right?!) I love the smell emanating from the oven as something is nearing it’s cooked stage. In fact it is this very thing that stops me from timing how long something takes to bake. My nose alerts me, with alarming accuracy!
As with planting a seed, caring and watering the plant that grows, then picking the produce or flowers, so too, in all types of cookery and baking, the ‘magic’ of turning a wet, lumpy mess into moist, delicious muffins never, ever fails to thrill me. Yes I make mistakes, but I am all the better for it, tweaking ingredients, methods etc. It’s fun!!
A sticky, wet, Morello Cherry and Almond batter….
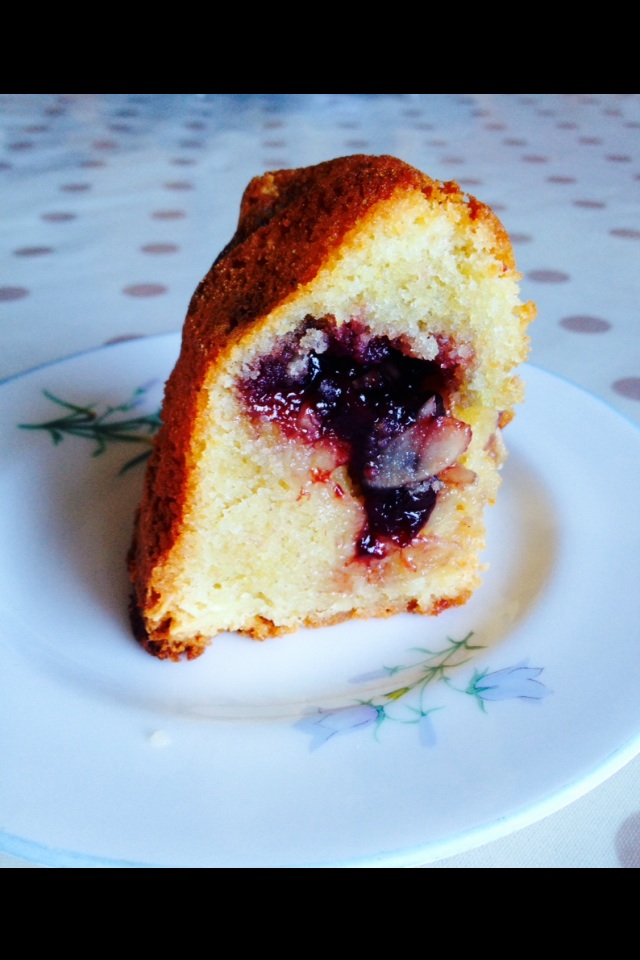
Once cooked, cooled and sliced looks like this…,.
A moist, baked cake, with a scrumptious Morello Cherry centre!!!!
Baking and cooking allow me to explore the creative side of my nature and I am never short of taste testers who give me the honest feedback I value.
Lastly and following on from the previous point, I get to share! l love the reaction from anyone I share my food with, whether it be the latest homemade ice cream flavour, devoured by our children and their cousins, or an individual portion of lasagne, given to one of my best friends, after a days serious walking (we’re talking 6-10miles here people!!!), knowing, she not only doesn’t have to think about what to have for dinner, but half an hour in the oven and a home cooked meal is ready.
Sharing is such an important part of who I am and so it naturally translates to my baking and cooking.
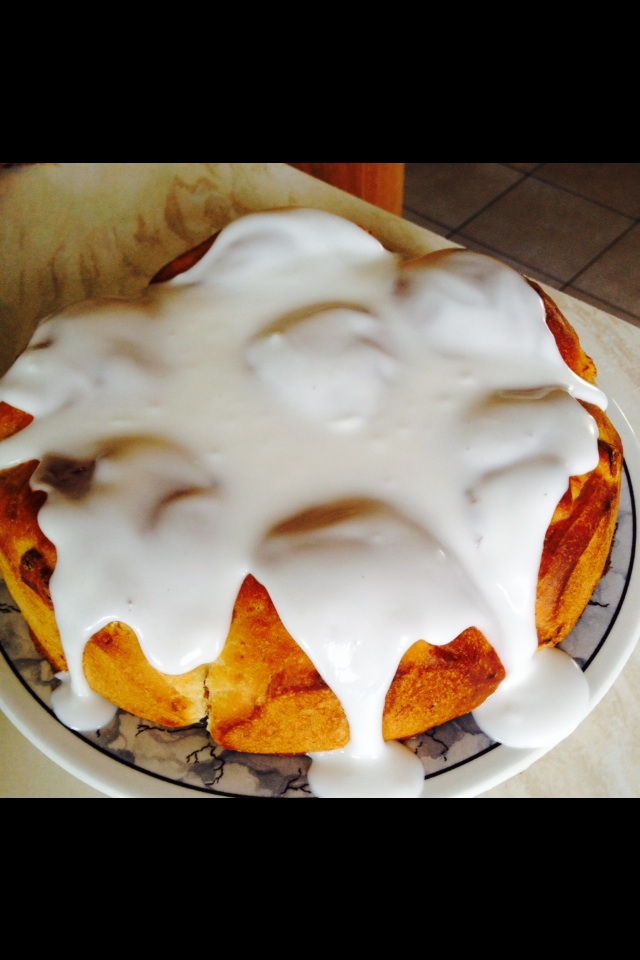
Made for sharing, totally delicious & good for you!!! Lemon iced baked fruit buns.
Many people’s diet is restricted by the fact that they live alone. If I’m making a Chilli for five of us it’s not any bother to make it for 6 people and it is always greatly appreciated.
None more so than by me. The week following our eldest daughter’s birth, neither my husband or I cooked. Family and friends brought round a main meal, everyday of that week. Now I can honestly say we’ve probably tried every single type of Shepherds pie ever made! But do you know what? To a nursing mum (me) and a severely sleep deprived couple, who had absolutely no idea of what parenting was all about, each evening meal was truly wonderful. I was constantly hungry and my gorgeous hubby has never, ever been a fan of cooking and our needs were met.
Beautiful Pink Cupcakes, made by my wonderful Mummy, for our Daughter’s Birthday. Love you Mummy xxxx
I have never forgotten the love and practical kindness shown to us, during the earliest days of parenthood (where bathing the baby would take over an hour – I’m not joking!!!).
My aim is to now show that same practical love to others and in doing so encourage others to also share.
Handing my shopping delivery man a cupcake. Thank you for carrying all my heavy shopping through to the kitchen.
It’s amazing how many people you can make smile, just because you take a moment to notice them and share with them!
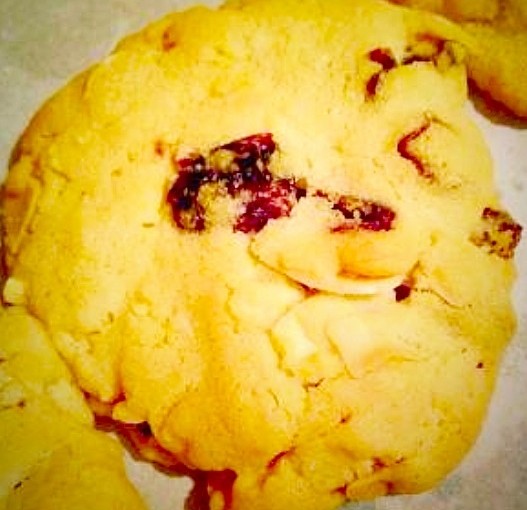
Hello, thank you for stopping by to take a peek at my blog and the recipe for these scrumptious Almond and Cranberry Cookies.
Almond and Cranberry Cookies – delish xxx
Just because Cranberries are naturally in season over the holiday period, doesn’t mean you can’t use the dried version any time of the year!
Pop the kettle on – I need to be dunked!!!
Dried cranberries have a sweet/tart flavour and work wonderfully well in these cookies as they are not too sweet. Most supermarkets stock Craisins (by Ocean Spray) otherwise I’ve found reliable stockists of dried Cranberries on Amazon/eBay.
Recipe : Makes 20 – 30 cookies
5 oz Caster Sugar
8 oz Unsalted Butter (at room temp)
1/4 tsp Salt (I use Kosher – no additives)
1 tsp Vanilla Extract
1/2 tsp. Almond Extract
1 Large Egg Yolk (free range if possible)
2 oz Ground Almonds
8 oz. Plain White Flour
4 oz Dried Cranberries
2 oz Flaked Almonds
Method :
Preheat the oven to 160C fan ((175C conventional oven).
Line 2 baking trays with parchment paper (if the trays aren’t non stick).
Cream together the butter, sugar and salt, using either an electric whisk (much easier!!) or wooden spoon, until pale and smooth to touch (rub a little of the mixture between your thumb and forefinger, it should not feel grainy).
Whisk/beat in the Egg Yolk, Vanilla and Almond extracts.
I now always switch to a spoon for mixing the dry ingredients, this way I can ‘feel’ when everything is combined and avoid overworking the flour (this can lead to tough cookies).
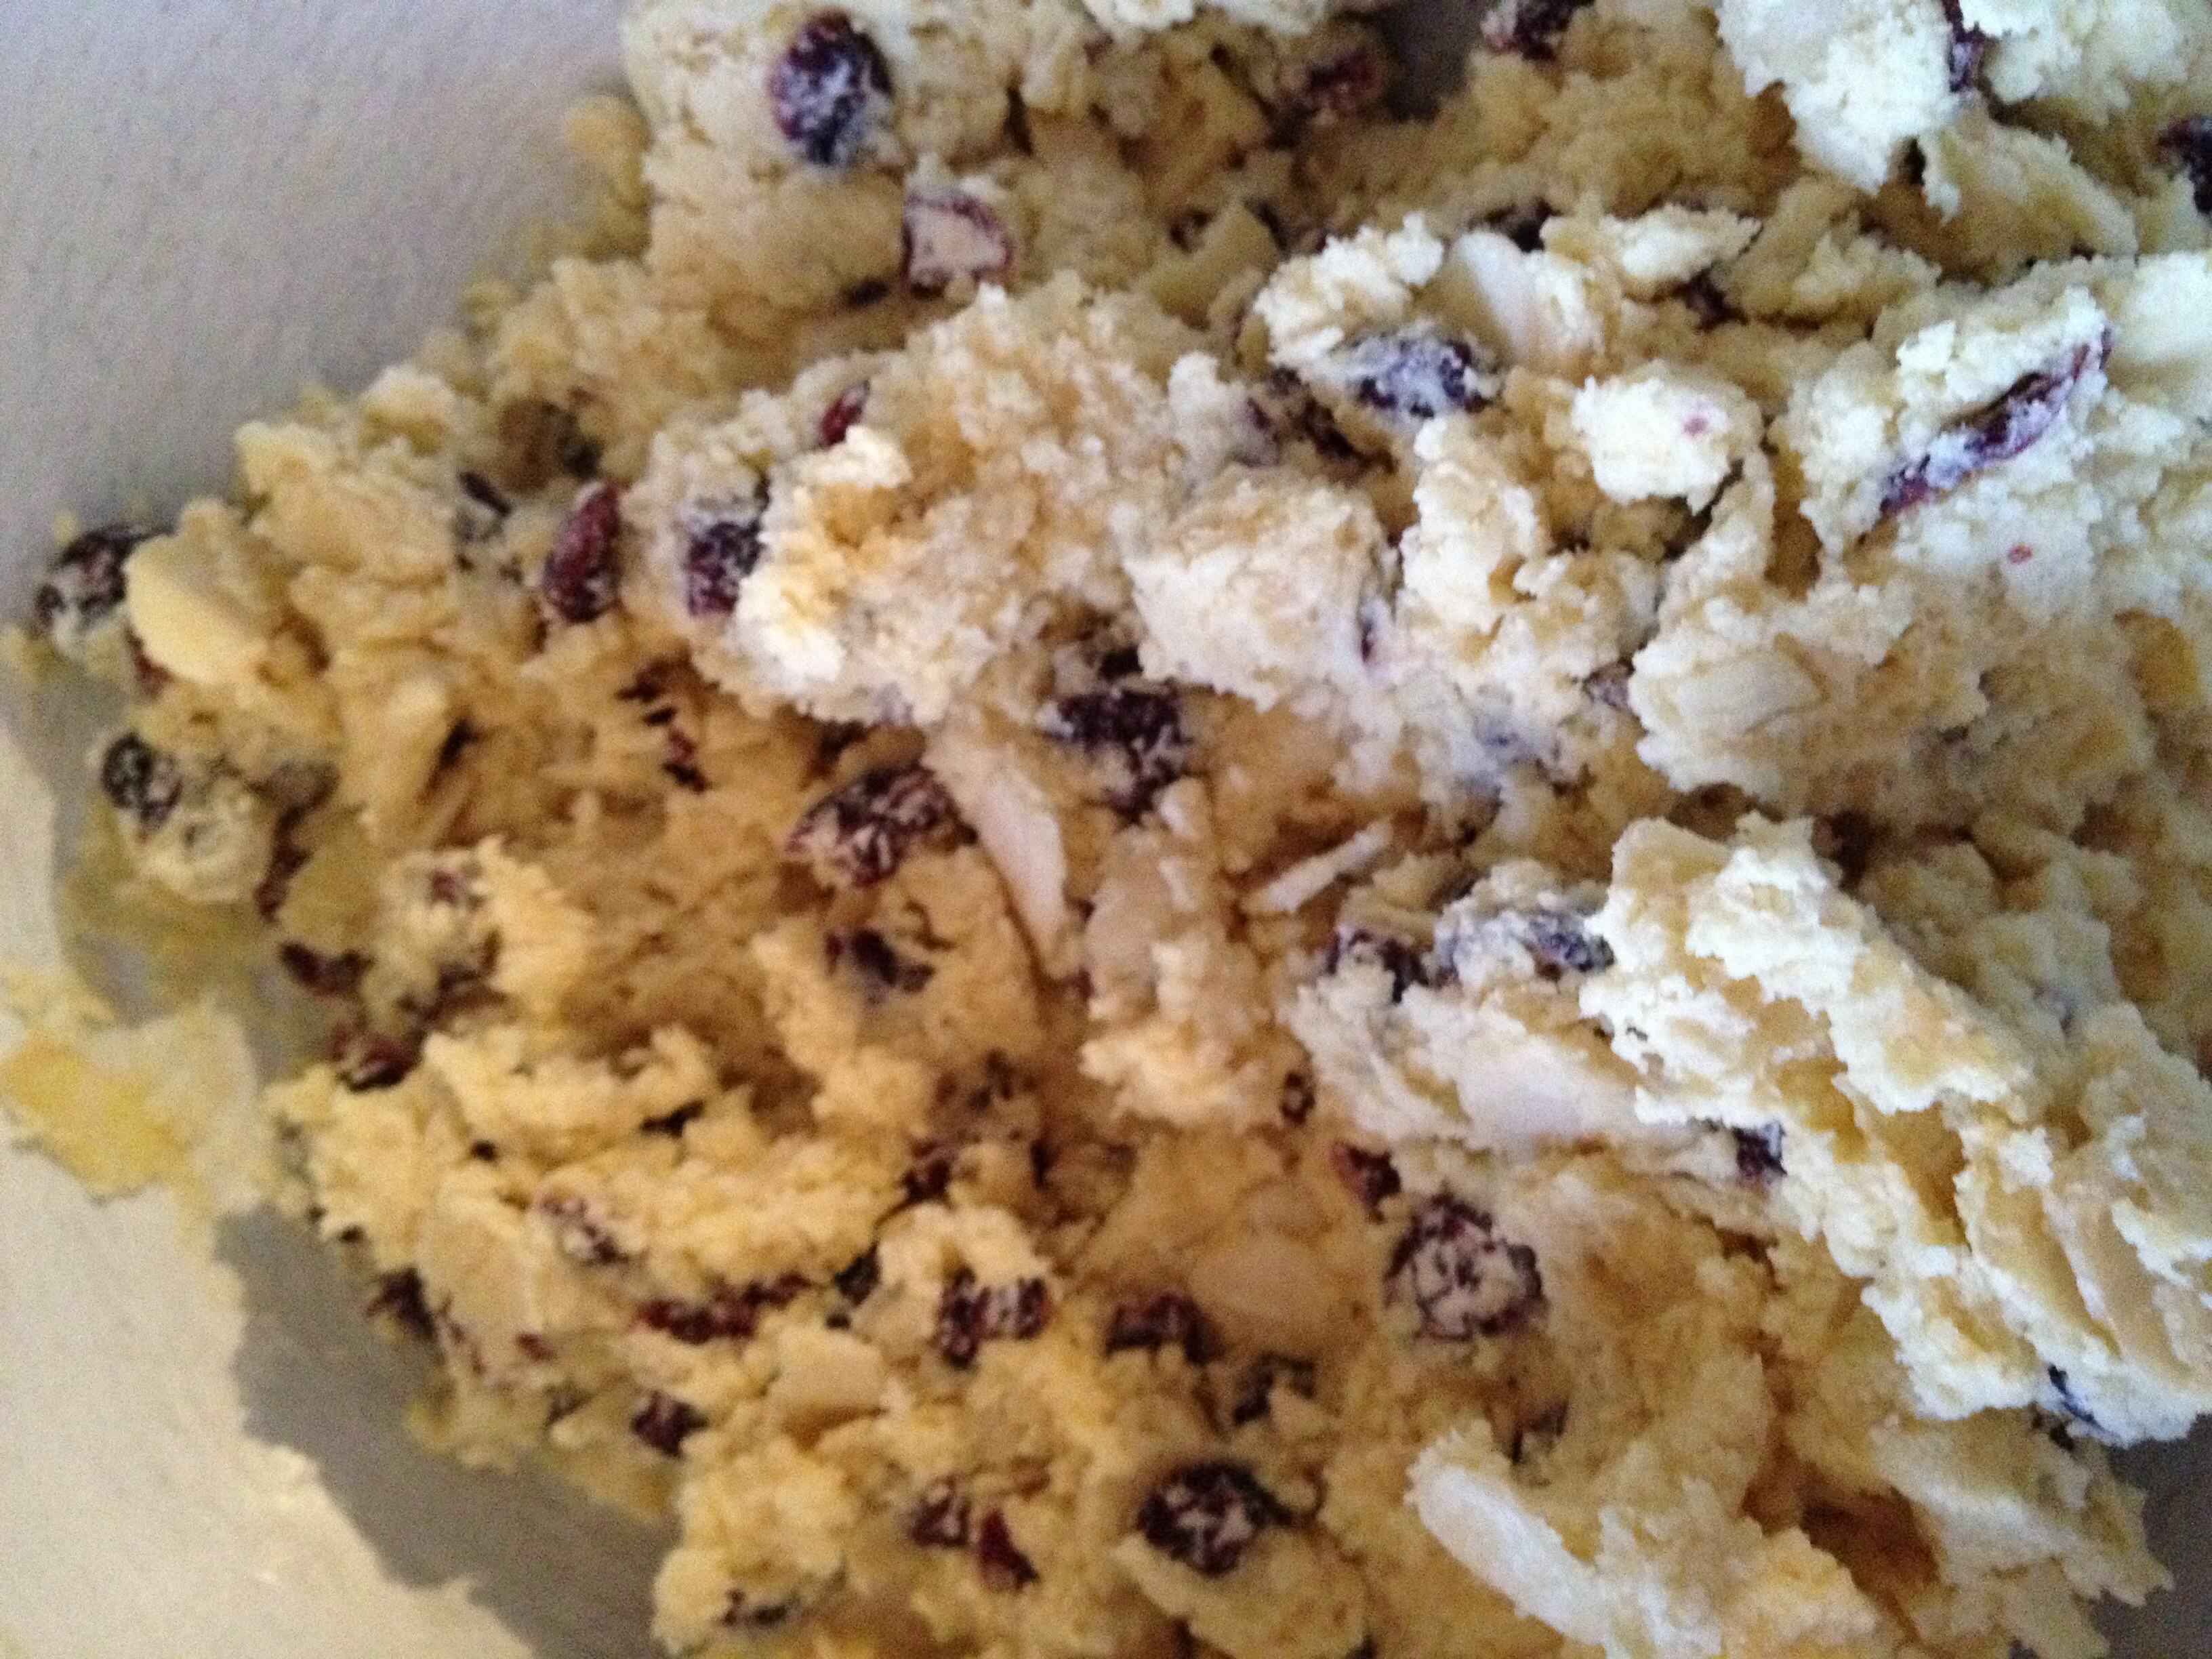
Add the Plain White Flour, Ground Almonds, Dried Cranberries and Flaked Almonds. Mix until all the ingredients are just combined.
This dough looks yummy enough to eat!!
Using a teaspoon form small balls (the size of large marbles) of the mixture, approx 12-14 balls – this will use approx half of the mixture.
Place the cookie dough balls, spaced evenly, onto the baking sheets. Lightly press the balls to form 1/4 inch thick disc.
Put both baking trays into the preheated oven and cook for 18-25 mins. They are cooked when they have turned a light, golden colour. Do not expect the cookies to be hard, they will firm up on cooling.
Leave to cool fully on the baking tray.
These taste even better the next day. I had to hide them to find that out!!!!
With the remaining cookie dough, wipe your worktop with a clean cloth and place at least 14 inches of cling film onto the worktop. Where the worktop is damp it will anchor the cling film in place!!
Place the cookie dough onto the cling film, form into a roll (approx 1 1/2 inch diameter). Wrap with the cling film and place in the fridge, it will keep fresh for up to one week. Or you can place in the freezer for up to one month.
Defrost the dough overnight in the fridge. To bake, preheat the oven and remove the dough log 20 minutes before slicing – this allows the dough to warm slightly and will help stop the cookies cracking when being cut.
Slice 1/4 inch (1cm) discs from the dough log, place on baking sheets as before and bake for 18-25 minutes. The time will vary depending on the diameter and thickness of your cookies.
Again they are cooked when lightly golden. Leave to cool on the baking sheet.
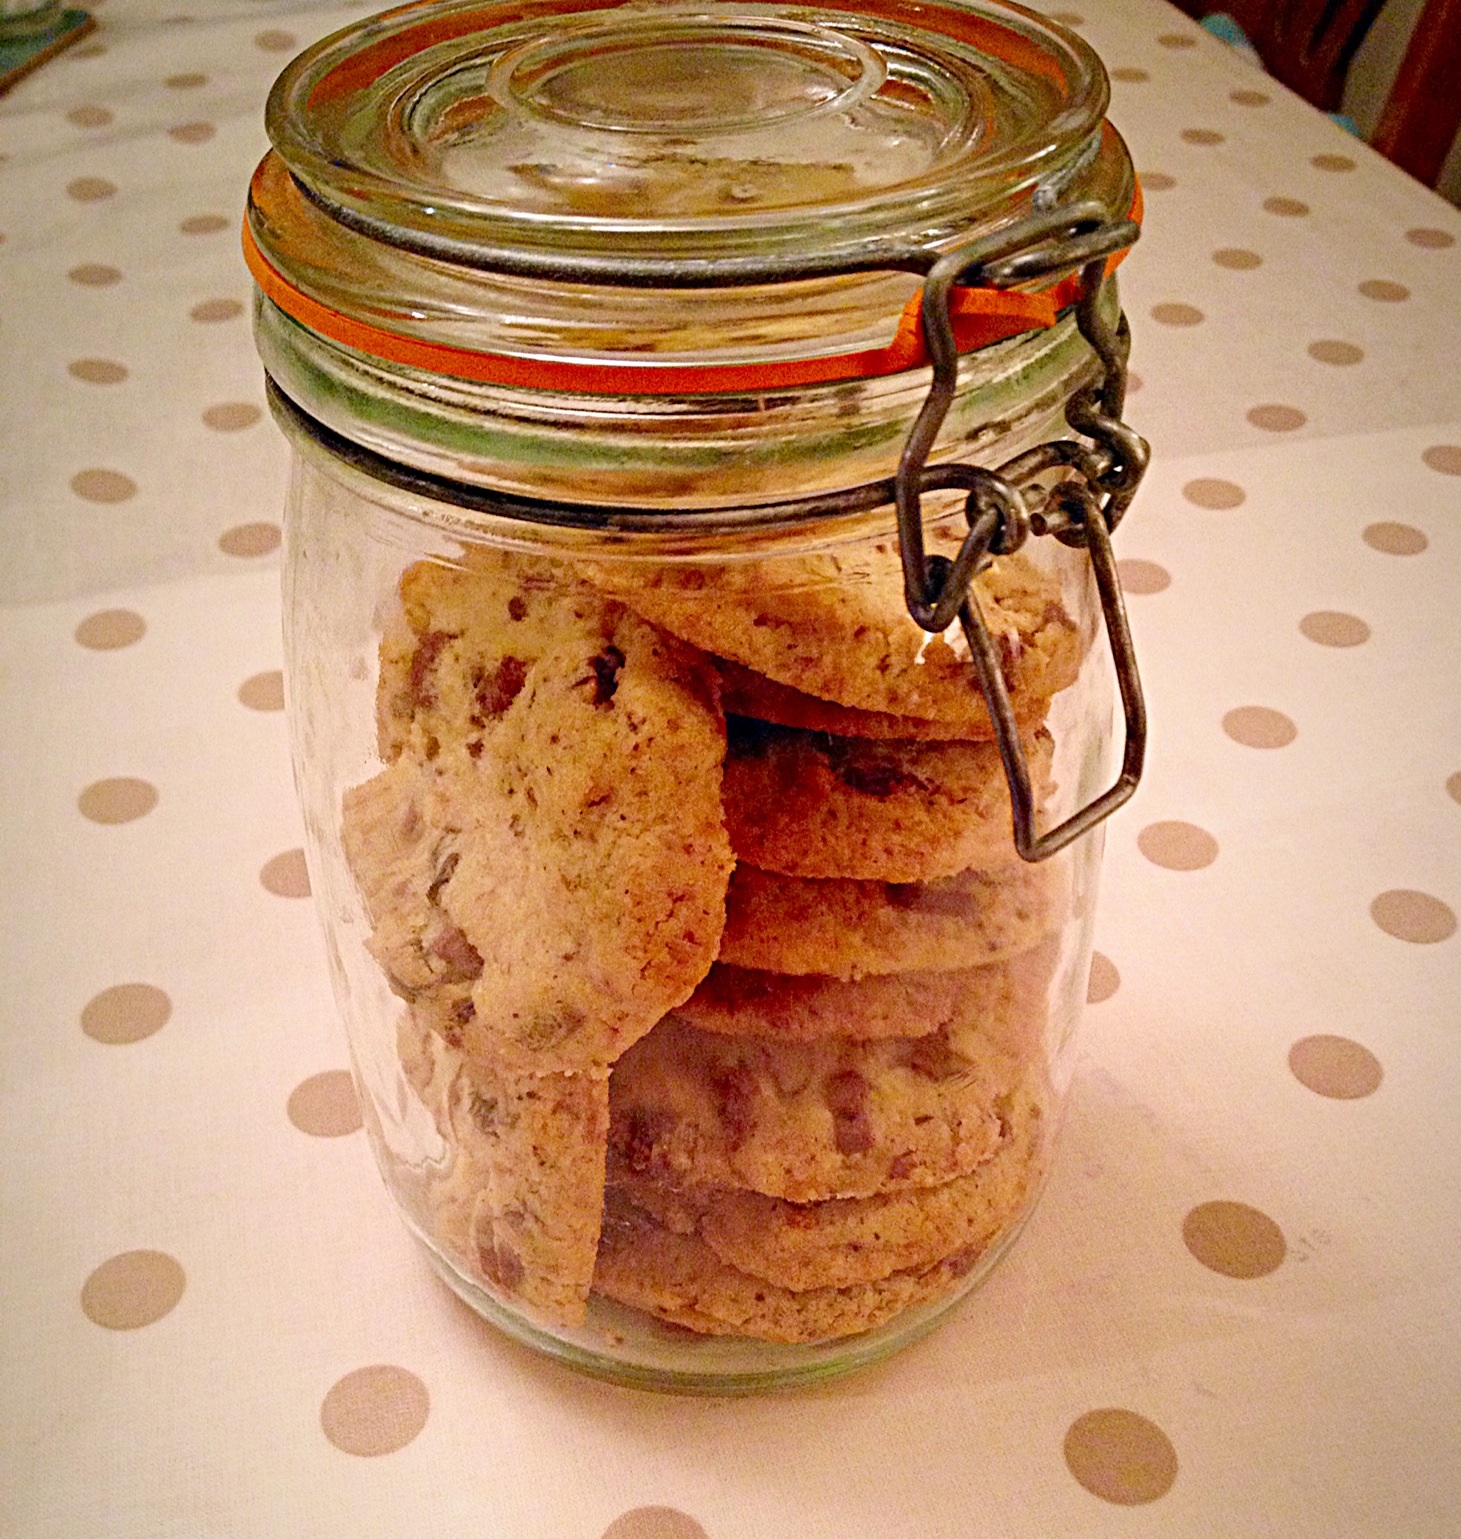
These cookies make lovely gifts. Pack a few up in a cellophane bag, tied with a pretty ribbon, reuse a Christmas chocolate tin and fill with Cookies, or pop some into a Kilner jar!
A super present, people can see what they’re being treated to!!!!
Not only are these so easy to make, you can keep the dough stored in the fridge to whip out when unexpected guests arrive and have freshly baked cookies, ready to share with a smile and a cuppa!
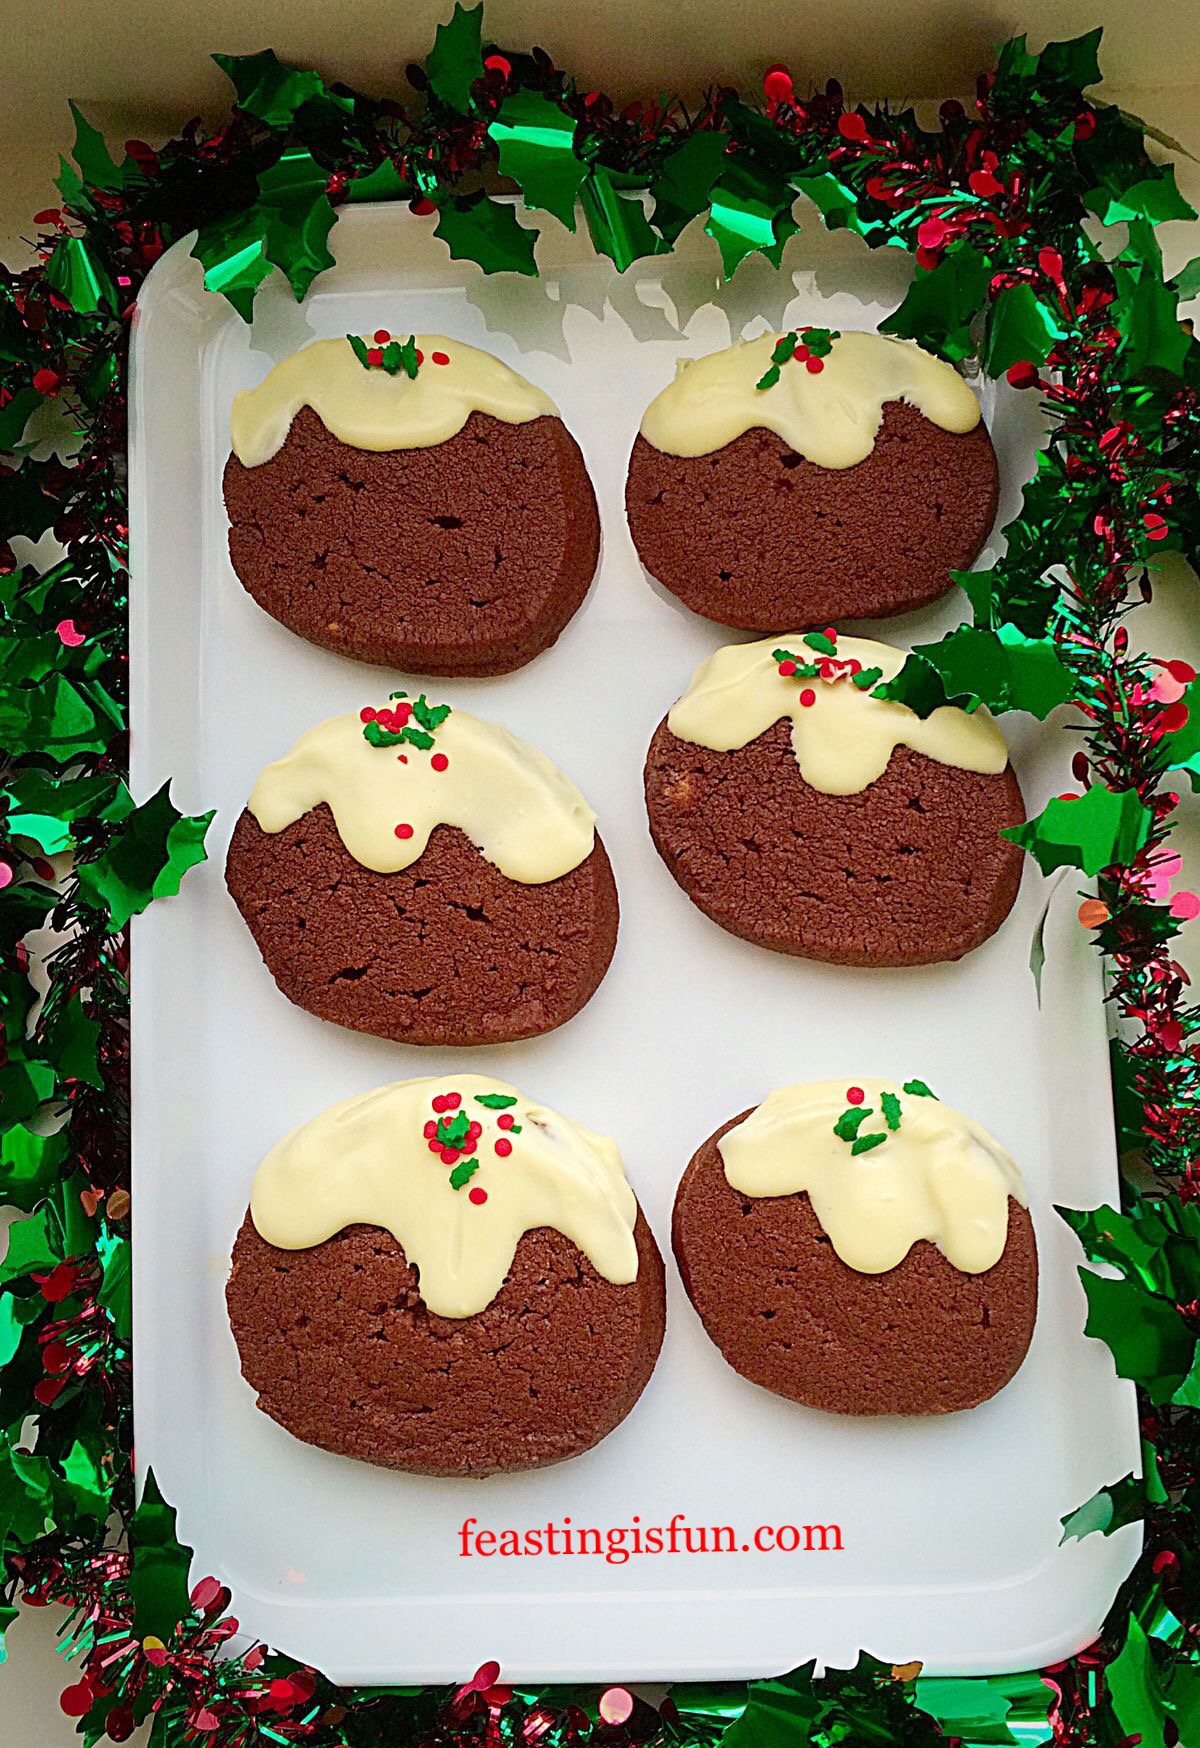
Hello, big apologies for not posting recently. Birthdays (mine included!), Christmas preparation, children breaking up from school, flu bugs etc have simply left me with zero time to write. Finally I was able to decorate our Christmas cake, so I thought I’d let you Meet OurPenguins!
However, I’m back and have been up since 4.30 this morning. So I thought I’d finally get round to icing our Christmas cake.
Today I woke up early and popped downstairs, in the beautiful, peaceful, quiet of a sleeping house and set about decorating our cake. And most importantly, giving our Penguins and Snowman a playground! So that you can Meet Our Penguins!
I will take you through, step by step, the fun I had decorating this years Christmas cake. The cake covered in this tutorial is a traditional Christmas fruit cake. I will try to get the recipe posted in the next couple of weeks. So, please don’t worry, as it’s not necessary to bake your cake 3 months before Christmas. In fact, I’ve baked ours in the week leading up to Christmas before!
Ingredients To Cover An 20cm/8inch Deep Fruit Christmas Cake
3-4tbsp Apricot Jam
500g/1lb 20z Ready Made Marzipan – golden or white
750g/1lb 10oz Fondant Icing also known as Sugar Paste
Coloured fondant for contrast – optional
A selection of Christmas decorations to place on top of your cake
Edible glitter – optional
Preparing The Christmas Cake To Meet Our Penguins
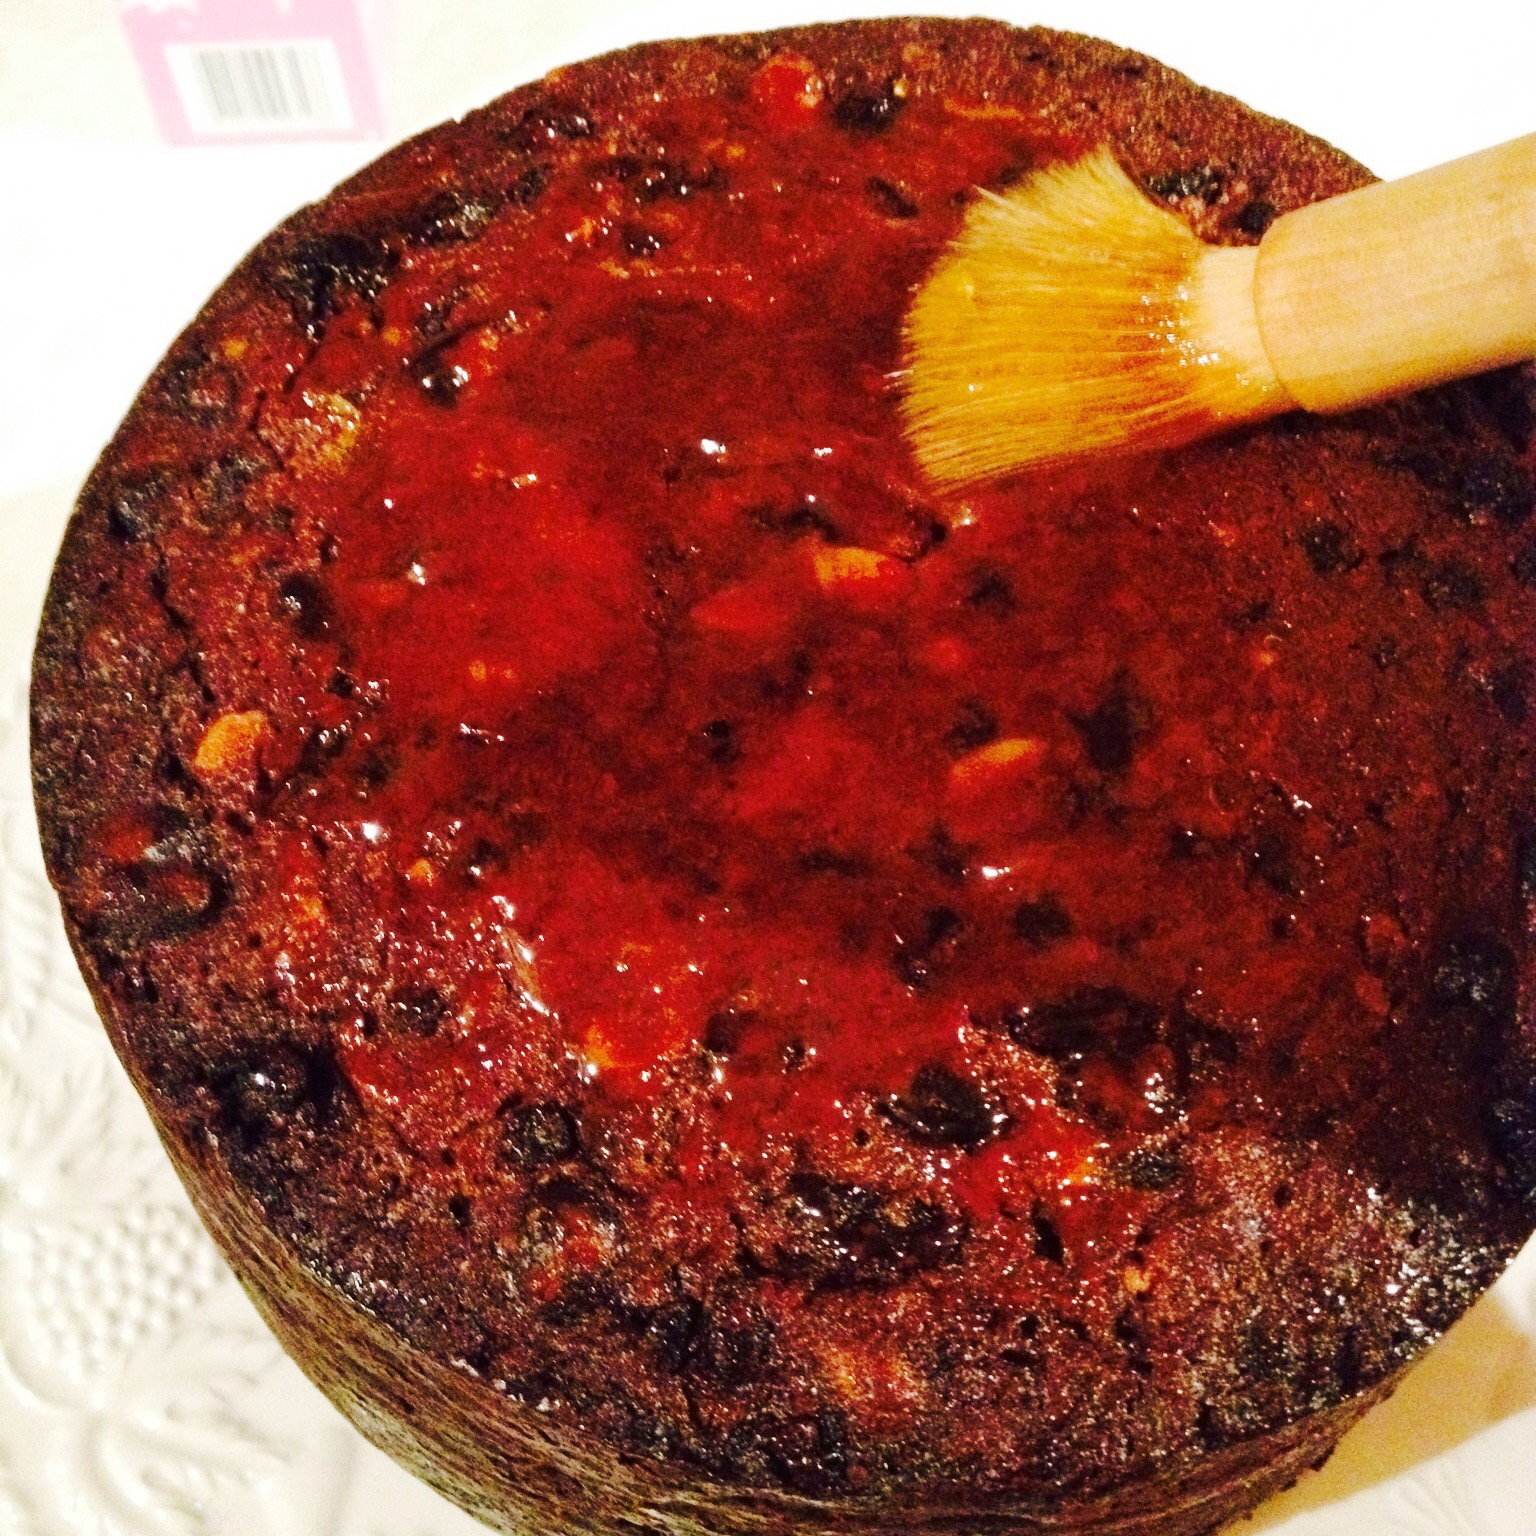
First of all place your Christmas fruit cake on to a cake board or flat cake plate or stand.
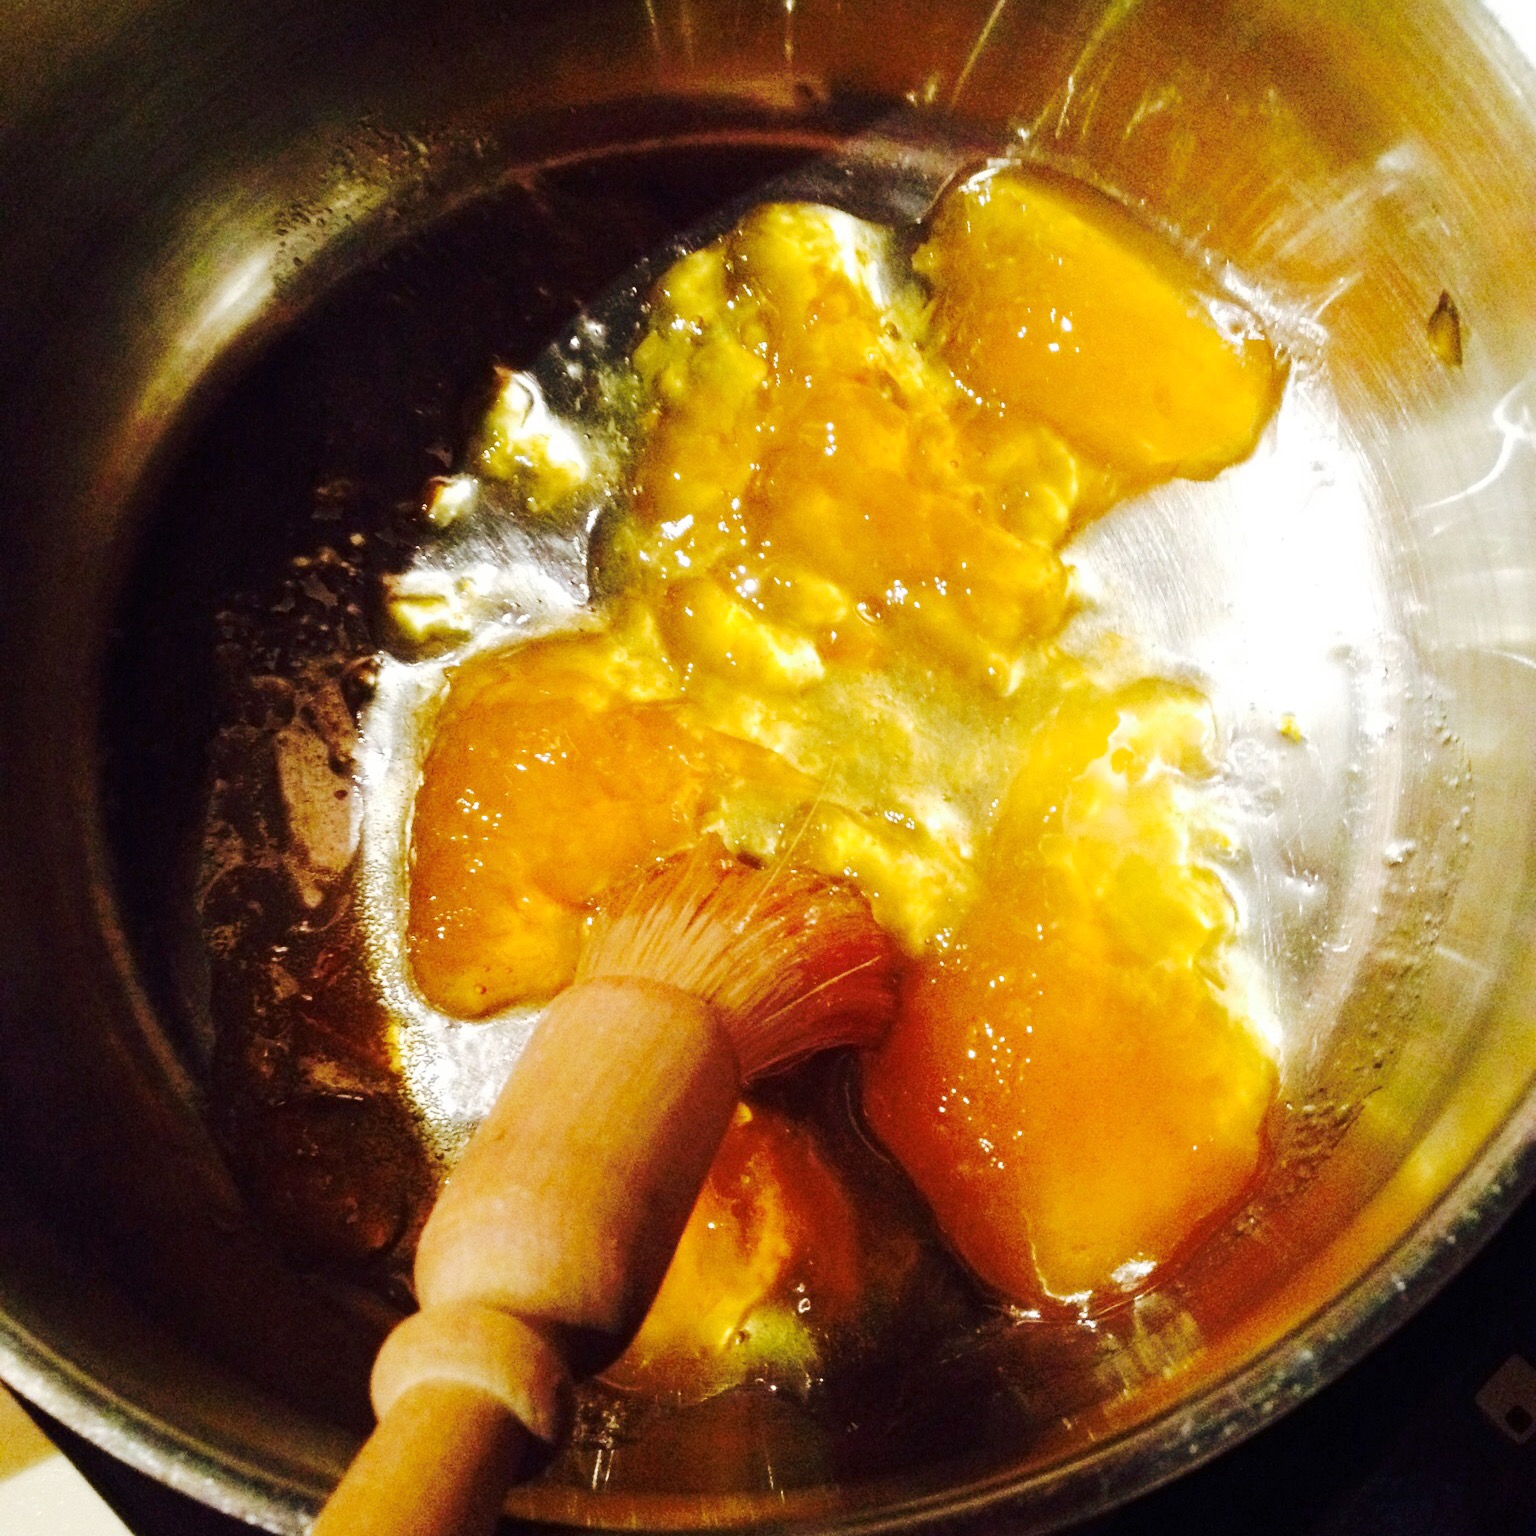
Next, heat 3 tablespoons of apricot jam in a saucepan, on a low heat, until the jam is slightly runny. At this stage you can then sieve the jam to remove any lumps. I didn’t bother as the jam I’d bought was fairly smooth and it was 5am and I really couldn’t be bothered! But feel free to sieve if you want to. Remember, the jam is there as a ‘glue’ for the marzipan to stick to, nobody will see it!
Next, using a pastry brush, completely slather the top and sides of the cake with jam. Don’t worry if some drips on the board as this can be wiped off later. Most importantly is to cover the cake thoroughly as the jam will act as the ‘glue’ to which the marzipan sticks.
Covering A Christmas Cake With Marzipan
Preparing The Marzipan
Unfortunately Marzipan isn’t as flexible as fondant icing. And it has a tendency to tear when rolled into a large disc and draped over the cake, which is the method I use for fondant. Because the marzipan will be covered by the fondant icing, I use a different method.
First of all make sure that you have the cake tin in which you baked you cake to hand. As this will be used as a template for the top of the cake and a rough guide for the sides.
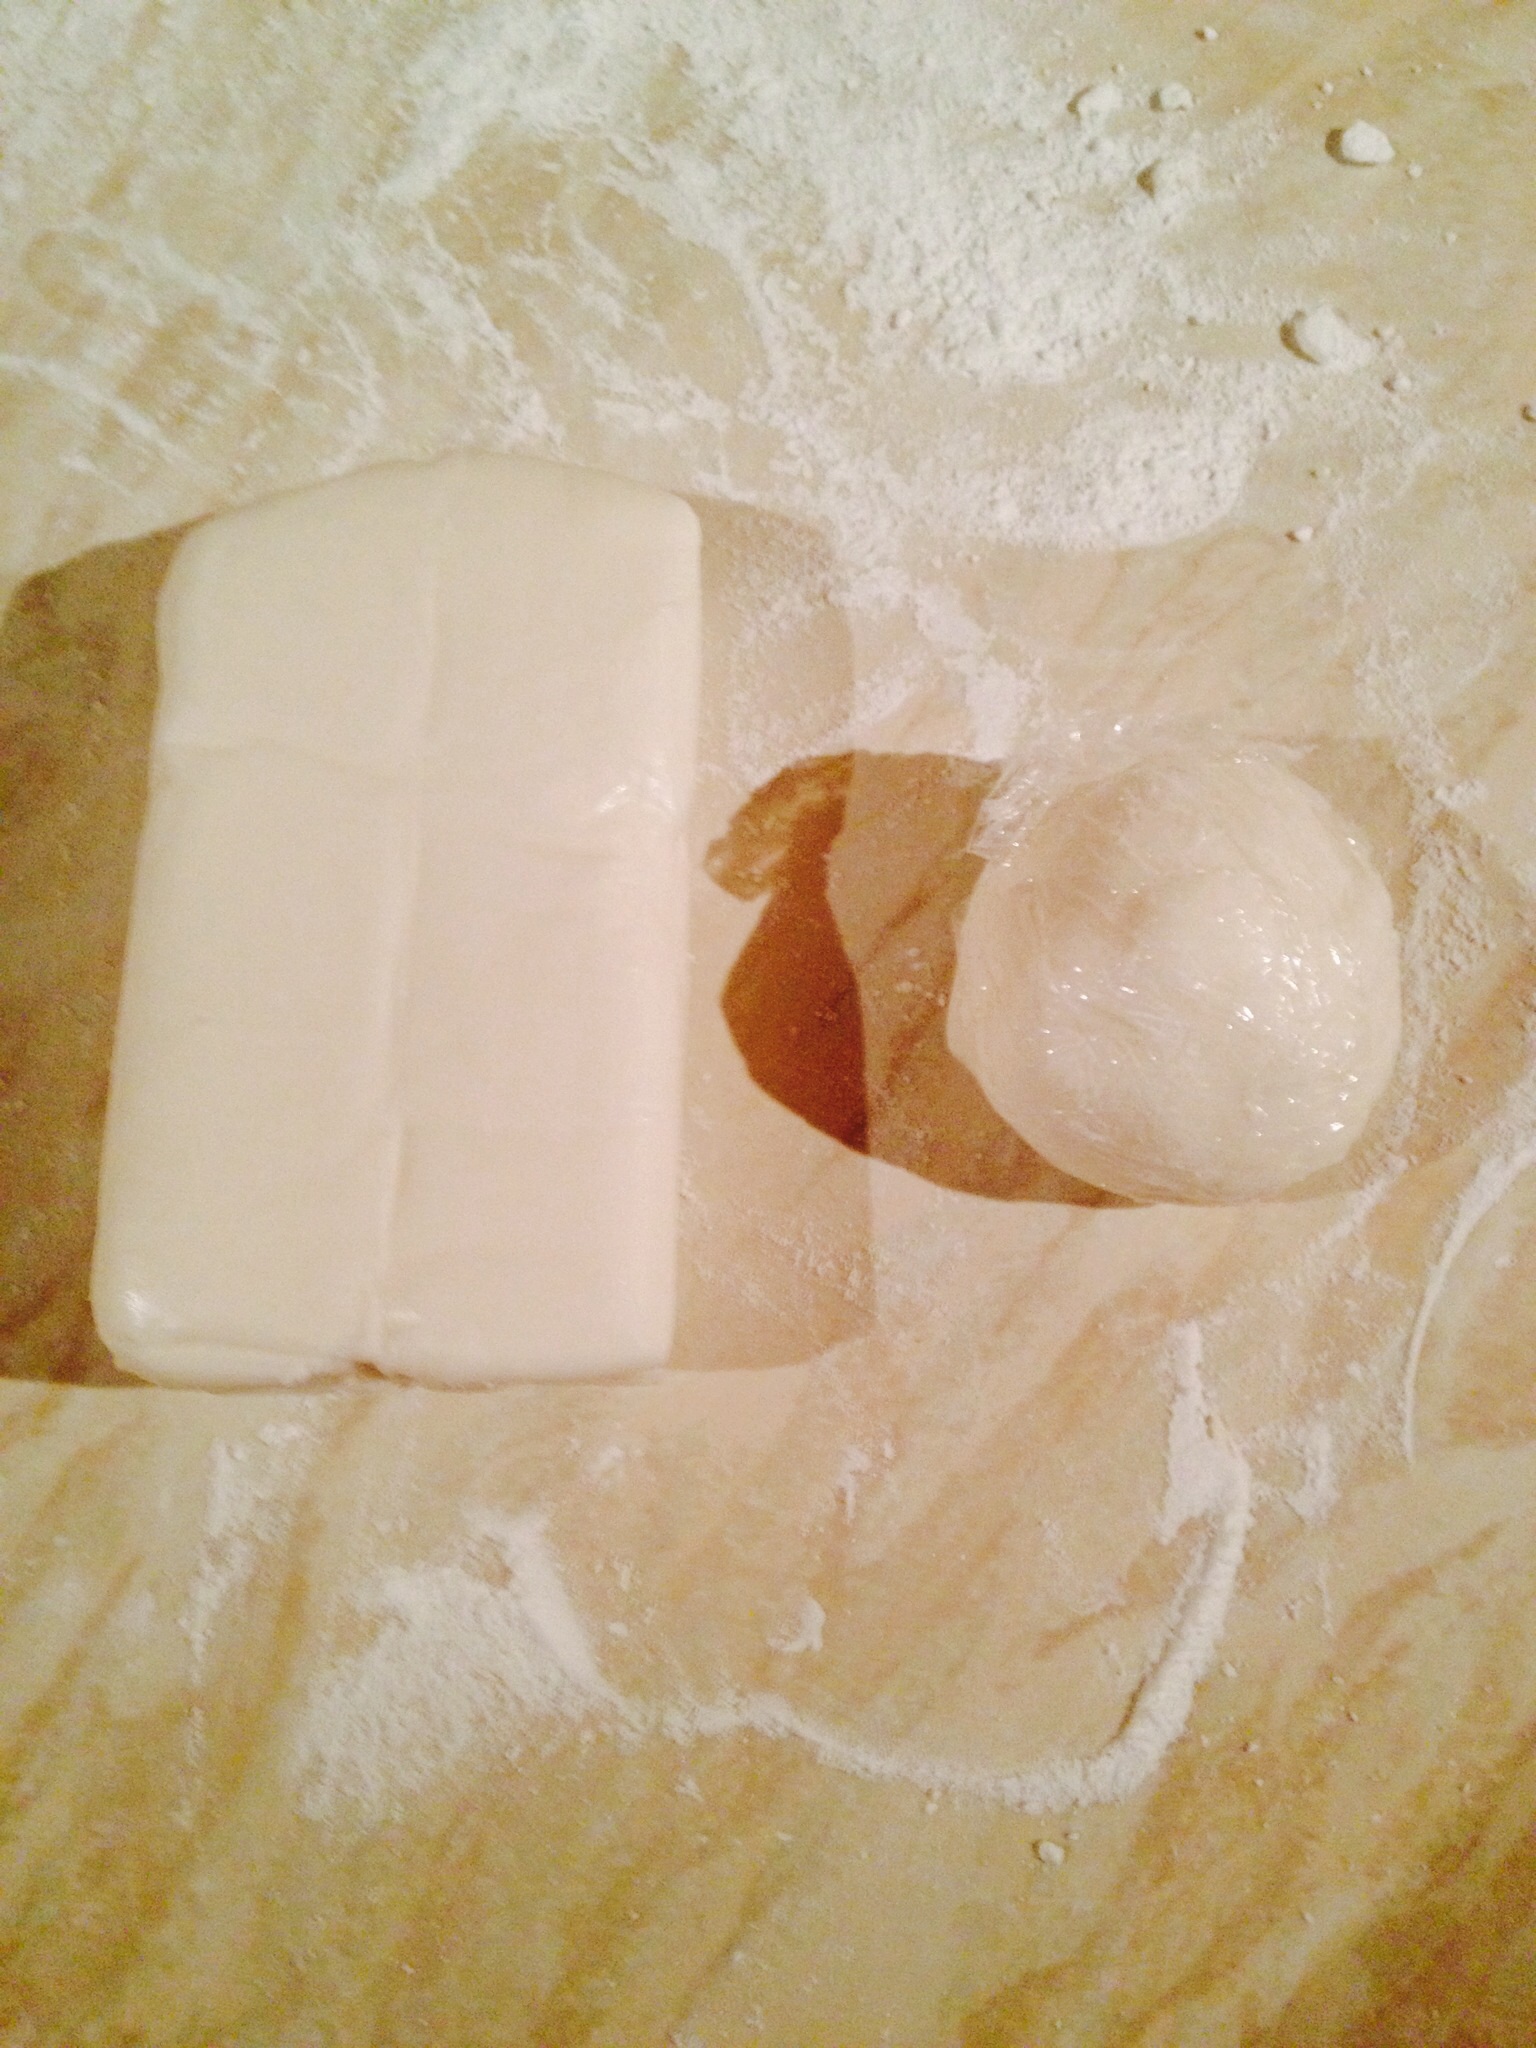
On a clean board or worktop, place a light dusting of corn flour. Also, dust your rolling pin. Take the Marzipan out of the packet. I found a 500g packet suitable for one cake. I bought the marzipan from.Waitrose. Lightly dust your hands with corn flour. Gently knead the marzipan so that it becomes softer and more pliable. As a guide at this point I divide the marzipan into 2 equal balls.
Rolling Out And Placing The Marzipan On The Cake
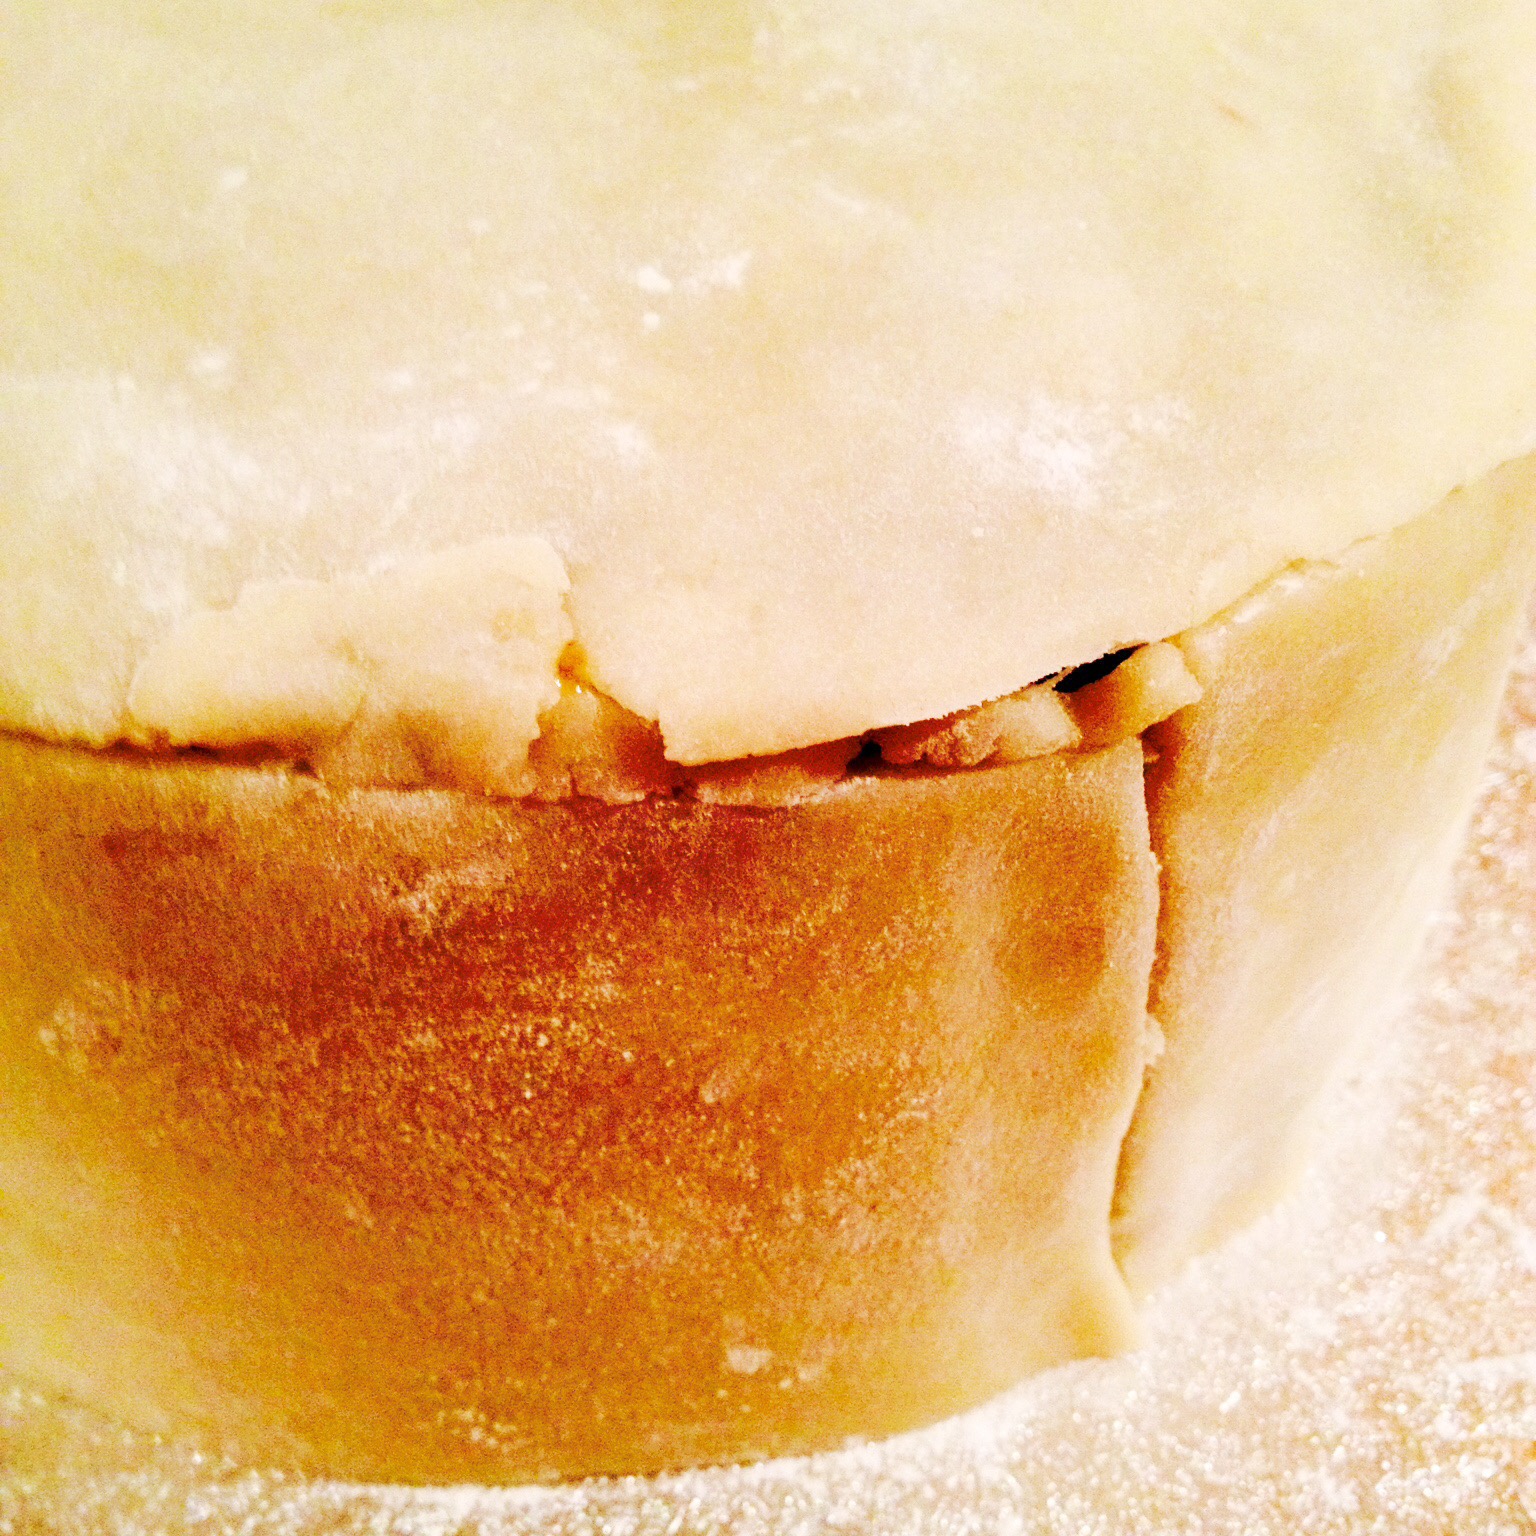
Roll out the first ball, taking care to make sure the marzipan does not become stuck to the worktop. When it looks roughly the size of the top of the cake place the cake tin on top of the marzipan. If it’s not quite big enough roll a little more until you have just over the size of the cake tin. Then using the cake tin as a template, place on top and cut around with a knife.
Using a rolling pin place the marzipan disc on top of the sticky cake.
Tip – if the disc isn’t centralised the jam will make it easy to slide the marzipan into the correct position.
Next shape the other half of the marzipan into a square. Roll until you have a long strip of marzipan, using the side of the cake tin as a guide. It’s very hard to get an even length, but don’t worry you then just trim the sides before placing the strip of marzipan around the side of the cake.
Use your hand to press and mould the marzipan to the cake.
If there are any small gaps, use the off cut pieces of marzipan to fill them.
Plug any gaps with spare marzipan.
Covering A Christmas Cake With Fondant
Preparing and rolling out the fondant
Now that the cake is covered in marzipan, the hard bit is over. Since covering with fondant is going to be super easy.
First of all completely clear and wipe down your worktop or board and rolling pin. When you’re working with white fondant, the tiniest speck of anything will show up. Even so, DON’T STRESS! Decorations can always be used to hide the odd speck!!
To cover the large cake I used 750g of White Fondant icing.
One 500g block and approx half of another block?
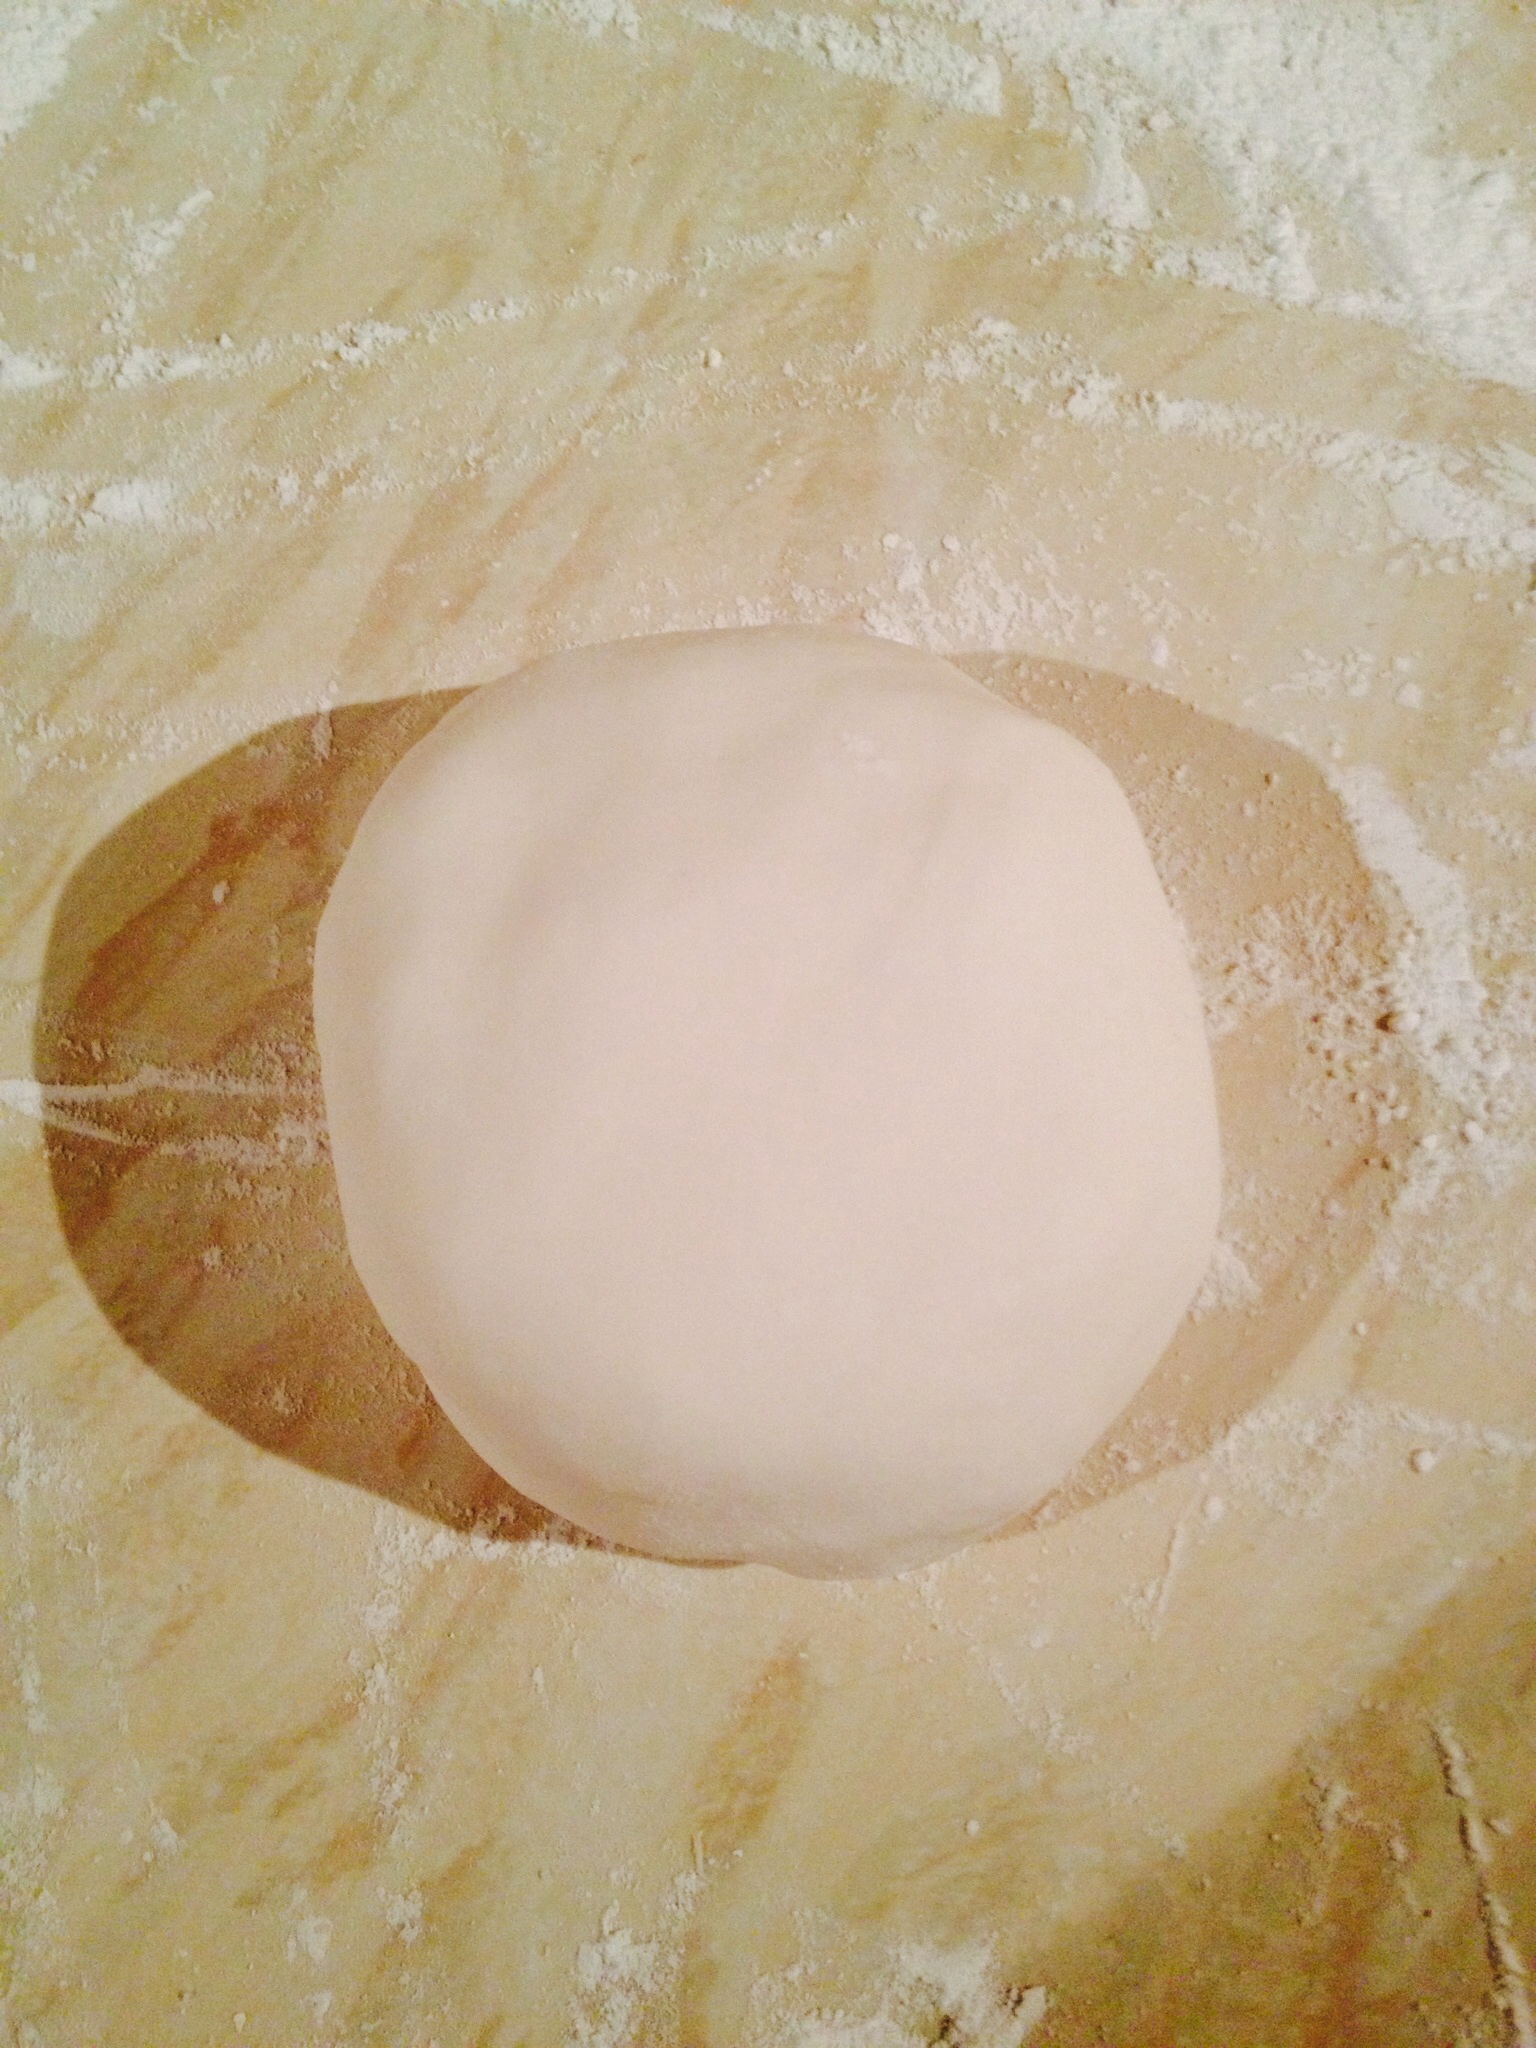
Knead the fondant with hands lightly dusted in corn flour. As soon as it is nice and pliable form into a ball.
Fondant is very sticky, so keep your hands, worktop and rolling pin well dusted with corn flour.
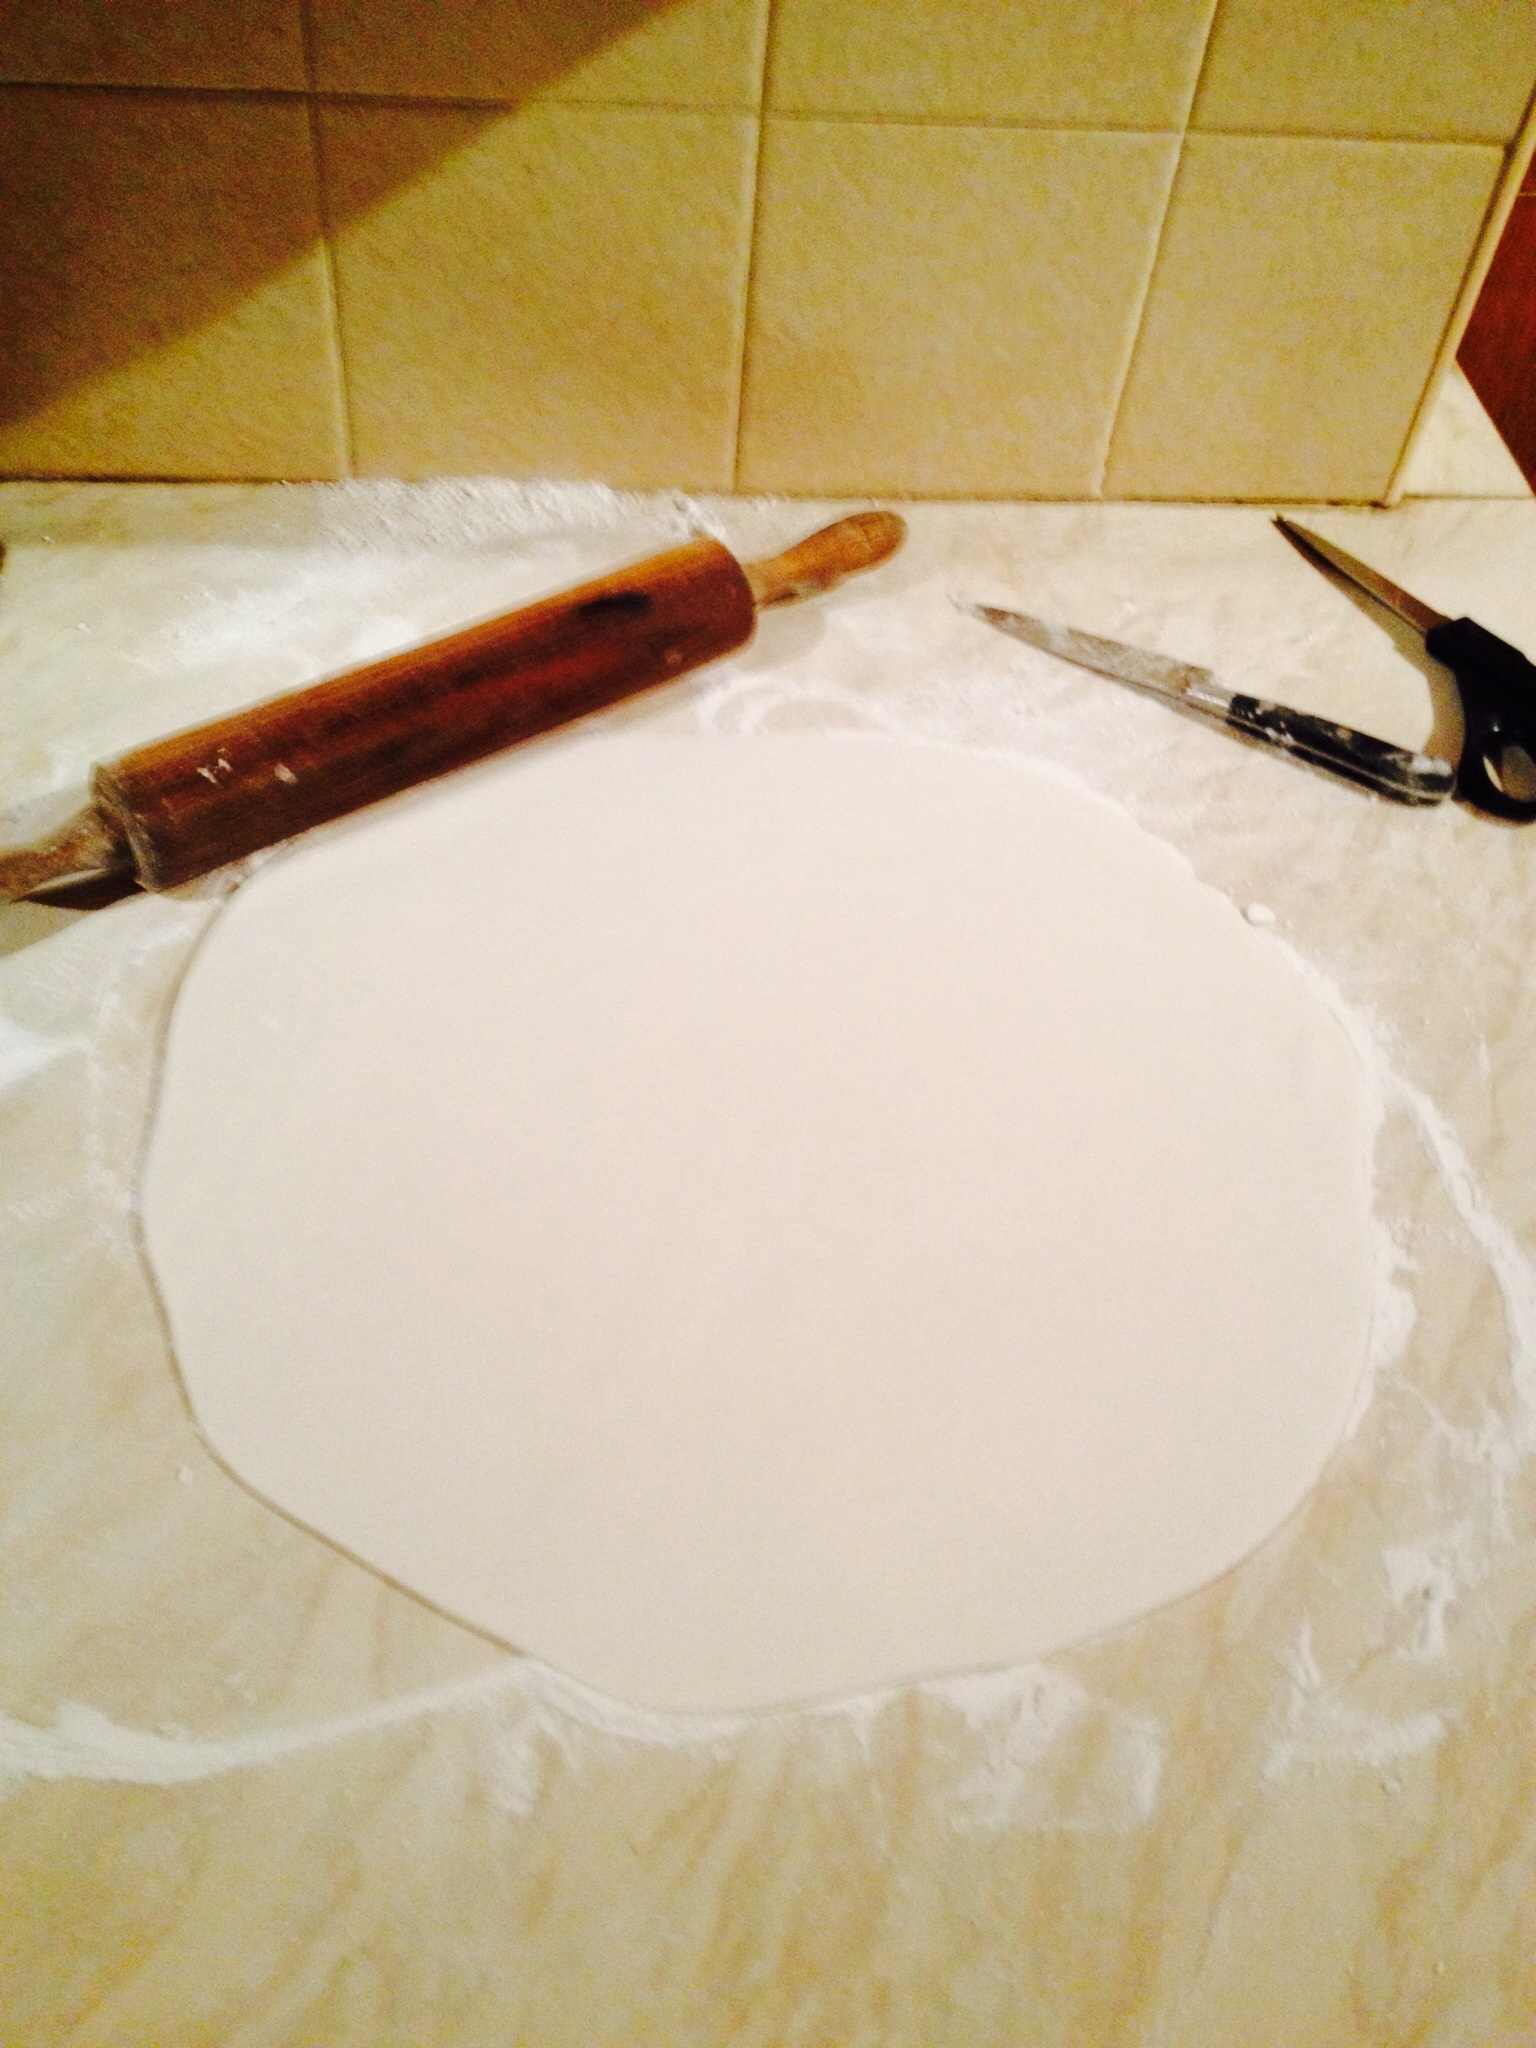
Pat the ball into an even disc shape. Using your rolling pin, roll outwards from the centre of the disc, turning the disc by a quarter before rolling again. Ensure there is plenty of corn flour on the worktop so that the fondant moves freely.
Roll out to the thickness of a £1 coin.
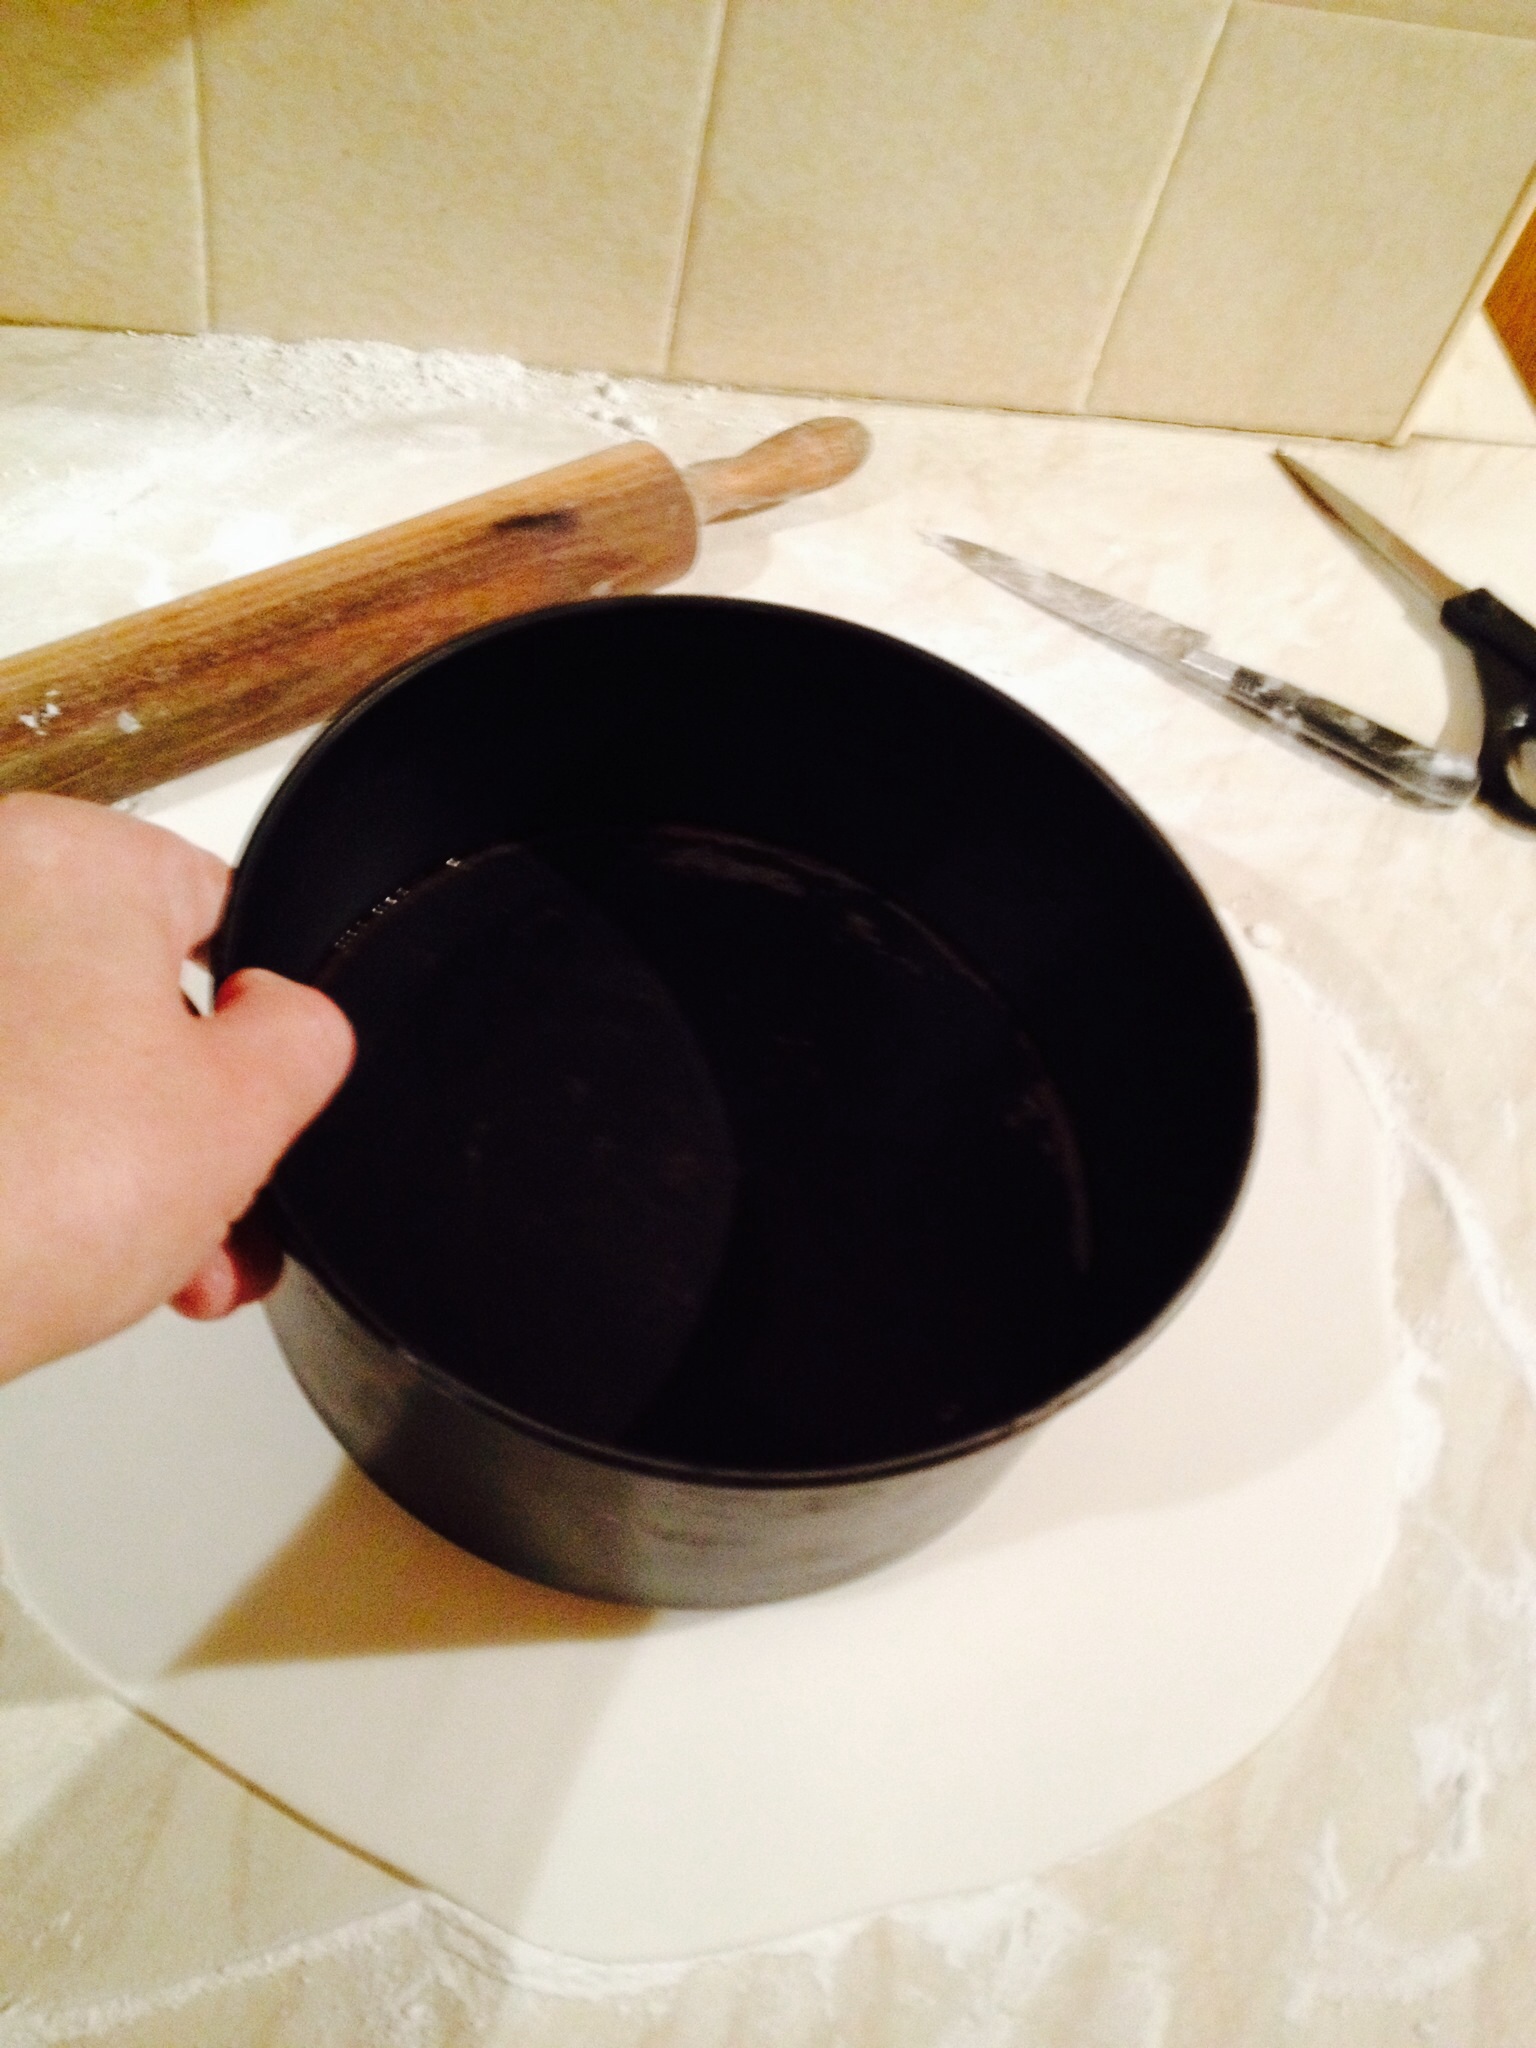
Using the cake tin, again, as a guide, roll out the fondant so that it is wide enough to cover the top and sides of the cake, allowing a good extra couple of centimetres all round to allow for the marzipan layer.
Using the tin you can roughly guess the final size of the fondant.
If you prefer to be more exact with your measurements, add the width ( diameter = D) of the tin plus 2 x the height (H) of the tin plus 2cm.
D + (2 x H) + 2cm = Total width of rolled fondant.
Placing the fondant on to the cake
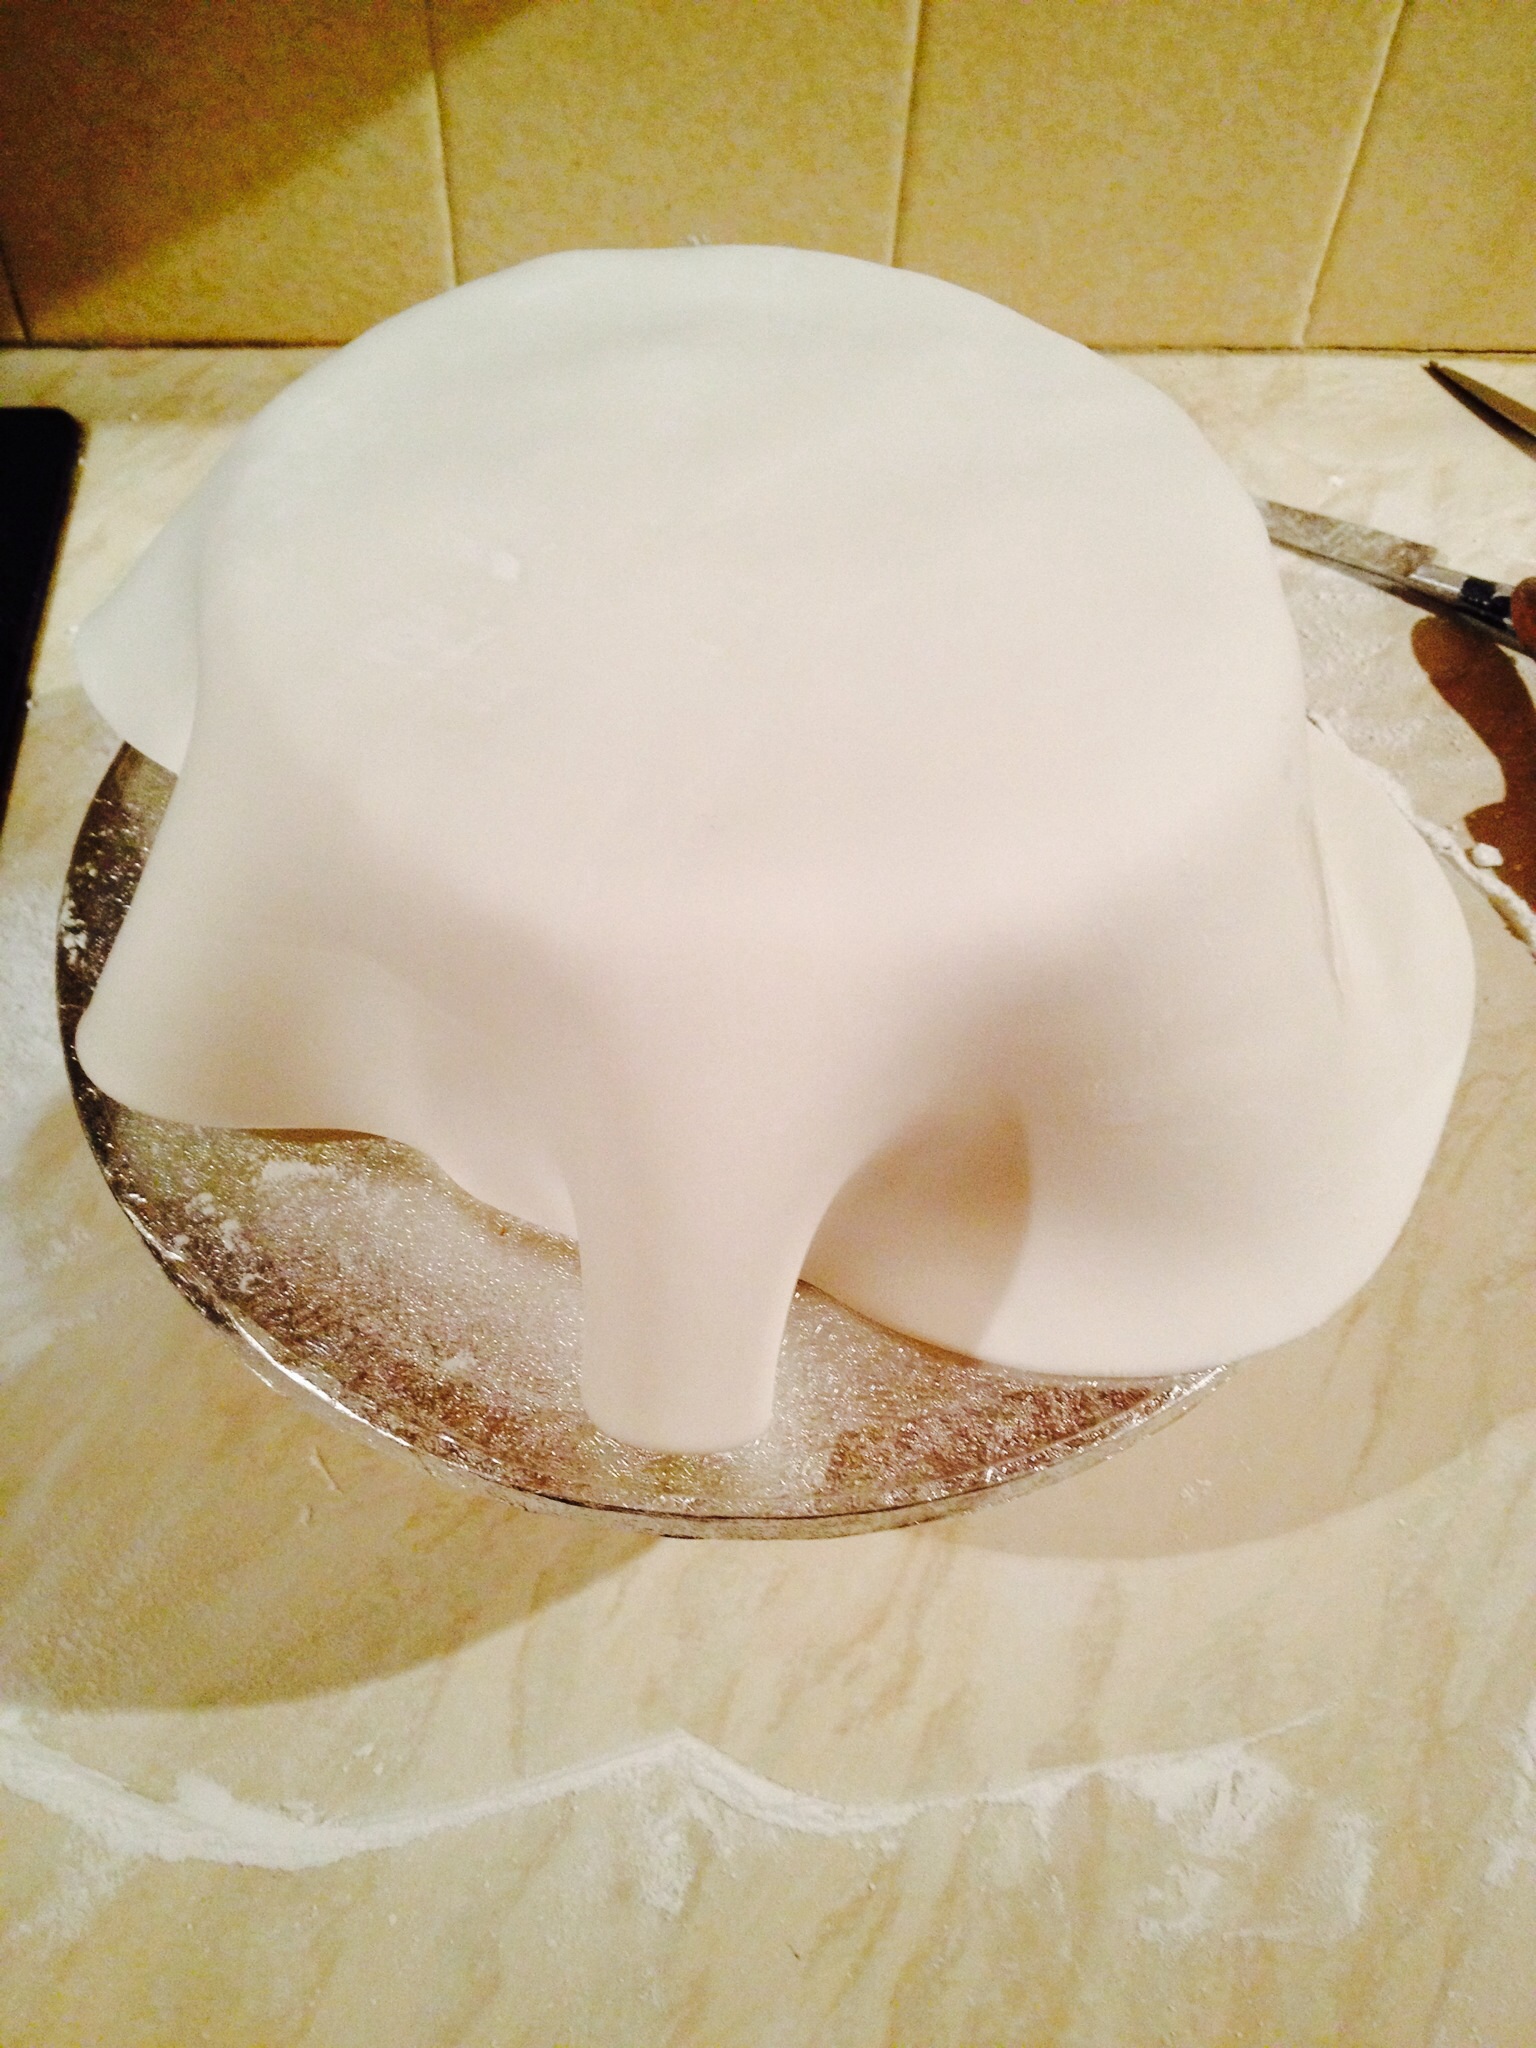
Use your rolling pin to drape the fondant over and carefully centralise over the top of the cake. Moving swiftly drape the fondant over the cake.
Note: if the fondant tears badly, remove and start again – the thickness should be that of a £1 coin. Too thick and the fondant will be too heavy and tear. And too thin and the fondant will not be strong enough to take the weight of draping.
I hadn’t quite centralised the fondant, but I got away with lightly lifting it and moving to the left!
Working swiftly, use your hands to smooth the fondant over the top and sides of the cake. I found I almost had to ‘tuck in’ the sides of the cake. There will be excess around the sides, just keep smoothing and gradually a beautiful smooth, covered cake will begin to appear!
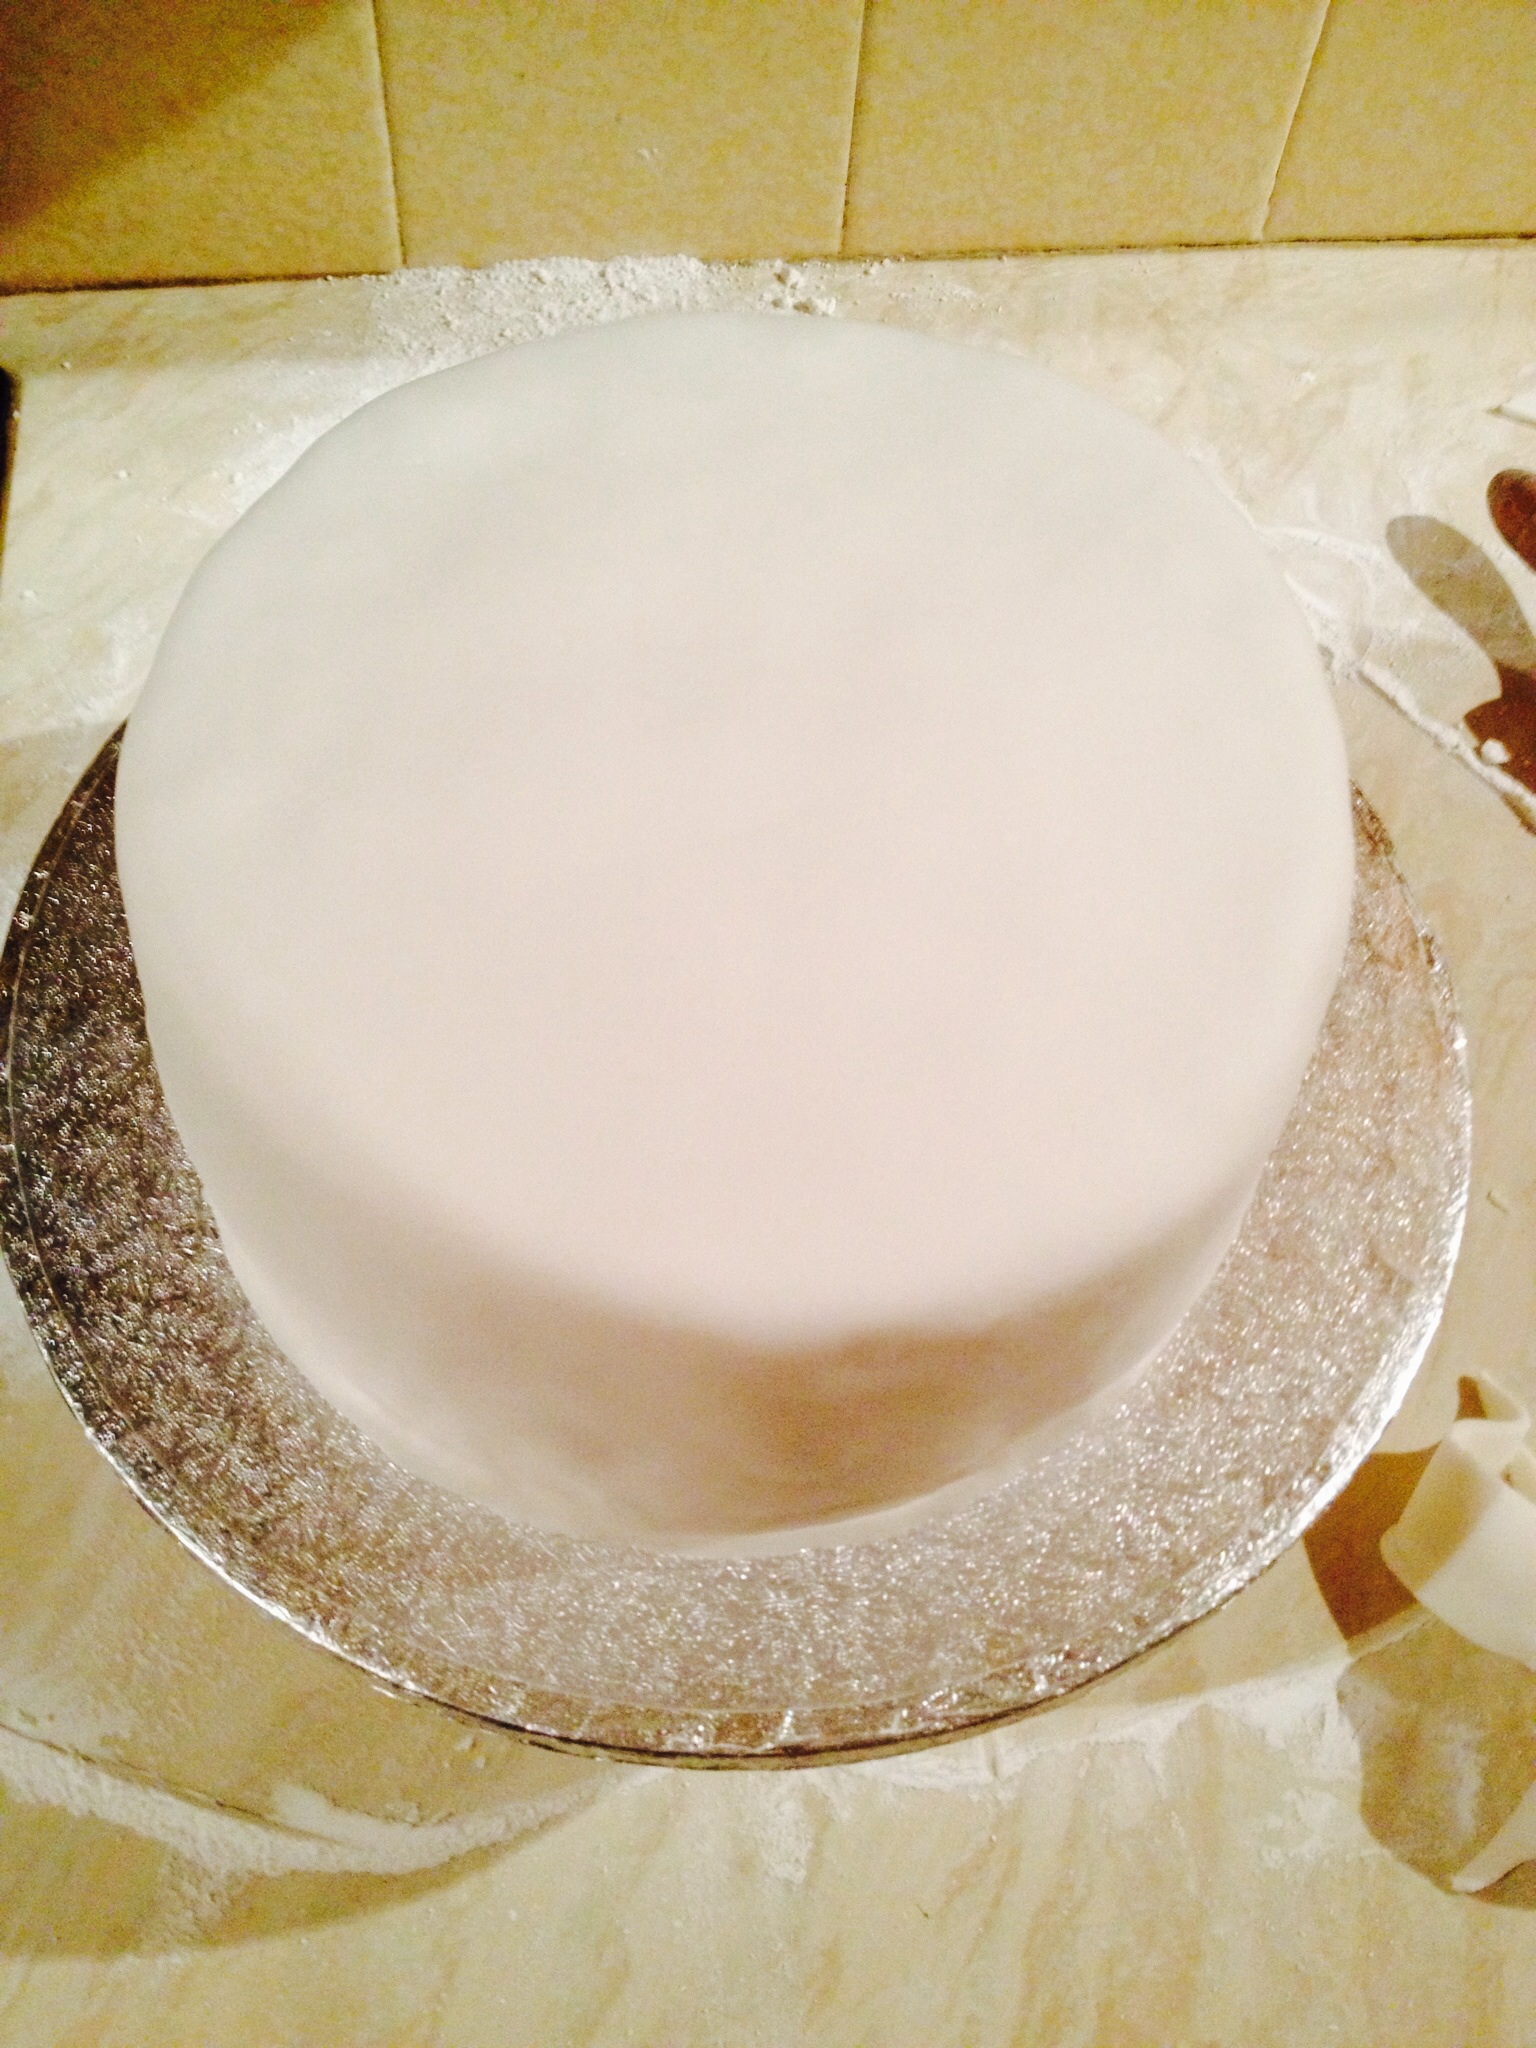
Using a small, sharp knife, cut away the excess fondant from the base leaving a good 1-2 cm of excess attached. Pat and tuck this fondant until the side of the cake is completely covered and using the fondant press down to form a seal with the cake board. This will help to keep your cake fresher for longer. However if, like me when covering my in laws cake, you have an uneven finish around the base, remember you can always cover it with ribbon!
A beautifully fondant covered cake. Clean the board with a piece of damp kitchen towel.
DECORATING YOUR ICED CAKE
Using Fondant To Decorate The Cake
Seeing as I decided to go ‘off piste’ with my icing this year, usually I use Royal Icing, but on a whim, I decided to live dangerously and opt for Fondant icing. Since one of the Christmas cakes was a gift and I’d only ever used Fondant icing once before, I would say that counts as dangerous. But then I like to live life on the edge!
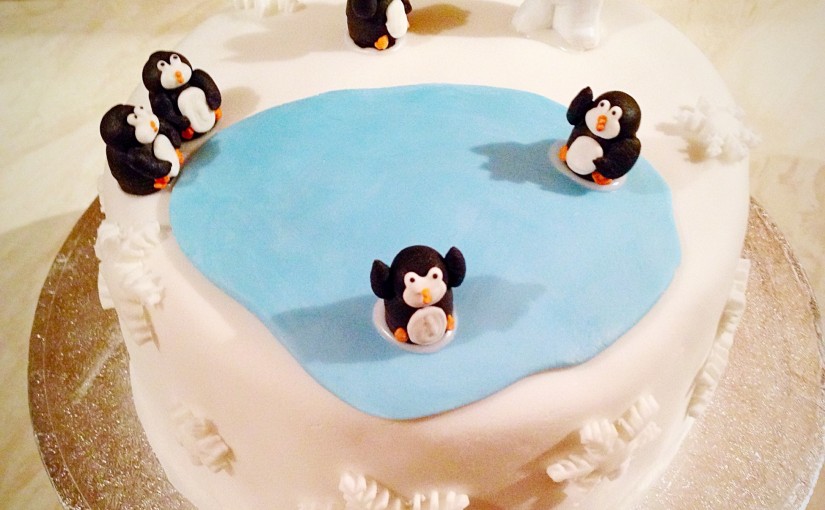
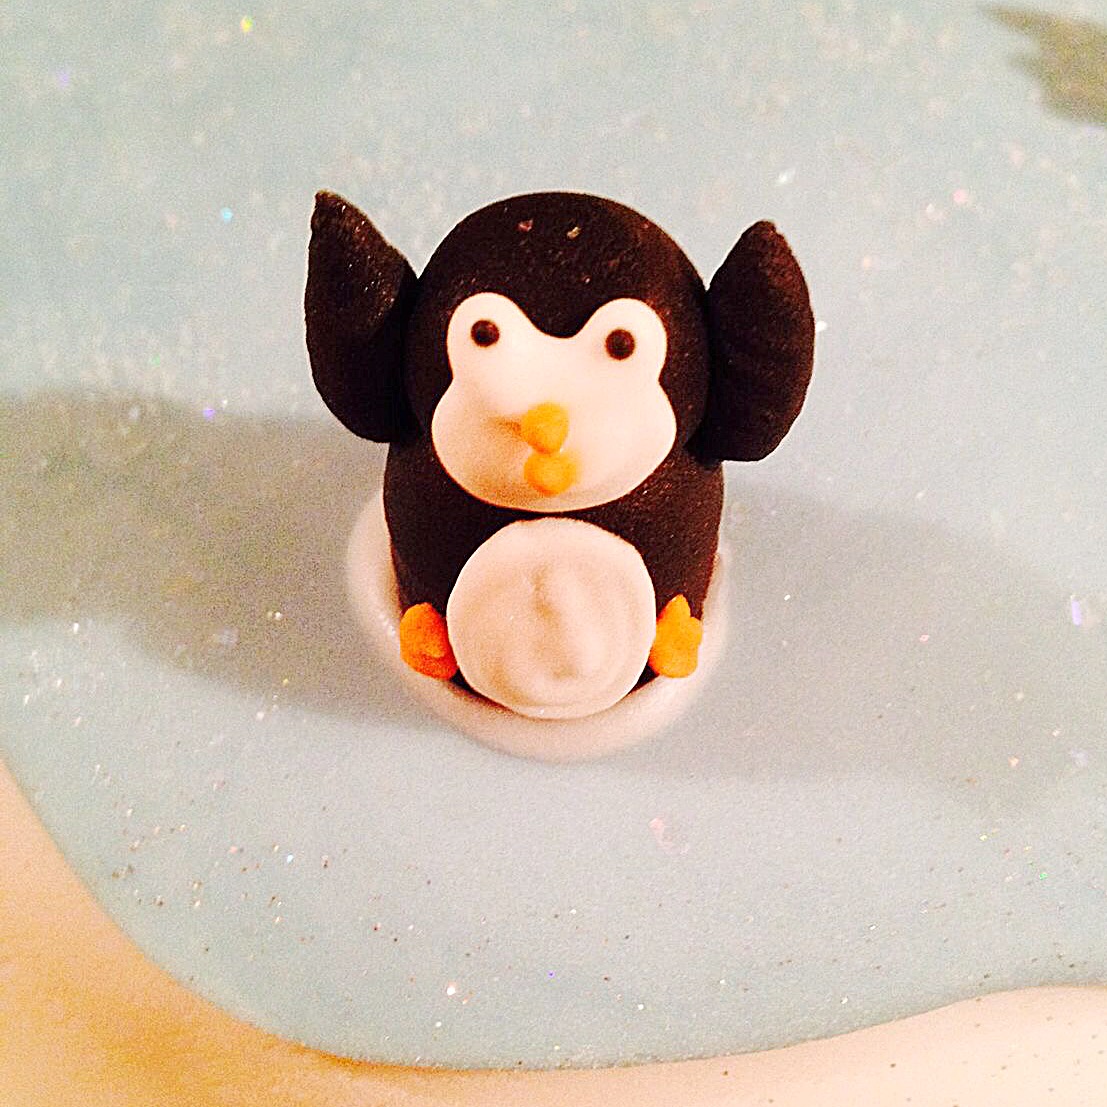
Since I had bought the 6 super cute Penguins and a Snowman decorating the cake centred around them. So I thought it’d be fun to have the Penguins skating on an iced lake with The Snowman watching over. A fantastical, Christmas scene.
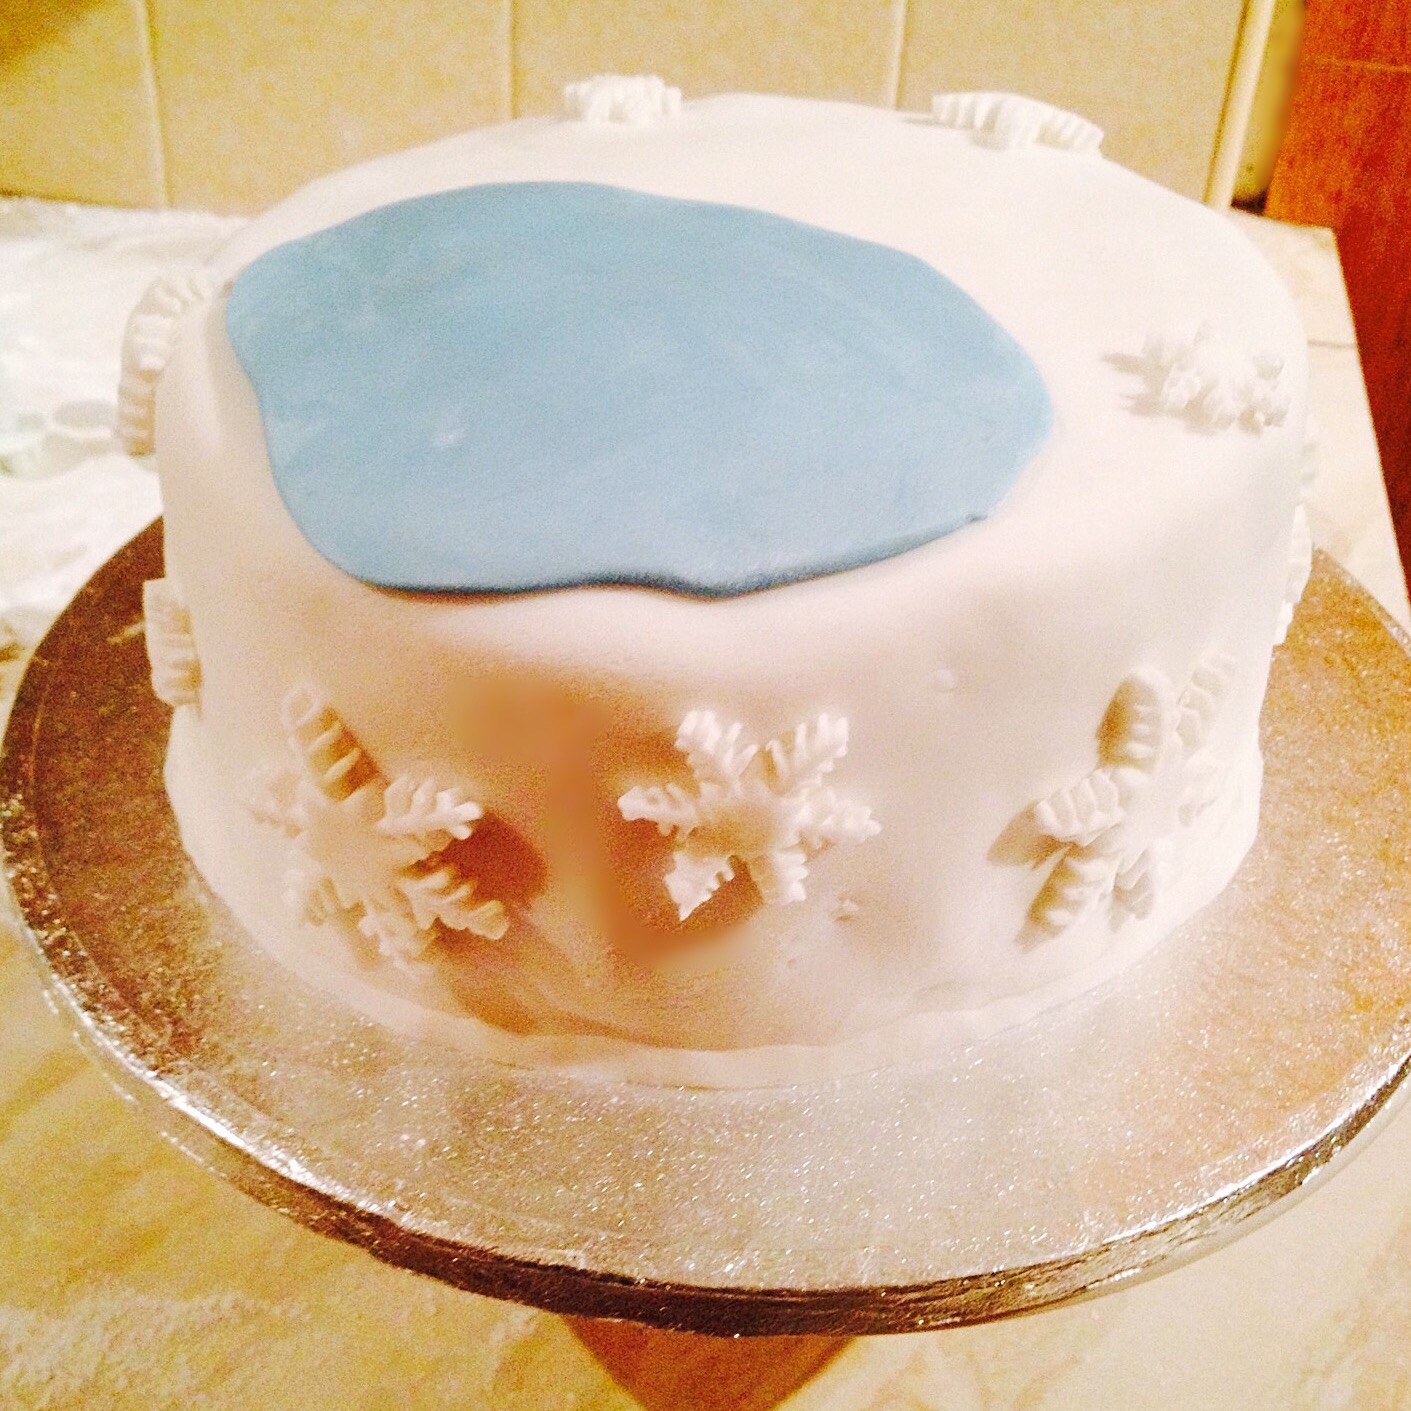
So at 6am Christmas Eve my vague idea started to take shape. First of all, I took a blob (approx 70g) of pale blue fondant, kneaded it until soft and formed it into a rough ball shape. Then I rolled it out, a little haphazardly! The shape you see on the cake is literally the shape I ended up with!
The cake is covered and ready to Meet Our Penguins.
Creating Fondant Snowflakes
Then using 3 different sizes of snowflake, plunge cutters (designed for sugar craft) I cut out different sizes of snowflakes. I attached them and the blue, ice lake using edible glue. Alternatively you could use snowflake or star cookie cutters to create cut out the fondant.
NOTE : Use Corn flour to dust your cutters to prevent the fondant from sticking.
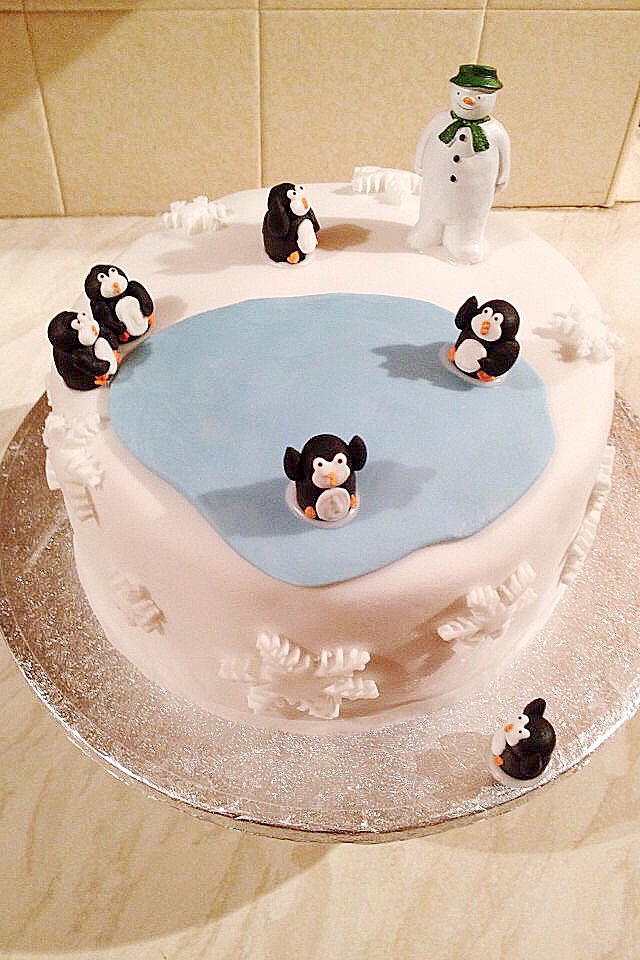
I placed the snowflakes in an irregular pattern around the side of the cake, allowing some of the smaller snowflakes to edge the top, some falling over the edge. As the lake was an irregular shape, visually I think this worked better than a regular pattern.
Meet Our Penguins – all that’s missing is some sparkle.
Meet Our Penguins and The Snowman
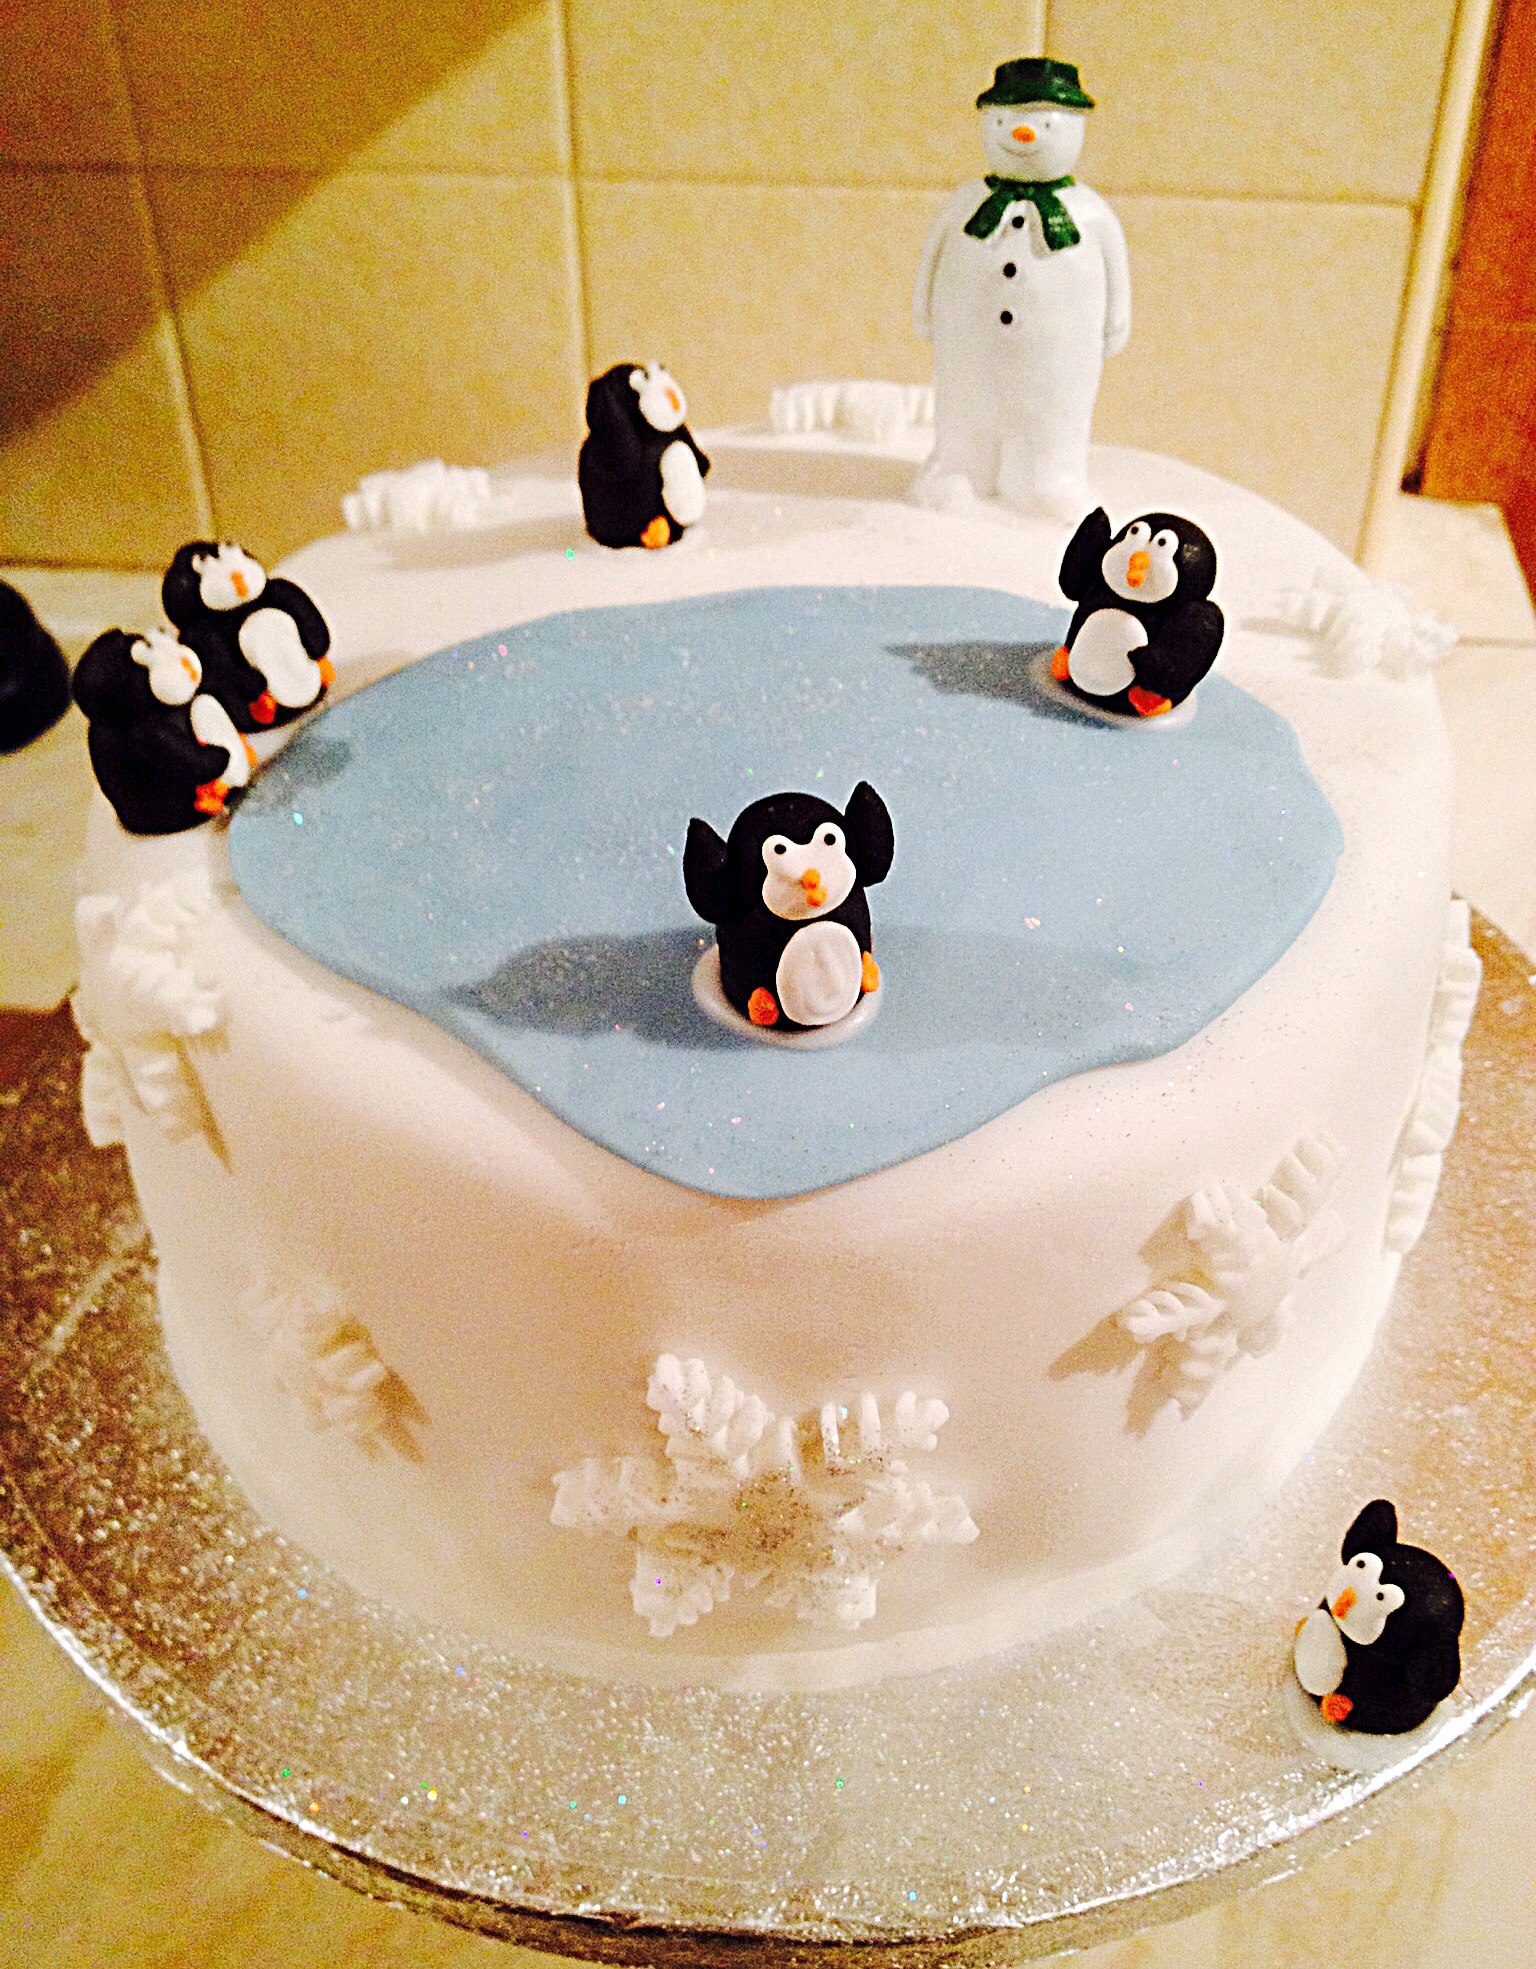
I mixed up a thick paste of icing powder, a teaspoon of meringue powder and a little water, to make royal icing. This would ensure the Penguins and Snowman stuck firmly to the cake and board. Alternatively you can buy readymade royal icing.
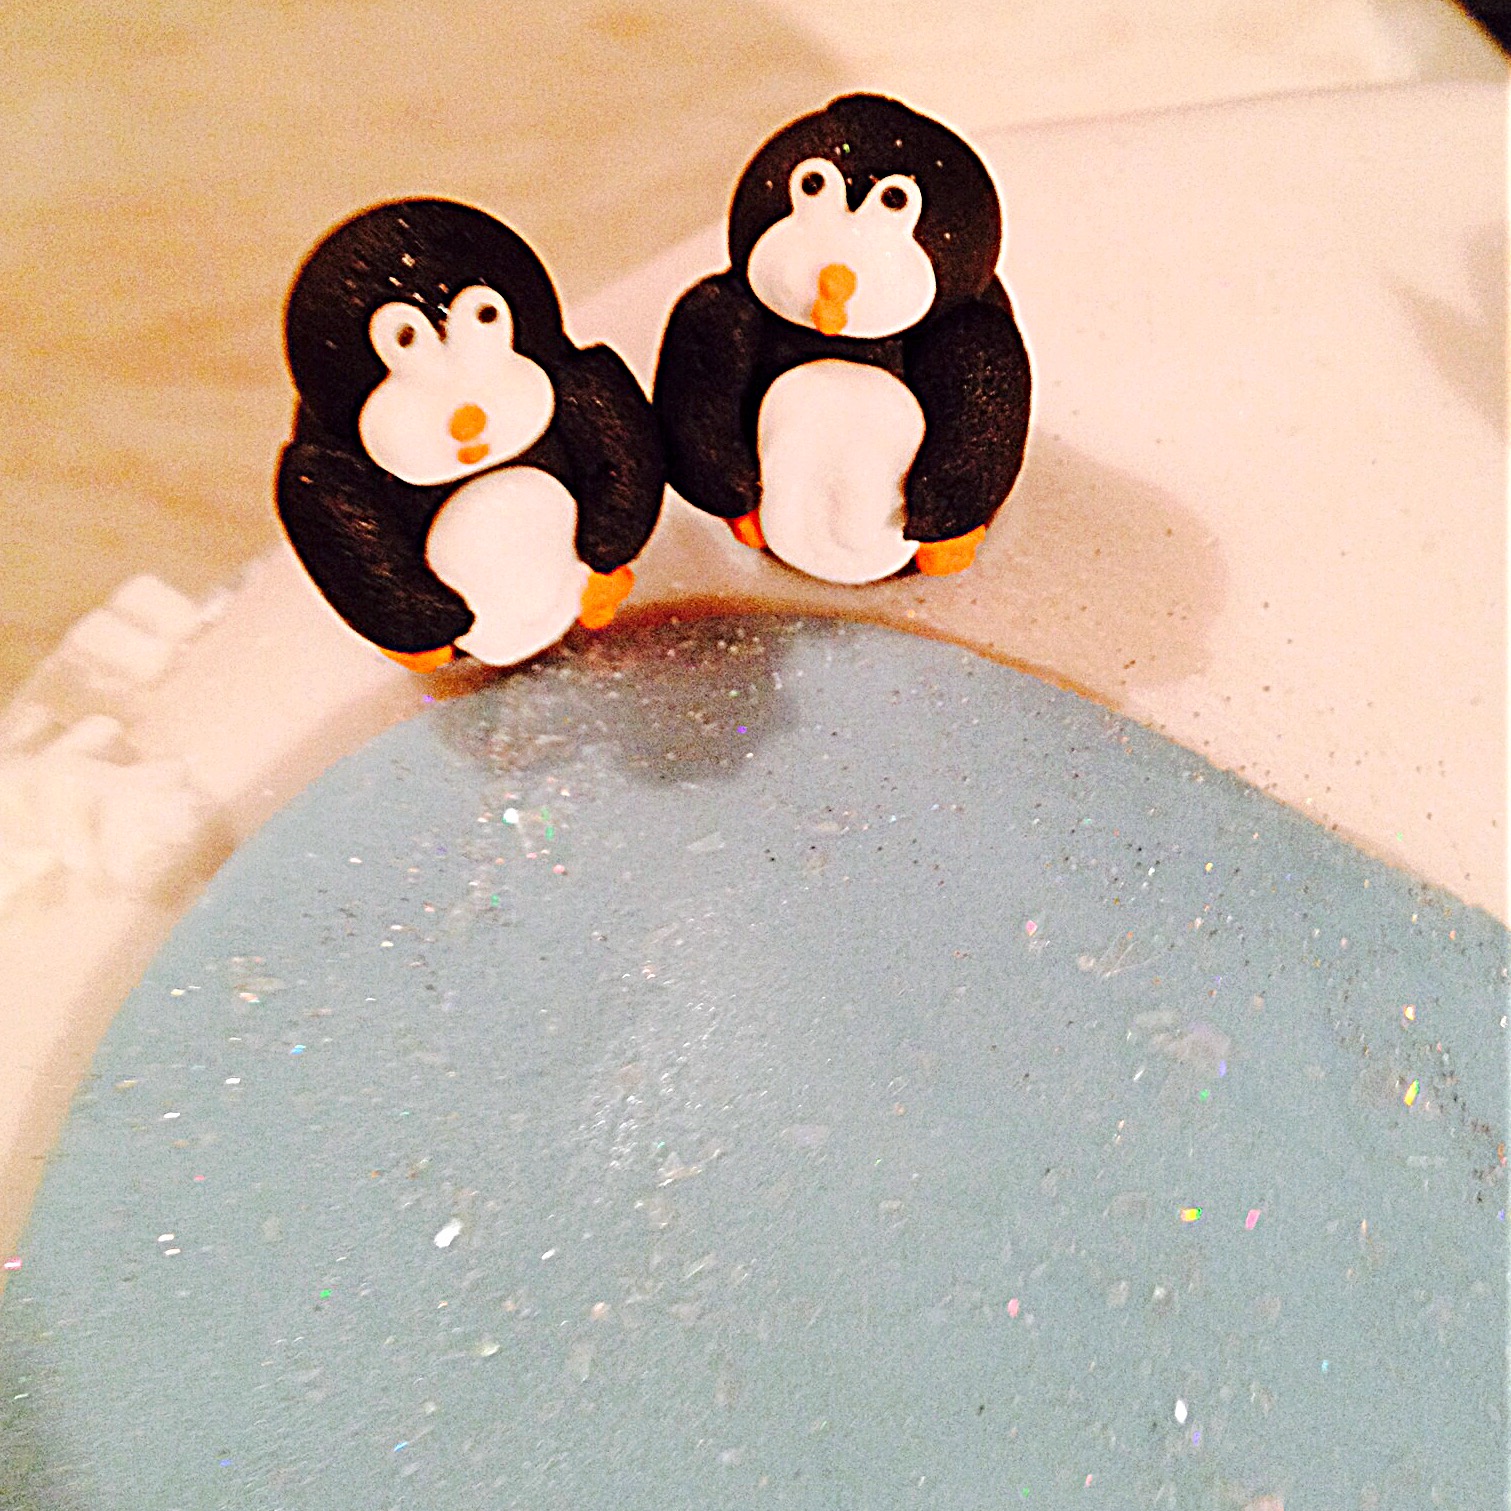
Using a small knife I pasted a small amount of the Royal icing to the base of the Snowman and Penguins and placed them on the cake. Honestly this was the best bit! As I was adding the Penguins they all seemed to have their own little personalities. Yes I know we are talking about cake decorations, just look at their little faces and you will see what I mean!
Finally I added a sprinkle of edible white glitter (available from Amazon )
Meet Our Penguins with extra sparkle.
Overall the cake, in my opinion, just has a balance to it. While it isn’t symmetrical it is balanced, but most of all FUN! I’m so glad you got to Meet Our Penguins!
If you have enjoyed this Christmas post Meet Our Penguins you may also like these:
Christmas is a wonderful time to get together with friends and family. And home baked treats make any gathering extra special. Even if you cheat slight, such as buying a fruit cake, you can then decorate it yourself. Most important is the time you spend with those you love, not the time spent stressing in the kitchen!
Wishing you all a wonderful Christmas.
Sammie x
No part of this post may be reproduced or duplicated without the written permission of the owner. Please see my Disclosure Policy.
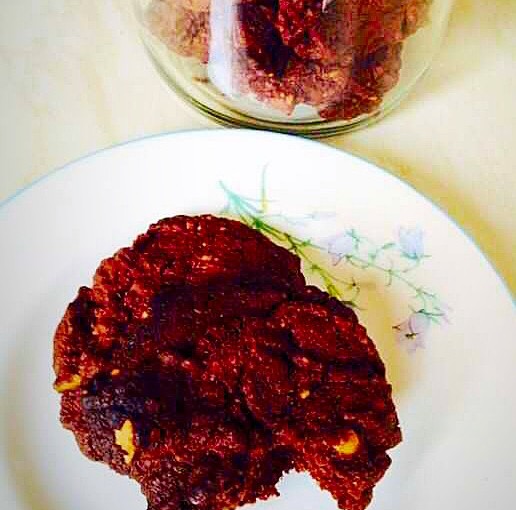
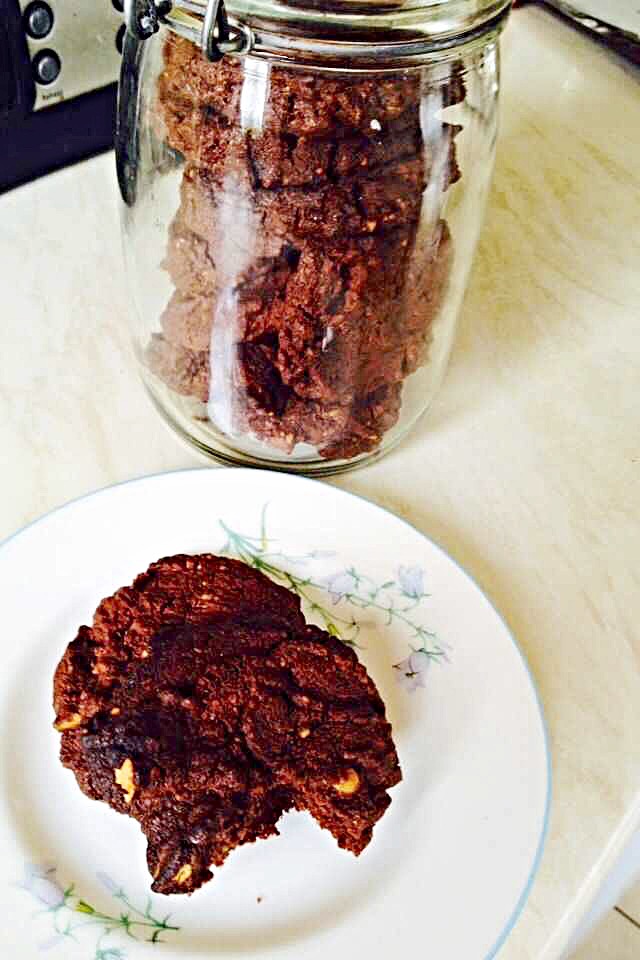
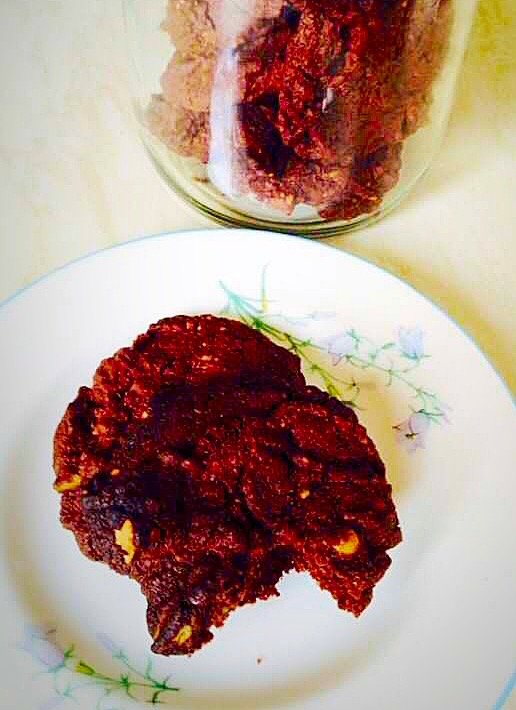
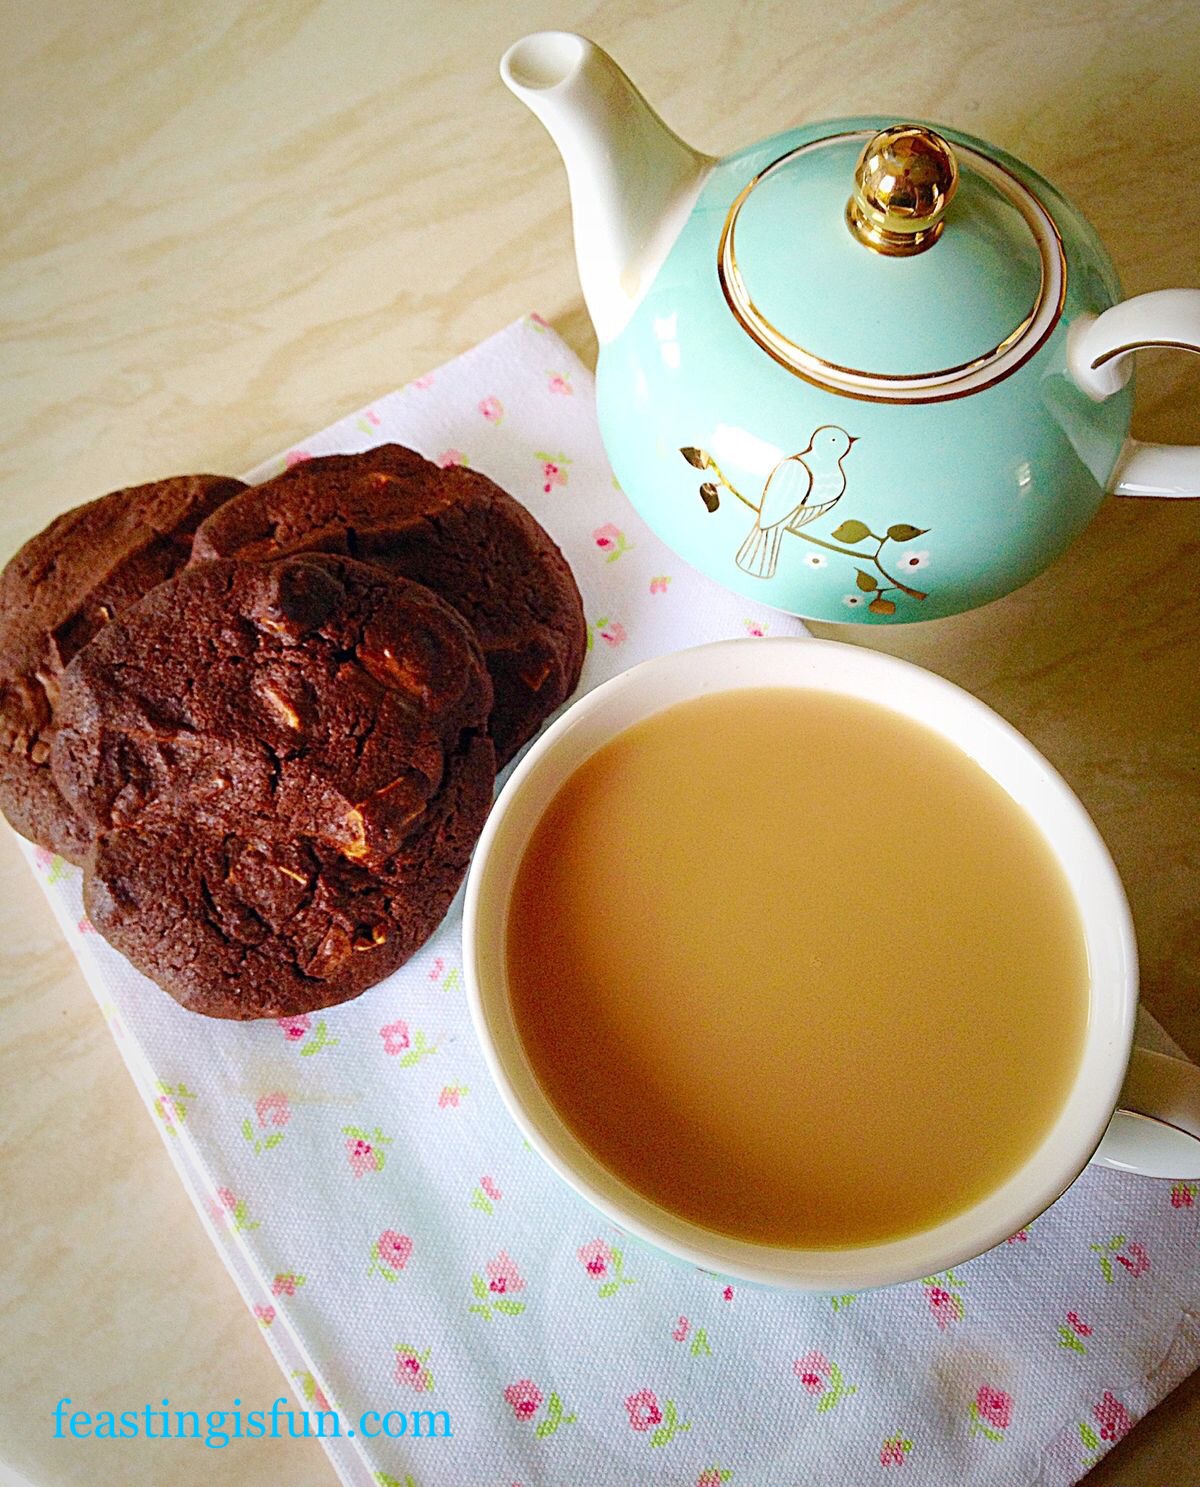
Double Chocolate Brazil Nut Cookies a perfect way to use up nuts after Christmas and totally delicious to boot!! www.feastingisfun.com
Today’s activities have been dictated by the weather!!! Actually not such a bad thing. I decided originally to make jam today, however it’s not raining and will be later on today, tomorrow, the next day, so on and so forth. Jam is most definitely a wet weather activity at this time of year – especially as I hadn’t yet put my Daffodil bulbs and Viola plants into the front garden flower bed.
I had actually resigned myself (given the very sorry state the Viola plants were in) to not being able to get this last bit of gardening done this year. My back has been playing up and as long as I’m up and about my priority for any given day is to try and get dinner sorted – in the morning, if possible, as my pain levels increase during the day. Also if I can get a wash load on that’s a bonus.
I know it sounds pathetic, but that simply is how it is. I always try and focus on the positive aspects of the day. If I started to look too closely as what I’ve not achieved I think that could lead me into a downward spiral – and that’s not the person I chose to be. Don’t get me wrong, there are days (weeks) that are harder than others and it does occasionally get me down, but I’m an optimistic person by nature, so I chose to look at the good things in my life.
I’m loved, more than I could ever imagine by The Most Amazing God, I have a wonderful family who also love and accept me. Friends that love and accept me despite my inability to be reliable or commit properly to something. I have a lot to be thankful for.
So today was the day for jam making, Except the weather’s good and jam can be made on rainy days!! I didn’t abort all cooking attempts though and decided to see whether some ‘left over’ chocolate covered Brazil nuts would make nice cookies? Oh yeah they do!!
Double Chocolate Brazil Nut Cookies
Recipe:
5oz Dark Brown Muscavado Sugar
8oz Unsalted Butter – room temp
1 Egg yolk – pref free range
1tsp Vanilla Extract
1/4tsp Salt
6oz Plain White Flour
2oz Cocoa Powder
2oz Shelled Brazil Nuts – chopped finely, to the same consistency of ground almonds
6oz Chocolate Covered Brazil Nuts
(or 3oz Shelled Brazil Nuts and 3oz Milk Chocolate Chunks)
Method:
Preheat the oven to 175C (160C fan)
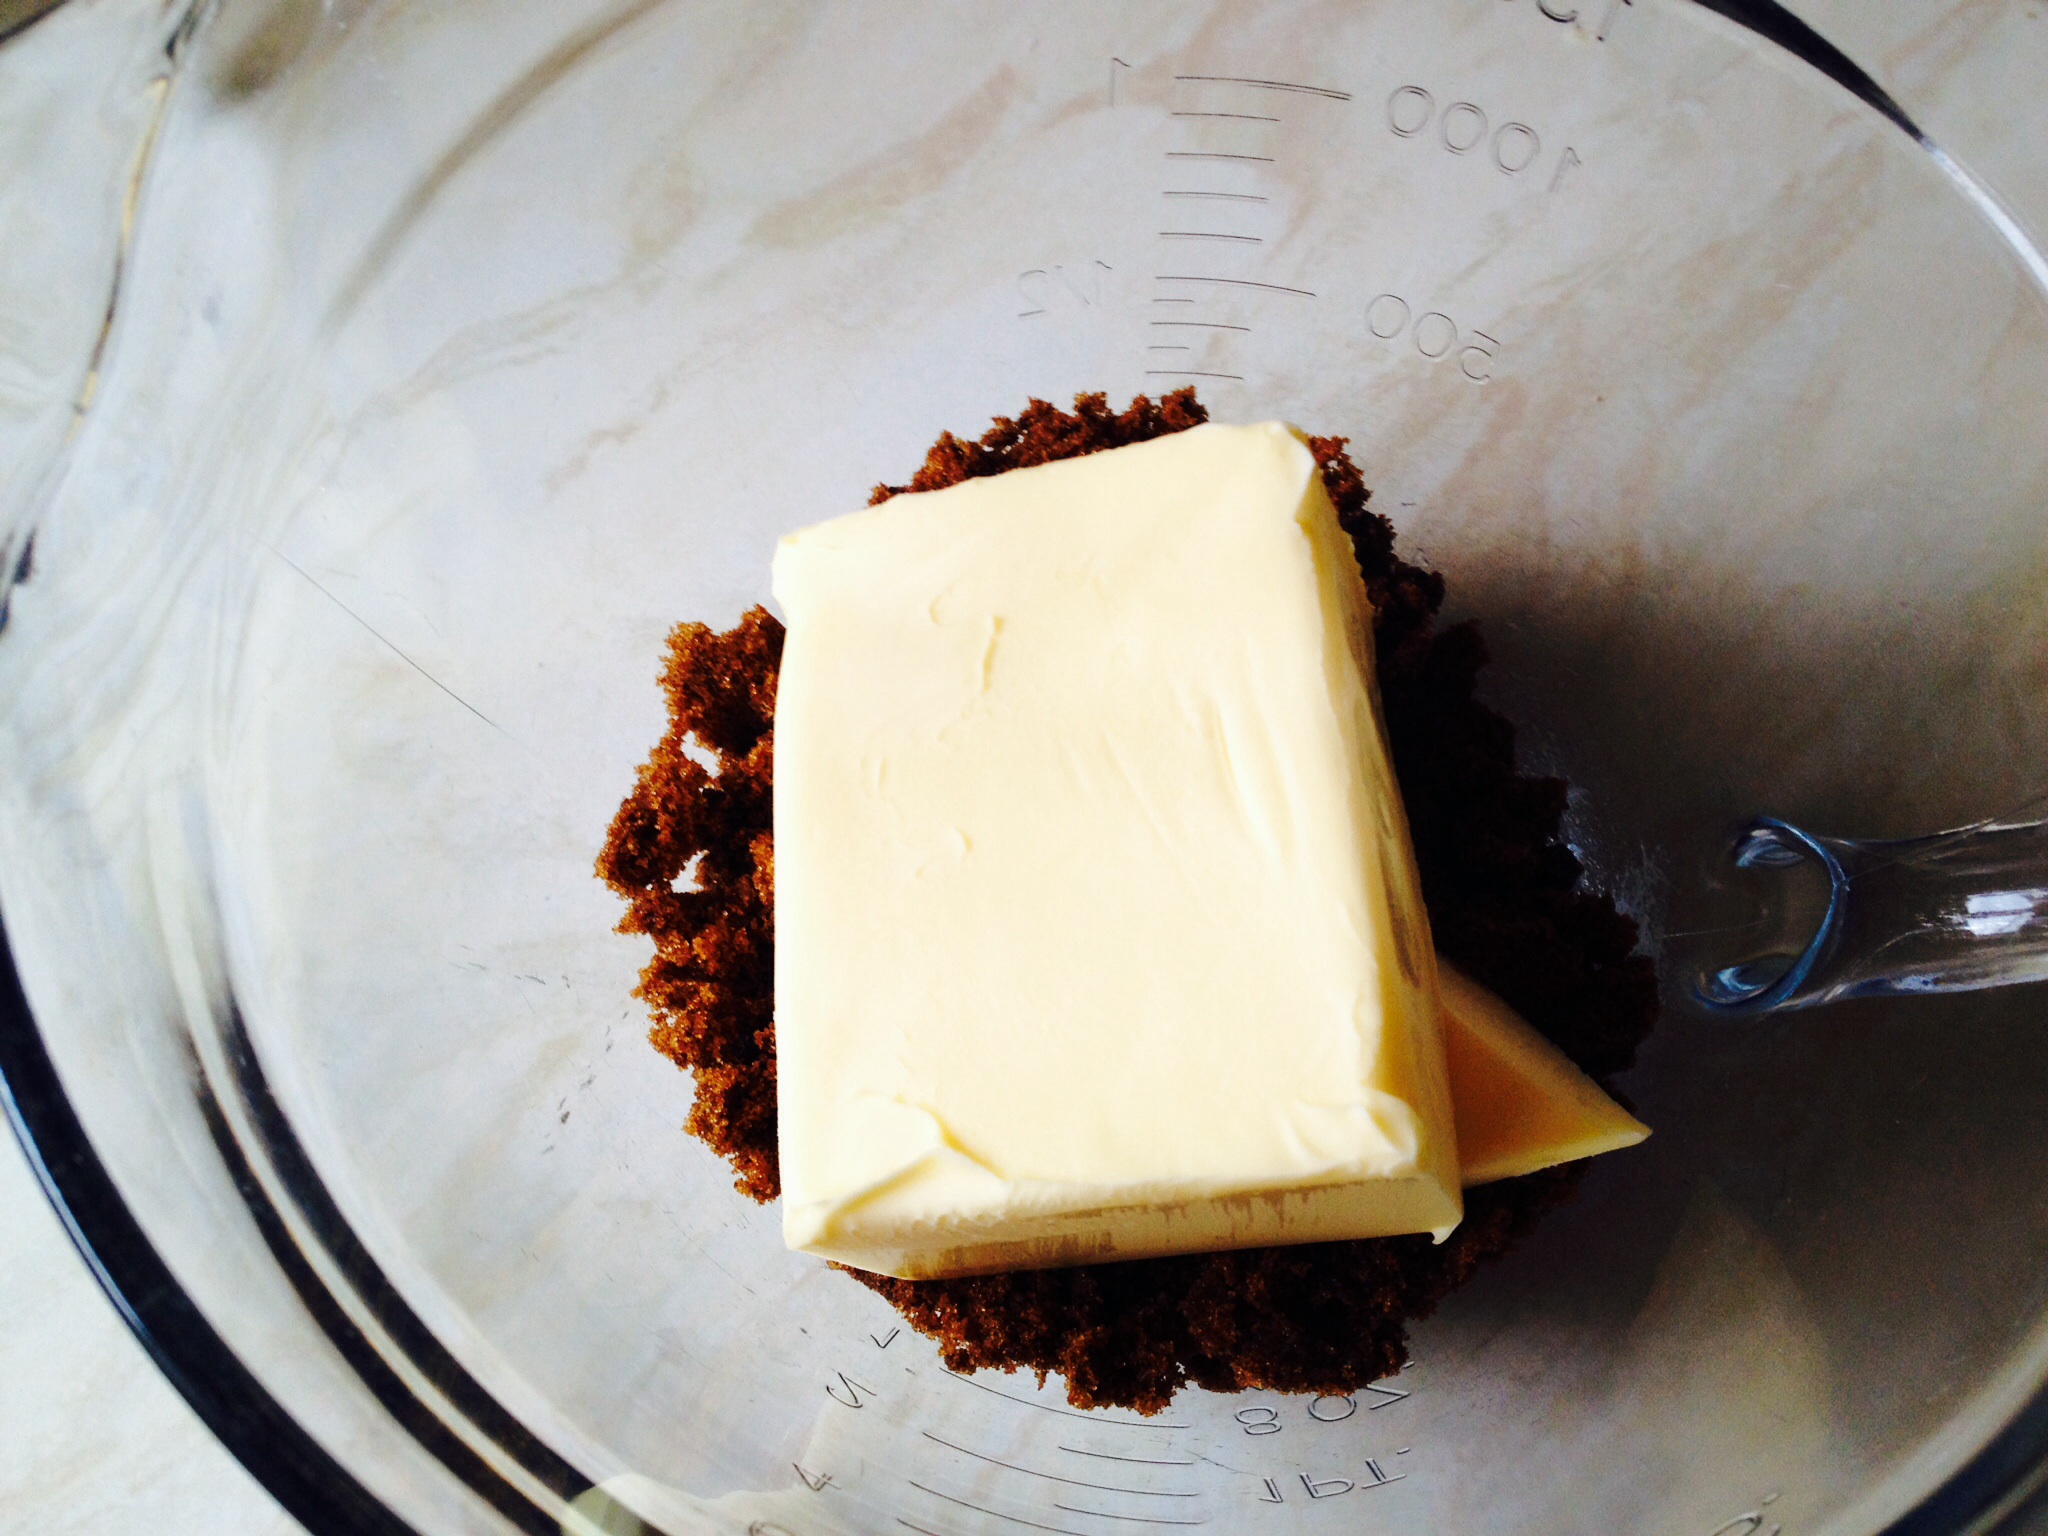
Place the sugar and butter into a large bowl (I’ve used a clear glass jug as it’s easy to check that all the dry ingredient have been mixed in, later on).
The dark muscavado sugar gives the cookies a lovely depth of flavour, without tasting too sweet!
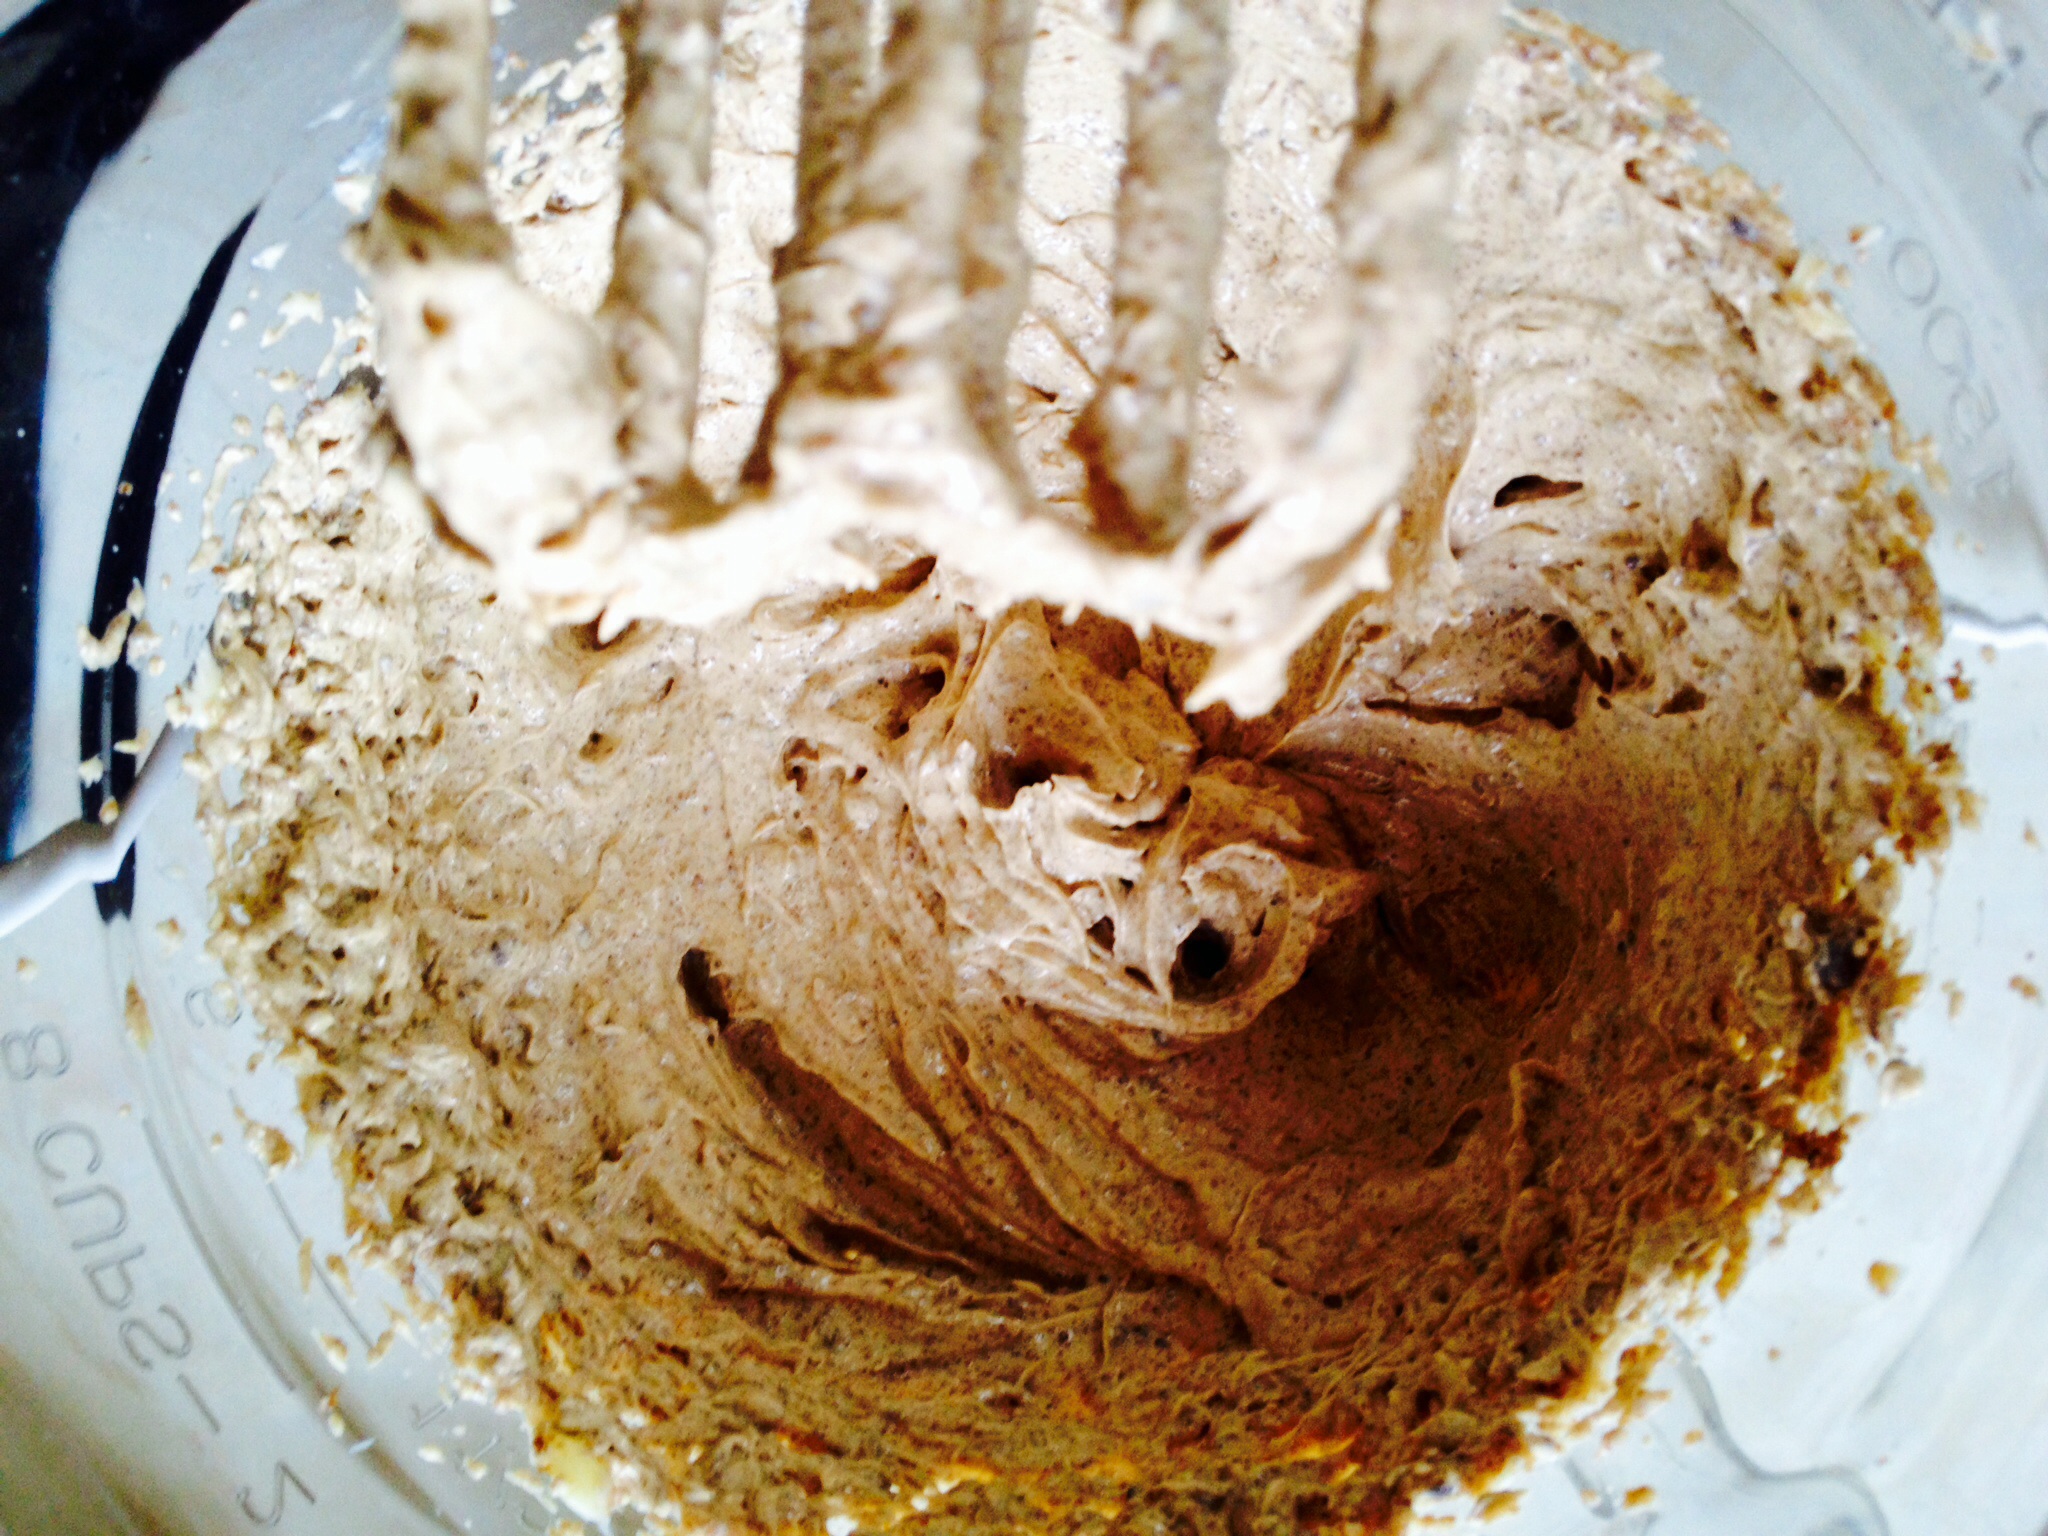
Whisk (or beat vigorously) the butter and sugar together until completely combined and paler in colour. Whisk in the egg yolk, salt and vanilla extract.
The whisked mixture will be darker than when using white sugar.
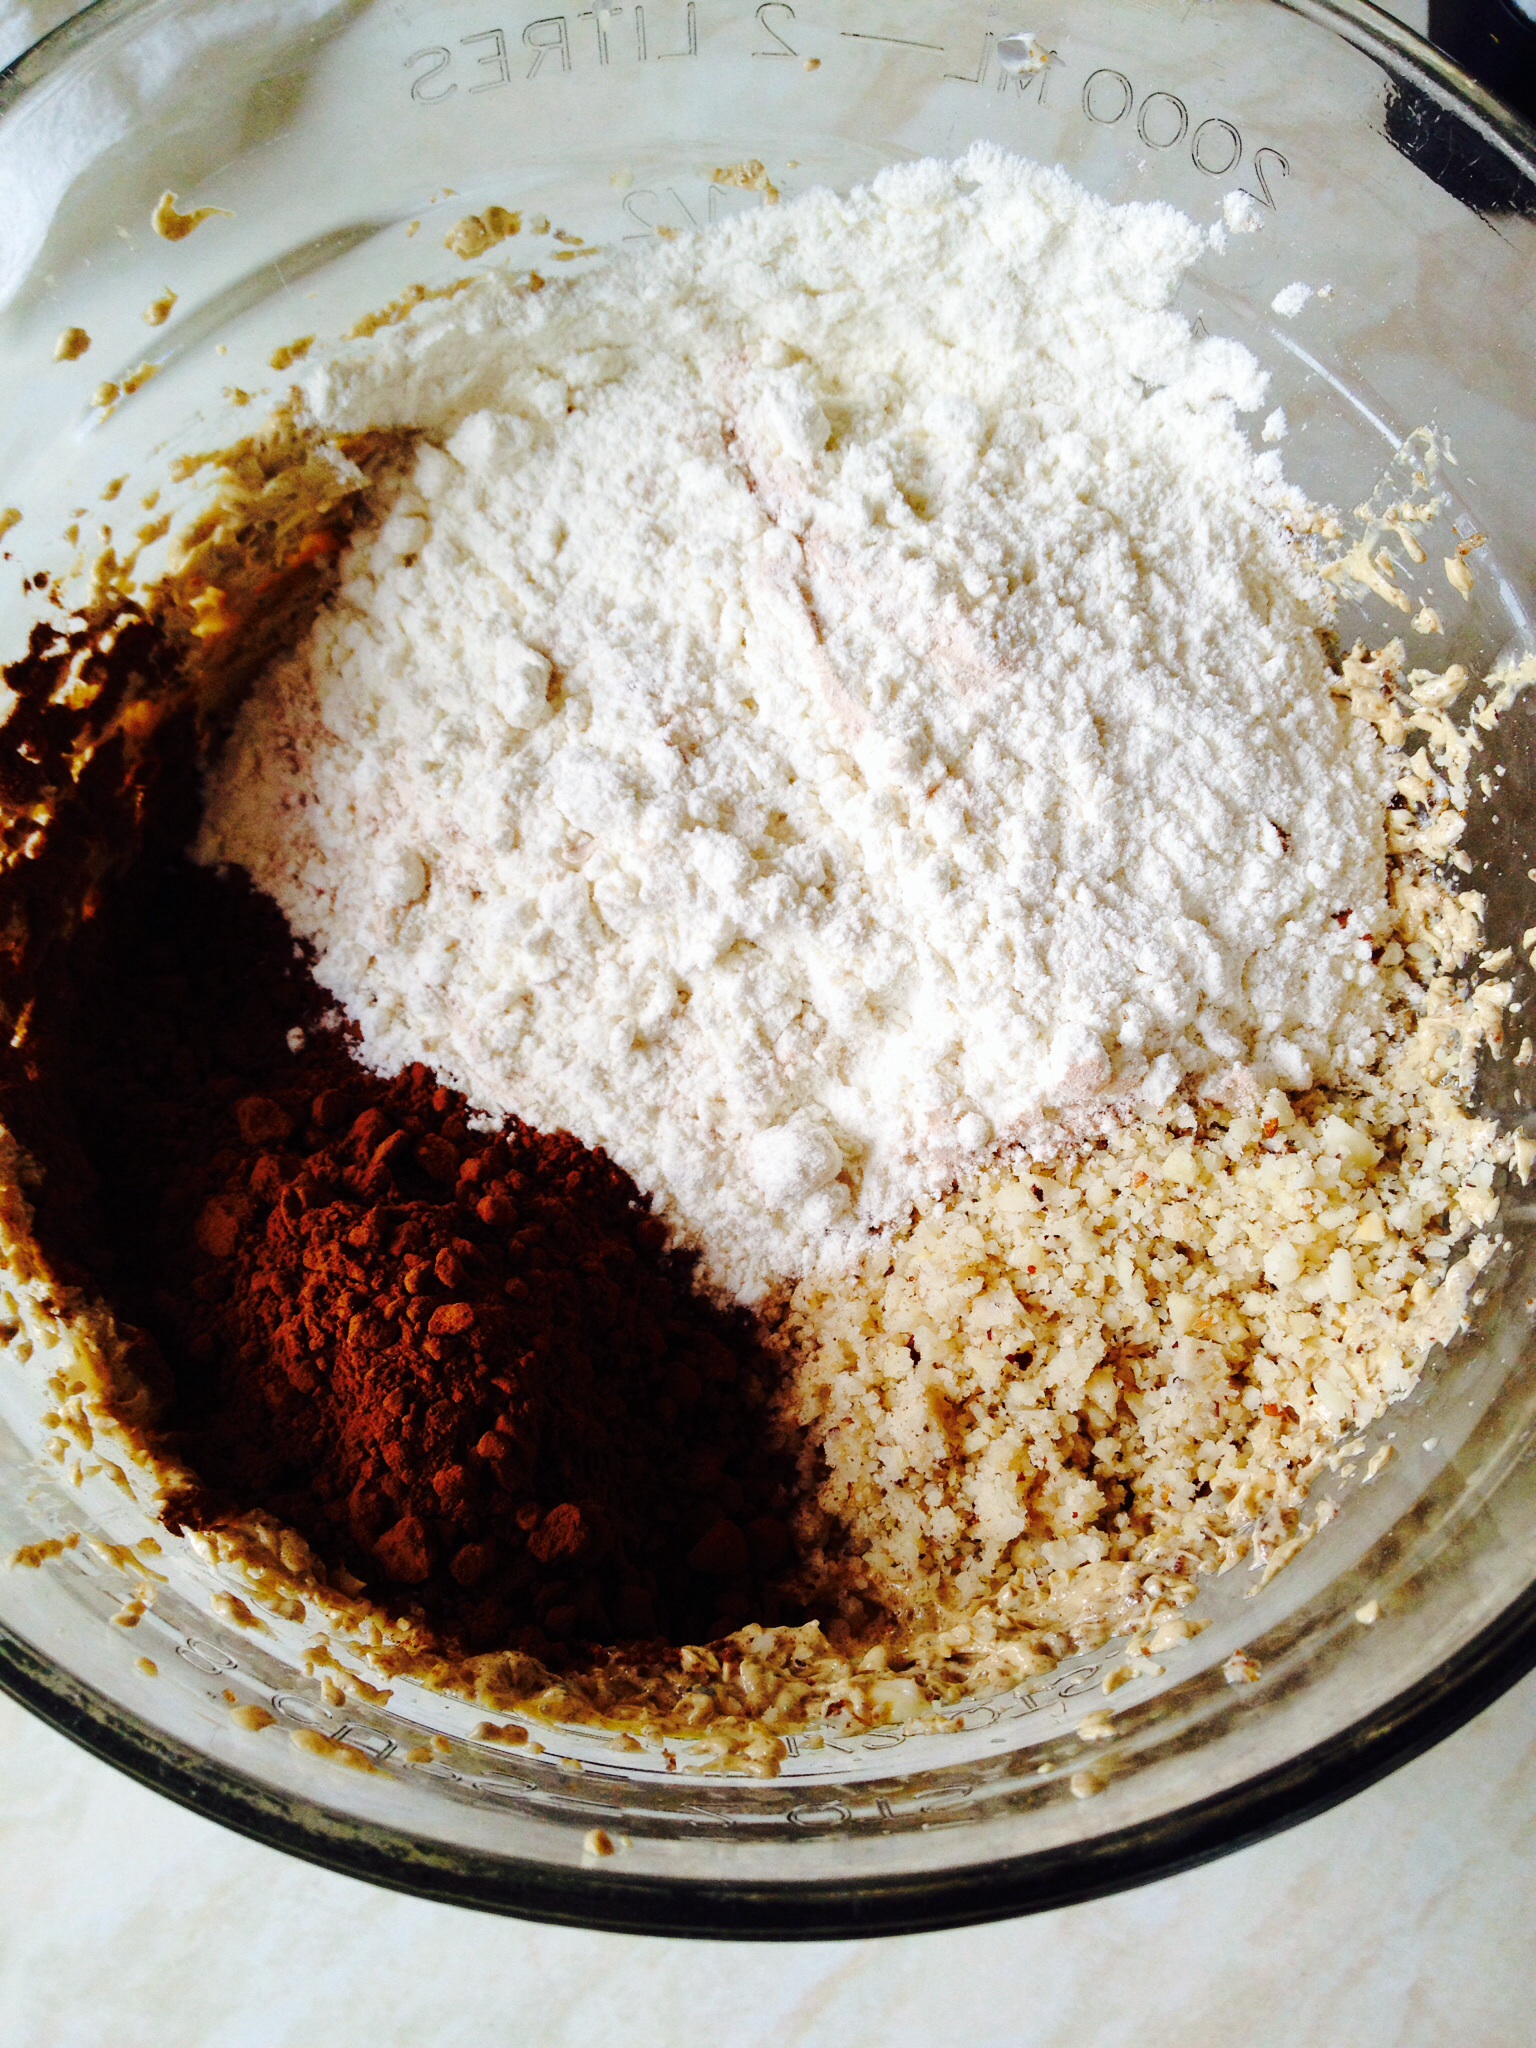
Now take the 2oz of shelled Brazil nuts and either using a mini-chopper or food processor, chop finely until it has the same texture of ground almonds. Add these finely chopped nuts, the cocoa and the flour to the bowl.
In this recipe I’ve substituted 4oz of flour with 2oz of both Cocoa powder and finely chopped Brazil nuts.
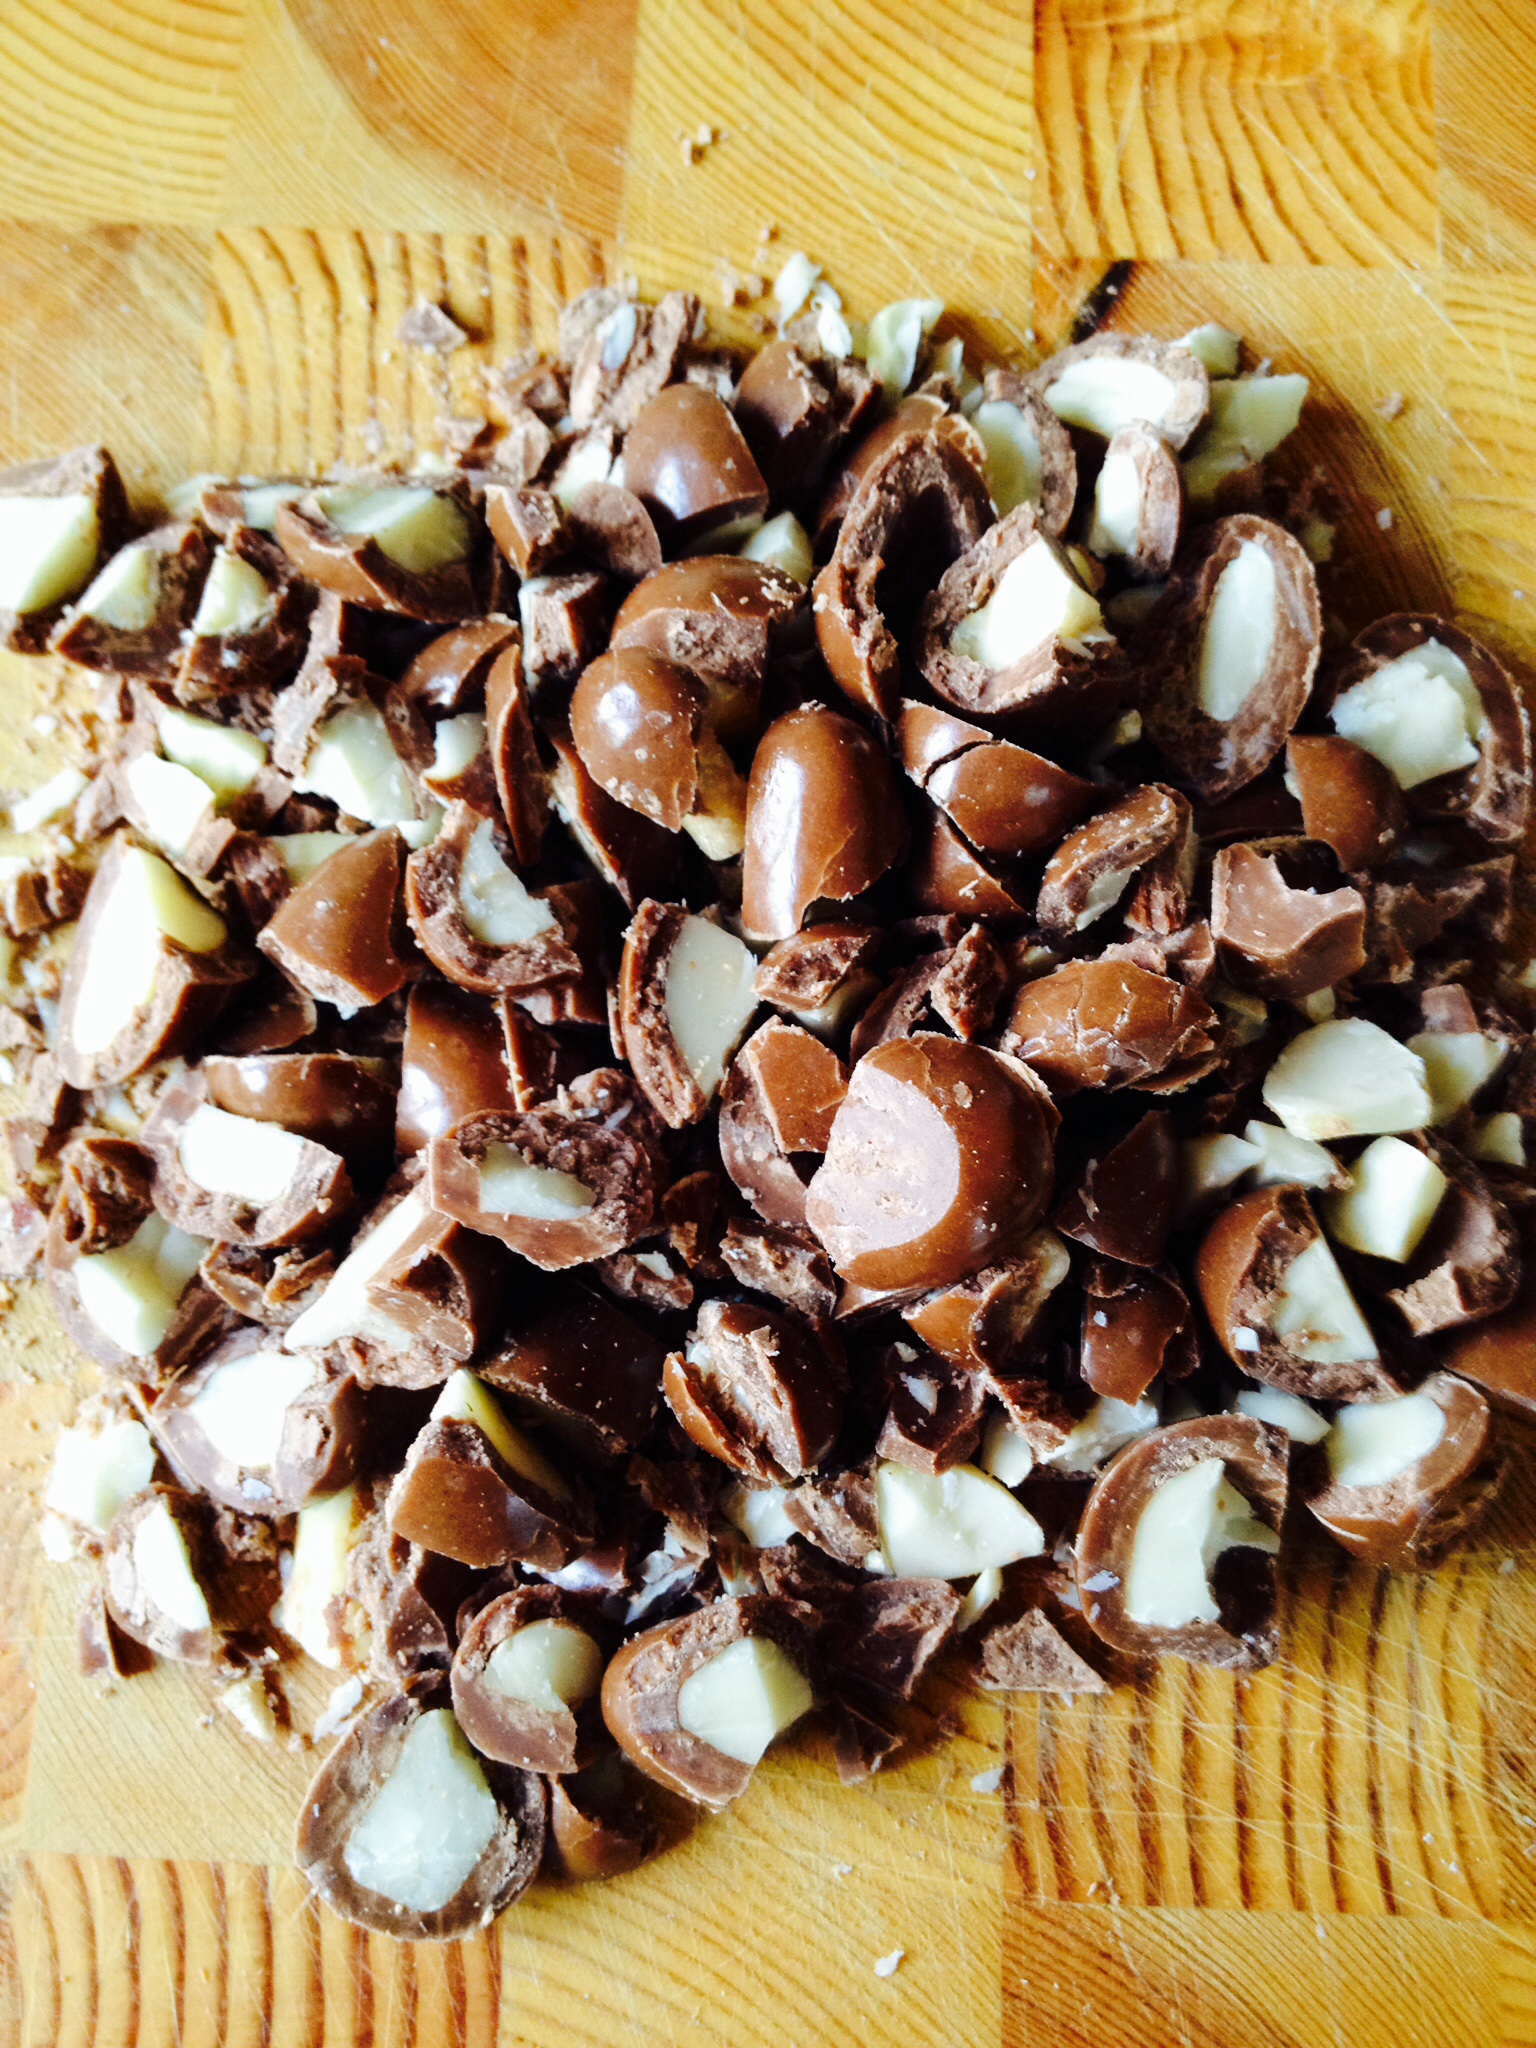
Now chop the chocolate covered Brazil nuts roughly (do the same for plain Brazils if using).
Don’t chop too finely as you want some nice, nutty crunch to your finished cookie!!
Add the roughly chopped Brazils and gently mix all the dry ingredients into the sugar/butter mix. Make sure you combine all the dry ingredients that have dropped to the bottom of the bowl. Once everything is combined STOP!! If you overwork the mixture the dough will become tough and will affect the finished cookie.
Next, using a desert spoon and eating knife, drop golf ball sized dollops of the cookie dough onto a baking sheet lined with parchment paper.
Aim for a roughly circular dollop of cookie dough!!
Dampen your hand and gently press down on the cookie dough to slightly flatten it. This mixture is very sticky so you may need to rinse your hands, in cold water, in between squishing the cookie dough.
Place in the preheated oven and cook for 20-25 minutes. Keep a close eye on your cookies whilst cooking, it’s much harder to tell if chocolate cookies are burnt by sight!! the cookies are ready when the tops have a sugary, slightly shiny surface. When cooked, remove from the oven and allow to cool completely and firm up on the baking sheet.
Double Chocolate Brazil Nut Cookies- the perfect way to use up leftover Christmas nuts www.feastingisfun.com
It’s time to pop the kettle on!!! Place the cold cookies in an airtight container, or pop a few into cellophane bags tied with pretty ribbon and give as gifts
I’m sharing mine with my official ‘Taste Tester’ the Green Goddess, whose honest feedback and encouragement is invaluable.
It really is so much more fun sharing what you’ve baked with others – and they enjoy it too!!
Hello there, thank you for stopping by to read my blog. I hope it inspires you to make this delicious, very economical, Bacon Cheese Pasta Bake – covered in a scrummy Cheese Sauce!
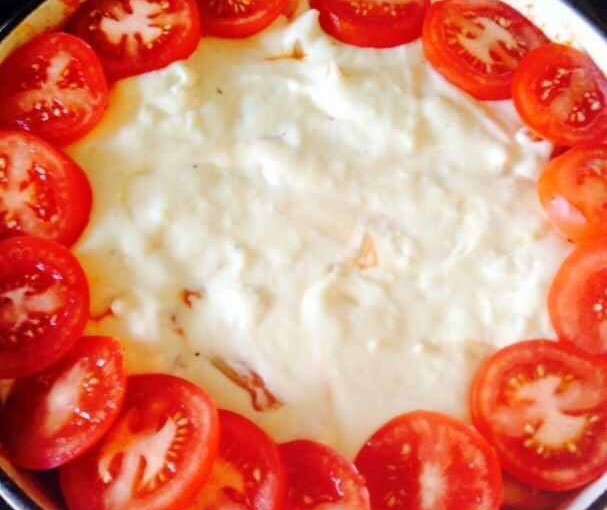
Bacon Cheese Pasta Bake
I’m sorry that I haven’t posted anything for a few days, unfortunately my body has been very uncooperative and I’ve been struggling with a lot of pain. Not looking for sympathy, just explaining.
Anyhow this morning, once I was up and dressed I was determined to make the Christmas cakes ( I know this blog is about the Bacon Cheese Pasta Bake – but I have to tell you the whole story, so bare with please??!!). One cake for us and a smaller cake for my lovely hubby’s Ma and Pa. They love Christmas cake like no other people I have ever met and since I love them and making cakes I thought I’d bake them a cake as well!
Once the cakes were happily baking away in the oven I turned my attention to dinner. I happened to have 8 rashers of streaky bacon in the fridge and thought ‘You know what, I’ll make Bacon Cheese Pasta Bake’. Not only that, but as I have tended to be a bit lazy with my savoury recipes, I also made a note of exactly what I used and took some photos to show you how to make it yourself!!
Recipe: Bacon Cheese Pasta Bake serves 6
For the bacon and tomato sauce you will need –
1tbsp Olive oil
1tbsp Butter
8 x rashers streaky bacon (smoked or not the choice is yours) – any rind removed
1 Large White Onion
2 Sticks of Celery
1 Green Pepper
6 – 8 Chestnut or Button Mushrooms
3 Bulbs of Garlic
2 Tins Chopped Tomatoes and their juice
1tbsp Tomato puree
1tsp Mixed Dry Herbs
1/2tsp Sea Salt (1/4tsp free flowing salt)
1/4 tsp Nutmeg – freshly grated
1/2tsp Black Pepper – freshly ground
1/2tsp Sugar
For the Cheese Sauce :
2tbsp Unsalted Butter
2tbsp Plain White Flour
500ml/1.25 pints Whole Milk
175g/6oz Strong Cheddar
1/4tsp Freshly Grated Nutmeg
Salt and Freshly Ground Black Pepper
Method
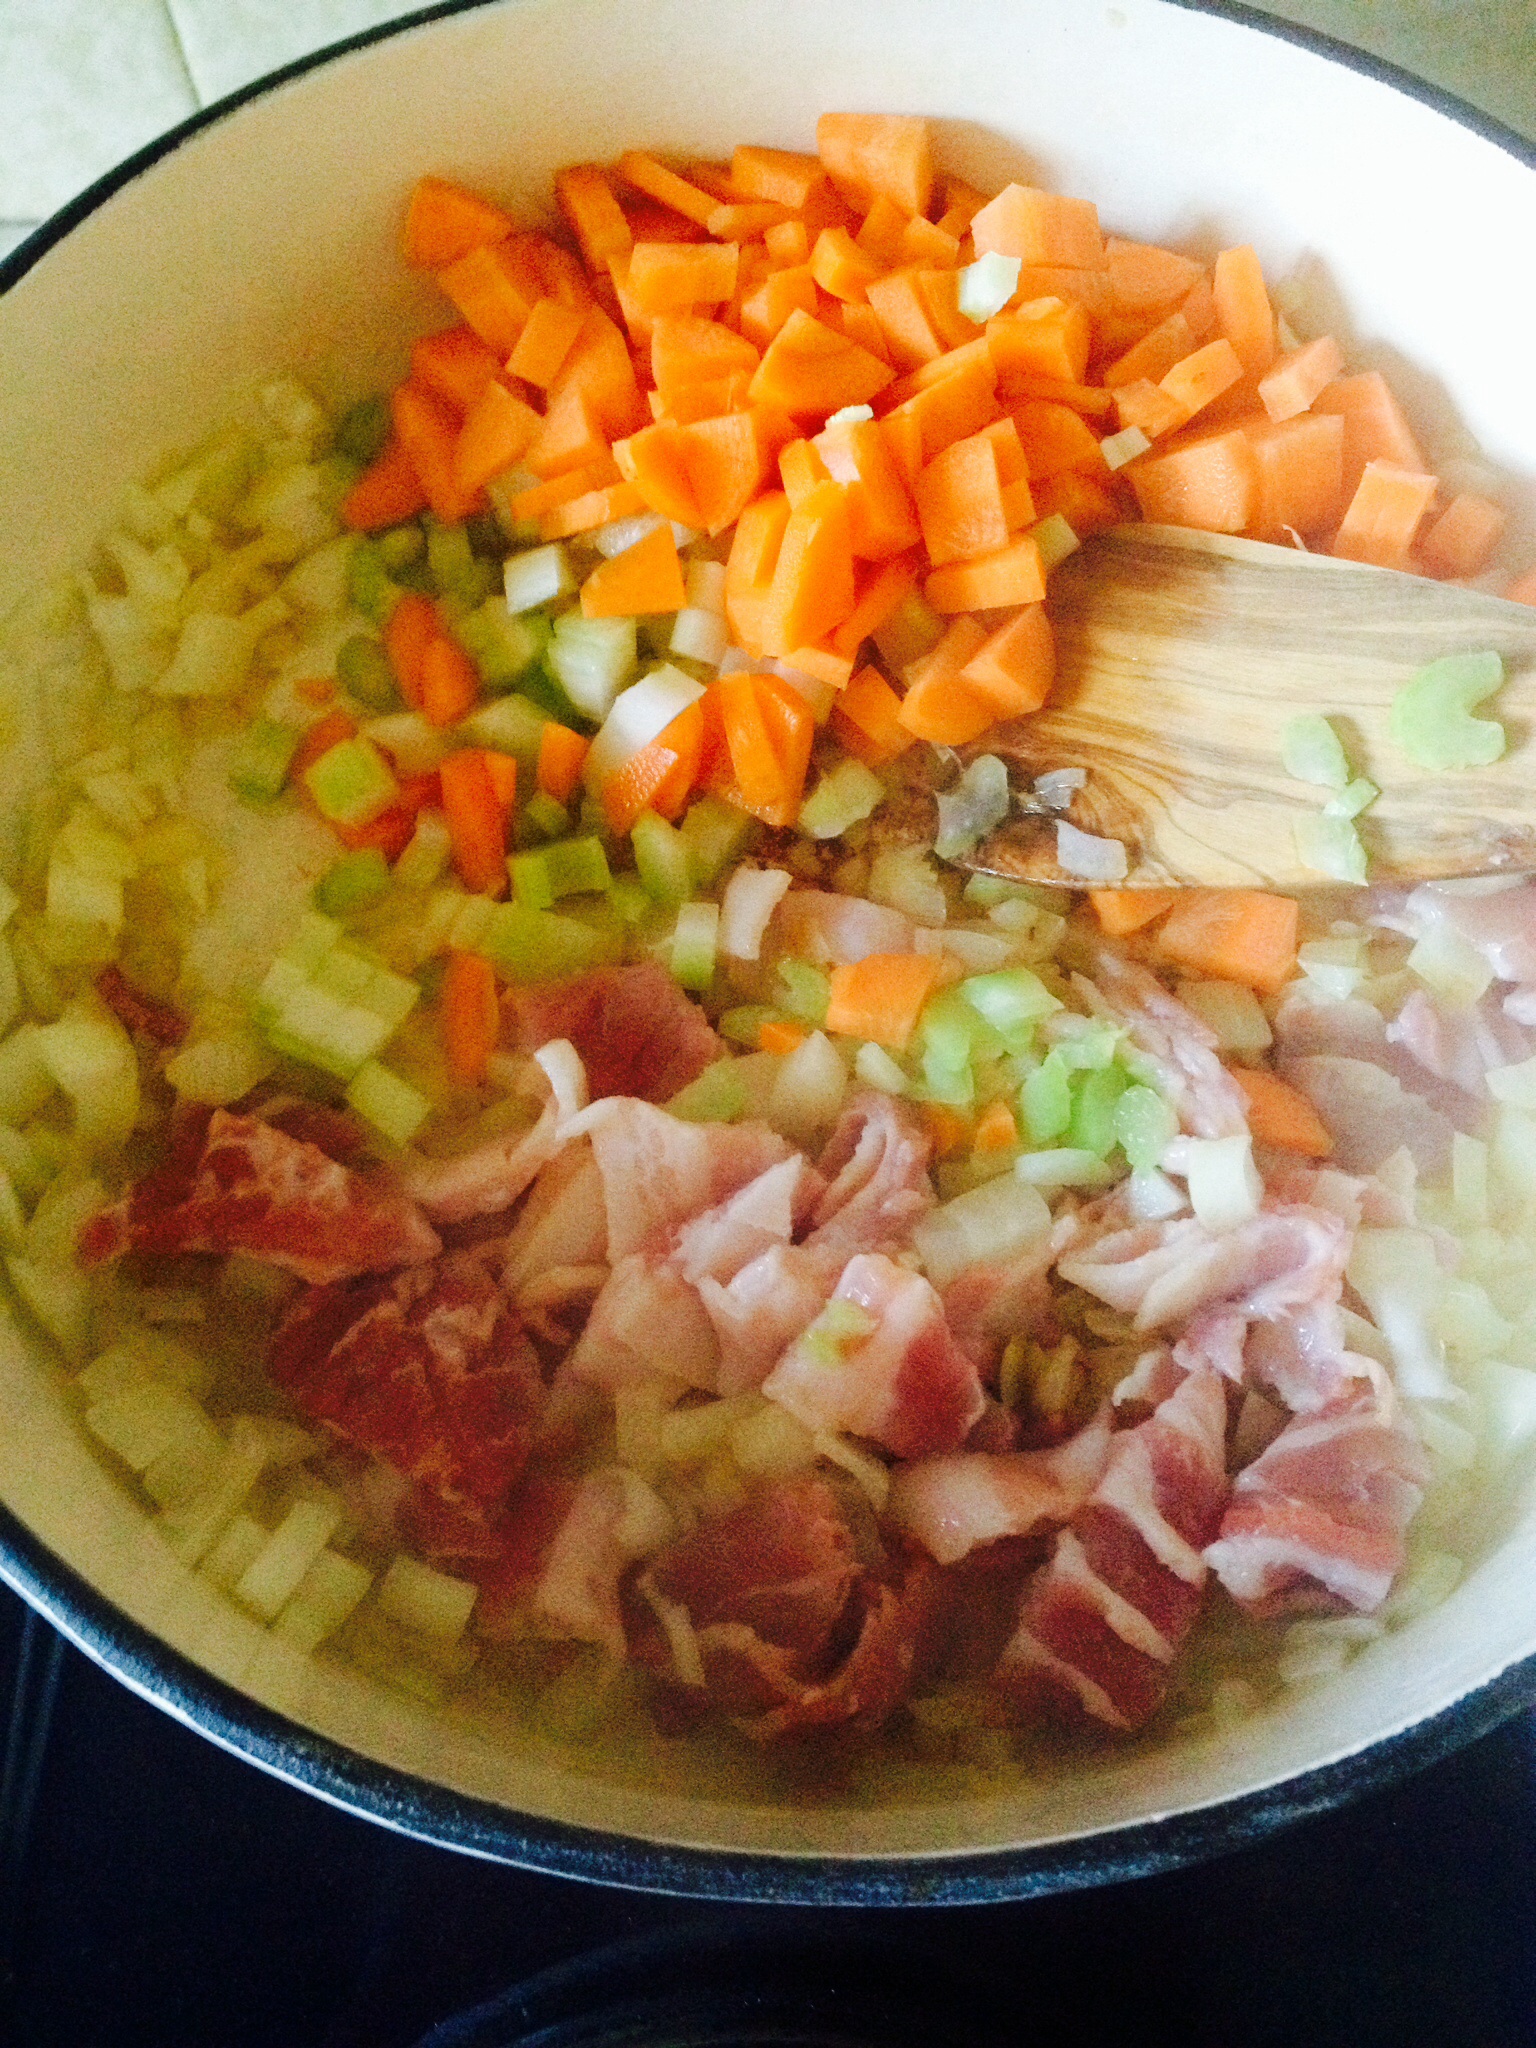
In a large saute pan (or shallow casserole dish) melt the Olive oil and Butter together over a medium heat. Add the finely chopped Onion and Saute until translucent (approx 5-8 mins). Add in the Bacon – I usually snip this into approx 1/2″ pieces, directly into the pan, however you can chip up the Bacon with a knife and then add it.
Let the bacon sizzle until it had rendered out some of it’s fat, but not so much that it goes crispy. Add in the Celery and Carrot ( which have both been finely chopped and cook for another 5 mins.
Sautéing the bacon, onions, carrots and celery.
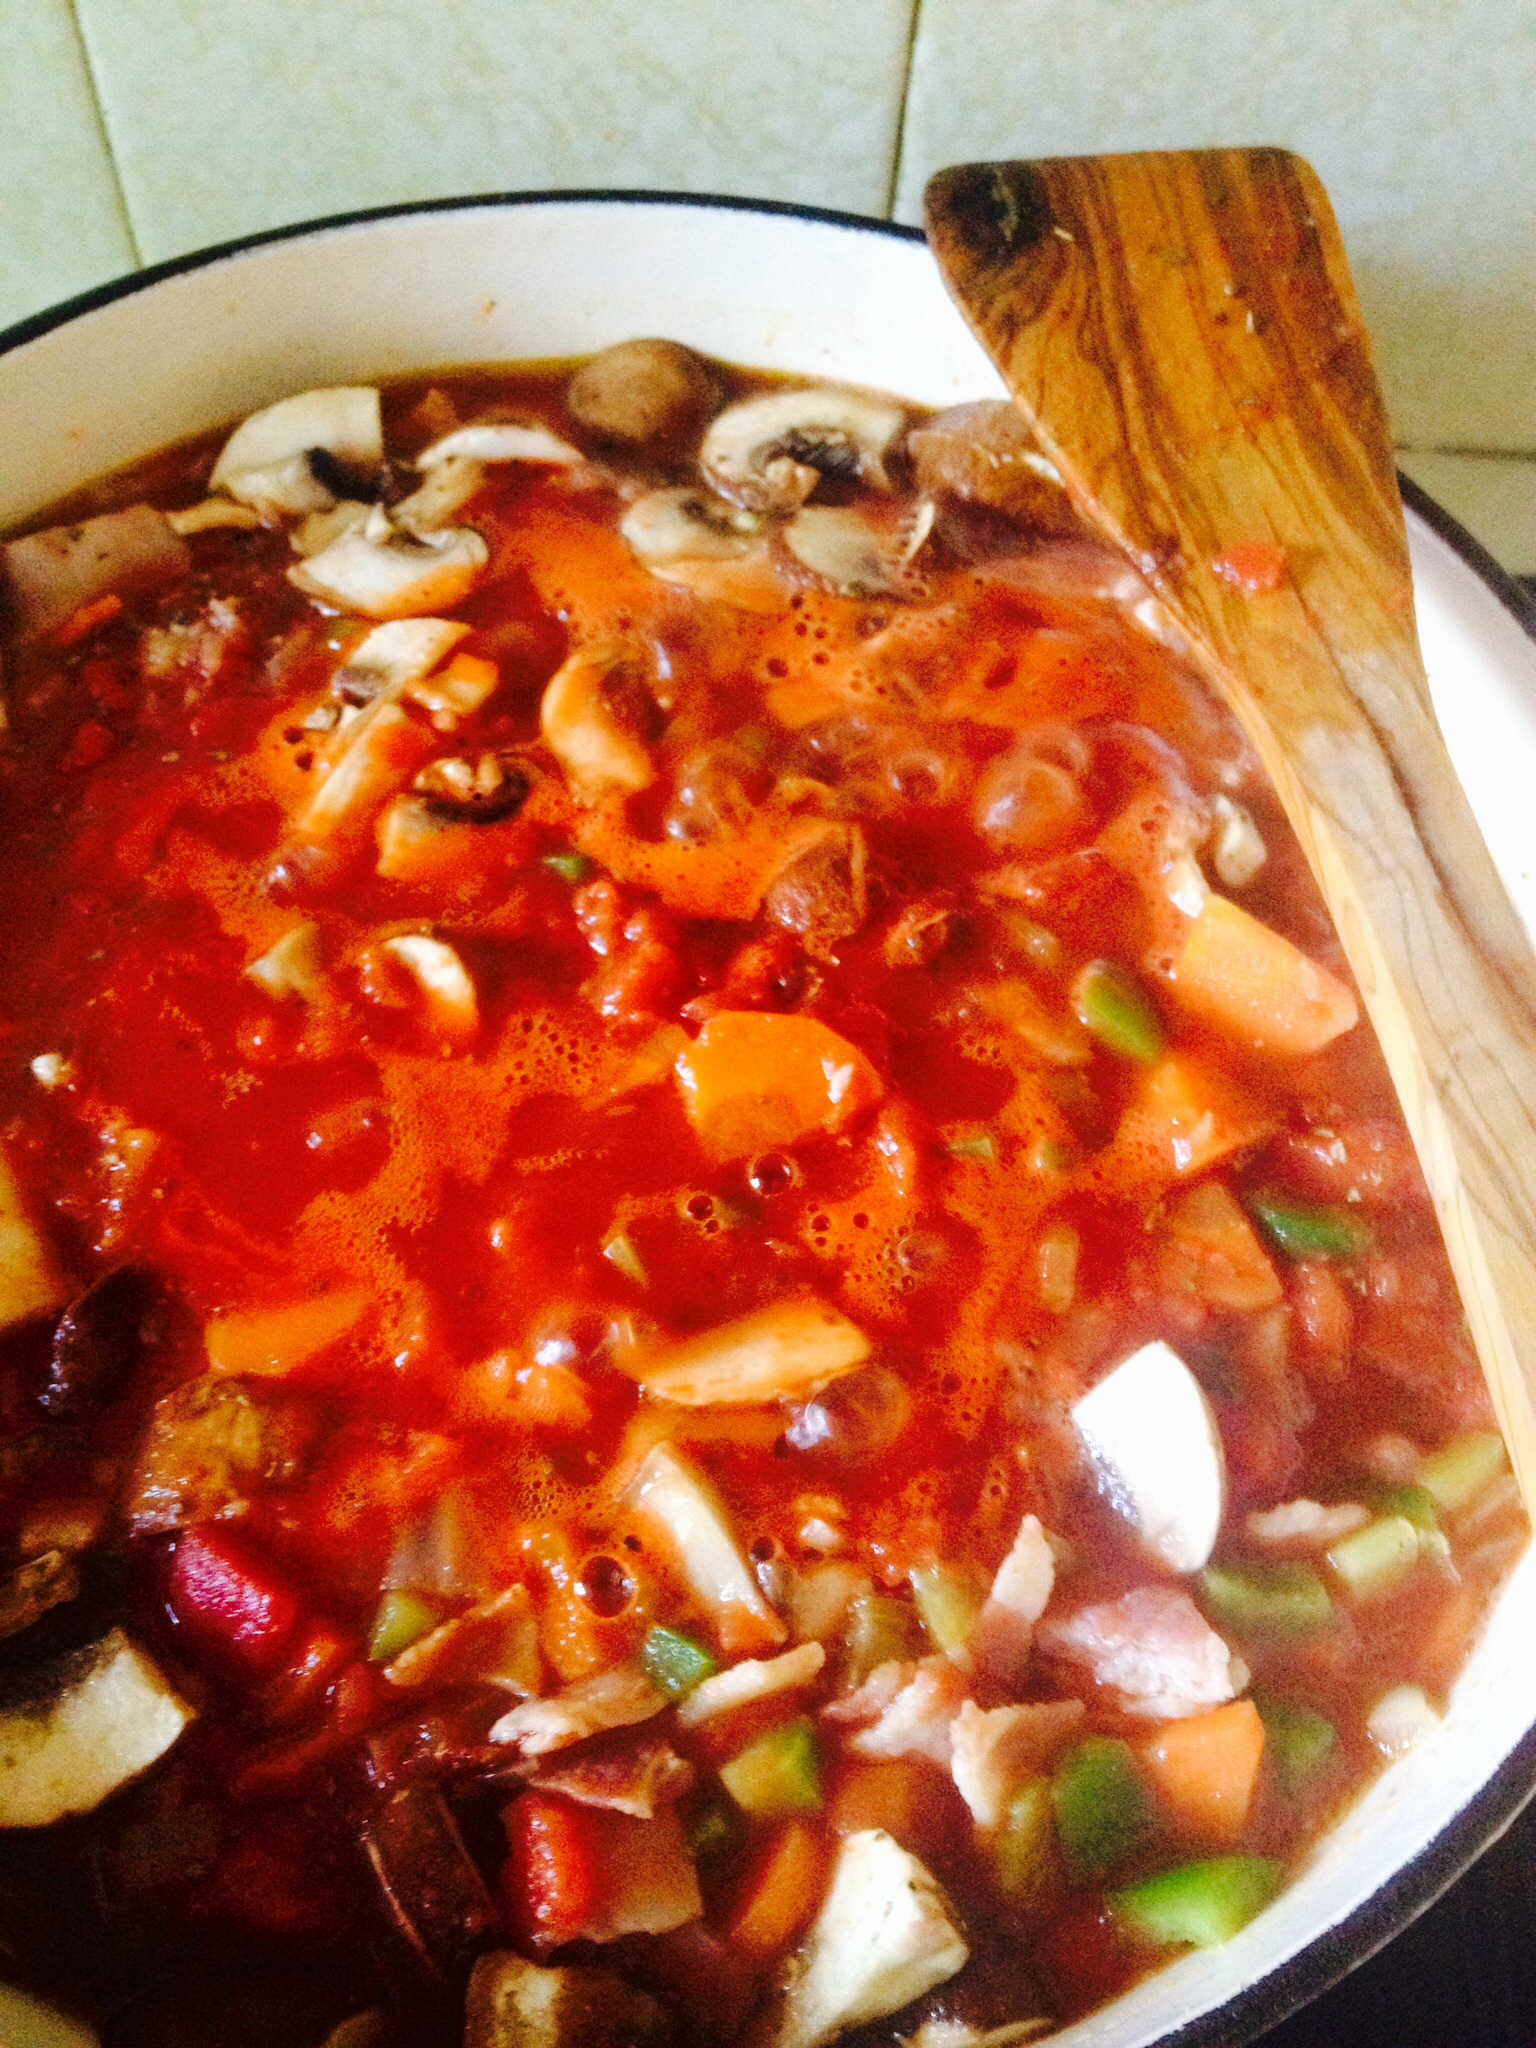
After 5 mins add in the finely chopped Green Pepper and the Mushroom ( I slice the mushrooms fairly thinly, then cut the slices in half – it just looks nice in the dish!). Add the crushed (or finely chopped) garlic and continue cooking for another 5-10 mins, until all the vegetables are slightly softened.
Green Pepper and Sliced Mushrooms added. How chunky or fine you chop your veg is entirely up to you!!
Once the vegetables have started to soften add the tinned, chopped tomatoes. Rinse each tin out with cold water (fill the tin to just over half with water and swish the tin to dilute any tomato juice left, into the water) and add the tomato purée. Add the seasonings next: salt, pepper, sugar, nutmeg and mixed herbs. The sugar balances out the tartness of tinned tomatoes and makes a very real difference to the finished dish.
Allow the bacon, vegetables and tomatoes to bubble away, uncovered, on a low-medium heat for at least an hour.
Cheese Sauce:
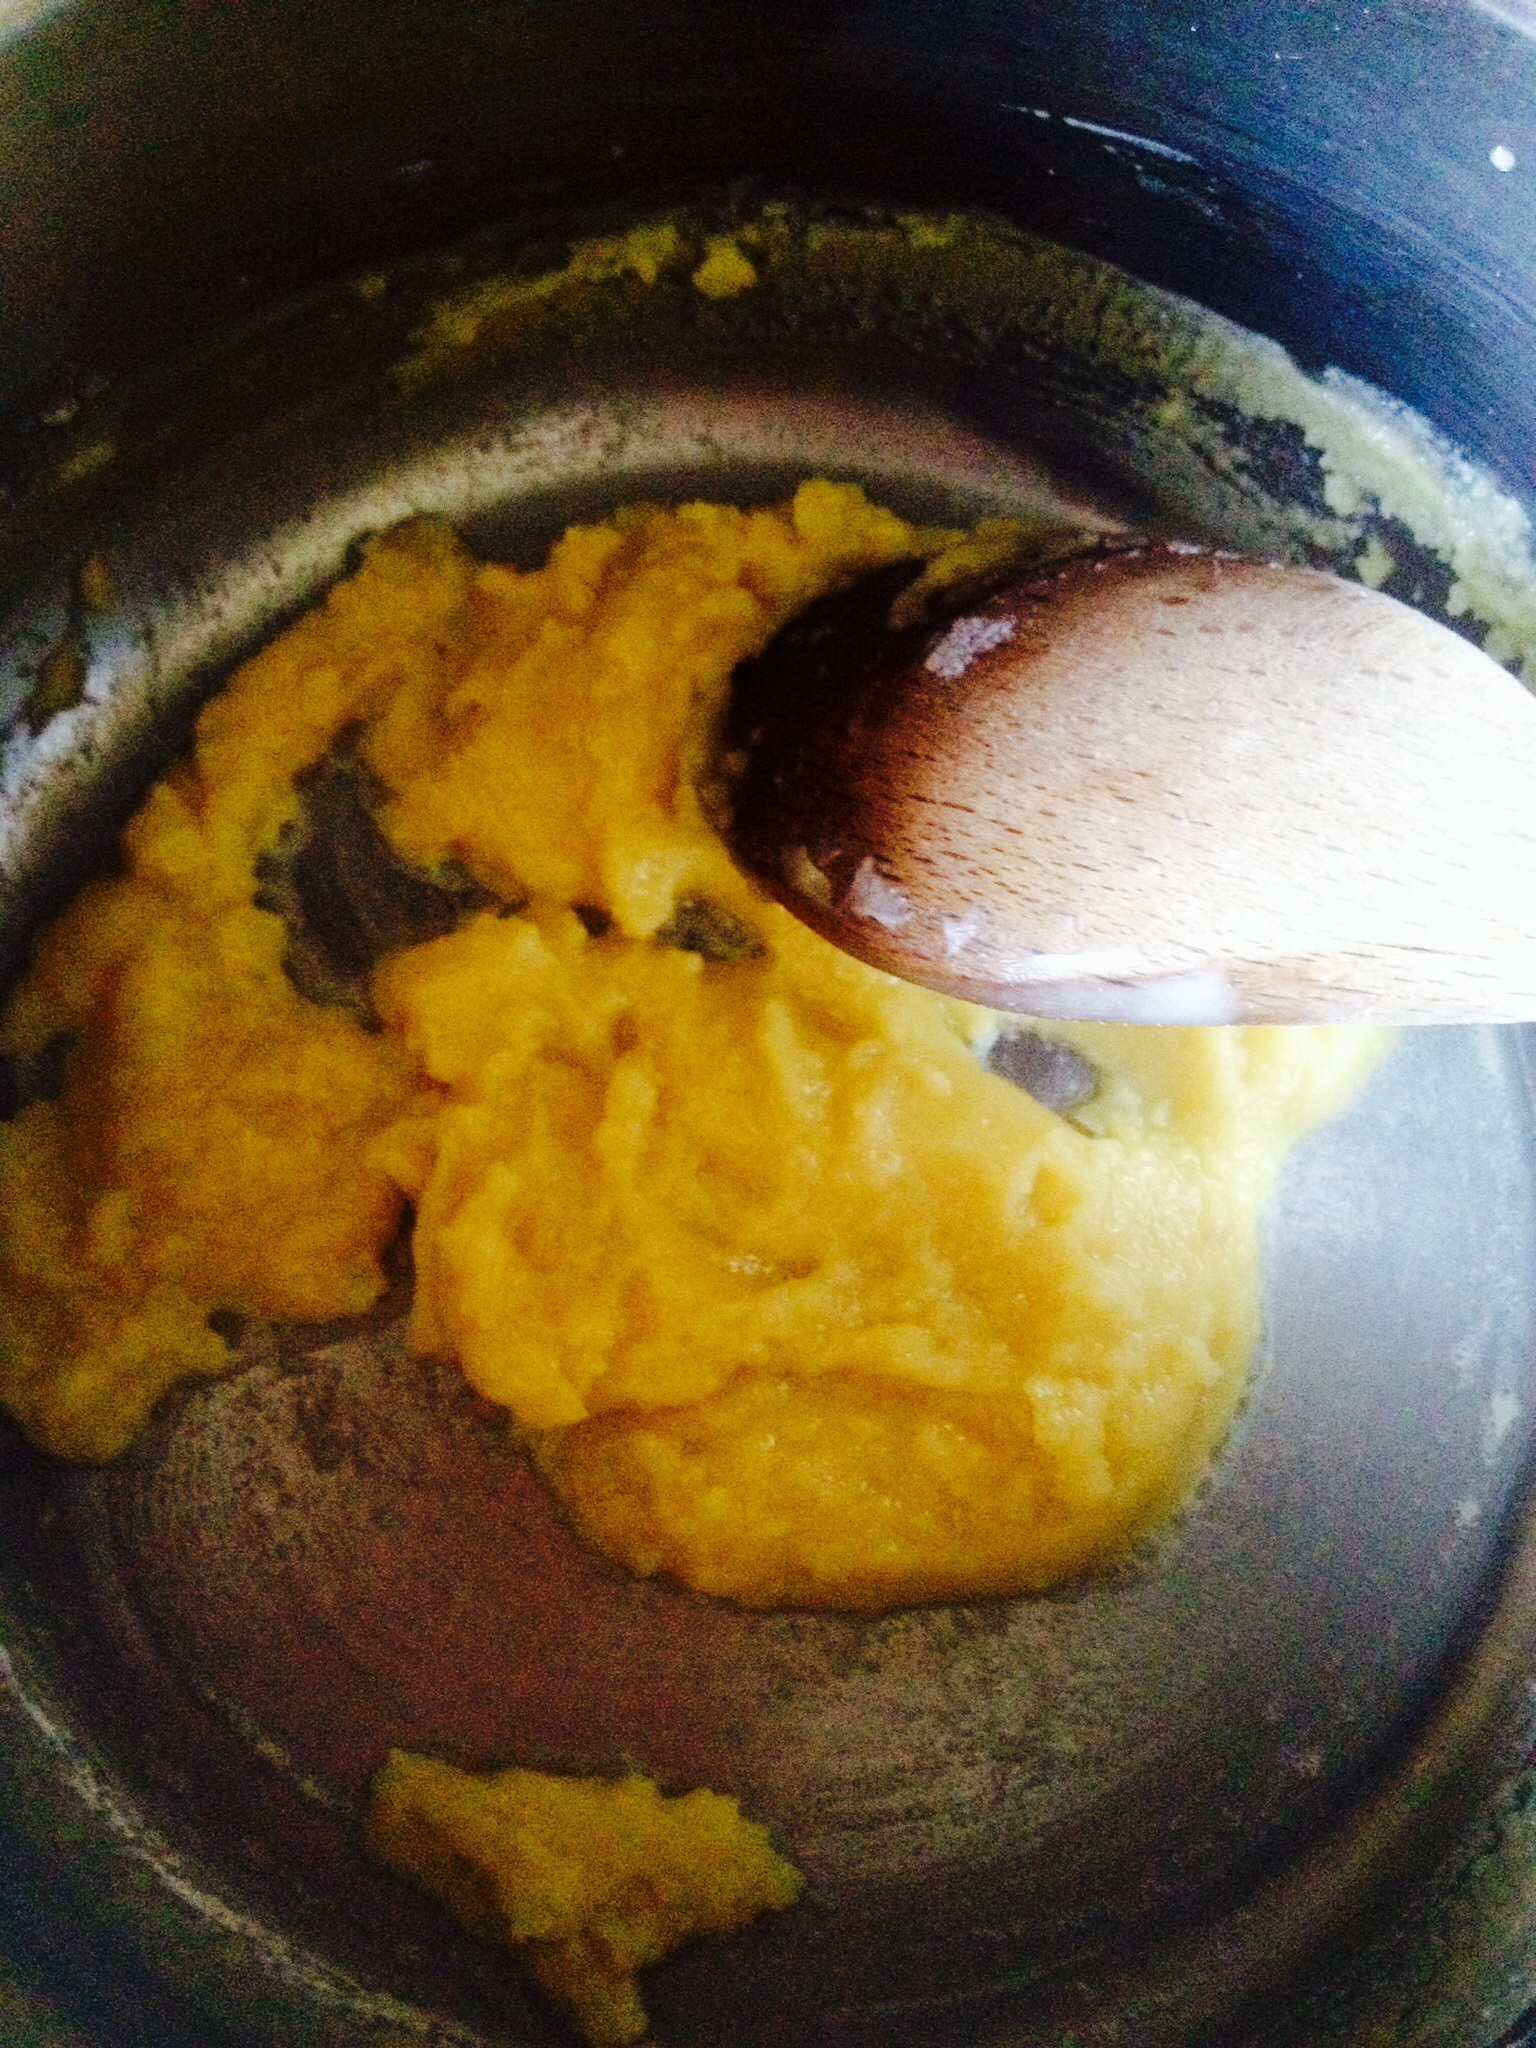
Melt 2tbsp butter on a medium heat in a saucepan. Once melted add 2tbsp of plain white flour and mix thoroughly, lowering the heat very slightly.
Cook the flour and butter together for a couple of minutes to get rid of the ‘raw flour’ taste.
This flour/butter mixture is now called a roux. Now gradually add (50ml at a time at the beginning) whole milk to the flour/butter mixture, stirring constantly. As the milk warms it will gradually become incorporated into the flour/butter. In the beginning, for the first few milk additions, the mixture will be very thick and stiff to stir. If you find the milk is not incorporating into the mixture, or it is very lumpy, it’s fine to switch to a whisk, this will ensure a beautiful, lump free, smooth sauce. Add 450-500ml of milk until your sauce has the consistency similar to custard.
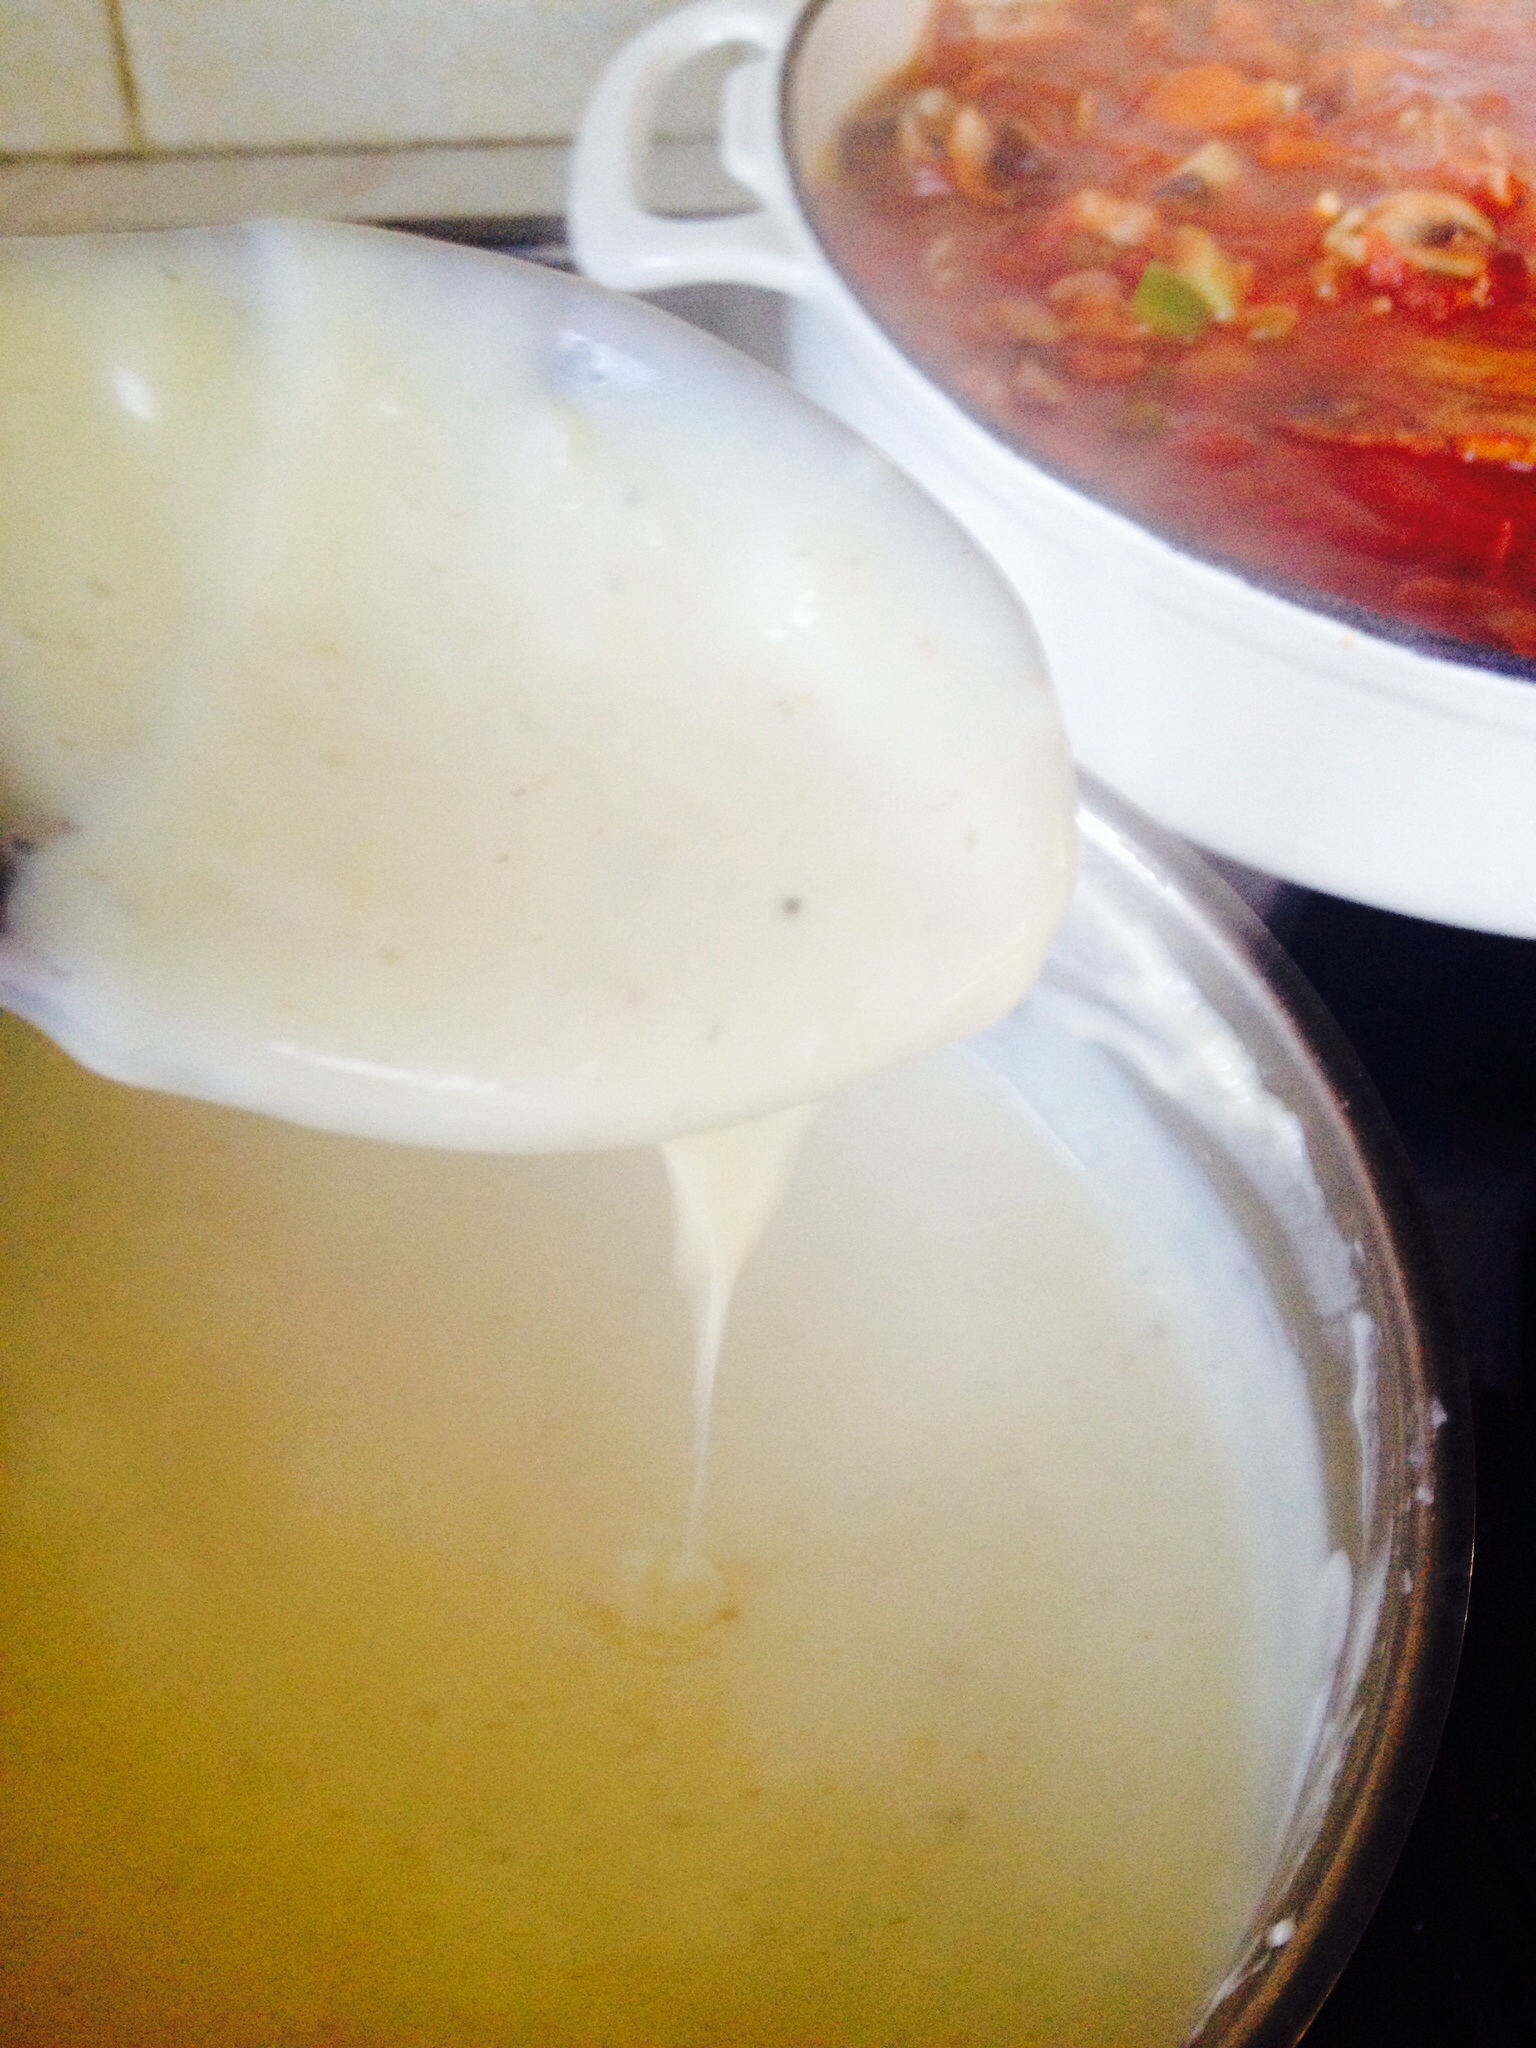
Lump free, smooth white sauce!! Easy!!
Add a pinch of salt, a good grinding of black pepper, 1/4 tsp freshly grated nutmeg and mix thoroughly. Off of the heat add a good 2 handfuls (4-6oz) of grated mature cheddar cheese. Mix thoroughly until the cheese has melted into the sauce.
The Pasta
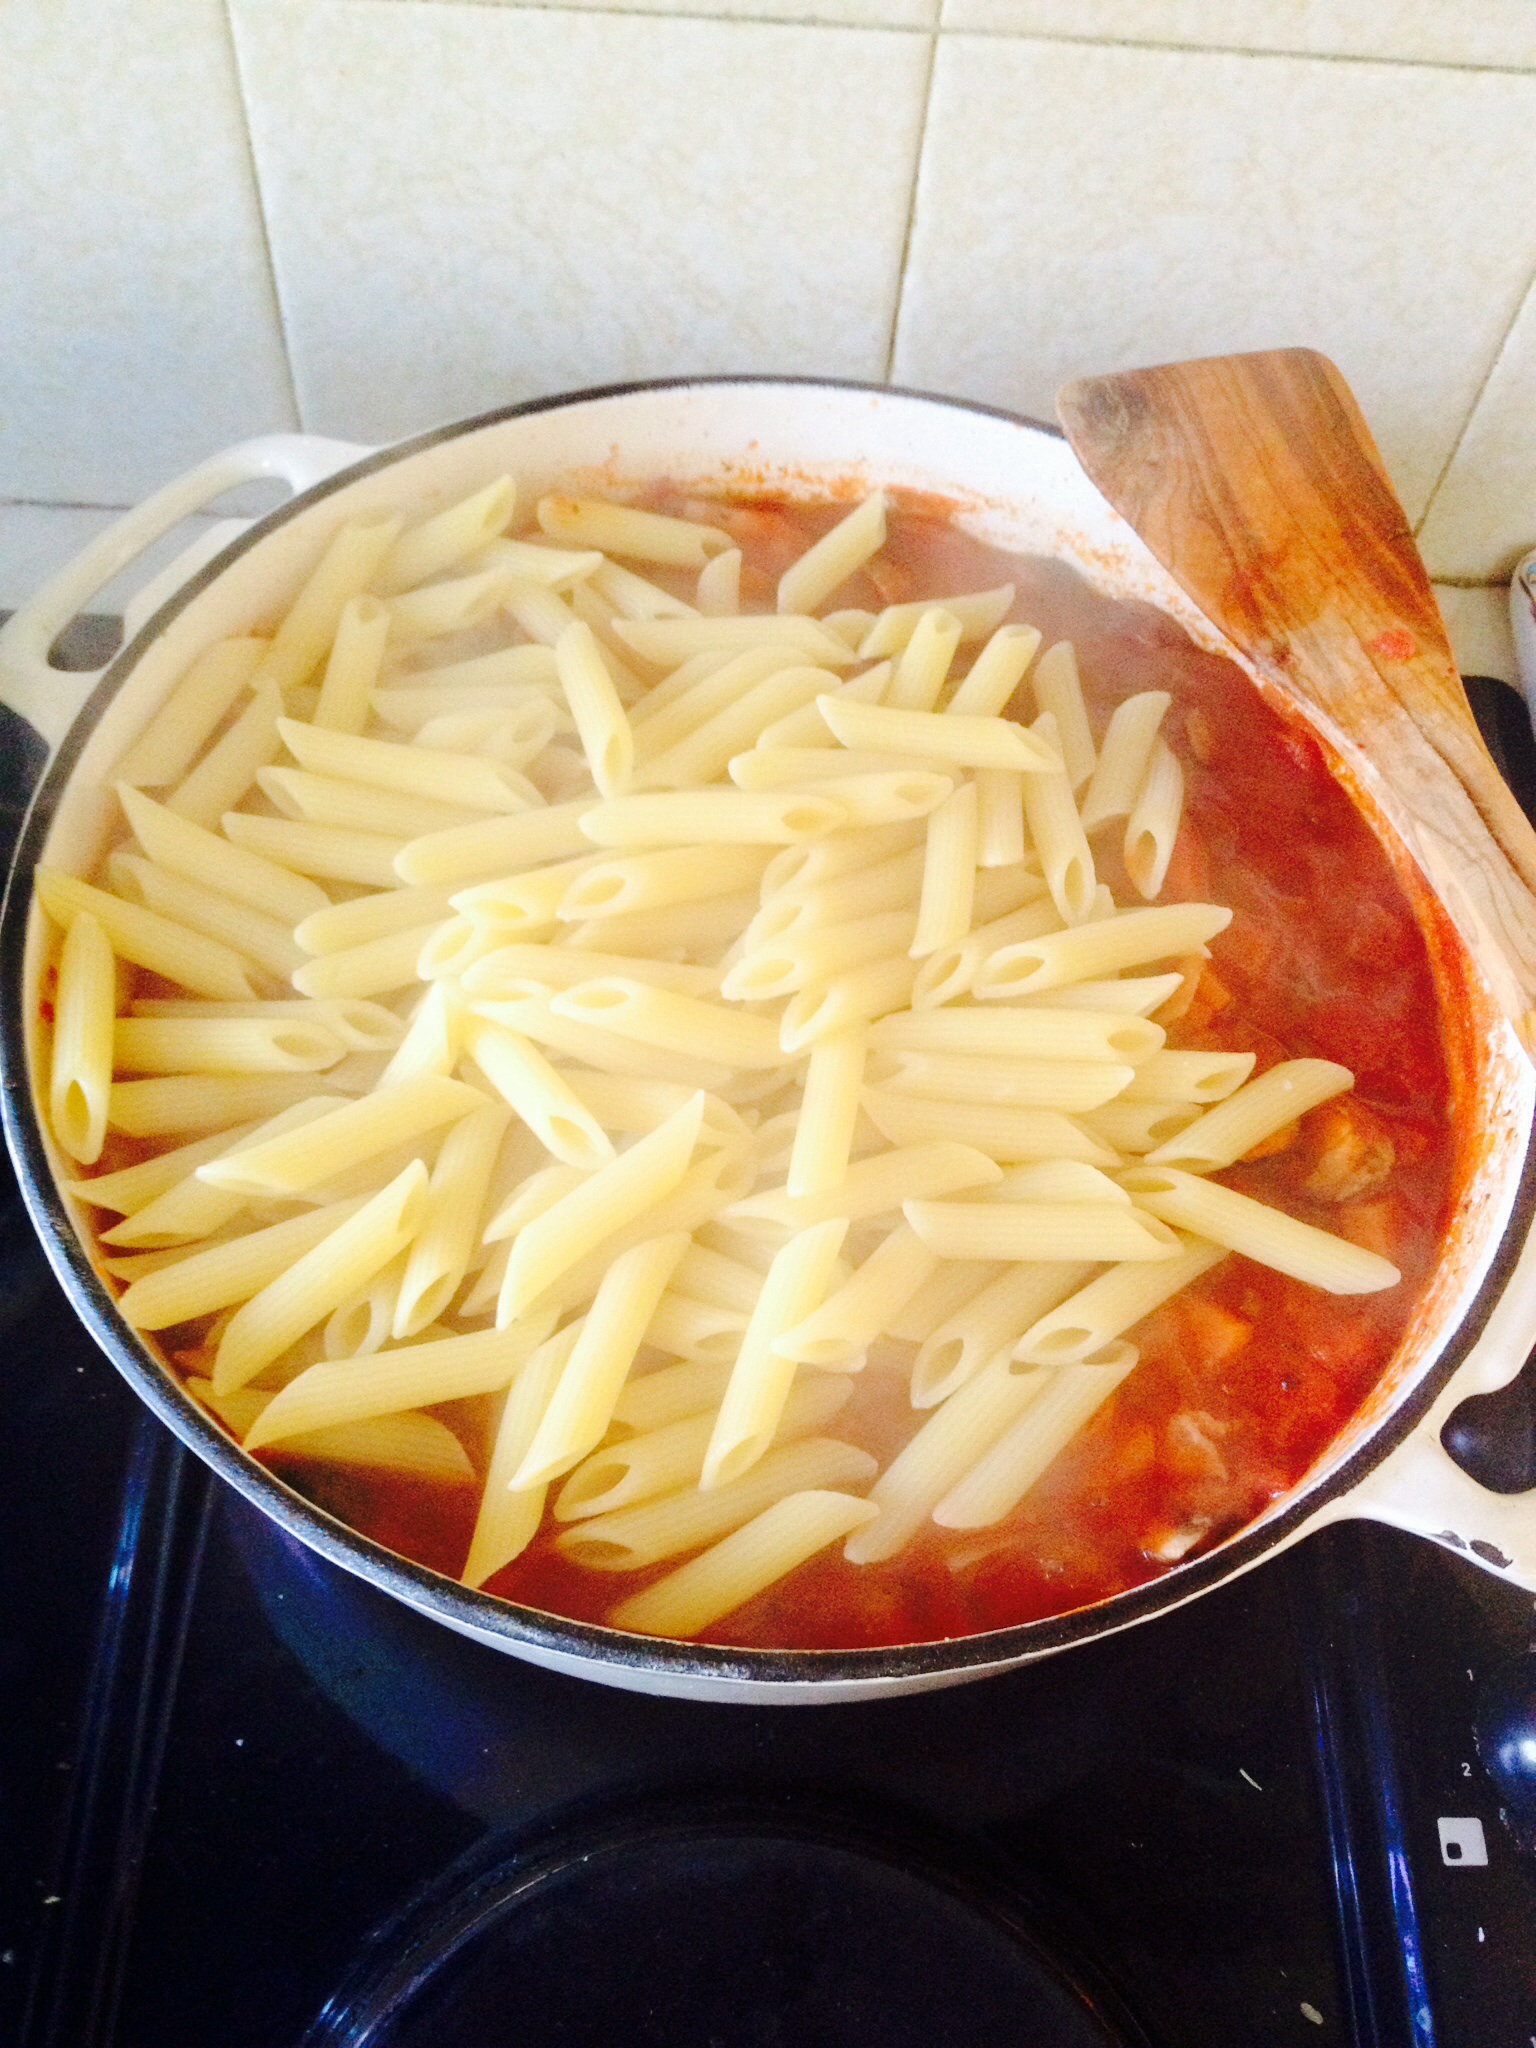
I have used penne rigate pasta for this dish. Basically pasta tubes, cut on a slant with ridges in the outside! I like penne rigate as it holds firm, the sauce not only goes into the pasta tubes, but also the sauce clings to the outside ridges of the pasta. I cooked about 3/4 of a 500g packet (350g if my maths is correct??).
I said earlier, this is such an economical dish – 8 bacon rashers, bits of veg you have in the fridge, a couple of handfuls of mature cheddar and not even a whole packet of pasta!! Not only that but it tastes fab and is easily transportable, so ideal to give individual portions to friends/family or pop in the freezer!!
Once the pasta is almost cooked (not quite al dente) drain and add to the bacon sauce.
The pasta dumped on top of the bacon sauce.
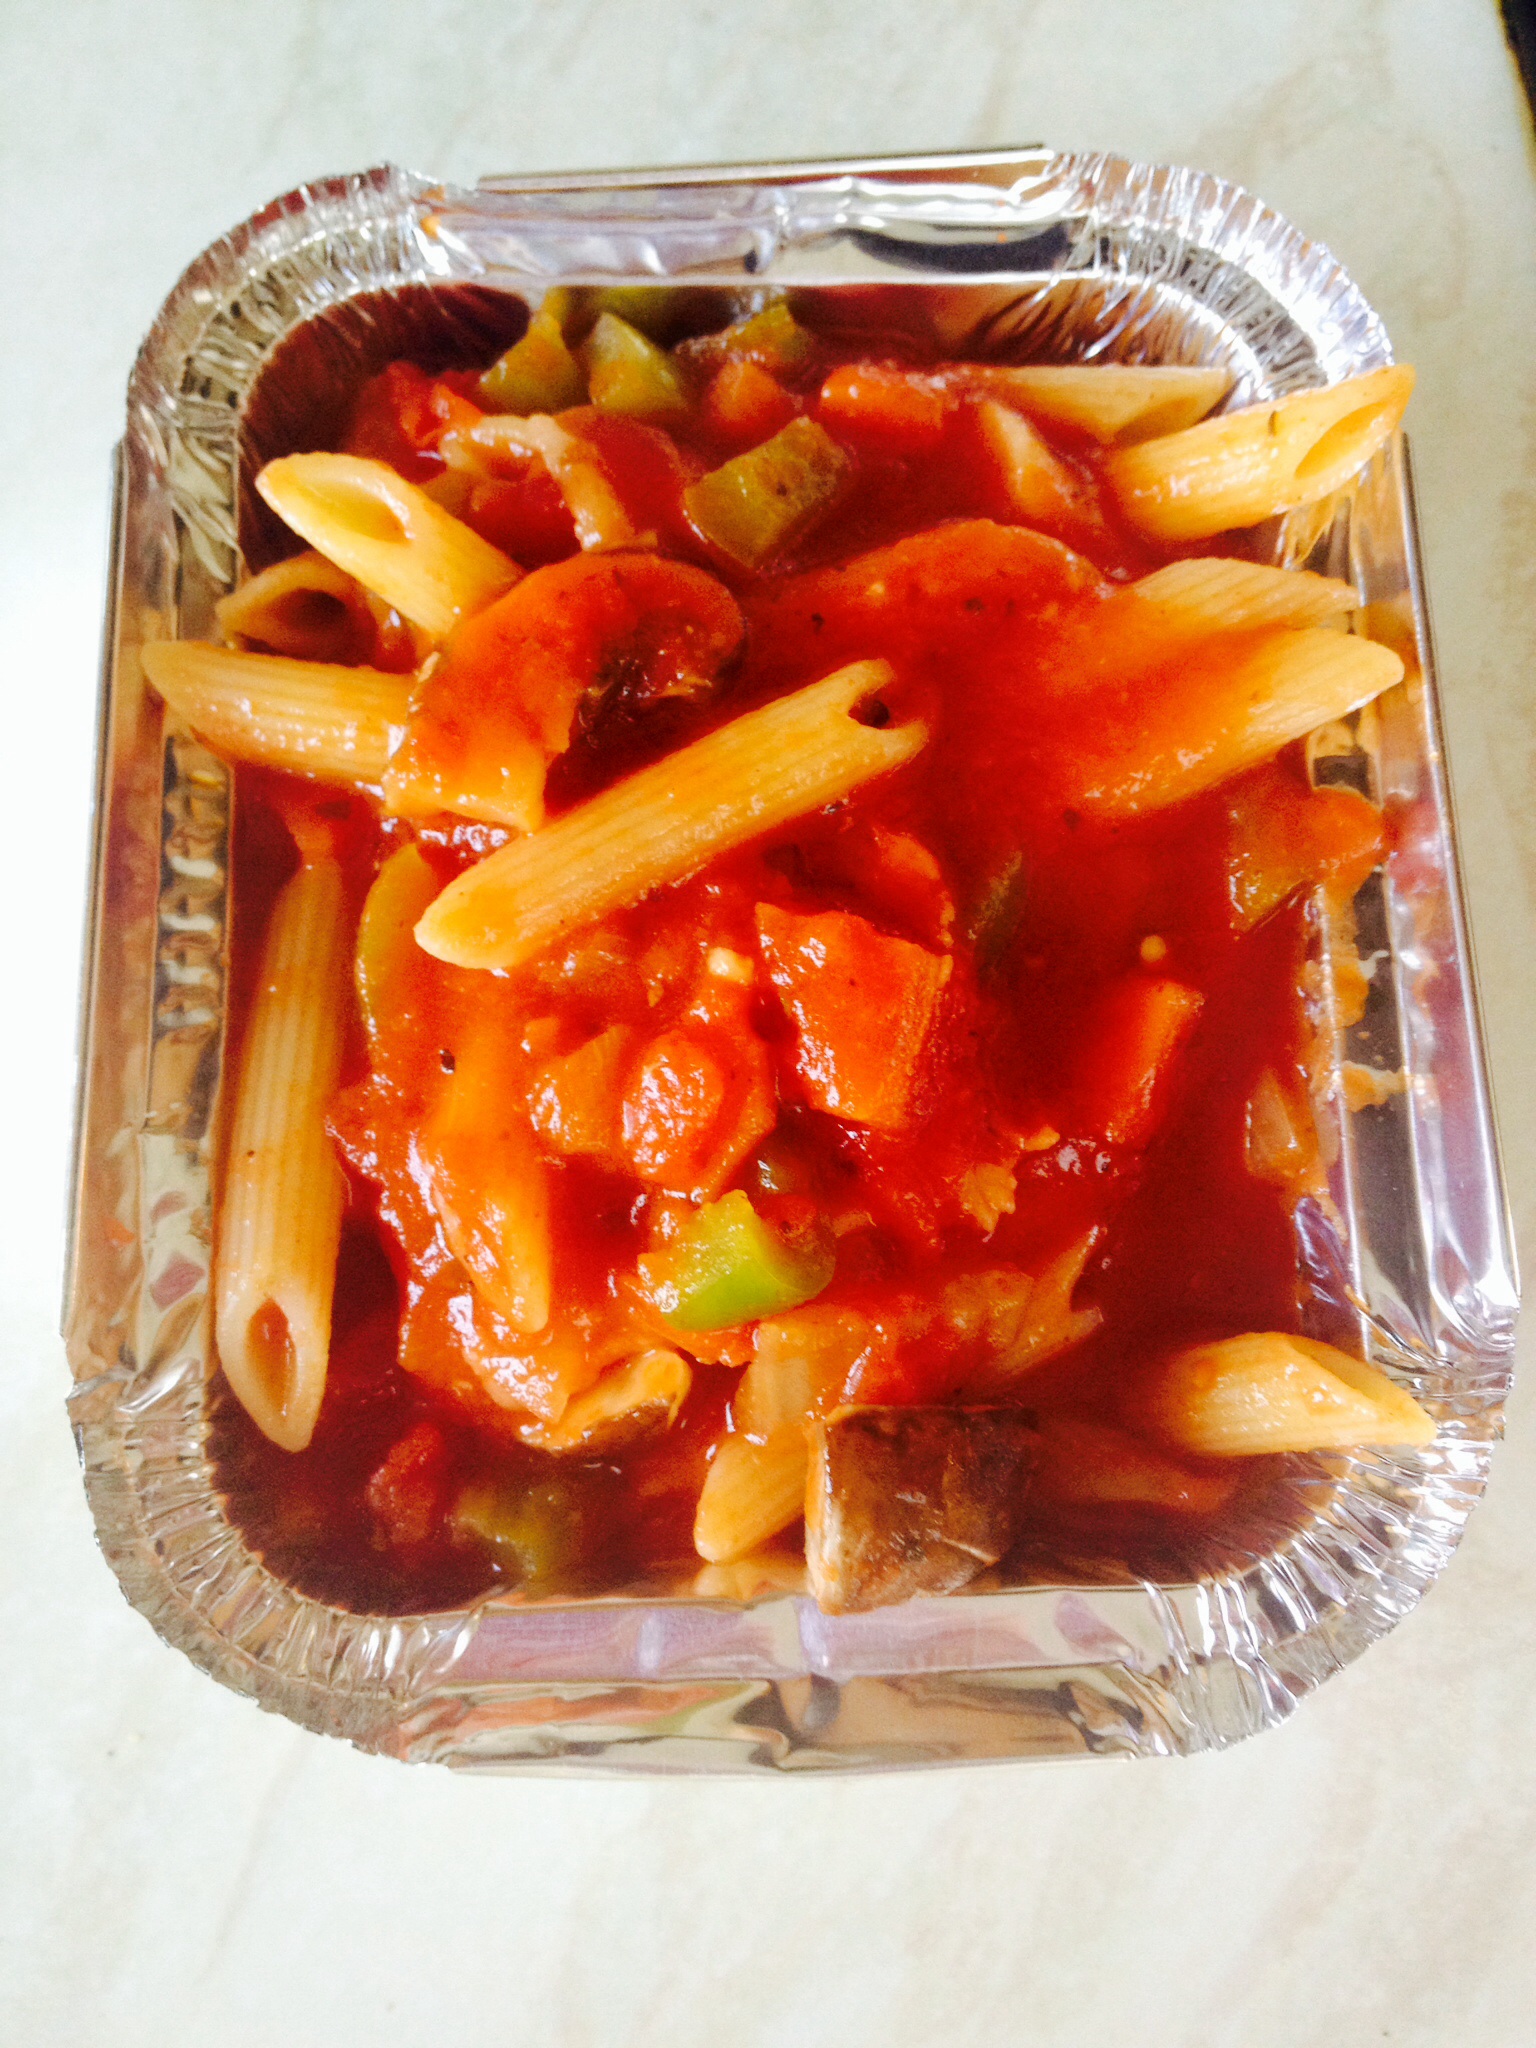
Mix the sauce and pasta together. If serving a separate portion to give away, remove a generous portion of the pasta/bacon mix, ensuring you get a good mix of the sauce, bacon, veg and of course pasta.
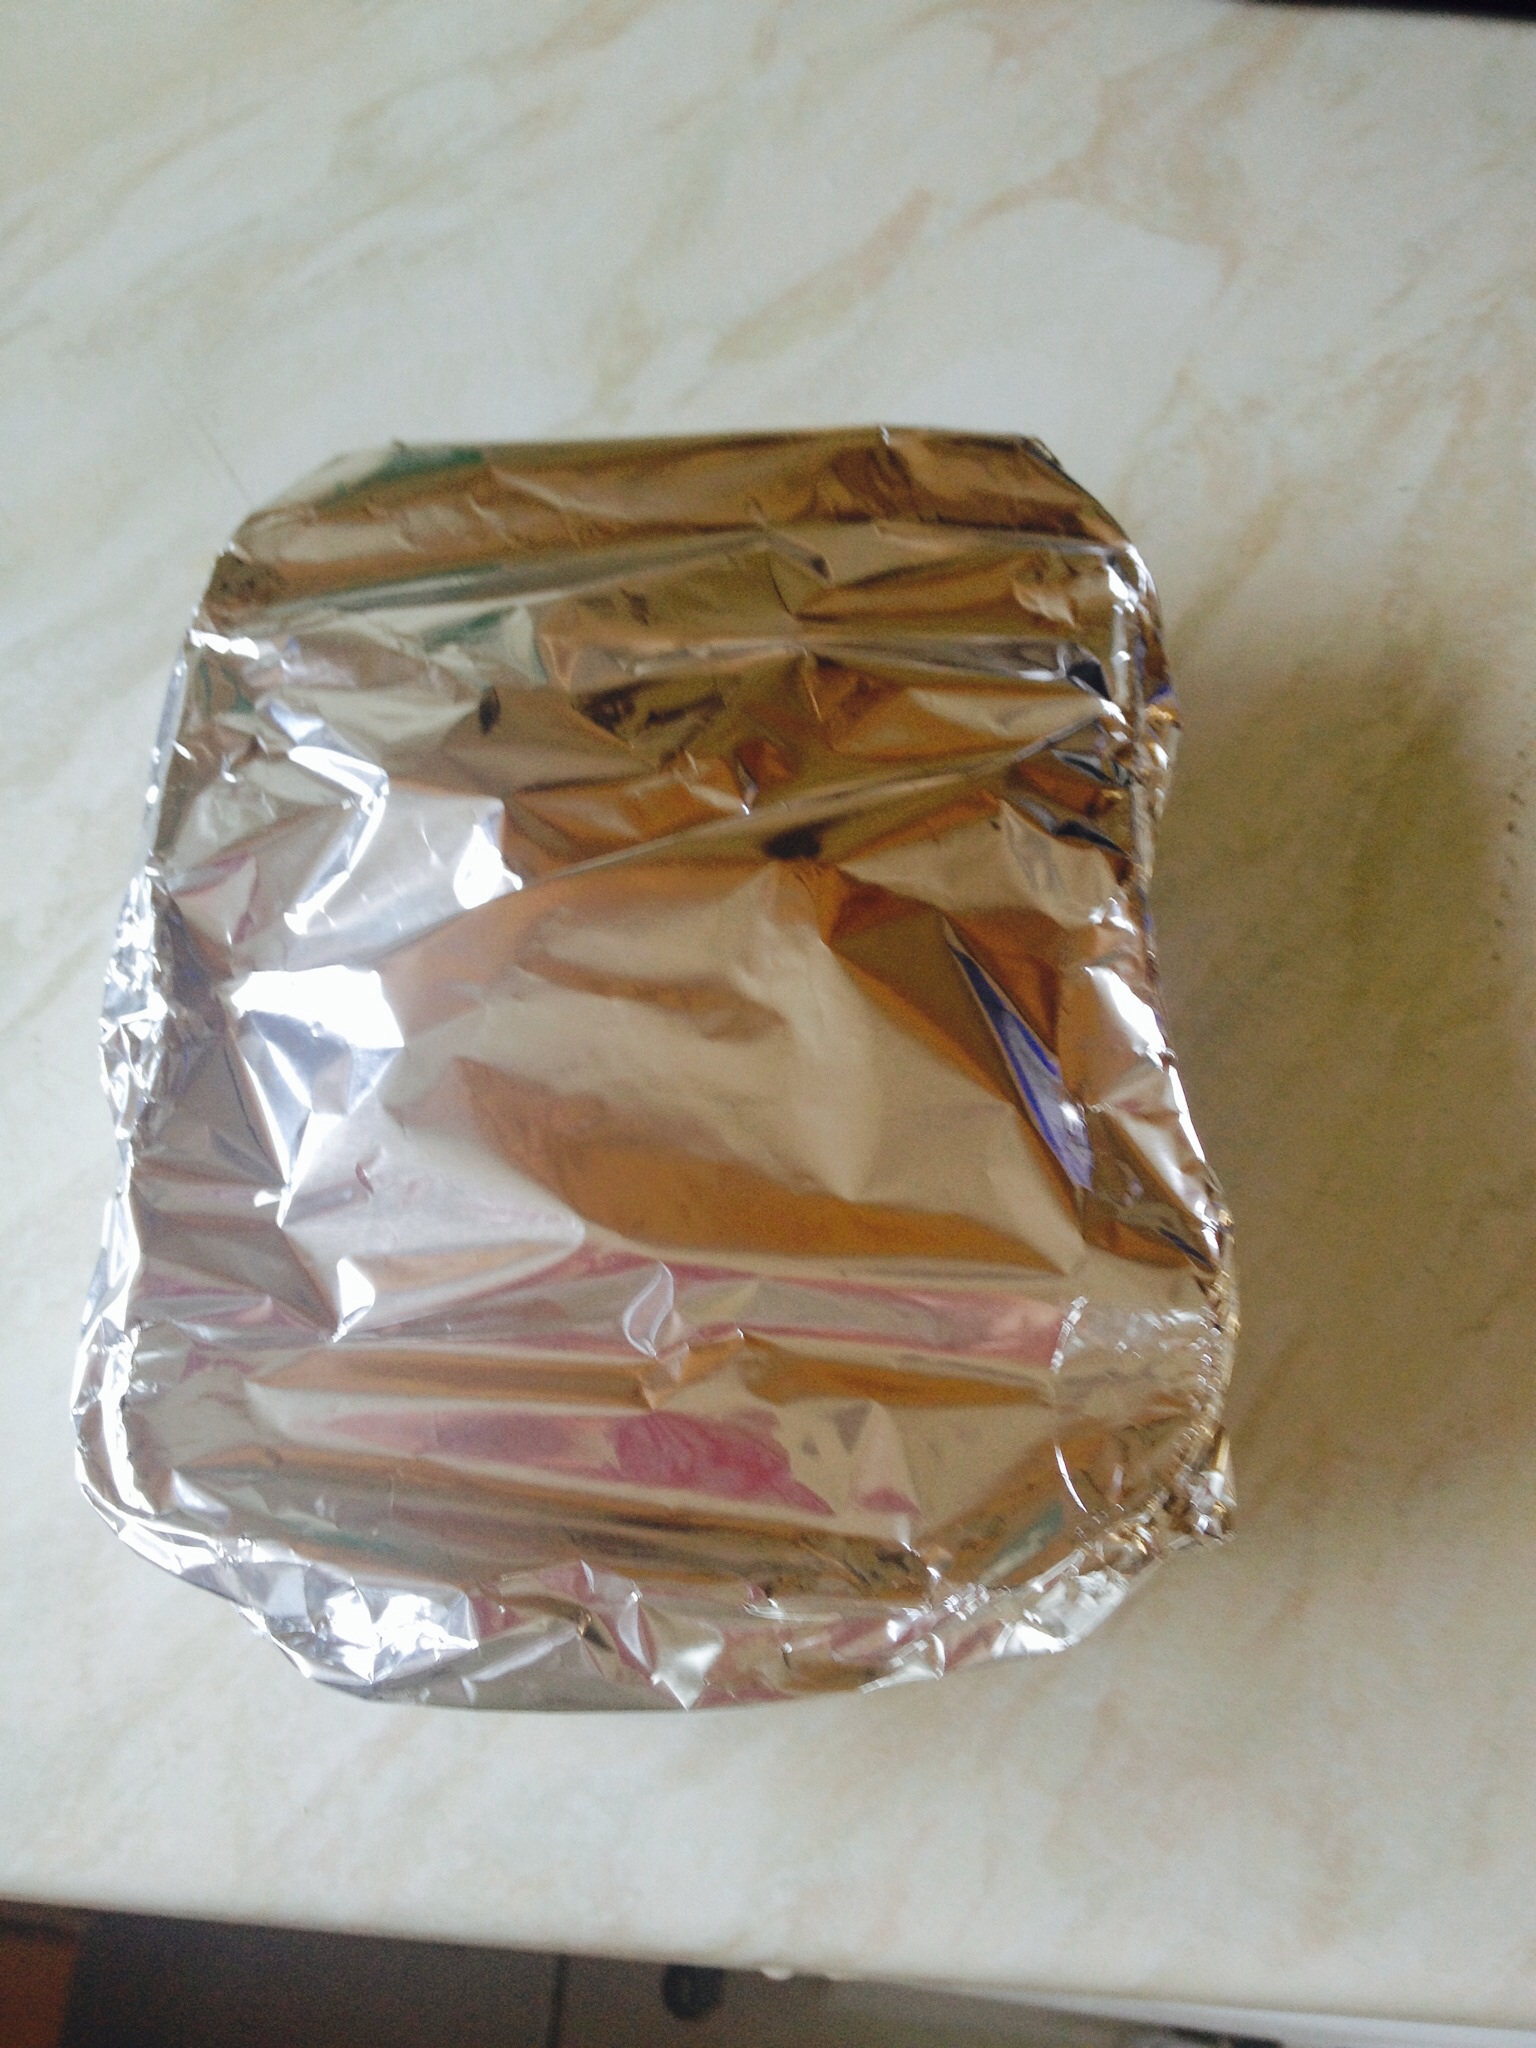
Not the most elegant container, but foil containers make transporting, or freezing the individual portions sooooo easy!!
Spread the rest of the bacon pasta evenly into an ovenproof container. Tap the individual portions to settle the pasta and remove any air bubbles.
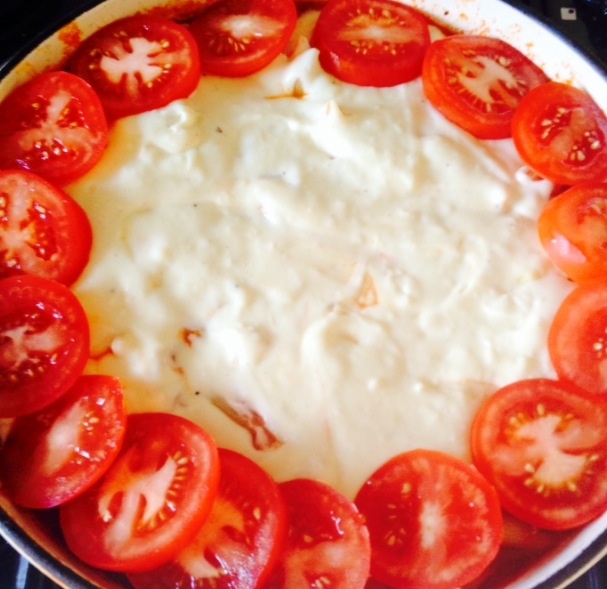
Cover your pasta dishes with a good dollop of the cheese sauce. For added prettiness (and because the cheese sauce didn’t reach the edges!!) I sliced ripe, ruby red tomatoes and placed them around the outside edge of the pasta.
Beautifully decorated Bacon Cheese Pasta BakeSlightly overstuffed, once the cheese sauce was added, so just wrapped in foil. One individual portion ready to go!!!
So a super tasty, super economical meal to eat and share!
For a bubbly,scrumptious meal, ready for the table: Cook the large Bacon Cheese Pasta Bake at 180C for an hour until thoroughly heated through, 1/2 hour at the same temp for the individual portion.
An amazingly tasty, versatile dish that’s easy on your wallet and tasty on your tongue.
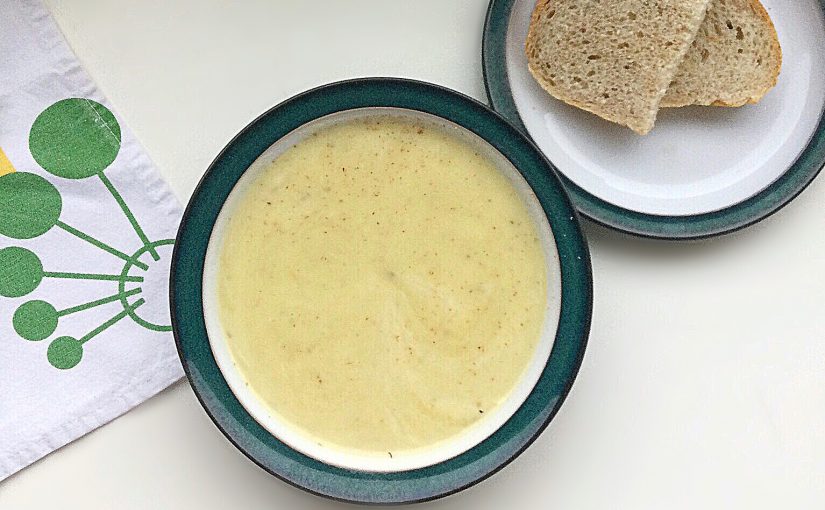
Hi, thanks for stopping by today. I hope you are well? As for me, I have a rotten sore throat (plus the high temperature etc that go with these horrid virus’). I need soup! And not any old soup, Leek and Potato Soup! I love this soup, it’s the one of the few foods I eat when feeling unwell and haven’t got an appetite. So, whenever I’m unwell this is what I feast on.
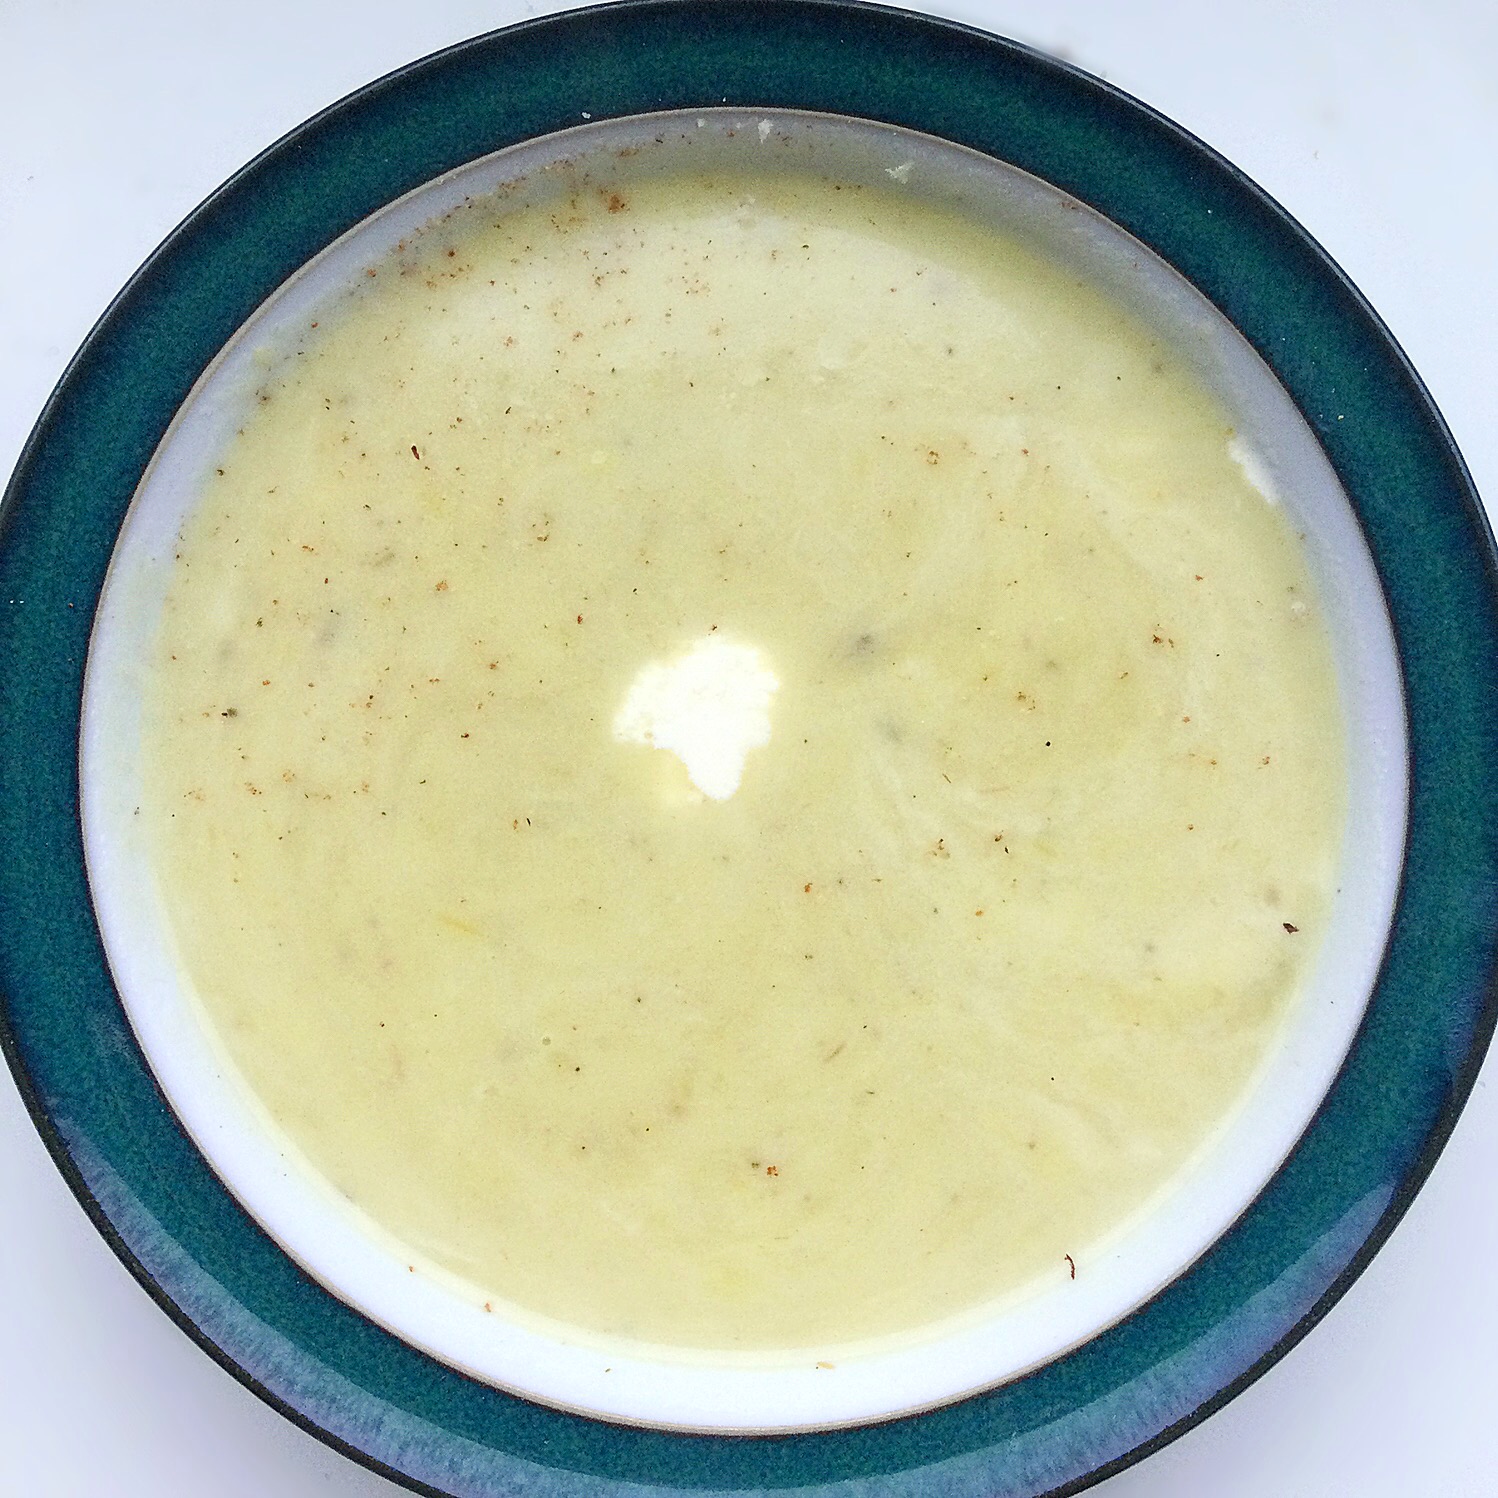
Leek And Potato Soup
So I make a big batch of this soup when I’m well, then I freeze it in single portions. That way, if I’m not feeling fantastic, like today, all I have to do is grab a portion out of the freezer, reheat and eat!
A splash of cream for added indulgence!
Recipe: Leek and Potato Soup
0.5Kg Leeks
0.5kg Potatoes – I’ve used King Edwards, floury potatoes work best in this recipe.
1 Tbs Butter – for sautéing leeks (use vegetable oil for vegetarian/vegan version*)
50mls plus a little extra Double Cream (alternatively use full fat Coconut Milk*)
Prepping The Leeks For The Soup
Place a large, heavy based saucepan on the hob, add the butter or oil) and melt on a slow heat.
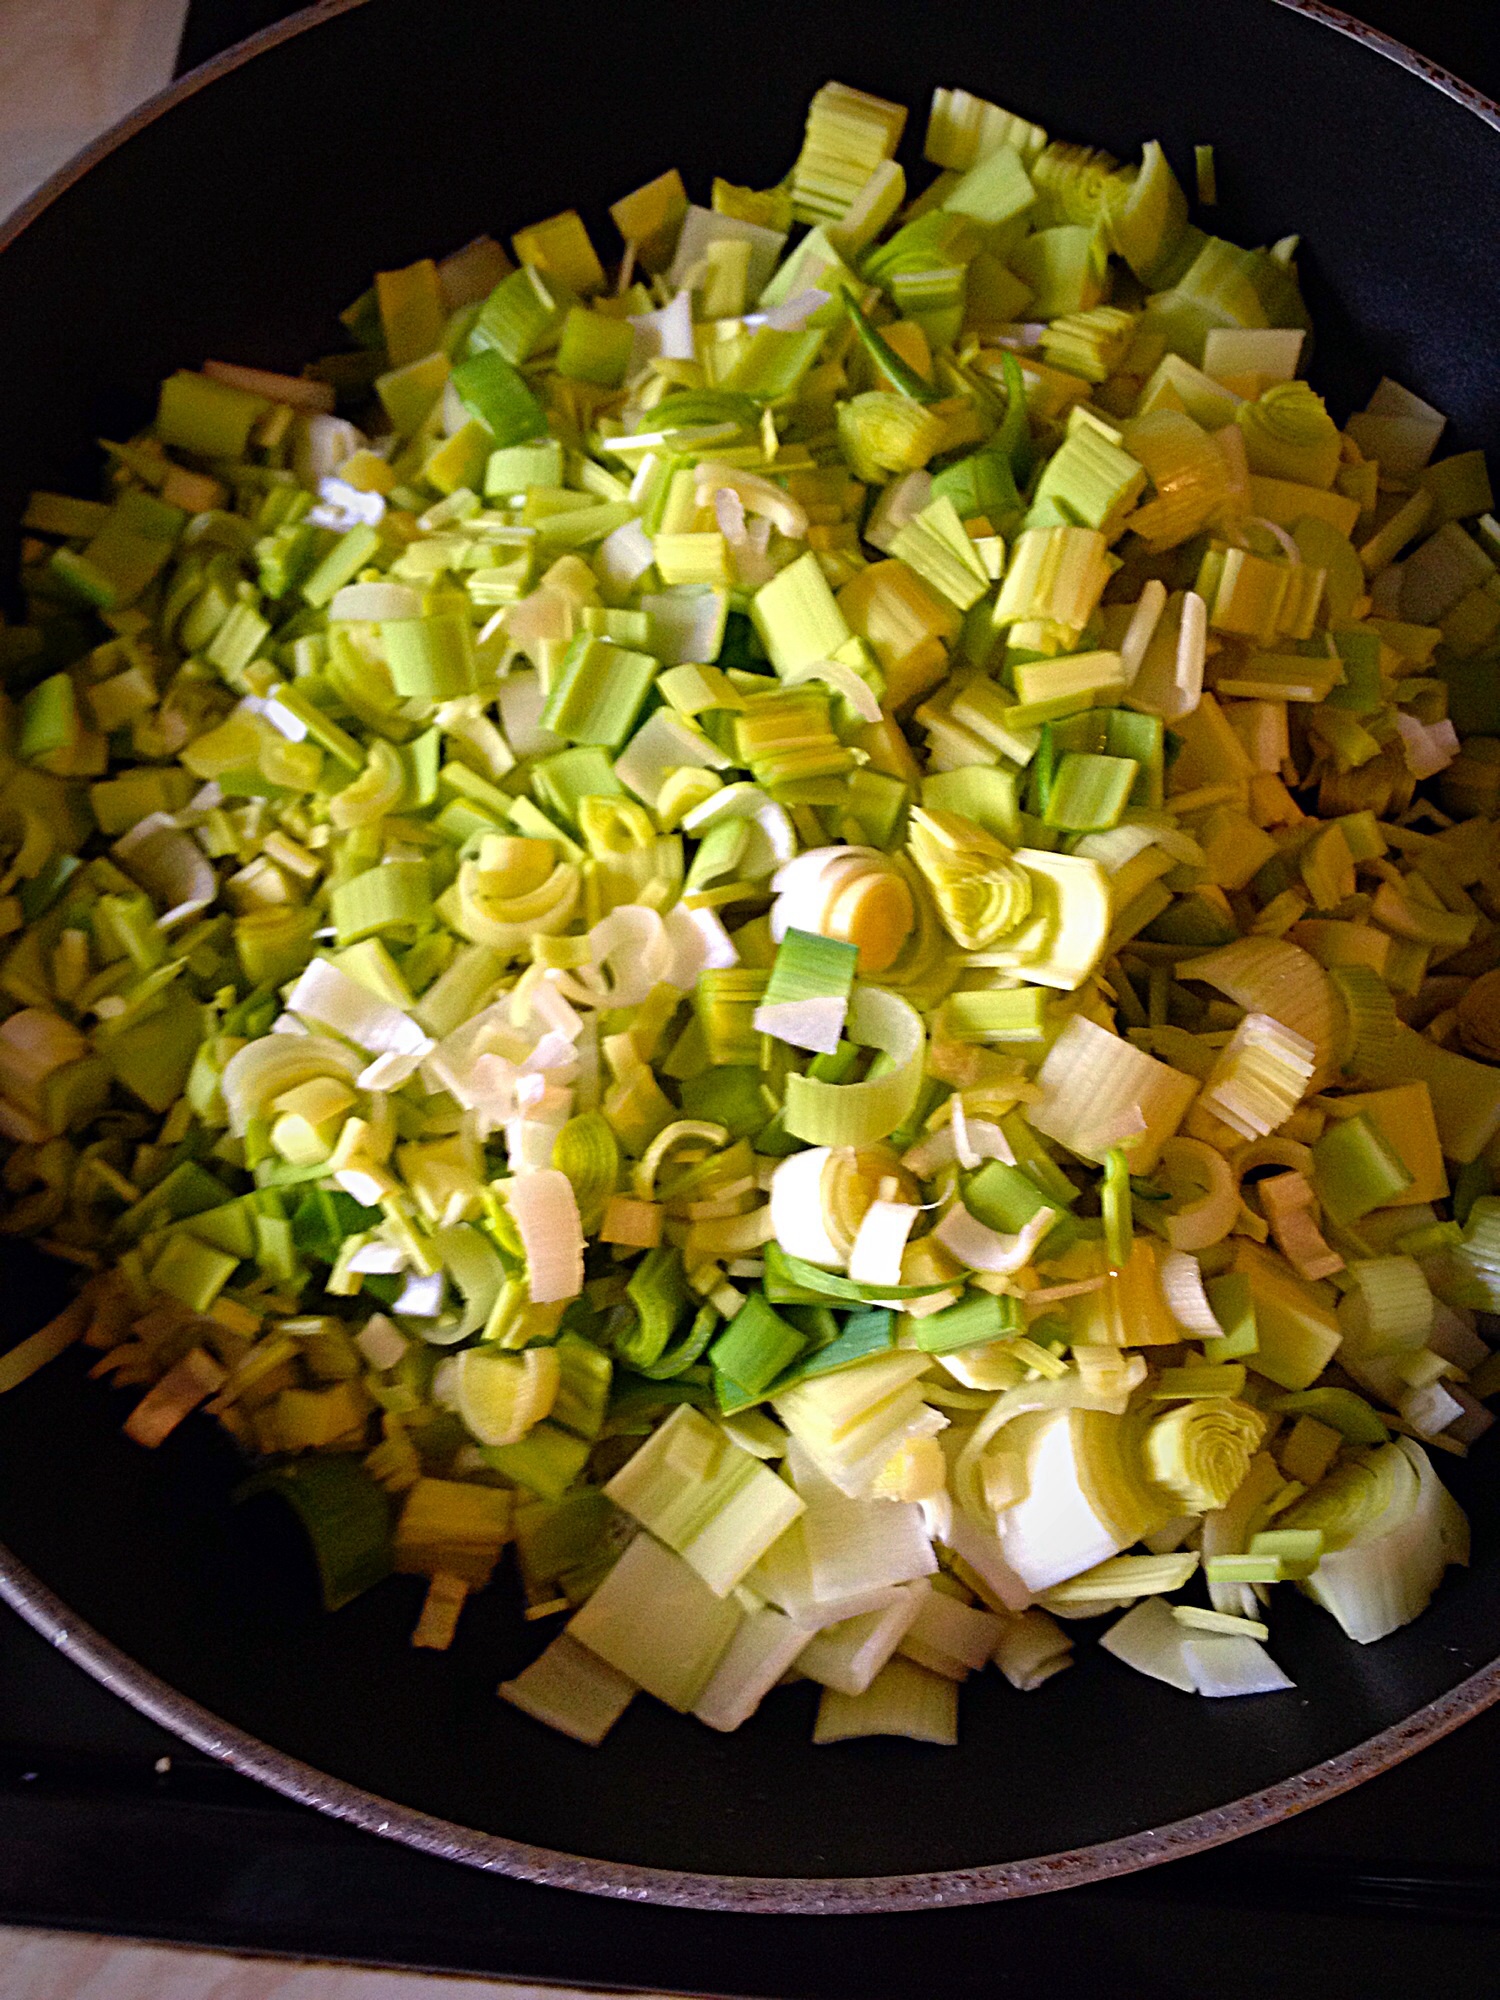
Trim the top and bottom of the leeks. Make a slit down the entire length of each leek. Wash each leek thoroughly under cold water, making sure that any dirt, trapped between the layers, is washed out. (This is best done under a tap of cold running water – or you can chop the leeks, place in a bowl filled with cold water, swish about to dislodge any dirt and drain.)
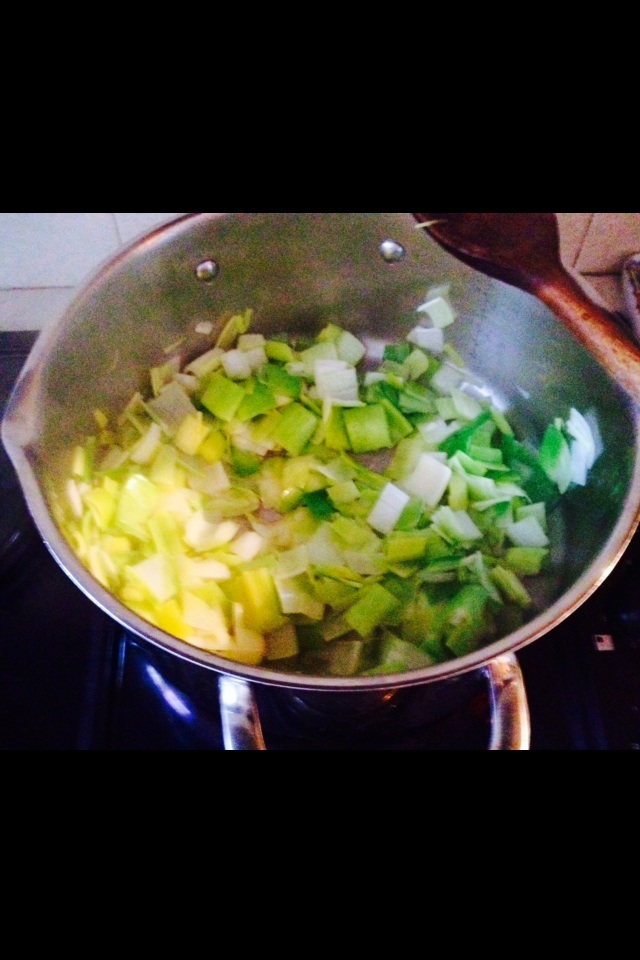
Chop the leeks into roughly 1/2″ dice.
Add the chopped leeks to the melted butter in the pan. Then add half of the salt and stir ( the salt will stop the leeks burning). Sauté the leeks for 5-10 minutes on a medium/low heat until translucent (the dark green parts of the leek won’t change, don’t worry that’s okay).
Sautéing the green and white parts of the leeks together, gives the finished soup a beautiful, finished colour.
Prepping The Potatoes For The Soup
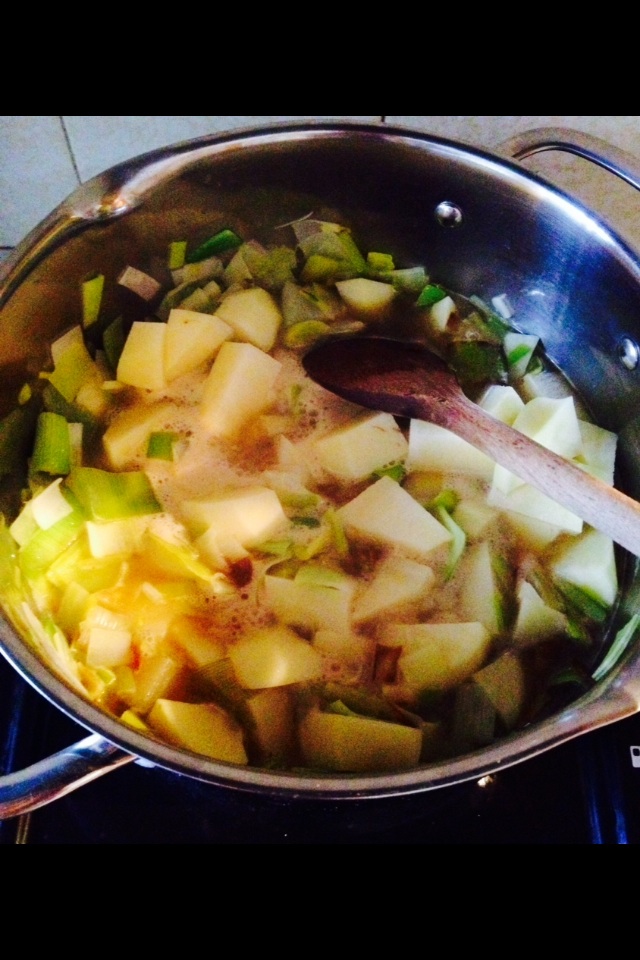
While the leeks are sautéing peel and chop the potatoes (1″ dice for the potatoes). Place the prepared potatoes into a bowl and cover with cold water.
As soon as the leeks are translucent add the potatoes and the water they have been stored in. Pour over enough recently boiled water, from a kettle, until the potatoes and leeks are completely covered in liquid.
The potatoes added.
Seasoning And Cooking The Soup
Turn the heat up and bring to a boil, and then immediately reduce the heat to a simmer.
Add the stock cube, pepper and freshly grated nutmeg. Hold back on adding the rest of the salt, stock cubes vary in their saltiness. Better to add a the salt later, than have an over salted ruined soup!
Adding freshly grated nutmeg really enhances the flavour of the soup.
Cook the soup on a gentle simmer for at least an hour. Because, slow cooking breaks down the tougher fibres found in the dark green tops of the leeks, enhancing not only the colour, but, most importantly the flavour of the soup. I’ve made this soup before leaving it to simmer happily, on a low heat, all morning. Not only did it taste delicious, the house had a wonderful, welcoming, warm aroma!
Creating A Velvety Leek And Potato Soup Texture
When the soup is fully cooked it’s time to blend. There are various ways to do this: A potato masher can be used to simply ‘mash’ the potatoes and leeks into the liquid. This will not give the smoothness achieved by using a blender, but creates a wonderfully textured soup.
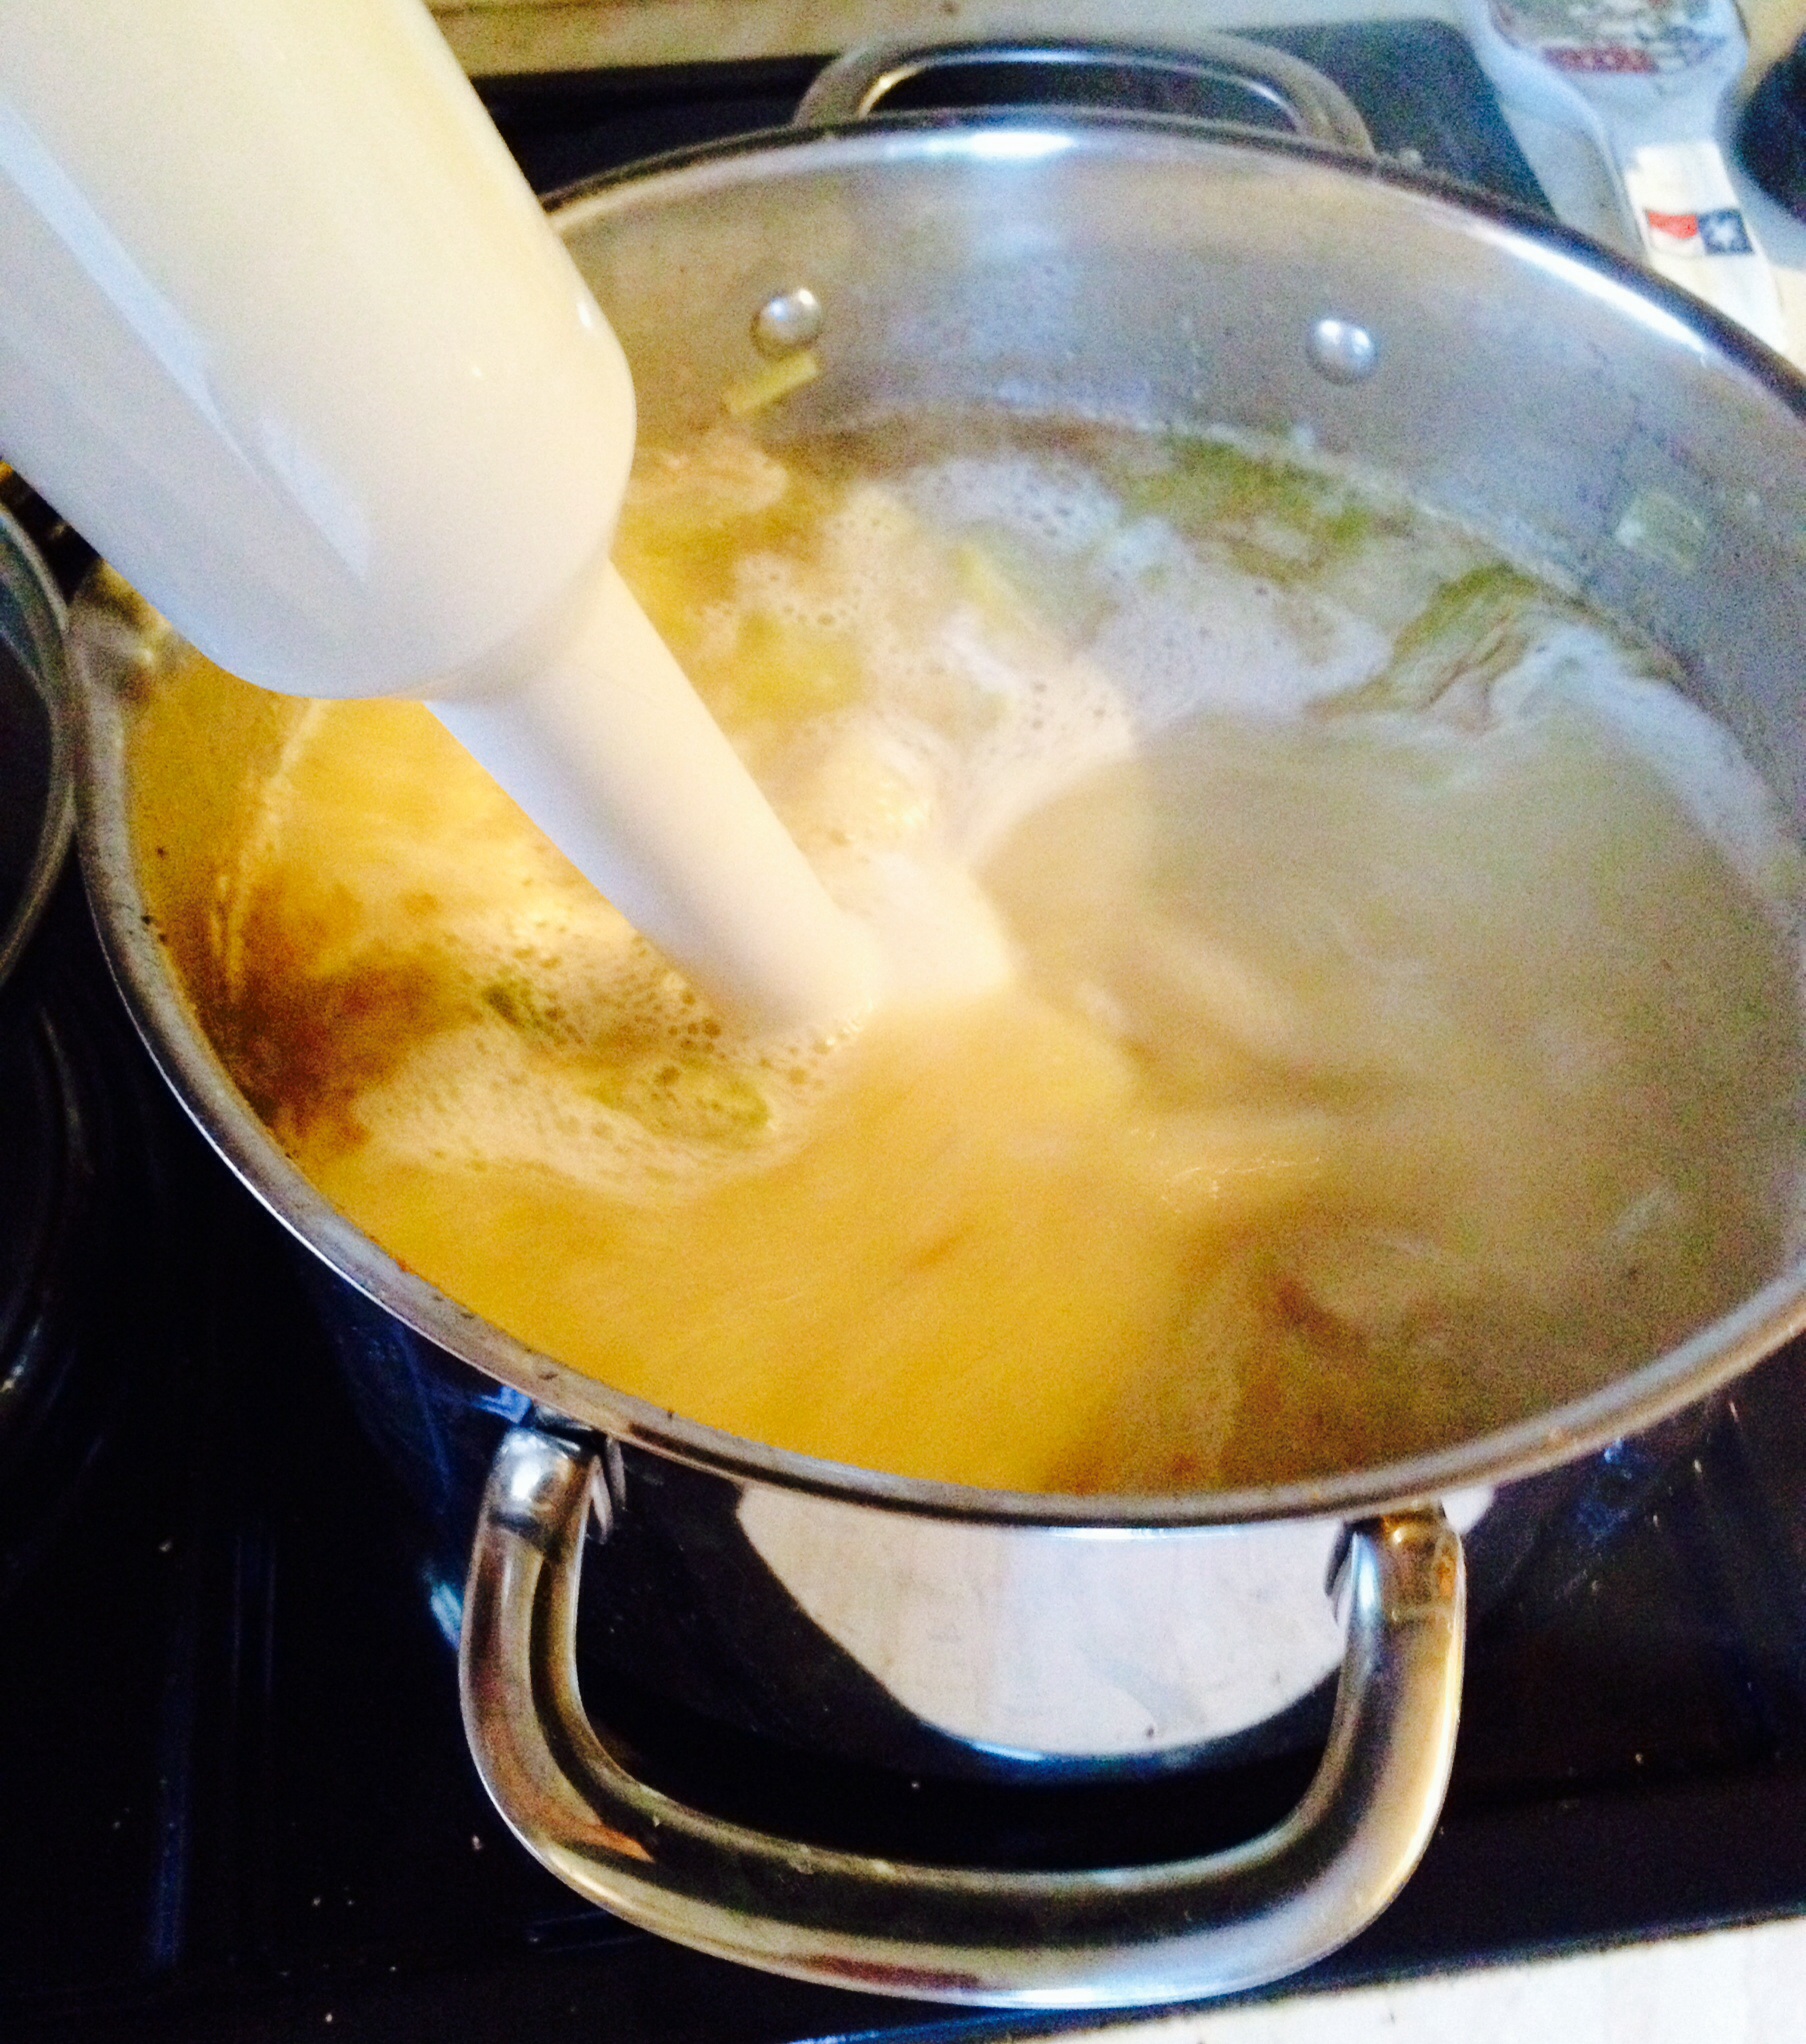
An immersion blender is quick and allows you to control the texture of the soup.
I’ve used an immersion blender for my soup. As can be seen from the photo, make sure you move your pan away from direct heat whilst blending. Blend the soup until it is smooth and velvety in texture.
Other ways of blending including using a liquidiser or food processor. I personally would not liquidise the soup until it has cooled. Whatever you decide, ensure you follow the manufacturers instructions for your appliance. Just looking out for your safety xx.
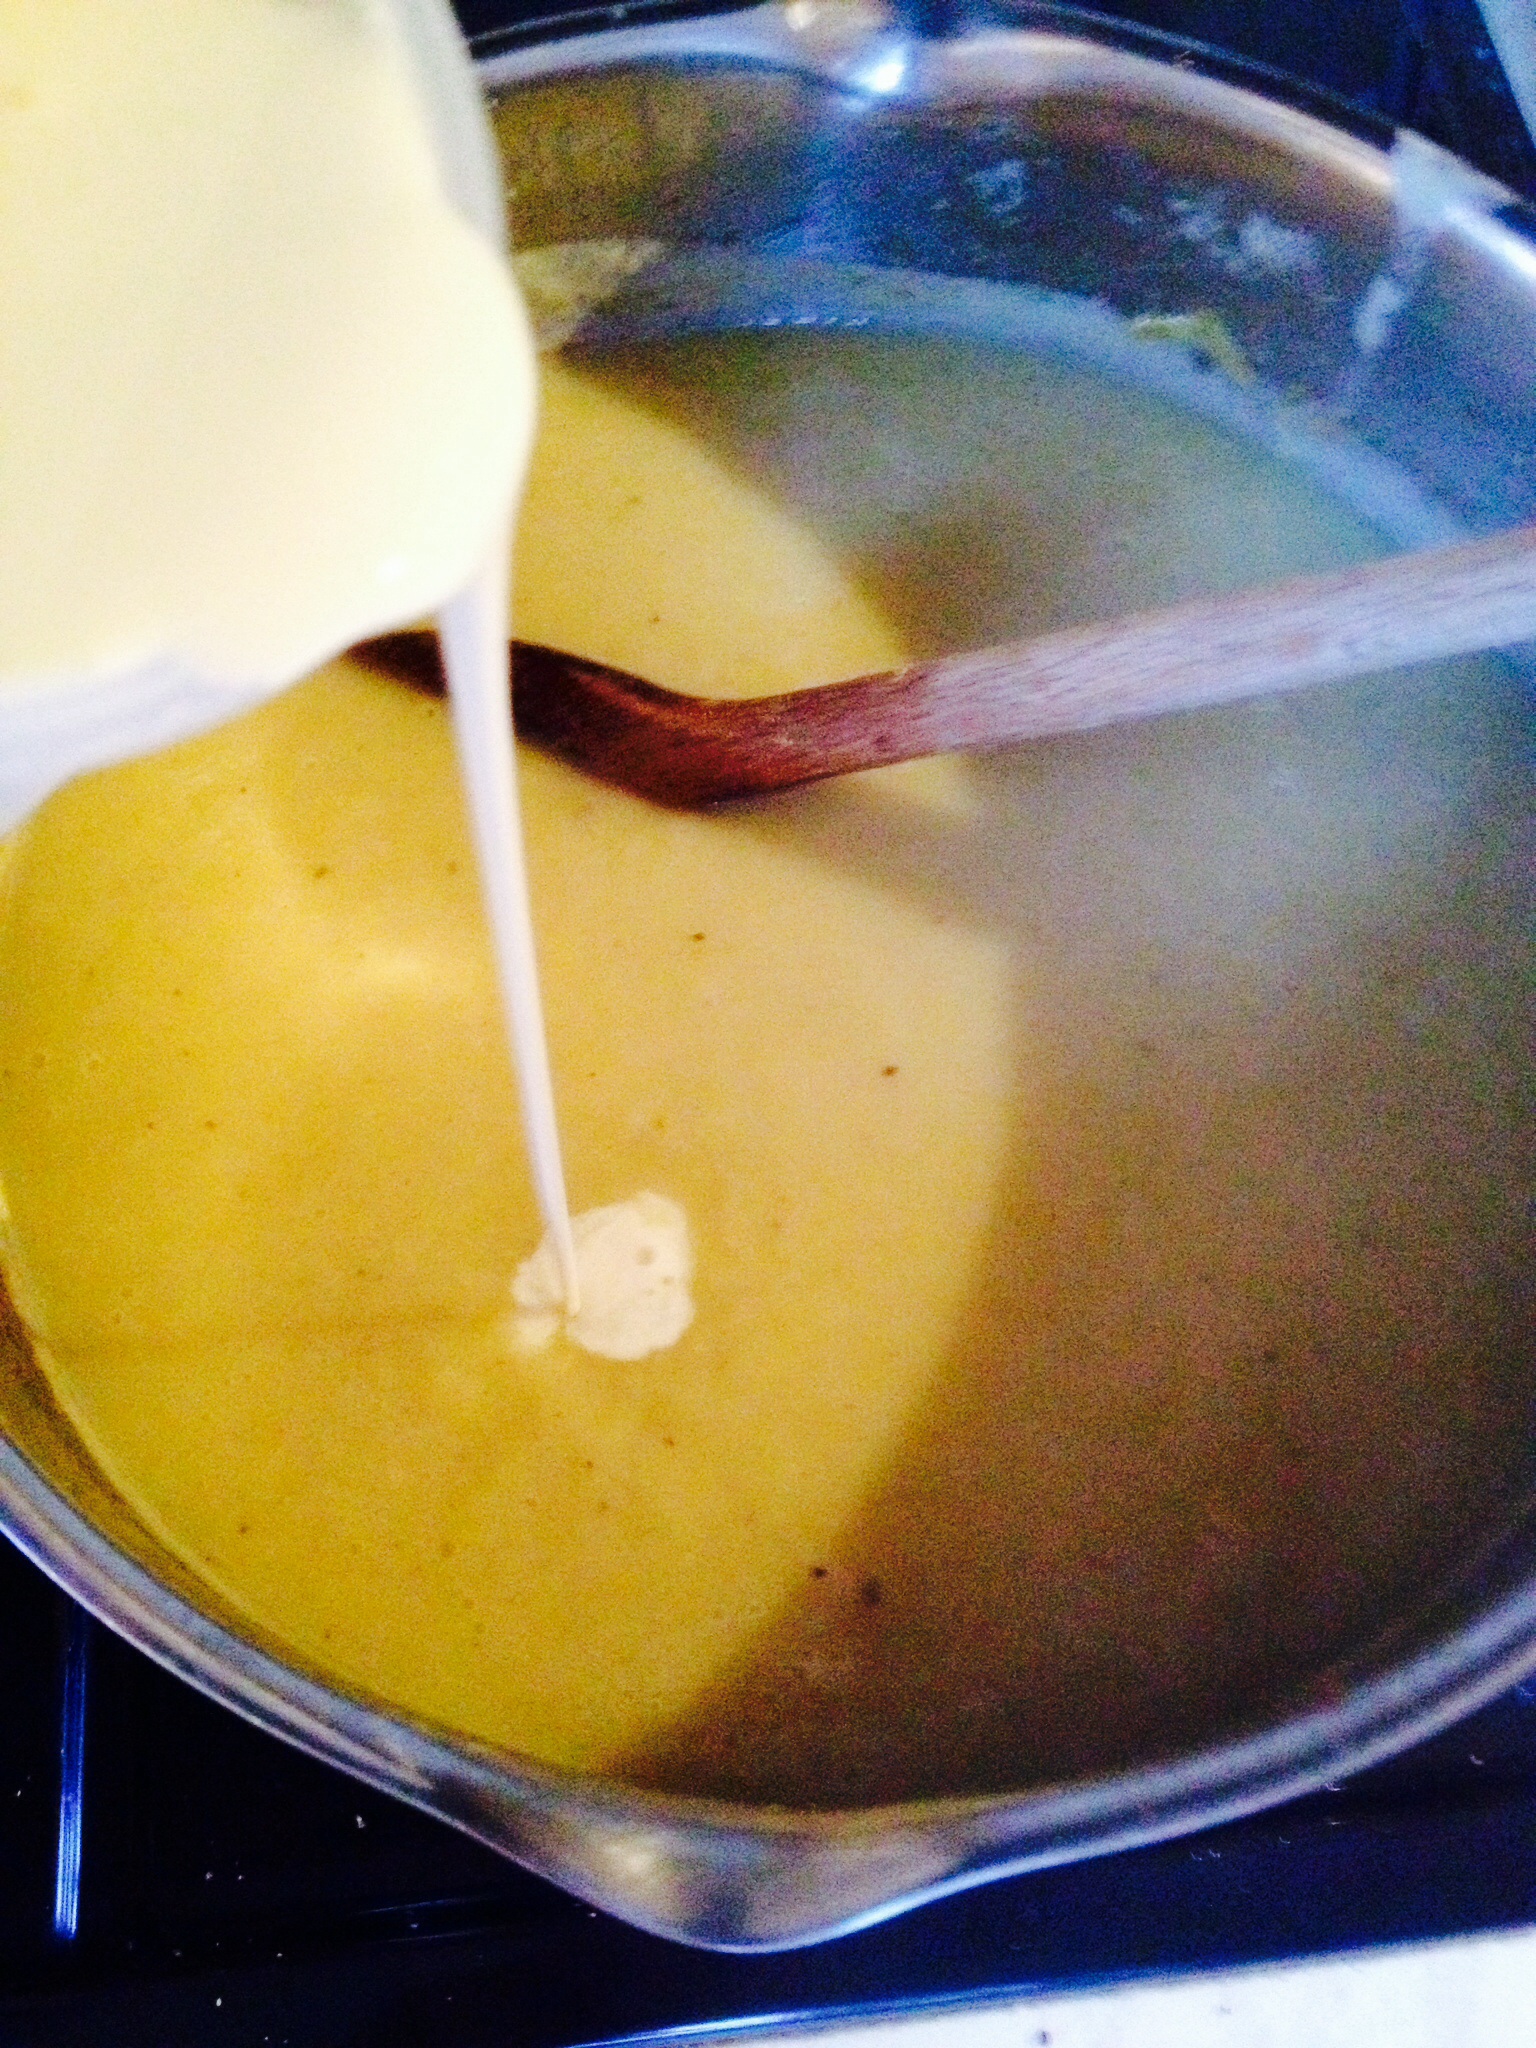
Serving The Soup At Its Best
When you have your soup at the desired texture, stir in 50mls of double cream. Doing so makes such a difference. If you are seriously counting the calories, check the soup for seasoning and eat the soup as is. Yet, for a creamier soup add either double cream or coconut milk. As soon as the small amount of cream has been added it enriches the soup, rounds out all of the flavours and takes the soup to a whole other velvety taste experience. So it really is worth adding the cream!
It’s only 50mls of Double Cream! Go on, you’re worth it!!!
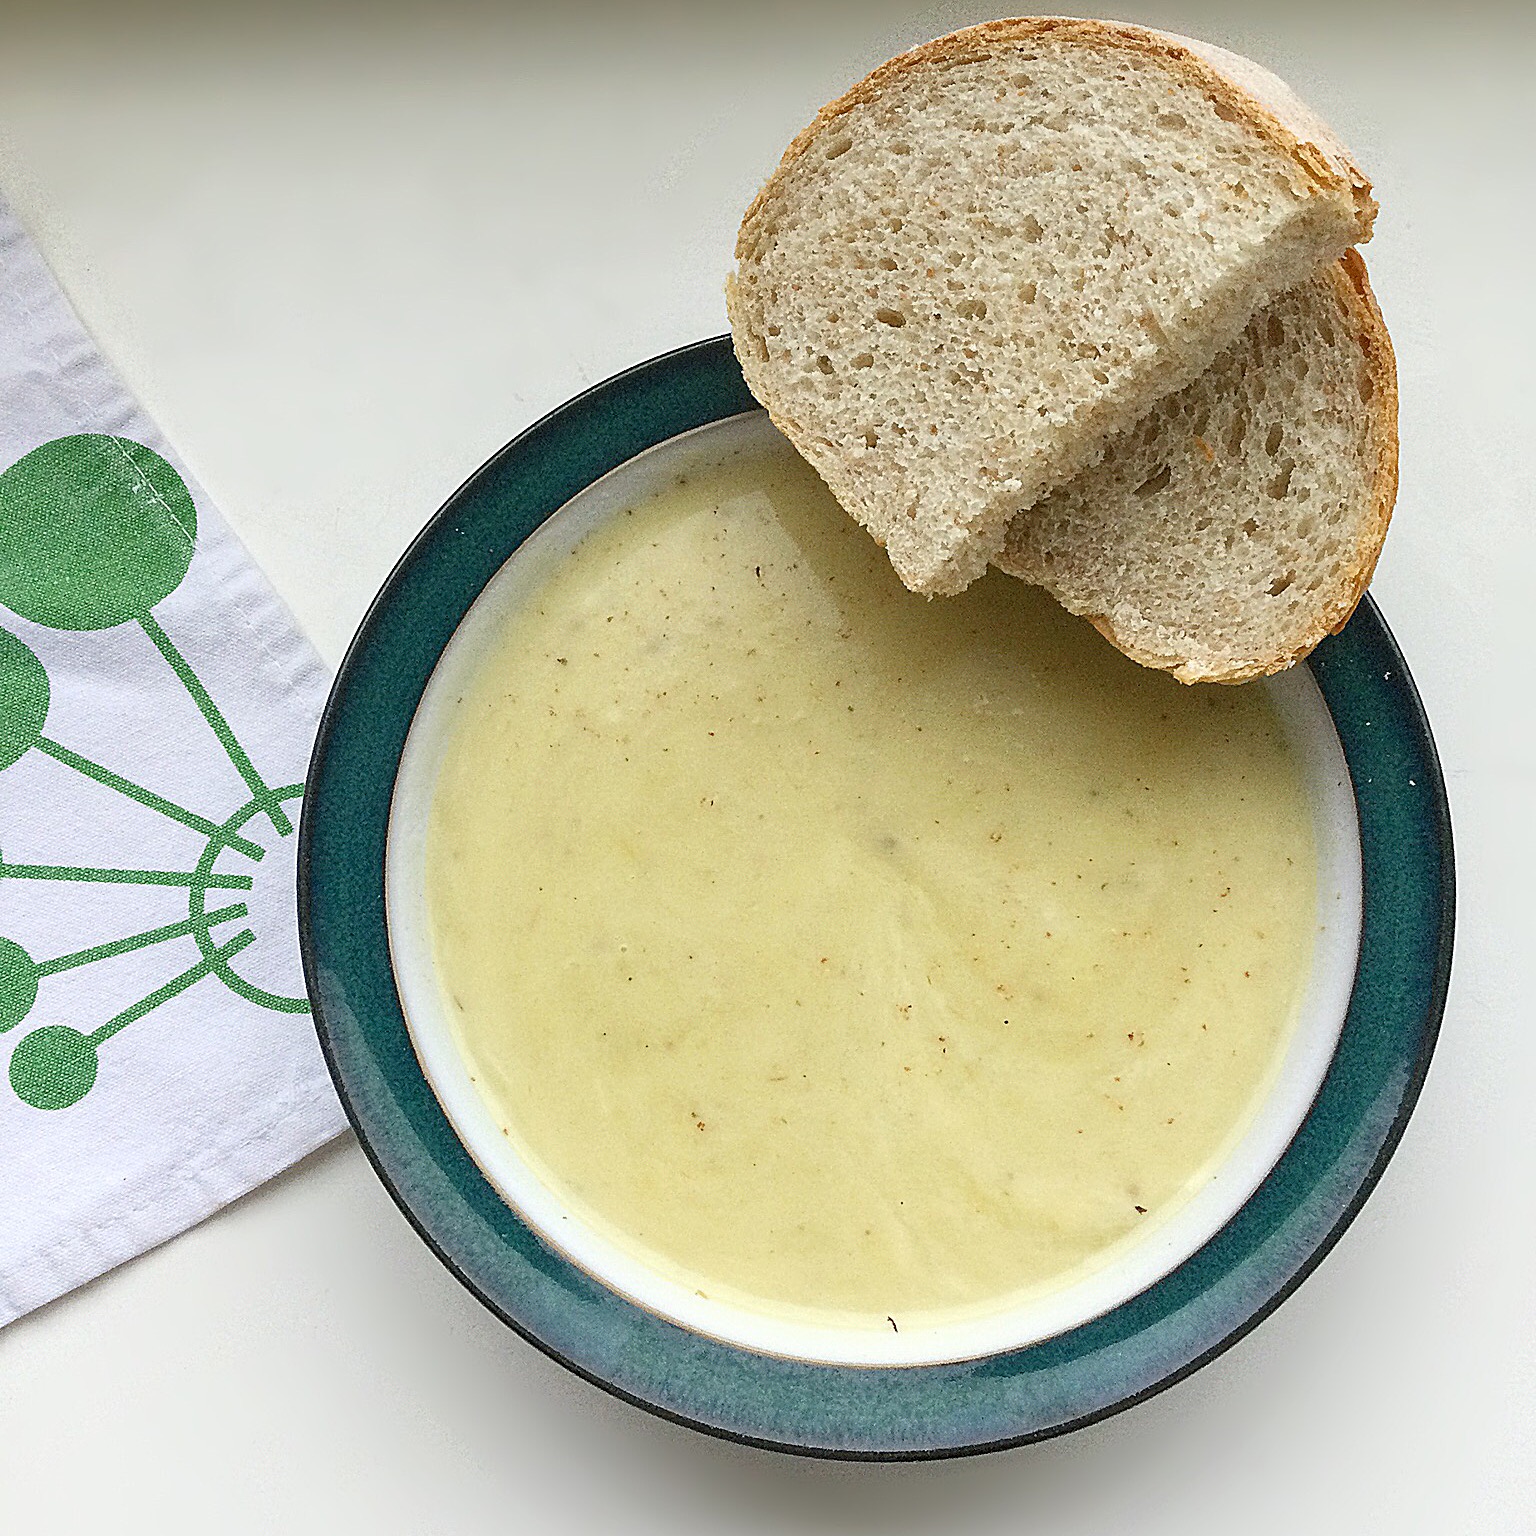
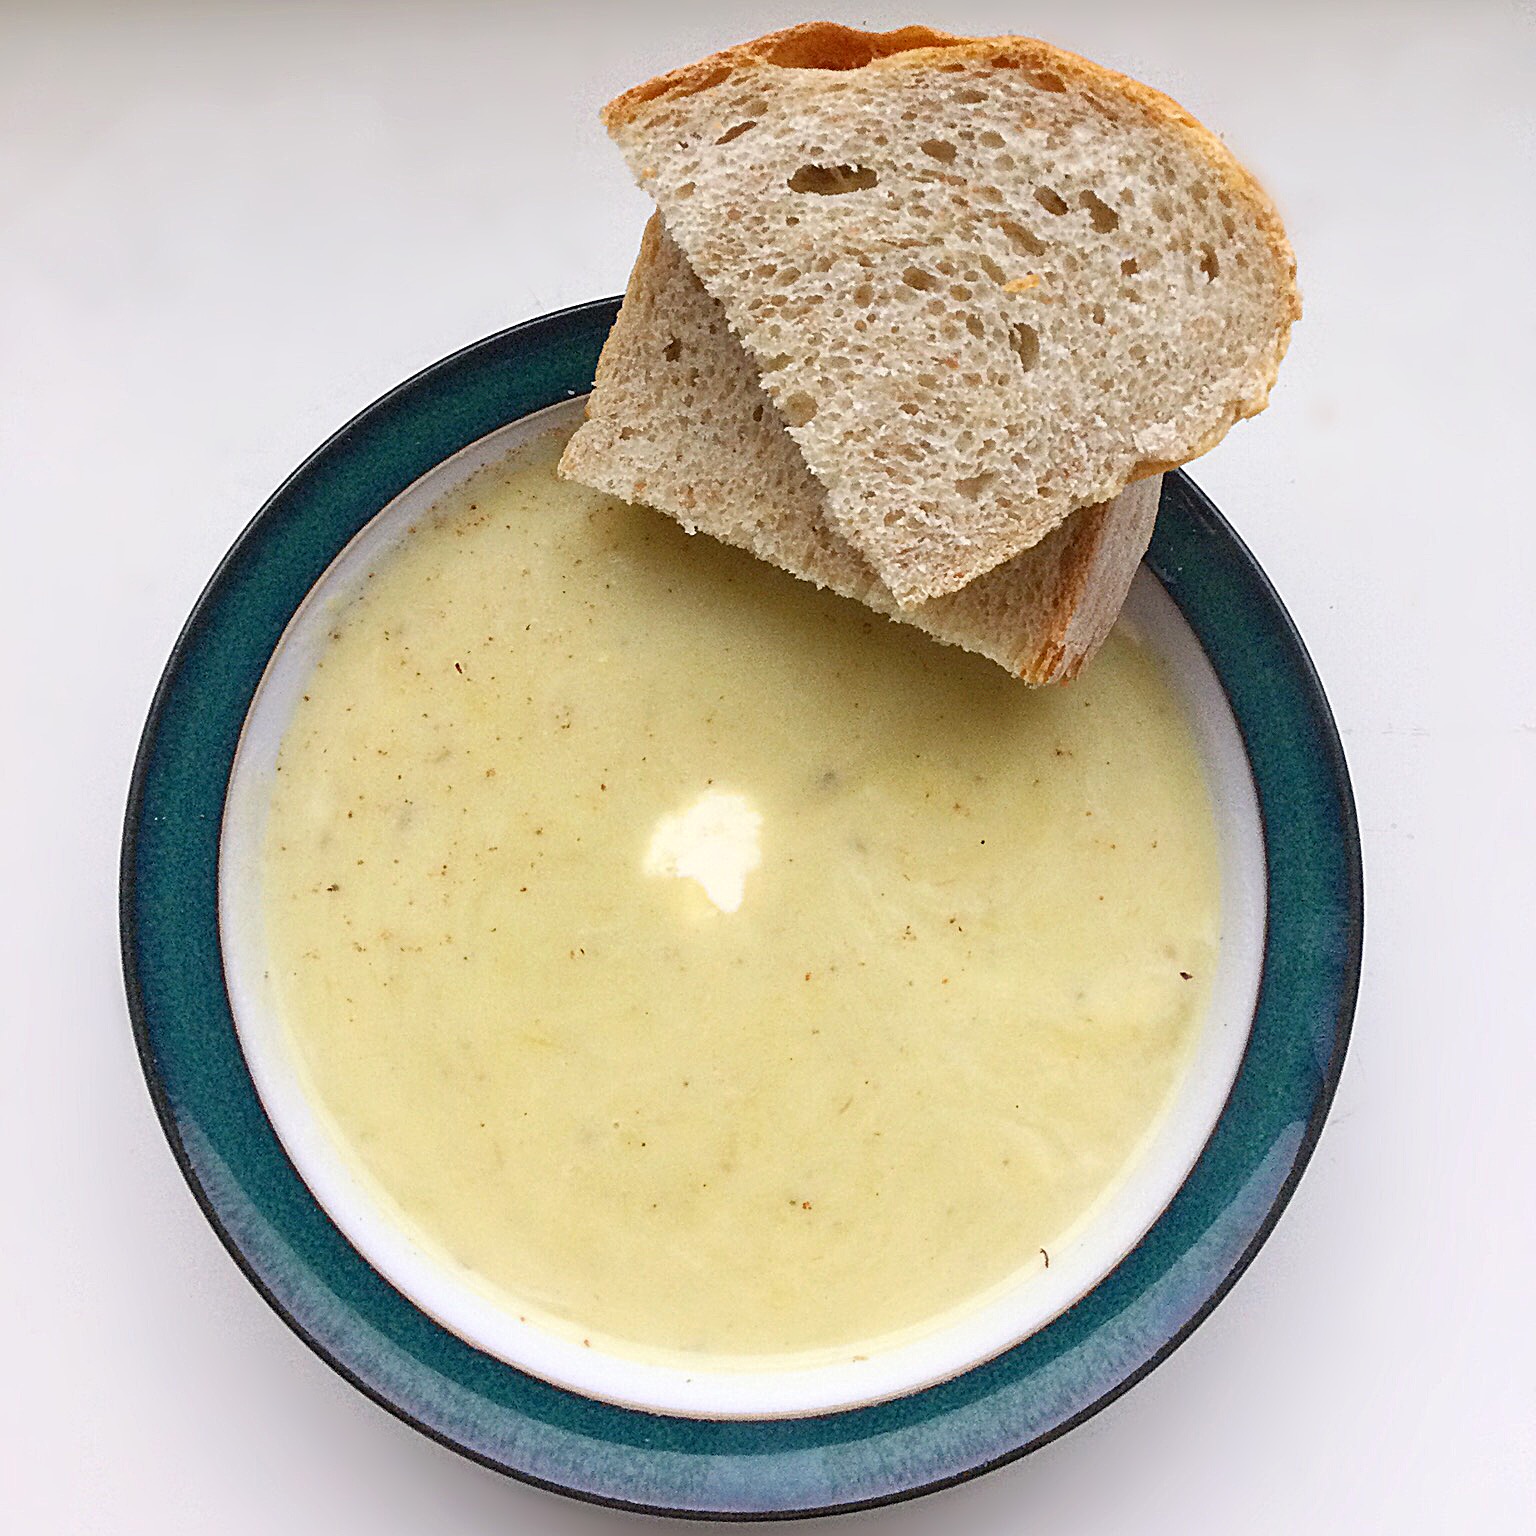
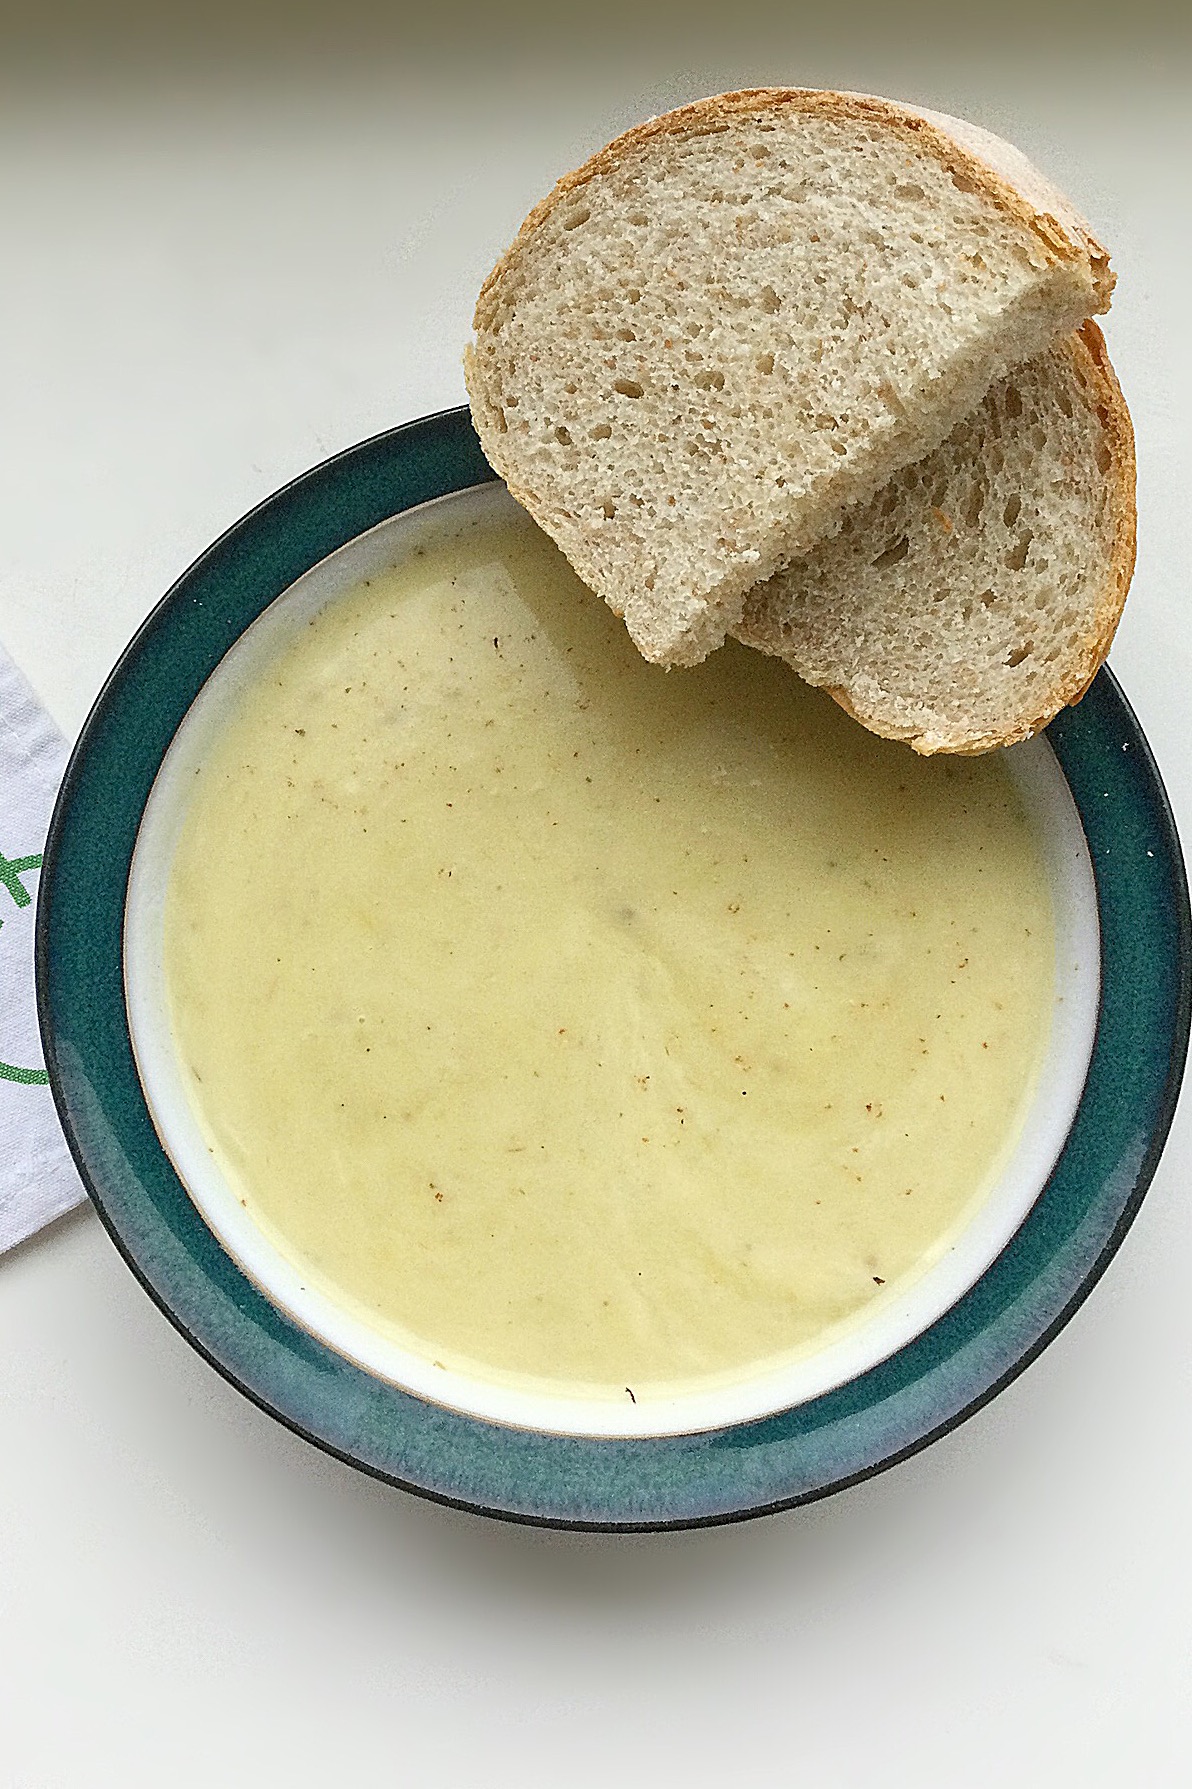
Next serve yourself up a generous bowlful, add a little swirl of cream, should you desire and enjoy.
Serve with crusty bread.
A warming feast to enjoy in the colder months. Especially good at soothing sore throats.
This soup freezes very well for up to 3 months. Pour into single serving, freezer proof plastic containers. Perfect for sharing if one of your friends or family members fall ill. Once frozen it is very portable, so a bowlful of homemade soup is just a quick drive away!
Leek And Potato Soup
If you have enjoyed this recipe for Leek And Potato Soup you may also like these:
Hi there, thank you for stopping by to read my blog. Cookies are always a welcome treat, whether eaten here at home, or shared amongst fiends. Today, both our Post Lady and shopping delivery man both took parcels of the cookies away with them. I hope it inspires you to try this recipe for Walnut Chocolate Chunk Cookies, have fun and share your feasting with others.
Walnut Chocolate Chunk Cookies.
Walnuts are healthy?
So walnuts? Just done a little bit of research and it seems they are very good for you. The BBC report I read claimed that, out of the most commonly eaten nuts, Walnuts had twice the number of antioxidants in them compared to the other nuts tested. Well I’m not going to argue with the Beeb. Also, in truth, I don’t really know what antioxidants are, or what they do. Yet it seems they are good to have in your body.
Walnut Chocolate Chunk Cookies
Now some, could say these cookiesare a ‘health food’ based on this evidence. Although I couldn’t possibly make such a claim! What I do believe and feel quite strongly about is this: As part of a healthy balanced diet, a couple of homemade cookies are better for you than eating lots of processed,especially low fat, low calorie, so called diet food products. Containing a myriad of stabilisers, hidden sugars, mould growth inhibitors etc, all so they can have a longer shelf life in the shops.
Anyway enough of my opinions on food. Because what really counts and makes it worthwhile baking is taste and texture. And yes these cookies hit the spot on both counts! The recipe came about as I had run out of normal plain white flour, so I had to improvise. Fortunately for me it worked, with both variations of the recipe being equally tasty.
Recipe: Walnut Chocolate Chunk Cookies makes 30 approximately
225g/8oz Unsalted Butter softened to room temperature
225g/8oz Plain White Flour, or alternatively 175g/6oz 00 White Flour plus 50g/2oz Corn Flour
6oz Milk Chocolate Chunks or Chips – I use Callebaut
Method: Prior to baking preheat the oven to 180C/160C fan, gas mark 4, 350F.
Making the cookie dough:
First of all add the butter, sugar and salt to a large bowl.
Using an electric whisk, or wooden spoon, cream the butter, sugar and salt together until pale and fluffy. The usual check can be applied, which is to rub a small amount of the creamed mixture between your forefinger and thumb, if no grittiness is felt the sugar is completely combined with the butter.
TIP: This is an important part of creating a Cookie with fab texture. When I first started baking, I would mix the butter and sugar together until combined. My cookies were okay. Then one day when following a Nigella recipe, that I’d made before I actually whisked the butter and sugar (as stated in the recipe – sorry Nigella for neglecting that bit before) and not only did the Cookies turn out much better, but the mixture made any extra 4 Cookies!
Next whisk/beat in the egg yolk and Vanilla Extract until fully incorporated.
Take 50g/2oz of walnuts and process in a food processor (or alternatively a mini chopper) to a similar consistency as ground almonds.
Add the processed walnutsand either plain white flour, orcorn flour and 00 white flour to the creamed mixture.
Now add the chocolate chunks and the remaining 100g/4oz roughly chopped walnuts.
Use a spoon gently mix until all the ingredients are combined.
Lay some cling film on top of a damp work top – see Super Easy Shortbread Cookies for detailed photos. Place half the mixture on to it and form a log shape. Wrap in the cling film and refrigerate. Repeat with the other half of the dough.
Finally, chill in the fridge for at least an hour, however the wrapped dough log can be kept in the fridge for up to 5 days.
Baking the cookies:
When ready to bake remove the dough log from the fridge and leave at room temp for 10-15mins to warm up slightly.
While the dough is warming preheat the oven
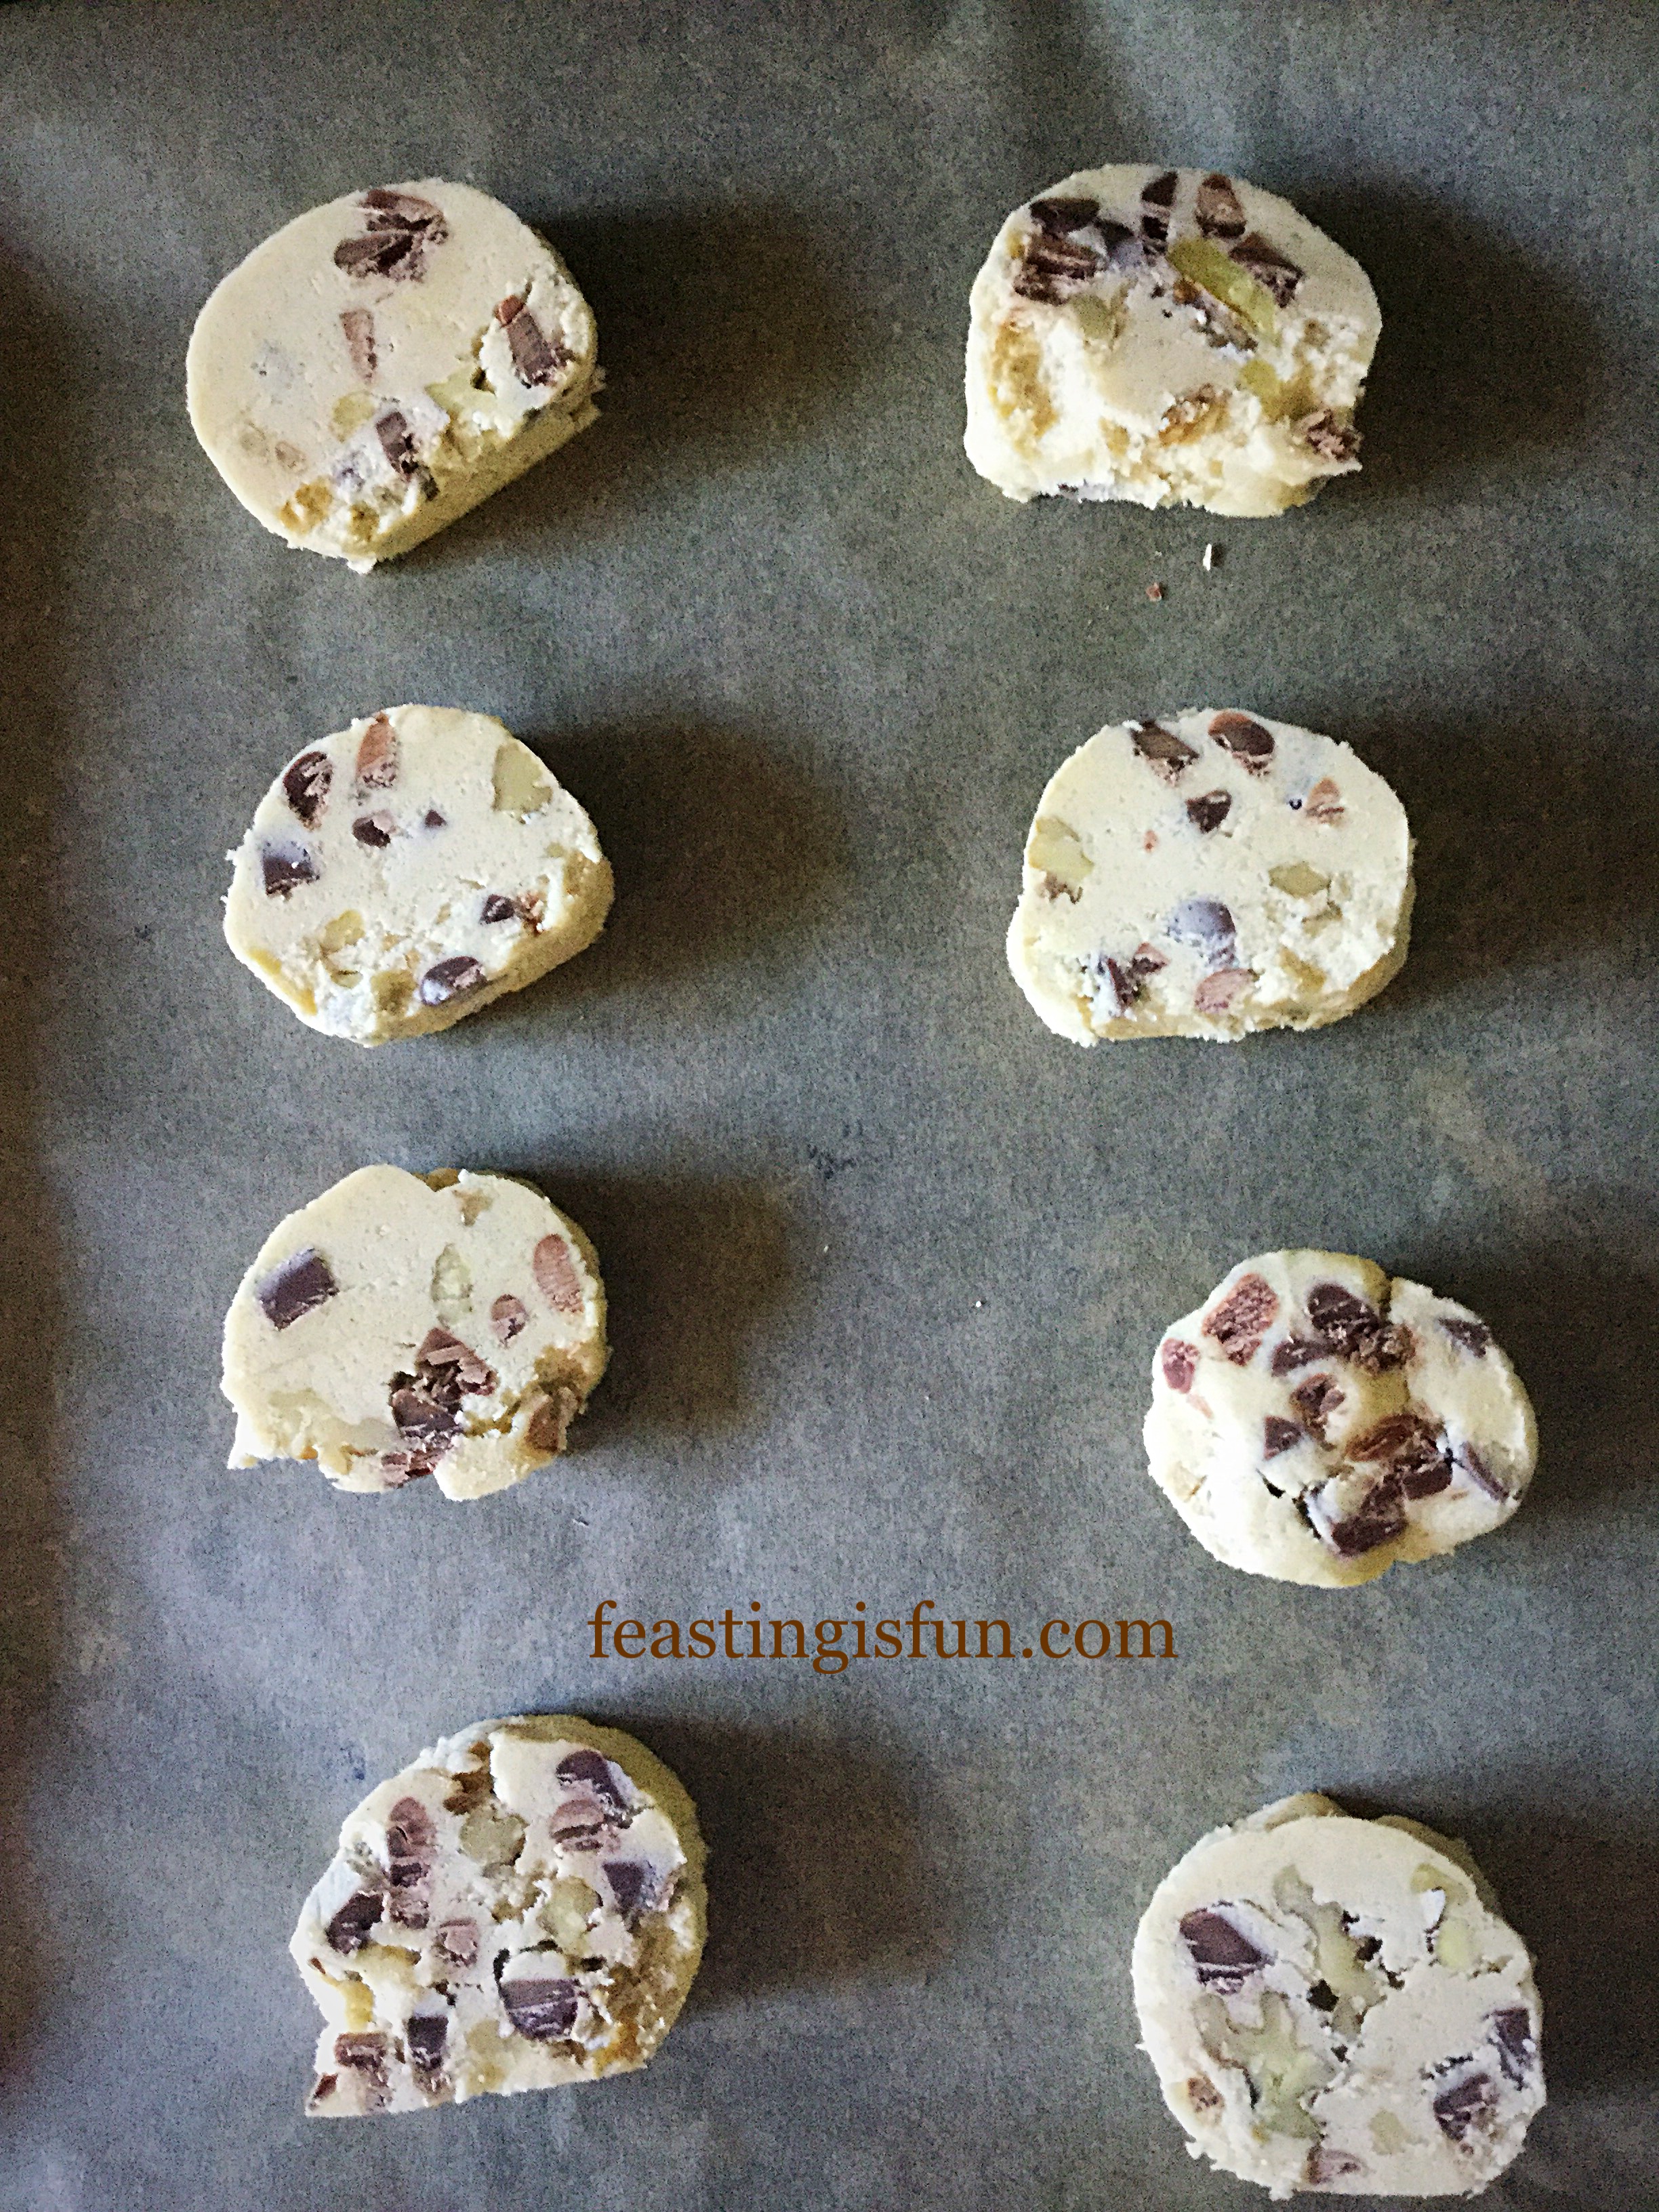
Use a sharp knife slice the dough log into 3/4cm discs – each log should yield 10-15 Cookies.
Place the cookie discs on to the baking sheet spaced evenly apart.
Walnut Chocolate Chunk Cookies ready for the oven.
Place the baking trays, spaced evenly apart, into the preheated oven.
Bake for 20-25 minutes, rotating and turning the baking trays halfway through baking.
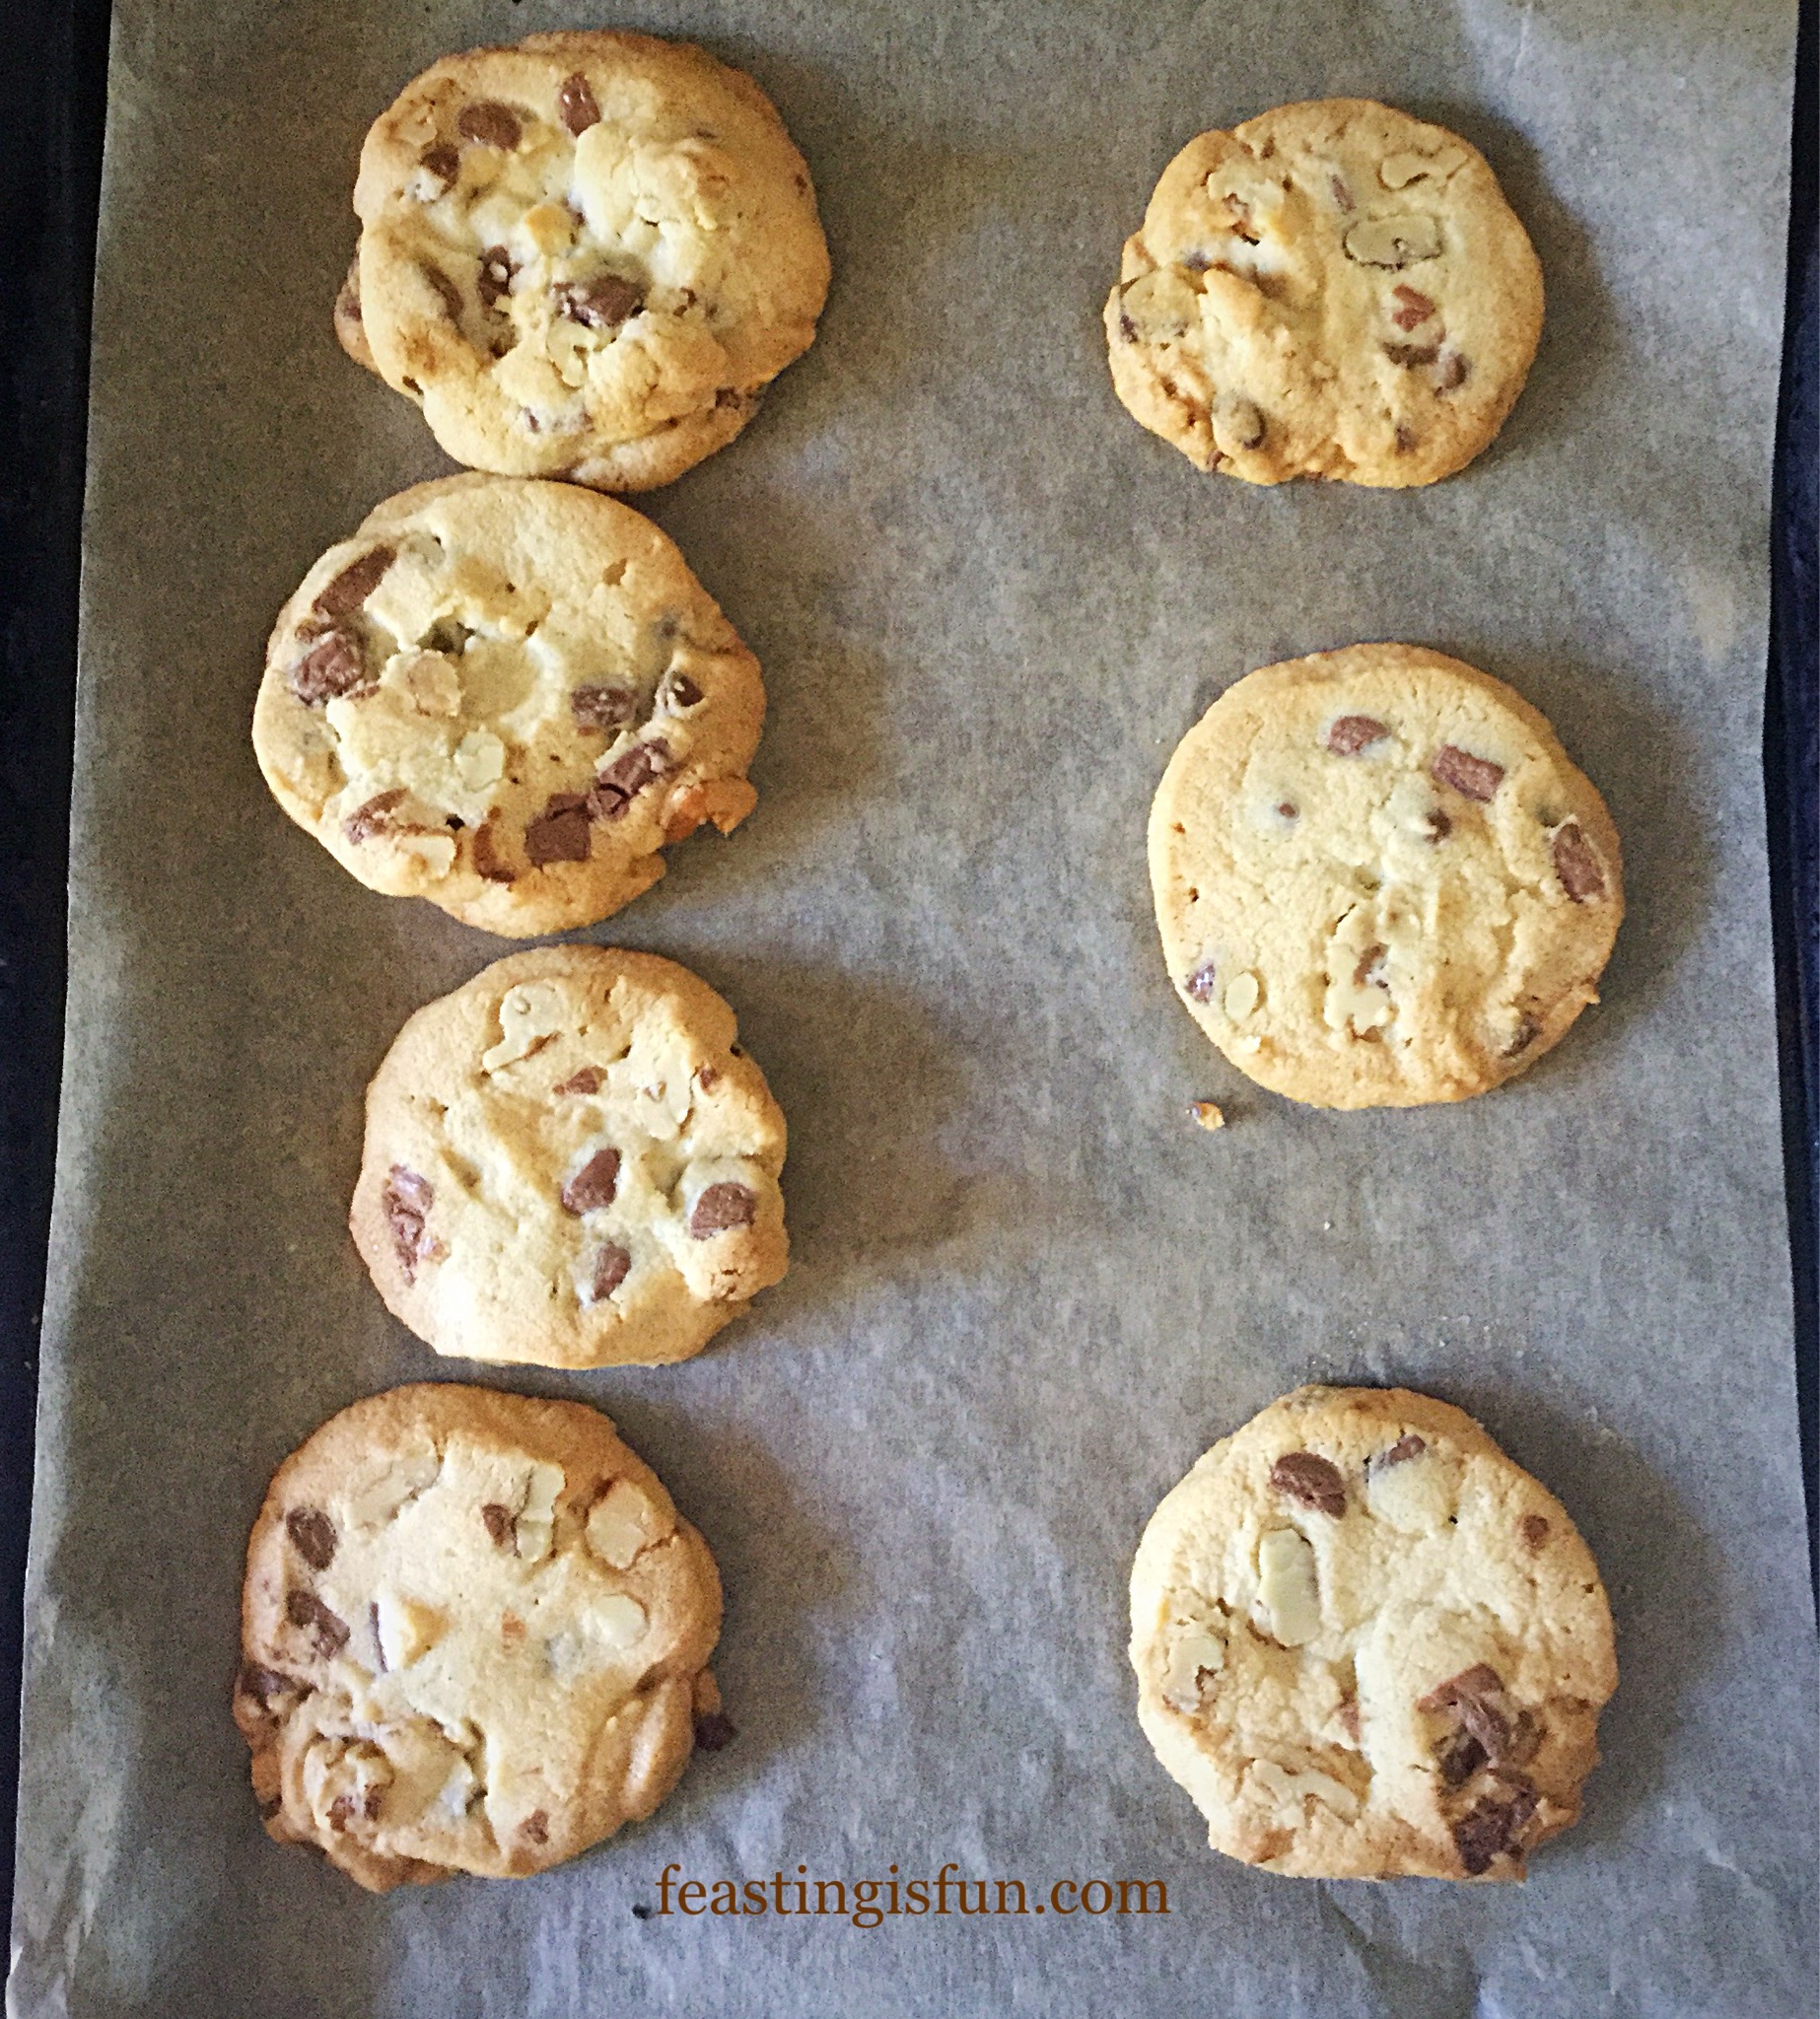
When baked the cookies are a golden colour.
As soon as the cookies are baked remove from the oven.
Perfectly baked Walnut Chocolate Chunk Cookies.
Allow to cool on the baking trays until completely cooled.
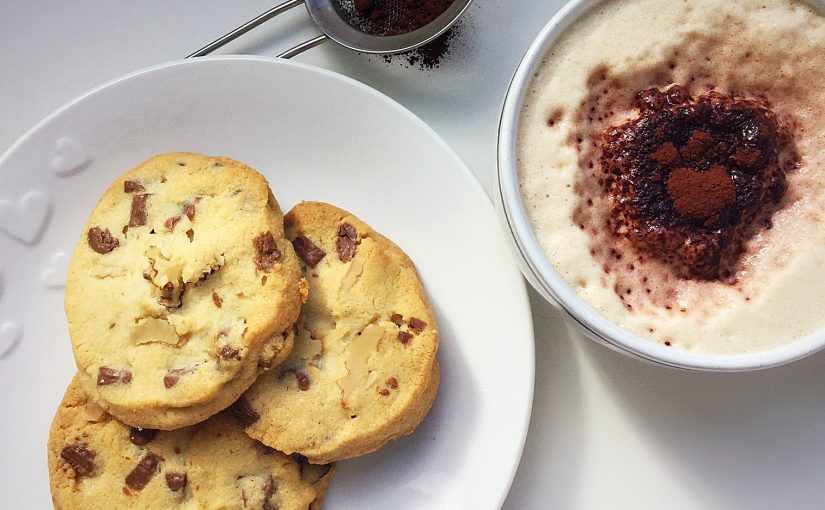
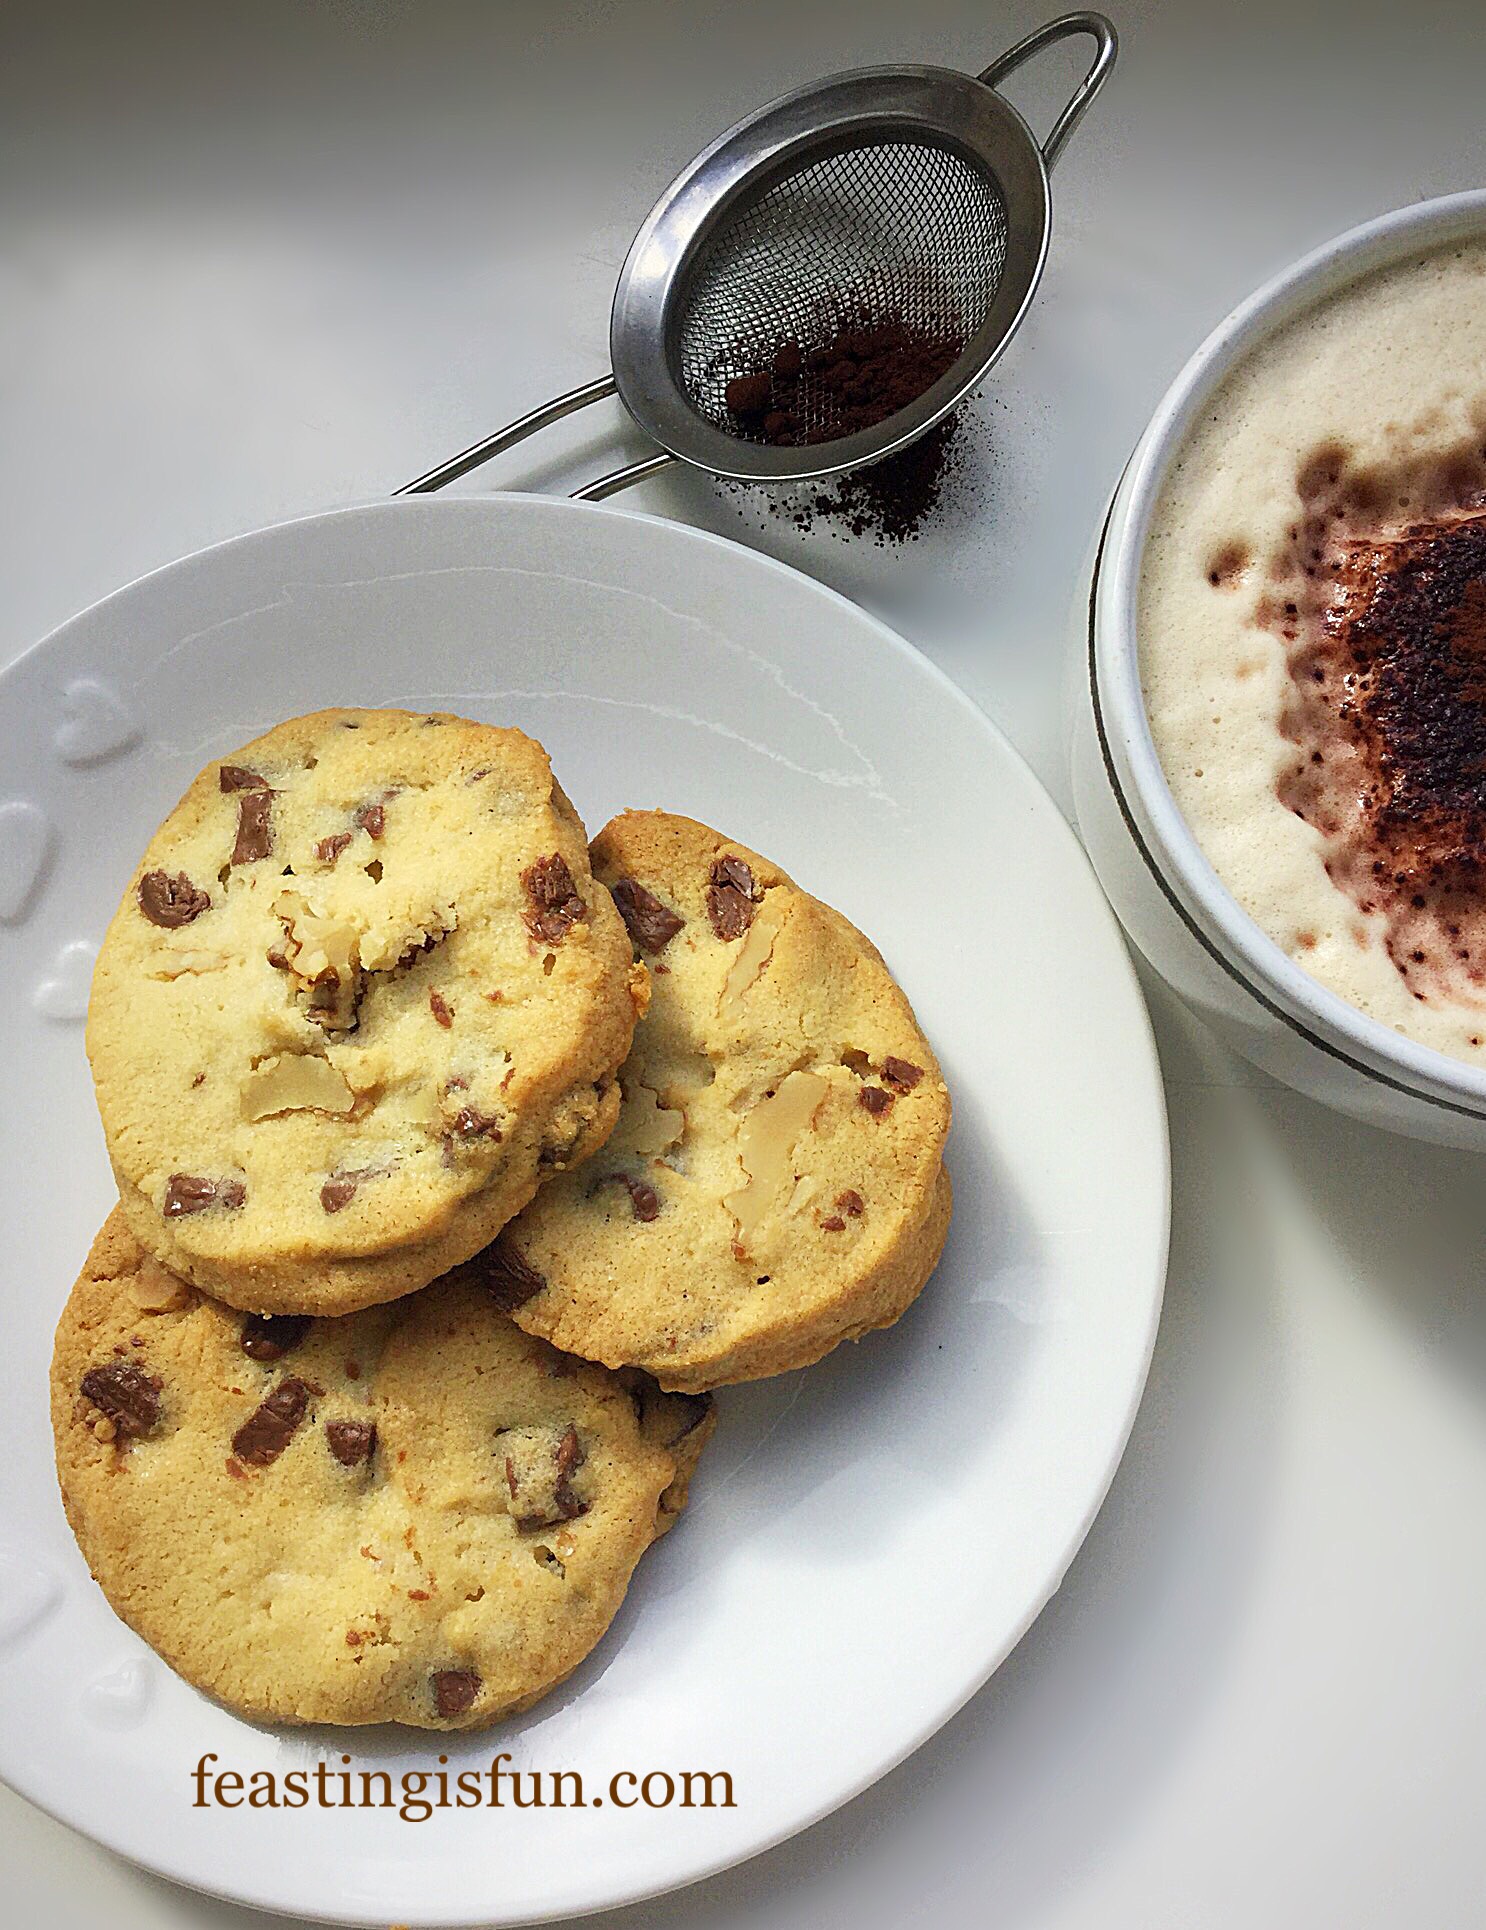
Walnut Chocolate Chunk Cookies great with a cappuccino.
Serve with a smile and you favourite drink.
Keep baked cookies in an airtight container for up to 5 days.
If you have enjoyed this recipe for Walnut Chocolate Chunk Cookies then you may also enjoy these:
If you know someone who’s nuts about nuts, especially walnuts, now is the time to share. Stack a few cookies in cellophane bags, tie with a pretty ribbon or some raffia and give as a gift. Alternatively, pack a tin full of cookies as a gift to family, friends or new neighbours. Whatever you do, sharing these cookies is an absolute must.
Whatever you are making, baking and creating in your kitchens, have fun creating your feast.
Sammie xx
No part of this post may be copied or replicated without the written permission of the owner. Please see my Disclosure Policy.
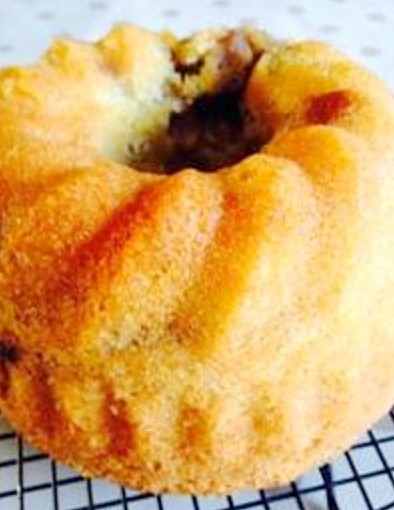
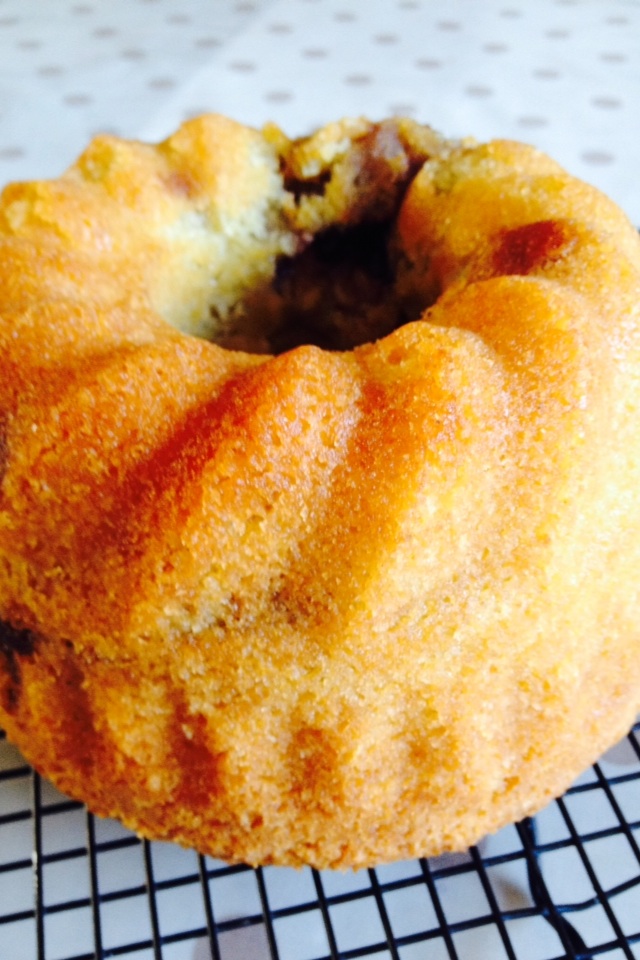
Hello there, thank you to everyone who has been reading and leaving comments on my blogs. I’m hoping you love this Almond and MoreIlo Cherry Bundt Cake Recipe?
A moist, cooked cake, with a scrumptious Morello Cherry centre!!!!
I hope, to all those of you who have been leaving helpful comments, especially regarding targeting more people to read my blog, thank you. However I will only approve and reply to one of each blog. I get a lot of identical blog comments!
I’m very happy to steadily build my site, confidence and readership numbers. I know SEO (site exposure optimisation!) is important to a lot of people and I respect that.
My website and blog is a creative outlet for me (especially as I am bed-bound for days on end – not asking for sympathy). I enjoy life and as part of that cooking, baking and most importantly having fun and sharing. So the very act of sharing my recipes, ideas, thoughts, beliefs through my website and blog, is, I suppose, practising what I’m preaching (without the preaching, more chatting really!).
Talking of sharing, my lovely mummy recently bought me a small Bundt pan from Aldi. I hadn’t used it until today and although there were a few things I learnt from my first go, it wasn’t half bad! The cake turned out (literally) extremely well – was a bit worried bout that bit and it tasted good. So all in all a success. Thanks mummy xx.
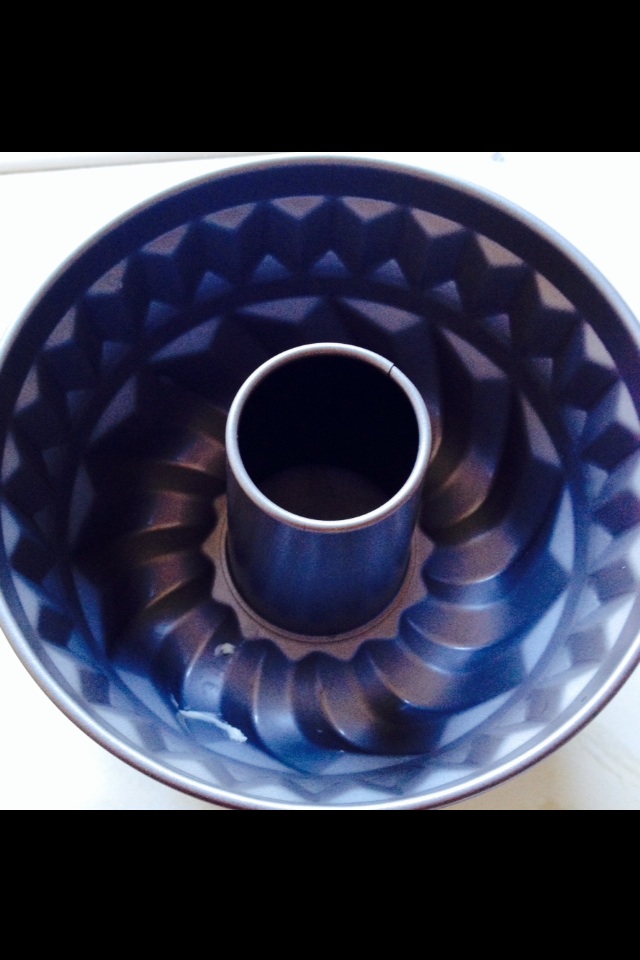
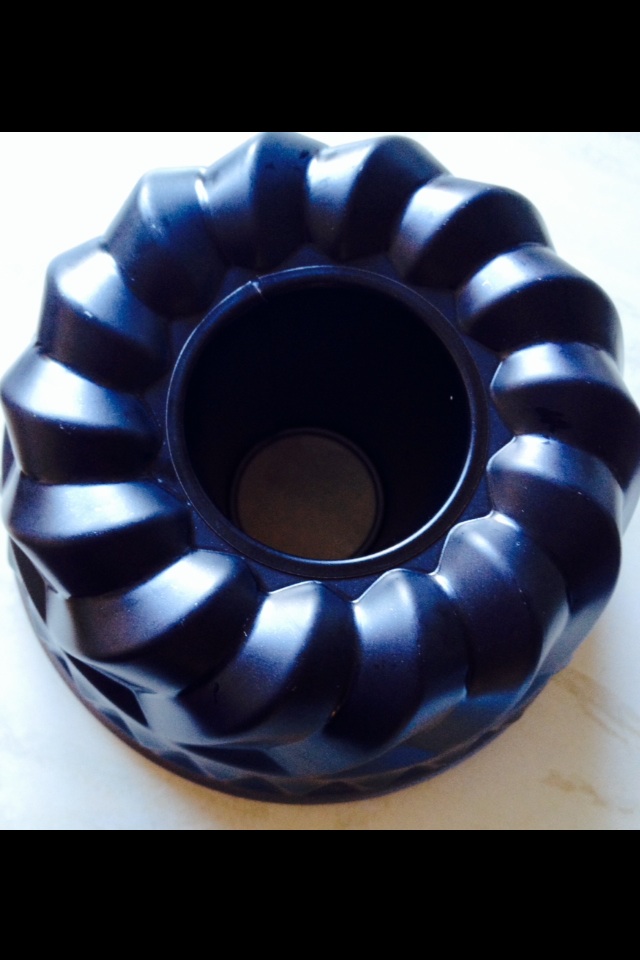
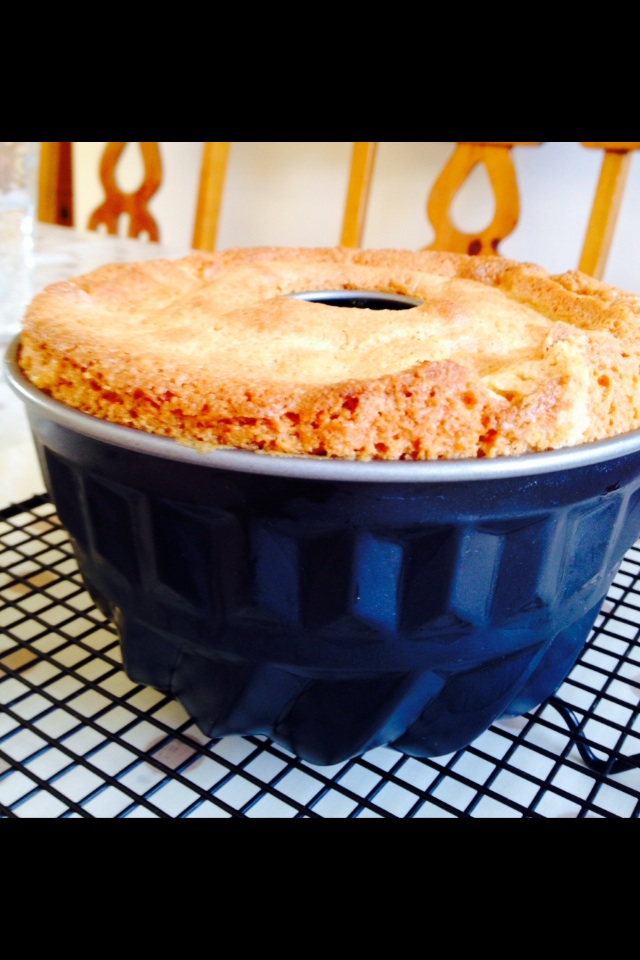
Just in case you’ve not seen one before, I took a couple of pics to show you what my Bundt tin looks like!
The inside of my Bundt tin!The outside of the Bundt tin – showing the moulded shape the cake will have once cooked.
My Bundt tin is quite small, but perfect for the recipe I used. It’s dimensions are approx 6.5″ wide x 3.5″ deep. You can buy all different sizes of pan: the common theme is that the pan has a moulded shape, to give a decorative finish to the cake and a central tube, allowing the inside of the cake to be cooked thoroughly (& allowing the finished cake to be filled with cream, fruit, patisserie creme or any number of delicious fillings).
A straight sided, round, flat bottomed tin, is an Angel Cake Tin. These are for making an entirely different type of cake (Angel cake!), where, when cooling, the tin is inverted (turned upside down) until the cake is completely cool. Don’t worry it’s on my birthday/Christmas/I must have this else my life will not be incomplete list!!!!!!
So my first attempt making an Almond and Morello Cherry Bundt Cake (as seen in the following photos) went something like this:
Firstly in the excitement – bare with, it’s the lil things in life that I enjoy – of taking all the wrapping/instructions etc off, I didn’t read them, so I could wash my new tin ready for use, I realised I had no idea if the tin is non-stick! It looked non-stick (please don’t ask me to describe?). But I thought I’d play it safe and butter it. Straightforward yes? Nope!!
The beautiful shaped cakes mean the Bundt tin has lots of dents, curves, nooks & crannies. Buttering a loaf tin with 5 straight sides is a breeze, how do I butter this gazillion sided round tin (being round does that mean it can’t have gazillions of sides? Answers on a postcard……
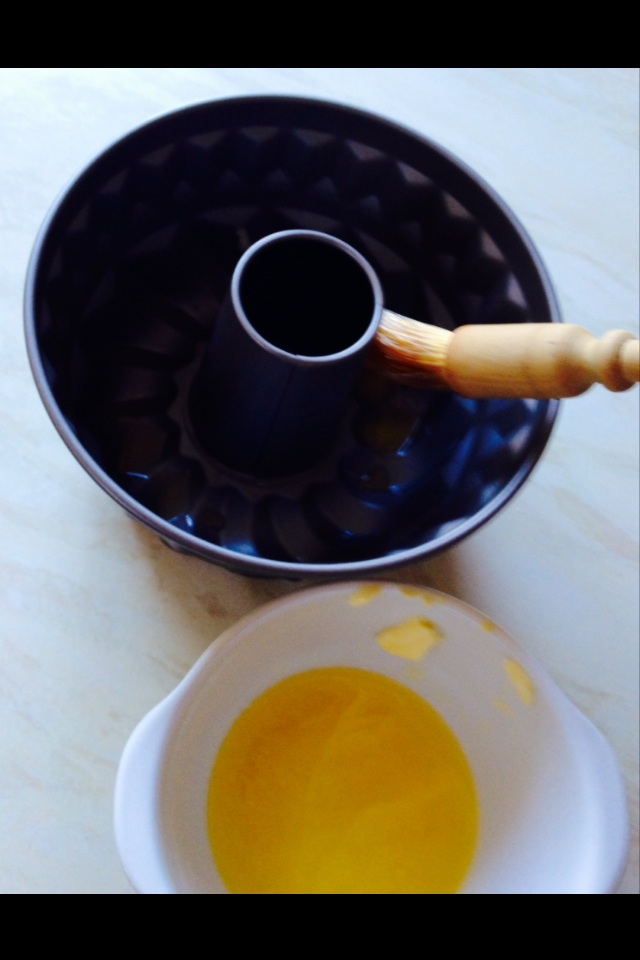
Aha, a moment of pure inspiration, I’d melt the butter & brush it on with a pastry brush. Genius!!!!
Me buttering the gazillion sided Bundt tin with melted butter. Seriously you’d have thought I’d invented the wheel…….
Feeling very smug and having an excess of melted butter, I also buttered my loaf tin this way today! Very satisfying to see a smooth(ish) layer of butter cooling in both tins!
Next it was time to decide what cake to bake? I’ve seen some beautiful chocolate marble cakes made in Bundt tins, on Google images, but to be honest after all the chocolatey cakes made for birthdays recently, I wanted to think outside the box, or Bundt tin in this case!
So I thought I’d ‘try’ an Almond flavoured sponge. A flavour that goes down well with all the family & crucially my official taste tester ‘the Green goddess’!
Good start but bit boring, so I had a peek in my cupboards & plucked out (the cupboards aren’t chickens in case you wondered!!) Almond flakes & Morello Cherry Jam – super.
Recipe : Almond and Morello Cherry Bundt Cake:
6oz Unsalted Butter – room temp
6oz Caster Sugar
Pinch of Salt (I use Kosher- no extra additives, but ground sea-salt is fine)
3 Large Eggs – room temp (pref free range)
1/4 teaspoon Almond Extract
1 teaspoon Vanilla Extract
6oz Self Raising White Flour
2oz Flaked Almonds (lightly toasted)
4 tablespoons Morello Cherry Jam
Method:
Preheat the oven to 175C (160C fan gas mark 3).
Cream the sugar & butter together using a wooden spoon or electric whisk until pale and creamy.
Add the salt, vanilla & Almond extract. Mix well.
Crack the eggs into a separate bowl. Add one half of the flour and 2 eggs, gently mix until almost combined. Add the remaining egg & flour. Gently mix until the mixture is completely combined.
Using a desert spoon place spoonfuls of the cake batter into the bottom of the Bundt tin. Using the spoon spread the mixture so that it covers the bottom of the Bundt tin. Building the batter up slightly towards the centre and outside edge. This creates a dip where the filling will go.
Making the dip in the batter should stop the jam from reaching the tin sides, causing the cake to stick.
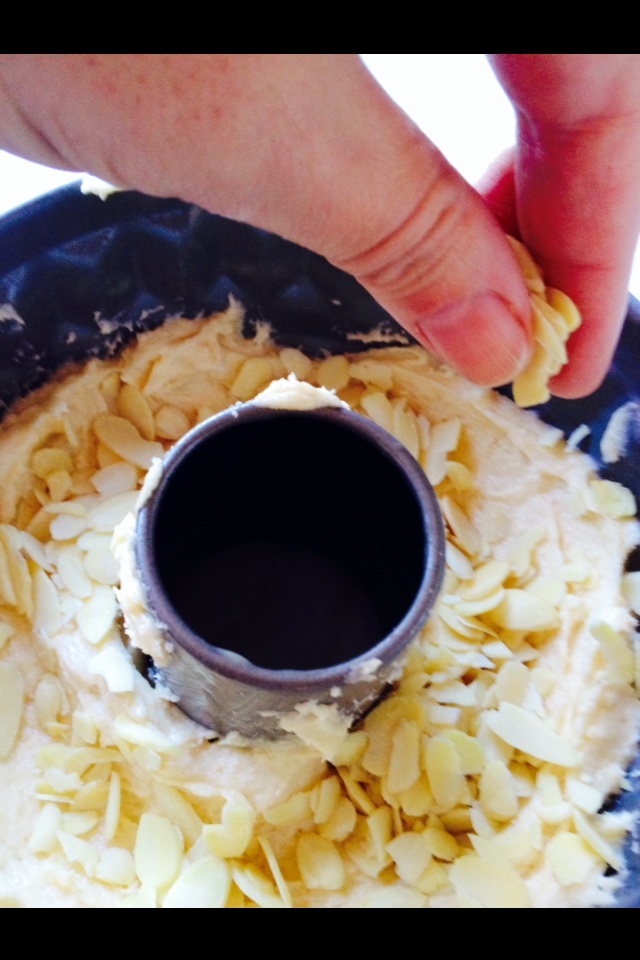
Sprinkle half the toasted Almond flakes on top of the batter.
I didn’t toast my Almonds – but I will next time!
Next using a small teaspoon, carefully spoon the jam into the centre dip of the cake batter, taking care not to touch the sides. Smooth the jam out carefully.
I’m pretty sure if the jam spreads to the edges, no amount if ingeniously buttered tin will stop the cake from sticking!!!!
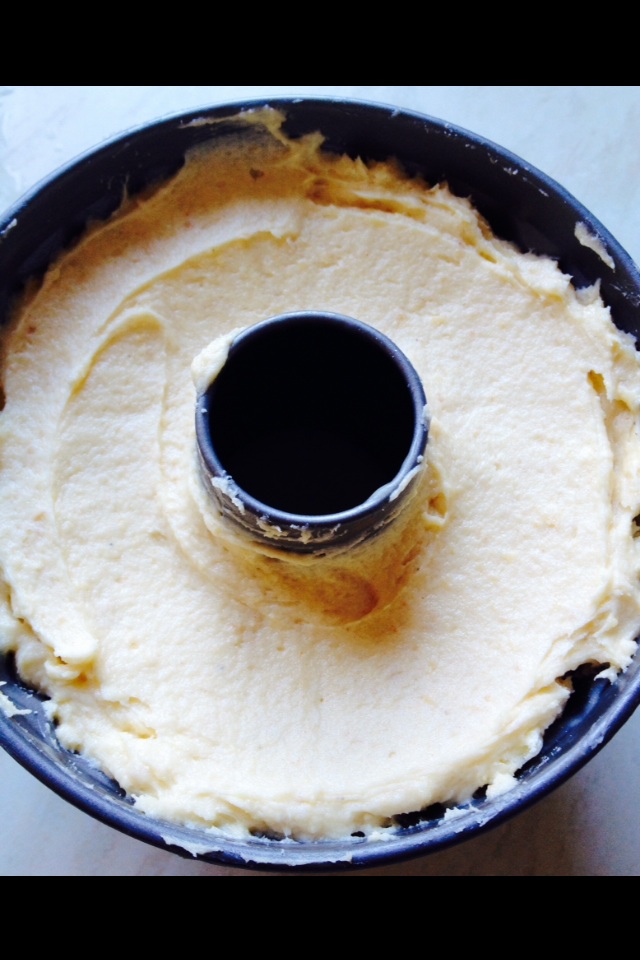
Sprinkle the last of the flake almonds over the jam, then dollop the remaining cake batter over the top, ensuring as you smooth it out you don’t press the jam toward the sides of the tin.
The cake batter completely encases the jam.
Place the Bundt tin in the preheated oven for an hour. The cake will look cooked approximately 15 minutes before it is, however the centre will not be cooked through. Continue cooking until the cake has cooked for 1hr 5 mins.
Remove the Bundt tin from the oven and place on a cooling rack. It is important to let the cake cool completely in the tin.
Looks like I guessed the right quantities for this Bundt tin!!
When the cake feels completely cool, including the centre, turn the cake out onto a pretty plate.
Or baking rack, will explain later!!!!
Now you can pop the kettle on (obviously I don’t mean you wear it just, fill & switch on!!!!!), then slice into this beautiful cake.
The jam is contained within the cake and it looks scrummy!
I popped the slice above round to my Green goddess friend who wasn’t feeling quite the ticket. It was received with thanks and thoroughly enjoyed.
See, I had fun making this and sharing with a wonderful friend, who sat with a cuppa, feasted and enjoyed (before my children & hubby came home & almost demolished the rest!).
Now what really happened:
The cake was removed from the oven after 45 mins. It was left until slightly warm & turned out onto a cooling rack (don’t ask me why? It seemed like a good idea at the time!!!!).
I then took the photo of the turned out cake, thankfully!! When I looked closely I realise the centre of the cake wasn’t completely cooked – whoops!
I turned the oven back on, tried to place the Bundt cake on a baking sheet, in doing so part of the cake collapsed – about a portion. So I attempted to squish the cake together, popped back in the oven & cooked for a further 15-20 mins until the centre was just cooked.
I removed the cake from the oven, allowed to cool until barely warm, cut the slightly collapsed portion out (which I feasted on with a cup of tea!). Then I sliced my friends portion and popped it round to her (2 doors down).
So I’ve adjusted adjusted the cooking time to 1hr-1hr10 mins. If the top of the cake – which will become the bottom when turned out – is browning too quickly just cover with aluminium foil, removing 5 mins before the cake is completely cooked, so that your cake does not have a soggy bottom!
The cake was rescued, tasted yummy and was feasted on & shared with family & friends.
Until next time keep sharing, you will be surprised how much it makes YOU smile and it’s FUN!