British Bakeware Product Review

Share
Facebooktwitterpinterestlinkedintumblr

Hello lovely readers. Today I am so thrilled to share with you my British Bakeware Product Review.

British Bakeware produce a wide range of fantastic bakeware that is all manufactured in the UK. If you need a well made, durable piece of baking kit, British Bakeware stock it.

I was sent a Large Baking Tray, 3lb Loaf Tin and 12 Cup Muffin Tray to review. I had so much fun developing recipes and testing each product and am excited to share the final results and my thoughts on their products with you.

Large Baking Tray dimensions 33cm length x 24cm wide x 2.5cm deep

British Bakeware Product Review
Large Baking Tray with a non-stick finish.

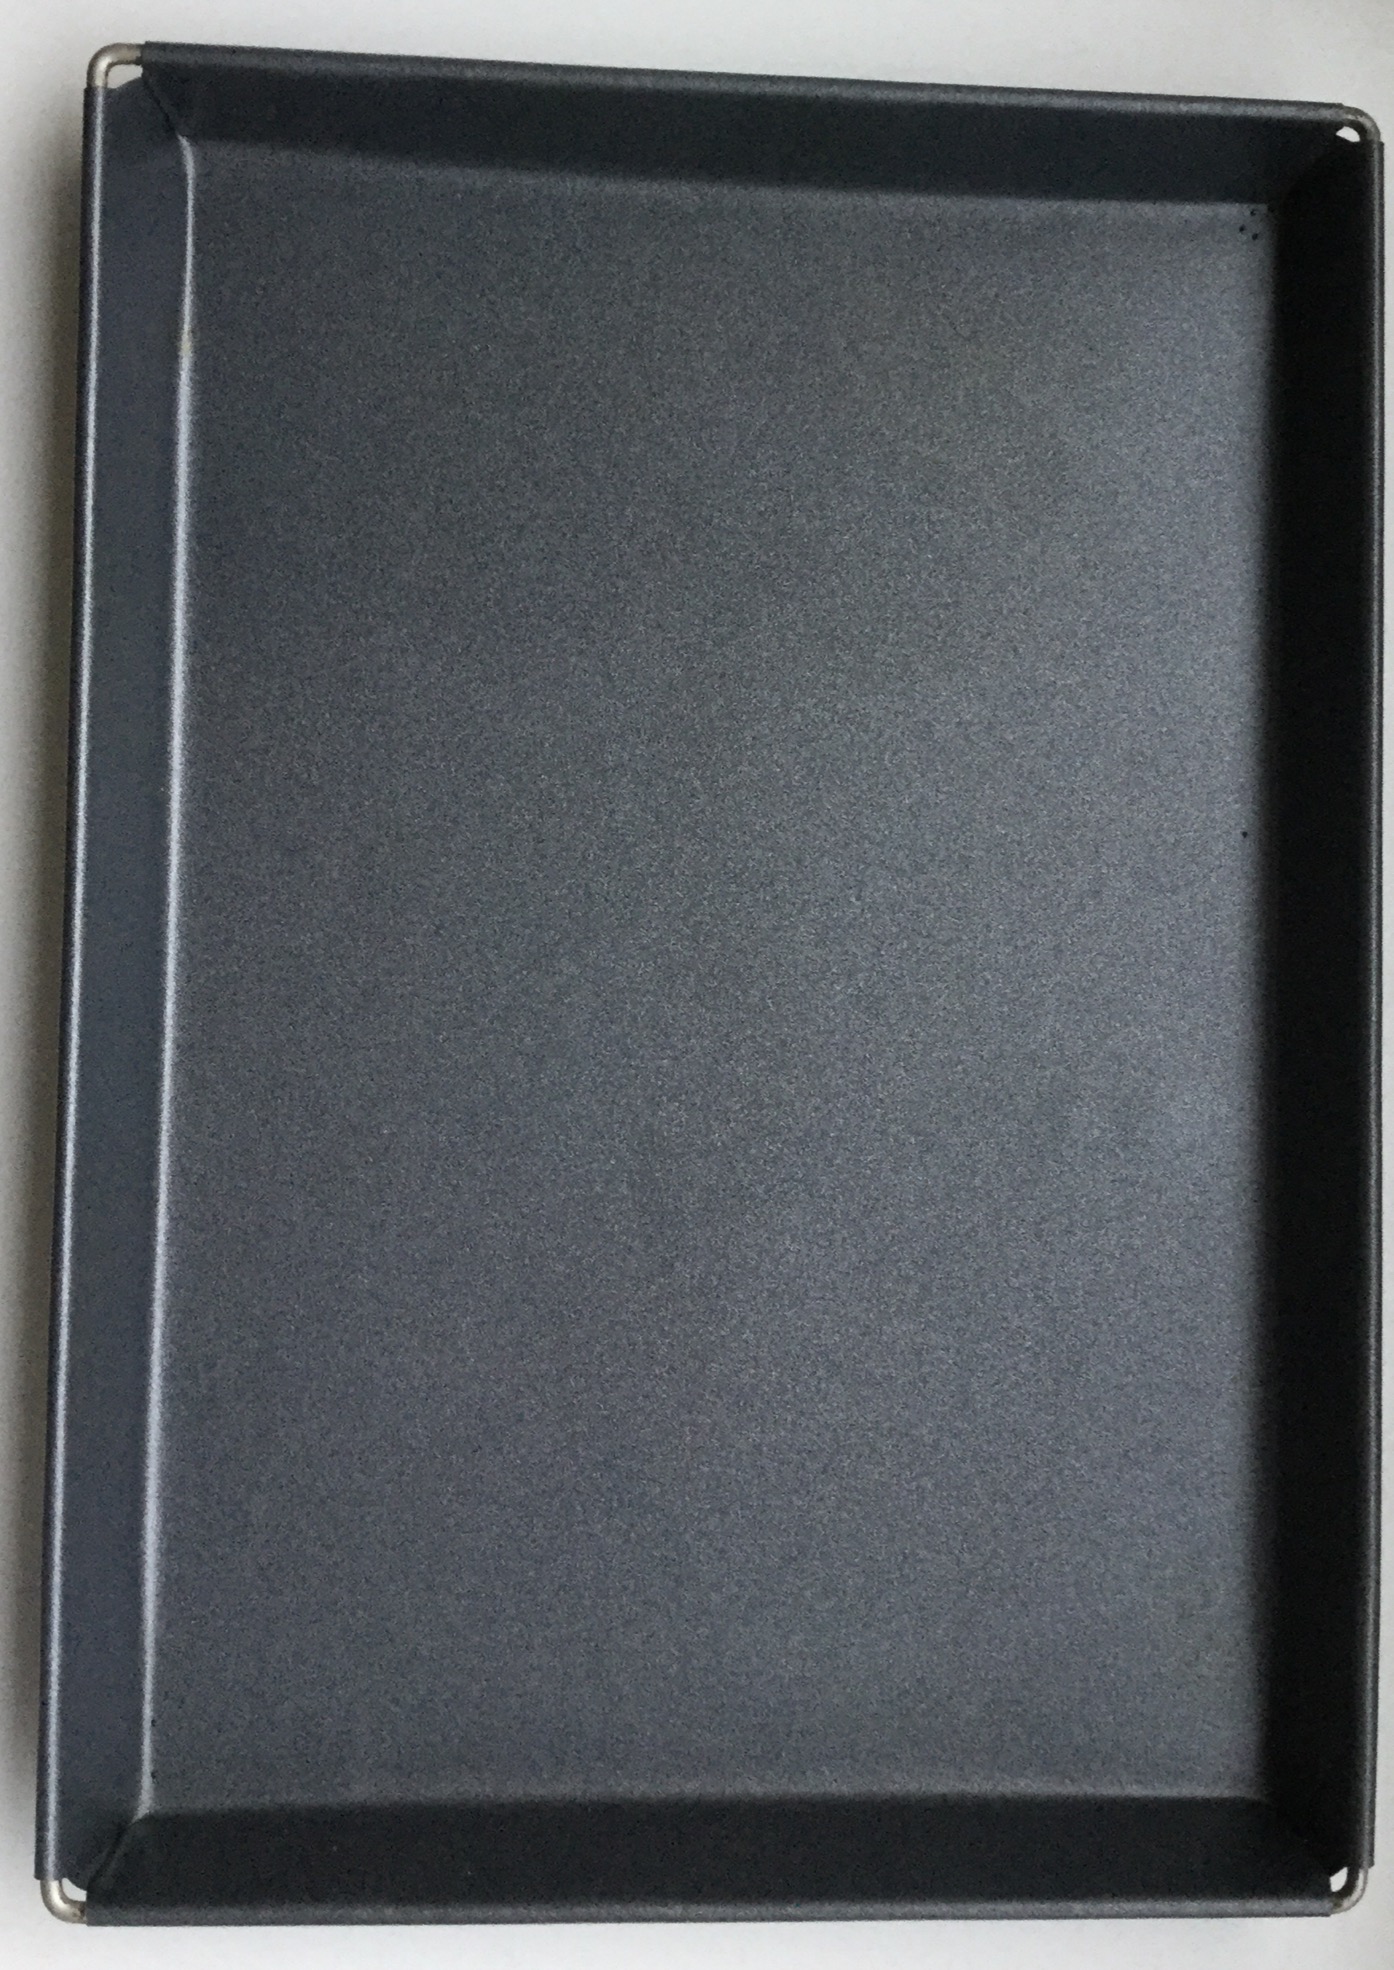
This Large Baking Tray has a double non-stick coating and is oven, freezer and dishwasher safe.

Oh, did I mention it comes with a 5 year guarantee – yep a whole 5 years.

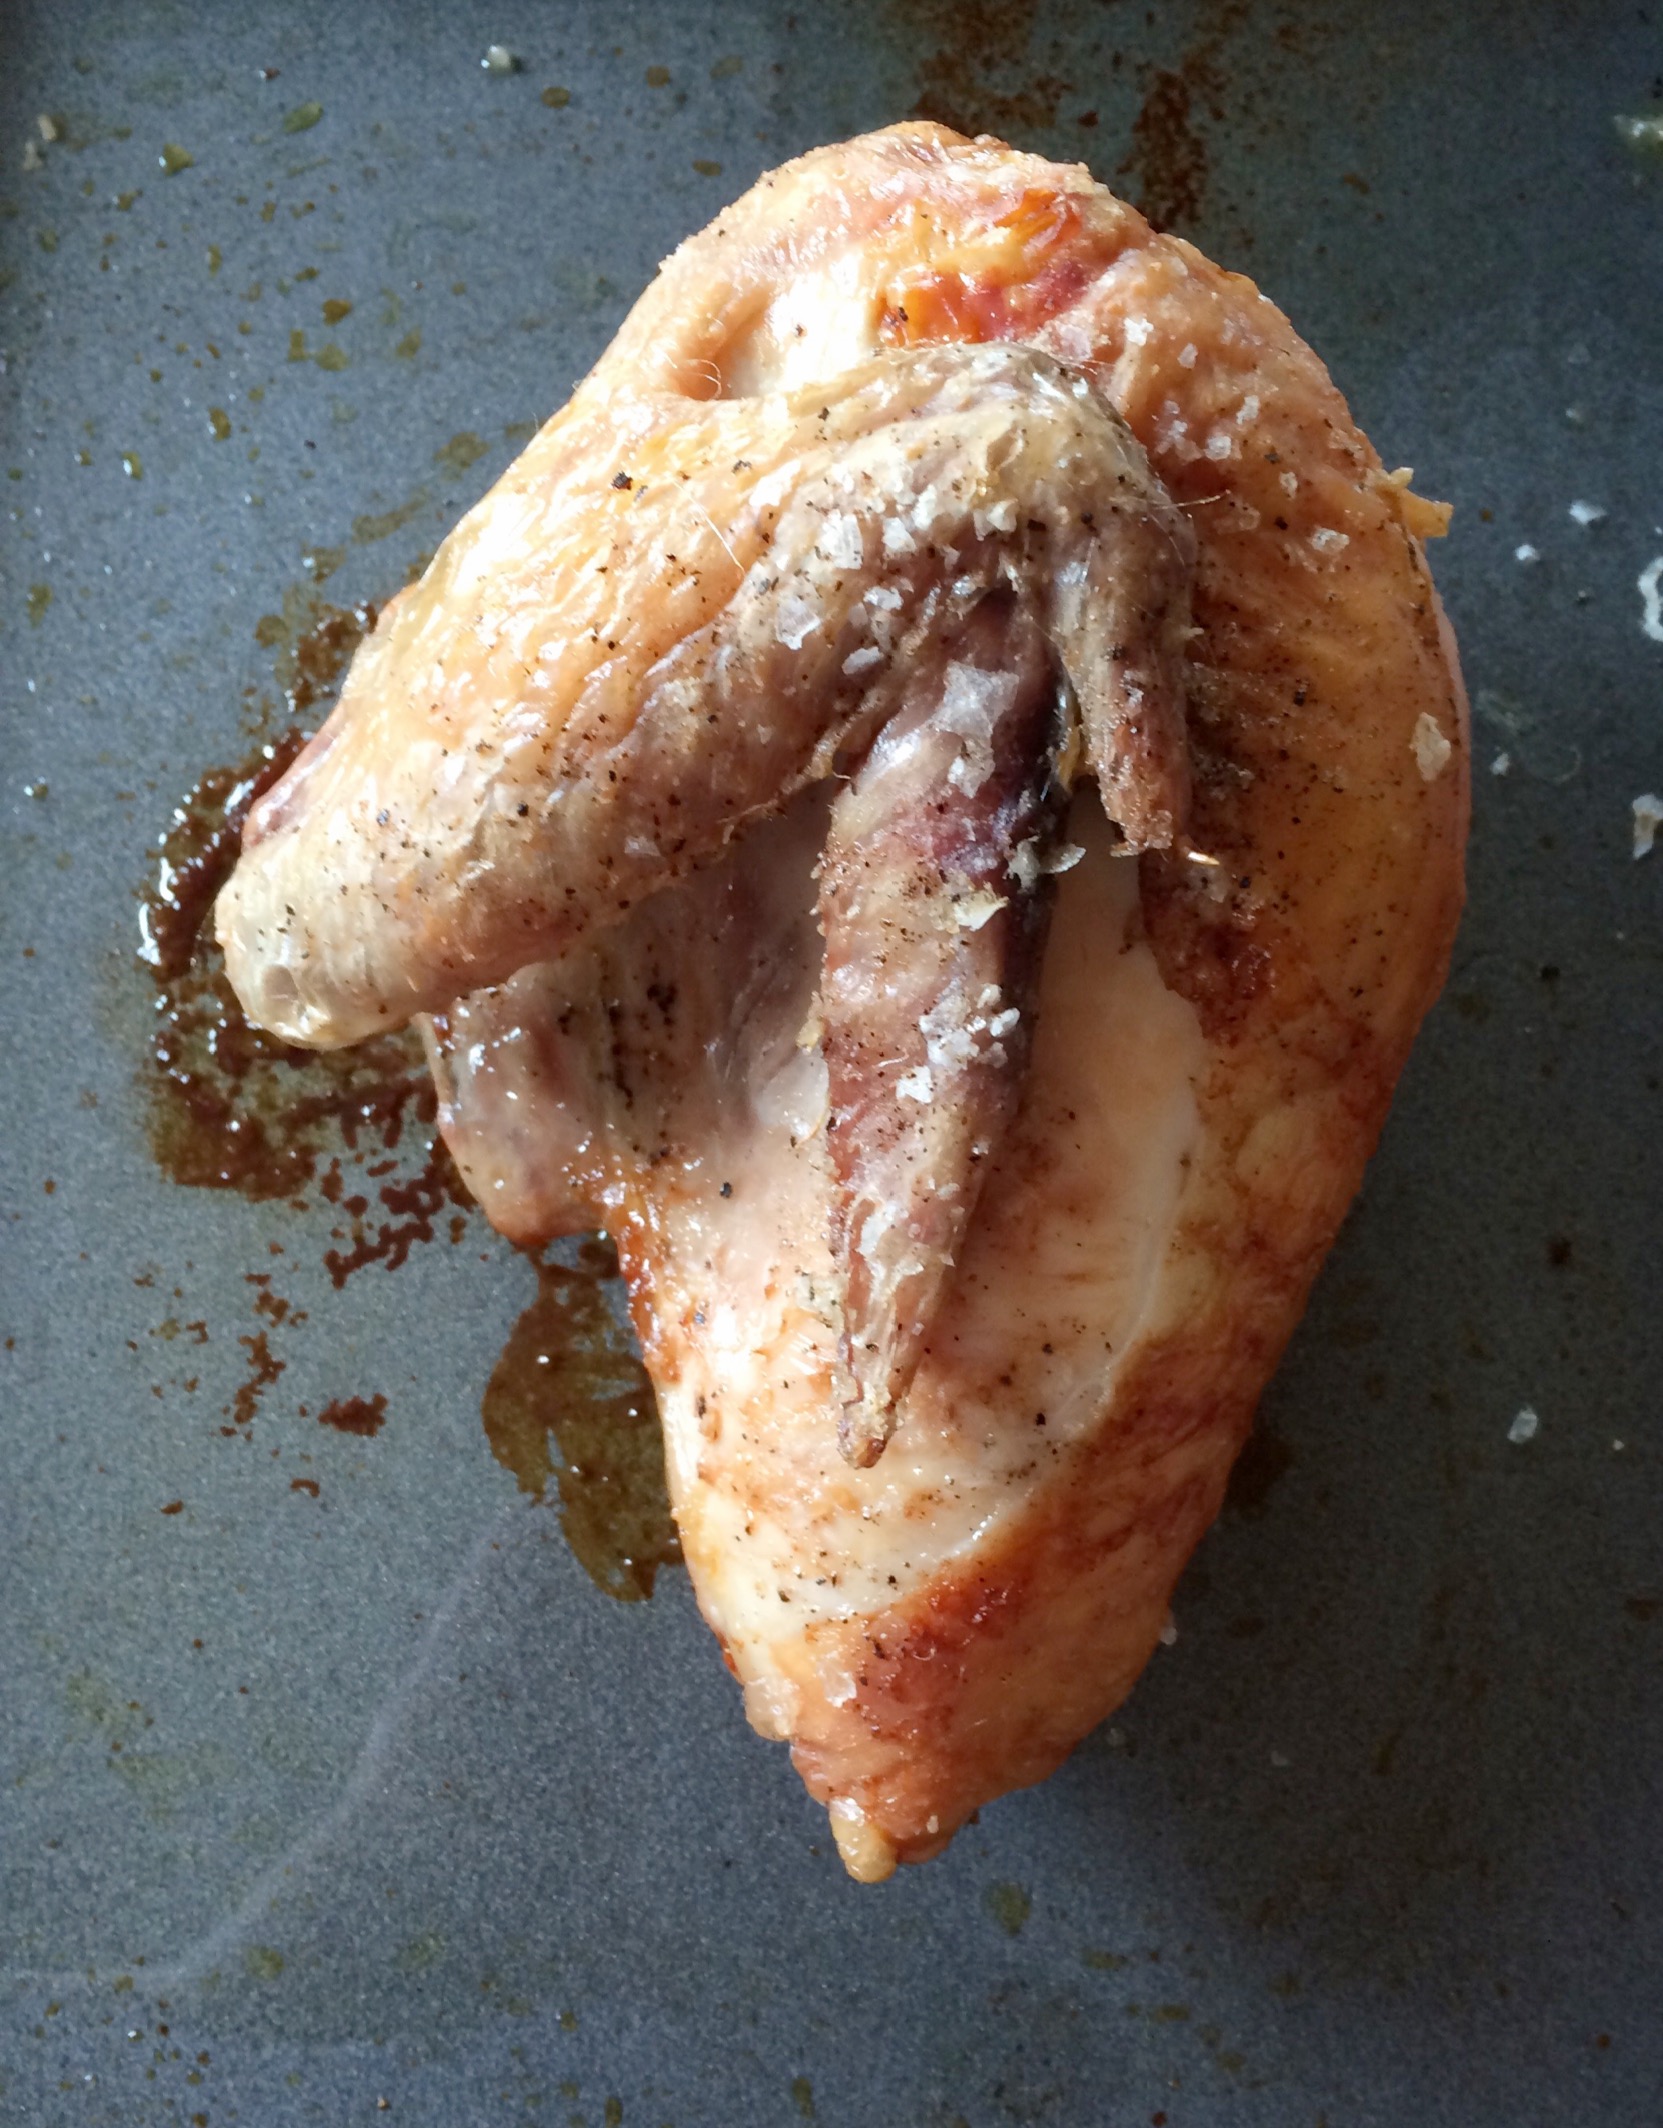
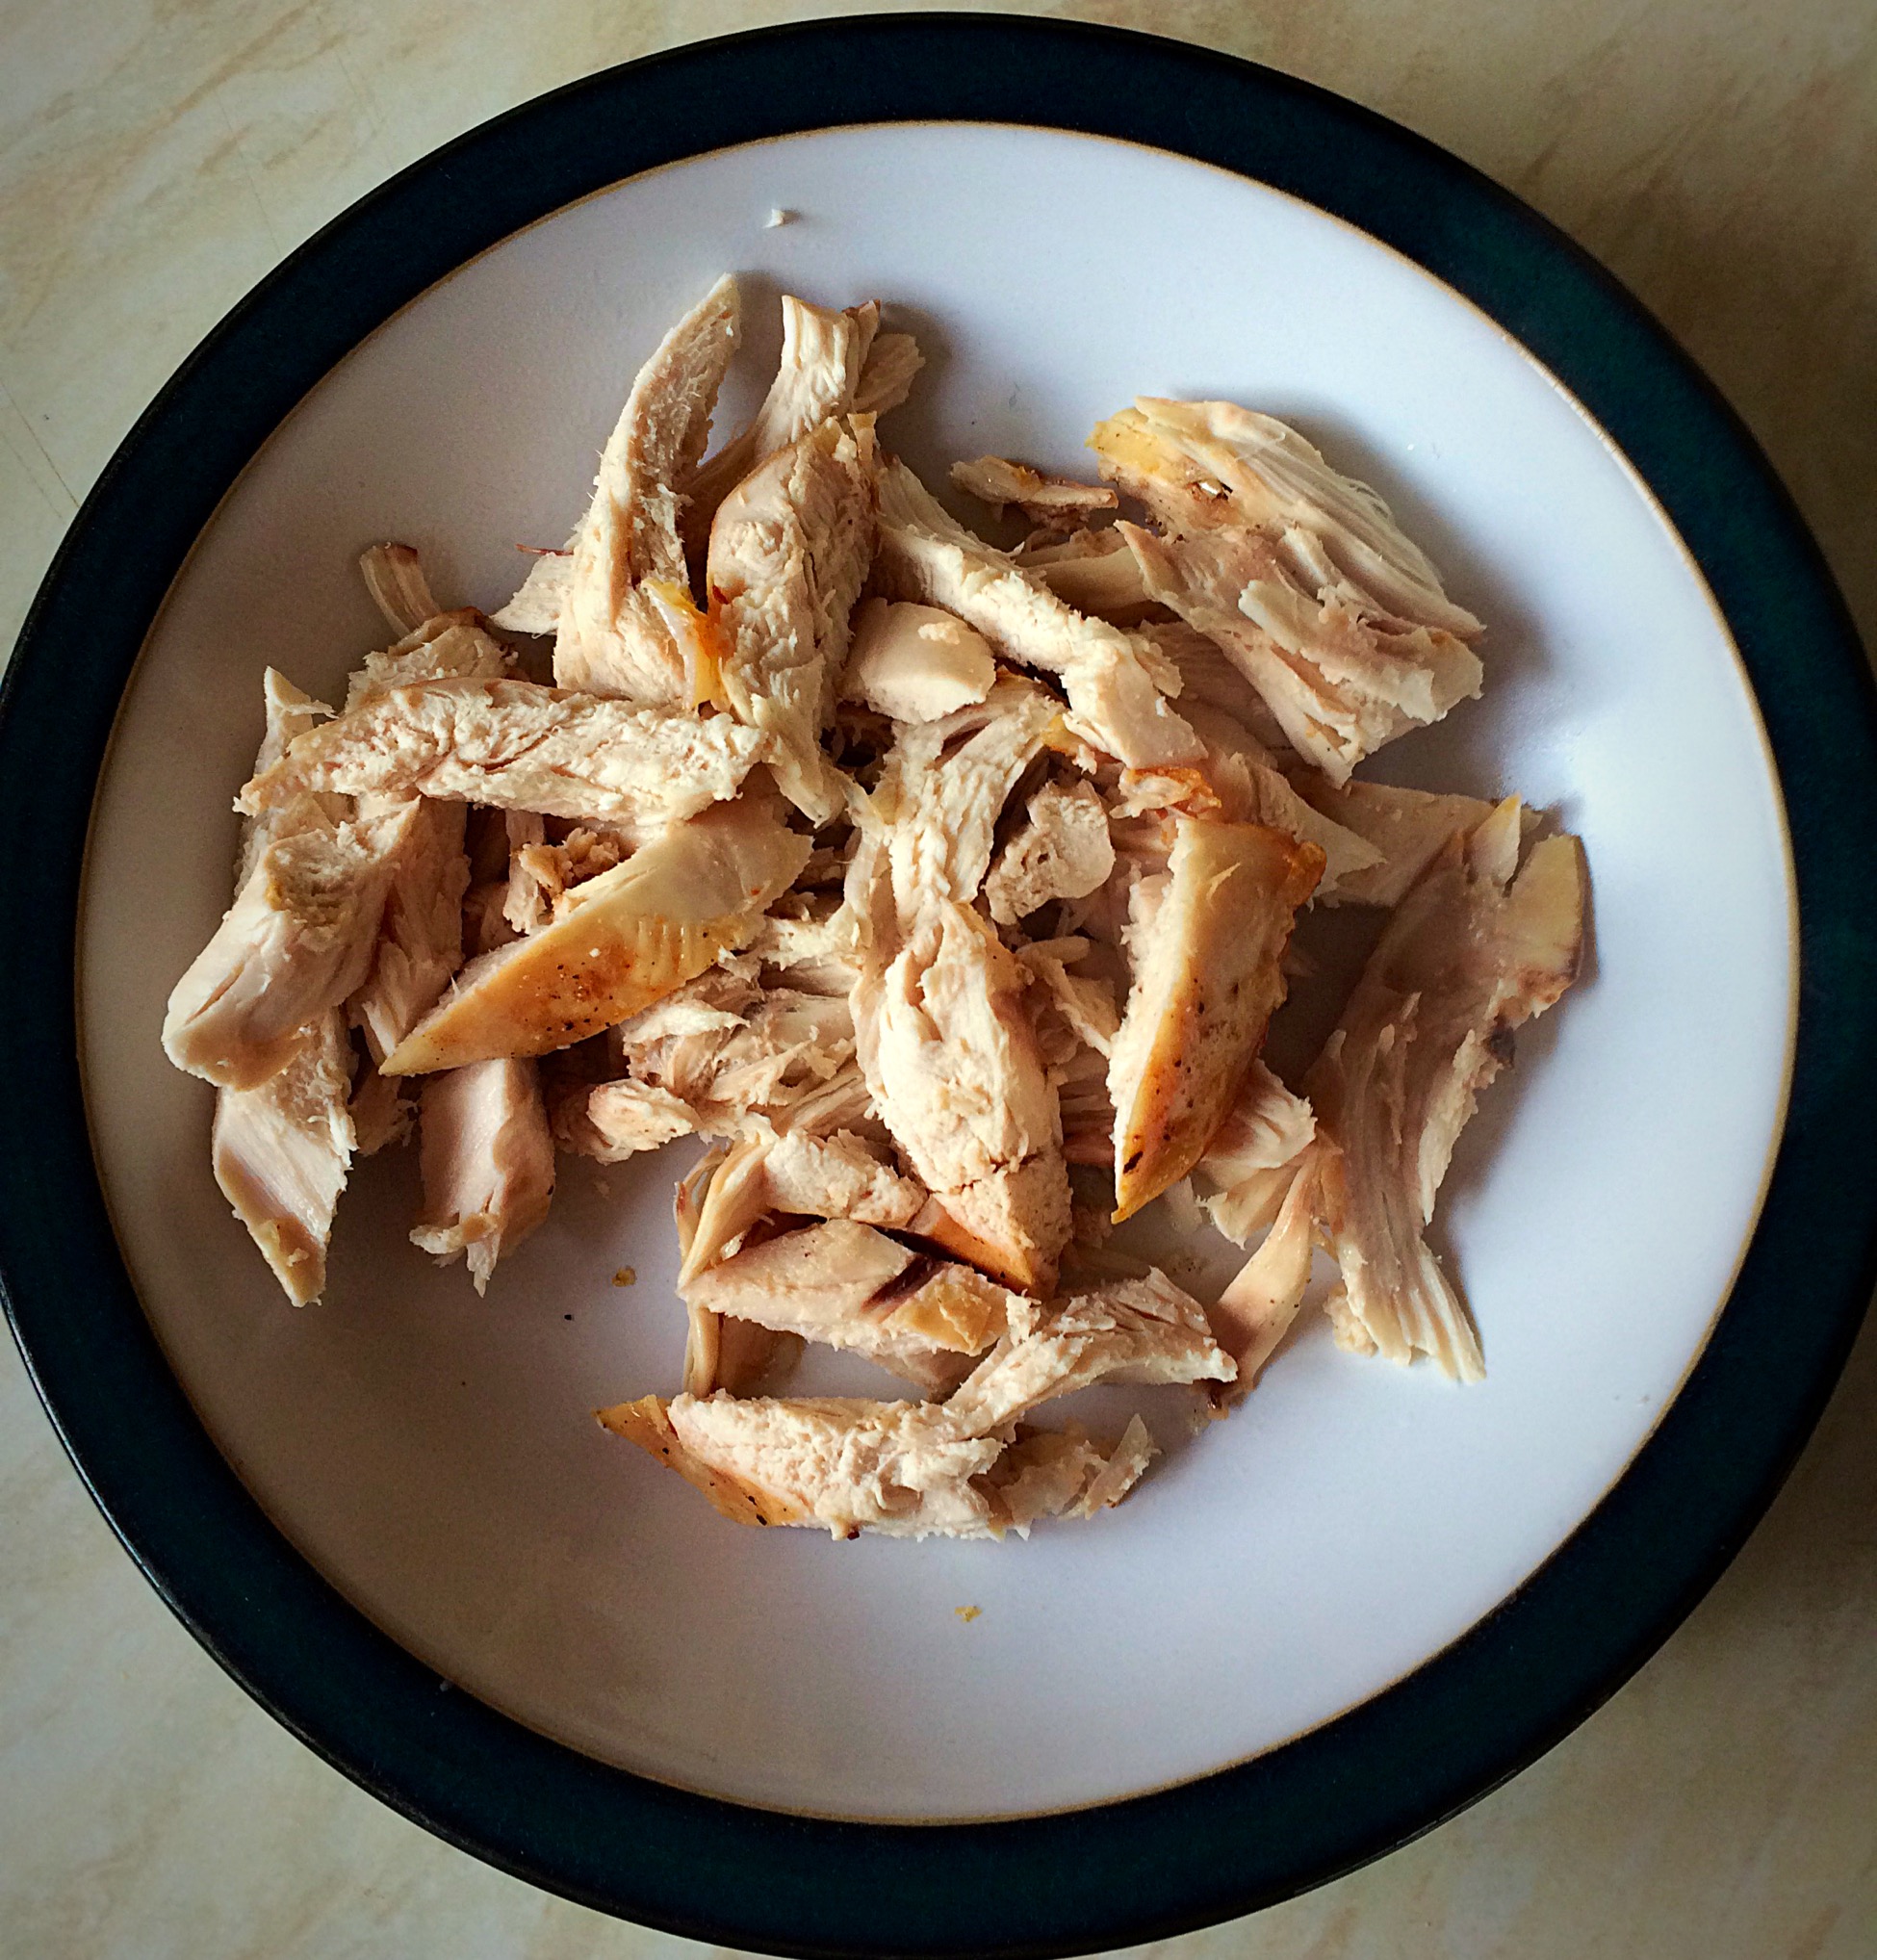
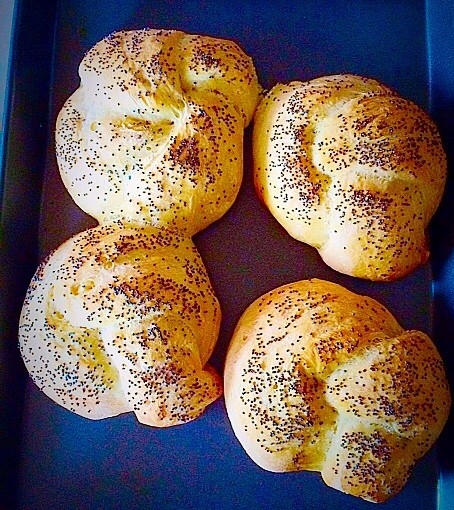
I really put this baking tray through it’s paces. From baking sausage rolls, on Christmas Eve, to roasting chicken, making biscuits and baking rolls. This baking tray performed time and time again.

Food cooked evenly and the baking tray was a dream to clean. Although it is non stick I gave it a very light coating of oil prior to using it. Doing so prolongs the life any non stick bakeware.

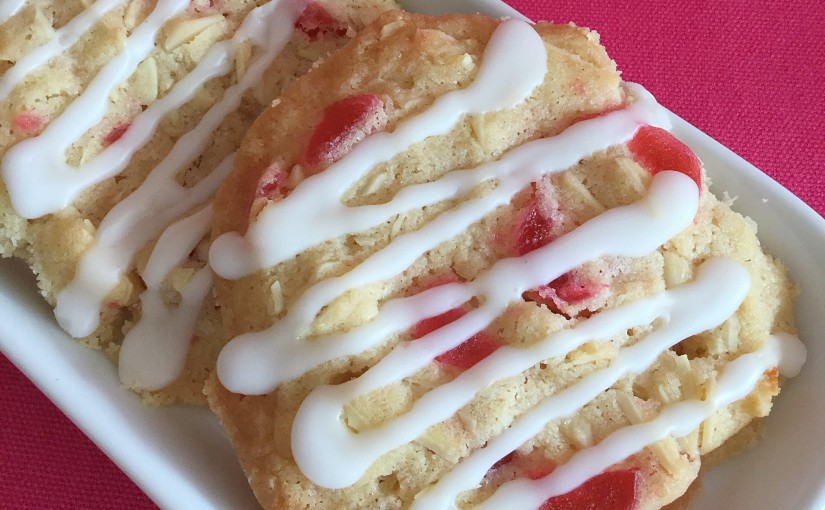
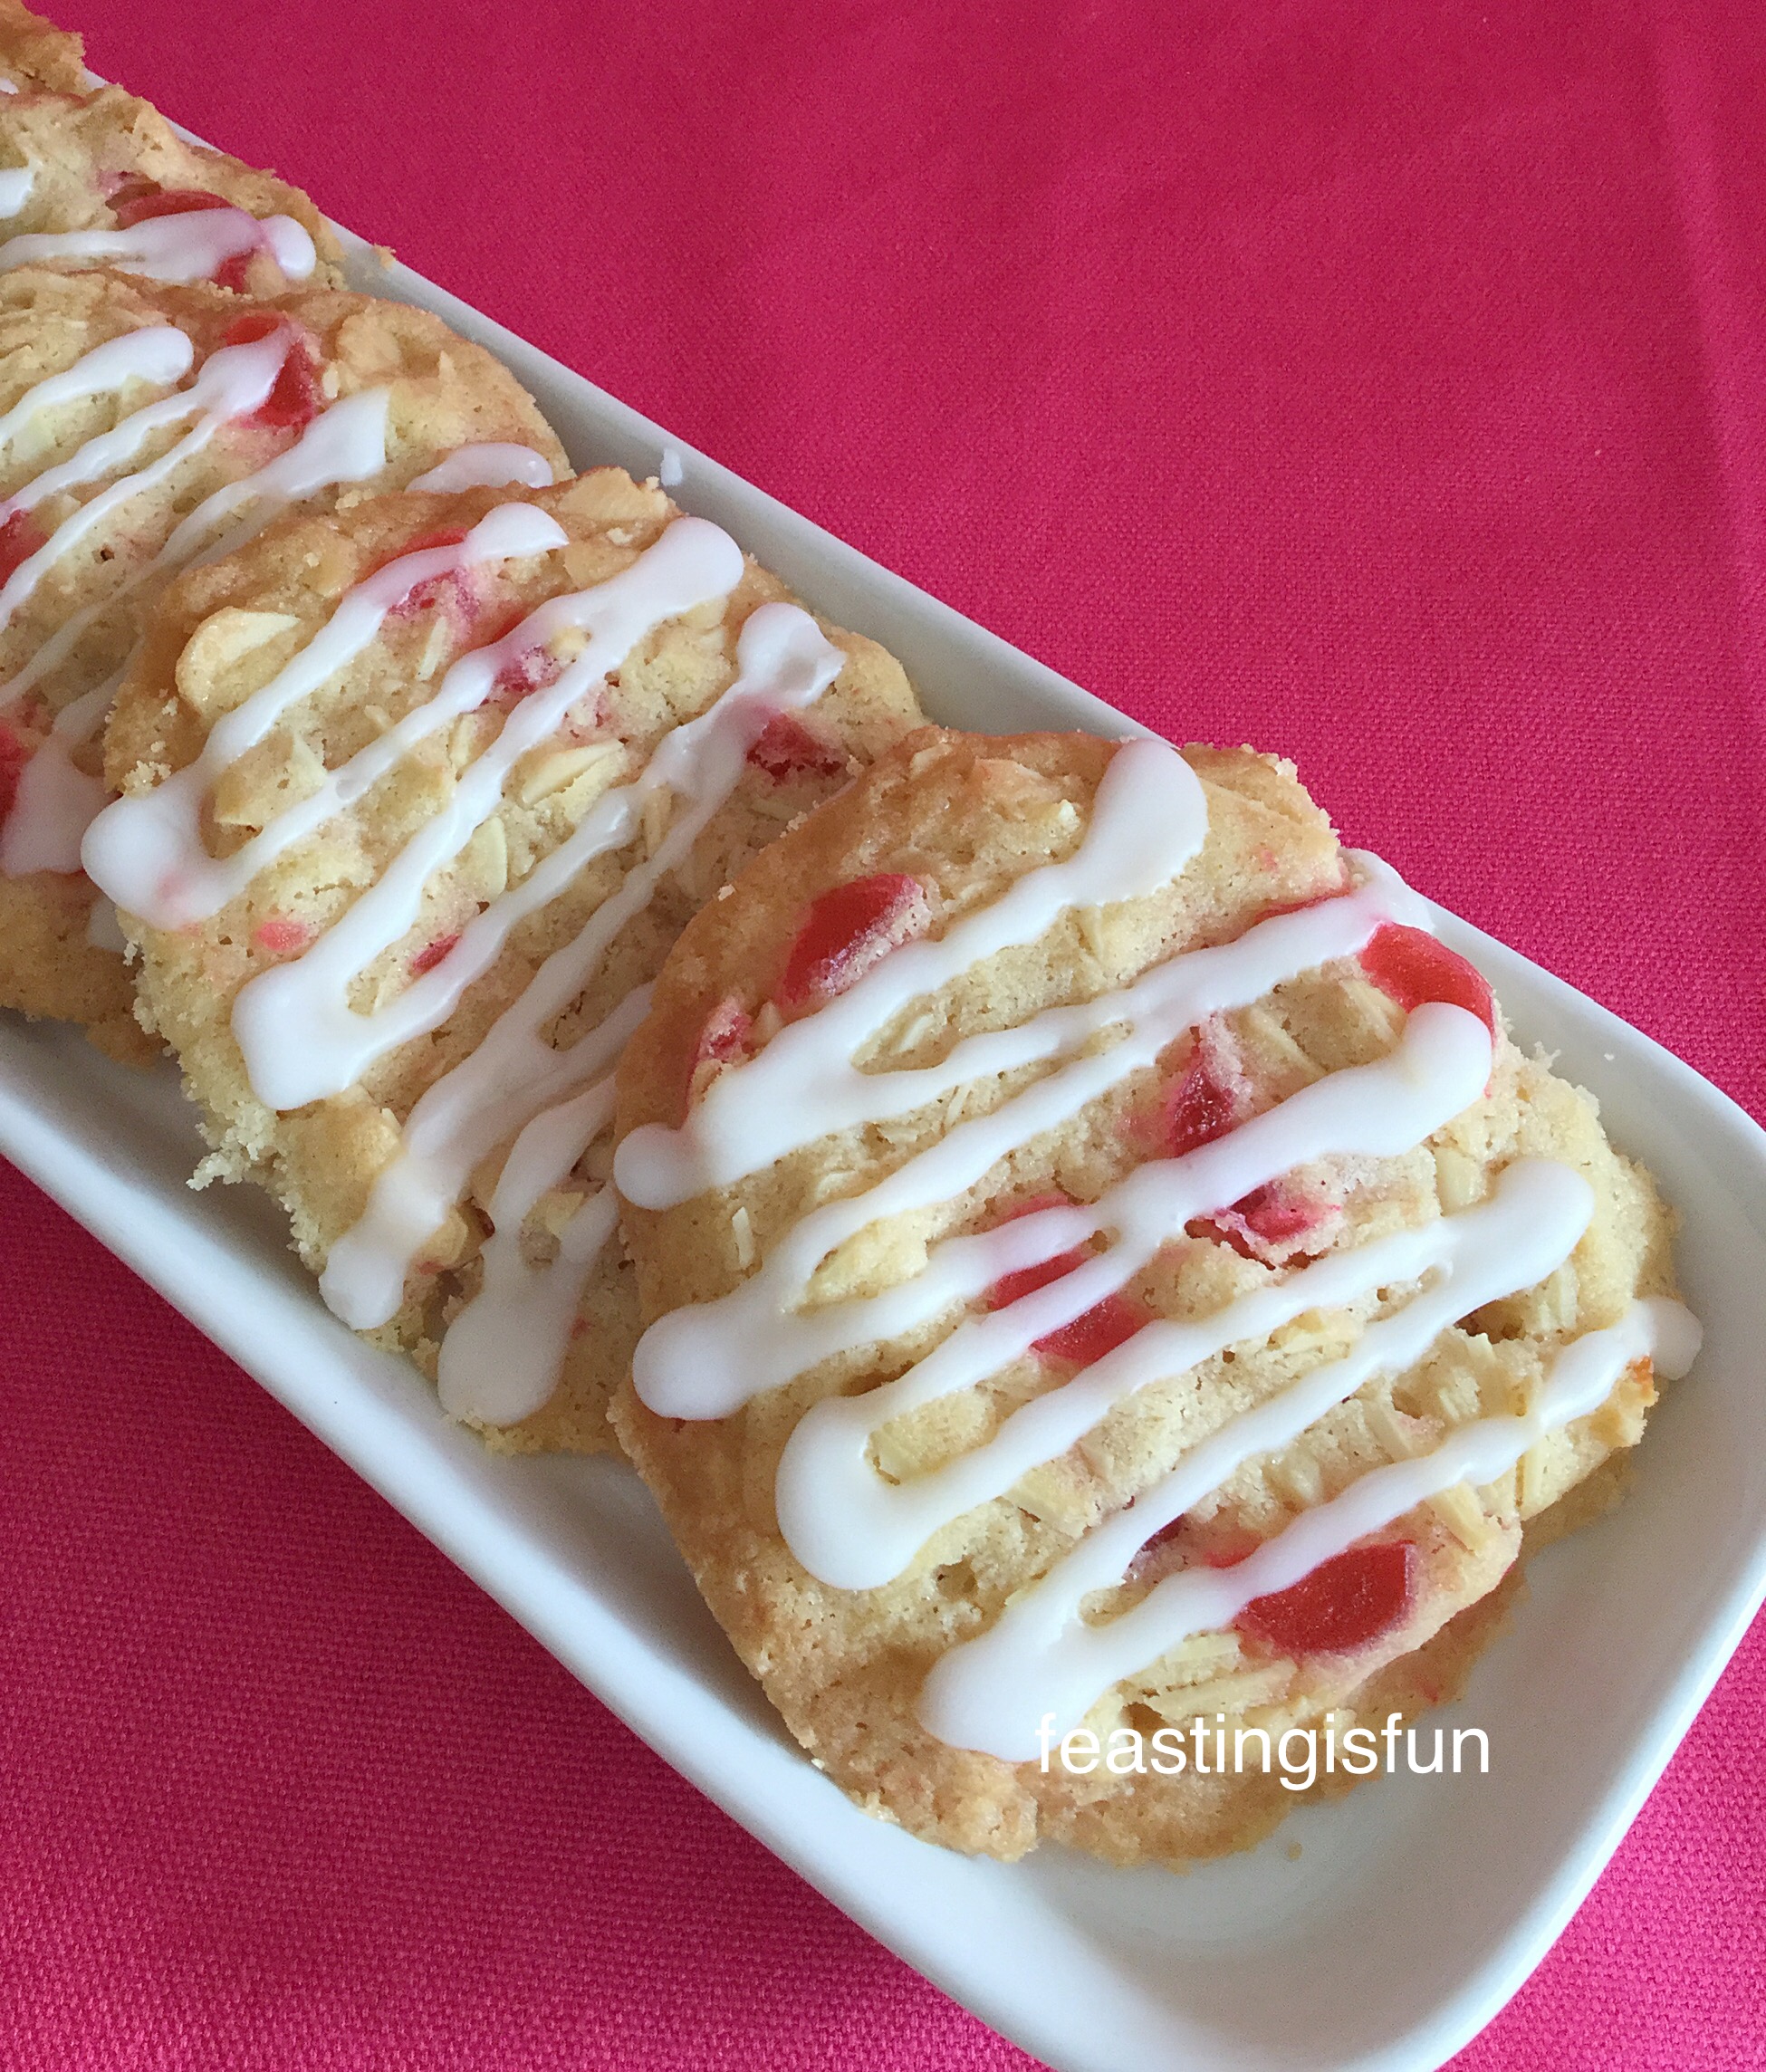
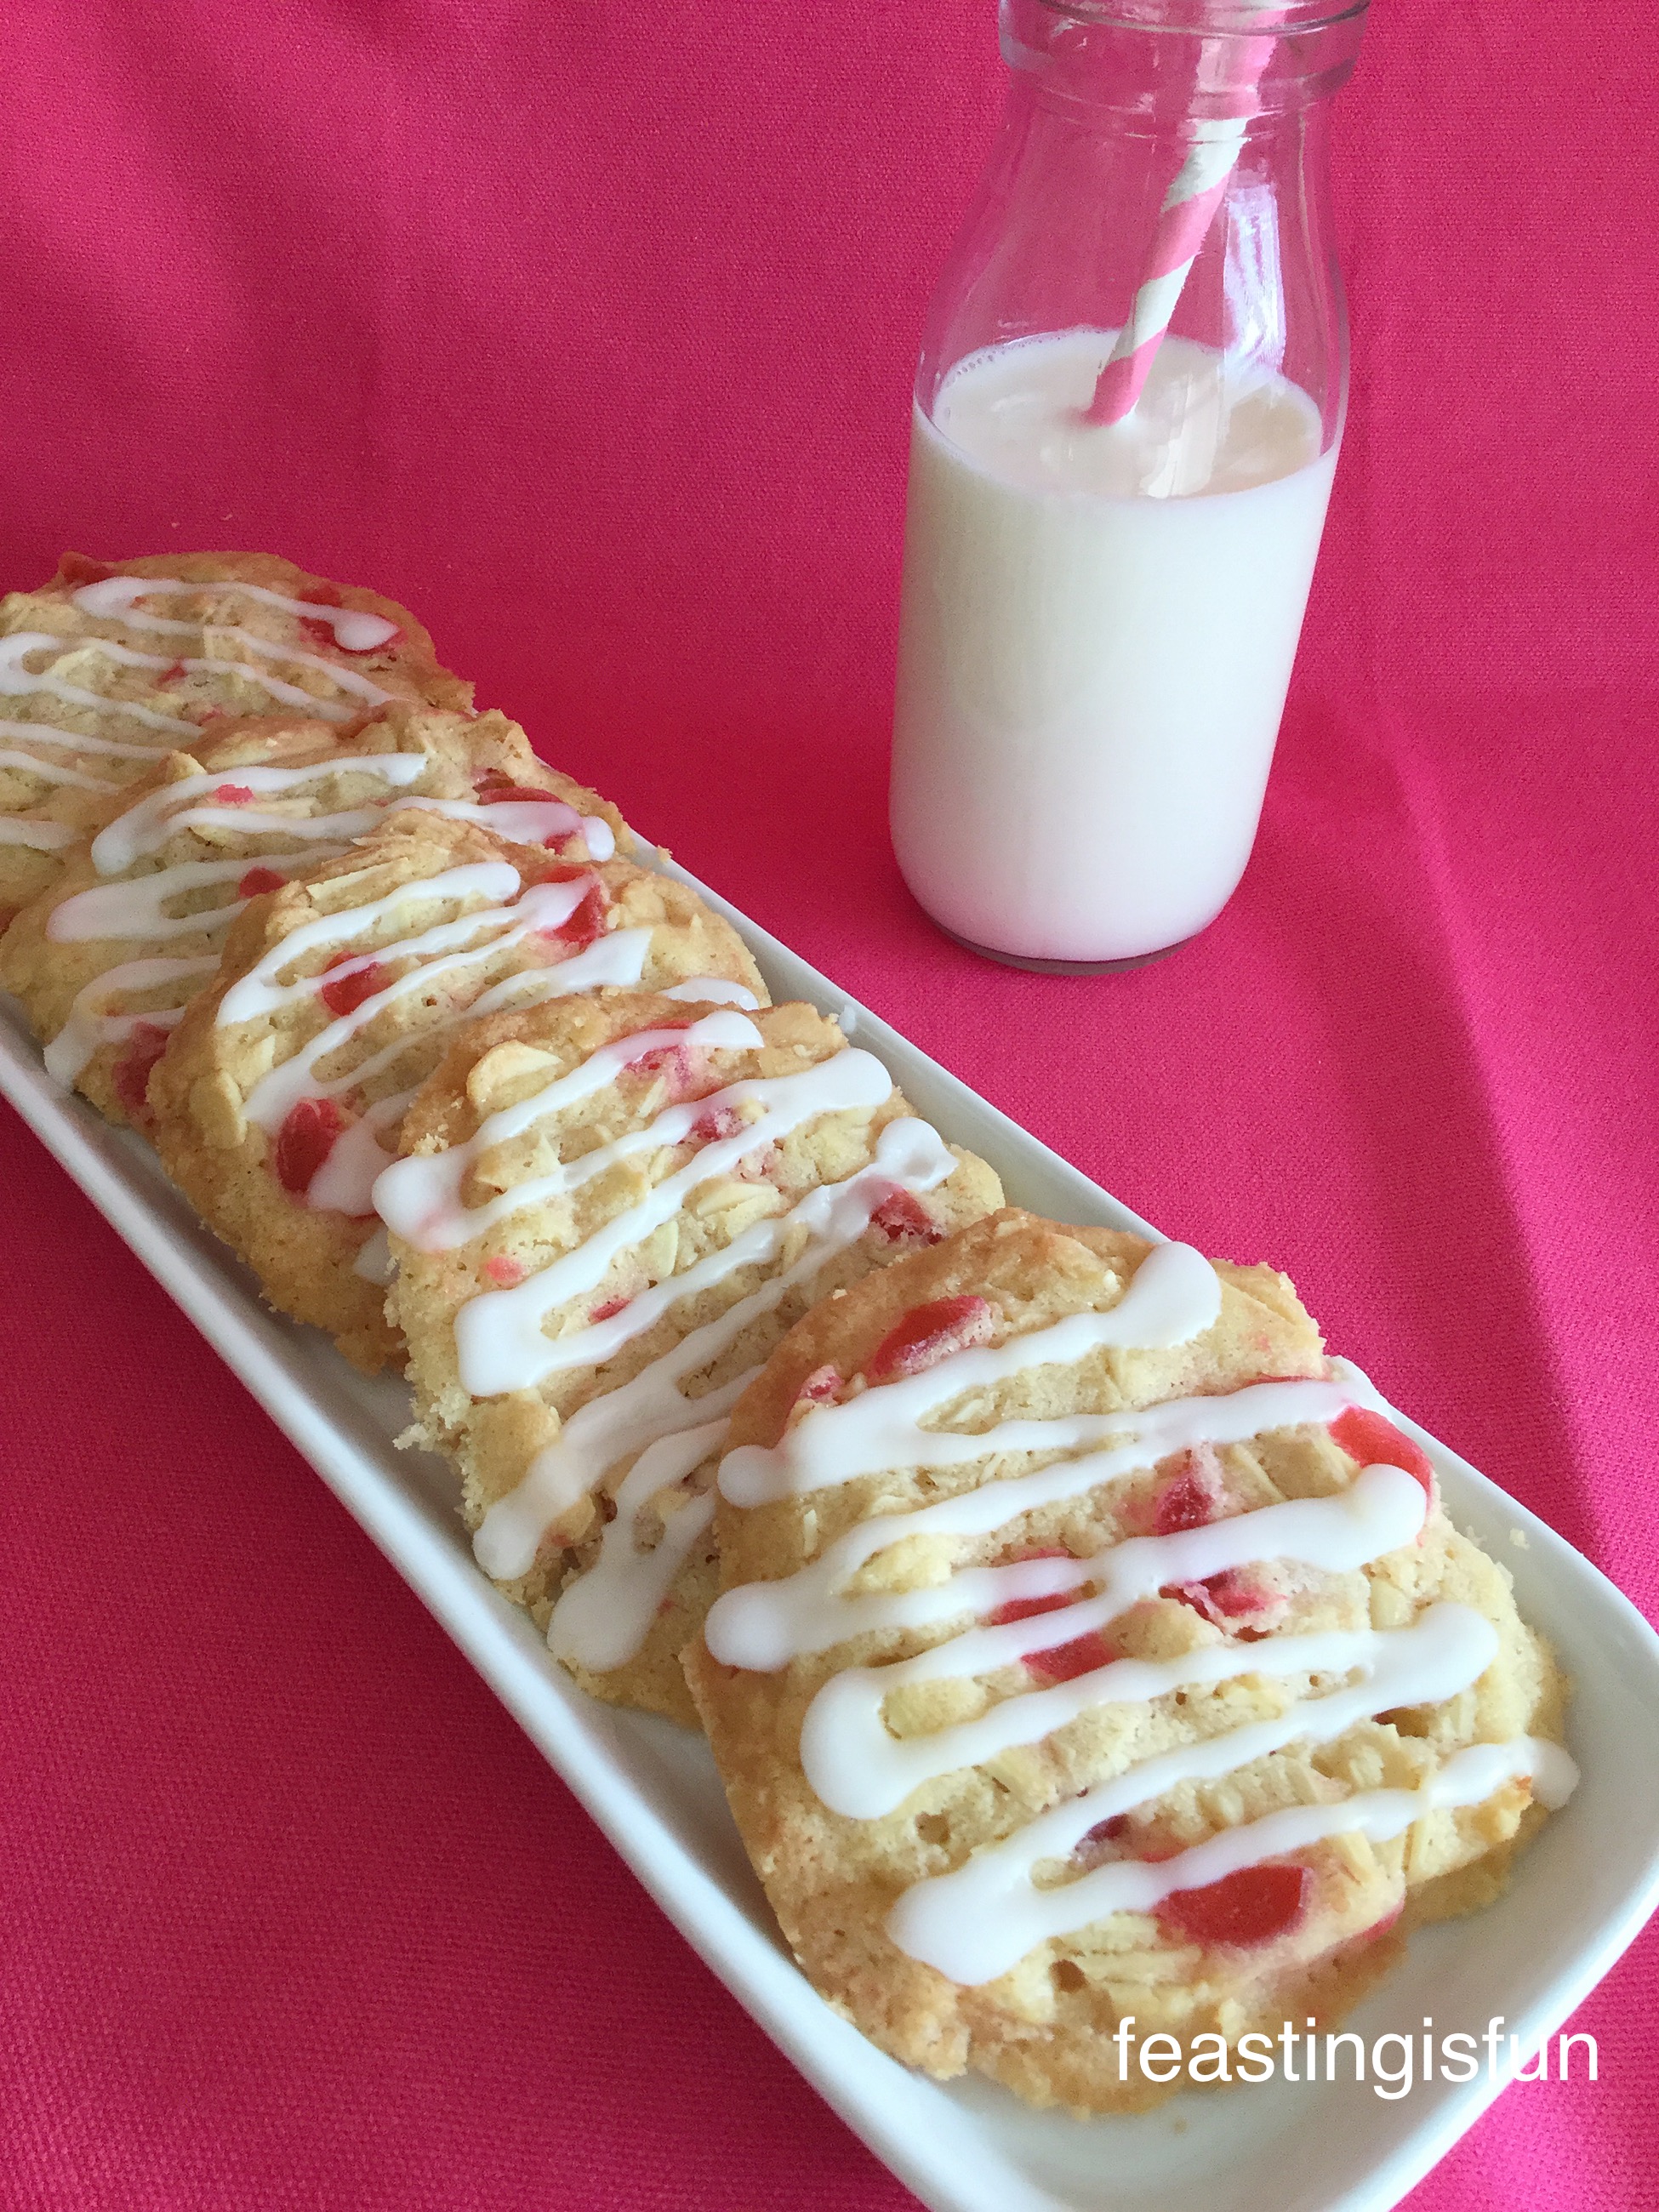
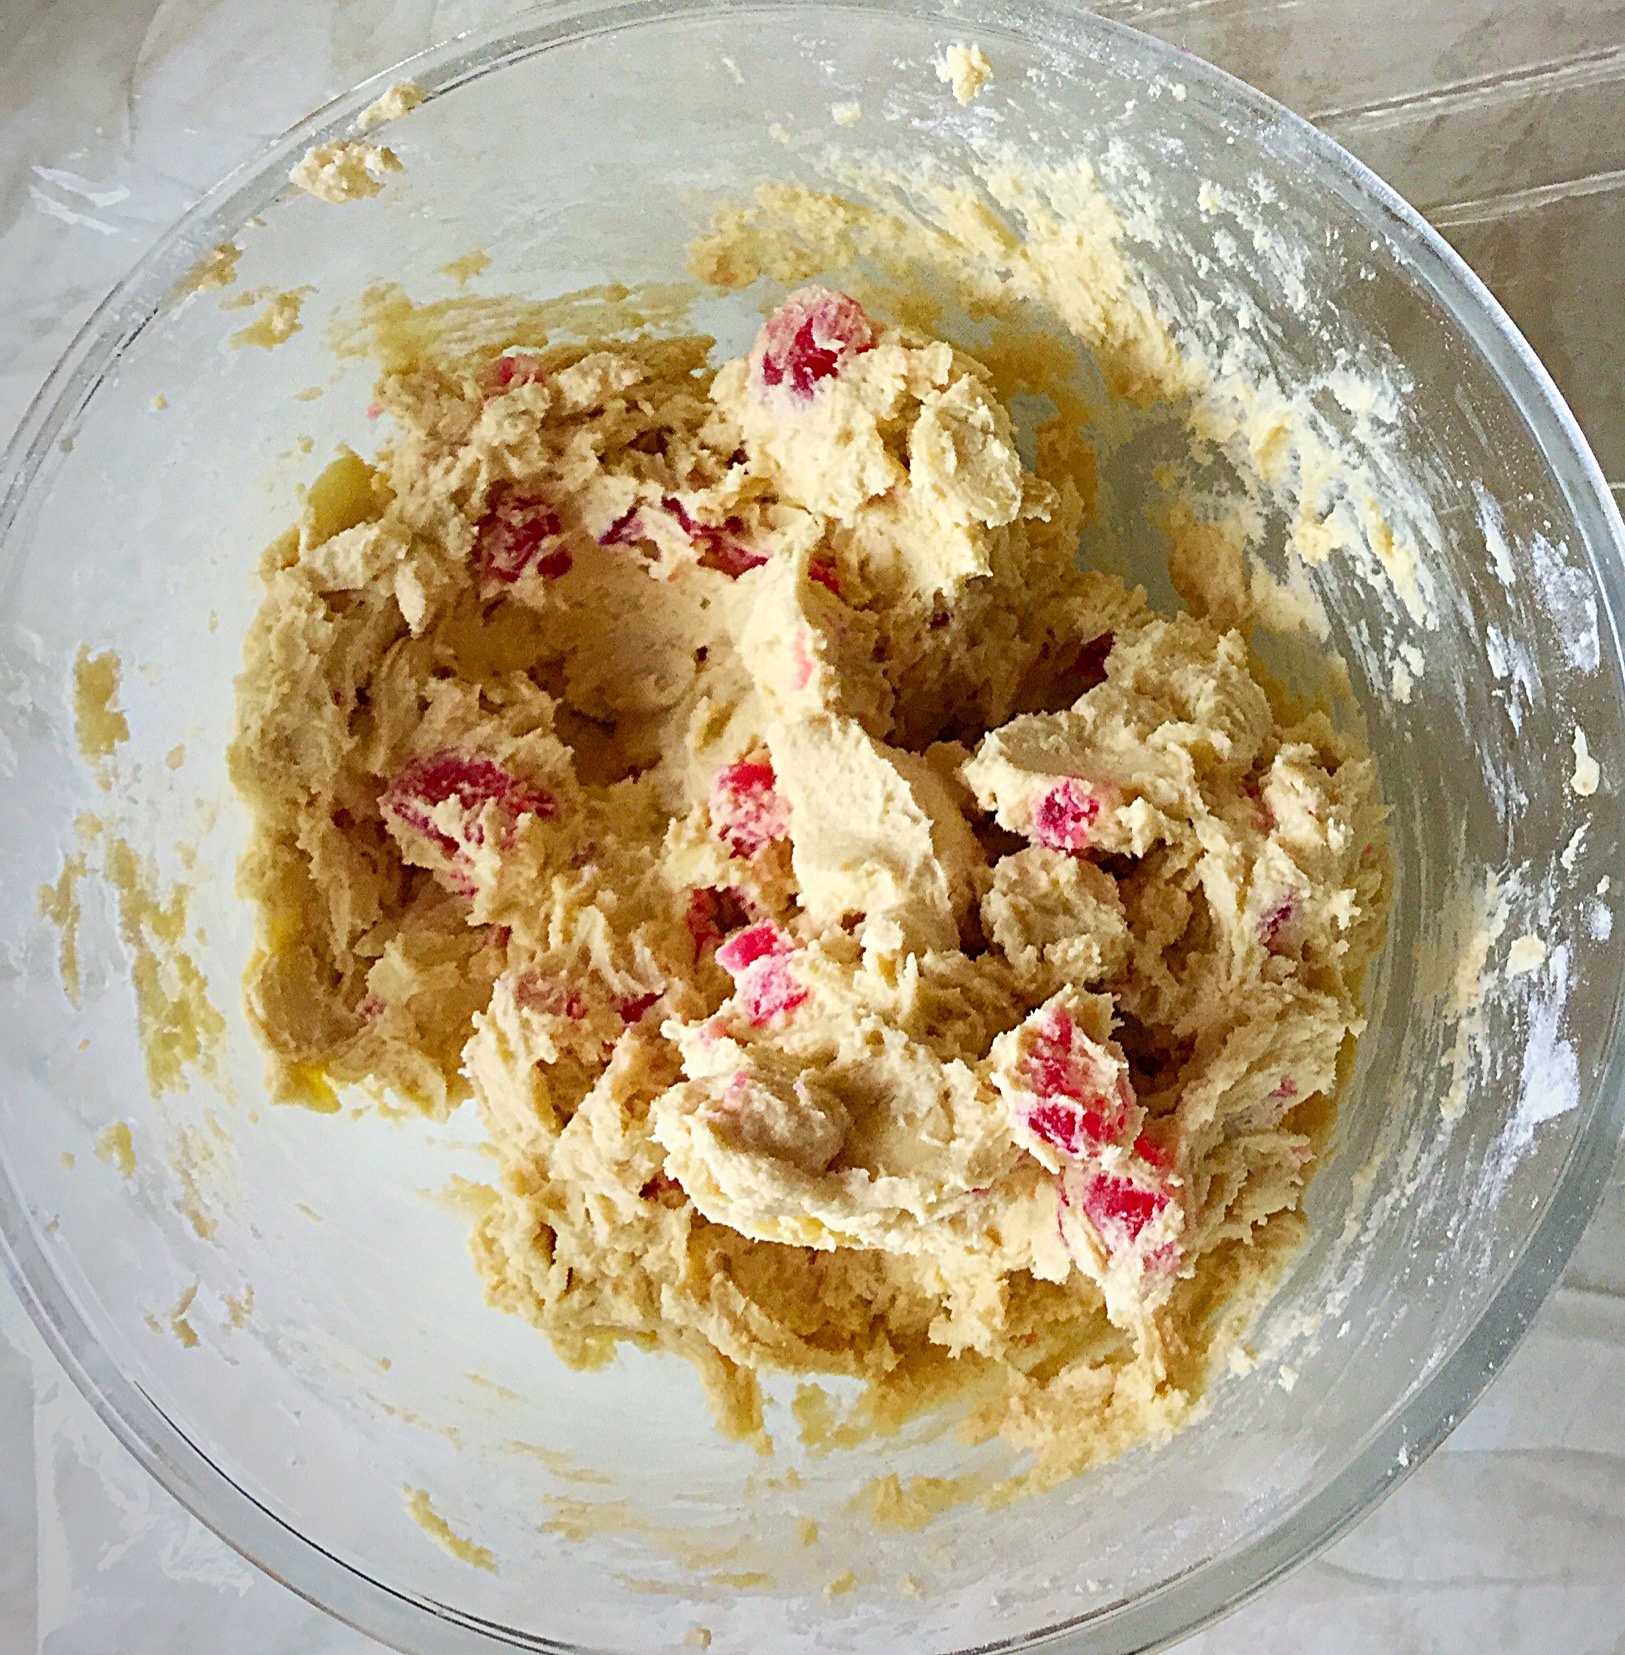
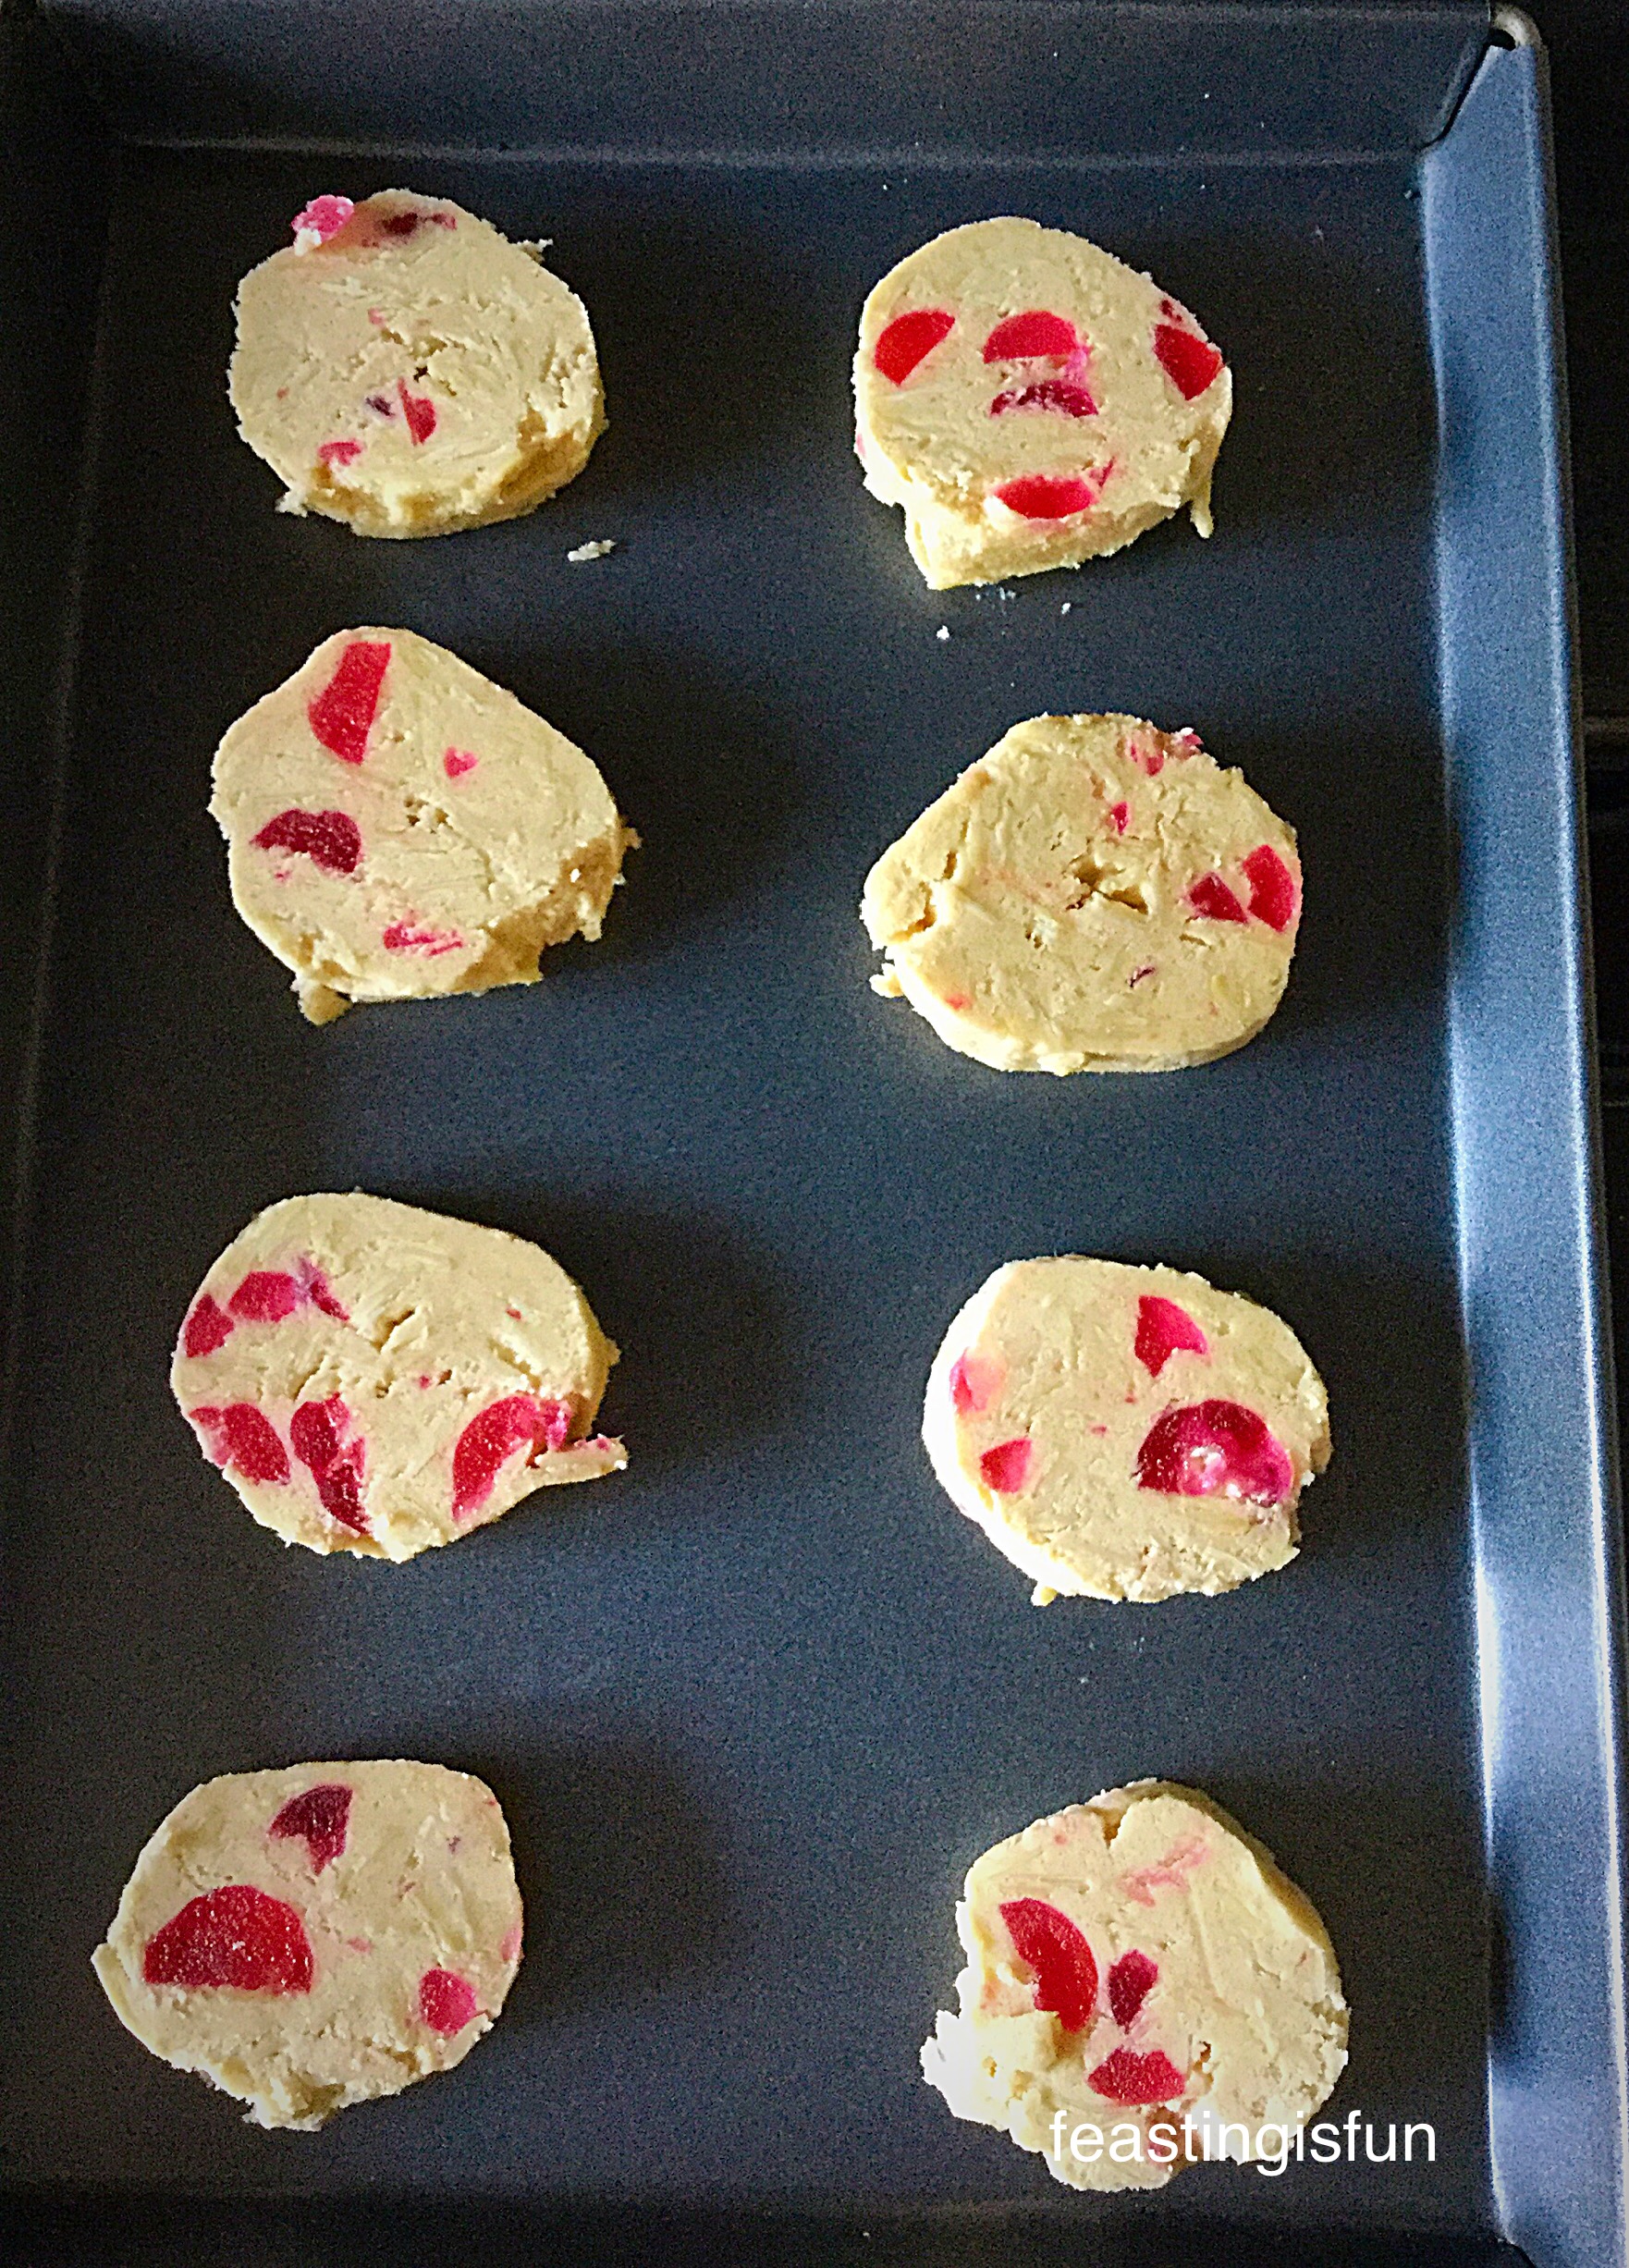
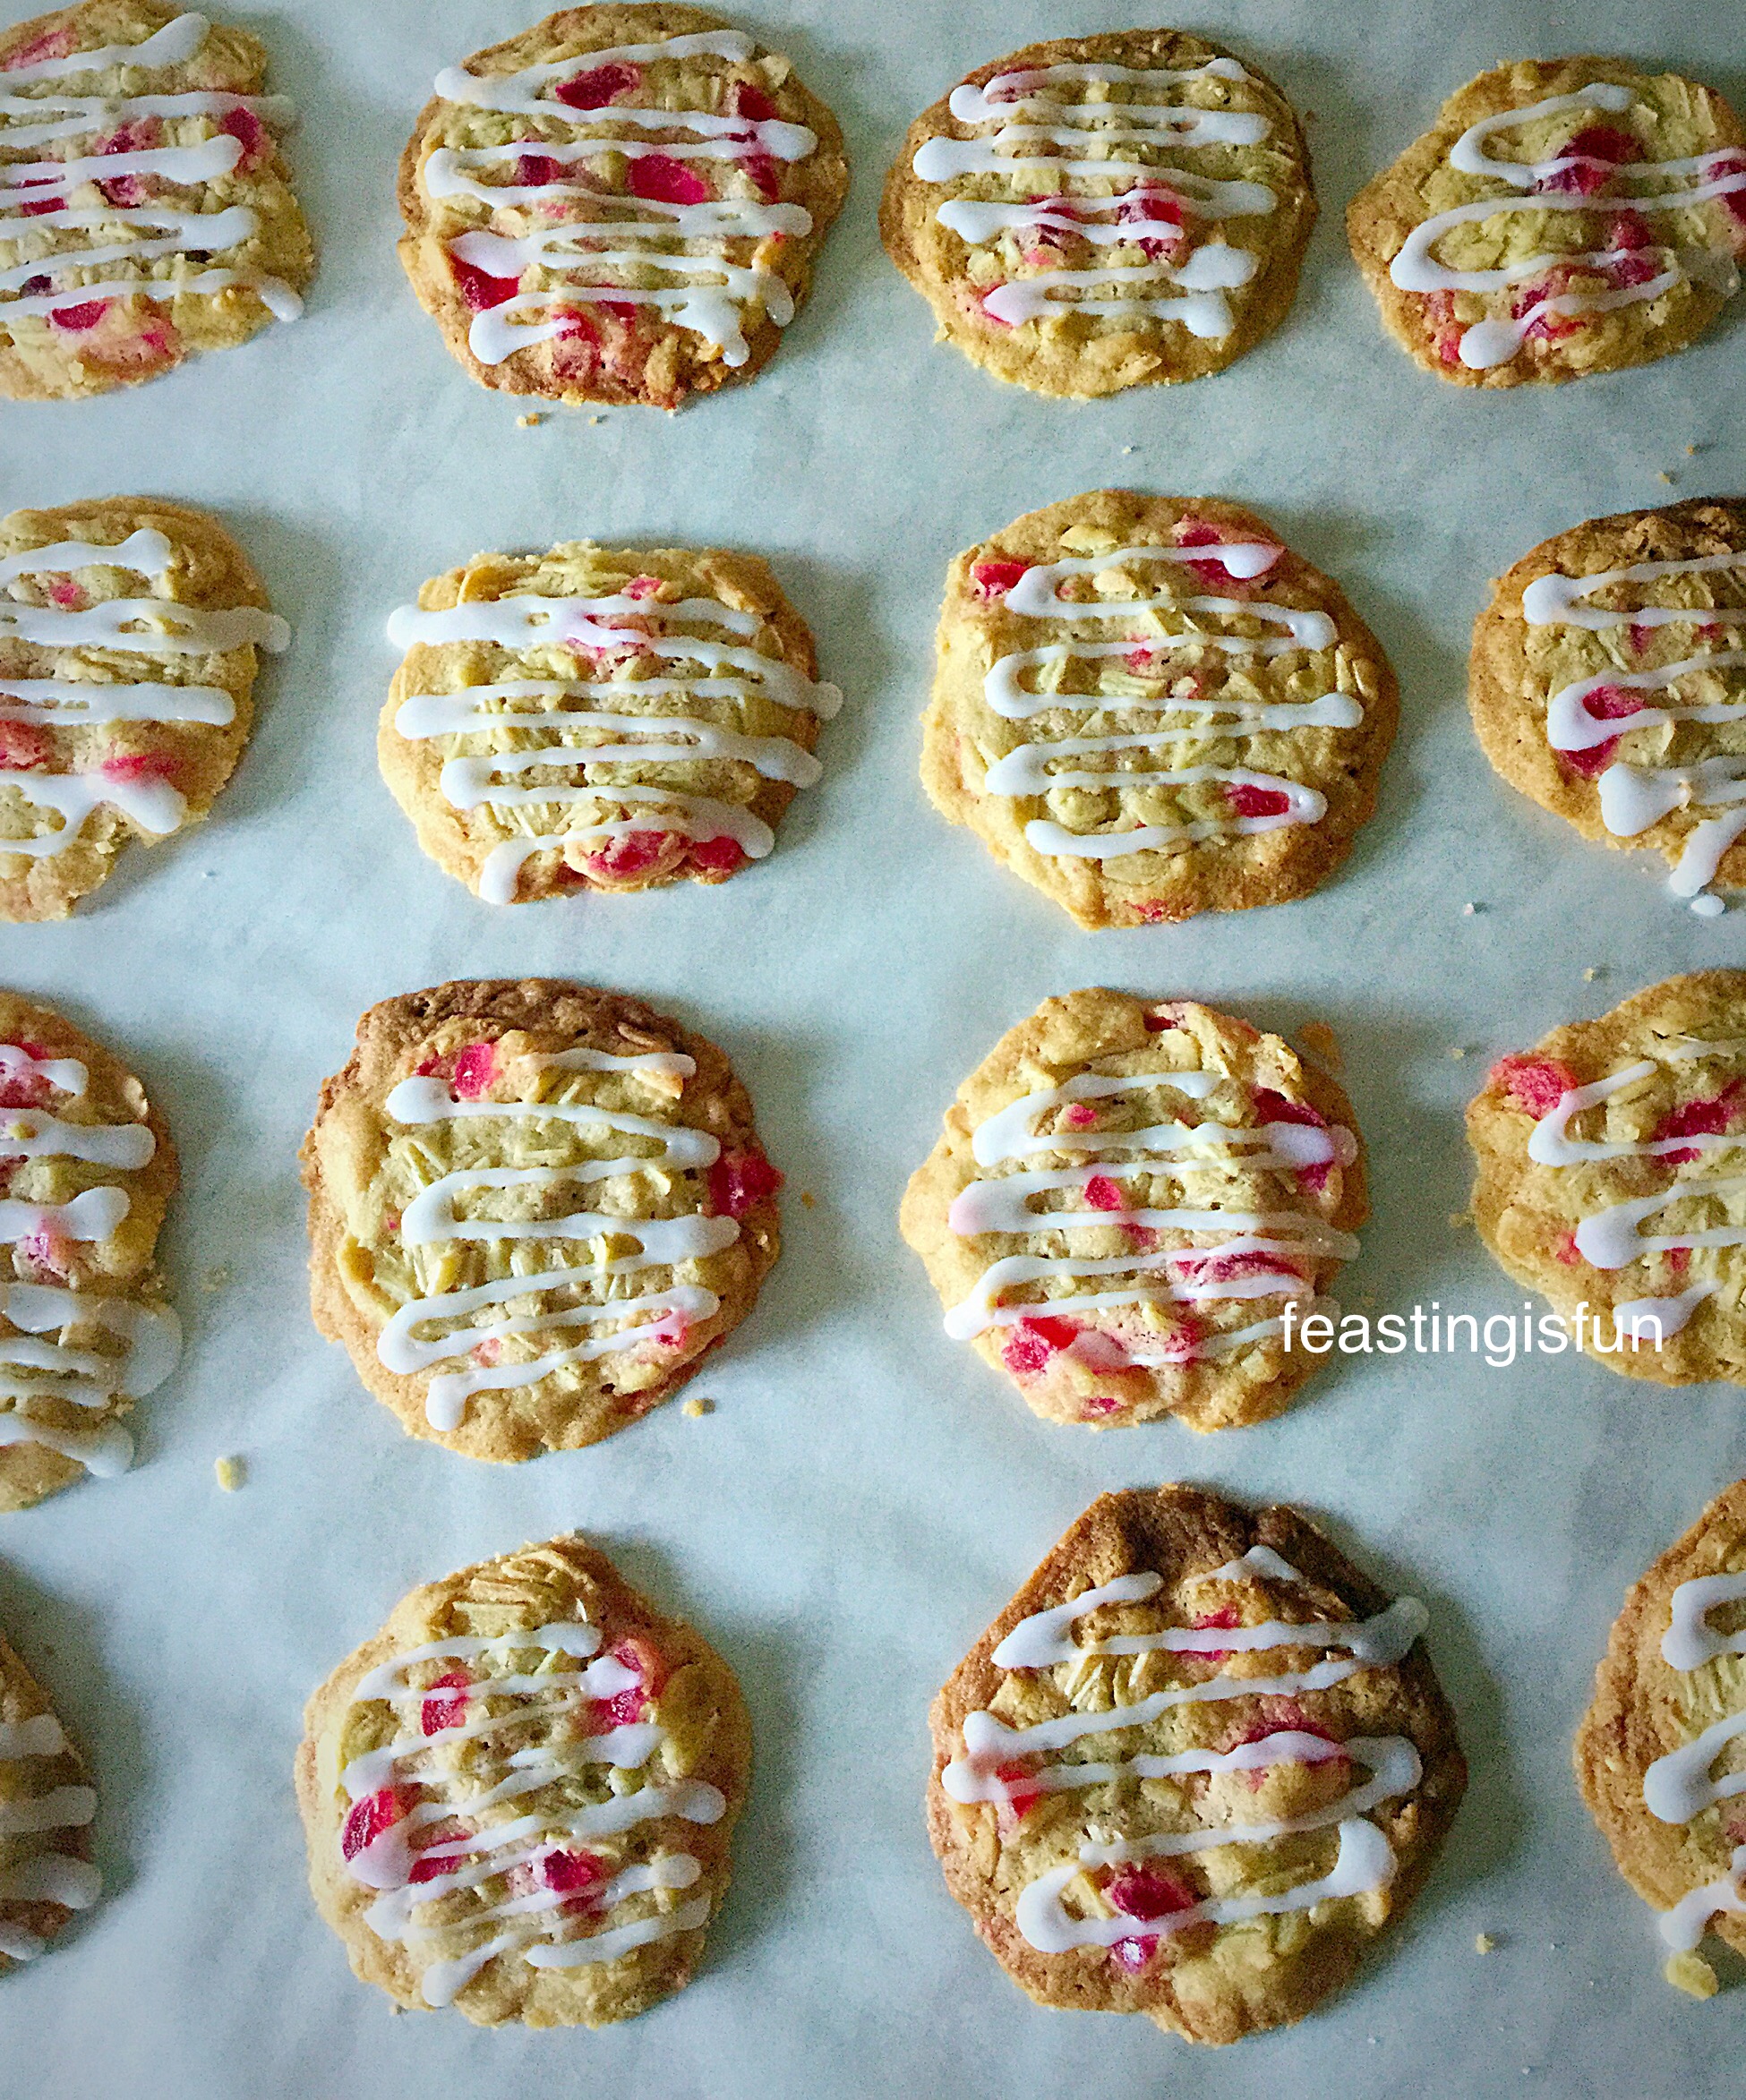
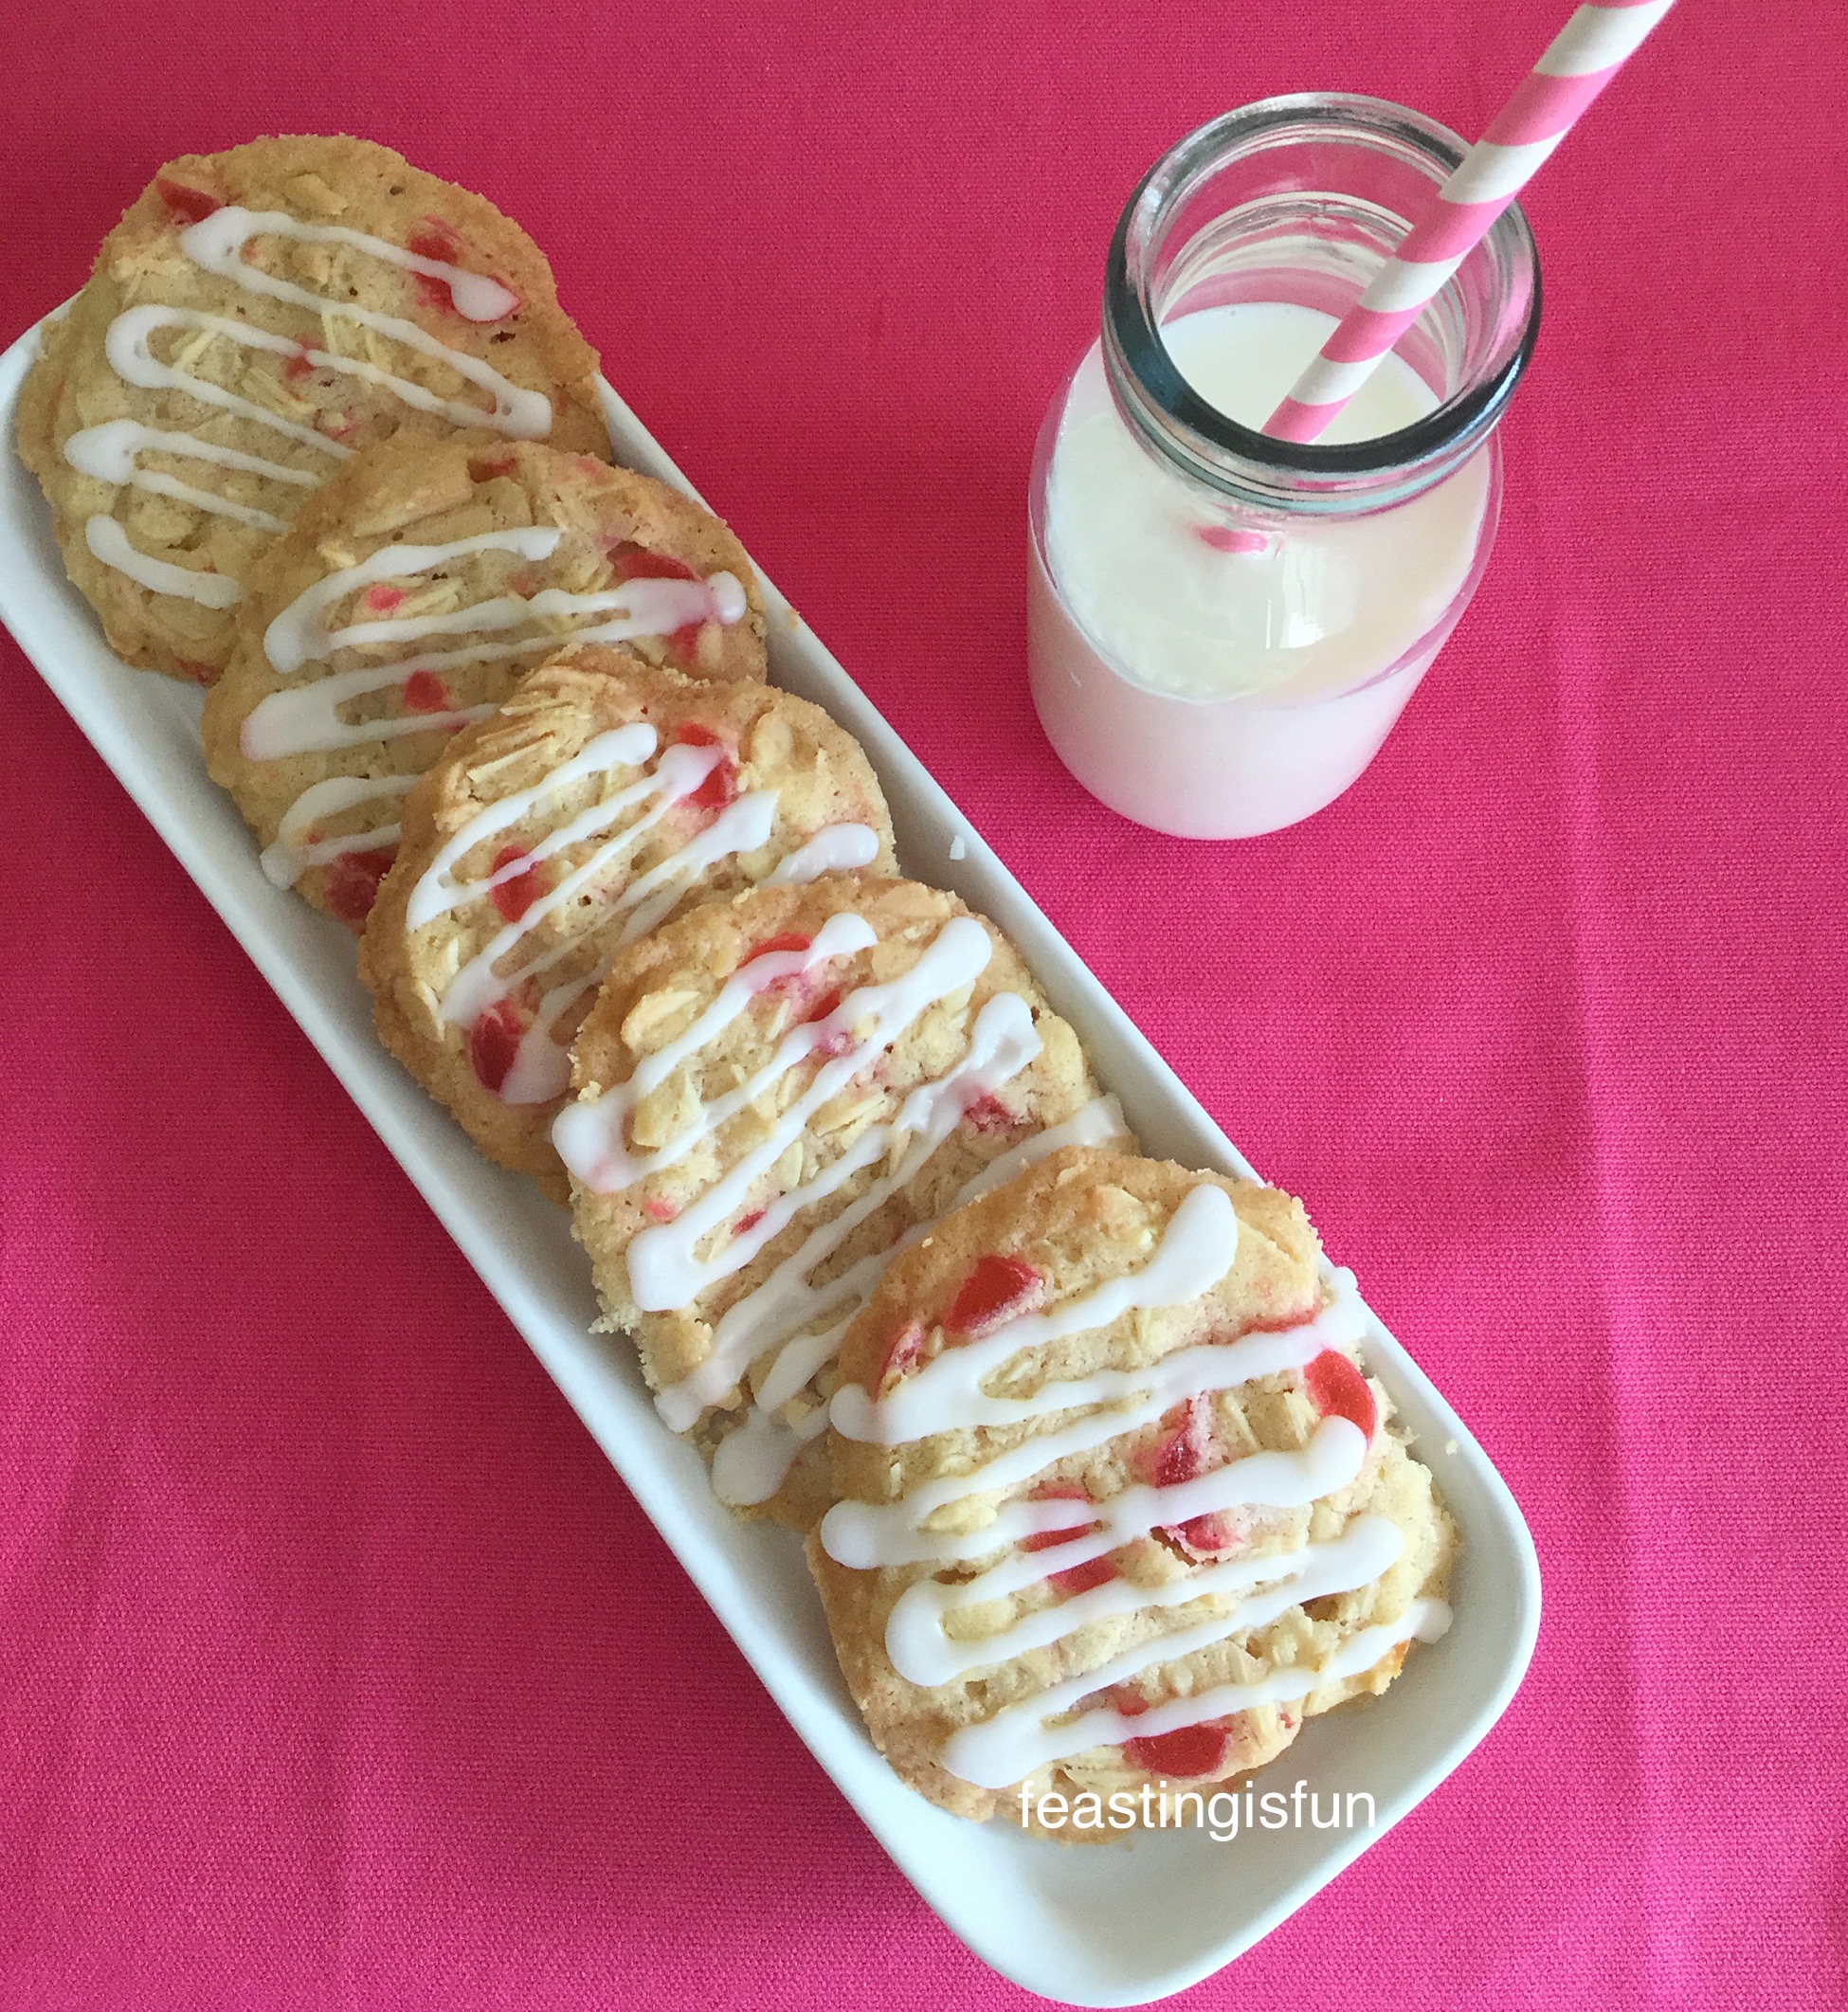
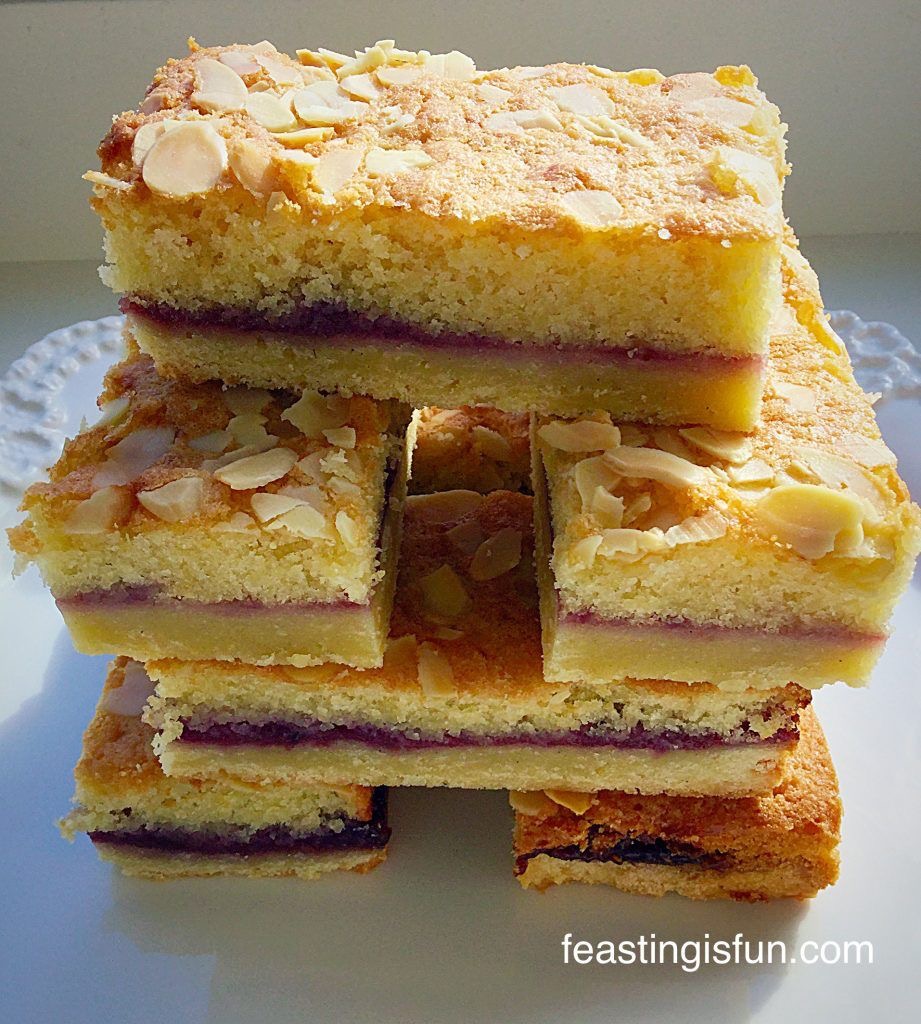
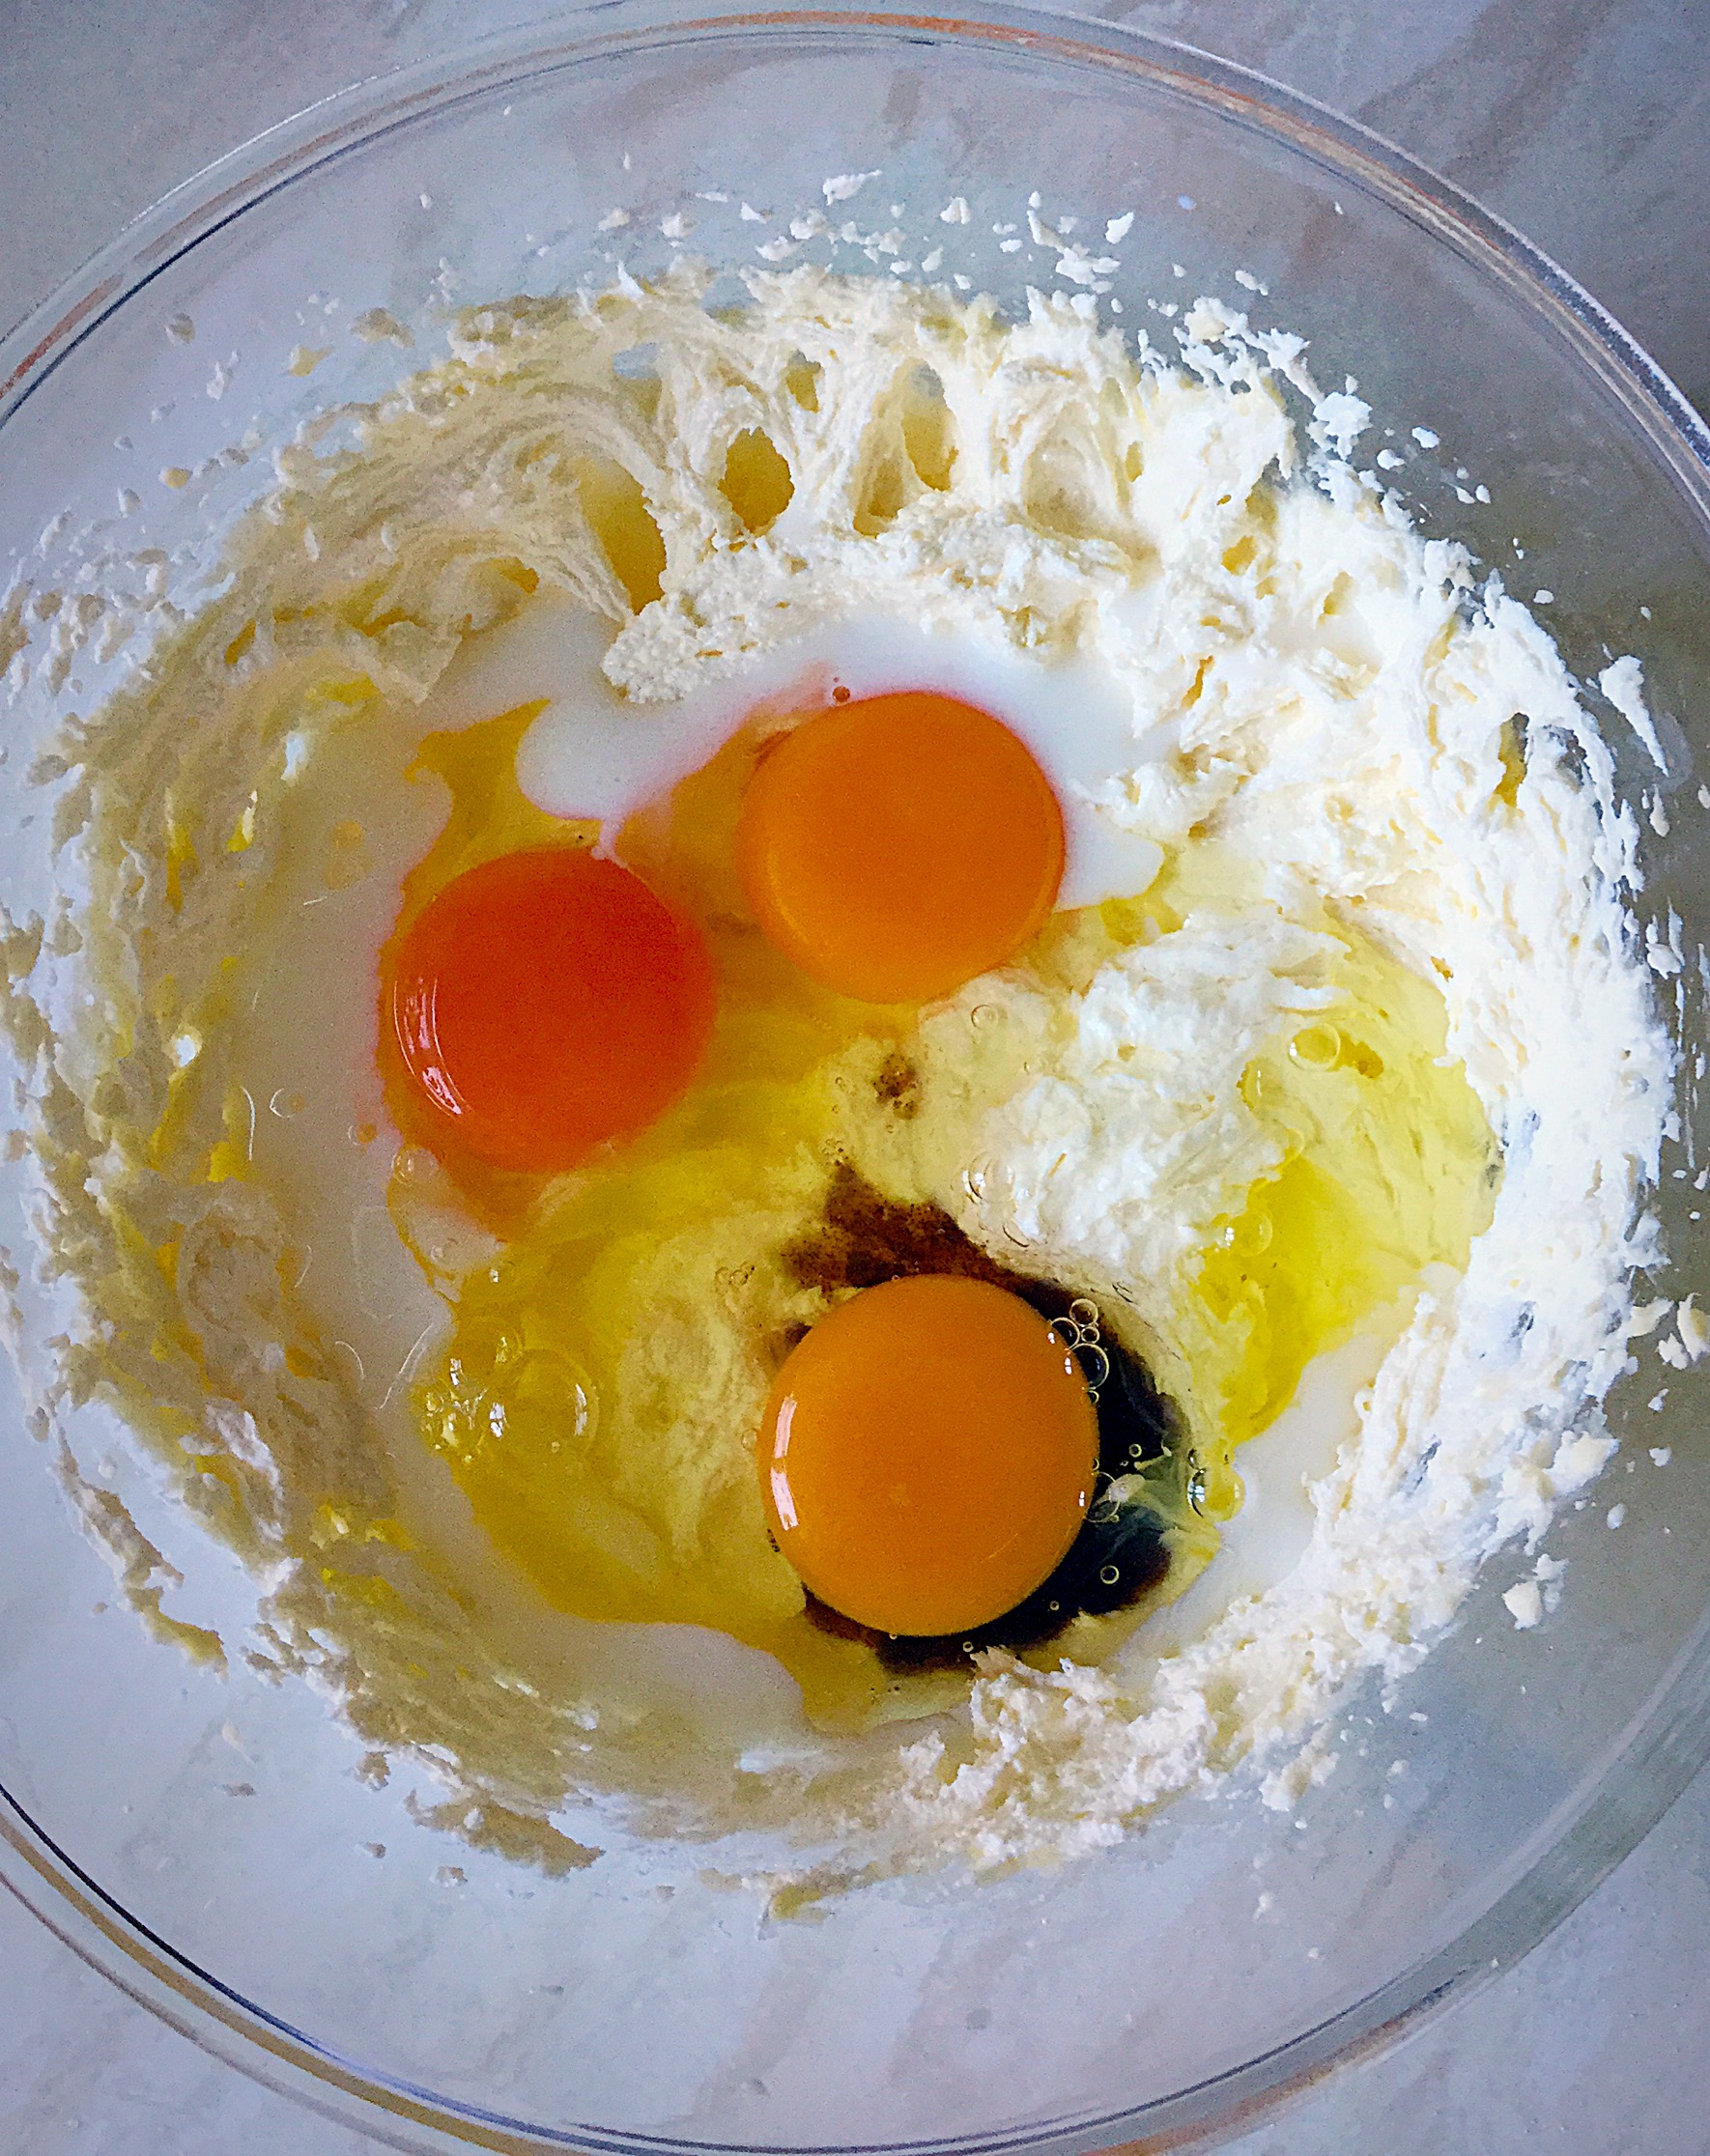
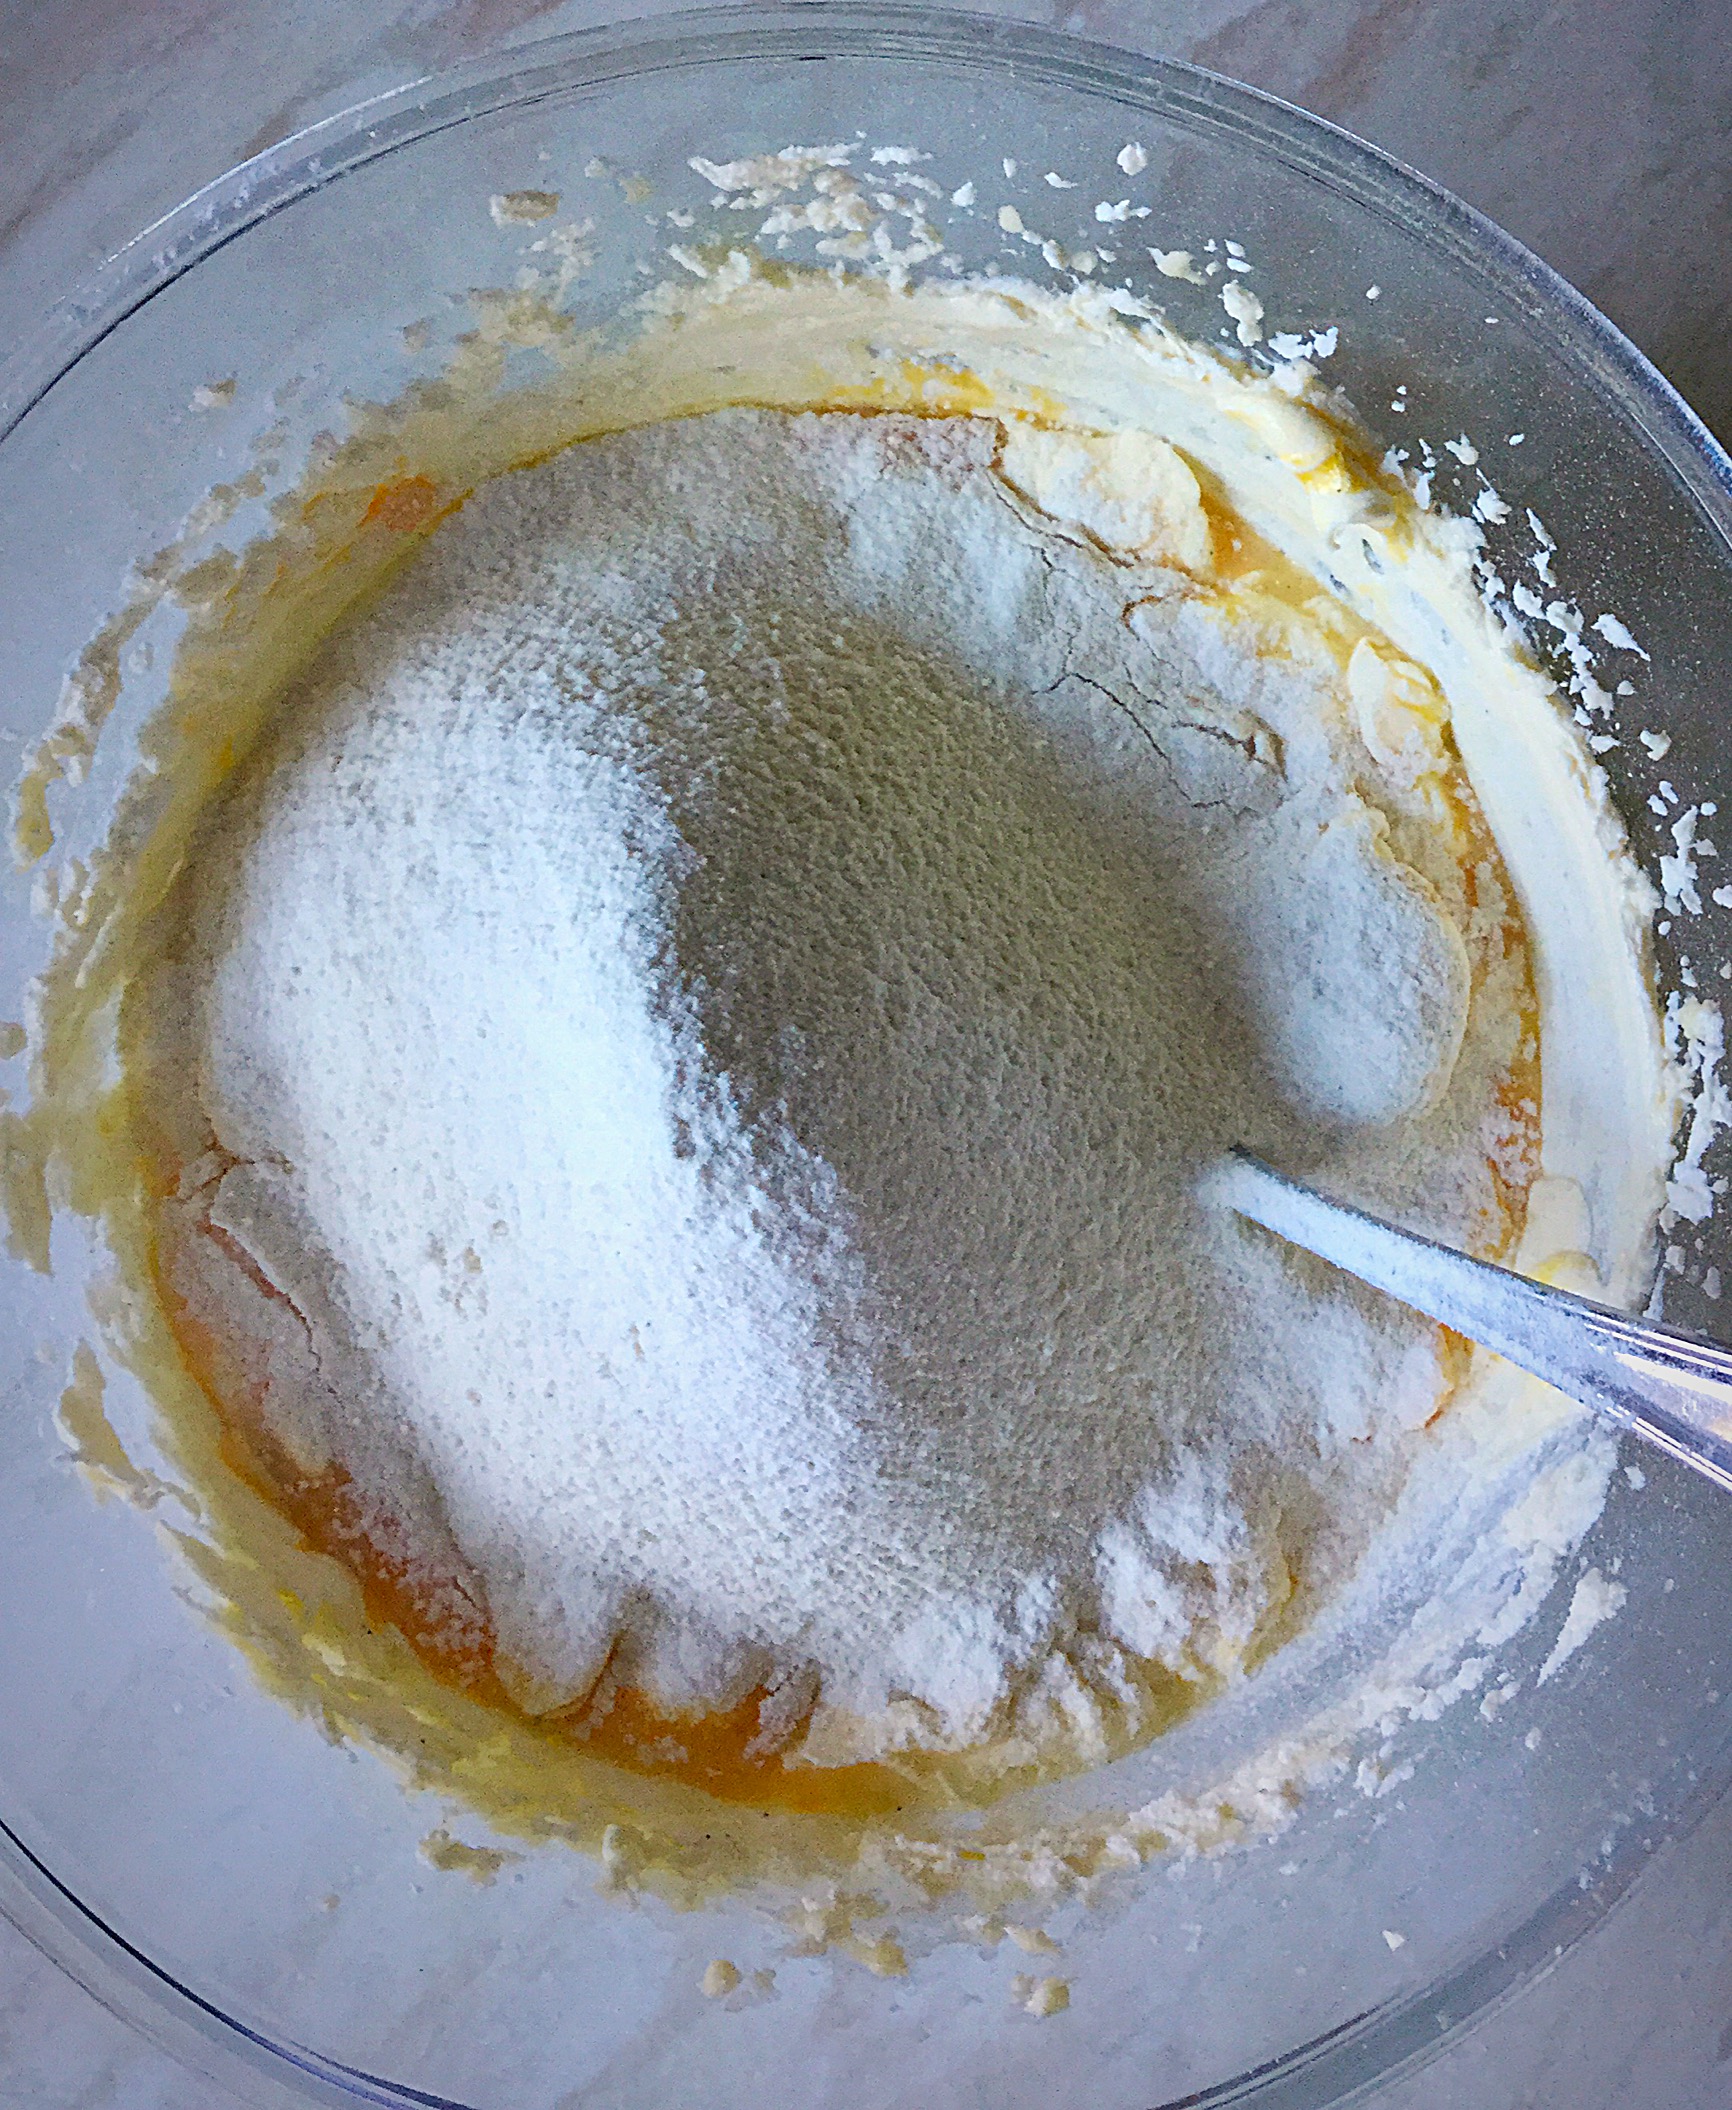
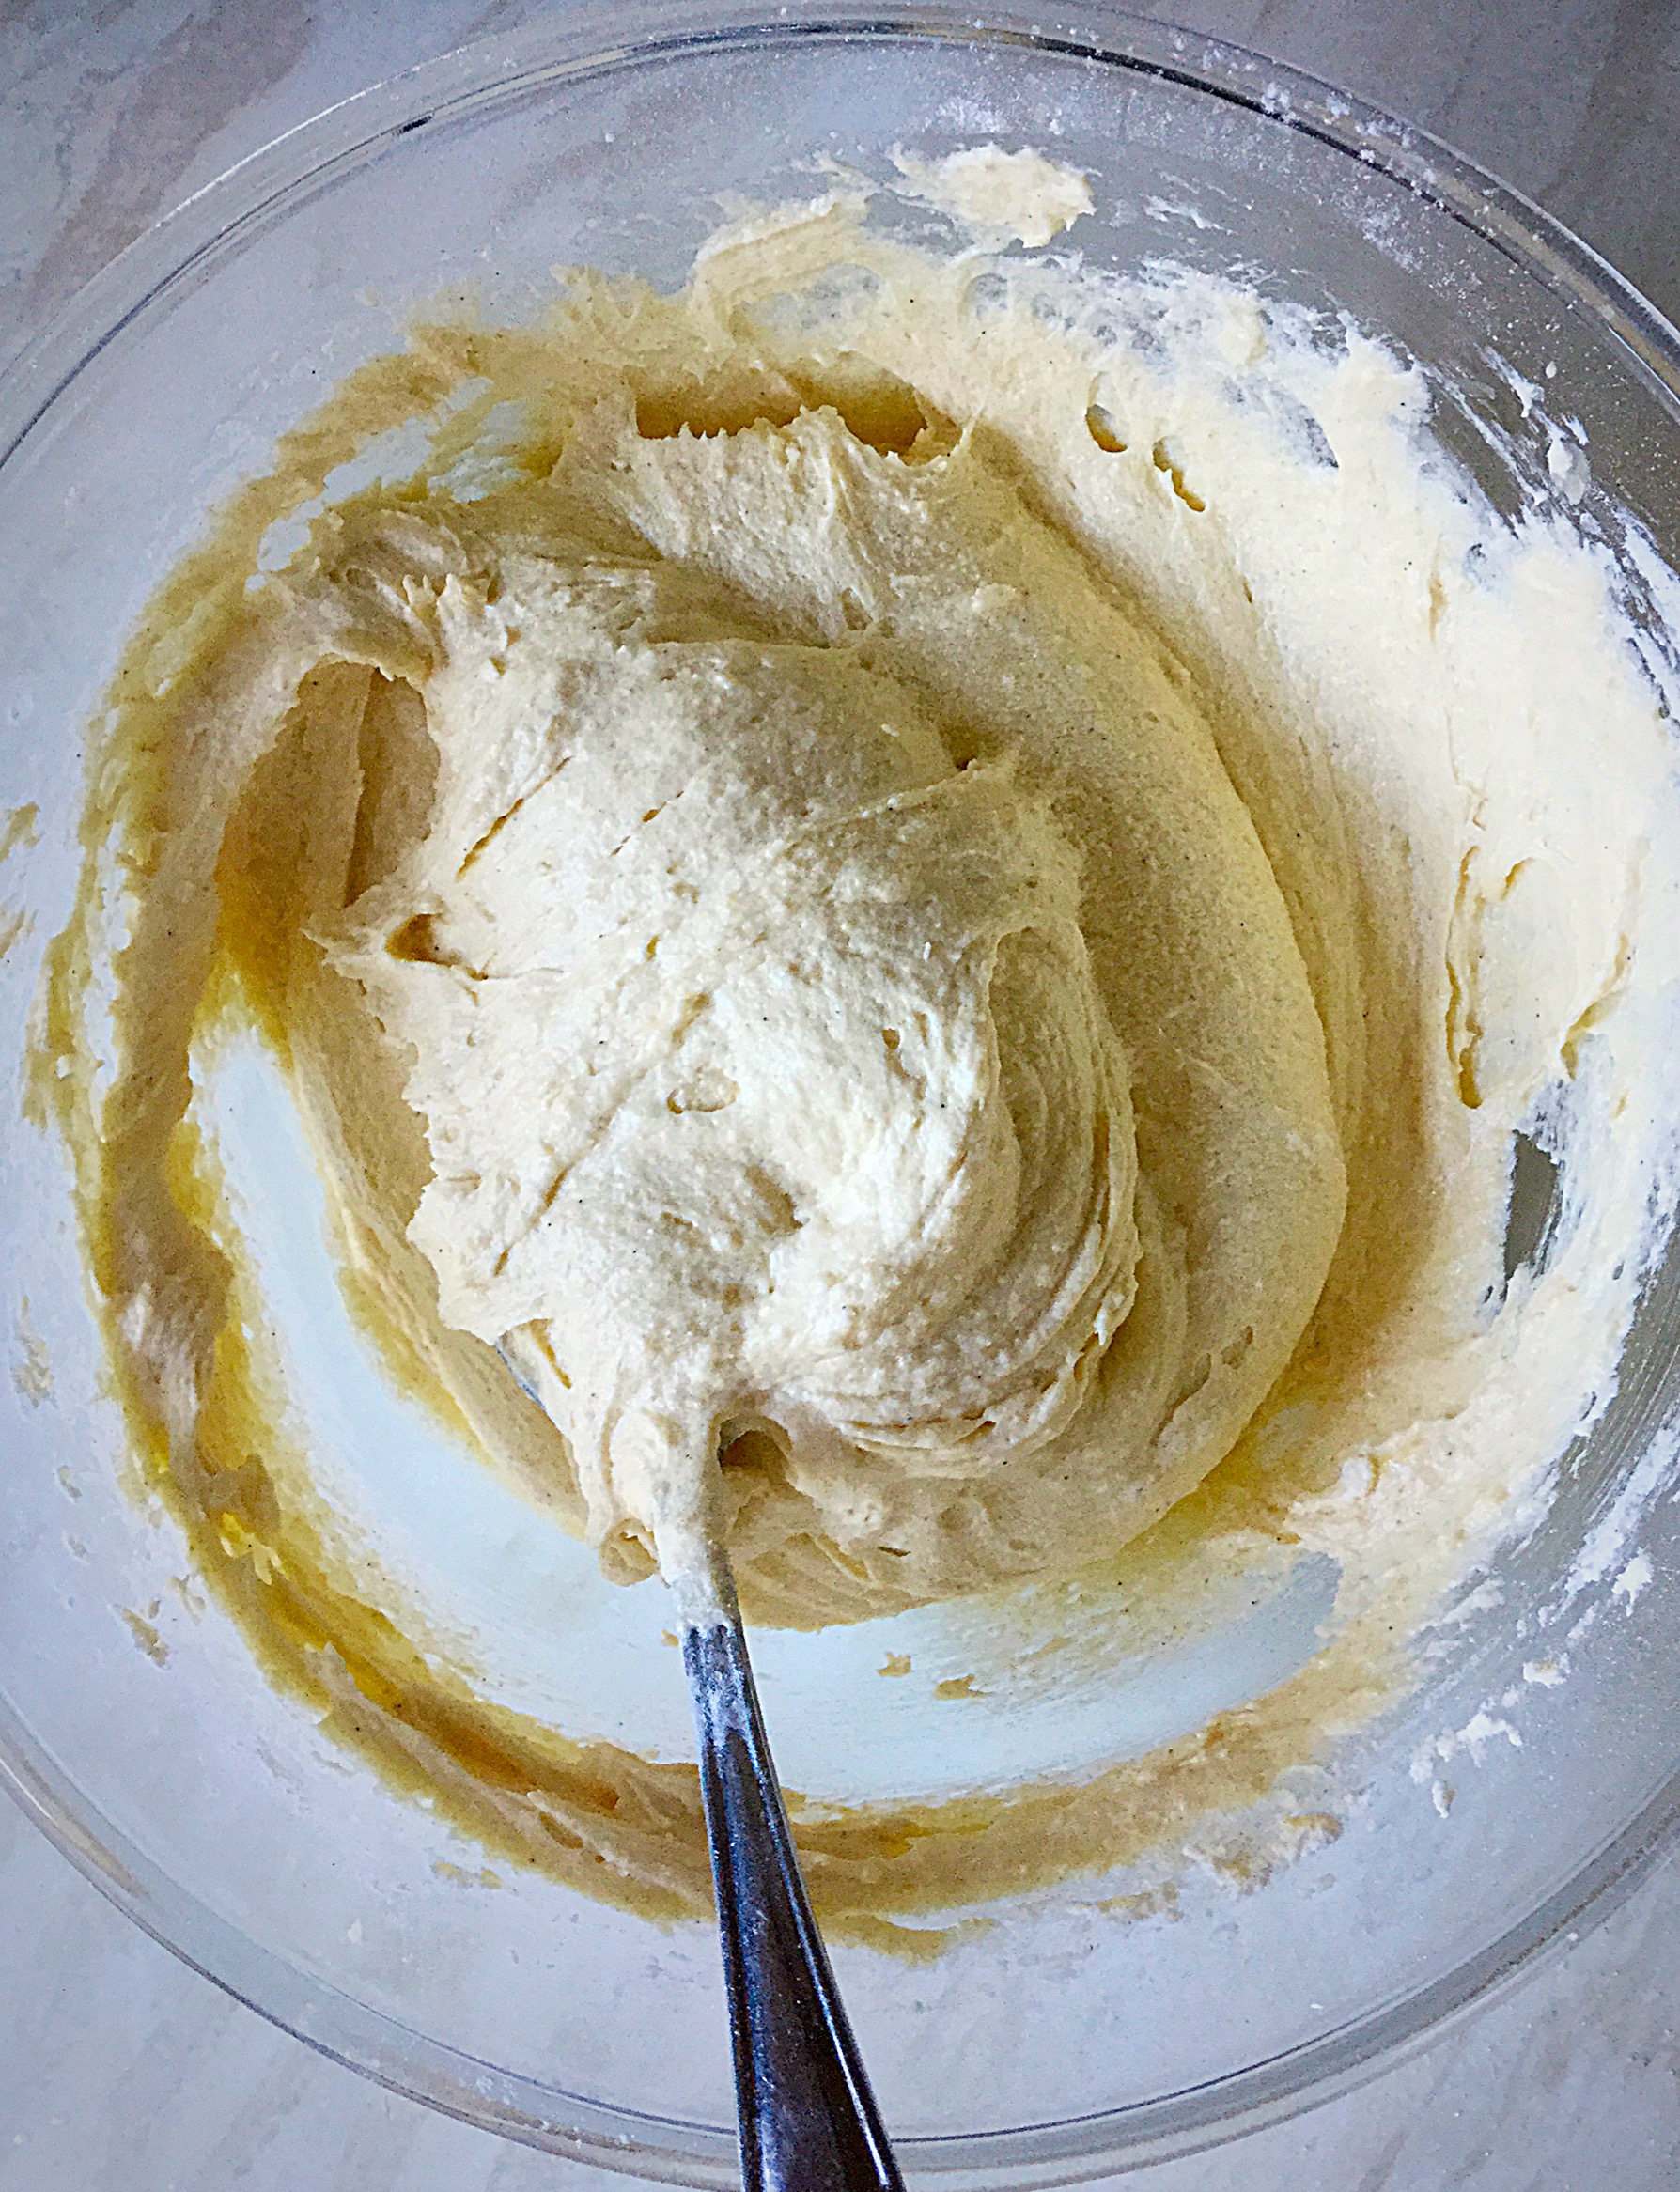
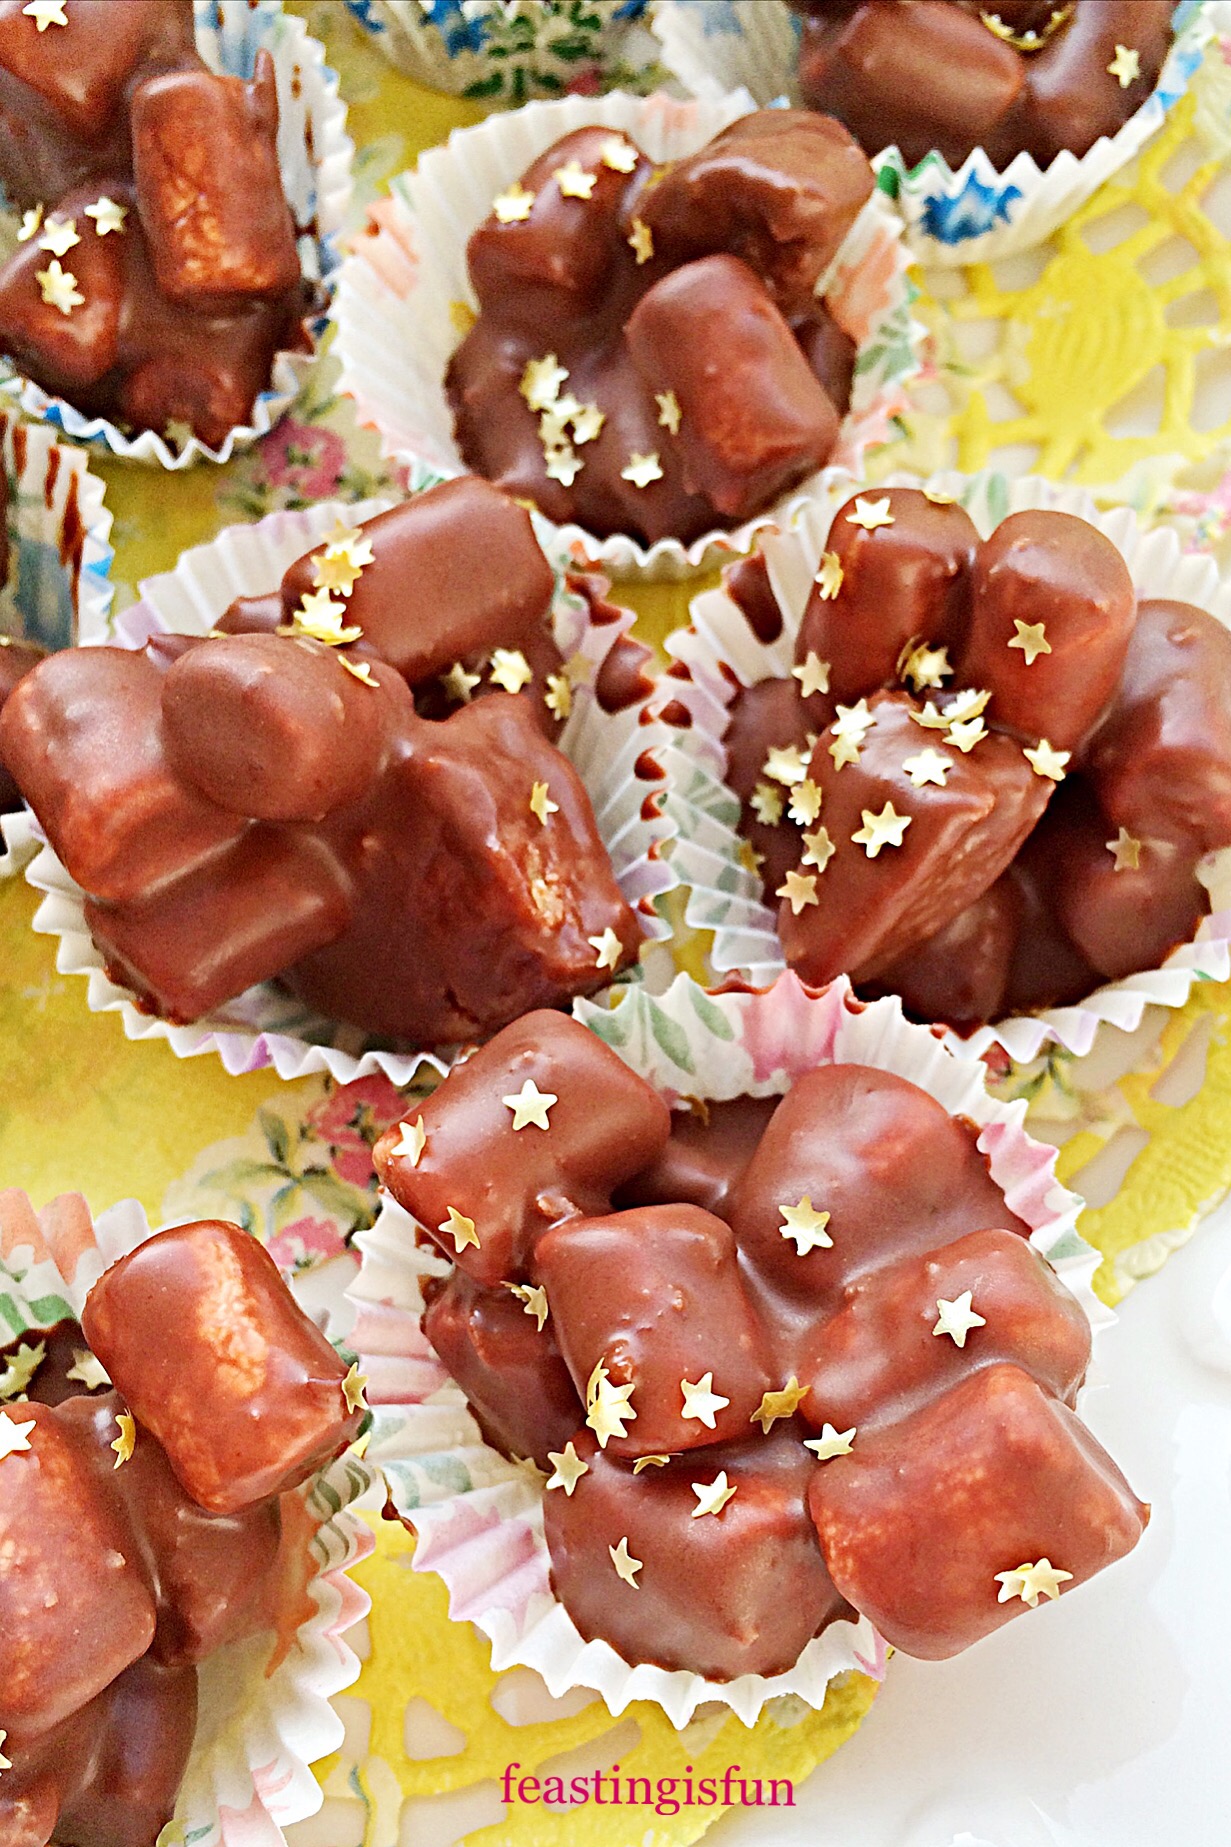
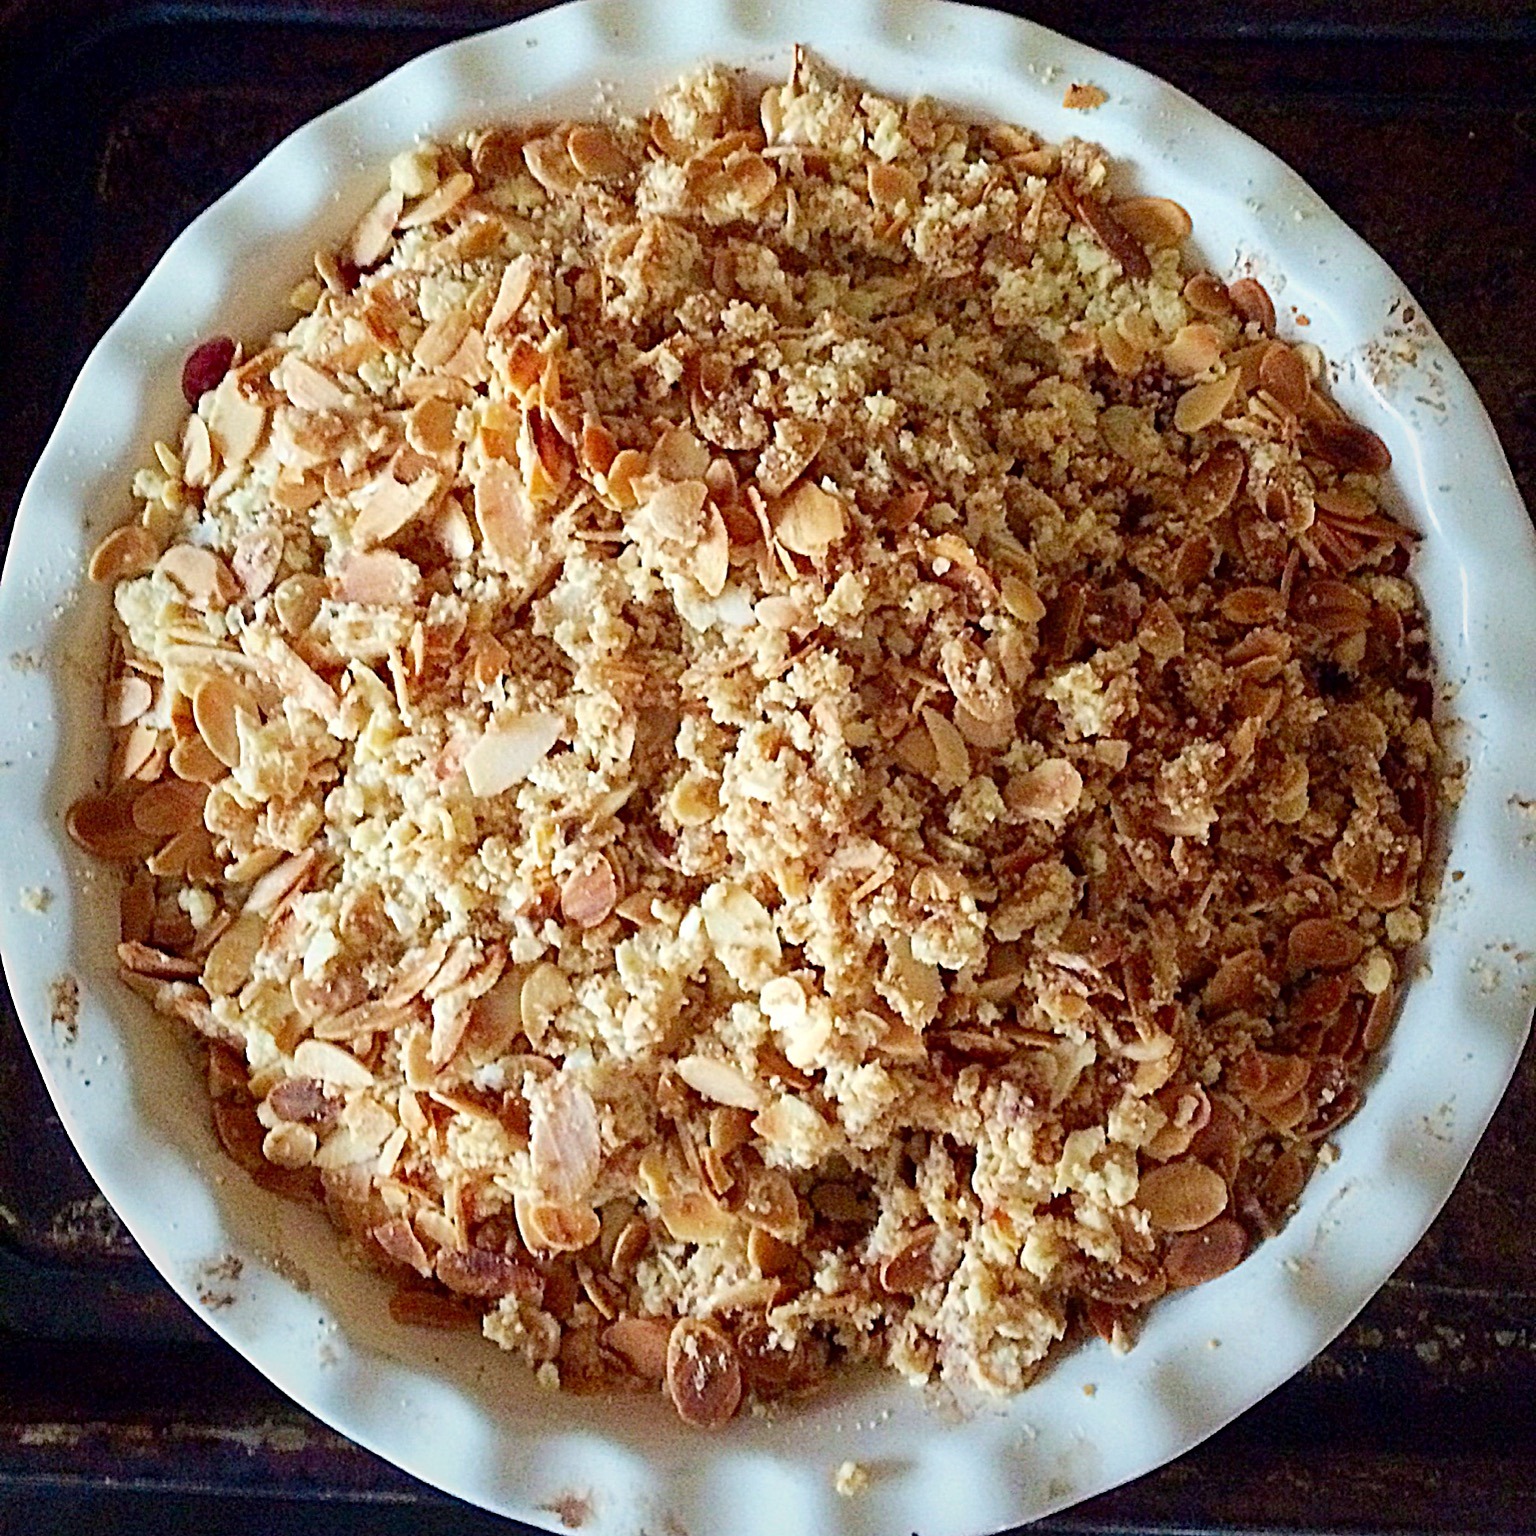
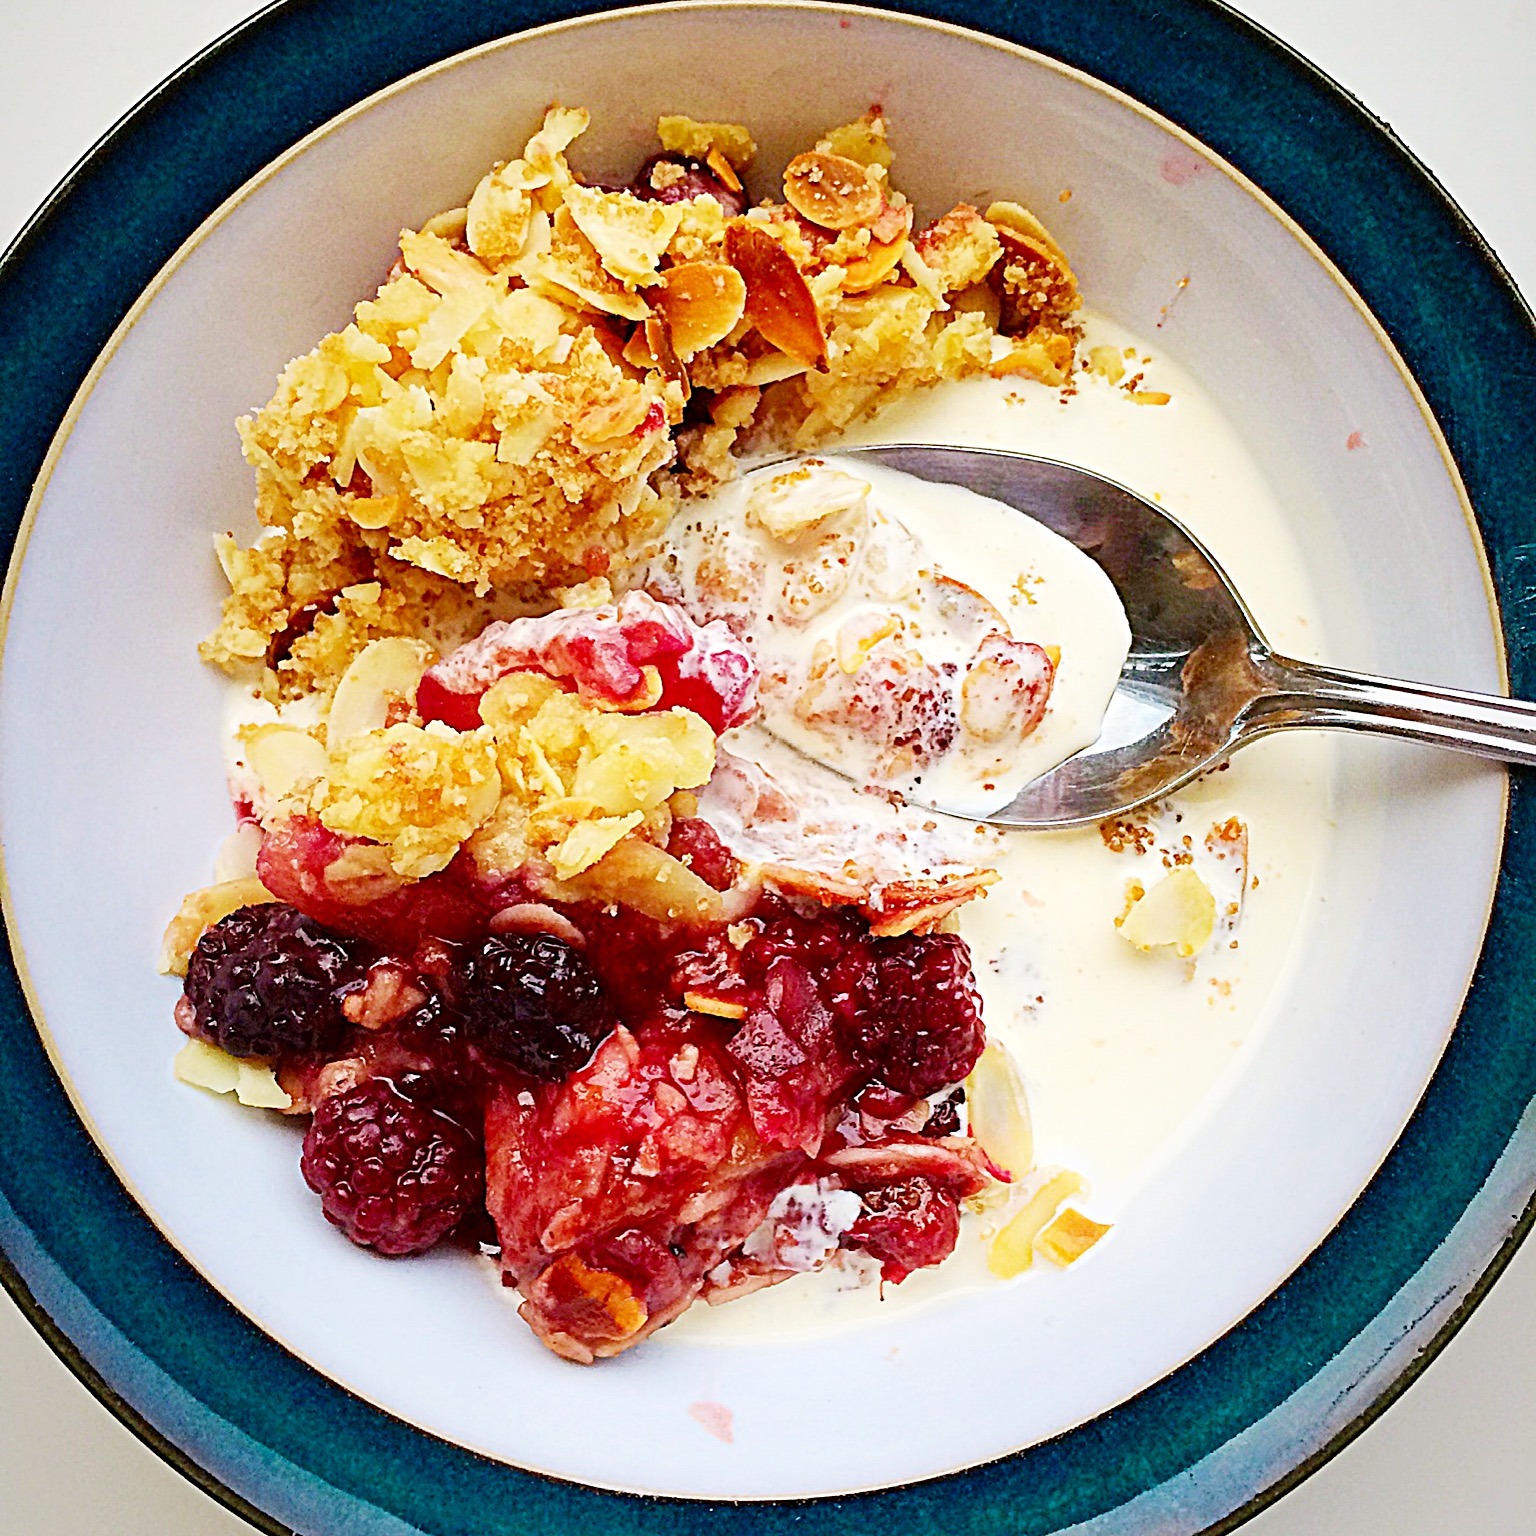
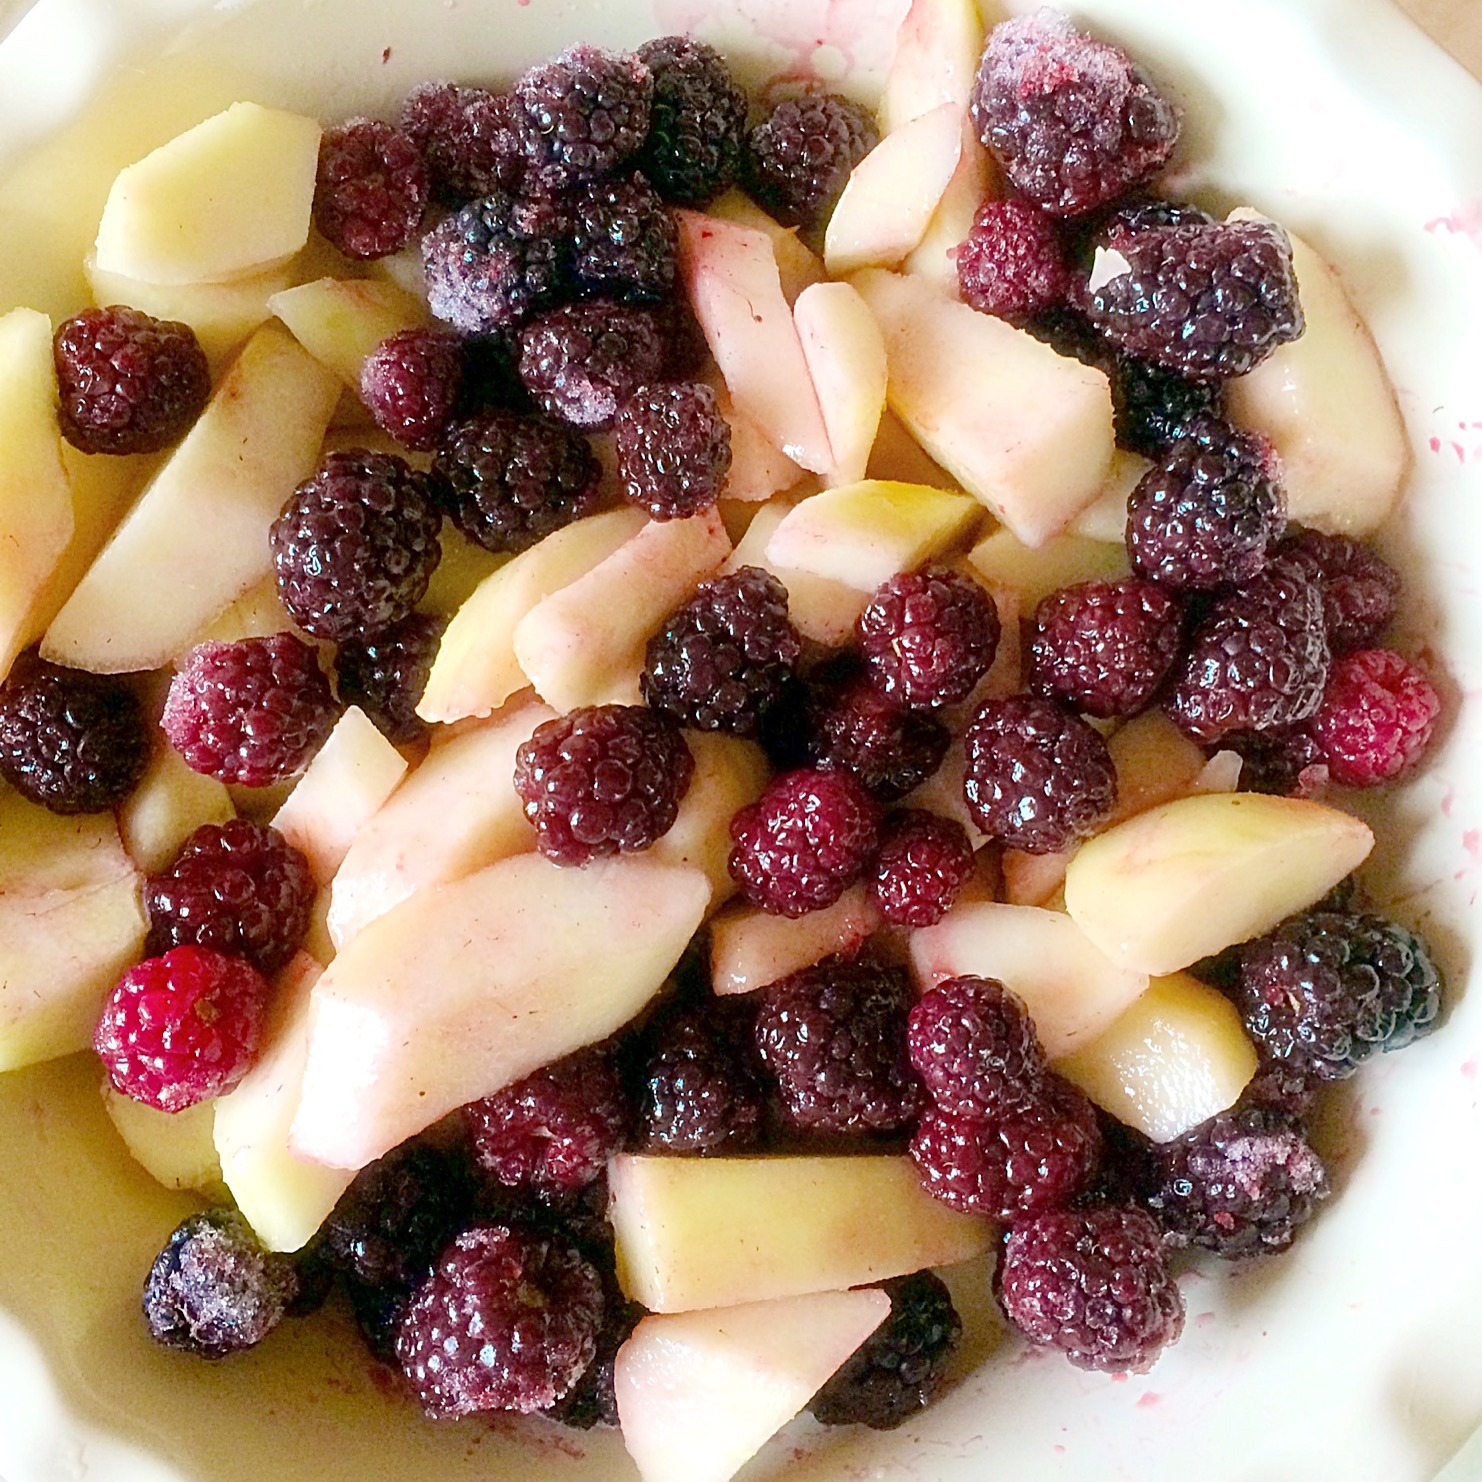
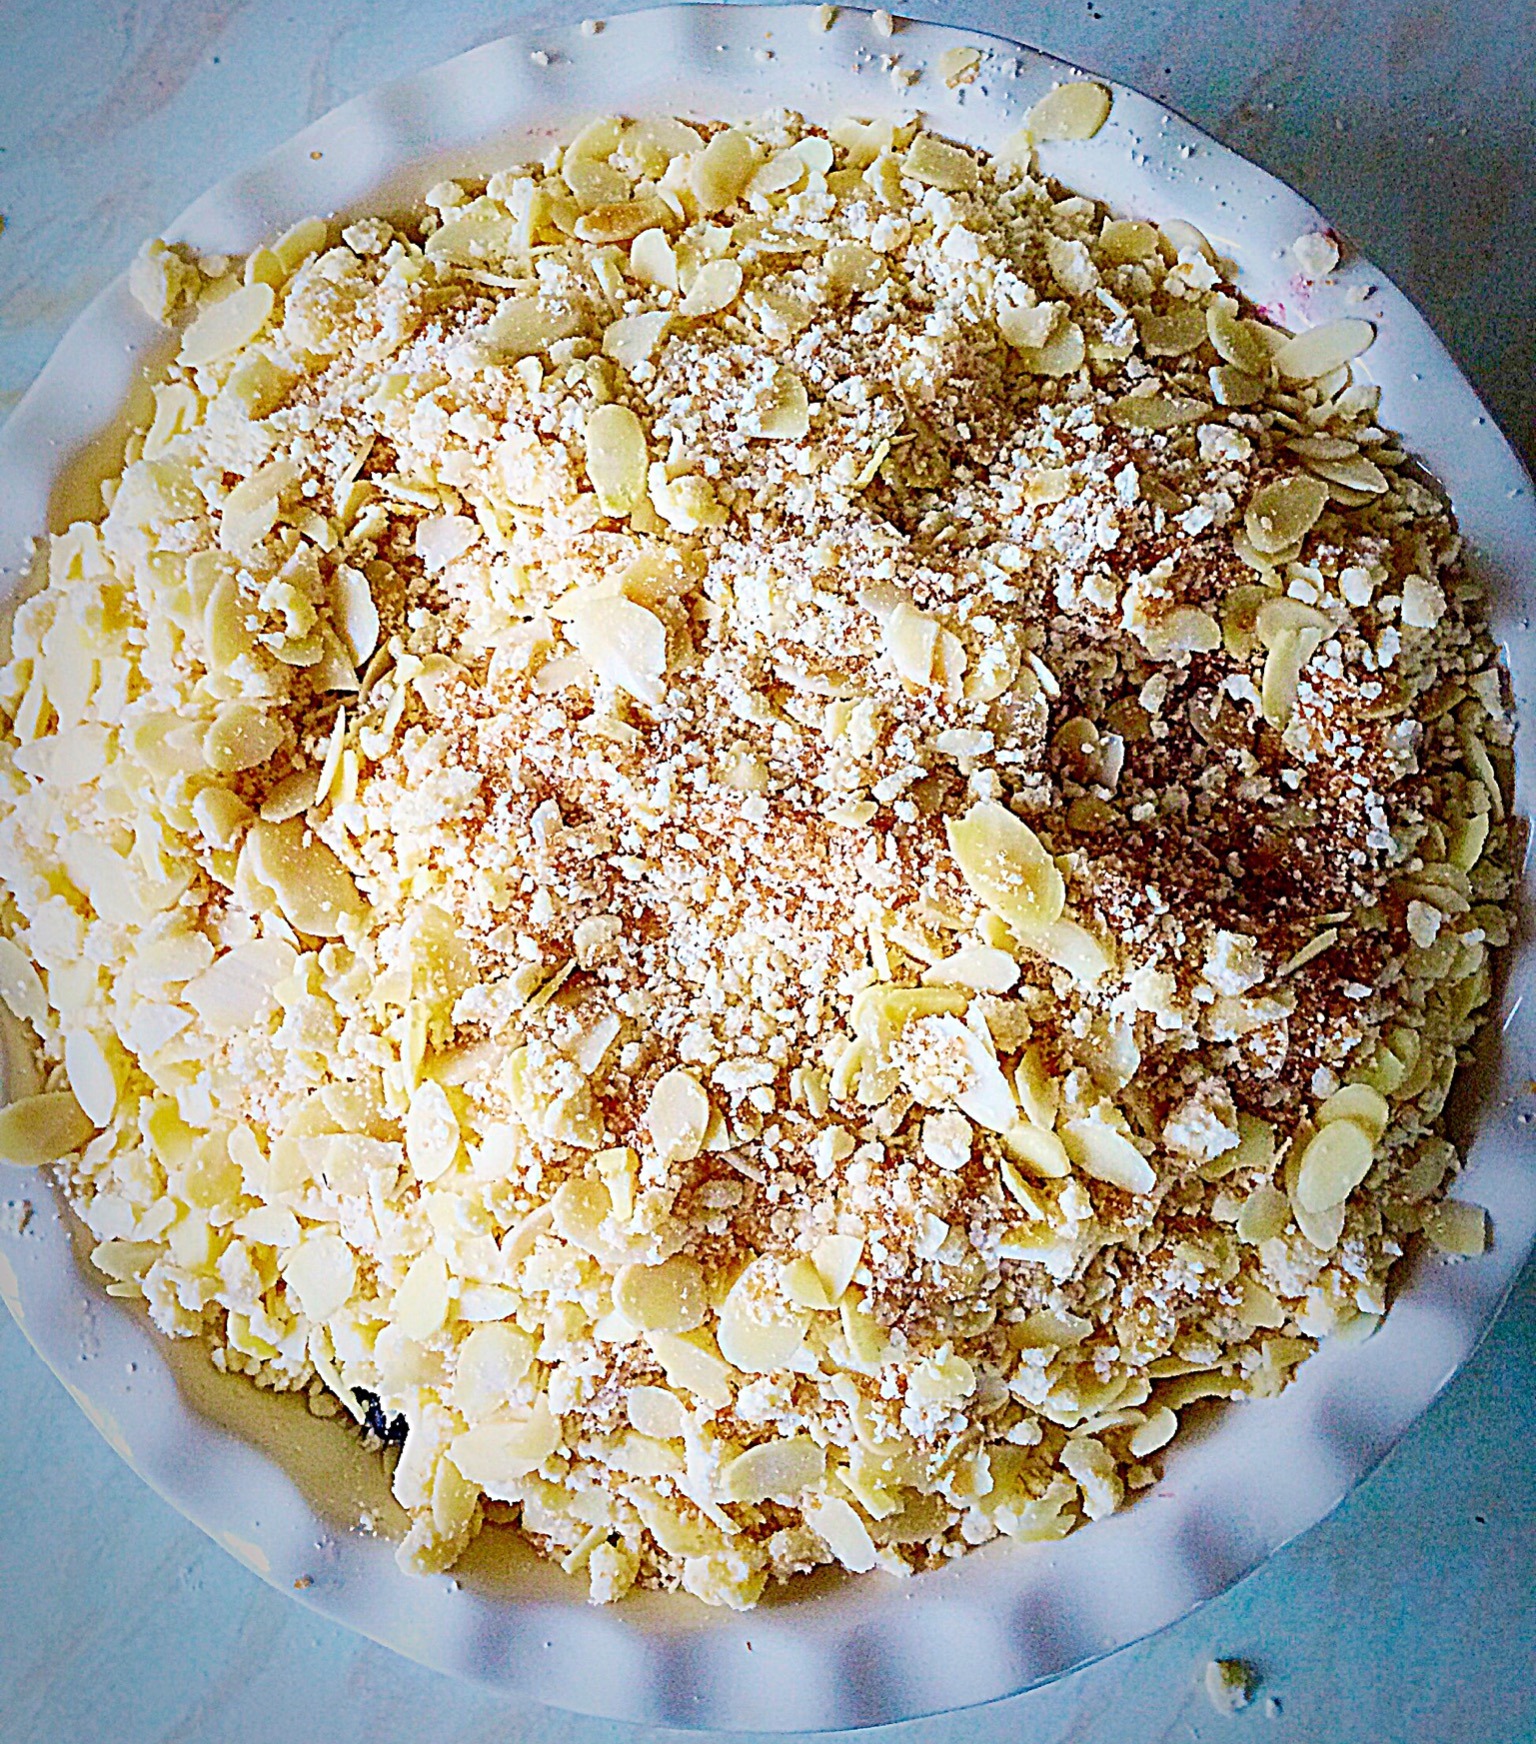
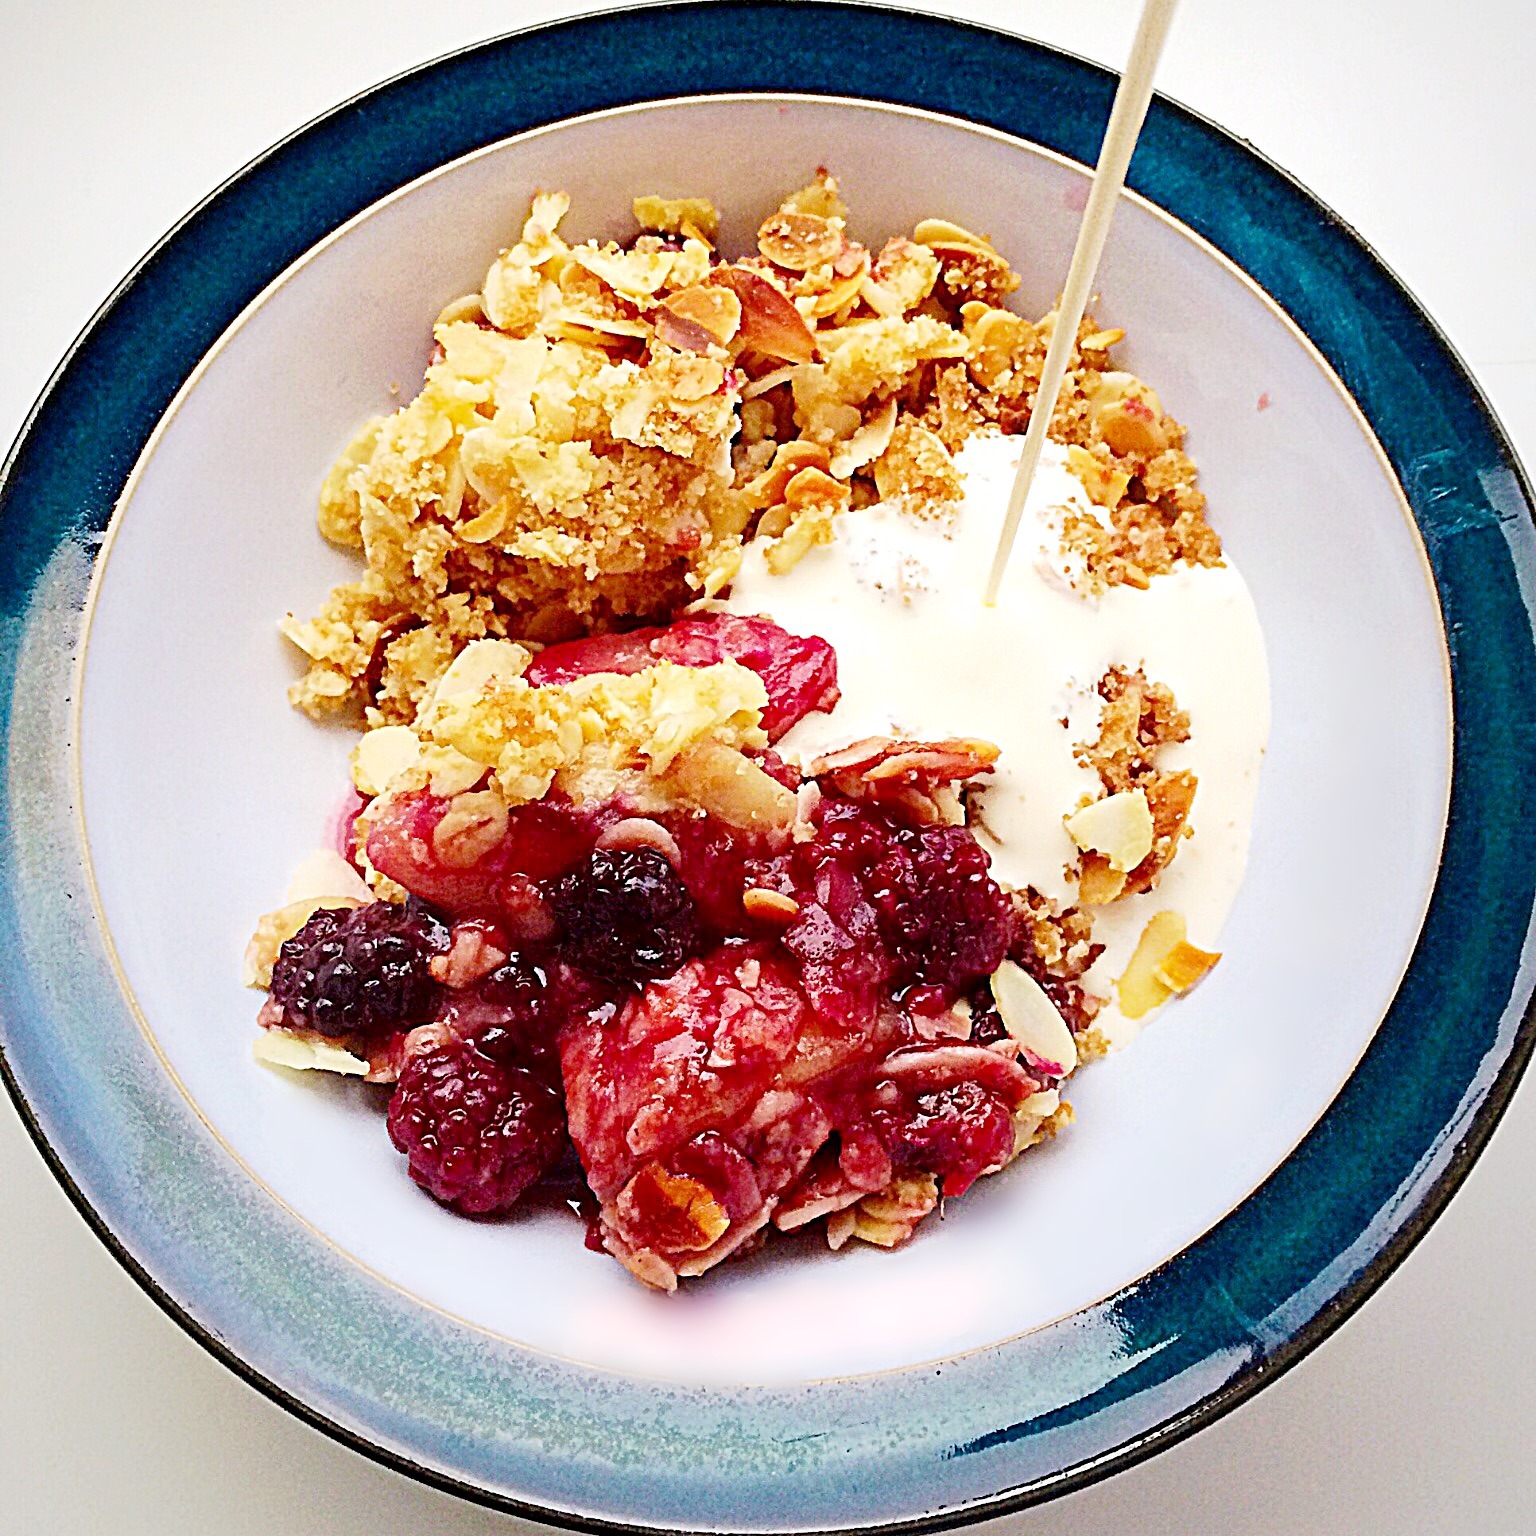
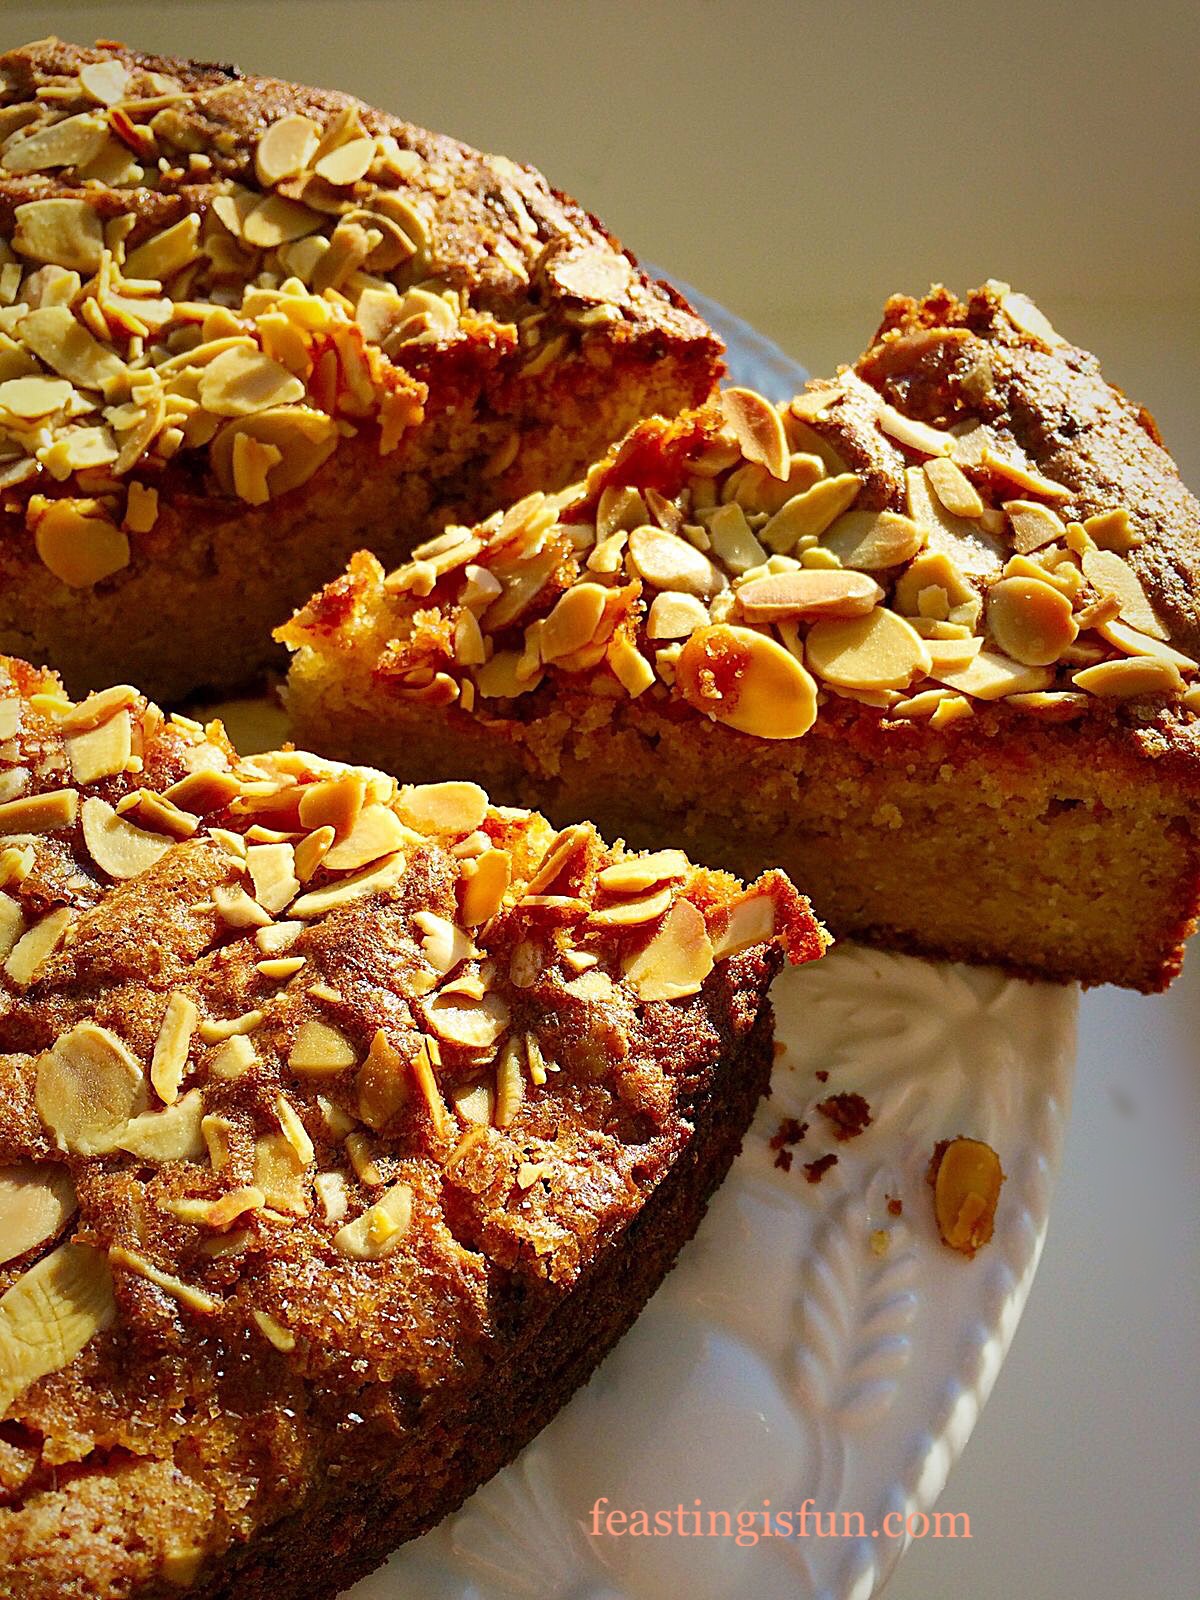
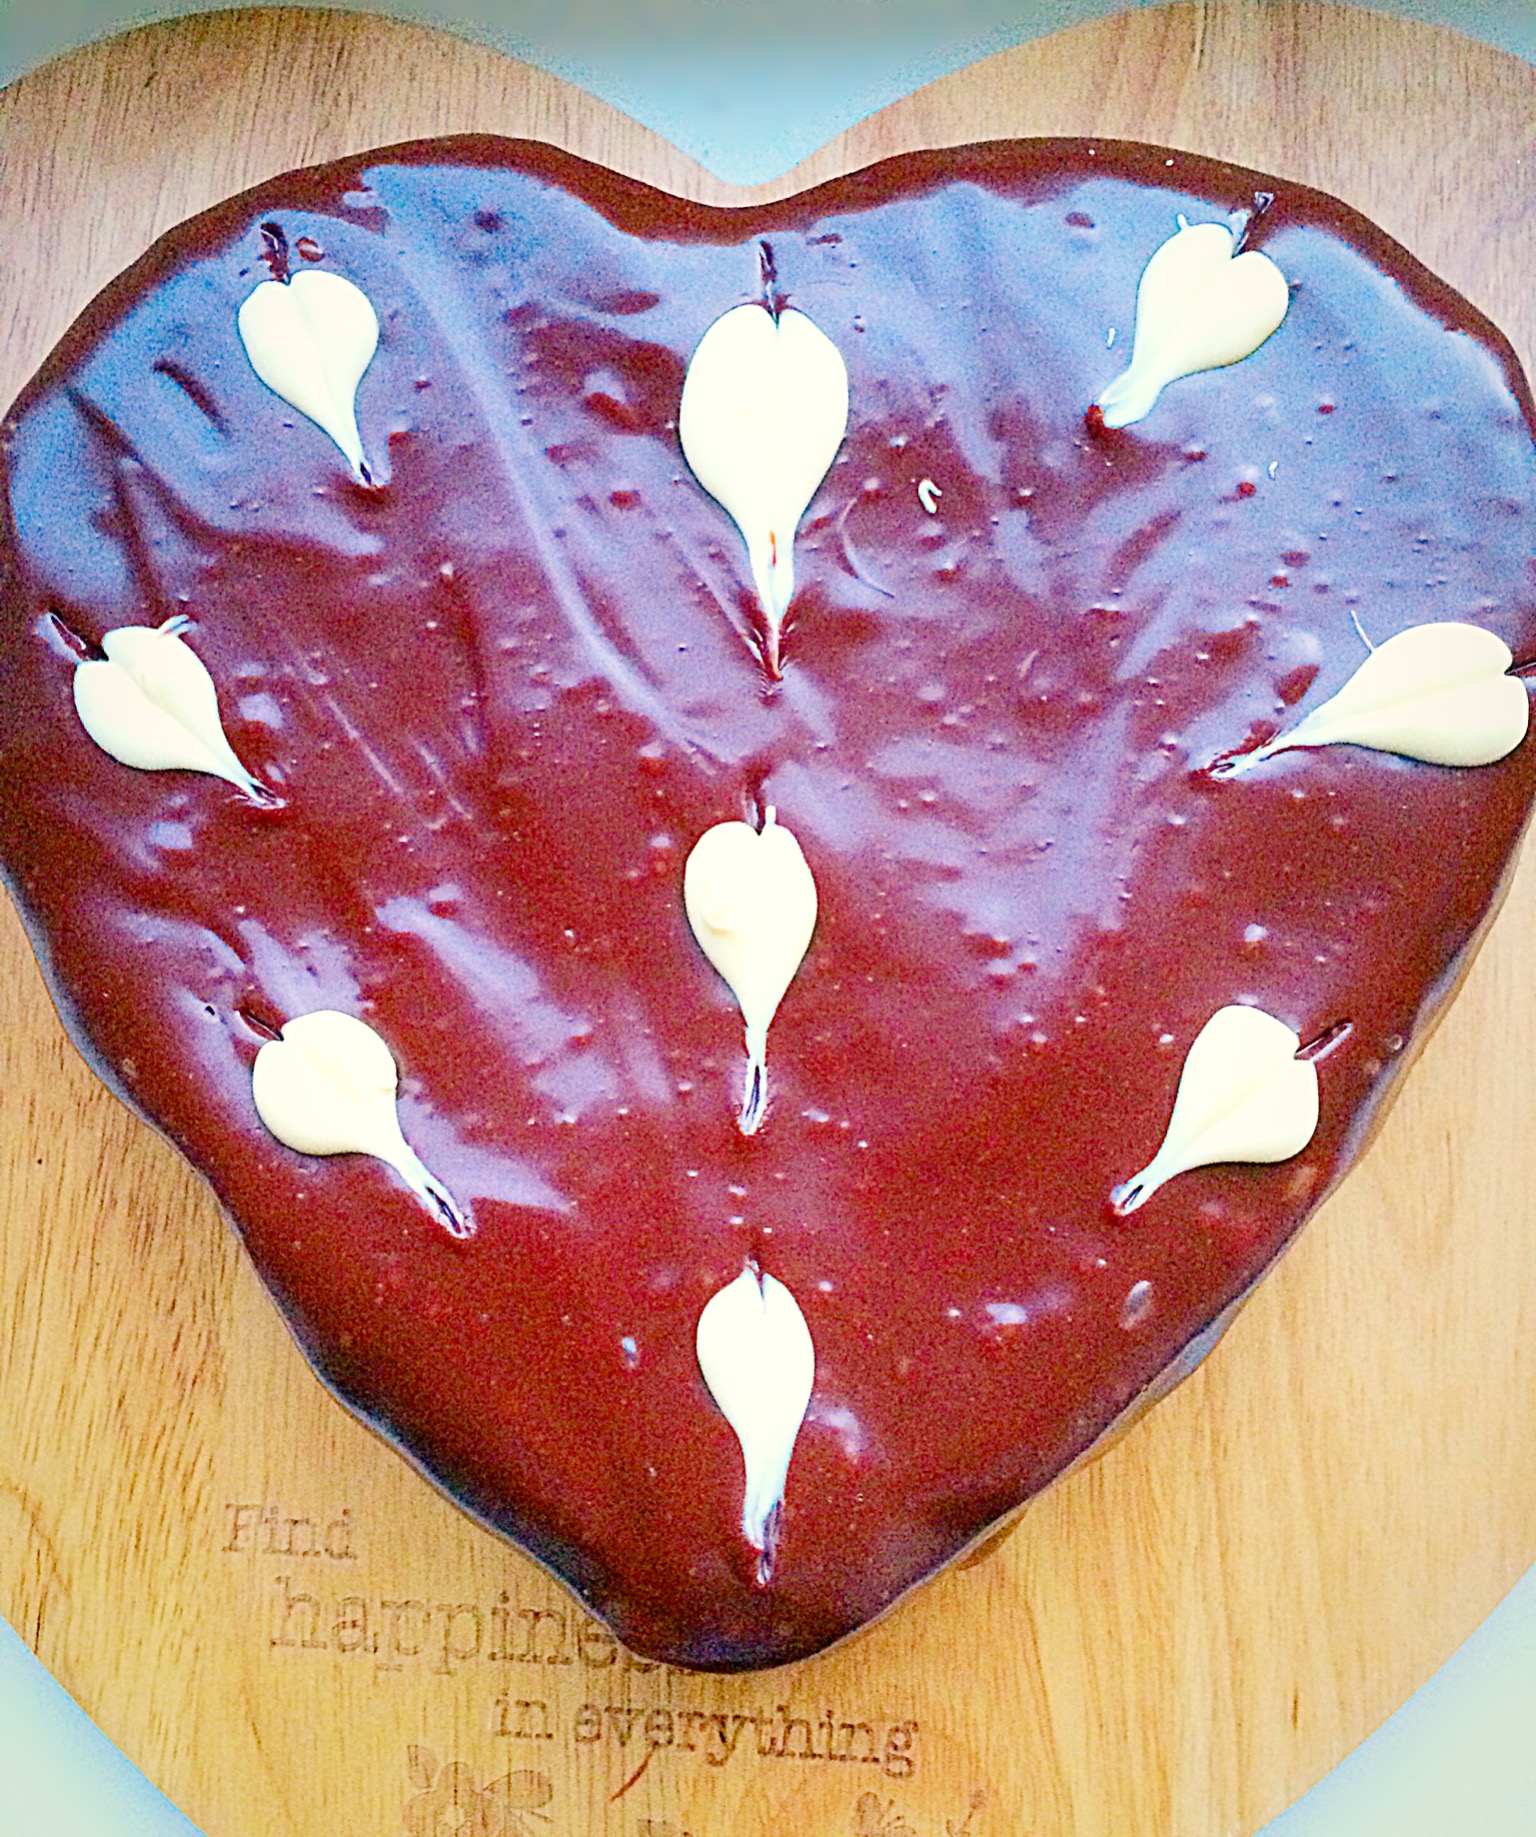
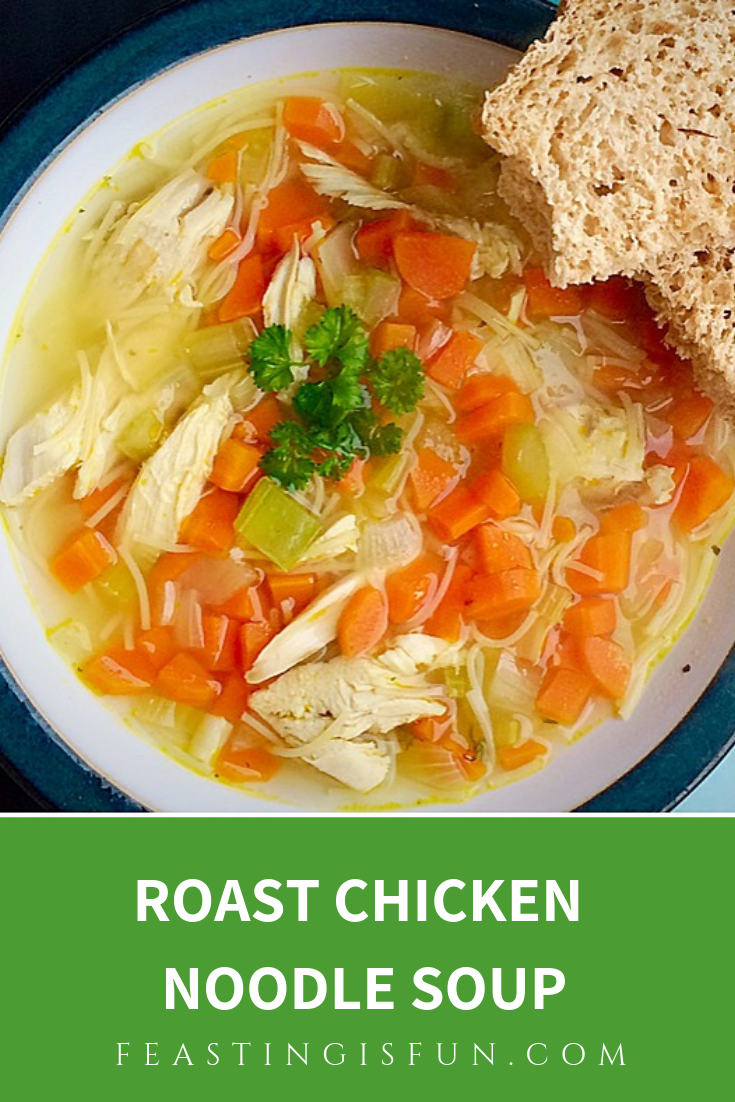
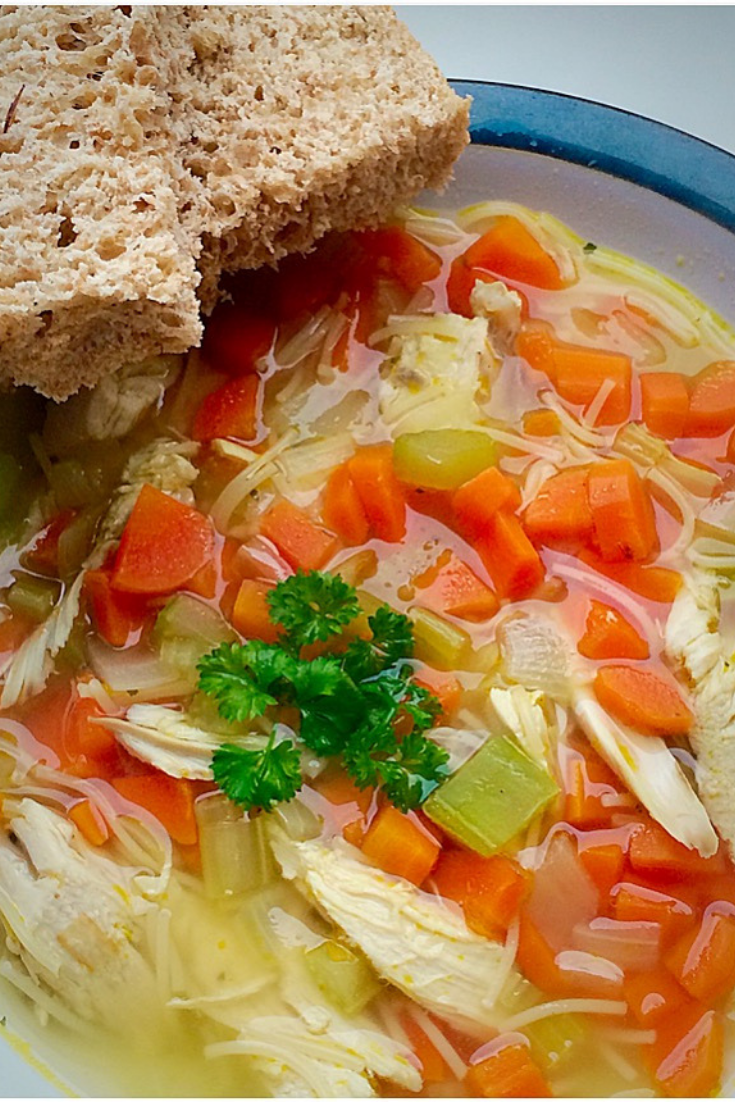
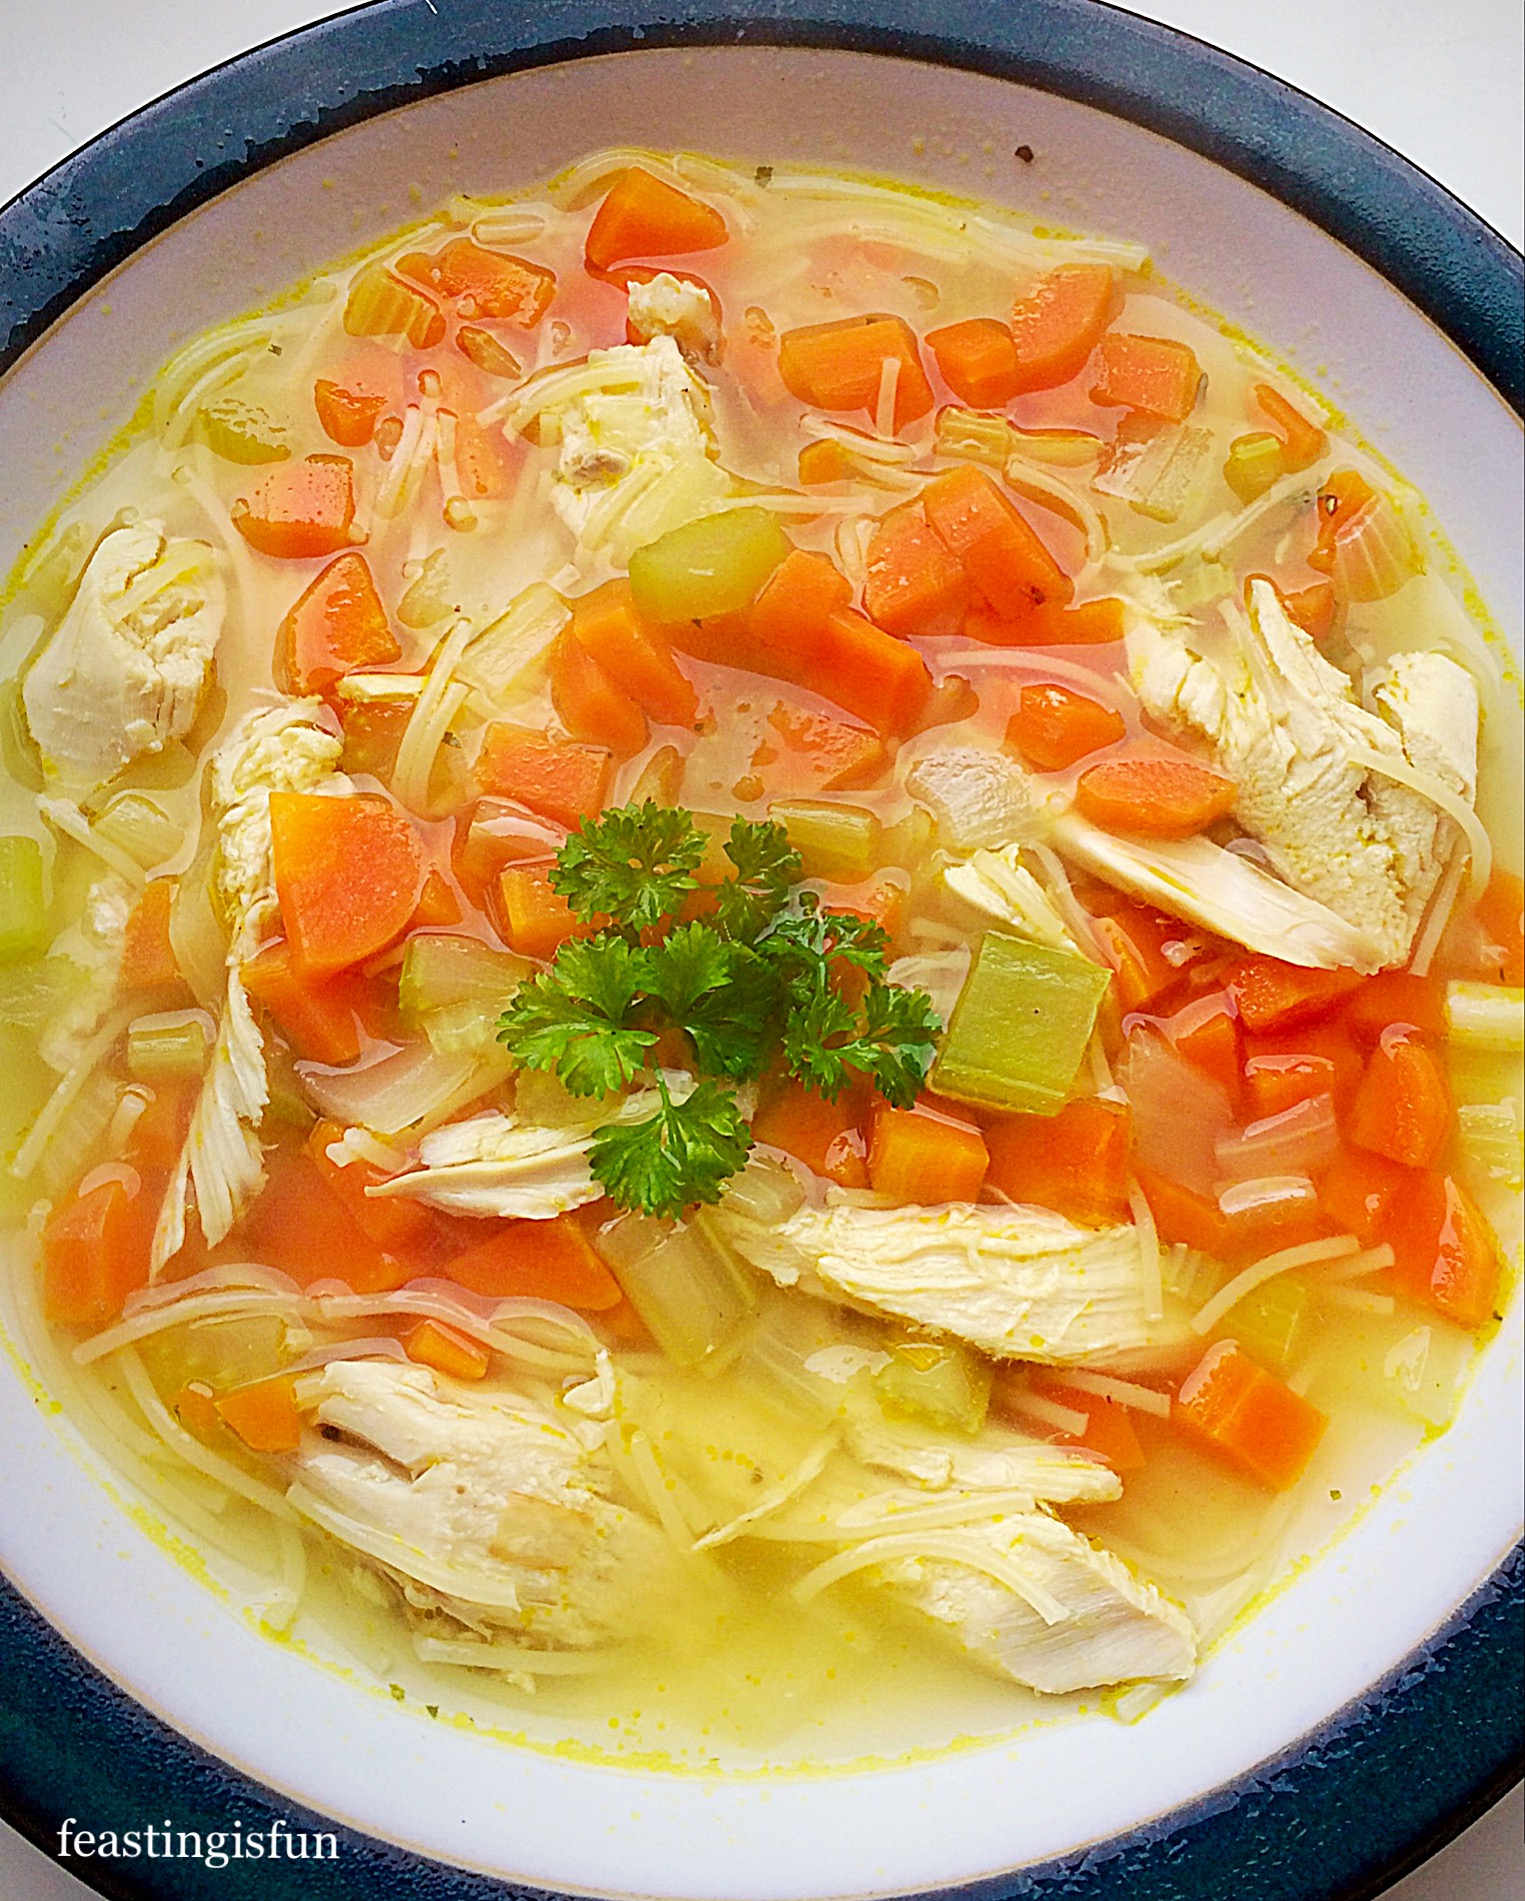
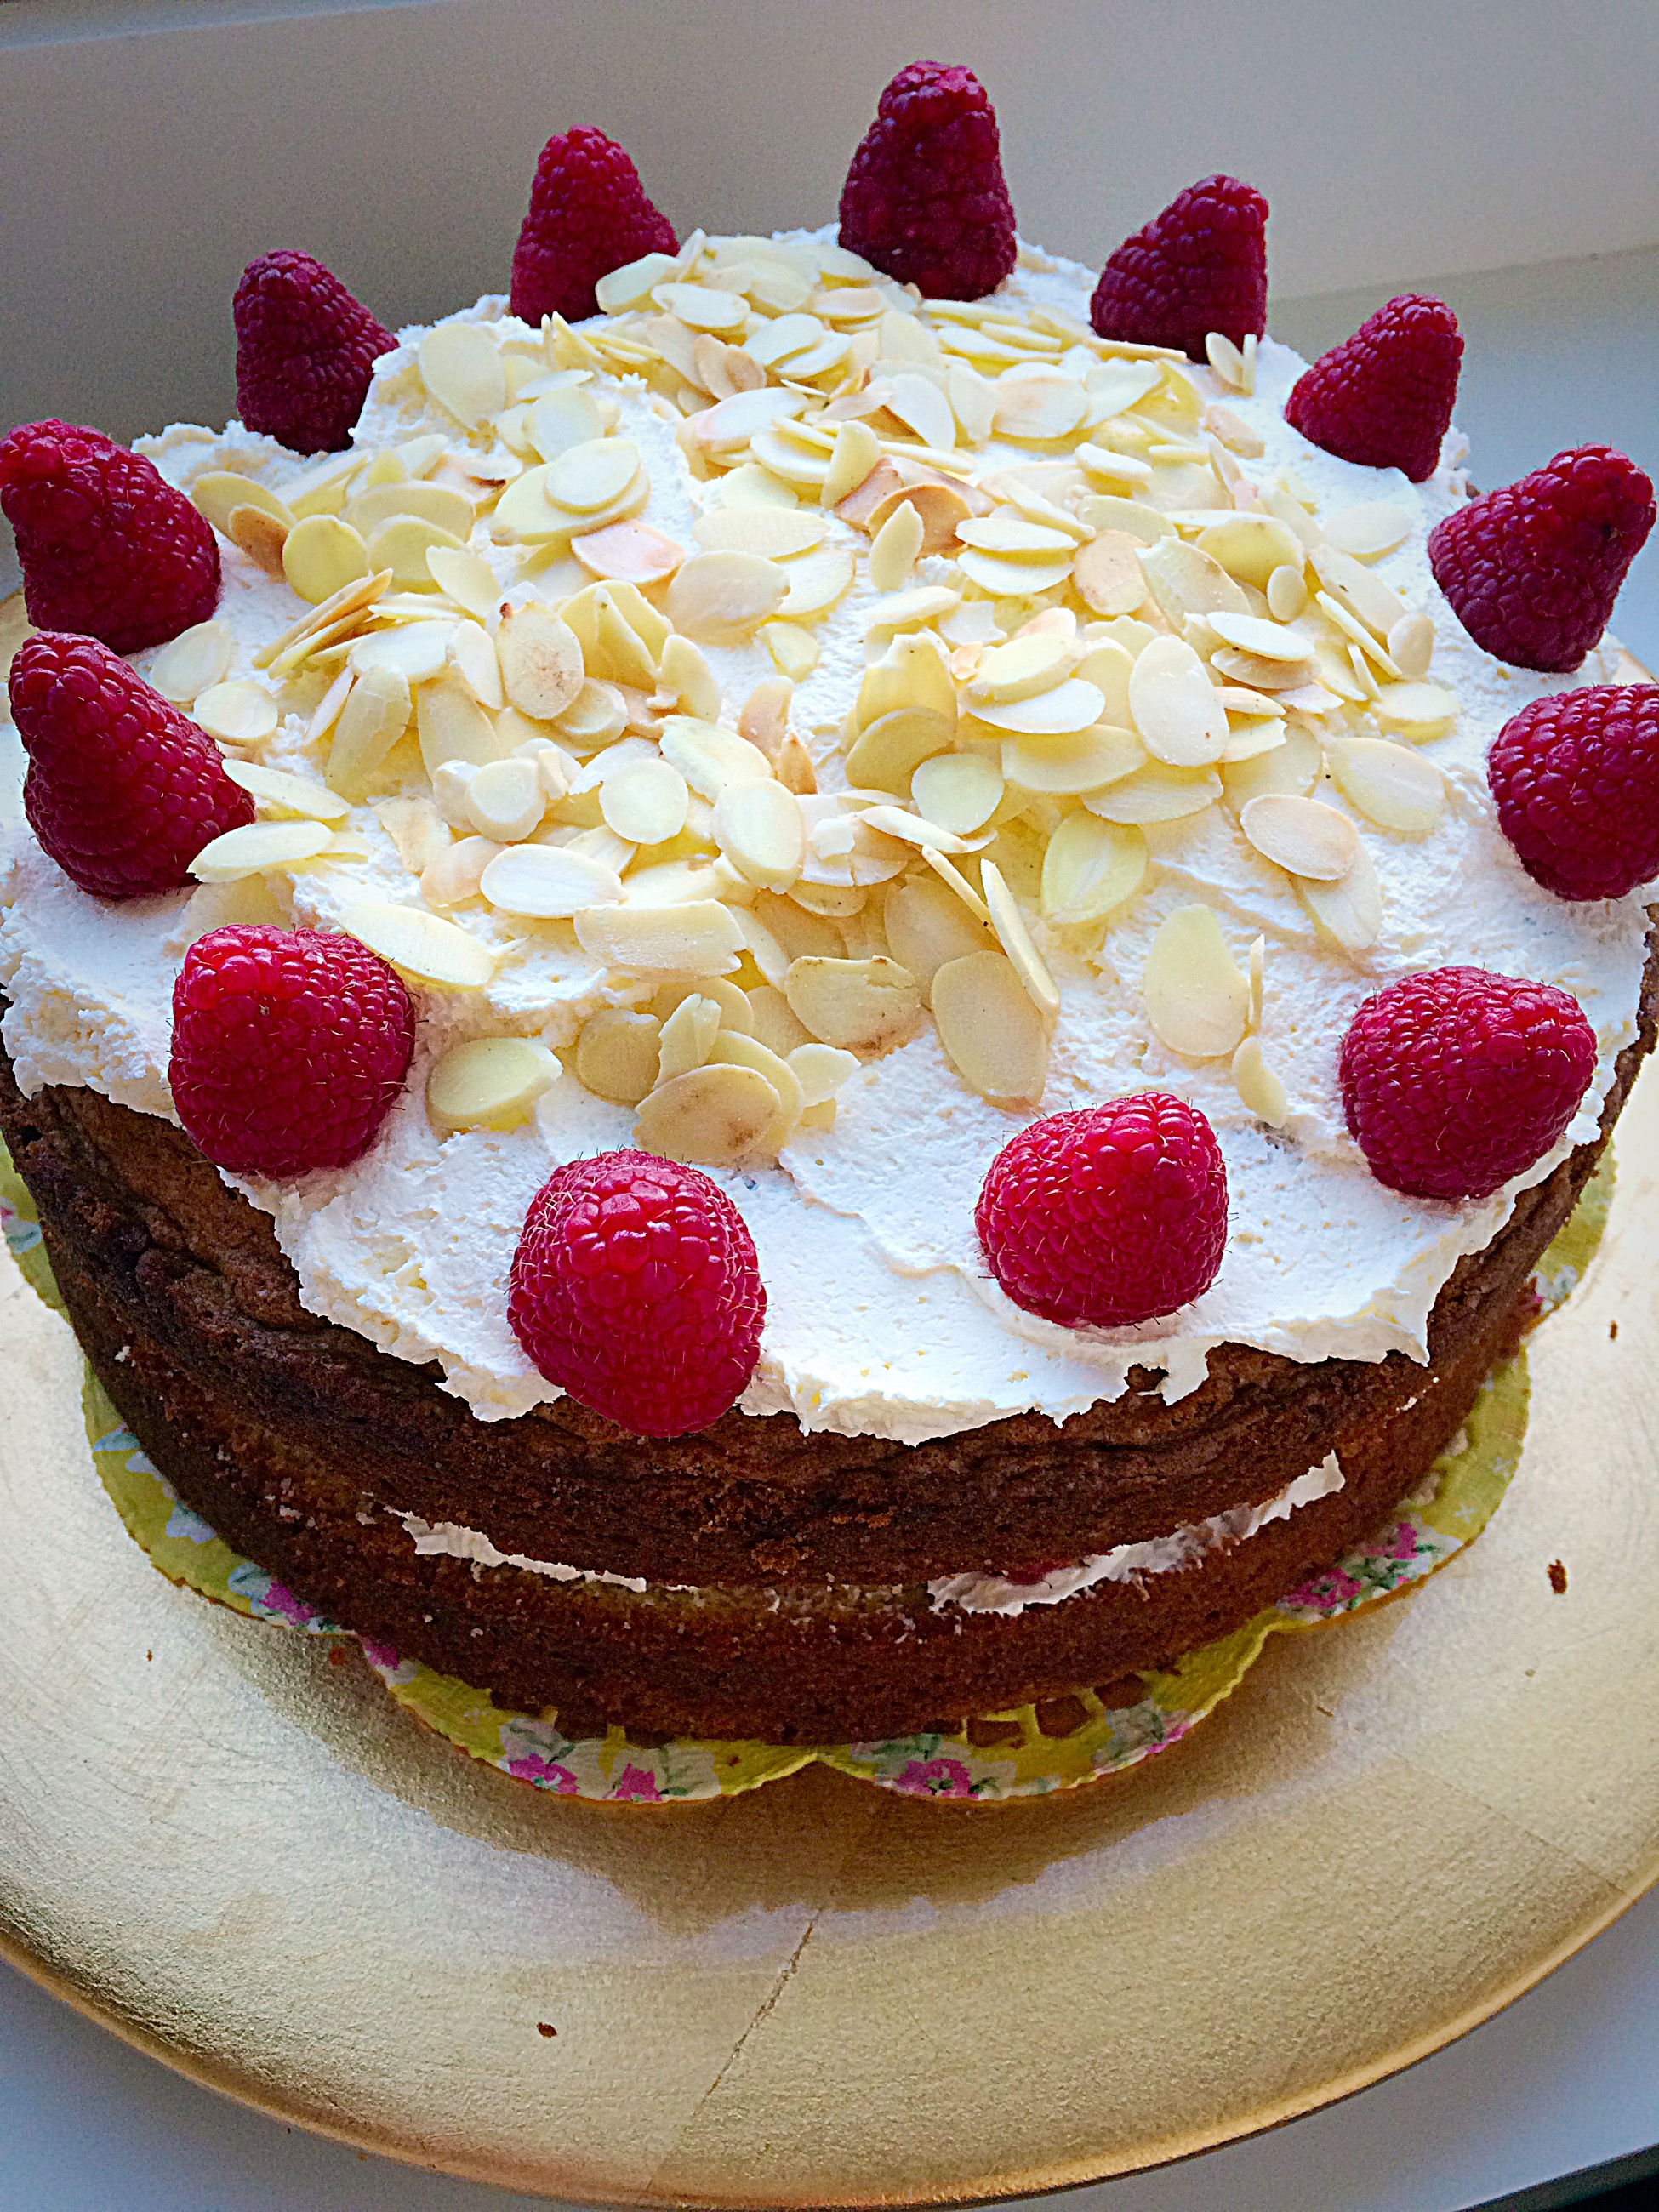
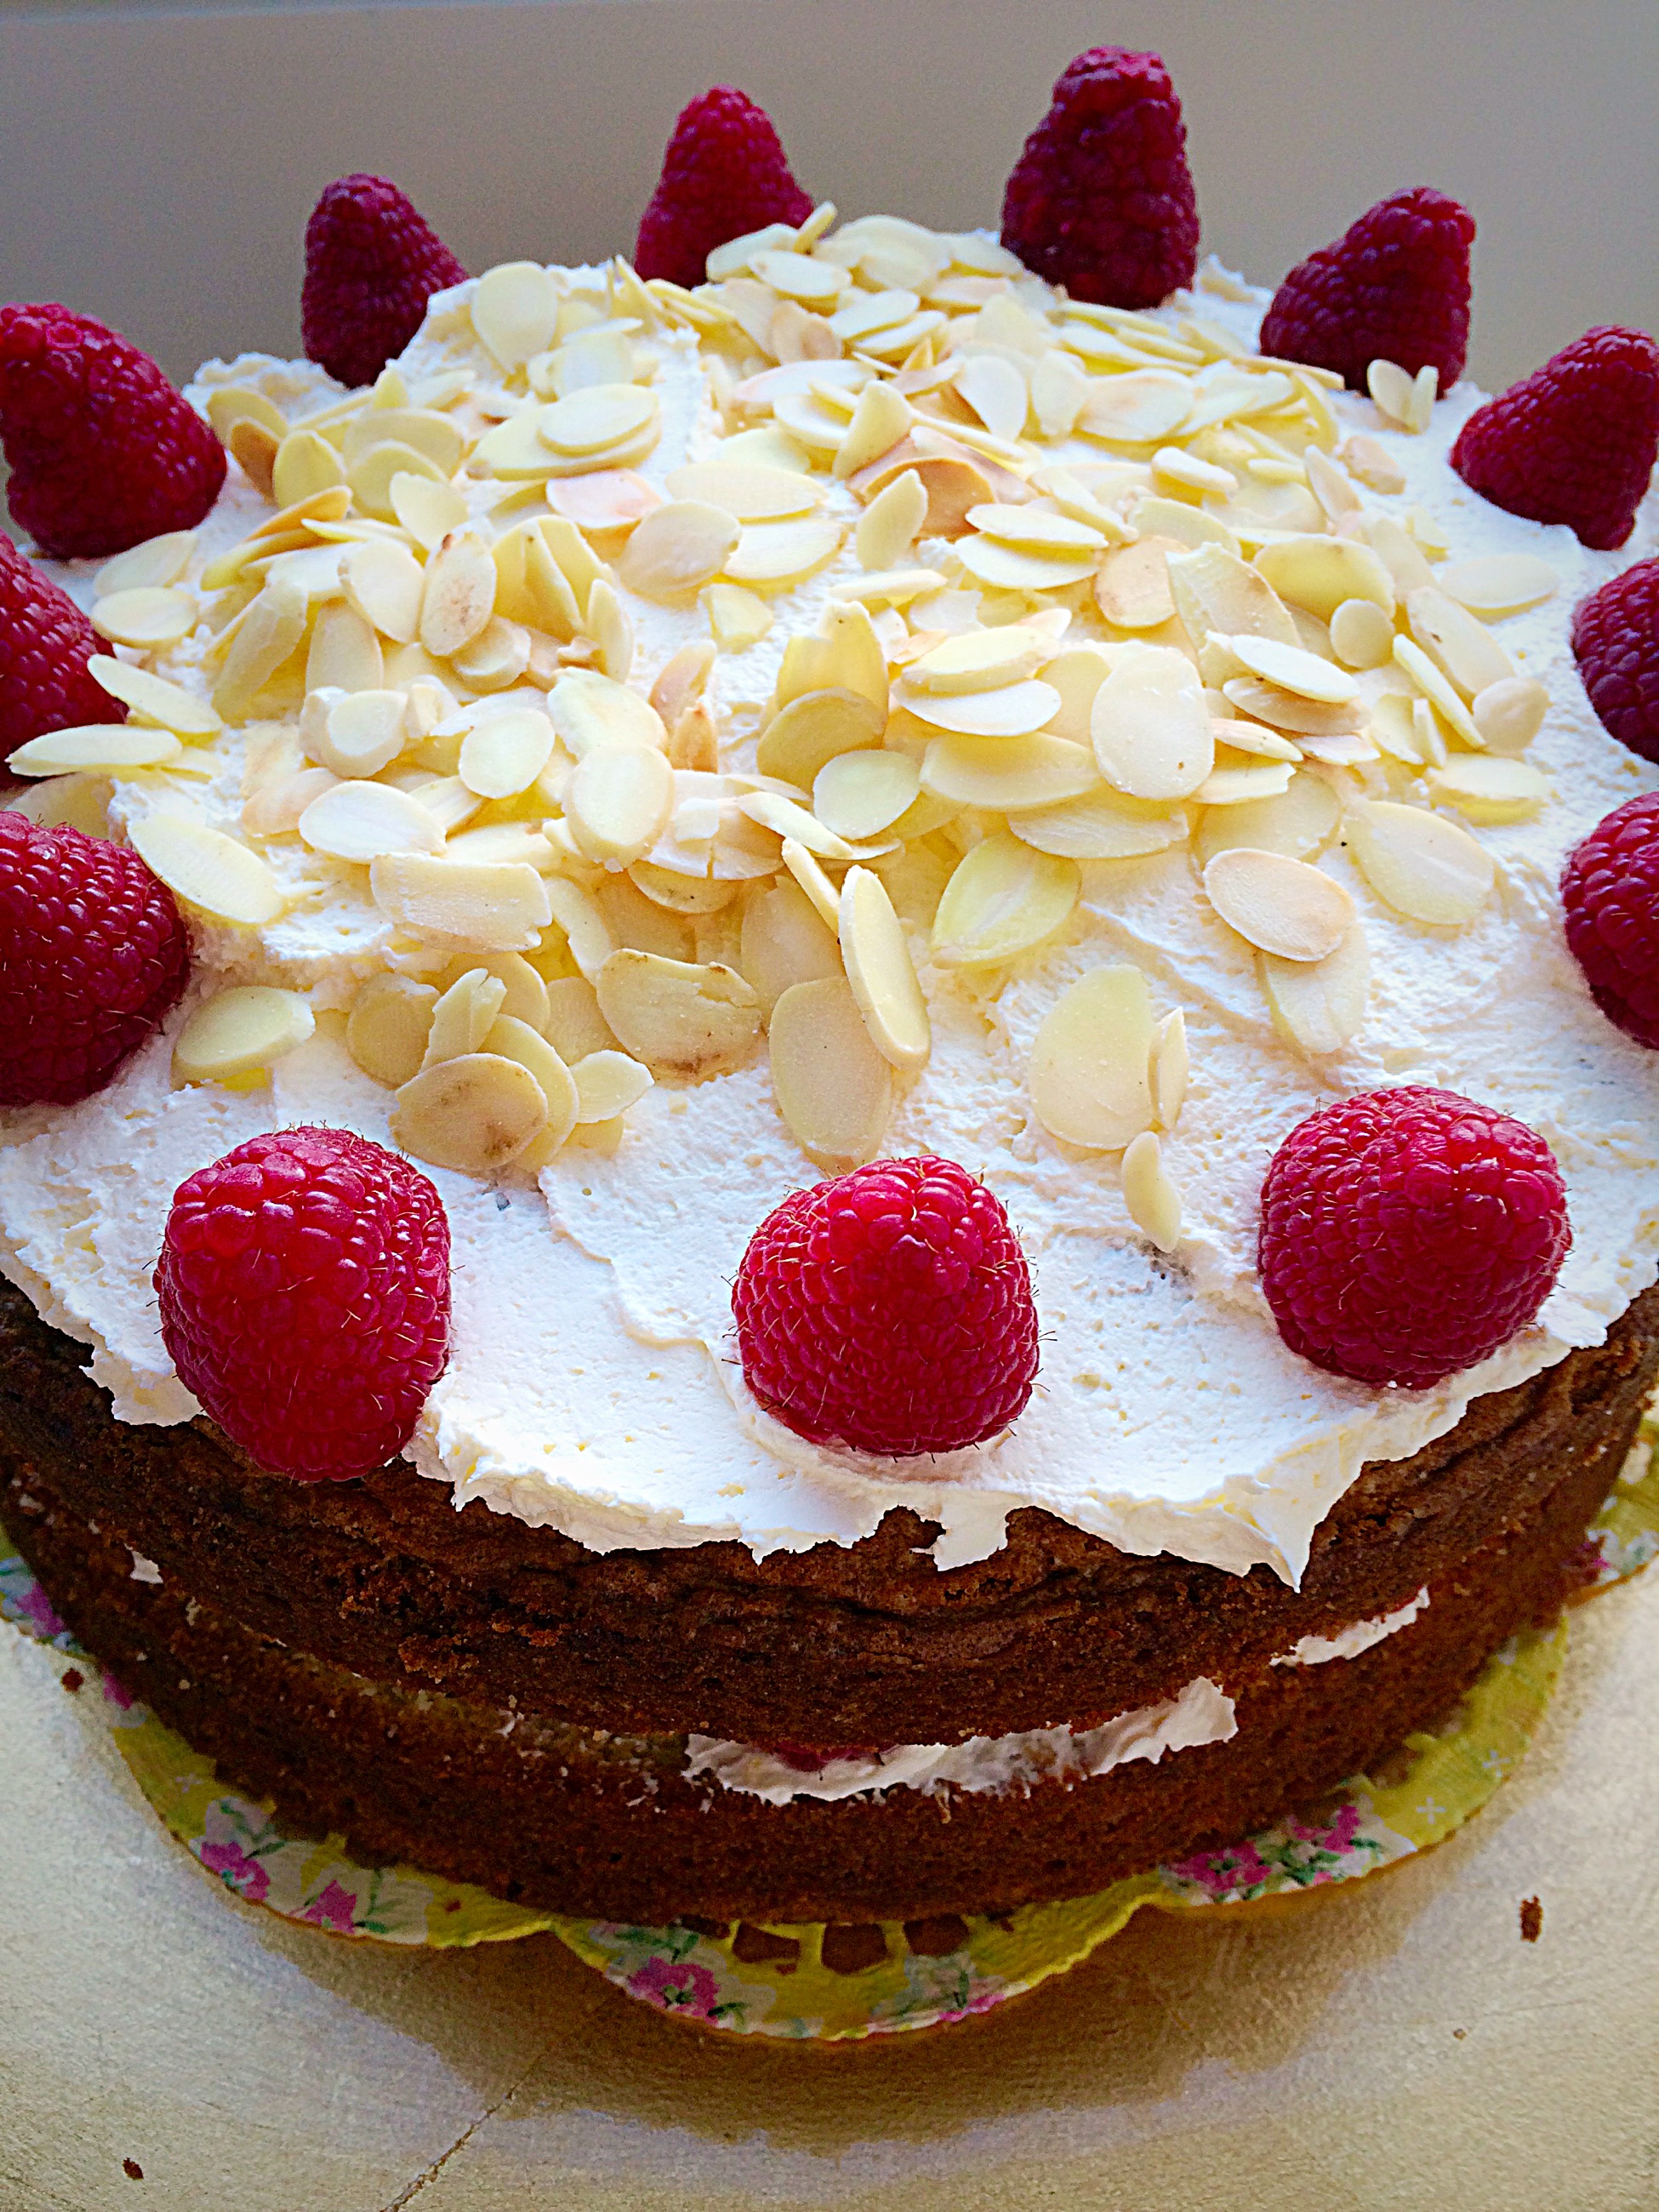
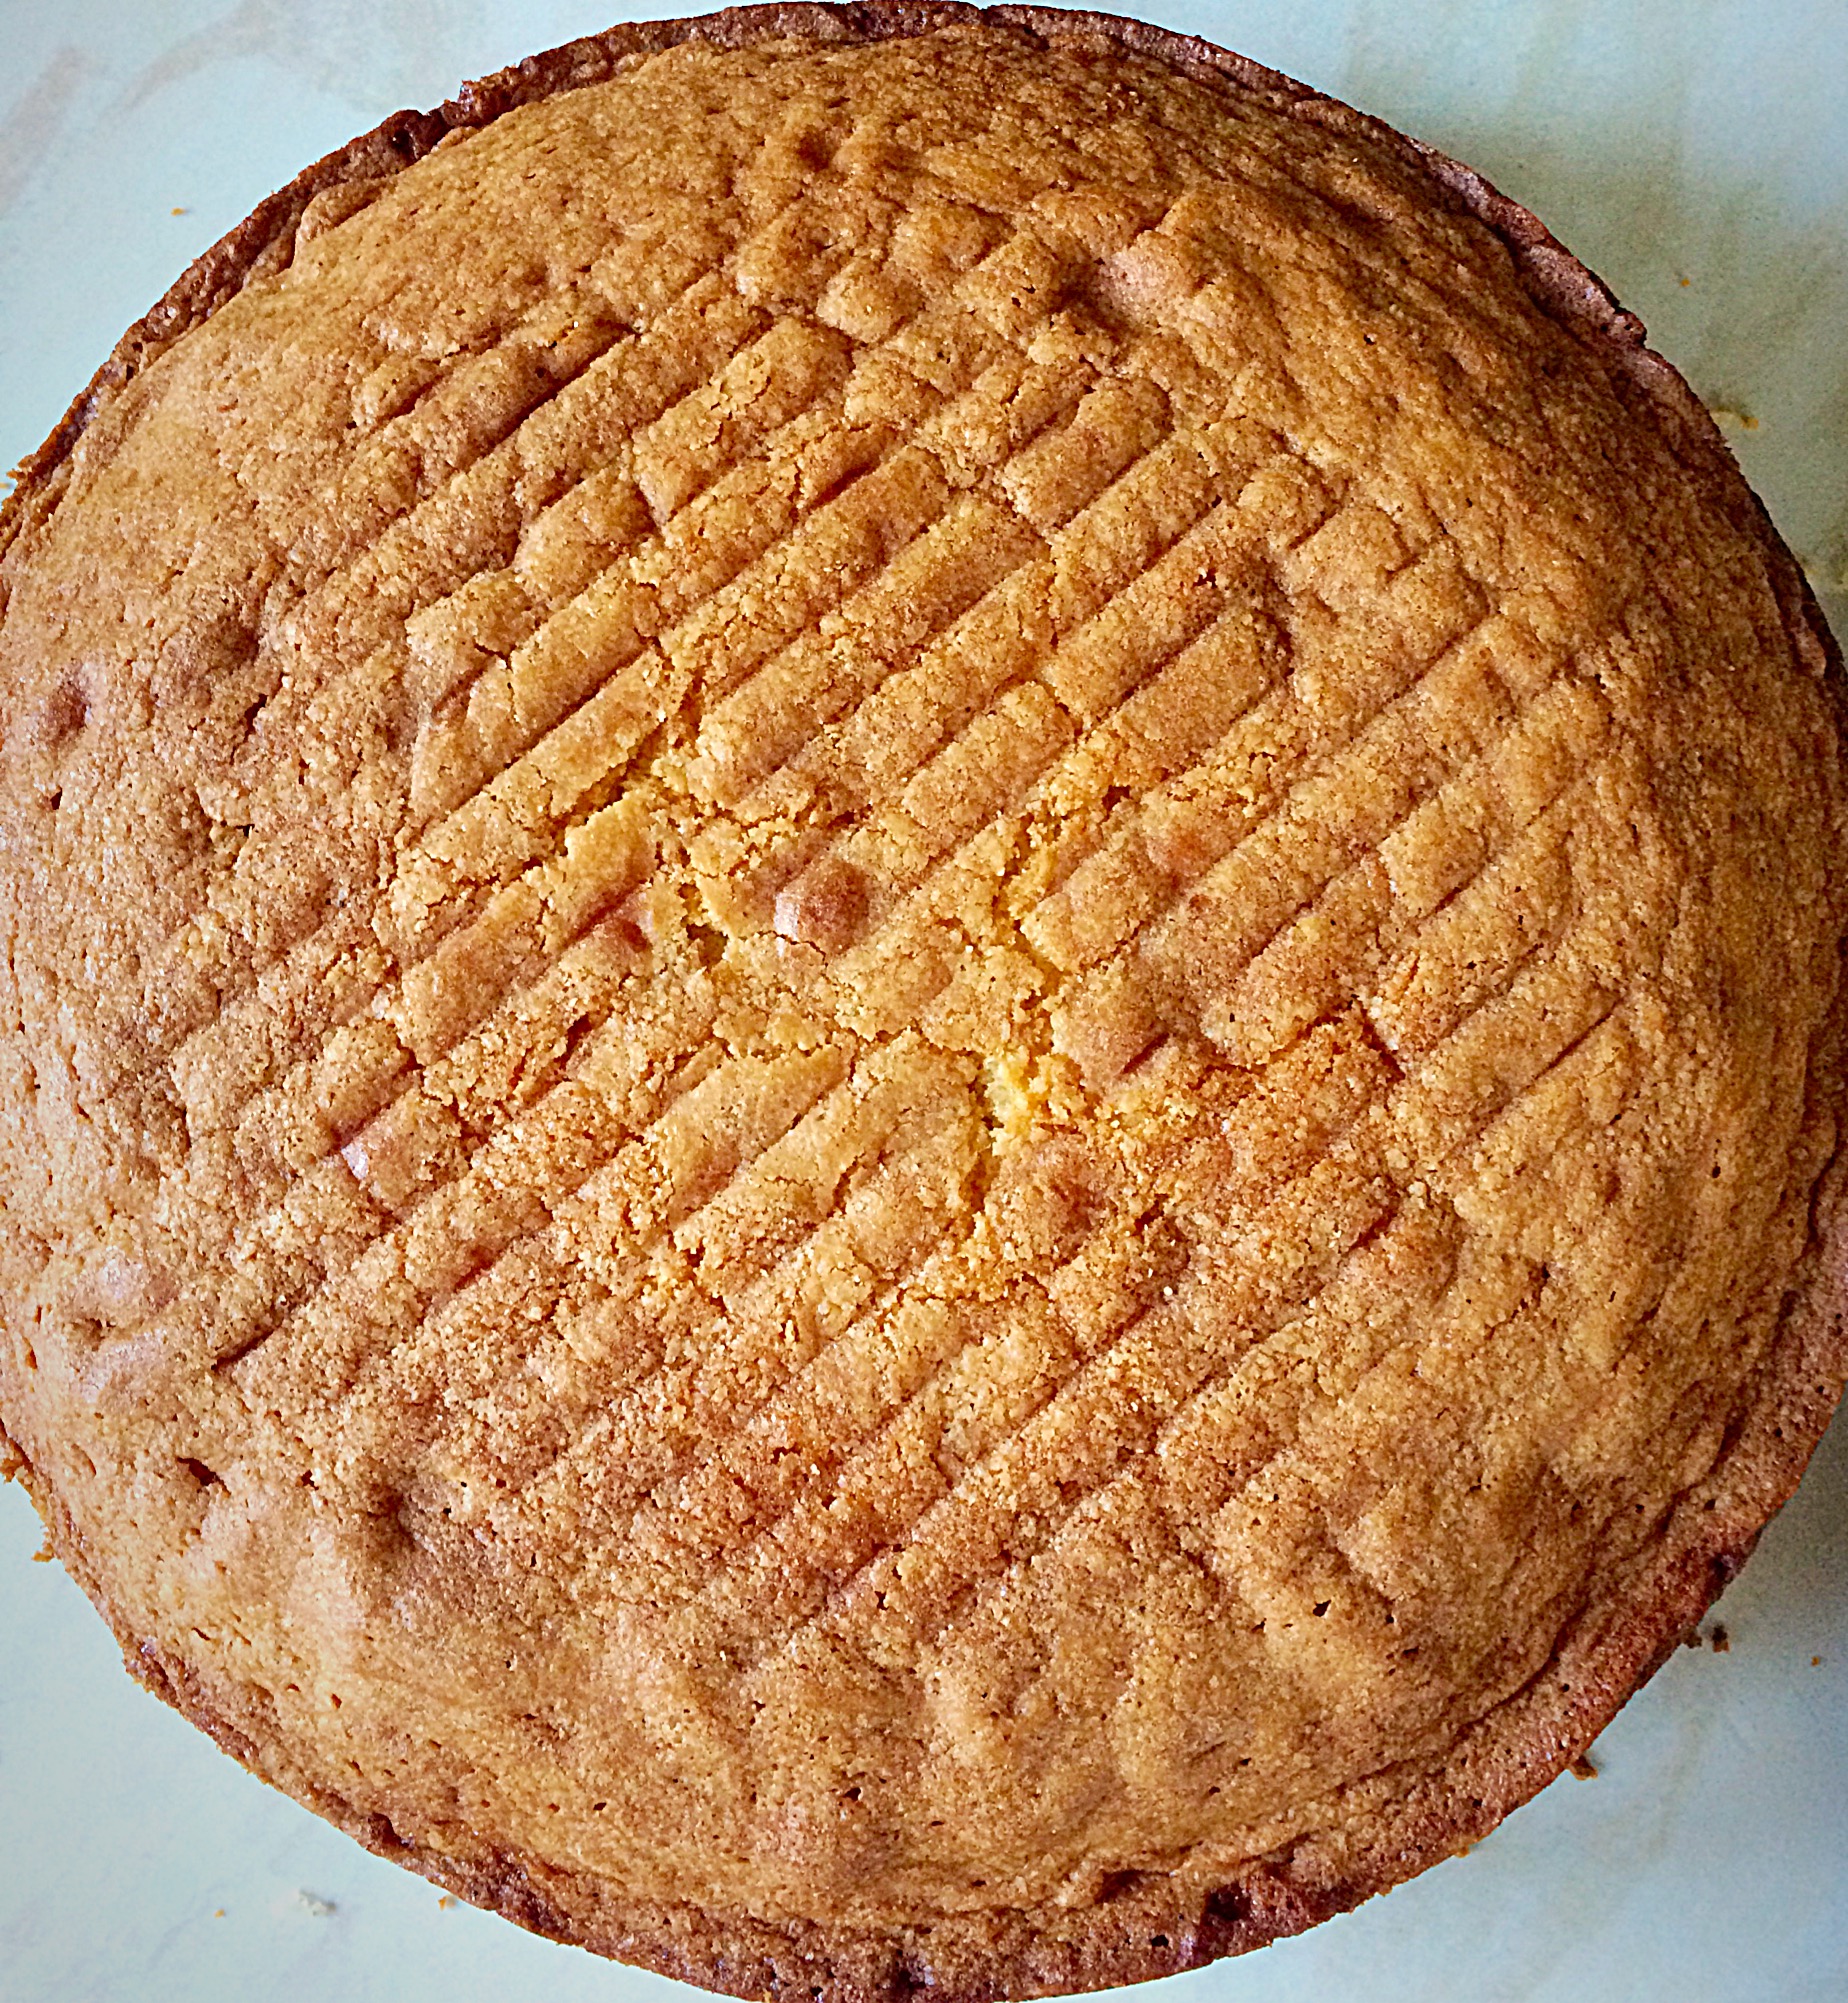
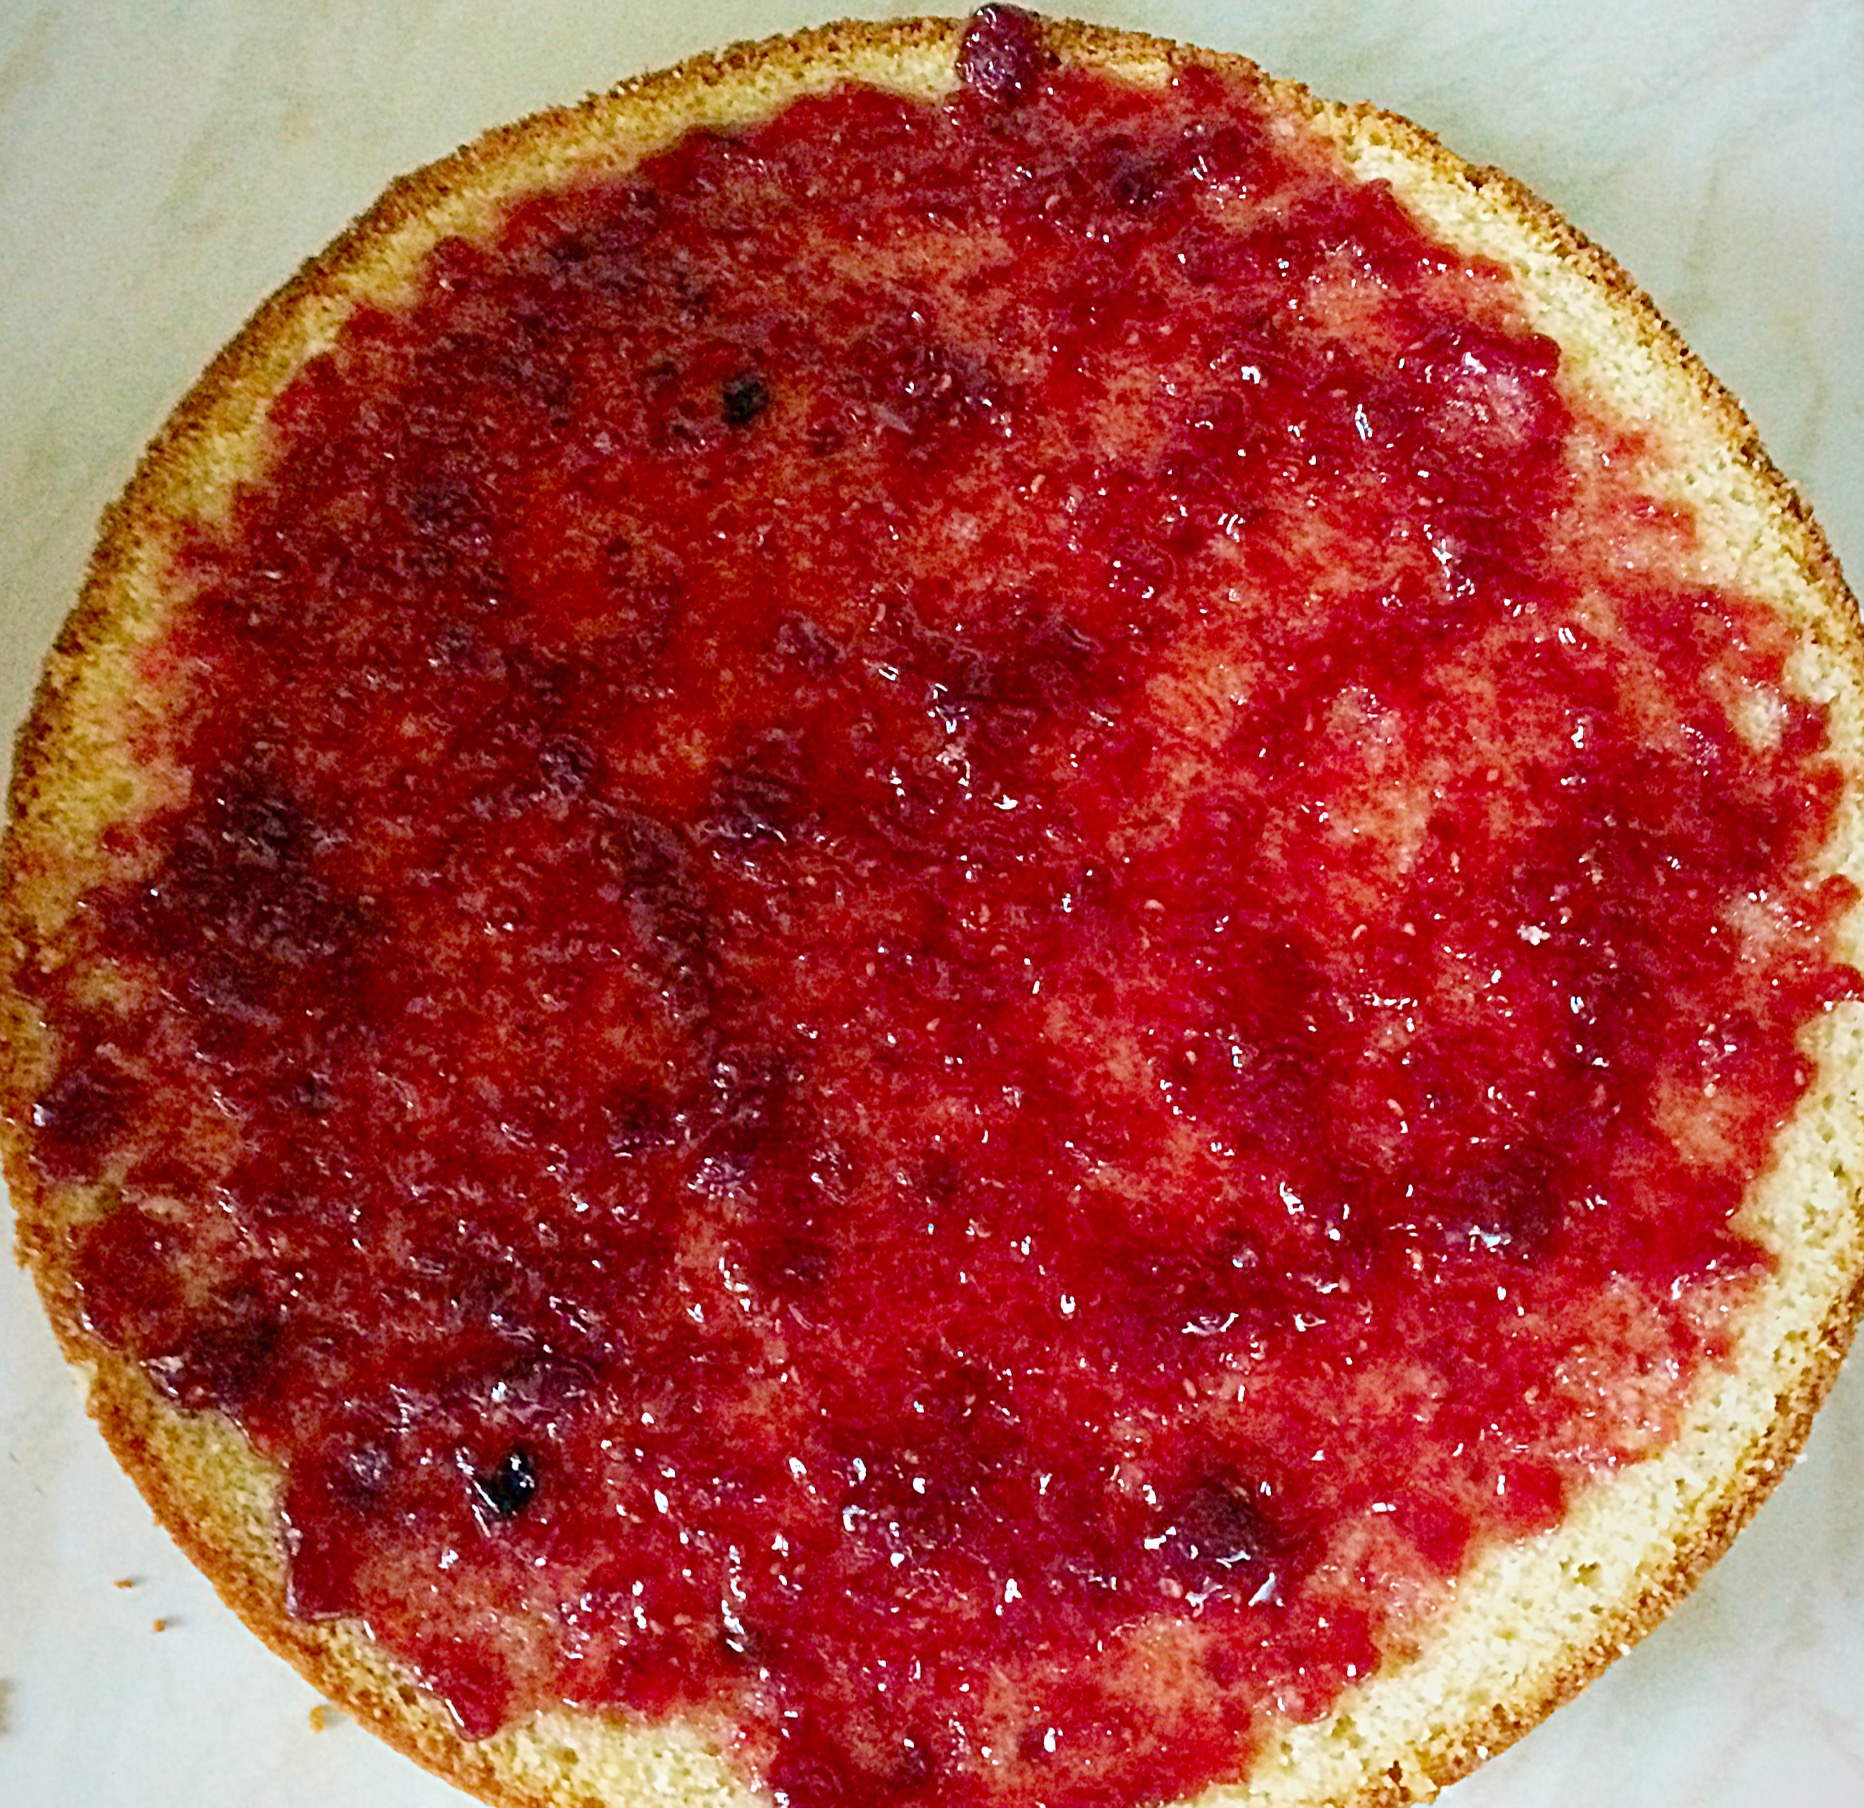
During my British Bakeware Product Review I developed new recipes. Using this Large Baking Tray I made Roast Chicken Noodle Soup  that is very low in fat and  these Cherry Bakewell Cookies for a little treat!

Cherry Bakewell Cookies
Cherry Bakewell Cookies cooling on the baking tray.

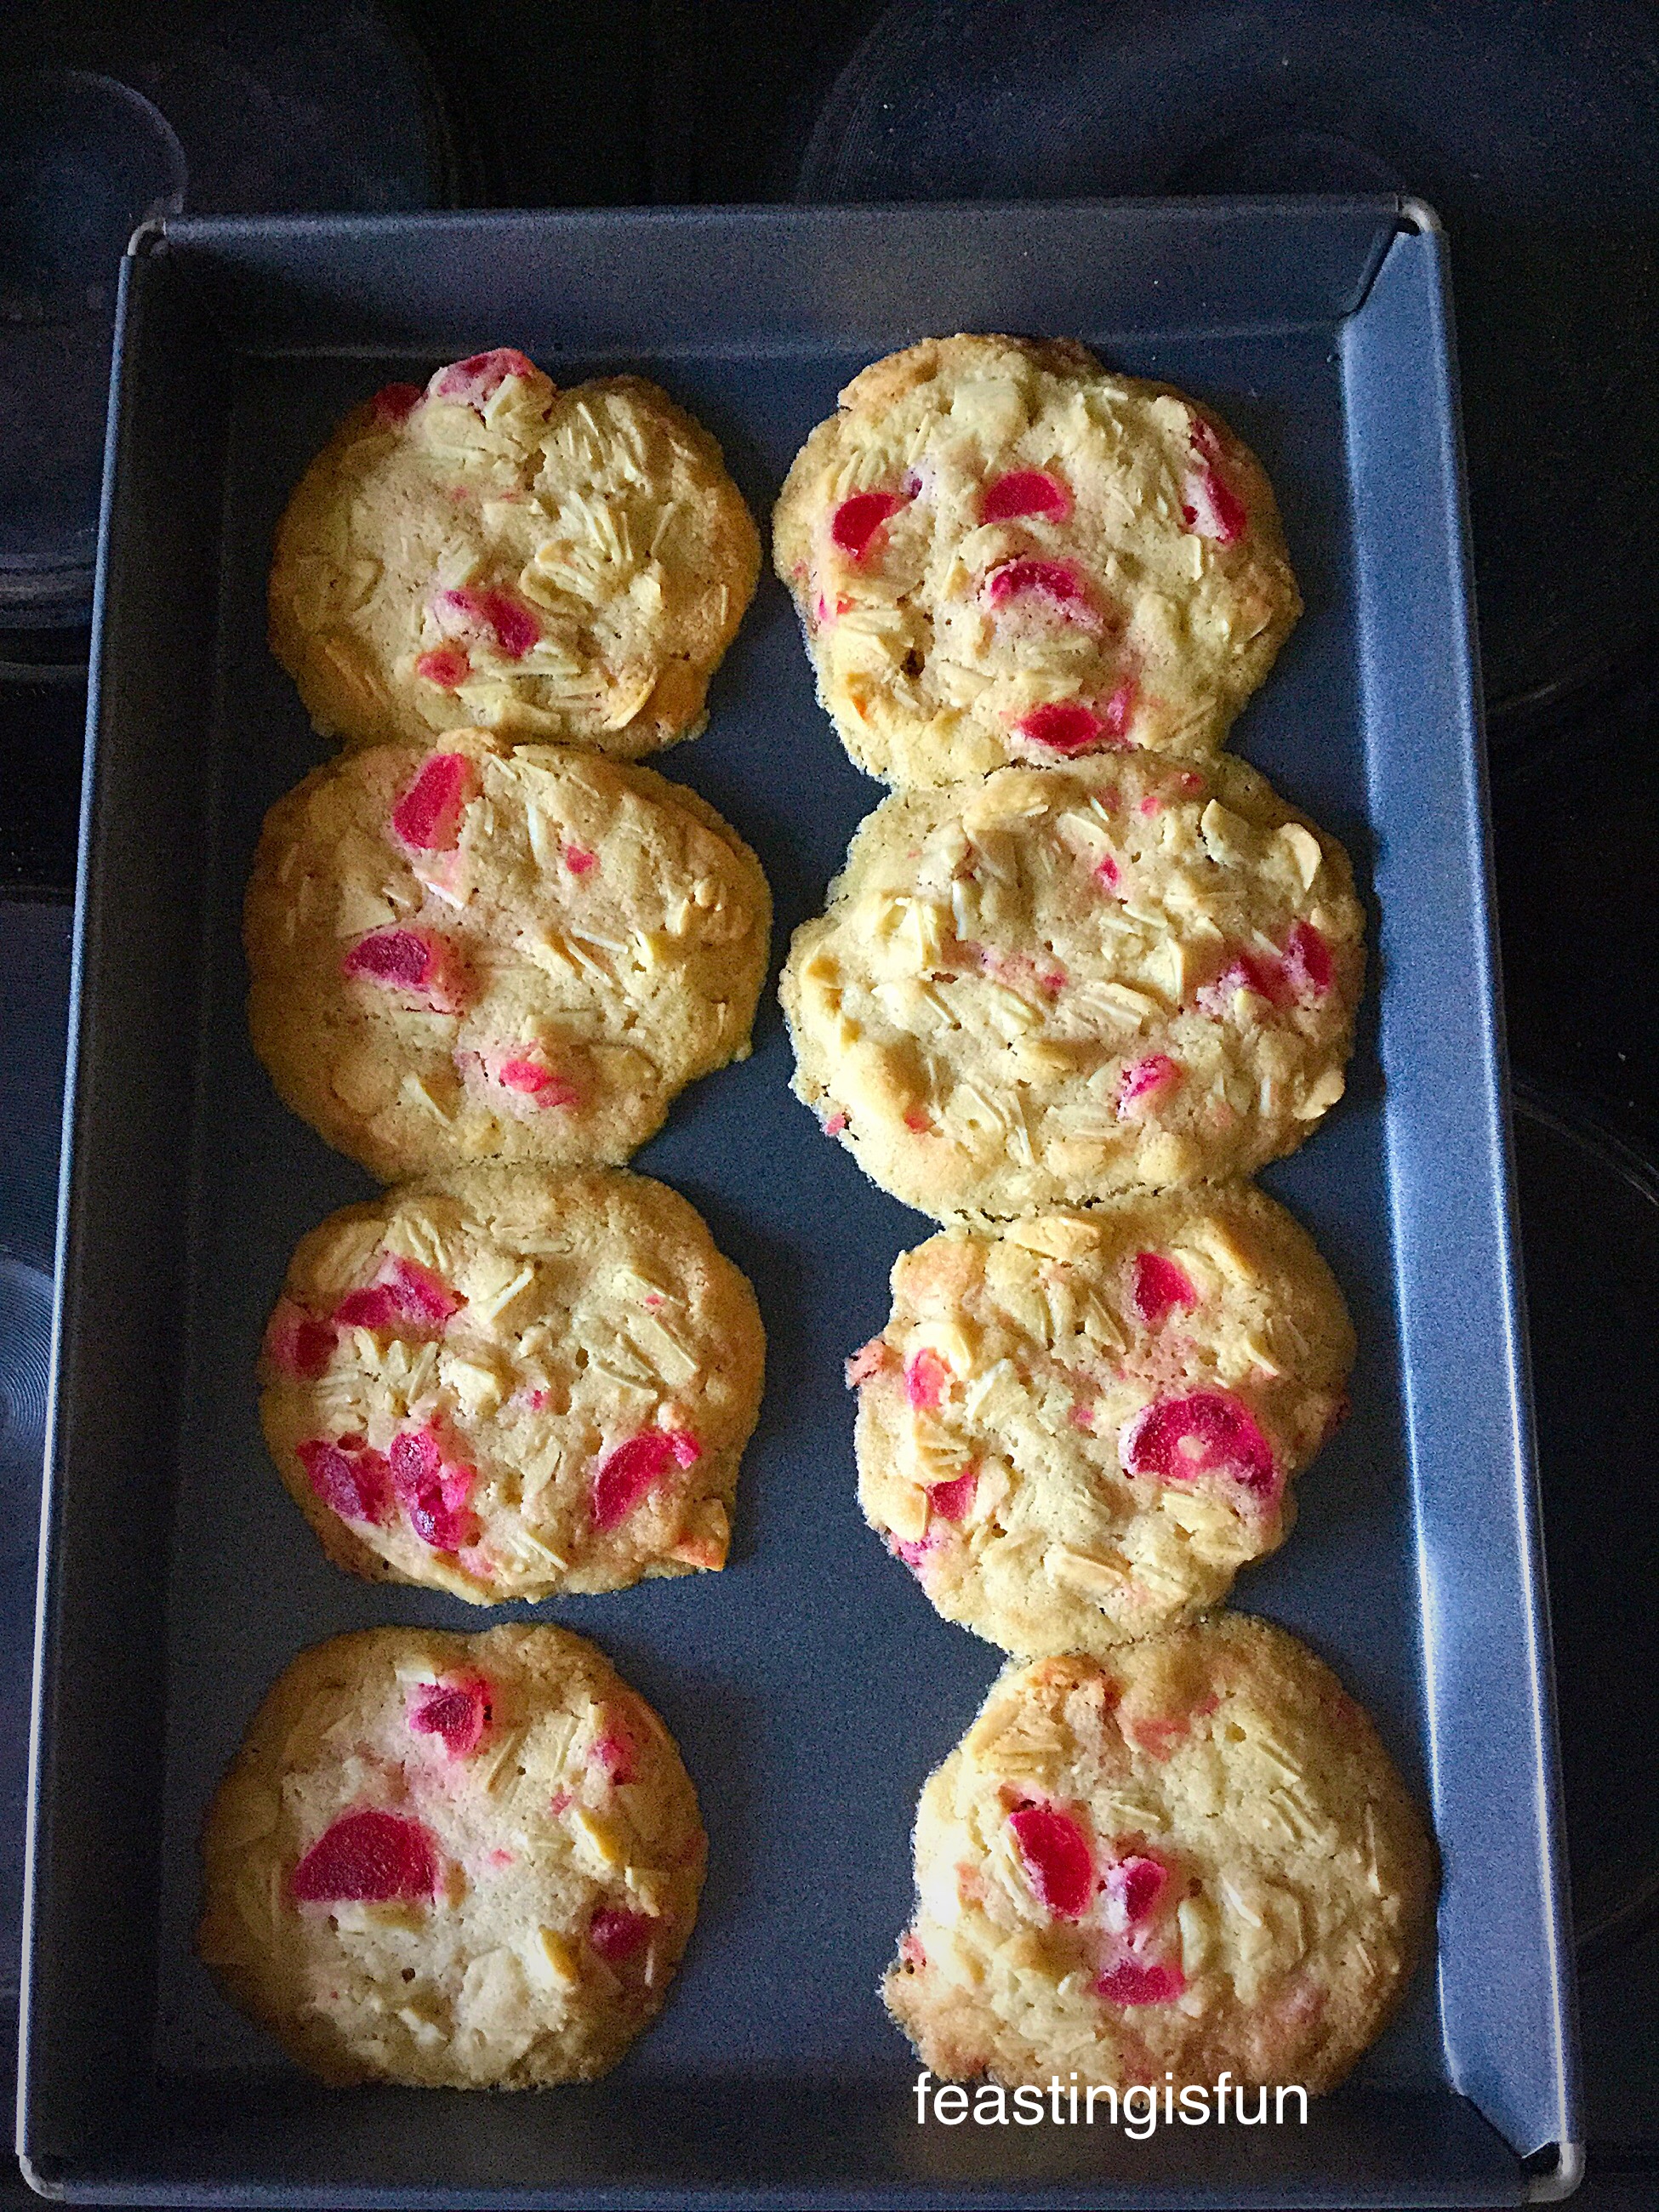
I deliberately did not grease the baking tray, or line with parchment paper. These cookies were very easy to remove, using a palette knife. That for me was the ultimate non-stick test and this large baking tray passed with flying colours.

In future I would line with baking parchment, as it is a great baking tray and I don’t want to scratch it!

Overall I was very impressed with the quality, durability and versatility of this Large Baking Tray.

12 Cup Muffin Tray dimensions 36cm length x 26cm wide x 3cm deep

British Bakeware Product Review
12 Cup Muffin Tray

This Muffin Tray has a double non-stick coating and is oven, freezer and dishwasher safe.

Yes this Muffin Tray also has a whopping 5 year guarantee.

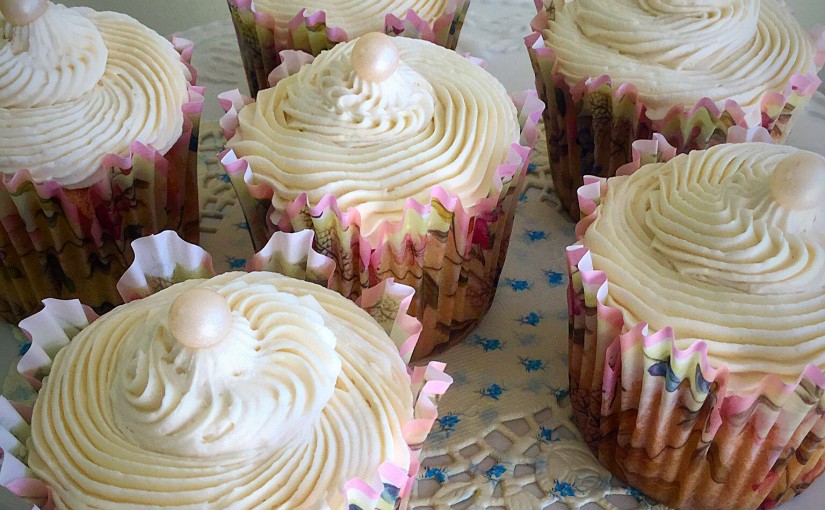
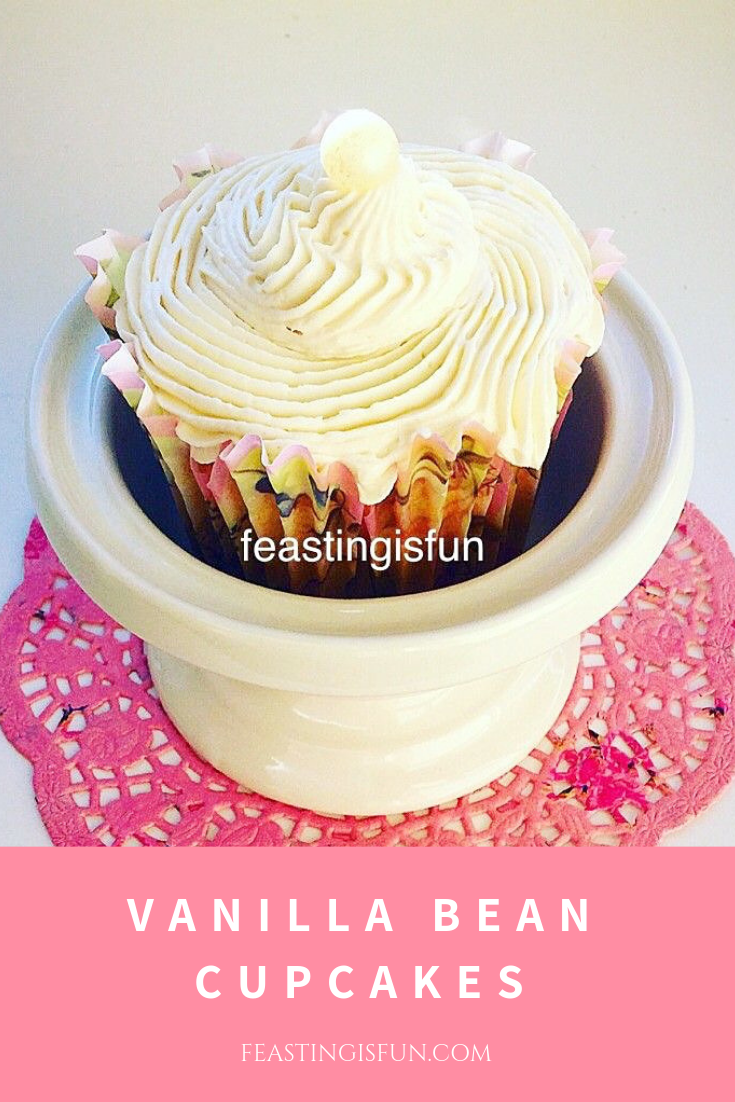
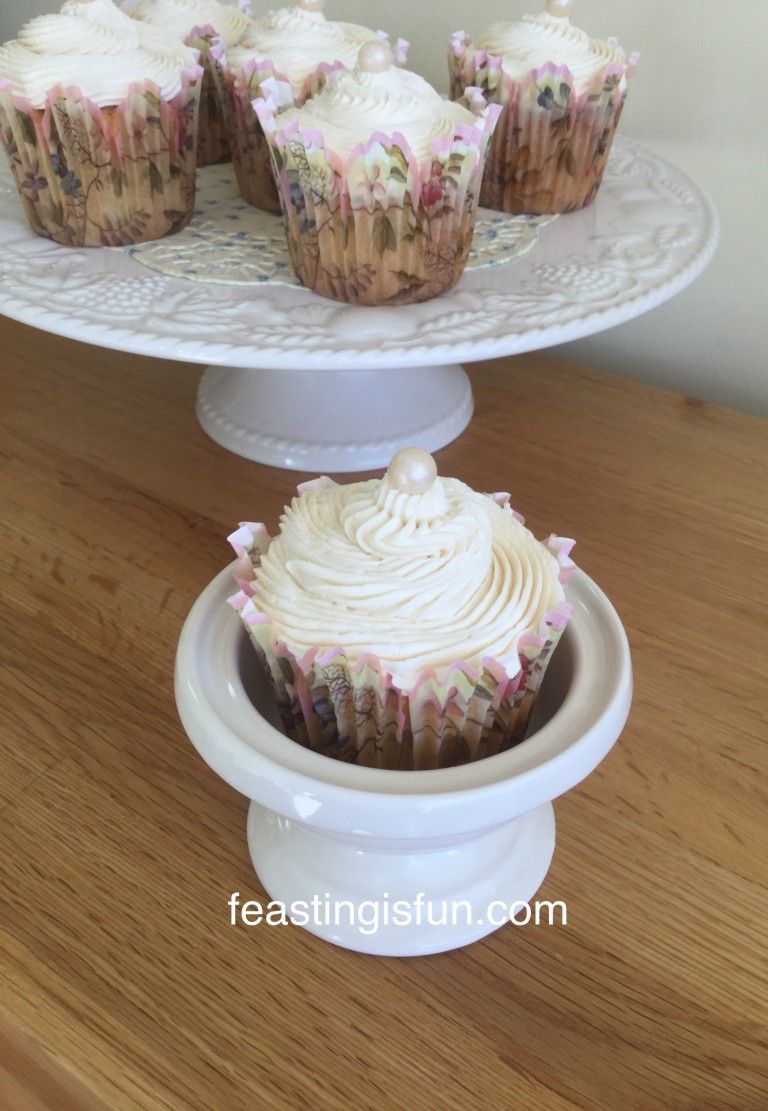
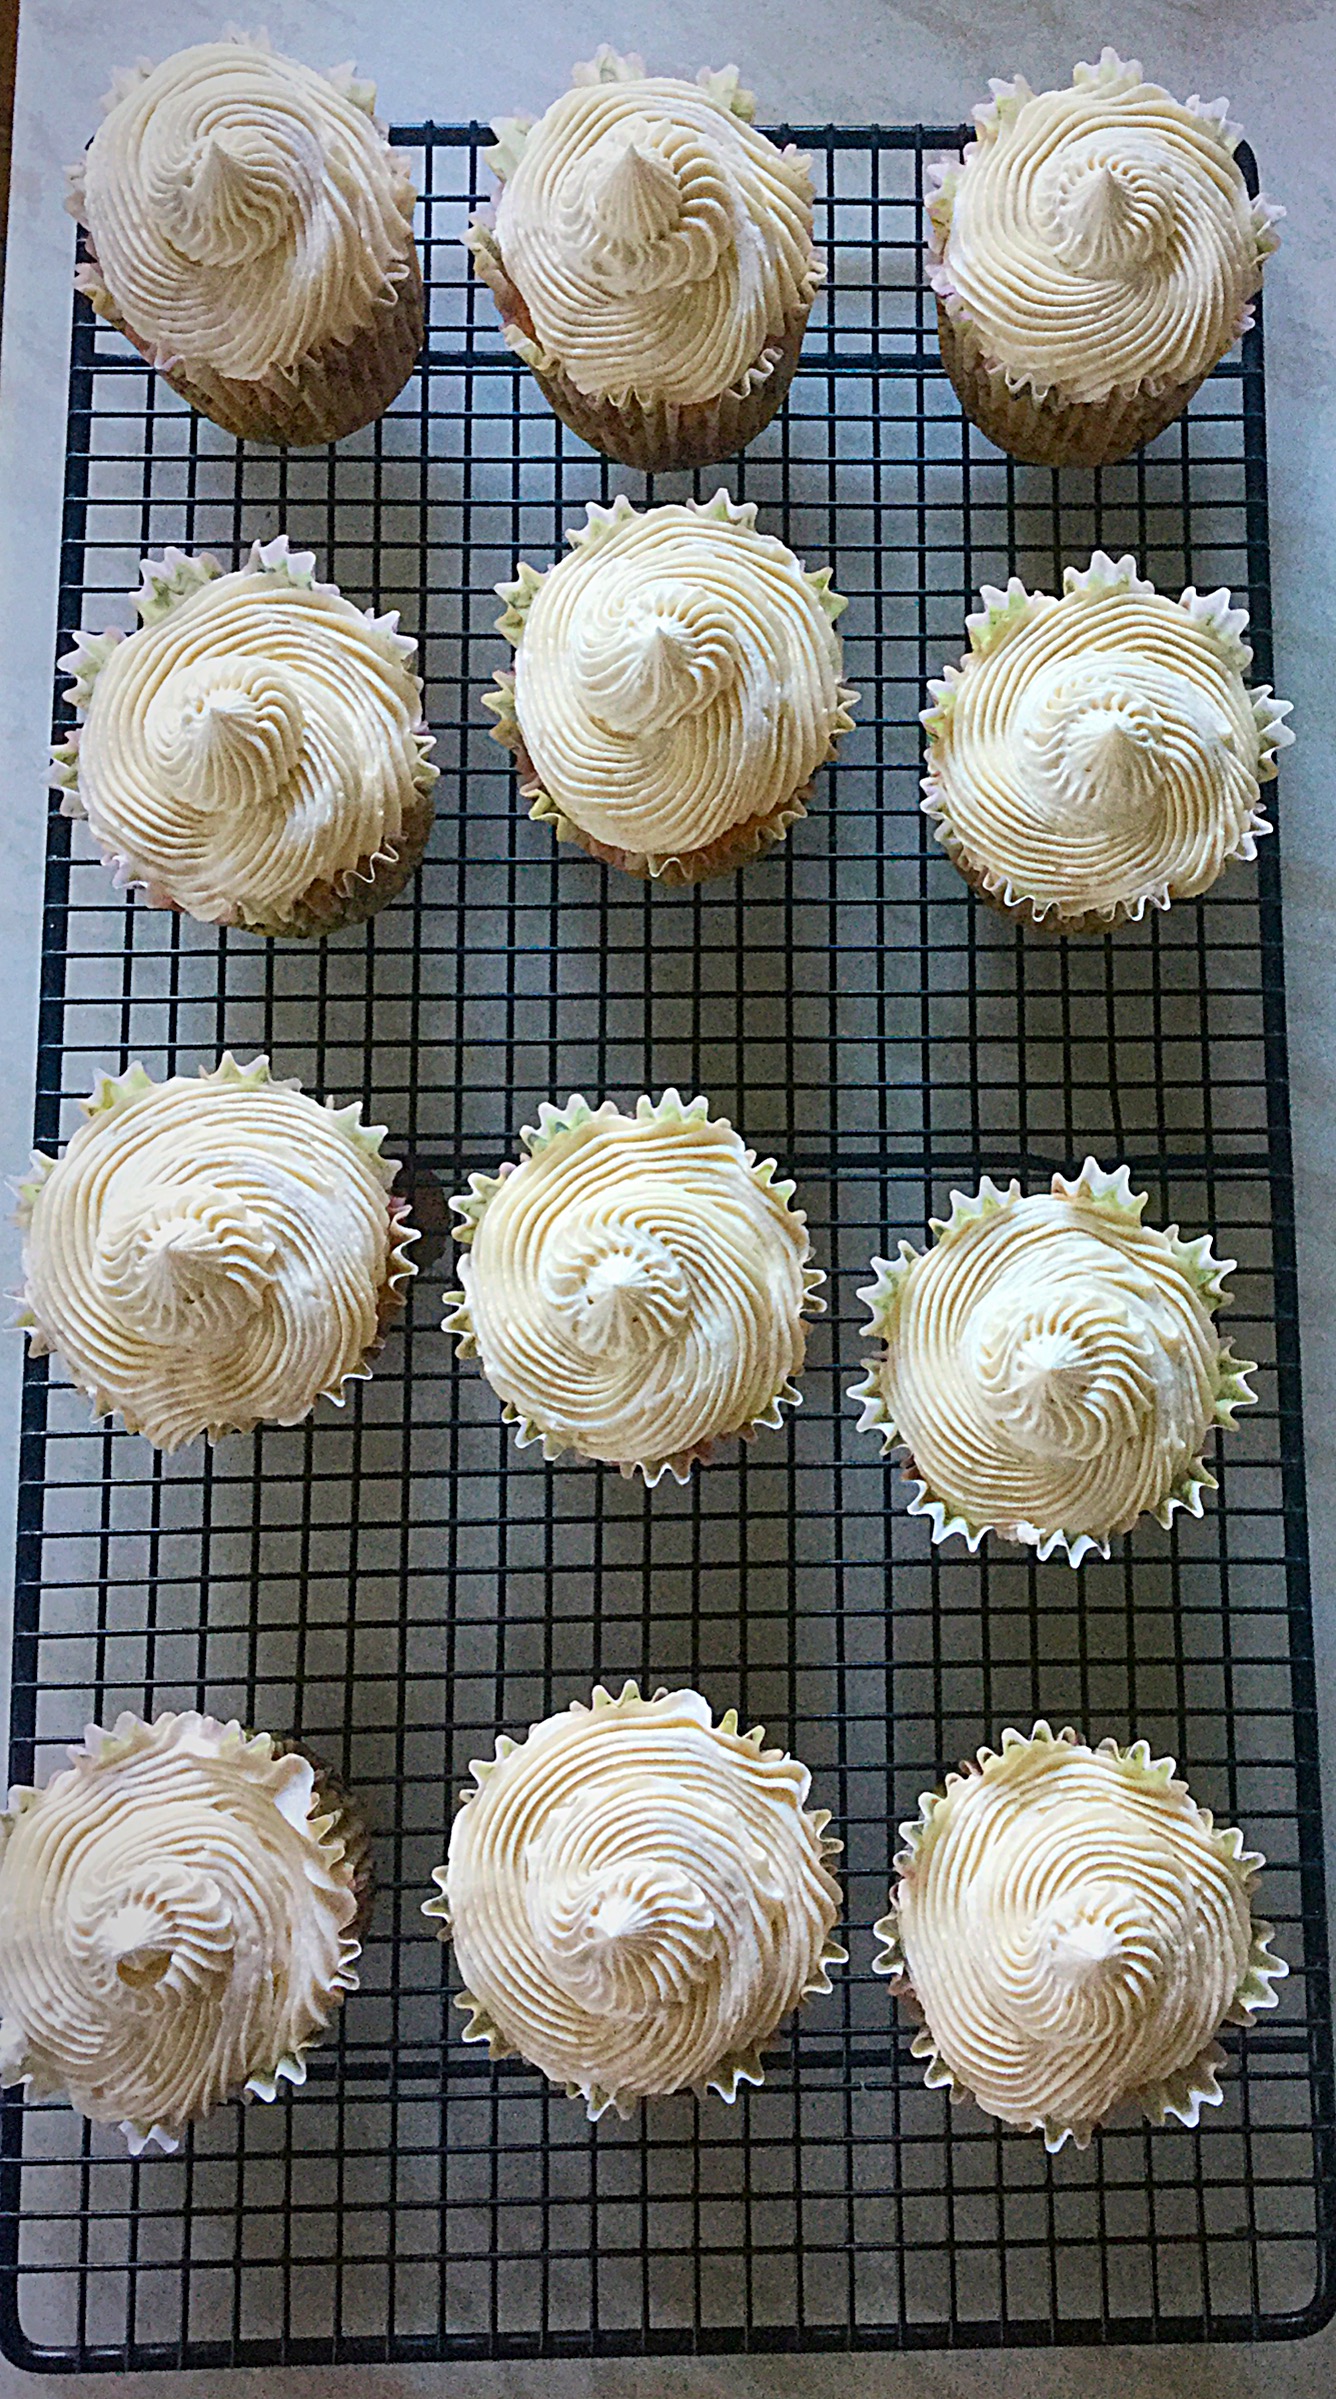
Although this is a Muffin Tray I wanted to bake deep cupcakes in it, to see how it performed.

Vanilla Bean Cupcakes
Baked, golden Vanilla Bean Cupcakes using the 12 Cup Muffin Tray.

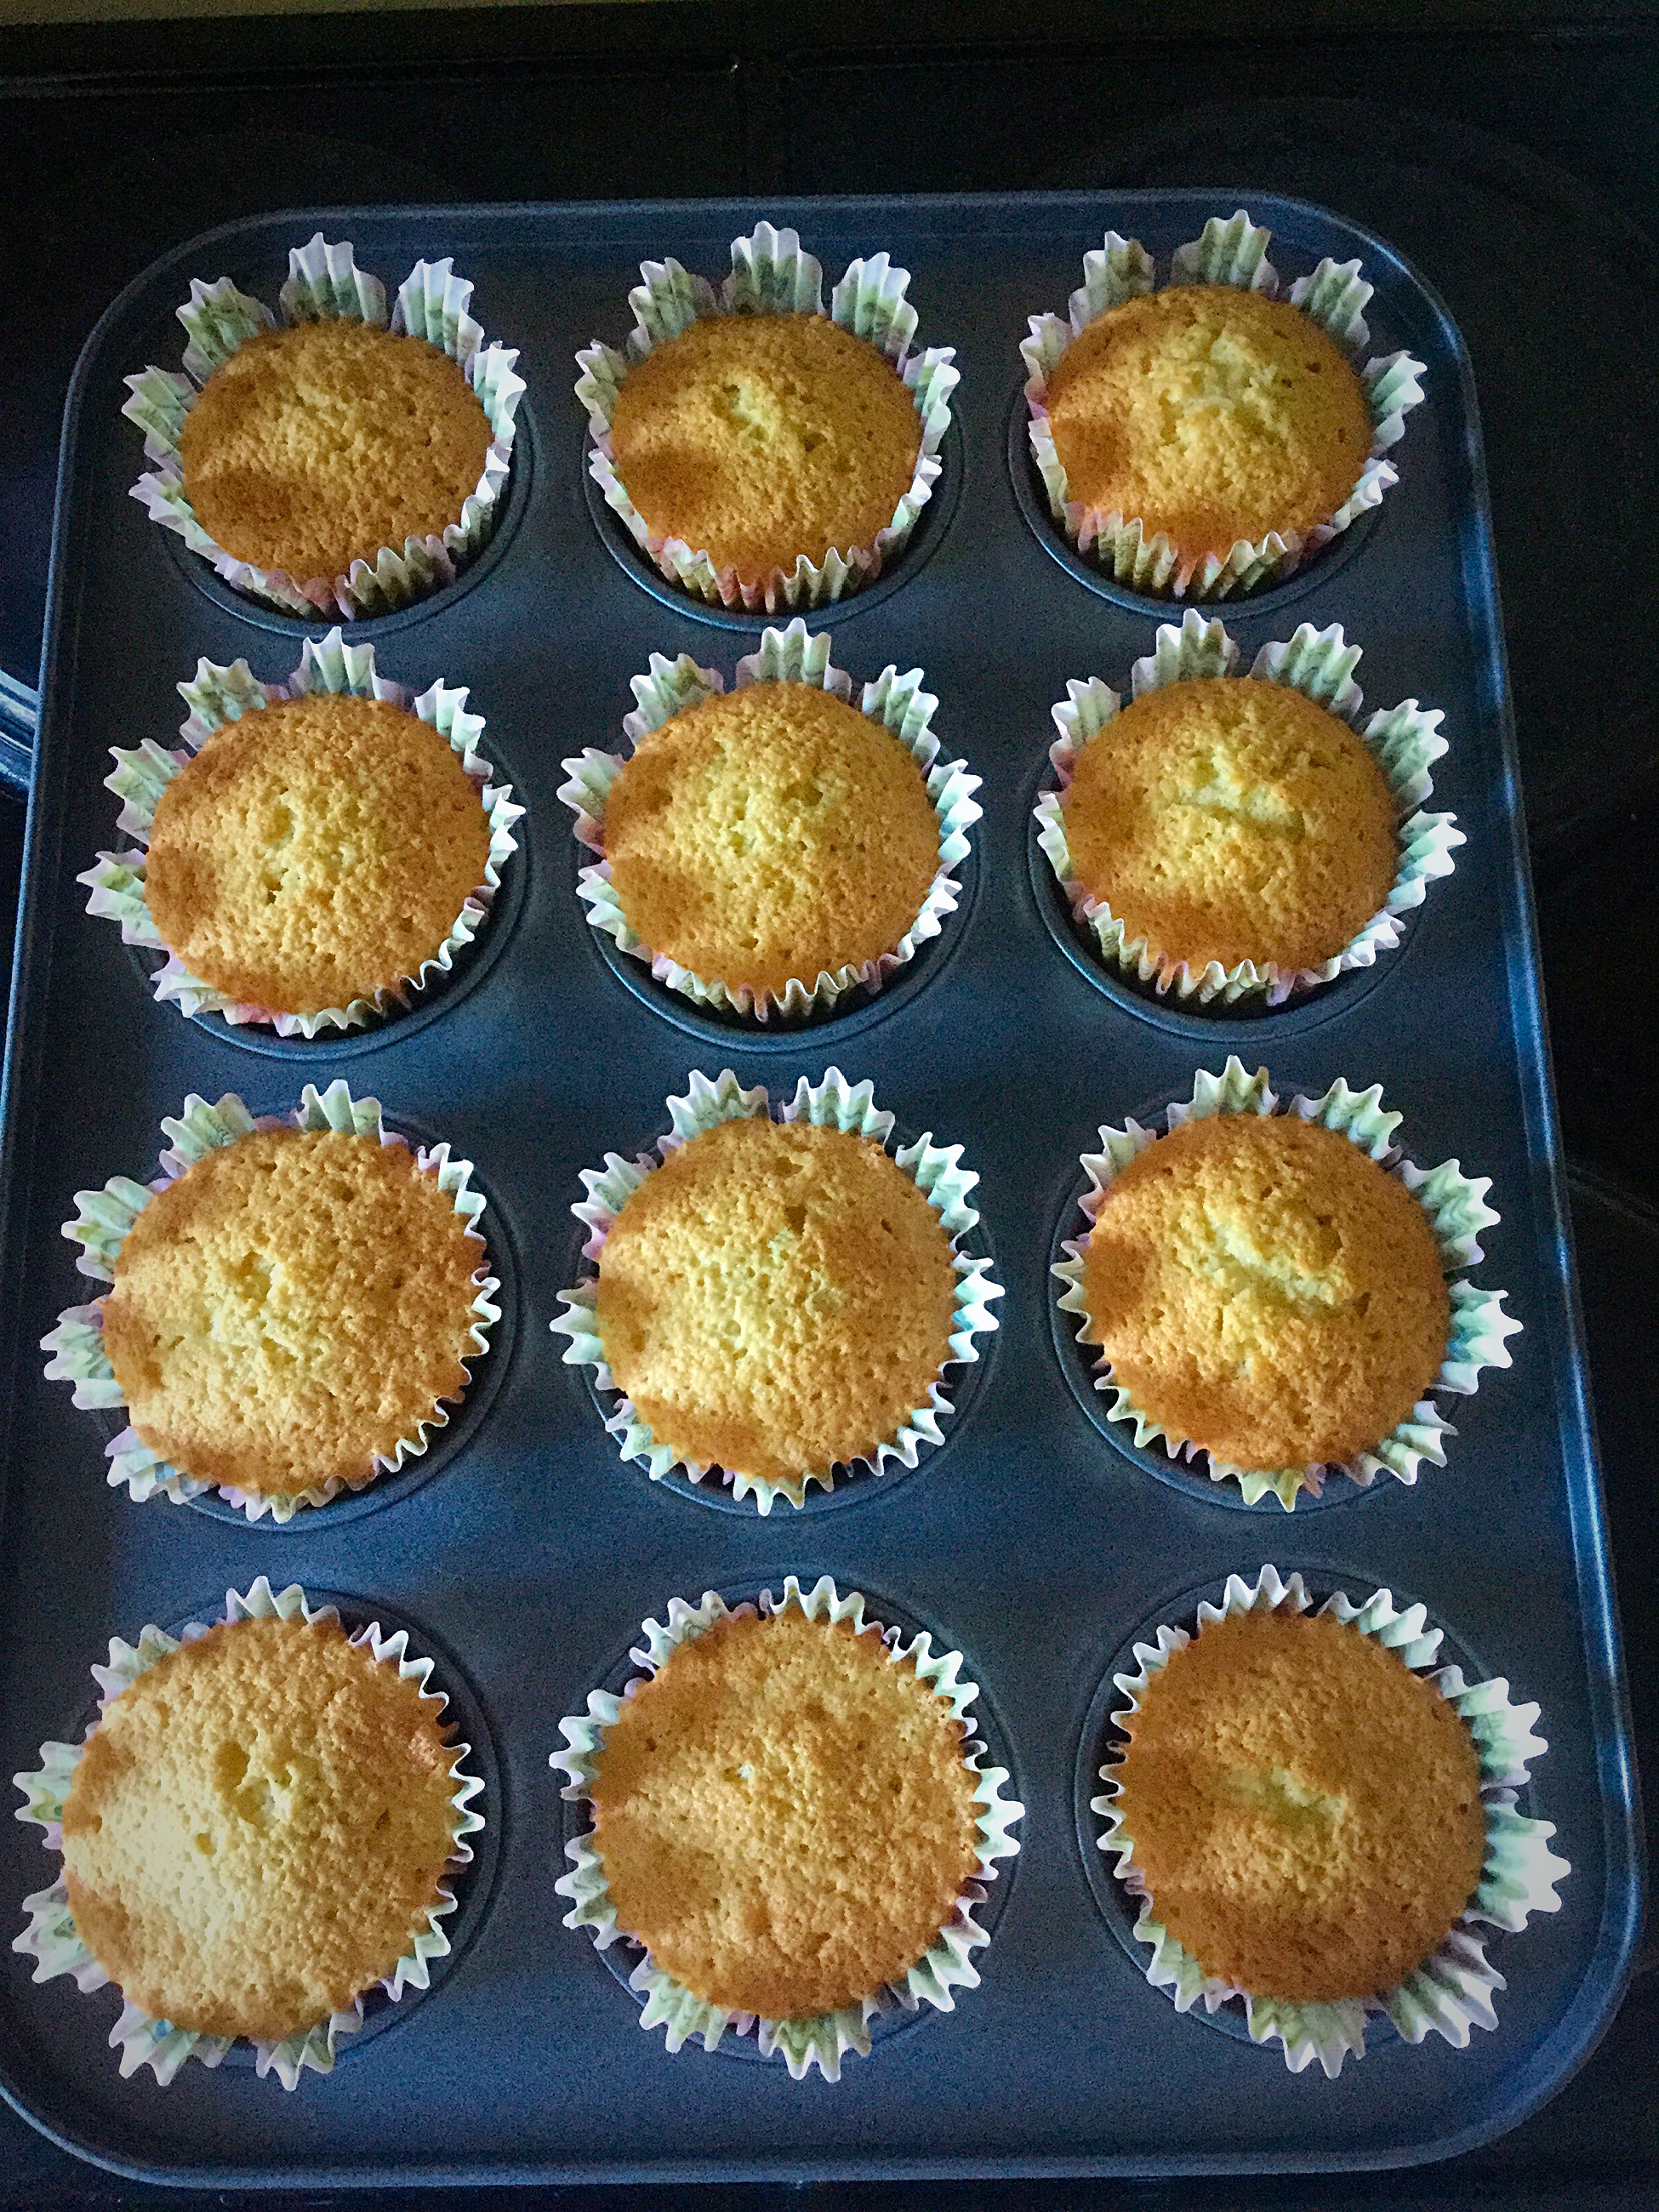
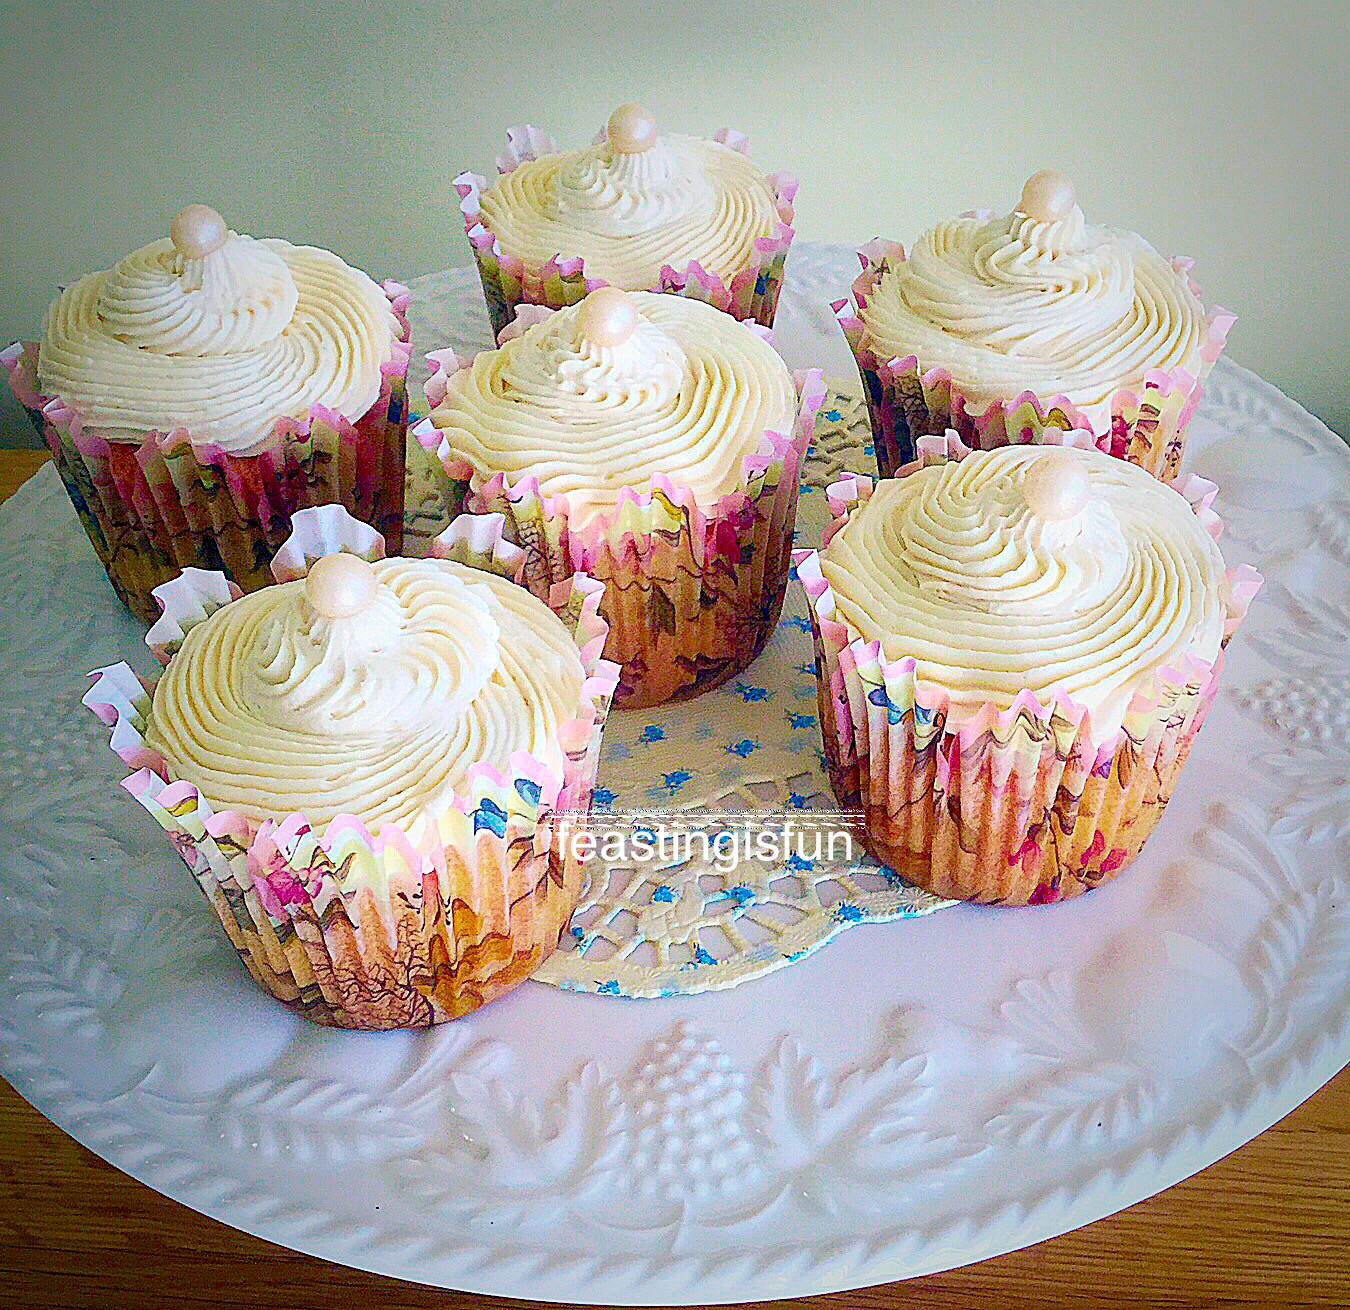
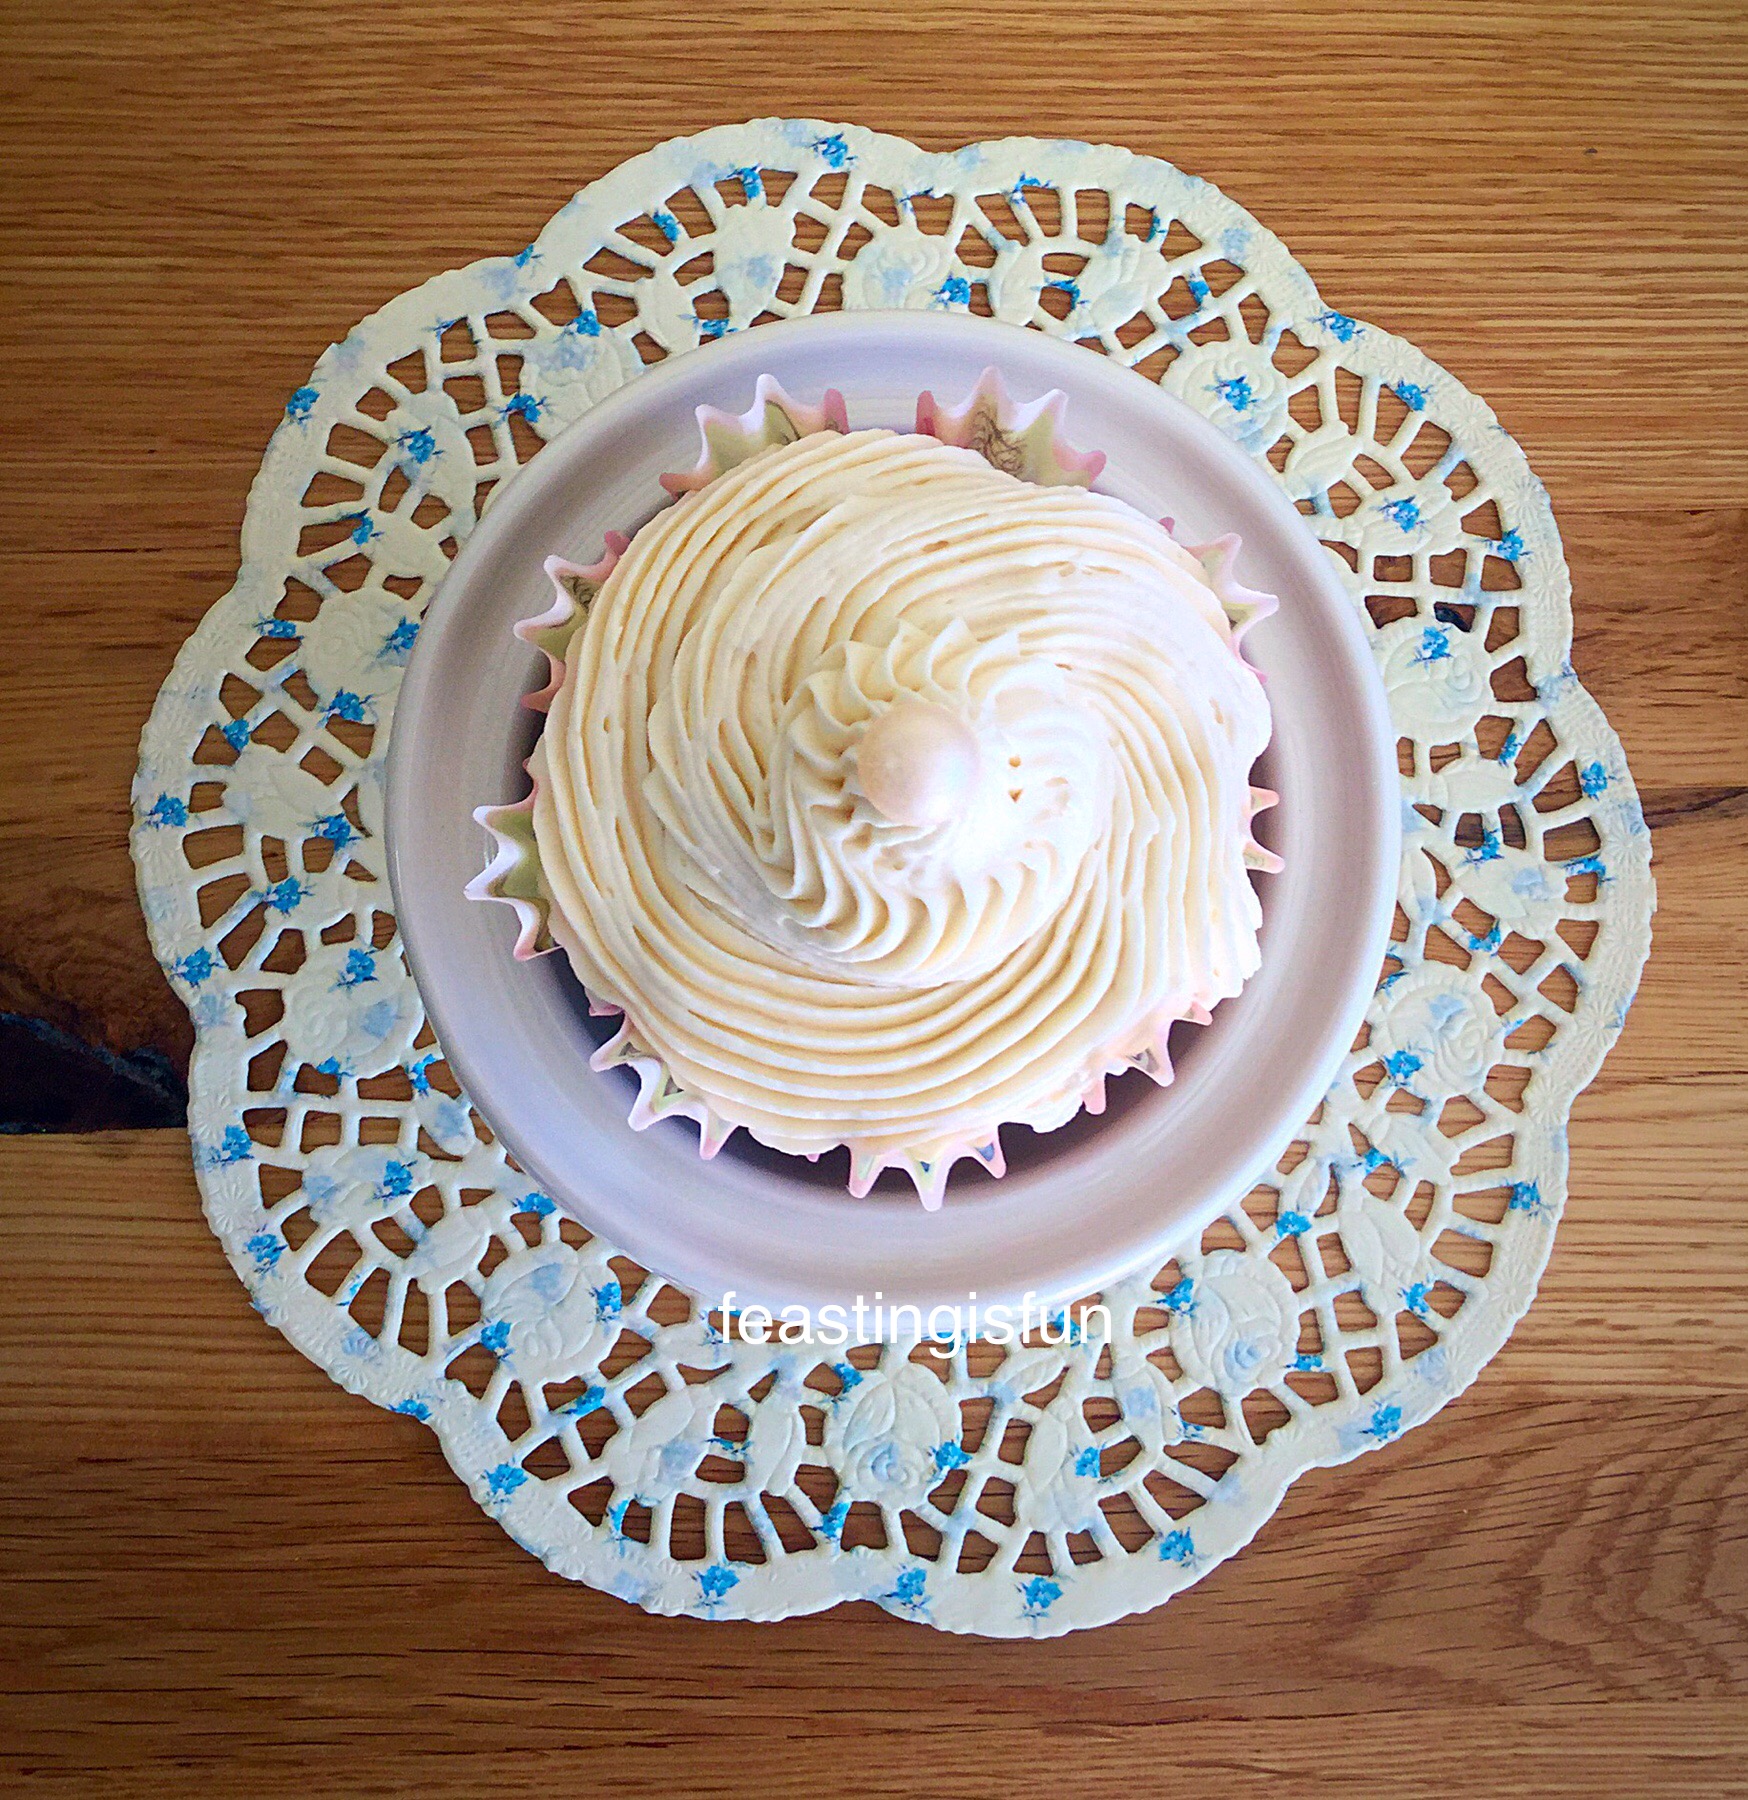
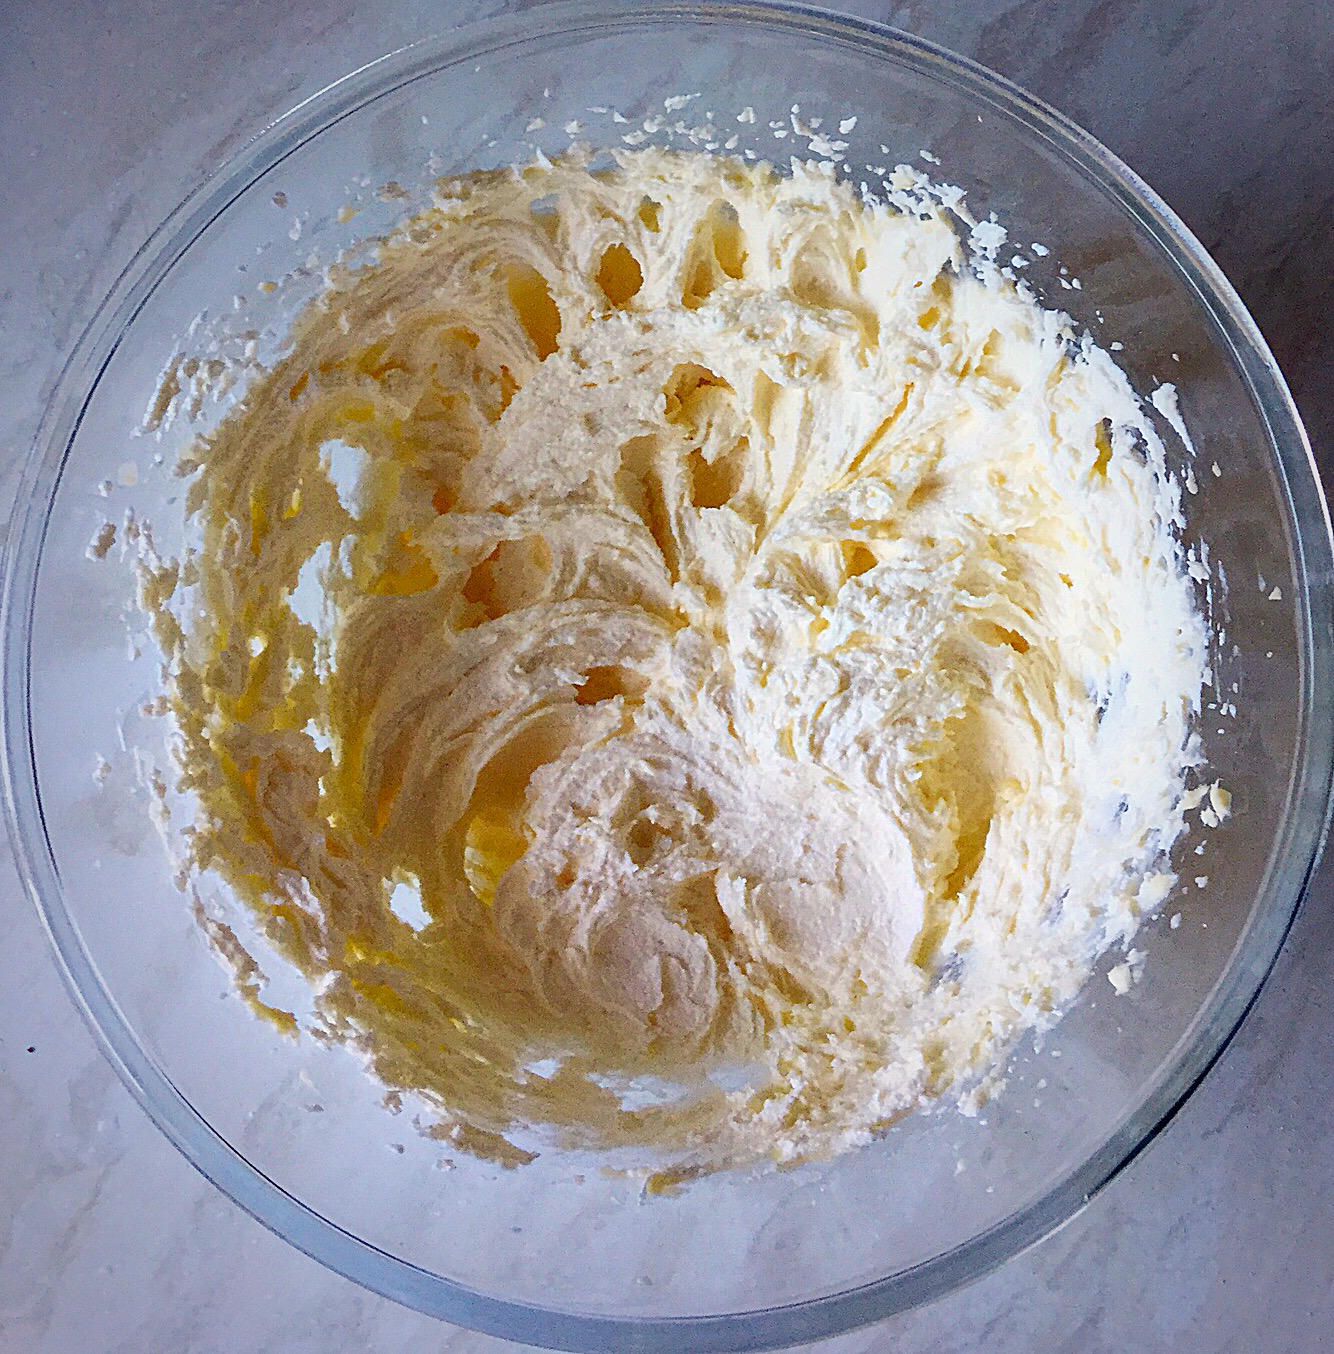
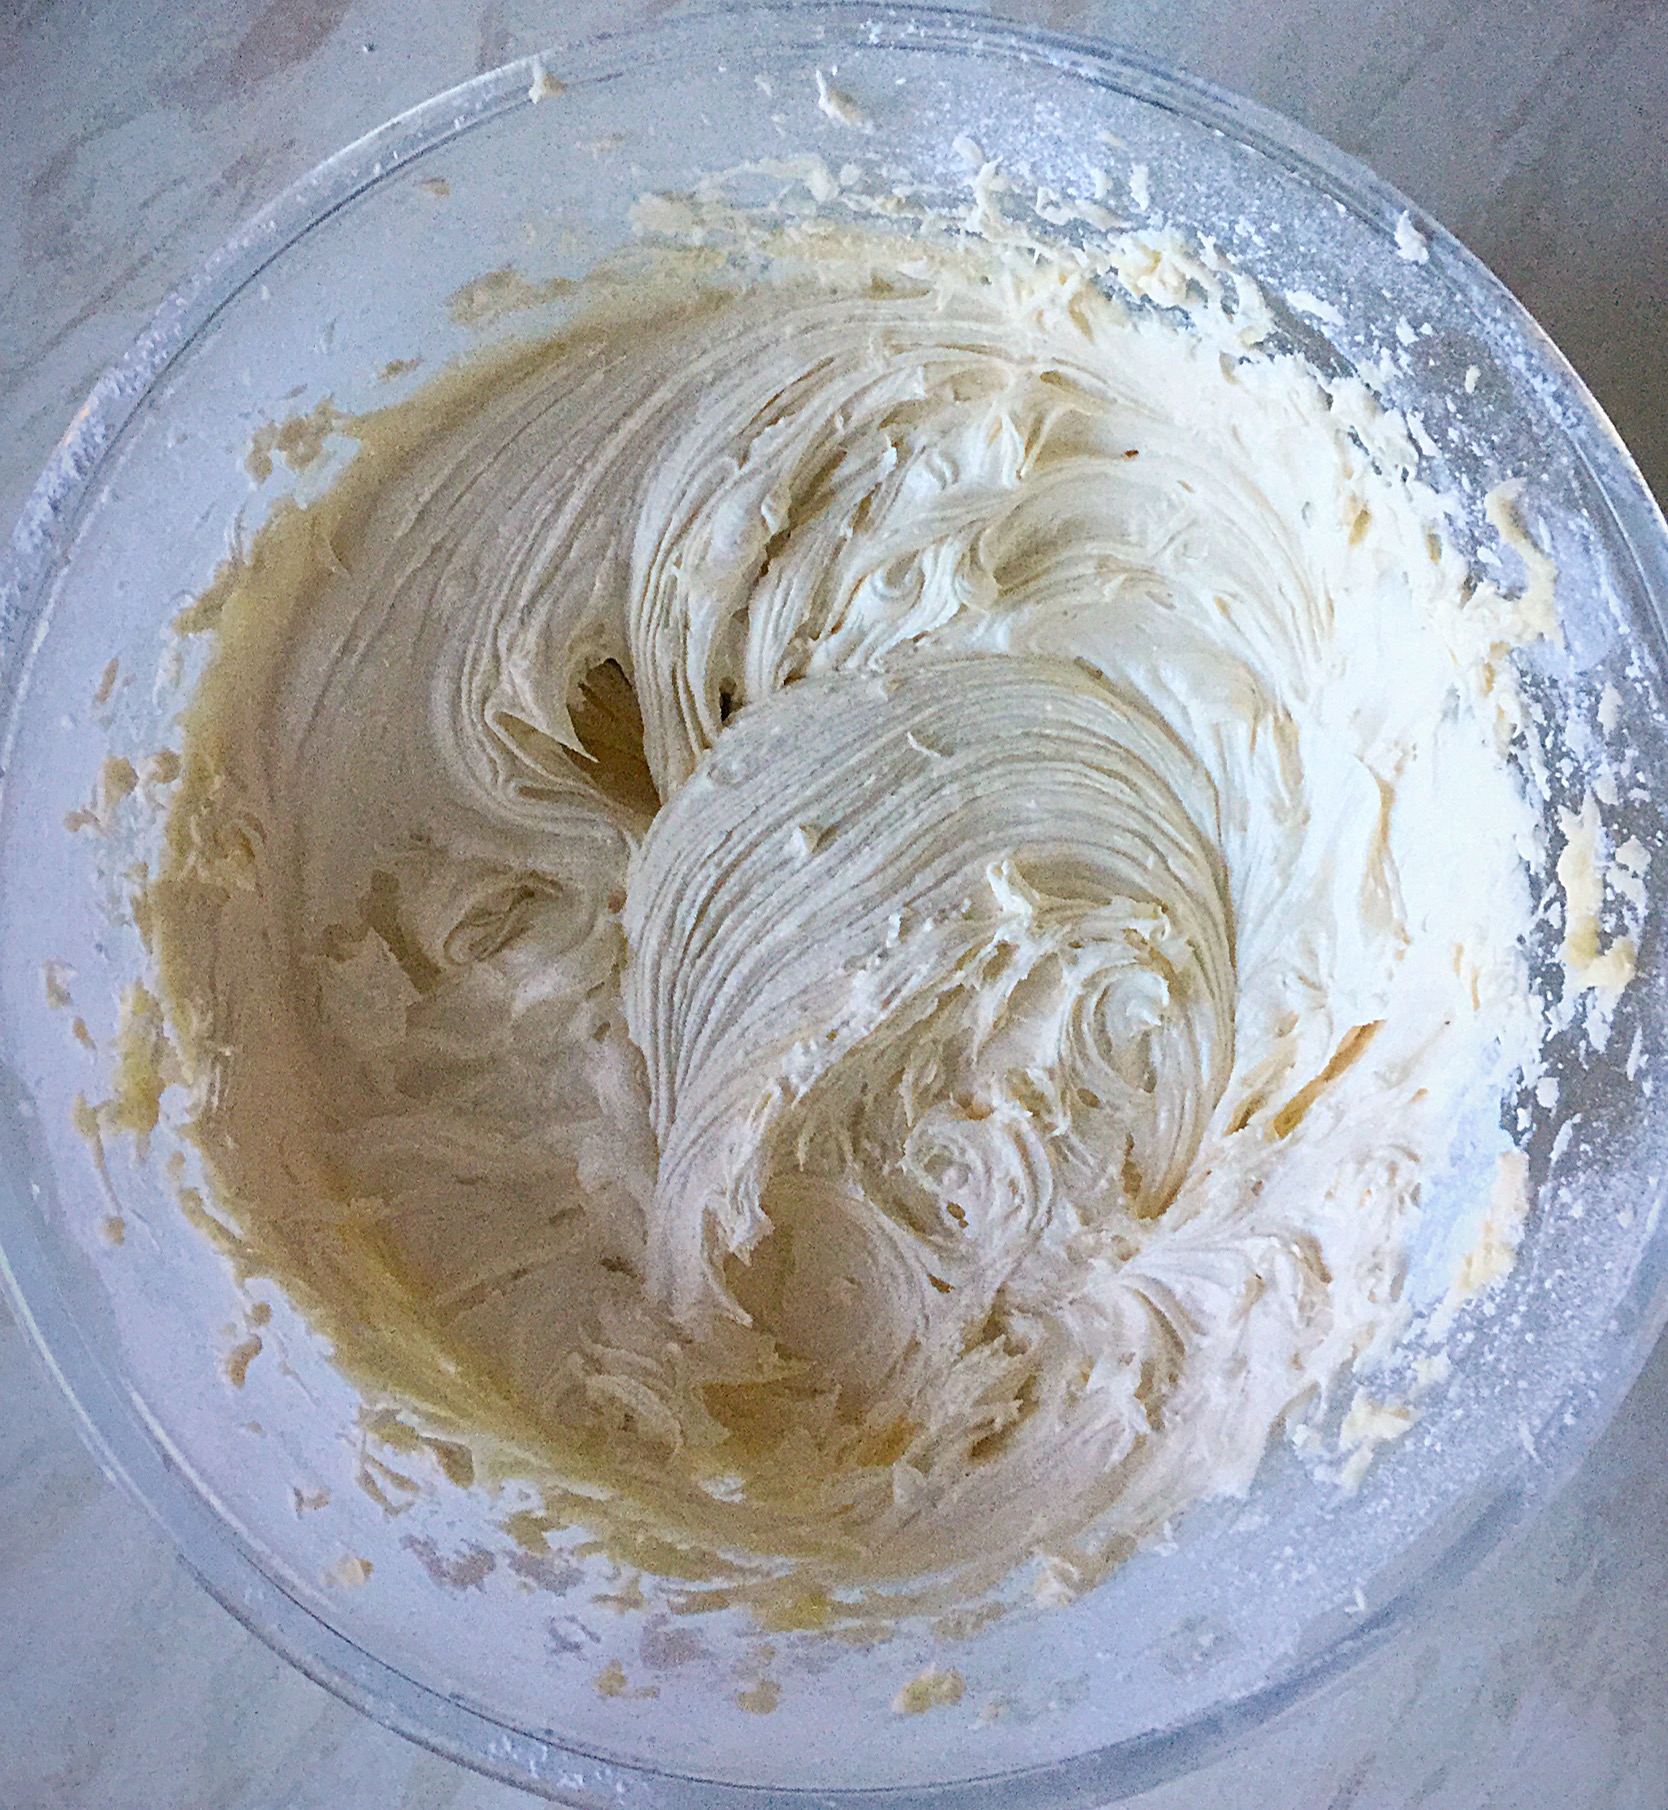
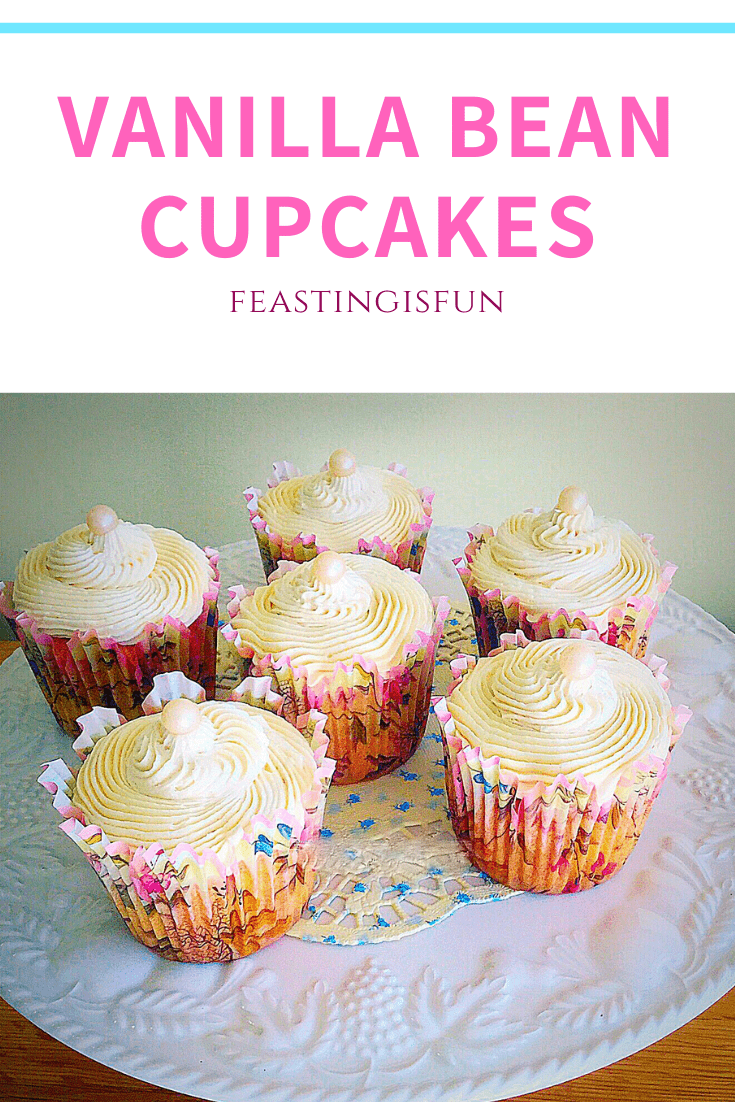
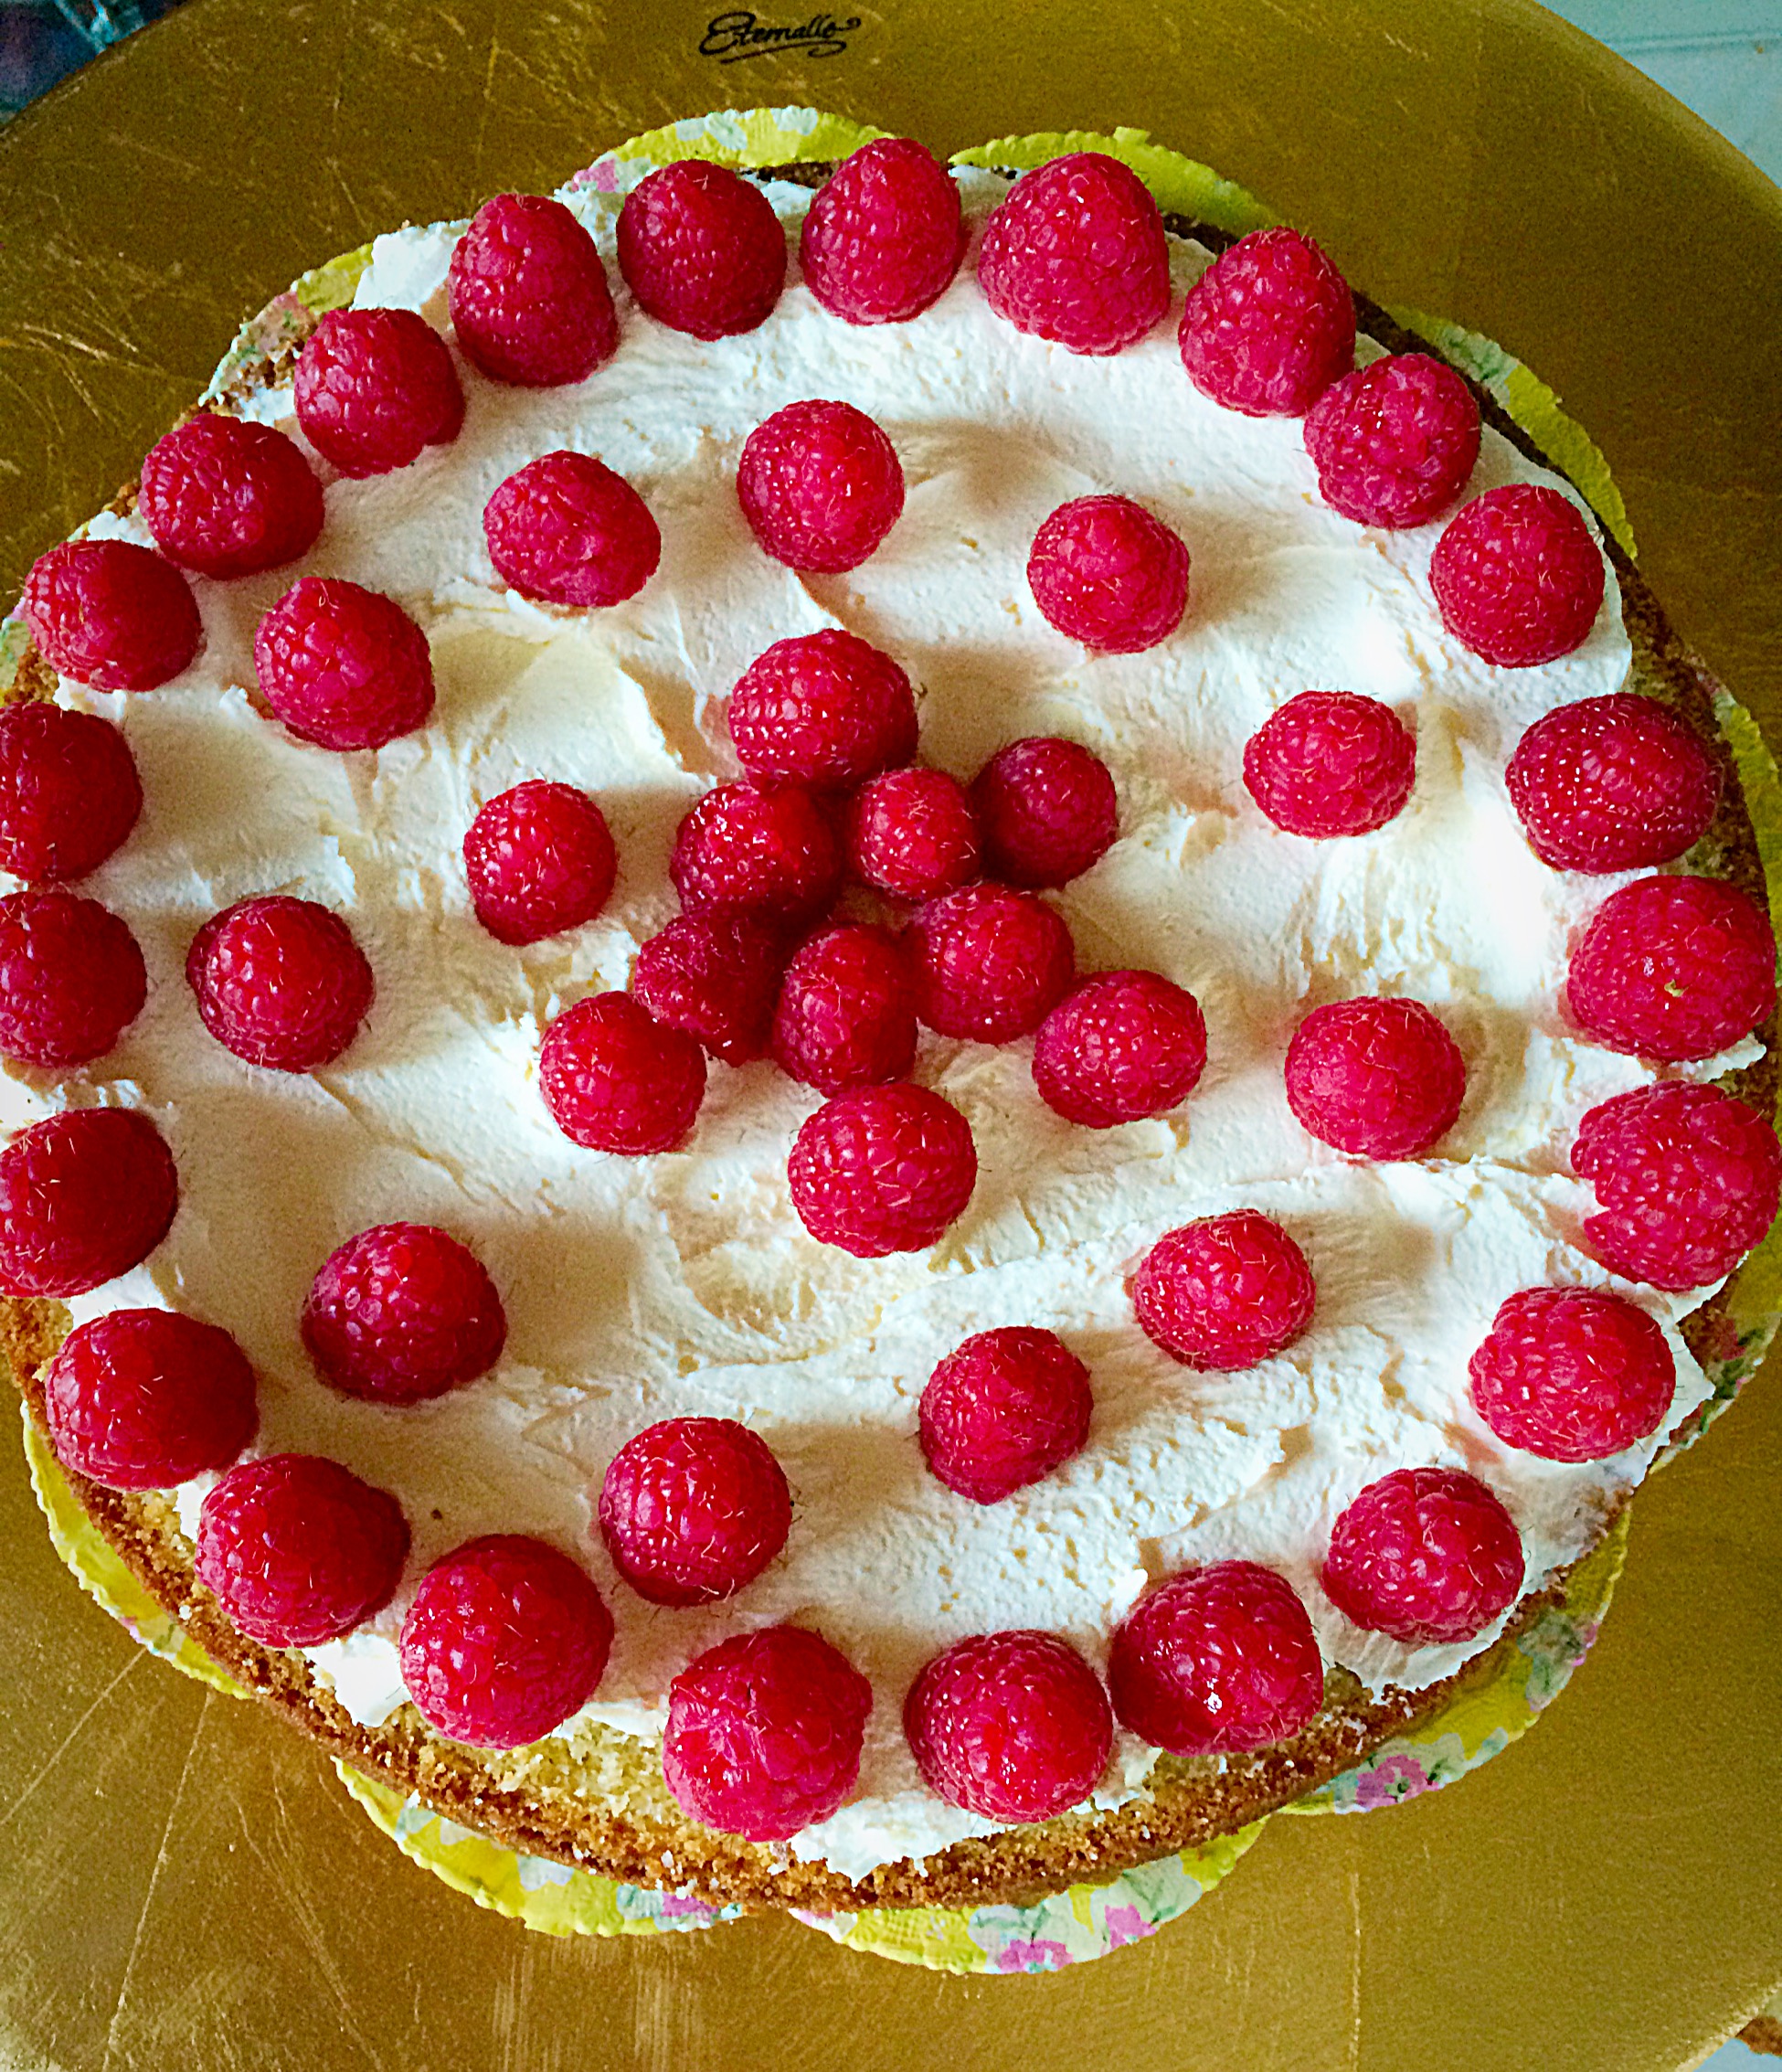
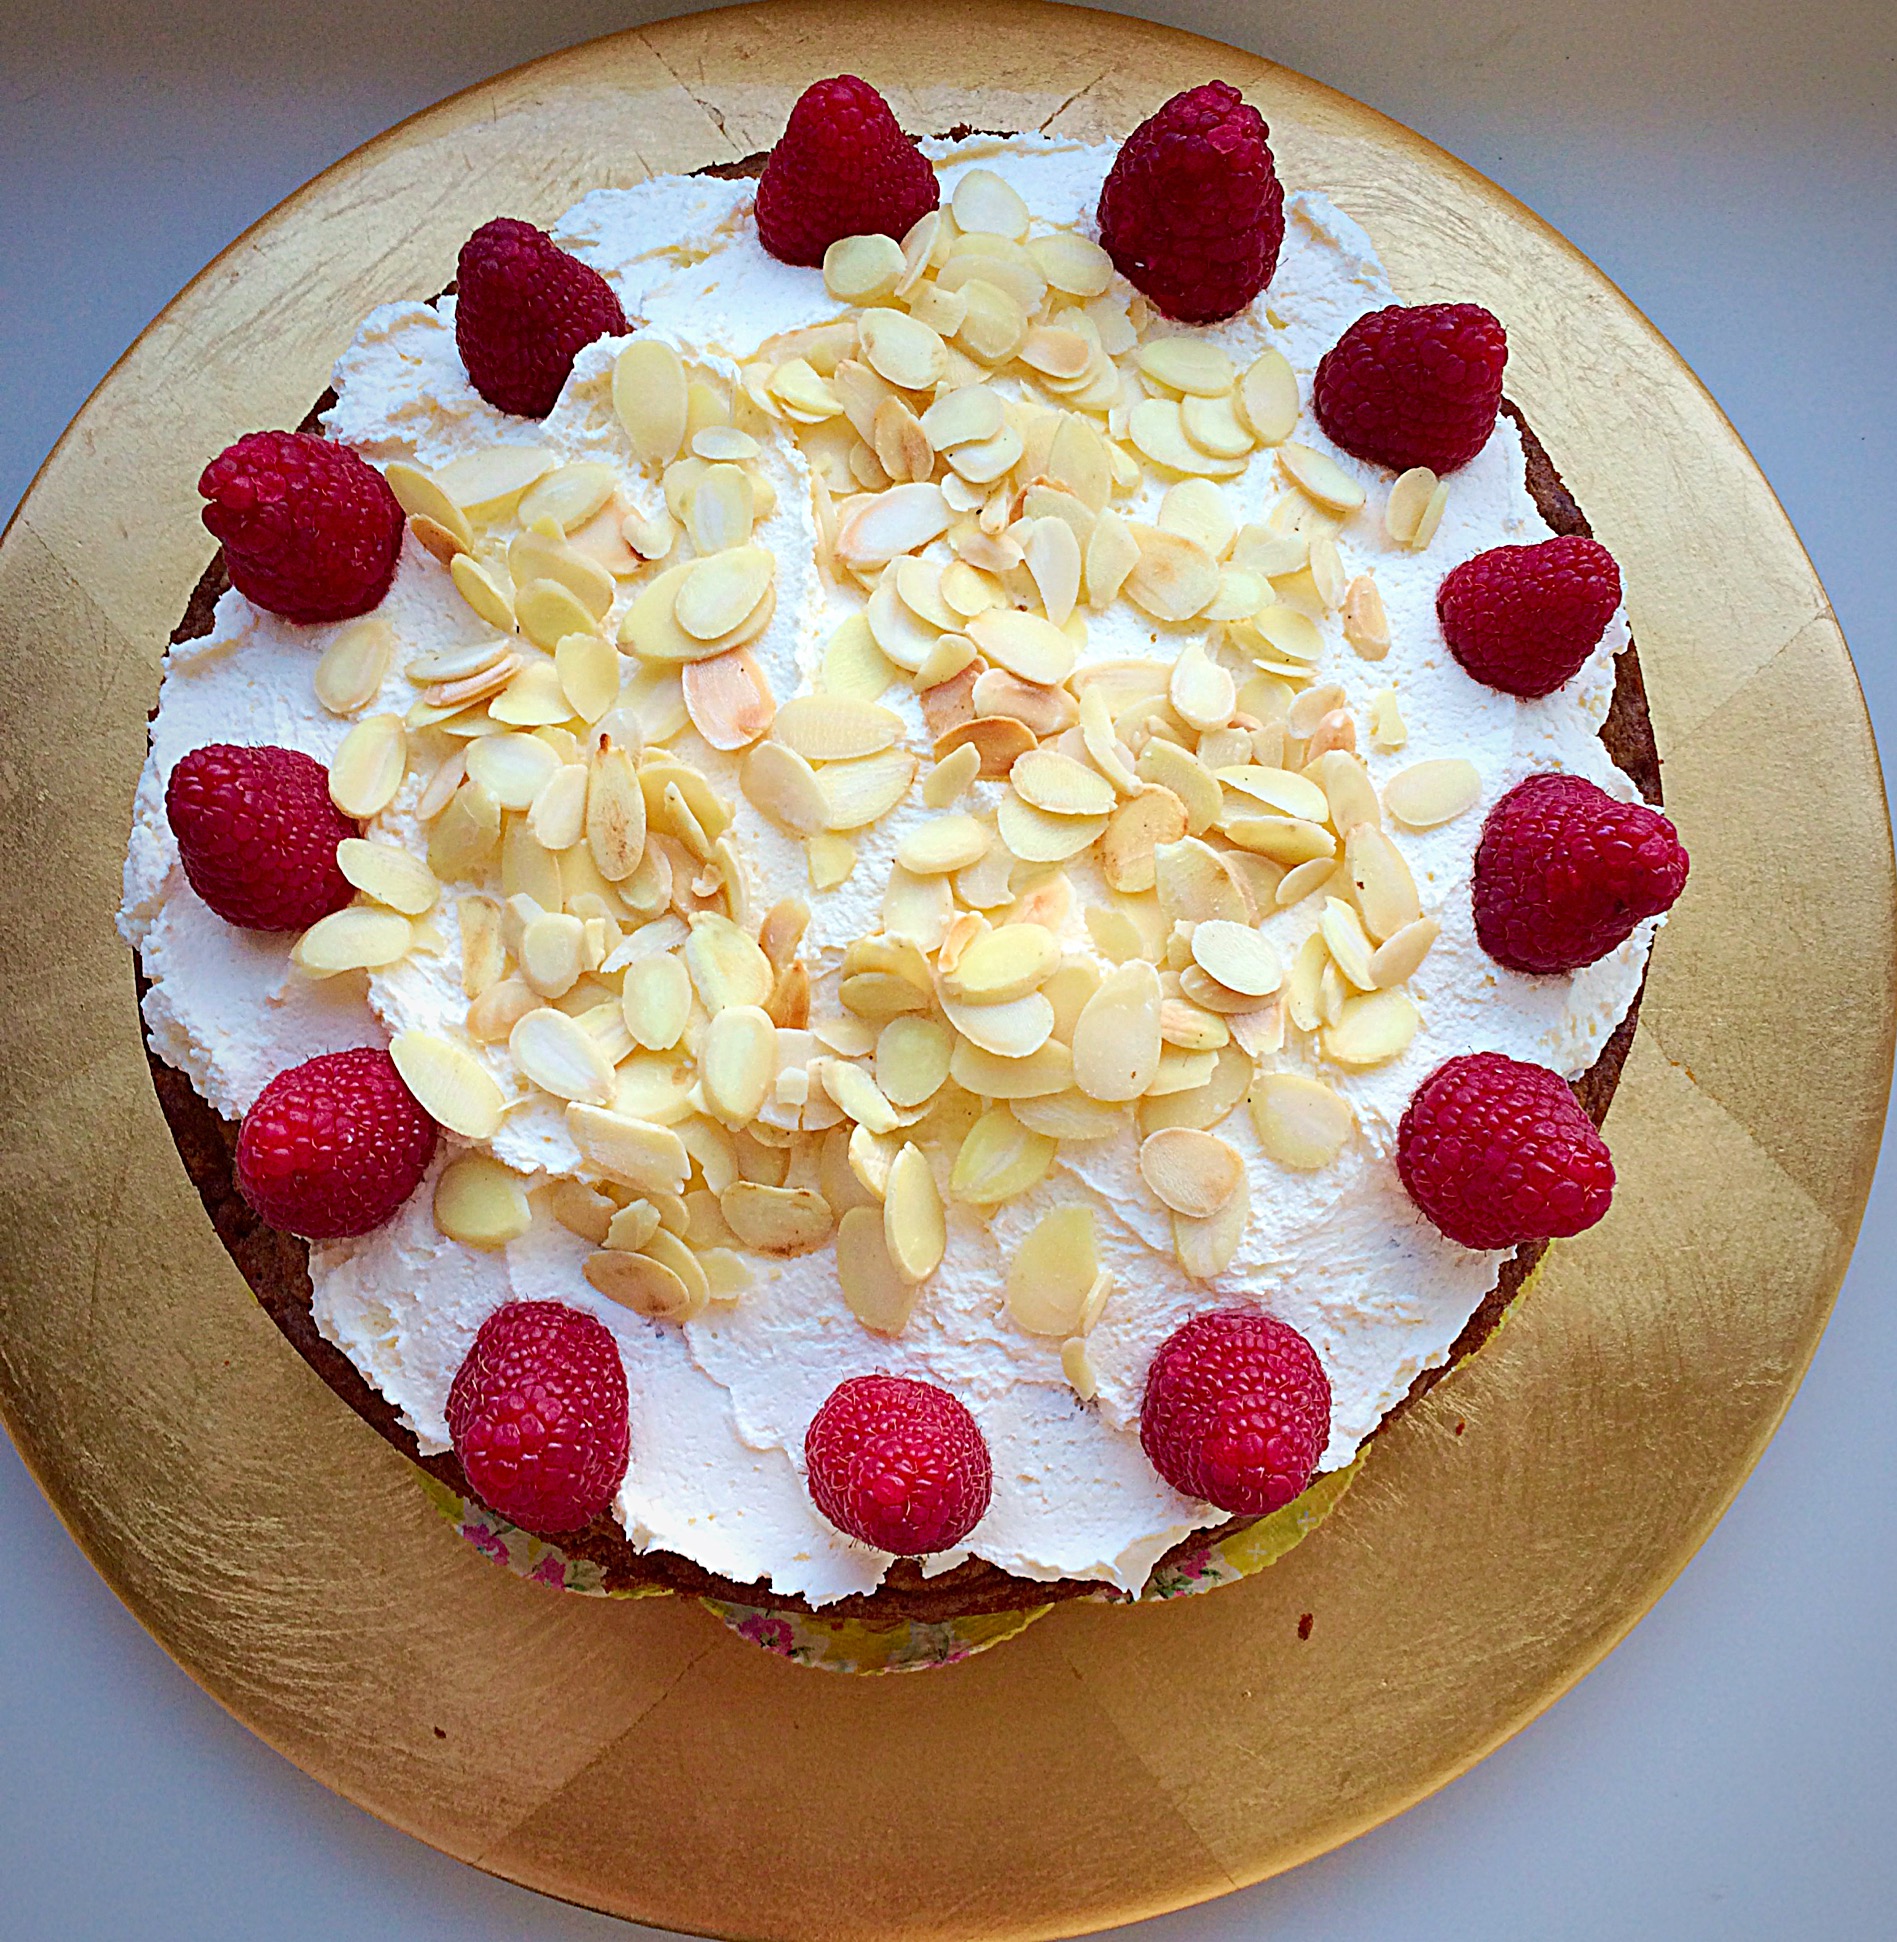
With the 12 Cup Muffin Tray I baked a batch of these Vanilla Bean CupcakesThe cupcakes baked evenly across the tray and were easy to remove.

What I particularly like about this Muffin Tray is the lip it has, that runs around the outside, on the top of the tray. This is a fantastic feature when baking any muffin or cupcake with a streusel topping. Inevitably some of the crumbly streusel gets knocked off the top of the muffin whilst moving the tray, this little addition ensures the sticky, crumbly mixture, doesn’t end up on your oven floor!

I do not know anyone who enjoys having to clean the oven!!!

So top marks for that British Bakeware.

This 12 Cup Muffin Tray was easy to clean, baked evenly and can be used for muffins and cupcakes. It is a complete winner all round.

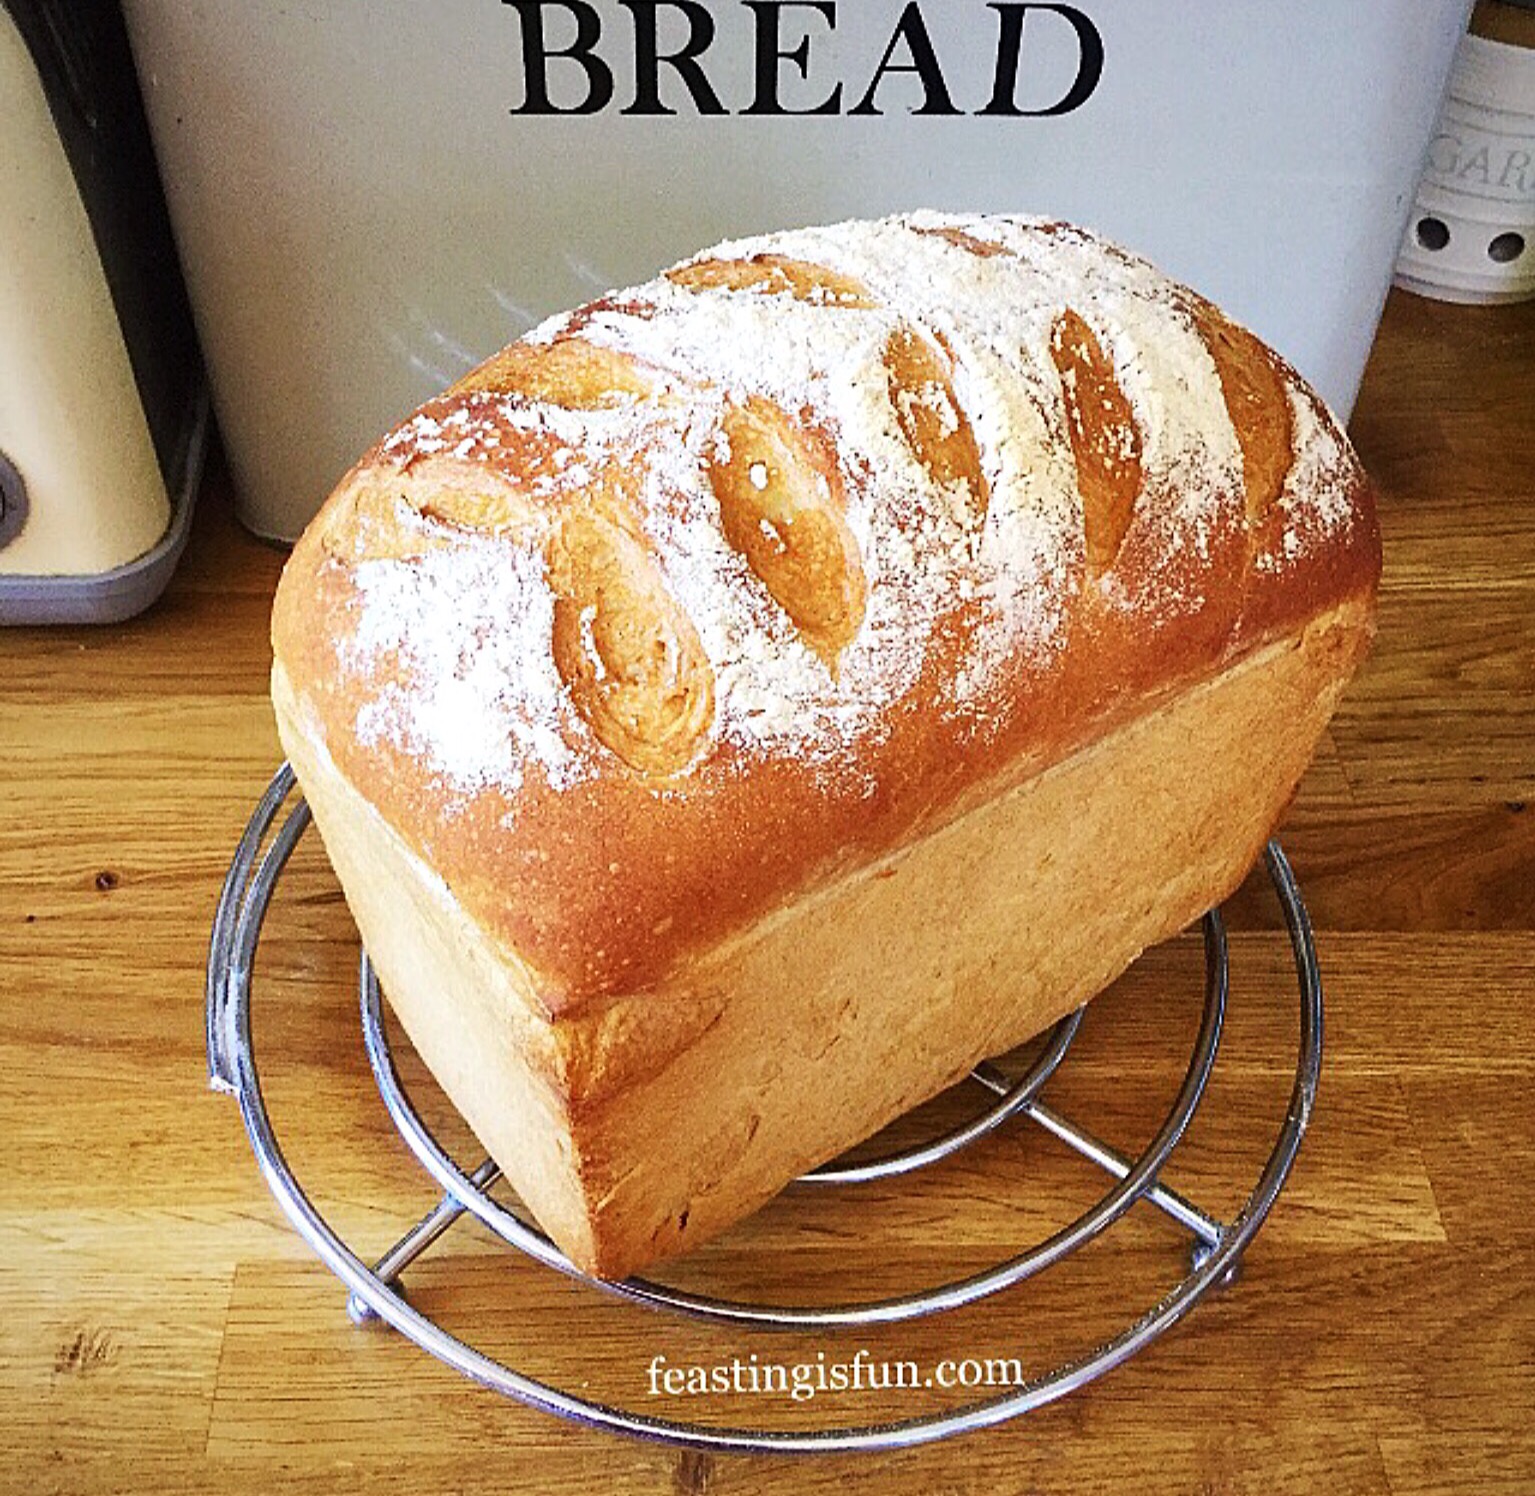
3lb Loaf Pan dimensions 21cm long x 13cm wide x 12cm deep.

British Bakeware Product Review
3lb Loaf Tin

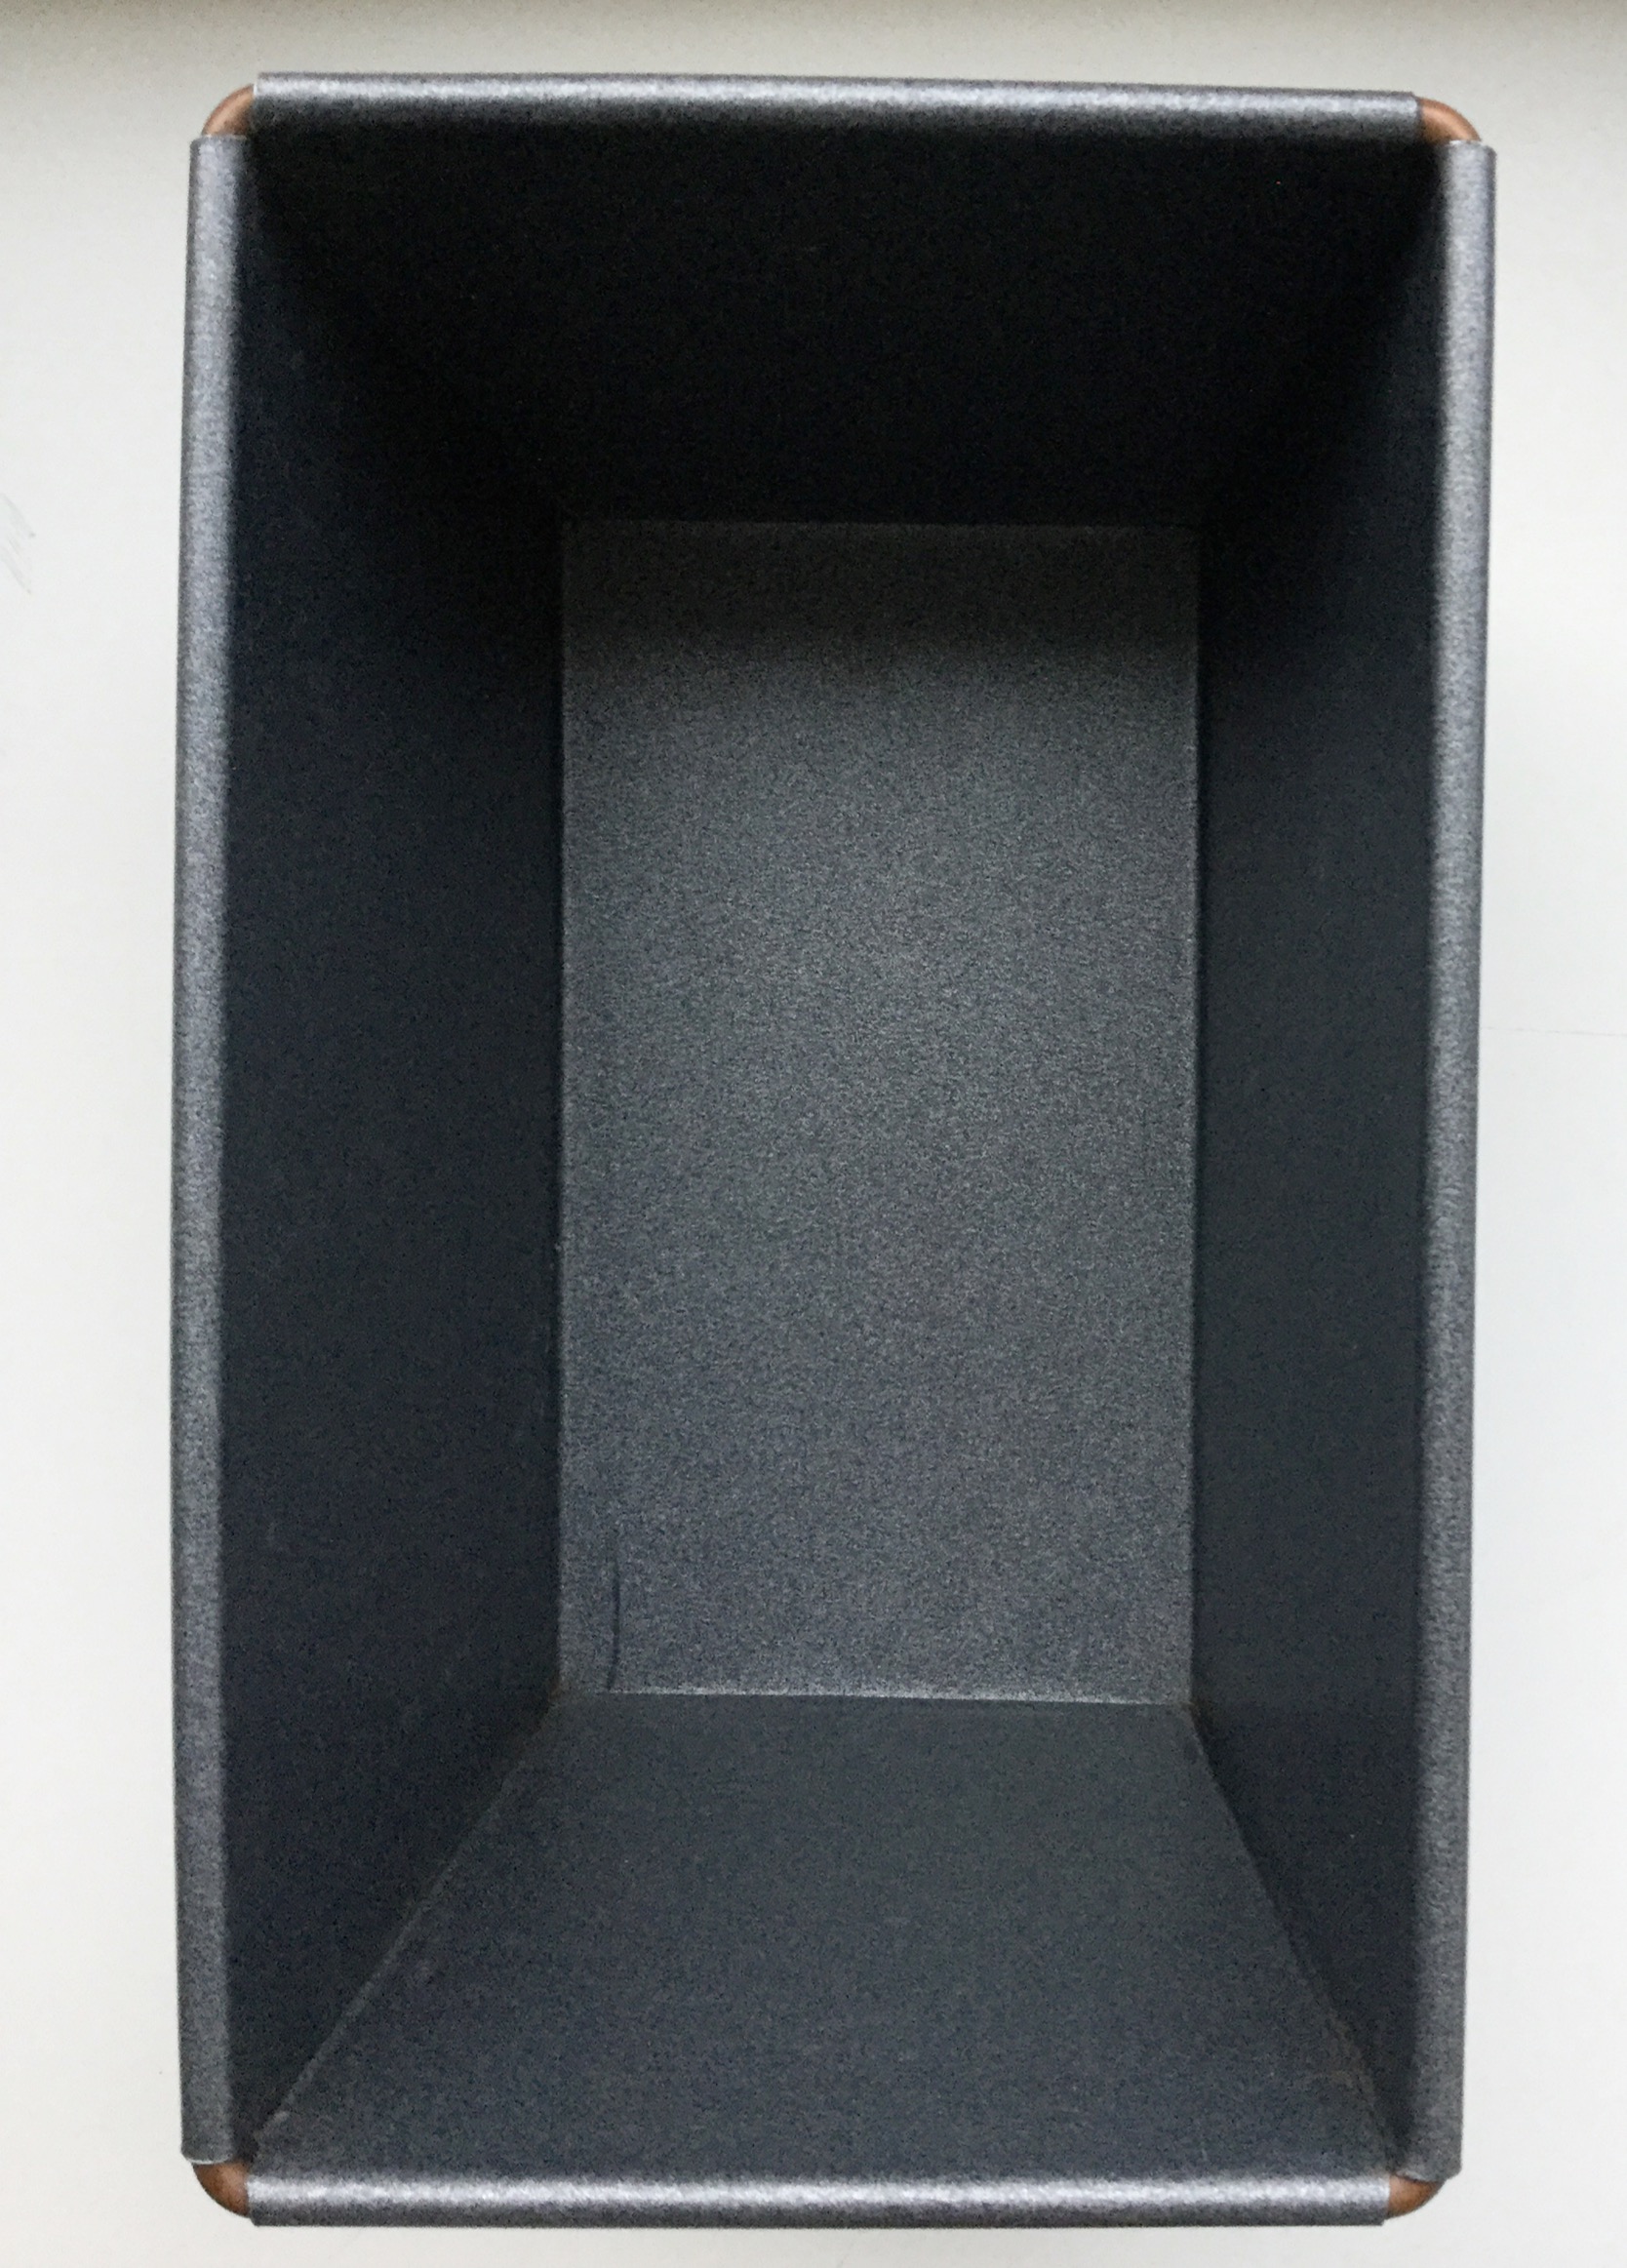
The 3lb Loaf Tin has a non-stick coating and is also oven, freezer and dishwasher safe.

Those of you who know me, know I love baking all sorts of delicious cakes, cookies, pies……

Did you know that I bake almost ALL of our bread?

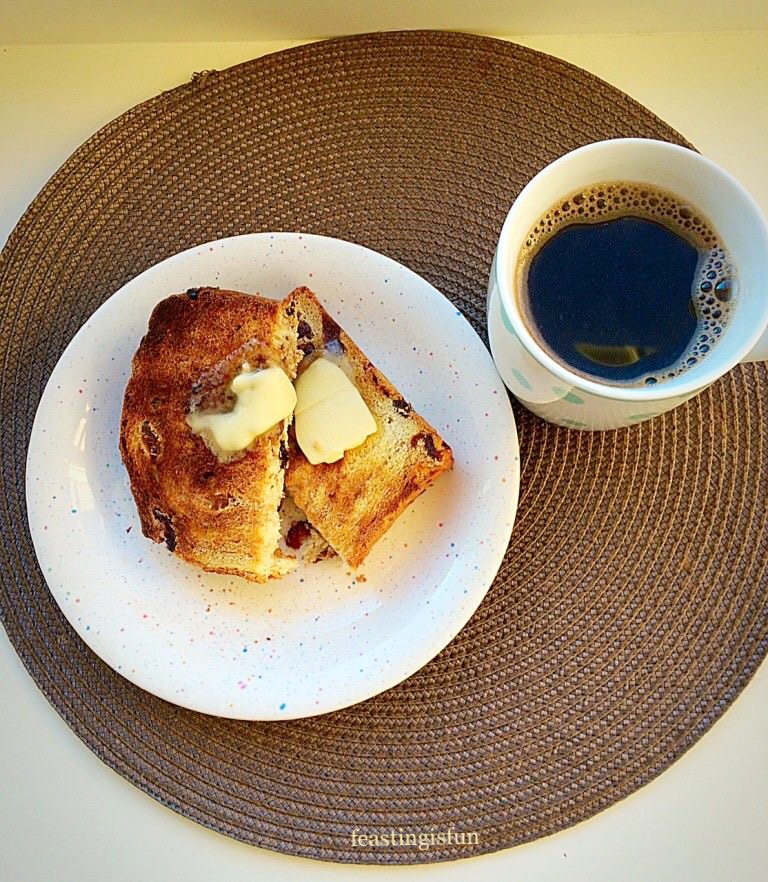
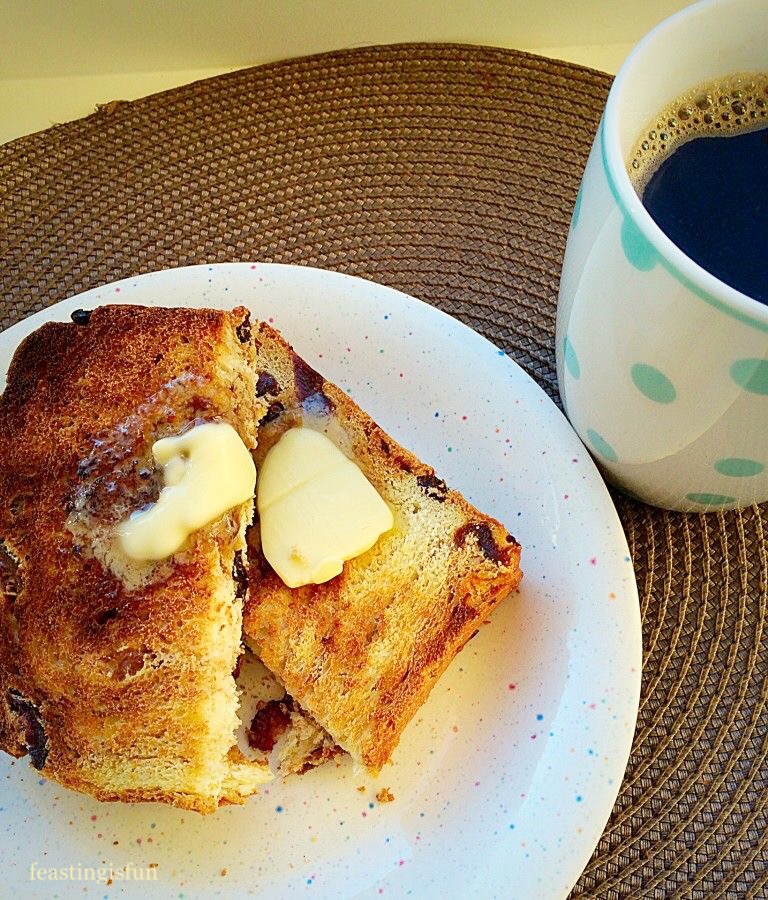
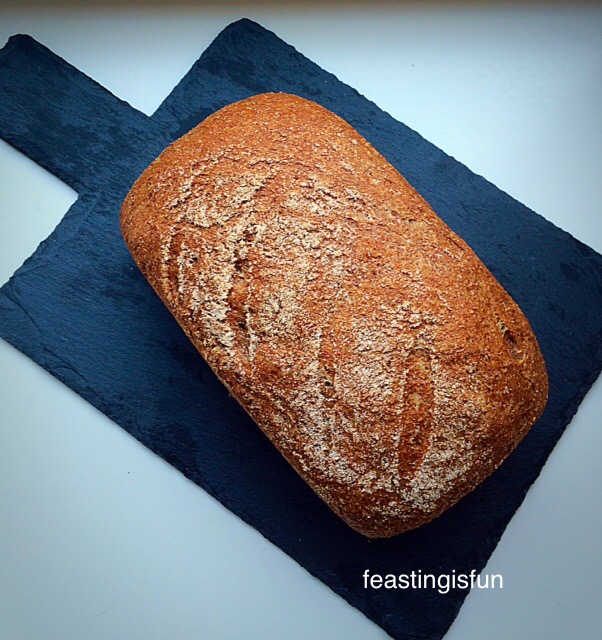
This 3lb Loaf Tin has been used almost every day, since just before Christmas. I have baked our regular variety of loaves and created 2 new recipes in honour of this loaf tin – if it is possible to love an item of baking equipment, well, let’s just say, don’t try and come between me and this loaf tin. Are we clear???

Time after time it produced fantastic loaves. If you bake bread you NEED this tin. If you don’t and want to start get THIS tin.

I have been baking bread for the best part of 40 years (I started very young!!) and this is, without question, the best non-stick loaf tin I have ever used.

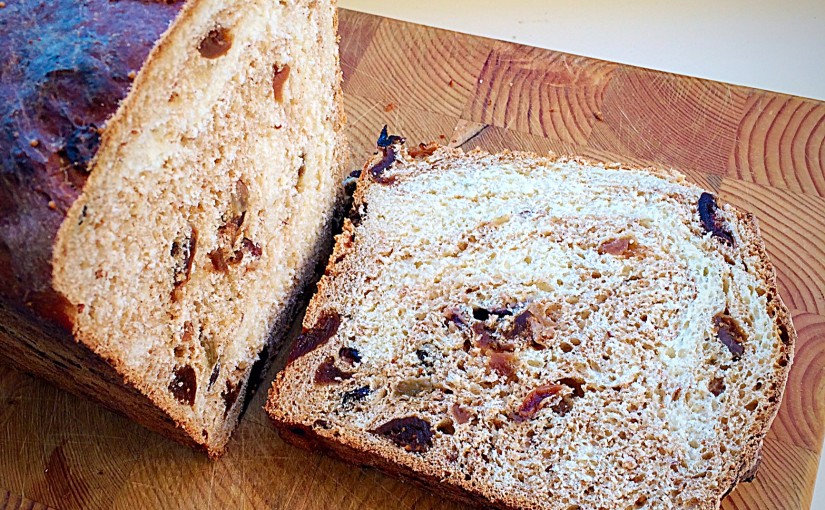
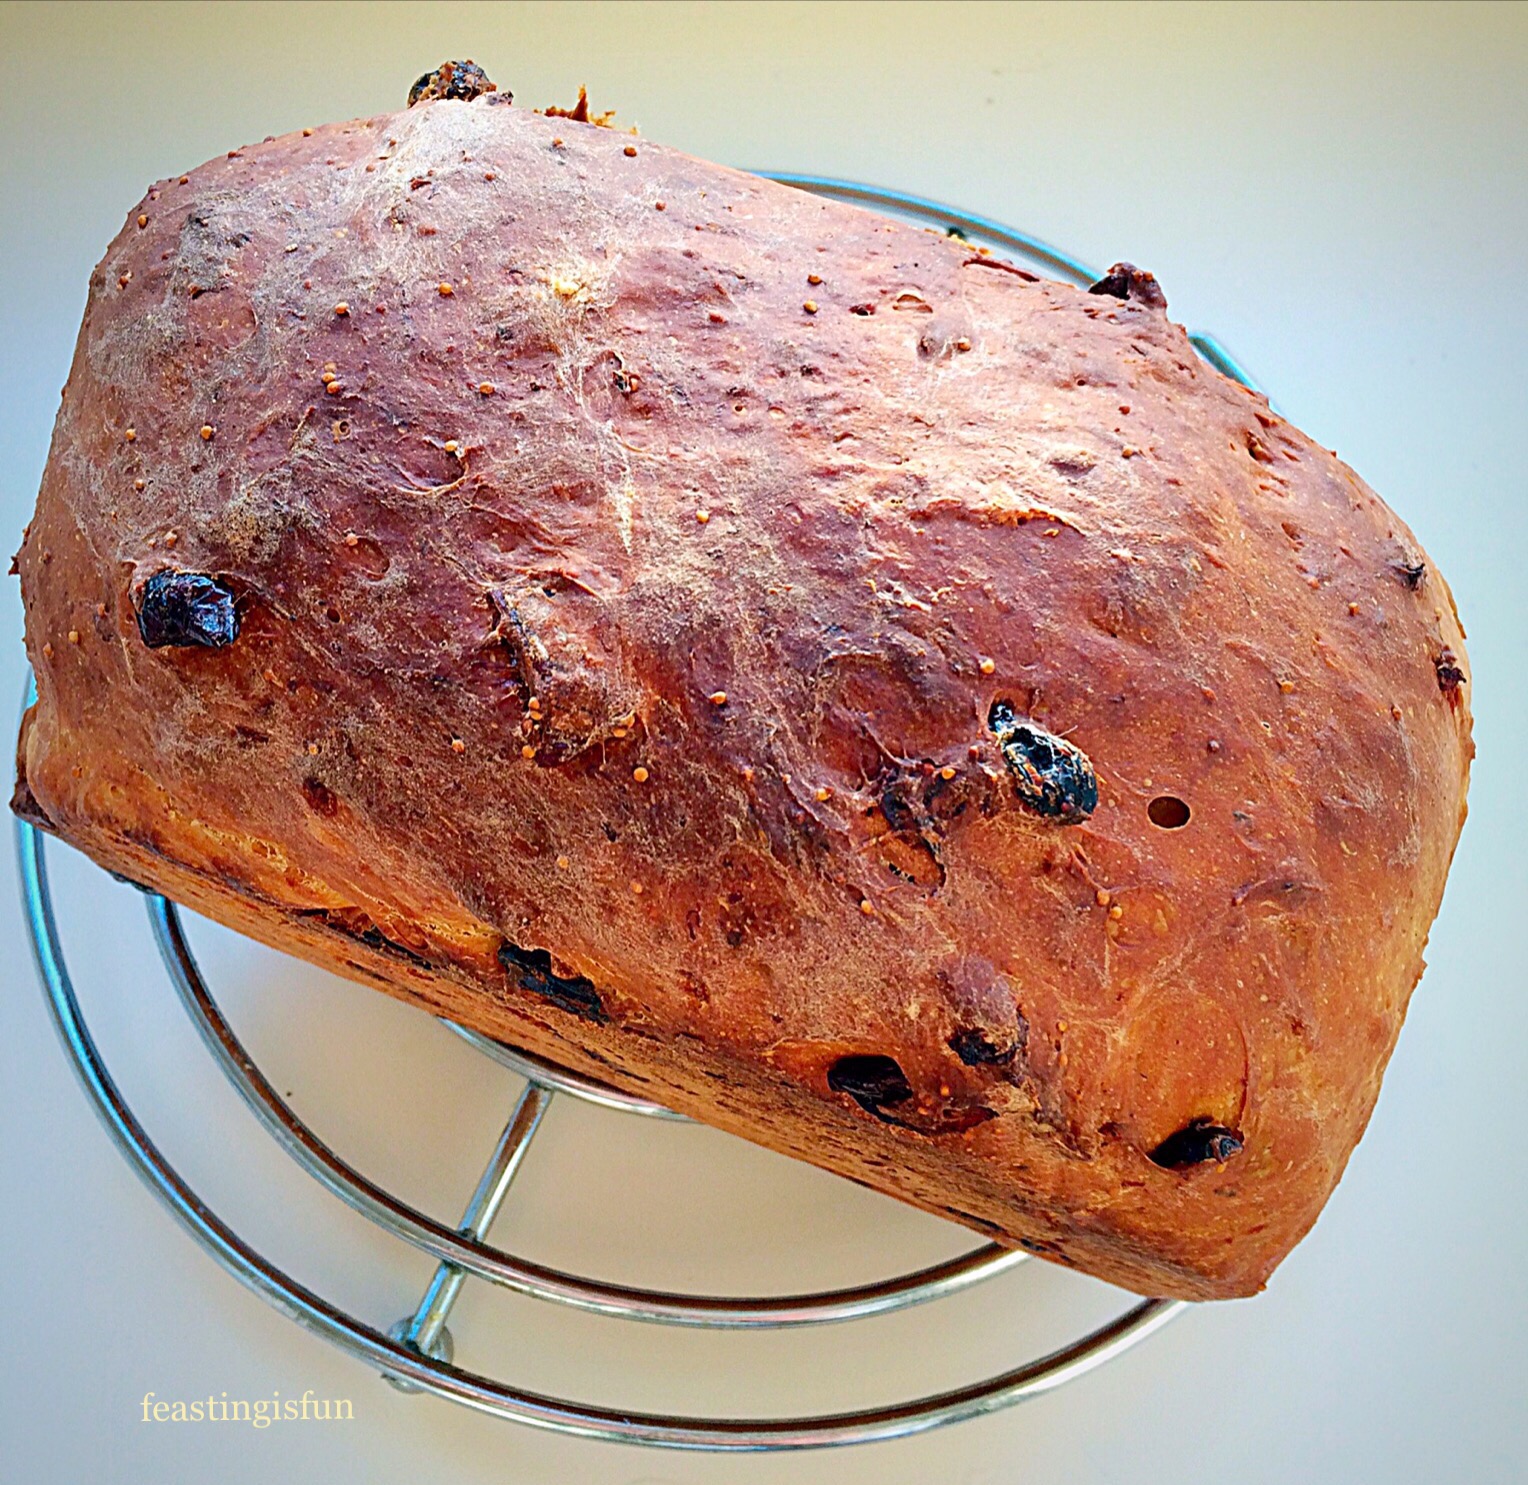
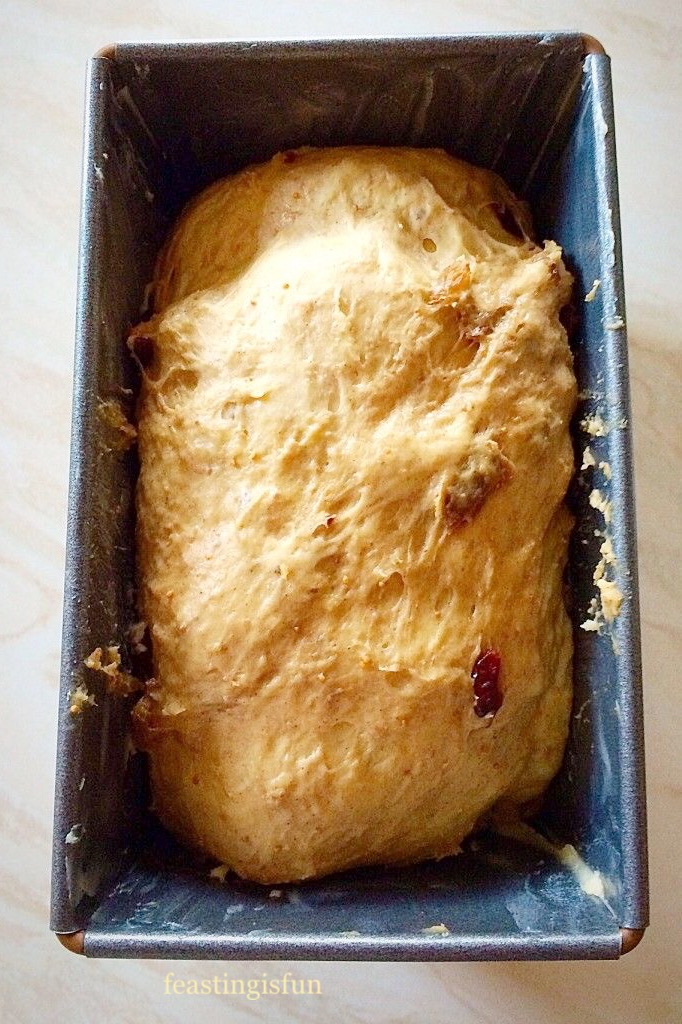
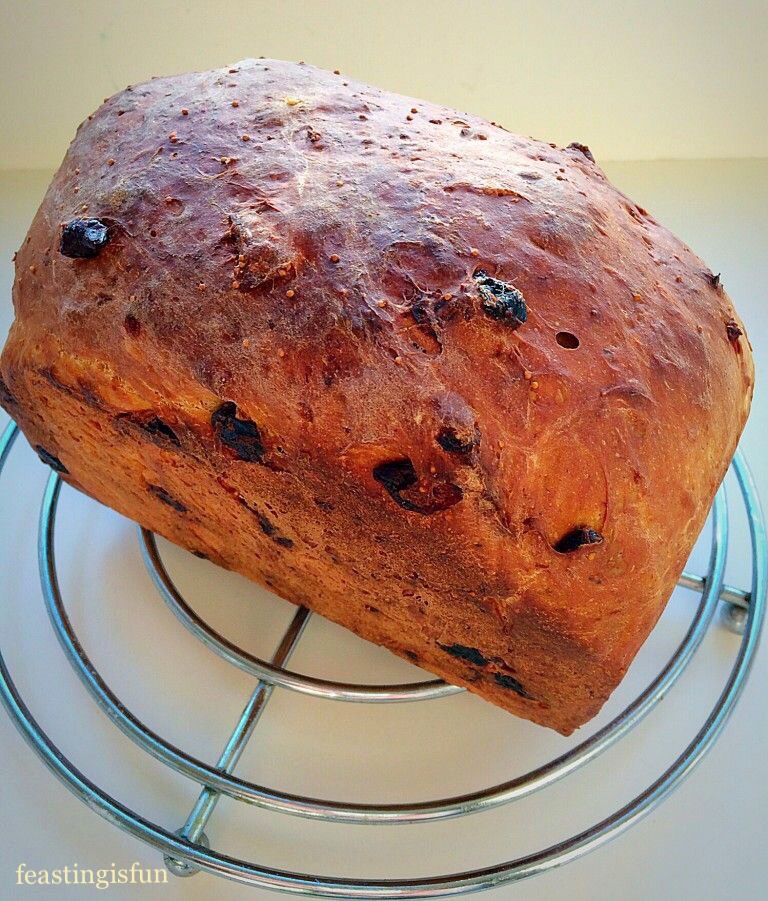
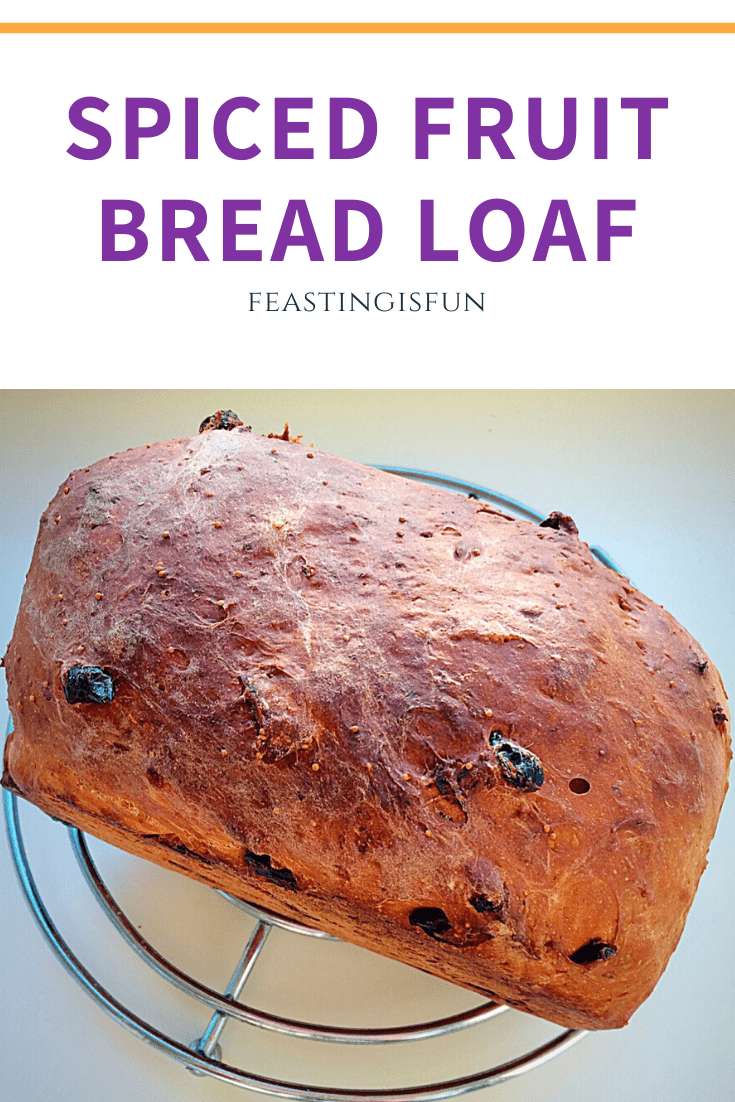
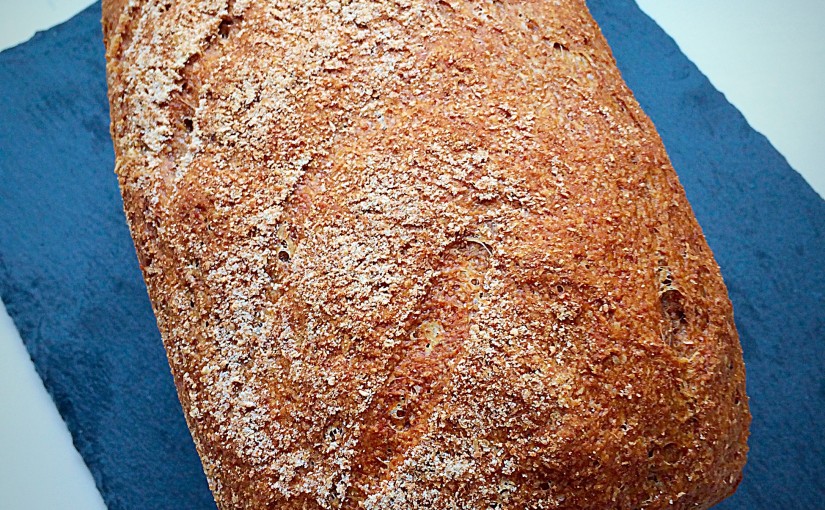
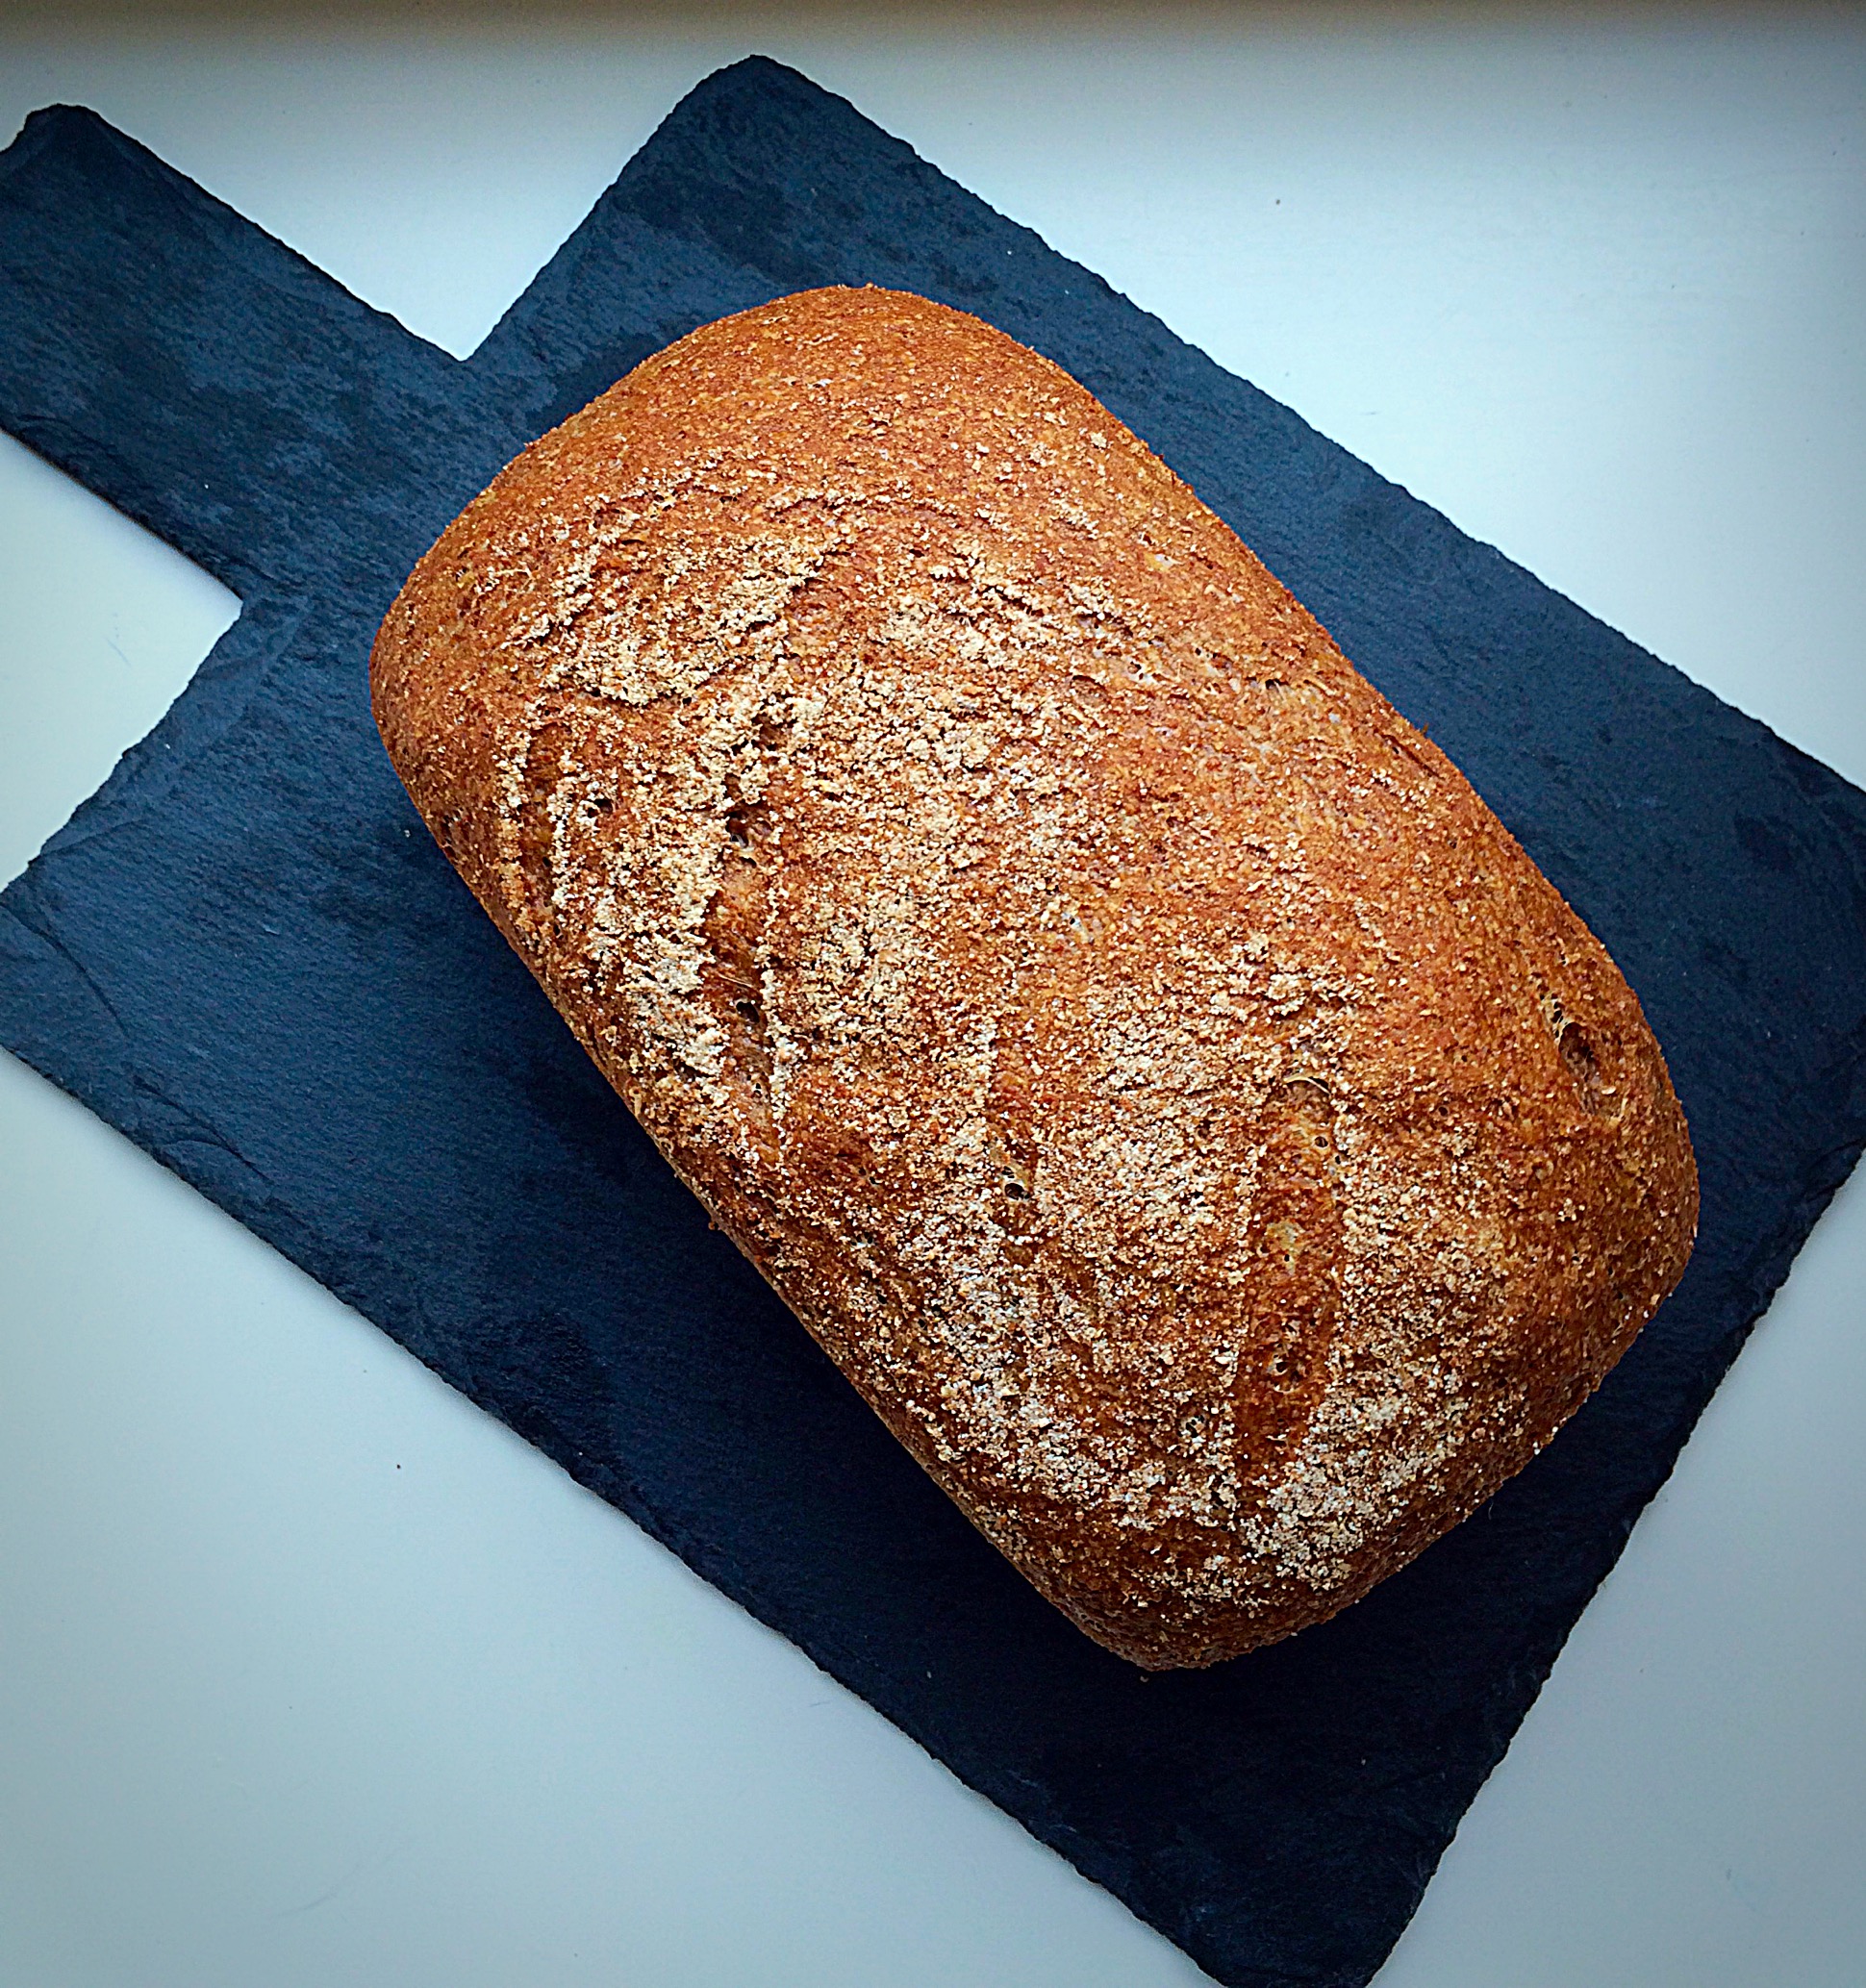
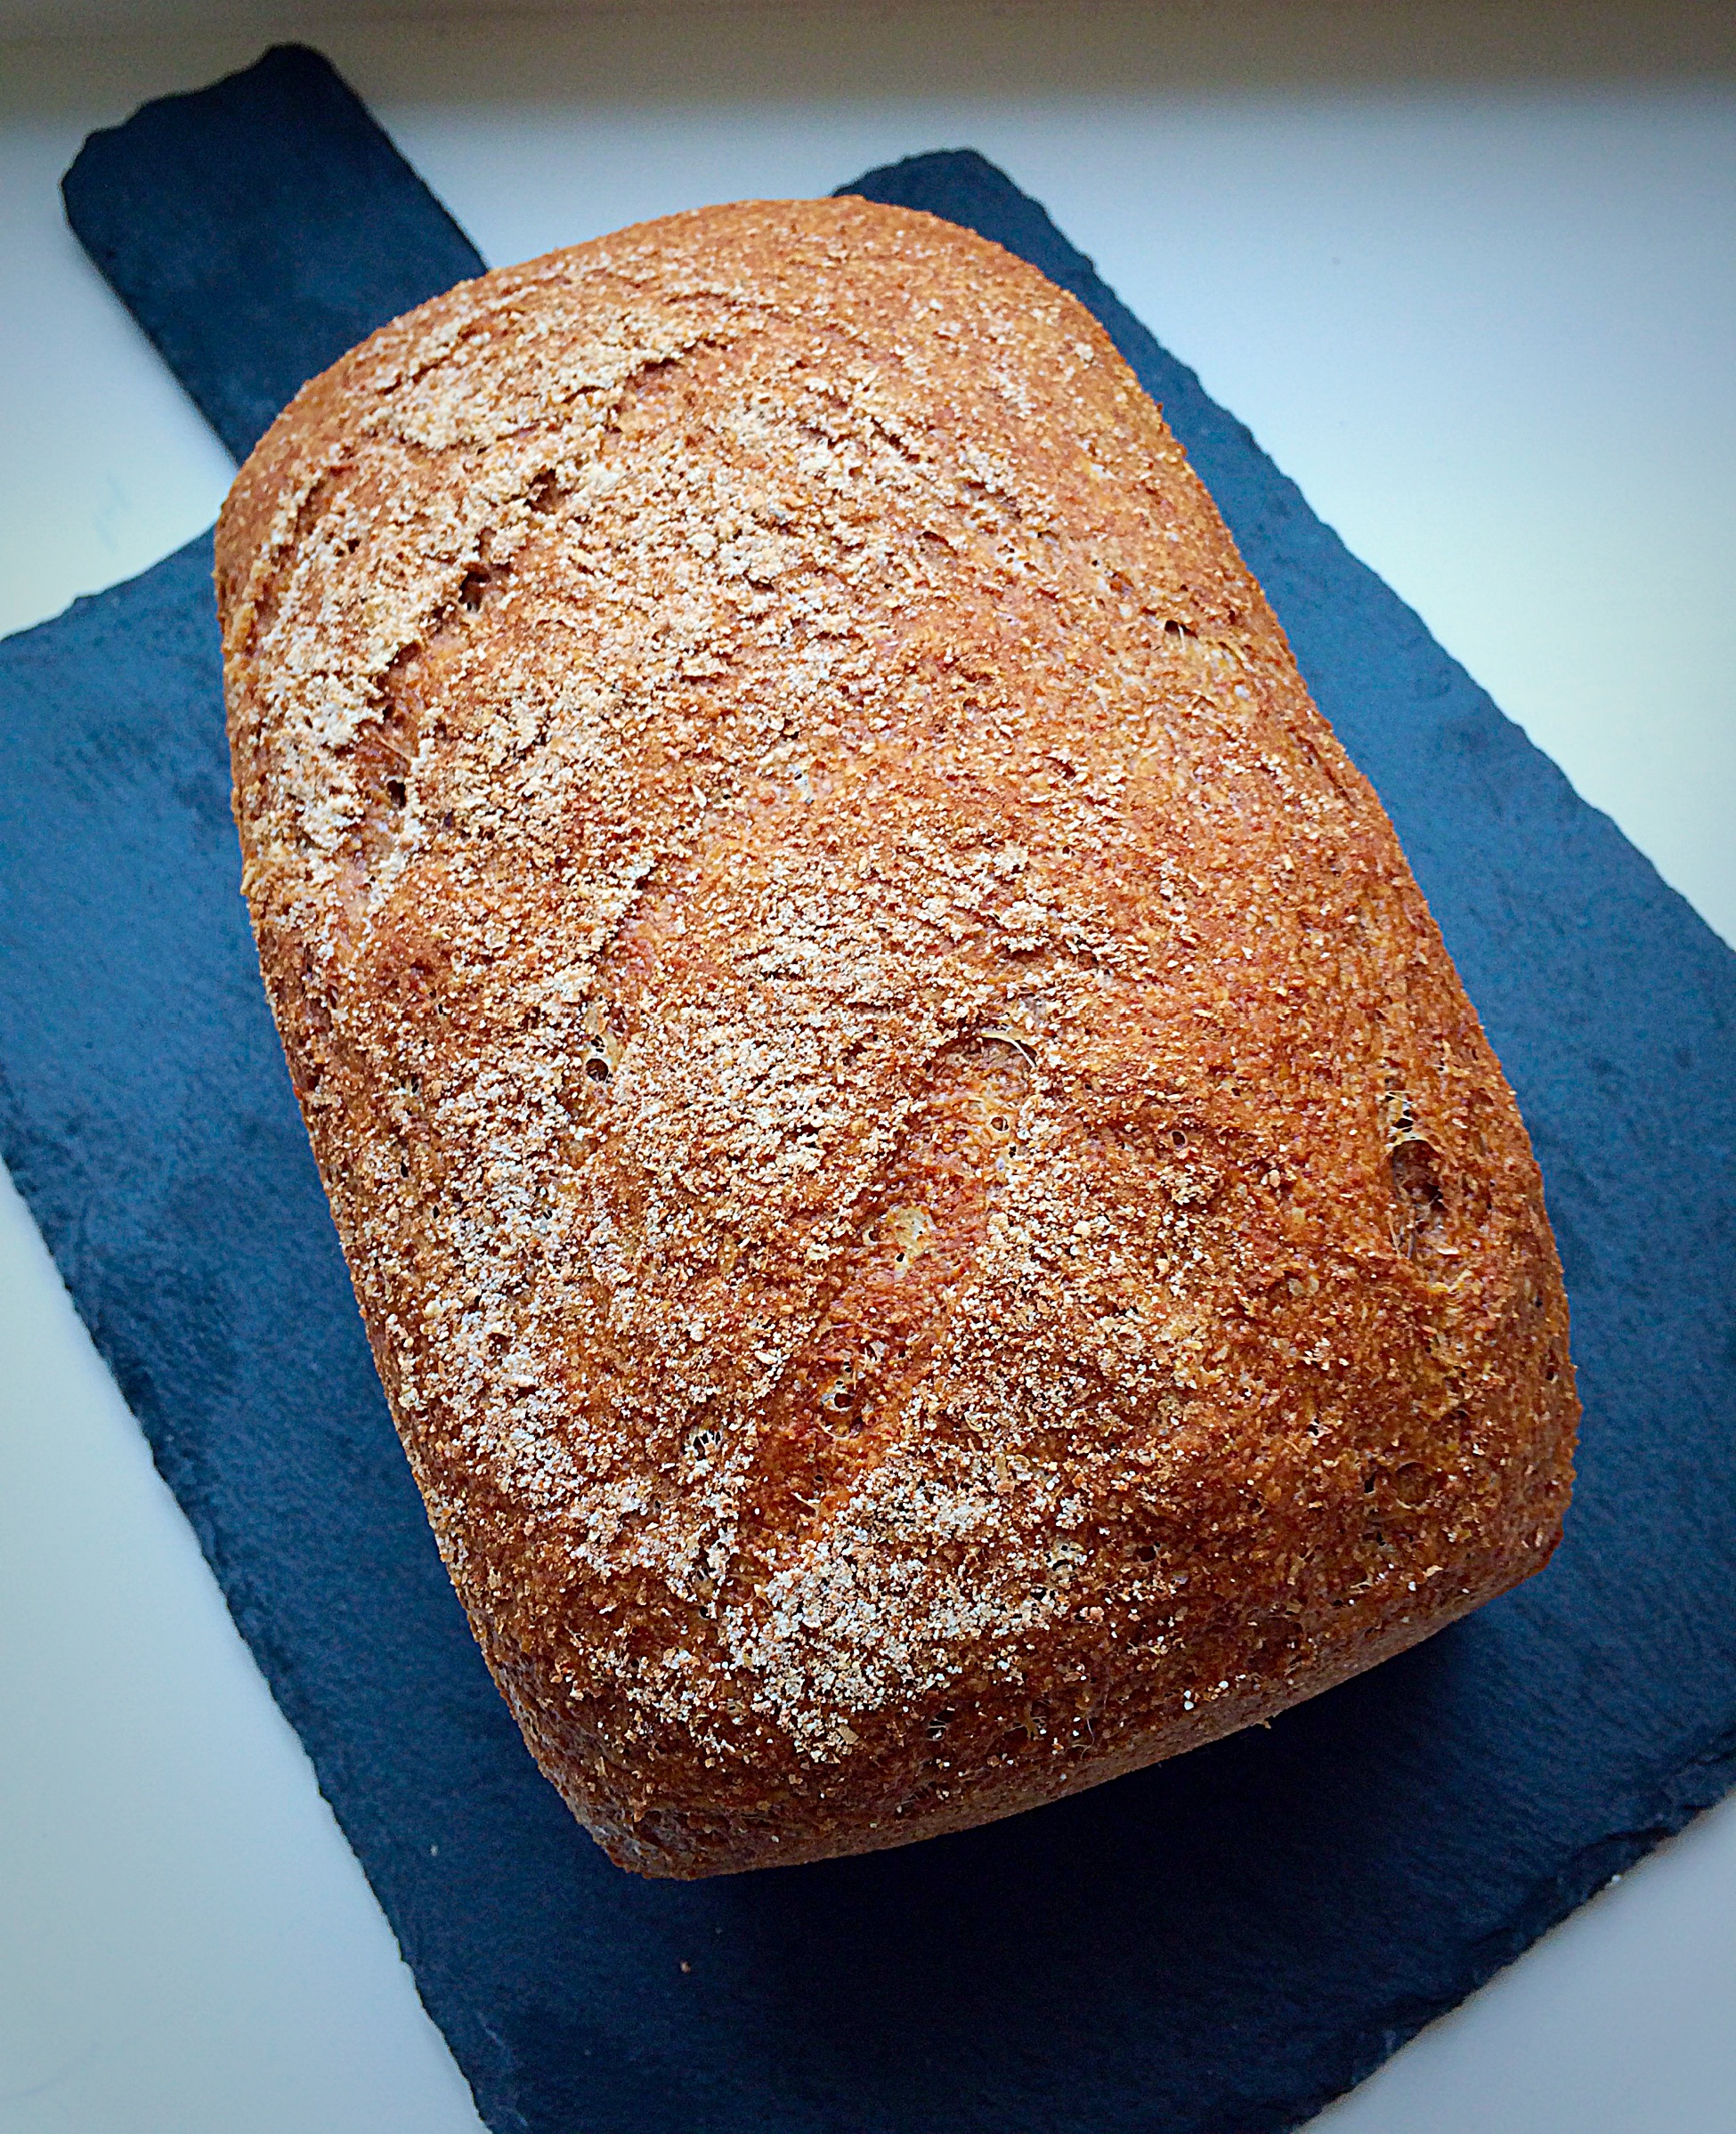
I created a recipe for a Wholemeal Loaf and a Spiced Fruit Loaf

The fruit loaf has a very, very sticky dough, yet it baked perfectly in this Loaf Tin.

British Bakeware Product Review
The 2nd Spiced Fruit Loaf I baked for this British Bakeware Product Review.

The 100% Wholemeal Loaf also baked beautifully in this 3lb Loaf Tin.

British Bakeware Product Review
Delicious and healthy Wholemeal Loaf.

Have I convinced you to start making your own bread yet?

I have thoroughly enjoyed carrying out this British Bakeware Product Review, not least because the products I reviewed were of excellent quality. They withstood the rigours of a normal household kitchen, although, it is probable that I bake more than most.

Whether you are a frequent baker, or not I can thoroughly recommend British Bakeware products. They are very reasonably priced, especially when you consider all three items I reviewed come with a 5 year guarantee and they are made right here in the UK.

Following this British Bakeware Product Review they will now be the first place I turn to when I need baking equipment – in fact I already have a few items on my list!!

As you know I frequently mention sharing on here. First home, wedding, birthday – how about giving a baking gift from British Bakeware? Maybe go one step further, pick a recipe (from feastingisfun of course 😉) buy the ingredients and the bakeware to bake it in and give it as a present?

Here are the links to get you started!

Large Baking Tray

12 Cup Muffin Tray

3lb Deep Farmhouse Loaf Tin

Do you enjoy baking?

Would you like to start baking?

Please let me know. I really enjoy reading your comments. I am not an expert but will always aim to give helpful advice.

Have fun baking, I’m off to do some online shopping at British Bakeware

Sammie xx

British Bakeware provided me with the 3lb loaf pan, large baking tray and 12 cup muffin tray, for me to review. All opinions and content are my own. I did not receive any payment for carrying out this review.


Share
Facebooktwitterpinterestlinkedintumblr

Cherry Bakewell Cookies

Share
Facebooktwitterpinterestlinkedintumblr

This post is Pink. Very Pink. And I make no apology for its pinkness, for one simple reason – Cherry Bakewell Cookies. Buttery, almond and cherry cookies, drizzled with almond flavoured icing. If you like Bakewell Tart you will love these cookies.

FF Cherry Bakewell Cookies

Because I have been testing some baking equipment for British BakewareI knew I couldn’t pass up the opportunity to bake cookies, using their large baking tray. Since those of you who regularly pop round here for a chat I mean read, will know I LOVE COOKIES. I really, really love cookies – and – please don’t hate me, I prefer nutty, fruity cookies over chocolate ones. If you love choccie cookies there’s a link at the bottom of the post. I’m so good to you 😉.

Cherry Bakewell Cookies:

But before you click the link to the Chocolate Cookies, just have a peek at these delicious Cherry Bakewell Cookies.

Cherry Bakewell Cookies

Can you imagine biting into this crunchy, buttery, cookie that is filled with flaked almonds, cherries and drizzled with a perfect, not-too-sweet icing?

So have I tempted you to try these scrumptious Cherry Bakewell Cookies? Perfect with milk, or a cup of tea/coffee, especially as it is frrreeeezzzing outside today!

Cherry Bakewell Cookies

One of the reasons I enjoy baking, so much, is that I can whip up a batch of cookies or loaf of bread and I know exactly what has gone into making them. Also I  really enjoy sharing what I bake, beyond our home. By that I mean, surprising our neighbours with a gift of cupcakes, baking a gift to say thank you, or just because.

And these cookies are incredibly easy to make. Once the cookie dough is made, it is rolled into logs, wrapped and chilled in the fridge and then sliced and baked when needed. Alternatively, you could dispense with the almond drizzle, just add the almond extract to the creamed butter and sugar part of the recipe, so that these  retain that proper Bakewell taste and once baked these babies are ready to eat!

Recipe: Makes Approximately 20 Cherry Bakewell Cookies

225g/8oz Unsalted Butter at room temperature

150g/5oz Caster Sugar

275g/10oz Plain White Flour

1/4tsp Salt I use Maldon Salt

1 Large Egg Yolk – I always use free range

1tsp Vanilla Extract

100g/4oz Flaked Almonds

100g/4oz Glacé Cherries roughly chopped

For the drizzle

200g/7oz Icing Sugar

1tsp Almond Extract – available from Nielsen-Massey 

Tap water

Method:

Making the cookie dough:

In a large bowl add the butter, sugar and salt. Whisk until pale and creamy.

Add the egg yolk and vanilla extract (and the almond extract, if not making the drizzle). Whisk together until all the ingredients are combined.

Add the flaked almonds to one side of the bowl, then add the flour to the other side. Put the cherries on top of the flour and gently mix them in the flour with your fingers – this will stop the cherries sticking together and ensure they are distributed evenly throughout the cookie dough.

Cherry Bakewell Cookies

Mix all the ingredients together until they are thoroughly combined.

Cherry Bakewell Cookies
Yummy cookie dough!

Wipe the worktop with a clean damp cloth. Lay some cling film over the damp surface – it should stay in place.

Place half of the cookie dough onto the cling film and roll into a log shape approx 4cm/1.5″ diameter. Repeat with the other half of the cookie dough.

Cherry Bakewell Cookies
Cherry Bakewell Cookie dough log.

Place both cookie logs into the fridge to chill until firm – approx 1 hour.

Baking the cookies:

When the cookie logs are firm enough to slice, preheat the oven to 180C/160C fan, gas mark 4, 350F

Remove the cookie logs from the fridge and slice into 1.5 cm discs.

Cherry Bakewell Cookies
Cherry Bakewell Cookies sliced and ready to bake.

I was testing this Large Baking Tray for British Bakeware however, I would advise lining any baking tray used with baking parchment.

Place the Cherry Bakewell Cookies onto the baking tray, allowing room between each cookie, as they do spread whilst baking.

Place into the oven and bake for 15 minutes. Do not bake for longer as the cookies will become too brittle once cooled.

As soon as the cookies are baked remove from the oven.

Cherry Bakewell Cookies
Cherry Bakewell Cookies allow to cool on the baking tray for 15 minutes.

After 15 minutes cooling transfer the cookies to a cooling rack. I needed to use a palette knife to lift the cookies away from the tray. Lining with baking parchment will avoid scratching your trays.

When completely cooled the cookies are ready to be iced.

Icing the cookies:

First of all, place the icing sugar and almond extract into a bowl. Add tap water, a little at a time (I use a teaspoon to add the water), mixing thoroughly after each addition.

The icing is at the correct thickness when it can hold a figure of eight shape for a moment, when drizzled onto itself with a spoon.

Cherry Bakewell Cookies
Almond flavoured icing, ready for drizzling over the cookies.

You can drizzle the icing over the cookies with a spoon, or fill a disposable piping bag (or plastic freezer bag) with the icing. Snip the end (or corner of the bag), so that there is a small hole. Drizzle a pattern over each of the cookies.

Cherry Bakewell Cookies

Leave the icing to set on the cookies before storing in an airtight container.

Cherry Bakewell Cookies
Do you think you can stop at one?

Now invite some friends round for a cup of tea and a catch up and share these delicious Cherry Bakewell Cookies.

Alternatively pop some in a clear cellphone bag, tie with pretty ribbon and give away as gifts.

I am always hungrier when the weather turns cold. Are you?

If you have enjoyed this recipe for Cherry Bakewell Cookies you may also like these:

Chocolate Dipped Shortbread Heart Cookies 

FF Cherry Bakewell Cookies
Chocolate Dipped Shortbread Heart Cookies

Bakewell Shortbread Bars

FF Cherry Bakewell Cookies
Bakewell Shortbread Bars

Extreme Chocolate Cookies 

FF Cherry Bakewell Cookies
Extreme Chocolate Cookies

So, whatever you are making, baking and creating in your kitchens, have fun preparing and sharing your feast.

Sammie xx

No part of this post may be reproduced or duplicated without the written permission of the owner. Please see my Disclosure Policy.

Share
Facebooktwitterpinterestlinkedintumblr

Vanilla Bean Cupcakes

Share
Facebooktwitterpinterestlinkedintumblr

It’s Sunday, time for a little treat?? So how about these Vanilla Bean Cupcakes? Moist, vanilla flavoured sponge, topped with the lightest, most dreamy vanilla buttercream and a pearl, because you are special.

FF Vanilla Bean Cupcakes

Look how pretty these cupcakes are. So beautiful, that I almost called them antique Vanilla Bean Cupcakes, although I thought better of it. Since I’m pretty sure everyone would have imagined them as hard, mouldy, relics of the past – yep not conjuring up the image I’d like!!!

Especially stunning are these cupcake cases. A wonderful Christmas present from a much loved friend.

FF Vanilla Bean Cupcakes
Vanilla Bean Cupcakes


Thank You For The Presents:

Because I received quite a few cooking and baking related presents last year, for both Christmas and my birthday, using them feel extra extra special. Especially the little, cute, individual cupcake stand , present from my hubby.

Also I was very excited to receive four cookbooks, which I enjoy reading, as if they are novels. Although I very rarely follow a recipe religiously, I gather inspiration and ideas from my ever increasing cookbook collection.

Am I alone in my cookbook obsession collection?  Thought not!!!

Vanilla Bean Cupcakes perfect for afternoon tea.
Vanilla Bean Cupcakes

These Vanilla Bean Cupcakes were the final bake for a review I have been carrying out. So after much discussion with my daughter, regarding flavour combinations, we decided to settle on a classic vanilla sponge, with the addition of vanilla bean paste instead of extract. Yet I kept to vanilla extract for the best buttercream icing ever!

Look at that delicious swirl of buttercream.

The result being, the best cupcakes I have made, this year!

Recipe: Makes 12 deep filled Vanilla Bean Cupcakes or 18-20 standard ones.

For the cupcakes

150g/6oz Caster Sugar

150g/6oz Unsalted Butter at room temperature

1/4tsp Salt – I use Maldon 

150g/6oz Plain White Flour

1.5 tsp Baking powder – I use Waitrose 

1tsp Vanilla Bean Paste – I use Nielsen-Massey 

3 Large Eggs – I always use free range

25ml/1fl oz Whole Milk

Cupcake cases

For the buttercream

400g/14oz Icing Sugar -sieved

200g/7oz Unsalted Butter – very soft

1/8tsp Salt

1tsp Vanilla Extract – I use Nielsen-Massey

3tbsp Boiling Water

Edible pearls or sprinkles for decoration

Method: Preheat the oven to 180C/160C fan oven, gas mark 4, 350F

Making And Baking The Vanilla Bean Cupcakes

  • First of all, into a large bowl add the butter and caster sugar.
  • Whisk the ingredients together until pale and creamy.

Whisk the sugar and butter together until pale and creamy.

  • Add the eggs, milk, vanilla bean extract and salt to the bowl and whisk until fully combined.

Add the eggs, milk, vanilla bean paste and salt to the bowl. Mix to combine be.

  • Sift the flour and baking powder into the bowl.

Sift the flour, baking powder and salt into the bowl.

  • Fold all of the ingredients together.

Fold all the ingredients together until combined. This will ensure the Vanilla Bean Cupcakes are light and fluffy.

  • Spoon the cake batter into each cupcake case so that they are half full.

Fill each cupcake case half way with cake batter.

  • Place the cupcake tray into the middle of the preheated oven and bake for 20 – 25 minutes (a shorter time will be required for smaller cupcakes).
  • The cupcakes are baked when golden brown and spring back when pressed lightly in the centre.
  • As soon as the cupcakes are baked remove the from the oven.
Baked, golden Vanilla Bean Cupcakes.
Vanilla Bean Cupcakes.
  • Allow the cupcakes to cool in the pan for 10 minutes and then place them on to a cooling rack to cool completely.

The Key To Making The Lightest Buttercream Frosting:

  • Place the butter, salt, vanilla extract and butter into a large bowl.

Place the butter, salt, vanilla extract, sifted icing sugar and boiling water into a large bowl.

  • Starting on a low speed whisk all of the ingredients together.

Starting on a low speed, mix all the buttercream ingredients together, gradually increasing the mixer speed.

  • For the very lightest, creamiest buttercream, continue mixing for 10 minutes. The result will be the dreamiest buttercream icing you will ever have tasted.
  • The addition of very hot water to the buttercream mix, stops it from forming a hard crust.

Decorating The Cupcakes:

  • Fit a large piping bag with the tip of your choice – I used a large French star tip.
  • Fill the bag with buttercream and fold over the top of the bag.
  • Using a circular motion, pipe buttercream in a swirl effect, onto the top of each cupcake.
Vanilla Bean Cupcakes swirling, light buttercream, adorns the tops.
Vanilla Bean Cupcakes
  • Finally top each cupcake with an edible pearl, or edible decoration of your choice.
Vanilla Bean Cupcakes an edible pearl provides the finishing touch to these edible treats.
Vanilla Bean Cupcakes

I hope you’ll agree with me, that these cupcakes are elegantly beautiful ?

Usually I cannot wait to sprinkle edible glitter on, well pretty much anything I bake, but these Vanilla Bean Cupcakes looked so perfect after the addition of the pearl, that I managed to restrain myself.

Resulting in a spectacularly elegant cupcake, that tastes every bit as good as it looks.

Vanilla Bean Cupcakes timeless elegance, in cake form.
Vanilla Bean Cupcakes

While carrying out a review of a cupcake tin for British Bakeware, I was impressed with how evenly the cupcakes baked. Also the tin washed clean easily in hot soapy water.

These Vanilla Bean Cupcakes did not last very long in our home, although I did give our neighbours a couple. I believe food tastes better when shared. While I only spent 10 minutes with them, we had a lovely catch up chat and they were thrilled with the cupcakes I gave to them.

If you enjoyed this recipe for Vanilla Bean Cupcakes, then I hope you’ll like these too:

Black Forest Cupcakes

V Black Forest Cupcakes
Black Forest Cupcakes chocolate, cherries and dreamy topping.

Lemon Blueberry Cupcakes 

FF Vanilla Bean Cupcakes
Lemon Blueberry Cupcakes

Pink Heart Topped White Chocolate Cupcakes 

FF Vanilla Bean Cupcakes
Pink Heart Topped White Chocolate Cupcakes

During the winter months especially, weeks, indeed months can easily pass without people living in close proximity, exchanging a word. Furthermore it really is worth taking a few minutes out of each day, once a week, or so, to make the effort to talk to those who live close by.

Are you friendly with your neighbours?

Do you keep a check on elderly or infirm neighbours, especially during the cold, winter months?

Whatever you are making, baking and creating have fun preparing and sharing your feast.

Sammie xx

@sammiefeasting Twitter/Instagram

Share
Facebooktwitterpinterestlinkedintumblr

Spiced Fruit Loaf

Share
Facebooktwitterpinterestlinkedintumblr

Hi, I have a double treat for you today. This absolutely delicious Spiced Fruit Loaf not only tastes amazing, but, the aroma, gently wafting from the oven, makes the whole house smell incredible. Cinnamon and bread filled with tasty dried fruit, baking together.

Who needs air freshener when you can bake this wonderful Spiced Fruit Loaf,


Spiced Fruit Loaf

If you have never baked bread before, bake this!

This Spiced Fruit Loaf is stuffed full of dried fruits. Don’t hide raisin haters! Although there are some dried vine fruits in this loaf (which you can absolutely leave out), there’s also dried cranberries and figs. Soft, golden, dried apricots would be a fantastic addition as well.

Spiced Fruit Loaf

The bread dough is enriched with egg, milk and butter and spiced with cinnamon and ginger. And as if bread baking didn’t smell good enough, this Spiced Fruit Loaf kicks it into another dimension.

A Great Breakfast Bread Loaf

My absolute favourite way to enjoy this bread is toasted, for breakfast. As my nose is assaulted with another spice hit as the bread toasts.

Perfect with a cup of good coffee.

Breakfast with back coffee and toasted fruit bread.
Spiced Fruit Loaf

I have been reviewing some baking products from British Bakeware, including their 3lb loaf pan. Having baked a range of breads I wanted to create something that really did the pan justice.

This Spiced Fruit Loaf does!

Spiced Fruit Loaf sliced and toasted with butter.
Spiced Fruit Loaf

One thick slice of this bread kept me full all morning – and it contains fruit, so it must be good for you. Right?

Everyone in our house was eager to try this tasty breakfast loaf this morning and they were not disappointed. As a mum I’m happier, during these chilly winter months, when they all have a hot breakfast. And I honestly do believe it is the most important meal of the day. So why not make it a tasty one?

Recipe: Makes 1 Spiced Fruit Loaf

500g/1lb 2oz Strong White Bread Flour

1 Large Free Range Egg

Approx 320ml/ just over 1/2 pint Whole Milk at room temperature

1tsp Honey

1 Sachet Fast Action Dried Yeast (7g)

1tsp/7g Salt – I use Maldon

75g/3oz Unsalted Butter plus extra for greasing the loaf pan

2tsp Cinnamon

1tsp Ginger

225g/8oz Dried Fruit – I used equal quantities of vine fruits, chopped dried figs and dried cranberries

You will need a 3lb loaf pan.

Making And Proving The Dough

  • Crack the egg into a jug. Make up to 340mls/12fl oz with milk. Using a fork, lightly beat together to break up the egg.
  • Pour this liquid into the bowl of a bread maker or stand mixer.
  • Add the honey and yeast.
  • Next add the flour.
  • Add the salt to the top of the flour and add the cubed butter.

If using a bread maker start the dough cycle, adding the spices and dried fruit when prompted by the machine, or 5 minutes before the mixing finishes.

If using a stand mixer, attach the dough hook. Mix on medium speed until all the ingredients are combined into a dough. Continue mixing for a further 5 minutes. Stop the mixer and scrape the dough from the hook, back down into the bowl. Add the spices and dried fruit and continue to mix on medium speed for a further 5 minutes. Stop the mixing and scrape all the dough from the hook. Form into a ball, place back into the mixer bowl, cover with a damp cloth and leave in a draught free place until doubled in size – approximately 1 hour.

Butter the loaf pan and set aside.

Knocking Back And Shaping The Dough

When the bread mixer has finished its dough cycle, restart again and allow the machine to mix (knock back) the dough for 2 minutes.

As soon as the dough in the stand mixer bowl has doubled in size, remove the cloth and mix, with the dough hook attached, on medium speed for 2 minutes. Again this knocks back the dough.

  • Turn your knocked back dough out onto a floured surface. It will be very sticky.
  • Press the dough to form a roughly rectangular shape.
  • Fold the bottom third of the dough up and then bring the top third down.
  • Turn the dough over, so that the seam is underneath. Form the dough into a log shape and place into the prepared loaf pan.
  • Finally, cover with a damp cloth and leave in a draught free place until doubled in size – approx 1 hour.

10 minutes before the loaf is ready to be baked preheat the oven to 220C/200C fan  oven, gas mark 7, 425F.

Unbaked spiced fruit bread loaf.
Spiced Fruit Loaf

Baking The Spiced Fruit Bread Loaf

  • As soon as the dough is doubled in size, remove the cloth and bake in the centre of a preheated oven for 30 minutes.
  • The loaf is baked when it has a dark, golden crust and sounds hollow when rapped on the base with your knuckle.
  • When baked, remove the bread from the oven.
  • Turn the loaf out of the pan and place on a cooling rack.
Bread filled with dried cranberries, figs and sultanas and flavoured with cinnamon and ginger.
Spiced Fruit Loaf

Leave to cool completely.

I know you want to tear into this Spiced Fruit Loaf the moment it comes out of the oven, but you shouldn’t. The butter and fruit in this loaf make it particularly squidgy whilst warm.

Trust me! As soon as this beauty is cool it will slice beautifully.

Enjoy as is, smothered in butter, or toasted and buttered.

If you enjoyed this recipe for Spiced Fruit Loaf then you may also like these:

English Muffins

English Muffins

Homemade Chelsea Buns

Homemade Chelsea buns with a lemon icing drizzle.
Homemade Chelsea Buns

Farmhouse White Loaf

Farmhouse style white bread loaf.
Farmhouse White Loaf

I absolutely love the smell and taste of hot cross buns around Easter and if you feel the same I know you too will enjoy this spiced and fruited bread. And a huge advantage to making bread at home is you can add whatever dried fruits you like. For example, I am allergic to oranges, yes it is annoying, but it means I can make Hot Cross Buns at home and leave the offensive ingredient out! Because that’s the beauty of baking at home, you chose what goes into your bakes.

So, whatever you are making, baking and creating in your kitchens, have fun preparing and sharing your feast.

Sammie xx

No part of this post may be reproduced or duplicated without the written permission of the owner. Please see my Disclosure Policy.

Pinterest image of spiced fruit bread loaf with descriptive graphics.


Share
Facebooktwitterpinterestlinkedintumblr

Rocky Road Petit Fours

Share
Facebooktwitterpinterestlinkedintumblr

Today’s treat is a fantastic way to use up any leftover chocolate that you may have in the house following Easter or Christmas. Alternatively, these treats look so festive you absolutely can buy the chocolate to make them. Finally I get to share my Rocky Road Petit Fours, individual portions of the delicious, well know classic recipe.

Rocky Road Petit Foursp

Ooh hello!!!

Because I am pretty certain ours is not the only home with an excess of Christmas chocolate, silently hiding behind over stuffed cupboard doors, waiting to wreck havoc on New Year eating resolutions.

So I thought I’d come up with a recipe that makes best use of all that lovely chocolate and portions it into more diet, I mean healthier sized morsels.

And with only four ingredients, these Rocky Road Petit Fours are a great treat to make for parties and as gifts, whatever time of year it is.

Miniature edible gold star topped rocky road petit fours.
Rocky Road Petit Fours

Giving Edible Gifts:

So, why not pop a few in a cellophane bag, tie with pretty ribbon and you have a great gift. Teachers, co-workers, shopping delivery drivers. The opportunities to say thank you, I really appreciate what you do, are limitless.

Rocky road petit fours wrapped in a cellophane bag and tied with gold raffia to give as a gift.
Beautifully wrapped Rocky Road Petit Fours

And that is who I made these for, my Waitrose delivery drivers. Because they always go above and beyond when it comes to delivering my shopping and I really, really appreciate that.

Since I started having seizures, see here , I have tried having our shopping delivered at the weekend. The problem was, it took a big chunk out of the day whilst hubby sorted and put all the shopping away. Also, I was losing track of what we needed etc. so I switched to a mid week delivery and with the delivery driver’s help, the shopping is unloaded, put away and weekends are way more relaxing for my hardworking hubby.

So, as a thank you, I filled a tin with these delicious treats and sent them back with the driver after he had helped with my shopping today.

I do think it is important to thank people. Especially when they go out of their way to help.

And edible gifts are a great way of saying a special thank you.

Also, making these chocolate delights is childs play. Literally!!

With a little supervision, they are perfect for making with children. Although whether they are then given as gifts, directly depends on the chocolate ‘evidence’ around the little cherubs face! So it might be an idea to have some prepared in advance to give away and let the children eat the fruits of their labour.

Recipe: Makes approx. 45 Rocky Road Petit Fours

150g/6oz Good Quality Milk Chocolate – I used Waitrose Seriously Intense Milk Chocolate with 49% Cocoa (or use a mix of milk and dark chocolate)

100g/4oz Mini Marshmallows

100g/4oz Shortbread  – cut into small chunks. Alternatively use mixed, unsalted, shelled nuts.

10 Glace Cherries – finely chopped

Petit Fours Cases

Edible glitter or stars for decoration – they are easily found on Amazon.

Making The Rocky Road Petit Fours

First of all, break or chop the chocolate into small pieces and place into a large heatproof bowl.

Melt, in the microwave, using the medium heat setting and 30 second bursts.

Remove before all the chocolate is melted and stir continuously until smooth and lump free.

Add into the melted chocolate the shortbread, mini marshmallows and chopped glace cherries. Thoroughly mix until all the ingredients are coated in chocolate.

Using two spoons carefully fill each petit fours case generously.

Set aside to cool and set. During warmer months, pop the Rocky Road Petit Fours into the fridge for a couple of minutes to set.

Sprinkle over edible glitter, or gold stars to add a finishing touch to these treats.

And there you have delicious gifts, sweet part canapés, or simply share with friends and family.

Rocky road petit fours in mini cake cases.
Rocky Road Petit Fours

If you have enjoyed this recipe for Rocky Road Petit Fours you may also like these:

Chocolate Fudge Brownie Bites

Chocolate fudge brownie bites served on a slate platter.
Chocolate Fudge Brownie Bites


Cream Cheese Pastry Mince Pies

Mini mince pies made with cream cheese pastry.
Cream Cheese Pastry Mince Pies


Chocolate Heart Cookies

Chocolate heart shaped cookies decorated with a white chocolate drizzle.
Chocolate Heart Cookies

Do you enjoy making edible gifts?

Let me know what you think of these. I really appreciate you taking the time to write a comment. Thank you.

So, whatever you are making, baking and creating in your kitchens, have fun preparing and sharing your feast.

Sammie xx

No part of this post may be reproduced or duplicated without the written permission of the owner. Please see my Disclosure Policy.

Rocky road petit fours with overplayed descriptive text and sized for Pinterest.


Share
Facebooktwitterpinterestlinkedintumblr

Almond Blackberry Pear Crumble

Share
Facebooktwitterpinterestlinkedintumblr

Finally, it is the middle of Winter. Time to banish the diet and eat pudding. So, bring on the warm, sweet comfort of fruit with a crunchy, crumble topping. And here we have an exquisite Almond Blackberry Pear Crumble, which is also gluten-free.

Since this crumble hits the spot where only warm, fruity, drizzled with cream or custard, or both – I’m not judging – puddings can really hit.

So, are you with me?

The pears are fresh and juicy, the blackberries are from the freezer, squirrelled away during our abundant, Autumn.

Fruit and nuts on a wooden board.

This crunchy, almond laden crumble comes together in mere moments, all the ingredients working in harmony together. The result, an unctuous, fruity, crunchy, explosion in your mouth. You know, the kind of eating experience, where the inside of your cheeks suddenly suck in and your taste buds are woken up by the flavour party happening on your tongue.

Yep – that good!

And because as many as possible should be able to share in this pudding sensation, I made it Gluten Free. Because, why not??

Backed almond blackberry pear crumble.


Balancing Flavours In A Dessert

What sends this Almond Blackberry Pear Crumble over the top, apart from my description, is the buttery, crunchy, flaked almond streusel, piled high, atop the juicy fruit.

And no additional sugar is added to the fruit layer. Because, the pears are sweet enough and I think it is good to have bursts of sharpness, from the plump, purple, blackberries. Also, to provide balance, crunchy, caramel, demerera sugar is mixed in with the crumble topping. Resulting in a pudding that absolutely sings!

Blackberry and pear almond crumble served in a bowl with cream.

Recipe: Almond Blackberry Pear Crumble serves 6 generous portions.

225g/8oz Gluten Free Flour – I use Dove’s Farm

100g/4oz Unsalted Butter – cold, straight from the fridge

225g/8oz Flaked Almonds

100g/4oz Demerera Sugar

1/4tsp Salt – I use Maldon

3-4 Conference Pears – alternatively use canned, drained pear halves

200g/7oz Fresh or Frozen Blackberries

Optional – Double Cream, Custard, Ice Cream to serve

Making The Topping

Method: Preheat Oven to 190C/170C fan

First of all, cut the cold butter into cubes and place in a large bowl with the flour and salt.

Rub the butter into the flour with your fingers, working quickly and lightly, until the mixture resembles breadcrumbs. Gluten free flour works equally well in this recipe.

Rubbing butter into flour in a bowl.

Alternatively place the cubed butter and flour into a food processor, with the steel blade attached and pulse until the mixture resembles breadcrumbs.

Add the flaked almonds and demerera sugar and stir with a spoon to mix.

Adding almonds to a crumble topping.

Preparing The Fruit

Peel the pears, remove the core and cut into chunks.

Place the pears and blackberries into a 10″/26cm dish.

Sliced pear and frozen blackberries in a serving dish.

Cover the fruit with the crumble mixture.

Almond Blackberry Pear Crumble ready to be baked.

Baking The Crumble

Place in the preheated oven for 40-50 minutes until the topping is golden and the fruit juices are bubbling.

As soon as the Crumble is baked remove from the oven.

Backed almond blackberry pear crumble.

Fruity pear and blackberries hidden beneath a crisp and crunchy crumble topping.
Serve immediately with the accompaniment of your choice.

A backed fruit dessert having cream poured over it.


Eat and enjoy!

Almond Blackberry Pear Crumble served in a bowl with cream.

Everyone in our house thoroughly enjoyed this warming, winter pudding.

Being Gluten Free makes this Almond Blackberry Pear Crumble accessible to more people. And I must agree, that has got to be a good thing!

Do you desire warm, comforting food when it’s cold? I certainly do.

If you enjoy this Almond Blackberry Pear Crumble, then you will love these recipes:

Apple Almond Cake 

FF Almond Blackberry Pear Crumble
Autumn Almond Apple Cake – gluten free.

Amazing Apple Pie

FF Almond Blackberry Pear Crumble
Amazing Apple Pie with homemade Luxury Vanilla Bean Custard.

I buy Dove’s Gluten Free flour from Waitrose.

While I am not allergic to wheat, or gluten it is important that gluten free recipes are included on Feasting is Fun. Since the heart of my blog is to encourage people to share and eat together, it makes sense to create recipes that more people can enjoy. Because nobody asks to have an allergy. And it’s nice when an “extra” dessert doesn’t have to be bought or made. Finally, I believe the more that people are included, the more comfortable and relaxed they will be.

Sammie xx


Share
Facebooktwitterpinterestlinkedintumblr

Chocolate Heart Cake

Share
Facebooktwitterpinterestlinkedintumblr

If you love someone and they love chocolate then THIS is the cake to bake for them my Chocolate Heart Cake. So, my hubby’s birthday was at the start of the year AND I didn’t make him a birthday cake.

Chocolate heart cake
Chocolate Heart Cake

While we still had nearly a whole Christmas cake left, we also had chocolate, in all it’s delicious forms, everywhere. Yet my hubby wanted a chocolate cake for his birthday. And I was struggling with the chocolate remnants of Christmas past that were, increasingly, threatening to take over every cupboard and side table in the house.

Breath……in……..and…..out.

Phew I was in danger of being over dramatic there?

What a difference a week makes.

Finally, three teenagers and hubby had made significant inroads on the chocolate abundance. Finally, it was time to bake a cake. Most importantly a chocolate cake!

It was late.   Delayed.   Belated.   Not on time.

There was no getting away from it. As soon as possible I needed to pull out all the stops and come up with an I Love You and I’m sorry it’s late, birthday cake.

And I’m pretty sure I nailed it with this fudgy, moist, rich, Chocolate Heart Cake.

Chocolate Heart Cake

Too near Christmas and this cake would have been too much. Since it is deeply chocolatey cake, slathered in a smooth, yet decadent chocolate ganache, accented with little white chocolate hearts. Because this Chocolate Heart Cake is perfect for all true chocolate lovers.

Find Happiness In Everything

Cake that’s worth the wait

And fortunately for me, my wonderful husband was happy to wait for his cake. Because, not only is he the one and only true love of my life, he is the kindest, most patient, loving man I have ever known.

So girls, don’t settle for second best, or not give proper attention to the man you are with, in the hope that someone better will rock up. As soon as you find someone who loves you, for you, with all their heart, hold on tight and never let go.

Just sayin’.

Back to all matters cake. While I was going to wait until Valentine’s Day to post this recipe, I remembered my heart tin, which I bought very cheaply, in the January sales last year.

So, if you like this cake, want to make it and see a heart tin in the sales, grab that bargain!

Chocolate Heart Cake with birthday candles.

Recipe: Makes 1 Chocolate Heart Cake – serves 10-12

225g/8oz Unsalted Butter at room temperature, plus a little extra to grease the tin

225g/8oz Light Soft Brown Sugar

1/4 tsp Sea Salt – I use Maldon

4 Large Eggs – I use free range

150ml/5fl oz Sour Cream

1tsp Vanilla Extract I use – Nielsen-Massey

125g/5oz Plain White Flour

75g/3oz Cocoa Powder – I use Callebaut

2tsp Baking Powder

75g/3oz Dark Chocolate

75g/3oz Milk Chocolate

150ml/5fl oz Double Cream

50g/2oz White Chocolate

Method: Preheat oven to 180C/160C fan, 350F, gas mark 4

Making the cake

Grease the pan and line the base with baking parchment.

  • First of all grease the tin and line with baking parchment.
  • In a large bowl whisk together the butter and sugar until pale and fluffy.
  • Crack the eggs into a jug, gently whisk to break up. Add the sour cream and vanilla extract to the eggs and stir to combine – wet ingredients.
  • Weigh the flour, cocoa powder, baking powder and salt into a sieve  – dry ingredients.
  • Sift one third of the dry ingredients into the creamed sugar and butter.
  • Add half of the wet mixture to the bowl. Mix gently until combined.
  • Repeat the addition of dry and wet ingredients.
  • Mix until combined and then slowly mix in the last of the dry ingredients.
  • Spoon the cake batter into the tin and smooth the surface.


Spoon the chocolate cake batter into the heart tin.

  • Place the cake into the oven and bake for approximately an hour.
  • The cake is baked when it springs back from a light touch.
  • Don’t worry if there is a slight jiggle to the cake, as long as it springs back when pressed.
  • As soon as the cake is baked remove from the oven.
Chocolate Heart Cake
  • Leave the cake to cool for 30 minutes in the tin.
Chocolate Heart Cake turn the slightly cooled cake out, bottom side up, onto a cooling rack.
Chocolate Heart Cake
  • Turn the cakeout of the tin and place bottom side up on a cooling rack.Take care when turning this cake out, as it is very moist, with an almost ‘brownie like’ texture.
  • Allow the cake to cool completely before decorating.

Decorating the cake

  • Place the double cream, milk and dark chocolate into a heat proof bowl set over a double boiler see here for detailed photos.
  • Stir constantly, removing the bowl from the heat when the chocolate is two thirds melted.  Keep stirring until all the chocolate is melted into the cream.
  • Set aside until slightly cooled and thickened.
  • Place the Chocolate Heart Cake onto a board or cake stand.

Pour the slightly cooled, thickened, chocolate ganache onto the cake.

  • Pour the slightly cooled and thickened chocolate ganache on to the cake.
  • Smooth the ganache over the cake, using a spoon or palette knife, allowing it trust cover the sides.

Smooth the ganache over the top of the cake, allowing it to just edge over the sides.

  • I used the back of a spoon, however, a palette knife would have given a smoother finish.
  • Melt the white chocolate, in a small heatproof bowl, in the microwave, set to medium. Zap in 20 second bursts, stirring after each one, until the chocolate is two thirds melted.
  • Remove from the microwave and continuously stir until the chocolate is melted and smooth.
  • Starting at the centre of the heart dip, drip, using a teaspoon, a small circle of white chocolate onto the cake. Approx. 1cm diameter.
  • Using a cocktail stick and starting just above the circle, drag the stick through the white chocolate to create a wispy heart accent.
Creating the wispy heart decoration.
  • Add as many heart accents as you like. Although the finished cake will look better if decorated in a symmetrical pattern.
  • Finally, move the cake to a cool place to set. During warmer months refrigerate.
Chocolate Heart Cake 

Most importantly, my husband was thrilled with his birthday cake.

Also it not only looked fantastic, but tasted deeply chocolatey too!

If you have enjoyed this recipe for Chocolate Heart Cake here are some others you may like:

Chocolate Sparkle Cake 

FF Chocolate Heart Cake
Chocolate Sparkle Cake

Marbled Chocolate Bundt Cake 

FF Chocolate Heart Cake
Marbled Chocolate Bundt Cake

Malted Marbled Chocolate Cake 

FF Chocolate Heart Cake
Malted Marbled Chocolate Cake

So, whatever you are making, baking and creating in your kitchens, have fun preparing your feast.

Sammie xx

No part of this post may be reproduced or replicated without the written permission of the owner. Please see my Disclosure Policy.


Share
Facebooktwitterpinterestlinkedintumblr

Roast Chicken Noodle Soup

Share
Facebooktwitterpinterestlinkedintumblr

How good does this delicious Roast Chicken Noodle Soup look? And it tastes even better.

FF Roast Chicken Noodle Soup

Since it’s not very often I mention the words ‘low calorie’ or ‘low fat’ here, on feastingisfun, yet it would seem, I may have put on a few pounds. And I’m guessing I may not be the only one. Am I right?

A bowl of soup made using roast dinner leftovers.
Roast Chicken Noodle Soup

So, I’ve come up with a delicious way to help you save money and keep your weight in check, my Roast Chicken Noodle Soup.

Seriously, one roasted, chicken breast, a few veggies and this soup feeds 4 people. Also it can easily be doubled, if cooking for a crowd, or kept in the fridge, waiting for a quick, thorough re-heat, after a long day at work.

What’s not to love?

FF Roast Chicken Noodle Soup
Roast Chicken Noodle Soup

I roasted a chicken breast quarter for this recipe, but leftovers from a Sunday roast would work perfectly. Also we are having roast turkey today and I intend to make a batch of this soup with a little of the leftovers, for the week ahead.

And did I mention this soup is virtually fat free. One teaspoon of olive oil, to sauté the vegetables, is all the added fat there is.

While you could poach the chicken, instead of roasting it. Yet that would rule out leftovers AND all the flavour in this Roast Chicken Noodle Soup comes from roasting the meat, at the start.

Since I’m happy to defer to the Barefoot Contessa, Ina Garten in these matters. Because she has been cooking chicken, for her husband Jeffrey, for many, many years and if she says roasting chicken imparts the most flavour, well who am I to argue?

Why The Need For Homemade Soup?

Also have a confession to make. Because I have never liked, pre-made, chicken noodle soup. Since it is what is know in our family as ‘headache food!’ And don’t ask me how it got that name, it just did.

So, in the interests of clarity, I’m talking packet soups. You know the flat packets that when ripped open reveal powder and dehydrated vegetables. Never liked the chicken noodle one – loved minestrone though!

Freshly made Roast Chicken Noodle Soup – not a packet mix in sight!

So creating this recipe was a double challenge. Firstly to see if I could make a Roasted Chicken Noodle Soup with very little fat and secondly, to see if I could eat it (without getting a headache) and enjoy it and make it taste way better than the packet soup from my childhood. That’s three things – never mind!

Anyway, I totally scored on all points. This Roasted Chicken Noodle Soup is delicious, low-fat nutritious and no headache!!!!

This is how to make it:

Recipe: Roast Chicken Noodle Soup – serves 4 – 6 

Approx 225g/8oz Roast Chicken – deboned, skin off and shredded – leftovers are fine – alternatively, use roast turkey leftovers.

1tsp Olive Oil – I use Filippo Berio

1 Medium Onion – finely diced

3 Carrots – finely diced

2 Celery Sticks – finely diced

1/2tsp Fresh Thyme – strip the leaves from the stalk (halve if using dried)

1 Chicken Stock Cube – I use Knorr dissolved in 1.2l/2 pints boiling water

100g/4oz Vermicelli – alternatively use any fine or small pasta, egg or rice noodles

Salt and Pepper to season

Method:

Making The Roast Chicken Noodle Soup

First of all, roast a breast quarter of chicken, at 200C/180C fan, gas mark 6, 400F for 30-40 minutes, until cooked through, if not using leftover roast chicken.

One delicious roasted chicken breast quarter.
When slightly cooled, remove the skin and shred the chicke, discarding any bone.
When slightly cooled, remove the skin and shred the chicken, discarding any bone.

Alternatively shred approximately 225g/8oz of roast chicken or turkey.

Place a large pan, over a medium heat and add the oil.

Add the diced onion, carrots and celery to the pan.

Saute the vegetables until just softened, approx 7 minutes.

Add the shredded chicken and fresh thyme to the pan.

Pour over the chicken stock.

Weigh out the noodles of your choice.

I used broken up vermicelli.

Add the noodles to the soup.

Taste for seasoning. And add salt and pepper as necessary.

Simmer for 5 minutes, or until the noodles are cooked.

Serve immediately.

Roast Chicken Noodle Soup made using Sunday dinner leftovers.

And to make a hearty meal out of this soup serve with some thick, crusty bread like my Wholemeal Cob Loaf or Wholemeal Loaf.

Also, if you want to avoid carbs altogether, you could add shredded cabbage, or spirilized courgette (zucchini).

This Roasted Chicken Noodle Soup is absolutely delicious, quick to make, fab for using up leftovers and feeds 4 people for very little. Resulting in a win-win recipe and one that I make frequently.

If you love this Roast Chicken Noodle Soup then you might want to have a look at these –

Carrot Soup also low fat,

FF Carrot Soup
Carrot Soup served with crumbled Stliton cheese.

Leek and Potato Soup leave out the cream and you will lower the calories in this delicious soup!

Leek and Potato Soup velvety comfort.

Roasted Garlic Butternut Squash Soup.

FF Roasted Garlic Butternut Squash Soup
Roasted Garlic Butternut Squash Soup just add crusty bread!

Soup is one of my comfort foods. Whether it’s full of chunky veggies or blitzed to a smooth velvety texture I can always count on a bowlful to make meal feel better. Also if the recipe is quick and easy that simply adds to the pleasure of making soup. Leaving me feeling relaxed and nourished.

So, whatever you are baking, making and creating in your kitchen, have fun preparing and sharing your feast.

Sammie xx

No part of this post may be reproduced or duplicated without the written permission of the owner. Please see my Disclosure Policy.

Share
Facebooktwitterpinterestlinkedintumblr

Wholemeal Loaf

Share
Facebooktwitterpinterestlinkedintumblr

What have I got here for you today? Only a 100% Wholemeal Loaf!

Delicious,tasty, Wholemeal Loaf www.feastingisfun.com

Gorgeous, crusty, healthy bread. Perfect for increasing fibre in your diet and keeping you feeling fuller for longer.

A completely Wholemeal Loaf is never going to be as light, or rise as much as a Large White Bloomer.

This is because the wholemeal flour has less protein (gluten) per gram than white flour, as the bran and germ have not been removed. So a Wholemeal Loaf is always going to be denser than a white loaf. What I have found, is, that when making wholemeal bread using the regular, knead/prove/knockback and then prove again, I’ve had disappointingly heavy loaves. So I set about trying to improve the result.

Wholemeal Loaf full of fibre and flavour www.feastingisfun.com

I am not claiming the following method is fool proof, or the only way to make 100% Wholemeal Bread, a quick search on the internet proved that! Sorry no pun intended well maybe! What I’ve found is, by triple proving the dough, the resulting bread is far more digestable and totally delicious.

Wholemeal Loaf where's the butter? www.feastingisfun.com
Wholemeal Loaf where’s the butter? www.feastingisfun.com

Wholemeal bread is extra delicious when paired with oily fish, such as smoked salmon, smoked mackerel or tuna. I particularly enjoy it, toasted, alongside a golden, dippy yolked, free range egg – the perfect breakfast.

Whatever your reason for wanting to make and bake this bread, the triple proving method ensures the resulting loaf is delicious and more easily digested.

I personally enjoy baking and eating a variety of breads, yet this Wholemeal Loaf and my Crunchy Seeded Bread are top of my favourite loaves for sandwiches and toast.

Well they do say that “Variety is the spice of life!!”

Recipe: Makes 1     Wholemeal Loaf (750g)

450g/1lb Strong Wholemeal Flour

2tsp/1 sachet Fast Action Dried Yeast

1tsp Runny Honey

325ml/1/2 pint Tepid Water

1tsp Salt

25g/1oz Unsalted Butter plus extra for greasing the loaf tin.

Method: Grease a 3lb Loaf Tin with butter.

Using either a bread maker or free standing mixer, with dough hook attachment, add the water, yeast and honey into the bowl. Gently mix together with clean fingers.

Add the flour on top of the water mixture.

Next add the salt.

Break the butter into small pieces and add to the bowl.

If using a bread maker, set the programme to dough cycle and start. When the cycle is complete, start the dough cycle again. This will knock back the dough and prove it for a second time.

If using a stand mixer, lower the dough hook and mix on a medium speed. Once all the ingredients have come together to form a dough, continue mixing for 10 minutes on a low – medium speed. Stop the mixer. Remove any dough from the dough hook and form into a ball. Place back into the mixer bowl, cover with a damp cloth and leave in a draft free place for an hour.

In the stand mixer, after an hour, lower the dough hook into the bowl and proceed to mix, as before for 10 minutes, this will knock back the dough. As before, stop the machine, scrape any dough off the hook, form the dough into a ball, cover with the cloth and leave for a further hour.

Once the second prove is complete, gently press the dough into a flat rectangle. Fold the bottom third upwards and then fold the top third down, over the first fold. Place the dough, seam side down, into the greased loaf pan. Cover with the cloth and leave for a further 1 – 2 hours, until doubled in size.

You can add a light dusting of flour to the top of the loaf before it bakes.

Preheat the oven to its highest setting 10 minutes before the wholemeal loaf is ready to bake.

Wholemeal Loaf a few gentle slashes across the top and a little sprinkle of flour give the loaf an extra special look www.feastingisfun.com

Place a baking tray, or grill pan in the bottom of the oven and fill with boiling water. Creating a steamy environment, will help the bread form a delicious crust.

When the oven is hot and full of steam, carefully place the loaf tin (with the cloth removed) into the oven and bake for 30-40 minutes.

The bread is baked when it is a golden, crusty brown and sounds hollow when rapped on the base with your knuckle.

Remove the bread from the oven. Turn out the loaf immediately and leave to cool completely on a rack.

Wholemeal Loaf - how do you like your bread? www.feastingisfun.com
Wholemeal Loaf – how do you like your bread? www.feastingisfun.com

If you make this loaf I would love to see your photos. Post them on Twitter and Tag me in with #feastingisfun.

I really hope you enjoy this delicious Wholemeal Loaf and you may also like this recipe –

Wholemeal Cob Loaf

This Wholemeal Loaf was baked in a British manufactured 3lb loaf tin available from British Bakeware.

I did not receive any payment for using this tin. All opinions and content are my own.

Sammie xx

Share
Facebooktwitterpinterestlinkedintumblr

Raspberry Almond Cream Cake

Share
Facebooktwitterpinterestlinkedintumblr

Welcome to a New Year and what better way to celebrate than with my Raspberry Almond Cream Cake.

Raspberry Almond Cream Cake perfect as a celebration cake and for sharing www.feastingisfun.com

This cake was made on December 31st 2015 and was taken to our very good friends, for their New Years Eve party.

It has been so long, too long, since I have been out of the house for anything other than a Doctors or Hospital appointment. We were invited to our friends, ages ago. Having missed out on other family gatherings, I really wanted to see the year out on a positive note.

Raspberry Almond Cream Cake moist, fruity cake www.feastingisfun.com

Taking this Raspberry Almond Cream Cake, as a gift, to our friends house, was also a massive achievement. The cake looked festive, without being too Christmassy. I resisted the urge to sprinkle some edible glitter on the top. Setting the cake on a gold plate seemed beautiful enough.

Raspberry Almond Cream Cake moist sponge layered with cream, jam and fresh fruit www.feastingisfun.com

The almond flavour in the moist sponge, pairs really well with gorgeous, plump, deep crimson raspberries. I tend to find frozen raspberries hold their flavour and shape and are excellent to keep on hand, in the deep freeze, for the winter months. On this occasion, fresh raspberries were available, but I would totally make this again with frozen fruit!

An extra layer of raspberry jam, brought additional flavour and made all the ingredients in this Raspberry Almond Cream Cake ‘sing’.

Raspberry Almond Cream Cake I wish I had a slice of this now www.feastingisfun.com

Usually when baking a layered cake I bake separate sponges, this time however, I baked one gorgeous, almond sponge and cut it in half. The result was an extra moist cake that kept people going back for another slice!!

If making this cake for only adults, I woud certainly have brushed the inside of the cut sponge with some Framboise (raspberry liquer), or alternatively added a splash of delicious almond liquer to the cream!

Here’s how to make this luscious cake!

Recipe: Makes 1 large 10″ Raspberry Almond Cream Cake serves 12

10oz/275g Unsalted Butter – at room temperature

10oz/275g Caster Sugar

8oz/225g Self Raising Flower

2oz/50g Ground Almonds

1/2tsp Baking Powder

1tsp Vanilla Extract – I use Nielsen-Massey 

1tsp Almond Extract

1/4tsp Salt

4 Large Free Range Eggs

2floz/50ml Whole Milk

3oz/75g Almond Flakes – very lightly toasted

2 packets Fresh or Defrosted Raspberries 14oz/400g

15floz/400ml Double Cream

3Tbsp Raspberry Jam

Method: Preheat oven to 175C/160C fan oven

Grease and line the base of a 10″ springform cake pan.

In a large bowl whisk the butter, sugar and salt together until pale and fluffy.

Add one third of the dry mix (flour, ground almonds and baking powder), 2 eggs, half the milk and the vanilla and almond extracts.

Mix until just combined.

Repeat the last step.

Finally add the last third of the dry ingredients and mix until combined.

Place the cake batter into the springform pan.

Bake in the oven for approximately an hour. The cake is baked when it is golden brown and springs back when pressed lightly in the centre.

Once baked remove the cake from the oven and place the pan on a rack to cool for 15 minutes.
After 15 minutes turn out the cake from the pan and leave to cool completely on a cooling rack.

Once the cake is cooled, carefully slice the sponge in half.

Use a serrated bread knife to slice the sponge in half.

Whip the double cream until it just holds a peak.

Spread the raspberry jam over one half of the sponge.

Sort through the raspberries and reserve 12 of the largest, plumpest fruits for the top of the cake.

Spread half of the whipped cream on the other half of the sponge. Add half of the raspberries.

Place the sponge, spread with jam, on top of the cream and raspberry filled sponge.

Raspberry Almond Cream Cake - spread the remaining cream on top of the cake, decorate with Raspberries and sprinkle over the toasted almonds slices. www.feastingisfun.com
Raspberry Almond Cream Cake – spread the remaining cream on top of the cake, decorate with Raspberries and sprinkle over the toasted almonds flakes. www.feastingisfun.com

Keep the cake chilled, removing from the fridge 20 minutes before eating.

Invite round some friends, or alternatively take this cake to your friends house.

You are certain to be a very popular guest if you turn up with this Raspberry Almond Cream Cake!!

All food tastes better when it is shared, none so more than cake, in my humble opinion 😉.

Wishing you all a happy, healthy 2016. May your friendships grow closer over a cup of tea and slice of cake.

If you enjoyed this Raspberry Almond Cream Cake here are some other bakes that you can enjoy sharing –

Strawberries and Cream Cake

Victoria Sponge Cake

Chocolate Sparkle Cake

Sammie xx


Share
Facebooktwitterpinterestlinkedintumblr