Hello there, I have the perfect cake to celebrate the sunshine, Zesty Lemon Lime Cake. Perfect for picnics, packed lunches or pausing for a cuppa in the garden!
Zesty Lemon Lime Cake – perfect with lemon tea!
The combination of lime with lemon results in a deliciously moist, tangy cake. Using the zest of the fruits gives a delightful depth of flavour to this delicious cake.
Zesty Lemon Lime Cake – sunshine in cake form!
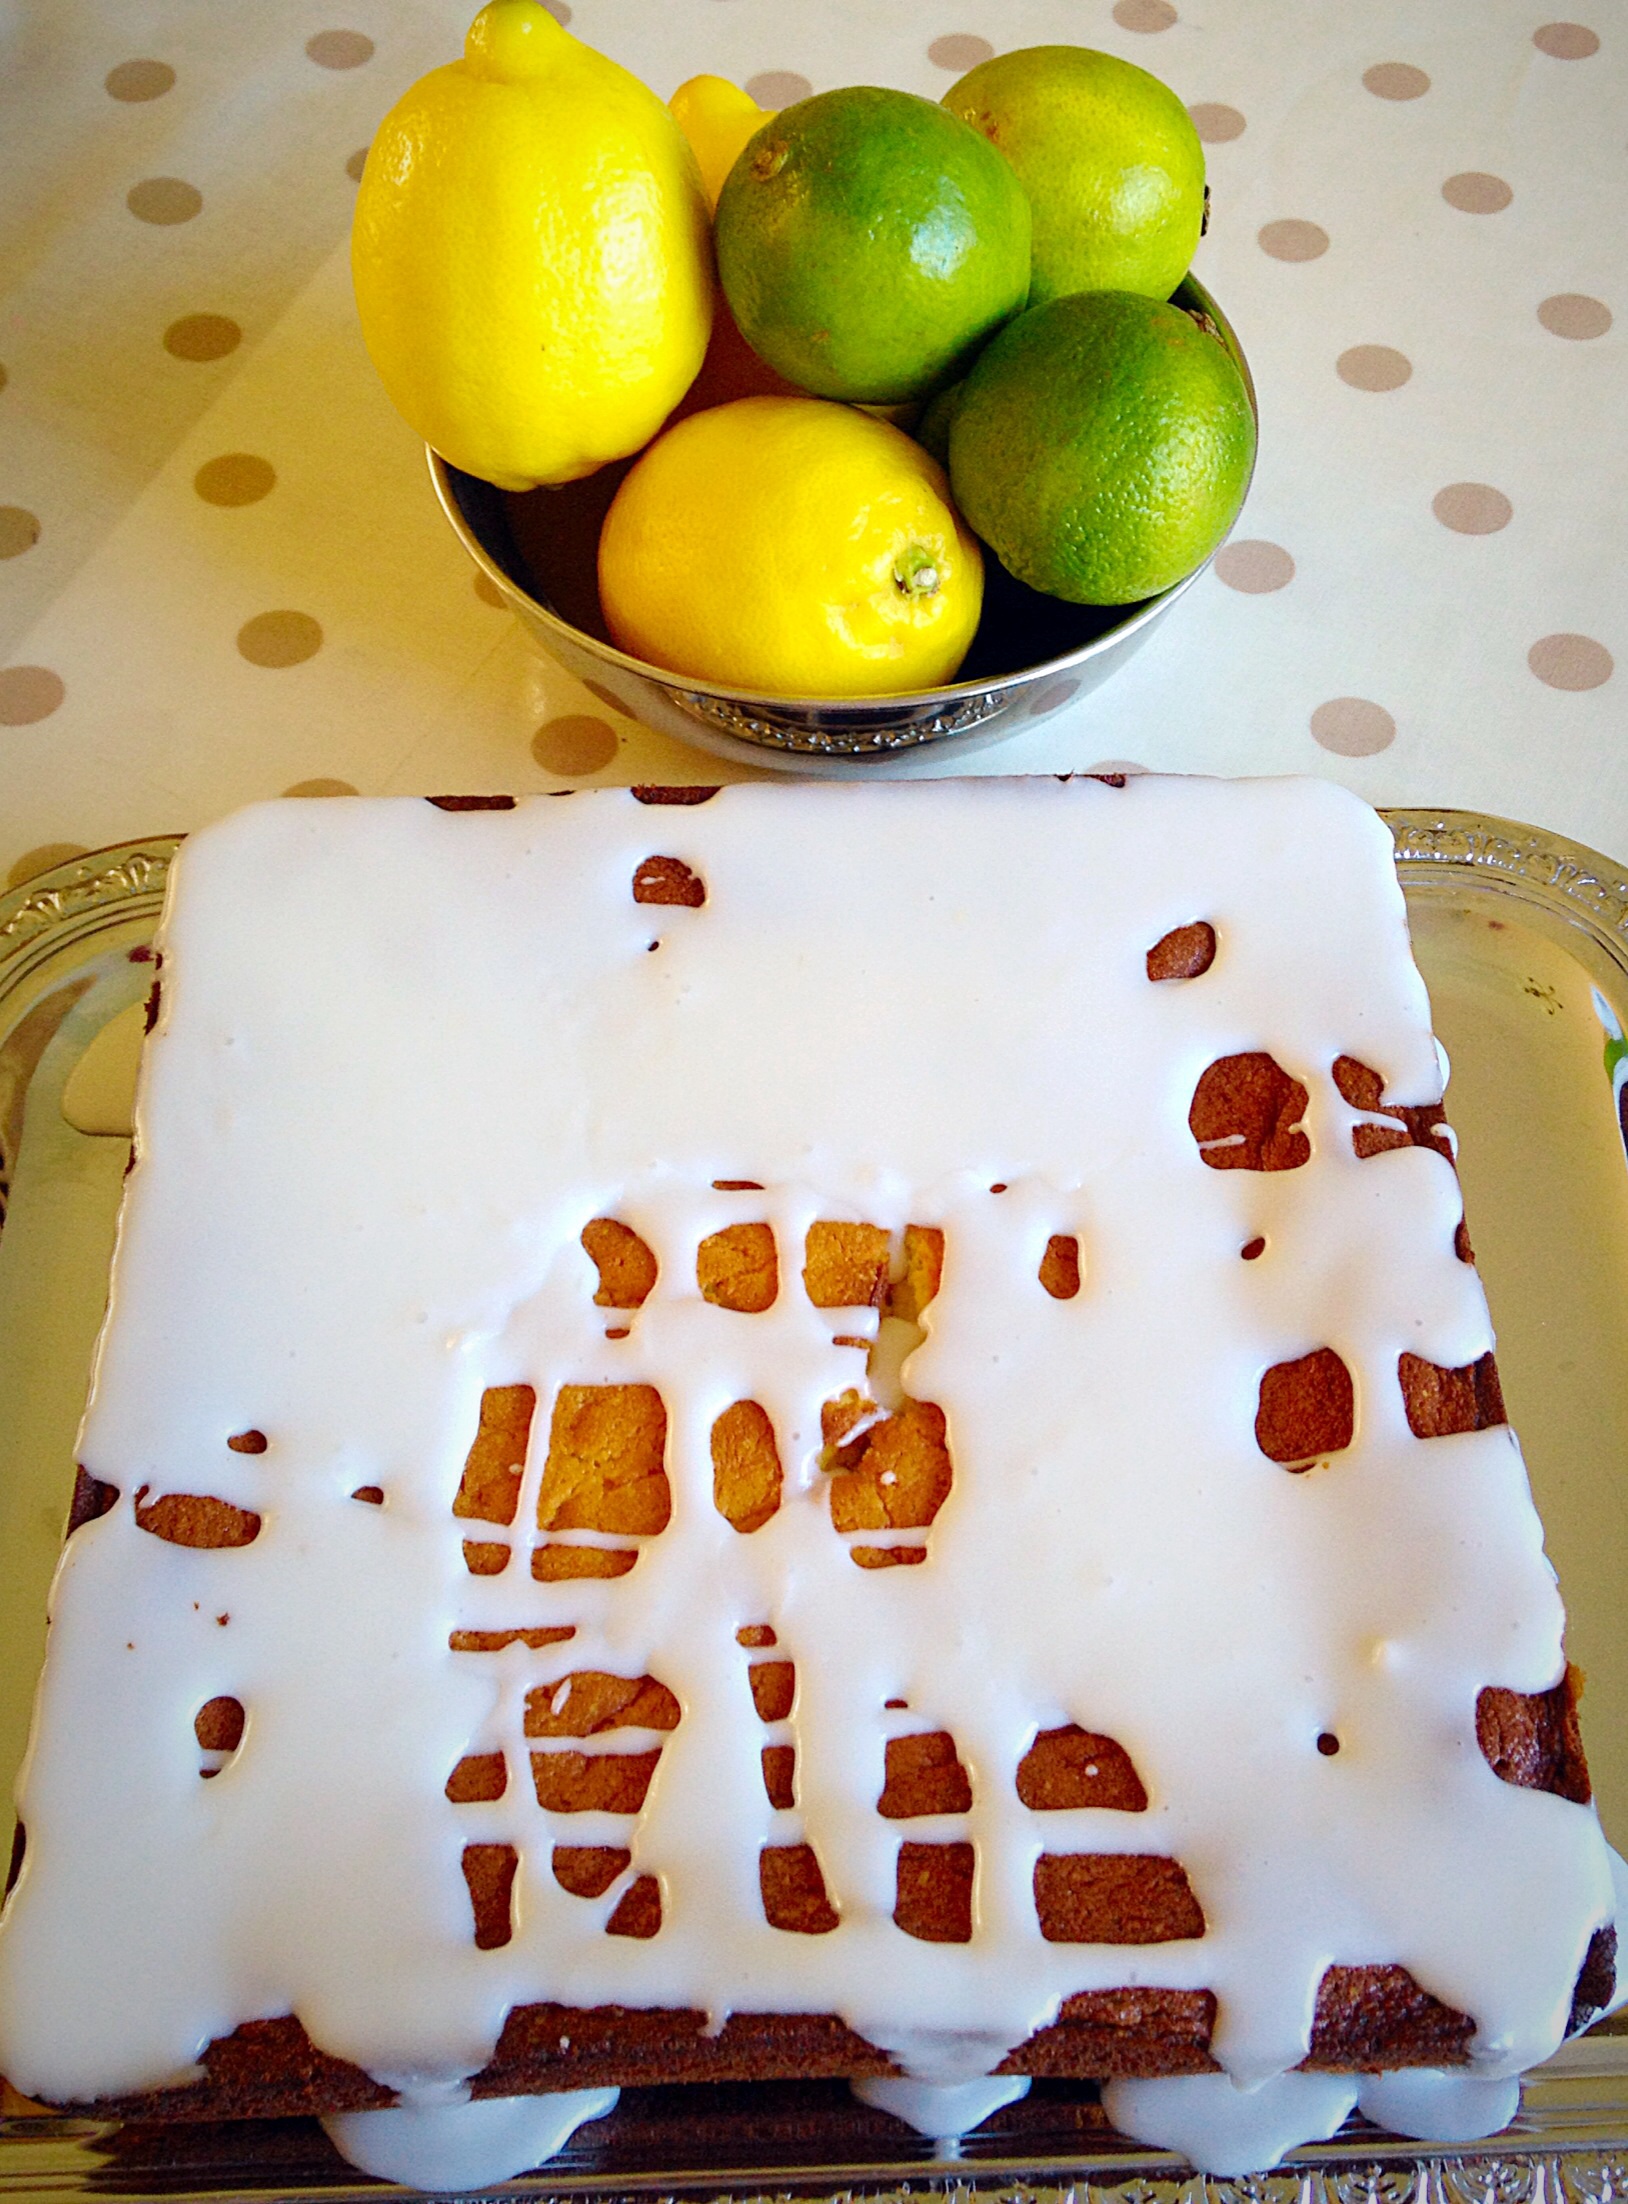
A gorgeous glaze made with both fresh lemon and lime juice is the perfect topping. Not too sweet, with a lovely zing!
I probably should have opted for an all over glaze instead of criss-cross!!
I love cake, especially in the summer. There’s nothing quite like opening up a tin at a picnic, with friends and family, to find a pre-cut, delicious, home made cake to tuck into. That’s when tray bakes or square cakes really come into their own – perfectly portable pudding!!
Recipe :
225g/8oz Caster Sugar
225g/8oz Unsalted Butter – room temp
1/4tsp Salt
1 x Lime
1 x Lemon
1tsp Vanilla extract
4 Large Eggs – pref. free range
150ml/5fl oz Sour Cream
225g/8oz Self Raising White Flour
225g/8oz Icing Sugar
Method : Preheat Oven to 175C/160C fan
In a large bowl whisk together the butter, sugar and salt until light and fluffy.
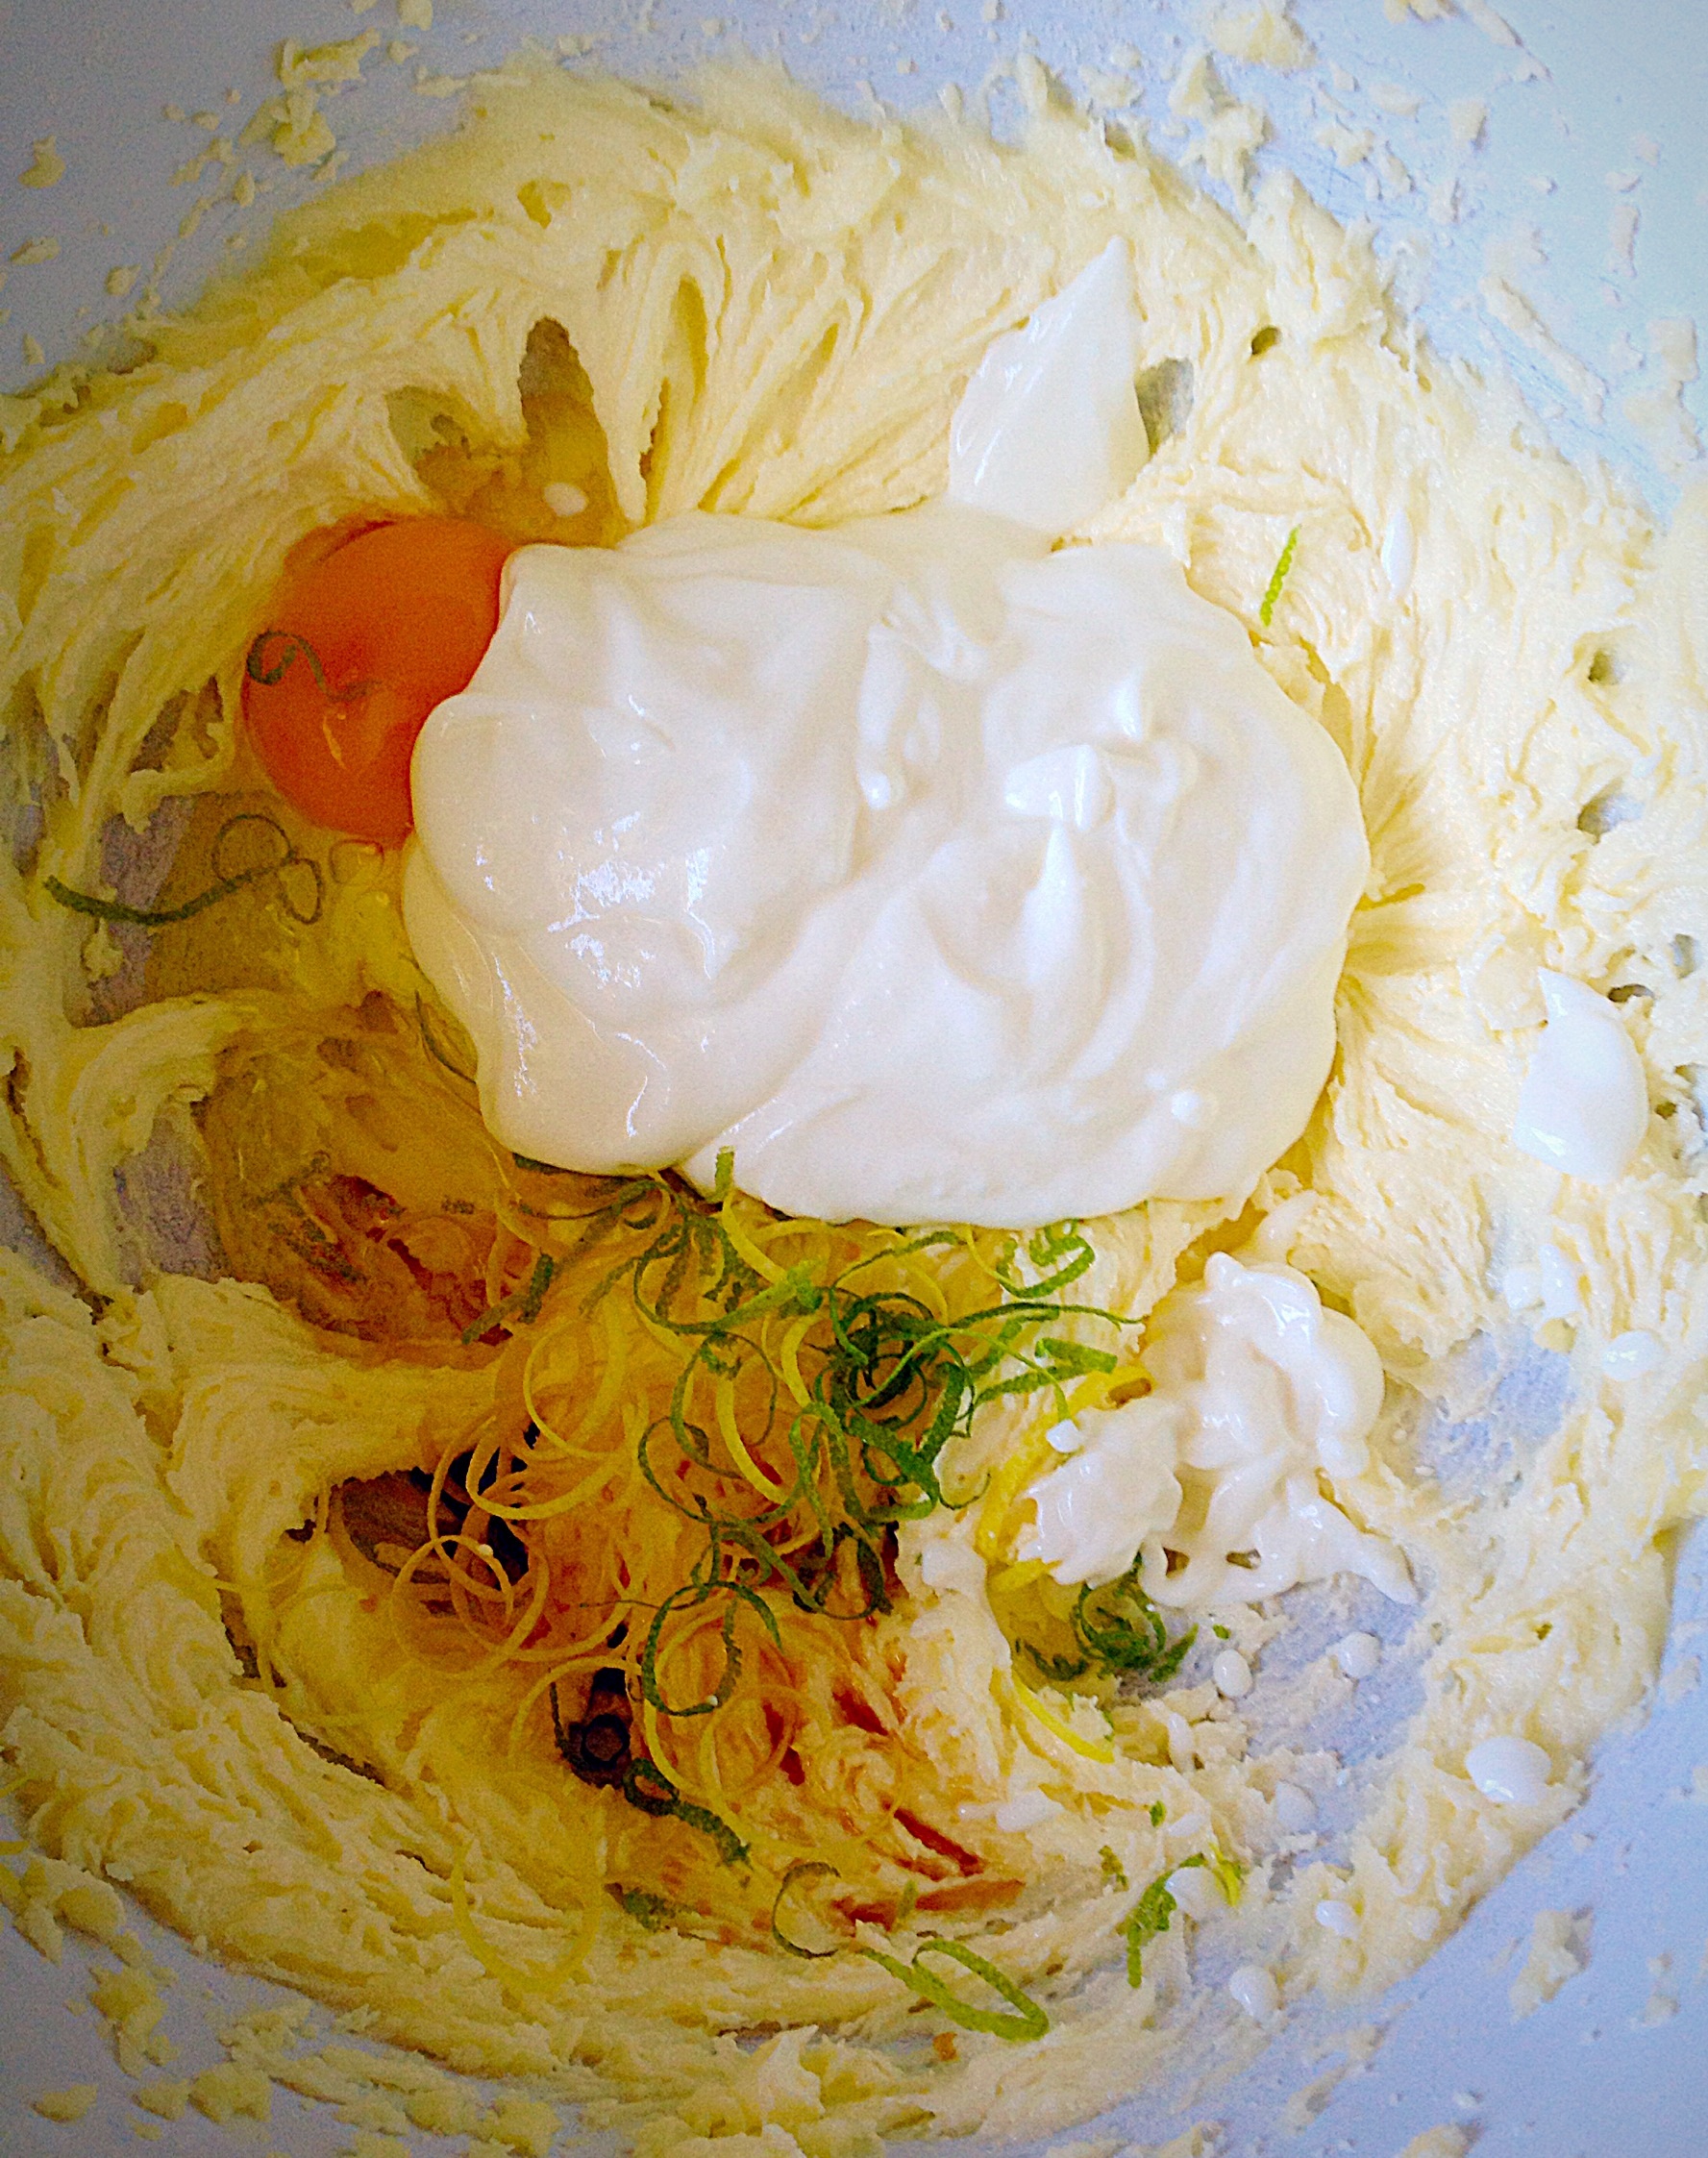
Add the vanilla extract, eggs, sour cream and zest of the lemon and lime and mix thoroughly – if the mixture starts to curdle add a couple of tablespoons of the flour.
You can finely grate the zest or use a zester to get long strips of zest as I have done.
Next add the flour and mix until just combined. Stir through the juice of half the lime.
Pour the mixture into a greased and line (I only line the bottom of the tin) 21cm x 21cm (8″ x 8″) square cake tin.
Smooth over the cake top for an even finish.
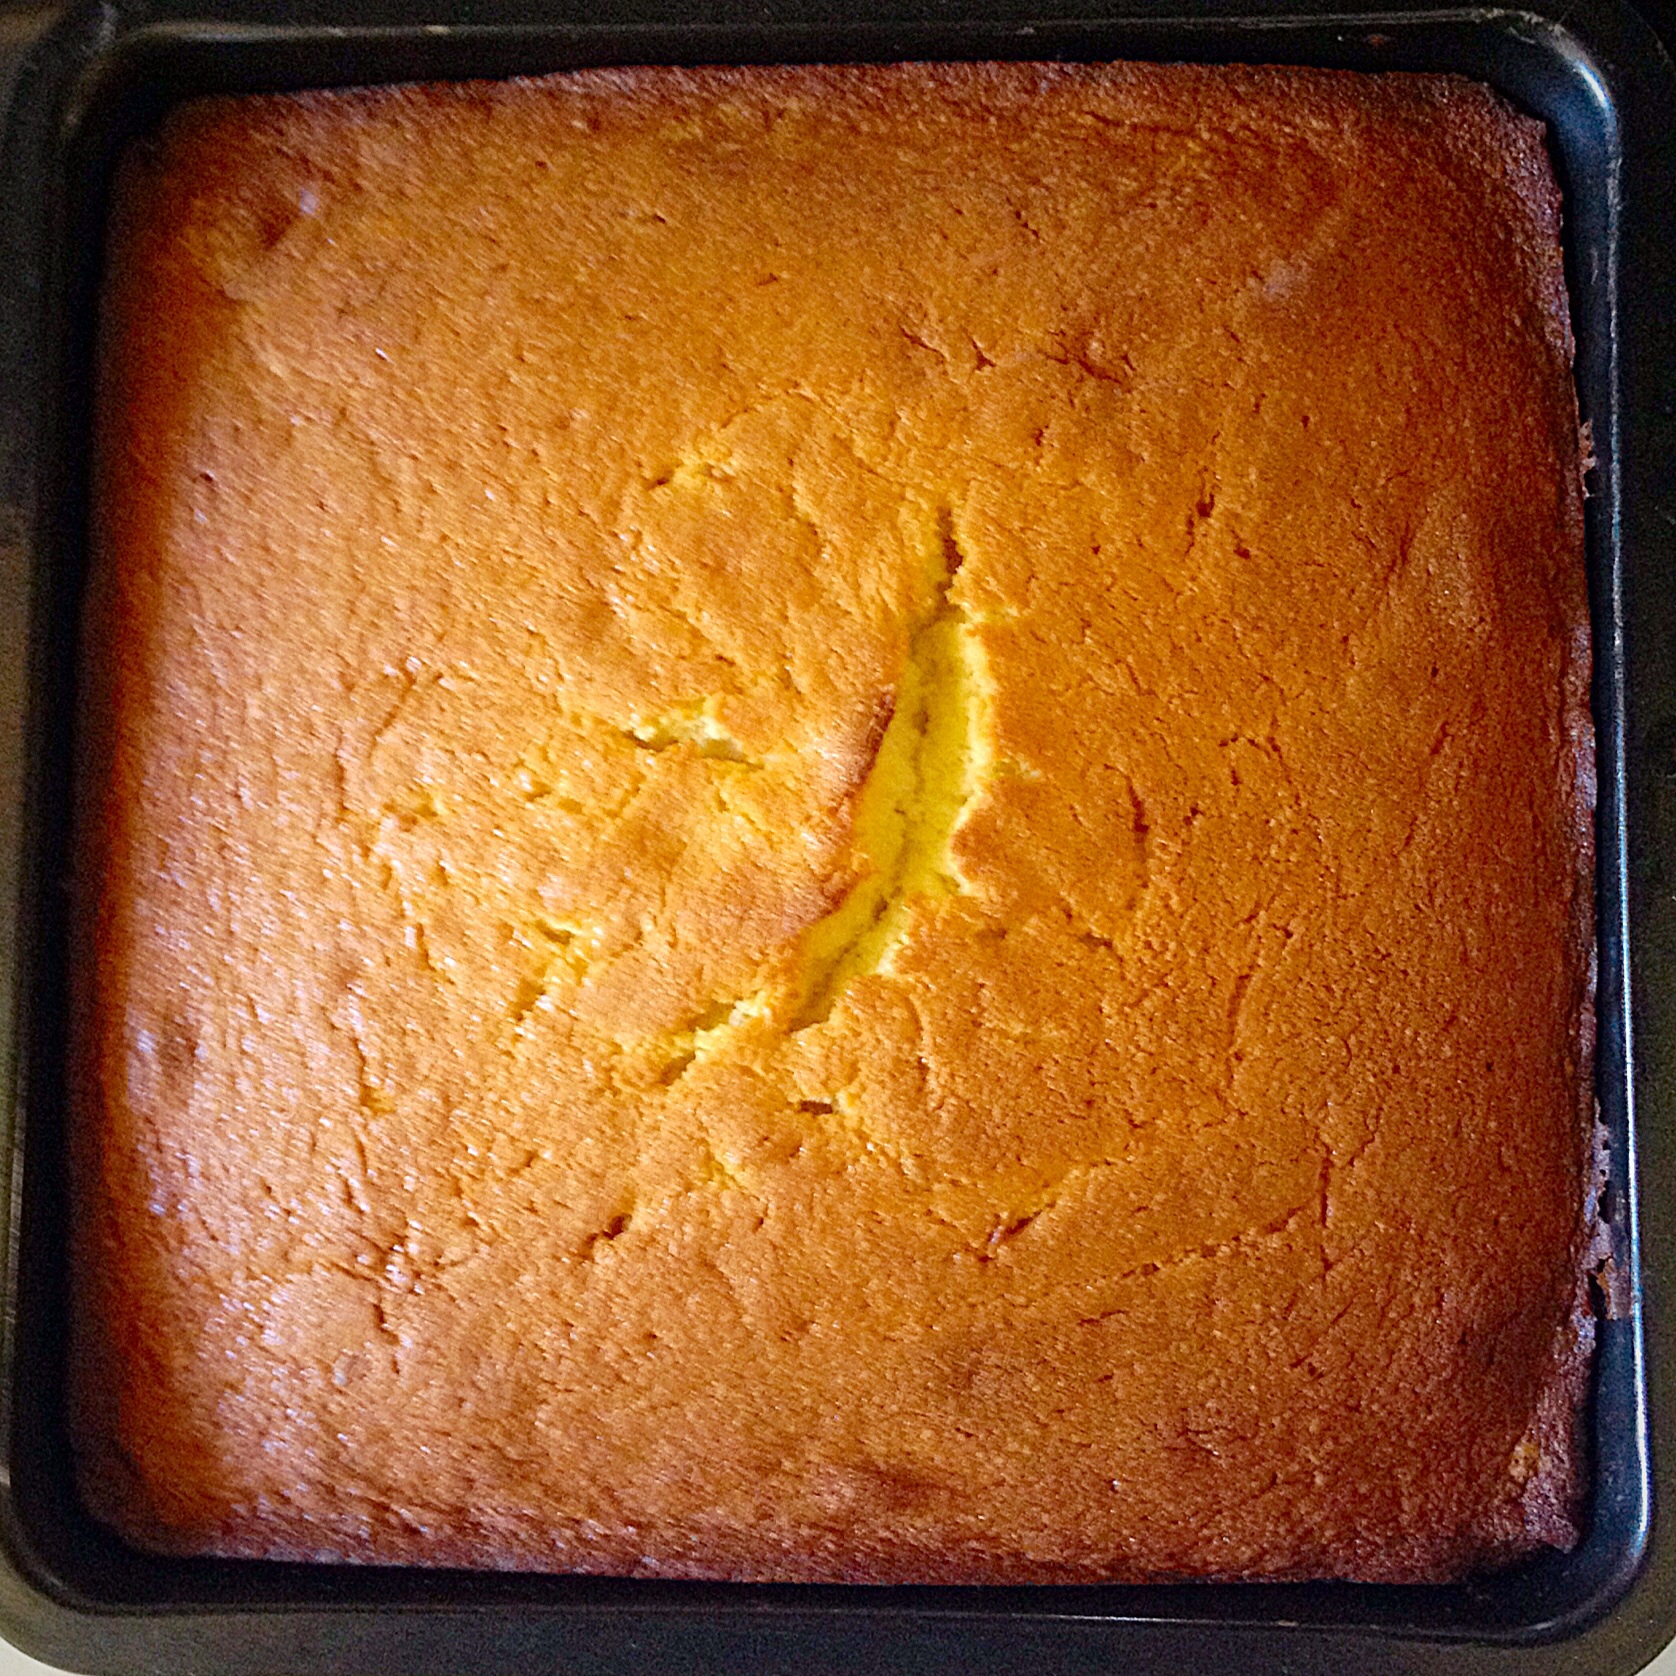
Place in the oven and bake for 45-50 mins until the cake spring back when lightly pressed – or a cocktail stick comes out cleanly, when inserted into the centre of the cake.
Cooling in it’s tin for 10 minutes – Zesty Lemon Lime Cake
Once cooked remove the cake from the oven. Leave to cool for 10 minutes in the tin, then turn out onto a cooling rack.
Tip – once the cake is turned out onto the cooling rack I remove the parchment paper and the use a second rack placed over the bottom of the cake and flip it. Now my cake is the right way up!! Very handy when you want the top of the cake to be on show.
Once the cake is cooled, transfer to a serving plate, as the icing drips down the sides of the cake.
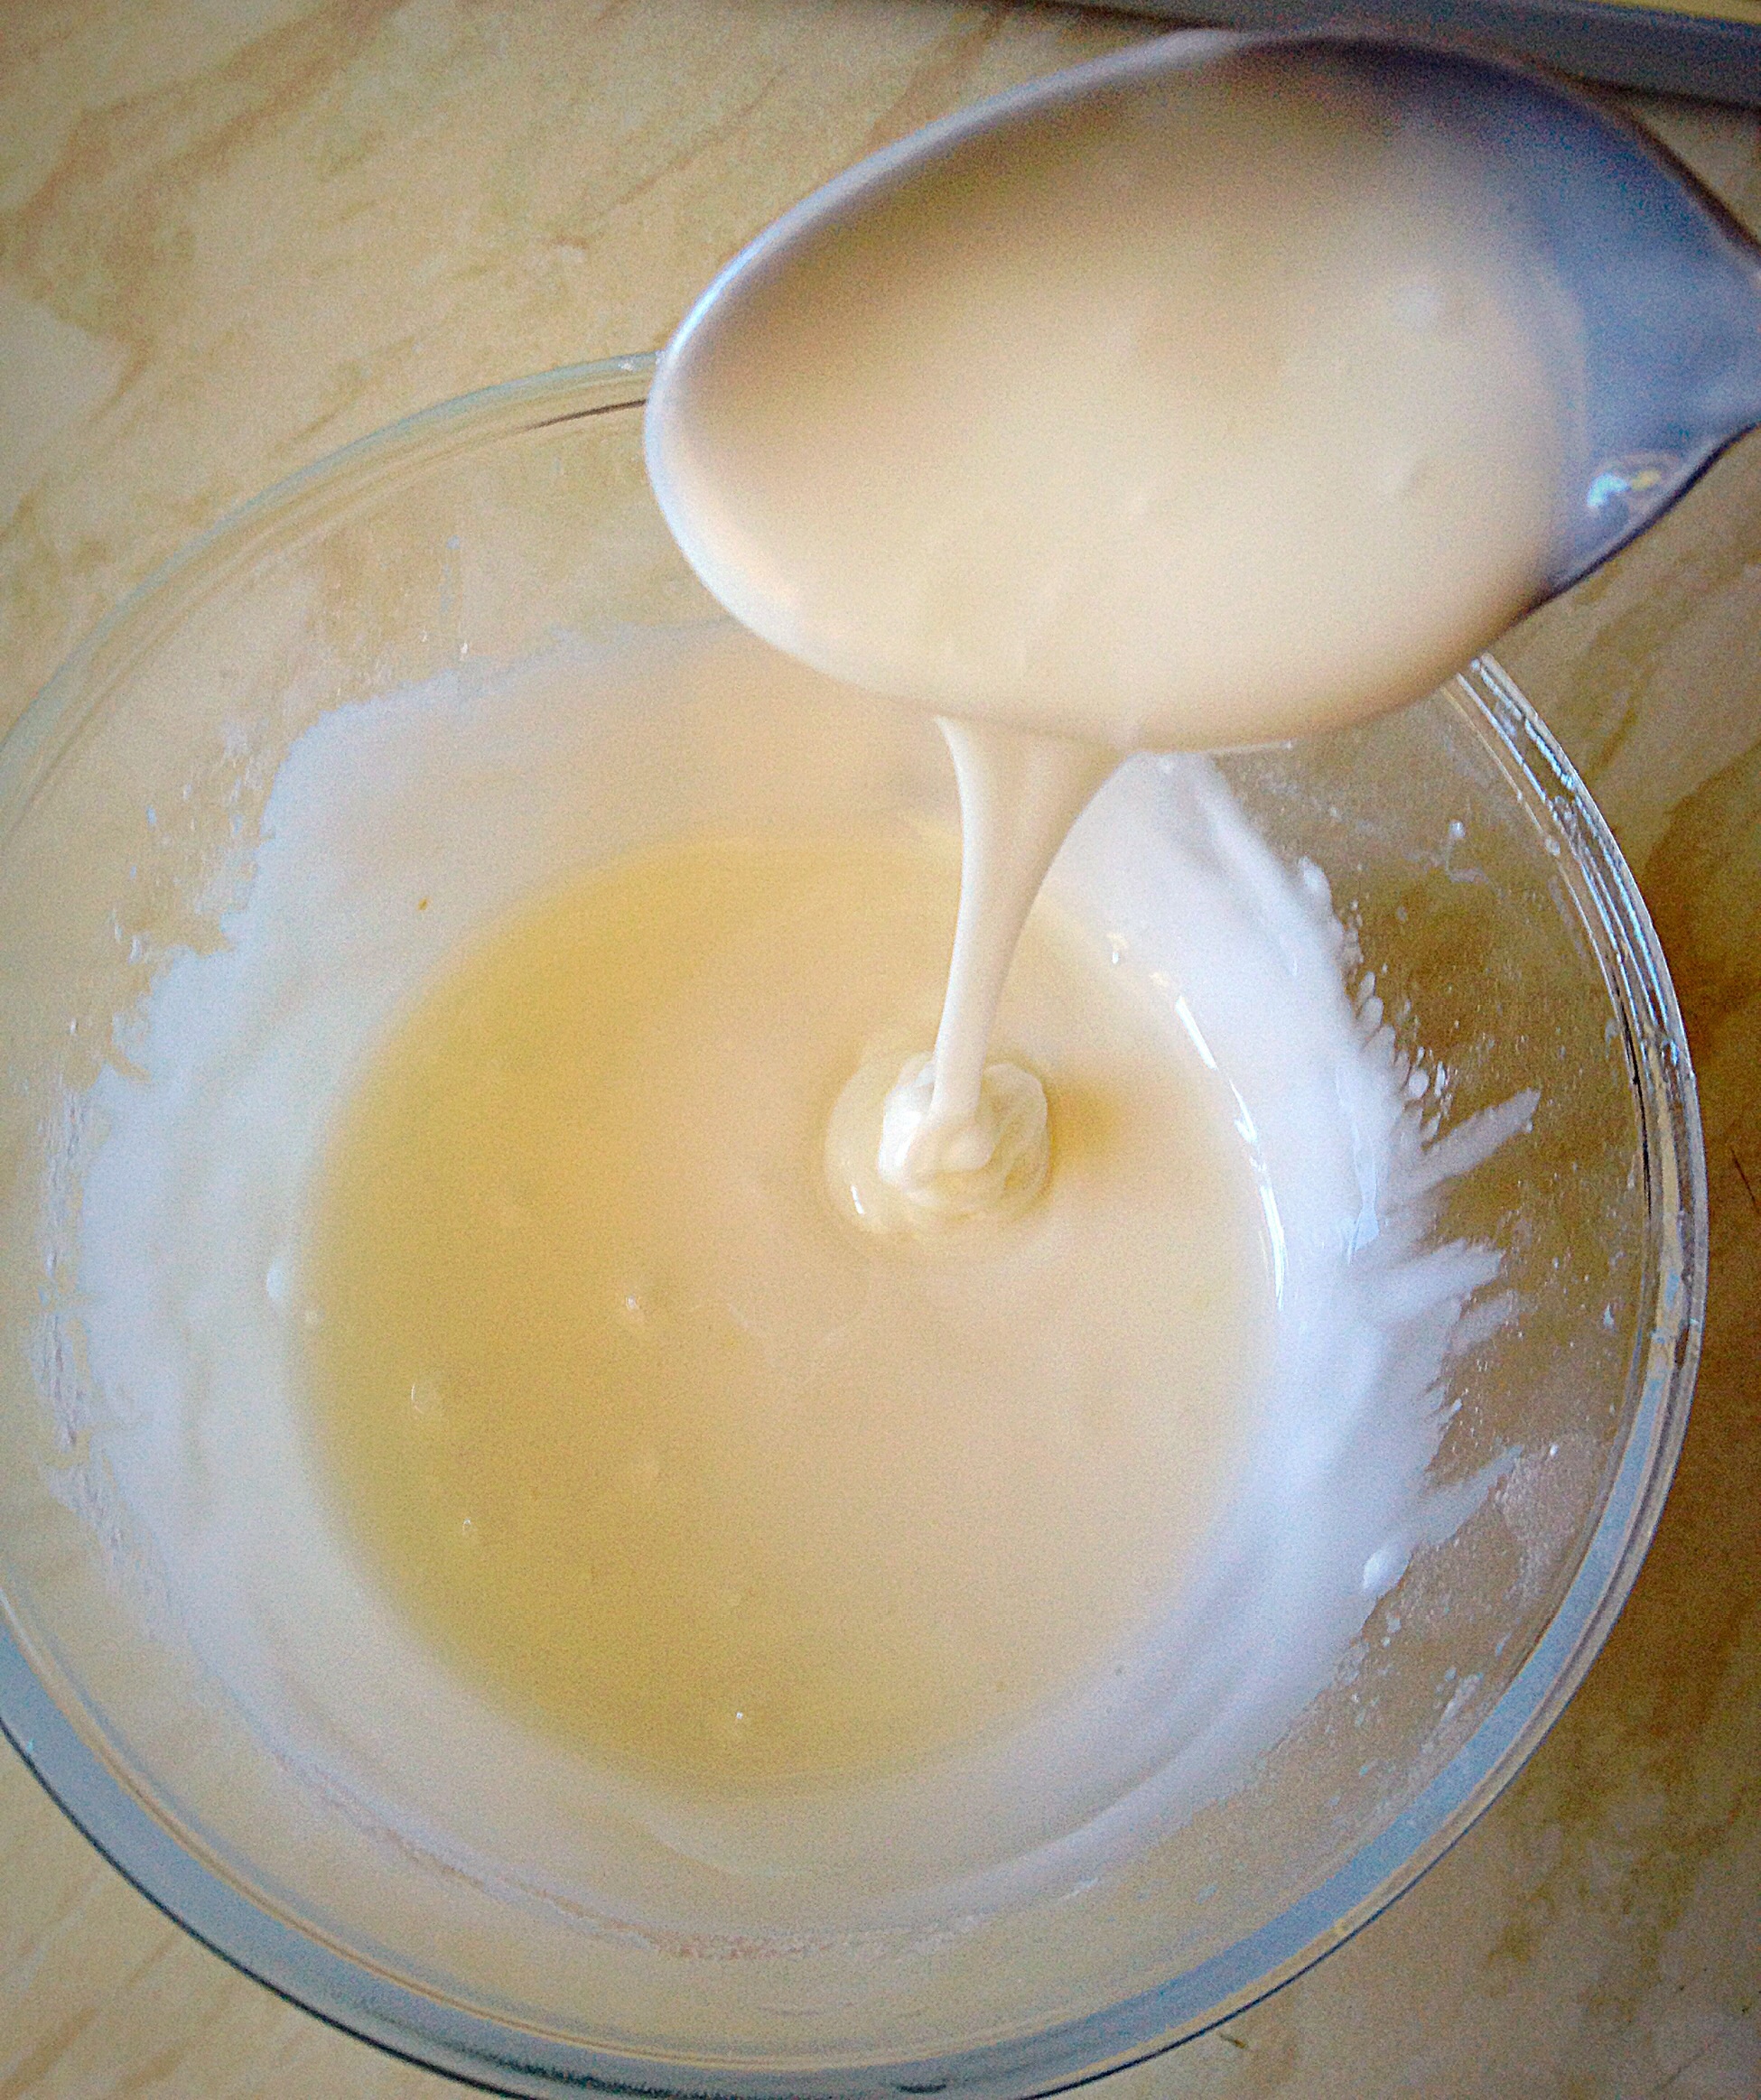
To make the icing, add the juice of half a lime and enough lemon juice to the icing sugar, in a bowl, mixing until you reach a nice smooth consistency.
Lemon lime flavoured icing, perfect for drizzling over your cake.Drizzle the icing over the cake, encouraging some icing to drip over the sides!I may have slightly overdone the drizzling???!!!
Allow the icing to set and then cut into squares – I made 12, but if you want larger pieces that’s fine
This Zesty Lemon Lime Cake has a lovely soft crumb texture and delicious citrus flavour. Perfect with a cup of lemon tea!
Do you have a favourite drink/cake flavour combination?
Hi, I’ve just made the easiest, tastiest, lunch ever: Perfect Panini Pizza. It’s so simple, yet so delicious.
Perfect Panini Pizza
Our daughter is at home, working hard on study leave. It’s exam time people! That means lots of study and lots of brain fuel – FOOD!! So in an effort to make lunchtime fun I decided to turn 2 panini rolls (ciabatta rolls would work fine too) into something other than a sandwich! Not that sandwiches aren’t good, but I wanted to change things up a bit and treat Star to a fabulous lunch. Perfect Panini Pizza totally hit the mark!
Perfect Panini Pizza – fuel for studying!
I’ve made pizza using baguette before, but I’ve always found it really, really hard to stop the curved edges of the baguette from toppling the whole pizza over, dumping the topping as it rolls. Now I’ve found a solution – Ciabatta bread. It’s flat!! I know right!! Takes me a while to catch on sometimes (always!!!!). But I got there in the end and ooh what a delicious result.
Perfect Panini Pizza – totally scrummy!
The best thing about this recipe is that you can top your pizza with whatever you have in the fridge. I’ve used Salami, but ham, peppers, olives, sweetcorn, really the list is endless. If you try this please let me know what toppings you try?
Recipe :
1 Panini roll/1/2 ciabatta loaf per person
Olive Oil
Tomato Salsa – or tomato pasta sauce (in a jar!)
Mozzerella Cheese – or any other good melting cheese
Salami – or any topping of your choice!
Method : Preheat oven to 200C/185C fan
I specifically haven’t given quantities for the ingredients above as it really depends on how many pizzas you are making and how hungry the people you are making them for are!!
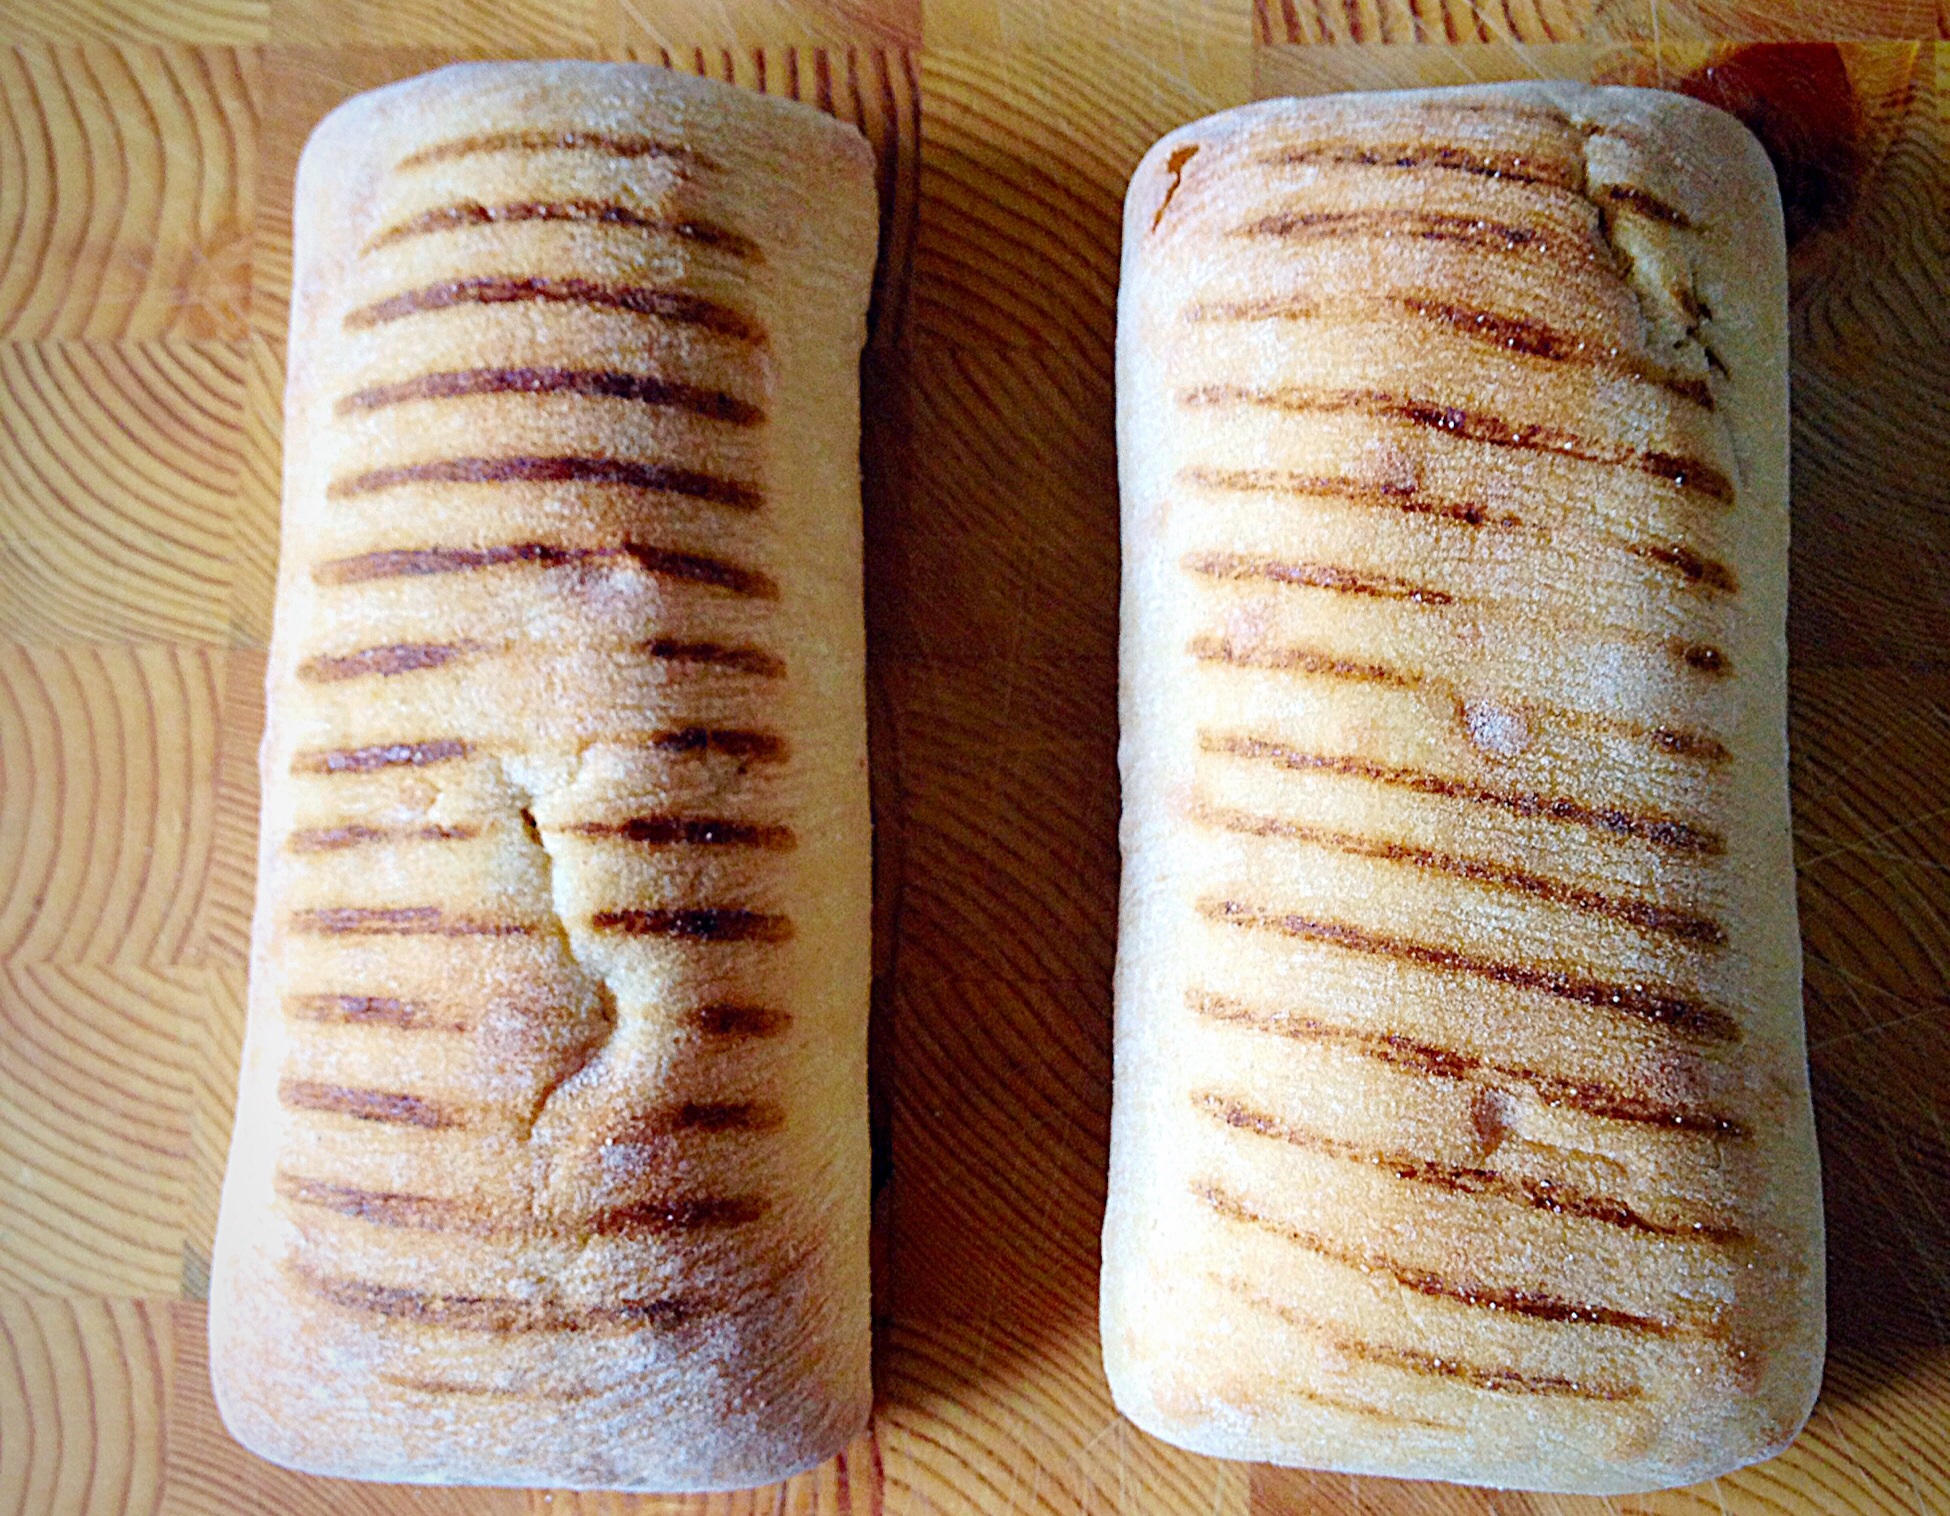
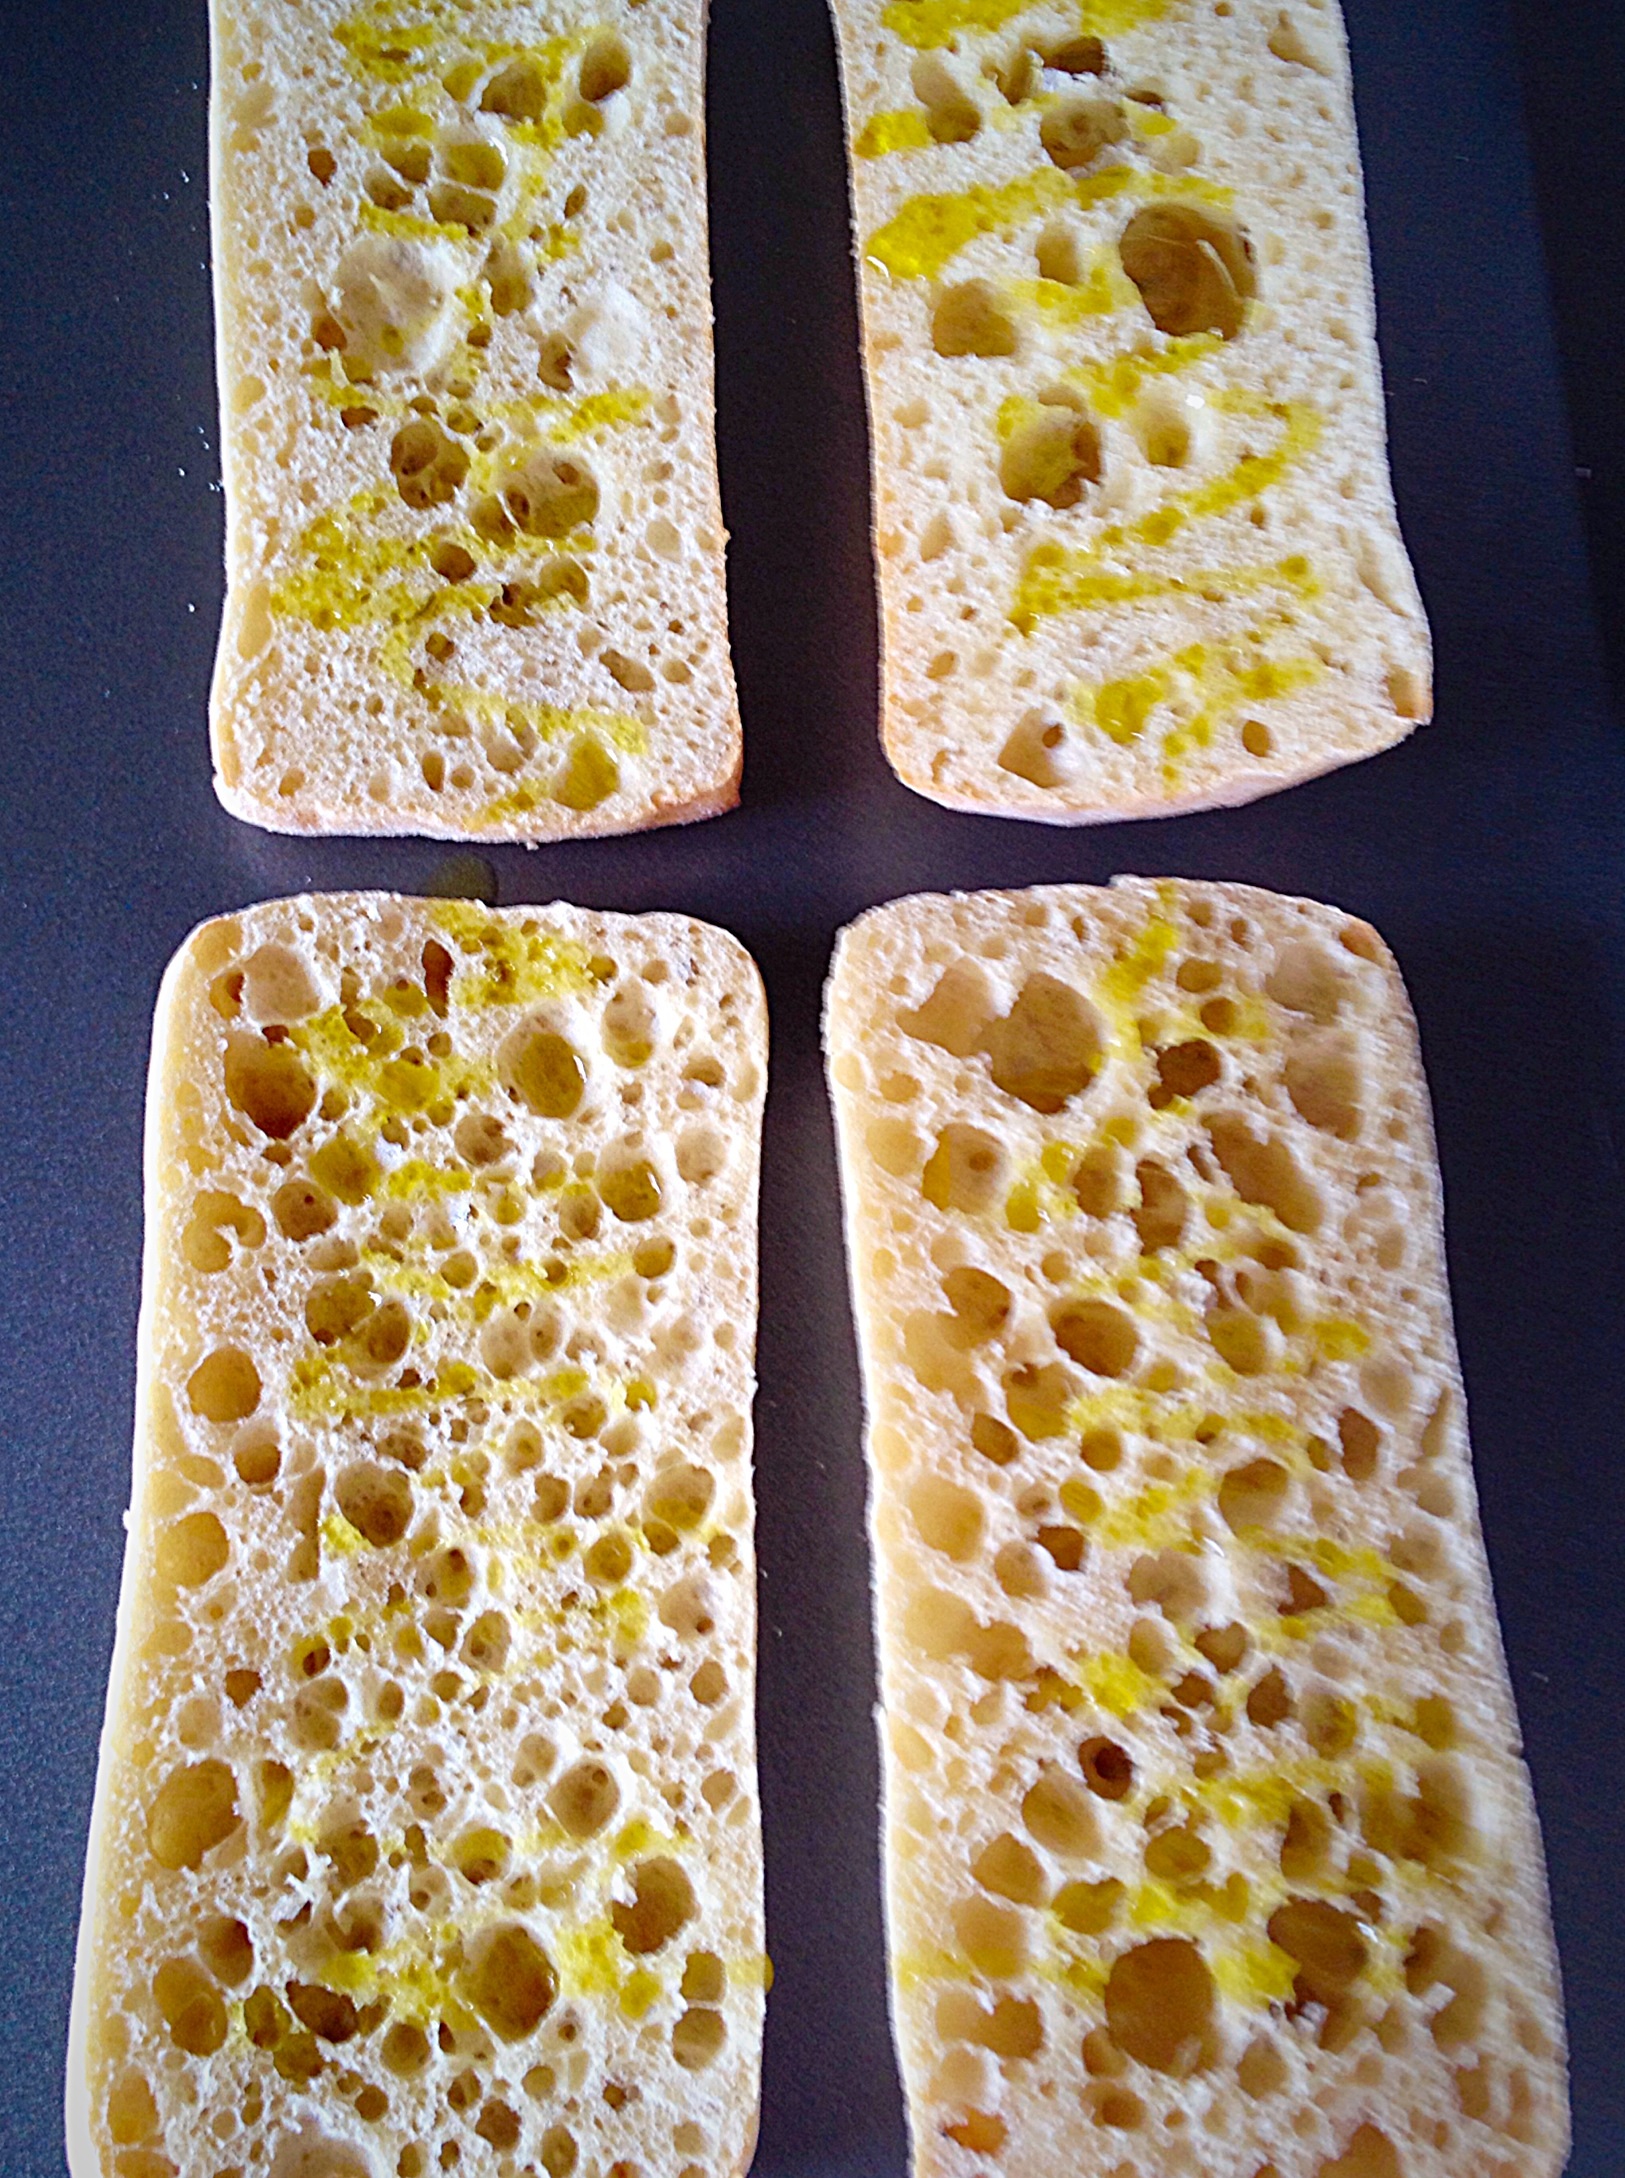
Here is how I made our Perfect Panini Pizzas :
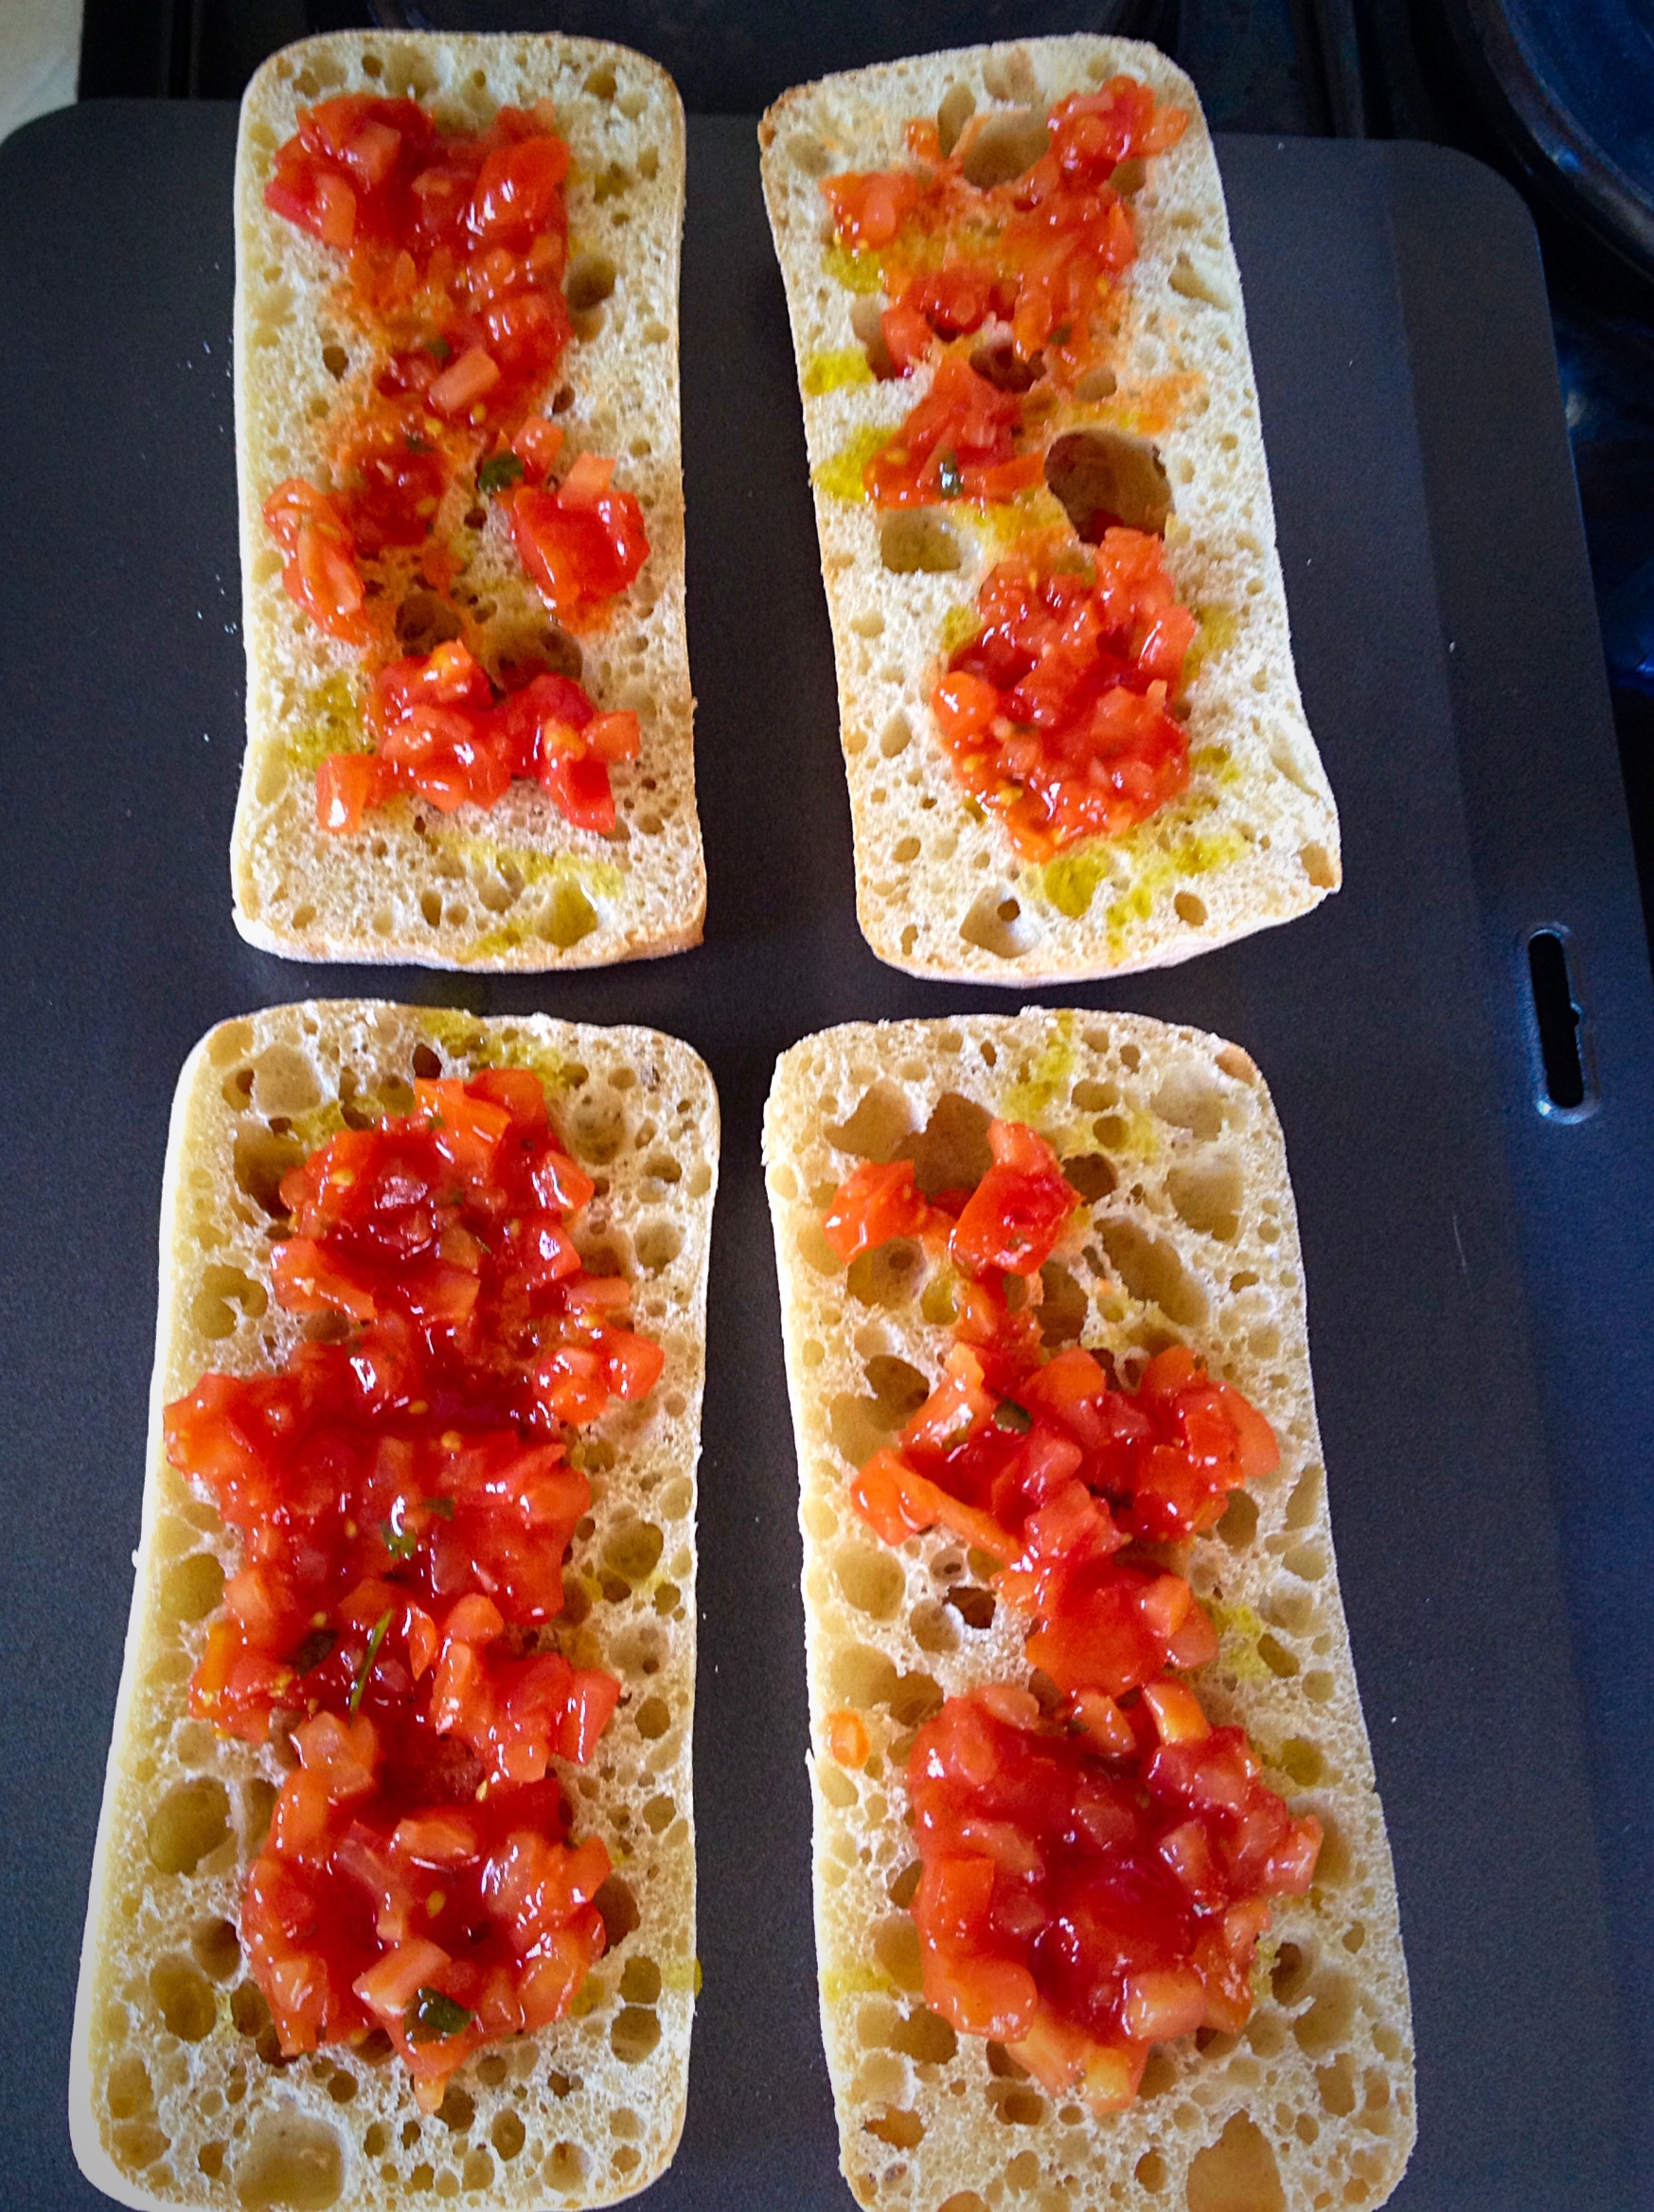
Take two panini rolls….Slice in half, place on a baking sheet and lightly drizzle with Olive oil.Spoon over some bought tomato salsa/pasta sauce, so it just covers the bread. Don’t overdo it or your pizza will be soggy.Lay slices of mozzarella over the top……Then top with slices of salami.
Bake in the oven for 20 mins until the base and edges are all crispy and the cheese is gooey and melting over the sides!
Remove the pizzas from the oven and get ready for the best lunch ever!!!!
Star and I thoroughly enjoyed our Perfect Panini Pizzas and had fun deciding what other toppings we’d like to try. The perfect break from studying. Rested and refuelled.
I’m sending lots of love to all students and school children ( it’s SATS week ) who are studying and taking exams at the moment.
Hello there people! The sun is shining and that makes me smile. It’s amazing how a little sunshine can improve our mood, as can the right food! Ooh that rhymed!! I have another fabulously easy side dish recipe for you today Baked Garlic Herb Potato Wedges.
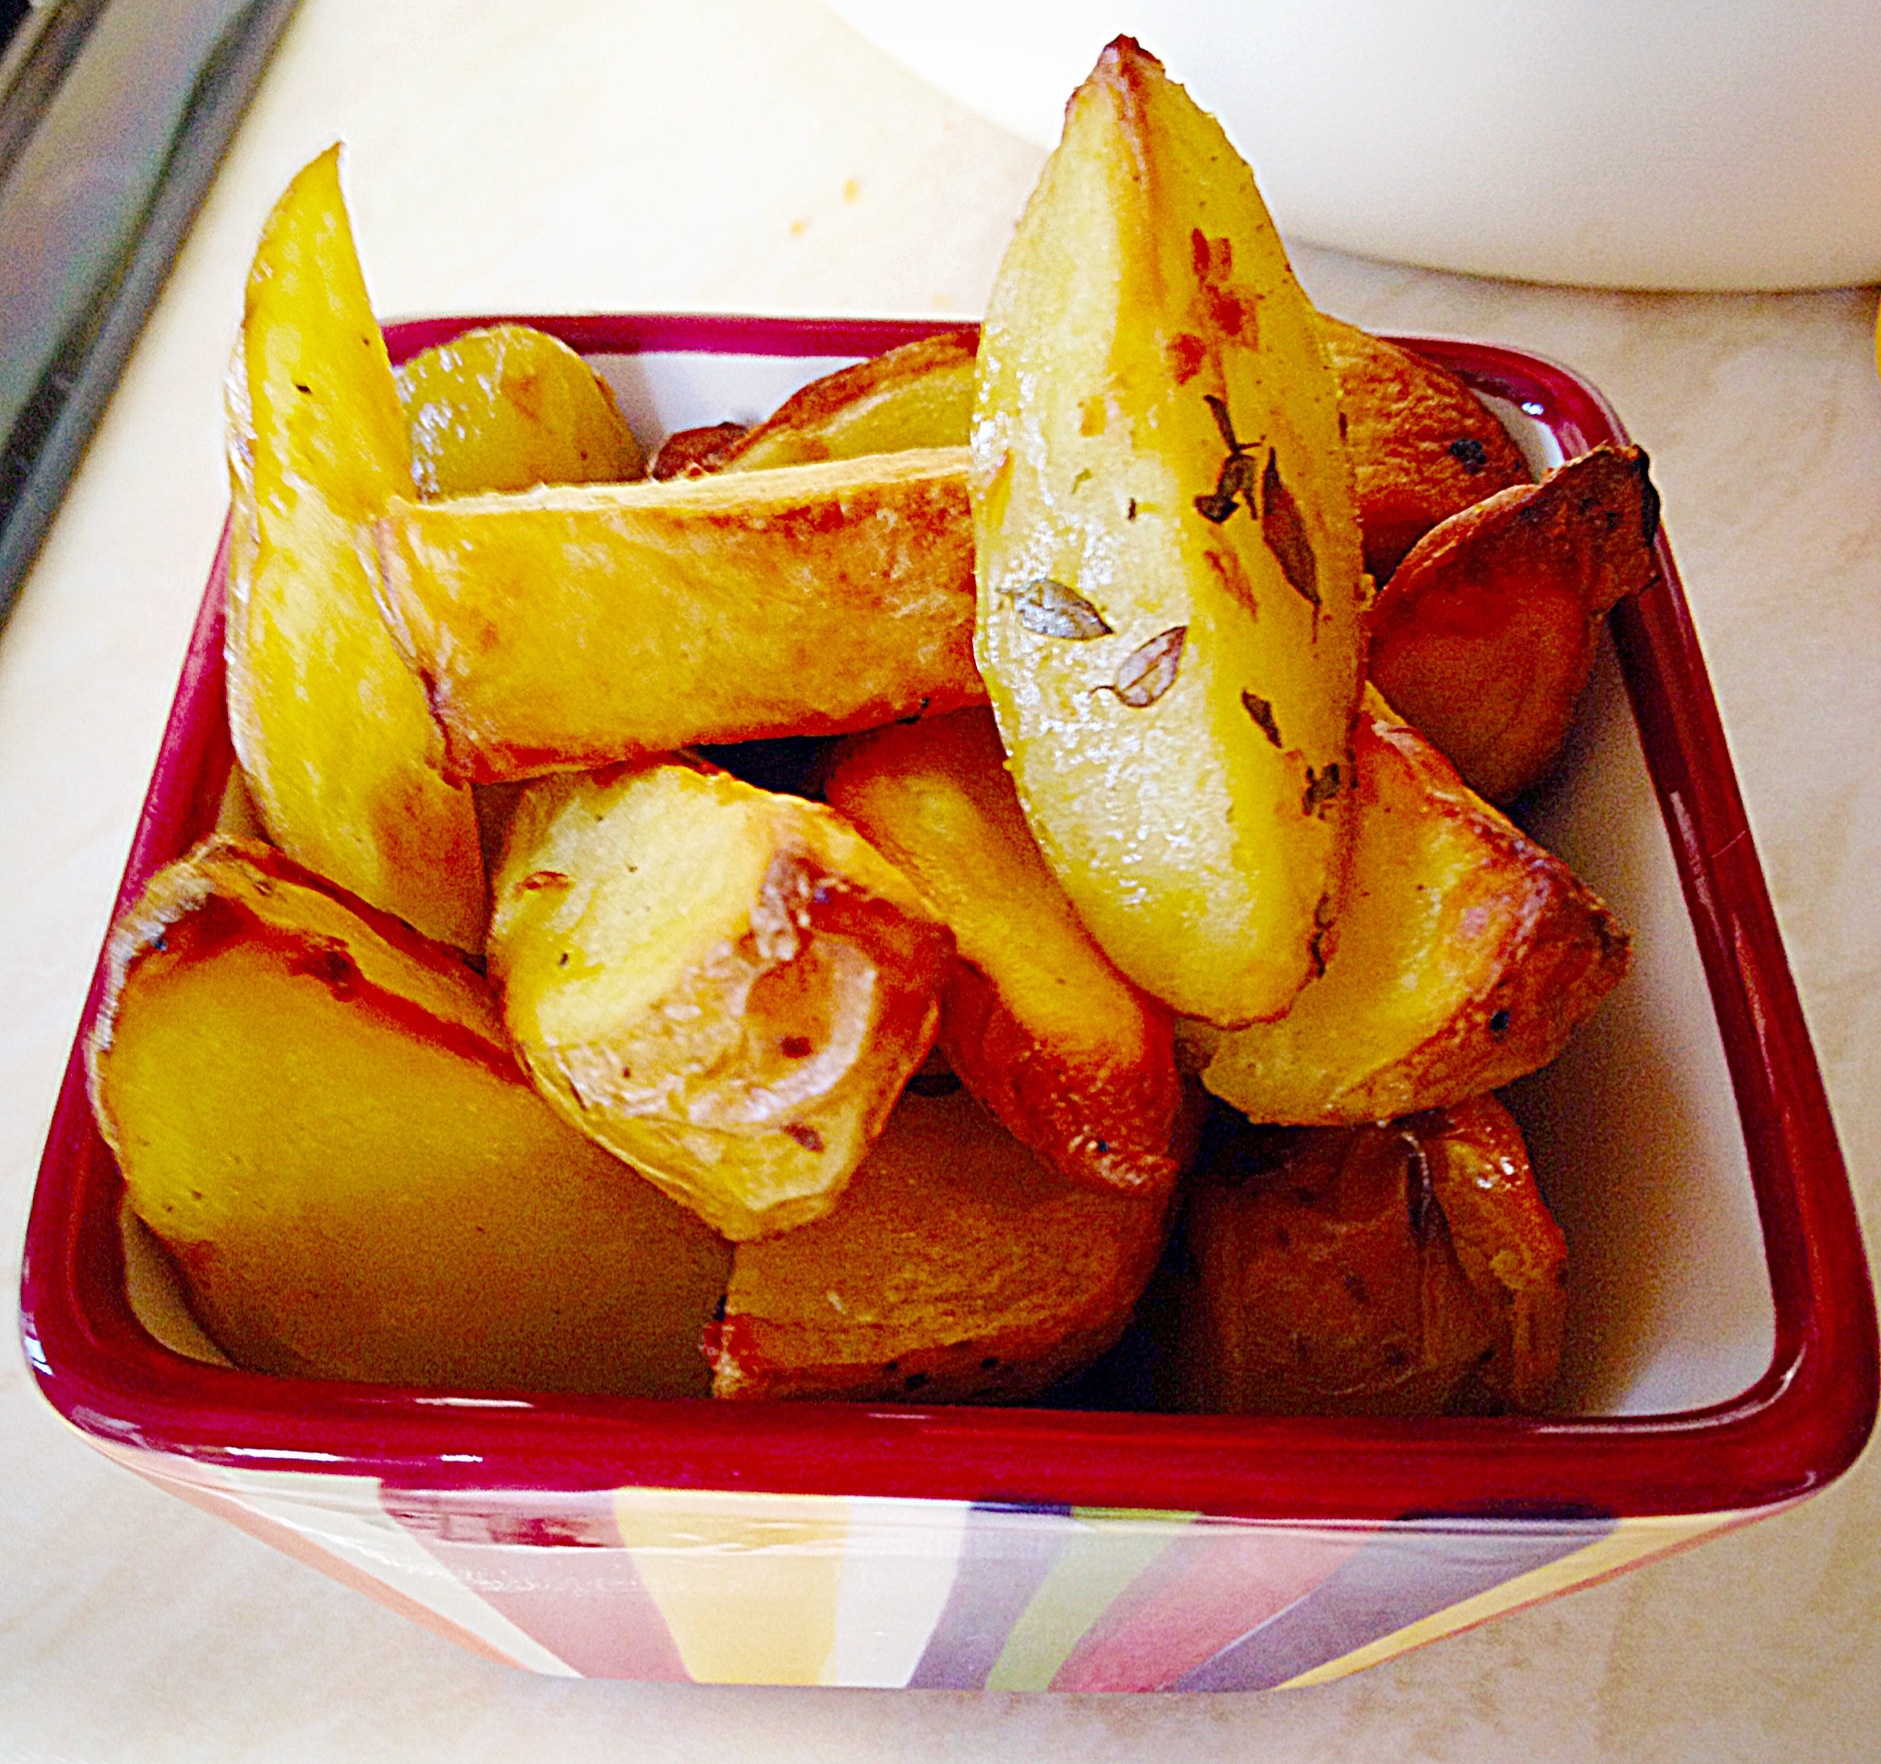
Yummy Baked Garlic Herb Potato Wedges.
Perfect on their own or as a side dish these Baked Garlic Herb Potato Wedges are a tasty alternative to oven chips. They are quick to prepare, need no attention whilst they bake in the oven and have a finger licking garlicky flavour.
Also, why is it food tastes better when eaten with our hands???
Sorry I’ll get back to the point – which is – these baked beauties go with just about anything: Roast Chicken, Fish, Quiche, Steak, Sausages…. The list is endless. Try them and let me know what you had them with?
Delicious just on their own, or dunked in a dip of your choice!
Recipe : Baked Garlic Herb Potato Wedges Serves 4-6 as a side.
1.5kg/3lb Baking Potatoes – scrubbed and dried
2-3 tbsp Olive Oil or Rapeseed Oil – I use Kentish Oils
4 Garlic Bulbs – crushed/finely minced
1 tbsp Fresh Thyme
Salt and Pepper to taste
Method :
Preheat oven to 200C/185C fan.
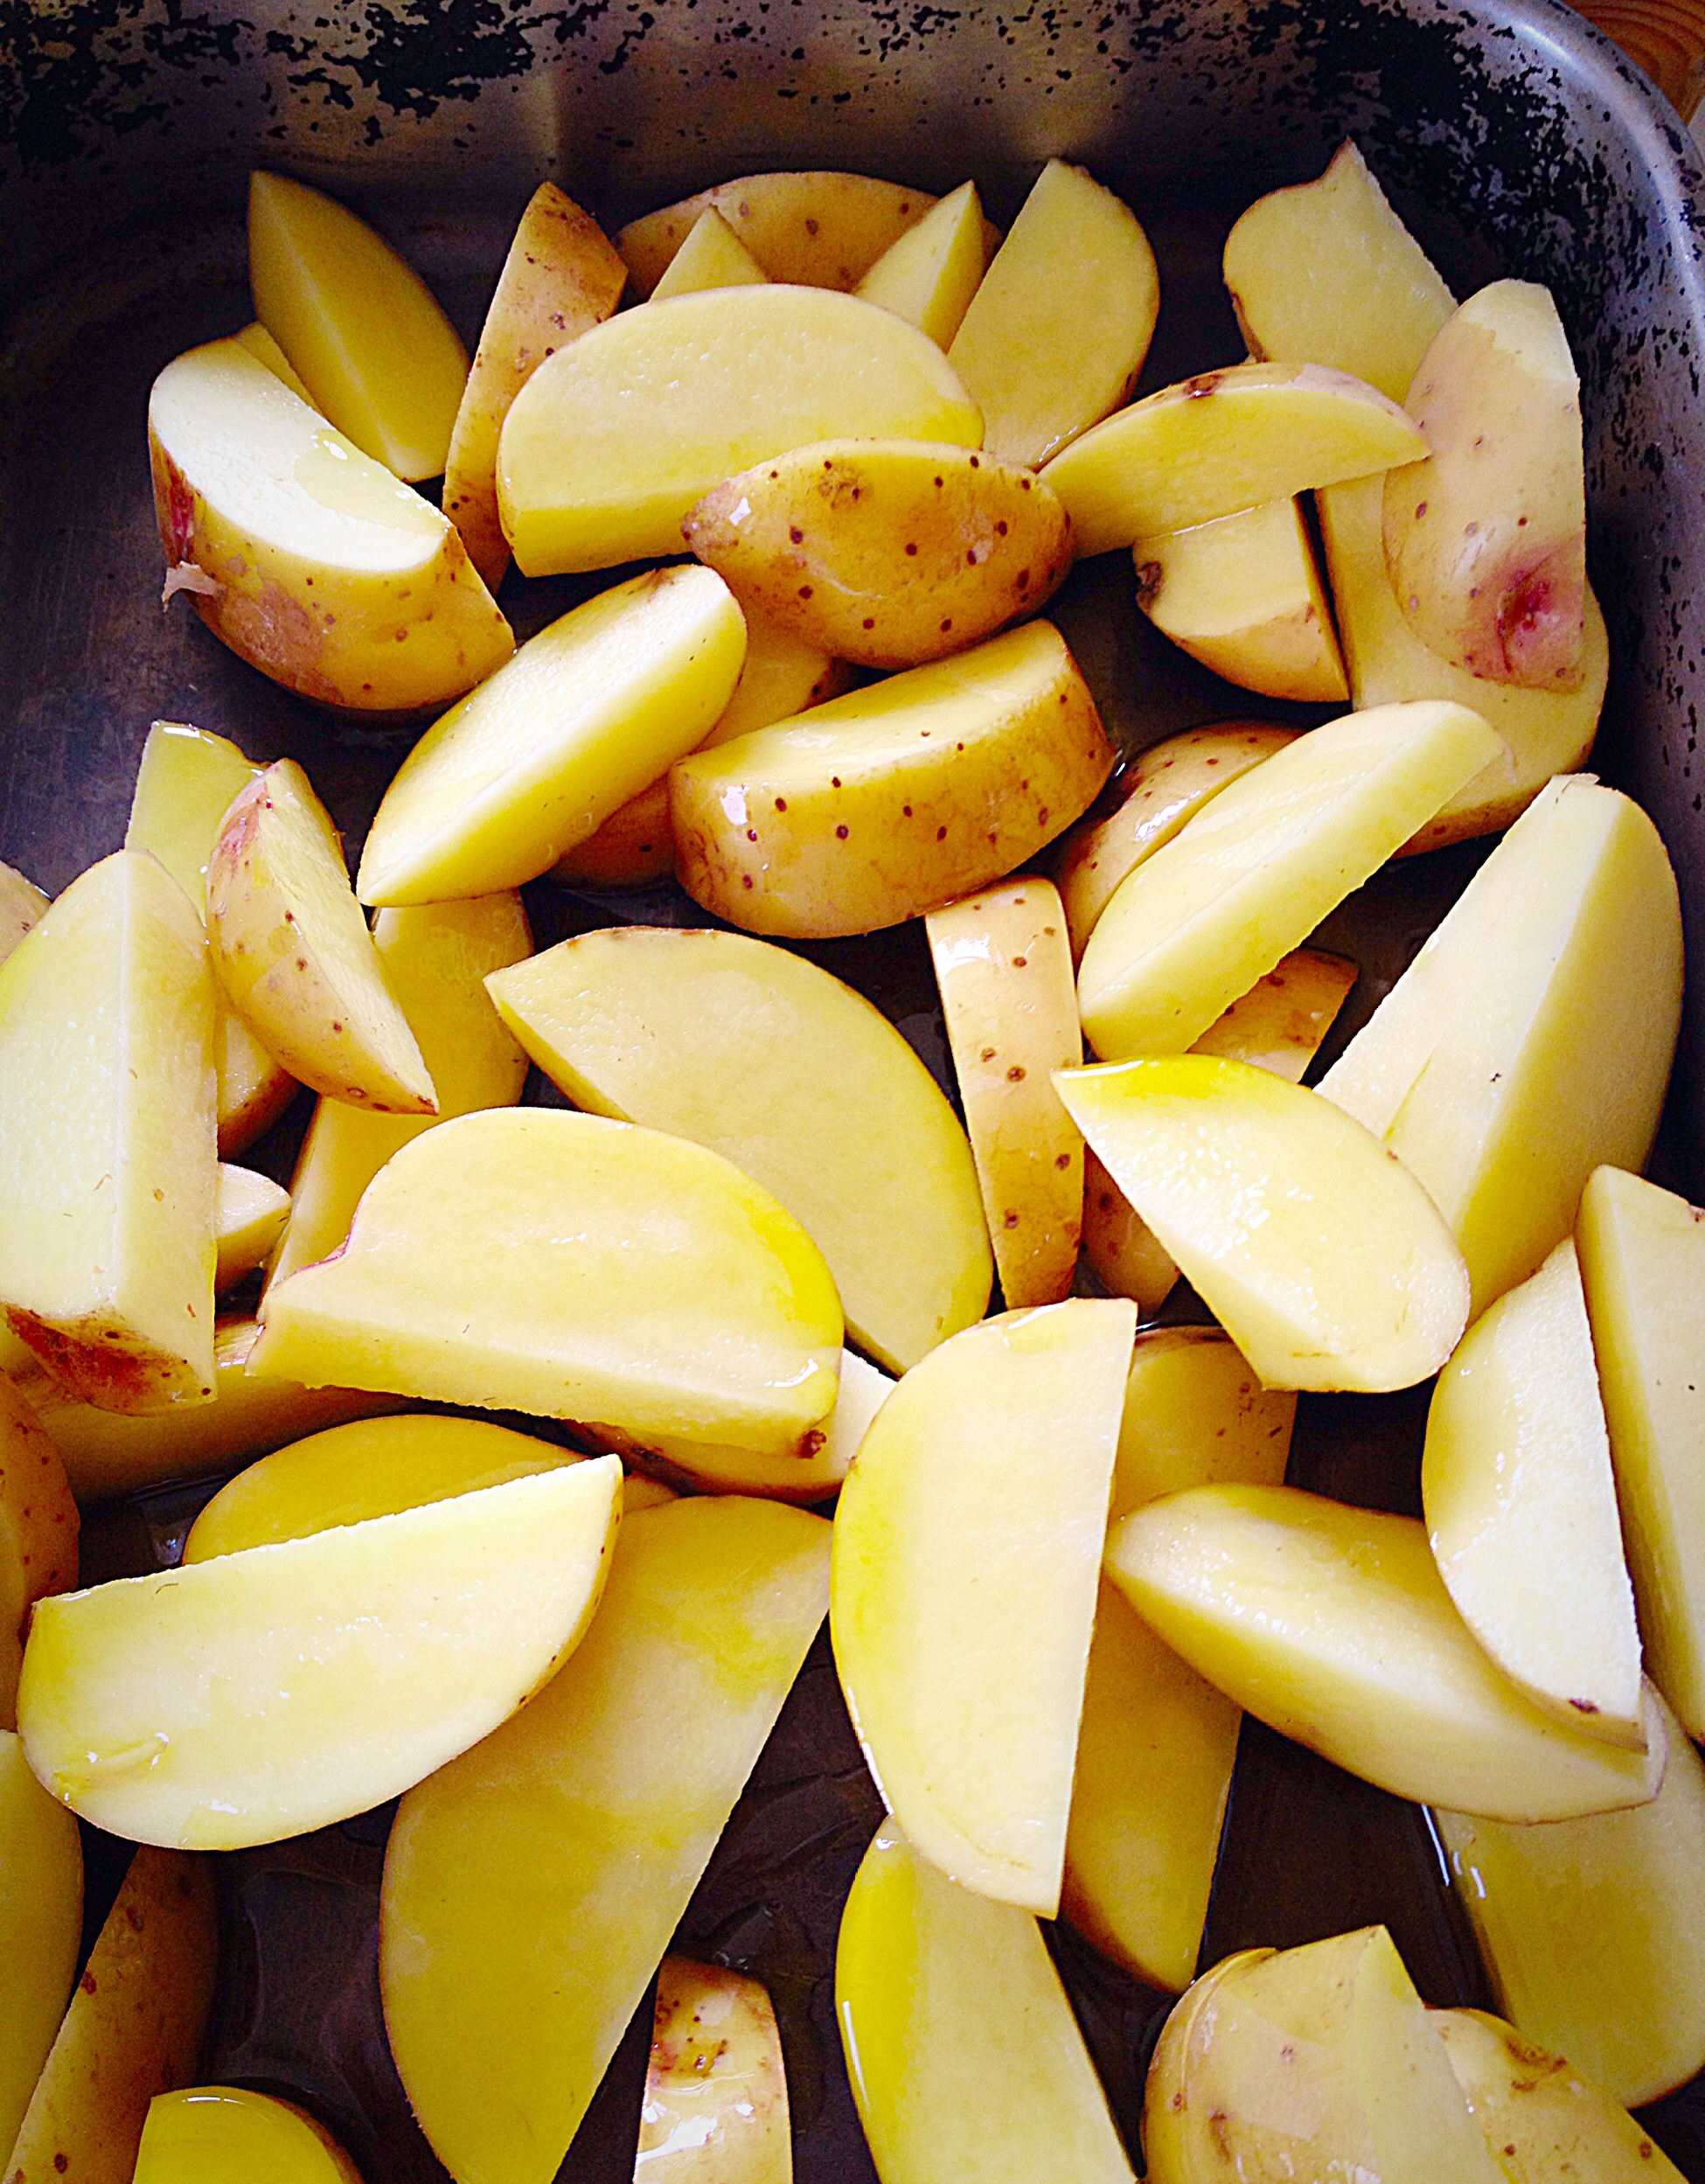
Cut each baking potato in half lengthways. Cut each half into wedges, approx 1/2 inch wide – try to keep all the potato wedges a similar size, this will ensure even cooking. Place all the potato wedges onto a large baking sheet/roasting pan.
Drizzle over the Olive Oil.I bought this pot of fresh Thyme from the supermarket and keep it on the kitchen window!Sprinkle over the Thyme and minced Garlic and then mix thoroughly so that each wedge is coated in oil, garlic and thyme.
Ensure the wedges are spread out evenly and then place in the oven.
Bake for 40 – 50 minutes until golden and cooked through (I usually test larger wedges with a knife).
Note : I give the tin a good shake halfway through cooking, to ensure they don’t stick. Also, if they do start to stick, use a fish slice to separate them and flip them over.
Hot Baked Garlic Herb Potato Wedges – straight from the oven.
Serve immediately with a sprinkle of crunchy sea salt and freshly ground black pepper.
Baked Garlic Herb Potato Wedges – delish!
Also I make these using fresh, minced Rosemary in place of the Thyme. I honestly couldn’t pick a favourite – both versions are equally delicious!
I hope you enjoy trying and feasting on this dish.
Hi, thank you for stopping by to look at this scrumptious Strawberries And Cream Cake! I hope the sight of it puts a smile on your face. Strawberries in Spring remind me of the promise of sunshine, picnics in the park and days at the beach. Ultimately I think that strawberries are a celebration of warm, sun drenched days, to be shared with friends and family.
Because this cake is so easy to make and looks so beautiful, it easily turns any occasion into a Feast! Since I found strawberries on special offer I baked this cake. Because, they were so sumptuous they deserved celebrating!
Strawberries And Cream Cake
Sometimes during Summer when it is hot, too hot for cake (yes there is such a thing in my world), we eat strawberries as they are, warm from the sun, or refreshingly churned into the most delicious ice cream, see my Strawberry Ripple Ice Cream. While cooler days allow for the indulgence of cake, with vanilla whipped cream and ruby red strawberries.
Recipe : Strawberries And Cream Cake serves 8
For the cake:
225g/8oz Caster Sugar
225g/8oz Unsalted Butter – room temperature (plus a little extra for greasing the tins)
450g/1lb Strawberries – hulled and sliced, save 1 pretty strawberry for the top
400ml/3/4 pint Double Cream
1 tsp Vanilla Bean Paste – alternatively use vanilla extract
1 tbsp Sugar – optional
Method : Preheat the oven to 180C/160C fan, 350F, gas mark 4
While using the ‘All in one’ technique for this cake, which usually involves placing all of the ingredients into a bowl and whisking, I have added an extra step.
Making and baking the sponge cakes
First of all grease 2 x 7in (17.5cm) sandwich tins and line the base of each with baking parchment.
Next add the butter, sugar and salt into a large mixing bowl. Whisk the ingredients together until pale and creamy.
Add the vanilla extract and eggs; Note – I always crack eggs into a separate bowl first, any shell is easily removed and one bad egg cannot spoil the cake batter. Also sift the self raising flour (or plain flour and baking powder) into the same bowl.
Whisk all of the ingredients together until just combined and smooth. Take care not to overmix the cake batter, as this can result in a heavy sponge.
The All-In-One-Method is a whizz.
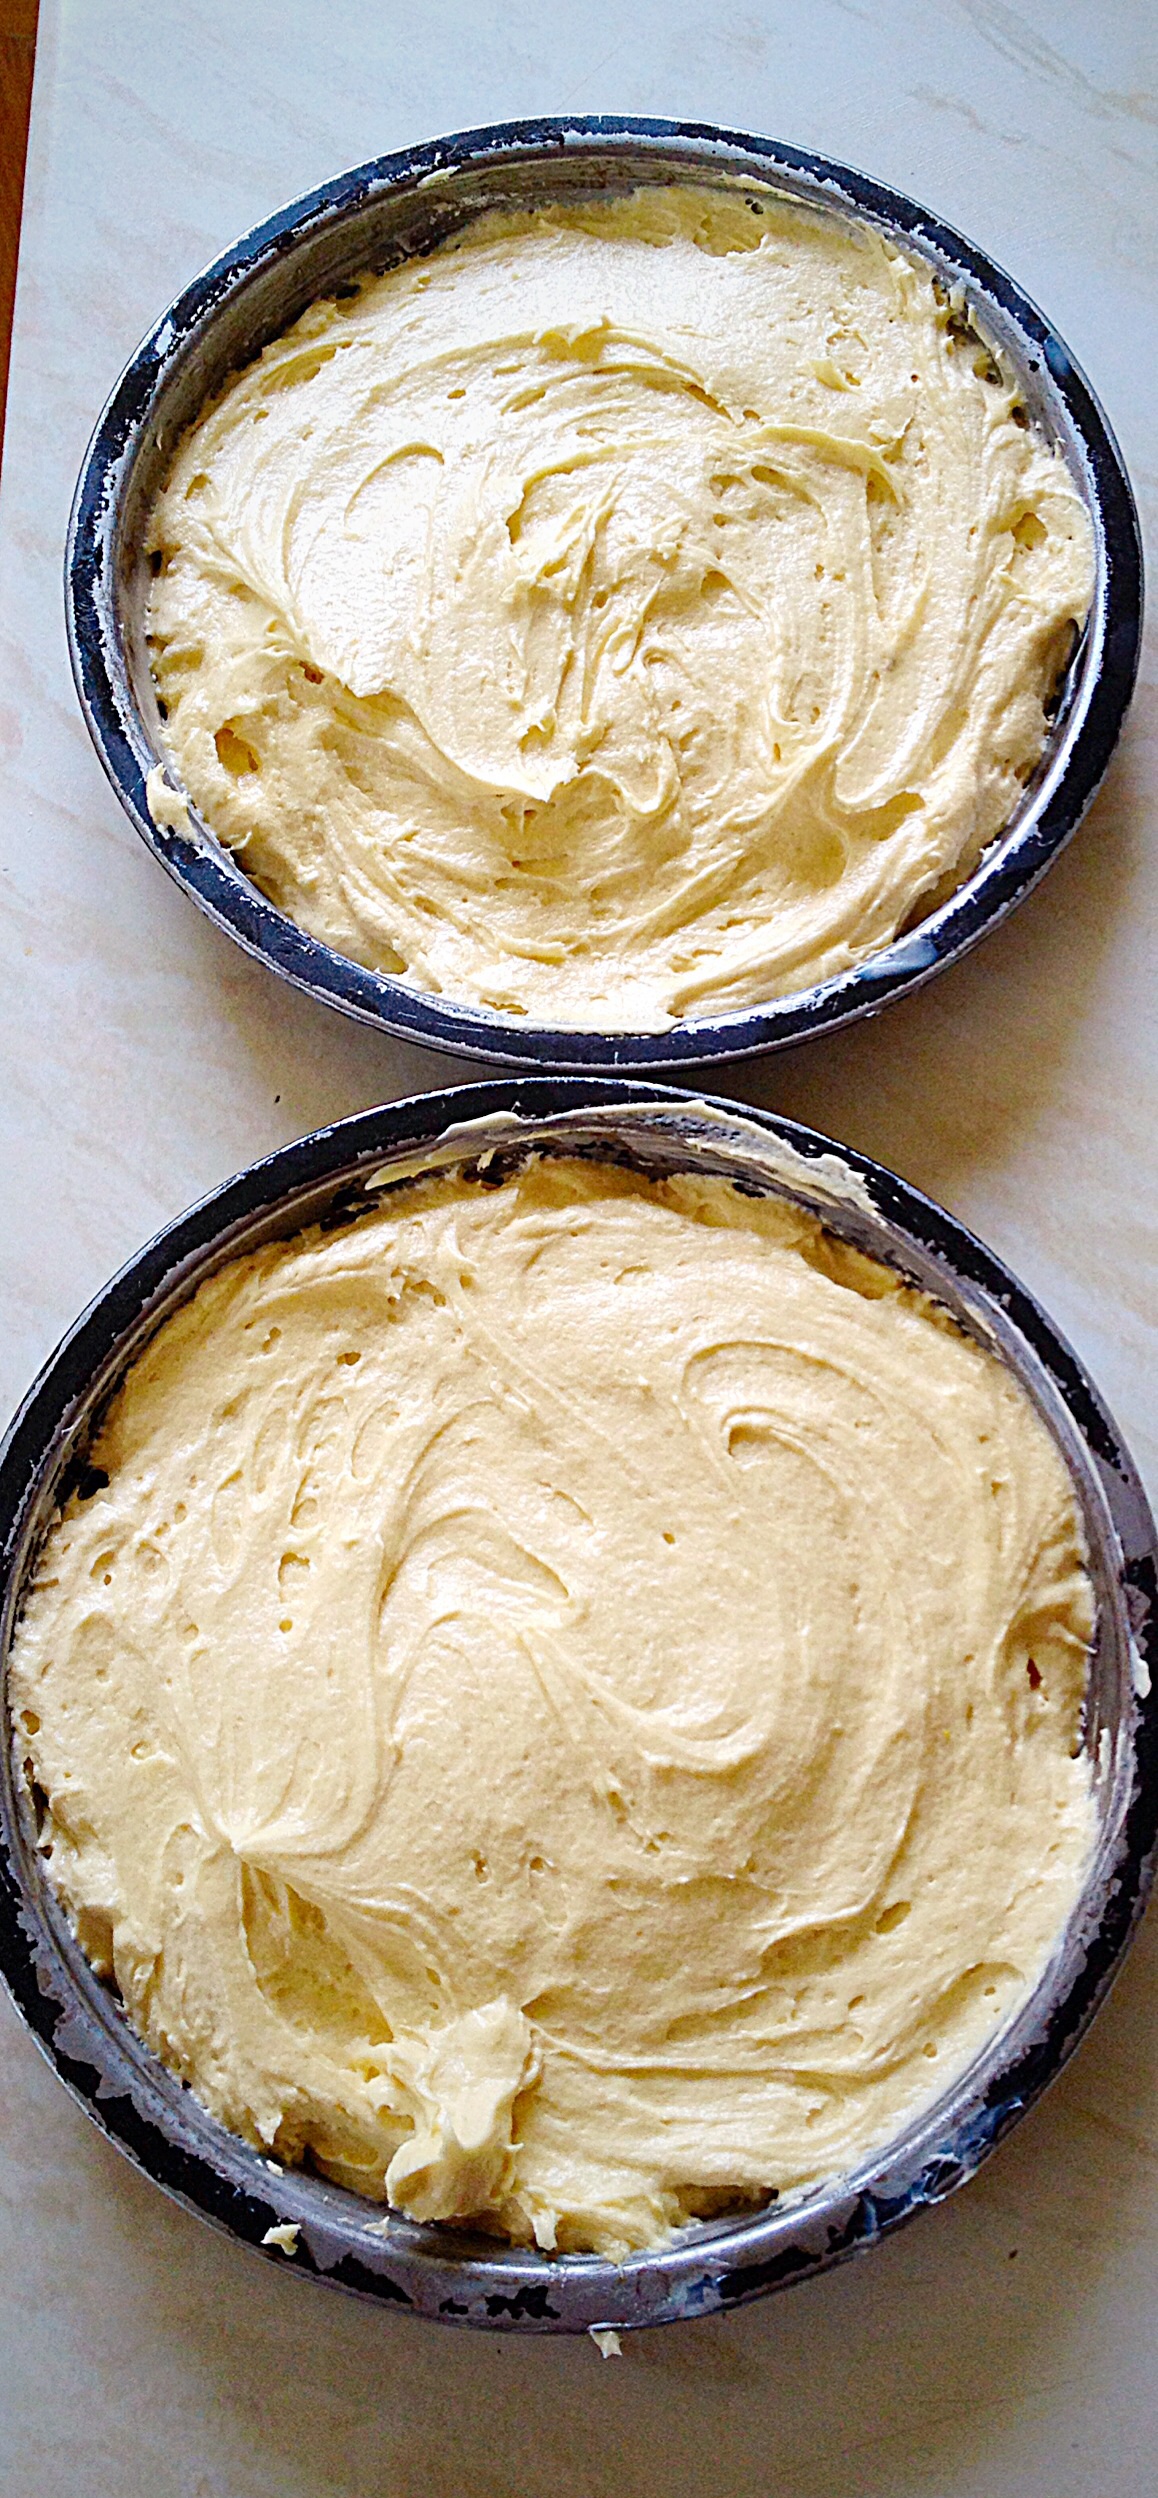
Divide the mixture evenly between the 2 prepared sandwich tins. Smooth the top of the cake batter using the back of a spoon.
Ready for the oven
Place the tins into the centre and lower parts of the oven and bake for 20-25 minutes.
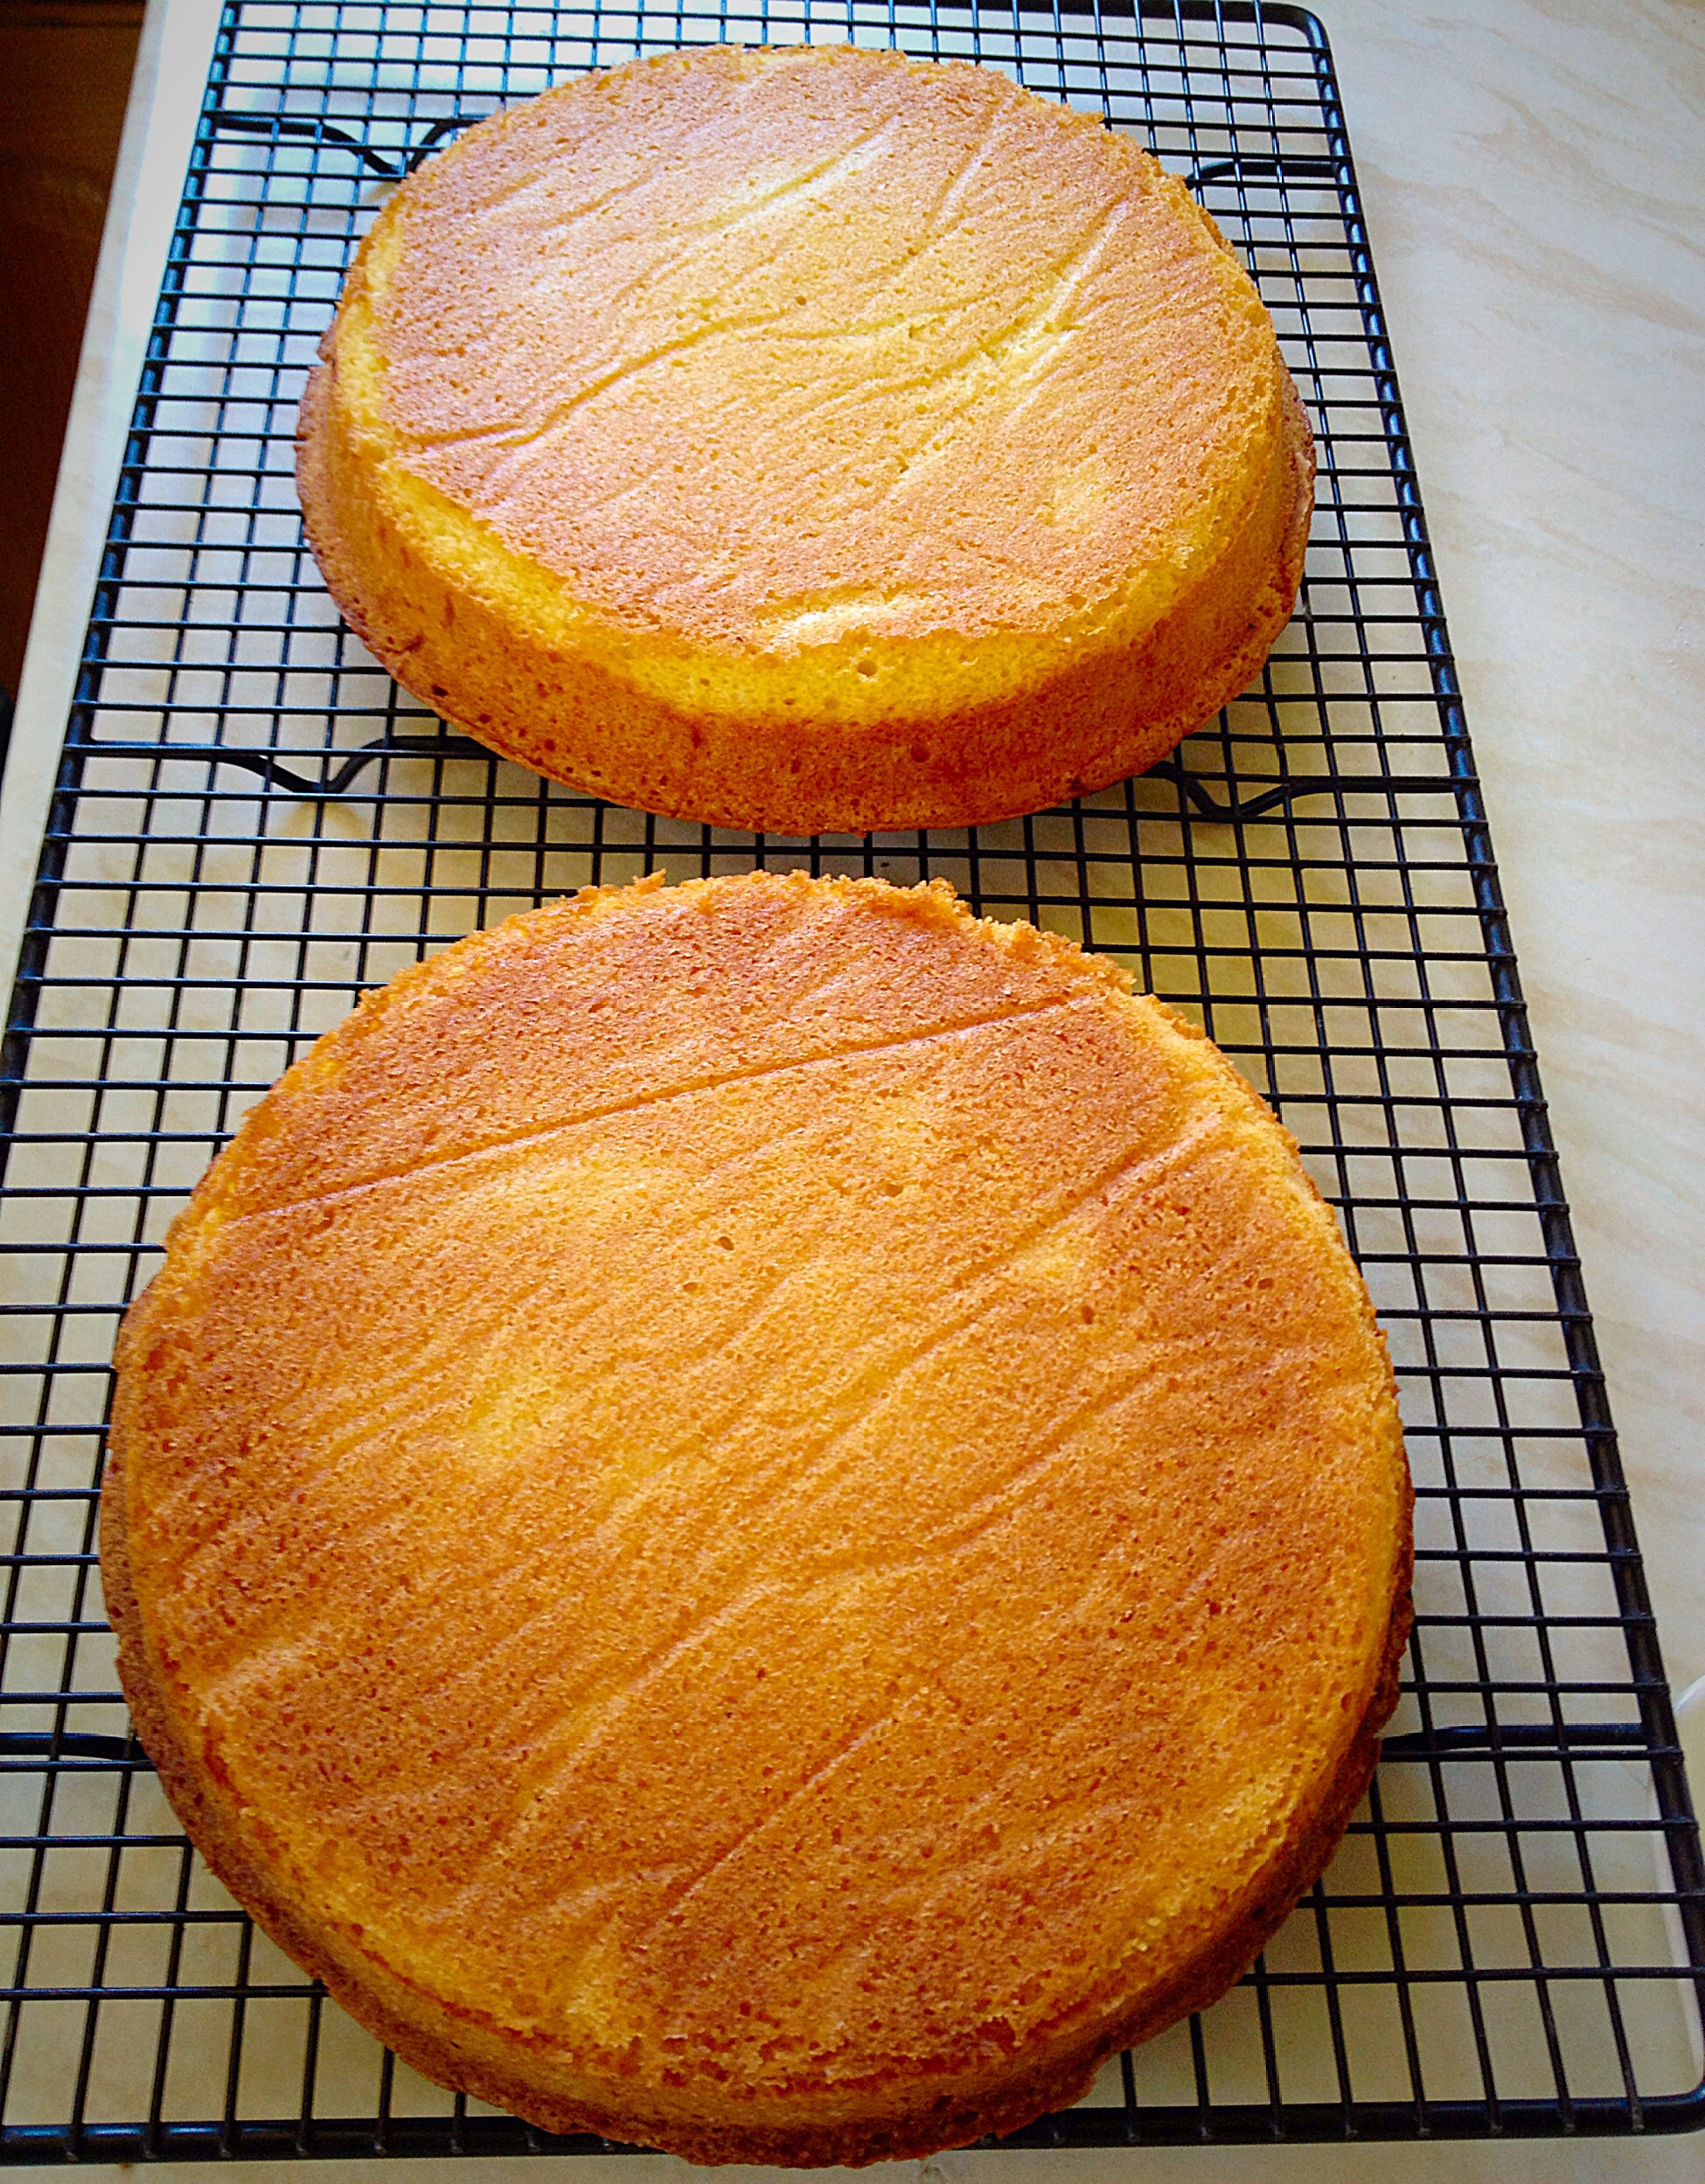
The sponges are baked when they are golden and spring back when lightly pressed in the centre. Also an inserted skewer will come out clean.
As soon as the cakes are baked remove from oven and allow to cool for 10 minutes in their tins.
Turn the cakes out on to a cooling rack and leave to cool completely before filling and decorating. Carefully remove the baking parchment.
Cooling cakes, waiting to be transformed….
Filling and decorating the cake
As soon as the cakes have cooled they can be filled and decorated.
In a large bowl whisk together the cream, sugar and vanilla bean paste until the cream holds it’s shape. Also, take care not to overmix as this can cause the cream to split, creating butter!
Bottom half of the cake
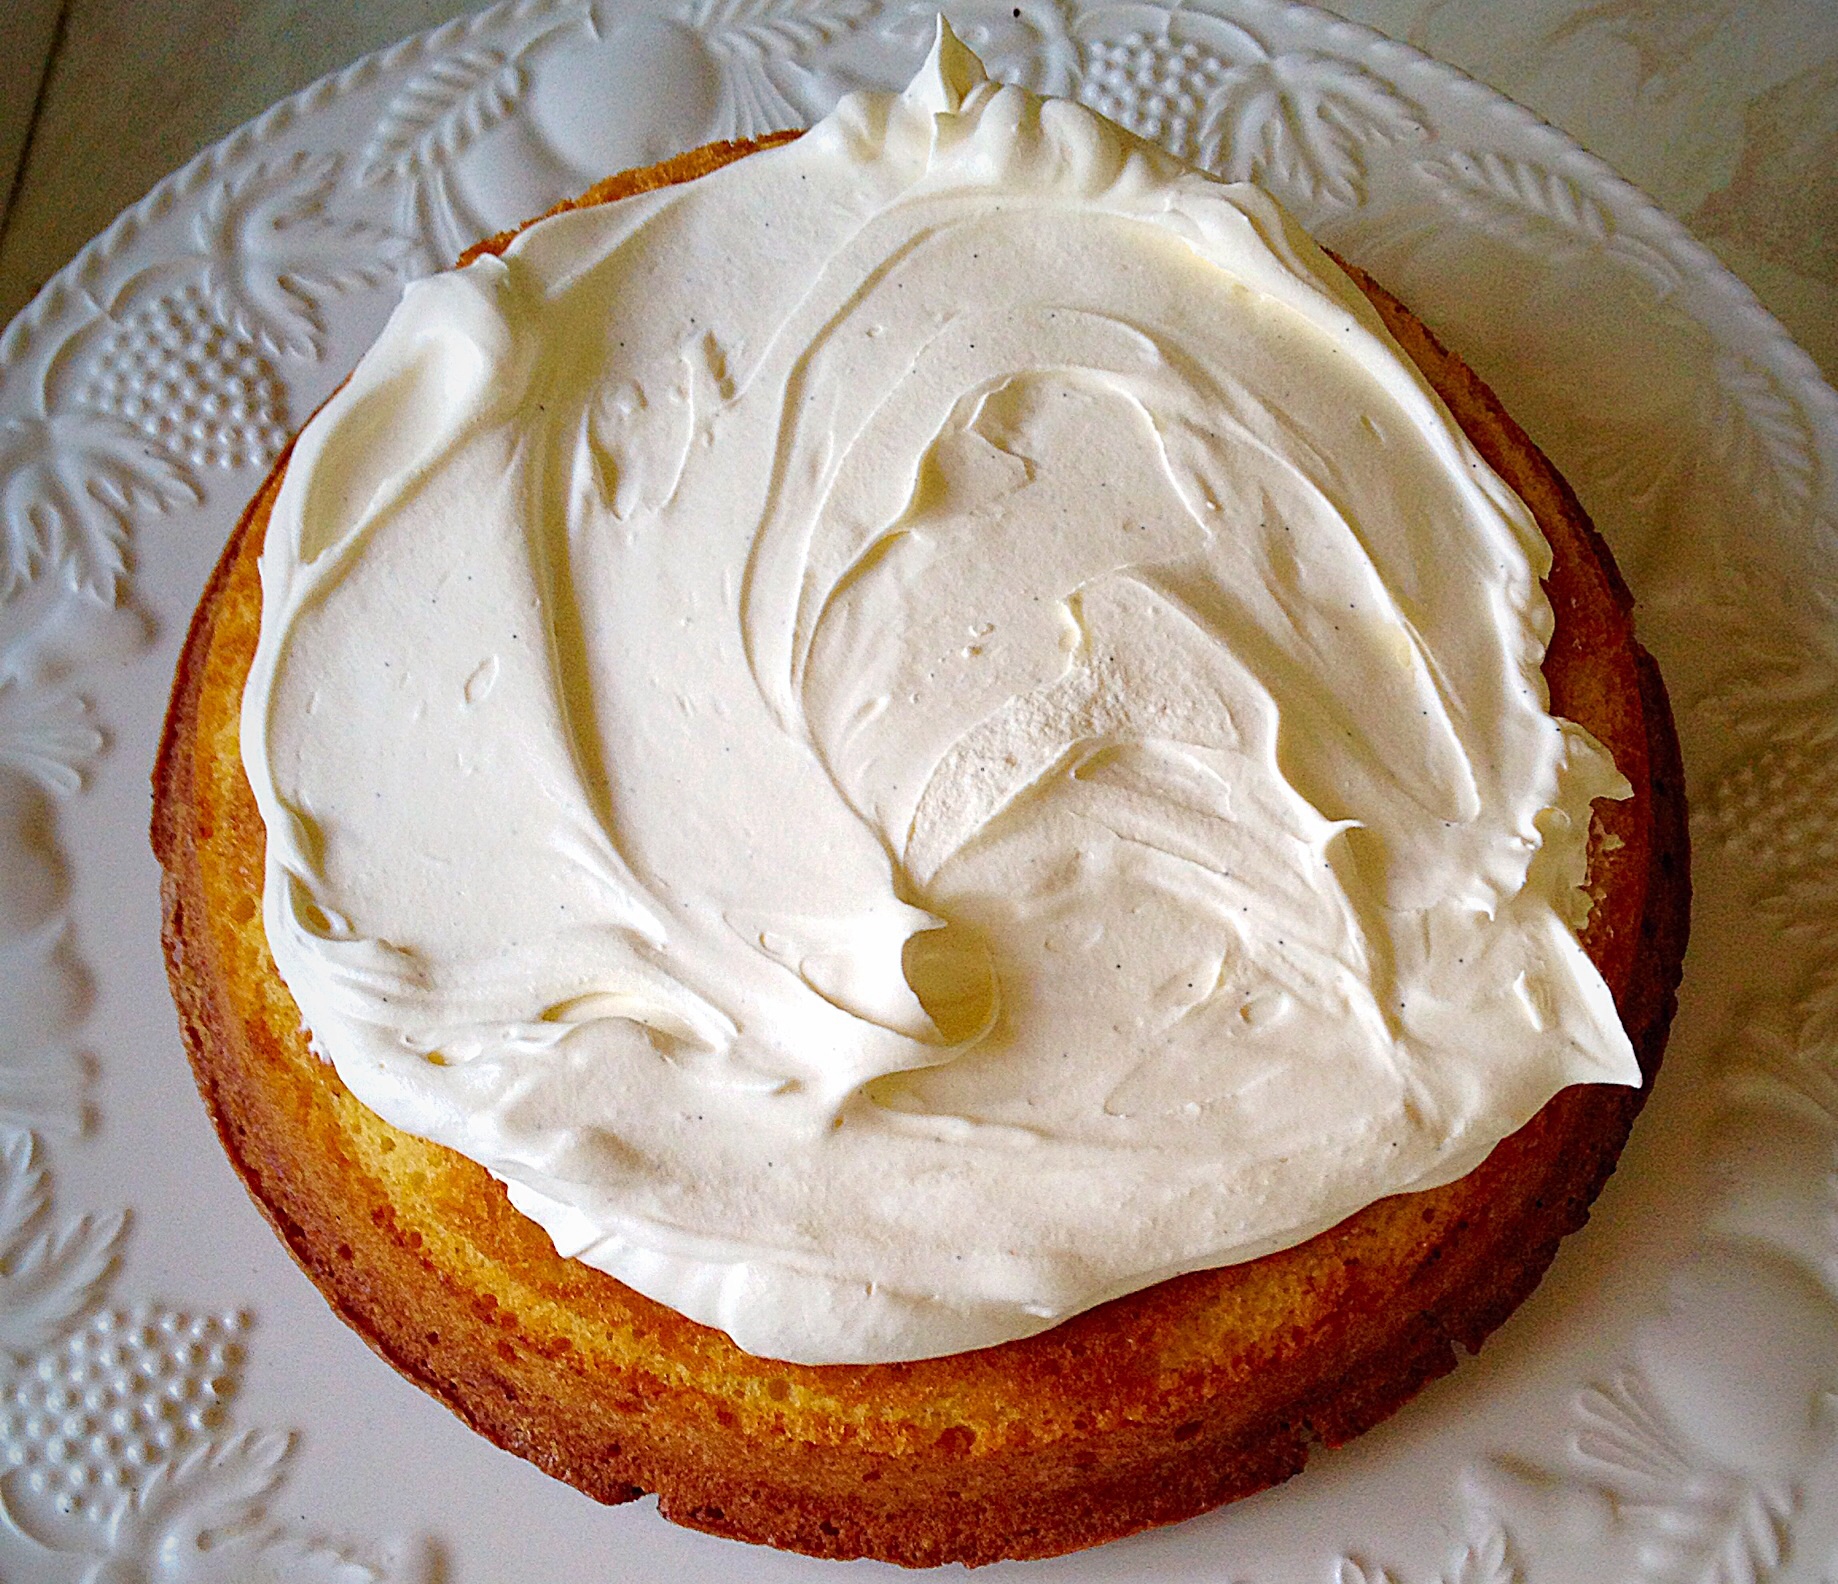
Place one cake sponge on to a plate or board, flat side up.
Spoon half of the whipped cream on to the cake and spread so that it almost comes to the edge.
Add a layer of sliced strawberries on to the cream.
Strawberries and cream
Now place the other cake on top, flat side facing down.
Cover the top with the rest of the cream and decorate with sliced strawberries, placing a whole strawberry in the middle.
Strawberries And Cream Cake
Place the finished cake into the fridge for 1 hour, as this allows the cream to firm up and makes slicing easier.
I serve this cake sliced and placed on my best china, with a cup of tea served in a cup and saucer. You may slice and serve this cake however you wish.
Both cake sponges can be made a day ahead, cool and store in an airtight container, using baking parchment to separate them. Yet the cake is best assembled on the day of eating.
As with all cream cakes they are at their best on the day they are made. Wrap any leftover cake in cling film, alternatively place in an airtight container and store in the fridge. Eat within 2 days of assembling.
If you have enjoyed this recipe for Strawberries And Cream Cake you may also like these:
While I love baking, sharing my finished bakes gives me the most pleasure. Since, I delight in seeing the anticipation and a happy face as someone enjoys something I’ve made. Finally, remember, before slicing into this cake I urge you to take a photo! Because, when you look at this cake in the deepest, darkest, depths of an icy winter, it will remind you that sunny days are ahead. Hope is powerful, even when it is in the form of cake!
So, whatever you are making, baking and creating in your kitchens, have fun preparing and sharing your feast.
Sammie x
No part of this post may be reproduced or duplicated without the written permission of the owner. Please see my Disclosure Policy.
So today I have another super easy, recipe for you, my Sausage Plait With A Twist. What’s the twist? Sun-dried tomatoes and fresh thyme that lift the flavours of this savoury pastry to the next level.
The addition of sundried tomatoes and thyme to pork sausage meat gives this sausage plait a deep savoury flavour. Ideal for a mid week meal, perfect for a buffet and portable for picnics!!
Sausage Plait With A Twist
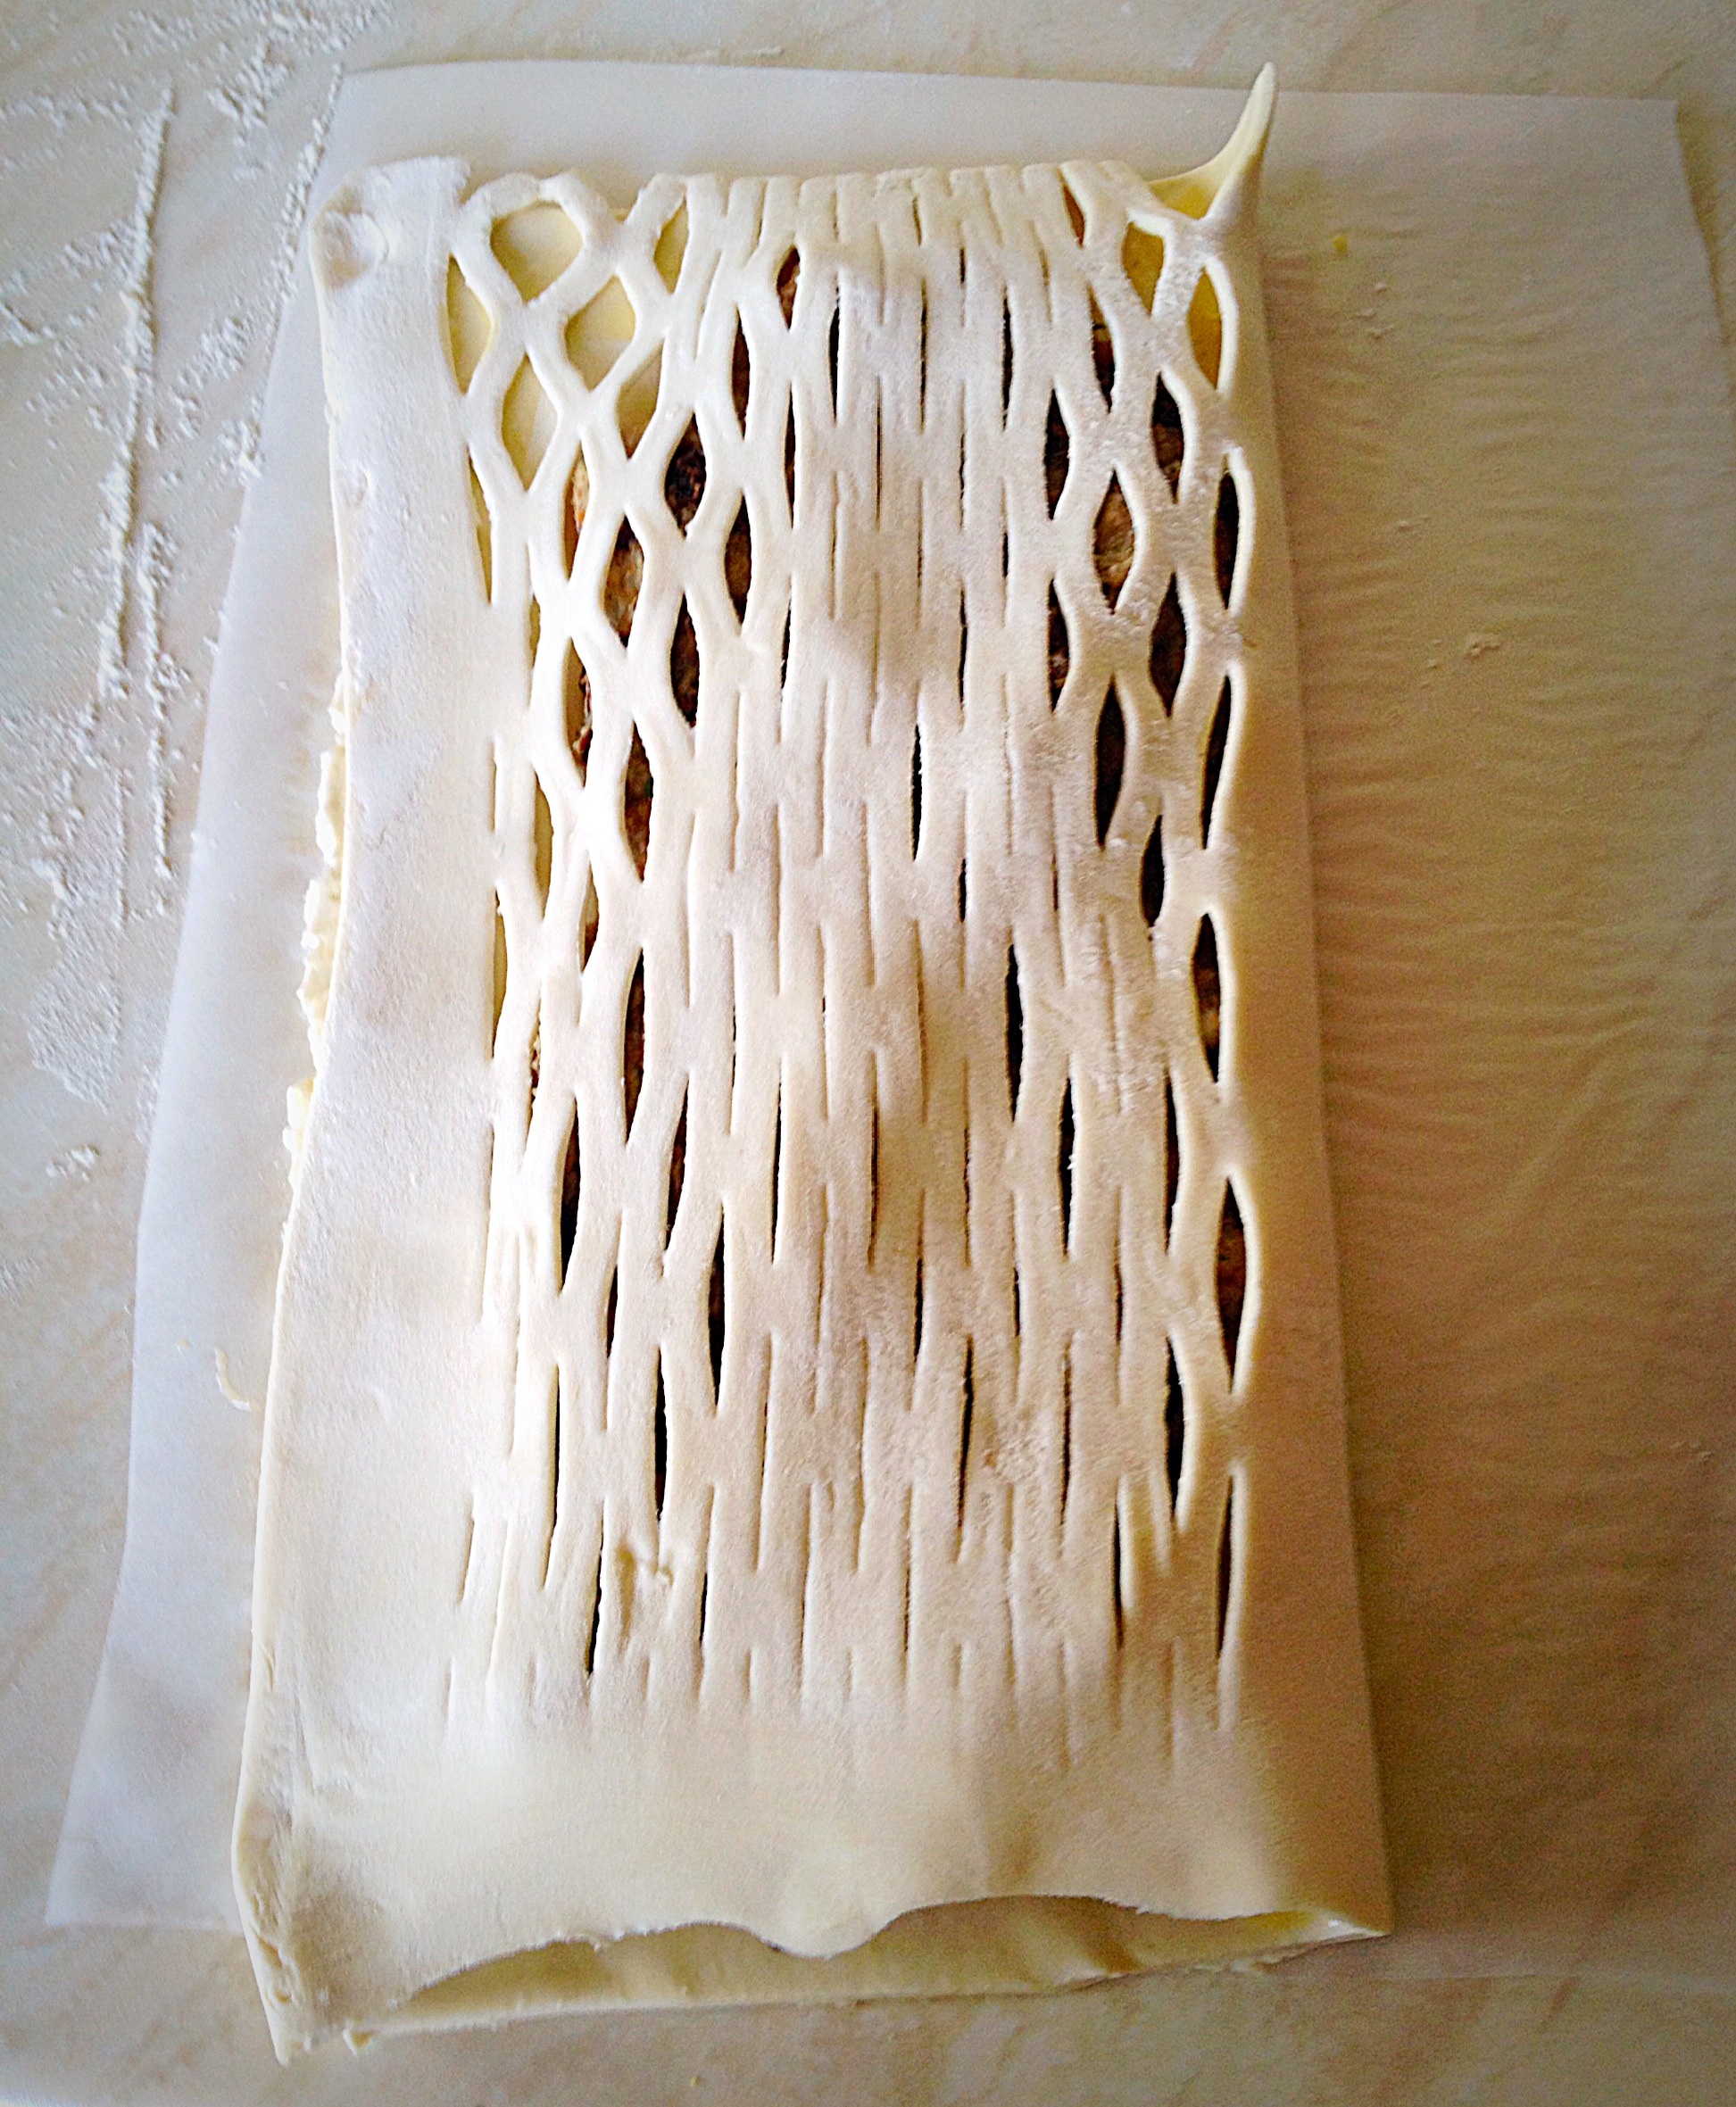
I have used a special roller to create the lattice pattern on the top of the Sausage Plait. I bought it 20+ years ago. I’ve just had a quick peek on Amazon and they sell them for about £5. Which is probably about what I paid all those years ago!
Pastry Lattice Cutter
So, if you bake a lot of pies and tarts then I would say this is a good buy. Likewise, the diamond effect on the pastry below was achieved by lightly scoring the uncooked pastry, on a slant, one way and then the other. When baked it produced a pretty, diamond effect pattern and I didn’t need a Lattice Roller. And this technique also works for any Sausage Plait.
Diamond effect on the puff pastry is very effective.
So, whichever method you use, your Sausage Plait With A Twist is sure to go down well with everyone who tries it. Served hot or cold, it is completely delicious. Why not bake my Tomato Thyme Garlic Focaccia Bread? It is the perfect, picnic accompaniment. As is my Tangy Lemon Potato Salad. While these Blueberry Lemon Shortbread Cake Barsare a delicious sweet treat that won’t attract every bug in a 10 mile radius.
Recipe: Sausage Plait With A Twist serves 6
500g/1lb Block Puff Pastry – defrosted if frozen – I use Just Rol not the all butter version.
500g/1lb Pork Sausage meat – use the best quality sausage meat
15 Sundried Tomatoes (drained if in oil)
1 tbsp Fresh Thyme Leaves – simply strip from the stems, or chop if very new green growth
1/2 tsp Black Pepper – freshly ground
1 Egg – for egg wash
Method : Preheat the oven to 190C/170C fan, gas mark 5, 375F
Making The Filling
First of all, chop the sun-dried tomatoes roughly, so there are no big pieces.
Place the chopped tomatoes into a bowl and add the thyme, sausage meat and black pepper.
Using your hand, squish (technical term) all the ingredients together until well combined.
Dark red pieces of sundried tomato and flecks of green thyme are spread throughout the sausage meat.
Assembling And Baking The Sausage Plait
On a floured worktop roll out the puff pastry so that it measures 30cm x 35cm (10″x12″). Trim to neaten the edges.
Now place the pastry onto a piece of parchment paper that is the same size as your baking sheet. Since this will make transferring the sausage plait MUCH easier. MUCH! I speak from experience!!
Place the sausage meat mixture evenly down one side of the pastry, leaving a 1 inch (2.5cm) border.
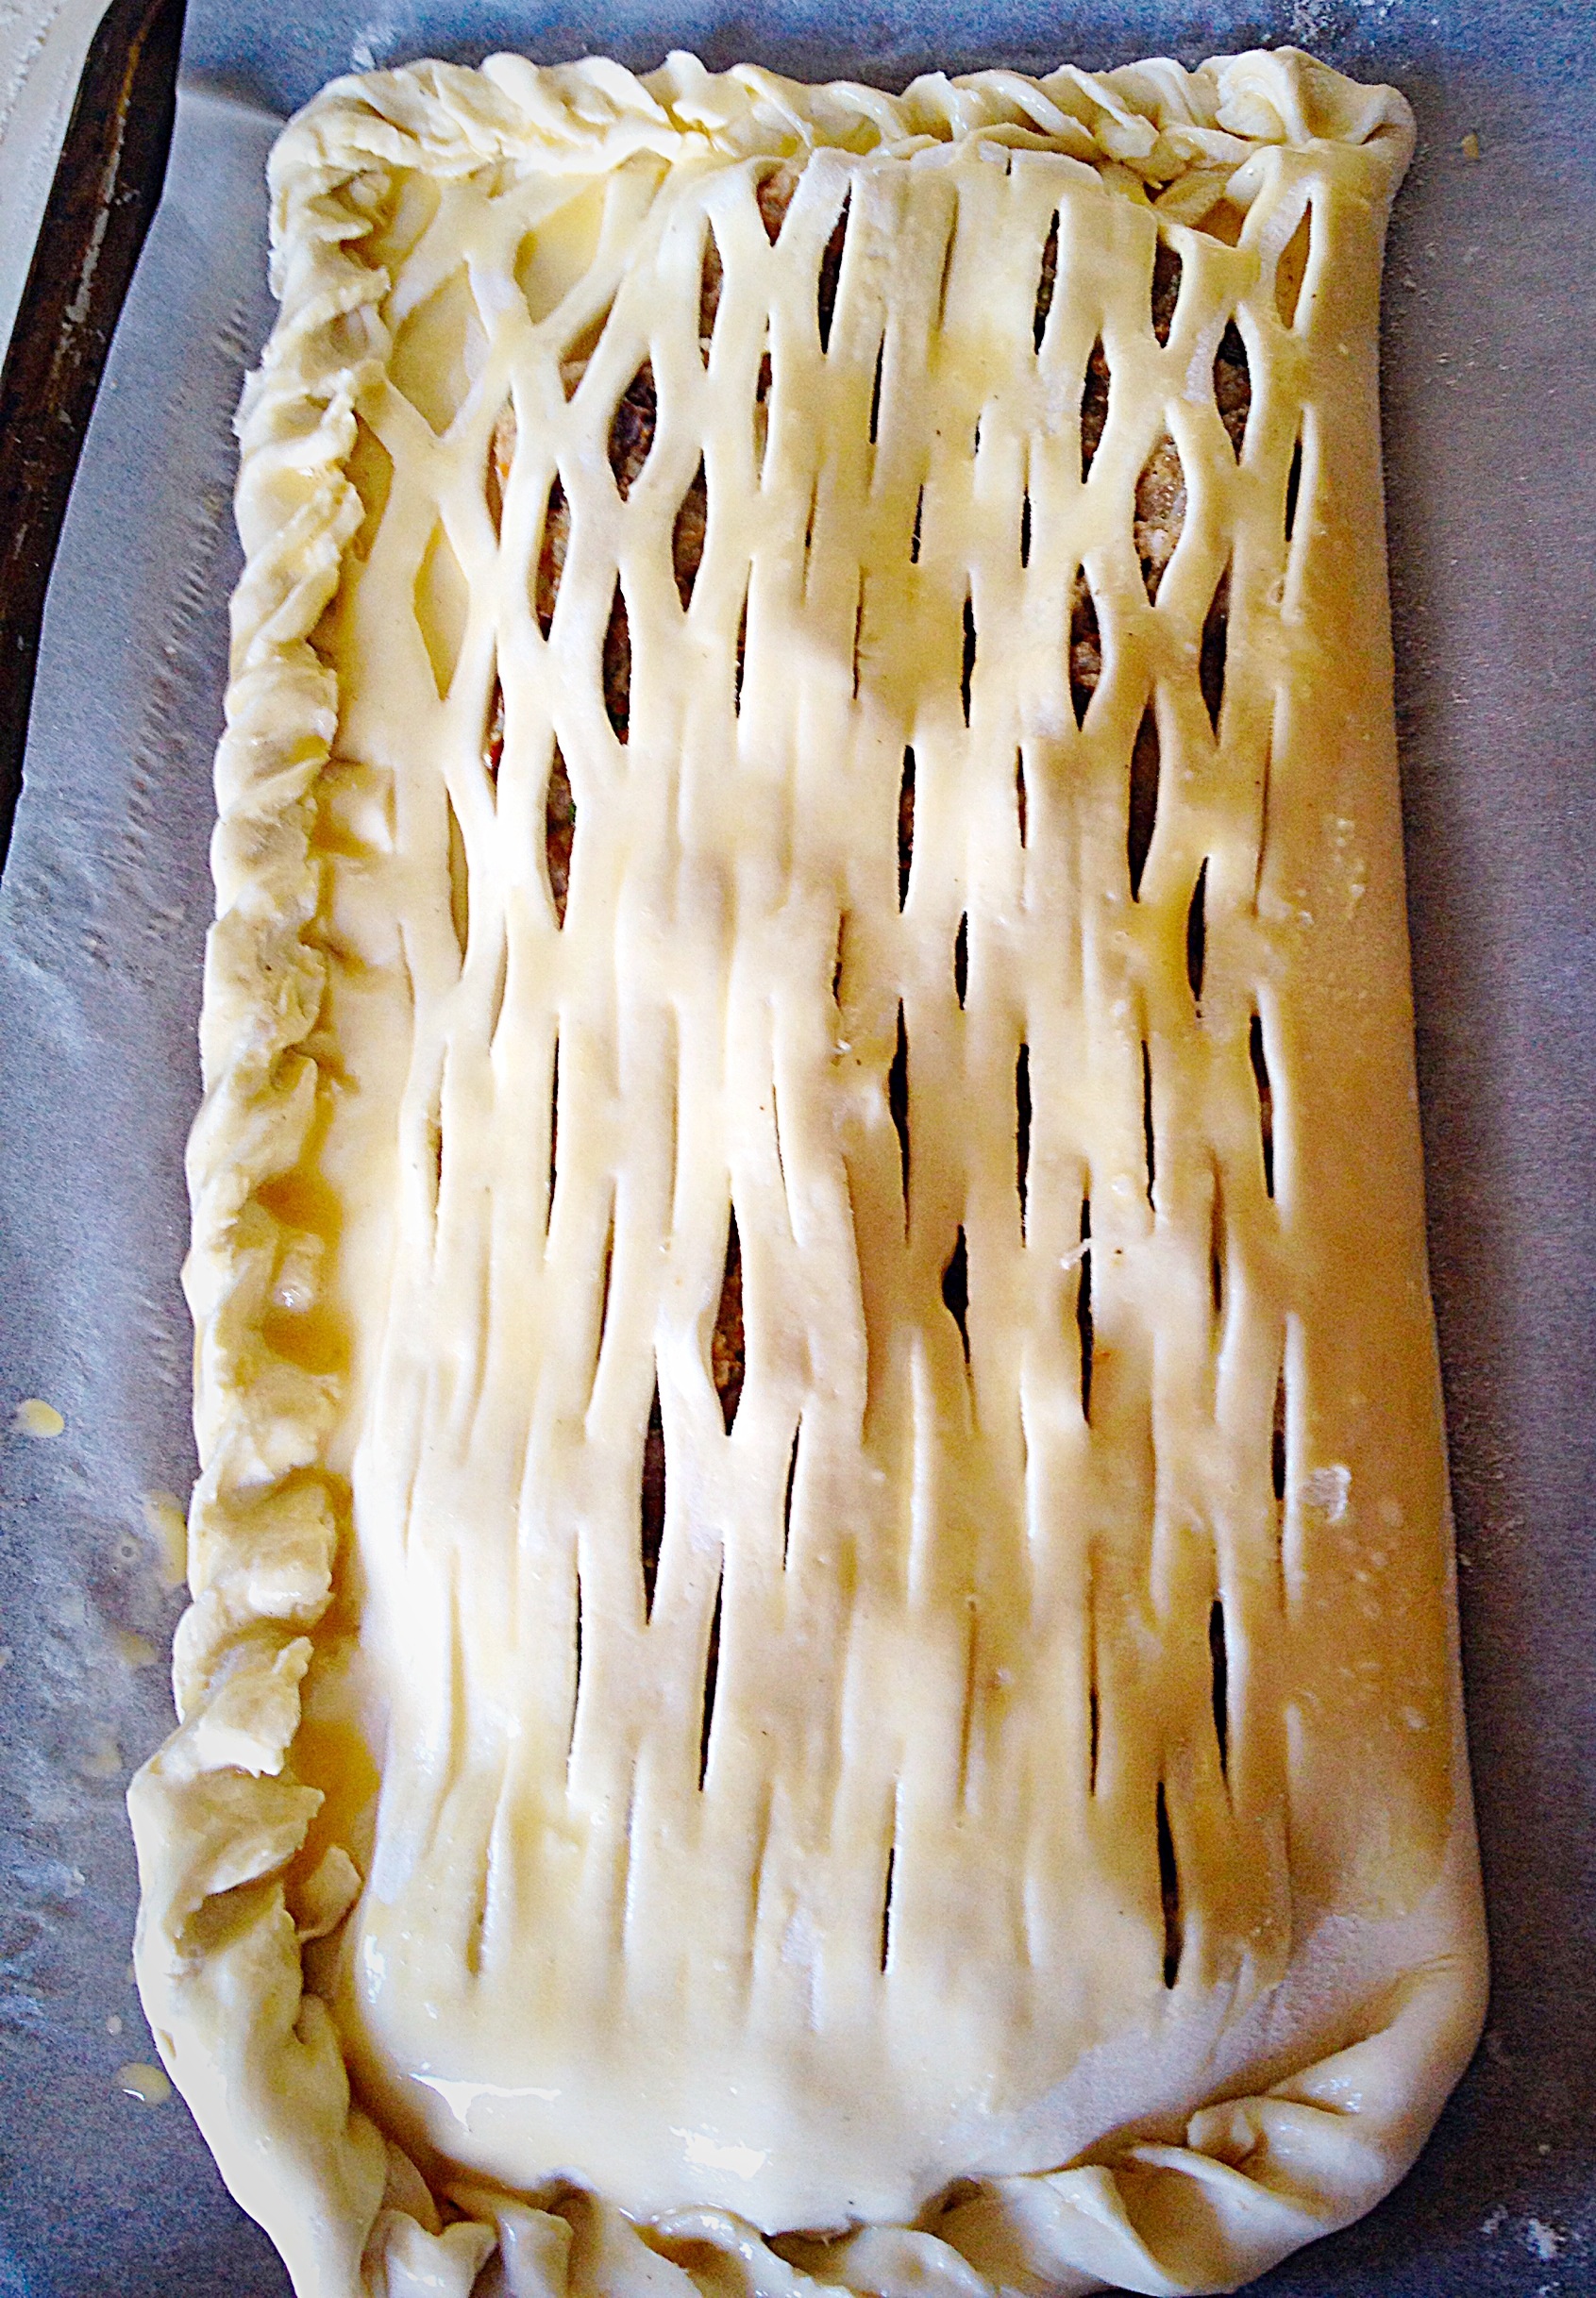
Pat the sausage mixture so that it is spread evenly. Then get ready to roll…..Place the Lattice Roller just inside the bottom edge of the pastry and roll to the top!Brush the beaten egg around the border of the sausage mixture.Fold the lattice cut side over the sausage meat, so the edges meet.I have crimped the pastry edges by twisting them together, then brushed egg wash over the top of the Sausage Plait.
Finally you can see how much easier it is to assemble the sausage plait on the baking parchment.
Place the sausage plait into the centre of a preheated oven and bake for 40 – 50 minutes, until golden brown.
The sausage plait is baked when golden in colour and any juices run clear.
As soon as it is baked remove from the oven and leave to cool on the baking tray.
Sausage Plait With A Twist
Such an easy dish to make, yet super impressive to look at and eat! It can be served hot or cold and is ideal for picnics and buffets as well as dinner time.
Cool completely and refrigerate for up to 3 days.
If you have enjoyed this recipe for Sausage Plait With A Twist you may also like these:
I really enjoy creating recipes for my family and for you to try on this blog. Especially recipes that are diverse. While this sausage plait is tasty served with salad and new potatoes for dinner, it also is great to slice and pack up for a picnic too. Because, in my opinion, diversity in recipes allows me to have more options for both mealtimes and buffets, when entertaining a crowd of people. Most importantly it’s easy. And we all love an easy recipe, right?
Whatever you are making, baking and creating in your kitchens, have fun preparing and sharing your feast.
Sammie x
No part of this post may be reproduced or duplicated without the written permission of the owner. Please see my Disclosure Policy.
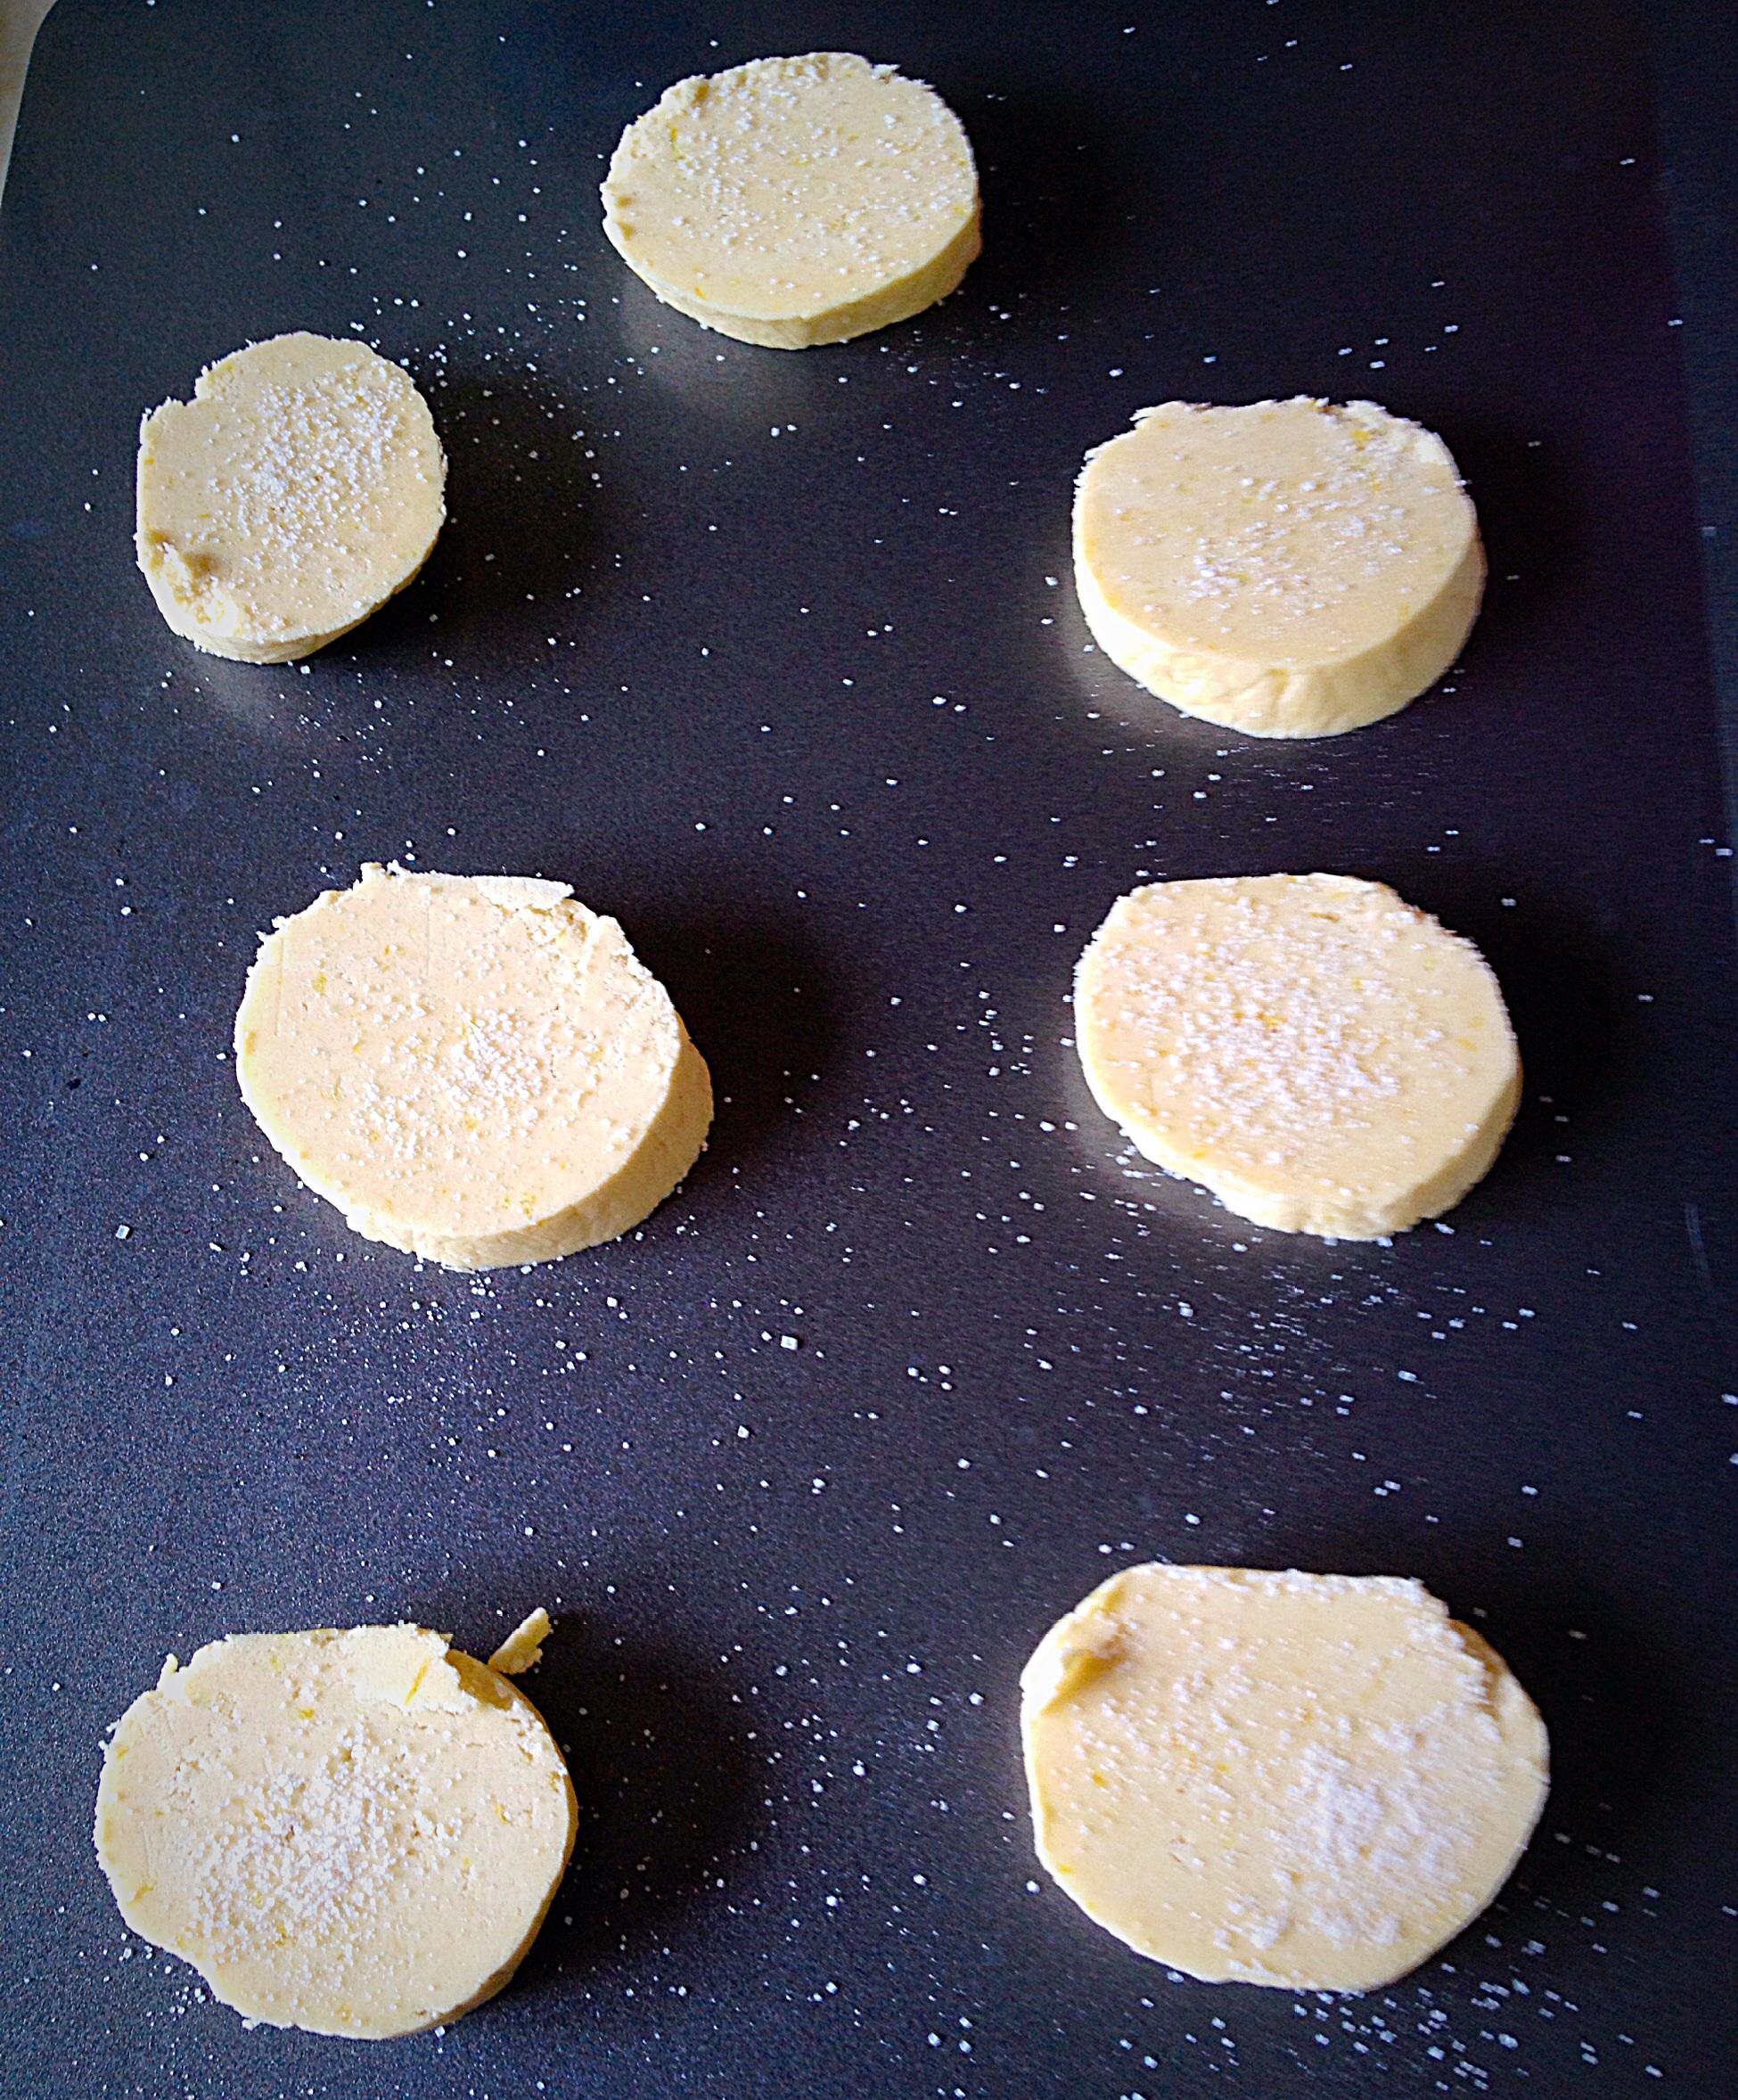
Hi, I’ve done it! I’ve managed to make Lemon Shortbread Cookies that are utterly delicious. Light, lemony and crumbly, yet also taste like shortbread!
Lemon Shortbread Cookies
I can’t tell you how good it feels to get back to baking since my recent stay in hospital. I’m not out of the woods yet, but at least I’m on the right path! Baking relaxes me, allows my creative juices to get flowing and produces something scrummy to eat afterwards. Not bad eh?
Lemon Shortbread Cookies
Buttery, lemony, light Lemon Shortbread Cookies. The perfect biscuit, in my book anyway. I encourage you to try this recipe if you are a fan of lemon and shortbread. I think you get the picture – I LOVE THESE COOKIES!
Lemon Shortbread Cookies
Recipe : Makes 20-24 Lemon Shortbread Cookies
150g/5oz Caster Sugar
225g/8oz Unsalted Butter – room temperature
1 Large Egg Yolk – free range – the white can be frozen for up to one month
As well as coming up with new recipe ideas and flavour combinations I really do enjoy baking for others. Whether it is a planned, family occasion, or a surprise, making something that I know others will appreciate and enjoy is a constant source of pleasure. An unexpected gift is a wonderful way to show someone that you care and food ALWAYS tastes better when it’s shared.
So, whatever you are making, baking and creating in your kitchens, have fun preparing and sharing your feast.
Keep smiling, Sammie x.
No part of this post may be reproduced or duplicated without the written permission of the owner. Please see my Disclosure Policy.
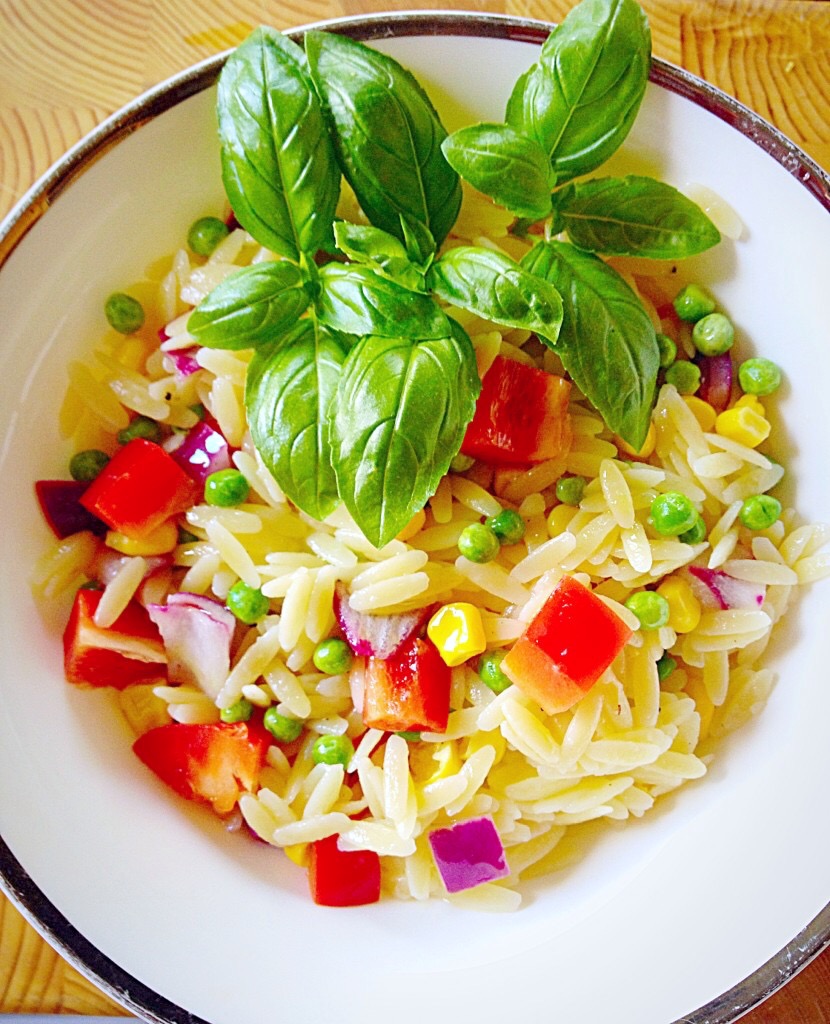
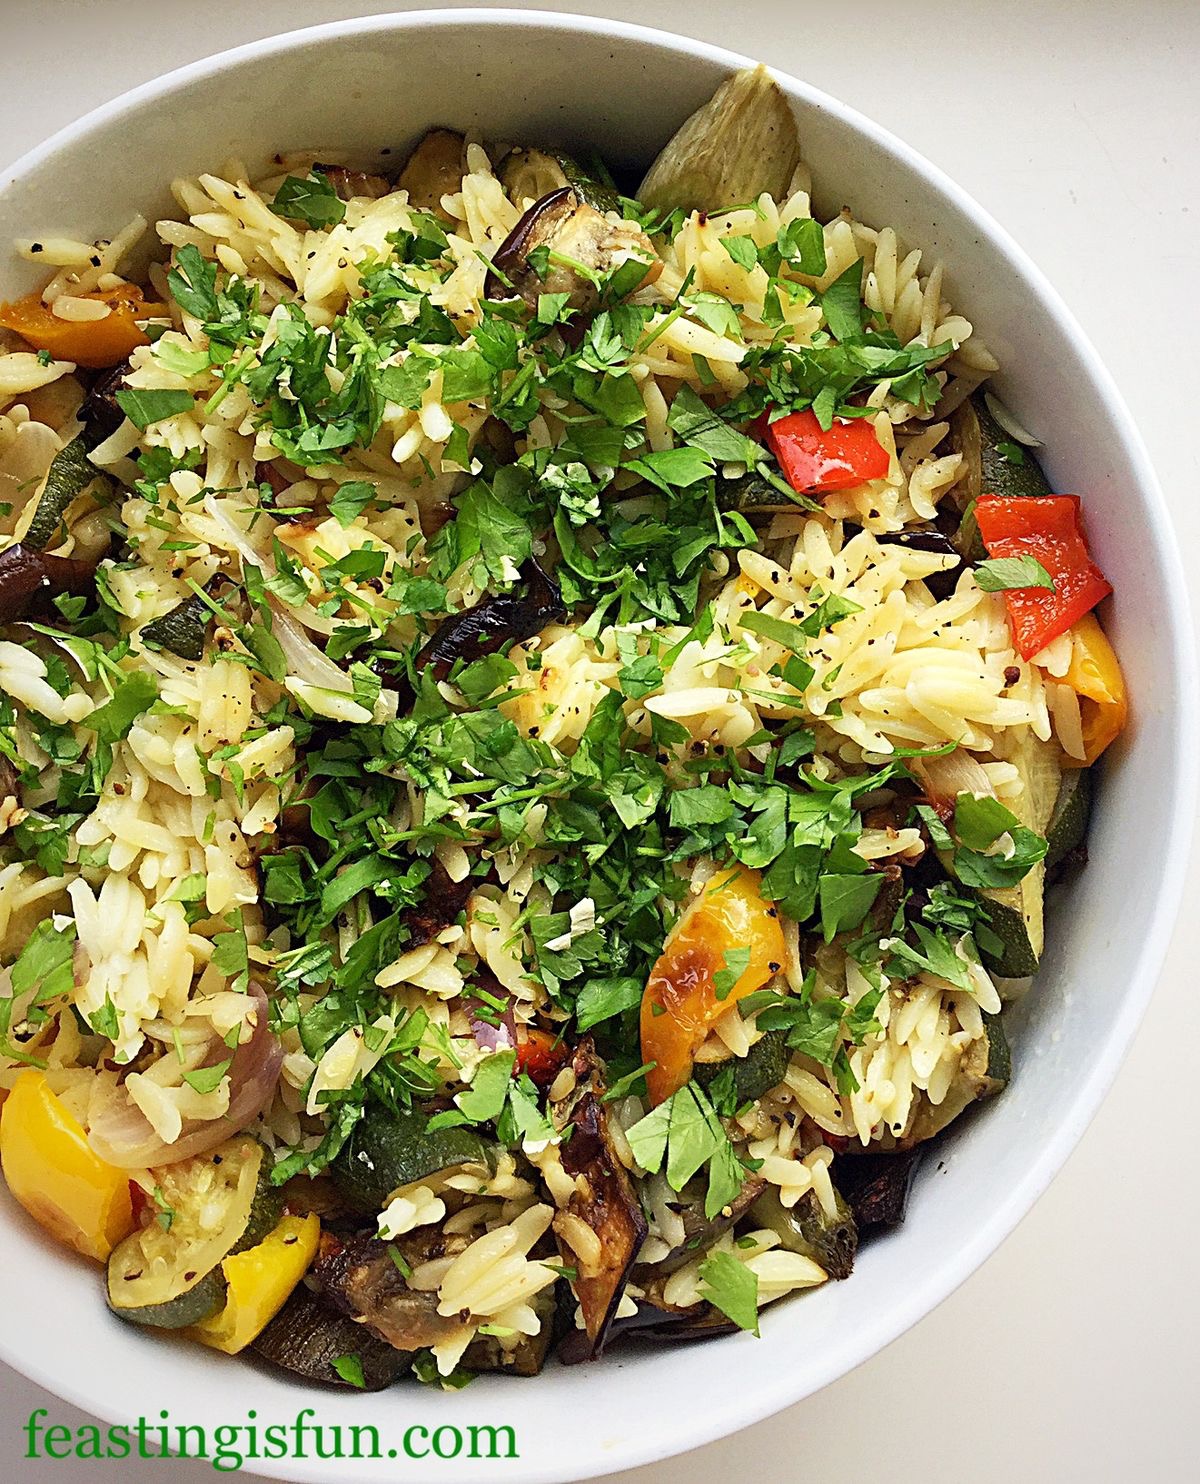
Hi, have I got the easiest, tastiest, make ahead side dish for you? Oh yes I have! Lemon Garlic Vegetable Orzo. Also, this dish does not disappoint as it is delicious.
Lemon Garlic Vegetable Orzo
While I’ve said this is a side dish, it’s also vegetarian and makes a fabulous light lunch. Likewise, adding a few shavings of Parmesan would add extra oomph for lunch, served alongside some crusty, crunchy bread.
I’m getting hungry!
Lemon Garlic Vegetable Orzo
While I’ve used red onion, peas, sweetcorn and red bell pepper in this dish – but feel free to switch up the veggies (celery is also good) with whatever you have on hand. Most importantly, I would say that this Lemon Garlic Vegetable Orzo is best served at room temp, or even warmed – BUT NOT COLD! Because, no matter how much lemon/oil you add, when served fridge cold the Orzo clumps together and not in a good way! So there you go, an easy recipe that doesn’t take up any room in your fridge, or require any last minute fiddling. Yay!! Because, we like easy!
Lemon Garlic Vegetable Orzo
Recipe : Lemon Garlic Vegetable Orzo serves 6-8 as a side dish.
500g/1lb Packet Dried Orzo – available from most supermarkets I buy mine from Waitrose
Juice of 1 Large Lemon
1 x Small Red Onion
150ml/5fl oz Extra Virgin Olive Oil
2 x Garlic Cloves – crushed
200g/7oz Frozen Peas
Medium Can Sweetcorn
Fresh Basil
Sea Salt – I use Maldon and freshly ground Black Pepper to taste
Making The Vegetarian Orzo Dish
First of all put a large pan of water on to heat up for the Orzo.
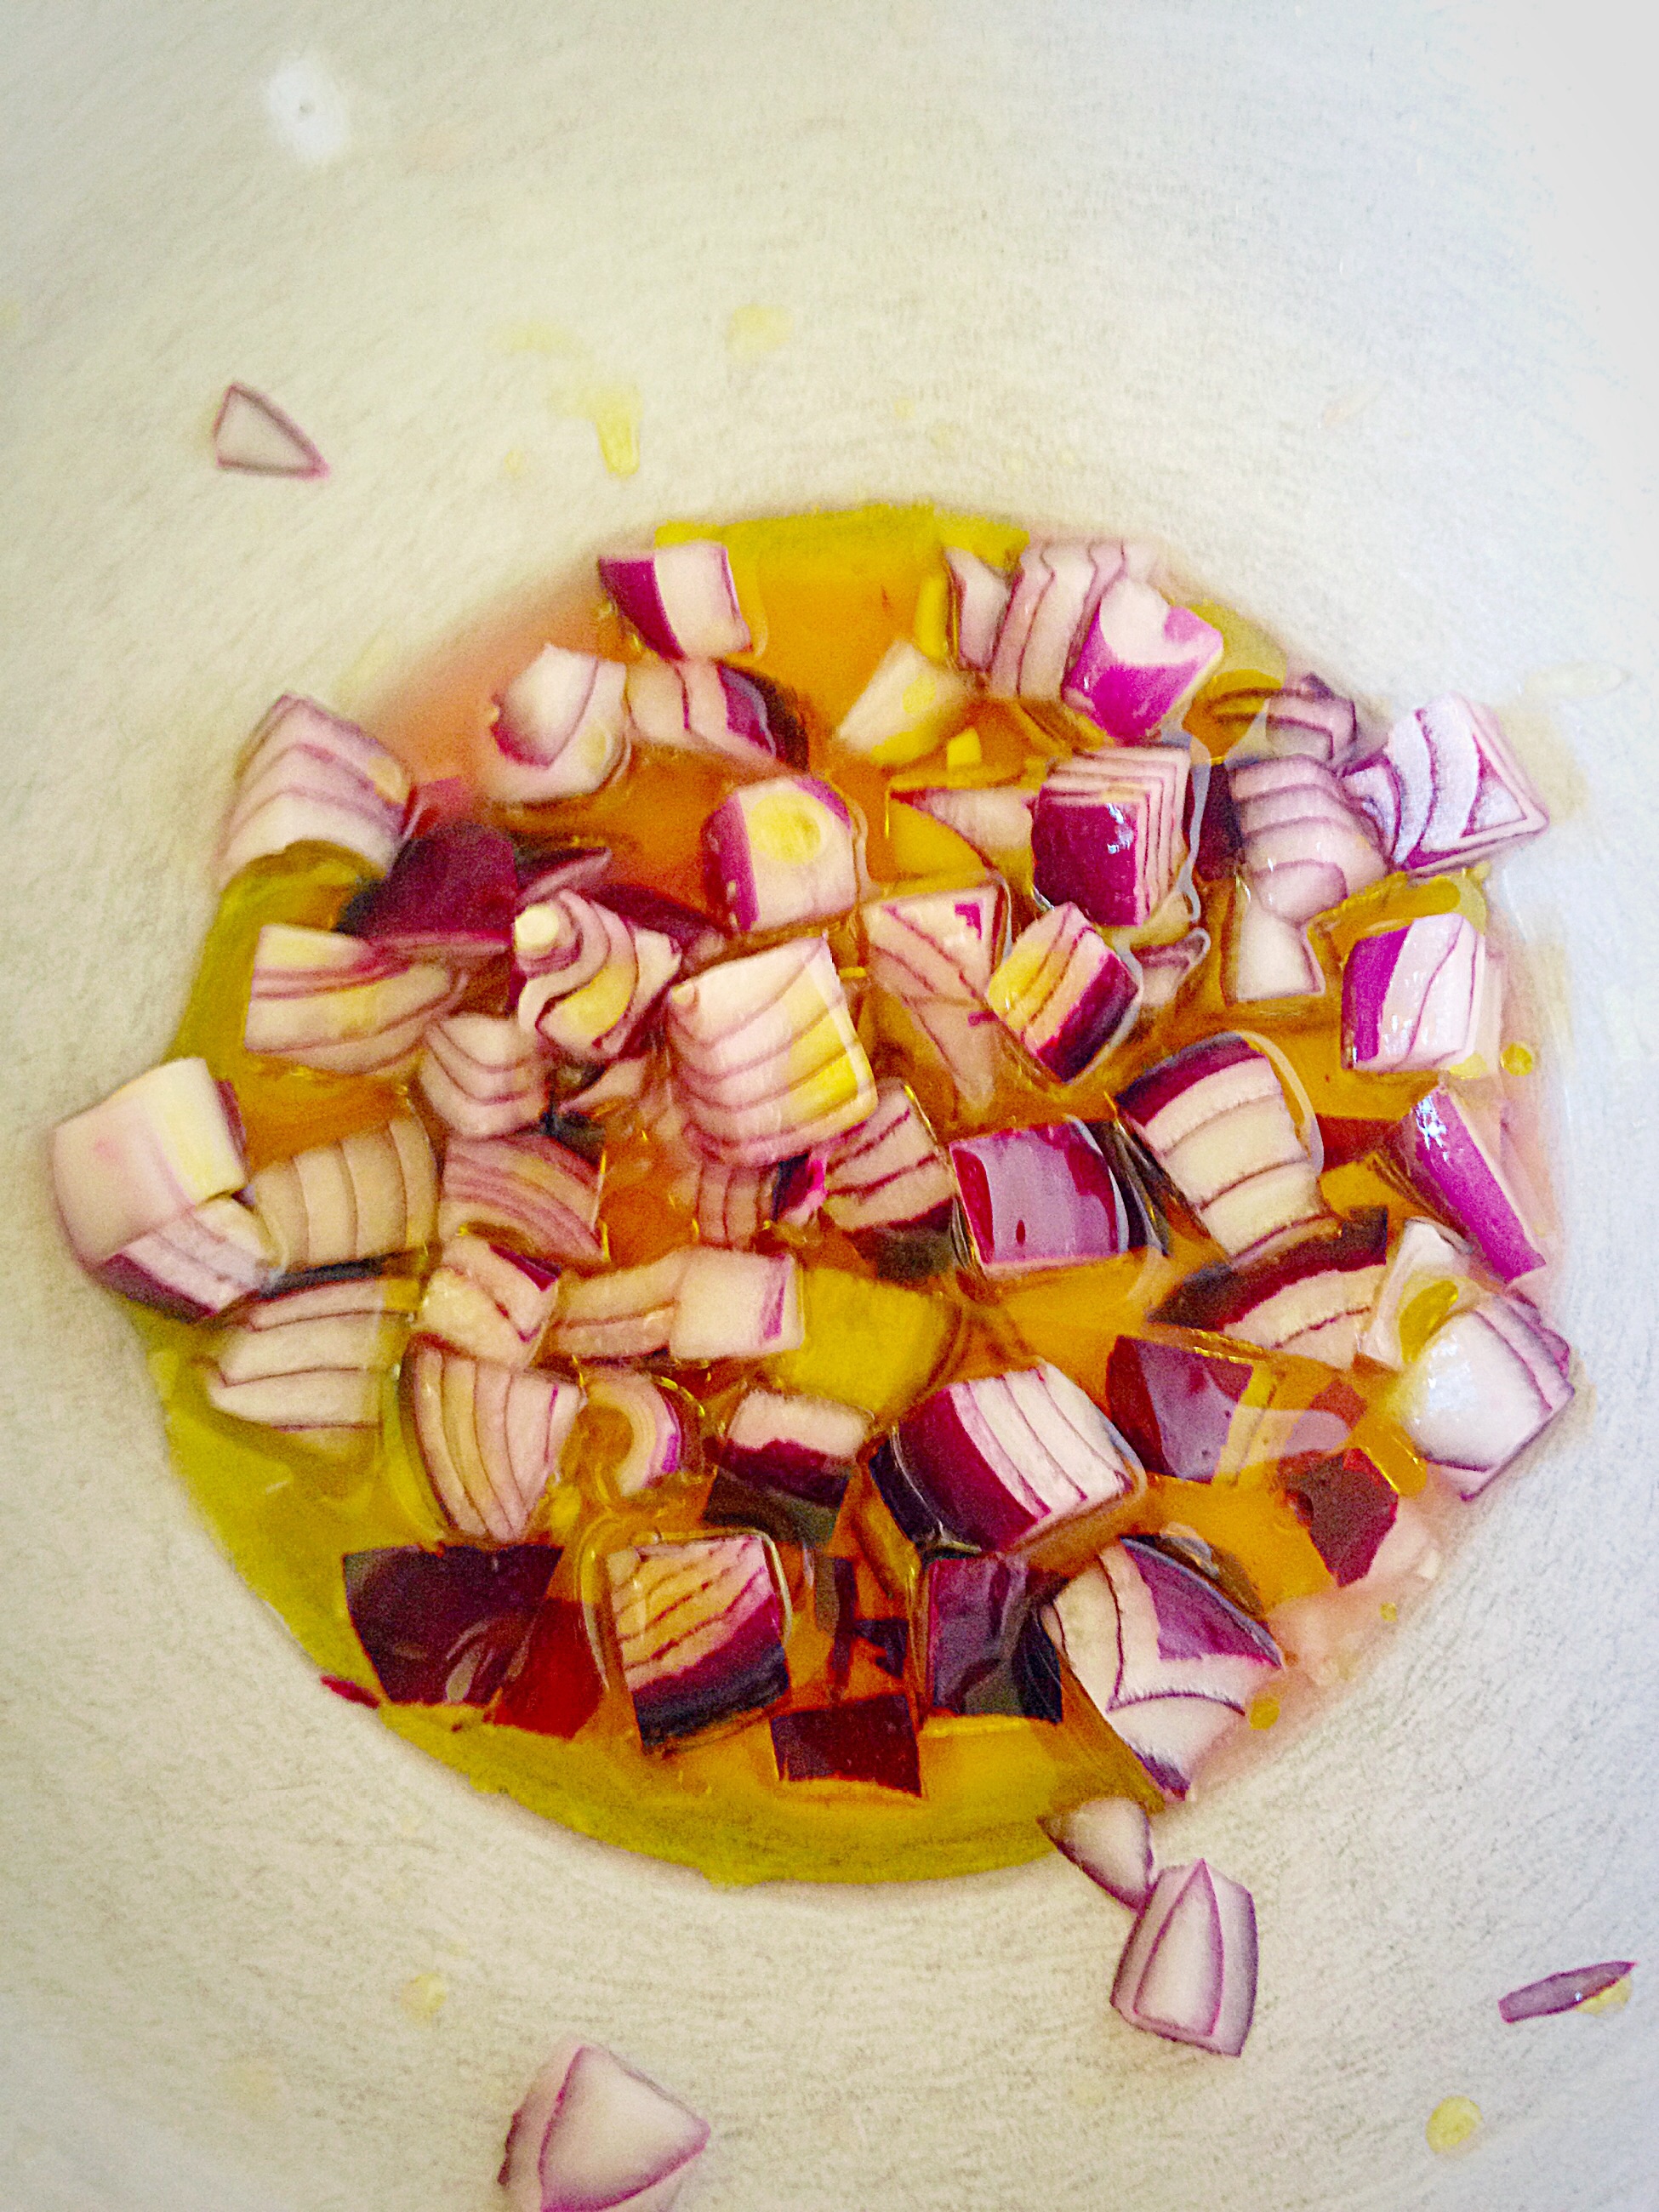
Place the lemon juice and finely diced red onion into a large bowl. Add a pinch of salt and mix together. Also leaving the onion in the lemon juice will remove the acrid taste!
As soon as the water in the pan is boiling add salt and then the Orzo. Cook according to the packet instructions, taking care not to overcook or the Orzo will simply clump together!
While the Orzo is cooking gently heat the Olive Oil and garlic together, for approximately 2 minutes on a medium heat. This allows the garlic to infuse the oil. And also the garlic is lightly cooked. Pour the garlicky oil over the onions and lemon juice.
Lemon Garlic Onions and Oil – add salt and pepper.
Drain the Orzo as soon as it is cooked and pour straight into the bowl. Using a large slotted spoon immediately toss the Orzo in the oil/lemon juice, this will stop the Orzo from sticking together.
Place the frozen peas (I used petit pois) in the bowl and mix in with the hot Orzo.
Add the sweetcorn (drained) and the diced, red, bell pepper. And mix together with a fork, then taste for seasoning. Add salt and freshly ground pepper as necessary.
Take a handful of Basil leaves, roughly chop and sprinkle over.
Finally, cover with cling film and serve at room temperature.
Lemon Garlic Vegetable Orzo
This side goes fabulously with fish – Salmon especially, Chicken and Pork. Likewise, it makes a fab alternative to roast potatoes and hot veggies for a Summer roast, Also, it completely seals the deal as part of a buffet or served at a barbecue. And with very little effort needed!
If you have enjoyed this recipe for Lemon Garlic Vegetable Orzo you may also like these:
Hi, it’s taken me ages to write this post and come up with a title that accurately describes where I’m at : Adapting My Life To A New Normal. What I am going to share with you, is my journey, over the last few weeks. Honestly. But maybe a bit back to front!!!
My life was about to take on a whole new direction.
About 3 weeks ago I came home from a 2 week stay in hospital. My stay was unplanned, difficult and was preceded by one of the most frightening periods of my life.
At the end of March my husband called the Paramedics, as I was having, what we now know are Seizures. Failing a series of, quite brutal tests, designed to get a response out of me (trust me – if I could have responded I would have – having various pressure points pinched, poked and twisted was painful. Very painful!!), it was decided I needed to be take to our local A & E via Ambulance.
Whilst there, the eye twitching/mouth contorting, developed into full body jerking. Arms shaking, legs moving, my whole body rocking and rolling and I was completely unable to stop or control any of the movements. I was very scared. Nothing like this had ever happened to me before.
The road ahead is going to be a very bumpy one.
Ok so I live with Chronic Pain and Frequent Migraines, so I’m used to my body not behaving as I’d like. But this, this was a whole different thing,
During each Seizure I remain completely conscious and aware of my surroundings and what people are saying – although during the longer Seizures (15 minutes plus) all I can focus on is trying to keep my breathing as steady as possible and getting through it!
After various tests I was admitted to a ward, where I spent the next 2 1/2 weeks. Easter was spent in hospital, not at home planning egg hunts with my hubby for our children – that was hard. I missed them so badly. Even though they visited on some days, we spoke or text everyday. Whilst I was still stuck in hospital, having upto 15 Seizures a day – our eldest daughter, Star was revising for her GCSE’s at home. Not that anytime would be ideal for what was happening to me, but to say the timing sucked would be a massive understatement.
It became clear, as more tests were carried out on me, that my future would mean Adapting My Life To A New Normal. Daunting to say the least!
What does the future hold? Which direction will it take me?
Gradually, over the 2 weeks the Seizures reduced to 5-10 a day, with a couple of rare days where they were absent altogether. I kept a record of the Seizures, time, length, previous activity etc. There was a lovely lady diagonally opposite me, she would note the time a Seizure started and then I would raise my hand, once it was over, she’d say “OK Sam, I’ve seen your hand” and then let me know how long it had lasted once I’d recovered.
Having a Seizure, for me, feels like I am strapped to a Bucking Bronco, unable to get off. My body is bucking and doing a full workout, whilst inside everything is spinning and dropping and it’s a very exhausting, frightening experience. During a Seizure I lose ALL control of my muscles. I can no more make a muscle move, at will, than stop it. I get through each episode by singing, in my head – this helps to give me something to regulate my breathing and to hold onto the one person that is immovable and constant, Jesus.
Without my Faith and the amazing love and support of my husband, I do not know how I would have got through the last month. Jesus is ALWAYS there, in the middle of a Seizure, during the long lonely days and nights. He truely never left me or gave up on me.
The cross. A reminder of my Rock and Anchor, Jesus.
The good news is that I don’t have Epilepsy, or a brain tumour (that was a bit of a shock when it was mentioned as I hadn’t eveen considered it!!). I am now home awaiting an appointment at a London Neurology Hospital. I get to see my hubby and children EVERY DAY. Oh and I haven’t had a Seizure since last Sunday – 5 days clear!!!! The flip side is, as I start to feel better, stronger and less ‘spacey’ I’ve realised I can’t drive and won’t be allowed to for at least a year. That’s going to be hard, very hard. All the time I was having regular Seizures I didn’t even want to drive, but as I get further away from my last Seizure I know I can’t. I’m Adapting My Life To A New Normal.
I will make it, we are adjusting as a family. True the timing is horrid given that Star has started her GCSE’s. Would the timing ever be right though? We have a strong Faith in Jesus, who has brought us through adversity before and we will get through this together, with Christ at the helm, steering our ship through choppy waters.
So I’d like to pass on a word of encouragement to all those of you who are going through difficult times and sailing in troubled waters, place your trust in Him who loves you with such a powerful, unyielding Love. Jesus loves you with a Passion and He will hold your hand, if you reach out to Him and guide you through the unchartered waters ahead.
Please feel free to share your experiences in the comments section.
Have your circumstances changed? Are you saying I’m Adapting My Life To A New Normal?
Hi, have I got the easiest, quickest meal for you? Yep, I have – Easy Tex Mex Chicken!
Easy Tex Mex Chicken tipped into a pan, ready for the oven.
I am talking 5 minutes prep in the morning. Leave in the fridge all day and then throw in the oven for 45 mins before you want to eat. I told you it was Easy!! This delicious dish is fab served in Tortilla Wraps Fajita style, or alternatively, as I have, with potato wedges – well if you’ve got the oven already on…..
Oh my, this Easy Tex Mex Chicken served with wedges – delish!
2 tbs Olive Oil or Rapeseed Oil – I use Kentish Oils
Method :
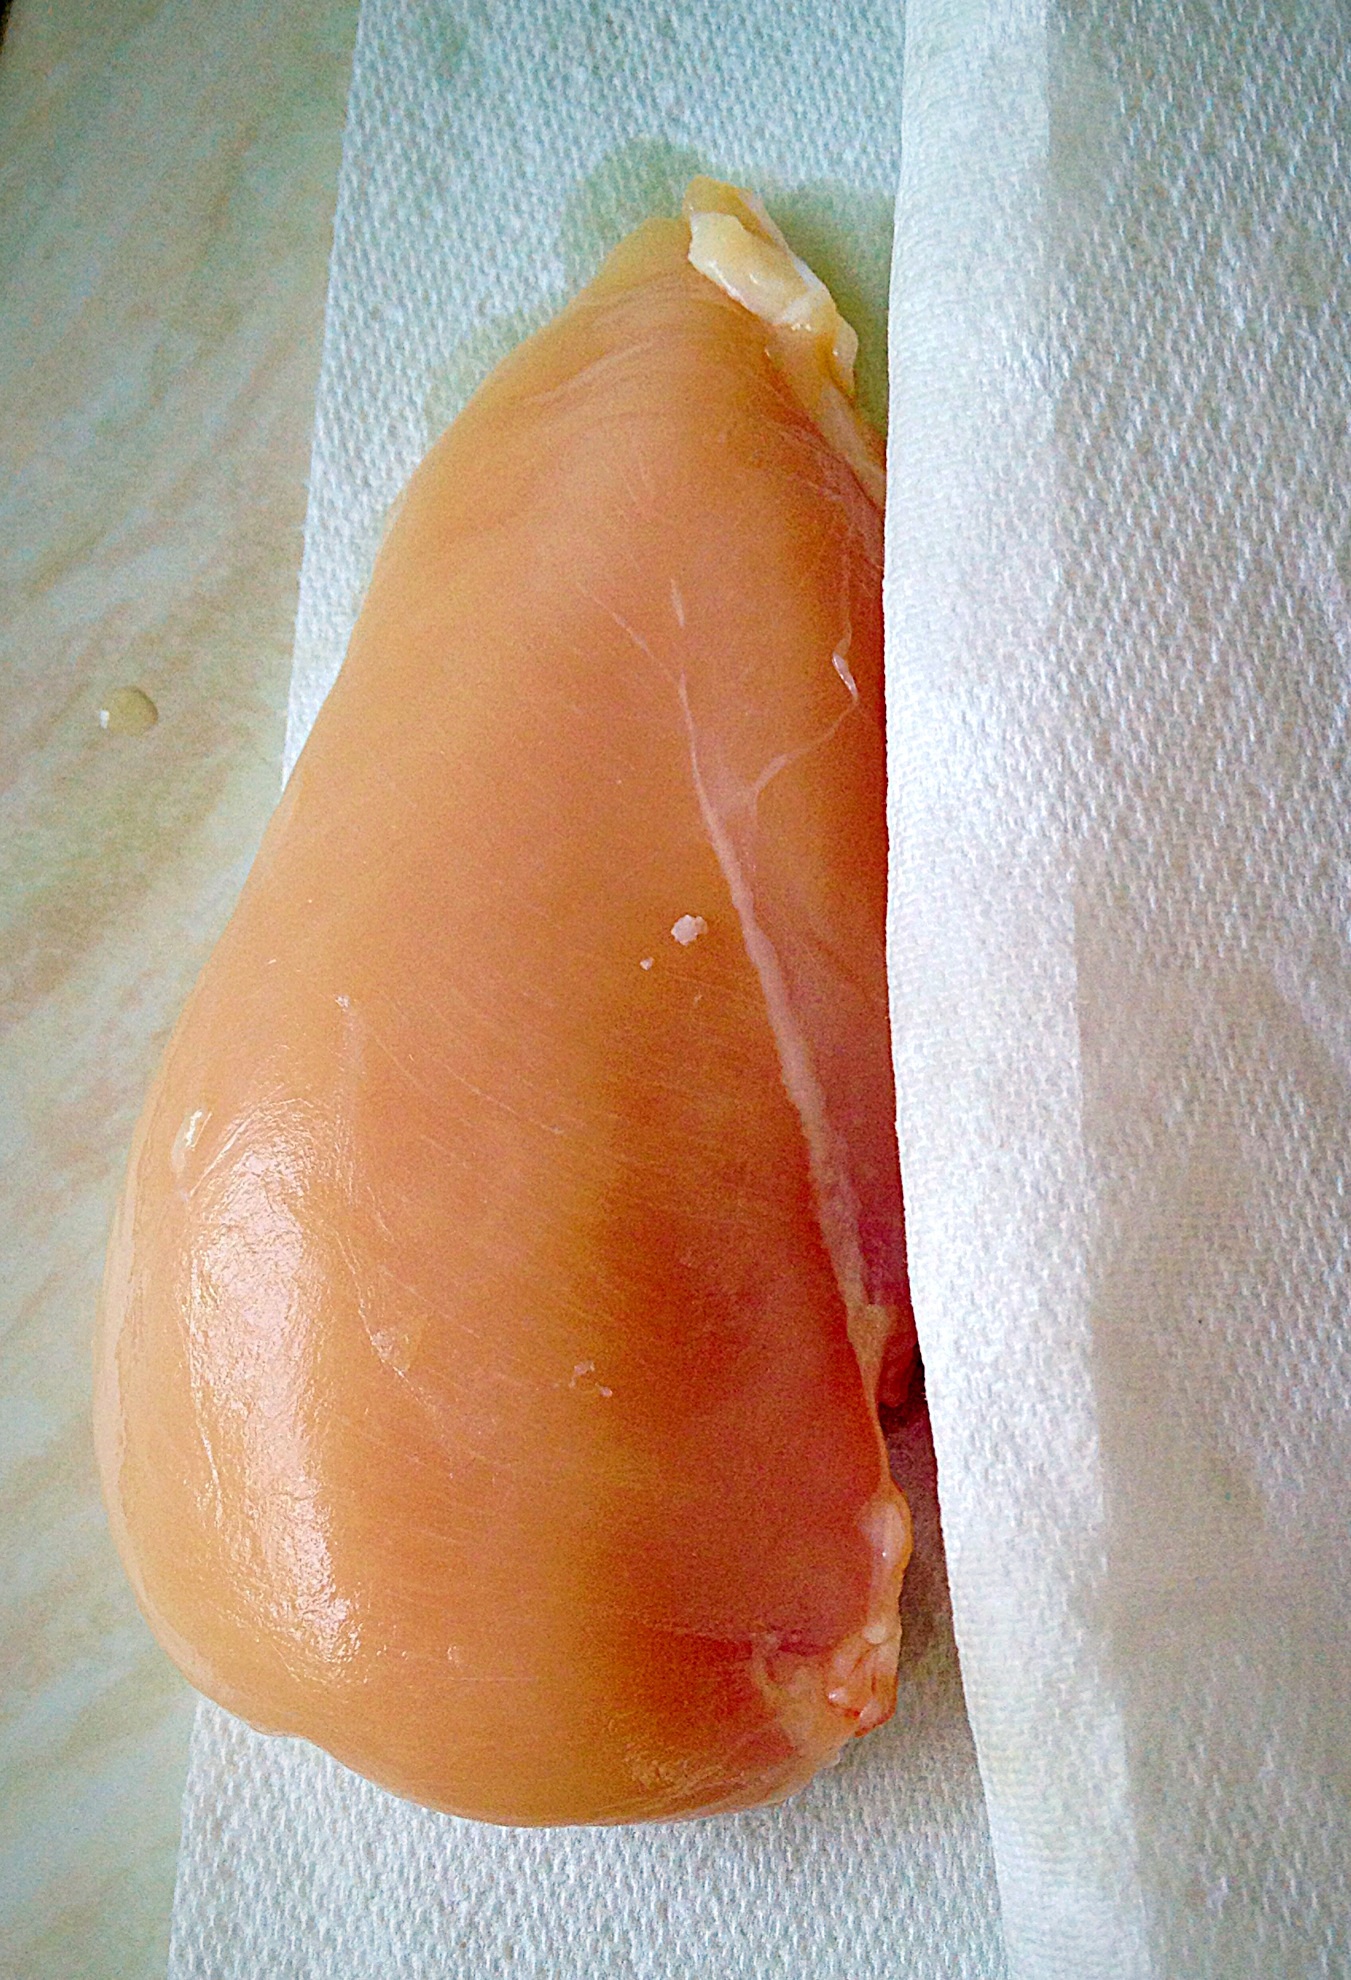
Pat dry the chicken breasts using kitchen paper.
Drying the chicken makes a real difference to the cooked dish.
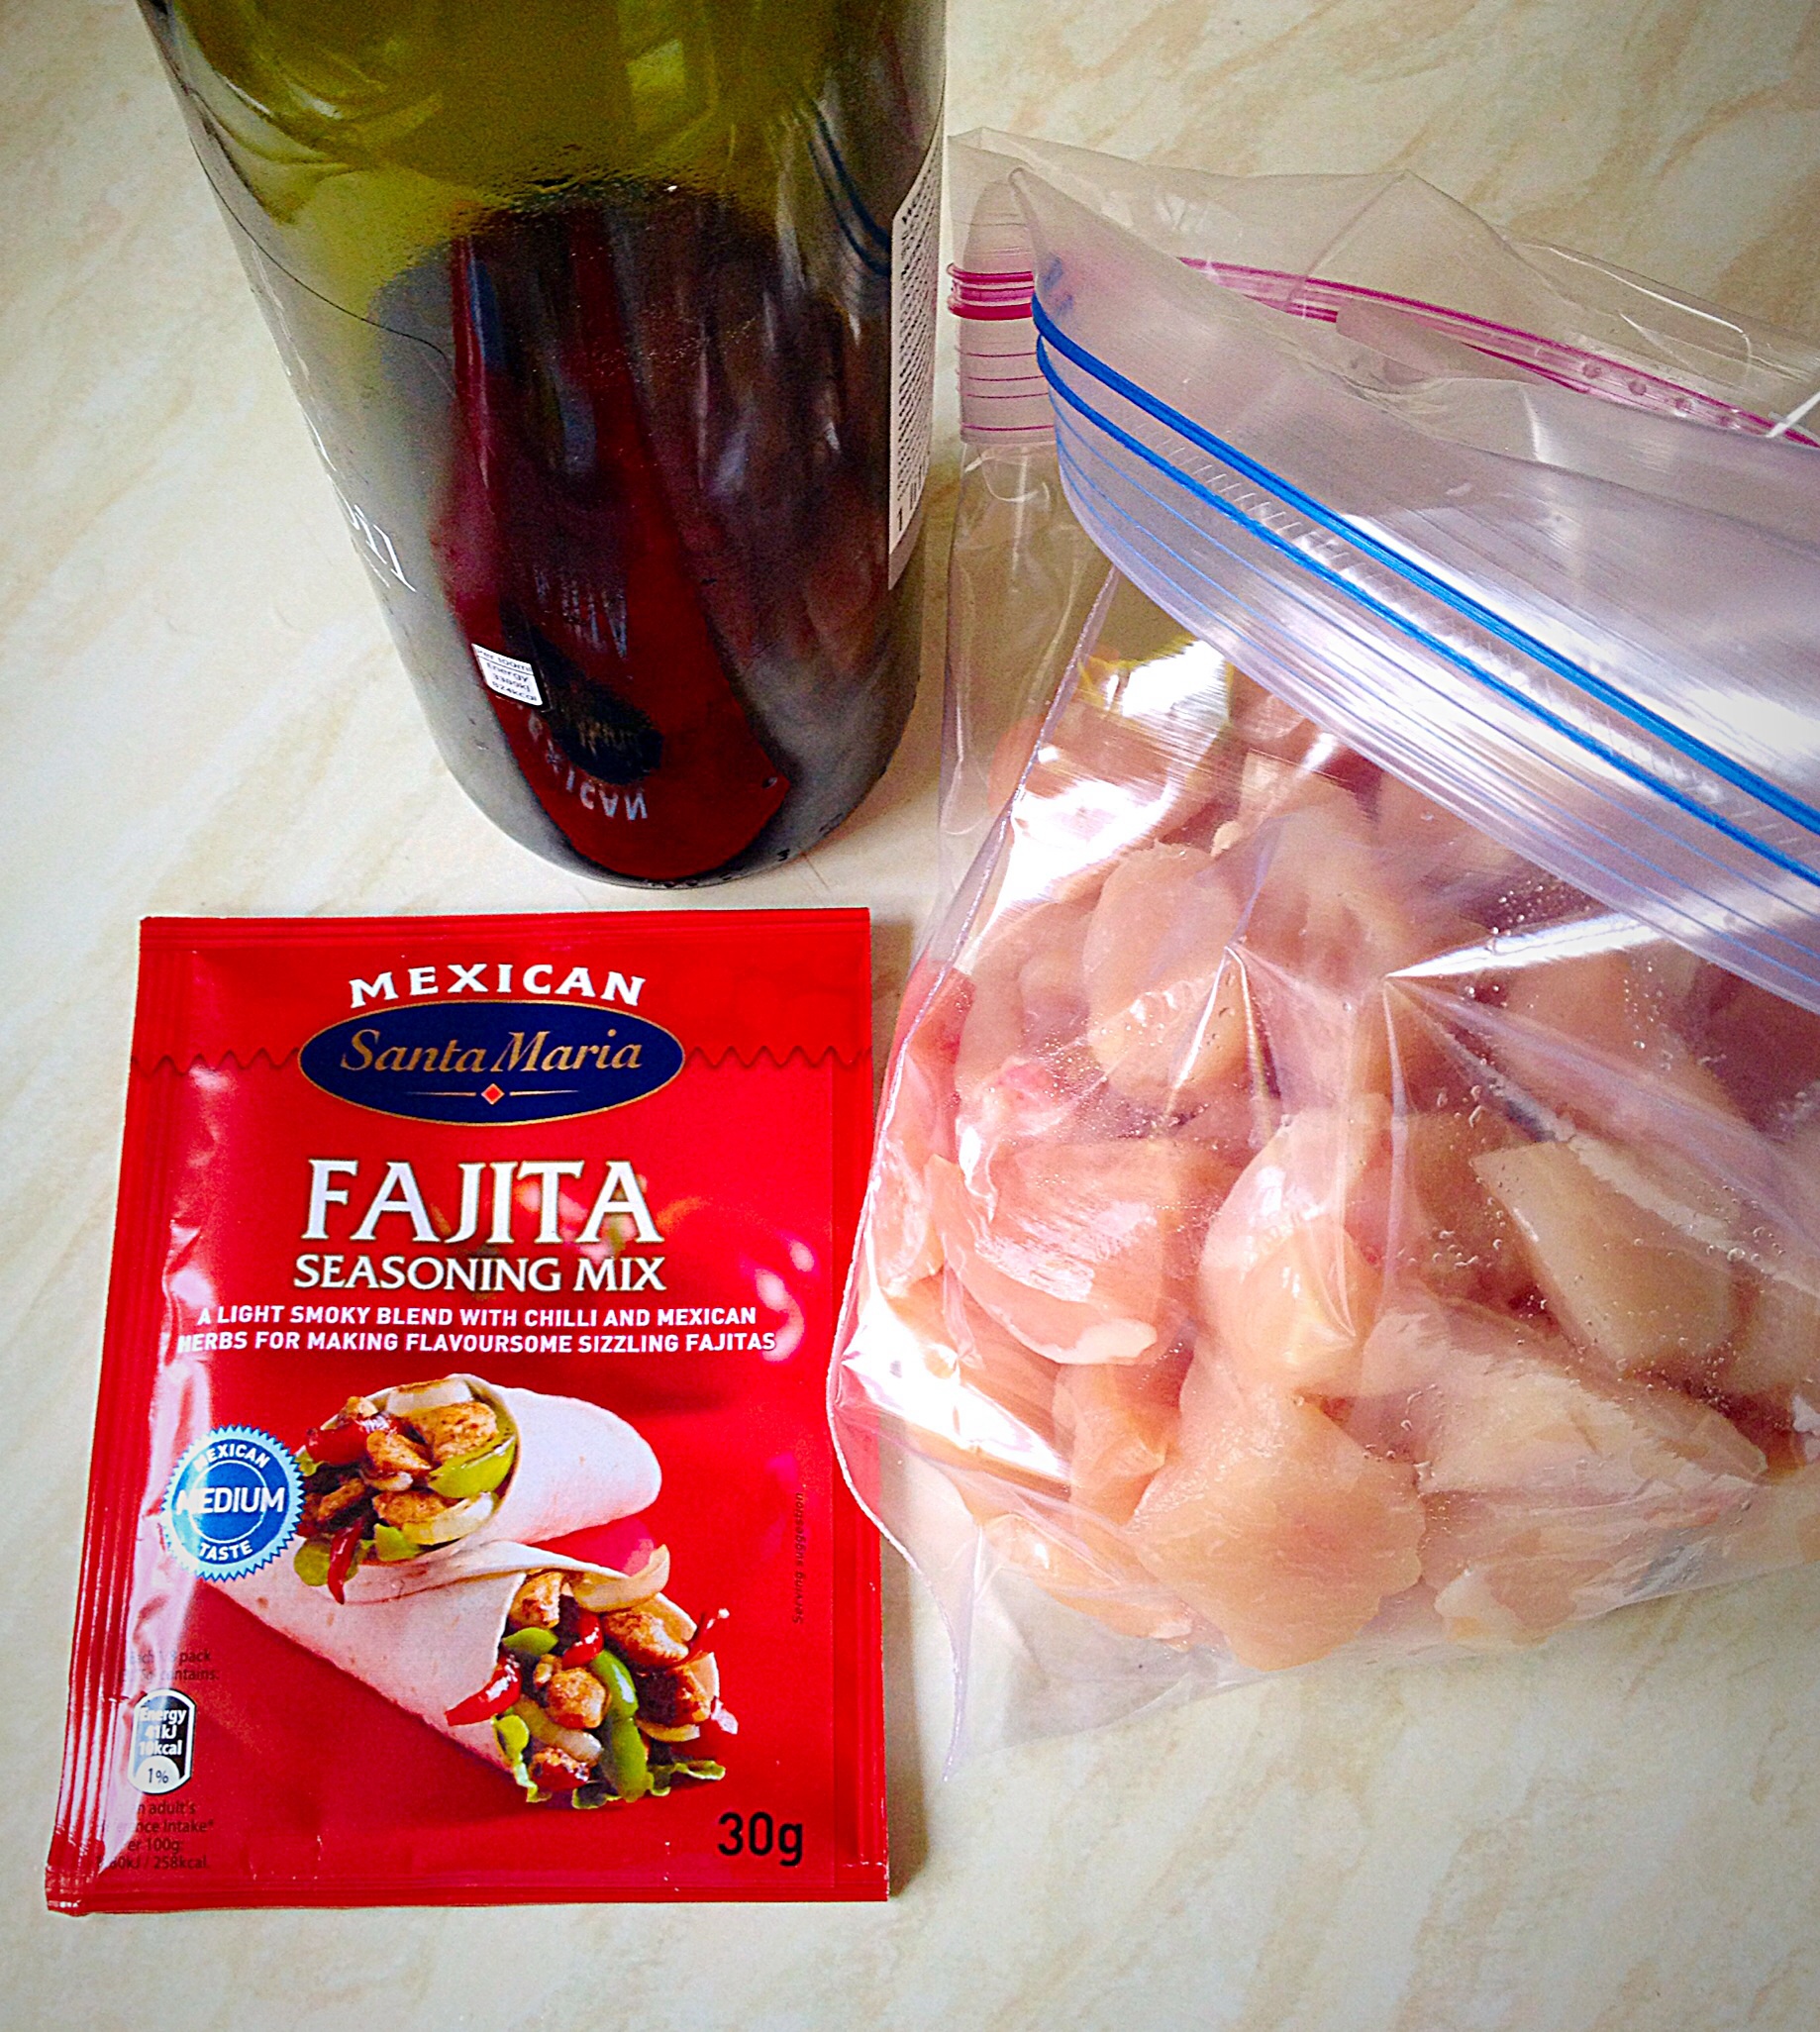
Cut up the chicken into bite sized chunks (I used scissors) and place in a large, freezer bag.
With these 3 ingredients Easy Tex Mex Chicken is just that, EASY!
Pour a couple of glugs of Olive Oil over the diced chicken then tip in the contents of a Fajita mix.
Massage the seasoning into the chicken.
Next it’s time to get chopping!
Ooh so pretty. Choose whichever colour peppers are your favourite and…
Chop the Peppers and Onion so they are about the same size.
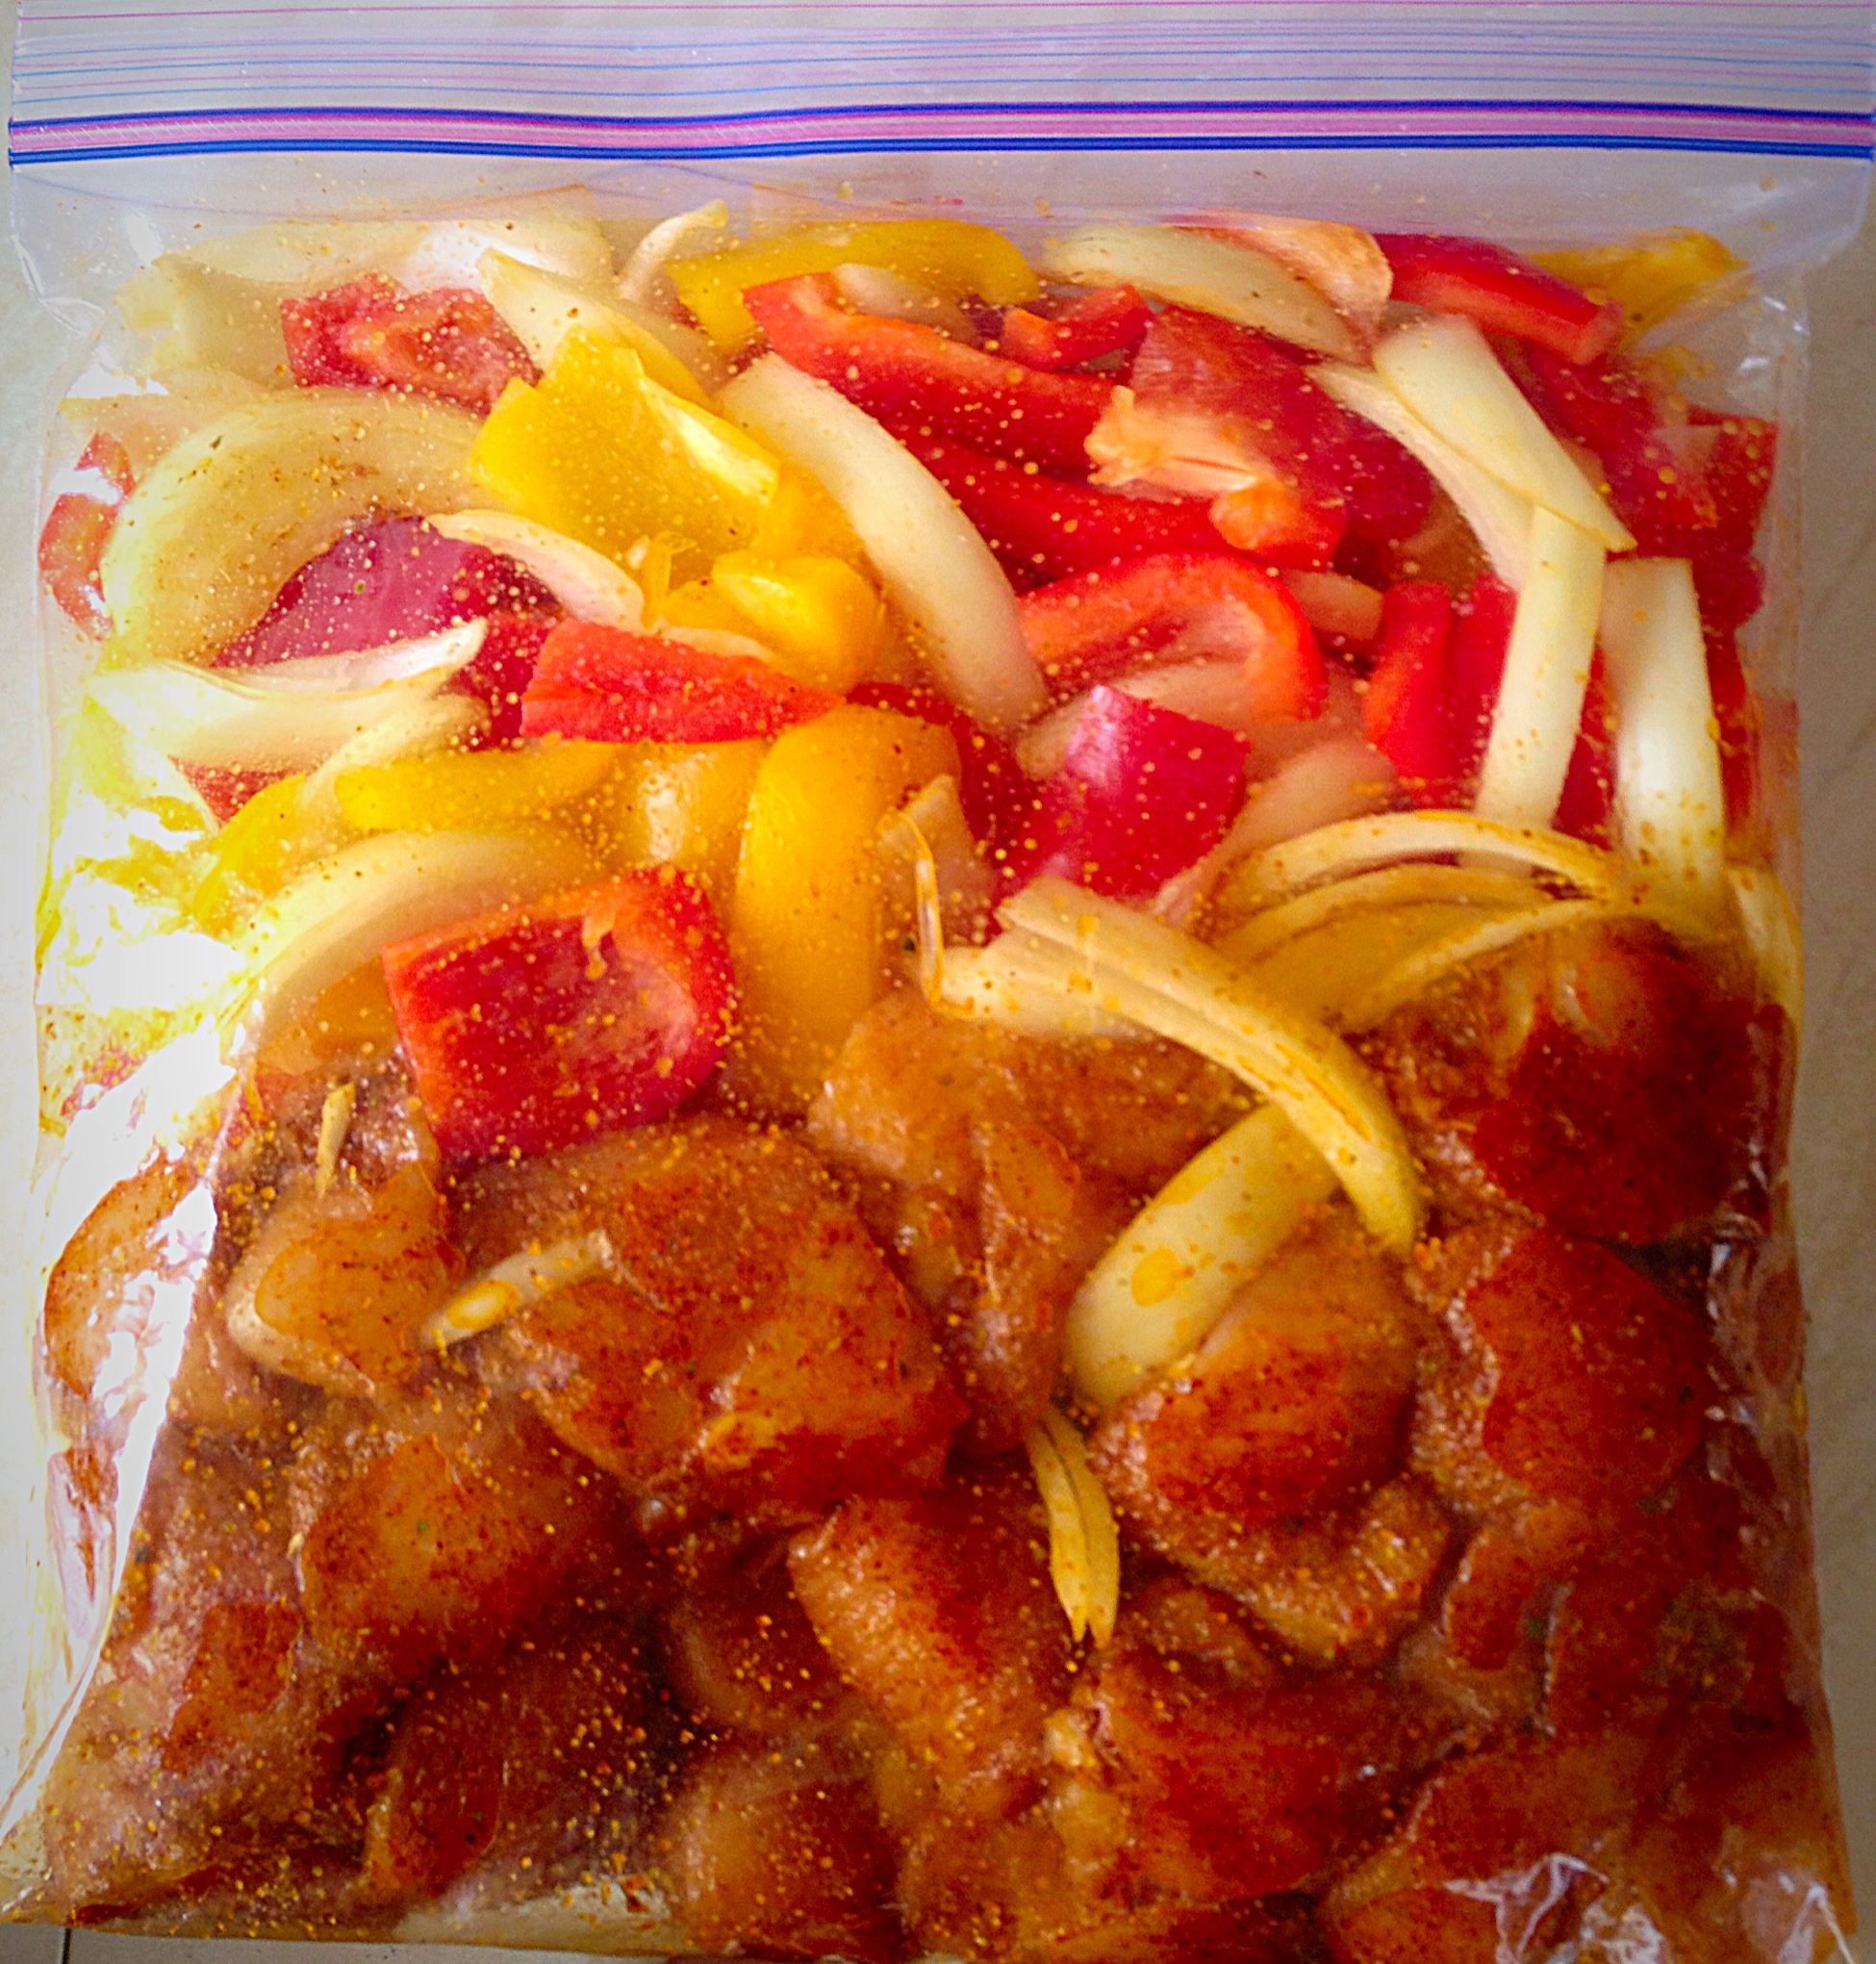
Pop the chopped veggies into the freezer bag with the seasoned chicken and smoosh about a bit so they are covered in the spicy oil.
Easy Tex Mex Chicken in a bag!!
I prepared the Easy Tex Mex Chicken in the morning and then stashed it in the fridge until dinner time.
To cook, tip the contents of the freezer bag into a shallow oven proof dish. Place in a preheated oven 200C/185C fan and cook for 45 minutes.
Easy Tex Mex Chicken with softened peppers and caramelised onions – delish!
To serve either warm some soft tortillas and load up fajita style, or, as I did tonight simply popped in some Baked Garlic Herb Potato Wedges . Since the oven is on it makes sense.
Hi, have I got a treat for you today – Extreme Chocolate Cookies. Also if you love cookies and need a chocolate fix then these babies are definitely for you!
Extreme Chocolate Cookies
I’ve been unwell lately, including a 2 week stay in hospital (I’ll save that for another post). Since having been home for 2-3 weeks now, today was the first day I really had the energy to bake. So, unashamedly I decided to make these Extreme Chocolate Cookies for our gorgeous children and my wonderful hubby, who has taken THE BEST care of me. I really do love that man.
Rows of Extreme Chocolate Cookies. Is there a better sight?
I know that I’ve said it before, but baking or cooking for others, especially my family, is one of the ways I like to show my love for them. While chocolate is not my go-to favourite Cookie. Since I favour nutty, fruity, oat cookies. Yet I obviously had to try one of these and they are my favourite chocolate cookies to date!
First of all, in a large bowl add the butter, sugar and salt. Whisk until well combined and fluffy.
Add in the egg and vanilla extract to the whisked butter/sugar.
Add the egg and vanilla extract and whisk until combined.
Next, chop up the white and milk chocolate into chunks.
These chocolate chunks are what make the cookies EXTREME!!!
Add the flour, cocoa, bicarbonate of soda and chocolate chunks to the bowl.
Once combined these ingredients make Extreme Chocolate Cookies!
Mix all of the ingredients together until just combined.
Shaping and baking the cookies
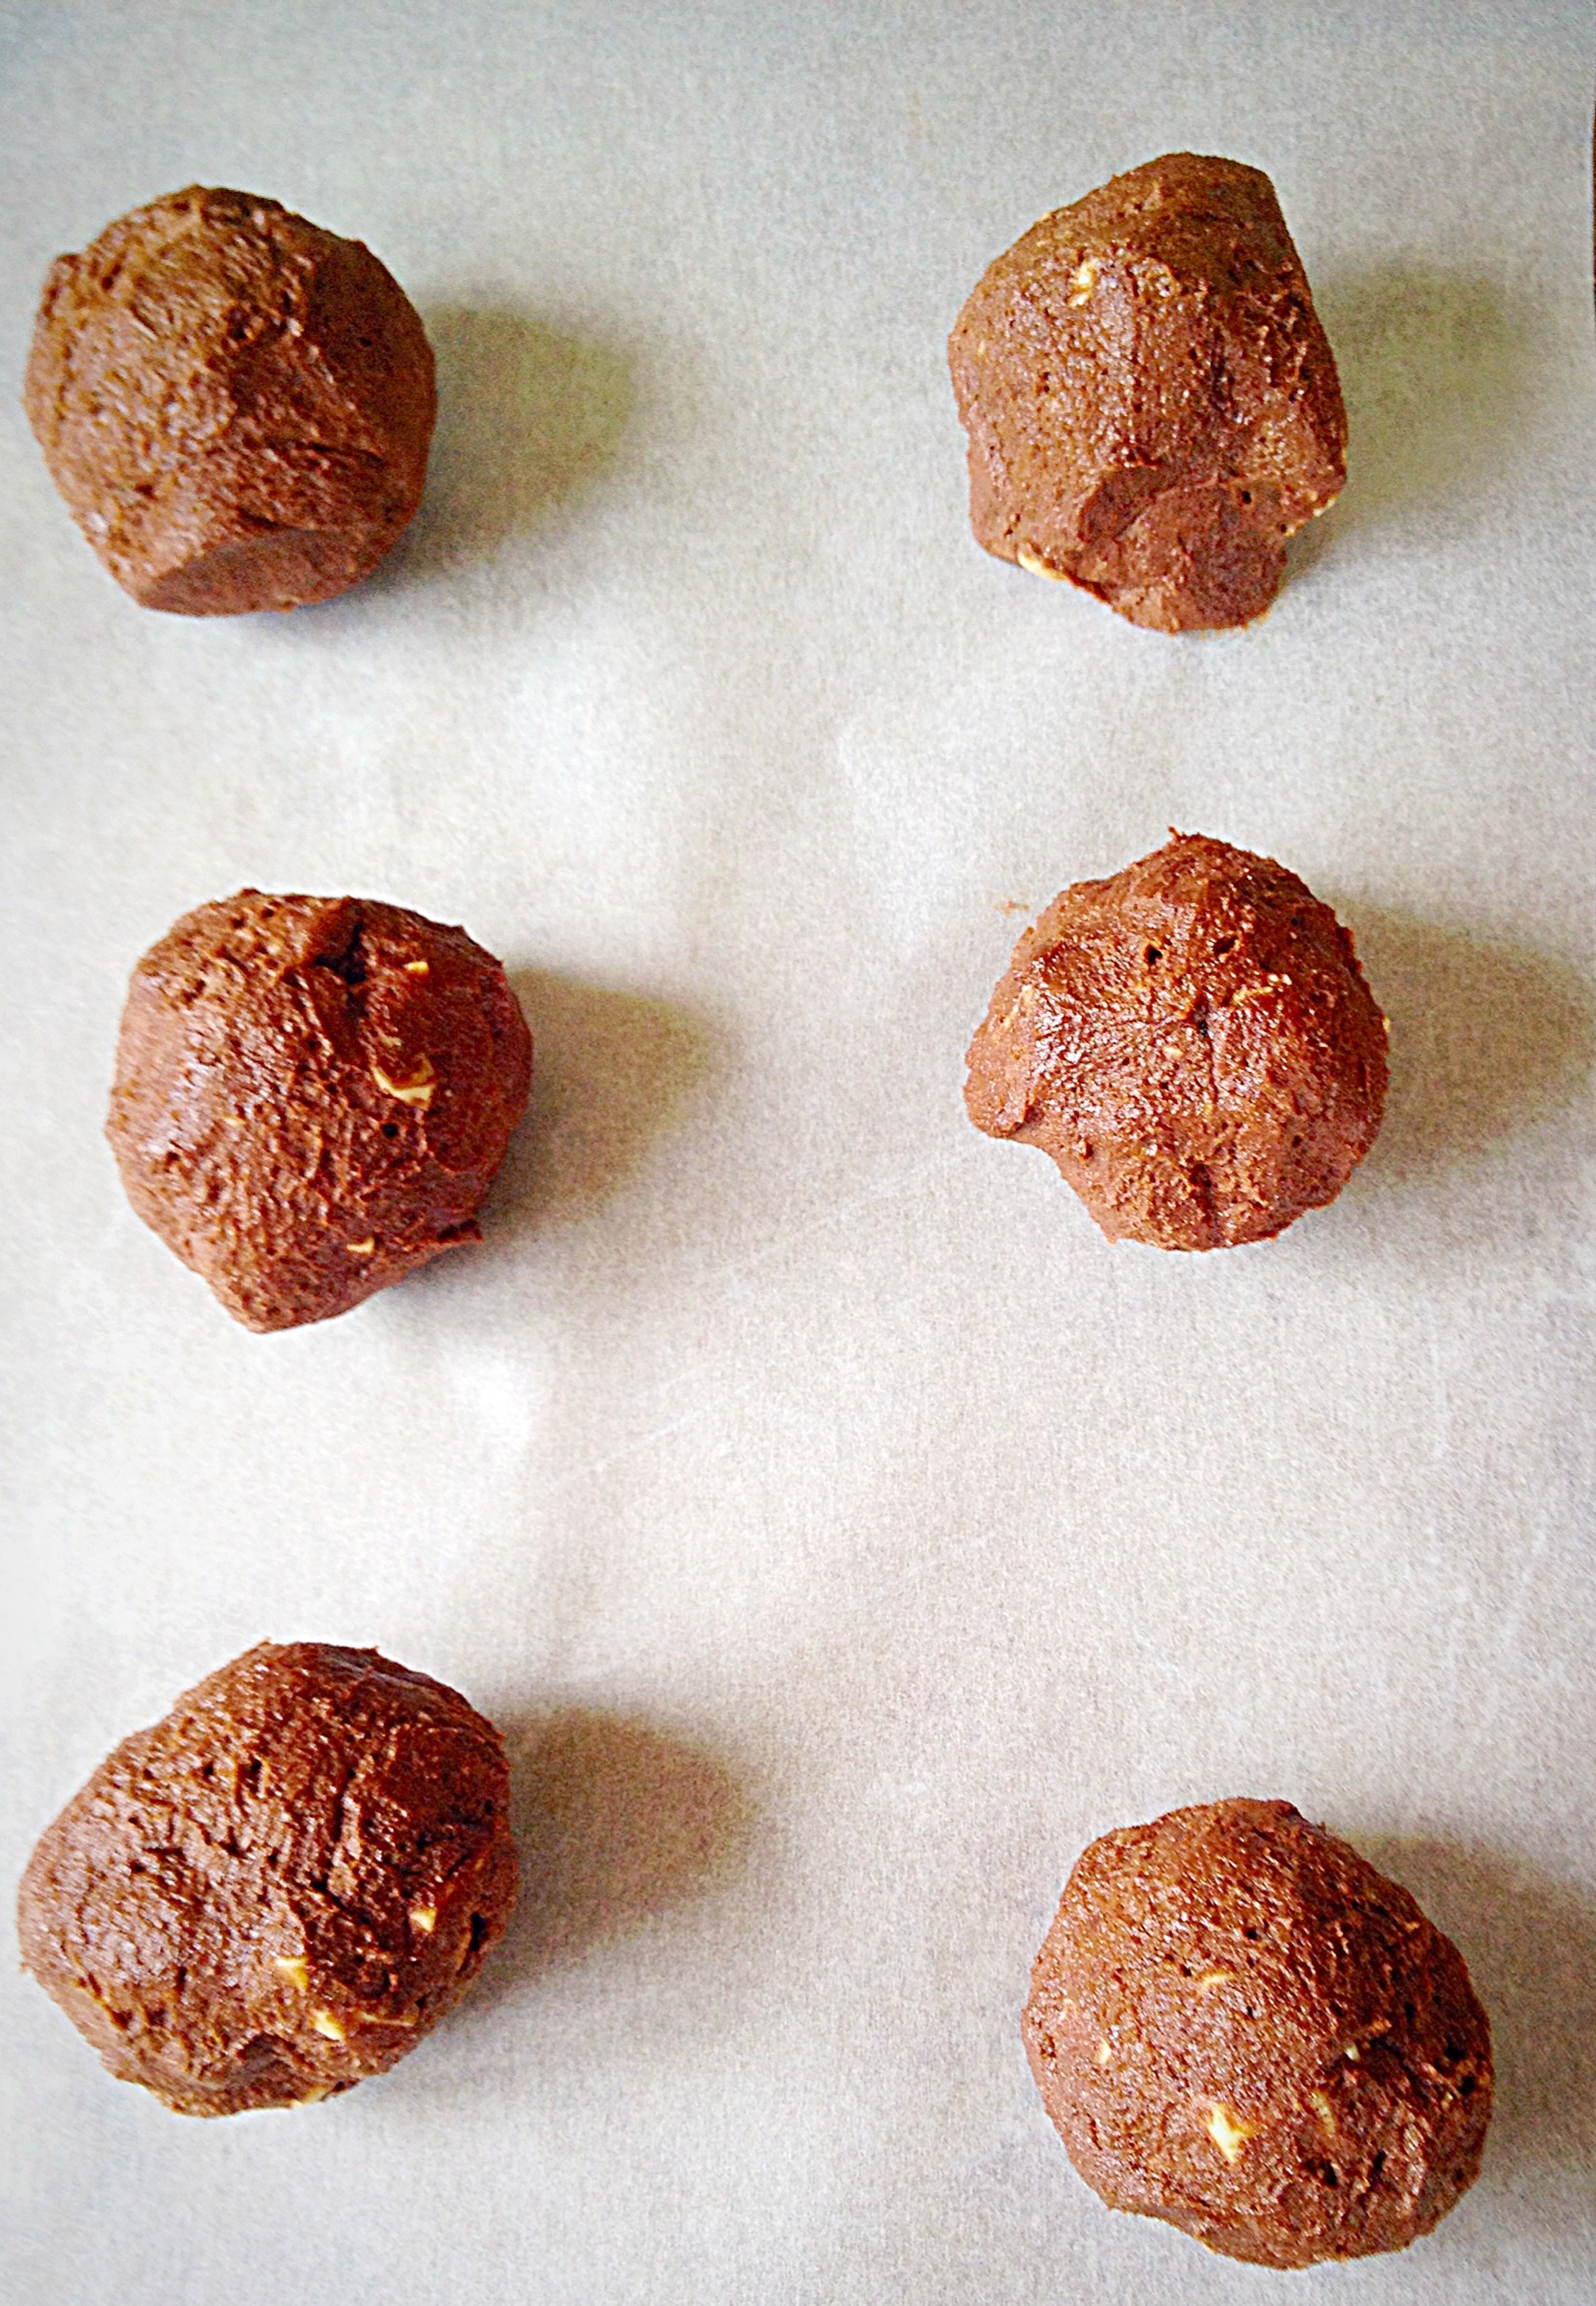
Take approximately a tablespoon of mixture, roll into a ball shape and place onto a parchment lined baking sheet.
Repeat until all the mixture is used.
These cookie dough balls are about to be squished!!!
Wash your hands, they WILL look like you’ve been making mud pies! Now using your fingers squish the cookie balls, they will still spread a bit whilst cooking.
The finger marks leave a pretty pattern even once baked!
Finally place the baking sheets in the oven and bake for 15-20 mins. I rotated my baking sheets halfway through the cooking process so that the cookies baked evenly. This is fine with cookies NOT cupcakes!
As soon as the cookies are baked remove from the oven and allow the Extreme Chocolate Cookies to cool on the trays for 5 mins, then transfer the cookies to a cooling rack.
Extreme Chocolate Cookies
While the cookies cooled I sent the children a text (at school – rebel mummy!!!) and put the kettle on for a lovely cuppa!!
Finally I can’t tell you how good it feels knowing I’m getting back to being me. Sooo good.
If you have enjoyed this recipe for Extreme Chocolate Cookies you may also like these: