Sun Dried Tomato Bread Pizza

Share
Facebooktwitterpinterestlinkedintumblr

Over the past couple of days Summer has asserted itself with a vengeance. Temperatures above 30C, blisteringly hot sunshine and clear blue skies. I love Summer and sunshine, but even this has been a little too hot for me. Cooking becomes a chore, rather than its usual relaxing pleasure. So you can imagine how relieved I was to be able to prepare a meal in under 10 minutes. Grabbing a packet of  Wright’s Baking cheddar and sun dried tomato bread mix, I came up with this easy Sun Dried Tomato Bread Pizza.

FF Sun Dried Tomato Base Pizza
Sun Dried Tomato Bread Pizza a delicious twist on a regular pizza base.

Also I have a recipe for Sun Dried Tomato Bread, which I’m sure would work just as well. However, I needed an easy, quick prep meal. So thank you Wright’s Baking for yet again coming to my rescue.

FF Sun Dried Tomato Base Pizza
Delicious Sun Dried Tomato Bread Pizza served with crunchy homemade coleslaw.

Pizza – So Much More Than The Toppings

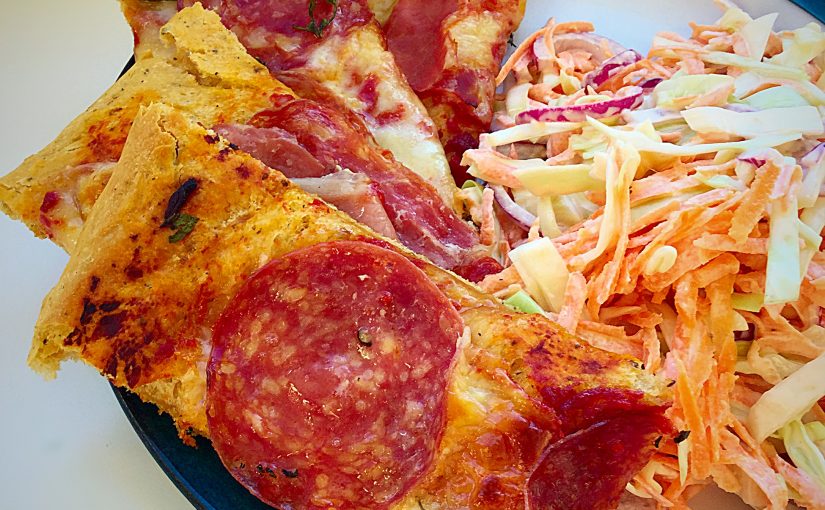
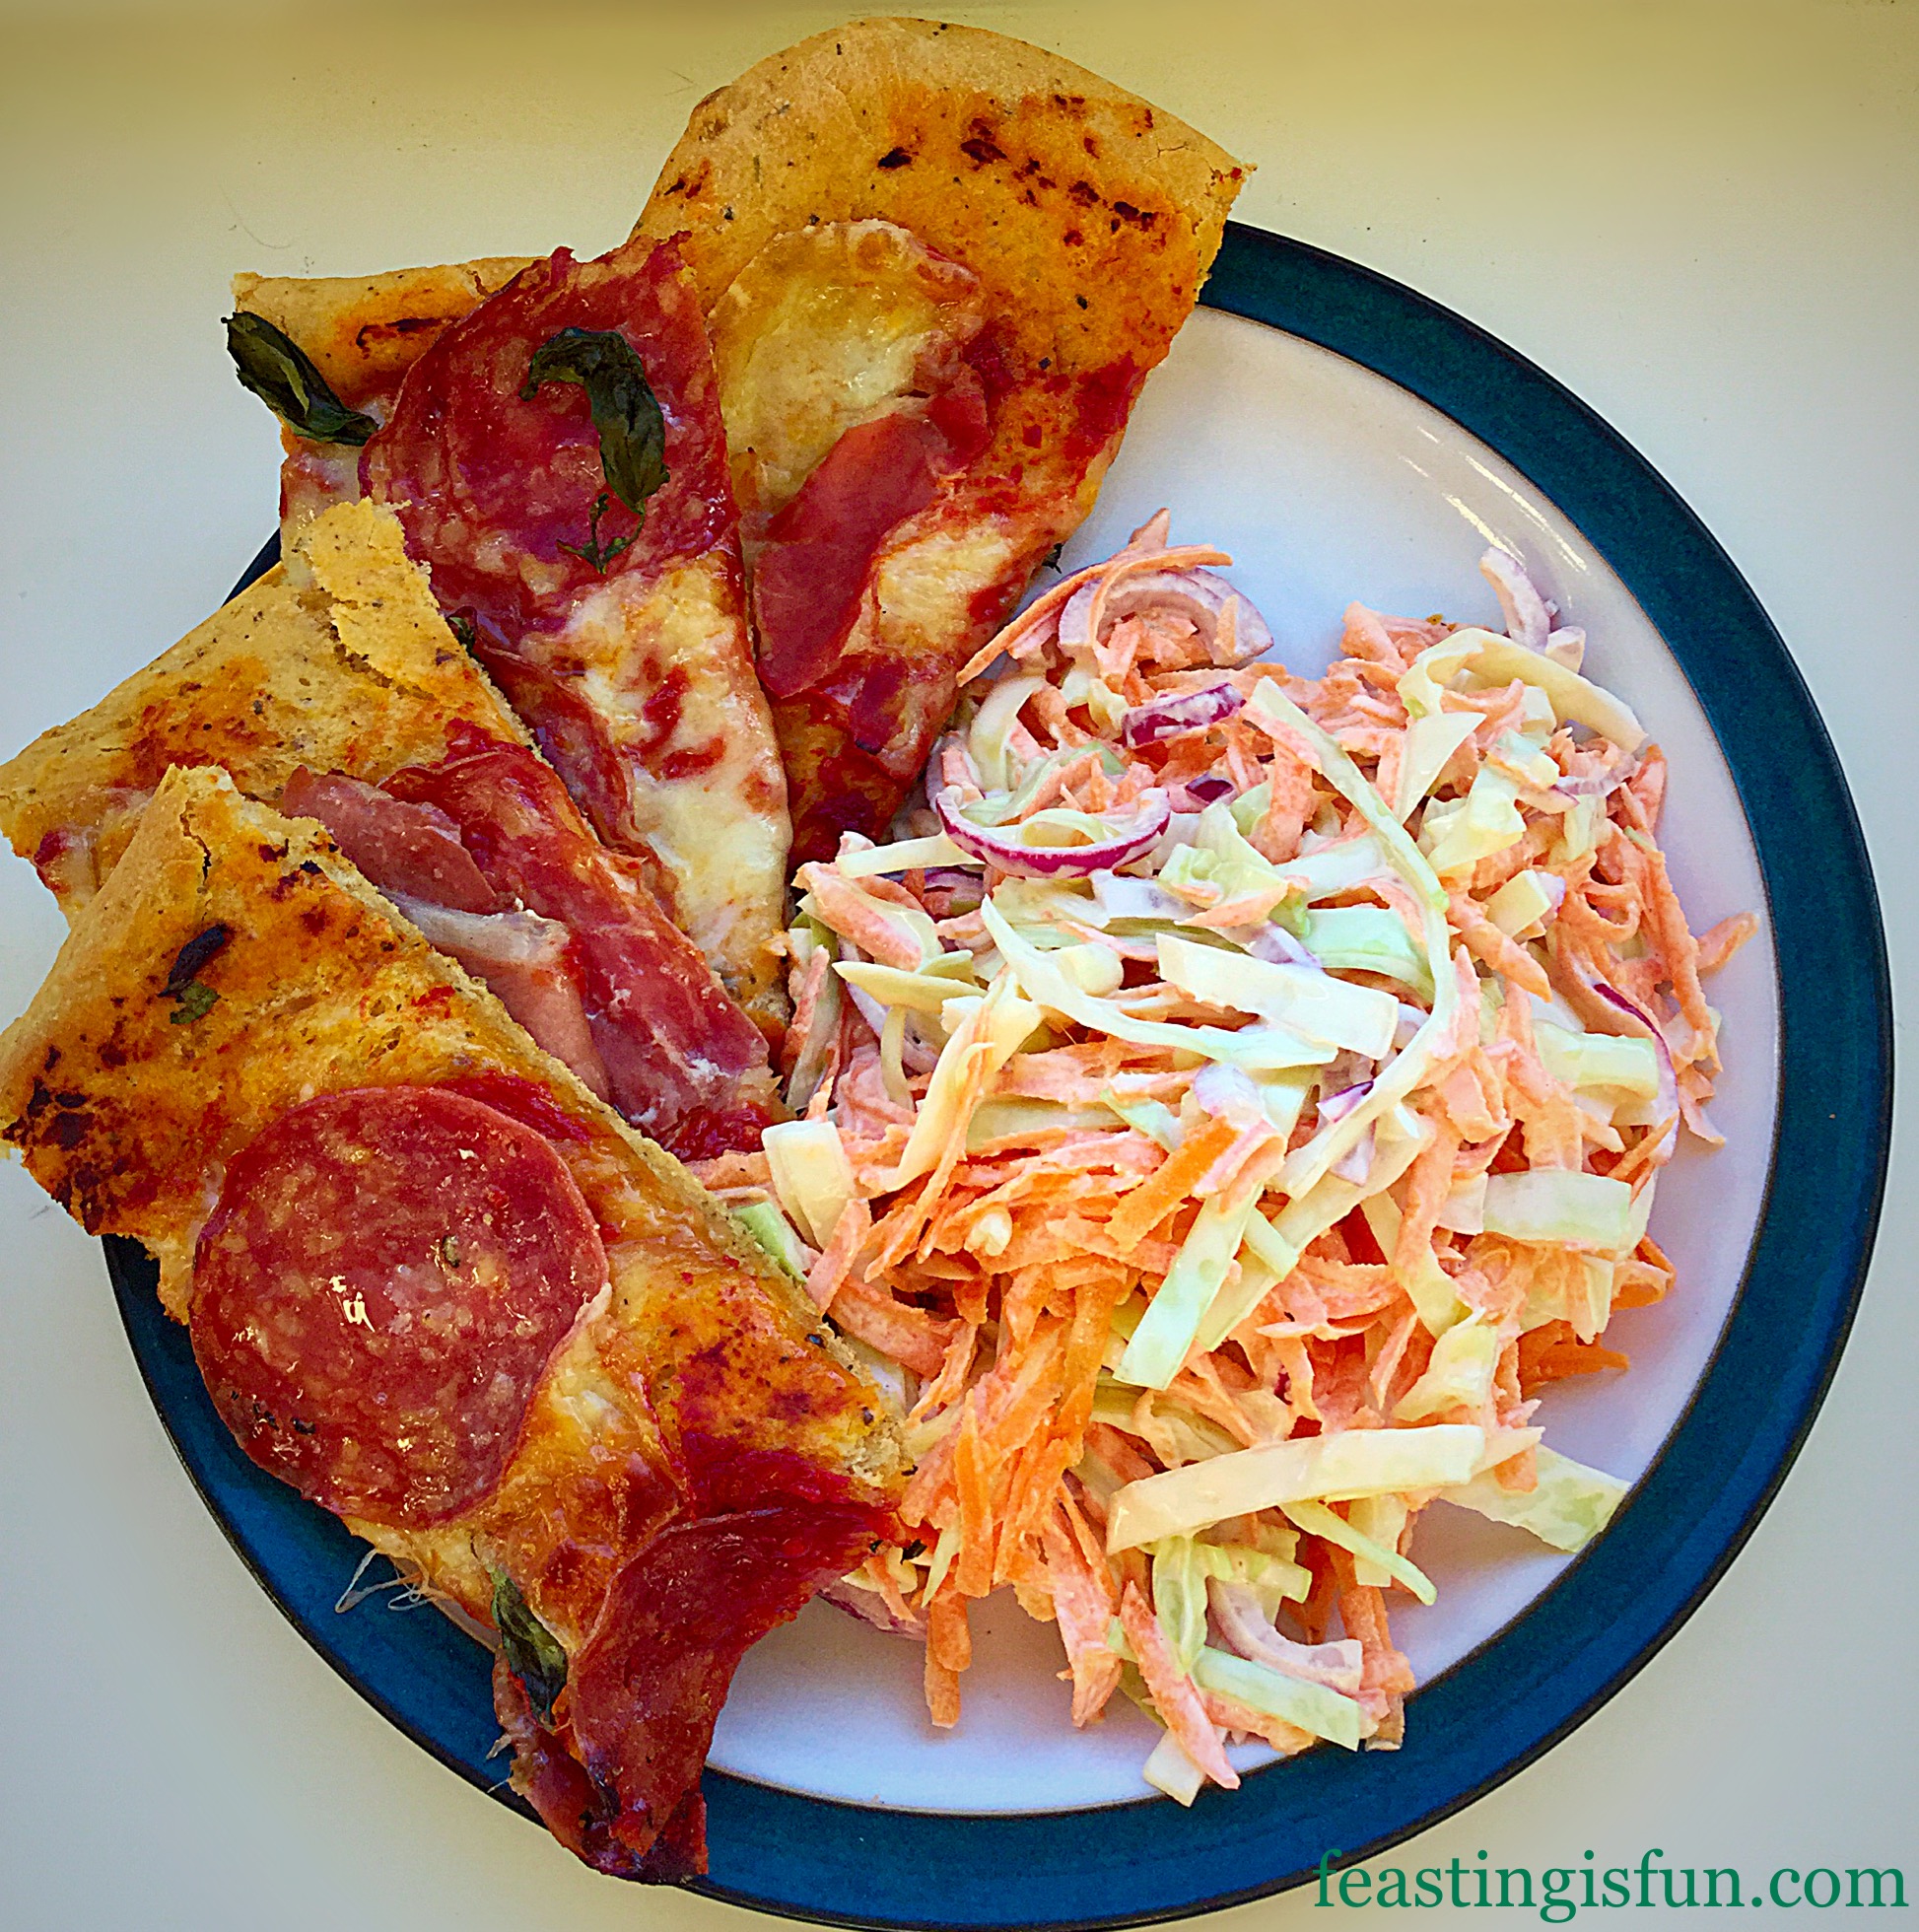
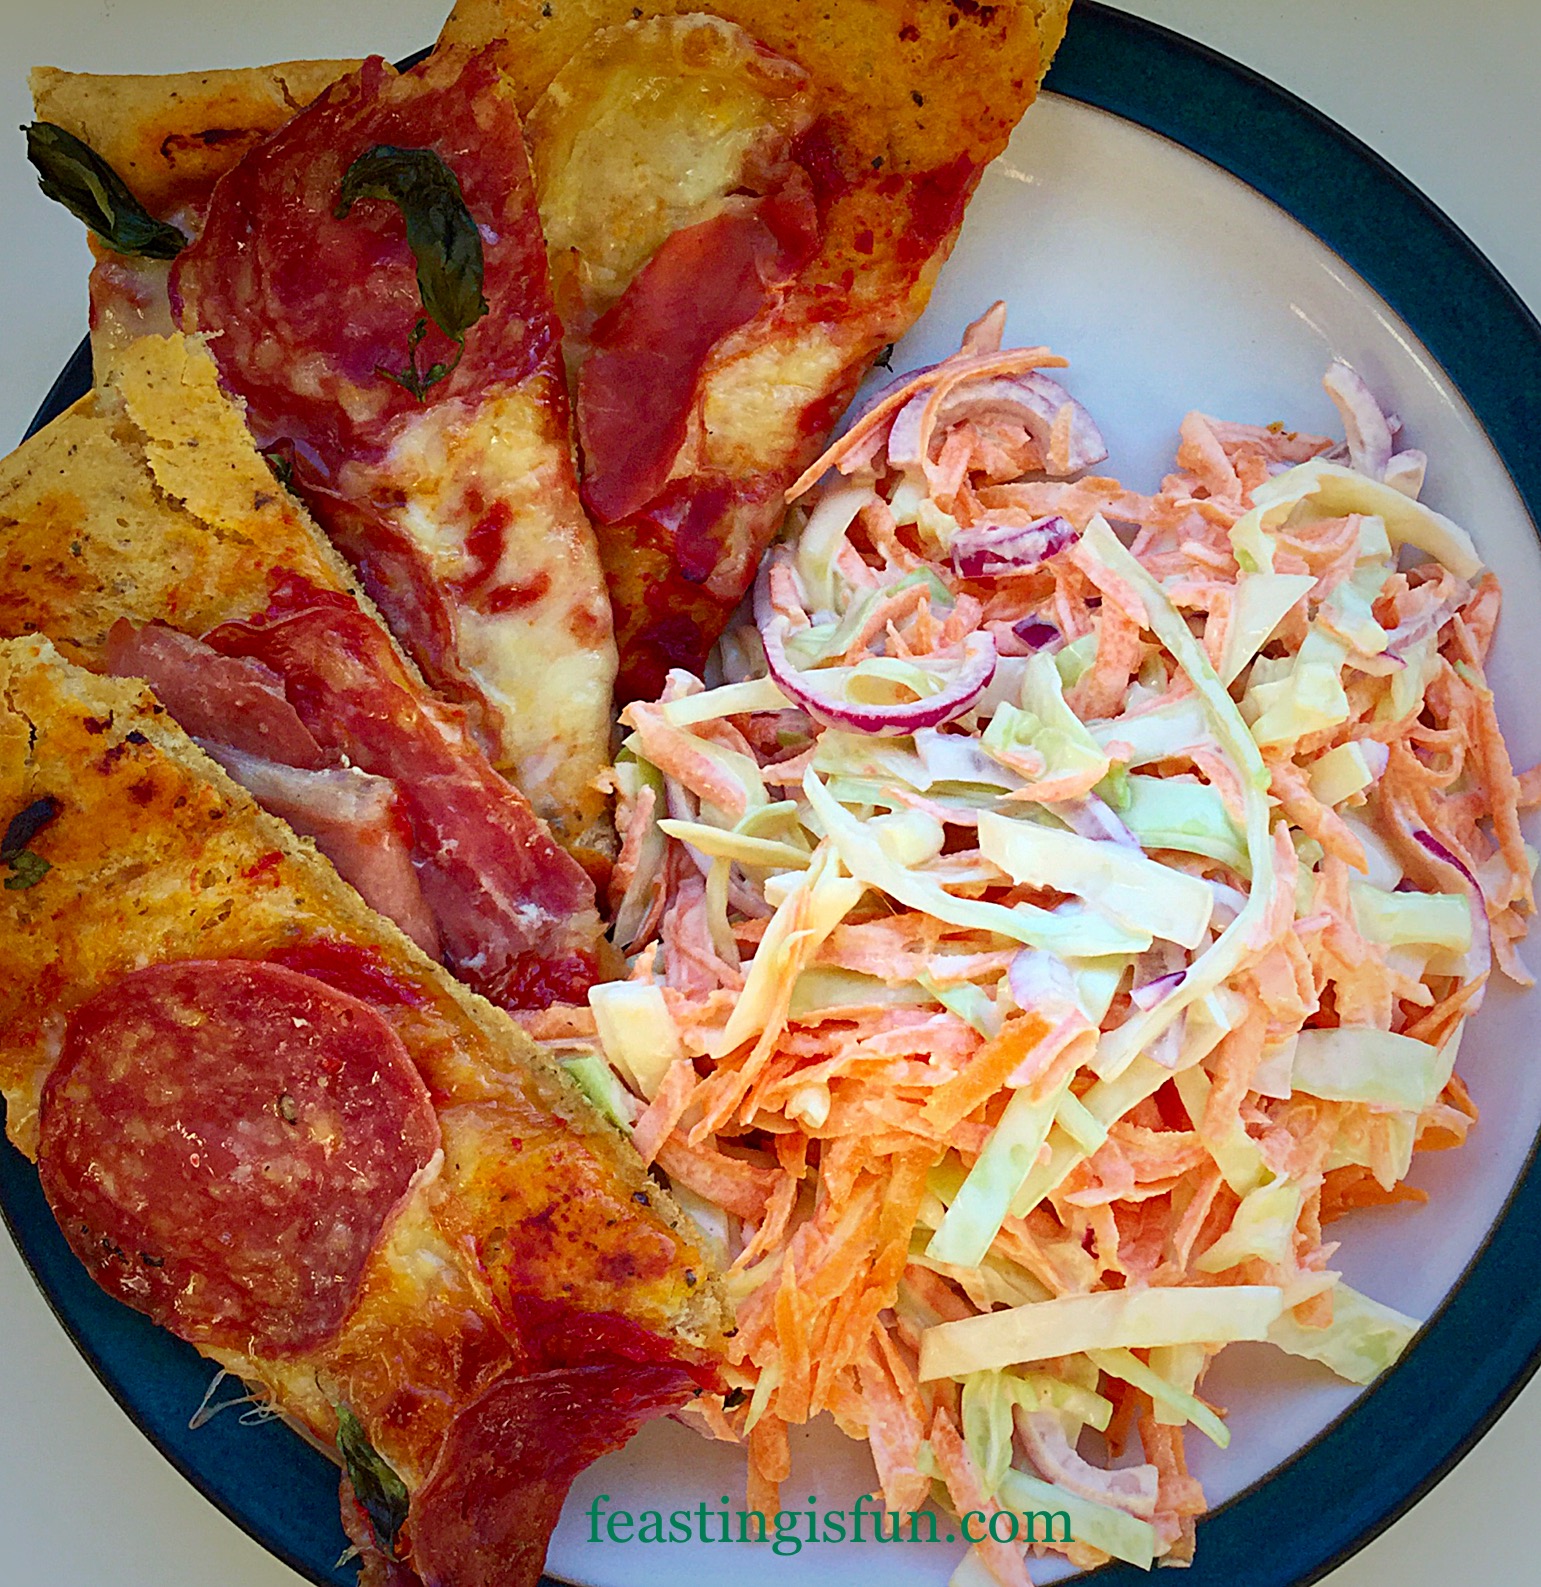
The beauty of using the sun dried tomato bread mix, is that while it is mixing, in the stand mixer, I can make my Crunchy Homemade Coleslaw. I always keep lemons in the kitchen and I love the way they not only thin the mayonnaise, but also remove the acrid taste from the onions in this coleslaw, which is, in my opinion one of the best accompaniments to homemade pizza.

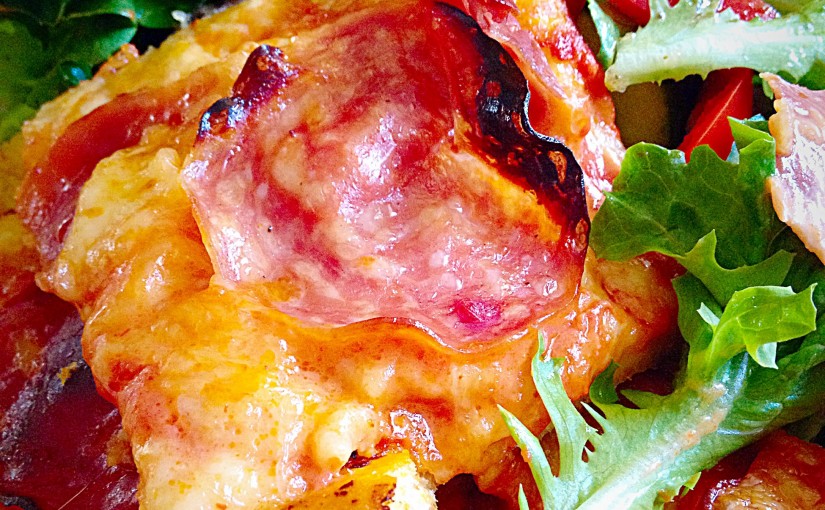
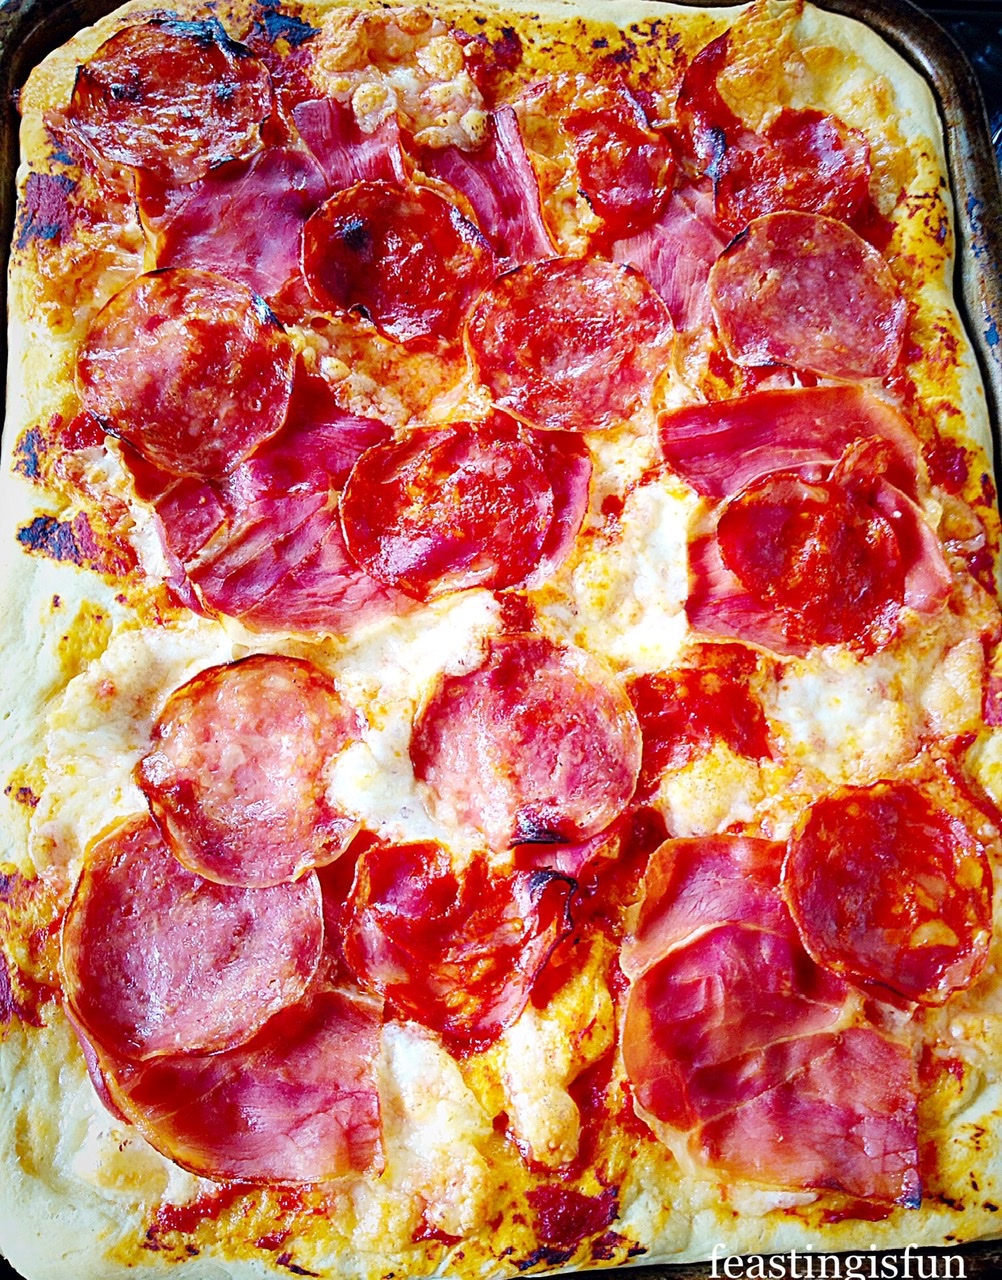
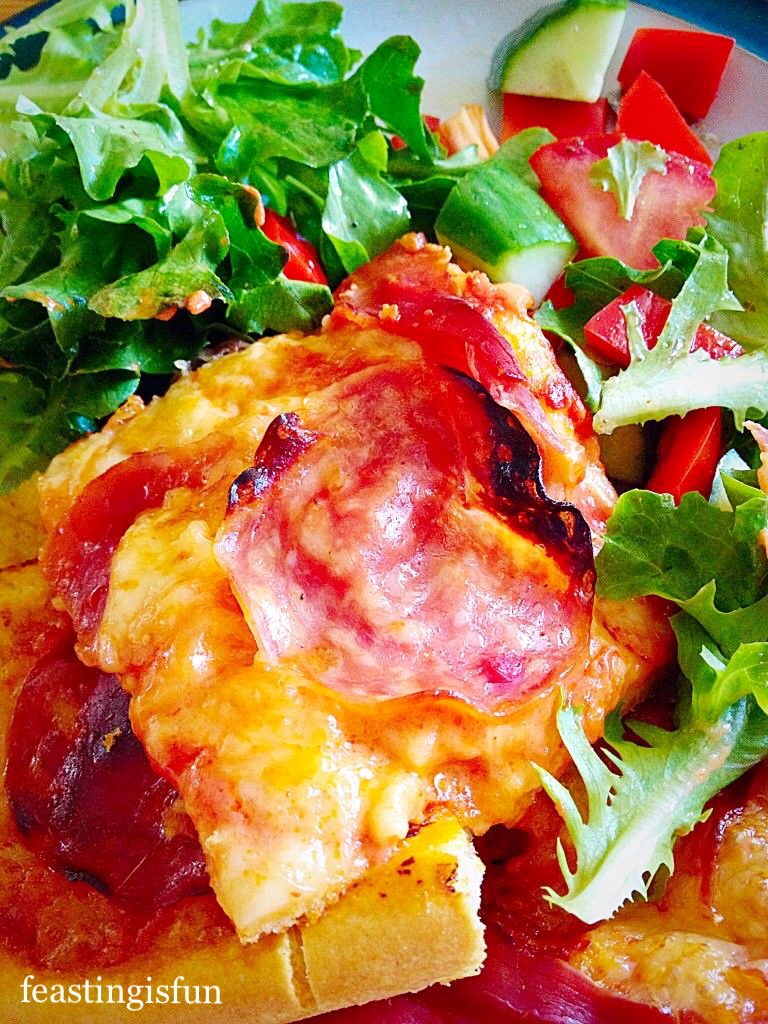
What’s great about making your own pizza, is that you can top it with whatever you like. I had an antipasto meat selection in the fridge that went beautifully with the delicious sun dried tomato base. In fact as well as lemons I generally have mozerella and at least one packet of cured meat in the fridge. Pizza makes a quick, delicious and nutritious meal, providing it is served with a healthy pile of salad of coleslaw!

FF Sun Dried Tomato Bread Pizza
Sun Dried Tomato Bread Pizza what would you top yours with?

It’s All About The Base

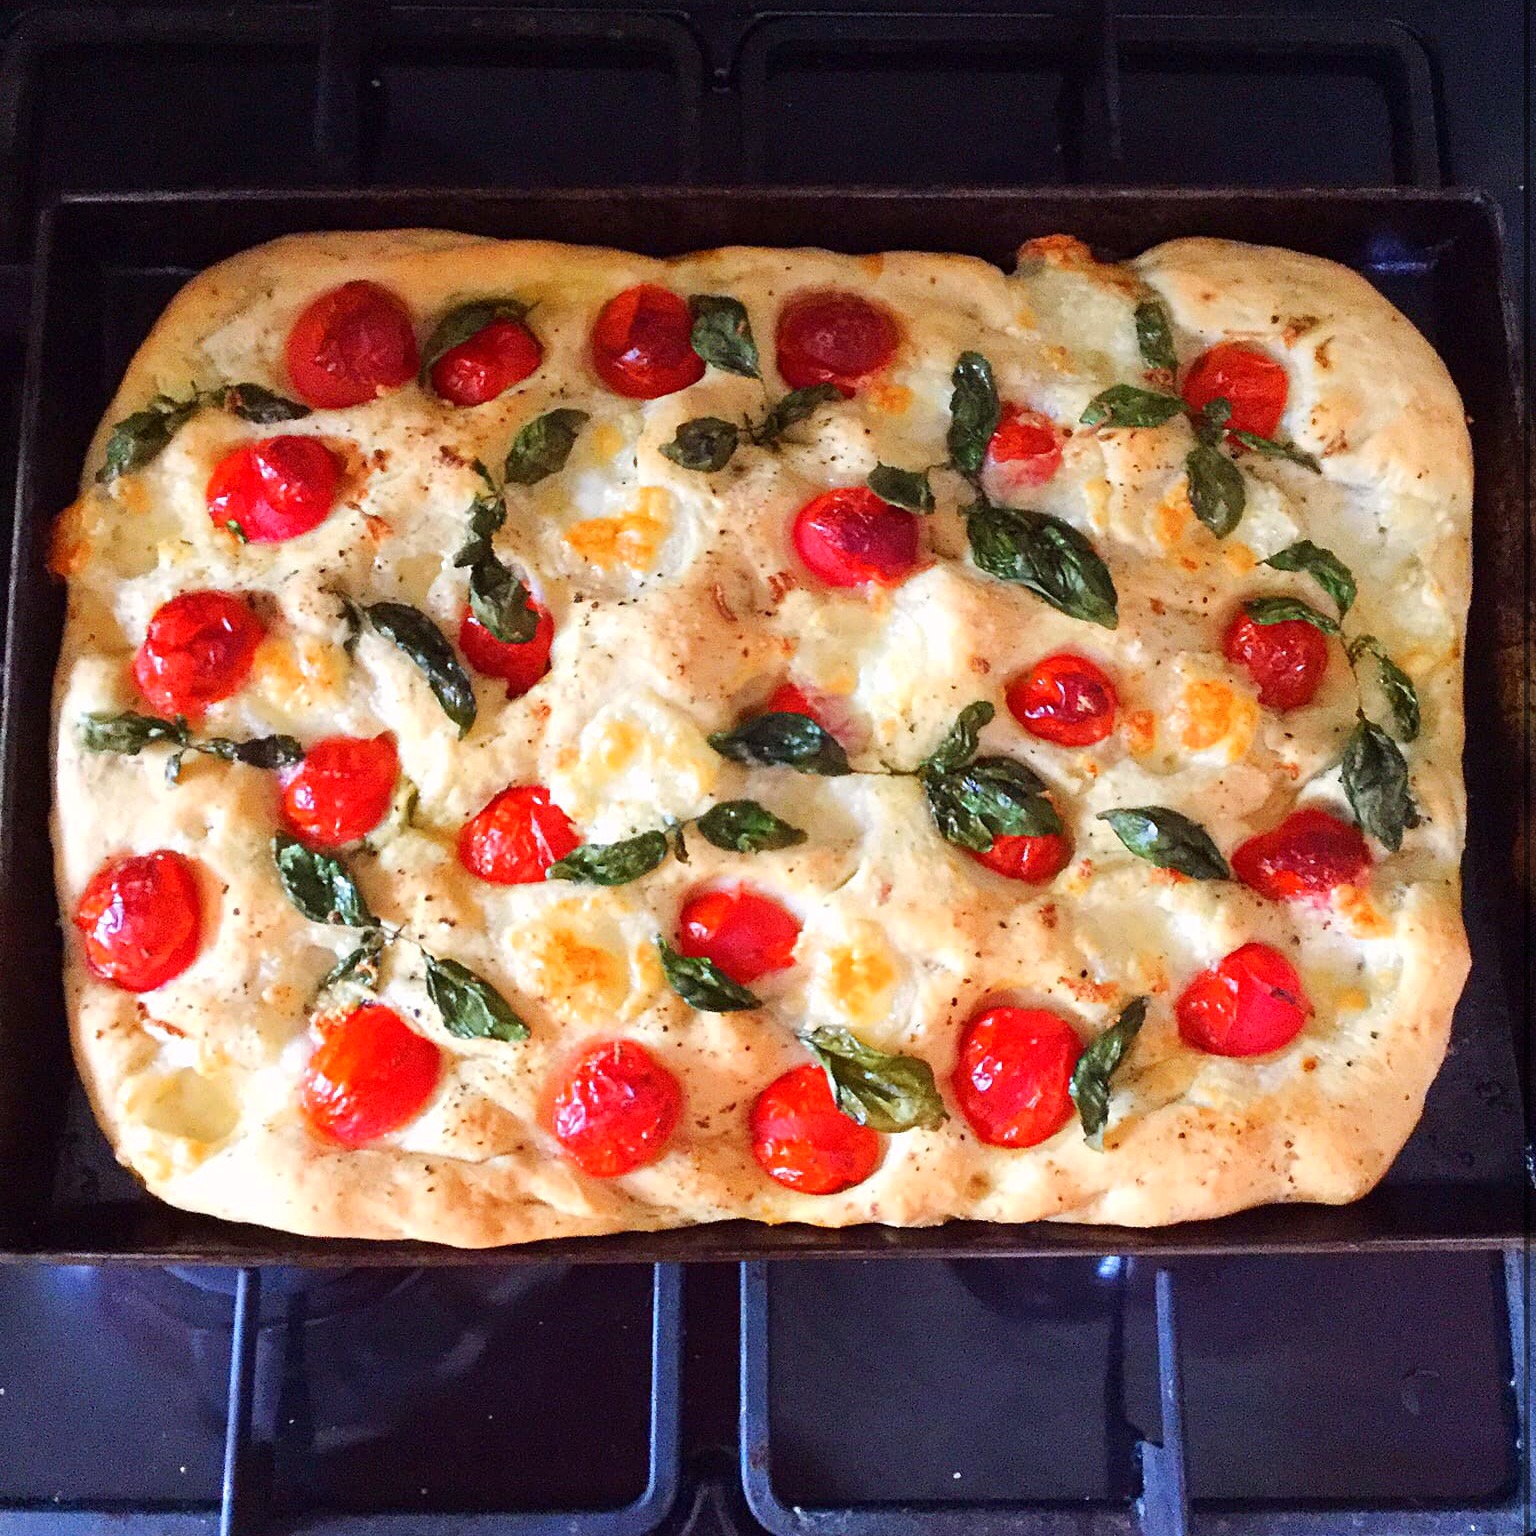
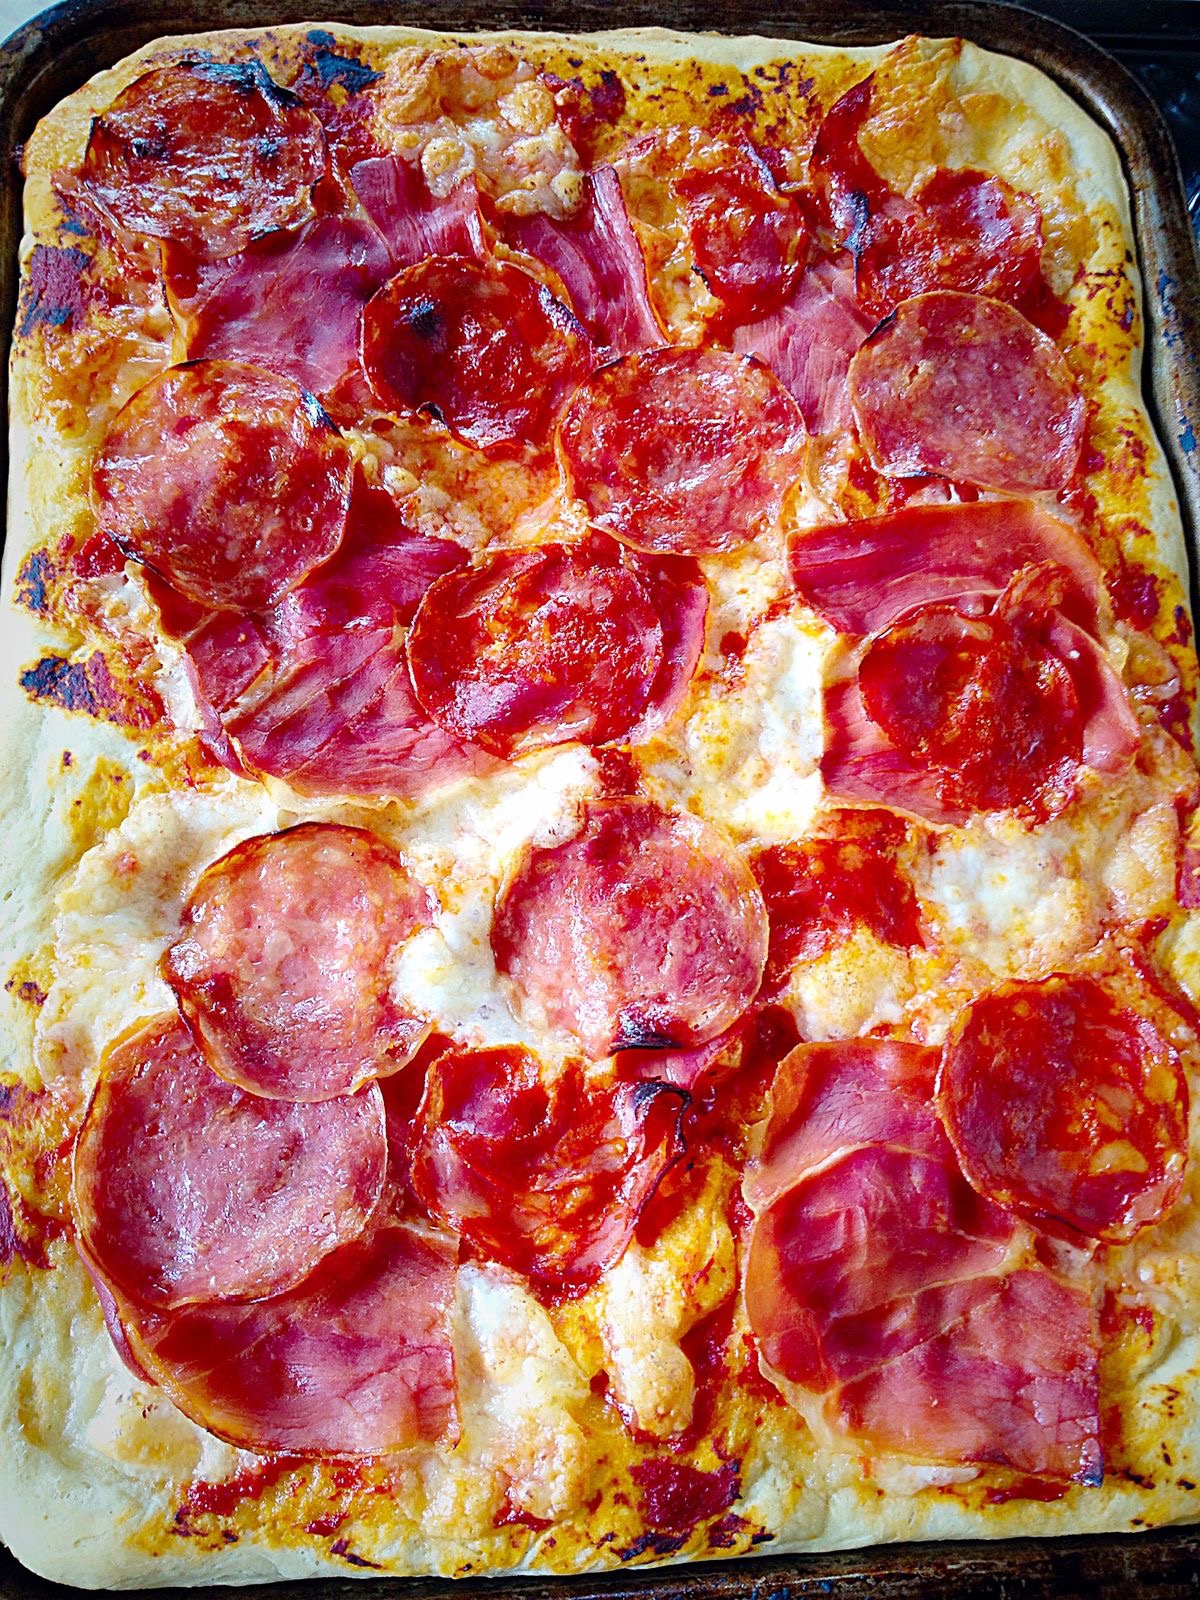
I have to mention just how completely delicious the base of this Sun Dried Tomato Bread Pizza is. The crust doesn’t turn jaw breakingly hard, but remains slightly soft with a delicious salty parmesan and herb tomato flavour all of its own. I wouldn’t recommend overloading this pizza with topping as the base is just as delicious, if not more so, than what you top it with.

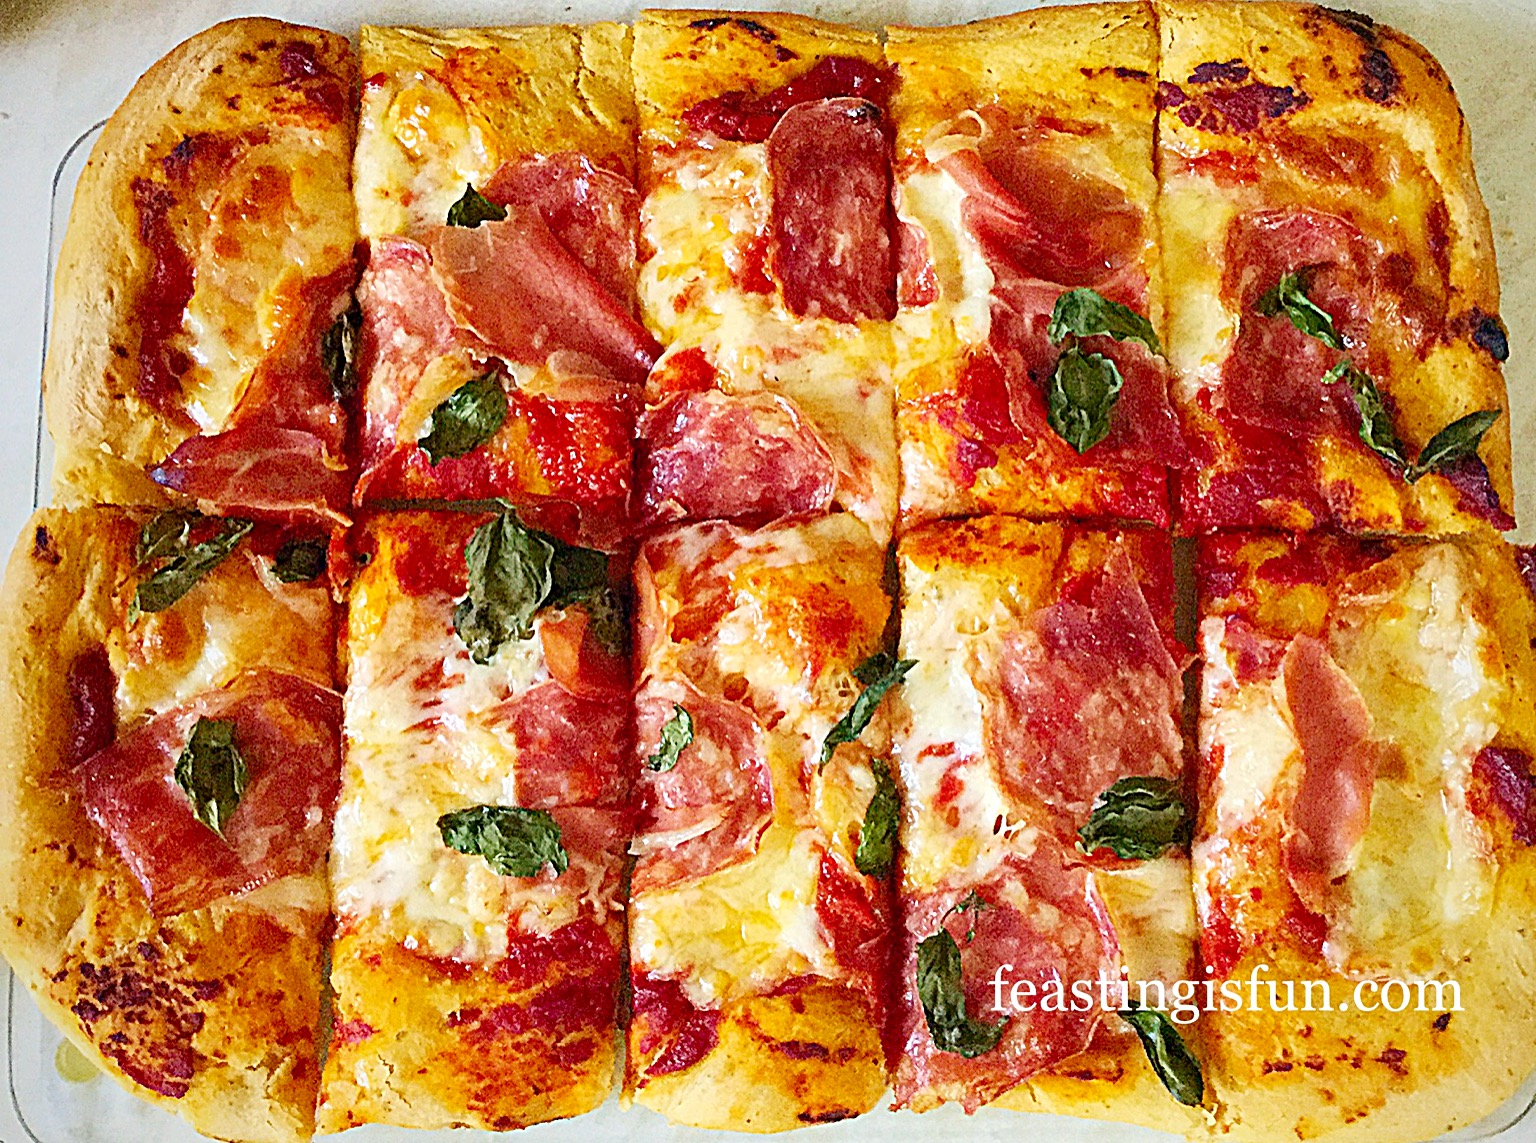
Make this Sun Dried Tomato Bread Pizza with toppings that will work with the tasty bread base. In fact this pizza would be wonderful with a little sauce, mozerella and some basil leaves. The sun dried tomato bread base really is that good.

Recipe: Makes 2 Large Sun Dried Tomato Bread Pizza  – makes 20 slices

1 Packet Cheddar and Sun Dried Tomato Bread Mix by Wright’s Baking  – alternatively use my Sun Dried Tomato Bread  recipe – although I would recommend adding 1/2tsp of dried oregano to the flour

4tbsp Tomato Purée

2tbsp Olive Oil plus a little extra for greasing the baking trays – I use Filippo Berio

400g Block of Mozzerella

Selection of cured meats for topping

2 handfuls fresh basil leaves

Method:

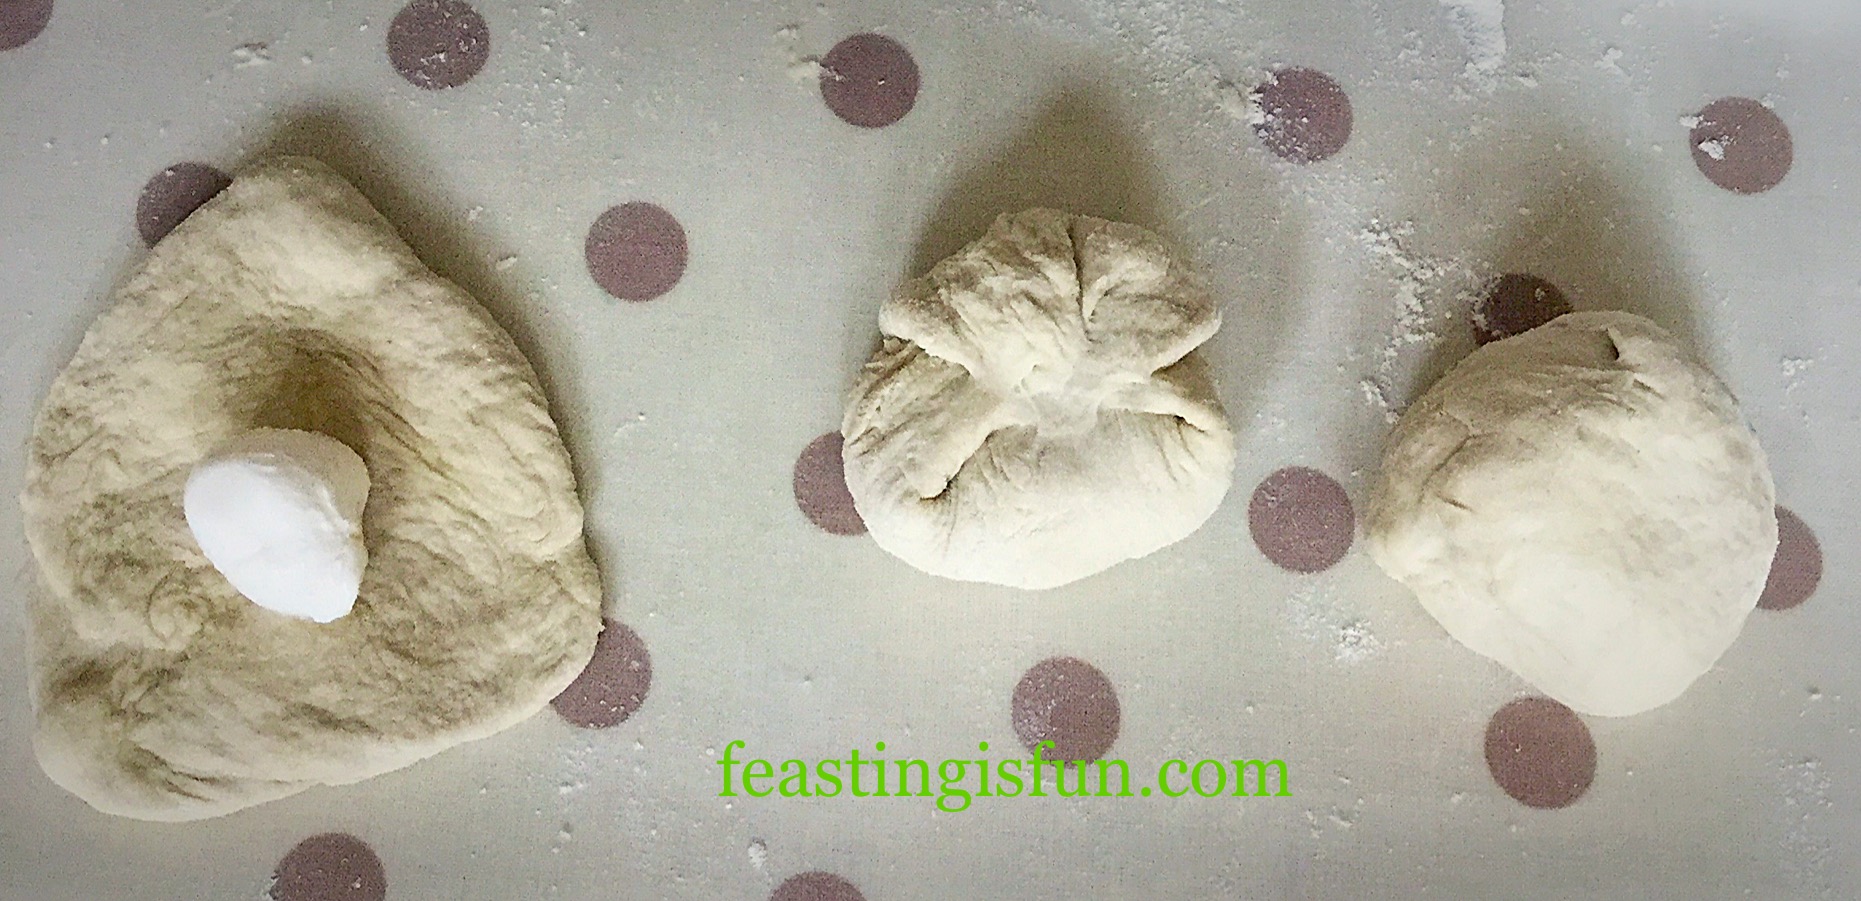
Making The Pizza Dough

  • Make the Cheddar and Sun Dried Tomato Bread Mix according to the instructions on the packet.
  • TIP – while the bread is mixing make the coleslaw or salad!
  • Grease 2 large baking trays with a little olive oil.
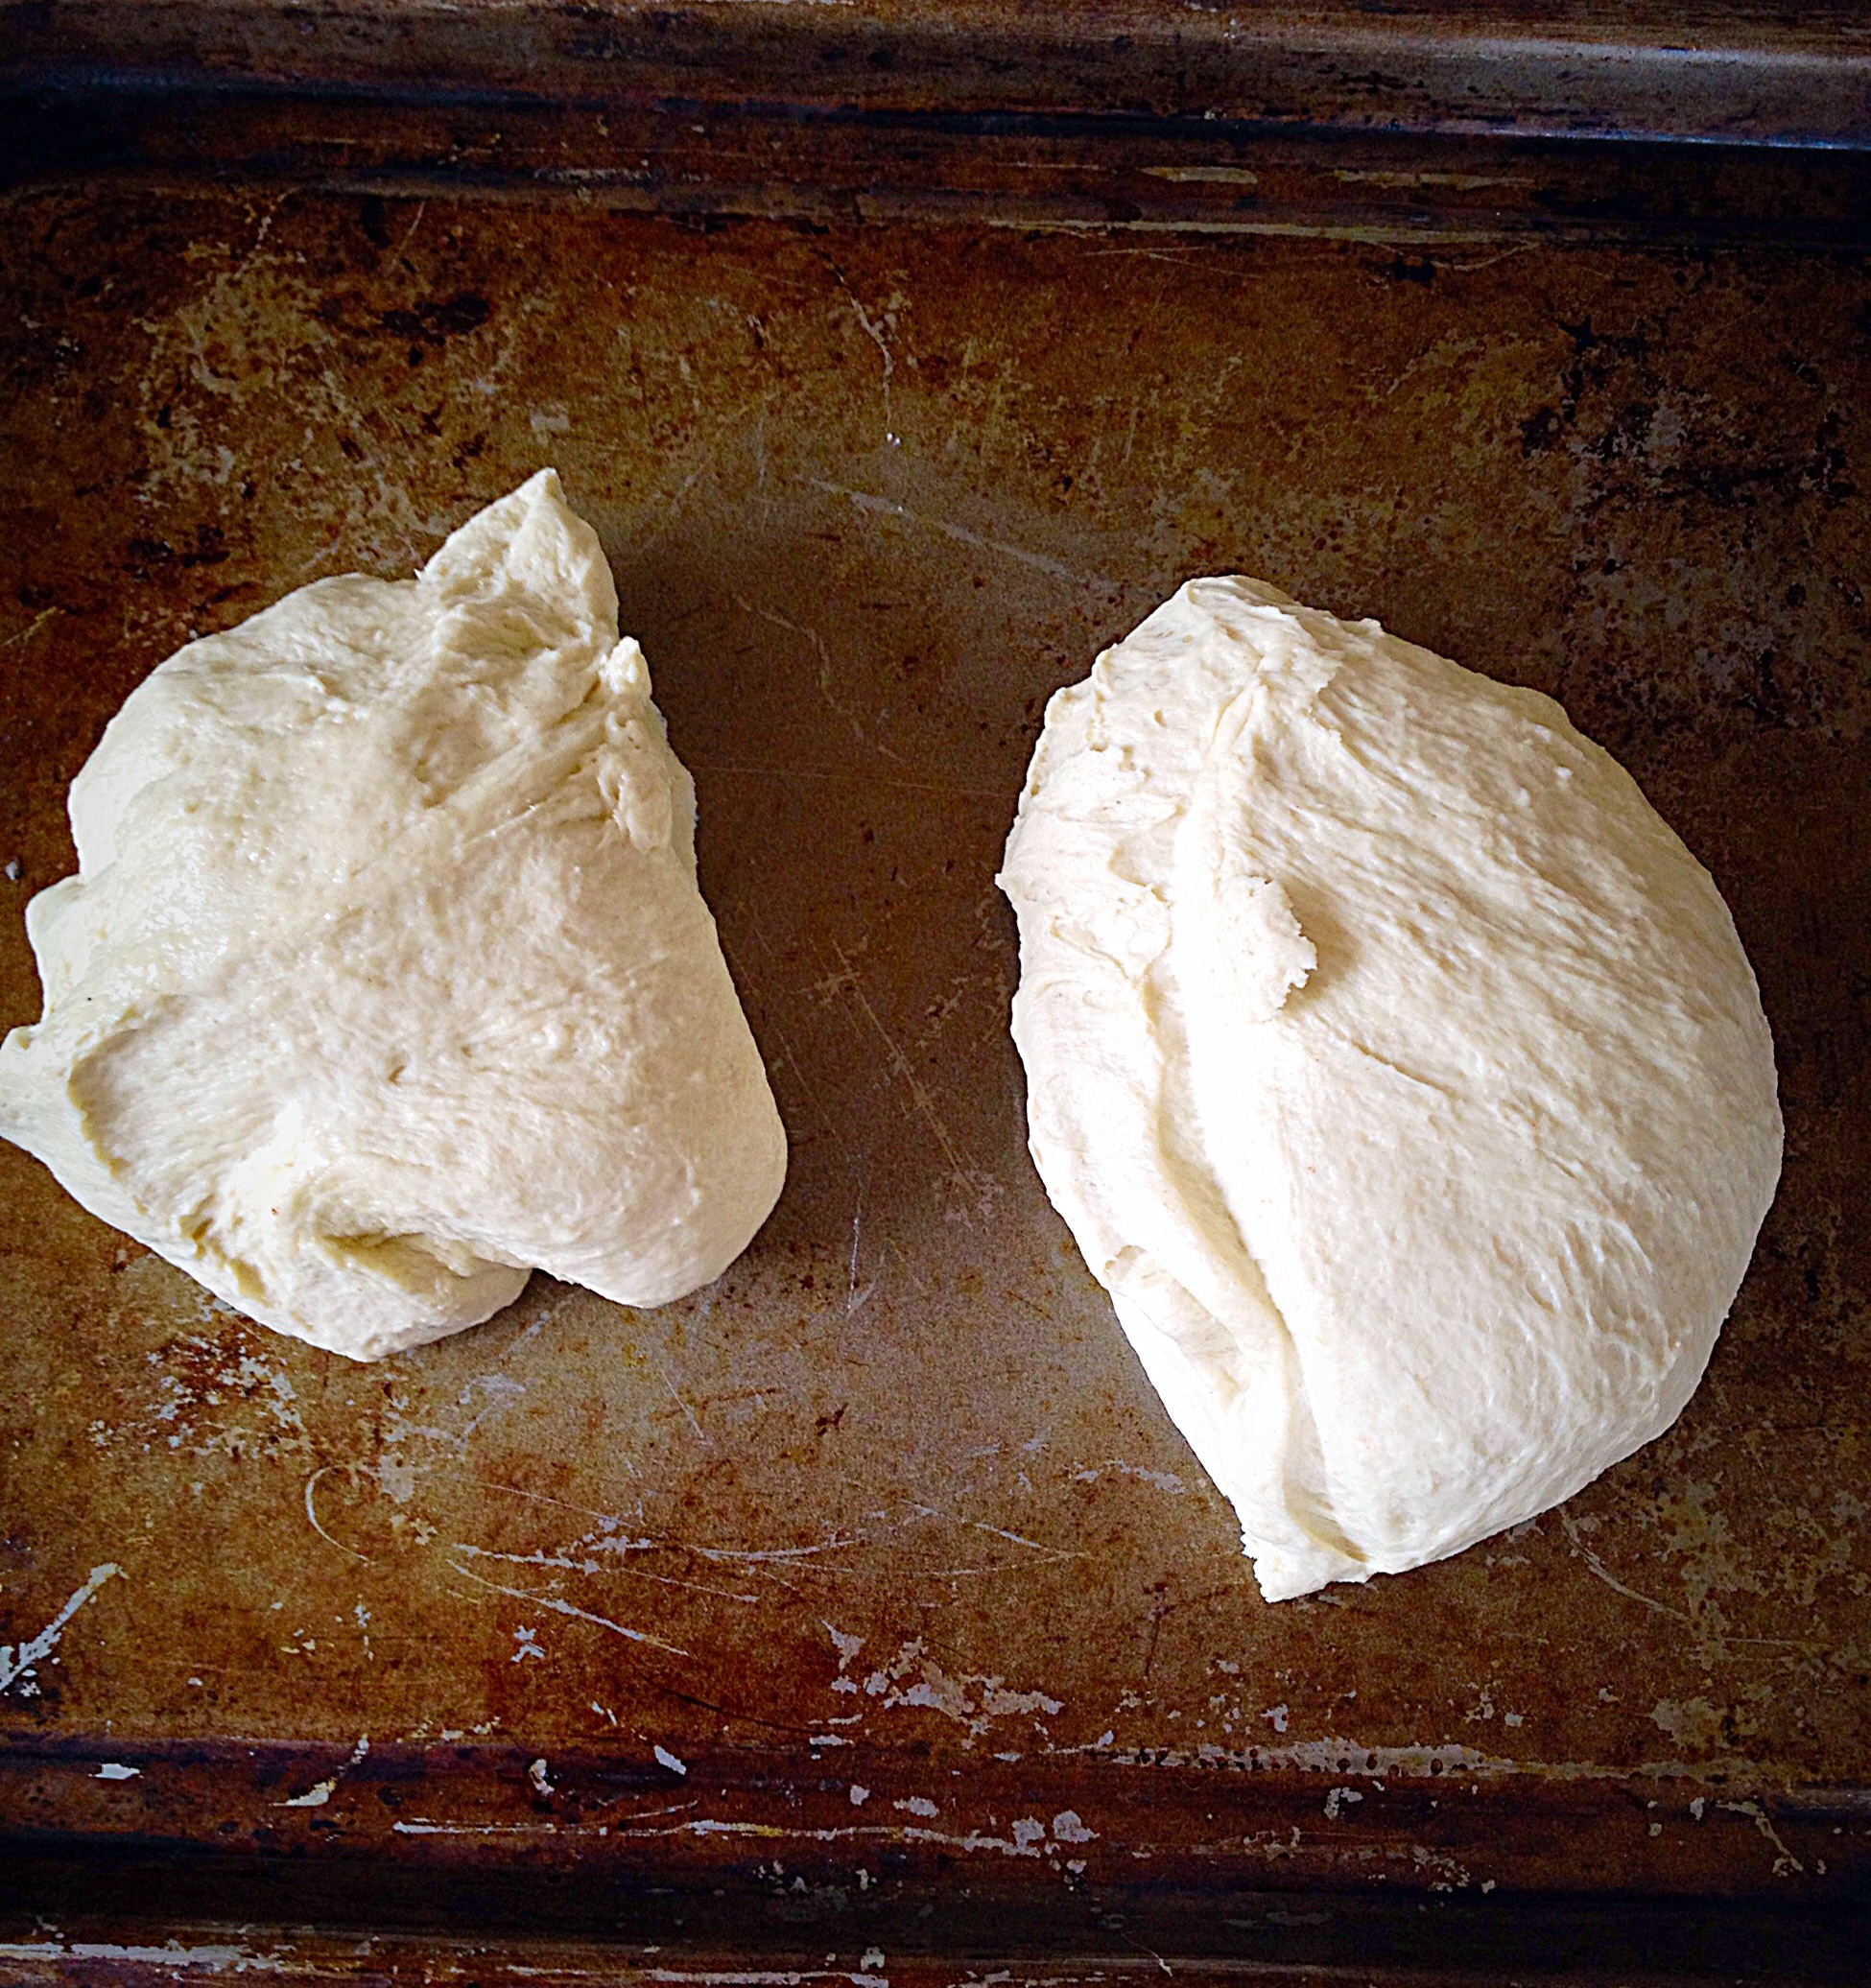
  • Turn the kneaded bread dough on to one baking tray and divide in half.
FF Sun Dried Tomato Bread Pizza
Divide the sun dried tomato bread dough in half.
  • Place one half of the bread dough on each of the oiled baking trays.
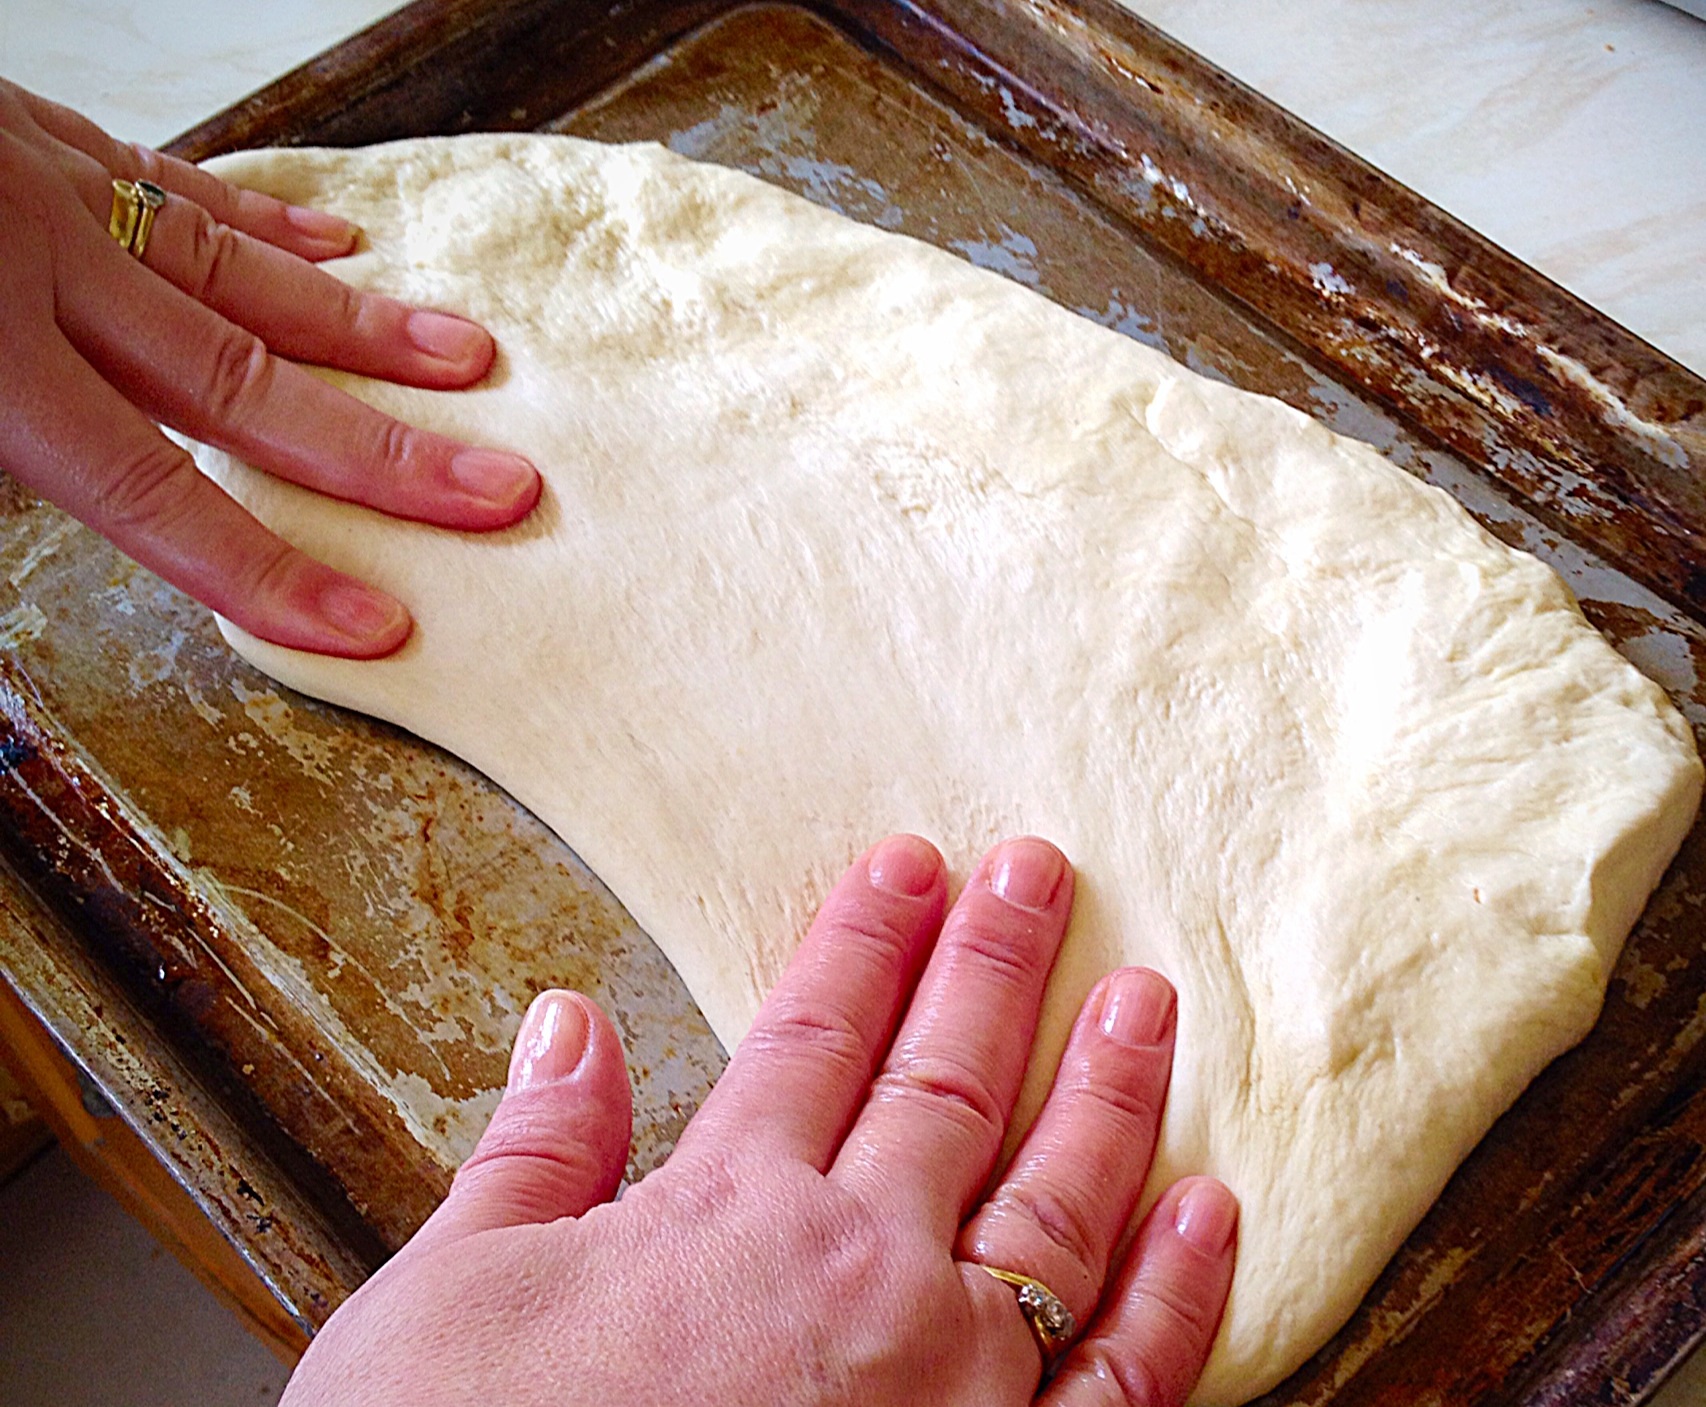
  • Rub your hands in a little oil and then gently pat the dough until it is flat and fills the baking sheet. Do the same for the other half of the dough.

Adding The Pizza Toppings

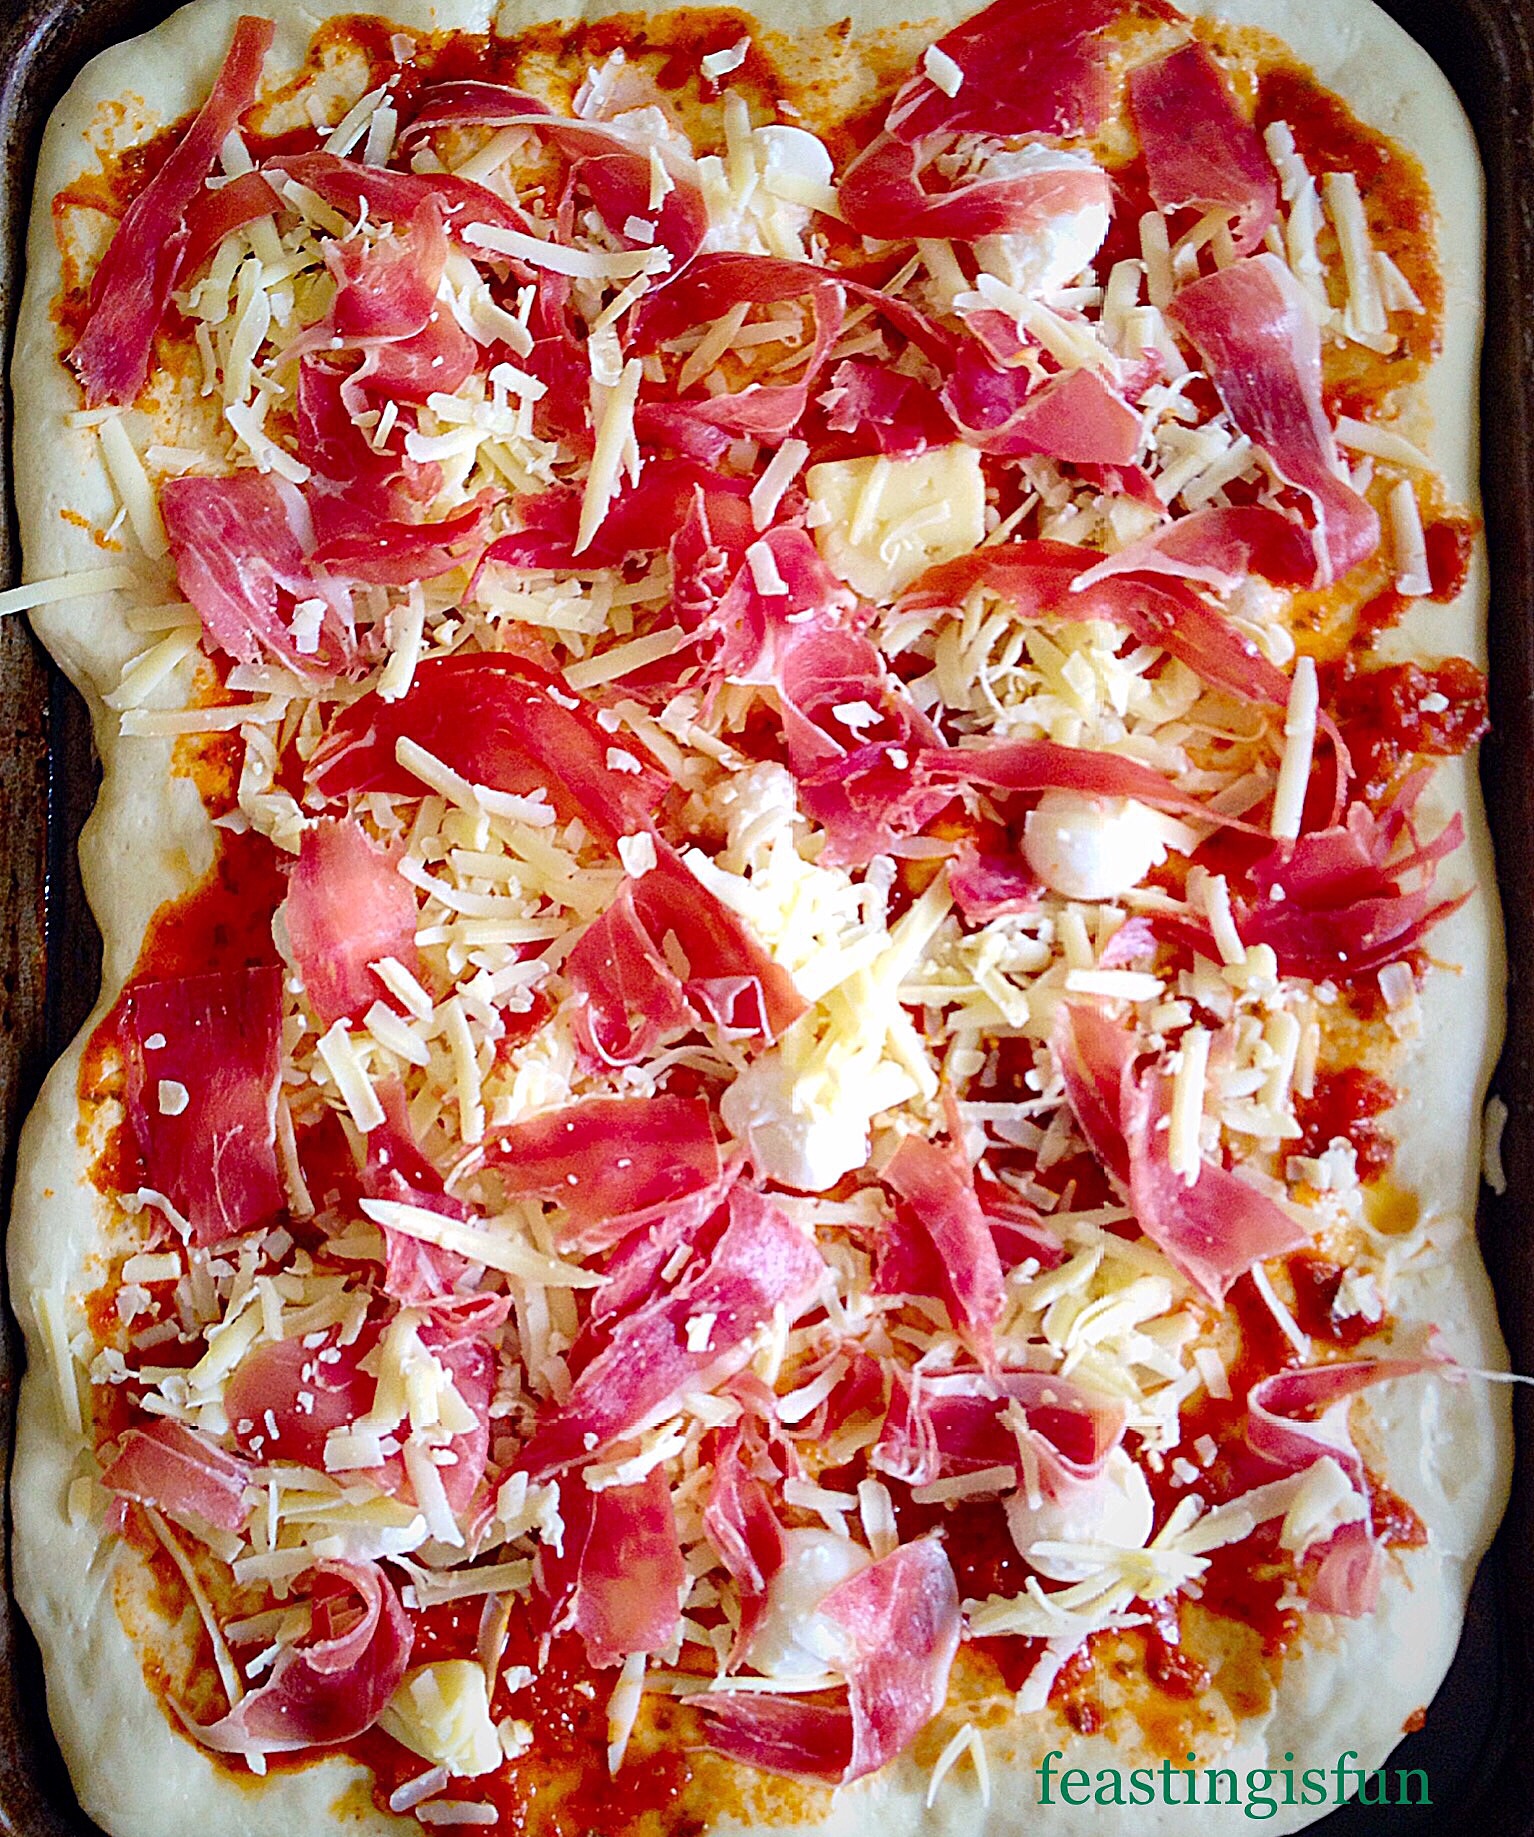
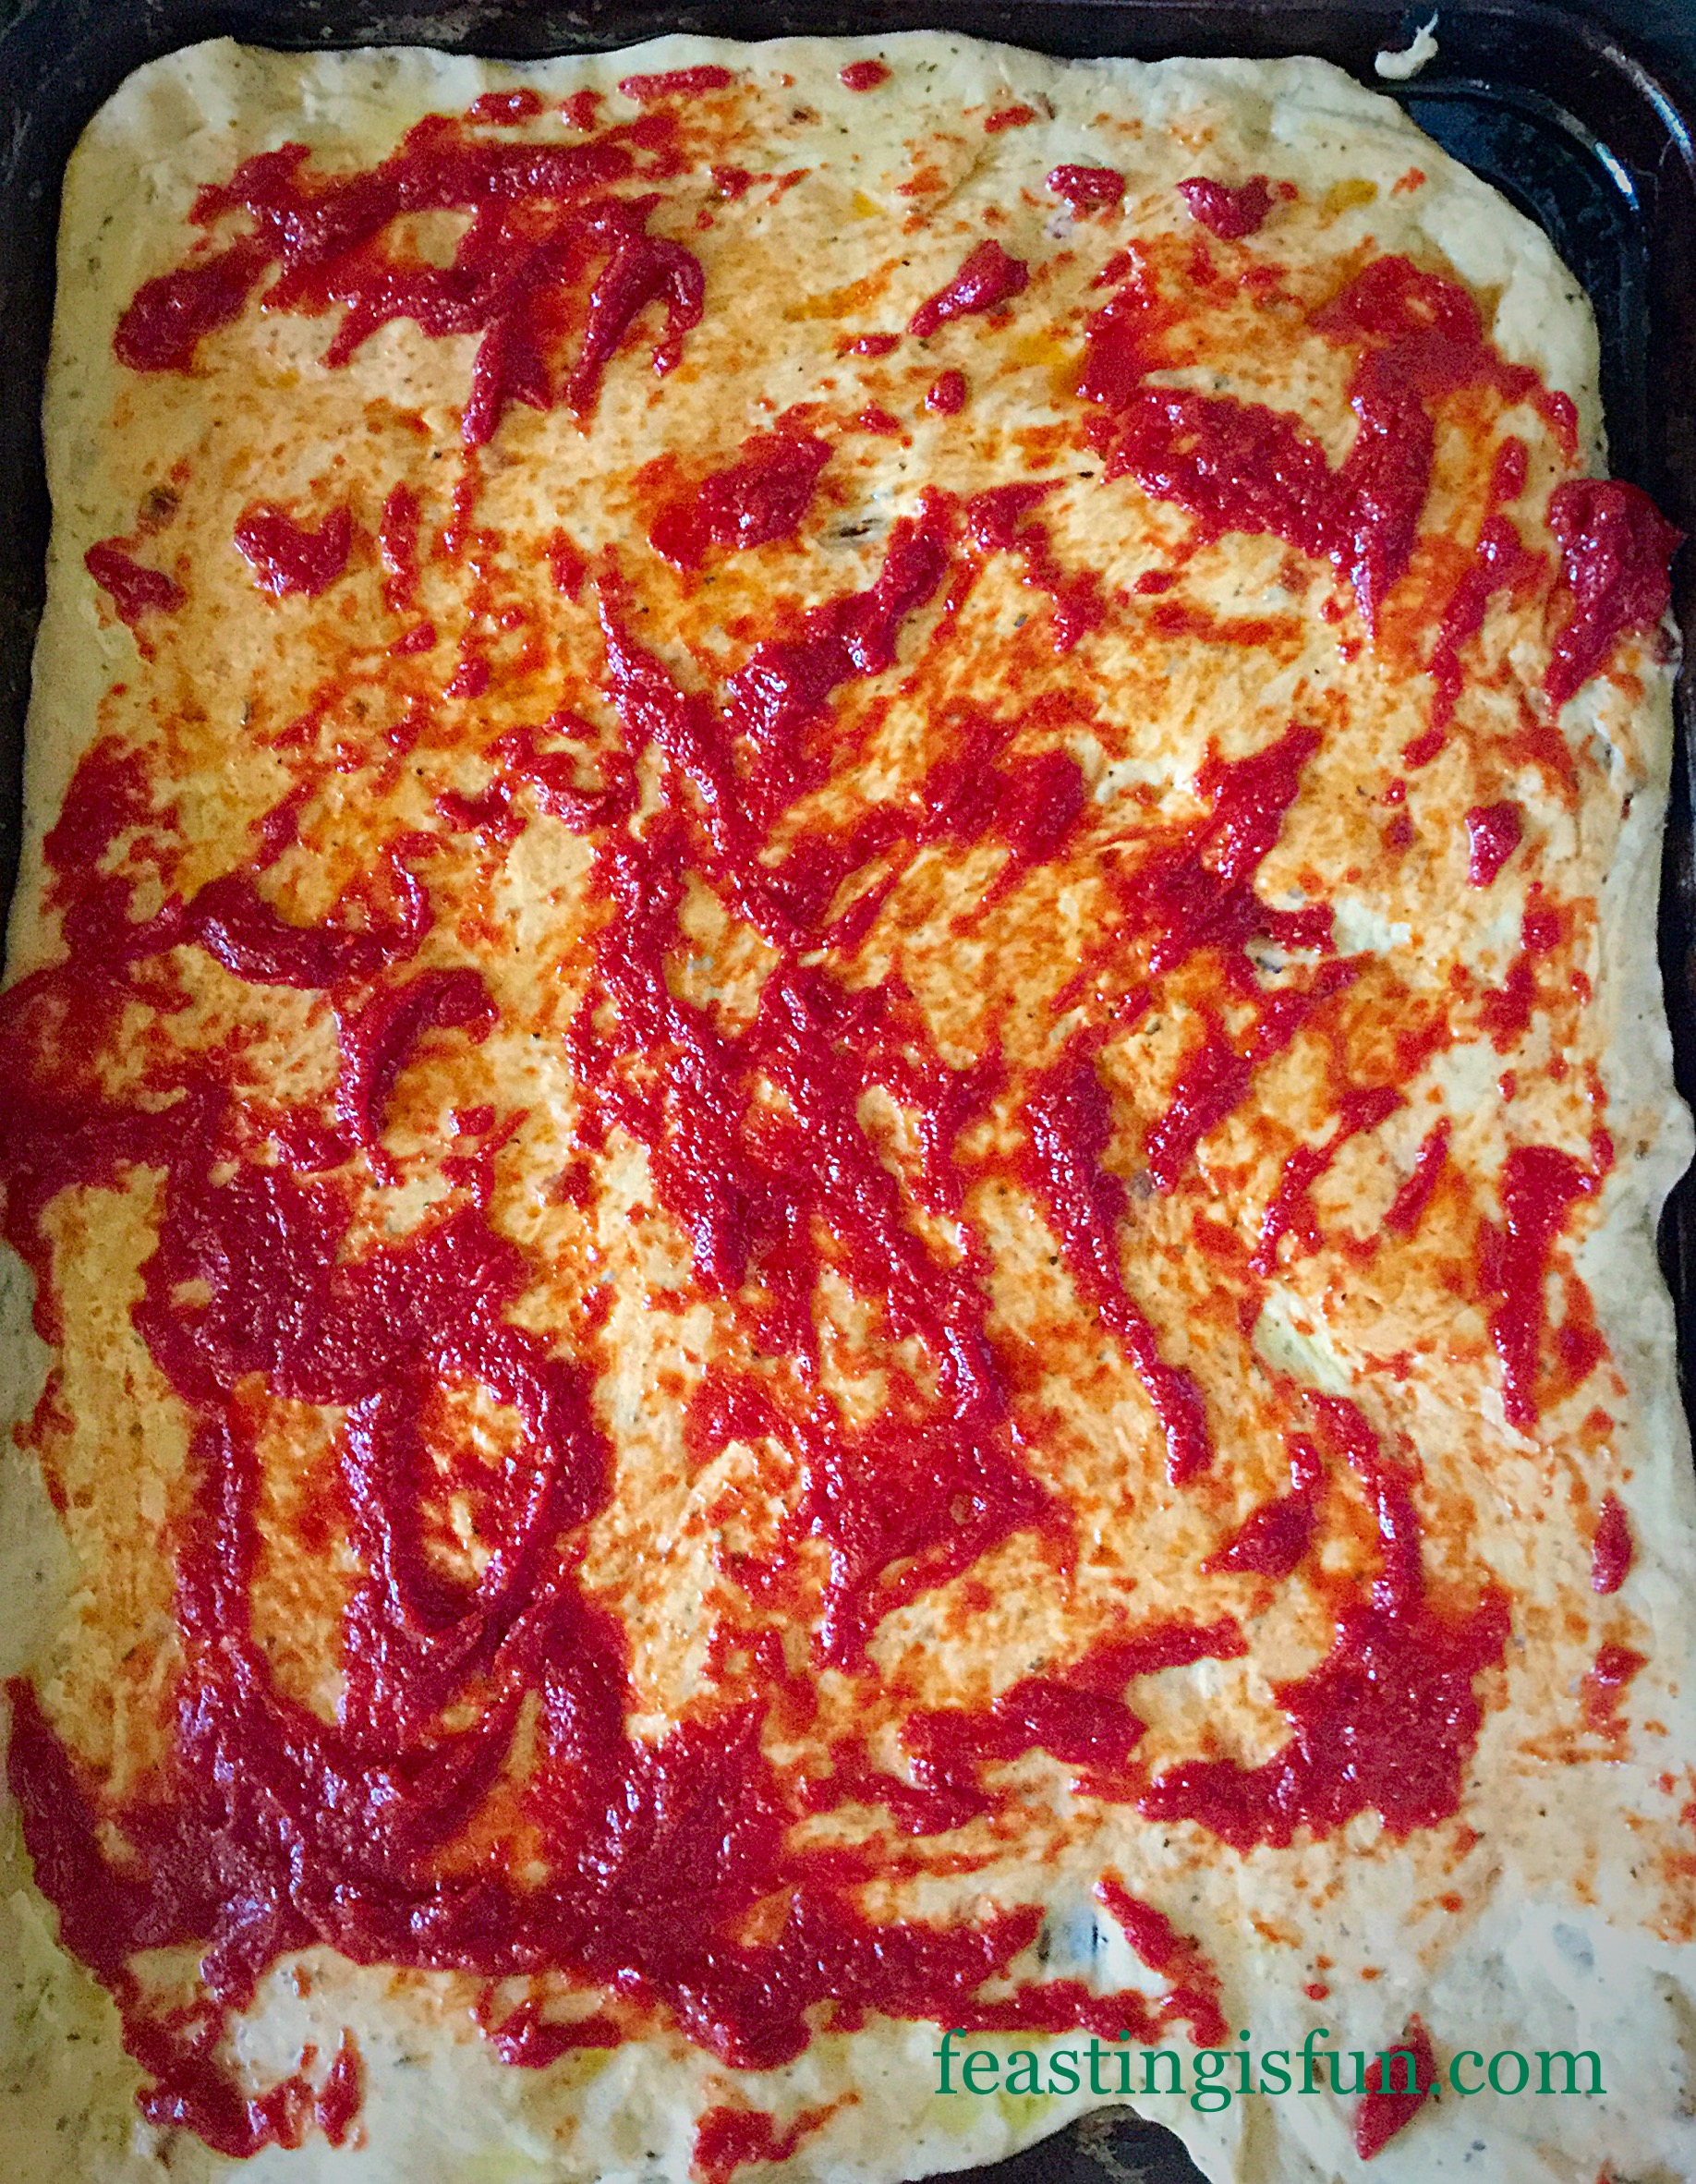
  • Add 1 tablespoon of olive oil and 2 tablespoons of tomato purée to the top of each pizza base.
  • Using your hand smoosh the tomato purée and olive oil together so that they cover the pizza base – yes smoosh is a technical term in the Feasting kitchen!
FF Sun Dried Tomato Bread Pizza
Sun Dried Tomato Bread Pizza
  • Slice or tear the mozerella and lay on top of the pizza base.
  • Add thin slices of cured meat and scatter a handful of basil leaves over each pizza.
FF Sun Dried Tomato Bread Pizza
Sun Dried Tomato Bread Pizza
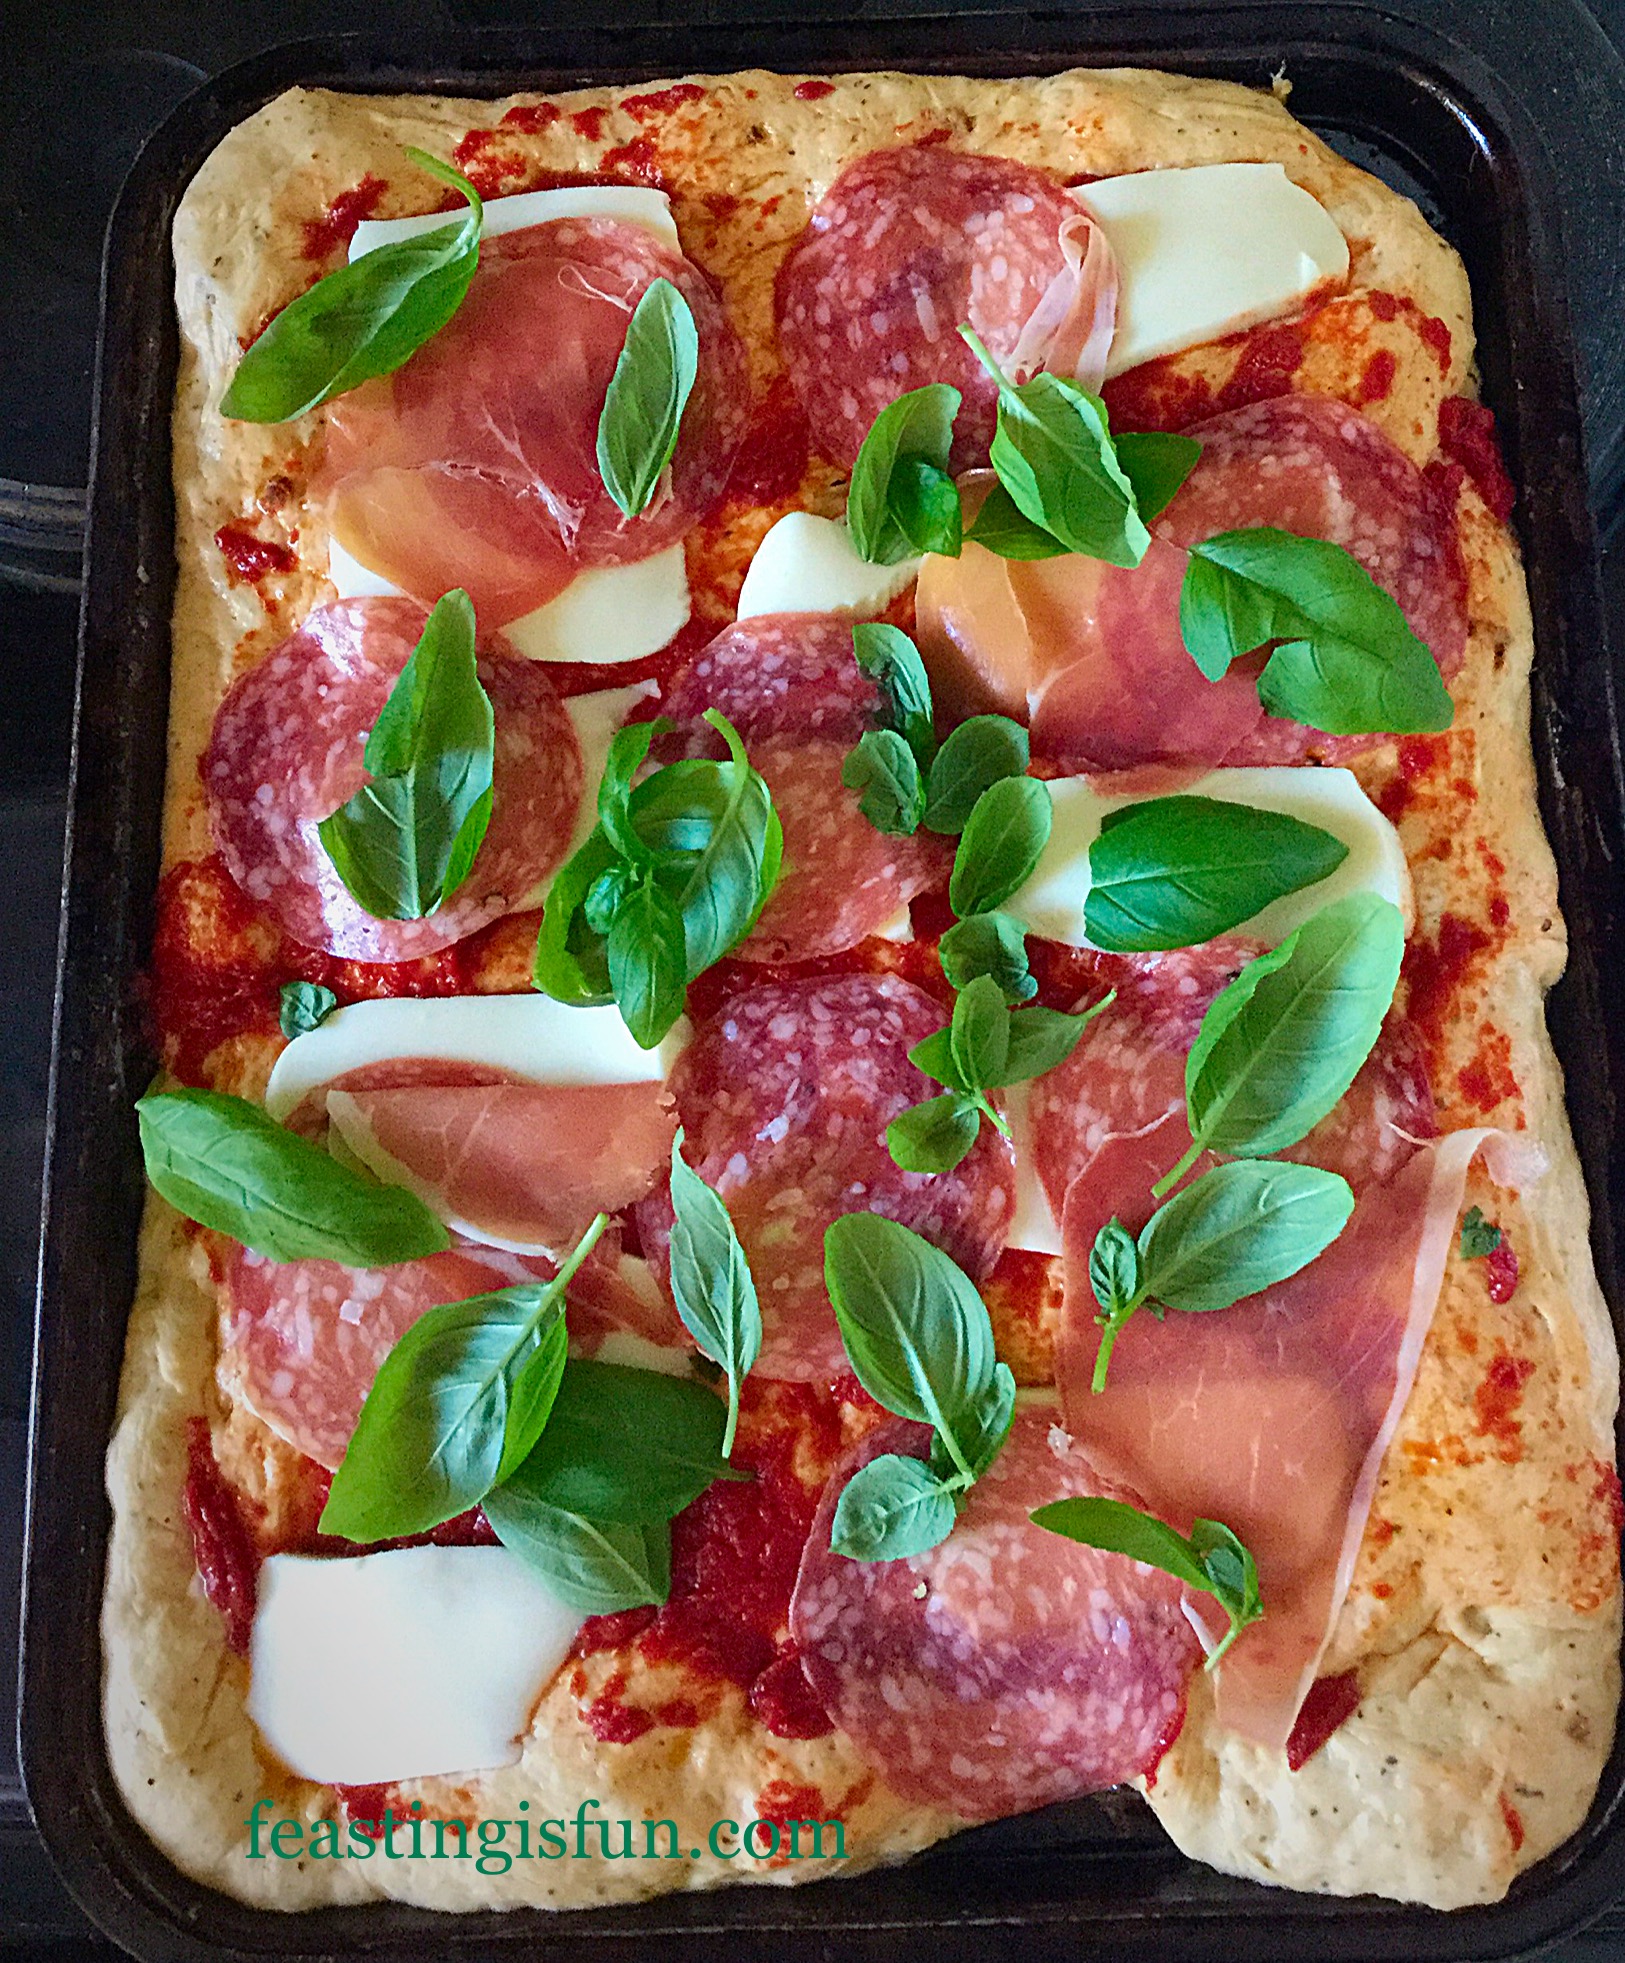
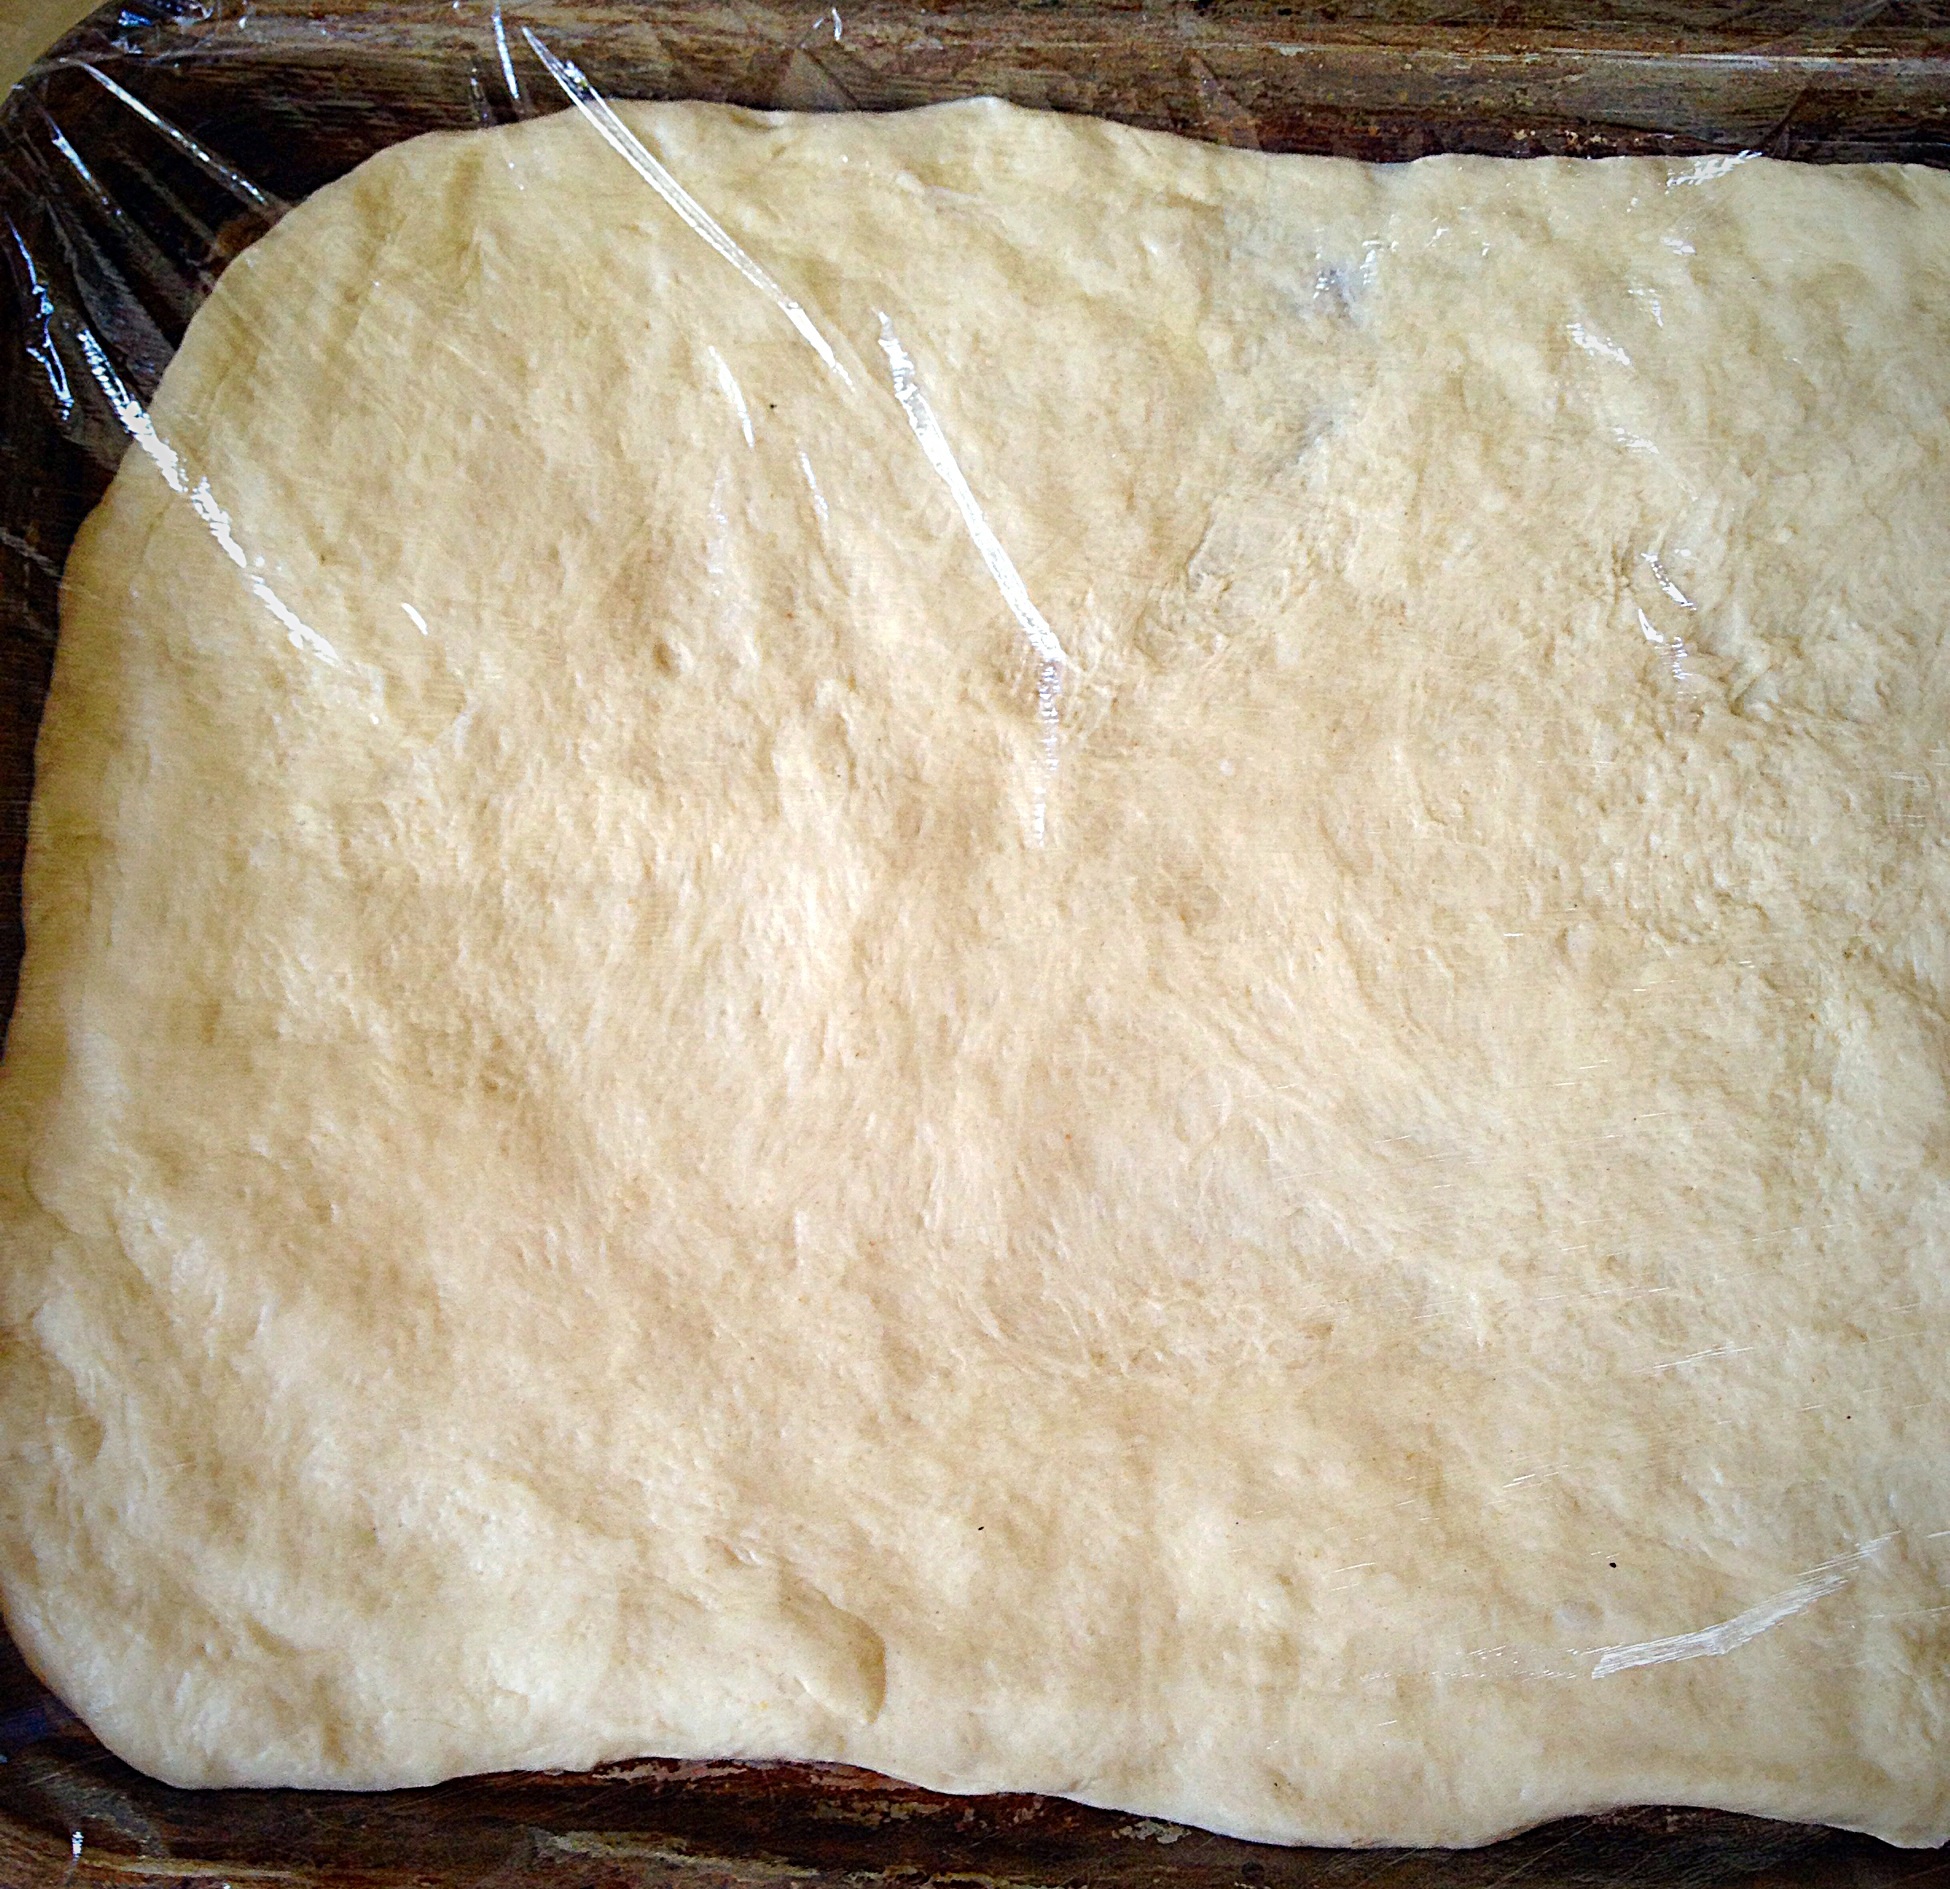
  • Cover both pizza’s with cling film, or do as I did on such a hot day, pop them into an unheated oven, uncovered, for 30 minutes. This will give them time to rise.
  • Turn the oven heat to 220C/200C fan, gas mark 7, 425F.

    Baking The Sun Dried Tomato Bread Pizza
  • Remove the cling film and place the pizza’s in the oven, if they are not already in there.
  • Bake for 20-30 minutes. The pizzas are cooked when the base is firm underneath. I use a large palette knife to slide under the pizza and lift it. If it’s not quite firm pop it back into the oven for another 5 minutes.
  • Once baked remove from the oven.
FF Sun Dried Tomato Bread Pizza
Baked Sun Dried Tomato Bread Pizza with melting cheese and crisp prosciutto ham.

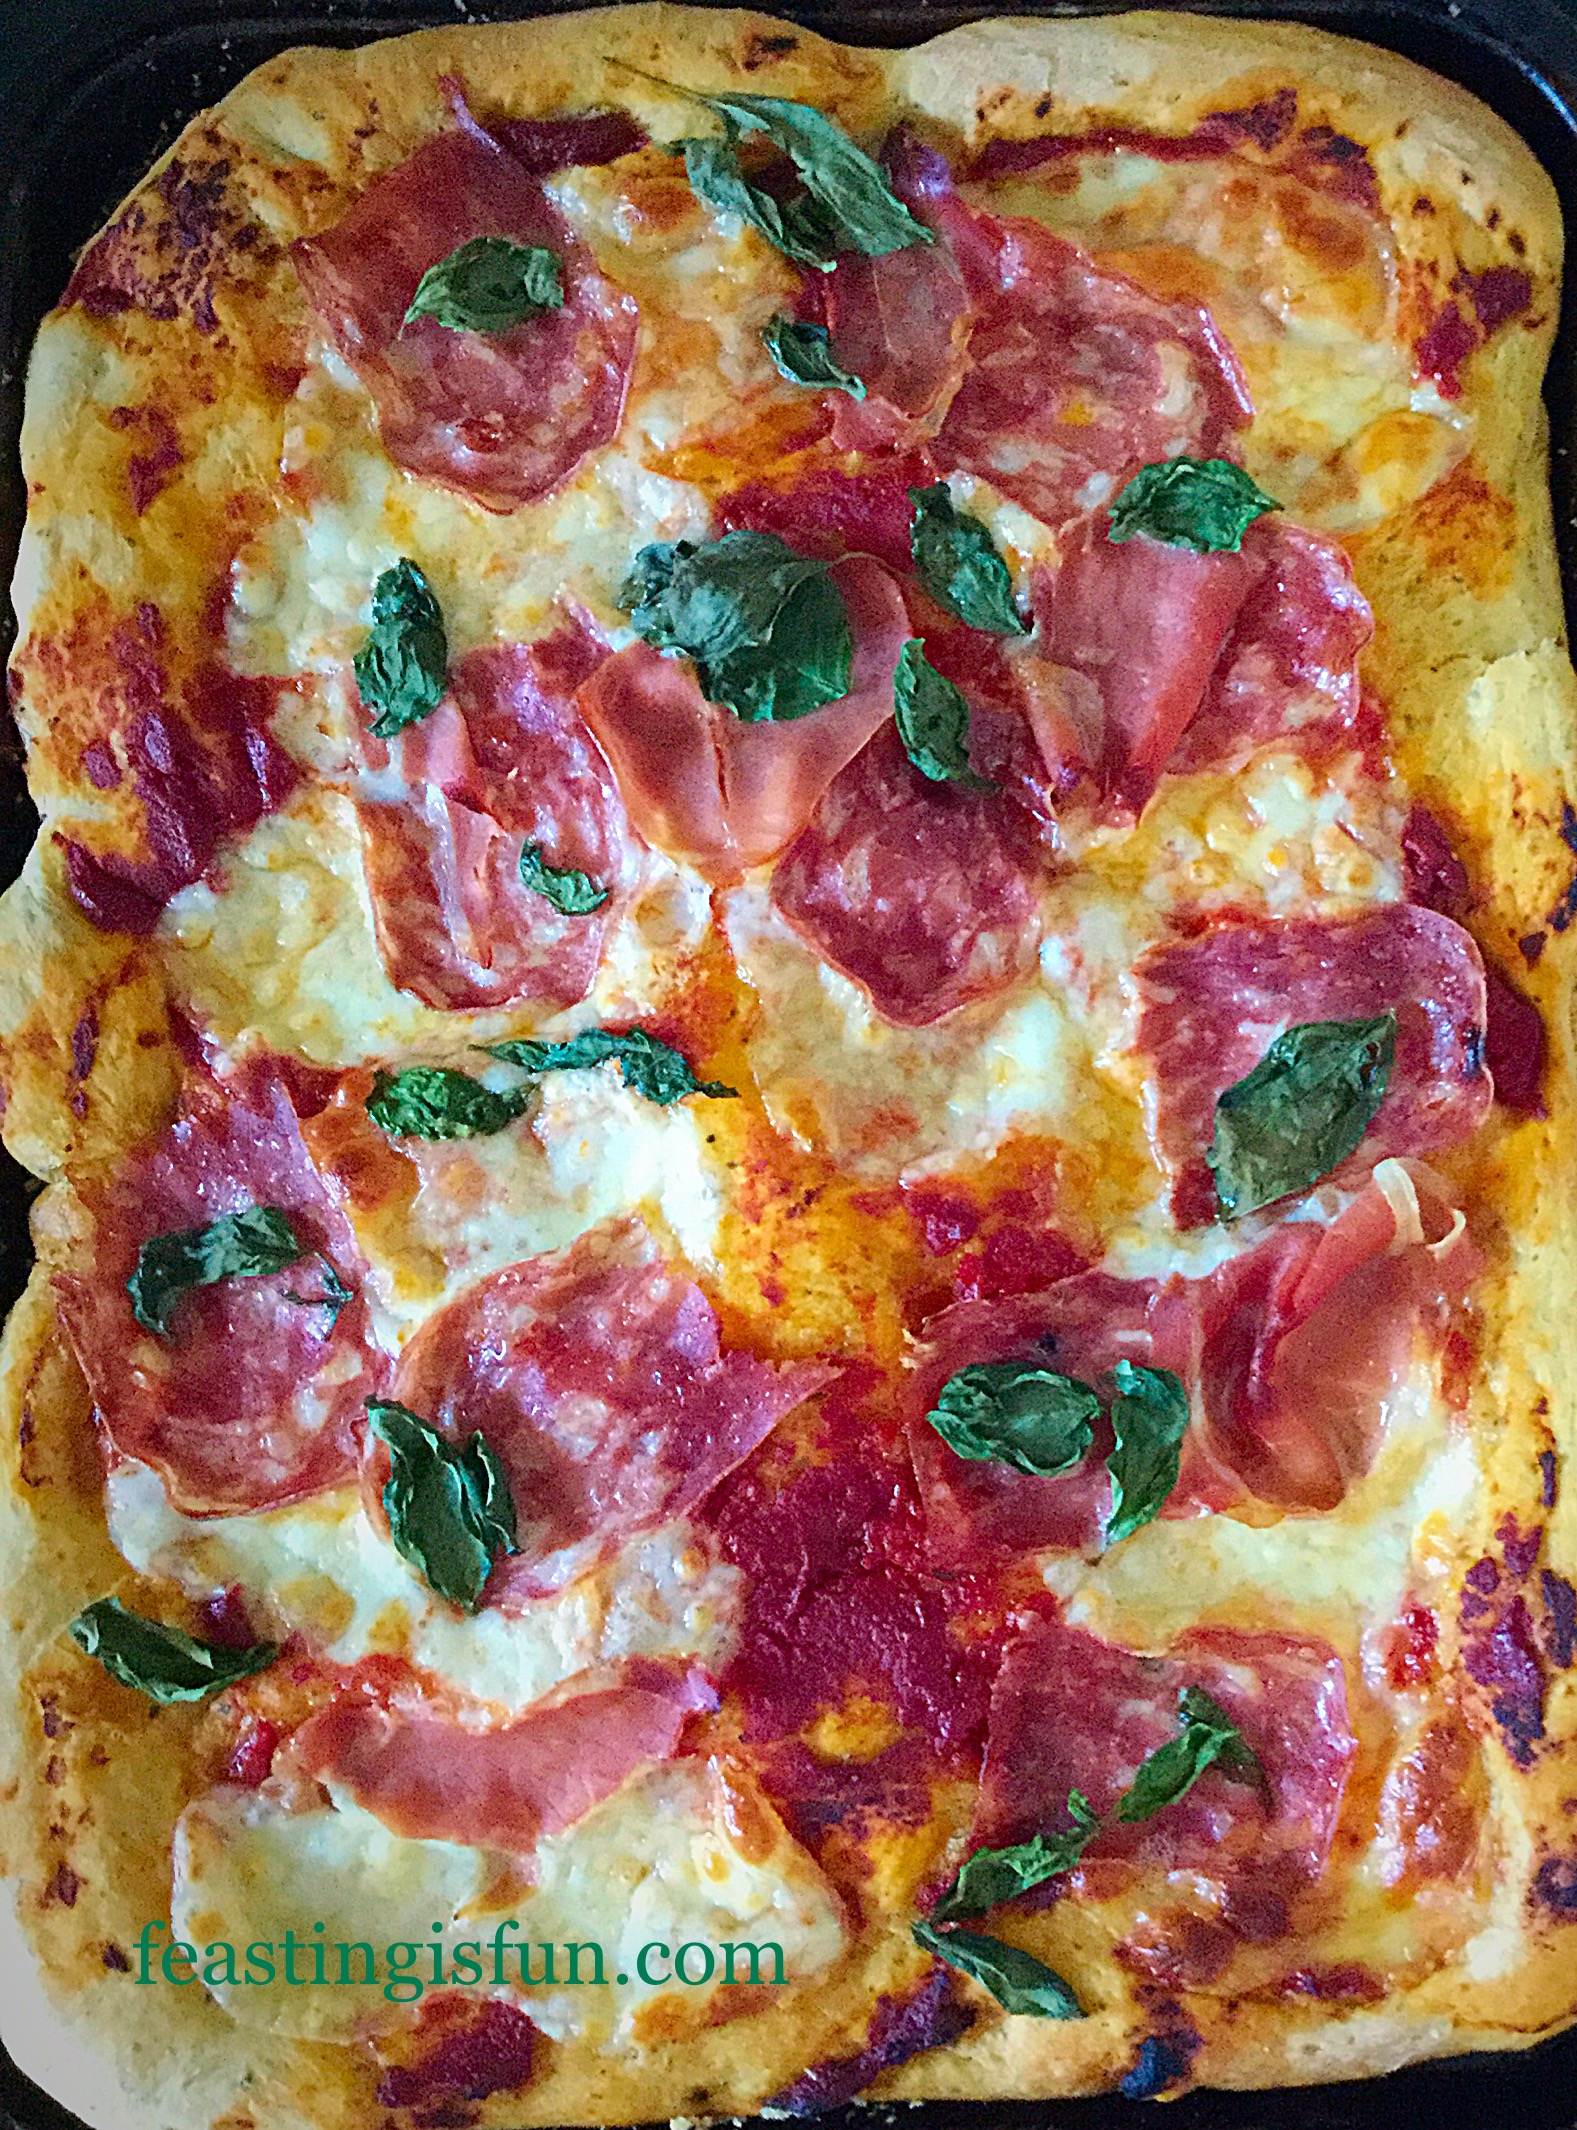
To serve, remove the pizza from the tray – I slide it on to a board – and cut into slices or triangles.

Sun Dried Tomato Bread Pizza is ideal for feeding a crowd, as part of a buffet, or served with homemade coleslaw for an easy meal.

I really do recommend trying the Wright’s Baking range of bread mixes. Having a couple in the cupboard, even though I make almost all of our bread from scratch, is really handy on hot, busy days!

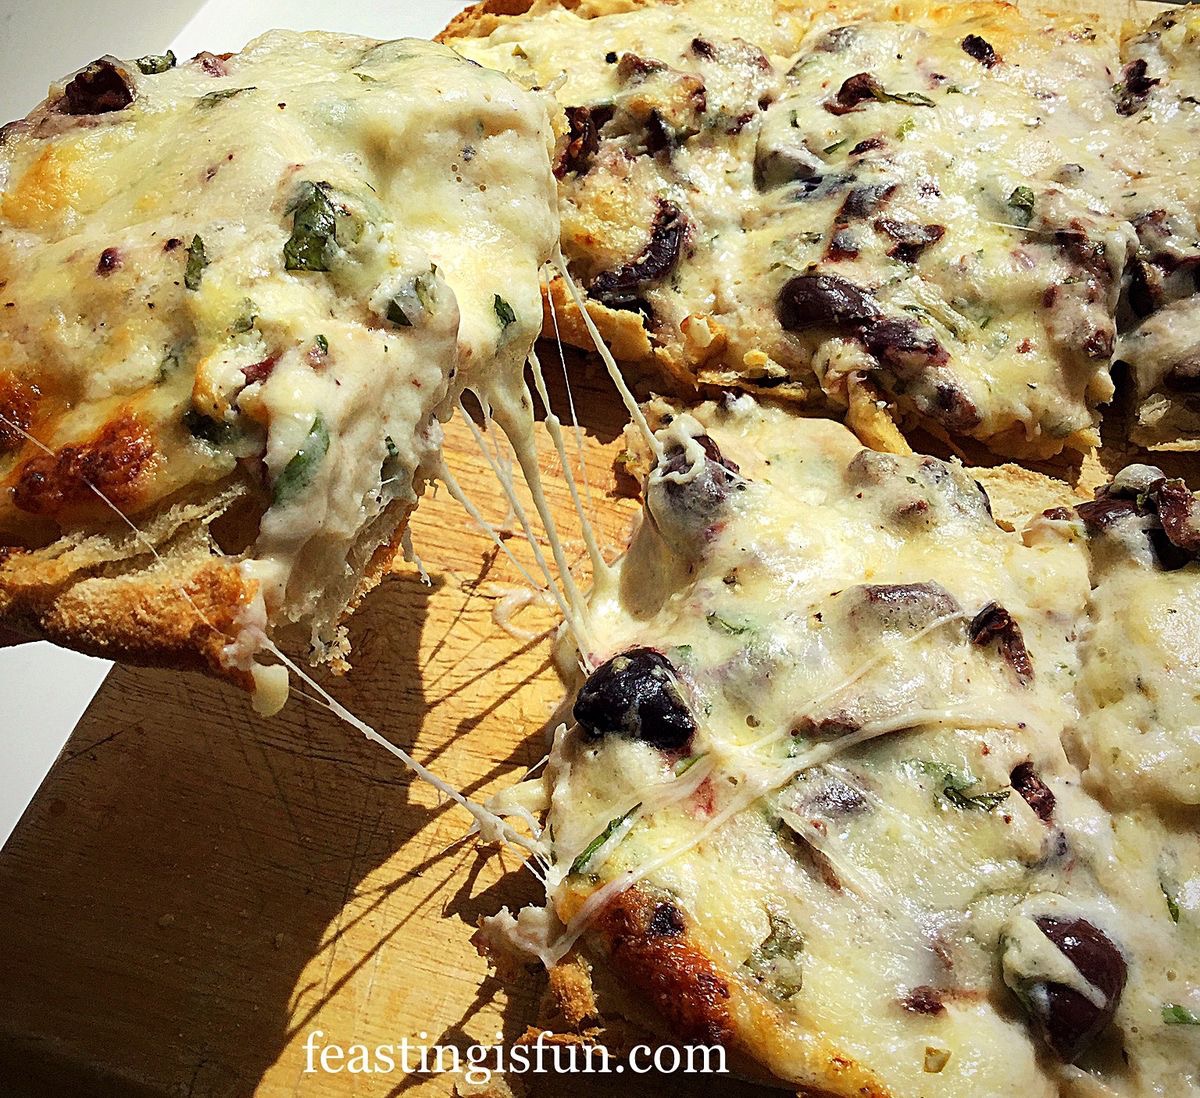
If you enjoyed this Sun Dried Tomato Bread Pizza you may also like these recipes:

Homemade Ciabatta Base Pizza

FF Sun Dried Tomato Bread Pizza
Homemade Ciabatta Base Pizza

Better Than Take Out Pizza

FF Sun Dried Tomato Bread Pizza
Better Than Take Out Pizza for when you have a little more time.

Asparagus Prosciutto Ham Tart

Sun Dried Tomato Bread Pizza
Asparagus Prosciutto Ham Tart easily made with puff pastry.


We all need a few quick prep. meals that we can draw on when we either don’t have the time, energy or both to create a nutritious and tasty meal. All of my pizza recipes contain less fat that delivery pizzas. That said, sometimes that really is the only option!

While in a perfect world I would have a freezer full of homemade pasta bakes, casseroles and the like, sometimes it’s nice to have a treat. Homemade pizza always feels like a treat simply because it takes so little effort to make and our children are always ready to help.

As the weather cools and we rediscover the urge to cook and bake again, enjoy it. Have fun in your kitchens creating your own very special feasts.

Since #NationalPizzaWeek is from 5th – 11th January, it simply shows how versatile pizza is. Summer or Winter, any day is a good day to make, bake and share pizza!

Sammie xx

Wright’s Baking sent me the parmesan and sun dried tomato bread mix to try. All opinions, views, content and recipes are my own. Please see my Disclosure Policy.

Share
Facebooktwitterpinterestlinkedintumblr

Garlic Cheese Bombs

Share
Facebooktwitterpinterestlinkedintumblr

Who doesn’t love garlic bread, served alongside a great pasta dish, with a glass of something chilled? I certainly do and after seeing a fantastic foodie craze on Pinterest I knew I had to try it. Everyone is mad about these Garlic Cheese Bombs!


Baked mozzarella stuffed buns being pulled apart to show the gooey, melted cheese.
Garlic Cheese Bombs

In our house these are the BOMB 😉.

Everyone loves it when I make them and having successfully frozen them, uncooked, they are great to have on hand. Fresh or frozen.

Garlic Cheese Bombs
Garlic Cheese Bombs

Honestly these Garlic Cheese Bombs have become such a massive hit in our house. I’m really glad that they freeze well as my family would scoff the whole lot if I baked them all at once. I have learned from the first time I made Garlic Cheese Bombs

Garlic Cheese Bombs

Baking With Children

If you have little ones, they will thoroughly enjoy making these.

The only extra ingredient required to make the Garlic Cheese Bombs is a little patience. Making 30 – 40 individual, little cheese wrapped buns, could be seen as tedious – not here at Feasting is Fun though. We don’t do tedious!! So put on some great music or a play, clear the table and enjoy some therapeutic relaxation, whilst you play with dough!

Before you know it you’ll have two trays full of delicious, homemade, bread buns proving and you can give yourself a smug pat on the back, knowing that one tray is going to be stashed in the deep freeze.

Baking bread is a real passion of mine, second only to my faith see Important Stuff. As this week has been Real Bread Week it seemed fitting to end on a recipe that is fun to make and tastes best when feasting with family and friends.

Garlic Cheese Bombs
Garlic Cheese Bombs

Made From Scratch Versus Using A Bread Mix

I have made these Garlic Cheese Bombs using both my own dough recipe and a Wright’s bread mix. Truthfully and this almost hurts to write this, the children preferred the ones made with the bread mix.

Our children are very honest!!

Personally I think they are both great. The Wright’s bread mix is handy if you’re an infrequent bread baker, or haven’t made bread dough before and want to ensure they turn out great. My dough recipe is for those of us who are happy to make their dough from scratch. That said, there’s room in my kitchen for both.

Recipe: Makes 30 – 40 Garlic Cheese Bombs

1 quantity of dough that’s been proved and knocked back, from either my Farmhouse White Loaf or using Wright’s Baking Premium White Bread Mix

2 Tubs Mini Mozerrella Balls – there are approx 15 – 20 balls per tub

4 Fat Garlic Bulbs – or more if you want an extra garlic kick

100g/4oz Butter

4tbsp Olive Oil

1tsp Sea Salt – I use Maldon

1/2tsp Freshly Ground Black Pepper

Bunch of Fresh Parsley to garnish and add flavour

Making The Garlic Cheese Bombs

You will need a foil freezer/baking tray or 2 if you intend to freeze these.

  • Drain the mozerella balls well and count how many you have.
  • Make up the dough according to your chosen option.
  • Allow the dough to prove until doubled in size and then tip out on to a lightly floured surface.
  • For the very precise among you, weigh the bread dough and then divide that number by the number of mozerella balls. That will tell you exactly how much each piece of dough should weigh.
  • If you are more ‘laissez faire’ about things, like me, simply divide the dough evenly into 3 or 4 equal pieces (depending on whether you have 30 or 40 mozerella balls) and then divide each potion into 10.
  • Flatten a small portion of dough into a rough circular shape.
  • Place the mozerella ball in the centre of the dough circle.
  • Bring the edges of the dough up so that they cover the cheese and seal by pressing together.
  • Place the Garlic Cheese Bomb seam side down on a lightly oiled baking tray.
FF Garlic Cheese Bombs
After a while you get into a rhythm and the process becomes very relaxing.
  • Continue until all of the Garlic Cheese Bombs have been made, allowing space in between each one the tray so that it has room to rise.
FF Garlic Cheese Bombs
Cover with damp kitchen towel or oiled cling film.


Proving The Buns

  • The Garlic Cheese Bombs in the photo above are from the first batch that I made.
  • Leave until doubled in size.
  • Whilst the rolls are proving, make the garlic butter.
  • Place the butter, oil, crushed/finely minced garlic, salt and pepper into a small saucepan over a low heat.
  • Cook until all the butter has melted. Set to one side.
  • Preheat the oven to 200C/180C fan, gas mark 6, 400F.
  • When the Garlic Cheese Bombs have doubled in size, remove the damp cloth/cling film and brush liberally, using a pastry brush, with the melted garlic butter.
FF Garlic Cheese Bombs
You’ll be surprised at how much these delicious rolls puff up.

Freezing The Uncooked Bread Rolls

Now is the stage at which the Garlic Cheese Bombs can be frozen. Double wrap the foil tray with freezer safe cling film, label and pop in the freezer. They should be fine for at least one month in the freezer.

Baking The Garlic Cheese Bombs

  • To bake the freshly garlic glazed buns, place into the middle of the oven and bake for 25-30 minutes, or until the rolls are golden brown.
  • When baked remove the tray from the oven and immediately transfer the individual Garlic Cheese Bombs to a serving platter. Be careful as they will be very hot.
  • Pour over any garlic butter left in the tray and garnish with roughly chopped parsley,
  • Leave for 5 minutes before serving to allow thm to cool slightly.
  • Serve with a smile and watch as people break open these golden, light, cheesy rolls, flavoured with garlic butter.

Garlic Cheese Bombs

Baking From Frozen

To bake from frozen, preheat the oven to 190C/170C fan, gas mark 5, 375F. Remove all cling film/foil. Place the frozen rolls into the middle of the oven and bake for 40-45 minutes, until golden and baked through. To test remove a roll and cut in half, if the mozerella is gooey and melted then the Garlic Cheese Bombs are baked. Serve as for freshly baked.

Making Ahead Tips

So you’ve got a party in the evening and you want to make these earlier in the day? I’d suggest making them the day, or even a few days aheadand stashing them in the freezer. Alternatively make them in the morning, glazed with garlic butter before their final prove (it’ll save you stinking of garlic as you great your guests 😉), wrap in cling film and keep in the fridge. Take them out 10 minutes before baking, whilst you preheat the oven and bake as for fresh.

Make ahead recipes are fantastic as they allow you to enjoy spending time with your guests, rather than being stuck, on your own in the kitchen!

If you have loved these Garlic Cheese Bombs, then here are some other recipes you might like to try:

Breadsticks with Garlic and Herb Dipping Oil

Breadsticks with garlic and herb dipping oil.

Garlic Rosemary Focaccia Bread

Garlic Rosemary Focaccia Bread

Cherry Tomato Mozzarella Basil Focaccia 

Cherry Tomato Mozzarella Basil Focaccia


I really hope you do try making your own bread. Most bread doughs can withstand a reasonable amount of mistreatment and still turn into fabulous loves, breadsticks, baguettes. The possibilities are endless and nothing, not even chocolate cake such as this White Chocolate Swirl Fudge Cake beats the smell of home baked bread.

Thank you for all you lovely comments, especially on Twitter regarding the great yeast debate – more on that in a future post! It really makes my day to see pictures of you baking my recipes and in most cases they look even better. Which I think is completely brilliant. You all inspire me to try harder and write easy to follow, delicious recipes.

Together we really do make Feasting Fun!

Sammie xx

Wright’s Baking provided me with the Premium White Bread Mix used in this recipe alongside my own bread dough recipe. All opinions, views, content and photographs are my own. Please see my Disclosure Policy.

Share
Facebooktwitterpinterestlinkedintumblr

Homemade Ciabatta Base Pizza

Share
Facebooktwitterpinterestlinkedintumblr

Hello lovely people, I have been wanting to share my Homemade Ciabatta Base Pizza recipe with you for ages. The trouble is I always forget to photograph the pizza once it’s cooked. I’m sorry, too many blonde moments! Yesterday though, I was resolute. That pizza was getting it’s picture taken no matter what.

Hand baked, Italian bread based recipe topped with tomato sauce, cheese and a selection of charcuterie.

Pizza Love And Baking With Kids:

So, I have been making pizzas with our children and many of their friends who’ve come to dinner, since, well, they could stand on a chair and smoosh pizza dough about. And over the years we’ve had various shaped pizzas, including; guinea pigs, batman (and pretty much every superhero a little boy could think of), lemons, flowers, cats, hearts and many more. It’s a great cop out. Invite your children’s friends for dinner, then get them to make it. First of all, they absolutely love it, secondly, I’ve never had a child who didn’t want to make their own pizza and lastly every single piece of their creation gets eaten. Also there’s no worrying about fussy eaters, just allow them to decorate their own pizza, whatever it’s shape, with a selection of toppings; pepperoni makes a great piggies snout.

Resulting in the perfect child friendly combination, messy hands, creativity and they bake and eat their creation. Because each child’s pizza is different, they happily chatter over the dinner table deciding whose is the biggest, most realistic, it literally goes on and on. I kinda miss those days. These days all 3 children can make large pizzas for the whole family, with a  bowl of salad or homemade coleslaw to go alongside.

I Get By With A Little Help From My Friends!

These pizzas are made from scratch except for one teeny tiny cheat. I use a 500g bag of Ciabatta bread mix, instead of making the pizza bases from scratch. Although I have made ciabatta pizza dough from scratch in the past, Wright’s Ciabatta Bread Mix gives such a fantastically crunchy, crisp crust, that is reliable and a lot less work than making your own!

Recipe: Makes 2 Large Homemade Ciabatta Base Pizza – serves 6 Adults.

500g Bag Ciabatta Bread Mix – Olive oil according to packet instructions, plus 2 tbsp extra – I use Wright’s – bread mixes are available from Morrison’s, The Co-Op, Sainsbury’s and Asda, as well as directly from their website.

Tomato purée – approx 4tbsp – I use Waitrose own brand

Optional – Dried Oregano/ Mixed Herbs – 1tsp per large pizza. When baking with kiddies I don’t add any herbs.

300g Mozzarella – drained weight

Toppings – I used a Spanish charcuterie selection : Serrano ham, Chorizo and Salchichon – use whatever you like, mushrooms, meatballs, sweet corn, bell peppers, sliced chillis, more cheese. The options and combinations are endless!

Method :

Making The Ciabatta Pizza Base

First of all, make the Ciabatta bread dough according to the packet instructions. I use my bread maker to mix, prove and knock back. Alternatively a stand mixer with dough hook attachment works well. Also you can make the dough by hand. Leave the dough to prove.

While the pizza dough is proving thoroughly oil 2 x  38cm x 28cm (14″ x 11.5″) baking trays. I prefer to use trays as it creates a crunchy pizza crust and avoids any molten cheese drips dropping and burning on the oven base.

Shaping The Pizza

As soon as the dough has reached the knocked back stage tip the dough on to one of the baking sheets. Rub the palms of your hands over the oiled baking sheet, this will stop the dough sticking to them.

Using a dough cutter or knife, divide the dough in half.


Now comes the fun bit. Especially for children or the child within us! Using your hands pat the dough out so that it is flat.

Keep patting with your hands, very gently stretching the dough as you do...
Keep patting with your hands, very gently stretching the dough as you do…
Work with the dough, gradually patting/stretching so that it reaches the edges of the baking tray.
The base to your Homemade Ciabatta Base Pizza is complete!
Drizzle a little Olive oil on your pizza base, smoosh about with your hands and then cove with cling film.


If you haven’t got a child or someone else to do the other pizza base, repeat with the second half of the dough.

Leave the pizza bases, covered in oiled cling film, in a warm place until doubled in size, or placed on separate shelves in the fridge for a few hours until needed.

Time To Add The Toppings

When the pizza is ready to assemble,  preheat the oven to 220C/200C fan, gas mark 7, 425F.

I find it easiest to have all the ingredients prepped and ready before I start assembling the pizza. In fact when I make pizza with little people, reckon on 1 x 500g batch of pizza dough to make 4-6 individual pizzas. I also have ham, cheese, sliced peppers (they make great light sabres) in bowls ready for little fingers.

Place 2tbsp tomato purée on each pizza base – smoosh with the back of a spoon or your hands to roughly cover the dough.

Now add the cheese and other toppings. I have learnt it is best not to overload with toppings, as you will end up with a soggy pizza base.

Baking The Pizza

As soon as both of the Homemade Ciabatta Base Pizzas are ready, place in a hot, preheated oven and bake for 20-30 minutes.

The pizzas are cooked when they are crusty around the edges and cooked through in the centre. I test this using a knife, the centre won’t be as crusty as the edges but you should feel resistance. If it’s still soft give the pizza another 5 minutes baking, reducing the heat slightly if the top is cooked.

Using a palette knife loosen the pizza around the edges and run it underneath. Slide the pizza out of the baking tray onto a large wooden board, or I have glass worktop saver (don’t use knives on glass it’ll blunt them) which I only use for pizzas. Cut into squares using a pizza cutter. I usually get 15 squares per pizza.

This Homemade Ciabatta Base Pizza is so easy, adaptable and reliable that makes it perfect for parties, buffets, weekend meals, sleepovers the list is endless. The perfect food for Feasting, Sharing and having Fun!

Baked italian bread with cheese and meat topping served as a meal with mixed salad on a plate.

If you have enjoyed this recipe for Homemade Ciabatta Base Pizza you may also like these:

Crunchy Homemade Coleslaw 

FF Homemade Ciabatta Base Pizza
Crunchy Homemade Coleslaw

Sun Dried Tomato Bread Pizza

Sun dried tomato bread pizza
Sun Dried Tomato Bread Pizza

Baked Cheese Olive Ciabatta Bread

FF Homemade Ciabatta Base Pizza
Baked Cheese Olive Ciabatta Bread

Homemade pizza can be so much fun. Since you are fully in control of the toppings you can add as much, or little as you like of your favourites. Also you can adapt parts of the pizza to suit individual tastes. For example by adding chopped jalapeño pepper to one half and not the other. Likewise, for those who dislike cheese, it is easily omitted.

Whatever you are making, baking and creating in your kitchens, have fun preparing and sharing your feast.

Sammie xx

No part of this post may be reproduced or duplicated without the written permission of the owner. Please see my Disclosure Policy.

Share
Facebooktwitterpinterestlinkedintumblr