Chocolate Share Eclair Flower

Share
Facebooktwitterpinterestlinkedintumblr

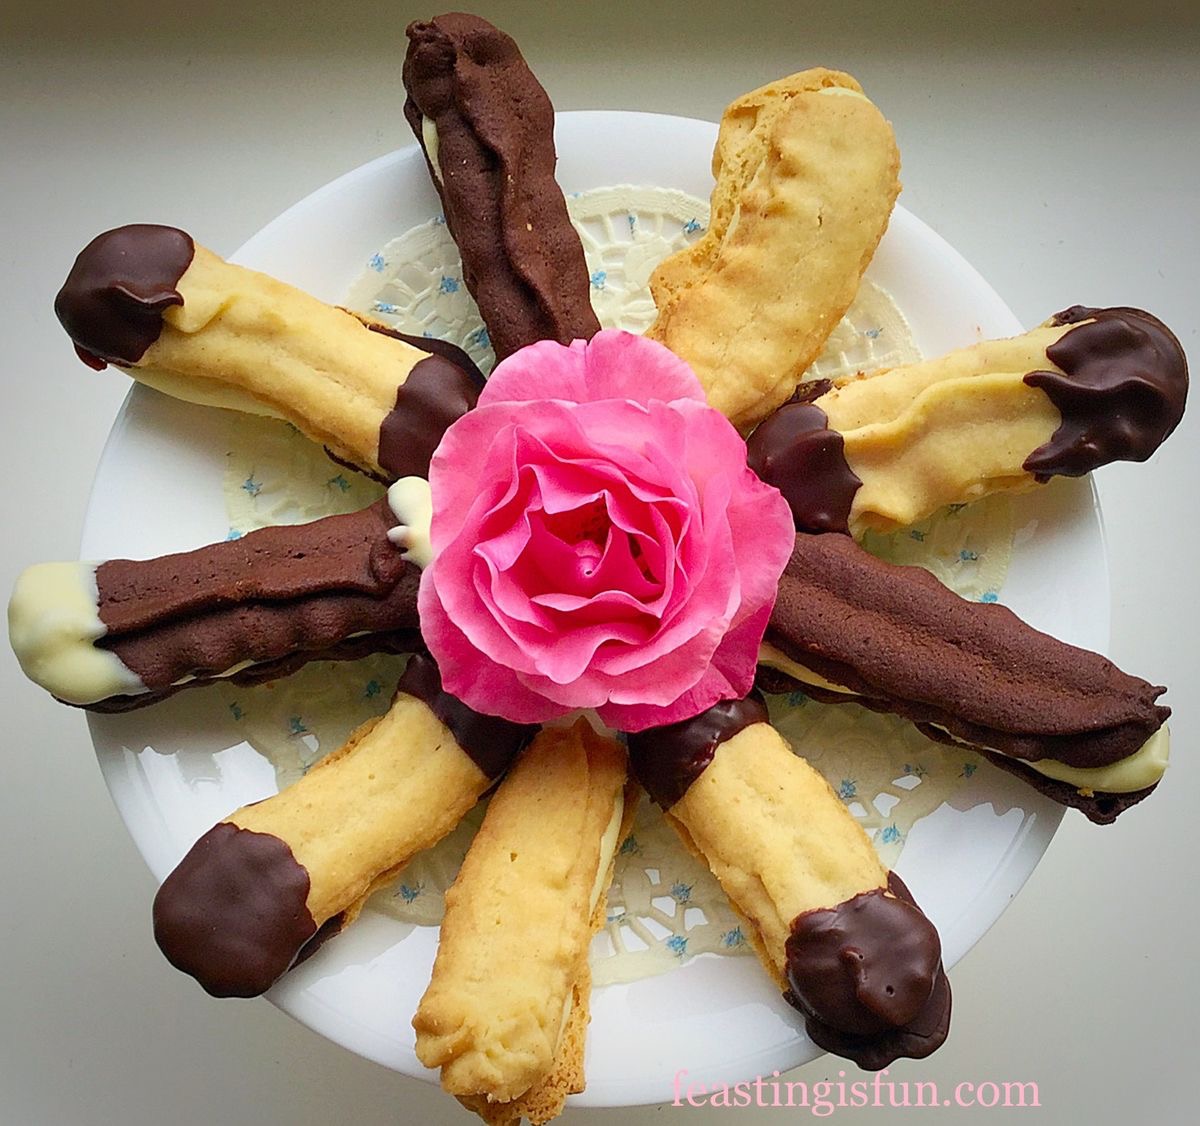
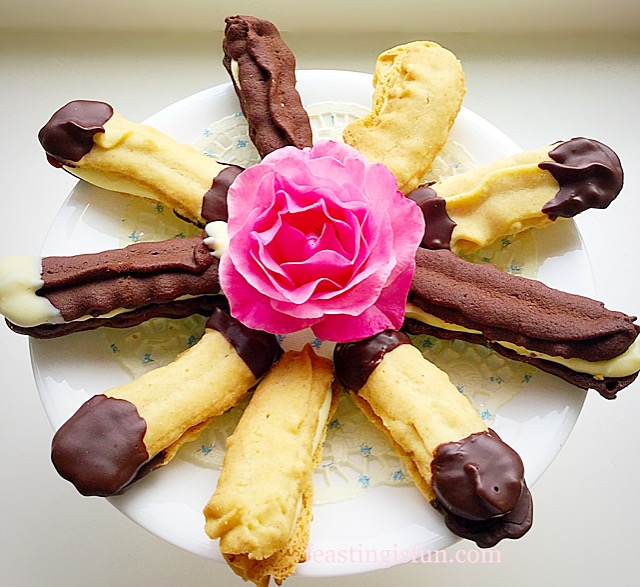
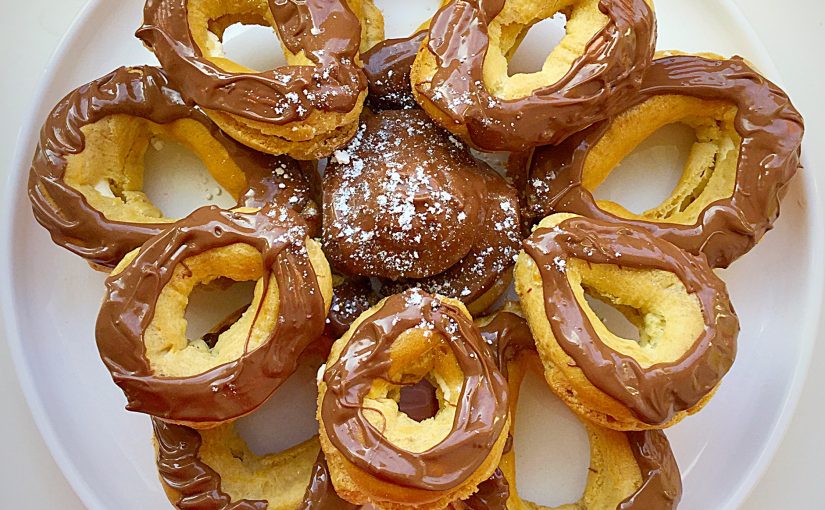
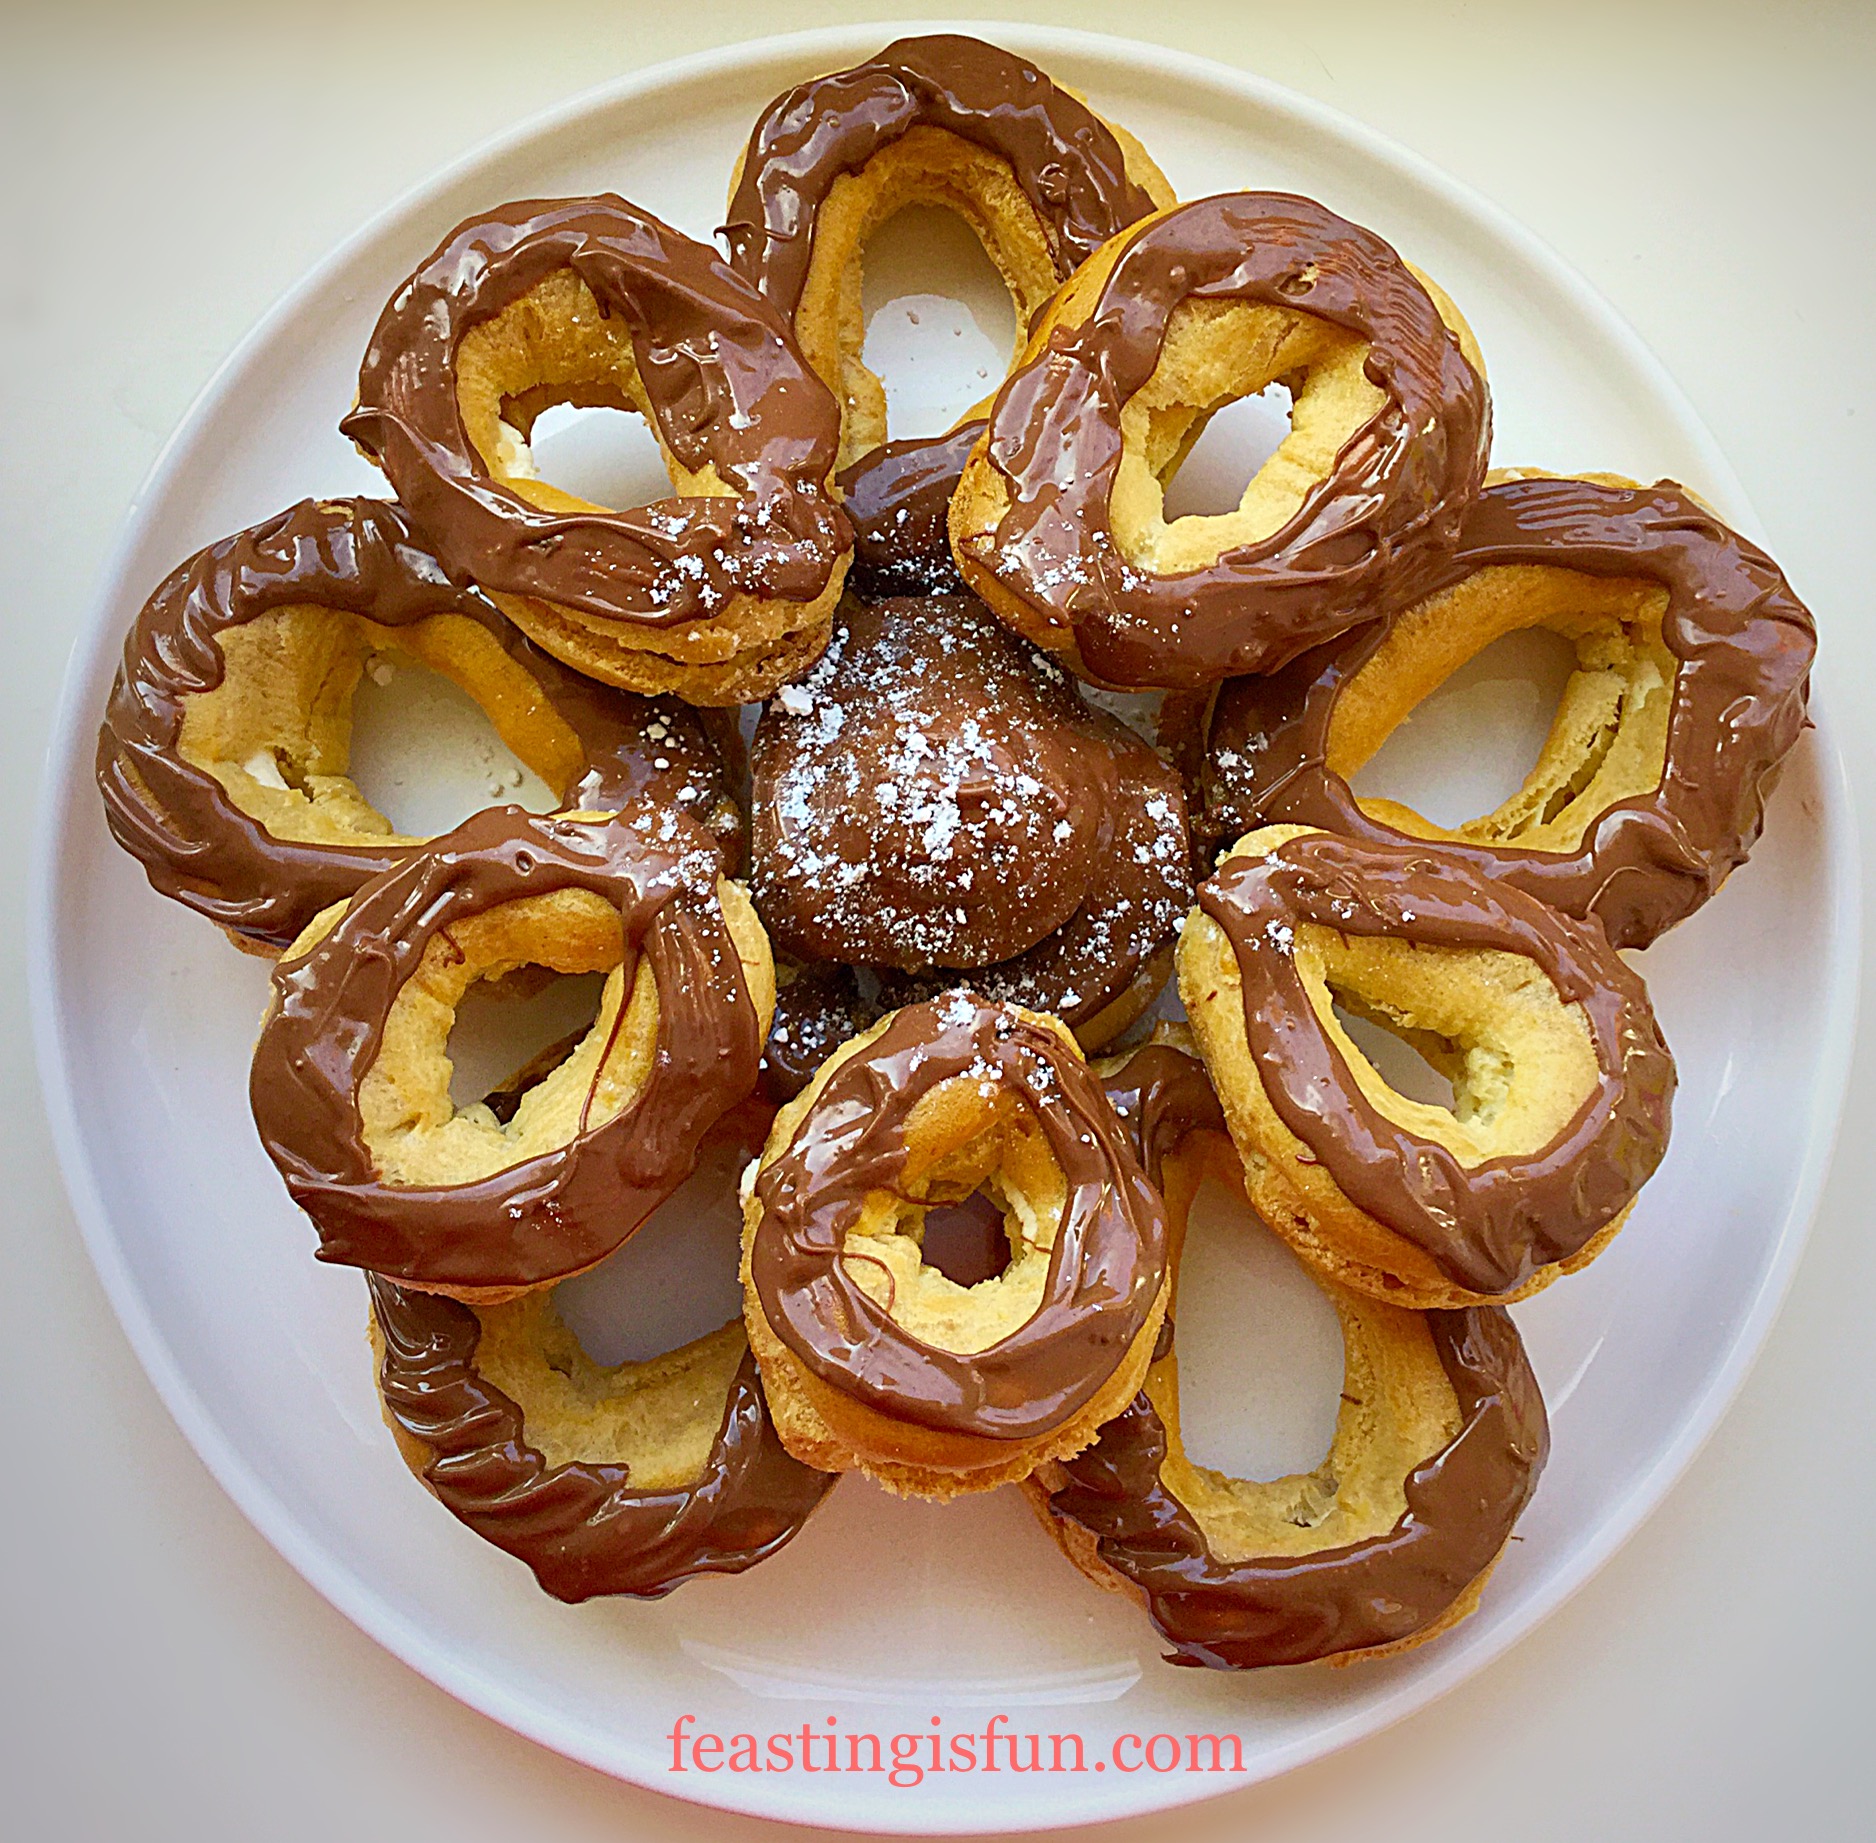
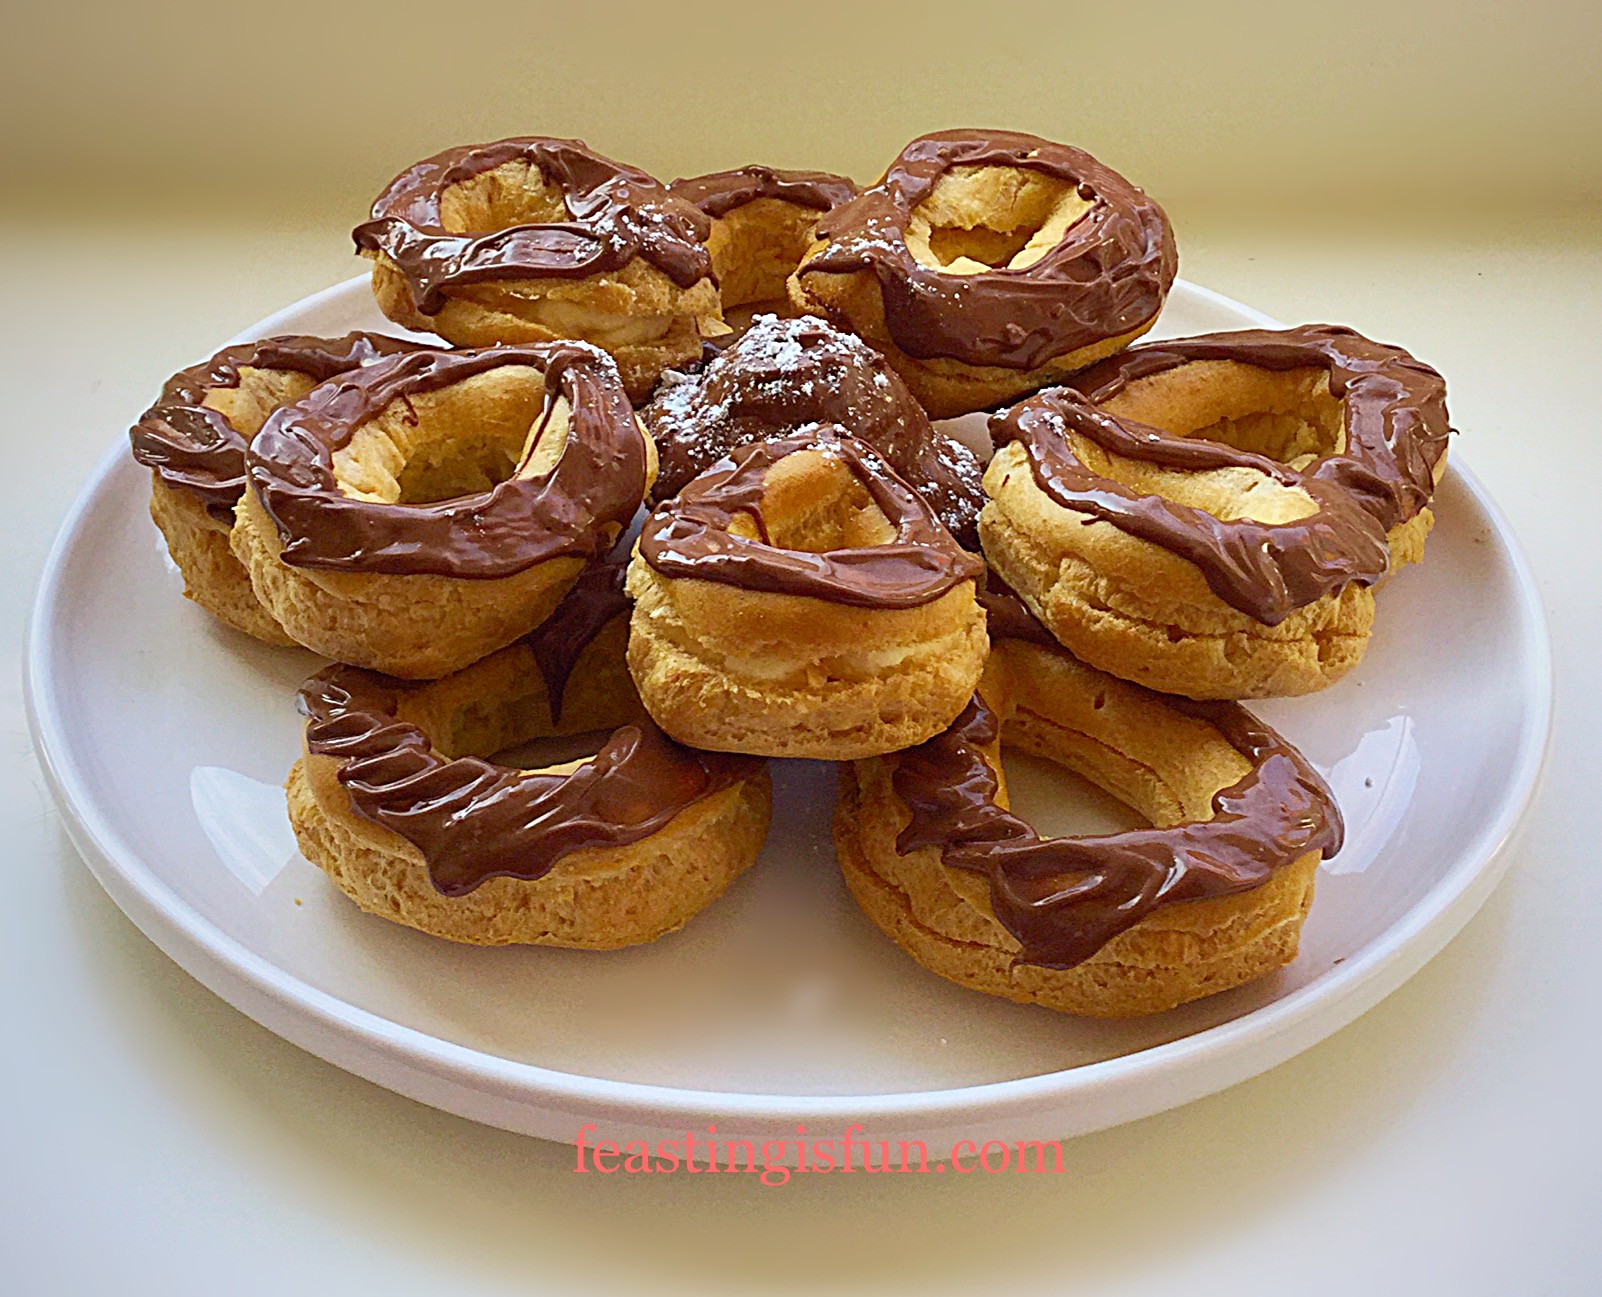
Chocolate Share Eclair Flower individual choux pastry petals, filled with chantily cream and covered in chocolate, surround a filled chocolate profiterole.

During the nine weeks that the Great British Bake Off is aired, Renshaw Baking have been holding various competitions, to encourage bakers to get baking. For my part, as a blogger, I chose to take part in the blind, technical challenge. The result being my Chocolate Share Eclair Flower.

FF Chocolate Share Eclair Flower
Chocolate Share Eclair Flower perfect for sharing.

True to the ‘technical challenge’ on the programme, I was given a list of ingredients and vague instructions on what to do with said ingredients!

I immediately recognised the recipe as being that for choux pastry, however, when making choux pastry you add water or milk and Renshaw had kindly left that part out!

Fortunately I have baked quite a few profiteroles and eclairs over the years and remembered the 2:1:1:2 rule – that is double liquid and egg to flour and butter. All good except the recipe called for differing amounts of flour and butter.

Aargh. Stay calm Sammie.

It does me good to have a good talking to myself and remember to relax and enjoy the process.

After a couple of trial bakes, both of which produced 8 even, straight eclairs, I knew I wanted to play.

FF Chocolate Share Eclair Flower
Chocolate Share Eclair Flower 3D and fun to make.

I came up with the idea of creating flower petals, of two different sizes. The larger petals sitting on the base surrounding the central, single profiterole, whilst the five smaller petals sit on top and between the lower petals, creating a 3D flower, made from choux pastry.

Whilst making and baking my Chocolate Share Eclair Flower I stuck rigidly to the recipe, as they would have to do on the television programme. It was so hard not to add sprinkles, glitter, piped contrasting chocolate, but I didn’t. The instructions asked for our inventive interpretations of the recipe – I took that to mean design!

Below is the recipe and method. Written in bold is where I had to fill the gaps!

Recipe: Chocolate Share Eclair Flower

65g/2.5oz Plain White Flour sifted

Pinch of Salt – I use Maldon

50g/2oz Unsalted Butter – cut into cubes

2 Large Free Range Eggs – beaten and weighed = 110g

110g Water

1tsp Vanilla Extract – I use Nielsen-Massey

5tsp Icing Sugar sifted

200mls/7fl oz Whipping Cream

100g/4oz Milk Chocolate chopped

Method: Preheat the oven to 200C/180C fan, gas mark 6

Note: This recipe will yield 8 straight chocolate eclairs. Baking time is the same, simply pipe 8 even straight lines.

  • Line 2 large baking trays with baking parchment, set to one side.
  • In a large saucepan add the butter, salt and water. Place over a high heat.
  • When the liquid boils, turn the heat down to medium and add all of the flour.
  • Stir vigorously with a wooden spoon for 3 minutes, keeping the pan on the heat. The mixture should be completely lump free and the flour will have had a chance to cook slightly – this needs to happen to ensure a good structure for the eclair.
  • Pull the saucepan off the heat and keep stirring to cool down the mixture.
  • Add 1/2tsp vanilla extract to the beaten eggs.
  • Add the eggs to the flour mixture and beat thoroughly to incorporate them into the mix, it can take a little time, just keep stirring with the wooden spoon and eventually everything will come together to form a thick, sticky choux pastry.
FF Chocolate Share Eclair Flower
Making the choux pastry.
  • Spoon the choux pastry into a large disposable piping bag.
  • Cut approx 1cm off the end of the bag.
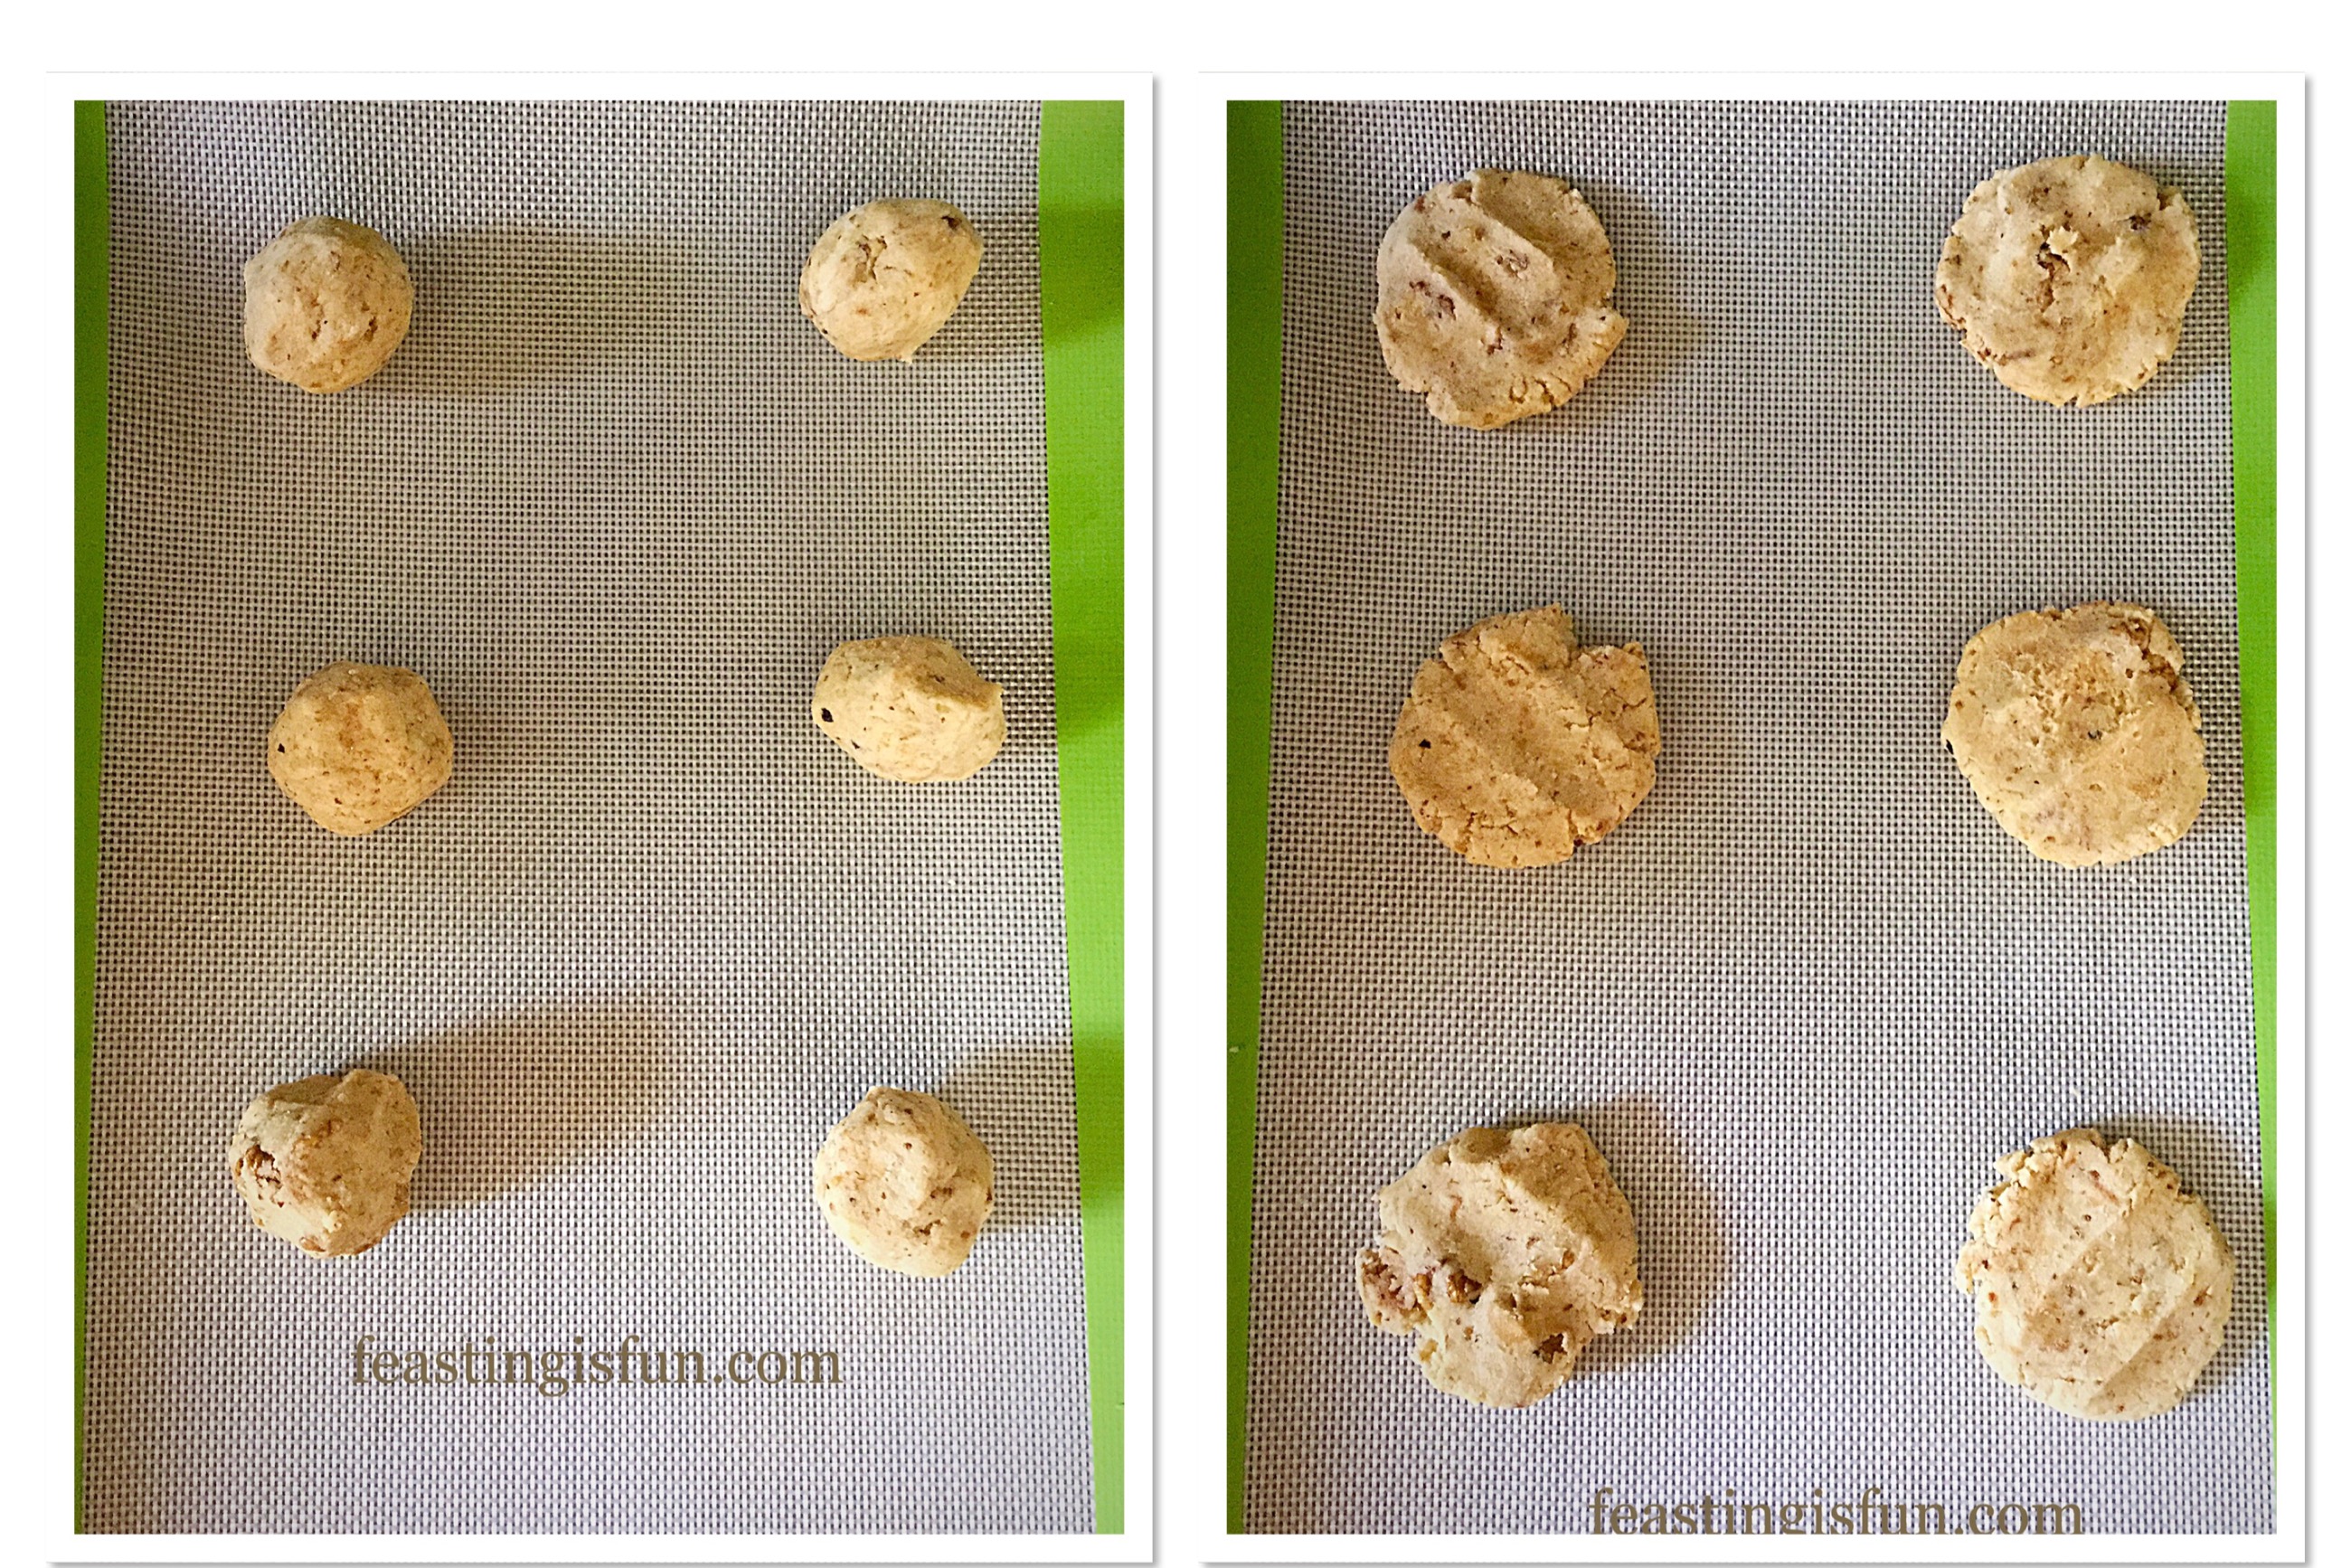
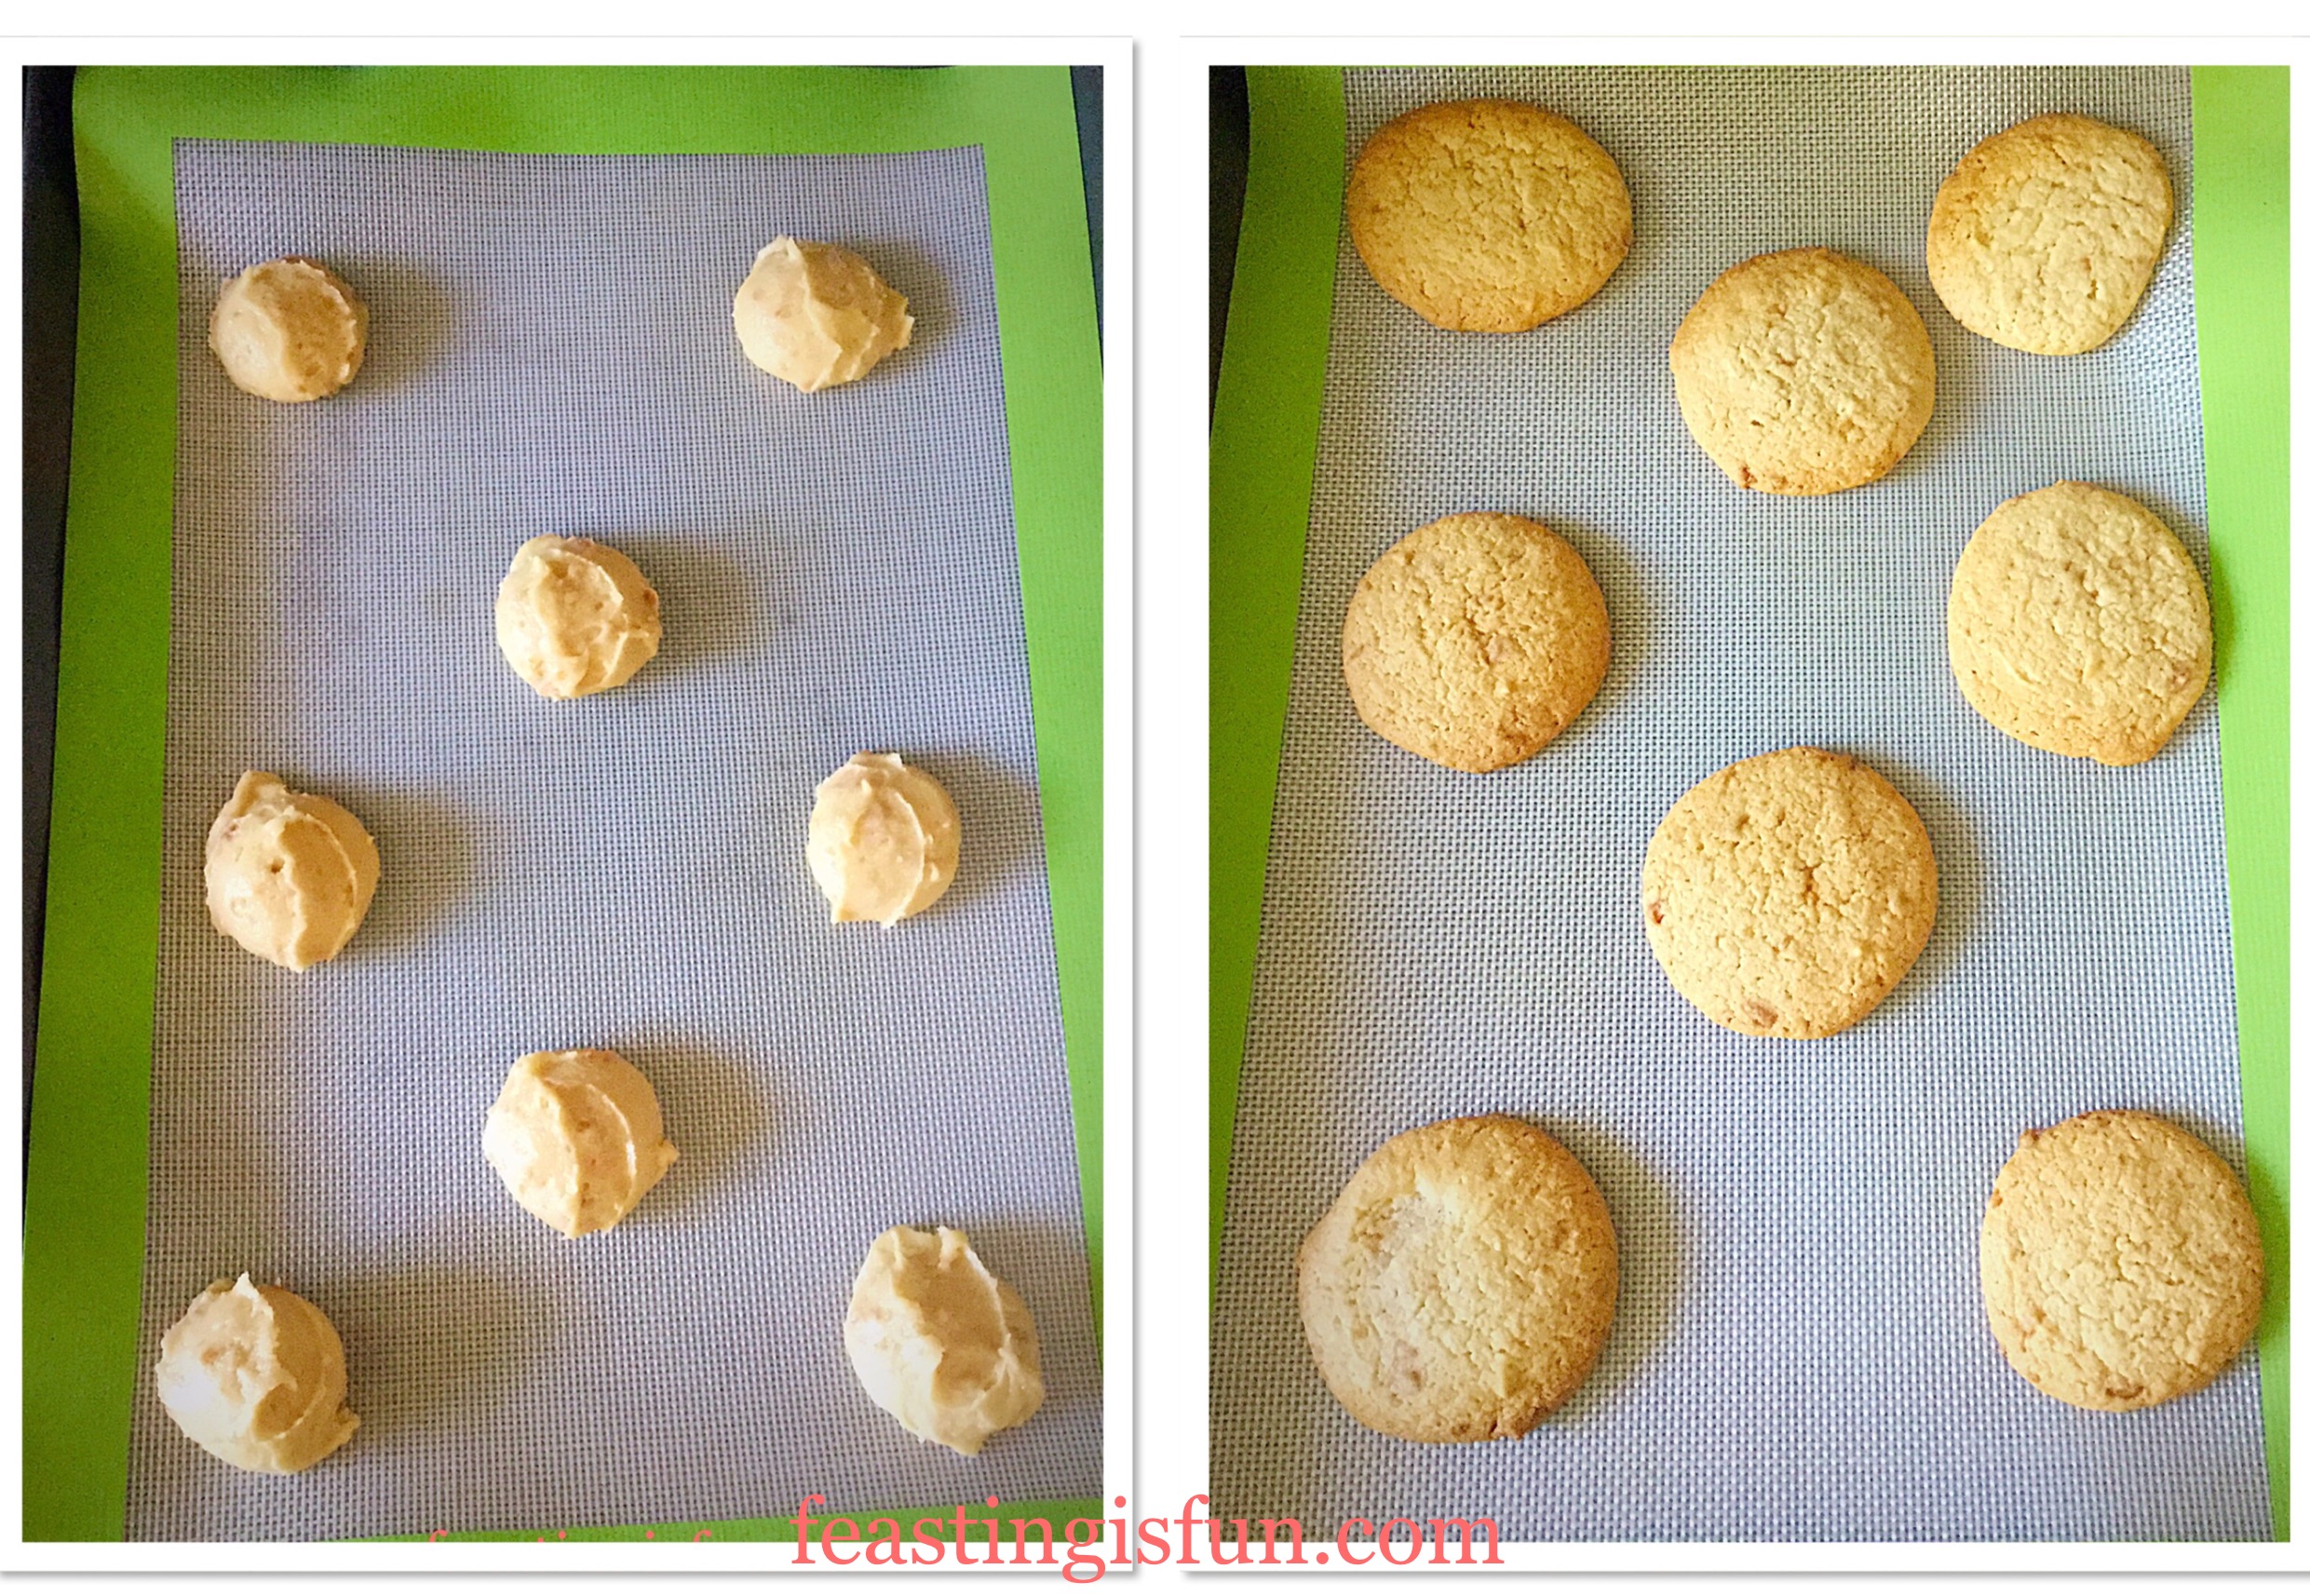
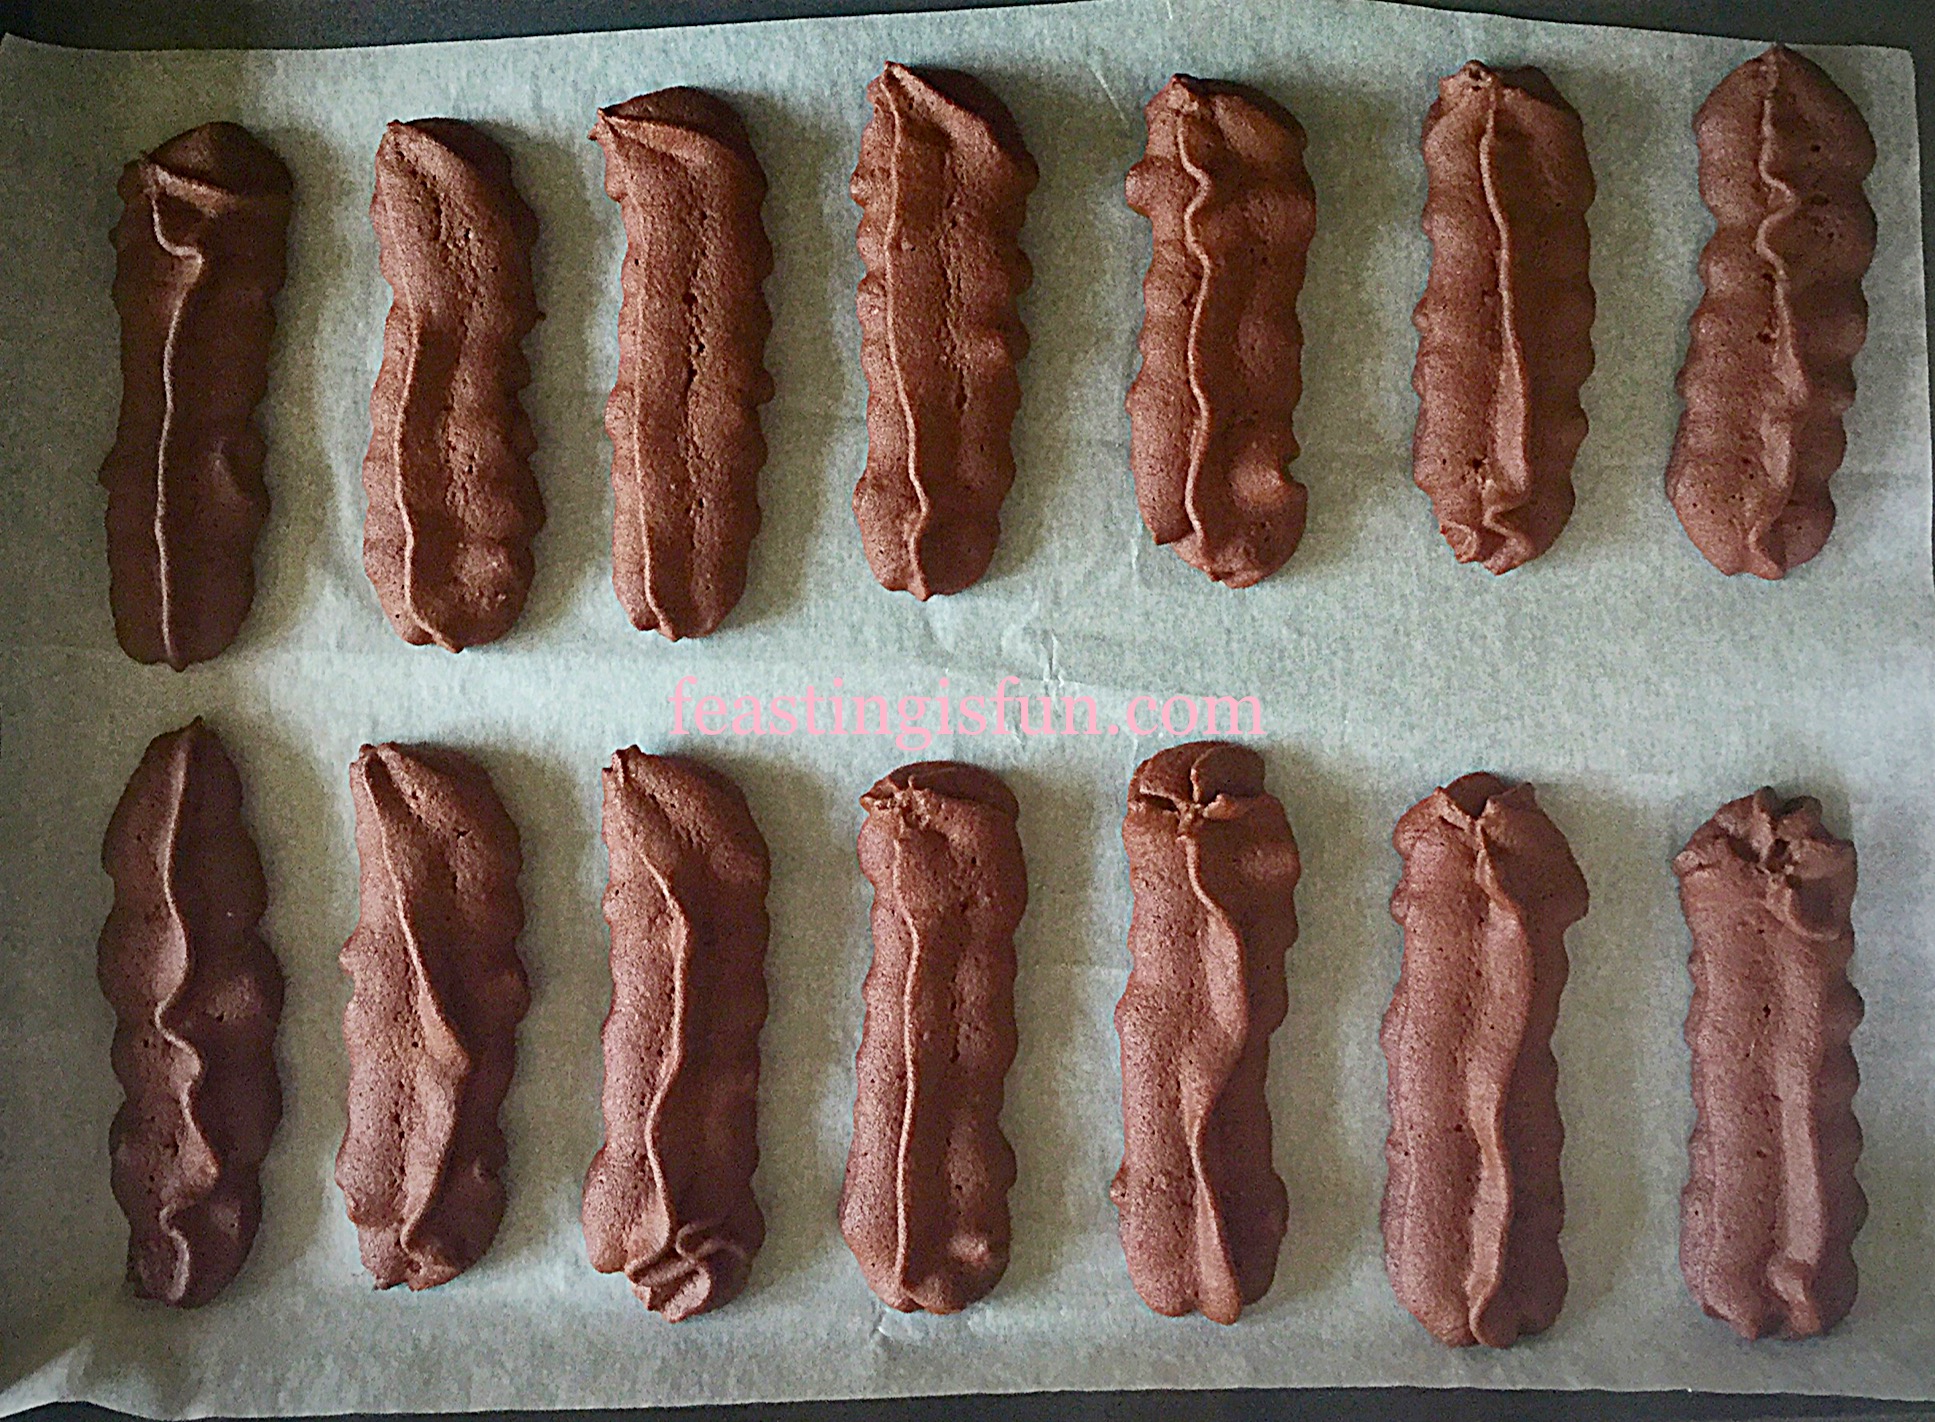
  • On one baking sheet pipe 5 tear drop shapes, approximately 10cm/4″ in length.
  • On a separate baking sheet pipe 5 more tear drop shapes, approximately half the size of the larger ones. Pipe one single profiterole, using a damp finger to press down any tip.
  • Place both trays, evenly spaced in the oven and bake for 30 minutes.
  • Do not open the oven during the first 25 minutes of baking as this could cause your piped choux petals to collapse!
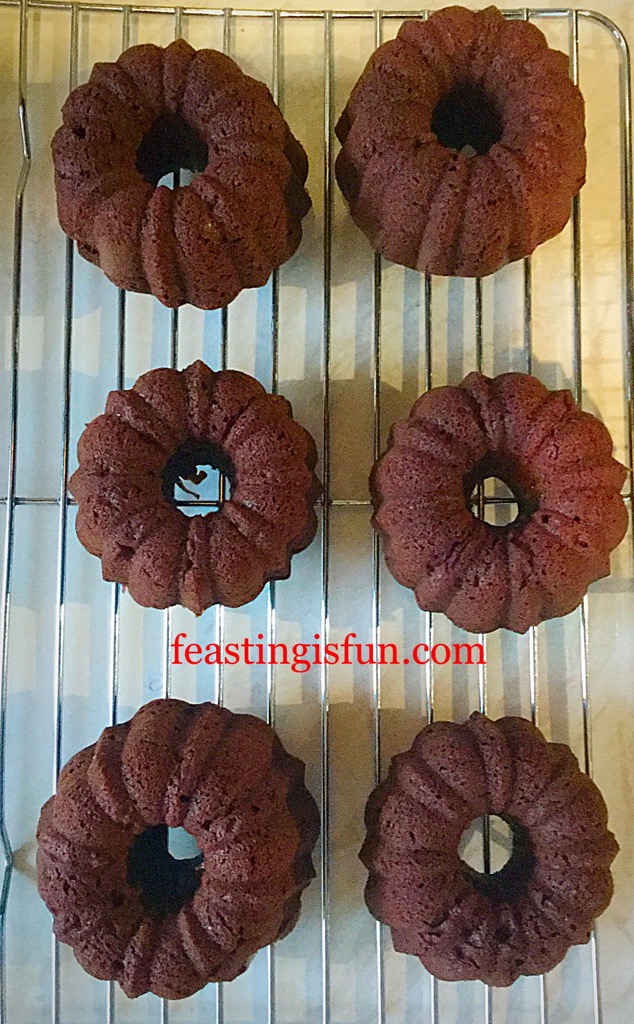
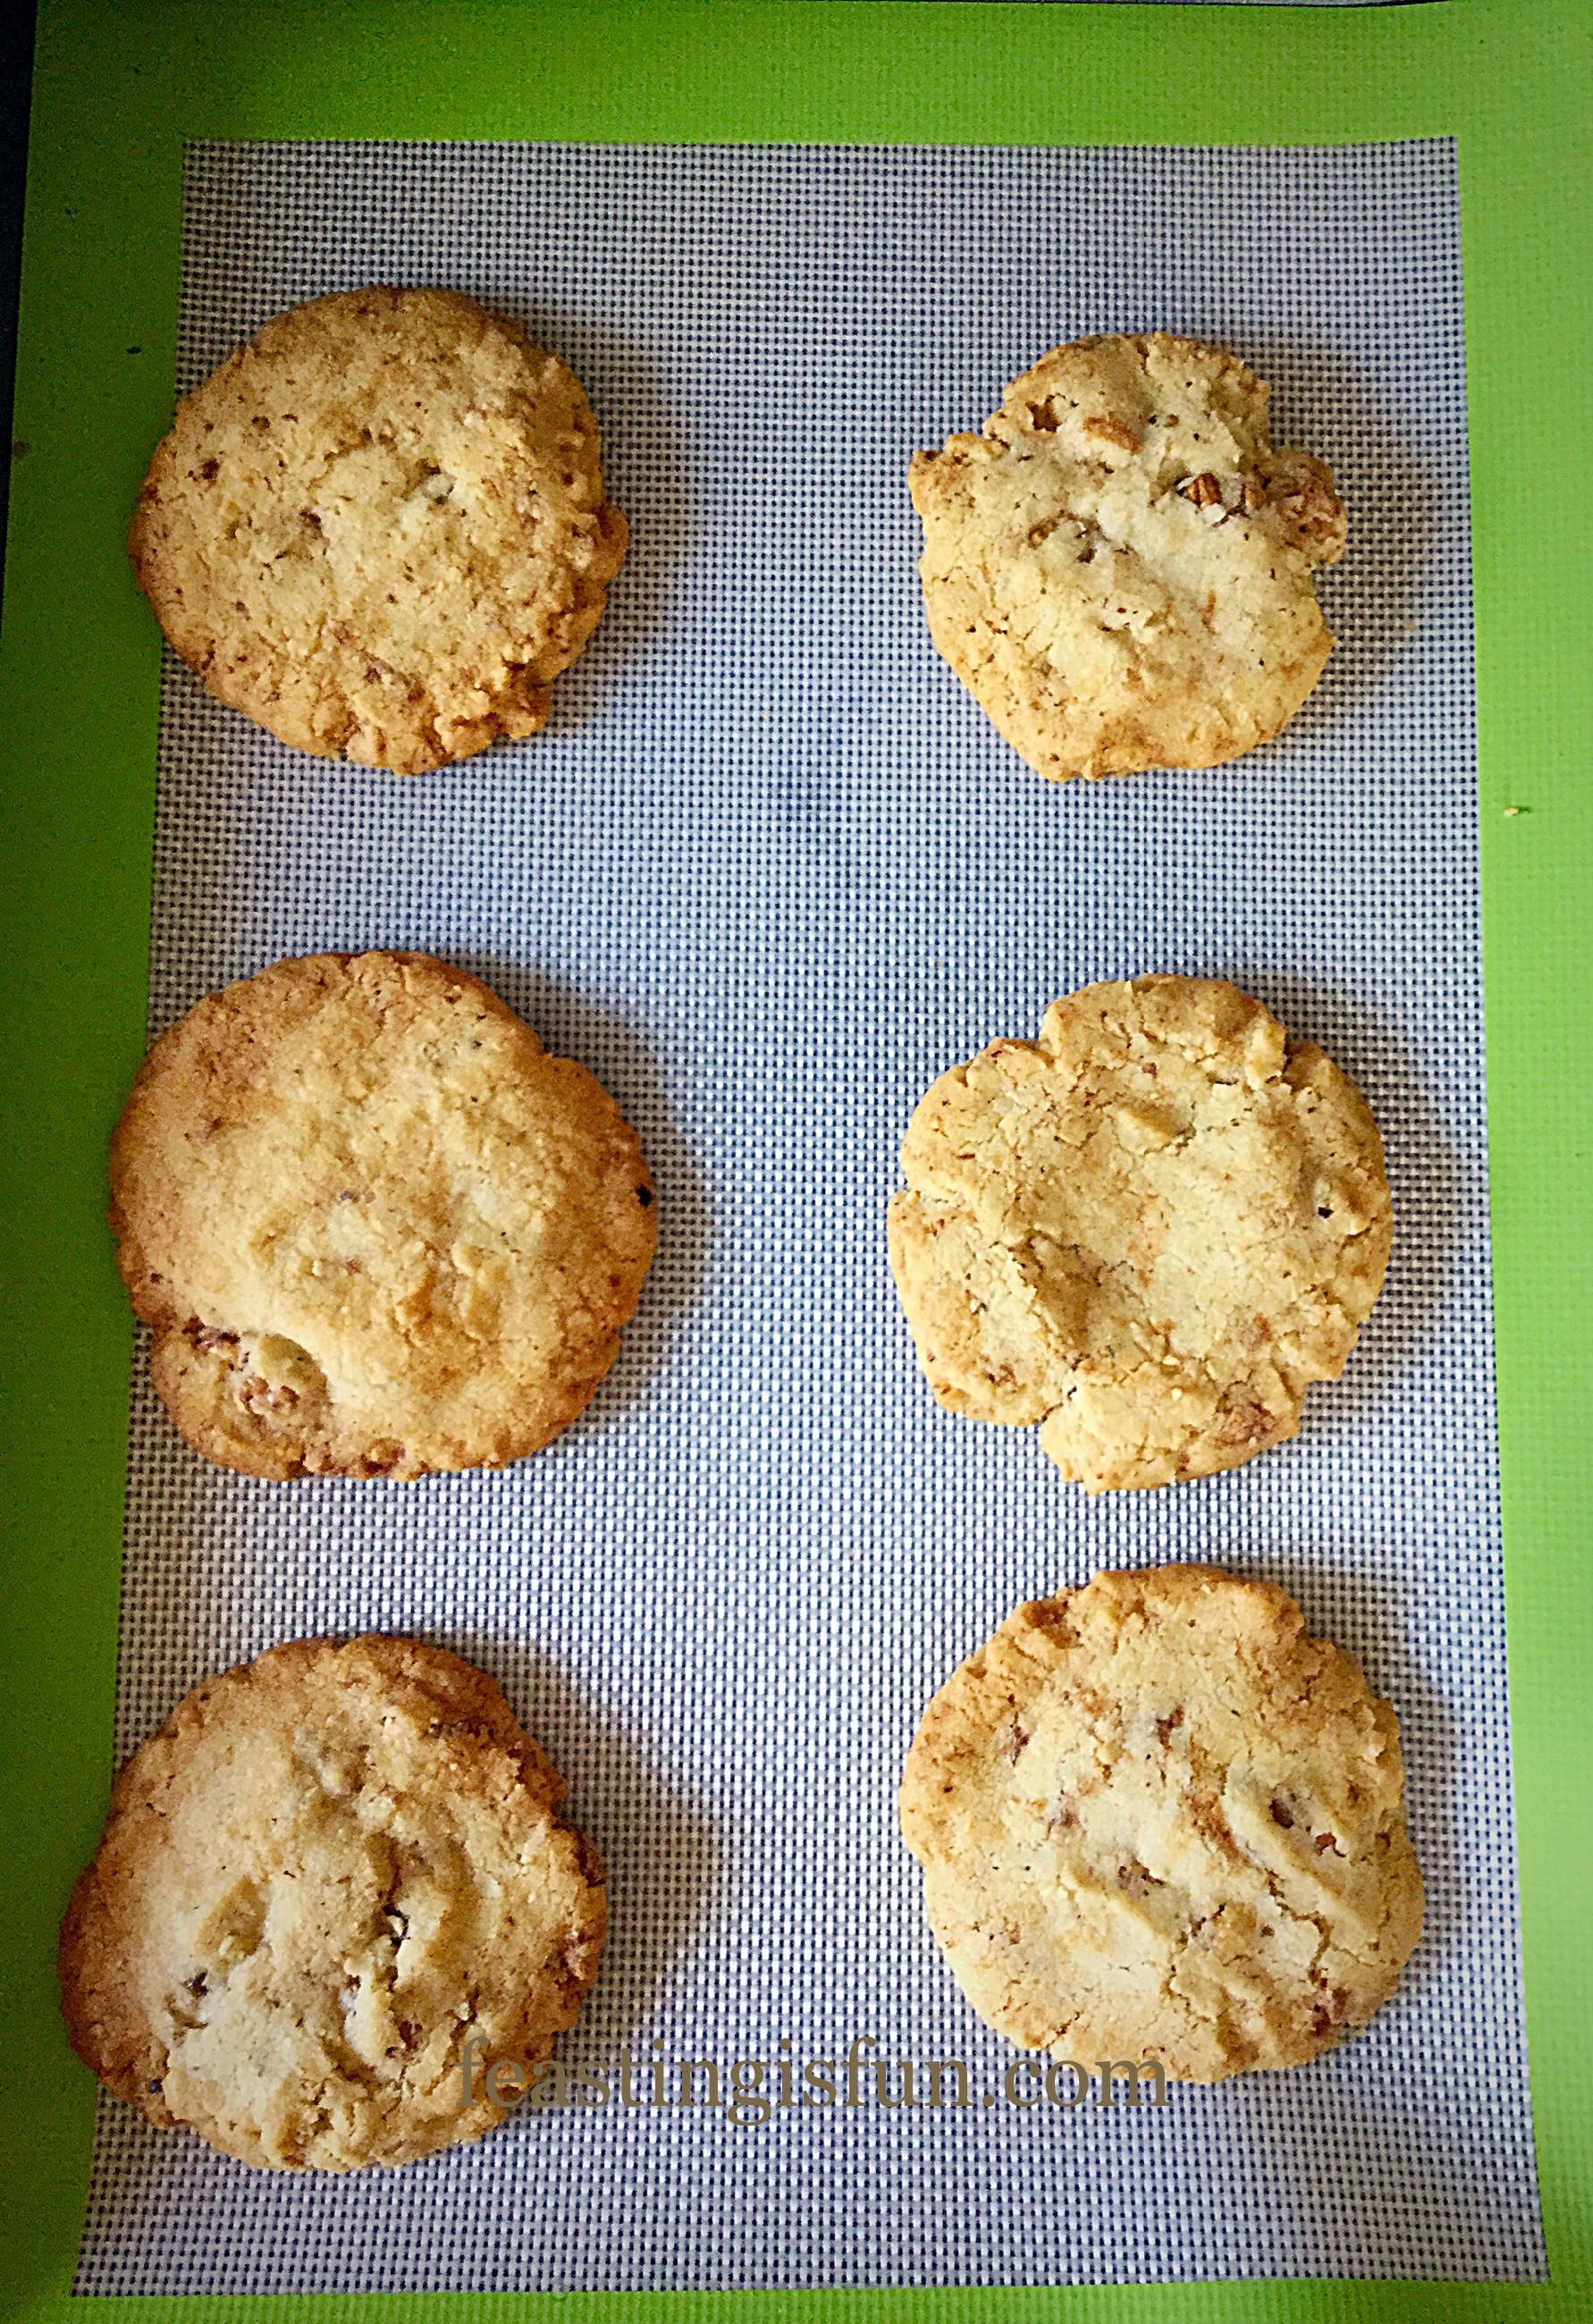
  • After 30 minutes remove the trays from the oven and place the choux pastry petals and the profiterole on to a cooling rack.
  • Leave until cold.
  • FF Chocolate Share Eclair Choux Flower
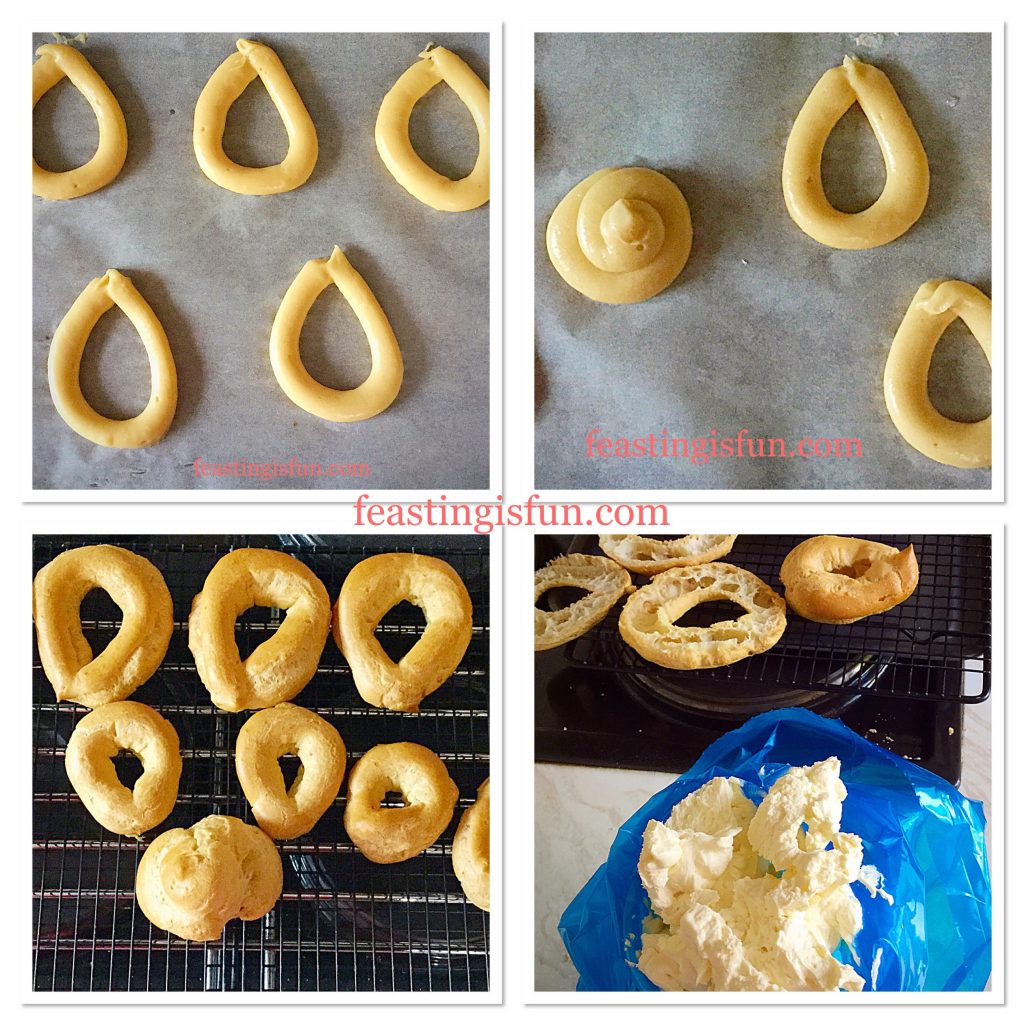
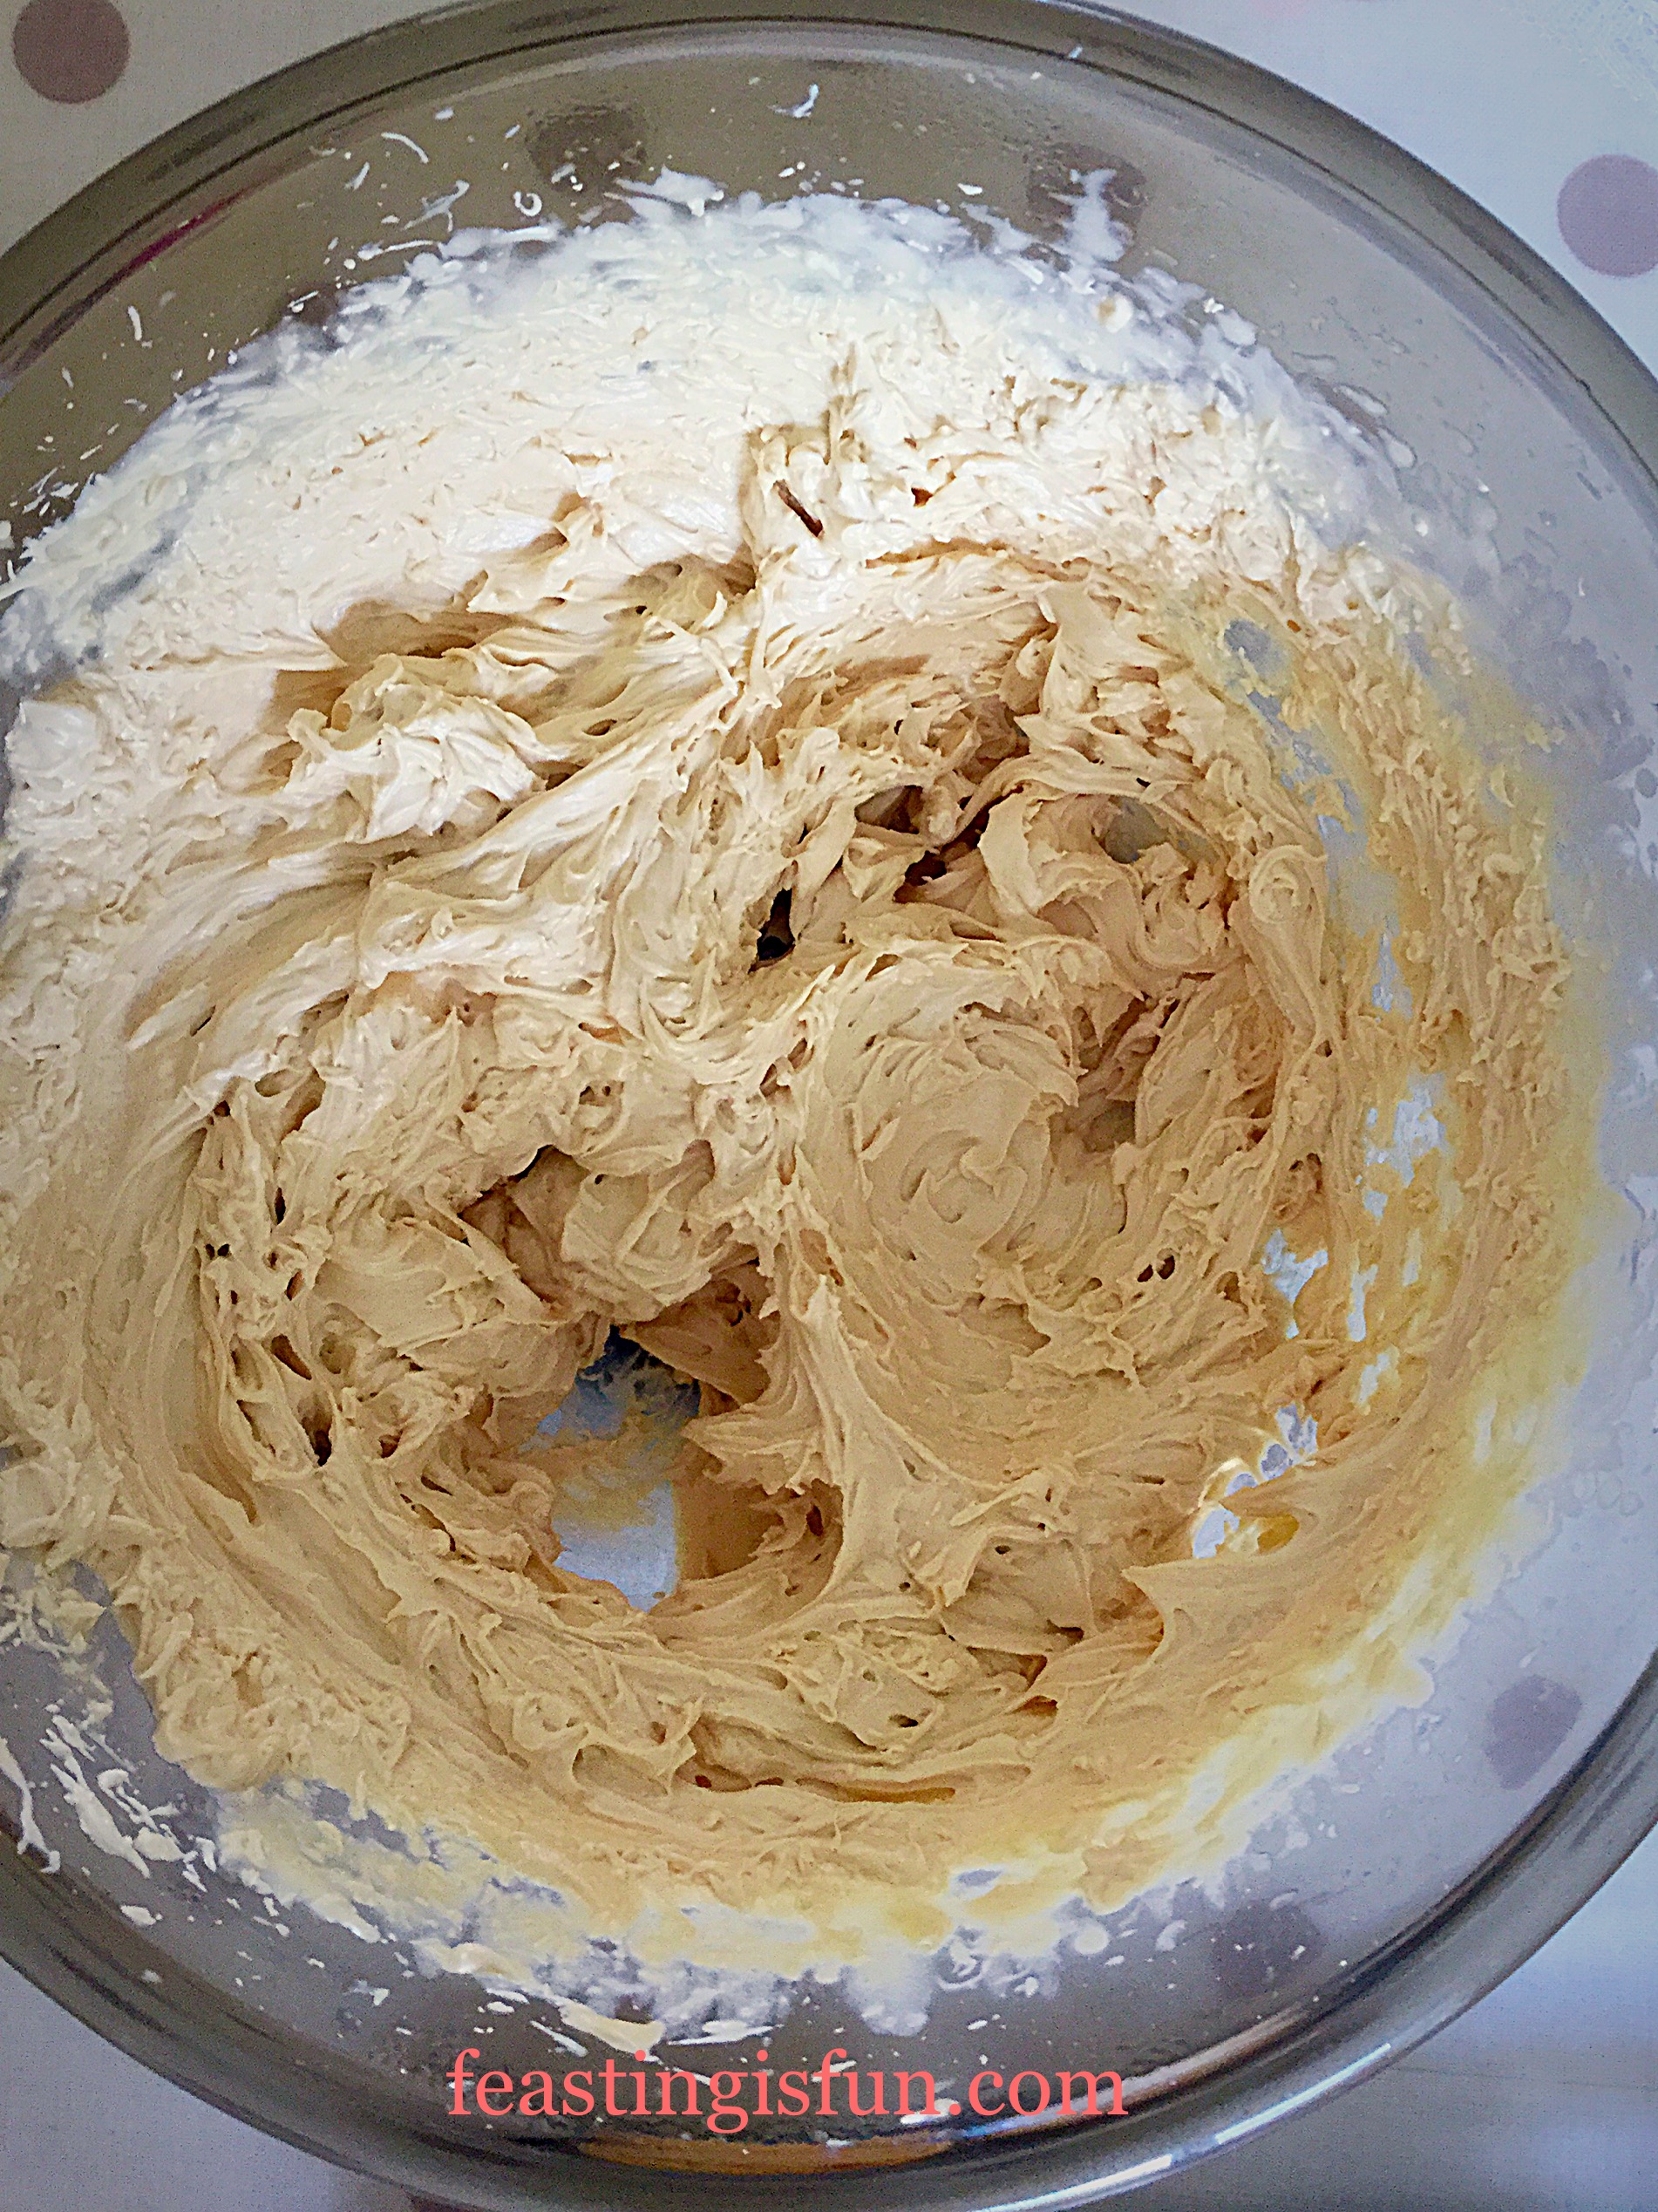
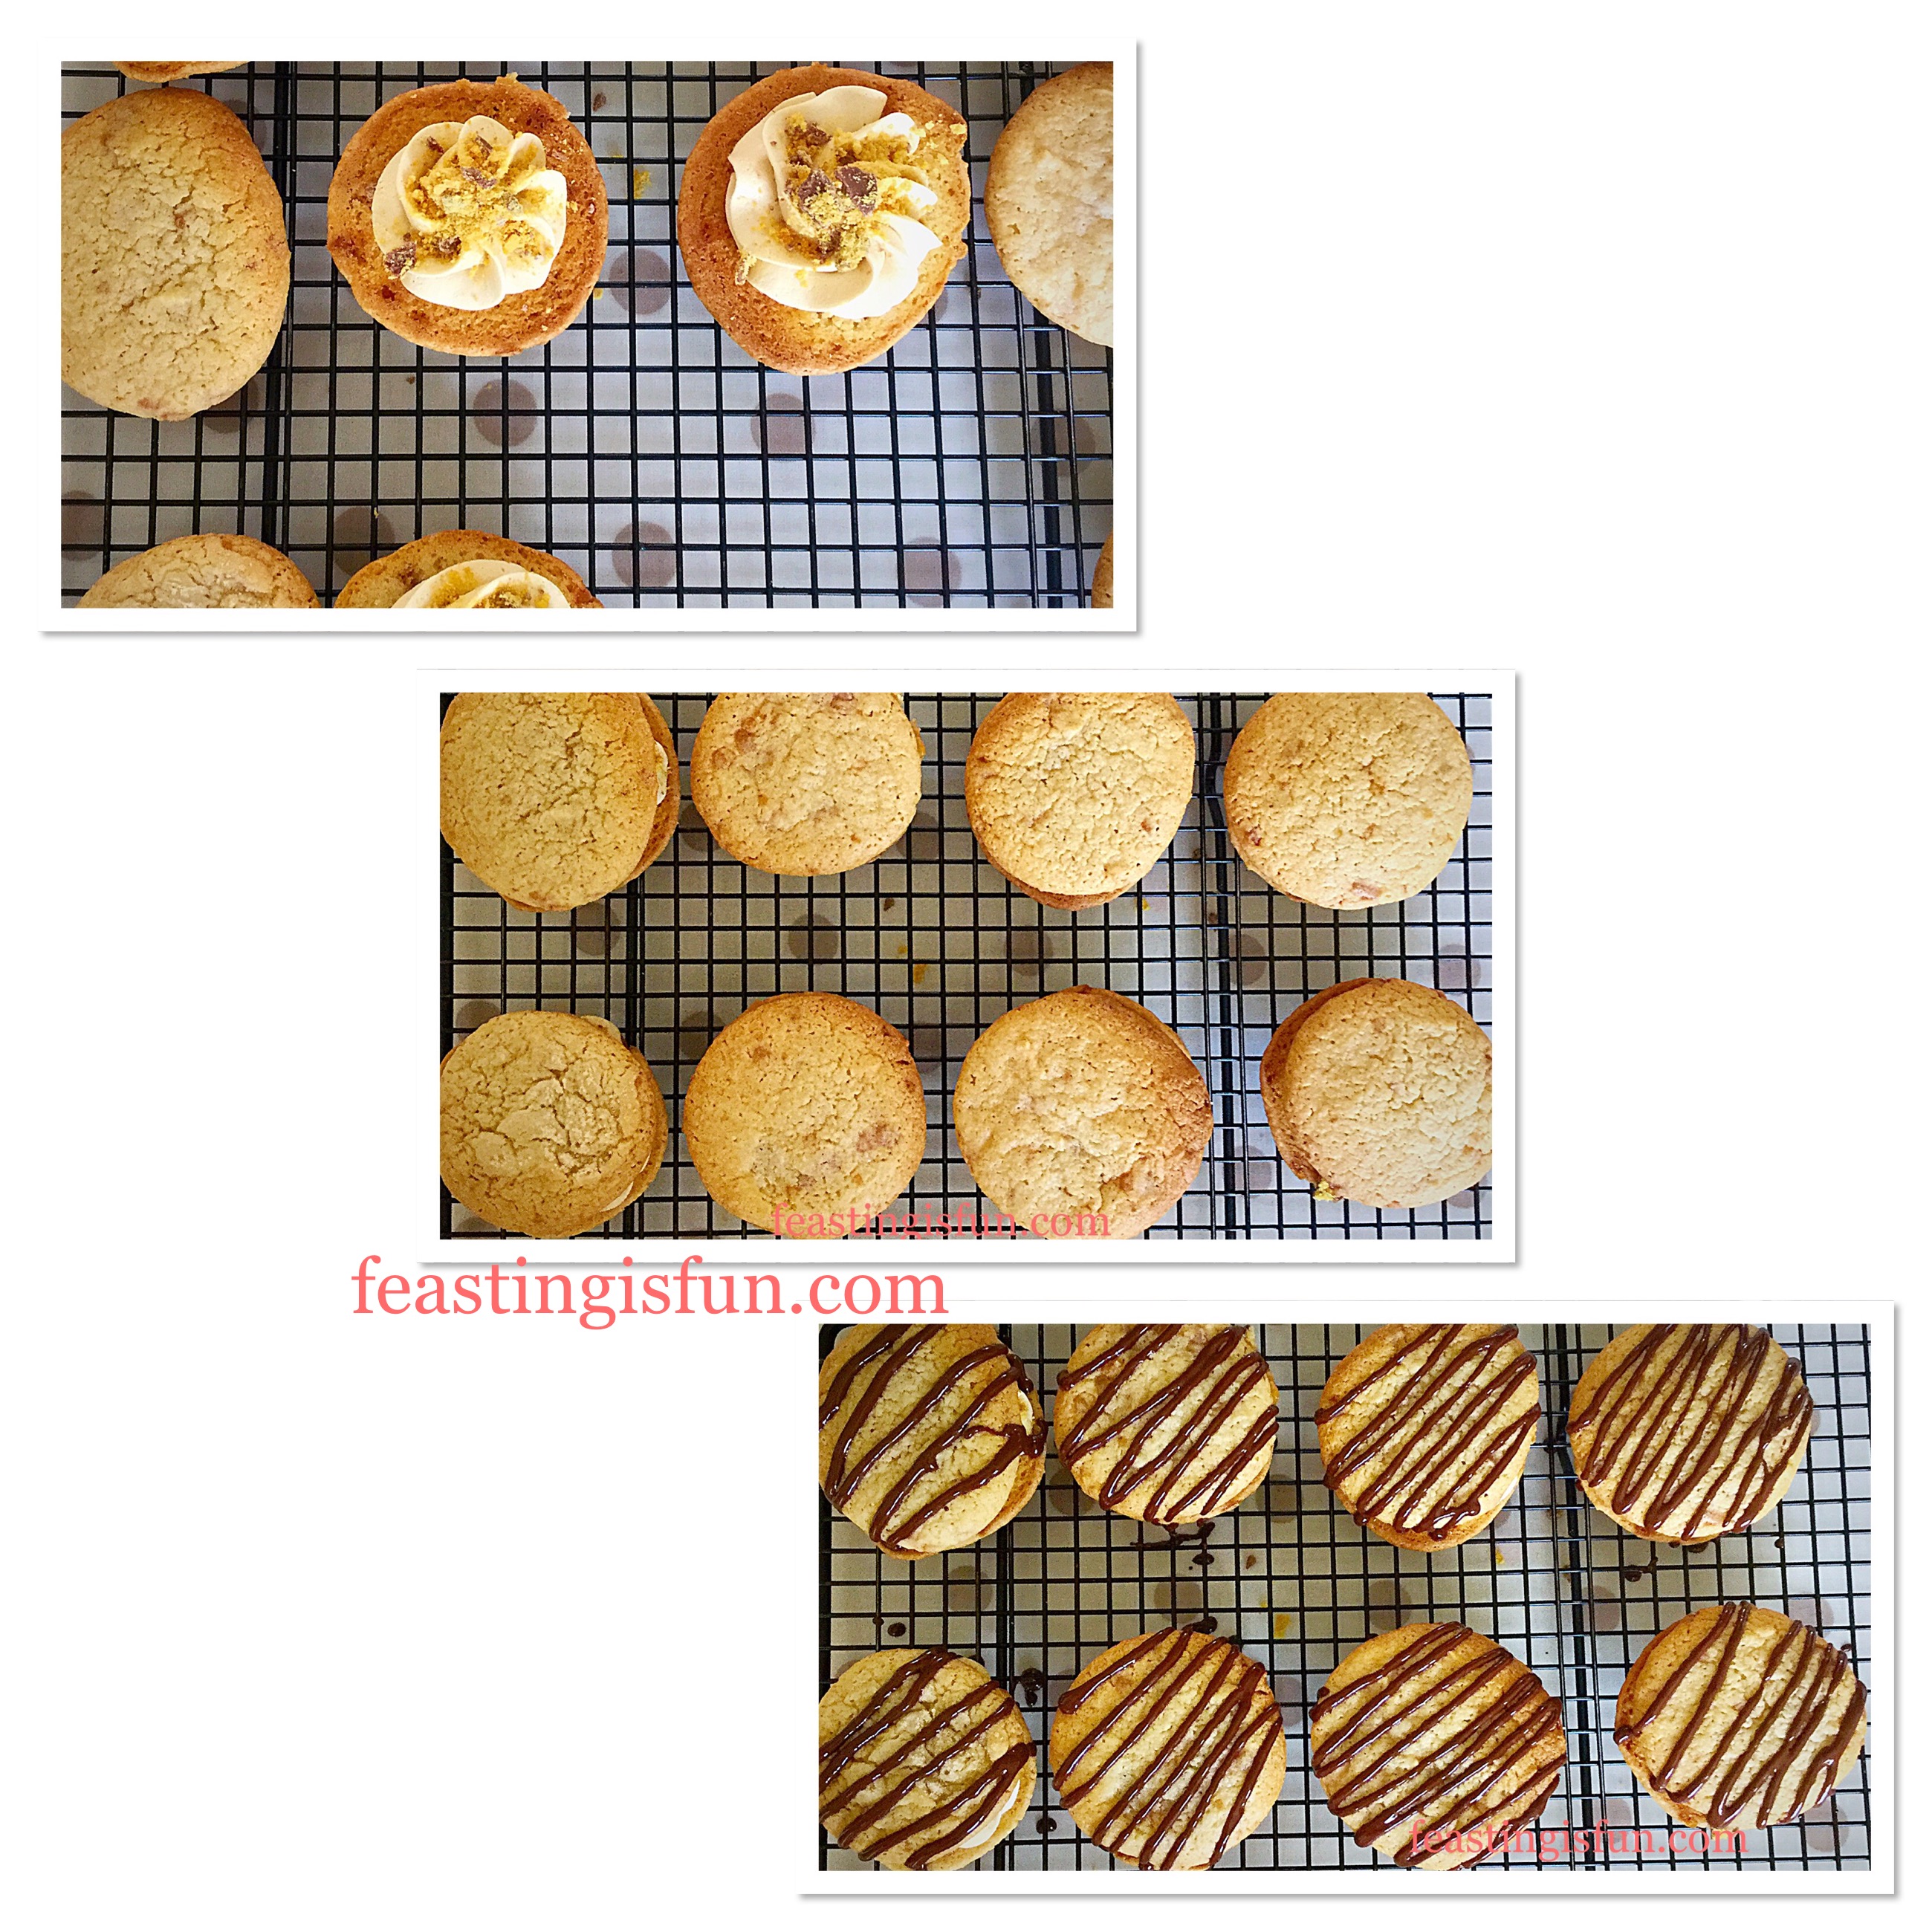
    Piping, baking, cutting and preparing the choux petals to be filled with cream.
  • Whilst the pastry is cooling pour the whipping cream, 1/2tsp vanilla extract and 4tsp icing sugar into a medium bowl.
  • Whisk until the cream holds a stiff peak.
  • Spoon the cream into a large disposable piping bag.
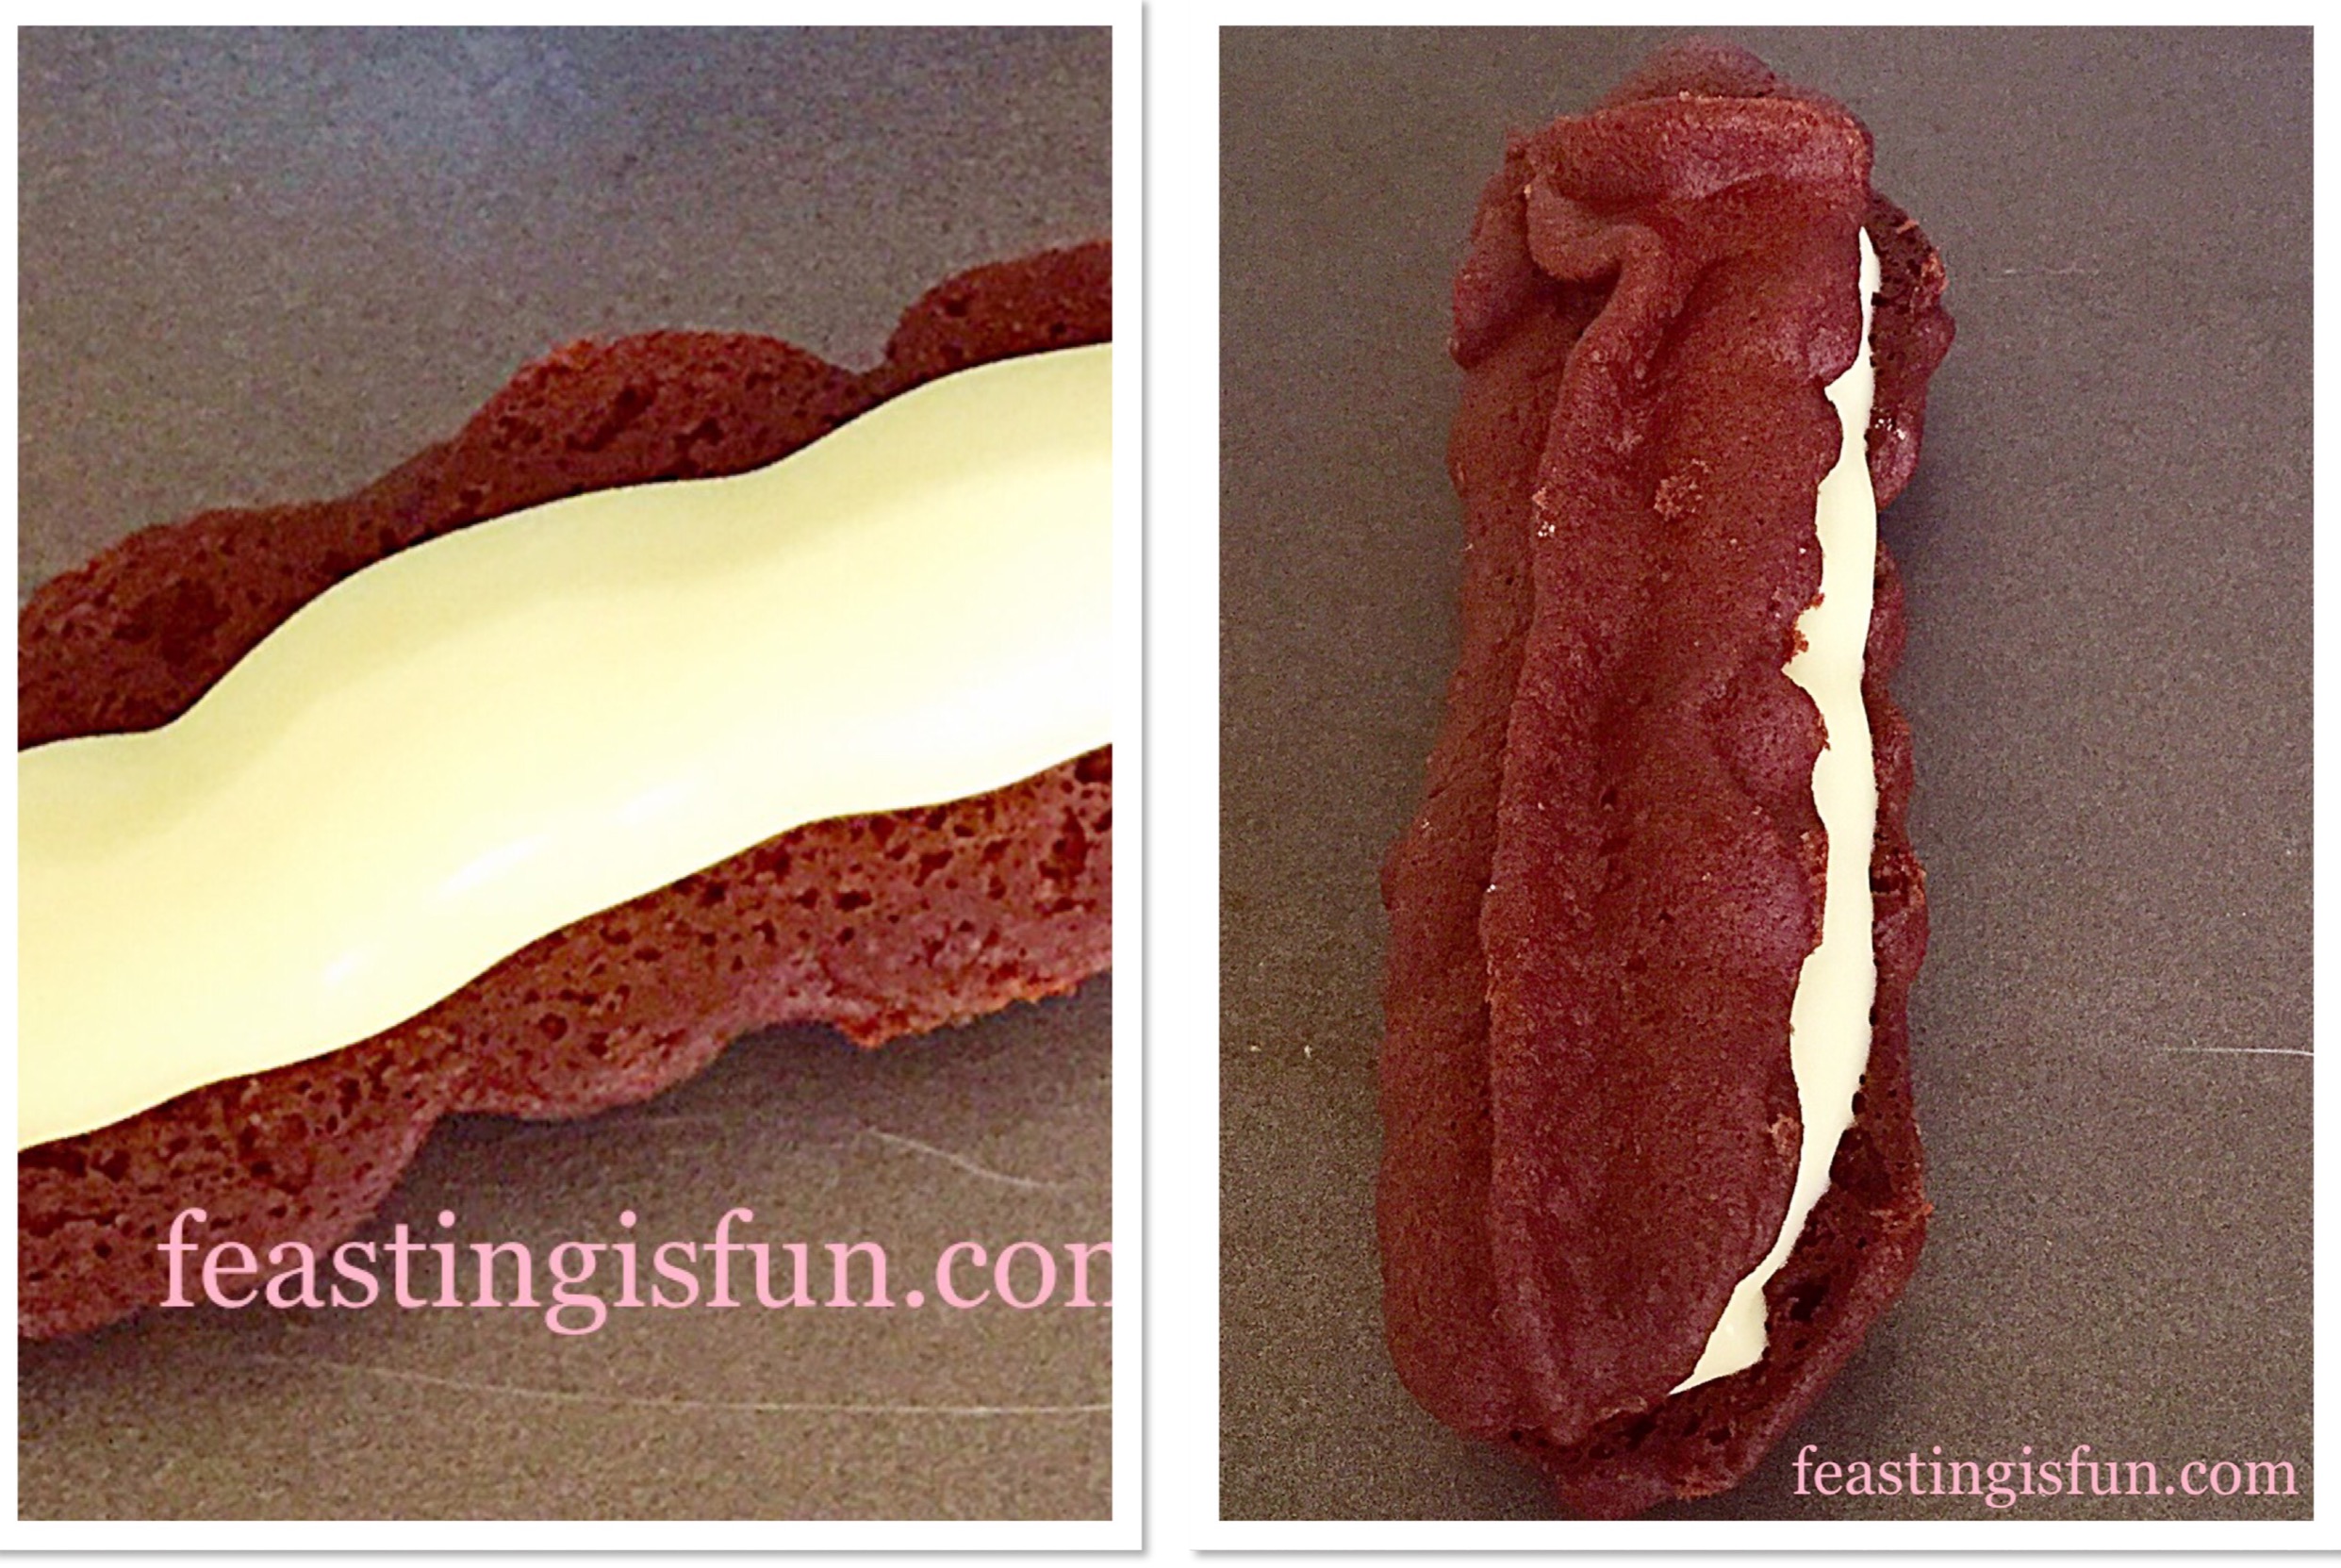
  • Starting with the largest petals, using a serrated knife cut the petal in half, so that the cream can be piped onto the bottom half. Lay each petal down so that the bottom is cut side up and the top is cut side down.
  • Do the same for the smaller petals and make a small incision in the side of the profiterole.
  • Cut approx 0.5cm off of the piping bag and proceed to pipe cream, following the shape of the petal. As each petal is filled replace the top. When all the petals have been piped with cream, push the piping bag into the incision in the profiterole and fill with cream.
FF Chocolate Share Eclair Flower
Filing and piping the choux pastry with chocolate.
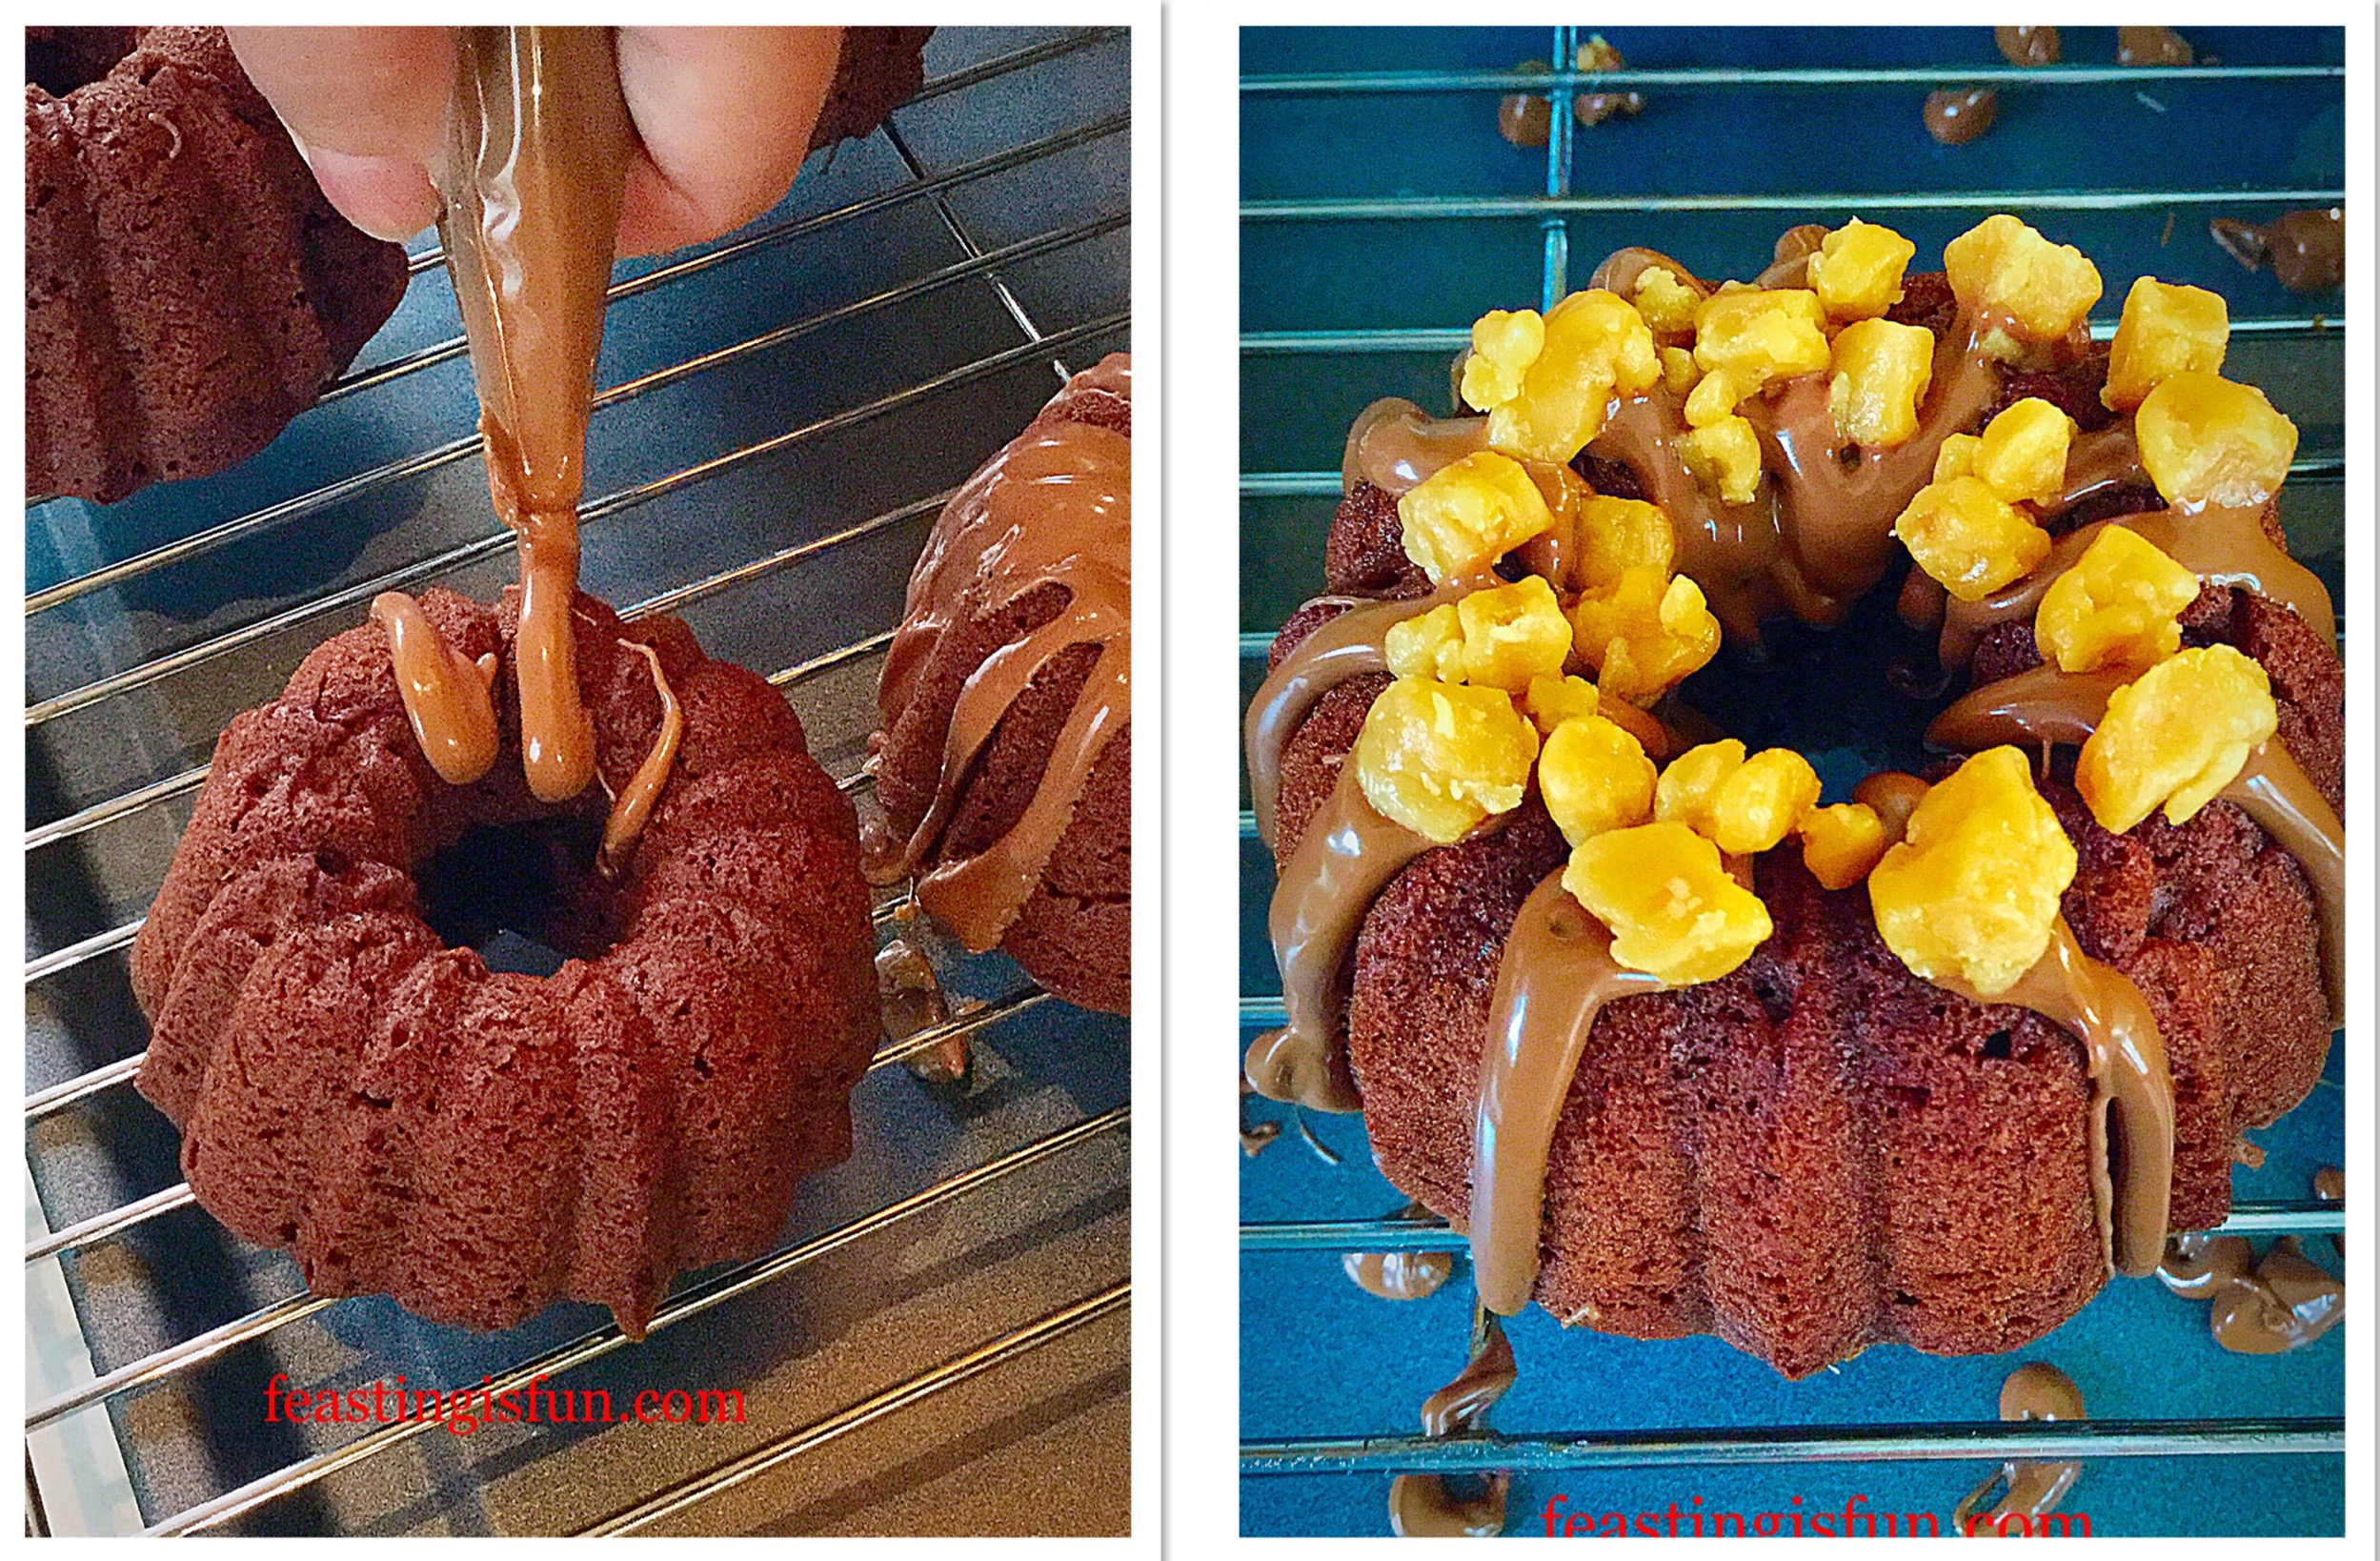
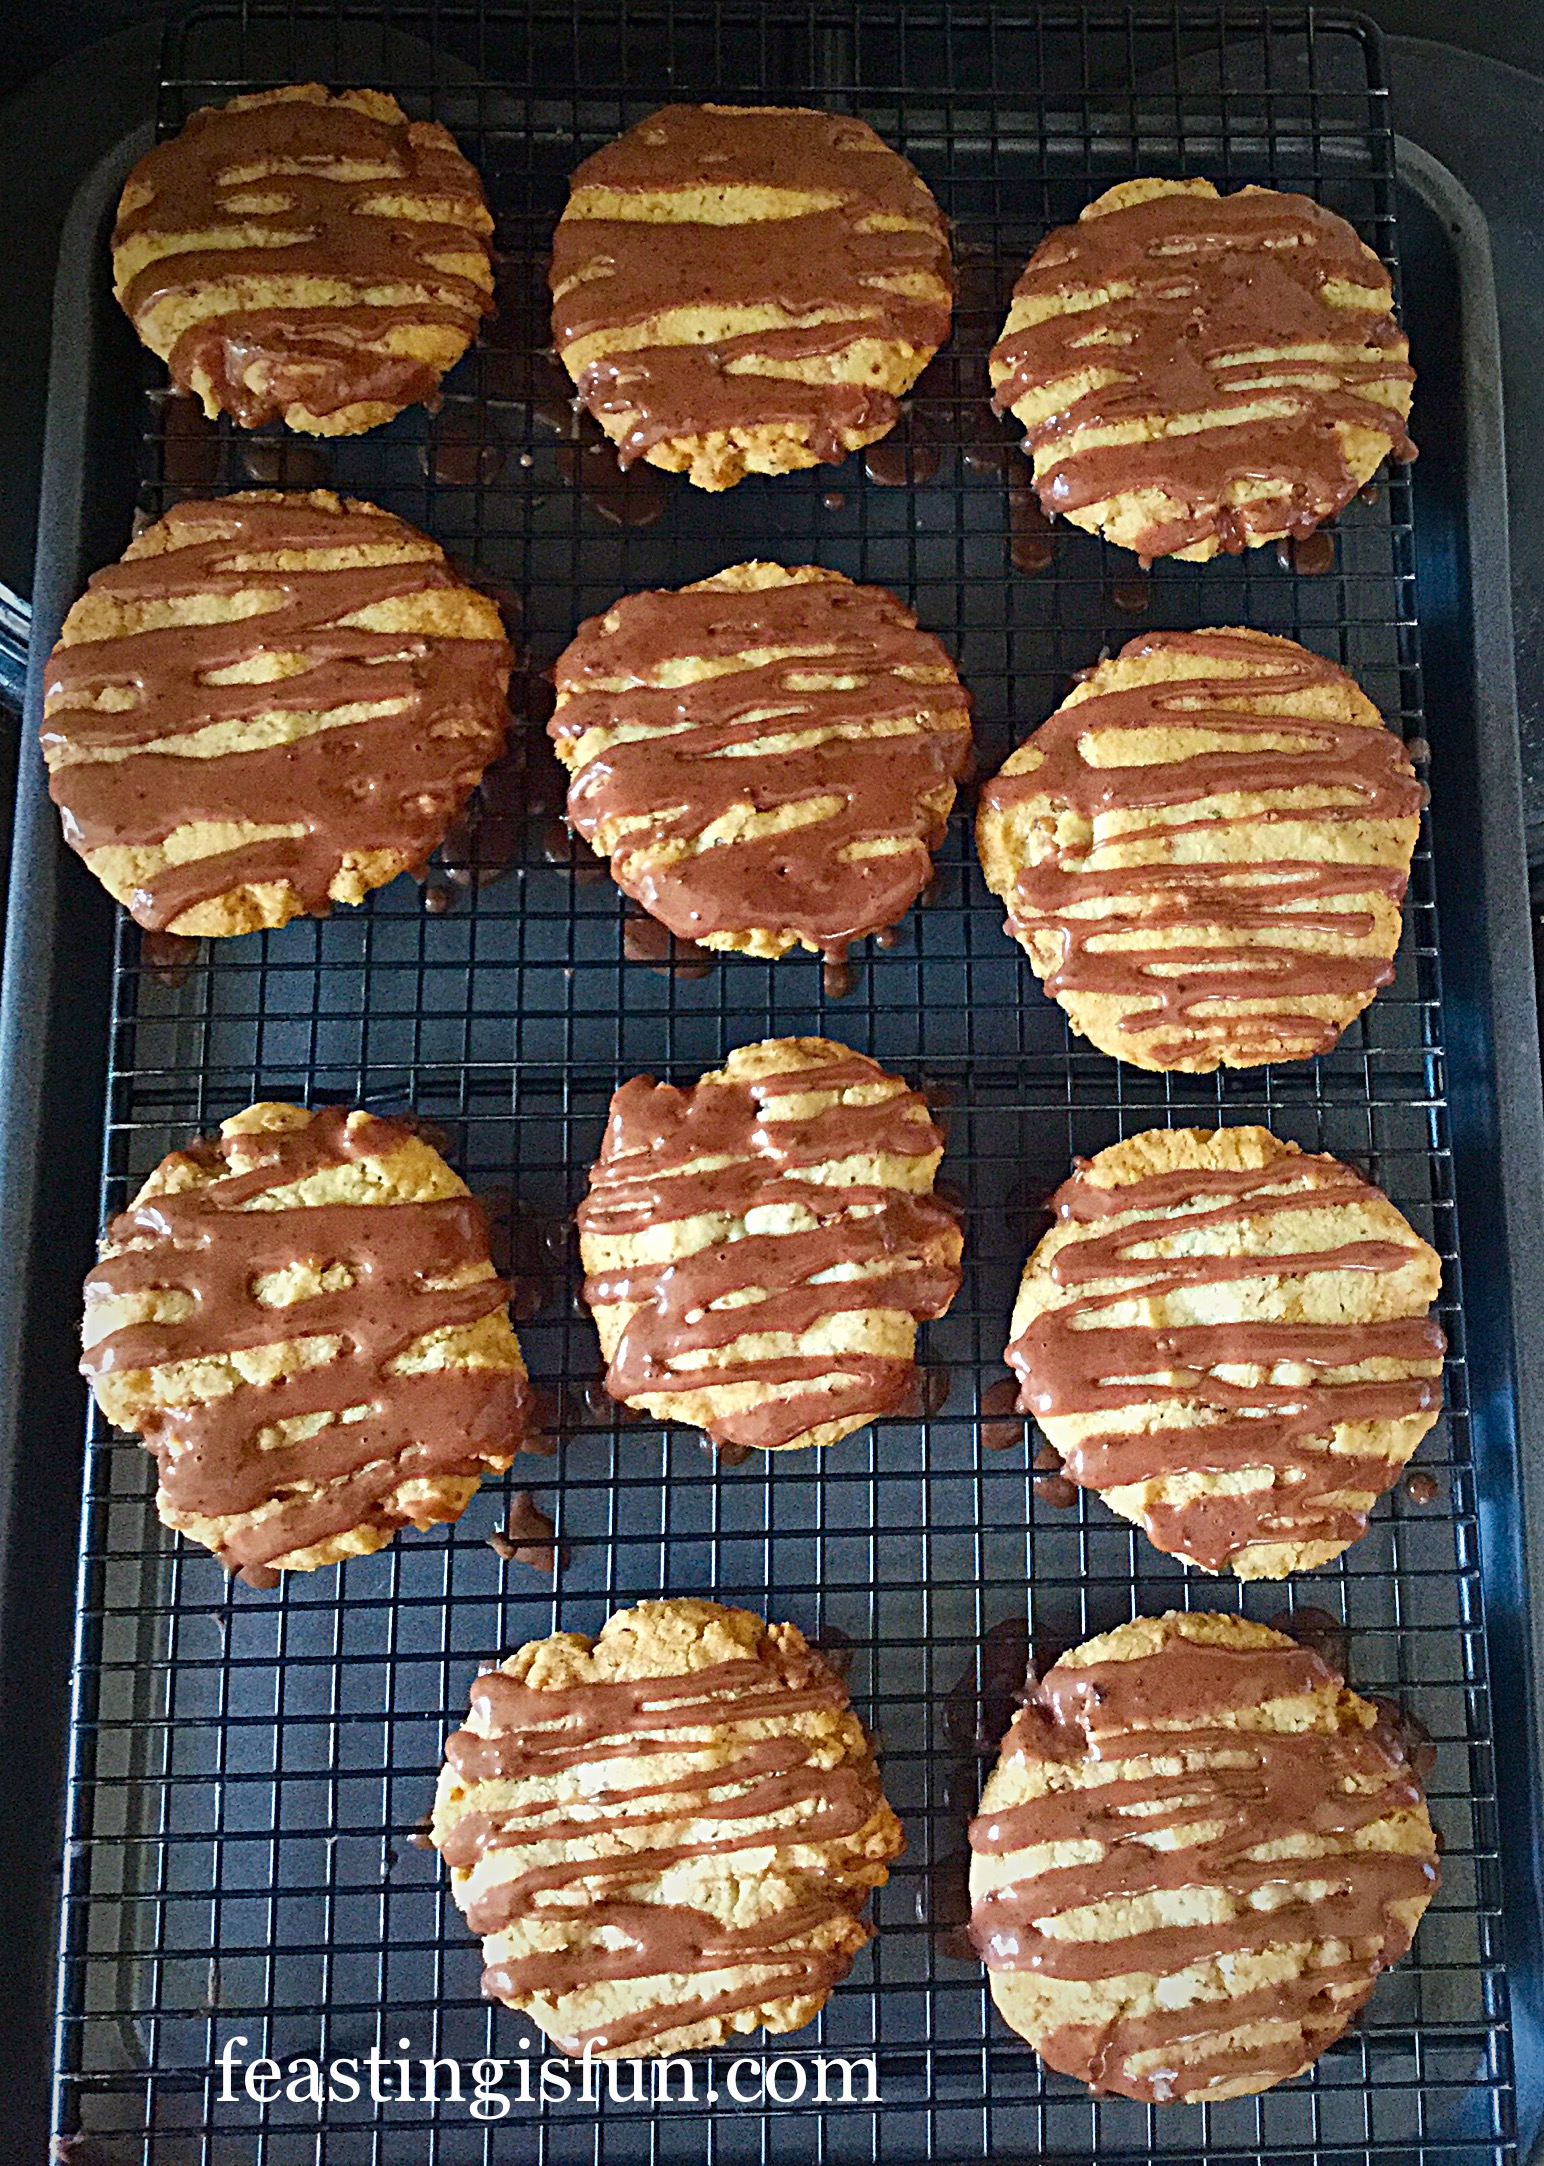
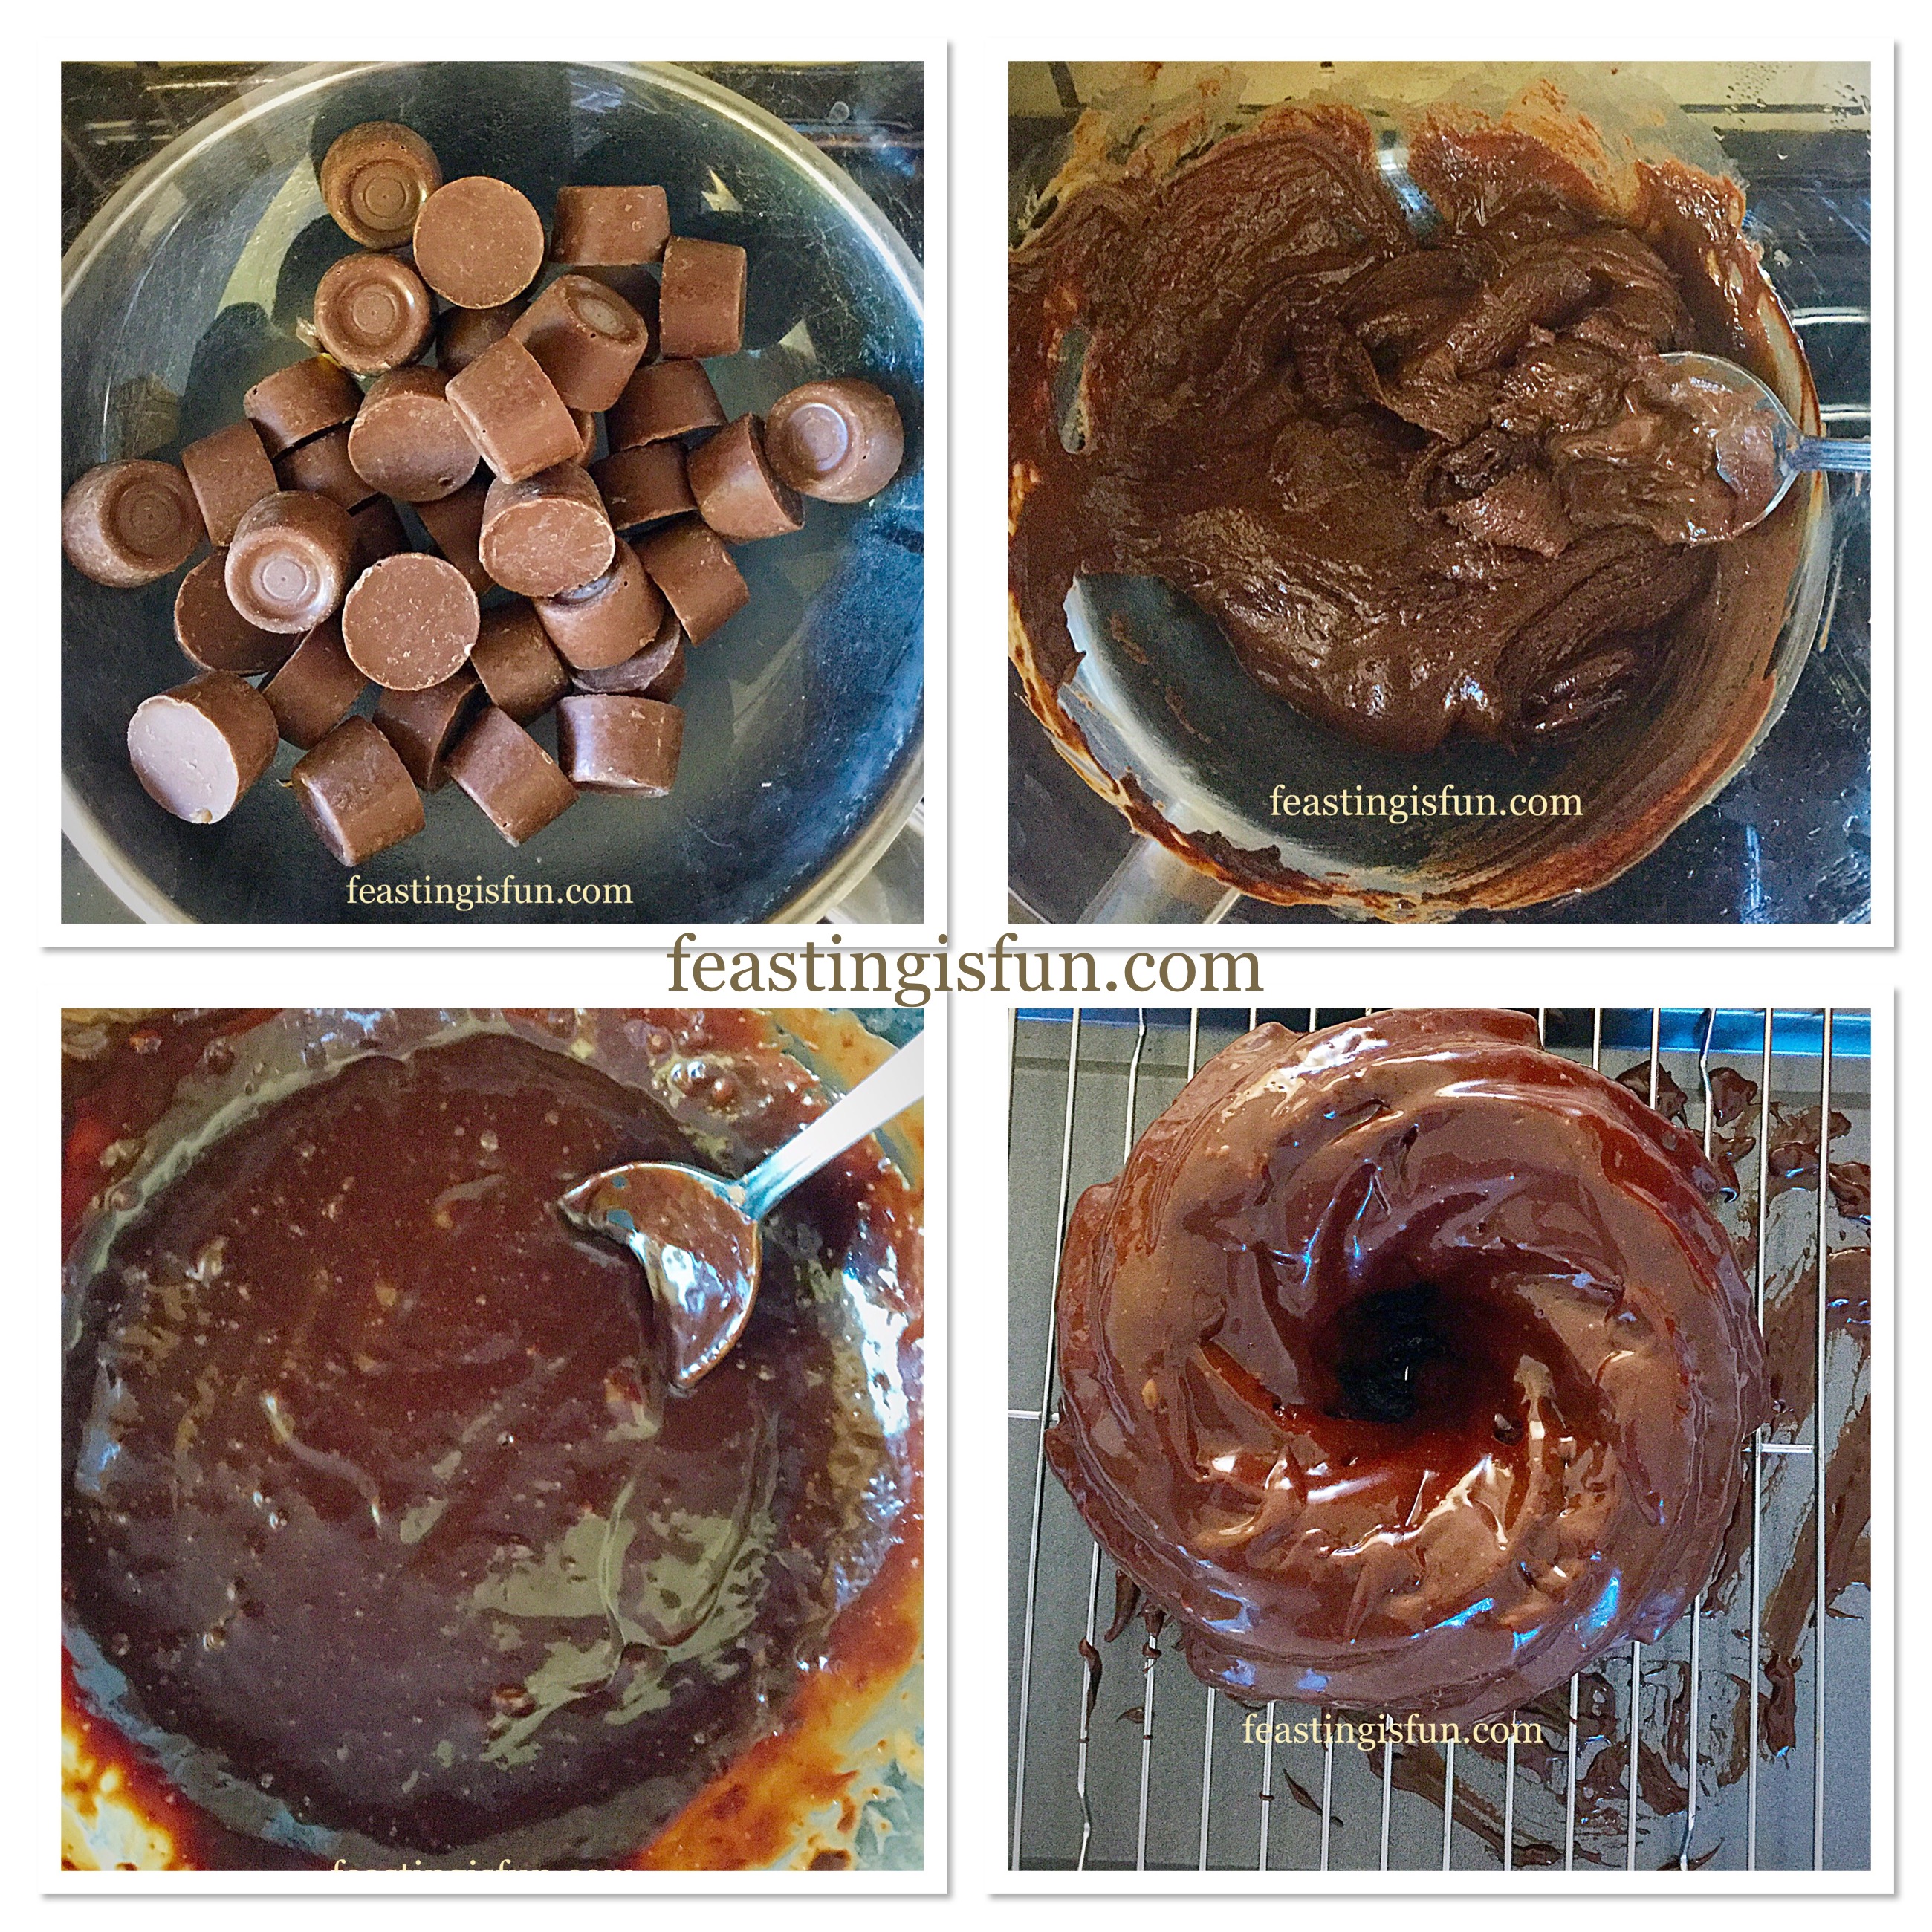
  • Place the chopped milk chocolate into a heatproof, microwaveable bowl and zap on medium, in the microwave for 30 seconds, stirring after each zap. When the chocolate is fully melted pour into a disposable piping bag (or alternately you could dunk the petals in the chocolate).
  • Pipe chocolate around the choux petals and cover the top half of the profiterole in chocolate.
  • Use a butter knife to spread the molten chocolate on the choux petals.
  • Whilst the chocolate is still warm assemble your Chocolate Share Eclair Flower.
  • On a large flat plate or board place the profiterole in the centre. Evenly space the 5 larger petals around the profiterole. Carefully place the smaller petals inbetween and on top of the larger petals.
FF Chocolate Share Eclair Flower
Chocolate Share Eclair Flower dusted with a little icing sugar.

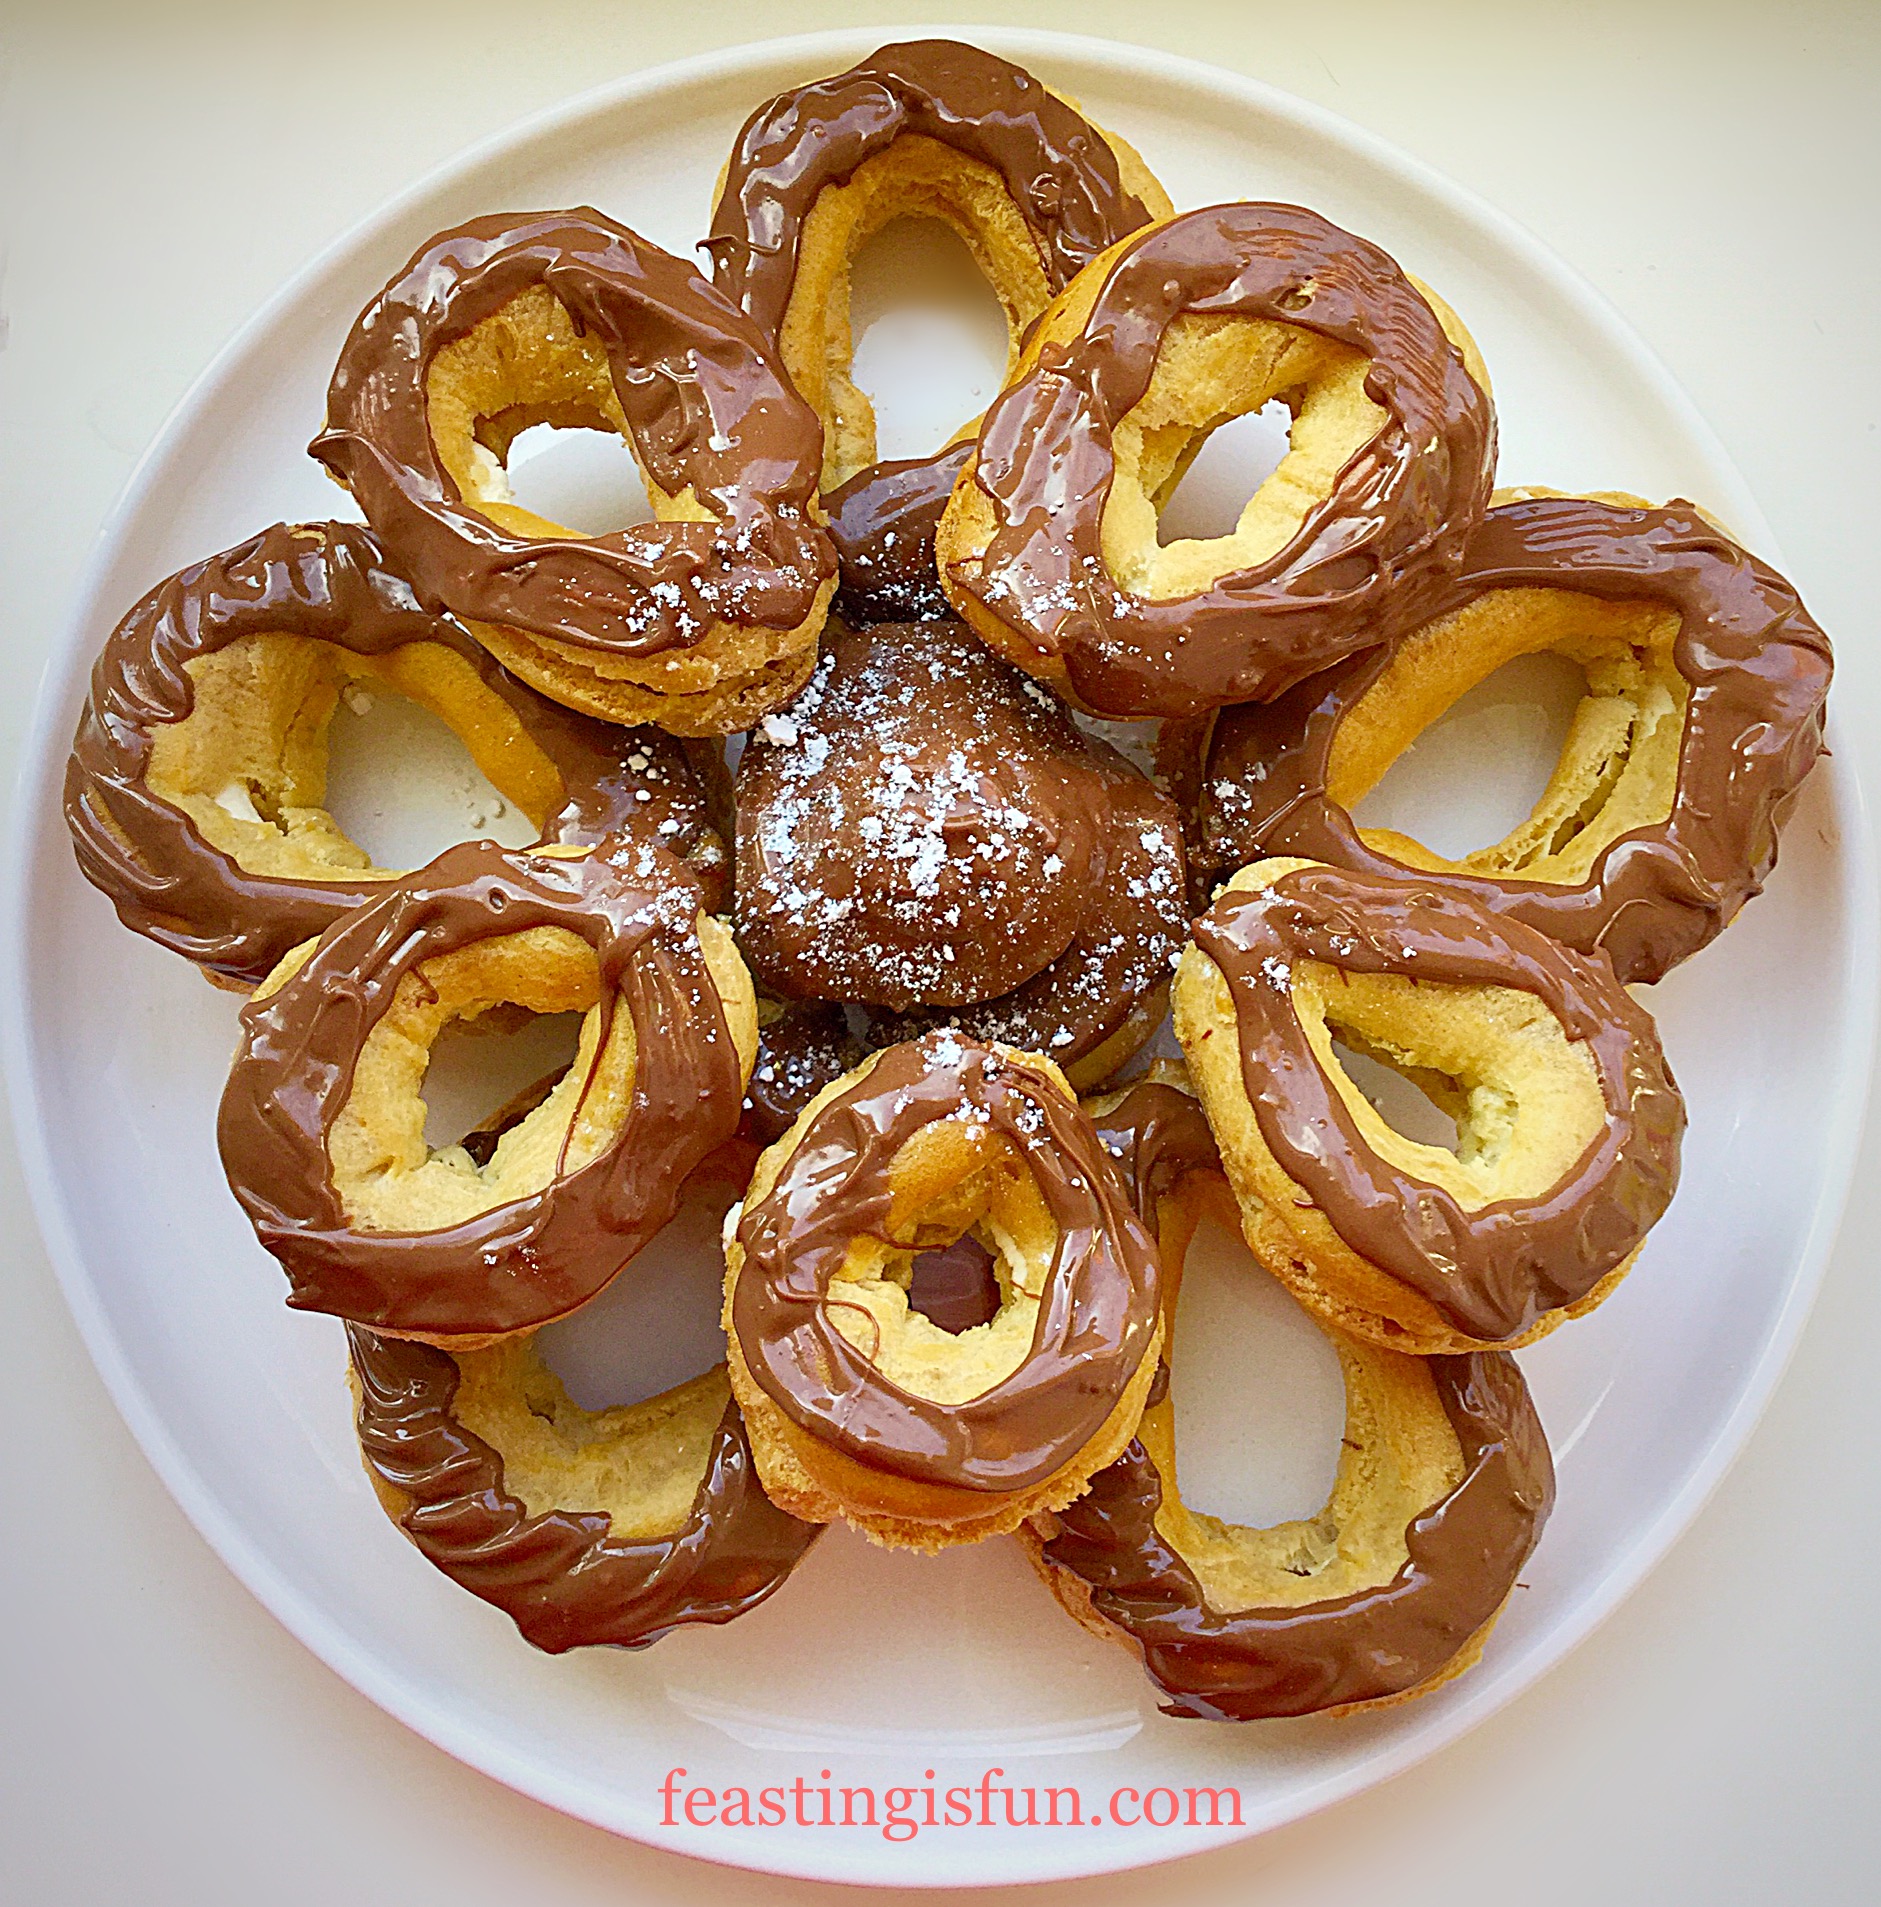
Dust the centre of the choux flower with the remaining icing sugar and your Chocolate Share Eclair Flower is complete.

Place in the fridge to allow the chocolate to set.

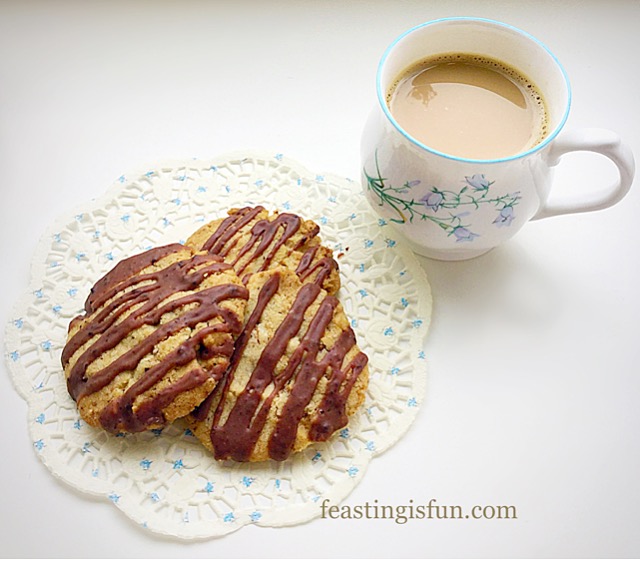
Serve with friends and family, who will no doubt be impressed with your artistic flair. As the flower has now been submitted I have embellished it a little using some sparkles.

FF Chocolate Share Eclair Flower
Chocolate Share Eclair Flower with sparkling pollen!

I don’t know anyone who doesn’t like profiteroles or eclairs, so this is the perfect way to make them into something different, that can then be shared and enjoyed.

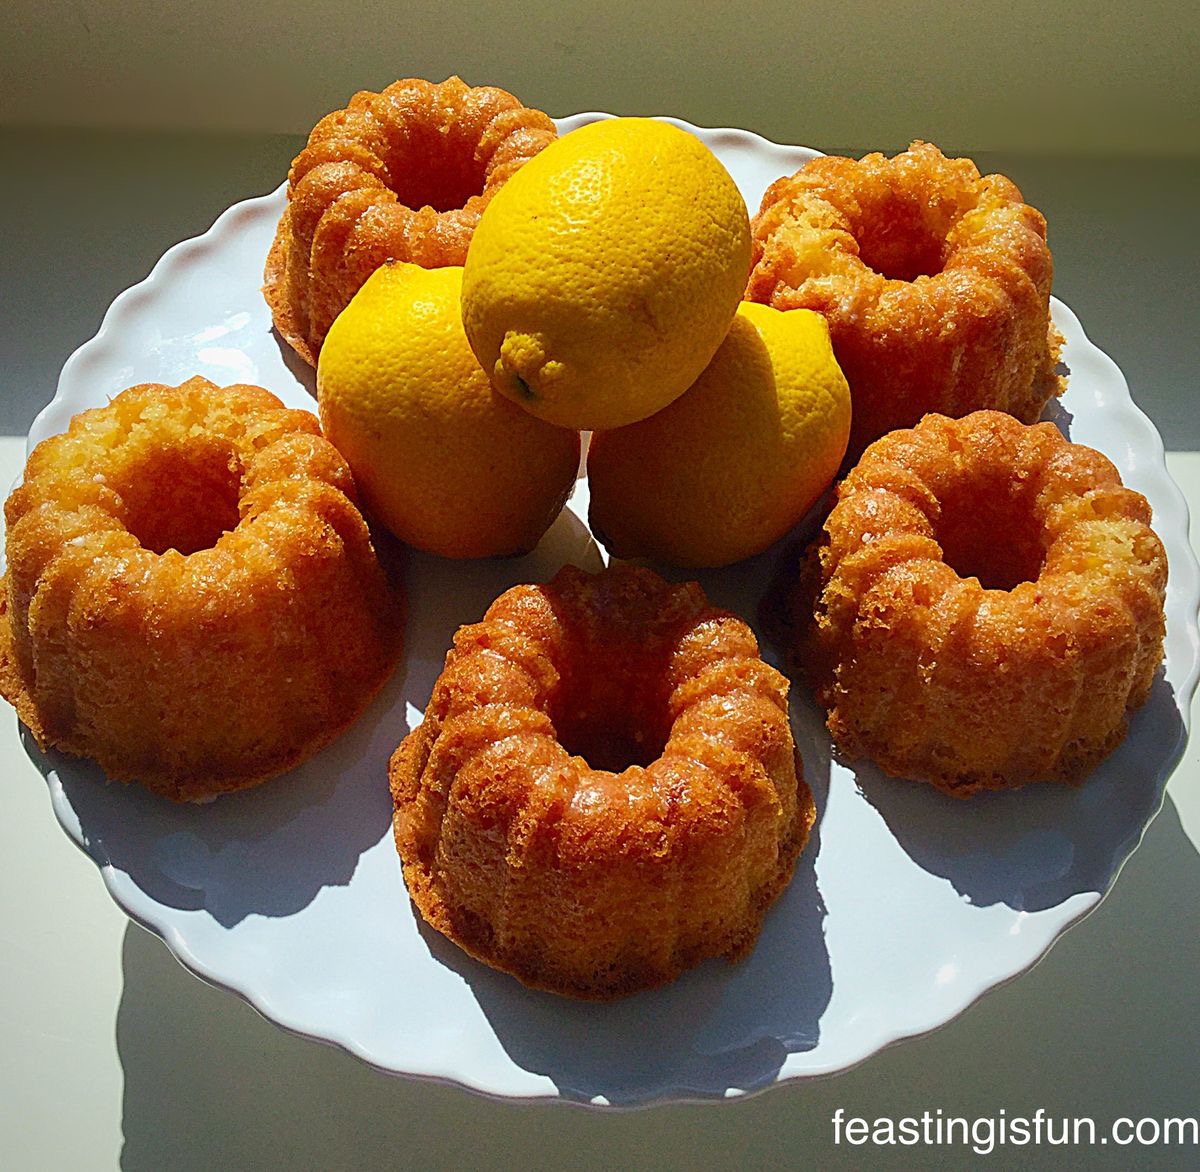
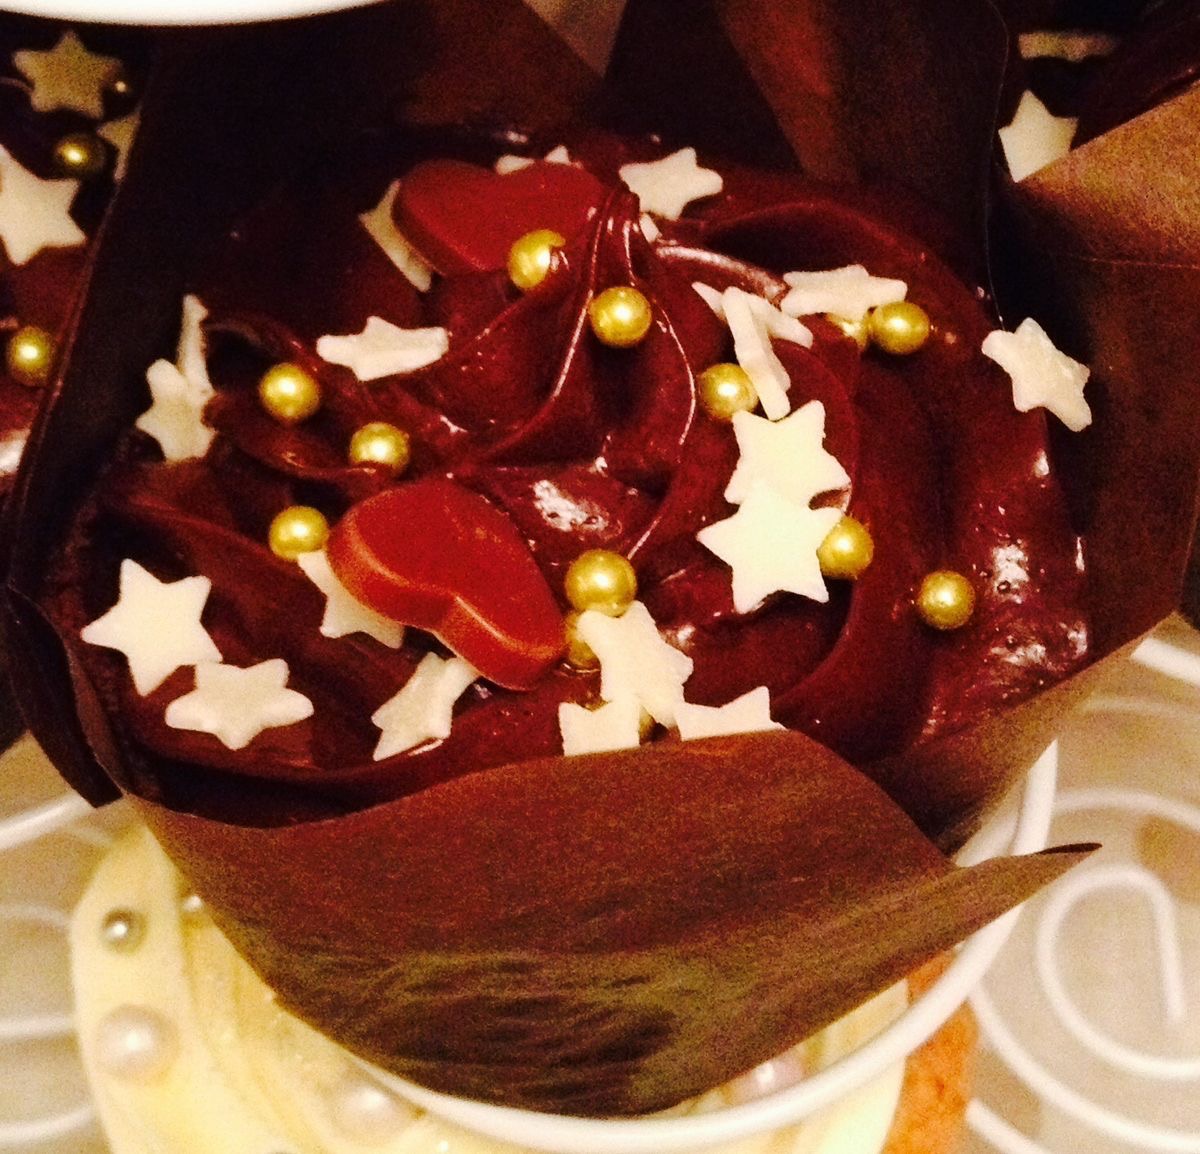
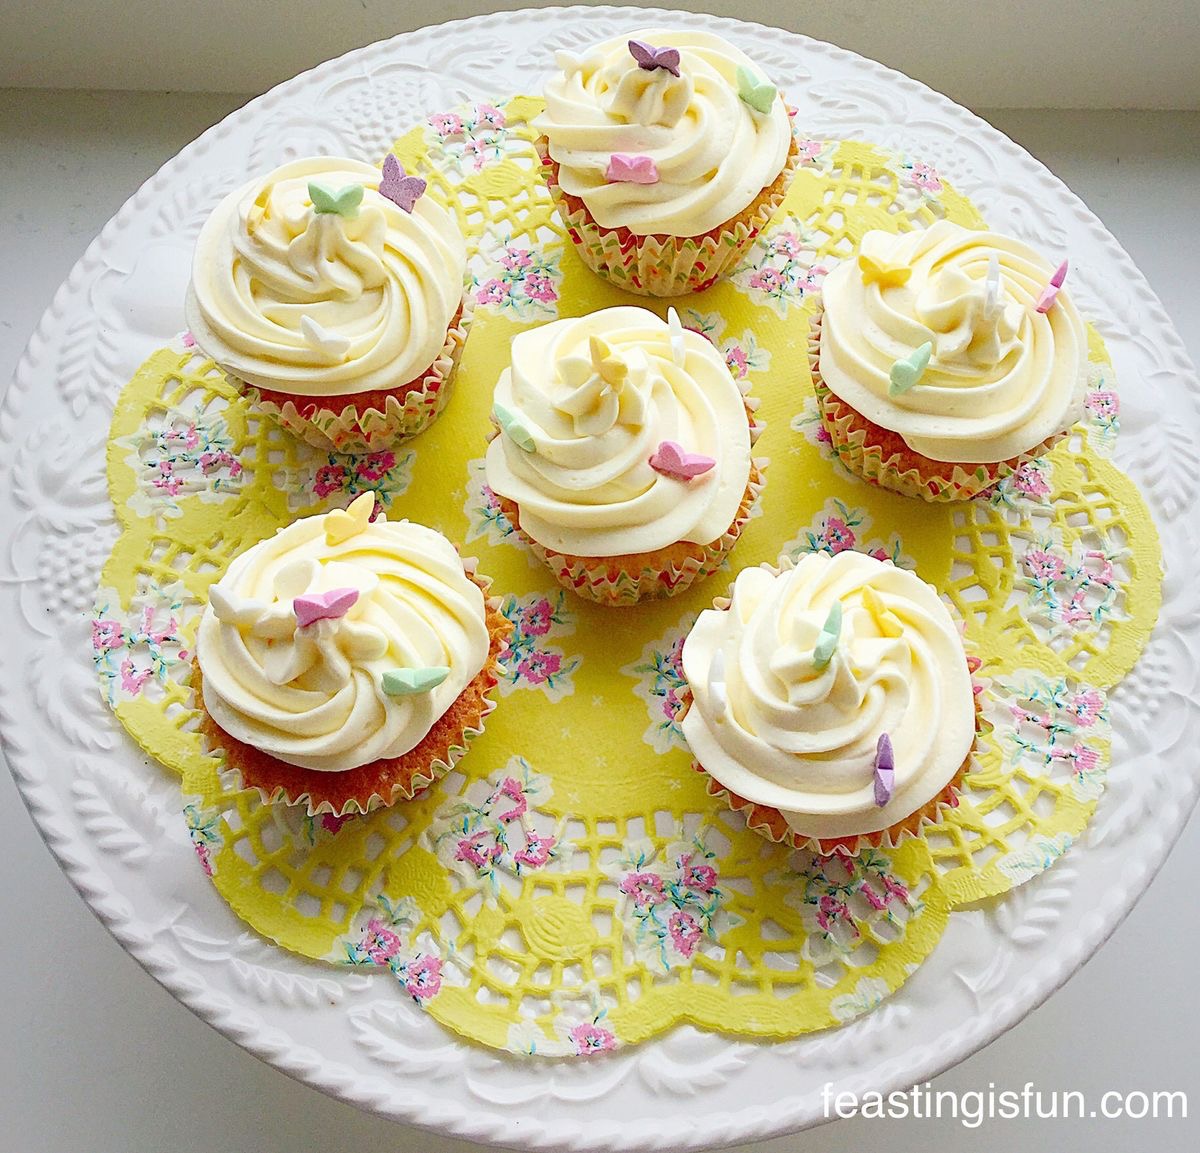
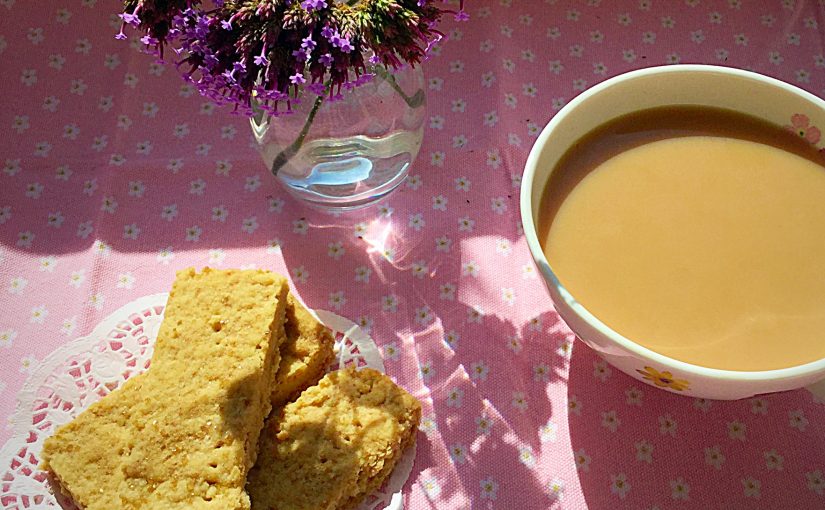
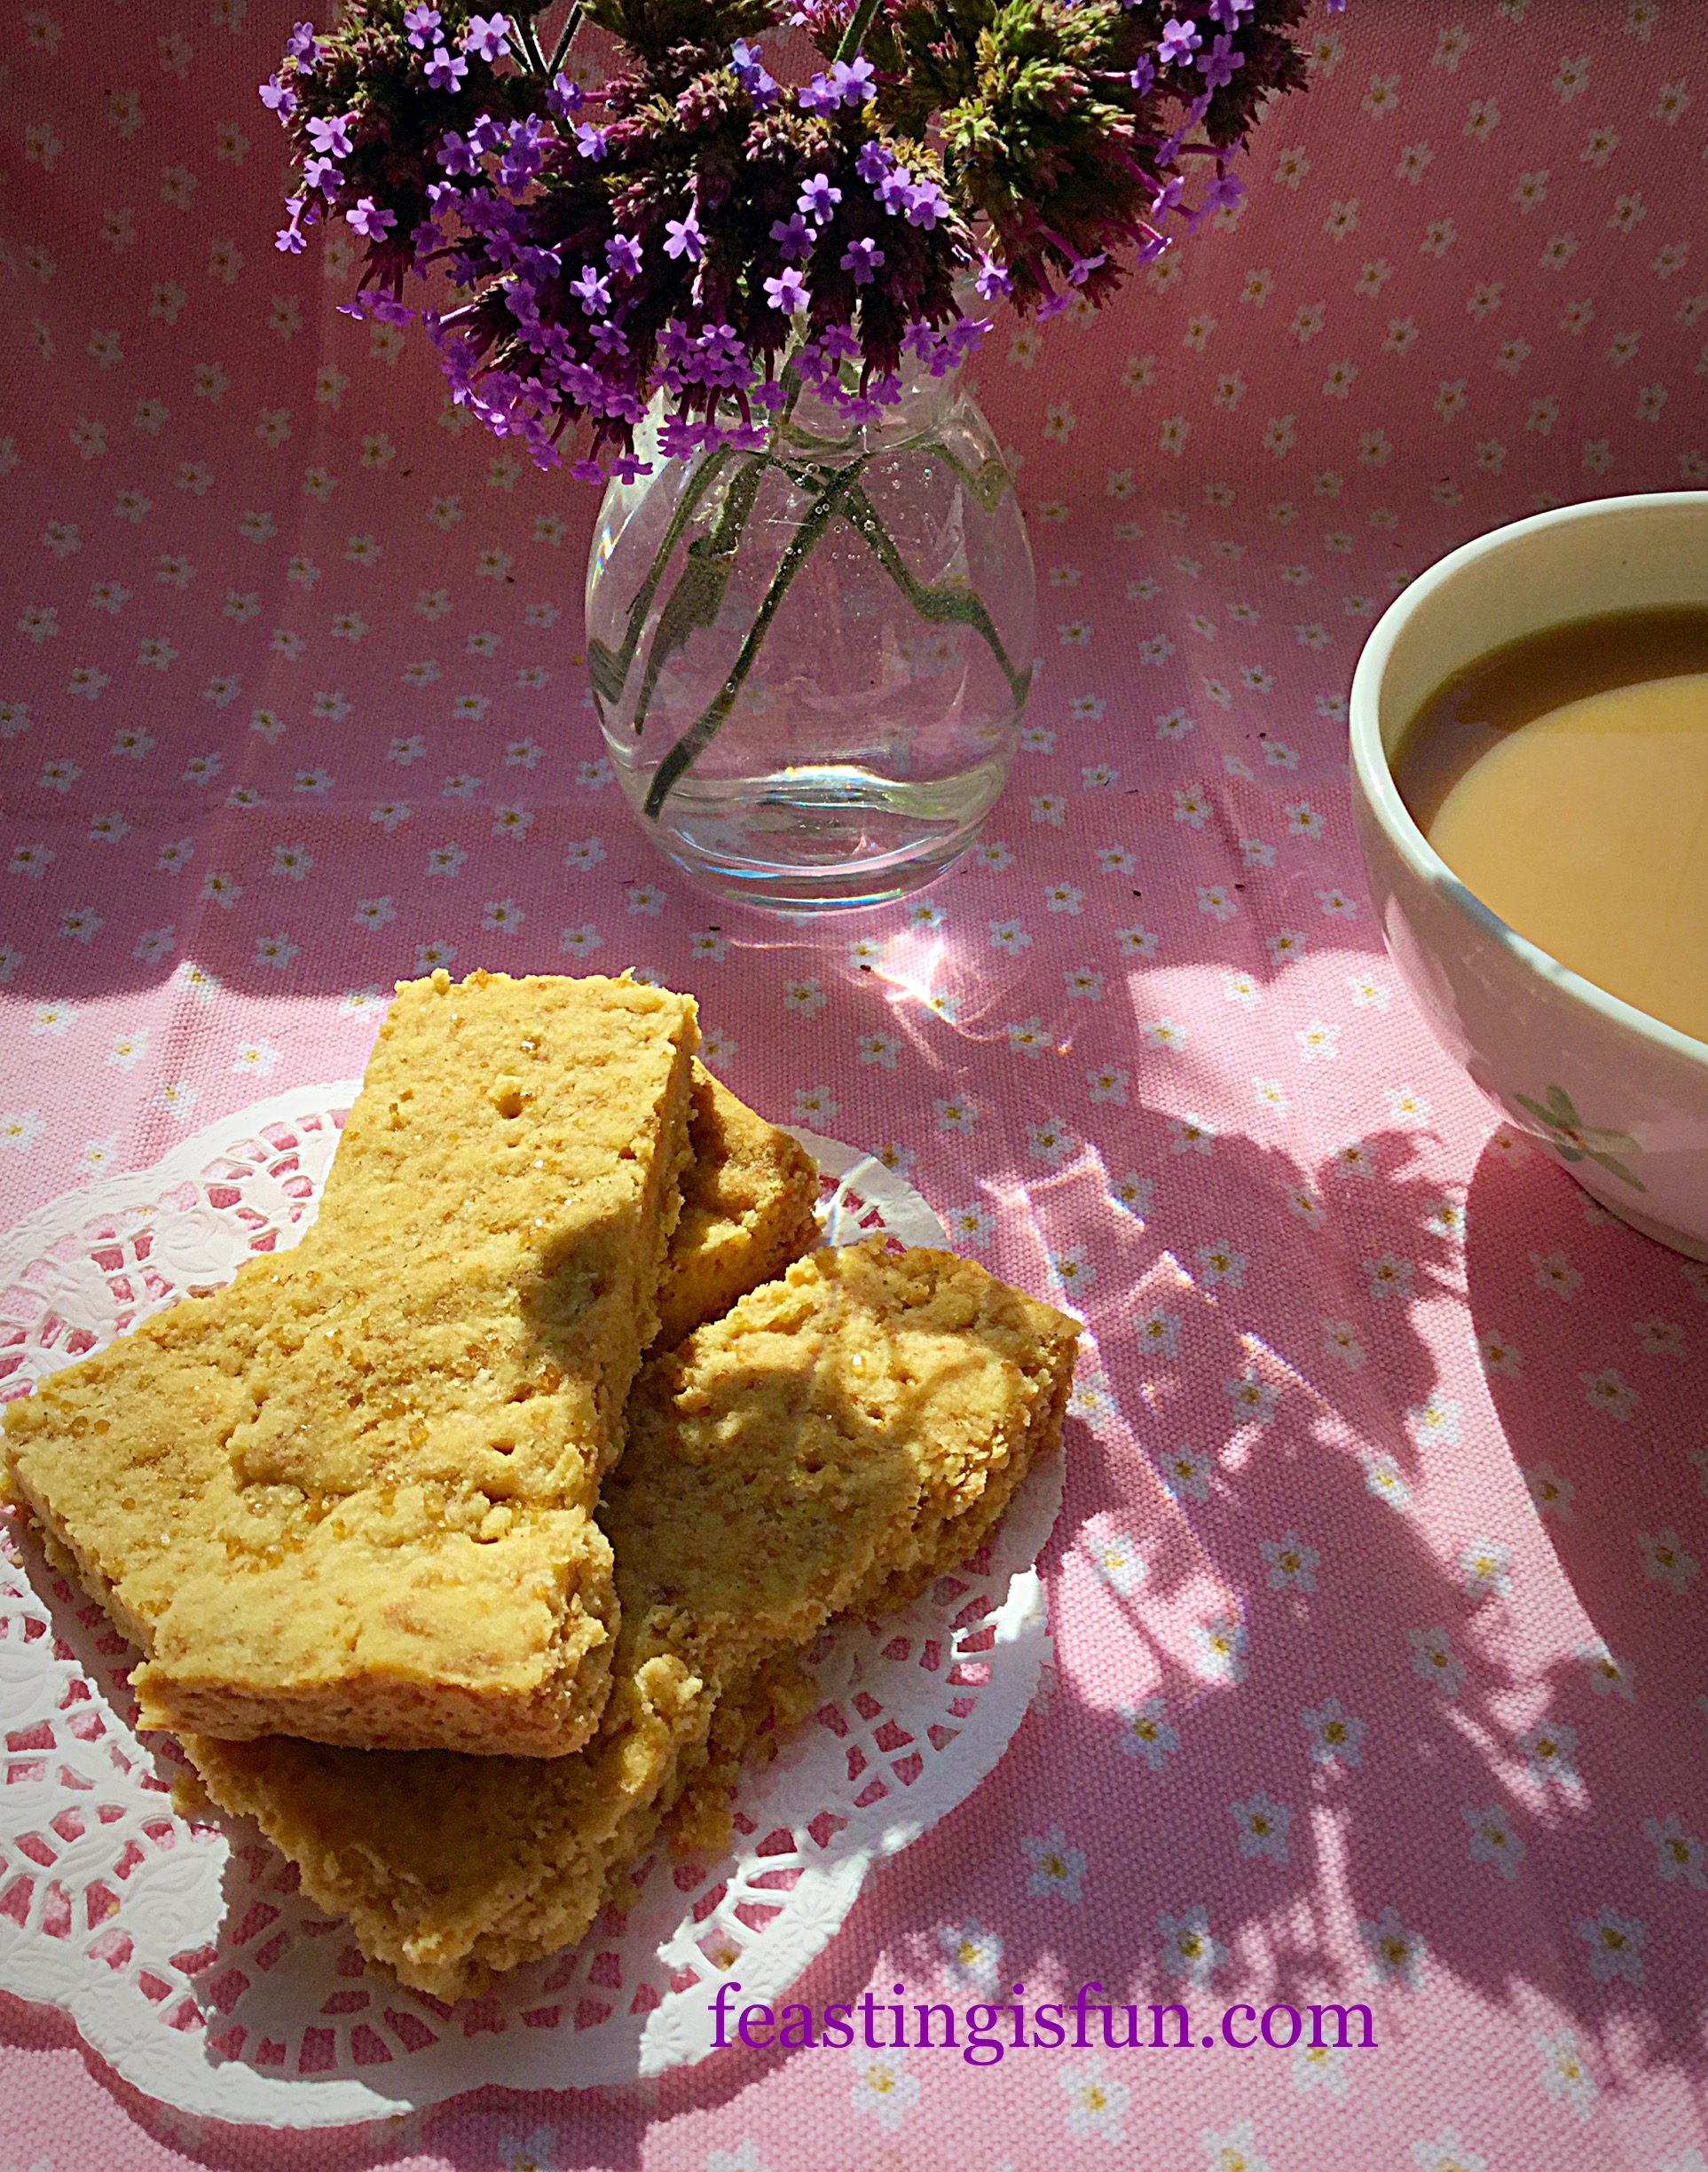
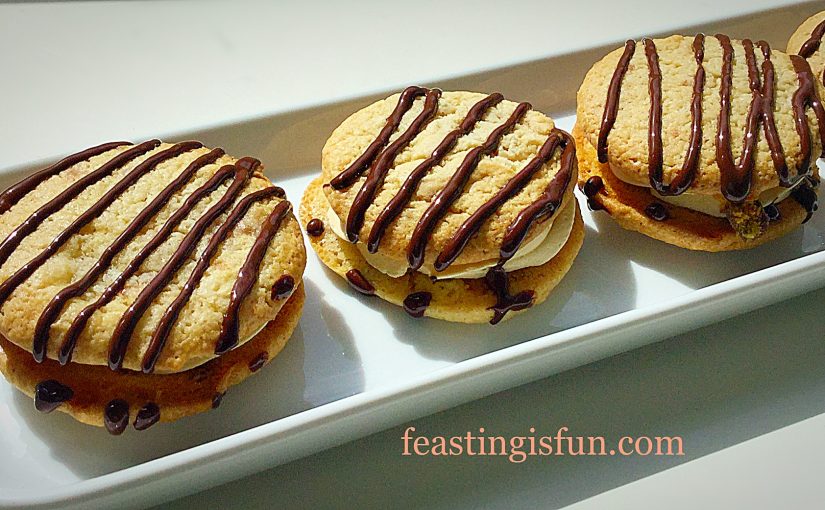
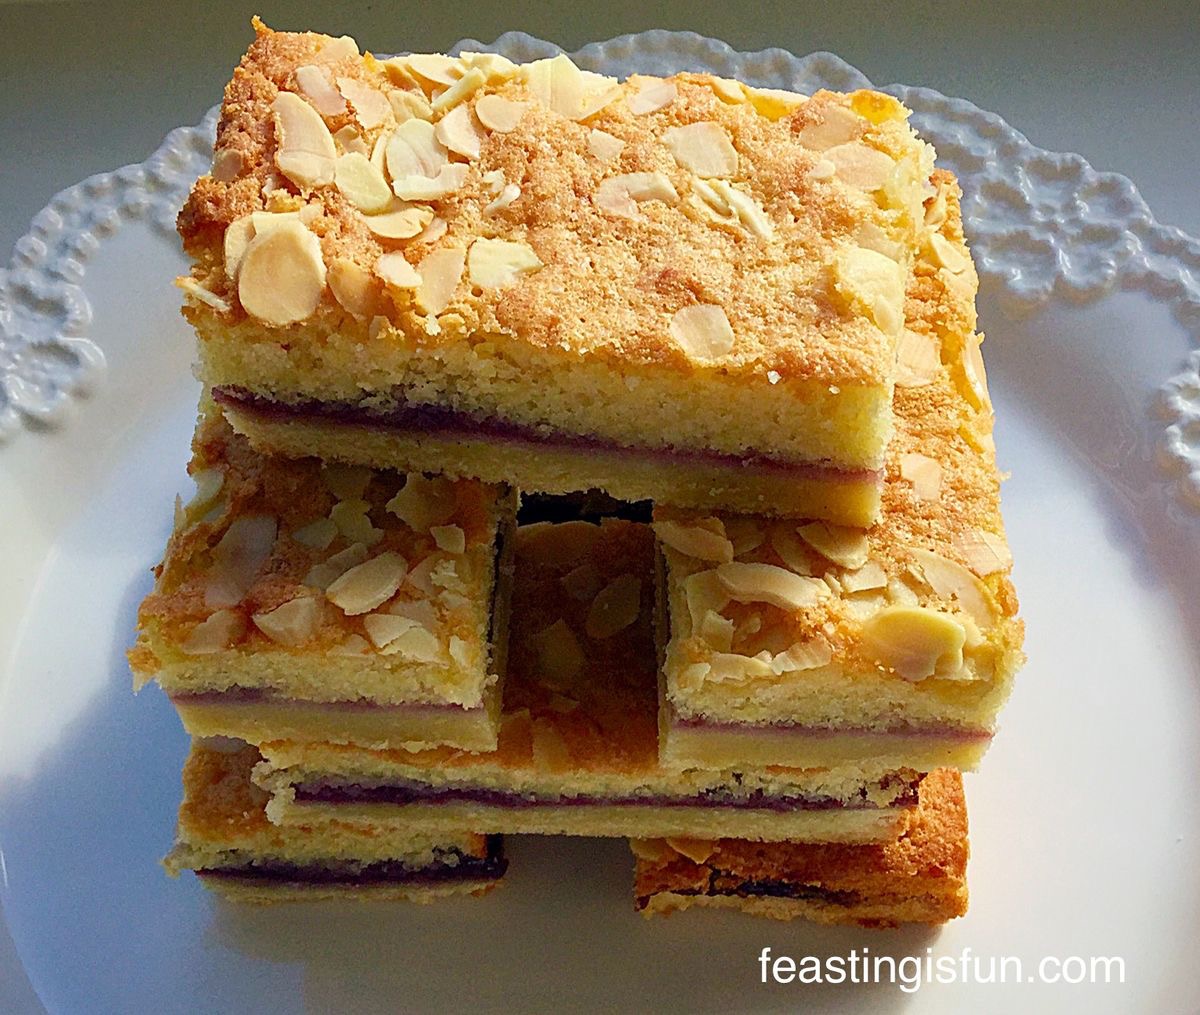
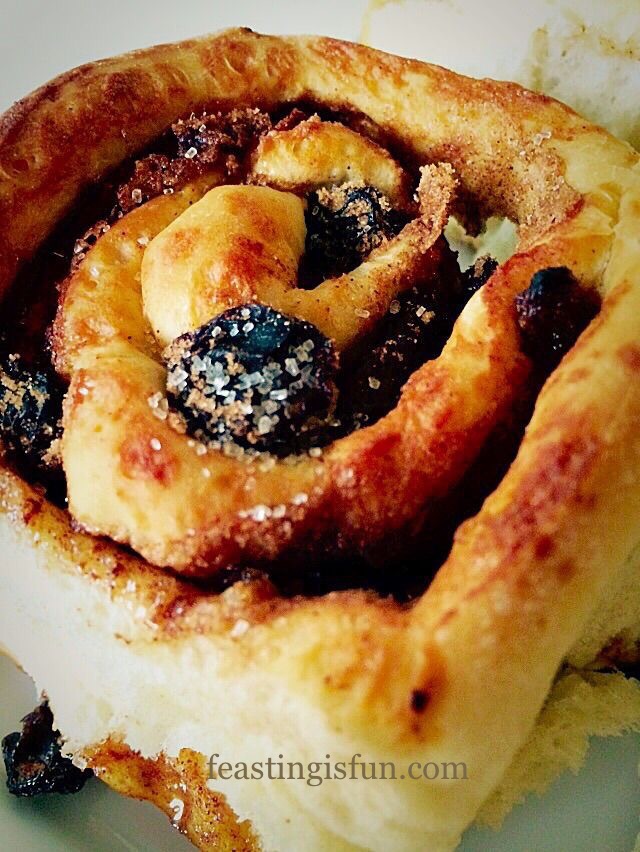
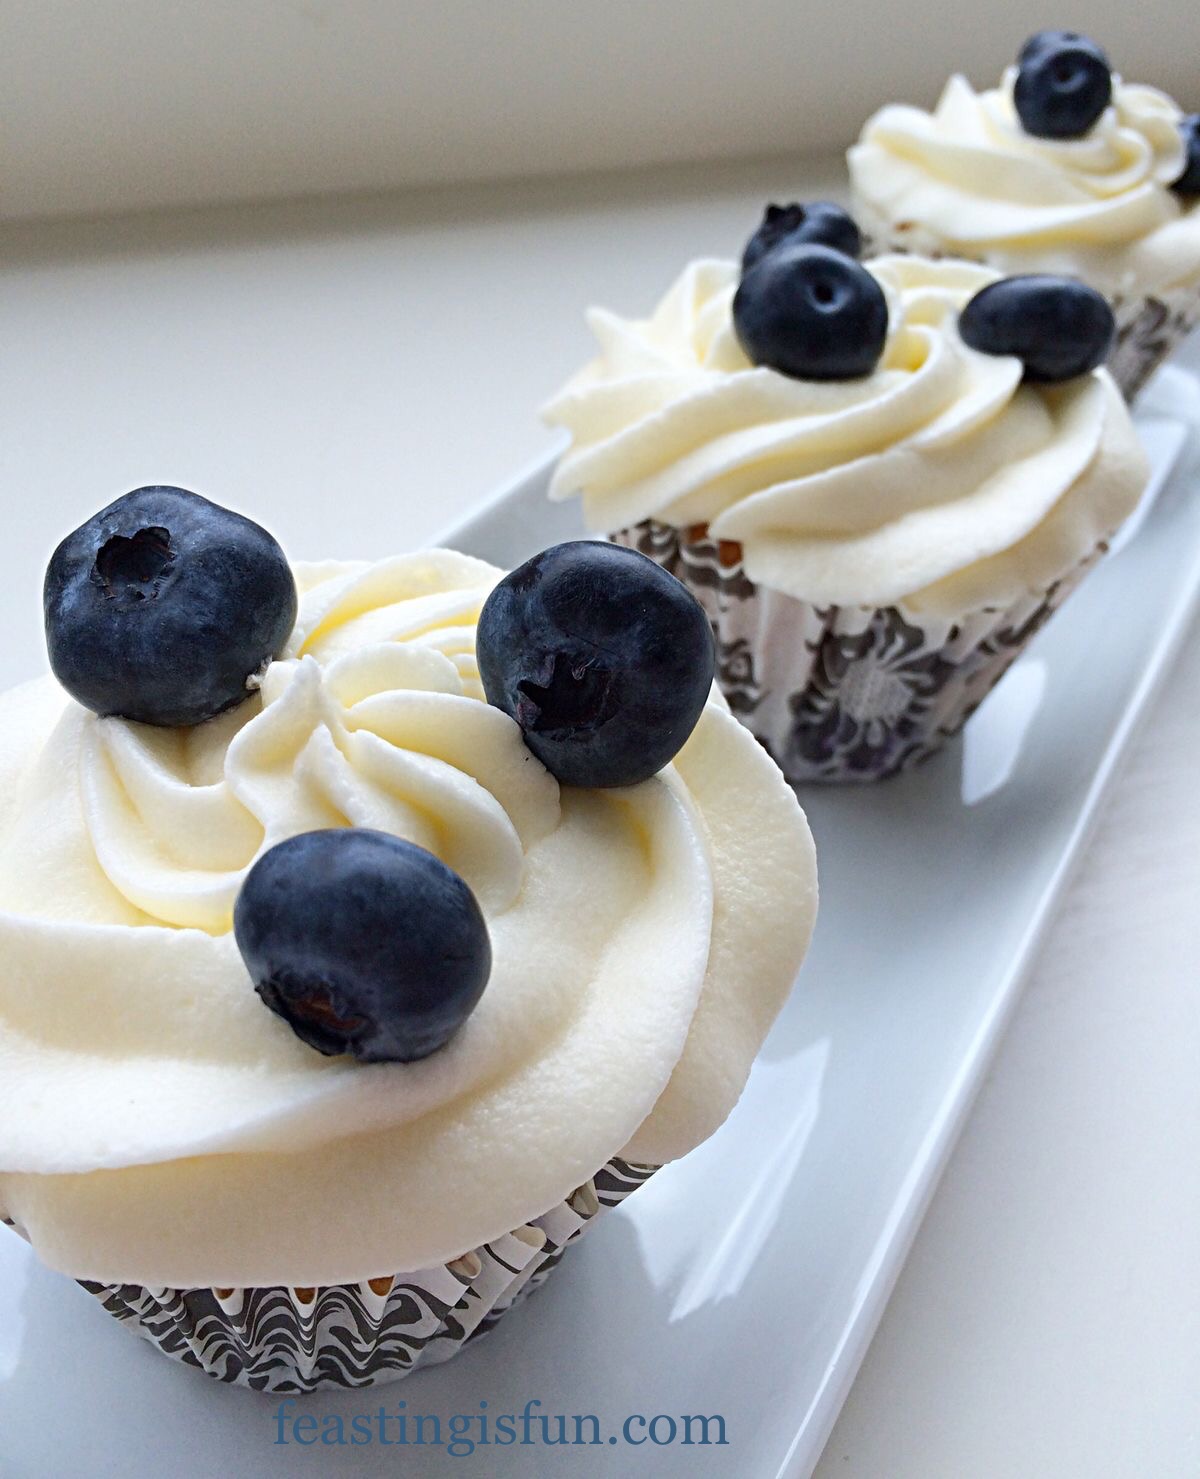
If you have enjoyed this recipe for Chocolate Share Eclair Flower then you may like these:

Sticky Pecan Sultana Buns

FF Chocolate Share Eclair Flower
Sticky Pecan Sultana Buns.

Homemade Chelsea Buns

FF Chocolate Share Eclair Flower
Homemade Chelsea Buns

Lemon Blueberry Cupcakes

FF Chocolate Share Eclair Flower
Lemon Blueberry Cupcakes

I hope I’ve shown you how easy it is to make and bake choux pastry?

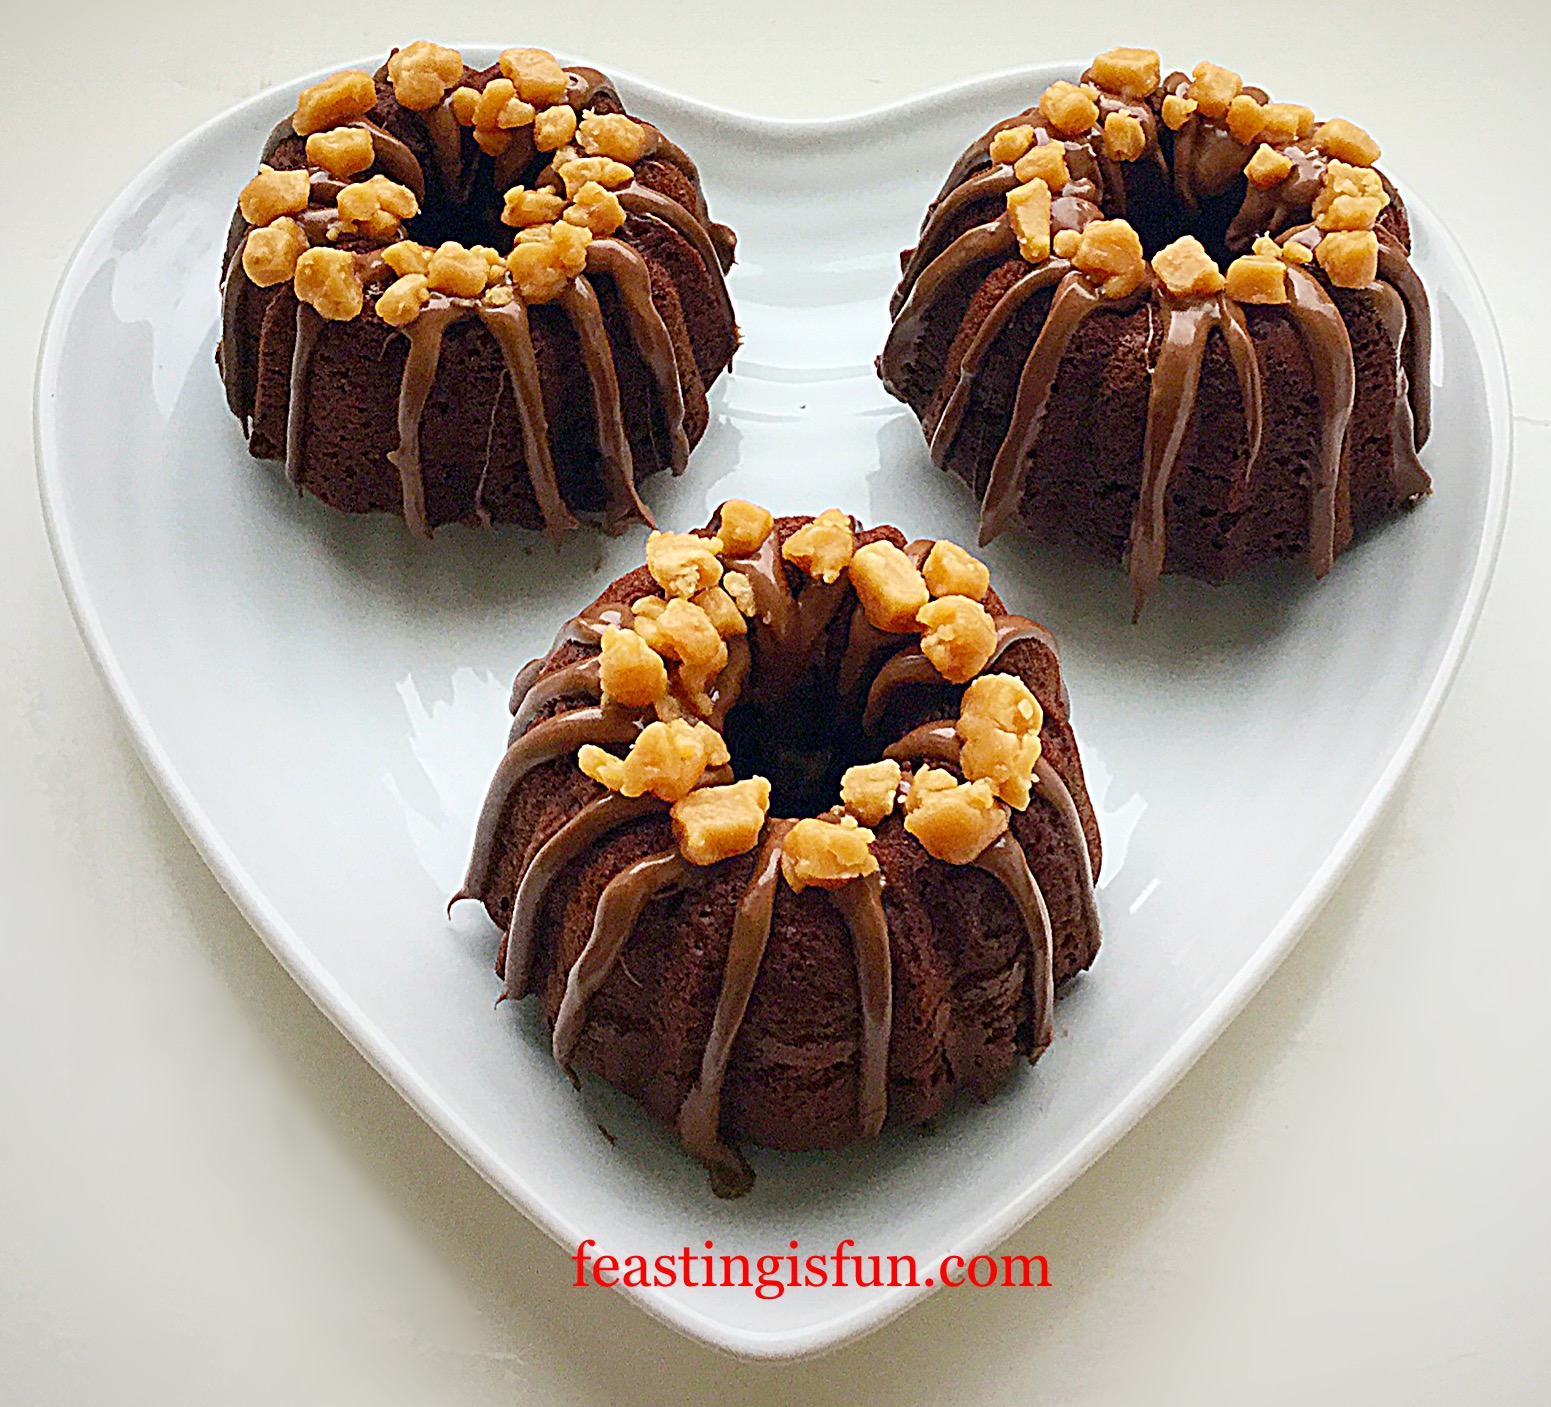
It really is one of the easiest pastries to master and as you have seen can be piped into regular profiteroles, eclairs, or be more adventurous, it really makes beautiful hearts.

Whatever you are making, have fun. Let your creativeness flow and if you make a mistake, well bake it, eat it and try, try, try again. For me the fun is in the learning!

Sammie xx

Share
Facebooktwitterpinterestlinkedintumblr

Mini Chocolate Fudge Bundt Cakes

Share
Facebooktwitterpinterestlinkedintumblr

Do you ever get the craving for chocolate cake? Well I did yesterday. So I whipped up these beautifully perfect, Mini Chocolate Fudge Bundt Cakes. Exact replicas of a large Bundt cake, in single portion size!

FF Mini Chocolate Fudge Bundt Cakes
Mini Chocolate Fudge Bundt Cakes pretty delicious!

How cool is it that you get to eat a whole mini Bundt cake to yourself?

Yep, that’s what I thought.

FF Mini Chocolate Fudge Bundt Cakes
Mini Chocolate Fudge Bundt Cakes with their crown of fudge.

These beautiful cakes are baked in Nordic Ware’s 65th Anniversary Bundlette Pan. The correct term for these perfect, mini Bundt cakes is Bundtlette.

Bundt cakes have started to become very popular in this country, in part to celebrity chef endorsement and following bakes seen on the television programme The Great British Bake Off. However, only those baked in Nordic Ware Bundt/Bundtlette pans can be called Bundt cakes in this country, as Nordic Ware own the copywrite to the word Bundt.

You may see other tins, silicone moulds available, but please beware of cheap imitations. I have got on fine with some silicone ‘Bundt style’ ring moulds and created a lovely swirl ice cream cake for our daughter’s birthday. While the genuine, heavy duty, Nordic Ware tins may be more expensive, they will last you a lifetime, if properly looked after.

FF Mini Chocolate Fudge Undt Cakes
Mini Chocolate Fudge Bundt Cakes – yes I used a cake mix!

I have made no secret of my belief, that every good kitchen should have a couple of great cake mixes stashed away in the cupboard, for those times when, for whatever reason, you are unable to bake from scratch.

Yesterday was one of those days for me. It’s been a difficult couple of weeks see here and yet I wanted to bake. Wright’s Baking came to the rescue with ther excellent Chocolate Fudge Cake Mix. I baked six Mini Chocolate Fudge Bundt Cakes and some cupcakes, however, the mix should yield between 12-15 Bundtlettes. Just ensure the Bundlette pan is cooled, washed, dried and re greased between batches.

FF Mini Chocolate Fudge Bundt Cakes
Mini Chocolate Fudge Bundt Cakes couldn’t you just pick one up and take a bite right now 😉

While one of these cakes perfectly hit the spot yesterday, with a nice, hot cup of tea, I can’t help thinking that they’d make a great dessert. Hot, chocolate custard poured over, so the central hole is filled. Yes I am definitely going to try that!

Cute little Bundlettes make a pretty and interesting change from cupcakes. Don’t get me wrong I love cupcakes, with their myriad of frostings, these mini Bundts simply make an elegant change.

Change is good, right?

For those who are unable to get hold of the cake mix, use the recipe from here Chocolate Heart Cake.

Recipe: Mini Chocolate Fudge Bundt Cakes – makes 12-15

1 Packet Chocolate Fudge Cake Mix by Wright’s Baking – available from most major supermarkets and via Wright’s online shop

60ml Vegetable Oil

200ml Water

200g Milk Chocolate

Mini Fudge Pieces – mine came from Asda

Method: Preheat the oven to 170C/150C fan, gas mark 3.5

Note:

I use Wilton cake release for all my Bundt bakes (ensure the inside of each Bundt is covered with cake release, using a pastry brush), alternatively melt butter and brush the inside of the Bundlette tin, remembering the central pole and then lightly dust with flour, tipping out any excess.

  • Measure the oil and water into a large mixing bowl, add the contents of the cake mix and proceed according to the instructions on the packet.
  • Spoon the mixture into each mould in the Bundtlette pan, so that it fills if by half. Continue until all 6 moulds have equal amounts of cake batter in them.
  • Wipe any spilt batter from the top of the Bundlette pan.
  • Place the Bundlette pan in the middle of the oven and bake for 25-30 minutes. The mini Bundts are baked when they spring bake from a light touch and a visibly coming away from the sides of the moulds.
  • Once baked remove the pan from the oven and allow the cakes to cool for 10 minutes in the pan.
FF Mini Chocolate Fudge Bundt Cakes
Before and after baking.
  • After 10 minutes cooling, turn the Bundlettes out on to a cooling rack.
  • Allow the cakes to cool completely before decorating.
FF Mini Chocolate Fudge Bundt Cakes
Mini Chocolate Fudge Bundt Cakes ready to decorate.
  • Break or chop up the chocolate and place in a heatproof, microwaveable bowl.
  • Zap on medium for 1 minute in the microwave, stir and then continue heating, for 30 seconds at a a time, until when stirred, the chocolate has completely melted.
  • Pour the melted chocolate into a disposable piping bag and snip off the very end leaving a small piping hole.
  • Pipe vertically, starting at the top of each cake and following the lines down to the bottom. You can be exact or as free form as you choose. I was very tired when I piped these cakes, so some, the ones in the final photos, turned out neater than others.
  • Once all the cakes have been piped with chocolate, top with mini pieces of fudge.
FF Mini Chocolate Fudge Bundt Cakes
Piping the chocolate on to the cakes and then topping with chocolate.
  • Leave the cakes so that the chocolate sets and then they are ready to serve!
FF Mini Chocolate Fudge Bundt Cakes
Mini Chocolate Fudge Bundt Cakes perfect for Afternoon Tea.

Serve your cakes on a pretty plate, with a hot drink and shared with good company.

I actually think these would be perfect for someone’s birthday, maybe at work, who doesn’t want a ‘big cake’ and lots of fuss. They are pretty and unique enough to let someone know they are special, without going over the top!

If you have enjoyed the recipe for these Mini Chocolate Fudge Bundt Cakes you may also like these:

Mini Lemon Drizzle Bundt Cakes

FF Mini Chocolate Fudge Bundt Cakes
Mini Lemon Drizzle Bundt Cakes

Chocolate Chunk Cupcakes

FF Mini Chocolate Fudge Bundt Cakes
Chocolate Chunk Cupcakes

Marshmallow Frosted Mango Cupcakes

FF Mini Chocolate Fudge Bundt Cakes
Marshmallow Frosted Mango Cupcakes – Gluten Free

While it is great to bake cakes for someone’s birthday, or a special celebration, sometimes it’s nice to bake them just because it’s Friday, or Monday and everyone at work could do with a boost to get them motivated.

Baking for others is something I absolutely love. Seeing the smile on their faces, knowing that you’ve thought about them, remembered that they’ve got ‘stuff’ going on. Although a mini Bundt cake, cupcake, or even great big grand gesture cake won’t make their problems disappear, it shows people that they’re loved and supported, no matter what.

I firmly believe a cake, baked for someone with love, when given, can say more than a thousand words.

Sammie xx

 Wright’s Baking provided me with the cake mix to create this recipe. All content, photographs, options and view are my own. Please see my Disclosure Policy.

Share
Facebooktwitterpinterestlinkedintumblr

Crunchy Vanilla Shortbread

Share
Facebooktwitterpinterestlinkedintumblr

Well, we certainly have our ‘Indian Summer’. It is a gloriously sunny day, with a gentle breeze blowing, stopping the late summer air turning stuffy. Windows are open and I can only imagine how many days like today we have left, this year. In celebration of the beautiful weather I decided to make some Crunchy Vanilla Shortbread, to have, sitting in the sun, with a cup of tea.

FF Crunchy Vanilla Shortbread
Crunchy Vanilla Shortbread perfect with a cup of tea.

I love the month of September, as summer’s hold loosens and hazy, low sunlight filters through the trees. Sitting in the garden, simply listening to the birds, or watching the bees and butterflies busily go about their way. It really is the month where it’s warm enough to still enjoy being outside, without piling on the layers.

FF Crunch Vanilla Shortbread
Crunchy Vanilla Shortbread perfect picnic food!

Of course this delicious Crunchy Vanilla Shortbread can and should be enjoyed anytime of the year. It just feels very luxurious to sit outside, mid September, with the sun warming my face and my cup of tea not getting cold!!

FF Crunchy Vanilla Shortbread
Crunchy Vanilla Shortbread perfect to make and take to work.

Traditional Shortbread

Whilst I have other shortbread recipes here and here, my Crunchy Vanilla Shortbread is a traditional version. By that I mean it follows the 3-2-1 rule. 3 parts flour, 2 parts butter and 1 part sugar. However, I have added a tiny pinch of salt and some vanilla bean extract. I adore the flavour of vanilla and in this shortbread it tempers the sweetness of the demerera sugar and balances the caramel flavours.

FF Crunchy Vanilla Shortbread
Crunchy Vanilla Shortbread a delightful treat.

For ease, this shortbread is baked in a tin, where it is simply pressed in and baked. No rolling out, chilling or cutting out required. It took less than 10 minutes to prepare and a further 30 minutes to bake. If you have visitors turn up, out of the blue, you could easily have this baking in the oven, by the time your guests have been settled and the kettle put on!

Sometimes it’s nice to have a simple recipe to hand, for when the occasion arises.

Recipe: Makes Crunchy Vanilla Shortbread

185g/6oz Unsalted Butter – plus a little extra for greasing the tin

75g/3oz Demerera Sugar – plus 1tsp for sprinkling on top

1tsp Vanilla Bean Paste – I use Nielsen-Massey

1/8th tsp Salt – I use Maldon

270g/9oz Plain White Flour

Making The Shortbread Dough

Method: Preheat the oven to 190C/170C fan, gas mark 5, 375F

  • Add the sugar, butter, salt and vanilla extract to a bowl.
  • Beat until the butter is pale and creamy.
  • Add the flour and mix with a spoon until you have a dough.
  • Line a lightly buttered, 20cm x 28cm x 5cm (8″ x 11″ x 2″) swiss roll tin with baking parchment.
  • Tip the shortbread dough into the tin and press gently with your fingers until the dough completely covers the tin base evenly.
FF Crunchy Vanilla Shortbread
Crunchy Vanilla Shortbread dough ready to be docked and sprinkled with sugar before baking.
  • Dock the shortbread dough with a fork – this will prevent it from rising too much during baking.
  • Sprinkle over the reserved teaspoon of sugar. This really does make the shortbread sparkle once baked.

Baking The Shortbread

  • Place the tin in the middle of the oven and bake for 30 minutes, or until the shortbread is golden and has a set crumb.
  • Once baked remove the shortbread from the oven.
  • Score a line halfway through the length of the cooked shortbread, then score 7 strips – creating 14 Crunchy Vanilla Shortbread fingers.
  • Allow the shortbread to cool in the tin.
FF Crunch Vanilla Shortbread
Golden Crunchy Vanilla Shortbread scored and cooling.
  • Scoring the shortbread whilst it is hot makes it much easier to break into fingers once cooled. I’ll be honest I did have a couple of shortbread fingers break, they were my testers 😉.
  • Once cooled lift the shortbread out of the tin, using the baking parchment and break into individual fingers.

Store the shortbread in an airtight tin for up to 5 days, if it lasts that long!

FF Crunchy Vanilla Shortbread
Crunchy Vanilla Shortbread see how it sparkles in the sunlight.

Serve this deliciously Crunchy Vanilla Shortbread with a good cup of tea or coffee. That said, these shortbread fingers would also pair very nicely with my Very Vanilla Ice Cream.

If you have enjoyed the recipe for Crunchy Vanilla Shortbread you make also like these:

Vanilla Fudge Chocolate Brownies

FF Crunchy Vanilla Shortbread
Vanilla Fudge Chocolate Brownies.

Cherry Bakewell Cookies

FF Crunch Vanilla Shortbread
Cherry Bakewell Cookies

Chocolate Heart Cookies

FF Crunchy Vanilla Shortbread
Chocolate Heart Cookies.

I hope you are enjoying the last of the summer wherever you are.

I shall remember to look back at these photographs, in the midst of winter, to remind me of the warmth of the sun in summer.

Whatever you are making, baking and creating in your kitchens, have fun preparing your feast. Why not check on elderly neighbours, just pop in to make sure they have enough to drink and maybe stay for a cuppa and a natter? You could always take some home baked treats round?

Food always tastes better when it is shared.

Sammie xx

No part of this post may be reproduced or duplicated without the written permission of the owner. Please see my Disclosure Policy.


Share
Facebooktwitterpinterestlinkedintumblr

Camp Coffee Walnut Cookies

Share
Facebooktwitterpinterestlinkedintumblr

Today I have a delicious cookie recipe for you. While it’s flavours are based on the classic coffee and walnut cake, there is also an added twist. So these Camp Coffee Walnut Cookies with a mocha drizzle are the perfect accompaniment to your morning, afternoon, anytime, cup of coffee.

FF Camp Coffee Walnut Cookies

So, do you remember Camp Coffee?

While I used to have a splash of it in hot milk when I was younger, other than that I can’t remember seeing it around for the last 20 years or so. Although maybe I just wasn’t looking!

FF Camp Coffee Walnut Cookies
Camp Coffee Walnut Cookies

Camp coffee is made using chicory extract. So the leaves that you add to your salad are also used to make this product. Another added benefit is that it contains 4% coffee extract, which means although not caffeine free, it has lower levels than regular coffee, without compromising flavour.

    FF Camp Coffee Walnut Cookies Camp Coffee Walnut Cookies

Because it is already in liquid form, Camp coffee is very easy to use, as a coffee substitute in many recipes. Including cookies, cakes, this Camp Coffee Ice Cream and different types of icing.

While Camp Coffee Walnut Cookies are very crisp, you can confidently bite into one without the cookie crumbling apart. And the mocha drizzle adds just the right amount of chocolate/coffee sweetness, however, you can easily leave it off if you are watching your sugar intake.

Camp Coffee Walnut Cookies

Since the recipe makes approximately 10 cookies I strongly suggest making a double batch. And take them in to work, to share with your colleagues over morning coffee. Also you can ask if anyone remembers the, oh-so-familiar bottle?

Recipe: Makes 10 Camp Coffee Walnut Cookies

100g/4oz Unsalted Butter – softened to room temperature

75g/3oz Caster Sugar

1/8tsp Salt – I use Maldon

1/2tsp Camp Coffee  widely available from supermarkets, grocery shops and on line

1/2tsp Vanilla Extract – I use Nielsen-Massey

100g/4oz Plain White Flour

40g/2.5oz Walnuts processed to a ground almond consistency

30g small walnut pieces

Drizzle:

150g/5oz Icing Sugar sifted

10g/0.5oz Cocoa Powder sifted

1/4 tsp Camp Coffee alternatively dissolve 1/2 tsp instant coffee in 1 tsp hot water and allow to cool

1/4 tsp Vanilla Extract

Approx 25mls water

Method: Preheat the oven to 190C/170C fan, gas mark 5, 375F

Making The Coffee And Walnut Cookie Dough

  • First of all line 2 baking trays with non stick silicone mats or baking parchment.
  • In a medium size bowl add the butter, sugar and salt.
  • Whisk/beat until pale and creamy.
  • Add the Camp coffee and vanilla extract. Whisk/beat to combine.
  • Process the 40g of walnuts either in a food processor or mini chopper, until they are finely ground and resemble ground almonds.
  • Add the flour, ground walnuts and walnut pieces to the bowl.
FF Camp Coffee Walnut Cookies
The ground walnuts really add to the nutty flavour and crisp texture of this cookie.
  • Use a spoon to stir and bring all the ingredients together.
  • Divide the mixture into ten and roll into balls.
  • Place the cookie dough balls on to the baking tray.
  • Press down to flatten the balls into discs.
FF Camp Coffee Walnut Cookies
Camp Coffee Walnut Cookies ready for the oven.

Baking The Cookies

  • Place the baking trays evenly spaced apart in the oven and bake for 13-15 minutes.
  • Turn the baking trays around halfway through baking.
  • The Camp Coffee Walnut Cookies are baked when they are crisp and golden.
  • As soon as the cookies are baked remove the baking trays from the oven and allow them to cool on the trays.
FF Camp Coffee Walnut Cookies
Camp Coffee Walnut Cookies freshly baked and they smell wonderful 😉

Making the Mocha Drizzle

  • Sift the icing sugar and cocoa into a bowl.
  • Add the Camp coffee and vanilla extract.
  • Next add 20mls of water and stir with a spoon adding the extra water, if needed, to make a thick icing that can be drizzled.
  • Place all of the cookies on a cooling rack that is placed over a large baking tray.
  • Spoon the drizzle into a small disposable piping bag, alternately you can drizzle the icing over the cookies with a spoon.
  • Snip the very end off of the piping bag and pipe zig zag lines across the cookies.

FF Camp Coffee Walnut Cookies

Finally, serve these delicious Camp Coffee Walnut Cookies, once the icing has set, with a drink of your choice. I am especially thrilled that these cookies withstand gentle ‘dunking’. Because in my house, dunking cookies makes them hat extra bit special.

In addition to my family our post lady enjoyed one of these cookies when she delivered a parcel late this morning. I can see these disappearing fast, so next time I’ll make a double batch! Because we encourage sharing here at home baked treats can disappear quickly. And it’s always nice to surprise delivery people with a quick snack.

    Camp Coffee Walnut Cookies

If you have enjoyed this recipe for Camp Coffee Walnut Cookies here are some others you might like too:

Apricot Oat Crumble Cookies

FF Camp Coffee Walnut Cookies
Apricot Oat Crumble Cookies

Oat Chocolate Chip Cookies

FF Camp Coffee Walnut Cookies
Oat Chocolate Chip Cookies

Caramac Caramel Cookies

FF Camp Coffee Walnut Cookies
Caramac Caramel Cookies

Since I start everyday with a cup of tea and a cookie/biscuit (same difference!) these cookies are ideal. And with just enough sweetness to kickstart my body and not too much caffeine to overload my system.

Since we I am a self confessed Cookie Monster, constantly trying new recipes. Although my preference is always for something nutty or with oats, so these Camp Coffee Walnut Cookies are perfect.

Do you have a set way to start your day?

So, whatever you are making, baking and creating in your kitchens, have fun preparing and sharing your feast.

Sammie xx

 Camp Coffee Club provided me with the Camp Coffee to make this recipe. All views, opinions, content and photographs are my own and may only be reproduced with my permission. Please see my Disclosure Policy.

Share
Facebooktwitterpinterestlinkedintumblr

Bath Soft Cheese Chilli Tarts

Share
Facebooktwitterpinterestlinkedintumblr

Today I have a fantastic, delicious recipe, that is easy to prepare and stunning to serve. While this recipe is ideal for a picnic or buffet it is also fancy enough for serving at a dinner party. So let me share my Bath Soft Cheese Chilli Tarts with you.

Bath Soft Cheese Chilli Tarts


A crisp, crunchy, golden filo pastry encases a layer of chilli pickle, topped with a generous layer of Bath Soft Cheese. I know, they look so tempting. While the late afternoon sunshine illuminates these Bath Soft Cheese Chilli Tarts, with their melting cheese and chilli centre.

Bath Soft Cheese is organic and suitable for vegetarians. It is made by the Bath Soft Cheese Company in Kelston near Bath. It tastes like an English version of Brie. Soft and buttery,  it matures to a ripe, full bodied cheese, that stands up well to the chilli in this recipe.

FF Bath Soft Cheese Chilli Tarts
Bath Soft Cheese Chilli Tarts incredibly simple to make and bake.

Finally, as you cut through the light, crisp filo pastry layers the melted cheese oozes out of the tart, accompanied by the spicy chilli pickle underneath. And to accompany this tart a few salad leaves and a glass of something crisp and cool.

FF Bath Soft Cheese Chilli Tarts
Bath Soft Cheese Chilli Tarts – tell me you can resist that delicious, melted cheese?

While cheese, chutney and crackers are a classic combination, it is fun and delicious using the ingredients in a different way.

Baking the chilli pickle and Bath Soft Cheese really wakes up the flavours. And when placed in a buttery, filo pastry tart, the result is a remarkably delicious dish.

Recipe: Makes 6 Bath Soft Cheese Chilli Tarts

250g Bath Soft Cheese – available from Pong Cheese

1 Packet of Filo Pastry – you will need 4-5 sheets – I used Jus Rol

100g Unsalted Butter melted and cooled

1/2 Jar Chillililli – from Hawkshead Relish

2-3tbsp Freshly Chopped Chives

1/2tsp Freshly Ground Black Pepper

Method: Preheat the oven to 180C/160C fan, gas mark 4, 350F

Creating the filo pastry tart shell:

  • First of all, place 6 loose bottom tart tins on a baking tray. I used 9cm width, between 8-10cm (3.5-4″) will be fine.
  • Brush each tart tin lightly with melted butter using a pastry brush.
  • Have a clean damp tea towel to hand as filo pastry can dry out very quickly, so it’s best to cover the spare pastry sheets.
  • Place one filo pastry sheet on to a board or pastry mat. Brush lightly with melted butter.
  • Using a sharp knife cut the filo pastry sheet into equal quarters and then cut each quarter in half, from top to bottom. You will have 8 squares/rectangles.
  • Start by laying 1 square of filo pastry in the tart tin, gently pressing it so that it sticks to the base and the sides.
  • Add another square of filo pastry, laying it slight offset from the first piece. The idea is to build up layers that form a solid tart shell with lots of edges/corners on the side, which will become golden and crisp on baking.
FF Bath Soft Cheese Chilli Tarts
See how the 5 layers of filo pastry build up to create a solid tart shell.
  • Continue building the tart case until you have used 5 separate layers of filo pastry – bottom right in the picture above.
  • I actually built 2 tart cases at a time, I wouldn’t recommend building more as each layer will dry out as you prepare the next sheet and is then likely to crack and fall apart once baked.

Layering the tart filling:

  • When all 6 tart cases have been built, spoon 2 generous teaspoons of the Chilli Pickle into the base of each one.
  • Cut the block of Bath Soft Cheese into 6 equal-ish portions – they will weigh approximately 40 grammes.
  • Place a square of cheese on top of Chilli Pickle in each tart case.
FF Soft Bath Cheese Chilli Tarts
Bath Soft Cheese Chilli Tarts are so easy to make
  • Sprinkle the top of each tart with a little freshly ground black pepper and some freshly snipped chives – reserve half of the chives for garnish once baked.
Bath Soft Cheese Chilli Tarts ready for the oven.

Baking the cheese tarts:

  • Place the Bath Soft Cheese Chilli Tarts in the top a preheated oven and bake for 15-18 minutes. The tarts are cooked when the filo pastry is crisp and golden and the cheese has melted to fill each tart.
  • As soon as they are baked remove the baking tray from the oven and allow the tarts to cool for 10-15 minutes in their tins.
Fresh from the oven!
  • The Bath Soft Cheese Chilli Tarts can then be carefully removed from their tins and are best served warm. Don’t worry if a couple of crispy pieces of filo pastry break off as you handle them. These delightful tarts are built of 5 layers of filo pastry and are actually quite strong.

Serving suggestion:

I like to serve each tart, warm, on a bed of deeply coloured, fresh lettuce leaves with an extra sprinkle of fresh chives.

Such a simple and yet flavourful appetiser or light lunch. Also these tarts tarts can be eaten cold. Store in the fridge for up to 3 days and vamp up your packed lunch.

I really would recommend the Chillililli from Hawkshead Relish. Not only does it have great flavour in this tart, it also adds a surprise texture, hidden beneath the melted cheese.

If you have enjoyed this recipe for Bath Soft Cheese Chilli Tarts then you may also like these:

Mini Sparkenhoe Red Leicester Tarts

FF Bath Soft Cheese Chilli Tarts
Mini Sparkenhoe Red Leicester Tarts.

Beauvale Cheese Walnut Scones

FF Bath Soft Cheese Chilli Tarts
Beauvale Cheese Walnut Scones.

Goddess Cheese Pine Nut Muffins

Bath Soft Cheese Chilli Tarts
Goddess Cheese Pine Nut Muffins

As you can see, I am loving creating recipes with cheese. You may also like my Cheddar Tomato Basil Quiche, which is exceptionally delicious if you substitute the Cheddar for Sparkenhoe Red Leicester cheese.

Coming up with new ideas, flavour pairings and recipes, really gives me a thrill. Also with all that my body goes through see here, it is wonderful that I can still express my creativity, through cooking and baking and in turn, share my recipes with you.

Whatever you are making, baking and creating in your kitchens, have fun. Enjoy your feast and remember, when you are able, to invite others round to share with you. It really is true that food tastes better when it is shared!

Sammie xx

Pong Cheese provided me with the cheese to create this recipe. All opinions, views, content and photographs are my own. I was not paid to write this post, please see my Disclosure Policy.

Share
Facebooktwitterpinterestlinkedintumblr

Salted Caramac Centre Toffee Cookies

Share
Facebooktwitterpinterestlinkedintumblr

Hello, I have a super, special treat for you today, my Salted Caramac Centre Toffee Cookies.

Salted Caramac Centre Toffee Cookies are so easy to make and such a treat to eat. Whipped, light, salted Caramac ganache, with a sprinkle of honeycomb dust, sandwiched between two toffee cookies. Oh and then finished with a dark chocolate drizzle. A complete flavour festival ready for you to bite into!

FF Salted Caramac Centre Toffee Cookies

    Salted Caramac Centre Toffee Cookies a flavour party in your mouth!

Sandwich Cookies Double The Pleasure

I love eating these sandwich cookies and that comes from someone who, until now, did not have a single salted caramel recipe on here. I didn’t jump on the bandwagon, I barely like caramel, why would I add salt to it?

FF Salted Caramac Centre Toffee Cookies
Salted Caramac Centre Toffee Cookies perfect with Afternoon tea or morning coffee.

So there’s a toffee cookie base with swirled, salted Caramac ganache on top, a sprinkle of honeycomb dust, topped with another toffee cookie and finished with a chocolate drizzle. That’s how these cookies stack up and believe me, they are a beautifully light, indulgent treat!

FF Salted Caramac Centre Toffee Cookies
Salted Caramac Centre Toffee Cookies with Wright’s Baking.

More like sandwich biscuits, these Salted Caramac Centre Toffee Cookies are perfect on their own, or with a relaxing cup of tea or coffee.

Each packet makes 8-10 good sized cookies, as can be seen below. I dipped each cookie in dark chocolate, so that one half was completely encased. Then I added delicious mini pieces of fudge (which I bought from Asda – in the baking aisle).

FF Salted Caramac Centre Toffee Cookies
Chocolate Dipped Fudge Topped Toffee Cookies delicious.

As you can see there are different ways to bake using the Toffee Cookie Mix.

For the smaller sandwich cookies I baked them a little longer as I wanted them to be crisper, more like a biscuit and able to hold the delicious salted Caramac ganache in the centre.

Recipe: Makes 8 Salted Caramac Centre Toffee Cookies

1 Packet Toffee Cookie Mix – available online from Wright’s Baking alternatively use my Caramac Caramel Cookies recipe

25g Unsalted Butter – I melt mine and allow it to cool

30mls Water as specified on the packet although I used 40mls

1 Cadbury’s Crunchie Bar

50g/2oz Caramac Buttons

50ml Double Cream

Very small pinch 1/8tsp Sea Salt – I use Maldon

50g Dark Chocolate

Method: Preheat the oven to 180C/160C fan, gas mark 3, 350F

Making And Baking The Toffee Cookies

  • Line 2 large baking trays with non stick silicone mats, or baking parchment.
  • Make the cookie mix up according to the packet instructions, including the extra water.
  • Using a small, truffle sized scoop, or a teaspoon, scoop 16 equal mounds of cookie dough, placing them spaced well apart on the baking trays.
  • Place them in the preheated oven and bake for 15 minutes. This allows them to bake into firmer biscuits, perfect for holding the delicious centre.
  • Rotate the baking trays halfway through the bake time to give an even bake.
  • Remove the cookies after 15 minutes of baking and allow to cool completely on the baking tray.
FF Salted Caramac Centre Toffee Cookies
Toffee Cookies before and after baking.
  • While the cookies are cooling, make the ganache.

Making The Salted Caramac Filling And Assembling The Cookies

  • Place the Caramac buttons and double cream in a heatproof, microwaveable bowl. Heat on medium for 1 minute in the microwave, remove stir and heat for 30 seconds more, or until the Caramac when stirred, fully melts and mixes with the cream. Cover the bowl in cling film and place in the fridge to chill.
  • Once the cookies are cooled remove, using a palette knife and place on a cooling rack.
  • Pair the cookies up with similar size/shape partners. Line them up and turn one cookie over so that it is flat side up.
  • Using a rolling pin bash the Crunchie bar inside its packet so that the honeycomb comes away from the chocolate. You want golden dust not chunks! Open the packet and tip the contents into a bowl.
  • When the ganache is cold, but still liquid add the salt. Whisk the liquid ganache until pale, fluffy and able to hold its shape.
FF Salted Caramac Centre Toffee Cookies
Whipped Salted Caramac Ganache.
  • Fit a piping bag with a large star tip – I use Wilton #1M and fill the bag with the whipped ganache.
  • Pipe swirls of salted Caramac ganache on 8 of the upturned cookies and then sprinkle with golden honeycomb dust from the Crunchie bar – the chocolate and honeycomb that’s left is great sprinkled on a whipped cream topped hot chocolate 😉.
FF Salted Caramac Centre Toffee Cookies
Salted Caramac Centre Toffee Cookies piped, tops and drizzled with dark chocolate.
  • Pop the other toffee cookie on top.

Adding The Dark Chocolate Drizzle

  • Break the dark chocolate up, heat in a microwaveable bowl until melted.
  • You can either drizzle the chocolate over the cookies with a spoon, or for a cleaner finish, pour the melted chocolate into a small, disposable piping bag. Snip off the very end a pipe zig zag lines across the top of the Salted Caramac Centre Toffee Cookies.
  • Allow the chocolate to set.
FF Salted Caramac Centre Toffee Cookies
Salted Caramac Centre Toffee Cookies these won’t last long!

I chilled these delightful cookies in the fridge before serving. It allows the ganache to firm up and then, when eaten, the centre really does taste like ice cream!

To store, should you have any left over, keep in an airtight container, in the fridge.

In fact I am certainly going to make a double batch of these next time. There are 5 of us here at home and sharing is important. It’ll only take a few extra minutes to make 16 Salted Caramac Centre Toffee Cookies 😉.

If you have enjoyed these Salted Caramac Centre Toffee Cookies, here are some other recipes you may also like:

Toffee Cookie Cups

FF Salted Caramac Centre Toffee Cookies
Toffee Cookie Cups using the same Wright’ Baking mix.

Caramac Caramel Cookies

FF Salted Caramac Centre Toffee Cookies
Caramac Caramel Cookies so good!

Chocolate Vanilla Viennese Finger Biscuits

FF Salted Caramac Centre Toffee Cookies
Chocolate Vanilla Viennese Finger Biscuits with a white chocolate ganache filling.

This week has been #BiscuitWeek on Twitter, I’m not sure where else, as it’s always biscuit week here at Feasting is Fun!

I hope I’ve inspired you to be creative with your cookies, or biscuits. In my mind there isn’t a difference, however, I’m happy to be proven wrong.

Whatever you are baking, making and creating in your kitchens, I hope you have fun. Enjoy feasting with family and friends as we bid a sad farewell to the Summer, here in the South East of England and welcome Autumn The Most Beautiful Season.

Sammie xx

Wright’s Baking provided the mix for this recipe, all opinions, views, content and photography are my own. Please see my Disclosure Policy.

Share
Facebooktwitterpinterestlinkedintumblr

Boozy Lemon Drizzle Bundt Cake

Share
Facebooktwitterpinterestlinkedintumblr

I adore lemons. They are used in both sweet and savoury cooking in my kitchen. So, in honour of our eldest daughter’s birthday and inspired by last week’s first Great British Bake Off episode, I bring you my 100% gluten free Boozy Lemon Drizzle Bundt Cake.

FF Boozy Lemon Drizzle Bundt Cake
Boozy Lemon Drizzle Bundt Cake moist, light with a great lemon tang.

This gluten free cake tastes no different to a regular cake made with ‘wheat’, which I am really pleased about, as it means more people can make and eat this delicious treat!

That said this Boozy Lemon Drizzle Bundt Cake can be made with regular, plain white flour if you do not need to make it gluten free.

FF Boozy Lemon Drizzle Bundt Cake
Boozy Lemon Drizzle Bundt Cake as beautiful to look at as it is to eat.

Such a delightfully light, moist cake, with the tang of limoncello spiked drizzle soaked through the entire cake.

My Boozy Lemon Drizzle Bundt Cake, is a true lemon drizzle cake, in the sense that it has hot lemon syrup poured over a skewer spiked cake. Using a Bundt pan means that the syrup soaks from the bottom to the top, creating a fabulously flavoured cake.

FF Boozy Lemon Drizzle Bundt Cake
Boozy Lemon Drizzle Bunt Cake such a stunning design.

As this cake was made for my daughter, to be shared with family and friends, I was very restrained when it came to adding the limoncello. For adults you could easily double, or triple the amount stated. Remember though it is the lemon flavour that needs to hit the palette first. Don’t knock everyone out with too much vodka 😉.

FF Boozy Lemon Drizzle Bundt Cake
Boozy Lemon Drizzle Bundt Cake with a damp, drizzled crumb.

The colours used to decorate this cake are simply her favourite. I piped a line of thick, lemon icing along each ridge of the cake and then added sky blue sugar sparkles, pressing them in gently to the icing so they would stay. A finial dusting of white, edible glitter in the centre adds the necessary sparkle, even if it doesn’t show up in all of the photographs.

I chose to use the Heritage Bundt Pan by Nordicware.

Recipe: Boozy Lemon Drizzle Bundt Cake serves 10-12

I highly recommend Wilton cake release spray to grease the Bundt pan, alternitavely use melted butter and brush every part of the inside of the pan, then add 1 tablespoon of gluten free flour, tip the pan around until it is completely covered and tip out any excess flour – I cannot guarantee the same sharp edges using the butter/flour method.

For the Cake

275g/10oz Unsalted Butter softened to room temperature

275g/10oz  Caster Sugar

1/4tsp Salt – I use Maldon Sea Salt

275g/10oz Certified Gluten Free Flour – I use Doves Farm

2tsp Baking Powder – I use Waitrose as it is gluten free

1tsp Vanilla Extract – I use Nielsen-Massey extracts

1tsp Lemon Extract or juice of half a lemon

Zest of one lemon

6 Large Free Range Eggs

For the Drizzle

Approx 50ml Freshly Squeezed Lemon Juice – juice of 2 lemons

Approx 50ml of tap water to make up to 100ml with the lemon juice

100g/4oz Caster Sugar

2tbsp Limoncello – more can be added for a pronounced flavour if desired

Icing to Decorate the Cake

200g/7oz White Icing Sugar

Juice of one whole lemon – approx 30mls, make up to volume with water if needed

Optional – sprinkles and edible glitter – ensure they are gluten free

Method: Preheat the oven to 170C/150C fan, gas mark 3.5

  • Prepare the Bundt pan by spraying or brushing on cake release, ensuring every part of the inside of the pan is covered.
  • Into a large bowl add the butter, sugar and salt. Whisk/beat until pale and creamy.
  • Weigh the gluten free flour and sift into a separate bowl with the baking powder.
  • Add the 6 eggs to the butter/sugar mixture and 2 tablespoons of the pre weighed, sifted flour – this will stop the mixture from splitting, which can lead to a denser cake. Whisk/beat the eggs into the butter and sugar until you have a fully combined, light mix.
  • Add the rest of the flour/baking powder, the lemon extract, vanilla and lemon zest.
  • Using a metal spoon fold all the ingredients together until they are fully combined.
  • Spoon the cake batter into the prepared Bundt pan.
FF Boozy Lemon Drizzle Bundt Cake
Boozy Lemon Drizzle Bundt Cake ready for the oven.
  • Place the Bundt pan in the centre of the preheated oven and bake for 50-60 minutes.
  • Whilst the cake is baking make the drizzle:
  • Squeeze the strained juice of 2 lemons into a measuring jug, make the volume up to 100ml with tap water. Place 100g of sugar into a small saucepan and add the lemon juice liquid to it. Swirl to mix and place over a medium heat. Do not stir! Swirl occasionally, until the sugar is fully dissolved and the liquid starts to bubble. Remove the saucepan from the heat. Add your desired amount of limoncello and place a lid on the saucepan.
  • The cake is cooked when it is golden in colour, coming away from the sides of the pan and an inserted skewer comes out clean.
  • Once baked remove the cake from the oven. Allow the cake to cool for 10 minutes in the Bundt pan.
  • After 10 minutes use a wooden skewer to create holes right through the cake. I poked approximately 25 holes in the cake, this will allow the syrup to moisten the entire cake, not just the bottom – remember the Bundt cake is upside down.
  • Drizzle over the warm, boozy, lemon syrup, making sure you cover the entire base of the cake.
FF Boozy Lemon Drizzle Bundt Cake
Piercing holes with a wooden skewer that allow the boozy lemon drizzle to soak through.
  • Leave the cake for a further 5 minutes in the pan, to allow the drizzle to soak right through to the top of the cake.
  • Now turn the Boozy Lemon Drizzle Bundt Cake out on to a cooling rack and allow to cool completely.
FF Boozy Lemon Drizzle Bundt Cake
Beautifully moist cake with clean, deep, swirling lines.

To Decorate the Boozy Lemon Drizzle Bundt Cake:

  • Sift the icing sugar into a bowl. Add 30mls of lemon juice and stir.
  • Add extra water to create a thick icing, that can still be piped.
  • Spoon the thick icing into a disposable piping bag (or piping bag fitted with a 3-4mm piping nozzle). Snip the end off of the disposable bag to leave a 3-4mm opening.
  • Place the cooling rack over a large baking tray – this will catch all the drips.
  • Starting from inside of the Bundt hole pipe the icing, following the lines of the swirl.  Keep the pressure steady and pipe into the groove of the swirl, finishing when you reach the edge. Pull the bag away from the cake and any excess icing will drip through the cooling rack.
  • Continue working around each swirl until the cake is completed.
FF Boozy Lemon Drizzle Bundt Cake
Boozy Lemon Drizzle Bundt Cake looks perfect just like this.
  • If adding sprinkles, either follow my design, adding them just away from the centre of the cake, or let your imagination take over and create your own design!
  • Finally add a dust of (I used) white edible glitter, to give your cake some added sparkle.
  • Carefully transfer the cake to a board/stand/plate.
FF Boozy Lemon Drizzle Bundt Cake
Boozy Lemon Drizzle Bundt Cake simply stunning to look at!

Take photos of your beautiful creation.

Then serve it sliced with a cup of tea or coffee, or if it’s adults only, a shot of limoncello alongside 😉.

FF Boozy Lemon Drizzle Bundt Cake
Boozy Lemon Drizzle Bundt Cake definitely made for sharing.

I am so pleased our daughter chose the light blue sprinkles for this cake. To be honest, it isn’t a colour I would put with a lemon cake and yet it looks so beautiful. She has a brilliant eye for design and I regularly ask her opinion on colour schemes/layouts and photographs for Feasting is Fun.

Thank you Star and very happy birthday.

If you have enjoyed this recipe for Boozy Lemon Drizzle Bundt Cake you may also like these:

Lemon Blueberry Bundt Cake

FF Boozy Lemon Drizzle Bundt Cake
Lemon Blueberry Bundt Cake.

Lemony Strawberry Pavlova

FF Boozy Lemon Drizzle Bundt Cake
Lemony Strawberry Pavlova also gluten free.

Swirl Lime Drizzle Cake

FF Boozy Lemon Drizzle Bundt Cake
Swirl Lime Drizzle Cake

I have other gluten free cake recipes such as my Marshmallow Frosted Mango Cupcakes and my Strawberry Whipped Cream Giant Doughnut.

My aim is to make as many recipes as possible gluten free. Obviously this is going to take some time to retest recipes and make adjustments as needed.

Next on the agenda is cracking gluten free pastry. I’ve been asked many times for a recipe, so I will be working on that over the coming weeks.

Whatever you are making, baking and creating in your kitchens, remember food always tastes better when it’s shared. So why not invite your neighbours round for a cup of tea and a slice of something delicious?

Sammie xx

My Boozy Lemon Drizzle Bundt Cake has also been submitted for this weeks #GBBOTwitterBakeAlong on Twitter. Click on the hashtag on Twitter and join in the Baking Community fun!


Share
Facebooktwitterpinterestlinkedintumblr

Dreamy Chocolate Fudge Cake

Share
Facebooktwitterpinterestlinkedintumblr

Dreamy Chocolate Fudge Cake, the softest chocolate fudge cake, draped in a chocolate fudge icing and adorned with chocolate caramel biscuit balls.

Do you ever dream of chocolate? I do! While making and then tasting this recipe there was only one name that fitted the incredible flavour, taste and texture experience, that is this Dreamy Chocolate Fudge Cake.

FF Dreamy Chocolate Fudge Cake
Dreamy Chocolate Fudge Cake every bit as good as it looks.

So, this incredibly tasty cake was made using  Wright’s Baking Chocolate Fudge Cake Mix. Alternatively, there’s a link in the recipe below for a great chocolate cake made from scratch.

Also, I love to have a few Wright’s Baking Mixes on hand, especially for days like today.

FF Dreamy Chocolate Fudge Cake
Dreamy Chocolate Fudge Cake

Getting Back To Baking

Having just spent 2 whole days, floored by the monster of all migraines, today I was able to get up. So, if you too suffer with migraines, you may find this helpful Migraine Not Always Sunshine And Roses.

My therapy, comfort and pleasure is to bake and cook. Yet baking a cake, from scratch today was beyond me. So instead I used my trustworthy packet mix to create this Dreamy Chocolate Fudge Cake.

And yes, you may thinks I’m nuts, wanting to bake after spending the weekend in pain, in bed, with the curtains closed. For me though, being in the kitchen is freeing. Since my creativity is allowed to run wild. And for the record I had absolutely no idea if I could pull off the icing, yet that’s part of the thrill. If it hadn’t of worked I’d have switched to plan B.

FF Dreamy Chocolate Fudge Cake
Dreamy Chocolate Fudge Cake

A Dreamy Chocolate Cake

Ooh this cake is good.

Really, really good.

So, if you have a boyfriend/girlfriend and you want to impress them, I mean I’m not guaranteeing a marriage proposal, but, this is the cake you need to make them, or anyone you know who loves really good chocolate cake, that you simply want to treat.

And as I have said it before and I’ll say it again the Wright’s Baking Mixes that I’ve used taste like homemade. In fact I’m already wondering how I can make a cake this delicious from scratch, because at the moment I don’t have a recipe to match this. Probably the closest recipe, would be my Chocolate Fudge Bundt Cake.

FF Dreamy Chocolate Fudge Cake
What you’ll need for this Dreamy Chocolate Fudge Cake.

So I found these new McVities Digestive Caramel Nibbles and they work perfectly on the cake. The contrast between soft fudgey cake/icing and crunchy biscuit balls is fabulous, however, if you can’t get hold of them I’d suggest Malteser’s or Minstrel’s. Since both would work well with the flavour of the cake and give that additional crunch!

Recipe: Dreamy Chocolate Fudge Cake serves 8-10

Oil or melted butter to grease the tin -approx 2 tablespoons – I used melted butter

1 Packet Chocolate Fudge Cake Mix from Wright’s Baking  – alternatively use this recipe for Chocolate Fudge Bundt Cake

60ml Melted Butter or Vegetable Oil – I use melted unsalted butter

200ml Water

For the Chocolate Fudge Icing:

4 Packets of Rolo’s

100g Dark Chocolate

100ml Double Cream

To Decorate:

1 Packet Digestive Caramel Biscuit Balls from McVities 

Alternatively use Maltesers, chocolate sprinkles, or whatever you fancy!

Method: Preheat the oven to 160C/140C fan gas mark 3, 325F

Making The Cake Batter

I use a silicone Bundt style mould, you can use a standard 20cm/8″ round cake tin.

  • First of all, grease your mould/tin well. I prefer to use melted butter and apply it with a pastry brush.
  • Place the silicone mould on to a baking tray for stability.
  • In a large bowl add the water, oil and cake mix and whisk according to the packet instructions.
  • Pour the smooth, chocolate cake batter into the prepared mould/tin, wiping away any splashes or spills.
FF Dreamy Chocolate Fudge Cake
Dreamy Chocolate Fudge Cake ready for the oven.

Baking The Chocolate Cake

  • Place the cake into the middle of the oven and bake for 50-60 minutes.
  • Check the cake at 45 minutes. The cake is baked when an inserted skewer comes out clean. My cake took 50 minutes to bake.
  • As soon as the cake is baked remove from the oven an allow to cool in the mould/tin for 10 minutes.
  • Turn the cake out onto a cooling rack and allow to cool completely.
FF Dreamy Chocolate Fudge Cake.
Dreamy Chocolate Fudge Cake cooled and ready to be iced.

To make the Chocolate Fudge Icing:

  • Place a small saucepan with an inch of water in the bottom over a medium heat.
  • Place a heatproof, I use Pyrex, bowl on top of the saucepan ensuring that the bottom of the bowl doesn’t touch the water.
  • Add the Rolo’s, chocolate and cream to the bowl.
  • Stir until you have a melted, glossy chocolate fudge icing.
FF Dreamy Chocolate Fudge Cake
Steps showing the chocolate fudge icing being made and then covering the cake.

Covering The Cake In Icing

  • Place the cake on a rack that fits over a clean baking tray. The idea being that as the icing drips through to the tray it can be scooped up with a spoon and poured back over the cake.
  • Start at the centre of the cake, evenly spooning the thick, fudgey icing around the middle and gradually turning the cake to ensure little air holes, that appear, are covered.
  • Continue spooning the icing around the cake – I actually turn the whole tray/rack around so that I can get a clear view.
  • When all the icing from the bowl has been used the cake should be 3/4 covered.
  • Scoop the remaining icing from the tray underneath the cake – you should be able to slide the cooling rack along the tray – spooning the remaining icing over the last remaining parts of exposed cake.
  • Allow the cake, once covered to sit on the rack for 10 minutes, you’ll be surprised how the definition of the swirls become visible again.

Decorating The Cake

  • Use 2 flat implements, for example a fish slice and palette knife, to transfer the cake to a plate or cake board.
  • Again, starting in the centre and take care to keep to the symmetry of the mould, add the caramel biscuit balls. Since I prefer to complete the centre then decorate each swirl.
FF Dreamy Chocolate Fudge Cake
Dreamy Chocolate Fudge Cake beautiful and delicious.

Finally, the cake is ready to serve straight away, although it can also be chilled for a thicker, denser ganache finish. Although I wasn’t prepared to wait! While the only thing this cake needs is a good cup of tea to accompany it, ooh and preferably the love of your life, or family and friends to share it with.

Unless you’ve had a really, really bad day!

FF Dreamy Chocolate Fudge Cake
Dreamy Chocolate Fudge Cake, who will you share it with?

If you have enjoyed this recipe for Dreamy Chocolate Fudge Cake then you may like these:

Swirl Lime Drizzle Cake

FF Dreamy Chocolate Fudge Cake
Swirl Lime Drizzle Cake

White Chocolate Swirl Fudge Cake

FF Dreamy Chocolate Fudge Cake
White Chocolate Swirl Fudge Cake

Black Forest Giant Doughnut

FF Dreamy Chocolate Fudge Cake
Black Forest Giant Doughnut

I love how making a cake feels like a feast. Because it always feels like a celebration, even if you are having it for Afternoon Tea on a Sunday.

Whatever you are making, baking and creating in your kitchens, have fun and remember food always tastes better when it is shared!

Sammie xx

Wright’s Baking provided me with the mix to make this cake. All content, views, opinions, photographs and recipes are my own. I was not paid to write this post. Please see my Disclosure Policy.

Share
Facebooktwitterpinterestlinkedintumblr

Chocolate Vanilla Viennese Finger Biscuits

Share
Facebooktwitterpinterestlinkedintumblr

Chocolate Vanilla Viennese Finger Biscuits sandwiched together with a light, white chocolate ganache. These light, melt in your mouth biscuits are perfect for an Afternoon Tea or morning coffee treat.

FF Chocolate Vanilla Viennese Finger Biscuits

The first time I made Chocolate Dipped Viennese Fingers was an experience, shall we say. It was relatively early on in my blog and in my wisdom I decided to set the dipped Viennese biscuits on a cooling rack!

Most of them stuck. Badly.

Resulting in a kitchen full of broken biscuits where I  managed to salvage just enough for a decent photograph. So, learning my lesson I did not make the same mistake when making these delicious, finger biscuits.

FF White Chocolate Ganache Filled Viennese Sandwich Biscuits
Chocolate Vanilla Viennese Finger Biscuits

These light, meltingly delicious Chocolate Vanilla Viennese Finger Biscuits are so yummy and are a favourite of my husbands.

Starting my day right

Now we all know I am a self confessed Cookie Monster. So are my whole family. When I was younger my Grandad would bring my youngest Auntie, my sister and I a cup of tea, in bed, every morning. And, no one can make tea like my Grandad did. Anyway, we would always get three biscuits, which we would swap so that we had our favourites. I still cannot understand the appeal of custard creams, but each to their own.

Chocolate Vanilla Viennese Finger Biscuits

Since I was little, staying in the comfort and security of my grandparents home having biscuits with my morning tea was my routine. It still is. I can miss breakfast and lunch, so long as I’ve had a cup of tea and a biscuit or cookie first thing in the morning. And, it is the one thing I would choose to never give up. It is part of my morning routine, so much so, that when I was in hospital last year see here, I would save my packet of 3 biscuits given out with the hot chocolate in the evening, so that I could have them with my morning tea.

Why Homemade Biscuits Are Best

While growing up, although my Grandma was an accomplished cook, I cannot recall her making biscuits. Yet for me, it was the very first skill I mastered in my kitchen. Although these days I tend towards lazy cookies rolled into balls, or scooped with an ice cream scoop. So, to actually pipe biscuits, make a ganache and sandwich them together is a first for me (not the piping), I’ve definitely never made sandwiched biscuits.

I made and baked one batch of my Chocolate Dipped Viennese Fingers and then tweaked the recipe to make a chocolate version. There’s a tiny bit more icing sugar in the chocolate finger biscuits as I wanted to offset any bitterness from the cocoa.

Chocolate Vanilla Viennese Finger Biscuits

Tomorrow morning, I will have a luxury start to my day. A Chocolate Vanilla Viennese Finger Biscuit to accompany my morning cup of tea!

Recipe: Makes 18-24 Chocolate Vanilla Viennese Finger Biscuits

200g/7oz Very Soft Unsalted Butter

60g/5.2oz Icing Sugar – sifted

Pinch 1/8tsp Salt – I use Maldon

1tsp Vanilla Extract – I use Nielsen-Massey

15g Corn Flour – approx 1tbsp

50g/2oz Cocoa Powder

100g/4oz Self Raising White Flour

50g/2oz Plain White Flour

100g/4oz White Chocolate – for dipping the ends of the biscuits

100g/4oz Dark Chocolate – for dipping the ends of the biscuits

For the white chocolate ganache:

100g/4oz White Chocolate

100mls Double Cream

Method: Preheat the oven to 180C/160C fan, gas mark 4, 350F.

Making And Piping The Viennese Biscuit Dough

  • First of all line 2 baking trays with non stick silicone mats or baking parchment.
  • Whisk the butter until it is very soft and pale – approx. 5 minutes.
  • Add the sifted icing sugar and vanilla extract and continue whisking for 2 minutes.
  • Next sift in the cocoa powder. Whisk for a further 2 minutes until the mixture is a dark, chocolatey brown colour.
  • Sift the corn flour, plain and self raising flour into the bowl.
  • Using a metal spoon mix the ingredients together until the are just combined, with no visible white streaks present.
  • Fit a large piping bag with a large, Wilton #1M star tip.
  • Fill the piping bag with the soft, chocolate biscuit dough.
  • Pipe 3″/7-8cm lengths of biscuit dough on to the lined baking tray.
FF Chocolate Vanilla Viennese Finger Biscuits
Piped Chocolate Vanilla Viennese Finger Biscuits ready for the oven.

Baking The Biscuit Halves

  • Place both trays of piped biscuits in the centre and lower part of the oven.
  • Bake the biscuits for 12 minutes. They will be firm to touch and may have spread a little.
  • As soon as the biscuits are baked remove from the oven and allow to cool completly on the tray.
FF Chocolate Vanilla Viennese Finger Biscuits
Chocolate Vanilla Viennese Finger Biscuits beautifully baked.

Making The White Chocolate Ganache Filling

  • While the biscuit fingers are cooling make the  chocolate ganache that will be piped on the underside of the fingers for sandwiching together.
  • In a heatproof, microwaveable jug add the white chocolate and double cream.
  • Zap for 1 minute on medium power.
  • Remove from the microwave and stir. If there are still lumps of unmelted chocolate, pop it back in for a further 30 seconds on medium.
  • Stir the ganache until the melted white chocolate is fully mixed into the cream.
  • Whisk the ganache to cool it and continue whisking until the ganache thickens and becomes airy – today it was so warm that I wasn’t able to get the ganache to solidify.
FF Chocolate Vanilla Viennese Finger Biscuits
Whisk the ganache until it is cool and thickened.
  • If the weather is cool the thickened ganache can be scooped into a piping bag with a medium round tip fitted – I poured the ganache into a disposable piping bag, which I then sealed with an elastic band and I placed it into the coldest part of the fridge until it had thickened.

Decorating And Filling The Chocolate And Vanilla Viennese Sandwich Biscuits

  • While the ganache was cooling I melted both the dark and white chocolate in small heatproof, microwaveable bowls.
  • Dip the chocolate fingers into the white chocolate and the vanilla fingers into the dark chocolate. Lay the dipped biscuit fingers on to anon stick silicone mat or baking parchment.
  • Not all of the biscuit fingers will be dipped in chocolate, that’s fine it is nice to have a variety.
  • When the ganache has firmed up to piping consistency, think buttercream, then you are ready to assemble your biscuits.
  • Pipe a line of white chocolate ganache down the length, flat side upper, of one biscuit.
  • Place a similar sized biscuit on top and set aside.
  • Continue until all of the biscuits are sandwiched together.
FF Chocolate Vanilla Viennese Finger Biscuits
Chocolate Vanilla Viennese Finger Biscuits sandwiched together with ganache.
  • NOTE: Due to the fragile, melting nature of the Viennese biscuits, it is inevitable that some will break. I thoroughly enjoyed ‘taste testing’ the few breakages with our 2 daughters!
  • I ended up with 18 perfectly sandwiched biscuits.
  • Due to the heat I popped all the filled biscuits on to a baking tray and placed them back into the fridge to set, before taking the photographs.

To store place the Chocolate Vanilla Viennese Finger Biscuits into a shallow tin and put in the fridge. With temperatures set to rise over the next few days, assuming they last that long 😉, they will keep for up to 4 days in the fridge.

FF Chocolate Vanilla Viennese Finger Biscuits
Chocolate Vanilla Viennese Finger Biscuits ooh I bet you go back for seconds!

Serve on a pretty plate, adorned with flowers from the garden. These Chocolate Vanilla Viennese Finger Biscuits are perfect with afternoon tea, or morning coffee.

If you have enjoyed these Chocolate Vanilla Viennese Finger Biscuits here are some other recipes you may like:

Apricot Oat Crumble Cookies

FF Chocolate Vanilla Viennese Finger Biscuits
Apricot Oat Crumble Cookies

Bakewell Shortbread Bars

FF Chocolate Vanilla Viennese Fingers Biscuits
Bakewell Shortbread Bars

Lemon Drizzle Cake Bars

FF Chocolate Vanilla Viennese Finger Biscuits
Lemon Drizzle Cake Bars

Sitting together with friends over a mid morning coffee, or with family for afternoon tea, doesn’t have to be a formal occasion. Yet when a little extra effort is made, for example, adding the rose to the centre of the plate, it really lifts the occasion.

All food should be feasted on and enjoyed, not just eaten for the sake of it (unless circumstances, for example illness, dictate otherwise). Food shared, tastes better and eating with company can be more fun.

Make the most of what’s left of the summer to eat outside. Watching the butterflies, listening to the birds, bees and ruffling leaves of the trees, adds an extra element of fun to our feasting.

Sammie xx

Share
Facebooktwitterpinterestlinkedintumblr

Mascarpone Topped Carrot Cake

Share
Facebooktwitterpinterestlinkedintumblr

Mascarpone Topped Carrot Cake, moist, cinnamon spiced carrot cake, with added walnuts for crunch and sultanas for sweetness. Finished with a lemon scented mascarpone cream cheese and walnuts.

FF Mascarpone Topped Carrot Cake
Mascarpone Topped Carrot Cake perfect for Afternoon Tea

What To Do When A Cake Craving Hits

When I crave cake, I really, really C R A V E it!

There are two important points to note:

First of all I rarely crave cake, maybe once or twice a year – but when I do I have to have it.

Secondly, without exception it HAS to be homemade. Too often I have been let down by supermarket copies, or bakery flops. And the only way to satisfy my craving is to bake the cake myself!

FF Mascarpone Topped Carrot Cake

Yesterday, the craving hit for carrot cake. I’d been struggling with a migraine all day and wanted to snuggle under the duvet until the pain had passed. Yet during a brief respite in the afternoon I whipped up this Mascarpone Topped Carrot Cake in less than 10 minutes.

FF Mascarpone Topped Carrot Cake
Mascarpone Topped Carrot Cake beautiful simplicity.

I have dozens of cookbooks and even have a Crazy Caramel Carrot Cake recipe on here, but in all honesty I didn’t have the patience to trawl through them deciding which cake to make. Because I knew the flavours I wanted to taste in my head I created the recipe as I went along. Fortunately having baked a lot of cakes I did have a rough idea of proportions.

Creating This Mascarpone Topped Carrot Cake Recipe

From memory I recalled baking a carrot cake with our youngest daughter, following a school recipe book method. Except all I could remember was that the recipe used oil! And because I love the flavour that butter imparts to a moist cake, I added both!

FF Mascarpone Topped Carrot Cake
Mascarpone Topped Carrot Cake

The need for walnuts, both flavour and crunchy texture was prevailent, so I made some walnut flour to boost the nutty flavour within the cake. It’s so easy, just toast the walnuts to bring out their flavour and either pulse in a food processor or use a mini chopper to achieve the desired result. Think ground almonds and you’re spot on.

One of the big problems I find with shop bough carrot cakes is that they are simply too sweet. I’m not talking the frosting or icing, the actual cake itself. Carrots are an inherently sweet vegetable, sultanas plump up and provide natural sweetness, why dump loads of extra sugar in the recipe? Don’t get me wrong there is sugar in this cake. It is there to add sweetness in balance with the other ingredients.

Can you tell that I’m really picky about my carrot cake 😉

FF Mascarpone Topped Carrot Cake
Mascarpone Topped Carrot Cake the perfect cake?

Recipe: Mascarpone Topped Carrot Cake serve 8-10

100g/4oz Unsalted Butter plus a little extra for greasing the tin.

50g/2oz Sunflower Oil

1tsp Vanilla Extract – I use Nielsen Massey

150g/5oz Light Soft Brown Sugar

1/4tsp Salt – I use Maldon

3 Large Free Range Eggs

150g/5oz Plain White Flour

50g/2oz Walnut Flour – walnuts chopped in a food processor or mini chopper until flour like consistency

2tsp Baking Powder

2tsp Cinnamon

150g/5oz Grated Carrot

50g/2oz Walnut Pieces – plus extra halves for topping the cake (approx 10)

75g/3oz Sultanas

375g Mascarpone Cheese

2tbsp Icing Sugar – sifted

1/2tsp Lemon Extract – Vanilla Extract can be substituted

Method: Preheat the oven at 180C/160C fan, gas mark 4, 350F.

Making And Baking The Carrot Cake

  • Grease and line the base of loaf tin with baking parchment.
  • Place all of the walnuts into a dry frying pan over a medium heat. Shake the pan occasionally and remove from the heat when you can smell the walnuts – approx 3-5 minutes. Tip the walnuts on to a tray so they can cool.
  • In a large bowl add the butter and microwave on low until just melted.
  • Add in the sunflower oil, sugar, salt and vanilla extract. Whisk for 5 minutes.
  • Next add all 3 eggs. Continue whisking on high for a further 2 minutes. You want the liquid mixture to be very light and frothy.
  • Prepare the 50g of walnut flour by chopping in a mini chopper, or pulsing in a food processor.
  • Add the walnut flour, plain flour, cinnamon and baking powder to the bowl.
  • Next add the grated carrots, sultanas and 50g of walnut pieces to the bowl.

FF Mascarpone Topped Carrot Cake

  • Using a metal spoon fold all of the cake ingredients together until they are fully mixed, taking care not to over mix the batter.
  • Tip the cake batter into the prepared loaf tin and smooth the top.
FF Mascarpone Topped Carrot Cake
Mascarpone Topped Carrot Cake ready for the oven.
  • Place the cake tin in the centre of the oven and bake for approximately 1 1/2 hours, or until an inserted skewer comes out clean.
  • As soon as the cake is  baked remove from the oven and allow to cool in the tin for 20 minutes.
  • Gently go around the outside rim of the cake with a palette knife to ensure no part of the cake has stuck to the tin.
  • Tip the cake out, removing the base layer of baking parchment and allow to fully cool on a cooling rack.
FF Mascarpone Topped a Carrot Cake
Beautifully scented carrot cake cooling.

Making the Mascapone Topping

  • In a bowl add the mascarpone cream cheese, sifted icing sugar and lemon extract (vanilla if you do not have lemon).
  • Whisk on a high speed for 3 minutes until the mascarpone is light and fluffy.
  • Dollop the mascarpone cheese on top of the cold carrot cake.
  • Using a palette knife spread the mascarpone so that it evenly covers the top of the cake. you can leave the topping smooth or create a pattern with the palette knife.
FF Mascarpone Topped Carrot Cake
Mascarpone Topped Carrot Cake next walnuts!
  • Adorn the top of the cake with the saved walnut halves and your Mascarpone Topped Carrot Cake is complete.
FF Mascarpone Topped Carrot Cake
Mascarpone Topped Carrot Cake ready to serve.

How To Enjoy This Cake At It’s Best

My suggestion for serving, is, to chill the cake in the fridge for 30 minutes – somehow it just seems to pull the cake together as one and set it – if you can’t wait, don’t worry.

Slice and enjoy with a delightful cup of afternoon tea, preferably made in a pot, it gives the leaves time to release their flavour as well as colour.

FF Mascarpone Topped Carrot Cake
Mascarpone Topped Carrot Cake my absolute favourite.

I love this pretty tea-for-one set that my hubby bought me for our anniversary. It really does turn a simple slice of cake and cup of tea into a sumptuous afternoon feast.

The Mascarpone Topped Cream Cake absolutely satisfied my cravings. The tiny hint of lemon in the mascarpone is very subtle and works with the nutty, fruity, spiced cake. This may very well be one of THE very best recipes I have come up with so far!

No I’m not egotistical, in fact the very opposite. So many recipes do not make it on to Feasting is Fun as they aren’t good enough. Also considering I wasn’t at my best, physically, this cake hits all the right spots. Spiced, crunchy, moist, fruity without tasting like a fruit cake.

If you have enjoyed the recipe for this Mascarpone Topped Carrot Cake you may also enjoy these:

Classic Coffee & Walnut Cake

FF Mascarpone Topped Carrot Cake
Classic Coffee & Walnut Cake

Double Chocolate Chip Loaf Cake

FF Mascarpone Topped Carrot Cake
Double Chocolate Chip Loaf Cake

Loveliest Lemon Curd Cake

FF Mascarpone Topped Carrot Cake
Loveliest Lemon Curd Cake

Any of these delicious cakes would make a wonderful gift to new neighbours, friends who have moved home, even bereaved families. Although taking cake to those struggling with grief isn’t necessarily for them to eat. Rather it’s likely  they will have endless visitors wishing to pay their respects. And a slice of cake, that someone has thoughtfully made, served with a cup of tea, may just make the visits more bearable.

The walnuts used in this recipe come from a a very dear friend who has a walnut tree in her garden. Sadly my dearest friend passed away a few months ago. Yet making this cake, or cooking using either things she bought me, or those her family have kindly given me, has, in some way, made her passing easier.

Everytime I use her cutters, cake stand, dragee balls or a myriad of other everyday kitchen items, I feel close to her. Whether it’s the memory of her laugh, tinkling across the gardens mid afternoon, or how we finished each other’s sentences. And she truly was the very best of people who lived her life to the full, despite becoming a widow at too young an age. Pat was the Green Goddess, my chief taste tester.

So this post is dedicated to her and the love she had for people. Because life is not about what we do. It is not about who we love. Rather it is indeed about those whose hearts we touch. How much we are loved in return. Please see Important Stuff.

Sammie xx

Share
Facebooktwitterpinterestlinkedintumblr