Monster Mint Chocolate Cookies

Share
Facebooktwitterpinterestlinkedintumblr

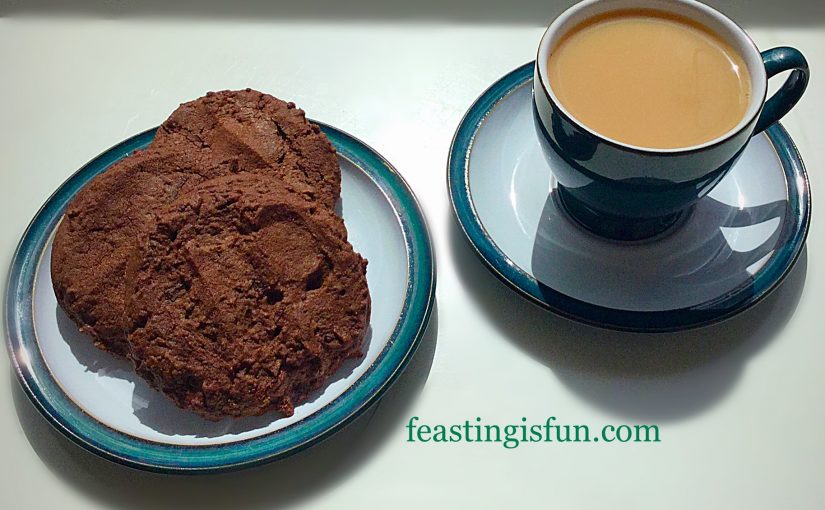
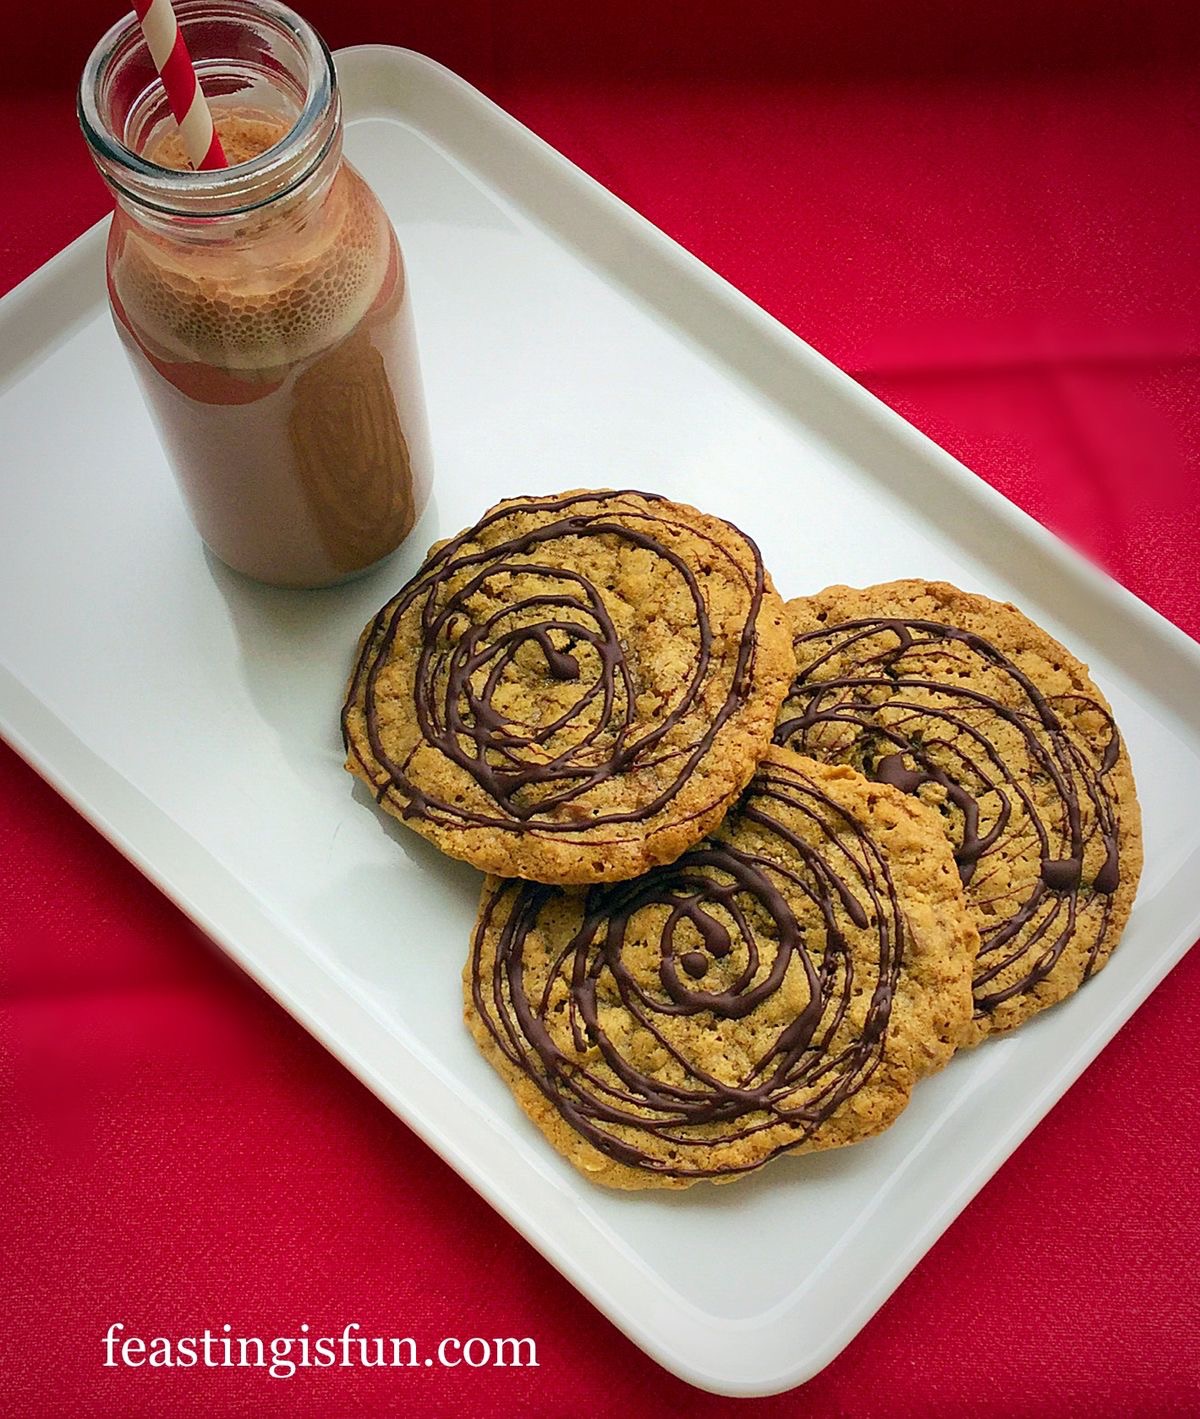
This this week just happens to be National Afternoon Tea Week. Not that we need an excuse to enjoy a good cup of tea with a little something on the side, however, I decided to get into the spirit of things and make these Monster Mint Chocolate Cookies.

FF Monster Mint Chocolate Cookies
Monster Mint Chocolate Cookies perfect for Afternoon Tea.

Afternoon Tea is traditionally served with dainty finger sandwiches, delicate pastries, intricately decorated cakes and the like. I seem to have stamped all over tradition with these Monster Mint Chocolate Cookies!

I do not apologise for this.

For one simple reason, these cookies are really, really good.

FF Monster Mint Chocolate Cookies
Monster Mint Chocolate Cookies packed full of crunchy dark chocolate mint crisps.

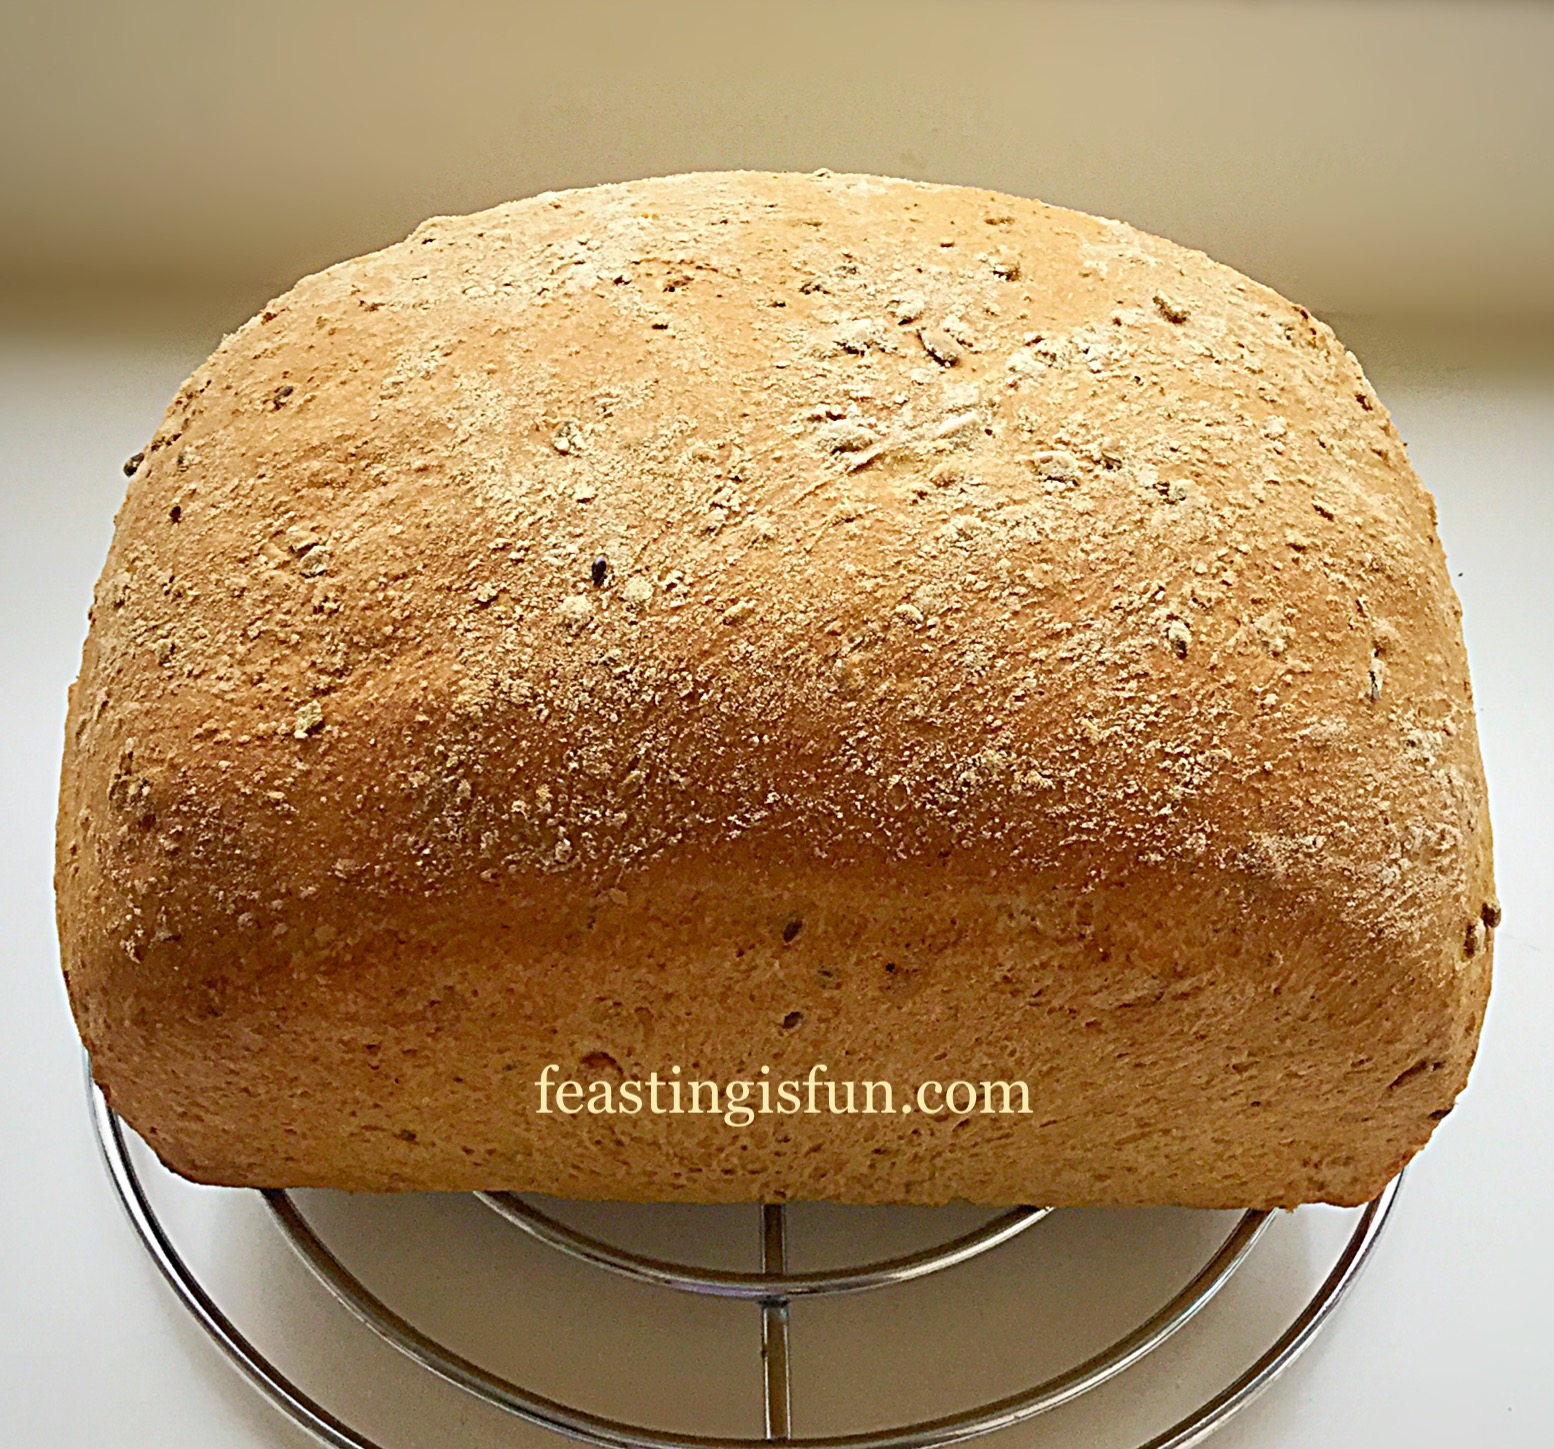
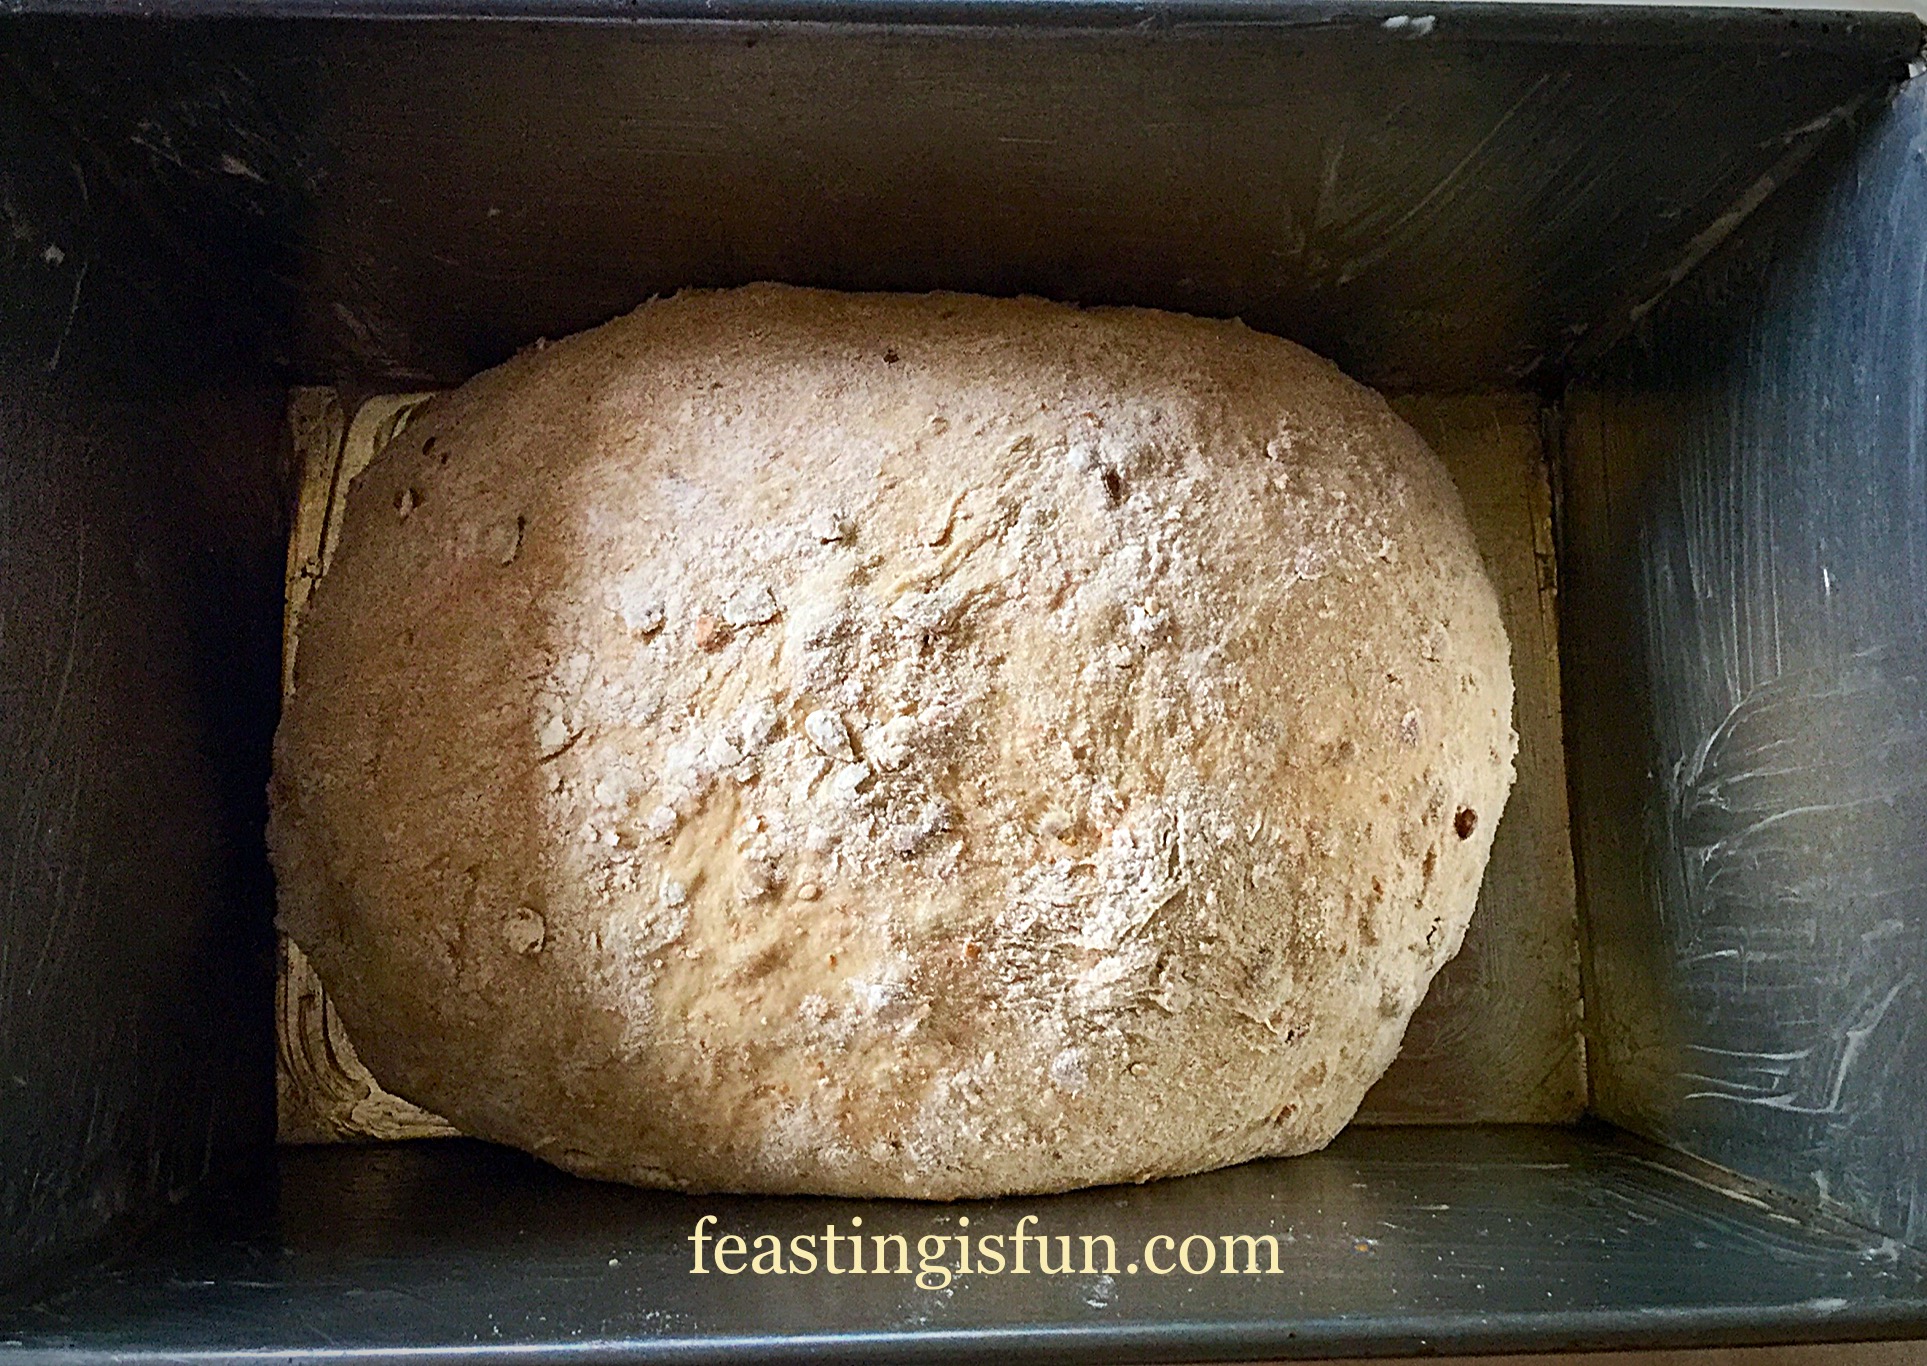
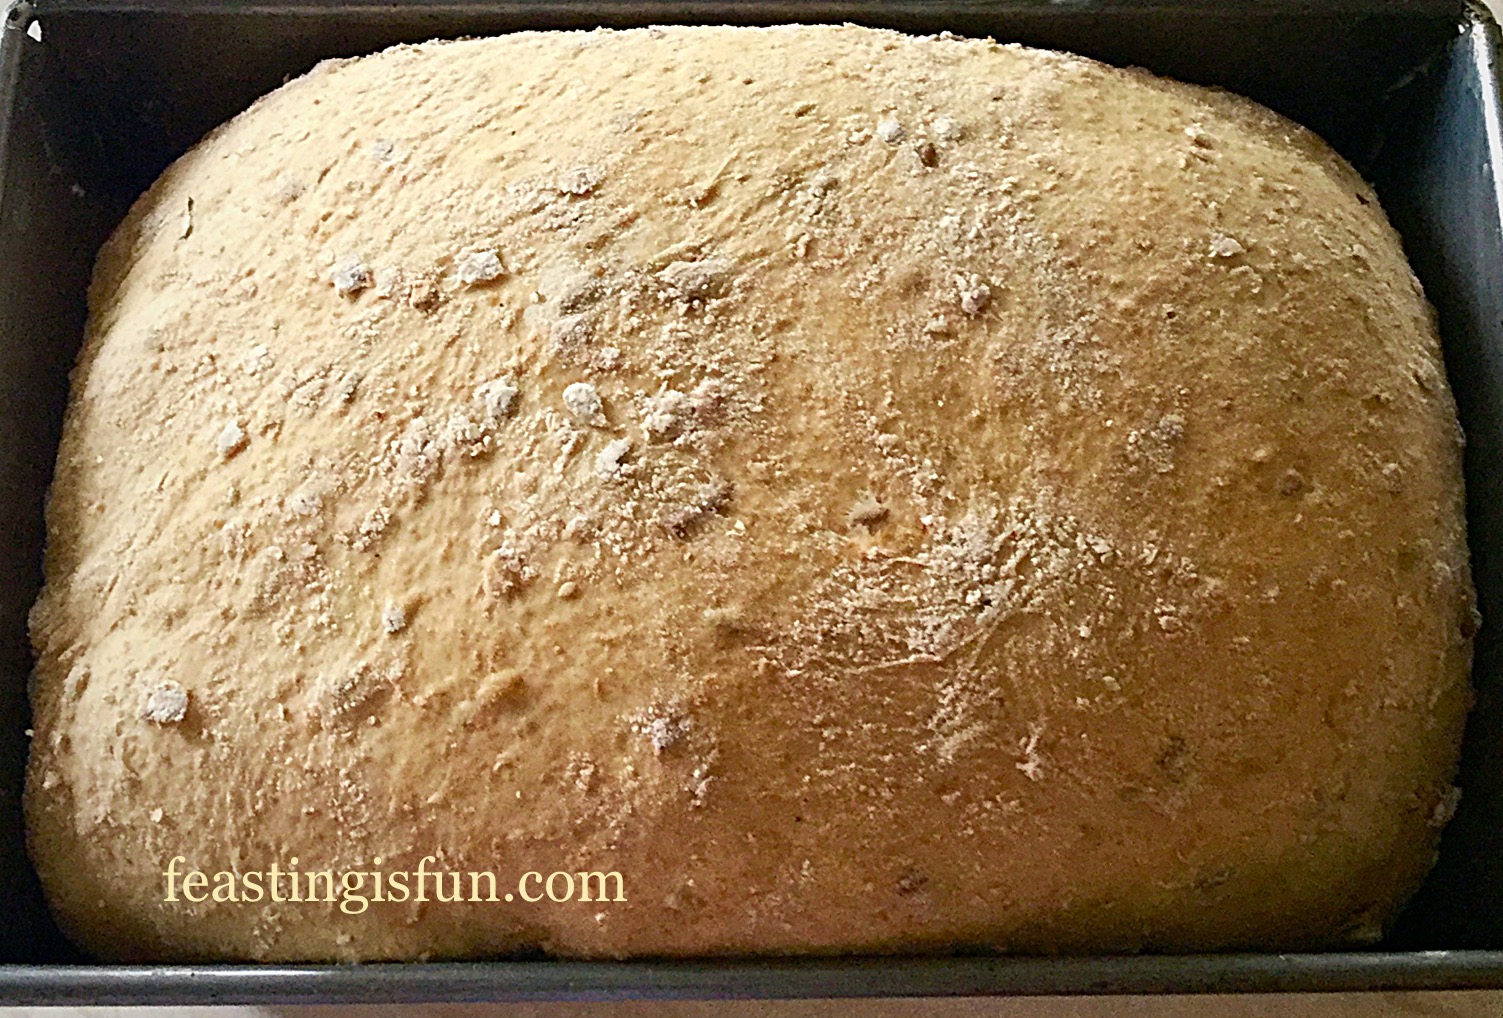
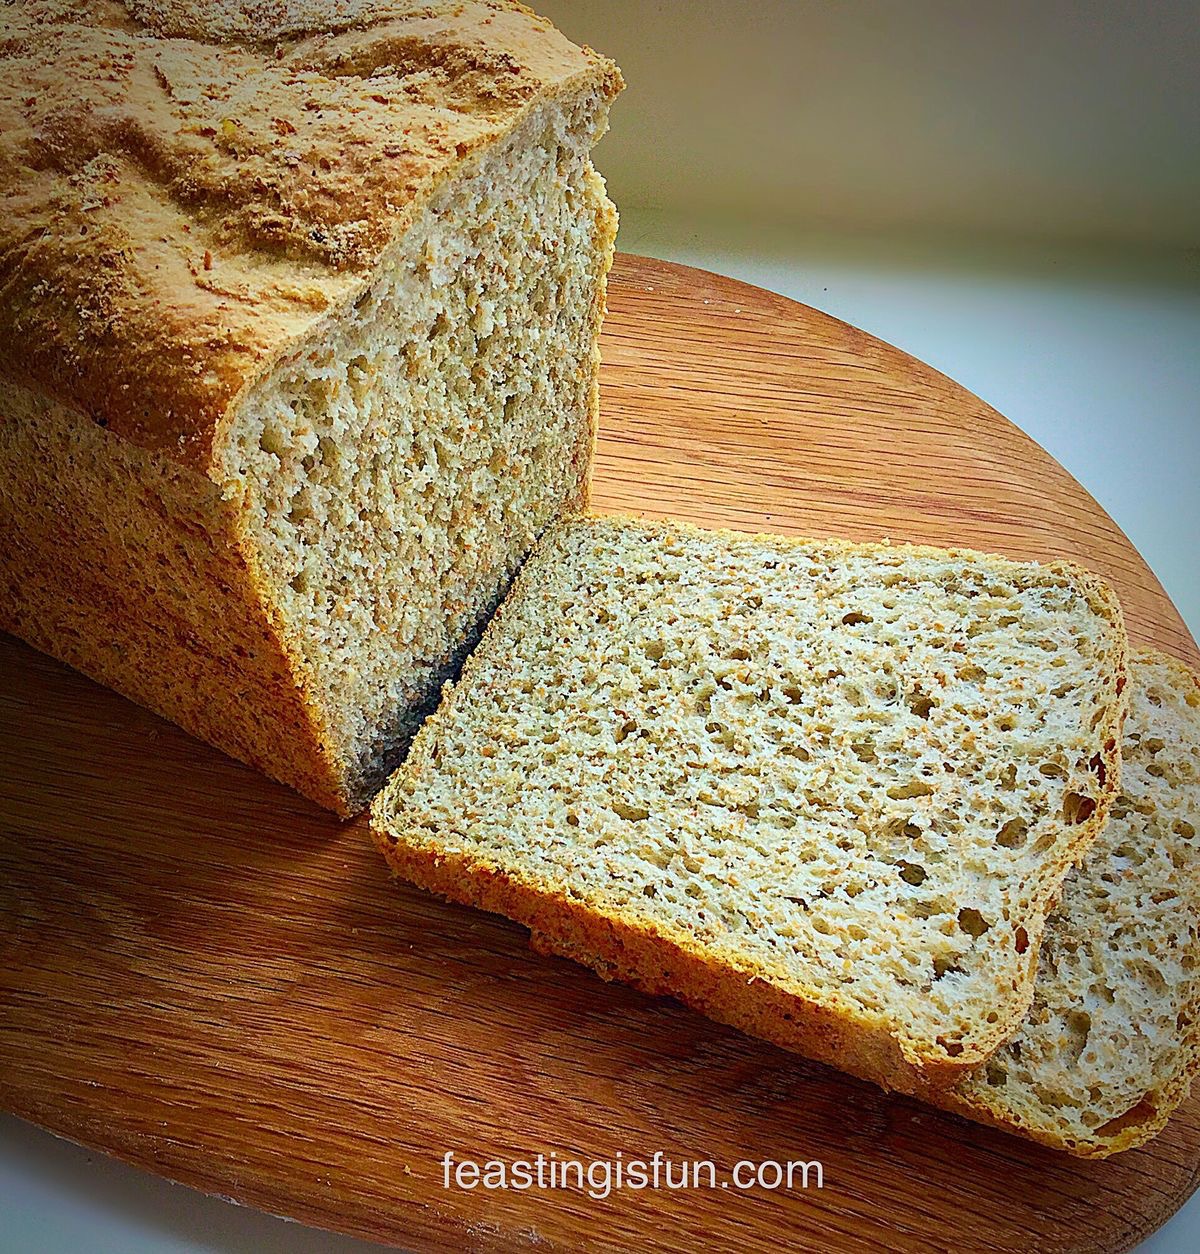
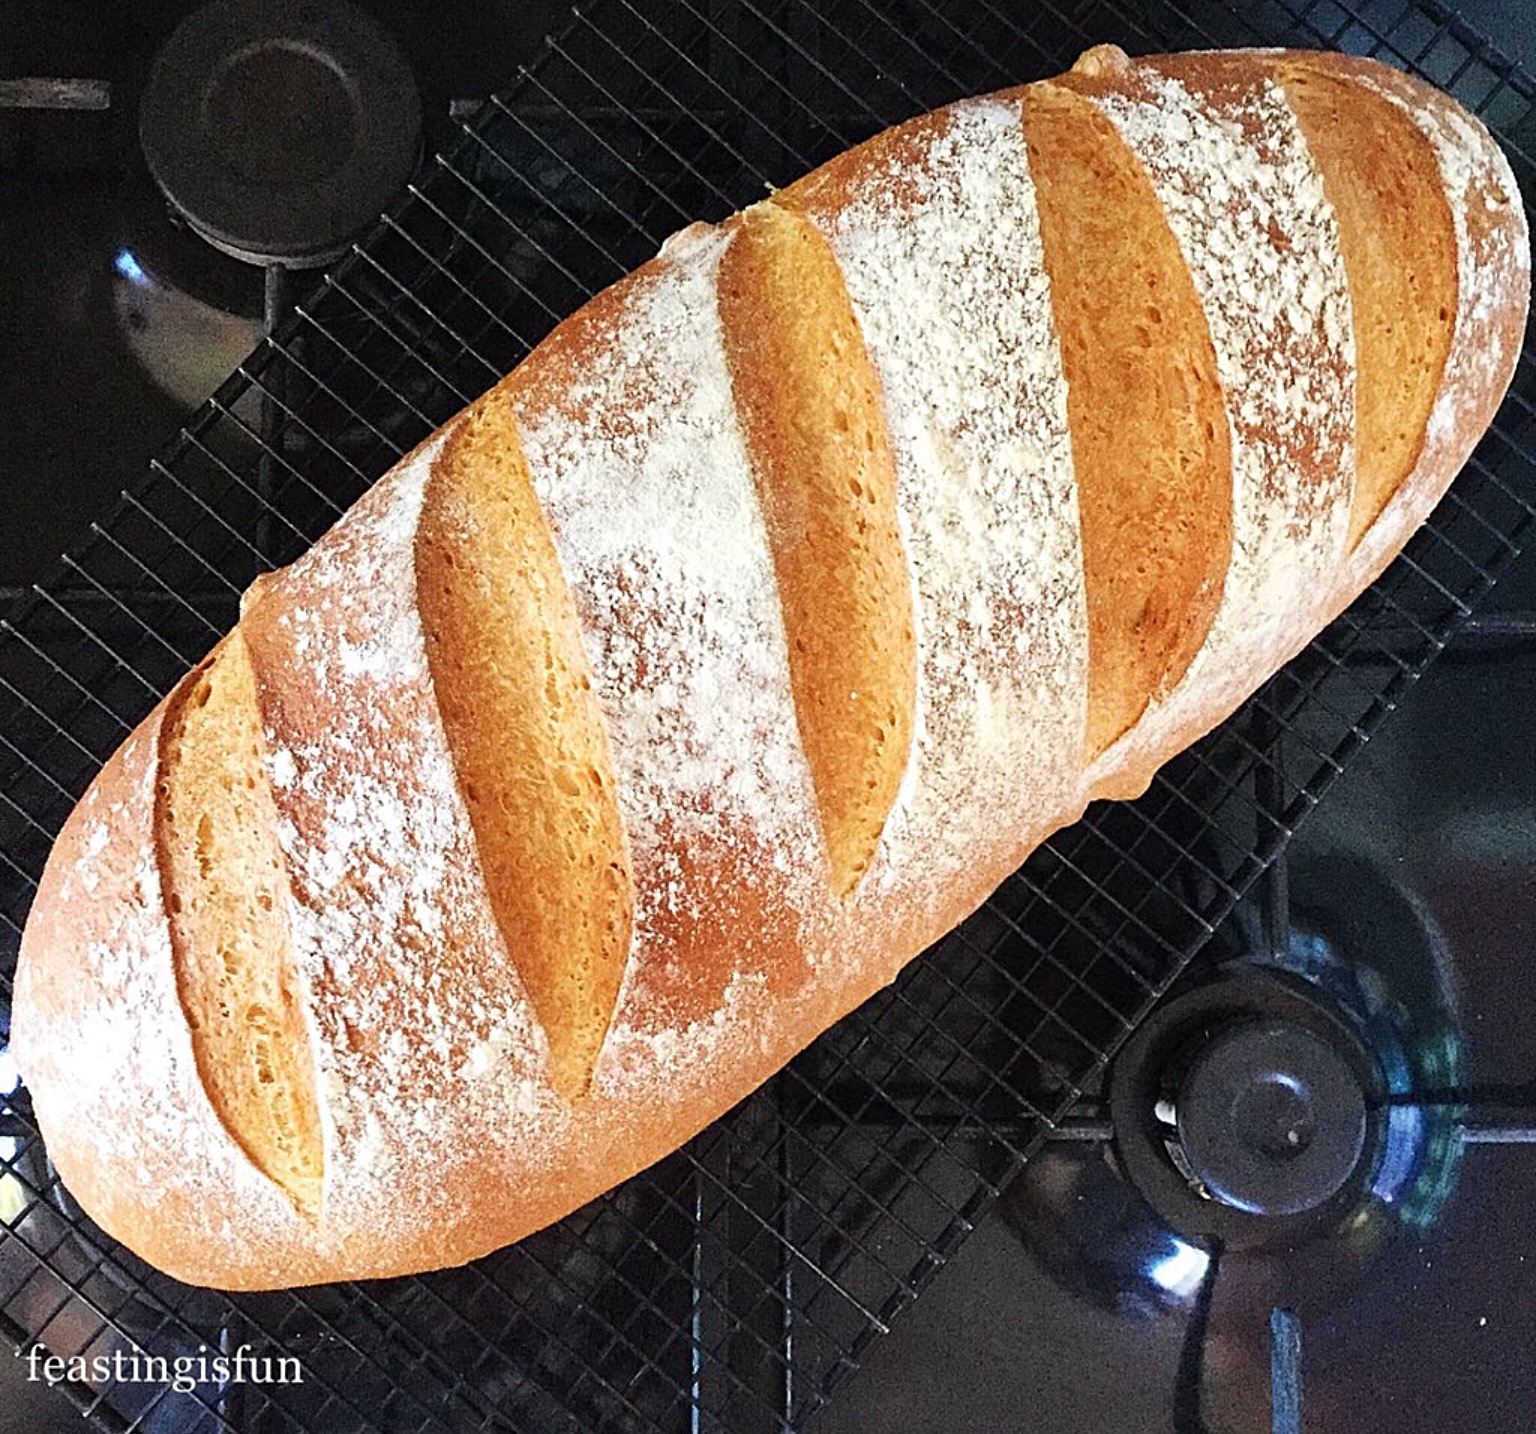
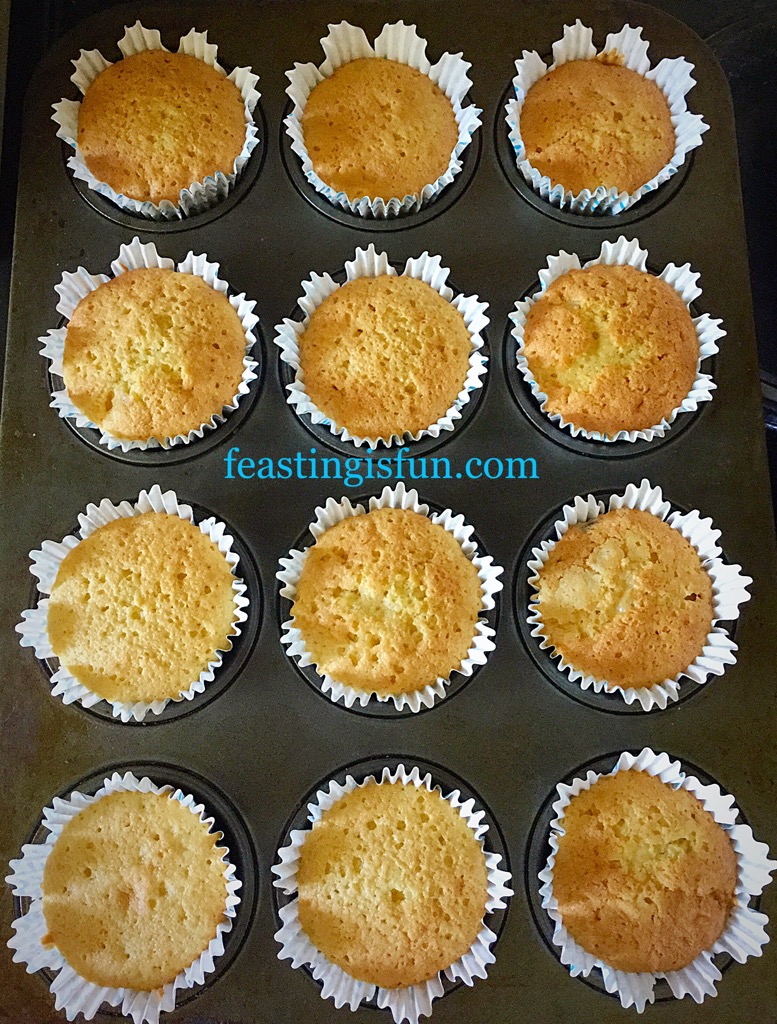
I seem to have got out of my regular cookie baking. There was a time when I made almost all of our biscuits and cookies along with our bread. I’m still keeping up with the bread making see here, but have been remiss with baking cookies.

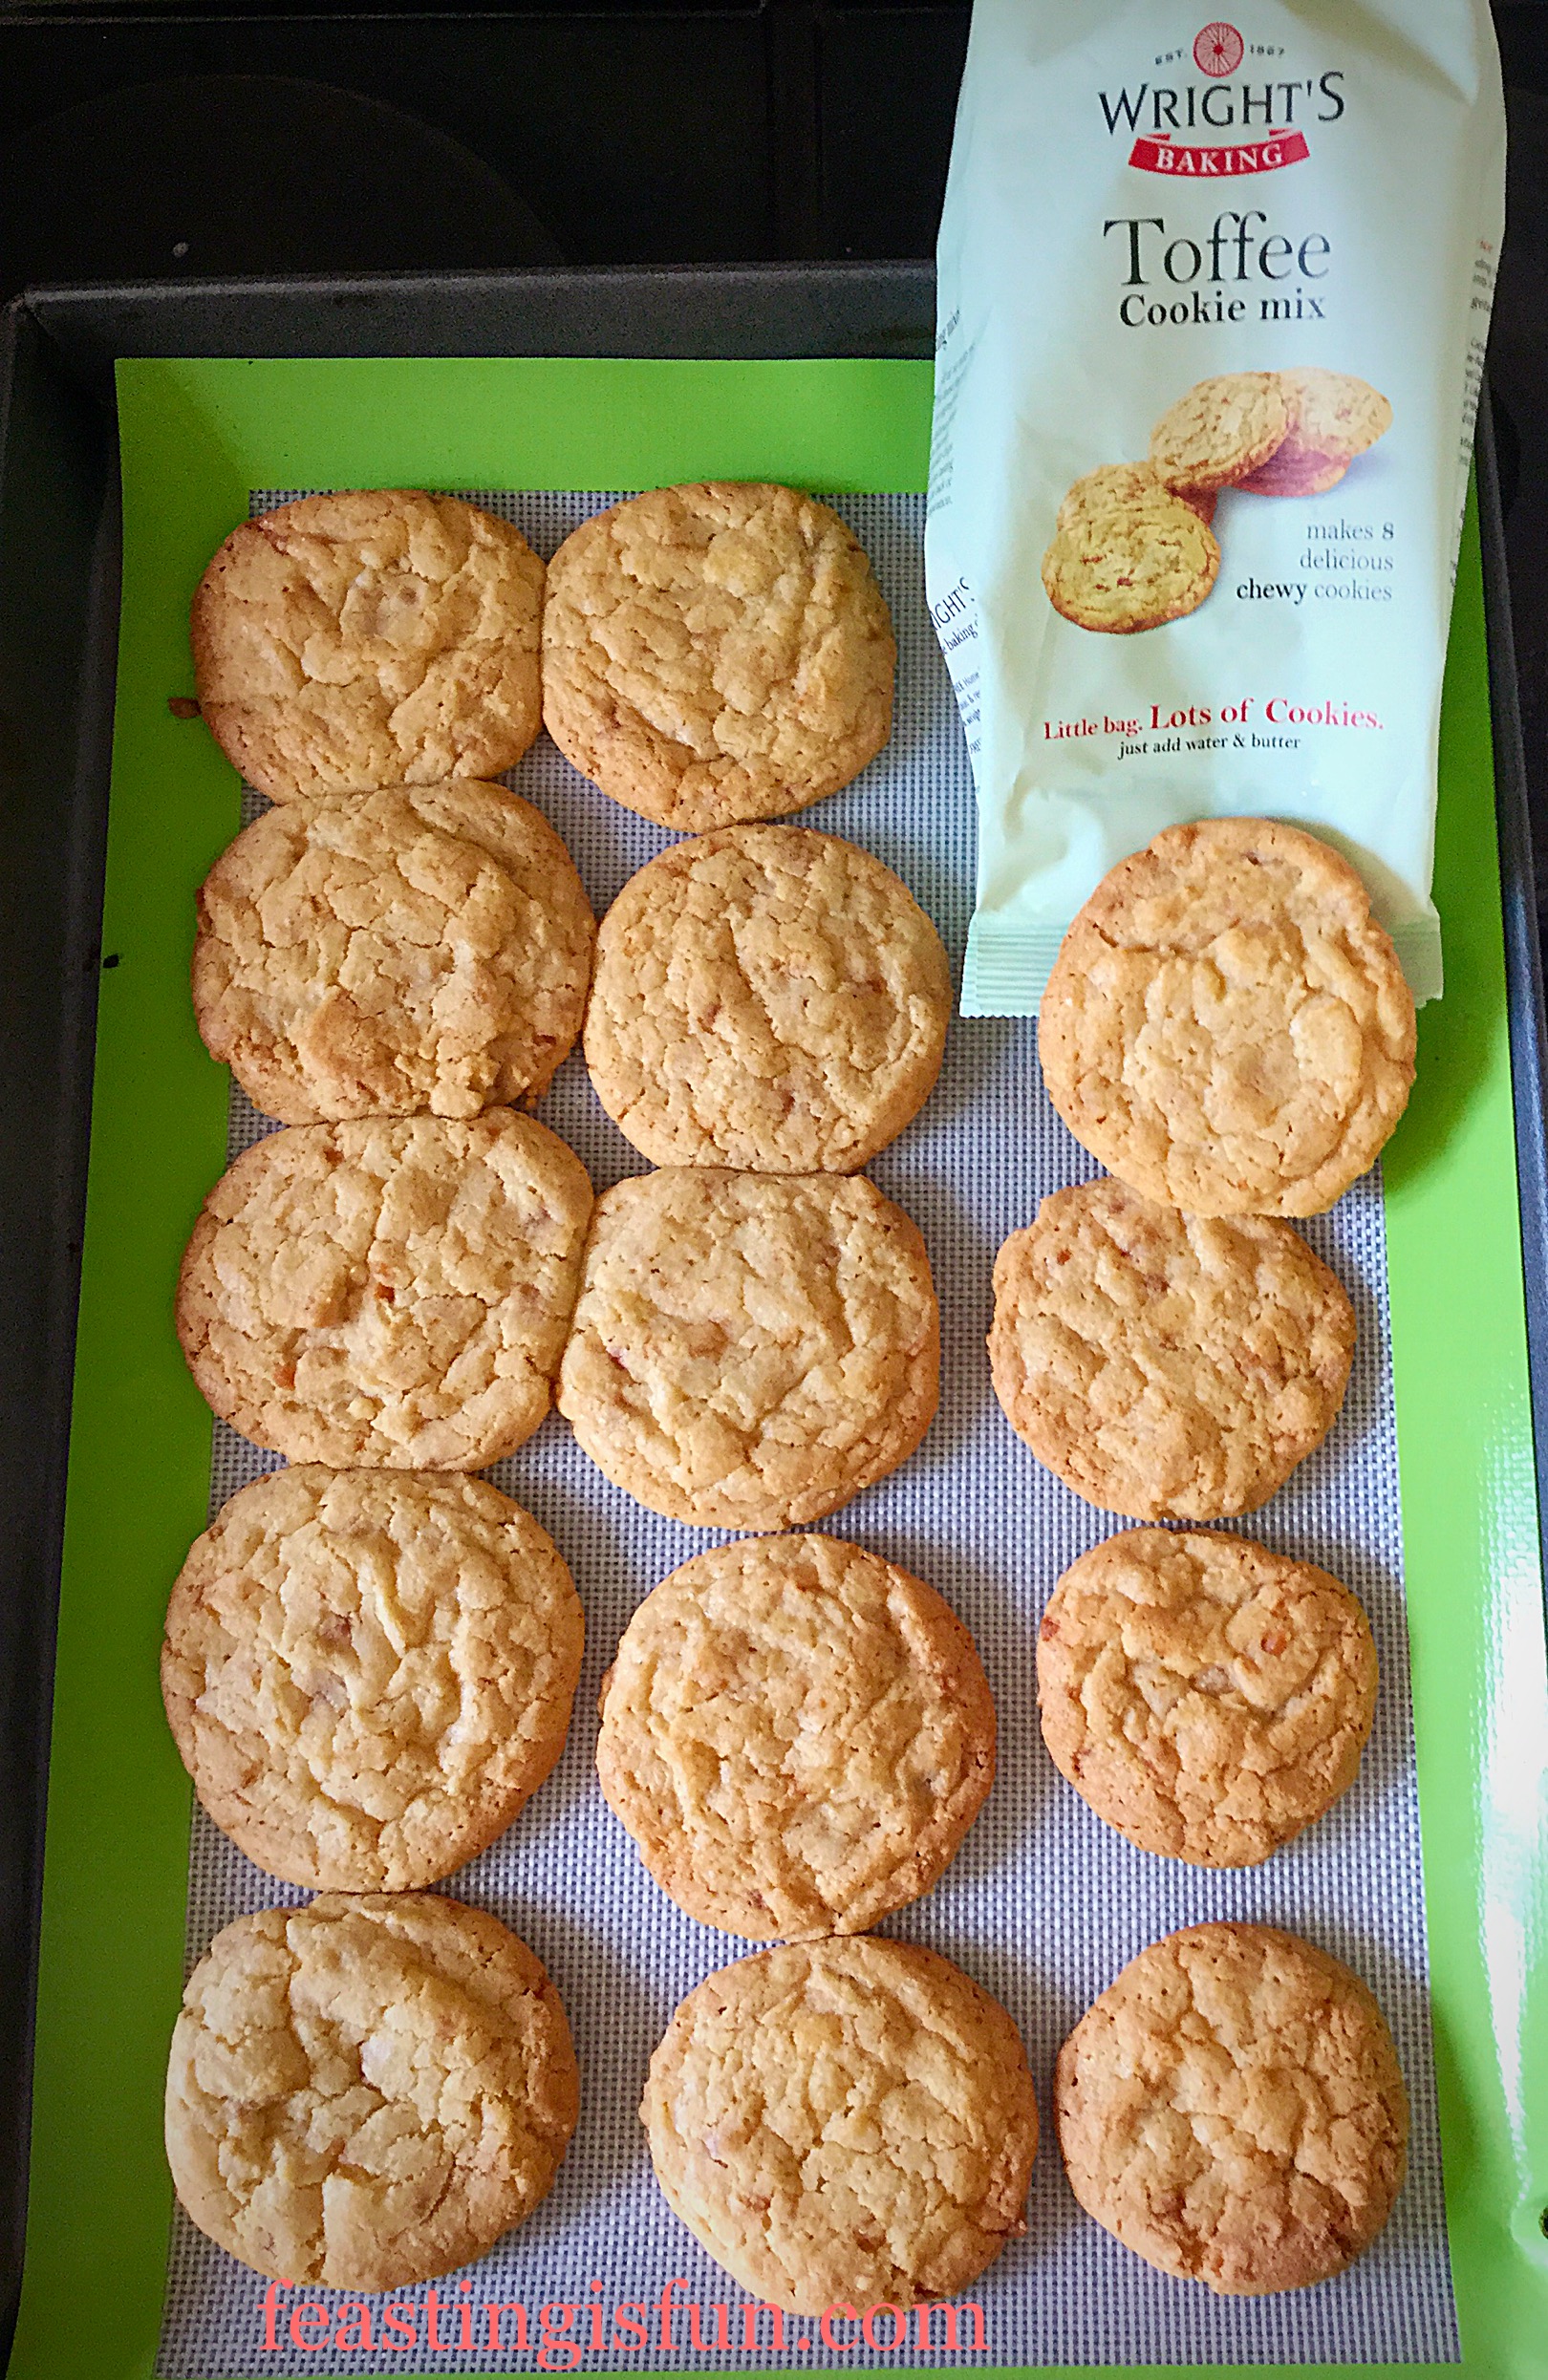
Sometimes I think it is good to be reminded just HOW much better homemade food is. Instead of ripping open a packet of bourbon biscuits I made these cookies this morning. Boy am I glad I did!

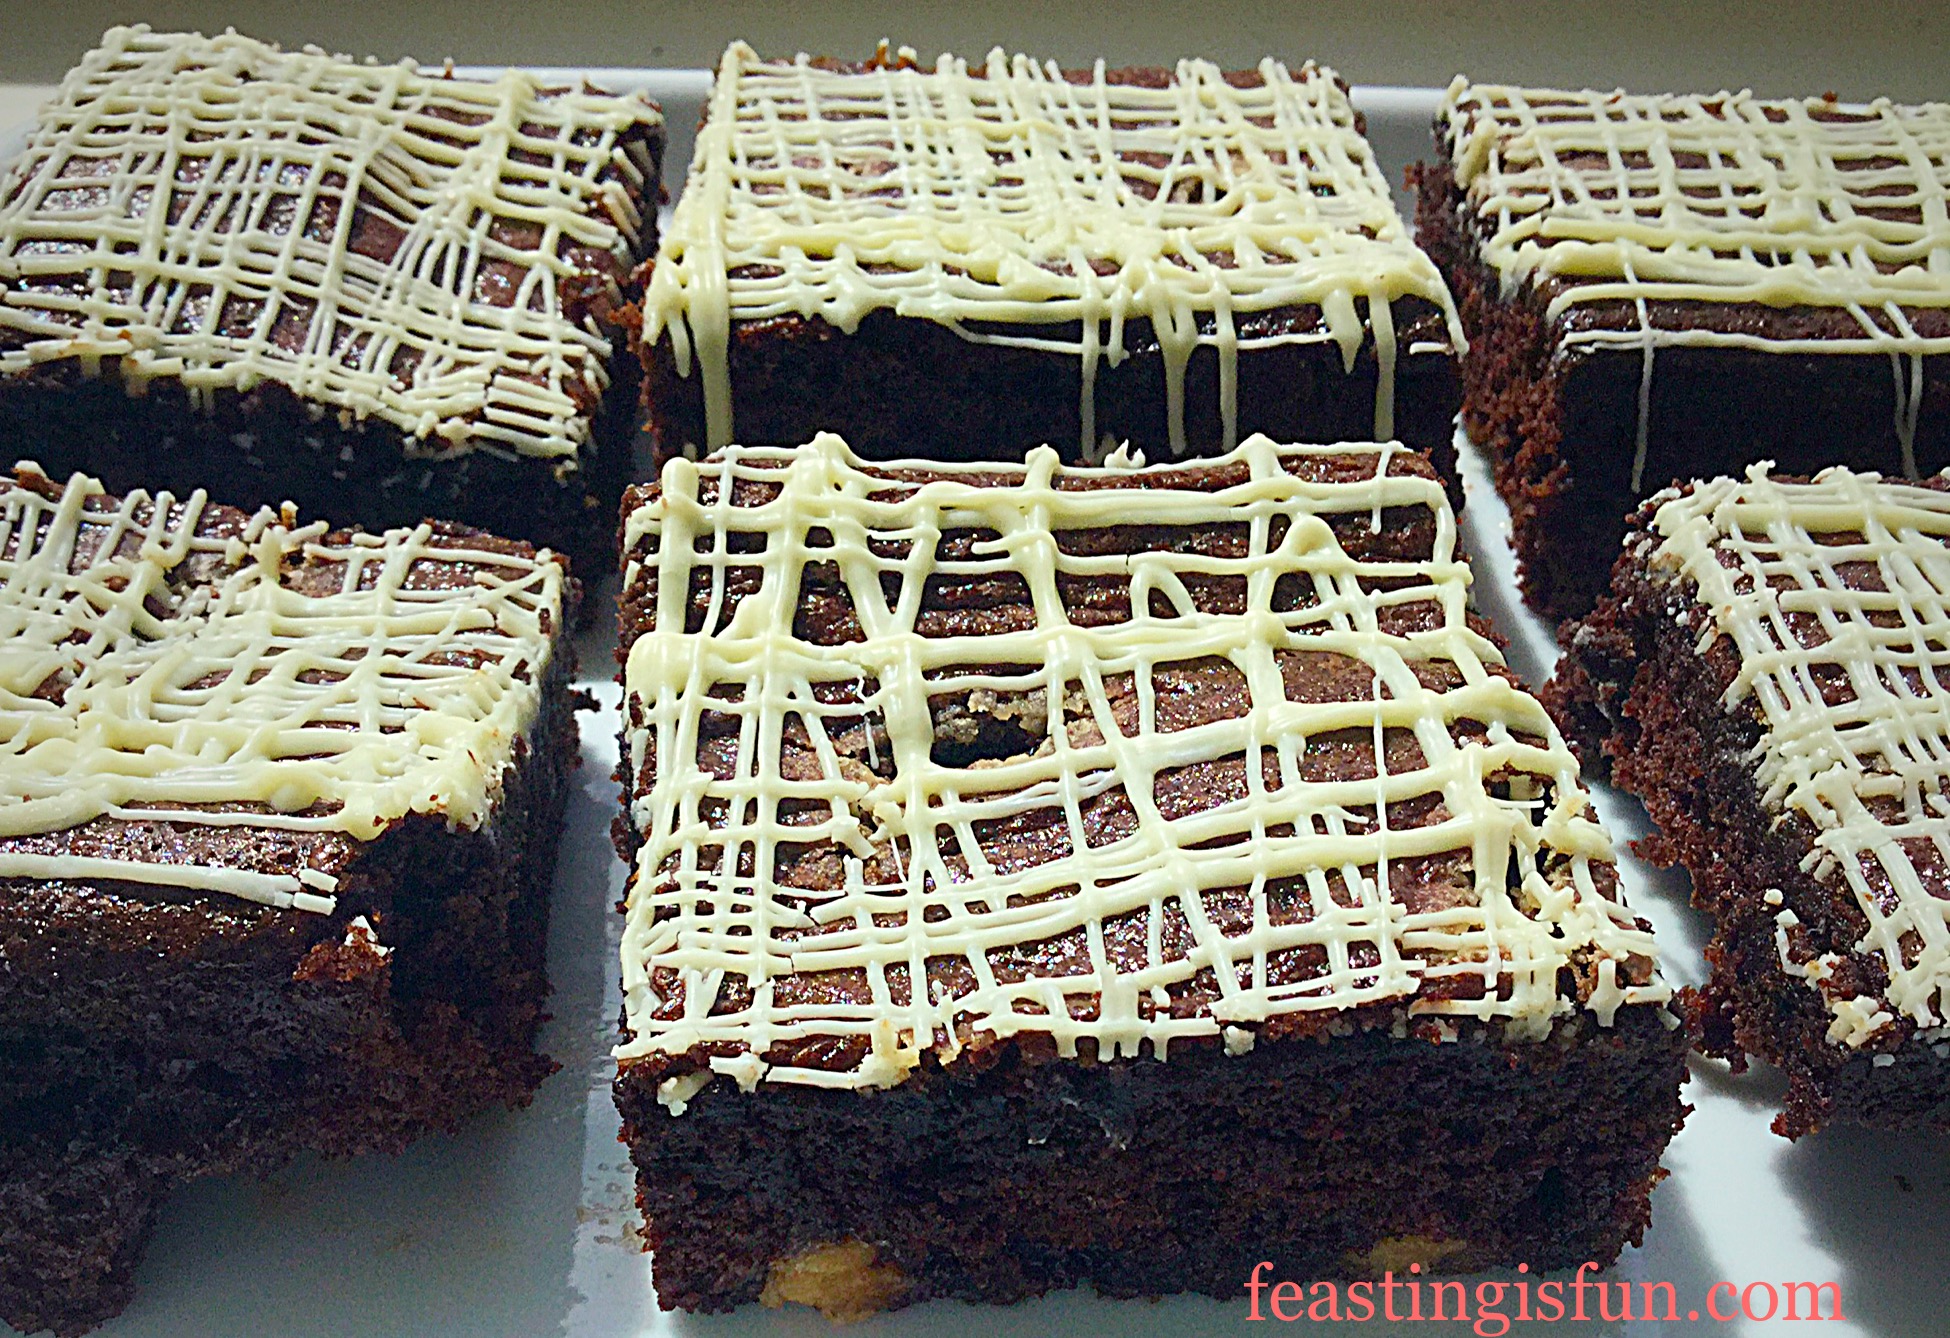
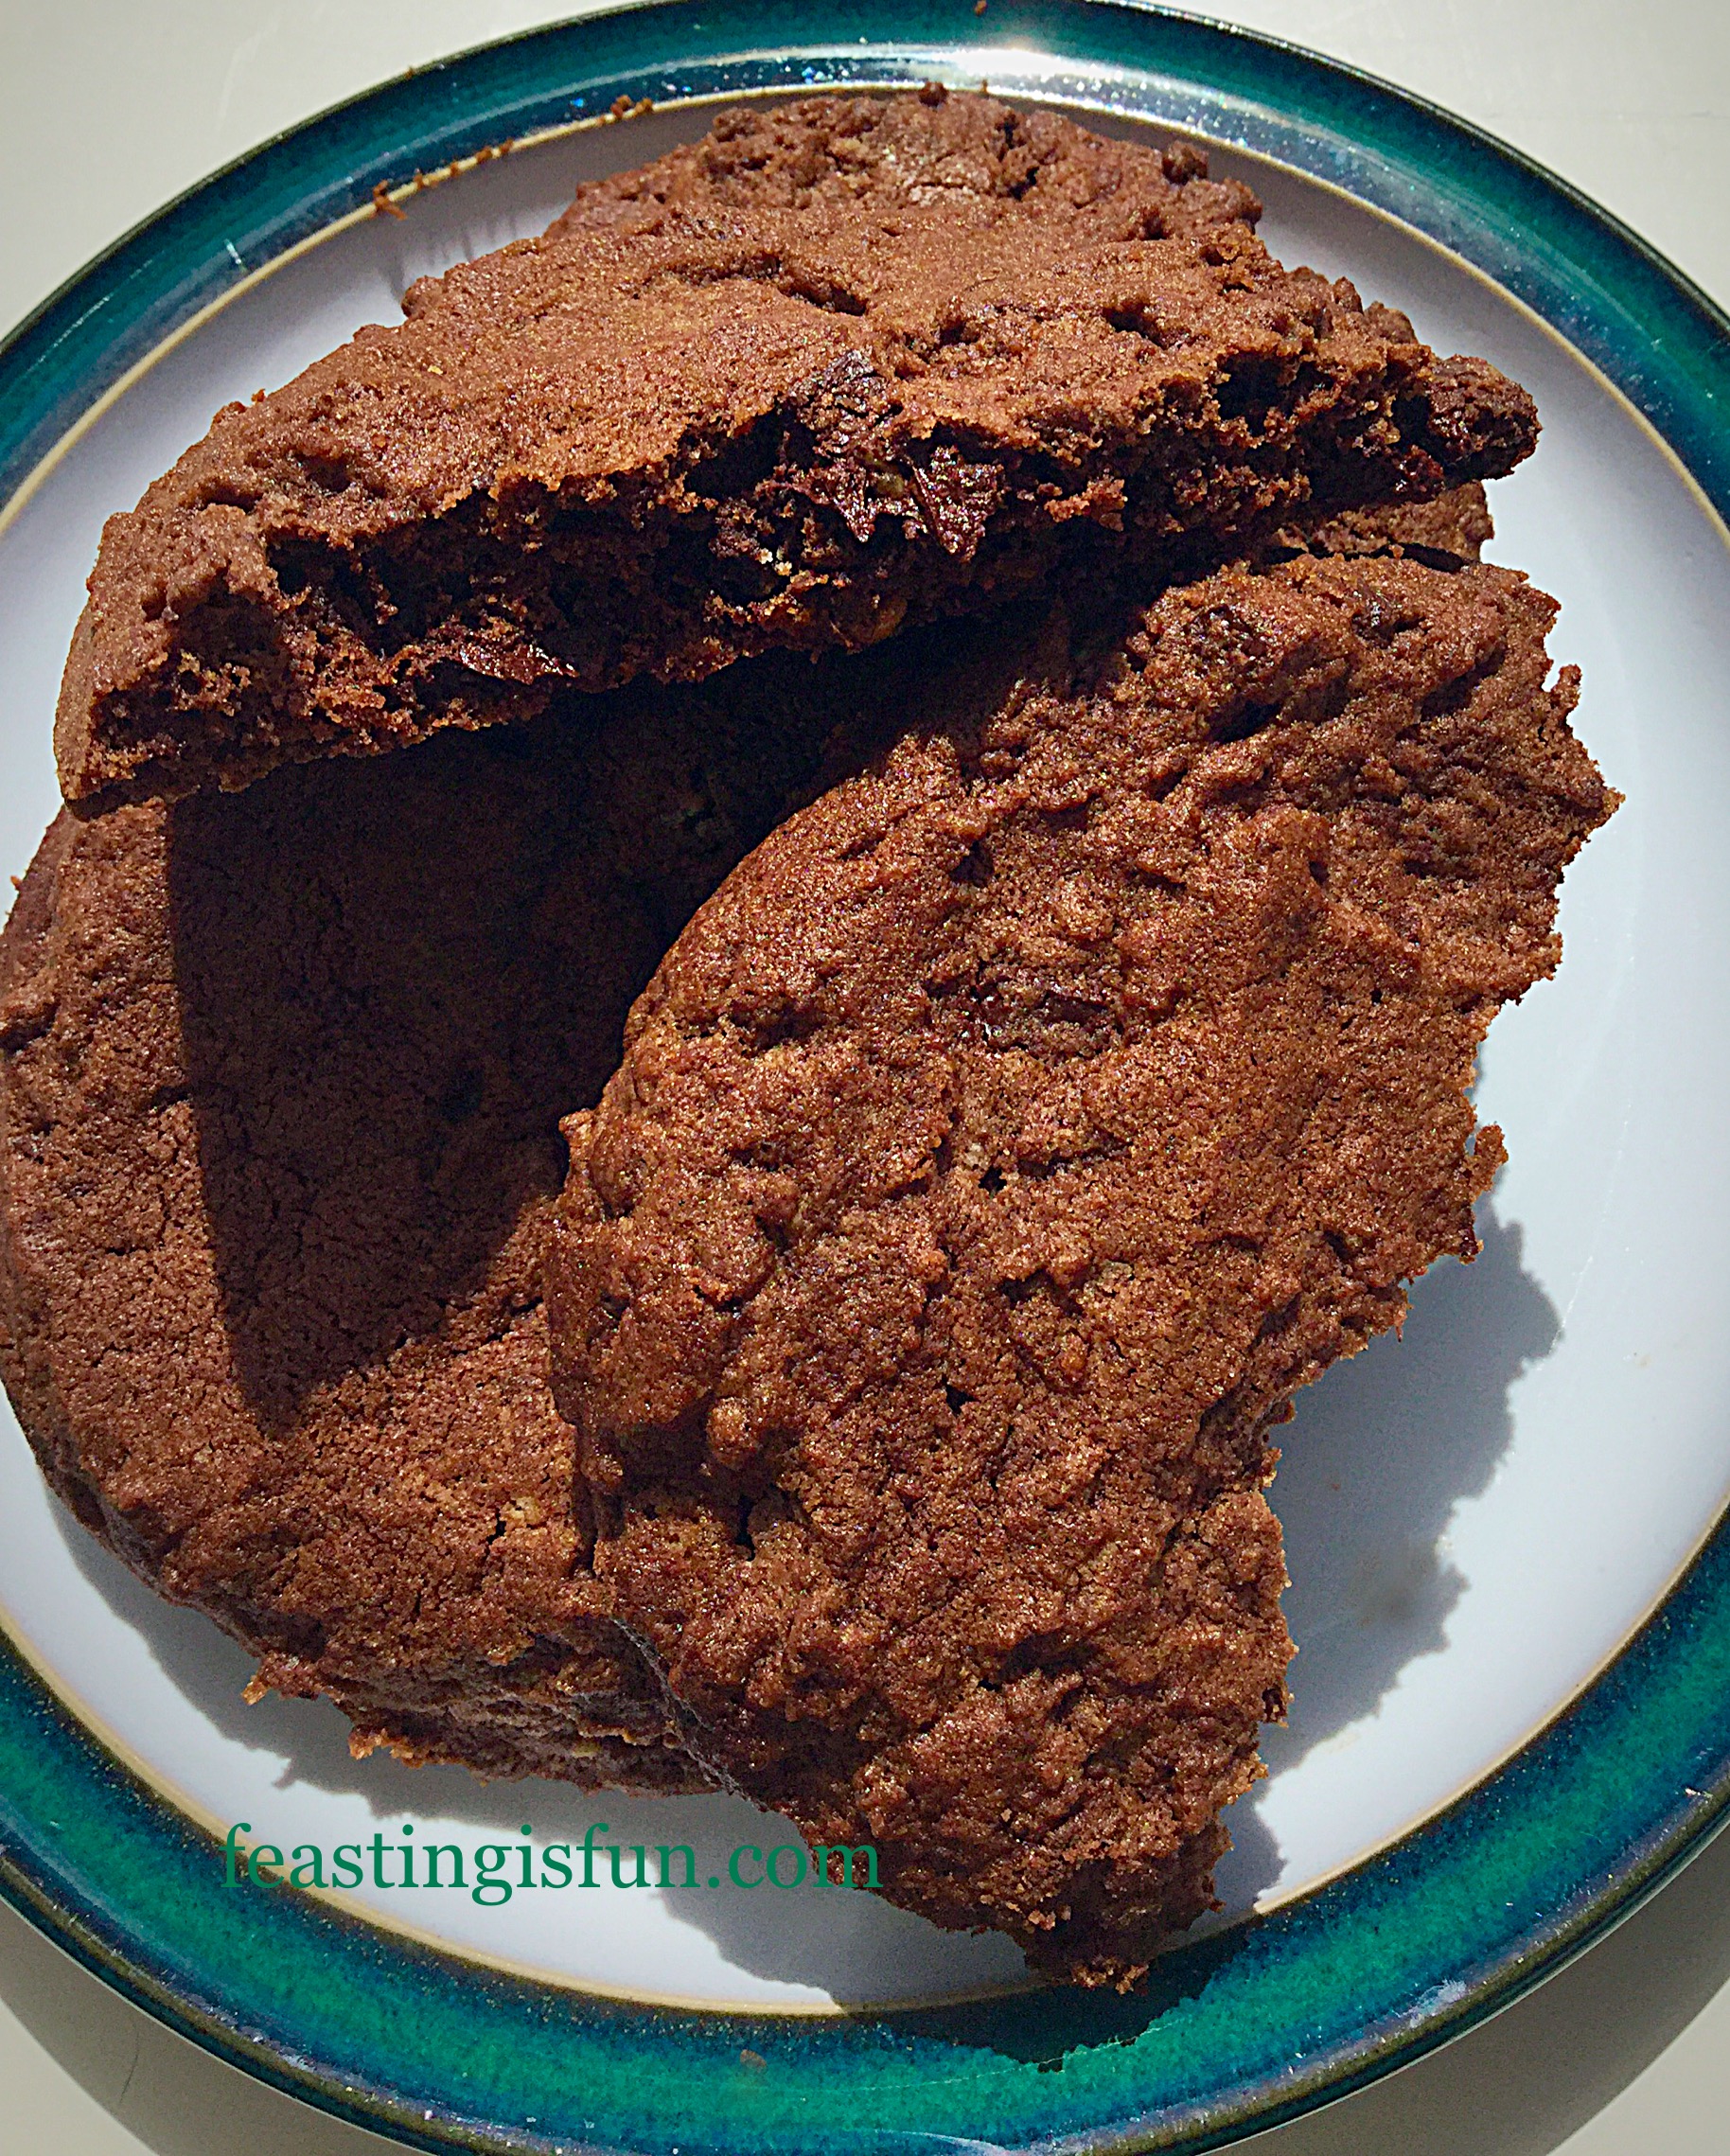
Deep chocolate biscuit, flavoured with peppermint extract and chunks of Elizabeth Shaw Dark Mint Chocolate Crisps throughout, make these cookies an unforgettable experience. The crunch from the mint crisps only serves to add to the variety of textures from soft cookie, melted chocolate and crisp, crunchy mint pieces.

Yep. These are pretty much Mint Chocolate Cookie perfection in plus size.

FF Monster Mint Chocolate Cookies
Monster Mint Chocolate Cookies perfect with a cup of tea.

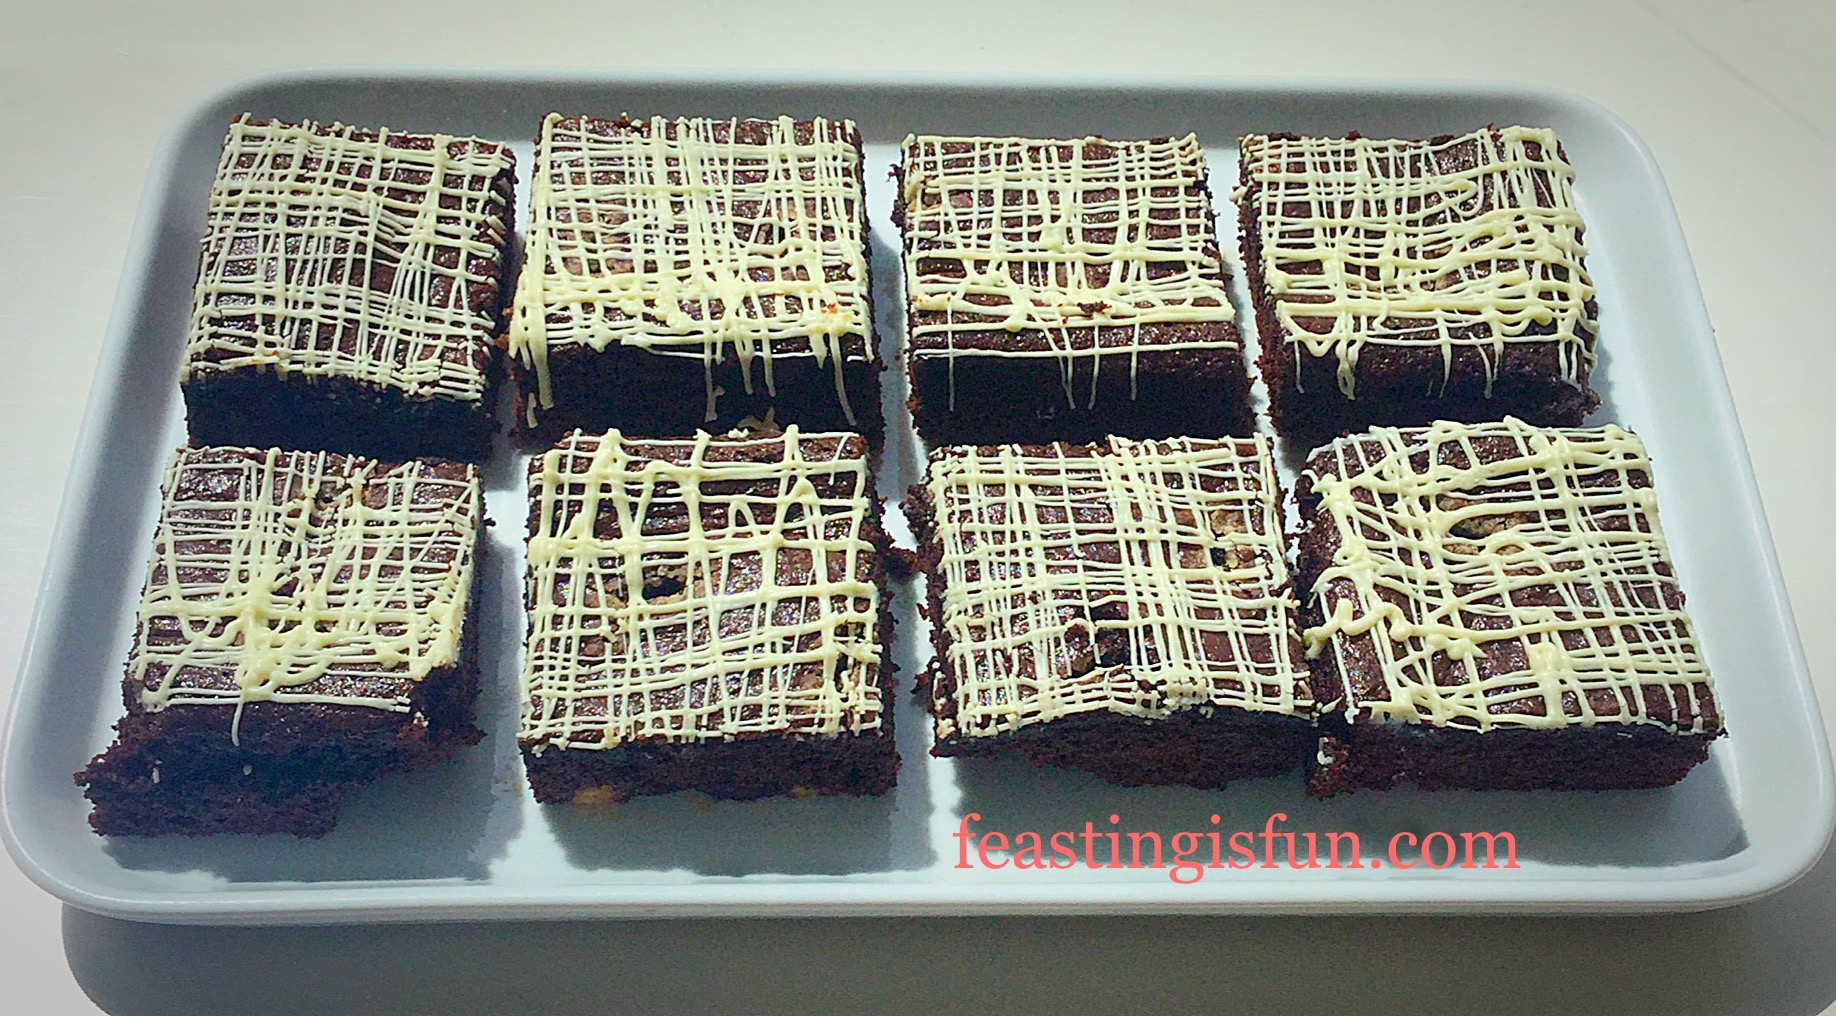
You could of course make these smaller, but I think you’d lose the thickness and density these cookies need to conceal their hidden mint chocolate delights. Besides having one Monster cookie simply stops you going back for a second one!

FF Monster Mint Chocolate Cookies
Monster Mint Chocolate Cookies with a little help from Elizabeth Shaw Chocolates.

Recipe: Makes 14 Monster Mint Chocolate Cookies

225g/8oz Unsalted Butter softened to room temperature

150g/5oz Light Soft Brown Sugar

1 Large Free Range Egg Yolk

1tsp Vanilla Extract

1/4tsp Salt – I use Maldon

1tsp Peppermint Extract – I use Nielsen-Massey

50g/2oz Cocoa Powder – I use Callebaut

225g/8oz Plain White Flour

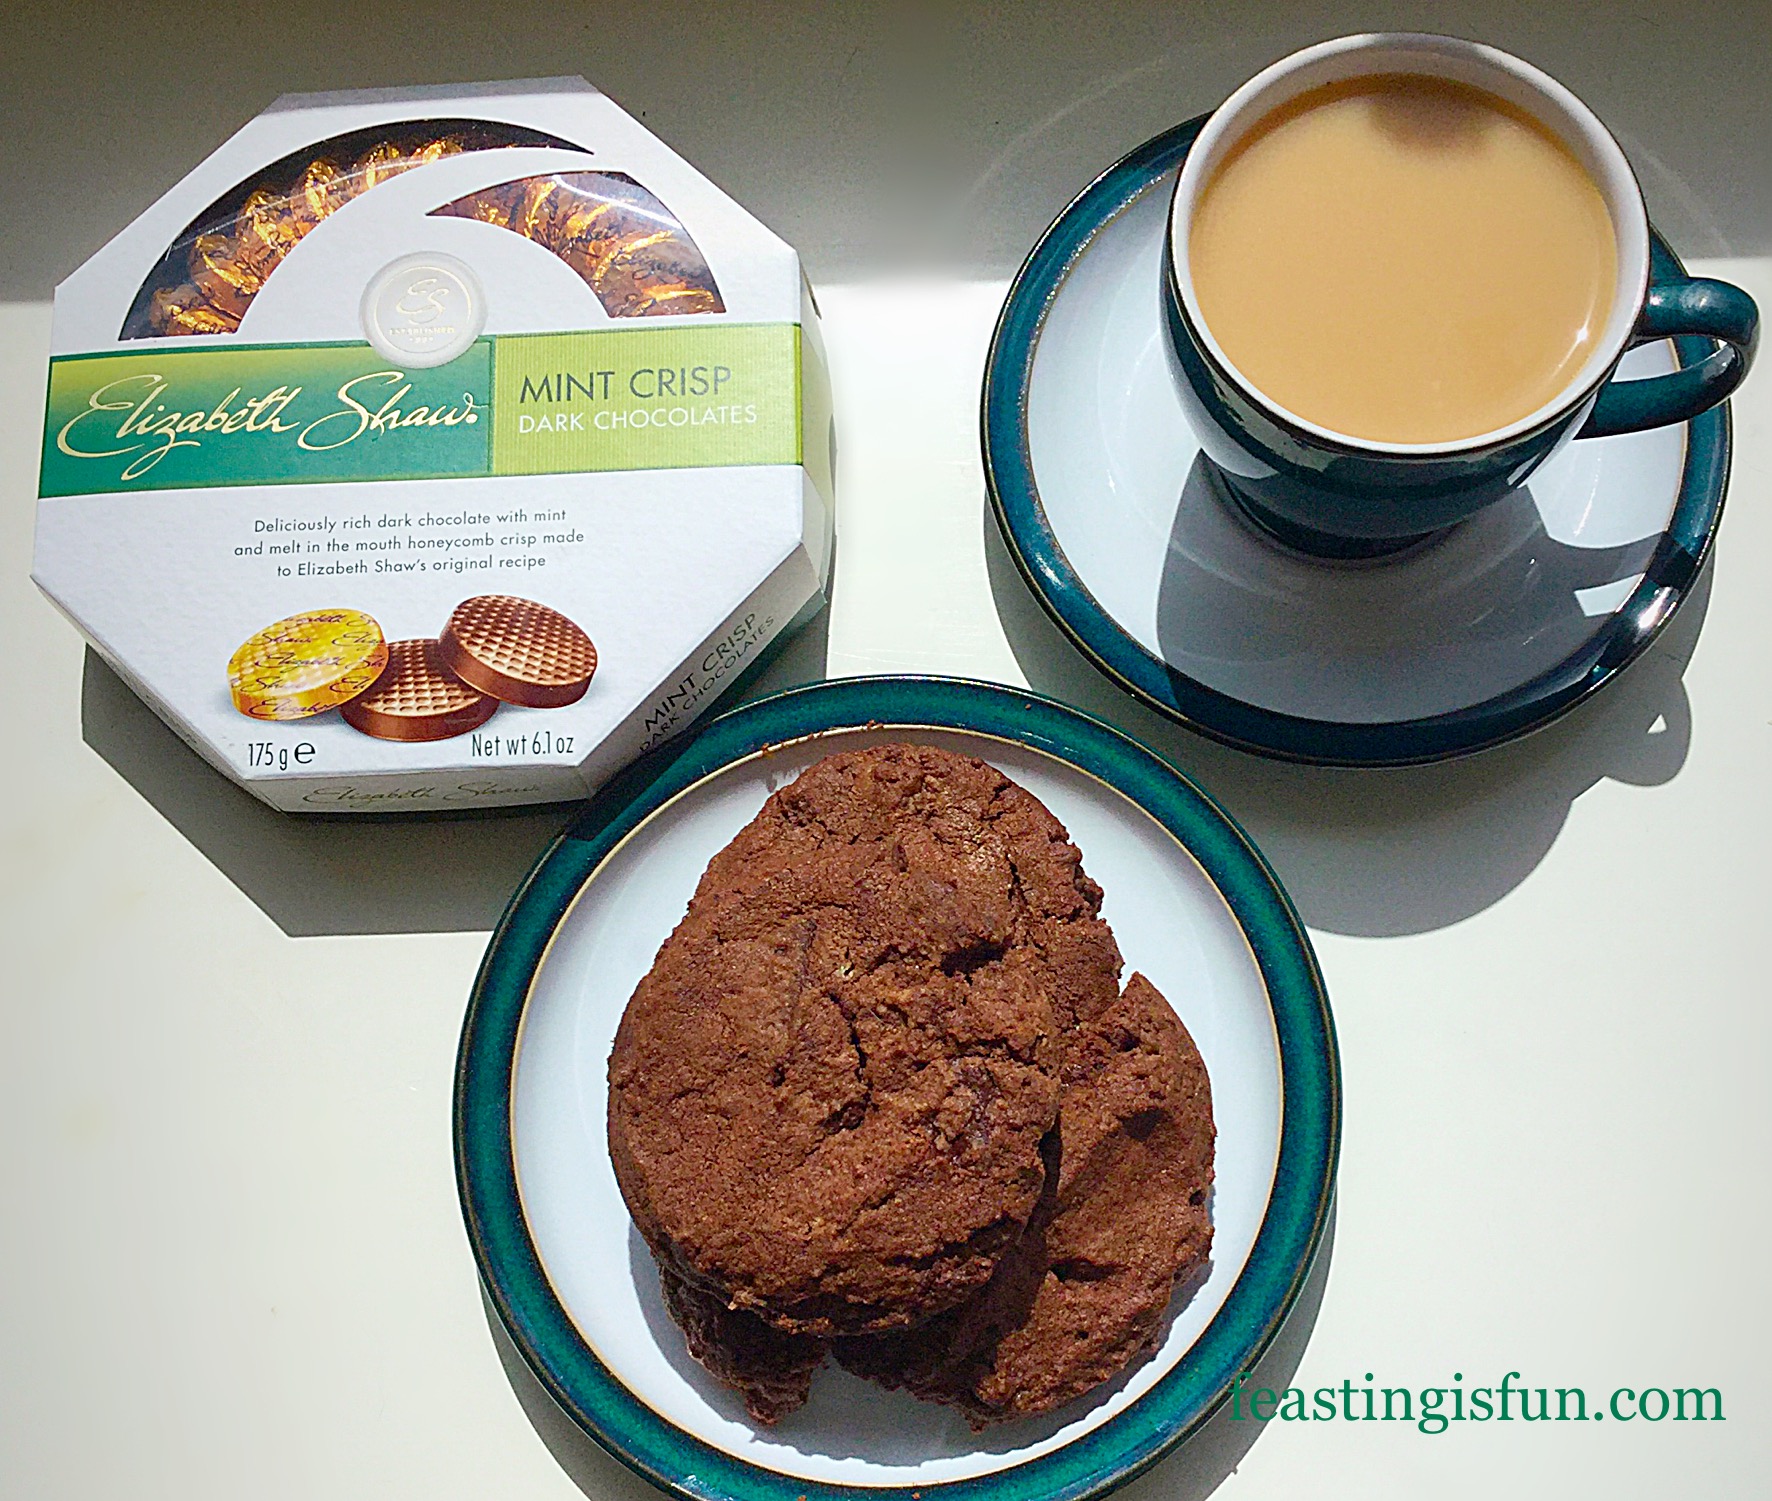
1 box Elizabeth Shaw Mint Crisp Dark Chocolates – unwrapped and broken into quarters

Method: Preheat the oven to 180C/160C fan, gas mark 4

  • Line 3 large baking trays with baking parchment or a non stick silicone mats.
  • In a large bowl add the butter, sugar, salt, vanilla and peppermint extract.
  • Whisk/beat for a good 5 minutes until the mixture is pale and very creamy.
  • Add the egg yolk and continue to beat for a further 2 minutes.
  • Next sift in the cocoa and flour.
  • Add the broken mint crisp chocolates.
FF Monster Mint Chocolate Cookies
Monster Mint Chocolate Cookies in the making.
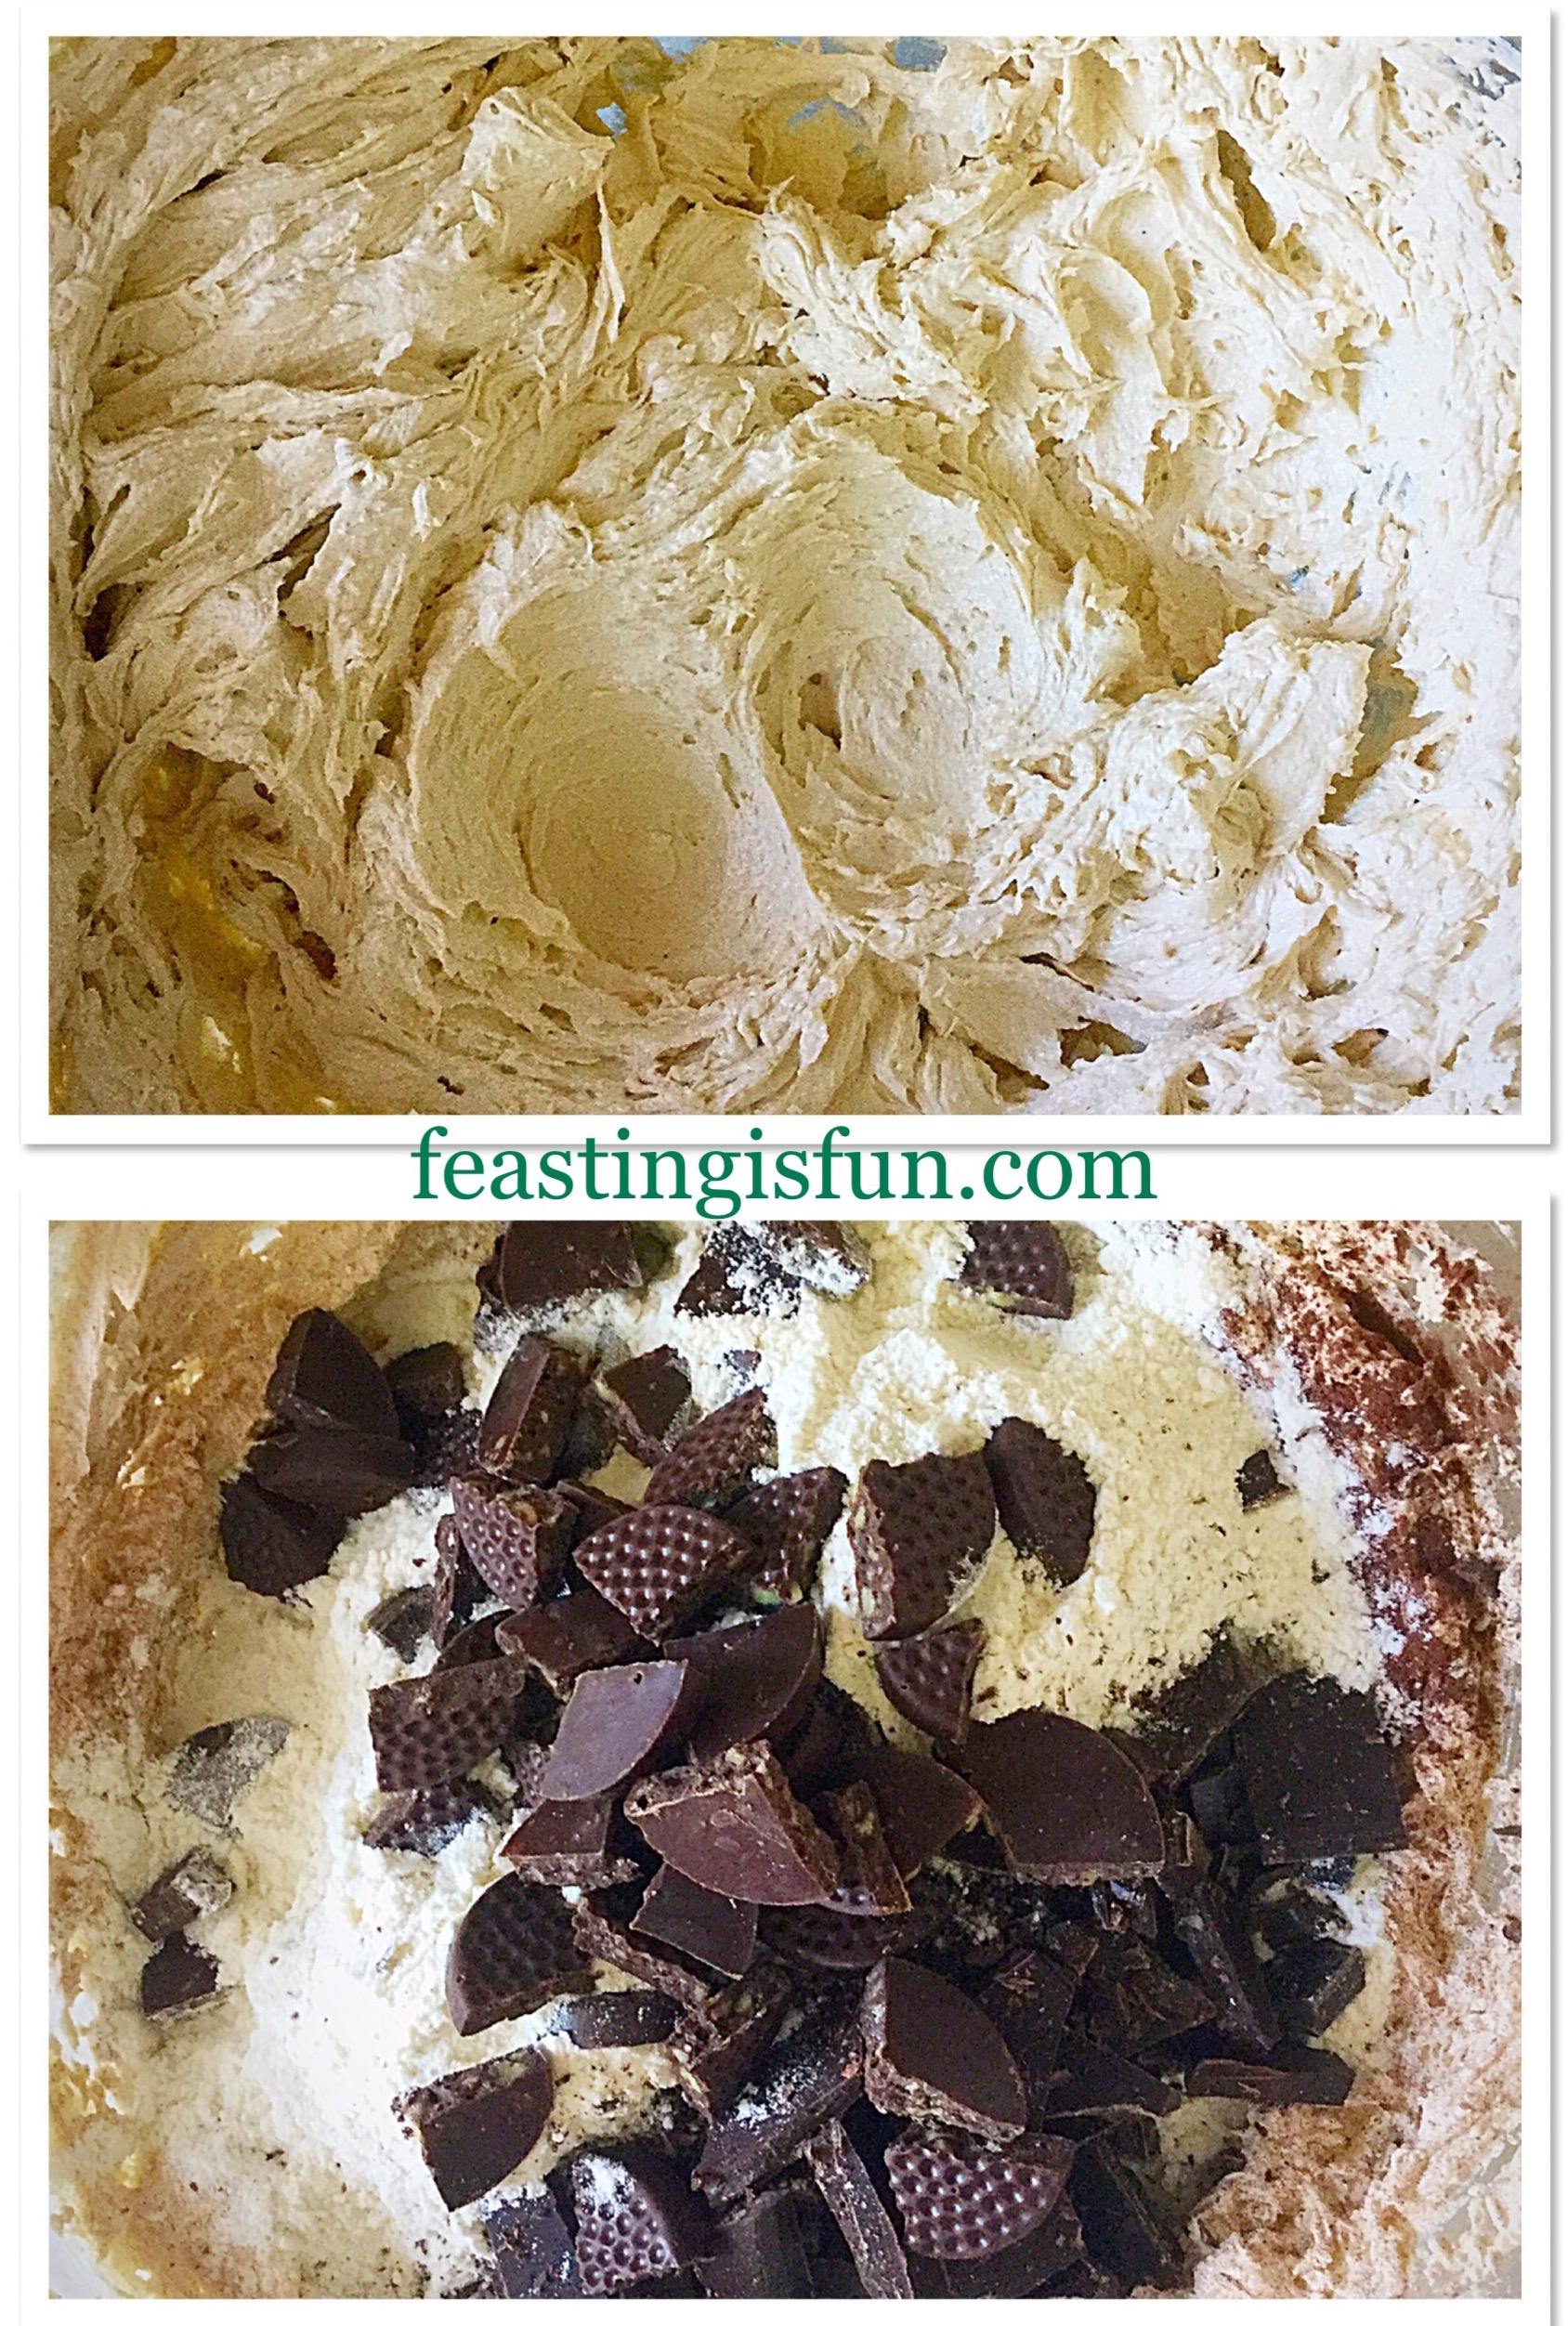
  • Mix by hand using a large spoon until everything is combined – don’t over mix or you’ll end up with tough cookies (which make be a good personality traight but not so pleasant to eat 😉).
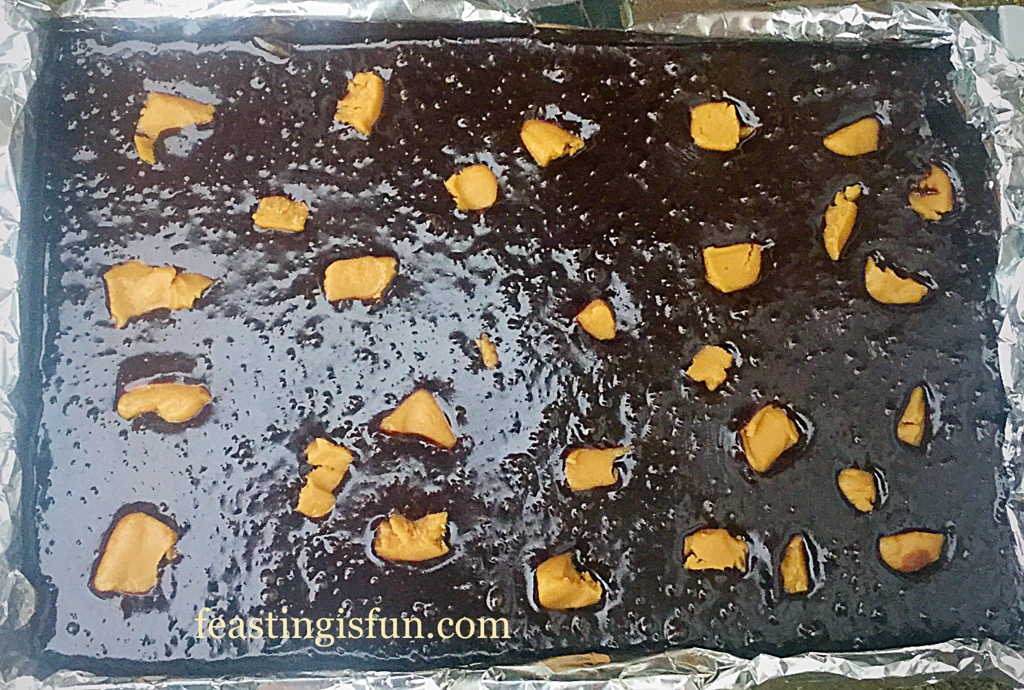
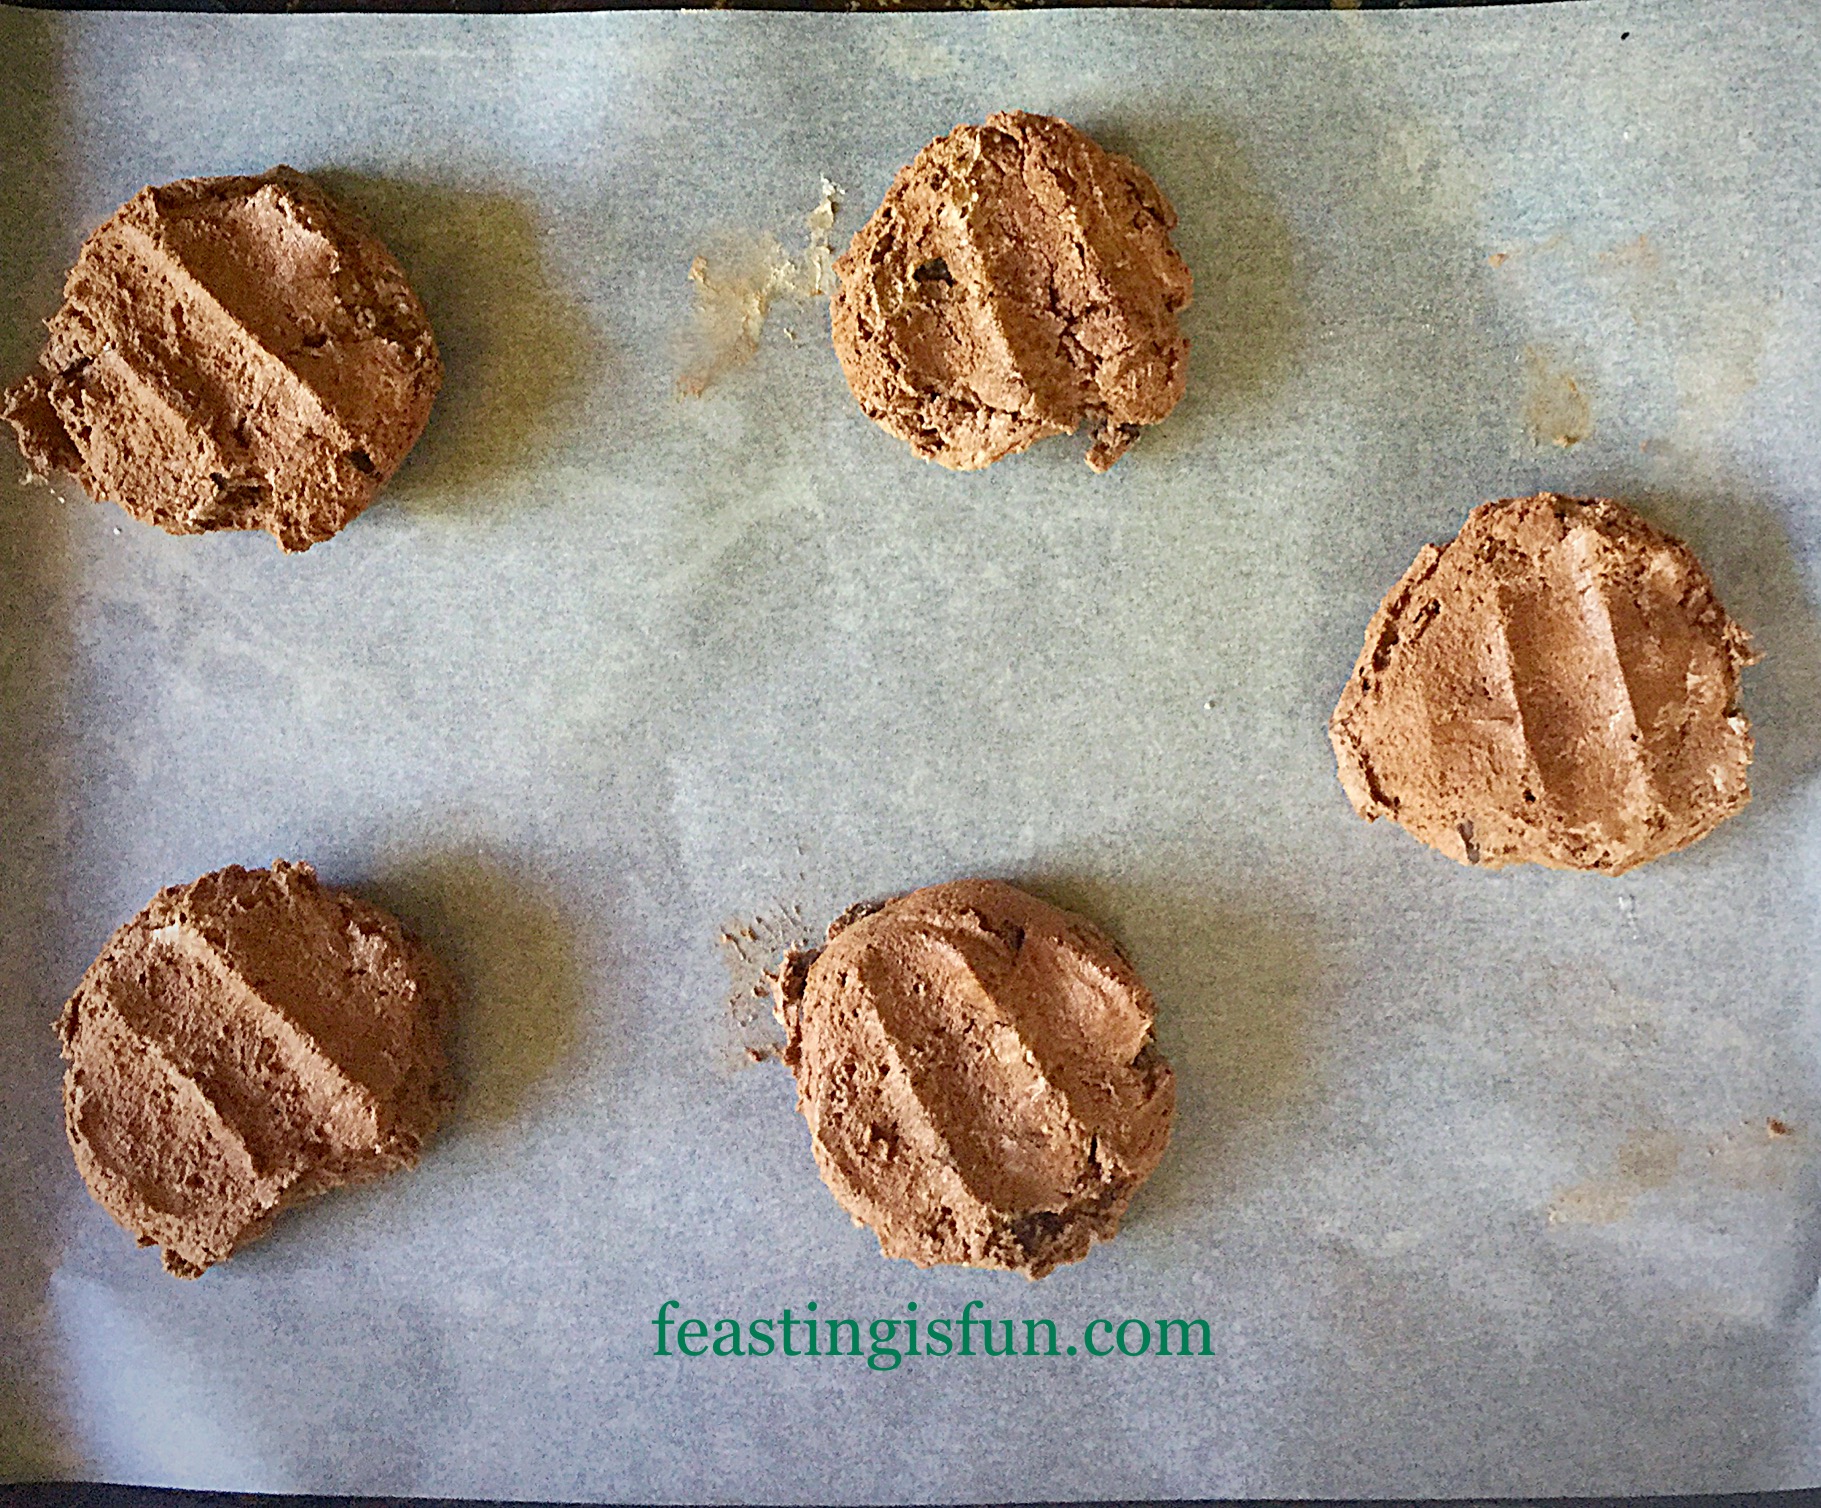
  • Using a large, spring loaded ice cream scoop, scoop out mounds of delicious mint chocolate cookie dough on to lined baking trays.
  • Using a damp hand press lightly to flatten the cookie.
FF Monster Mint Chocolate Cookies
Monster Mint Chocolate Cookies ready for the oven.
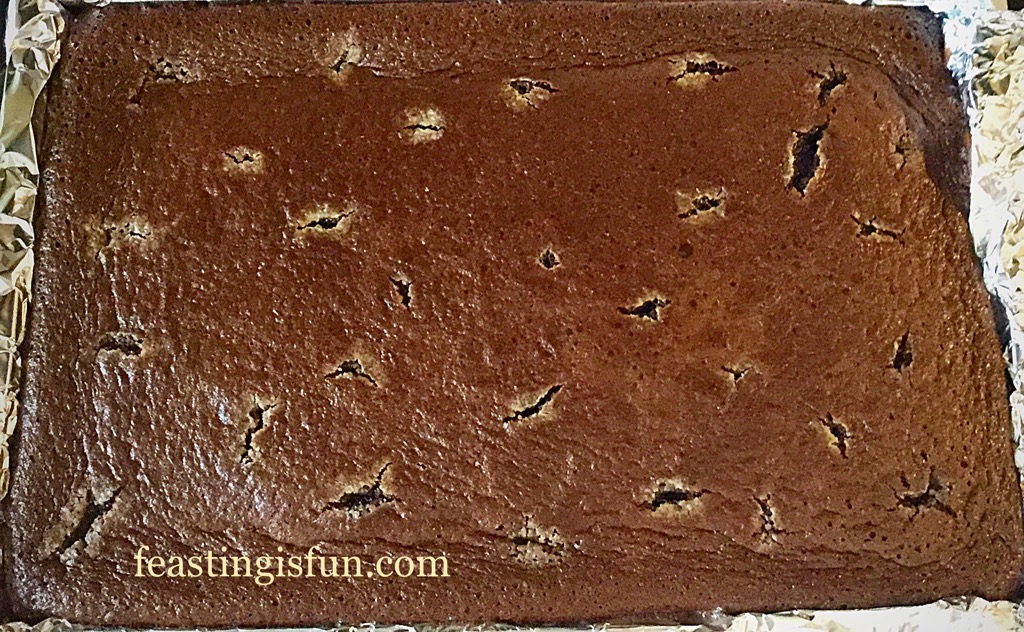
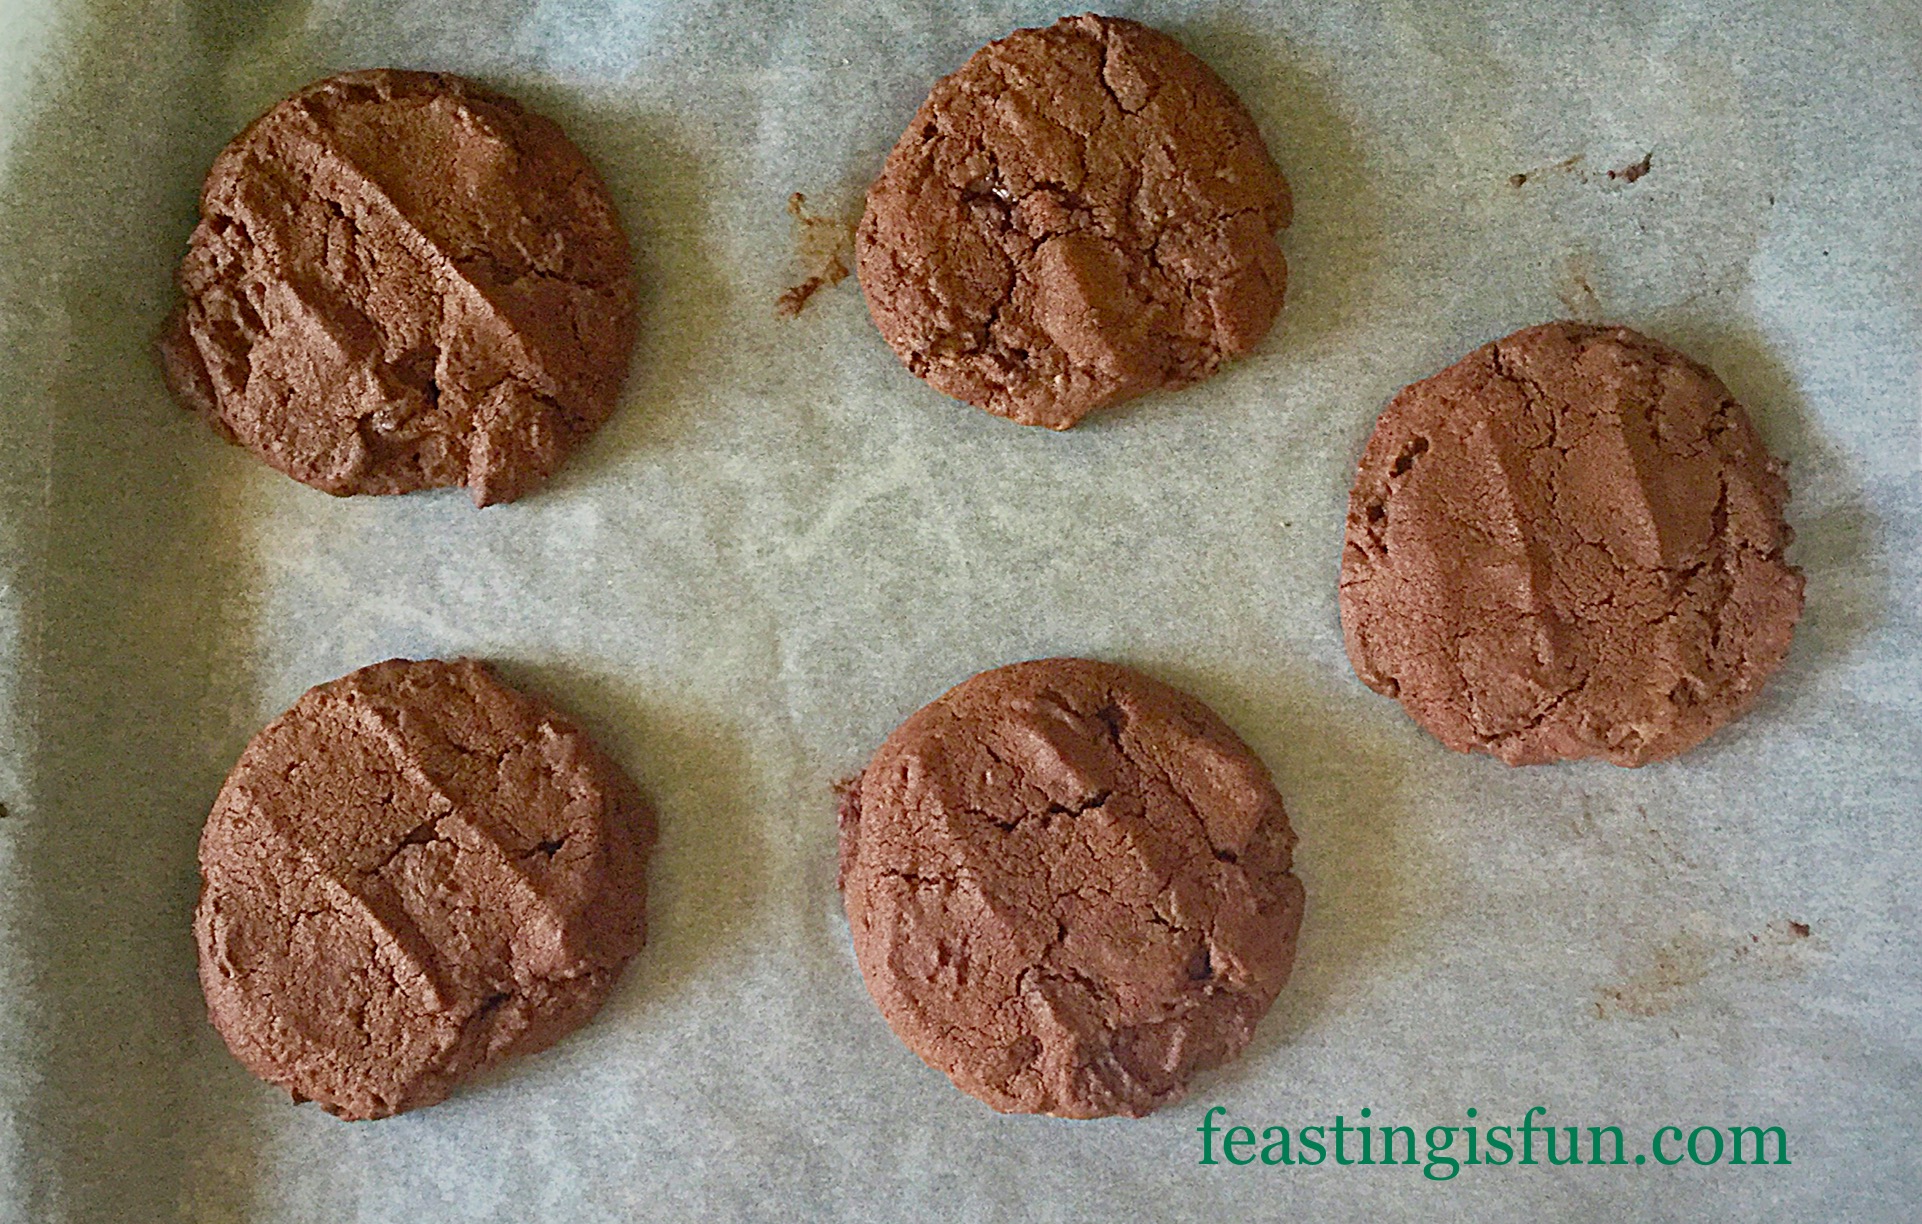
  • Place all three baking trays in the oven, rotating them twice during the 20 minutes baking time.
  • Remove from the oven after 20 minutes and allow the Monster Mint Chocolate Cookies to cool on the baking trays.
FF Monster Mint Chocolate Cookies
Monster Mint Chocolate Cookies cooling.

Once the Monster Mint Chocolate Cookies are cooled, make yourself a proper cup of tea and enjoy.

FF Monster Mint Chocolate Cookies
Monster Mint Chocolate Cookies perfect for sharing.

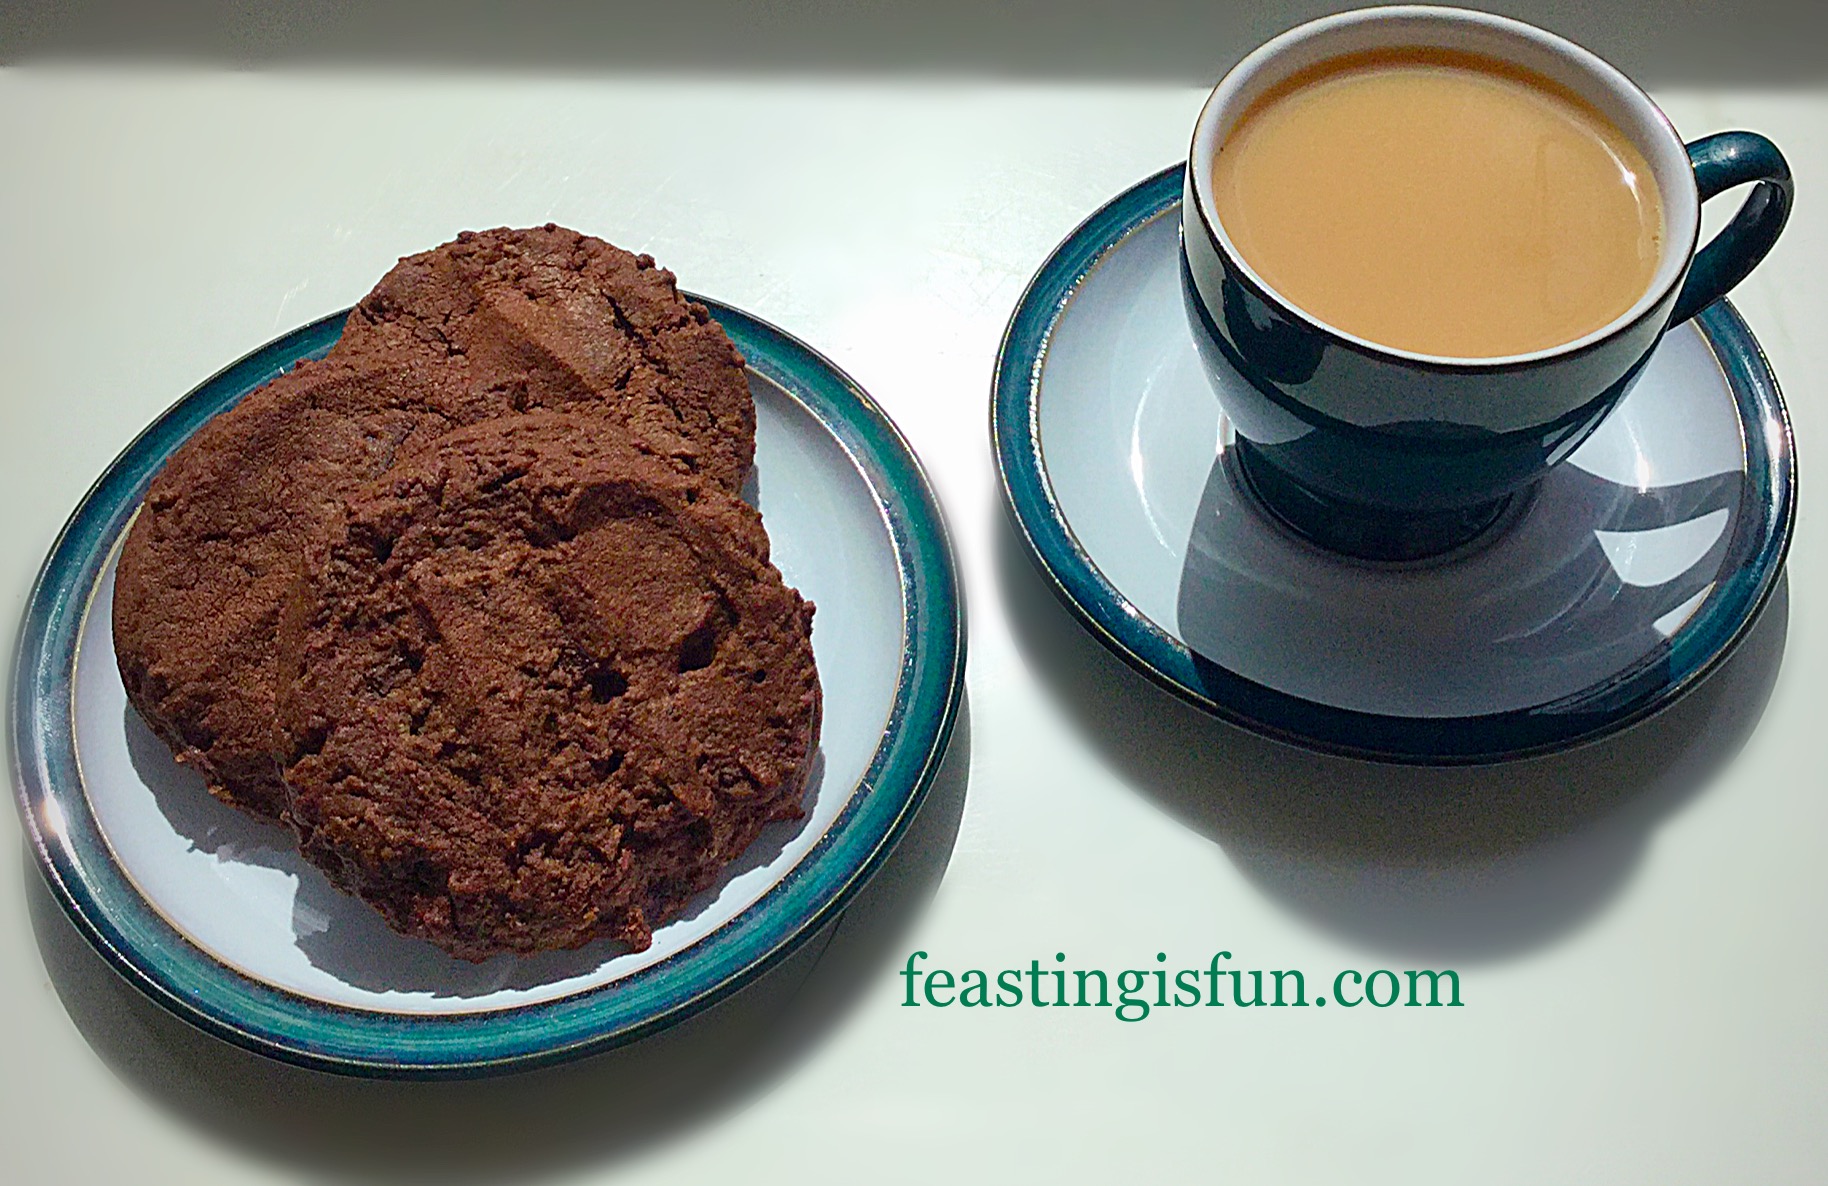
I have to confess, deeply chocolate cookies are not my favourite kind. In general I prefer oat/fruit combinations. These cookies though, with their refreshing, lingering minty aftertaste are utterly scrumptious. Even on a hot, Summer’s afternoon, I felt thoroughly refreshed after my tea and cookie.

I like pushing myself outside of my comfort zone. Making a cookie that isn’t necessarily my ‘cup of tea’ for the children. This time they’ll have to watch out for mum raiding the cookie jar 😉

If you have enjoyed the recipe for these Monster Mint Chocolate Cookies, here are some others you may also like:

Cherry Bakewell Cookies

FF Monster Mint Chocolate Cookies
Cherry Bakewell Cookies.

Oat Chocolate Chip Cookies

FF Monster Mint Chocolate Cookies
Oat Chocolate Chip Cookies

Caramac Caramel Cookies

FF Monster Mint Chocolate Cookies
Caramac Caramel Cookies

I am known as a bit of a Cookie Monster. The cookies mentioned are but a small representation of the recipes on my site. Type cookies into the search bar and see what else you may like to make.

Thank you for you photos on Instagram and Twitter. It really makes my day to see you having fun making my recipes. I also love reading your comments.

Is there a cookie recipe that you would like to see on Feasting is Fun?

Would you like to share a favourite family recipe that has been passed down through the generations?

Let me know and I’ll do my best to create cookies for you to share and feast on.

Sammie xx

Elizabeth Shaw provided the chocolates used in this recipe. All opinions, views, content and photography is my own. Please see my Disclosure Policy.

Share
Facebooktwitterpinterestlinkedintumblr

Vanilla Fudge Chocolate Brownies

Share
Facebooktwitterpinterestlinkedintumblr

Who doesn’t love a delicious brownie? I know I do. So, when I received a small selection of fudge to try out, I knew where the vanilla version was heading, straight into these very tasty Vanilla Fudge Chocolate Brownies.

FF Vanilla Fudge Chocolate Brownies
Vanilla Fudge Chocolate Brownies dots of gold fudge throughout the brownie.

The Vanilla Fudge from Fudge Angels, is creamy with a definite vanilla taste, not just sweetened sugar and cream. So I kept with a deeply chocolate brownie recipe, allowing the fudge to ‘sing’ as it hits your tastebuds.

Also, I received a delicious Strawberry Pavlova Fudge, which was very popular with our eldest daughter, in truth a little too sweet for me, although it did leave a delightful strawberry flavour in my mouth. In contrast, the Smooth Ginger Fudge was delicious. So, if you love ginger, which I do, then you will enjoy this fudge. I can imagine using it in some ginger cookies, if I don’t snaffle it all beforehand!

FF Vanilla Fudge Chocolate Brownies
Vanilla Fudge Chocolate Brownies topped with the perfect complimentary ice cream.

These Vanilla Fudge Chocolate Brownies are perfectly delicious on their own.

However, here at Feasting is Fun, I wanted to turn them into a fantastic dessert.

Brownies And Ice Cream – A Great Dessert Combo

What goes better with brownies than ice cream. And not any ice cream, one created to perfectly compliment the flavours found within these Vanilla Fudge Brownies, Dark Chocolate Chip Vanilla Ice Cream.

See how good I am to you!

While they are both perfectly delicious on their own, bring them together and we have a taste bud party starting baby 😉

FF Vanilla Fudge Chocolate Brownies
Vanilla Fudge Chocolate Brownies – how will you eat one 😉

Such an easy traybake, turned into a jaw dropping, beautiful dessert!

Finally, a drizzle of white chocolate on top of the brownies echoes the flavours of the vanilla fudge within. So you can be assured, if you have no desire to make your own ice cream, that the brownies are still, one hundred per cent, top class.

Our youngest daughter gave these a 10!

I wish there was a way of putting that in BIG FLASHING LIGHTS. Because she rarely awards a 10 for my efforts. I am literally cock-a-hoop with joy.

Did I mention the 10?

Ok I’ll leave it for now.

TEN OUT OF TEN – yup I’m done 😉

Vanilla Fudge Chocolate Brownies

Also, something else I should tell you before you make these, is that all the preparation, mixing etc. is carried out in a saucepan. And (I know your not supposed to start sentences with and – but I got a 10!!!), you line the swiss roll tin with foil, so there is very little clean up.

You’re welcome xx.

Recipe: Makes 15 Vanilla Fudge Chocolate Brownies

275g/10oz Dark Brown Muscavado Sugar

150g/5oz Unsalted Butter

50g/2oz Cocoa Powder

150g/5oz Plain White Flour

1tsp Bicarbonate of Soda

1/4tsp Salt – I use Maldon

1tsp Vanilla Bean Extract or Vanilla Extract – I use Nielsen-Massey

4 Large Free Range Eggs

100g/4oz Vanilla Fudge – from Fudge Angels

50g/2oz White Chocolate for drizzling over the top

Making The Vanilla Fudge Chocolate Brownies

Preheat the oven to 180C/160C fan, gas mark 4, 350F.

  • First of all, line a 28cm x 20cm x 5 cm (12″ x  8″ x 2″) swiss roll tin with aluminium foil.
  • Place the butter, sugar and salt into a large heavy bottomed saucepan, over a medium heat.
  • Gently melt the butter and sugar together, stirring constantly with a wooden spoon until melted.
  • Move the saucepan from the heat and add the cocoa powder. Stir in immediately and the cocoa will combine easily with the melted sugar and butter.
  • Add the flour and bicarb and mix in.
  • Crack the eggs into a jug and add the vanilla bean paste. Beat lightly with a fork to combine.
  • Pour the egg mixture into the warm chocolate mix in the saucepan stirring constantly. Don’t worry everything will come together into a smooth batter.
  • Tip the brownie batter into the foil lined swiss roll tin.
  • Lift the tin and rap it hard against the worktop a couple of times. This brings any bubbles within the batter to the surface – remember brownies aren’t cake, so we want to encourage density in the bake.
  • Break off small pieces of the vanilla fudge and dot them on to the top of the uncooked brownie.
FF Vanilla Fudge Chocolate Brownies
Vanilla Fudge Chocolate Brownies ready for the oven.

Baking The Brownies

  • Place the brownies in the centre of the oven and bake for 20-25 minutes.
  • Halfway through the cooking time, open the oven and rap the tin against the oven shelf. Again this stops the brownies from rising and becoming cake like.
  • The brownies are cooked when the surface has a sugary sheen and has a very slight wobble in the centre.
  • As soon as they are baked remove the Vanilla Fudge Chocolate Brownies from the oven.
FF Vanilla Fudge Chocolate Brownies
Vanilla Fudge Chocolate Brownies you can see where the fudge has baked through brownie.
  • Allow the brownie to completely cool in the tin. I actually left this brownie, once cooled, wrapped in foil for 2 days post baking, due to illness and it kept beautifully.
  • As soon as they are cooled remove the big slab of brownie from the tin and place on to a board.
  • Meanwhile, melt the white chocolate in the microwave, taking care not to overheat it.
  • Pour the melted chocolate into a small, disposable piping bag. Snip the very end off to create a small hole.
  • Drizzle or pipe the top of the brownie slab, however you like, with the melted chocolate.
  • Finally, place the brownie to one side to set. In very warm weather pop the bake into the fridge to allow the chocolate to set.
FF Vanilla Fudge Chocolate Brownies
Once set cut the brownies into 15 squares.

To serve, use a pallet knife to slide beneath the base of the brownies and the foil. This ensures that any fudge at the bottom of the brownies sticks to the brownies, not the foil!

Serve the brownies as they are or with a delicious scoop of ice cream on top.

FF Vanilla Fudge Chocolate Brownies.
Vanilla Fudge Chocolate Brownies deliciously topped with homemade ice cream.

An easy traybake transformed into an elegant dessert.

If you have enjoyed this recipe for Vanilla Fudge Chocolate Brownies you may also like these:

Blackberry Nectarine Tart

FF Vanilla Fudge Chocolate Brownies
Blackberry Nectarine Tart topped with vanilla ice cream.

Chocolate Fudge Brownie Bites

FF Vanilla Fudge Chocolate Brownies
Chocolate Fudge Brownie Bites

Almond Blackberry Pear Crumble

FF Vanilla Fudge Chocolate Brownies
Almond Blackberry Pear Crumble gluten free

I love dual purpose bakes. For example, creating these delicious brownies and then turning them into a fabulous dessert. And with the weather looking good for a few days, why not have a go at making your own ice cream? So, you too can adorn your delicious bakes with homemade ice cream too. Because Feasting really is Fun!

So, whatever you are making, baking and creating in your kitchens, have fun preparing and sharing your feast.

Sammie xx

Fudge Angels sent me 3 different types of flavoured fudge to try. All opinions, views, content and photographs are my own. Please see my Disclosure Policy.

Share
Facebooktwitterpinterestlinkedintumblr

Strawberry Whipped Cream Giant Doughnut

Share
Facebooktwitterpinterestlinkedintumblr

Ooh this Strawberry Whipped Cream Giant Doughnut has been made twice now, once using regular flour and then using gluten free flour. Nobody could tell the difference! Delicious, light vanilla sponge, sandwiched with strawberry jam, whipped cream and topped with chocolate piped strawberries.

Image sized for Pinterest with descriptive graphics.

Piping the strawberries with white and dark chocolate takes this cake to the next level in terms of prettiness. That said, beautiful, lush summer strawberries, left un piped would still look fabulous.

FF Strawberry Whipped Cream Giant Doughnut
Strawberry Whipped Cream Giant Doughnut such a pretty cake.

Having made this cake with both whipped cream and whipped buttercream, I have to say we all preferred the whipped cream. I have given quantities for buttercream in the recipe for those who prefer it.

I don’t know about you, but I love making the most of our delicious, homegrown, seasonal strawberries in summer. Yes I am guilty of buying the occasional punnet of imported ones during the colder months. With the invention of poly tunnels and huge greenhouses, we are increasingly able to buy British grown berries over a longer period. Thank you farmers!

Large, baked doughnut filled with whipped cream and decorated with chocolate strawberries.
Strawberry Whipped Cream Giant Doughnut

Going Gluten Free

As you can see from the photographs there is no real visual difference between the gluten free and regular Strawberry Whipped Cream Giant Doughnut. Only the size of the strawberries! The ones in the photo above were huge, which made them easier to pipe. Whereas the smaller ones were more tricky. If possible choose longer strawberries as they look more effective with the piping on. That said, I’d definitely choose flavour over size any day. The strawberries above may have been big, but they were also utterly delicious!

How do I tell if they are going to taste good? I smell them. If the punnet smells of warm summer strawberries they will taste delicious, however, if you can barely detect that delicious strawberry smell, move on as they will be bland.

Both of these giant doughnuts were made to go with afternoon tea and they were a huge hit. So, whether you are on a restricted diet or not, you can make this Strawberry Whipped Cream Giant Doughnut and feast!

Recipe: Strawberry Whipped Cream Giant Doughnut serves 8-10

225g/8oz  Plain White Flour – or gluten free flour I used Doves Farm

2tsp Baking Powder – ensure certified gluten free

225g/8oz Unsalted Butter at room temperature – plus a little extra for greasing the silicone doughnut moulds.

225g/8oz Caster Sugar

1/4tsp Salt I use Maldon

5 Large Free Range Eggs

1tsp Vanilla Bean Paste – or Vanilla Extract – I use Nielsen-Massey

10 Good Quality Strawberries

2tbsp Good Quality Strawberry Jam – I used Hartleys Best Strawberry Jam

300mls Cold Double Cream – alternatively for buttercream use 300g/11oz icing sugar and 150g/5oz butter and a drop of vanilla extract

50g/2oz White Chocolate

50g/2oz Dark Chocolate

Optional – edible glitter

Method: Preheat the oven to 160C/140C fan, gas mark 3

Making The Cake Batter And Baking The Doughnut

  • Grease both the silicone doughnut moulds thoroughly with butter. Place on a large baking tray.
  • Into a large bowl add the butter, sugar and salt.
  • Whisk/beat for a good few minutes – 5 minutes ideally – until pale and creamy.
  • Add in the vanilla bean paste (or extract) and beat until incorporated.
  • Next add all 5 eggs. Continue whisking/beating until the mixture is pale and creamy. If the mix looks as though it has split (curdled) add 1 tablespoon of the weighed flour, continue mixing and it will pull back together.
  • Sift in the flour (gluten free or regular) and the baking powder.
  • Fold in the flour until just combined.
  • Divide the batter equally between the 2 doughnut moulds.

FF Strawberry Whipped Cream Giant Doughnut

    These silicone doughnut moulds from Lakeland are so easy to use.
  • Place the baking tray into the centre of the oven and bake for 30-40 minutes.
  • The sponge is baked when it is a golden colour and springs back when lightly pressed – note – the gluten free doughnut was slightly paler than the regular doughnut, this is nothing to worry about.
  • As soon as they are baked remove the baking tray from the oven and allow the doughnuts to cool for 10 minutes before turning them out on to a cooling rack.
FF Strawberry Whipped Cream Giant Doughnut
Leave the doughnut halves to cool completely on the rack.

Filling And Decorating The Doughnut

  • Whilst the doughnut’s are cooling, break up the white and dark chocolate and place into separate heatproof, microwaveable bowls. Zap until just melting and stir until completely melted. Fill 2 small disposable piping bags with each melted chocolate. Snip off the very end, leaving a small hole. Place the strawberries on baking parchment or a silicone mat placed on a baking tray (helpful if you need to move them). Pipe some with white chocolate zig zags and others the same using dark chocolate. Allow to set, in hot weather pop in the fridge for a few minutes to set.
  • When completely cooled place one doughnut half, flat side up on to a board or plate.
  • Whisk the cream (or icing sugar/butter/vanilla) until it holds its shape (or until the buttercream is pale and creamy).
  • Spoon the strawberry jam on to the base of the doughnut and spread so that it almost reaches the edges.
  • Fill a disposable piping bag, fitted with a large star tip, with the cream/buttercream.
  • Pipe some cream on top of the jam.
FF Strawberry Whipped Cream Giant Doughnut
Strawberry Whipped Cream Giant Doughnut – luscious swirls of cream inside the doughnut!
  • Place the other half of the doughnut, flat side down, on top of the base.
  • Pipe swirls of cream/buttercream around the doughnut and then pipe stars around the centre, on the side.
  • Top the swirls with chocolate piped strawberries and sprinkle with edible glitter.
FF Strawberry Whipped Cream Giant Doughnut
Beautiful swirls of whipped cream are topped with chocolate piped strawberries.

Serving The Giant Doughnut

Make sure you take a photo of your beautiful Strawberry Whipped Cream Giant Doughnut, as once it is assembled I can guarantee that it will not last long!

I have specified more strawberries in the recipe than you see on the cake. This is so that everyone gets a delicious, chocolate piped strawberry with their slice.

Served with a proper cup of tea, I can think of no better way than feasting on this delicious treat any afternoon.

I bought the giant doughnut silicone mould from Lakeland at a silly price in the sale. That said, they are so much fun, I’d happily pay full price for one!

If you have enjoyed the recipe for Strawberry Whipped Cream Giant Doughnut then you may like these too:

Raspberry and Cream Giant Doughnut

FF Strawberry Whipped Cream Giant Doughnut
Raspberry and Cream Giant Doughnut

Black Forest Giant Doughnut

FF Strawberry Whipped Cream Giant Doughnut
Black Forest Giant Doughnut

Loveliest Lemon Curd Cake

FF Strawberry Whipped Cream Giant Doughnut
Loveliest Lemon Curd Cake

The idea of Afternoon Tea really appeals to me. Even if I can’t be fussed to make finger sandwiches and the like, making a treat for Sunday afternoon, where we sit down and enjoy as a family, is becoming a tradition.

Quite often I will bake the cake/giant doughnut on the Saturday, ready for icing the following day. We give a lot of the sweet treats that I make away. Primarily because as a family we love sharing, we are also conscious of our health too.

If you have family traditions I’d love to hear about them. Leave a comment for me to read in the comments section?

Whatever you are making, baking and creating in your kitchens, have fun preparing and sharing your feast.

Sammie xx

No part of this post may be reproduced or duplicated without the written permission of the owner. Please see my Disclosure Policy.

Share
Facebooktwitterpinterestlinkedintumblr

Large 3 Malts Sunflower Loaf

Share
Facebooktwitterpinterestlinkedintumblr

Many of you may have realised by now, that I love baking bread. Especially as the smell and taste, is far superior to any supermarket loaf. Also, no unnecessary additives are added to home baked breads. Finally, having been asked numerous times for the recipe to make my Large 3 Malts Sunflower Loaf here it is! A tasty, family sized loaf of bread that’s ideal for sandwiches and toast.

FF Large 3 Malts Sunflower Loaf
Large 3 Malts Sunflower Loaf utterly delicious.

Since I have been asked a few times if I’m sponsored by Shipton Mill I will set the record straight, I am not. Yet their’s is simply THE best bread flour I have ever used. And I adore that their 3 Malts with Sunflower flour blend gives the loaf a chewy, nutty, malt flavour, without the heaviness of 100% wholemeal Flour.

Likewise, this Seeded Cob Loaf is also a tasty, semi wholemeal bread, that’s easy to make and bake and highly recommended.

Since I’ve baked this Large 3 Malts Sunflower Loaf a number of times now, I’ve found it to be consistently good. Resulting in a fantastic, family sized bread, that slices well and tastes great toasted, made into sandwiches, or buttered and served with soup.

Recipe: Makes one Large 3 Malts Sunflower Loaf

Note: A large plain white loaf can also be made using this recipe. Substitute an equal quantity of Strong White Bread Flour and follow the recipe and method as given.

750g 3 Malts with Sunflower Flour from – Shipton Mill – Alternately use a malted bread flour mix and add 3tbsp of sunflower seeds.

530mls Tepid Water

12g Fast Action Dried Yeast – I use Allinson Easy Bake Yeast

1.5tsp Runny Honey – alternatively use either the equivalent of Maple Syrup, or  sugar for a Vegan loaf

40g Softened Unsalted Butter – alternately use 2tbsp Rapeseed Oil (Canola Oil)

10g Sea Salt – I use Maldon

You will need a large 4lb loaf tin that’s been buttered for this recipe.

Making, Shaping And Proving The Malted Dough

  • First of all, place the water, honey and yeast into the bowl of a stand mixer with a dough hook attached.
  • Add the 3 Malts flour on top of the wet mixture in the bowl.
  • Next add the salt and butter – broken into small pieces.
  • Lower the dough hook and mix on low speed for ten minutes. The dough should be stretchy and coming clean away from the sides of the bowl.
  • Lift up the dough hook and scrape any dough off, using your fingers, into the bowl.
  • Remove the dough hook and cover the bowl with a clean tea towel.
  • Leave the dough to prove in a draught free place until it is doubled in size.
  • Lightly dust the worktop with flour.
  • As soon a the dough has doubled in size, using a clean, flour dusted hand, tip the dough on to the work top, easing it out of the bowl with your hand.
  • Flatten the dough slightly and fold the bottom third up and the just over the top third down. Rotate 90 degrees and repeat.
  • Turn the dough over and tuck any edges underneath so that you have an oval shaped piece of dough.
  • Place the shaped dough into the buttered bread tin and cover with a clean tea towel.
FF Large 3 Malts Sunflower Loaf
Shaped and tucked into it’s tin.
  • Place the covered dough in a warm, draught free place until doubled or tripled in size.
    As this loaf starts to rise above the tin put the oven on to preheat at 230C/210C fan, gas mark 8, 450F.

Making The Large 3 Malts Sunflower Loaf

  • As soon as the loaf has risen well and is above the edge of the pan place in the centre of the hot oven and bake for 30 minutes.
FF Large 3 Makts Sunflower Loaf
Large 3 Malts Sunflower Loaf 3 times its original size and ready for the oven.
  • You can check your loaf at 25 minutes. It is baked when golden brown and sounds hollow when rapped on the base with your knuckle.
  • For a deeper, darker crust, tip the loaf out of the tin and bake for a further 10 minutes directly on the oven shelf.
  • Once baked to your liking, remove the bread from the oven and place on to a cooling rack.
FF Large 3 Malts Sunflower Loaf
Freshly baked Large 3 Malts Sunflower Loaf.

You simply cannot get the smell of freshly baked bread at home, well, without freshly baking it yourself!

During the summer, I cover the loaf with a net food tent to keep flies and bugs off.

Finally, leave the bread to cool completely before slicing. Not only will the bread slice better, it is also said to be better for digestion.

FF Large 3 Malts Sunflower Loaf
Large 3 Malts Sunflower Loaf so flavourful.

I had a delicious slice of this bread toasted, with jam, for breakfast this morning. Sitting and relaxing in our garden, cup of coffee in hand, watching the bees and butterflies, while munching away!

Note: For a smaller loaf use the weights and timings for the Lighter Wholemeal Loaf.

Homemade bread is so easy using a stand mixer. Alternatively, you can by always make this loaf by hand.

If you have enjoyed the recipe for this Large 3 Malts Sunflower Loaf here are some others you may enjoy too:

Lighter Wholemeal Loaf

FF Large 3 Malts Sunflower Loaf
Lighter Wholemeal Loaf a balance between white and wholemeal bread.

Large White Bloomer

Family sized white bloomer loaf cooling on a rack.
Large White Bloomer

Farmhouse White Loaf

FF Large 3 Malts Sunflower Loaf
Farmhouse White Loaf the best everyday white bread you’ll ever need!

Importantly, the process of making bread, for me, is really enjoyable and fun. Also, if you look at the ingredient list on any standard, plastic wrapped loaf and compare it to mine, prepare yourself for a shock!

As you begin to routinely make your own bread, it will become easier to double the recipe and make two loaves. Resulting in an extra loaf for the freezer and lessening the need to buy a loaf from the supermarket. Most importantly, the nutritional quantity and flavour homemade bread is far superior and less expensive than it’s supermarket counterpart.

So, whatever you are making, baking and creating in your kitchens, have fun preparing and sharing your feast.

Sammie xx

No part of this post may be reproduced or duplicated without the written permission of the owner. Please see my Disclosure Policy.

Family size malted bread with seeds.

Share
Facebooktwitterpinterestlinkedintumblr

Easy Butterscotch Dip With Toffee Cookies

Share
Facebooktwitterpinterestlinkedintumblr

It’s the summer holidays and I’m in the mood for fun! This Easy Butterscotch Dip With Toffee Cookies is just what it says. Quick and easy to make, this is a fun, sweet treat. Perfect for feasting and sharing.

FF Easy Butterscotch Dip With Toffee Cookies
Easy Butterscotch Dip With Toffee Cookies so easy and so good!

As much as I adore cooking and baking, my priority during the summer holidays is to spend time with our teenage children. I am well aware there are not that many summer holidays left where they’ll want to hang around as a family, so they come first.

That said, when we are all home, it can seem as if a swarm of locusts have gleaned the kitchen of anything edible in just a few days!!! Parents of teenagers will completely understand!

FF Easy Butterscotch Dip With Toffee Cookies
Easy Butterscotch Dip With Toffee Cookies these don’t hang around long here.

What I love when everyone is at home, is that we throw all the rules out of the window, for the whole summer. We all lay in, stay up late, the atmosphere is very chilled. Yes each person still has their ‘jobs’ to do for the day, so these get done first thing (that can be 11.30am – but they get done), so the rest of the day is free.

Friends drop by, we all go out together, or our three go out. So this recipe for Easy Butterscotch Dip With Toffee Cookies is perfect anytime, but especially now. It is so easy to make whilst you chat to unexpected visitors.

FF Easy Butterscotch Dip With Toffee Cookies
Easy Butterscotch Dip With Toffee Cookies once you start dunking it’s hard to stop!

I pulled this whole dish together in less than 20 minutes!

Yep you heard right – 20 minutes!

Have I got your attention now???

The cookies are made using Wright’s Baking new Toffee Cookie Mix, except that I made the cookies smaller so we had 15 cookies instead of 8. If you haven’t tried this new mix it is a dream to make. 5 minutes prep. time, 10 minutes in the oven and you’ll have the whole neighbourhood wondering where the delicious baked Toffee Cookie smell is coming from.

Shut the windows if you don’t want a queue at the front door 😉

FF Easy Butterscotch Dip With Toffee Cookies
Easy Butterscotch Dip With Toffee Cookies ooh this dip is so good.

The dip takes 7 minutes. I kid you not.

Who remembers Angel Delight?

Oh yes, that is the Easy Butterscotch Dip my friends. With a few white chocolate curls decorating the top.

Told you it was easy!

That is why I love this Easy Butterscotch Dip With Toffee Cookies, it is a simple, straightforward, snack. That also tastes so good. I had two cookies for breakfast this morning, after the photo shoot. I had to literally move away from the Butterscotch Dip and avoid any spoons, else I’d have hidden down the bottom of the garden and scoffed the lot.

Angel Delight was and is popular for a reason. It tastes so utterly I-can’t-stop-myself good.

Recipe: Easy Butterscotch Dip With Toffee Cookies 

1 packet Toffee Cookie Mix – from Wright’s Baking

25g Unsalted Butter plus water – see directions on the packet

1 packet Butterscotch Angel Delight

300ml Cold Milk – Whole or Semi Skimmed

Small bar of white chocolate

Method: Preheat the oven to 180C/160C fan gas mark 4

  • Line a large baking tray with a non stick silicone mat or baking parchment.
  • Make up the Toffee Cookies according to the packet instructions.
  • Form 15 smaller cookies (the mix calls for 8) from the cookie dough and place on the lined baking tray.
FF Easy Butterscotch Dip With Toffee Cookies
15 Toffee Cookies made from the Wright’s Baking mix.
  • Place the baking tray into the preheated oven and bake the Toffee Cookies for 10-12 minutes.
  • The Toffee Cookies are baked when they are golden in colour and have a shiny, wrinkled surface.
  • As soon as the cookies are baked remove from the oven and allow to cool completely on the tray. They will harden as they cool.
FF Easy Butterscotch Dip With Toffee Cookies
Perfect Toffee Cookies for Dunking in the Butterscotch Dip!
  • Whilst the Toffee Cookies are cooking it’s easy to whip up the Angel Delight – literally.
  • Add the milk to a bowl, add the Butterscotch Angel Delight and whisk according to the packet instructions.
  • Pour the Butterscotch Angel Delight into a wide bowl and using a vegetable peeler, shave curls of white chocolate over the dip to make it look pretty!
  • Place the Butterscotch Dip bowl in the centre of a large plate and surround with golden Toffee Cookies. Easy, see?

Serve immediately, or place the Butterscotch Dip in the fridge covered in cling and the cooled Toffee Cookies into an airtight container to store.

FF Easy Butterscotch Dip With Toffee Cookies
Easy Butterscotch Dip With Toffee Cookies dunking is so much fun!

What a fantastic change from savoury dips!

Feasting really can be fun.

Thank you Deb for suggesting the idea. Deb the bread is Wright’s Baking point of contact. If you have questions about their mixes she is the lady to ask.

If you’ve enjoyed this fun Easy Butterscotch Dip With Toffee Cookies you may also like these:

Toffee Cookie Cups

FF Easy Butterscotch Dip With Toffee Cookies
Toffee Cookie Cups perfect for filling with ice cream.

Toffee Banoffee Waffles

FF Easy Butterscotch Dip With Toffee Cookies
Toffee Banoffee Waffles perfect any time of the day.

Twisted Fruity Jam Tarts

FF Easy Butterscotch Dip With Toffee Cookies
Twisted Fruity Jam Tarts delicious for breakfast.


Even if you do not have children, I find summertime to be the season when people seem to be more carefree. Lunch breaks turn into impromptu picnics, glasses clinking in pub gardens across the land, salad eaten with a cool glass of white wine in the evening out in the garden.

I love our changing seasons here in England and by the end of one I am ready for the next. This summer I intend to have as much fun as I can!

Sammie xx

Wright’s Baking provided the toffee cookie mix for this post. All opinions, views, content and photographs are my own. I never get paid to write posts. Please see my Disclosure Policy.

Share
Facebooktwitterpinterestlinkedintumblr

Hawkshead Relish Review

Share
Facebooktwitterpinterestlinkedintumblr

I have thoroughly enjoyed carrying out this Hawkshead Relish Review. Using a trio of fantastic, handmade preserves as ingredients was a challenge and that is what I thrive on.

FF Hawkshead Relish Review
Hawkshead Relish Review Red Onion Marmalade delicious as a condiment.

Traditionally I have used chutneys and Red Onion Marmalade as a condiment. Now I was tasked with incorporating three separate preserves in new recipes!

I was sent three different, savoury preserves by Hawkshead Relish.

  • 2 Jars of Red Onion Marmalade – deliciously different to usual onion marmalades. Cooked with balsamic vinegar and added pine nuts, I adored both the flavour and texture of this marmalade. This is not a sticky sweet marmalade, it is packed with deep onion flavour, punctuated by occasional sweet sultanas and the nutty flavour of pine nuts. As an ingredient 10/10 as a condiment 10/10!
  • I Jar of Windermere Pale Real Ale Jelly – gloriously pale gold, clear jelly. Sweet but not overwhelmingly so, as the ale taste really comes through and the slight bitterness tempers the jelly. A real surprise, as I’d not tried a jelly like this before. Made using ale made at the Hawkshead Brewery, light and fruity in flavour, it was a dream to use. As an ingredient 10/10 as a condiment 9/10 dropping a mark as I prefer a more textured accompaniment.
  • 1 Jar of Hot Garlic Pickle – packed full of garlic cloves in a hot spicy sauce. Personally I would not eat this as a condiment, however, if you are a real garlic lover, then this is the perfect pickle for you. When used as an ingredient this pickle transforms into the most wonderful rich, hot, spicy, garlic flavour, that can be as intense as you want. An absolute dream to use as an ingredient 10/10 as a condiment 5/10.
FF Hawkshead Relish Review
Feta Red Onion Marmalade Quiche utterly delicious.

My first venture was making this Feta Red Onion Marmalade Quiche. The different layers of flavour in the quiche are so exciting on the palette. Warmed, the Red Onion Marmalade flavour itself becomes more vibrant, contrasting beautifully with the mild, slightly salty feta cheese. This quiche has become a firm favourite in our house.

Hawkshead Relish Review
Red Onion Sausage Plait perfect for picnics or as a tasty mid week meal.

Red Onion Sausage Plait is so simple to make, yet the finished flavour will have your tastebuds singing. Can tastebuds sing 😉? It is so important to use good quality sausage meat, as the meaty flavours work so well with with the flavour and texture of this delicious Red Onion Marmalade.

FF Hawkshead Relish Review
Roasted Ale Jelly Tomatoes unbelievably good.

These Roasted Ale Jelly Tomatoes are so simple and yet this has to be my favourite recipe, if forced to choose. Please don’t make me choose? 

To make: Roasted Ale Jelly Tomatoes

  • Cut a dozen, or thereabouts, medium tomatoes in half. I used economy tomatoes from the supermarket.
  • Place them on a baking tray cut side up.
  • Spoon 1/2 a teaspoon of Pale Ale Jelly on top of each tomato.
FF Hawkshead Relish Review
Very firm, not particularly flavourful tomatoes.
  • Drizzle over a little olive oil, sprinkle lightly with sea salt flakes (I use Maldon ) and freshly ground pepper.
  • Place into a preheated oven at 180C/160C fan, gas mark 4 and bake for 1-1.5 hours until softened and slightly caramelised.
  • When cooked remove from the oven and serve on a platter with some shredded basil leaves. Eat smeared on to some very fresh baguettes, or alongside quiche, sausage plait, chicken, fish.
FF Hawkshead Relish Review
Hawkshead Relish Review these Roasted Ale Jelly Tomatoes have become my new favourite side dish.

Warning once you’ve made these Roasted Ale Jelly Tomatoes once you will find more and more reasons to make them. Such a simple recipe, yet it turns even underripe, flavourless tomatoes into a taste sensation. I cannot wait to try it on our home grown tomatoes later this year. A tasty side to many meals.

Another brilliant use for the Real Ale Jelly was adding a couple of spoonfuls to a beef cooked in ale casserole. Added right at the end, just before serving, the sweet, fresh flavour of the jelly lifted the casserole and balanced out any bitter notes from the cooked beer.

Finally to the Hot Garlic Pickle. To be truthful this pickle was indeed a pickle for me! I was stumped as to what I should make with it. The weather was very hot and whilst I knew the spicy garlic would be wonderful in soups, stews and curries, my heart simply wasn’t into cooking a large, hot meal. During the summer we practically live on salad.

Also, to be honest, the strong, pungent aroma of the pickle wasn’t inspiring me. Until one day. I had some pretty hot chilli’s and I figured I’d go with the hot, spicy, garlic flavour, rather than trying to tame it.

FF Hawkshead Relish Review
Hawkshead Relish Review Hot Spicy Garlic Cheese Straws.

Thus, my Hot Spicy Garlic Cheese Straws were born. Whilst not overly  keen on the pickle as a condiment, used in these delicious cheese straws, alongside spicy Parmesan cheese and hot jalapeño peppers, the flavour shines. These are THE best cheese straws I have ever made and it is worth having a jar of this pickle on hand simply to make these!

Recipe: Hot Spicy Garlic Cheese Straws makes 16-18

500g Homemade Perfect Butter Shortcrust Pastry

1 Free Range Egg – beaten

3tsp Hot Garlic a Pickle from – Hawkshead Relish

75g Finely Grated Parmesan Cheese

1 Jalapeño Pepper – membrane and seeds removed and finely diced

Method: Preheat the oven to 220C/200C fan, gas mark 7

  • Line a large baking tray with a silicone baking mat or baking parchment.
  • Lightly dust a clean worktop with flour and place the pastry on top.
  • Roll the pastry into a rectangular shape – roughly 35cm x 25cm (14″ x 10″).
  • Ensure the pastry can move and is not stuck on to the worktop.
  • Trim the edges with a knife and then brush egg over the surface of the pastry.
  • Spoon 3 teaspoons of the Hot Garlic Pickle over the pastry and spread to create a thin layer.
FF Hawkshead Relish Review
Hot Spicy Garlic Cheese Straws in the making.
  • Sprinkle over the grated Parmesan cheese and finely chopped chilli.
  • Fold the bottom half of the pastry over the top half. Gently run a rolling pin over the top to ensure both halves are pressed together.
  • Cut just over 1cm (1/2″) strips using a sharp knife and make sure it cuts all the way through.
  • Transfer the cheese straws to the lined baking tray.
  • Place in the top of a preheated oven and bake for 20-30 minutes, until golden and crispy.
FF Hawkshead Relish Review
Hawkshead Relish Review Hot Spicy Garlic Cheese Straws.
  • Once the cheese straws are baked remove from the oven.
  • Enjoy the inviting, warm garlic and cheese aroma!
  • Allow to cool for 5 minutes before serving immediately.
FF Hawkshead Relish Review
Hawkshead Relish Review Hot Spicy Garlic Cheese Straws.

These Hot Spicy Garlic Cheese Straws are incredibly good served warm (my favourite) or cold. Perfect for sharing with friends over drinks, at parties, or snacking on whilst watching your favourite game, on the telly, with the family.

I really urge you to use the pastry recipe given. These cheese straws are somewhere between flaky and shortcrust pastry. This texture really adds to their flavour, however, if you aren’t keen on pastry making, I would use bought, all butter puff pastry as a substitute.

Carrying out the Hawkshead Relish Review has been a challenge, but a challenge I have enjoyed. Each product I reviewed imparted so much flavour when used as an ingredient, I will definitely be using more of their delicious chutneys, marmalades and jellies in future recipes.

I have also learnt not to judge an ingredient on first appearance. The Hot Garlic Pickle completely transformed once cooked and everyone agreed the cheese straws were the best they’d ever tasted. Layers of Red Onion Marmalade in the quiche created an amazing flavour sensation and lastly but by no mean least, the Pale Ale Jelly. Wow! The roasted tomatoes were incredibly good. Slow roasting and the addition of the jelly meant intense, but not overwhelming flavour.

If you have enjoyed my Hawkshead Relish Review you make like these recipes:

Easy Crusty Baguettes

FF Hawkshead Relish Review
Easy Crusty Baguettes

Asparagus Prosciutto Ham Tart

FF Hawkshead Relish Review
Asparagus Prosciutto Ham Tart

Mini Sparkenhoe Red Leicester Tarts

FF Hawkshead Relish Review
Mini Sparkenhoe Red Leicester Tarts

Whatever you are making, baking and creating in your kitchens, I hope this post has inspired you to Embellish With Relish? A phrase used by Hawkshead Relish to inspire people to be more creative with their products.

Sammie xx

Hawkshead Relish provided me with the relishes listed for the purposes of this revie. All opinions, views, content, recipes and photography are my own. I was not paid to write this review post, please see my Disclosure Policy.

Share
Facebooktwitterpinterestlinkedintumblr

Mini Sparkenhoe Red Leicester Tarts

Share
Facebooktwitterpinterestlinkedintumblr

Mini Sparkenhoe Red Leicester Tarts, delicious morsels of light, flaky, puff pastry, filled with onion marmalade and topped with vibrant, melted Sparkenhoe Red Leicester cheese. Resulting in the perfect party canapé.

FF Mini Red Leicester Tarts
Mini Sparkenhoe Red Leicester Tarts perfect canapés.

While tasting this cheese, it has a nutty, almost grassy flavour that sets it apart from any similar cheese I have tried before. And a gorgeous golden wedge of unpasteurised cheese coloured using Annatto, a natural plant based dye that imparts it’s characteristic colour. Also, it makes a dramatic addition to any cheese board.

FF Mini Red Leicester Tarts
Sparkenhoe Red Leicester gorgeously golden and full of flavour.

Since this cheese has a firm texture is perfect for slicing and finely grating. Encased in an all butter puff pastry, the grated cheese melts into the onion marmalade and creates the most delightful mini bites.

FF Mini Red Leicester Tarts
Mini Sparkenhoe Red Leicester Tarts oozing melted cheese.

Topped with chives, that both echo the mild onion marmalade and grassy flavours found in the cheese, these little tarts are perfect to serve as canapés, party food, at a buffet or just for snacking on, warm from the oven with a glass of your favourite wine.

FF Mini Red Leicester Tarts
Mini Sparkenhoe Red Leicester Tarts so easy to make.

Made in minutes, these tarts are easy to make, bake in minutes and then  ready to serve.

Recipe: Makes 28-32 Mini Sparkenhoe Red Leicester Tarts 

Note: Sparkenhoe Red Leicester Cheese is UNPASTEURISED

320g Puff Pastry – I used ready rolled puff pastry from JustRol

100g/4oz Sparkenhoe Red Leicester Cheese – available from Pong Cheese

4tbsp Good Quality Onion Marmalade – I recommend Hawkshead Relish Red Onion Marmalade

3tbsp Chives – finely chopped

Method: Preheat the oven to 220C/200C fan, gas mark 7, 425F

You will need a mini muffin tin to make these Mini Sparkenhoe Red Leicester Tarts. Alternatively, use a larger tin to make larger tarts!

Making the puff pastry tarts:

  • First of all, if frozen remove the pastry from the freezer and allow to thaw in the fridge overnight.
  • Cut the rind from the cheese and finely grate.
  • Unroll the pastry and cut into 5cm/2″ squares. I actually used a ruler to measure out the squares.
FF Mini Red Leicester Tarts
5cm puff pastry squares cut with a sharp knife.
  • If your mini muffin tin is not non stick then spray with a little oil.
  • Place one pastry square on to each mini muffin hole and press gently so that it dips in and forms a cup.
  • NOTE – I overlapped two of the smaller pastry strips, squeezing them together, from the edge to create more tarts.
  • Add 1/4 teaspoon of onion marmalade to each pastry square.
FF Mini Red Leicester Tarts
Each pastry square forms a little tart shape.
  • Place 1 teaspoon of finely grated cheese on top of the onion marmalade.
  • Snip over a sprinkle of fresh chives.

FF Mini Red Leicester Tarts

Baking the cheesy tarts:

  • Place the tin in the middle of the preheated oven and bake the tarts for 10-12 minutes. They are baked when they are risen, golden and full of bubbling, melted cheese.
  • As soon as the tarts are baked remove from the oven.

FF Mini Red Leicester Tarts

  • Finally, remove the tarts from the tin and place on to a serving platter, if serving immediately, or on to a cooling rack for serving later.
FF Mini Red Leicester Tarts
Mini Sparkenhoe Red Leicester Tarts delicious mouthfuls of flavour heaven.

I served these tarts with a few extra chives snipped over for an extra pop of colour.

Served warm these Mini Sparkenhoe Red Leicester Tarts are at their best. Especially as the mild onion flavours pair beautifully with the warm, nutty cheese. Also to make ahead, store in an airtight container for up to three days in the fridge. Refresh by popping on to a baking sheet and into a medium, preheated oven for 5 minutes.

If you have enjoyed this recipe for Mini Sparkenhoe Red Leicester Tarts here are some others you may also like:

Goddess Cheese Pine Nut Muffins

FF Mini Red Leicester Tarts
Goddess Cheese Pine Nut Muffins.

Asparagus Prosciutto Ham Tart

FF Mini Red Leicester Tarts
Asparagus Prosciutto Ham Tart using Goddess Cheese.

Beauvale Cheese Walnut Scones

FF Mini Red Leicester Tarts
Beauvale Cheese Walnut Scones

Cheese comes in such a variety of textures and flavours. I am thoroughly enjoying experimenting with and using them as  ingredients to create different recipes.

I hope I have inspired you to both make and try different cheeses?

So, whatever er you are making, baking and creating in your kitchens, have fun preparing and sharing your feast.

Sammie xx

Pong Cheese provided me with the cheese for this recipe. All opinions, views, content and photography are my own. Please see my Disclosure Policy.

Share
Facebooktwitterpinterestlinkedintumblr

Union Jack Sponge Cake

Share
Facebooktwitterpinterestlinkedintumblr

This Union Jack Sponge Cake is one of the simplest recipes I have made and yet it is also one of the most delicious cakes I’ve ever made.

FF Union Jack Sponge Cake
Union Jack Sponge Cake

A light vanilla sponge base, covered and piped with freshly whipped cream and decorated with strawberries and blueberries. Finally, a sprinkle of caster sugar and glitter sets this cake off.

So, why bake a flag cake?

On Twitter there is a community run by two fabulous, fun women, called @SundayBakeClub, they were recently featured in the Telegraph newspaper. And each week they pick a different theme that challenges bakers to express their creativity, try news skills and most of all, have fun! Last Sunday’s theme was #GirlPower. So, the Spice Girls and our longest reigning monarch, Queen Elizabeth II, were my inspiration.

Resulting in this Union Jack Sponge Cake.

FF Union Jack Sponge Cake
Union Jack Sponge Cake with pretty piped cream edges.

Adapting The Bake To My Circumstances

To be completely honest my original idea was to make a cheesecake with a Union Jack design on it, however, I woke up on Sunday with a cracking migraine. As a result, I resigned myself initially to not being able to take part. Yet, later in the day the pain eased enough for me to get a sponge base made and baked. And then back came the pain. So I went back to bed!

After a couple of hours I was able to get up and decorate the cake. And I am really pleased that I saw this bake through. However, you have no idea how many times I start a recipe, only for me to be too unwell to complete, or photograph the results. So, on this occasion #GirlPower really did prevail.

FF Union Jack Sponge Cake
Union Jack Flag Cake my lunch portion the following day!

Sunday Bake Club – a community of bakers

I adore how the Sunday Bake Club is a community of bakers who inspire and help each other. Although, the main focus is to encourage people to get baking and stretch those who already bake often. Most importantly, the community engage in a completely non competitive and supportive way. While ‘Best Bits’ are chosen, by the organisers each week and posted on to their Blog, bakers can then vote for their favourite bake and a ‘winner’ is awarded a virtual golden spoon, just for fun!

A few weeks ago I was very fortunate to be awarded a golden spoon for my Hazelnut Raspberry Vacherin, I promise to write it up and post it on here soon. It has three tiers of hazelnut meringue with whipped cream, raspberries and toasted hazelnuts in between and on top. While it was a real technical challenge for me the finished bake was worth my effort!

Back to the Union Jack Sponge Cake, you will need a 20cm x 28cm x 5cm (8″ x 11″ x 2″) Swiss roll tin to bake this flag cake.

Recipe: Union Jack Flag Cake serves 12

For the cake:

225g/8oz Unsalted Butter at room temperature – plus an extra tablespoon for greasing the tin

225g/8oz Caster Sugar

1/4tsp Salt – I use Maldon

2tsp Vanilla Bean Paste – I use Nielsen-Massey

4 Large Free Range Eggs

225g/8oz Plain White Flour – plus an extra tablespoon for dusting the tin, alternatively use self raising flour and leave out the baking powder.

2tsp Baking Powder

To decorate the cake:

400ml Double Cream

300g Fresh Blueberries

400g Fresh Strawberries

1tsp Caster Sugar

Optional – edible glitter or caster sugar

Preheat the oven to 160C/140C fan, gas mark 3, 325F.

Making The Sponge Cake

  • First of all, thoroughly grease the Swiss roll tin using the extra 1 tablespoon of butter.
  • Next add one tablespoon of flour and tip it around the tin until the inside of the tin is completely coated. Tip any excess away into the bin.
  • In a large bowl add the butter, sugar and salt.
  • Whisk or beat together until pale and creamy.
  • Add 1 teaspoon of vanilla bean paste, all four eggs and the flour.
  • Whisk or beat slowly until everything is just combined. Finish mixing using a spatula or spoon to ensure all the ingredients are combined, taking care not to over mix as this can result in a heavy cake.
  • Tip the cake batter into the prepared tin and smooth out so that it fills each corner and is even.
FF Union Jack Sponge Cake
Delicious light vanilla cake batter ready for the oven.

Baking The Sponge Cake

  • Place in the centre of the oven and bake for 30-40 minutes.
  • The sponge is baked when it is golden and springs back from a light touch.
  • As soon as the cake is baked, remove the tin from the oven and allow the cake to cool for 10 minutes in the tin.
FF Union Jack Sponge Cake
Beautifully golden baked sponge.
  • Run a palette knife around the edge of the cake and then tip the sponge out on to a cooling rack.
  • Allow the sponge to cool completely before decorating.
  • Since I don’t have a board large enough for this cake, I placed it on to some baking parchment and then back on to the cooling rack to decorate.

Decorating the Union Jack Sponge Cake

  • Place the cold fresh cream, 1tsp of caster sugar and 1tsp of vanilla bean paste into a bowl.
  • Whisk until the cream just holds a stiff peak.
  • Place half of the whipped cream into a piping bag fitted with a large star tip. Secure the bag and place in the fridge. It was an extremely hot summer’s day when I made this cake, so I had to work quickly.
  • Spread the other half of the whipped cream on to the surface of the cake, using a palette knife to achieve a flat even finish. You DO NOT need to cover the sides in cream.
  • Hull and slice the strawberries. Wash and dry the blueberries, sorting through them as you dry them to remove any stalks or over ripe berries.
  • Have a picture of the Union Jack flag in front of you. While you can use my cake as a reference, a picture is more accurate.
  • Start by forming the central red cross using sliced strawberries.
  • Cut some of the strawberry slices in half. Angle these into the cream to create the X shaped cross.
FF Union Jack Sponge Cake
The Union Jack Sponge Cake is starting to take shape.
  • Use blueberries to fill in the triangles ensuring there is a gap of plain cream to represent the white lines of the flag.
  • Now pipe stars around the outside. I first piped around the bottom edge of the cake and then again around the top edge. It gives the cake a beautiful finish.
  • If, like me you like a few sparkles, sprinkle over some edible glitter or caster sugar to complete your Union Jack Sponge Cake.
FF Union Jack Sponge Cake
Union Jack Sponge Cake perfectly pretty and very tasty.

Chilling And Serving The Cake

I popped the whole cake, uncovered, into the bottom of the fridge for an hour before serving. It helps the cream set and cools the cake down. As I mentioned I baked and decorated this cake on a very, very hot day.

If the temperature isn’t melting everything in sight this Union Jack Sponge Cake is fine to serve as soon as it has been decorated. Cut into squares, or slice down the centre and serve as slices.

This cake keeps exceptionally well, in an airtight tin for 5 days in the fridge. It remained light and fresh and is simply one of the best cakes to enjoy with a cup of tea!

If you have enjoyed this Union Jack Sponge Cake recipe, here are some others you may like:

Raspberry Almond Cream Cake

FF Union Jack Sponge Cake
Raspberry Almond Cream Cake simply delicious.

Loveliest Lemon Curd Cake

FF Union Jack Sponge Cake
Lemon Curd Cake so tangy and refreshing.

Black Forest Giant Doughnut

FF Union Jack Sponge Cake
Black Forest Giant Doughnut with a hint of kirsch.

The baking community on Twitter are very encouraging and supportive, as well as a constant source of inspiration for me. Everyone shares and seeing as how I’m that kind of person, I fit in well!

Whatever time of year you make this cake, use whatever seasonal berries are available. I bet it would taste wonderful with raspberries and blackberries!

Thank you for all of your comments both here, on Twitter and Instagram. Hearing and seeing your creative, culinary makes is a constant source of encouragement and inspiration to me.

So, whatever you are making, baking and creating in your kitchens, have fun preparing and sharing your feast.

Sammie xx

No part of this post may be reproduced or duplicated without the written permission of the owner. Please see my Disclosure Policy.

Note: Since this year, 2020, is the 75th anniversary of V.E. Day, this cake is an easy and beautiful way to bake and celebrate with those you live with, during this unusual time of Covid-19 lockdown. Why not get creative and create the flag decoration with whatever berries, dried fruit and sprinkles you have in your kitchens? Most of all, stay safe and well during this challenging time. X


Fresh berry decorated flag bake dessert.


Share
Facebooktwitterpinterestlinkedintumblr

Sun Dried Tomato Bread Pizza

Share
Facebooktwitterpinterestlinkedintumblr

Over the past couple of days Summer has asserted itself with a vengeance. Temperatures above 30C, blisteringly hot sunshine and clear blue skies. I love Summer and sunshine, but even this has been a little too hot for me. Cooking becomes a chore, rather than its usual relaxing pleasure. So you can imagine how relieved I was to be able to prepare a meal in under 10 minutes. Grabbing a packet of  Wright’s Baking cheddar and sun dried tomato bread mix, I came up with this easy Sun Dried Tomato Bread Pizza.

FF Sun Dried Tomato Base Pizza
Sun Dried Tomato Bread Pizza a delicious twist on a regular pizza base.

Also I have a recipe for Sun Dried Tomato Bread, which I’m sure would work just as well. However, I needed an easy, quick prep meal. So thank you Wright’s Baking for yet again coming to my rescue.

FF Sun Dried Tomato Base Pizza
Delicious Sun Dried Tomato Bread Pizza served with crunchy homemade coleslaw.

Pizza – So Much More Than The Toppings

The beauty of using the sun dried tomato bread mix, is that while it is mixing, in the stand mixer, I can make my Crunchy Homemade Coleslaw. I always keep lemons in the kitchen and I love the way they not only thin the mayonnaise, but also remove the acrid taste from the onions in this coleslaw, which is, in my opinion one of the best accompaniments to homemade pizza.

What’s great about making your own pizza, is that you can top it with whatever you like. I had an antipasto meat selection in the fridge that went beautifully with the delicious sun dried tomato base. In fact as well as lemons I generally have mozerella and at least one packet of cured meat in the fridge. Pizza makes a quick, delicious and nutritious meal, providing it is served with a healthy pile of salad of coleslaw!

FF Sun Dried Tomato Bread Pizza
Sun Dried Tomato Bread Pizza what would you top yours with?

It’s All About The Base

I have to mention just how completely delicious the base of this Sun Dried Tomato Bread Pizza is. The crust doesn’t turn jaw breakingly hard, but remains slightly soft with a delicious salty parmesan and herb tomato flavour all of its own. I wouldn’t recommend overloading this pizza with topping as the base is just as delicious, if not more so, than what you top it with.

Make this Sun Dried Tomato Bread Pizza with toppings that will work with the tasty bread base. In fact this pizza would be wonderful with a little sauce, mozerella and some basil leaves. The sun dried tomato bread base really is that good.

Recipe: Makes 2 Large Sun Dried Tomato Bread Pizza  – makes 20 slices

1 Packet Cheddar and Sun Dried Tomato Bread Mix by Wright’s Baking  – alternatively use my Sun Dried Tomato Bread  recipe – although I would recommend adding 1/2tsp of dried oregano to the flour

4tbsp Tomato Purée

2tbsp Olive Oil plus a little extra for greasing the baking trays – I use Filippo Berio

400g Block of Mozzerella

Selection of cured meats for topping

2 handfuls fresh basil leaves

Method:

Making The Pizza Dough

  • Make the Cheddar and Sun Dried Tomato Bread Mix according to the instructions on the packet.
  • TIP – while the bread is mixing make the coleslaw or salad!
  • Grease 2 large baking trays with a little olive oil.
  • Turn the kneaded bread dough on to one baking tray and divide in half.
FF Sun Dried Tomato Bread Pizza
Divide the sun dried tomato bread dough in half.
  • Place one half of the bread dough on each of the oiled baking trays.
  • Rub your hands in a little oil and then gently pat the dough until it is flat and fills the baking sheet. Do the same for the other half of the dough.

Adding The Pizza Toppings

  • Add 1 tablespoon of olive oil and 2 tablespoons of tomato purée to the top of each pizza base.
  • Using your hand smoosh the tomato purée and olive oil together so that they cover the pizza base – yes smoosh is a technical term in the Feasting kitchen!
FF Sun Dried Tomato Bread Pizza
Sun Dried Tomato Bread Pizza
  • Slice or tear the mozerella and lay on top of the pizza base.
  • Add thin slices of cured meat and scatter a handful of basil leaves over each pizza.
FF Sun Dried Tomato Bread Pizza
Sun Dried Tomato Bread Pizza
  • Cover both pizza’s with cling film, or do as I did on such a hot day, pop them into an unheated oven, uncovered, for 30 minutes. This will give them time to rise.
  • Turn the oven heat to 220C/200C fan, gas mark 7, 425F.

    Baking The Sun Dried Tomato Bread Pizza
  • Remove the cling film and place the pizza’s in the oven, if they are not already in there.
  • Bake for 20-30 minutes. The pizzas are cooked when the base is firm underneath. I use a large palette knife to slide under the pizza and lift it. If it’s not quite firm pop it back into the oven for another 5 minutes.
  • Once baked remove from the oven.
FF Sun Dried Tomato Bread Pizza
Baked Sun Dried Tomato Bread Pizza with melting cheese and crisp prosciutto ham.

To serve, remove the pizza from the tray – I slide it on to a board – and cut into slices or triangles.

Sun Dried Tomato Bread Pizza is ideal for feeding a crowd, as part of a buffet, or served with homemade coleslaw for an easy meal.

I really do recommend trying the Wright’s Baking range of bread mixes. Having a couple in the cupboard, even though I make almost all of our bread from scratch, is really handy on hot, busy days!

If you enjoyed this Sun Dried Tomato Bread Pizza you may also like these recipes:

Homemade Ciabatta Base Pizza

FF Sun Dried Tomato Bread Pizza
Homemade Ciabatta Base Pizza

Better Than Take Out Pizza

FF Sun Dried Tomato Bread Pizza
Better Than Take Out Pizza for when you have a little more time.

Asparagus Prosciutto Ham Tart

Sun Dried Tomato Bread Pizza
Asparagus Prosciutto Ham Tart easily made with puff pastry.


We all need a few quick prep. meals that we can draw on when we either don’t have the time, energy or both to create a nutritious and tasty meal. All of my pizza recipes contain less fat that delivery pizzas. That said, sometimes that really is the only option!

While in a perfect world I would have a freezer full of homemade pasta bakes, casseroles and the like, sometimes it’s nice to have a treat. Homemade pizza always feels like a treat simply because it takes so little effort to make and our children are always ready to help.

As the weather cools and we rediscover the urge to cook and bake again, enjoy it. Have fun in your kitchens creating your own very special feasts.

Since #NationalPizzaWeek is from 5th – 11th January, it simply shows how versatile pizza is. Summer or Winter, any day is a good day to make, bake and share pizza!

Sammie xx

Wright’s Baking sent me the parmesan and sun dried tomato bread mix to try. All opinions, views, content and recipes are my own. Please see my Disclosure Policy.

Share
Facebooktwitterpinterestlinkedintumblr

Thanking Teacher Cupcakes

Share
Facebooktwitterpinterestlinkedintumblr

Thanking people is important to me. I am very thankful for you, my wonderful readers who stop by and take time to read my posts. As a parent with three children, all now in their teen years, I am very grateful to all the teachers who have taught and nurtured them over the years. As the Summer term comes to a close I have created this Thanking Teacher Cupcakes recipe as a way to say thank you for all of their dedicated work.

FF Thanking Teacher Cupcakes
Thanking Teacher Cupcakes a delicious way to show your appreciation.

Thanking Teacher Cupcakes a delicious light vanilla sponge, with added chocolate chips. Chocolate buttercream is then swirled on top and they are decorated with  Elizabeth Shaw  wrapped mint milk chocolate crisps!

FF Thanking Teacher Cupcakes
Thanking Teacher Cupcakes easy to make.

I know that for most of the country, these past few days have been extremely hot. You will be relieved to know that these Thanking Teacher Cupcakes are very easy and quick to make, so the oven won’t be on for too long!

FF Thanking Teacher Cupcakes
Thanking Teacher Cupcakes so pretty, yet ideal for both male and female teachers.

Making these Thanking Teacher Cupcakes is something you can do with your children and they make a unique homemade gift.

I have friends and family that are teachers and while they all really appreciate the gifts they are given, sometimes they receive enough bubble bath to see them through the year.

So send in a batch of these delicious cupcakes and everyone in the staff room can have a treat with their morning cuppa at break time.

Recipe: Makes 15-18 Thanking Teacher Cupcakes

175g/6oz Unsalted Butter at room temperature

175g/6oz Caster Sugar

1/4tsp Salt

1tsp Vanilla Extract – I use Nielsen-Massey

3 Free Range Large Eggs

175g/6oz Plain Flour

1.5tsp Baking Powder

2tbsp Milk – Whole or Semi Skimmed

100g/4oz Milk Chocolate Chips or Chunks

For the buttercream:

200g/7oz Unsalted Butter at room temperature

350g/12oz Plain Icing Sugar – sifted

50g/2oz Cocoa Powder – sifted

2tbsp Very Hot Water

1 box Elizabeth Shaw Mint Chocolate Crisps

Method: Preheat the oven to 160C/140C fan, gas mark 3

  • First of all, line 2 deep 12 hole cupcake/muffin tins with 18 cupcake cases.
  • Into a large bowl add the sugar, salt and butter.
  • Whisk/beat until pale and creamy.
  • Add the vanilla, eggs, milk and sift in the flour and baking powder.
  • Whisk/beat on a low speed until all the ingredients have just combined.
  • Add the chocolate chips/chunks and fold into the cake batter using a spoon.
  • Divide the cake batter evenly between the cupcake cases, so that the cases are half full. My cases are very deep, you may easily get 18 cupcakes from the batter.
FF Thanking Teacher Cupcakes
Thanking Teacher Cupcakes ready for the oven.
  • Place the trays in the middle and lower half of the oven and bake for 25-30minutes. Mine took 30 minutes exactly.
  • The cupcakes are baked when they are a light golden brown and spring back when pressed lightly.
  • Once baked remove the cupcakes from the oven.
FF Thanking Teacher Cupcakes
Thanking Teacher Cupcakes beautifully baked with flat tops.
  •  Leave the cupcakes to cool for 5 minutes in the tin, so that you don’t burn yourself and then remove and place on a cooling rack.

Making the buttercream:

  • In the bowl containing the sifted icing sugar and cocoa add the butter and hot water.
  • Slowly whisk until all of the ingredients are combined and then increase the whisk speed to high. Continue whisking for 5 minutes, the buttercream will have doubled in size and be lighter in colour.
  • You can spoon some chocolate buttercream on to the cupcakes, or for a pretty finish, fit a piping bag with a large star tip.
  • Fill the piping bag with the chocolate buttercream and pipe swirls and roses on to the top of the cupcakes.
FF Thanking Teacher Cupcakes
Thanking Teacher Cupcakes with delicious chocolate buttercream frosting.
  • Now all you need to do is adorn them with the chocs! I think the beautiful blue colour looks so pretty against the chocolate background.
FF Thanking Teacher Cupcakes
Thanking Teacher Cupcakes elegant and delicious, the perfect thank you.

Pack the cupcakes into specially designed cupcake boxes, available from good cake decorating shops and online, or pack them into saved Christmas sweet/biscuit tins. You could even decorate the tins with tissue paper and ribbon. I’ll leave that to you though. Arts and crafts are definitely not my gifts!!!

FF Thanking Teacher Cupcakes
Thanking Teacher Cupcakes a pretty, perfect, treat!

These Thanking Teacher Cupcakes are a wonderful way to say thank you to all the teachers that dedicate so much of their time and energy whilst educating our children.

They would also make a great gift for nurses and doctors, who have looked after a loved one whilst in hosptial, the vetinary surgery who have cared for your pets. Whoever you want to thank, these cupcakes really do make a wonderful gift.

Thank you teachers and all the support staff that work so hard in our schools.

If you have enjoyed these Thanking Teacher Cupcakes here are some other recipes you might like:

Vanilla Bean Cupcakes

FF Thanking Teacher Cupcakes
Vanilla Bean Cupcakes topped with edible pearls.

Springtime Vanilla Cupcakes

FF Thanking Teacher Cupcakes
Springtime Vanilla Cupcakes almost too pretty to eat.

Raspberry Ripple Almond Cupcakes

FF Thanking Teacher Cupcakes
Raspberry Ripple Almond Cupcakes so delicious.

Marshmallow Frosted Mango Cupcakes – Gluten Free

FF Thanking Teacher Cupcakes
Marshmallow Frosted Mango Cupcakes 100% Gluten Free

Only a couple of days until the school summer holidays. I don’t know about you, but I love having my children – now in their teens – at home.

They seem to spend such a lot of time at school/college and then working on homework in the evenings. It’s a great opportunity to chill out, throw the rules out of the window, fill the huge inflatable pool and enjoy feasting and having fun as a family.

Whatever the summer holds for you, enjoy the longer days, open windows and bird song. Take time to watch the butterflies and bees fly and flutter about their buisiness. Enjoy this beautiful world that we live in.

Sammie xx

Elizabeth Shaw provided the chocolates for this recipe. All content, photographs, opinions and views are my own. Please see my Disclosure Policy.


Share
Facebooktwitterpinterestlinkedintumblr