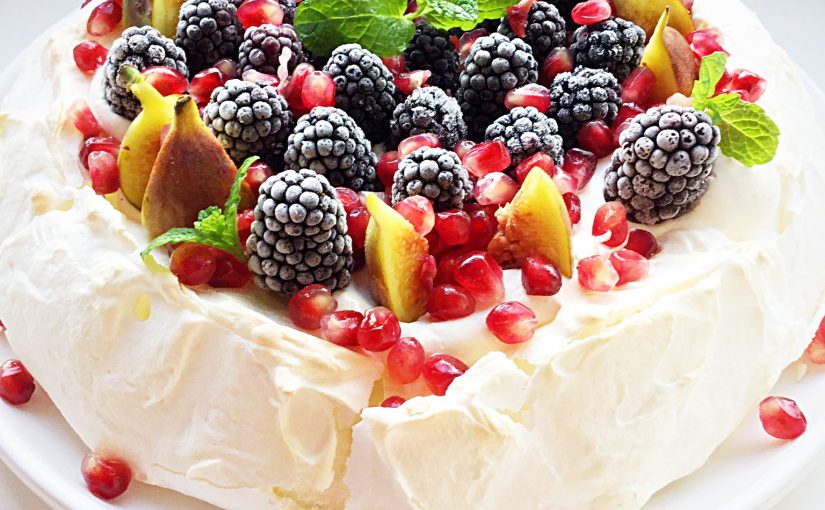
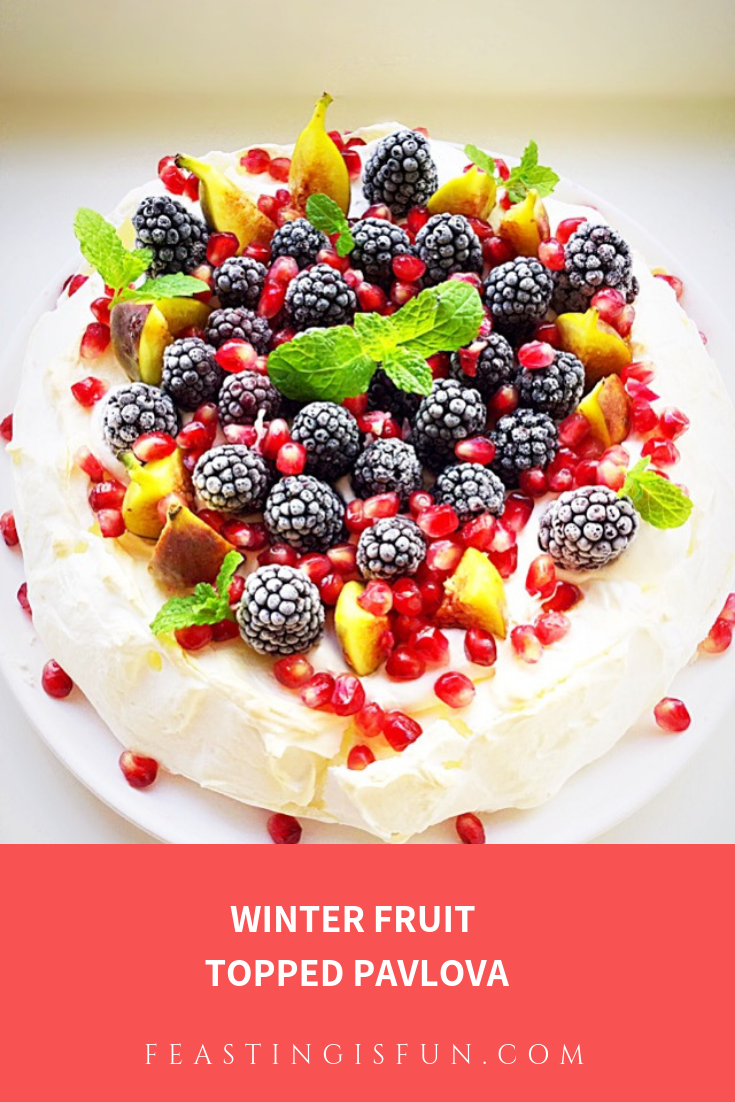
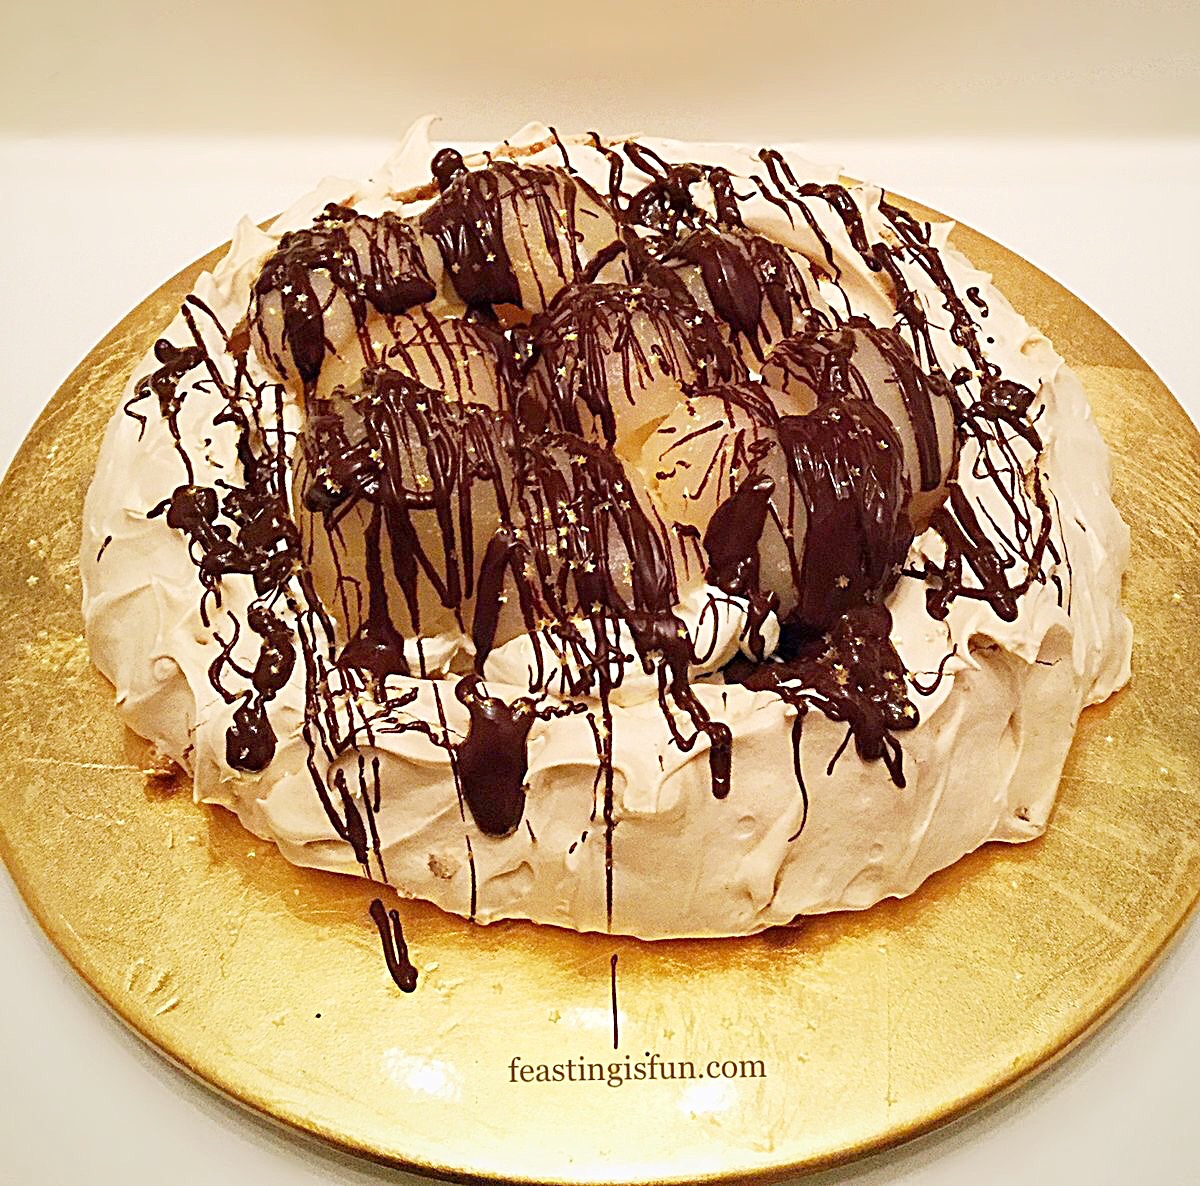
Finally December is here, heralding the start of Winter. And with it we celebrate a month of festive planning, carols by candlelight and sellotape everywhere! While, here at home, there are also two birthdays during December, the celebrating can seem never ending. Since there’s only so much cake you can eat, fear not, because this gluten free Winter Fruit Topped Pavlova is the perfect celebratory dessert.
Tips For The Perfect Pavlova:
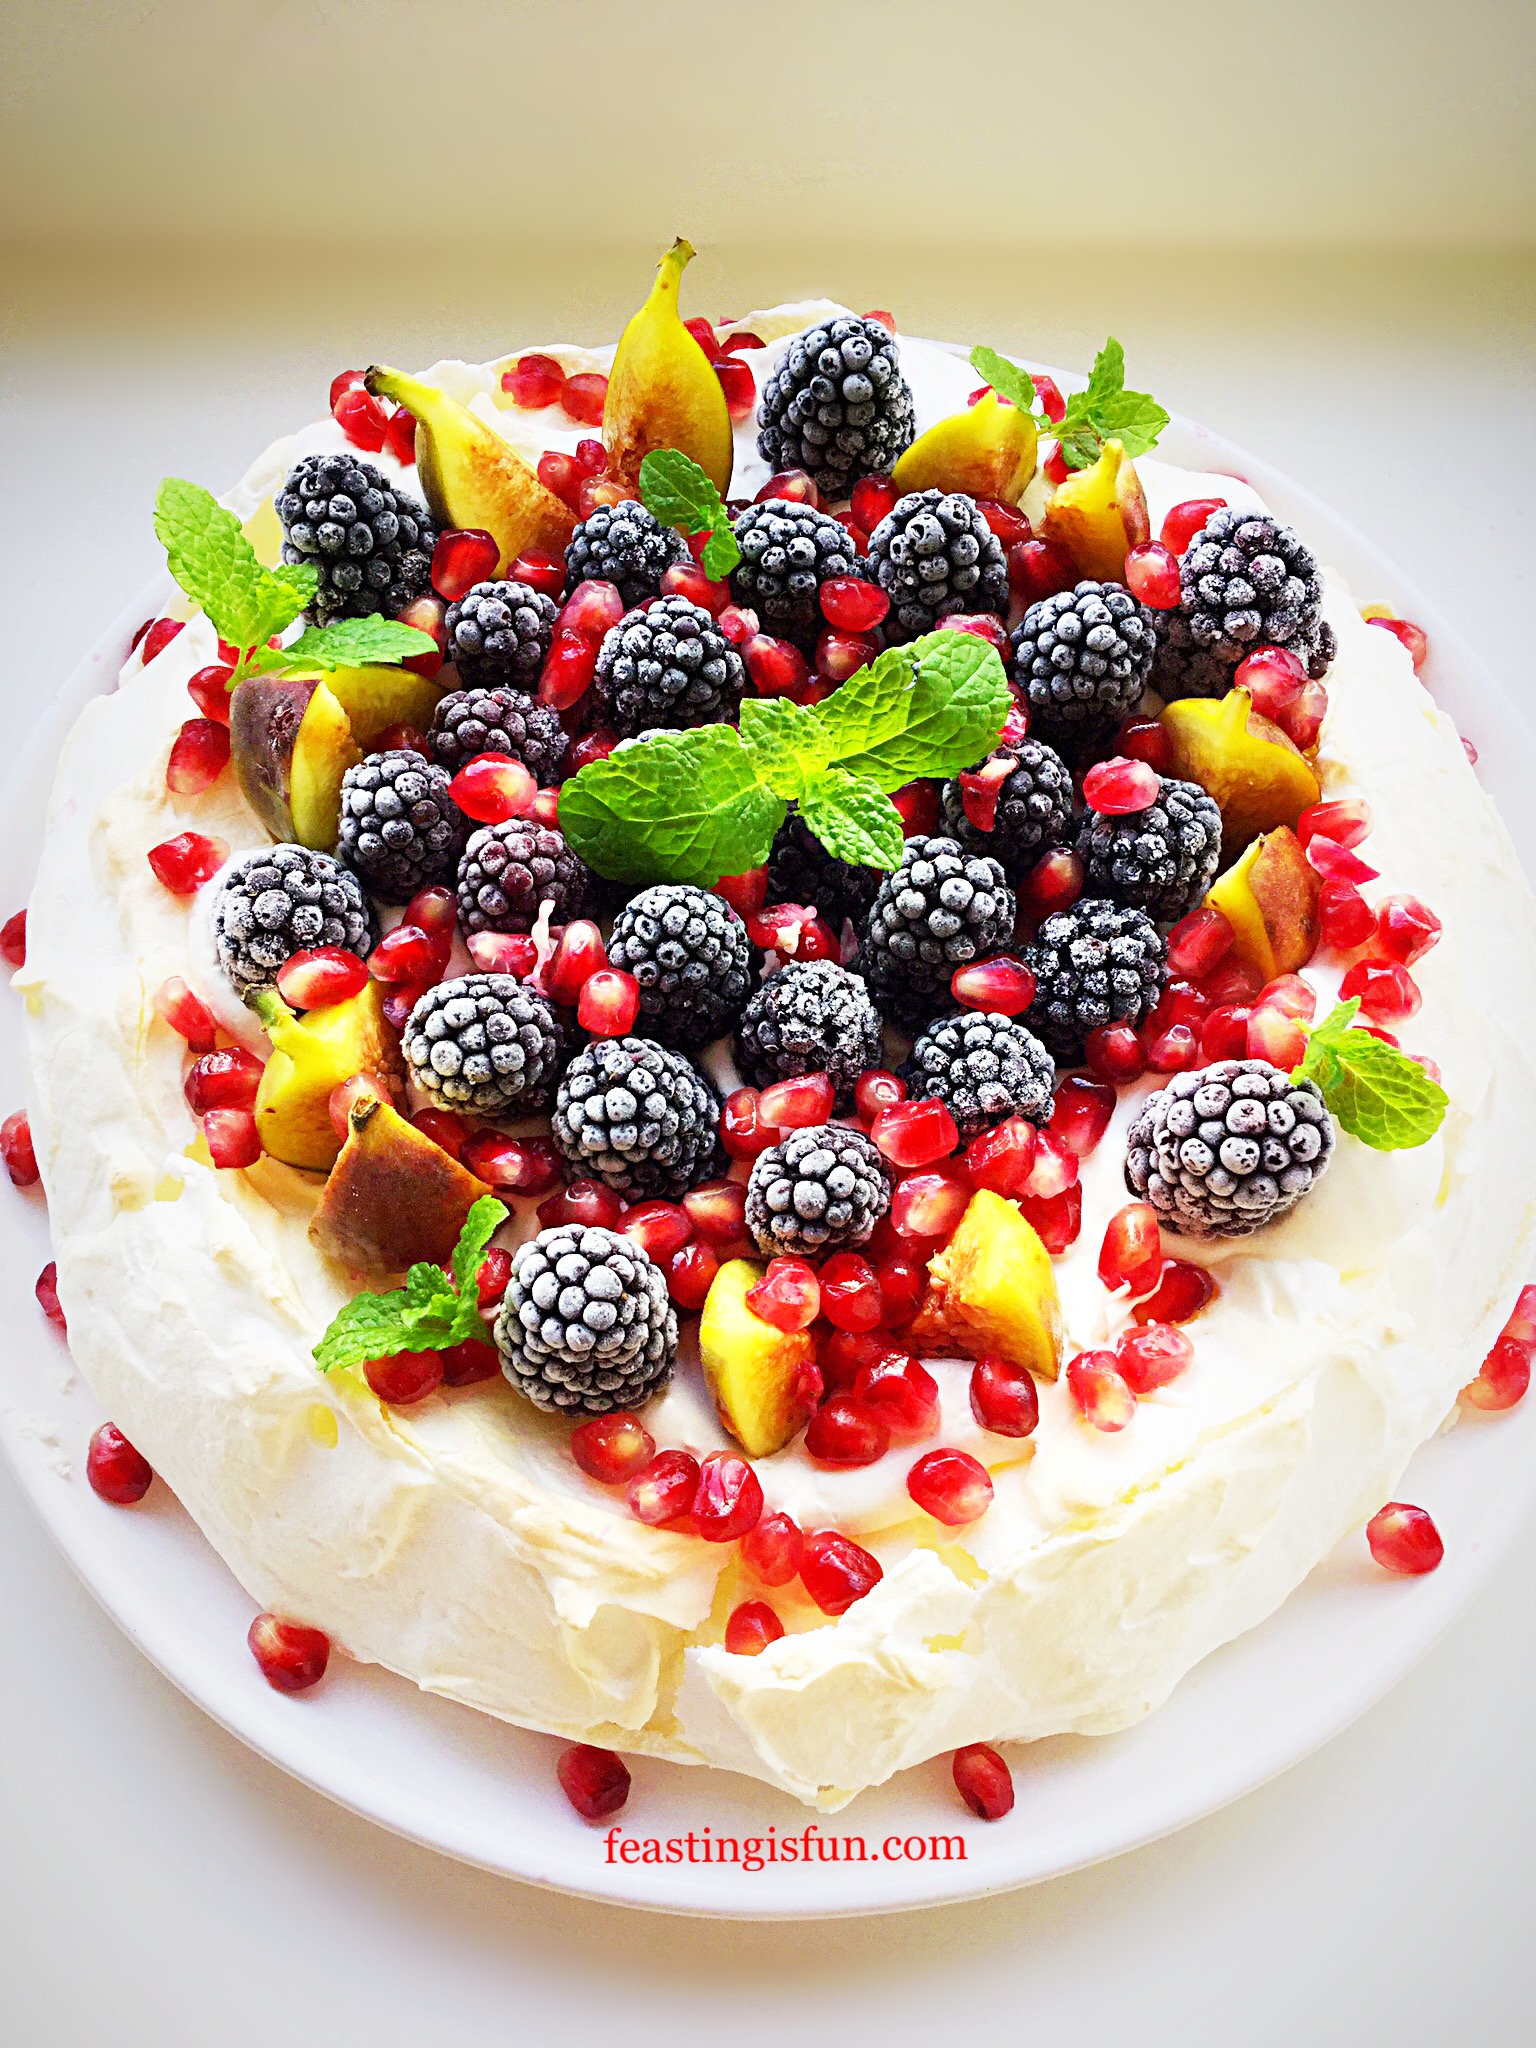
For me, Pavlovas always feel like such an elegant dessert. Since they are simple to make as long as you follow a few basic rules. And they cannot, must not and should not be rushed. Either during the whisking or baking stage. While whisking, all of the sugar must be given time to dissolve in the egg white, otherwise it will leak out during cooling and the meringue will collapse. Likewise, after baking it is important to leave the Pavlova to cool slowly, preferably in the oven. Rushing this stage can cause the meringue structure to badly crack.
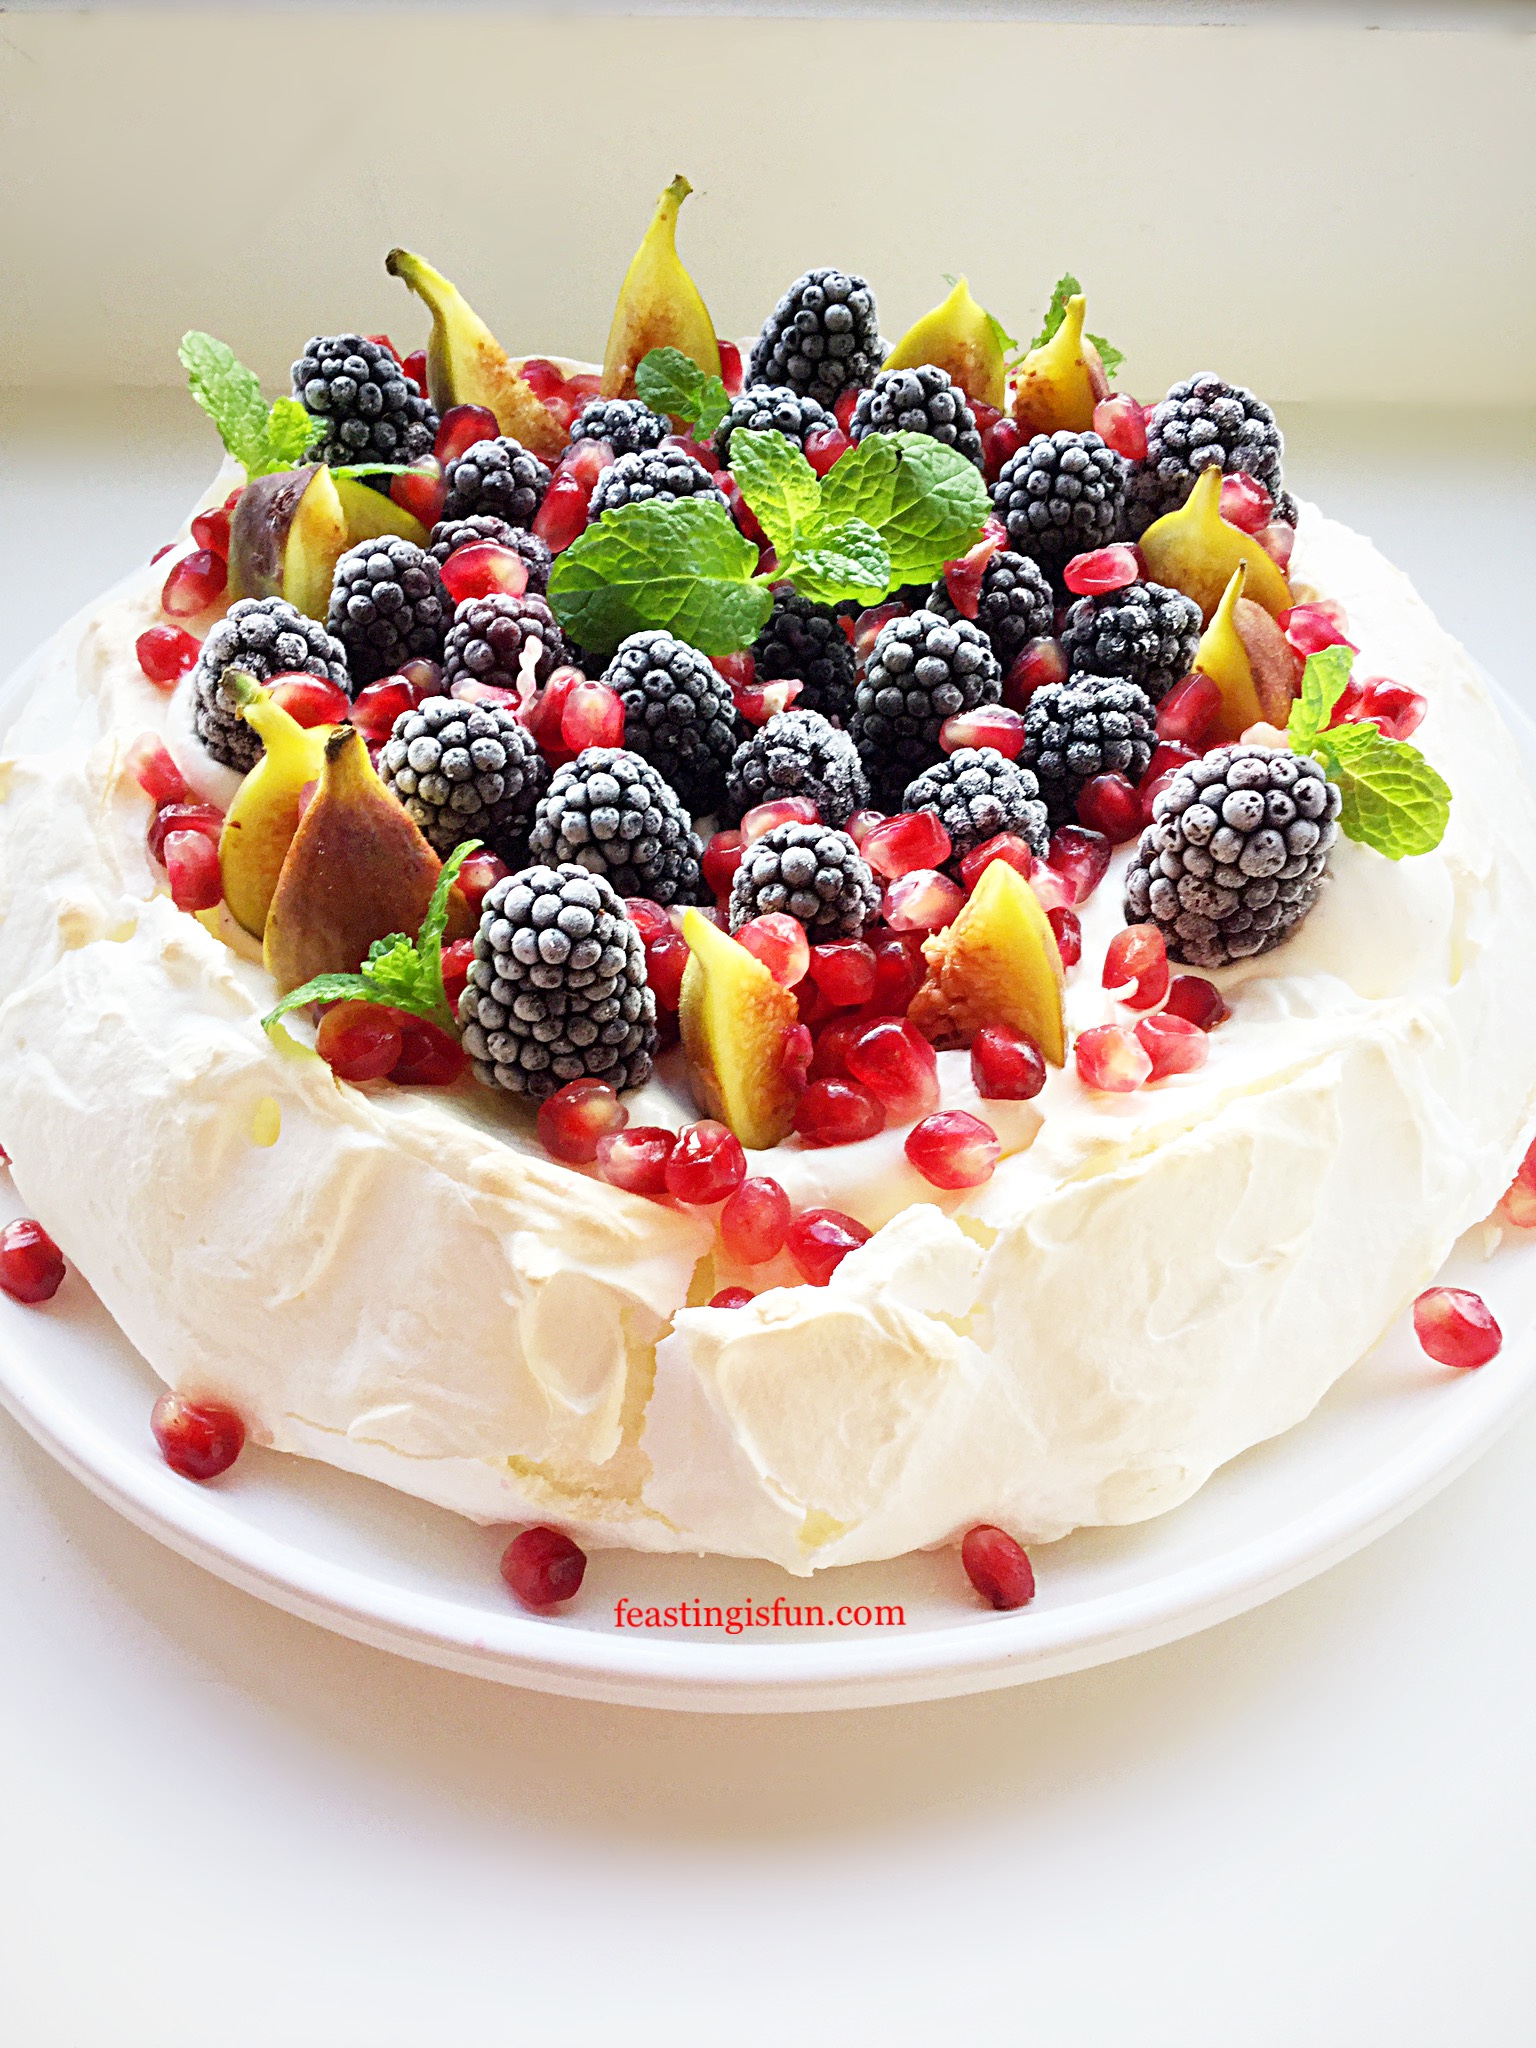
Winter Fruit Topped Pavlova
Please do not let the previous advice discourage you from making a pavlova. Rather I hope it has the opposite effect and encourages you. Because, taking an extra five minutes (that’s 5 minutes not forever!) to ensure the meringue is properly mixed will improve your bake.. Another tip is to bake the Pavlova in the evening, leaving it in the oven overnight to cool. Since this allows the meringue to cool slowly overnight without tying up the oven. Resulting in a quick assembly job the next day and easy your festive workload!
Winter Fruit Topped Pavlova
And if the meringue does crack, it will be covered with whipped cream and fruit. While no one ever need know!
300g Frozen Blackberries – I buy them from Waitrose
1-2 Fresh Pomegranates – seeds removed
Optional – Fresh Mint to garnish
Preheat the oven to 180C/160C fan, 350F, gas mark 4
Making the meringue base:
First of all draw an 8in/20cm circle on to a piece of baking parchment. Turn the paper over and place on to a baking tray.
Wipe around the inside of a very clean, large bowl with half a lemon.
Add four eggs white to the bowl and the juice of half a lemon.
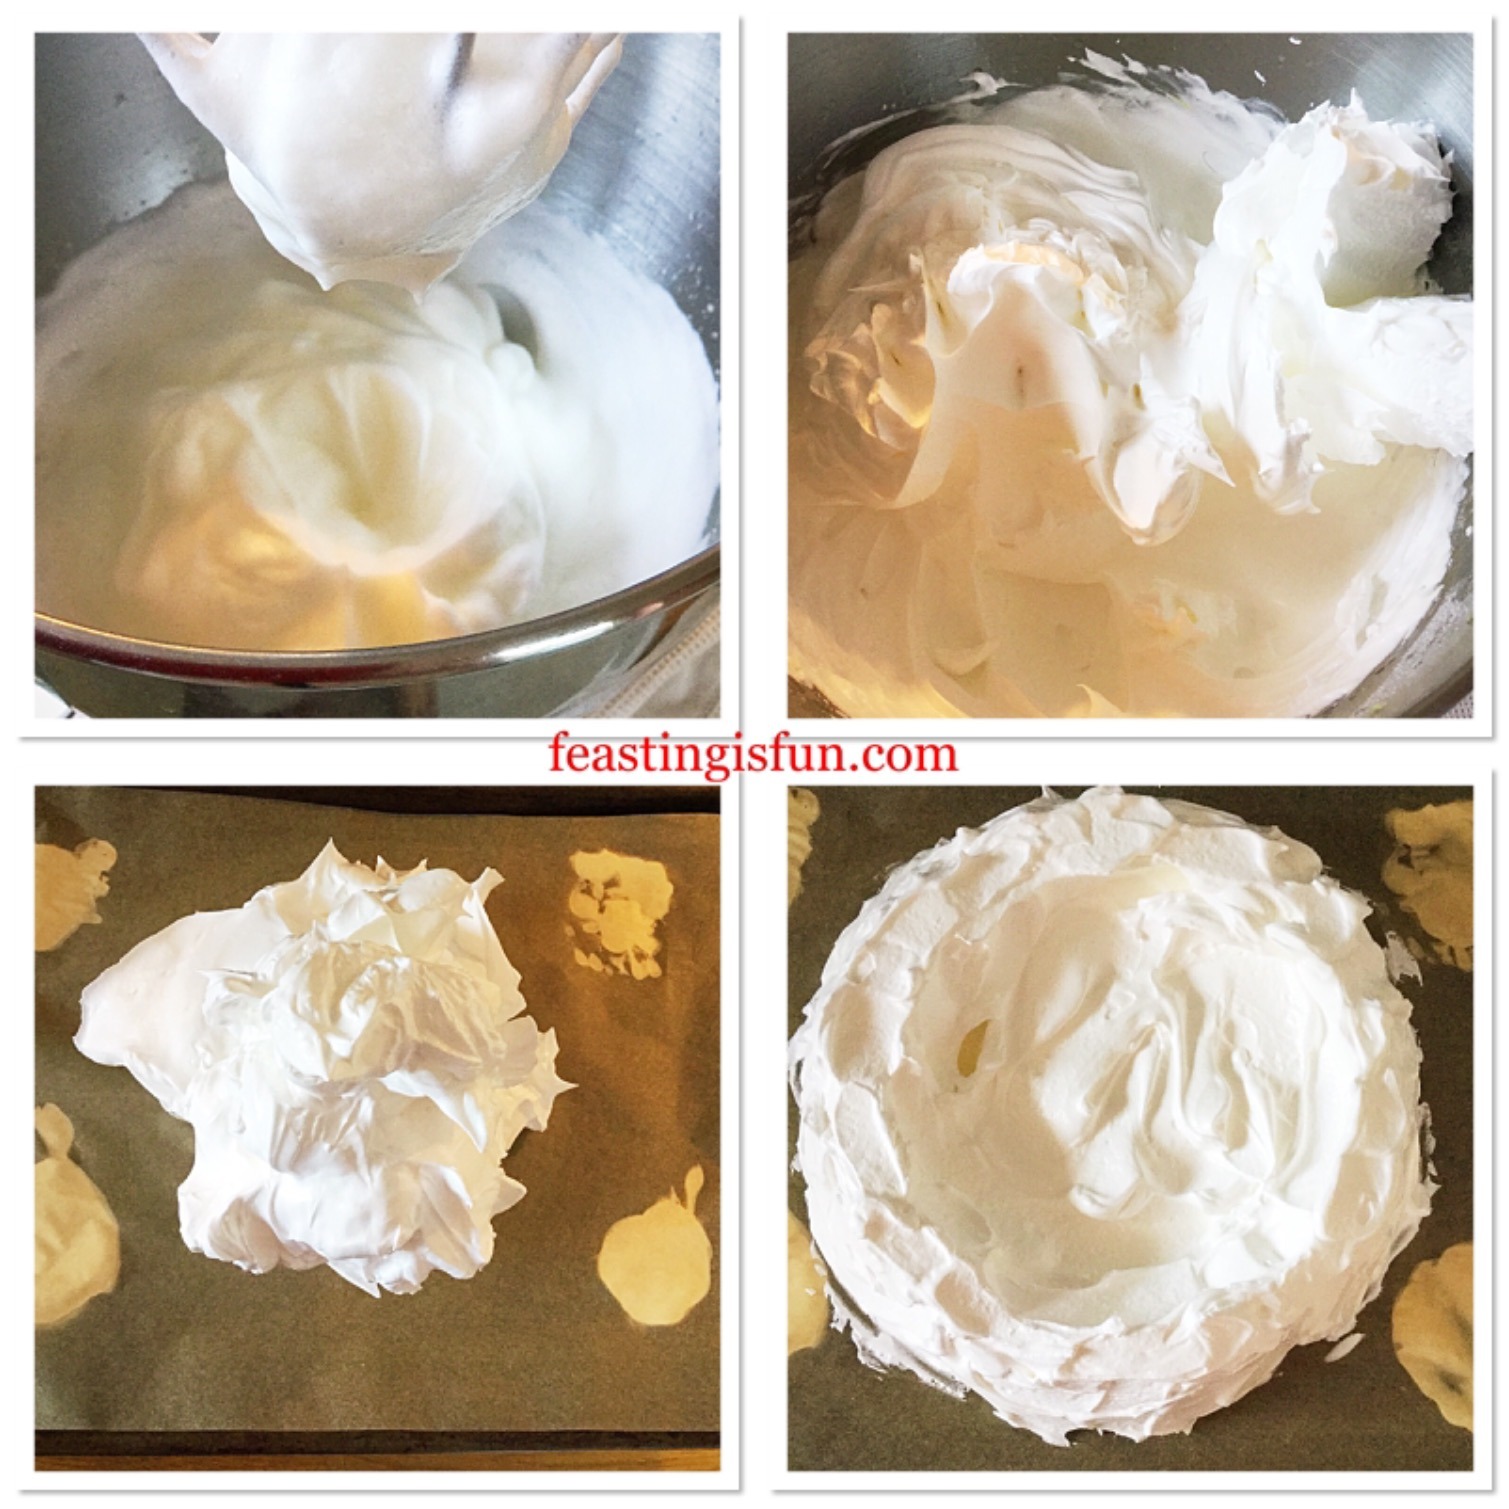
Whisk the egg whites until they form a stiff peak.
Continue whisking on a medium speed, slowly adding one tablespoon of sugar at a time to the egg whites.
When all of the sugar is added the mixture should be thick and glossy. Rub a little of the meringue between your finger and thumb, if it feels gritty continue to whisk. Check again after a couple of minutes. As soon as it feels smooth and silky it is ready.
Remove a small amount of the meringue and use it as glue to stick the baking parchment to the baking tray.
Spoon the meringue mixture on to the baking parchment, inside the circle.
Use a palette knife to shape the meringue into a disc, building up the outside edge.
Baking the meringue:
Place the meringue into the centre of the oven and bake at the preheated temperature for 5 minutes.
Reduce the oven temperature to 120C/100C fan, 250F, gas mark 1/2 and continue to bake for 1 hour.
Do not open the oven during baking.
As soon as the baking time has elapsed turn off the oven and leave the meringue to cool completely in the oven.
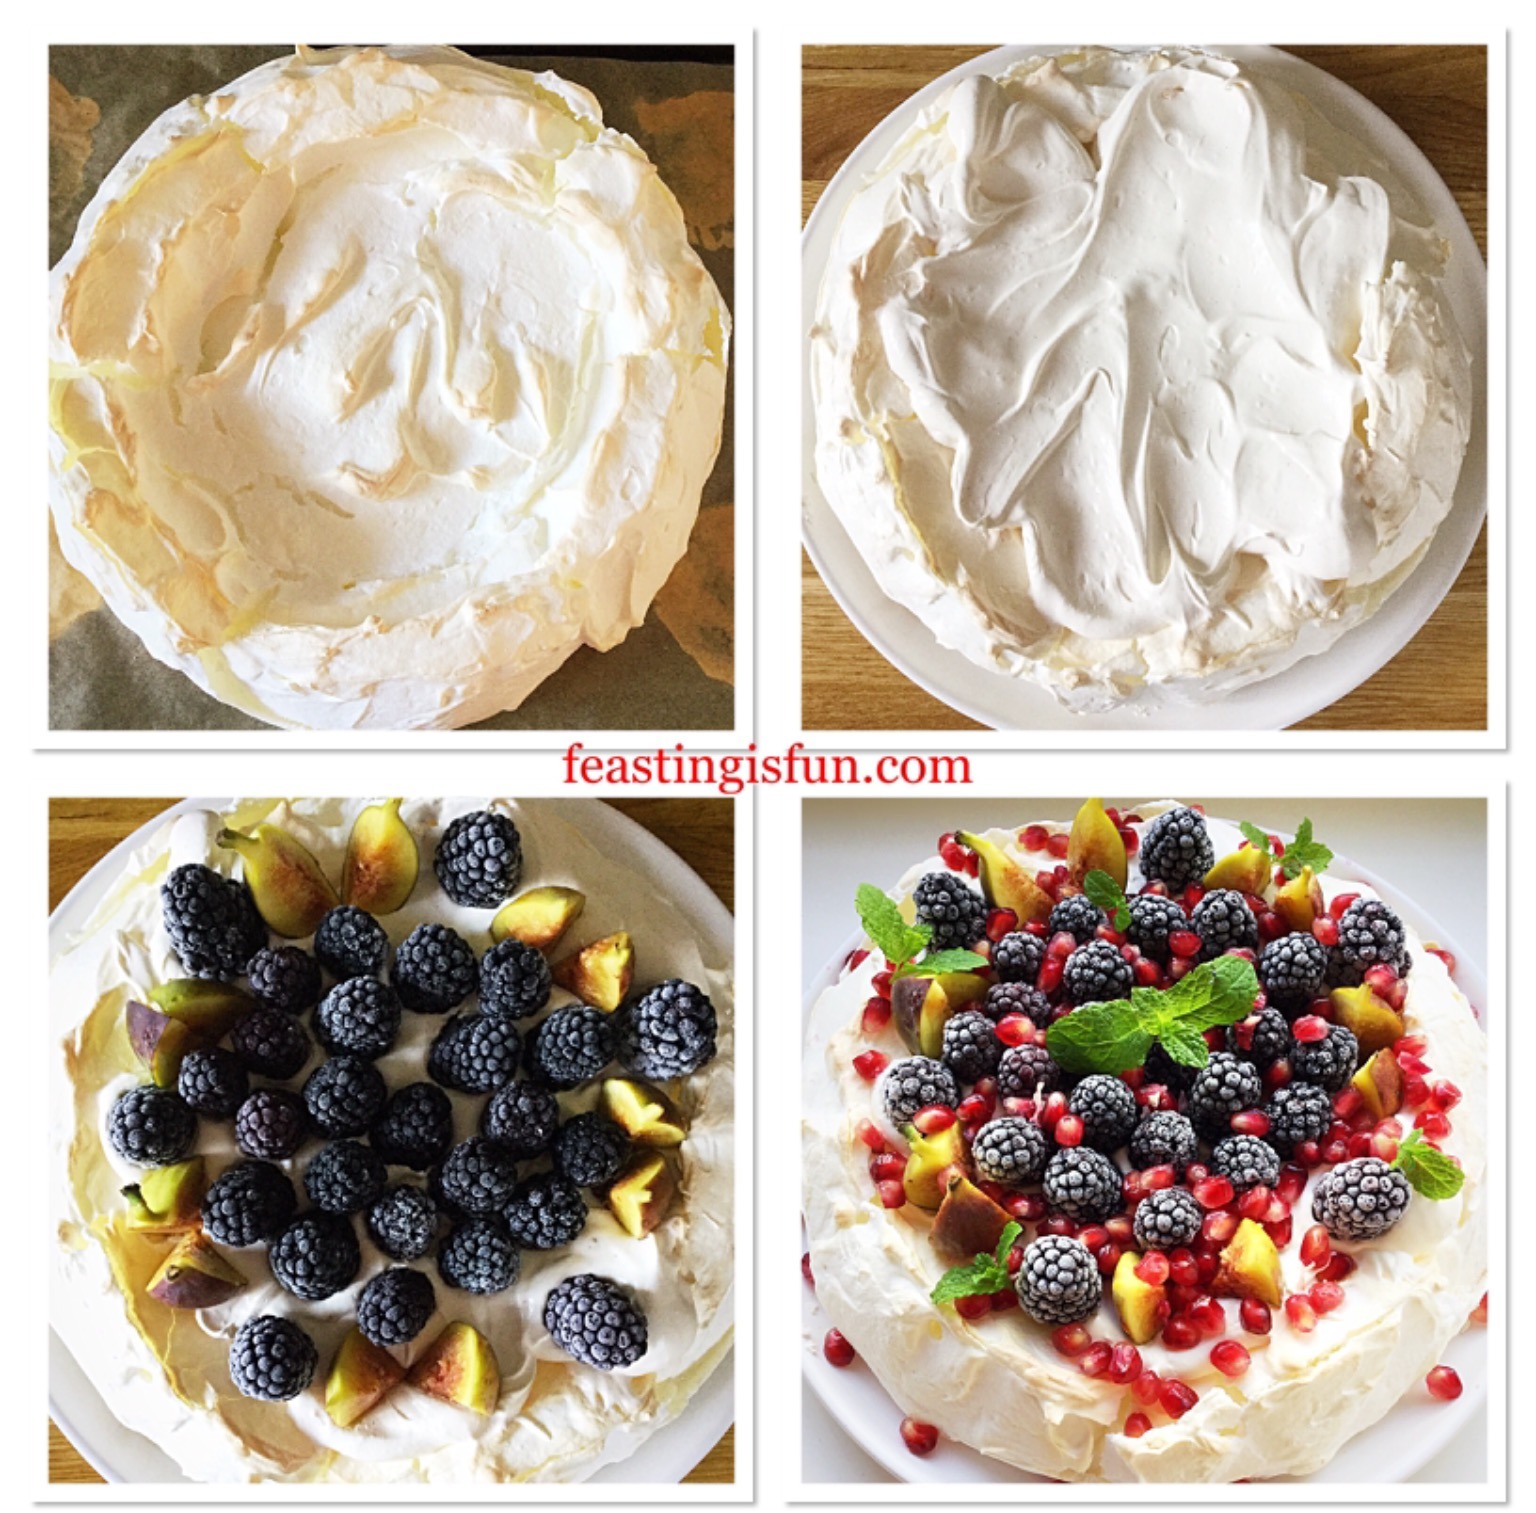
Once cooled remove the meringue from the oven.
Filling and decorating the Pavlova:
Pour the cream into a large bowl. Add the vanilla bean paste.
Whip the cream until it is thick but not stiff.
Carefully run a palette knife between the meringue and baking parchment.
Place the meringue on to a plate or cake stand.
Spoon the whipped cream on to the meringue.
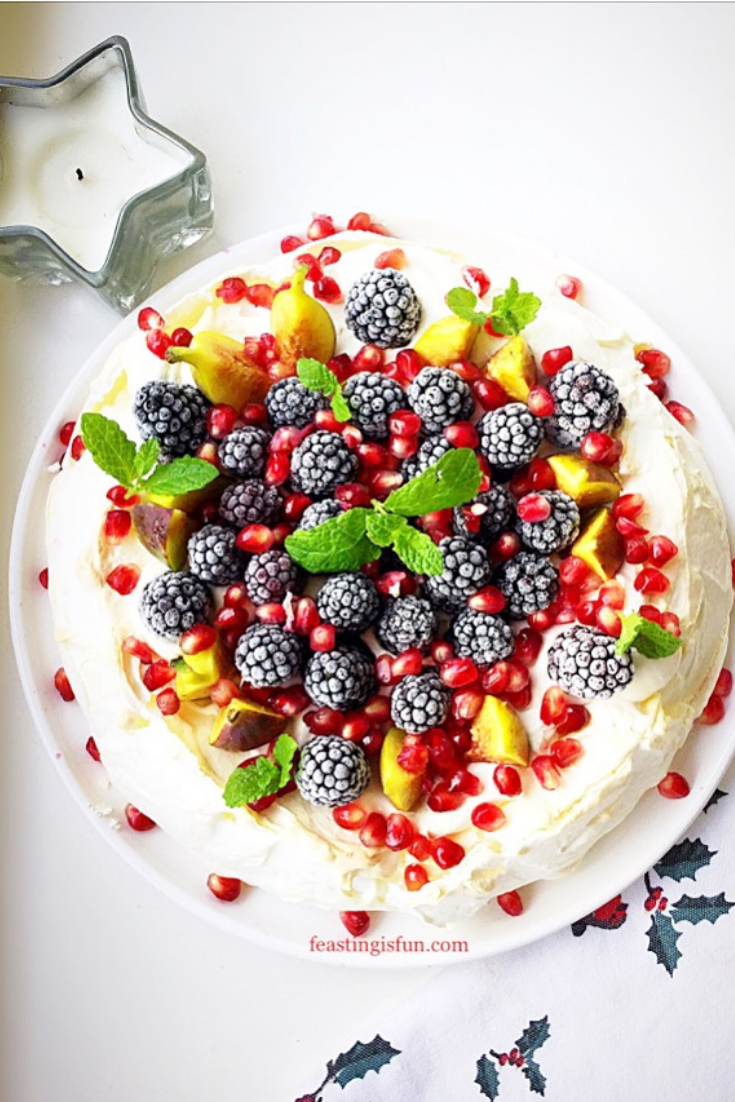
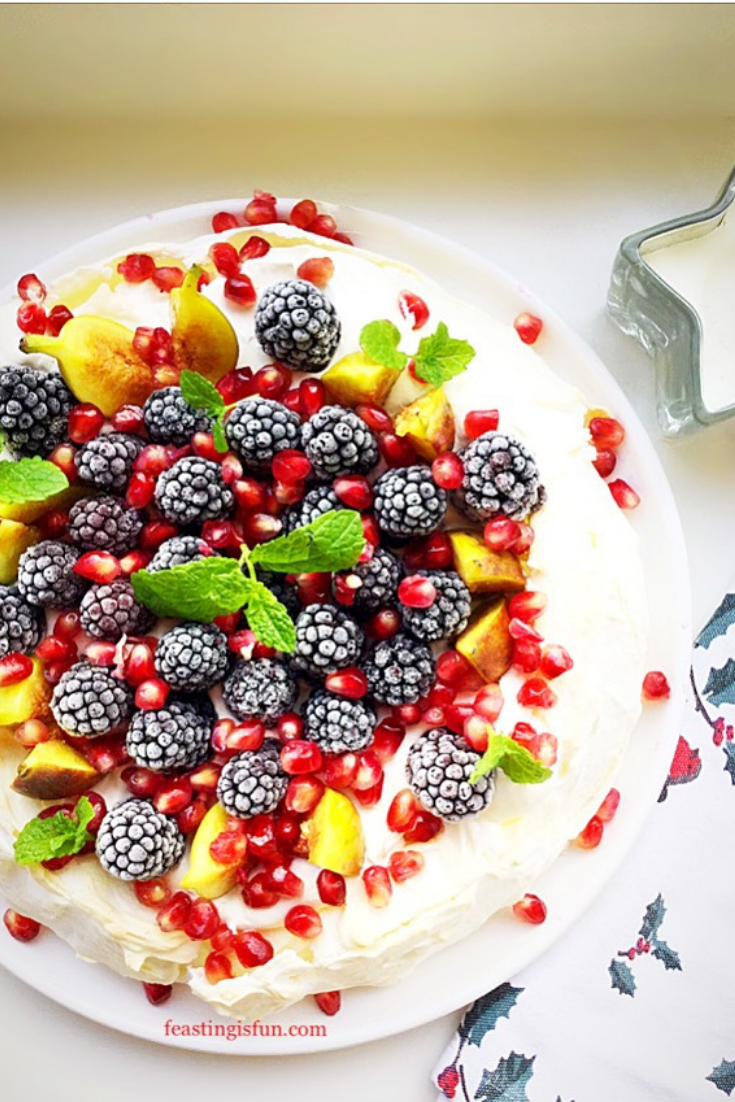
Add the figs and blackberries. Finally sprinkle over with pomegranate seeds.
Garnish with fresh mint.
Alternatively, sprinkle over a dusting of icing sugar to create an extra festive feel!
Fill and decorate the Pavlova 1-2 hours prior to serving. So that the blackberries have time to defrost.
Winter Fruit Topped Pavlova
To serve, cut the Pavlova into slices and use a cake knife to transfer to a dessert plate.
The meringue pavlova base can be made a day in advance. After filling and decorating keep the Pavlova refrigerated and away from strong smells. The Pavlova will keep for up to 2 days in the fridge.
If you have enjoyed this recipe for Winter Fruit Topped Pavlova you may also like these:
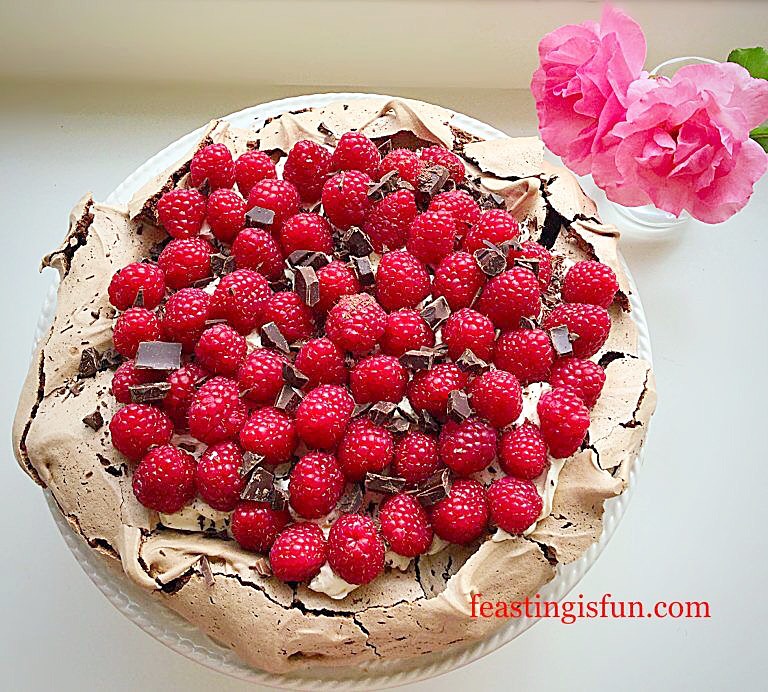
With a crisp outer shell and marshmallow centre Pavlovas are a delicious dessert. Since they can be filled with many different combinations of fruit they are perfect for using seasonal or frozen fruit. While this recipe uses a whipped cream filling, see my Raspberry Topped Lemon Curd Pavlova for an alternative filling. Also, all Pavlova recipes here on Feasting is Fun are gluten free (please see individual recipes for recommendations). As a result this dessert is a festive winter feast that more people can enjoy.
So, whatever you are making, baking and creating in your kitchens at this festive time, have fun preparing and sharing your feast.
Sammie xx
No part of this post may be reproduced or duplicated without the written permission of the owner. Please see my Disclosure Policy.
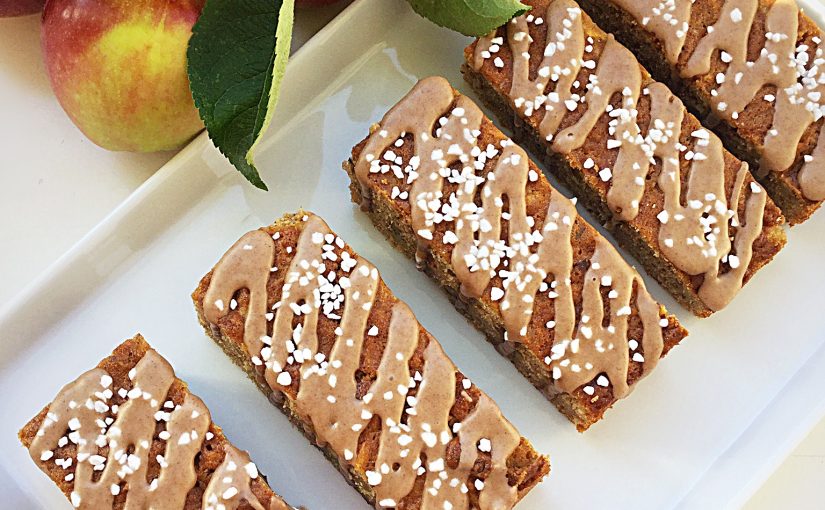
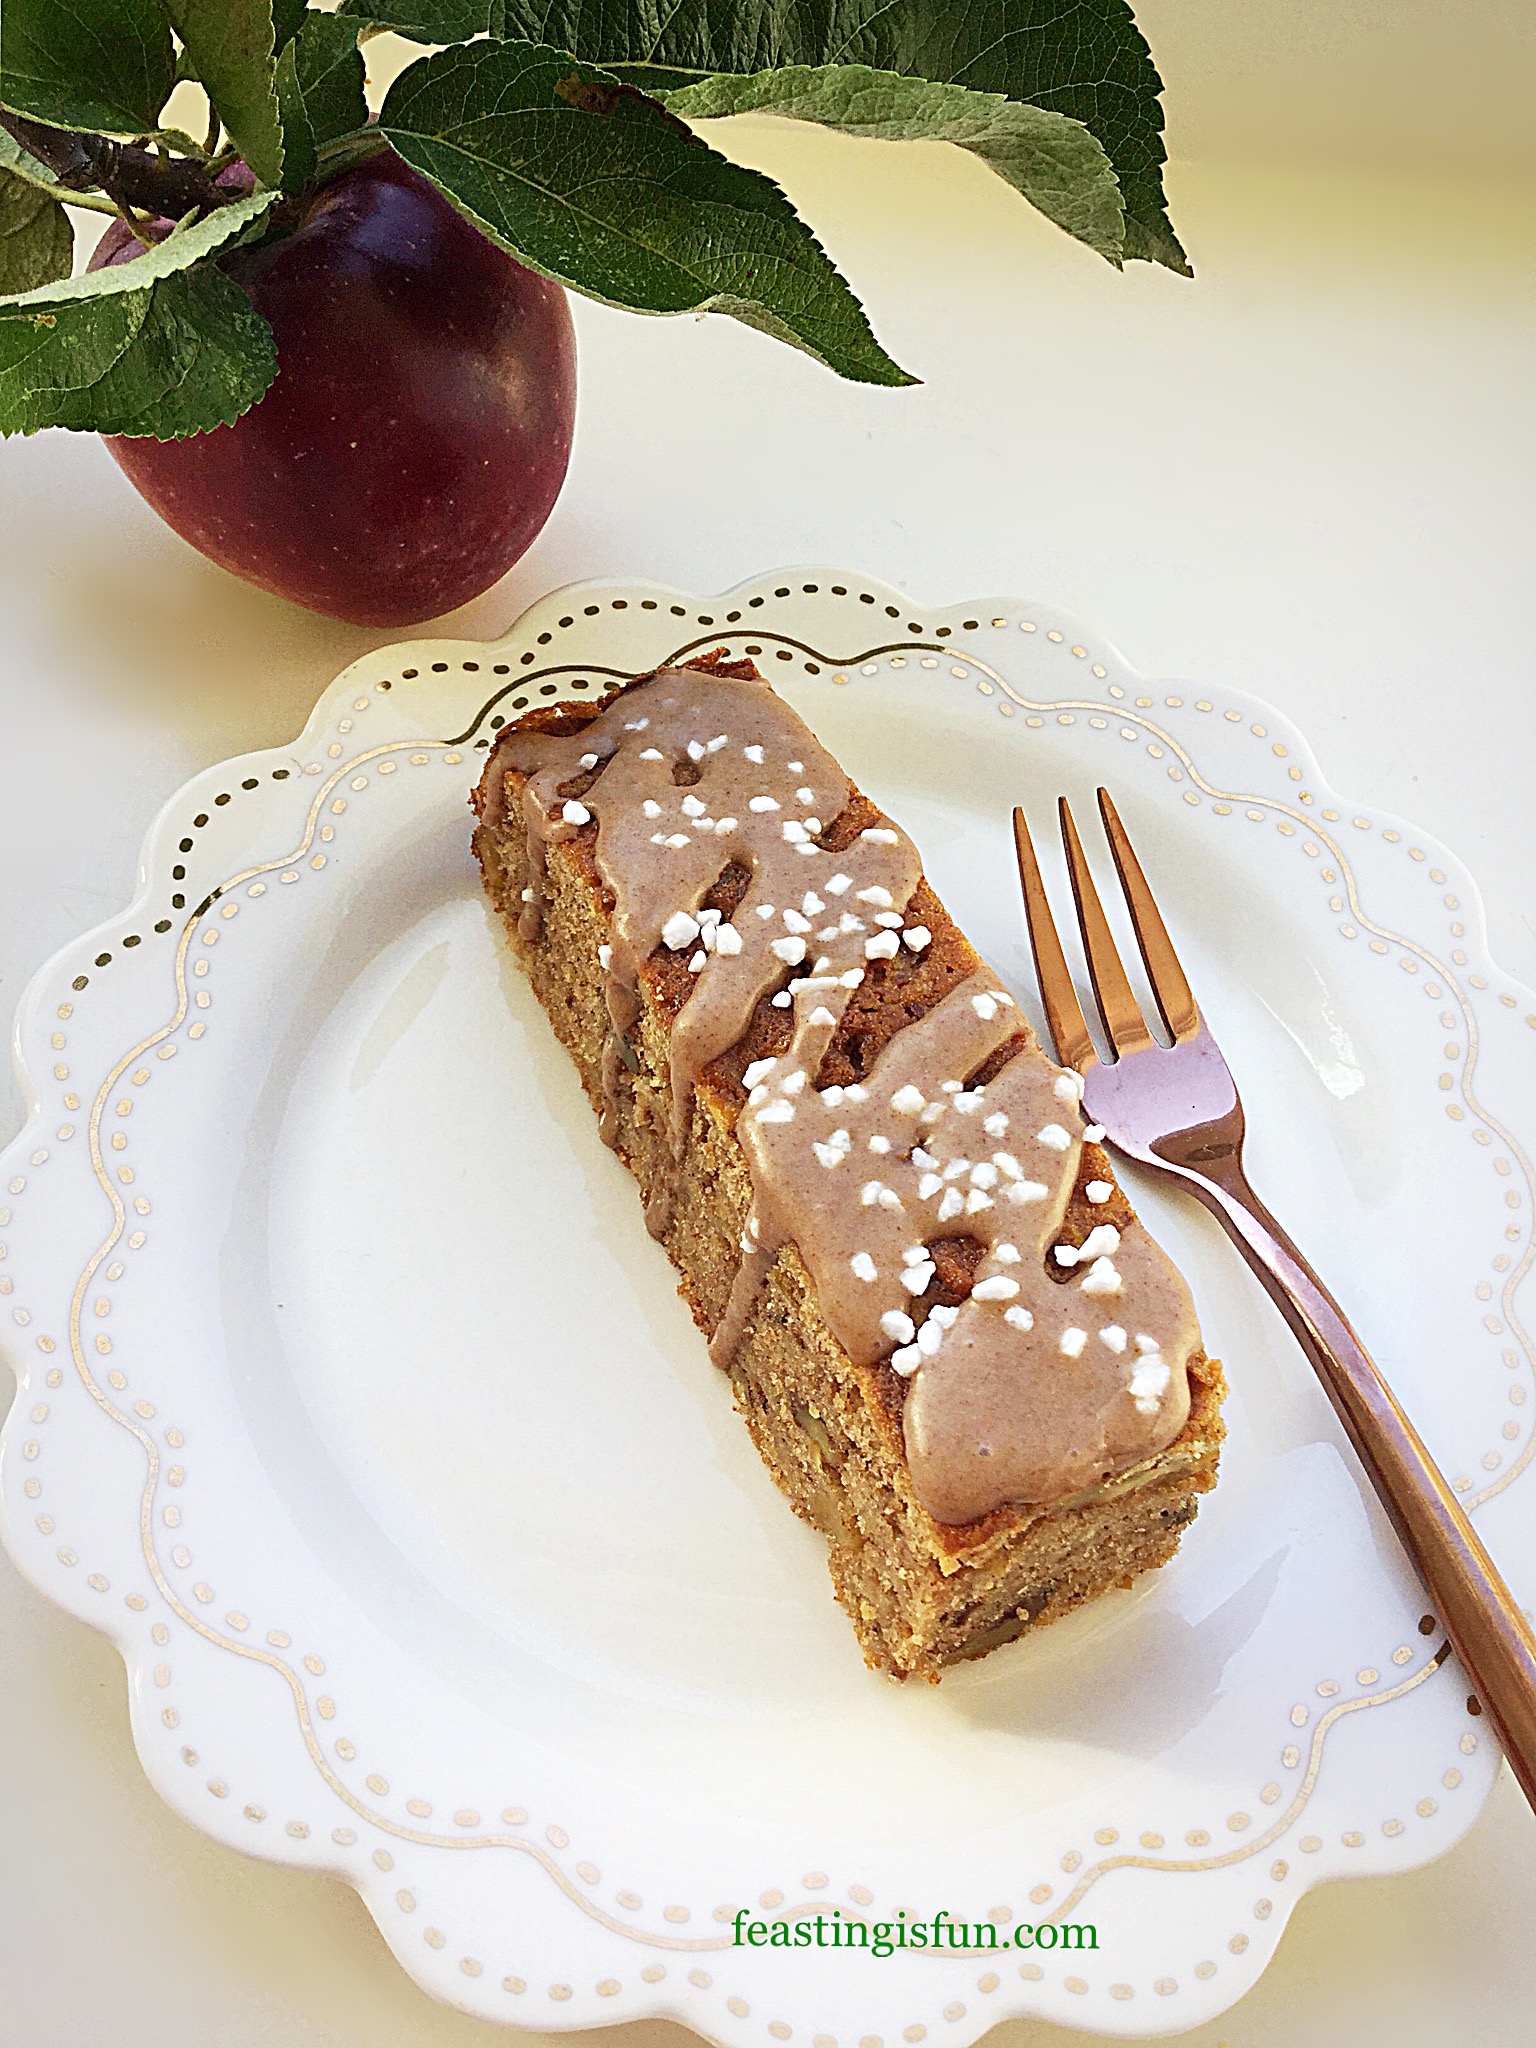
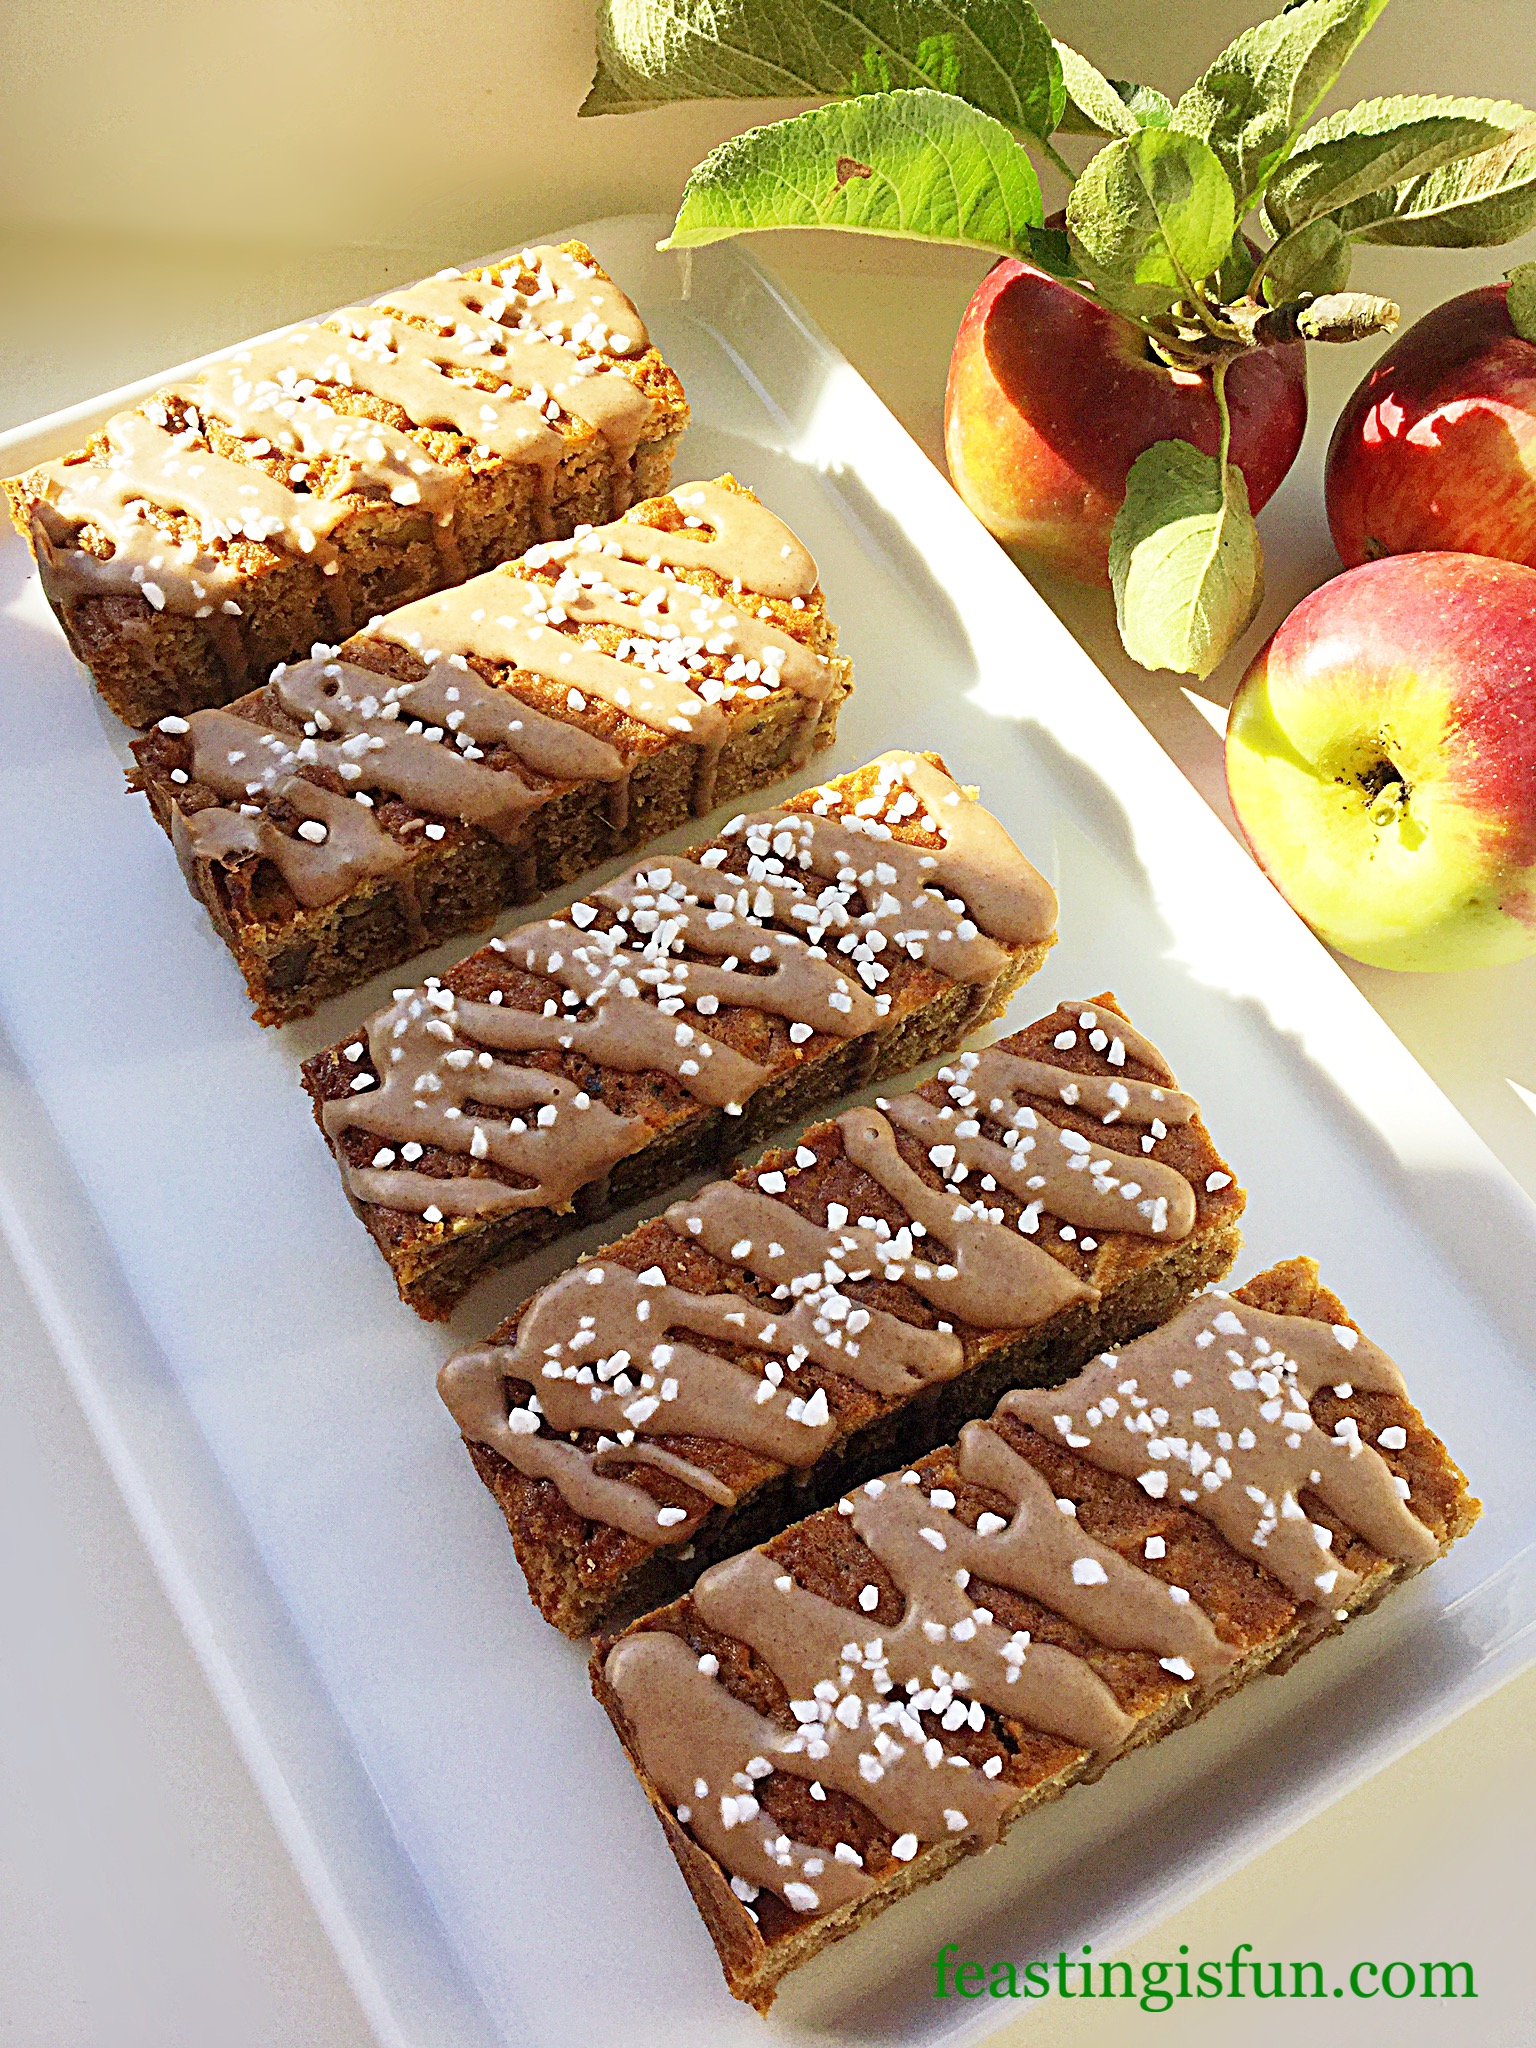
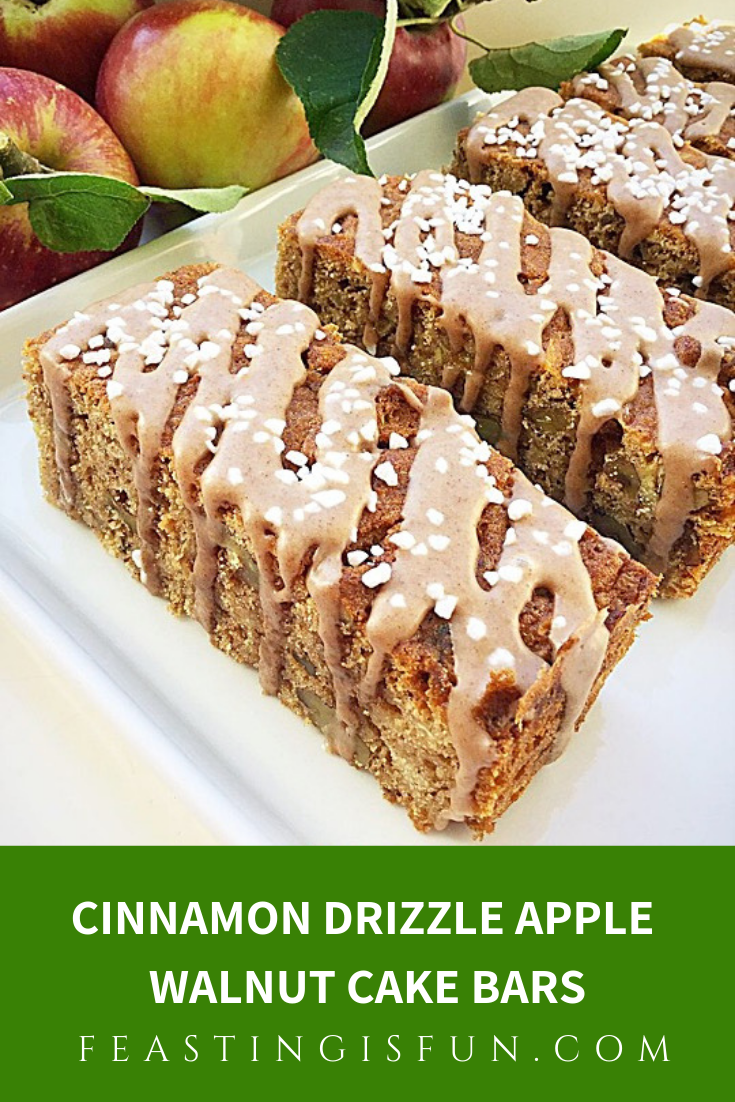
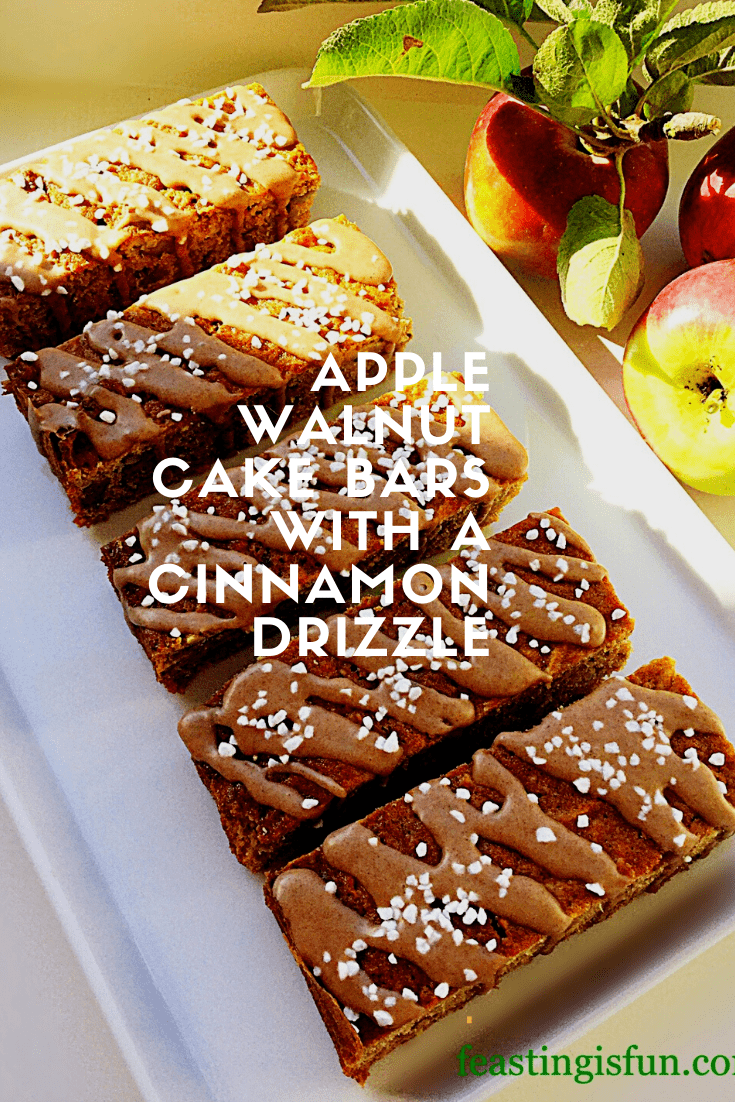
Today I have a real treat for you, my Cinnamon Drizzle Apple Walnut Cake Bars. Packed with freshly grated apple and toasted walnuts these cake bars are full of flavour. And a simple cinnamon drizzle adds just the right amount of sweetness, while the sugar nibs add extra crunch. Resulting in a simple traybake that is a treat on the tongue and the senses.
Cinnamon Drizzle Apple Walnut Cake Bars
I adore Autumn. While gales and rain lash down, there are also the bright, golden sunshine filled days. Because of the variations in the weather, some days are perfect for gardening, having a tidy up, and picking fruit and windfalls. Yet when the weather rages I find comfort in the kitchen, baking delicious cakes that make the whole house smell warm and inviting. And when I can include produce from my own garden, such as the apples used in both the cake bars and photographs, I’m even happier.
Cinnamon Drizzle Apple Walnut Cake Bars
Our Apple Trees
Due to the very hot summer we have had this year I wasn’t sure how well our two apple trees would fare. Because of the heat this years apples are sweeter than usual. While both our trees produce eating apples, one usually small, red and sweet, the other red and green, sharper in flavour. Similar to a Granny Smith apple’s flavour. As a result of the summer weather both varieties have a more intense apple flavour and are delicious to eat straight from the tree.
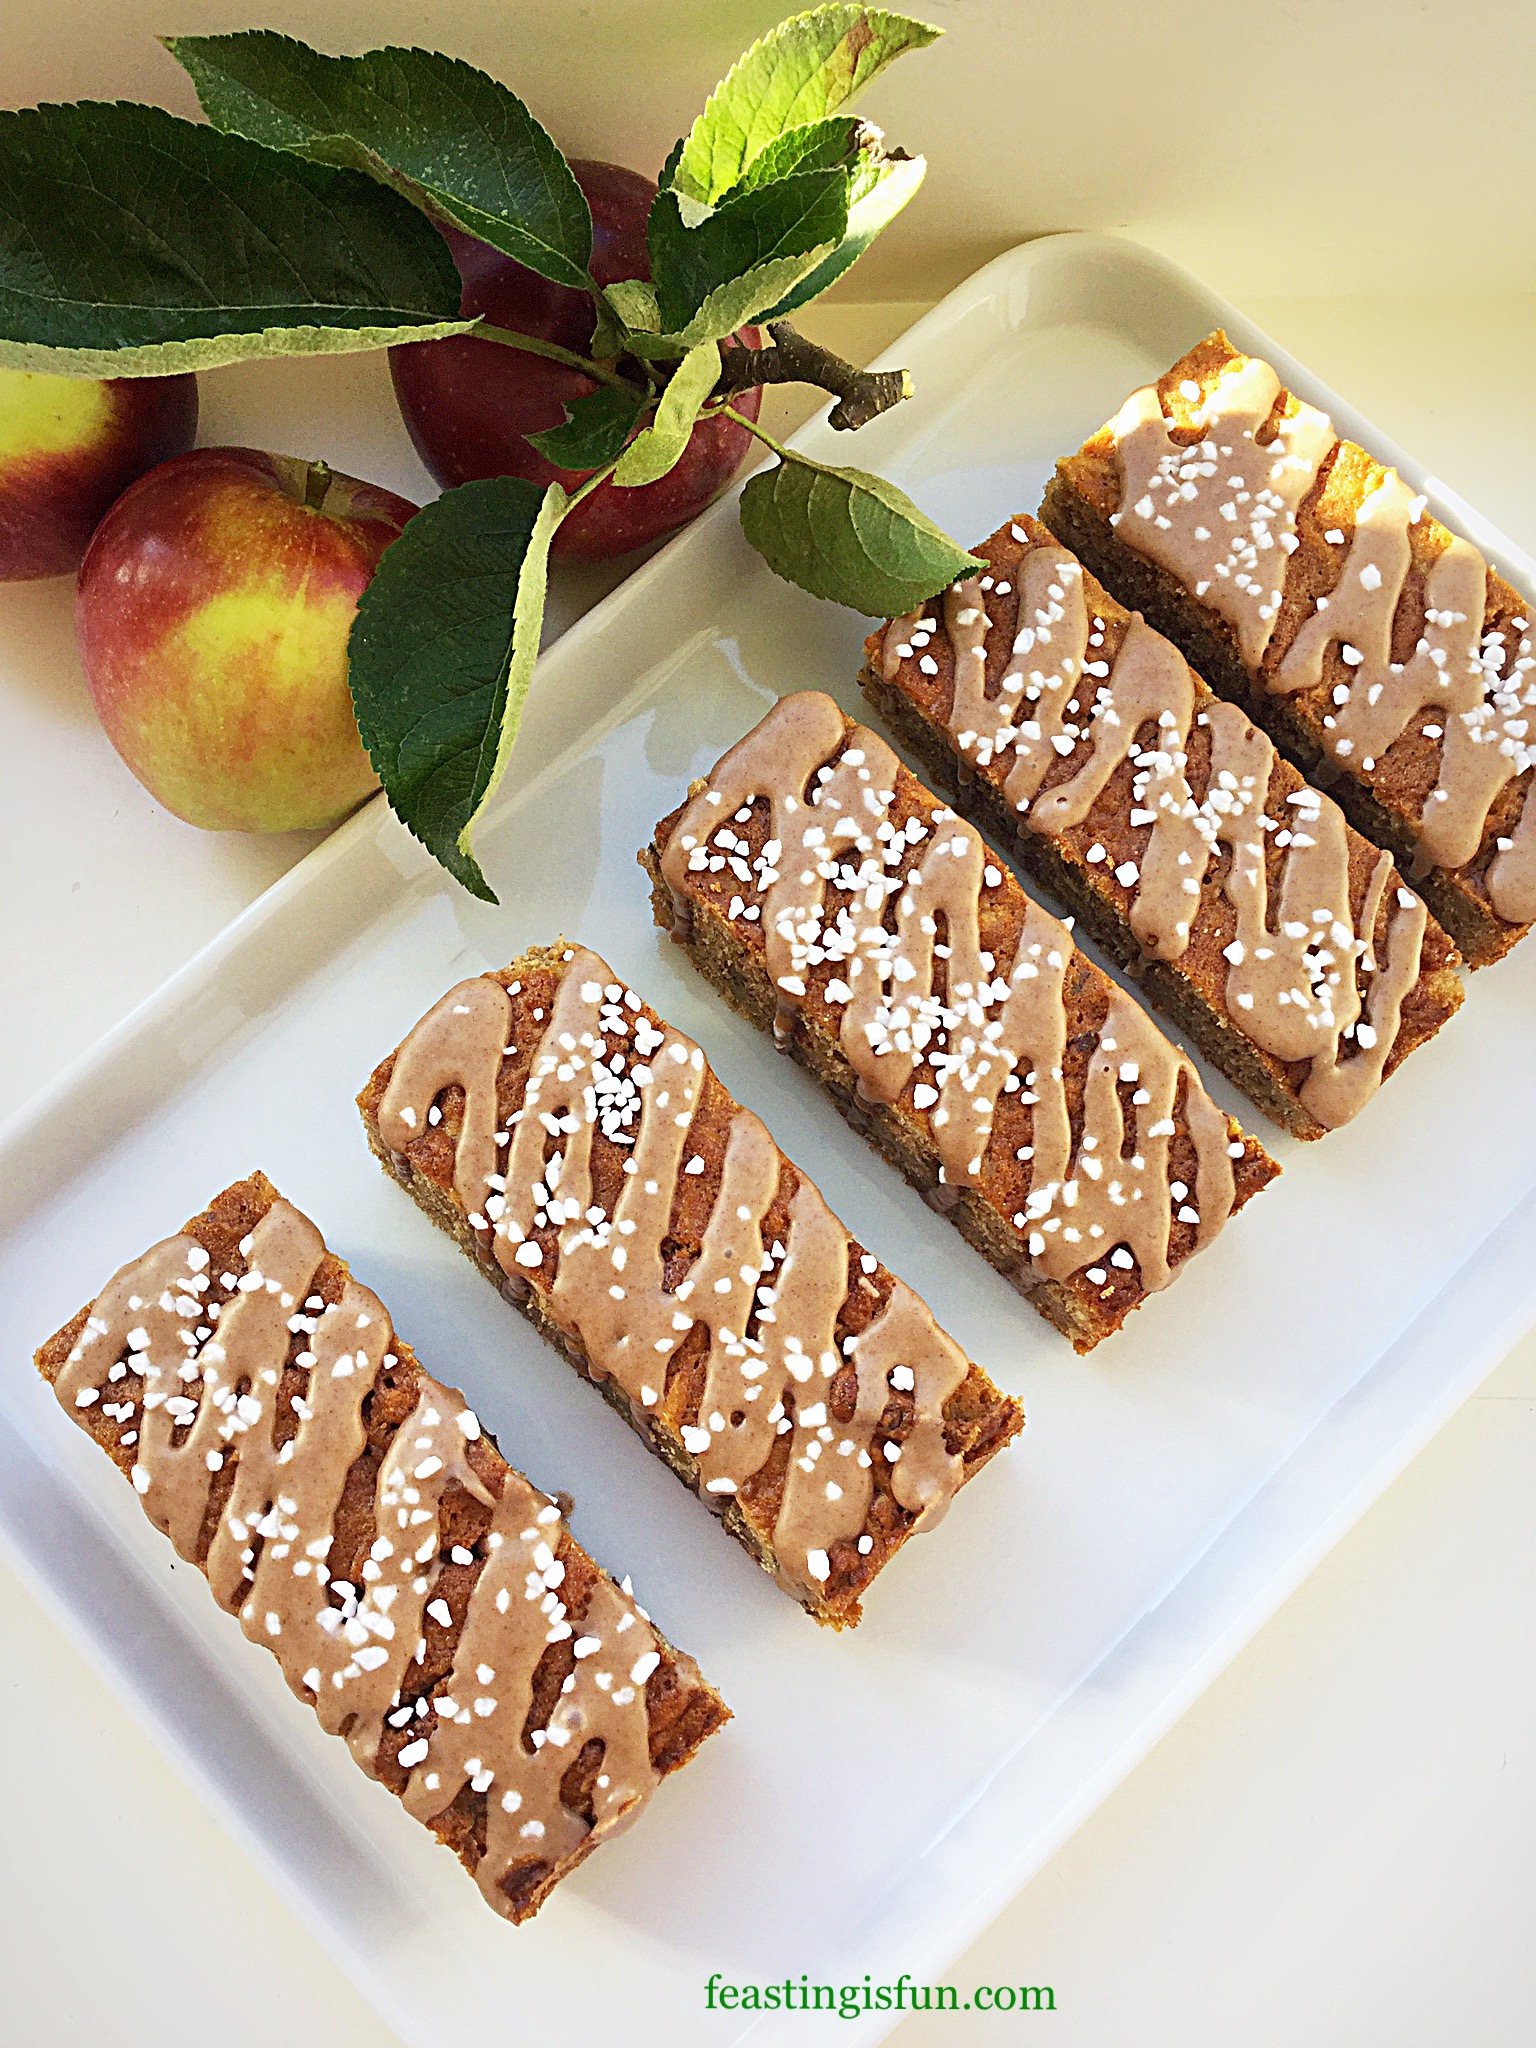
Cinnamon Drizzle Apple Walnut Cake Bars
Since we have plenty of windfalls from the recent storms I have used them in the recipe. If you have access to windfall apples make the most of nature’s opportunity. Either use them to make these cake bars or perhaps my Apple Pie? Finally, a quick note, if you like puddings, then I should mention that this cake is delicious served with hot custard!
Recipe: Cinnamon Drizzle Apple Walnut Cake Bars make 16
Optional – Pearl or Nibbed Sugar – I use Dansukker Parlsocker available from Amazon
For this recipe you will need a 22.5cm x 30cm x 5cm (9” x 12” x 2”) tin lined with baking parchment.
Making and baking the cake:
Preheat the oven to 190C/170C fan, 375F, gas mark 5.
First of all add the butter, soft, light brown sugar and salt to a large bowl. Due to the quantity of ingredients I found a wide bowl easier to use.
Beat the sugar and butter together until creamy with no visible lumps.
Add the 4 eggs, 75g/3oz of flour and the spices to the bowl. Whisk everything together until fully combined.
Sieve the remaining flour and baking powder into the bowl and added the chopped walnuts.
Because some apples turn brown quickly once cut or grated I add them last.
Finally fold all of the ingredients together until they are just combined.
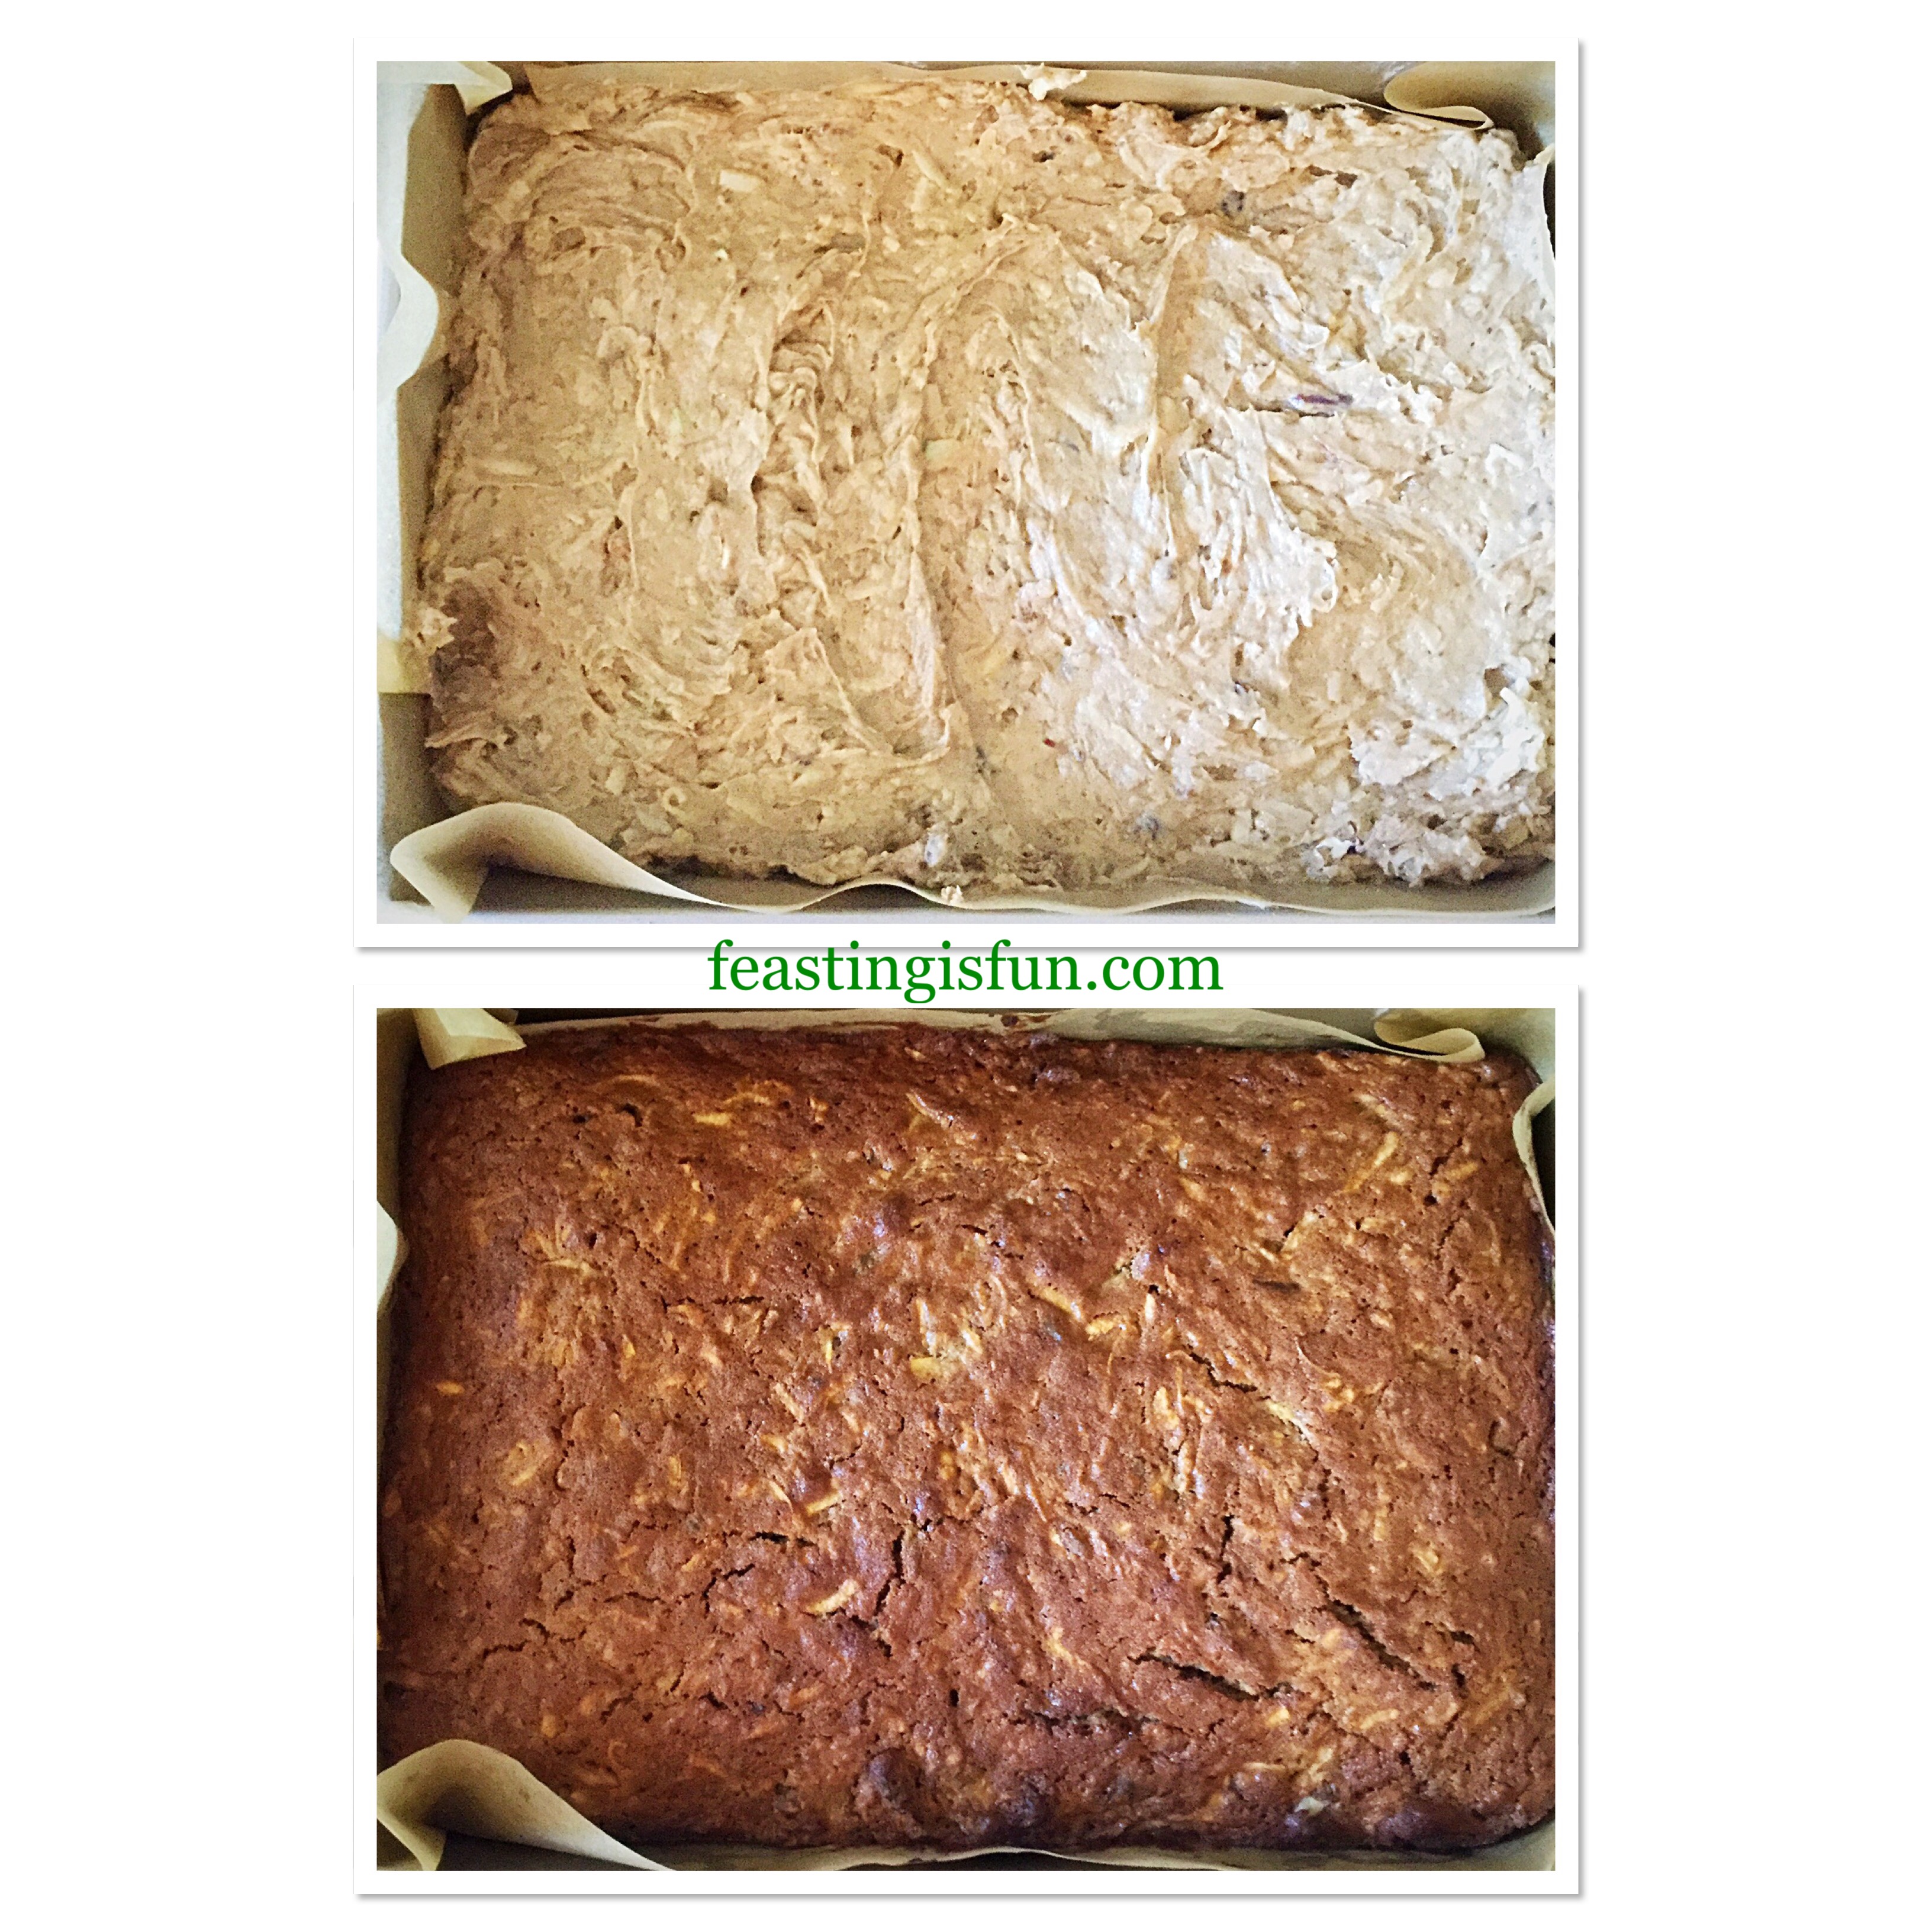
Making the cake batter.
Spoon the cake batter into the prepared tin and ensure the batter is even and the top is smooth.
Place the cake tin into the centre of a preheated oven and bake for 40-45 minutes.
The cake is baked when it is golden in colour and firm (with only a little give) to touch in the centre.
As soon as the cake is baked remove from the oven and leave to cool completely in the tin.
Filling the tin and baking the cake.
Portioning and decorating the cake bars:
Add the icing sugar and cinnamon to a large jug. Using a balloon whisk, stir the two powders to combine and break up any lumps.
Pour 2 tablespoons of cold tap water into the jug and stir using the whisk. Add more water as needed until a thick, not runny consistency is achieved.
Decant the cinnamon icing into a piping bag fitted with a small round nozzle. Alternatively use a plastic sandwich bag and just prior to decorating cut a very small hole in one corner, this also applies to disposable piping bags.
To prepare the cake for decorating first of all cut across the width of the cake, dividing it in half. Now cut from top to bottom in the middle of the cake creating 4 quarters. Cut each quarter into 4 bars from top to bottom.
While you can decorate the cake as a whole, I like to see the drizzle of icing on each cake bar.
Separate the bars and place on to a cooling rack over a baking tray, to catch any drips.
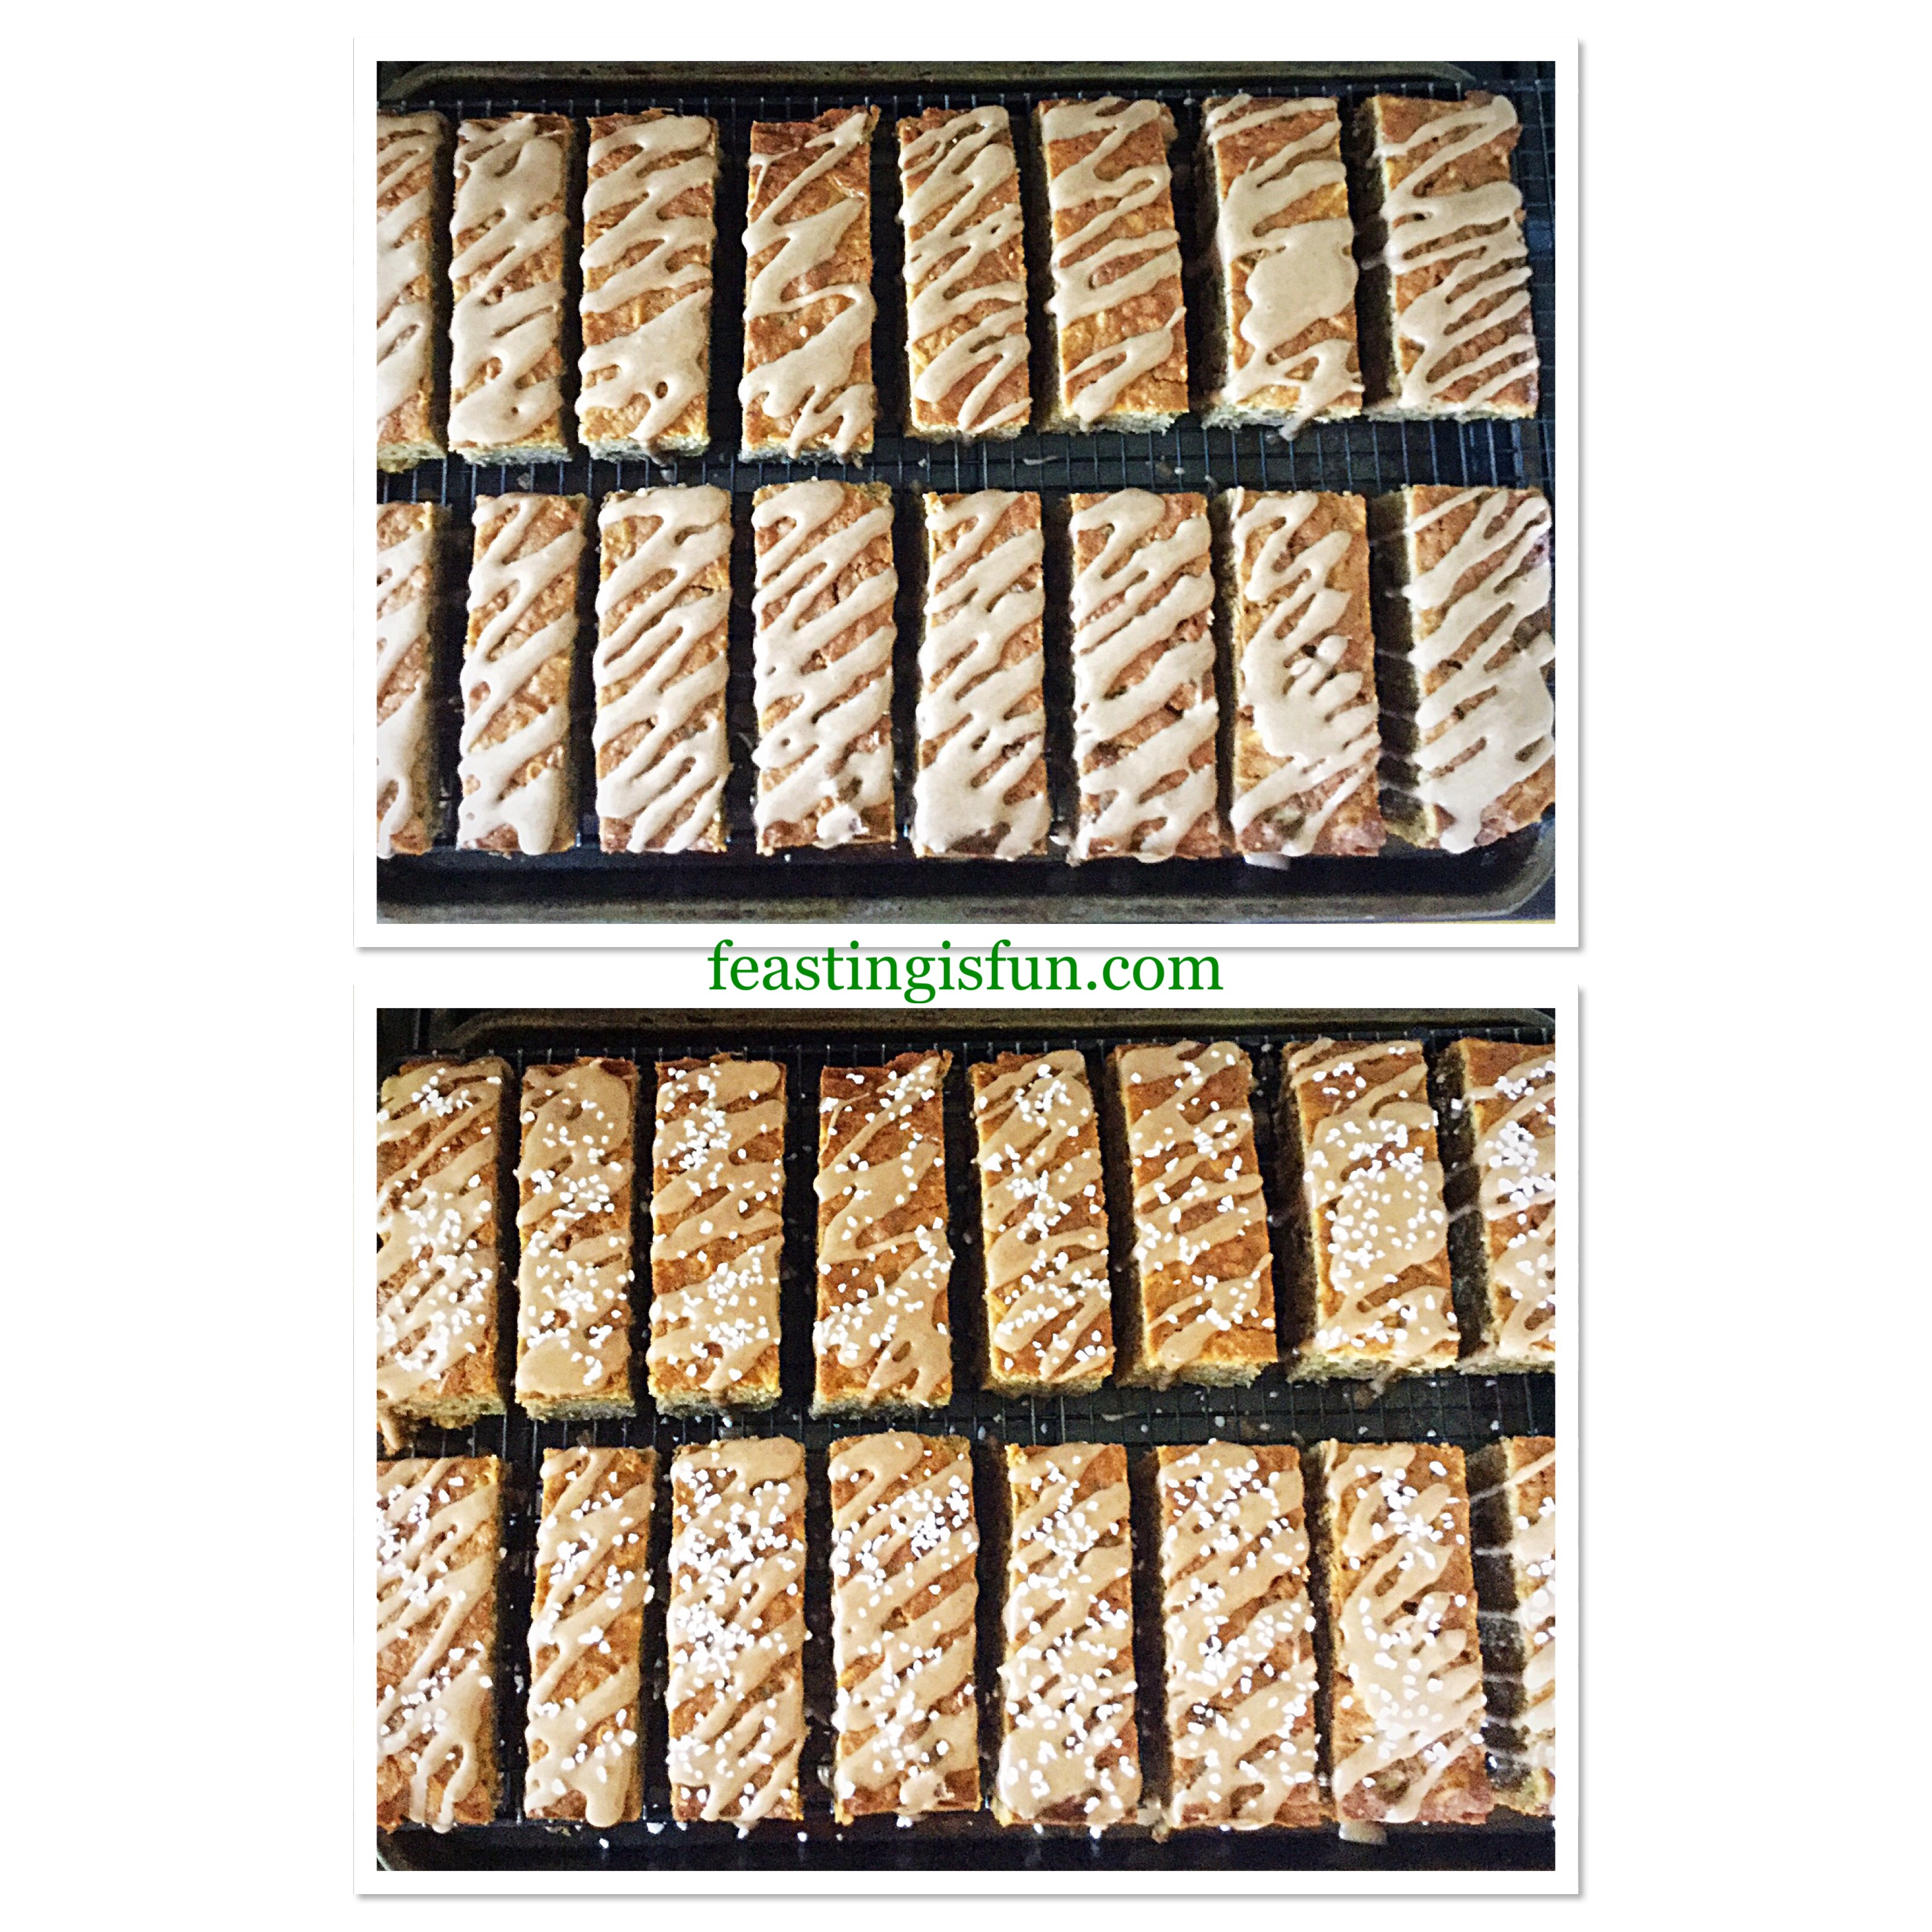
Preparing the cake bars for decorating
Use gentle, steady pressure to pipe diagonally across each cake bar. Continue piping until each bar is iced.
Sprinkle some sugar nibs over each bar while the icing is still wet.
Place to one side to allow the icing to set.
Decorating the Cinnamon Drizzle Apple Walnut Cake Bars
Finally take a photo of your creation! Because your house will smell amazing and these cake bars will not last long.
Cinnamon Drizzle Apple Walnut Cake Bars
Store the bars in an airtight container. They will keep for 5 days. Refrigerate during warmer weather.
The cake can be made a day in advance and decorated the following day.
If you have enjoyed this recipe for Cinnamon Drizzle Apple Walnut Cake Bars you may also like these:
With Bonfire Night, November 5th not far away these cake bars are perfect for sharing. Whether you are going to an organised event, holding a bonfire party in your back garden, or simply watching from your window, everything about these cake bars will elicit oohs and aahs! Because they are so yummy, they deserve to be made and enjoyed all year round.
Whatever you are making, baking and creating in your kitchens, have fun preparing and sharing your feast.
Sammie xx
No part of this post may be reproduced or duplicated without the written permission of the owner. Please see my Disclosure Policy for details.
Apple and walnut cake bars with a cinnamon icing drizzle.Share
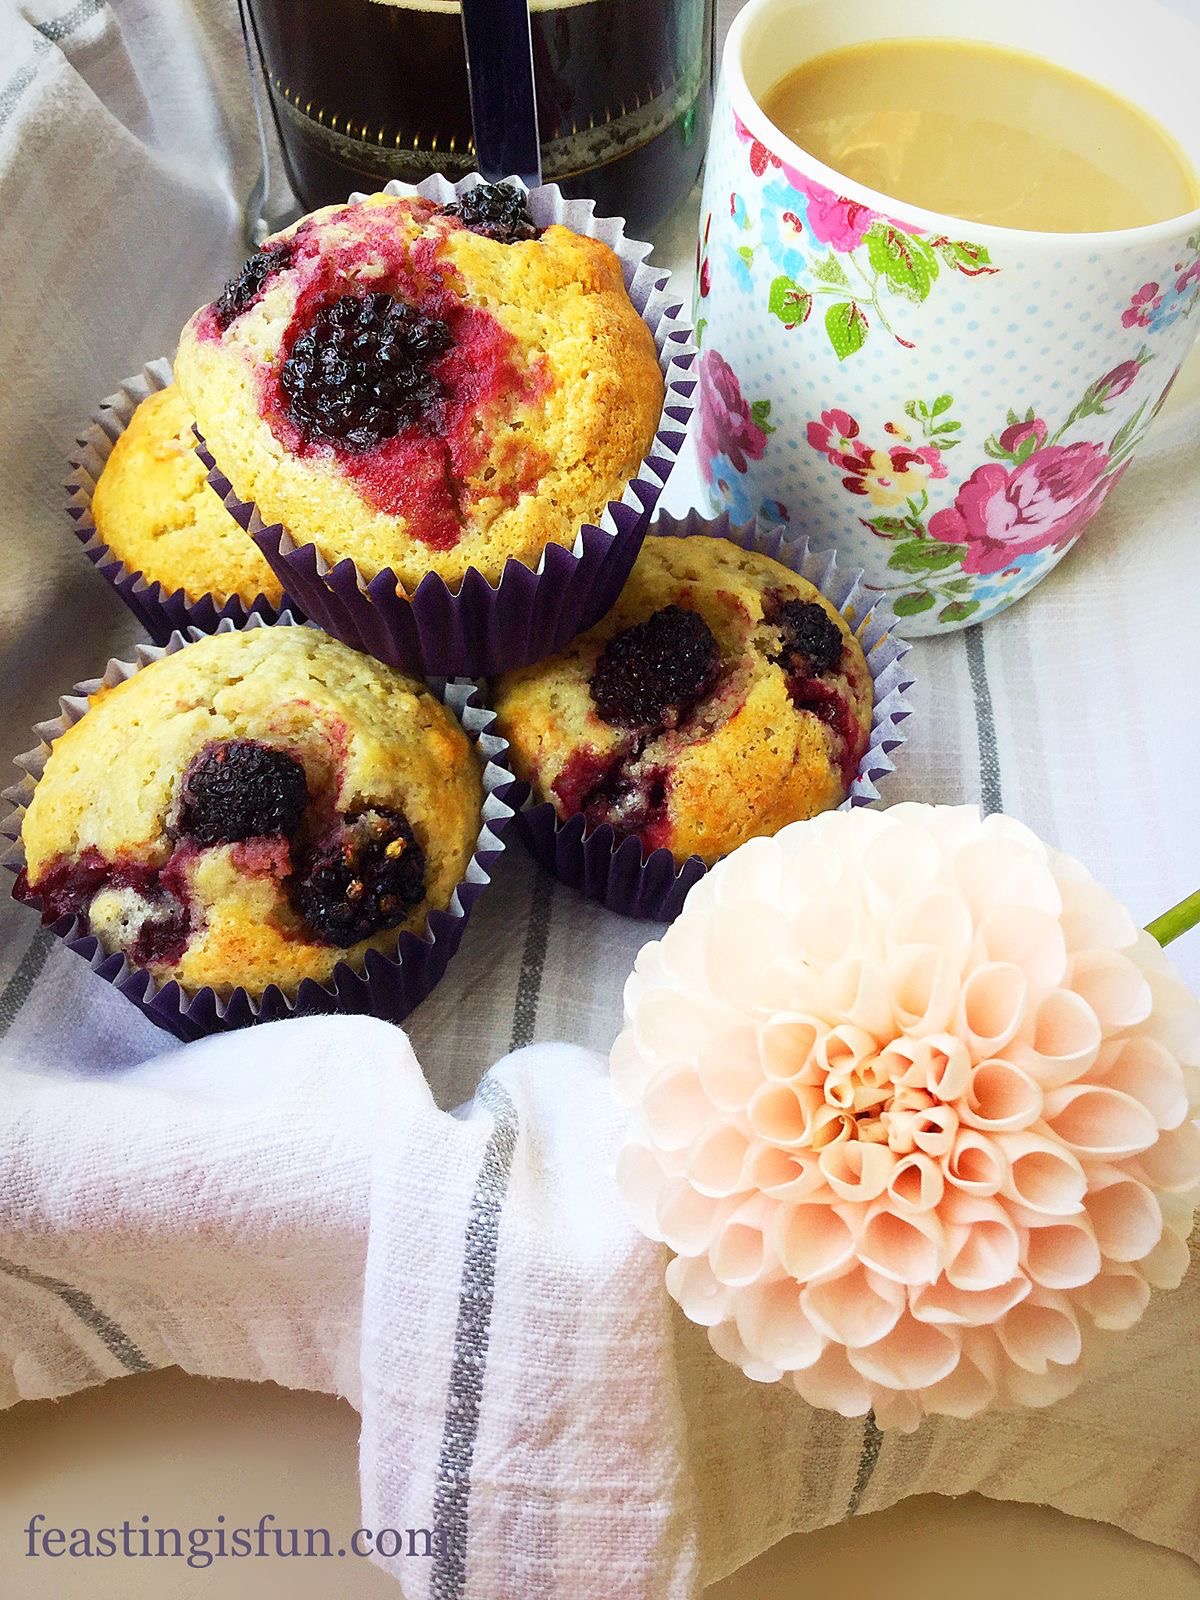
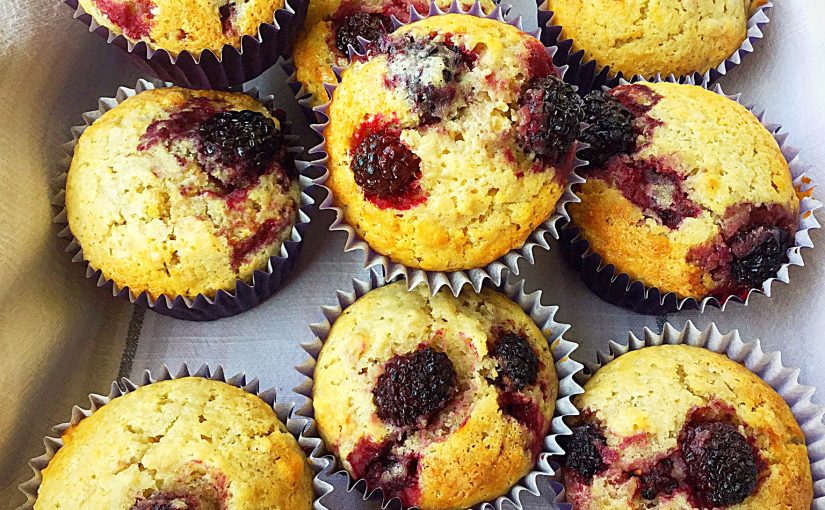
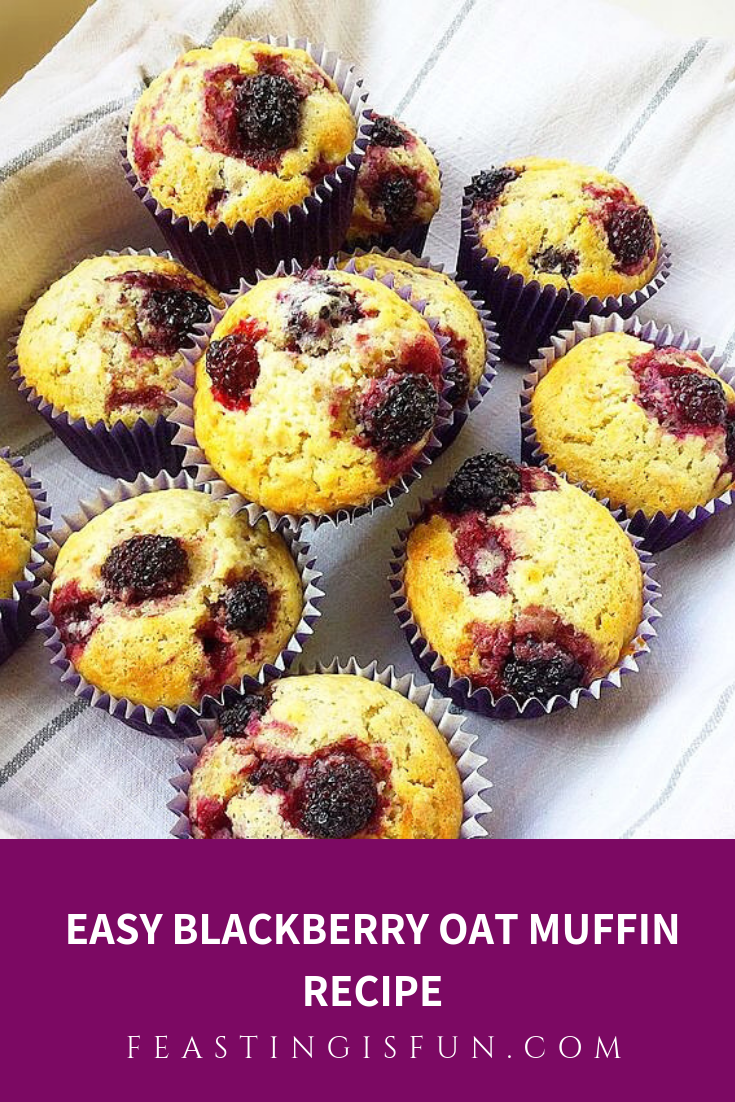
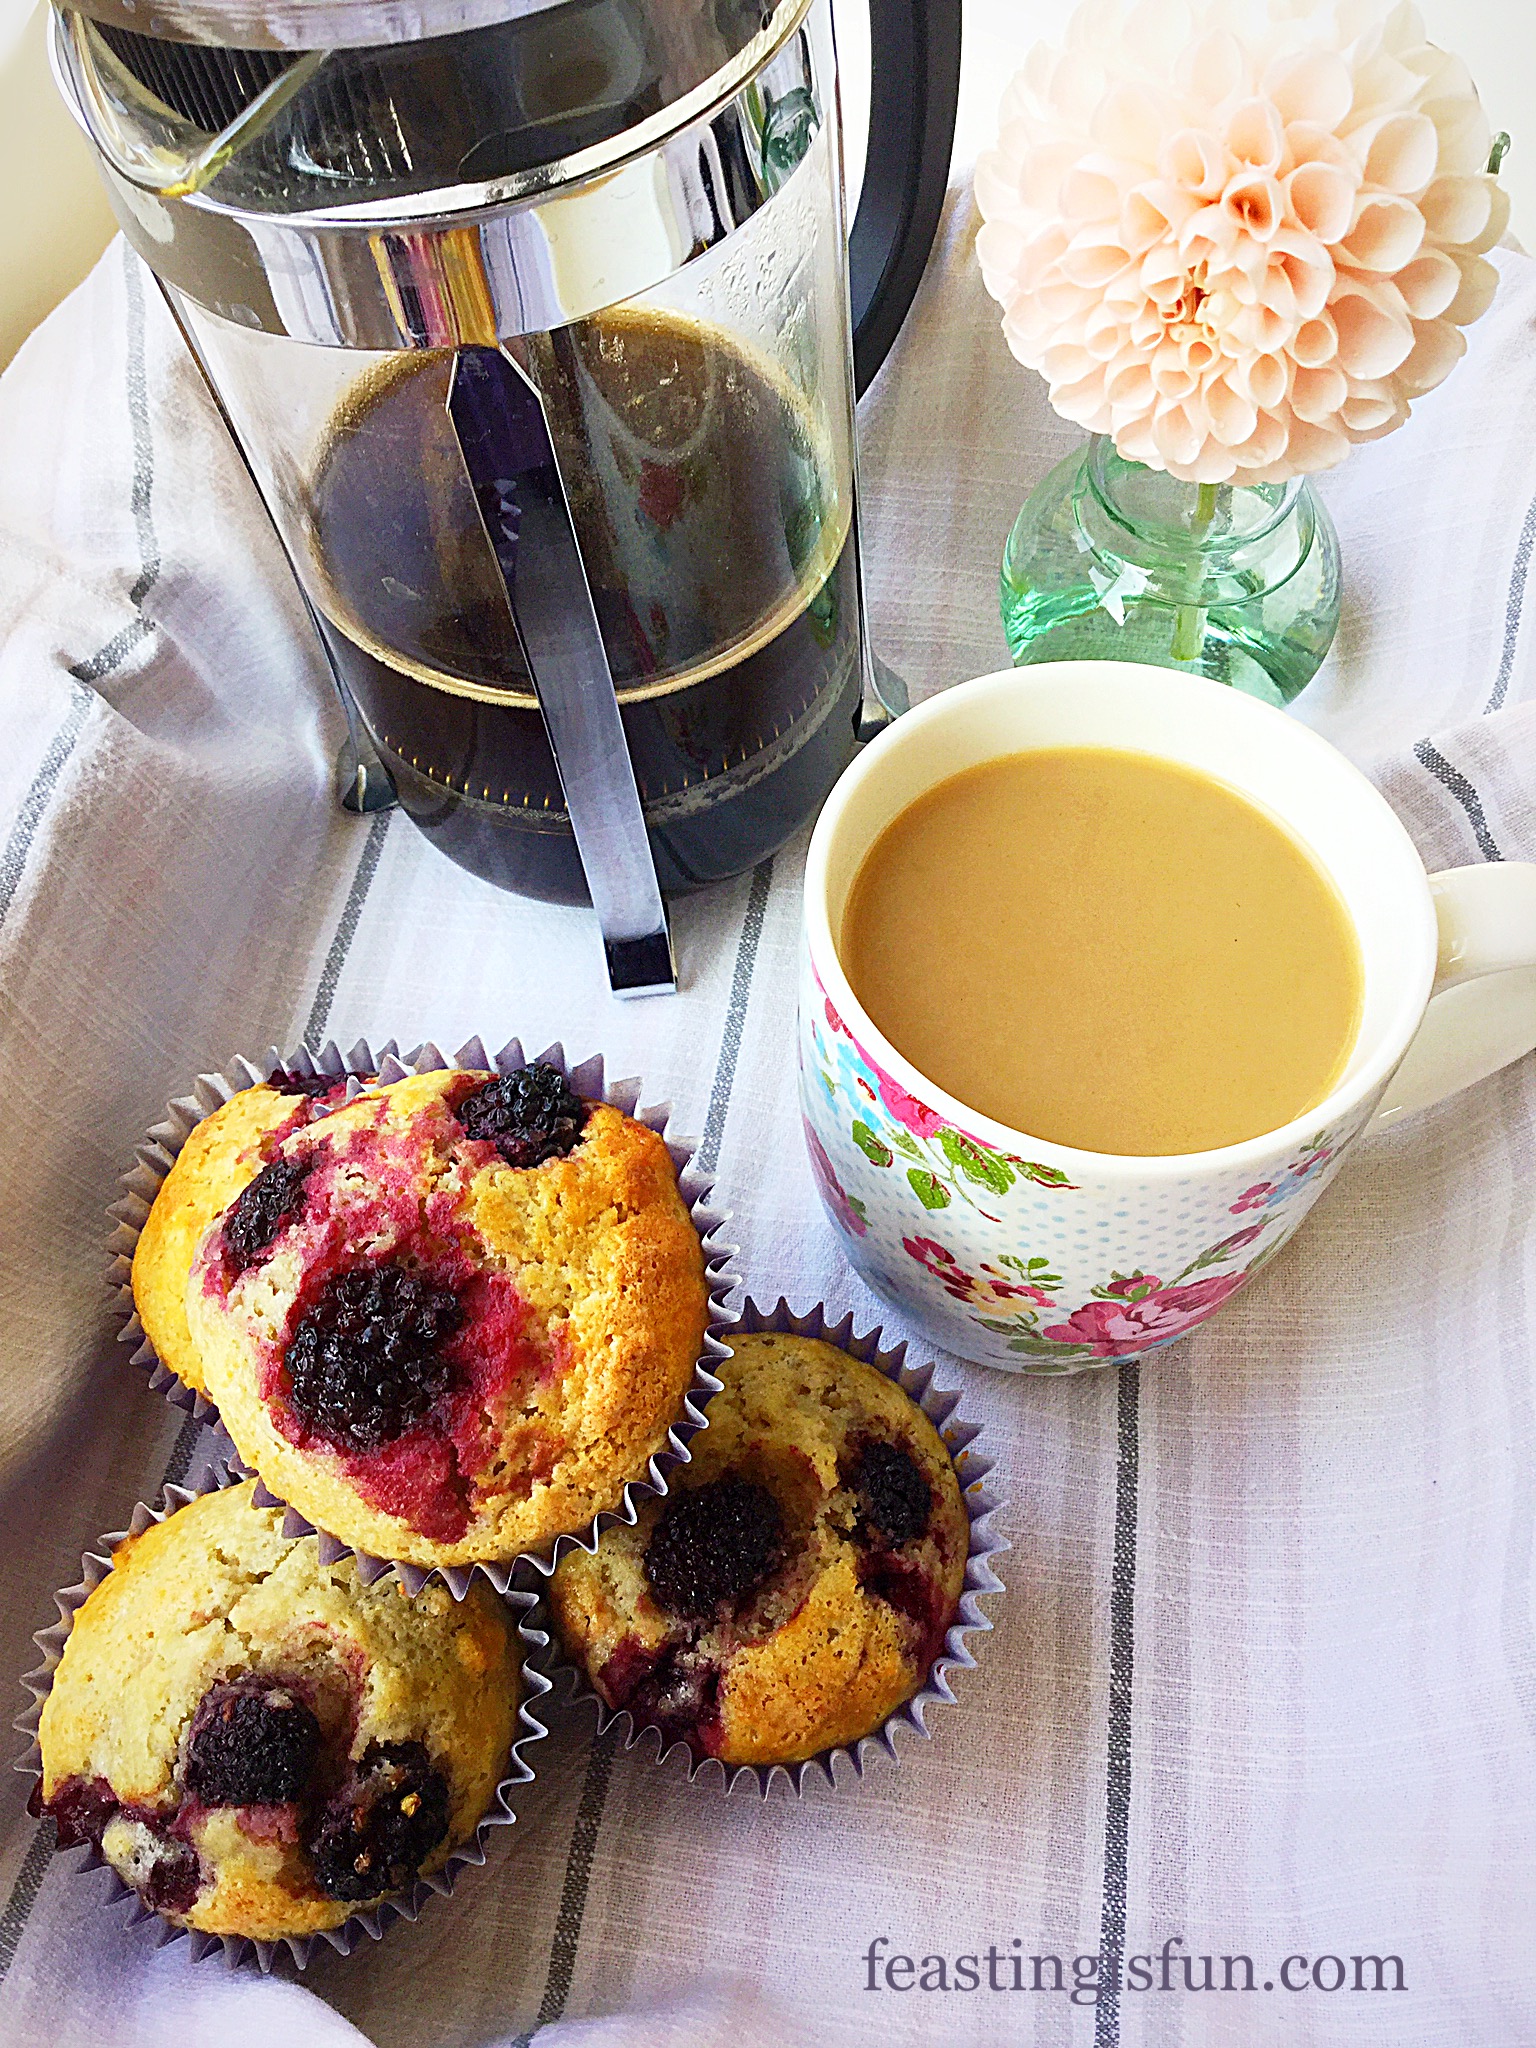
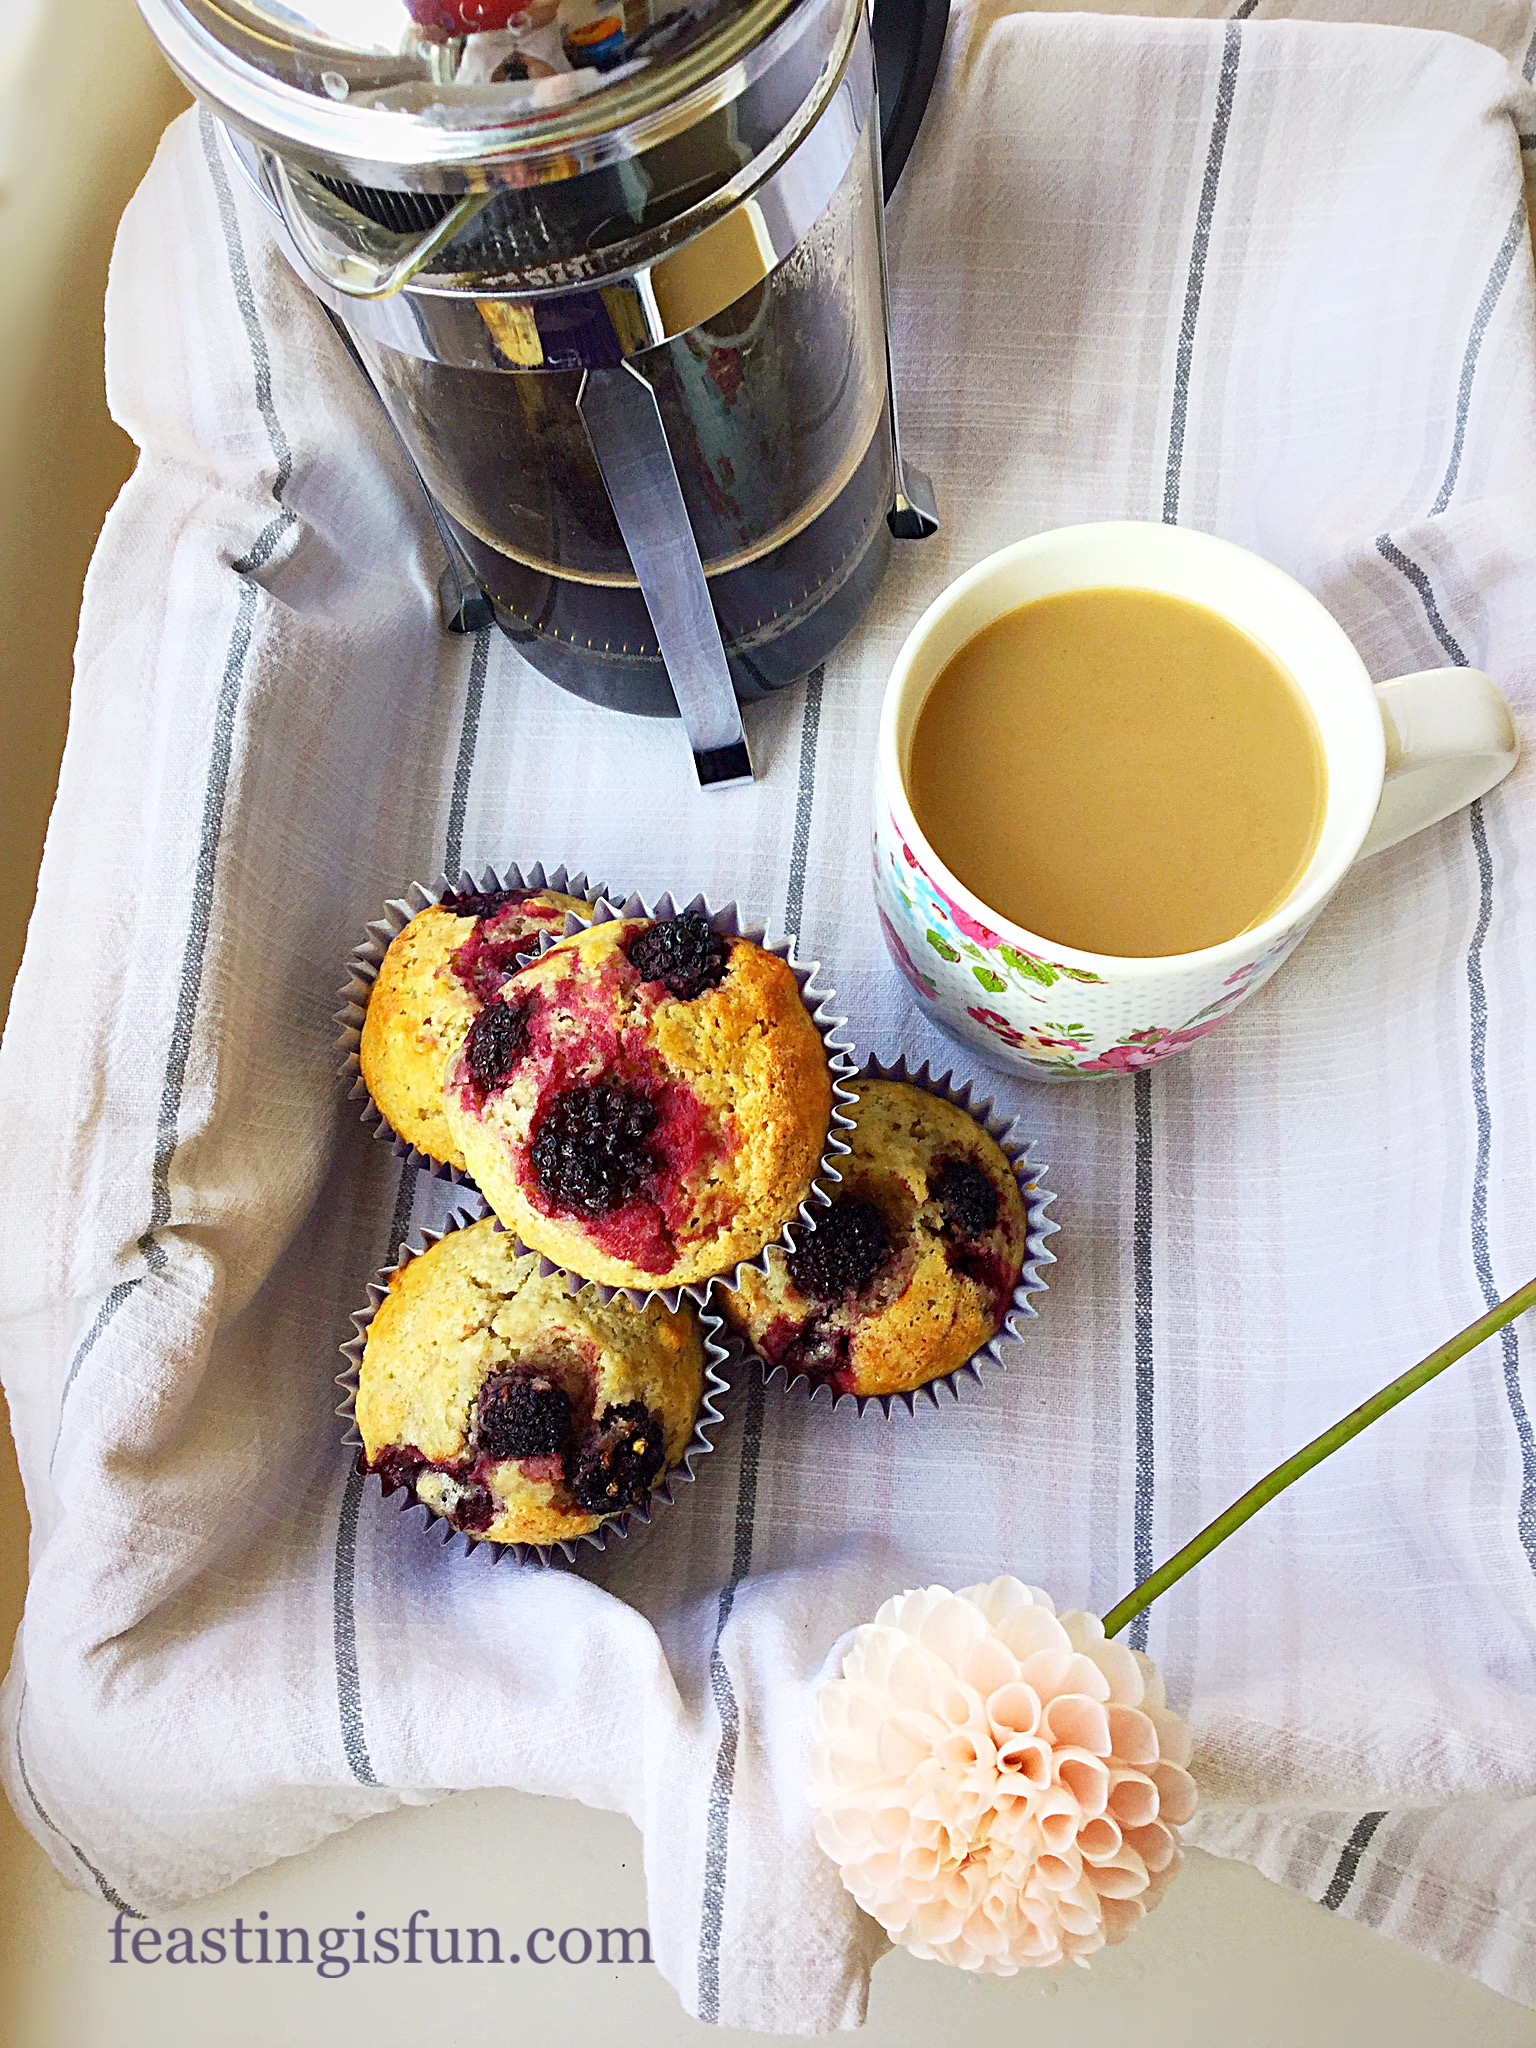
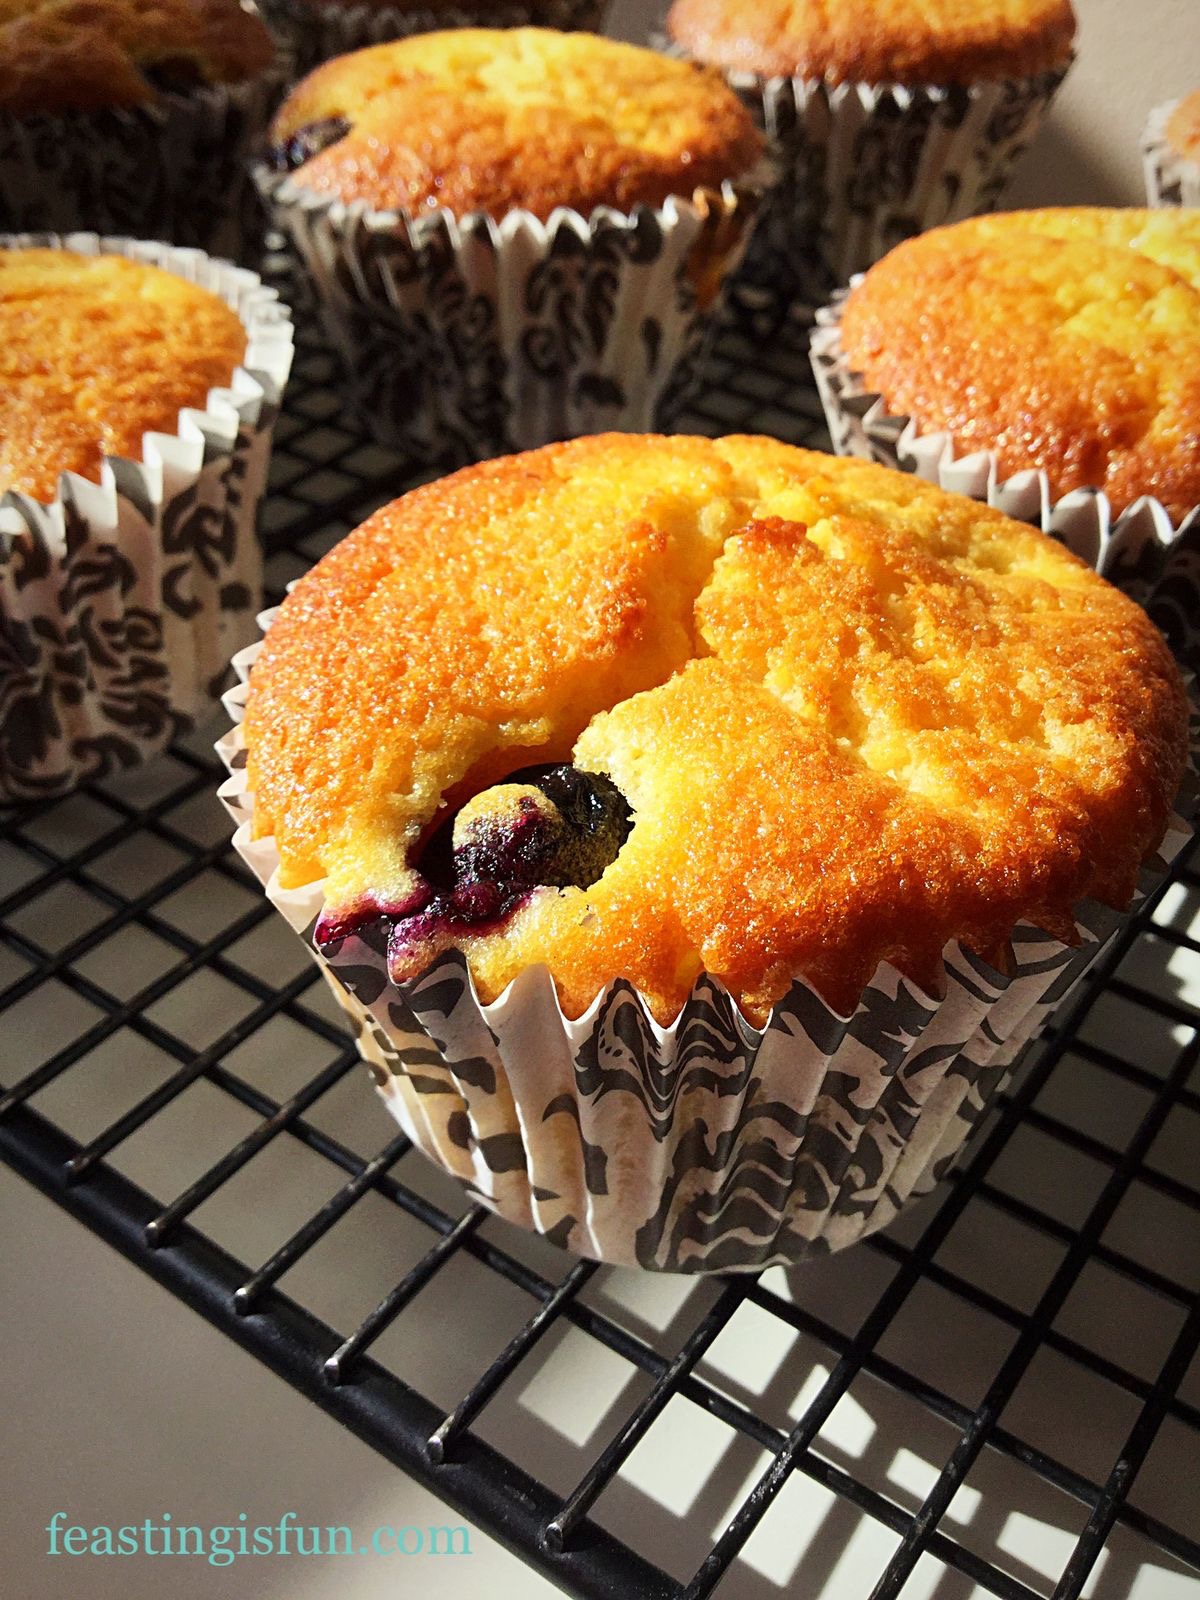
September is here and after the long, hot summer I am ready for Autumn. While walking around the garden this morning I noticed some ripe blackberries on my thornless plant. Although, to be clear, I should mention I’d forgotten to put my glasses on. Expecting a great harvest I hurried back to the kitchen to collect a modest size bowl. Also I grabbed my glasses. Five ripe blackberries. Five! So, consoling myself I plundered our freezer, where fortunately I had a stash. Finally I can now share my Easy Blackberry Oat Muffin Recipe.
While I find it very satisfying to use produce picked from our garden I am also a realist. Because of the very hot and dry summer some of our fruiting plants have suffered. And while our cherry tree had a bumper crop this year, we haven’t any plums and as I mentioned the blackberries are small and scant. Although I am hopeful for a reasonable apple harvest. Even if they are a little smaller this year, I’m sure they will be sweet.
Easy Blackberry Oat Muffins Recipe
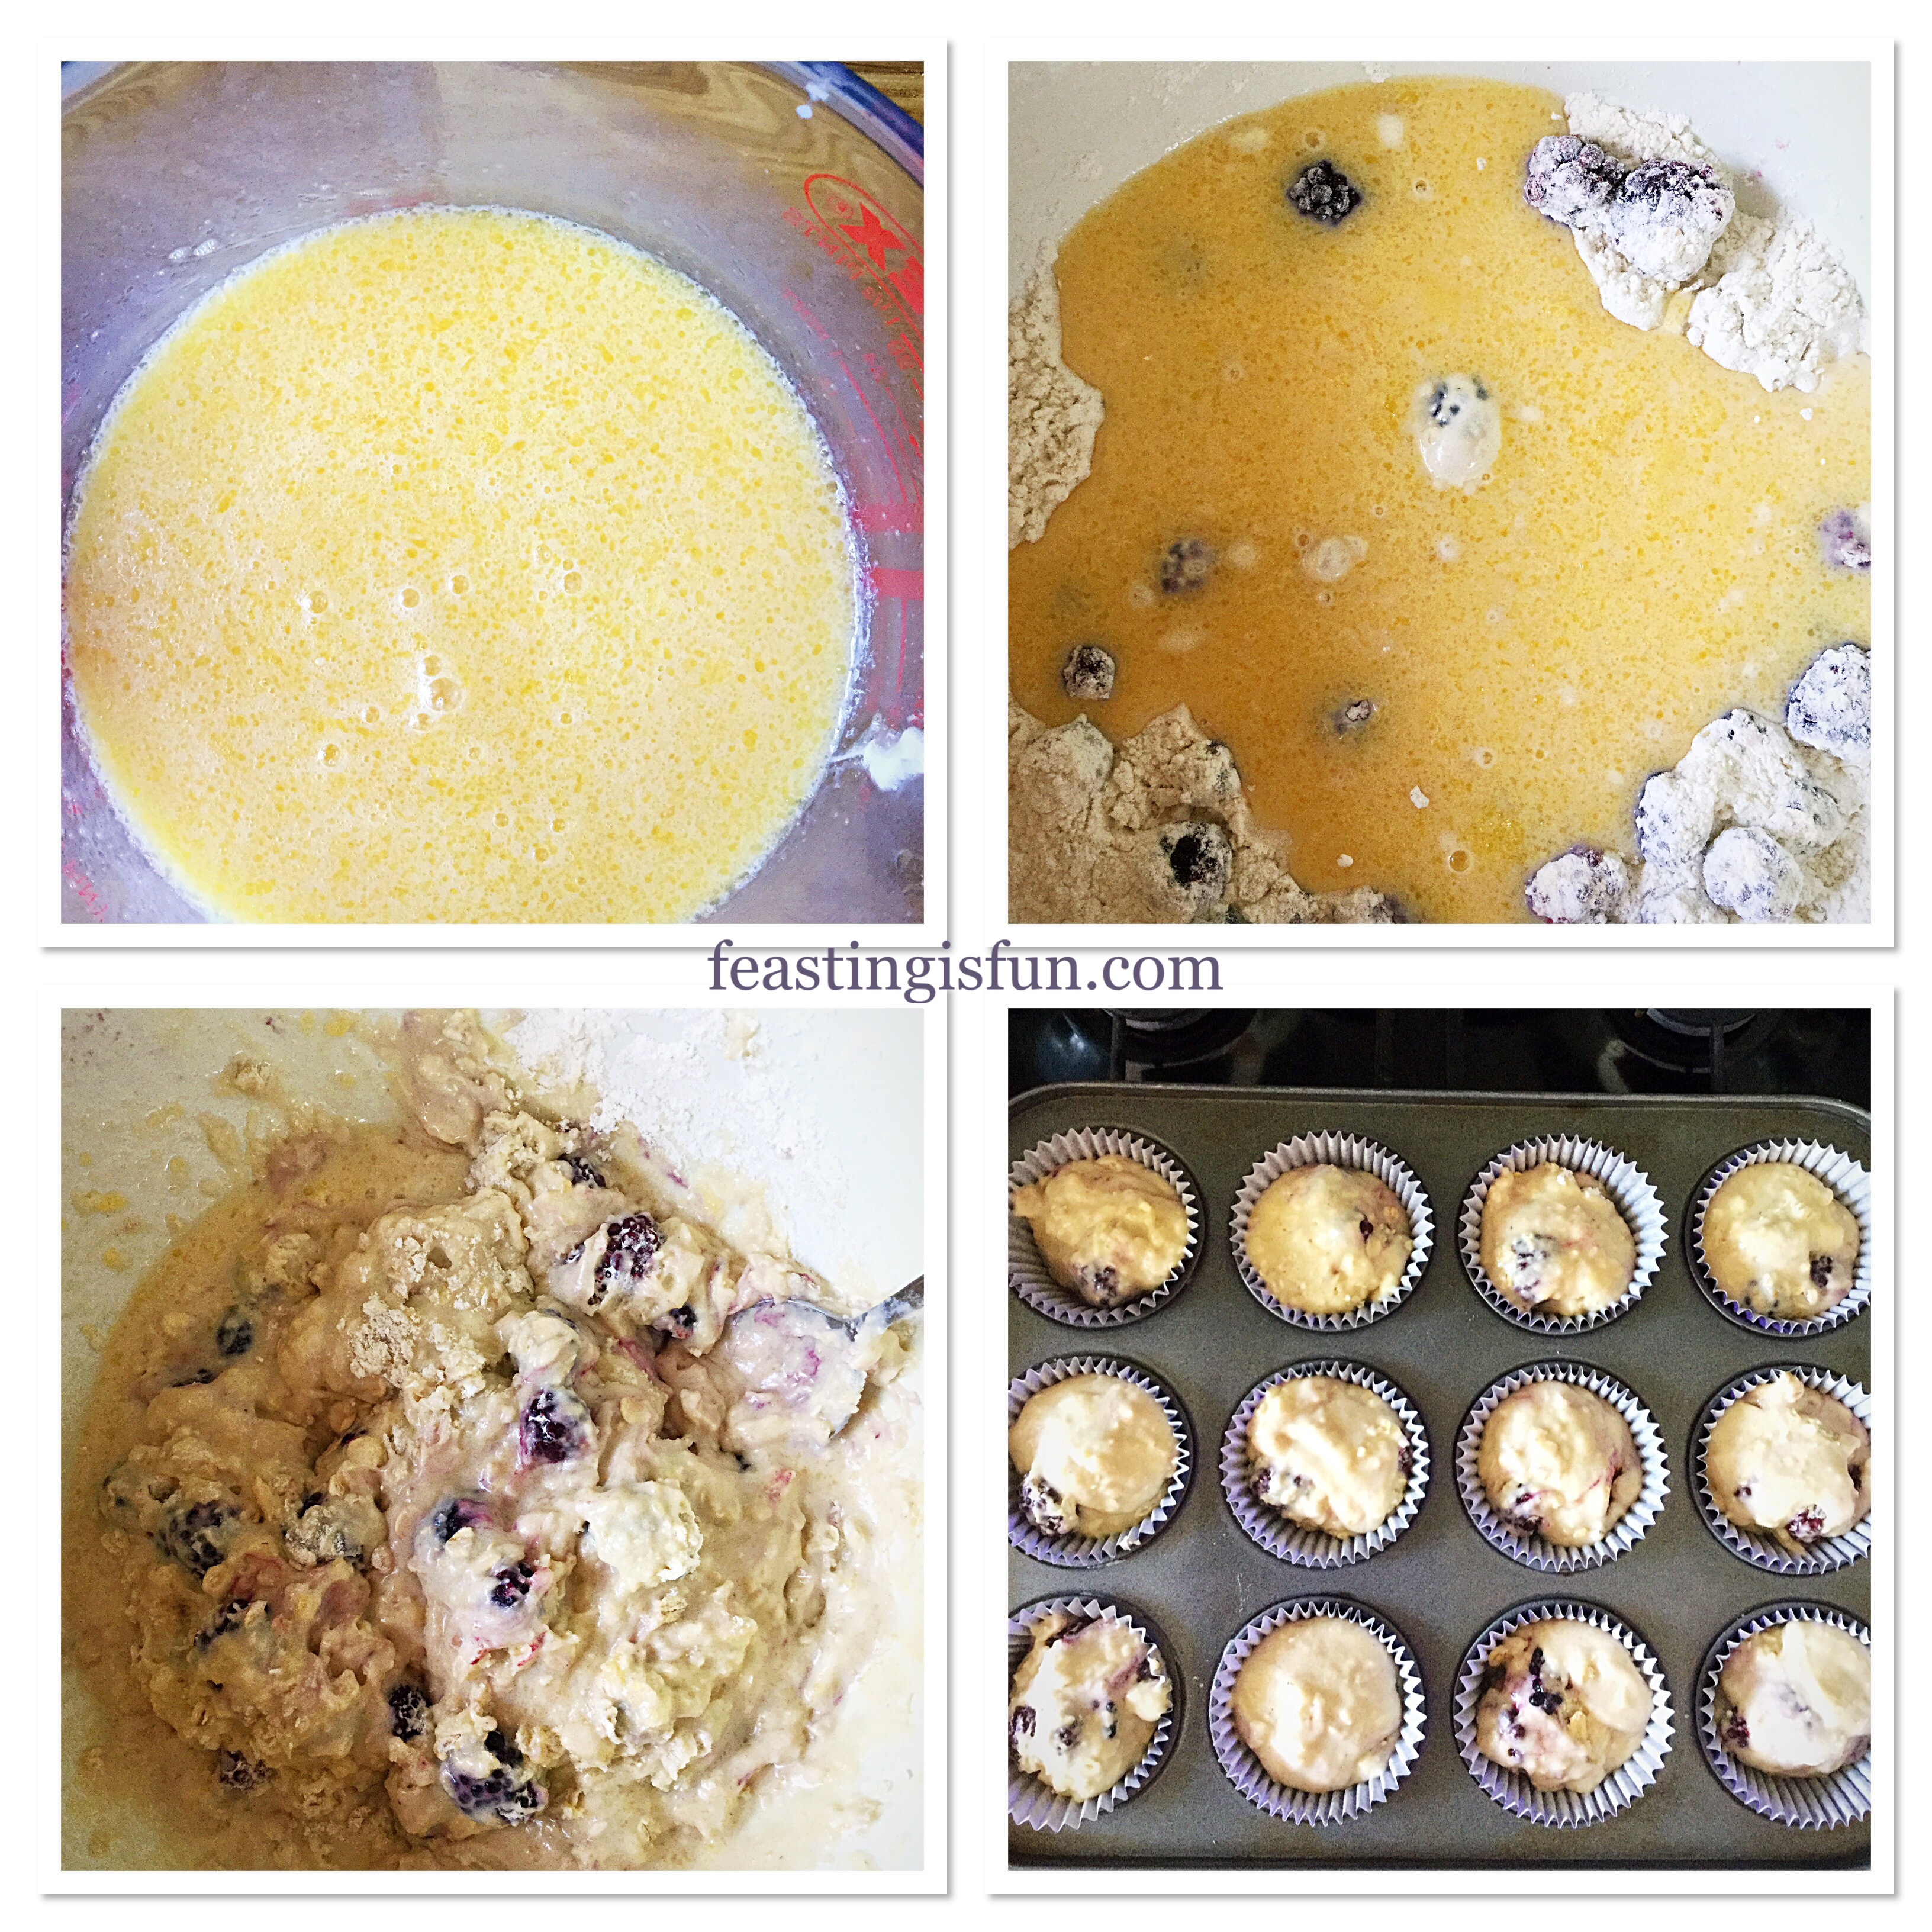
I am glad that I had the foresight to buy punnets of British blackberries and freeze them. Especially as most berries freeze well, with the exception of strawberries. While strawberries defrost to a mushy mess, frozen blackberries, raspberries, red and blackcurrants can be used in place of fresh fruit when it is out of season. Whether you buy and freeze the fruit yourself or buy it ready frozen, it means that we need not be denied luscious berries in the depths of winter.
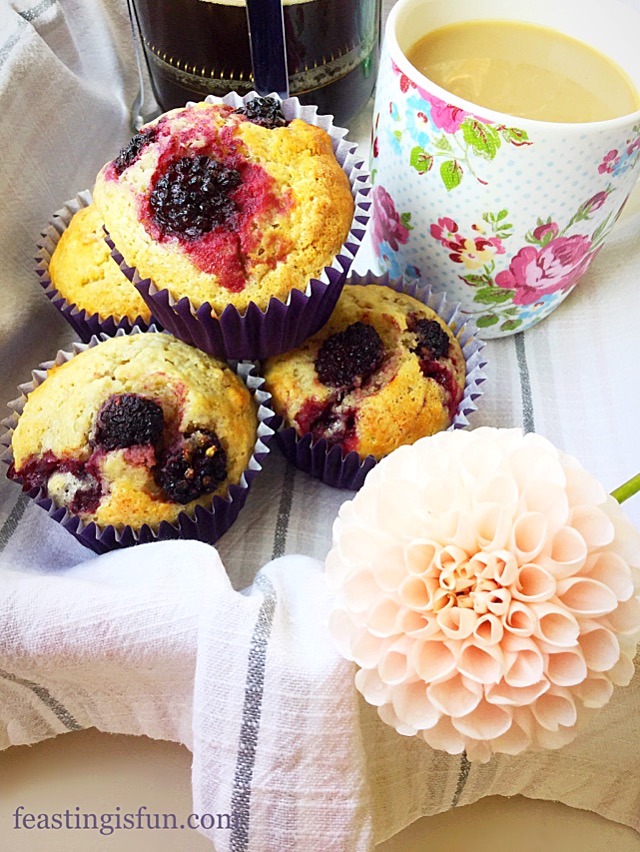
Freshly baked muffins are best eaten on the day they are made. Although you can store them in an airtight container for up to two days, refrigerate in warm weather and then refresh in a medium oven for 5 minutes. Especially delicious eats to start the day and also fill hunger gaps throughout the day. Since these muffins truly are delicious served warm from the oven, why not bake them with the intention to share. Neighbours, friends and family are always delighted with a surprise delivery of freshly made muffins. And it is a fact that food always tastes better when shared!
So, whatever you are making, baking and creating in your kitchens have fun preparing and sharing your feast.
Sammie xx
No part of this post may be reproduced or duplicated without the written permission of the owner. Please see my Disclosure Policy.
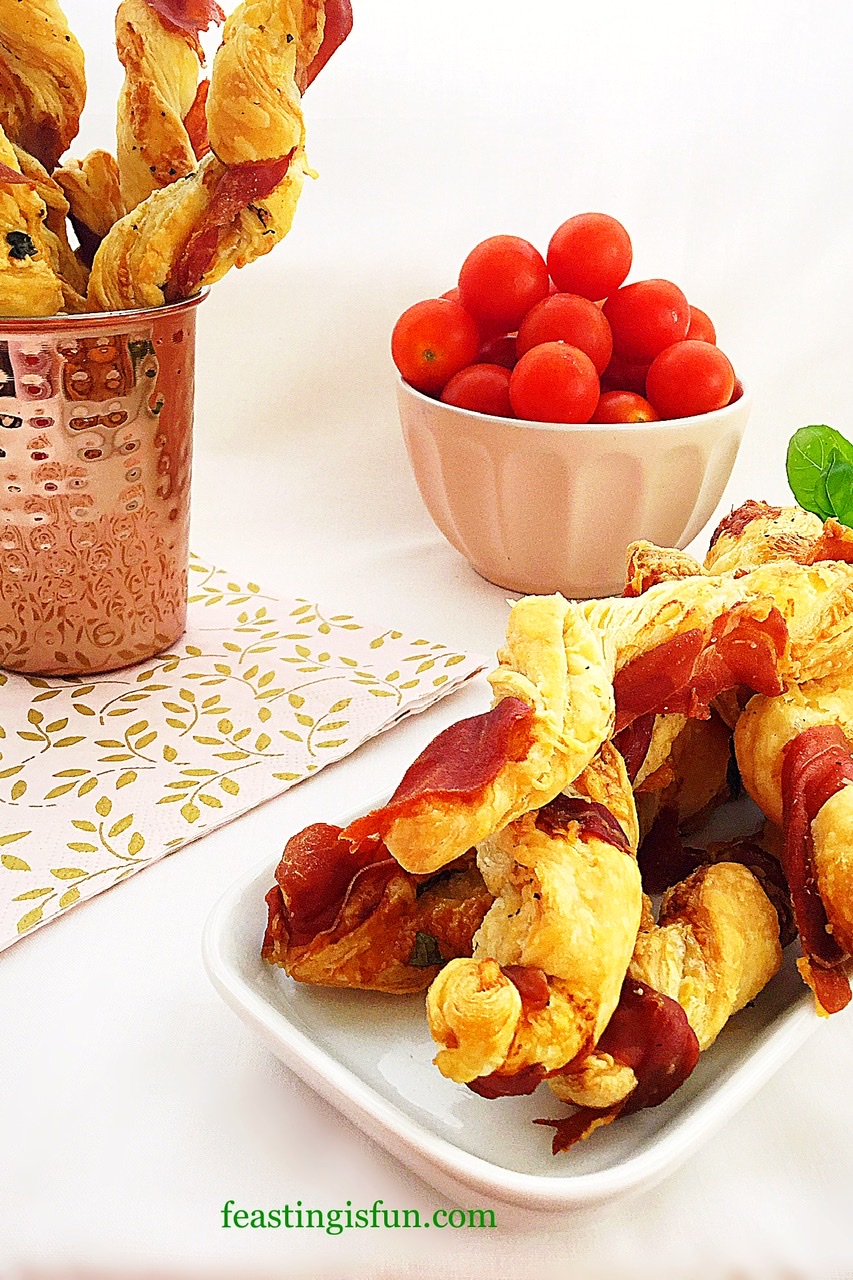
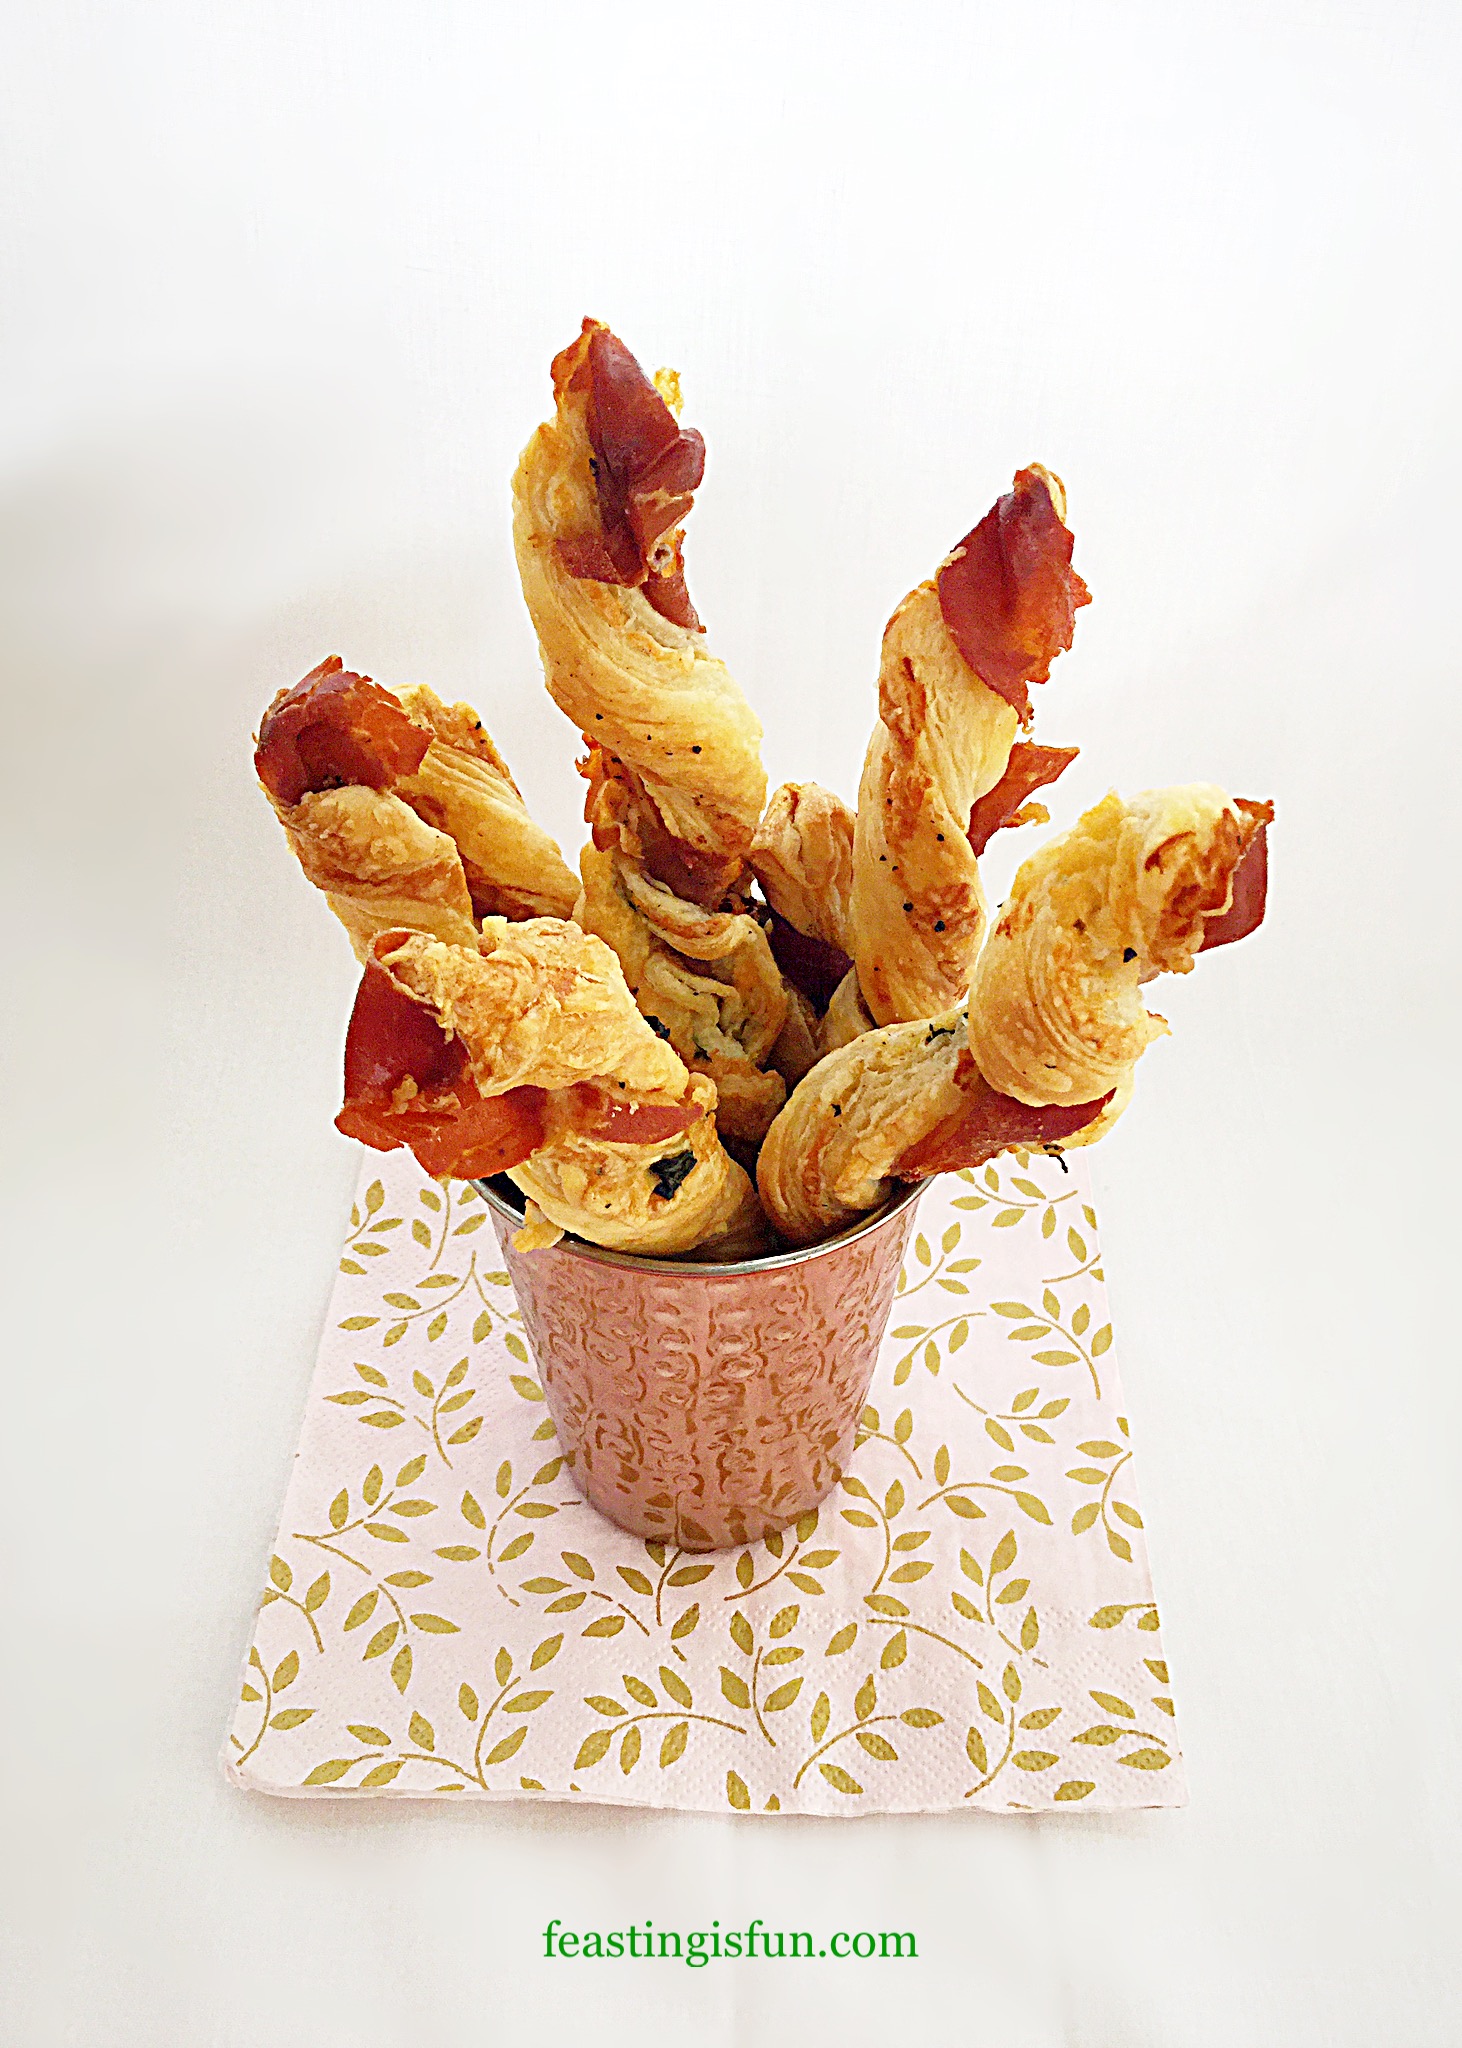
So, who is ready for a super easy, party food recipe? While there are plenty of sweet recipes here on the blog, I prefer food that is more savoury. Given a choice, I will usually choose a cheese board over dessert. While my family always pick a delicious, sweet treat. Also, at parties I much prefer something salty and savoury to compliment my glass of wine or sparkling water. My Prosciutto Wrapped Cheese Puff Pastry Straws tick all of my preferred flavour boxes. So much so, I ate three as soon as they were cool enough!
Easy Party Food Recipes:
Creating easy recipes is a top priority for me. These straws can be made ahead and kept refrigerated or frozen. Since party food can involve lots of little morsels, keeping the recipe simple reduces stress and leaves more room for fun. Because that’s what parties should be, fun! Whether it’s drinks with friends or a full on family bash, these straws are a perfect addition to any occasion.
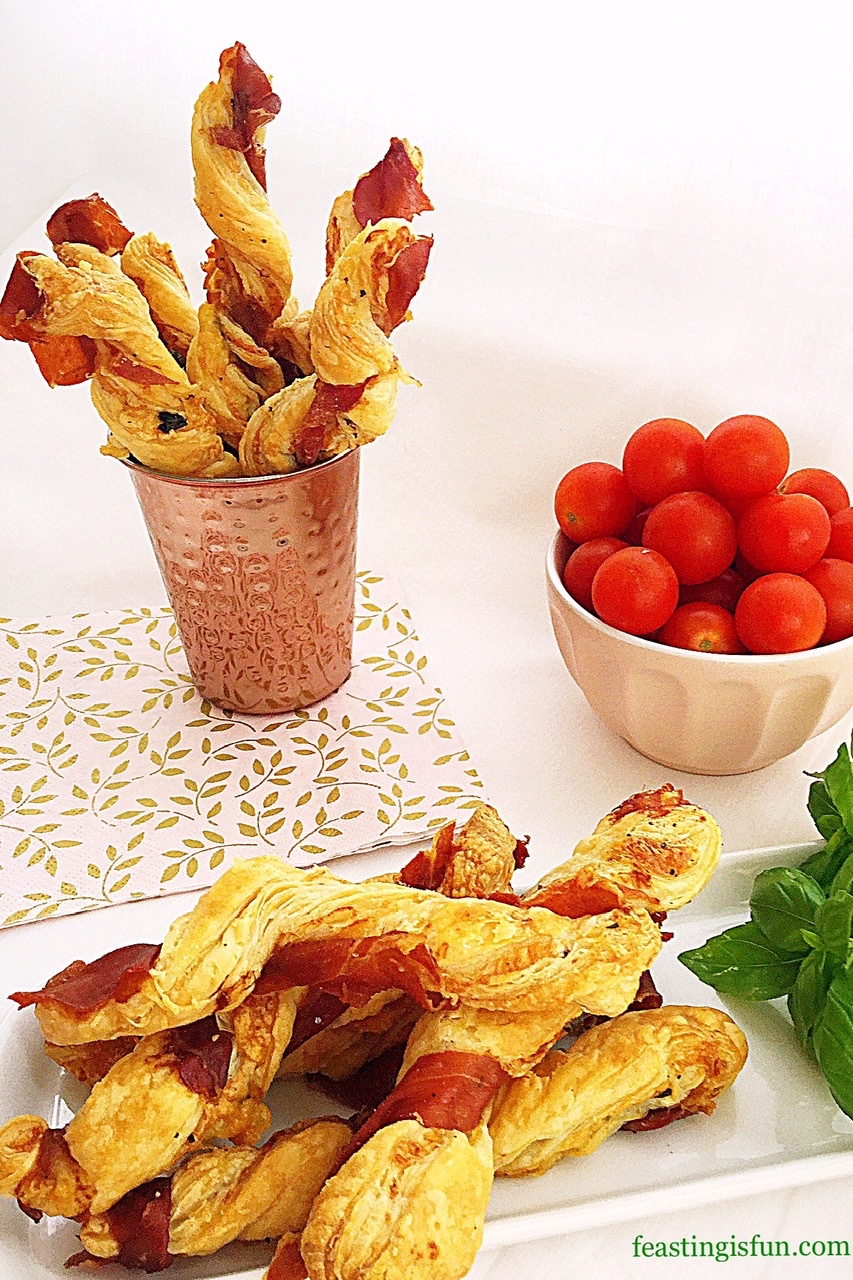
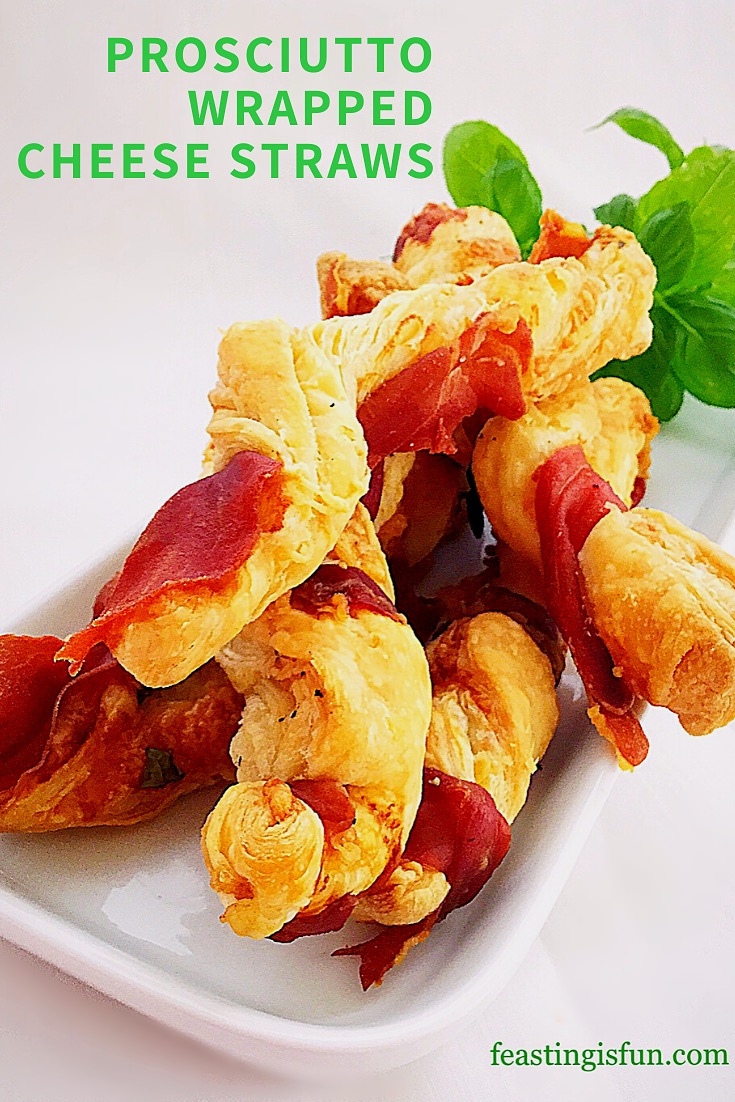
Prosciutto Wrapped Cheese Puff Pastry Straws
So incredibly easy to make and bake, these straws are filled with grated cheddar and fresh basil. A strip of Prosciutto ham is then twisted around the straw and then baked. As they bake the Prosciutto becomes crisp and salty on the outside with melting cheddar and fresh Basil inside.
Recipe: Prosciutto Wrapped Cheese Puff Pastry Straws – makes 24
2 x 250g/14oz All Butter Puff Pastry – I use Waitrose own brand. Alternatively use ready rolled pastry, however you may need to adjust the cheese/basil/prosciutto quantities.
100g/4oz Finely Grated Mature (Sharp) Cheddar Cheese – I use Wyke Farms
A Handful of Fresh Basil Leaves – approximately 20 leaves. Alternatively when Basil is unavailable use 1tsp finely chopped thyme or rosemary
12 Slices Prosciutto Ham
Freshly Ground Black Pepper
Making The Cheese Straws: Preheat the oven to 200C/180C fan, 400F, gas mark 6
First of all line 2 large baking trays with baking parchment.
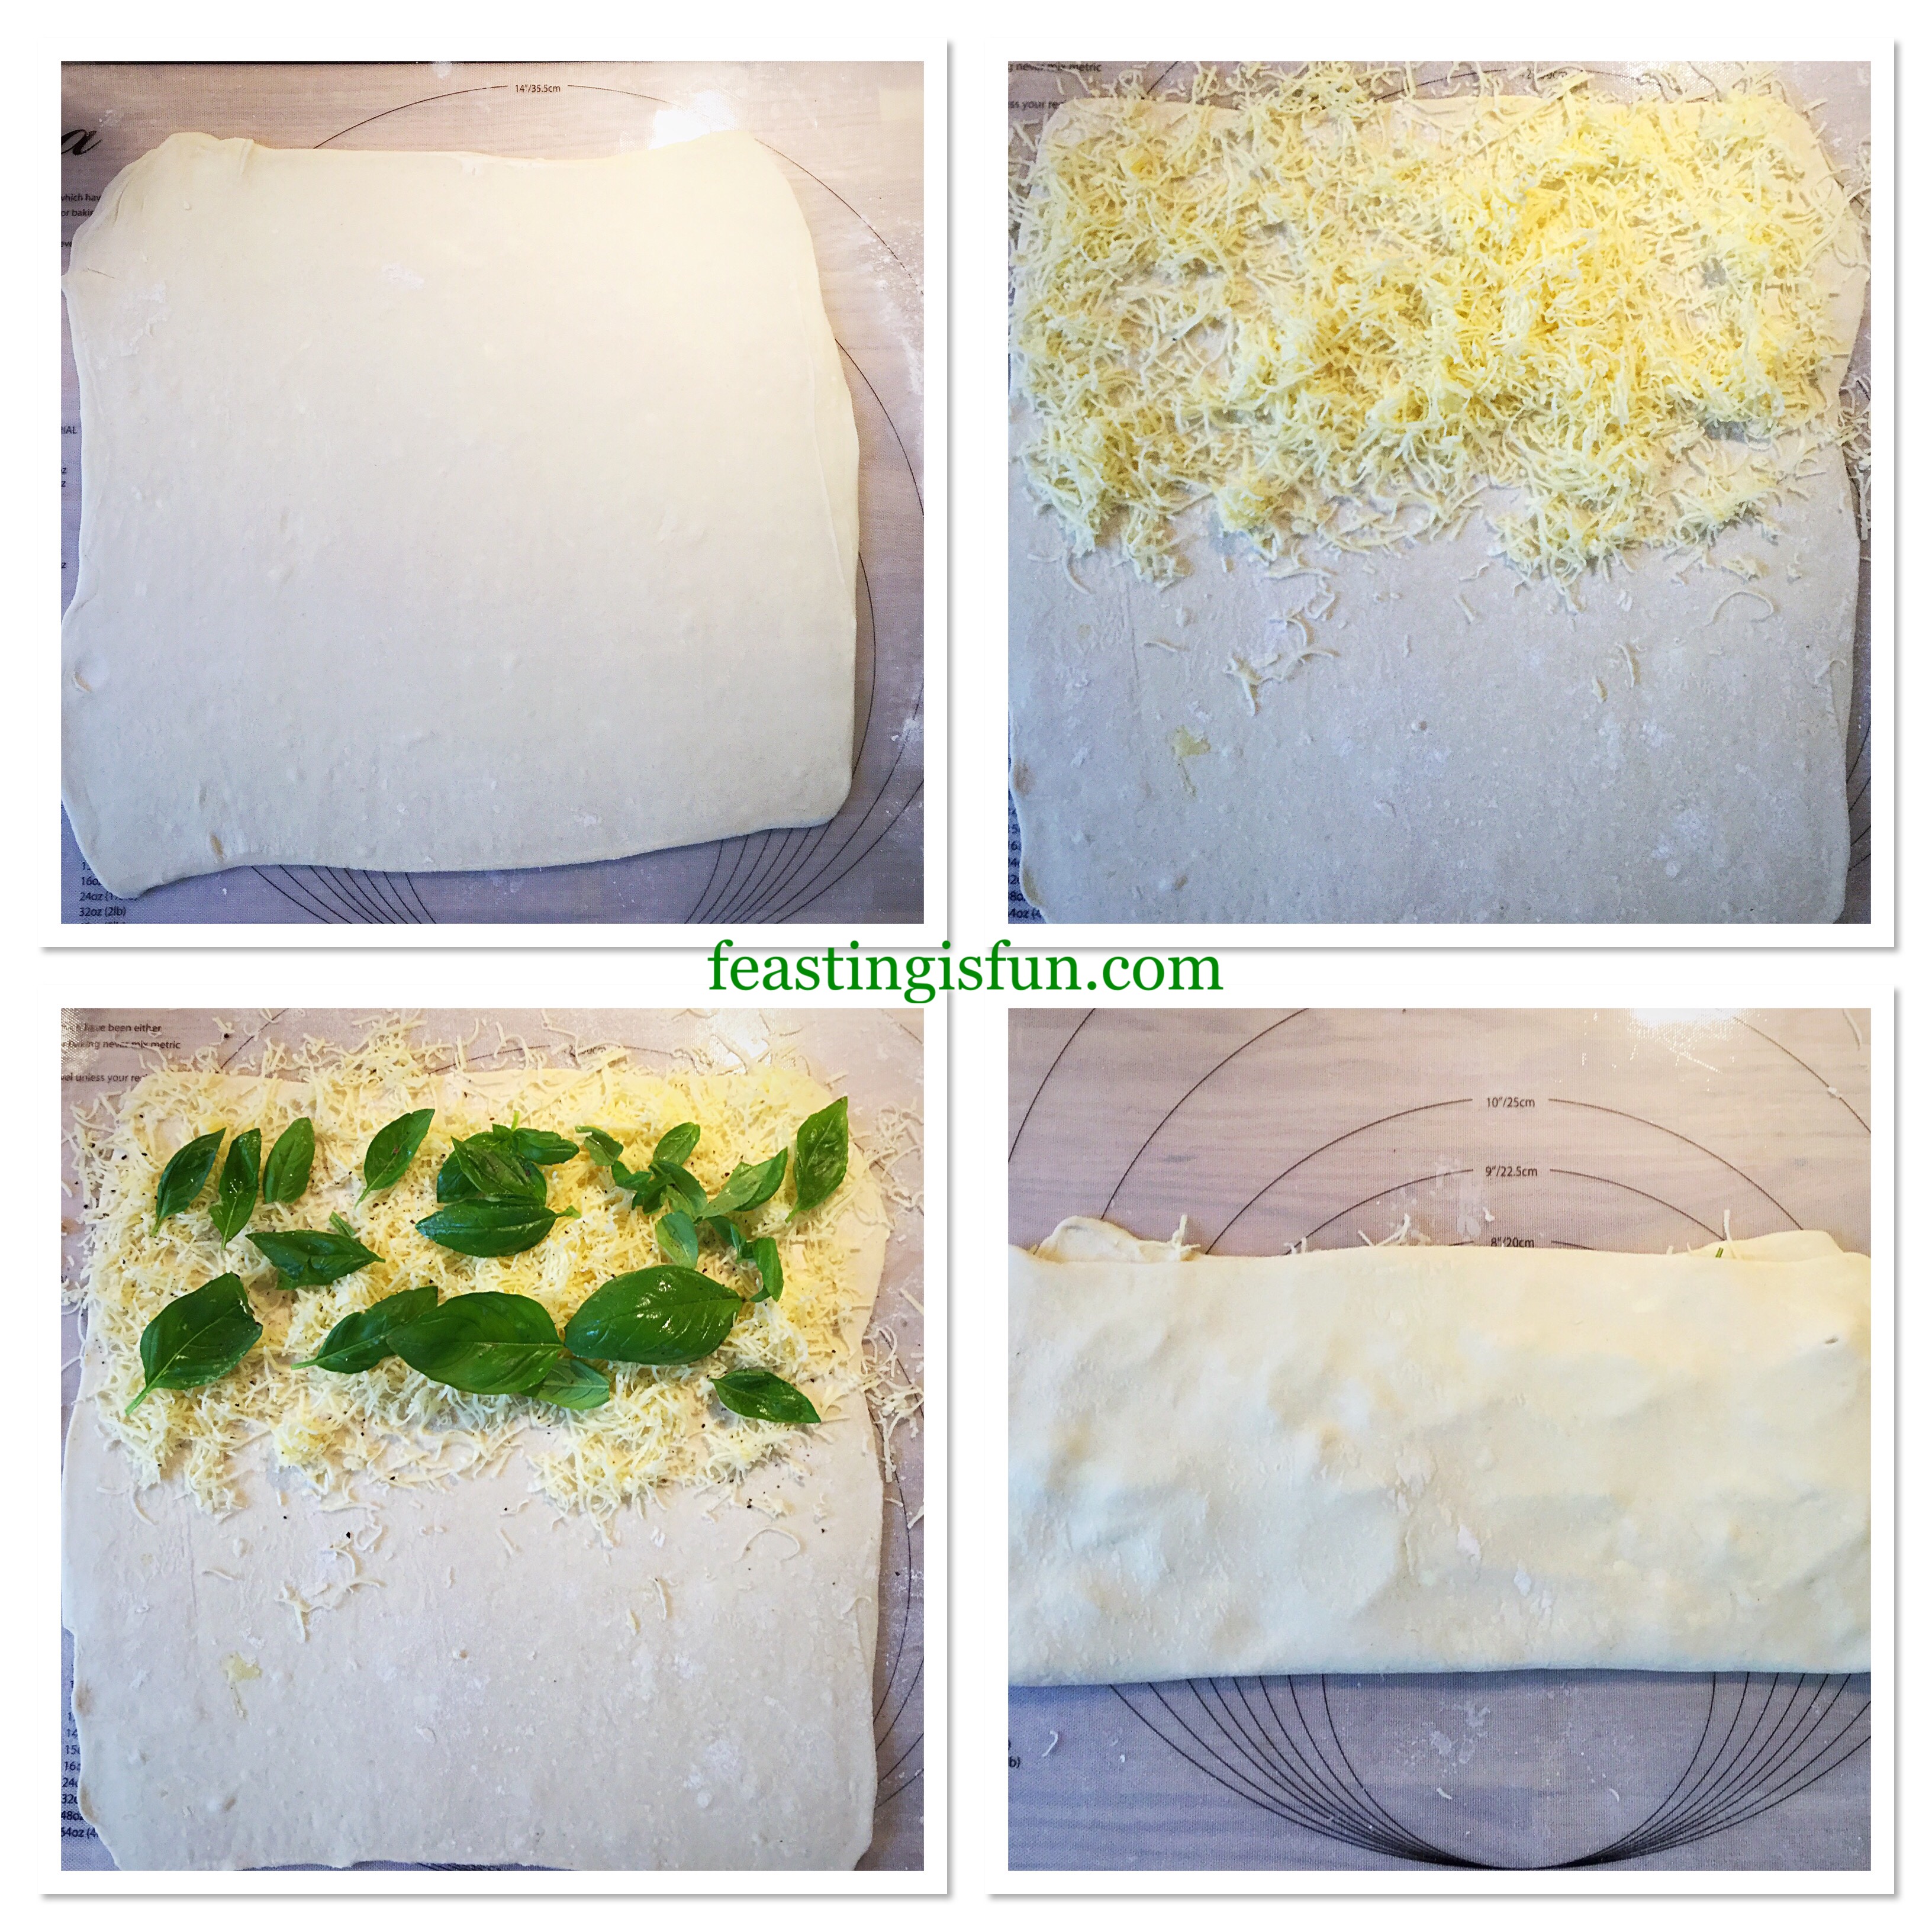
Roll the first block of puff pastry into a square, approximately 30cm x 30cm (12in x 12in).
Sprinkle half the grated cheddar over the top half of the square.
Place half of the fresh basil leaves on top of the cheese.
Add some freshly ground black pepper.
Fold the bottom half of the pastry up over the cheese and basil.
Filling the pastry with cheese and basil.
Use a rolling pin to roll the pastry so that it flattens and becomes smooth.
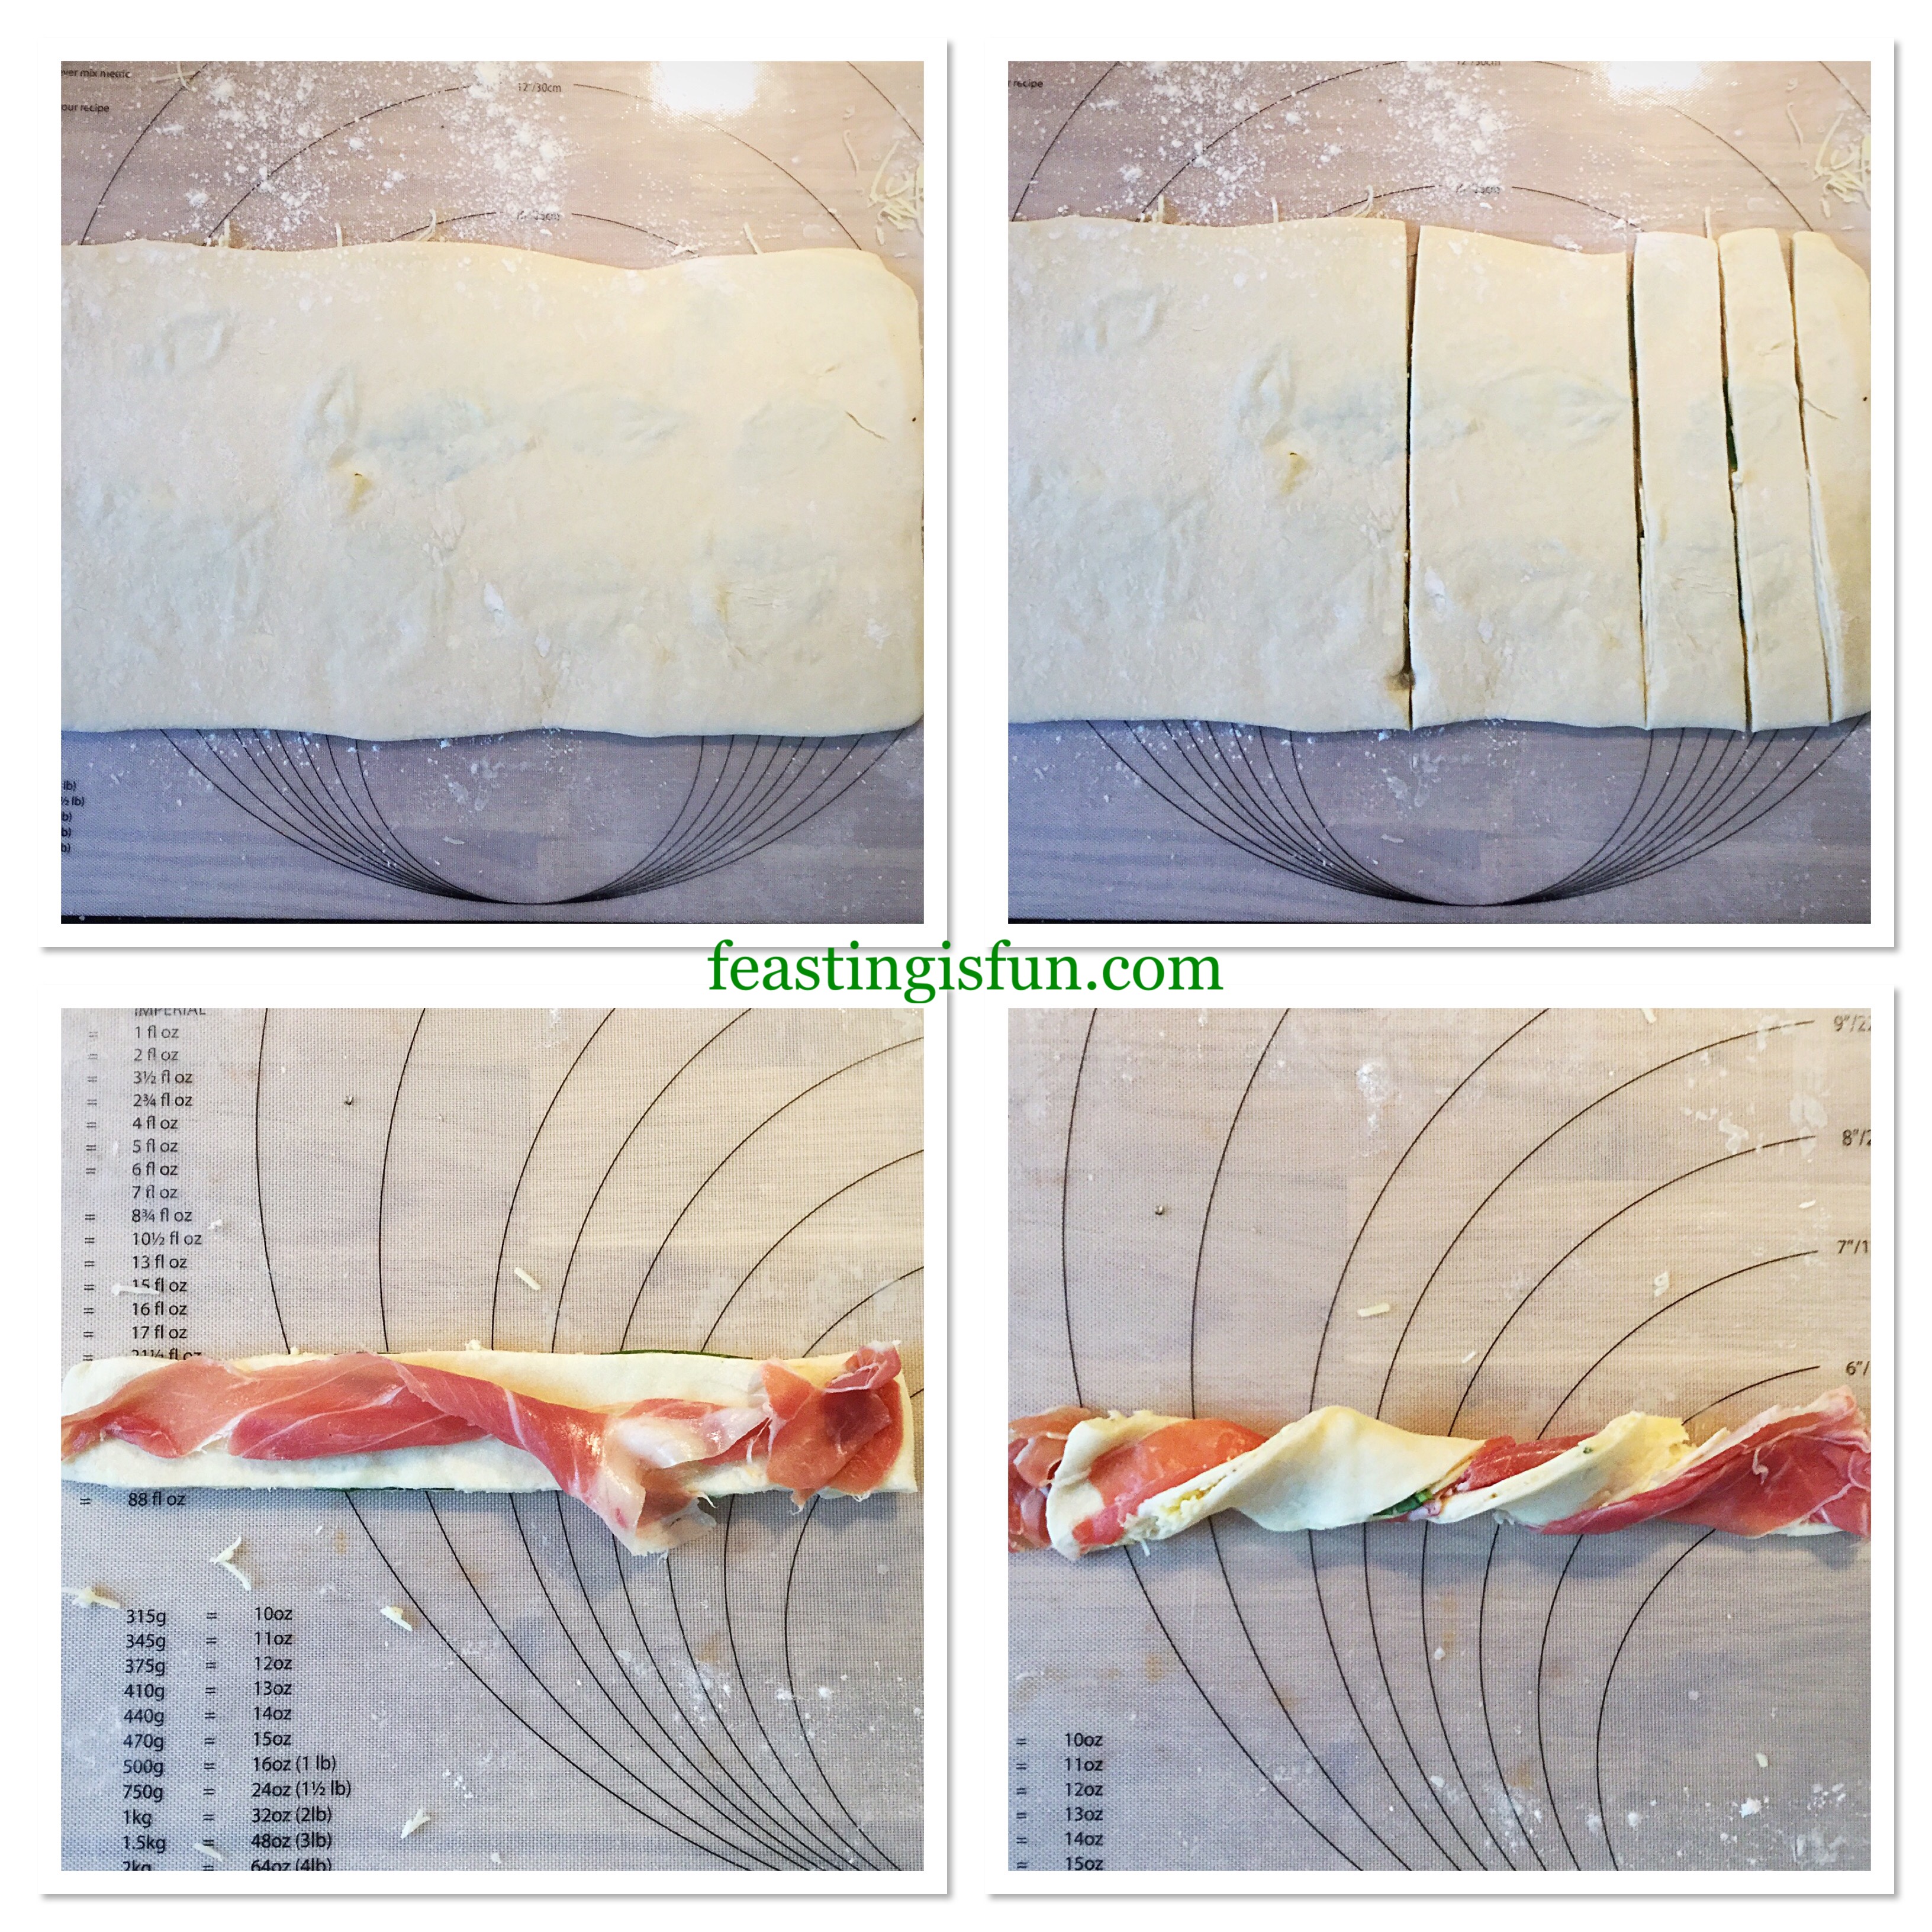
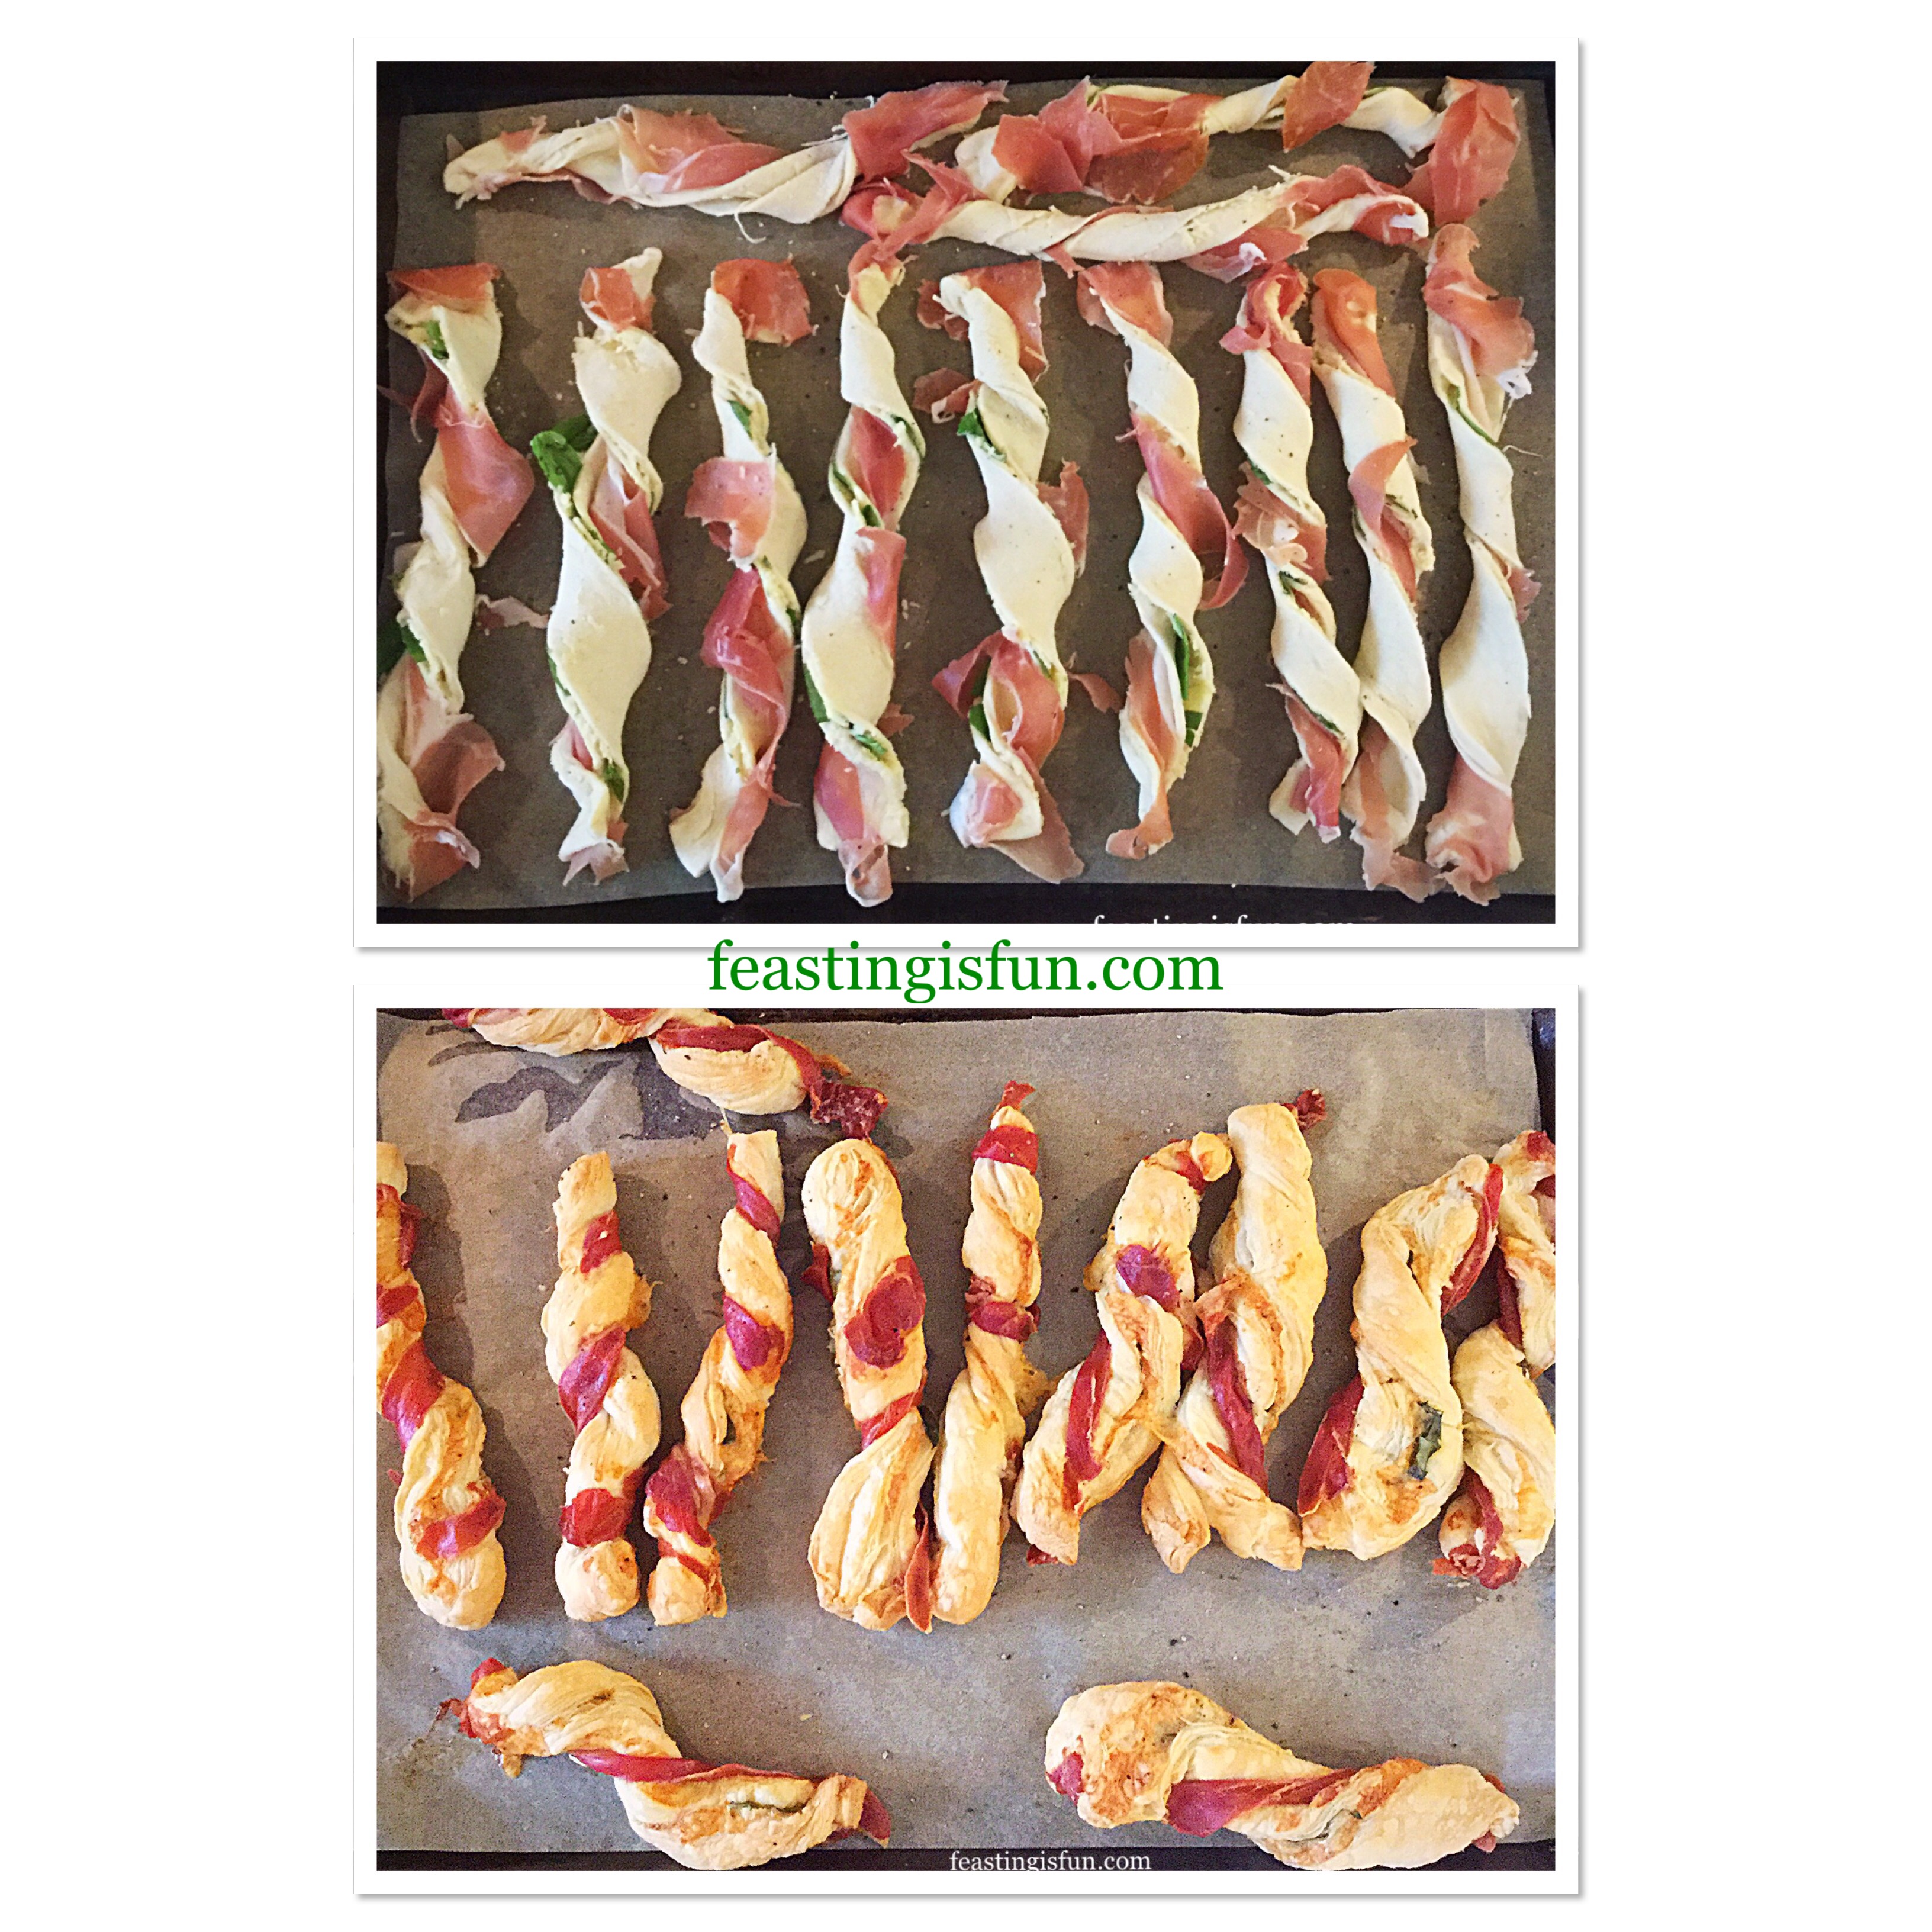
Portioning The Straws And Wrapping With Prosciutto:
Divide the pastry in half using a sharp knife. Then cut each half in half again, you will have four separate pieces.
Cut each quarter into 3 strips. Resulting in 12 straws.
Tear a piece of prosciutto ham in two lengthways.
Place the ham on top of a straw and press at both ends so it sticks.
Using both hands twist the pastry so that the prosciutto wraps around.
Place the twisted pastry on to a baking sheet.
Repeat with the rest of the straws.
Roll out the second block of pastry and repeat the process again.
Cutting the straws and wrapping with Prosciutto.
Baking The Prosciutto Wrapped Puff Pastry Straws:
Place the baking trays into a preheated oven and bake for 20-25 minutes until the pastry is golden and the prosciutto is crisp.
As soon as the straws are baked remove from the oven and place on a serving plate.
Note – if you are planning to freeze the straws, remove from the oven 5 minutes early when the straws are baked, yet not golden..
Baking the Prosciutto Wrapped Cheese Puff Pastry Straws
Allow the straws to cool slightly before serving.
Cool, place in an airtight container and refrigerate for up to 2 days. To freeze place in freezer bags or boxes for up to 2 months. To reheat from frozen place in a medium oven for 5-10 minutes.
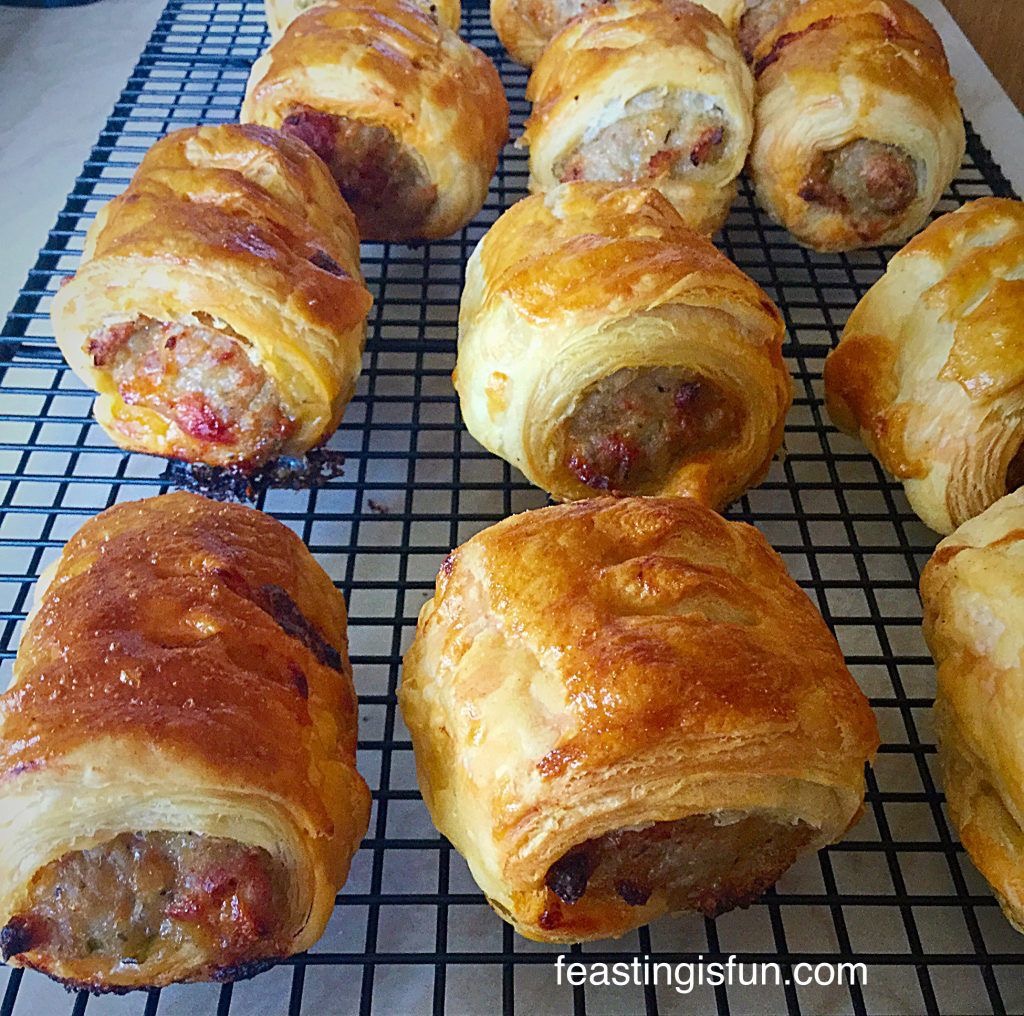
If you have enjoyed this recipe for Prosciutto Wrapped Cheese Puff Pastry Straws you may also like these:
Whether I’m hosting or going out, parties are fun and a great way to catch up with friends and make new ones. Recipes that are easy and also travel well make life easier. These Prosciutto Wrapped Cheese Puff Pastry Straws are ideal for making and taking to parties. Also, as they can be frozen I plan on making a big batch prior to Christmas. Bake the frozen straws into a moderate oven for ten minutes and you have a delicious snack to share with unexpected visitors.
So, whatever you are making, baking and creating in your kitchens have fun preparing and sharing your feast.
Sammie xx
No part of this post may be reproduced or duplicated without the written permission of the owner. Please see my Disclosure Policy.
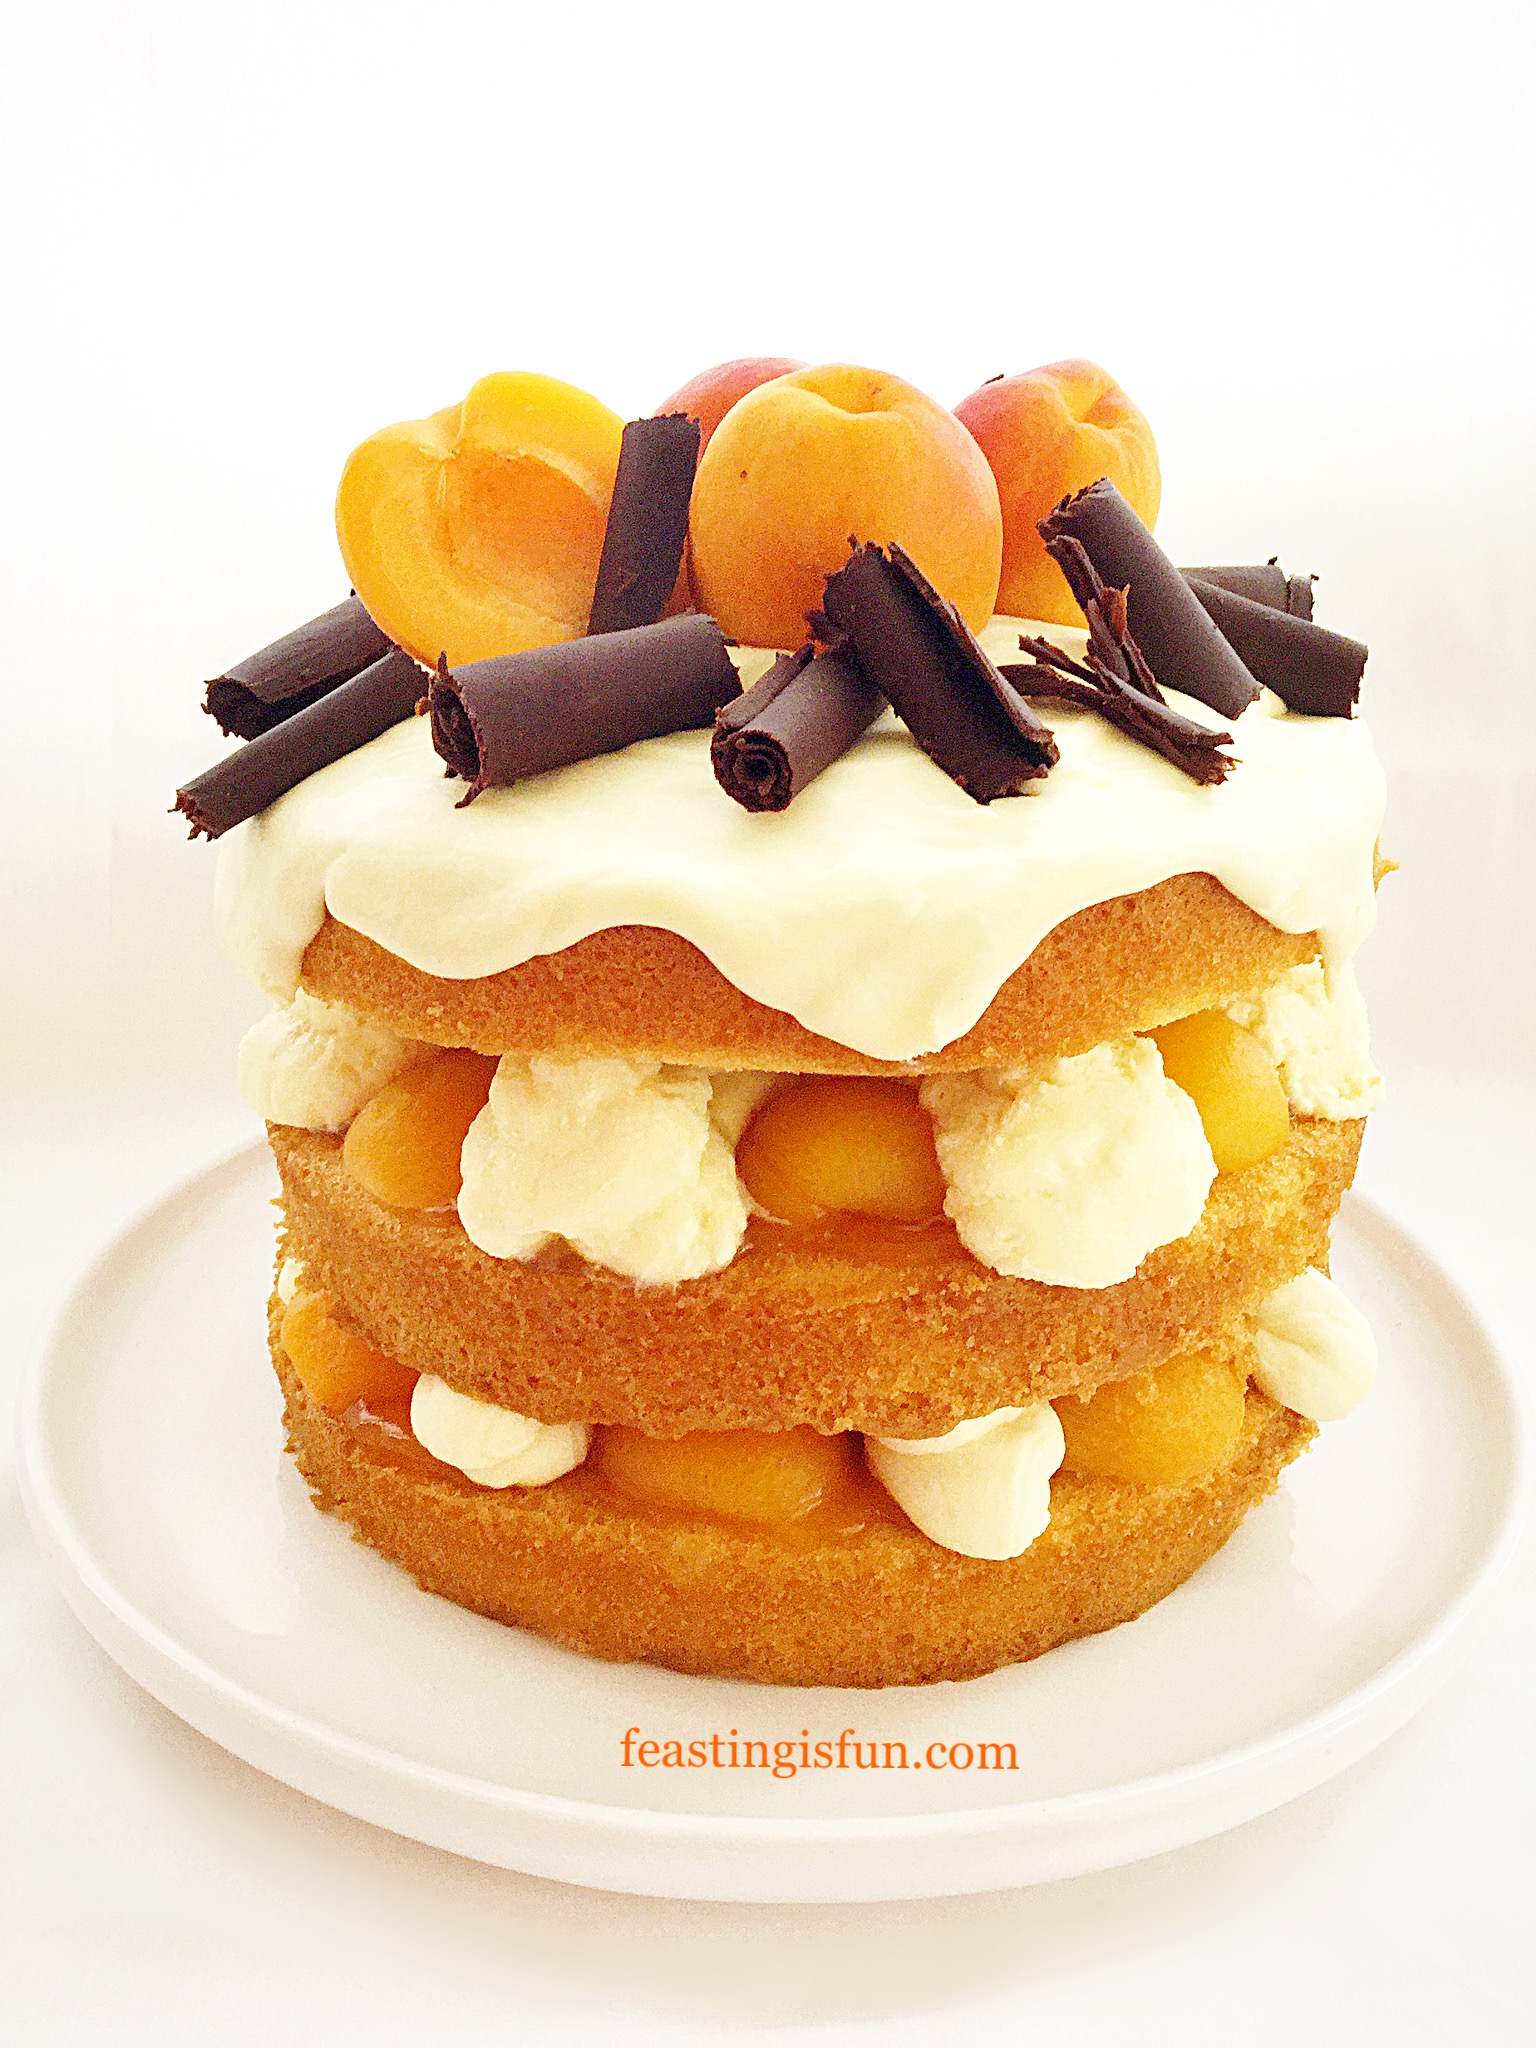
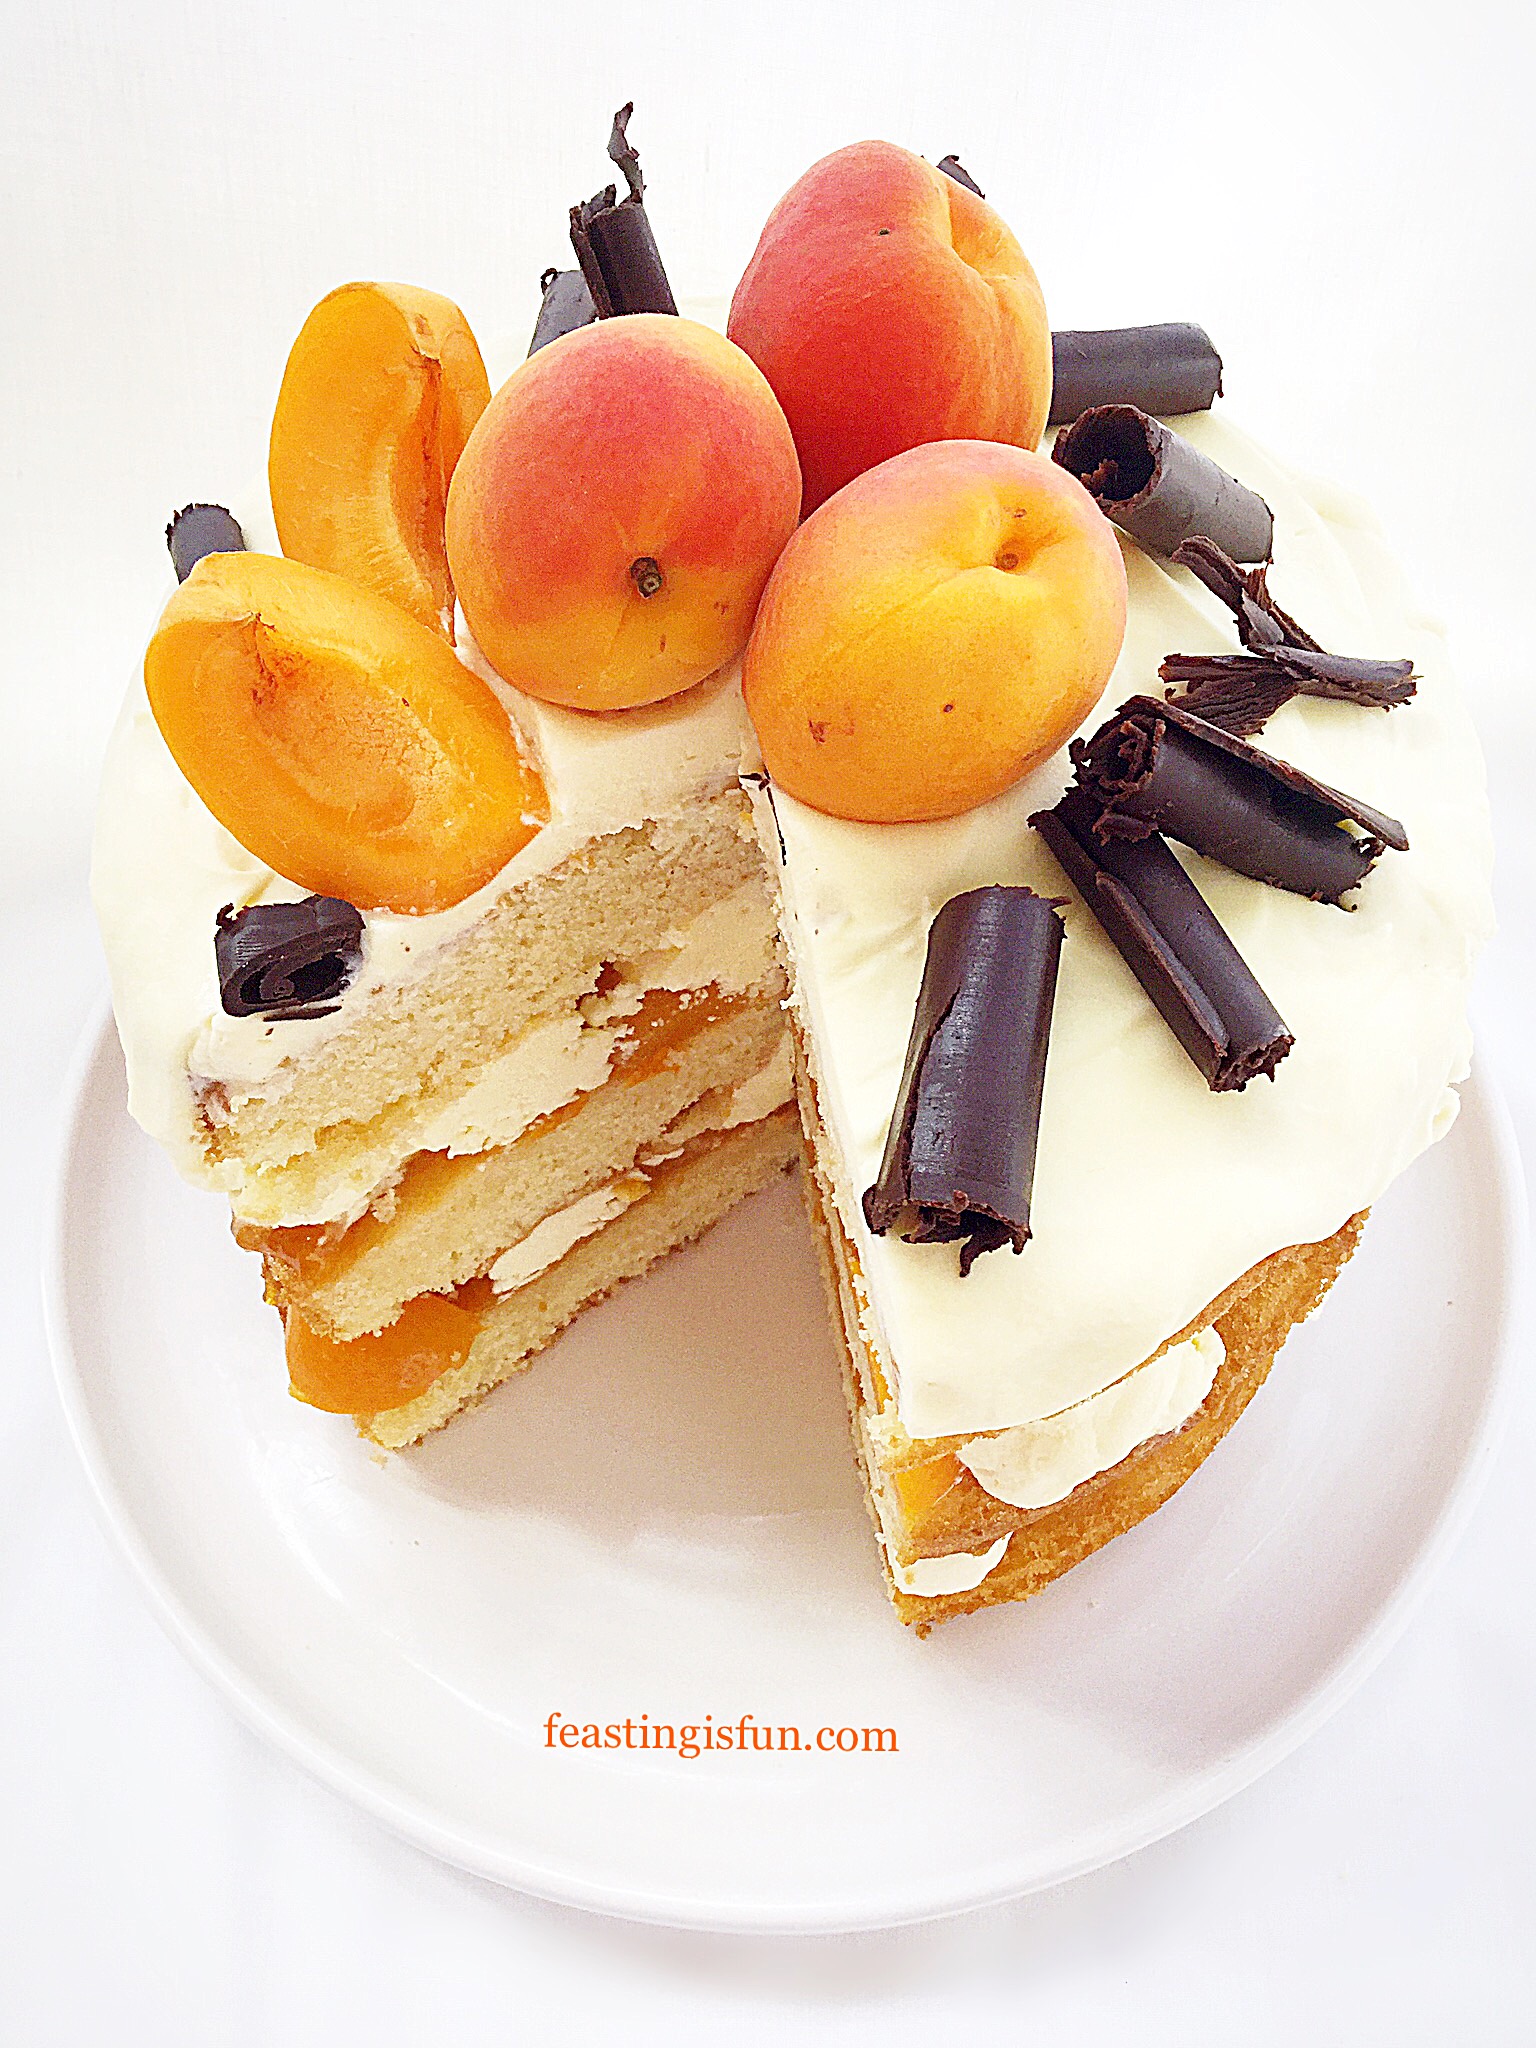
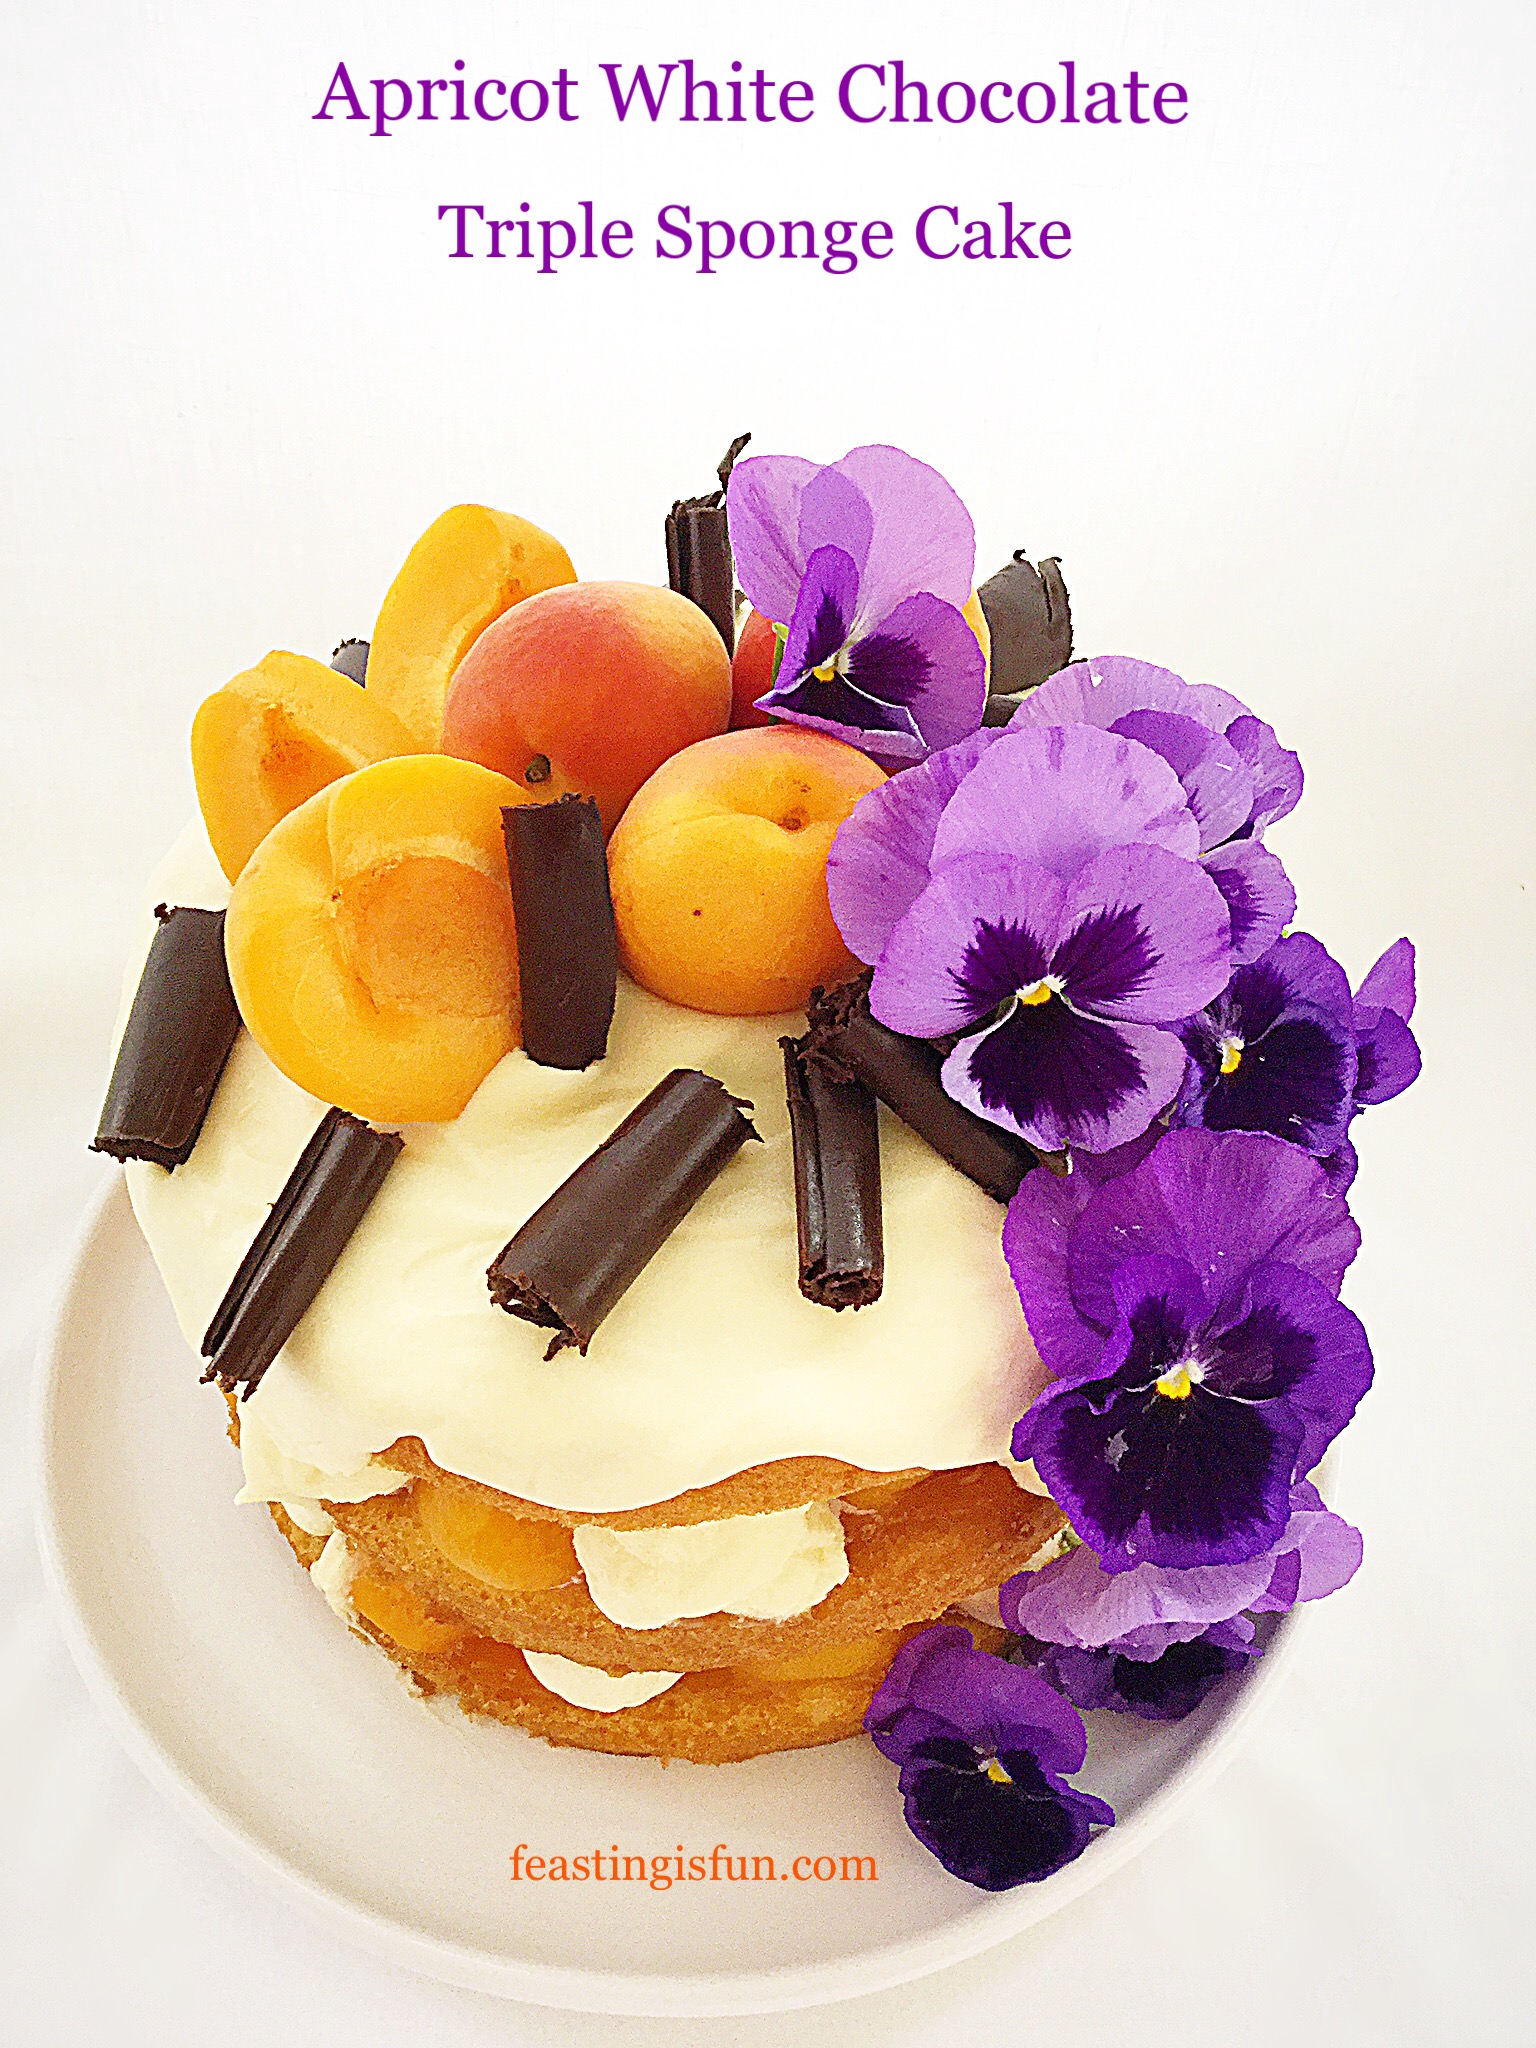
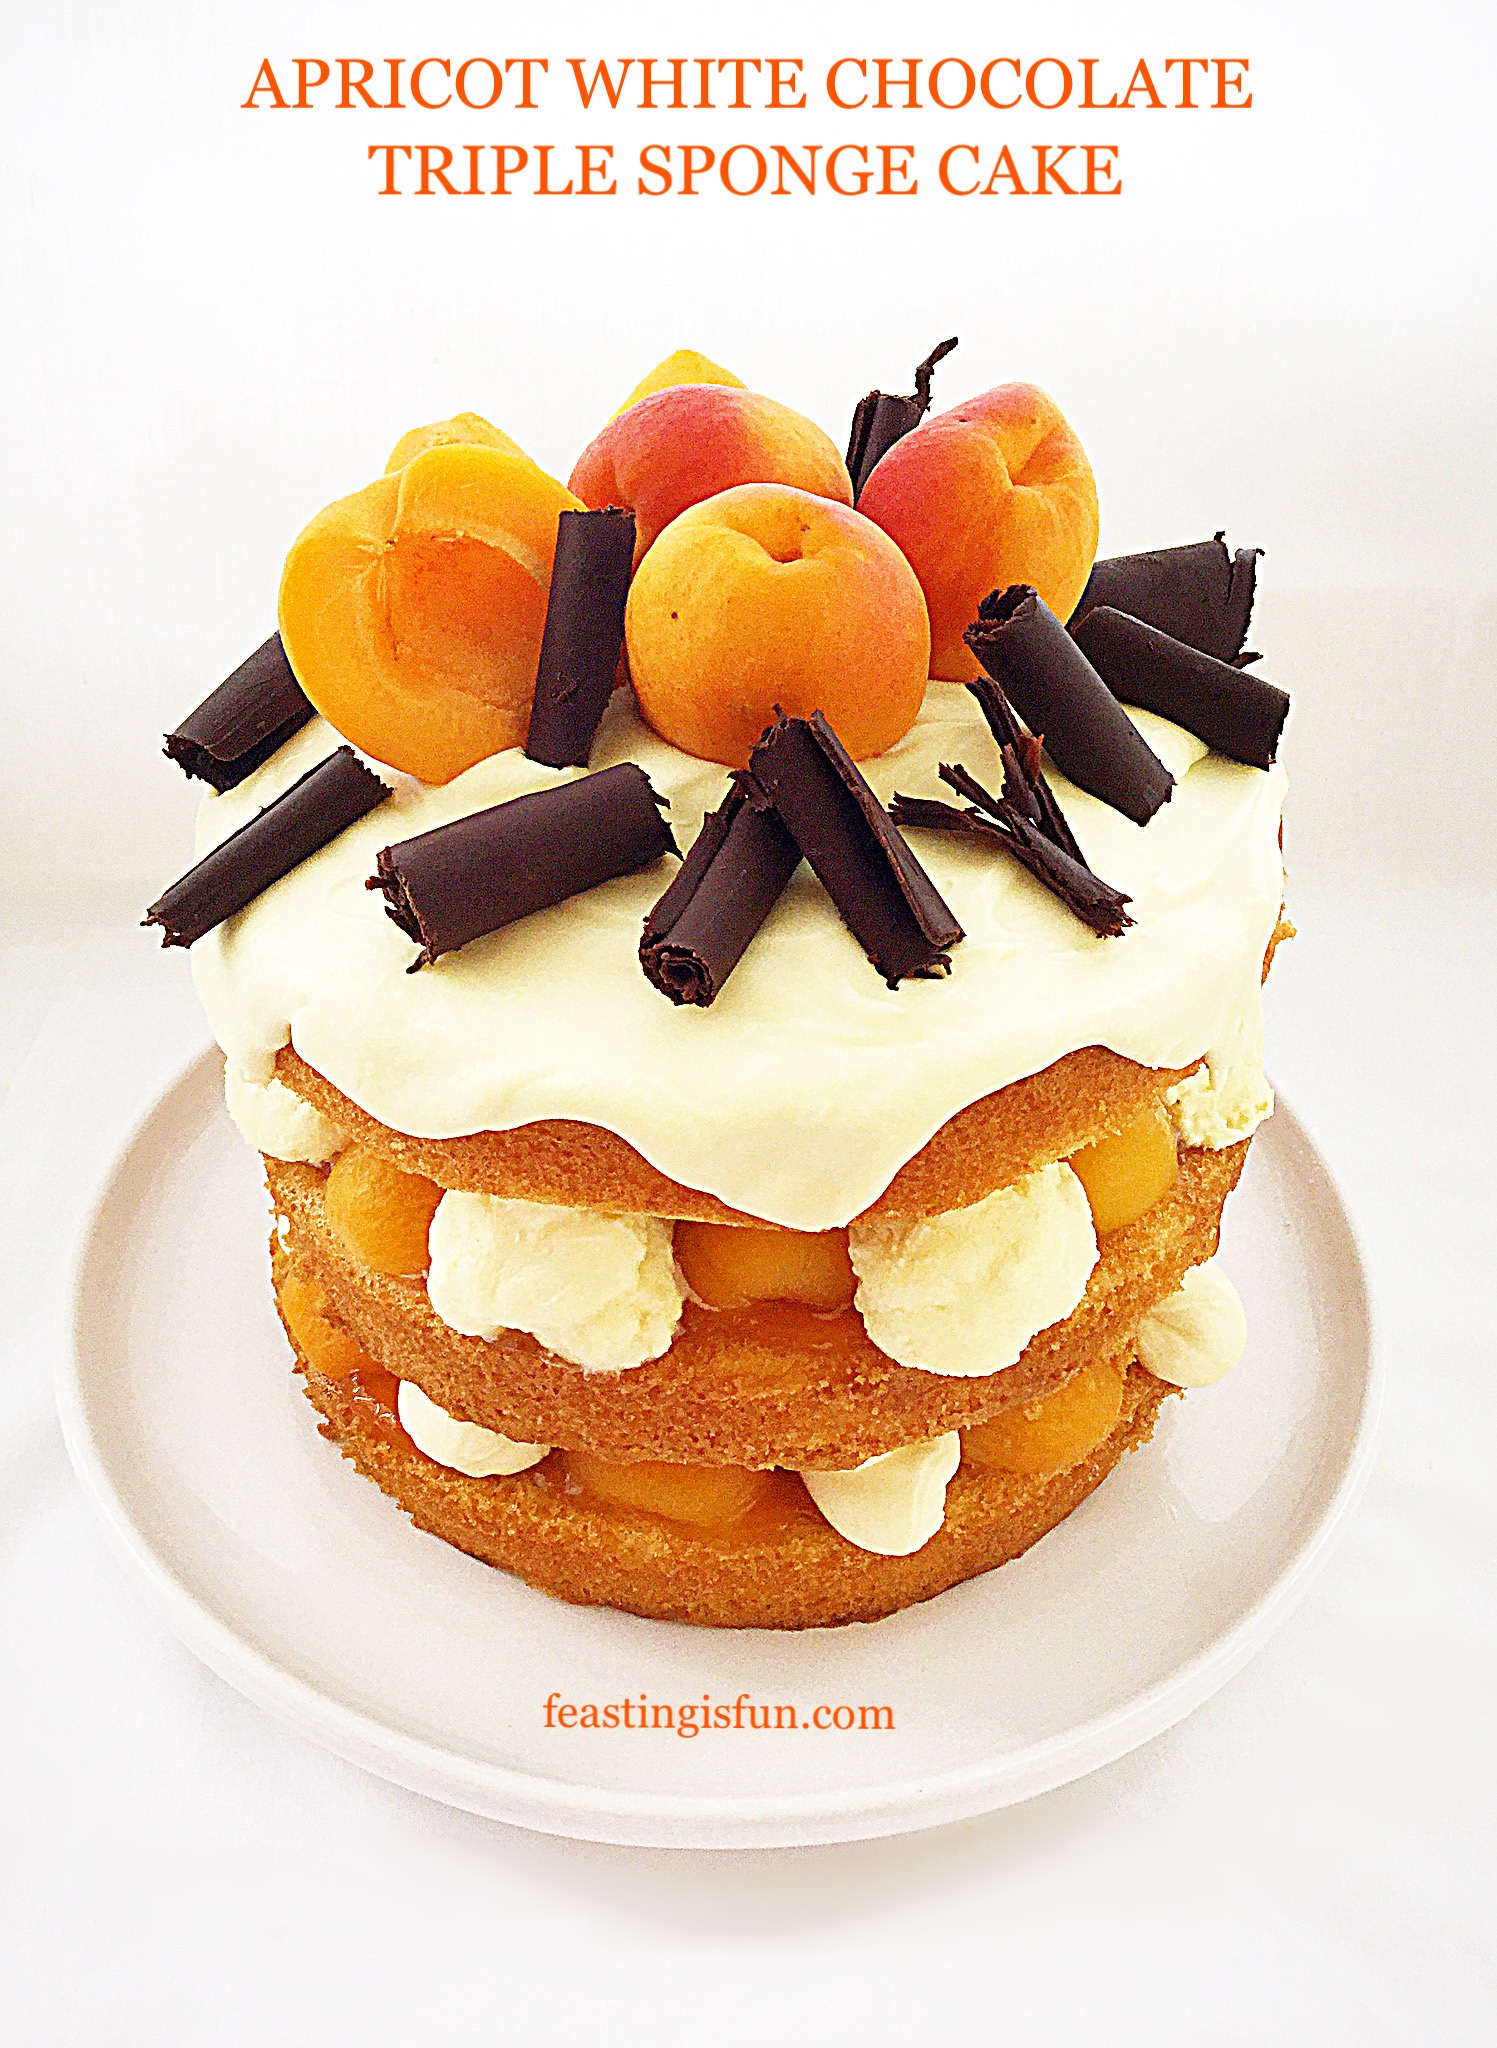
After being approached by Maha Home to create a cake using the new Innovative Range by Mason Cash that they stock, I was beyond excited. I can remember every single adult female in our family owning the iconic, beige coloured, cane bowl by the same manufacturer. Yet with this new range I was in for a double treat (I’ll explain more later). I chose to create this gluten free Apricot White Chocolate Triple Sponge Cake.
Apricot White Chocolate Triple Sponge Cake
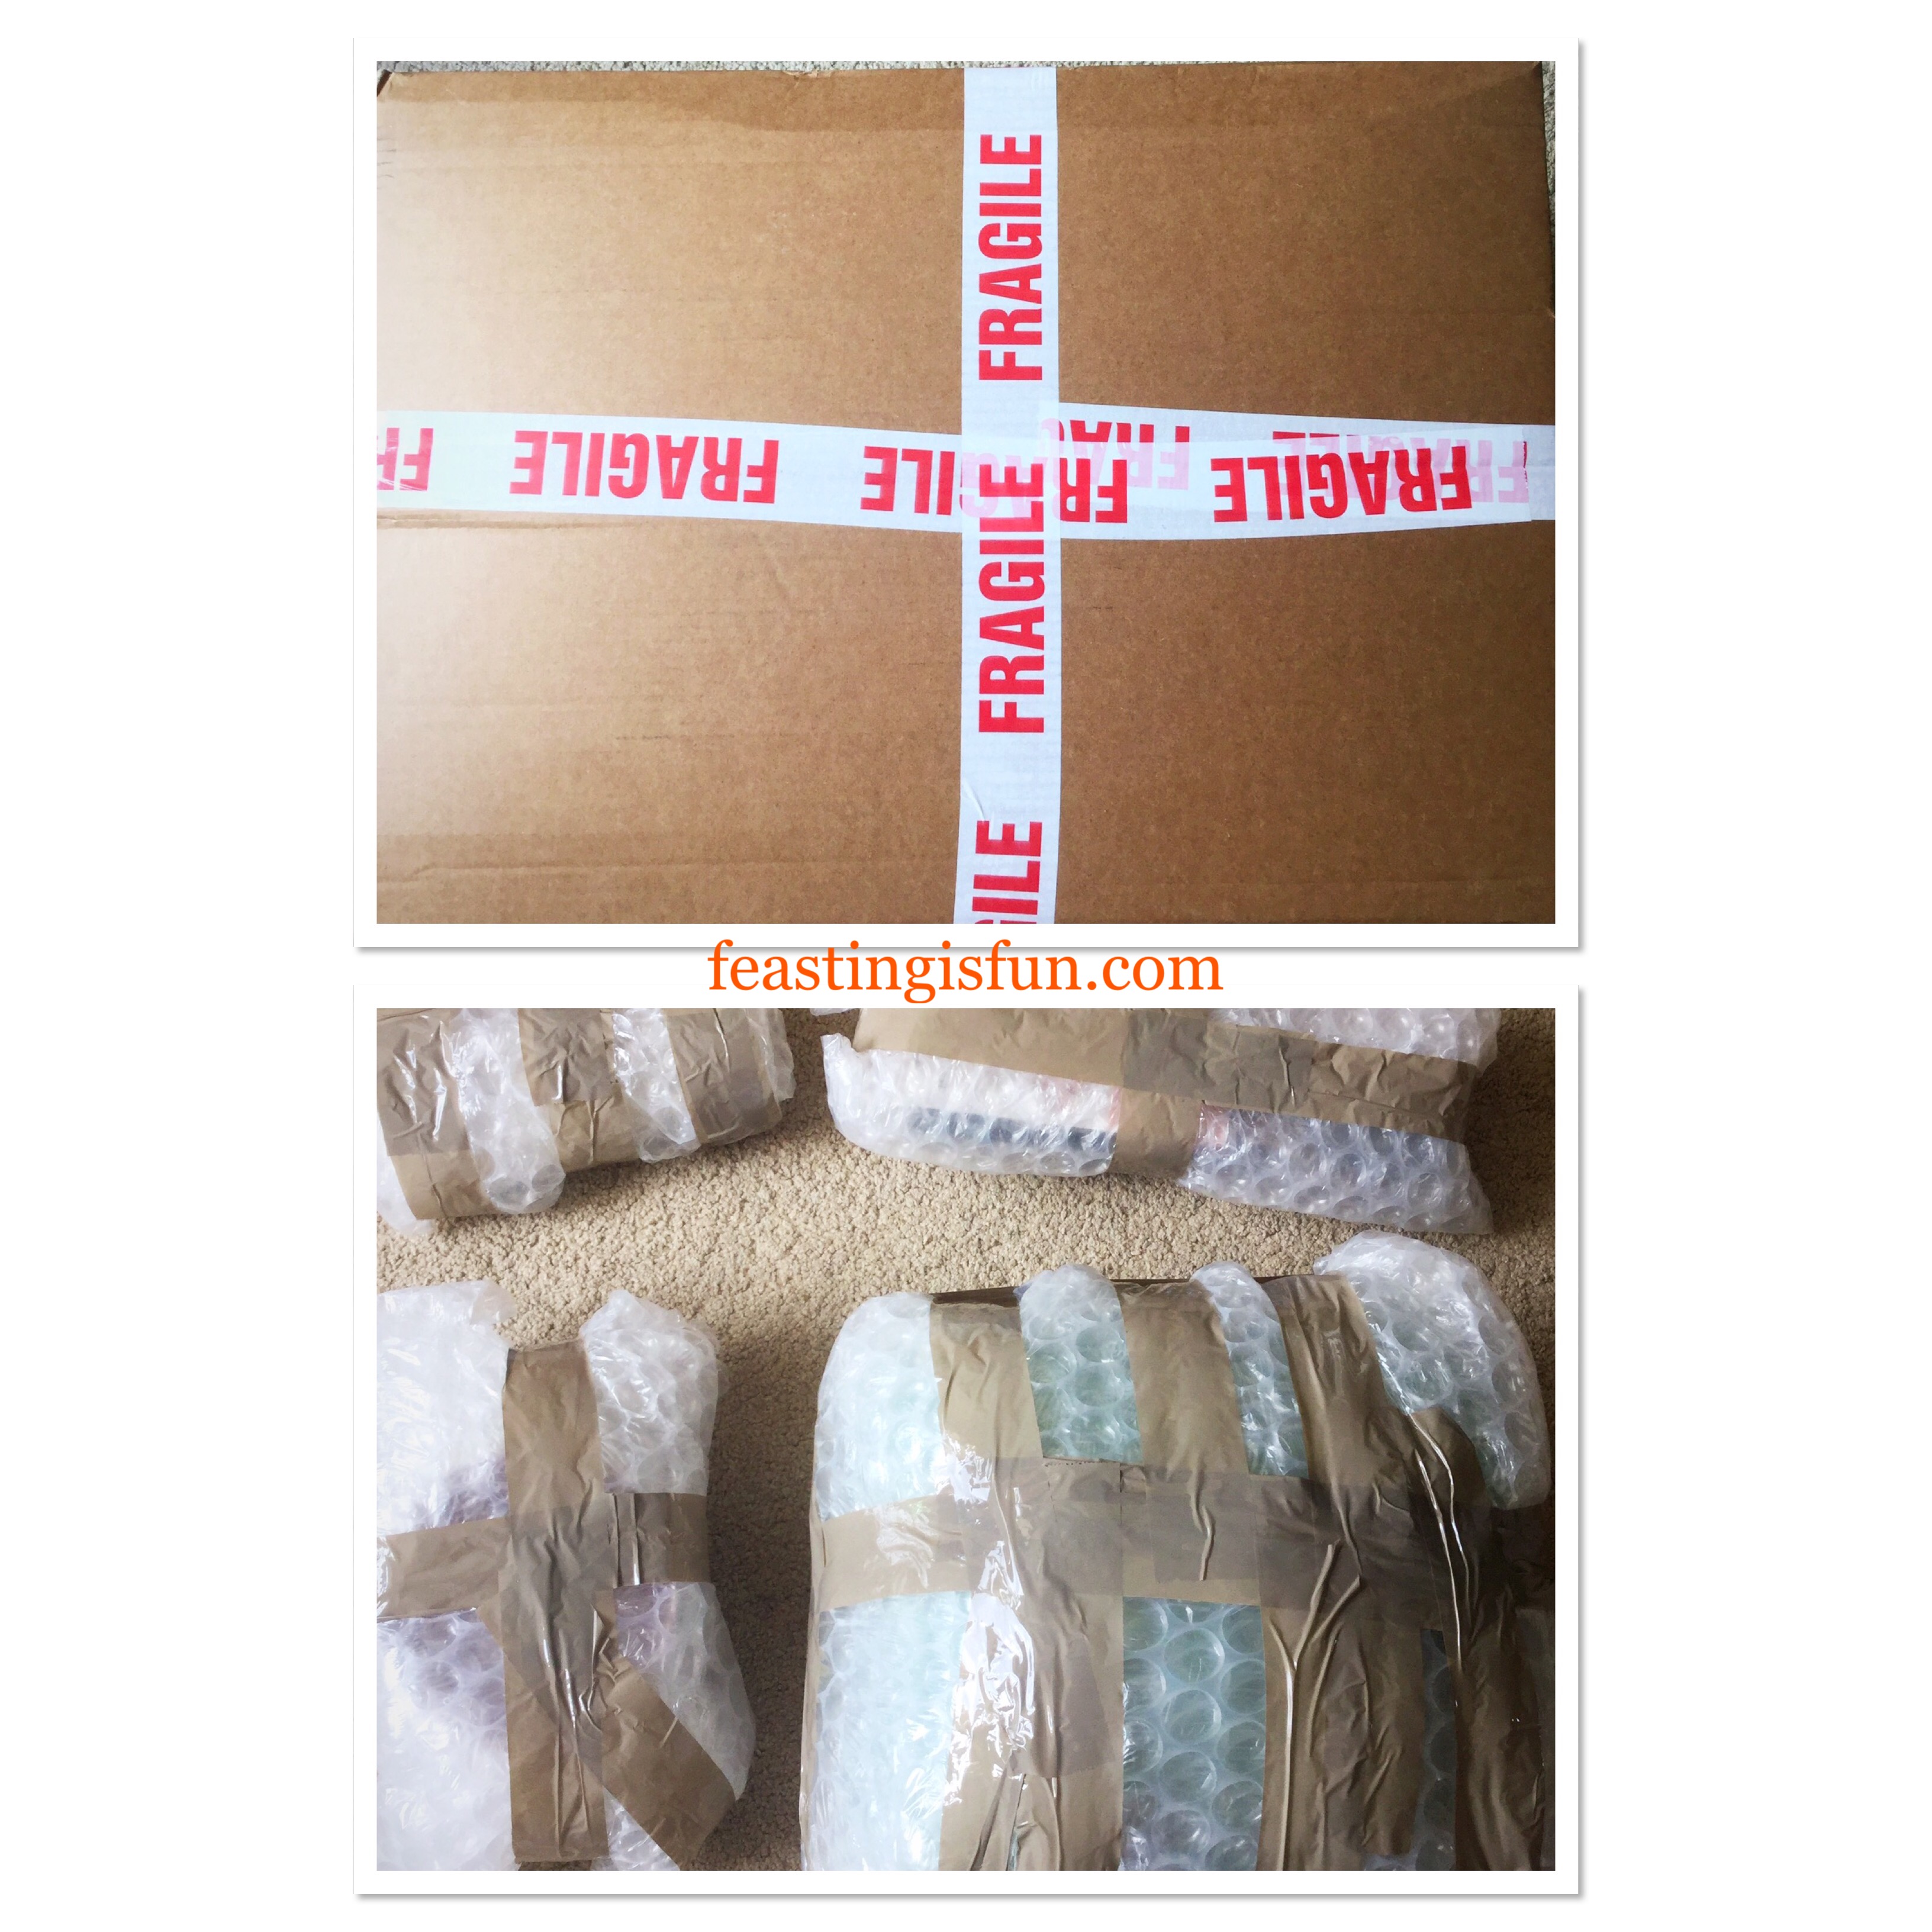
As a result of my health issues, I rely heavily on the ability to order items online. Having had mixed results from the different companies I order from I have learned who I can trust to properly package and ship things within an acceptable time frame. With Maha Home I placed my order and it arrived the following day. Every item was securely wrapped, without there being an excess of packaging. Most importantly every single item, when unwrapped, was in perfect condition. Because of the careful packaging, lowest price match promise and prompt delivery I would happily order from them in future.
Package delivery from Maha Home
I will admit that it did take some time to complete the unwrapping!
I tested and used all of the items except the reamer and jar scraper while making the Apricot White Chocolate Triple Sponge Cake.
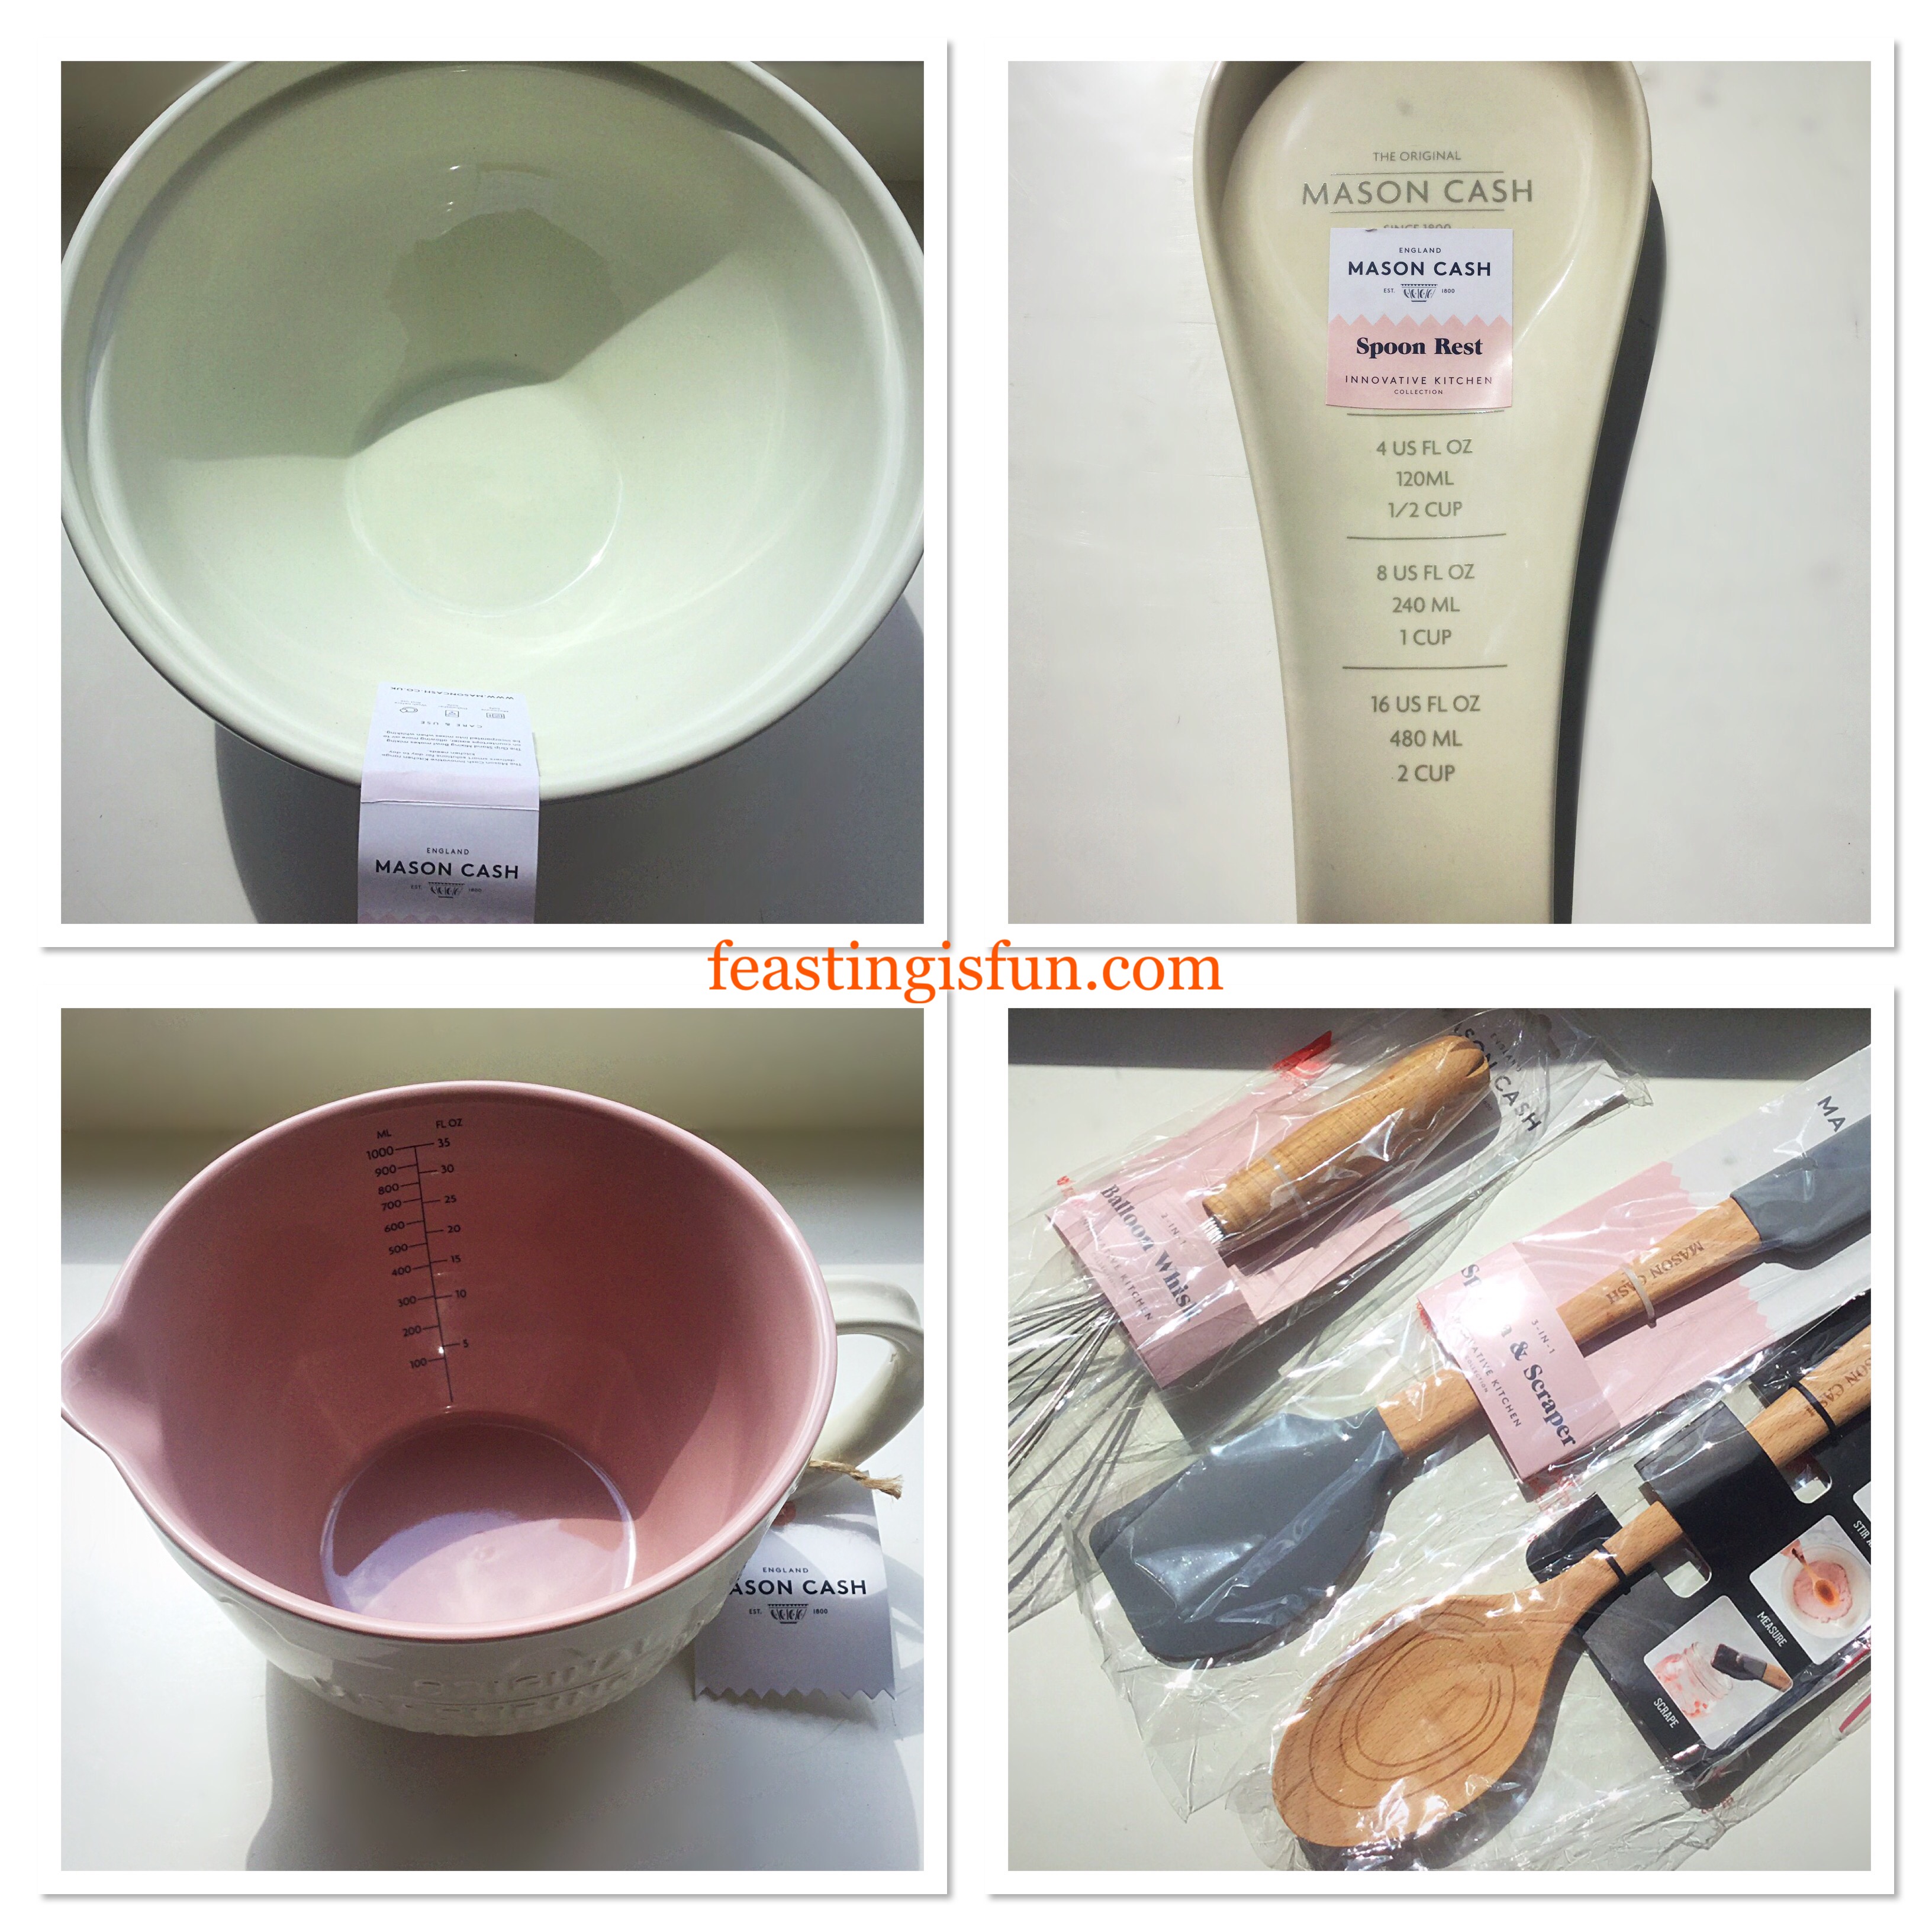
Mason Cash Innovative Kitchen items from Maha Home
Note: please visit the Mason Cash website for specific care and use of items listed.
My Thoughts On The Innovative Kitchen Kit
Innovative Kitchen Mixing Bowl:
I love the size of this bowl and it is beautiful to look at. It’s wide enough to get my hands in, for making bread, pastry and crumble. Using the tilt feature allows for thorough mixing. Also I would use this as a serving bowl, for example my Creamy Garlic Lemon Chicken Pasta Salad. While the bowl itself isn’t too heavy, once ingredients are added I would struggle to be able to lift this and mix in the crook of my arm. Also this bowl would make a perfect new home/wedding/birthday present for a newbie or keen baker.
Innovative Kitchen Spoon Rest:
Possibly my favourite item! Although this may seem odd, as someone who frequently uses an electric whisk that always drips on to the worktop having this spoon rest is an absolute joy. Large enough to rest both beaters from my whisk, or the large solid spoon and the balloon whisk from the range, this has saved me a substantial amount of clean-up time.
Innovative Kitchen 1 Litre Measuring Jug
Absolutely the cutest item in the range. A really useful size jug with accurate measurements inside. For that reason it was particularly useful when creating the Apricot White Chocolate Triple Sponge Cake. Especially easy to use in the microwave and the colours match my kitchen perfectly.
Innovative Kitchen Whisk And Reamer
Such a comfortable balloon whisk to hold and use. I wasn’t sure at first how useful the reamer would be, however after making a batch of Homemade Chelsea Buns, with a lemon drizzle I found myself happily using both the reamer and whisk. Brilliant invention.
Innovative Kitchen Spatula
Fantastic large spatula at one end with a smaller spatula at the other end. Any worries I had about how comfortable it would be to hold were immediately dispelled on first use. Two for one usage, saving utensil room in the kitchen.
Innovative Kitchen Solid Spoon And Jar Scraper
A strong solid spoon that is comfortable to hold and use. I see a wooden spoon as one of THE most essential items in any kitchen, this spoon fits the bill and some! No longer do I have to sniff my range of wooden spoons when baking, to check for lingering curry/garlic smells. I now have a dedicated wooden spoon for baking, that also has a very handy jar scraper at the other end. Especially useful for honey and marmite, both particularly sticky and reluctant to leave the inside of a jar. Again double usage from one utensil.
Apricot White Chocolate Triple Sponge Cake
Recipe: Apricot White Chocolate Triple Sponge Cake serves 10-12
For the cake sponges
225g + 112g/8oz + 4oz (337g/12oz) Unsalted Butter at room temperature – plus extra for greasing the cake tins
225g + 112g/8oz + 4oz (337g/12oz) Gluten Free Plain White Flour – I use Doves Farm alternatively use regular white wheat flour
2tsp + 1tsp Baking Powder (3tsp) – I use Waitrose as it is gluten free
Filling and decorating the cake
6tbsp Good Quality Apricot Conserve – I like Bonne Maman
2 x 240g (drained) Canned Apricot Halves
4 Fresh Apricots – if not in season there will be enough left to decorate from the canned apricots
For the white chocolate ganache
600g/1lb 5oz Good Quality White Chocolate
600ml/21fl oz Double (heavy) Cream
For the dark chocolate curls
109g/4oz Good Quality Dark Chocolate – minimum 70% Cocoa Solids
100g/4oz Unsalted Butter – cut into chunks
Method: preheat the oven to 180C/160C fan, 350F, gas mark 4
To make this Apricot White Chocolate Triple Sponge Cake
Note – you will need 3 x 20cm/8in round sandwich tins for this recipe. If, like me however, you only have 2, simply follow the first set of quantities given in the recipe. Make 2 cake sponges using the first quantity given in the recipe and bake. Once the cakes are turned out, wash up one sandwich tin and proceed to make the third cake using the second quantity given in the recipe. Alternatively if you have 3 cake tins make the cake batter using the full quality given (shown in brackets in bold), dividing the mixture equally between the three sandwich tins.
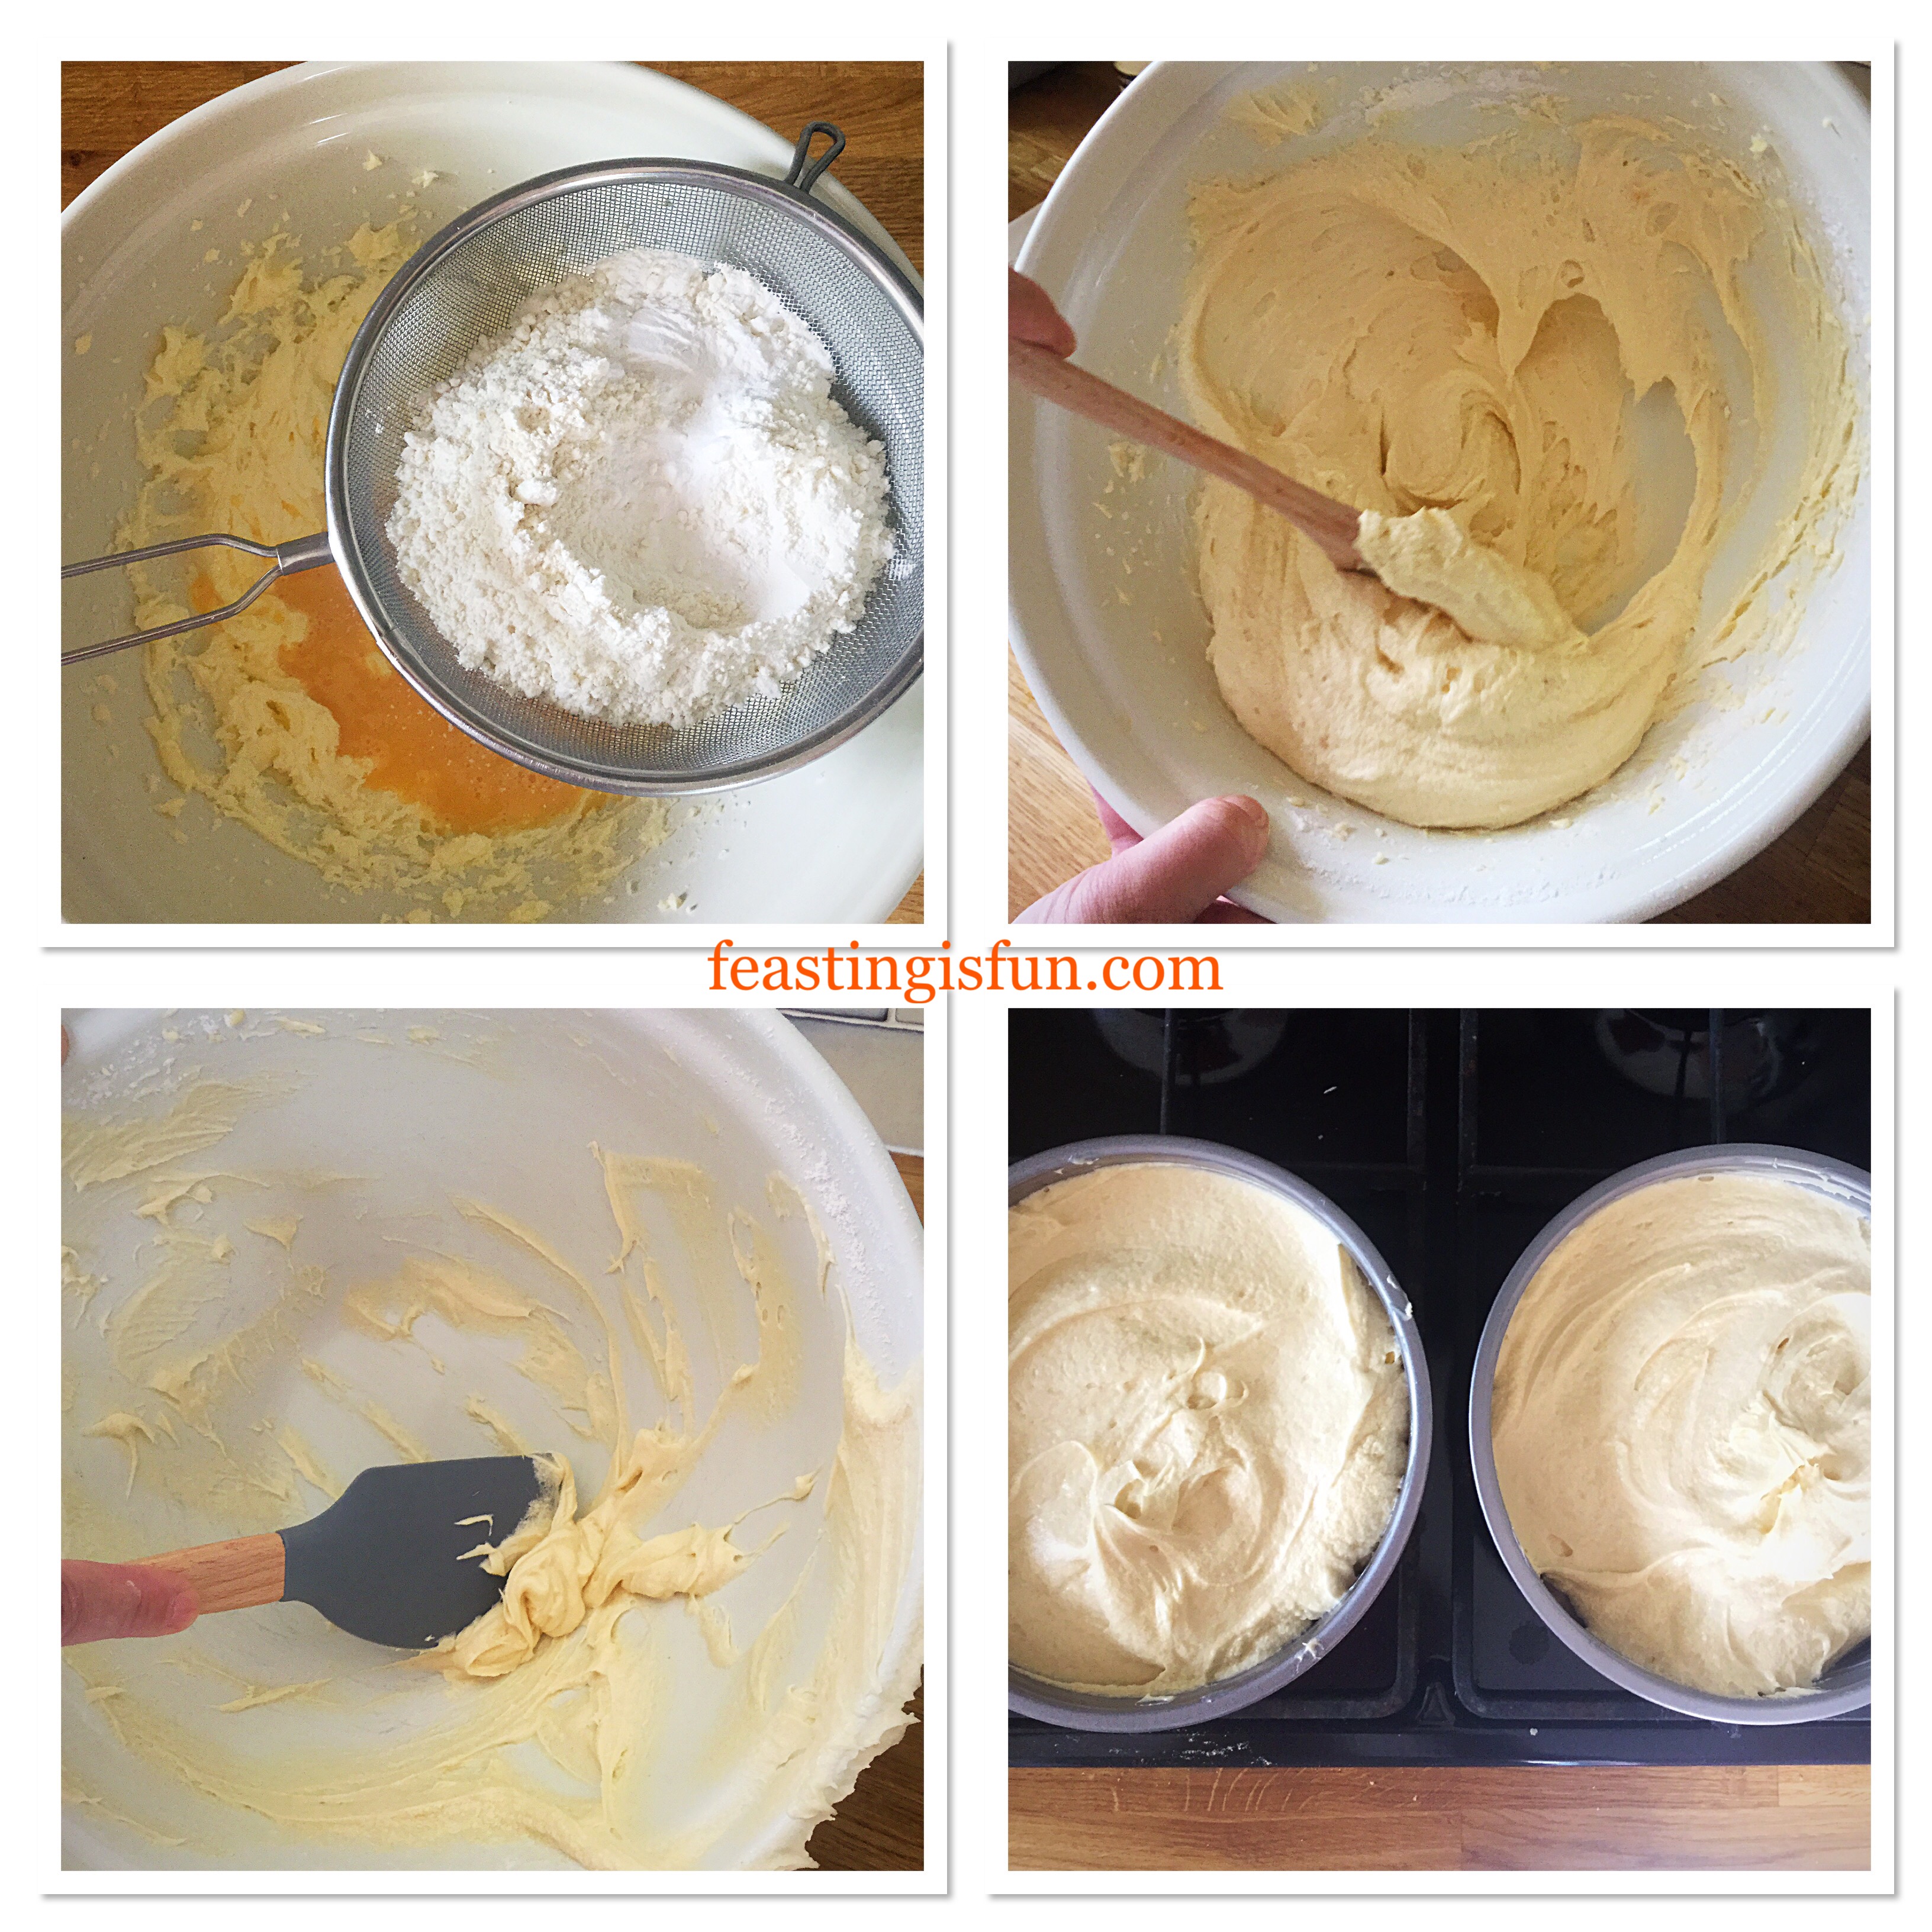
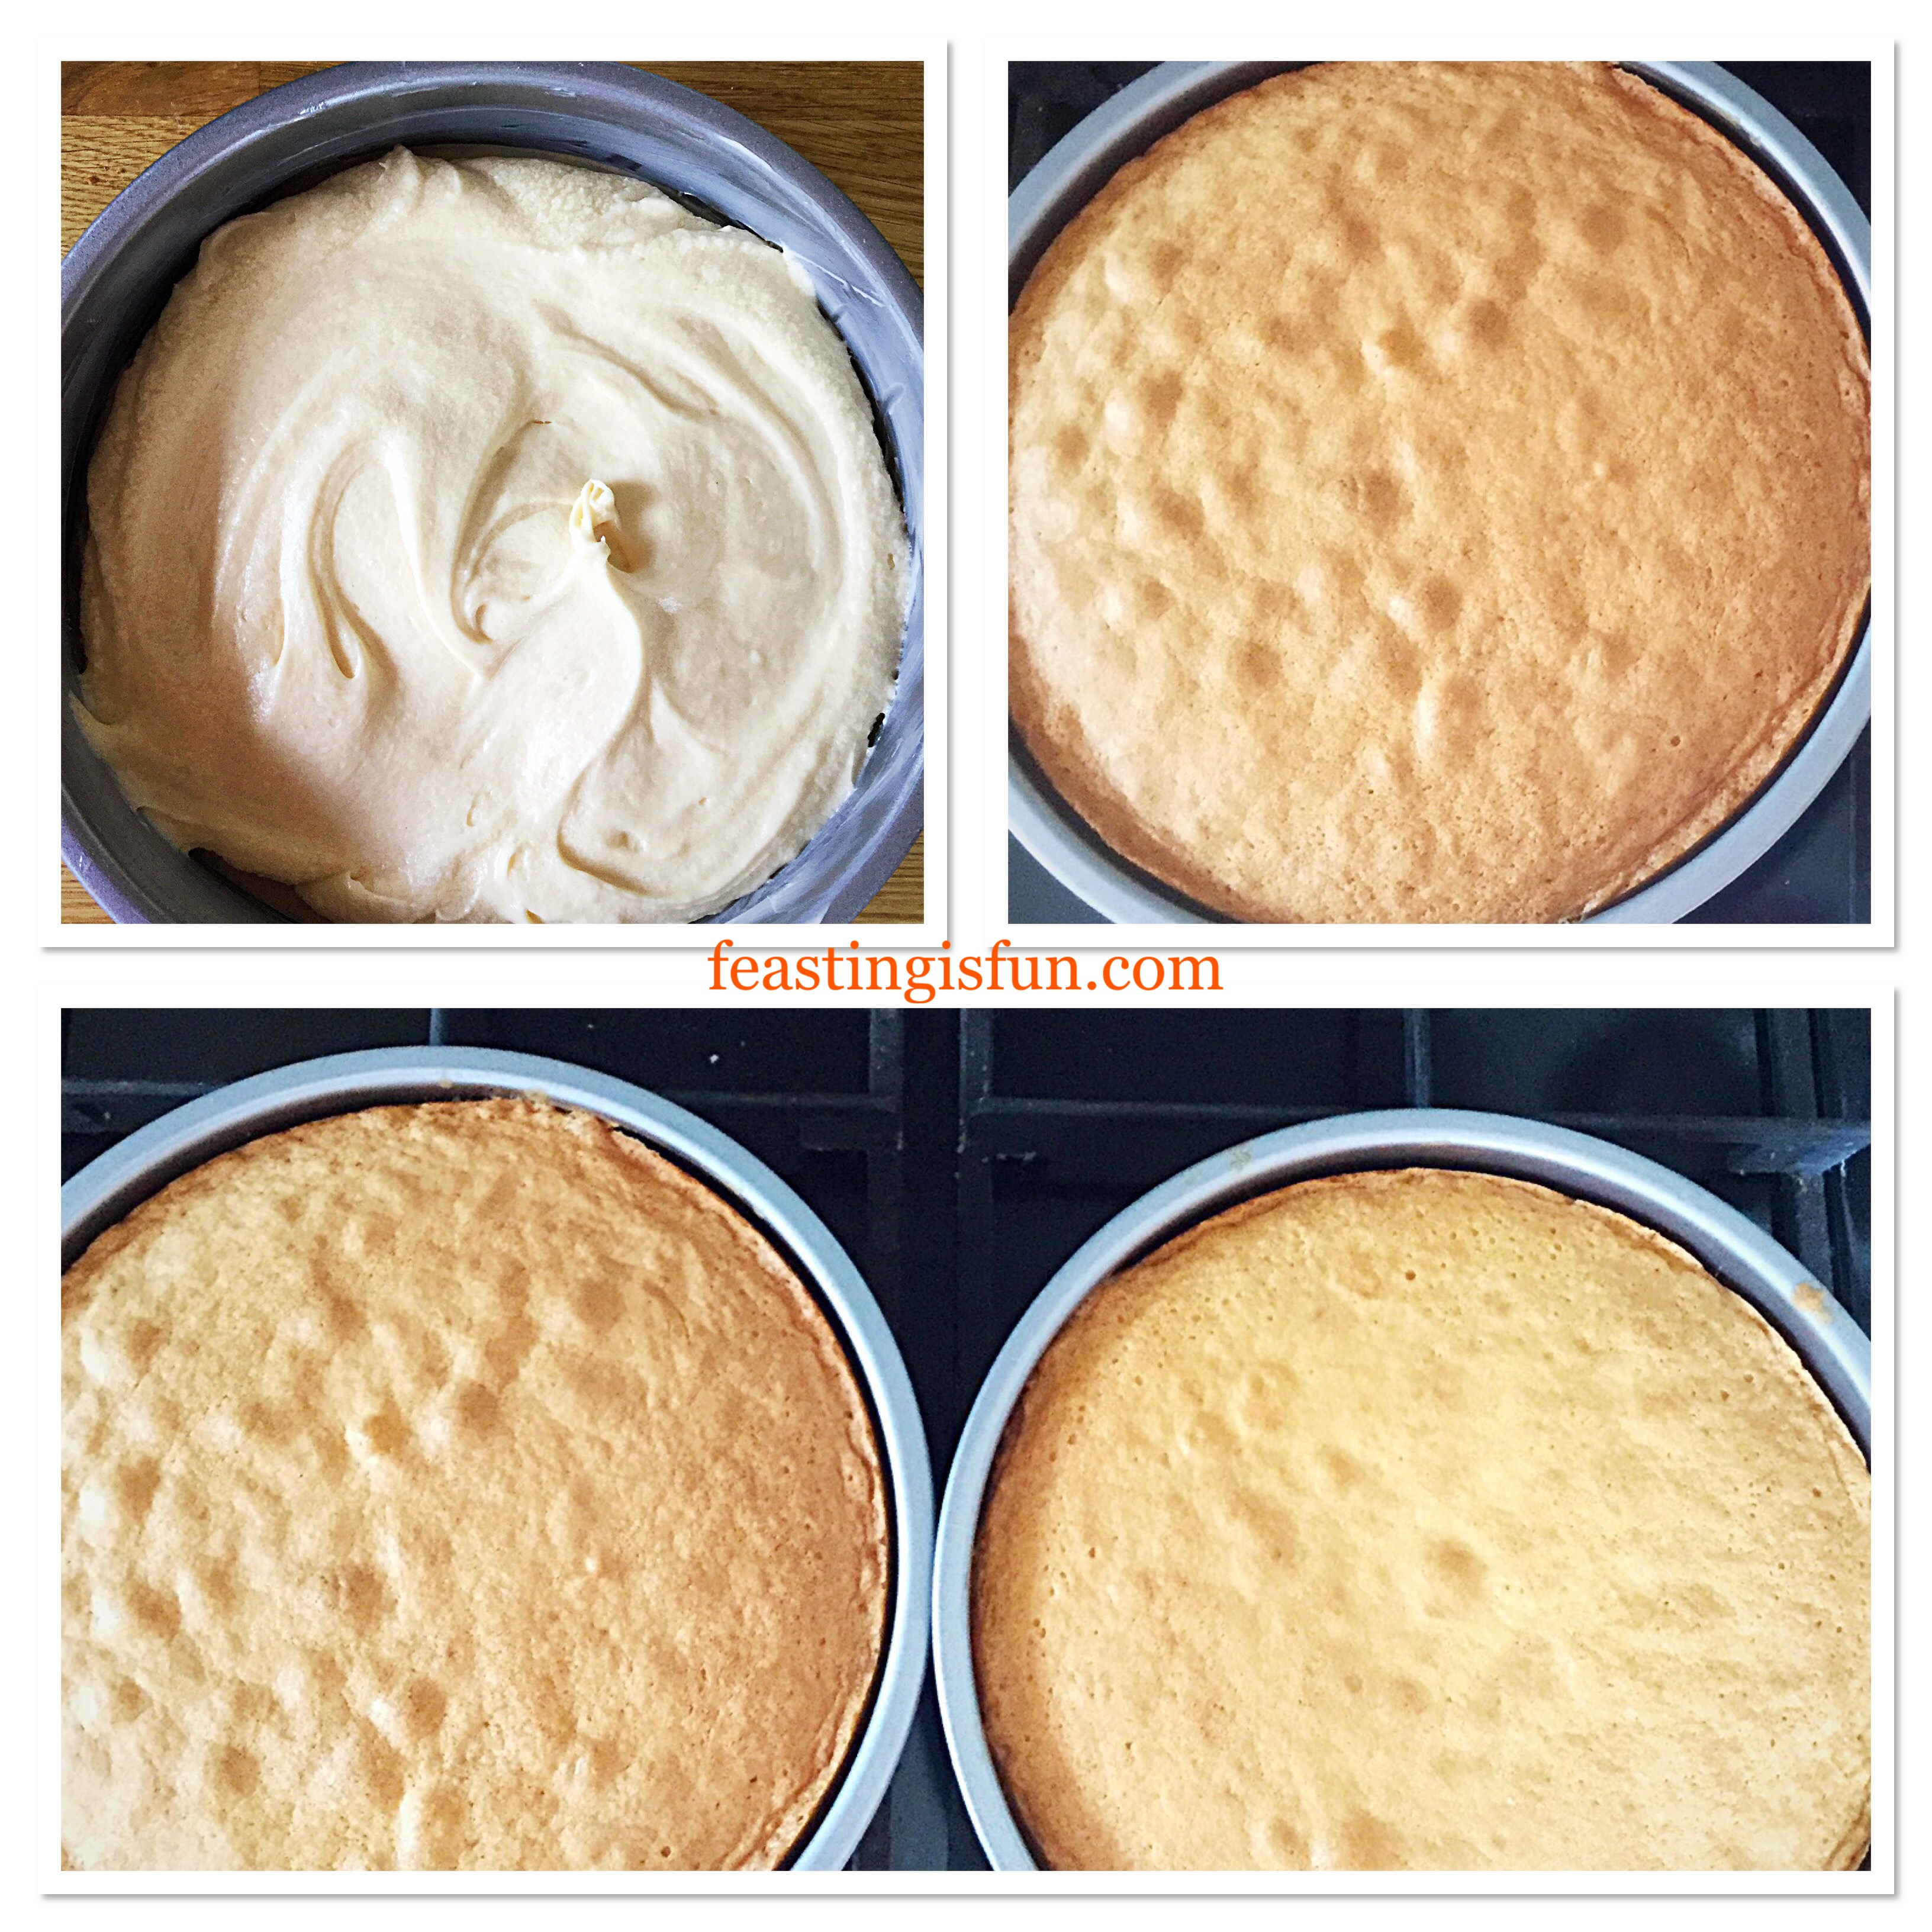
Making the triple sponge cakes
First of all grease with butter and line the sandwich tins with baking parchment.
Next crack the eggs into the jug and whisk to combine.
Add the butter, sugar and salt to the large bowl and whisk together until pale and creamy.
Pour the eggs into the large bowl and add the vanilla extract.
Beating the cream and sugar, whisking the eggs.
Sieve the flour and baking powder into the bowl.
Using a large wooden spoon mix the ingredients together until just combined. Over mixing when using wheat flour can lead to a heavy cake.
Divide the cake batter evenly between the sandwich tins, using the spatula to scrape the bowl clean. Ensuring nothing is wasted.
Smooth the top of the cakes with the spatula.
Adding the dry ingredients, mixing and filling the cake tins.
Place the cake tins into the centre and lower part of the preheated oven.
Bake the cakes for 25-30 minutes.
The cakes are baked when golden and they spring back from a light touch in the centre.
As soon as the cakes are baked remove from the oven.
Allow the cakes to cool in the tins for 15 minutes and then turn out on to a cooling rack.
Proceed with making the third sponge as per the note above.
Baking the three separate cake sponges
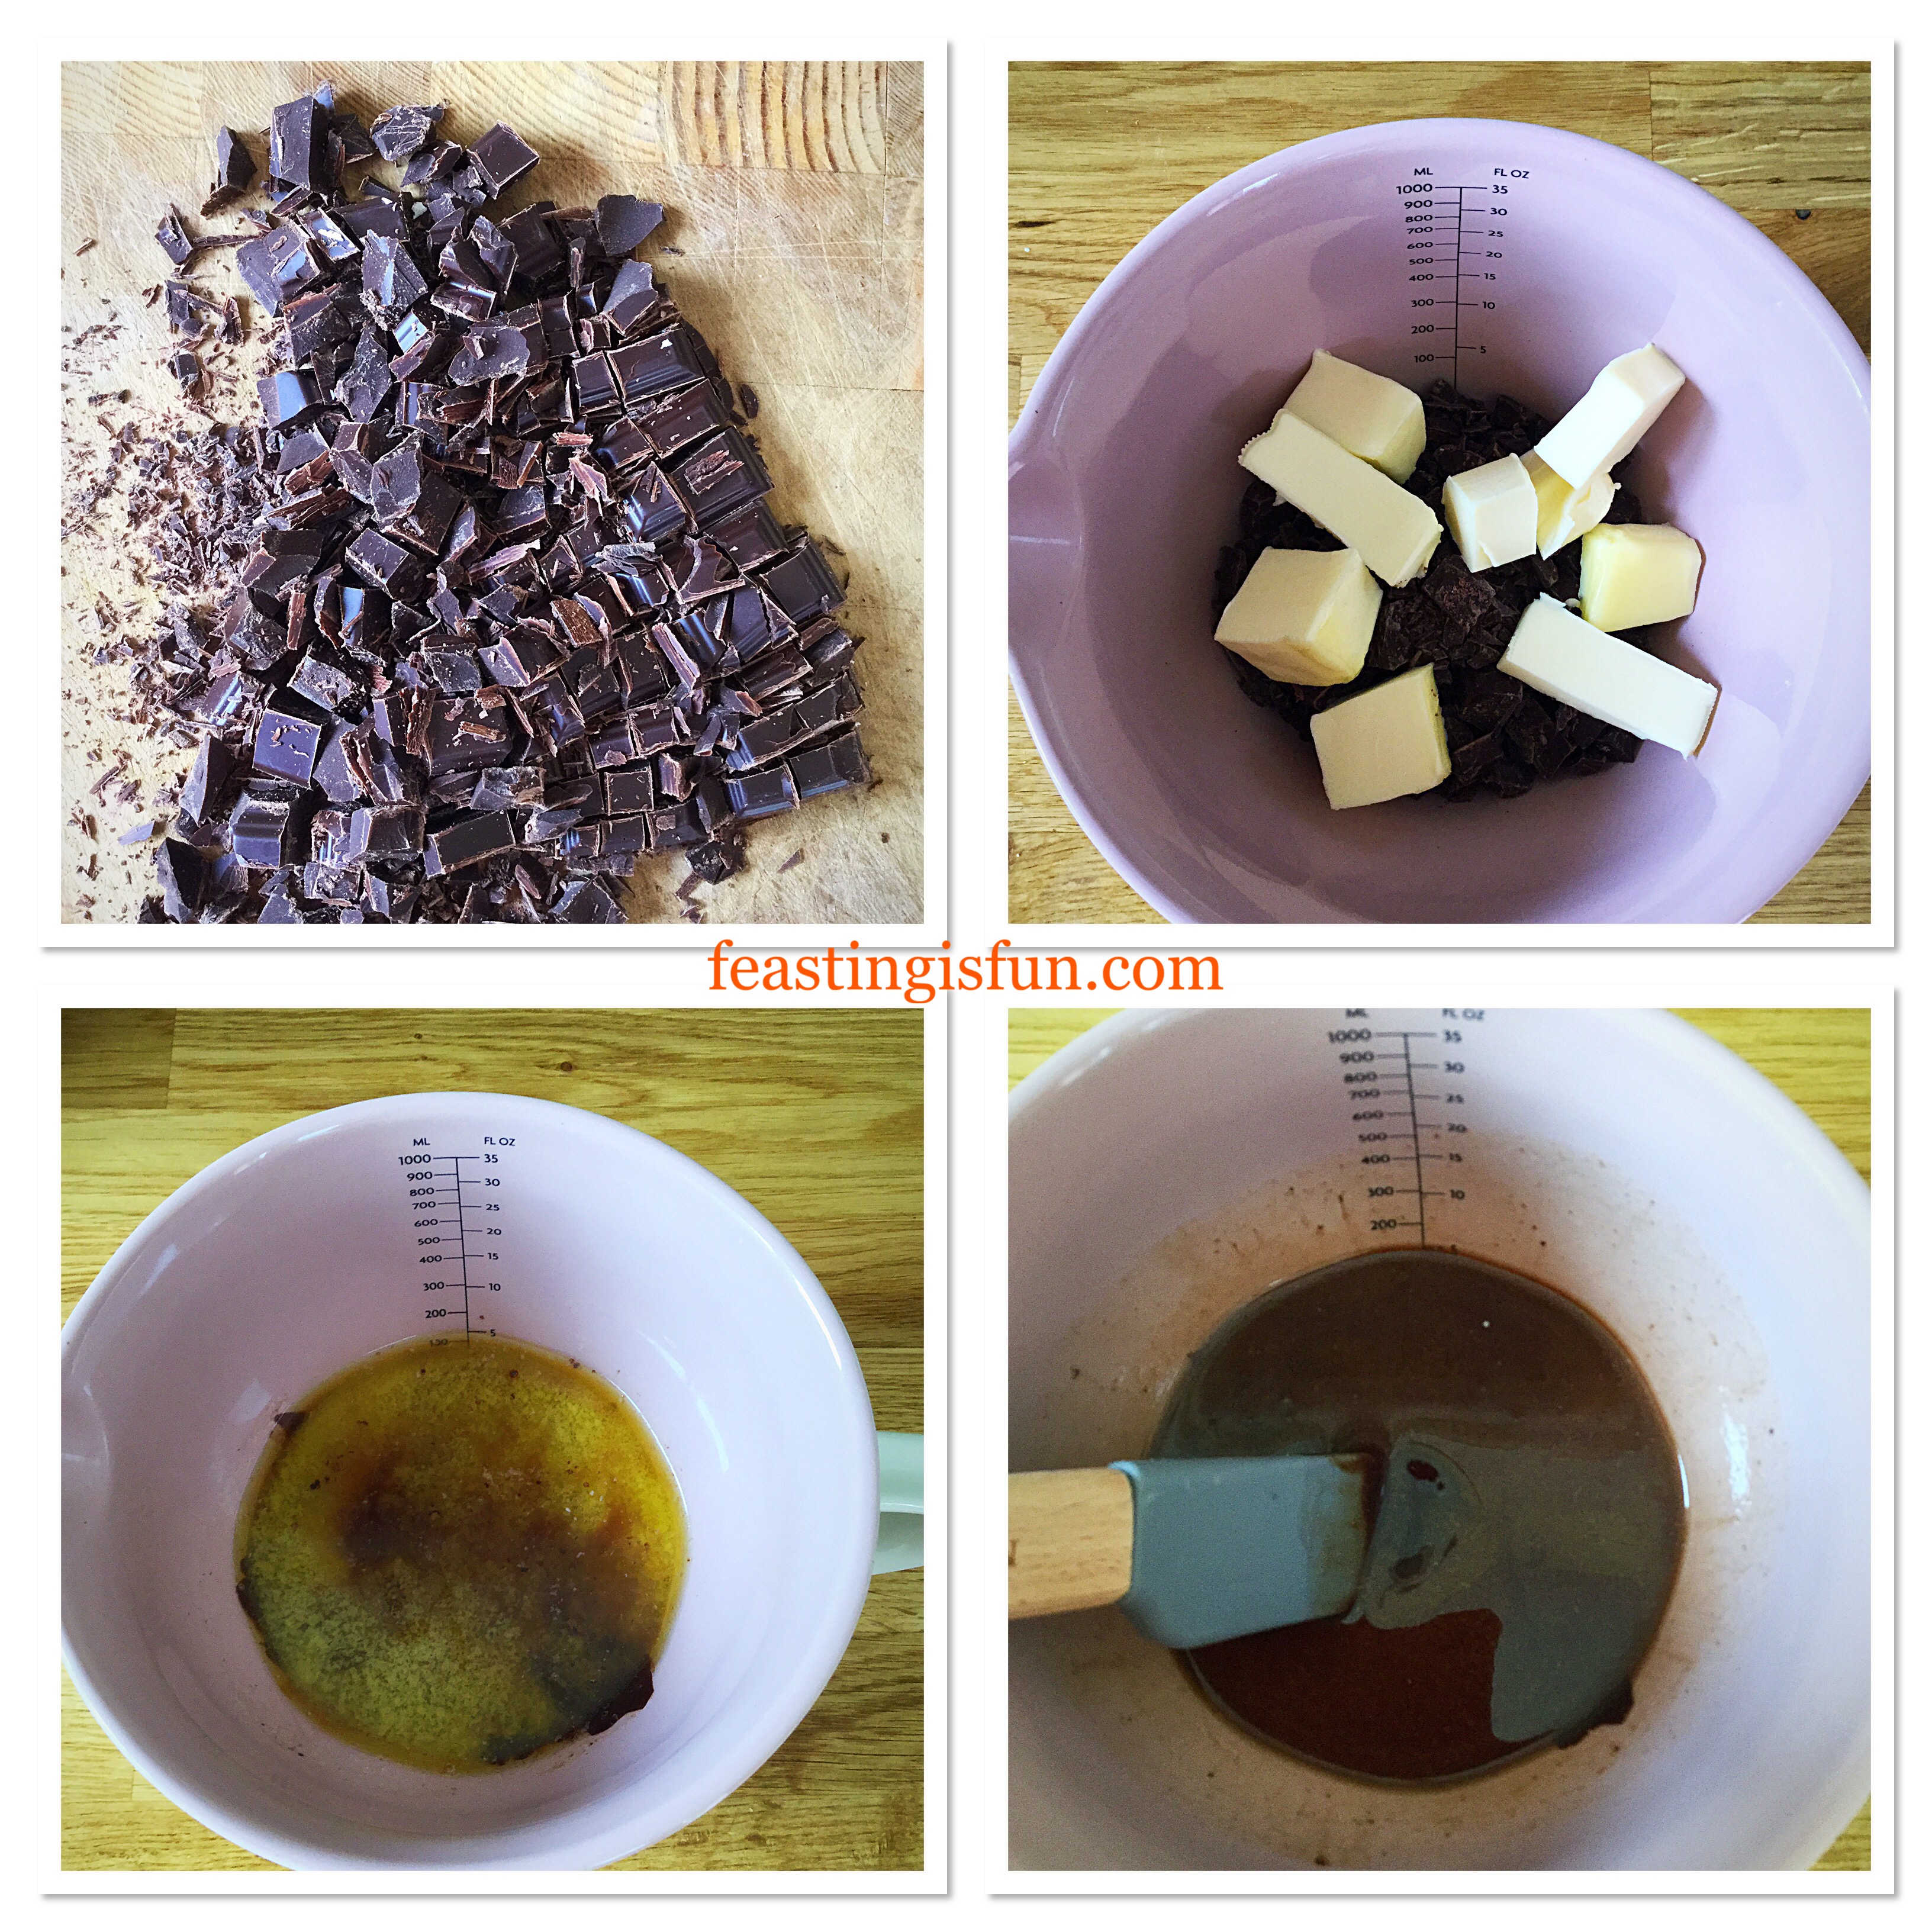
Making Dark Chocolate Curls To Use As Decoration
Chop the dark chocolate into small chunks.
Place the chocolate into the jug and add the butter.
Using a microwave heat the chocolate/butter for 30 seconds on medium power. Repeat until both chocolate and butter are melted.
Stir using the small spatula until the ingredients are combined and glossy.
Making the dark chocolate ganache
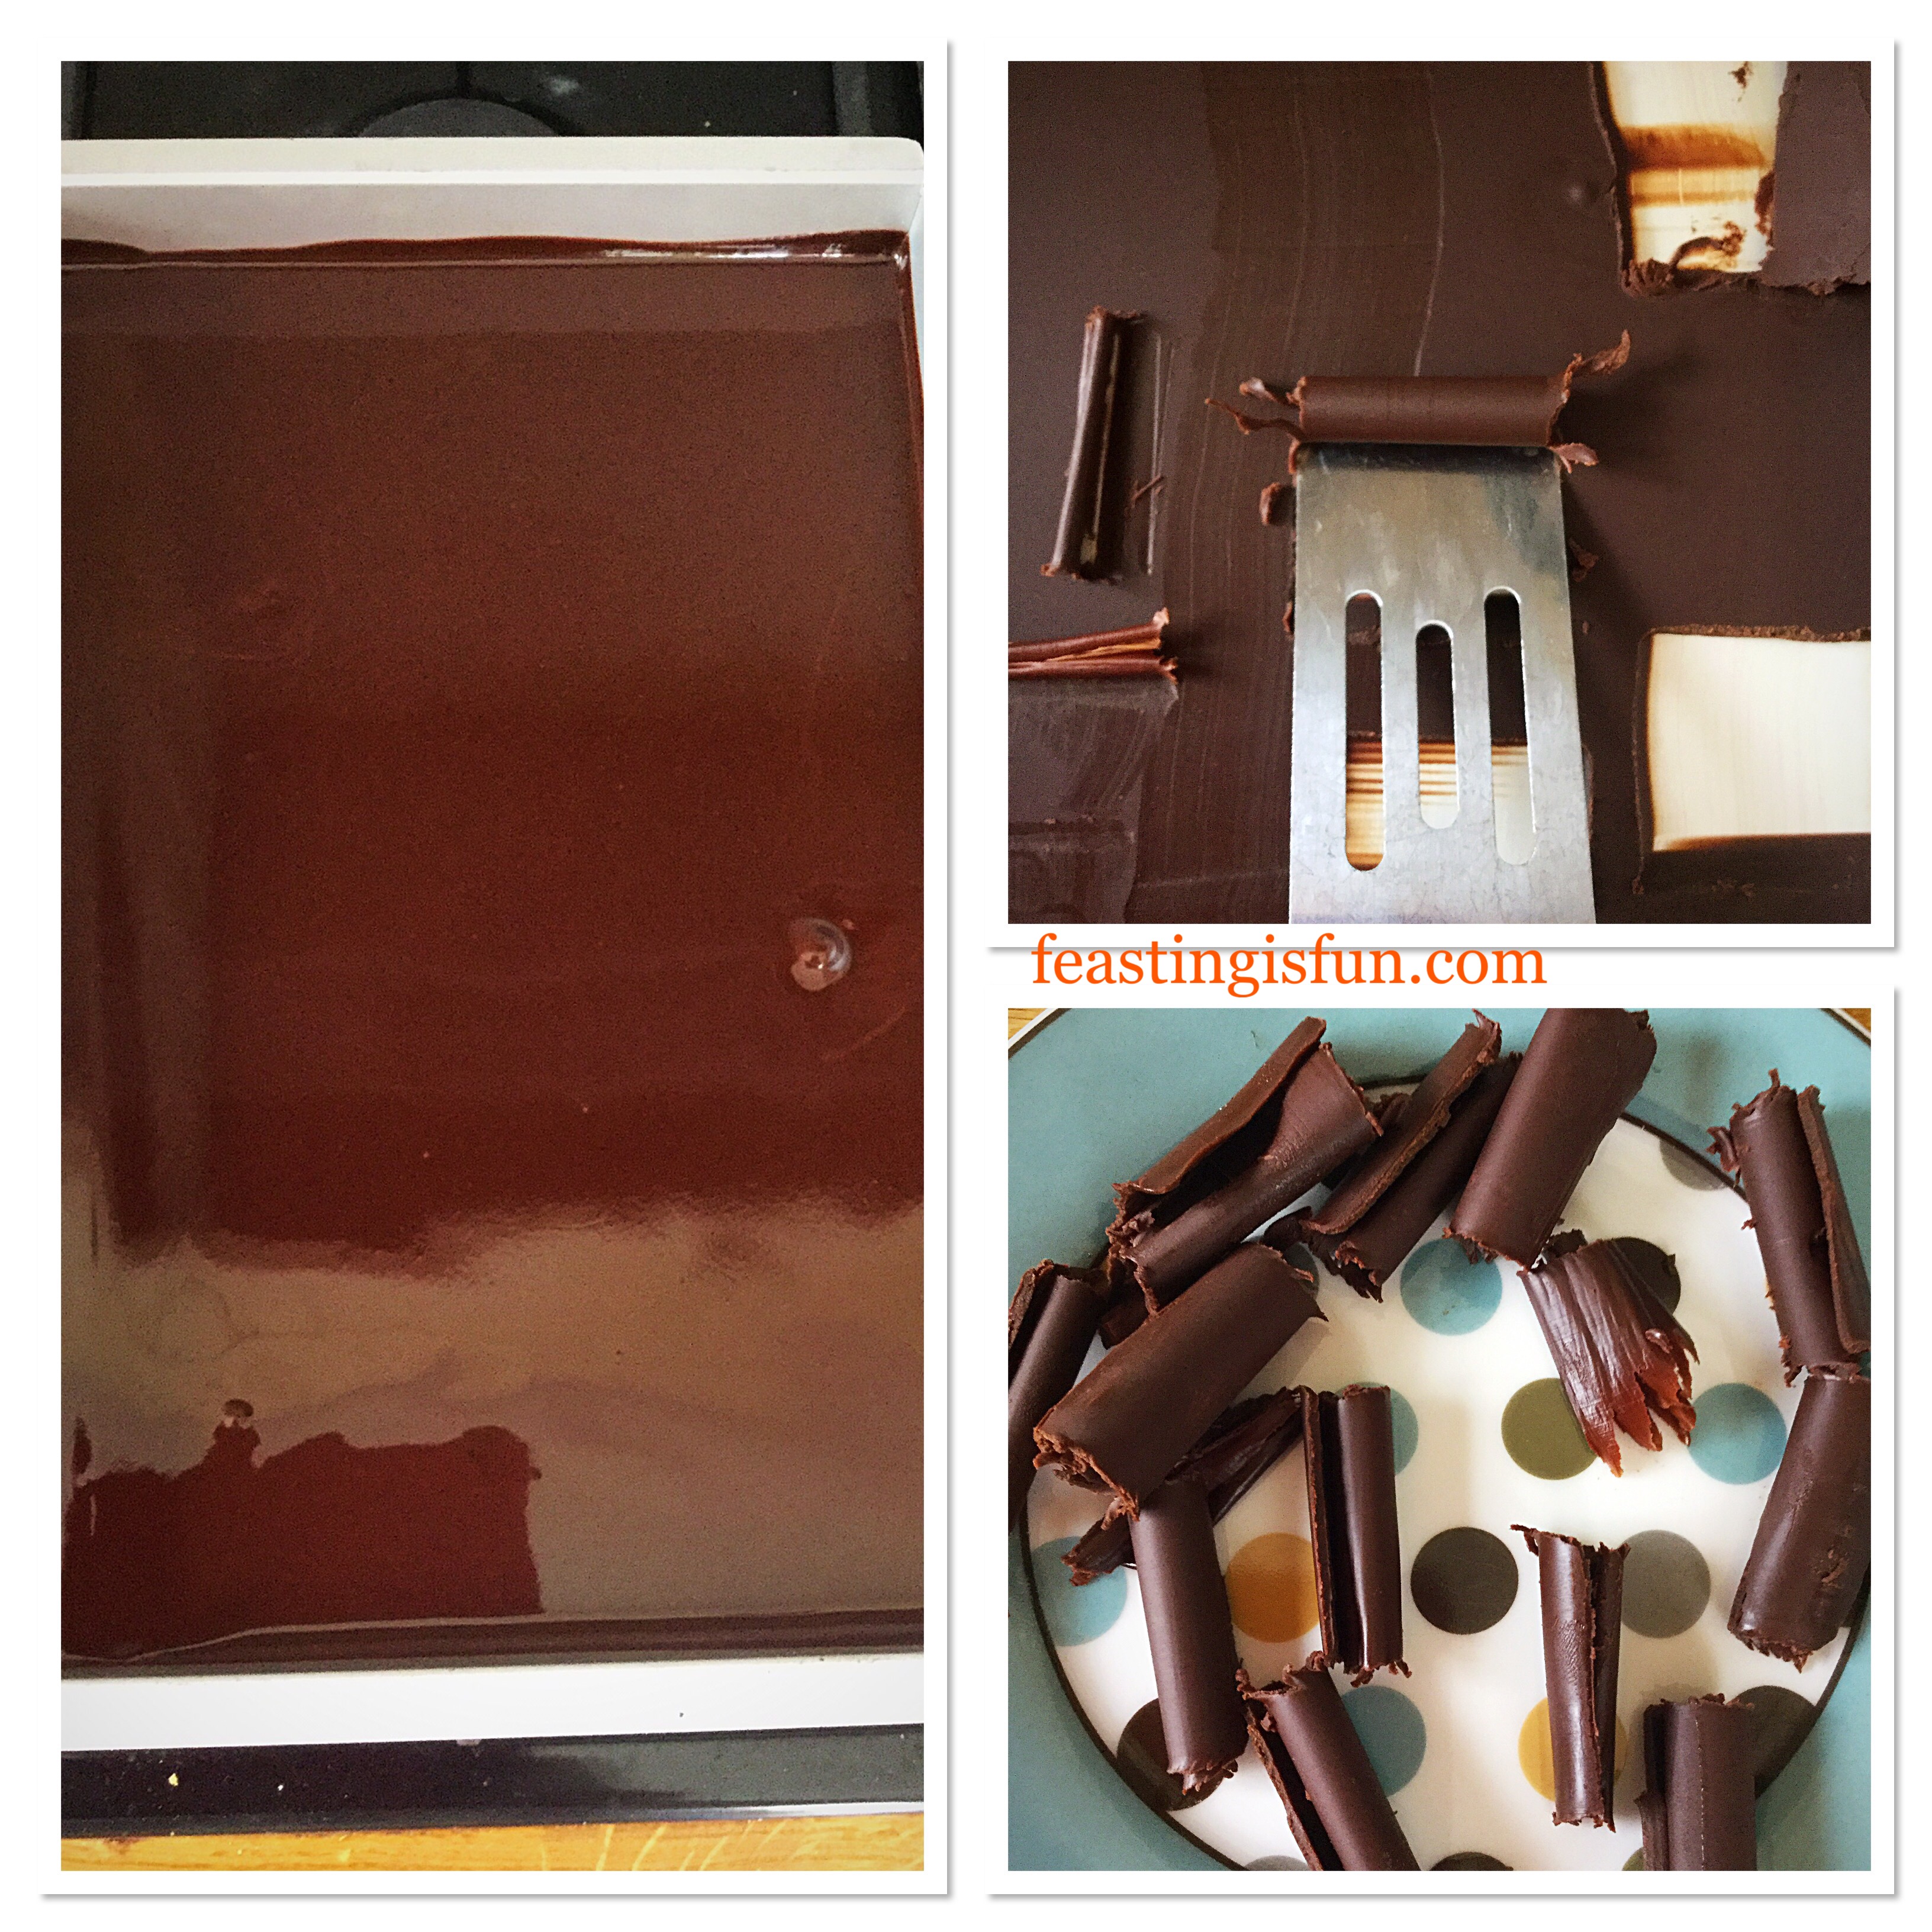
Pour the dark chocolate ganache into a baking tray approximately 38cm x 25cm x 3cm (15in x 10in x 1in).
Tilt the tray so that it is evenly covered with ganache.
Refrigerate the tray for 1 hour to set the ganache.
To make the curls, push a straight edged implement (I have used a small metal cake server, a dough cutter or something similar would also work well) into the ganache. The chocolate will form curls. Place each curl on to a cold plate. Repeat until all of the chocolate has been used. During hot weather it maybe necessary to chill the chocolate ganache in between making curls.
Once made, place the plate of chocolate curls into the fridge until needed. Note, the dark chocolate curls can be made the day before, Store in an airtight container in the fridge.
Making the dark chocolate curls
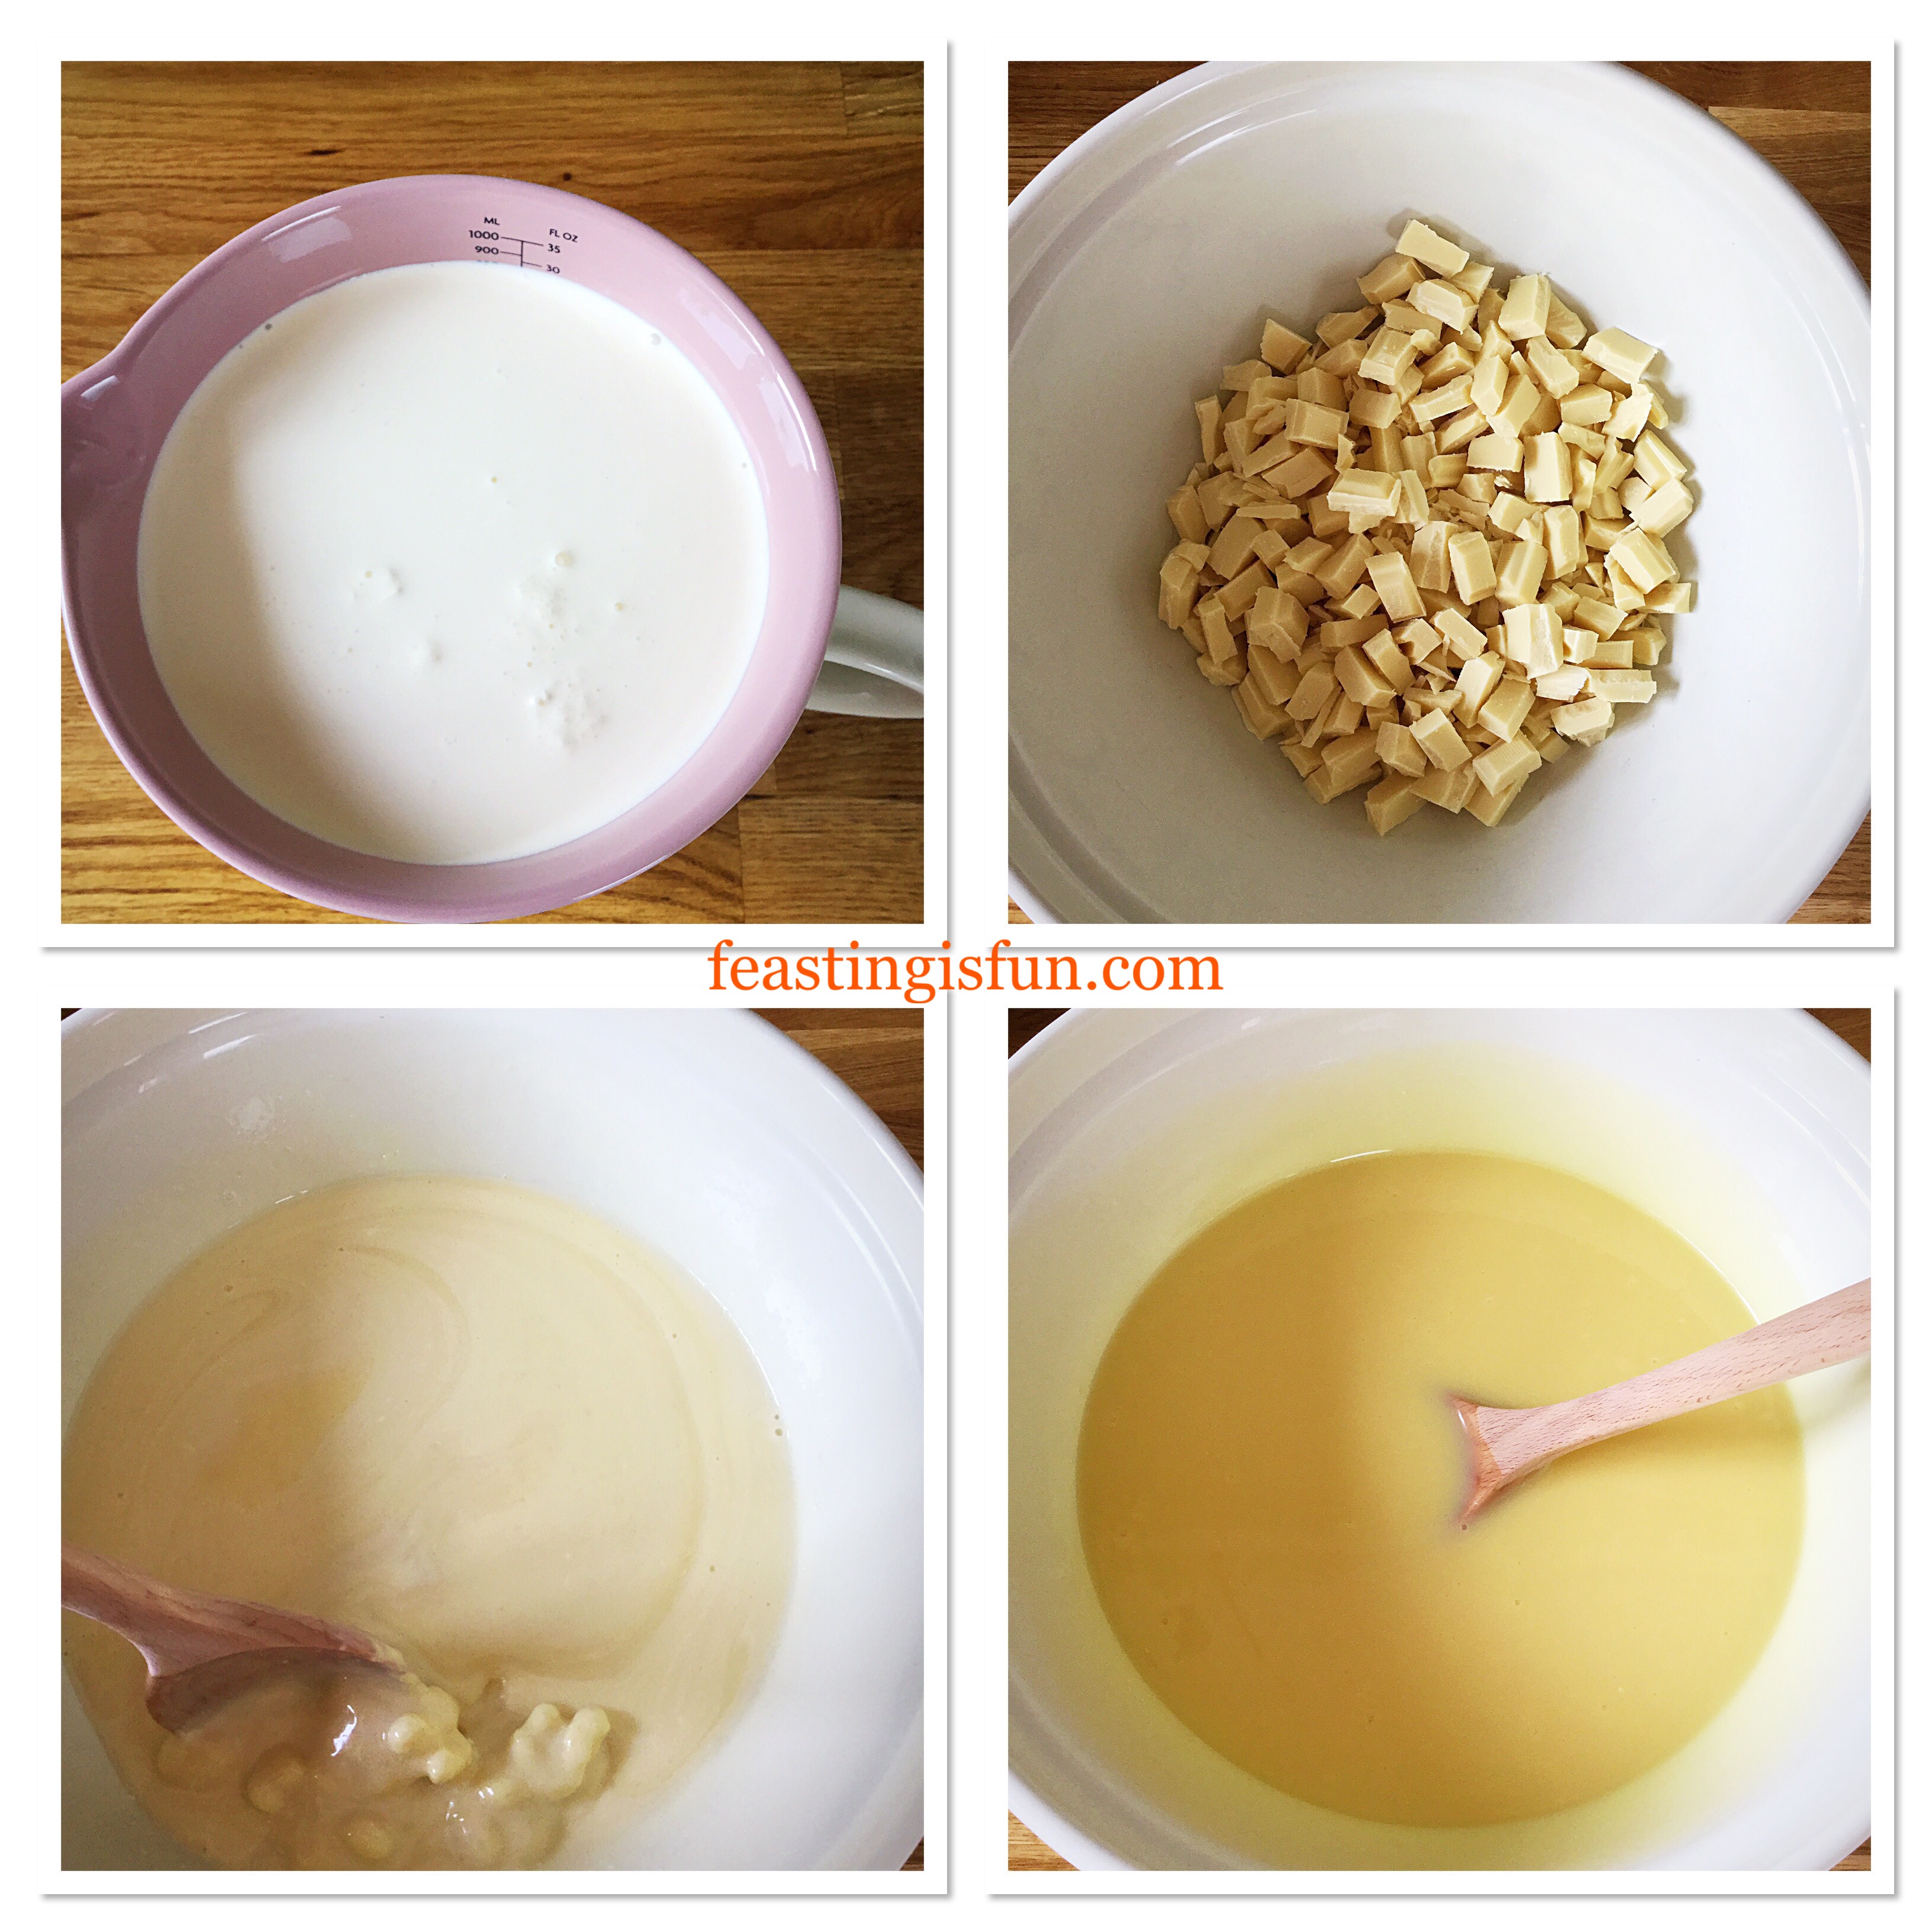
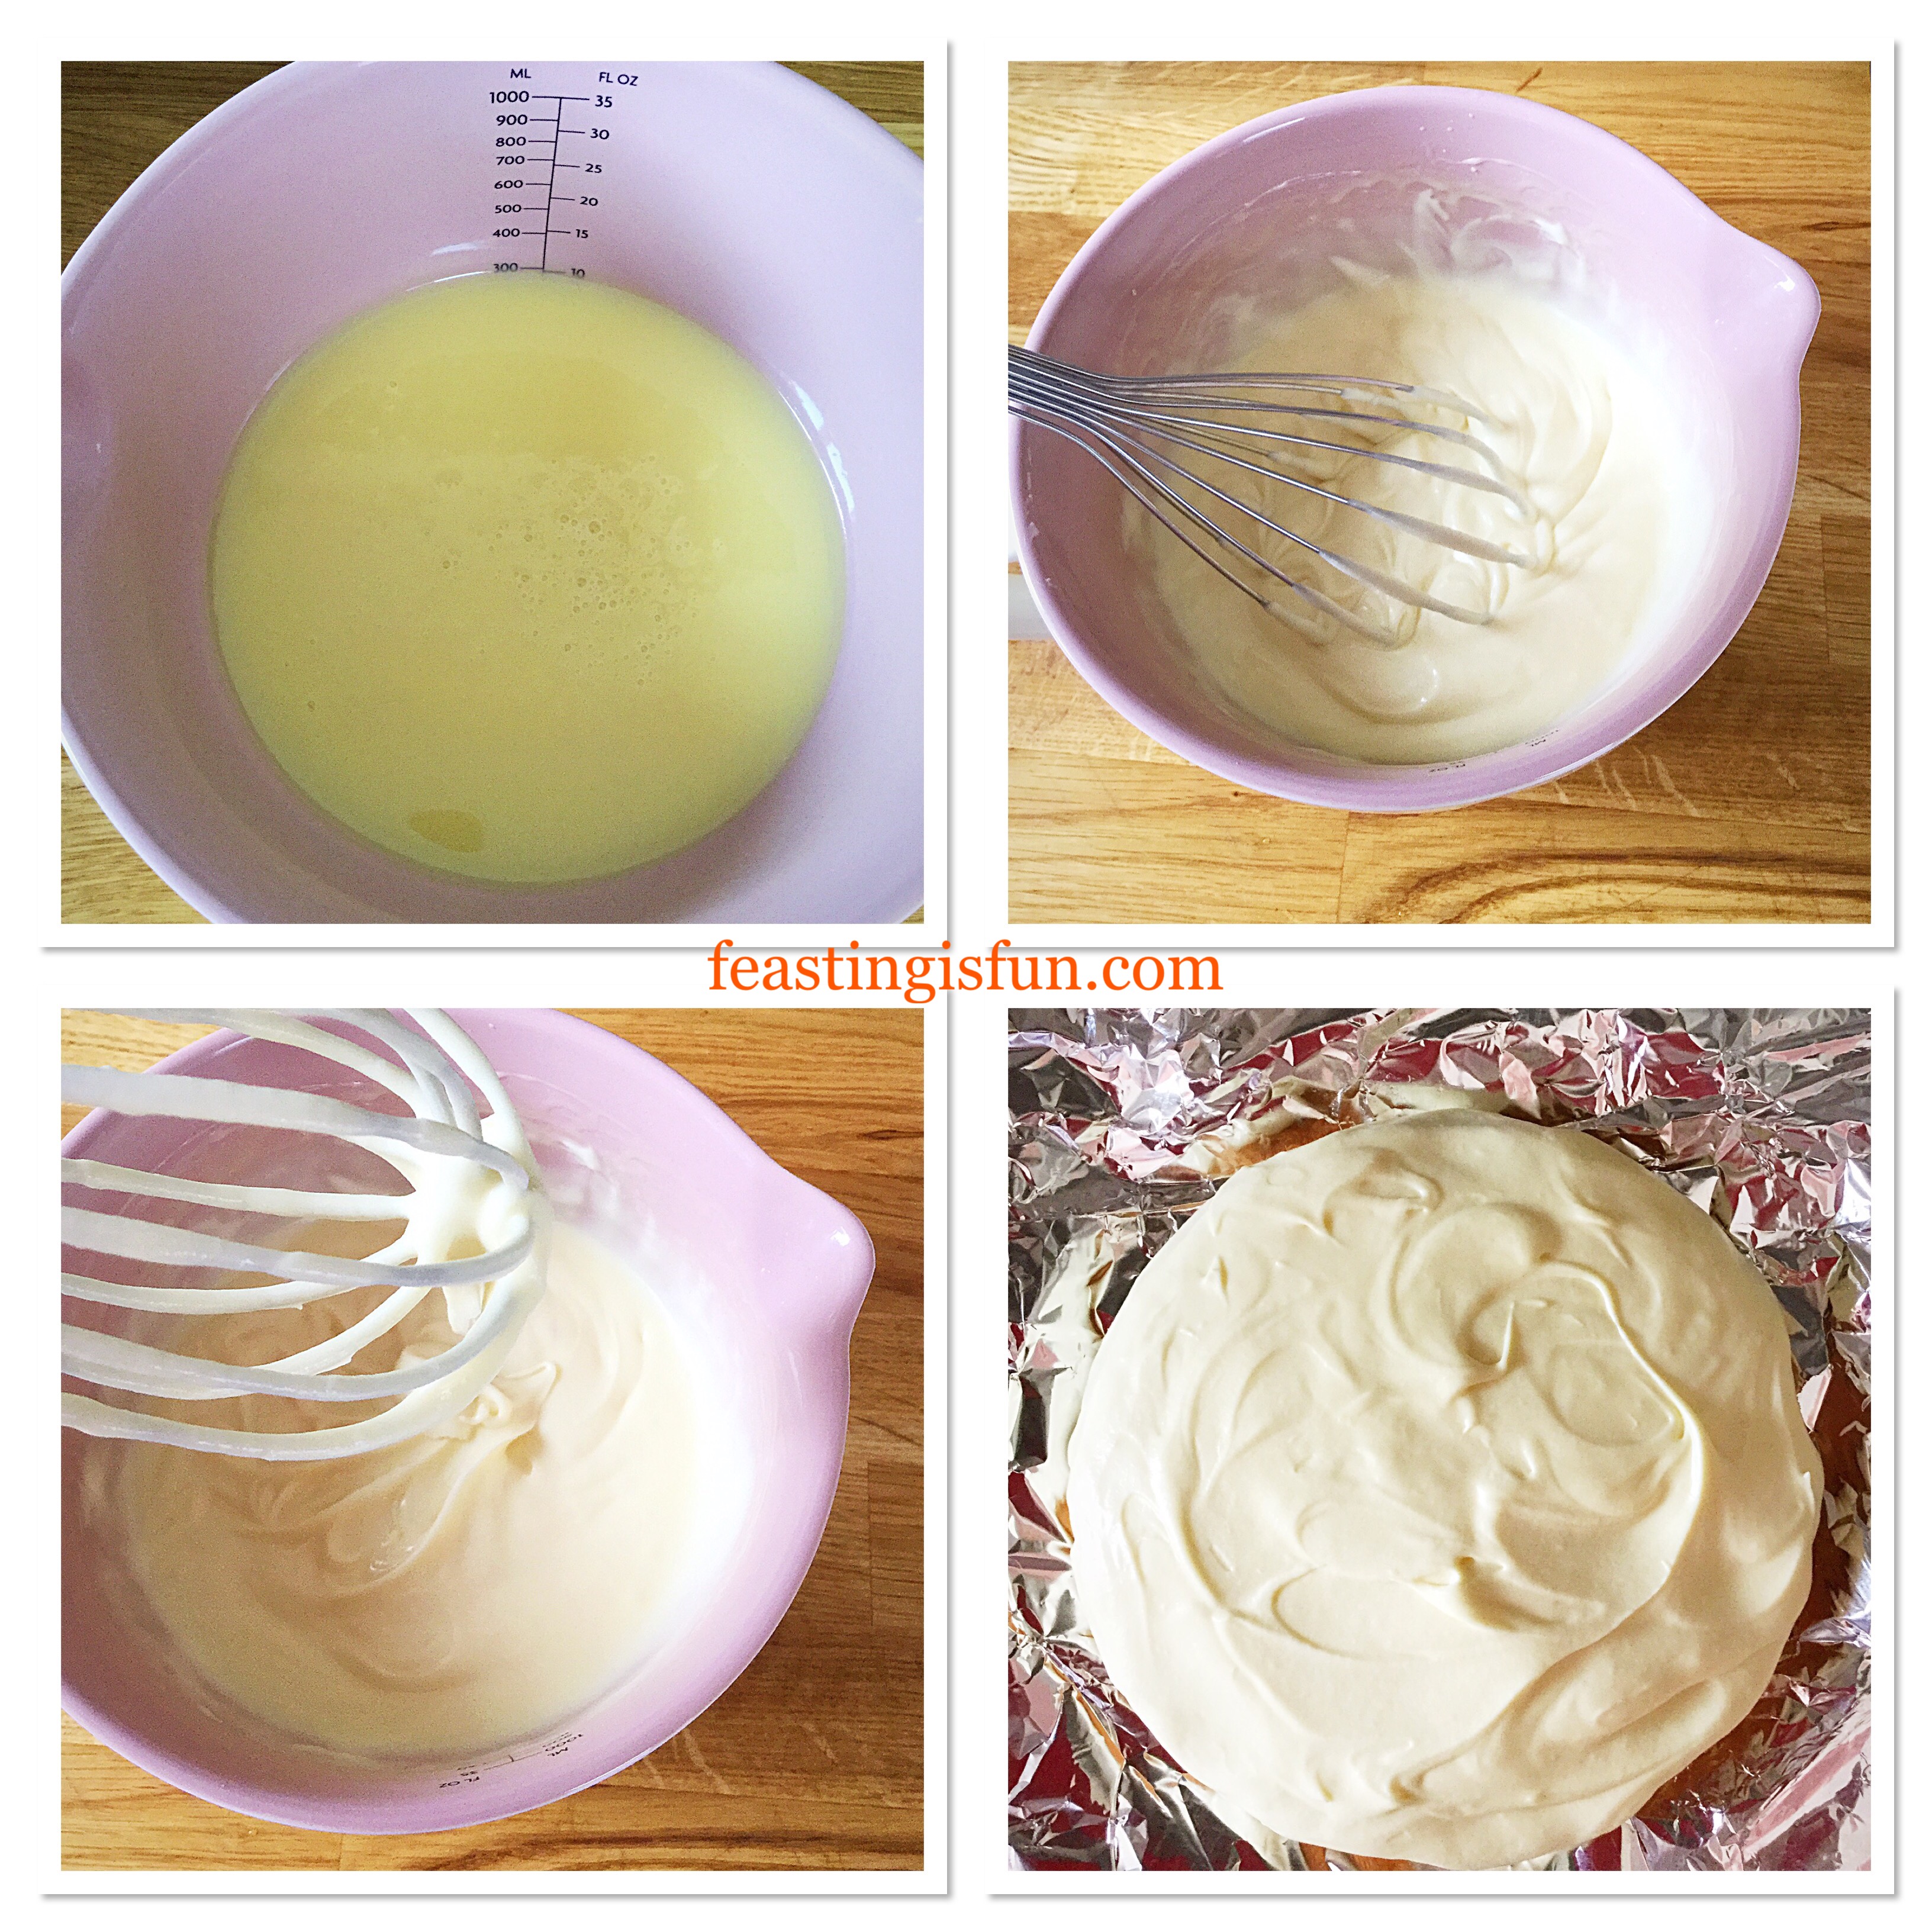
Making the white chocolate ganache
Measure out the cream into the jug.
Heat in the microwave on medium for 30 second bursts until the cream is hot – not boiling.
While the cream is heating chop the white chocolate into small chunks and place into the large bowl.
Pour the hot cream over the white chocolate chunks.
Stir continuously with the spoon until all of the chocolate is melted and combined with the cream. The mixture should look glossy.
Making the white chocolate ganache
Pour 300ml of the liquid white chocolate ganache into the jug.
Place the large bowl of ganache into the fridge to cool.
Meanwhile, using the whisk, whip the white chocolate ganache in the jug until it just holds it’s shape (see bottom left photo below).
Place a cake sponge, flat side down, on to some foil on a plate.
Spoon the soft, yet floppy ganache on to the sponge. Spread the ganache with the small spatula to cover the sponge allowing it to naturally drape around the sides.
Place the sponge into the fridge to set.
Covering the top sponge of the cake with whipped white chocolate ganache
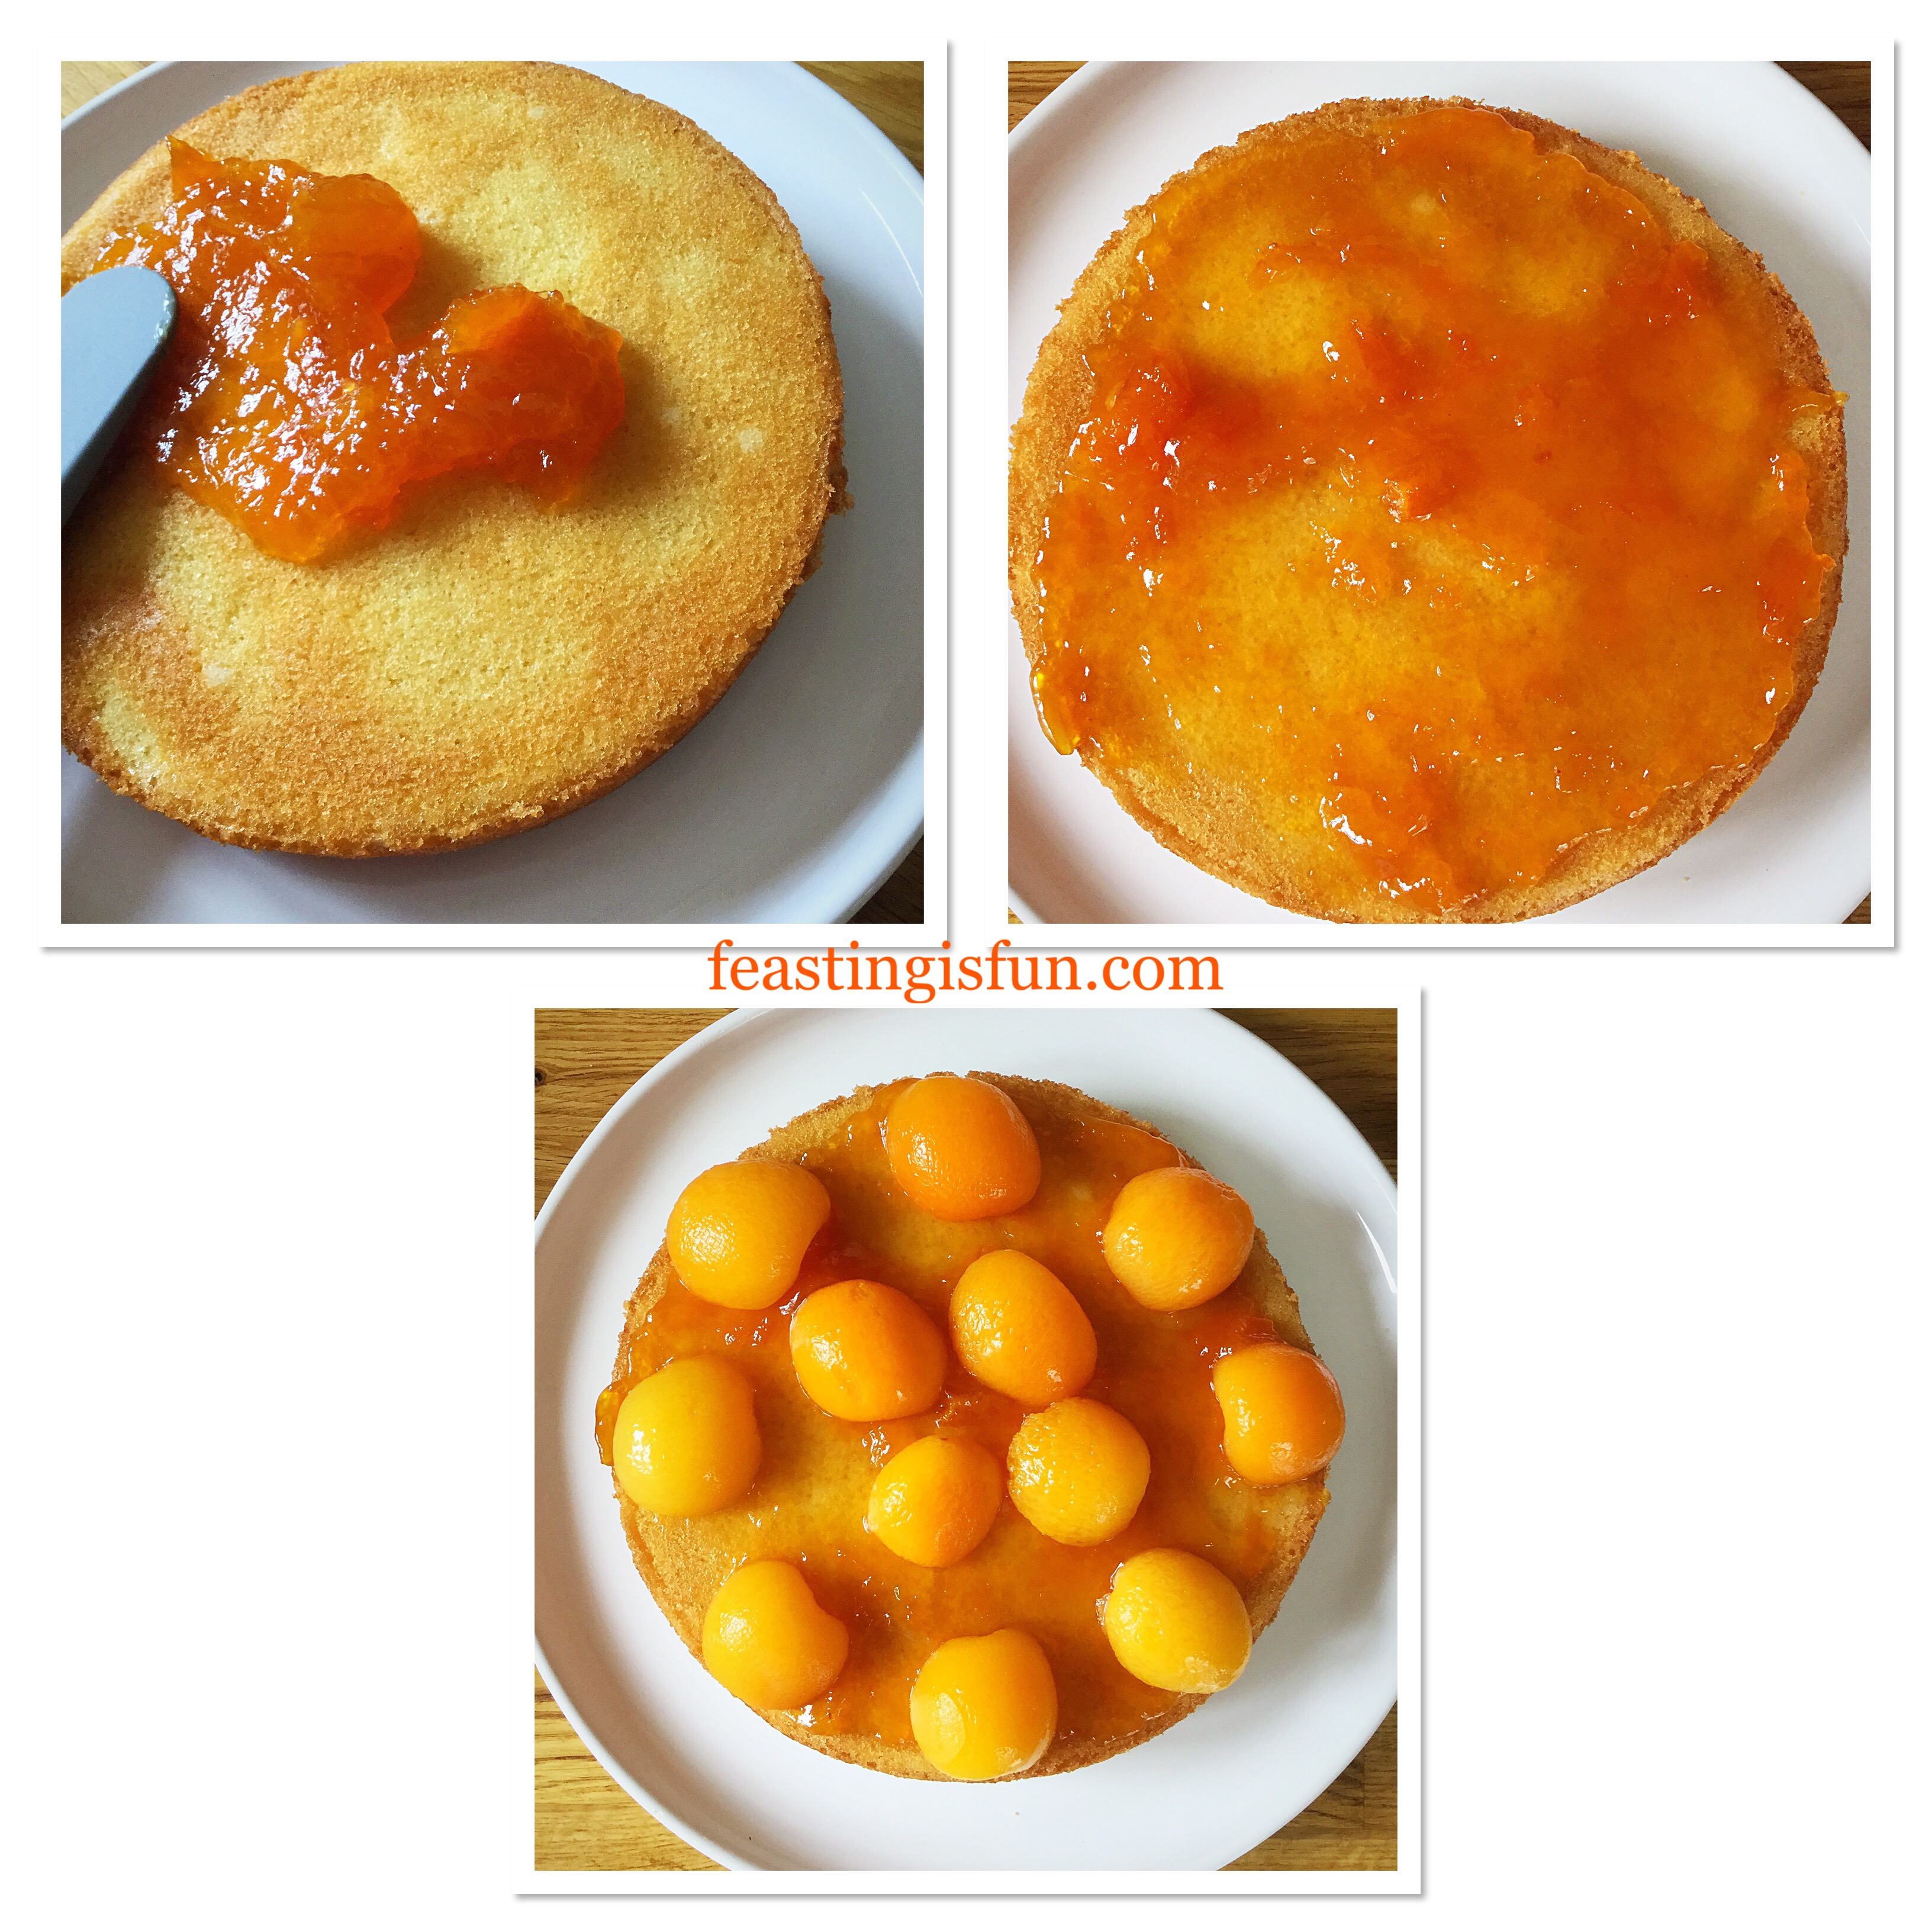
Assembling the Apricot White Chocolate Triple Sponge Cake
First of all, drain both cans of apricot halves into a sieve.
Place the remaining 2 cake sponges, flat side up, on separate plates. Make sure the sponge that will be the bottom layer of the cake is on a serving plate or board.
Spoon 3 tablespoons of apricot conserve on to each sponge and spread to the edges using the small spatula.
Place 8 apricot halves evenly around the outside of each sponge and 4 in the centre.
Adding the apricot jam and apricots
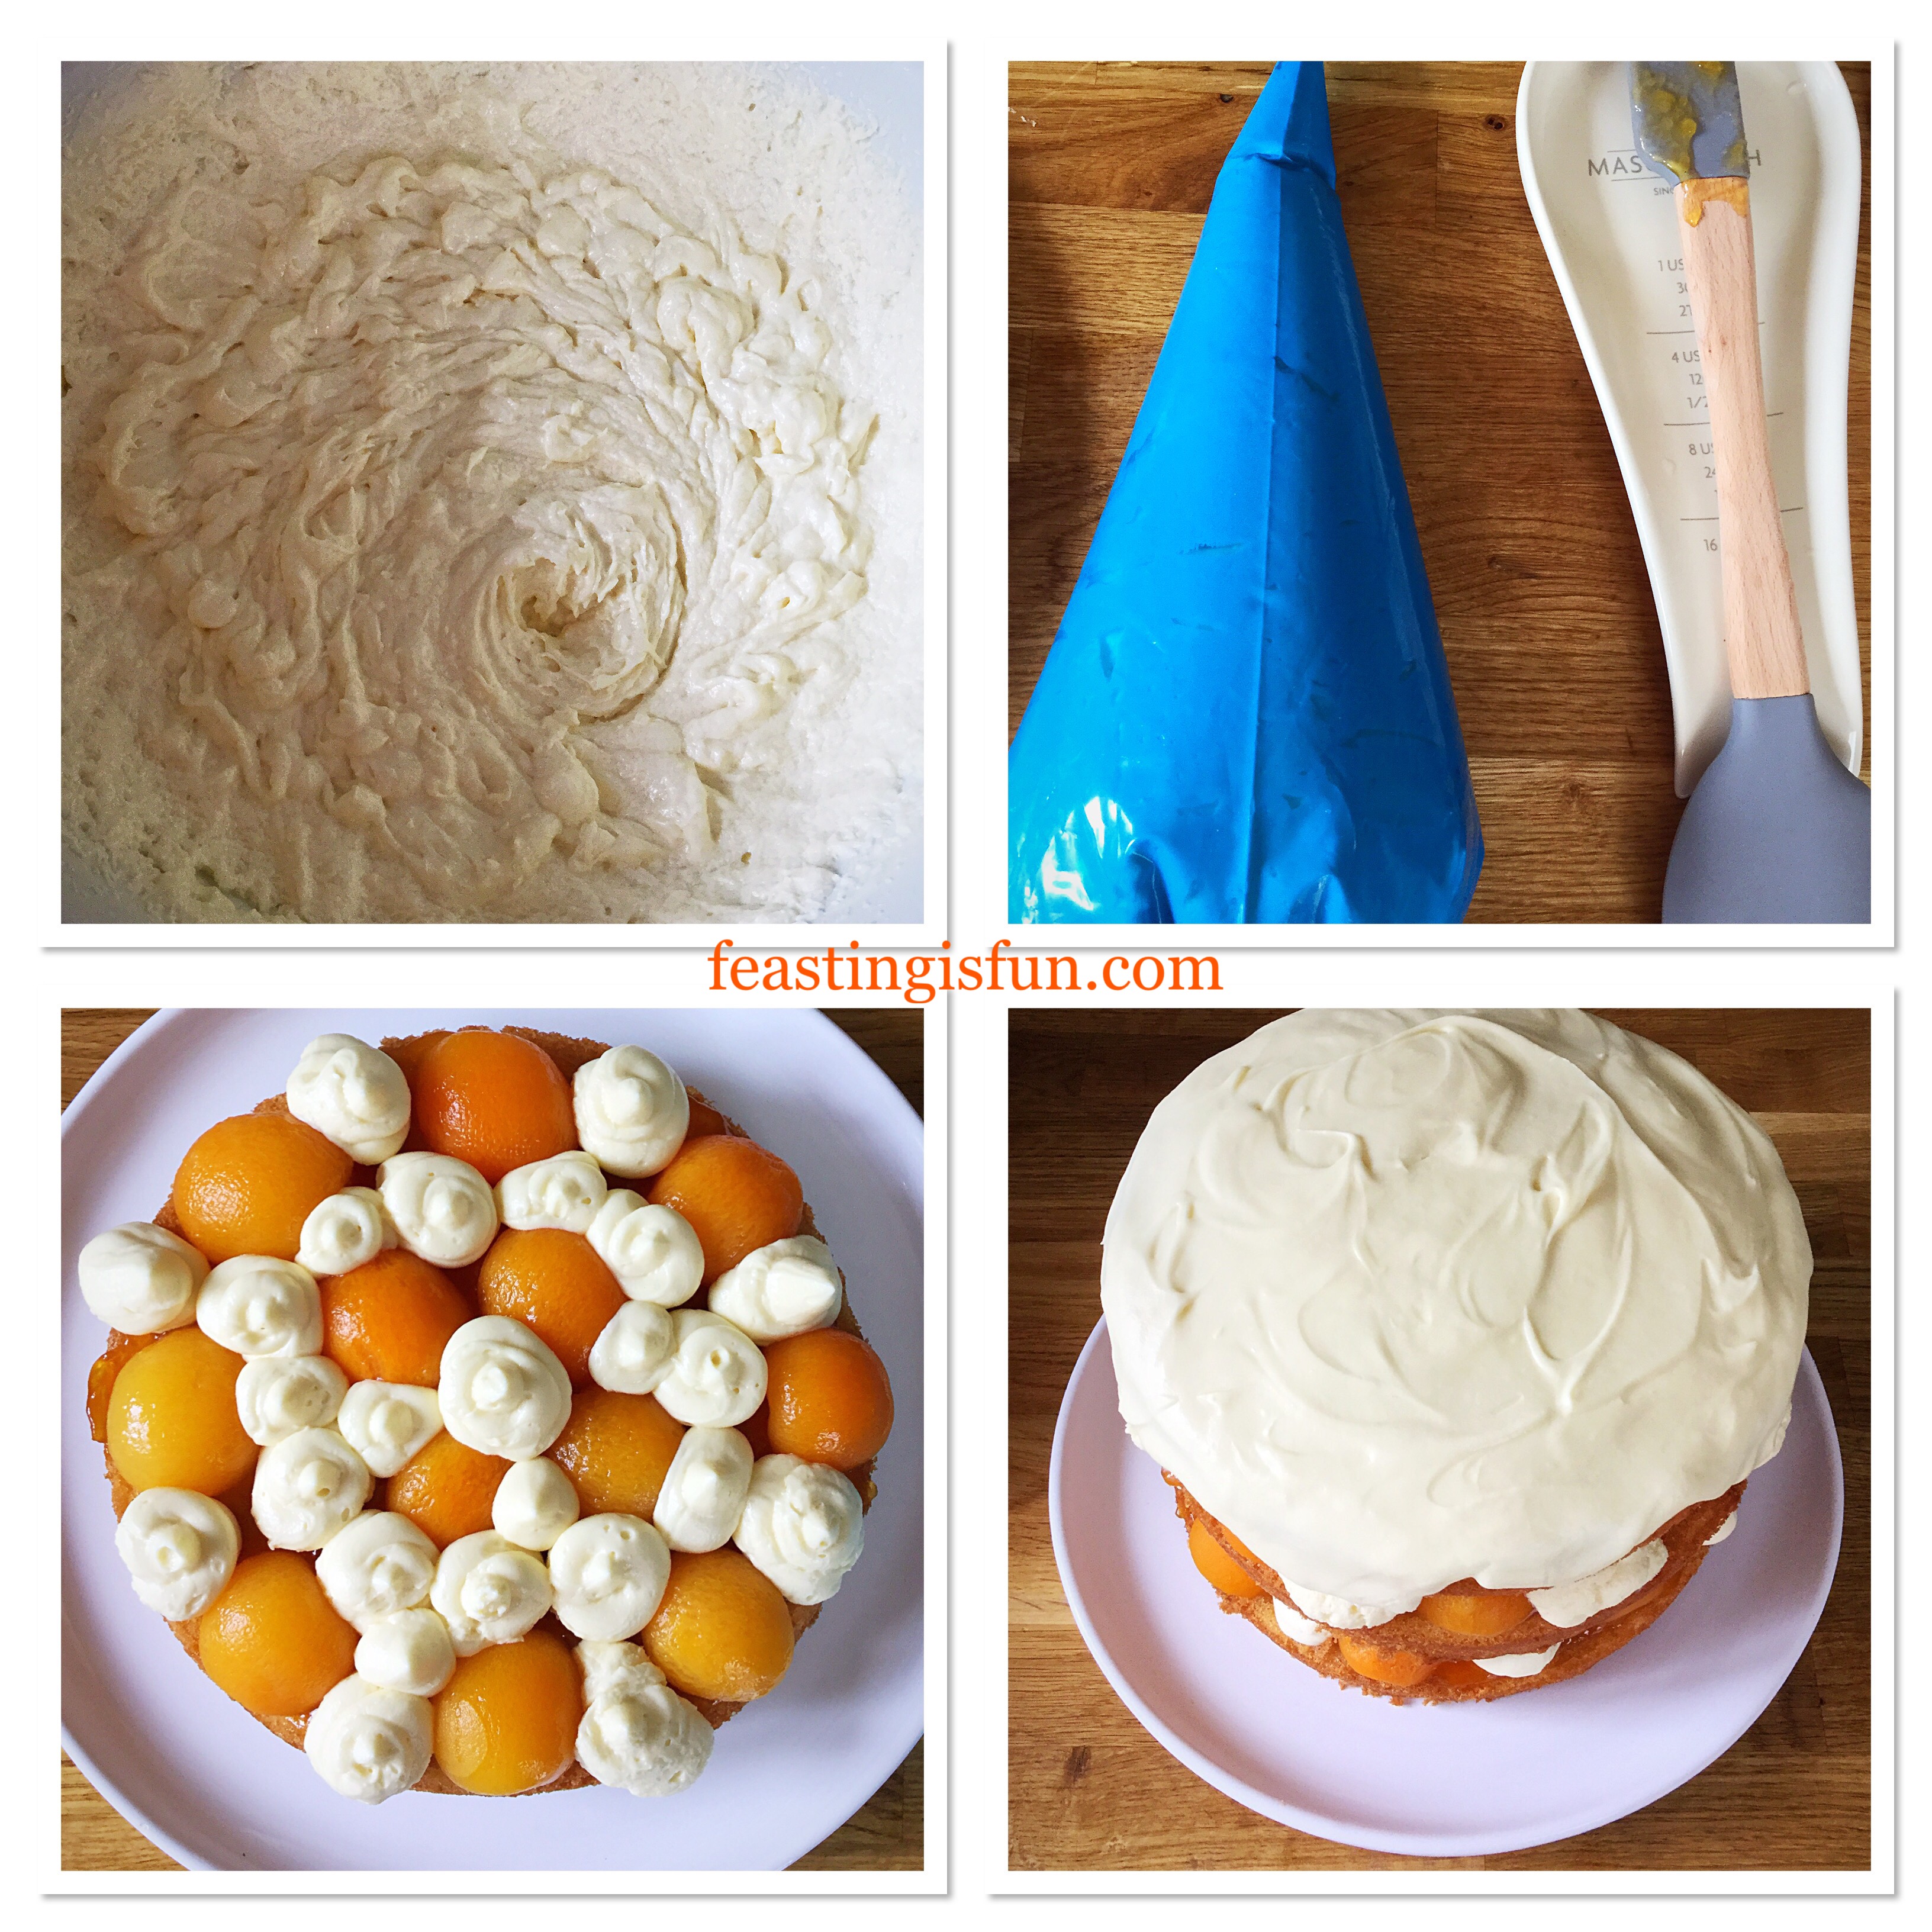
Remove the cooled ganache from the fridge and whisk until it firmly holds its shape.
Fill a large piping bag with the ganache.
Cut the end of the piping bag off to leave a 1cm opening.
Applying even pressure pipe swirls of ganache between the apricots on the edge of the cake working in towards the centre, until there aren’t any gaps left. Repeat for the second sponge.
Place both sponges into the fridge and leave to set for 30 minutes.
Once the ganache has set it is time to assemble your cake.
Place the second layer centrally on top of the bottom layer.
Finally, place the ganache covered sponge on top.
Piping whipped ganache and assembling the cake
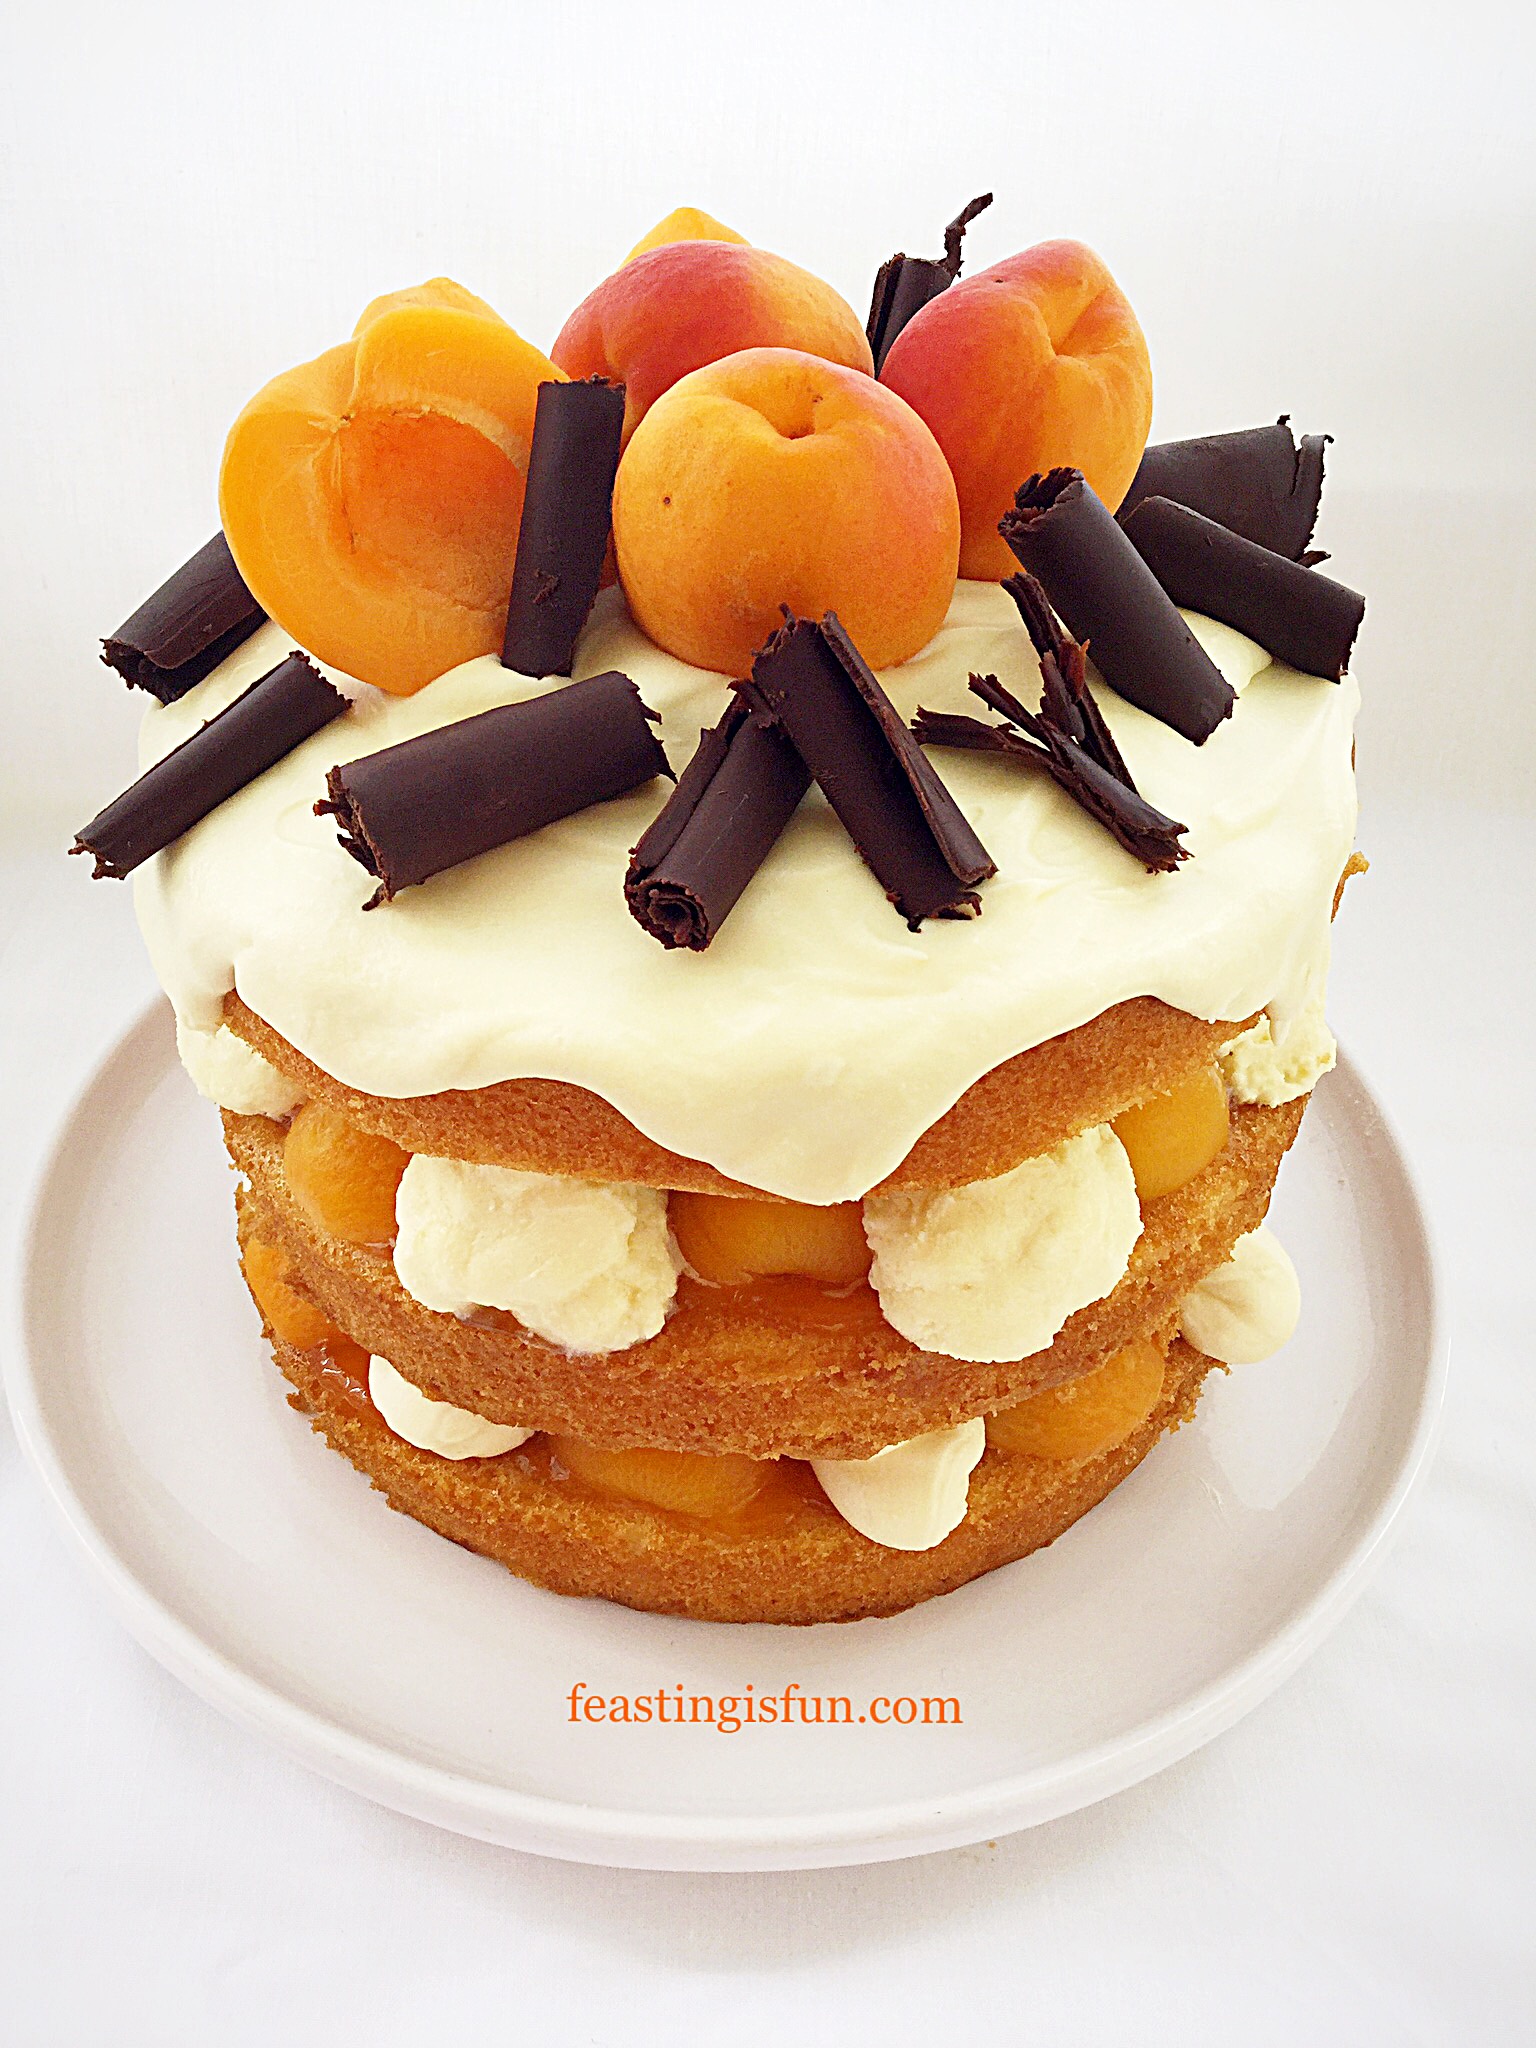
Decorating The Apricot White Chocolate Triple Sponge Cake
Arrange the fresh (or canned) apricots on top of the cake and add the dark chocolate curls.
Refrigerate the cake for a further 30 minutes, or until time to serve.
Apricot White Chocolate Triple Sponge Cake
Remove the cake from the fridge 10 minutes prior to serving. Doing so allows for easier slicing.
Apricot White Chocolate Triple Sponge Cake
I made the gluten free sponges the day before assembling the cake. They were stored in an airtight cake tin separated by sheets of baking parchment.
If you have enjoyed this recipe for Apricot White Chocolate Triple Sponge Cake you may also like these:
While making this Apricot White Chocolate Triple Sponge Cake I had great fun testing out the Mason Cash Innovative Kitchen items sent to me by Maha Home. As well as creating a feast, fun has to be at the heart of what I do. Likewise, by testing new kitchenware I learn what works and what doesn’t. As a result I can offer an unbiased opinion to you my readers. Your trust in me is central to any review I undertake. Resulting in a review that is open and honest.
So, whatever you are making, baking and creating in your kitchens, have fun preparing and sharing your feast.
Sammie xx
Apricot White Chocolate Triple Sponge Cake
In the photograph above I added edible Pansies to create a pop of colour. When using flowers to decorate a cake, ensure they are edible and free from any chemicals.
Maha Home sent me the Innovative Kitchen items by Mason Cash for the purpose of reviewing. Please visit their website for lowest price match promise and discount code T’s & C’s. All opinions, views and content are my own. I was not paid to carry out this review. No part of this post may be reproduced or duplicated without the written permission of the owner. Please see my Disclosure Policy.
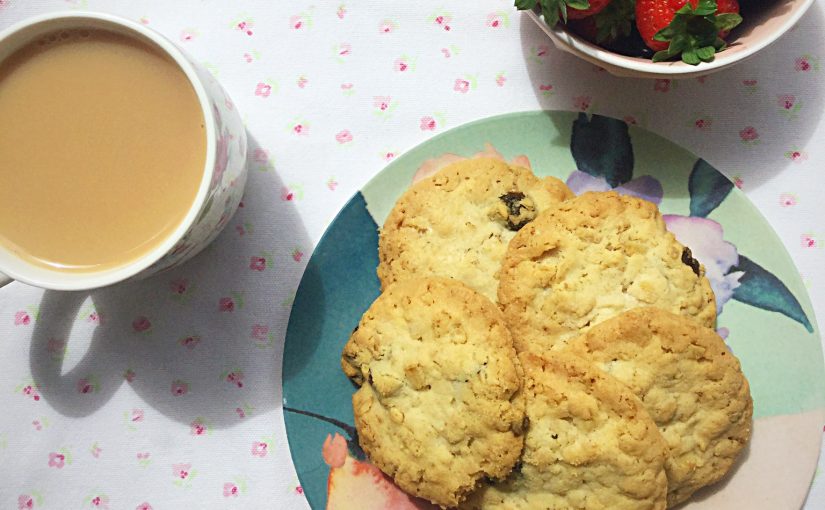
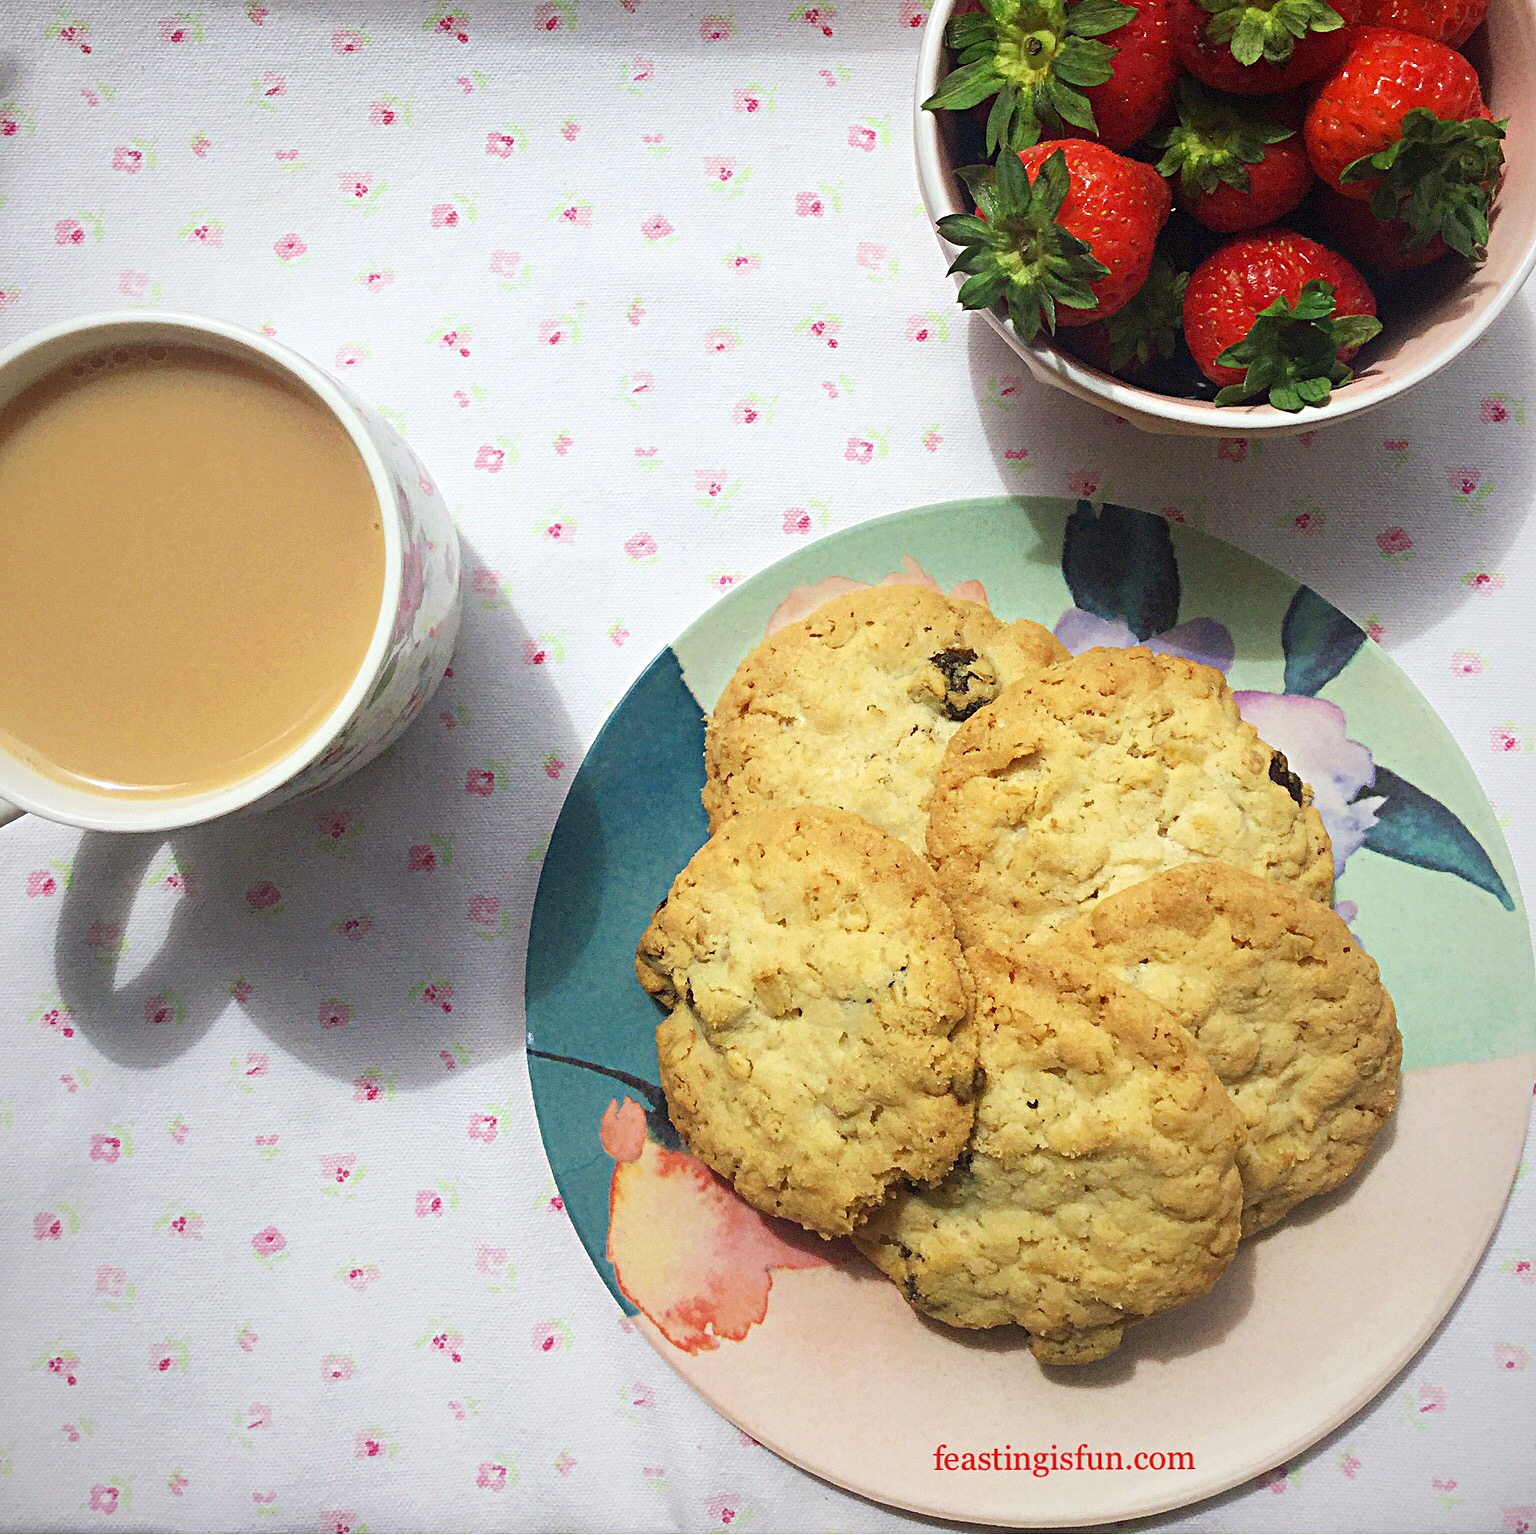
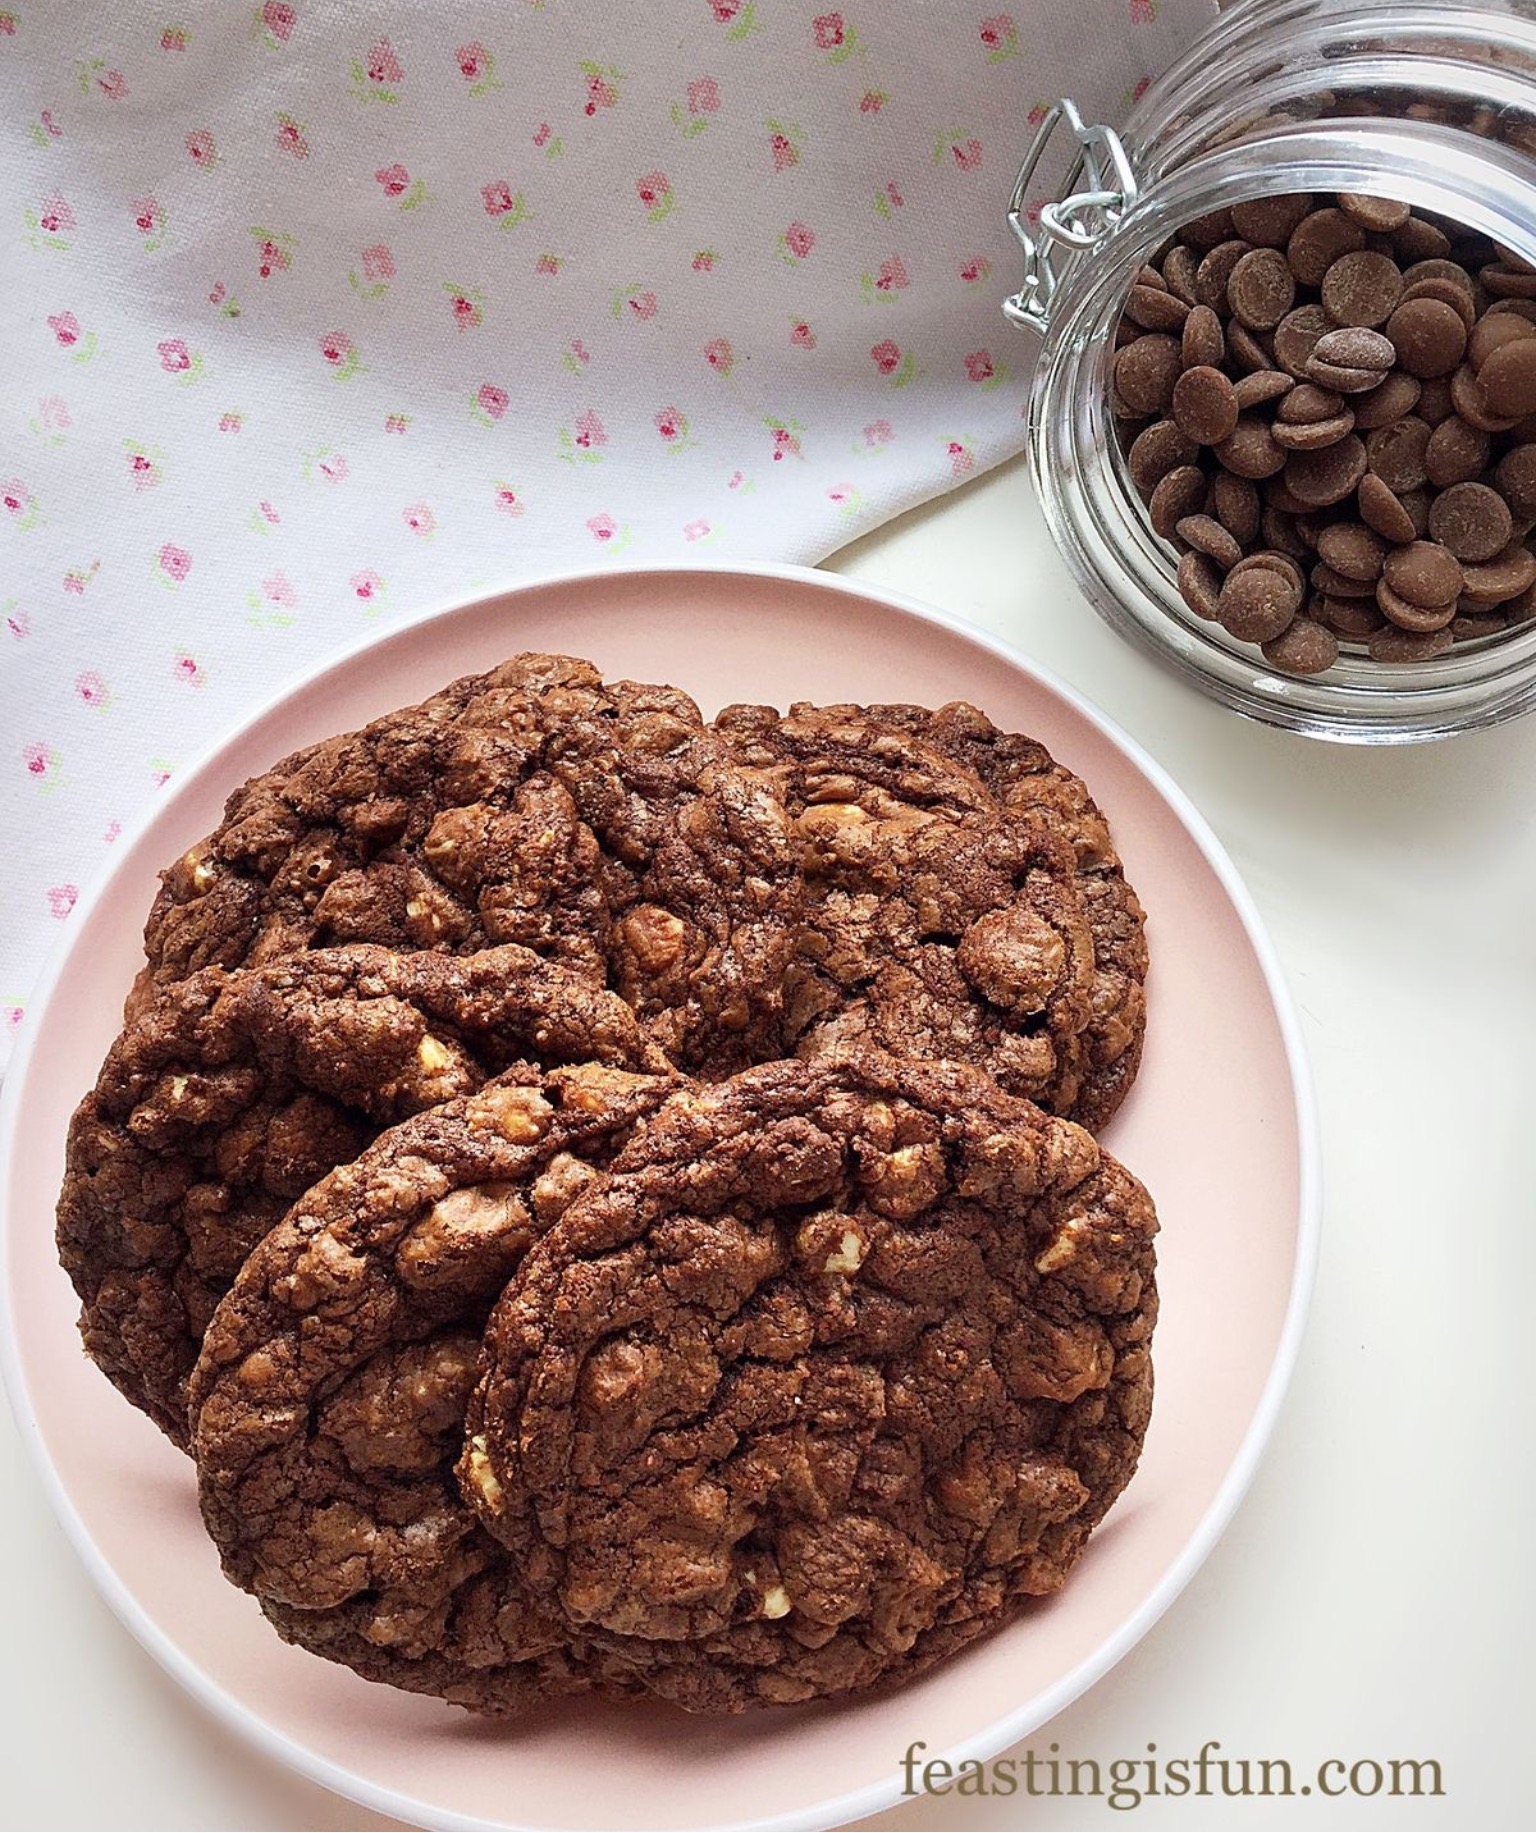
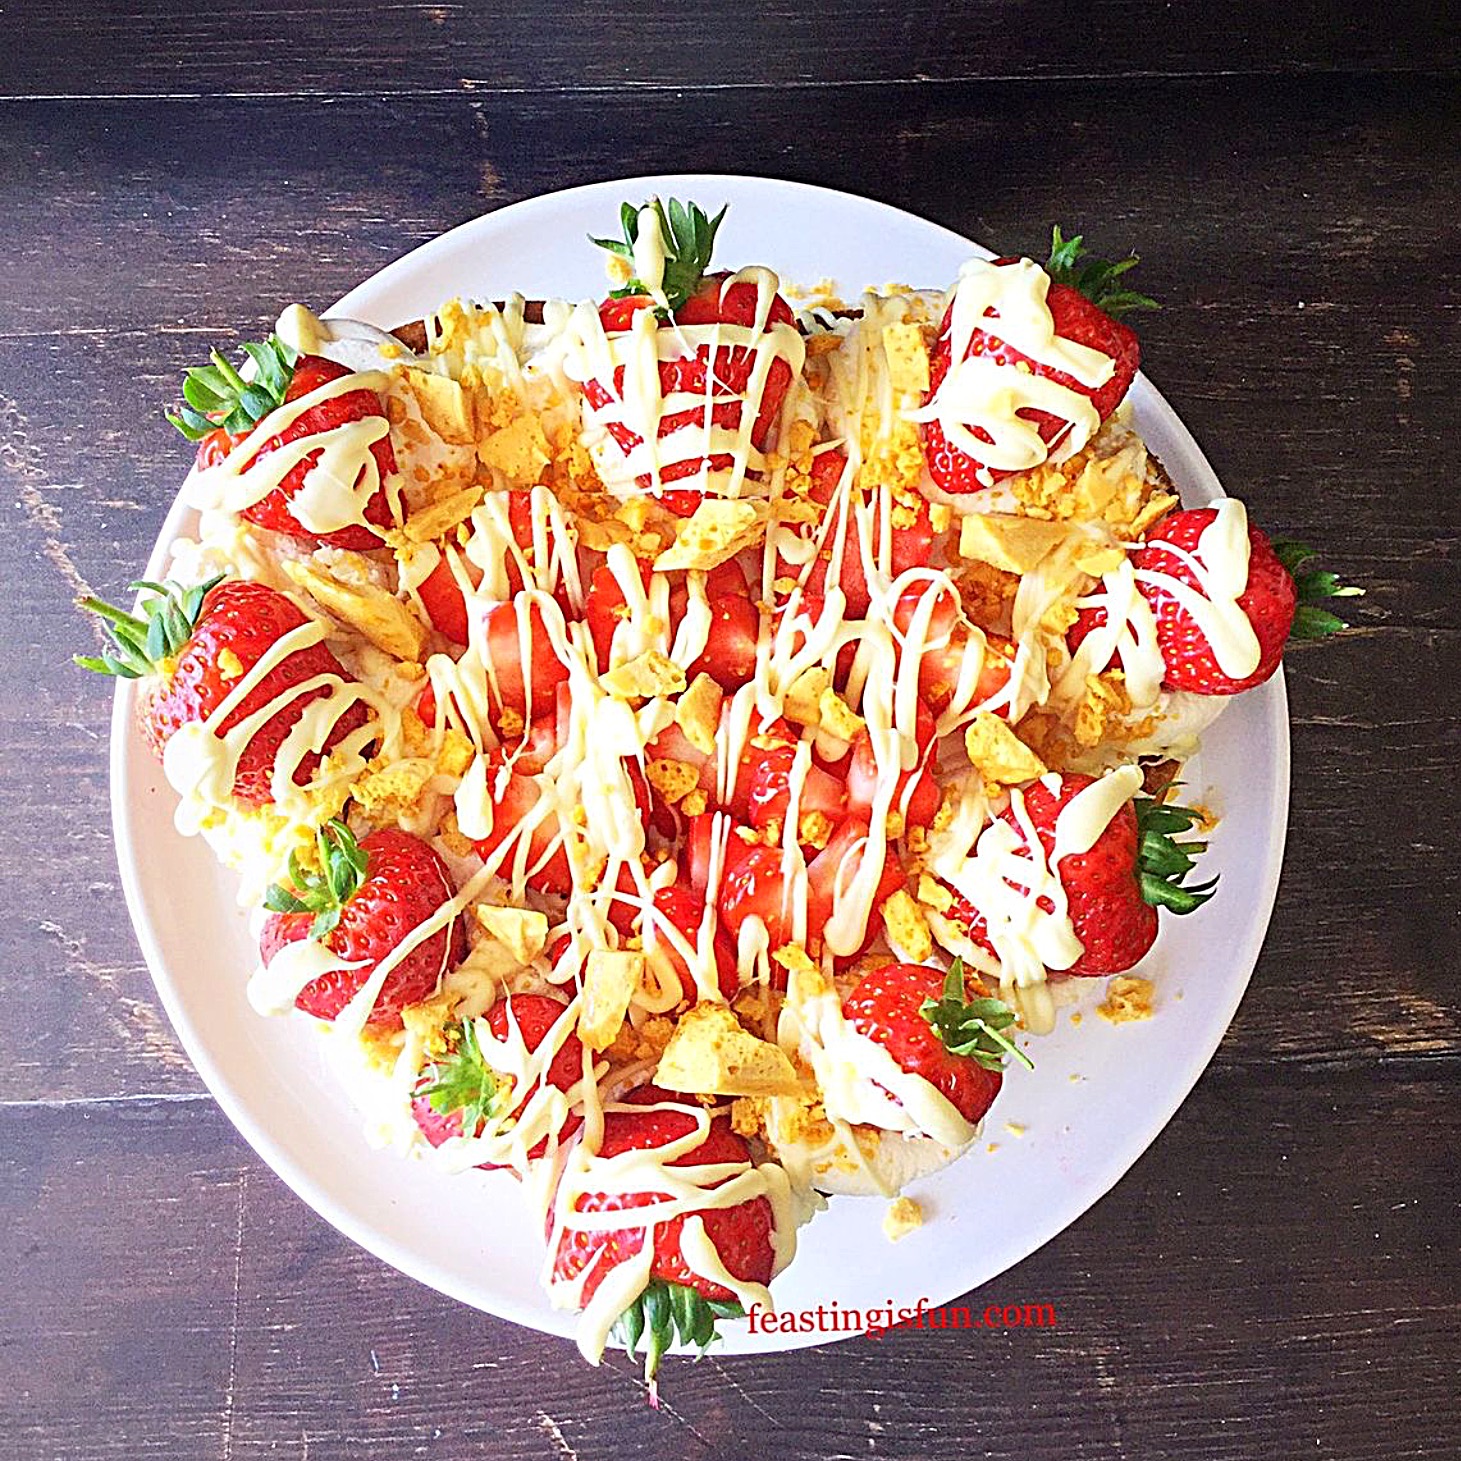
I, as some of you may know, am a self confessed Cookie Monster. Since early childhood starting the day with a cup of tea and a biscuit has become a tradition. Something I have passed on to our children as well. As long as I’ve had my cuppa and biscuit/cookie I can face the day. Especially if I have to wait a while for breakfast. Oat and fruit cookies are among my favourites, obviously the children always prefer chocolate. Yet, after tasting these Strawberry Oat Crumble Cookies there were smiles all round and they received a big thumbs up.
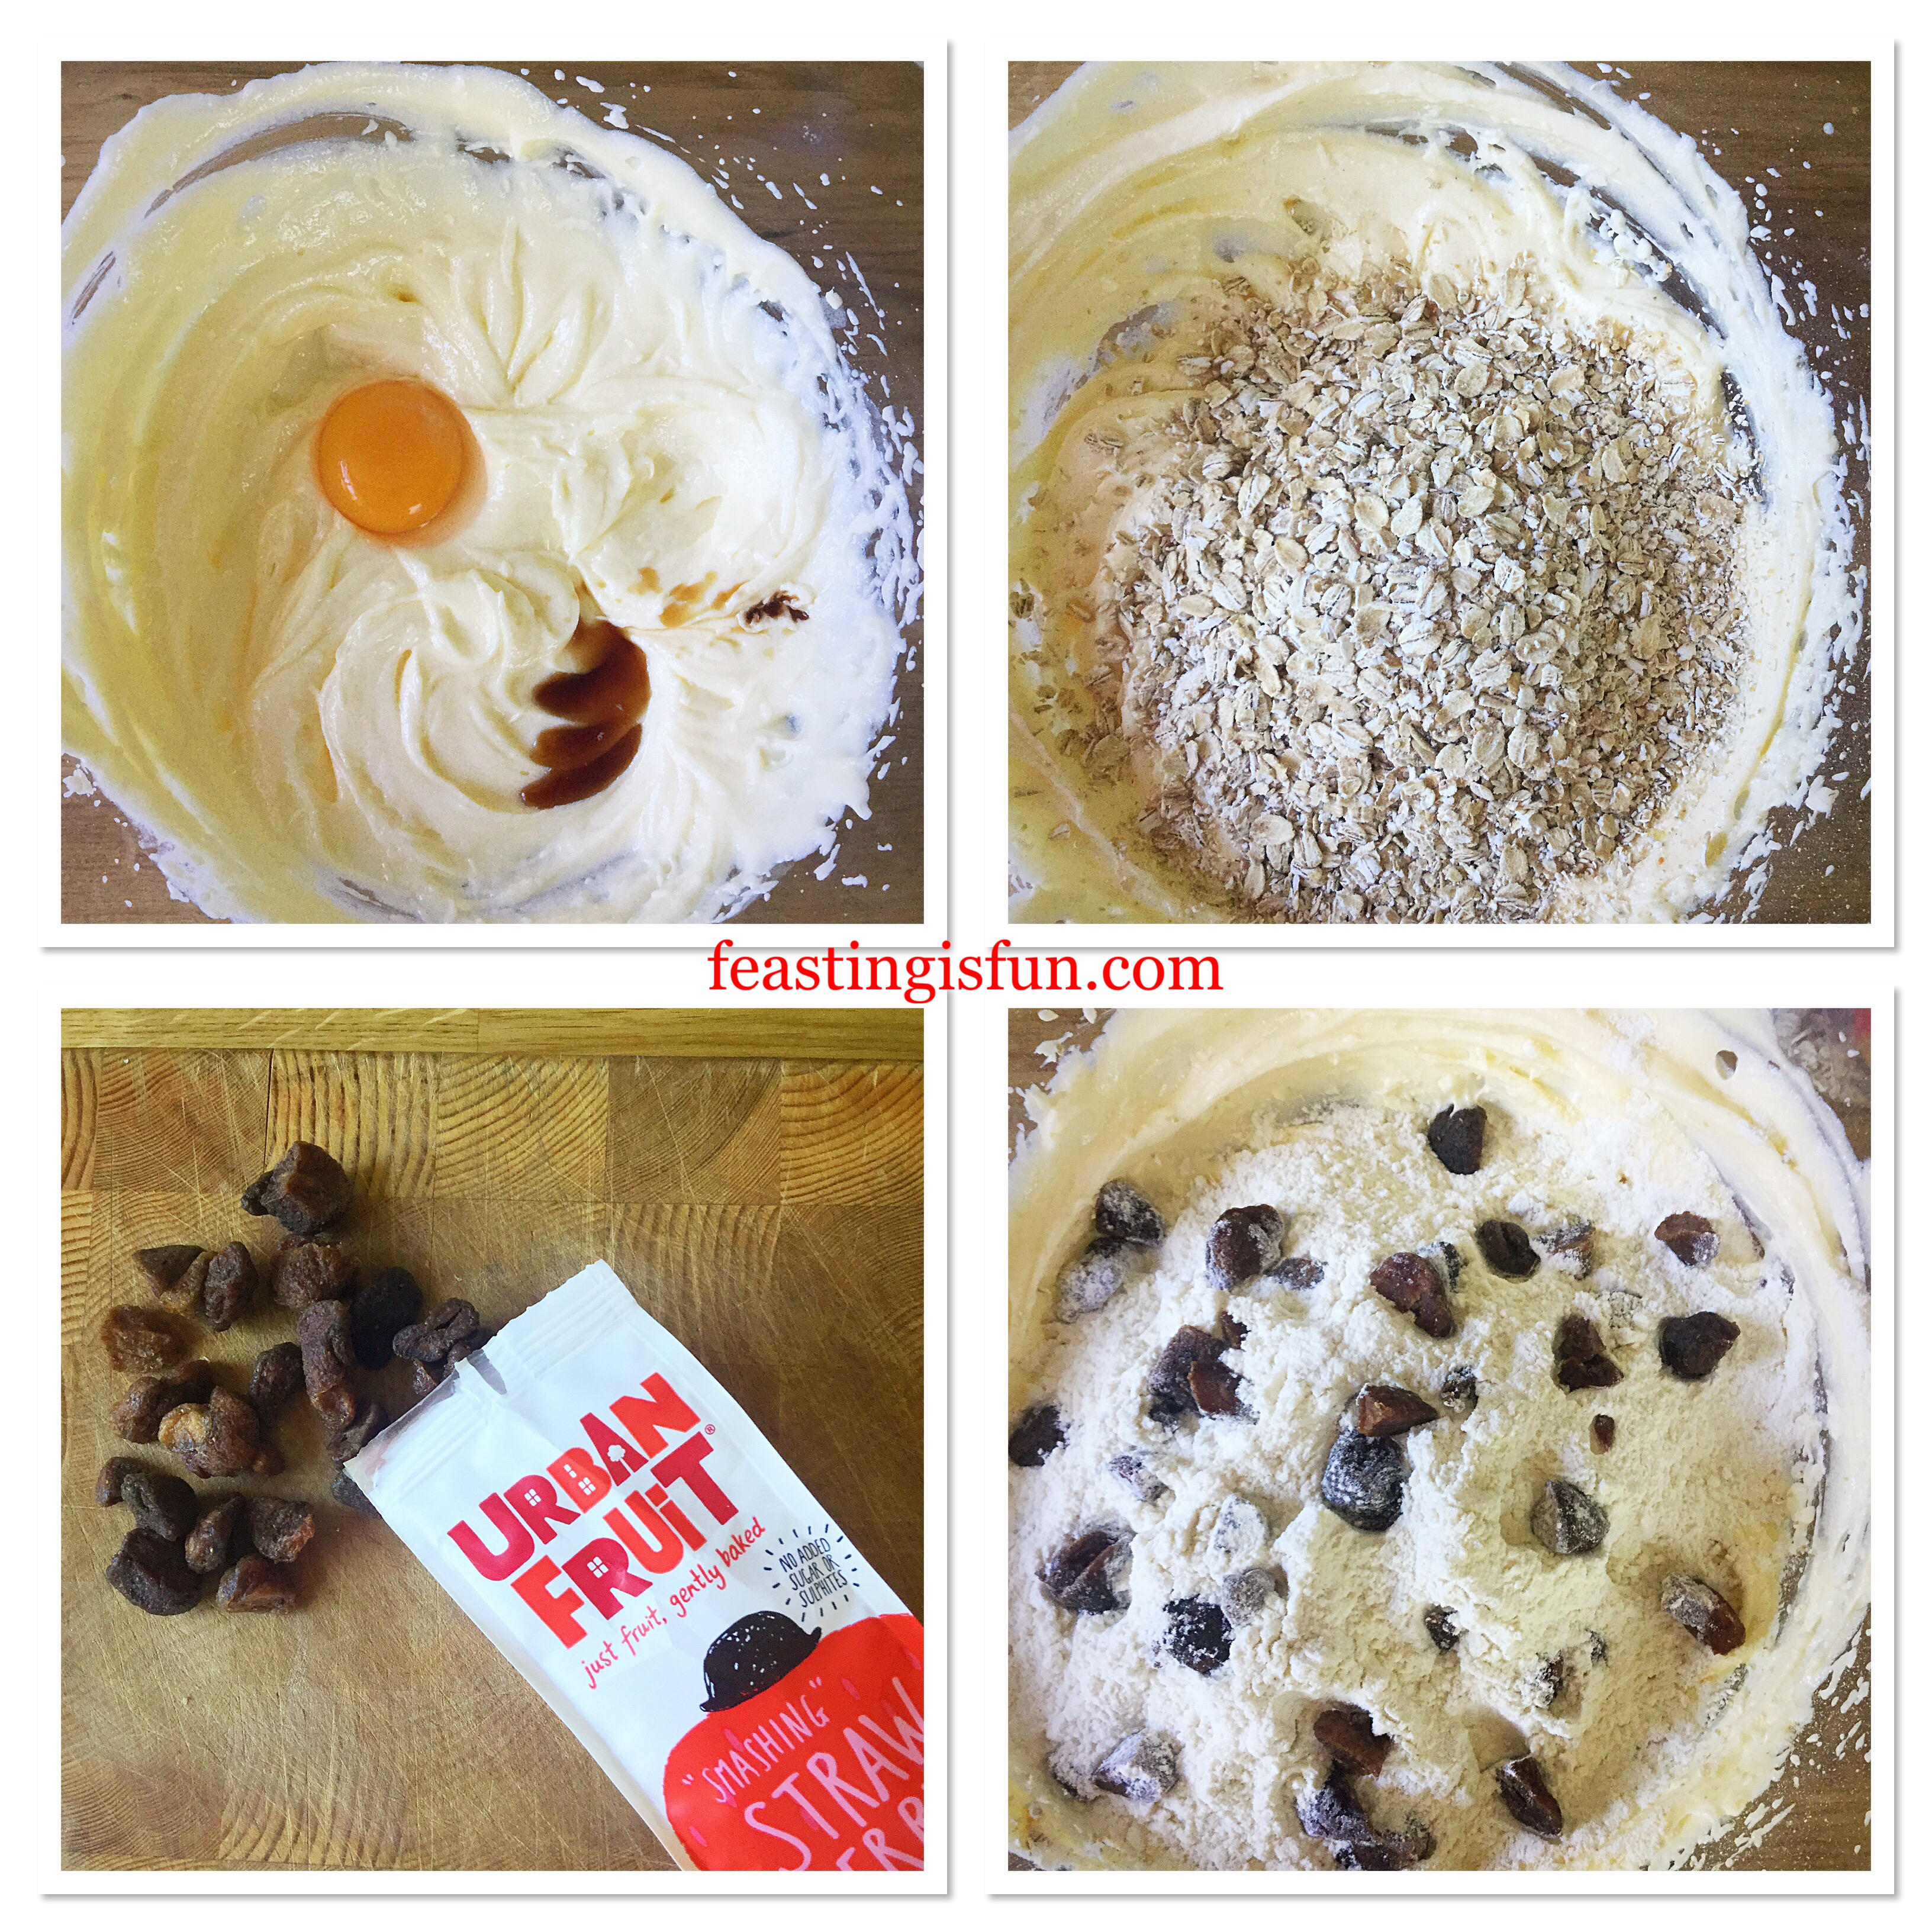
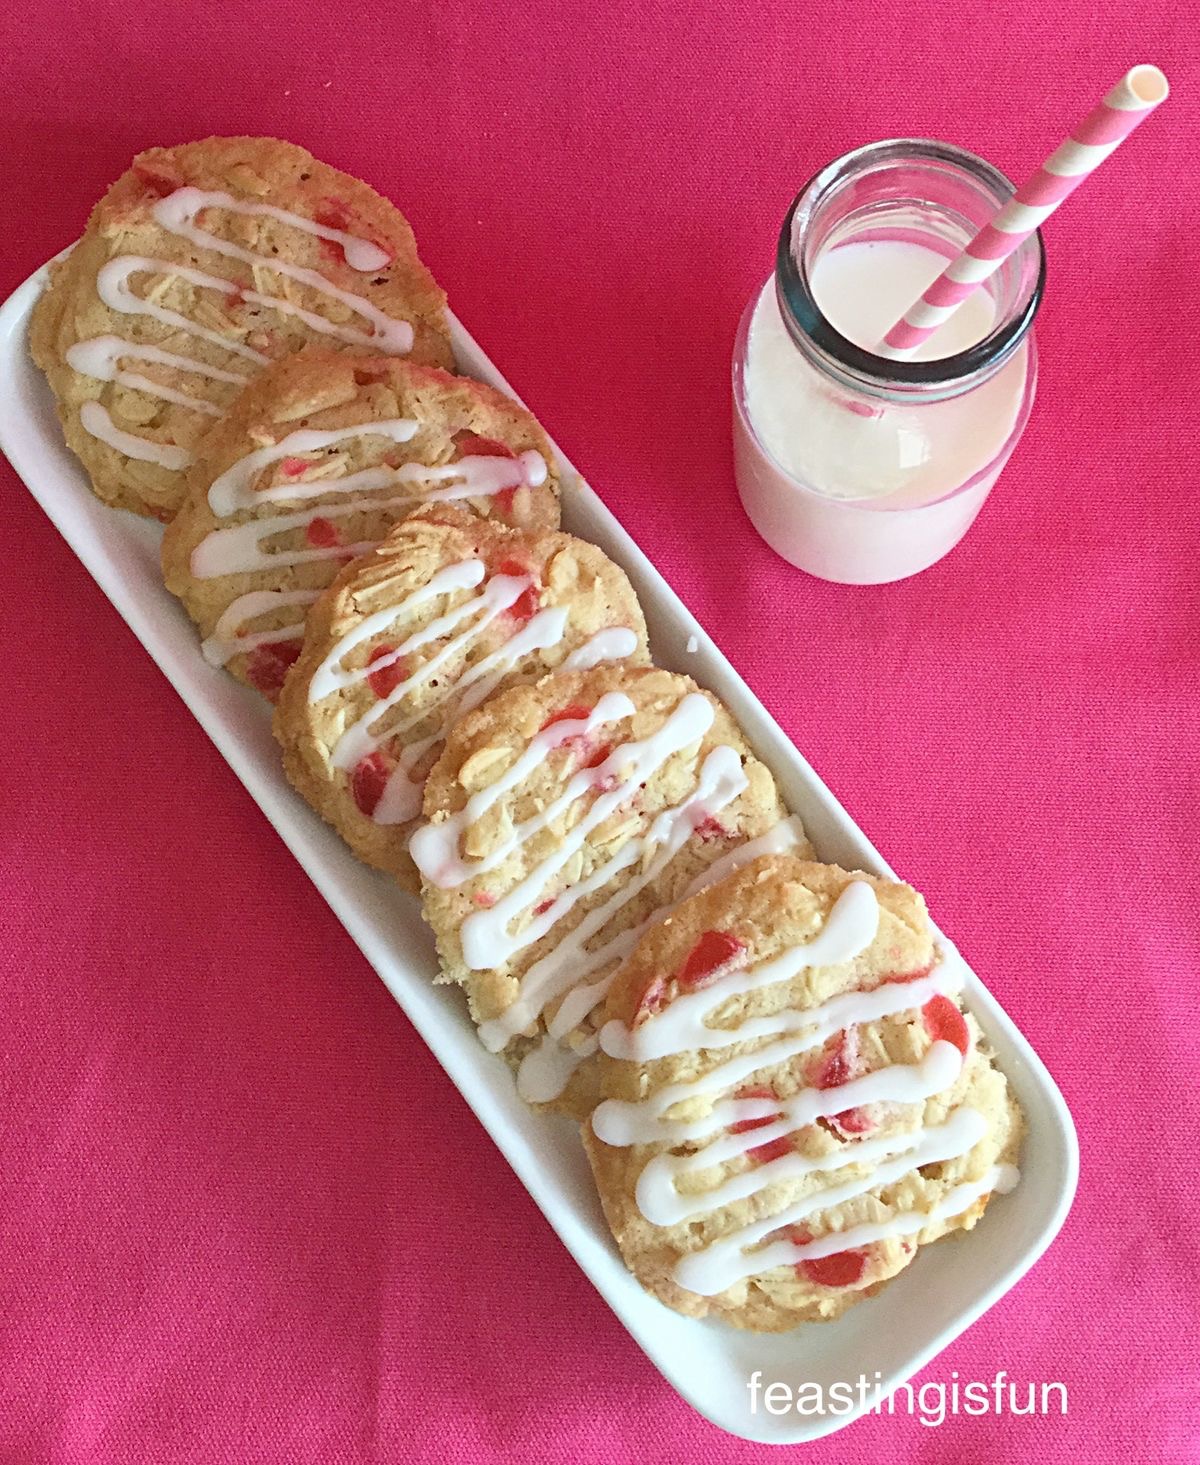
Since I discovered these baked strawberries from Urban Fruit I have loved adding them to bakes, such as my Double Strawberry Almond Muffins. Similar in texture to dried apricots, the baked strawberries are little pods of intense strawberry flavour. As well as being a delicious snack they are perfect for adding to bakes. Because fresh strawberries are so full of water they can be difficult to add to dry bakes. Whereas the chewy texture of the baked strawberries contrasts well in the oat crumble cookie.
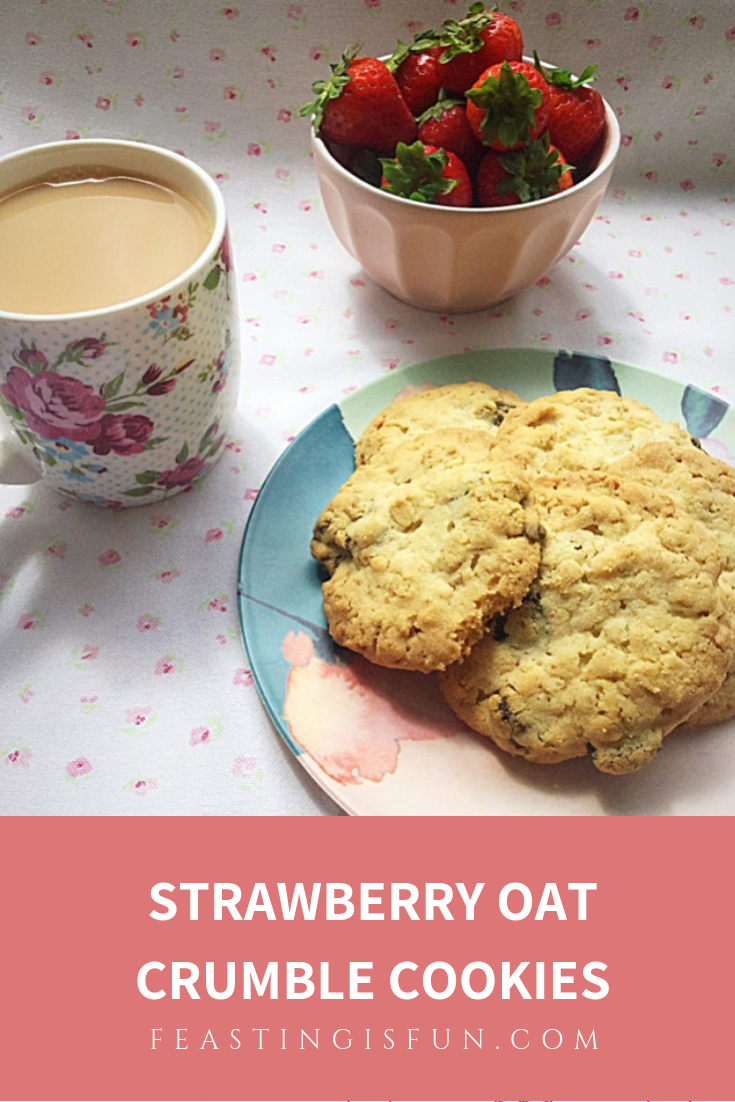
Strawberry Oat Crumble Cookies
While I have used the snack pack strawberries from Urban Fruit I have also checked online and found similar products available to buy from both high street stores and online. I find it quite frustrating when wanting to try a recipe and it requires a specialist ingredient. Actually I bulk bought these baked strawberries from Amazon.
Strawberry Oat Crumble Cookies
Recipe: Strawberry Oat Crumble Cookies makes approximately 20
90g/4oz Baked Strawberries – I use 1 packet from Urban Fruit
Method: Preheat the oven to 180C/160C fan, 325F, gas mark 3
Making the cookie dough
First of all line 2 large baking trays with baking parchment.
Into a large bowl add the butter, sugar and salt. Whisk together until pale and creamy.
Add the egg yolk and vanilla extract. Continue whisking until fully incorporated.
Next add the rolled oats.
Using a sharp knife chop the baked strawberries in half.
Add half of both the flour and strawberries to the bowl. Toss the strawberries around in the flour, this will stop them sticking together. Add the remaining flour and strawberries and repeat as before.
Making the strawberry and oat cookie dough
Using a spoon mix the cookie dough together.
Place the cookie in the fridge for half an hour to chill and firm up.
Shaping the cookies
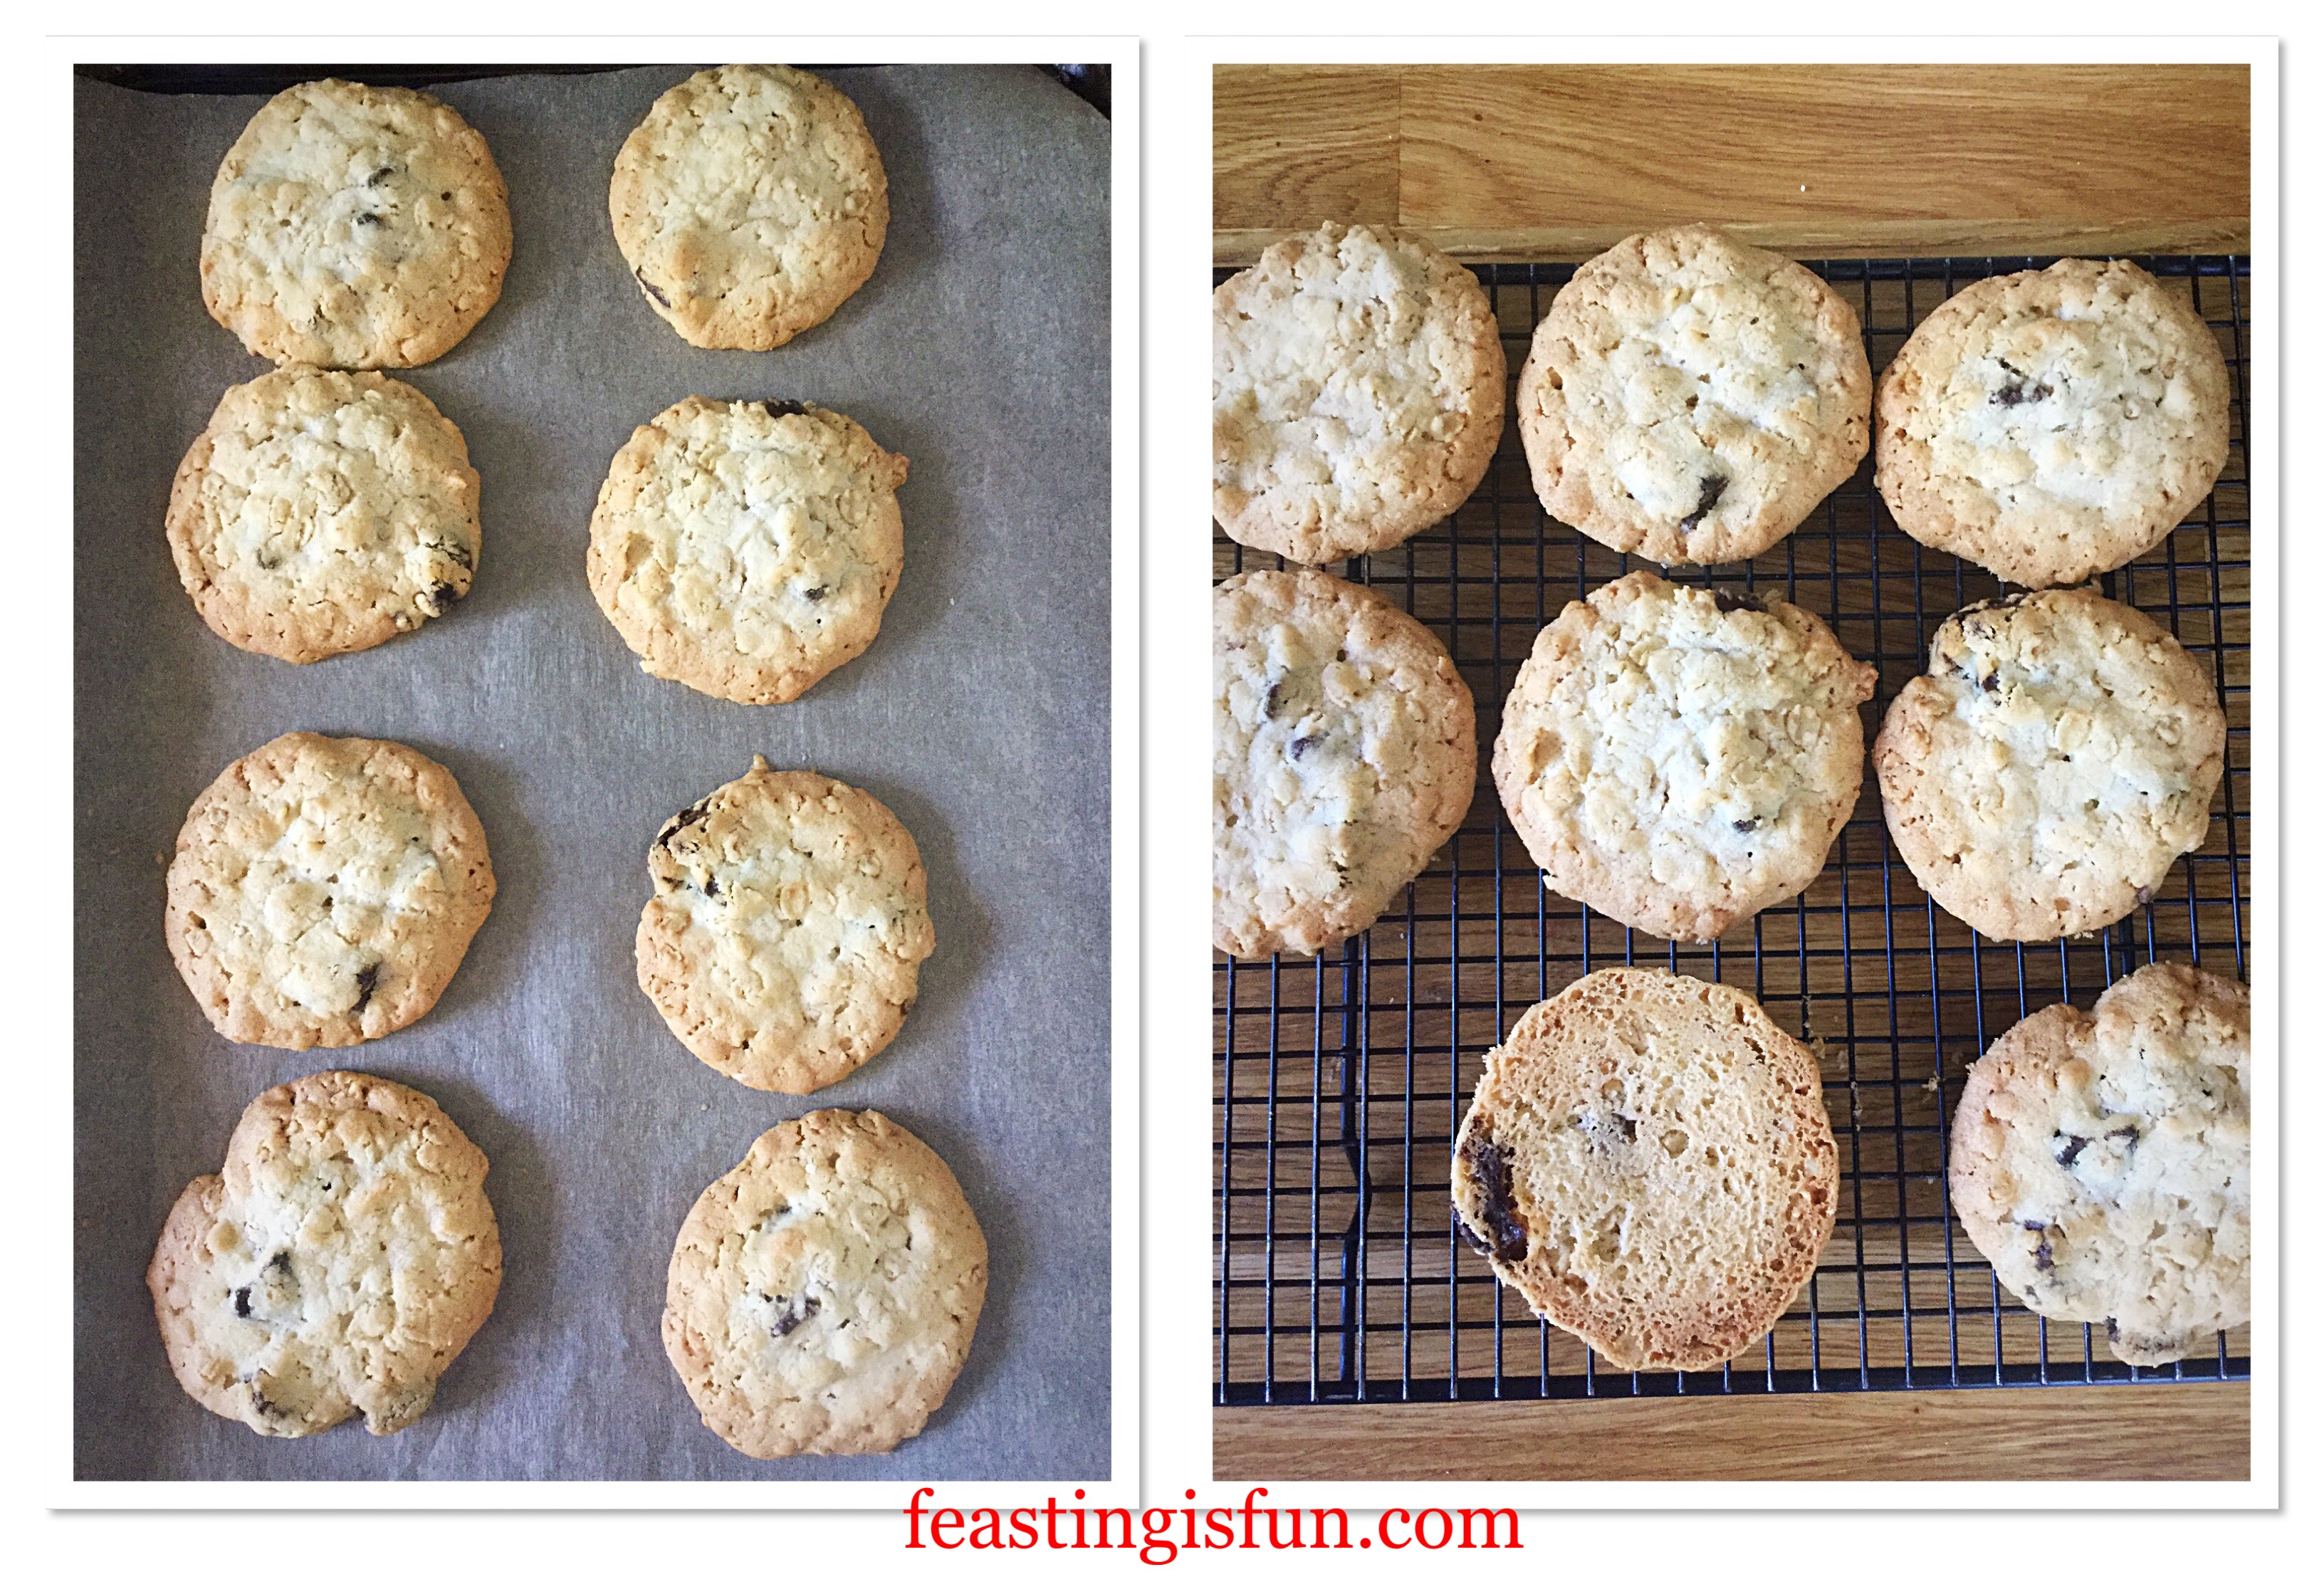
Remove a heaped teaspoon of cookie dough and roll into a ball. Place on the baking tray. Repeat until both baking trays are full.
Gently press down with your fingers to flatten the dough ball.
Note – I placed 8 cookies on each baking tray. After baking and cooling I flipped over the baking parchment, added the remaining 5 cookies and baked them.
Shaping the cookies
Baking the cookies
Place the baking trays into the oven and bake the cookies for 20-25 minutes until golden brown.
As soon as the cookies are baked remove from the oven.
Leave to cool for 5 minutes on the tray and then transfer to a cooling rack.
Check the underside of the cookie is golden.
The baked cookies.
Leave the cookies to cool before serving.
Strawberry Oat Crumble Cookies
Who could resist a delicious crumbly, strawberry and oat cookie with a cup of tea? Not me!
Once cooled store the cookies in an airtight container and eat within 5 days.
If you have enjoyed this recipe for Strawberry Oat Crumble Cookies you may also like these:
I love baking cookies, especially to share with others. And while it would be a real stretch to call these cookies healthy, sneaking oats into the recipe does add extra goodness. Also, the oats give these cookies their delicious crumbly texture. The perfect cookie to bake and take to your workplace and share with colleagues. Because all food tastes better when shared.
Whatever you are making, baking and creating in your kitchens, have fun preparing and sharing your feast.
Sammie xx
No part of this post may be reproduced or duplicated without the written permission of the owner. Please see my Disclosure Policy.
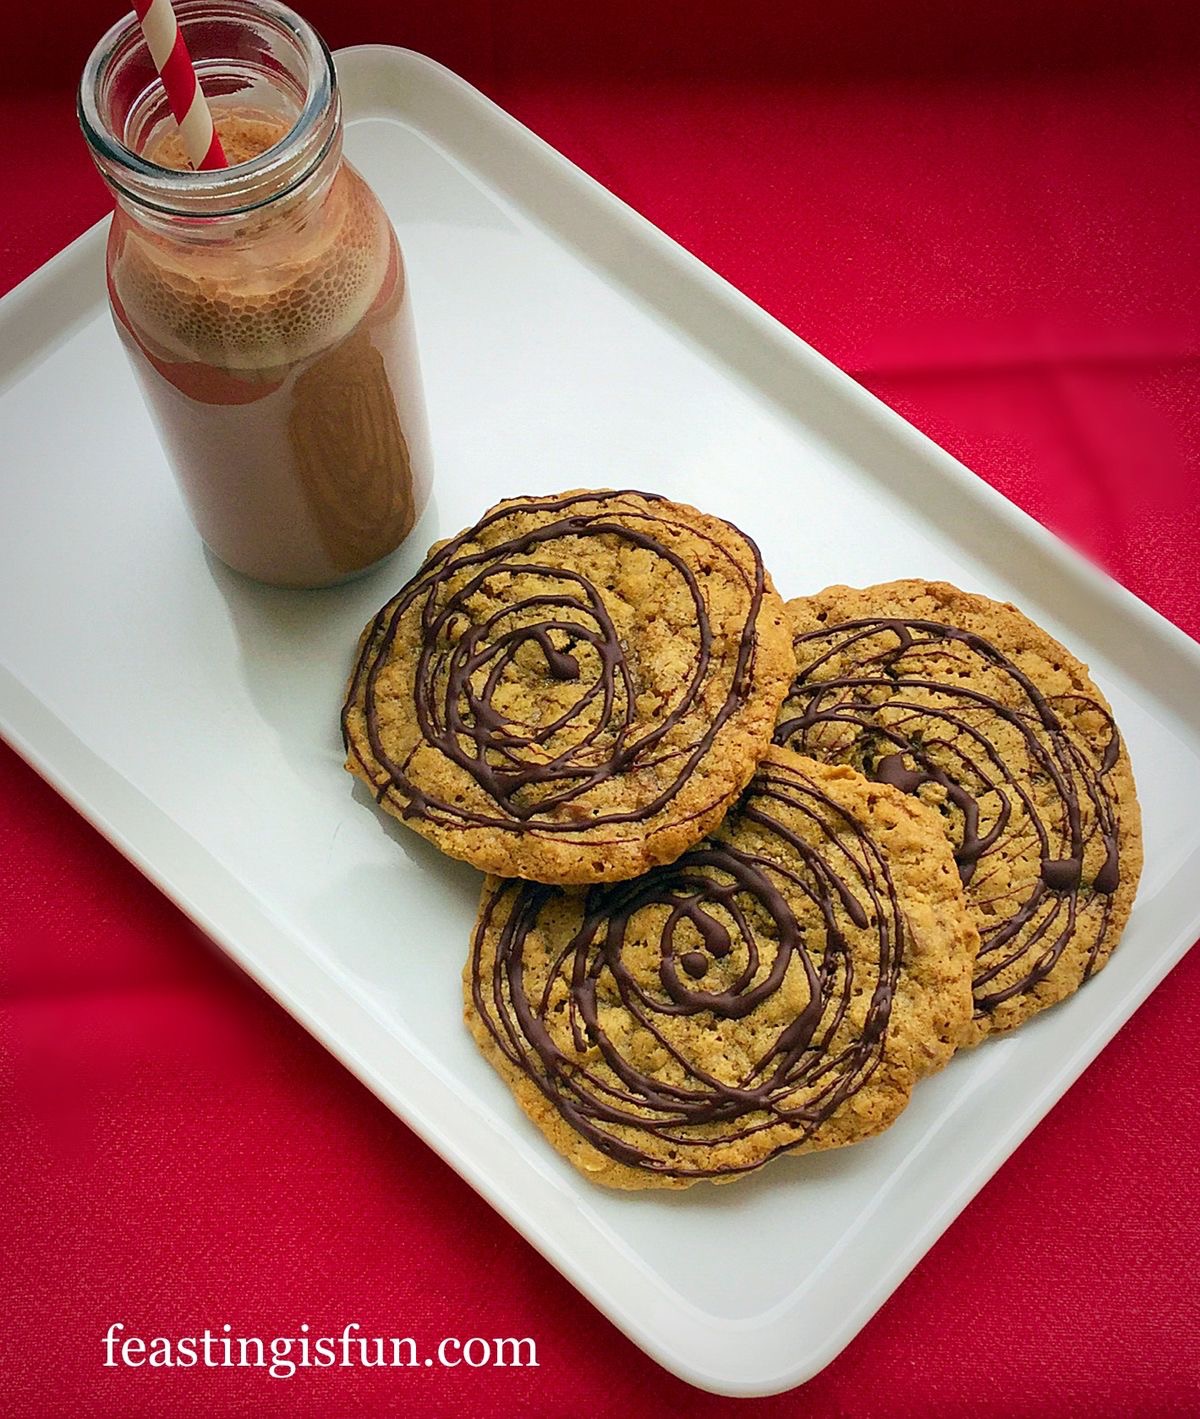
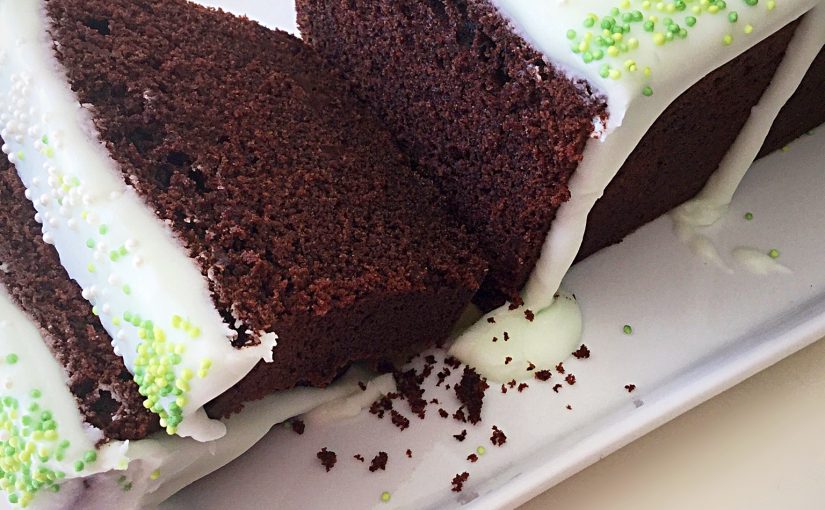
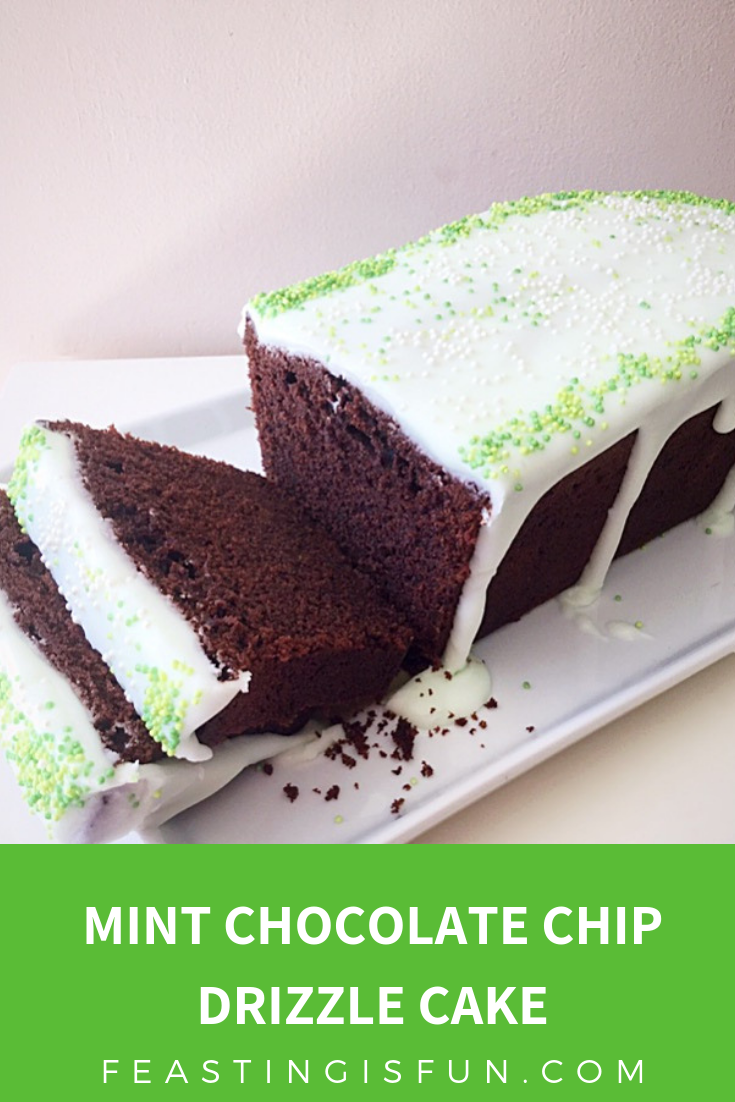
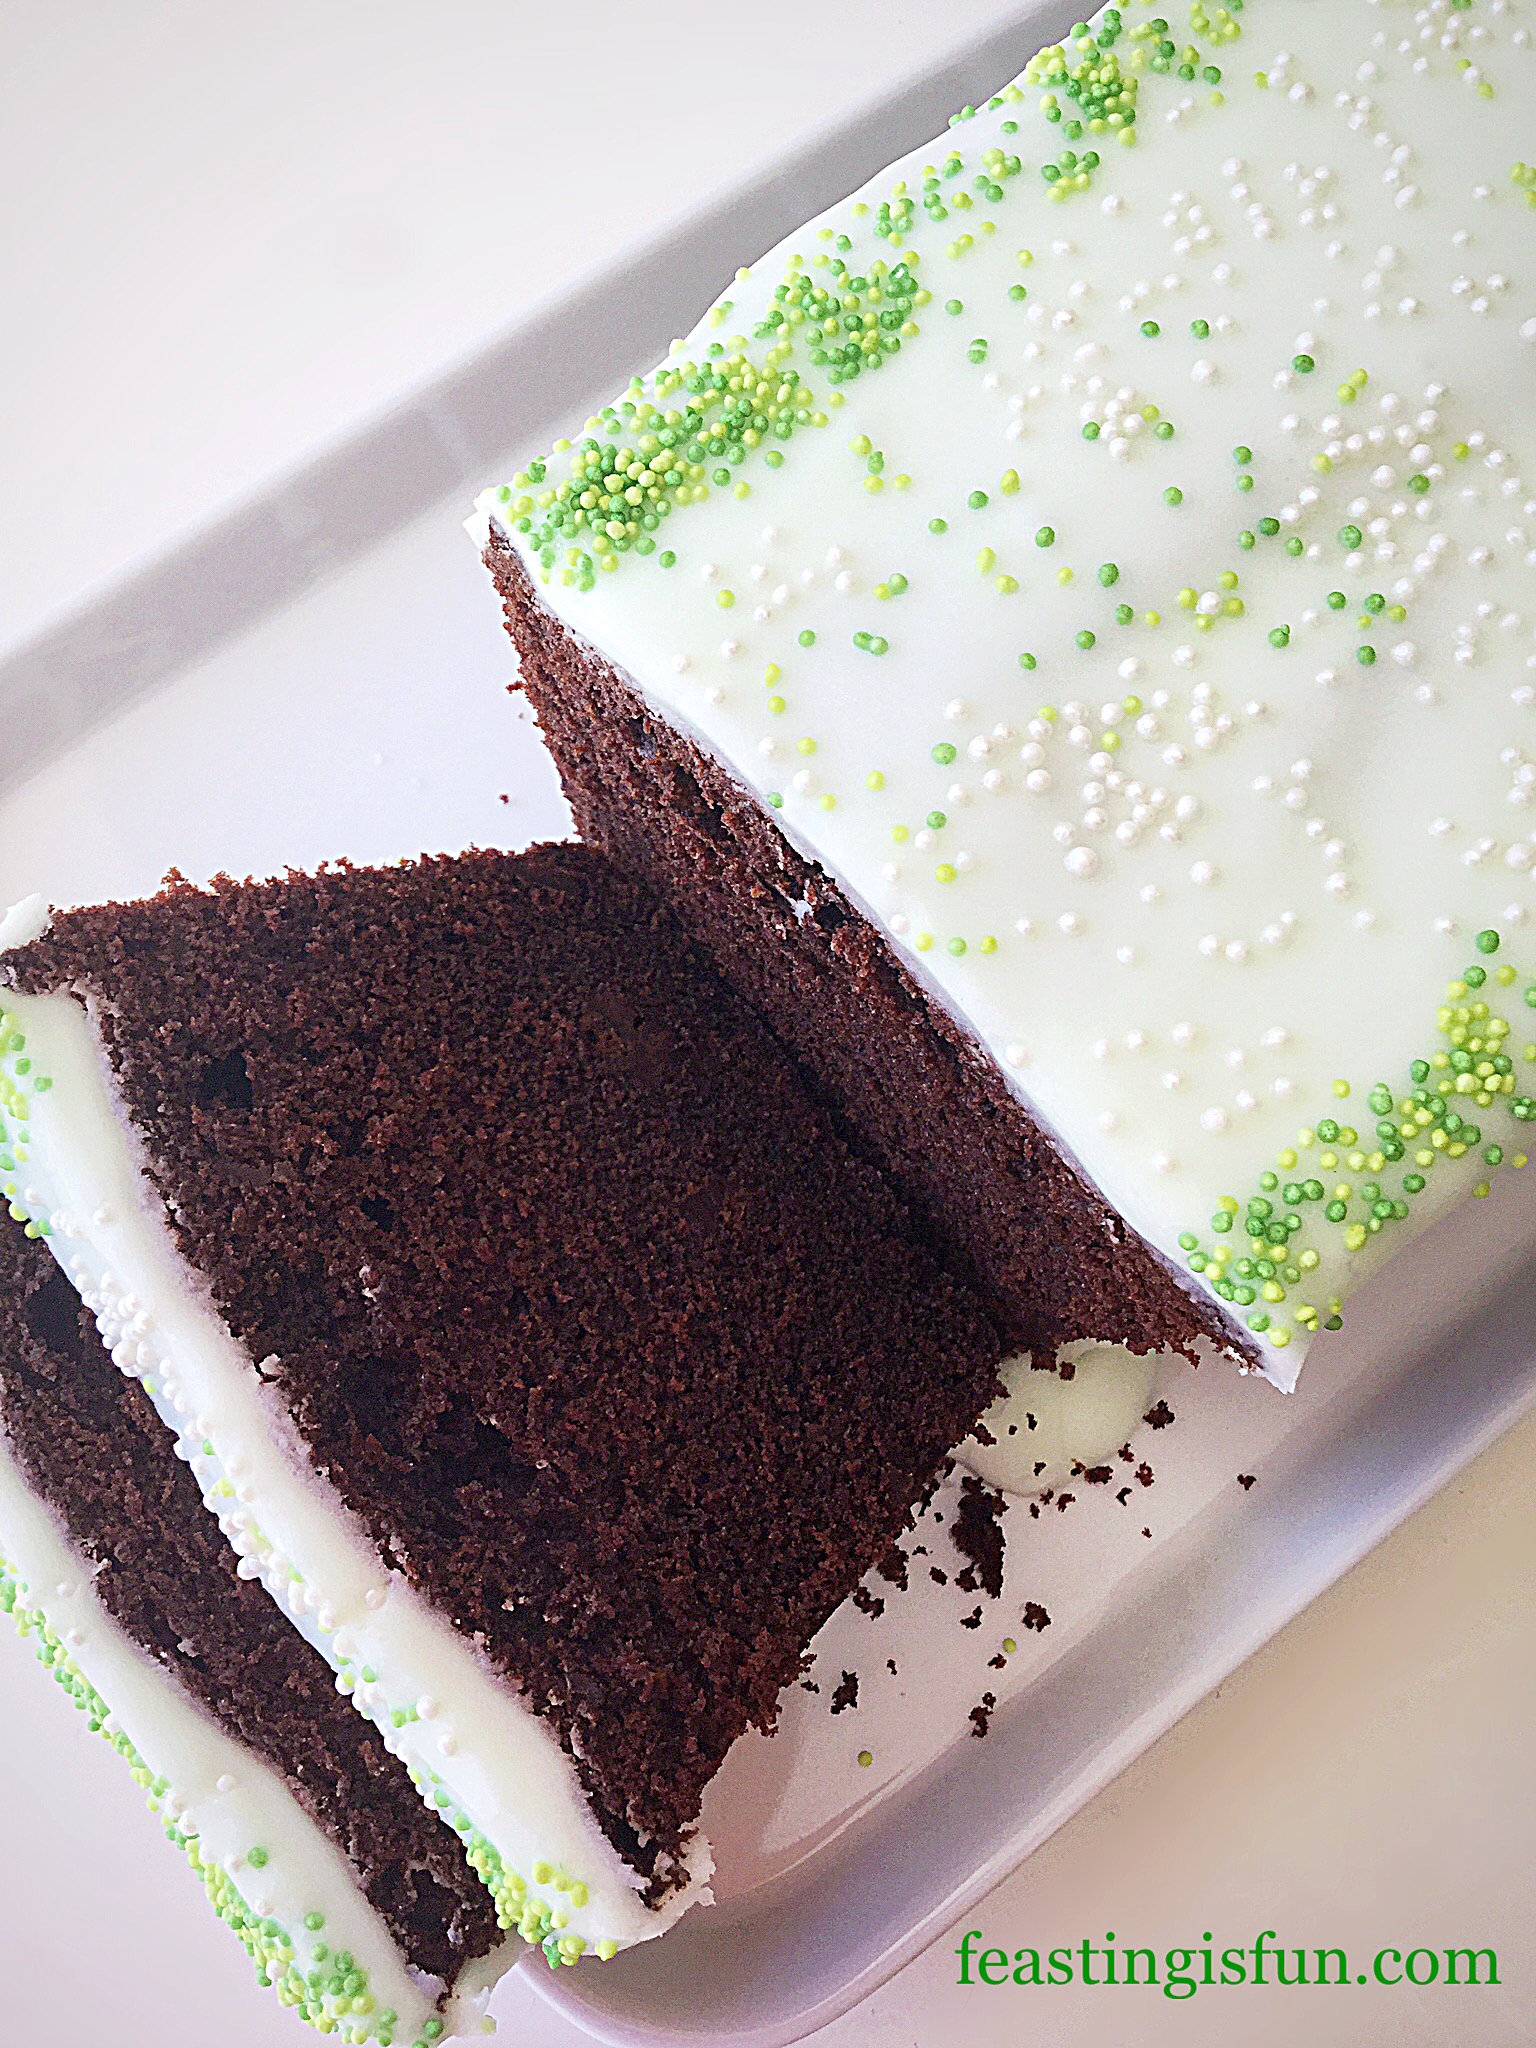
Wow this Summer has been hot so far. So when I was asked to bake a cake I wanted to create something that was not only delicious, but also refreshing. My Mint Chocolate Chip Drizzle Cake ticks both of the boxes. A rich chocolate cake that is full of mint chocolate chips finished with a peppermint drizzle icing. This cake was a big hit with all who tried it!
Mint Chocolate – which side are you on?
While I love the combination of mint and chocolate together, it appears that opinion is split. While there are those who wholeheartedly agree with me, there are also a group of people who really dislike the flavour combination. Since I love sharing and assume that you do too, check that those you will be sharing with enjoy fresh mint flavour with chocolate. Unless of course you want the whole cake to yourself?
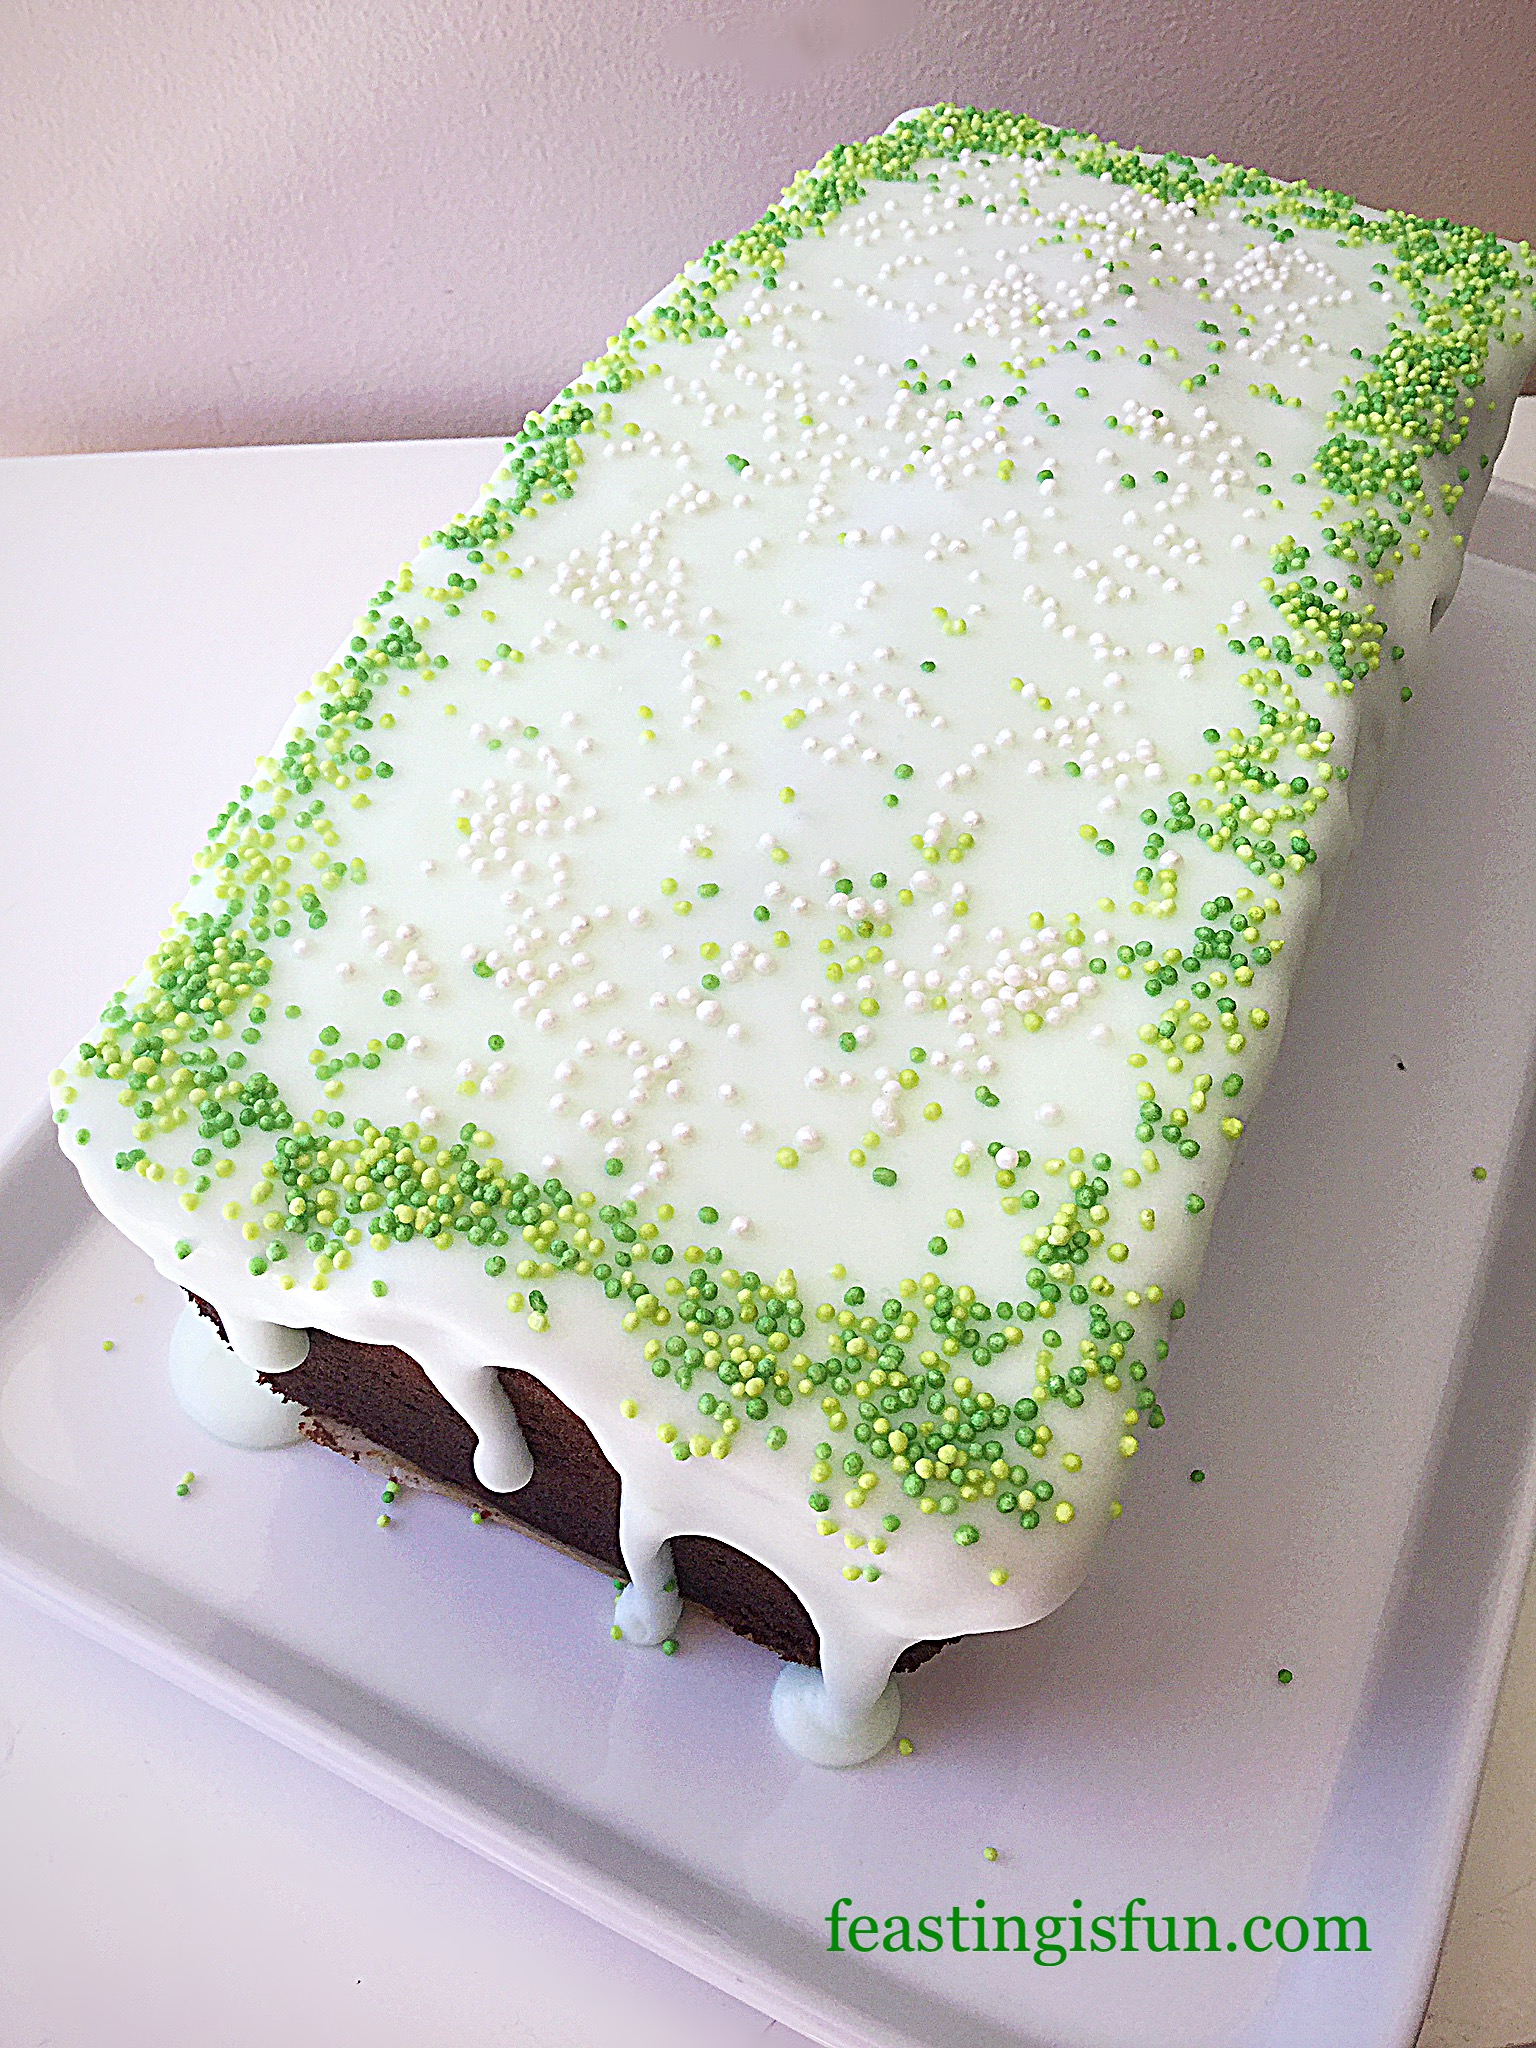
Mint Chocolate Chip Drizzle Cake
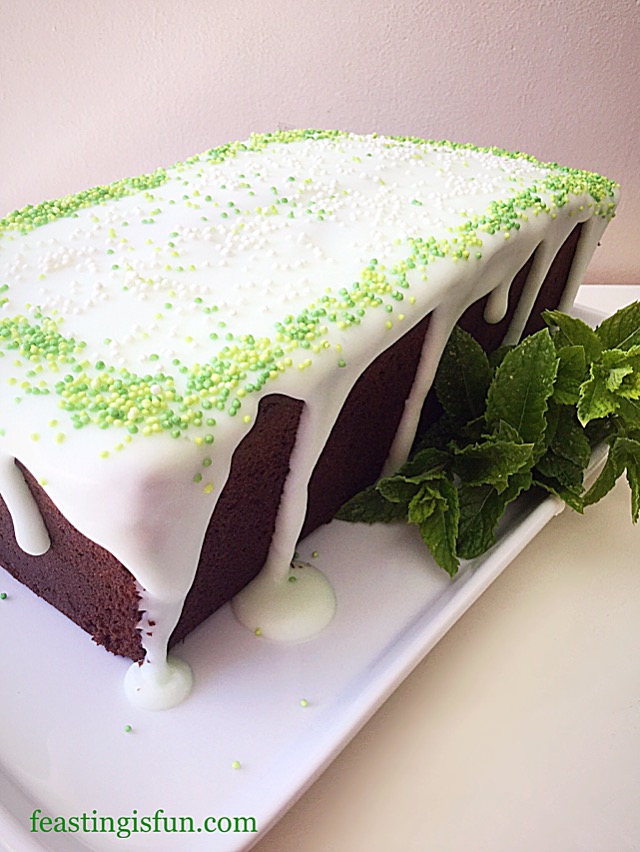
I adore the way that mint is such a refreshing flavour. In this cake it really lifts the deep chocolate flavour of the sponge, with nuggets of mint chocolate bursting in your mouth with every bite. Also, the peppermint hit in the icing merges with the cake to create a party in your mouth. I love the flavours in this cake, especially during the heat of the summer. Because of the mint, I can literally bake my cake AND eat it!
Mint Chocolate Chip Drizzle Cake
While I have baked this cake in a loaf tin, I’m sure it would also look great baked in a square or round tin. For me the straightforward slicing of a loaf cake makes it easy to pack, ready sliced for picnics. Alternatively, it also is great for packed lunches.
Recipe: Mint Chocolate Chip Drizzle Cake serves 8-10
Optional – Green Food Colouring – I use Wilton Food Colouring Gel
Green and White small sugar balls
Method: Preheat oven to 180C/160C fan for 1 hour, 350F, gas mark 4
To bake this cake you will need a 25cm x 11.5cm x 7.5cm (10” x 4.5” x 3”) 2lb loaf tin. Grease thoroughly with butter and line the base of the tin with baking parchment.
Making and baking the cake
First of all into a large bowl add the butter, sugar and salt. Whisk until pale and creamy and thoroughly combined.
Add the eggs, vanilla extract and cocoa powder. Whisk again until the mixture is fully combined with no lumps.
Sift the flour and baking powder into the bowl and add the chopped mint chocolate.
Finally, using a spoon mix all of the ingredients together until they are just combined. Take care not to overmix the cake batter as this can result in a heavy cake once baked.
Making the cake batter.
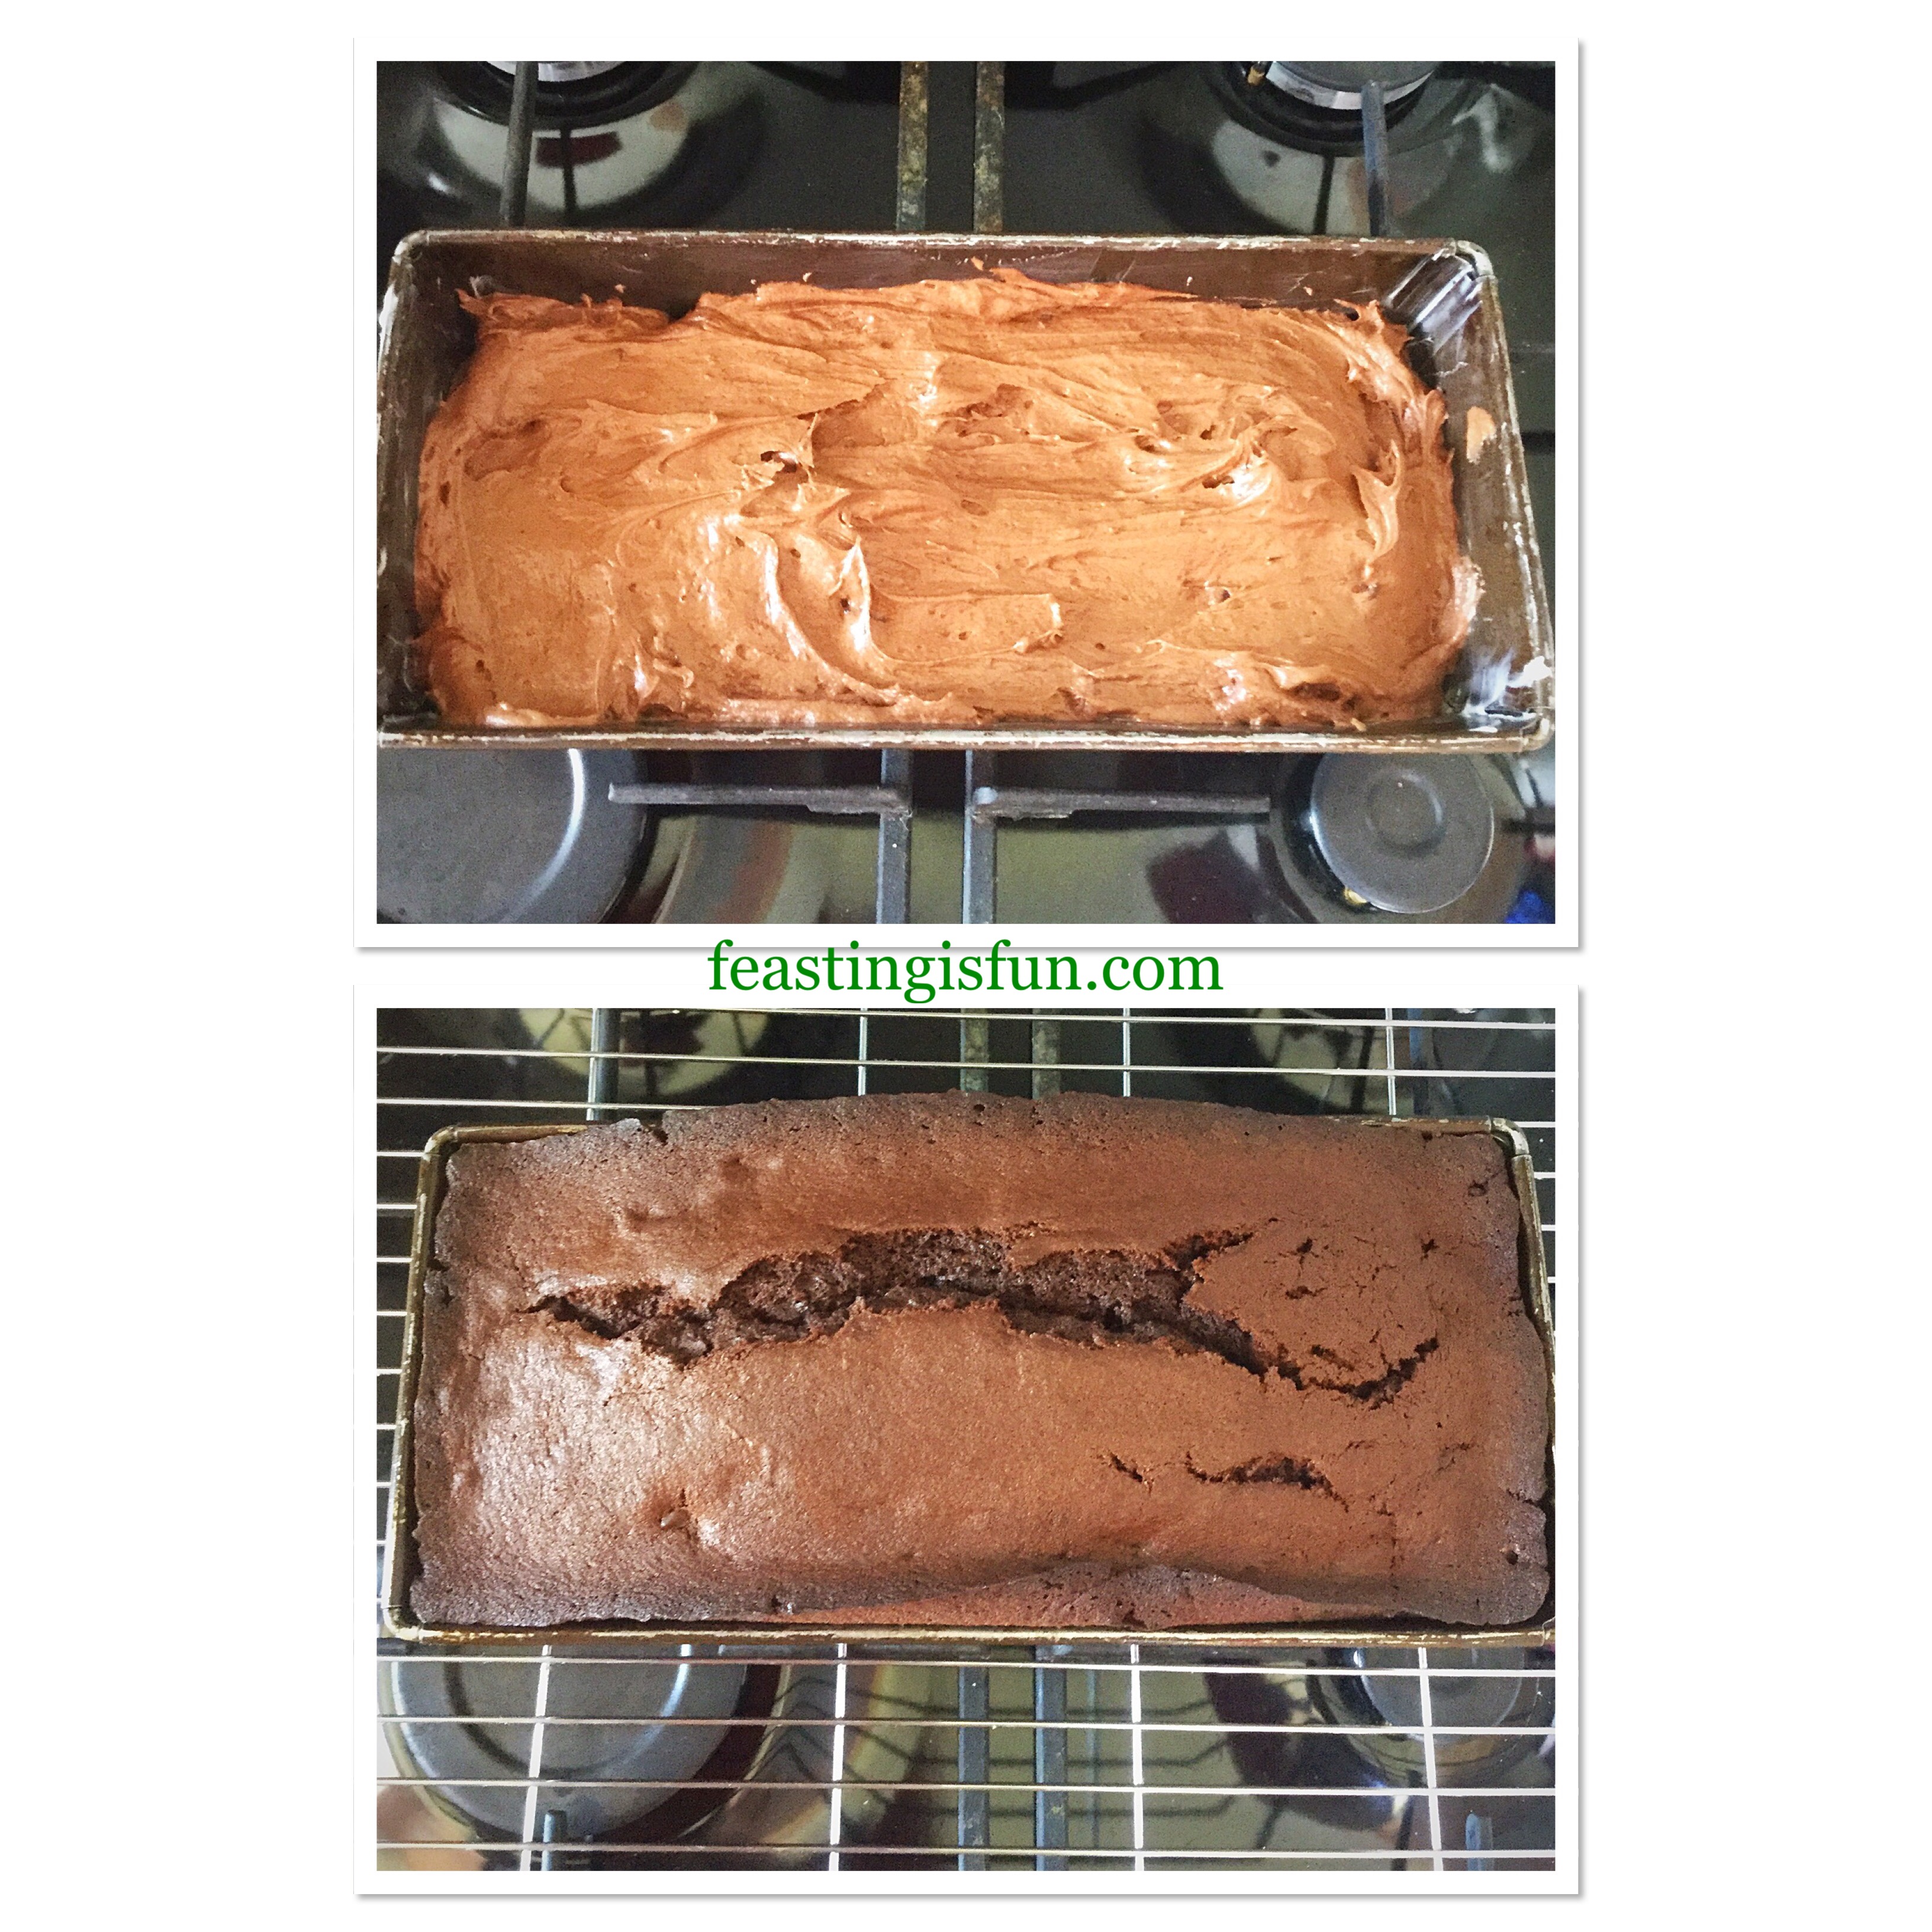
Spoon the cake batter into a prepared tin and smooth the surface.
Place the cake tin into the centre of the oven and bake for approximately 1 hour. Baking times may vary due to oven differences or using a different size tin.
The cake is baked when an inserted skewer comes out clean.
As soon as the cake is baked remove from the oven and leave the cake to fully cool in the tin.
Filling the loaf tin and baking the cake.
When the cake is cooled carefully run a palette knife between the cake and the tin.
Turn the cake out of it’s tin and remove the baking parchment.
Place the cake on to a cake or board ready to be iced.
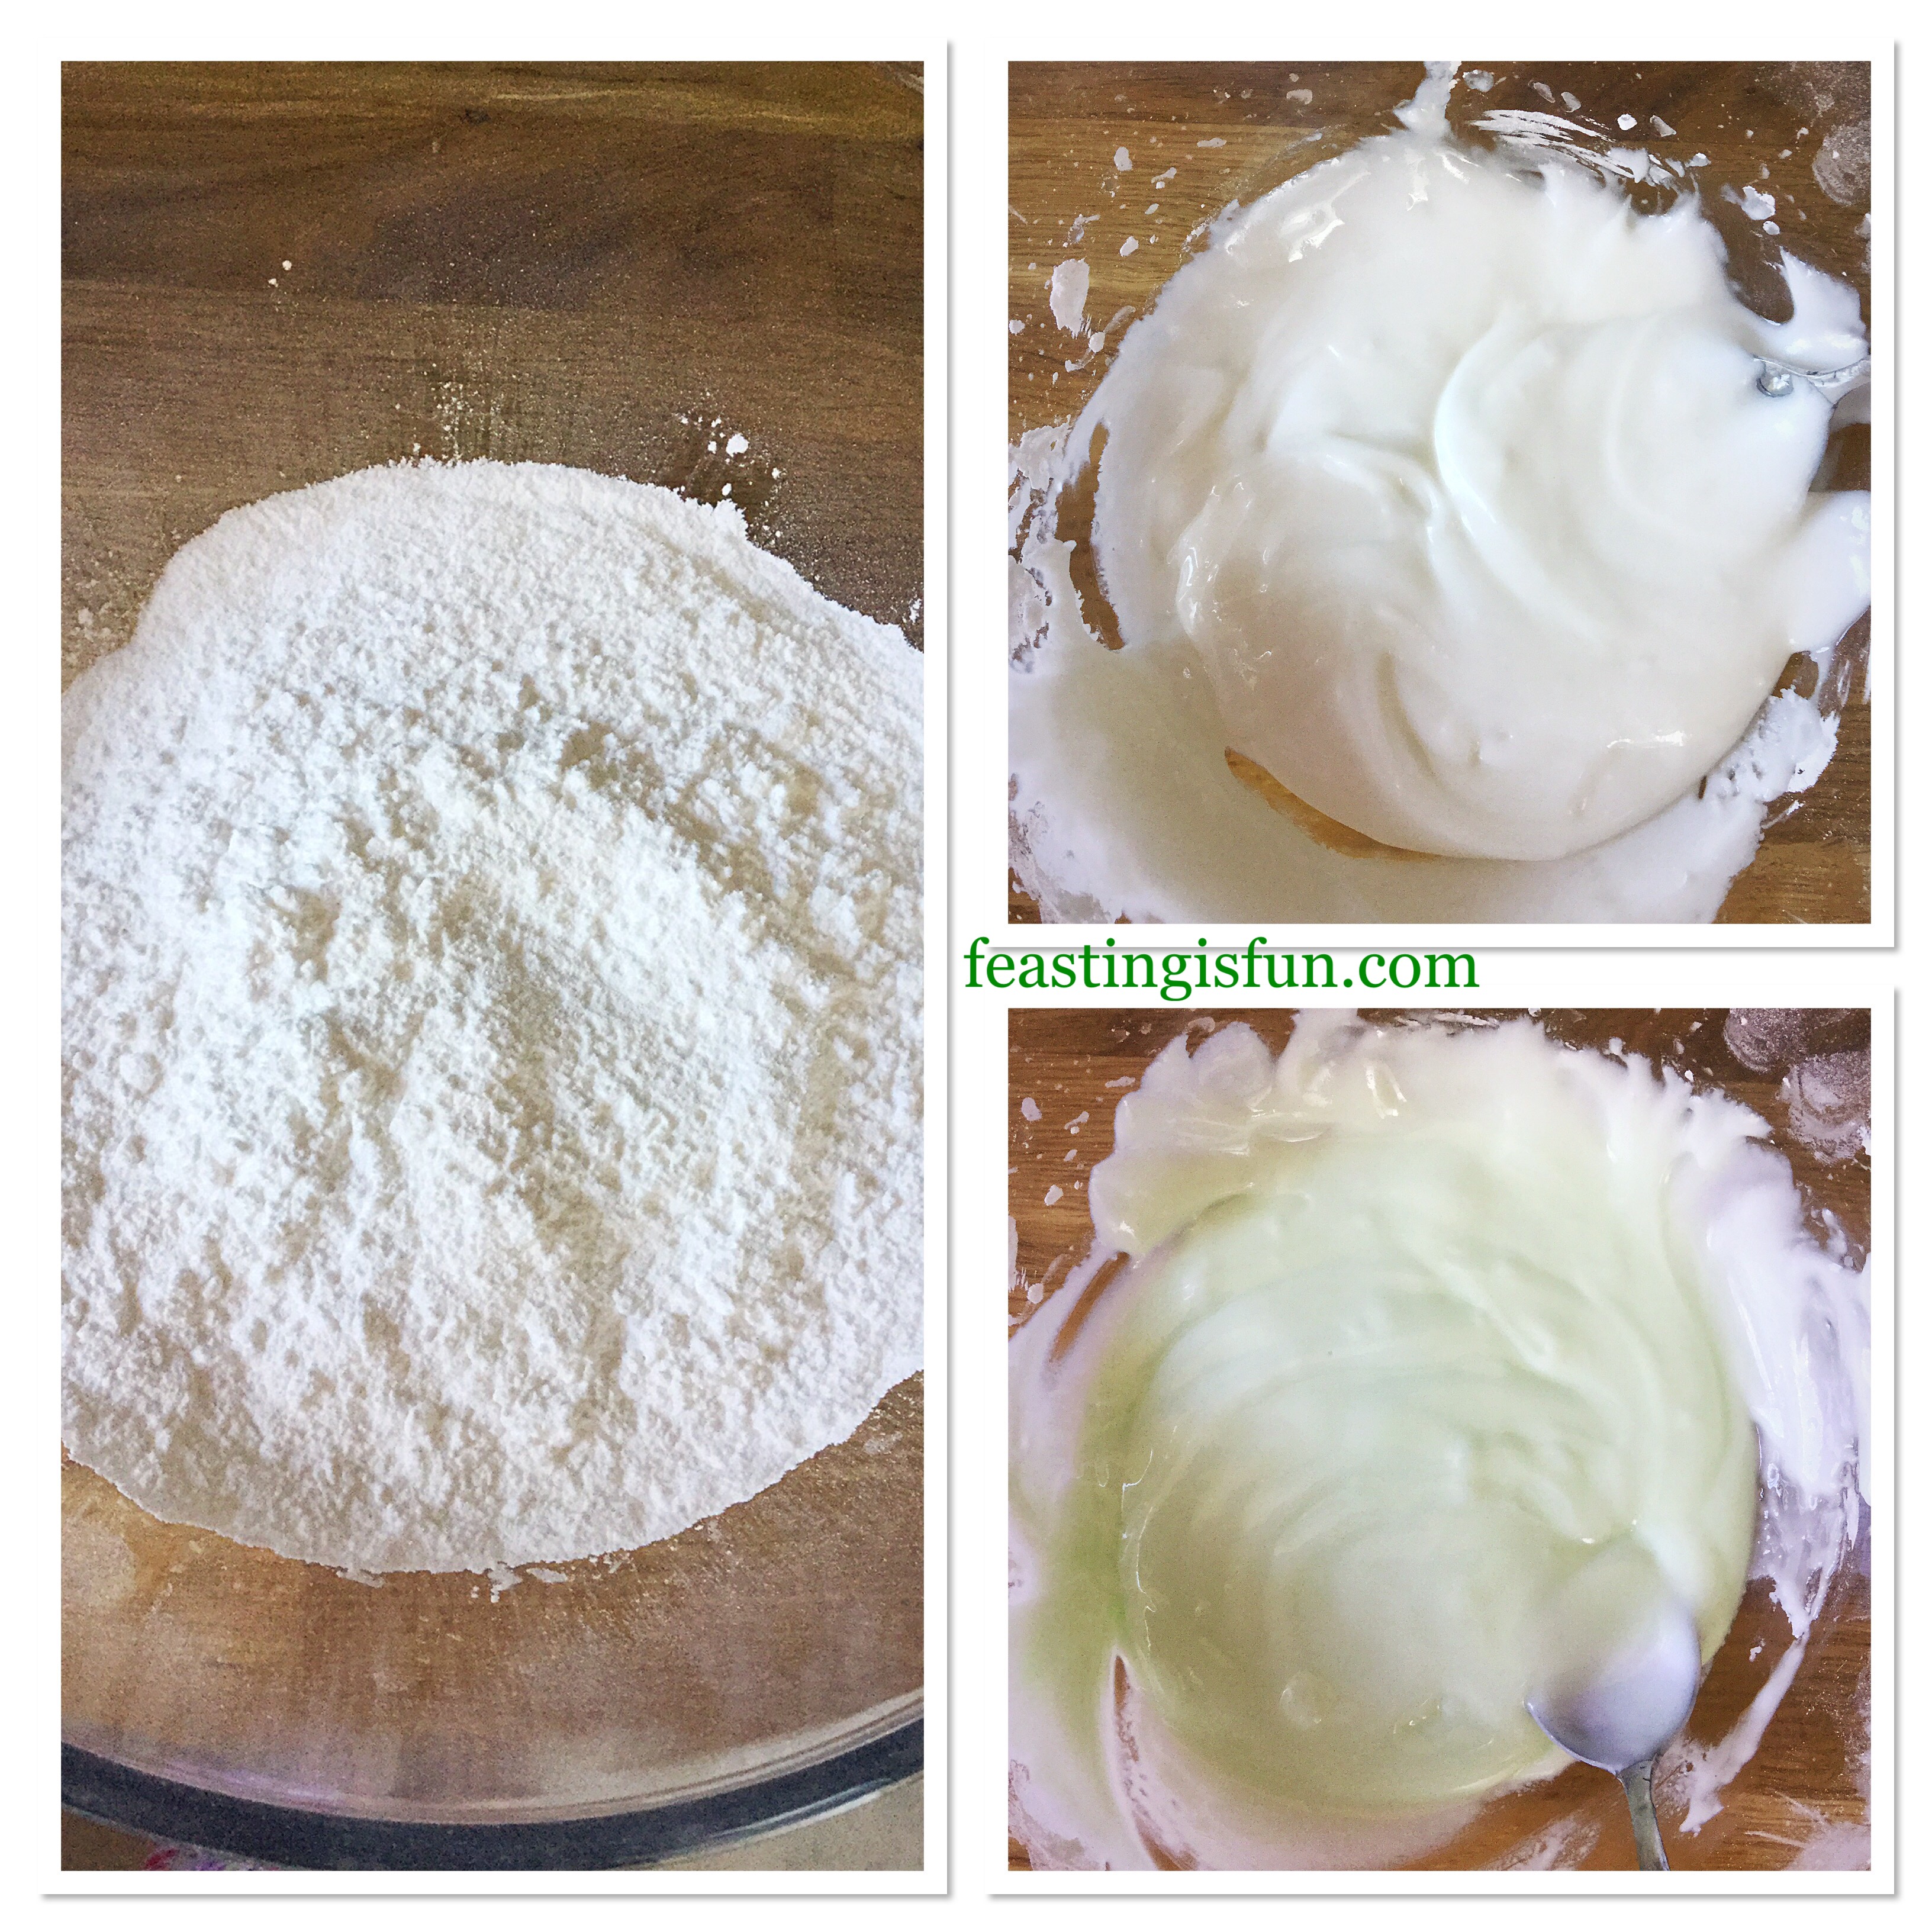
Making the icing and decorating the cake
First of all add the icing sugar to a bowl. Gently stir with a balloon whisk to remove any lumps. I find this method much easier than sifting the sugar. Especially as sifting results in icing sugar going everywhere!
Add the peppermint extract and enough water to for a thick, but still slowly dripping paste.
Dip the tip of a cocktail stick into the food colouring gel and then swirl the stick through your icing. I opted for a very subtle mintgreen colour. Stir the icing so that the colour is even throughout.
Making the mint flavoured drizzle icing.
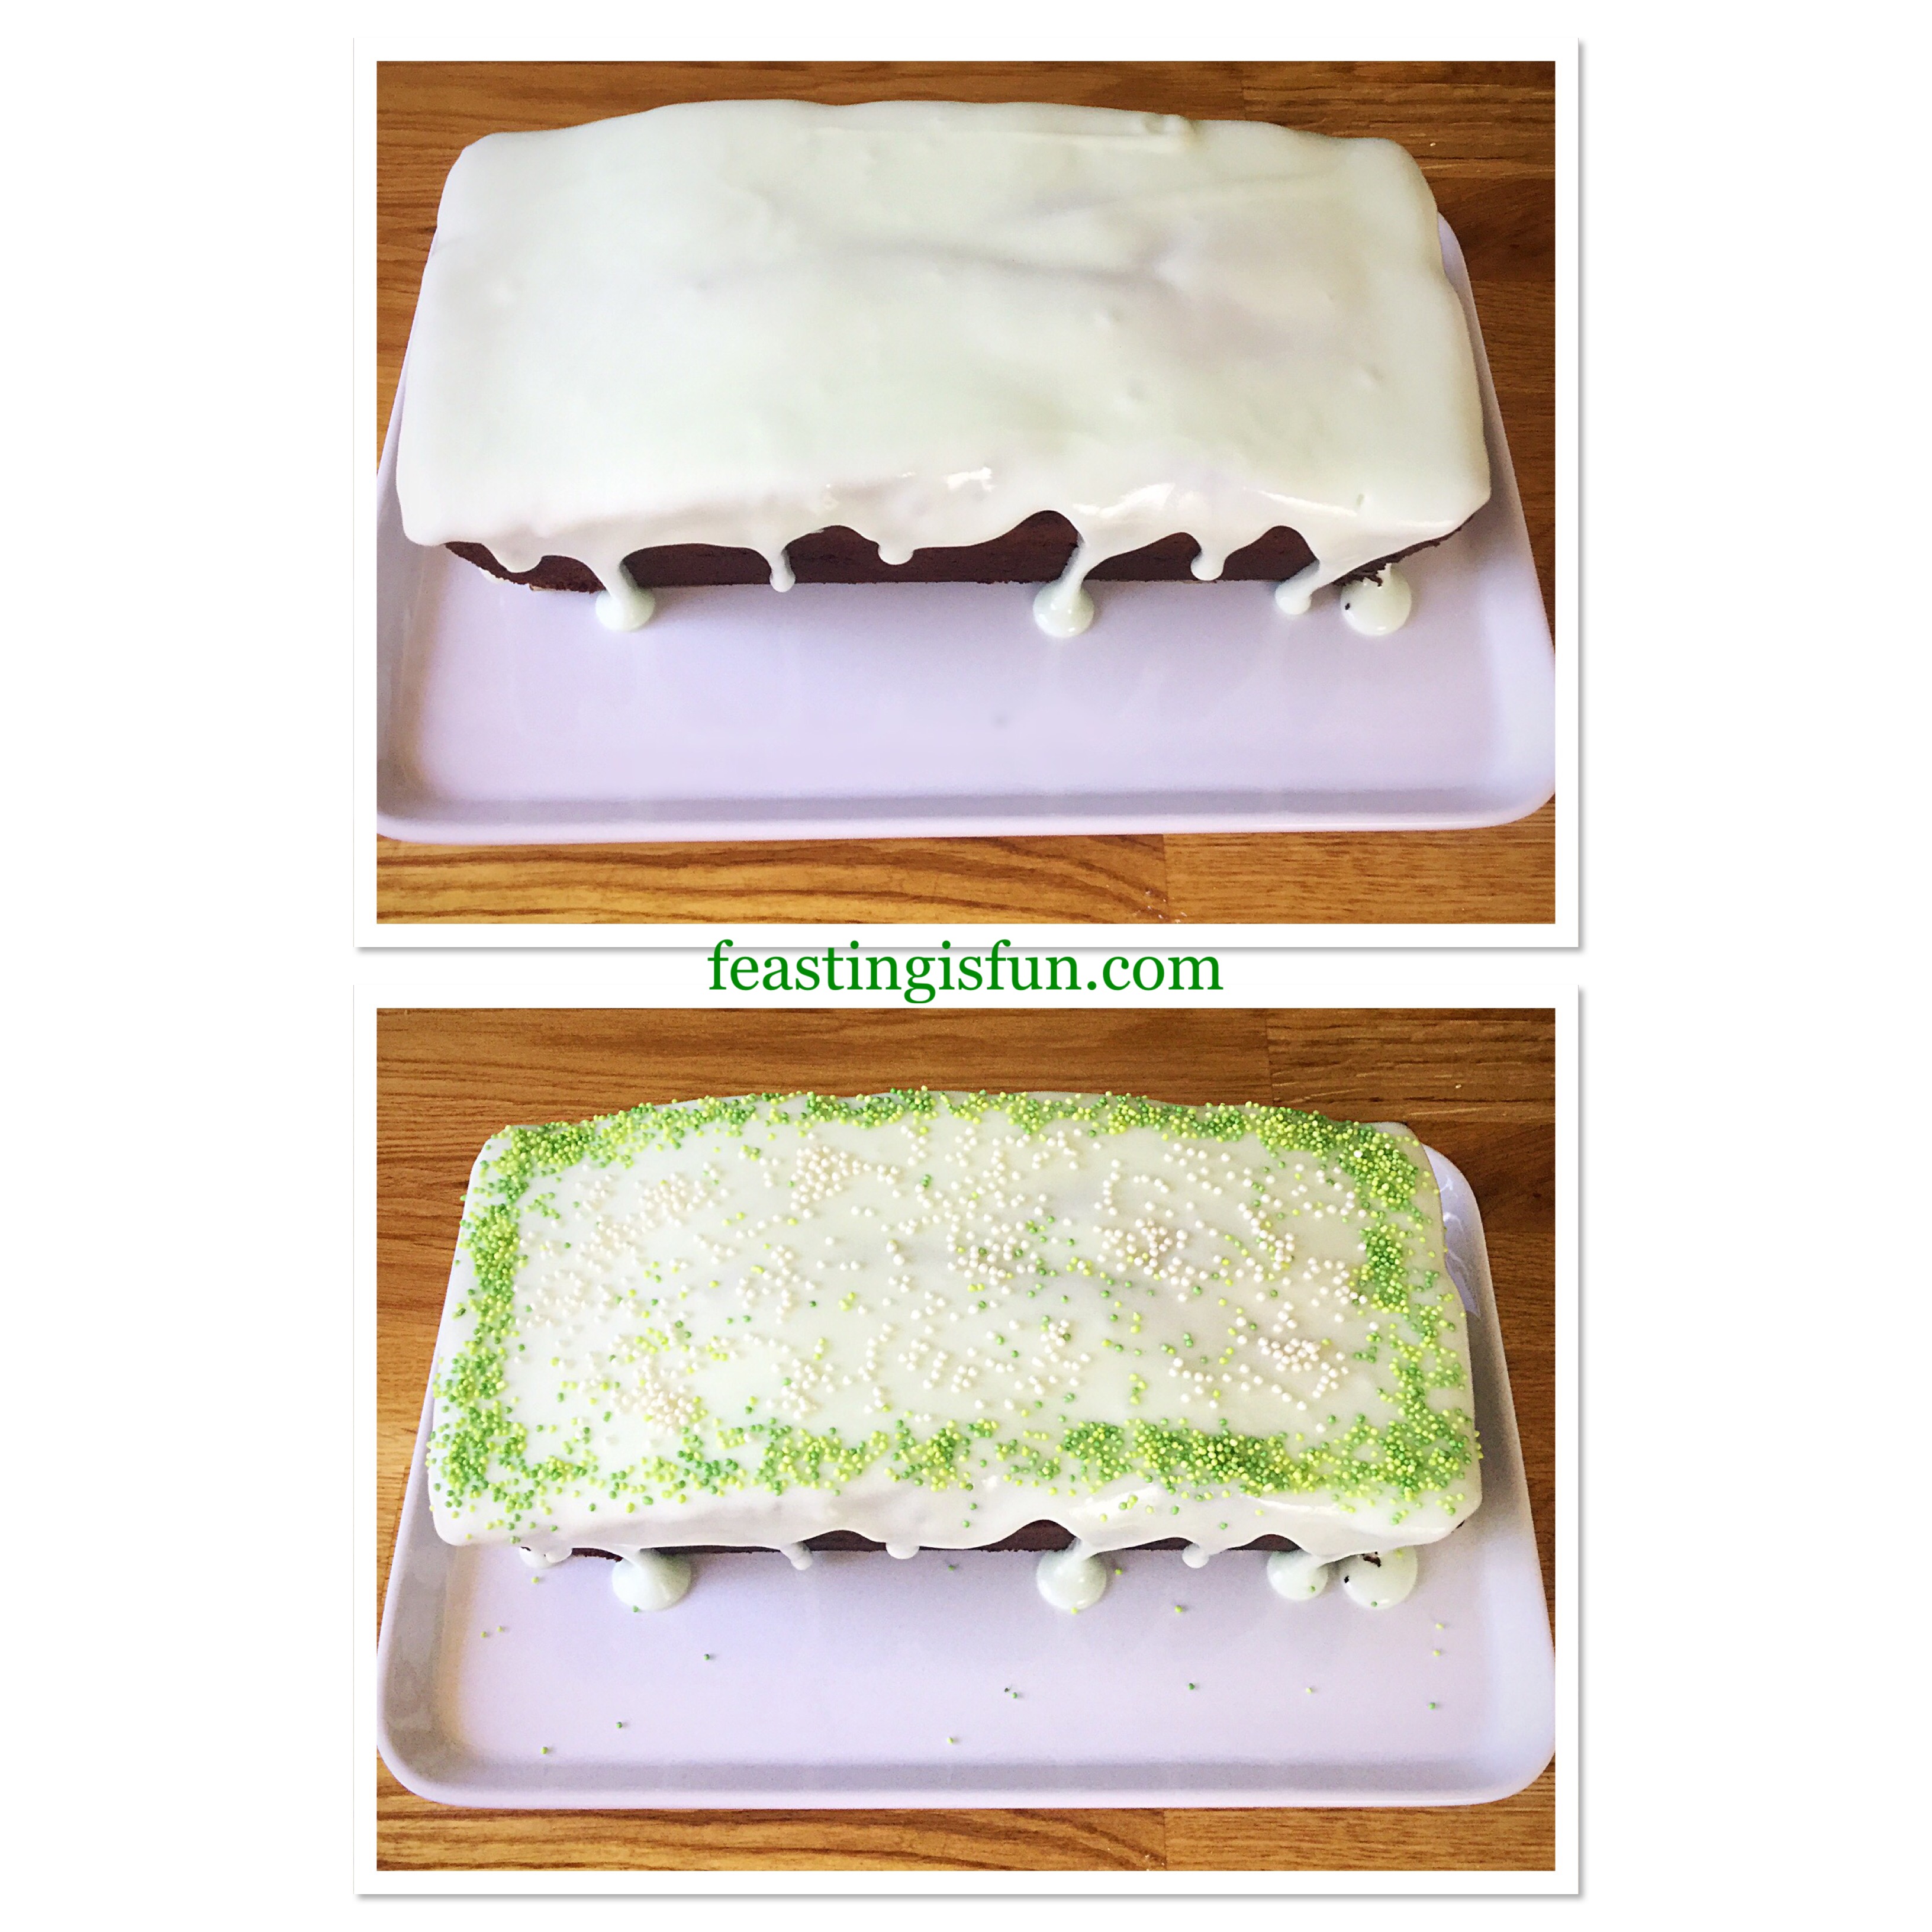
Spoon the icing over the cake so that the top is completely covered. Use the spoon to encourage the icing to drip around the sides.
Finally, sprinkle the coloured sugar balls around the outside edge of the icing before it sets. And then sprinkle the white balls inside the border.
Icing and decorating the Mint Chocolate Chip Drizzle Cake
Allow the icing to set before slicing the cake for serving.
Mint Chocolate Chip Drizzle Cake
Slice and serve with a smile.
Store any leftover cake in an airtight container or wrapped in cling film. Also during warmer weather I keep the cake refrigerated. Eat within 5 days of making.
If you have enjoyed this recipe for Mint Chocolate Chip Drizzle Cake you may also like these:
While I don’t eat cake everyday, I enjoy making them. Although my preference leans towards more savoury flavours, many of my family and especially my husband do have a sweet tooth. Sharing my bakes is important to me and loaf cakes travel well. Also, they are easy to portion, either as a whole slice or cut in half so that younger ones can have a finger of cake. Most importantly the cakes I bake are always made with love and the minimum of artificial ingredients.
Whatever you are making, baking and creating in your kitchens have fun preparing and sharing your feast.
Sammie xx
No part of this post may be reproduced or duplicated without the written permission of the owner. Please see my Disclosure Policy.
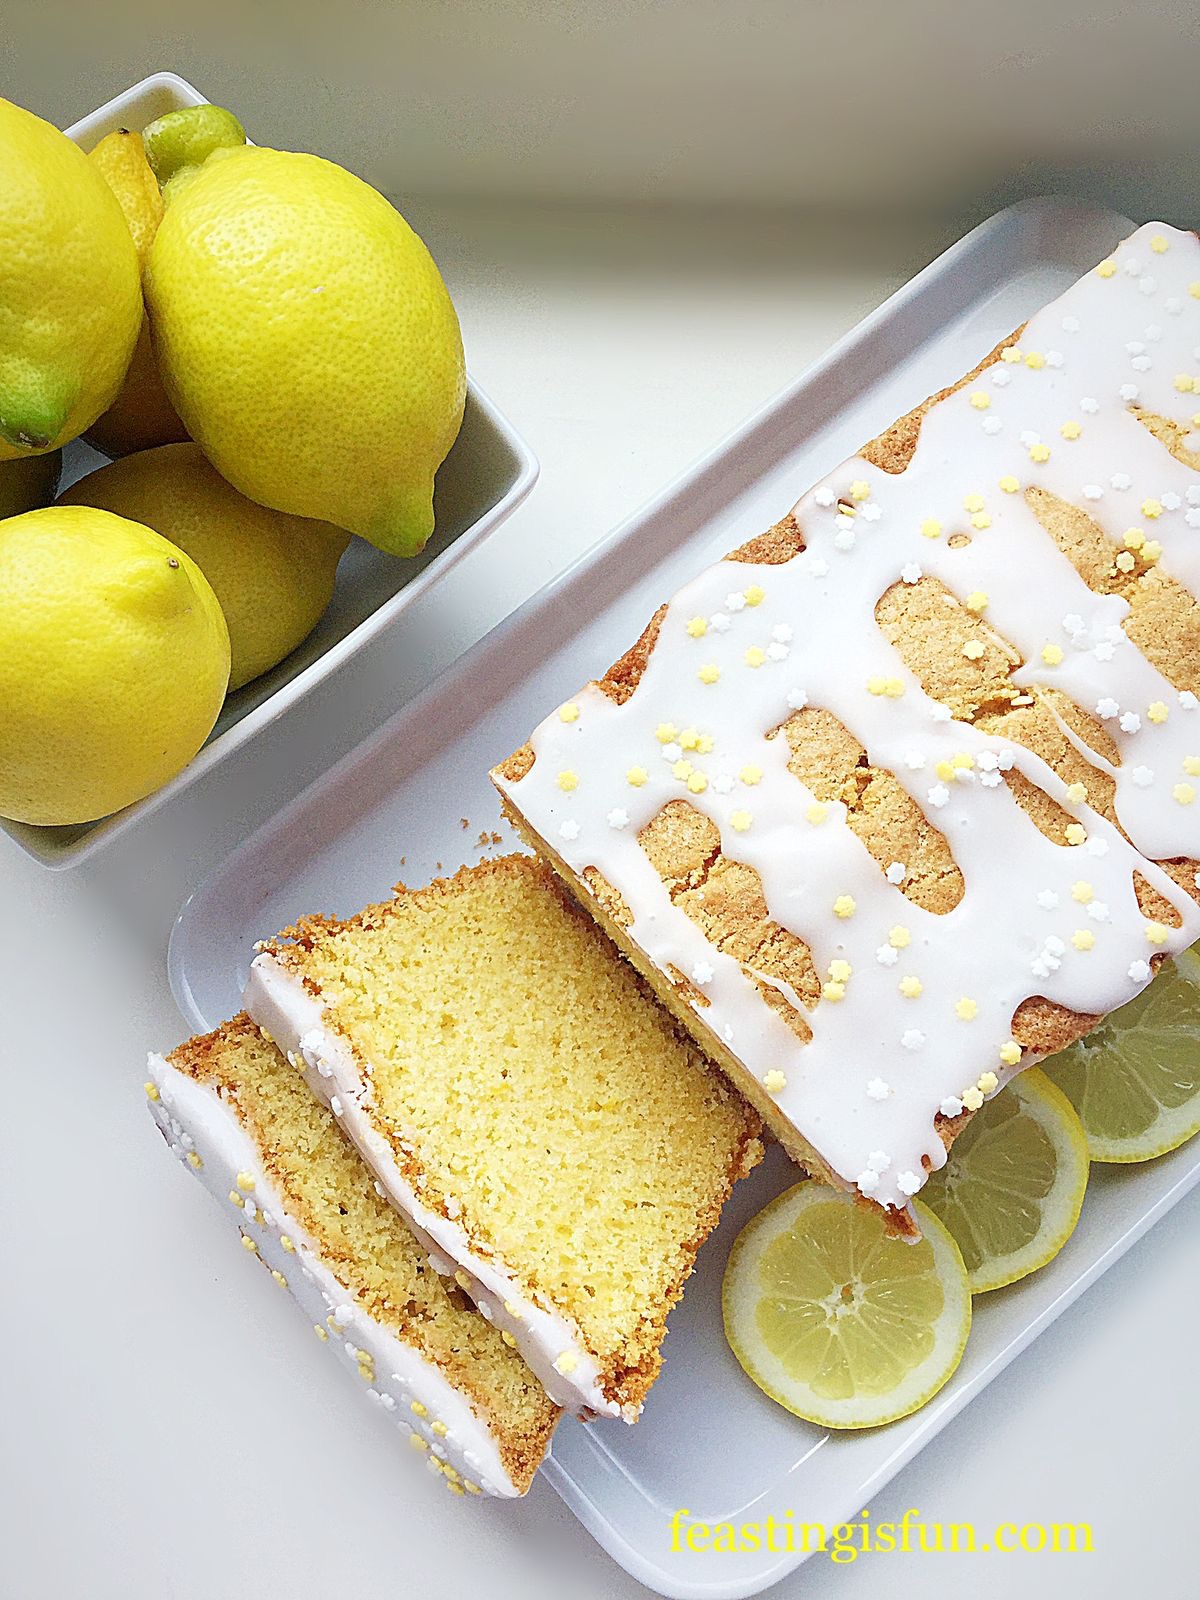
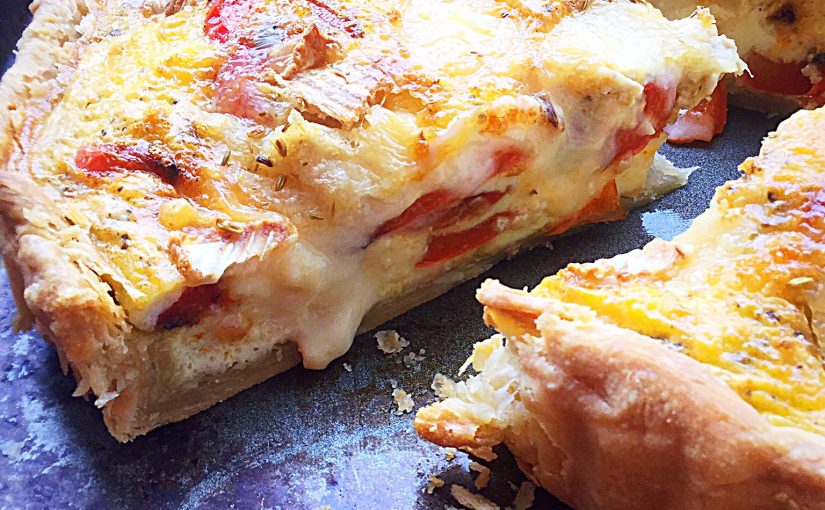
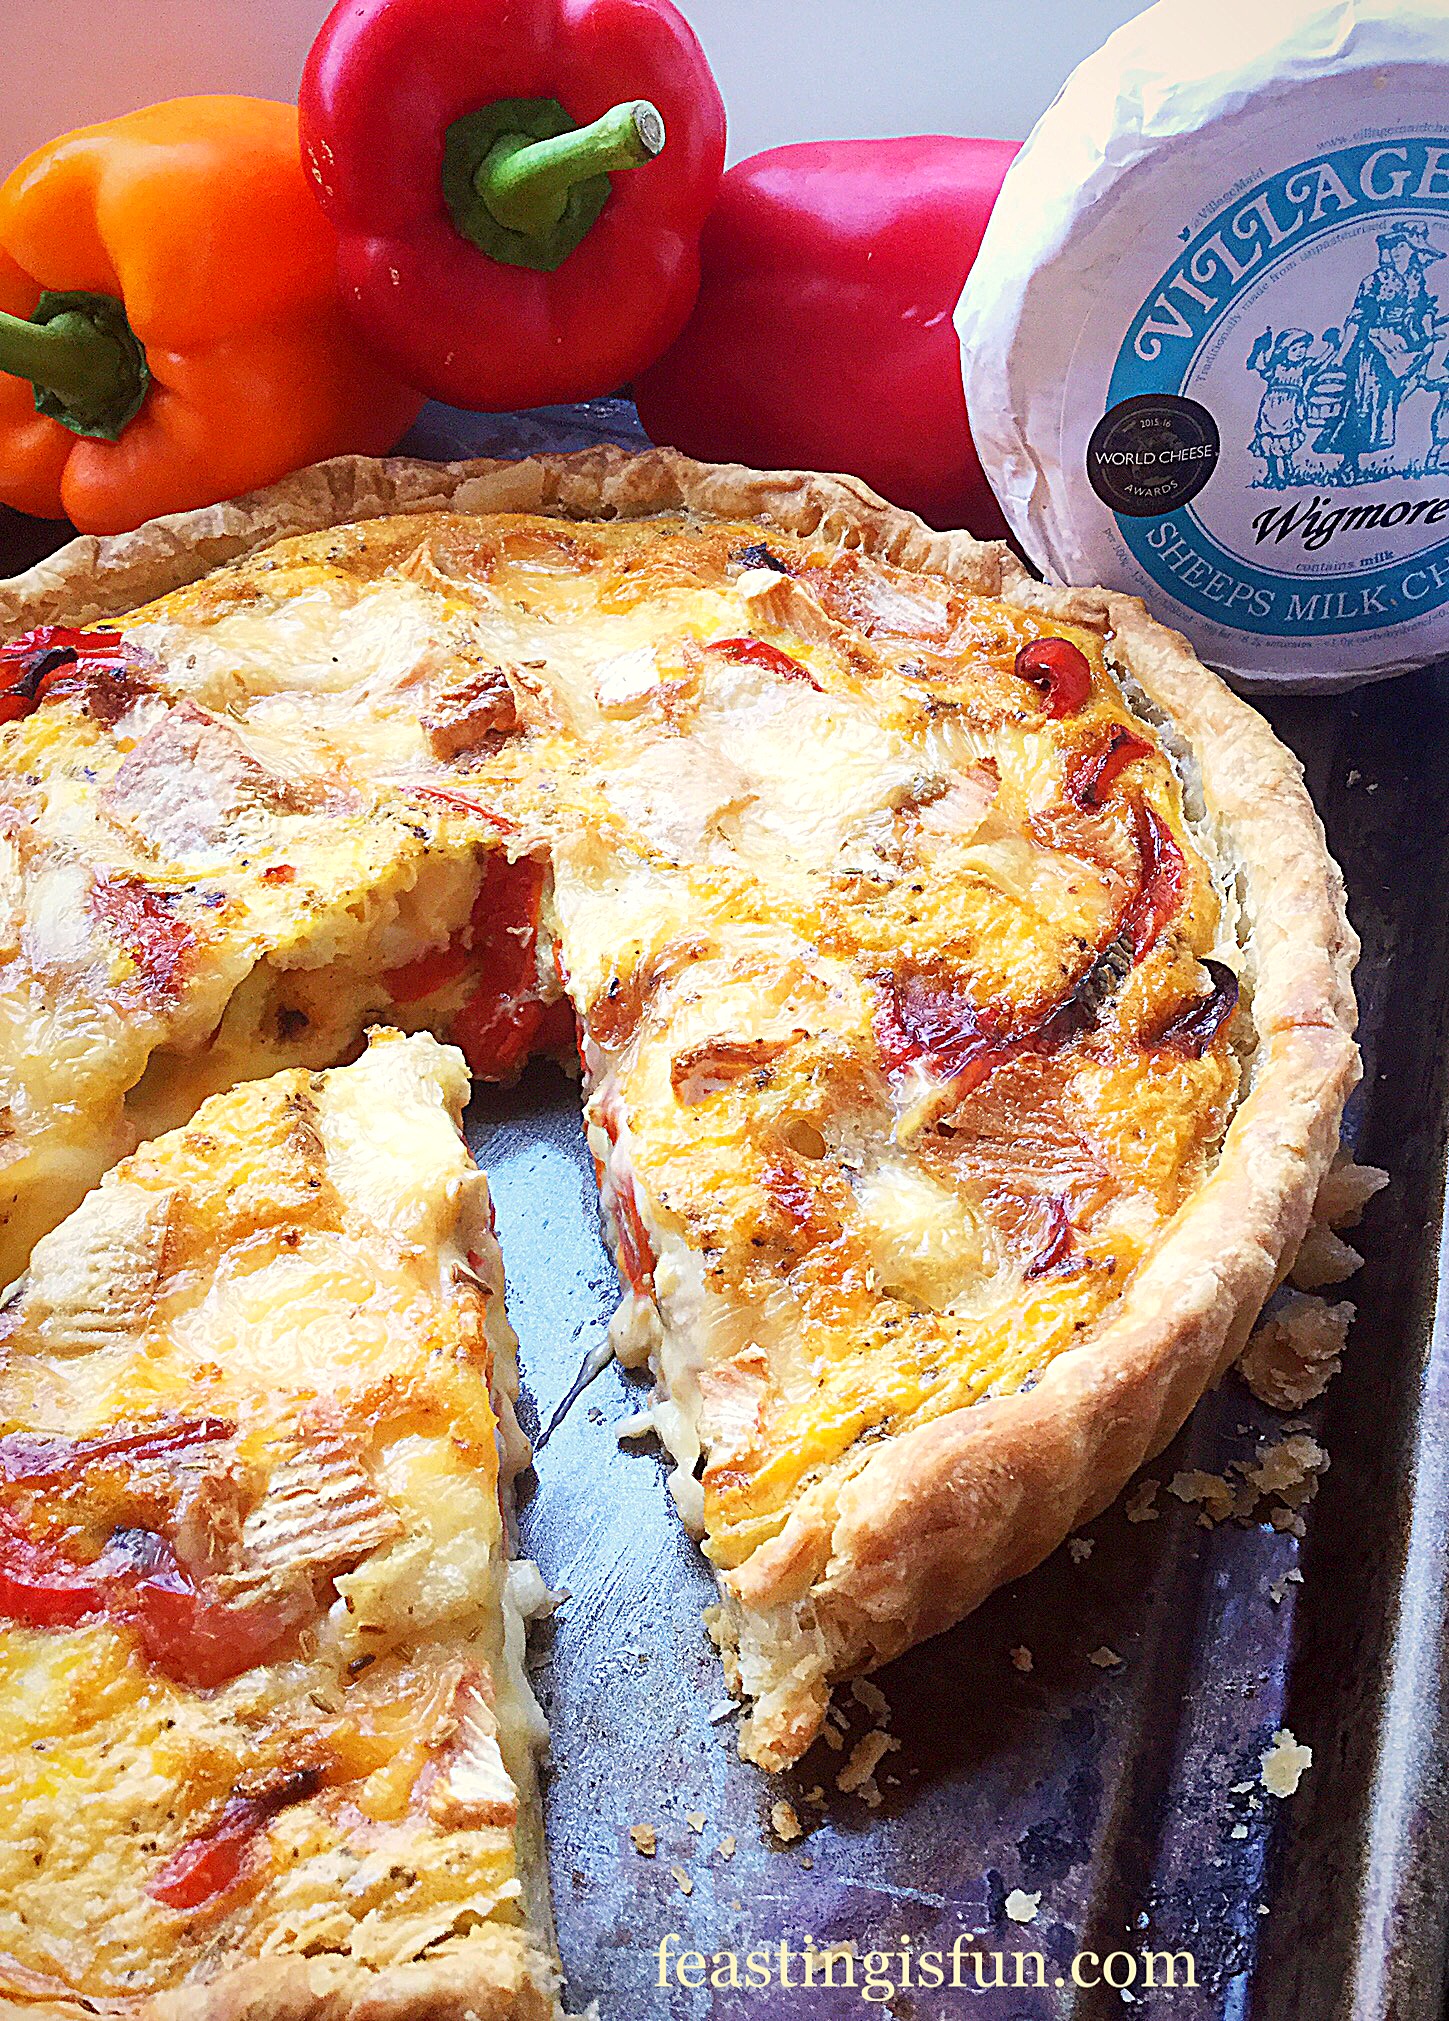
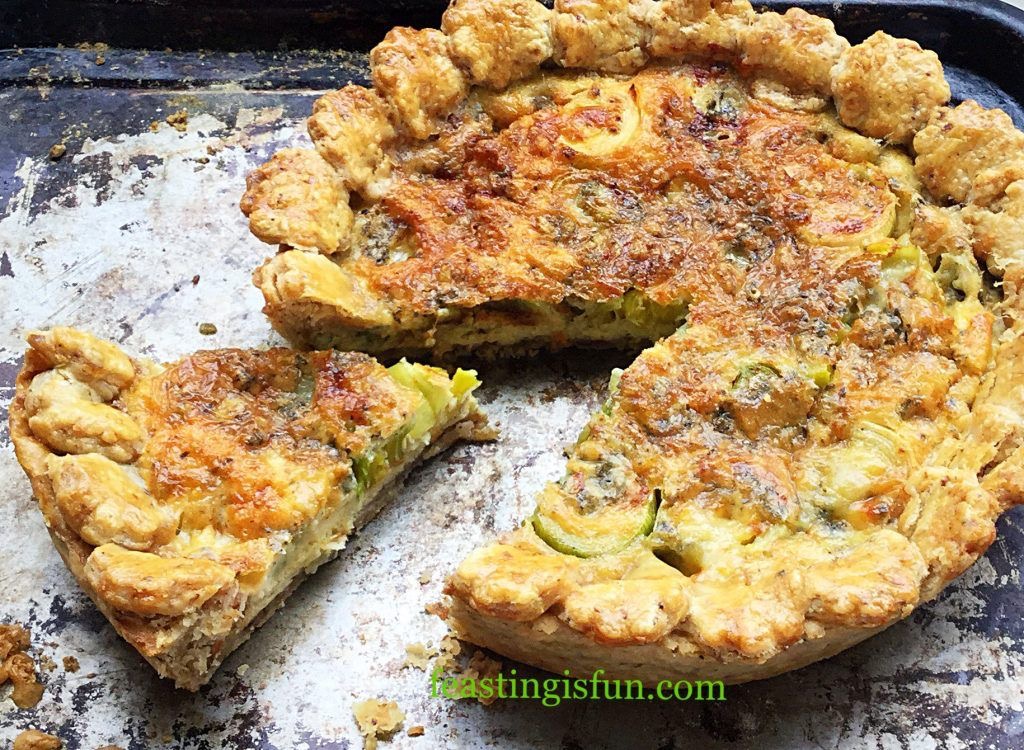
Wow the summer of 2018 has proved to be a scorcher so far. And I have to say I’m loving it! Flinging open the windows and doors and basking in the fresh, warm air. I was born in the Winter, yet I love the Summer sunshine. Because of the heat I have adjusted the way I go about my day. I’ve always been more of a morning person, however the hike in temperatures has got me organised. So I make dinner as early in the day as I can. And this Wigmore Cheese Red Pepper Tart is super easy to make, ready to be eaten at room temperature later in the day.
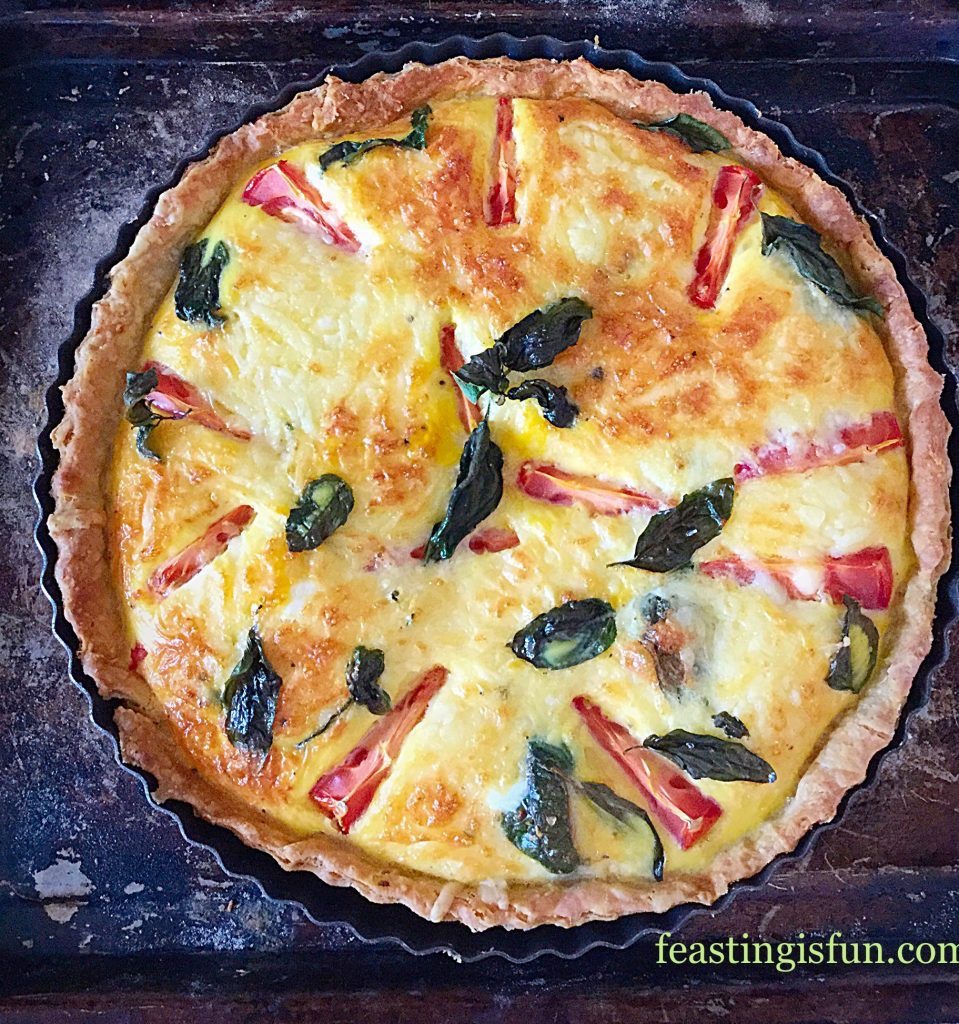
Wigmore Cheese Red Pepper Tart
Artisan Wigmore Cheese, an award winner:
Wigmore Cheese, the dominant flavour at the heart of this tart is a semi soft, unpasteurised, ewes milk cheese. A handmade, washed curd cheese, with a flavour and texture similar to Camembert and Brie. Yet it has a flavour all of its own, slightly saltier with less of a nasal hit than a fully ripe Brie. Baked in this quiche style tart it’s flavour permeates throughout, balanced beautifully with sweet, softened red bell peppers.
Wigmore Cheese Red Pepper Tart
Perhaps unusually, I’ve added a subtle hint of anise flavour to the tart with the addition of fennel seeds. Resulting in a Mediterranean taste to this all butter pastry tart. While you may be tempted to buy the pastry, I strongly suggest you try my recipe. It is absolutely foolproof and is consistently good. Since the recipe makes double the amount needed it’s a bonus to freeze half, knowing next time you make this tart all that’s needed is for it to be defrosted overnight in the fridge!
200g/7oz Wigmore Semi Soft Cheese available from Village Maid Cheese if you are not in the U.K. a great substitute would be Camembert or Brie style cheeses with a soft, edible rind.
3 Red Bell Peppers (400g/14oz sliced de-seeded red pepper)
Note – You will need a 25cm x 5cm (10in x 2in) preferably loose bottom round tart tin for this recipe.
First of all if making the pastry from scratch chill it in the fridge for 2 hours before using. Especially during this super warm weather. Otherwise defrost ready made pastry in the fridge overnight.
Preheat the oven to 200C/180C fan, 400F, gas mark 6.
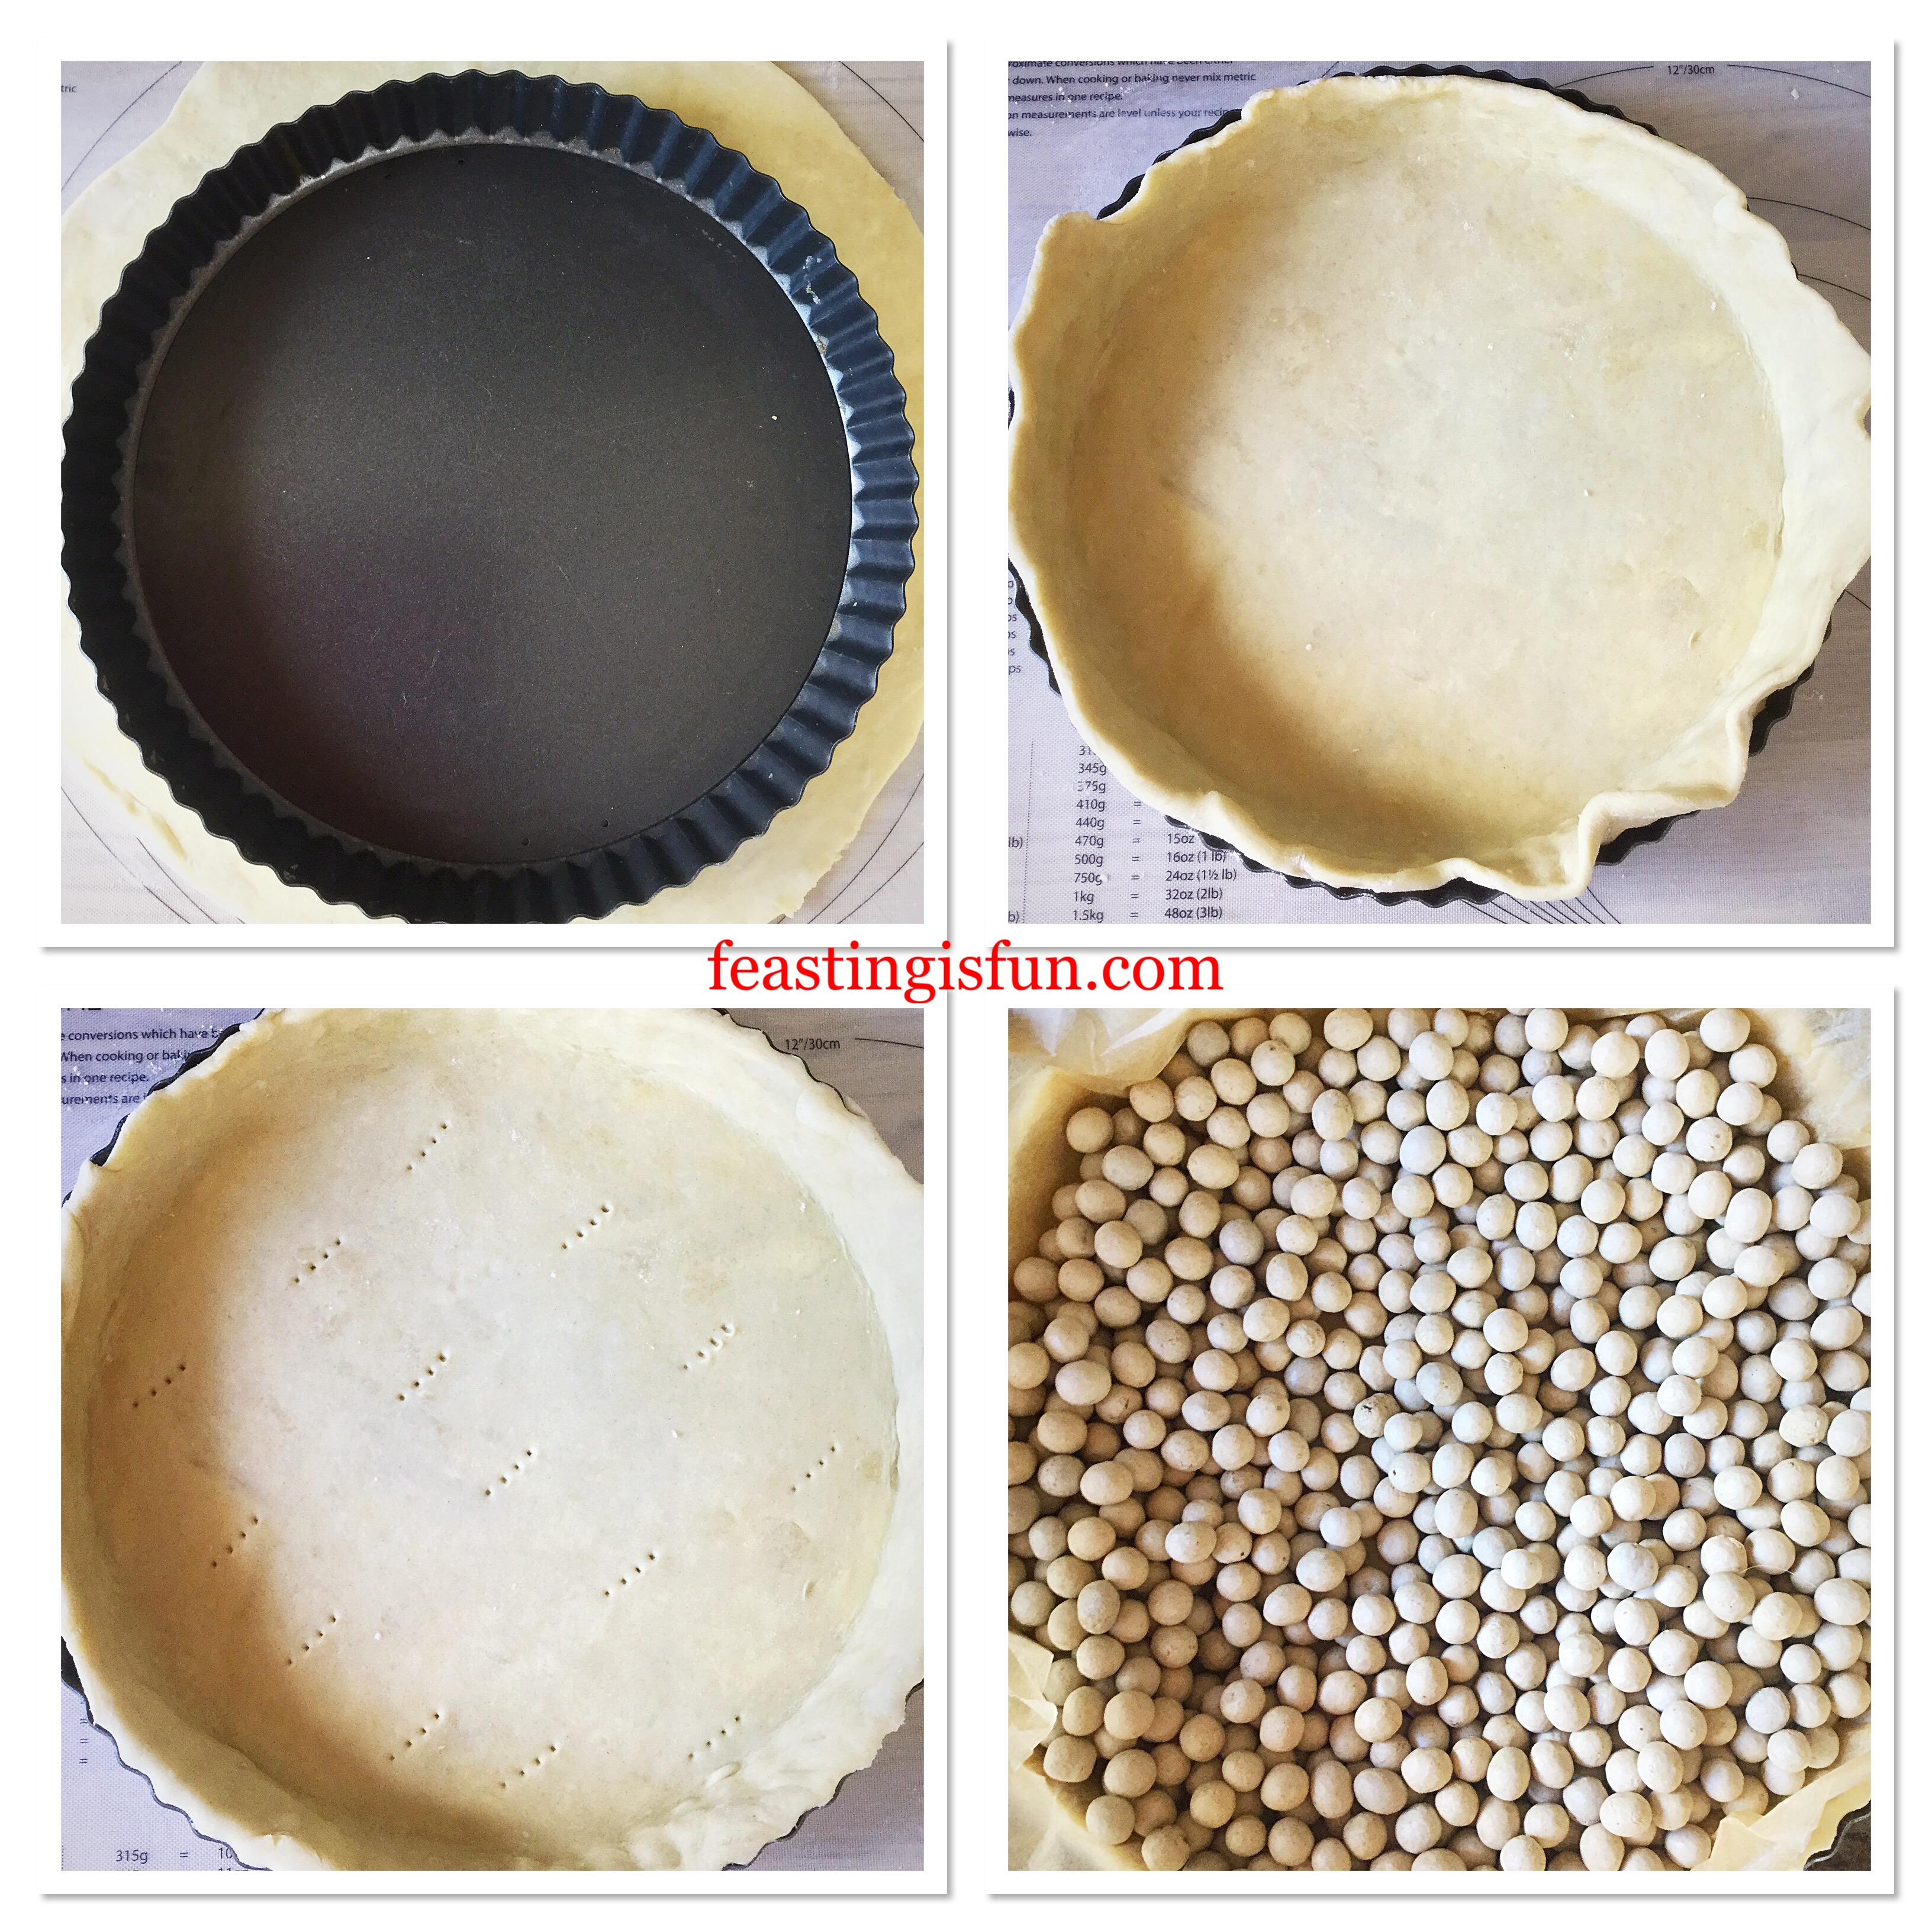
Lightly flour the worktop and roll out the pastry so that it is slightly bigger than the width and sides of the tart tin.
Roll the pastry around the rolling pin and transfer to the tin.
Most importantly do not stretch the pastry. Ease it gently into the tin taking care to press it into the crease between the base and sides.
Trim any excess pastry and then dock the base with a fork.
Place baking parchment directly on to the pastry and fill with baking beans.
Creating the all butter tart crust.
Place the tart tin on to a baking sheet and put into the centre of the preheated oven.
Bake for 15 minutes, remove the baking beans and parchment paper, return the tart back to the oven for a further 10 minutes. Once baked, remove and set to one side.
Reduce the oven heat to 190C/170C fan, 325F, gas mark 3.
Filling the tart:
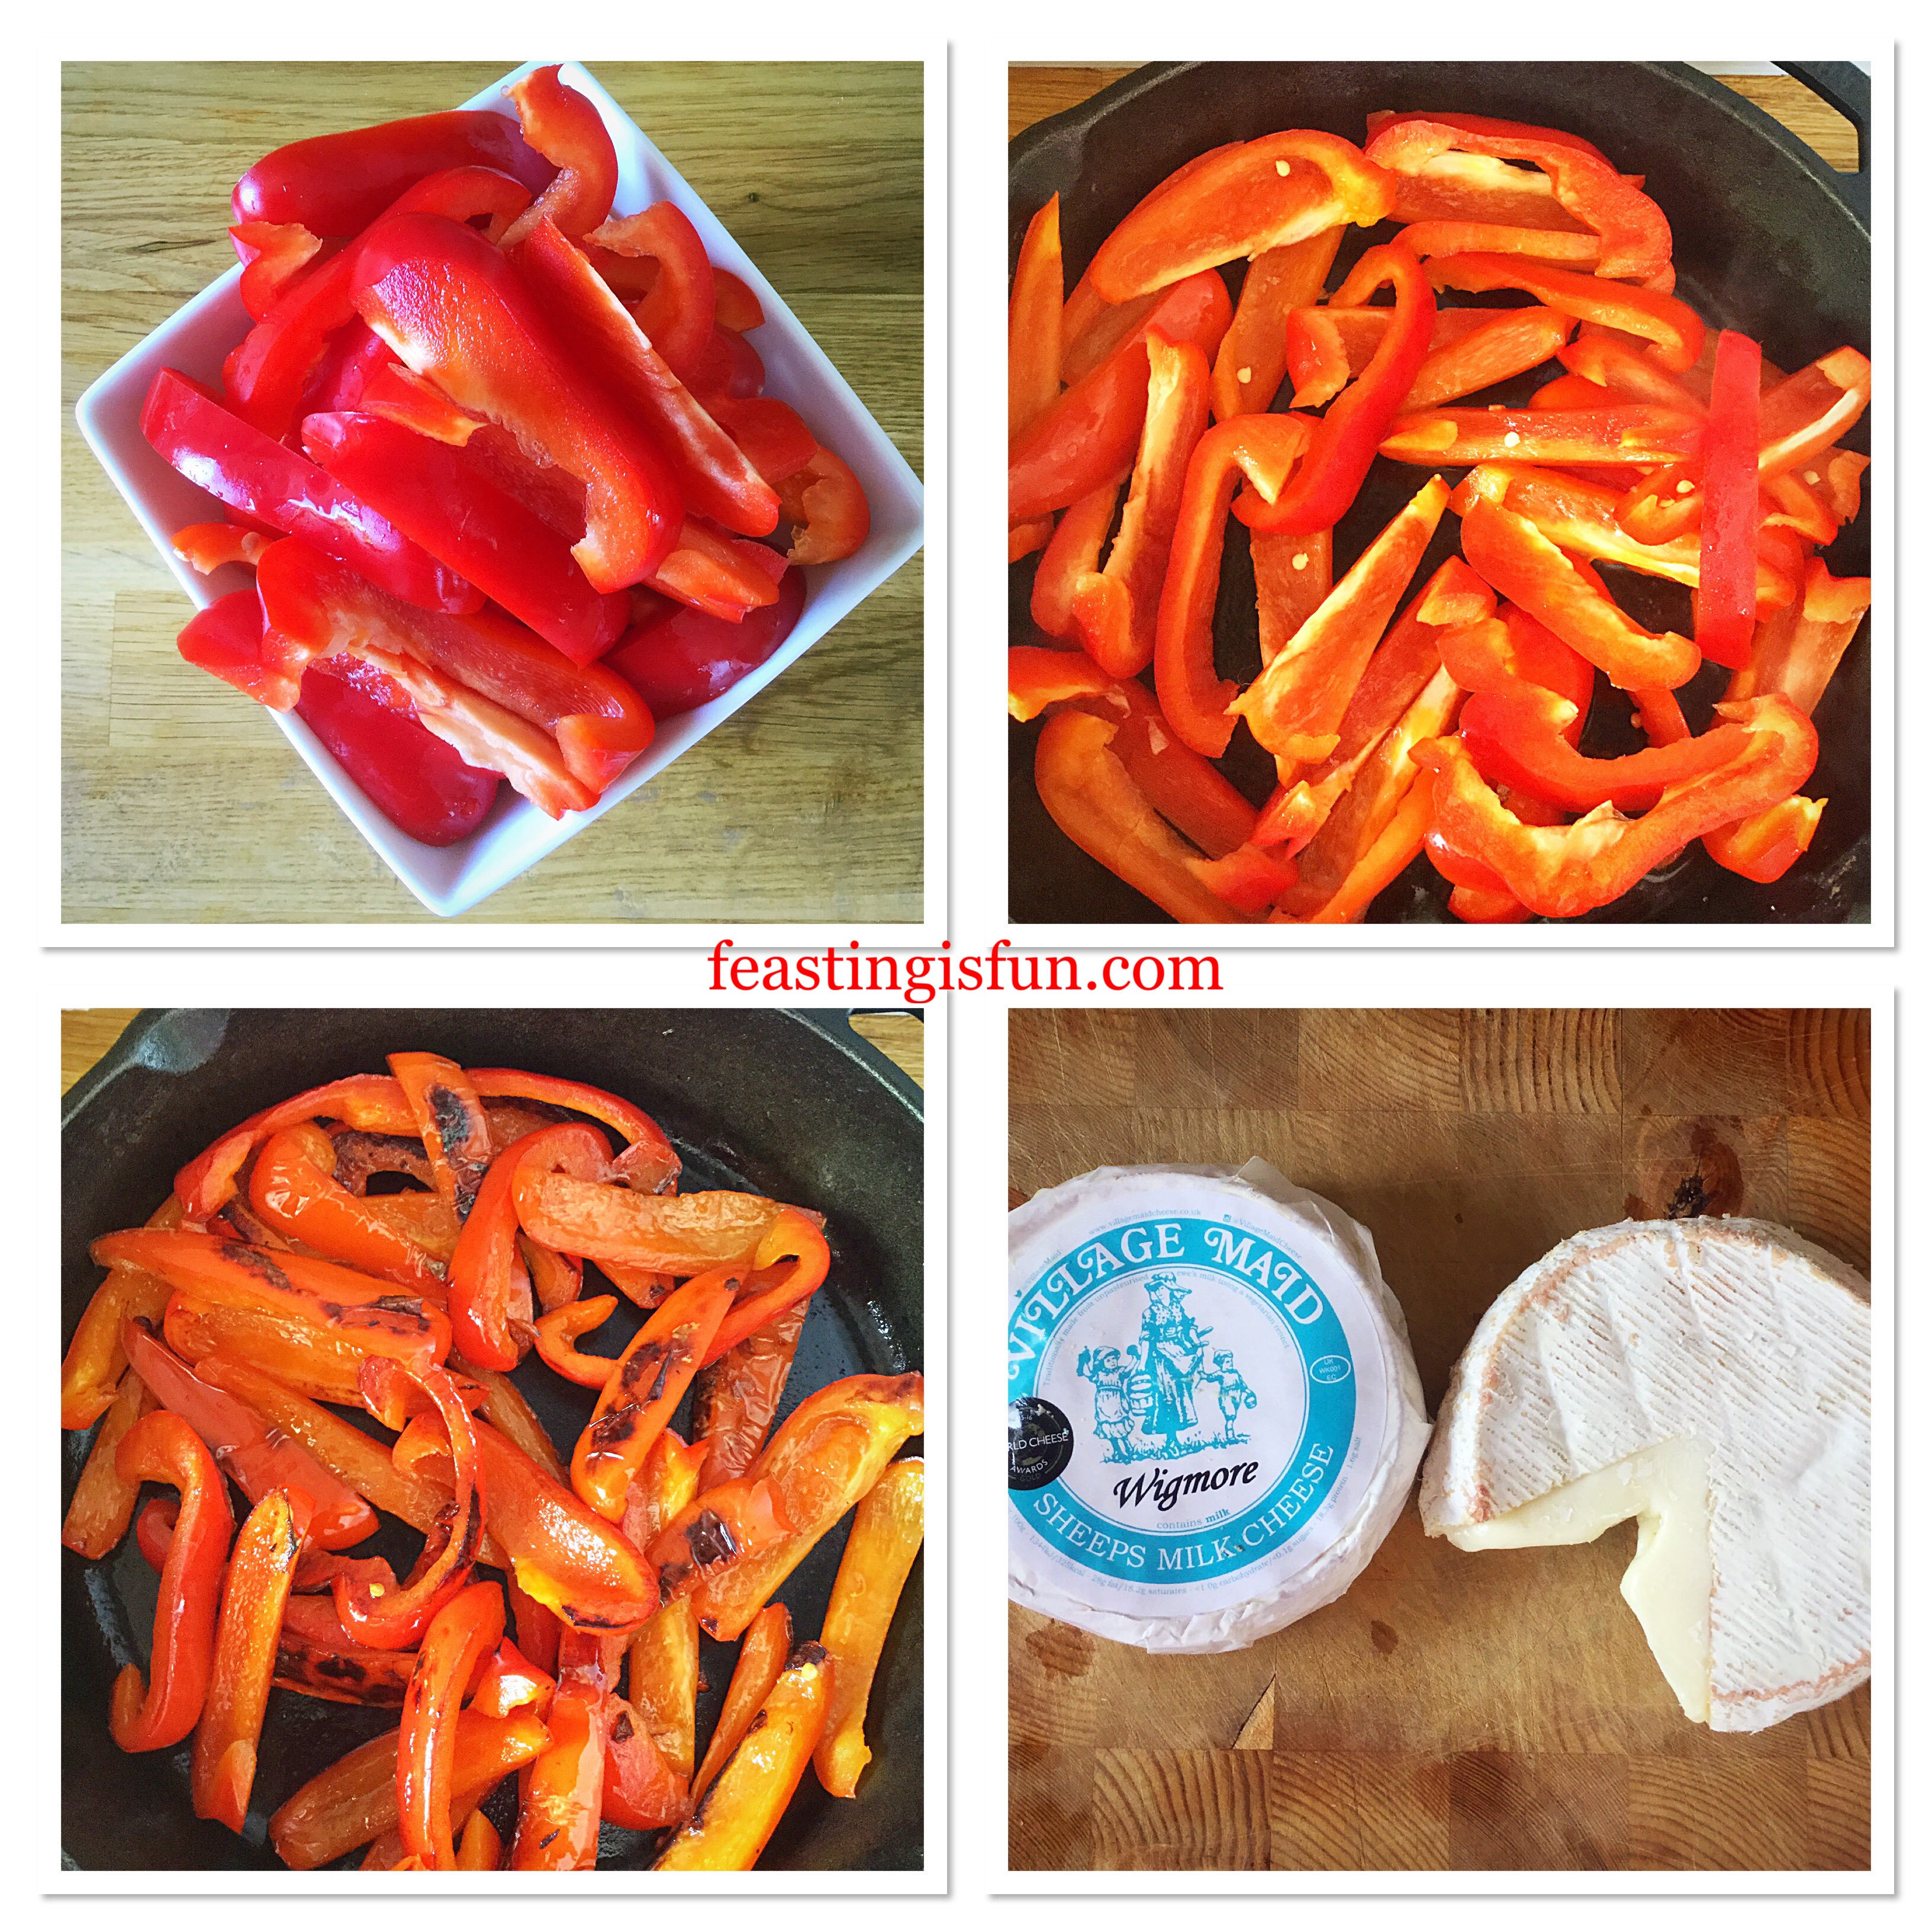
While the tart case is baking prepare the filling.
Remove the seeds and green part from the peppers. Slice lengthways to produce long strips.
Pour the oil into a pan over a medium heat. Add the peppers and sauté for 10-15 minutes until slightly softened and reduced in size.
Sautéing the red peppers.
Cut up the cheese into bite size chunks. It helps if the cheese is fridge cold before cutting.
Into a jug add all 8 eggs, black pepper and fennel seeds. Whisk with a fork to combine.
Cover the base of the tart with sautéed peppers.
Next add the chunks of cheese, spread evenly around.
Finally pour over the seasoned, whisked eggs.
Filling the Wigmore Cheese Red Pepper Tart ready for baking.
Baking the tart:
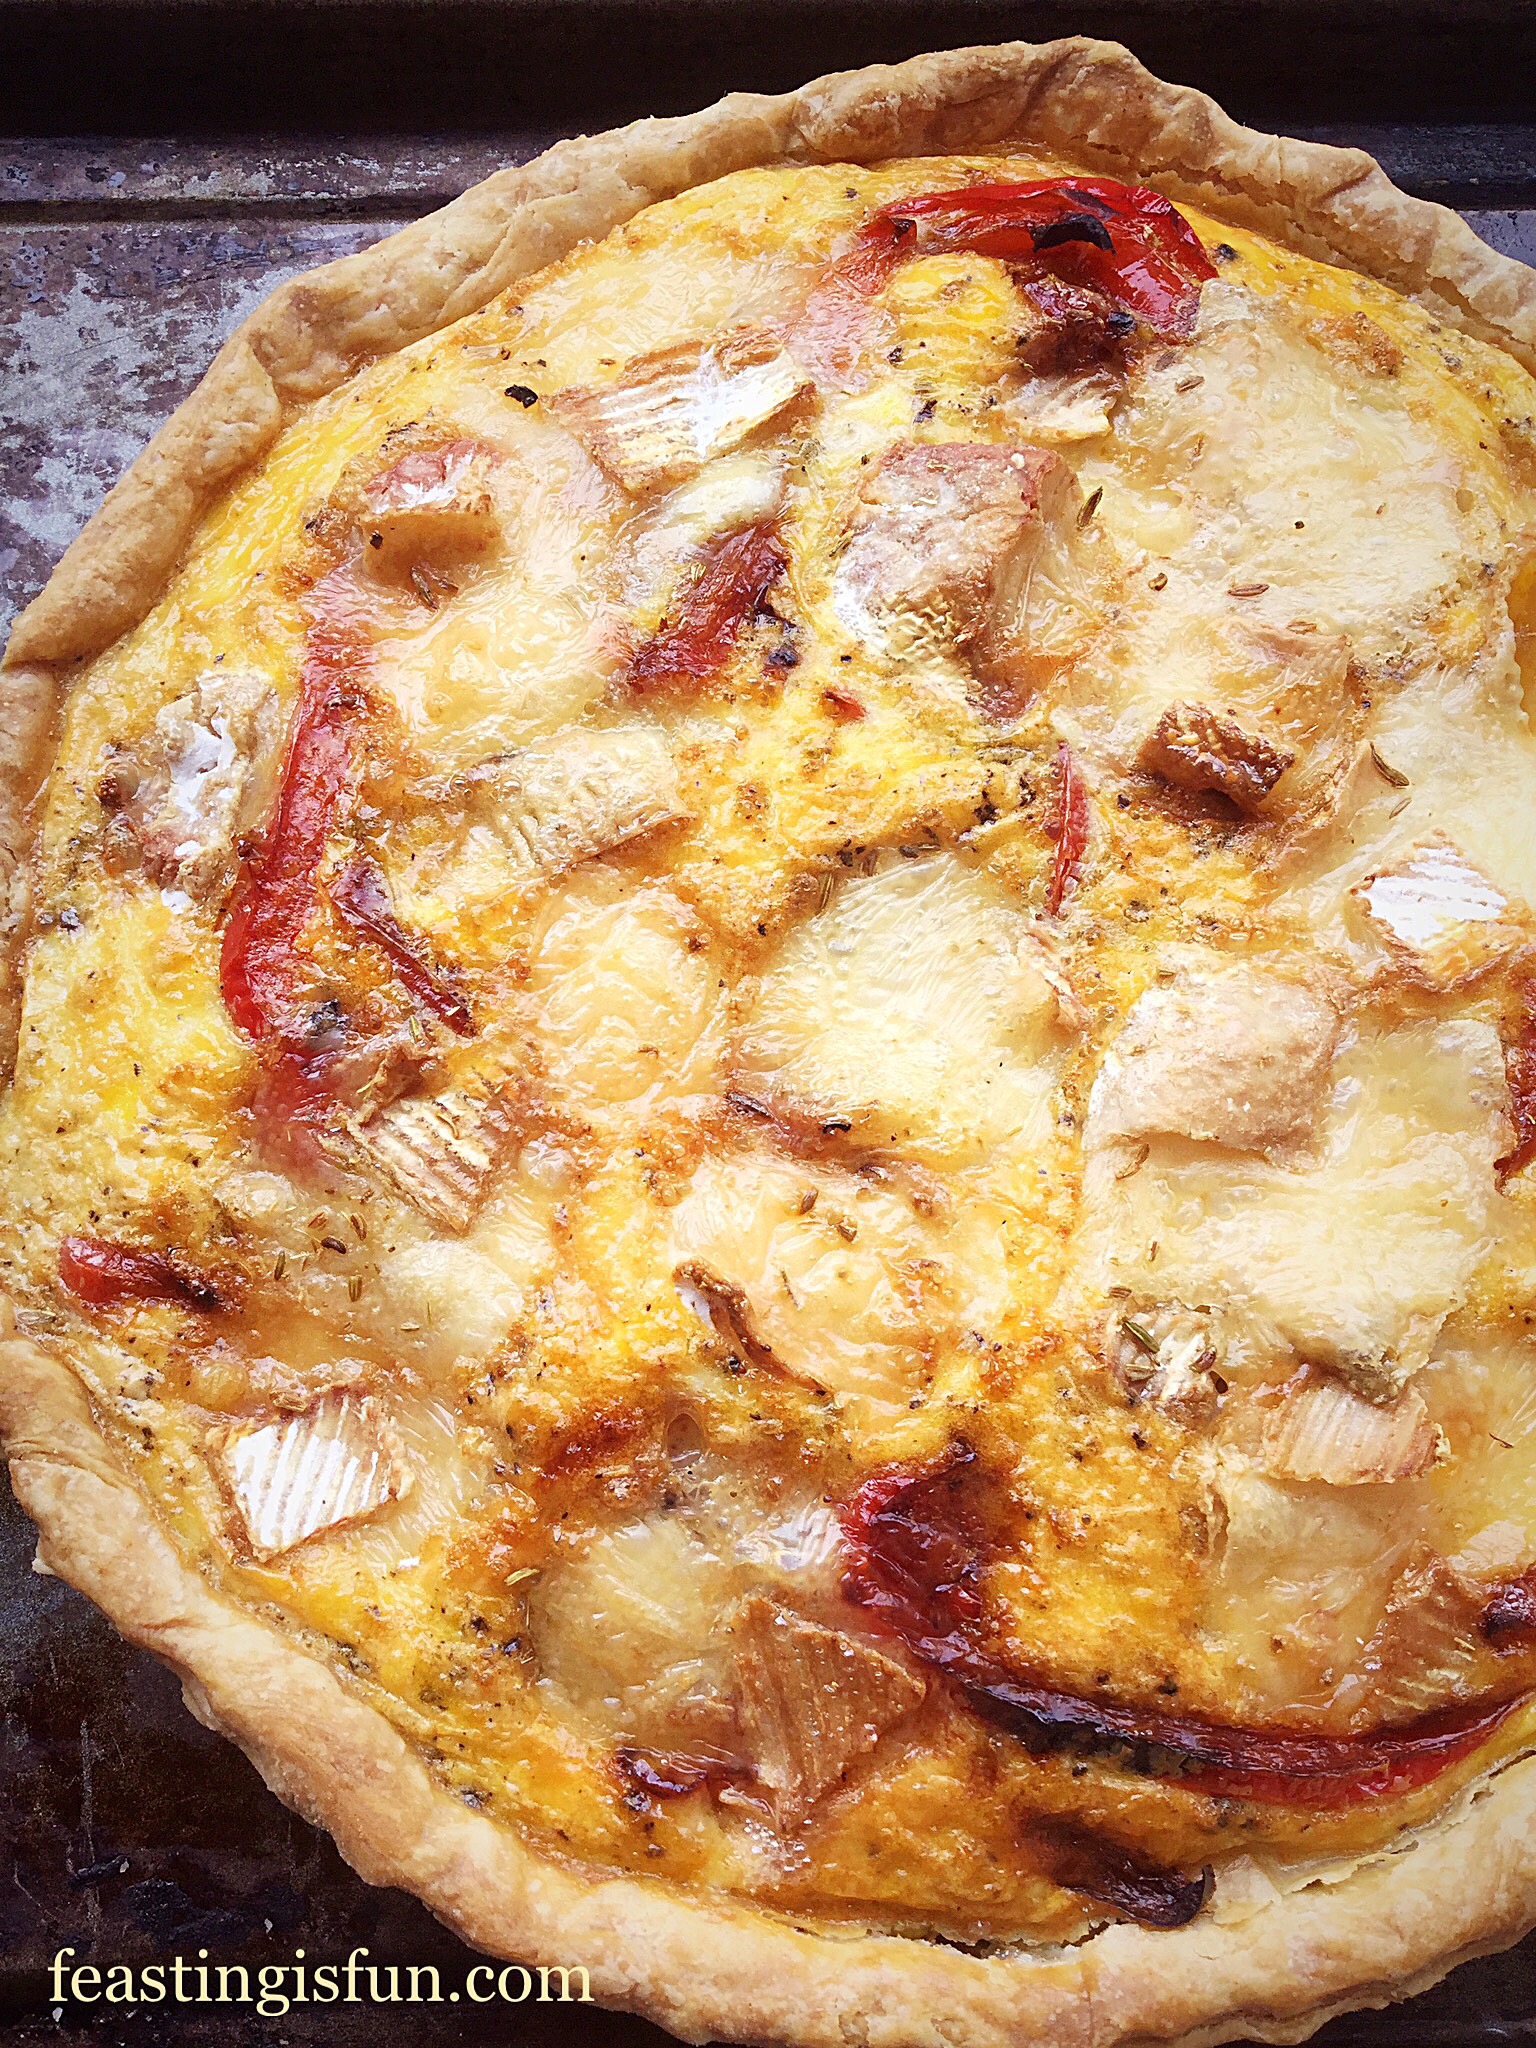
Place the tart into the centre of the oven and bake for 30-35 minutes.
The tart is baked when the top is set and there is no jiggle in the centre.
As soon as the Wigmore Cheese Red Pepper Tart is baked remove from the oven and set to one side.
Wigmore Cheese Red Pepper Tart
If serving as soon as baked allow the tart to settle for 10 minutes before slicing.
Wigmore Cheese Red Pepper Tart
I love serving this tart when it is warm. At the moment this means room temperature! However if making during a cooler time of the year simply reheat in a medium oven for 10 minutes to lightly warm through.
Store any leftover tart in an airtight container or wrapped in cling film and refrigerate. Eat within 3 days.
Due to the moisture content of the peppers I would advise against freezing.
If you have enjoyed this recipe for Wigmore Cheese Red Pepper Tart you may also like these:
Making pastry and baking during this unusually hot summer may seem like the last thing anyone would want to do. Yet, by mid morning dinner is made. I quite often make my Tangy Lemon Potato Salad at the same time, as it’s absolutely delicious, fridge cold, served alongside with a salad. Also when using the tasty Wigmore Cheese, this recipe only uses half a wheel, leaving plenty for you to enjoy with apples, crackers and a cold glass of wine on a Summer’s evening.
Whatever you are making, baking and creating in your kitchens, have fun preparing and sharing your feast.
Sammie xx
Village Maid Cheese sent me the Wigmore Cheese to try. All opinions and content are my own and I was not paid to write this post. No part of this post may be reproduced or duplicated without the written permission of the owner. Please see my Disclosure Policy.
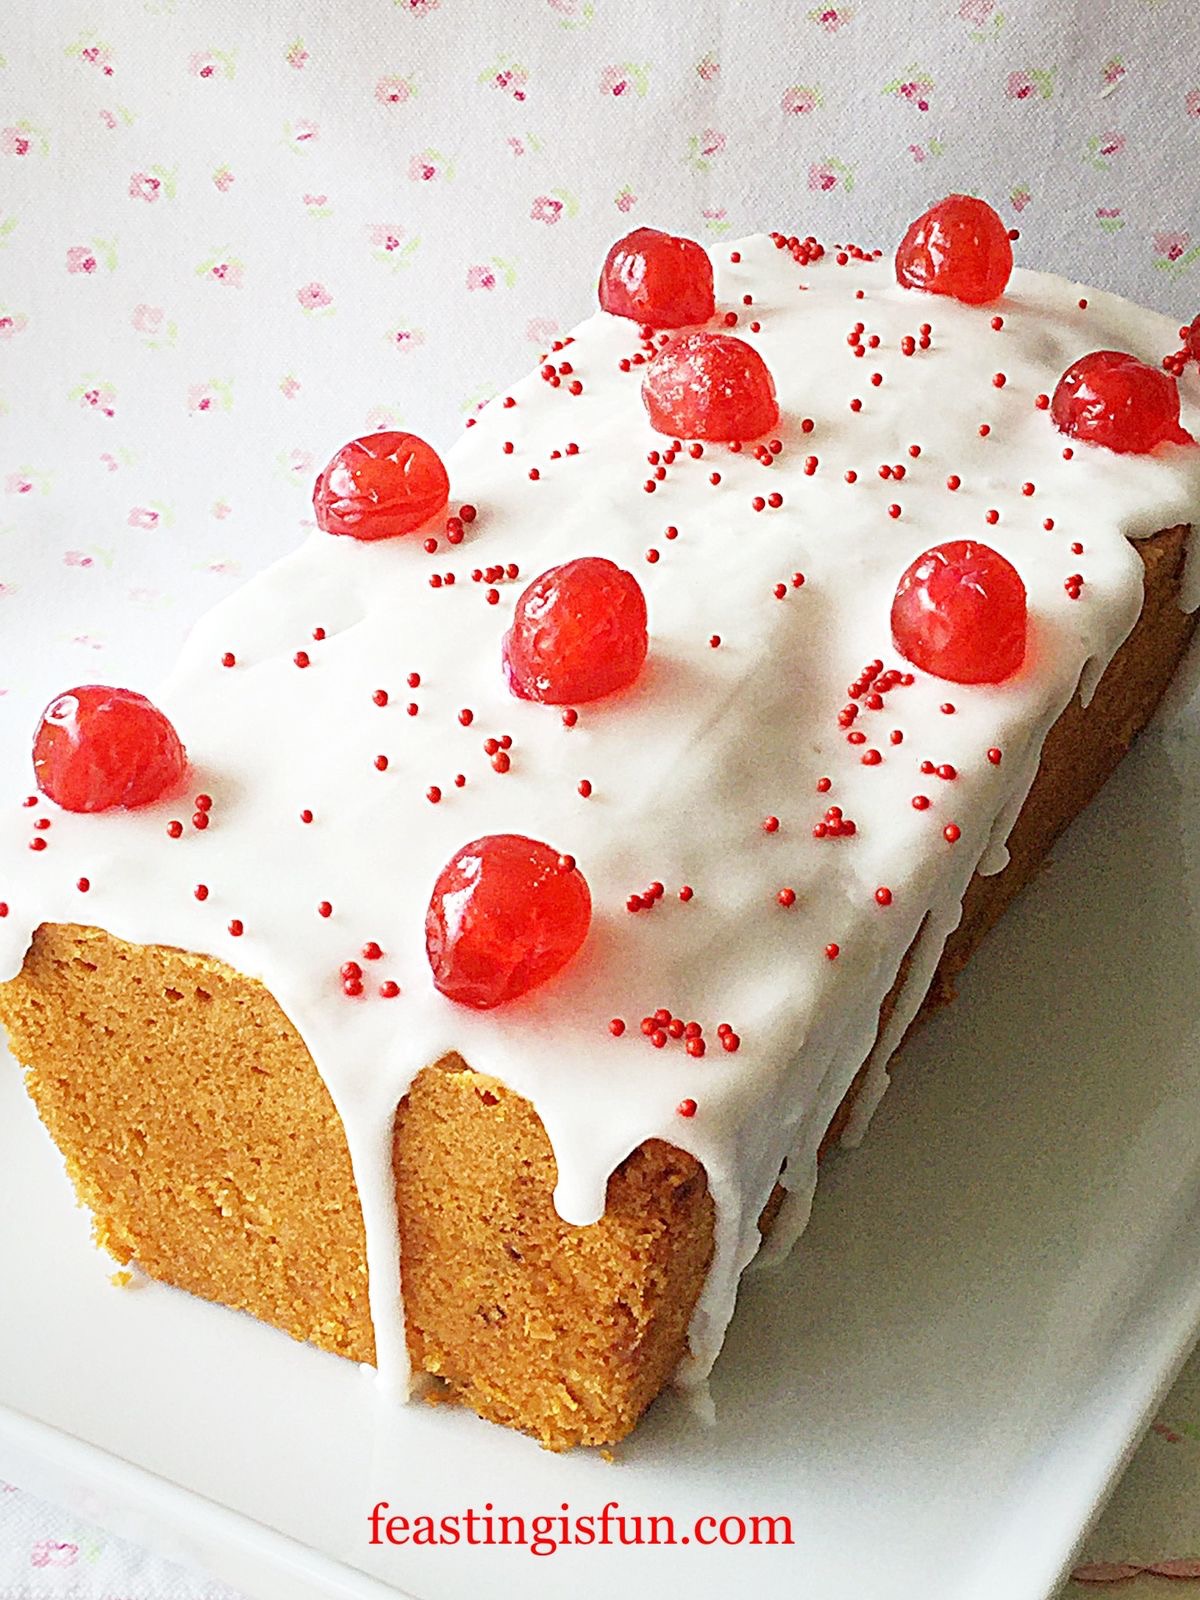
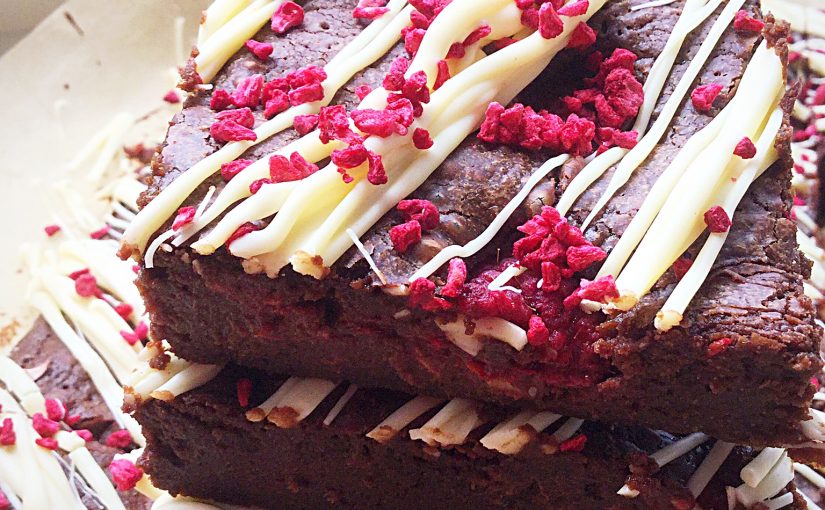
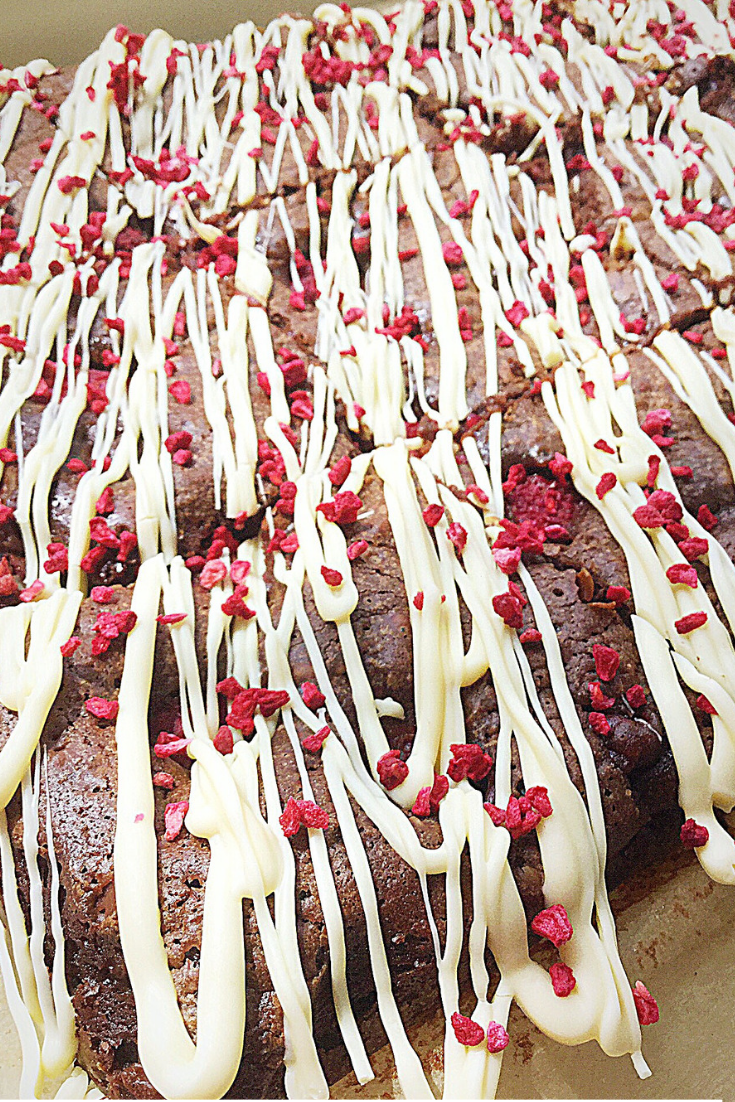
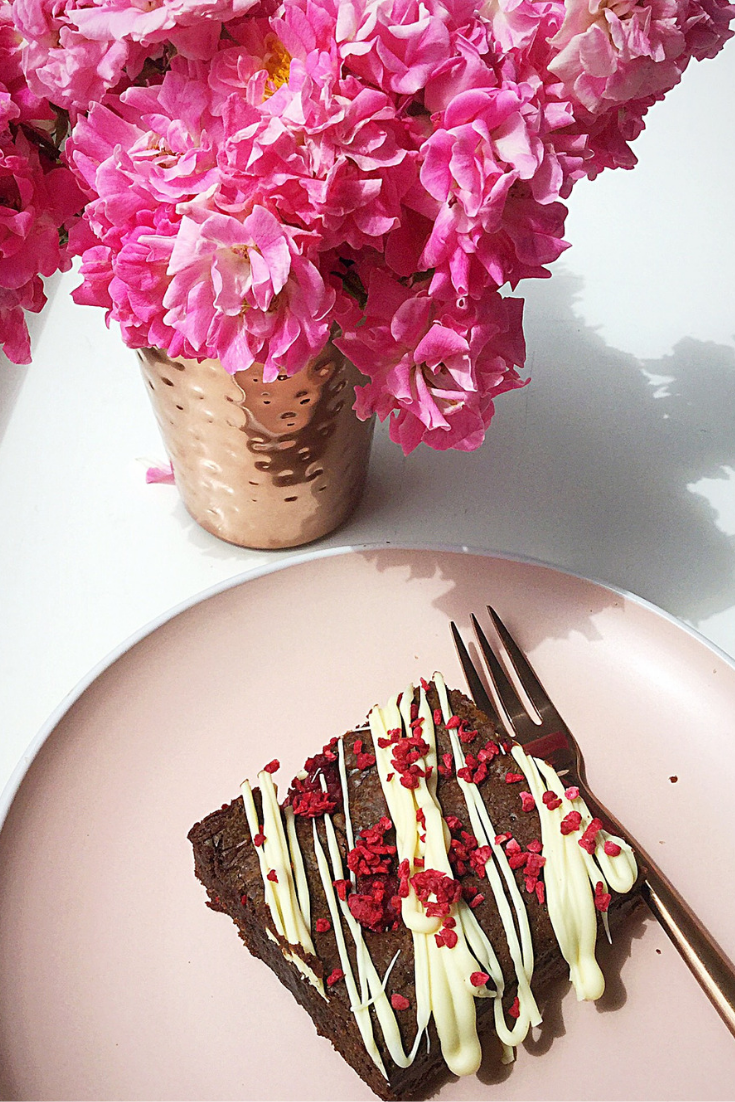
Hello everyone. I have THE most amazing recipe to share with you all today. Not only do these Rich Raspberry Chocolate Fudge Brownies taste incredible, they can also be made gluten free. Yippee! I absolutely love creating recipes that can be enjoyed by more people. Also, this brownie recipe has an added, optional boozy ingredient. Yet, the alcohol can be left out so that children and those who don’t or can’t have alcohol can also delight in these brownies.
Brownies are one of my favourite bakes. And lately I’ve been experimenting with various additions. Most importantly, the resulting brownie must deliver on both flavour and that damp, slightly squidgy texture that qualifies a true brownie. Yet I’ve found the addition of various ingredients creates a fantastic, taste bud treat, such as these Chocolate Fudge Double Hazelnut Brownies. Since I know that raspberries and chocolate are a great flavour combination I decided to try it in a brownie. Oh wow! I was totally unprepared for how scrumptious the result was.
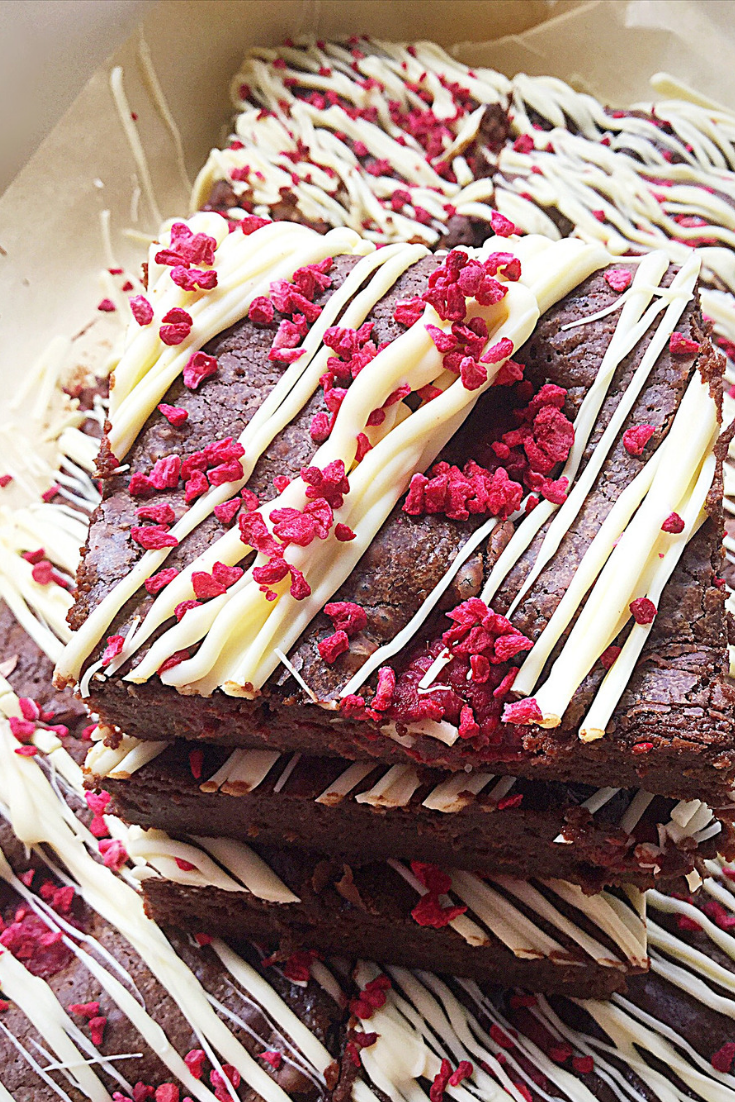
Rich Raspberry Chocolate Fudge Brownies
Raspberry and Chocolate Alchemy
As soon as the raspberries start to bake into the brownie batter something incredible happens. While exposed to the heat of the oven the raspberry flavour intensifies. Also, the raspberries merge with the brownie so that they become as one. The addition of raspberry liqueur turns the final taste into raspberry and chocolate heaven. And, the raspberries also add to the fudgey texture, creating a ridiculously good dessert.
Rich Raspberry Chocolate Fudge Brownies
If I were to serve these brownies at a dinner party I would top with fresh raspberries and a generous scoop of the very best Vanilla Ice Cream. Also I would warm each brownie for 10 seconds in the microwave. Warming them further awakens the combination of flavours.
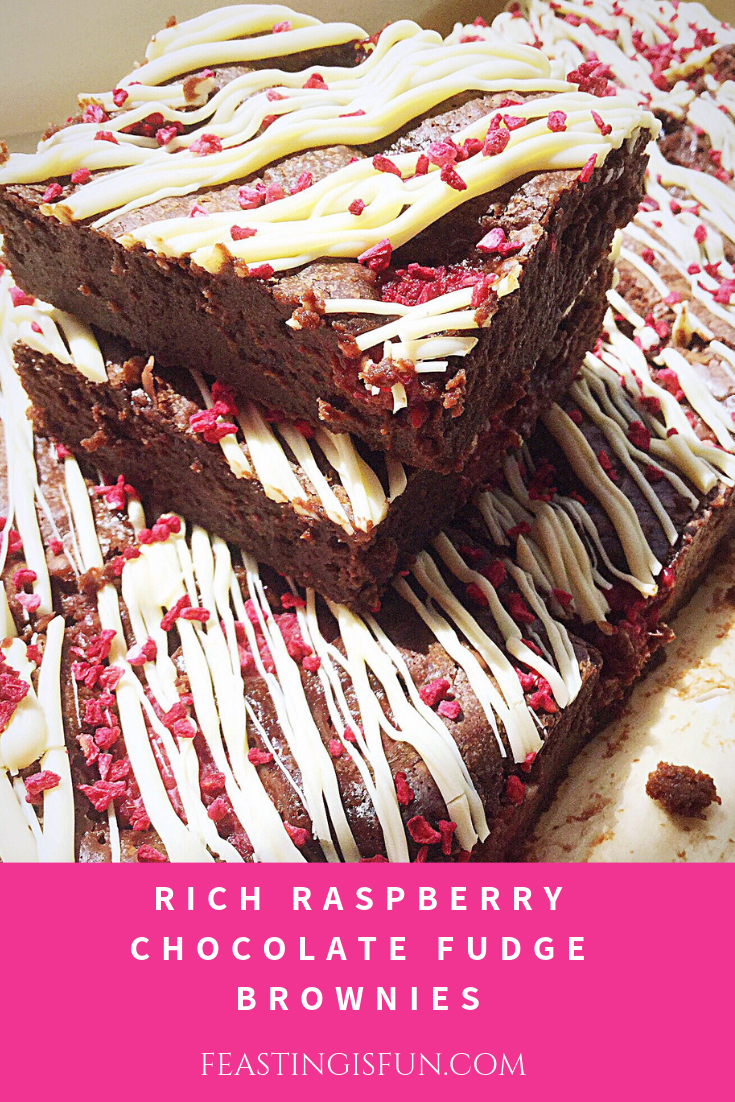
Recipe: Rich Raspberry Chocolate Fudge Brownies, makes 15
200g/7oz Milk Chocolate minimum 35% Cocoa solids
200g/7oz Dark Chocolate minimum 70% Cocoa solids
225g/8oz Unsalted Butter
1/4 tsp Sea Salt – Maldon (halve if using table salt)
Optional – 2 tbsp Raspberry Liqueur, alternatively Cassis works well
75g/3oz Plain White Flour – for Gluten Free use all purpose gluten free flour – I use Doves Farm
300g/10.5oz Fresh Raspberries (frozen raspberries also work well here, use straight from the freezer, no need to defrost.) – plus extra to serve if you wish
175g/6oz White Chocolate
3 tbsp Freeze Dried Raspberries – I buy mine from Waitrose
Method: Preheat oven to 180C/160C fan, 350F, gas mark 4
You will need a 22.5cm x 30cm (9” x 12”) deep tin, lined with baking parchment or tin foil.
Making And Baking The Rich Chocolate Fudge Brownies
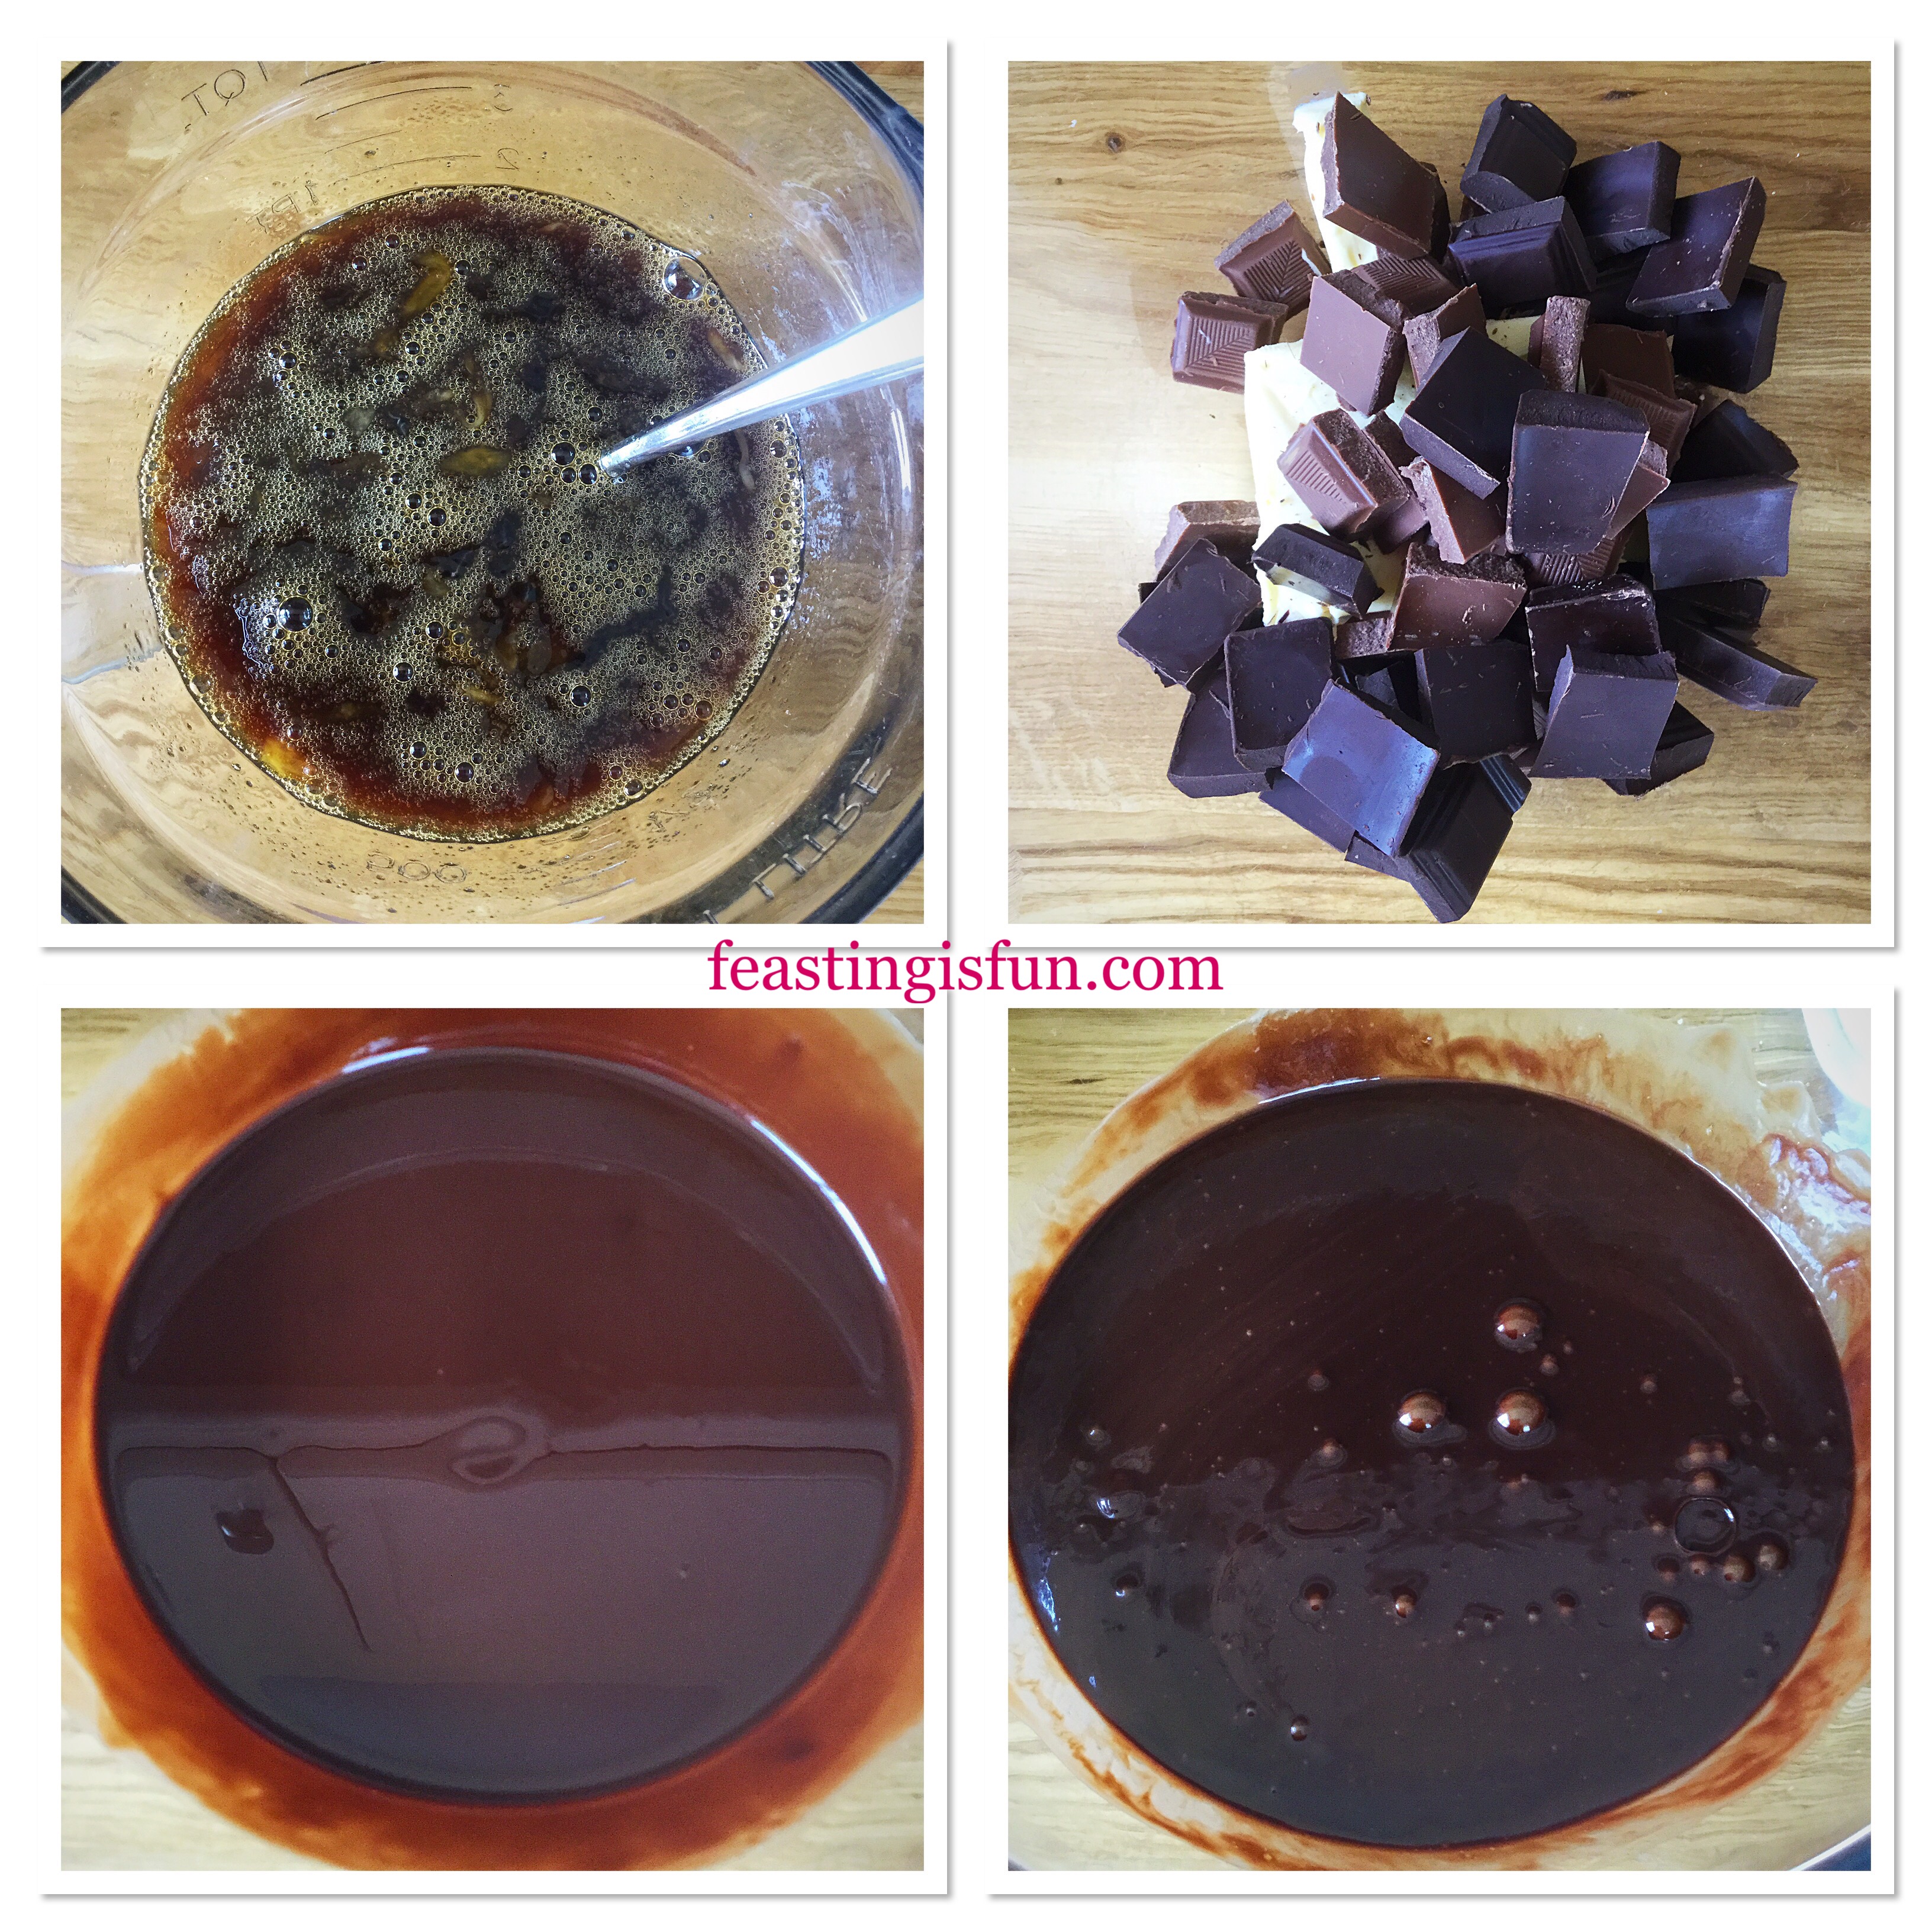
First of all break up the chocolate and place into a heatproof, microwaveable bowl with butter and salt. Microwave on medium power for 30 seconds, stirring in between, until the butter is melted and the chocolate has started to melt. Remove from the microwave and stir continuously until all of the chocolate has melted and combined with the butter. Set aside to cool.
Weigh the sugar into a large jug, add the eggs, vanilla extract and raspberry liqueur (if using). Using a fork stir to combine the ingredients.
As soon as the chocolate has cooled, pour the egg and sugar mixture in stirring constantly.
Creating the brownie base.
Add the flour and stir into the chocolate mix.
Finally add half of the raspberries to the brownie batter. Stir carefully to combine.
Pour the brownie mixture into the prepared tin.
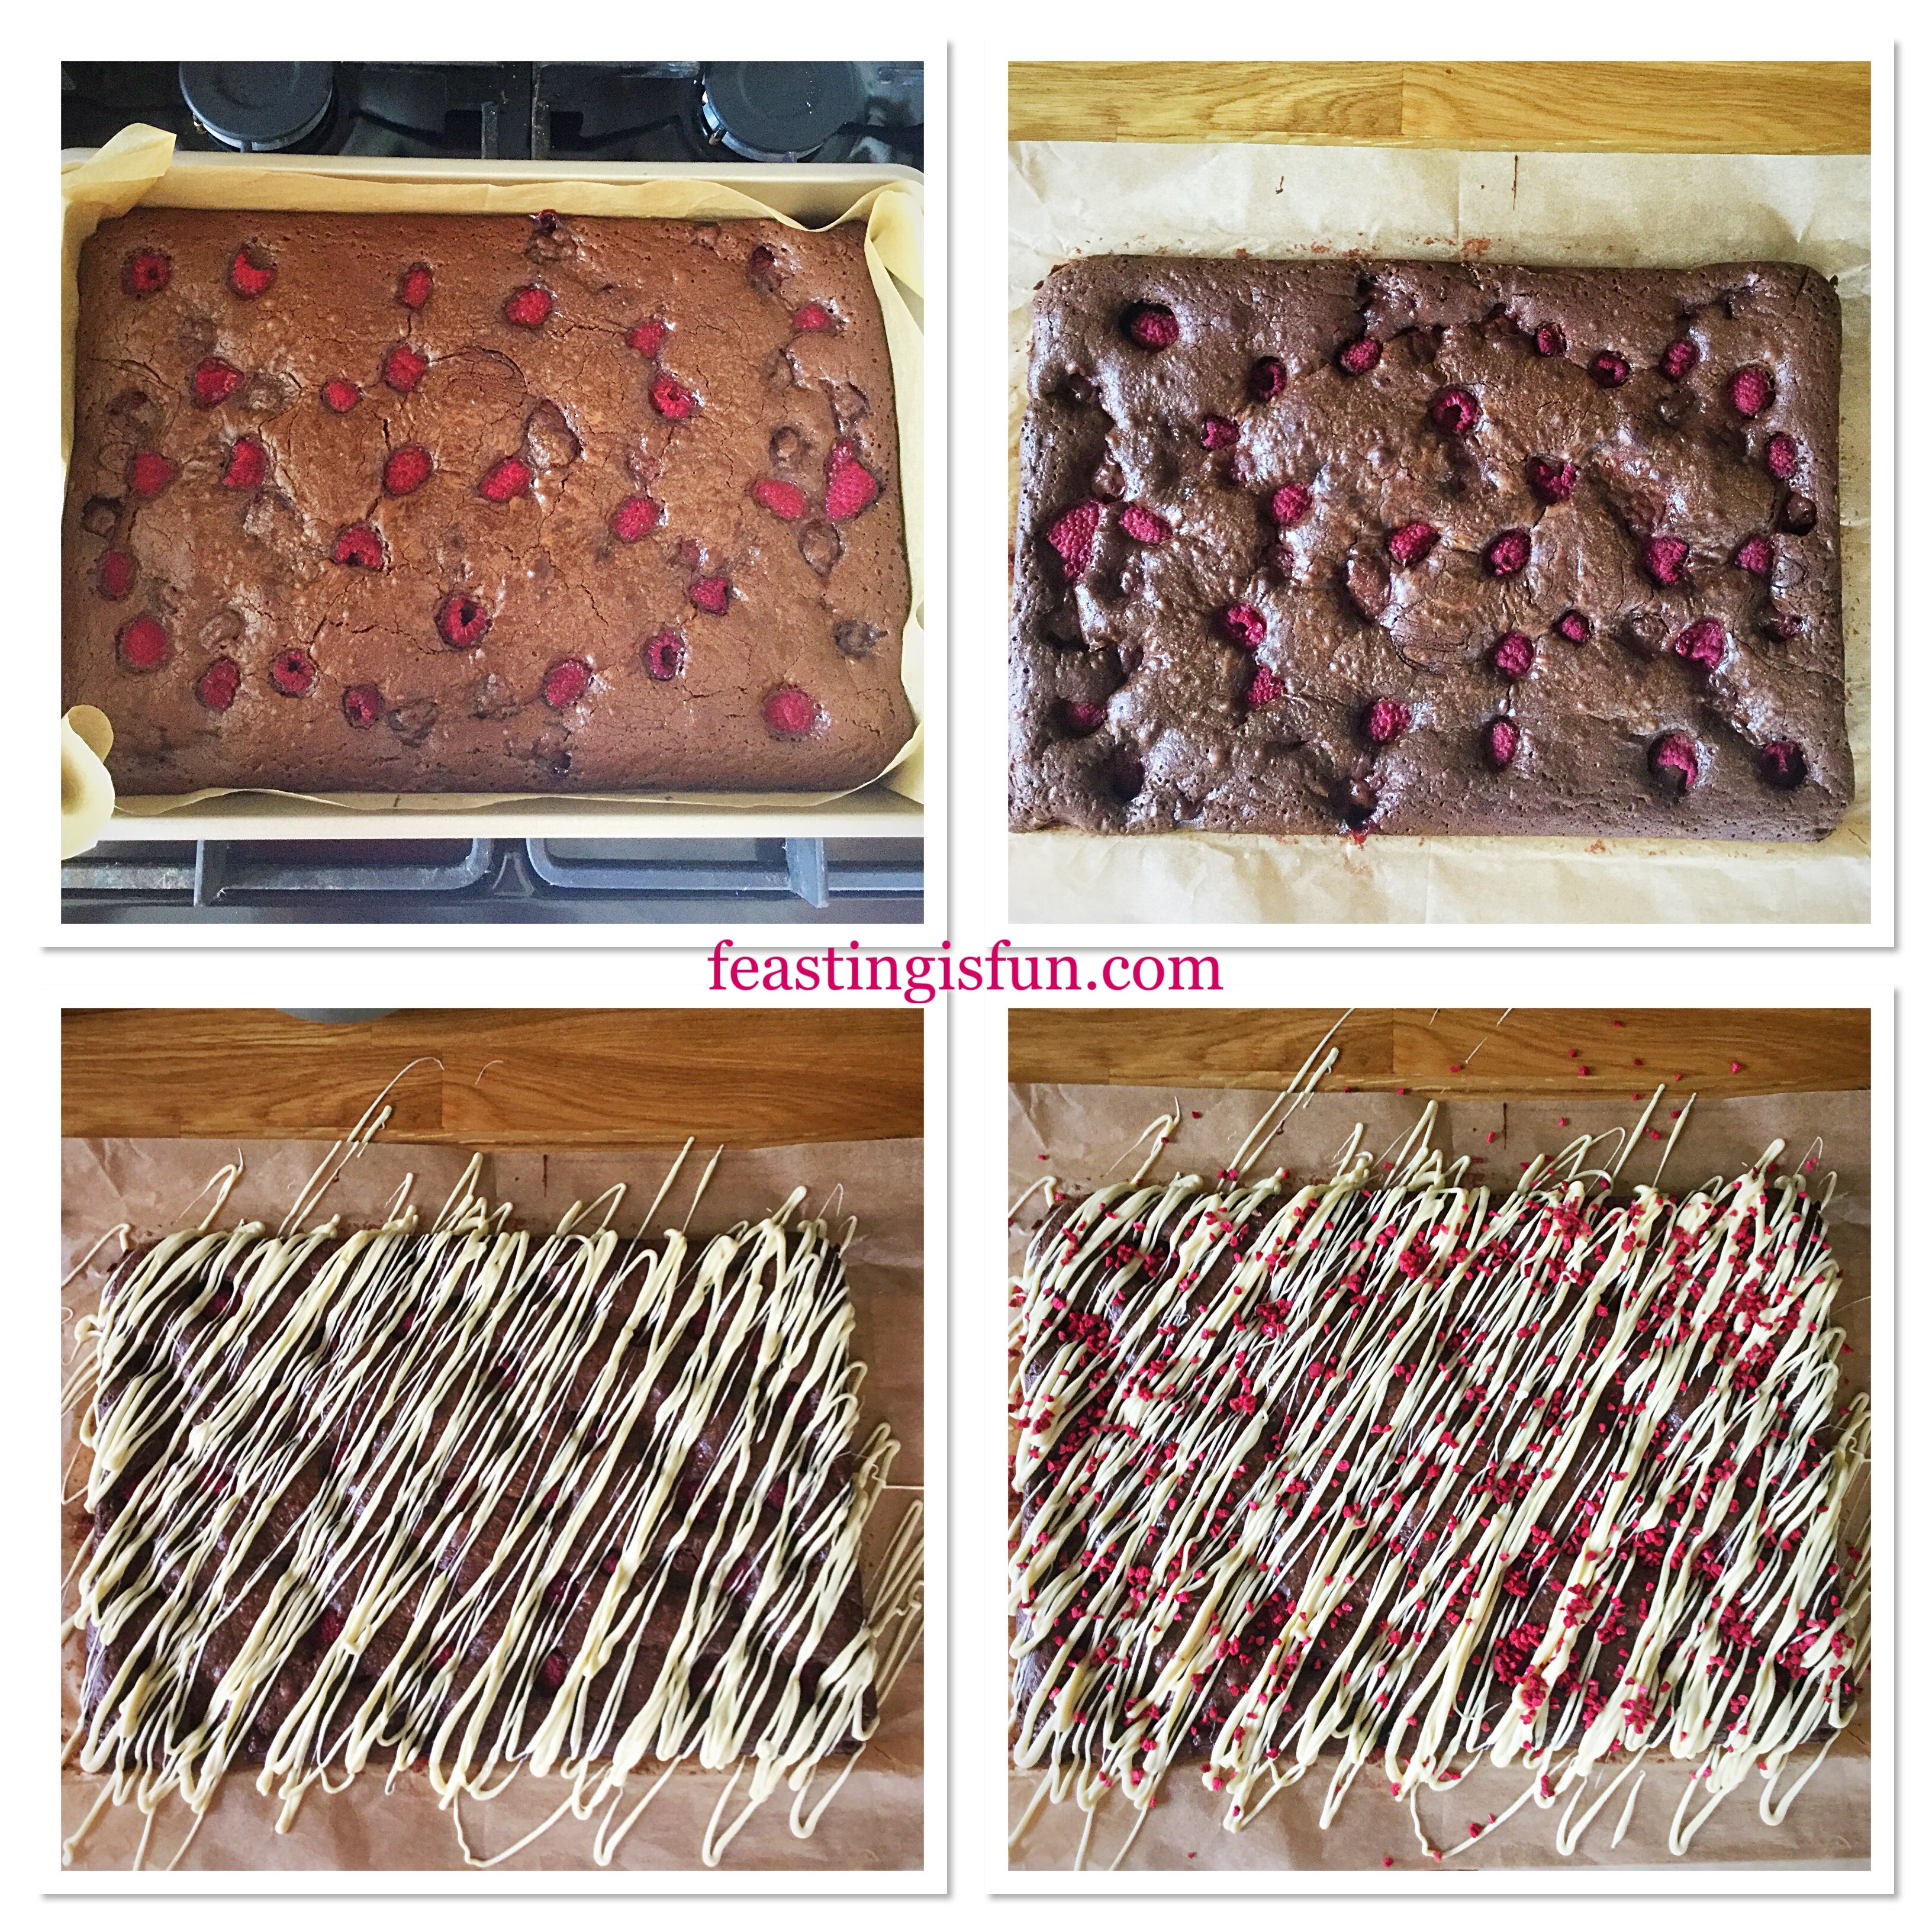
Finish by adding the remaining raspberries evenly to the top of the mixture.
Adding fresh raspberries into the batter and on top of the traybake.
Place the tin into the centre of a preheated oven and bake for 25-30 minutes.
Halfway through the baking time open the oven and using gloves rap the brownie tin on to the shelf a couple of times. This helps to release any air bubbles formed during baking. Resulting in dense, fudgey brownies.
The brownies are baked when the surface is shiny, with a slightly crackled appearance. Also, there should be a very slight wobble to the centre of the bake.
As soon as the brownies are baked remove from the oven and leave to cool completely in the tin.
Baking, cooling and decorating the Rich Raspberry Chocolate Fudge Brownies
Drizzling and Decorating the Brownies
As soon as the brownies have cooled lift them out of the tin, using the baking parchment. Pull out the sides of the parchment so the paper is flat.
Break up the white chocolate and place in a heatproof, microwaveable bowl. Zap for 30 seconds at a time, stirring in between. As soon as the chocolate starts to melt remove from the microwave and stir continuously until it is completely liquid.
Pour the melted chocolate into a disposable piping bag. Snip the very end of the bag leaving a small opening.
Starting at a corner drizzle white chocolate in a diagonal pattern over the brownie slab.
Sprinkle over freeze dried raspberries so they stick to the melted chocolate.
Leave to set.
Cut across the width at 3 even intervals, wiping the knife with a cloth between each cut. Follow by cutting vertically down at 5 even intervals. Resulting in 15 brownies.
Rich Raspberry Chocolate Fudge
Serve chilled with a glass of something sparkling. Alternatively, warm as mentioned and serve with ice cream. However you enjoy these brownies, they will taste better when shared!
Because of the fresh raspberries store in an airtight container, between layers of baking parchment, in the fridge
If you have enjoyed this recipe for Rich Raspberry Chocolate Fudge Brownies you may also like these:
We have experienced a very warm start to the Summer this year and I haven’t wanted to have the oven on. Yet, when I’m baking brownies, it is such a short baking time that I haven’t minded. Similarly, meringues bake at a low oven temperature, so why not try this Raspberry Chocolate Pavlova? Finally why not try one of the many ice cream recipes here on my blog? It is so much fun coming up with new and delicious flavours!
Whatever you are making, baking and creating in your kitchens, you have fun preparing and sharing your feast.
Sammie xx
No part of this post may be reproduced or duplicated without the written permission of the owner. Please see my Diclosure Policy.
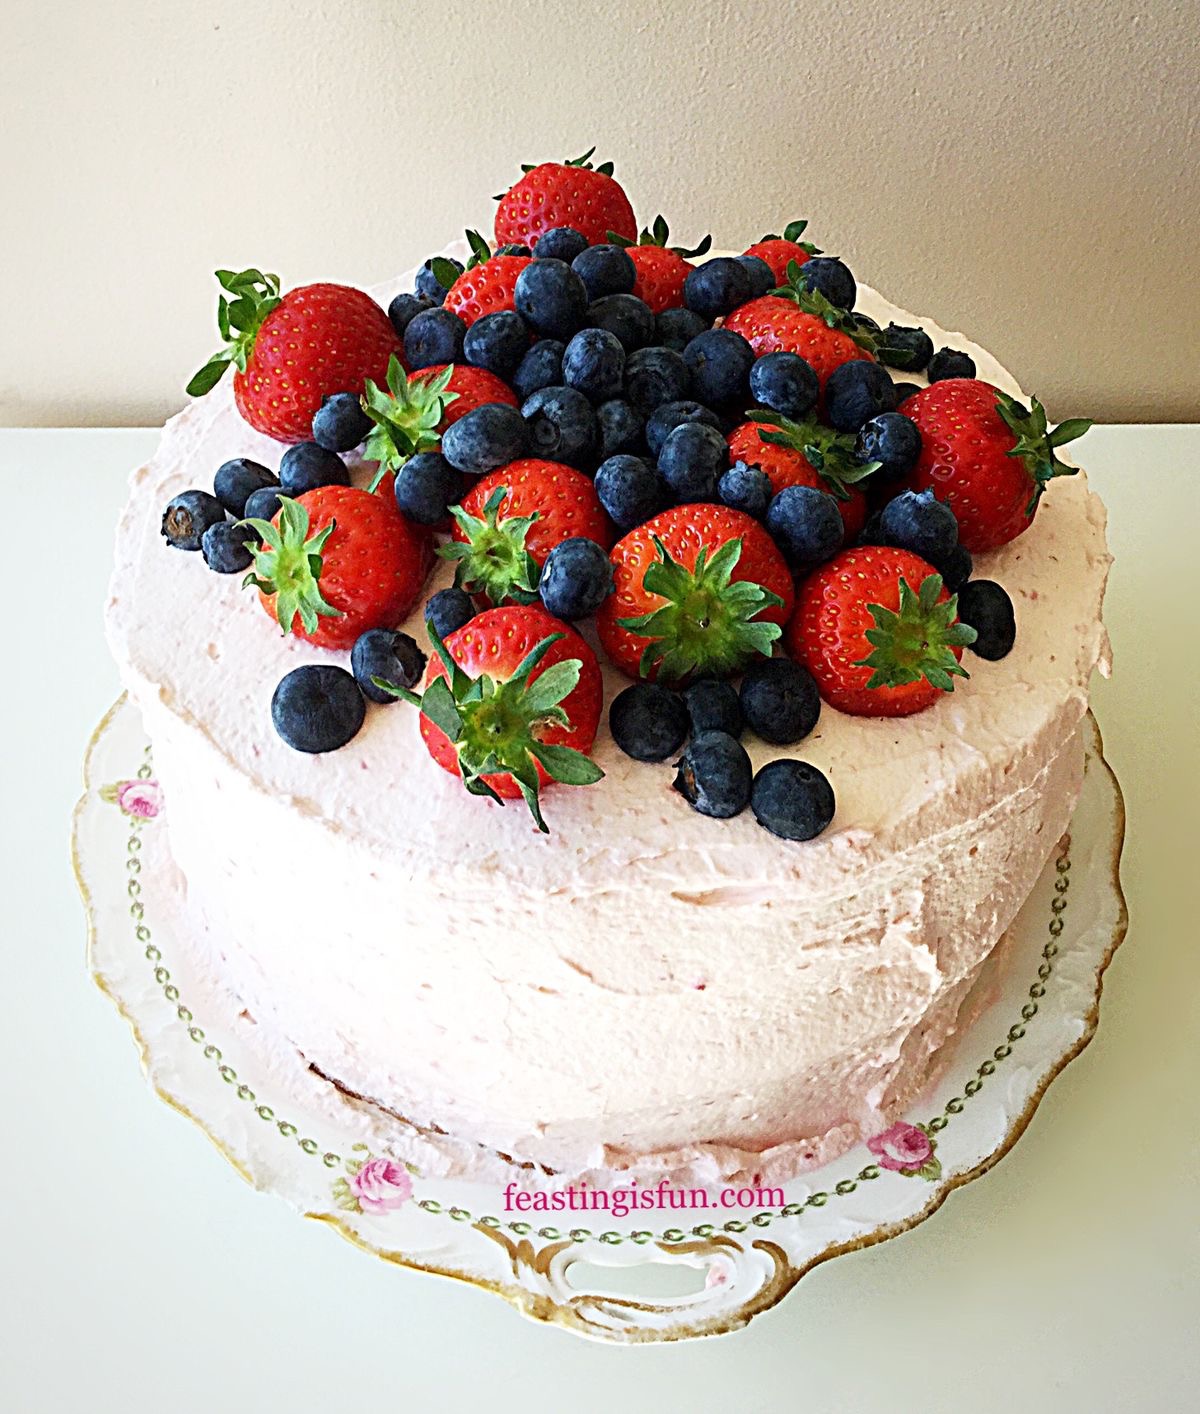
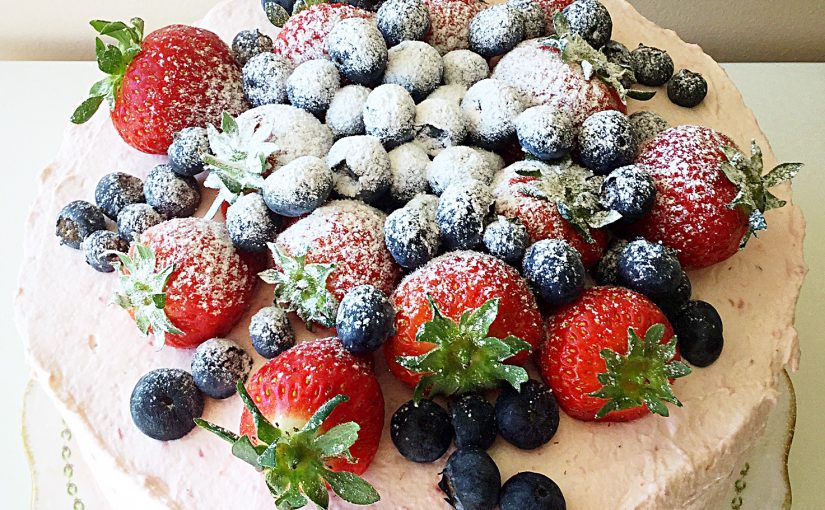
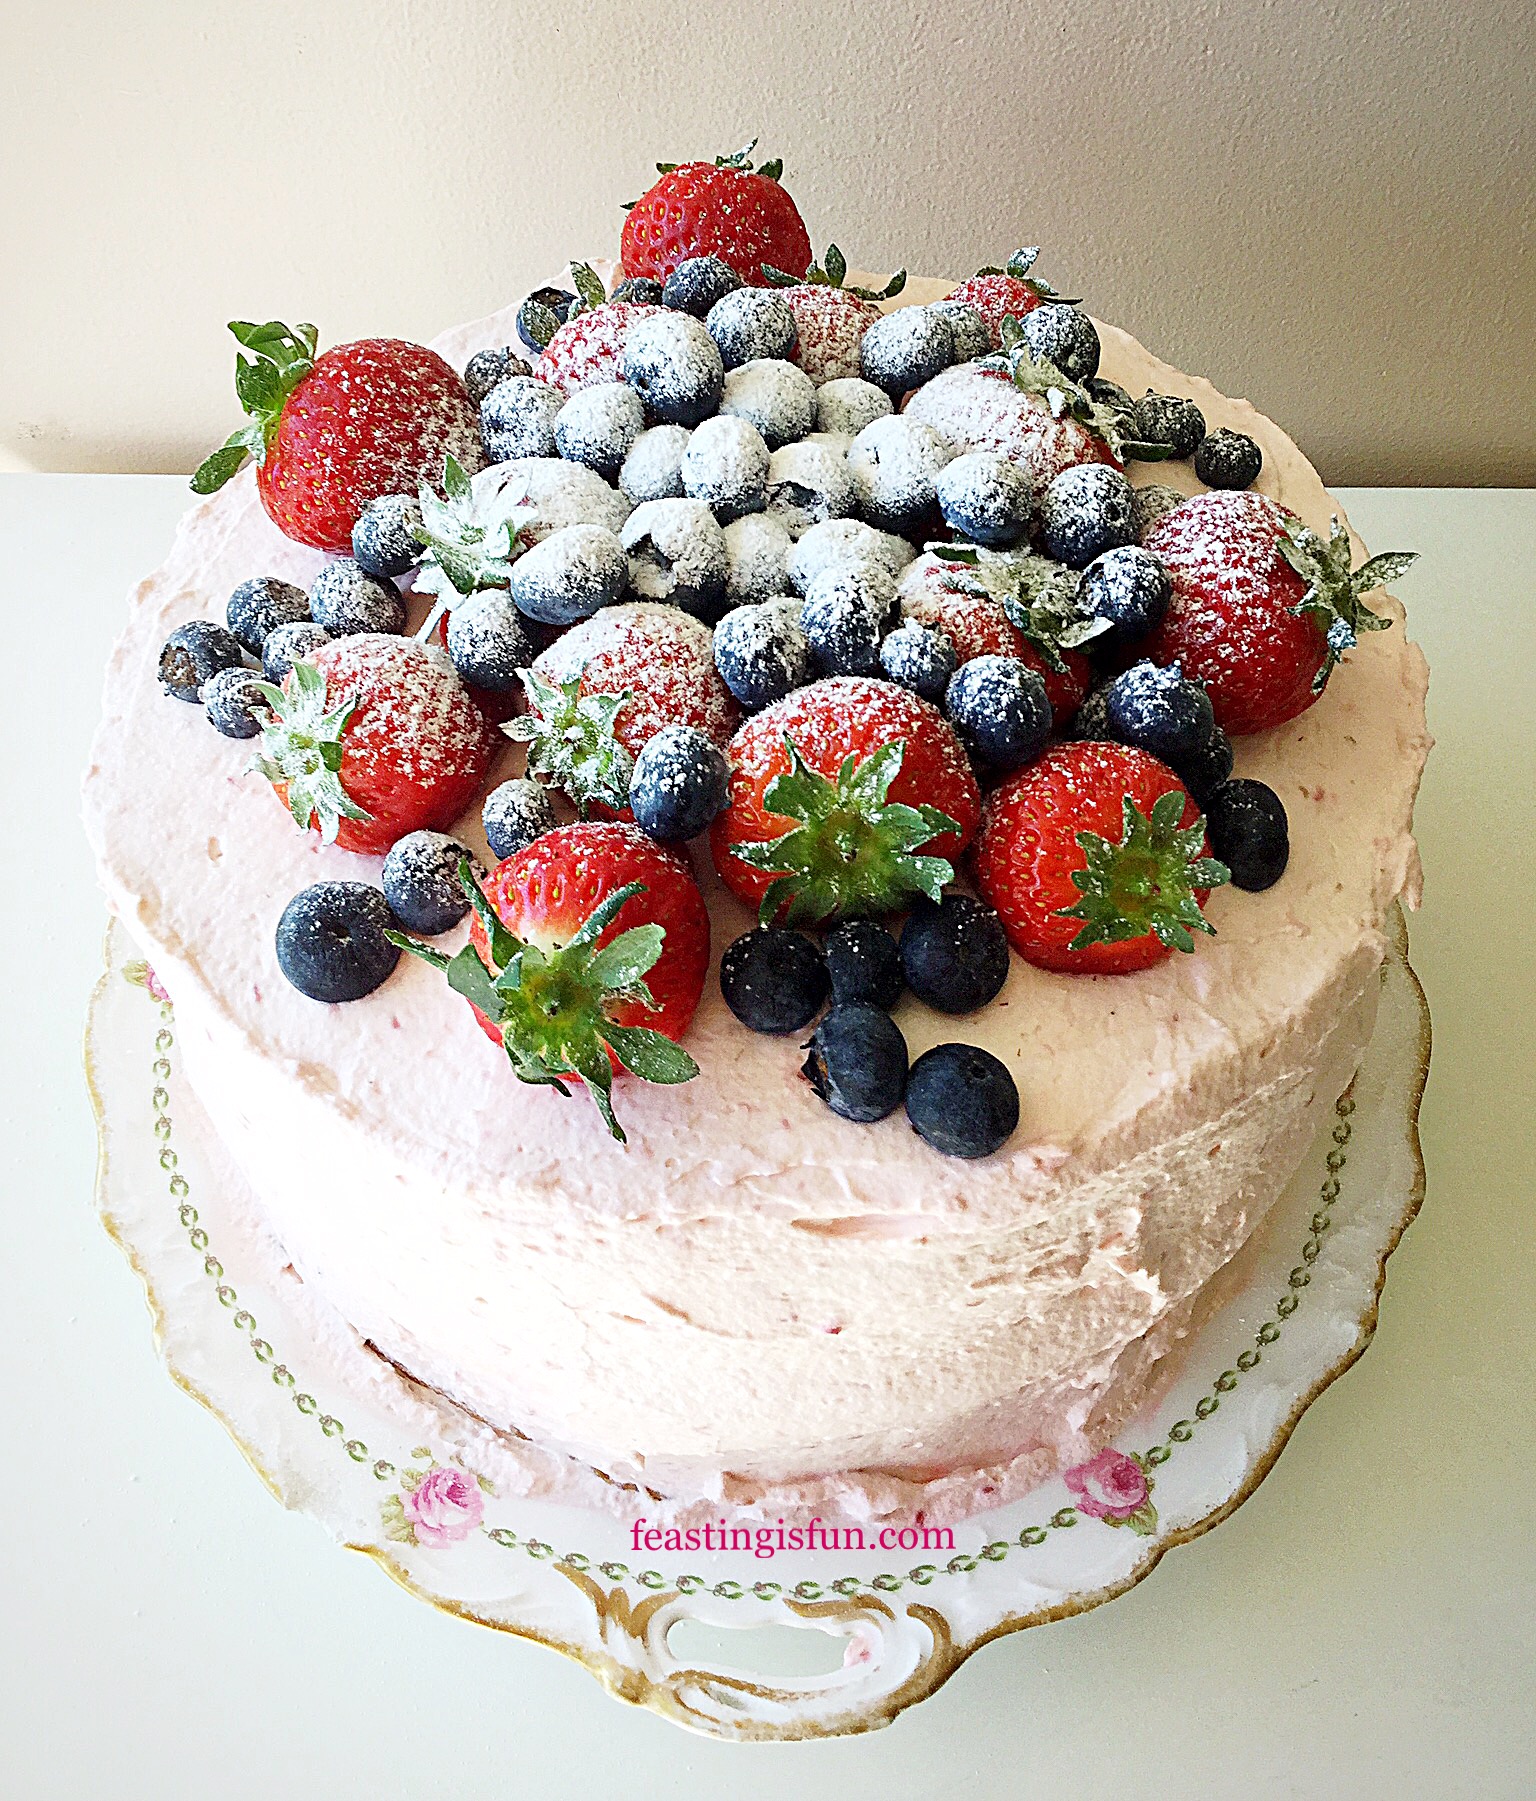
I adore the variety and abundance of fresh fruit available during the warmer months of the year. So, if I can restrain myself from simply eating them as they are I love to use them in recipes. And here in my Summer Mixed Berry Sponge Cake they are given centre stage. Freshly made raspberry and blueberry jam sandwiched between the two sponges with fresh raspberry whipped cream covering the entire cake. Finally topped with more fresh blueberries and strawberries this cake is a celebration of summer fruit.
Summer Mixed Berry Sponge Cake
Since not everyone here at Feasting headquarters is a fan of sweet frosting, I decided to use something different to cover this cake. And fresh raspberries added to whipped cream are utterly delicious. While the raspberries are tart, when whipped into the cream they lend a sweetness and very light raspberry flavour. Also, as the cream is used between the sponges and to cover the cake it adds a very pretty pink colour to the finished creation.
Summer Mixed Berry Sponge Cake
Seasonal fruits
Finally the cake it topped with a tumble of seasonal strawberries and blueberries. Alternatively switch up and swap around the fruits according to what is abundant, available and in season. Since I have blackberry, raspberry, tayberry, redcurrant, blackcurrant, strawberries AND a cherry tree in our garden I will have different choices as the season progresses. Also I am sure that strings of redcurrants dripping over the side of this cake will look really pretty.
Summer Mixed Berry Sponge Cake
A guide for changing up the fruit is to keep at least one ‘sweet’ fruit for the top. Also I would be careful about adding strawberries to the whipped cream. Since they can be quite watery and may cause it to split. If in doubt, scoop a spoonful of whipped cream on to a plate and mash in a small amount whichever fruit you want to use. And the fruit should mix easily into the cream. Alternatively, if the mixture splits try a different fruit.
1/4 tsp Sea Salt Flakes – halve if using free flowing
5 Large Free Range Eggs
275g/10oz Plain White Flour
3 tsp Baking Powder
1 Large Lemon – scrubbed and finely zested
To fill and cover:
225g/8oz Fresh Fruit Jam – to make fresh raspberry jam please see the recipe on Victoria Sponge Cake substitute half of the raspberries for blueberries for the jam I used here
450ml/1 pint Double Cream (heavy cream)
100g/4oz Fresh Raspberries
25g/1oz Caster Sugar
1 tsp Vanilla Extract
To decorate:
150g/5oz Fresh Blueberries – alternatively use blackberries
225g/8oz Fresh Strawberries – alternatively use raspberries
Optional – 1 tsp Icing Sugar to dust
Method: Preheat oven to 160C/140C fan, 325F, gas mark 3.
You will need two 20cm/8in sandwich tins, buttered and the base lined with baking parchment.
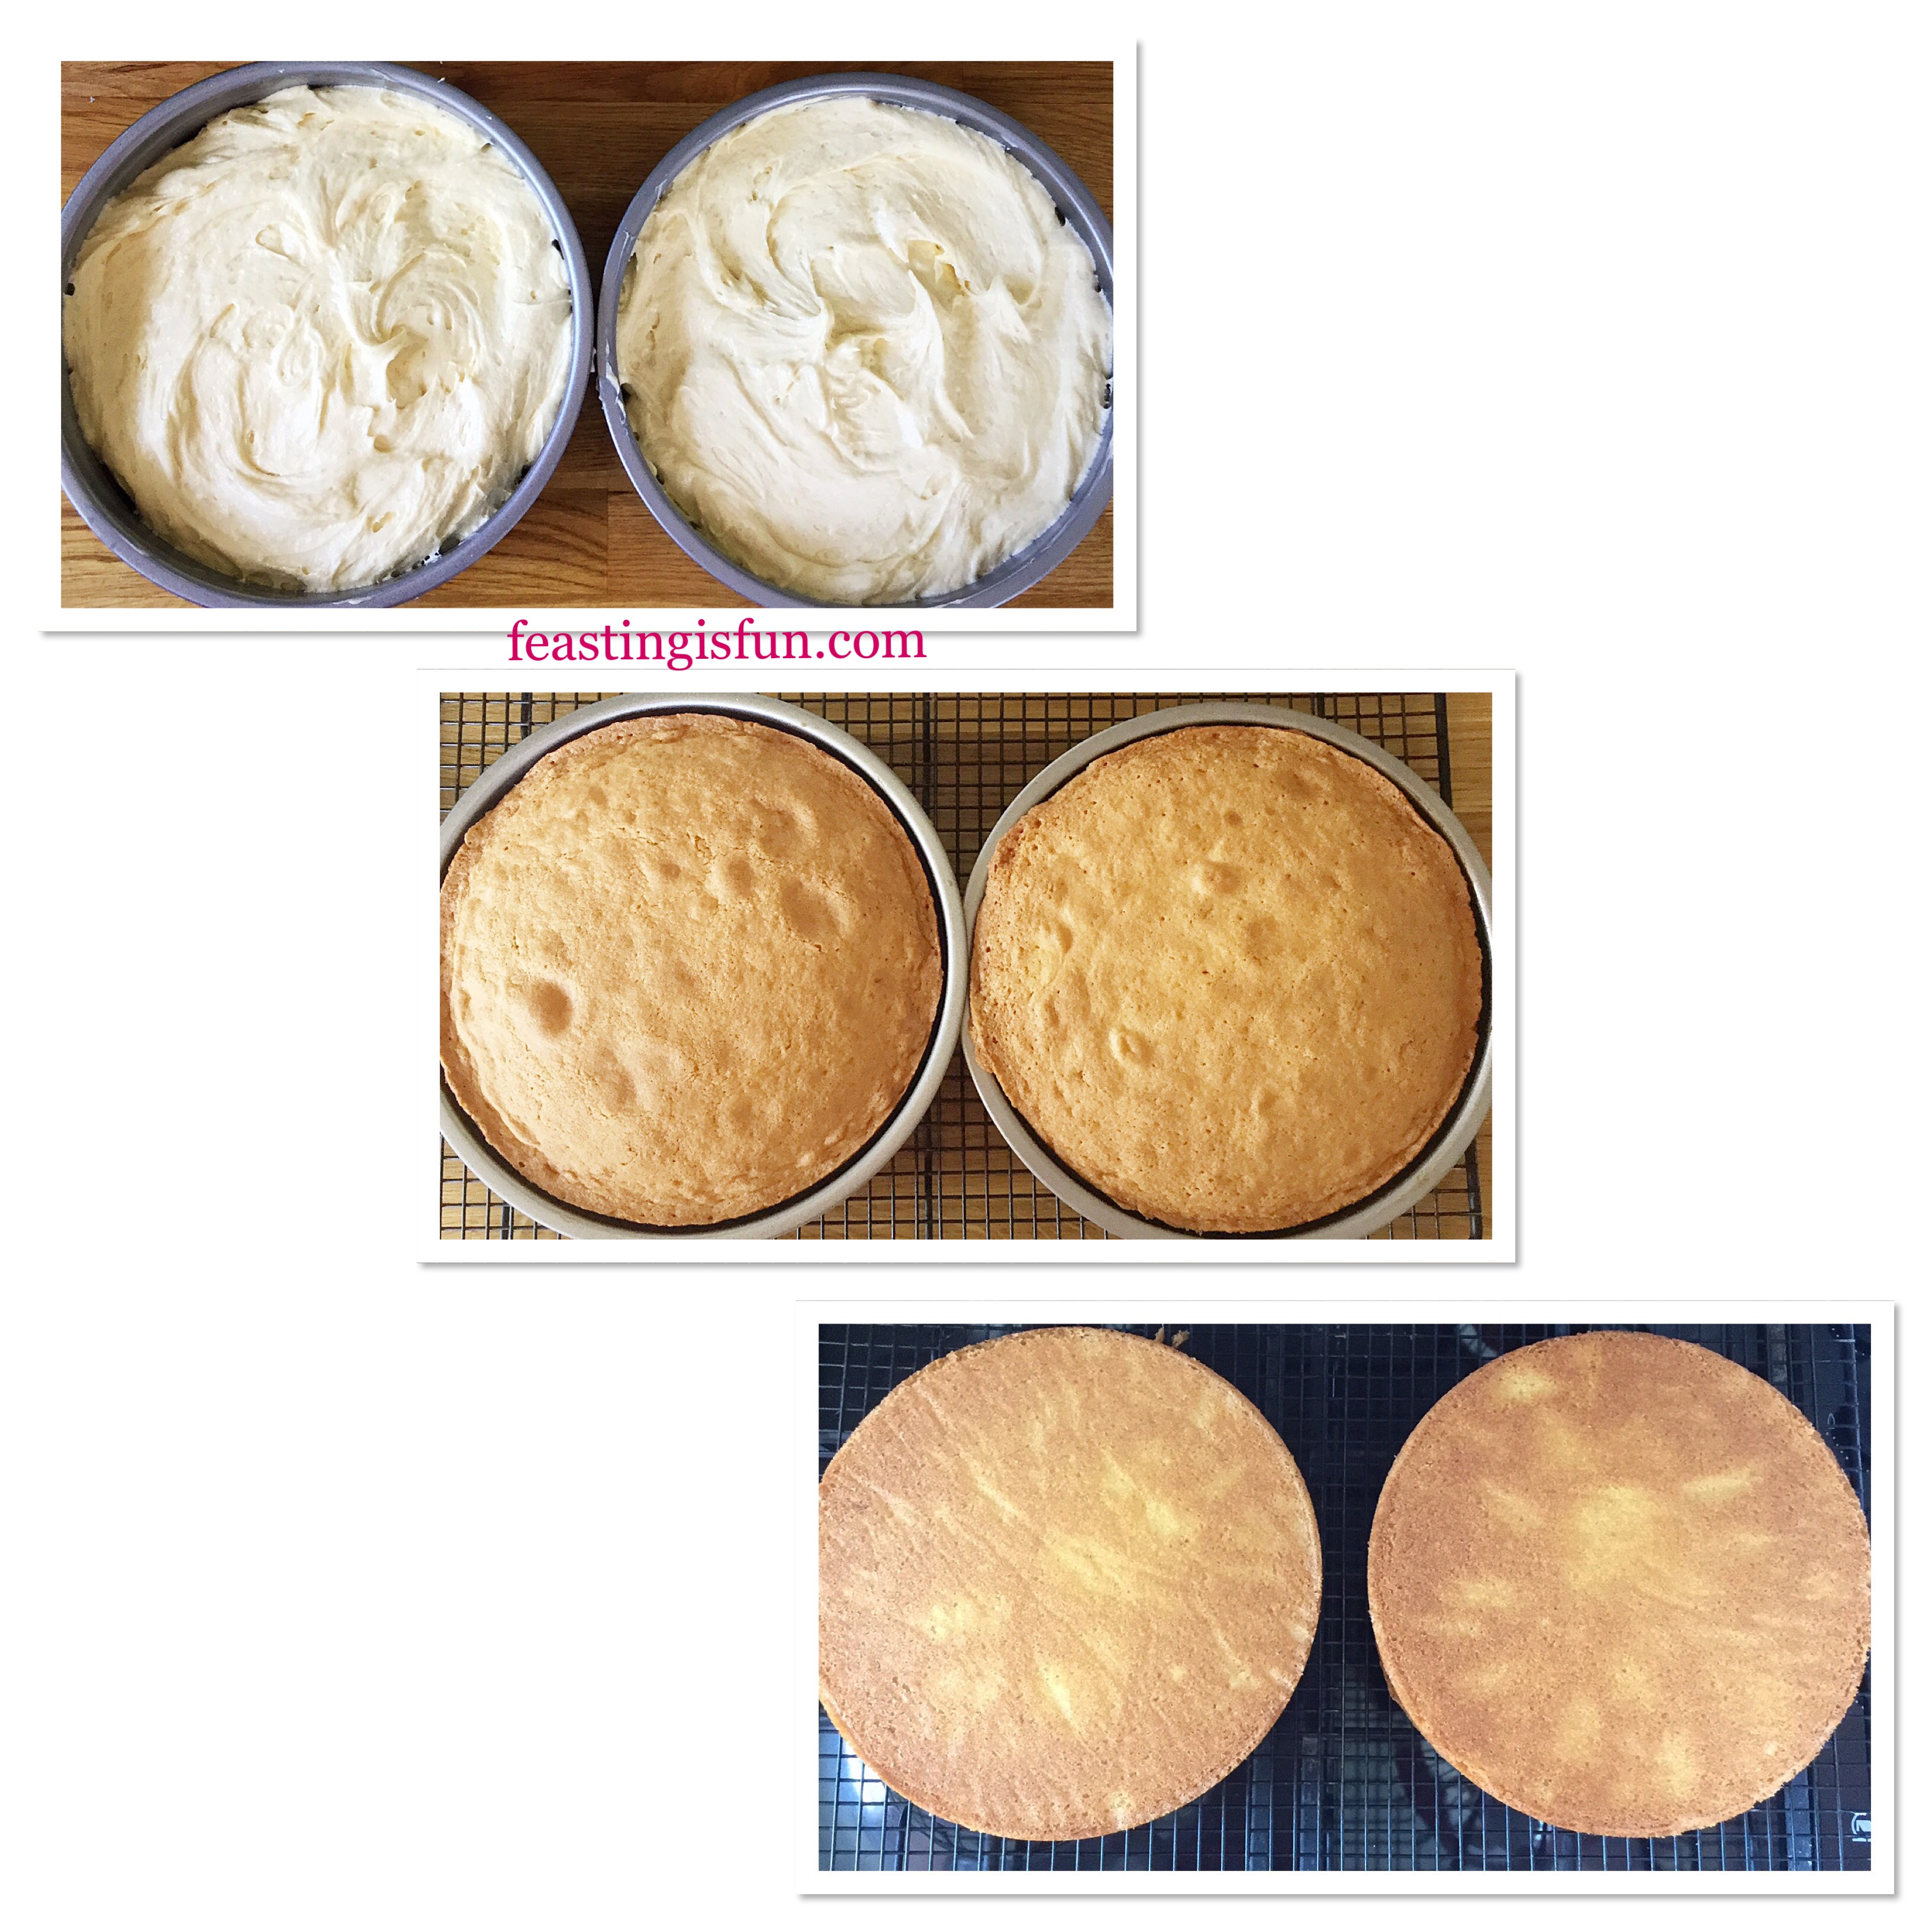
Making and baking the sponge cakes
First of all, into a large mixing bowl add the butter, sugar and salt. Whisk everything together until pale and creamy.
Now add 2 eggs, vanilla extract and half of the flour. And whisk until just combined.
Finally add the remaining flour and baking powder, 3 eggs and the lemon zest. Whisk together until everything is just combined. Over mixing will cause the cake to be dense.
Making the sponge cake batter
Divide the cake batter evenly between the sandwich tins.
Place into the centre of the oven and bake for 35-40 minutes.
The sponge cakes are baked when golden in colour and firm to a light touch. Also an inserted skewer will come out clean.
Filling the cake tins, baking and cooling the cakes
As soon as the cakes are baked remove from the oven and place the tins on to a cooling rack.
Leave the cakes to cool in the tin for 10 minutes, then turn the cake out carefully removing the baking parchment.
Allow the cakes to fully cool on the rack.
Making the raspberry whipped cream
Making the raspberry whipped cream
As soon as the cakes have cooled make the raspberry whipped cream.
Place the fresh raspberries on to a plate and mash with a fork.
Pour the cream, vanilla extract and sugar into a bowl and whisk until thickened but still floppy, not stiff.
Add the mashed raspberries to the cream and continue to whisk until the cream has thickened and holds it’s shape.
Filling and covering the cake
Filling and decorating the cake
Place the first sponge, flat side up on to a plate or board.
Spoon jam on to the sponge and spread to almost the edge. Leaving a small gap around the rim of the sponge.
Now spoon some of the raspberry cream on top of the jam. Spread the cream to the edge of the cake.
Place the other sponge, flat side down, on top of the bottom sponge.
Spoon plenty of raspberry cream on to the top of the cake. Using a palette knife push the cream on to the side of the cake. See photos above.
Once all of the cake is covered with raspberry cream smooth the top and sides using a palette knife.
Finally, with a clean piece of kitchen towel, wipe around the base of the cake, removing any excess cream.
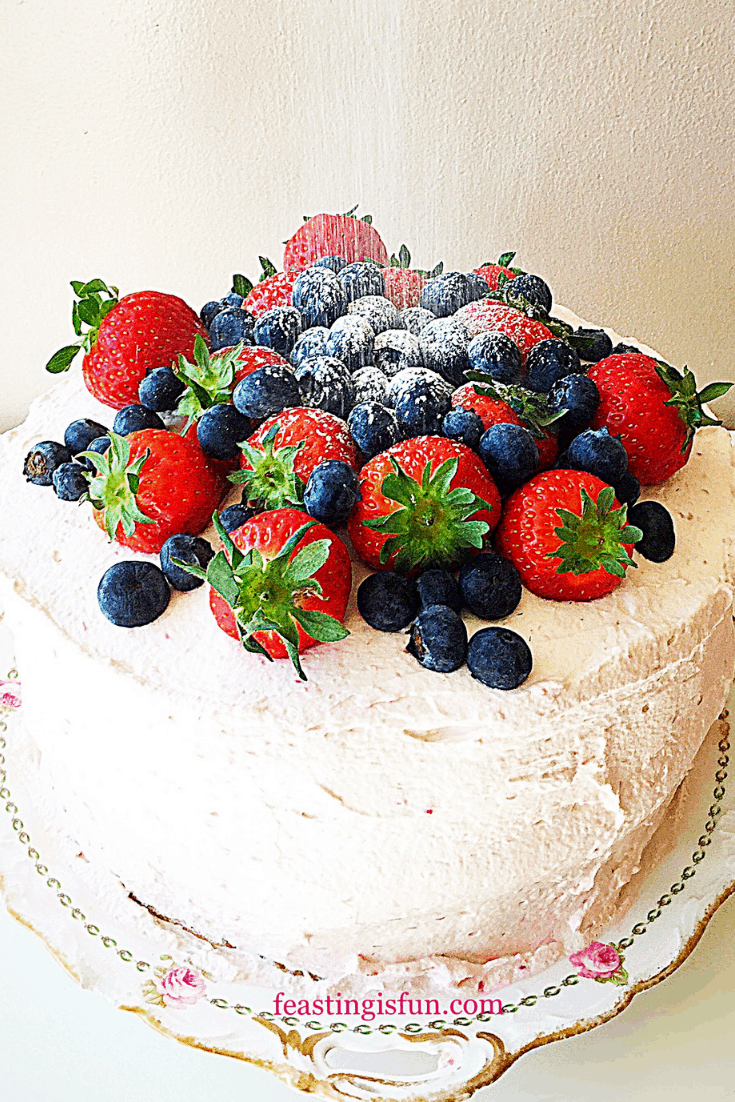
Arranging the fruit on top of the Summer Mixed Berry Sponge Cake
To finish the cake add fruit to the top. Importantly aim for a little height in the centre.
Finally dust the top of the cake with icing sugar if desired.
Place the finished cake into the fridge to chill for one hour.
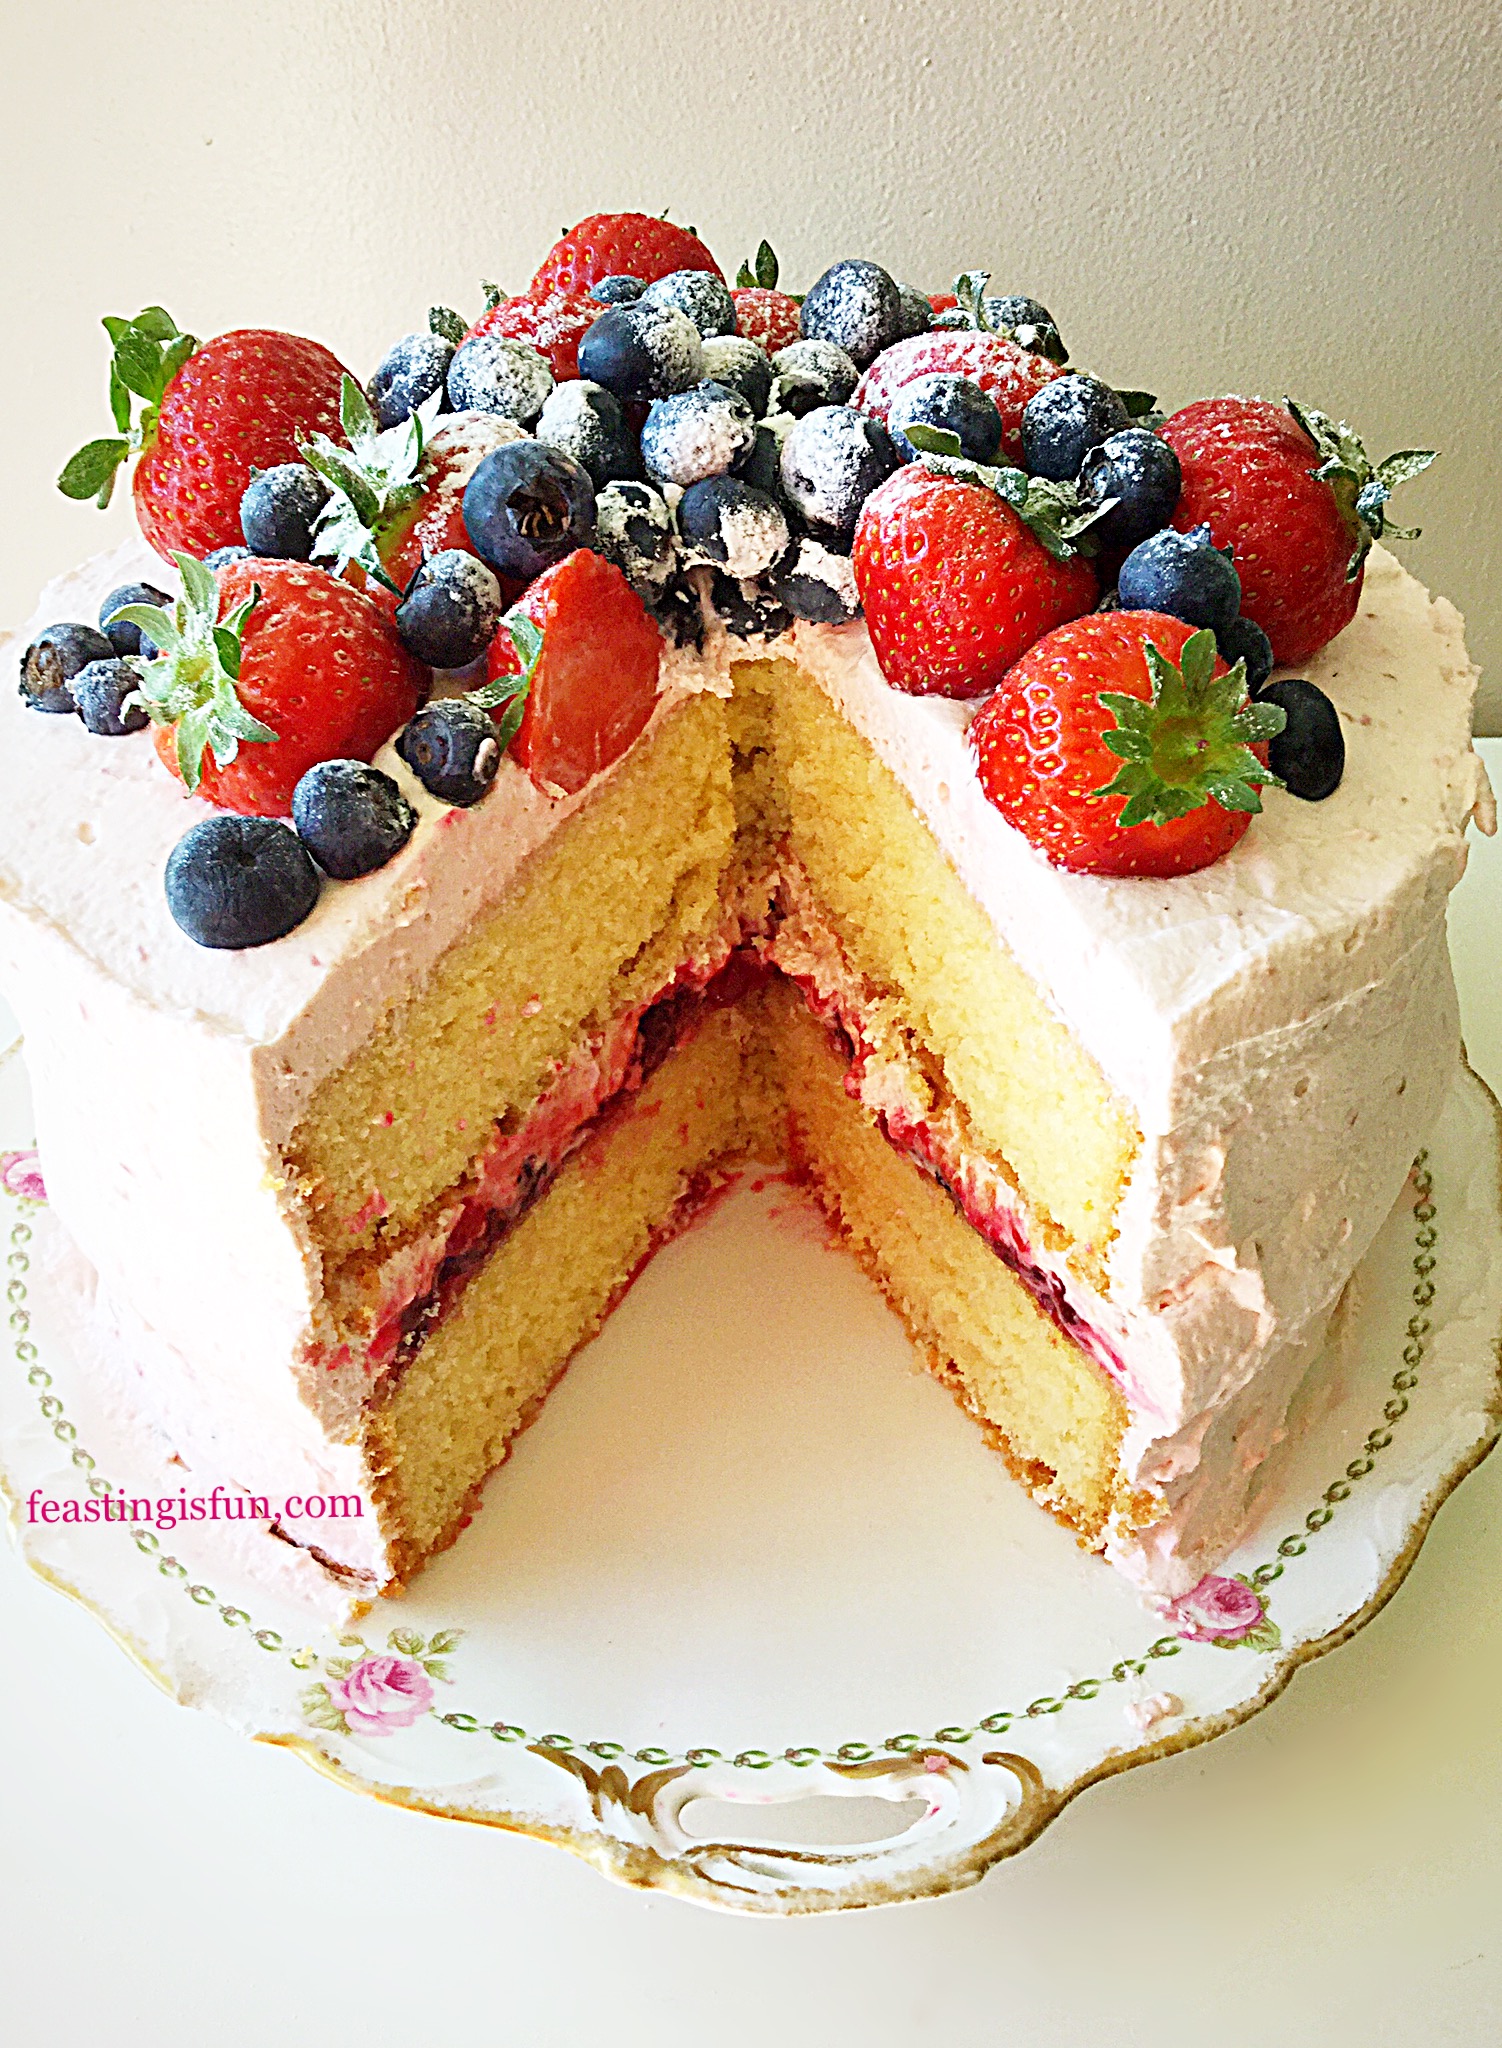
Summer Mixed Berry Sponge Cake
As soon as the cake is chilled it can be sliced and served. Also a useful tip is to wipe the cutting knife with kitchen paper after each cut. Since doing so keeps the cake slices clean.
Summer Mixed Berry Sponge Cake
While the sponges can be made one day ahead and stored in an airtight container. Ideally this cake is best eaten the day it is assembled. Store leftover cake in an airtight container in the fridge and eat within 3 days.
If you have enjoyed this recipe for Summer Mixed Berry Sponge Cake you may also like these:
Sharing this cake with friends and family gives me a real buzz. Because I do not sell anything that is made for this blog it also helps to keep our family healthy. While I can see how people may think we eat cake all of the time. We don’t! As a family cakes are treats for us too.
So, whatever you are making, baking and creating in your kitchens, I hope you have fun preparing and sharing your feast.
Sammie xx
No part of this post may be reproduced or duplicated without the written permission of the owner. Please see my Disclosure Policy.