In an ideal world, all food consumed by myself and our family would be homemade. Yet reality dictates that is not always feasible. However, certain products, made with natural ingredients make that dream, a step closer. For example, the lemon curd used in my Blueberry Lemon Shortbread Cake Bars, tastes as good, if not better than that made at home. Resulting in a delicious recipe, made one stage easier by a product already available.
Bakes That Travel Well
Creating bakes that are sturdy enough to withstand transport in a school backpack or briefcase can have its challenges. However, these shortbread base bars easily remain intact during transit. Since hubby does not always have time for a set lunch break, knowing he has something he can munch with a coffee makes me happy. And, of course, he functions better when his energy is topped up too.
There are a variety of traybakes here, on Feasting is Fun, including Lemon Drizzle Cake Bars and Macadamia Apricot Flapjacks. While some are considered more ‘healthy’ than others. With respect, anything cooked at home, using good quality ingredients and made with love, is, in my opinion far better than a mass produced product with a shelf life of months!
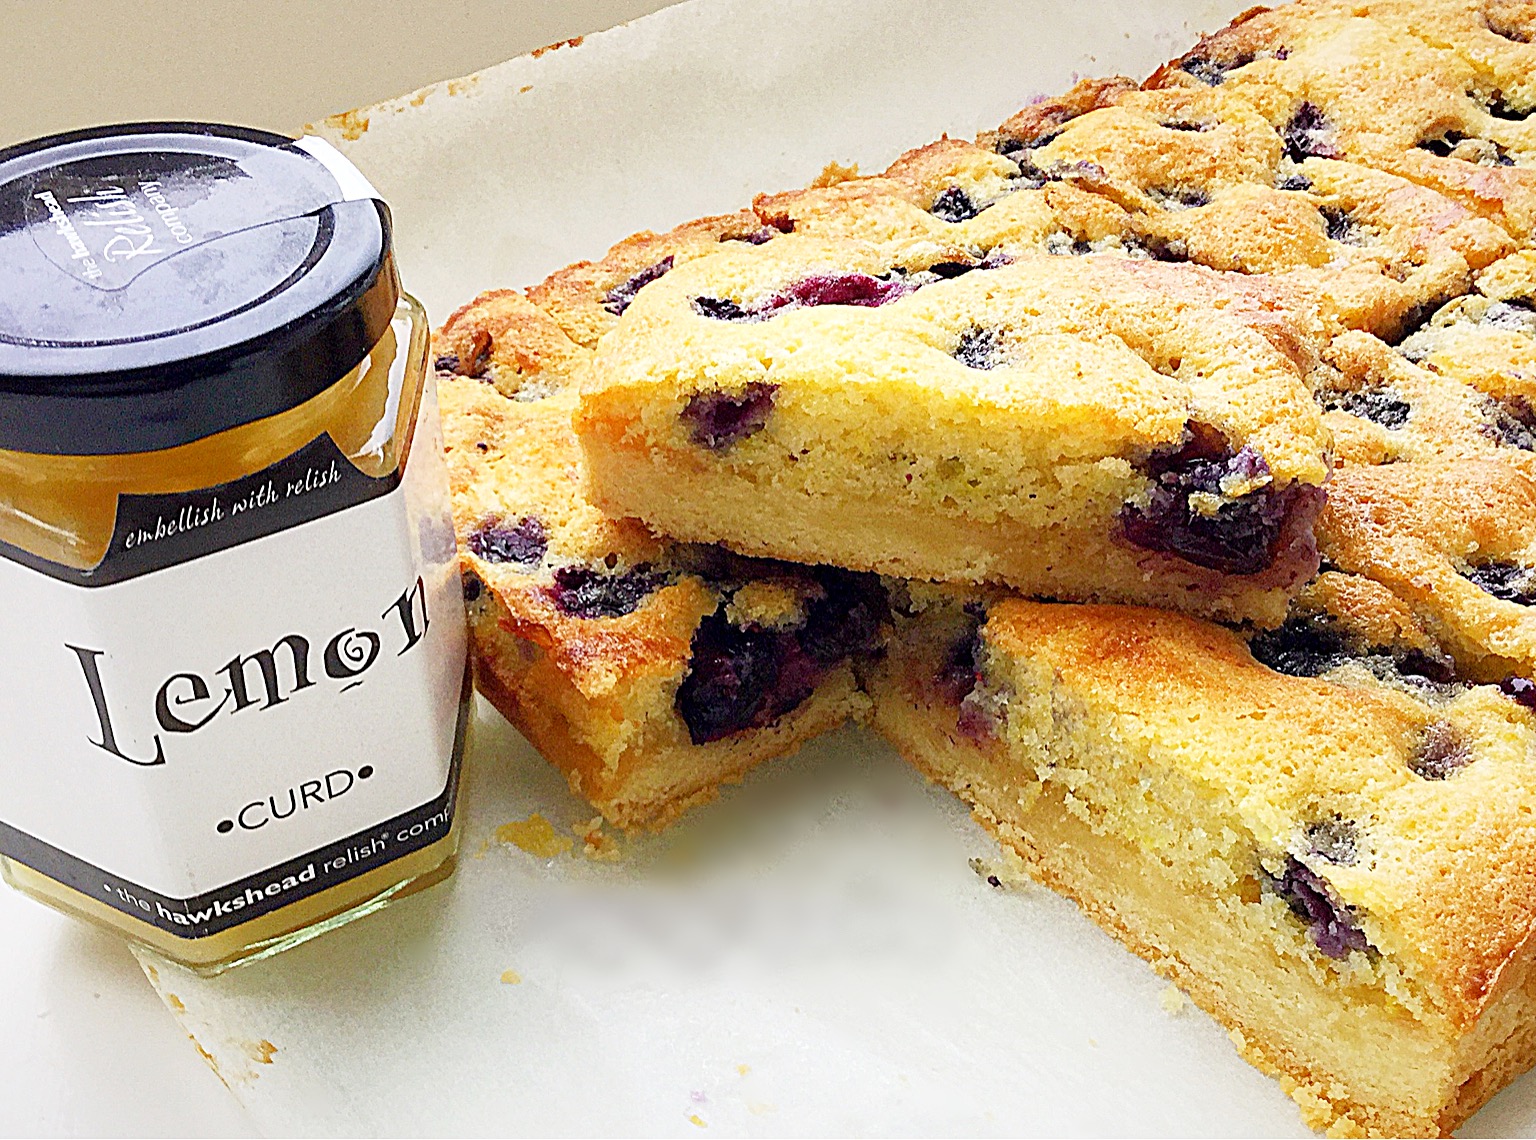
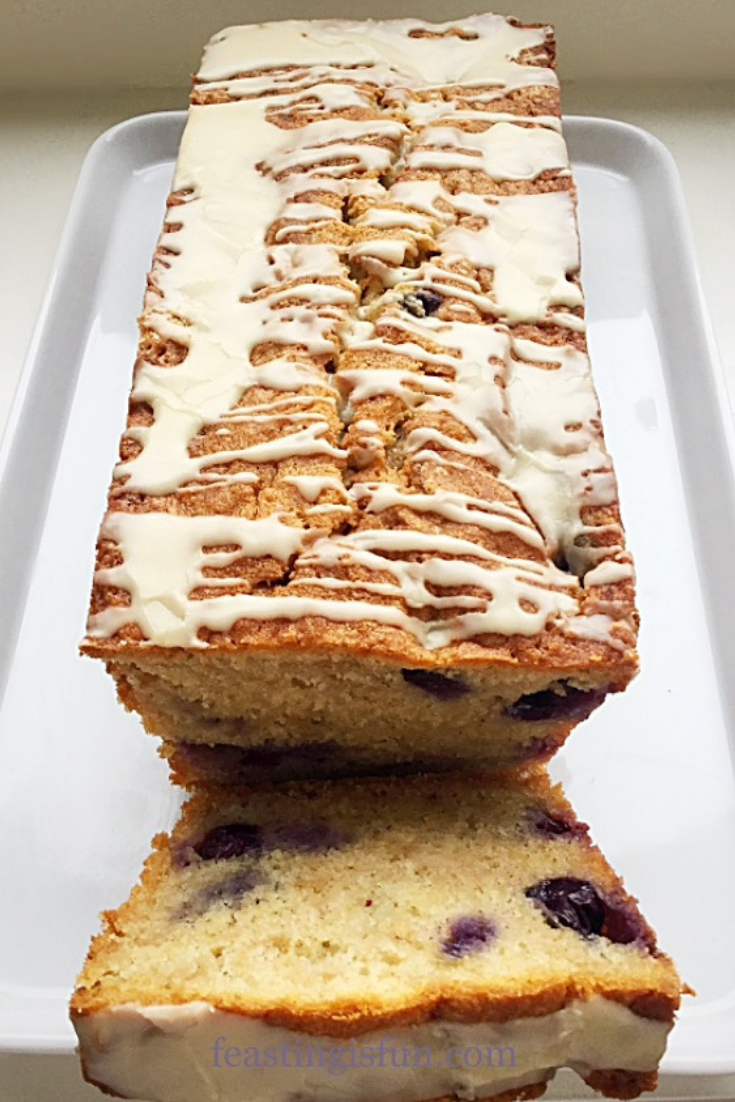
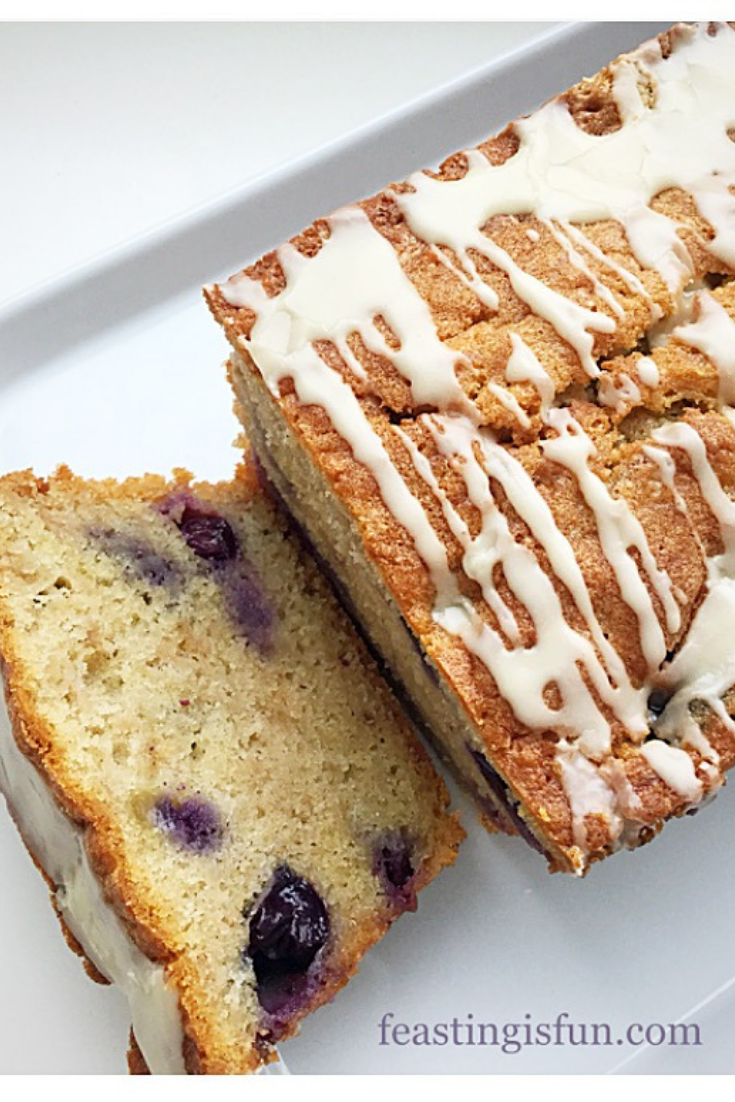
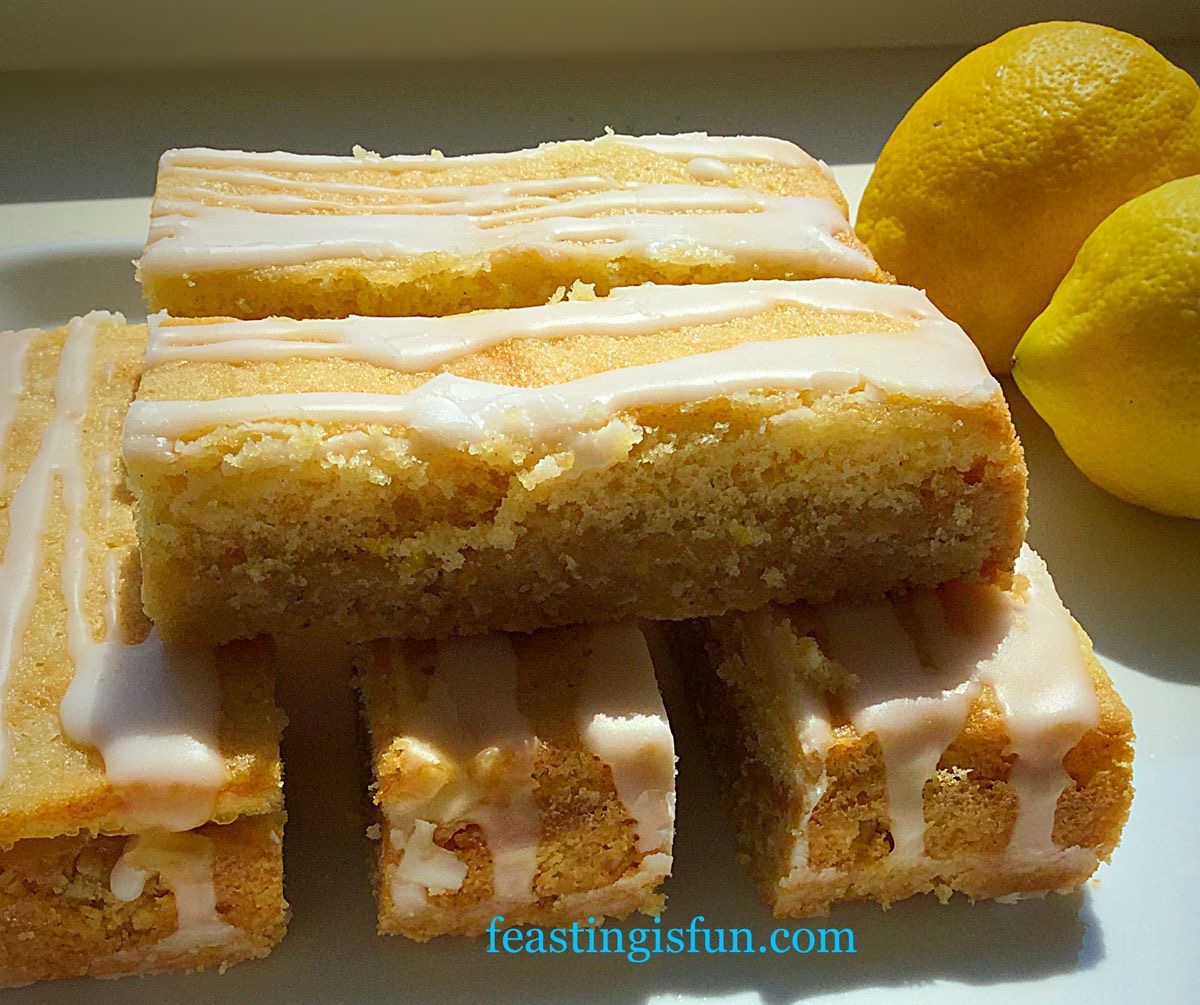
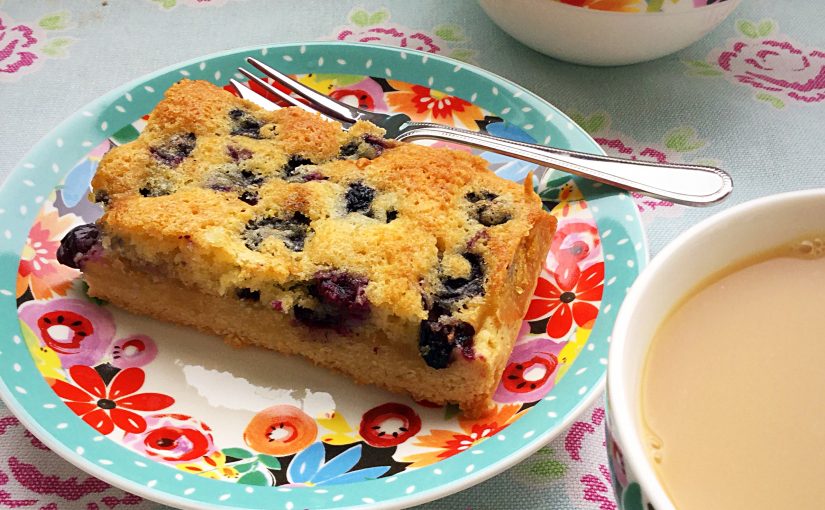
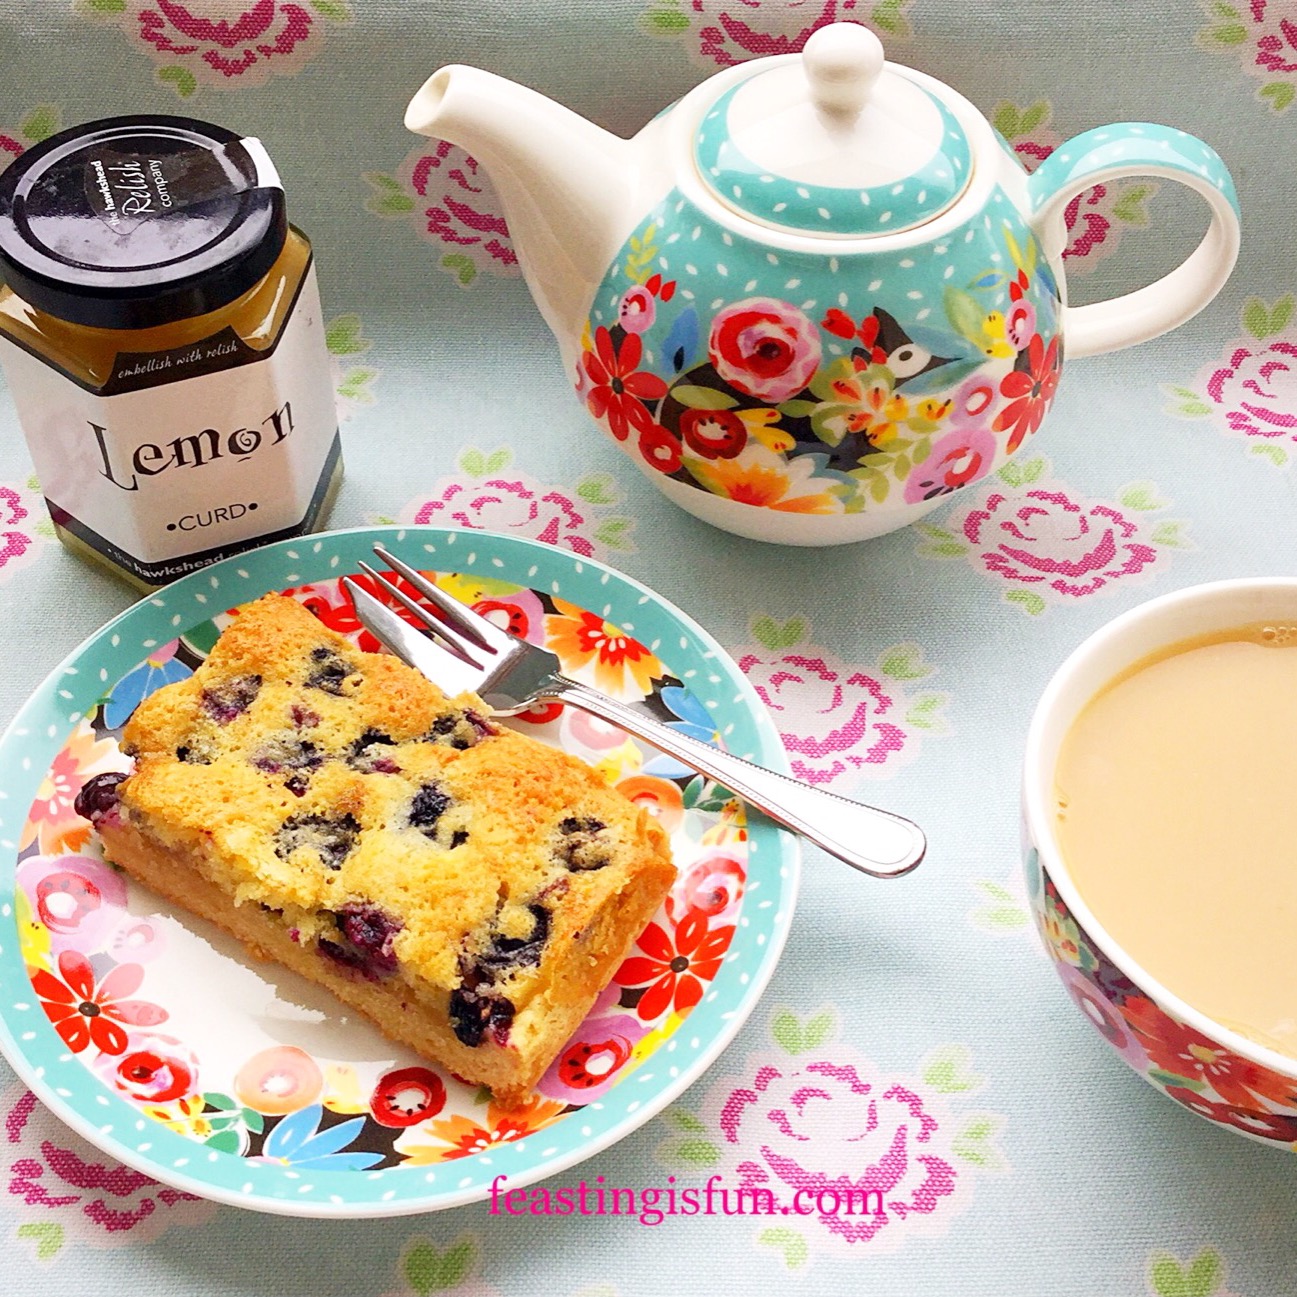
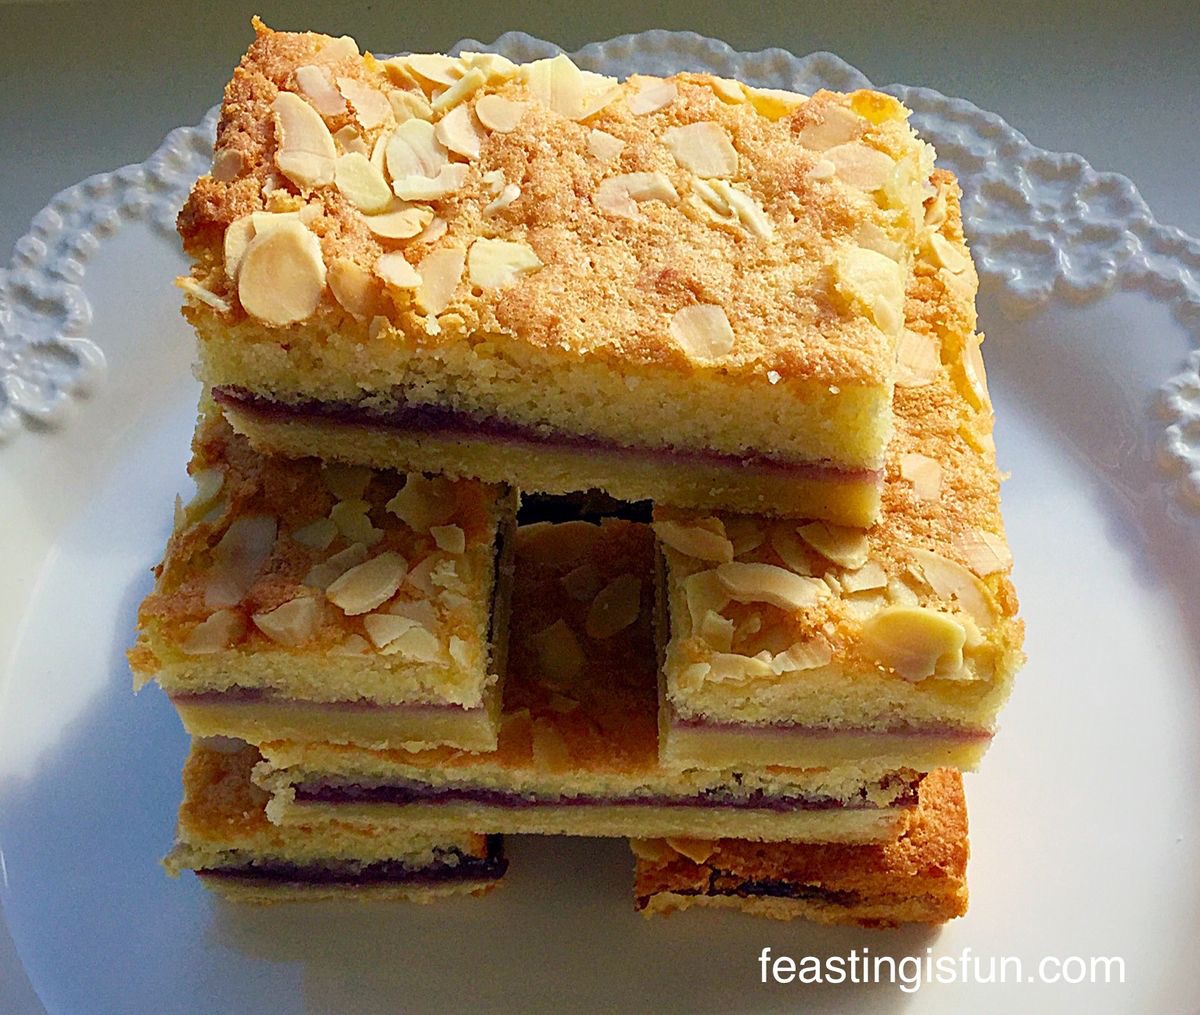
Biting into a bar really is a taste and texture sensation for your tongue and tastebuds. And each blueberry, when baked, turns into its own little pod of jam. Yet without the added sweetness of preserves. Finally, the cake layer, moist and light contrasts beautifully with the tang of lemon and defined shortbread base. Resulting in a complete mouthful of joy with each bite.
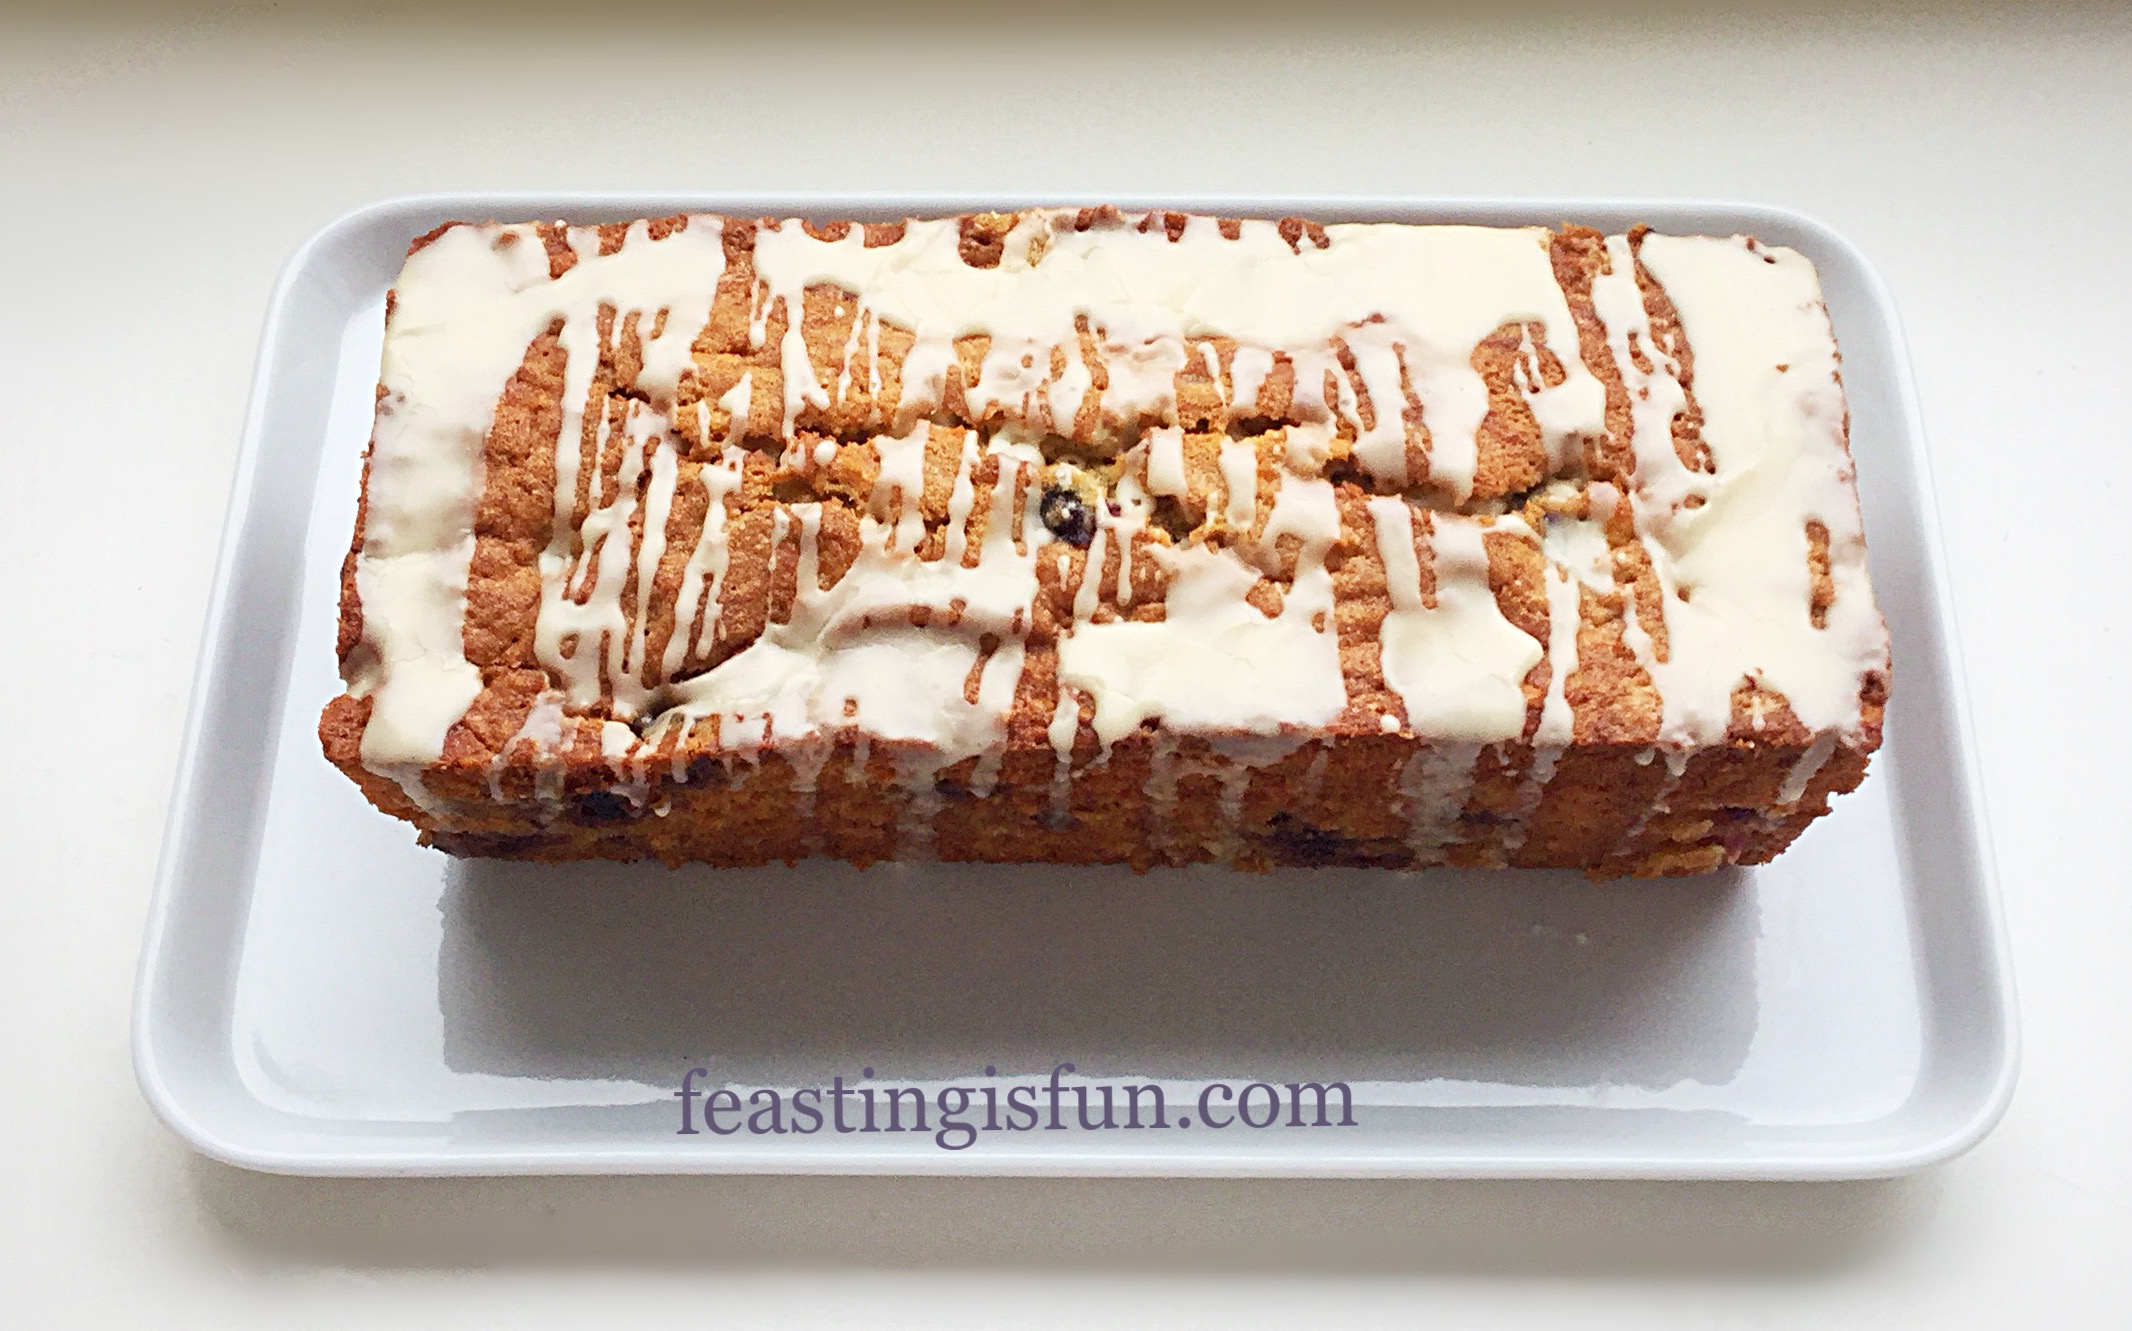
Recipe: Blueberry Lemon Shortbread Cake Bars makes 12
Shortbread Base
225g/8oz Unsalted Butter softened
150g/5oz Caster Sugar
1/4tsp Salt I use Maldon
275g/10z Plain White Flour
1tsp Vanilla Extract I use Nielsen-Massey
1 Large Free Range Egg Yolk
For the Sponge Topping
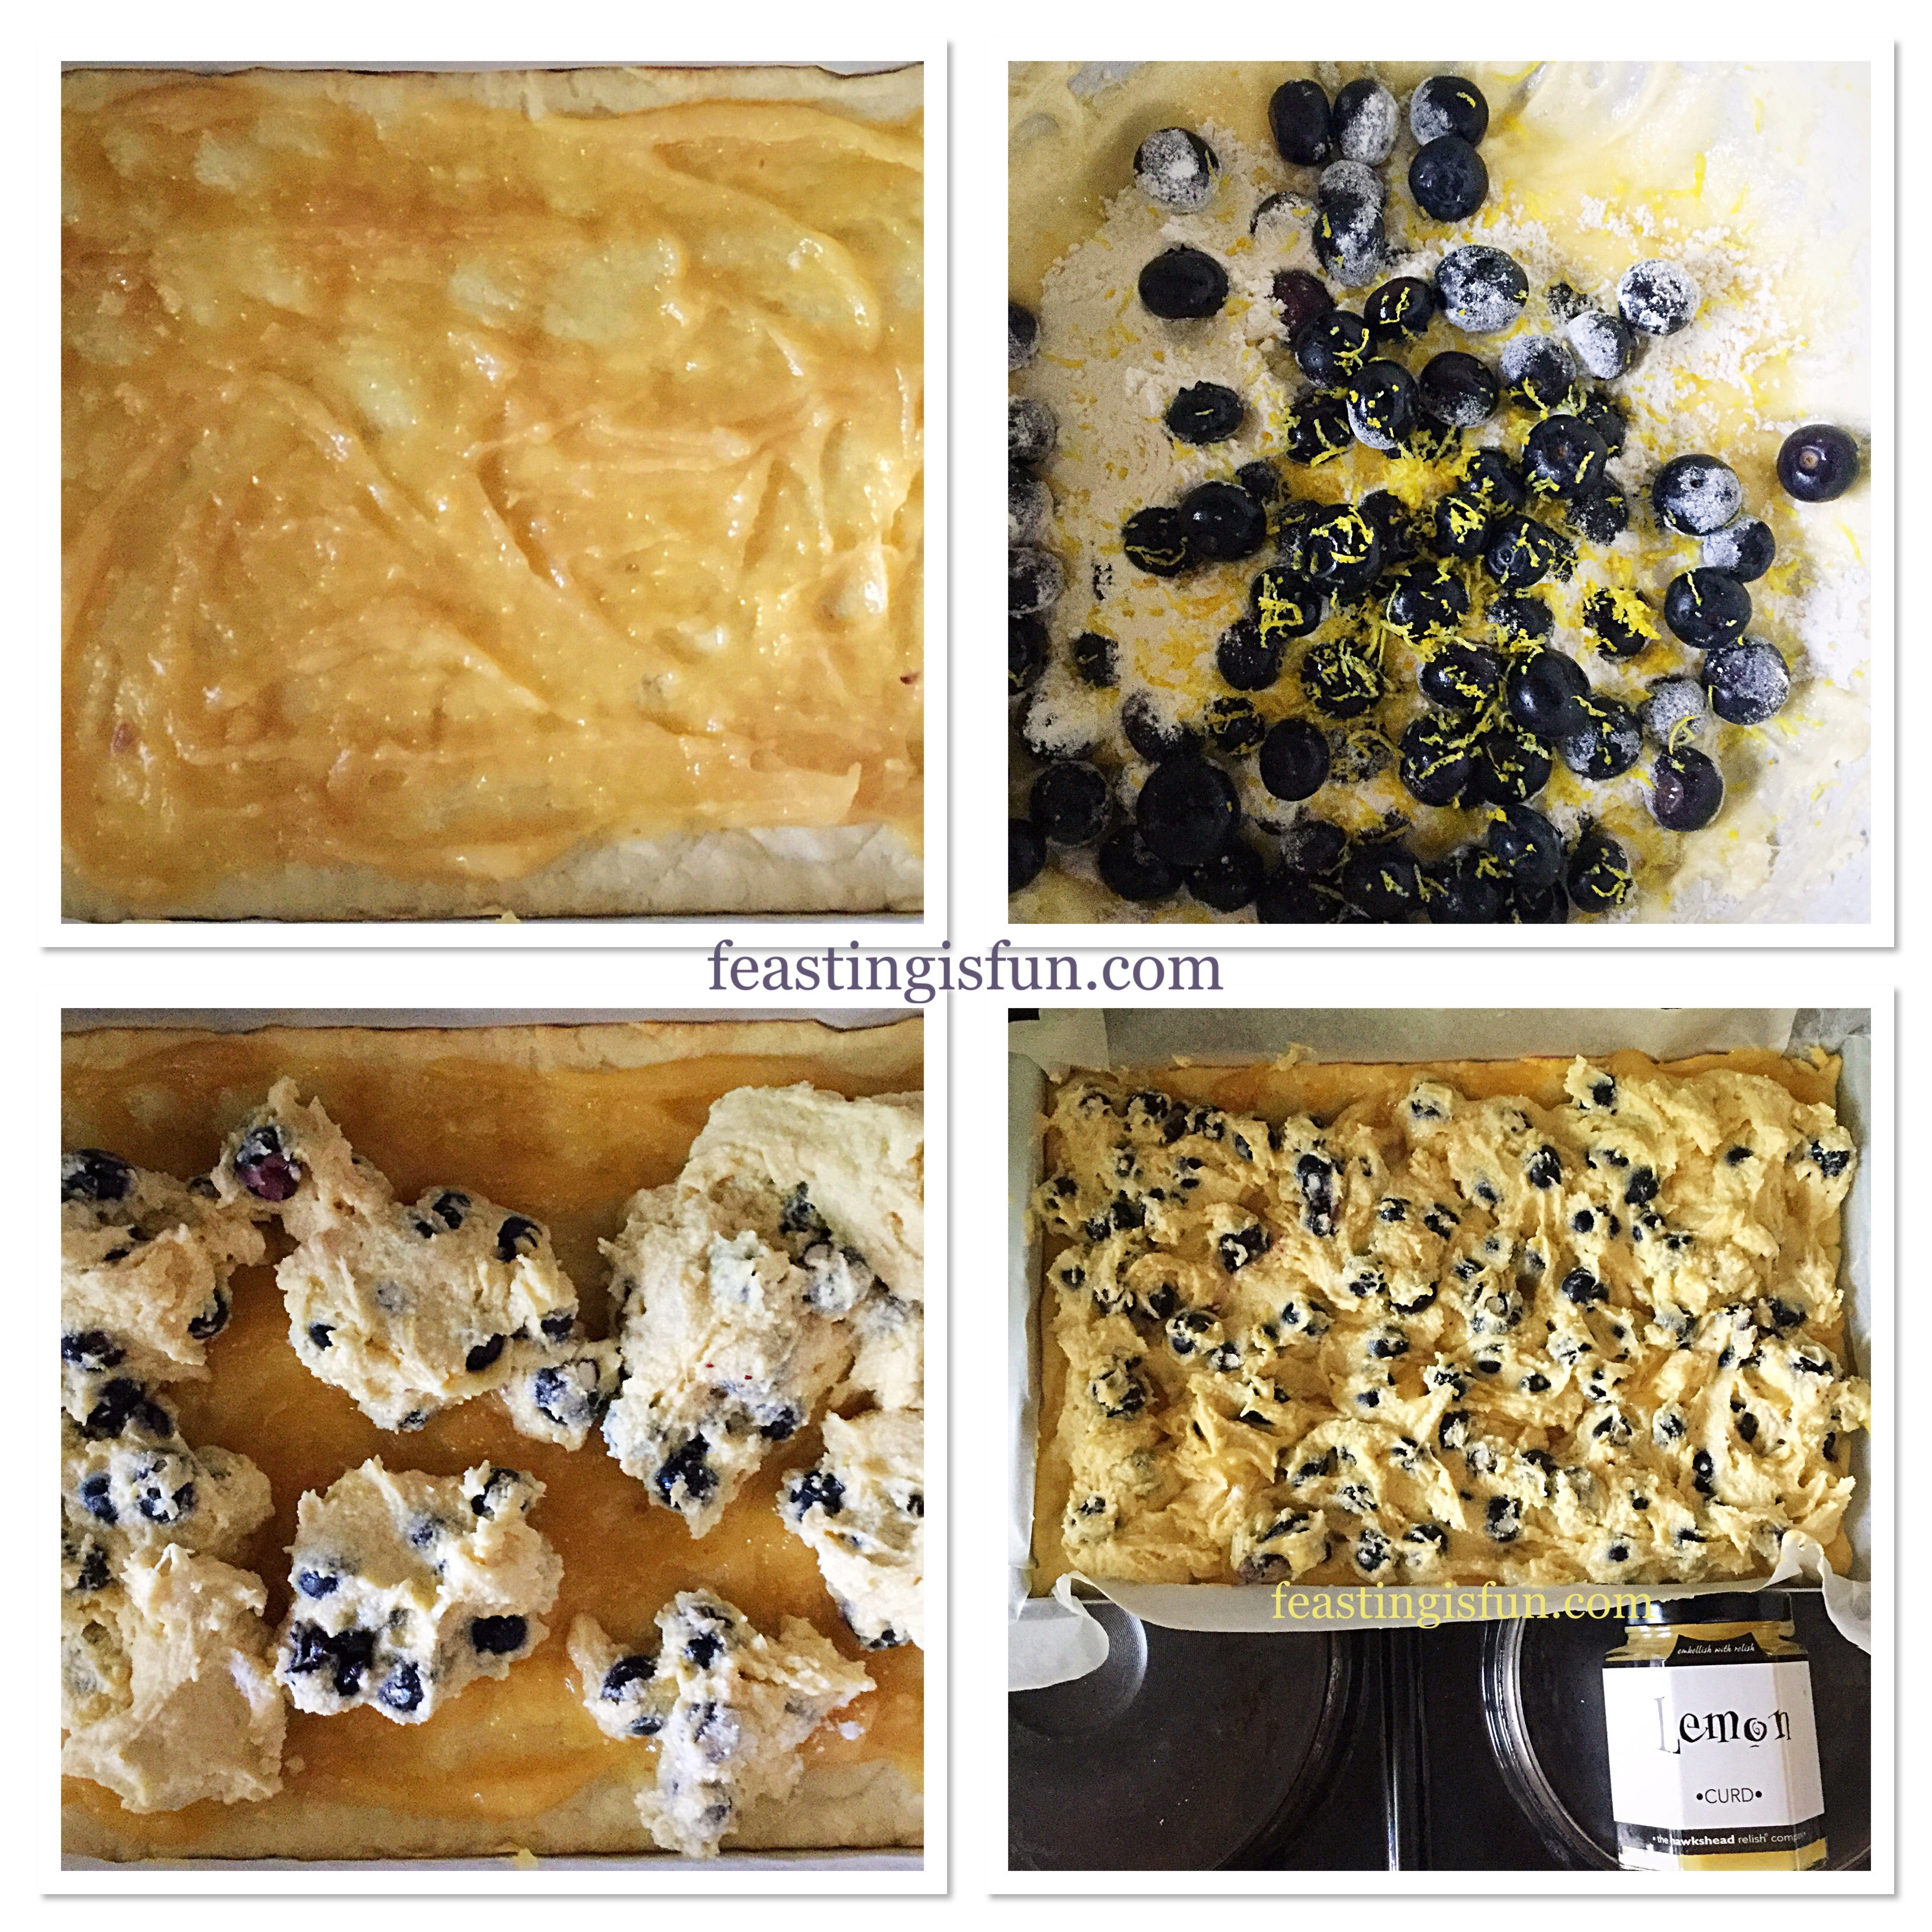
4-5 tbsp Lemon Curd I use Hawkshead Relish
100g/4oz Unsalted Butter softened
100g/4oz Caster Sugar
2 Large Free Range Eggs
100g/4oz Plain White Flour
1tsp Baking Powder
200g/7oz Fresh Blueberries
Finely Grated Zest of 1 Lemon
Method: Preheat the oven to 160C/140C fan, gas mark 3, 325F
Line a 20cm x 28cm x 5cm (8″ x 11″ x 2″) tin with baking parchment, ensuring the parchment is higher than the sides of the tin. The tin does not need to be greased first.
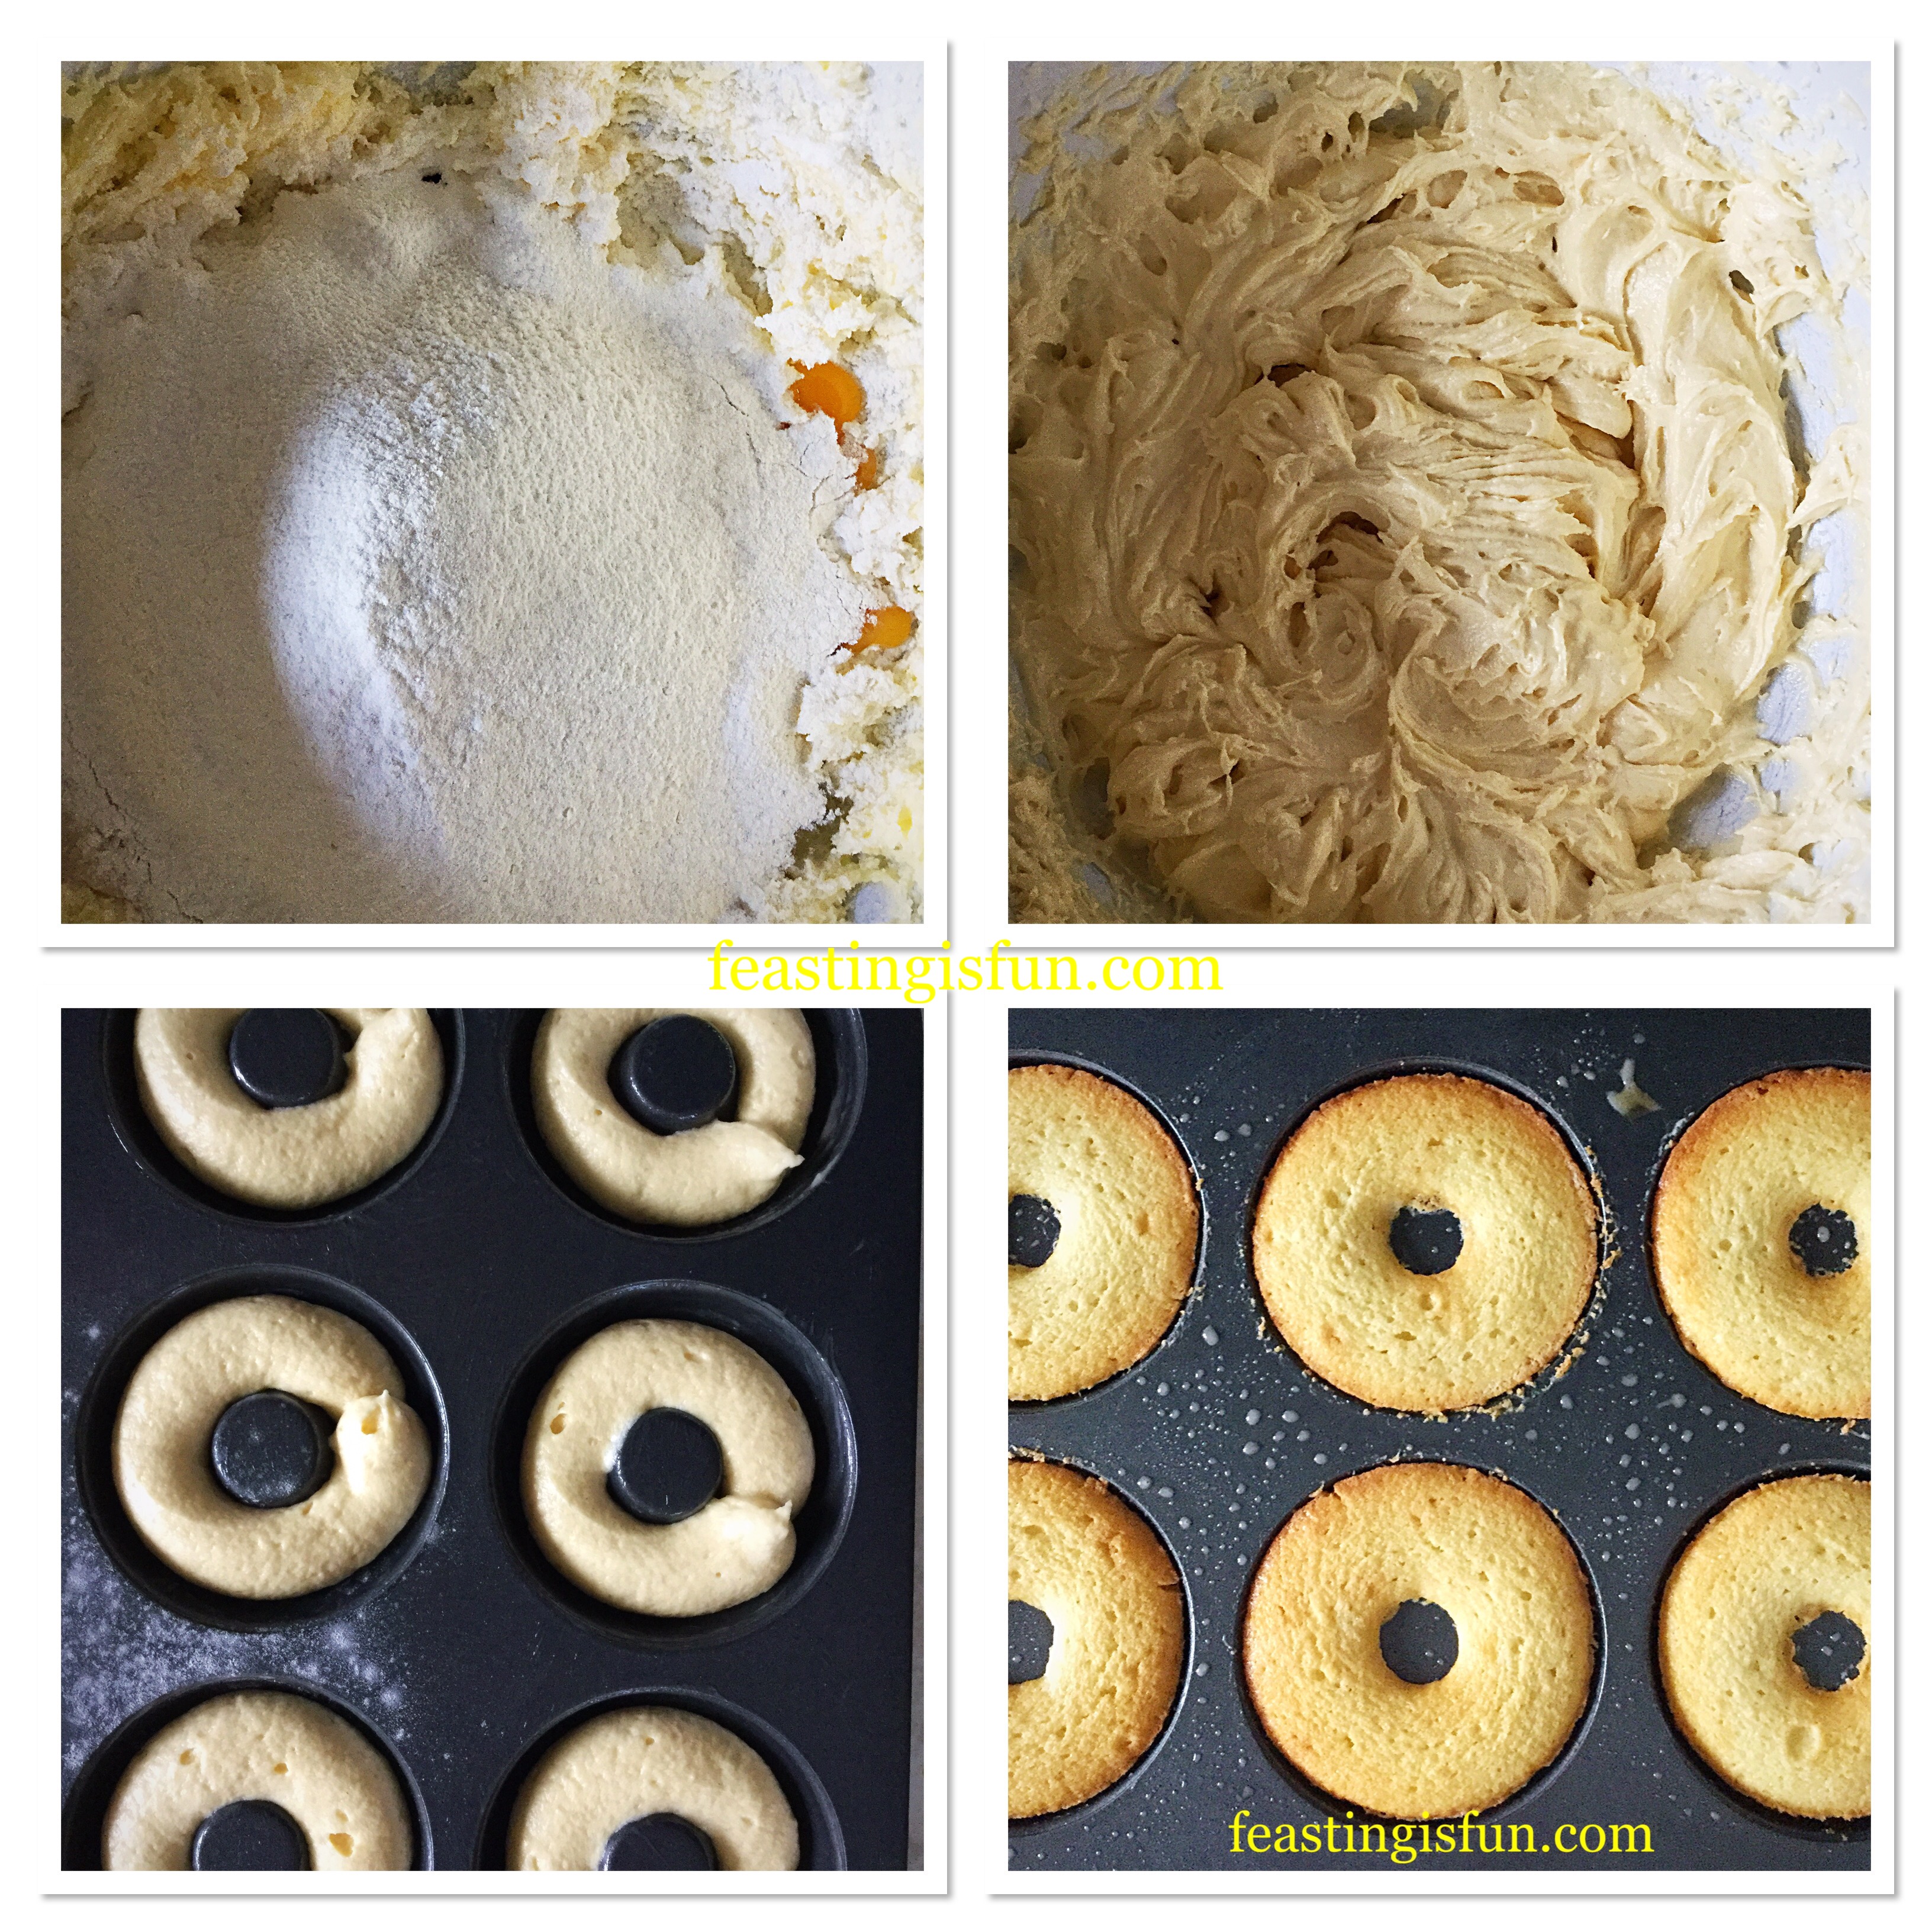
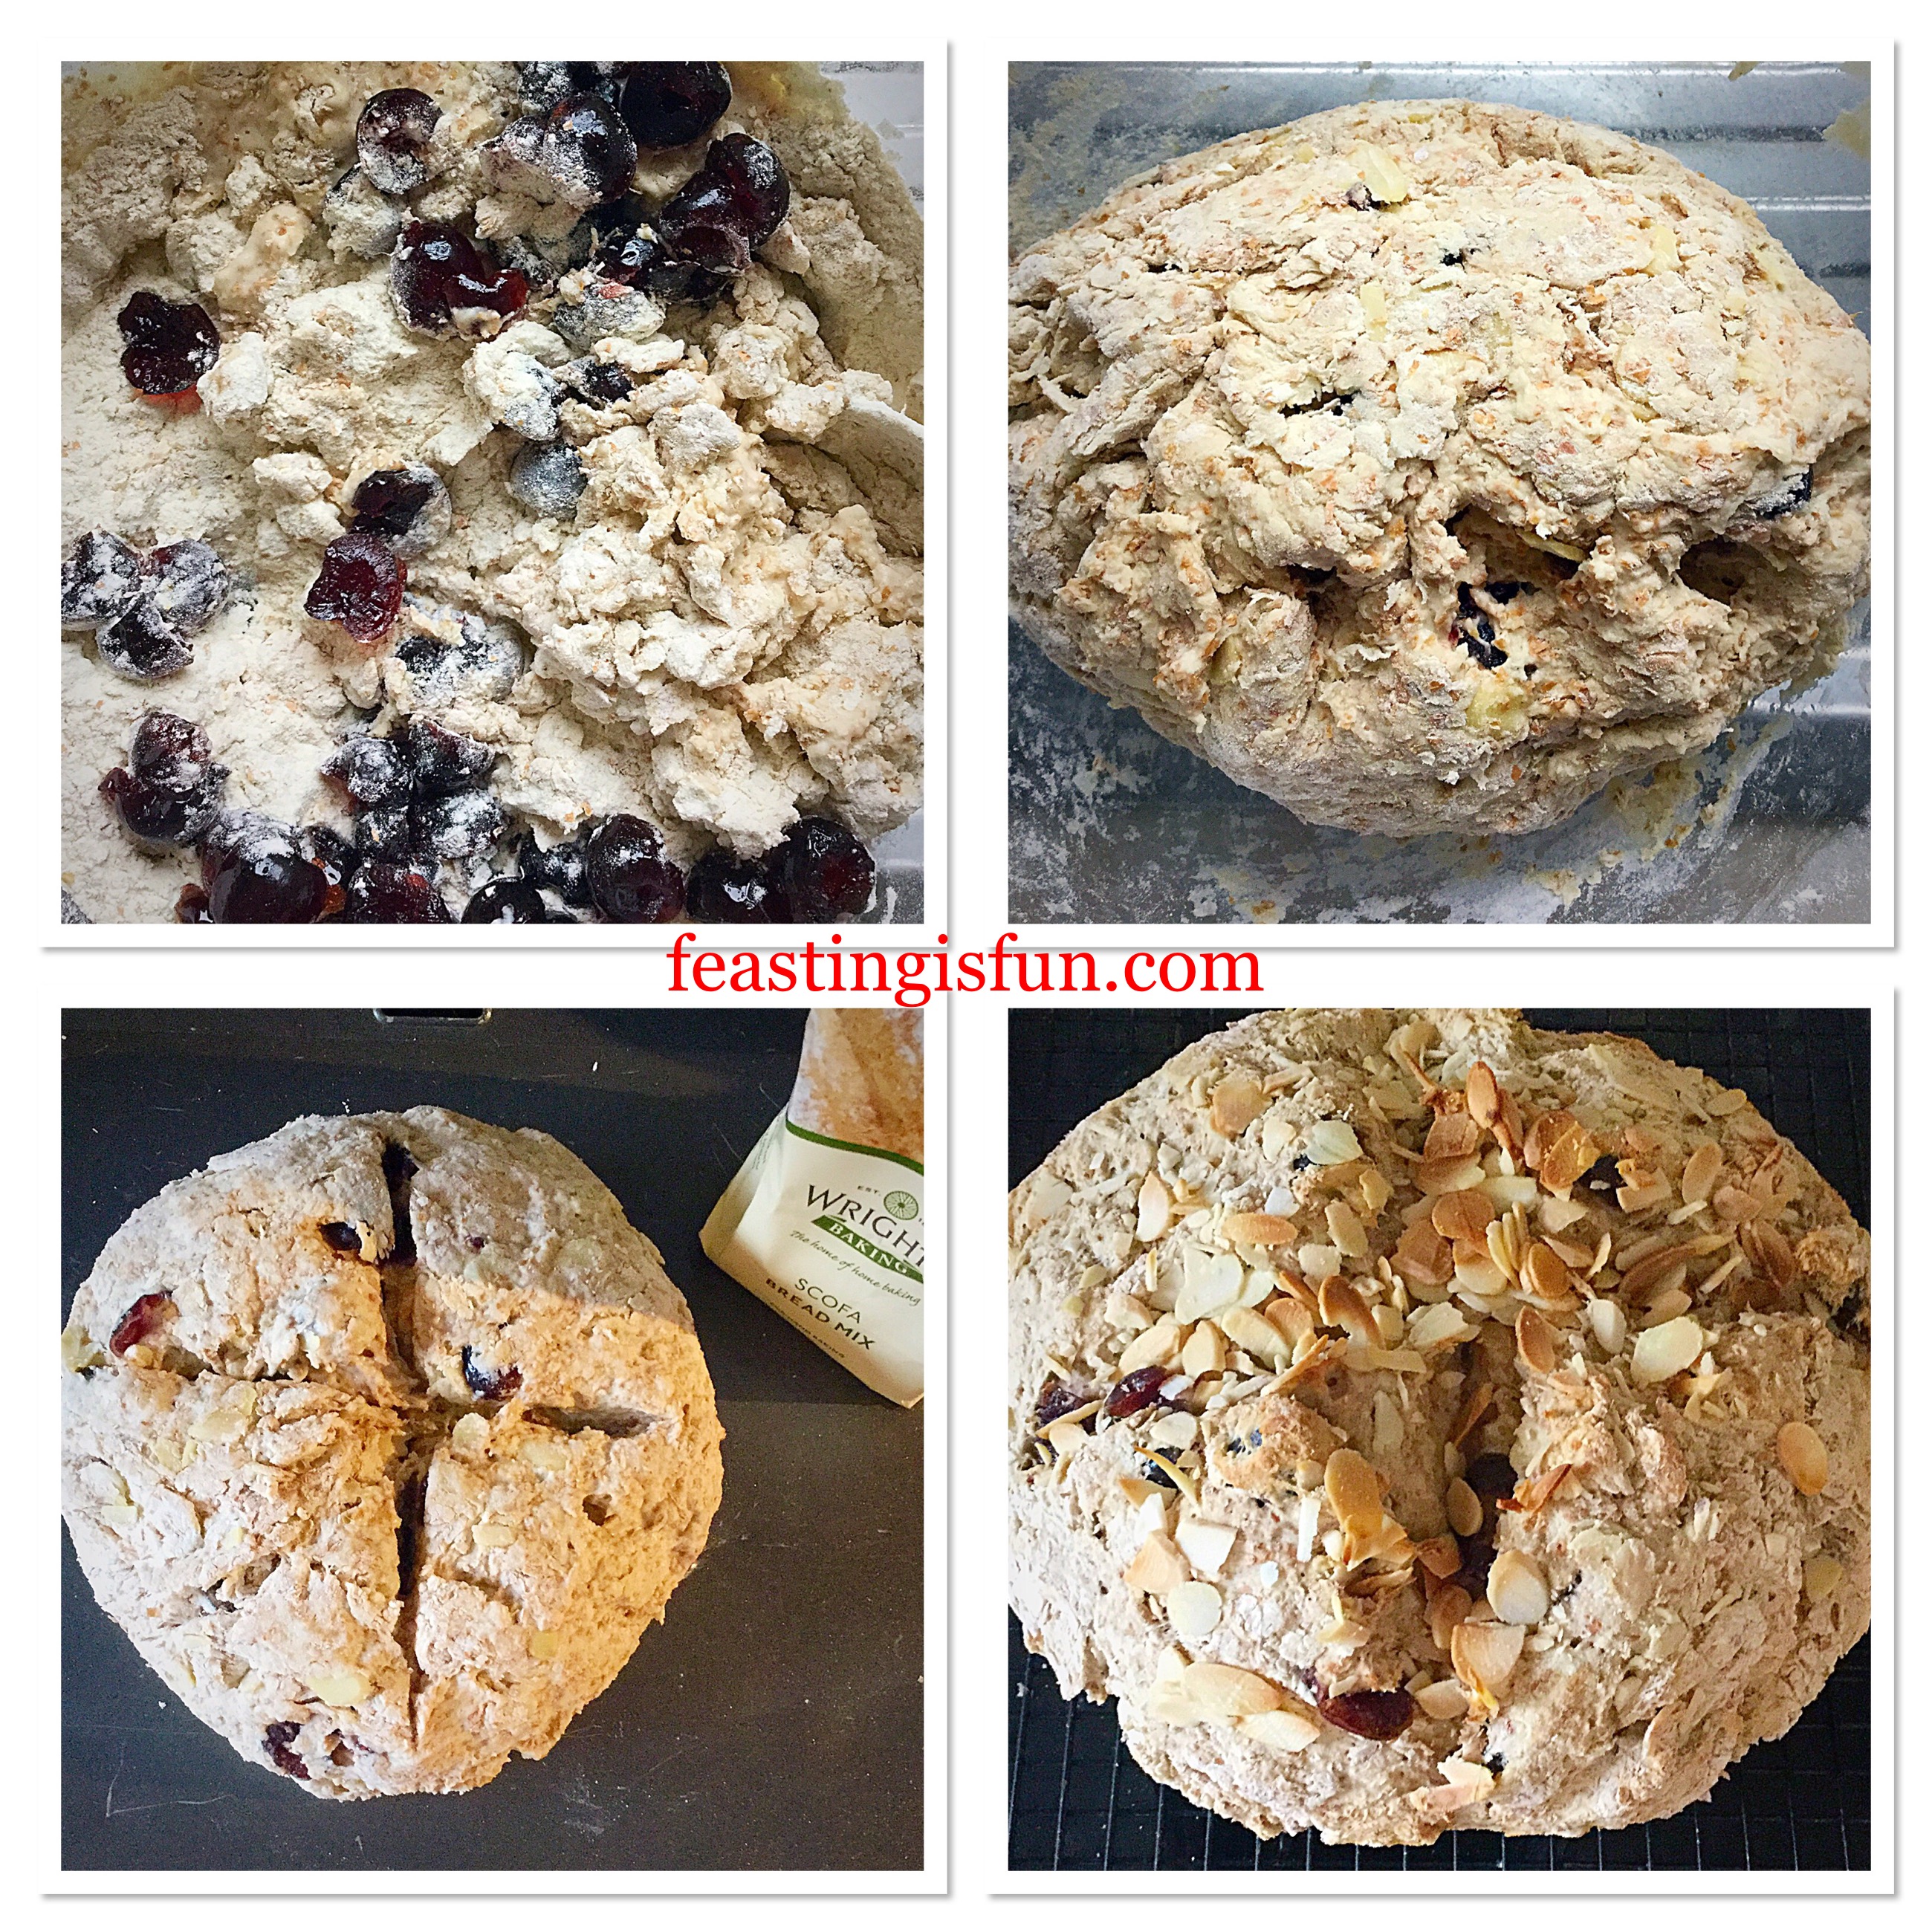
Making And Baking The Shortbread Base:
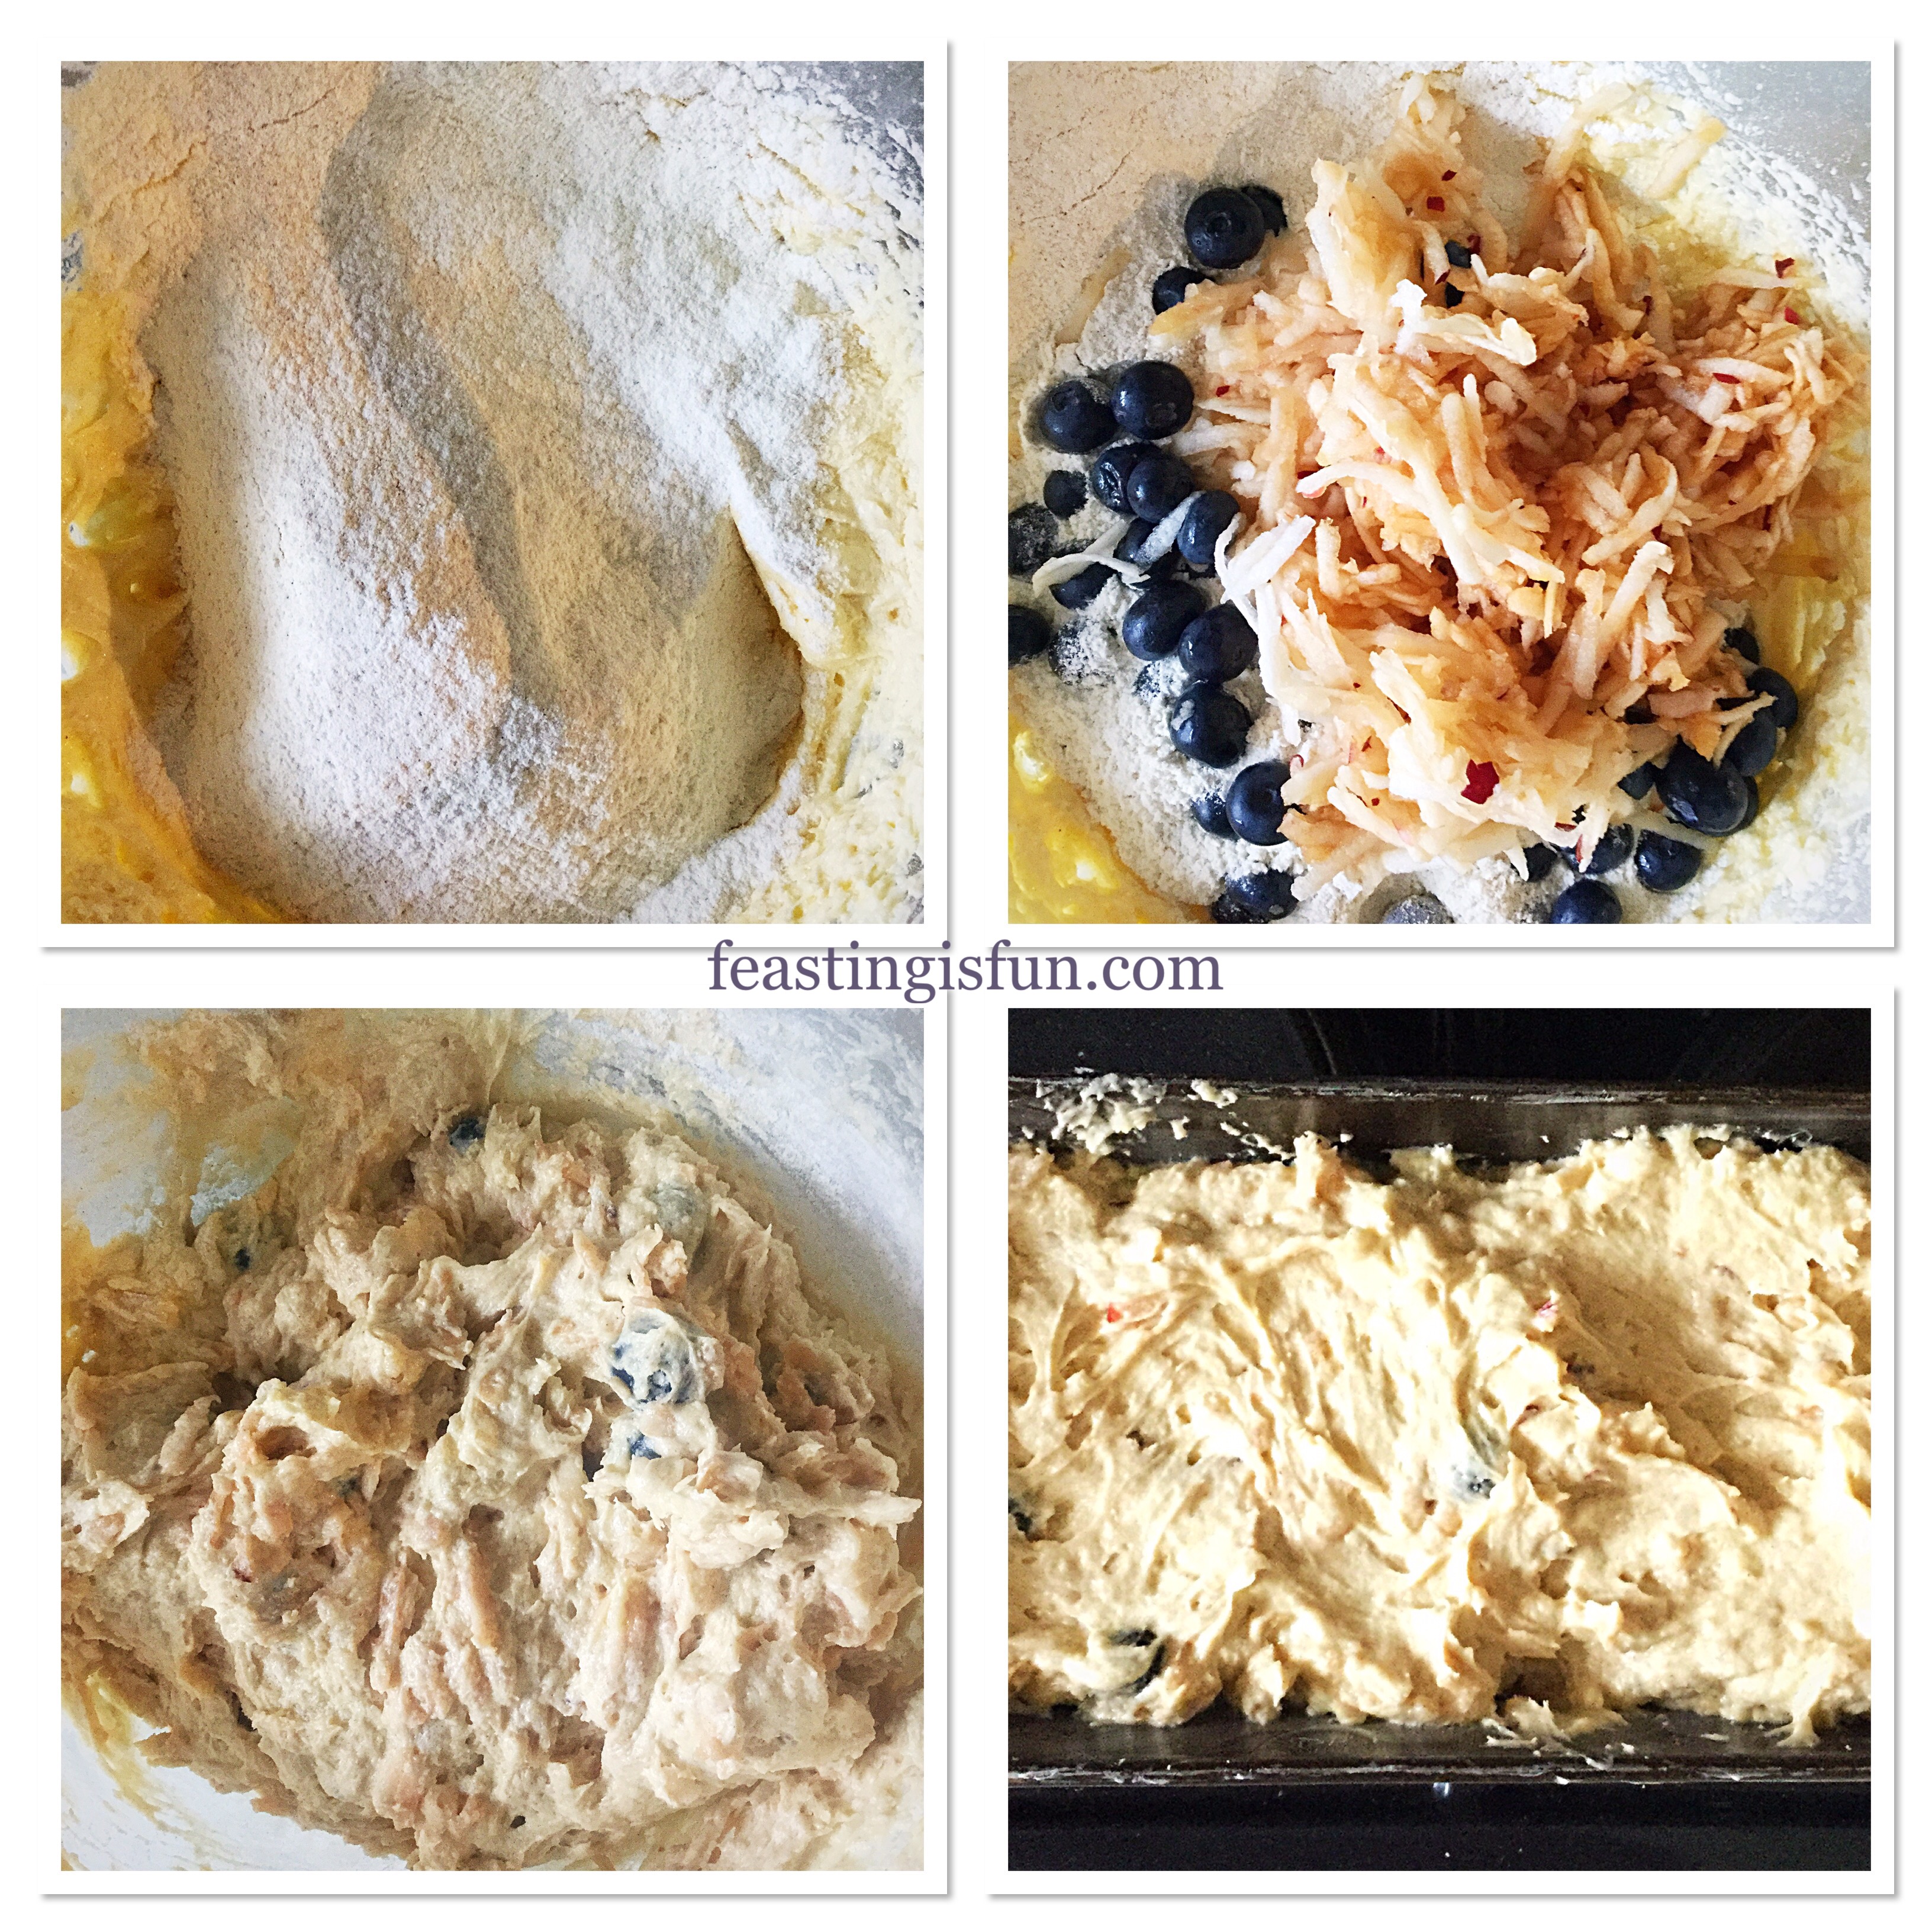
- Place the softened butter, salt and sugar into a large bowl. Whisk or beat until the mixture is pale and creamy.
- Next, add the egg yolk and vanilla extract. Continue to beat until all ingredients are completely incorporated.
- Now sift the flour into the bowl and then, using a spoon gently mix all the ingredients until they just come together.
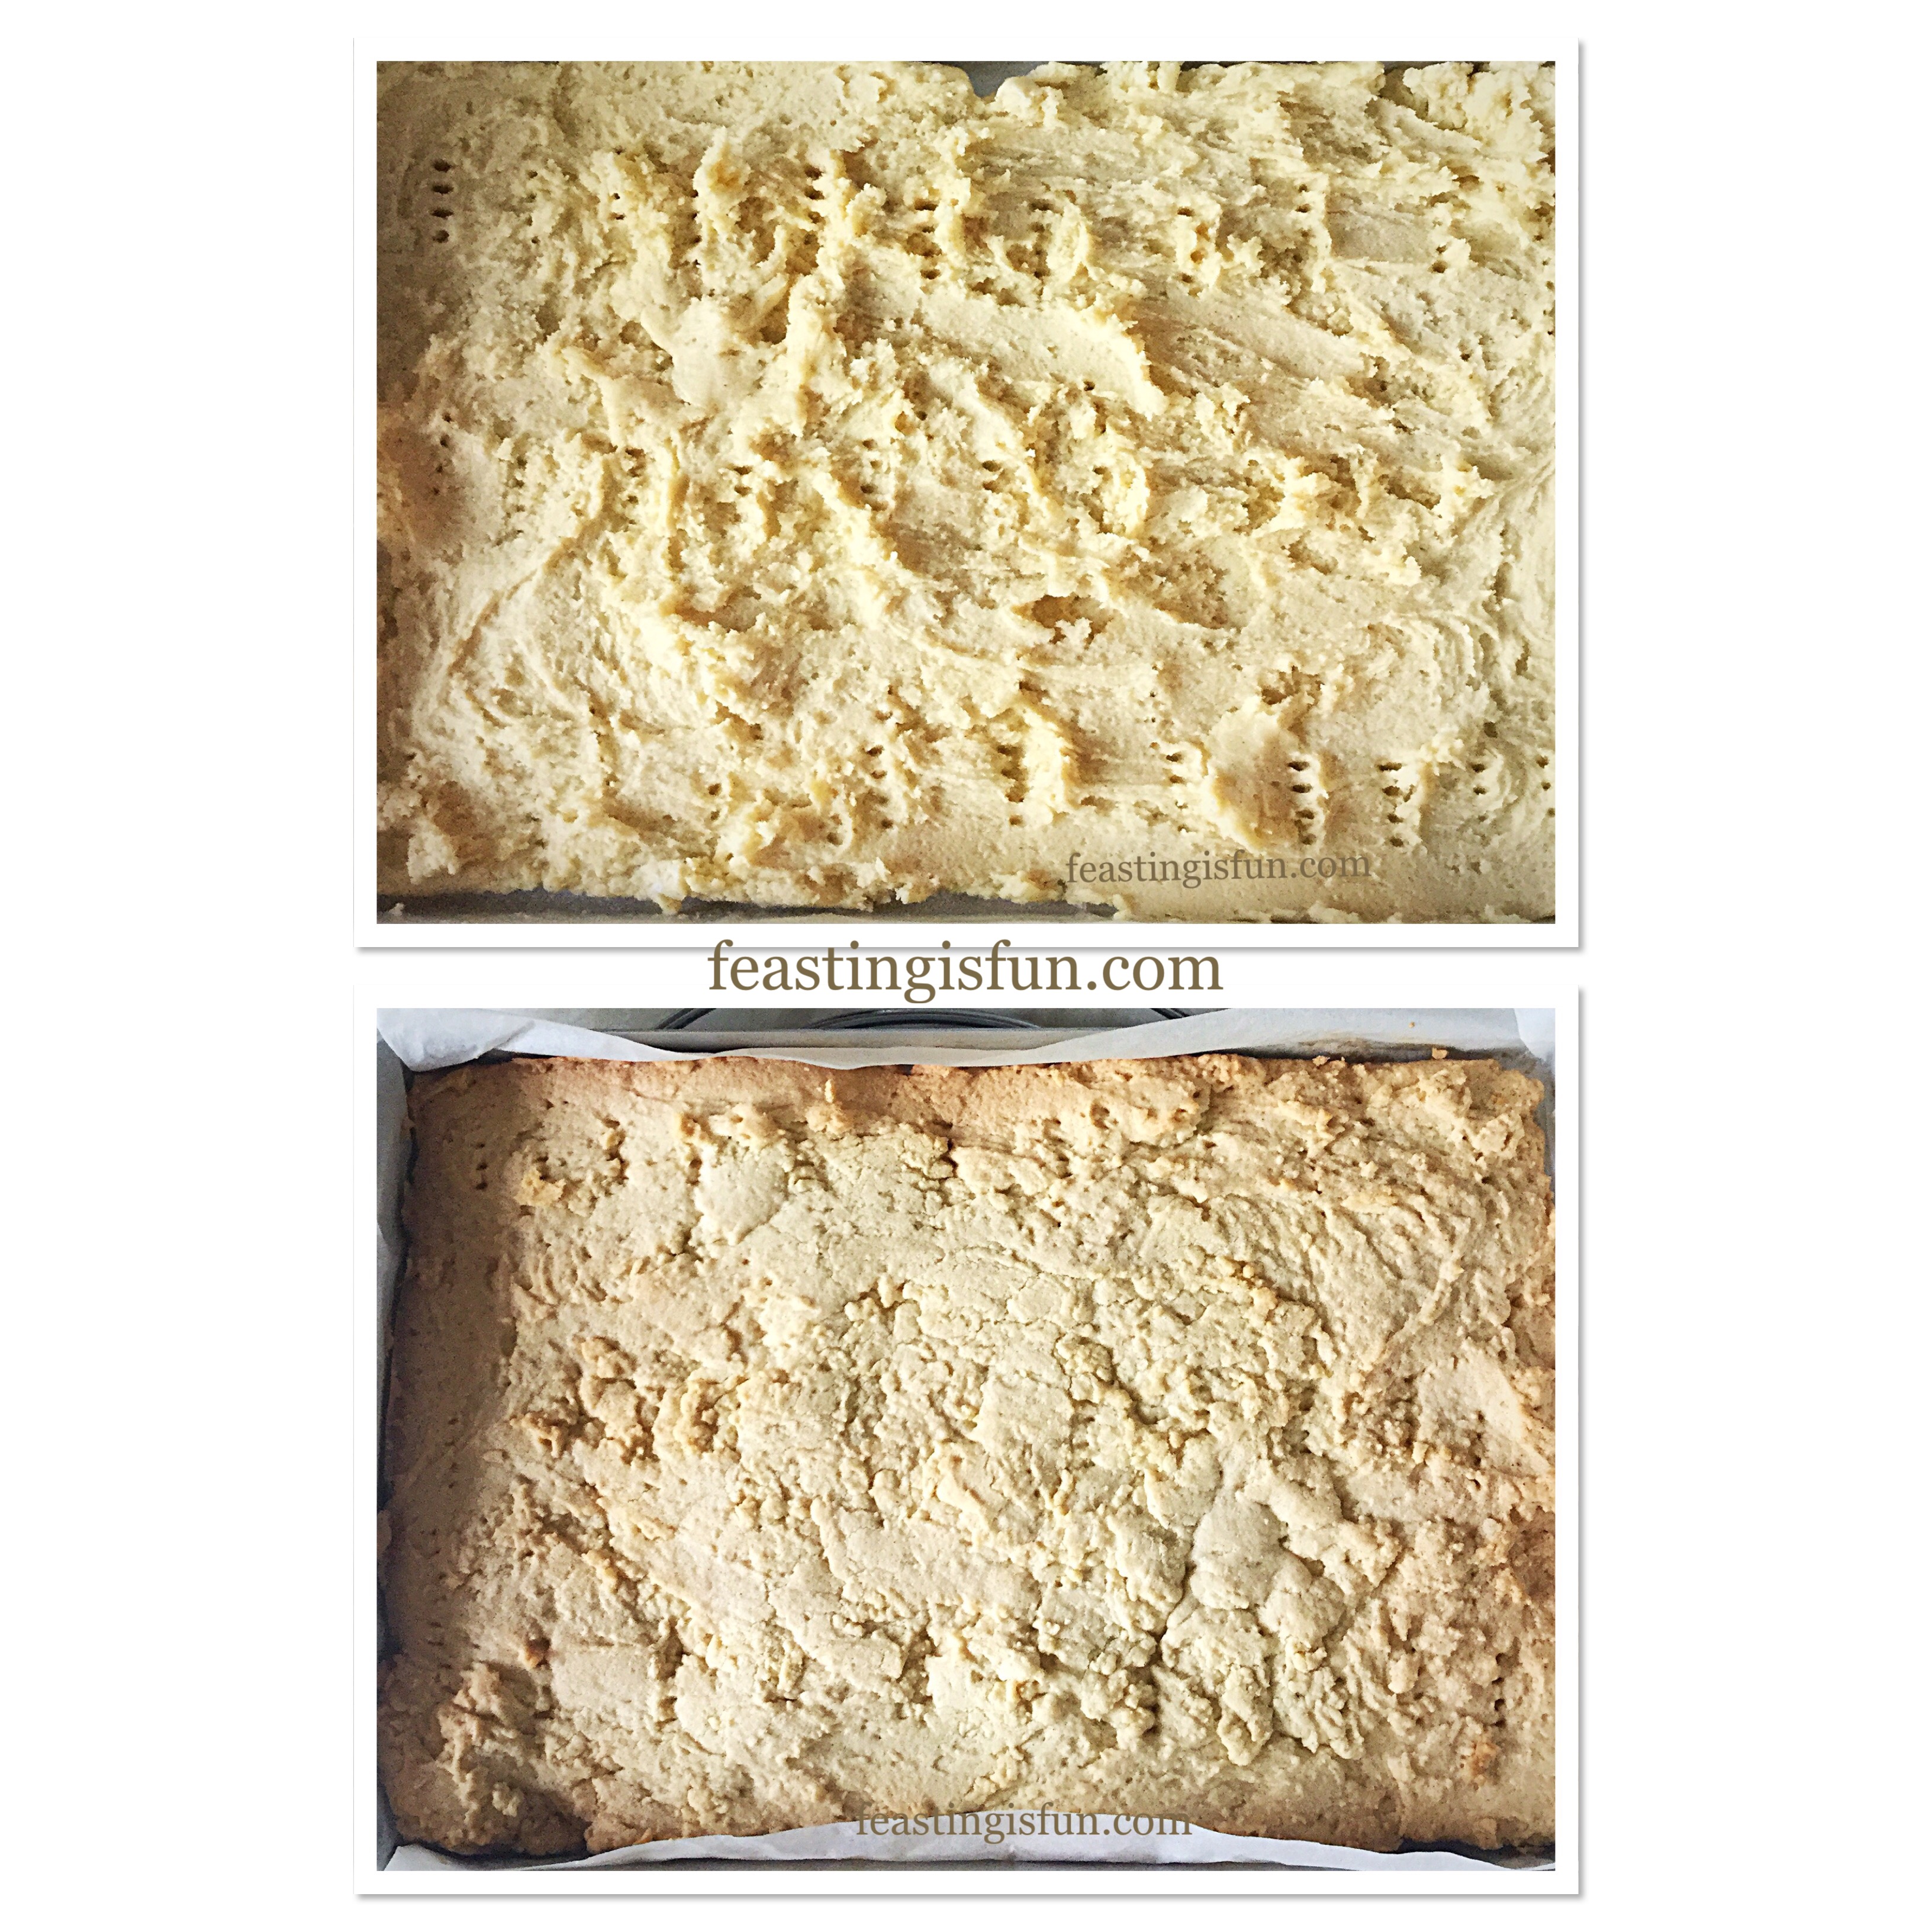
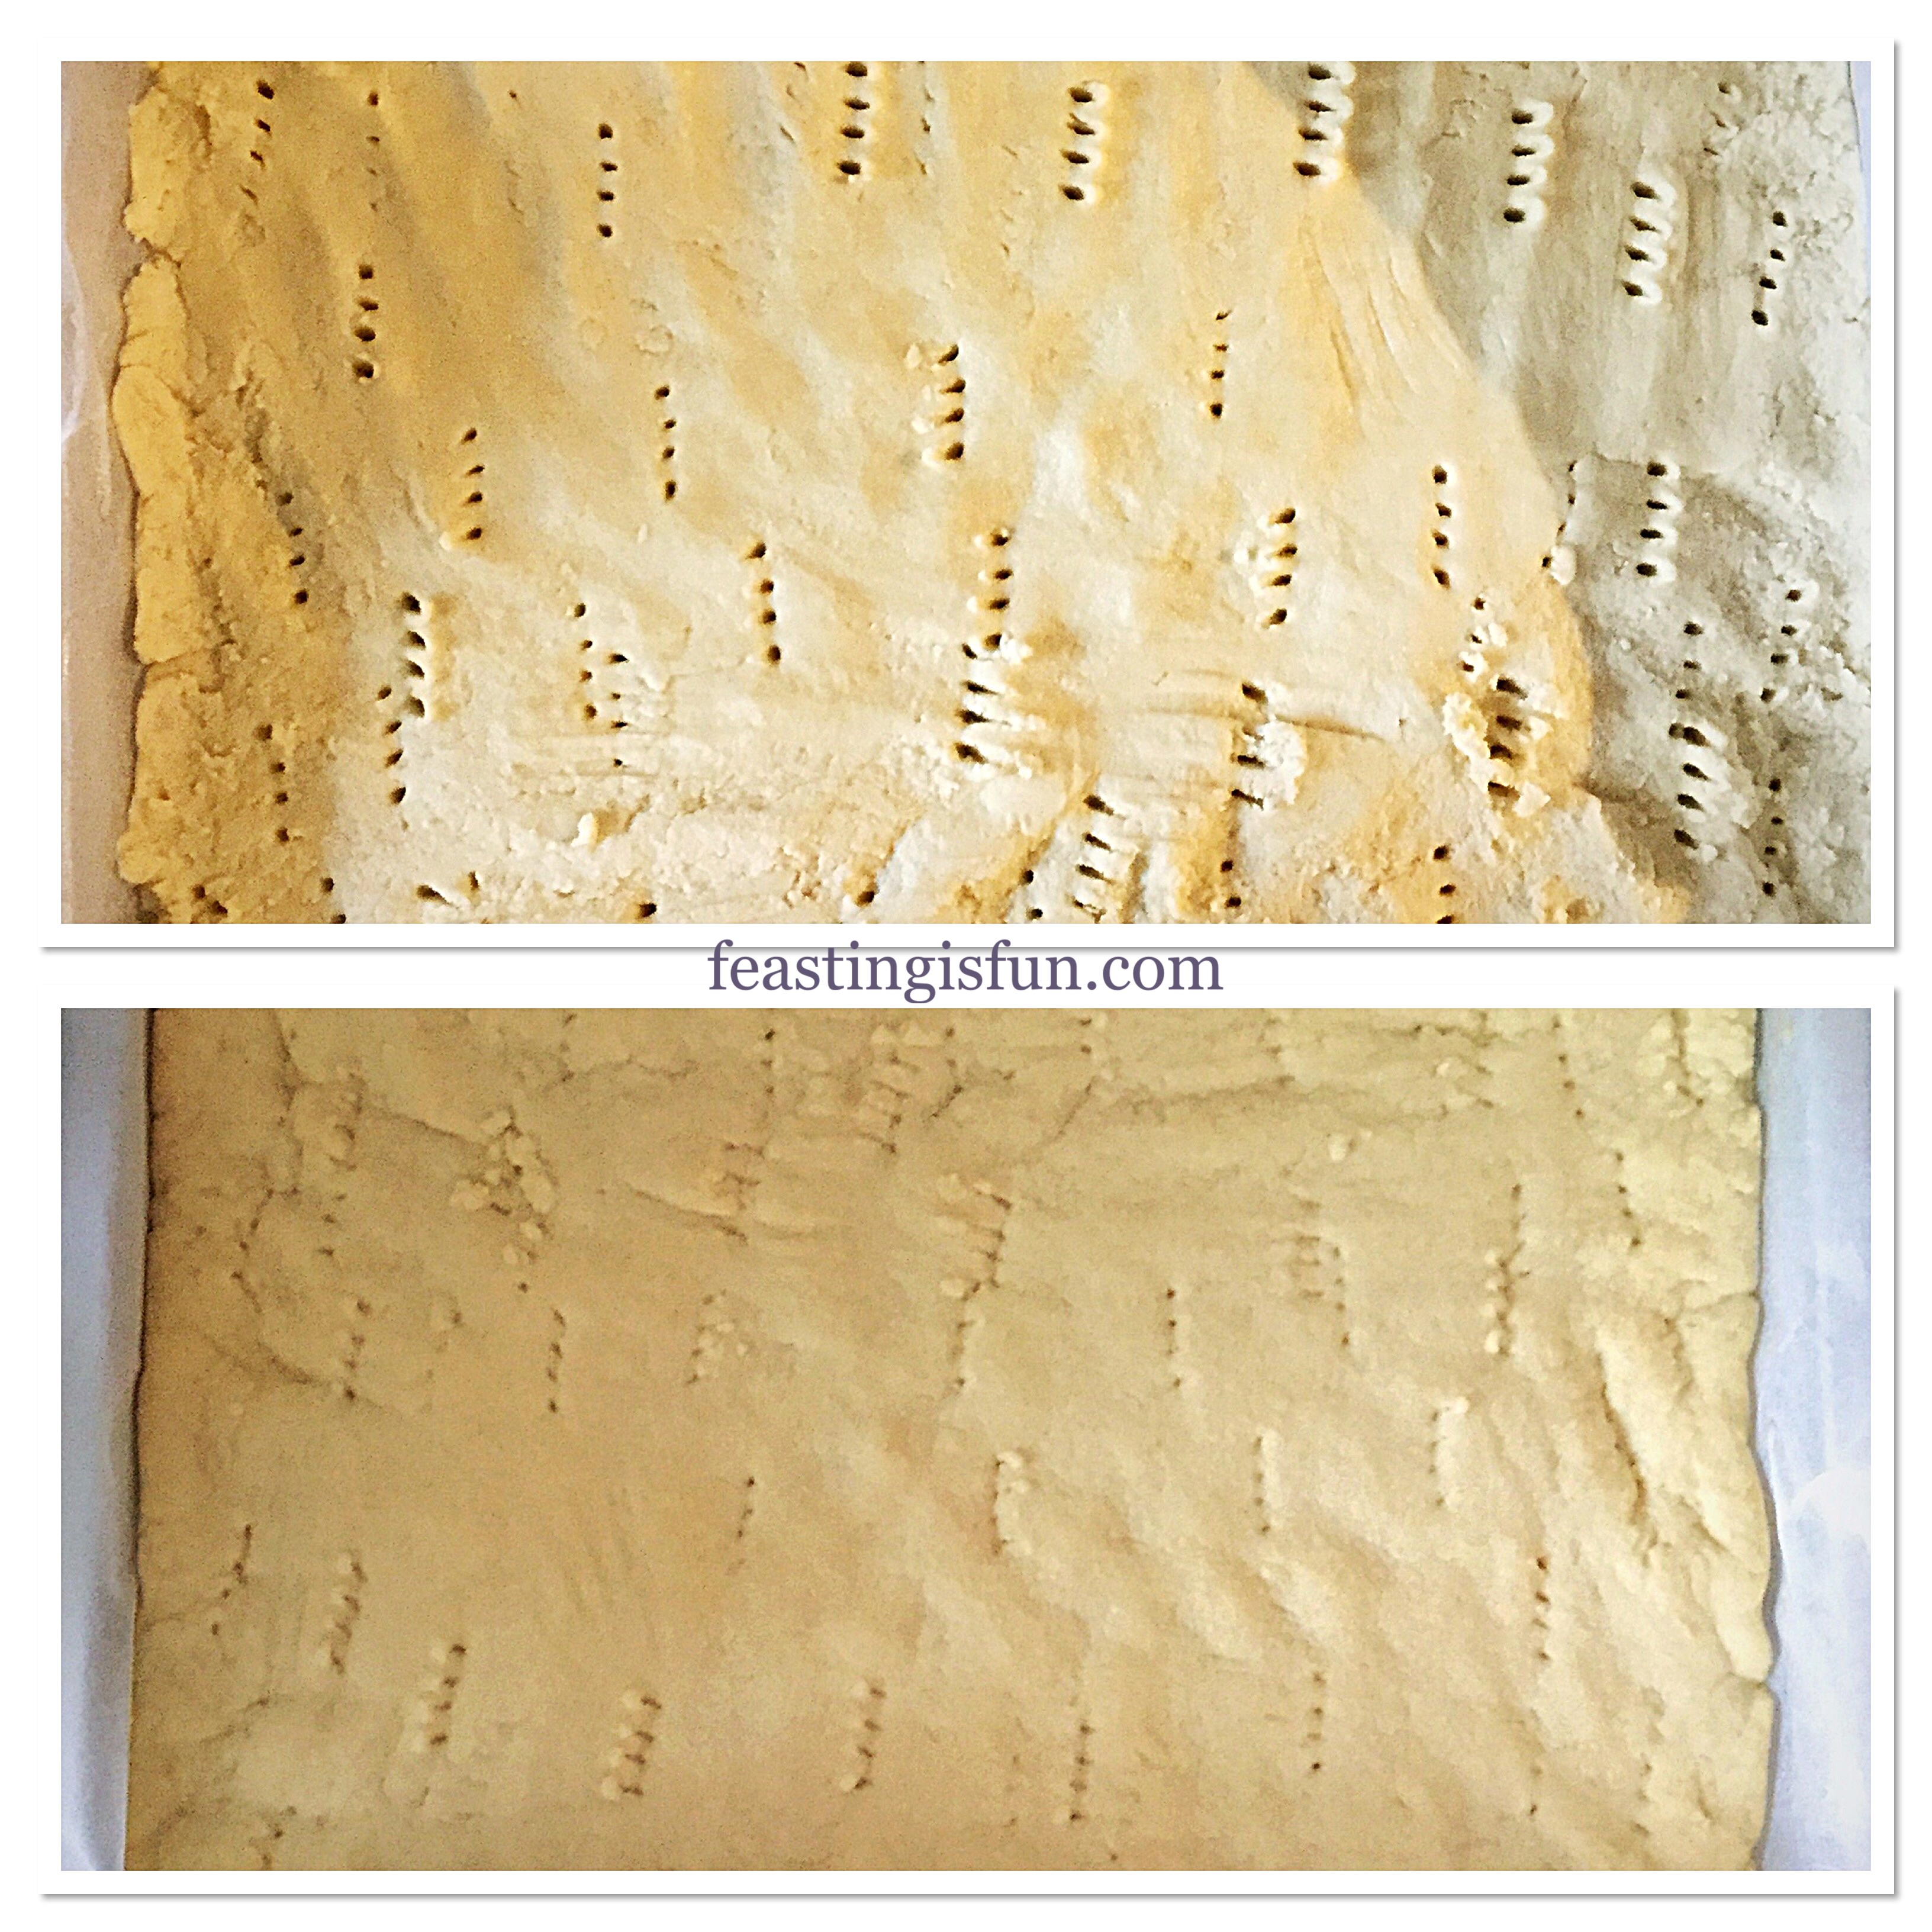
- Spoon the shortbread mixture into the lined tin and then press into an even layer using your fingers. Use a fork to prick holes, known as docking, into the shortbread. This allows any steam to escape and create a golden base.
- Place the tin into the centre of a preheated oven and bake for 25 minutes. Until the top is just turning golden.
- While the shortbread is baking make the sponge topping – see below for instructions.
- As soon as the shortbread is baked remove from the oven. It is important to note that the shortbread is not fully cooked at this point.
Making the Sponge Topping
- While the shortbread is baking the cake batter can be made.
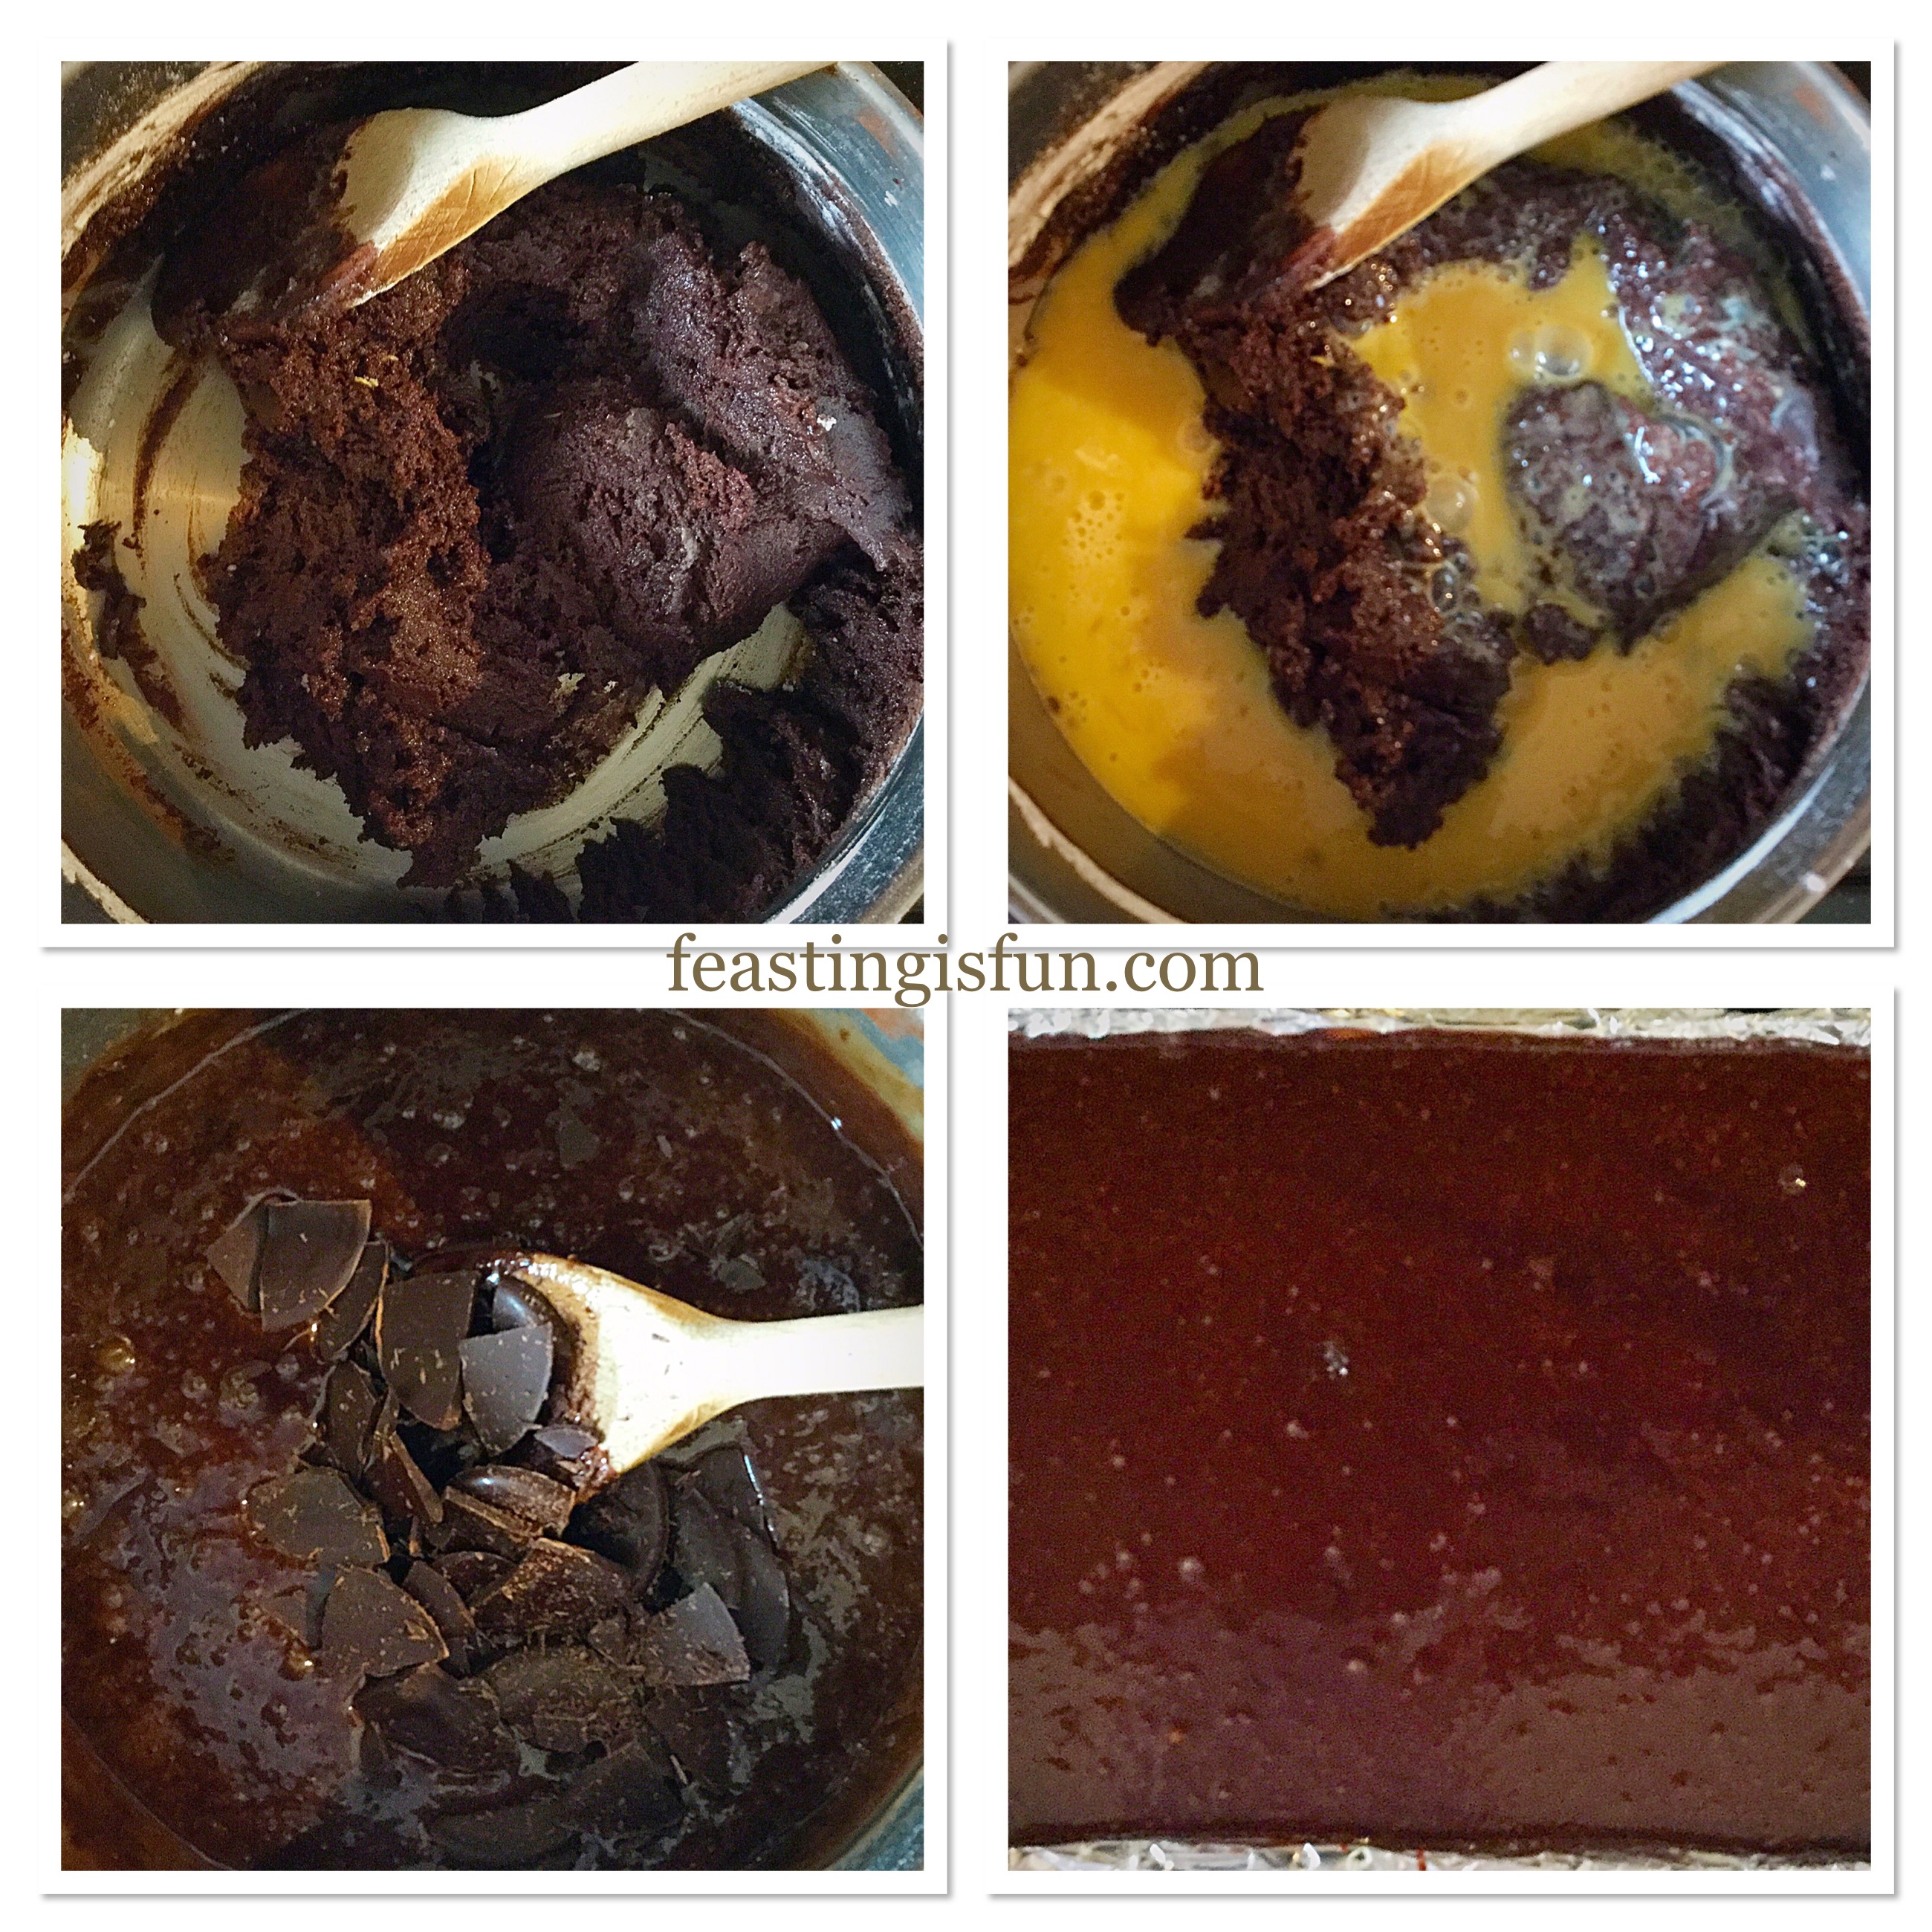
- Into a large bowl, as before, add the butter and sugar. Whisk/beat until pale and creamy.
- Next add the two eggs and continue whisking until the mixture is completely combined.
- Now sift the flour and baking powder into the same bowl. Then add the blueberries and the lemon zest.
- Using a metal spoon, fold the ingredients together gently, to minimise breaking up the blueberries. Set to one side.
Assembling And Baking The Blueberry Lemon Shortbread Cake Bars
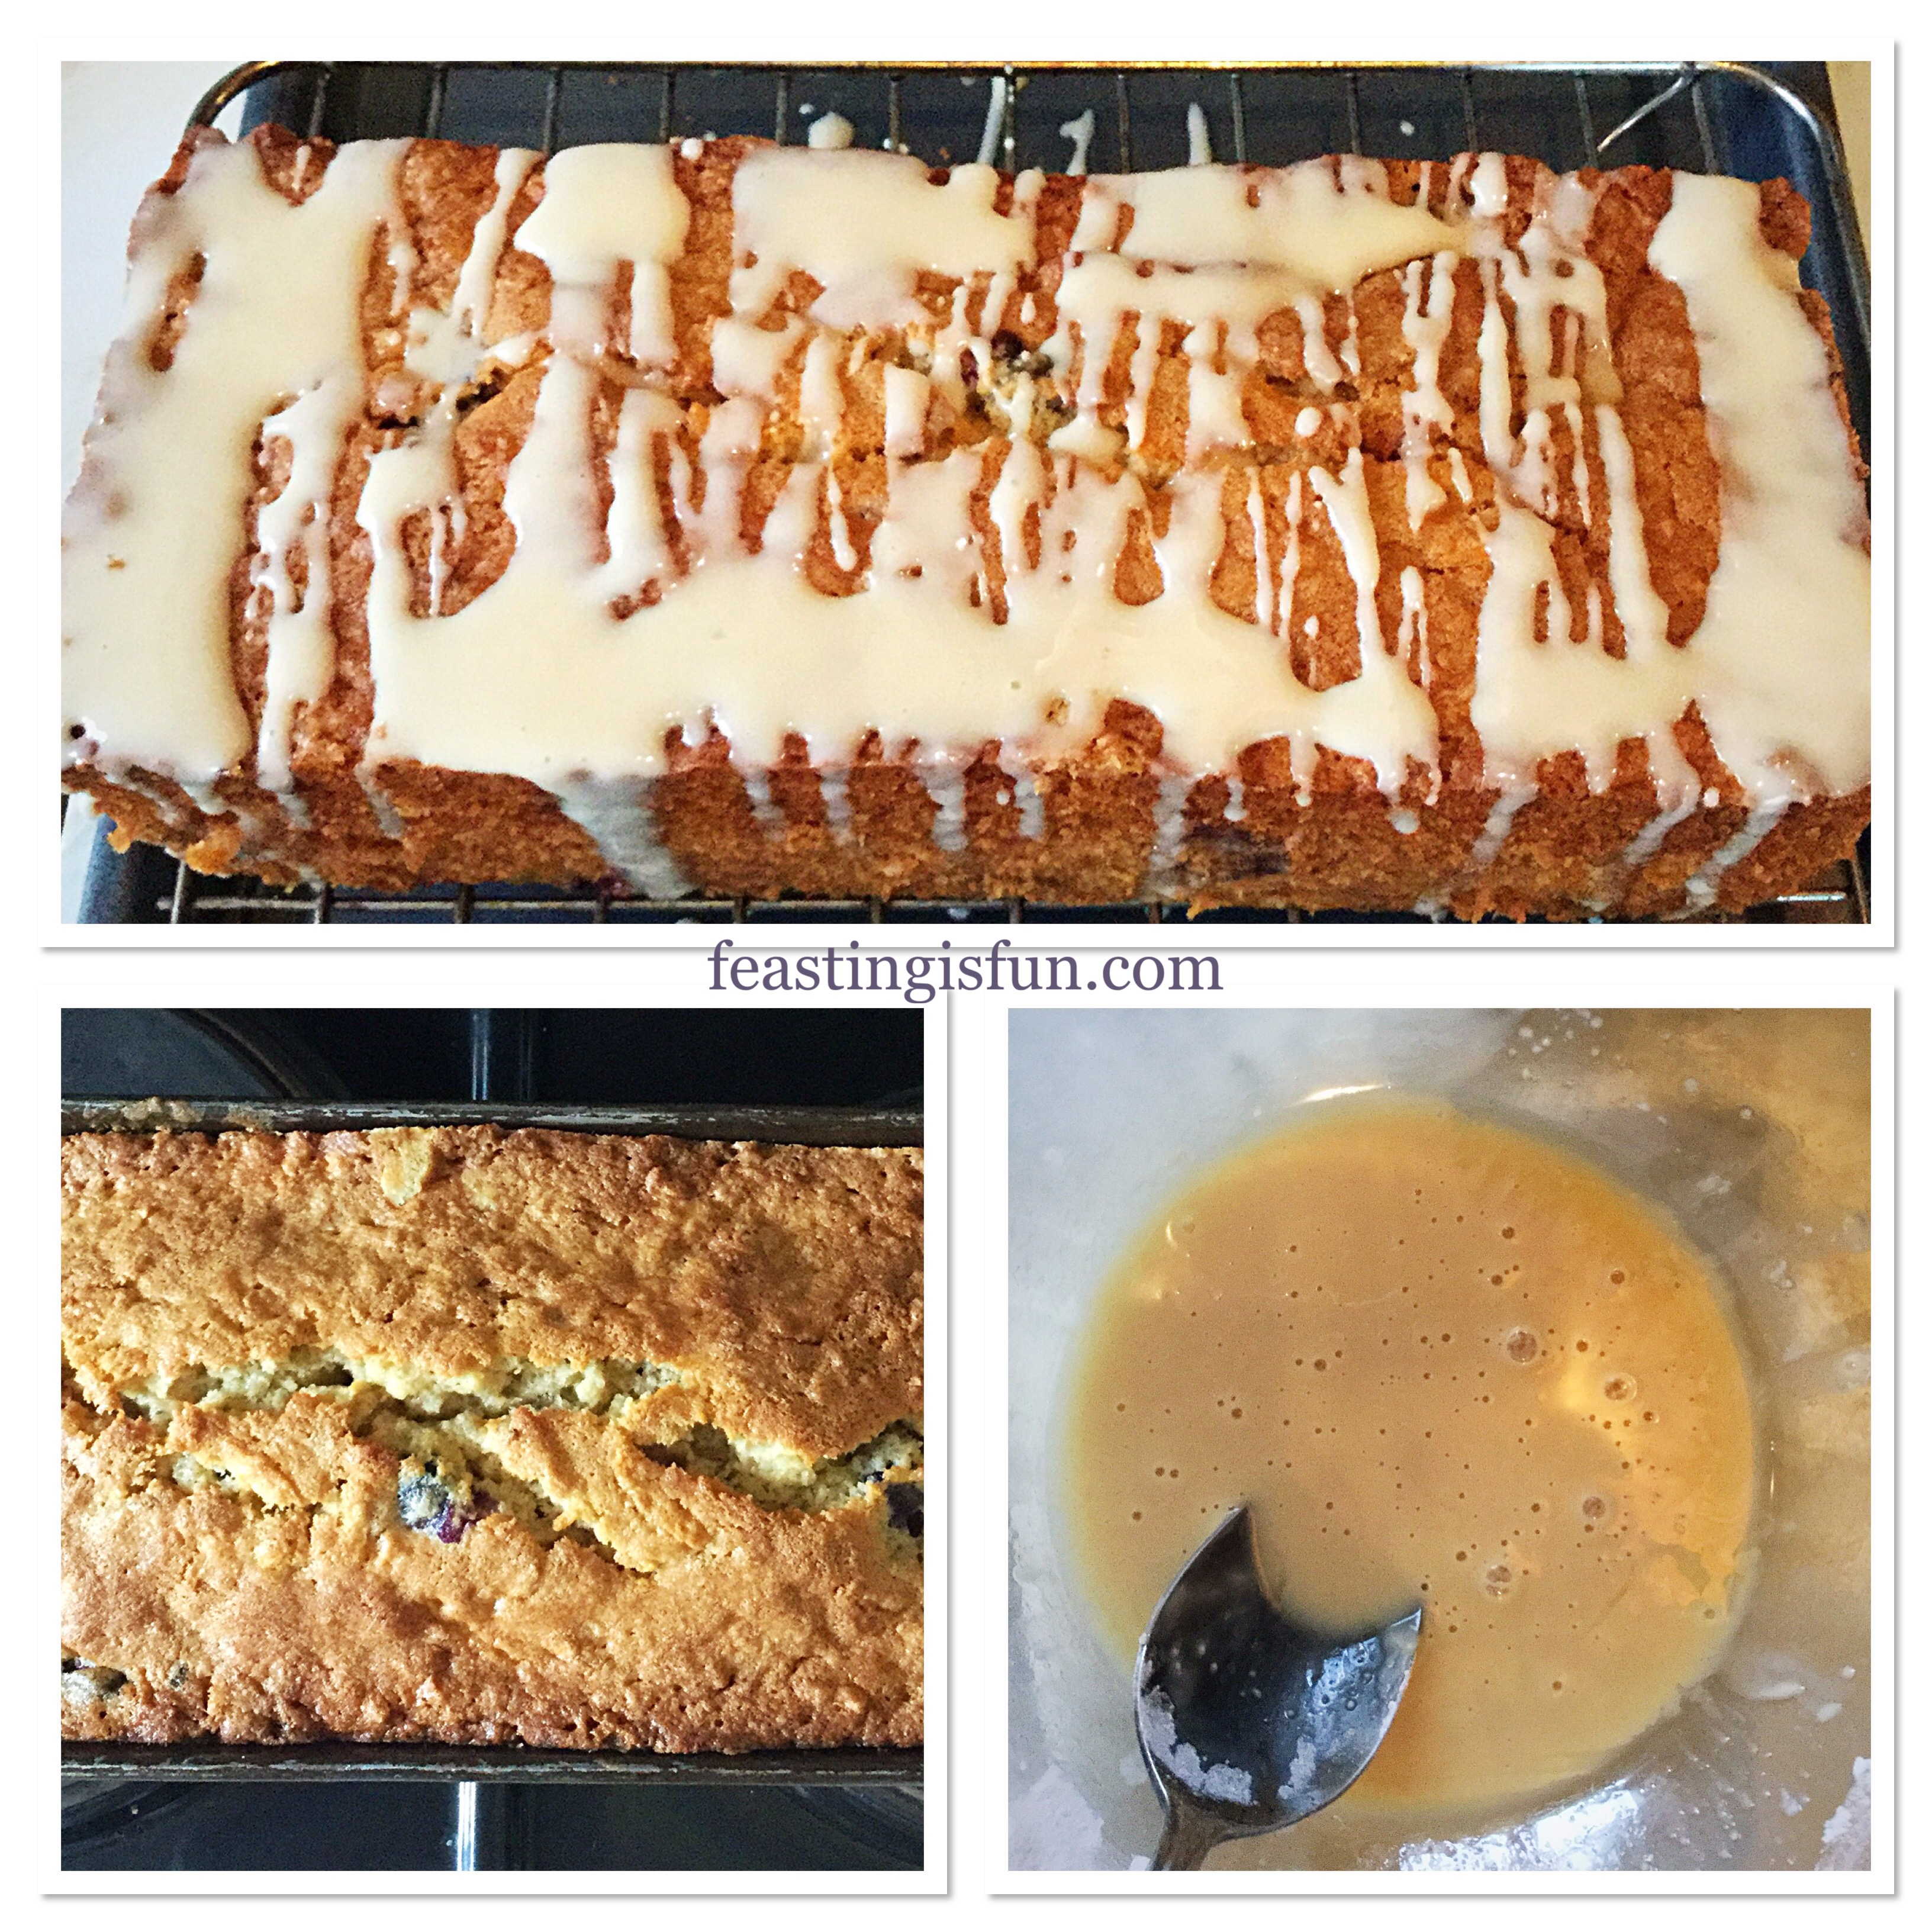
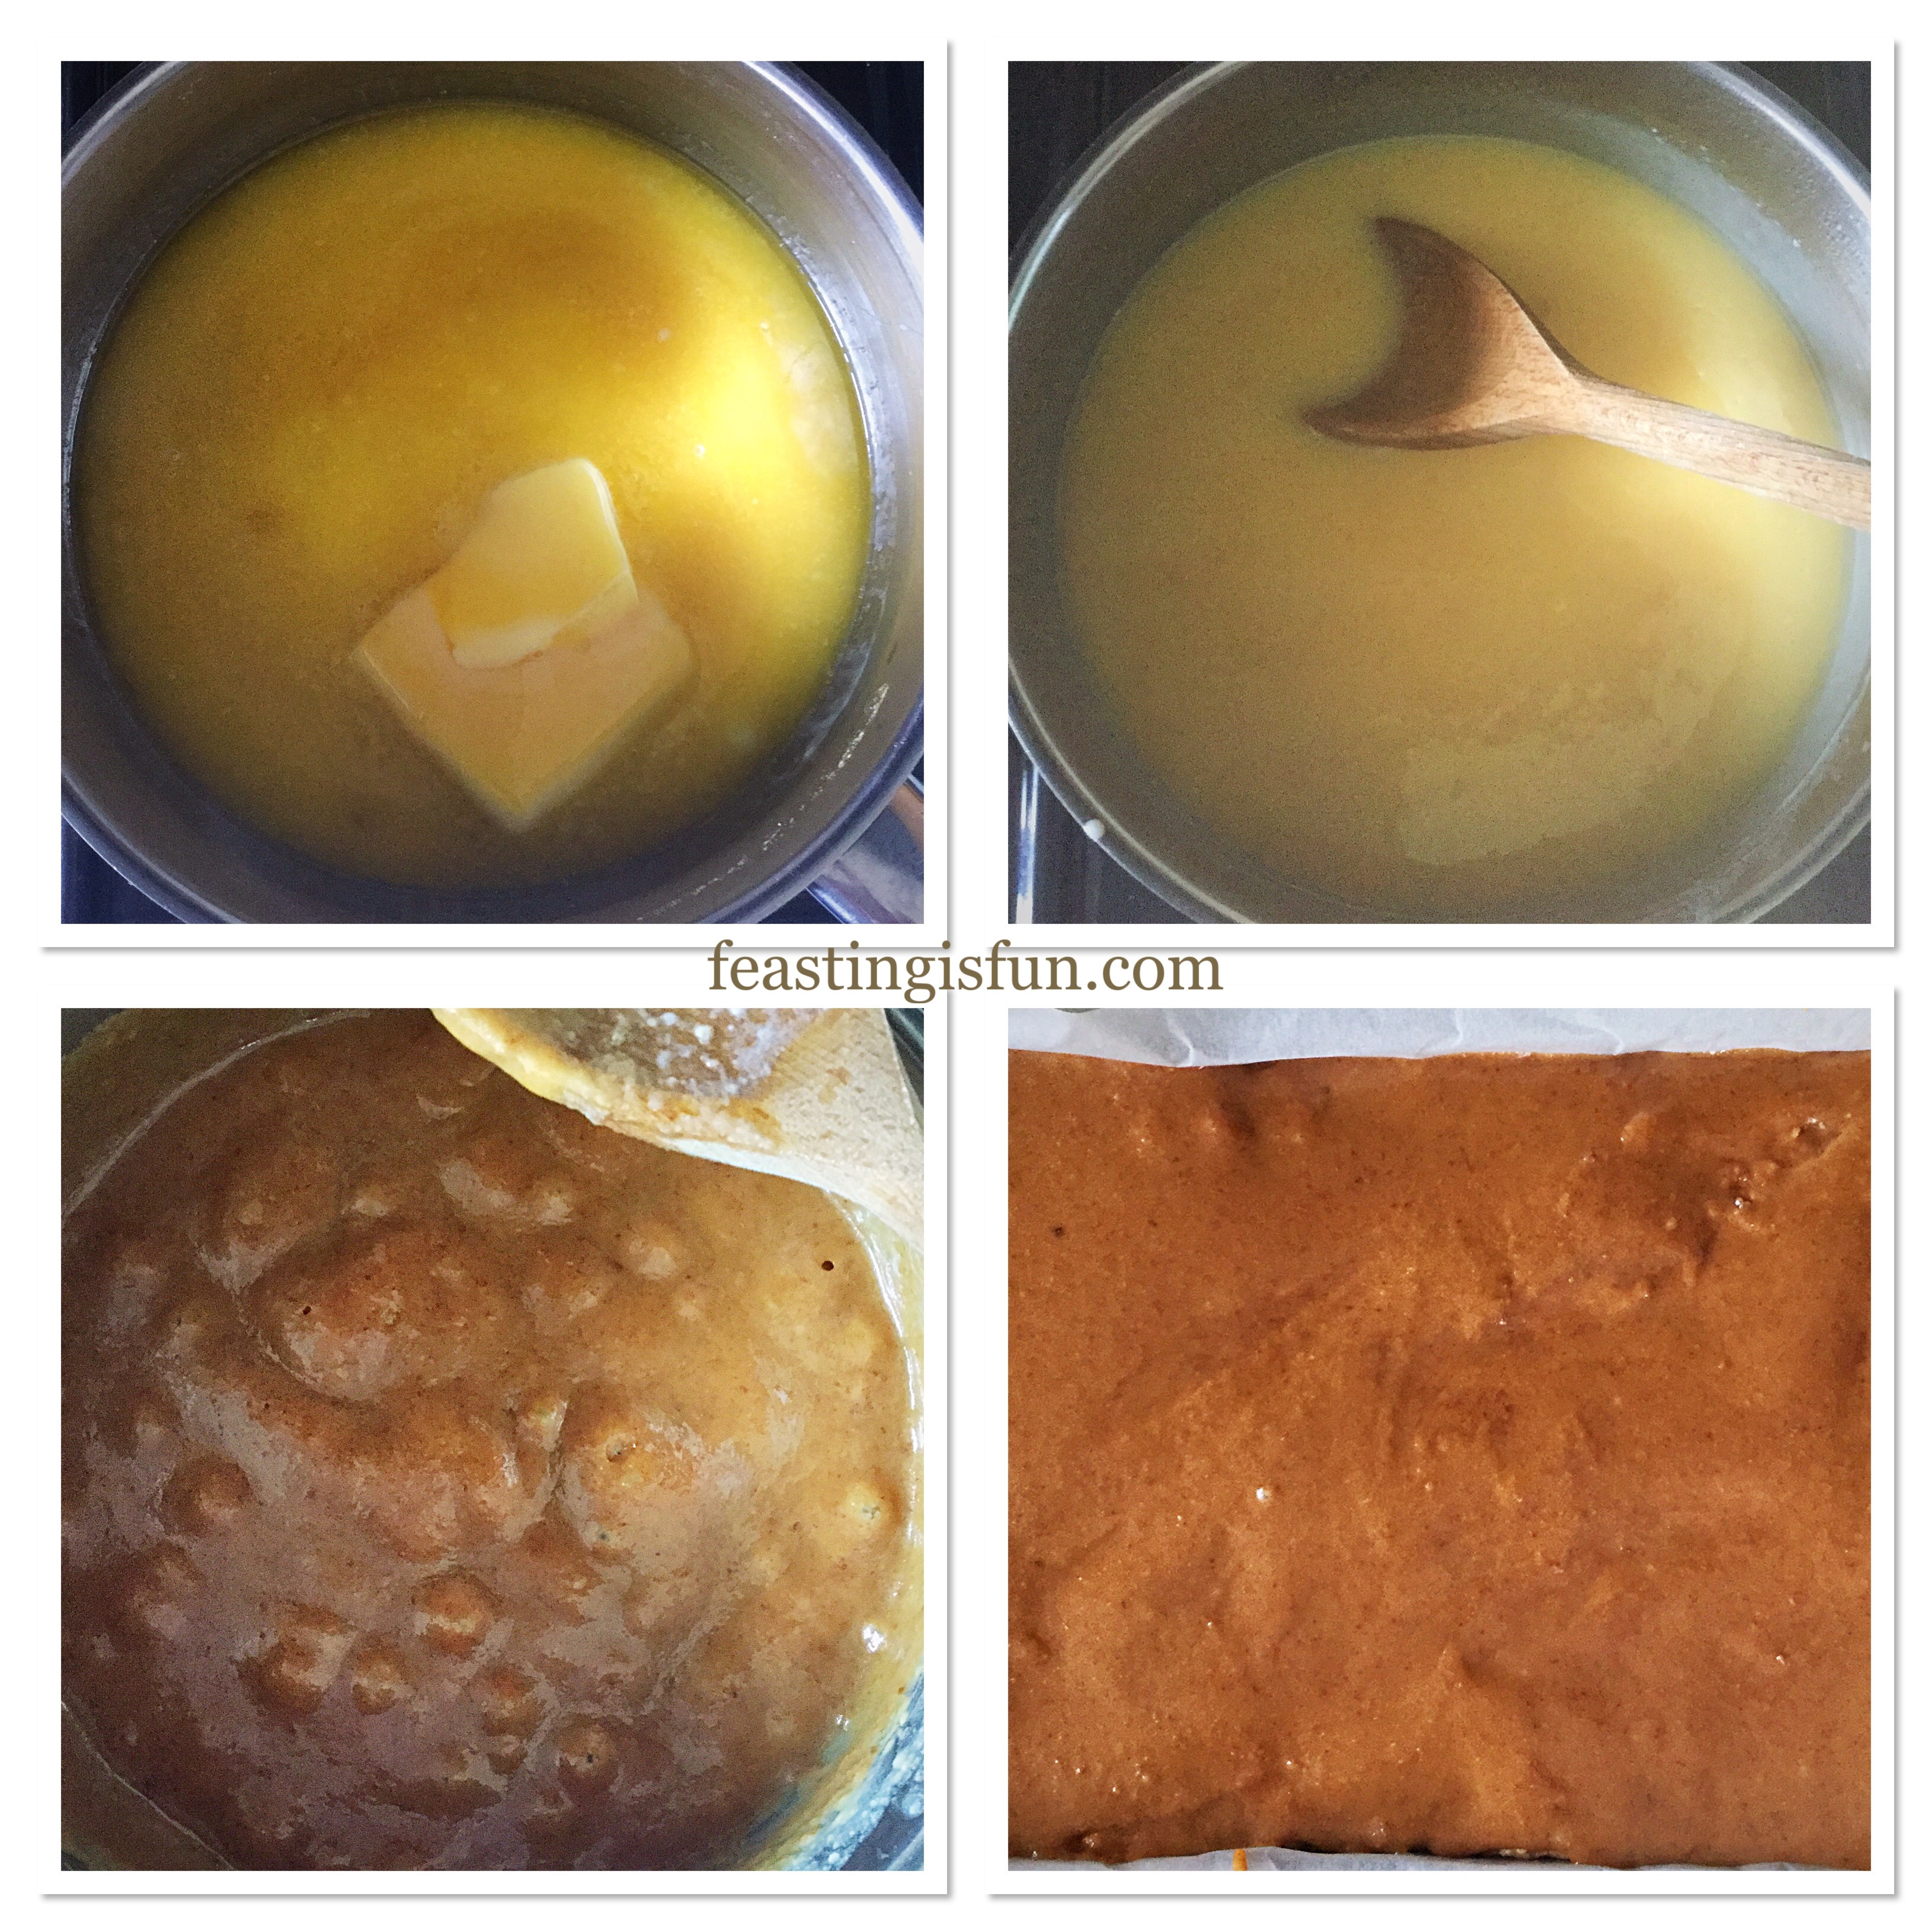
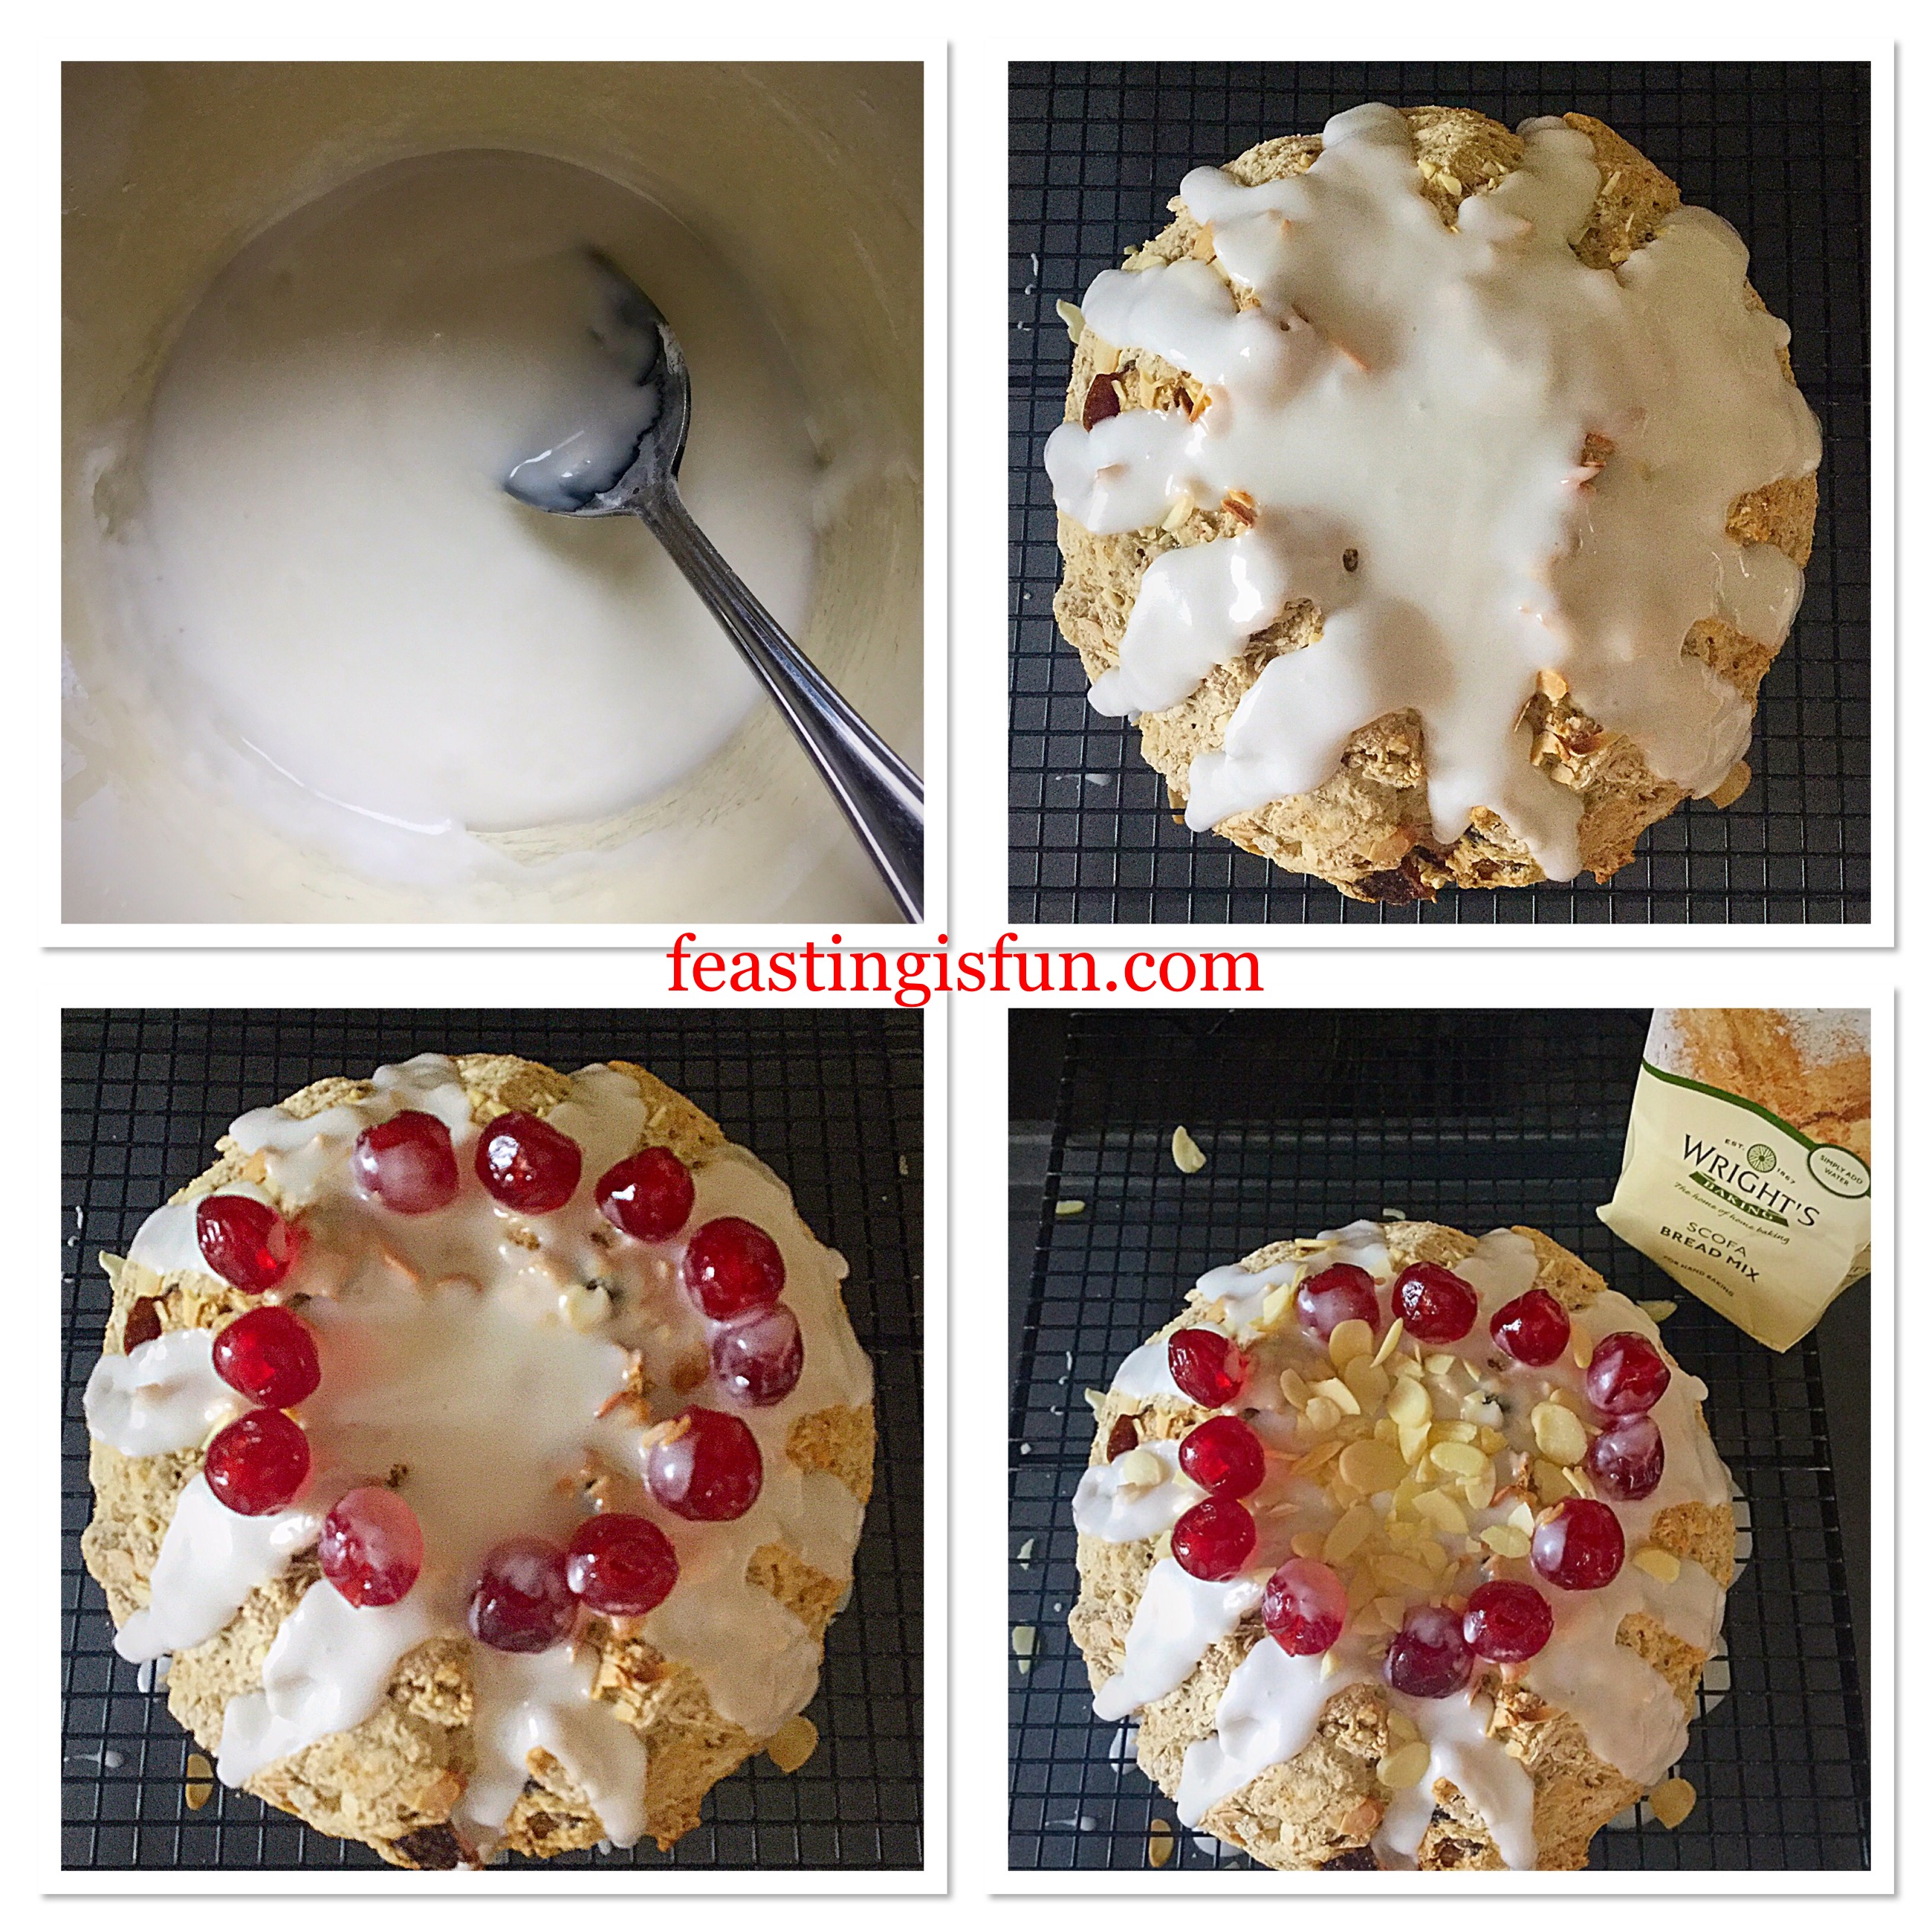
- As soon as the shortbread base is baked allow to cool for 5 minutes. Then spoon over the lemon curd, spreading so that it covers the base, yet doesn’t quite reach the edges.
- Spoon over the cake batter. Dolloping it fairly evenly across the base. Finally, gently spread the batter so that it covers the base. Pay particular attention to the edges. Aiming to seal in the lemon curd, by ensuring the cake batter is in contact with the shortbread around the entire edge.
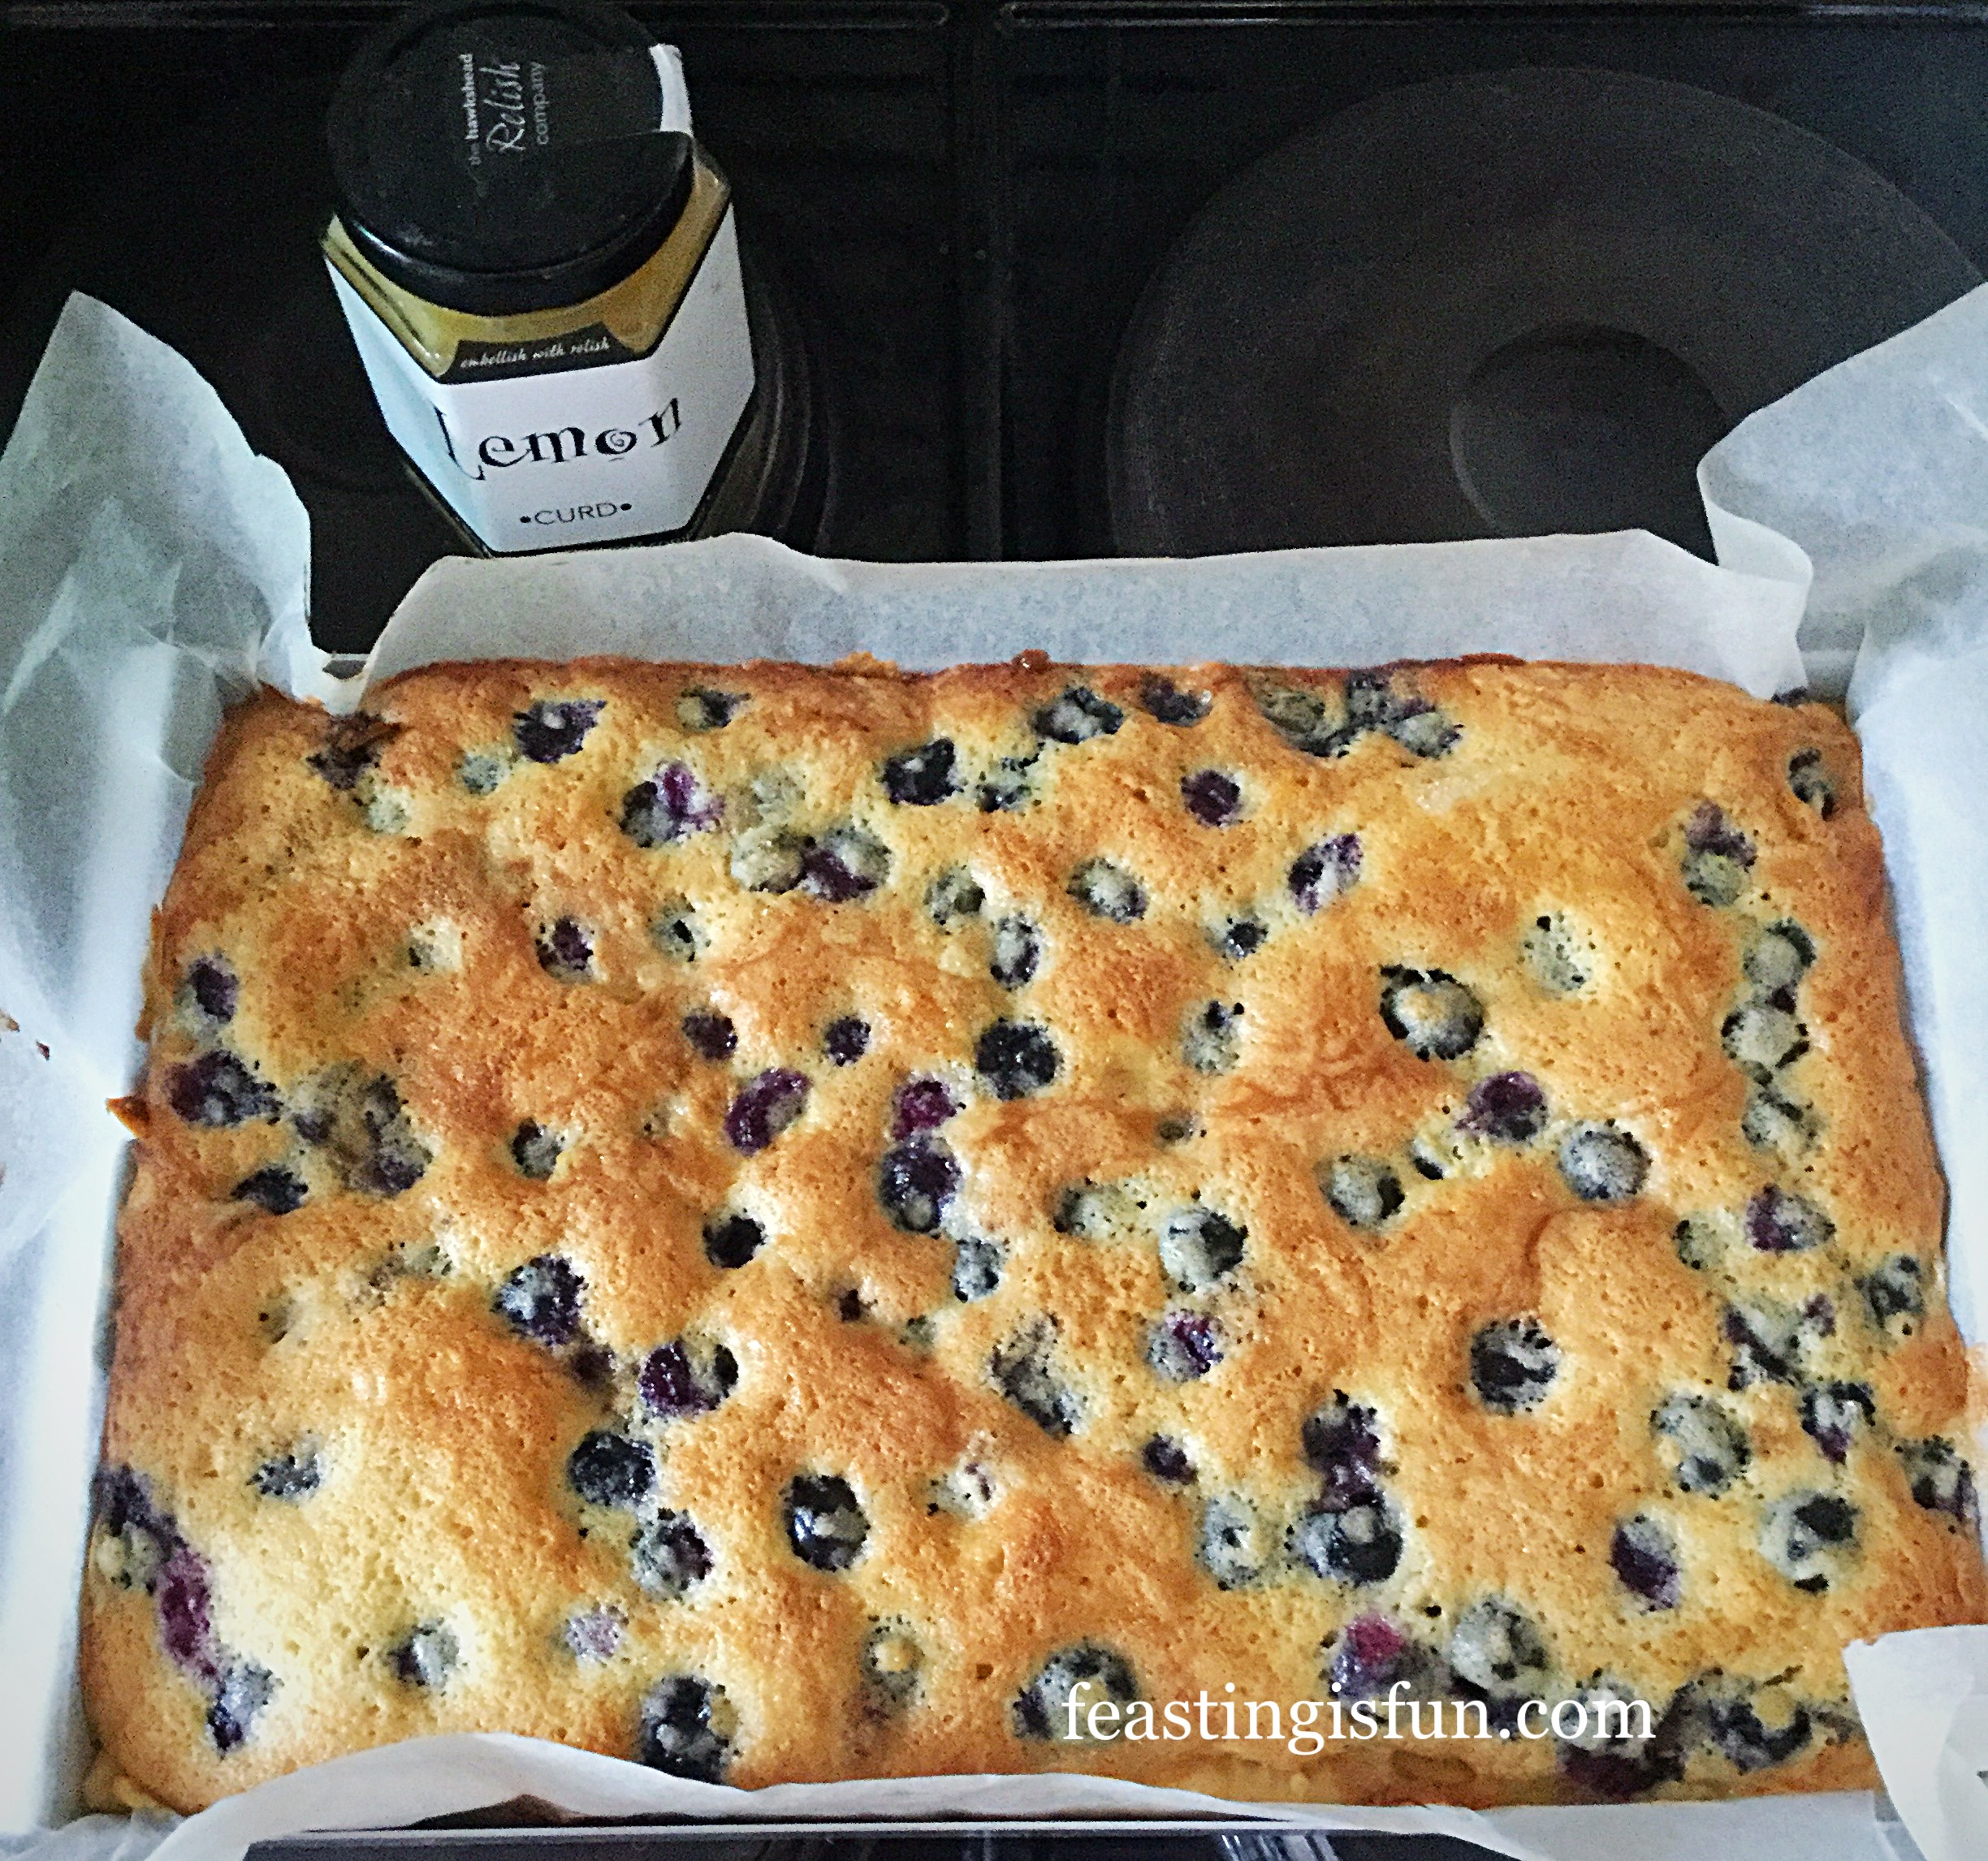
- Place the tin back into the centre of the oven and bake for 40-50 minutes. The lower and longer baking results in an even bake with a flat surface.
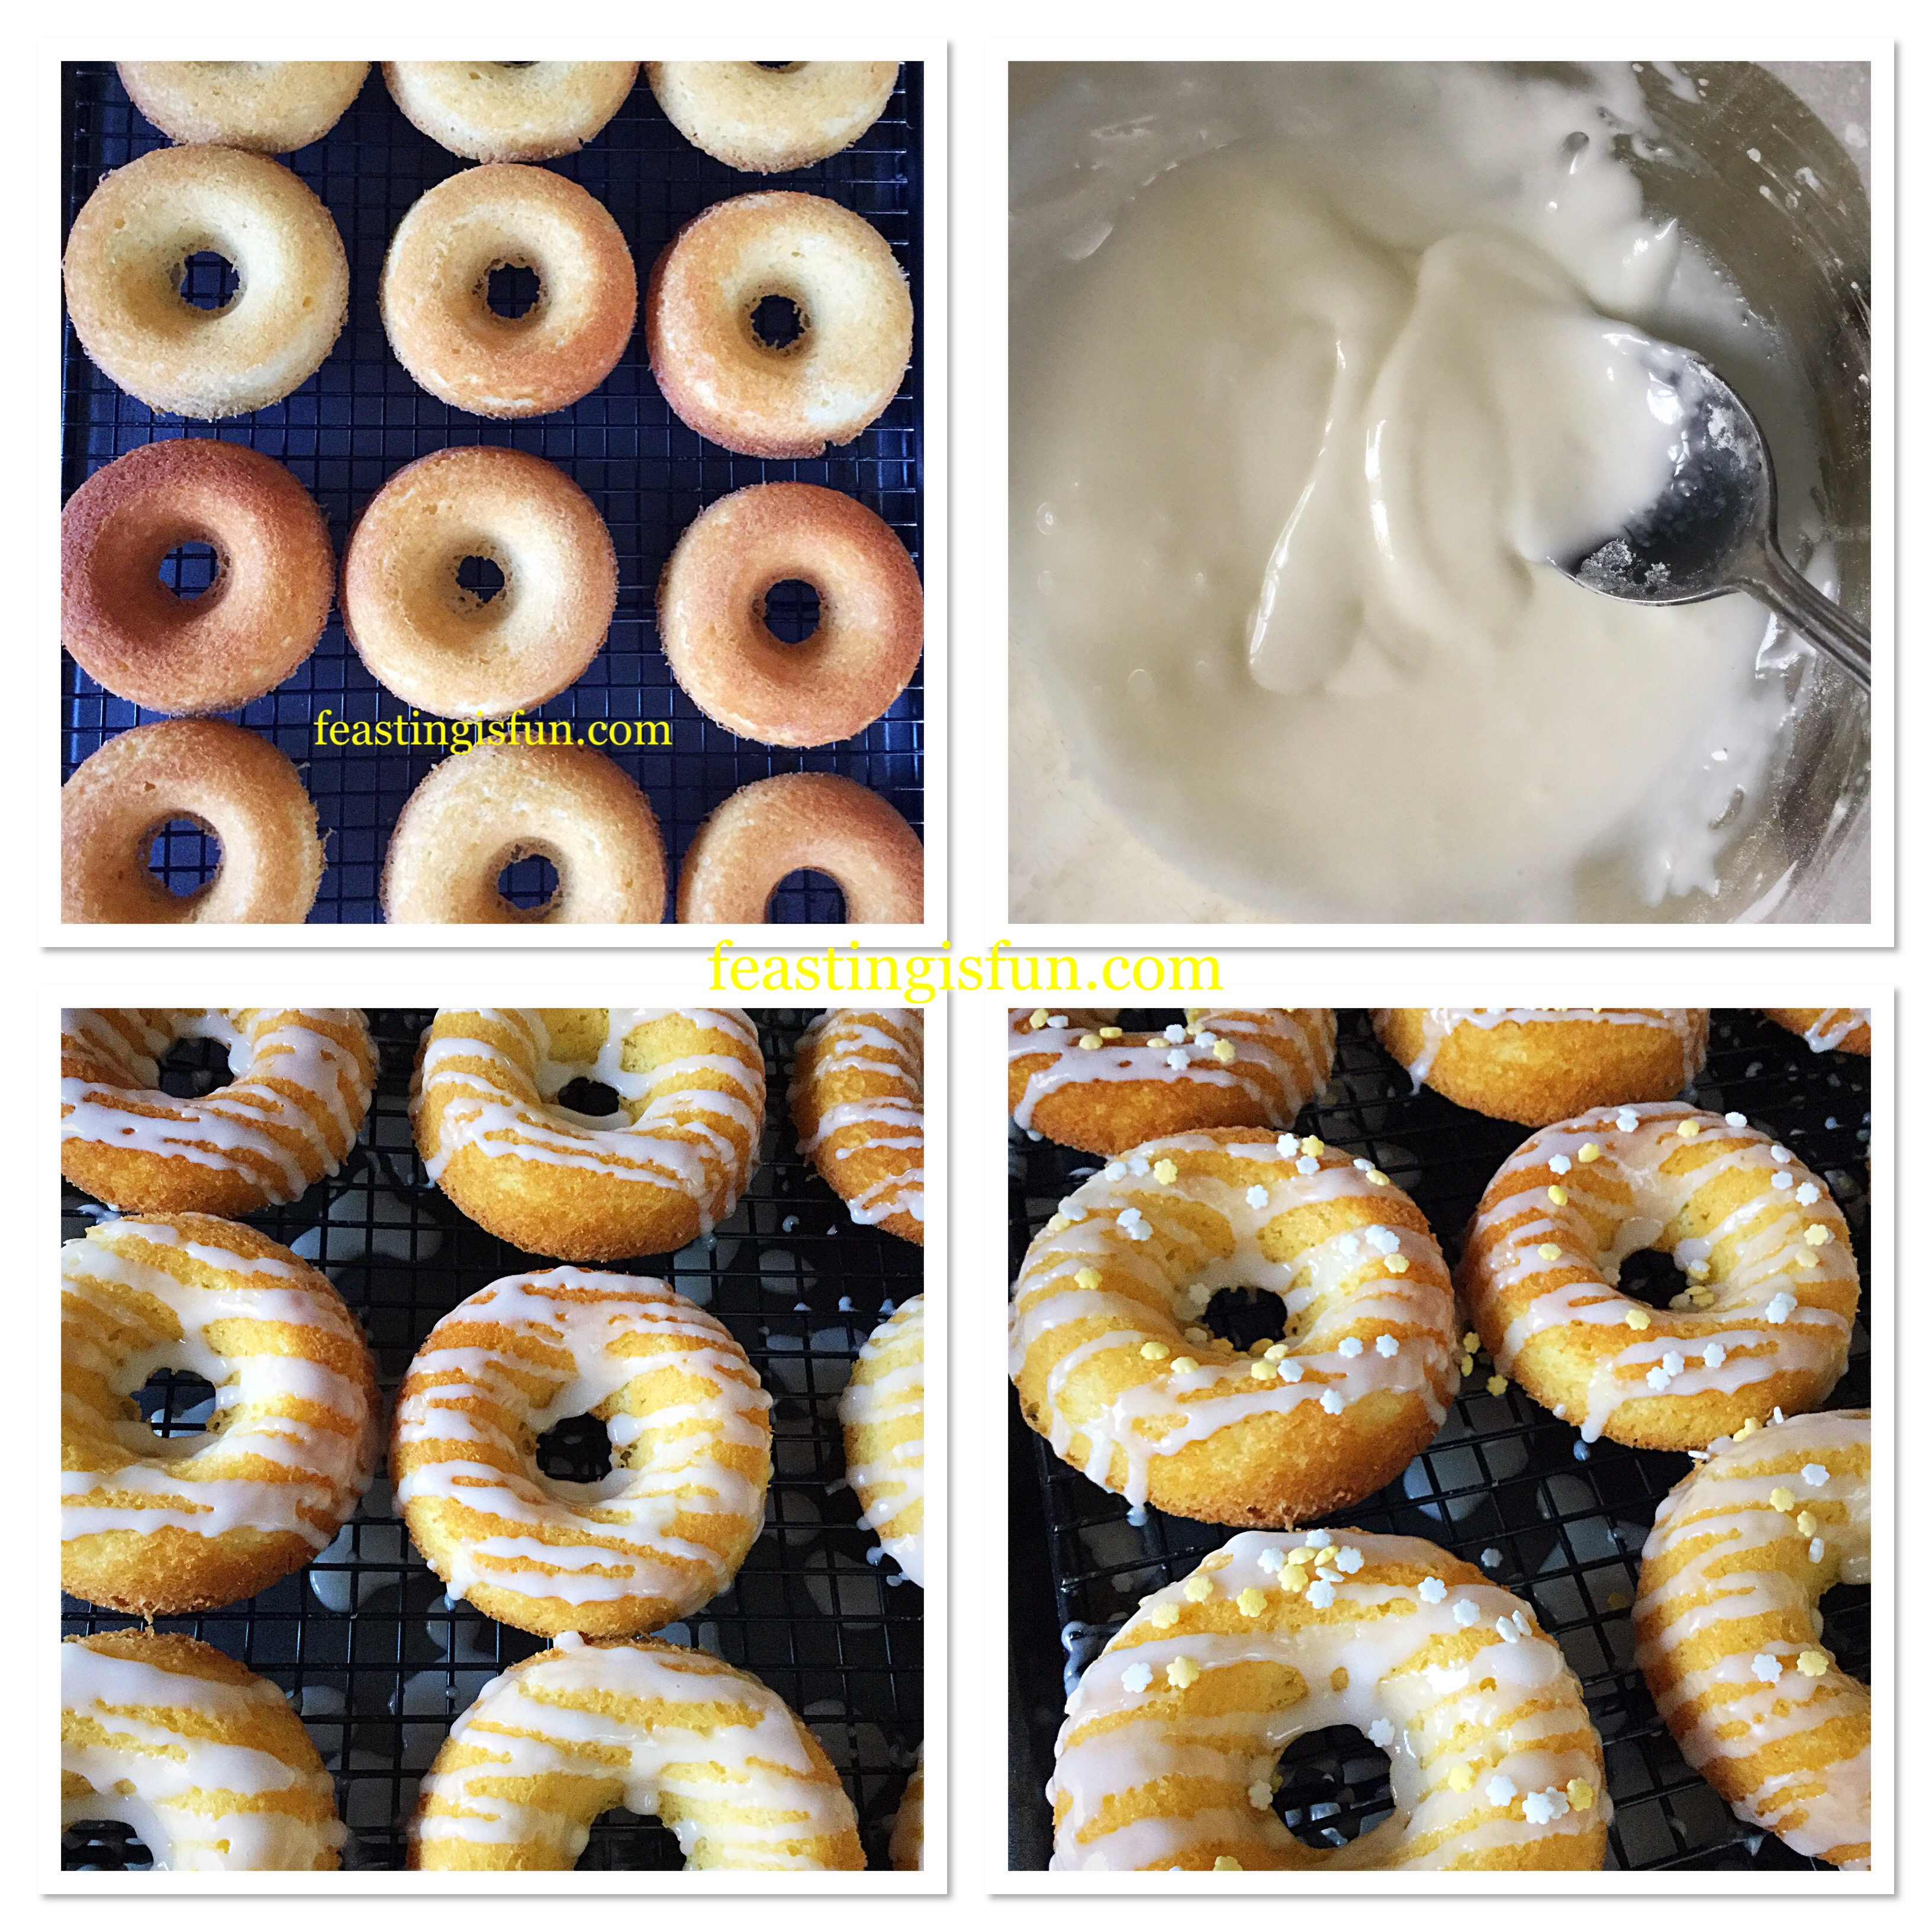
- The Blueberry Lemon Shortbread Cake Bars are baked when the top is golden in colour and is firm to touch. As soon as it is baked remove from the oven and allow to cool in the tin.
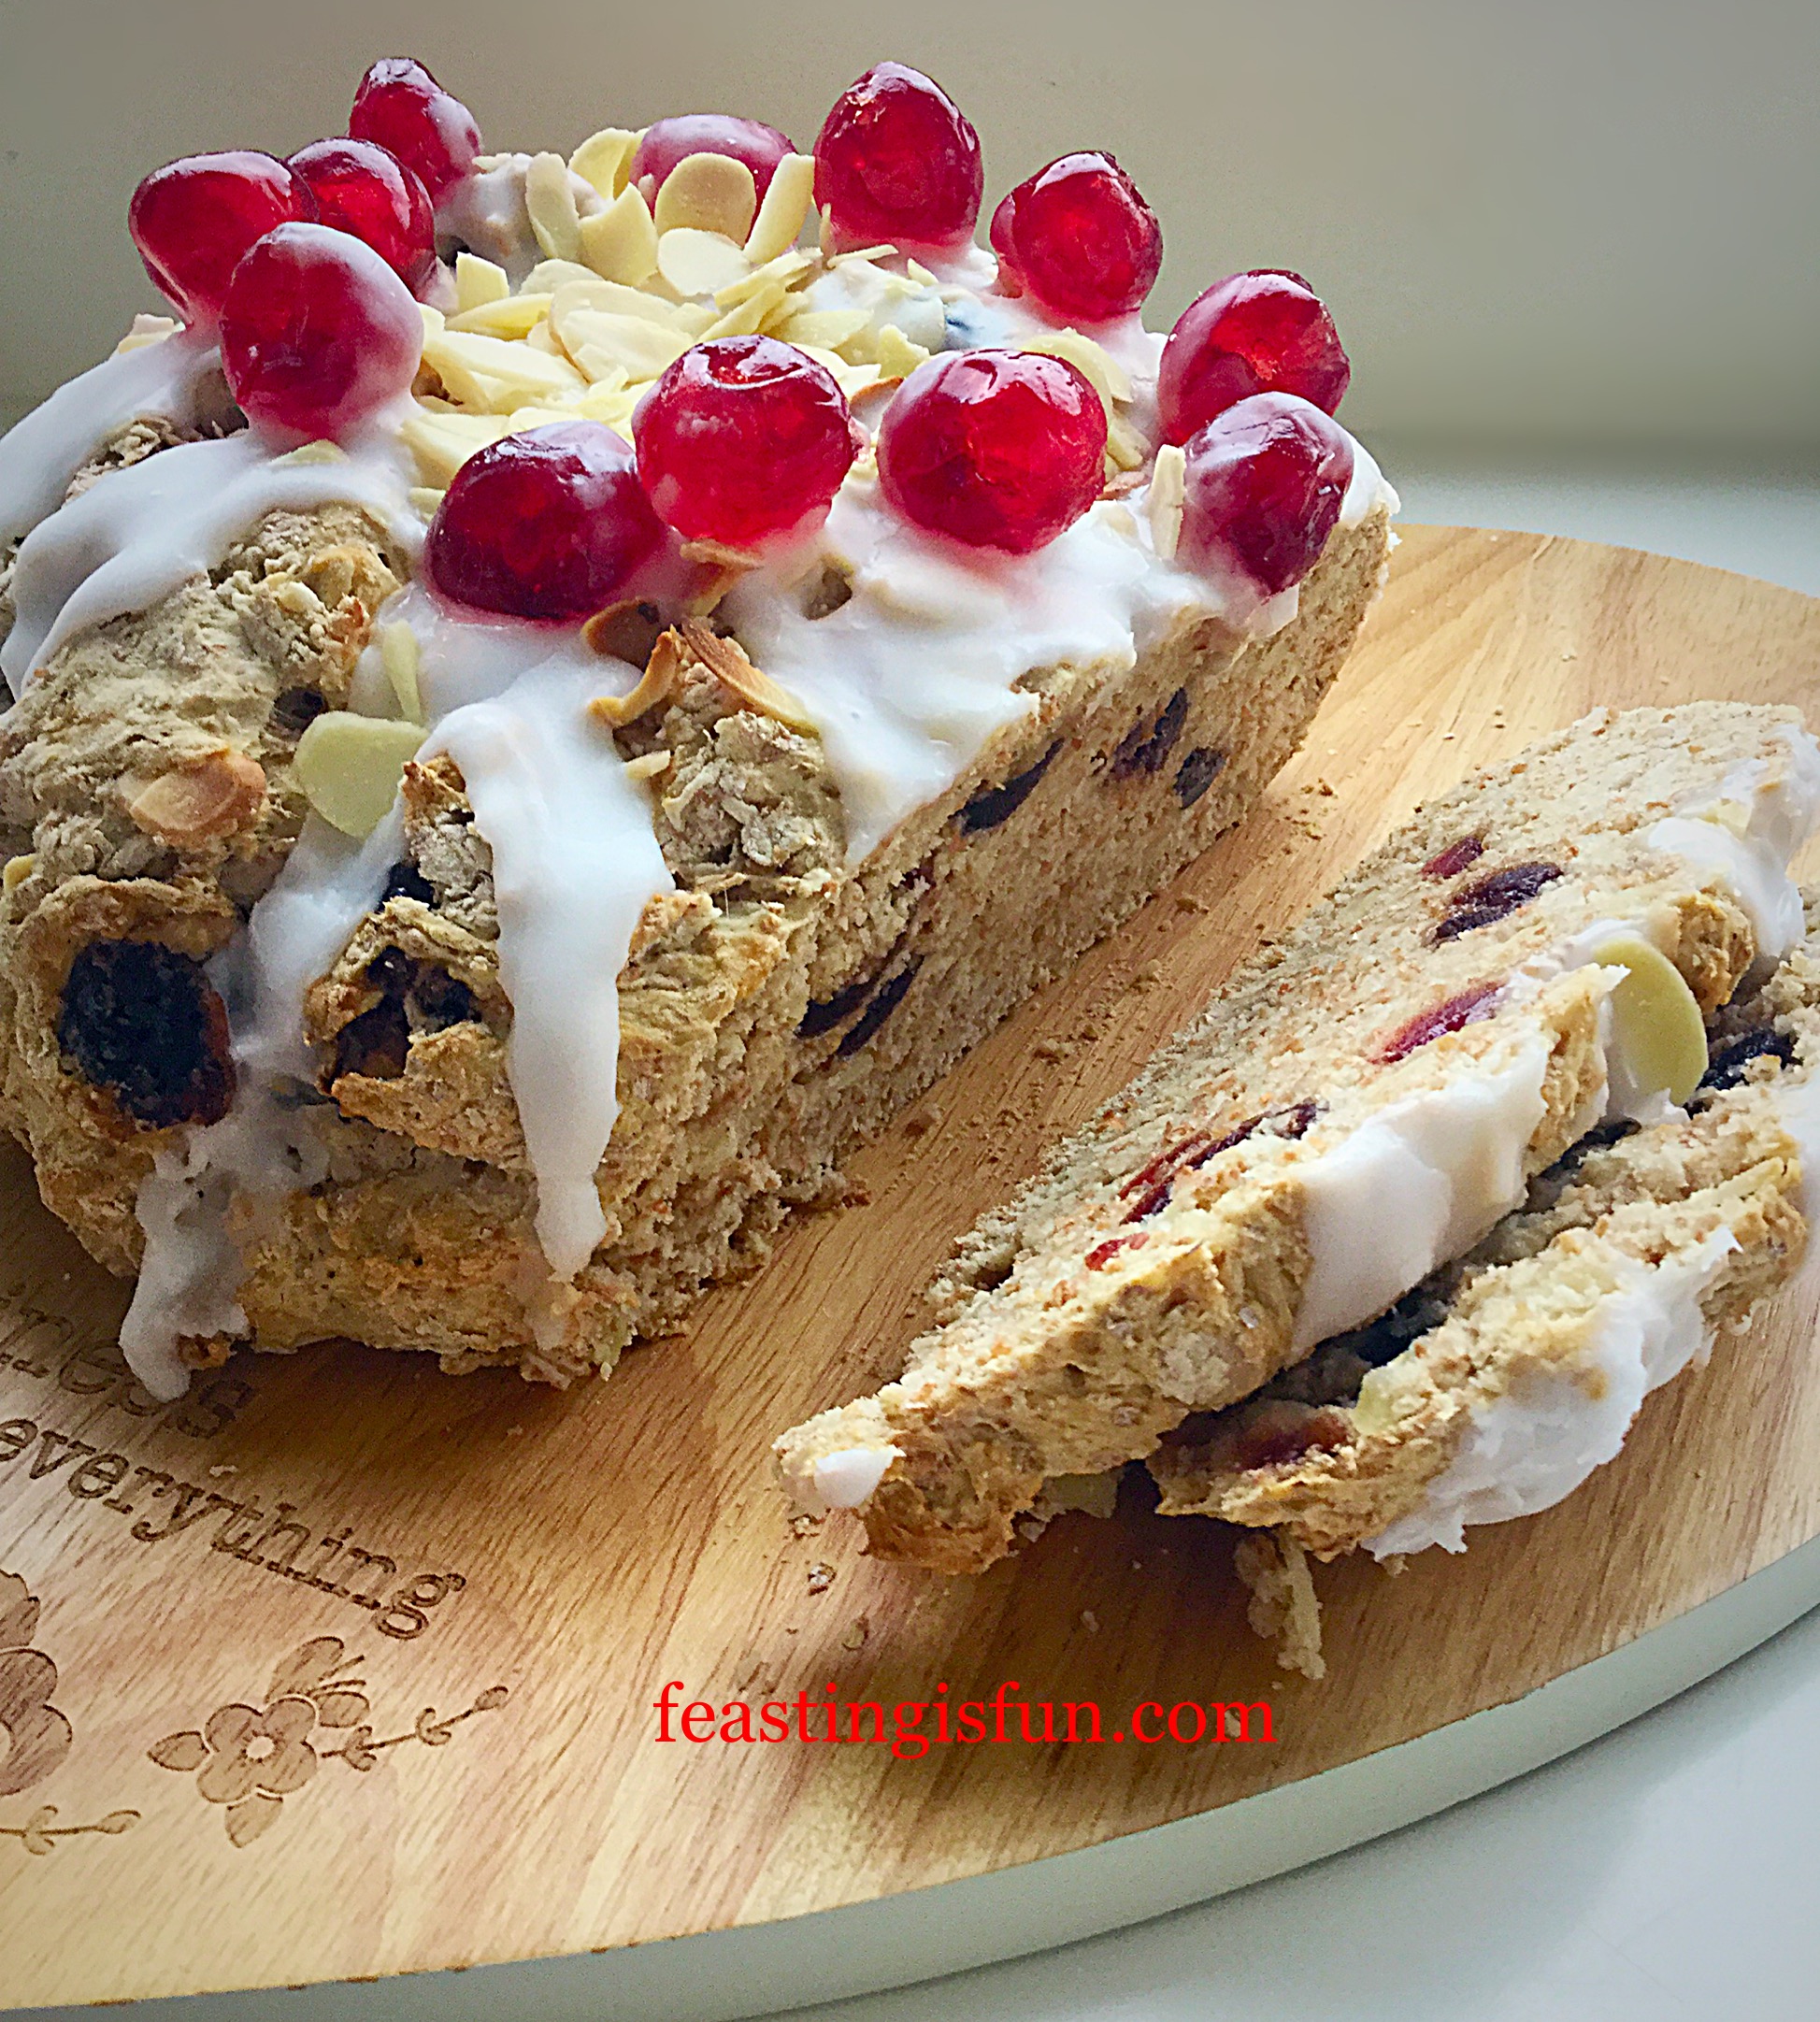
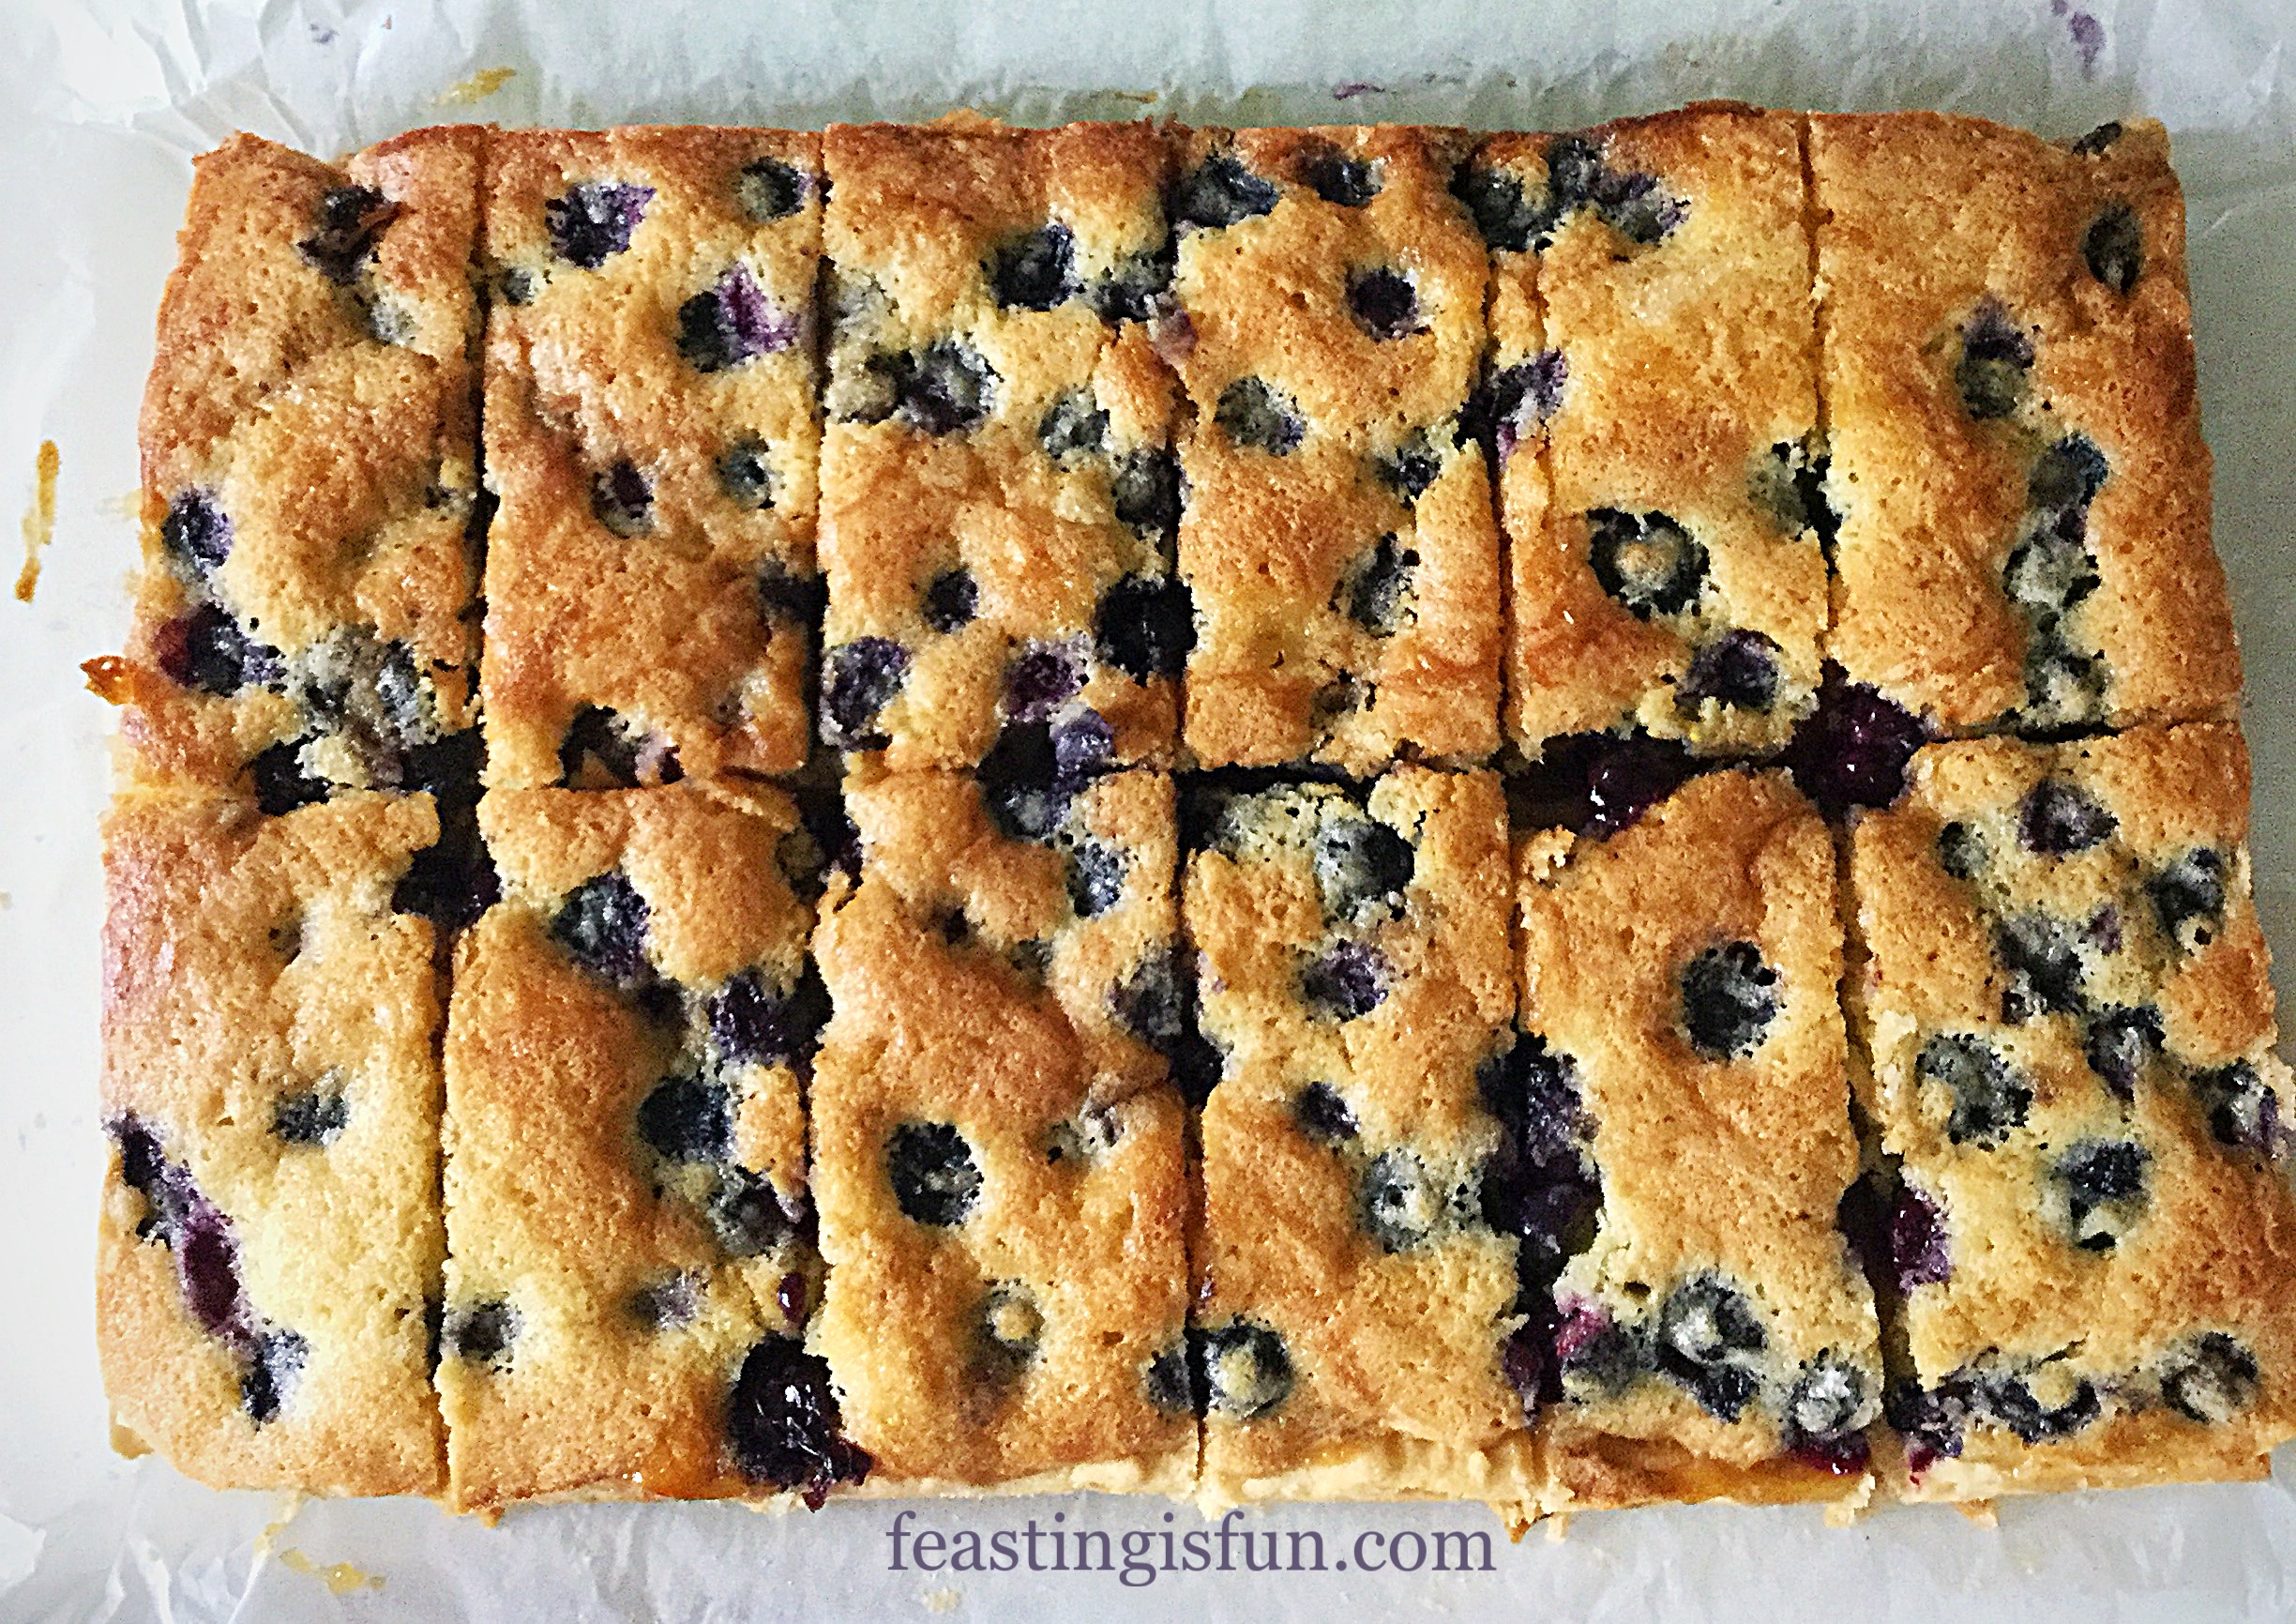
Cutting The Bars Into Individual Portions
- When completely cooled, remove the entire traybake from the tin. A fish slice or large palette knife is useful. Ease the knife under the bake, using it to lift and support as you move the traybake to a flat surface.
- Using a sharp knife cut halfway through the width of the bake. Wipe the knife between each cut, this avoids spoiling the bake.
- Following this first cut, now cut downwards, dividing the bake into four equal quarters.
- Finally, cut each quarter into three equal sized bars.
The lemon curd is perfect in these bars.
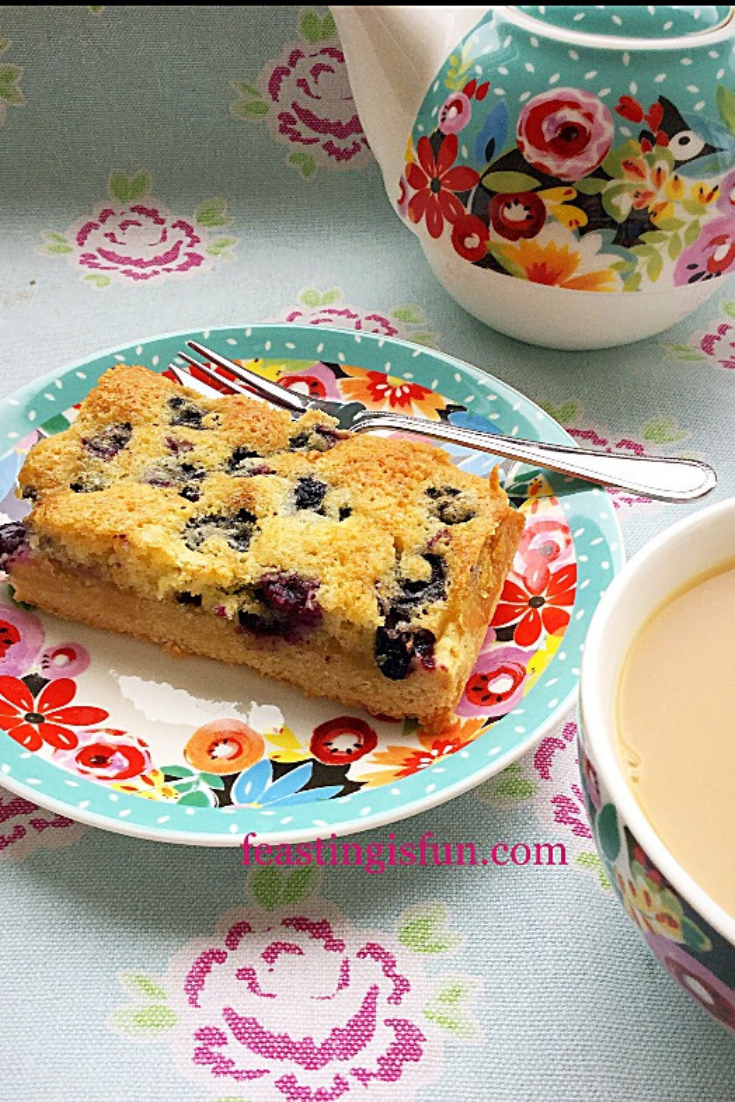
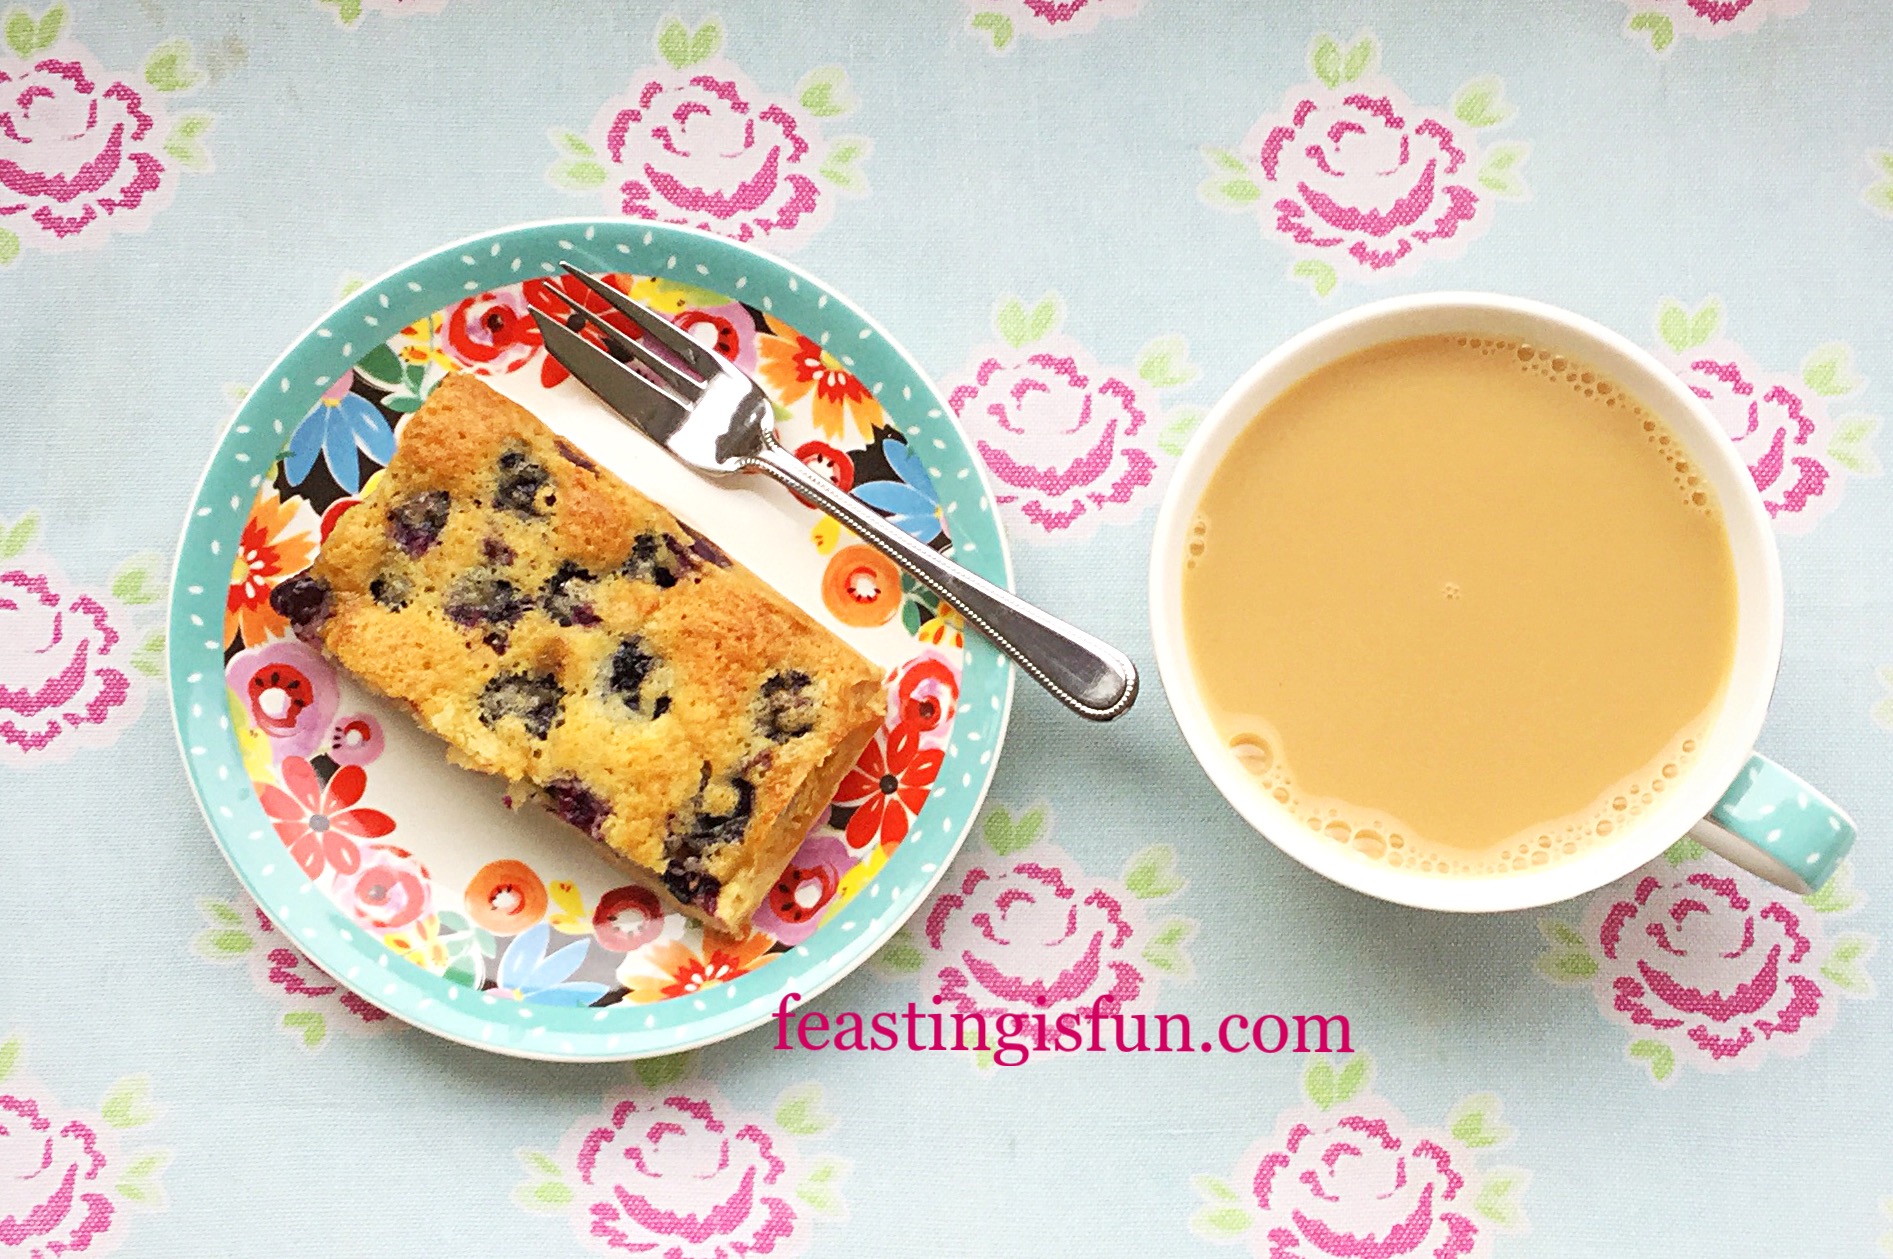
Serve the Blueberry Lemon Shortbread Cake Bars with a cup of tea, on some cheerful china, with a smile.
Store in an airtight container. They will keep for 4 days. During warm weather, storing in the fridge is advised.
If you have enjoyed this recipe for Blueberry Lemon Shortbread Cake Bars you may also like these:
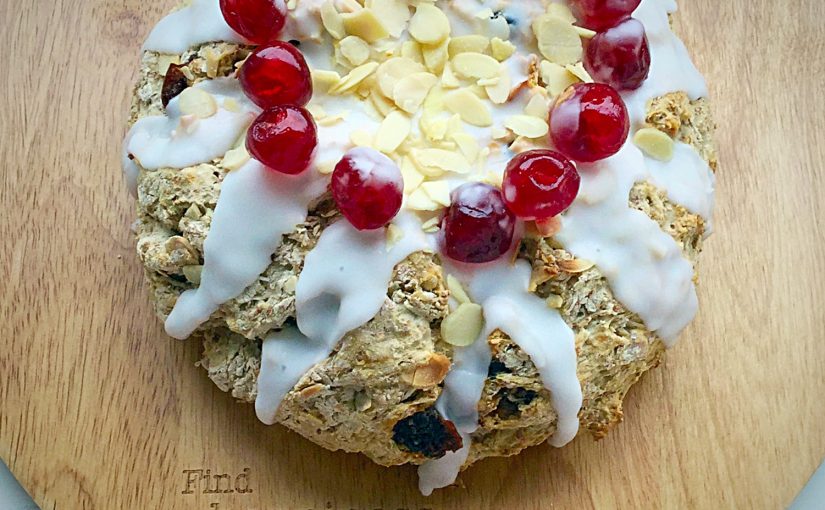
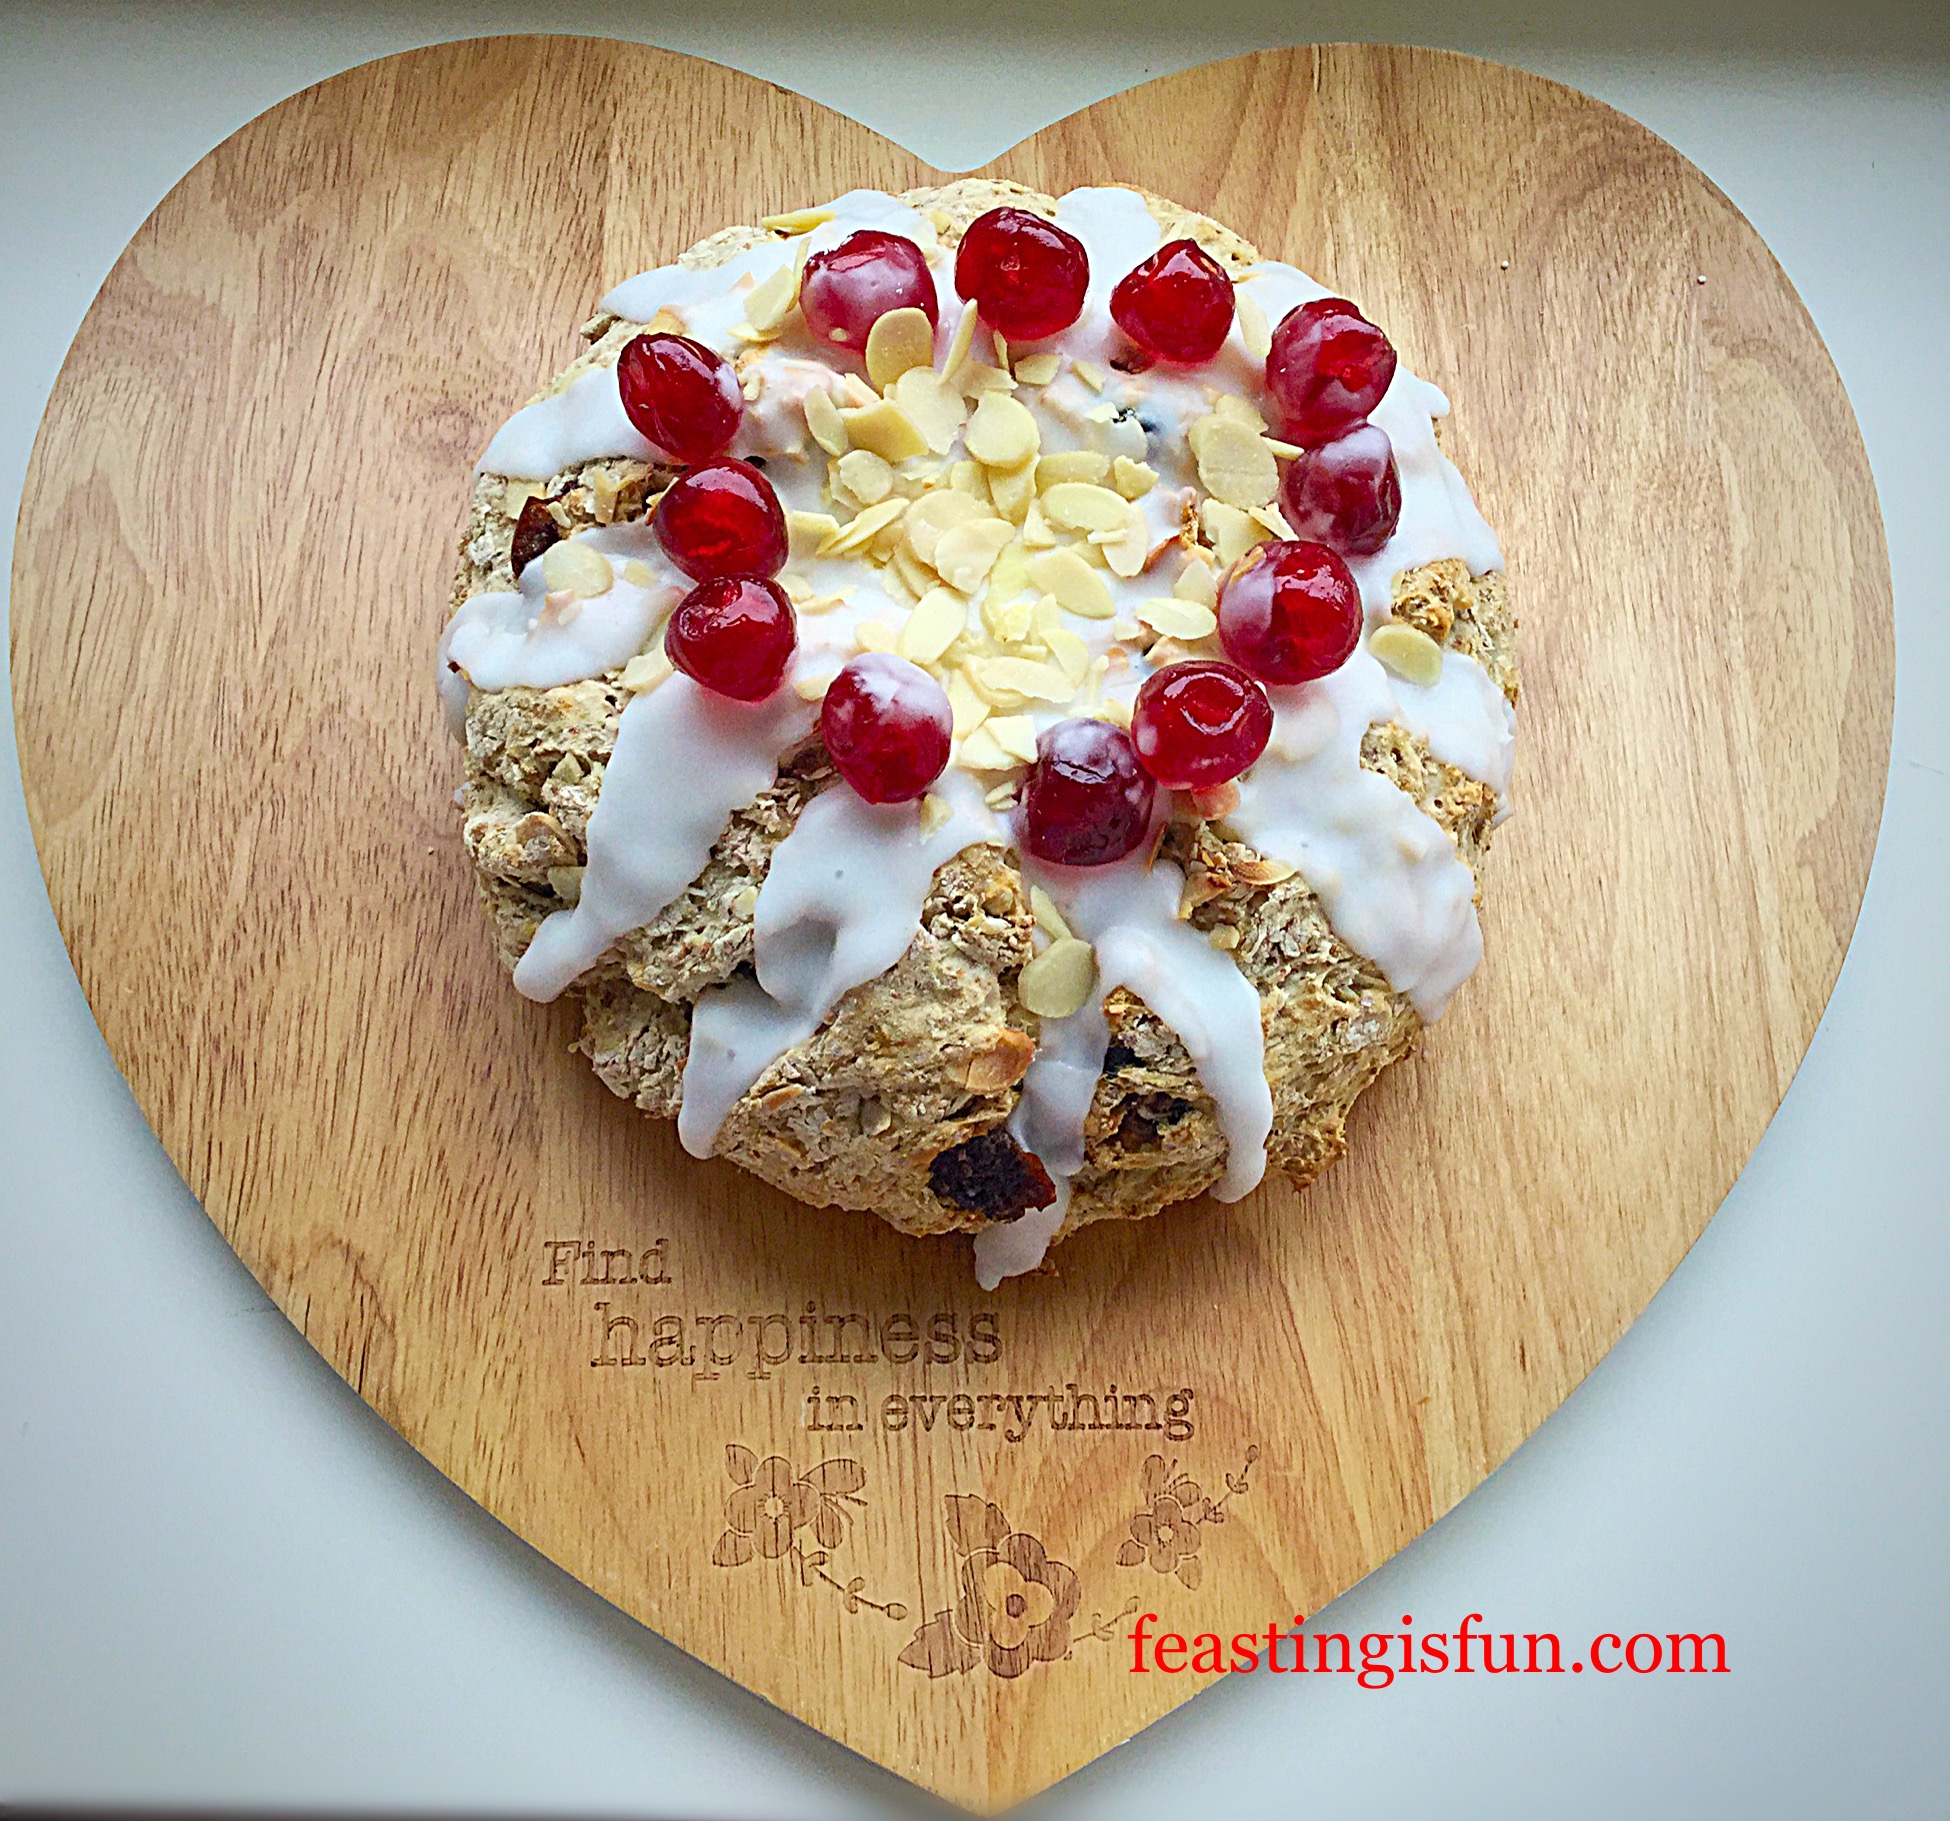
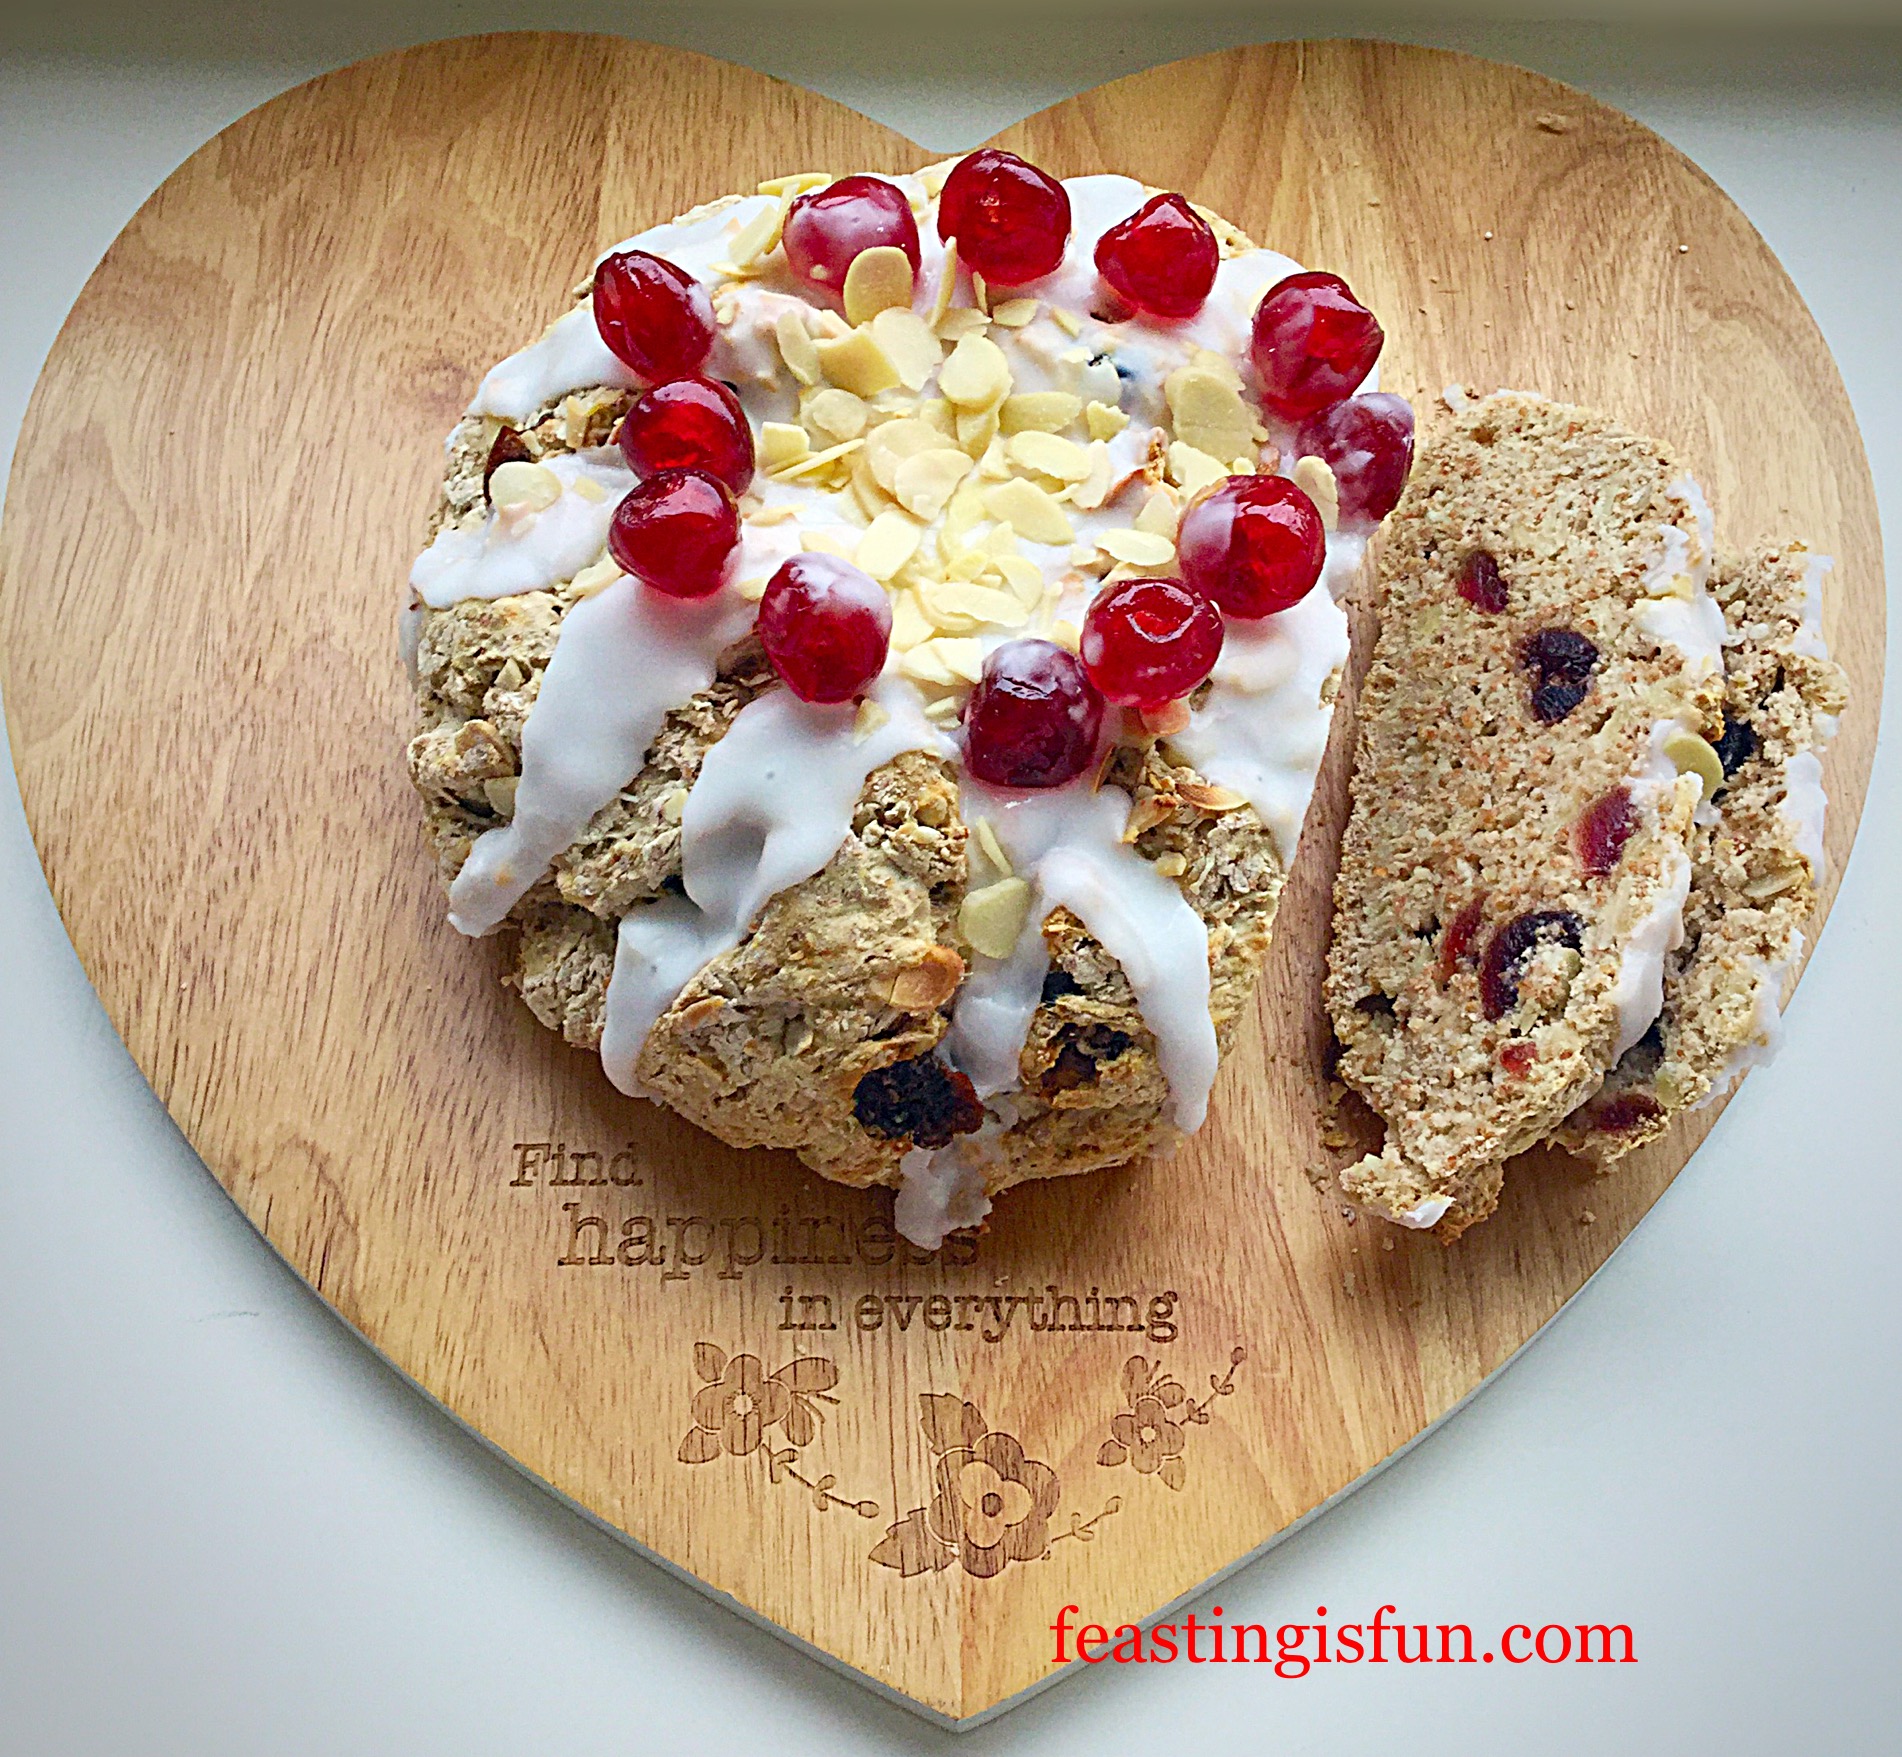
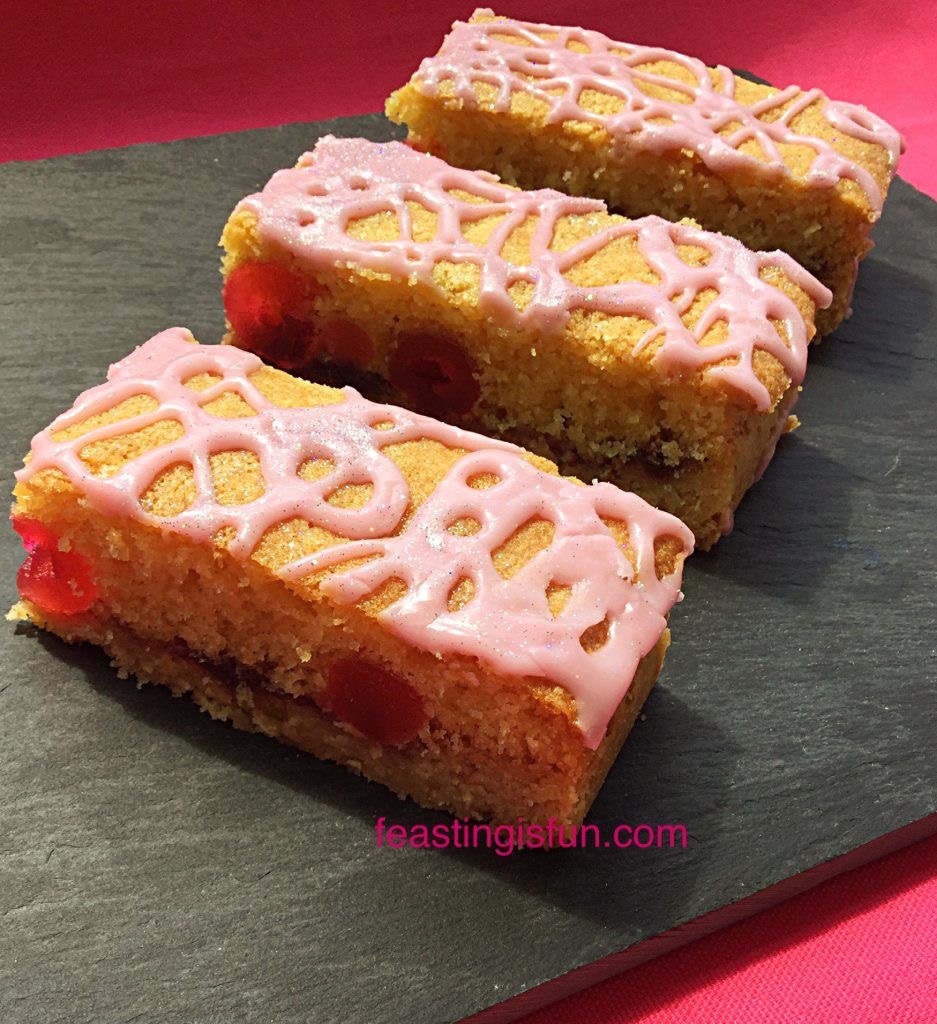
Double Cherry Drizzle Oat Bars
Baking and cooking good, wholesome food for my family is very important to me. It truly is one of the ways that I show them my love. Knowing in the middle of a busy day that my hubby has something made with love, by me, to help him through. Well, it doesn’t get better than that when we are apart from each other. The oohs and aahs as each family member returns at the days end, to the comforting kitchen aromas, ensures they know that they are truly home.
Love, inquisitiveness and creating are the main motivational factors behind all of my cooking. What are yours?
Sammie xxx
Please see my Disclosure Policy.
Share