Raspberry Coulis Drizzled Mixed Berry Pavlova

Share
Facebooktwitterpinterestlinkedintumblr

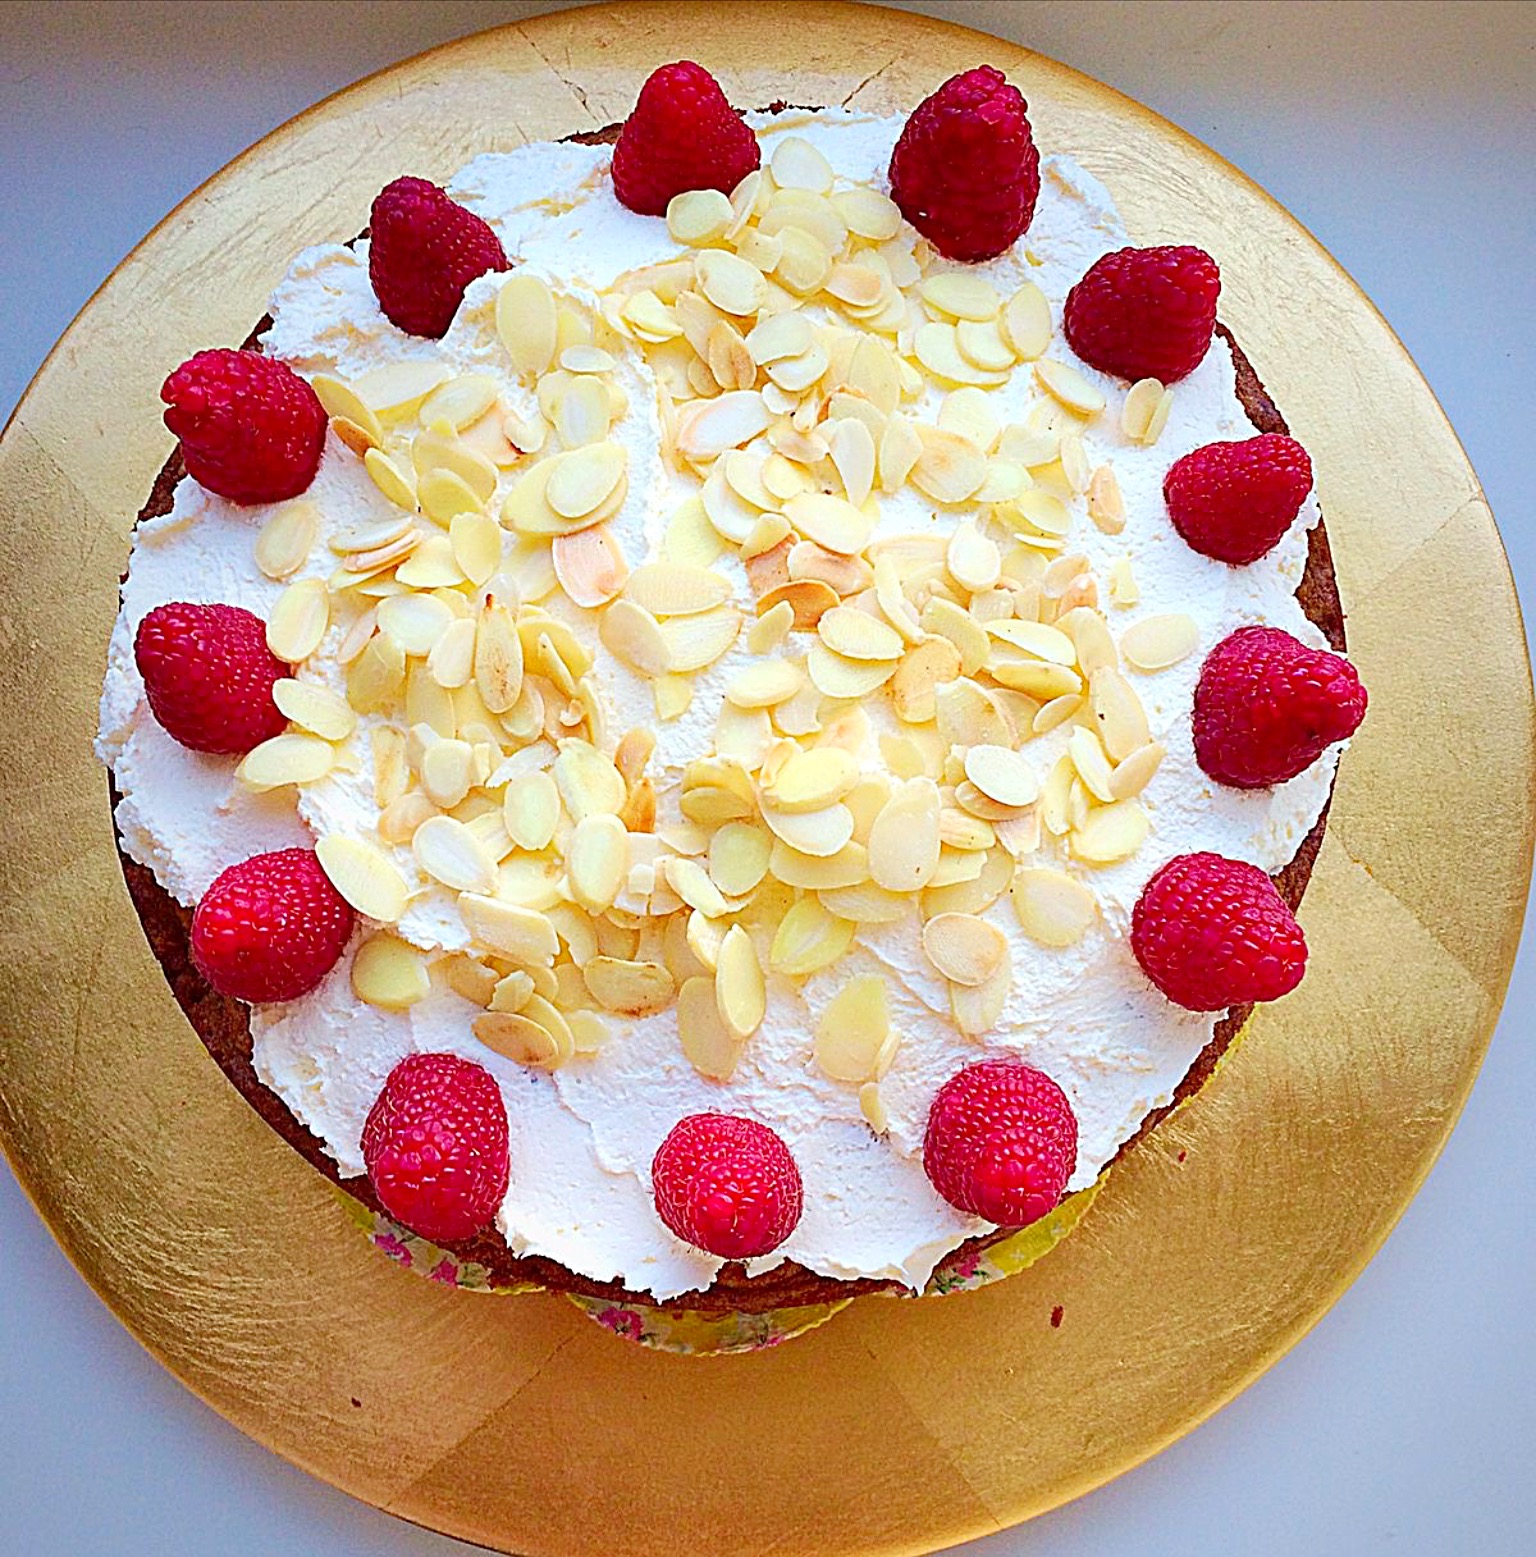
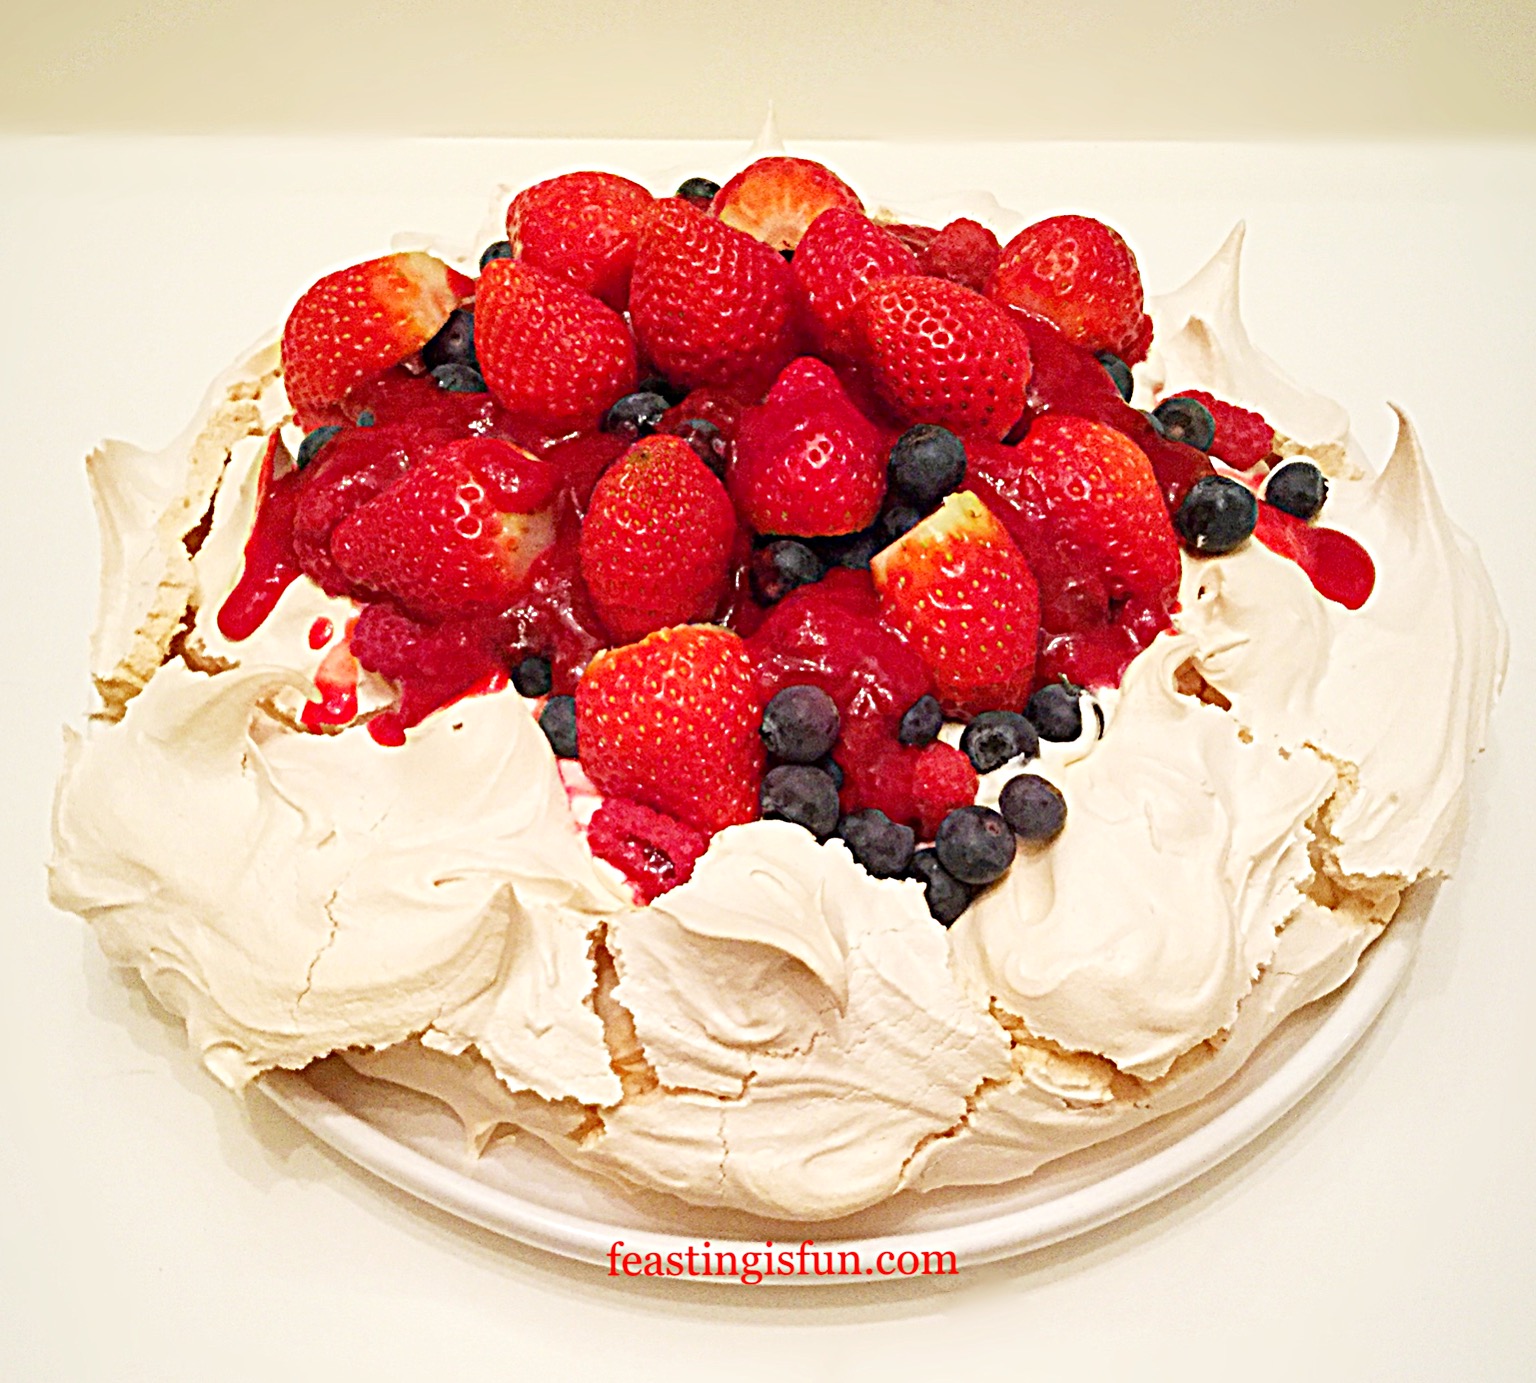
A very Happy New Year to all of my readers. And I hope this coming year brings good health, peace, love, lots of fun and feasting. So, I’d like to take this opportunity to thank you for taking the time to read this blog and for trusting the recipes that have lovingly been created to share with you. And, with that in mind I have a beautiful dessert recipe for you that is a complete knock-out. Why not celebrate  with my Raspberry Coulis Drizzled Mixed Berry Pavlova?

Raspberry Coulis Drizzled Mixed Berry Pavlova Dessert


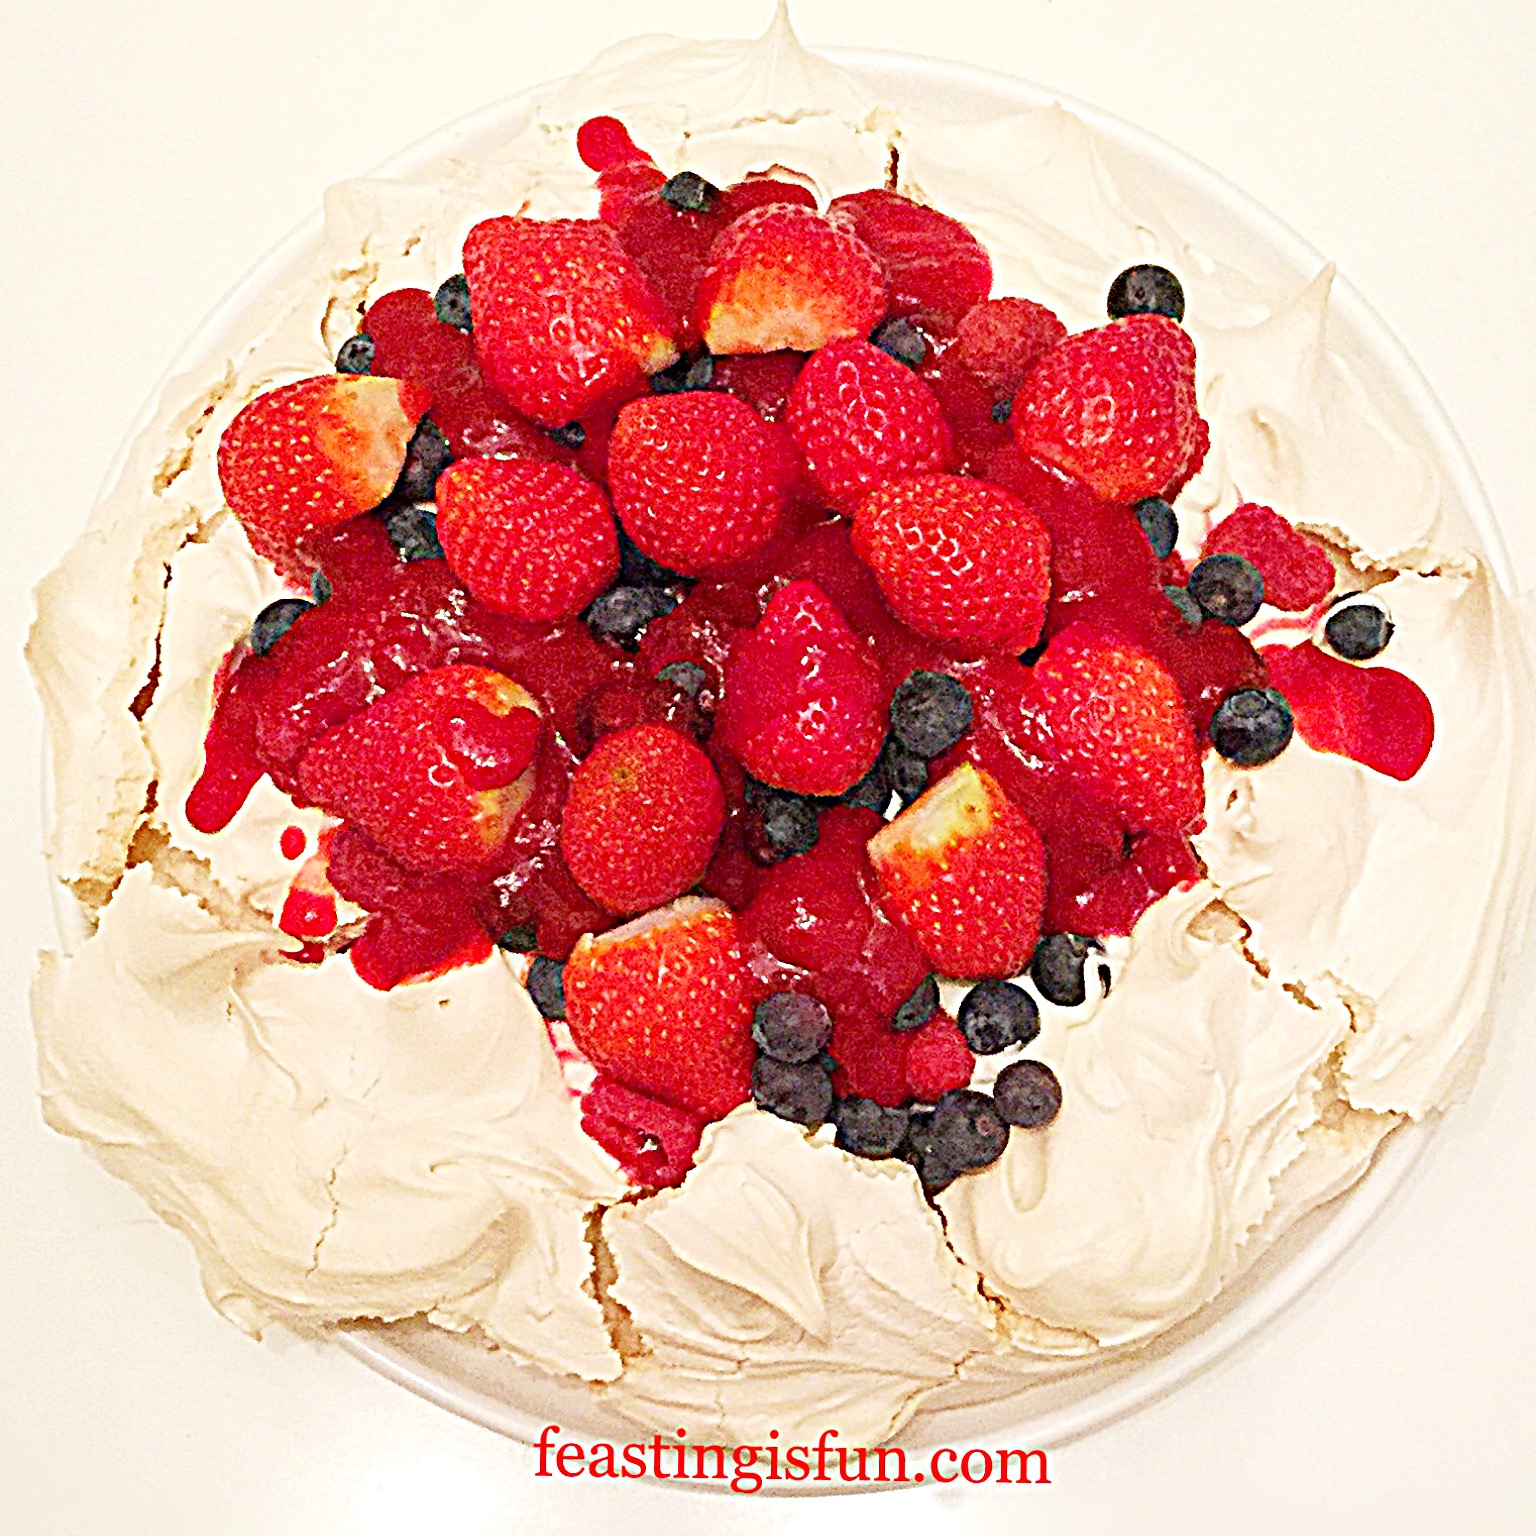
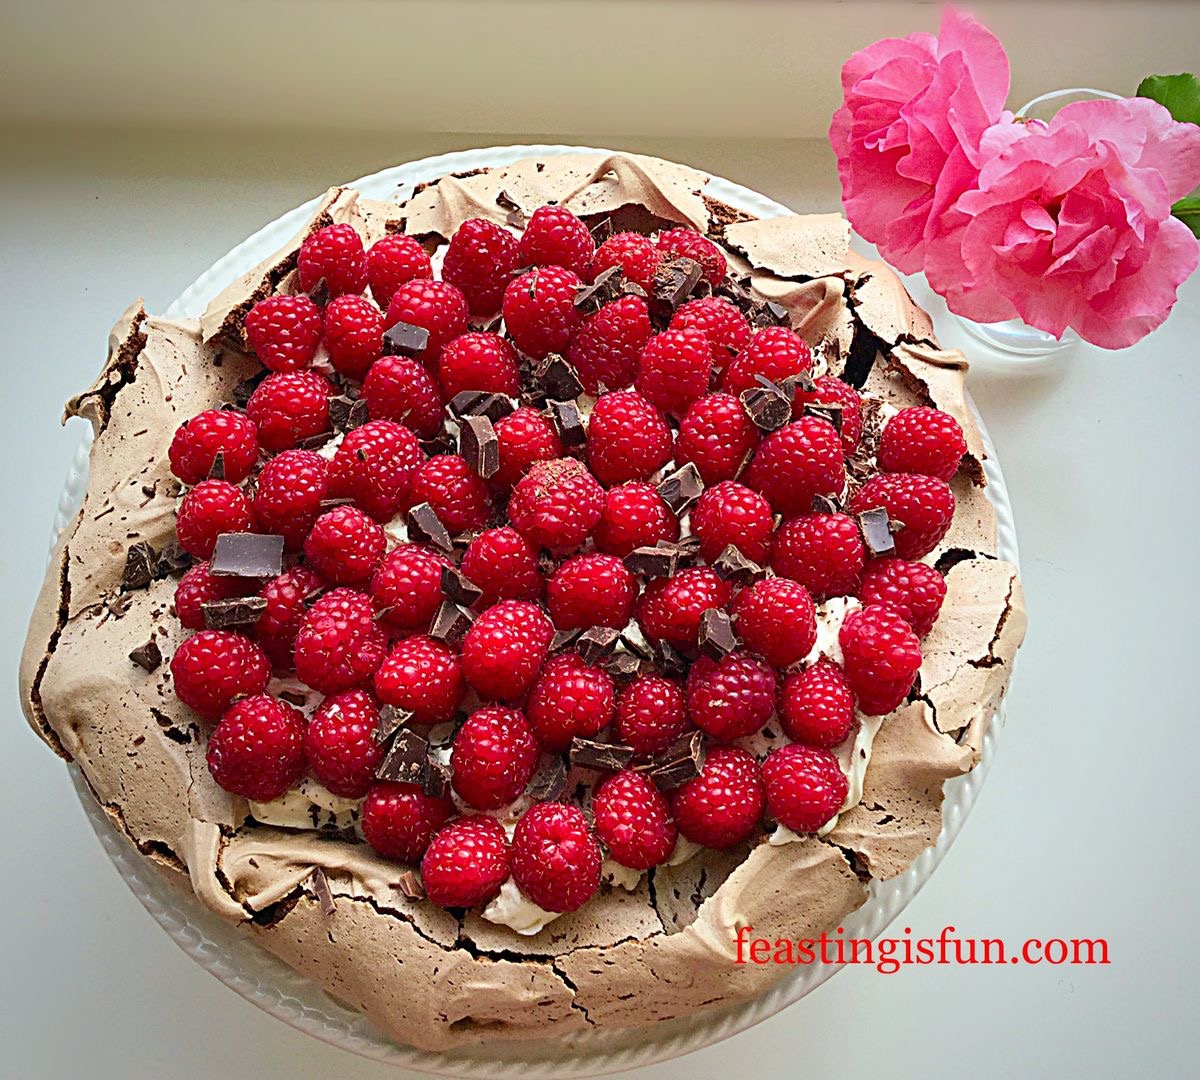
This pavlova has a delicious combination of textures and flavours. First of all, the crunchy meringue shell hides a marshmallow inner, which is draped in thickened cream, topped with tumbling, assorted, fresh berries and drizzled with a tart raspberry coulis. Resulting in a tastebud sensation with each mouthful. A truly elegant dessert that is light and also fulfills that need for something sweet at the end of a meal.

Fruit topped meringue dessert with indoor sparklers for celebrating.
Indoor sparklers add a celebratory element.

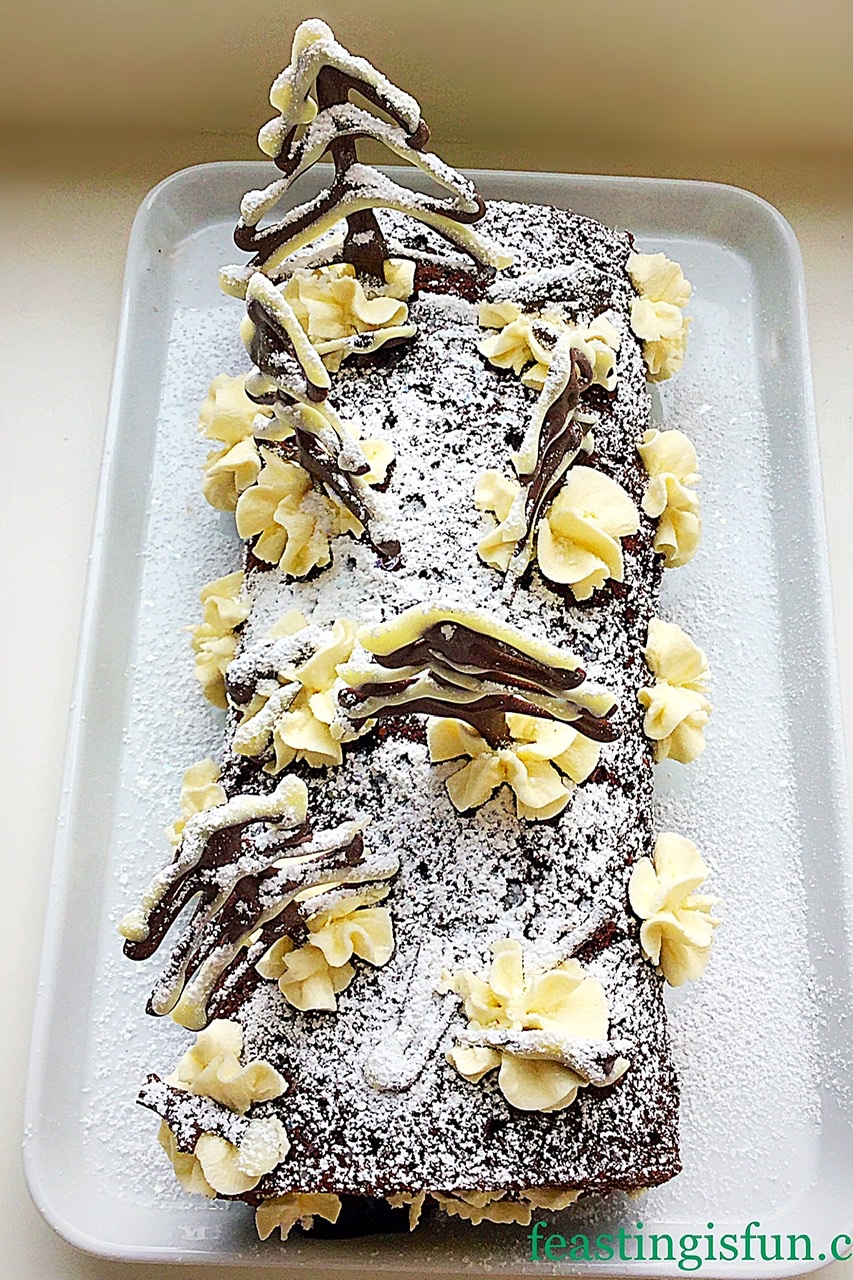
Pavlova And Mixed Berries – Dessert Heaven:

While beautifully adorned with fresh, ripe berries, the sweetness of this pavlova is complimented by the raspberry coulis, which is quick and easy to make, and utterly transforms the flavour of the finished dessert. As well as adding to the aesthetic of this stunning pavlova. While the coulis cuts through the richness of the cream, providing balance against the sweetness of the dessert.

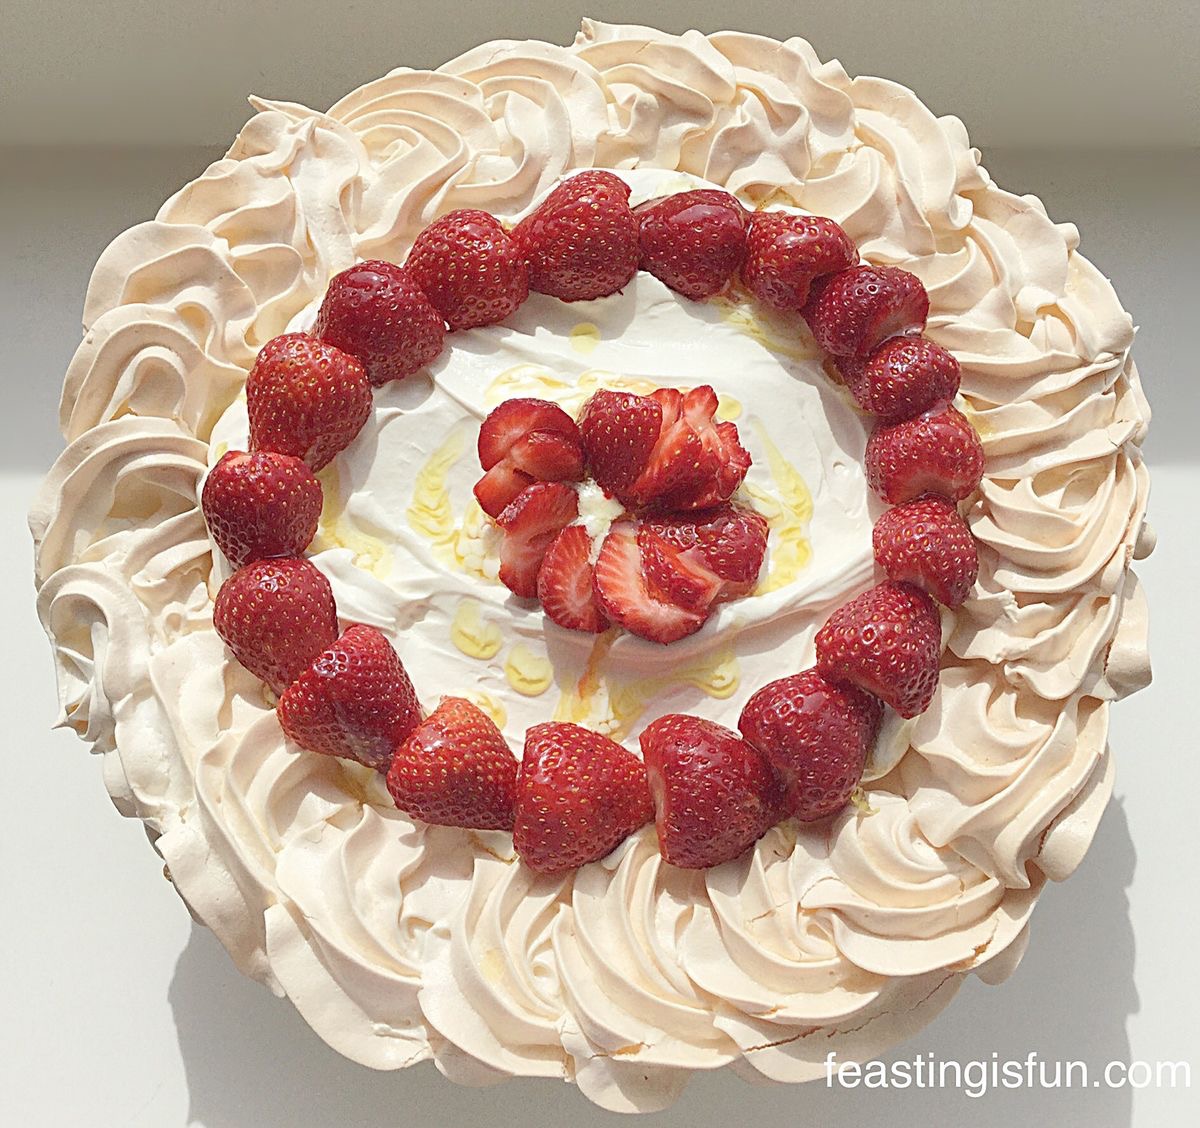
Making Pavlovas is not difficult, requiring only a whisk and patience. Yet, the reward they give, in return for effort, is outstanding. And, any cracks that may develop are easily covered with cream and the meringue can be topped with any fruit desired such as my Winter Fruit Topped Pavlova. Since the pavlova shell can be made up to 2 days in advance, they are perfect for entertaining.

Raspberry Coulis Drizzled Mixed Berry Pavlova


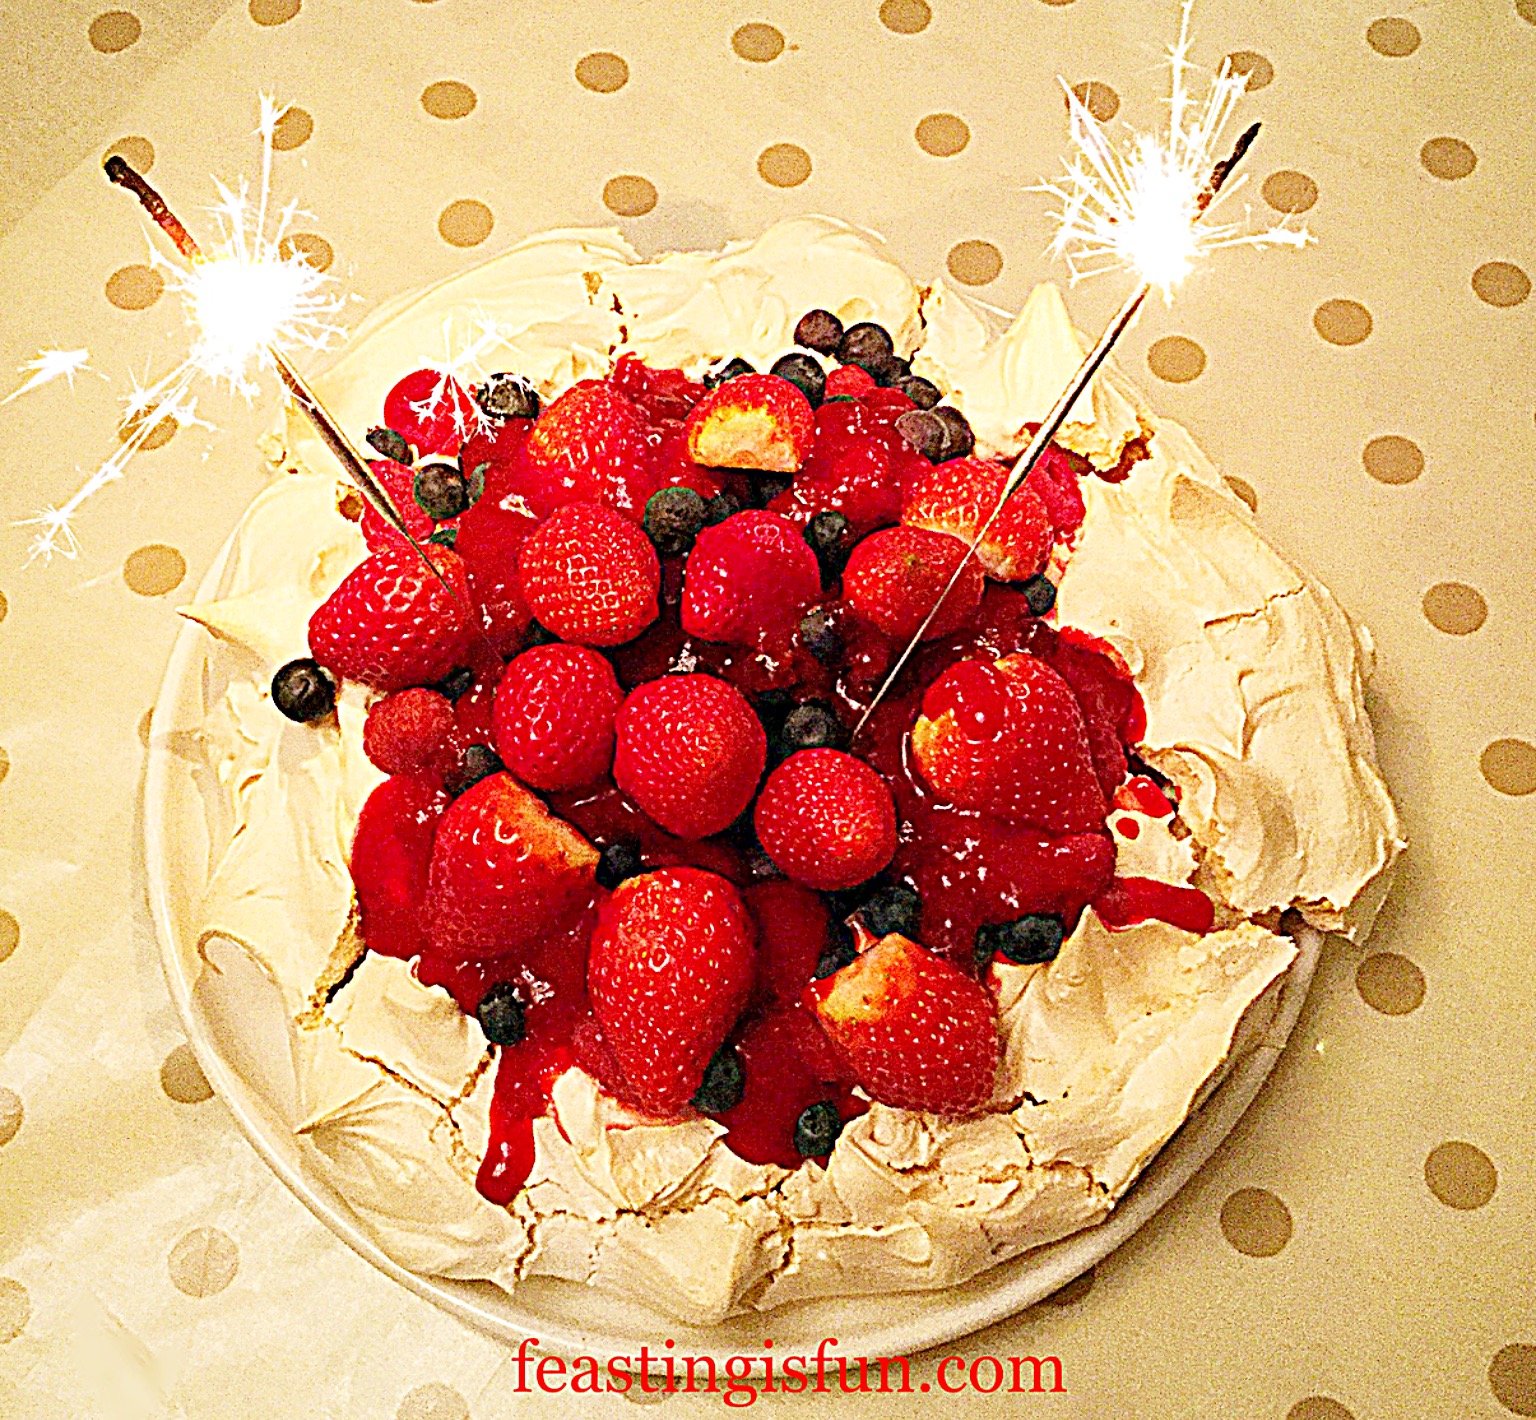
This Raspberry Coulis Drizzled Mixed Berry Pavlova was made to celebrate New Years Eve, which also happens to be the night before my hubby’s birthday. Using cake sparklers to add fun, fizz and sparkle, ensures this is no ordinary dessert. A fabulous celebration of the year passed and the new year to come.

Recipe: Raspberry Coulis Drizzled Mixed Berry Pavlova serves 8

For the Pavlova:

4 Large Free Range Egg Whites at room temperature

1tsp Lemon Juice

200g/7oz Caster Sugar

1tsp White Wine Vinegar

1tsp Cornfour – certified gluten free I use Doves Farm

400ml Double Cream

1tsp Vanilla Bean Paste – I use Nielsen-Massey

Berry Topping

450g/1lb Mixed Berries – I used strawberries, blueberries and raspberries removing stalks and leaves as necessary

For the Coulis

200g/7oz Raspberries

1tbsp each of Fresh Lemon Juice and Tap Water

1tbsp Caster Sugar

Method: Preheat the oven to 180C/160C fan, gas mark 4, 350F

Making The Pavola:

  • First of all line a baking tray with baking parchment. Using pencil draw a 20cm/8″ circle on one side. Flip the paper over so that the pencil mark is underneath.
  • Next in a scrupulously clean large bowl add the 4 egg whites.
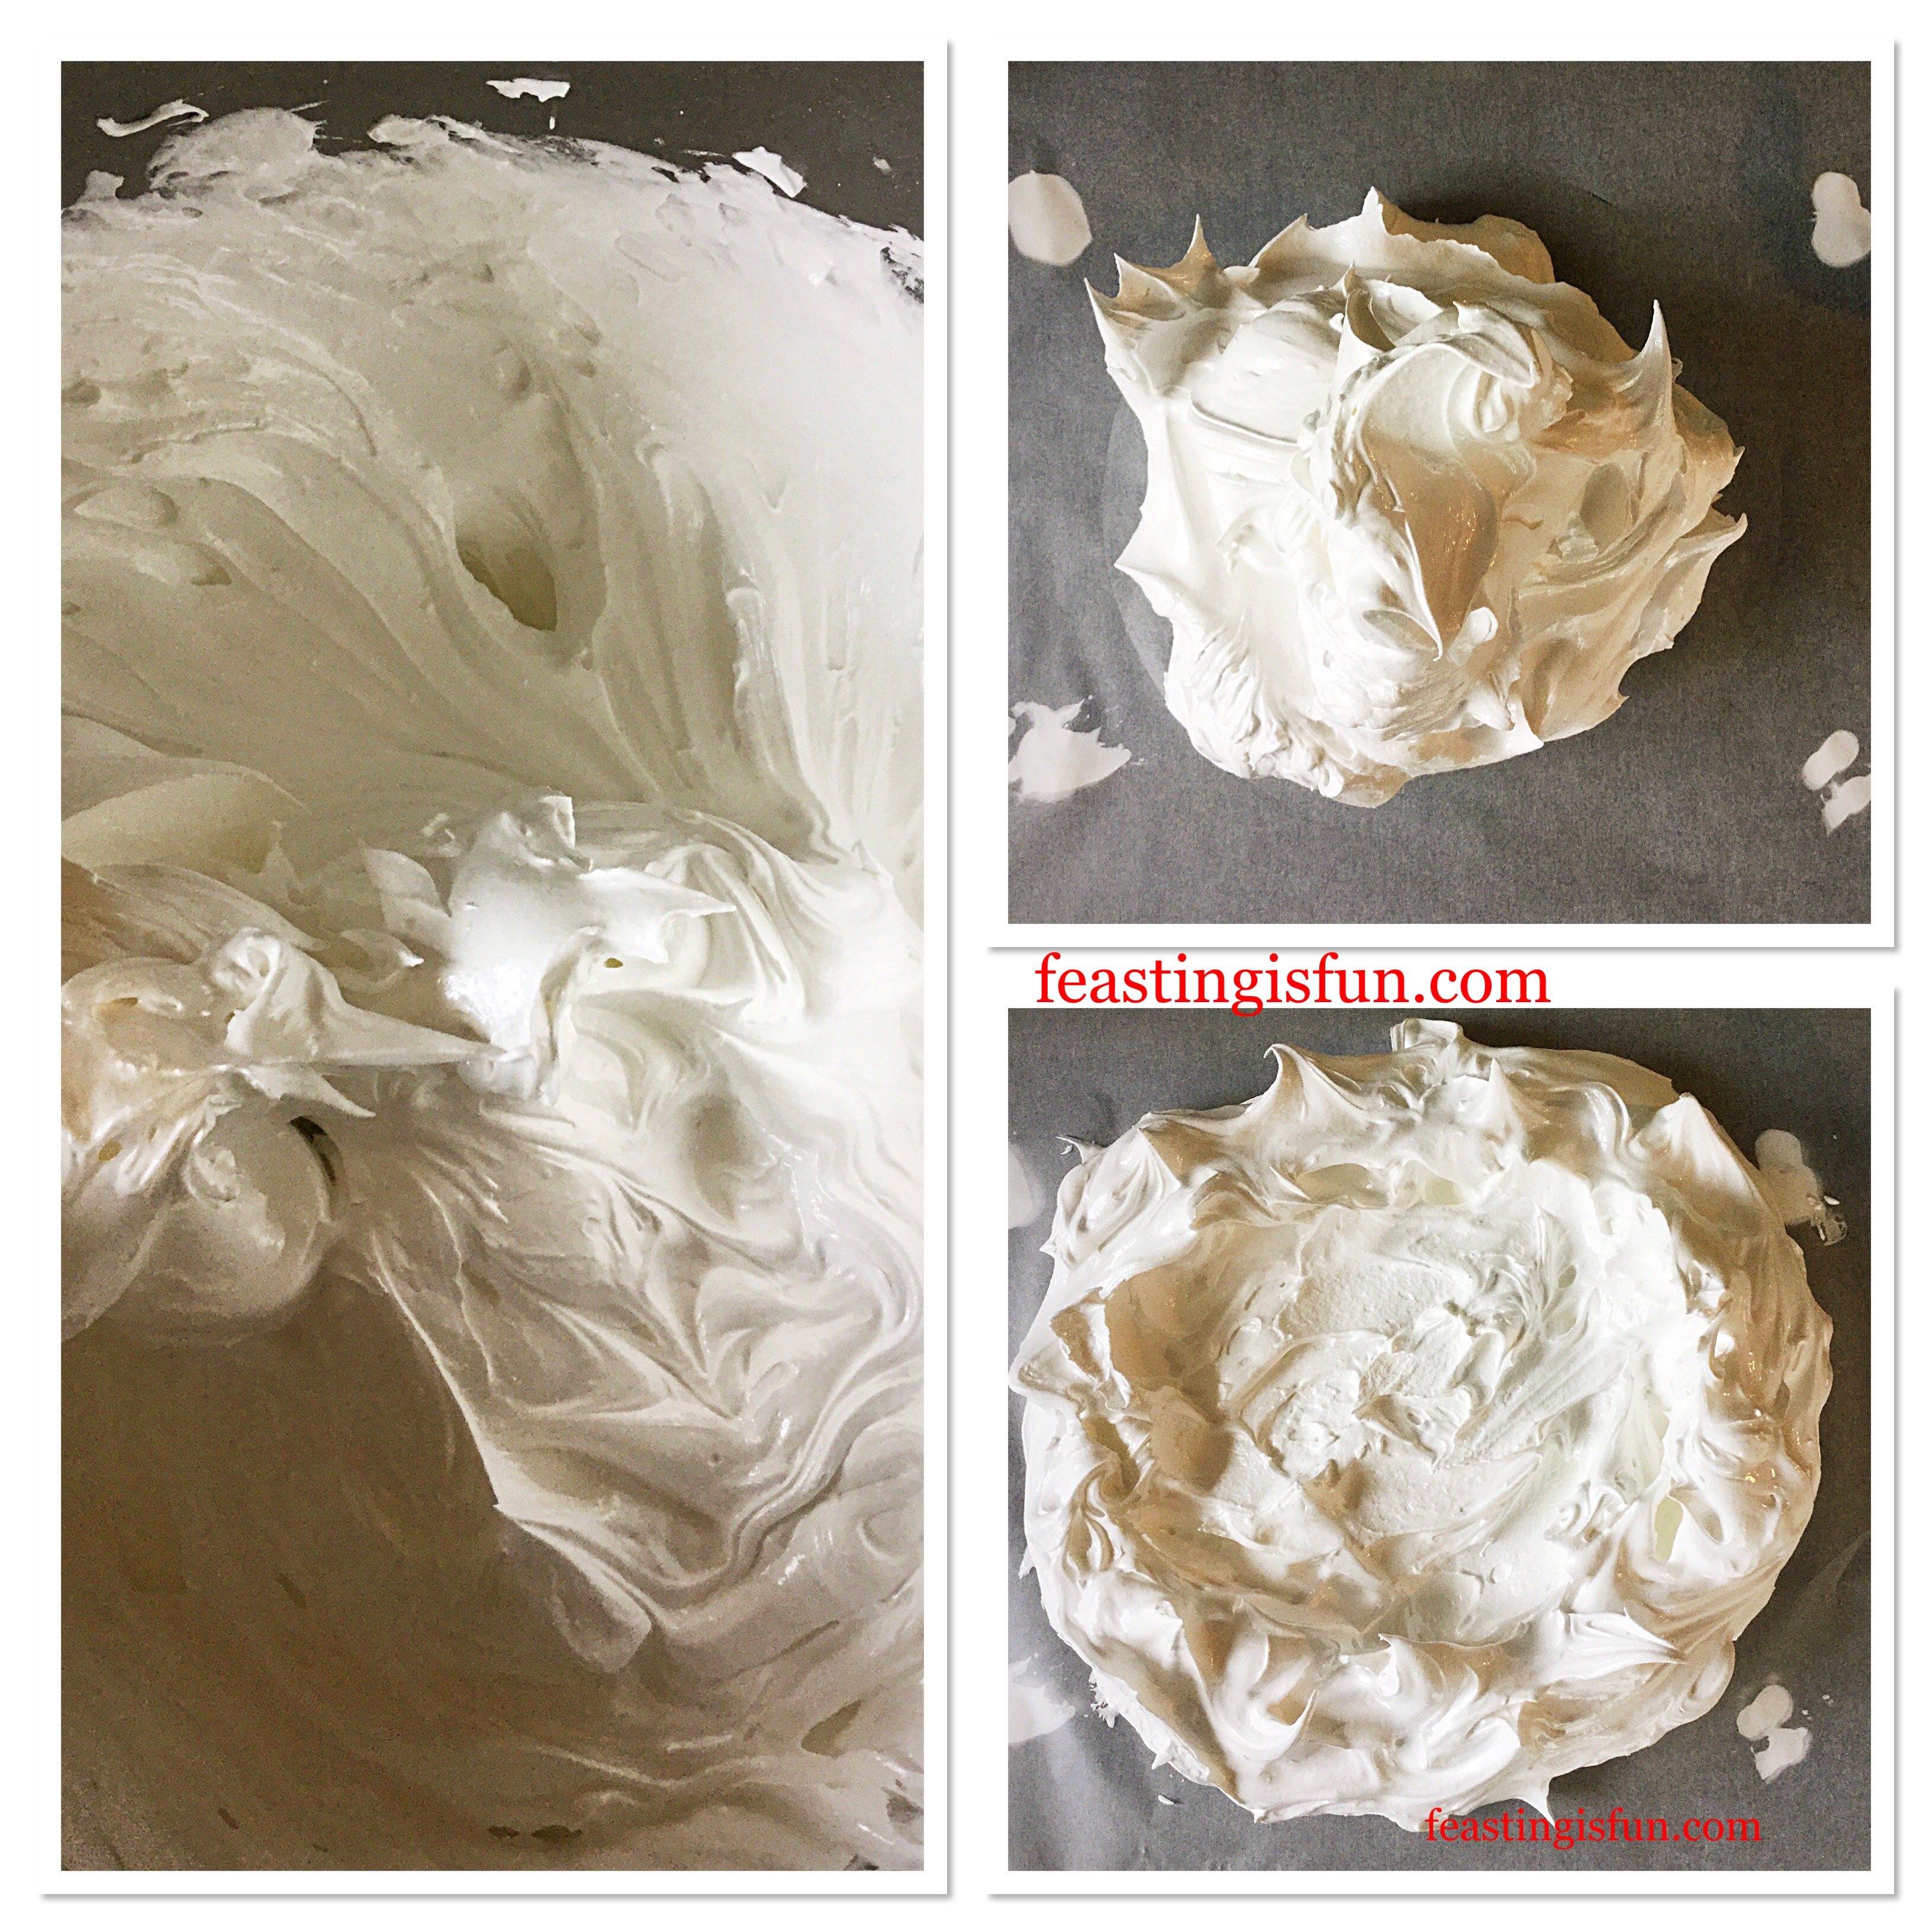
  • Whisk until they are light and airy. While whisking at medium speed gradually add the caster sugar one spoonful at a time. Continue whisking on medium – high until the meringue is shiny and glossy. Rub a little of the meringue mixture between your thumb and forefinger, when it feels smooth and there are no signs of grittiness, the sugar is completely dissolved into the egg white.
  • Next, while still whisking, add the lemon juice, vinegar and cornflour. Continue whisking for a further minute.
  • Stop the whisk and using the beater, place 4 dots of meringue on to the baking tray. Place the parchment on top, the meringue acts like glue and will stop it from moving around.
  • Using a clean, metal spoon, scoop the meringue on to the centre of the circle marked baking parchment.
  • Continue with a pallet knife, spreading the mixture evenly to form a disc, building up the sides so they are slightly raised.
FF Raspberry Coulis Drizzled Mixed Berry Pavlova
Creating the Pavlova shell.

Baking The Pavlova Base:

  • Place the meringue into the centre of the oven and immediately reduced the heat to 160C/140C gas mark 3, 325F.
  • Bake for 1 hour and 15 minutes and DO NOT open the oven door while baking.
  • As soon as the baking time has elapsed the oven off and allow the pavlova to cool completely in the oven. Also, cooling the meringue slowly in the oven helps reduce any cracking.
  • Tip: Make the pavlova the night before it is needed, then cool overnight in the oven.

Making The Raspberry Coulis:

  • To make the coulis, tip the raspberries, lemon juice, water and sugar into a small saucepan.
  • Place the pan over a high heat, stirring with a wooden spoon to mash the raspberries up. As soon as the mixture has bubbled to a boil, turn the heat off.
  • Strain the raspberry mixture into a heatproof bowl, through a sieve. And then press the raspberries with a spoon to extract all of the juice. Set the bowl aside to cool.
FF Raspberry Coulis Drizzled Mixed Berry Pavlova
Making the Raspberry Coulis.

Assembling The Raspberry Coulis Drizzled Mixed Berry Pavlova:

Note:  For best results, assemble the Pavlova no more than 3 hours ahead and keep chilled in a refrigerator.

  • Place the cream into a bowl with the vanilla bean extract. Whisk until it just starts to thicken, but will still slowly drop from a spoon.
  • Peel the pavlova carefully away from the baking parchment. Place on a plate or cake stand.
  • Spoon over the thickened cream so that it fills the central well in the pavlova.
  • And then add the prepared berries, arranging so they look attractive.
  • Finally, drizzle over the raspberry coulis, encouraging it to drip  down the sides of the Pavlova.
  • Serve the Raspberry Coulis Drizzled Mixed Berry Pavlova sliced, with a smile and on special occasions a glass of bubbly!

A slice of whipped cream filled meringue topped with fresh berries and a fruit sauce.

A delicious, refreshing dessert, that is a wonderfully light way to celebrate and makes a great change from cake.

Store any remaining Pavlova in the fridge and eat within 24 hours.

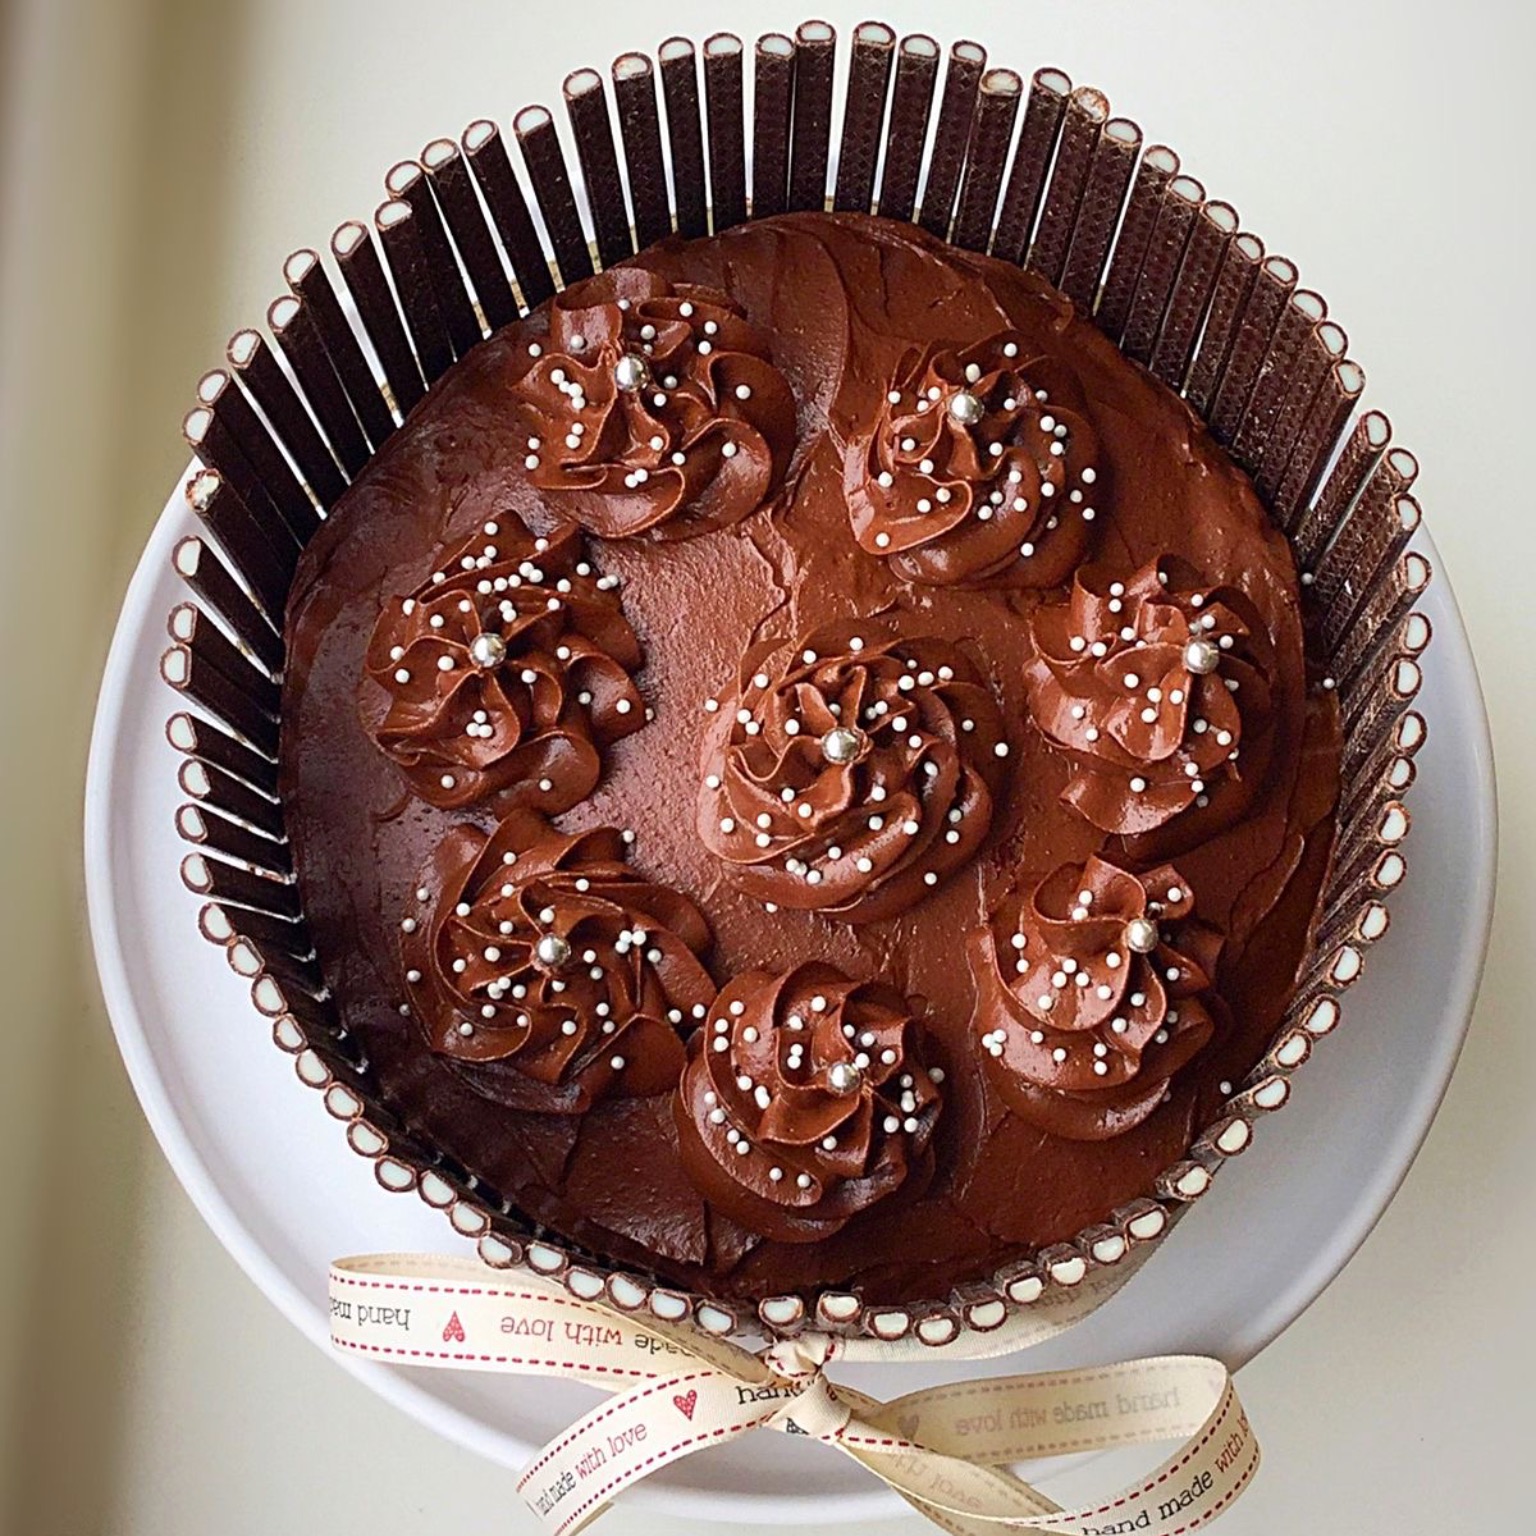
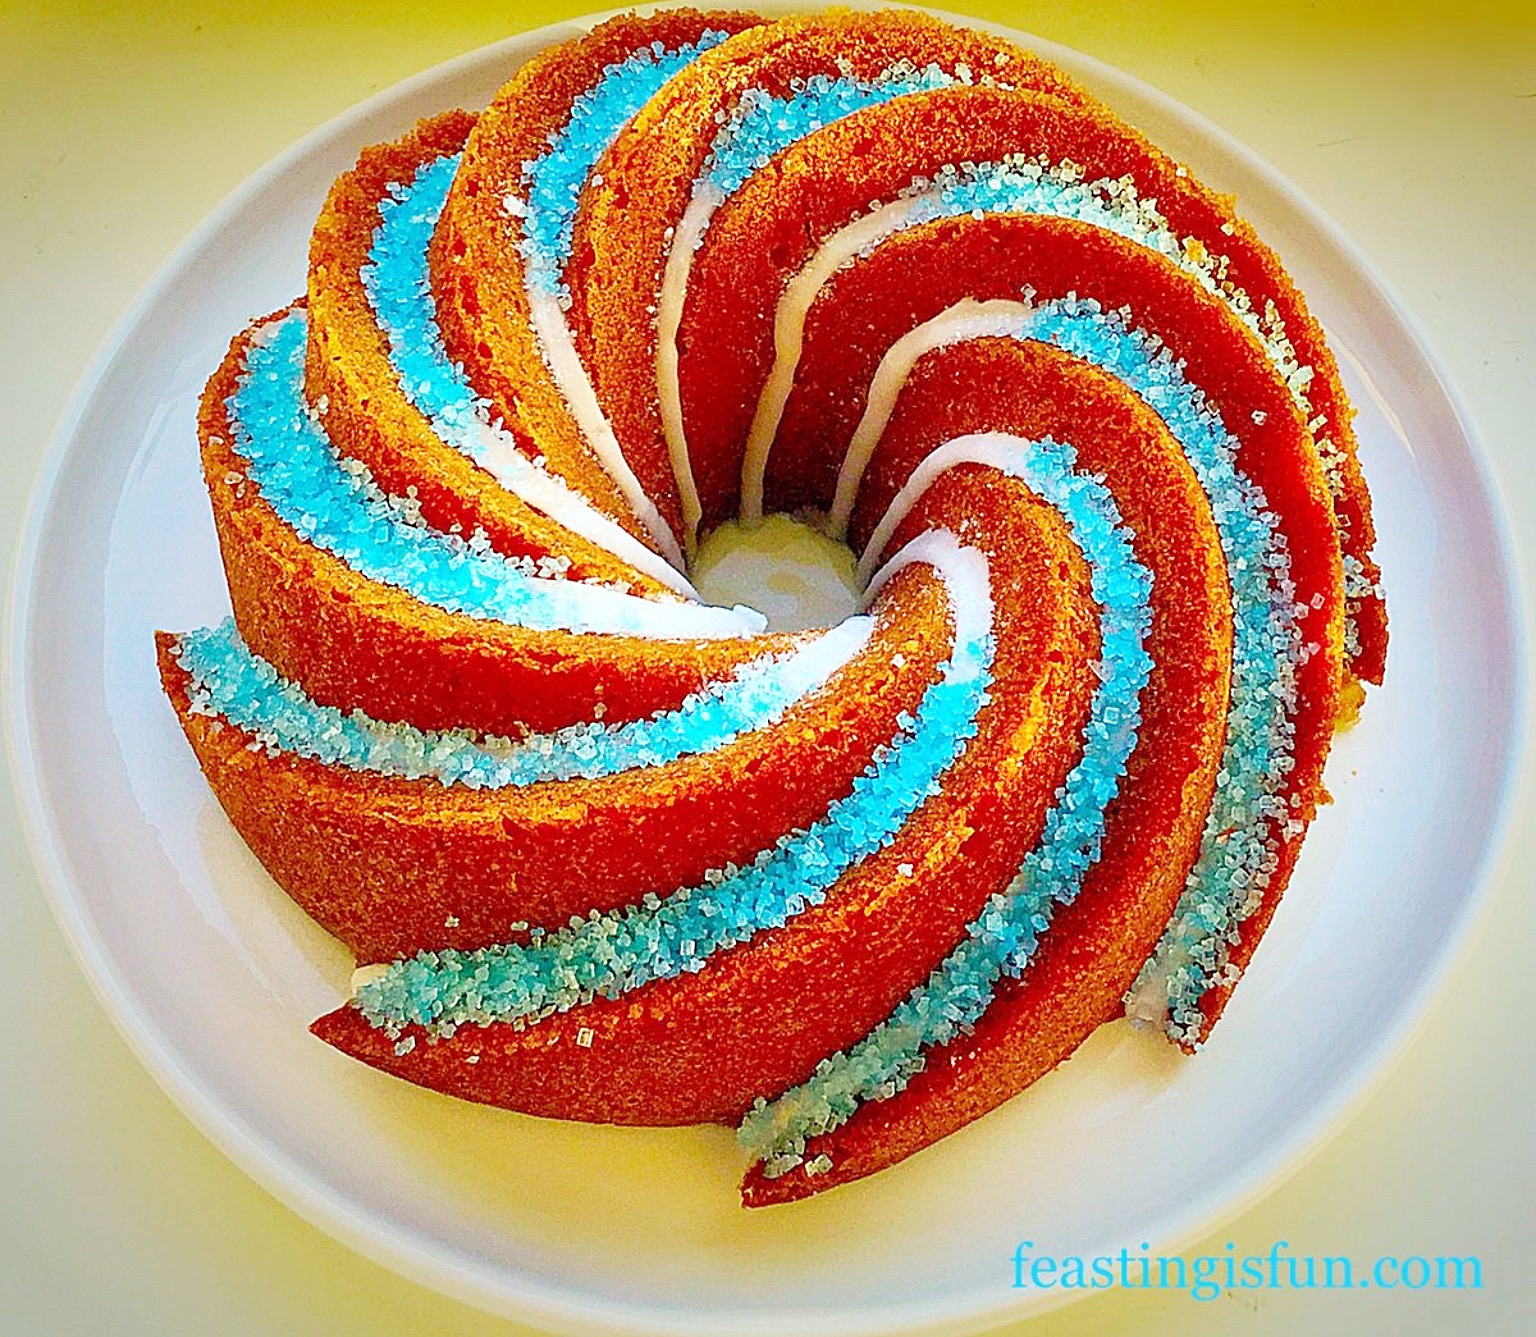
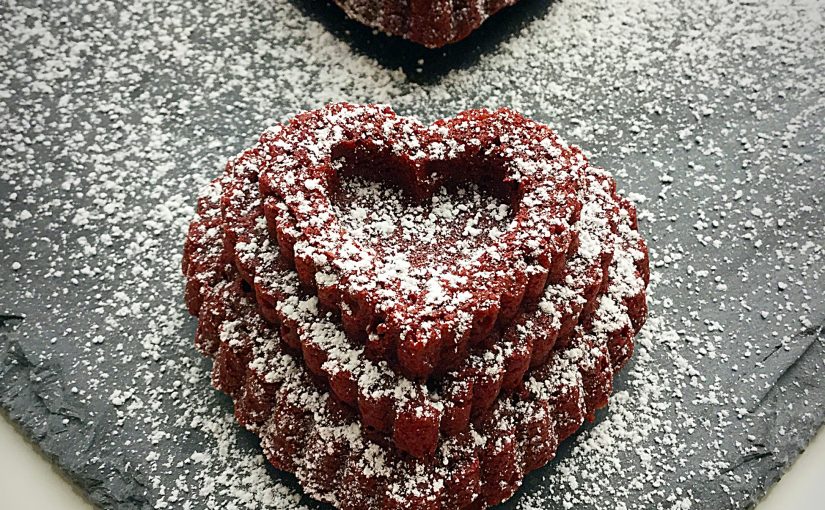
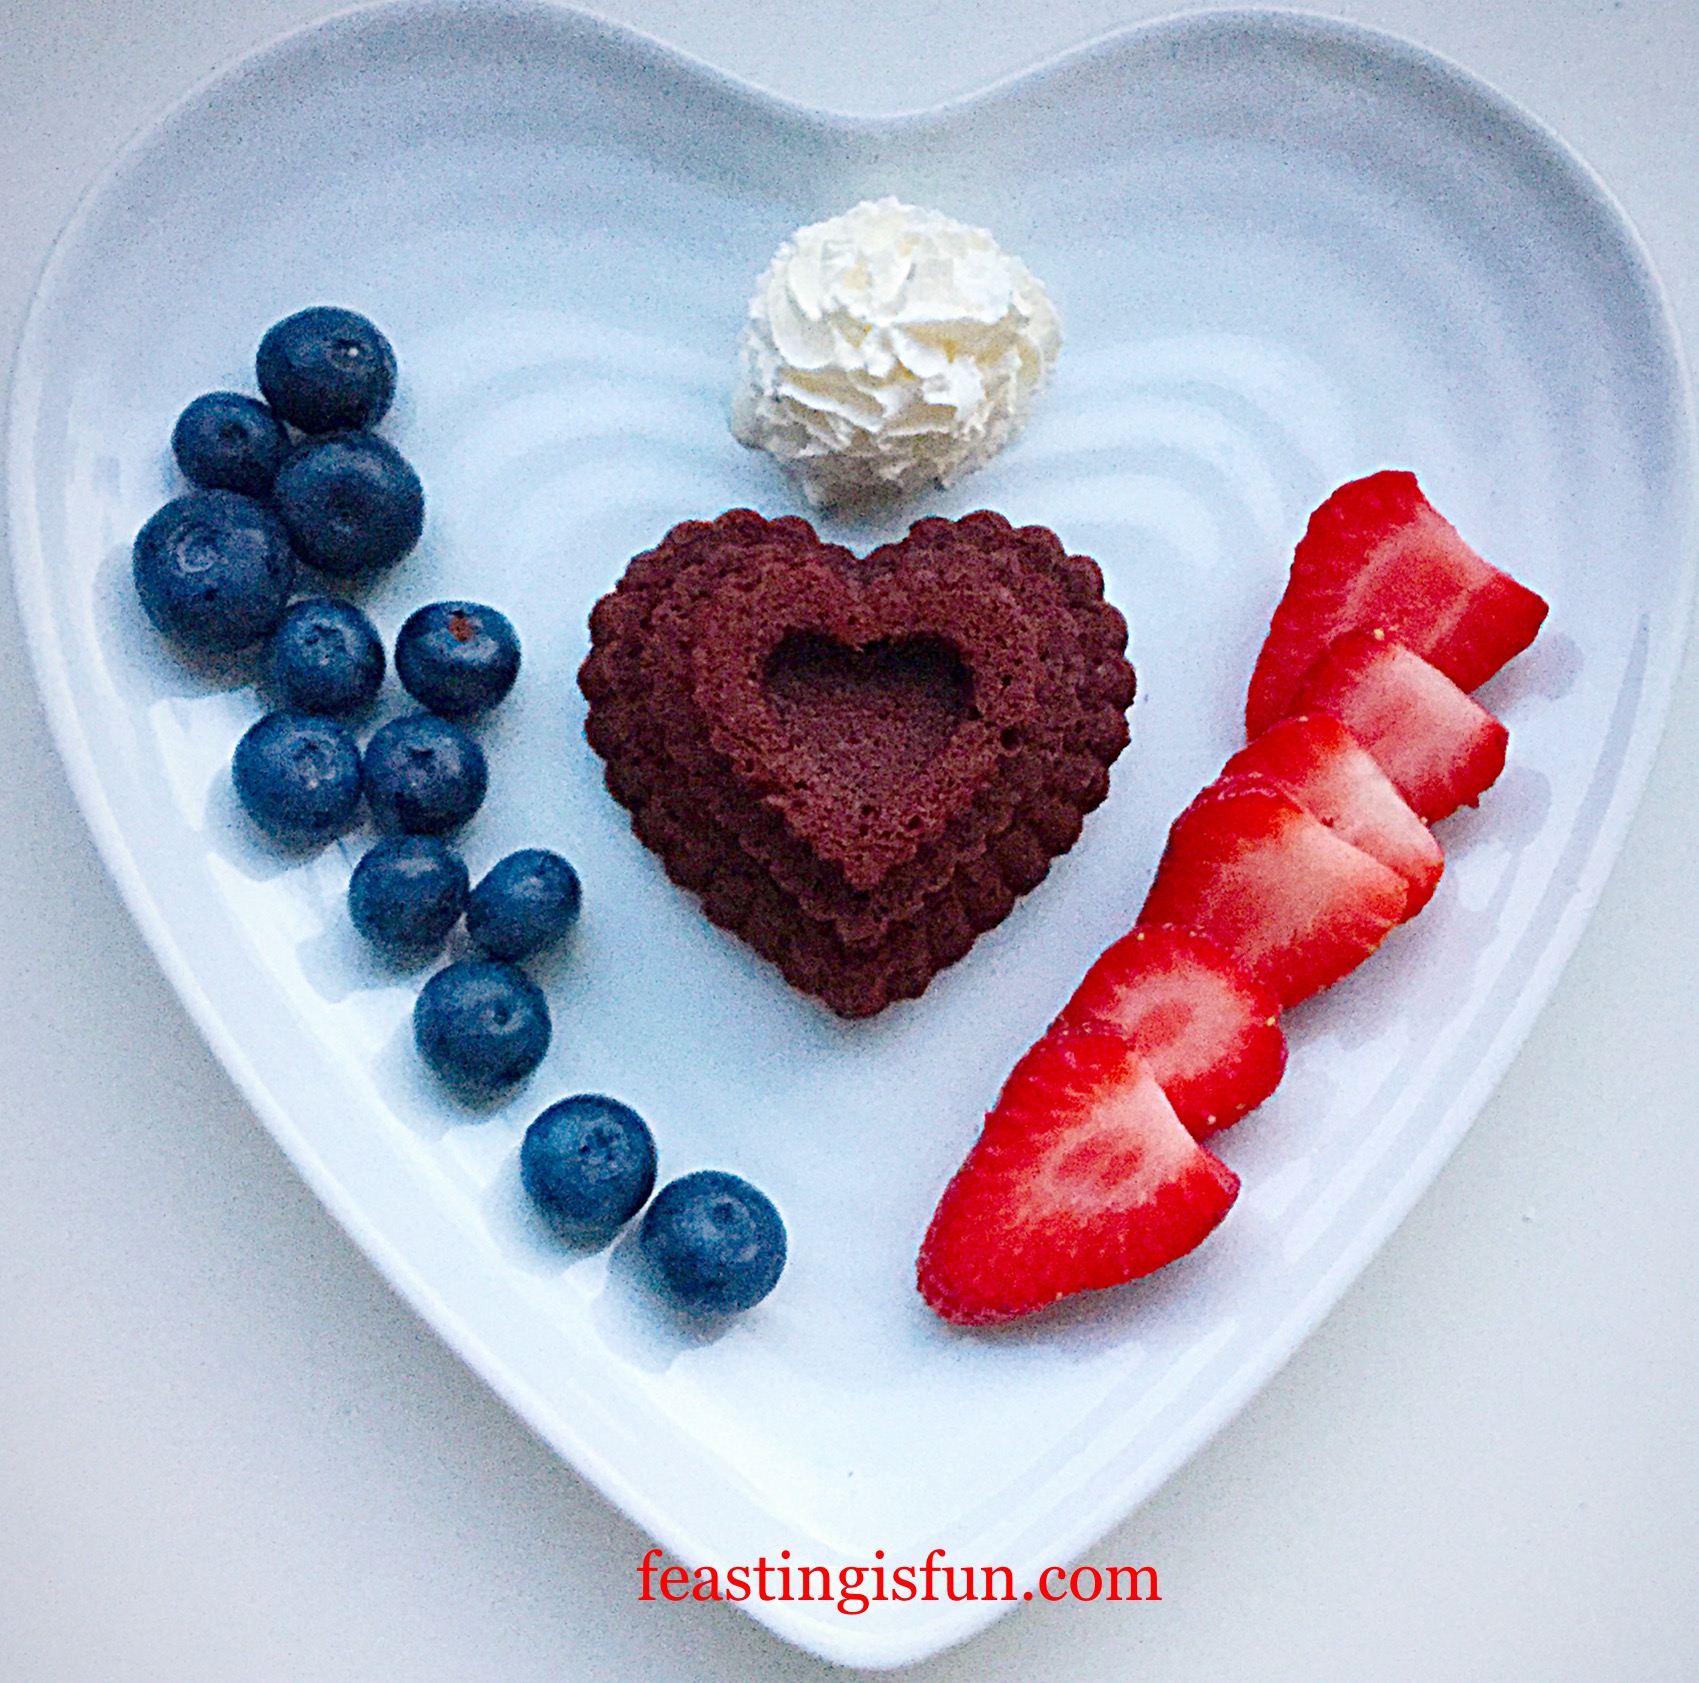
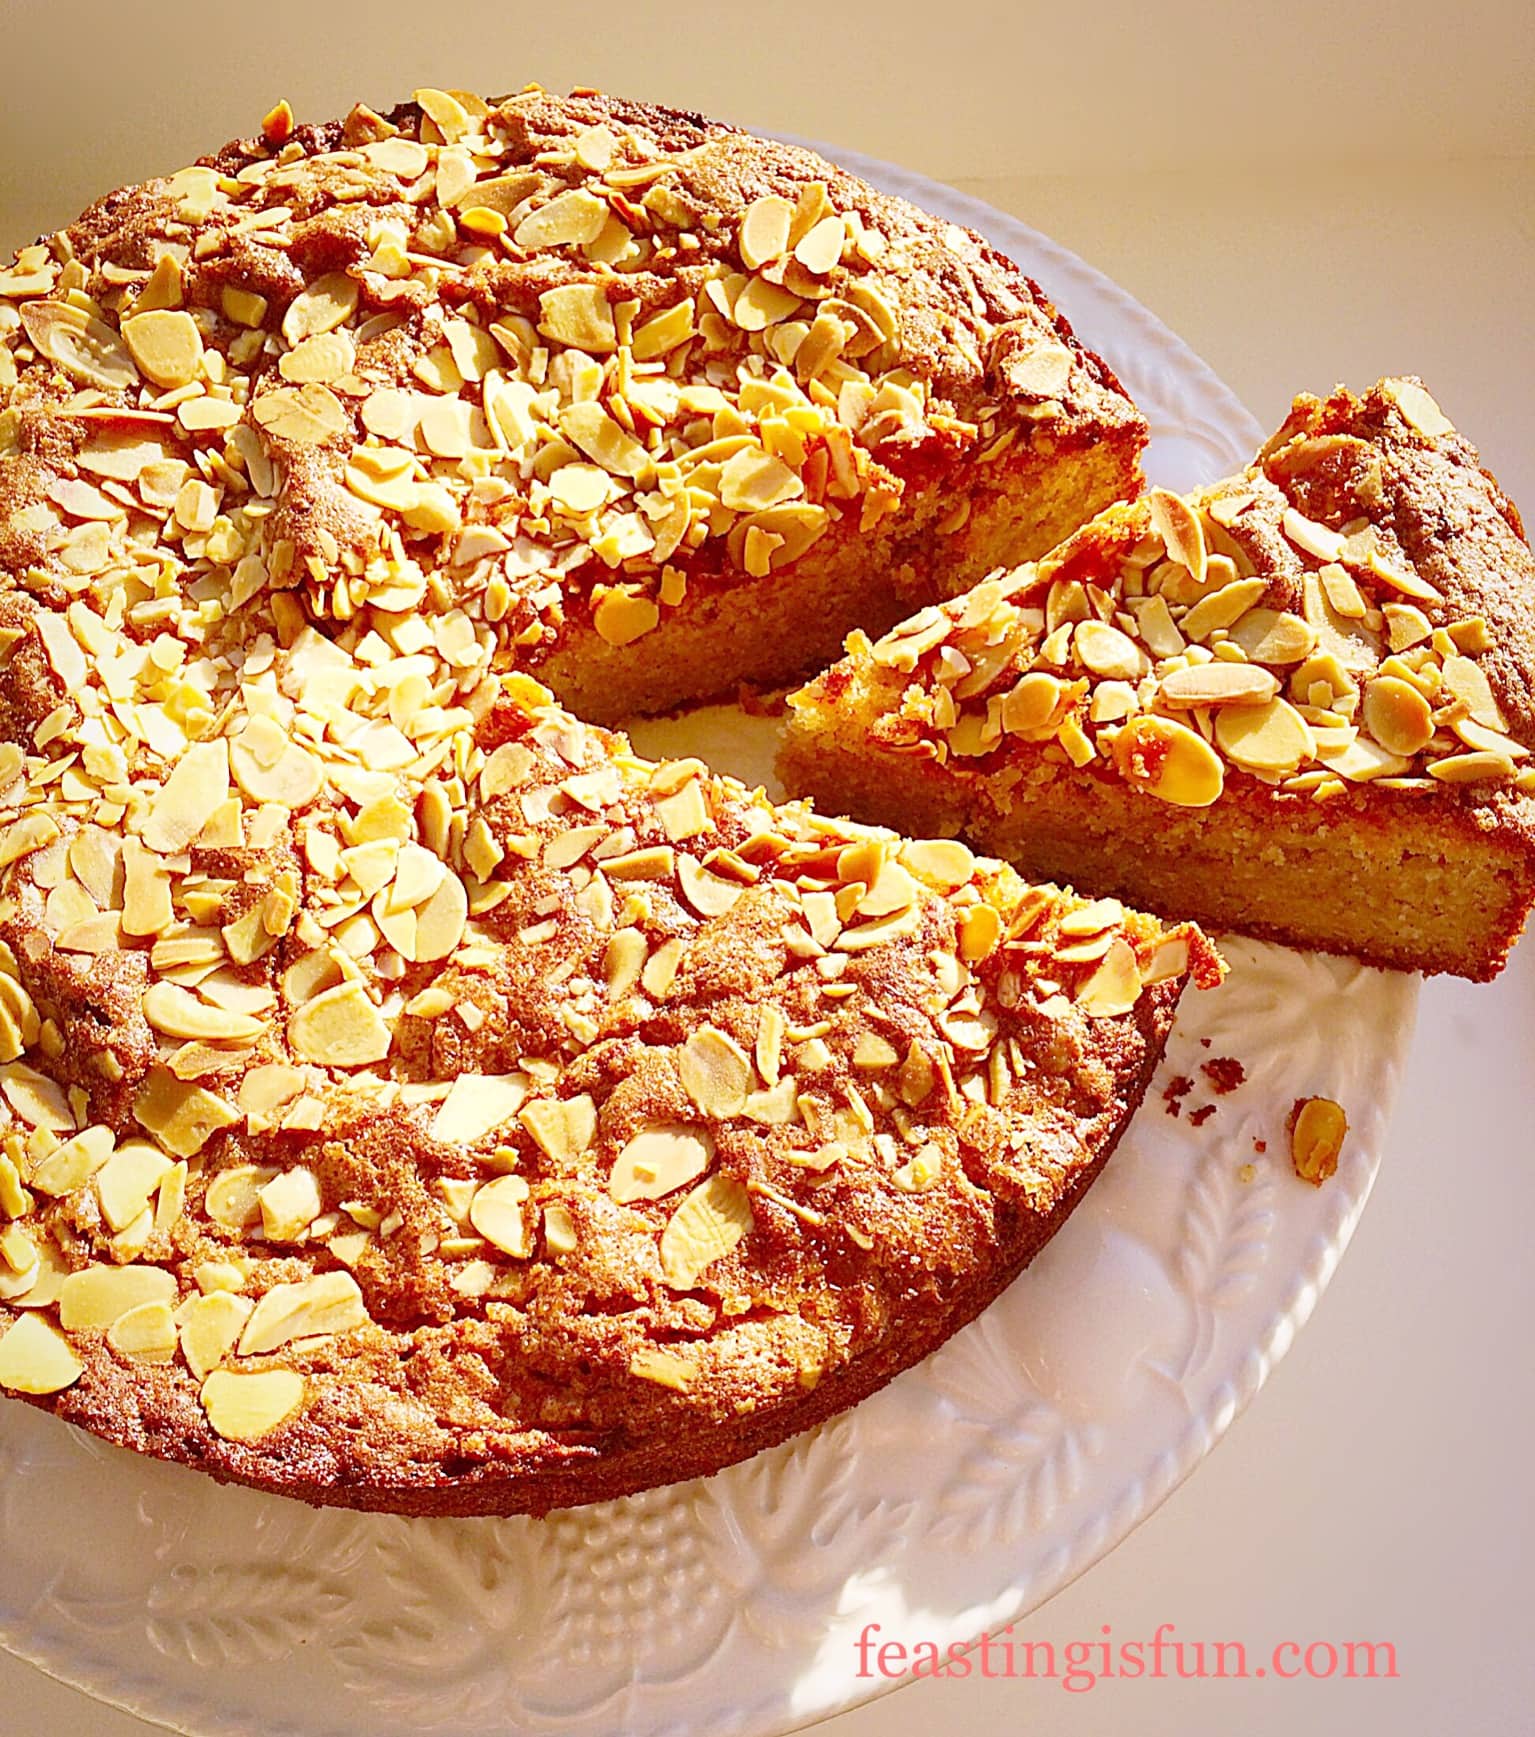
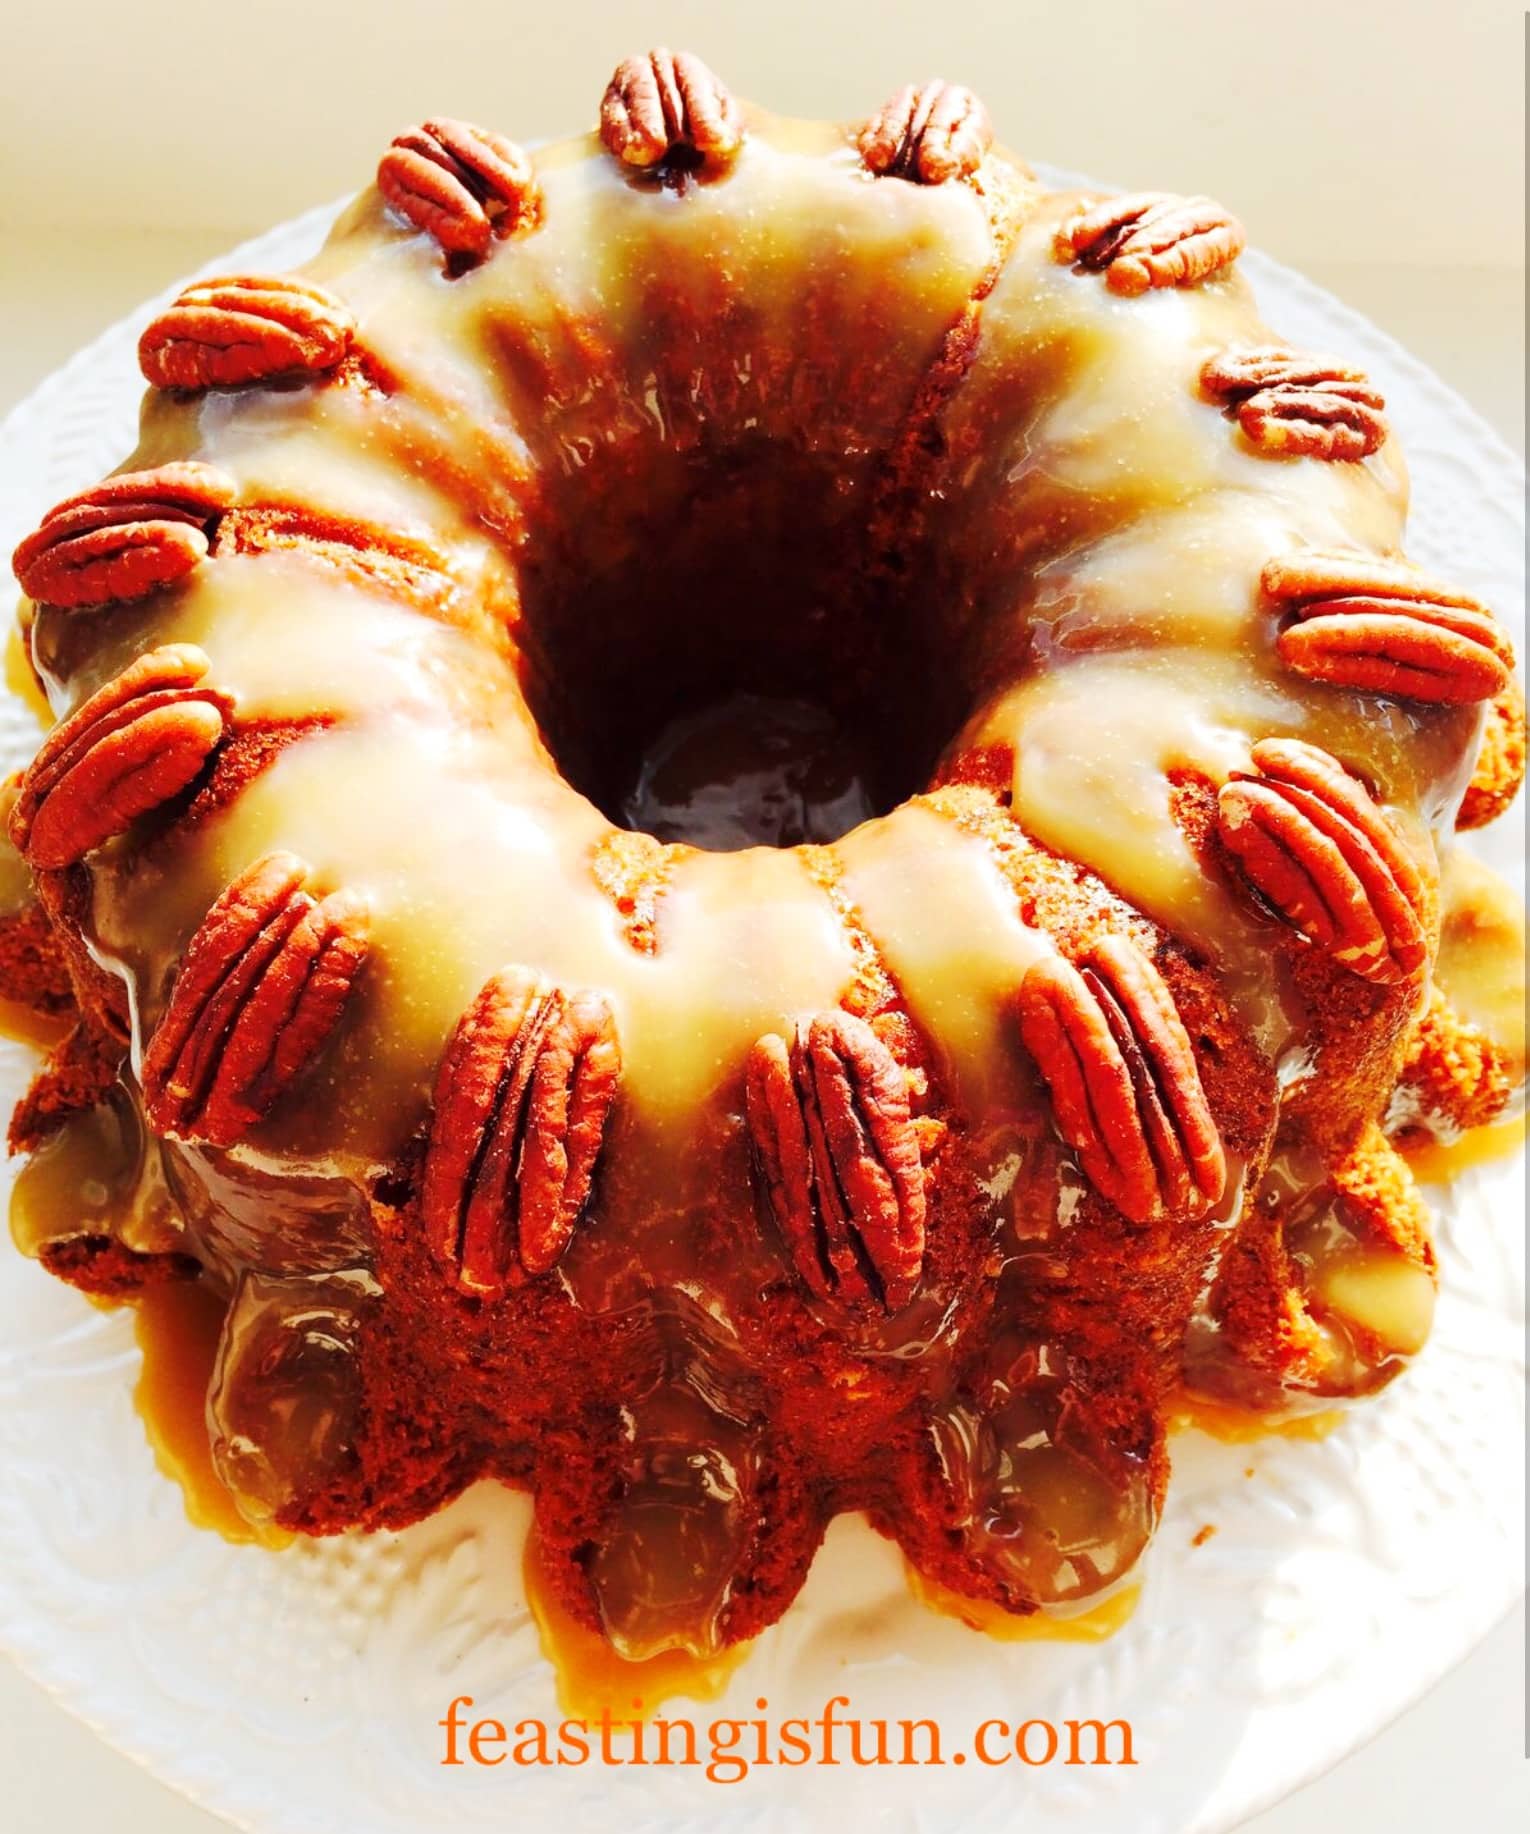
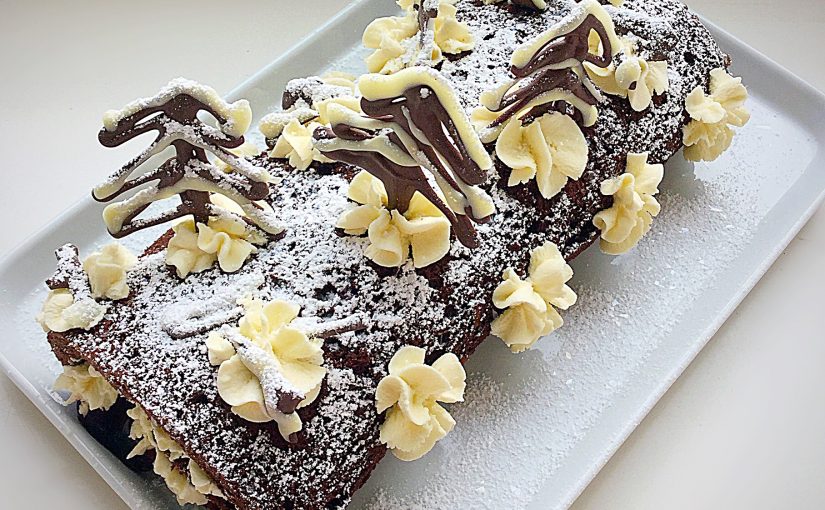
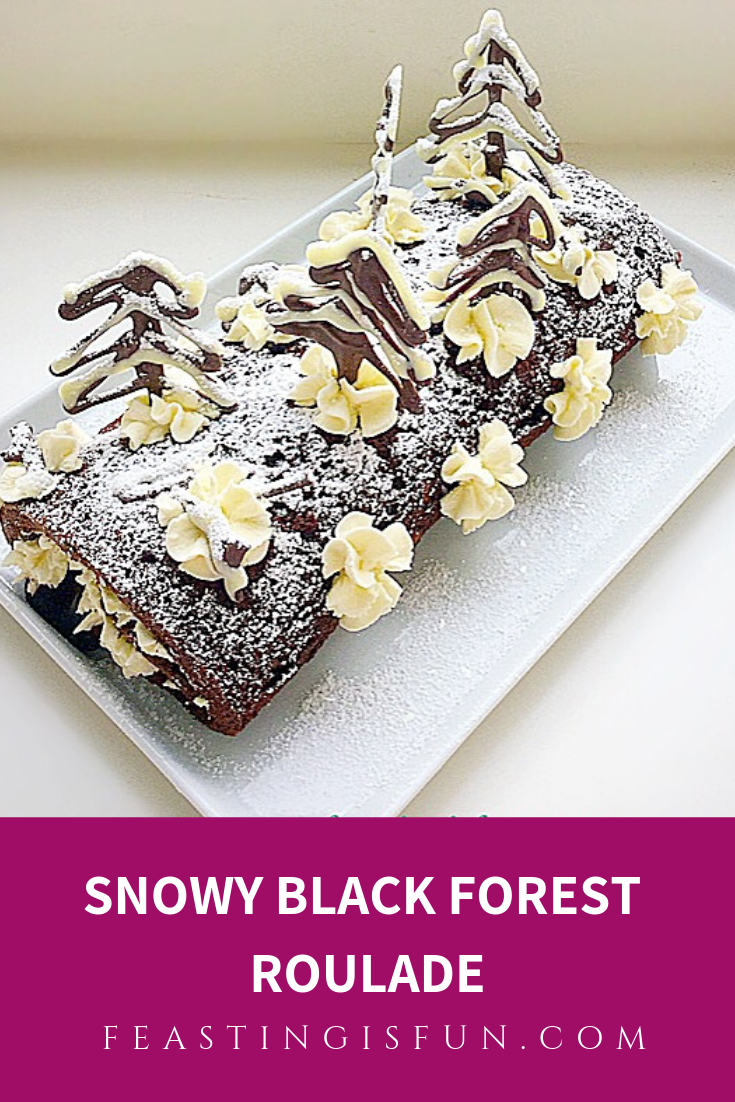
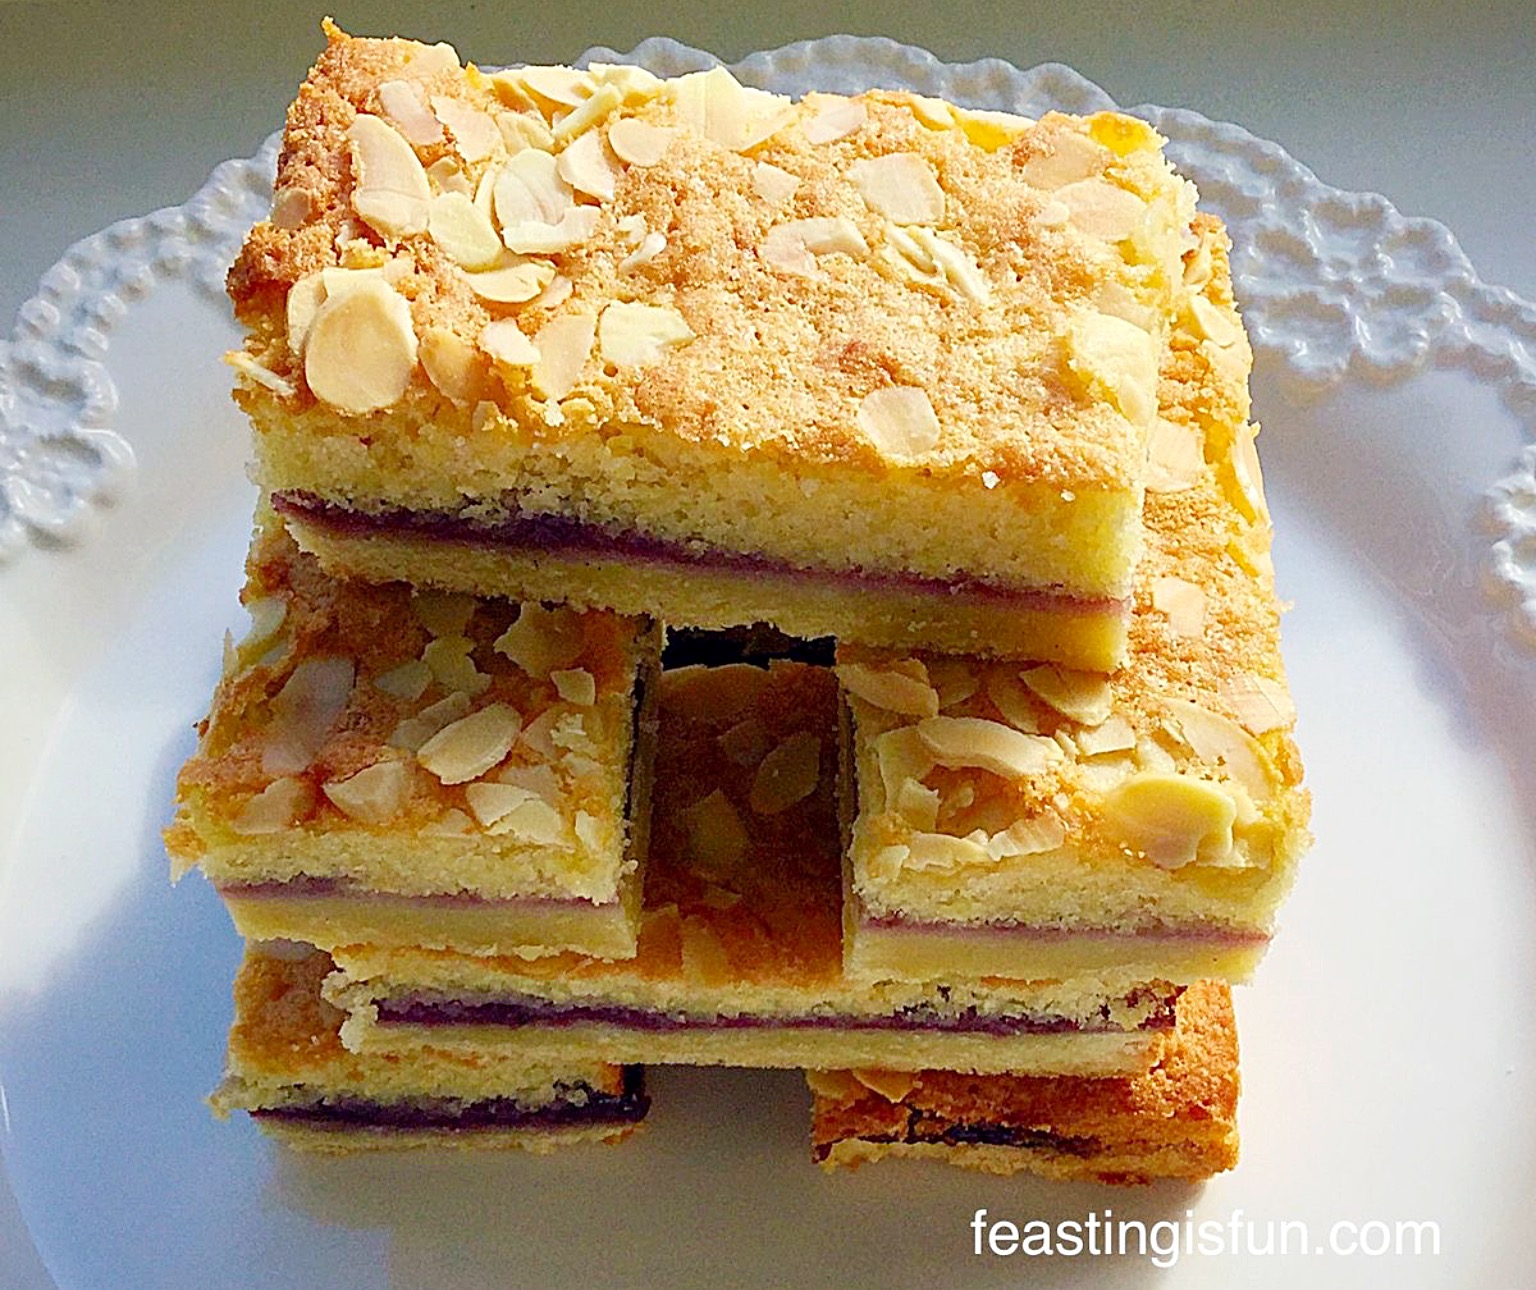
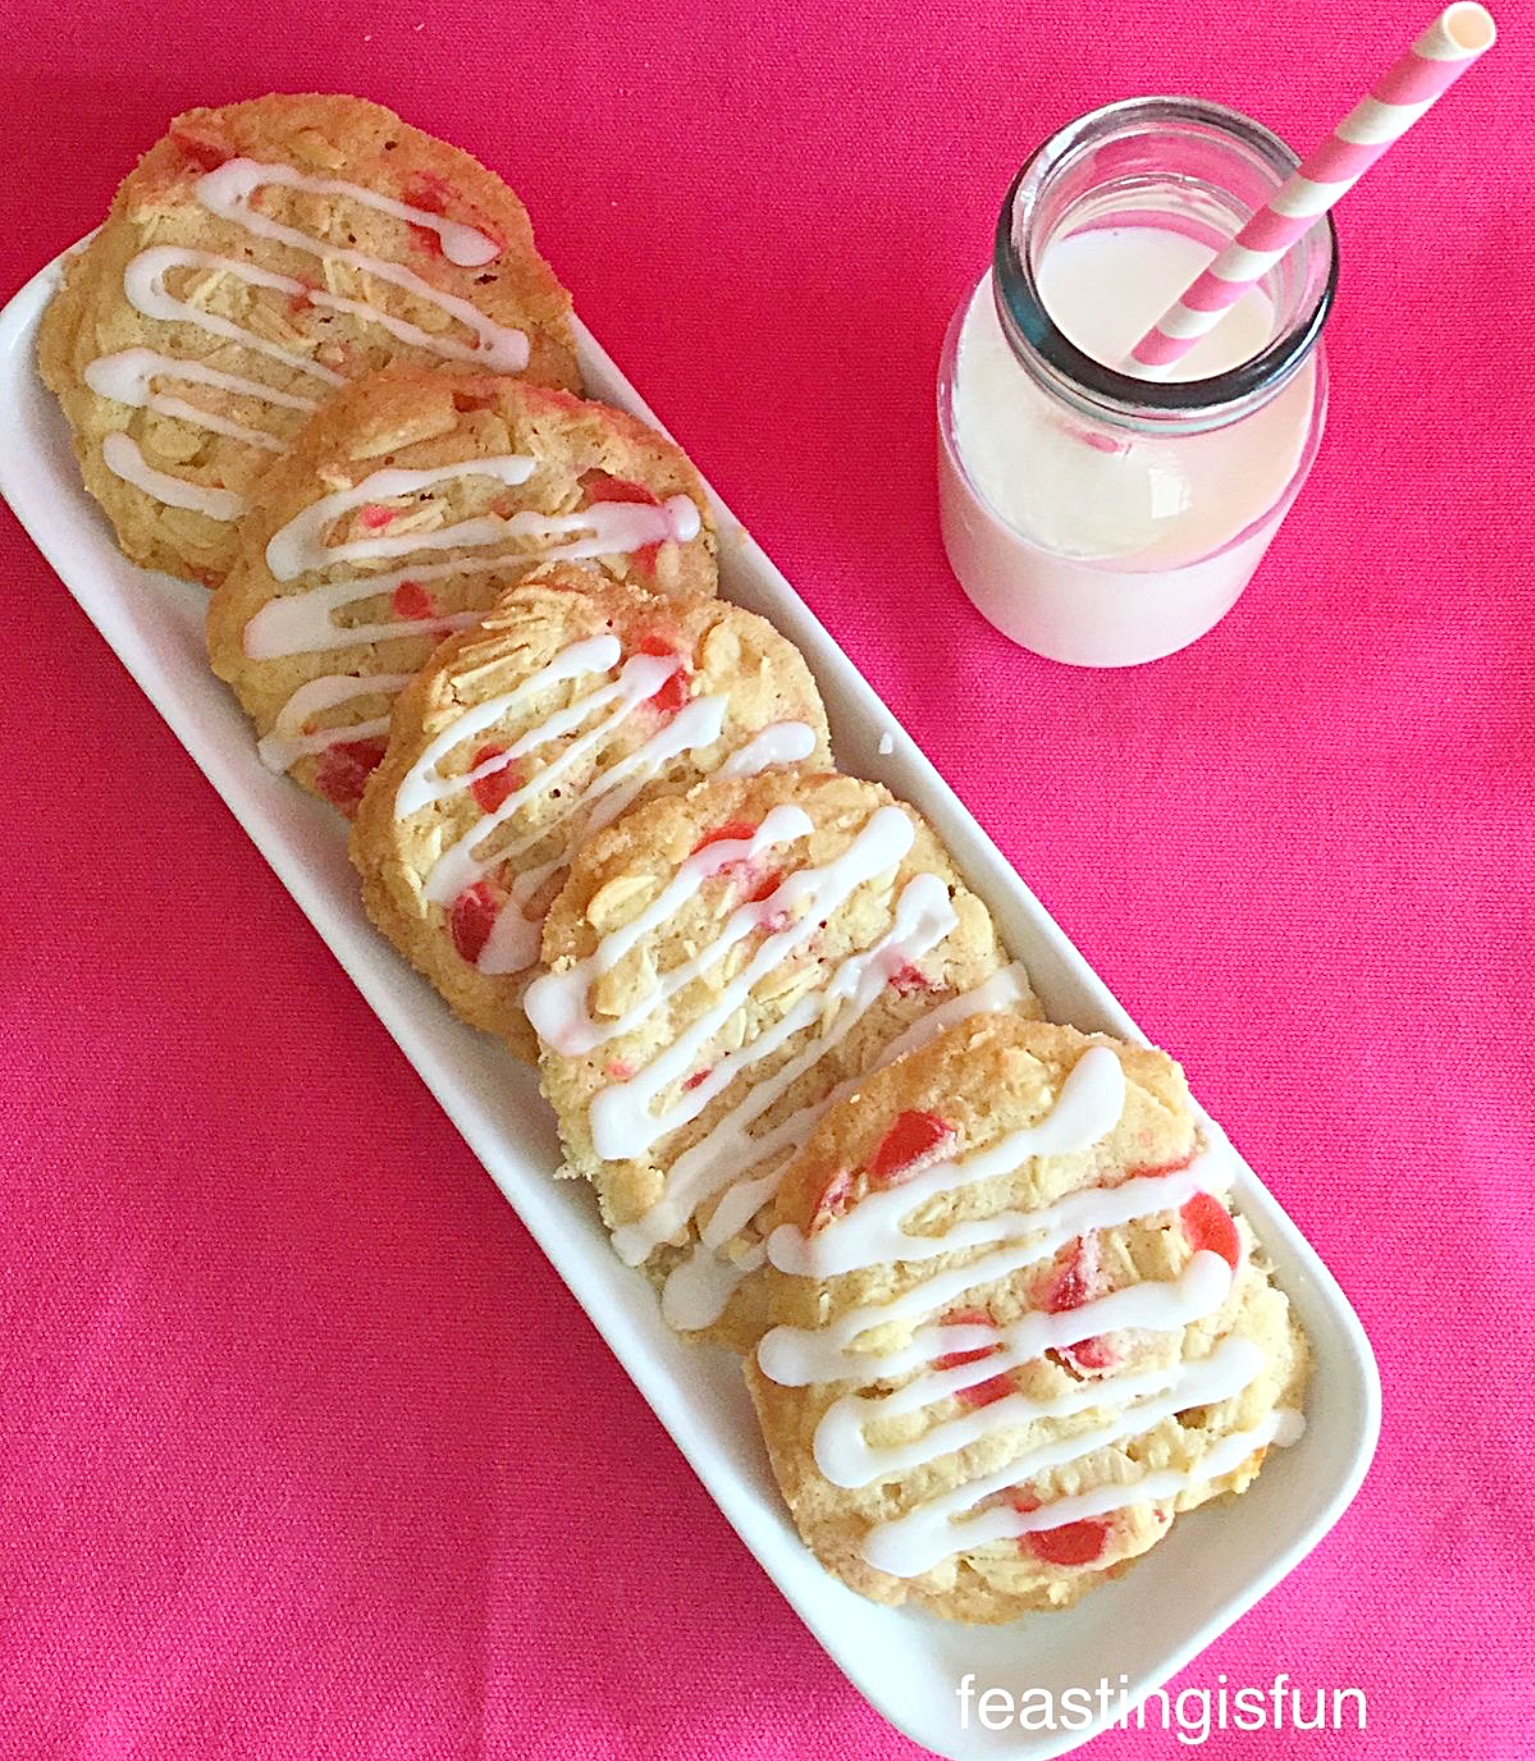
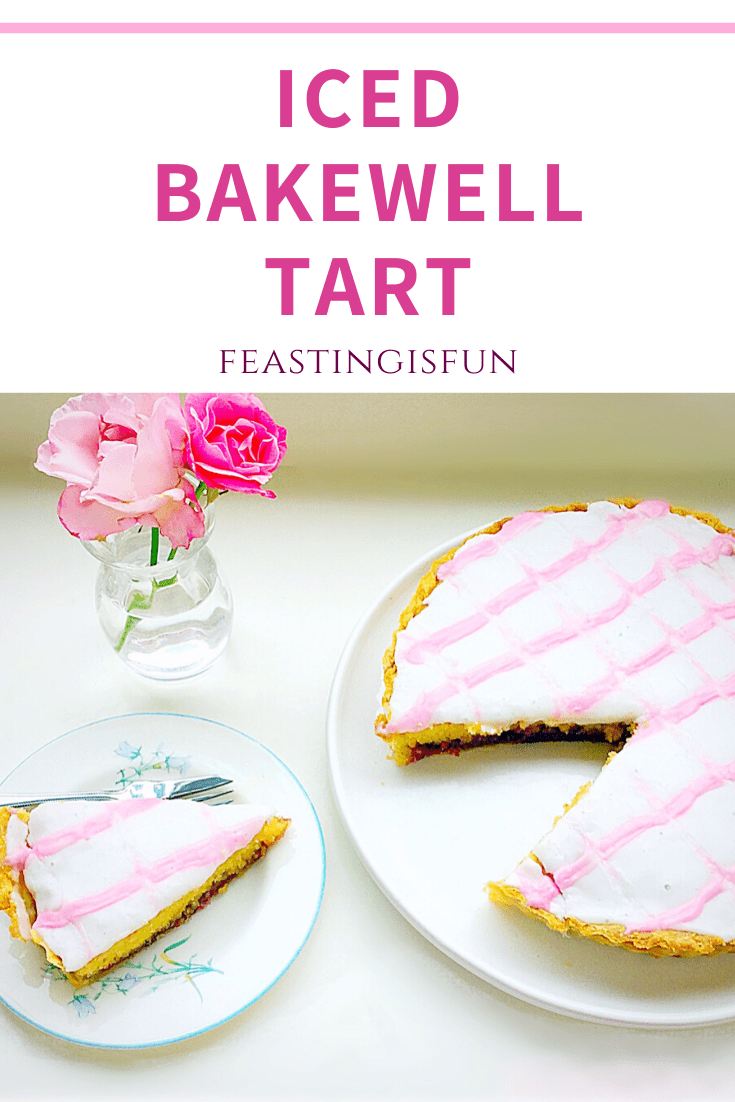
If you have enjoyed this recipe for Raspberry Coulis Drizzled Mixed Berry Pavlova you may also like these:

Lemony Strawberry Pavlova

FF Raspberry Coulis Drizzled Mixed Berry Pavlova
Lemony Strawberry Pavlova

Raspberry Chocolate Pavlova

FF Raspberry Coulis Drizzled Mixed Berry Pavlova
Raspberry Chocolate Pavlova

Strawberry Eton Mess

FF Raspberry Coulis Drizzled Mixed Berry Pavlova
Strawberry Eton Mess

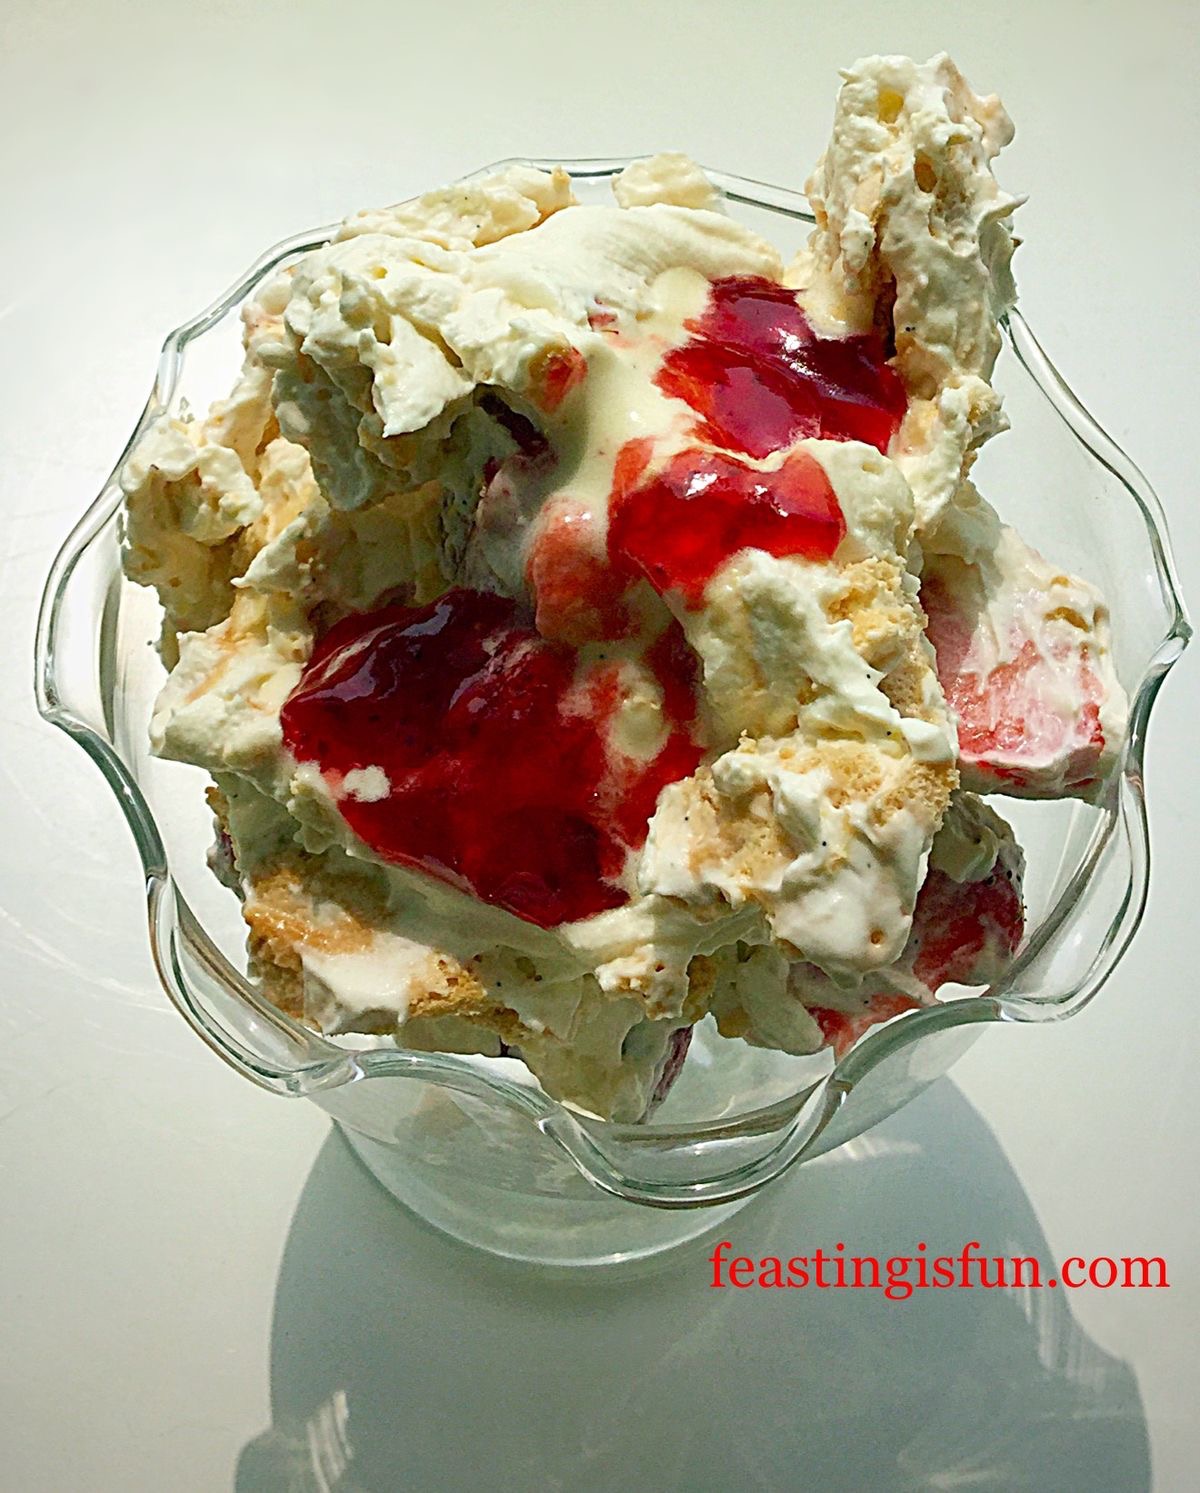
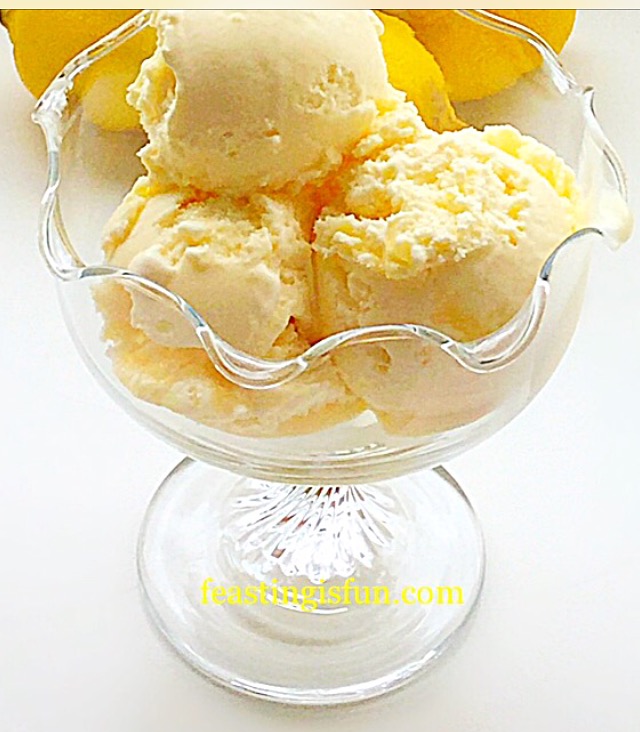
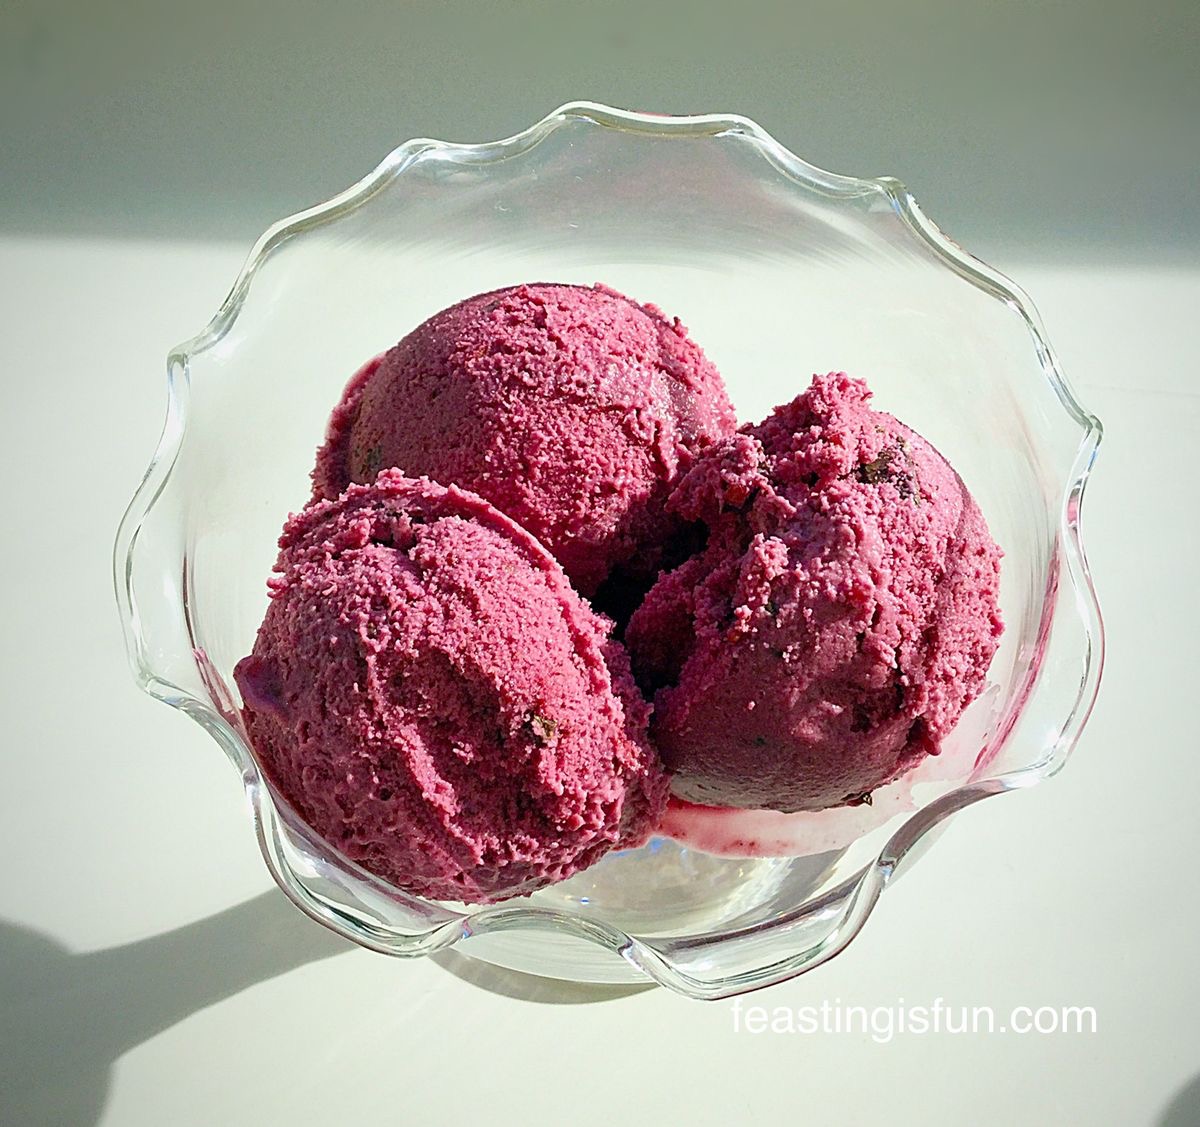
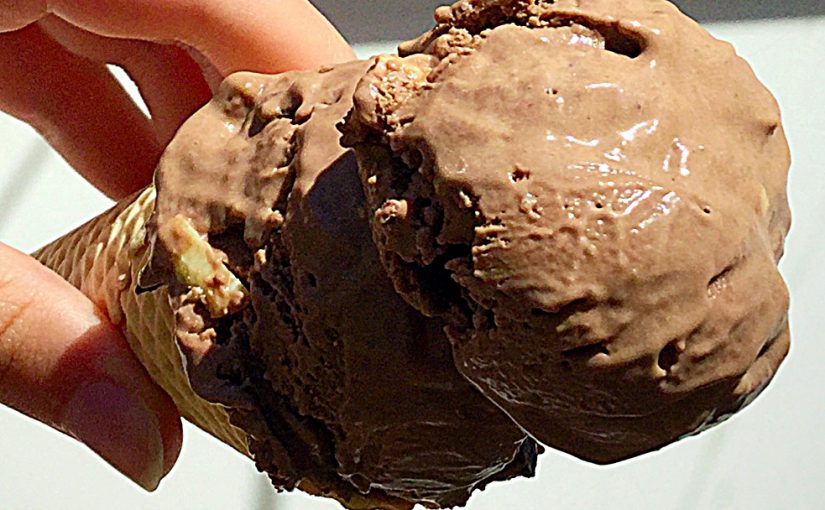
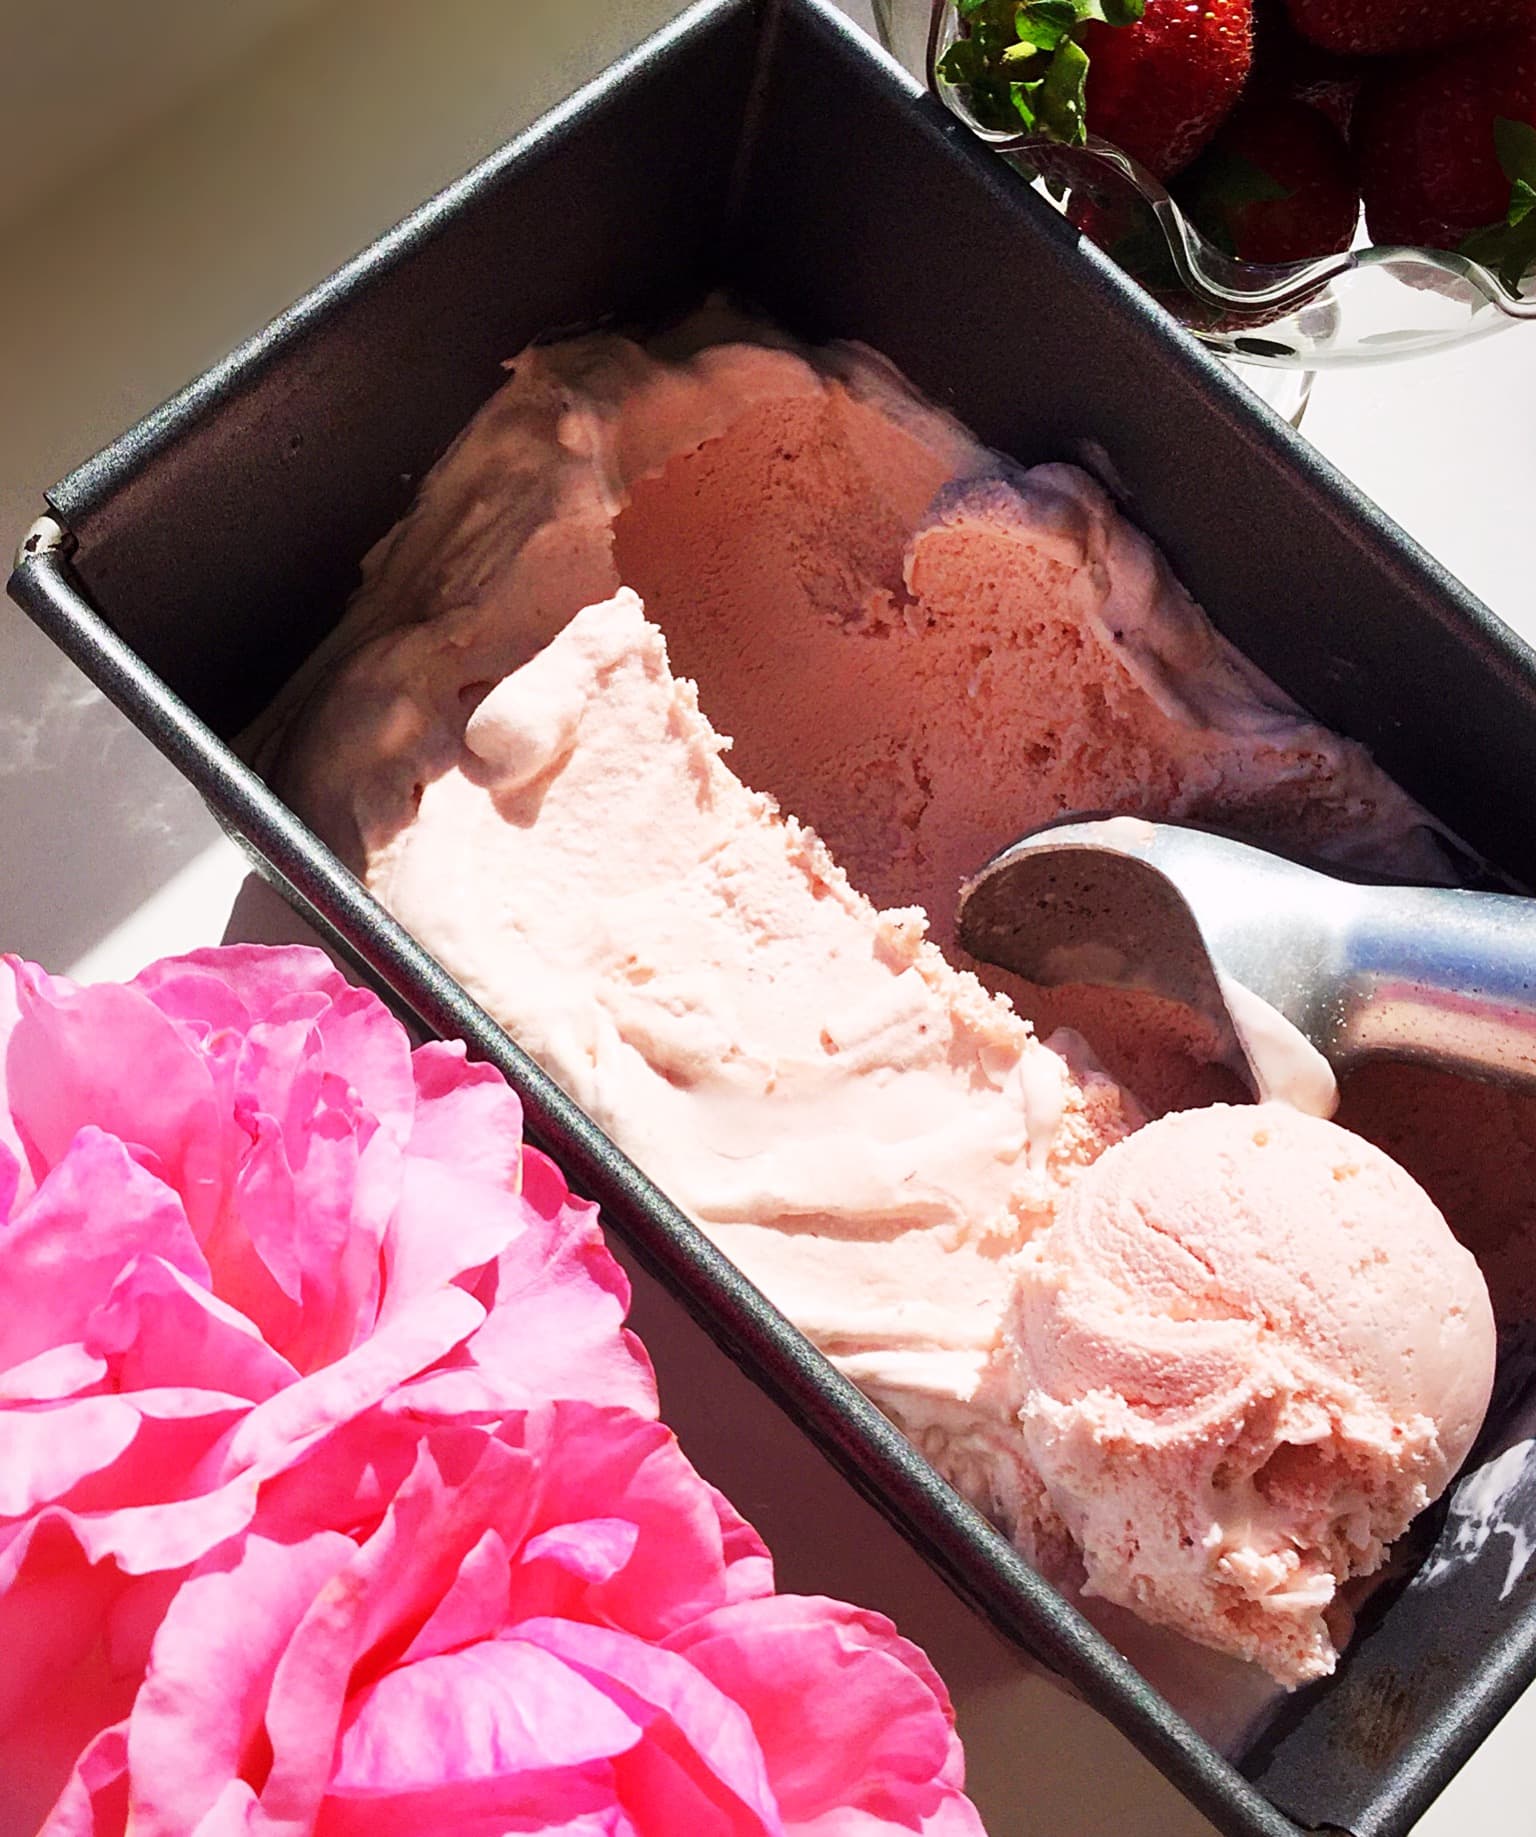
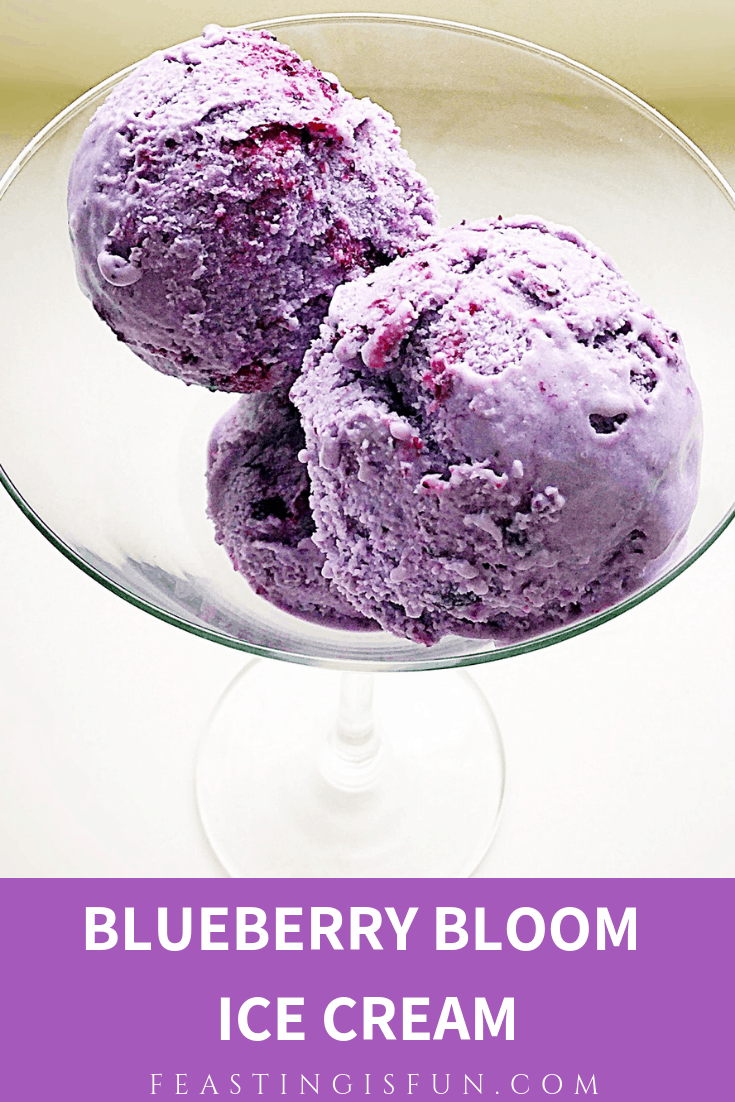
Pavlovas are a favourite of mine, because they are extremely forgiving as a dessert. And, even if they crack and crumble beyond repair, switch to making an Eton Mess as pictured above or, alternatively make Raspberry Chocolate Ice Cream Sundae.

And as this recipe is easily made gluten free, it is a great way of serving dessert, without excluding people who have dietary restrictions. Most importantly at Feasting is Fun, the aim is to create recipes that more people can share and enjoy. And, on that note, from experience, when transporting this dessert, it is easier to take the separate components and assemble once there.

Finally, whatever the past year held for you, my hope is that the coming year will be one of love, peace and reconciliation

Sammie xx

No part of this post may be reproduced or duplicated without the written permission of the owner. Please see my Disclosure Policy.


Share
Facebooktwitterpinterestlinkedintumblr

Dark Chocolate Ginger Brownies

Share
Facebooktwitterpinterestlinkedintumblr

Baby it’s cold outside! The second of two storms is currently battering the southern half of the British Isles. While gale force winds and squally showers are battering outside, baking makes indoors warm and cosy. Especially when the aroma of these Dark Chocolate Ginger Brownies escapes from the oven. A brilliant and tasty way to warm up the day.

FF Dark Chocolate Ginger Brownies
Dark Chocolate Ginger Brownies a deliciously warming treat.

Since discovering Sugar and Crumbs gingerbread flavour icing sugar, I have become a little obsessed with all things ginger flavoured. Wanting to create a winter spiced brownie, I decided to substitute the flavoured icing sugar for some of the treacly dark sugar in the recipe. Having been sent some Dark Chocolate Ginger Thins from Beech’s Chocolates, to try, I couldn’t resist adding some to the brownie batter. Resulting in a deep, dark chocolate brownie with a background warmth from the gingerbread sugar and nuggets of ginger chocolate studded throughout.

FF Dark Chocolate Ginger Brownies
Dark Chocolate Ginger Brownies perfect for sharing.

While not as dense, or fudgey as regular gingerbread and brownies, these squares are perfect as they are. Bordering on cake-like, yet not light and fluffy, these squares tick all the boxes. Sweet, but not overly so. Chocolatey, yet not cloying. Warming, without being overwhelming. Perfectly balanced flavours that satisfy with every bite.

FF Dark Chocolate Ginger Brownies

    Dark Chocolate Ginger Brownies a delicious comforting treat.

So easy to make and bake, these brownies also make a delicious edible gift. Ensure the icing is set, then pop a few into a pretty tin, or cellophane bag tied with ribbon. All food tastes better when shared. Homemade treats have the extra luxury of love mixed into them. Now that is something that cannot be bought!

Recipe: Dark Chocolate Ginger Brownies makes 15

150g/5oz Unsalted Butter

225g/8oz Dark Brown Muscavado Sugar

50g/2oz Gingerbread Icing Sugar available from Sugar and Crumbs see *note

1/8tsp Salt – I use Maldon

50g/2oz Cocoa Powder – I use Callebaut

150g/5oz Plain White Flour

1/2tsp Sodium Bicarbonate

4 Large Free Range Eggs

1tsp Vanilla Extract – I use Nielsen-Massey

100g/4oz Dark Chocolate Ginger Thins – available from Beech’s Fine Chocolates

*note – if flavoured icing sugar is unavailable use 275g/10oz of D/B Muscavado sugar and add 2tsp of ground ginger to the sieved flour.

For the icing:

100g/4oz Gingerbread Flavour Icing Sugar – if not available use plain icing sugar.

Method: Preheat the oven to 180C/160C fan, gas mark 4

You will need a 28cm x 20cm x 5cm (12″ x 8″ x “2) traybake tin lined with aluminium foil.

  • First add the butter, both types of sugar and salt to a heavy bottomed large saucepan. Place over a medium heat and stir constantly until the butter is melted.
  • Take the pan off the heat and add the cocoa powder, stirring until it is thoroughly combined. Set the saucepan to one side to cool slightly.
  • While the pan is cooling, crack the eggs into a jug, add the vanilla extract and whisk lightly to combine – liquid ingredients.
  • Next sift the flour and sodium bicarb. into the saucepan. Stir to combine. The mixture will be quite stiff, that is normal.
  • Now pour the liquid ingredients into the saucepan and stir thoroughly until the brownie batter is thoroughly combined.
  • Roughly chop the ginger chocolate and add to the saucepan. Stir a couple of times to distribute evenly.
  • Finally pour the brownie batter into the prepared tin. Give the tin a couple of sharp raps against the work top. This will bring any bubbles to the surface.
FF Dark Chocolate Ginger Brownies
Making the brownie batter and filling the tin.
  • Place the tin in the centre of the oven and bake for 20-25 minutes. Halfway through the baking time, open the oven door and rap the tin against the shelf. This really helps to stop the brownies becoming too airy and cake-like.
  • The brownies are baked when the top is set and there is not hint of wobble in the centre.
  • Once baked, remove the tin from the oven and allow the brownies to completely cool in the tin.
FF Dark Chocolate Ginger Brownies
Dark Chocolate Ginger Brownies baked and cooling in the tin.
  • While the brownies are cooling, make the gingerbread icing.
  • First, sift the icing sugar into a medium sized bowl, then add a teaspoon of water. Stir, adding extra water, drop by drop, until you have a thick, drizzling consistency.
  • Spoon the icing into a small piping bag. Alternatively, cover the bowl with cling film and you can use a spoon to drizzle the icing.
  • When the brownies are completely cooled, lift the entire slab from the tin, using the foil to help. Peel the foil carefully away from the baked brownie and place on to a large piece of baking parchment. Now cut the brownie into 15 equal sized squares. First cutting across the width, diving into 3 and then cutting across at 5 equal intervals to create 15 individual brownie squares. Spread the squares out so that each one can be iced individually.
  • Next, snip the end from your piping bag to leave a very small hole. Pipe diagonal lines across each brownie, or lightly drizzle the icing using a teaspoon.
FF Dark Chocolate Ginger Brownies
Dark Chocolate Ginger Brownies finished with piped icing.

Leave the icing to set before serving, or storing in an airtight container for up to 5 days.

FF Dark Chocolate Ginger Brownies
Dark Chocolate Ginger Brownies the piped icing gives them a professional finish.

These Brownies are delicious served just as they are, with a hot drink and a smile. However, if you really want to turn them into a fantastic dessert, warm briefly (10 seconds in the microwave) and serve with a scoop of you favourite ice cream!

If you have enjoyed these Dark Chocolate Ginger Brownies then you may like these too:

Chocolate Christmas Pudding Cookies

FF Dark Chocolate Ginger Brownies
Chocolate Christmas Pudding Cookies

Gingerbread Frosted Ginger Christmas Cupcakes

FF Dark Chocolate Ginger Brownies
Gingerbread Frosted Ginger Christmas Cupcakes

Chocolate Sparkle Cake

FF Dark Chocolate Ginger Brownies
Chocolate Sparkle Cake

Whether you bake these Dark Chocolate Ginger Brownies as a treat for yourself and you family, or to take into school or work to share with friends, they are sure to be a big hit. Homemade bakes taste infinitely better, unless you live close to a great bakery. Sharing our bakes shows others that they are valued in our lives. Regardless of their situation, someone has thought of them. I personally, cannot think of a better reason to get in the kitchen and bake!

Whatever you are creating, making and baking in your kitchen, have fun and remember to stir some extra love in.

Sammie xx

Beech’s Chocolates sent me the dark chocolate ginger thins to try. This is not a sponsored post. All opinions, views, photographs and content are my own. Please see my Disclosure Policy.


Share
Facebooktwitterpinterestlinkedintumblr

Maple Syrup Iced Coffee Bundt Cake

Share
Facebooktwitterpinterestlinkedintumblr

Baking for someone I love has to be one of my favourite things to do. Especially when the recipient is my wonderful Father-in-law. Even more so when it is to celebrate his birthday. While I usually make him a Coffee and Walnut Cake, however, this year I’ve kept all of his favourite flavours and baked them into this beautiful Maple Syrup Iced Coffee Bundt Cake.

FF Maple Syrup Iced Coffee Bundt Cake

Using the Heritage Bundt tin from Nordic Ware, this cake is literally a twist on a classic, popular cake. While the distinct mould of the tin creates an incredible, swirl shaped coffee cake, which is defined with the maple syrup icing. Resulting in a stunningly outstanding cake.

FF Maple Syrup Iced Coffee Bundt Cake
Maple Syrup Iced Coffee Bundt Cake mesmerising.

An incredibly moist and delicious cake, that includes walnuts, it is also lump free. Chopping the walnuts very finely ensures their nutty flavour mixes well with the coffee and spices. While the maple syrup icing adds another layer of flavour. Resulting in a light, not heavy sponge, that tastes fantastic.

FF Maple Syrup Iced Coffee Bundt Cake
Maple Syrup Iced Coffee Bundt Cake full of flavour.

My Father-in-law is a very special and incredibly talented man. Much loved and respected, I consider myself to be very blessed to be part of his family. He is a wonderful Dad and Grandad, with a gentle sense of humour. And our children love to hear stories of his past adventures which span many centuries. Especially those of his time as a Pirate!!

FF Maple Syrup Iced Coffee Bundt Cake
Maple Syrup Iced Coffee Bundt Cake dazzling.

No candles are needed to light up this dazzlingly, delicious cake.

Recipe: Maple Syrup Iced Coffee Bundt Cake serves 10-12

250g/9oz Unsalted Butter – softened to room temperature

250g/9oz Soft Light Brown Sugar

1/4tsp Sea Salt – I use Maldon

1tsp Vanilla Extract – I use Nielsen-Massey

2tsp Camp Coffee or 1.5tsp Instant Coffee – dissolved in 1tsp water

5 Large Free Range Eggs

100g/4oz Plain Natural Yoghurt

75g/3oz Walnut Halves or pieces – chopped or processed until they are very fine. Similar in texture to ground almonds

1/4tsp Freshly Grated Nutmeg

1/4tsp Cinnamon

200g/7oz Plain White Flour

3tsp Baking Powder

150g/5oz Icing Sugar

3tbsp Maple Syrup – I like Pure Maple

White, silver or golden sprinkles

Making And Baking The Bundt Cake

Preheat the oven to 160C/140C fan, gas mark 3, 310F.

Note: I always use Wilton cake release to guarantee a clean, sharp edged finish. Apply using a soft pastry brush, taking care to ensure every part of the Bundt tin is evenly covered. Alternately brush on melted butter in the same manner, followed by a light coating of flour.

  • First of all, prepare the Bundt tin as per the instructions above.
  • Whisk the softened butter, sugar and salt together in a large bowl for at least 5 minutes. The mixture should be light and creamy.
  • Add the vanilla extract and the eggs to the bowl. Continue whisking until all of the ingredients are well mixed.
  • Now add the yoghurt, but do not stir.
  • Next add the finely chopped walnuts, then sift in the flour, baking powder and spices.
  • Use a metal spoon to fold all of the ingredients together until they are fully combined.
  • Spoon the cake batter into the prepared Bundt tin, pressing down to ensure the tin does not have any air gaps. Smooth the top of the batter.
  • Place the Bundt tin into the centre of the preheated oven and bake for 50-60 minutes.
  • To test if the cake is fully baked, insert a wooden skewer. The cake is baked when the skewer comes out clean. Also the cake should spring back from a light touch and have shrunk away from the sides of the Bundt tin.
  • As soon as the cake is baked remove the from the oven. Leave the cake to cool in the tin for 5-10 minutes.
  • Finally, turn the Bundt cake out on to a cooling rack and allow to cool completely before icing.
FF Maple Syrup Iced Coffee Bundt Cake
Filling the tin, baking and turning out the Bundt Cake.

Adding The Decoration

  • First, sift the icing sugar into a bowl.
  • Add the maple syrup and stir well. And then add up to one tablespoon of cold, tap water. Stir well so that the icing is a smooth, fairly thick consistency.
  • Fill a small, disposable piping bag with the maple syrup icing.
  • To ice the cake, first place the cooling rack over a large baking tray. This will allow any excess icing to drip through.
  • Snip the very end of the piping bag off, leaving a 3-4mm hole.
  • With the cake in front of you, follow the line of one swirl and pipe the icing along it. Double back on yourself, piping over the original line to ensure an even finish.
  • Continue in the same manner until all of the swirls have been iced.
  • Finish the decoration by adding sprinkles on top of the icing. Start at the bottom and finish approximately two thirds of the way up the cake. Most importantly, make sure the sprinkles all finish at the same point.
FF Maple Syrup Iced Coffee Bundt Cake
First the icing, then add the sprinkles.

To serve, place the cake on to a plate or cake stand. Since I do not have a cake lifter, two palette knives, positioned either side of the cake, make easy work of moving the cake.

FF Maple Syrup Iced Coffee Bundt Cake
Maple Syrup Iced Coffee Bundt Cake ready to serve.

No waiting needed! Since the icing sets pretty quickly, simply slice and serve, with a smile. Especially if baking for a celebration. It has been said, a celebration without a cake is simply a meeting.

FF Cake baked in Heritage Bundt Pan
Maple Syrup Iced Coffee Bundt Cake

If you have enjoyed the recipe for this Maple Syrup Iced Coffee Bundt Cake then you may also like these:

Mascarpone Topped Carrot Cake

Mascarpone Topped Carrot Cake

Fluted Chocolate Lemon Marble Cake

Fluted Chocolate Lemon Marble Cake

Boozy Lemon Drizzle Bundt Cake

Boozy Lemon Drizzle Bundt Cake


Although shop bought cakes may be convenient, nothing compares to the taste of a home baked one. And supermarkets definitely do not bake love into a cake unlike cakes baked at home. Most importantly, when made with love and given with a smile, homemade cakes are unique gift.

So, whatever you are making, baking and creating in your kitchens, have fun preparing a feast. Finally, remember that food tastes better when it is shared.

Sammie xx

No part of this post may be reproduced or duplicated without the written permission of the owner. Please see my Disclosure Policy.


Share
Facebooktwitterpinterestlinkedintumblr

Red Velvet Mini Tiered Heart Cakes

Share
Facebooktwitterpinterestlinkedintumblr

Some days you have to bake love into your day. Whether that means actually getting in the kitchen and physically baking, or metaphorically adjusting yourself – literally putting on love. Today, as the results of the 2016 United States of American presidential election were revealed, I had to do both. First of all, I had to pray, give all my fears to God and accept His peace, then I made myself bake. More specifically, bake these Red Velvet Mini Tiered Heart Cakes.

FF Red Velvet Mini Tiered Heart Cakes
Red Velvet Mini Tiered Heart Cakes stunning individual cakes.

Oh these cakes are so good. Since making these cupcakes , I’ve wanted to try another red velvet recipe. Having recently bought the tiered heart mini Bundt pan from Sugar and Crumbs and considering the shock I, along with many others were in this morning, it seemed the perfect tin to use. A visual reminder that pure love always overcomes fear, no matter how frightened we may become.

Red Velvet Mini Tiered Heart Cakes
Red Velvet Mini Tiered Heart Cakes 3 tiers of love in a cake.

Perfectly detailed, these tiered heart cakes taste ridiculously good. If you are in a bad mood these cakes will cheer you up. Their deep chocolate flavour, in a rich, fudgey cake, pairs beautifully with fresh berries. Truthfully the red, white and blue theme was planned. Representing the colours of the American flag and what their constitution stands for. While praying, baking and then photographing these cakes, I could feel the worry and fear lift from me.

FF Red Velvet Mini Tiered Heart Cakes
Red Velvet Mini Tiered Heart Cakes such a deliciously elegant dessert.

The relief of being able to hand over my worries and fears to our Awesome Heavenly Father is immeasurable. To know that He abides by His written word, which states in 1 John 4:18 “There is no fear in love; but perfect love casts out all fear…

Recipe: Red Velvet Mini Tiered Heart Cakes makes 12

Note: To grease the individual cake moulds I recommend Wilton cake release.

150g/5oz Unsalted Butter softened to room temperature

150g/5oz Caster Sugar

1/8tsp Salt – I use Maldon

2 Large Free Range Eggs

150g/5oz Sour Cream

1tsp Vanilla Extract – I use Nielsen-Massey

150g/5oz Plain White Flour

50g/2oz Cocoa Powder

2tsp Baking Powder

1/4tsp Red Food Colouring Gel – I use Wilton

Method: Preheat the oven to 160C/140C fan, gas mark 3.

  • First of all, it is important to prepare the Bundt pan correctly. Spray or pour cake release into each mould. Use a pastry brush to ensure every part of the cake mould is covered. Because this mould is very detailed, it needs care taking over this stage.
  • Next, into a large bowl add the sugar, butter and salt. Whisk/beat these ingredients together until they are pale and creamy. This is known as the ‘creaming’ method.
  • Next add the eggs, sour cream, vanilla extract and food colouring. Sift in the flour, cocoa and baking powder.
  • Using a spoon or electric whisk, mix all of the ingredients together until they are thoroughly combined. This is know as the ‘all in one’ method.
  • To fill the individual cake moulds, carefully spoon the red velvet cake batter into the mould so that it is three quarters full. Continue until all six moulds are equally filled.
  • Now place the Bundt pan in the centre of the oven and bake for 15-20 minutes.
  • The cakes are baked when they spring back from a light touch, alternatively insert a wooden cocktail stick (so that it doesn’t damage the pan) and if it come out clean the cakes are done.
  • Once baked, remove the cake pan from the oven.
FF Red Velvet Mini Tiered Heart Cakes
Preparing, Filling and baking the cakes.
  • Allow the cakes to cool for 5 minutes in the tin before turning them out on to a cooling rack.
FF Red Velvet Mini Tiered Heart Cakes
Red Velvet Mini Tiered Heart Cakes turned out on to a rack to cool.

While allowing to cool you could make some Boozy Berry Sauce, to serve with these cakes. Alternatively some fresh berries and whipped cream, turn these pretty cakes into a stunning dessert. Also a light dusting with icing sugar shows up these cakes incredible detail.

FF Red Velvet Mini Tiered Heart Cakes
A sprinkling of icing sugar brings out the detail of these cakes.
FF Red Velvet Mini Tiered Heart Cakes
An elegant and enticing dessert.

A truly tasty recipe that is versatile!

If you have enjoyed these Red Velvet Mini Tiered Heart Cakes you may also like these:

Mini Lemon Drizzle Bundt Cakes

FF Red Velvet Mini Tiered Heart Cakes
Mini Lemon Drizzle Bundt Cakes.

Maple Syrup Frosted Apple Cupcakes

FF Red Velvet Mini Tiered Heart Cakes
Maple Syrup Frosted Apple Cupcakes

Mini Chocolate Fudge Bundt Cakes

FF Red Velvet Mini Tiered Heart Cakes
Mini Chocolate Fudge Bundt Cakes – tip if you aren’t able to get the cake mix, use the recipe from the tiered heart cakes leaving out the food colouring.


Finally, change can be unsettling for everyone. Interestingly, in the bible, the words “do not fear” and “fear not” feature very frequently. Jesus did not come to promise us a life that was all plain sailing. Clearly not! Since He knew there would be circumstances and situations that would cause us to worry. The key is to hand that anxiety to Him in prayer and in turn accept His Peace, which surpasses our understanding.

Ultimately, not worrying, is, in my experience an active ongoing experience. Rather like forgiveness, sometimes we have to keep forgiving, likewise we also need to continue to hand all things to God in prayer. Giving thanks for all He has brought us through and trusting Him to see us through again.

If you would like to know more about my Christian faith please see Important Stuff.

Sammie xx

Share
Facebooktwitterpinterestlinkedintumblr

Maple Syrup Frosted Apple Cupcakes

Share
Facebooktwitterpinterestlinkedintumblr

Today we are celebrating National Apple Day here in the U.K. Since there are two trees groaning under the weight of their abundant apple harvest in our back garden, an apple bake is needed. And a gift of maple syrup sparked inspiration  resulting in these Maple Syrup Frosted Apple Cupcakes. Finally, the finished result is better than I could imagine.

Three small cakes on a white plate next to a basket full of red fruit.
Maple Syrup Frosted Apple Cupcakes

One apple tree produces Spartan apples. Tennis ball sized, shiny red-green apples that are deliciously crunchy, sweet and ideal for little people hands! While the other apple tree variety is unknown. Sharper in taste than the Spartans, they are similar to a slightly sweeter version of Granny Smith apple. Also they are slightly larger with a similar colour that when rubbed becomes shiny. And fortunately, both apples are great for eating and cooking. Resulting in a combination of both being used for these cupcakes.

A single small cake on a white plate surrounded by the red-green fruit that are used in this recipe.
Maple Syrup Frosted Apple Cupcakes

Apples, The Core Of These Cupcakes:

Unlike Granny Smith apples, both varieties brown easily when sliced/grated and exposed to the air. While the grated apple be tossed in some fresh lemon juice, which would have prevented discolouration, I didn’t want to do this for two reasons. First of all, the lemon flavour would change the cupcake flavour, possibly overpowering the apple and frosting. Also, the lemon juice would have added moisture, resulting in a wetter batter, where the apple may not have kept it’s even distribution. Grating the apples into the cake batter keeps any discolouration to a minimum.

Freshly baked and frosted small cakes in caramel coloured tulip wrappers on a cooling rack.
Maple Syrup Frosted Apple Cupcakes

Preparing the cake batter first and then adding the grated batter works really well. As it ensures each cupcake has plenty of evenly distributed apple within a light, moist crumb. Without the maple syrup frosting, these could easily be served as muffins, in which case the addition of some toasted pecan or walnut pieces would bring added flavour and texture. Tasting these cupcakes with the dreamy frosting means I could not possibly eat them any other way now!

A small cake cut in half to shown even distribution of fruit in the bake.
A Maple Syrup Frosted Apple Cupcake cut in half.

Maple syrup frosting. Just think on those words for a moment!

Initially I had worried that the addition of maple syrup to a buttercream frosting would result in a too sweet topping. Instead, the opposite happened, with the maple syrup adding a very slight smoky, creamy flavour. Resulting in the sweetness of the unflavoured frosting being dumbed down. As a result, the final flavour paired beautifully with the lightly spiced apple cupcake.

Maple syrup swirled frosting on apple cupcakes.

Recipe: Maple Syrup Frosted Apple Cupcakes – makes 12

Cupcake Ingredients:

175g/6oz Unsalted Butter at room temperature

175g/6oz Soft Light Brown Sugar

1/8th tsp Salt – I use Maldon

3 Large Free Range Eggs

1tsp Vanilla Extract – I use Nielsen-Massey

200g/7oz Plain White Flour

3tsp Baking Powder

1/2tsp Cinnamon

200g/7oz Grated Eating Apple – approximately 3-4 peeled apples

Frosting Ingredients: you may have extra frosting left over

250g/9oz Salted Butter very soft, ideally removed from the fridge the night before

500g/1lb 2oz Sifted Icing Sugar

1tsp Vanilla Extract

2tbsp Maple Syrup – use real maple syrup not maple syrup flavouring

1tbsp Very Hot Water from a recently boiled kettle

Extra Maple Syrup to drizzle over the finished cupcakes

Method: Preheat the oven to 180C/160C fan, gas mark 4, 350F.

Making And Baking The Cupcakes:

  • First of all, line a 12 hole deep muffin tin with tulip cupcake wrappers, or deep muffin cases.
  • Next in a large bowl add the butter, sugar and salt. Whisk/beat them together until they are very pale and creamy.
  • Add the vanilla extract and all 3 eggs to the bowl. Whisk/beat briefly to partially mix the ingredients, without the risk of them curdling – no more than 30 seconds.
  • Now sift the flour, baking powder and cinnamon into the bowl. Set the bowl to one side.
  • Working quickly, yet carefully, peel and grate 200 grams of apple.
  • Add the grated apple on top of the flour, in the large bowl and using a spoon mix all the ingredients together, until they are just combined.
  • Next, using a dessert spoon, place a heaped spoonful of cake batter into each of the cupcake wrappers. Finish by dividing any remaining batter between the twelve cases, so that they are all equally filled.
  • Finally place the tin in the middle of the preheated oven and bake the cupcakes for 25-35 minutes.
  • The cupcakes are baked when they spring back from a light touch. Use an inserted skewer to check if they are baked, if it comes out clean they are ready to remove from the oven.
  • As soon as the cupcakes are baked remove them from the oven and leave them in the tin to fully cool, regardless of which type of wrapper/case has been used.
FF Maple Syrup Frosted Apple Cupcakes
The stages of making the cupcake batter, through to filling and baking them.
  • Allow the cupcakes to fully cool before frosting them.

Making The Frosting And Decorating The Cupcakes:

  • First, add the very soft butter to a large bowl.
  • Then sift the icing sugar into the bowl.
  • Next add the vanilla extract, maple syrup and very hot water.
  • Finally whisk the ingredients, starting slowly and increasing in speed, until you have a smooth, creamy, light buttercream.
  • Fit a large piping bag with a large star piping nozzle – Wilton #1M.
  • Fill the piping bag with the maple syrup frosting.
  • Start in the centre of each cupcake pipe swirls, so the entire top of the cupcake is covered and then, continue to pipe, bringing the tip back to the centre and finishing with a star, as the nozzle is pulled away.
  • Continue to pipe frosting until each cupcake is generously topped with frosting.
  • To finish the decoration, drizzle approximately 1/2 teaspoon of maple syrup on to the top of the frosting, allowing the drizzle to drip around the frosting swirls.
FF Maple Syrup Frosted Apple Cupcakes
Maple Syrup Frosted Apple Cupcakes ready to be served.

Maple Syrup Frosted Apple Cupcakes a taste of Autumn in a cupcake! If you enjoy the season of Autumn, or Fall as it’s also known, take a look at this non food related post Autumn The Most Beautiful Season.

Maple Syrup Frosted Apple Cupcakes

Baking these cupcakes certainly makes the most of seasonal fruit. Since there are plenty of apples freely available I will be making again. Another reason to bake them is also so they can be shared. While none of our friends or neighbours expect deliveries of cake, it is an extra special way of sharing our abundance of apples, which are also given away.

Lightly spiced apple cupcakes in tulip wrappers, topped with creamy, piped frosting and a drizzle of maple syrup on a speckled white plate with apples.

If you have enjoyed the recipe for these Maple Syrup Frosted Apple Cupcakes you may also like these:

Autumn Apple Almond Cake

Gluten free large cake topped with flaked almonds. A slice is cut and pulled slightly away from the Autumn inspired cake.
Gluten Free – Autumn Apple Almond Cake

Crazy Caramel Carrot Cake

Crazy Caramel Carrot Cake - a bundt style carrot cake drizzled with caramel and top with pecan nuts.
Crazy Caramel Carrot Cake

Cinnamon Drizzle Apple Walnut Cake Bars

Fruit and nut cake bars drizzled with cinnamon icing and finished with contrasting white sugar nibs.
Cinnamon Drizzle Apple Walnut Cake Bars

I enjoy baking and find the process very relaxing. And creating new recipes is also be very rewarding, especially as I get to share them here, on Feasting Is Fun. Firstly as a personal achievement and also because of the pleasure my baking brings to others. Watching faces full of pleasure as they bite into a delicious treat, big smiles when a friend receives a birthday bake and gracious thanks from a busy, tired family upon receipt of a homemade lasagne, all bring me a deep sense of joy. Life is for sharing and if my small contribution encourages others to do the same, well then, this blog, Feasting is Fun, will have served its purpose.

Do you share your makes and bakes?

Sammie xx

No part of this post may be reproduced or duplicated without the written permission of the owner. Please see my Disclosure Policy.


Share
Facebooktwitterpinterestlinkedintumblr

Snowy Black Forest Roulade

Share
Facebooktwitterpinterestlinkedintumblr

Happy holidays to all of my wonderful readers. Since we are all getting in the festive mood here at Feasting headquarters (home!) I have an easy to make and delicious gluten free dessert to share. While you can absolutely make this Snowy Black Forest Roulade with regular wheat flour, using a gluten free alternative ensures this dessert recipe is available to more people. And we are all about inclusivity here at Feasting is Fun.

FF Gluten Free Black Forest Roulade

Making A Genoise Sponge

Since I have never made a gluten free genoise sponge before, I wanted to attempt it. No fat is added when making a Genoise Sponge. Rather, whisking eggs and sugar until light and foamy. And then you carefully fold both the flour and cocoa powder into the mix.  Most importantly is to be careful not to knock out the whipped air. Resulting in a baked sponge that is beautifully light.

Cherry and whipped cream filled chocolate sponge roll. Topped with chocolate trees and a dusting of icing sugar snow.
Snowy Black Forest Roulade with gluten free option.

Because adding cocoa can have a drying effect on the sponge, I worried whether the cake would hold up to being rolled. Since a good roulade sponge  should withstand rolling, without cracking. So the possibilities of how wrong this sponge could go, seemed endless. Maybe this bake would fail? Yet the only way to know, was to try.

FF Gluten Free Dessert
Gluten Free Snowy Black Forest Roulade

Gluten Free Genoise Sponge Roulade

So, the gluten free chocolate genoise sponge was made and baked. And as you can see from the photos, it did indeed roll, without cracking and the flavour is utterly delicious. Light, soft, chocolate sponge, filled with kirsch flavoured whipped cream and soft, sweet cherries. One mouthful of this Snowy Black Forest Rouladand I  am  completely lost in one of my favourite flavour combinations.

Finally, my taste testers were happily enjoying eatythe roulade, completely unaware it was gluten free. A very positive sign. Since I have baked quite a few gluten free recipes, it’s a thrill when the texture and flavour are spot on.  A soft, yielding sponge, that tastes just like a sponge should. As a result of this bake I have plans to make another gluten rolled sponge, that is simply flavoured with vanilla or lemon.

I find that the proof of the pudding is in the eating! And when plates and bowls are left empty, I am satisfied that whatever I have made is a hit. Our children can be brutally honest, especially Snugs, our youngest daughter. She scored this Snowy Black Forest Roulade at 9 out of 10. Another success for the Feasting kitchen.

Recipe: Snowy Black Forest Roulade

1tbsp Unsalted Butter

4 Large Free Range Eggs

80g Caster Sugar

50g Gluten Free Plain White Flour – I use Doves Farm alternatively use Plain White Flour (for non gluten free Roulade)

50g Cocoa Powder plus an extra 2tbsp – I use Callebaut

1tsp Baking Powder – I use Waitrose as it is gluten free

Small Pinch of Salt – I use Maldon

300ml Double Cream

1tsp Vanilla Extract – I use Nielsen-Massey

4tsp Icing Sugar

1 Tin Cherry Pie Filling (410g)

Optional 2tbsp Kirsch Liquer

100g Dark Chocolate

50g White Chocolate

Optional – White Edible Glitter

Method: Preheat the oven to 180C/160C fan, gas mark 4

Note: To bake the sponge for this Snowy Black Forest Roulade you will need a baking tray that measures 38cm x 25cm x 3cm (15″ x 10″ x 1″).

Creating the Chocolate Genoise Sponge Batter

  • First of all grease the baking tray with butter and line the base with baking parchment.
  • Sift the gluten free flour, cocoa, baking powder and salt into a bowl.
  • Next, in a large bowl, or if you have a stand mixer use the bowl with the whisk attachment, add the sugar and eggs. Whisk continuously for at least 5 minutes, until the egg/sugar mixture has more than tripled in size. The mixture will be a pale cream colour that is very light and airy. It should leave a ribbon trail, that lasts a few seconds, after you remove the whisk.
  • Tip the sifted ingredients into the whisked egg mixture and using a large metal spoon, carefully fold the sifted ingredients in. The aim is to retain as much air within the finished cake batter as possible.
  • Once the ingredients are completely combined pour the mixture in to the prepared baking tray. Use a palette knife to ensure that the cake batter is evenly spread, ensuring that it reaches all of the corners.
FF Snowy Black Forest Roulade
Making the sponge batter and filling the baking tray.

Baking and Cooling the Sponge

  • Now place the baking tray into the centre of the preheated oven and bake for 15-20 minutes.
  • To test if the sponge is baked press lightly in the centre, when baked the sponge will spring back. Note – be careful not to over bake as this will cause the sponge to be dry and it will then be harder to roll without cracking.
  • Finally, when the sponge is baked, remove it from the oven.
  • Next, allow the sponge to cool in the tin for 2 minutes.
  • While the sponge is cooling, lay a large, just bigger than the sponge, piece of baking parchment on the work top.
  • Dust the baking parchment with the extra 2 tablespoons of cocoa, so that it is evenly covered.
  • Now run a palette knife around the edge of the sponge and then turn it out on to the baking parchment.
  • Very carefully remove the parchment that lined the baking tray.
  • Starting at one side and using the baking parchment to help, gently roll the sponge, while it is still warm.
  • Once rolled, set to one side until completely cooled.
FF Snowy Black Forest Roulade
Please use baking parchment, my brain wasn’t working and I used a pastry mat. It worked absolutely fine but next time I will turn the sponge out on to parchment!

Making the Chocolate Trees:

  • While waiting for the sponge to cool, the chocolate trees can be made.
  • First you will need 2 small disposable piping bags to pipe the trees with.
  • Next break up both types of chocolate and place in heatproof, microwaveable bowls.
  • Heat the chocolate, individually, on medium until it has started to melt.
  • Remove the bowl from the microwave and stir until the chocolate has completely melted.
  • Now fill each piping bag with melted chocolate. Leave the chocolate to cool, until it is still liquid, yet warm, not hot, in the piping bag. As a result of leaving the chocolate to cool, it will be thicker and easier to control whilst piping the trees.
  • Starting with the dark chocolate, pipe tree shapes on to a non stick silicone mat, or baking parchment. The trees should be about 3 inches (7.5cm) high, please see the photo below.
FF Snowy Black Forest Roulade
Pipe the main trunk down then up and then pipe the branches.
  • Allow the dark chocolate to set and then pipe white chocolate on the top of each branch. Leave the trees to completely set before attempting to remove them.
  • It is inevitable that some trees will break as they are removed. This is great as most forest floors have fallen/broken branches on them. So they can be used to add further decoration to the roulade.

Filling and decorating the Snowy Black Forest Roulade:

  • In a large bowl add the cream, vanilla extract, 1 tablespoon of Kirsch and 2 teaspoons of sifted icing sugar – a tea strainer is handy for sifting small amounts.
  • Whisk the cream until it just holds a stiff peak.
  • Unroll the chocolate sponge and then, using a palette knife, spread half of the cream over the sponge.
  • Decant the cherry pie filling into a bowl. Add 1 tablespoon of kirsch and stir to mix.
  • Next, using a spoon, place cherries evenly across the sponge, then spoon the syrup in between the cherries.
  • Using the baking parchment roll the sponge into it a log, finishing with the seam underneath.
  • Transfer the Roulade to a suitable plate.
  • Fit a piping bag fitted with a large star tip, then fill the bag with the remaining whipped cream.
  • Pipe single flower stars along the top of the Roulade and then along the sides.
FF Snowy Black Forest Roulade
Building, rolling and piping the Roulade.
  • To finish the decoration, carefully peel the piped chocolate trees away from the non stick surface.
  • Place the trees evenly along the top of the Roulade, pushing them into the piped cream.
  • Use any broken tree parts as forest floor decorations, anchoring them to the roulade with the piped cream.
  • Finally finish the dessert by sifting icing sugar snow over the Roulade, sprinkling edible glitter for added sparkle!
FF Gluten Free Roulade
Snowy Black Forest Roulade

Serve sliced with a smile!

FF Gluten Free Dessert
A slice of Black Forest Roulade.

All the flavour of a Black Forest Gateaux rolled into a stunning, Christmassy, Snowy Black Forest Roulade that is completely gluten free. A dessert that can be enjoyed by more people, without any loss of taste, texture or quality.

If you have enjoyed this recipe for this Snowy Black Forest Roulade here are some other gluten free recipes you may enjoy:

Lemon Ripple Ice Cream 

FF Lemon Ripple Ice Cream
Lemon Ripple Ice Cream

Raspberry Chocolate Pavlova

FF Snowy Black Forest Roulade
Raspberry Chocolate Pavlova gluten free.

Strawberry Whipped Cream Giant Doughnut

FF Snowy Black Forest Roulade
Strawberry Whipped Cream Giant Doughnut gluten free.

Gluten free recipes can taste just as great as their regular, wheat based counterparts. Also, creating recipes that can be made and eaten by people on a restricted diet, is an important part of what I do at Feasting is Fun. So you can look forward to more recipes being added, especially with Christmas not very far away.

Finally, when a recipe tastes as good as this Snowy Black Forest Roulade, there is no need to bake separate desserts. And that has to be a good thing, for both those on a restricted diet and the cook!

So, whatever you are making, baking and creating in your kitchens, have fun preparing and sharing your feast.

Sammie xx

I am submitting this Snowy Black Forest Roulade to October’s We Should Cocoa over at Tin and Thyme

FF Snowy Black Forest Roulade

Share
Facebooktwitterpinterestlinkedintumblr

Iced Bakewell Tart

Share
Facebooktwitterpinterestlinkedintumblr

I adore Bakewell Tart. Especially the layers of pastry, raspberry jam and almond sponge combined, taste utterly delicious to me. Because I love the flavours so much I have a few ‘Bakewell’ recipes on here. Usually I am content to leave the top of the sponge covered in almond flakes. While following Mary Berry’s pretty iced tart last week, on the Great British Bake Off programme, I decided to try it out. Resulting in this Iced Bakewell Tart.

FF Iced Bakewell Tart

Everything you see on and in this tart is homemade, including the raspberry jam. Which, just happens to be my favourite and is incredibly easy to make, for the recipe please see HERE . I’ll put that into a separate post, otherwise this ones going to be miles too long, we just want to get to the part where we can eat this Iced Bakewell Tart!

Adding Fresh Flowers To Enhance The Photography

Having spotted a couple of open blooms open on my rose bush, I couldn’t resist cutting them and placing the vase next to the tart. They give the photos a romantic, afternoon tea look, echoing the pink icing on the top of the tart.

As much as I enjoy coming up with new recipes and testing them to ensure they will work as well for you as they do me, I’ve also grown to enjoy the photography side of my blog. Sometimes adding a single item can transform the ‘feel’ of a photograph. My slightly wind ravaged rose has added an element of beauty, but also imperfection, which I really like. Especially as I feathered the icing all in the same direction, more on that later!!!

FF Iced Bakewell Tart
Iced Bakewell Tart a delicious raspberry and almond treat for any special occasion.

The Importance Of Sharing A Meal

With Feasting is Fun, my aim is to make each meal, recipe or bake a feast. What I mean by that is this; when time is taken to prepare good, homemade food, it should be enjoyed and the atmosphere as we feast together should be fun. Conversation across the dinner table can be one of the most important parts of the day. People relax, enjoy their meal and open up about their day.

Sitting together as a family, at least one day a week, I believe is incredibly important for the health and well being of us all. Sharing a meal more regularly is preferable, however, my hubby doesn’t get in until late some nights and I realise we are not unique in that aspect of family life.

I honestly believe, that from sharing family time, over a meal, our 3 children have grown to enjoy the same foods and meals as us, their parents. Of course they all have their preferences and  there are certain ingredients they do not eat. What we enjoy is sitting with a curry, or a couple of pizza’s and some homemade coleslaw, at the weekend, feasting both on the food and each other’s company.

FF Iced Bakewell Tart
Iced Bakewell Tart skimping on the raspberry jam simply shouldn’t happen!

Weekend Baking And Afternoon Tea

That’s why I love the idea of afternoon tea. Usually at the weekends when we tend to eat our evening meal a bit later. Mid afternoon the kettle will go on, teapot filled and we’ll feast on whatever ‘mum’s’ been making that morning. Truthfully, most of what I make on those occasions doesn’t make it to this blog. I want to enjoy the company of my family. That said on occasions when I am taking photos, once I’ve said that it’s ok for everyone to help themselves it still amazes me how quickly a cake can disappear!

I take this as a good sign that it tastes great 😉.

This tart was baked in an 25cm/10″ x 5cm/2″ deep loose bottom tart tin, the same one I use for my quiches, see here.

Recipe: Iced Bakewell Tart serves 10-12

400g Shortcrust Pastry – in my opinion the Iced Bakewell Tart is sweet enough without using sweetened shortcrust pastry, see my pastry recipe here

3-4 heaped tablespoons Raspberry  Jam

175g/6oz Unsalted Butter

150g/5.5oz Caster Sugar

1/8th tsp Salt – I use Maldon

1tsp Vanilla Extract – I always use Nielsen-Massey extracts

1/2tsp Almond Extract

3 Large Free Range Eggs

100g/4oz Ground Almonds

75g/3oz Plain White Flour

1 tsp Baking Powder

For the icing:

350g White Icing Sugar

1/2 tsp Almond Extract

Alternatively for an un-iced finish you will need 25g flaked almonds

Method : Preheat the oven to 220C/200C fan, gas mark 7, 425F

Just a quick note about the pastry case – usually I trim any excess pastry from the tin, chill for 30 minutes in the fridge and then bake. When I baked this tart I was really pushed for time, so baked with an overlapping of pastry which was them trimmed after baking. I would thoroughly recommend trimming the pastry prior to baking for a neater edge. I also had a couple of problems with the pastry sticking right near the top.

Making And Blind Baking The Shortcrust Pastry Tart Shell

  • Roll the pastry fairly thinly, about the depth of a £1 coin and line the tart tin – note when using homemade pastry I never grease the tart tin, however if you are unsure of how non stick your tin is brush lightly with some cooled melted butter.
  • Dock the bottom of the pastry case with a fork to keep it flat during baking.
  • Cut a large piece of baking parchment, screw it into a ball and then line your pastry tart case with it and fill with baking/ceramic beans.
  • Place in the middle of the oven and ‘blind bake’ for 15 minutes.
  • After 15 minutes baking has elapsed, remove the tart from the oven. Lift out the baking beans using the baking parchment and place the tart back into the oven for a further 10 minutes, until it is golden and cooked on the base.

Making The Almond Cake Layer

  • In a large bowl whisk/beat together the butter, sugar and salt until it is very pale and creamy.
  • Add in the almond and vanilla extract and whisk/beat until incorporated.
  • Next add all 3 eggs and whisk/beat for a minute.
  • Remove the whisk, add in the flour, baking powder and ground almonds. Using a large spoon fold these ingredients into the mix until they are just combined.

Assembling And Baking The Bakewell Tart

  • Once the baked tart case has cooled slightly, spoon the raspberry jam into the centre and spread it, using the back of the spoon, so that it almost reaches the rim.
  • Now spoon over the almond sponge, starting from the outside and working towards the centre. The almond sponge will cover and seal the jam in. Thus stopping the jam from leeching out the side and on to the top of the sponge.
  • If you are baking an un-iced tart sprinkle the top with flaked almonds.
FF Iced Bakewell Tart
Lining, baking and filling the baked tart case.
  • Reduce the oven heat to 190C/170C fan, gas mark 5, 375F.
  • Place the jam and almond sponge filled tart back into the middle of the oven and bake for 45-50 minutes, until the sponge is golden and firm to the touch, without wobbling in the centre – mine took 45 minutes.
  • As soon as the tart is baked remove from the oven and allow to cool.
FF Iced Bakewell Tart
Beautifully Golden this cooked Tart was quickly snapped with the #GBBOTwitterBake Along in case I ran out of time!


An in-iced Bakewell tart finished with flaked almonds.
Baked un-iced Bakewell Tart topped with flaked almonds.

Icing The Bakewell Tart

  • Sift the icing sugar into a bowl. Add the almond extract and enough water, I used approximately 30mls, to form a thick but pourable paste, once stirred together.
  • Remove 2tbsp of icing to a small bowl, add the tip of a cocktail stick, that has been dipped in pink gel icing and stir. Aim for a pale pink colour, however if you’d like a deeper pink, go for it! Place your coloured glacé icing into a small piping bag.
  • Keeping the 2 icings very separate, pour the pure white icing over the tart. Start in the centre use an offset spatula to push it to the edges.
  • Snip the end off of the small icing bag and pipe horizontal lines of pink icing across the white icing, separated by 5cm/2″, from edge to edge. Work fairly quickly as you want both icings to still be unset when you drag through, with a cocktail stick.

Feathering Piping Effect

  • Using a cocktail stick, again with a spacing of 5cm/2″, place the tip of the skewer at the top of the icing and drag it through to the bottom. Reversing from bottom to top next time. You can see, during the rush to complete my tart on time, I pulled my icing all in the same direction. Oh the pressure!
  • Below is a photo of my tart with my one directional feathering (if it can be called that) compare with the accurate feathering of my Cherry Almond Sandwich Cake.
FF Iced Bakewell Tart
You can see hire effective proper 2 directional feathering is here.
  • As the glacé icing is quite thick, leave for a good 2-3 hours before serving.

Place your Iced Bakewell Tart on a pretty plate or stand and serve with a drink of your choice. Mid morning with a steaming mug of coffee or a pot of tea mid afternoon.

FF Iced Bakewell Tart
Iced Bakewell Tart perfect at anytime.

If you enjoy the flavour of almonds and raspberry together, this Iced Bakewell Tart is really worth making.

If you have enjoyed this recipe for Iced Bakewell Tart you may also like these:

Raspberry Almond Cream Cake

Raspberry Almond Cream Cake

Bakewell Shortbread Bars

Bakewell Shortbread Bars
Bakewell Shortbread Bas

Cherry Bakewell Cookies


Cherry Bakewell Cookies

While talking about family time and feasting together, my intention certainly is not to preach. In truth, I eat far too many meals away from my family, in bed, due to my health. Rather what I’m trying to say I say, is, that when you have the opportunity, make the most of it!

Whatever you are making, baking and creating in your kitchens, have fun remembering times spent and times to come feasting with friends and family.

Sammie xx

No part of this post may be reproduced or duplicated without the written permission of the owner. Please see my Disclosure Policy.


Share
Facebooktwitterpinterestlinkedintumblr

Camp Coffee Ice Cream

Share
Facebooktwitterpinterestlinkedintumblr

Camp Coffee Ice Cream with crunchy chocolate coffee beans.

It is mid September and here in the south of the U.K. the weather is still relatively warm. Not that you need it to be warm outside to enjoy my Camp Coffee Ice Cream.

FF Camp Coffee Ice Cream

Yes, ice cream is great to have during the hot, Summer months, but I happily eat it all year round. This particular ice cream with its inviting coffee flavour (without the caffeine) would be so good scooped on top of a warm chocolate brownie.

FF Camp Coffee Ice Cream
Camp Coffee Ice Cream great all year round.

Chocolate and coffee are a classic combination, which is why I decided to add a good measure of chocolate coffee beans to this ice cream.

The delicious chocolate/coffee crunch against the smooth, silky, coffee flavoured ice cream, keeps this interesting on the palette.

Camp Coffee Ice Cream with chocolate coffee beans.

Making your own ice cream at home gives you complete control over the intensity of flavours. This Camp Coffee Ice Cream is how I’d drink my coffee, medium strength. You, however, can put as much, or as little Camp coffee as you like!

Churning this ice cream, in an ice cream maker, ensures it is silky smooth. If you like your ice cream just like that, leave out the chocolate coffee beans. Again, what you add is completely in your control.

So let’s show you how to make this delicious dessert, or fun treat.

Recipe: Makes 750ml Camp Coffee Ice Cream

300ml/ 1/2pt Double Cream

300ml/ 1/2pt Milk – Whole or Semi Skimmed

2tsp Camp Coffee – widely available in stores and online

4 Large Free Range Egg Yolks – the whites can be frozen for a month

1tsp Vanilla Extract – I use Nielsen-Massey

1tsp Corn Flour – I use Doves Farm as it is certified gluten free

5tbsp Caster Sugar

100g/4oz Chocolate Coffee Beans – mine were from Waitrose

Method: Ensure the ‘Frozen’ container part of your ice cream maker has been in the freezer for 8 hours, overnight, or according to the manufacturer’s instructions.

Note: For a step by step guide, with photographs, on making ice cream please see Very Vanilla Ice Cream.

Making the ice cream base

  • Pour the cream and milk into a large, heavy bottomed saucepan and place over a medium heat.
  • Heat the liquid until scalding point is reached – a rim of small bubbles will appear around the outside edge of the liquid – remove from the heat.
  • Whilst the liquid is heating place the egg yolks, corn flour, sugar and vanilla extract into a large, heatproof bowl. Whisk until the eggs are pale and have increased in volume.
  • With the whisk still running on low, slowly add the scalded cream mixture to the eggs, continually whisking.
  • Whisk thoroughly until all the ingredients are combined.
  • Tip the custard ice cream base back into the saucepan and place back over a medium heat, stirring constantly.
  • Before putting the pan back on the heat I quickly wash and dry the original bowl used.
  • When the custard has thickened and coats the back of a spoon remove from the heat.
  • Pour the custard through a wire sieve into the large heatproof bowl.
  • Add the Camp coffee and stir thoroughly.
  • Place cling film directly on top of the ice cream base, to prevent a skin from forming.
  • Allow the custard to cool slightly before placing in the fridge to chill thoroughly.

Churning the ice cream

  • Once chilled, set up your ice cream maker according to its manufacturer’s instructions.
  • Remove the cling film, stir the ice cream base and taste. If you wish to have a stronger coffee flavour add more Camp coffee, stirring and tasting until the desired strength is reached.
  • With the ice cream machine switched on and churning, pour the ice cream base through the opening into the bowl.
  • Churn for 15-20 minutes until the ice cream is thick, but not frozen solid.
  • Switch off the machine and remove the top and the paddle.
FF Camp Coffee Ice Cream.
Deliciously softly frozen Camp Coffee Ice Cream
  • Scrape as much ice cream as possible from the paddle (and then lick the rest off 😉).
  • Using a deep silicone spatula transfer the rest of the ice cream to a freezer proof tub.
  • Add the chocolate coffee beans and swirl through the ice cream using the handle of a wooden spoon.
FF Camp Coffee Ice Cream
The chocolate coffee beans add a final crunch to the Camp Coffee Ice Cream.
  • Clip on a tight fitting lid and place the Camp Coffee Ice Cream into the freezer for at least 4 hours, longer if it is very hot weather, so that the ice cream completely freezes.

To serve, remove the ice cream from the freezer 15-20 minutes before scooping. As your ice cream is homemade and therefore does not contain any artificial softeners, preservatives or additives, it will take a little while to soften.

FF Camp Coffee Ice Cream
Camp Coffee Ice Cream a delicious dessert.

I like to serve Camp Coffee Ice Cream in a pretty bowl for dessert, or in a cone if we are eating in the garden and enjoying the sun. It’s not unheard of to be handing cones full of ice cream, over the fence to our neighbours either!

It’s definitely more fun to share.

If you have enjoyed this recipe for Camp Coffee Ice Cream you may also like these:

Blackberry Chocolate Chunk Ice Cream

FF Camp Coffee Ice Cream
Blackberry Chocolate Chunk Ice Cream

Chocolate Orange Ice Cream

FF Camp Coffee Ice Cream
Chocolate Orange Ice Cream

Strawberry Ripple Ice Cream

FF Camp Coffee Ice Cream
Strawberry Ripple Ice Cream

I have a thing for hot and cold food together. So my Vanilla Fudge Chocolate Brownies with a scoop or two of Camp Coffee Ice Cream and hot custard poured over, would be my idea of pudding heaven!

That is exactly why I enjoy cooking and baking so much at home. The flavours and combinations are limitless, plus it’s usually a lot cheaper to make it yourself and tastes a lot better. Why? Because you can make it exactly how you want it to taste.

Whatever to are making, baking and creating in your kitchens, have fun creating you feast. Also if you have the means to share some of your bakes, it is so rewarding. Seeing someone smile as you hand them a slice of cake, knowing they have not been forgotten about, simply because the can’t get out and about. We live in communities. Let’s make someone’s day with a surprise treat?

Sammie xx

Camp Coffee Club  provided me with the Camp coffee to make this recipe. All opinions, views, content and photography are my own. Please see my Disclosure Policy.

Share
Facebooktwitterpinterestlinkedintumblr

Triple Chocolate Chunk Ice Cream

Share
Facebooktwitterpinterestlinkedintumblr

I have come across very few people who do not like ice cream. Perhaps they are restricted due to dietary reasons, and yet they still love it. And the most popular flavour, by far, is chocolate. So why not indulge yourself with my dreamy, creamy Triple Chocolate Chunk Ice Cream?

FF Triple Chocolate Chunk Ice Cream
Triple Chocolate Chunk Ice Cream chocca full of flavour!

So, if you are a lover chocolate ice cream, then this is THE one for you!

Rich, smooth chocolate ice cream with delicious chunks of white, milk and dark chocolate in every mouthful. What more could a chocolate lover ask for!

FF Triple Chocolate Chunk Ice Cream
Triple Chocolate Chunk Ice Cream perfect for every kind of chocolate lover.

I honestly don’t think I’ve ever seen our three teenage children so excited about an ice cream. They absolutely couldn’t wait for the photo shoot of this Triple Chocolate Chunk Ice Cream to be over so that they could start eating their laden cones.

FF Triple Chocolate Chunk Ice Cream
Triple Chocolate Chunk Ice Cream patiently held waiting to be consumed!

Quite a cute picture, especially as the tallest is holding the bottom ice cream!

A Divine Recipe

Divine Chocolate sent me some of their chocolate to use in baking. And so I couldn’t resist making an ice cream. Not just any ice cream though, a really good chocolate ice cream, with whole pieces of chocolate throughout, making each bite utterly delicious.

FF Triple Chocolate Chunk Ice Cream
Divine Chocolate flavours this ice cream all the way through.

While I have made no churn ice cream before, which did turn out spectacularly well, following attempts have been too sweet for my palette. Although our children have enjoyed my experiments, I couldn’t honestly put the recipes on here. Because, my standards are high and overly sweet doesn’t cut it with me.

FF Triple Chocolate Chunk Ice Cream
Triple Chocolate Chunk Ice Cream a perfect balance of flavours.

While it may be seen as more convenient making a no churn ice cream, the preparation time is the same, although churning adds an extra 15-20 minutes. Although churned ice cream is already three quarters frozen when it goes into the freezer. So there’s less time to wait until it’s ready to scoop!

Anyhow this Triple Chocolate Chunk Ice Cream is beautiful when churned, with a  silky, smoothness that tempts the tastebuds.

Recipe: Make 750ml Triple Chocolate Chunk Ice Cream

300ml/ 1/2 pint  Double Cream

300ml/ 1/2 pint Milk – Whole or Semi Skimmed

4 Large Free Range Egg Yolks – the whites can be frozen for up to 1 month

1tsp Corn Flour

5 tablespoons Caster Sugar

1tsp Vanilla Extract – I use Nielsen Massey

200g/7oz Dark Chocolate

100g/4oz Milk Chocolate

100g/4oz White Chocolate

Method: Ensure the frozen compartment of your ice cream maker has been in the freezer for 12 hours or according to manufacturer’s instructions.

Making The Ice Cream Base

Note: For step by step instructions with accompanying photographs please see Very Vanilla Ice Cream.

  • Pour the cream and milk into a heavy bottomed saucepan and heat over a medium heat, until scalding point is reached, a rim of small bubbles will appear appear around the outside liquid, at the saucepan’s edge, this is called the scalding point, just before the liquid is about to boil. As soon as the scalding point has been reached remove the pan from the heat.
  • Into a large, heatproof bowl add the egg yolks, sugar, corn flour and vanilla extract.
  • Whisk the egg yolks until they are pale and thickened, with the whisk running slowly gently pour the scalded liquid on to the eggs. Whisk until thoroughly incorporated.
  • Tranfer the contents of the bowl back to the saucepan, (I quickly wash up the original bowl, once the custard base has been poured into the pan and before I put the pan back on to the heat). Place the saucepan over medium heat and stir until the custard base has thickened and coats the back of a wooden spoon.
  • Break up 150g of the dark chocolate and place it into the freshly washed bowl.
  • Pour the custard base, through a sieve, into the bowl, over the top of the broken chocolate.
  • Stir until the chocolate has completely melted into the hot custard base. Incidentally, this is also how to make chocolate custard!
  • Place cling film directly on to the top of the chocolate custard, to stop a skin forming and leave to cool on the worktop until warm, then place in the fridge to completely chill.

Churning The Ice Cream

  • Set up your ice cream maker as per the manufacturer’s instructions, mine has to be churning as I pour the ice cream base in.
  • Remove the cling film from the top of the ice cream base and give it a good mix. If you find it easier transfer the liquid to a jug.
  • Pour the chocolate ice cream base into the churning bowl via the opening.
  • Churn for 15-20 minutes until the ice cream is thickly frozen.

Preparing The Ice Cream To Freeze

  • Once churned to a thick consistency, turn off the machine and remove the top and paddle. Scrape off as much ice cream from the paddle as you can. And then, over the sink lick off the rest!!
  • Using a deep silicone spatula, transfer the thick chocolate ice cream to a freezer proof container that has a tight fitting lid.
  • Roughly chop the remaining dark, milk and white chocolate.
FF Triple Chocolate Chip Ice Cream
White, milk and dark chocolate chunks.
  • Sprinkle the chocolate chunks on top of the thick chocolate ice cream in the freezer tub.
FF Triple Chocolate Chunk Ice Cream
Triple Chocolate Chunk Ice Cream you know this is going to taste so good!
  • Swirl the triple chocolate chunks evenly through the ice cream. I use the handle of a wooden spoon, swirling the chunks through the ice cream. Then snap on the tight fitting lid and place in the freezer for 6-8 hours, or overnight to finish freezing.
FF Triple Chocolate Chunk Ice Cream
Triple Chocolate Chunk Ice Cream ready for the freezer.

How good does that tub look?

Exactly! You cannot buy this kind of deliciousness.

To serve, remove from the freezer 15-20 minutes prior to serving. As there are no artificial softeners or artificial anything in this Triple Chocolate Chunk Ice Cream, it needs a little time to warm before being scoop-able!

Scoop into cones, bowls, chocolate dipped cups, or even my Toffee Cookie Cups – whatever your heart desires.

FF Triple Chocolate Chunk Ice Cream
Triple Chocolate Chunk Ice Cream so decadent and delicious.

Then tuck in. Savour the supreme creaminess of this delightful ice cream.

Just a little tip, make a double batch of this ice cream, it disappeared in one night between 5 of us – just sayin’.

If you love this recipe for Triple Chocolate Chunk Ice Cream why not take a look at these:

Blueberry Bloom Ice Cream

 FF Triple Chocolate Chunk Ice Cream
Blueberry Bloom Ice Cream definitely one for the adults with a splash of gin 😉

Lemon Ripple Ice Cream

FF Triple Chocolate Chunk Ice Cream
Lemon Ripple Ice Cream

Chocolate Rolo Ice Cream

FF Triple Chocolate Chunk Ice Cream
Chocolate Rolo Ice Cream

Ice cream is fun. Since it brings back childhood memories for many people and why shouldn’t we still enjoy food from our memories.

During my summer ice cream making journey, all who have tried the various flavours I have made, including the ones that didn’t make the cut, have agreed that homemade tastes best.

So as we edge into Autumn and proper pudding season begins, don’t banish your ice cream maker to the back of the cupboard, languishing lonely for another year. And yes in our house ice cream makers have feelings. Join me as I pair new ice cream flavours with puddings and desserts through the colder months.

Not got an ice cream maker? I highly recommend the Which Best Buy ice cream maker from Andrew James . It has been thoroughly tested throughout the summer, keep your eyes open for the review coming up shortly.

Have fun, feasting, sharing and enjoying good company, remembering that food always tastes better when it’s shared!

Sammie xx

Divine Chocolate provided me with the chocolate for this recipe. All view, opinions, content and photography are my own. Please see my Disclosure Policy.


Share
Facebooktwitterpinterestlinkedintumblr

Blueberry Bloom Ice Cream

Share
Facebooktwitterpinterestlinkedintumblr

Today I have a visually beautiful treat to share with you. It tastes as good as it looks and so I present my Blueberry Bloom Ice Cream. This dessert definitely has a grown up feel about it. Smooth blueberry flavour, layered with subtle, floral flavours that come from the addition of Bloom Gin. Also, as with most of the ice cream recipes on this blog, this dessert is gluten free. Resulting in more people, with restricted diets, being able to enjoy thisdelightful dessert.

Scoops of frozen fruit dessert served in a martini glass.
Blueberry Bloom Ice Cream.

Gently cooking the blueberries with a little sugar results in them keeping both their distinct flavour and colour. And a dash a of Bloom Gin adds floral notes to the delightful, fruity ice cream flavour, while also complimenting the sweetness of the blueberries. Creating an elegant and delightful dessert.

Purple frozen fruit dessert wire a dachshund of gin. Pinterest sized with descriptive graphics.

When freezing food the flavour naturally becomes duller. So foods to be eaten while very cold usually need to have a stronger flavour base.  Yet here, the vivid purple Blueberry Bloom Ice Cream comes alive on the palette. Because the cooked blueberries are left whole, the ice cream has a texture, not dissimilar to rum and raisin, which I absolutely adore. Resulting in the blueberries providing interest against the smooth, silky ice cream.

A tub of purple frozen fruit dessert with a martini glass to the side containing scoops of the dessert.
Blueberry Bloom Ice Cream

Since using an ice cream maker results in a much creamier ice cream than other methods, it is my preferred choice. Because the churning action stops a large volume of fruit from creating large ice crystals. Similar to champagne, where the smaller the bubbles, the creamier the champagne tastes, in ice cream making, the smaller the ice crystals the smoother the finished ice cream.

Recipe: Makes 1L Blueberry Bloom Ice Cream

300ml/ 1/2pt Double Cream

300ml/ 1/2pt Milk – Whole or Semi Skimmed

1/2tsp Vanilla Extract – I use Nielsen-Massey

4 Large Free Range Egg – freeze the whites for up to 1 month

1tsp Corn Flour – I use Doves Farm 

as they are certified gluten free

5tbsp Caster Sugar

300g Fresh Blueberries

1tbsp Caster Sugar

1tbsp Tap Water

2tbsp Bloom Gin – optional. Alternatively leave the gin out and you still have a delicious blueberry ice cream.

Method: Ensure the freezing compartment/bowl of your ice cream maker has been in the freezer overnight, or according to manufacturer’s instructions.

Note: For step by step instructions with photographs, on how to make the ice cream base please see Very Vanilla Ice Cream.

Preparing The Blueberries

  • First of all, place the blueberries in a small saucepan. Add 1 tablespoon of both sugar and water. Place over a medium heat and cook until the blueberries just start to burst, giving up their precious juice. Remove the pan from the heat and transfer the contents to a bowl. Allow to cool and then add 2 tablespoons of Bloom Gin if using and set to one side.
Cooked fruit in a bowl with a bottle of gin to the side.
Cooked and cooled blueberries with a dash of gin.

Making The Ice Cream Base

  • Into a large heavy bottomed saucepan add both the milk and cream. Place over a medium heat and cook until scalding point is reached – this is the point before the liquid boils. Small bubbles will appear around the edge of the cream mixture, once scalding point is reached remove the pan from the heat.
  • In a large, heatproof bowl, add the eggs, sugar, vanilla extract and corn flour.
  • Whisk the eggs until they are pale and creamy.
  • With the whisk still running on slow gently pour the hot cream mixture into the whipped eggs. Whisk until well combined.
  • Tip the ice cream base back into the saucepan and cook over a medium heat, stirring until the custard has thickened and coats the back of a wooden spoon. Remove the saucepan from the heat.
  • Pour the hot custard through a sieve into a heatproof bowl – I usually quickly wash up and dry the original bowl I’ve used.
  • Most importantly, place the cling film directly on top of the custard as this will stop a skin from forming.
  • Allow the custard to cool a little on the worktop and then transfer both it and the prepared blueberries to the fridge to chill.
  • When both are chilled assemble your ice cream maker, as per the manufacturer’s instructions.

Churning The Blueberry Bloom Gin Ice Cream

  • Pour the blueberry mixture into the cold custard ice cream base and stir.
  • Tranfer the Blueberry Bloom Ice Cream mixture to a large jug.
  • With the ice cream maker switched on (in my case) pour the ice cream mixture into the churning ice cream maker.
  • Churn until the ice cream is softly frozen – about 20 minutes.
  • Switch of the machine, remove the paddle and scoop the softly frozen ice cream into a freezer proof tub.
A tub of churned semi frozen fruit dessert
Blueberry Bloom Ice Cream ready for the freezer.
  • Clip on a tight fitting lid and place in the freezer to firm up. Ideally it should be left for 6 hours or overnight, depending on the ambient temperature.

To serve, remove the Blueberry Bloom Ice Cream from the freezer 15 minutes prior to scooping. Doing so allows the ice cream to soften slightly making it easier to scoop. Although there is a small addition of alcohol it is not enough to affect the freezing of this ice cream.

Scoops of Blueberry Bloom Ice Cream in a martini glass.
Blueberry Bloom Ice Cream

This stunning looking ice cream looks elegant scooped into martini glasses.

Why not serve with a glass of Bloom Gin, tonic water and lightly crushed blueberries, over ice?

Unusual, unique and utterly delicious, this delightful ice cream needs to be tasted to be truly appreciated.

Blueberry Bloom Gin Ice Cream scoops in a martini glass with a bottle of Bloom gin to one side.
Blueberry Bloom Ice Cream

If you have enjoyed this recipe for Blueberry Bloom Ice Cream you may also like these:

Amaretto Creamy Ice Cream

Scoops of almond liqueur frozen dairy dessert topped with flaked almonds in a glass bowl with a bottle of Amaretto to one side.
Amaretto Creamy Ice Cream

Strawberry Rose Ice Cream

Strawberry Rose Ice Cream scoops in a tin.
Strawberry Rose Ice Cream

Lemon Ripple Ice Cream

Scoops of Lemon Ripple frozen dairy dessert served in a pretty glass dessert bow.
Lemon Ripple Ice Bream

There are lots of other iced recipes here on my blog, including my Refreshing Tropical Fruit Sorbet . When you put your mind to it there are endless flavour combinations availed to you if you own an ice cream maker. I prefer not to be limited by what’s available in store. It is important to remember that each make of gin has their own unique mix of botanicals. So for the fragrant floral notes unique to this recipe I highly recommend using Bloom gin.

Whatever you are making, baking and creating in your kitchens, have fun preparing and sharing your feast.

Sammie xx

I was gifted a bottle of  Bloom Gin for the purposes of a review. All opinions, views, content and photography are my own. No part of this post may be reproduced or duplicated without the written permission of the owner. Please see my Disclosure Policy.


Blueberry Bloom Ice Cream image for Pinterest with descriptive graphics.

Share
Facebooktwitterpinterestlinkedintumblr