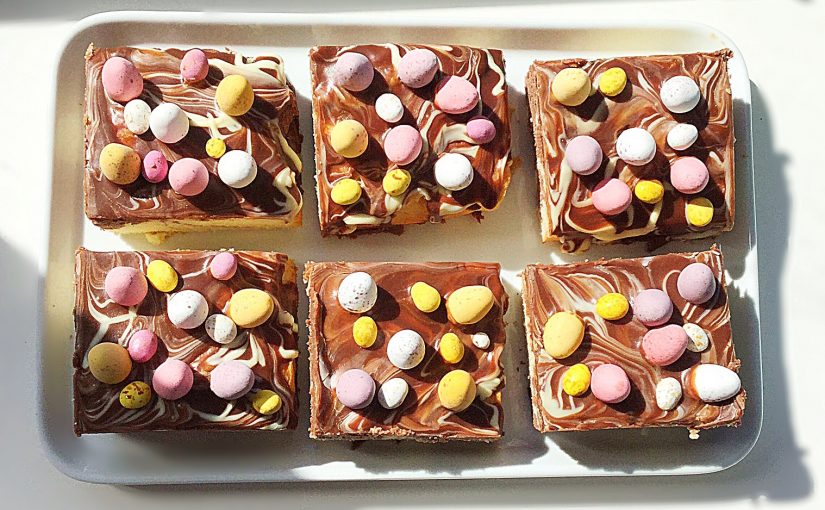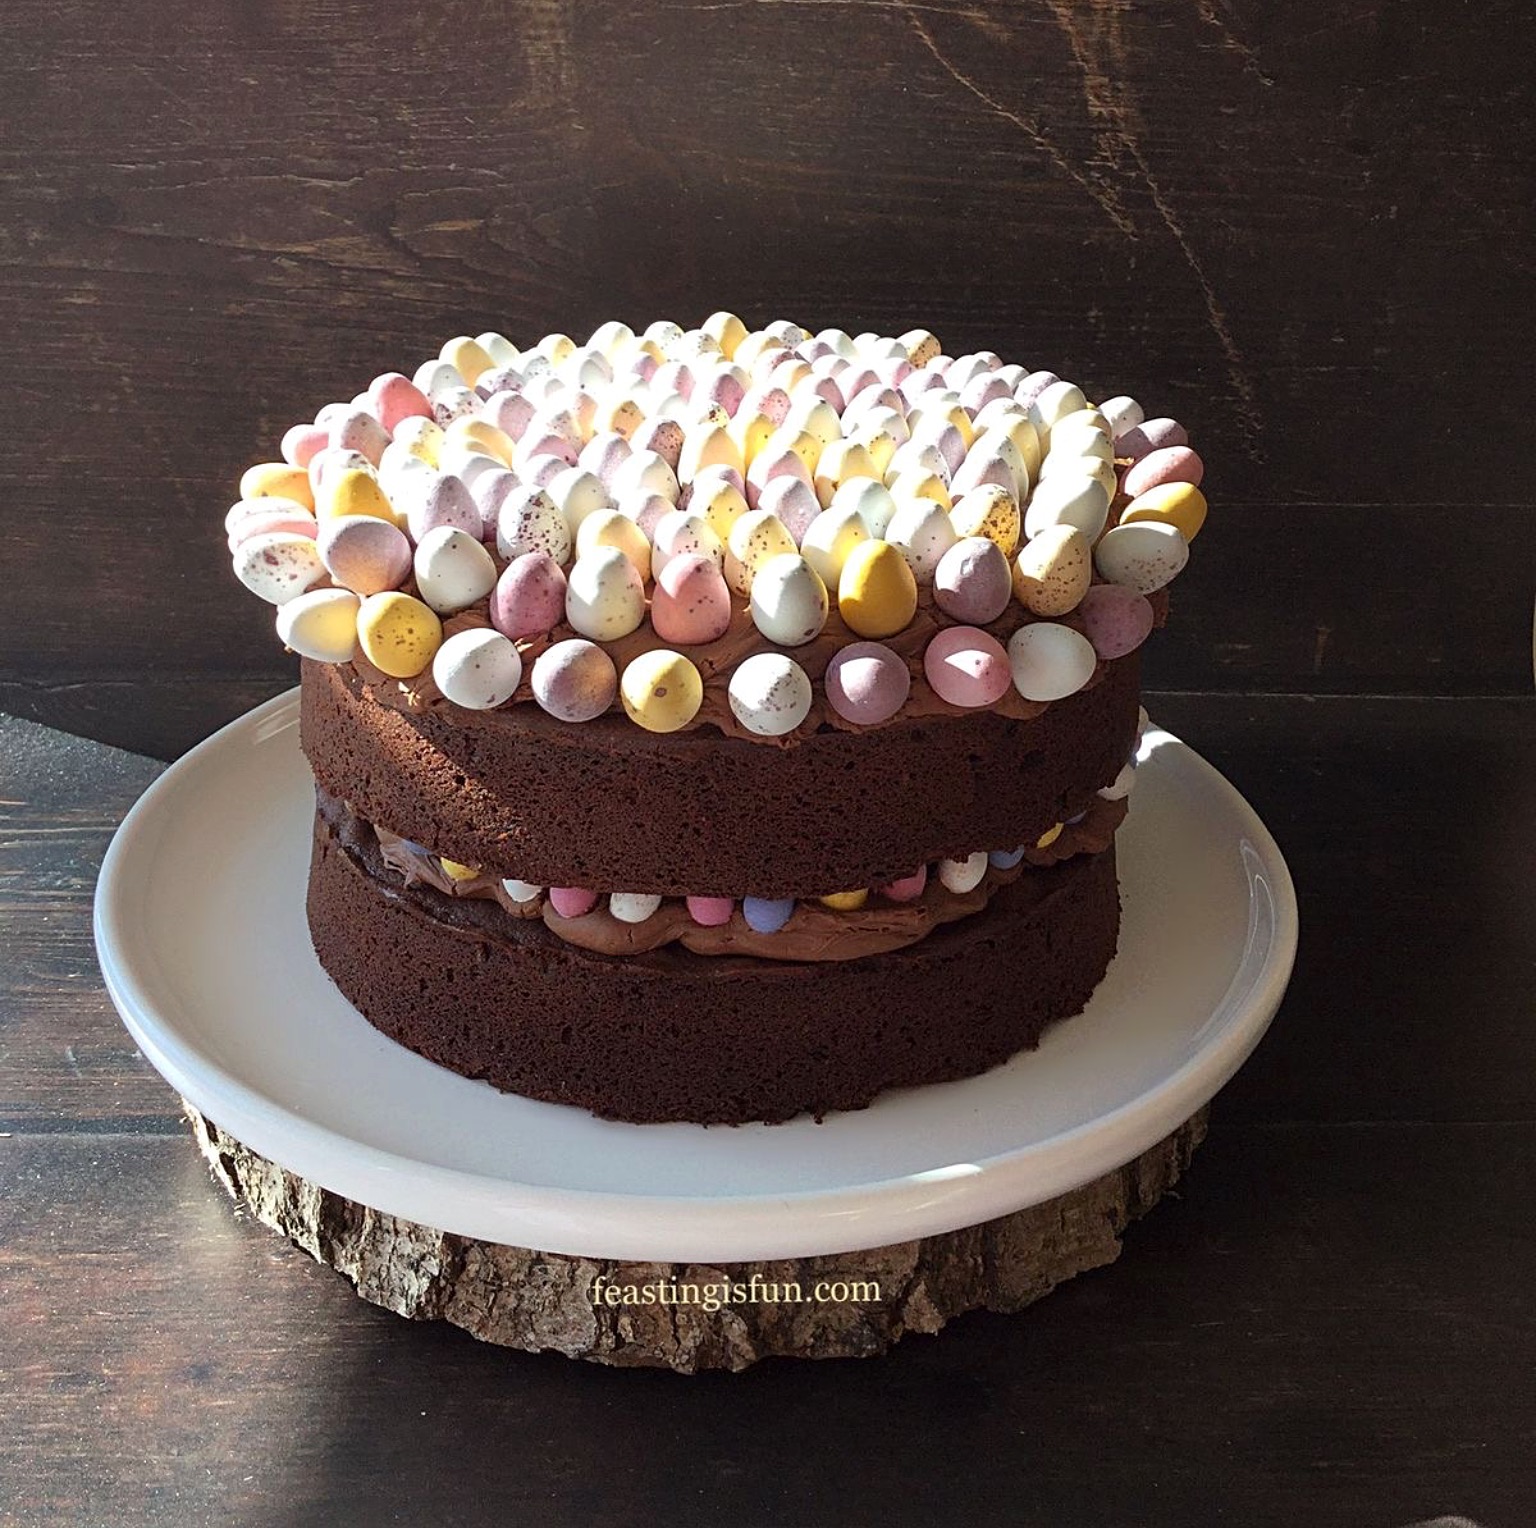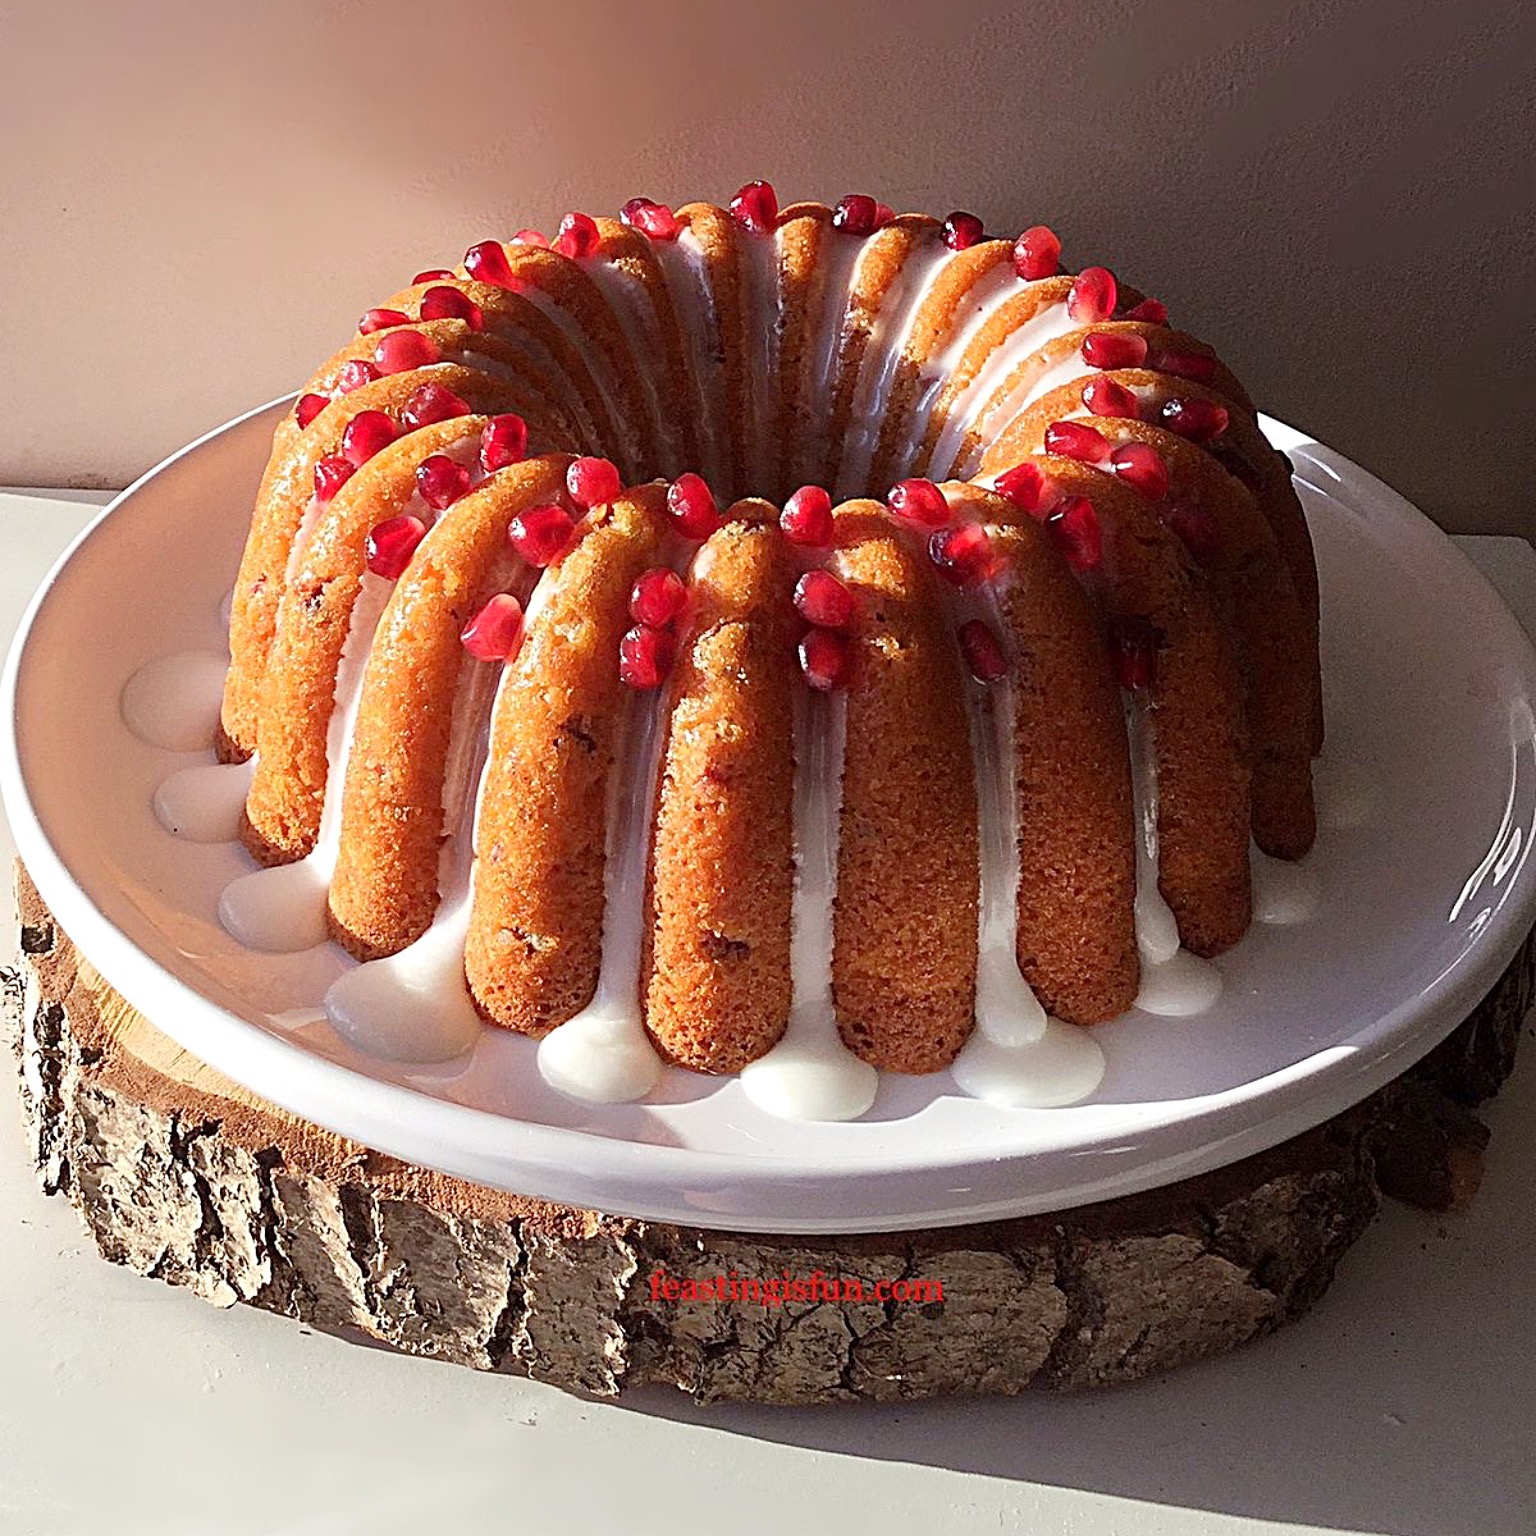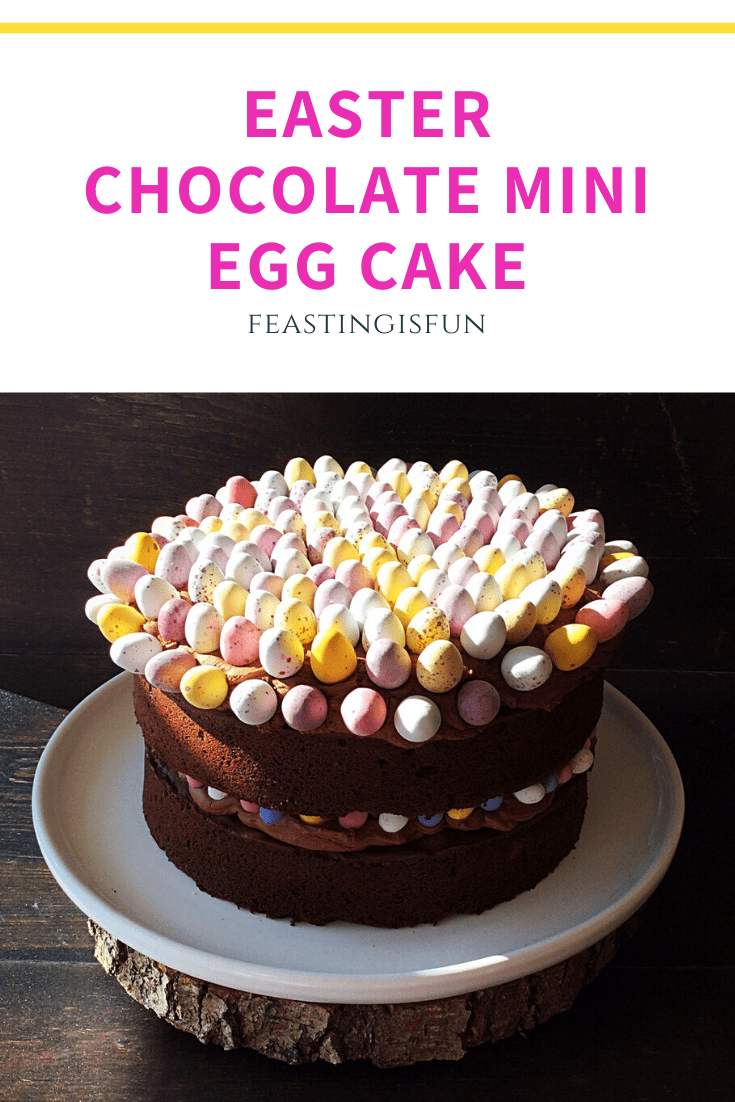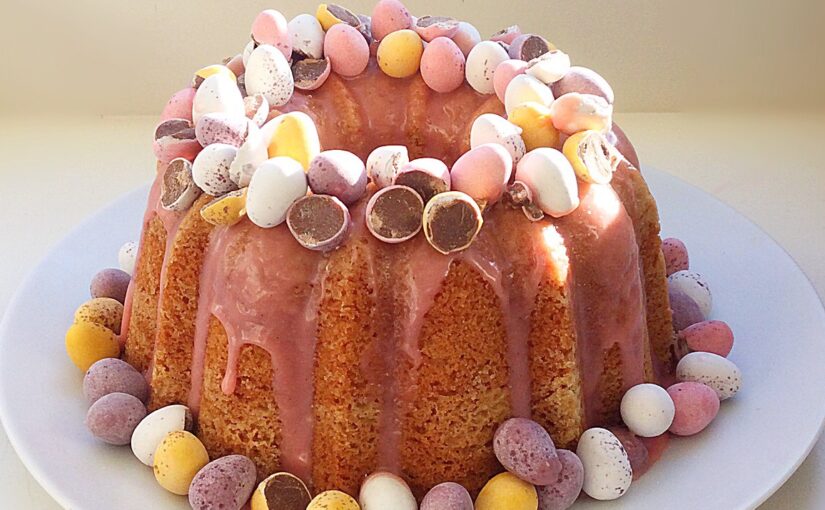
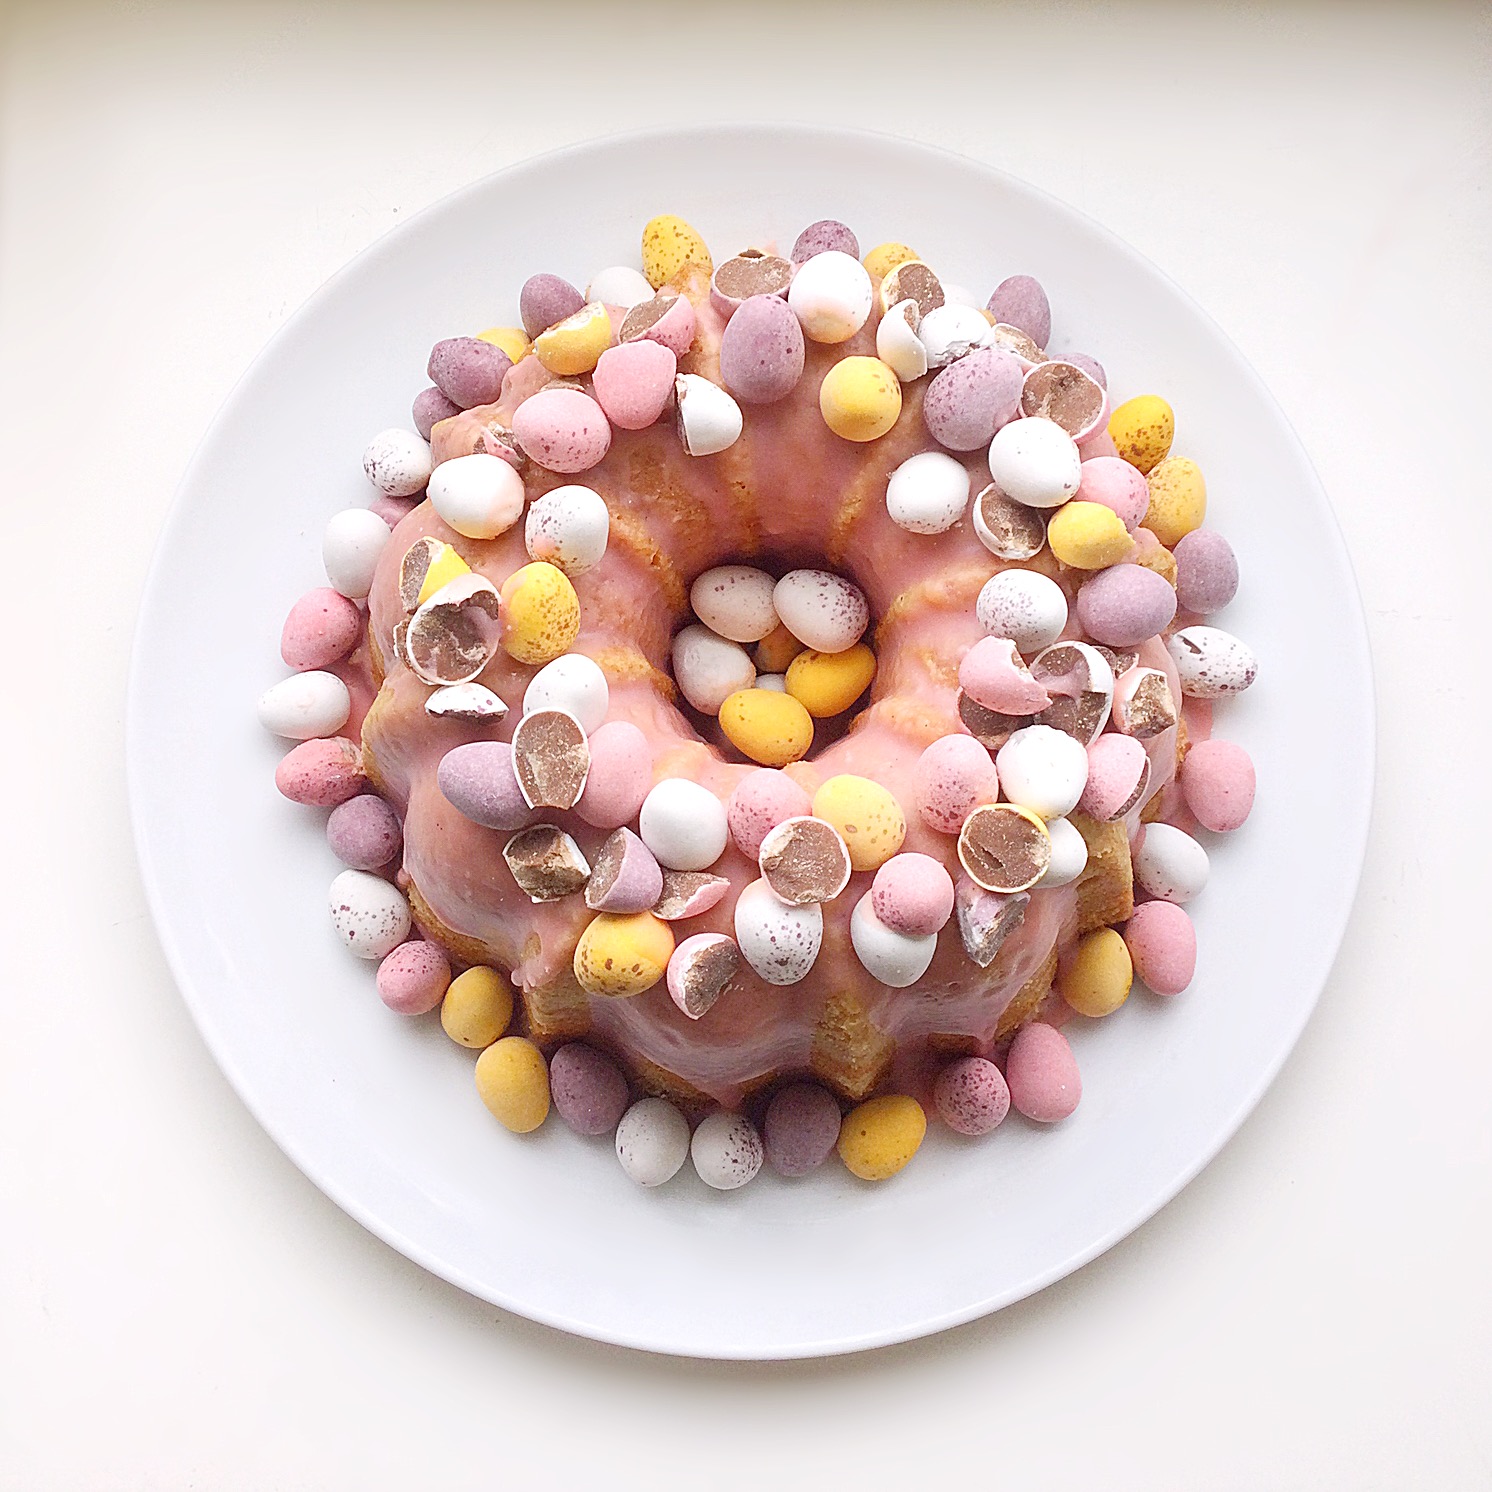
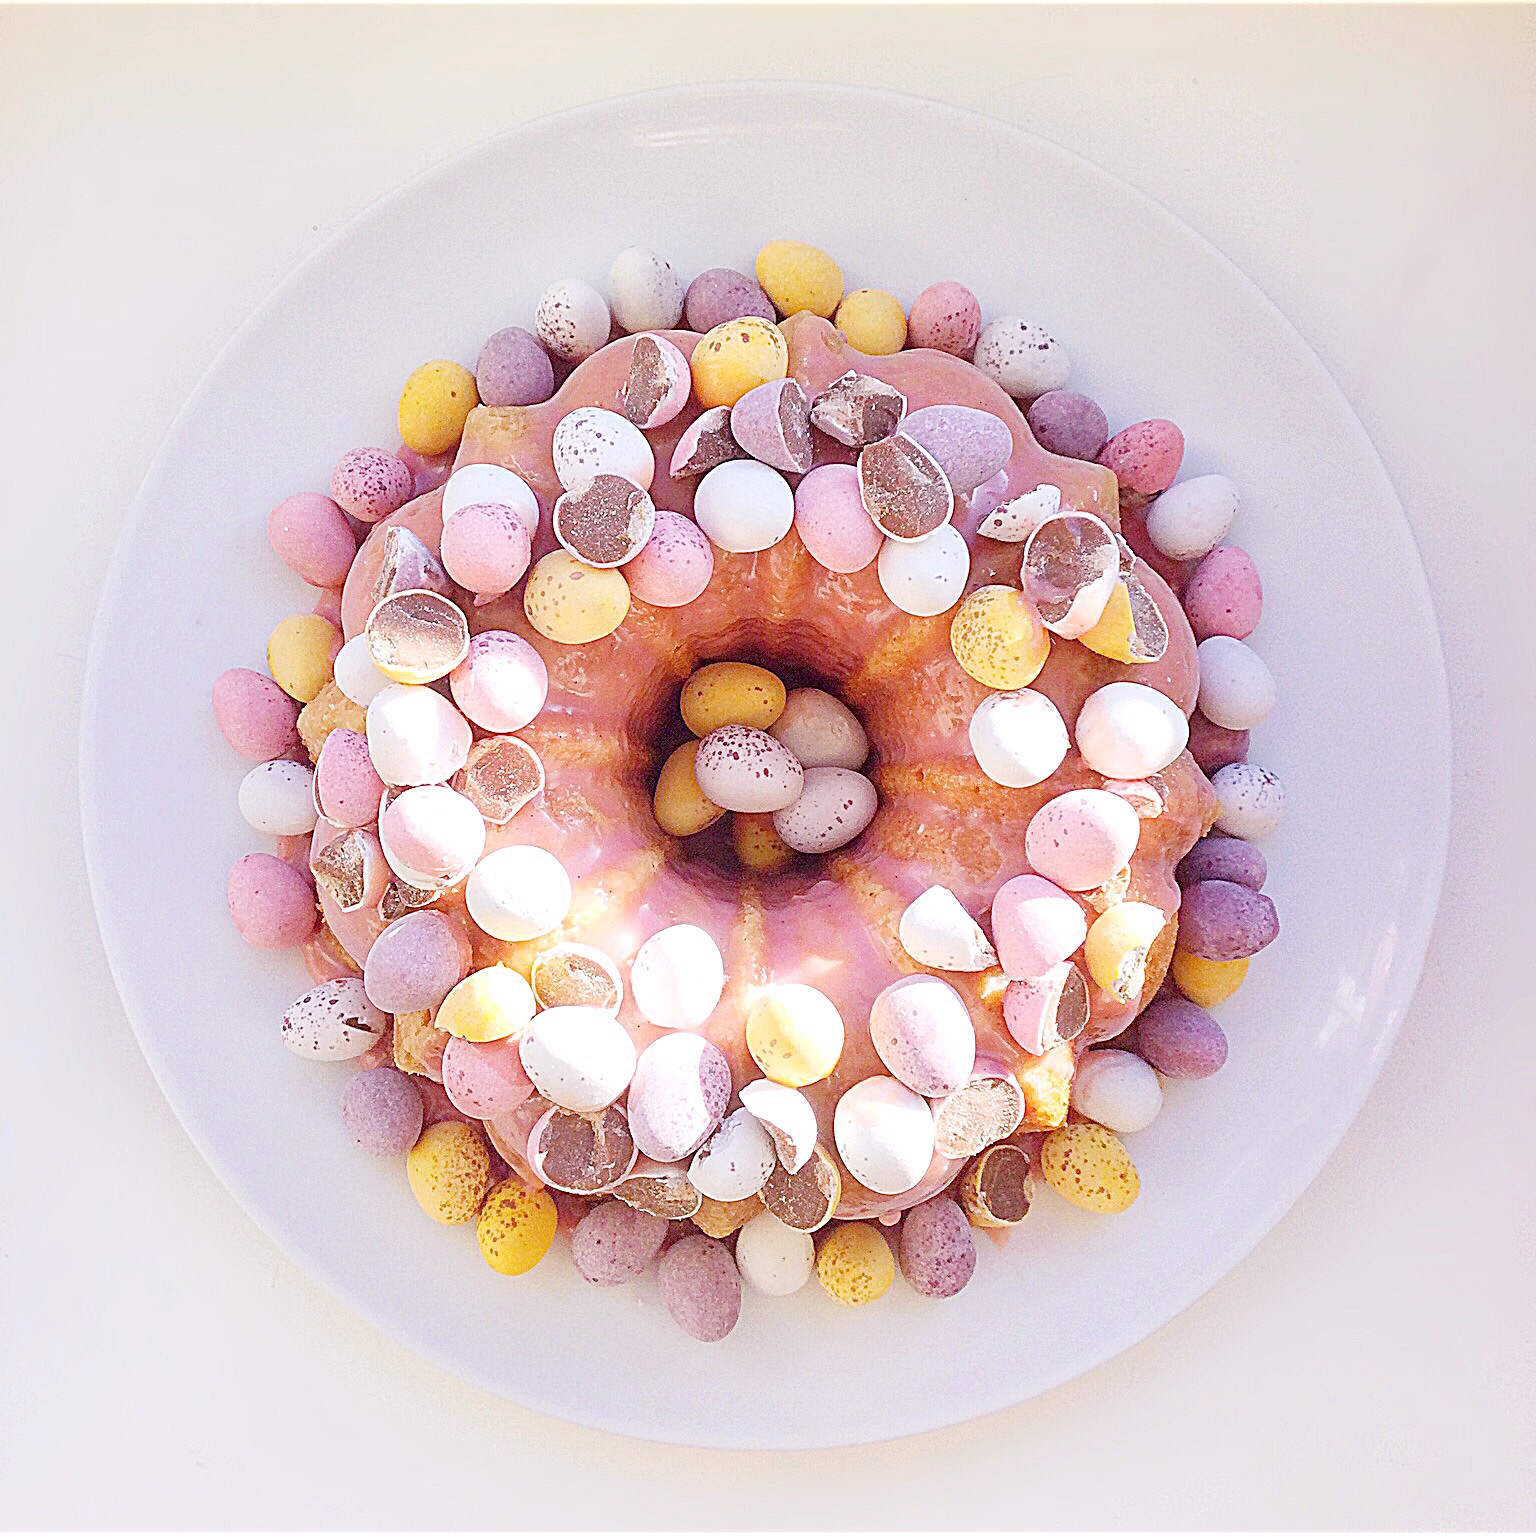
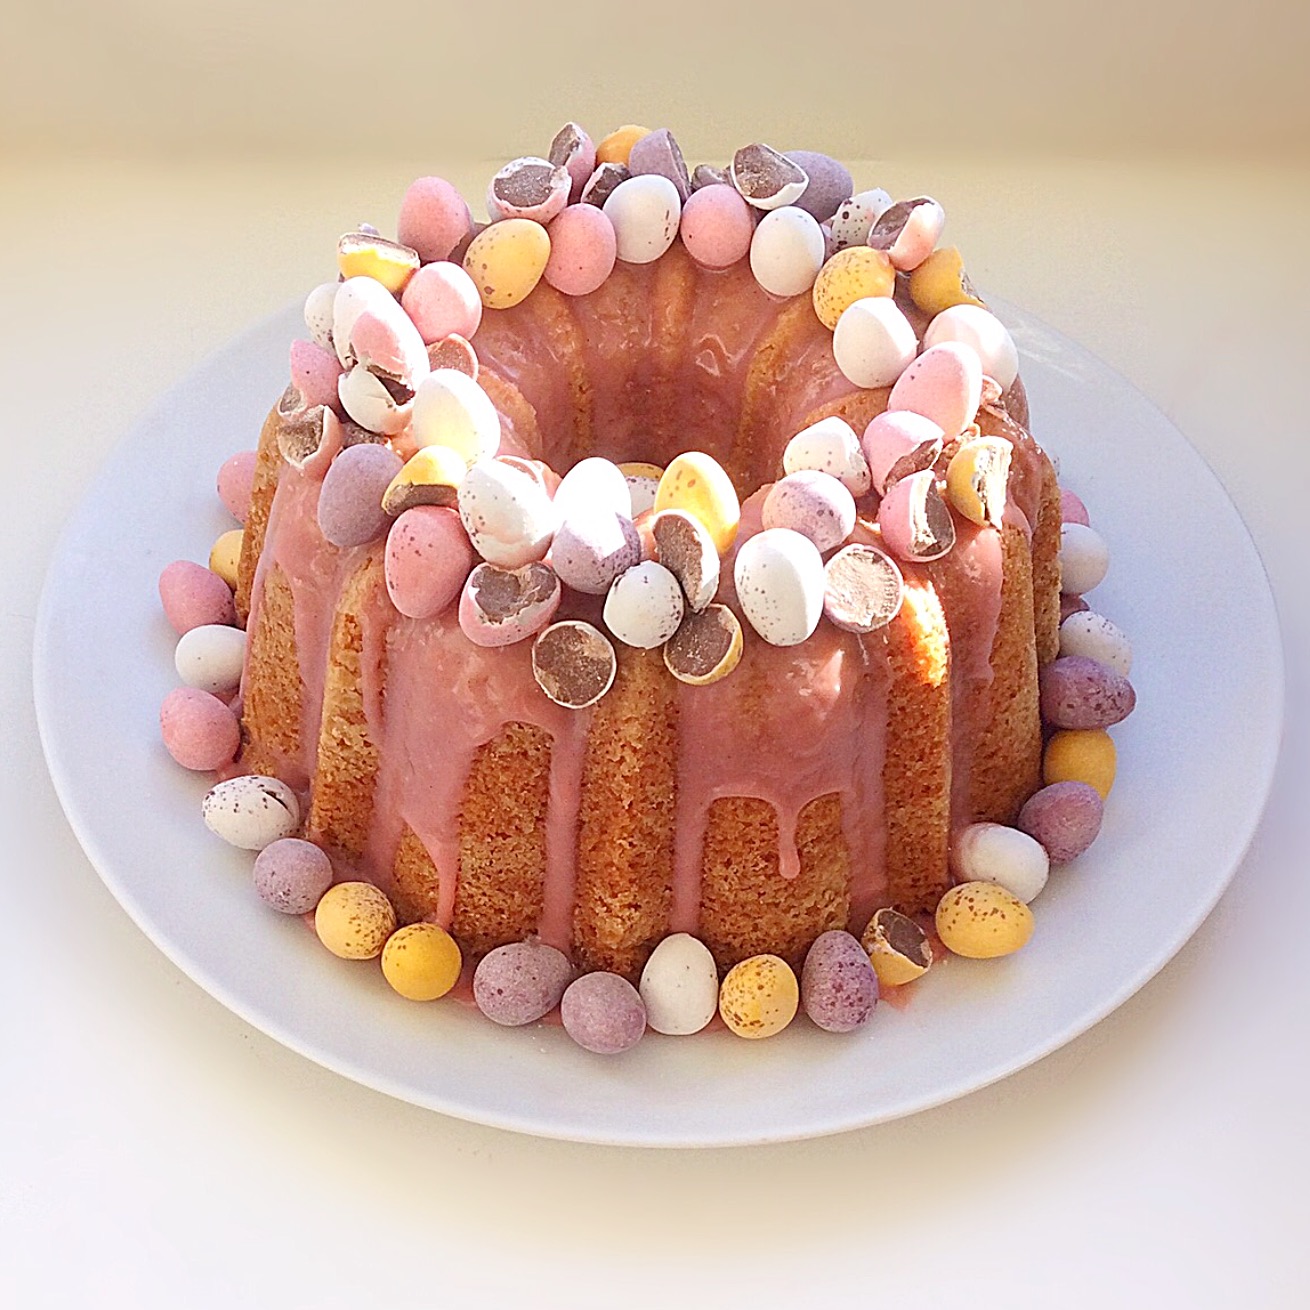
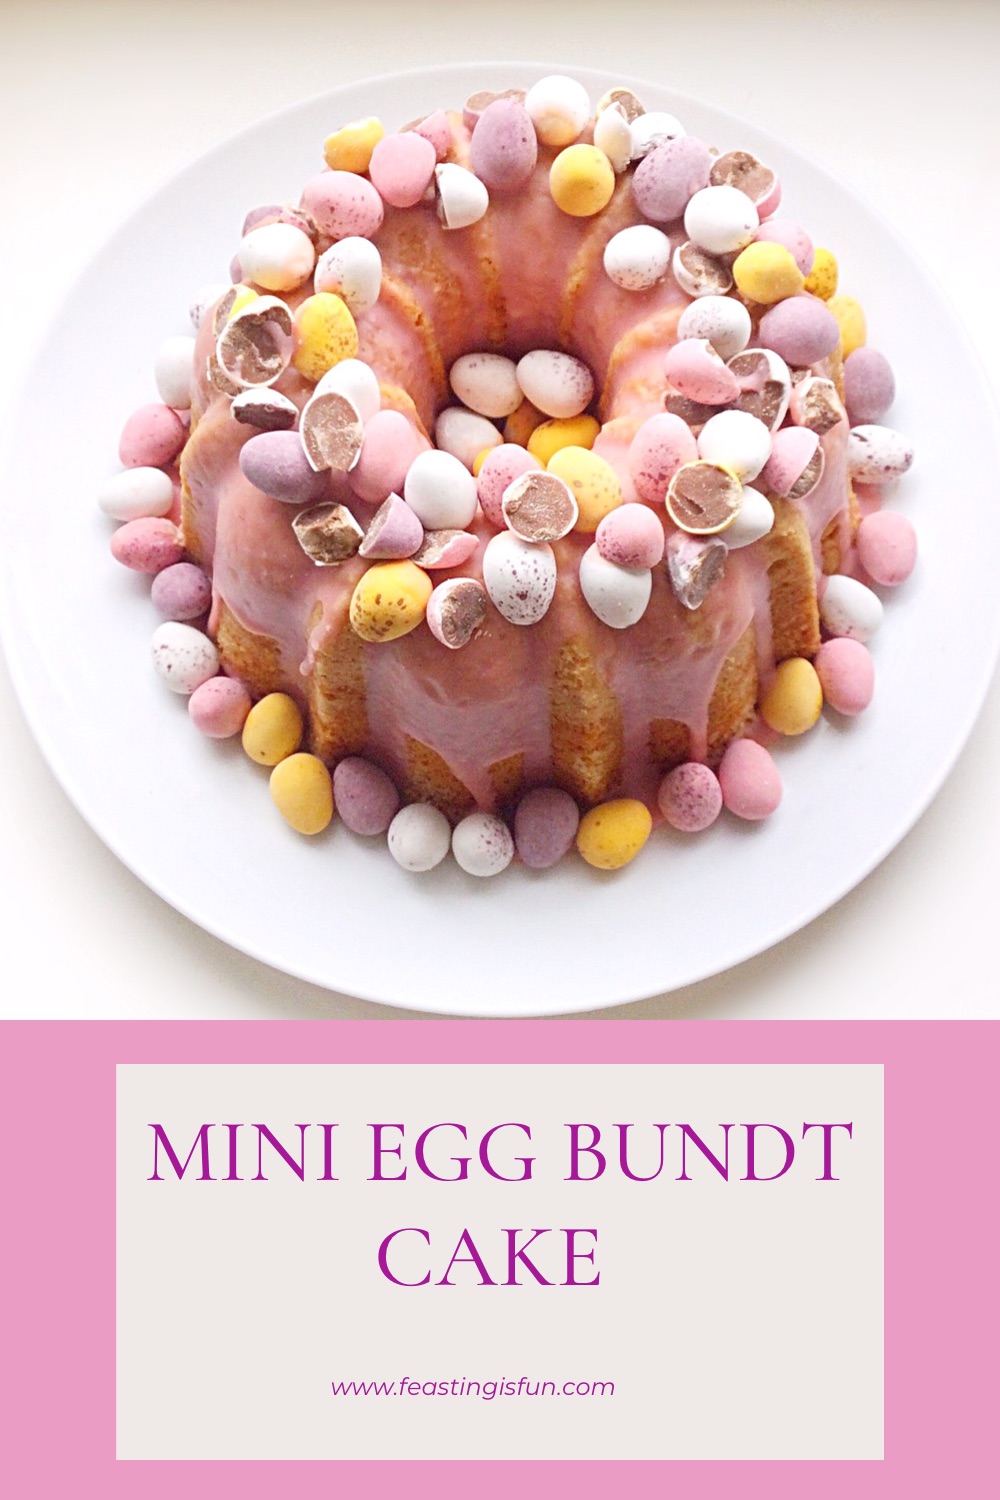
Easter is almost here and with it comes Spring here in the U.K. Finally, longer days, more sunshine, bright yellow daffodil blooms in the hedgerows and, an abundance of Easter eggs in the shops. Whether large or small, eggs remind us of new life at this time of year. So, this Mini Egg Bundt Cake is the perfect bake to eat and celebrate, with friends and family this Easter.
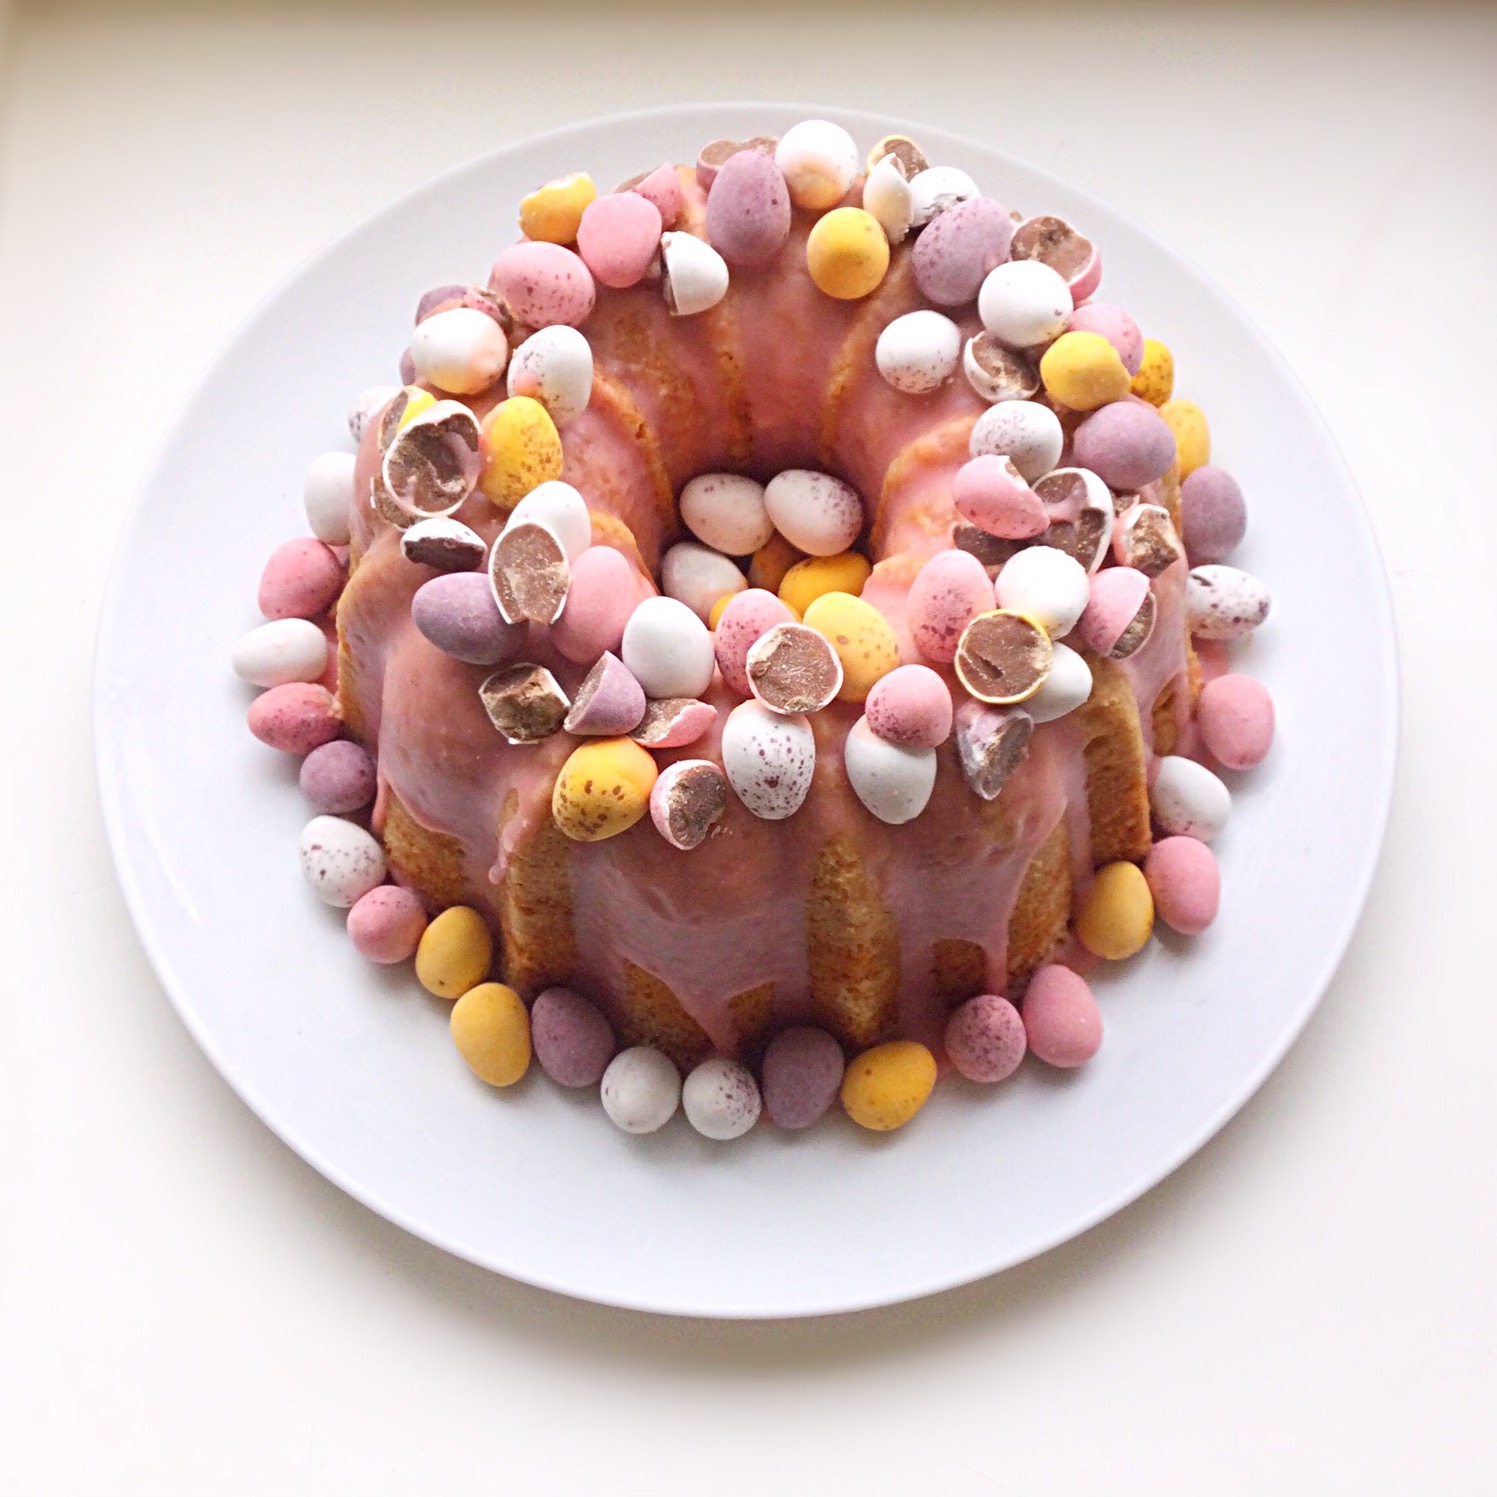
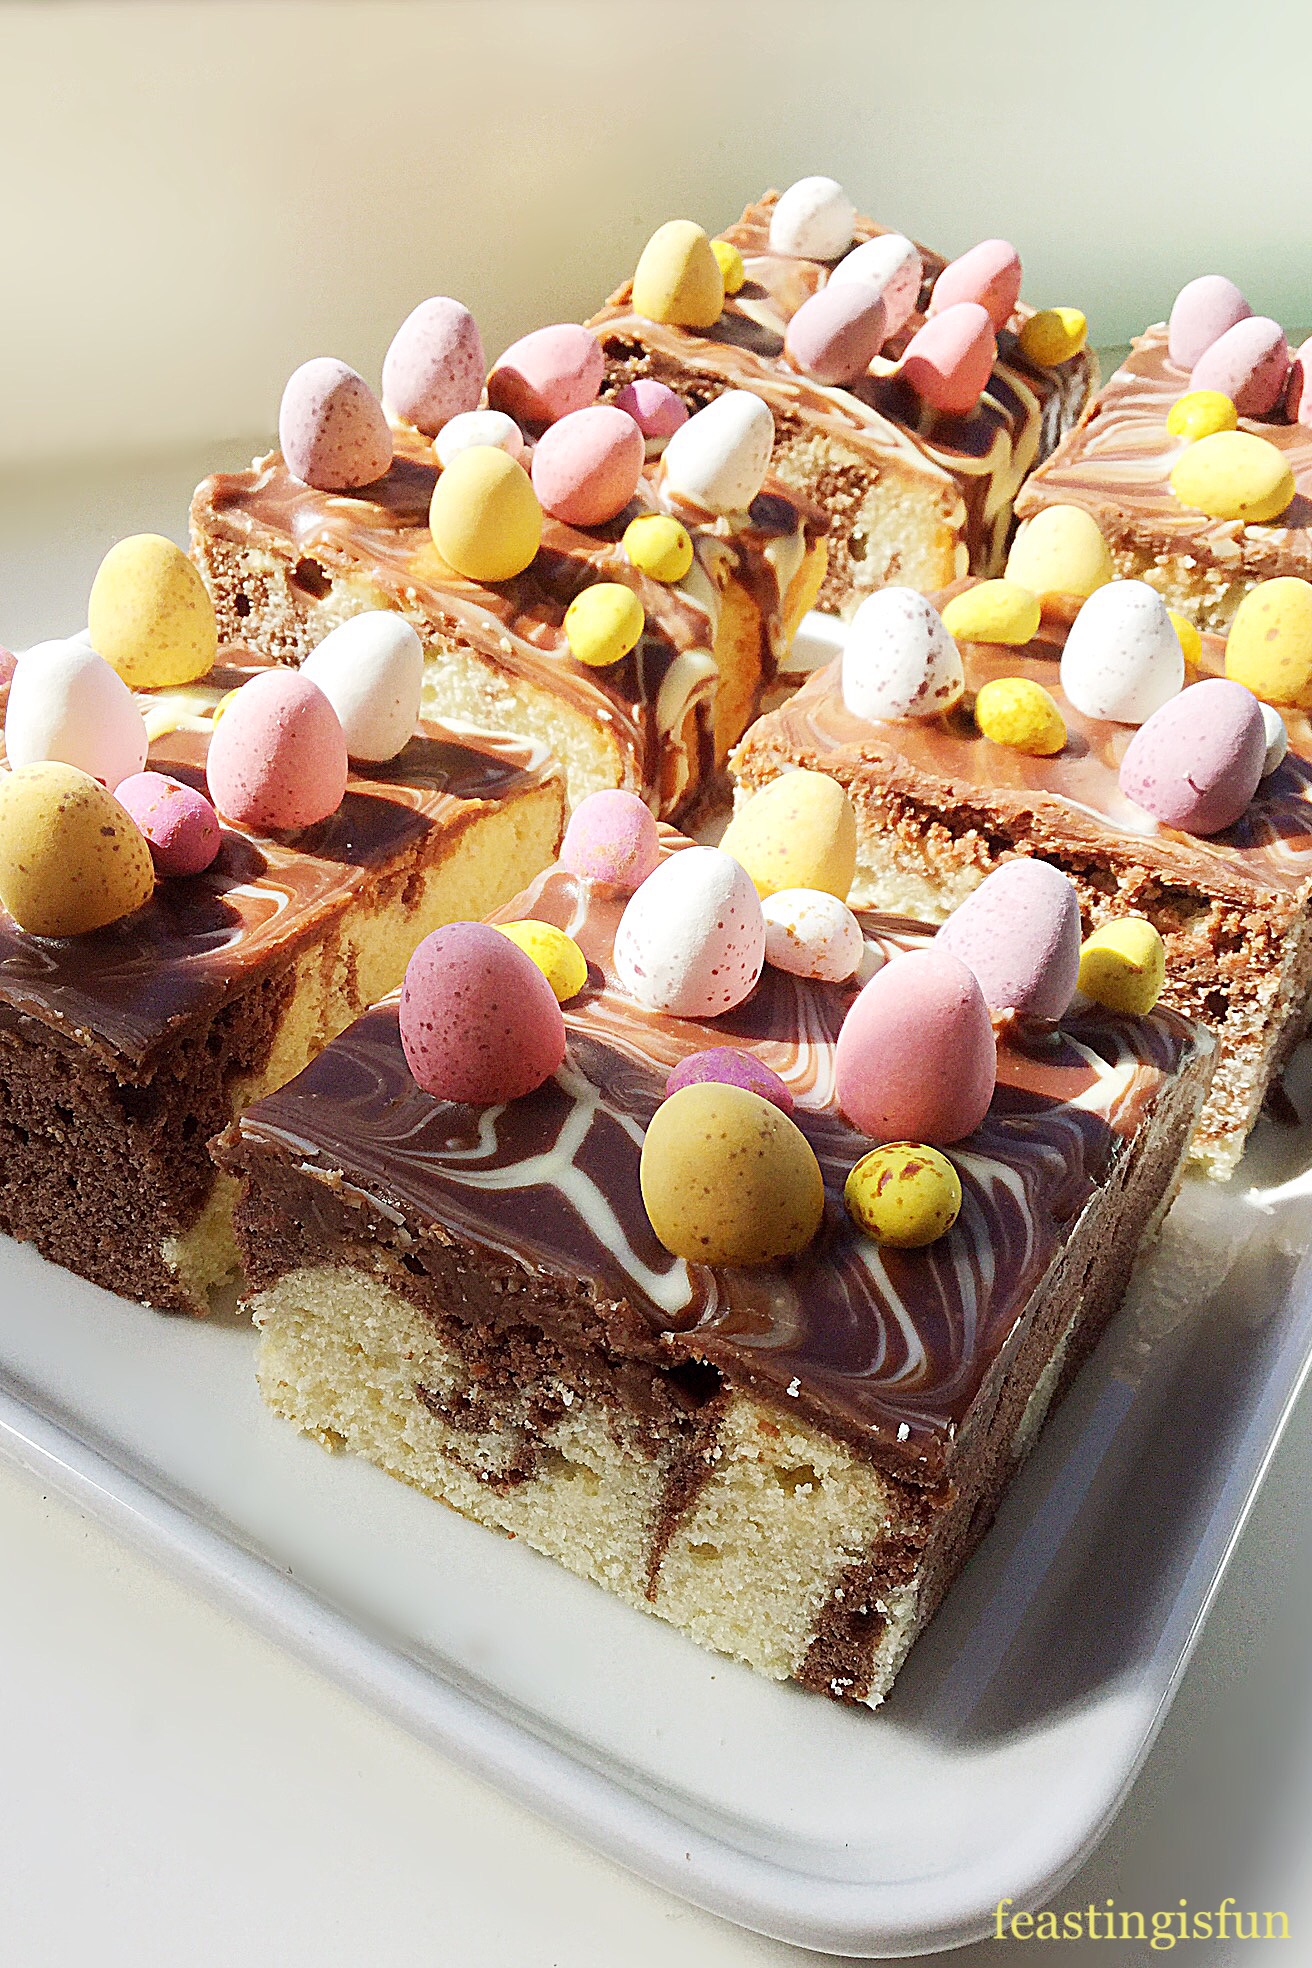
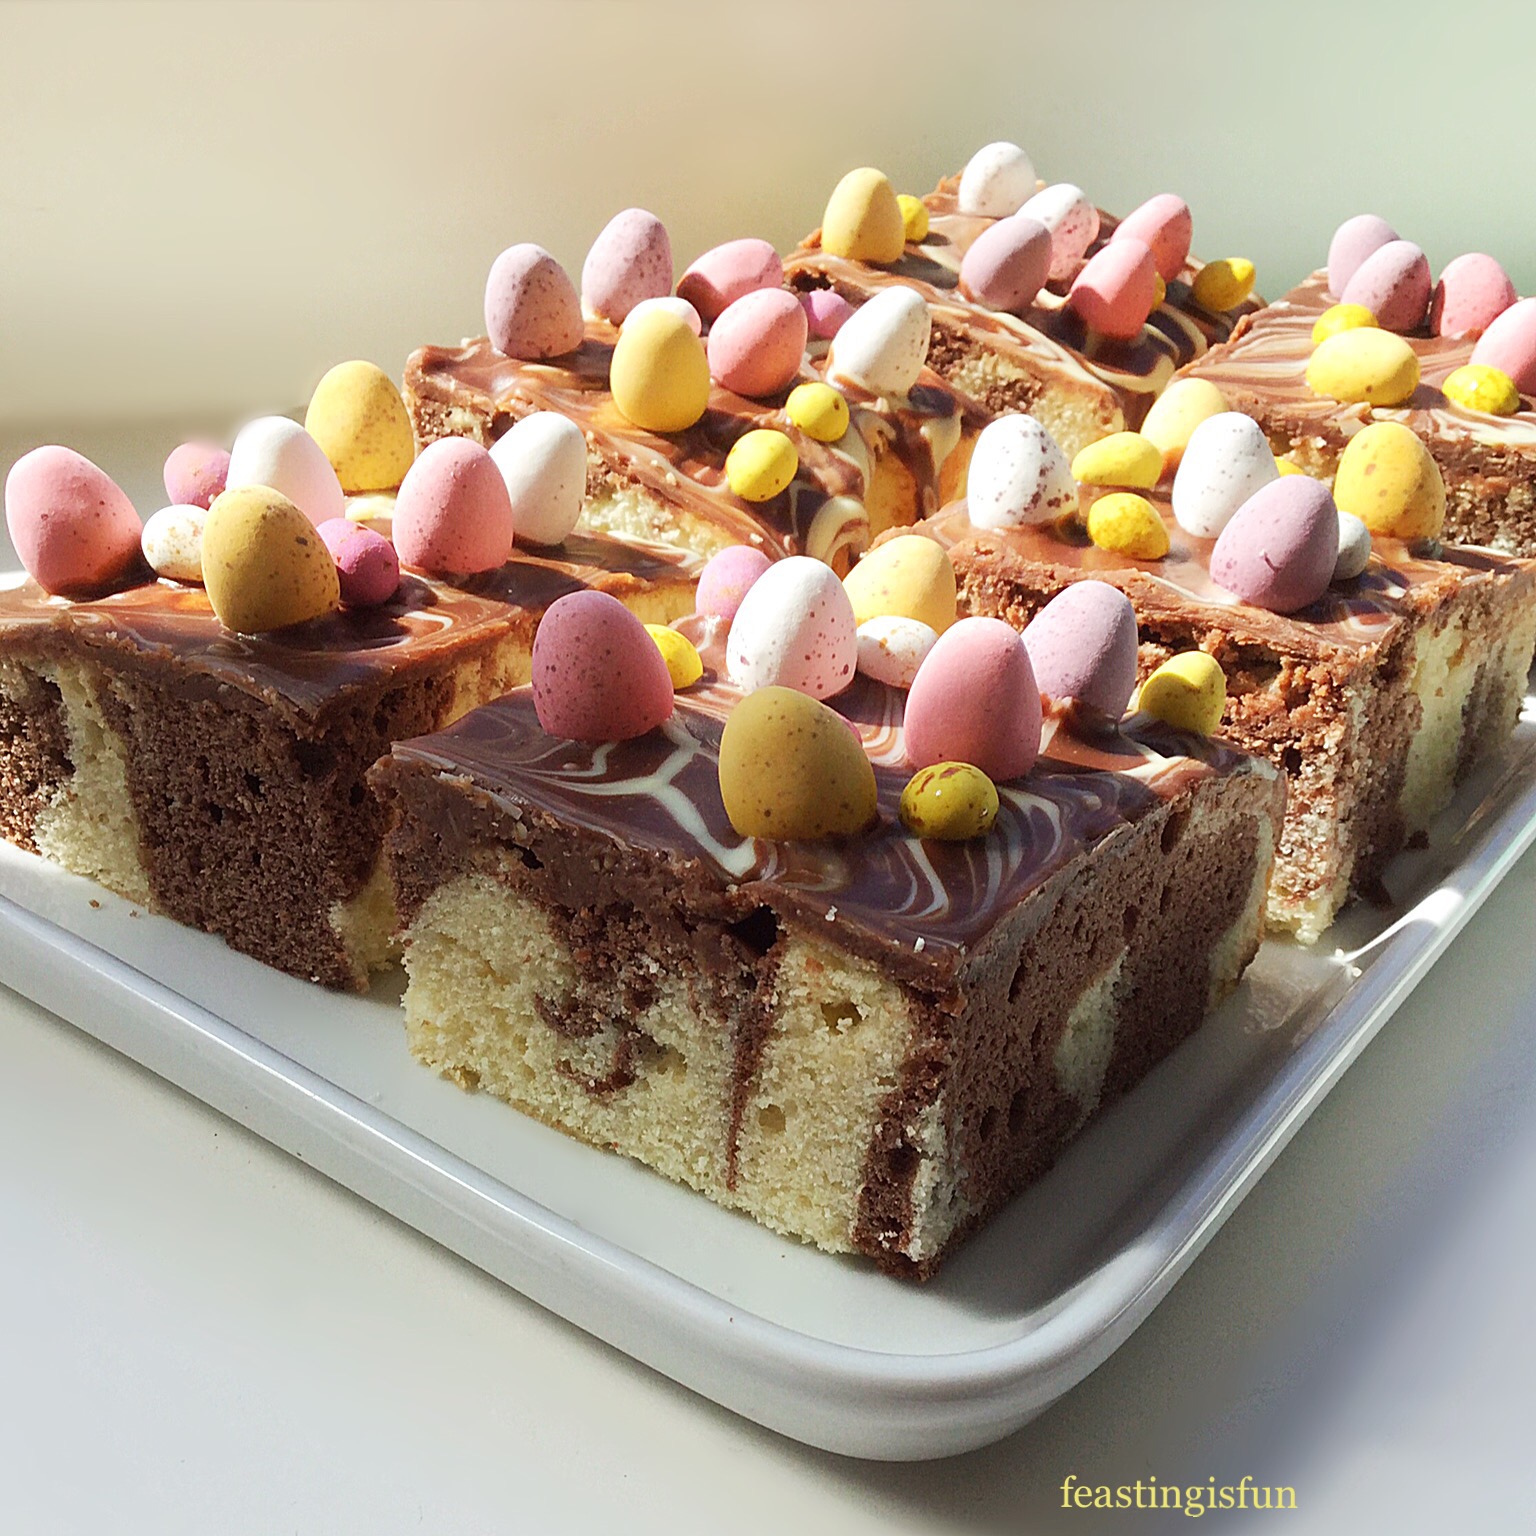
Chocolate mini eggs are an extra special treat at Easter. Cadbury’s chocolate is encased in pastel coloured, crisp, vanilla shells, resulting is the most delicious flavour! And so the flavour of the cake sponge takes it’s vanilla notes directly from the shell of the mini eggs, as does the vanilla chocolate drizzle. Resulting in a light, vanilla cake that compliments the mini chocolate eggs that adorn it.

Beautiful Bundt Cakes
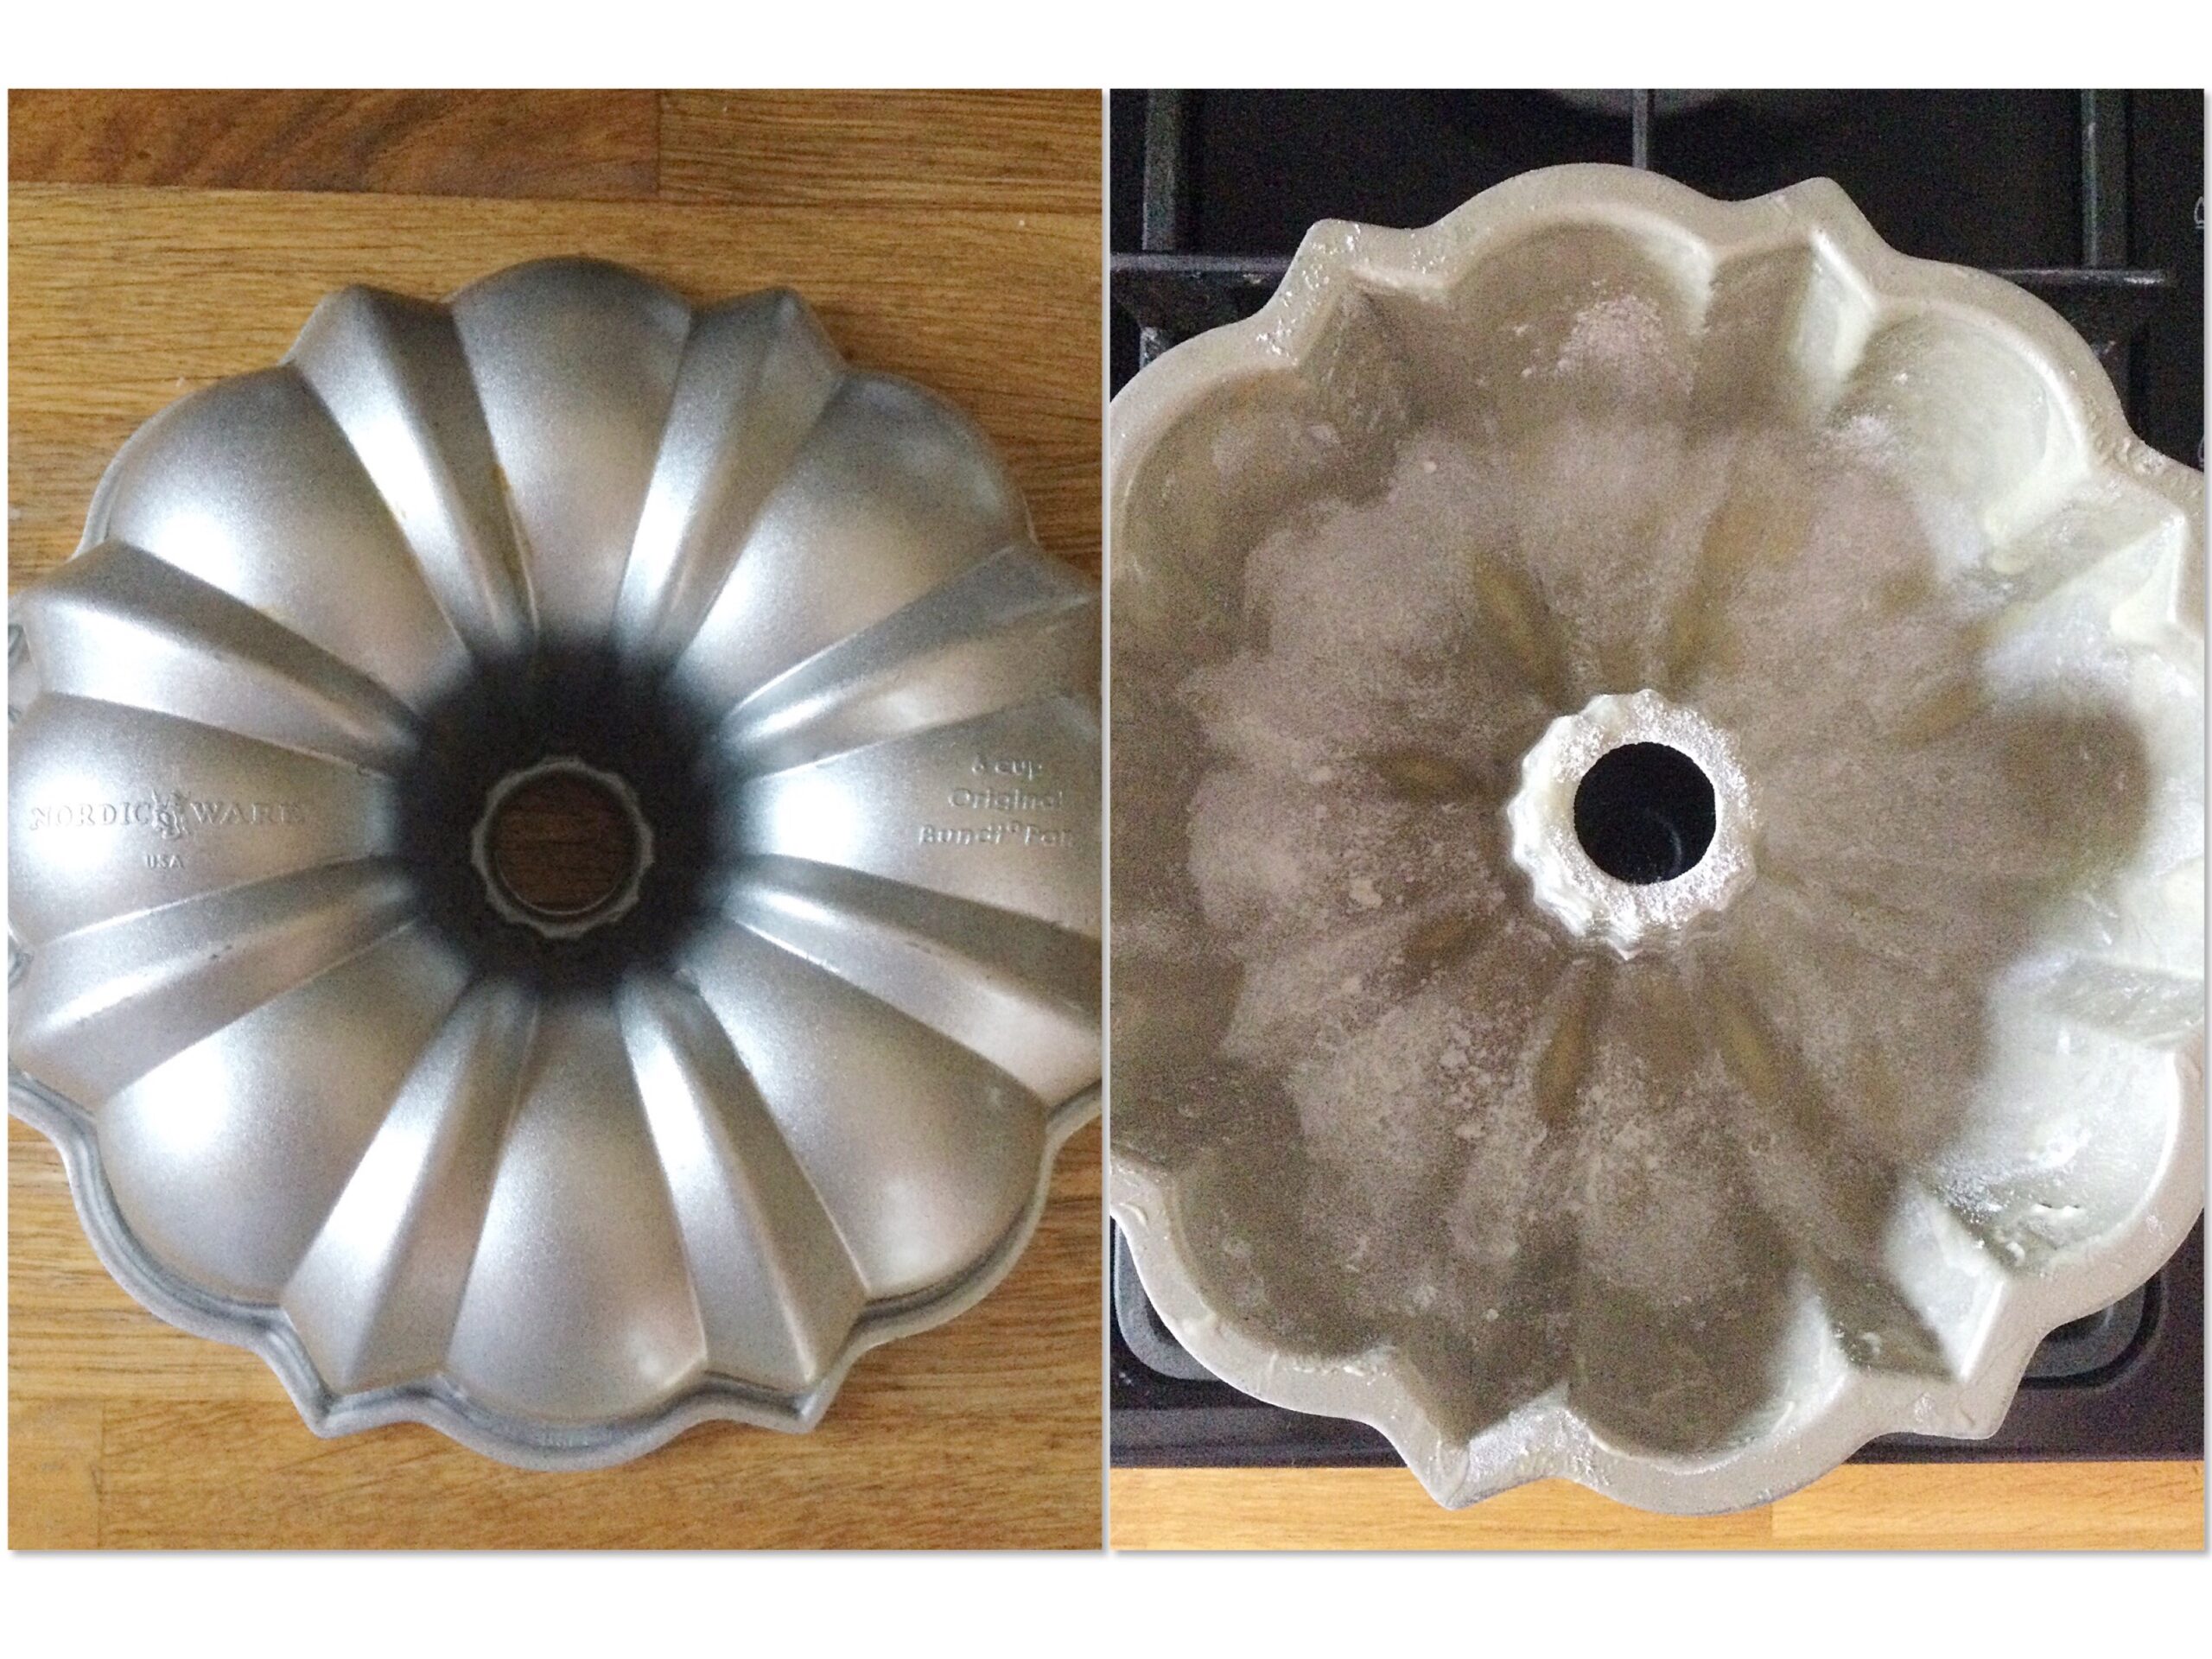
I adore baking with Bundt cake tins. Their beautiful detailing means that, once baked, the cake has a distinct hole in the centre, alongside elegant detailing on the outside of the cake. Here, in the U.K. Nordicware.com who make Bundt pans as well as a whole range of kitchen bakeware, own the trademark “Bundt”. Therefore, for a cake to legally be called a Bundt cake, it must be baked in Nordic Ware Bundt Pan.
And, in my baking, I wouldn’t consider using copies of true Bundt pans, nor would I recommend it. Since Nordic Ware Bundt pans come with a lifetime guarantee. So, I recommend looking after your Bundt pans, as they will give you years of beautiful, baked Bundt cakes. And, should any issues arise, simply contact Nordic Ware. Recently, I had a pan replaced by them, due to an issue that had been present since it’s first use. Finally, I should say that this post is not sponsored by Nordic Ware, I just love their Bundt pans and highly recommend them!
EASTER MINI EGG BUNDT CAKE – serves 8 – 10
For The Bundt cake:
225g/8oz Unsalted Butter at room temperature
225g/8oz Caster Sugar
4 Large Free Range Eggs
1tbsp Vanilla Bean Paste – I use Vanilla Mart
alternatively substitute vanilla extract (1tbsp)
225g Plain White Flour
1/4tsp Salt – I use Maldon
2tsp Baking Powder
For The Chocolate Drizzle:
100g/4oz White Chocolate
50mls/2tbsp + 1tsp Double Cream (heavy cream)
1tsp Vanilla Bean Paste
For Cake Decoration:
1 large packet of Cadbury’s Mini Eggs (296g)
Gel food colouring – I use Wilton
To Make This Cake – you will need a 6 cup Bundt pan (the size is embossed on the outside of the pan). Alternatively, for a 10 cup pan increase the ingredients by half again. Also, you will need either cake release spray or, my preferred method brush melted butter liberally on every part of the inside of the pan and then dust with plain flour, tapping any excess flour out over the sink.
Preheat the oven to 170C/150C fan, gas mark 3, 325F.
Making And Baking The Vanilla Bundt Cake Sponge:
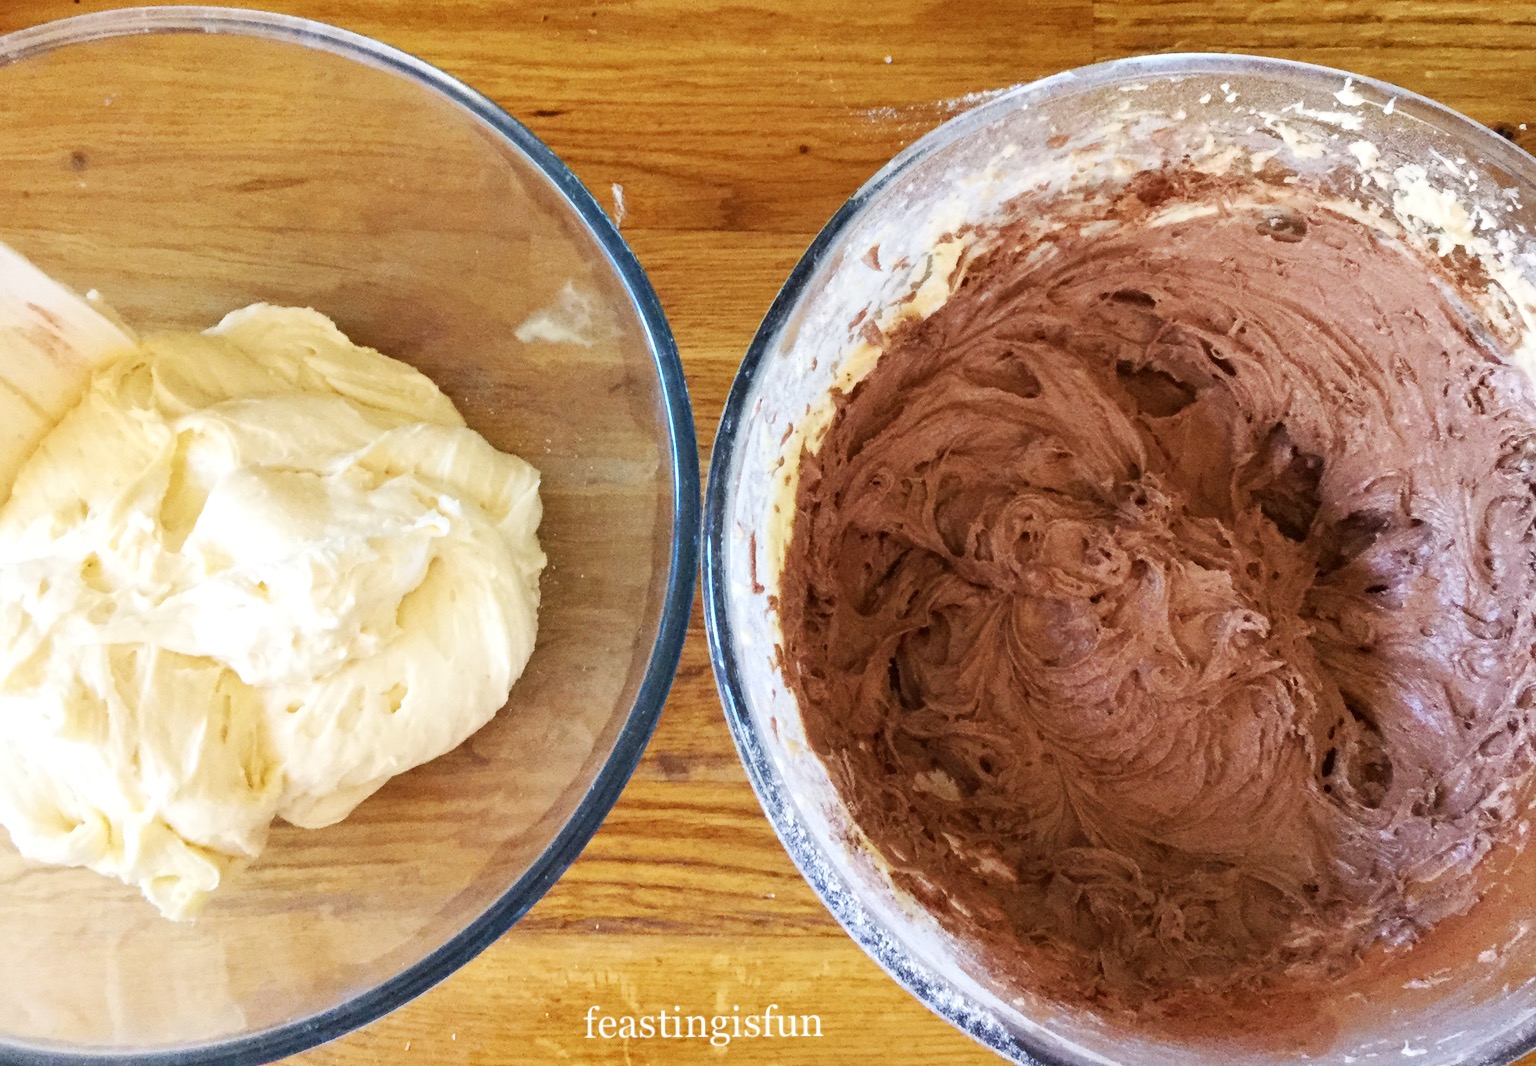
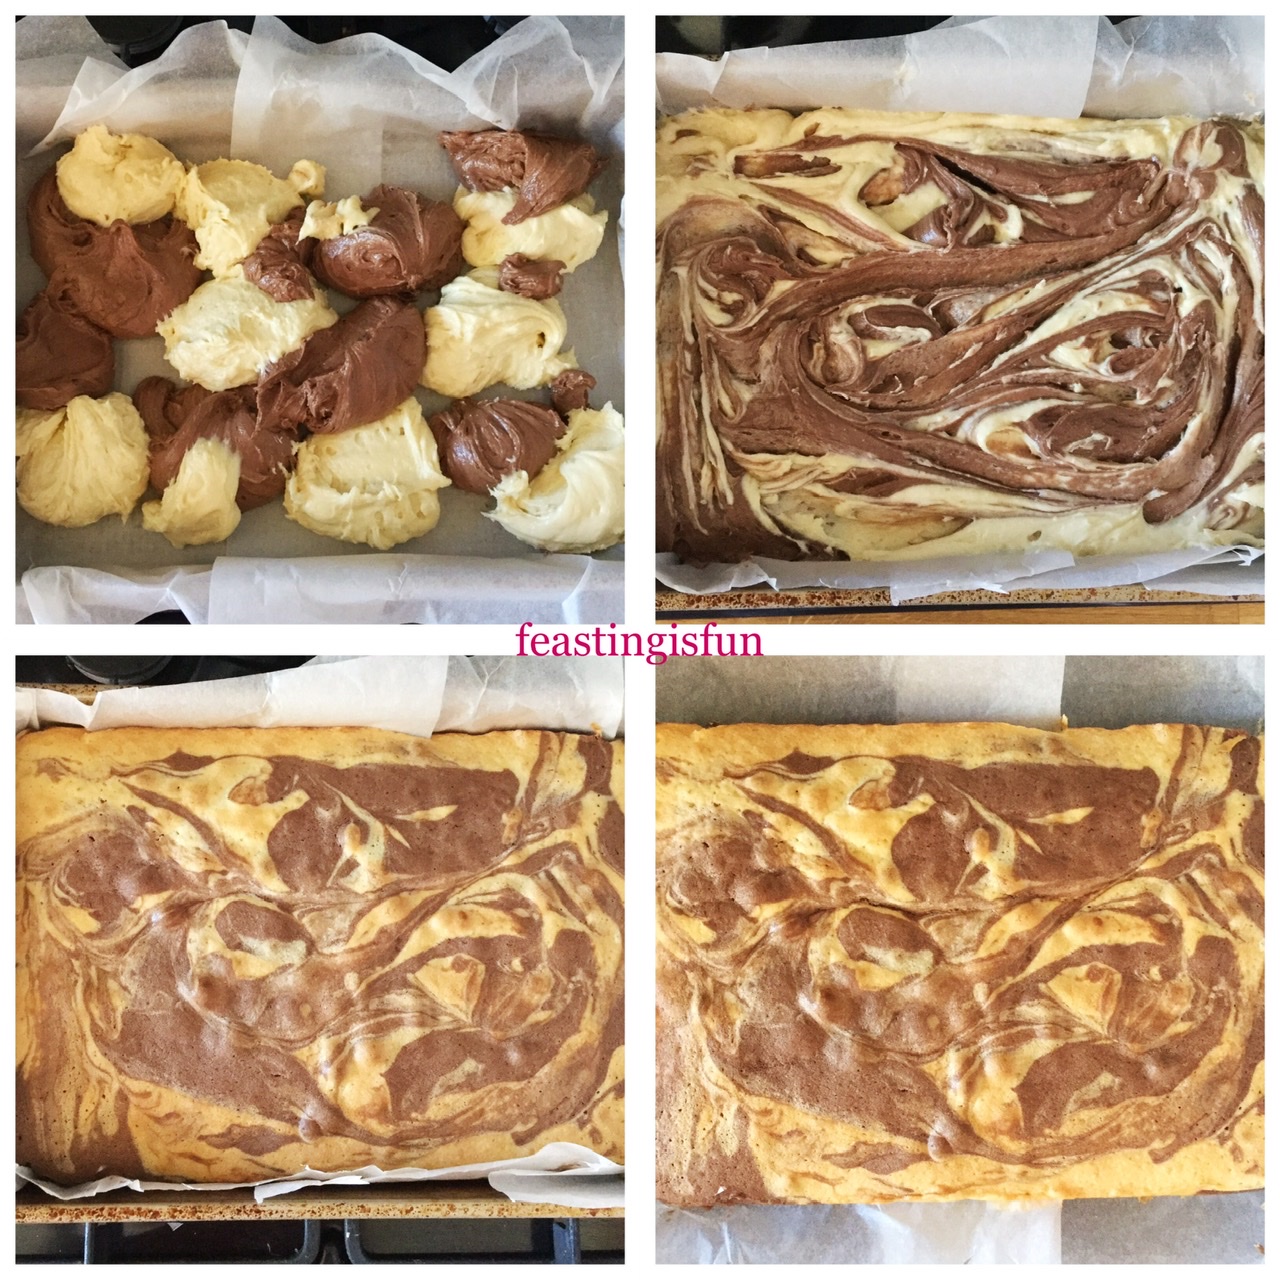
- First of all place the sugar, butter and 1 tablespoon of vanilla extract into a large bowl.
- Whisk together the ingredients until they pale and creamy.
- Next, crack all 4 eggs into the same bowl. Sift the flour, baking powder and salt on top of the eggs.
- Whisk all of the wet and dry ingredients together until you have a smooth batter. Take cake not to over whisk as this can result in a heavy cake.
- Spoon the cake batter into the prepared Bundt pan, ensuring the batter fills the pan by no more than three quarters full.

- Place the Bundt pan into the centre of a preheated oven and bake for 55minutes – 1hour. The cake is baked when it is golden in colour and pulling away from the sides of the pan.
- As soon as the cake is baked remove it from the oven. Place it onto a rack or trivet to cool, in the same position as in the oven.
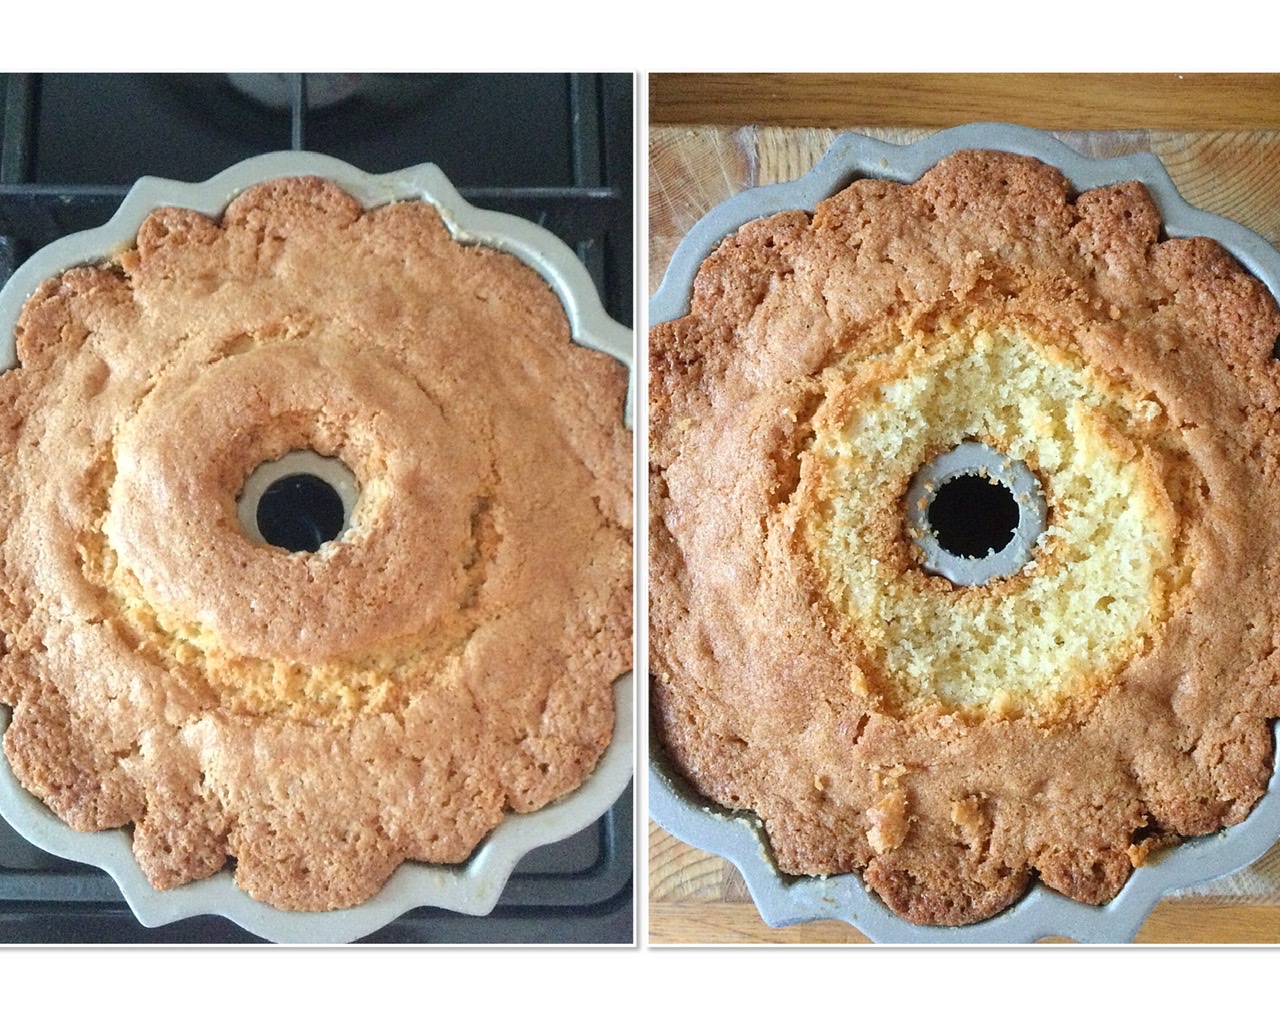
- After 15 minutes cooling, use a serrated bread knife, trim any excess cake that covers the central hole. This will allow the cake to release easily when turned out.
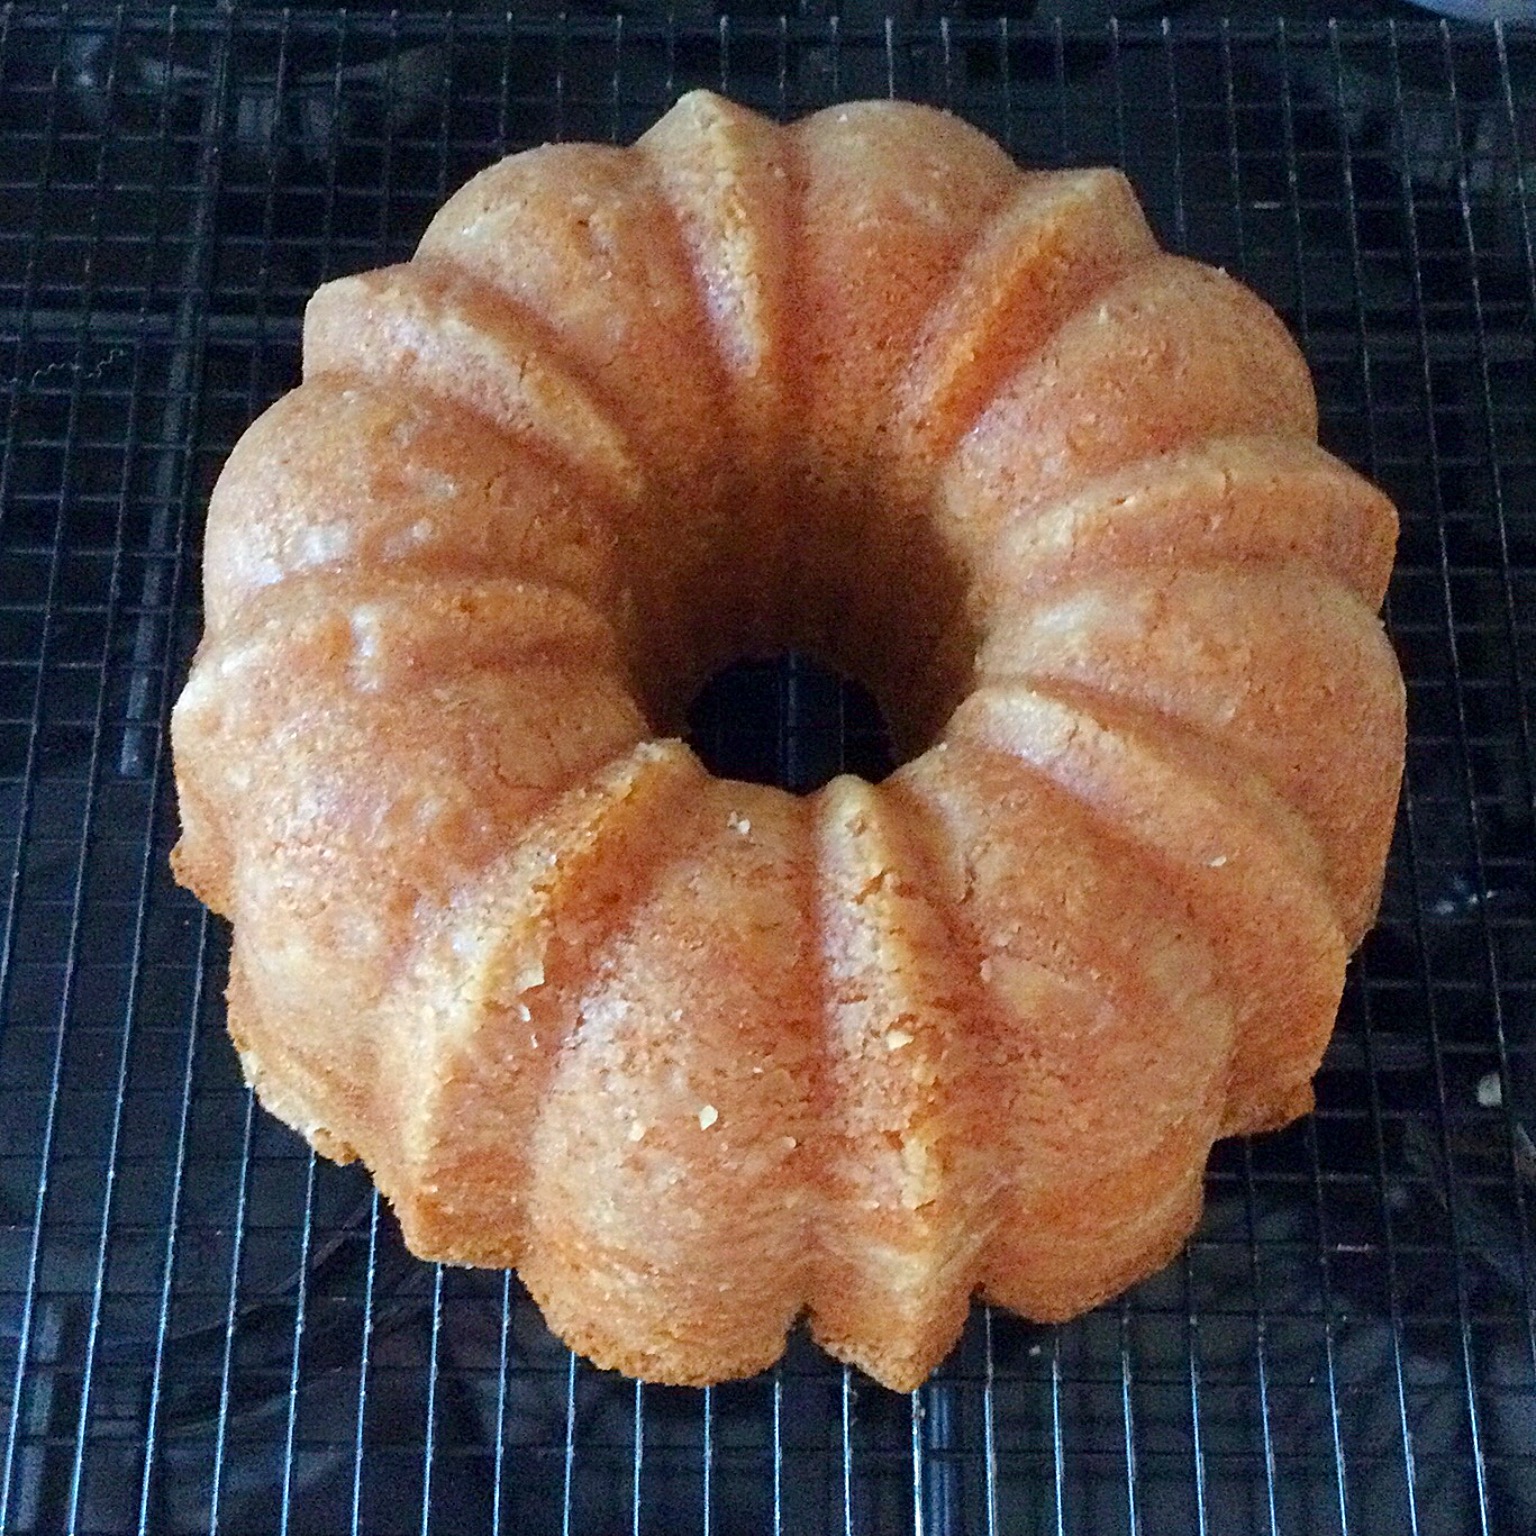
- Turn the Bundt cake out on to a cooling rack and leave to cool completely.
Preparing And Using The Chocolate Drizzle
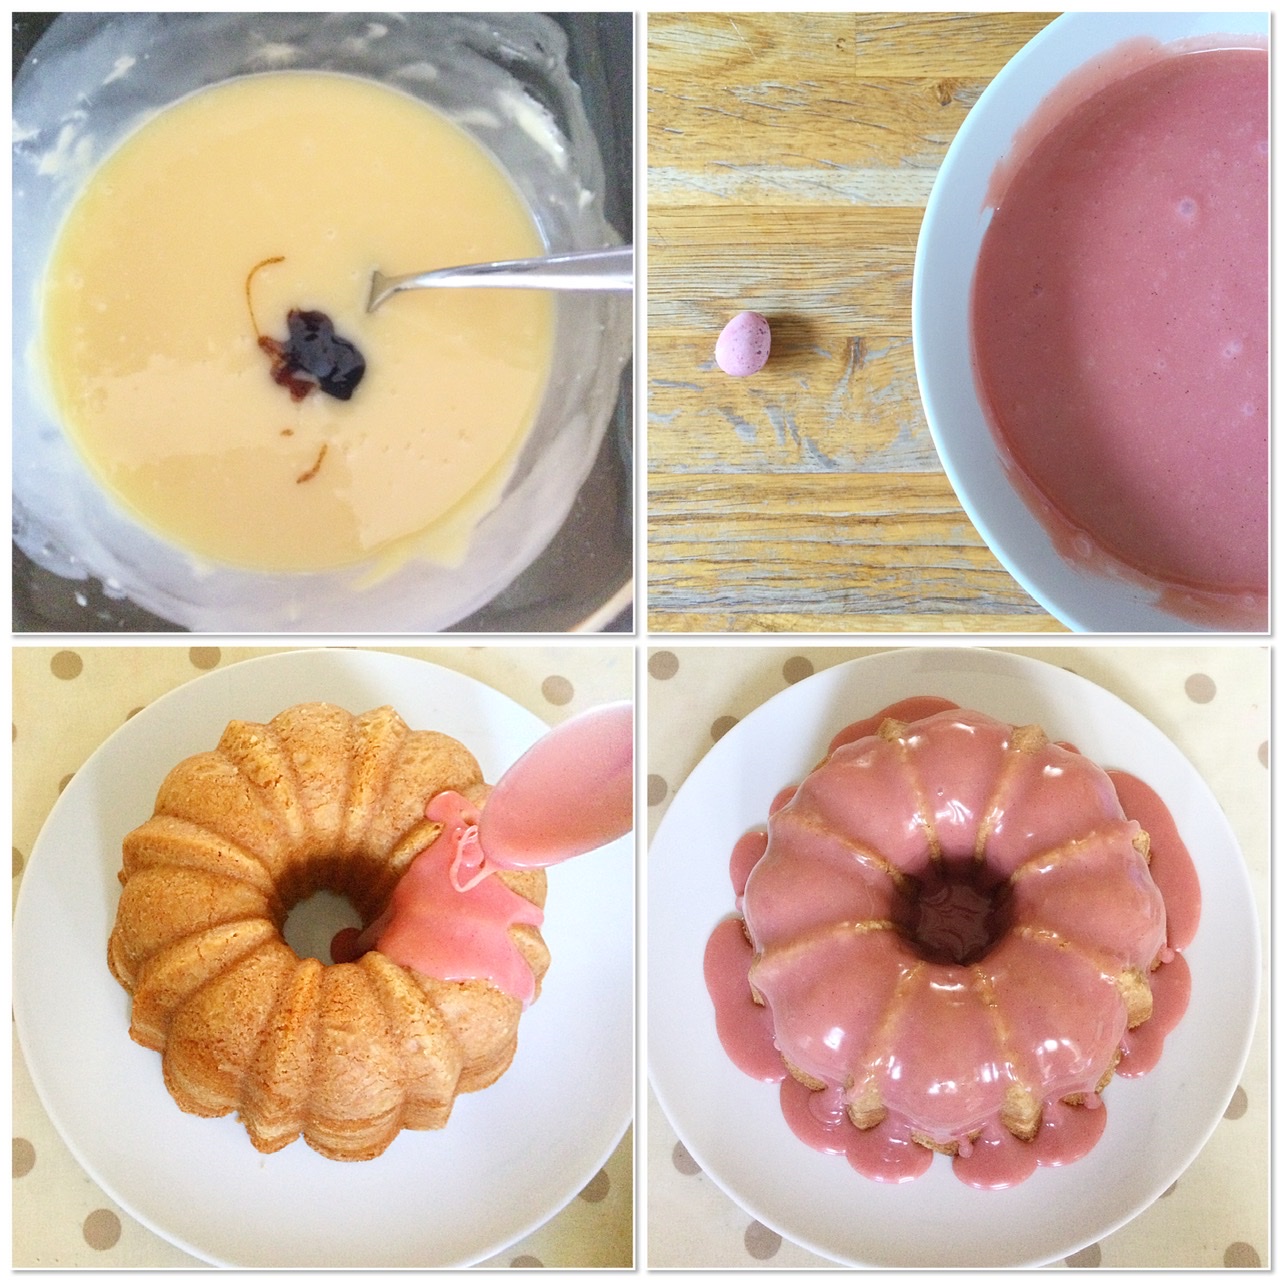
- Chop up the milk chocolate and place in a heatproof bowl, then add the cream.
- Pour approximately 5 cm of water into a small saucepan, then place the heatproof bowl on top of the saucepan, ensuring that it does not touch the water.
- Place the saucepan on a medium heat and stir the chocolate and cream together until all the white chocolate has melted and combined with the cream.
- Remove the bowl from the saucepan.
- Add 1 teaspoon of vanilla bean paste to the bowl and stir to mix.
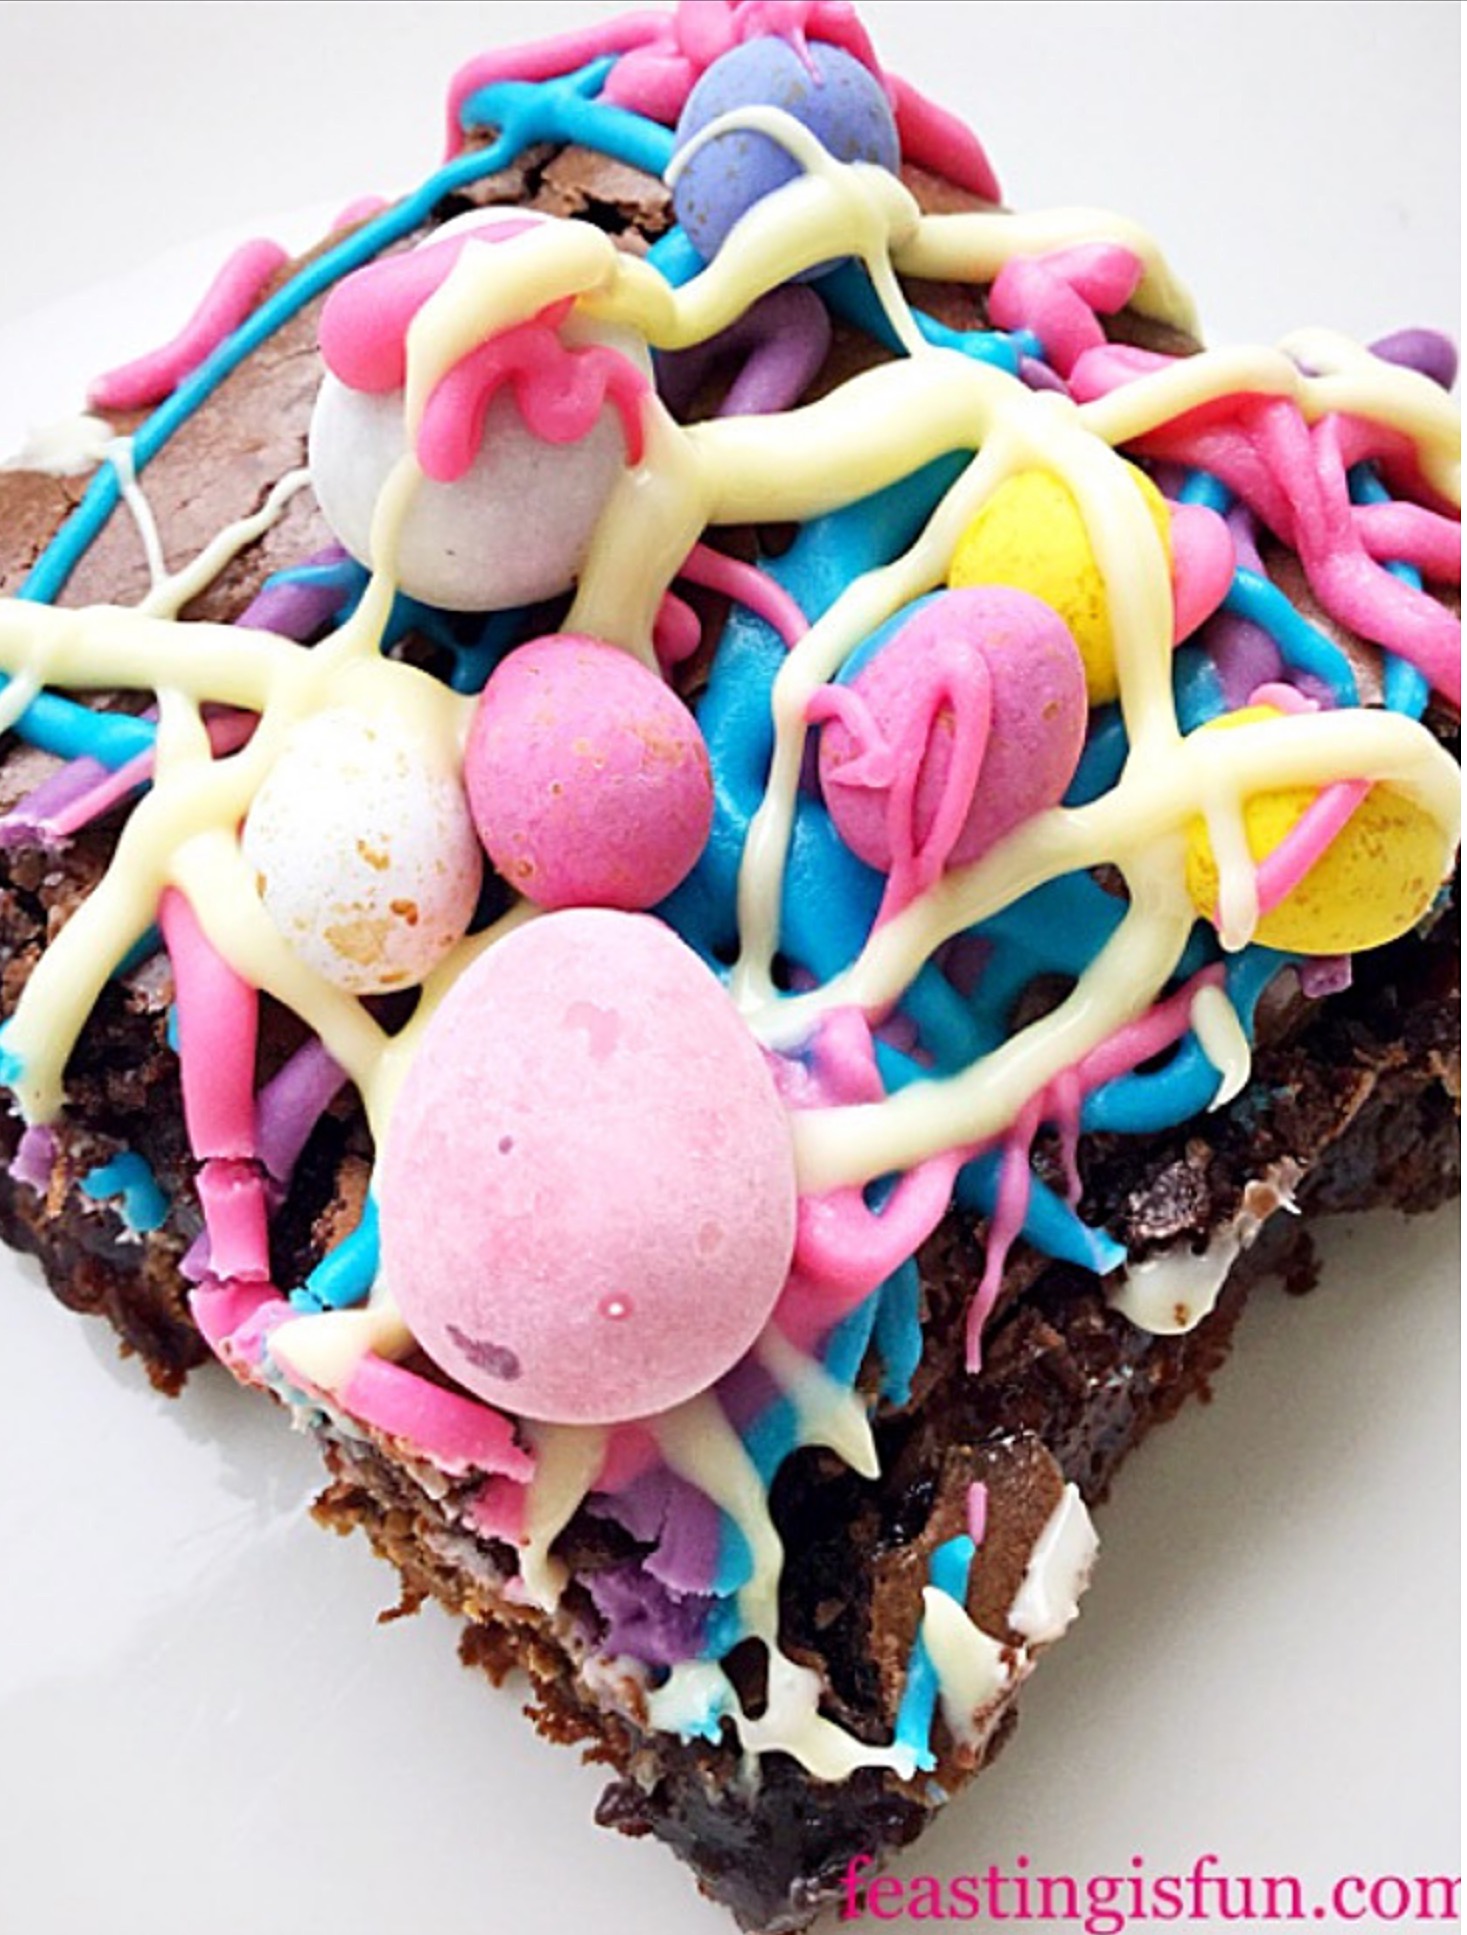
- Next, use a skewer to dip into the colouring gel. Swirl the skewer into the melted chocolate until you reach your desired colour.
- Leave the coloured chocolate to cool and thicken slightly.
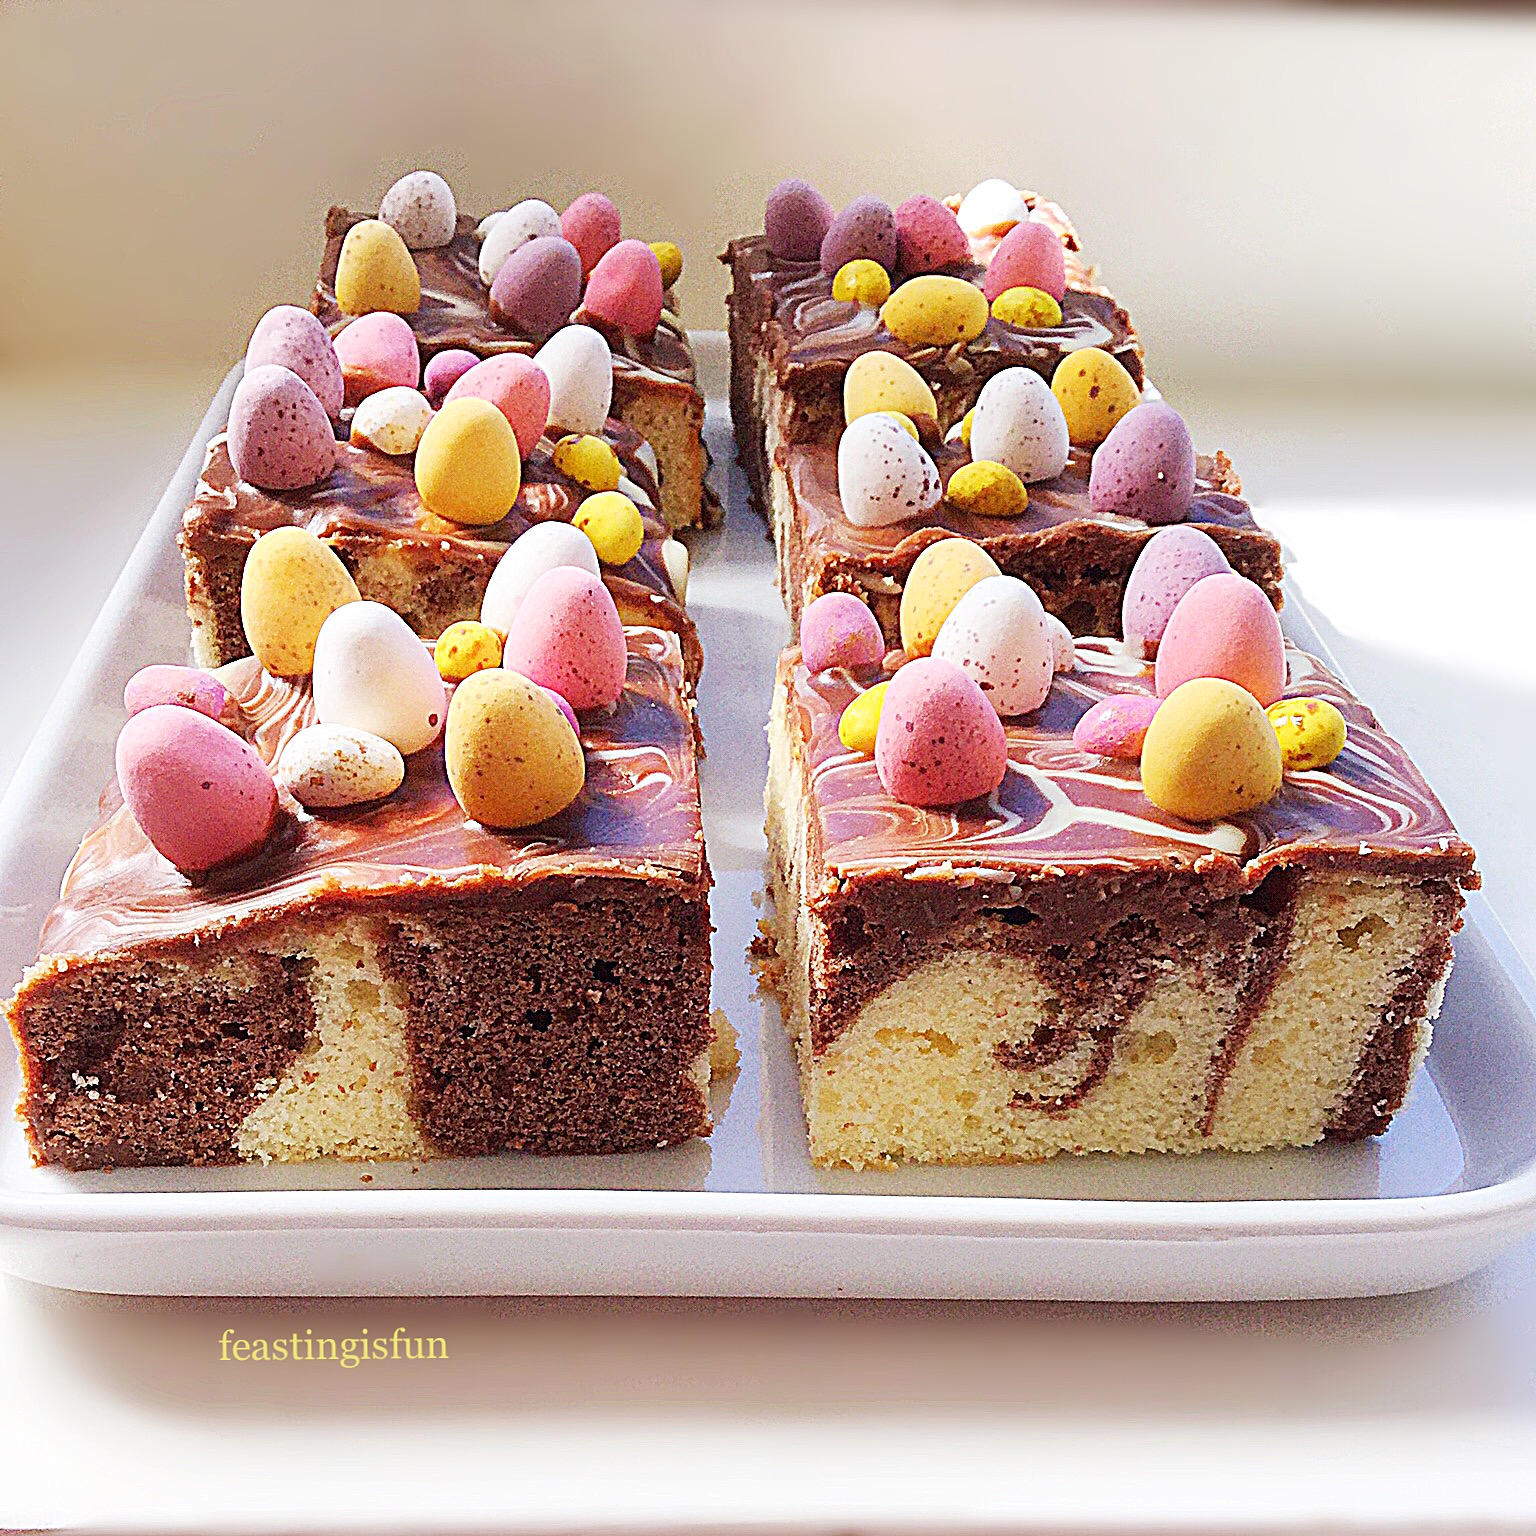
- When you are ready to decorate, place the cake on a rack over a baking tray, this is buy far the easiest method which I forgot to do! Alternatively, place the cake on to a serving plate, however, any excess chocolate drizzle will need to be removed with a spoon and some kitchen roll!
- Start spooning the coloured chocolate on top of the Bundt cake, ensuring that it drips down the sides of the cake. Continue drizzling until the is covered on top, yet still has some uncovered sponge around the sides.
- Leave for 5-10 minutes to set. During this time, if you have your cake on a plate, clean up any excess drizzle and wipe the plate with kitchen roll.
- After the drizzle has slightly set move the cake on to a serving plate (for those who used the rack over baking pan method).

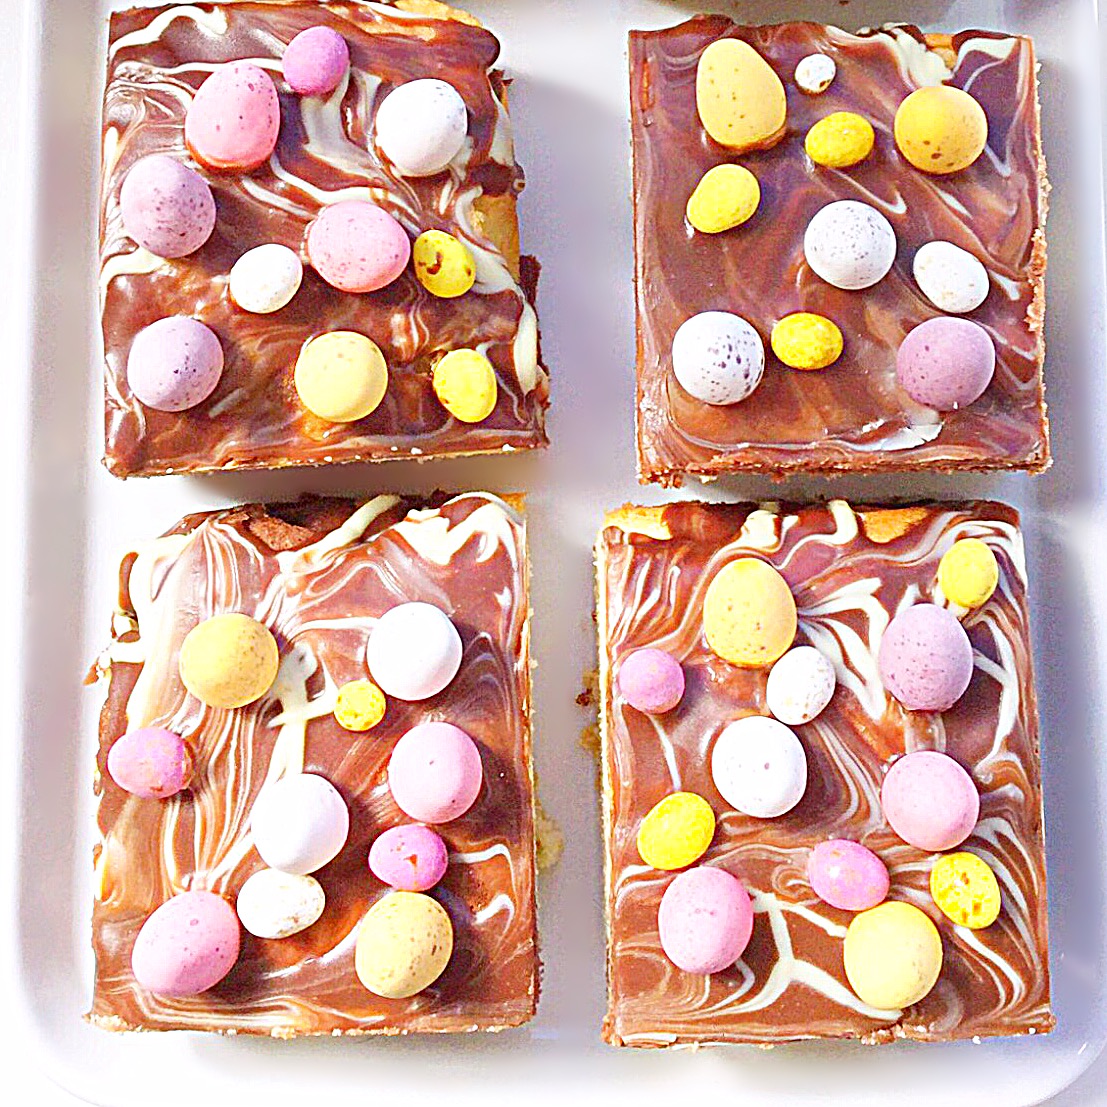
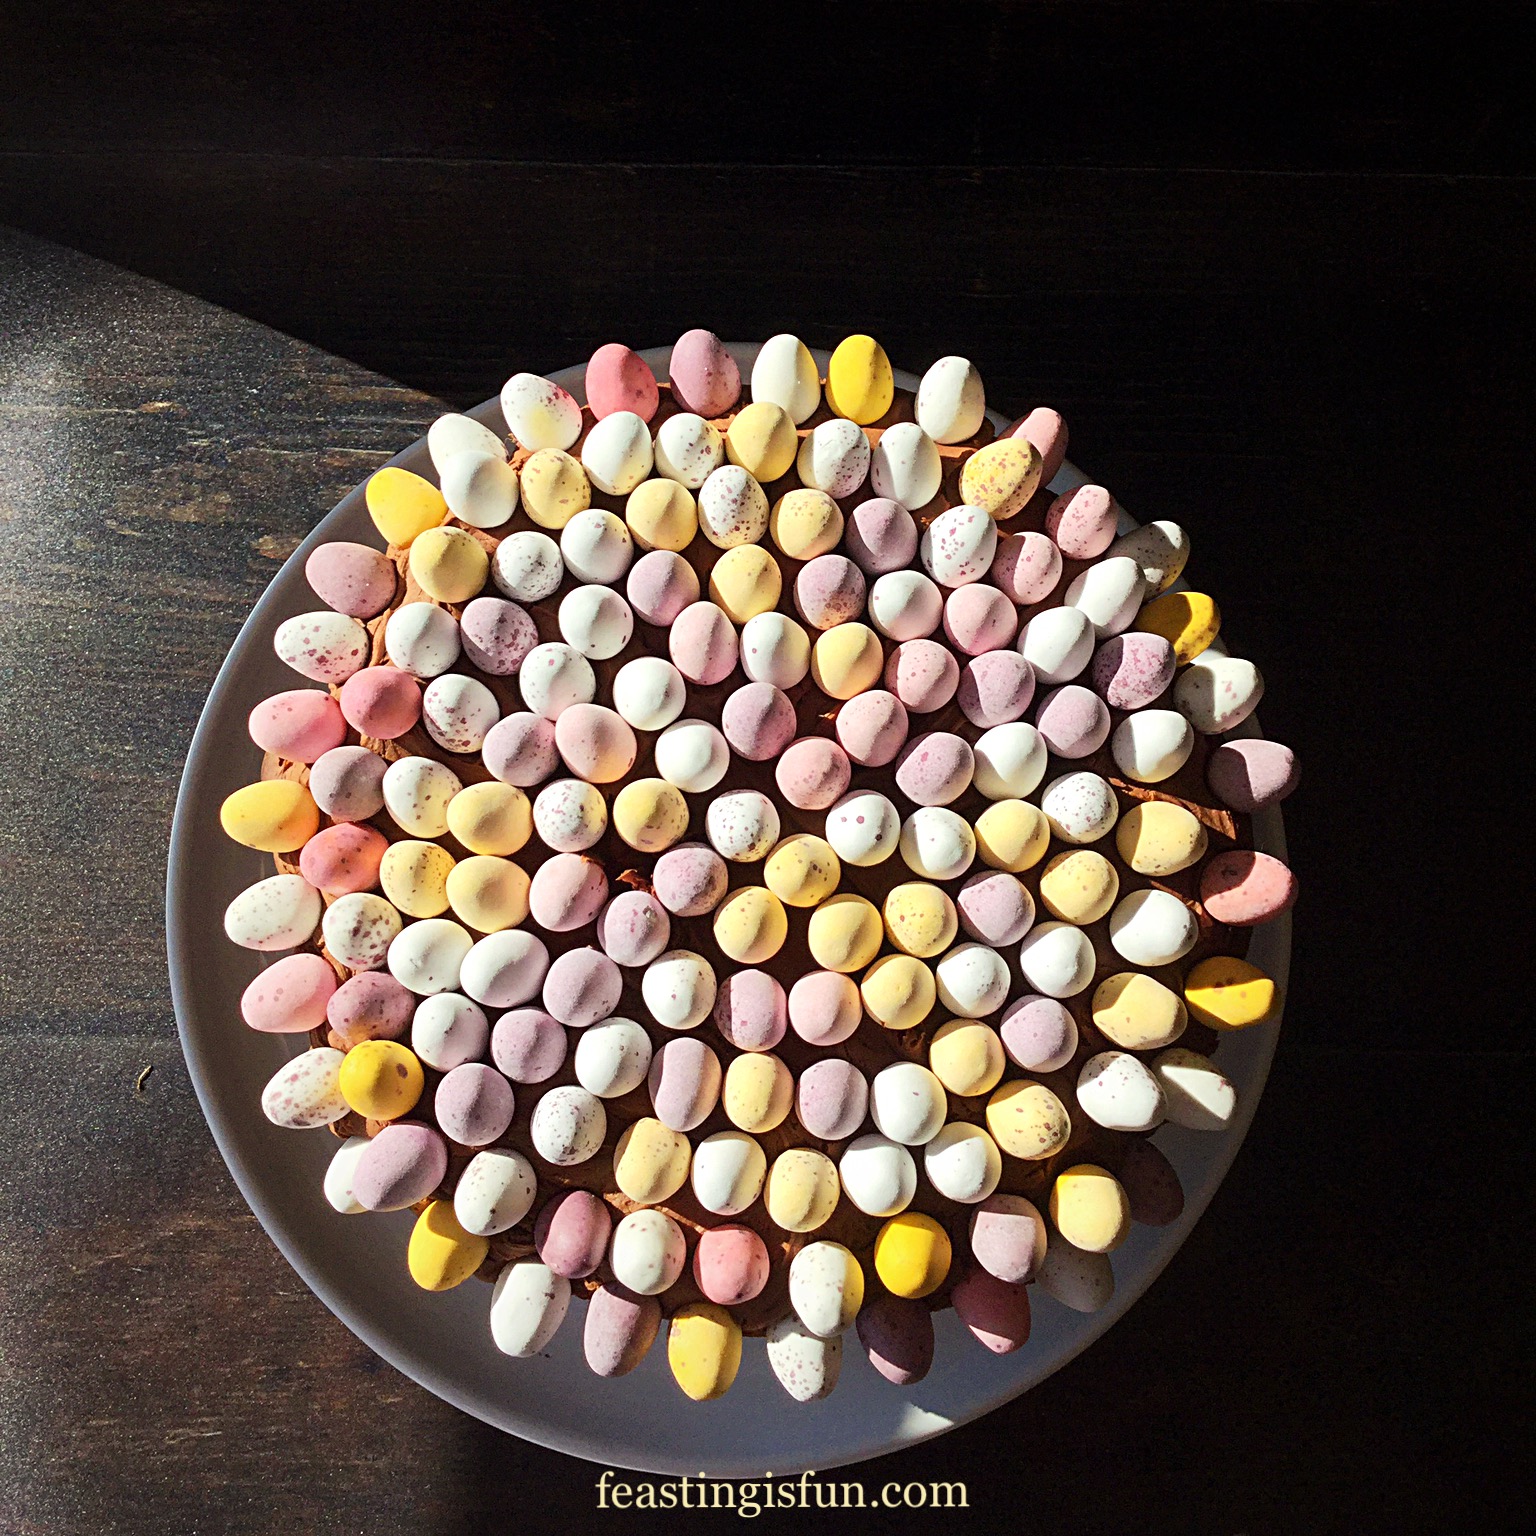
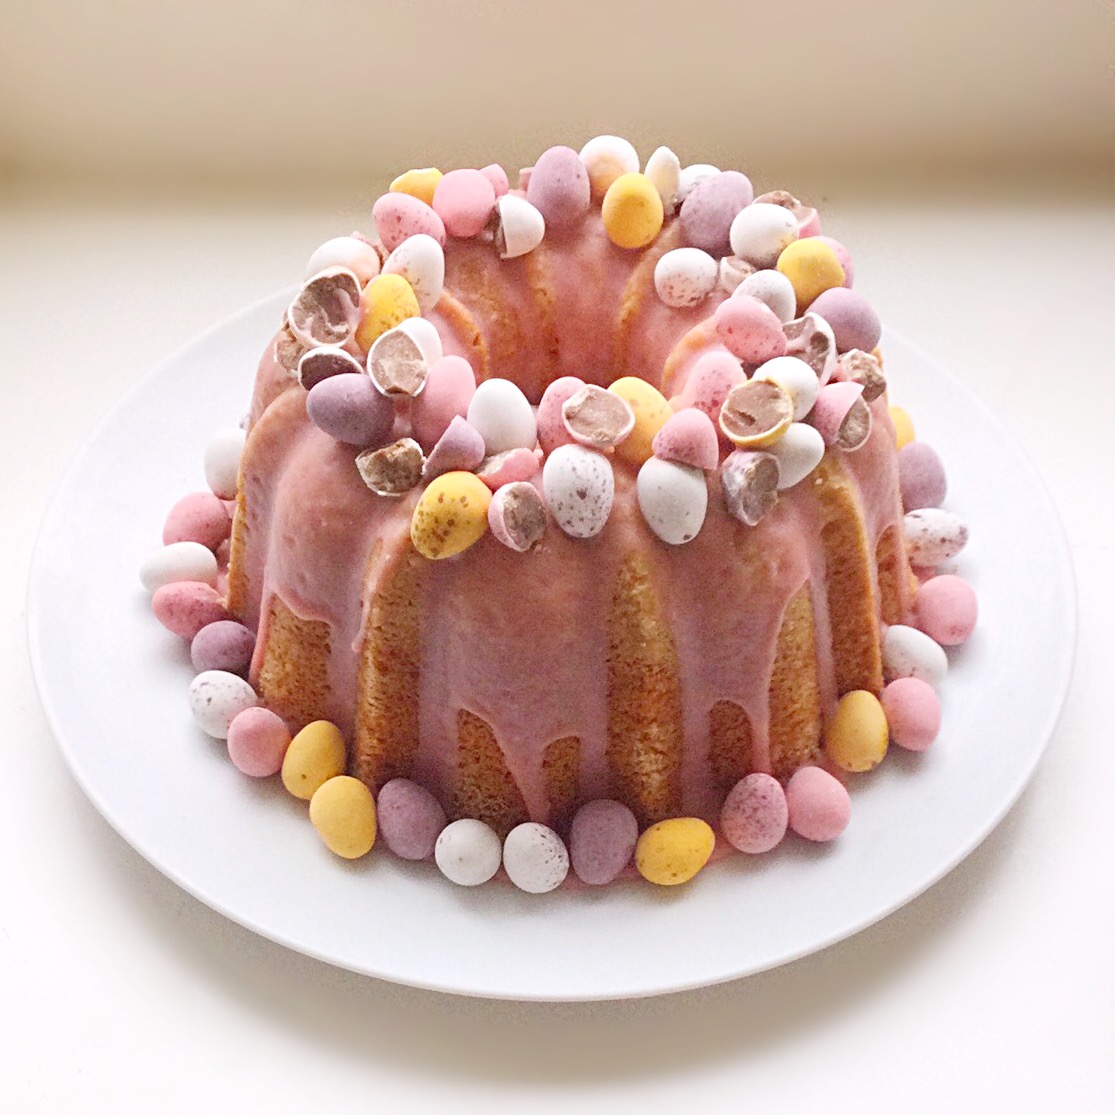
Decorating The Bundt Cake With Mini Eggs:
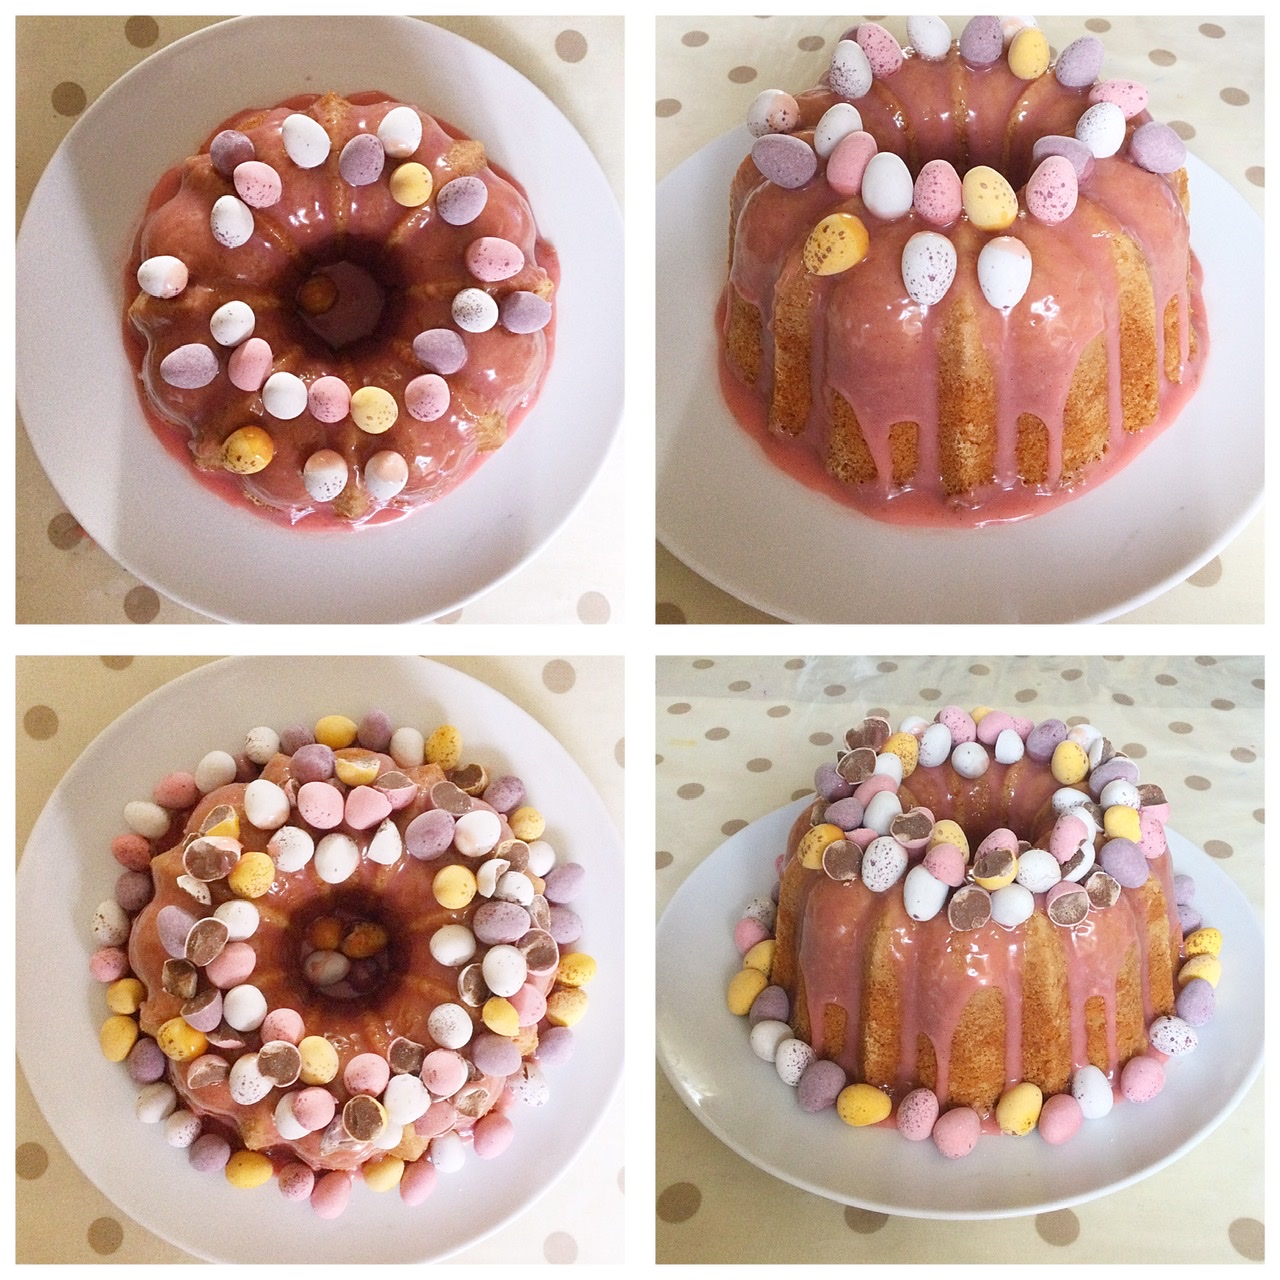
- First of all, remove appropriately half of the mini eggs from the bag and place into a bowl.
- Next, ensure the top of the mini egg bag is securely closed, hit the bag with a rolling pin a few times to break up the remaining eggs.
- Start decorating the top of the cake with mini eggs. The chocolate drizzle should be slightly tacky and act like a glue, adhering the eggs to the cake. Because the chocolate is not fully set hold each egg in place for a few seconds, before moving on to the next mini egg. Including cracked eggs as you decorate enhances the finished cake.
- Rotating the cake will ensure an even distribution of whole and cracked eggs on the top.
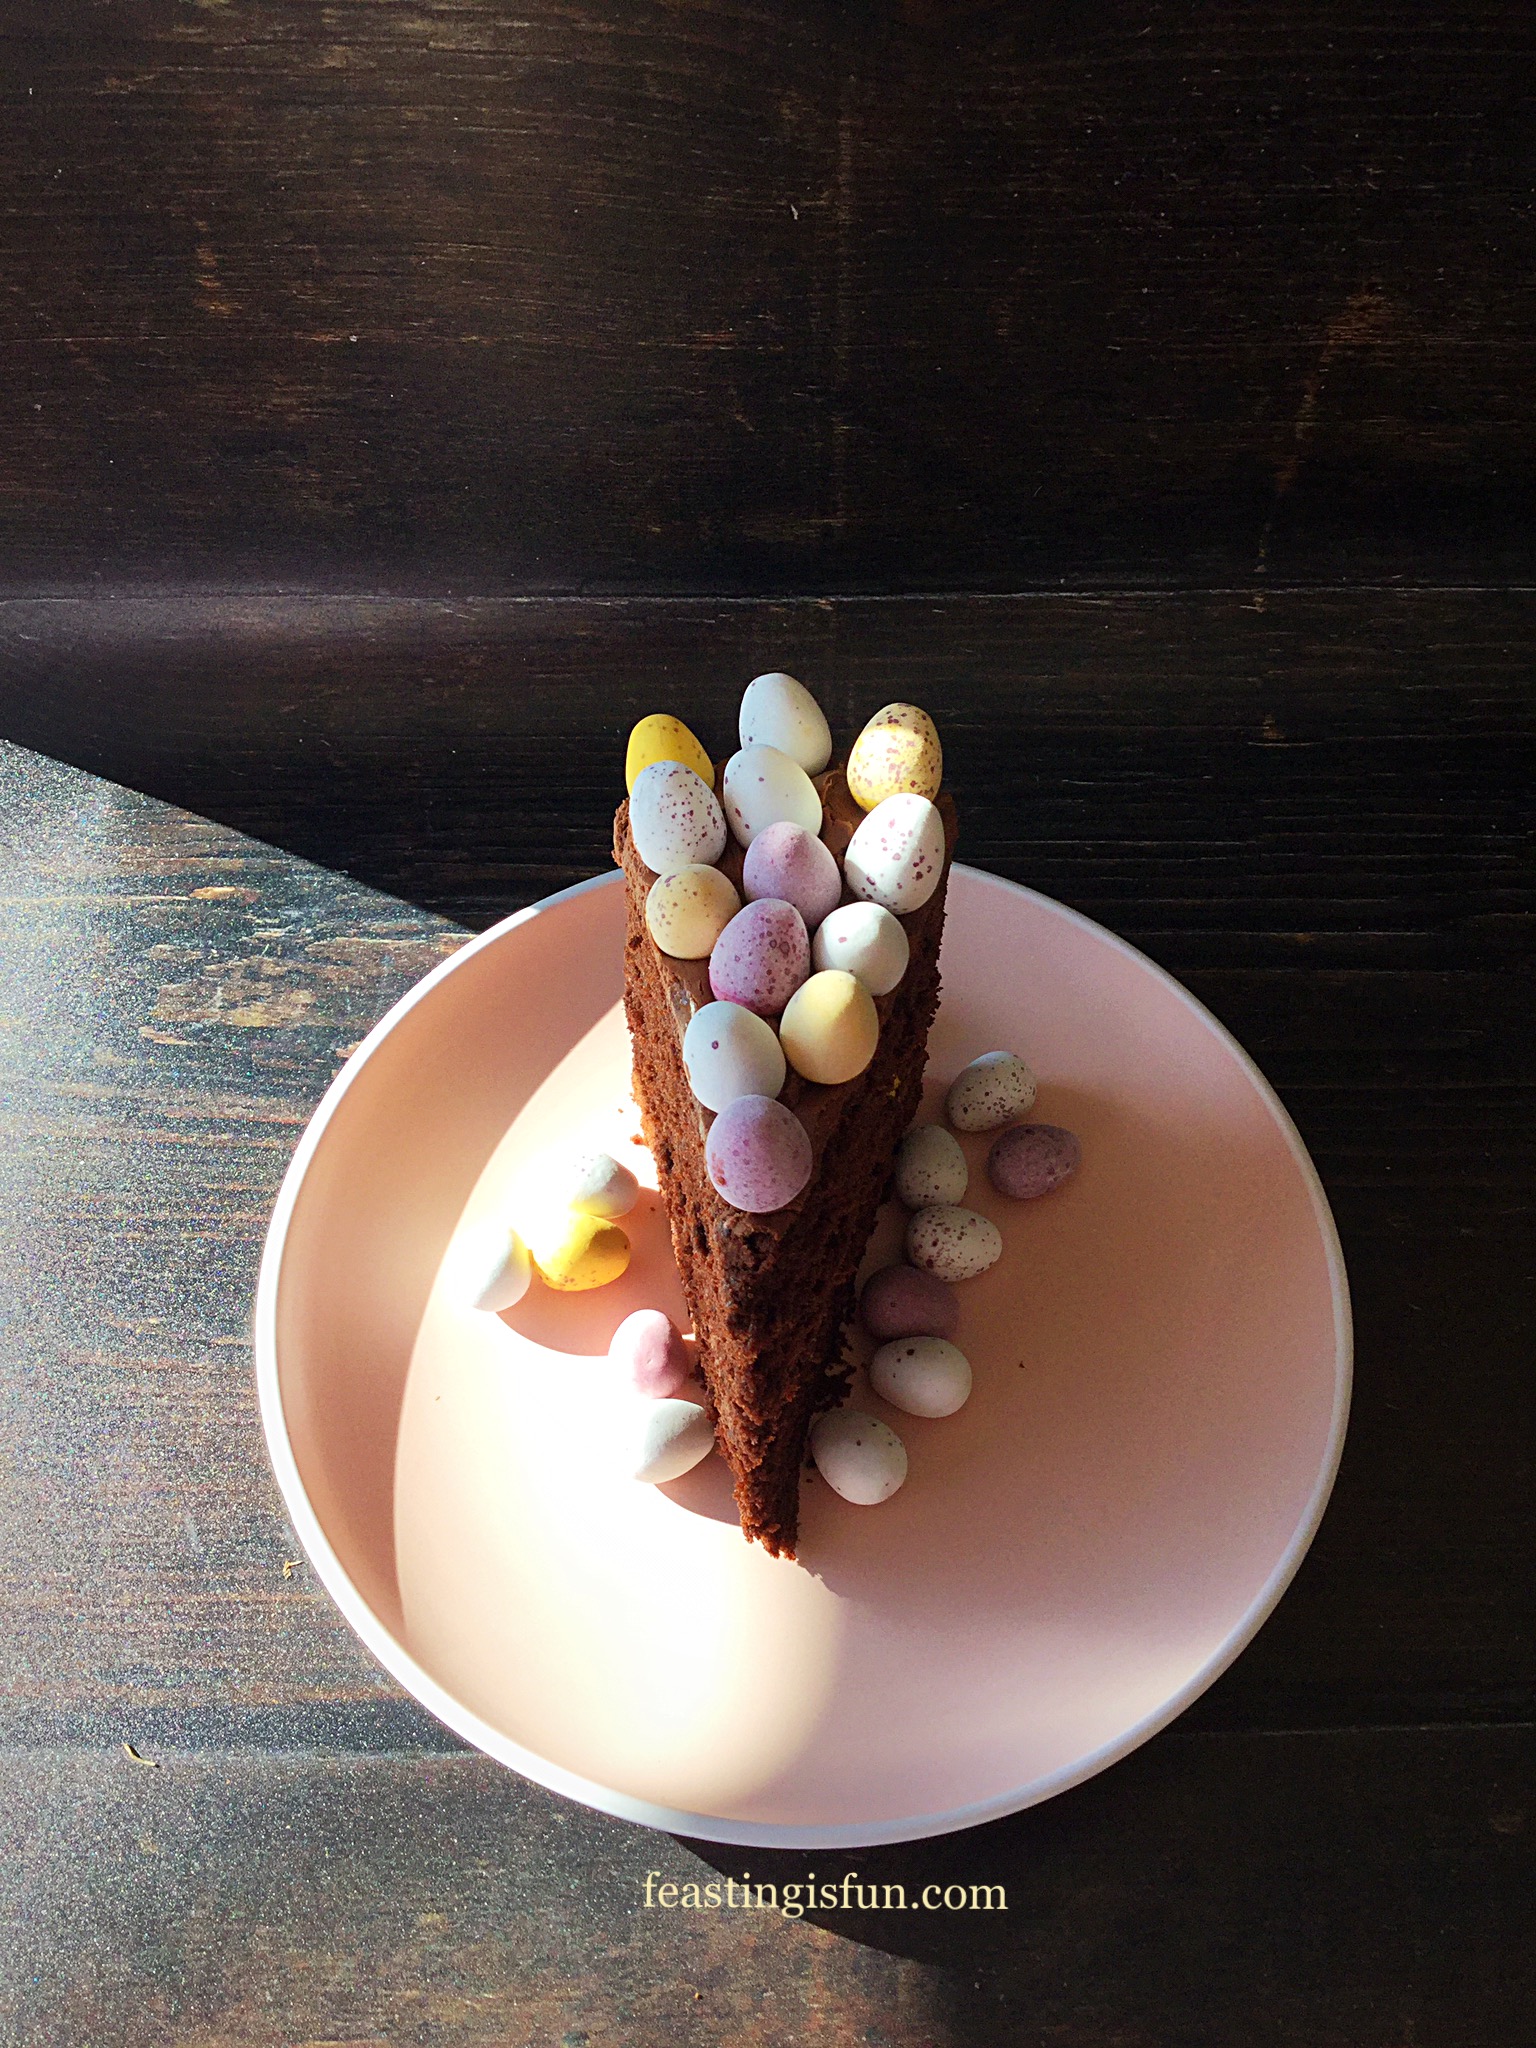
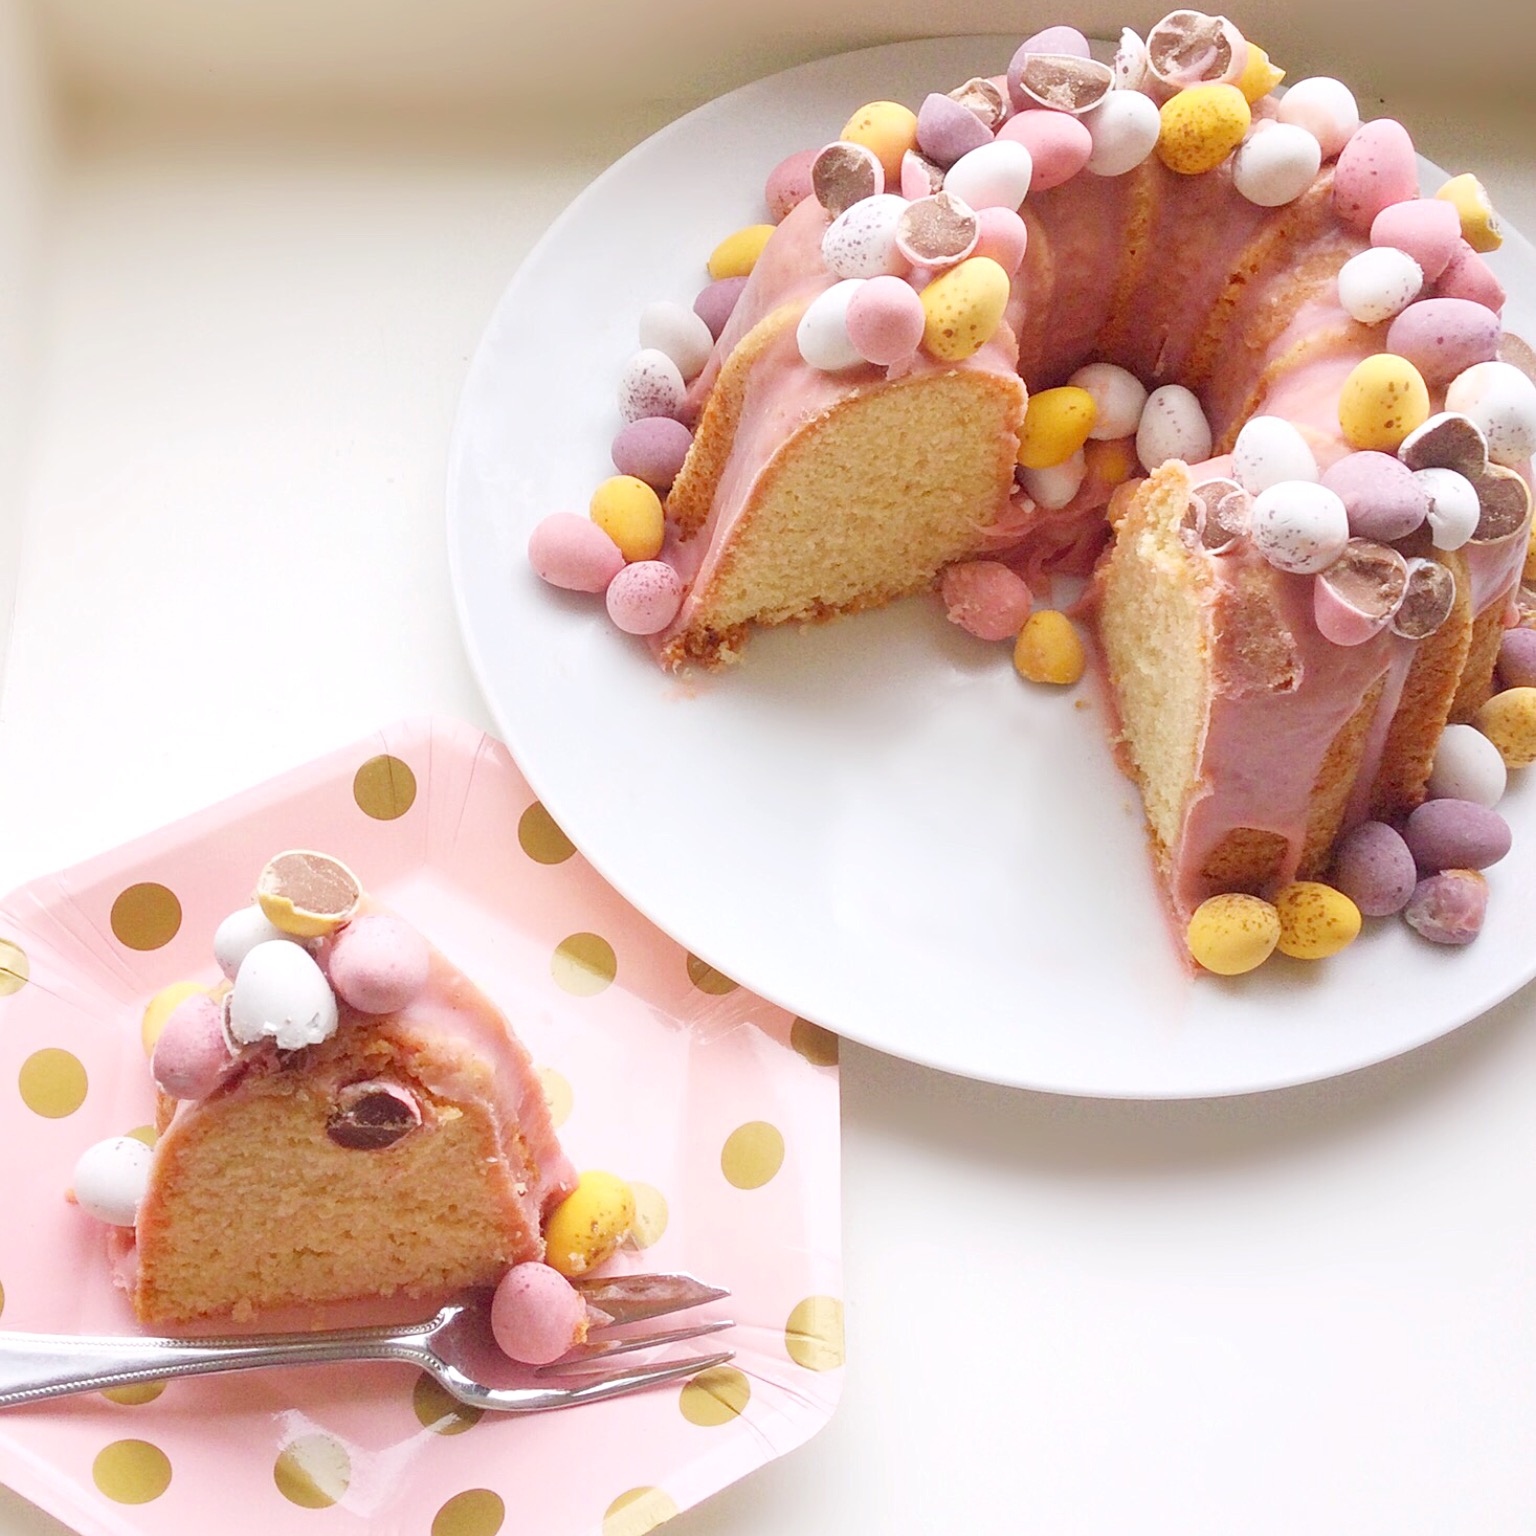
- Finally, place the remaining eggs around the base of the cake, adding a few eggs to the hollow centre. See the photos below for guidance.
- As soon as the cake decoration is complete, carefully transfer the cake to a fridge to fully set. Depending on the time of year, it should take between 2 and 4 hours, or overnight, to set.
Serving The Mini Egg Bundt Cake
To serve, remove the cake from the fridge and allow to come up to room temperature. Alternatively, if it’s a very hot day, remove from the fridge, slice and serve immediately.
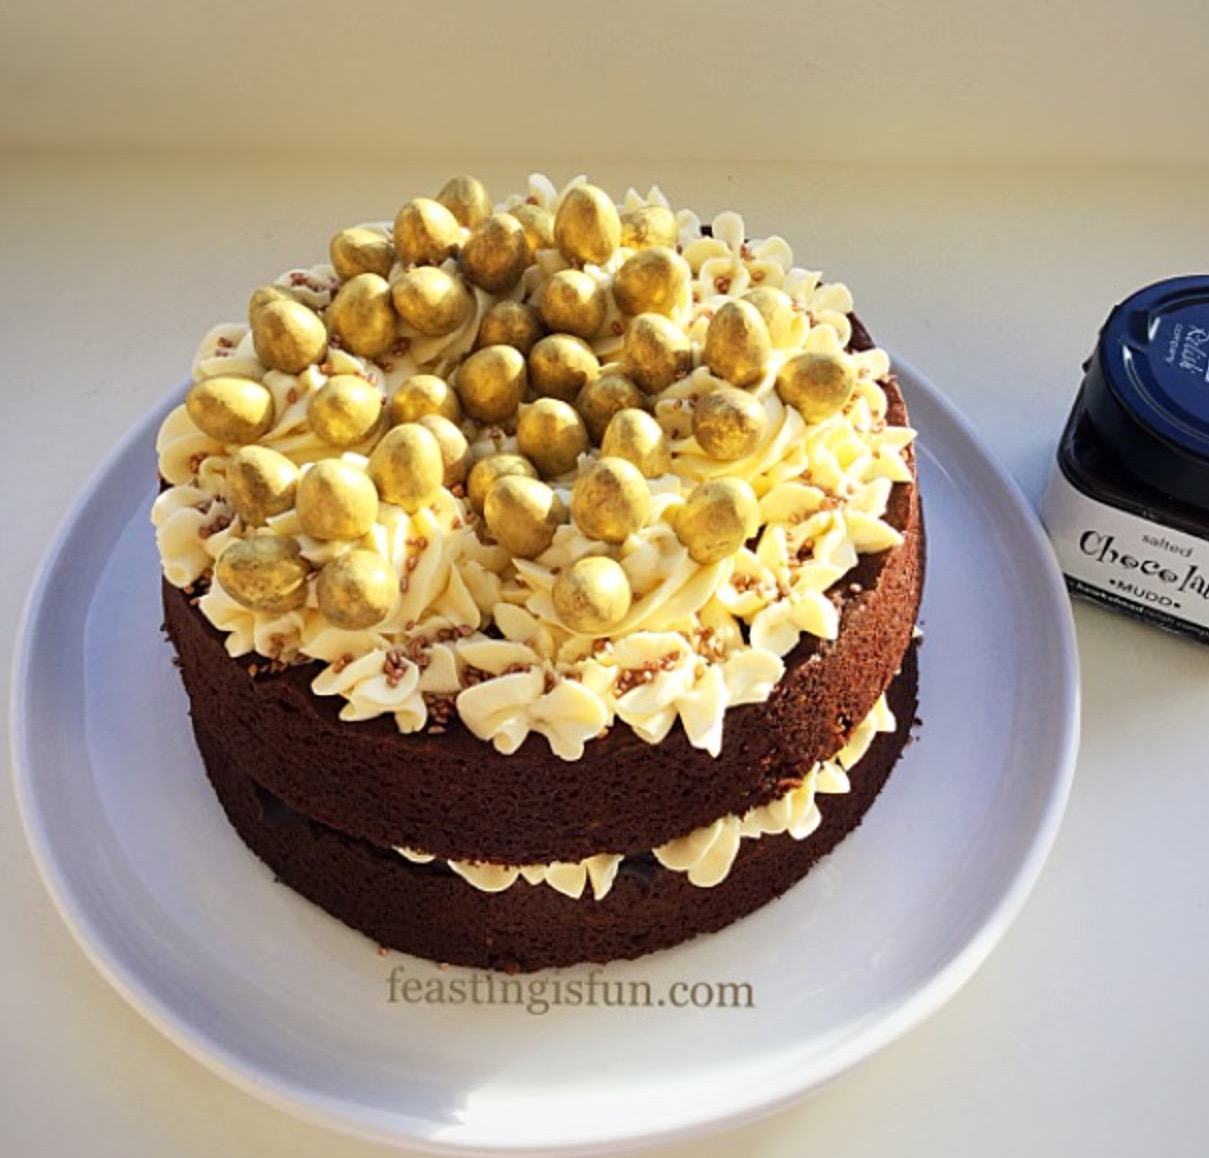
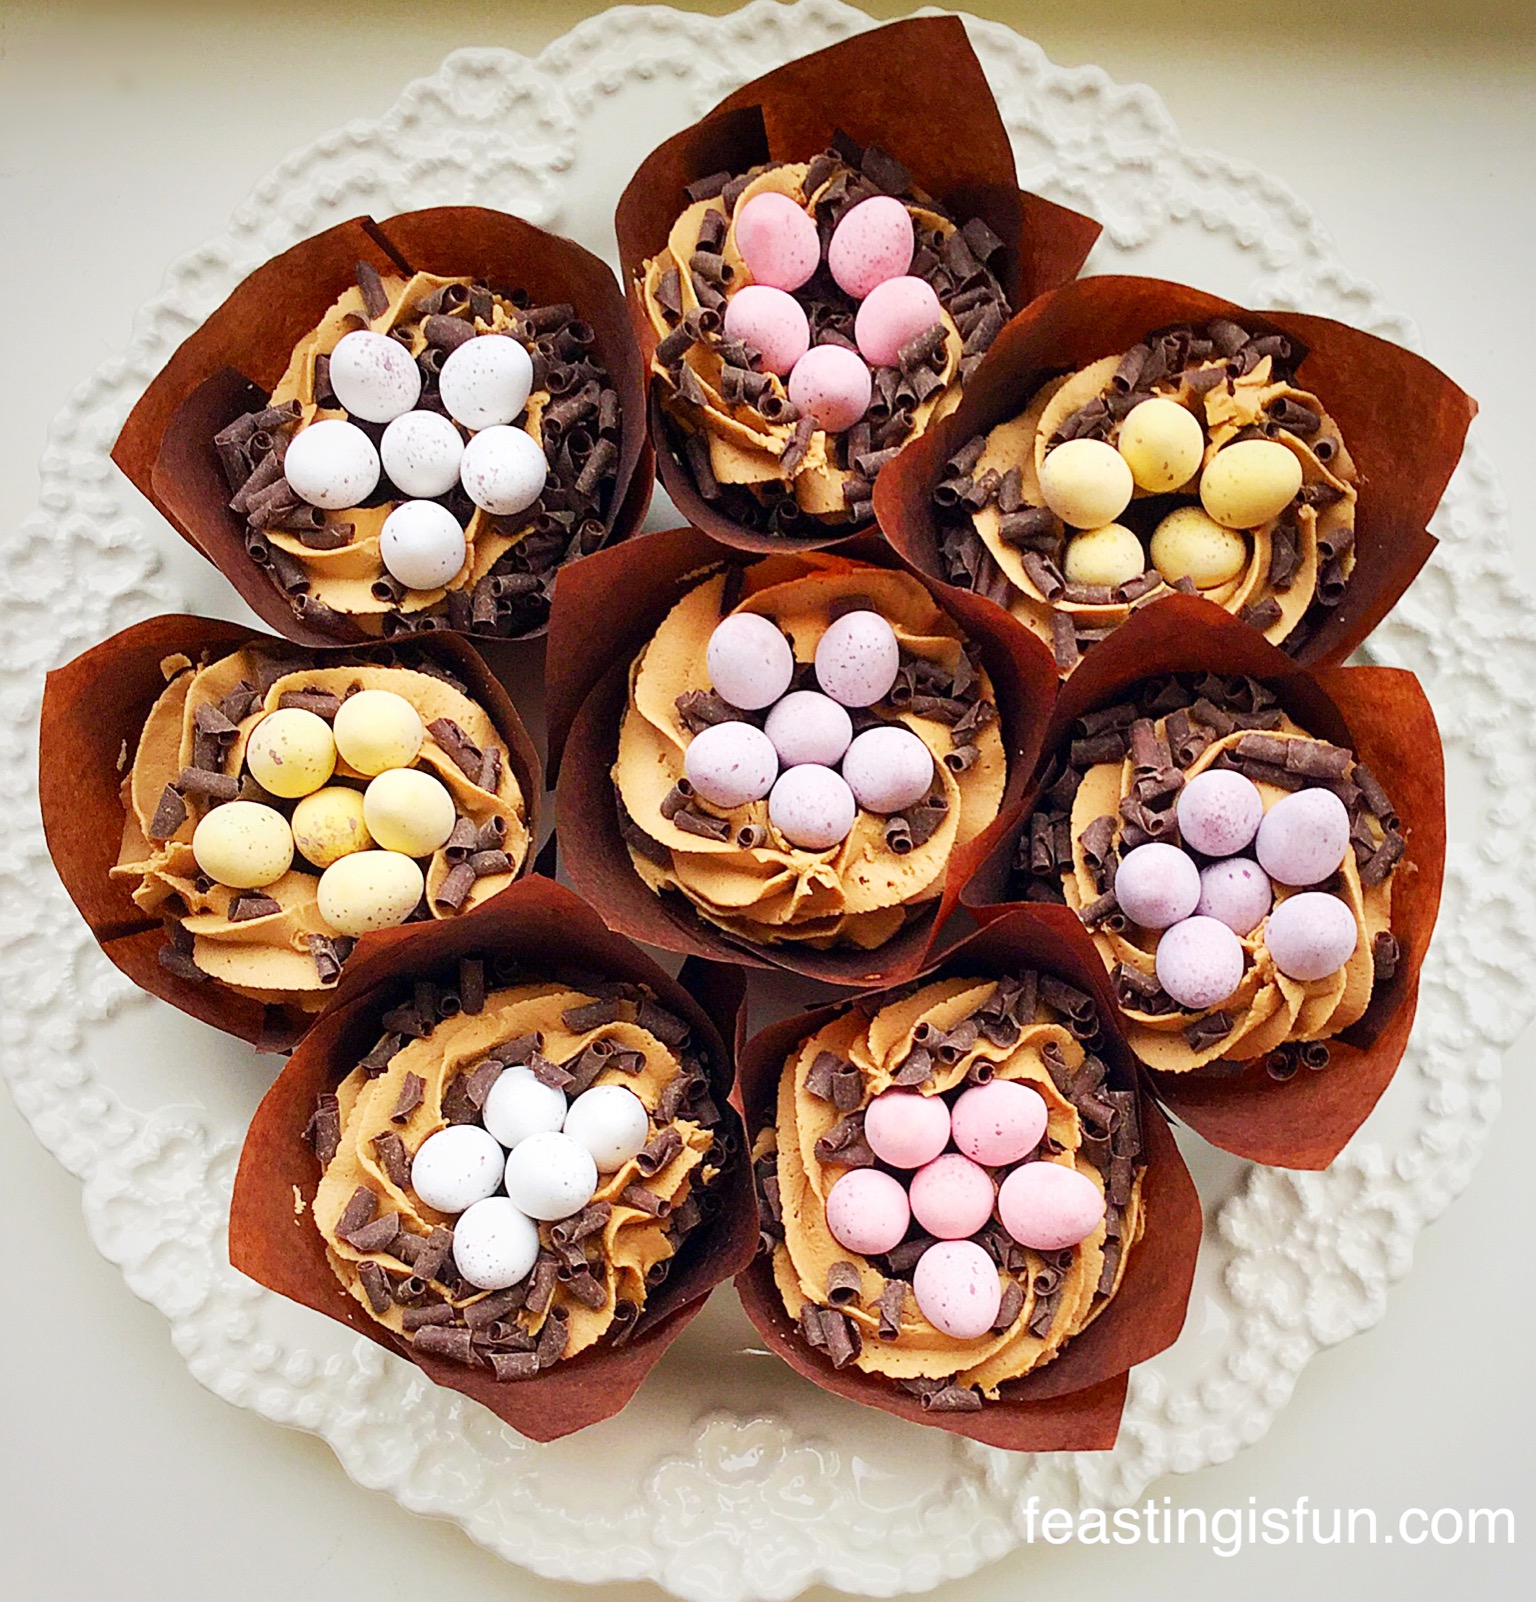
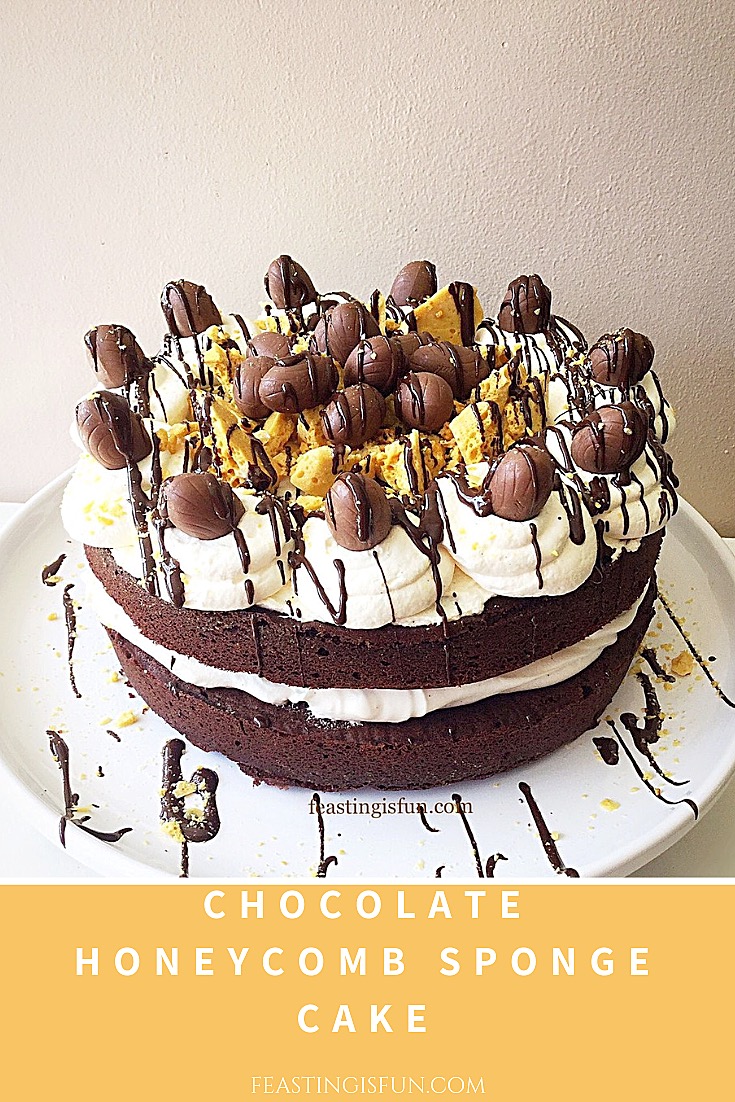
If You Have Enjoyed This Easter Recipe For A Mini Egg Bundt Cake, You may Also Like These:
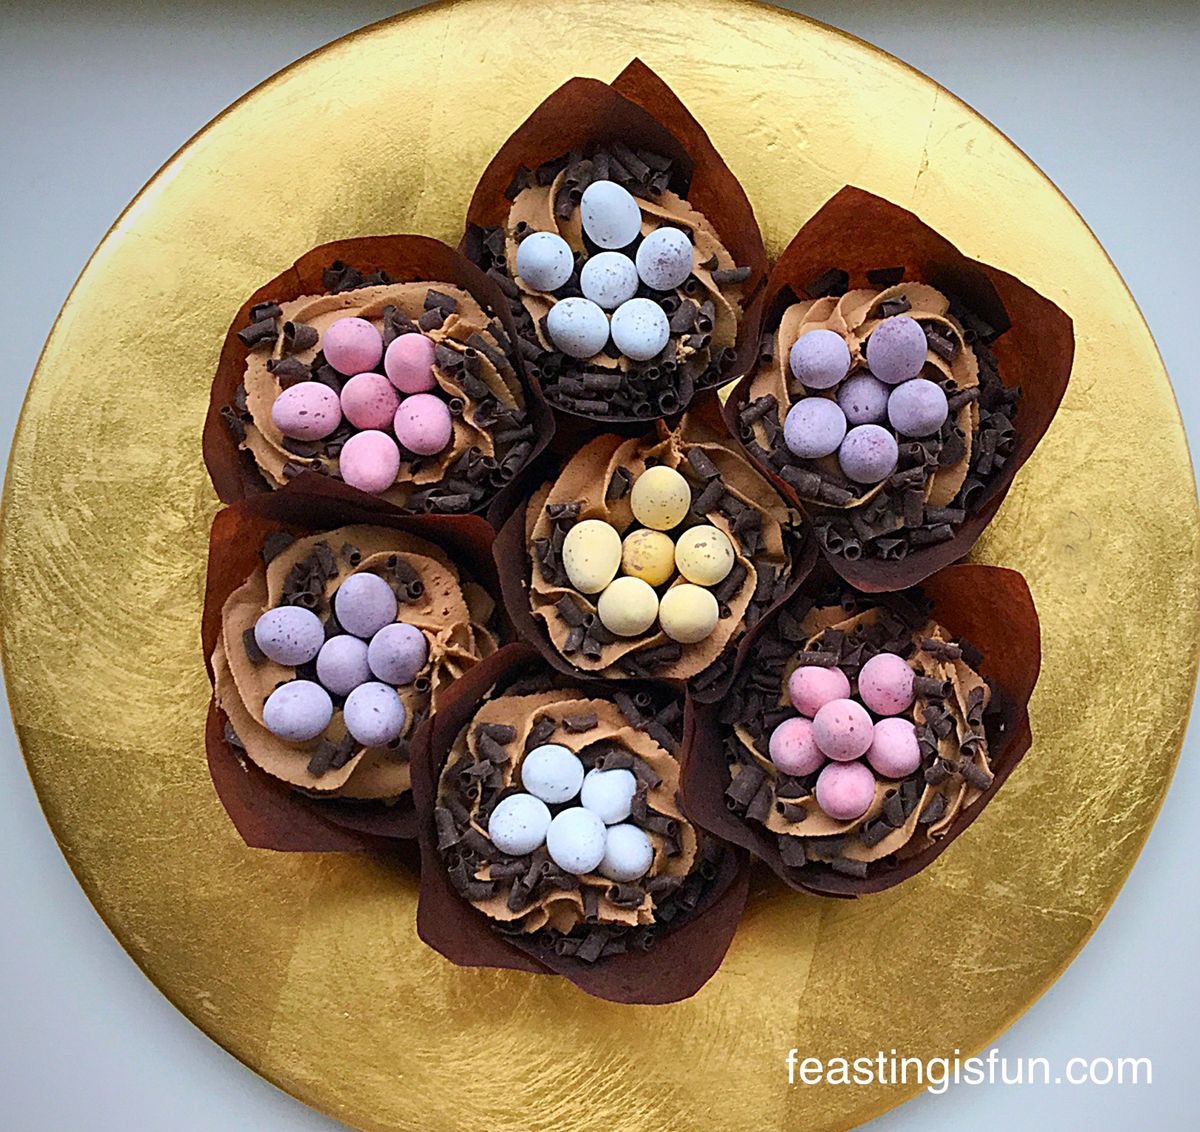
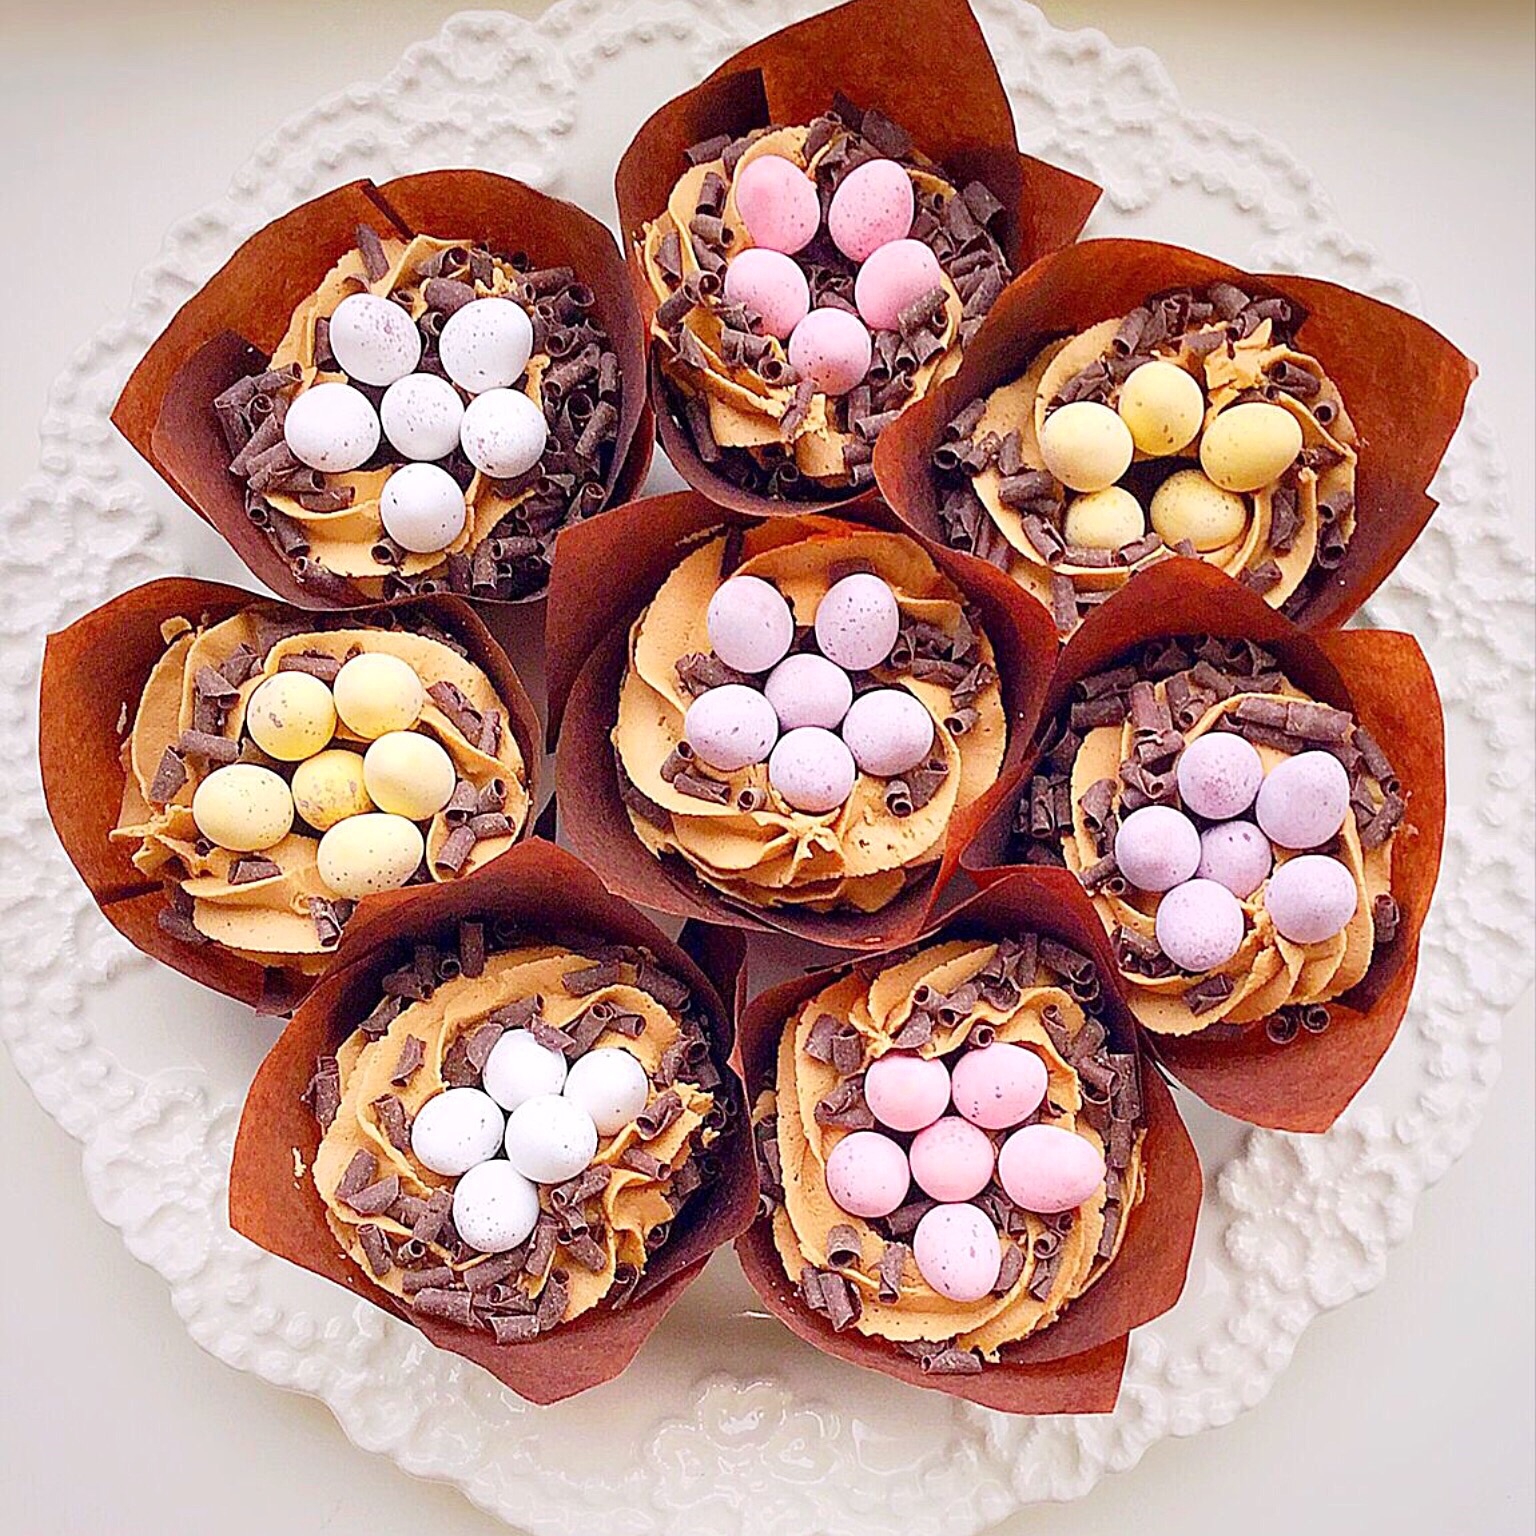
Vanilla Mini Egg Nest Cupcakes
Easter is a time when we come together with family and friends, however for Christians it is also a time when we celebrate the resurrection of Jesus Christ from the dead. While eggs symbolise new life, so does the resurrection of Christ. His love for us is beyond measure, which He shows by sacrificing His life, on our behalf, dying on the cross. If you would like to know more about Jesus, please see my post Important Stuff. Because the real truth of Easter is so much more than chocolate!
Whatever you are making, baking and creating this Easter, I hope that you have fun preparing and sharing your feast.
Sammie x
No part of this post may be reproduced or duplicated without the written permission of the owner. Please see my Disclosure Policy.
Share