Chilli Lime Chicken Kebabs

Share
Facebooktwitterpinterestlinkedintumblr

During warm Summer evenings, sitting in our garden, listening to the birds chatter and chirp, the delicious smell of barbecue often fills the air. Yet I’m never going to be a cheap sausages and cheap burgers girl. Good sausages yes. Burgers that are traceable back to their origin, definitely. For me though, kebabs are the way to go. I made these Chilli Lime Chicken Kebabs last year for our daughters birthday. With a slight change to the recipe, all for the better, I now can show them to you.

FF Chilli Lime Chicken Kebabs
Chilli Lime Chicken Kebabs perfect cooked on the grill or in the oven.

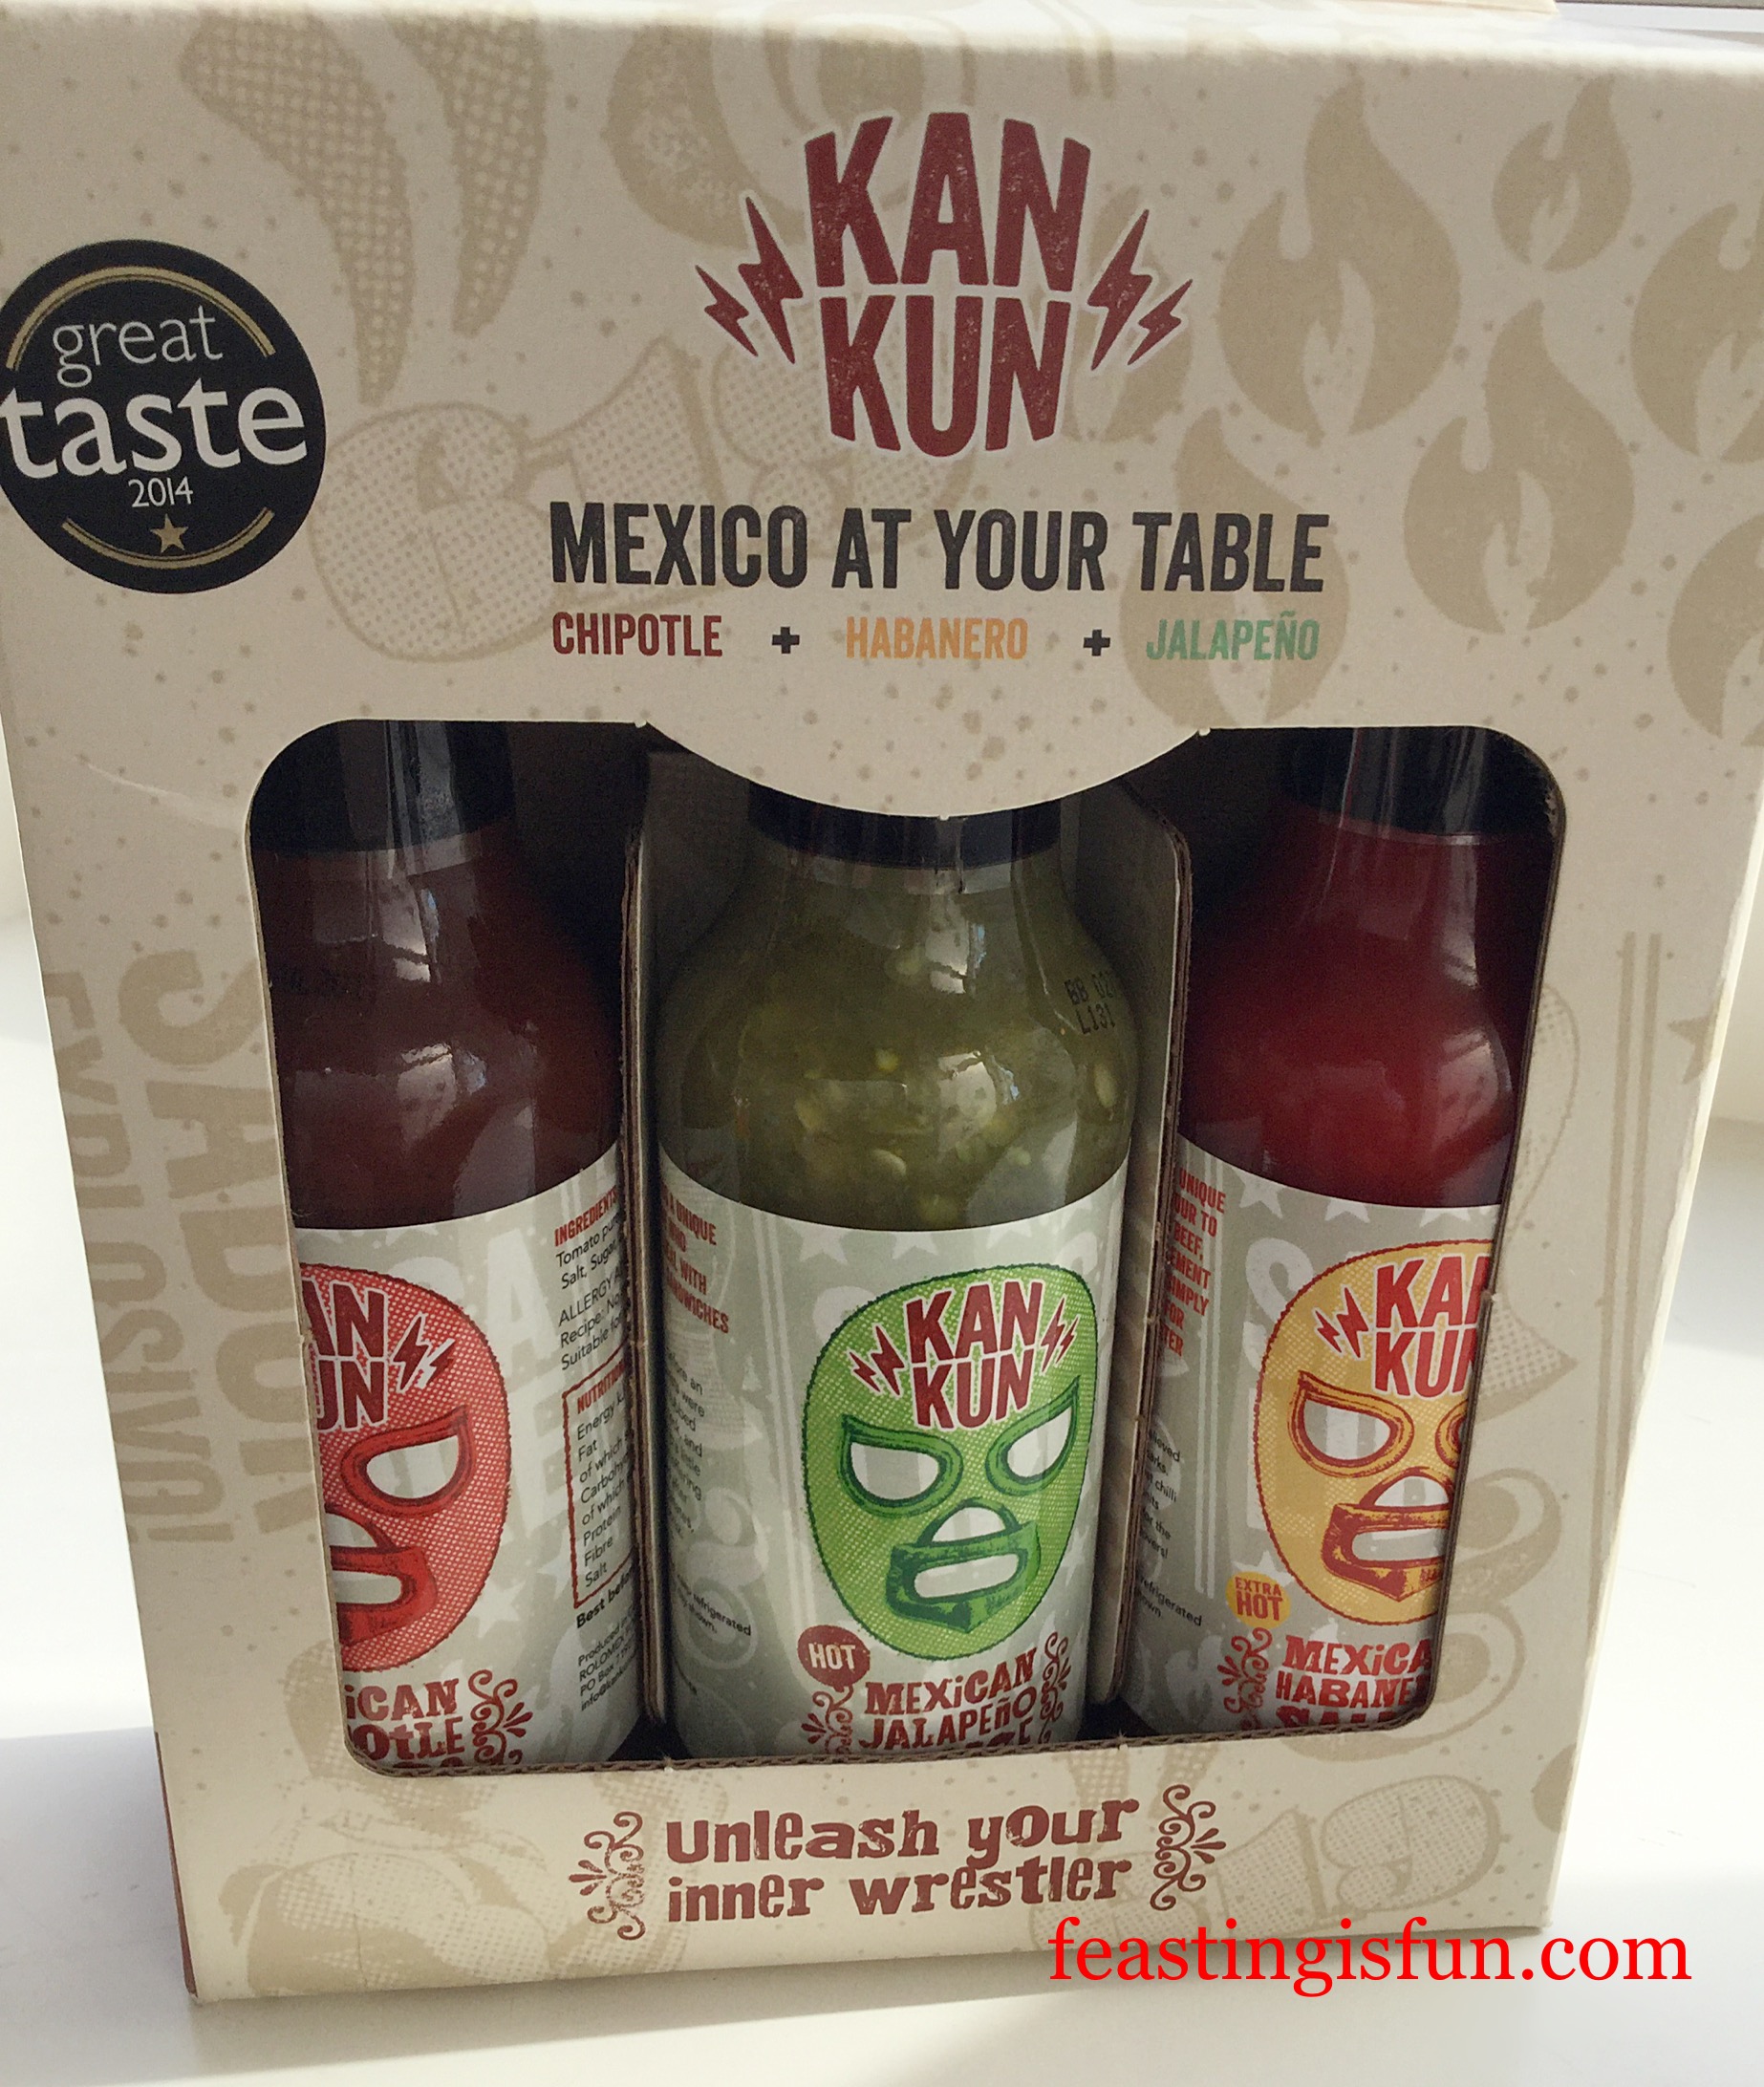
Since I’d been sent some KanKun Mexican Chilli Sauce to try, I was eager to see how the jalapeño chilli sauce would work with the kebabs I had made for last year’s birthday barbecue.

Oh wow. They are so good!

The jalapeño chilli sauce infuses a warmth into the chicken pieces without over powering them with heat. Also the lime and garlic in the marinade infuses the chicken pieces with incredible flavour as well as tenderising them with the lime juice. I love that these Chilli Lime Chicken Kebabs can be both cooked in the oven or on the barbecue. S

FF Chilli Lime Chicken Kebabs
Chilli Lime Chicken Kebabs tasty, tender chicken.

I wasn’t able to grill the on the barbecue, but the smokey, charred, flavour added by grilling them means that I will as soon as possible. Another alternative, maybe when the weather isn’t up to grilling would be to stir fry the chicken. Add in the ingredients from the vegetable kebabs and you have a quick, easy meal.

As our children ate these Chilli Lime Chicken Kebabs with us I didn’t add too much sauce. While you can certainly use it as a condiment if you want to kick the heat up a notch!

FF Chilli Lime Chicken Kebabs
KanKun Mexican Chilli Sauce range – the jalapeño sauce used for this recipe is in the middle.

I love chilli’s and am, at present growing some from seed. As soon as they are big enough I will then be transfer them  to the front garden. Since that is the driest bed and gets the most sun. Chilli’s like to be treated a bit mean whilst they are growing, although I add the odd splash of tomato food, once the chilli’s are forming does them the world of good.

For those of you who cannot or do not want to grow your own chilli’s, KanKun have a range of 3 bottles of chilli sauce – Chipotle, Habanero and Jalapeño. Each can be used in cooking (keep an eye out for my upcoming Chipotle Pulled Pork Fajita’s), or as a condiment. Just make sure that any sauce that has been in contact with raw meat is disposed of and not reused.

FF Chilli Lime Chicken Kebabs
Chilli Lime Chicken Kebabs delicious served alongside vegetable kebabs.

Recipe: Makes 5 Chilli Lime Chicken Kebabs

650g/1.5lb Skinned Boneless Chicken Breast – preferably Free Range or Organic – I buy ours from Graig Farm

2tbsp Olive Oil

Juice of 1 Lime

1tbsp Mexican Jalapeño Sauce from KanKun Sauce

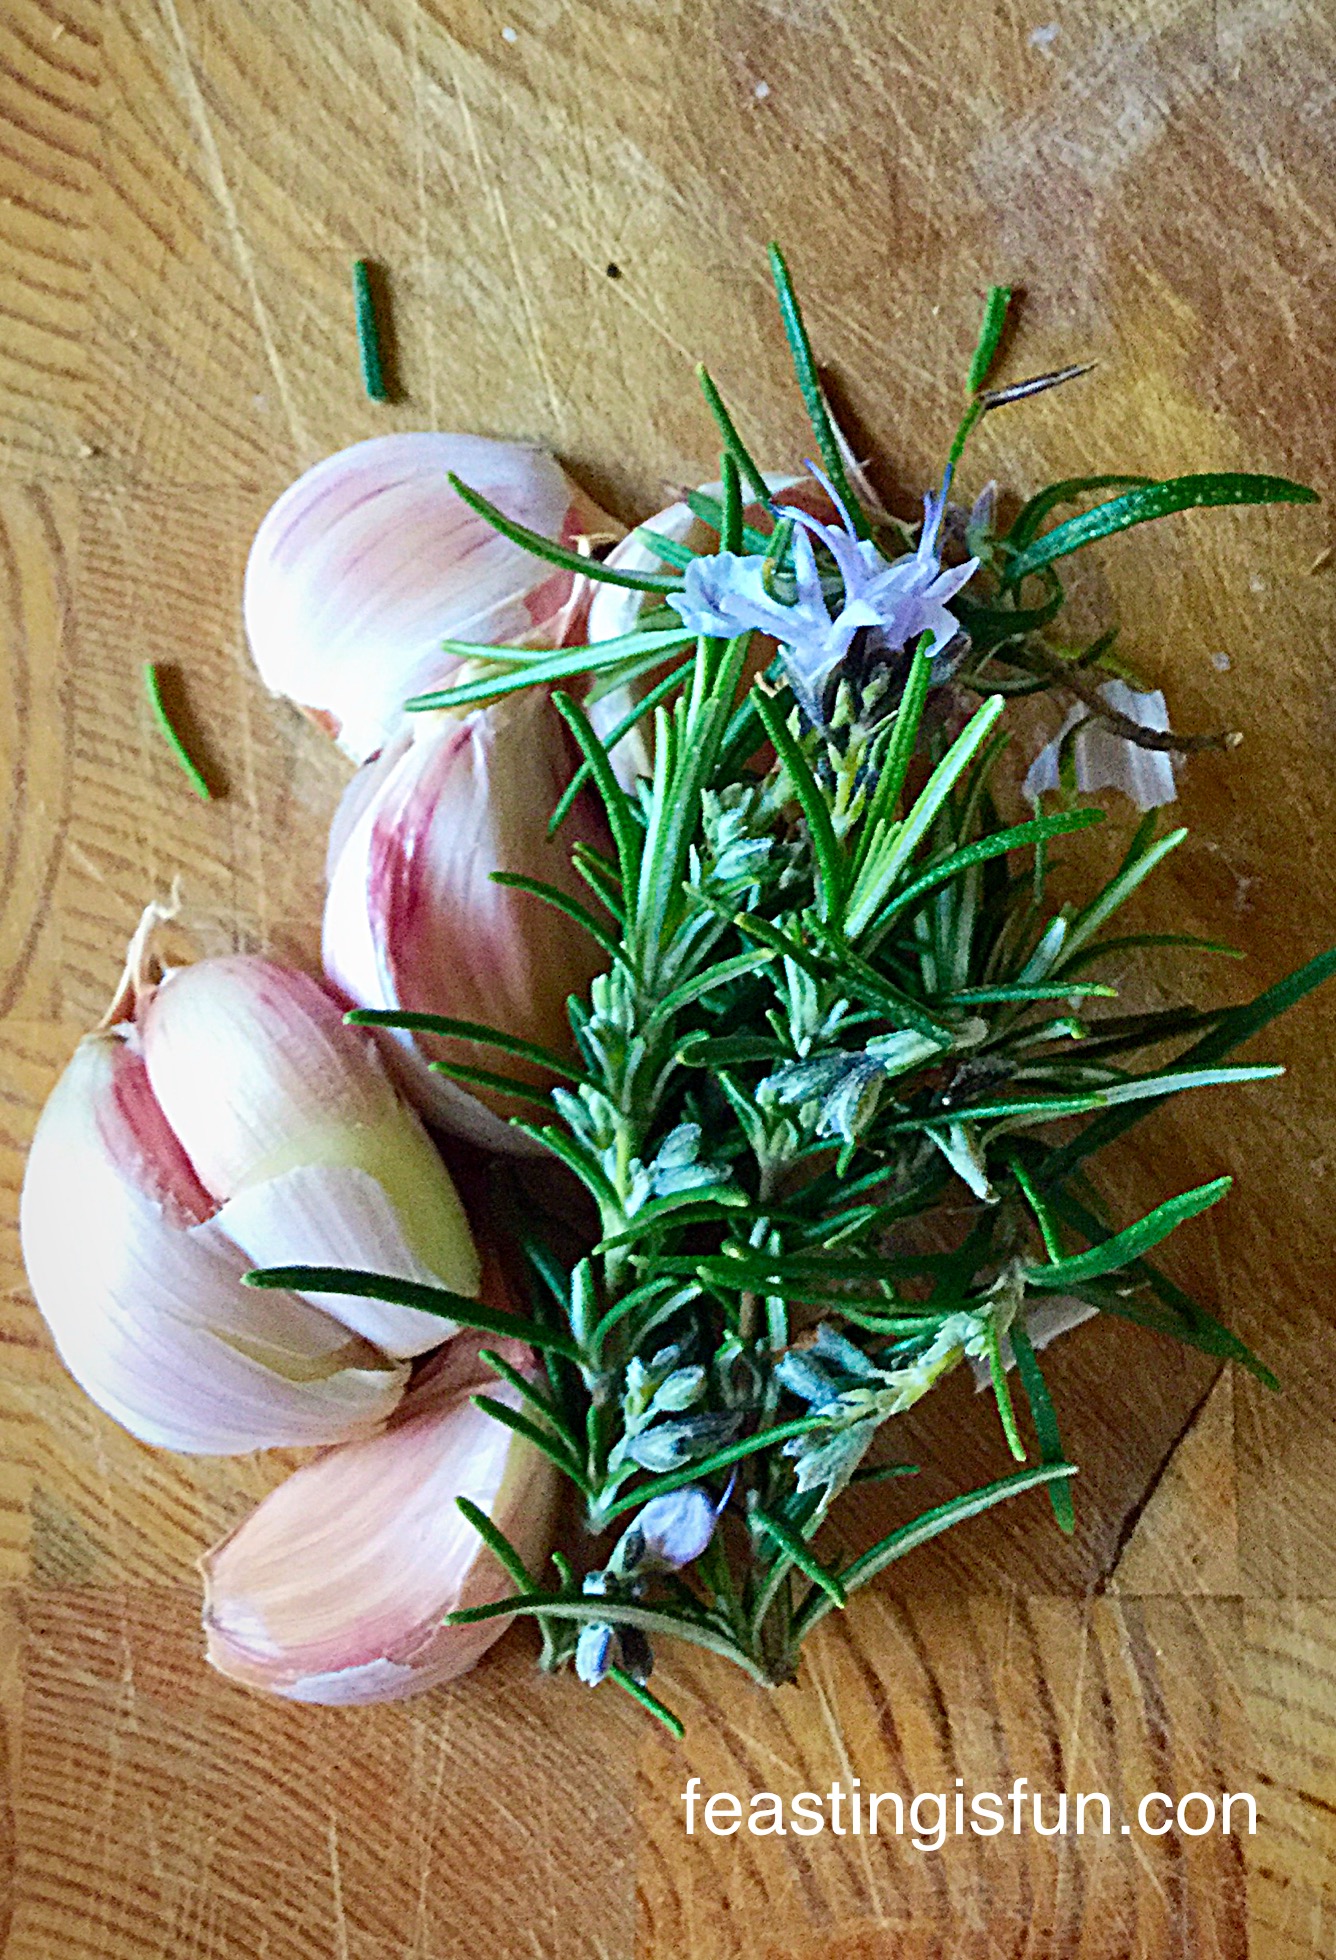
2 Cloves of Garlic – crushed or minced

1 Small Chilli or 1/2 Jalapeño Chilli –  sliced (seeds removed if preferred)

1/4tsp Sea Salt – I use Maldon

1/4tsp Freshly Ground Black Pepper

1 large resealable plastic food bag.

Method: Preheat the oven to 200C/180C fan, gas mark 6 or cook over a medium hot barbecue grill.

Note – Especially when handling raw meat, including chicken, ensure all utensils, work tops and hands are thoroughly washed before and after use.

  • First of all open the resealable bag and turn down the sides. This makes it easier to add things to the bag.
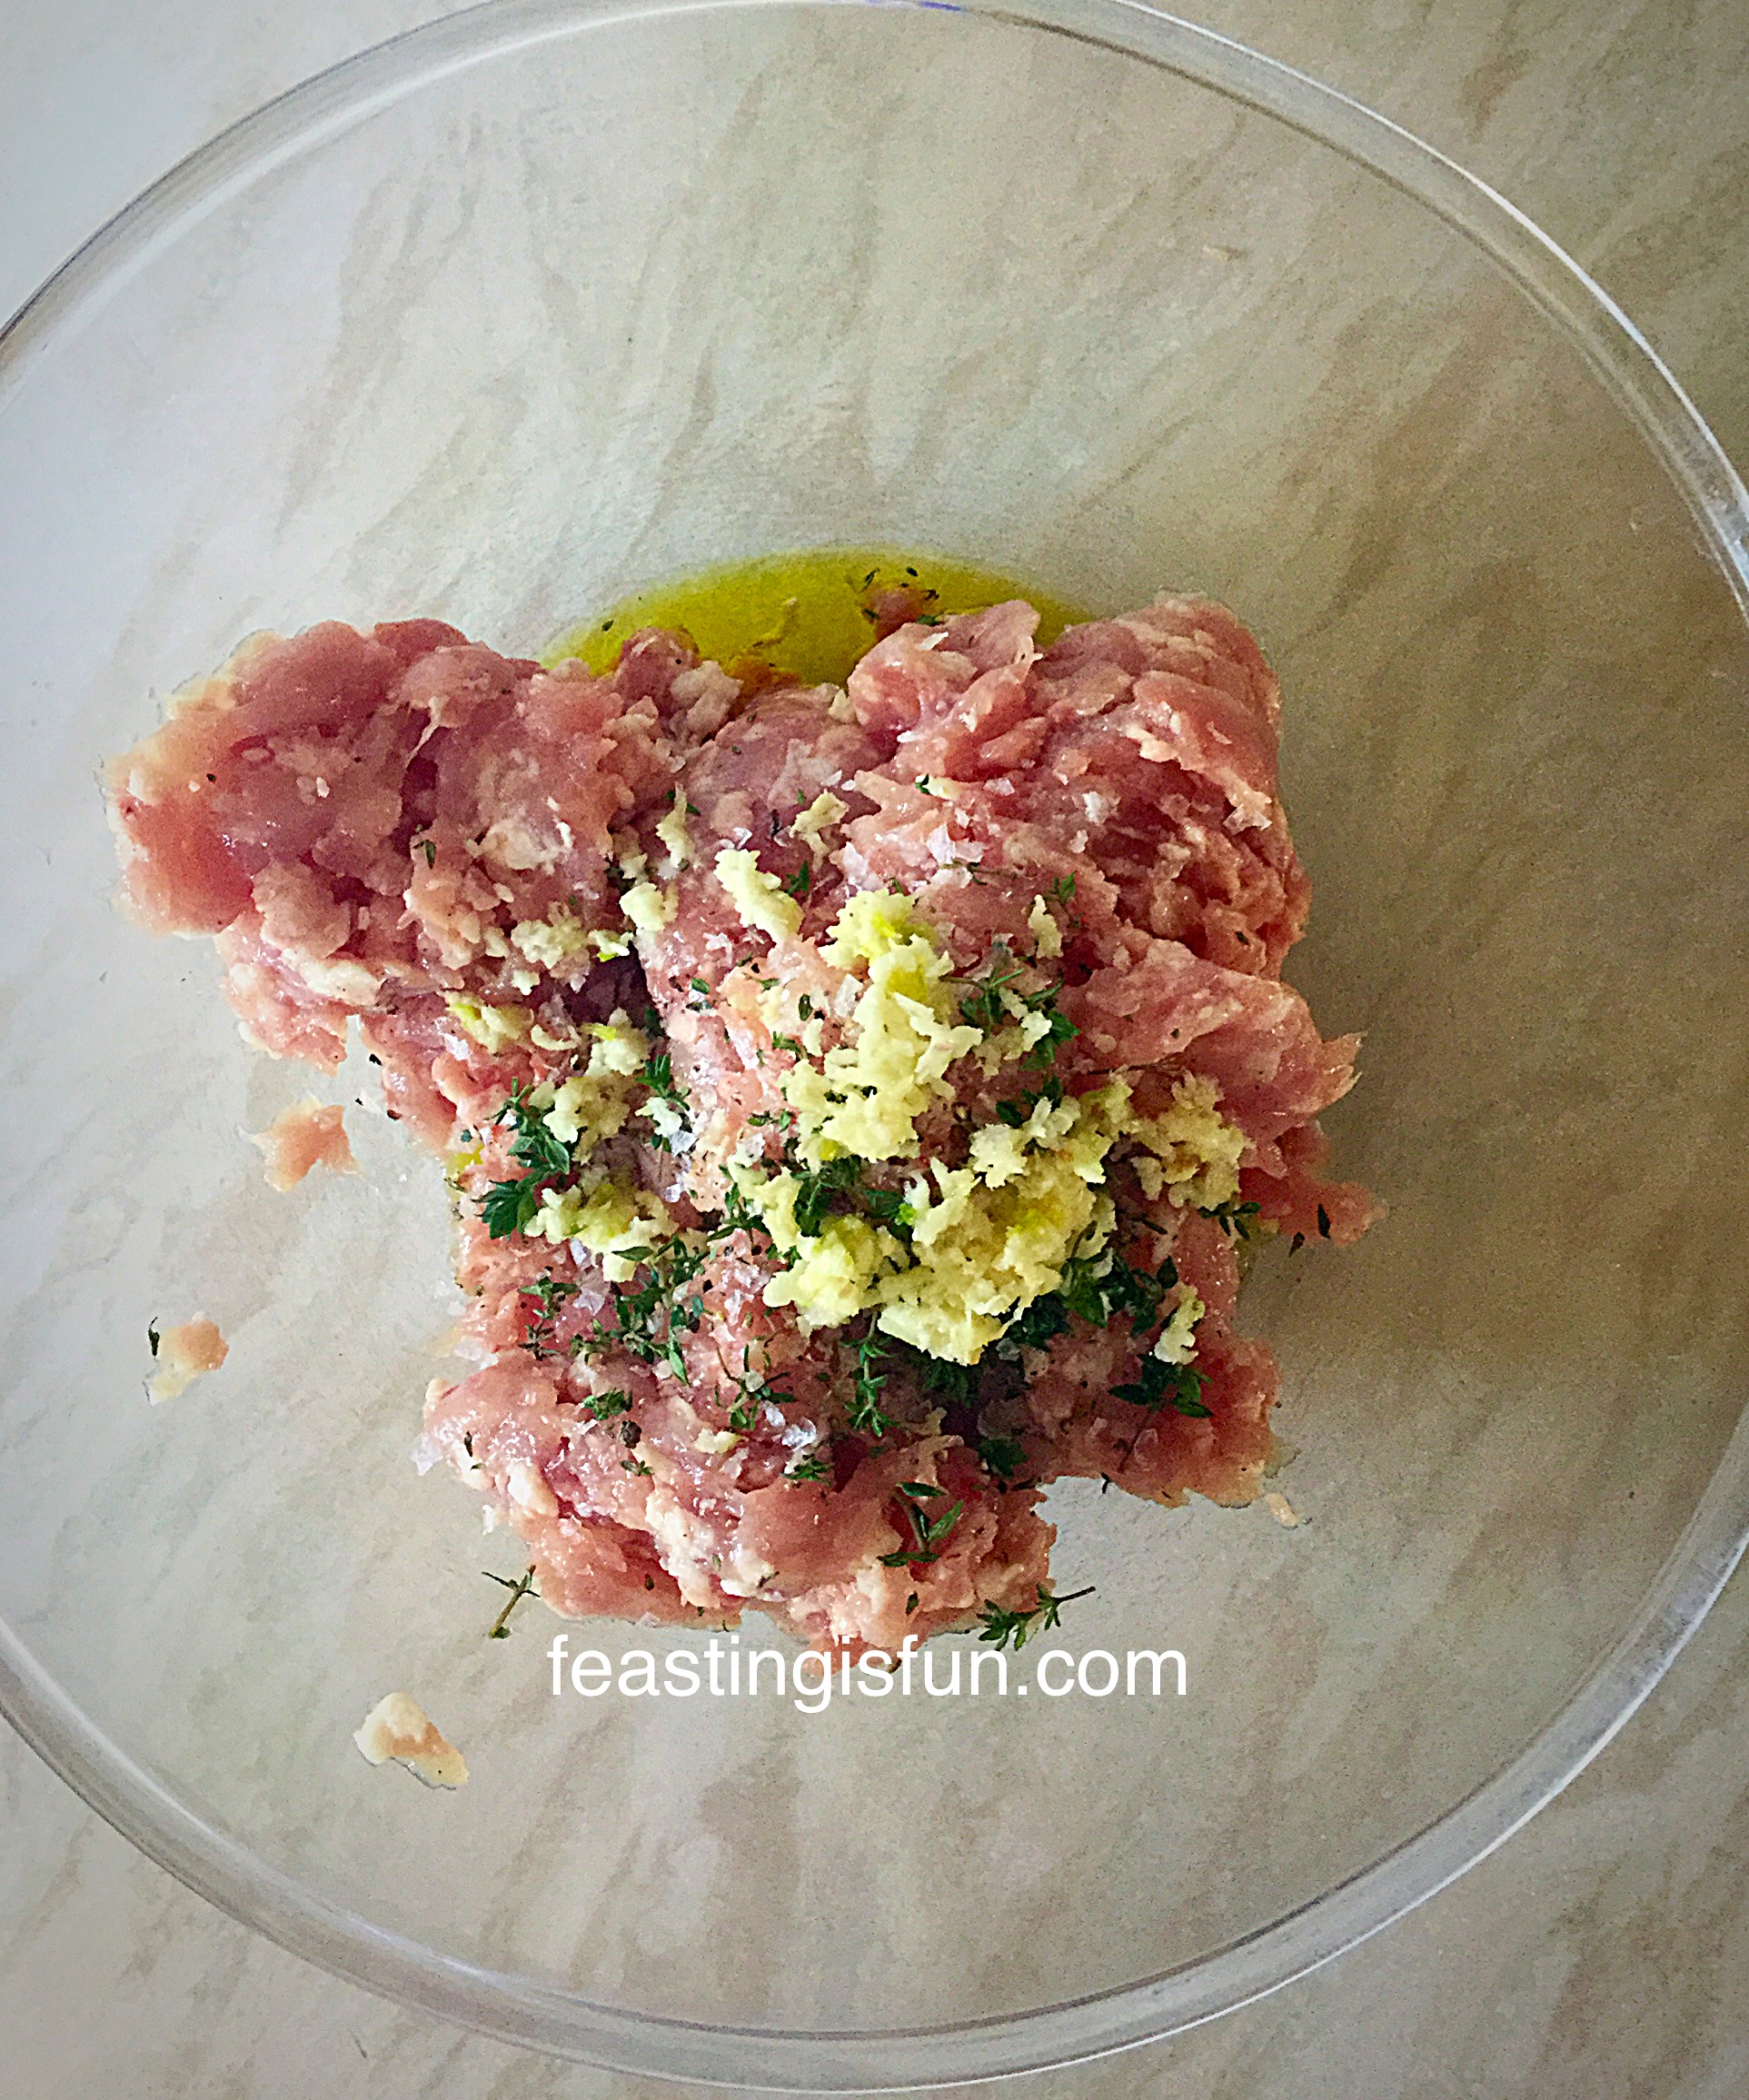
  • Pour in the olive oil, jalapeño sauce, juice of 1 lime and then add the crushed garlic, sliced chilli, salt and pepper.
  • Cut the chicken breast into 3cm chunks and add to the bag. I actually use sharp kitchen scissors to snip the chicken straight into the bag.
  • Seal the bag and with clean hands smoosh the chicken about in the bag, ensuring every piece is covered in the marinade. I have to admit to this being something I always enjoy, a bit of smooshing!
  • Label the bag and place in the bottom of the fridge for 30 minutes to 2 hours. Alternatively, prepare at the start of the day, before work and have a smile on your face knowing dinner is sorted when you finally return home!
FF Chilli Lime Chicken Kebabs
Label the bag so that others are aware that it contains raw meat.
  • While the chicken is marinating, soak the wooden skewers in cold water – so they don’t catch fire on the barbecue!
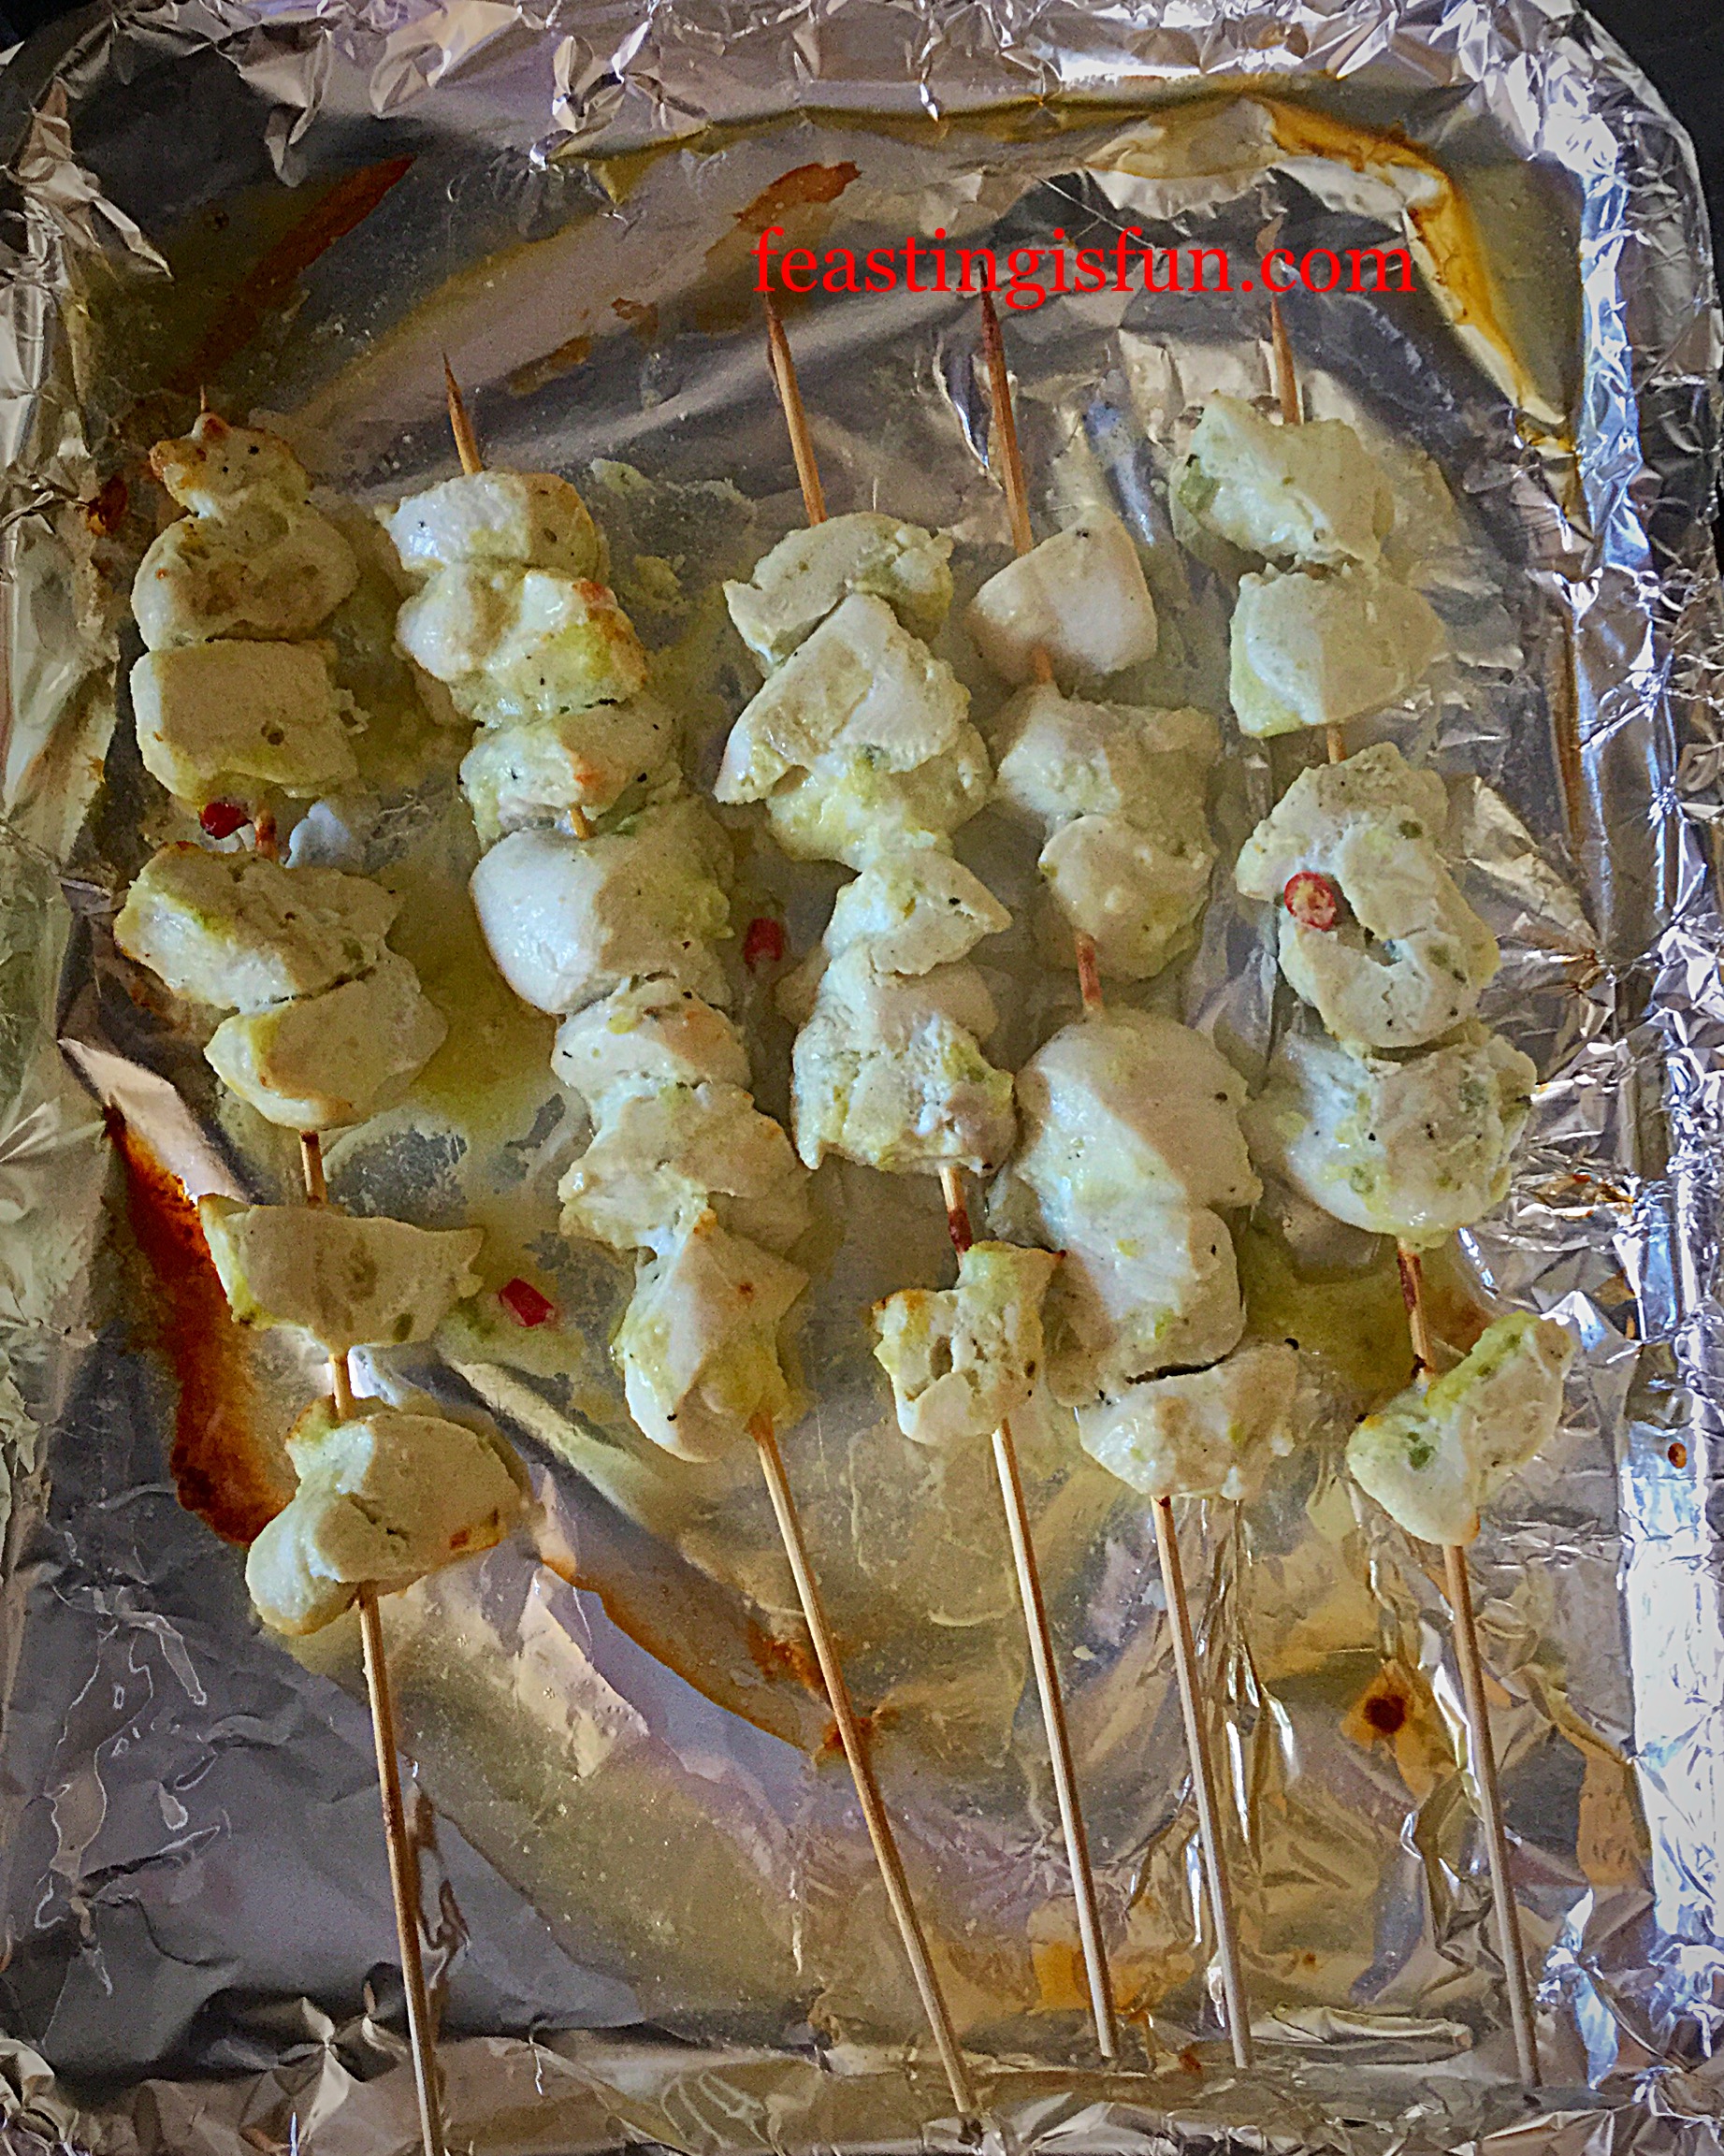
  • Cover a large baking tray with aluminium foil – this really helps with the clean up process.
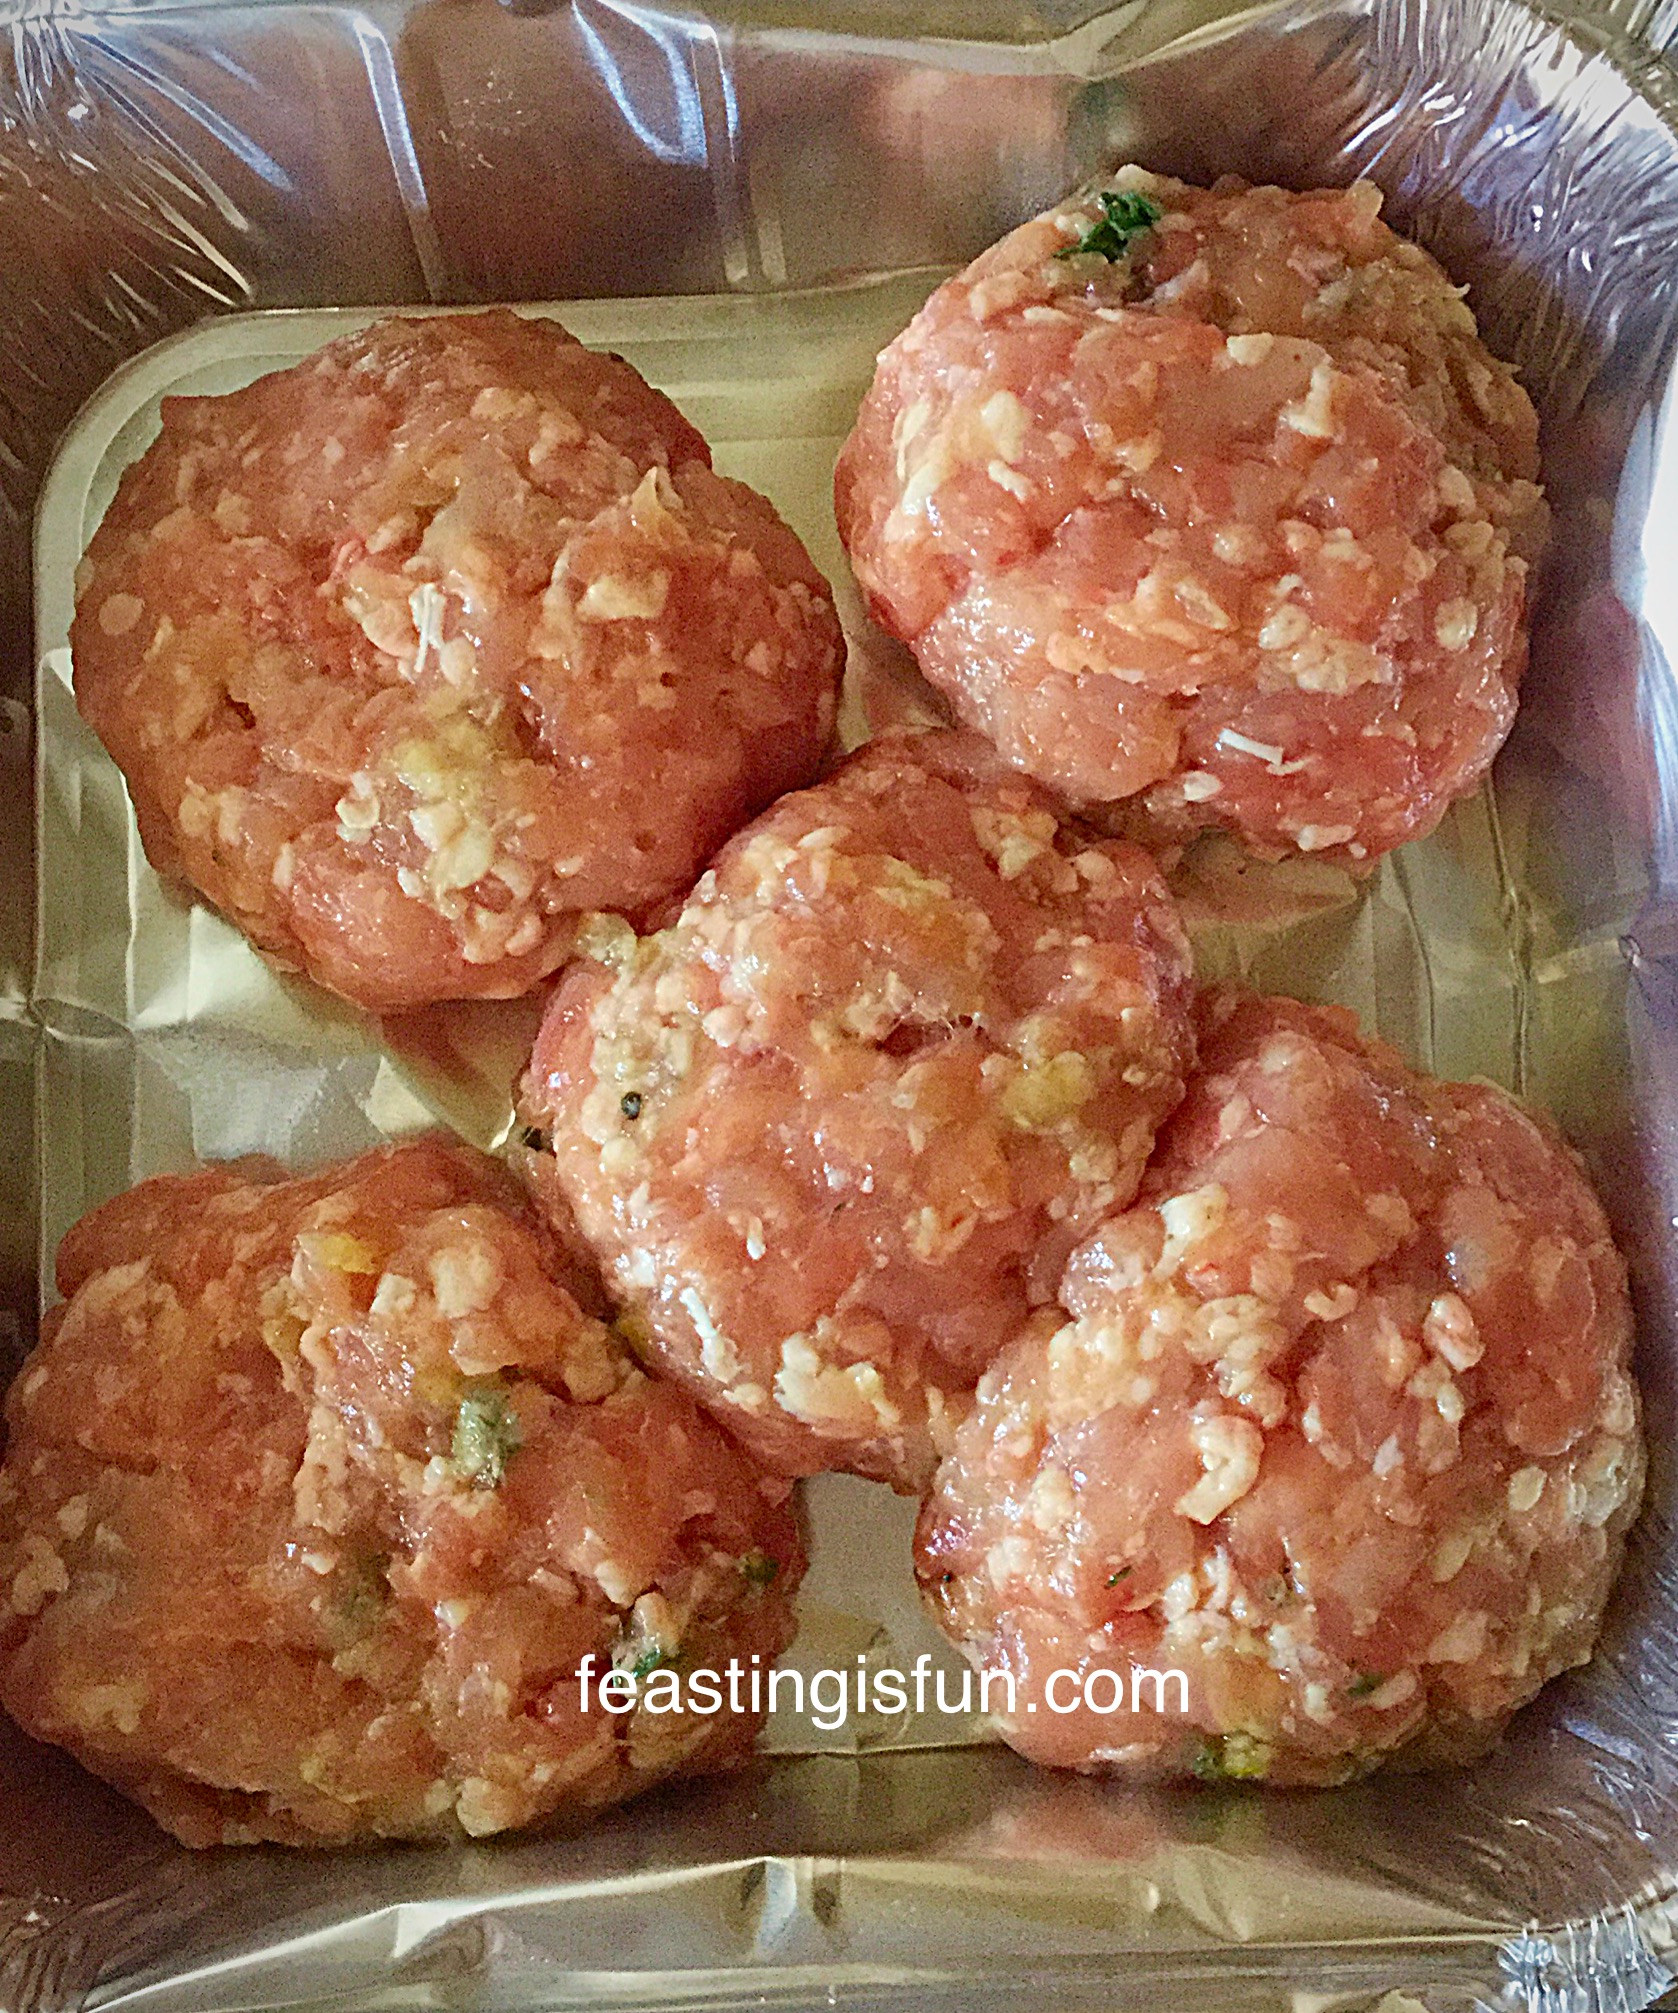
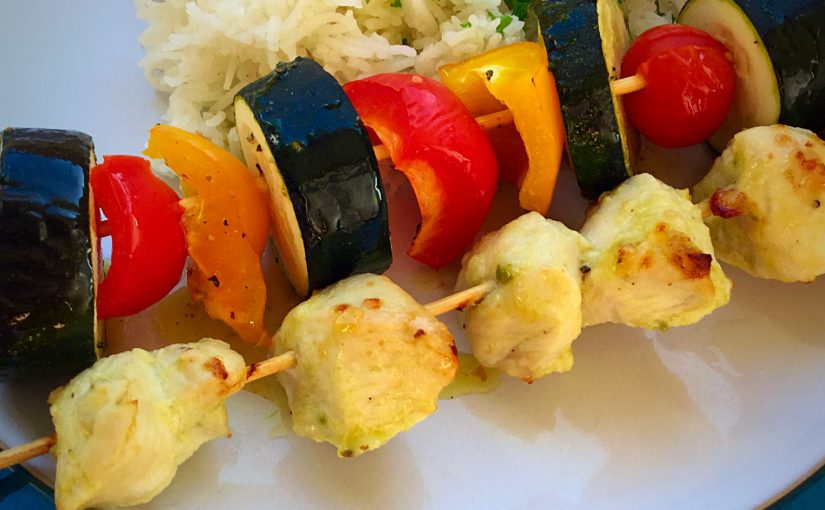
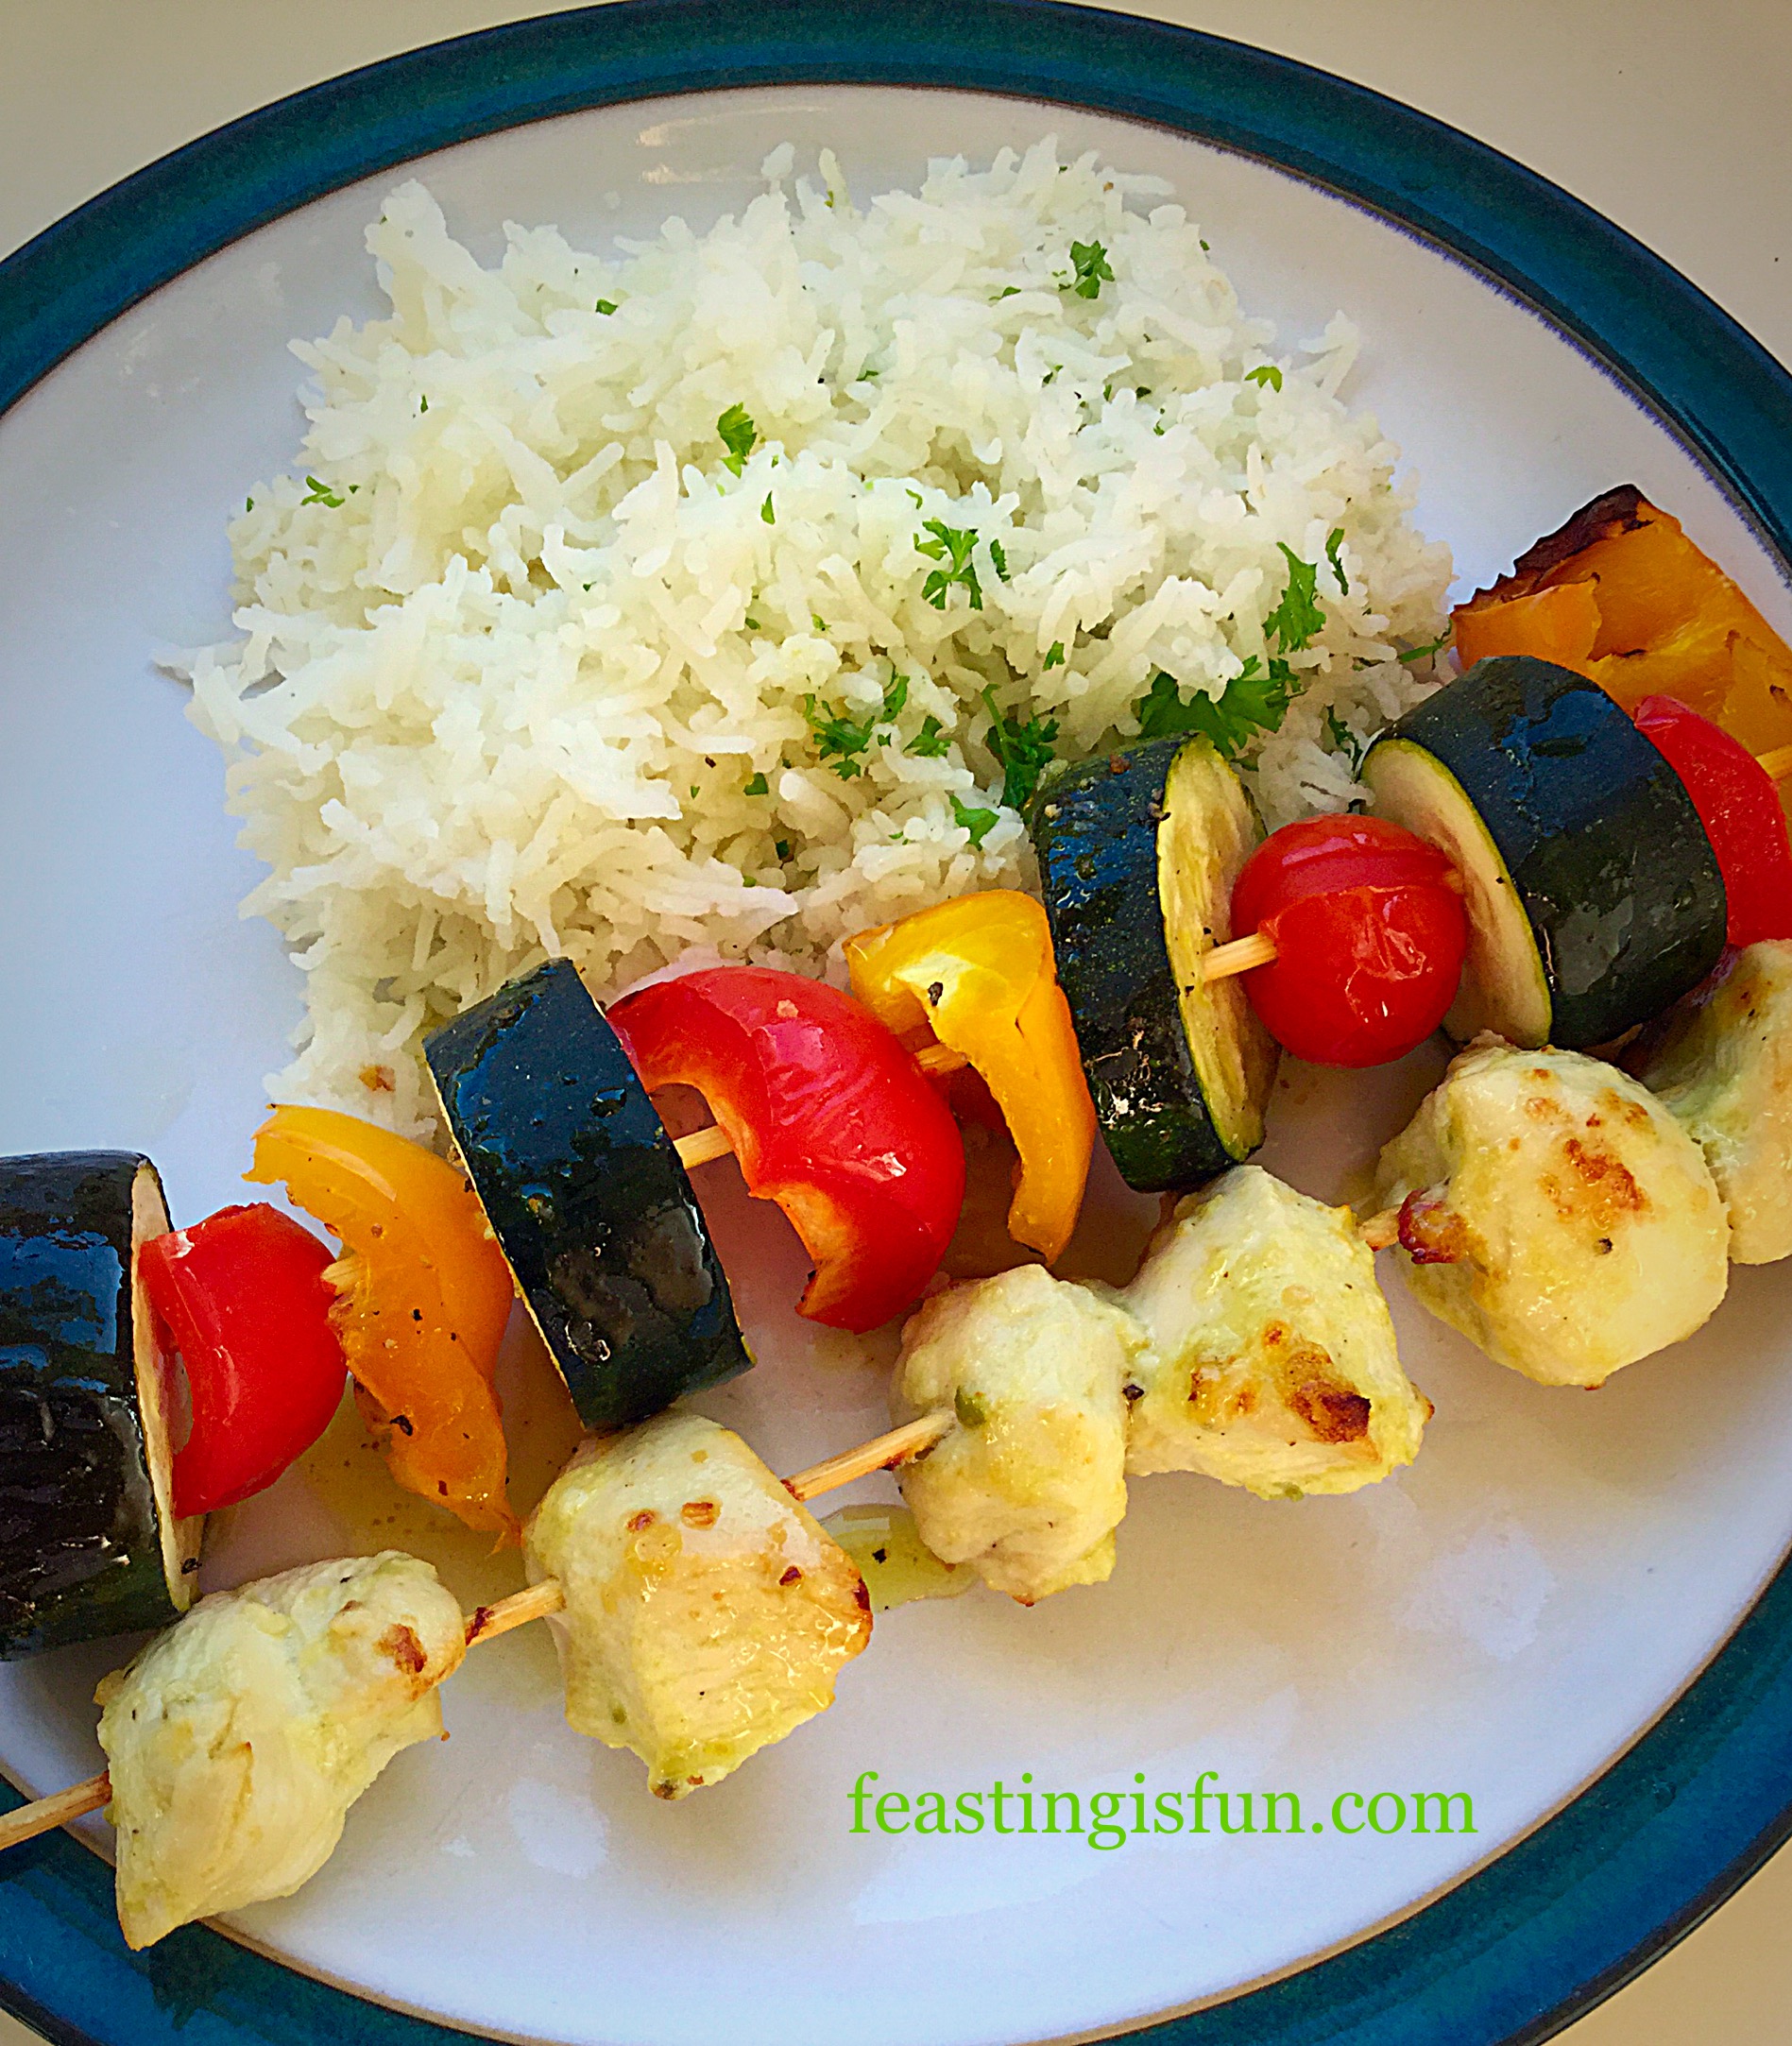
  • Carefully thread 5-7 pieces of chicken on each skewer. Since the chicken takes the same amount of time to cook as the vegetable kebabs, I also add sliced courgette, cherry tomatoes and red/yellow peppers to separate skewers. Alternatively I would place whole jalapeños, chunks of red onion or shallots on to skewers as well.
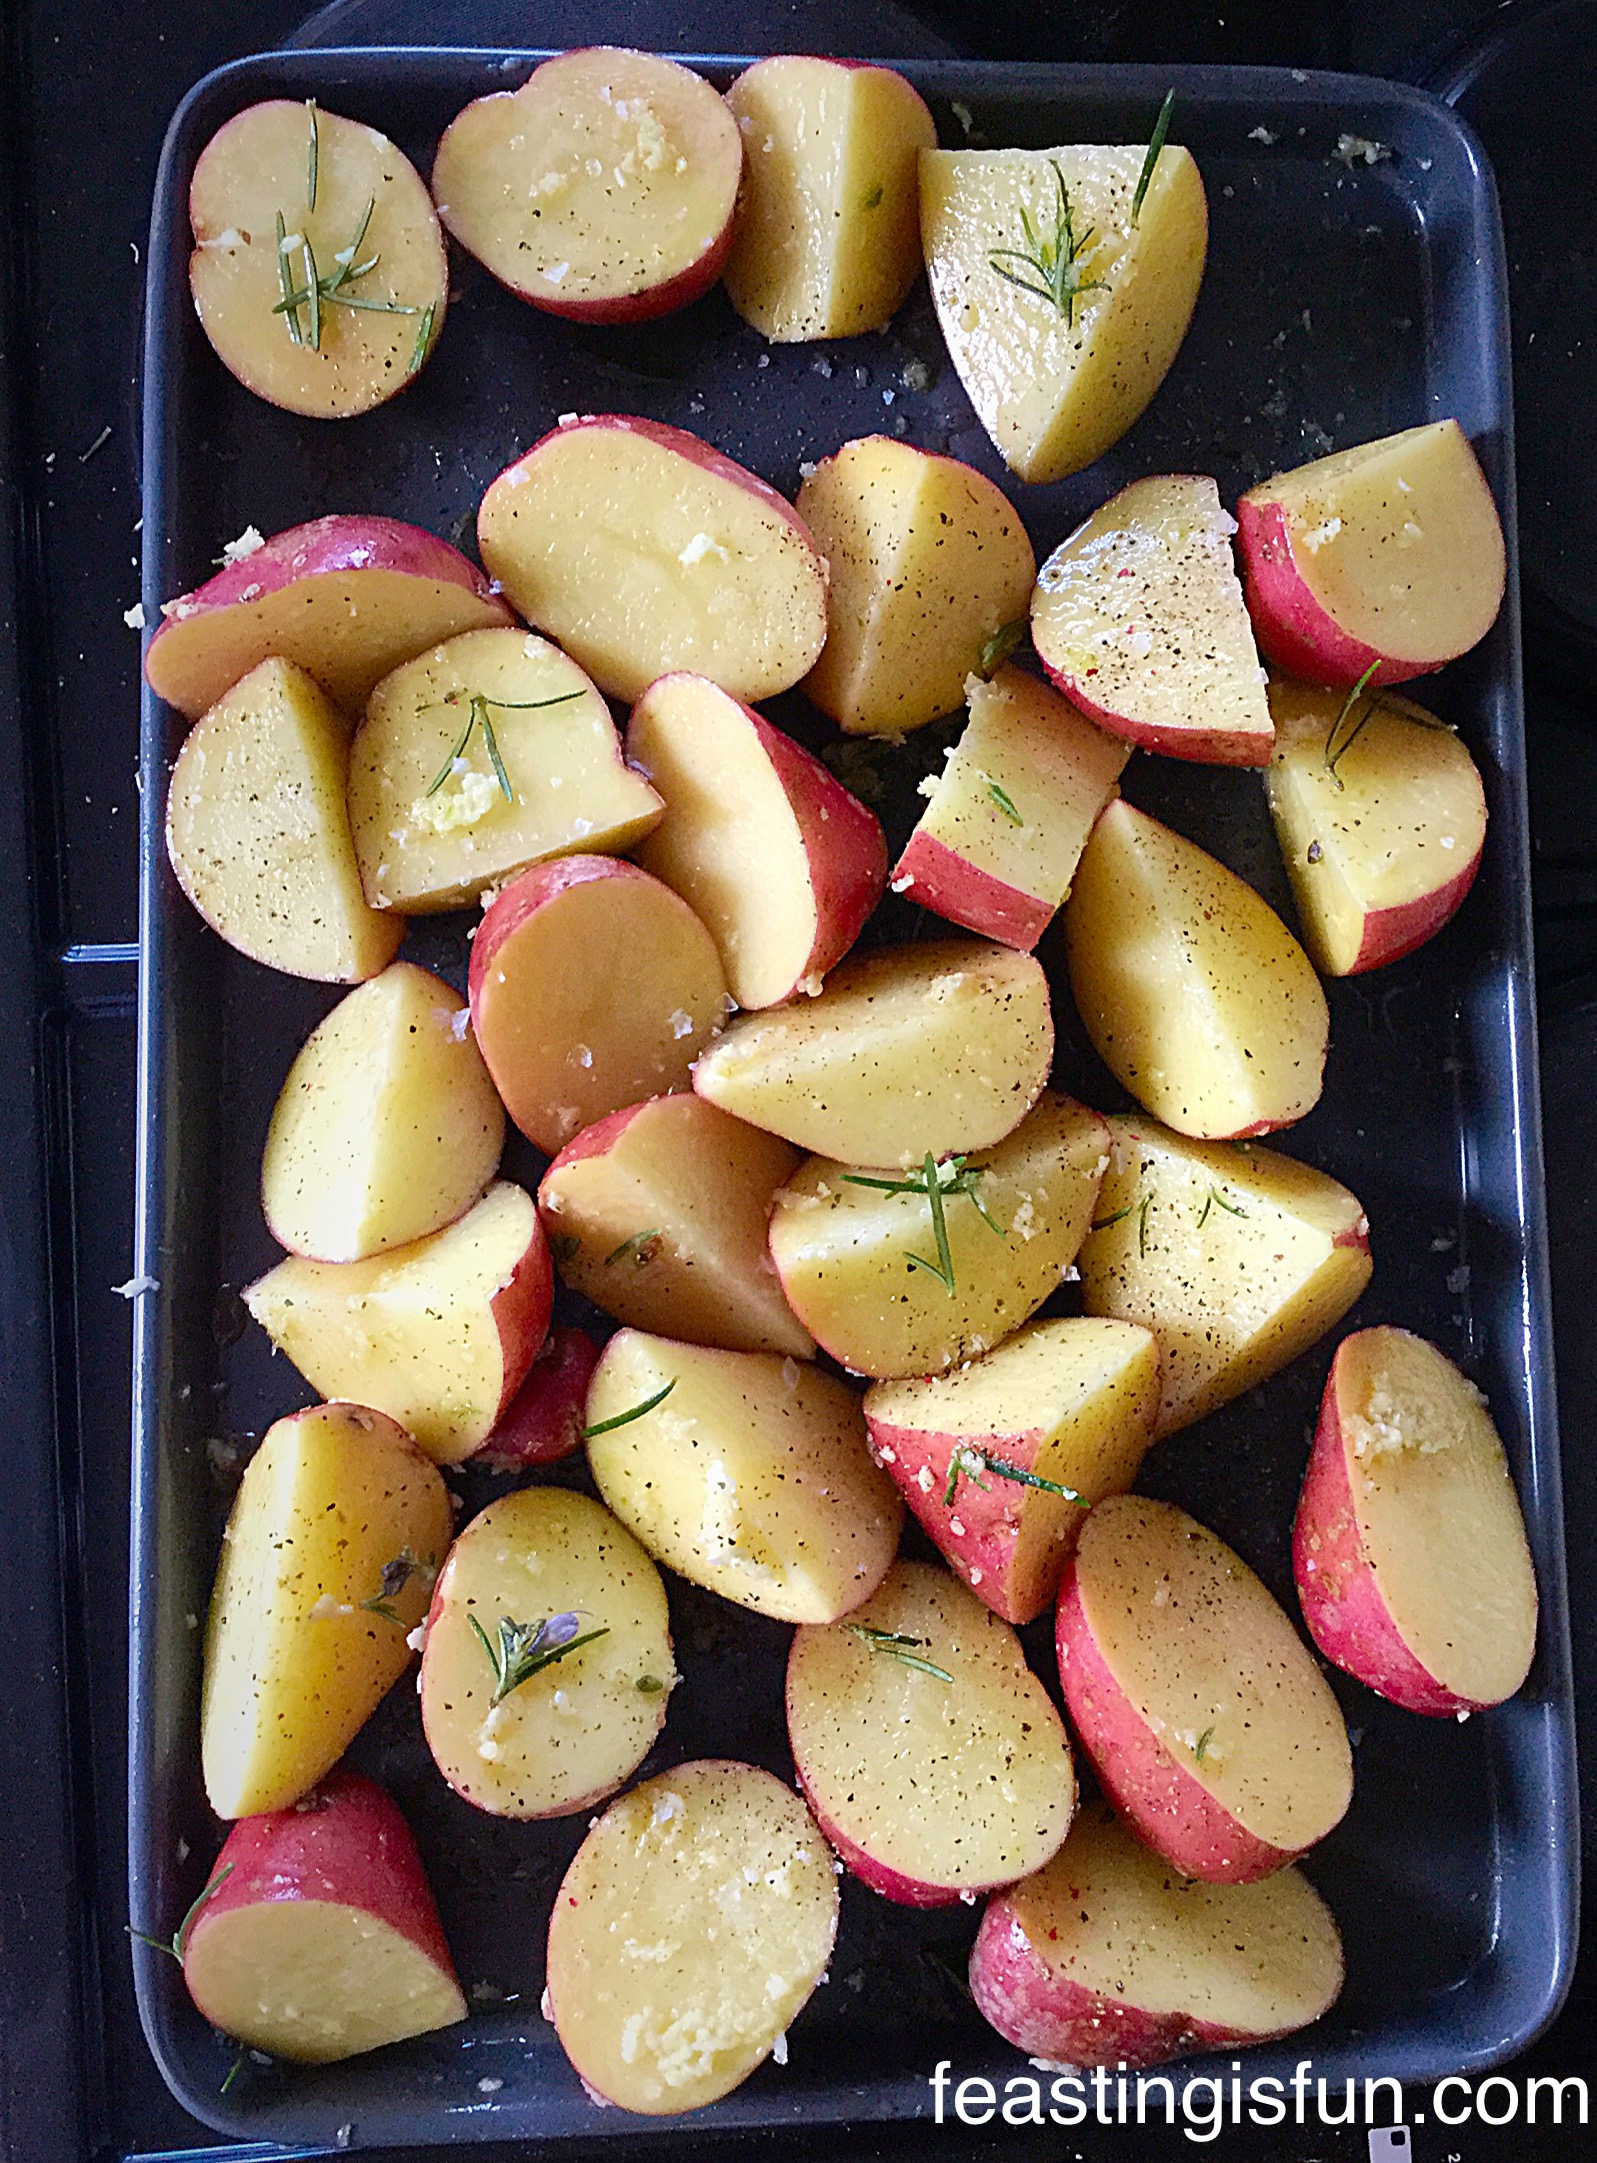
  • Place the Chilli Lime Chicken Kebabs on to the foil covered tray and pour over any excess marinade.
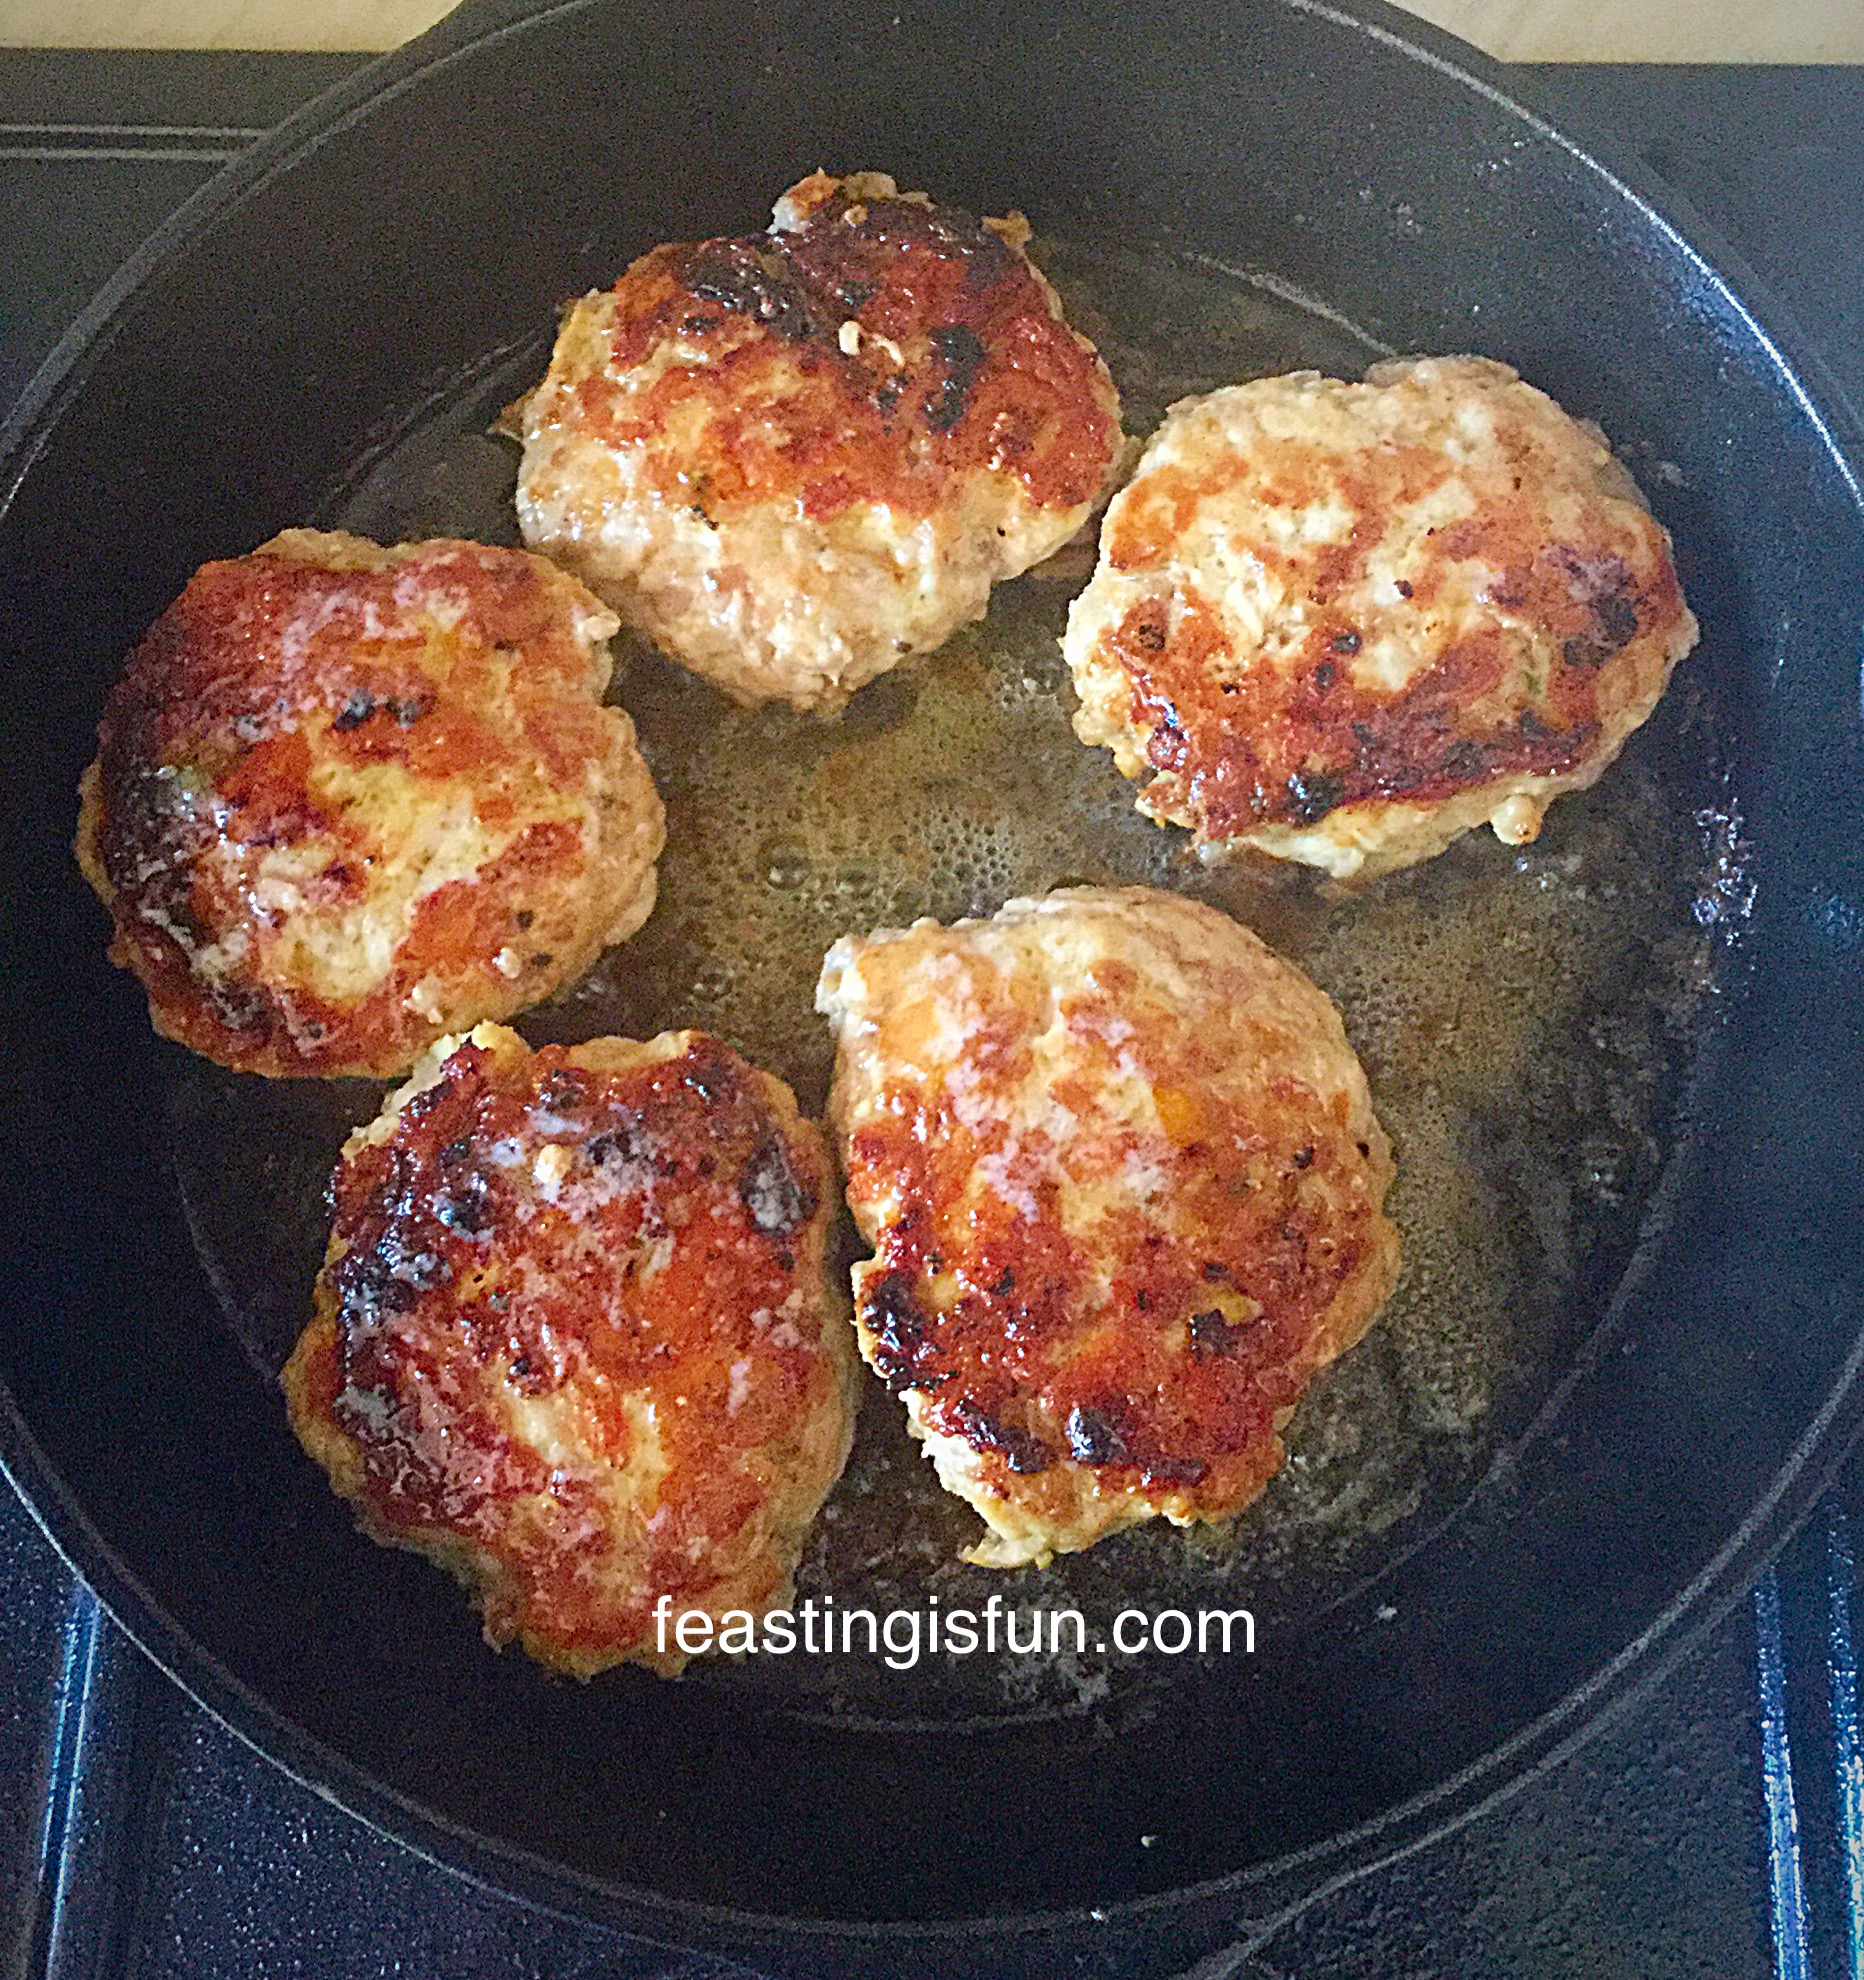
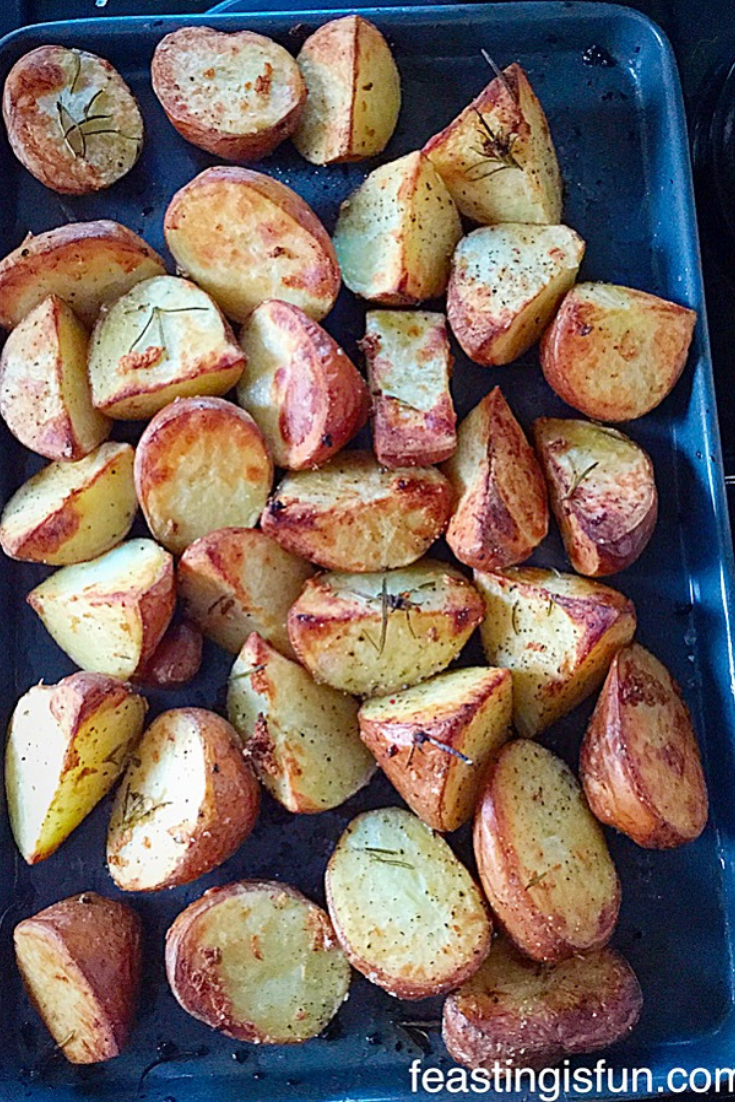
  • Cook in the top of the oven for 30 minutes, turning halfway through the cooking time.
  • If grilling on the barbecue these Chilli Lime Chicken Kebabs should take no longer than 20 minutes on a medium/hot barbeque grill, turing halfway through cooking.
  • To check if the chicken is cooked all the way through, slide off a thicker chunk and cut in half – there should not be any pink colour, the chicken should be opaque all the way through.
  • As soon as the kebabs are cooked remove them from the oven/barbecue.
FF FF Chilli Lime Chicken Kebabs
Chilli Lime Chicken Kebabs beautifully cooked in the oven.

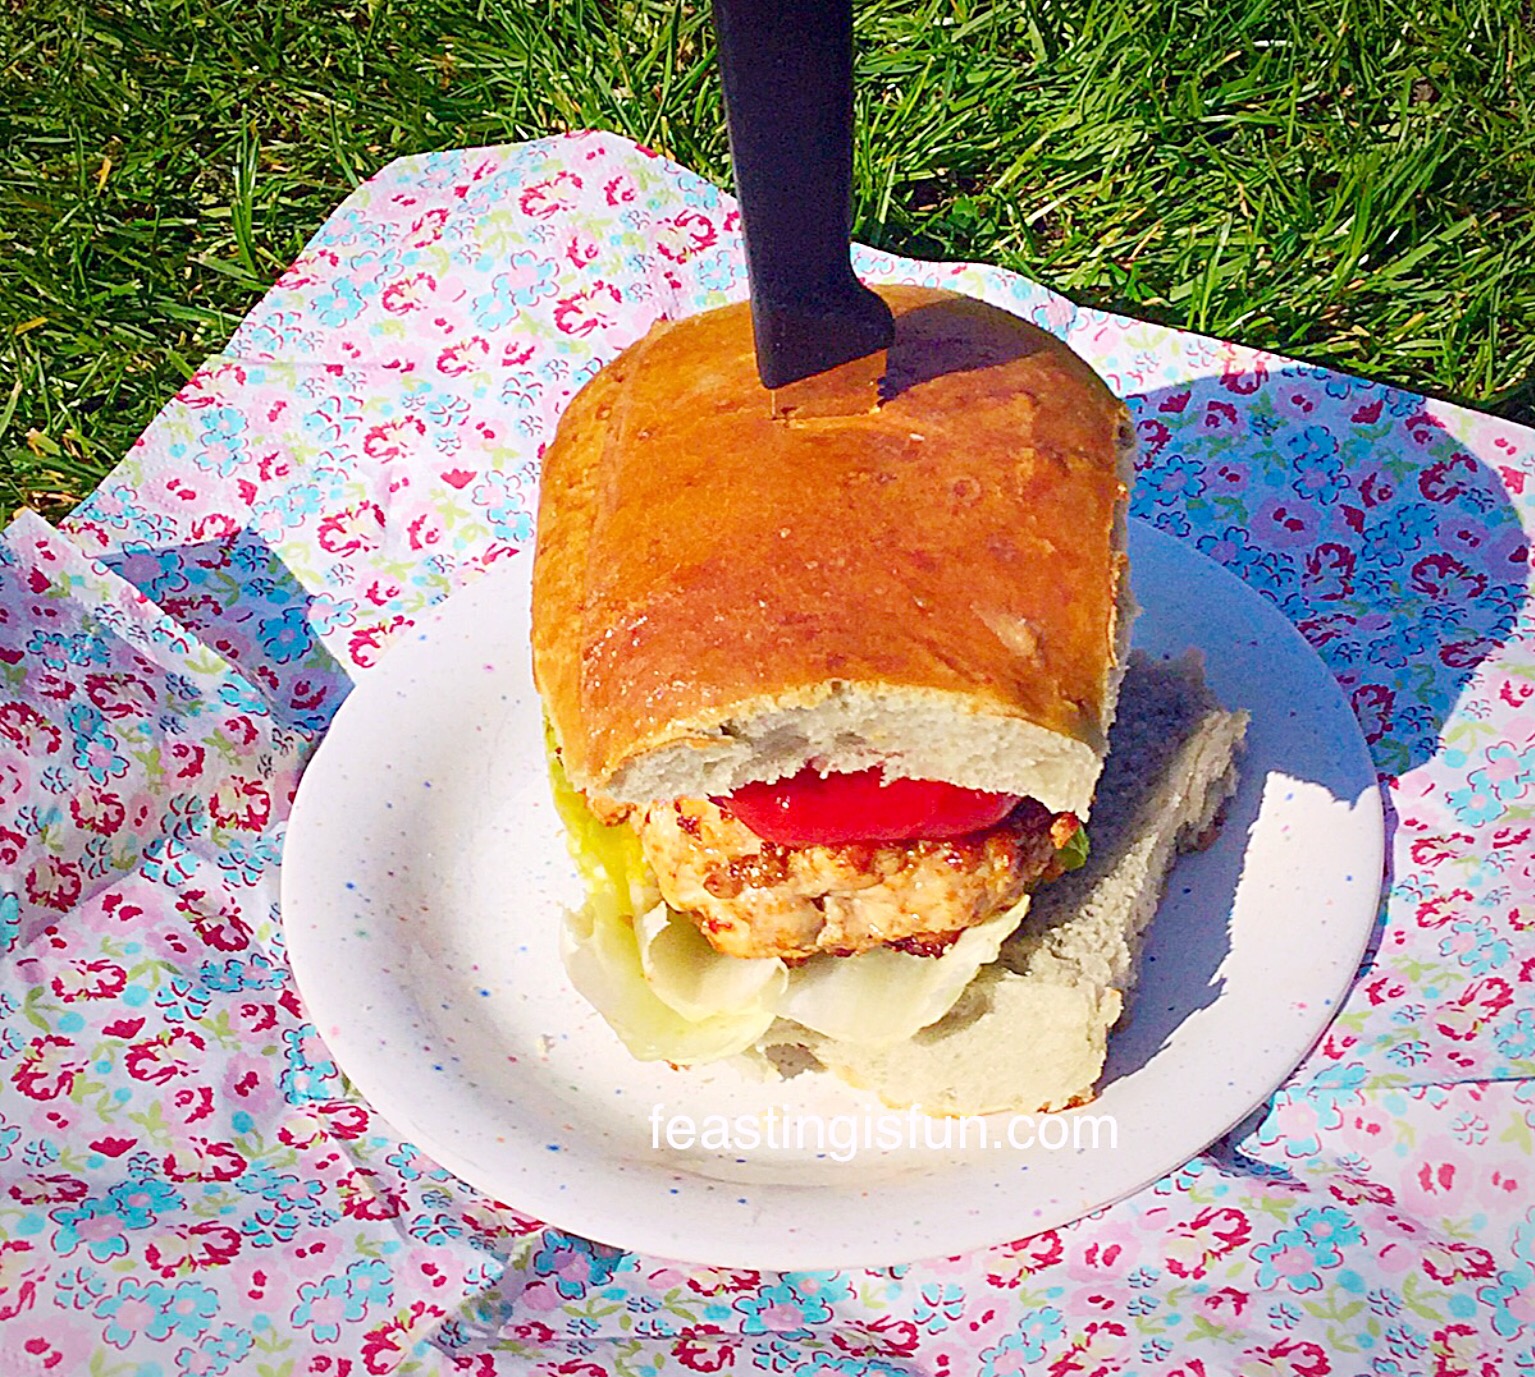
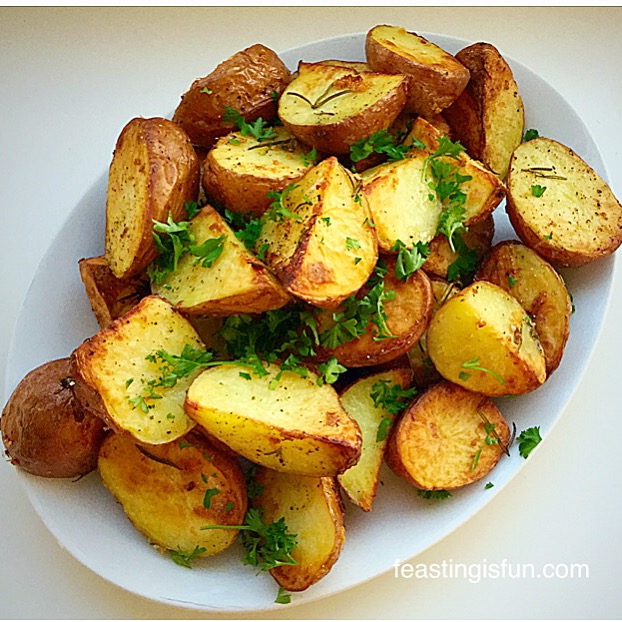
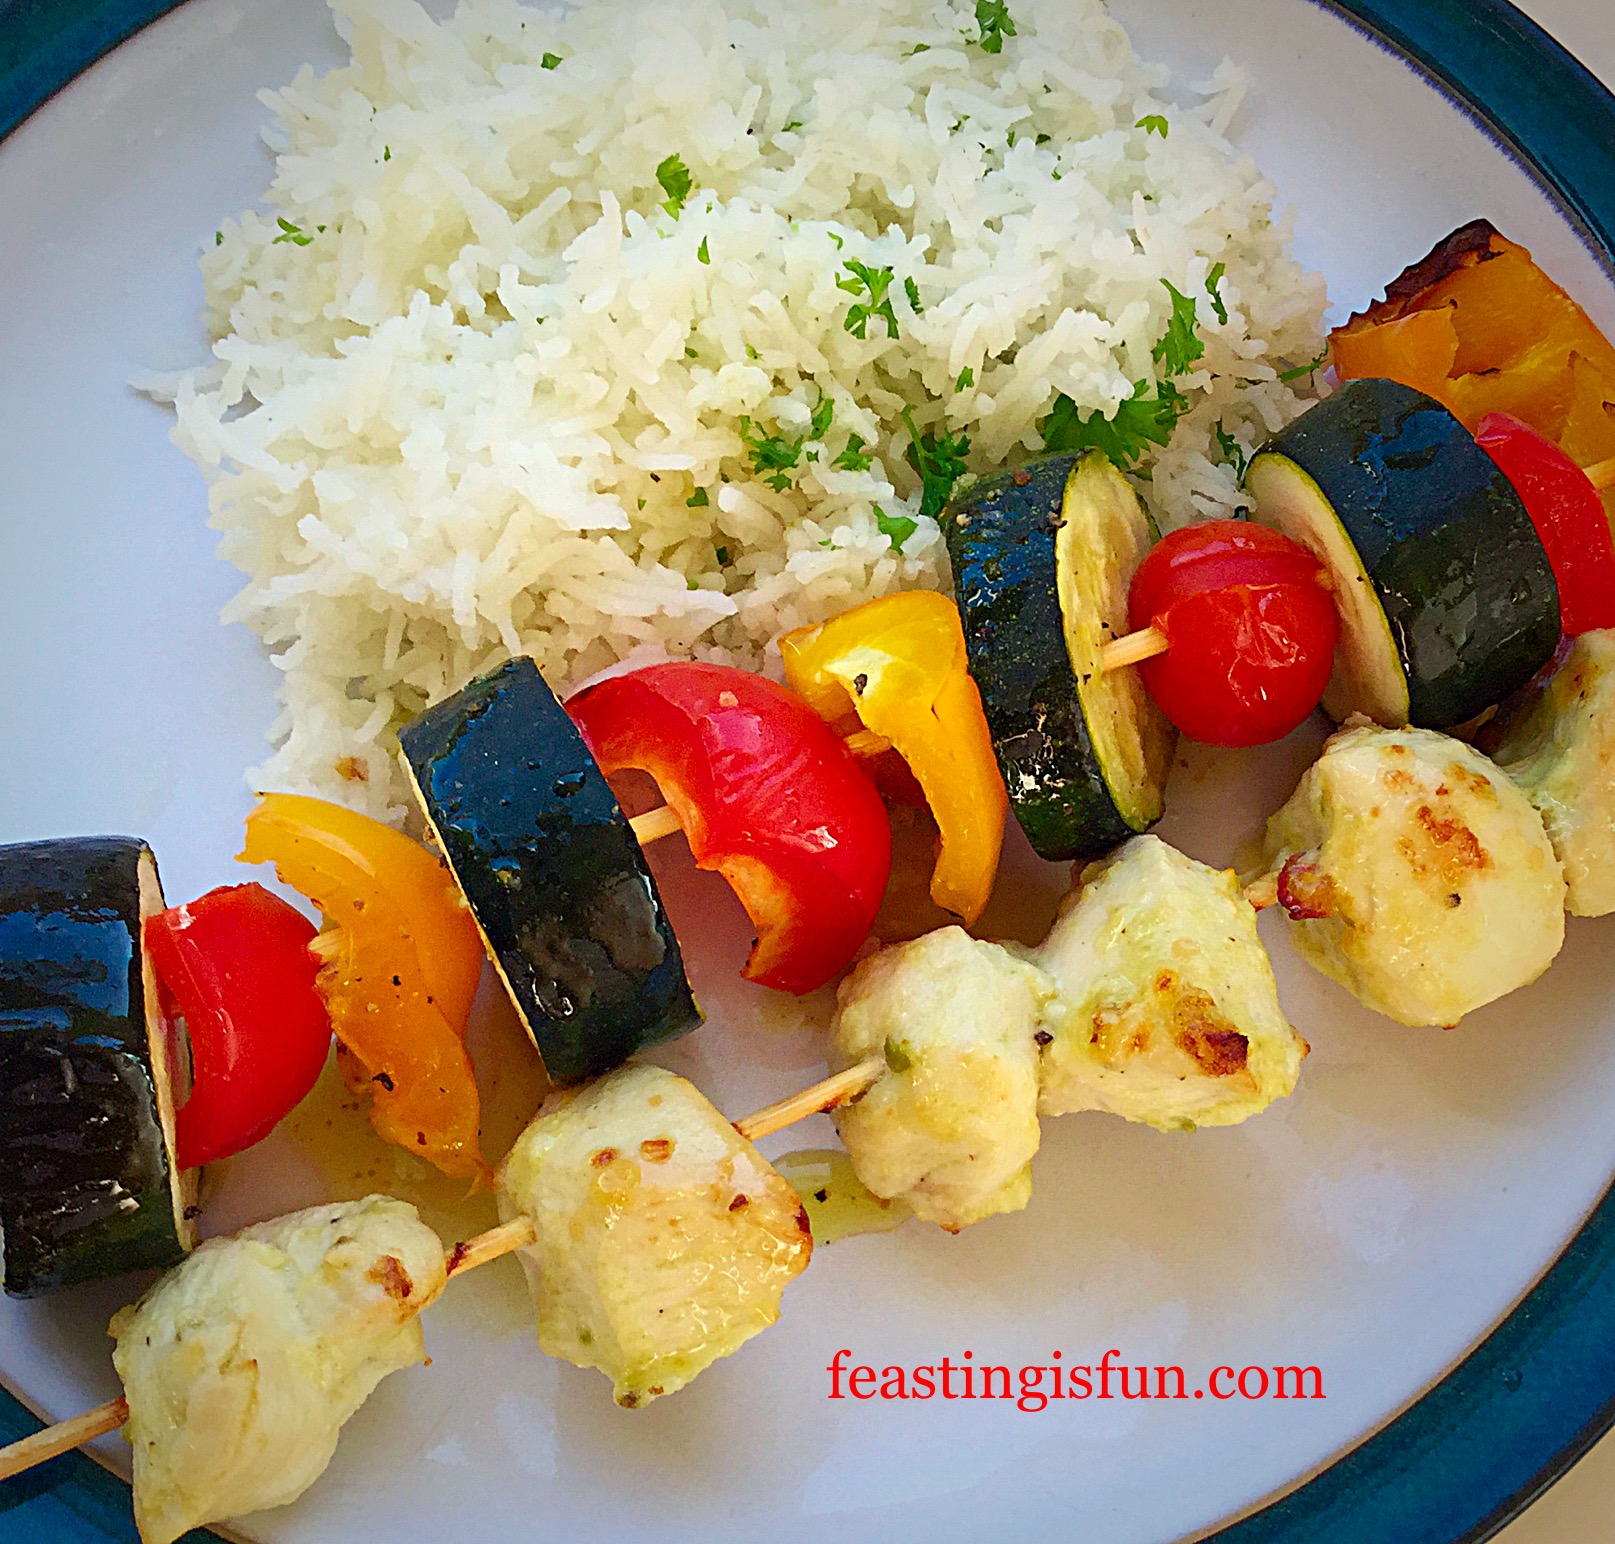
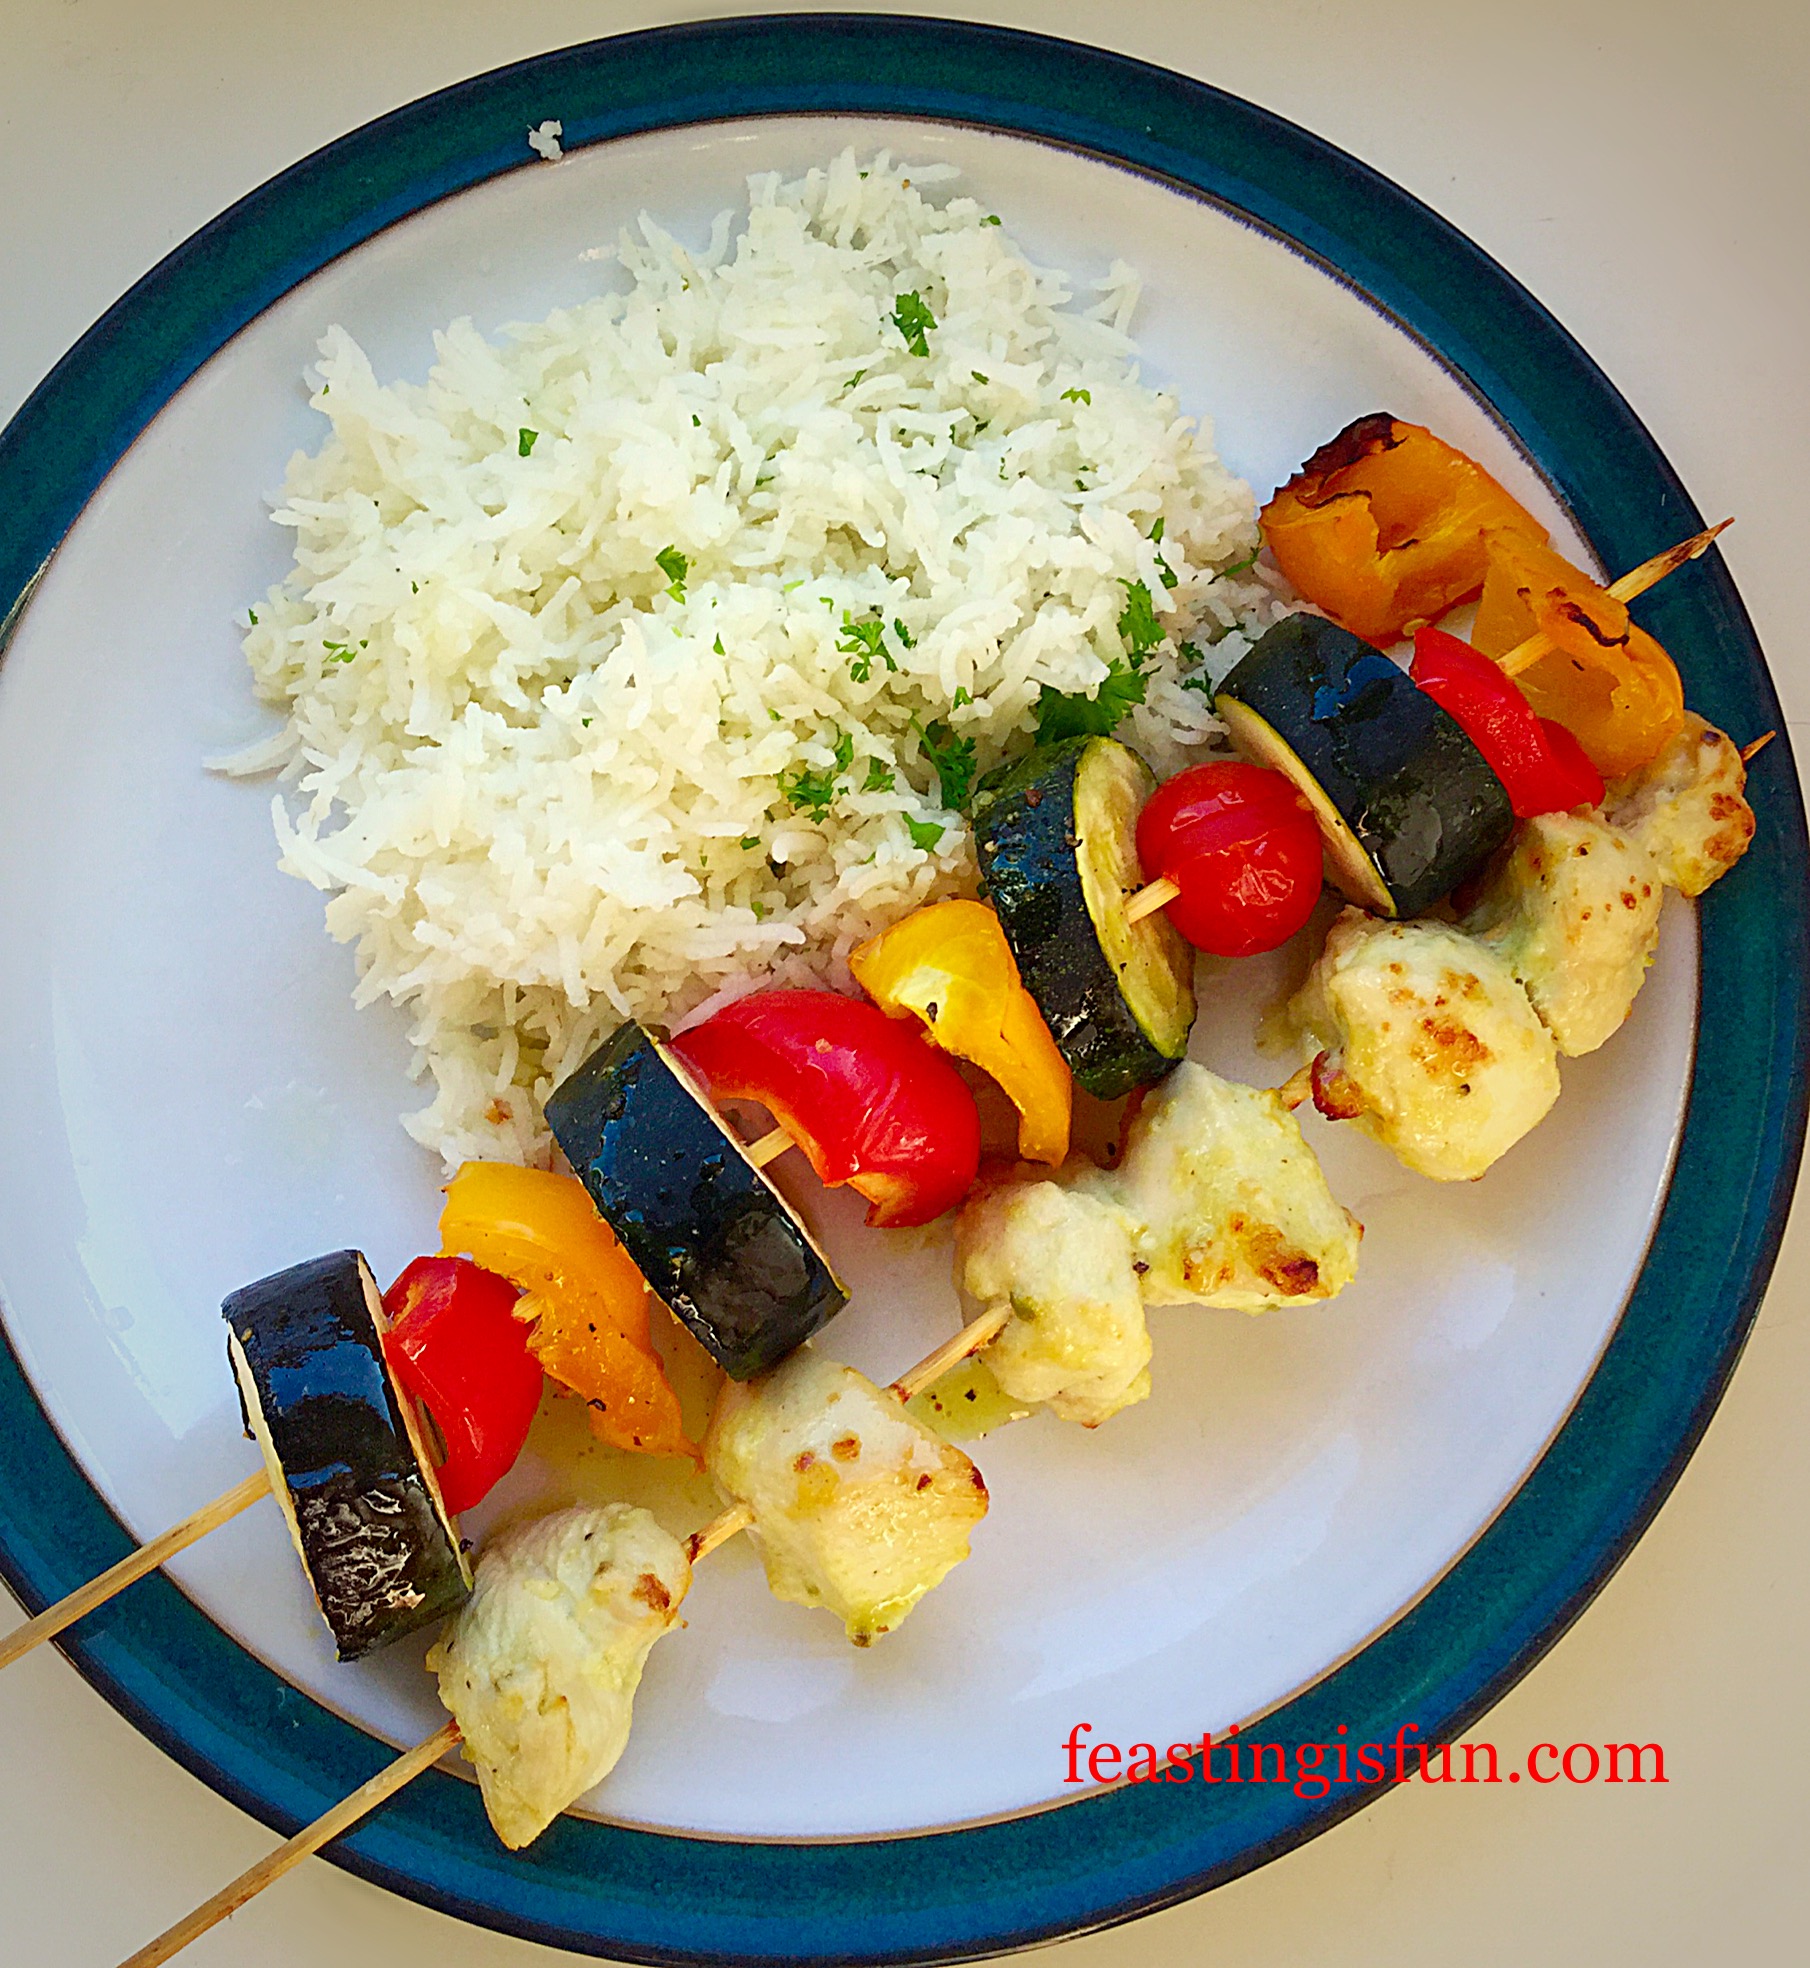
Serve the Chilli Lime Chicken Kebabs in warmed pitta bread with fresh salad and extra Jalapeño Sauce, or as I have done, with herb basmati rice and vegetable kebabs.

However you serve these delicious kebabs they are sure to be thoroughly enjoyed. The lime, garlic and jalapeño chilli give them a warming, fresh, vibrant flavour. For real chilli fans, serve with extra slices of jalapeño chilli’s to up the heat factor.

While I love the heat that chilli imparts to a dish, I never want to compromise on flavour. This Mexican Jalapeño Chilli Sauce is so delicious and perfectly blends with the other flavours in these Chilli Lime Chicken Kebabs.

FF Chilli Lime Chicken Kebabs
Chilli Lime Chicken Kebabs the perfect feel good meal.

If you like to add a little heat to your meals like me, try adding a dash or two of KanKun Mexican Jalapeño Sauce!

If you have enjoyed this recipe for Chilli Lime Chicken Kebabs here are some others you may like:

Easy Tex Mex Chicken

FF Chilli Lime Chicken Kebabs
Easy Tex Mex Chicken perfect to make ahead.

Chunky Chilli

FF Chilli Lime Chicken Kebabs
Chunky Chilli perfect for colder days.

Lemon Thyme Roast Chicken

FF Chilli Lime Chicken Kebabs
Lemon Thyme Roast Chicken spice up your leftovers with some KanKun Sauce!

I love the Summer months. Having the back door open, sunlight streaming in through open windows, longer daylight hours. Let’s all make the most of this Summer. Eat outdoors, dust off the BBQ, invite friends and family round, for feasting, fun and the obligatory (in our house) water fight in the garden.

Let us all enjoy the warmth of the sun, good company, great food and having fun.

Sammie xx

KanKun Sauce sent me a pack of three of their sauces to try. All content, recipes, photographs, views and opinions are my own. I was not paid for this post. Please see my Disclosure Policy.


Share
Facebooktwitterpinterestlinkedintumblr

Strawberry Eton Mess

Share
Facebooktwitterpinterestlinkedintumblr

Oh how I love summer fruit. Ruby red strawberries, crimson through to black cherries, tart yet sweet raspberries and the array of different currents. I am definitely a soft fruit fan and love to eat them freshly picked, or use them in delightful, dessert recipes. This Strawberry Eton Mess is a classic English dessert, that is best made with fresh, local strawberries.

FF Strawberry Eton Mess
Strawberry Eton Mess a delicious trio of ingredients.

While homemade pavlova provides a crisp and marshmallow like texture that I’ve enveloped in lightly whipped cream, with sweet luscious strawberries.

FF Strawberry Eton Mess
Strawberry Eton Mess the perfect make ahead dessert.

Since this Strawberry Eton Mess is so easy to assemble, it is also brilliant as a make ahead dessert. The pavlova can be made the same day, or even the day before, strawberries can be hulled, quartered and left covered in a bowl and the cream takes only a couple of minutes to whisk by hand.

Finally, all of the ingredients can be assembled prior to serving, for a stress free delectable dessert!

FF Strawberry Eton MessStrawberry Eton Mess a classic English summer dessert.

True to my word, I am adding more desserts to Feasting is Fun. My family are loving the new-ish aspect to my blog!!

This Strawberry Eton Mess is probably one of my favourite desserts. The differing textures within the pavlova and the fresh local strawberries really make this a stunning dish. As with all recipes, especially those that have few ingredients, it really is worth buying the best that you can afford. Or in the case of this dessert, taking the time to make your own pavlova.

I know ready made meringues are easily available in supermarkets, they won’t give the marshmallow inner softness that a homemade pavlova yields. If you make your own ice cream like my  Strawberry Ripple Ice Cream then you will be left with 4 eggs whites. The exact amount needed for this recipe.

FF Strawberry Eton Mess
Strawberry Eton Mess topped with a drizzle of strawberry jam.

I was fortunate to win some Hartleys strawberry jam on Twitter. Warmed slightly, so that it becomes a sauce, it adds the perfect finishing touch to this dessert. The bright red colour contrasts beautifully with the pale cream meringue and it lends an extra strawberry hit as you take your first mouthful.

Recipe: Strawberry Eton Mess serves 6

For the pavlova:

4 Large Egg Whites – preferably free range or organic

150g/5oz – 1 US Cup Icing Sugar

2tsp Corn Flour – also known as corn starch

1tsp White Wine or Cider Vinegar

1/2tsp Vanilla Extract – I use –Nielsen-Massey

For the Strawberry Eton Mess:

400g/ Fresh British Strawberries

300ml Double Cream

1tsp Vanilla Bean Paste – again I use Nielsen-Massey

1tbsp Caster Sugar

1tbsp Strawberry Jam – I used Hartley’s Best Strawberry Jam – warm slightly before drizzling onto the Strawberry Eton Mess

Method: Preheat the oven to 200C/180C fan, gas mark 6

  • First of all line a large baking tray with baking parchment that has a 20cm circle, drawn in pencil, on the underside.
  • Into a spotlessly clean, large bowl place the egg whites.
  • Whisk until the egg white hold a stiff peak.
FF Strawberry Eton Mess
The meringue peaks stand proud.
  • While whisking on a medium speed gradually add the sugar. Continue whisking until the meringue is glossy and shiny.
  • Sift in the cornflour and add the vanilla and vinegar.
FF Strawberry Eton Mess
Shiny, glossy meringue, ready to have the extra ingredients folded in.
  • Using a large metal spoon gently fold in the added ingredients into the meringue, turning the bowl until they are fully incorporated.
  • Spoon the meringue on to the baking parchment, keeping within the circle marked on the reverse.
  • Spread the meringue out so that it forms a circle and slightly build up the sides so that they are a little higher than the centre.
FF Strawberry Eton Mess
This pavlova is ready for the oven.
  • Place the pavlova into the centre of the oven and immediately turn the temperature down to 140C/120C fan, gas mark 1.
  • Bake for 1 and 1/4 hours. Then turn off the oven and leave the pavlova to cool inside the oven with the door very slightly ajar.
  • Once cooled removed the pavlova from the oven.
FF Strawberry Eton Mess
The cooked pavlova.
  • Cover the pavlova and baking tray in cling film until ready to use.

Assembling the Strawberry Eton Mess:

  • Hull and cut the strawberries into halves or quarters, depending on their size.
  • Into a large bowl add the cream, vanilla bean paste and caster sugar.
  • Whip the cream until it thickens, but is still floppy – not stiff.
  • Add the strawberries, break the pavlova up into bite size chunks and add those too.
FF Strawberry Eton Mess
Strawberry Eton Mess you can see the marshmallow insides of the pavlova.
  • Fold all the ingredients together with a large metal spoon.
  • Serve in pretty glass bowls with a drizzle of slightly warmed strawberry jam.
FF Strawberry Eton Mess
Strawberry Eton Mess serve with a spoon and a smile.

Because this is such an easy to assemble dessert, with a little preparation beforehand, you too can sit down and enjoy eating this with family, friends, or whoever you have invited round.

Also, if you wanted to up this Strawberry Eton Mess to the next level, a drizzle of my Boozy Berry Sauce, served cold, on top would be a fantastic idea! That’s one for the adults though.

Strawberries and cream are such a classic combination and here, in this dessert, they are lifted by the presence of amazing, homemade pavlova.

Tip: The pavlova itself can be covered in whipped cream and tart berries (passionfruit is also exceptionally good). One recipe two desserts!

If you have enjoyed the recipe for this Strawberry Eton Mess here are a few others you might like:

Lemony Strawberry Pavlova

FF Straw Eton Mess
Delicious Lemon Pavlova slathered in cream, decorated with strawberries and finished with a limoncello drizzle.

Raspberry Chocolate Ice Cream Sundae

FF Strawberry Eton Mess
Vanilla ice cream layered with chocolate meringue and unbelievably good raspberry sauce.

Chocolate Brownie Raspberry Cheesecake

FF Strawberry Eton Mess
Light Raspberry Cheesecake on a Chocolate Brownie base – so good.

Do you enjoy desserts?

I hope you’ve enjoyed this post and have been encouraged to make and bake a pavlova. It doesn’t matter if they sink, or crack as it can all be covered with cream and fruit, or crumbled into the best Strawberry Eton Mess you have ever eaten!

Have fun making and baking in your kitchens. Keep the photos and comments coming, I’d especially like to see ones of you sharing your delicious feasts?

Sammie xx

This is not a sponsored post, the jam was won in a competition on Twitter.

Share
Facebooktwitterpinterestlinkedintumblr

Oat Chocolate Chip Cookies

Share
Facebooktwitterpinterestlinkedintumblr

So, if you’ve spent a little time on this blog, you’ll know that I am a self confessed Cookie Monster. And cookies are my favourite go to sweet treat. Perhaps that’s why there are 21 cookie recipes on here! Anyway I try to keep on the oat/nut/fruit side of things but I craved CHOCOLATE! So I caved and made these unbelievably good Oat Chocolate Chip Cookies.

Oat Chocolate Chip Cookies

They are so good!

Oat Chocolate Chip Cookies

Oh yes I did. I totally stacked a piles of these very yummy Oat Chocolate Chip Cookies. Because what’s better than one cookie? A whole stack of them!

So there you go, that’s my kind of maths.

Also adding oats to cookies does two important things; it nudges them slightly more toward the healthier end of the nutritional spectrum and it gives them a wonderful, chewy, almost nutty flavour.

Oat Chocolate Chip Cookies

A Family Of Cookie Lovers

While you all know how much I love and adore my family. I have the best hubby in the world, who has all but given up his office, so that I can store baking equipment. Bundt tins take up a lot of room you know! Also there’s my Star and Snugs, our two gorgeous girls who, help me so much. Whether it’s cooking dinner, cleaning, vacuuming and much more. Last but definitely not least is our little man, who isn’t so little anymore so I’ll call him by his best friends nickname, Bob. He is growing into a loving and strapping lad who is always ready to help, especially fixing things. And Bob has definitely inherited his paternal Grandad’s capability with his hands.

So you see I love them all – but – they also are cookie monsters. Which is fine I make food to be eaten, except out of this batch of 18 cookies I only ate 1. It didn’t help that I’d spent a few days in bed (see here ) after making these. While I appreciate that they bring me cups of tea, however, as I’d ordered some shortie biscuits, which I love, they brought those with my hot drink. So it was only a few days later, when I was able to venture downstairs that I realised they’d all gone!

A stack of Oat Chocolate Chip Cookies
Oat Chocolate Chip Cookies

I was sad for a teeny tiny moment and then very thankful and flattered that my lovely family had enjoyed them so much.

Family, My Biggest Supporters

Since they are my biggest supporters, along with extended family, it really gives me a warm, fuzzy feeling inside knowing I’ve made them something that they  have really enjoyed. Although, being stuck in bed is not fun, knowing there is a tin full of cookies downstairs in the kitchen, helps me to feel that I am more present, than in reality I am.

Recipe: Makes 16-18 Oat Chocolate Chip Cookies

225g/8oz Soft Light Brown Sugar – I used Billingtons

150g/5oz Unsalted Butter- at room temperature

2tsp Vanilla Extract – I use Nielsen-Massey

1 Large Free Range Egg – plus

1 Large Free Range Egg Yolk

175g/6oz Plain White Flour

100g/4oz Plain Rolled Oats – not quick cook

1/2tsp Bicarbonate of Soda

Pinch of Salt

150g/5oz Milk Chocolate Chips or Chunks

50g/2oz Dark Chocolate 70% cocoa

Method: preheat the oven to 170C/150C fan, gas mark 4, 350F

Making The Oat Cookie Dough

  • First of all, line 3 large baking trays with baking parchment.
  • Place the sugar and butter in a large bowl and whisk/beat for 5 minutes until pale and creamy – whisking for 5 minutes here and then after adding the eggs is very important to the finished texture of the cookie.
  • Add the vanilla extract and the eggs and continue whisking/beating for a further 5 minutes.
  • Sift in the flour, bicarb. salt and add the oats.
  • Add the chocolate chips.
  • Fold all the ingredients together until you have uniform cookie dough.
  • Using a medium sized ice cream scoop, or a spoon and your hands, scoop/roll 5cm/2″ ball of cookie dough and place onto the baking tray.
FF Oat Chocolate Chip Cookies
Cookie dough balls.
  • With slightly dampened fingers (it stops the cookie dough sticking to them), press down on each ball to flatten slightly.
FF Oat Chocolate Chip Cookies
Oat Chocolate Chip Cookies ready for the oven.

Baking The Oat Chocolate Chip Cookies

  • Place the baking trays in the centre and lower parts of the oven. I rotate mine halfway through baking.
  • Bake for 15-20 minutes. The cookies are baked when they have spread out and are golden brown.
  • As soon as the cookies are baked remove the cookies from the oven. Because they will still be very soft, leave on the baking tray to cool and set.
FF Oat Chocolate Chip Cookies
Oat Chocolate Chip Cookies baked and cooling on the tray.


  • As soon as they are cooled lift each cookie free of the baking parchment, use a palette knife to slide underneath the cookie first. Place the cookie back on the baking parchment.

Adding The Dark Chocolate Swirl

  • In a heatproof, microwaveable bowl add the chopped/broken up dark chocolate.
  • Zap for 20 seconds in the microwave stirring after each heating session. When the chocolate is almost melted remove from the microwave and continue stirring until fully melted.
  • Pour the liquid chocolate into a small disposable piping bag.
  • Snip the very end of the piping bag off, creating a small hole.
  • Pipe swirls onto each of the cookies. Use all of the chocolate up, simply pipe over the swirls again.
FF Oat Chocolate Chip Cookies
Oat Chocolate Chip Cookies with swirls of dark chocolate.
  • Set the cookies to one side to allow the chocolate to cool and set.
  • As soon as the chocolate is set, pop the kettle on, invite a neighbour round and spend some time chatting over a cup of coffee and delicious Oat Chocolate Chip Cookies.

In the United States and Canada where my friend Liz lives, they carry out cookie exchanges during the holiday season – usually from Thanksgiving through to Christmas. I love that idea! Baking up batches of cookies, sharing, swapping, making new friends, remembering old friends. Liz is an amazing cook and her attention to detail always leaves me impressed.

What do you think, should we have a cookie/biscuit exchange here?

Not because it’s ‘another American custom’ simply because it’s a great idea?

If you have enjoyed these Oat Chocolate Chip Cookies you may also like these:

Double Chocolate Nut Spelt Cookies

Double Chocolate Nut Spelt Cookies

Caramac Caramel Cookies

FF Oat Chocolate Chip Cookies
Caramac Caramel Cookies delicious chewy bites of nostalgia.

Rolo Chocolate Cookies

FF Oat Chocolate Chip Cookies
Rolo Chocolate Cookies chewy bites of cookie heaven.

Thank you to everyone who reads this blog. I really do appreciate you. It’s been wonderful seeing all the bake photos that you have been putting up on Twitter and Instagram. Please keep them coming and if you every have any questions about a particular recipe, either leave a comment, or probably for a quicker response send me a Tweet.

We have a three day bank holiday weekend coming up. So, whatever your plans, I hope that they involve lots of smiles, laughter, fun and feasting with friends, family and neighbours.

Sammie xx

No part of this post may be reproduced or duplicated without the written permission of the owner. Please see my Disclosure Policy.

Share
Facebooktwitterpinterestlinkedintumblr

Chocolate Brownie Raspberry Cheesecake

Share
Facebooktwitterpinterestlinkedintumblr

Chocolate Brownie Raspberry Cheesecake. Whipped mascarpone cheese with fresh raspberries over a deep, chocolate ganache topped brownie base.

If I had known you were coming I would have made this elegant Chocolate Brownie Raspberry Cheesecake.

Chocolate Brownie Raspberry Cheesecake

How pretty does this cheesecake look?

And you can make it too, with the additional help of an IfIKnewYouWereComing Artisan Chocolate Brownie Baking Box! Alternatively, you can follow my recipe below for an easy brownie base.

A slice of Chocolate Brownie Raspberry Cheesecake

I love the gorgeously dense and fudgey brownie base to this cheesecake. Because chocolate and raspberry flavours work so well together this Chocolate Brownie Raspberry Cheesecake really is a dream dessert.

Why a brownie base?

Recently our youngest daughter revealed that she really didn’t like the traditional biscuit that usually is on the base of a cheesecake. YET she does love the creamy, top part. Therefore this cheesecake was made with her in mind.

Since she absolutely loves brownies I decided to make a cheesecake with a brownie base. Also adding a layer of deep, dark chocolate ganache to the top of the brownie base to stop the base from becoming soggy. While this too adds another chocolate layer!

Each ingredient comes in a separate package all I neede to do was add butter and eggs and follow the recipe!
Each ingredient comes in a separate package all I needed to do was add butter and eggs and follow the recipe!

Brownies this kit form

I was impressed with the ingredient packaging and the instructions provided with the Artisan Chocolate Brownie Bake Box. While baking these brownies was very similar to making my own homemade brownies, except someone had already weighed the ingredients out for me! So all I needed to do was add butter and eggs.

Chocolate Brownie Raspberry Cheesecake fudgey chocolate base covered in light raspberry mousse cheesecake.

This Chocolate Brownie Raspberry Cheesecake is utterly stunning to look at and even more delicious to eat.

The whipped, mousse like, raspberry cheesecake layer, isn’t overly sweet. Also, with an added splash of raspberry liquer and vanilla notes from the white chocolate, this dessert is an awesome combination of flavours.

Layered together, with a final swirl of the best quality dark chocolate, this cheesecake may be my favourite dessert yet?!!

Chocolate Brownie Raspberry Cheesecake

Recipe: Chocolate Brownie Raspberry Cheesecake serves 10-12

1 Brownie Bake Box from IfIKnewYouWereComing

(alternatively use half of my Chocolate Fudge Brownie Bites) recipe

115g Unsalted Butter

2 Large Free Range Eggs

300g/Raspberries I use frozen Raspberries from Waitrose when they are out of season

4tbsp Caster Sugar

2tbsp Framboise – raspberry liquer  – can be substituted for cassis or fresh apple juice

150g Dark Chocolate

300ml Double Cream

500g Tub Mascapone Cheese

100g White Chocolate

Method: Preheat the oven to 200C/180C fan, gas mark 6, 400F.

Making the Brownie Base:

  • First of all, line the base of a 10″ (25cm) Springform cake tin with the parchment backed, tin foil provided.
  • Follow the recipe card provided to make the brownies.
  • Pour the brownie mixture into the springform tin and tap against the work top twice to release any trapped air bubbles.
  • Place the tin in the oven and bake according to the instructions – my brownie base took 15 minutes to bake.
  • As soon as the base is  baked remove the tin from the oven and place on a cooling rack. Allow to cool completely.
Delicious brownie base studded with dark chocolate chips.

Making the Chocolate Ganache:

  • In a heatproof bowl add 100g dark chocolate and 100ml of double cream.
  • Place the bowl on top of a small saucepan that contains approximately an inch of barely simmering water – this is called a double boiler.
  • Stir the chocolate and cream together until the chocolate has completely melted and the mixture is thick and glossy.
  • Pour the chocolate ganache over the cooled brownie base.
  • Smooth to an even layer using the back of a metal dessert spoon.
  • Place in the fridge until the ganache has set.
Glossy chocolate ganache not only adds an extra layer of deliciousness, but also stops the brownie base from becoming soggy.

Making the raspberry cheesecake filling

  • Place the raspberries, caster sugar and framboise (or apple juice) into a blender.
  • Pulse until you have a smooth, deep cerise, thick raspberry coulis. Set to one side.
  • Break up the white chocolate and place into a heatproof microwaveable bowl.
  • Zap for 20 seconds at a time, stirring in between, until the chocolate has almost melted.
  • Remove from the microwave and continue stirring until completely melted. Set to one side.
  • In a large bowl add the tub of mascarpone cheese and 200mls of double cream.
  • Using a hand mixer, whisk until fully combined.
  • Pour the raspberry coulis into the cheesecake mix and whisk until fully incorporated.
  • Next pour in the melted white chocolate.
  • Whisk all of the cheesecake ingredients together until light and creamy.
  • Spoon the raspberry cheesecake on to the cold, set, chocolate ganache covered brownie base in the springform tin.
  • Smooth the top of the raspberry cheesecake to ensure a flat, even finish.
  • Cover the cheesecake with cling film and place in the fridge for at least 2 hours to allow to set.
Once you have smoothed the top of the cheesecake you can lick the spoon 😉
  • Remove the cheesecake from the fridge.
  • Run a palette knife between the outside edge of the cheesecake and the iside of the springform tin.
  • Place the springform tin centrally on a large tin of beans (or something equally as sturdy).
  • Release the springform catch and gently encourage the sides of the tin to fall away from the base.
  • Place the Chocolate Brownie Raspberry Cheesecake on to a serving plate or cake stand – the base will still be attached, don’t worry that’s fine.
  • Use a palette knife, that has been kept in a jug of boiling water, to smooth the top and sides of the cheesecake.

Decorating the cheesecake

  • Melt 50g of dark chocolate in a microwaveable, heat proof bowl, as before.
  • Pour the melted chocolate into a small, disposable piping bag.
  • Snip off the very end of the piping bag to create a small hole.
  • Pipe swirls of chocolate all around the edge of the cheesecake and larger loops in the centre. Continue piping over the swirls around the edge until the chocolate is all used.
Chocolate Brownie Raspberry Cheesecake so beautifully decorated and yet so easy to achieve.

Now stand back and look at the beautiful Chocolate Brownie Raspberry Cheesecake that you have made and decorated.

Such a simple piping technique and yet incredibly elegant. Resulting in a cheesecake that is perfect for adding the wow factor to any dinner party or celebration. Pale pink and chocolate brown are a classic colour combination, ensuring this dessert looks elegantly appetising.

While the taste and texture of the brownie base was perfect, exactly like homemade. So I would definitely recommend it, especially if you bake only at weekends or for special occasions. Also, all the ingredients come pre-weighed, so you can easily make and bake brownies in under 30 minutes!

A delicious dessert with a slice in the foreground.
Chocolate Brownie Base Topped With Raspberry Cheesecake.

If you have enjoyed this Chocolate Brownie Raspberry Cheesecake then you may also like these recipes:

White Chocolate Strawberry Cheesecake

FF Chocolate Brownie Raspberry Cheesecake
White Chocolate Strawberry Cheesecake.

Strawberry Chocolate Cheesecake

FF Chocolate Brownie Raspberry Cheesecake
Strawberry Chocolate Cheesecake.

Blackberry Nectarine Tart

Blackberry Nectarine Tart


I like to make cheesecakes all year round. Especially as frozen raspberries ensure that a glimpse of Summer can be seen and enjoyed, in the midst of the colder months. Likewise, fruit tarts can also be easily made using frozen and store cupboard ingredients. Ensuring dessert is only a short bake away!

So, whatever you are making and baking in your kitchens, have fun feasting on all your creations.

Sammie xx

IfIKnewYouWereComing supplied me with the Artisan Chocolate Brownie Bake Box for this recipe. All opinions and views are my own. Please see my Disclosure Policy.

Share
Facebooktwitterpinterestlinkedintumblr

Chicken Herb Burgers

Share
Facebooktwitterpinterestlinkedintumblr

Ah the sunshine of the last few days has almost tempted me to get the barbecue out. Judging by the delicious aromas wafting across our garden, I am not the only one. Instead I made these Chicken Herb Burgers and we ate them outside!

FF Chicken Herb Burgers

I have never really been a fan of barbecues. The mass produced cheap sausages and burgers in limp, dry buns, has never held any appeal for me. Yet last year when went were on holiday to Devon we had a barbecue to celebrate our eldest daughter’s 16th birthday.

It was a totally awesome barbecue!

The weather was fantastic and so was the food. King prawn kebabs, free range pork sausages, unbelievably good chicken and lime kebabs – all of which I intend to make again this year and share with you. Oh and we skipped buns in favour of pita bread!

These Chicken Herb Burgers would be absolutely awesome cooked on a barbecue. They are equally fantastic cooked in a cast iron skillet, where the searing heat ensures a great golden outer, which left un-disturbed seals in all the fantastic juices and holds the burger together.

Chicken Herb Burgers

Higher Welfare Chicken

Made from 100% additive free, organic/free range, minced chicken, these burgers are meaty and juicy. The only addition is some fresh thyme, garlic and seasoning. No suspect, milky liquid escapes from the burgers whilst cooking, because the minced chicken does not have any liquid added to it, pre-sale, to bulk it out.

Chicken Herb Burgers use premium meat and boy can you taste the difference.

I am well aware that many people feel that they cannot afford to buy organic meat. Yet it is so much better for us. Happy hens fed a natural diet, allowed to roam freely and build muscle as they slowly mature are a million miles away from their mass produced, intensely reared counterparts.

My answer to the increased cost of good organic chicken is simply to eat it less often, ensure that absolutely nothing goes to waste and cherish the flavour of how real chicken should taste!

Chicken Herb Burgers

If you’ve never made your own burgers before, then this recipe for Chicken Herb Burgers is a great place to start 😉

Recipe: Makes 6-8 Chicken Herb Burgers

2 x 454g/2lb Minced Chicken from Graig Farm

3tbsp Olive Oil

1tbsp Fresh Thyme

4 Garlic Cloves

1tsp Sea Salt – I use Maldon Sea Salt Flakes

1tsp Freshly Ground Black Pepper

1tbsp Butter

Method:

Making the burgers

  • Empty both packets of chicken mince into a large bowl.
  • Add the thyme, crushed garlic, 2 tablespoons olive oil, salt and pepper.
FF Chicken Herb Burgers
You can alter the amount of garlic to your preference.
  • Using clean hands squish (mix) all the ingredients together until they are thoroughly combined.
  • Divide the chicken mixture into 6 or 8 equal portions and shape into burger patties using your hands.
  • Place the burgers on to a plate or foil container and chill in the fridge for at least an hour – this helps the Chicken Herb Burgers hold their shape whilst cooking.
FF Chicken Herb Burgers
Chicken Herb Burgers chilled and ready to cook.
  • Heat a cast iron skillet, or heavy bottomed frying pan until searing hot.
  • Add 1 tablespoon of oil and add the chicken burgers, one at a time – take care not to overcrowd the pan.
  • Turn the heat down slightly. The outside of the burgers will sear on contact with the hot pan, however, we don’t want them to burn on the outside whilst remaining raw in the centre.
  • Once placed in the pan do not disturb the burgers for at least 8 minutes. This will allow a nice crust to form on the underside of the burger.
  • After 8 minutes, using a metal spatula, flip each burger over.
FF Chicken Herb Burgers
Chicken Herb Burgers golden, cooked and ready for a brioche bun.

Cooking the Chicken Herb Burgers

  • You can see from the photo above that the chicken burgers really hold their shape well whilst cooking.
  • Cook the burgers for another 5 minutes and then add a little dot of butter to the top of each burger – trust me, this adds an extra layer of flavour and juiciness.
  • Once the butter has melted, cut halfway into a burger to check if it is cooked. The meat should be completely opaque all the way through without even a hint of pinkness – these are chicken burgers and so unlike beef or steak they must be completely cooked through.
  • Once cooked place each burger on a delicious brioche bun (recipe coming up soon) with slices of tomato, red onion and crunchy green lettuce.
  • Add the condiment of your choice – tomato ketchup for me and pop on the lid of the bun.
  • For an extra restaurant style touch secure each burger in its bun with a steak knife.

FF Chicken Herb Burgers

Homemade tastes best

Oh my, these Chicken Herb Burgers are unbelievably good!

They are a million miles away in taste from the local fast food burger joint. The butter added right at the very end of the cooking adds such a delicious buttery finishing note, which works in complete harmony with the succulent, juicy, chicken.

Making your own burgers is so much fun and you can make them as big or small as you like. You may have indeed noticed that there are only 5 Chicken Herb Burgers in this post. Well that’s because I only made 5!! This was a last minute idea for Sunday dinner and we were hungry! I make no apologies, they tasted so amazingly good.

I haven’t found anywhere else that sells chicken mince other than Graig Farm. Saying that I’ve not looked really hard because why would I? Their additive free organic and free range chicken mince is so fantastic, with freezer friendly packaging. I have no reason to look elsewhere!

FF Chicken Herb Burgers
Minced Chicken flat packed and frozen makes defrosting so easy!

Brilliantly packaged to take up minimum freezer space, this chicken mince also defrosts really quickly as well.

If you have loved this recipe for Chicken Herb Burgers you may also enjoy these:

Chicken and Four Cheese Lasagne

FF Chicken Herb Burgers
Chicken Four Cheese Lasagne

Roast Chicken Noodle Soup

FF Chicken Herb Burgers
Roast Chicken Noodle Soup a great way to make an incredible meal from leftovers.

Chicken Pasta Pesto Salad

FF Chicken Herb Burgers
Chicken Pasta Pesto Salad a great all in one dish.

Eating good quality chicken, cooked well. in one of these recipes is a taste experience you will not forget. Trust me it is worth trying – why not find out for yourself?

Thank you for spending time reading this blog. I really do appreciate you all.

Whatever you are making, baking and feasting on, remember that food tastes better when it is shared.

Sammie xx

This is not a sponsored post. I have been buying our meat from Graig Farm for the last four years now and I cannot personally recommend their produce highly enough.

Share
Facebooktwitterpinterestlinkedintumblr

Raspberry Chocolate Ice Cream Sundae

Share
Facebooktwitterpinterestlinkedintumblr

Every time I look at the colour of this Raspberry Chocolate Ice Cream Sundae it makes me smile.

The colours are bright, summery, vibrant and let’s face it beautiful!

So, just wait until you taste this!

FF Raspberry Chocolate Ice Cream Sundae
Raspberry Chocolate Ice Cream Sundae this is a party in a glass!

So, let’s clear one important matter up, this Raspberry Chocolate Ice Cream Sundae does NOT have to only be eaten on Sunday’s!

I know, I can feel your relief. Because this Sundae is so yummy you will definitely want to eat it on other days of the week too.

What Is A Sundae?

Start with the best vanilla ice cream, drape over vibrant, tart and fruity raspberry coulis and add delicious, soft, chocolate meringue all layered in a tall sundae glass. Absolutely the most incredible flavour combination where every ingredient is distinct, yet each works in total harmony as a whole.

FF Raspberry Chocolate Ice Cream Sundae
Raspberry Chocolate Ice Cream Sundae 

You are so going to love this recipe. Apart from making the deeply chocolate meringues, there is no other baking involved!

And, as much as I love baking, I really, really do – sometimes it’s nice to pull together a fabulous dessert where very little effort.

Happy Baking Accidents

In fact this Raspberry Chocolate Ice Cream Sundae came about by accident. Having baked the chocolate meringues I was hoping to make an Eton Mess type dessert. The cream, which was well within it’s use-by-date had gone off, the strawberries were past their best. The whole Eton Mess thing just wasn’t happening – don’t worry it will be made!

Instead I improvised. Typically, when I wing it the result is either amazing or revolting! Fortunately the combination of flavours in this incredible dessert totally, utterly and completely worked.

I mean really, really, really worked!

FF Raspberry Chocolate Ice Cream Sundae
Raspberry Chocolate Ice Cream Sundae share this with everyone.

Don’t you just love it when things turn out better than you could of ever hoped?

Recipe: Makes 6 Raspberry Chocolate Ice Cream Sundae

For the chocolate meringues:

Note: for photos showing step by step pavlova instructions, please see here

3 Large Egg Whites

125g/4.5oz Cater Sugar

1/2tsp Corn Flour

50g/2oz Cocoa Powder

1/2tsp Vanilla Extract – I use Nielsen Massey

1/2tsp White Wine Vinegar

For the raspberry coulis:

300g/11oz Raspberries – I used frozen raspberries from Waitrose

1tbsp Caster Sugar

Juice of a Lemon

Ice Cream – 750ml Vanilla Ice Cream – really good quality ice cream or you can use my recipe for Very Vanilla Ice Cream

Method: Preheat the oven to 160C/140C fan, gas mark 3

Making the chocolate meringues:

Preheat the oven to 160C/140C fan, gas mark 3

  • Line a baking tray with baking parchment.
  • In a large bowl add the 3 egg whites and whisk until they can hold a stiff peak.
  • Continue whisking and addding in the caster sugar one tablespoon at a time.
  • Keep mixing until the egg whites are glossy and the caster sugar has been incorporated.
  • Add the vanilla extract, vinegar, corn flour and sift in the cocoa powder.
FF Raspberry Chocolate Ice Cream Sundae
These meringues are intensely dark and chocolatey.
  • Gently fold the ingredients into the meringue.
  • Dollop 6 clouds of chocolate meringue onto the baking sheet.
FF Raspberry Chocolate Ice Cream Sundae
Chocolate Meringue Clouds ready for the oven.
  • Place the chocolate meringues into the oven an immediately turn the oven temperature down to 140C/120C fan, gas mark 1.
  • Bake the meringues for 40 minutes and then switch off the oven, allow the meringues to cool completely in the oven – this is how they will obtain their brownie like texture.
  • Once completely cooled they can be used straight away, or stored in a tin, separated by baking parchment, where they will keep for 5 days.
FF Raspberry Chocolate Ice Cream Sundae
Chocolate meringues that taste like the best brownies!

Making the raspberry coulis:

  • Place the fresh or frozen raspberries into a medium bowl.
  • Sprinkle over 1 tablespoon of caster sugar.
  • Cover and leave for at least an hour.
  • Tip the raspberries, sugar and juice of a lemon into a blender.
  • Blitz in the blender until you have a super smooth purée.

Assembling the Raspberry Chocolate Ice Cream Sundae:

  • Remove the vanilla ice cream from the freezer 20 minutes prior to assembling the sundaes.
  • Place a scoop of ice cream into each sundae glass.
  • Pour over some raspberry coulis, ensuring that you have a little left for the tops of the sundaes.
  • Add another scoop of ice cream to each sundae glass.
  • Break two thirds off of the chocolate meringue, break up and add on top of the second ice cream layer. Repeat for each sundae.
  • Add a third and final scoop of ice cream on top of the crumbled chocolate meringue.
  • Finish with a final drizzle of raspberry coulis and the final third of the chocolate meringue.
FF Raspberry Chocolate Ice Cream Sundae
Raspberry Chocolate Ice Cream Sundae ready to be eaten and enjoyed.

Serve with a long sundae spoon so that you can reach right down to the very bottom of your sundae glass. You are not going to want to waste any of this utterly luscious, refreshing dessert!

Bargain Buys For Delicious Desserts

I bought these sundae glasses a couple of years ago, in Asda for £1.50 each. I had been wanting some for ages and as a rather clumsy person at times, I needed something sturdy that could withstand me and be used for smoothies, milkshakes and of course sundaes. Plus if I do break one it is cheaper to replace.

We all enjoyed these Raspberry Chocolate Ice Cream Sundaes for dessert today and were amazed a not only the awesome flavour combo, but also how refreshing they are. These are a massive hit and will be enjoyed on many more occasions throughout the warmer months.

Each Raspberry Chocolate Ice Cream Sundae has a 50g serving of raspberries and fresh lemon juice in it – they are virtually a health food 😉

FF Raspberry Chocolate Ice Cream Sundae
Raspberry Chocolate Ice Cream Sundae add spoon and devour.

In the photo above you can see how gloriously dark the inside of the chocolate meringue is – yummy!

Also, true to my promise, I am including more desserts on here – it’s a tough job……

If you have loved this recipe for Raspberry Chocolate Ice Cream Sundae here are a few more you may like too:

Blackberry Chocolate Chunk Ice Cream

FF Raspberry Chocolate Ice Cream Sundae
Blackberry Chocolate Chunk Ice Cream

Strawberry Chocolate Cheesecake

FF Raspberry Chocolate Ice Cream Sundae
No Bake Strawberry Chocolate Cheesecake

Lemony Strawberry Pavlova

FF Raspberry Chocolate Ice Cream Sundae
Lemony Strawberry Pavlova

I never really urge you to try any particular recipe, but in this instance I am. The theme of Feasting is Fun is sharing and I’d be crazy not to encourage you to try these Raspberry Chocolate Ice Cream Sundaes at least once!

The meringues can’t fail as they aren’t meant to be light and fluffy, rather more like a dense brownie texture. Ice cream can be bought and the raspberry coulis is a whizz – literally.

Ooh I should also mention that this is a fab recipe if you have a sore throat – three of us here have sore throats at the moment and this cool, refreshing sundae really soothed.

Whatever you are making and baking in you kitchens this weekend I really do hope you have fun creating a feast to be share.

Sammie xx

Share
Facebooktwitterpinterestlinkedintumblr

Macadamia Apricot Flapjacks

Share
Facebooktwitterpinterestlinkedintumblr

I am so loving the longer daylight hours at the moment. Feeling as though I want to make the most of every drop of sunshine. Winter being a distant memory, I’ve been out in the garden, clearing, ready for sowing and planting. Don’t worry I have also been in the kitchen baking and these Macadamia Apricot Flapjacks are the delicious result.

FF Macadamia Apricot Flapjacks

When the weather is warm and the sun is shining I simply love being in the garden. Listening to the chatter and chirruping of birds, feeling the warmth of the sun on my back, our garden becomes my haven again, after the long, cold winter months.

Easy Recipes For Breakfast On The Go

So being able to eat breakfast, or more usually brunch, outside is very much treasured. These Macadamia Apricot Flapjacks are perfect to munch on whilst sitting on our garden bench, hot cup of coffee to hand. Packed with slow energy release oats, they make a tasty, yet filling alternative to toast or cereal.

FF Macadamia Apricot Flapjacks
Macadamia Apricot Flapjacks so good with a cup of good coffee.

This recipe is so simple and quick. A few minutes in the kitchen melting, mixing, baking and cooling means that you can have a great, portable bar, that is perfect for breakfast on the go, packed lunches, getting through the late afternoon energy dip. Plenty of deicious bars to see you through the week.

That has to be a winning recipe – right?

FF Macadamia Apricot Flapjacks
Macadamia Apricot Flapjacks – crunchy, chewy bars of yum!

I love easy recipes – more so during the warmer months, when my passion for cooking and baking is matched by my passion for gardening. Yes I still have to work around my body (see – Living with siezures ), that just makes the time I have even more precious. Whilst in the winter I can happily spend all day – relatively speaking – in the kitchen, during warm spring and summer days my preference is to be outside.

Baking According To The Weather

My hubby jokes that I was born wearing Wellington boots! Whilst I may not be able to do the heavy digging of years past, I still like to get my hands dirty. I’ve also found, especially during the hotter months of summer, baking is best done first thing in the morning. That way there isn’t a hot oven baking bread, mid afternoon, just as the temperature outside is peaking.

Macadamia Nut Dried Apricot Flapjacks
Macadamia Apricot Flapjacks crunchy, chewy and full of flavour.

Easily Made Gluten Free Traybake

Back to the Macadamia Apricot Flapjacks! The macadamia nuts add a buttery crunch to these bars that I absolutely adore, however, I know they can be pricey. A great substitute would be almonds, either flakes or whole almonds that you chop yourself. I have used dried apricots that are the gorgeous tangerine orange of their fresh counterparts, however, if you prefer the darker, unsulphured apricots, use them instead. Good quality rolled oats, absolutely make these flapjacks the stars that they are.

I have specified that these Macadamia Apricot Flapjacks are gluten free, please check the labels of ingredients carefully to ensure that they are so. This is vital when baking for someone on a restricted diet. Their health absolutely cannot be compromised.

Recipe: Makes 12 Macadamia Apricot Flapjacks

250g/10oz Unsalted Butter – plus a little extra for greasing the tin

100g/4oz Golden Syrup (light corn syrup)

1/4tsp Salt – I use Maldon

125g/5oz Light Brown Sugar

325g/11.5oz Rolled Oats (not quick cook) – I used Delicious Alchemy as they are 100% gluten free

150g/5oz Dried Apricots – chopped into rough quarters

100g/4oz Chopped Macadamia Nuts – I buy whole nuts and roughly chop them myself

Optional – 100g White Chocolate – alternatively use milk or dark chocolate

Method: Preheat the oven to 180C/160C fan, gas mark 4, 350F

Making The Flapjacks

  • Grease and line a 8″ x 11″ – 20cm x 28cm swiss roll tin/shallow baking tin, with butter and baking parchment.
  • Into a medium saucepan add the butter and sugar. Warm over a medium heat, stirring until melted.
  • In a large bowl add the golden syrup.
  • Pour the melted butter/sugar mixture into the bowl containing the golden syrup. Stir continuously until combined.
  • Add the oats, chopped apricots and macadamia nuts and stir to thoroughly combine.
  • Tip the mixture into the prepared tin and press down using the back of a metal spoon, until the mixture is one even layer.
FF Macadamia Apricot Flapjacks
The Macadamia Apricot Flapjack mixture compacted into an even layer and ready for the oven.

Baking The Macadamia Nut Apricot Flapjacks

  • Place the tin in the middle of the oven and bake for 20 minutes exactly.
  • The flapjacks will be a light golden colour when baked – do not be tempted to bake them for longer as this will result in them being hard, not chewy!
  • As soon as the flapjacks are baked remove the tin from the oven and allow to cool completely.
  • When completely cooled remove the entire flapjack bake from the tin, using the excess baking parchment to help lift it out.
Macadamia Apricot Flapjacks
Macadamia Apricot Flapjacks ready for the finishing touch.
  • As seen above, cut down the middle length of the bake and then across the width.  Cut each quarter into 3 generous bars – you could cut each quarter into 4 making 16 individual flapjacks in total.
FF Macadamia Apricot Flapjacks
Macadamia Apricot Flapjacks with a drizzle of white chocolate.

Finishing With A Chocolate Drizzle

  • To finish the flapjacks – chop the white chocolate into small pieces and place in a heatproof, microwaveable bowl.
  • Zap for 20 seconds at a time, stirring between each heating session.
  • When the chocolate is half melted, remove from the microwave and stir until completely liquid.
  • Fill a small disposable piping bag with the melted chocolate.
  • Snip off the very end of the bag, creating a small hole.
  • Pipe swirls or zig zags of chocolate onto each flapjack to provide a beautiful finish.
FF Macadamia Apricot Flapjacks
Macadamia Apricot Flapjacks as pretty to look at as they are delicious to eat.

Ooh how completely yummy do these Macadamia Apricot Flapjacks look?

A couple of notes: During the summer, once the flapjack bake has cooled to room temperature, if the ambient temperature is 25C or above, it may be worth popping the tin in the fridge for an hour to allow the flapjacks to completely set. Likewise, unless the flapjacks are stored in the fridge I would leave off the white chocolate drizzle. If these Macadamia Apricot Flapjacks are going to get warm throughout the day, whether in a packed lunch box, or a bag, the white chocolate will melt and create a whole lotta mess!

This is just my advice as a mum of three and wife to hubby who takes a packed lunch to work.

Im just sayin’!!!

Love these Macadamia Apricot Flapjacks? Here are a couple of other recipes you may like to try as well.

Coconut Almond Date Flapjacks

FF Macadamia Apricot Flapjacks
Coconut Almond Date Flapjacks

Bakewell Shortbread Bars

FF Macadamia Apricot Flapjacks
Bakewell Shortbread Bars

Cranberry Walnut Flapjacks

FF Macadamia Apricot Flapjacks
Cranberry Walnut Flapjacks

While spending time in your kitchen, baking and cooking, have you ever thought of making extra and sharing some?

We all have people in our neighbourhood who are lonely and perhaps a little unhappy. Inviting them round for a chat over a cup of tea and delicious slice of cake, or flapjack, may seem such a small thing to us and yet can make the world of difference to someone else’s day.

Time seems to be so precious to many, which is why it is such a valuable gift to give.

Sammie xx

No part of this post may be reproduced or duplicated without the written permission of the owner. Please see my Disclosure Policy.

Share
Facebooktwitterpinterestlinkedintumblr

Strawberry Chocolate Cheesecake

Share
Facebooktwitterpinterestlinkedintumblr

Summer is near, not that you’d know it, with certain parts of the country blanketed in snow and with it heralds the start of the soft fruit season. I do like all fruit, but soft fruits are my favourites; strawberries, raspberries, peaches, nectarines, apricots and plums, as well as many others. To celebrate this I have made this utterly divine Strawberry Chocolate Cheesecake.

Strawberry Chocolate C\heesecake
Strawberry Chocolate Cheesecake the perfect no bake dessert.

No bake cheesecakes are incredibly easy to put together. So whether you’re an experienced home cook, or just starting out, I can guarantee that you can make this Strawberry Chocolate Cheesecake.

All you need, aside from the ingredients is a 10″ (25cm) springform cake pan.

Strawberry Chocolate Cheesecake
A slice of delicious Strawberry Chocolate Cheesecake?

Oh yes please!!

As promised, I am making a conscious effort to include more desserts on Feasting is Fun. I have been making cheesecakes for many years and the recipe has adapted over time. When I was younger I would whip vanilla angel delight into mascarpone and single cream. It makes an utterly delicious cheesecake, however, I can no longer find angel delight in the shops.

This has been a good thing! As good as the cheesecake of years passed was, this Strawberry Chocolate Cheesecake is better!

Whipping melted chocolate into cream cheese and cream gives this cheesecake a wonderful lightness. This Strawberry Chocolate Cheesecake is perfect to serve at any time, however, it is beautifully light after a large Sunday Roast Dinner like my Redcurrant Glazed Roast Lamb.

Strawberry Chocolate Cheesecake
Strawberry Chocolate Cheesecake a delightfully light dessert.

One of the most important parts of a cheesecake to me, is the crust. I don’t want some flimsy – can barely hold it together, low carb nonsense – I need a thick, crunchy base, that is delicious and contributes to the cheesecake as a whole. Digestive biscuits are the answer! Not too finely broken up either. A few small chunks makes for incredible texture against the smoothness of the softly whipped cream cheese and cream.

Strawberry Chocolate Cheesecake
Strawberry Chocolate Cheesecake ooh look at this layer – delicious!

The crunchy, crumbly, golden base also gives this Strawberry Chocolate Cheesecake a very slight, salty hit. Not as salty as pretzels, just enough to balance out the sweet tang of the chocolate cheesecake that covers it. To conclude, this cheesecake is more than the sum of it’s individual parts. Eating a little of each layer together will give your taste buds a flavour party like never before!

Before we start, I should mention that there are a few hours chilling in the fridge required, so it’s best to plan for that. If this cheesecake is needed for the same day, start the base in the morning, if you have a little more warning, I suggest making the base the night before. Actual time spent hands on making this cheesecake is very little, but it’s worth knowing about the chilling times before you start.

Recipe: Makes one Strawberry Chocolate Cheesecake serves 8-10

300g/11oz Digestive Biscuits – Graham Crackers can be used as an alternative

150g/5oz Unsalted Butter

560g/2 tubs Philadelphia Cream Cheese

600ml/1 pint Double Cream

2tsp Vanilla Extract – I use Nielsen-Massey

200g/7oz Milk Chocolate – at least 35% Cocoa – or use plain chocolate if you want a richer chocolate flavour

1tsp Caster Sugar

10 Strawberries – or more

1tsp Icing Sugar to finish

Method: Line the base of a 10″ – 25cm Springform Pan with aluminium foil.

  • Place the digestive biscuits into a freezer bag and whack with a rolling pin until they are almost completely broken up. You can also you a food processor to blitz them, I’m just too lazy to get it out for a few biscuits 😉.
  • In a medium sized saucepan gently melt the butter. Note: if you melt the butter too fast it could spit and burn you, also the butter may burn. I have learnt this from experience!
  • Once the butter is melted, remove the pan from the heat and add the crushed biscuits to the melted butter.
  • Stir well, ensuring all the biscuit crumbs are covered in melted butter.
  • Tip the butter slicked biscuit crumbs into your foil line springform pan.
  • Press the biscuit crumbs into a uniform layer using the back of a metal spoon.
  • Cover the pan with cling film and place into the fridge to chill and set the biscuit layer – I actually made the base the night before – a couple of hours should be sufficient to set the base.
  • Once the base has set the cheesecake layer can be made.
  • Break or chop up the chocolate and place into a heatproof microwaveable bowl.
  • Zap for 30 seconds at a time stirring in between. When almost melted remove from the microwave and keep stirring until completely melted. Set the chocolate to one side.
  • Into a large bowl add the cream cheese, 200mls of double cream and 1tsp of vanilla extract.
  • Whisk until light and creamy – approx 3 minutes.
  • Next, whist whisking add the melted chocolate to the cheesecake mix – it helps if you have someone to hold the whisk whilst you add the chocolate, alternatively add the chocolate in thirds, whisking well after each addition.
  • Spoon the chocolate cheesecake mix on to the biscuit base. Smooth the surface with the back of a spoon.
Strawberry Chocolate Cheesecake
Once you have smoothed the top of the cheesecake lick the spoon!!
  • Cover the pan with cling film and pop back into the fridge for an 2 hours. This allows the chocolate to set the cheesecake layer. The cheesecake layer does not set to a firm consistency, rather it is able to hold its shape and support the whipped cream a strawberries on top.
  • When set and ready to decorate, run a palette knife that has been dipped in very hot water, between the pan and the cheesecake. Place the springform pan on to a large can (of beans or whatever you have in the cupboard) and release the spring latch. Allow the sides of the pan to drop down.
  • Place the cheesecake – still on the foil covered pan base – on to a cake stand or serving plate. Note: I have never successfully transferred an entire cheesecake off of its base, so I cover the base in foil to protect it from knife marks and keep the cheesecake on the pan base!
  • Into a large bowl add the remaining 400mls of double cream, 1tsp vanilla extract and 1tsp of caster sugar. Whisk until the cream holds its shape.
  • Fit a large piping bag with a large star tip – I use Wilton #1M.
  • Fill the piping bag with the whipped cream.
  • Pipe swirl roses – start piping the letter e and continue round – around the outside edge of the cheesecake. Fill in the empty spaces with simple piped stars.
  • Place a strawberry on each of the piped swirls – I removed the green stalks for these – and place three strawberries, with their stems still on, in the centre of the cheesecake.
  • Dust the Strawberry Chocolate Cheesecake with icing sugar – I use a clean tea strainer – and serve.
Strawberry Chocolate Cheesecake
Strawberry Chocolate Cheesecake a fantastically easy, yet sensational dessert.

How enticing does this Strawberry Chocolate Cheesecake look?

It is said that we eat with our eyes first. Well this is certainly a feast to be gazed upon – and then eaten 😉.

This cheesecake travels well too. Simply prepare the cheesecake without the whipped cream and strawberries, take to your destination and complete the decoration there!

Once fully decorated this cheesecake is best eaten straight away, although it will keep for up to two days wrapped in cling film, or stored in an airtight container, and placed in the fridge.

Cheesecake for breakfast anyone??

I hope that you have enjoyed this Strawberry Chocolate Cheesecake recipe, here are some others you may like too:


White Chocolate Strawberry Cheesecake

FF Chocolate Strawberry Cheesecake
White Chocolate Strawberry Cheesecake


Lemony Strawberry Pavlova

FF Chocolate Strawberry Cheesecake
Lemony Strawberry Pavlova


Strawberries and Cream Cake

FF Chocolate Strawberry Cheesecake
Strawberries and Cream Cake


Thank you for all your lovely comments, please keep them coming I love reading your views on what I am posting. Again it is wonderful to see so many of you cooking and baking my recipes and popping a photo on Twitter or Instagram. I always feel genuinely honoured that you have chosen to make one of my recipes.

I am working hard to balance Feasting is Fun with a few more savoury recipes. Is there anything you would particularly like to see more of on here?

Have fun making and baking in your kitchens and enjoying the memories that you are making whilst feasting together with friends and family.

Sammie xx

@sammiefeasting Twitter/Instagram/Pinterest


Share
Facebooktwitterpinterestlinkedintumblr

Feta Cheese Herb Muffins

Share
Facebooktwitterpinterestlinkedintumblr

Oh wow, these Feta Cheese Herb Muffins certainly have a taste of the Mediterranean about them.

FF Feta Cheese Herb Muffins
Feta Cheese Herb Muffins perfect for eating any time of the day!

Sorry, I know I usually write a little intro, but these Feta Cheese Herb Muffins are so, so good I wanted to tell you about them straight away. Like an excited child with news of their day at school, I am literally bursting with excitement over how good these are.

Salty feta cheese, that almost melts, in a slightly healthier muffin – I’ve added in some wholemeal flour, without any added heaviness – accompanied by the delicate onion flavour of fresh chives and just the teeny tiniest hint of fresh mint!

FF Feta Cheese Herb Muffins
Feta Cheese Herb Muffins delicious warmed for brunch.

Having first made my friend, Jackie Heaton aka The Baking Nanna’s Cheese Bacon Breakfast Muffins which are absolutely delicious, I have loved coming up with different variations of the muffin.

Today I wanted to see if I could add wholemeal flour to the muffins, without making them heavy. So I replaced one third of the flour with plain, wholemeal flour. I increased the baking powder and hoped that the balance would work. It totally did.

The wholemeal flour adds a subtle depth of flavour that completely works with the salty feta cheese. I thoroughly enjoyed a late breakfast this morning feasting on these flavour packed morsels.

FF Feta Cheese Herb Muffins
Feta Cheese Herb Muffins so good and so easy to bake.

Freshly cut from the garden, both the chives and the mint add a subtle brightness to the Feta Cheese Herb Muffins. None of our children noticed the mint, I was a bit worried thinking that might be the deal breaker! There are only three mint leaves in the whole recipe, yet they provide a fantastic, fresh flavour, without making the muffins taste like toothpaste!!!

If you don’t have fresh herbs in your garden, they can easily be grown on a window-ledge. I buy mine growing in pots, from the supermarket. Woody herbs such as sage, thyme, oregano and rosemary grow in the garden, as do the chives, which have recently started to sprout. Mint I grow in a tub, as it can be a bit of a thug if planted in the open ground, rapidly spreading and smothering other plants.

There is a place for both fresh and dried herbs in my kitchen. In this recipe however, I would only recommend using fresh herbs. Look out for upcoming posts where I will share tips and recipes on the vegetables and herbs I grow.

FF Feta Cheese Herb Muffins
Feta Cheese Herb Muffins delicious, healthier and low in fat.

Recipe: Makes 12 Feta Cheese Herb Muffins

200g/7oz Plain White Flour

100g/4oz Plain Wholemeal Flour

3tsp Baking Powder

200g/7oz Feta Cheese – drained

1tbsp Chopped Fresh Chives – plus extra to garnish – I use scissors to snip the chives

3 Fresh Mint Leaves – finely chopped

200ml Whole or Semi-skimmed Milk

2 Large Free Range Eggs

2tbsp Vegetable Oil

2tbsp Extra Virgin Olive Oil

Approx 1tsp Freshly Ground Black Pepper – or less if desired

Method: Preheat the oven to 200C/180C fan, gas mark 6

  • Line a 12 cup muffin pan with muffin cases
  • Measure the milk into a jug. Crack in the 2 whole eggs and add the oils. Stir with a fork to combine – wet ingredients.
  • Into a large bowl add both the flours, the crumbled feta cheese, black pepper finely chopped mint and chives. Stir with a fork ensuring all the pieces of crumbled feta are coated in flour – dry ingredients.
  • Make a well in the centre of the dry ingredients and pour the wet ingredients into it.
  • Stir lightly with a fork until almost combined. Note: lumpy batter ensures tender muffins, if you over mix the muffins will be tough!
FF Feta Cheese Herb Muffins
Here is good, lumpy batter.
  • Divide the batter equally between the 12 muffin cases.
  • Place the muffin pan into the preheated oven and bake for 15-20 minutes (mine took 17 minutes).
  • The muffins are cooked when the are starting to turn golden brown and are firm to touch.
  • Once baked remove the muffins from the oven.
FF Feta Cheese Herb Muffins
Feta Cheese Herb Muffins hot straight from the oven.
  • Allow the Feta Cheese Herb Muffins to cool slightly on a cooling rack.

Serve the delicious Feta Cheese Herb Muffins warm with an extra sprinkling of freshly cut chives.

Store in an airtight container for up to 3 days. To refresh pop in a medium heated oven for 5 minutes and they will regain their freshly baked flavour.

These Feta Cheese Herb Muffins are the perfect addition to any packed lunch or picnic. They are a perfect, portable, fairly healthy snack and great for sharing. Long days at the office? These take barely 30 minutes to make and bake and then you have breakfast/lunch sorted for a few days!

I love coming up with easy to make, nutritious food, that means you always have something delicious to fall back on instead of always reaching for a chocolate bar or packet of crisps. With food made at home, you know exactly what has gone into it and it always tastes so much better than anything you can buy.

Loved these Feta Cheese Herb Muffins? Here are some other easy, food on the go recipes you may like to try:

Chorizo Goats Cheese Muffins 

FF Chorizo Goats Cheese Muffins
Chorizo Goats Cheese Muffins utterly delicious.

Coconut Almond Date Flapjacks

VC Coconut Almond Date Flapjacks
Coconut Almond Date Flapjacks a slow release energy bar wherever you are.

Cranberry Walnut Flapjacks

BN Cranberry Walnut Flapjacks
Cranberry Walnut Flapjacks – perfect for sustained energy release.

Are you good about eating breakfast and taking a packed lunch to work, or do you grab a sweet muffin with your morning latte?

Hopefully I’ve given you some tips to make mornings less stressful on some days? There are always going to be days when you oversleep, or no matter what you do, you’re running late. If you can plan just a little bit, then a bad start to the day needn’t set the tone for how the day pans out!

Thank you for taking the time to leave a comment. I really enjoy reading them. Likewise for all of you who have posted your makes and bakes on Twitter and Instagram. I love seeing how my recipe turns out in someone else’s kitchen!

Have fun making and baking your feast.

Sammie xx


Share
Facebooktwitterpinterestlinkedintumblr

Garlic Rosemary Roast Potatoes

Share
Facebooktwitterpinterestlinkedintumblr

Let’s talk potatoes, the staple of many a British meal, yet often assigned the side role when it comes to dinner time. Although I will never be a fan of plain, peeled, boiled potatoes, yet give me a healthy serving of Perfectly Mashed Potatoes and I’m likely to forget the sausages on the plate! And these crunchy Garlic Rosemary Roast Potatoes are so full of flavour and enhance any meal that accompanies them.

FF Garlic Rosemary Roast Potatoes

Since winning some Albert Bartlett red Rooster Potatoes a while ago, I wanted to create a delicious roast potato recipe that included the gorgeous red Rooster skin. While the skin has a fantastic flavour, it is also good good source of fibre. Also potatoes contain Potassium, Vitamin C and Iron and are low in fat – unless you fry them or smother them in butter 😉.

All things in moderation eh?

FF Roast Red Potatoes
Rosemary Garlic Roast Potatoes

I apologise for not posting this recipe earlier, however, as today is #National Garlic Day, I thought it would be rather appropriate. While I love garlic and have used quite a bit in this recipe, you can add as much or as little as you like. Likewise with the Rosemary. And I couldn’t resist a final sprinkling of freshly chopped Parsley, which gives the finished dish a burst of colour and flavour and an extra hit of vitamin C. Again this is optional.

FF Garlic Rosemary Roast Potatoes
Garlic Bulbs and Fresh Rosemary complete with flower!

When I picked the Rosemary for these Garlic Rosemary Roast Potatoes, it still had some beautiful blue flowers on it. These can be eaten along with the finely chopped thick leaves.

Recipe: Garlic Rosemary Roast Potatoes serves 6

2kg/4.5lb Red Potatoes – such as the Albert Bartlett Rooster Potatoes I’ve used

2 tablespoons Olive Oil

4-5 Bulbs of Garlic

Small Handful Fresh Rosemary Stems

Sea Salt  – I use Maldon and Freshly Ground Black Pepper

Optional – handful of chopped fresh parsley to finish.

Method: Preheat the oven to 200C/180C fan, gas mark 6, 400F.

Preparing The Potatoes For Roasting

  • Wash and thoroughly dry the potatoes. I place them onto a clean tea towel and place another tea towel on top to absorb all the moisture – dry potatoes = crunchy potatoes!
  • Chop the potatoes into 2″-3″ sized chunks and place onto a baking sheet.
  • Strip the Rosemary leaves from the stem and finely chop.
  • Finely chop/mince the garlic, removing the papery skin.
  • Drizzle the Olive Oil over the potatoes, then sprinkle over the garlic and chopped Rosemary.
  • Add 1/2tsp of sea salt and some freshly ground pepper.
  • Using clean hands toss all the ingredients together on the baking tray, ensuring each potato chunk is slicked in oil.
FF Garlic Rosemary Roast Potatoes
Garlic Rosemary Roast Potatoes ready for the oven.

Roasting The Herb Potatoes

  • Place the baking tray into the preheated oven and bake for 1 hour – 1 hour 15 minutes.
  • The potatoes are cooked when they are golden brown and tender all the way through – test with a knife if unsure.
  • Once cooked remove the potatoes from the oven,
FF Herb Roasted Red Potatoes
Crispy Garlic Rosemary Roast Potatoes
  • Place the Garlic Rosemary Roast Potatoes on a serving platter and sprinkle over a handful of chopped Parsely.
Garlic Rosemary Roast Potatoes

Almost certainly you will not have to call everyone to tell them dinner is ready! These potatoes smell as good as they taste. I like to serve them with everything from grilled salmon, chicken, to a fully roasted beef joint for Sunday dinner. It’s nice to ring the changes on week nights and weekend dinners.

This is a much requested dish in our house and we quite often have them with cold meat and salad, during the warmer summer months.

If you have enjoyed these Garlic Rosemary Roast Potatoes you may also like these other recipes:

Baked Garlic Herb Potato Wedges 

FF Baked Garlic Herb Potato Wedges
Baked Garlic Herb Potato Wedges

Tangy Lemon Potato Salad

FF Tangy Lemon Potato Salad
Tangy Lemon Potato Salad

Perfectly Mashed Potatoes 

FF Perfectly Mashed Potatoes
Perfectly Mashed Potatoes creamy and delicious.


Sometimes the simplest recipes are the tastiest.

Whatever you are baking and making in your kitchens, have fun!

Sammie xx

No part of this post may be reproduced or duplicated without the written permission of the owner. Please see my Disclosure Policy.

Share
Facebooktwitterpinterestlinkedintumblr