Lime Couscous

Share
Facebooktwitterpinterestlinkedintumblr

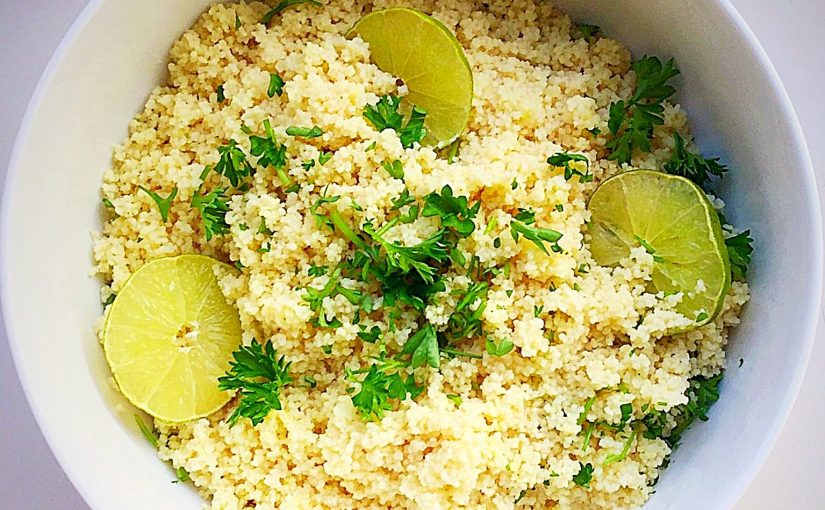
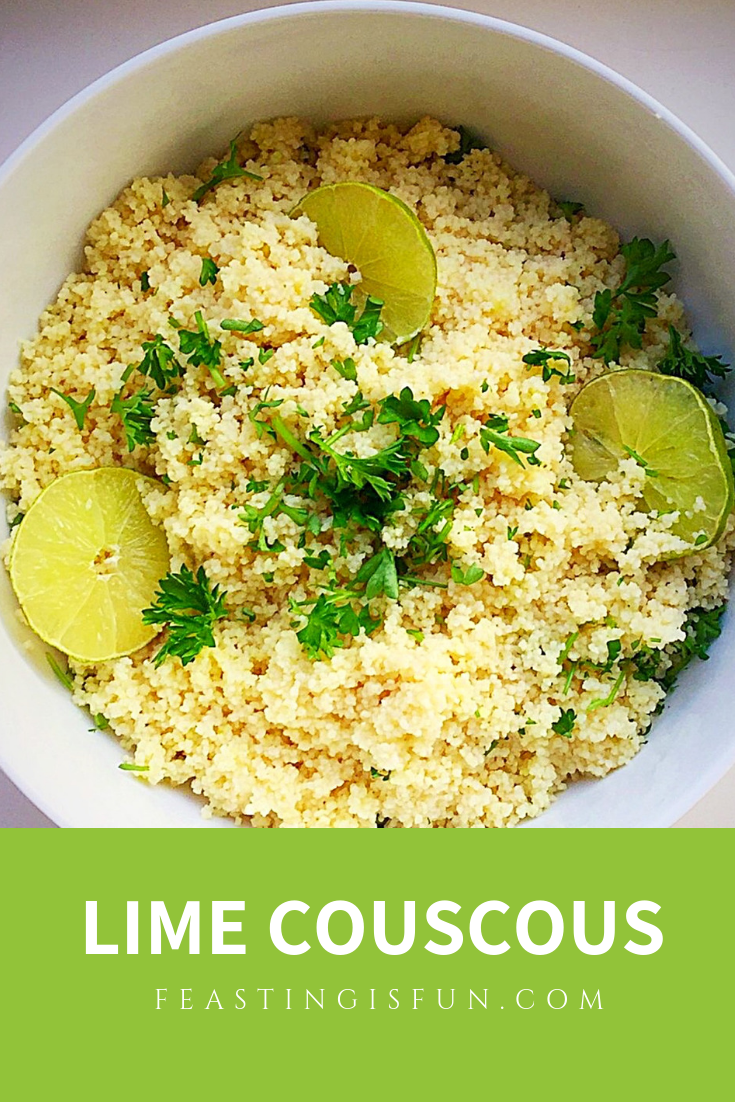
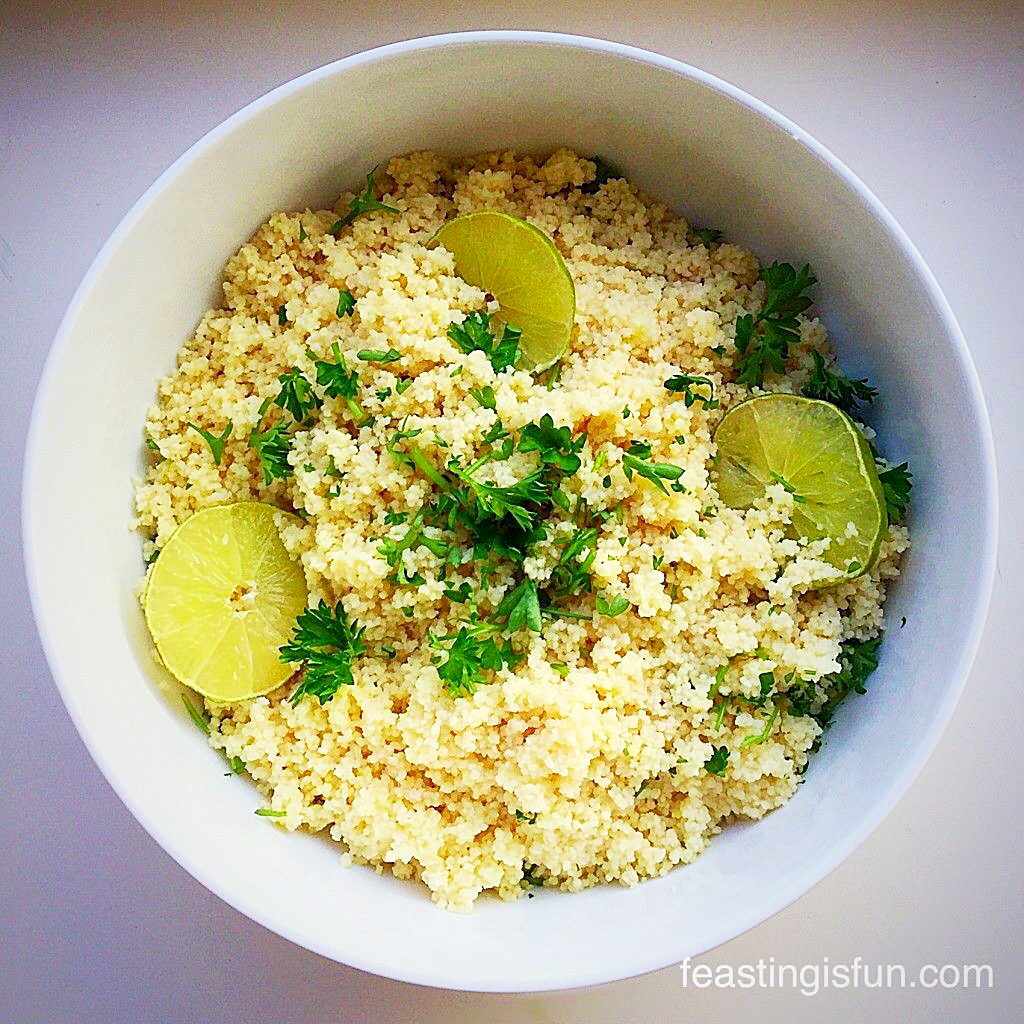
Today I have the easiest, most delicious and versatile side dish for you, my Lime Couscous.

FF Lime Couscous

So, for those of you who haven’t tried couscous yet, I’ll explain what it is. Couscous is small, crushed durum wheat semolina that requires steaming or soaking in boiling water to cook. And it is traditionally served with stew, much like my Moroccan Lamb Stew. Because couscous is made from durum wheat it IS NOT gluten free.

FF Moroccan Lamb Stew
Moroccan Lamb Stew served with Lime Couscous.

Since this couscous is full of fresh lime flavour and so easy to make, it will soon become part of your repertoire.

A sprinkle of fresh parsley and slices of lime give this dish the finishing touch.

And as the grains are so small it doesn’t even need cooking. Rather, it simply needs rehydrating with hot liquid.

How easy is that ?

Lime Couscous

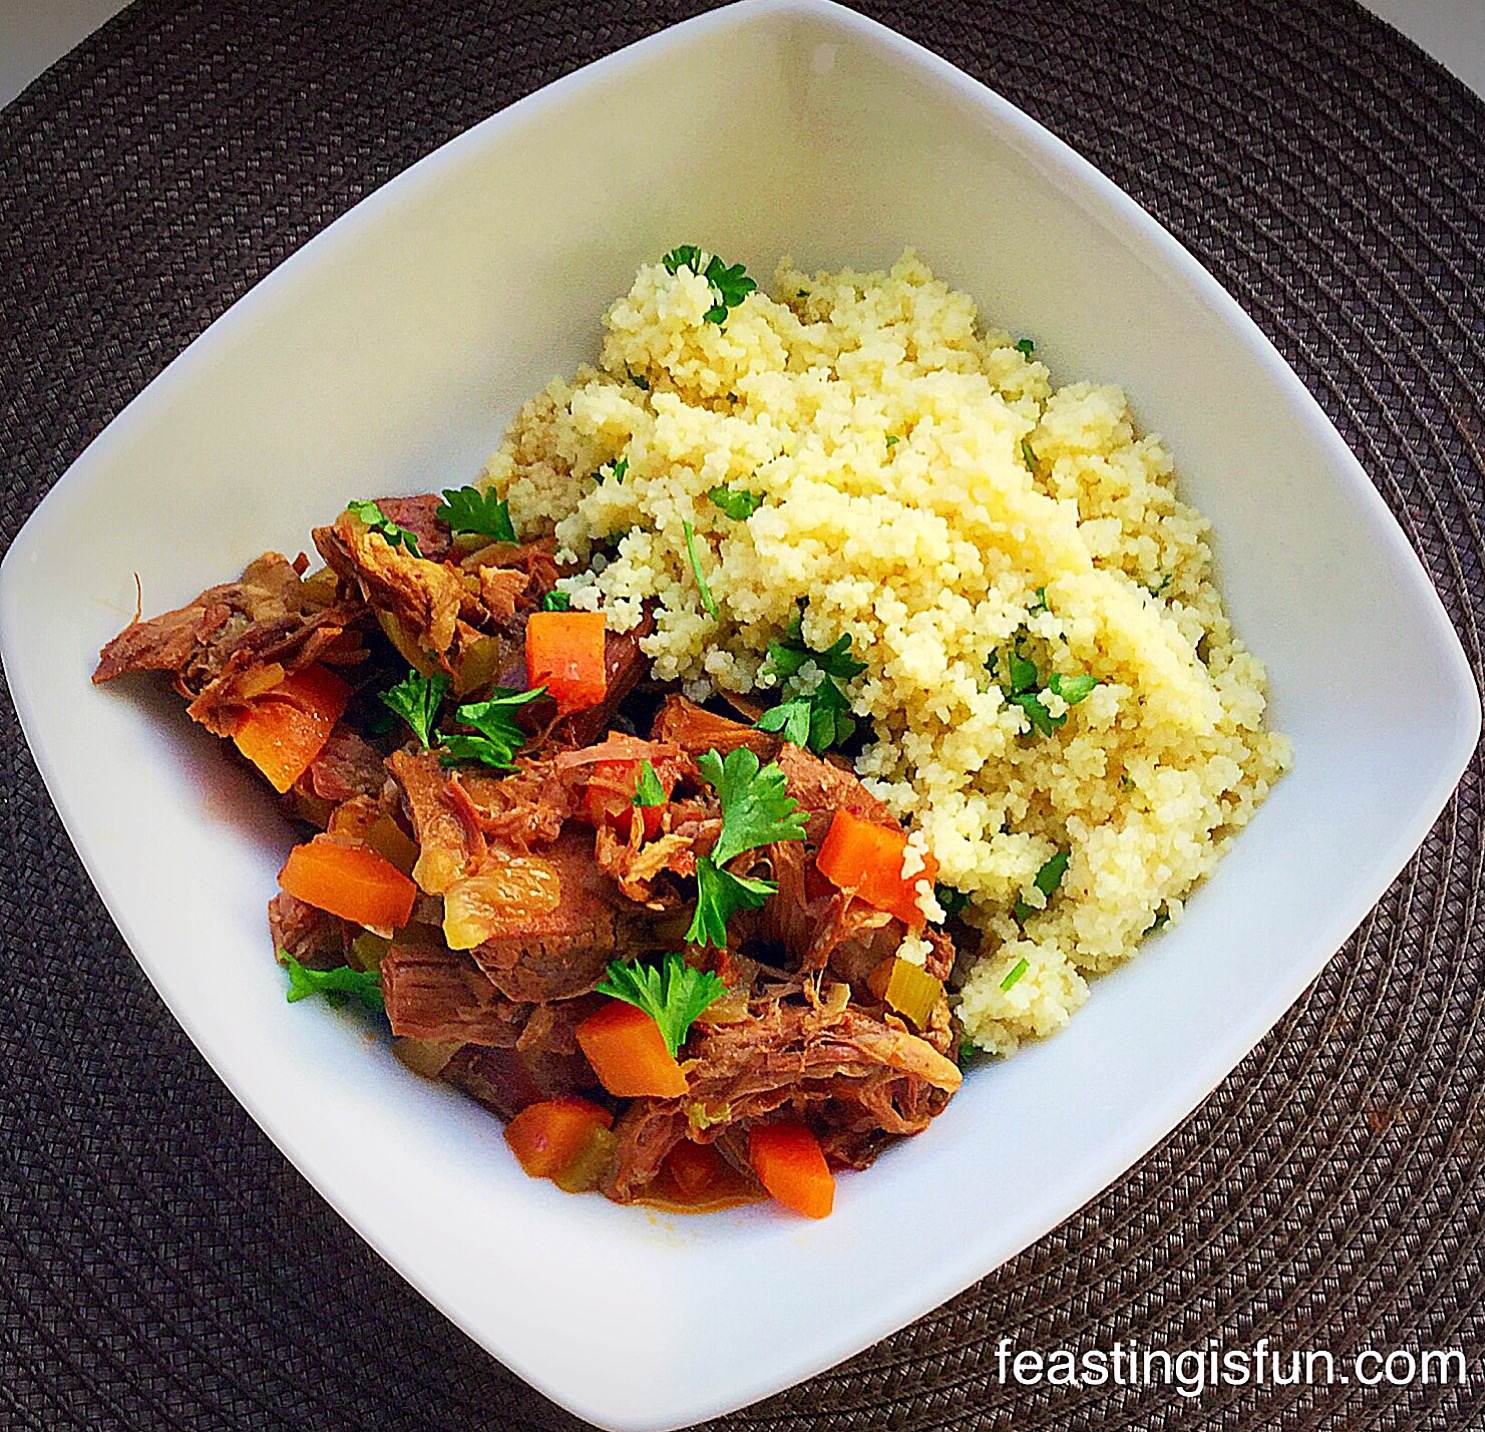
I developed this recipe for Lime Couscous to specifically partner my Morrocan Lamb Stew. It is absolutely delicious with the stew. As it balances the fruity, spicey sauce, with its own tangy, citrus flavour.

Since couscous can be served at room temperature it is absolutely perfect for buffets and barbecues. While it’s fresh lime flavour pairs really well with fish, chicken, lamb kebabs – really the possibilities are endless. I cannot wait to try it with my Chunky Chilli.

Recipe: Lime Couscous serves 6 people.

300g/11oz Dried Couscous – allow 50g/2oz per person

2 Limes

1 Vegetable Stock Cube – I use Knorr’s

Boiling Water

Sea salt and freshly ground black pepper to taste

Method – Making The Couscous 

Note – Do not stir the Couscous at any point.

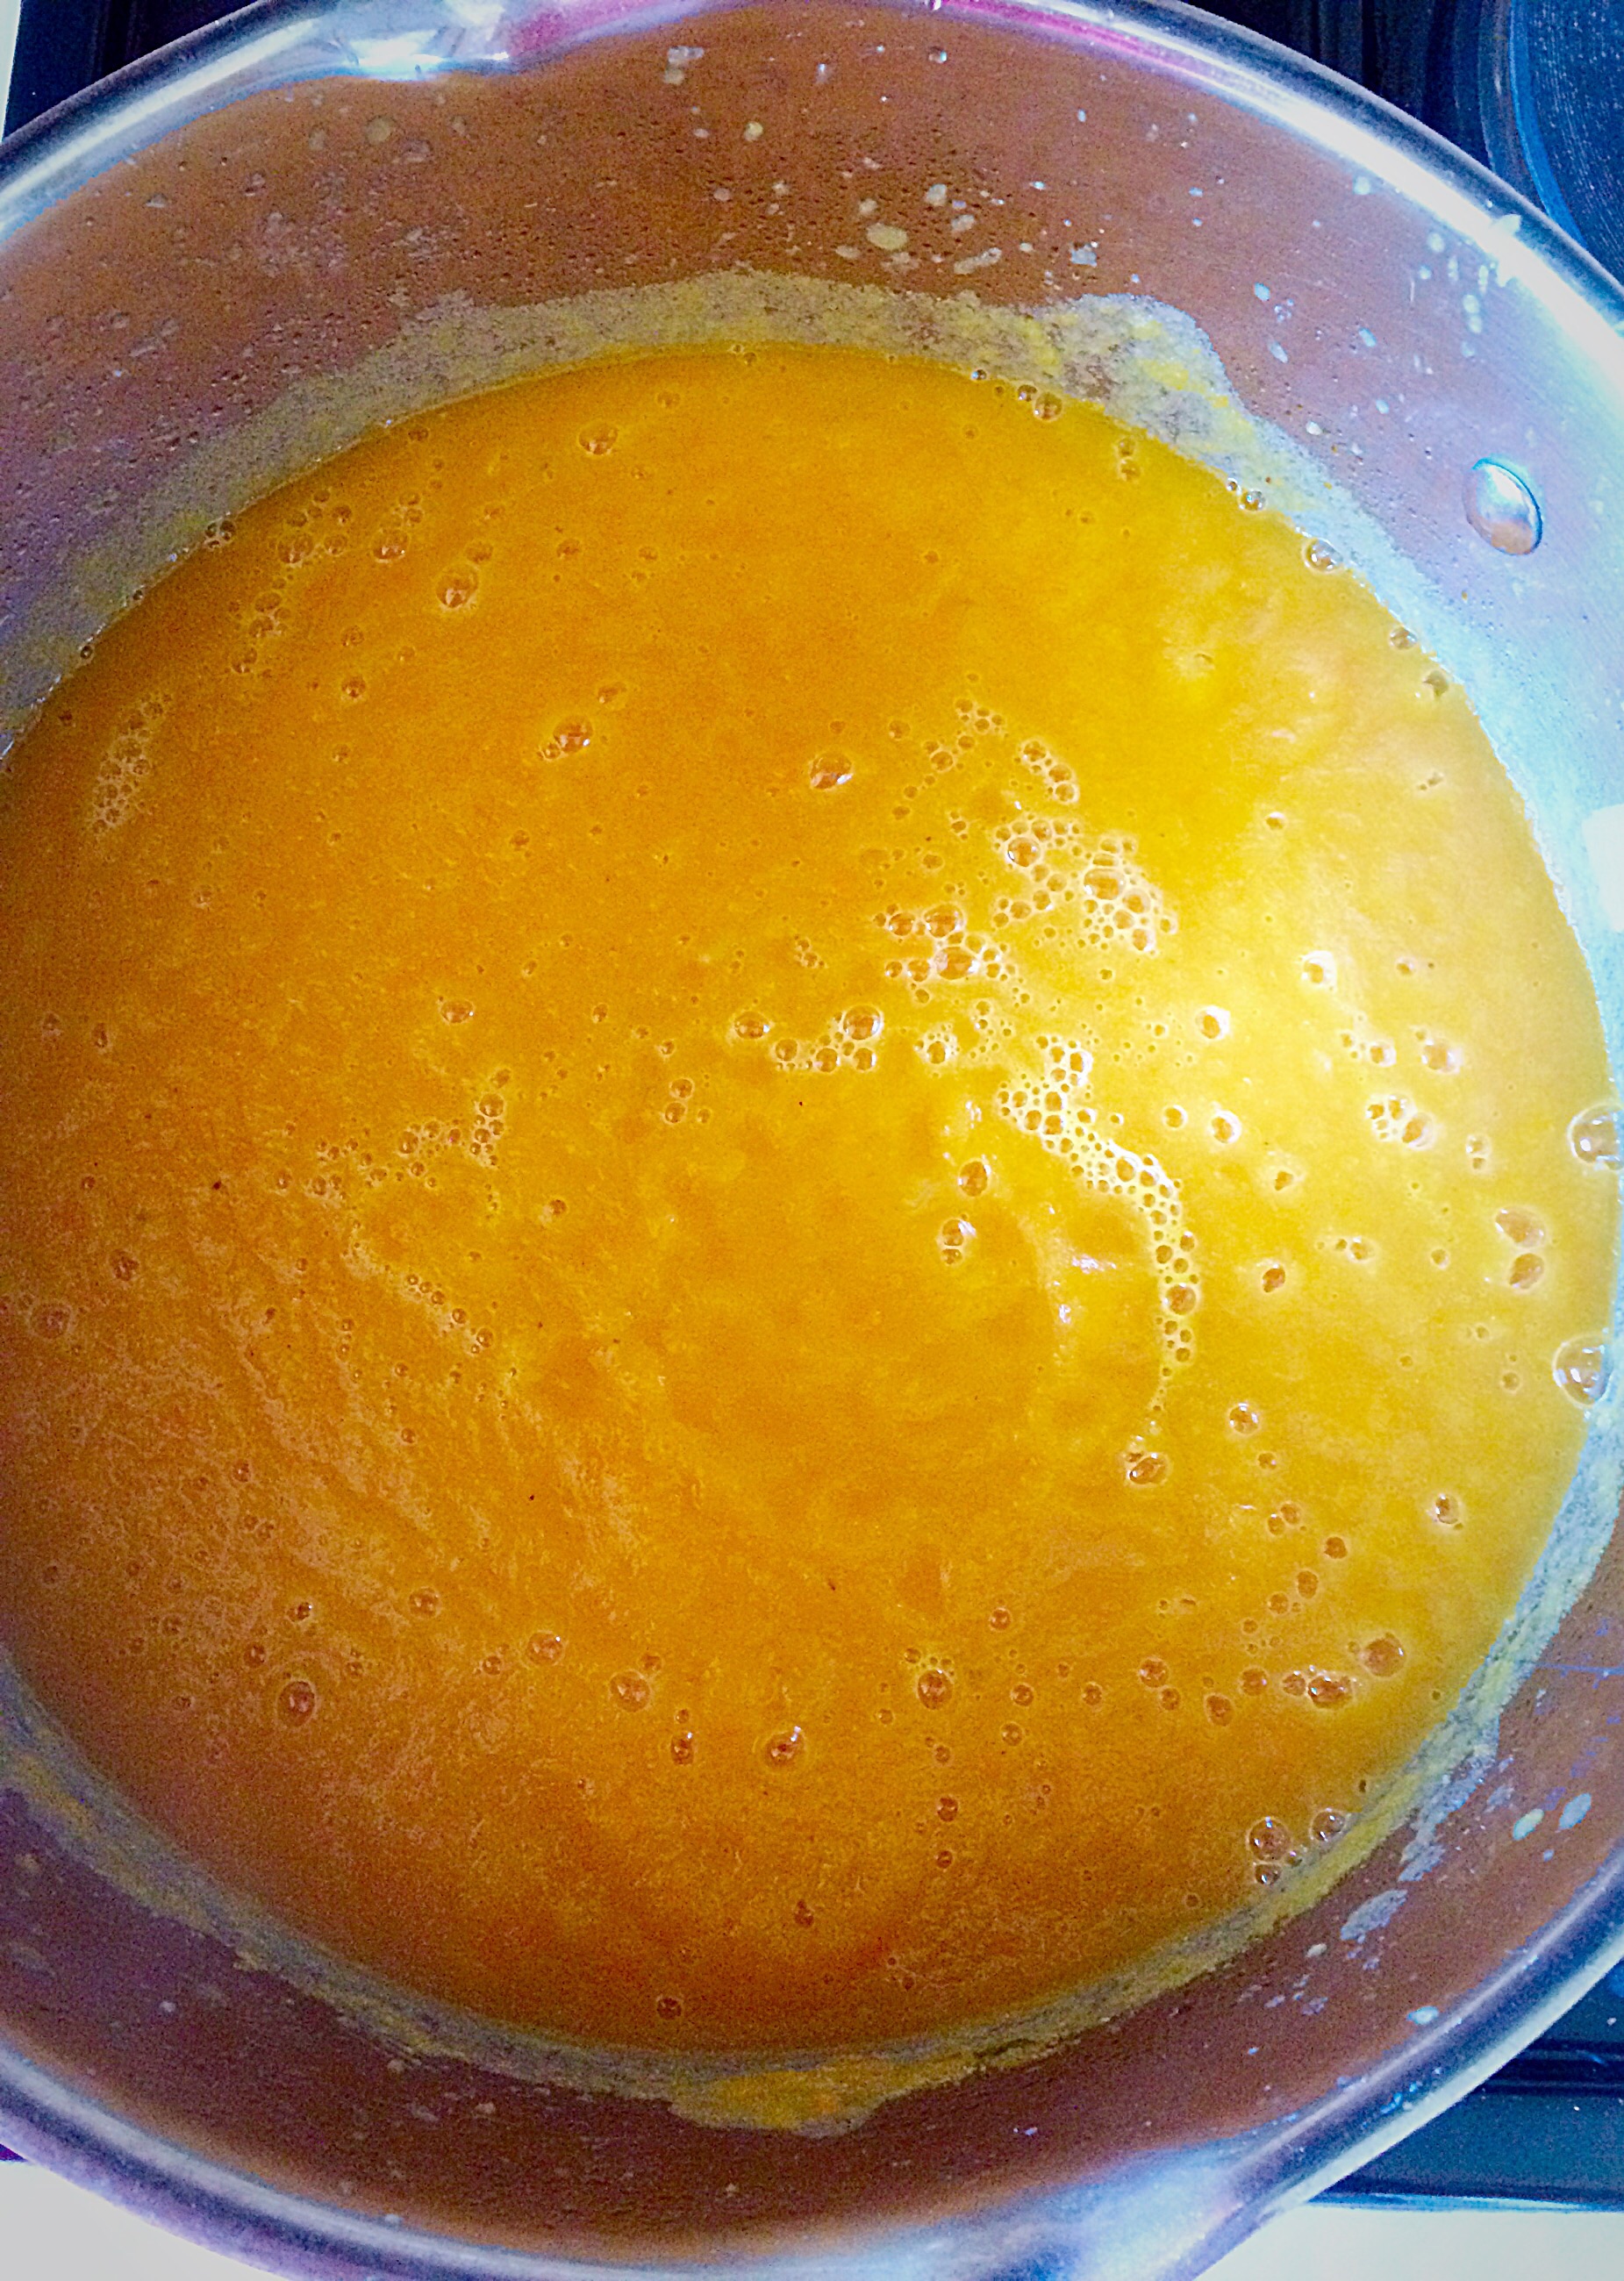
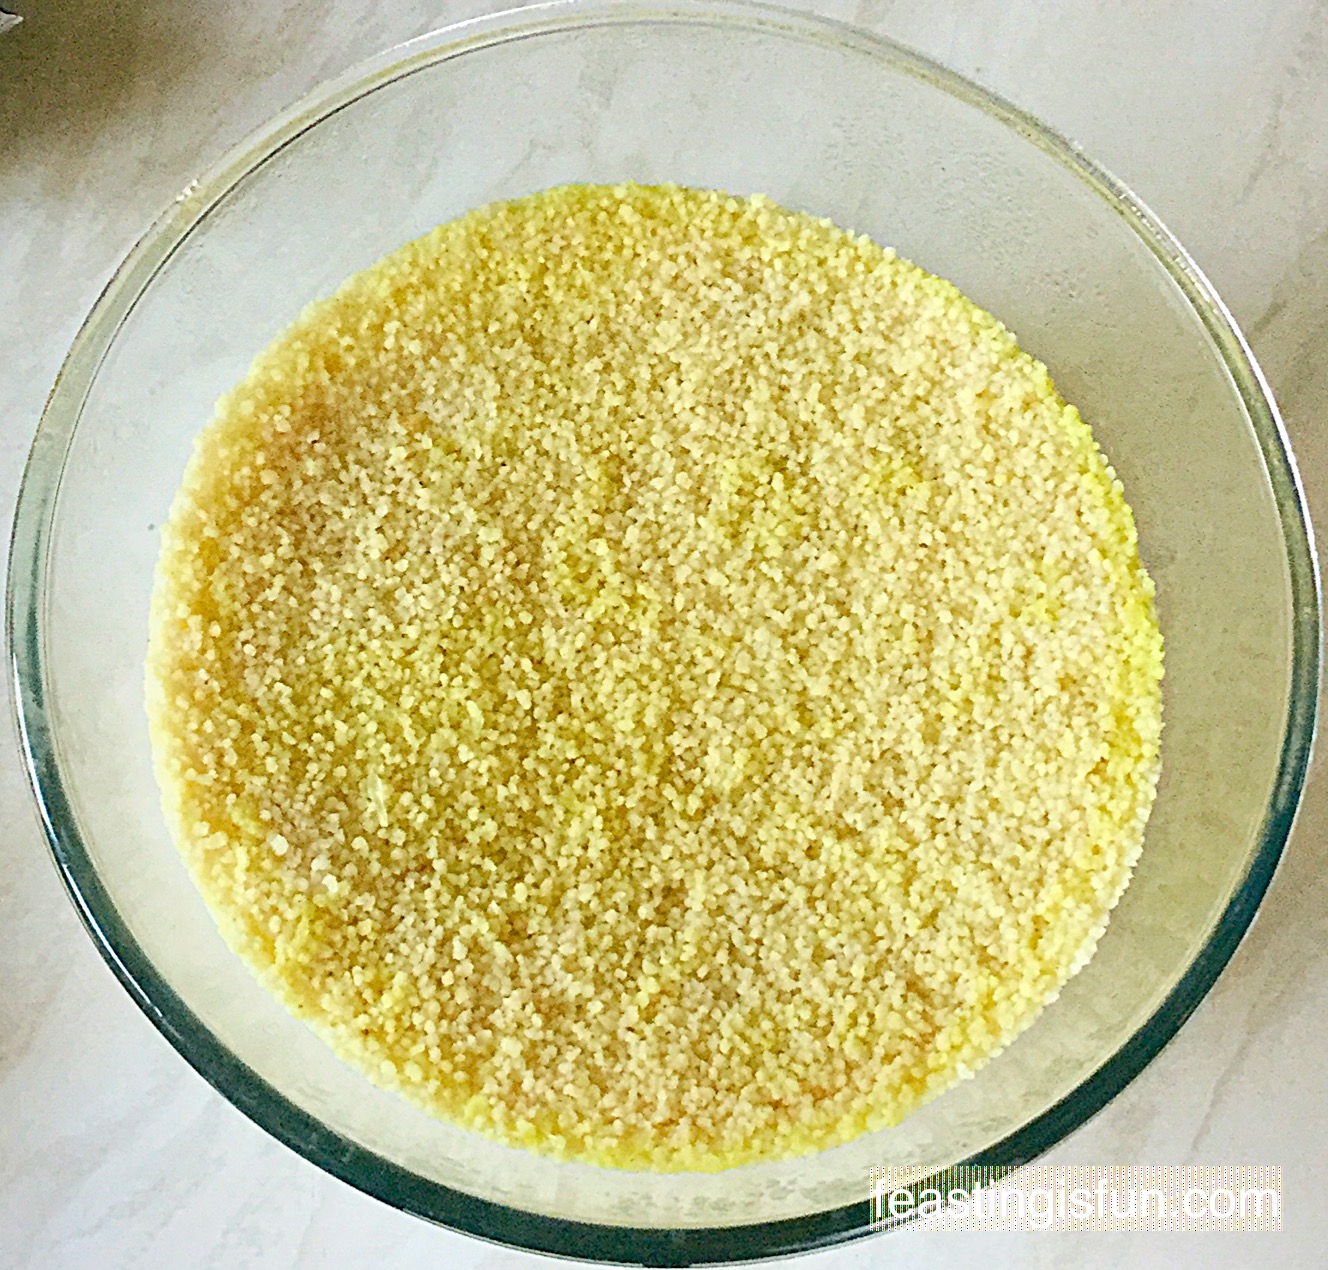
First of all, weigh out the couscous into a large, heatproof bowl.

Dissolve the stock cube in a jug of boiling water, approx 450mls/1 pint.

Squeeze the juice of one and a half limes and add this to the couscous.

Pour the stock over the couscous and top up with boiling water so that the liquid comes 2.5cm/1″ above the top of the couscous.

Cover the bowl with cling film, or I used a plate and leave for 15 minutes.

After this time the couscous will have absorbed all of the hot liquid.

MD Lime Couscous
The couscous has absorbed all of the stock and lime juice.

Remove the cling film/ plate.

Using a fork, fluff up the couscous, like you would with rice,

MD Lime Couscous
Fluff the couscous with a fork.

Importantly, taste the Lime Couscous and check for seasoning, adjust as necessary.

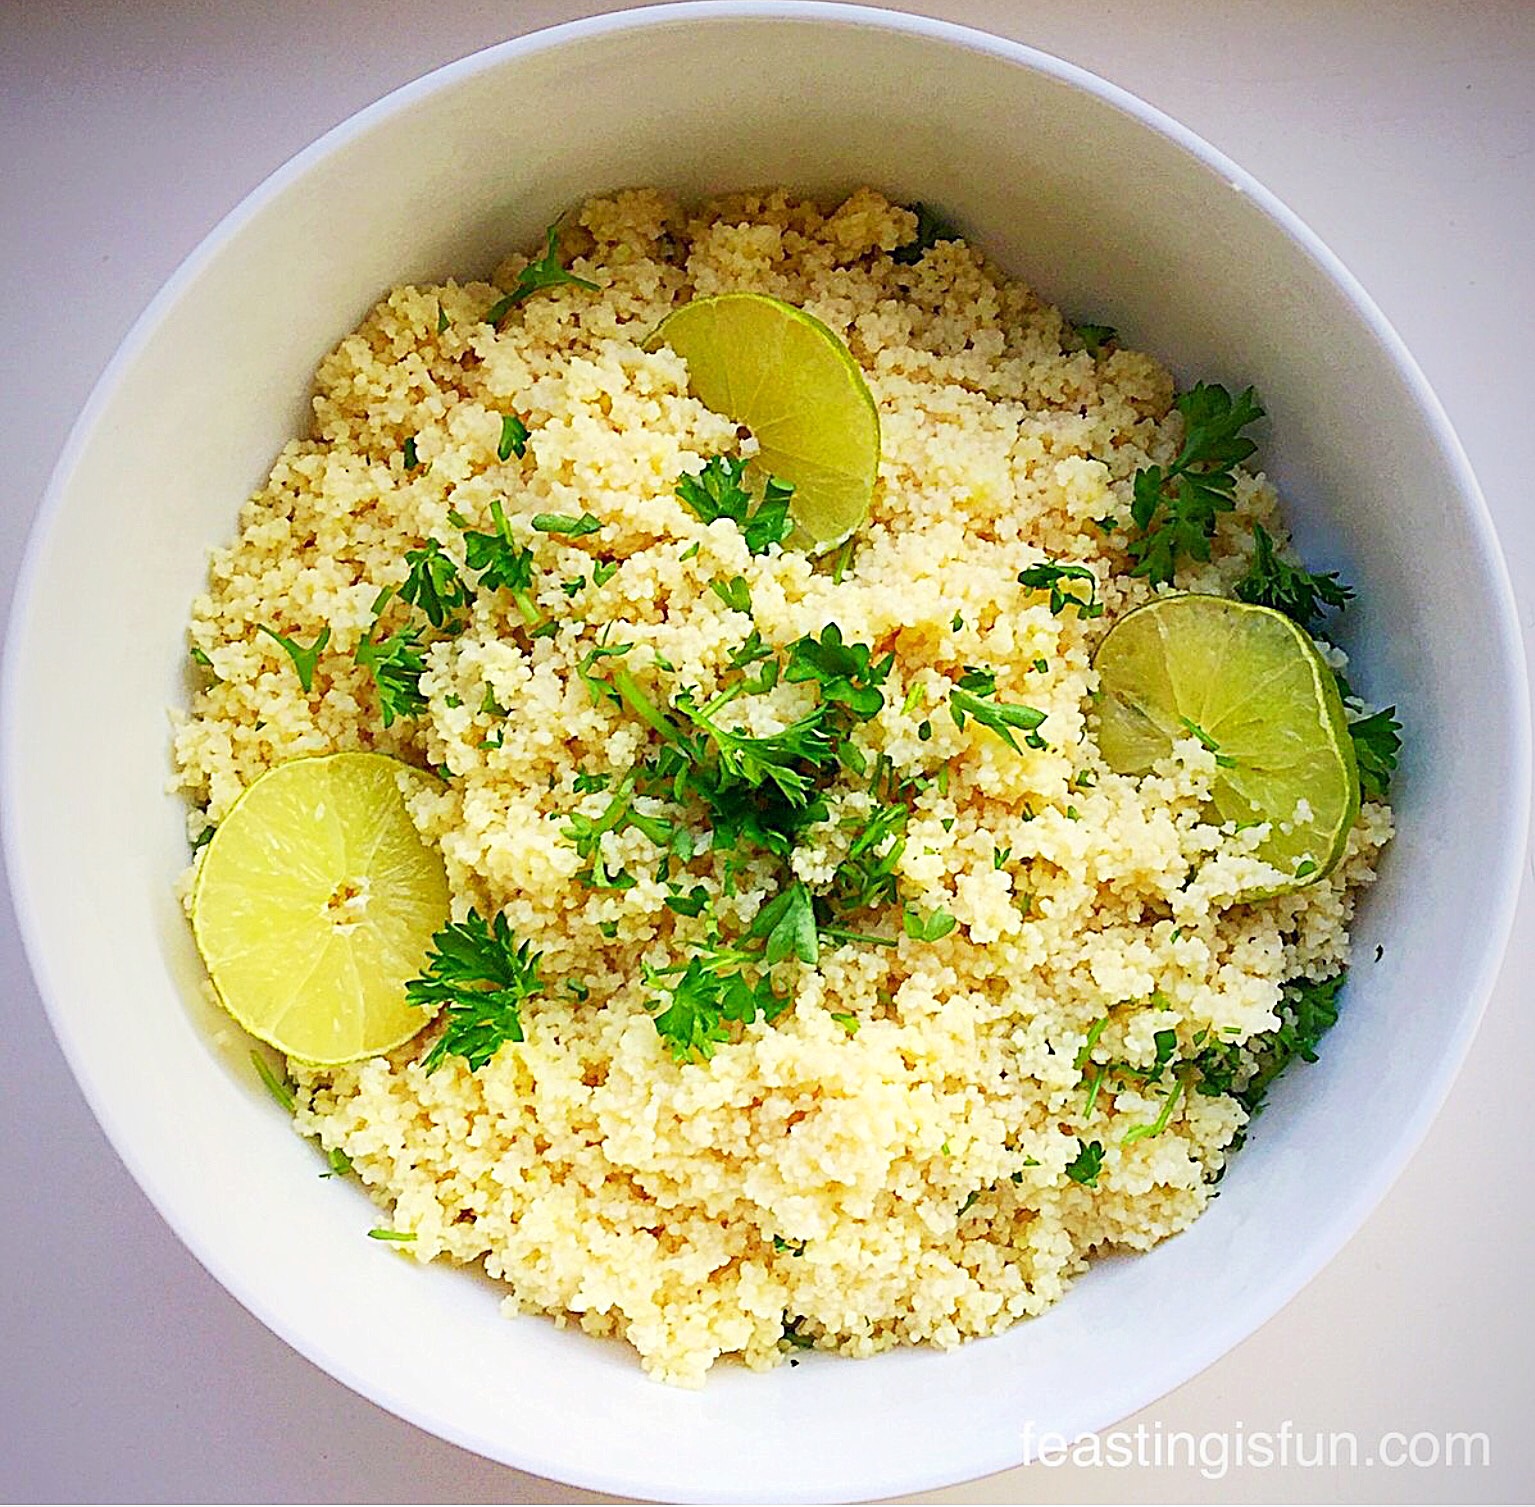
Finally, roughly chop a large handful of parsley leaves. Add these to the couscous and transfer to a serving dish.

Add a final touch by popping a few slices of lime to the couscous and a final sprinkle of parsley leaves on the top.

Lime Couscous

It really is that simple to make this dish!

Since Spring is now here and the promise of warmer days beckoning, this Lime Couscous is the perfect dish to serve, as it can sit at room temperature, not taking up fridge or oven space.

However you serve this Lime Couscous, it will be enjoyed and feasted on,  because it tastes so delicious.

If you have enjoyed this Lime Couscous, here are some other recipes that you might like to try:

Leek Colcannon

GF Leek Colcannon
Leek Colcannon

Lemon Garlic Vegetable Orzo

MD Lemon Garlic Vegetable Orzo
Lemon Garlic Vegetable Orzo

Baked Garlic Herb Potato Wedges

MD Garlic Herb Potato Wedges
Garlic Herb Potato Wedges

Since couscous is so easy to prepare, the possibilities are endless. Also, although it is perfectly fine eaten hot, I much prefer it slightly warm. It is also great for packed lunches. Simply add some chopped bell peppers, spring onions and cherry tomatoes and pack into an airtight container. And there you have it, packed lunch to go.

So, whatever you are making, baking and creating  in your kitchens, have fun preparing and sharing your feast.

Sammie xx

No part of this post may be reproduced or duplicated without the written permission of the owner. Please see my Disclosure Policy.


Share
Facebooktwitterpinterestlinkedintumblr

Cheese Bacon Breakfast Muffins

Share
Facebooktwitterpinterestlinkedintumblr

Are mornings busy in your house? Because they certainly are here. So, I always ensure there is a good breakfast on offer, as it is the most important meal of the day and today I am able to share these delicious Cheese Bacon Breakfast Muffins with you, my lovely readers.

FF Cheese Bacon Breakfast Muffins

The recipe for these Cheese Bacon Breakfast Muffins was given to me Jackie Heaton, she is known as The Baking Nanna.

Most importantly, these delicious muffins take under 30 minutes from start to baked. Especially good for weekend and holiday breakfast baking, or as I did today, make a batch, 5 minutes in the oven to warm through the next morning and breakfast is ready.

BN Cheese Bacon Breakfast Muffins
Cheese Bacon Breakfast Muffins

The Twitter Baking Community

I met Jackie through Twitter and she is now one half of #TwitterBakeAlong, a group baking challenge run on Twitter.

And, this morning, as I baked these muffins, within the hour people on Twitter were also baking these delicious, savoury treats. While some had a slight variations, others were coming up with ideas for future bakes. It was honestly so much fun. We laughed, smiled, shared and most of all enjoyed the fact that these Cheese Bacon Breakfast Muffins brought us all together.

BN Cheese Bacon Breakfast Muffins
Cheese Bacon Breakfast Muffins 

I baked these muffins without cases (I couldn’t lay my hands on any white ones – it was early!), I was confident a quick spray with Wilton cake release and my British Bakeware muffin pan would be more than up to the non stick job in hand.

By all means use muffin cases, I probably will next time, just as soon as I can find my plain white ones!

As well as eating these warm, for breakfast, they also make a great addition to packed lunches and picnics. The Baking Nanna also puts them on the top of stews and casseroles aren’t they the same thing wrappers removed, in place of dumplings.

Recipe: Makes 12 Cheese Bacon Breakfast Muffins

4 Rashers Streaky Bacon – I used unsmoked. Use whatever bacon you prefer.

300g/11oz Plain White Flour

1tsp Baking Powder

100g/4oz Mature Cheddar – I use Wyke Farms

2 Large Free Range Eggs

200ml Whole or Semi Skimmed Milk

3tbsp Vegetable Oil

Pinch of freshly ground black pepper

Method: Preheat the oven to 200C/180C fan, gas mark 6, 400F

Making The Muffin Batter

  • First of all cook the bacon until it is just crispy. I used a skillet on the hob but you can grill or bake the bacon. Place on a plate to cool then chop into pieces.
  • Sift the flour and baking powder into a large bowl.
  • Add the chopped bacon, grated cheese and pinch of black pepper to the flour and stir through – dry ingredients.
  • In a jug measure the milk. Add the 2 eggs and vegetable oil and stir with a fork to combine – wet ingredients.
  • Pour the wet ingredients into the dry ingredients and stir until everything just comes together.
  • Muffin batter is meant to be lumpy, if you over mix you will have tough muffins.

BN Cheese Bacon Breakfast Muffins

Portioning And Baking The Muffins

  • Scoop the muffin mixture into the cases/pan.
BN Cheese Bacon Breakfast Muffins
These muffins are ready for the oven.
  • Bake for 15-20 minutes until they are golden brown and firm to touch.
  • As soon as they are baked remove the muffins from the pan and place on a cooling rack.
BN Cheese Bacon Breakfast Muffins
Cheese Bacon Breakfast Muffins 

Since this is such an easy recipe, producing light and tasty muffins – you’ve got nuffin to lose, by giving them a try!

Most importantly, these muffins are best eaten within 24 hours of being made, store in an airtight container. Alternatively, they can be frozen for up to one month. Defrost fully and reheat before eating.

BN Cheese Bacon Breakfast Muffins
Cheese Bacon Breakfast Muffins perfect for feasting on in the morning.

Are your mornings hectic?

And do you have a strategy for getting everyone up, feed and on their way?

If you love the idea of these Cheese Bacon Breakfast Muffins being a great way to grab breakfast on the go, take a look at these other ideas:

Cranberry Walnut Flapjacks 

BN Cranberry Walnut Flapjacks
Cranberry Walnut Flapjacks – perfect for sustained energy release.

Hot Cross Buns 

BN Hot Cross Buns
Hot Cross Buns – good to grab and go.

Cherry Bakewell Waffles

AJ Cherry Bakewell Waffles
Cherry Bakewell Waffles

I hope I’ve given you some ideas to take some of the stress out of busy mornings.

Please tag me in on Twitter/Instagram? I love to see what you are baking and making.

Sammie xx

@sammiefeasting Twitter/Instagram/Pinterest

Share
Facebooktwitterpinterestlinkedintumblr

Boozy Berry Sauce

Share
Facebooktwitterpinterestlinkedintumblr

If you want to vamp up your desserts I have the perfect Boozy Berry Sauce to do it with. Raspberries, strawberries and morello cherry conserve, mingle together with a decent splash of Framboise, to make a very classy fruit sauce.

Waffles Boozy Berry Sauce
Boozy Berry Sauce delicious with Vanilla Bean Waffles.

This Boozy Berry Sauce is the work of moments, however, your dinner party guests won’t know that. We’ll just keep it a secret between us. Ok?

I firmly believe that if you can make a couple of sauces really well, it can transform your dessert menu. Pour this intensely fruity sauce, with it’s little hint of raspberry liquer, over good quality vanilla ice cream and you have yourself one extremely tasty after dinner treat!

I developed this recipe to go with my Vanilla Bean Waffles it was a fantastic pairing, what surprised me more was how well it went with my Chocolate Waffles.

Waffles Boozy Berry Sauce
Boozy Berry Sauce perfectly compliments these gorgeous chocolate waffles,

I should have realised that raspberries and chocolate are a classic pairing and this Boozy Berry Sauce with it’s delicious raspberry flavour, only need be poured over a chocolate waffle for the magic to happen. A taste bud party that you won’t want to end!

This rich fruity sauce is also perfect poured, warm, over a pavlova, piled high with whipped cream and fresh berries. Ooh crunchy meringue with marshmallow inner, fresh fruit, cream and this glorious Boozy Berry Sauce, that is one dessert I must make – soon!

Waffles Boozy Berry Sauce
Boozy Berry Sauce perfect to make ahead and keep in the fridge.

You can of course substitute the raspberry liquer, for it’s blackcurrant counterpart Cassis, ooh that would be delicious. Of course you can leave the alcohol out altogether, in which case I’d recommend adding pomegranate juice, for it’s deep purple colour and intense flavour.

I do love a recipe that is versatile. With this sauce I actually used frozen raspberries. I see no reason why other berries can’t be substituted, providing the quantities are kept the same.

For the ‘boozy’ part of this sauce, if you have both Framboise and Cassis to hand, I’d say keep with the colours and flavour – so if you make this whilst blackberries are abundant  add Cassis, for red berries and cherries I’d stick with Framboise. That said it is all a matter of taste and preference. I would advise against adding a stronger spirit, for example brandy, as it would completely over power the fruit flavour.

Recipe: Makes 6 servings of Boozy Berry Sauce

300g Raspberries

300g Strawberries – hulled and quartered

100g Morello Cherry Conserve

3tbsp Caster Sugar

1tsp Vanilla Extract- I use Nielsen-Massey

3tbsp Framboise – raspberry liquer

1tsp Corn Flour – also known as Corn Starch

Method:

Waffles Boozy Berry Sauce
Add the raspberries, sugar and Framboise to a small, heavy based pan.

Bring gently to a simmer and stir to dissolve the sugar.

Once the raspberries are gently bubbling add the cherry conserve.

Waffles Boozy Berry Sauce
Next add the morello cherry conserve to the saucepan.

Stir to mix the cherry conserve with the raspberries.

When the sauce is bubbling add the strawberries.

Waffles Boozy Berry Sauce
Add the chopped strawberries to this delicious smelling Boozy Berry Sauce.

Stir and leave to bubble away on a gentle heat for 15 minutes.

In a small bowl add the teaspoon of cornflour to 2 teaspoons of cold water.

Mix together and then pour into the sauce.

Stir until the sauce thickens – less than one minute.

Allow the Boozy Berry Sauce to continue bubbling gently on a low heat for 5 more minutes.

Allow the sauce to cool until warm before using.

Once cooled it can be poured into airtight containers and kept in the fridge for 3 days.

When needed, add the cold sauce back to a saucepan, over a medium heat bring the sauce up to simmering point.

Allow to cool slightly before serving.

Waffles Boozy Berry Sauce
Boozy Berry Sauce alongside a delicious caramel sauce.

What will you pour your Boozy Berry Sauce over?

The Caramel Sauce can be found here.

I do hope you try my Boozy Berry Sauce with or without the booze! It really is delicious and will turn any dessert into a taste adventure.

If you have enjoyed making my Boozy Berry Sauce then you’ll love these:

Blackberry Nectarine Tart 

Blackberry Nectarine Tart Sauce
Blackberry Nectarine Tart the simplest of desserts.

Raspberry Chocolate Pavlova 

Raspberry Chocolate Pavlova Sauce
Raspberry Chocolate Pavlova everyone’s favourite.

Have fun whatever you make and send me a photo via Twitter/Instagram, I really love seeing what you make.

Sammie xx

@sammiefeasting Twitter/Instagram/Pinterest


Share
Facebooktwitterpinterestlinkedintumblr

Cranberry Walnut Flapjacks

Share
Facebooktwitterpinterestlinkedintumblr

Gosh mornings are busy. So much to do, yet so little time. Besides that awe are supposed to make time for the most important meal of the day – breakfast. Well I have a solution right here for you my friends –  Cranberry Walnut Flapjacks.

Cranberry Walnut Flapjacks
Cranberry Walnut Flapjacks perfect for breakfast on the go.

Breakfast, is just that – breaking the fast. Our bodies have just been starved for 6-7 hours (I’m being optimistic here), whilst we sleep. Eating a good breakfast helps kick our bodies into GO. If you are anything like me, I need a kick start in the morning!

That’s where these yummy Cranberry Walnut Flapjacks can help.

Packed full of good-for-you, slow release energy oats, one of these bars will keep you going until lunchtime. And, because it’s the morning and let’s face it eating anything can be a struggle, I threw in crunchy walnuts and chewy, slightly tart cranberries.

Yes there’s a squiggle of rich, dark chocolate on top of these beauties – it’s breakfast people, we need all the caffeine flavour we can get!!

Cranberry Walnut Flapjacks
Cranberry Walnut Flapjacks the perfect start to your day.

The beauty of these flavour and texture packed bars is that you make them ahead.

Making and baking ahead

Imagine this? It’s Sunday afternoon, you spend 15 minutes in the kitchen, whipping up a batch of these Cranberry Walnut Flapjacks and you have breakfast and snacks for the whole week.

Am I the only one who gets that mid afternoon dip around 3-4pm?

Thought not!

Also these bars also make a great mid afternoon snack and stop you grabbing for that chocolate bar/doughnut/cookie. Because we all know these give us an instant feel good sugar hit, only to slump in hunger again half an hour later. Therefore, why not wrap an extra one of these, in baking parchment and take it to work? It’ll keep those hunger pangs away until dinner time.

Cranberry Walnut Flapjacks
Wrap up one of the Cranberry Walnut Flapjacks and take it with you.

You can certainly mix up the fruit and nut element. Dried apricots with almonds, or dried figs with pecan nuts. Really the possibilities are endless, I would keep the weights the same, as the flapjack needs to hold together.

I have deliberately not used the word ‘healthy’ for these Cranberry Walnut Flapjacks, as I am aware of the sugar/butter content. I am not a nutritionist, although I would rather pop one of these bars into my daughter’s hand as she heads off for college, than have her grab a muffin or doughnut from a coffee shop!

Recipe: Make 16 Cranberry Walnut Flapjacks

250g/9oz Unsalted Butter

100g/4oz Golden Syrup (light corn syrup)

125g/5oz Light Brown Sugar

Scant pinch of salt – I use Maldon 

325g/11.5oz Rolled Oats (not quick cook) I use Waitrose essential oats

150g/5oz Dried Cranberries

100g/4oz Chopped Walnuts

50g/2oz Dark Chocolate (70% cocoa is ideal) – optional

Making and baking the Cranberry Walnut Flapjacks

Preheat the oven to 180/160C fan oven, 350F, gas mark 4
  • First of all, grease and line a 8″ x 11″ – 20cm x 28cm swiss roll tin/shallow baking tin, with butter and baking parchment.
  • Into a large bowl add the golden syrup.
  • Into a medium saucepan add the butter and sugar. Warm over a medium heat, stirring until melted.
  • Pour the melted butter/sugar mixture into the bowl containing the golden syrup. Stir continuously until combined.

Cranberry Walnut Flapjacks

  • Add the oats, cranberries and walnuts to the bowl.
  • Stir until all the oats, walnuts and cranberries are thoroughly coated in the melted butter/sugar.
  • Tip the mixture into the lined tin.

Cranberry Walnut Flapjacks


  • Using the back of a metal spoon press the mixture into the tin, forming an even layer.
  • Place the tin into the oven and bake for 20 minutes until golden brown.
  • Remove the tin from the oven and allow the Cranberry Walnut Flapjacks to cool in the tin.
  • The flapjacks will be very soft at this stage, but will harden on cooling.
Cranberry Walnut Flapjacks
When the flapjacks are slightly warm, remove from the tin.

Cutting and decorating the flapjacks

  • Using a sharp knife cut down the centre of the flapjacks. Then cut across the middle. Cut each quarter in half again. The flapjacks will still be slight soft.
  • Leave the flapjacks on the baking parchment to continue cooling and setting.
  • As soon as the Cranberry Walnut Flapjacks are completely cooled they can be drizzled with chocolate.
  • Break the chocolate into small pieces and melt in a heatproof bowl, in the microwave, using 30 second bursts. Stir well and when the chocolate is nearly melted keep stirring and the inherent heat will melt any solid pieces left.
  • You can use a teaspoon to drizzle the chocolate over the flapjacks or pour the chocolate into a disposable icing bag, snip the corner off and pipe the chocolate on.
Cranberry Walnut Flapjacks
Chocolate drizzled Cranberry Walnut Flapjacks
  • Allow the chocolate to set and then store in a tin.
Cranberry Walnut Flapjacks
Store layered with baking parchment in a tin.

While Cranberry Walnut Flapjacks are perfect anytime of day, they are especially handy to have, when time for breakfast disappears in the morning. Just grab one and eat on the go!

An added bonus, which does rely on checking the packaging, is that oats are gluten free. So even more people can enjoy a delicious, easy breakfast.

If you enjoyed these Cranberry Walnut Flapjacks then try these:

Bakewell Shortbread Bars 

FF Cranberry Walnut Flapjacks
Bakewell Shortbread Bars

Macadamia Apricot Flapjacks 

FF Cranberry Walnut Flapjacks
Macadamia Apricot Flapjacks

Lemon Drizzle Cake Bars

FF Cranberry Walnut Flapjacks
Lemon Drizzle Cake Bars

Why not bake a batch of these flapjacks and take them to work? Since I’m sure they would be appreciated. Especially by those who have skipped breakfast!

So, whatever you are making, baking and creating in your kitchens, have fun preparing and sharing your feast.

Sammie xx

No part of this post may be reproduced or duplicated without the written permission of the owner. Please see my Disclosure Policy.


Share
Facebooktwitterpinterestlinkedintumblr

Rocky Road Petit Fours

Share
Facebooktwitterpinterestlinkedintumblr

Today’s treat is a fantastic way to use up any leftover chocolate that you may have in the house following Easter or Christmas. Alternatively, these treats look so festive you absolutely can buy the chocolate to make them. Finally I get to share my Rocky Road Petit Fours, individual portions of the delicious, well know classic recipe.

Rocky Road Petit Foursp

Ooh hello!!!

Because I am pretty certain ours is not the only home with an excess of Christmas chocolate, silently hiding behind over stuffed cupboard doors, waiting to wreck havoc on New Year eating resolutions.

So I thought I’d come up with a recipe that makes best use of all that lovely chocolate and portions it into more diet, I mean healthier sized morsels.

And with only four ingredients, these Rocky Road Petit Fours are a great treat to make for parties and as gifts, whatever time of year it is.

Miniature edible gold star topped rocky road petit fours.
Rocky Road Petit Fours

Giving Edible Gifts:

So, why not pop a few in a cellophane bag, tie with pretty ribbon and you have a great gift. Teachers, co-workers, shopping delivery drivers. The opportunities to say thank you, I really appreciate what you do, are limitless.

Rocky road petit fours wrapped in a cellophane bag and tied with gold raffia to give as a gift.
Beautifully wrapped Rocky Road Petit Fours

And that is who I made these for, my Waitrose delivery drivers. Because they always go above and beyond when it comes to delivering my shopping and I really, really appreciate that.

Since I started having seizures, see here , I have tried having our shopping delivered at the weekend. The problem was, it took a big chunk out of the day whilst hubby sorted and put all the shopping away. Also, I was losing track of what we needed etc. so I switched to a mid week delivery and with the delivery driver’s help, the shopping is unloaded, put away and weekends are way more relaxing for my hardworking hubby.

So, as a thank you, I filled a tin with these delicious treats and sent them back with the driver after he had helped with my shopping today.

I do think it is important to thank people. Especially when they go out of their way to help.

And edible gifts are a great way of saying a special thank you.

Also, making these chocolate delights is childs play. Literally!!

With a little supervision, they are perfect for making with children. Although whether they are then given as gifts, directly depends on the chocolate ‘evidence’ around the little cherubs face! So it might be an idea to have some prepared in advance to give away and let the children eat the fruits of their labour.

Recipe: Makes approx. 45 Rocky Road Petit Fours

150g/6oz Good Quality Milk Chocolate – I used Waitrose Seriously Intense Milk Chocolate with 49% Cocoa (or use a mix of milk and dark chocolate)

100g/4oz Mini Marshmallows

100g/4oz Shortbread  – cut into small chunks. Alternatively use mixed, unsalted, shelled nuts.

10 Glace Cherries – finely chopped

Petit Fours Cases

Edible glitter or stars for decoration – they are easily found on Amazon.

Making The Rocky Road Petit Fours

First of all, break or chop the chocolate into small pieces and place into a large heatproof bowl.

Melt, in the microwave, using the medium heat setting and 30 second bursts.

Remove before all the chocolate is melted and stir continuously until smooth and lump free.

Add into the melted chocolate the shortbread, mini marshmallows and chopped glace cherries. Thoroughly mix until all the ingredients are coated in chocolate.

Using two spoons carefully fill each petit fours case generously.

Set aside to cool and set. During warmer months, pop the Rocky Road Petit Fours into the fridge for a couple of minutes to set.

Sprinkle over edible glitter, or gold stars to add a finishing touch to these treats.

And there you have delicious gifts, sweet part canapés, or simply share with friends and family.

Rocky road petit fours in mini cake cases.
Rocky Road Petit Fours

If you have enjoyed this recipe for Rocky Road Petit Fours you may also like these:

Chocolate Fudge Brownie Bites

Chocolate fudge brownie bites served on a slate platter.
Chocolate Fudge Brownie Bites


Cream Cheese Pastry Mince Pies

Mini mince pies made with cream cheese pastry.
Cream Cheese Pastry Mince Pies


Chocolate Heart Cookies

Chocolate heart shaped cookies decorated with a white chocolate drizzle.
Chocolate Heart Cookies

Do you enjoy making edible gifts?

Let me know what you think of these. I really appreciate you taking the time to write a comment. Thank you.

So, whatever you are making, baking and creating in your kitchens, have fun preparing and sharing your feast.

Sammie xx

No part of this post may be reproduced or duplicated without the written permission of the owner. Please see my Disclosure Policy.

Rocky road petit fours with overplayed descriptive text and sized for Pinterest.


Share
Facebooktwitterpinterestlinkedintumblr

Chocolate Madness Muffins

Share
Facebooktwitterpinterestlinkedintumblr

Well hello lovely people, what an amazing day it is today. Especially as I have mayhem happening in the kitchen today, in the form of Chocolate Madness Muffins. And please trust me, because you are going to go crazy for these scrumptious muffins.

FF Chocolate Madness Muffins


So, did you spot what I did? Diving straight into the photos of these chocolate masterpieces. Amazingly light chocolate sponge, studded throughout with milk and white chocolate chunks and chips.

And then I pressed extra chocolate chips into the top of the batter before baking the Chocolate Madness Muffins in the oven.

However, just in case there is any doubt about how madly, chocolatey, delicious these muffins are, I scattered a few extra chocolate chips over them, after baking, because why not??

So, let’s bring the Chocolate Mayhem on!!!


It’s good to shake things up once in a while, well not fizzy water – but that’s another thing entirely!


Usually, traditional muffins are quite dense and fairly quite good for you. Definitely not the case with these Chocolate Madness Muffins, as they don’t tick either of those boxes (RECIPE REBEL!). Since I was aiming for the cafe style muffins, but better. Big, beautiful, light-as-air sponge, enveloped in these gorgeous tulip style cake wrappers.

As you unwrap your own moment of madness, it really is like having a special chocolate present all to yourself. Unless, of course, you bake these Chocolate Madness Muffins and then invite lots of friends round. Ooh imagine sharing the Madness Mayhem. Now that sounds like my kind of party.


Muffins are not cupcakes:

Incredibly easy to make, the only difficulty with these Chocolate Madness Muffins is waiting for them to cool. Beautiful though these tulip cake cases are, the trick to them not peeling off as they cool, is to leave the muffins to cool completely in the pan. Once they are room temperature they can be removed from the pan.

I love the tulip cases, but they can be pricey. I’ve found buying online is much cheaper than any of the supermarkets. Also, unless you are going to make huge cupcakes, these tulip wrappers make piping icing pretty tricky. If you want to add frosting it’s easier just to dollop it on with a spoon see my Chocolate Chunk Cupcakes.

Please don’t worry if you haven’t got these tulip cake wrappers, this recipe will make 18 regular sized muffins instead of 12 Mega Chocolate Madness Muffins.

Recipe : Makes 12 mega or 18 regular Chocolate Madness Muffins

225g/8oz Caster Sugar

225g/8oz Unsalted Butter at room temperature

1/4tsp Salt – I use Maldon

1tsp Vanilla Extract

4 Large Eggs – I use free range

200g/7oz Plain White Flour

50g/2oz Cocoa Powder – I use Callebaut powder and chocolate chips/chunks

2tsp Baking Powder

100ml/4fl oz Whole Milk

150g/5oz Milk Chocolate Chunks or Chips

150g/5oz White Chocolate Chunks or Chips

Optional – extra chocolate chips for decoration after baking

Method : Preheat oven to 180C/160C fan, 350F, gas mark 4

Making The Batter

Cream the butter and sugar together until light and fluffy.
Add 2 eggs, vanilla extract and then whisk together.


Place your flour, cocoa, baking powder and salt into a bowl. These are your dry ingredients.

Sift in half of the dry mix. Mix until just incorporated.


Repeat, adding first the eggs and milk. Then sift in the rest of your dry ingredients and mix until you have a smooth batter.

Add in 100g/4oz of both the white and milk chocolate. Fold gently into the batter.


Line a muffin pan with 12 tulip cake wrappers. Using a large ice cream scoop, add a large rounded scoop of batter into each wrapper.

And so the madness commences.
Chocolate Madness Muffins sprinkle over the remaining 50g each of milk/white chocolate chips.


If using standard muffin cases, scrape the scoop against the side of the bowl. Add the smoothed off scoop to each case. Then sprinkle with the chocolate chips.

These muffins are now ready for the oven.

Baking The Muffins

Bake for 20-23 minutes (15-18 minutes for standard muffins) until the muffin springs back when lightly pressed.

Freshly baked muffins in a tray.


As soon as the muffins are baked remove from the oven and place on a baking rack to cool.
Once cooled sprinkle over a few extra chocolate chips.

To make the most of these Chocolate Madness Muffins I suggest sharing them. If you have chocoholic friends invite them round for a chat and a treat. Once they see these muffins the mayhem will commence. These muffins are most definitely FUN FOOD!

If you have enjoyed this recipe for Chocolate Madness Muffins you may also like these:

Caramac Drizzle Rolo Caramel Brownies

FF Chocolate Madness Muffins
Caramac Drizzle Rolo Caramel Brownies

Chocolate Honeycomb Sponge Cake

FF Chocolate Madness Muffins
Chocolate Honeycomb Sponge Cake

Maltesers Popping Candy Cupcakes 

FF Chocolate Madness Muffins
Maltesers Popping Candy Cupcakes


I don’t suggest eating one of these every day, but once in a while, why not let lose? All food is much more fun when shared.

Do you have a favourite recipe you like to share?

Sammie x


Share
Facebooktwitterpinterestlinkedintumblr

Carrot Soup

Share
Facebooktwitterpinterestlinkedintumblr

Hello and thanks for popping by. Autumn is most definitely here and with it the very changeable weather. While one minute there are blue skies and warming sunshine only to vanish, in a flash of lightening, to deep grey clouds, swirling winds and cold, drenching rain. In fact, autumnal weather has all the consistency of a teenager’s mood swings! Yet, one thing that is guareented to brighten the dreariest day is this vibrant orange, Carrot Soup by my very talented and beautiful friend Liz.

Pinterest sized image of carrot soup with descriptive graphics.
Carrot Soup with a hint of ginger.

Liz and I ‘met’ over on Twitter. Because we are both newbies to the blogging and Tweeting world, I guess we found a kindred spirit in each other. While Liz no longer blogs on her site Teta Lizza, she can be found on Instagram as @teta_lizza. Rather than blogging on her site, she now shares plant based recipes on her Instagram account.

Carrot Soup with some crumbled Stilton cheese.


I will be forever thankful to Liz for allowing me to create and post this Carrot Soup. While the subtle hint of ginger gently warms you through as you consume this delicious soup. Also the beautiful sweetness of the carrots contrasts with the sharp, salty, Stilton, crumbled into the middle. Alternatively, Liz uses Parsley to garnish her soup and that too would be delicious, as would a swirl of cream, dollop of creme fraiche…. the garnishing possibilities are endless. And it’s important to mention that without garnish, this soup is entirely delicious on it’s own. Especially if it is accompanied by nothing more than a good, thick, slice of bread, for dunking and mopping!

Carrot Soup


Recipe : Serves four portions of Carrot Soup

1tbsp Olive Oil – I use Filippo Berio

1 Medium Onion diced

450g/1lb Carrots – peeled and medium diced

1 Large Potato – baking sized, peeled and medium diced

1tsp Fresh Grated Ginger

1 litre/Approx 2pints Water

1 Vegetable Stock Cube – if not making vegetarian version, a chicken stock cube is fine

Salt and Freshly Ground Pepper to season

Stilton Cheese to garnish – optional

Method :

Making The Soup

  • First of all, pour the Olive Oil into a heavy based pan, over a medium heat.
  • Add the diced onions and a small sprinkle (1/4tsp) of salt.
  • Sauté the onions until soft and translucent – adding the salt will help stop them browning.
Add the carrots and potatoes to the softened onions.
  • Stir the vegetables over a medium/low heat for a minute.
Grate 1tsp of fresh ginger and add to the pan.
  • Add the freshly grated ginger to the saucepan.
Add the water and stock cube to the vegetables.
  • Finally pour the water over the vegetables.
  • Add a good grinding of black pepper.
  • I wouldn’t add any additional salt at this stage as the stock cube contains salt.
  • Bring the soup to a boil, then reduce the heat and allow the soup, covered with a lid, to simmer for half an hour.
  • As soon as the soup has finished cooking move the pan off of the heat.
Purée using a hand held blender.
  • Purée the soup using a hand blender. Alternatively, cool the soup and purée in a blender.
Carrot Soup have a final taste and adjust the seasoning if necessary.

Finally serve the Carrot Soup ladled into warmed bowls and garnished with some crumbled Stilton Cheese (unless you are making the soup for vegans) and thick slices of homemade bread.

Pinterest sized image of carrot soup served in a green rimmed soup bowl.

This Carrot Soup warms you right through. Also it is perfect for lunch after a long walk, admiring the changing colours of the season and kicking through the fallen leaves.

If you have enjoyed this recipe for Carrot Soup you may also like these:

Roasted Garlic Butternut Squash Soup 

Roasted Garlic Butternut Squash Soup in a green rimmed bowl.
Roasted Garlic Butternut Squash Soup.

Warming Winter Vegetable Soup 

Winter Warming Vegetable Soup served in a bowl
Winter Warming Vegetable Soup – also vegan

Creamy Low Fat Mushroom Soup 

Creamy Low Fat Mushroom Soup

I am such a fan of soup. While it can be a quick, warming, light lunch, it can also serve as a substantial meal. Adding tasty, rustic, homemade bread such as my  Crunchy Seeded Bread and also some tasty cheese, turns this simple bowl into a heart warming feast. And it’s easy to double up on ingredients if you are feeding a crowd.

So, whatever you are making, baking and creating in your kitchens, have fun preparing and sharing your feast.

Sammie x

No part of this post may be reproduced or duplicated without the written permission of the owner. Please see my Disclosure Policy.


Share
Facebooktwitterpinterestlinkedintumblr

Lemon Blueberry Cupcakes

Share
Facebooktwitterpinterestlinkedintumblr

Hello, I have an incredibly delicious treat for you today, these Lemon Blueberry Cupcakes. I know, I hardly ever post cupcake recipes, except today, I had this big punnet of beautiful, juicy, blueberries sitting in the fridge, waiting to be eaten. And then I noticed the lemons. I love lemon, the flavour, the scent and these lemons are super special – they are called Eureka lemons. What a cool name. So I had a little think to myself (mostly a dangerous pursuit!) and decided it was time to make me some cupcakes.

FF Lemon Blueberry Cupcakes

Actually, when I say me I mean our family. Because all of us enjoy a cupcake and as I don’t make them very often they really are a treat. Although I must confess that two of these cupcakes didn’t make it throught to the frosting stage, because my daughter and I snaffled one each whilst they were still warm. Mmm. Totally worth it. Jammy pods of sweet, warm blueberry in a moist lemon crumb, yep no guilt felt at all. In fact you could make these and skip the frosting stage completely and they’d still be knockout delicious!

Lemon Blueberry Cupcakes

Warning, the frosting on these Lemon Blueberry Cupcakes totally sends them over the top. Since using fresh lemon juice ensures the frosting is the perfect balance to an already wonderful cupcake. And it adds another dimension of sweet/tart creaminess that simply makes these cupcakes awesome.

I actually had to resist adding some sparkles to these cupcakes, because sparkles?? I held back as the blueberry, polka dot studded frosting looked so pure and, well, perfect. However, If you want to add sprinkles or sparkles, just know I’m good with that.

Lemon Blueberry Cupcakes

Recipe : Makes 12 Lemon Blueberry Cupcakes

For The Cupcakes

175g/6oz Unsalted Butter at room temperature

175g/6oz Caster Sugar

1tsp Vanilla Extract – I use Nielsen-Massey 

1/4tsp Salt

3 Large Free Range Eggs

175g/6oz Plain White Flour

1 1/2tsp Baking Powder – I use Waitrose 

300g/11oz Fresh Blueberries

1 Lemon zest

For The Frosting 

400g/14oz Icing Sugar (Confectioners sugar)

150g/5oz Unsalted Butter at room temperature

3-4tbsp Lemon Juice (from the lemon above)

Making the cupcakes

Preheat the oven to 180C/160C fan, 350F, gas mark 4

  • First of all add the sugar, salt and butter to a large mixing bowl.
  • Whisk together until pale and creamy.

Add the sugar and butter to a bowl.

Whisk together until light and fluffy.


  • Add the vanilla extract and 2 eggs and whisk thoroughly.
  • Remove 1 tablespoon of flour, for dusting the blueberries later.
  • Sift in half the flour/baking powder and mix until just combined. I usually do this by hand, or use a low setting on a stand mixer.
  • Add the remaining egg. Stir briefly before adding the remaining sifted, dry ingredients. Mix until everything is just incorporated.

This cake batter is ready for its fruit!


  • Keep back enough blueberries to decorate the cupcakes with. Now toss the remaining blueberries in the tablespoon of flour. This will stop them sinking to the bottom of the cupcake whilst baking.
  • Zest the lemon using a grater or, as I have, a lemon zester. Add to the bowl.
  • Stir the batter carefully by hand to avoid breaking up the blueberries.

Add the blueberries and lemon zest.


Stir the batter carefully by hand to avoid bursting the blueberries.


  • Line a muffin/cupcake tin with 12 cupcake cases.
  • Using an ice cream scoop fill the cases evenly with batter.

Lemon Blueberry Cupcakes


  • Place the Lemon Blueberry Cupcakes in the middle of the preheated oven.
  • Bake for 20 – 25 minutes. The cupcakes are baked when they are golden brown and spring back when lightly pressed.
  • I don’t suggest using a toothpick or skewer to check these particular cupcakes, as they are full of jammy blueberries, the skewer is likely to come out unclean.
  • As soon as the cupcakes are baked remove from the oven.

Lemon Blueberry Cupcakes


  • Leave the cupcakes to cool in the tin for 10 minutes.
  • Then place the cupcakes on a cooling rack.

Lemon Blueberry Cupcakes


Making the buttercream and icing the cupcakes

  • Place the icing sugar, soft butter and 3 tablespoons of lemon juice into a bowl.
  • Whisk thoroughly adding more lemon juice if the frosting is too thick.

Whisk the butter, icing sugar and lemon juice together until light and fluffy.

  • The whipped buttercream.
  • Fit a nozzle of your choice (I used a large star tip) to a piping bag. I then turn over the outside edges and use a large glass or jug to put my piping bag in whilst I fill it with the frosting. I created a swirl pattern with my frosting.

Starting at the outside edge, frost the cupcake using a circular motion.

  • Start at the outside edge and keeping an even pressure on the piping bag ice the cupcake in a circular motion.
  • Repeat until all of the cupcakes are frosted.

Lemon Blueberry Cupcakes


  • Now it’s time to adorn the beautiful, creamy, frosting with the deep, dark, blue, berries that you reserved.
Lemon Blueberry Cupcakes


If not served immediately store in an airtight container. During hot weather refrigerate. Eat within 3 days.

If you have enjoyed this recipe for Lemon Blueberry Cupcakes you may also like these:

Black Forest Cupcakes 

FF Lemon Blueberry Cupcakes
Black Forest Cupcakes

Caramac Frosted Chocolate Cupcakes 

FF Lemon Blueberry Cupcakes
Caramac Frosted Chocolate Cupcakes

Fresh Raspberry Frosted Lemon Cupcakes 

FF Lemon Blueberry Cupcakes
Fresh Raspberry Frosted Lemon Cupcakes

While enjoying these Lemon Blueberry Cupcakes it is important to me to share. Seeing the pleasure on neighbours and friends faces when you pop round with one of these beauties makes me go all warm and fuzzy inside. Most importantly, it isn’t because of my actions, rather the reaction of seeing the recipient grinning. And, I honestly believe that all food tastes better when shared.

So whatever you are making, baking and creating in your kitchen, have fun preparing and sharing your feast.

Sammie x

No part of this post may be reproduced or duplicated without the written permission of the owner. Please see my Disclosure Policy.


Share
Facebooktwitterpinterestlinkedintumblr

Easy Crusty Baguettes

Share
Facebooktwitterpinterestlinkedintumblr

Hi, so I’ve now had feastingisfun.com for a year! Thank you to everyone who has taken time to read and comment on my blog. I appreciate you more than you could ever know. If I could bake each and everyone of you a cake I would. Instead I have a bread recipe for you!!! I know, I’m all heart – but this is a recipe you will, hopefully, thank me for. Easy Crusty Baguettes.

Easy Baguettes
Easy Crusty Baguettes


You may be thinking – “why bake my own baguettes when I can pick them up from the grocery store?”

Well, not everyone can get to a shop, they can be out of stock – but mostly I’m the kinda girl who is inquisitive. If I can buy something, I want to know if I can make it! Personally I get a real kick out of making something that’s so easy to buy – knowing exactly what’s gone into my creation! Easy Crusty Baguettes are so easy to make (if you have a stand mixer with dough hook or a bread maker they are easier still!) and taste so good.

The only ‘special’ piece of equipment I use is a French Baguette Tray.

French Baguette Trays


I purchased my baguette from Amazon UK

Swift Faringdon Collection Bakers Pride Non-Stick French Bread Pan Carbon Steel 39 cm x 16 cm x 2.5 cm

by Faringdon Collection


I have made baguettes on a baking sheet, they were ok but tended to spread a little. I decided to buy one French Baguette Tray, used it, was thrilled with the results and quickly purchased a second tray. The advantages of using the baguette tray are that they really do hold the shape of the baguette, whilst it’s proving and baking and they are longer than most baking trays so you can put them in your oven at an angle – giving you longer baguettes. These Easy Crusty Baguettes are made using these trays.

Gorgeous imprint on the underside of the baguette from the tray.


Recipe : makes 3 x 16″ (40cm) Easy Crusty Baguettes

500g/1lb 2oz Strong White Bread Flour

1 x 7g Sachet Fast Action Dried Yeast

1tsp Sugar or honey

300ml/10floz Lukewarm Water

25g/1oz Unsalted Butter

1tsp Salt

Method :

I use a bread maker to mix, prove and knock back the dough, instructions will also be given for a stand mixer using a dough hook.

Place the water into the bowl. Add the yeast and sugar. Swirl with clean fingers to mix.

Add the flour so that it covers the water/yeast mixture. On top of the flour add the salt and butter.

If using a bread maker set the program to mix and prove.

If using a stand mixer slowly start to mix the ingredients. Once combined increase the speed to medium and mix for 10 minutes. Once mixing is complete form the dough into a ball, place back into the stand mixer bowl, cover with a clean tea towel and leave in a draft free place until doubled in size.

When the bread mixer has finished proving, or the dough in the stand mixer is doubled in size it is time to knock back the dough.

Using the bread maker mix and prover cycle, start again and allow to knead for the mix part of the cycle then stop the machine and remove the dough.

Using a stand mixer with a dough hook attachment as before, remove the towel and start the mixer on low increasing to medium to knock back and knead the proved dough. If the dough doesn’t all pull together, stop the mixer. Using clean hands pull the dough into a ball shape. Knead the dough on a medium speed for a further 10 minutes. Stop the mixer and remove the dough from the bowl/dough hook.

Place the dough on a floured surface.
Divide the dough into 3 equal pieces - unlike mine!!!
Divide the dough into 3 equal pieces – unlike mine!!!
Roll each piece of dough out to just under the length of your baguette tray.
Place the baguette roll in the tray and using a very sharp knife slash lightly through the dough as in the photo.


I could have recombined my dough to create three equal sized baguettes. What I did instead was to place the smaller baguette in a separate tray, knowing it would cook a little quicker than the other two! Very lazy I know!!

Place the trays in a draught free place and cover with a clean tea towel. Leave to prove until doubled in size.

Preheat the oven to it’s hottest setting and place a tray of hot water in the bottom of the oven. The steam produced will help give your Easy Crusty Baguettes the super crusty, crunchy exterior that is required in a baguette!

Removing the towel place the baguette trays into the oven diagonally. Bake for 20-25 minutes until the baguettes are golden, with a hard crust. They should sound hollow when rapped on the base with your knuckle.

Easy Baguettes - golden, crunchy, crust.
Easy Crusty Baguettes – golden, crunchy, crust.


Remove from the oven and place the baguettes on a cooling rack.

We ate one baguette the day they were made. The other two were stored in our bread tin. 2 days later I sprinkled them with a little water and placed in a preheated, hot oven for 5-8 minutes. Below is the baguette I refreshed in the oven. It tasted as good as the day it was made. Absolutely delicious with a really crunchy crust.

Easy Baguettes - perfect with cheese and chutney.
Easy Crusty Baguettes – perfect with cheese and chutney.

If you have enjoyed this recipe for Easy Crusty Baguettes then you may also like these:

Garlic Rosemary Focaccia Bread

FF Easy Crusty Baguettes
Garlic Rosemary Focaccia Bread

Oat Bran White Bread

FF Easy Crusty Baguettes
Oat Bran White Bread

Cheddar Cheese Thyme Soft Breadsticks 

FF Easy Crusty Baguettes
Cheddar Cheese Thyme Soft Breadsticks

Of course there are times when we all buy baguettes – because, LIFE! If I lived near an artisan bakery I may never have made these. Really I am so glad I tried. For minimal effort, delicious bread is on hand. Easy Crusty Baguettes so worth the few minutes prep time.

Have you ever made baguettes?

I love reading your comments and appreciate you taking the time to write them.

You may also like Crusty White Bread                                                                 Wholemeal Cob Loaf

Sammie x

This is not a sponsored post, item links provided for information purposes only.


Share
Facebooktwitterpinterestlinkedintumblr

Cheer Up Chocolate Chip Cookies

Share
Facebooktwitterpinterestlinkedintumblr

Hi, I’m here to help put a smile on faces today. Since my Cheer Up Chocolate Chip Cookies are perfect for anyone who is feeling a little unwell, down or just needs a hug.

Cheer Up Chocolate Chip Cookies - perfect with a glass of milk.
Cheer Up Chocolate Chip Cookies – perfect with a glass of milk.


Our family had a barbecue over the weekend. While all of the cousins got together with Aunts, Uncles and Grandparents, sadly I was unable to go, due to still having daily seizures. Although the children went and as always, had the best of times. Everyone had to make their own kebabs, from ingredients laid out before them and then remember which kebab was theirs once on the grill! Afterwards our children came home happy, tired and full.

The next day revealed that our eldest had been bitten 30 times by Mosquitos and our other two had a fair few bites between them as well. All in all they were feeling pretty sorry for themselves. Because they were all tired and itchy and apart from administering antihistamines/cream etc. I decided to bake them these Cheer Up Chocolate Chip Cookies!

Cheer Up Chocolate Chip Cookies.


Mmm these Cookies certainly did cheer the children up and although chocolate isn’t my go-to flavour, I have to say they are delicious. Hubby snaffled one after work and also agreed they were yummy, while reaching for a second one!!

Easy to make, quick to bake, if you need cheer up food fast, these cookies are the way to go.

Recipe : Cheer Up Chocolate Chip Cookies makes approx. 24

225g/8oz Unsalted Butter – room temp.

150g/5oz Caster Sugar

1/4tsp Salt – I use Maldon 

1 Large Egg Yolk

1tsp Vanilla Extract – I use Nielsen-Massey 

350g/10oz Plain White Flour

100g/4oz each –

Plain Chocolate Chips

Milk Chocolate Chips

White Chocolate Chips

Optional – extra chocolate chips for topping the cookies.

Method : Preheat oven to 180C/160C fan oven. gas mark 4, 350F

Making And Shaping The Cookie Dough

  • First of all line two baking sheets with parchment paper.
  • Place the butter, sugar and salt into a bowl. Whisk until creamed together.
Add the egg yolk and vanilla extract. Beat until light and fluffy.
Next add the flour...
Next add the flour…
On top of the flour add the three different chocolate chips.
Mix until all the ingredients are just combined.
I used a 2" ice cream scoop to measure out identical scoops of cookie dough.
I used a 2″ ice cream scoop to measure out identical scoops of cookie dough.
Identical mounds of Cheer Up Chocolate Chip Cookie dough.
Lightly press on each mound of dough to flatten it.
For extra cheer I pressed a few extra milk chocolate chips into the top of the unbaked cookies.

Baking The Cookies

  • Place the baking trays into the preheated oven and bake for 10-15 minutes.
  • As soon as they are lightly golden remove from the oven.
  • While they will still feel soft if overcooked they will be hard.
Allow the Cheer Up Chocolate Chip Cookies to cool and firm up on the baking sheet for 10 mins.


  • Transfer to a cooling rack to finish cooling.
  • As soon as they were just cooled the children tucked into the cookies.
Cheer Up Chocolate Chip Cookies.


Since I only baked half of the cookie dough the rest was wrapped up in cling film to form a dough log. This can sit happily in the fridge for up to a week, or double wrap and pop in the freezer. Allow to defrost and then slice and bake your cookies as above. Finally, with the refrigerated dough log I find it’s best to leave it out of the fridge for 15 minutes before slicing.

Cheer Up Chocolate Chip Cookie dough log.

If you have enjoyed this recipe for Cheer Up Chocolate Chip Cookies you may also like these:

Extreme Chocolate Cookies

FF Cheer Up Chocolate Chip Cookies
Extreme Chocolate Cookies

Caramac Caramel Cookies 

FF Cheer Up Chocolate Chip Cookies
Caramac Caramel Cookies

Chocolate Dipped Shortbread Heart Cookies 

FF Cheer Up Chocolate Chip Cookies
Chocolate Dipped Shortbread Heart Cookies

While watching the children munch on their cookie big smiles appeared. Although the itching didn’t disappear their focus was on eating. A distraction that did indeed cheer them up.

Do you have a way of cheering people up?

Sammie xx

No part of this post may be reproduced or duplicated without the written permission of the owner. Please see my Disclosure Policy.

Chocolate chip cookies on a cooling rack.


Share
Facebooktwitterpinterestlinkedintumblr