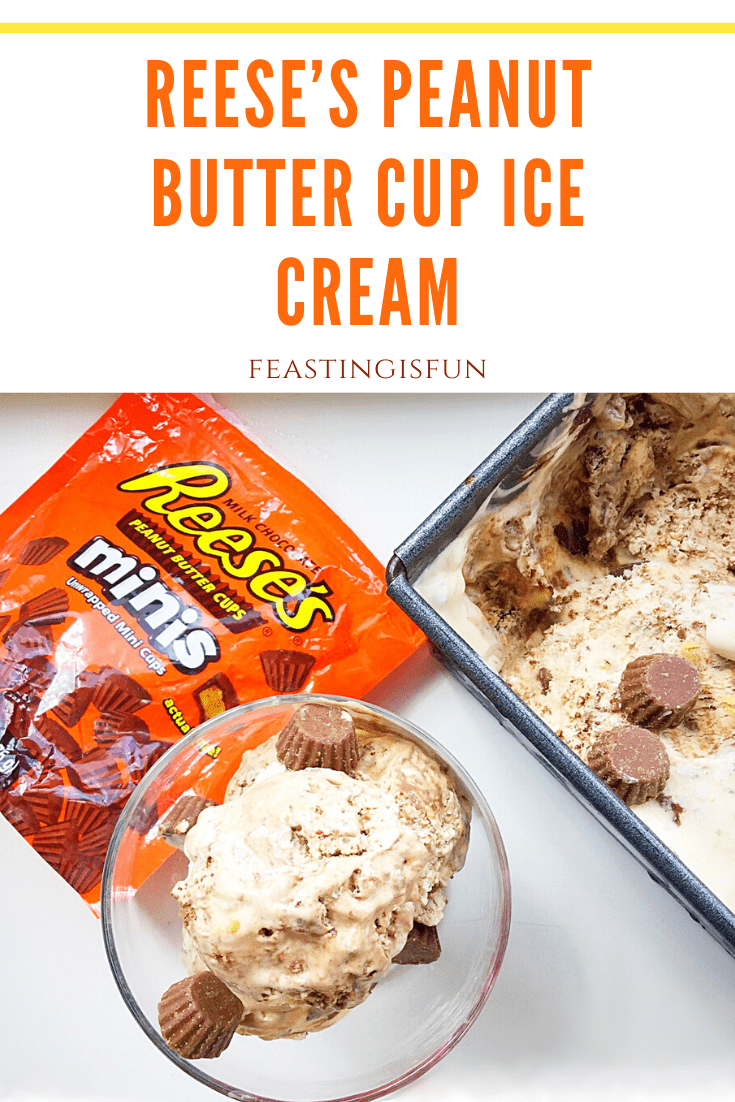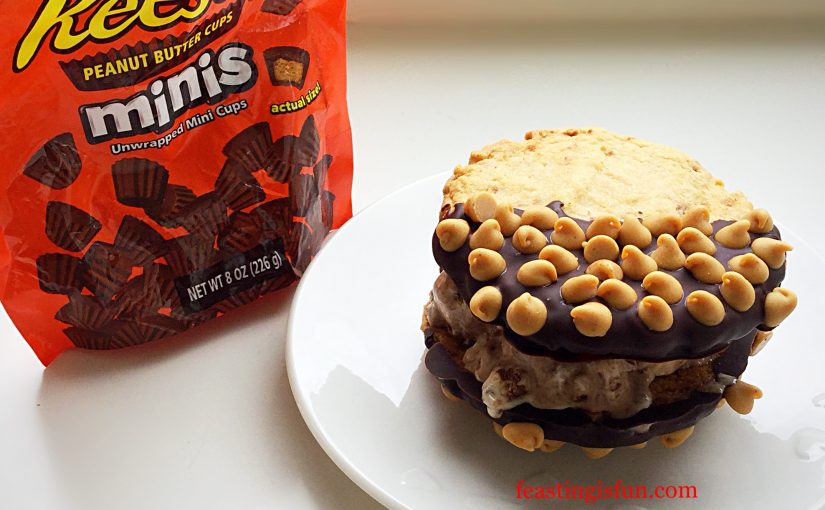
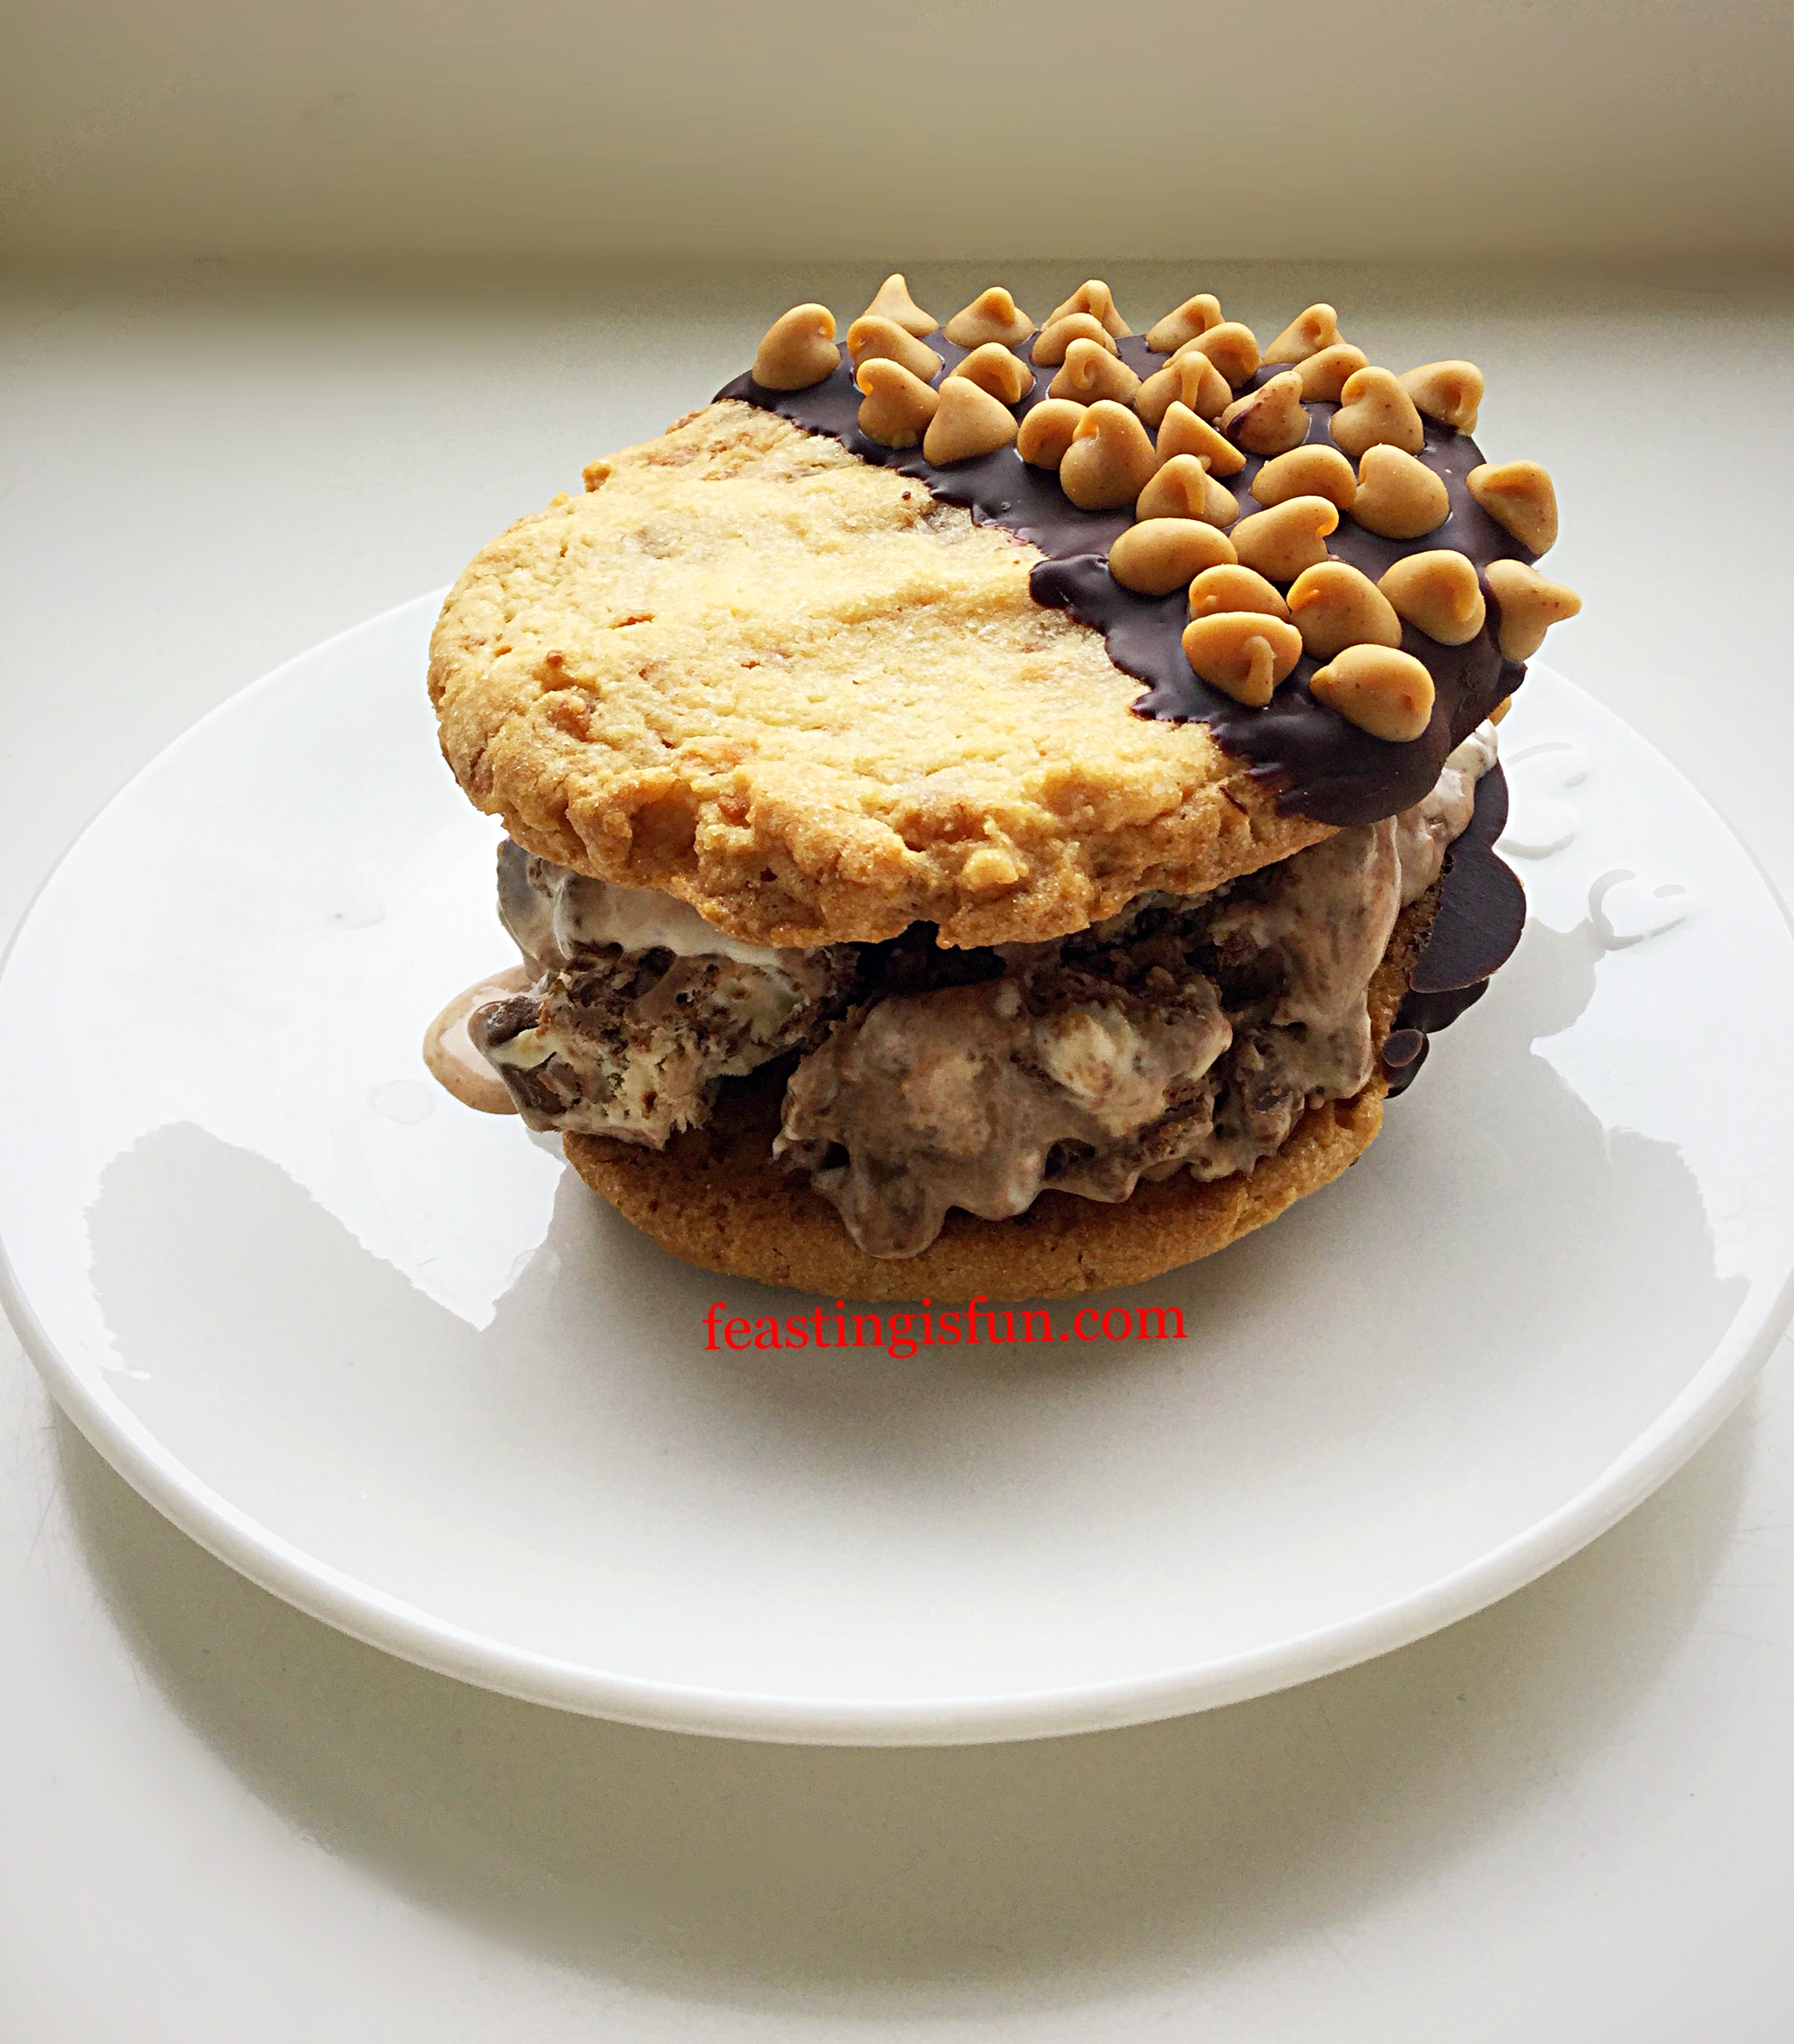
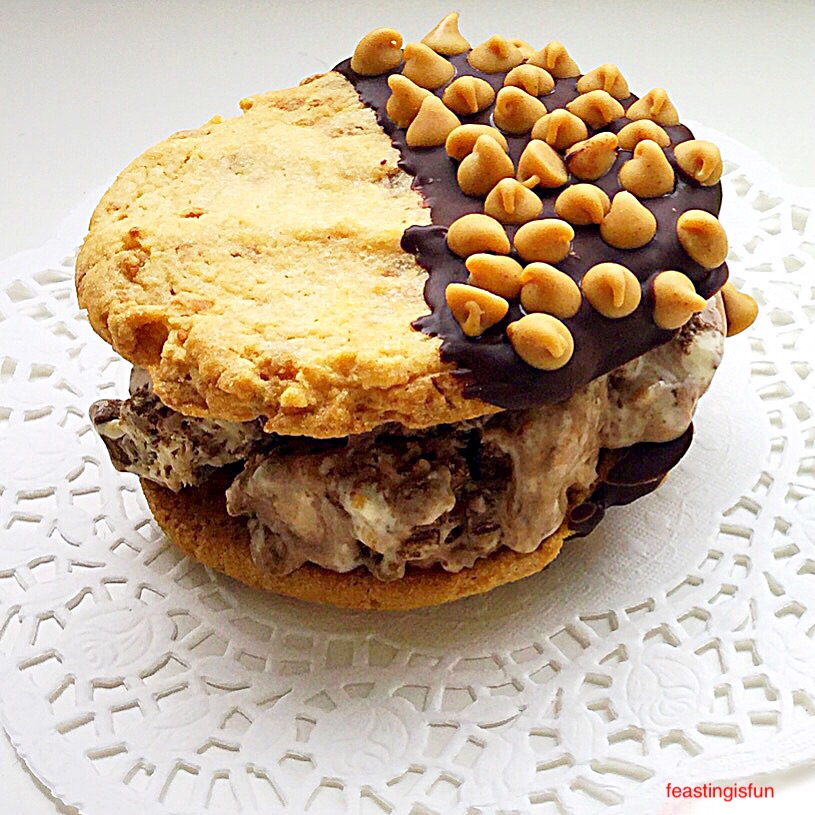
How do you improve on one of the best flavours of ice cream known to man? You squish it between two incredible, homemade cookies! And so I bring you Reeses Peanut Butter Cup Ice Cream. Because lovely people, this is the foodie equivalent of winning all the coins and one-ups in a Super Mario game and then some. So, stick with me as I take you through an incredible ice cream journey.

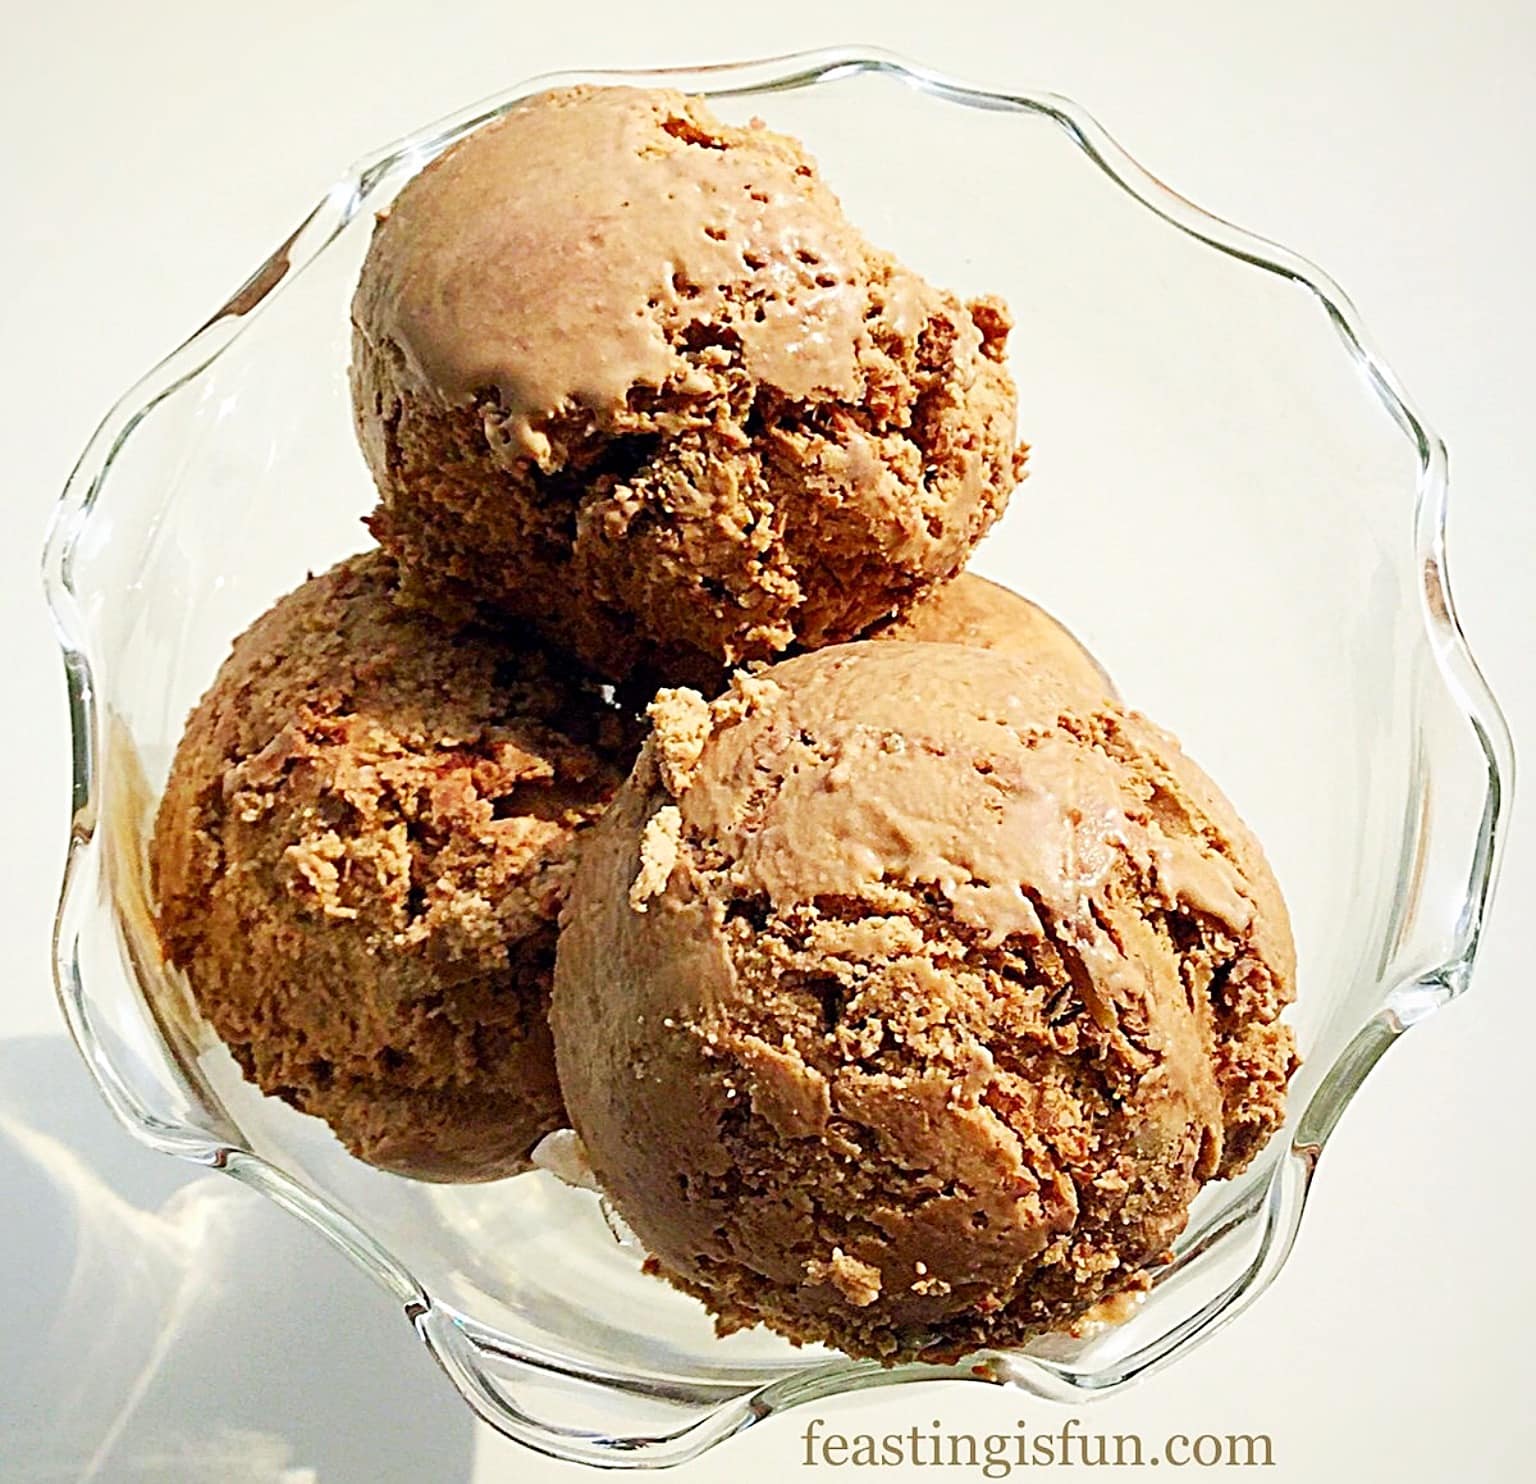
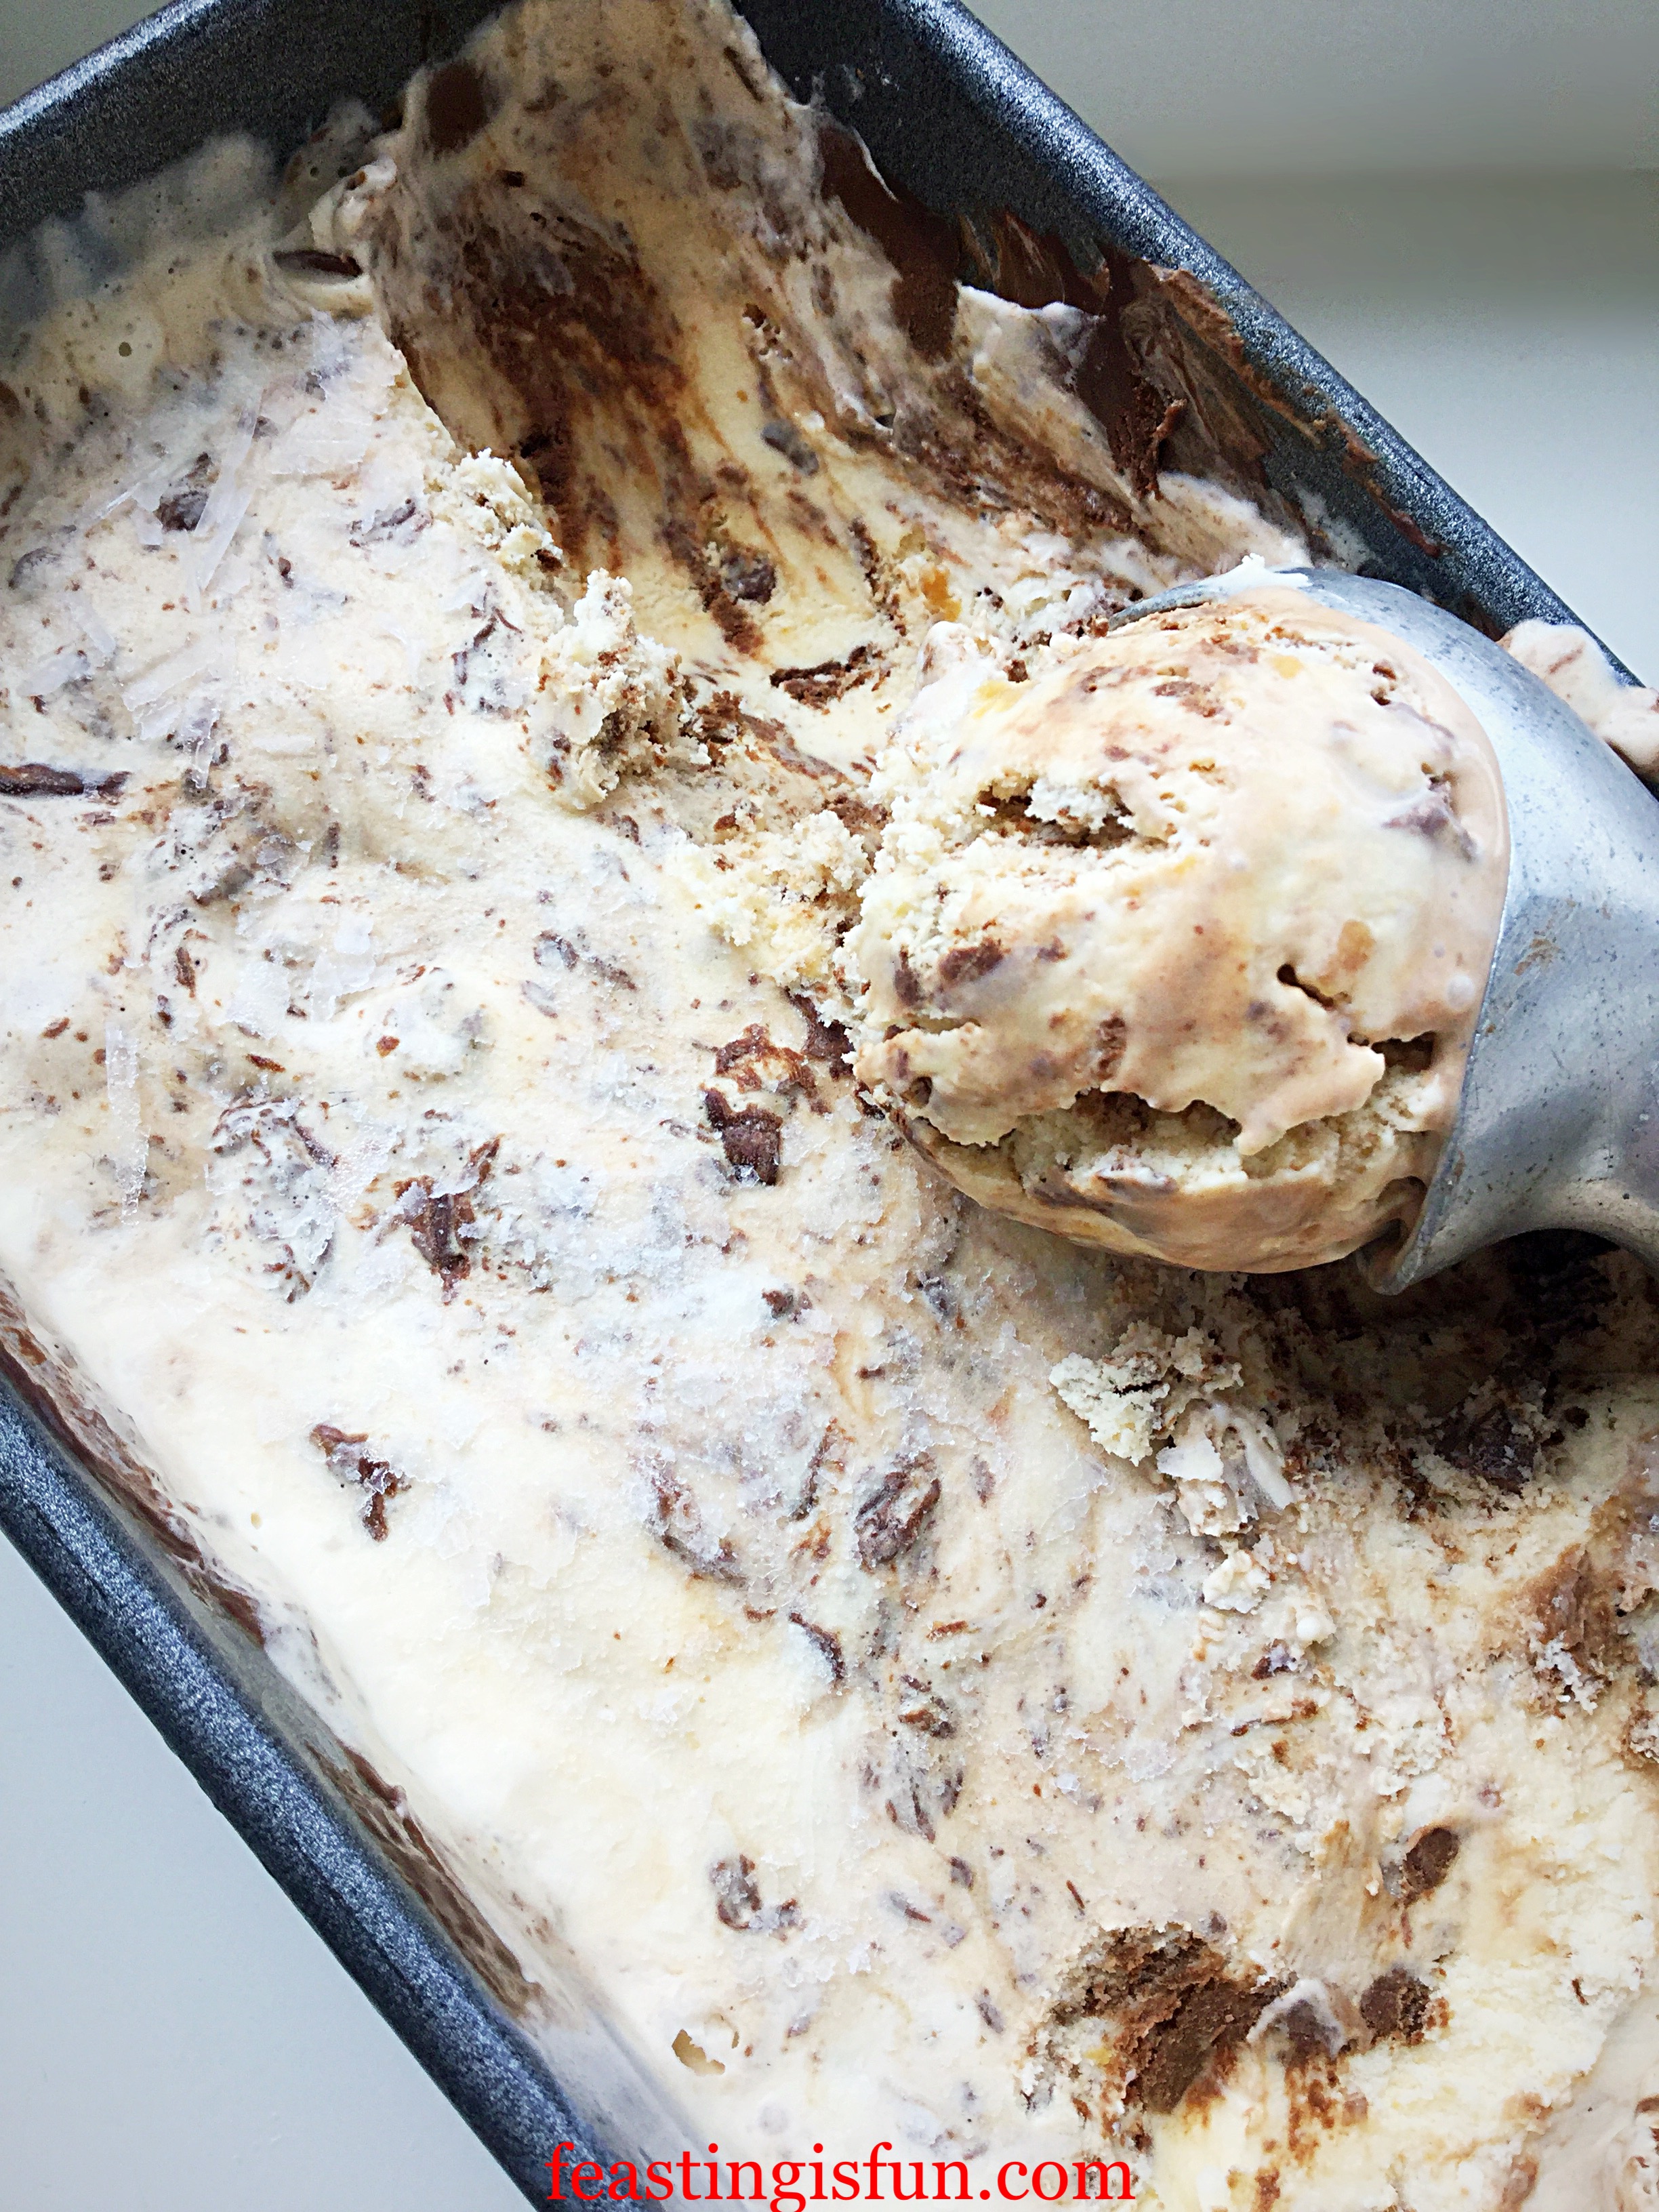
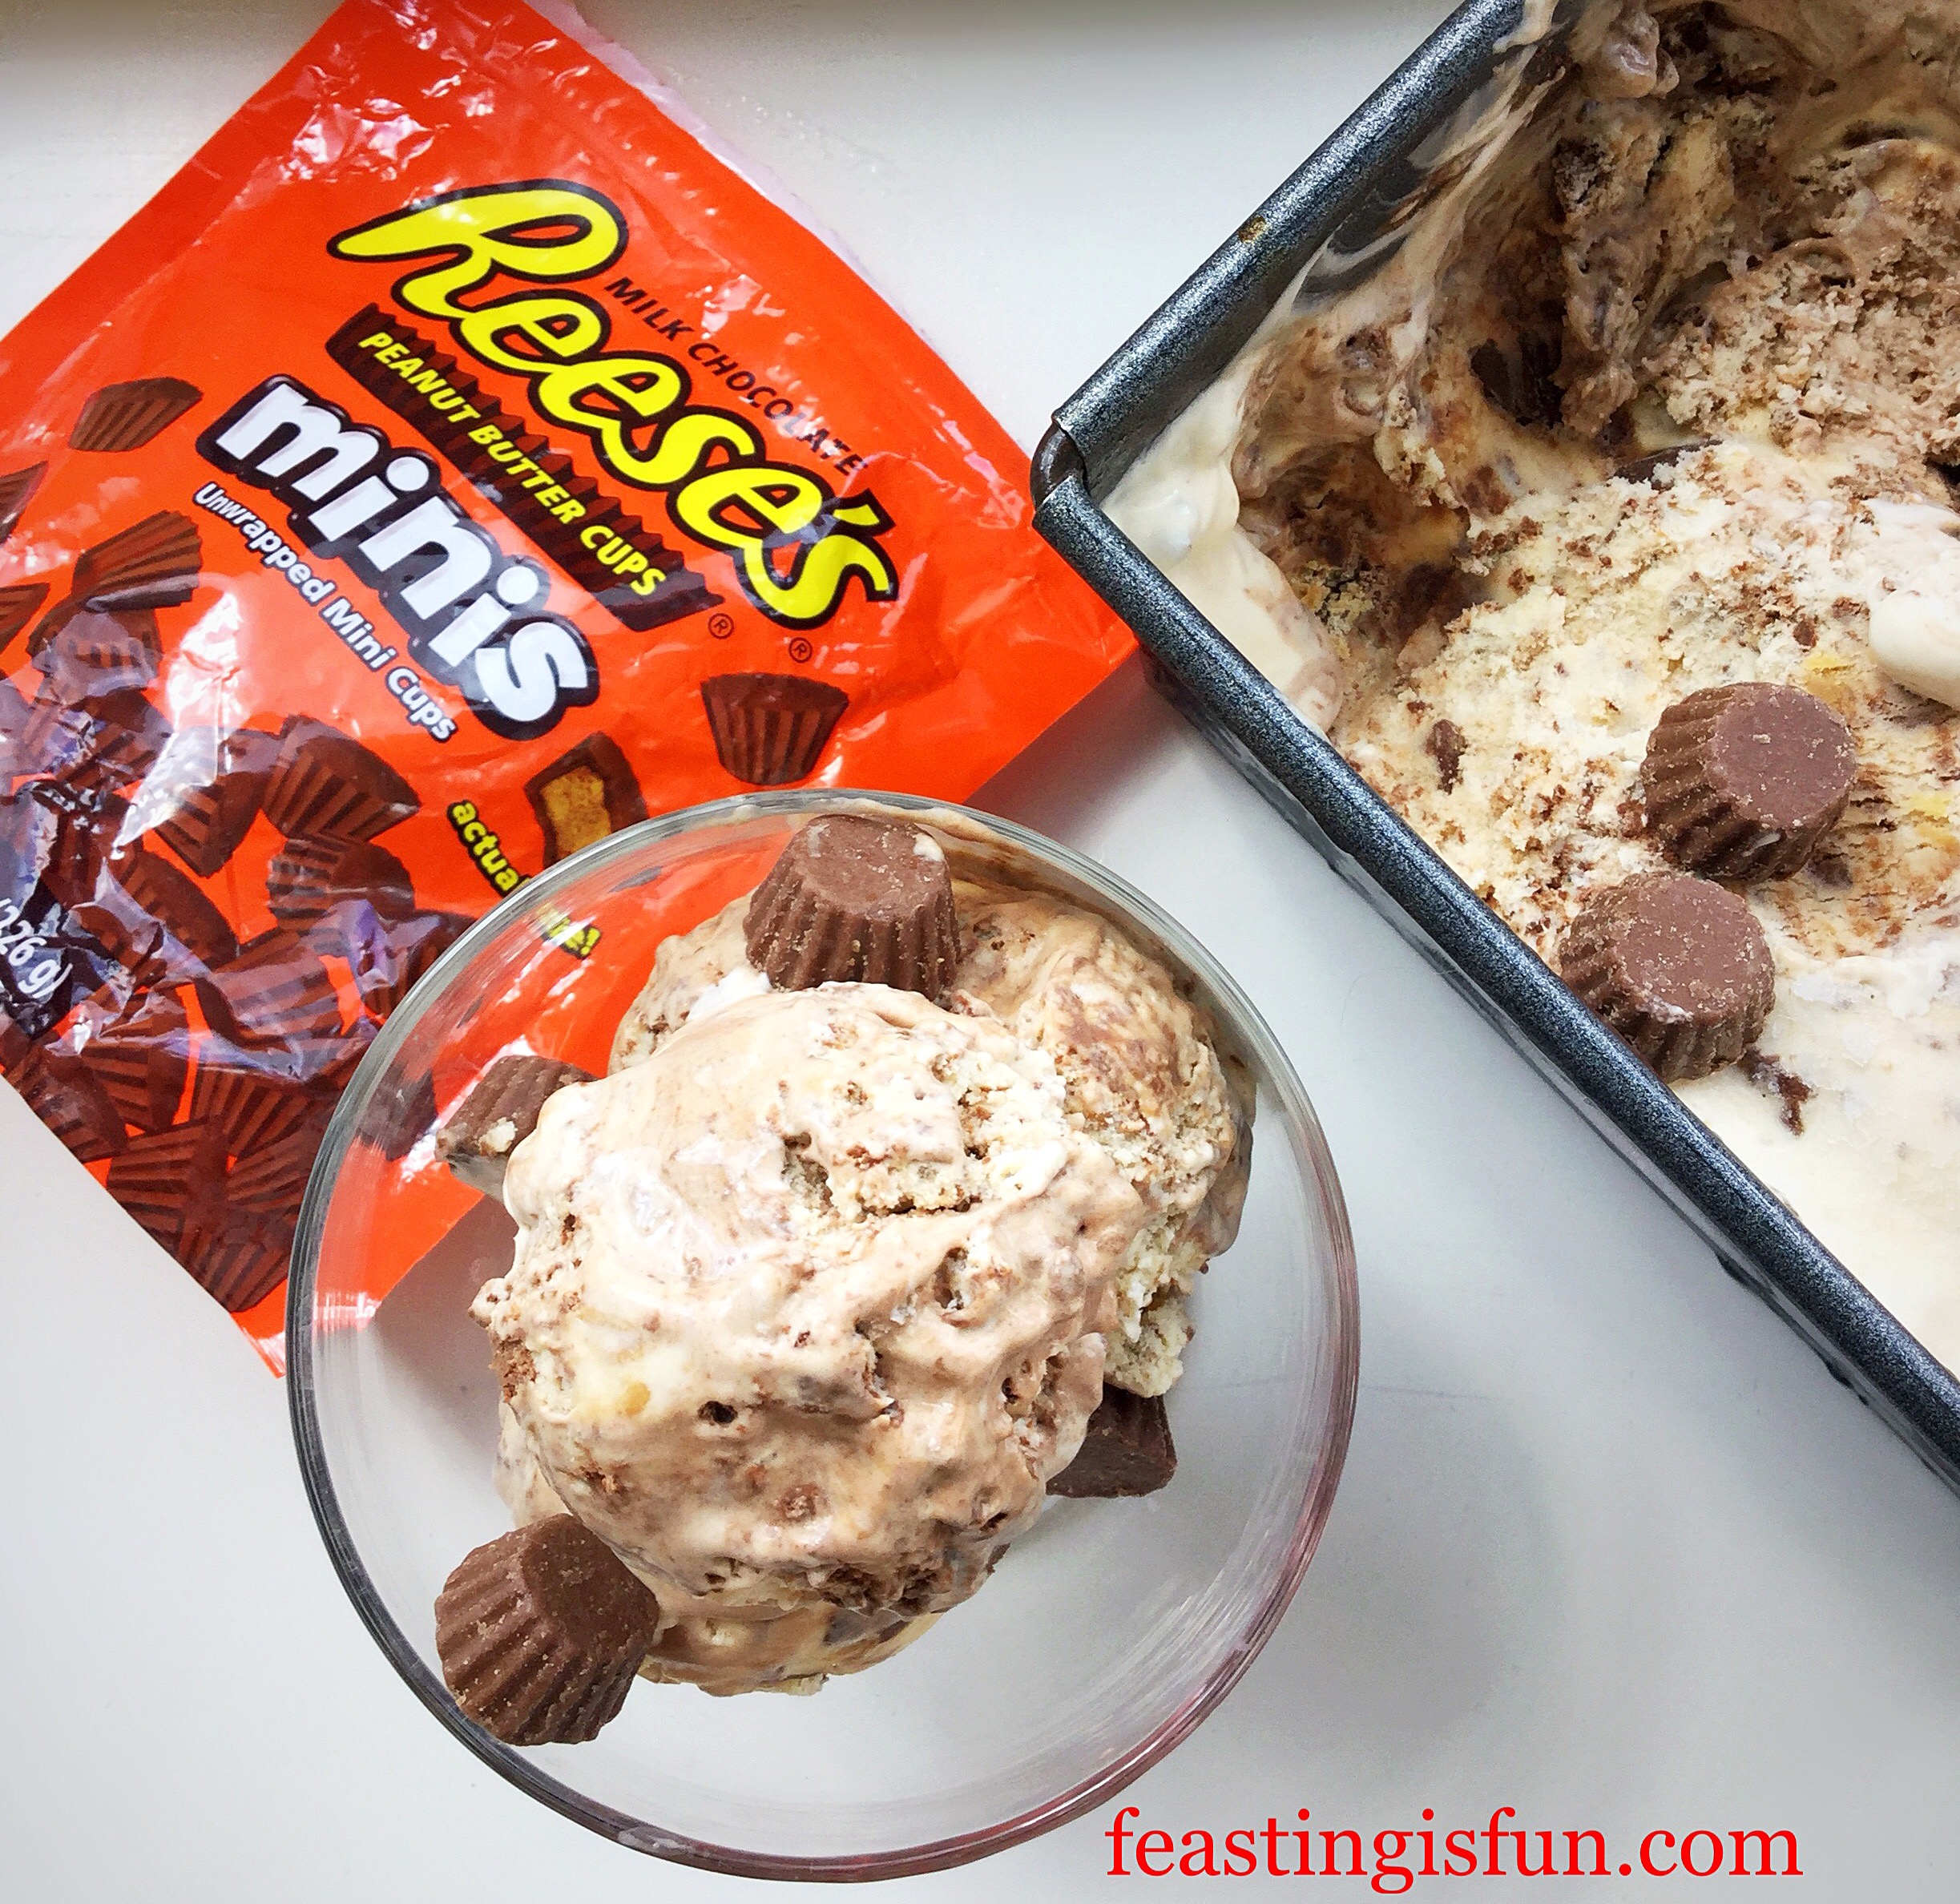
First of all there is ice cream, packed with Reeses Mini Peanut Butter Cups. While some are mini cups are left whole, others are roughly chopped. Resulting in a peanut butter cup filled ice cream base. While dark chocolate ganache ripples through the vanilla base, with a hit of pure peanut butter in every spoonful. Take a moment. Because, I undersrand if you want to think on that for a while?
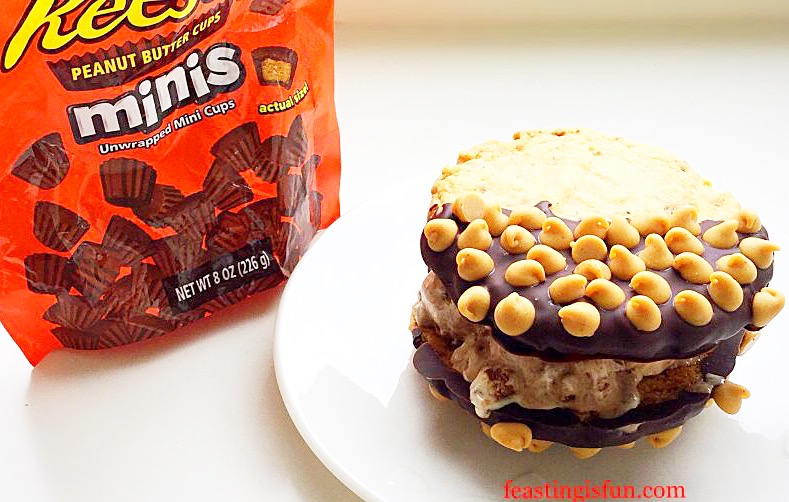
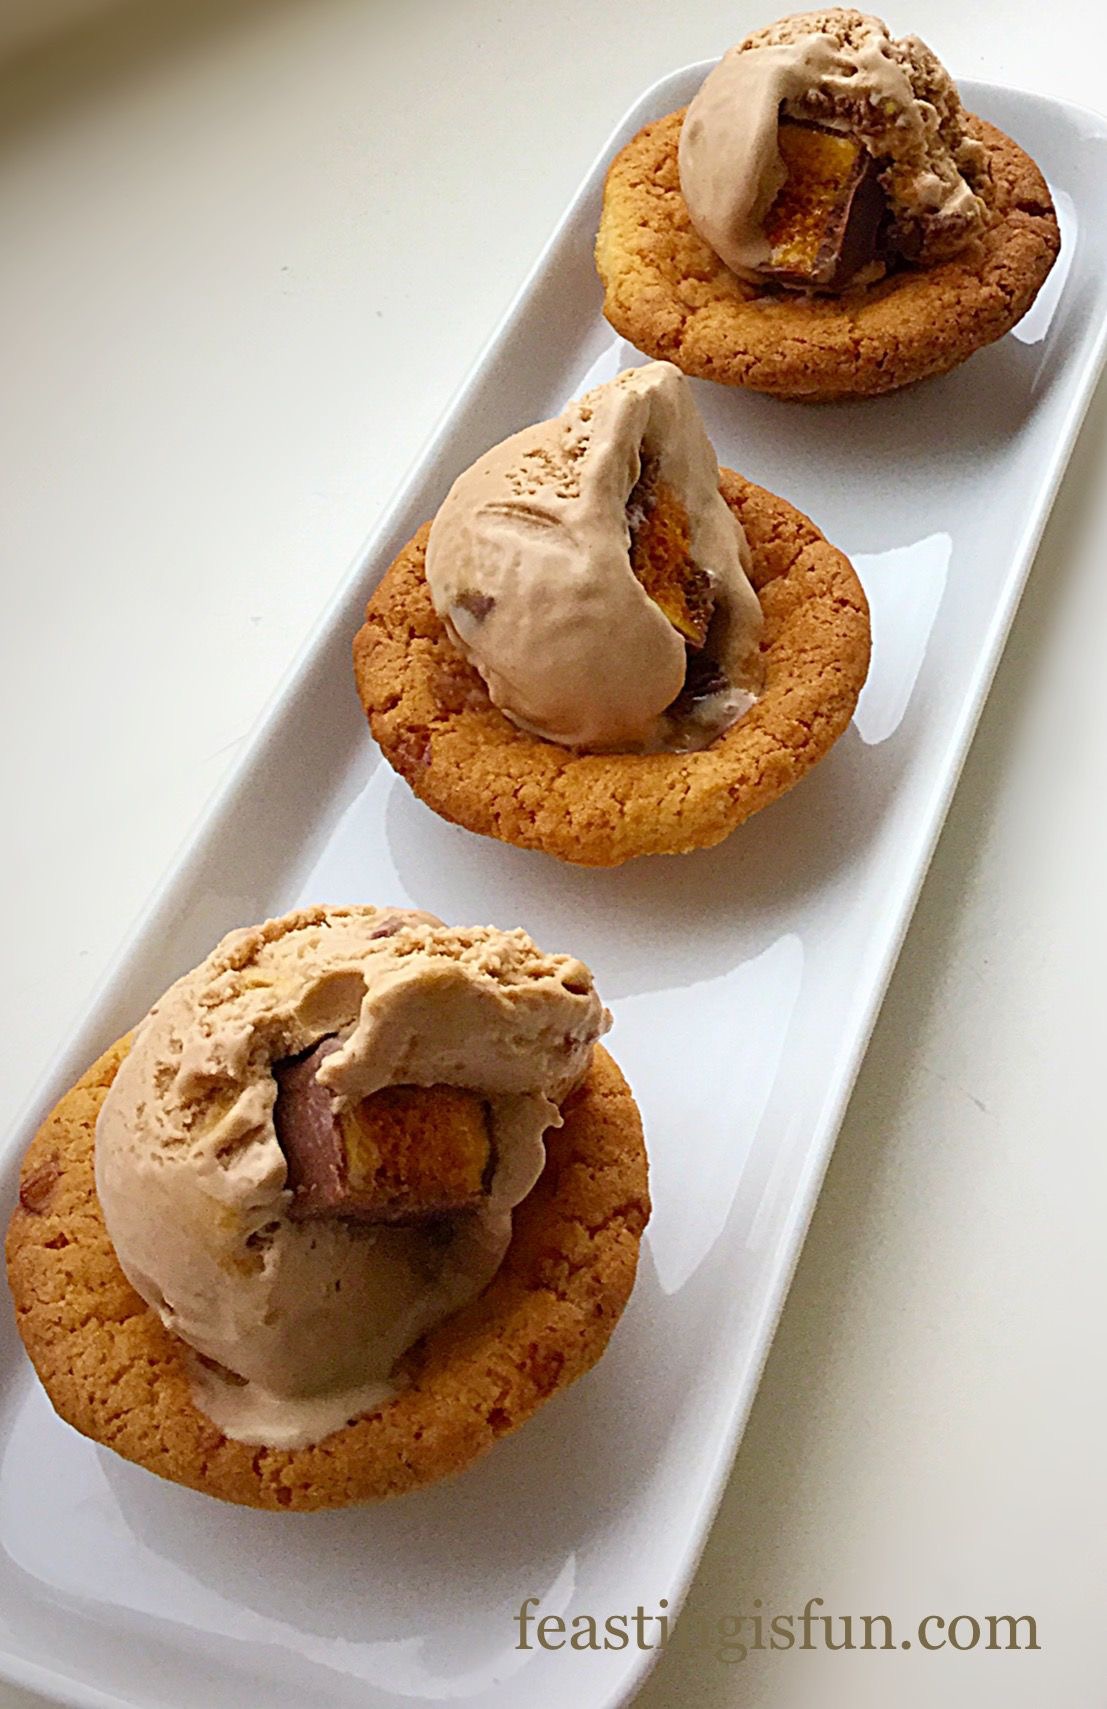
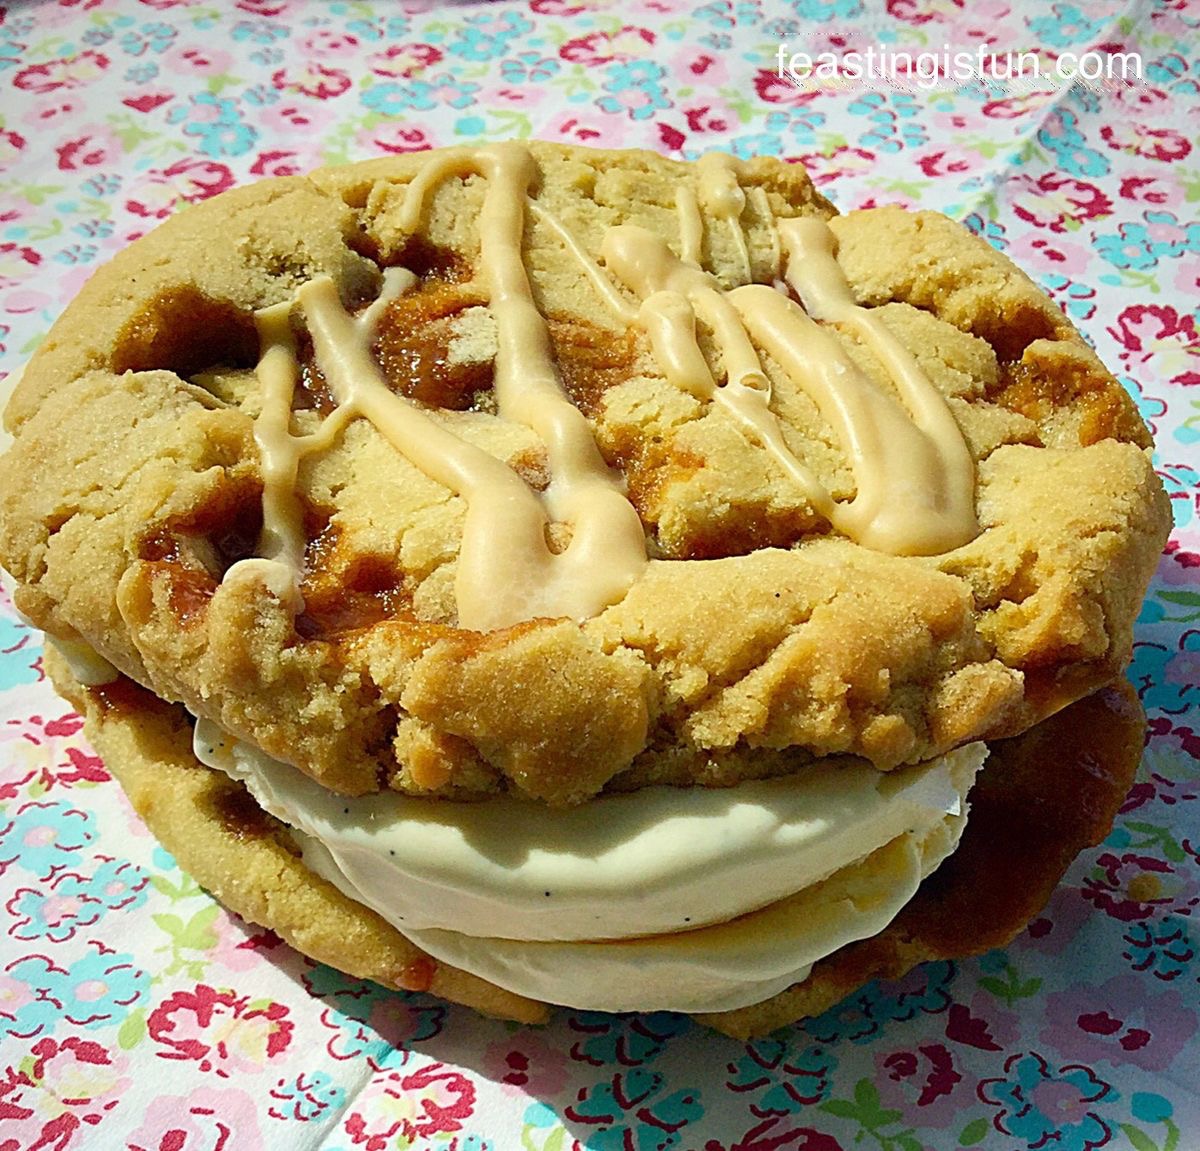
Finally, complimenting such a flavour punched ice cream are my Caramac Caramel Cookies. Since a large, robust Cookie is the only way to go when sandwiching chunks of peanut butter cup ice cream. And because these cookies are double their usual size, they are perfect for creating an ice cream sandwich.
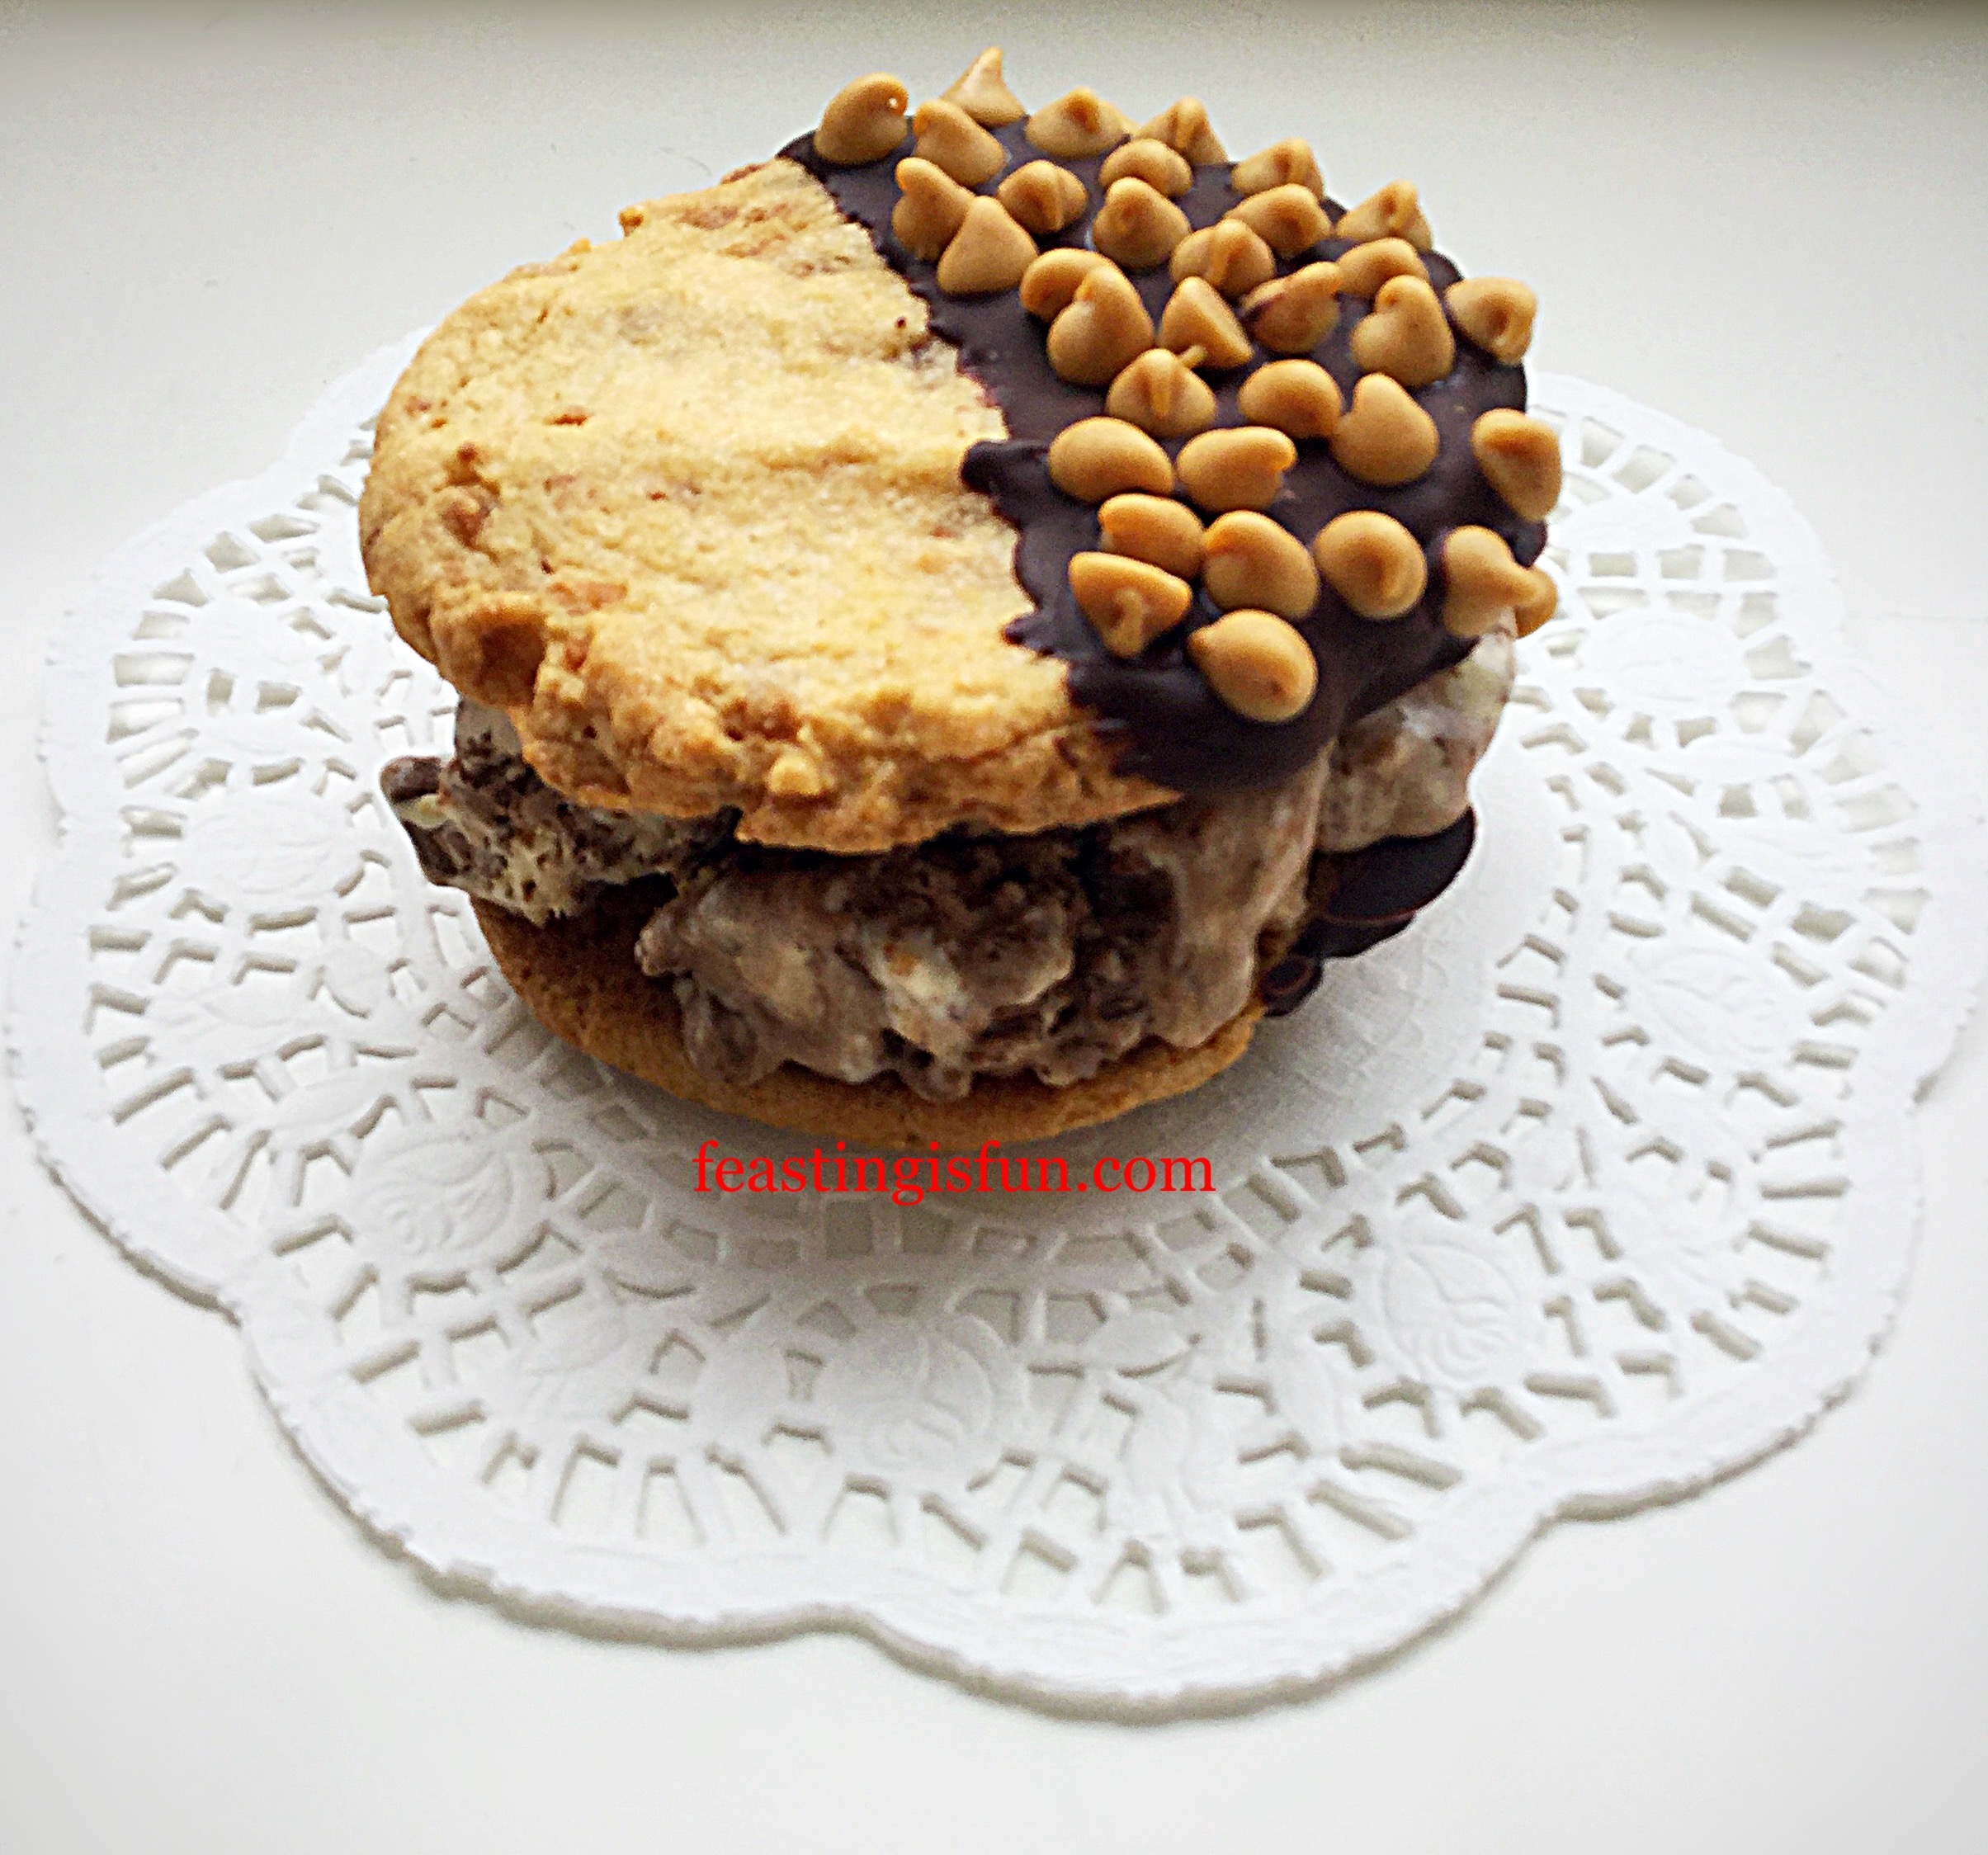
Finally, completely sending this ice cream cookie sandwich over the top, is the customisation of the mega cookies. First of all they are dipped in dark chocolate and then sprinkled with peanut butter chips, rather than contrasting, they compliment the flavours within the ice cream.
Recipe: Reeses Peanut Butter Cup Ice Cream makes 1L approx.
300mls Double Cream plus an additional 100mls for the chocolate ganache
300mls Whole Milk
6tbsp Caster Sugar
1/4 tsp Sea Salt – I use Maldon
4 Large Free Range Egg Yolks
1tsp Vanilla Extract – I use Nielsen-Massey
1tsp Cornflour
100g/4oz Dark Chocolate minimum 70% Cocoa plus an additional 100g of Dark Chocolate for dipping the cookies
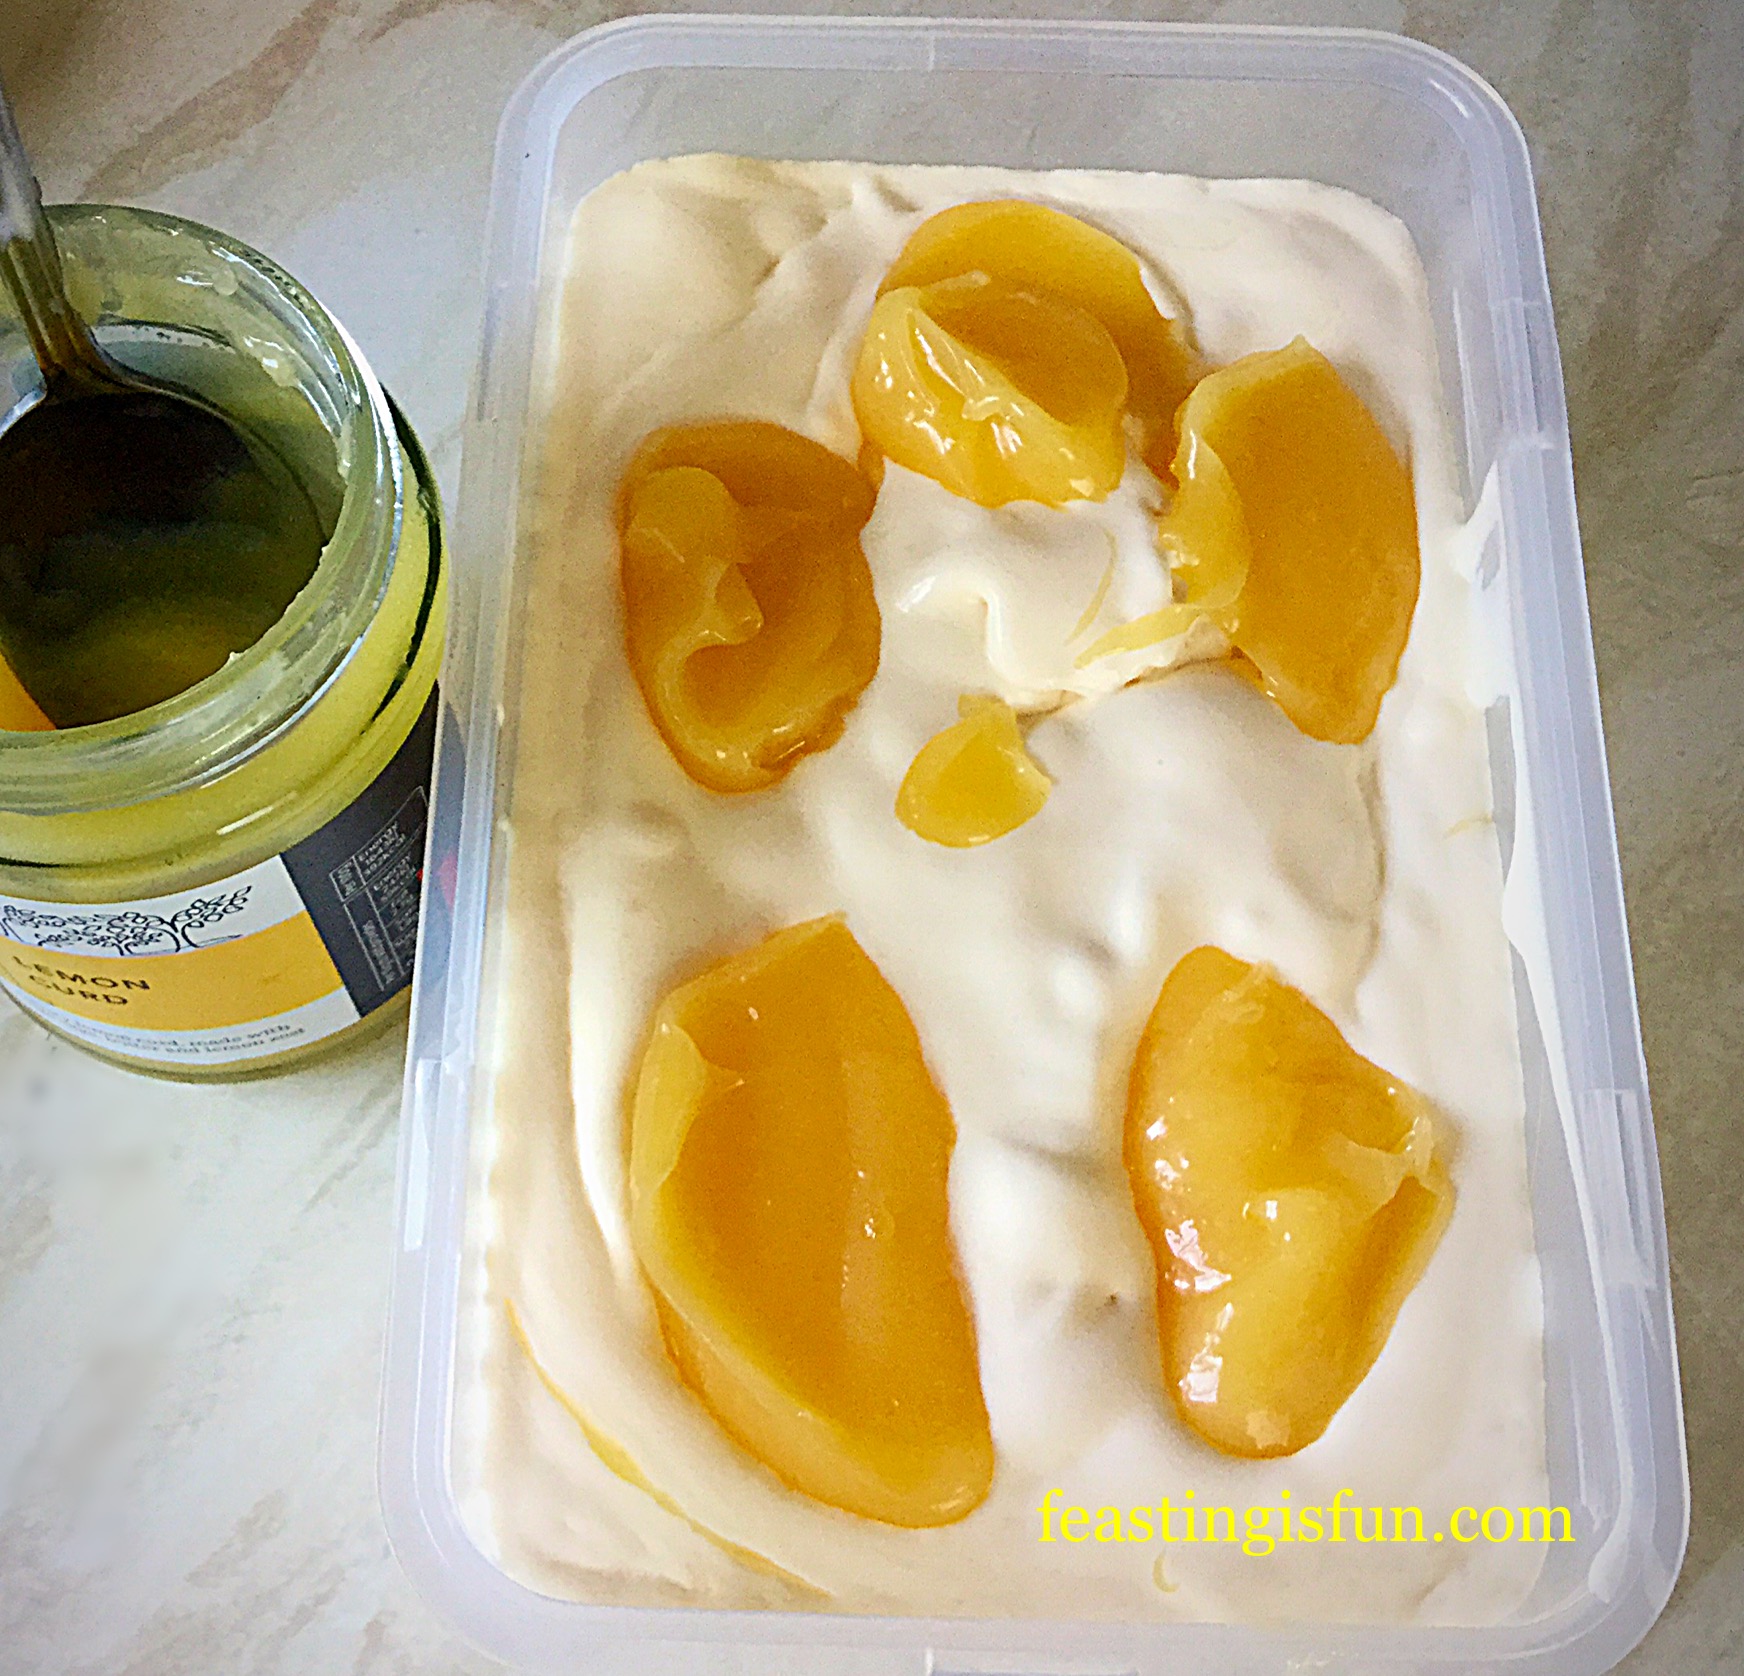
50g/2oz Peanut Butter
1 x 226g/8oz Reeces Peanut Butter Cup Minis – alternatively use the equivalent weight of regular Reeces Peanut Butter Cups roughly chopped
Caramac Caramel Cookies recipe to create the cookie sandwiches.
Method: Preparing the ice cream maker.
Ensure the freezing part/bowl of the ice cream maker has been in the freezer for at least 6 hours, ideally overnight, or according to manufacturer’s instructions.
Note: For step-by-step instructions, including photographs please see here.
Making The Ice Cream Base
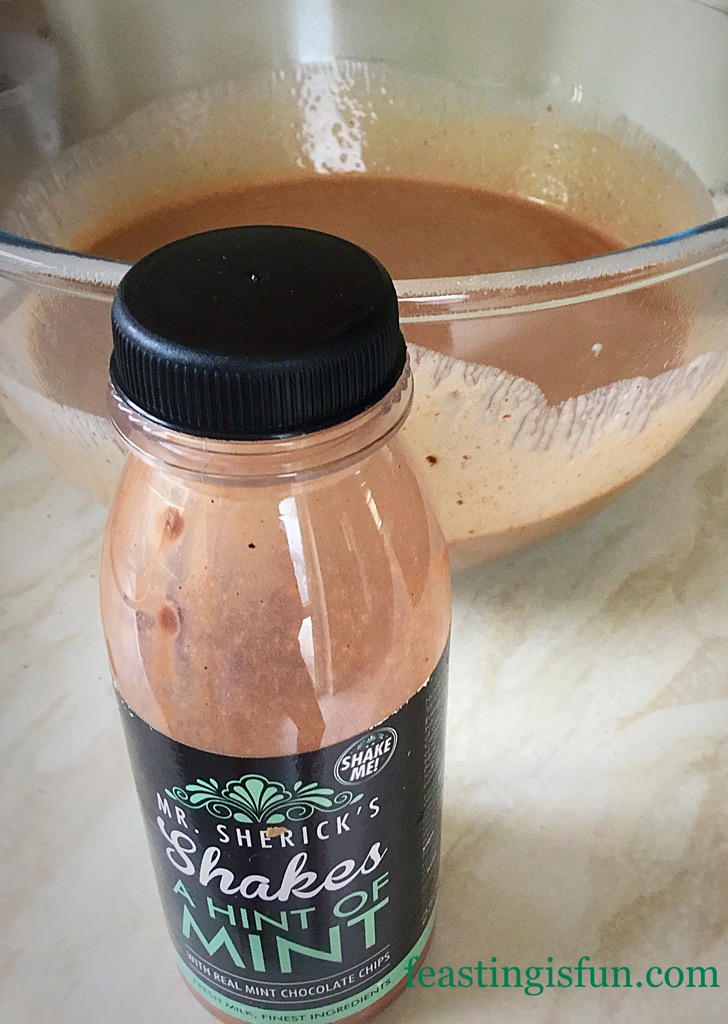
- First of all, Place the milk and cream into a heavy bottom saucepan over a medium heat. Heat the cream mixture to scalding point, little bubbles appear around the rim of the saucepan before the mix reaches boiling point. As soon as scalding point is reached, remove the pan from the heat.
- While the cream mix is heating, place the eggs, salt, sugar, cornflour and vanilla extract into a large heatproof bowl. Whisk together until the eggs have thickened.
- With the whisk switched to slow, gently pour the hot cream mix into the bowl with the egg mix, whisking constantly. This creates the custard base for the ice cream.
- Pour the custard base back into the saucepan, place over a medium heat and stir constantly. Cook until the custard has thicker and coats the back of a wooden spoon.
- Remove the pan from the heat and pour the custard through a sieve, into a large heatproof bowl.
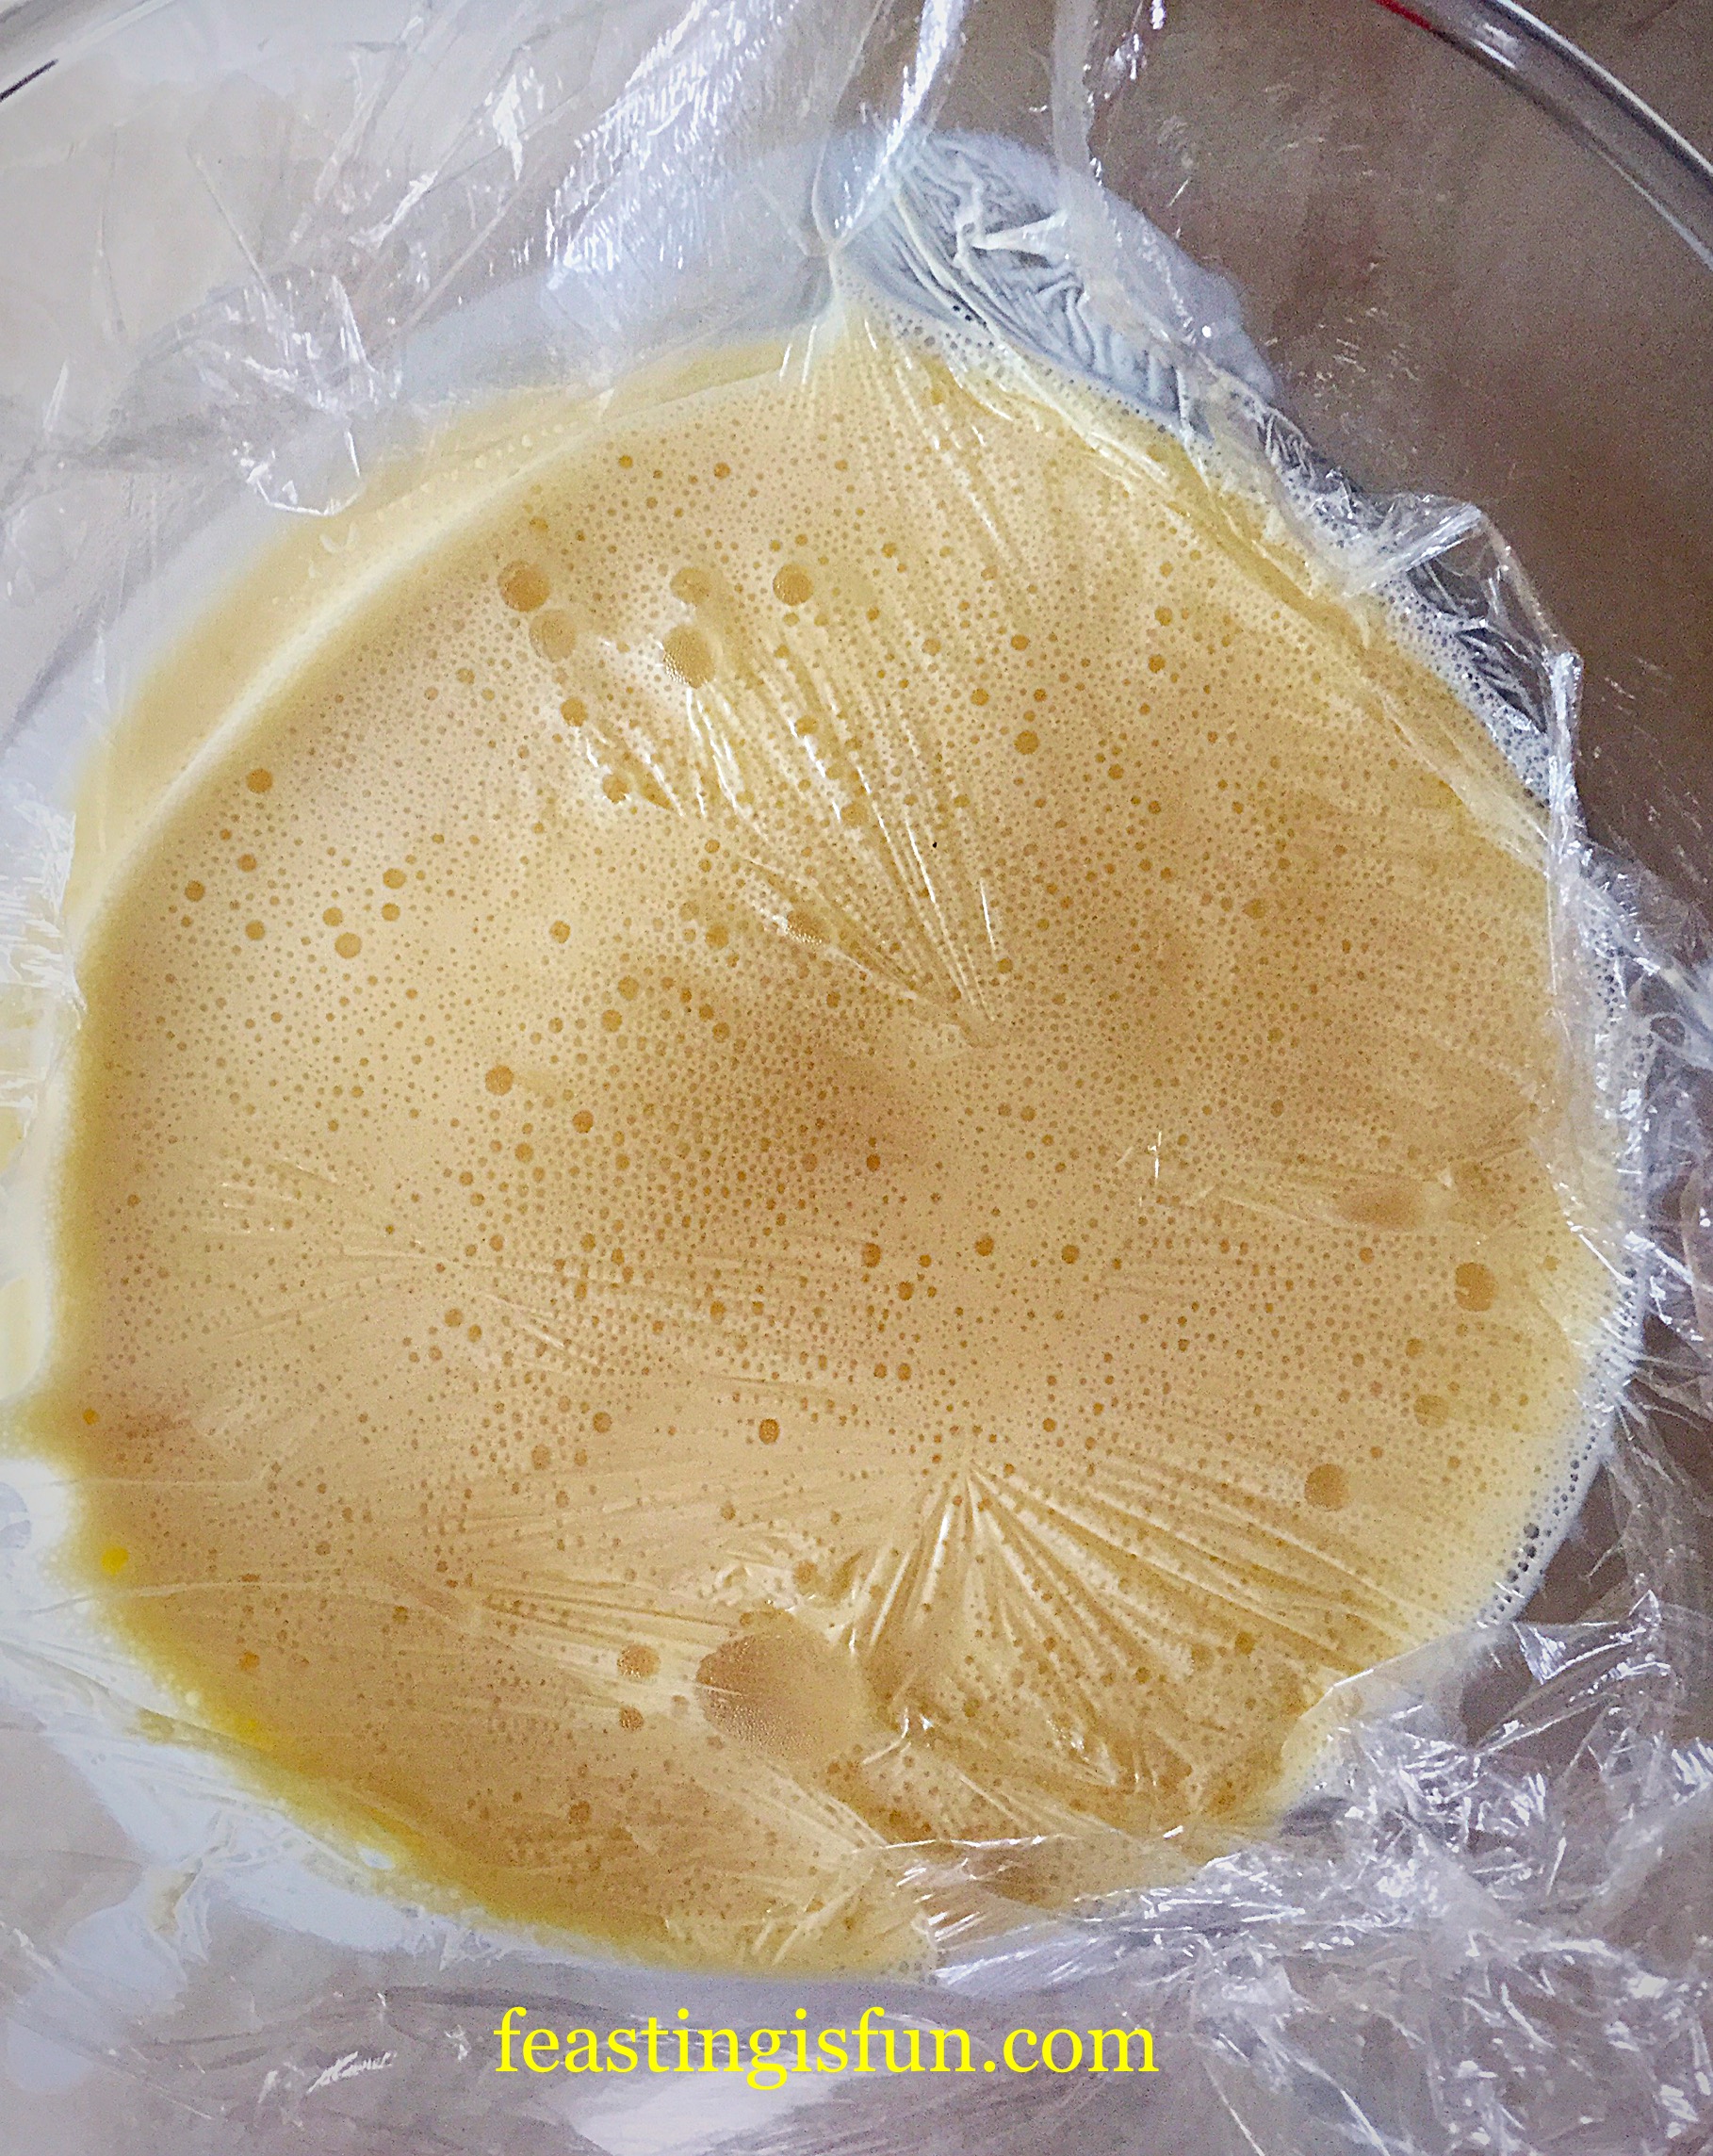
- Place cling film directly on top of the custard to stop a skin from forming.
- Leave the custard to cool a little before placing in the fridge to chill.
Preparing The FlavouringS And Churning The Ice Cream
- While the ice cream base is chilling, prepare the mini Reeces butter cups. Tip out on to a chopping board, roughly divide into two thirds which will be roughly chopped and one third, which are kept whole.
- Also make the chocolate ganache, which will be swirled through the ice cream. Place 100g of chocolate and 100mls of double cream into a heatproof/microwaveable jug. Heat on medium for 30 second bursts, stirring after each heating session. As soon as the chocolate starts melting into the cream continue stirring until the ganache is smooth and shiny. Set to one side to cool.
- Set the ice cream maker up as per manufacturer’s instructions.
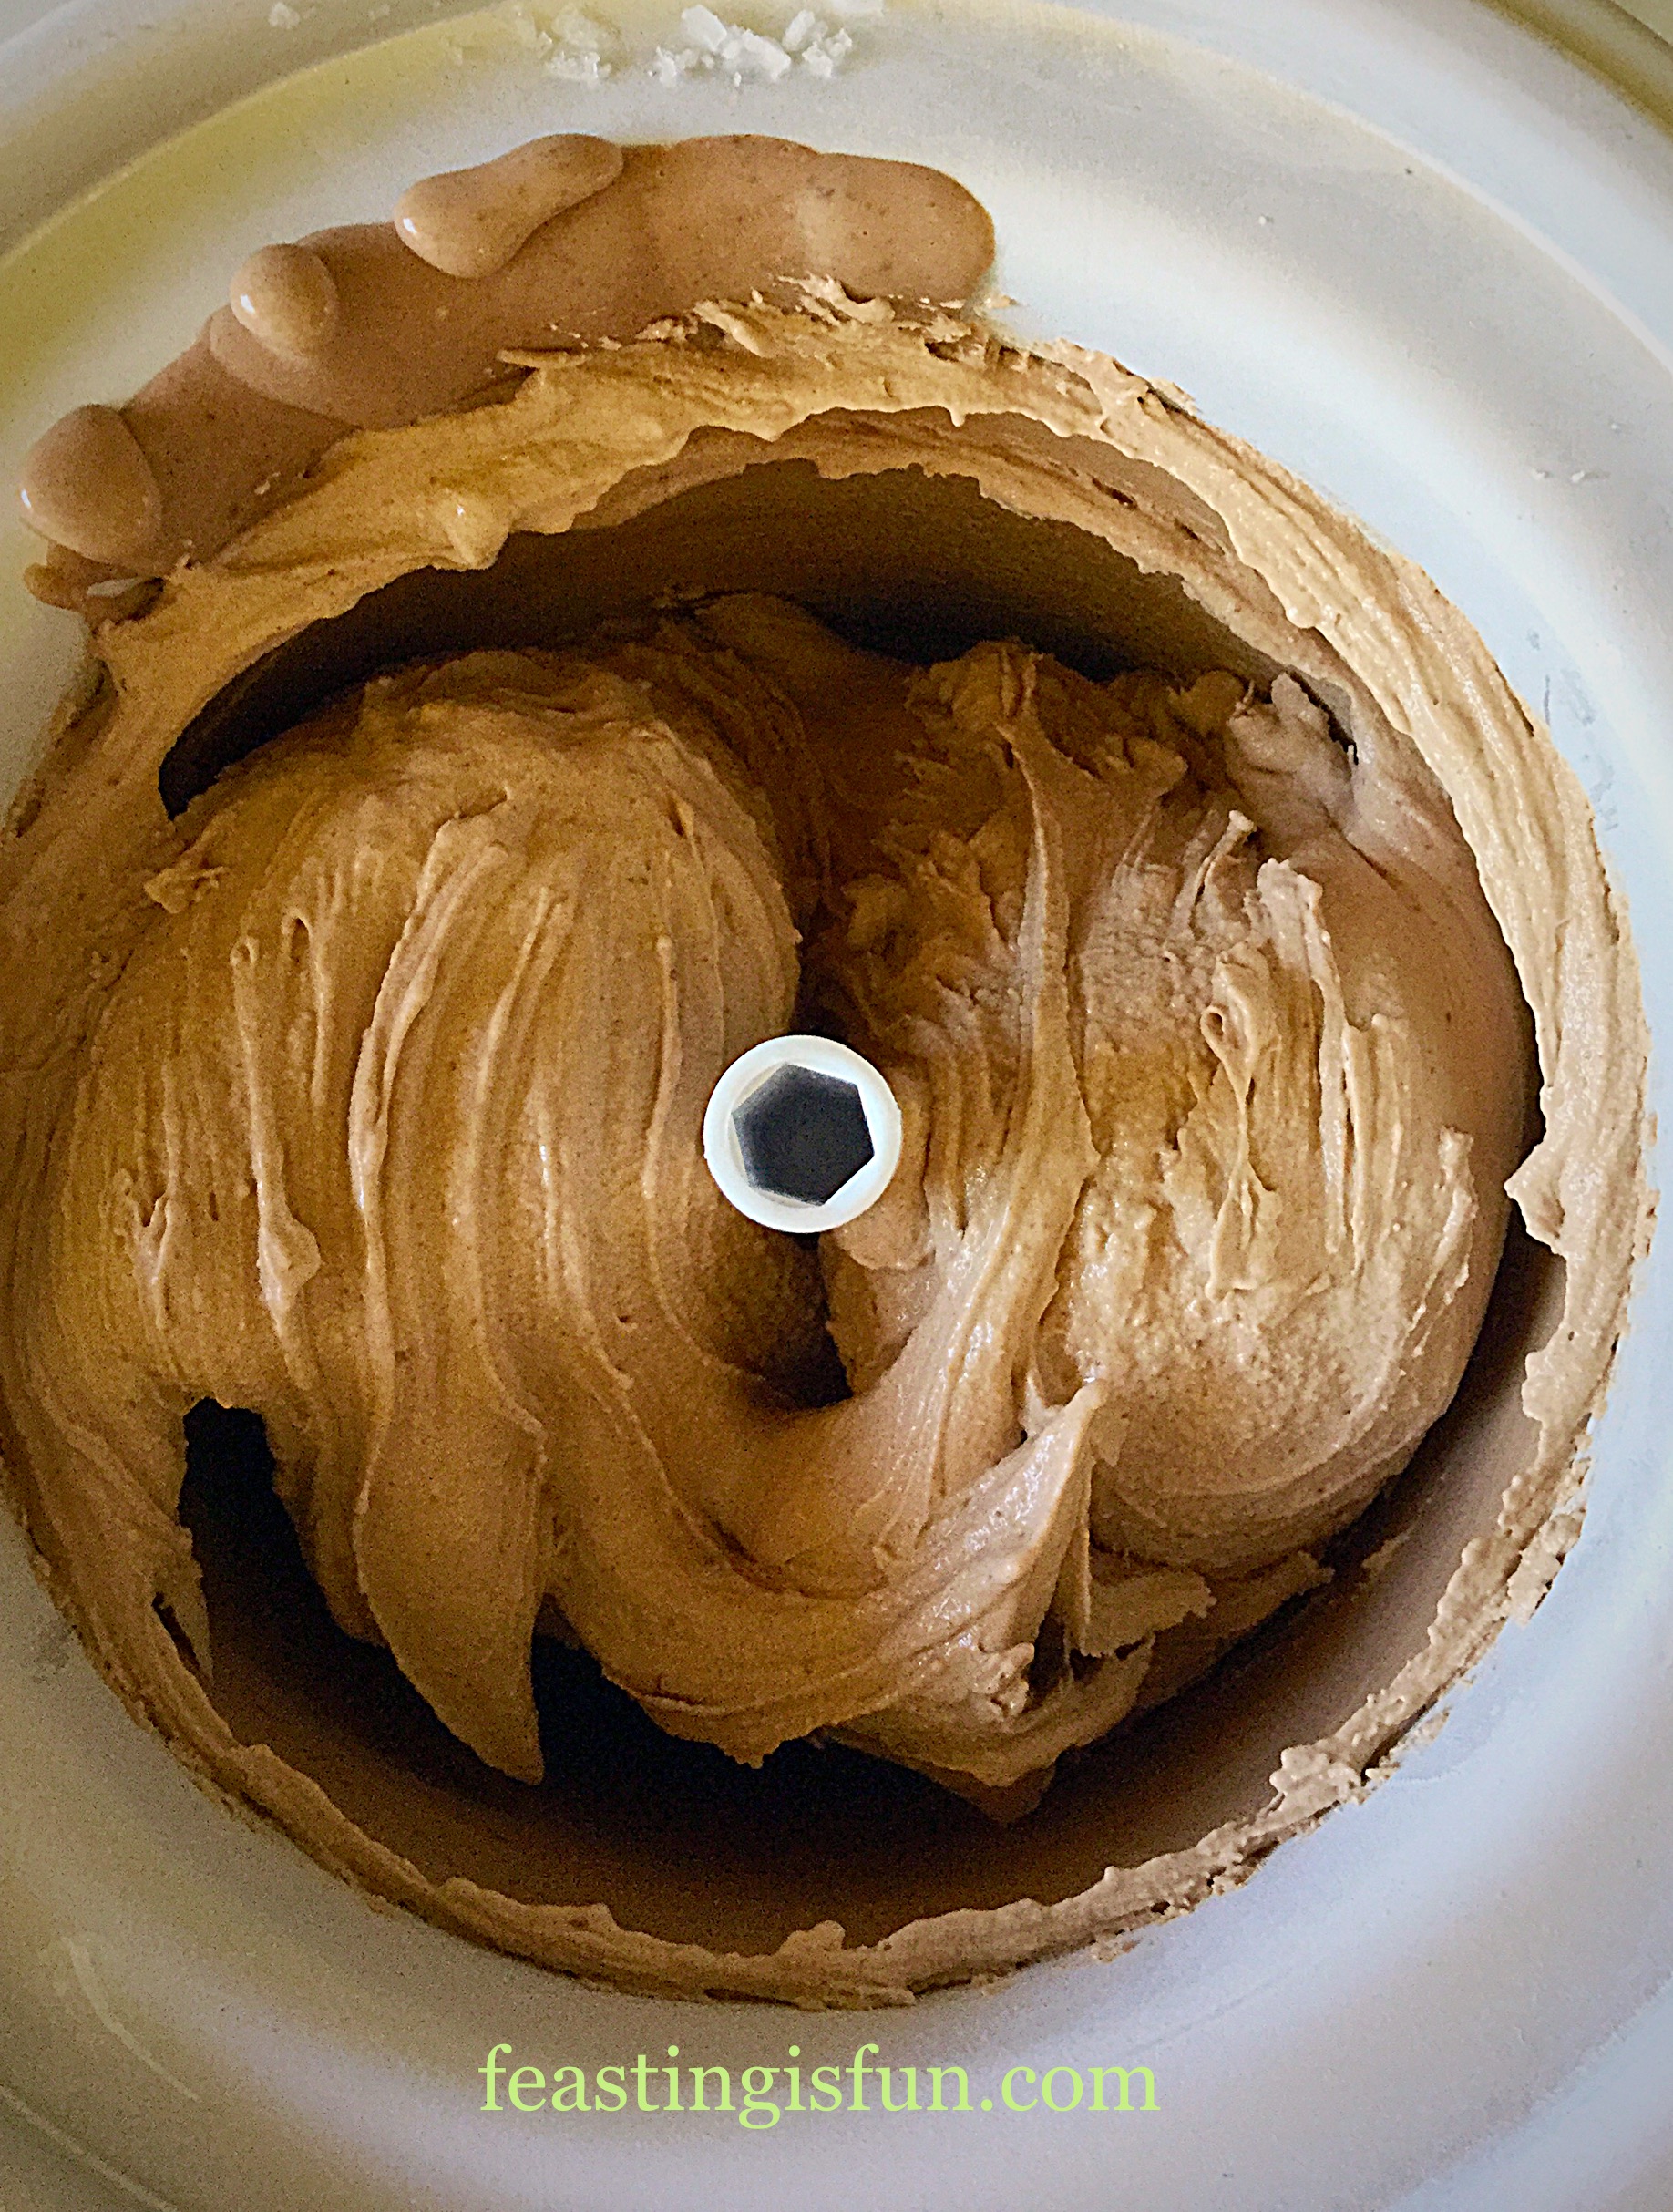
- Add the peanut butter to the ice cream base. Use a balloon whisk to break it up into small pieces within the ice cream base.
- Pour the ice cream mixture into the already churning ice cream maker.
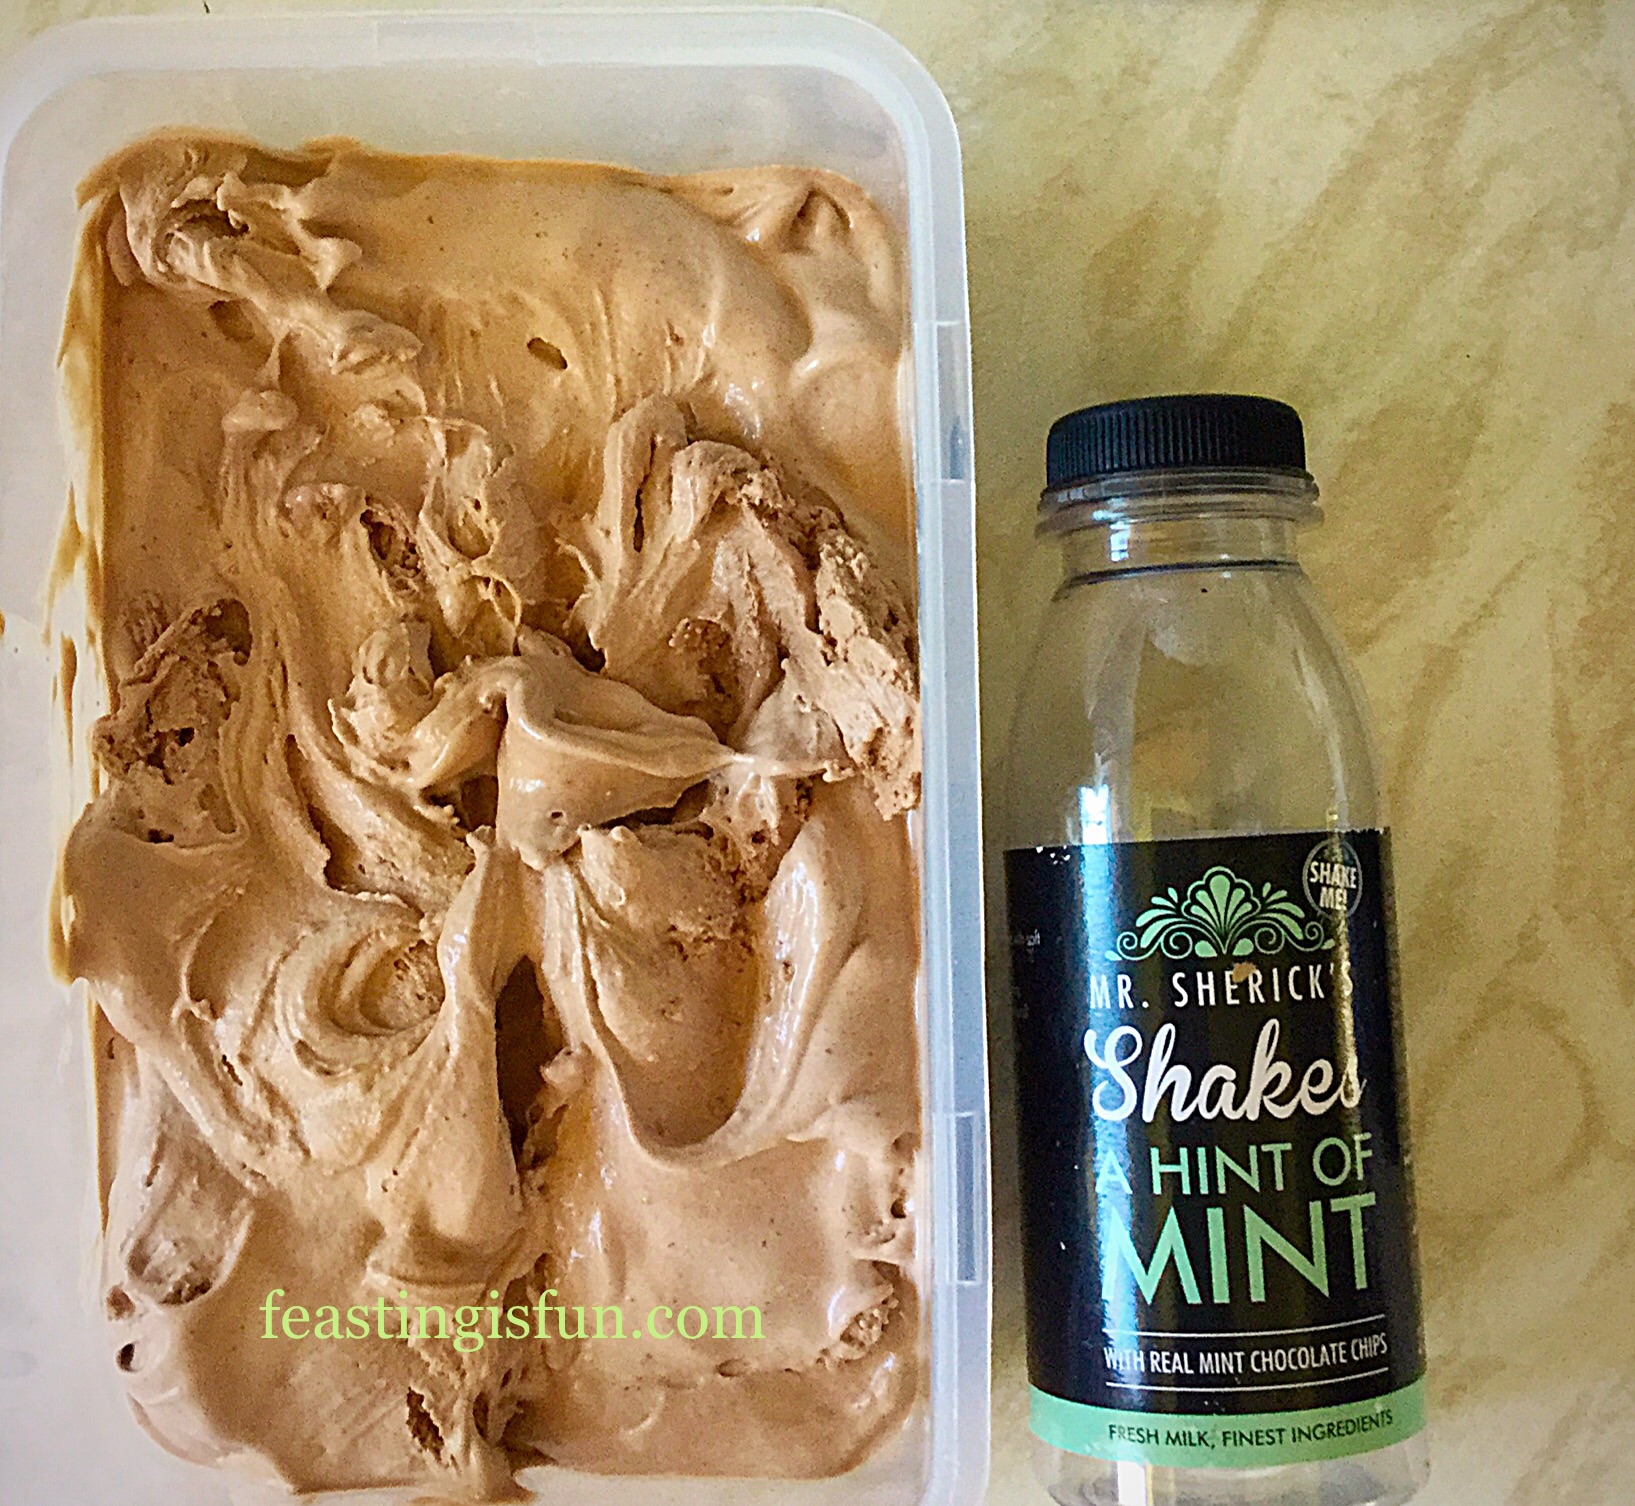
- As soon as the ice cream is thickened and frozen stop the machine. Remove the paddle so the ice cream can be scooped out.

Adding The Reeses Peanut Butter Cups And Chocolate Ganache To The Ice Cream
- Scatter a few chopped Reeces Peanut Butter Cup Minis in the bottom of the freezing container.
- Scoop half of the ice cream on top of the peanut butter cups.
- Add one half of the remaining chopped and whole peanut butter cups. Now add the remaining ice cream.
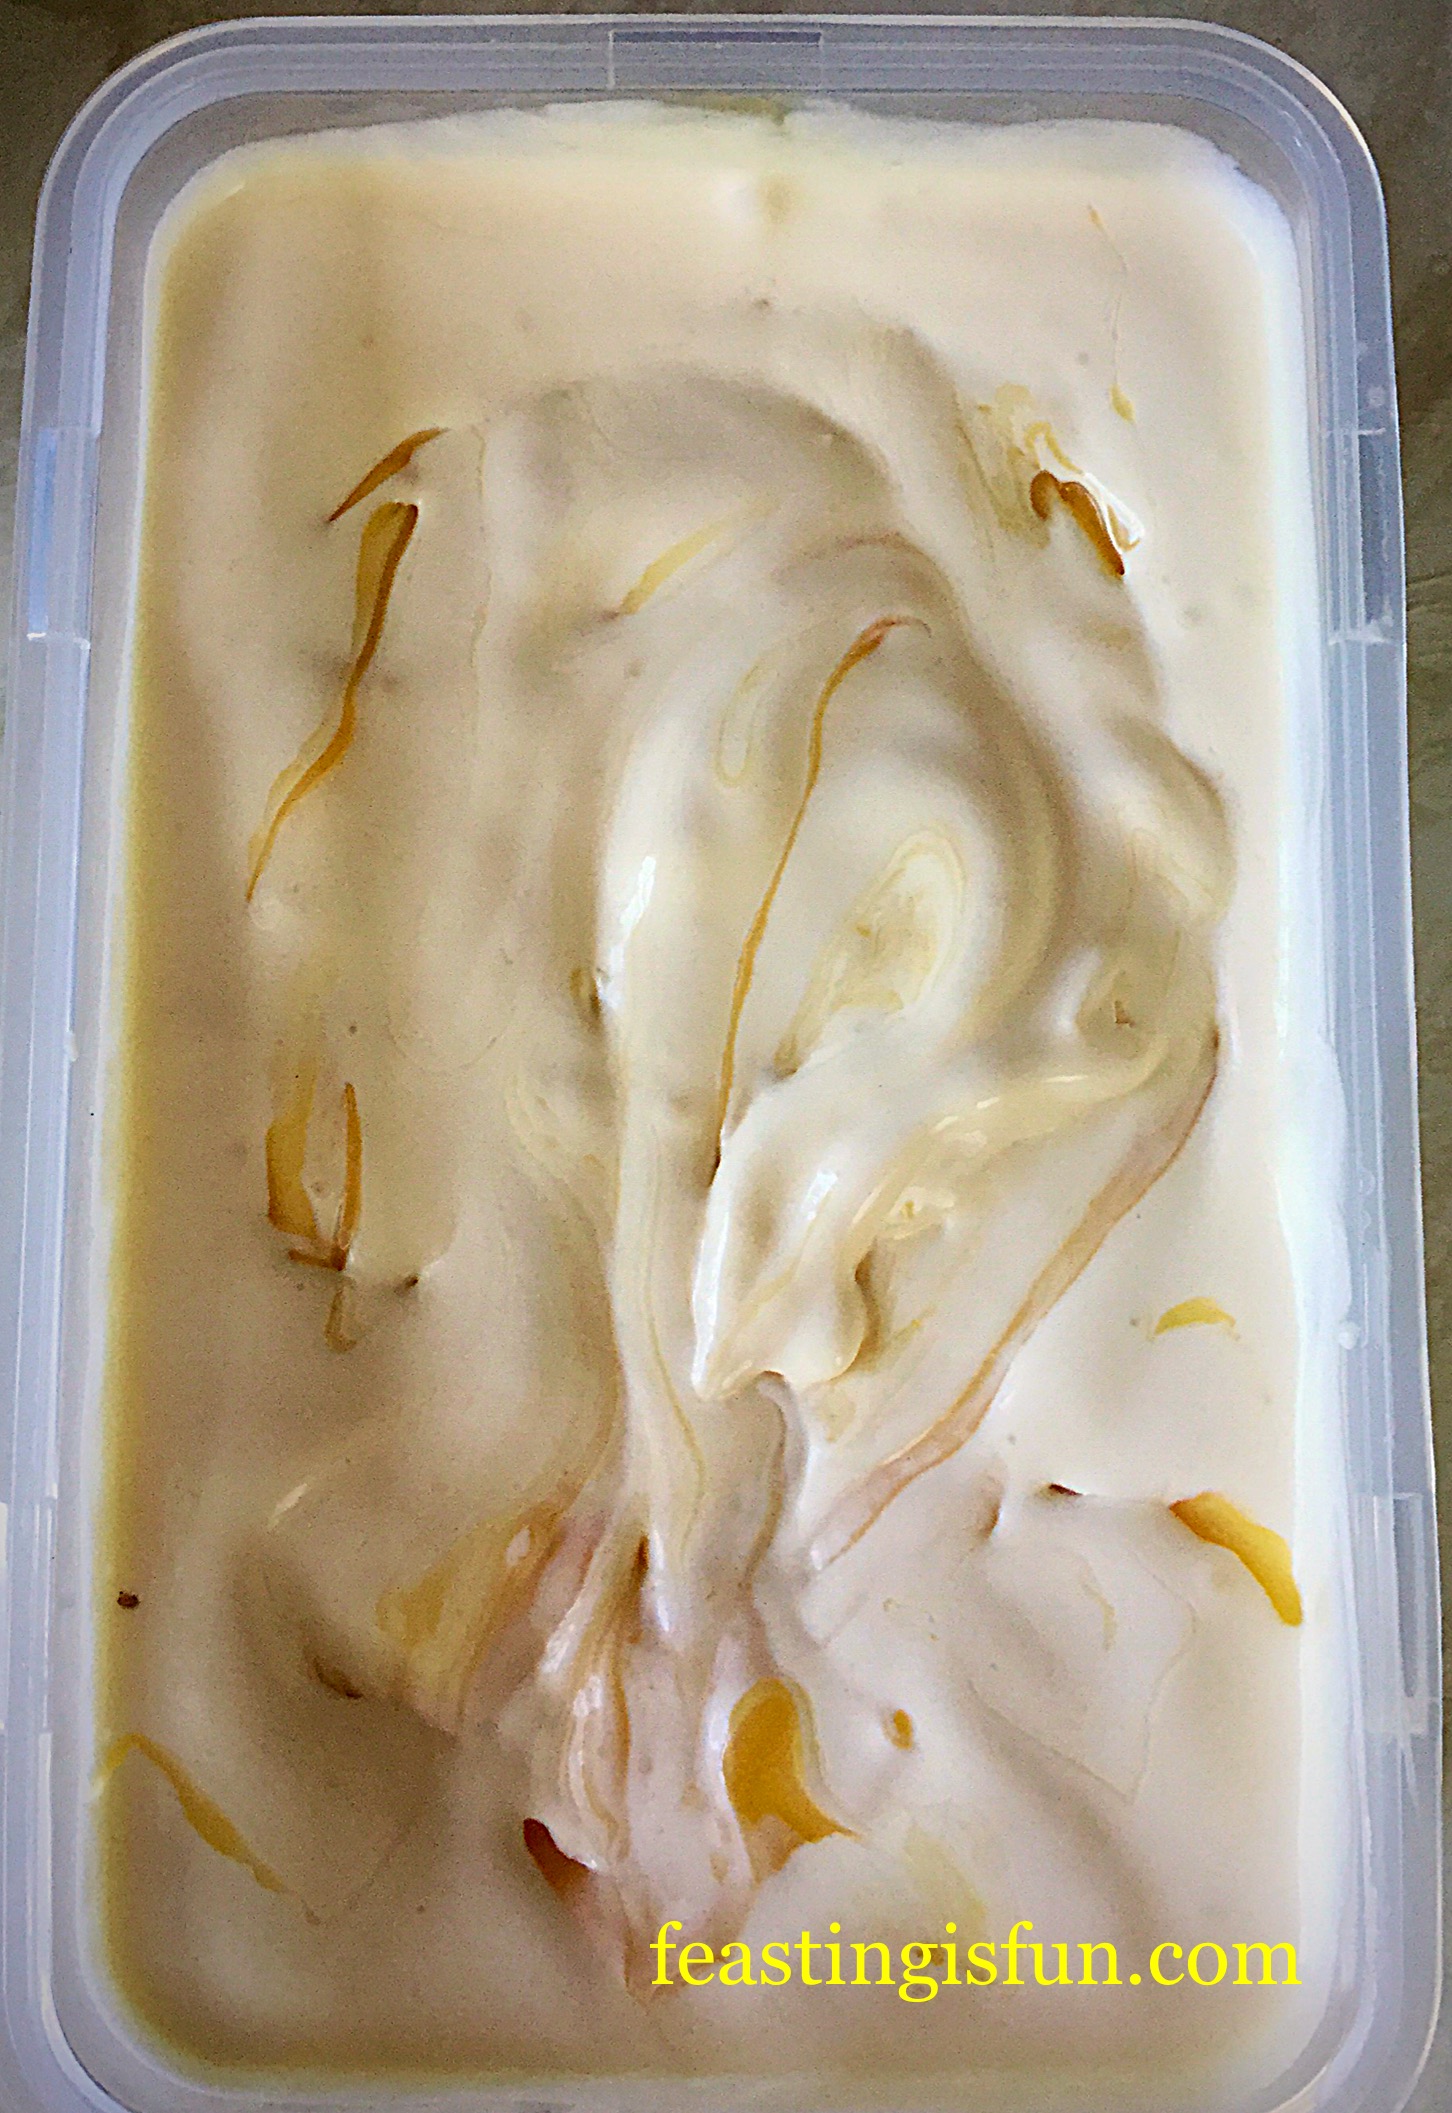
- Using the handle of a wooden spoon, swirl the peanut butter cups through the ice cream using a figure of eight motion.
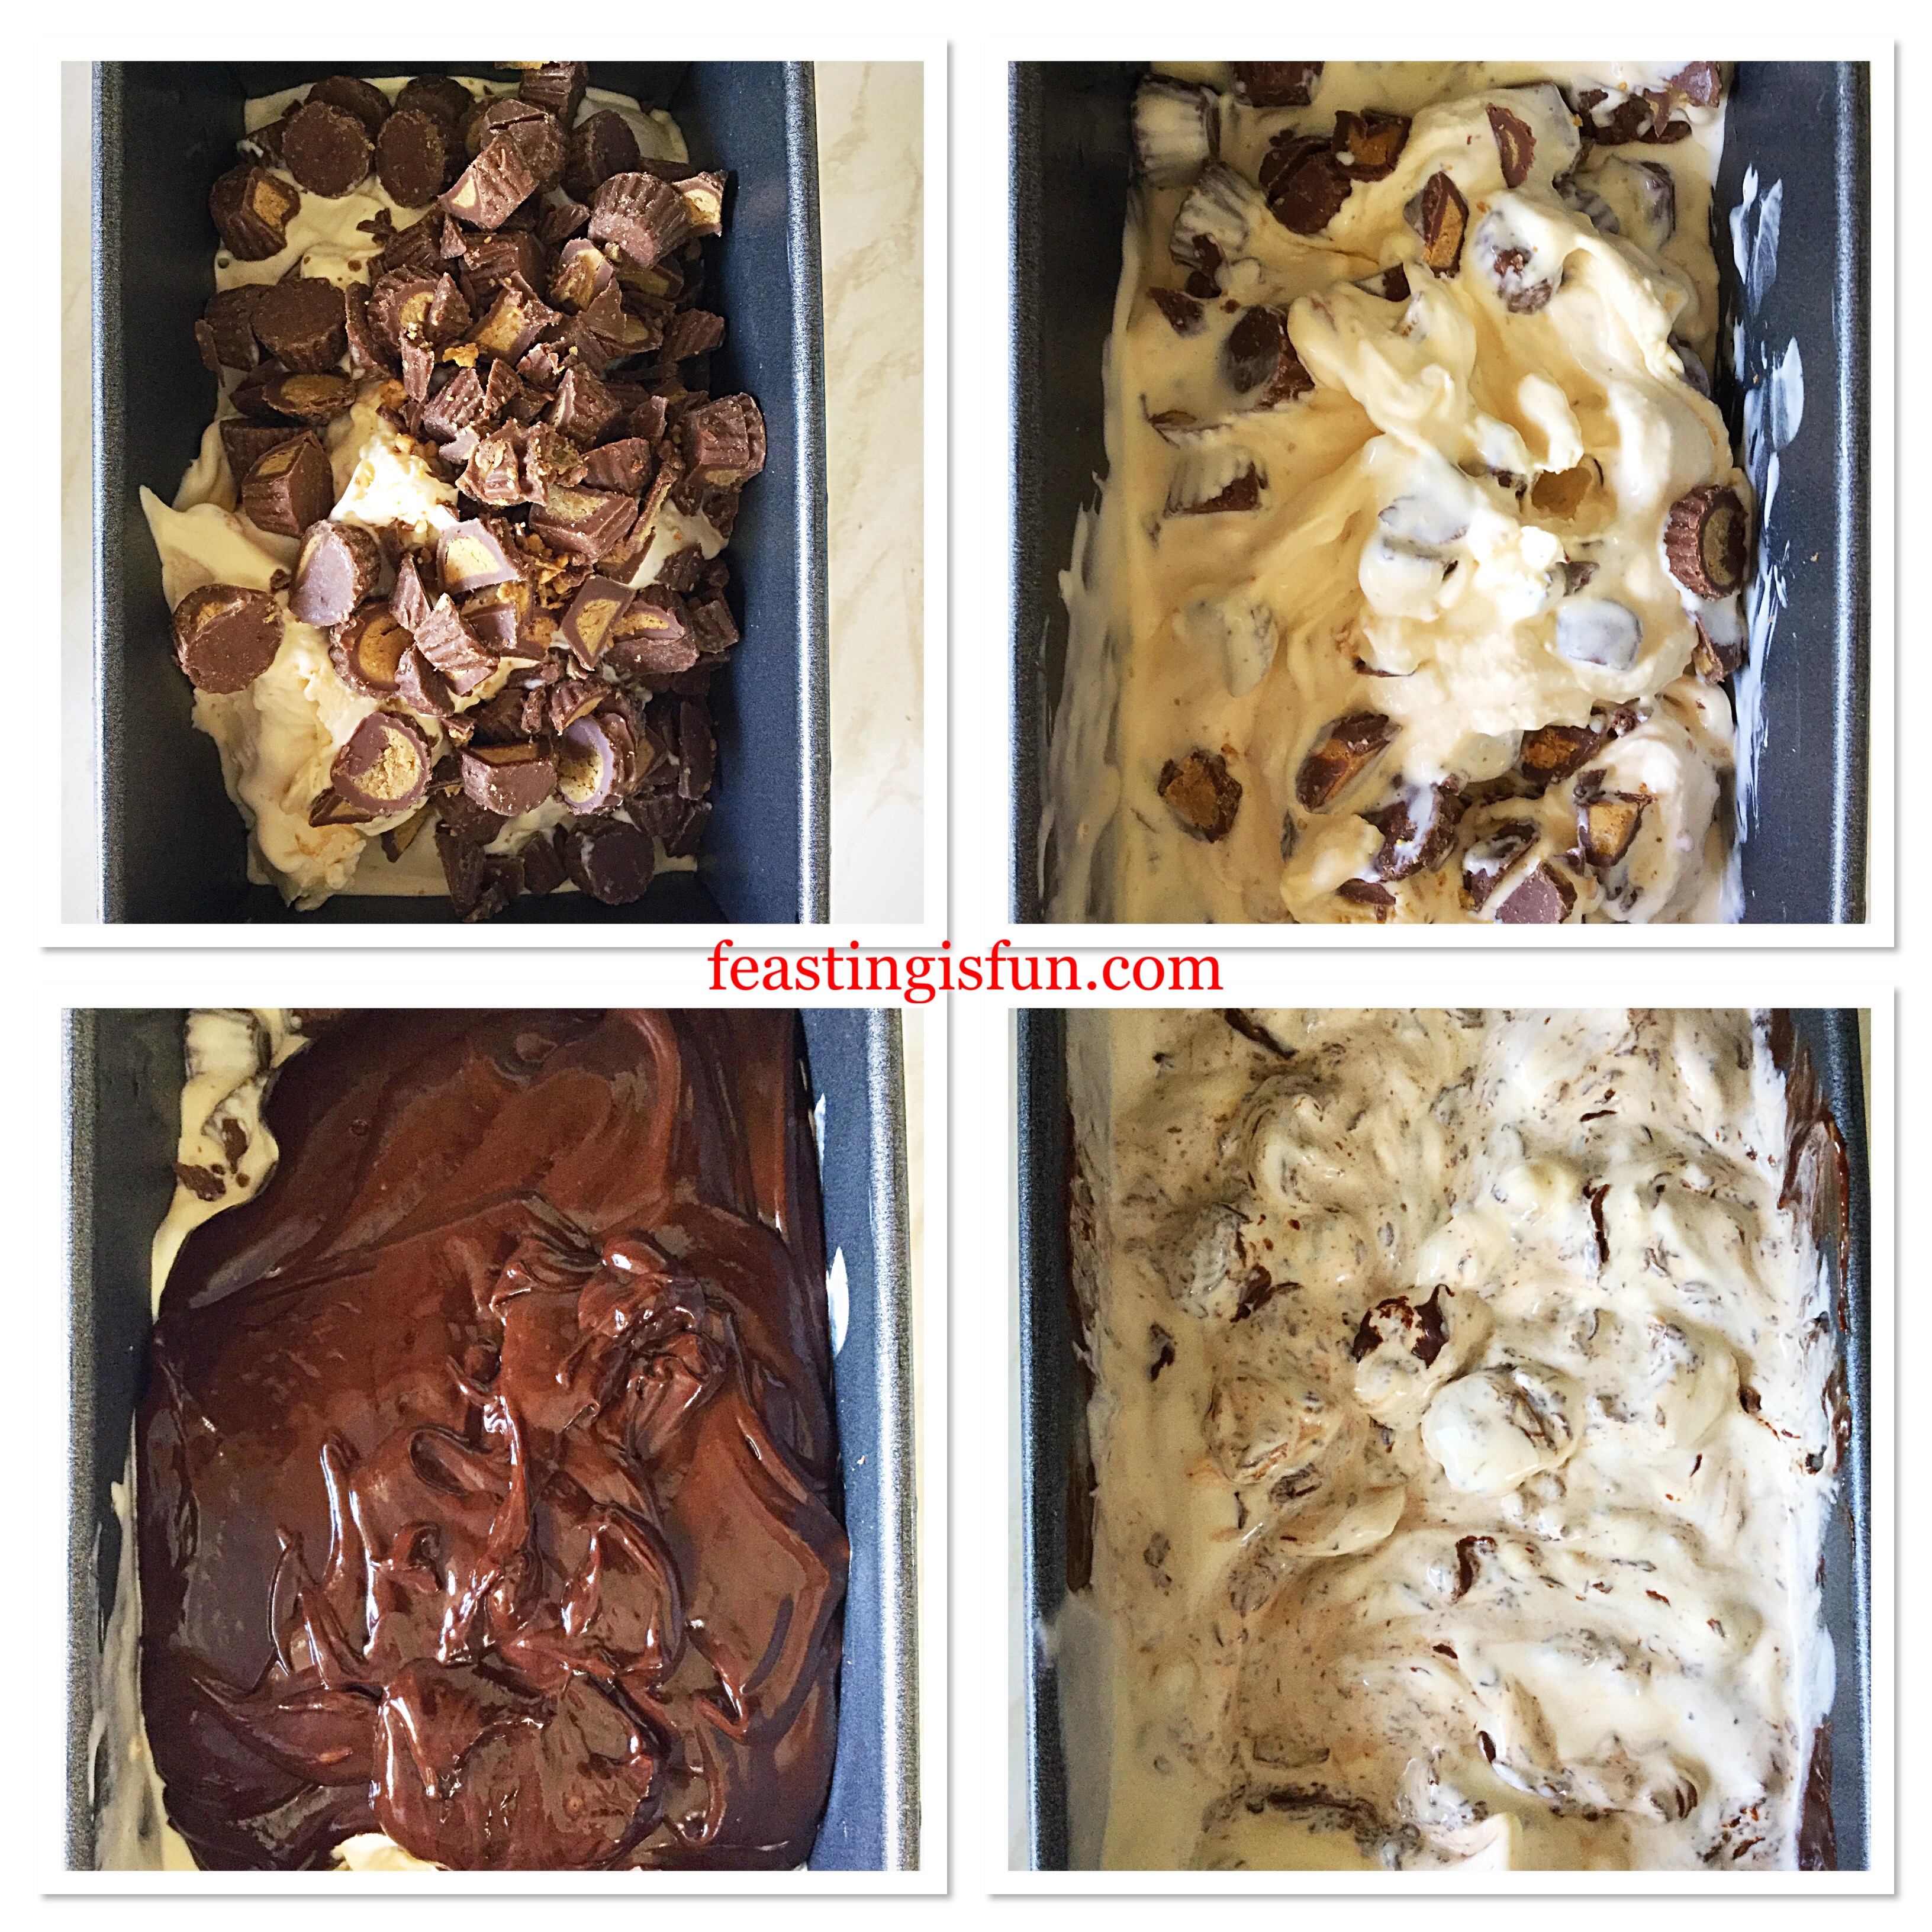
- Pour the cooled, yet still liquid, chocolate ganache on top of the ice cream. Again, using the handle of a wooden spoon swirl the ganache through the ice cream.
- Snap on an airtight lid, or double wrap in cling film and place the ice cream into the freezer to firm up.
- Leaving the ice cream to freeze overnight ensures the chocolate ganache fully freezes within the ice cream.
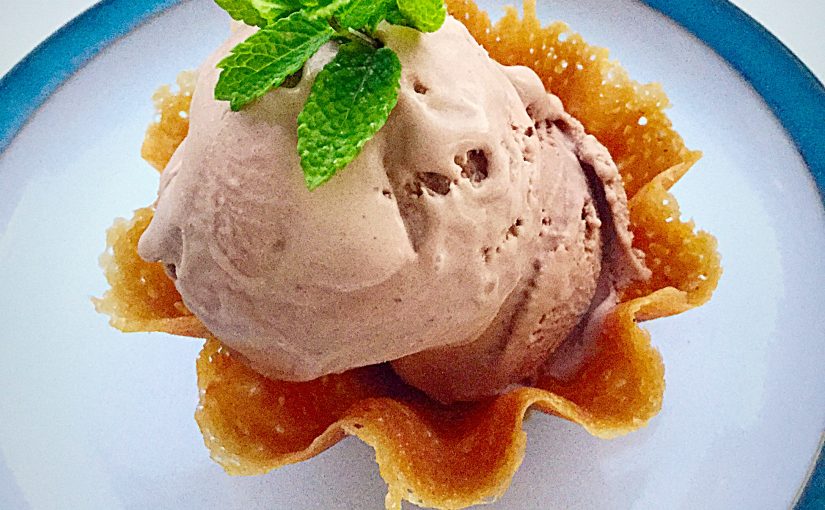
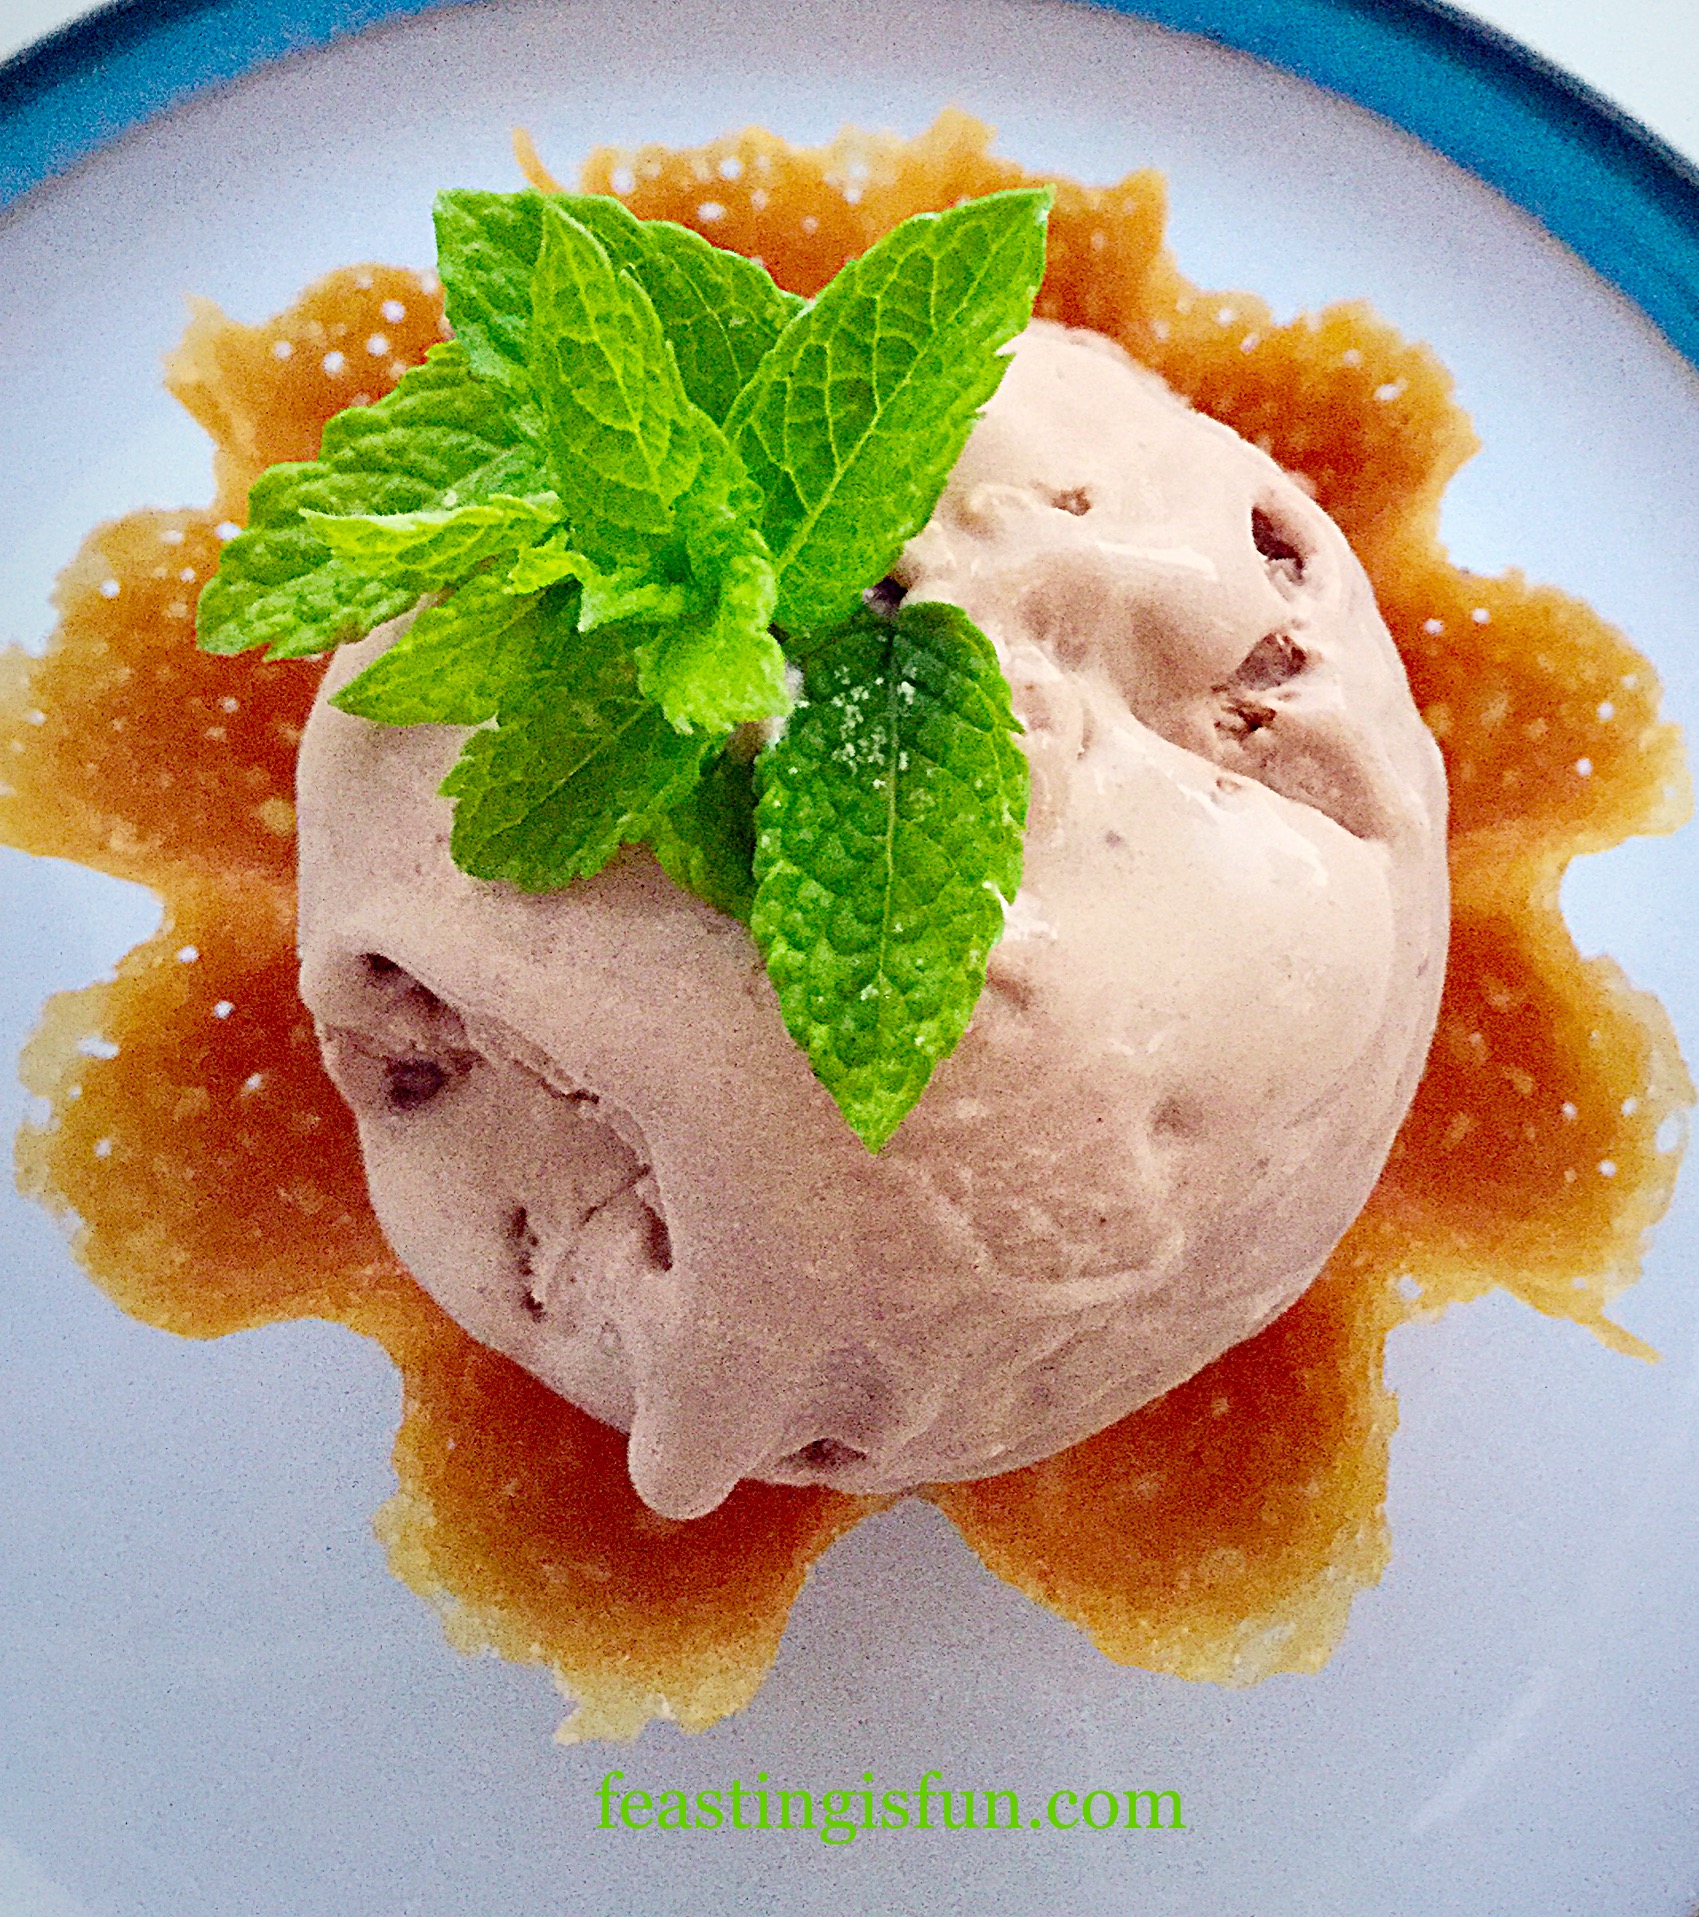
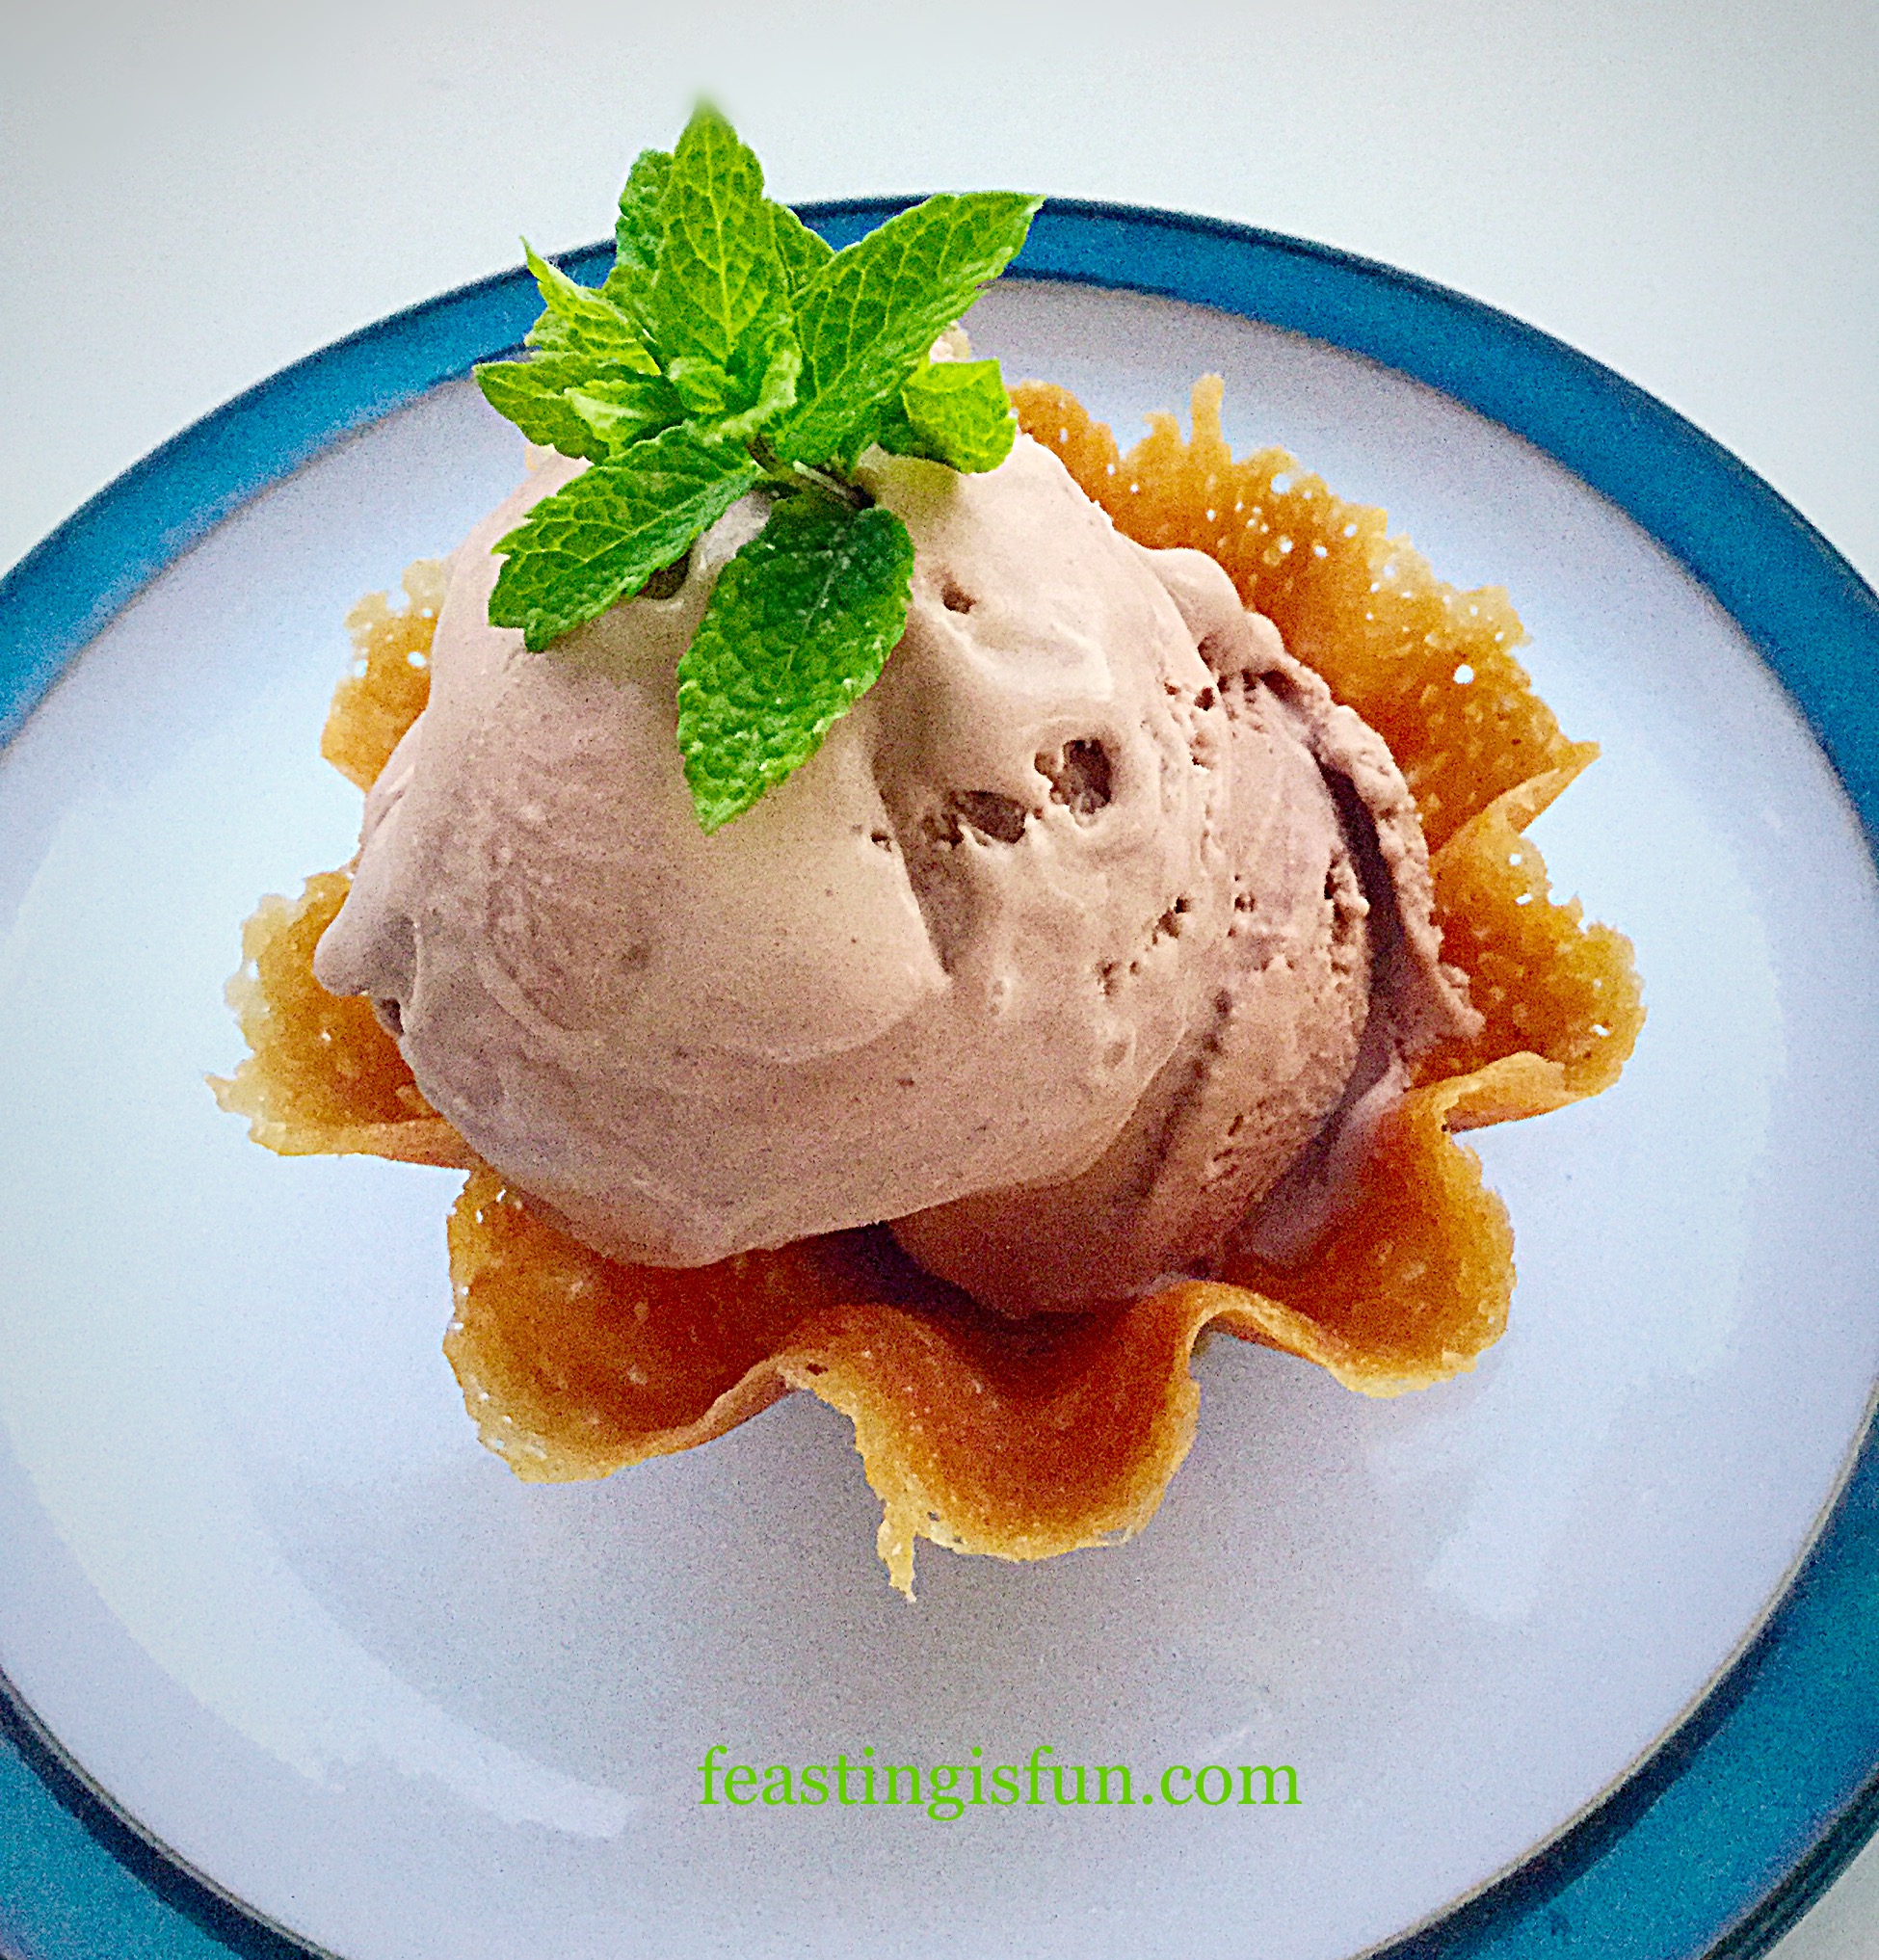
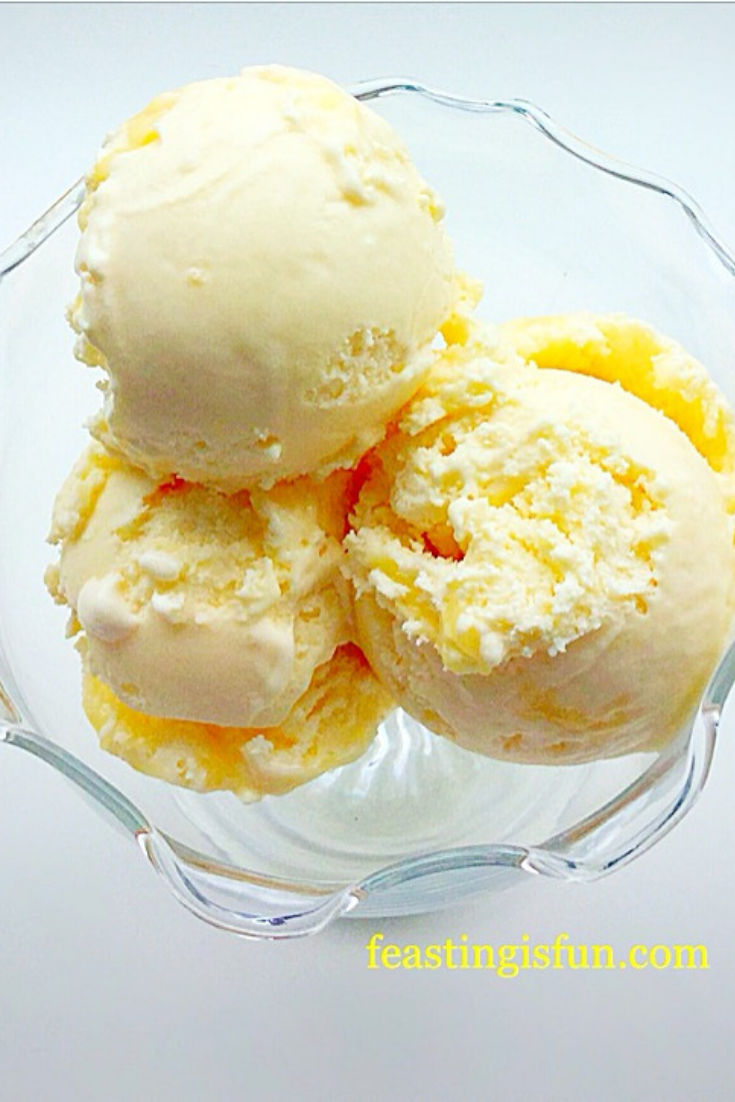
Finally, to serve, remove the ice cream from the freezer 10-20 minutes prior to scooping. Allowing the ice cream to soften slightly. Scoop two balls of ice cream and place on one large cookie, top with another cookie and press gently to form the ice cream cookie sandwich. Alternatively, scoop and serve in a bowl with additional Mini Reeces Peanut Butter Cups.
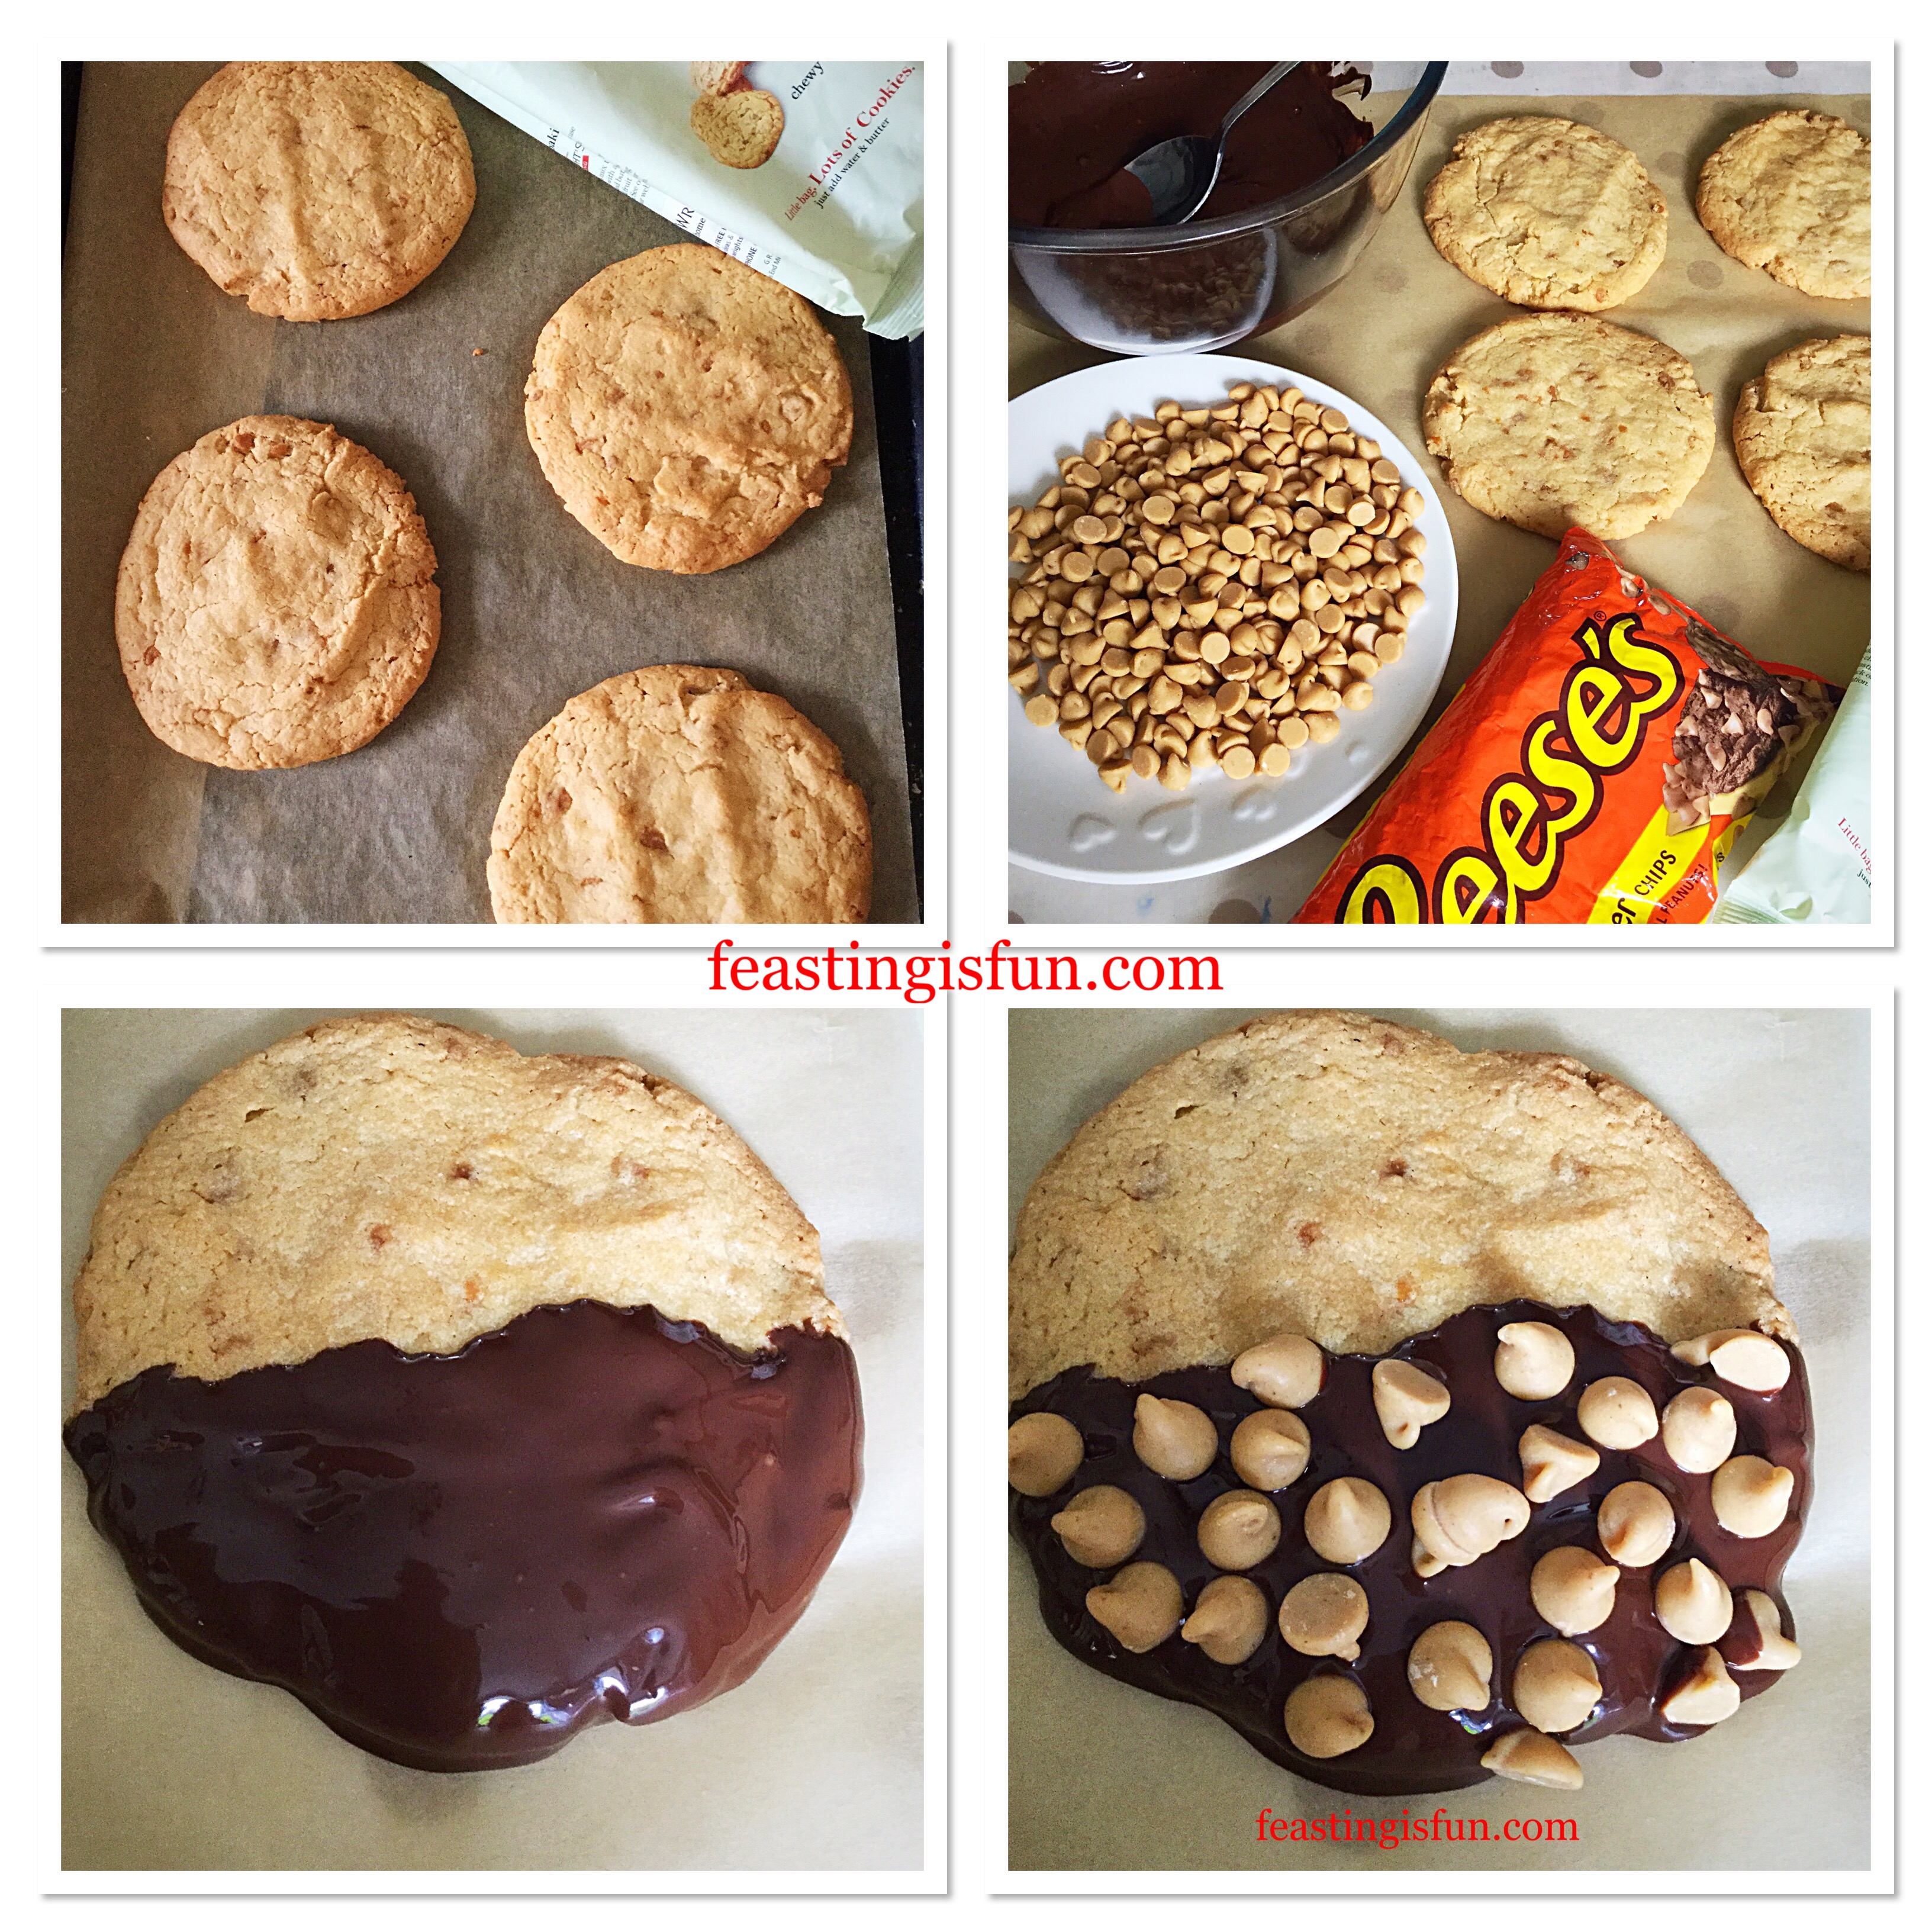
Decorating The Cookies
- Make the Caramac Caramel Cookies according to the Recipe.
- Allow the cookies to cool completely on the baking tray.
- Melt 100g of chocolate in a heatproof, microwaveable bowl, on medium setting, for 30 seconds at a time. Stir the chocolate after each heating session.
- As soon as the chocolate is melted, dip each cookie into the chocolate, using a spoon to cover halfway across the top oven each cookie.
- Place the chocolate covered cookies on to baking parchment and sprinkle Reece’s peanut butter chips over the chocolate covered half. Leave to set. In hot weather place in the fridge for a few minutes until set.
Such an incredible ice cream deserves a cookie that enhances all of its qualities.
If you have enjoyed this recipe for Reeses Peanut Butter Cup Ice Cream you may also like these:
Caramac Caramel Cookieswith Very Vanilla Ice Cream
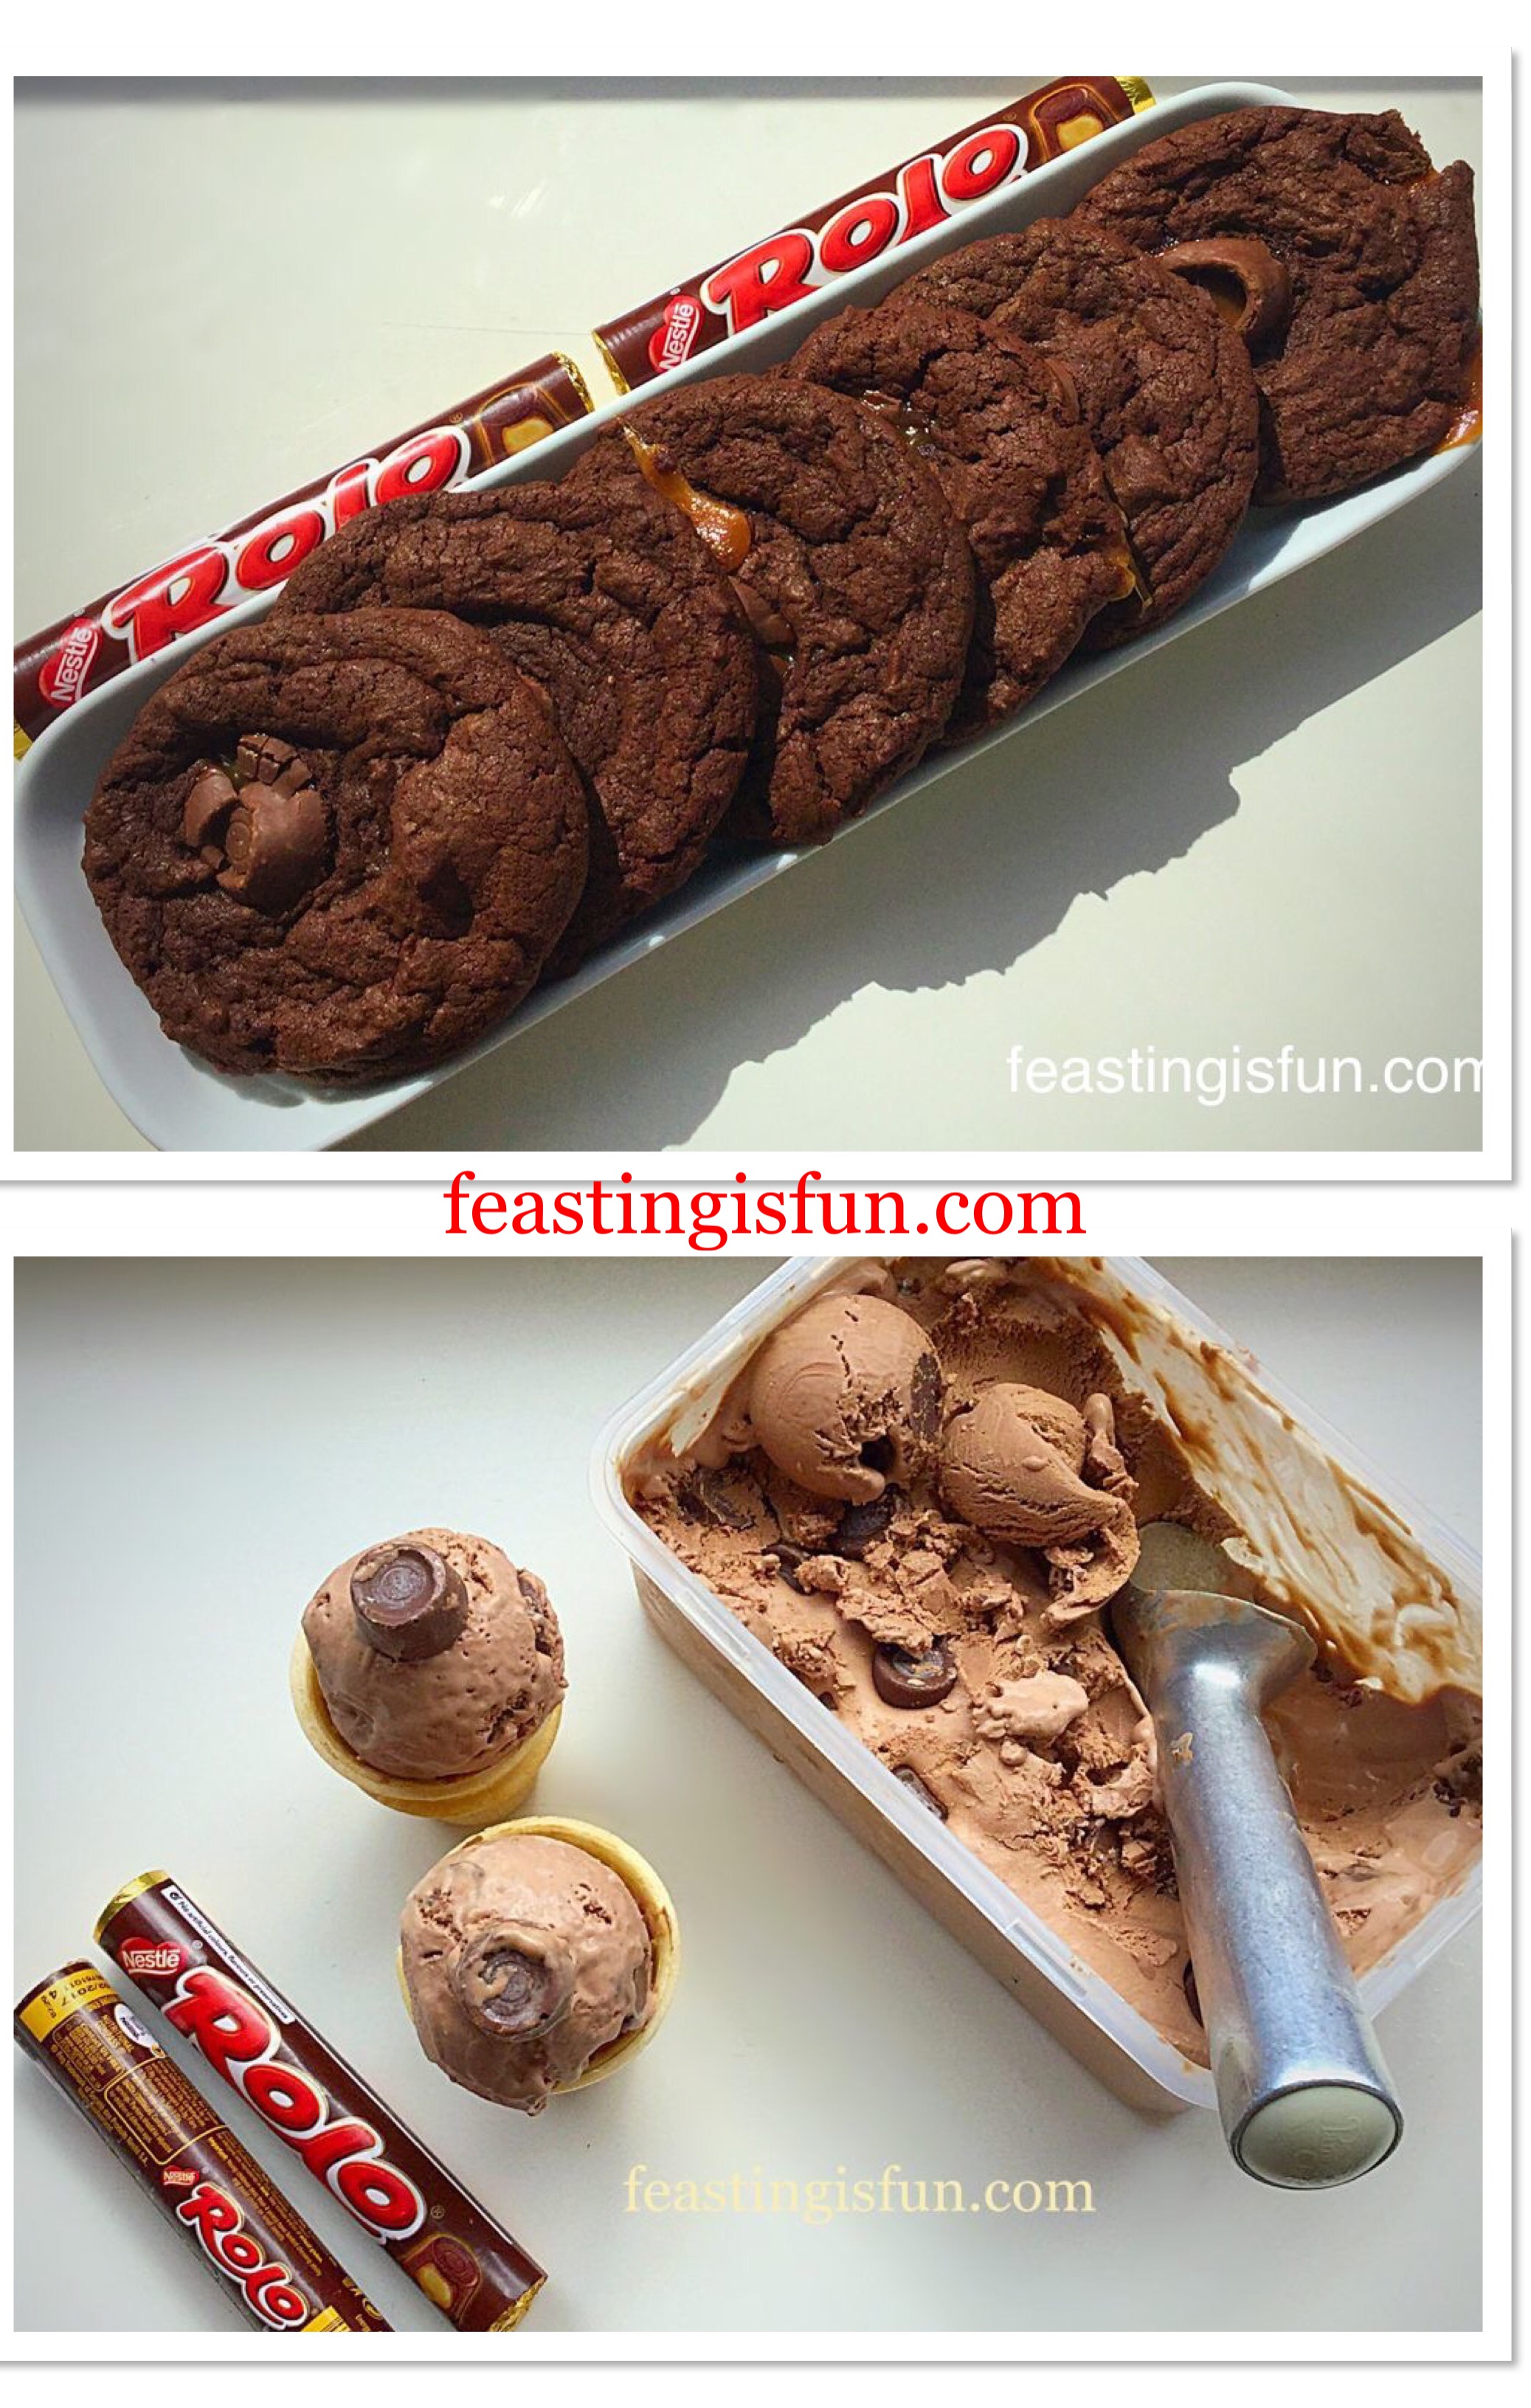
Rolo Chocolate Cookies with Chocolate Rolo Ice Cream
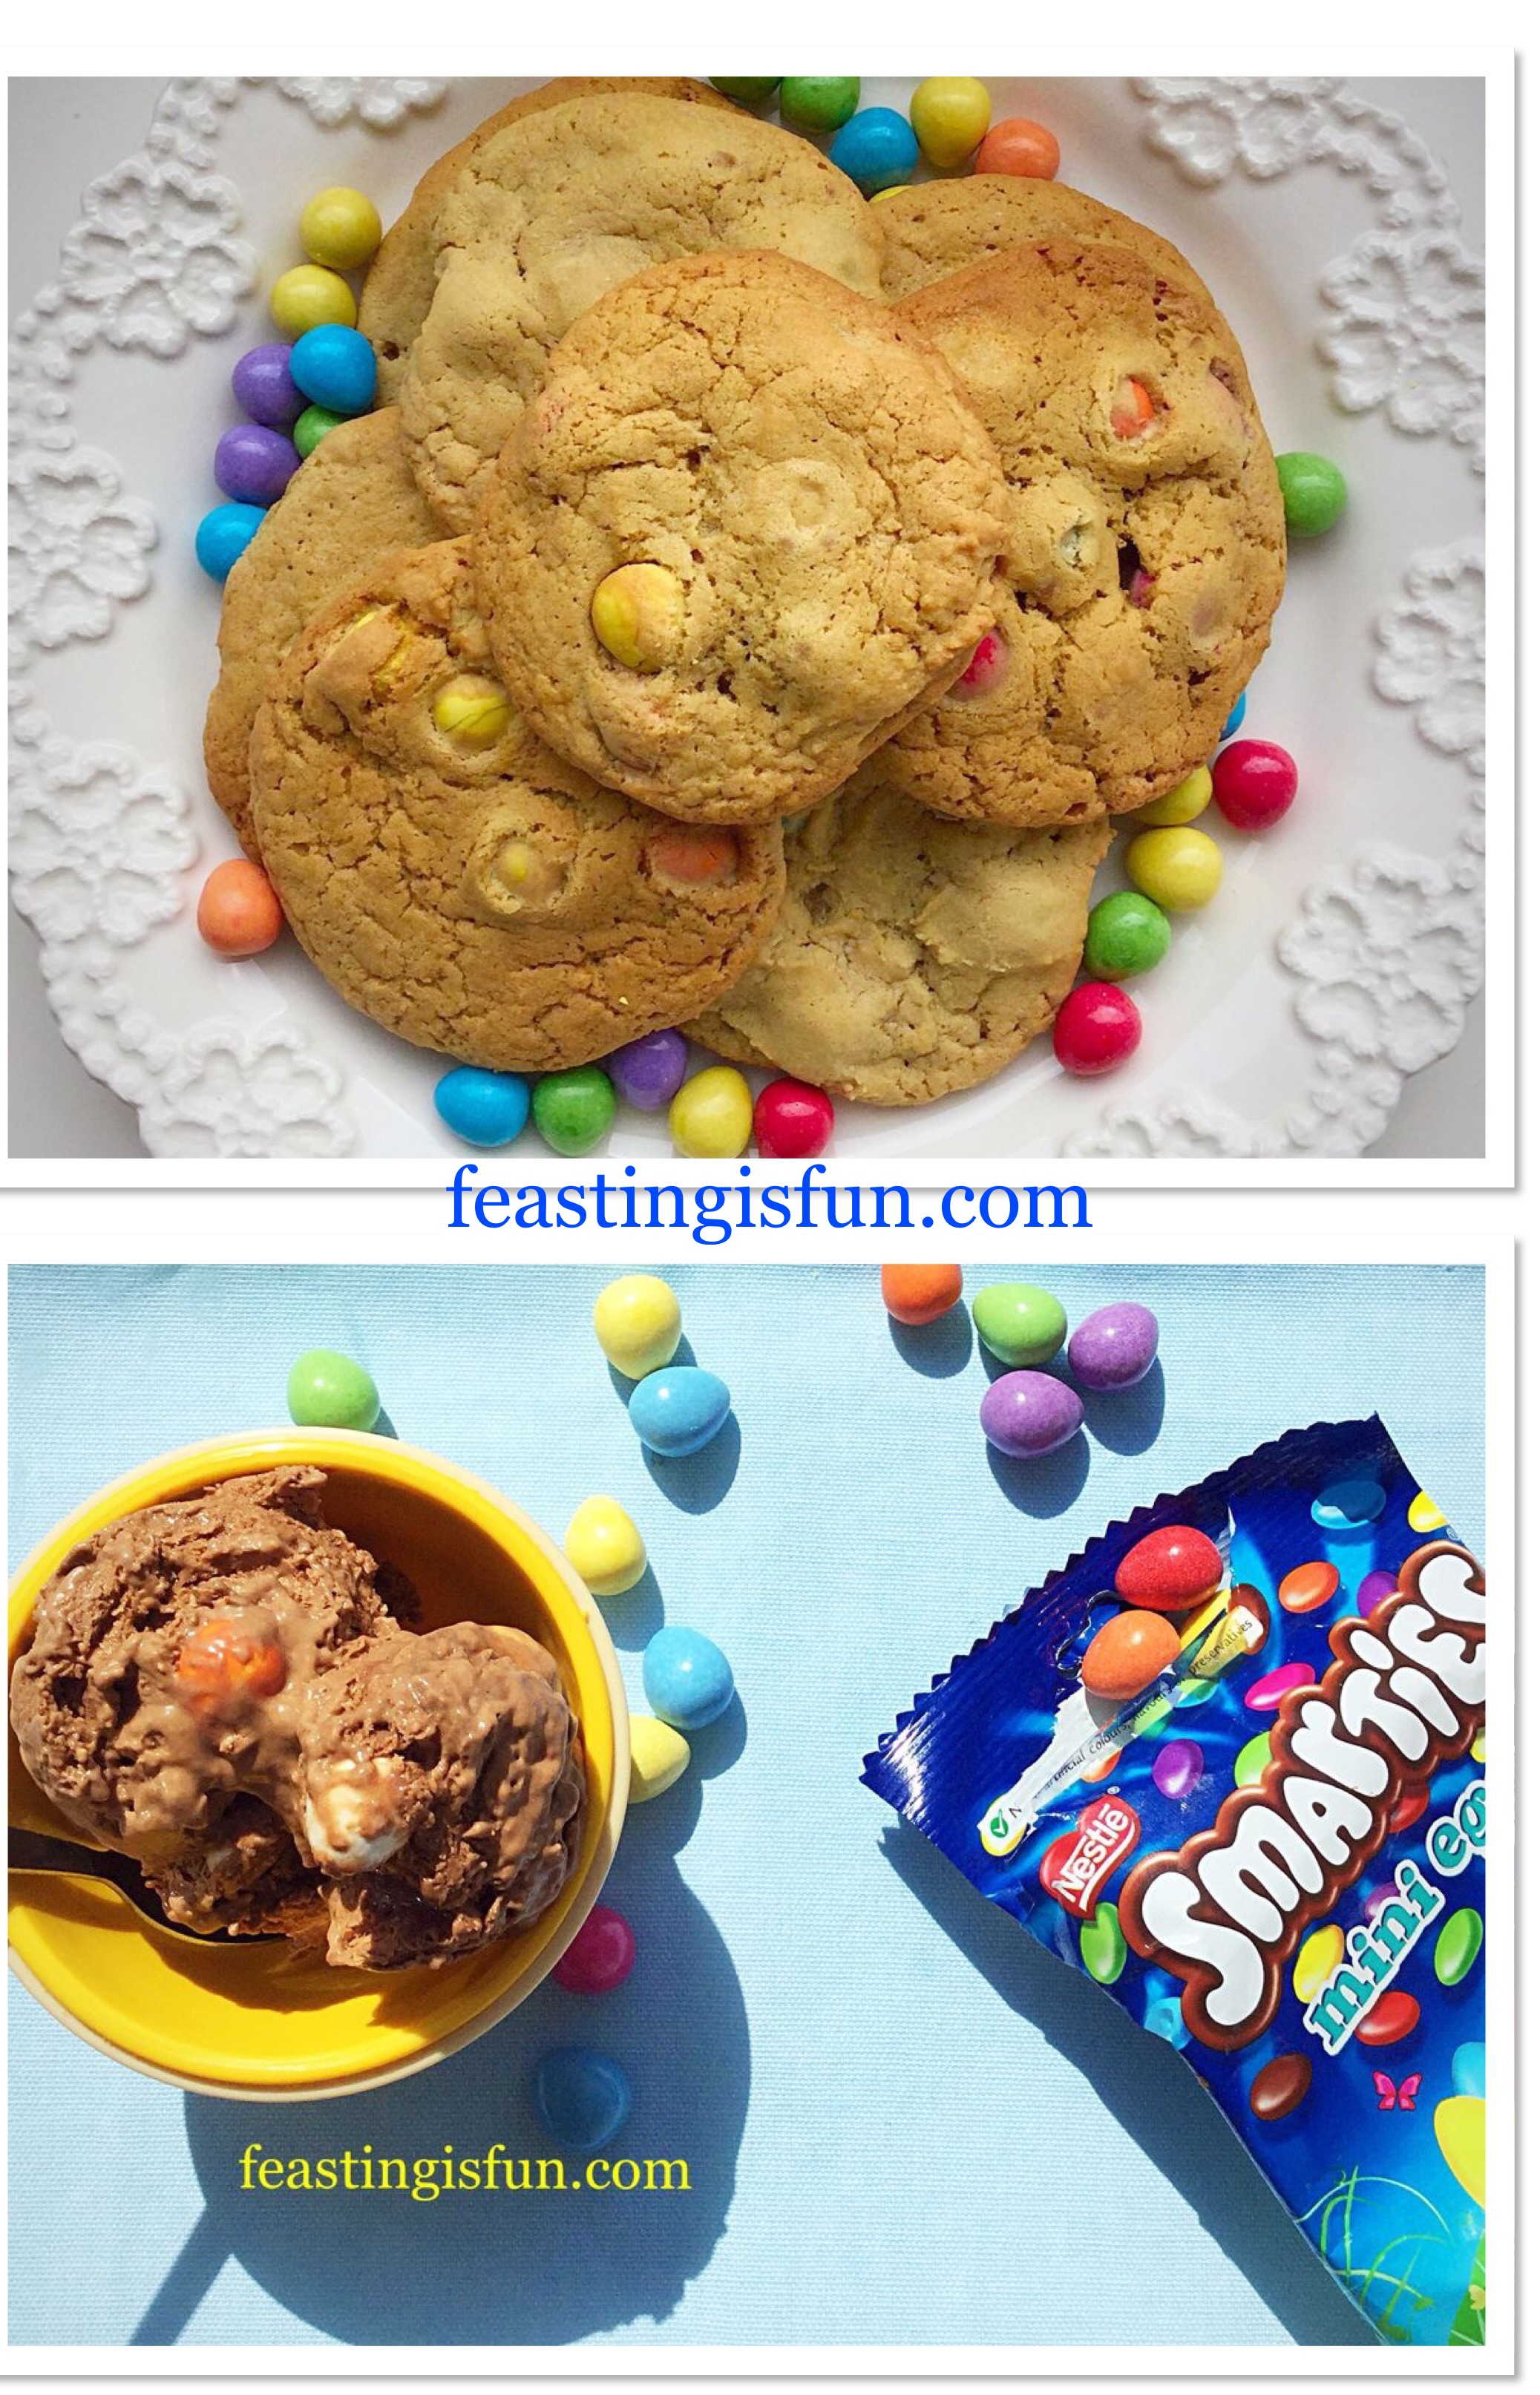
Chocolate Monster Mini Egg Cookies with Smarties Chocolate Mini Egg Ice Cream
Since all of the recipes shown can only be made at home, this emphasises the core beliefs of Feasting is Fun. Because creating flavour combinations at home, should be fun. Resulting in each one of these examples as a feast in itself. Also, most importantly, invite your friends over to share these incredible ice cream cookie sandwiches. Finally proving that all food tastes better when shared.
So, whatever you are making, baking and creating in your kitchens, have fun preparing and sharing your feast.
Sammie xx
No part of this post may be reproduced without my specific written permission. Please see my Disclosure Policy.