Cheddar Sun Dried Tomato Scones

Share
Facebooktwitterpinterestlinkedintumblr

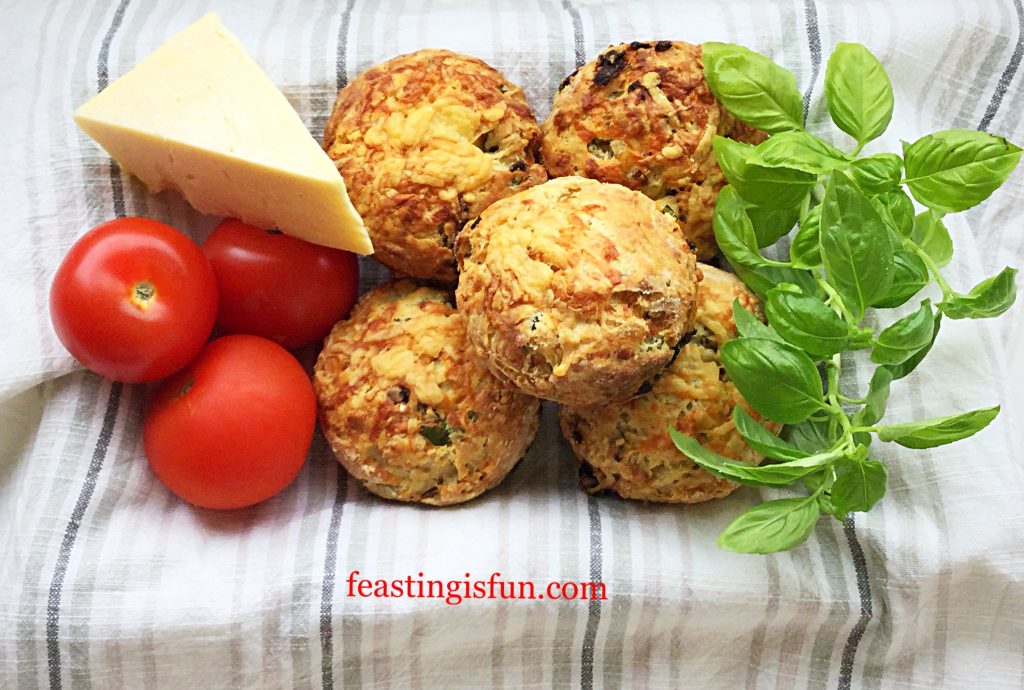
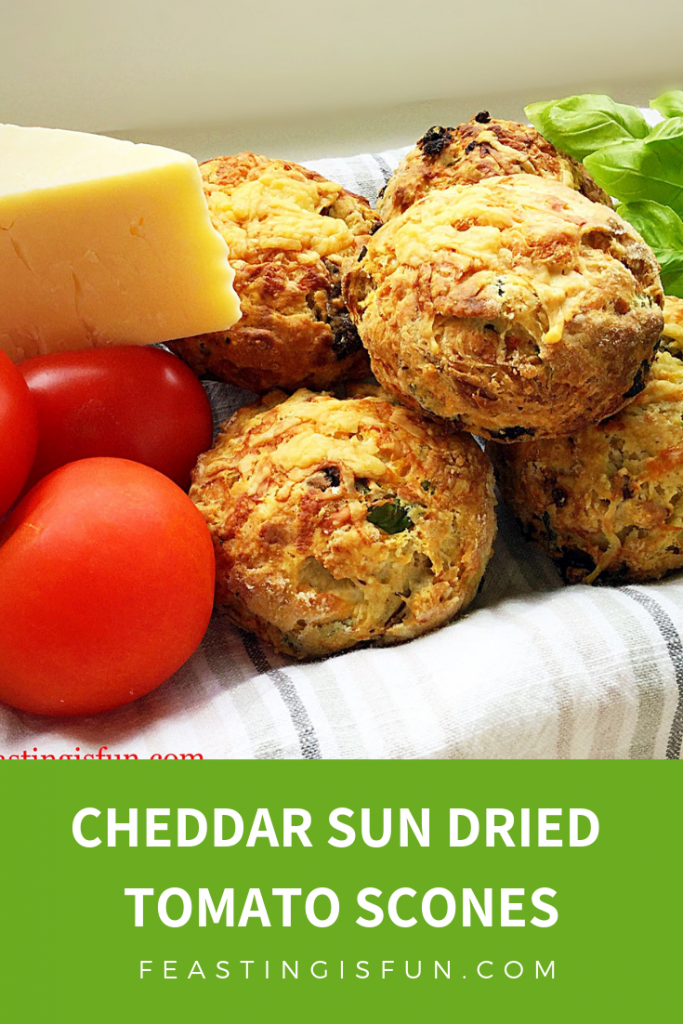
Cheddar Sun Dried Tomato Scones are the best savoury scones made at Feasting headquarters so far. Sharp, mature cheddar pairs beautifully with the sun dried tomatoes and the addition of fresh basil completes the final flavour. These scones need no addition as they are moist and light.

FF Cheddar Sun Dried Tomato Scones

Two things are really important when making these scones. First of all, use great ingredients. That doesn’t mean everything has to be top of the range, but buy the best mature cheddar you can afford. While the final flavour is not overpowering, using a mild cheddar results in a bland tasting scone. Also keeping your hands light, while making the scone dough will result in a light scone. Because if you work the dough too much the baked scones will be heavy.
FF Cheddar Sun Dried Tomato Scones
Cheddar Sun Dried Tomato Scones it’s hard to stop at one!

Since the sun dried tomatoes add a depth of savoury flavour to the finished scone, they are crucial to the recipe. Dry packaged are best, however if they are only available in oil that’s okay. Simply remove slightly more than the recipe calls for and drain them thoroughly using kitchen towels. While their deep, unique flavour and texture will still work in this recipe.
FF Cheddar Sun Dried Tomato Scones
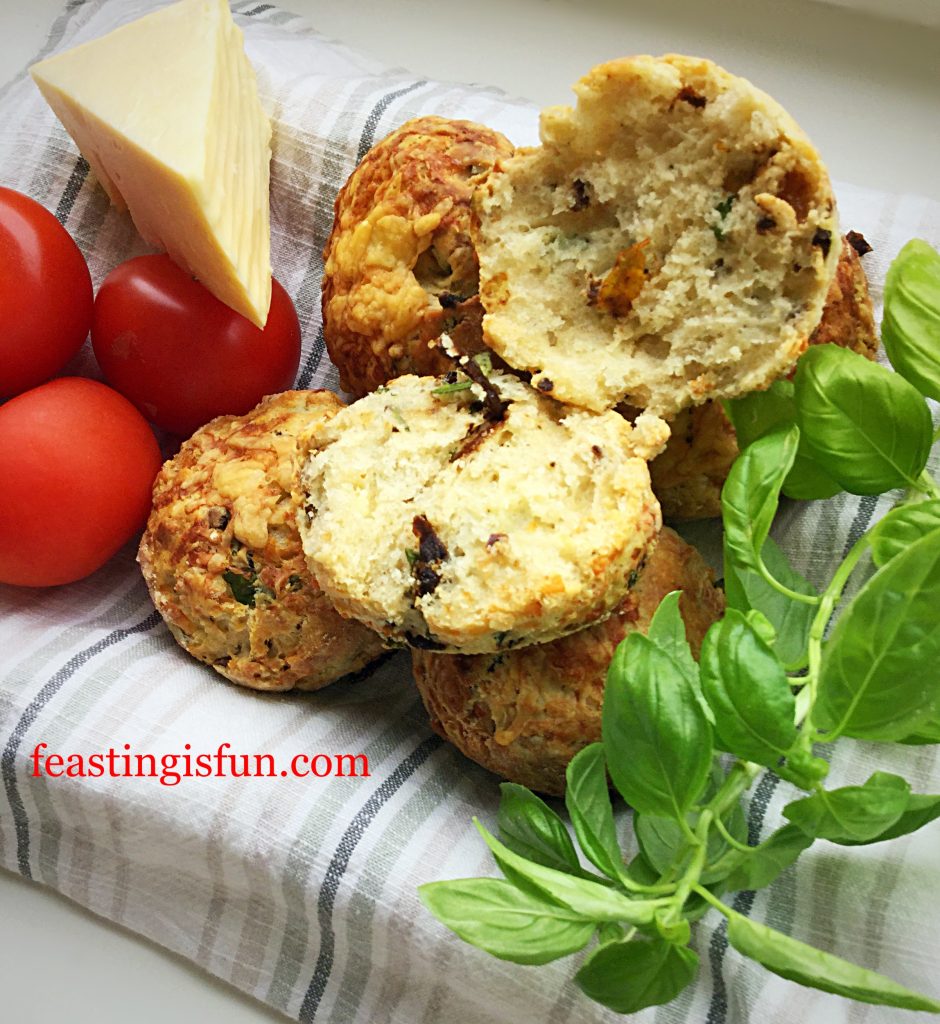
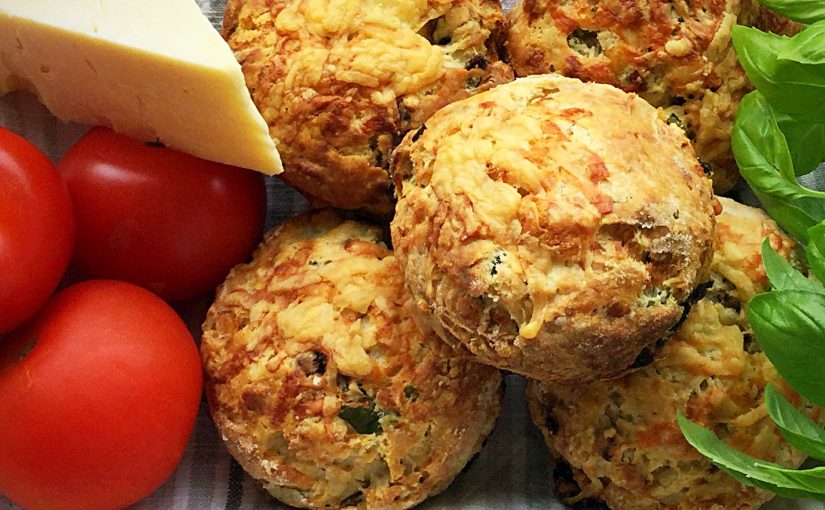
Cheddar Sun Dried Tomato Scones the cheese melts into the scone, yet the basil and tomatoes are still visible.

Time to get baking!

Recipe: Cheddar Sun Dried Tomato Scones makes 10-12

450g/1lb Plain White Flour

3tsp Baking Powder

25g/1oz Trex – solid vegetable fat kept very cold

50g/2oz Unsalted Butter kept very cold

250mls Whole Milk straight from the fridge – plus a little extra for brushing the tops of the scones

150g/5oz Freshly Grated Mature/Sharp Cheddar – I used Wyke Farm mature cheddar

50g/2oz Sun Dried Tomatoes preferably not in oil

Handful of Fresh Basil Leaves – approx. 10 large leaves.

1/4tsp Sea Salt Flakes – I use Maldon

Good grinding of Black Pepper to taste

Method: Preheat oven to 220C/200C fan, 425F, gas mark 7,

You will need two large baking trays lined with baking parchment and a 5cm/2″ plain round cutter.

Making The Cheddar Scone Dough

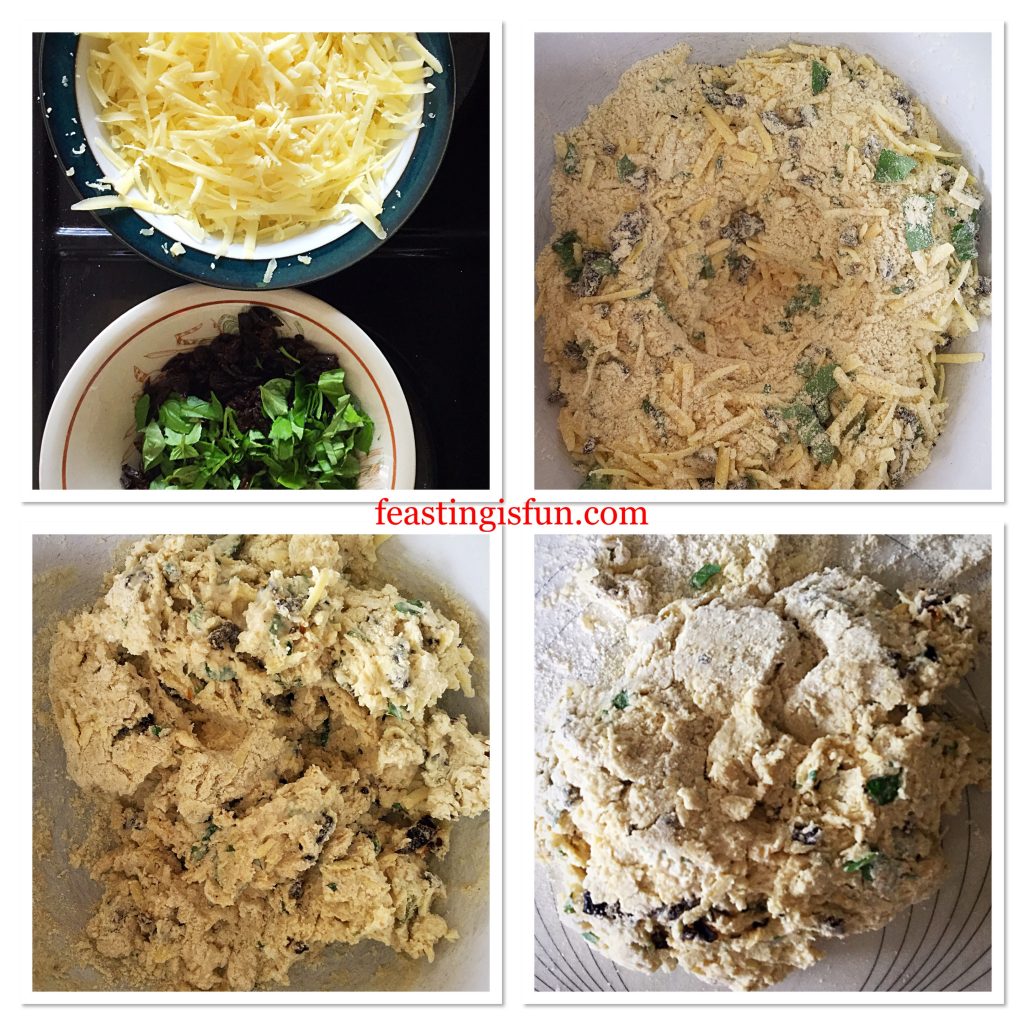
  • First of all prepare the ingredients. Grate the cheese and chop, or snip the sun dried tomatoes and basil into similar sized pieces – see photo.
  • Add your flour, baking powder, salt and a good grinding of black pepper to a large bowl. Use a balloon whisk to blend the ingredients together.
  • Next add both the fats and blend them into the flour using a pastry cutter. Alternatively rub the fat into the flour using your fingers. Finally the flour should have a breadcrumb appearance with some larger, pea sized, pieces of fat visible.
  • Add one third of the grated cheese to the bowl. Use your fingers to toss the cheese in the flour. This coats the cheese and stops it from clumping. Repeat with half of the remaining cheese. Set the unused cheese to one side.
  • Now do the same with the sun dried tomatoes and fresh basil, tossing them in the flour to coat them.
  • Make a well in the centre of the bowl and pour in the cold milk.
  • Stir the ingredients together with a dinner knife, until they form a rough dough.
  • Use your hand, shaped like a claw to pull all the ingredients together.
  • Tip the scone dough on to a lightly floured work top.
FF Cheddar Sun Dried Tomato Scones
Making the Cheddar Sun Dried Tomato Scones dough.

Shaping The Dough And Cutting Out The Scones

  • Bring the dough together with your hands and pat into a rough circle approximately 1 inch/2.5cm deep.
  • Thoroughly flour the round cutter and cut out the scones. NOTE: Do not twist the cutter as you push through the dough as this will result in uneven/lopsided final bakes. Place the scones on to the lined baking trays.
  • Brush the top of each scone with milk and add a little of the remaining cheese.
FF Cheddar Sun Dried Tomato Scones
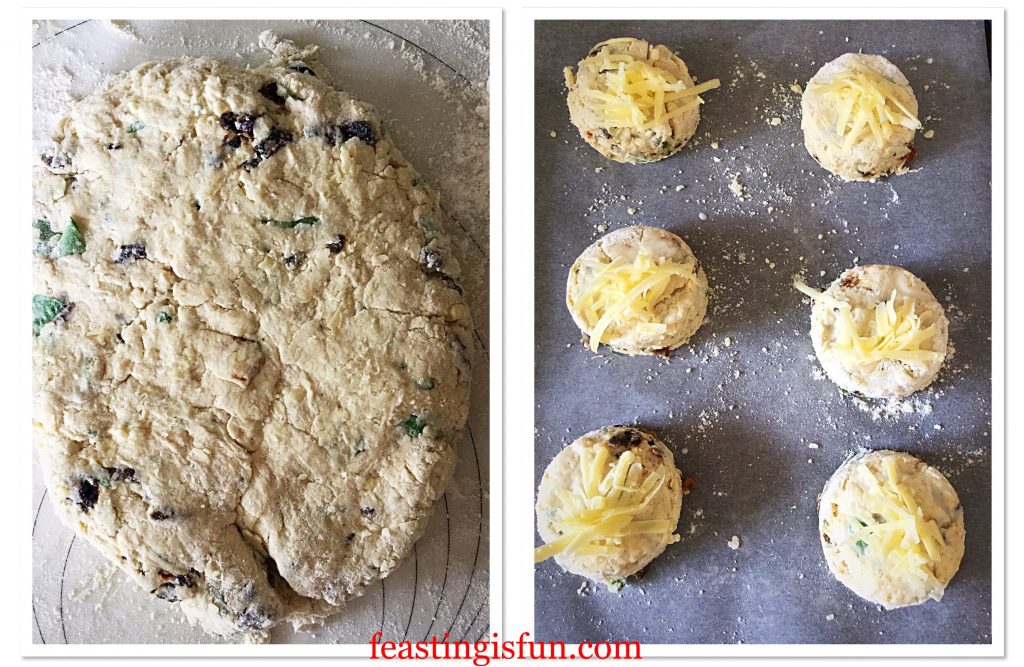
Shaping the dough and cutting out the scones.

Baking The Cheddar Sun Dried Tomato Scones

  • Place the baking trays into the preheated oven and bake for 20-25 minutes.
  • The scones are baked when they are a golden colour and similar to bread sound hollow when rapped on the base with a knuckle.
  • As soon as they are baked remove the scones from the oven.
  • Immediately place the scones on to a cooling rack, using a clean tea towel to transfer them as they will be very hot.
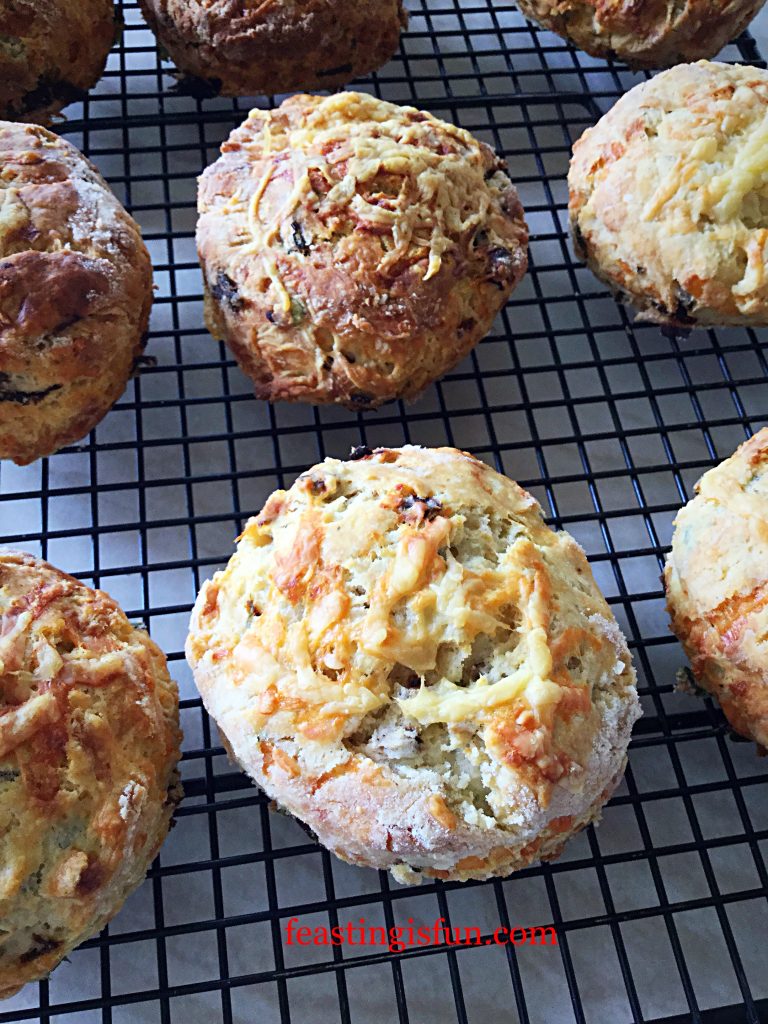
FF Cheddar Sun Dried Tomato Scones
Cheddar Sun Dried Tomato Scones cooling on a rack.

Since these scones are at their absolute best when still slightly warm, there is no need to wait for them to completely cool before tasting!
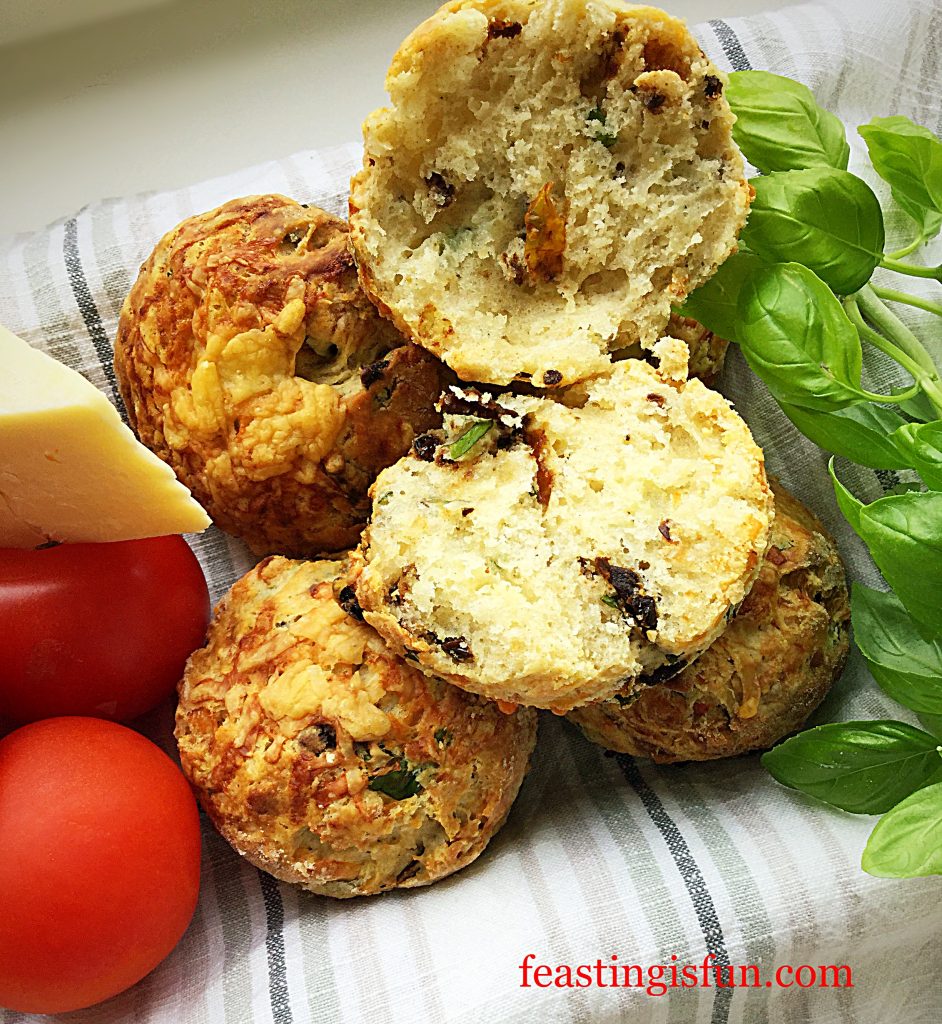
FF Cheddar Sun Dried Tomato Scones
Cheddar Sun Dried Tomato Scones delicious split with a little butter!

While delicious eaten warm, cool completely before packing into an airtight container to store.

Also the scones can be made ahead, cooled and packed into freezer bags. They will keep for up to one month in the deep freeze. Ideal for making ahead.

If you have enjoyed this recipe for Cheddar Sun Dried Tomato Scones you may also like these:
Beauvale Cheese Walnut Scones

FF Cheddar Sun Dried Tomato Scones
Beauvale Cheese Walnut Scones.

Super Light Scones

FF Cheddar Sun Dried Tomato Scones
Super Light Scones

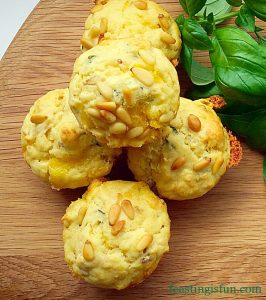
Goddess Cheese Pine Nut Muffins

FF Cheddar Sun Dried Tomato Scones
Goddess Cheese Pine Nut Muffins

Cheddar Sun Dried Tomato Scones, such a delicious combination of flavours and texture. Also perfect for making ahead and freezing, ready to pop in the oven on a low heat when unexpected guests arrive. Make ahead recipes are my all time favourites. Especially as I never know from one day to the next how my body will be. Fortunately it’s always nice to know that there is good, homemade food in the house.

So, whatever you are making, baking and creating in your kitchens, have fun preparing and sharing your feast.

Sammie xx

No part of this post may be copied. Please see my Disclosure Policy.

Share
Facebooktwitterpinterestlinkedintumblr

Homemade Yorkshire Puddings

Share
Facebooktwitterpinterestlinkedintumblr

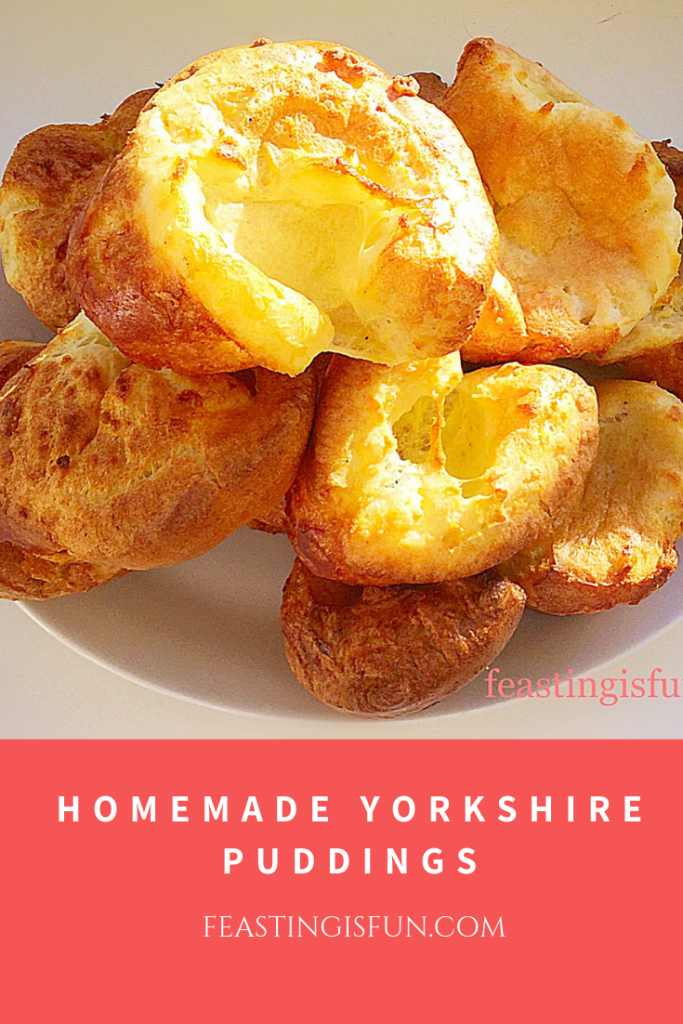
Homemade Yorkshire Puddings are golden, crisp, well risen, individual bakes of pure, indulgent, comfort food.

FF Homemade Yorkshire Puddings

While no meal HAS to have Homemade Yorkshire Puddings, what they add, to a roast, bangers and mash, or cooked with the sausages as ‘Toad in the Hole’, is immeasurable. Ultimately, eating them with roast beef is the traditional accompaniment here in England. Rather like stuffing with chicken or turkey.

Actually, for me, Homemade Yorkshire Puddings me shouldn’t be uniformly perfect. Because part of their charm is the craggy appearance, some with a hole, others billowing  like cumulus clouds. Ready to soak up rich, meaty gravy.

FF Homemade Yorkshire Puddings
Homemade Yorkshire Puddings little effort for big reward.

Yet in the U.S.A. our beloved Yorkie Puds, are called ‘Popovers’. A fantastic name that I think describes them perfectly. Since they literally popover the top of the muffin tin whilst they bake.

Since childhood I enjoy happily watching these incredible bakes, laying prostrate, in front of the oven, in awe at the ‘magic’ as they rise.

FF Homemade Yorkshire Puddings
Homemade Yorkshire Puddings just add meat and gravy.

Made from a simple batter, these gravity defying delights enhance any dinner plate they grace.

Various methods as well as recipes exist claiming to be the ‘best way’ of making a Yorkie Puds. While my method is tried and tested over the years. I have found no difference in the final result, whether I rest or use the batter immediately. Finally, what I am sure of, is that this recipe consistently works for me.

Furthermore, a real bonus to making these is that they can be made ahead and even frozen. What’s not to love about these savoury wonders?

Recipe: Makes 12 Large Homemade Yorkshire Puddings 

Vegetable oil or Lard for greasing the muffin tin

3 Large Free Range Eggs

250ml Milk -Whole or Semi Skimmed

200g Plain White Flour

1/8th tsp Salt – I use Maldon

1/8th tsp Freshly Ground Black Pepper

Pinch of Sugar

Method: Preheat the oven to 220C/200C fan, gas mark 7, 425F

Making The Yorkshire Pudding Batter

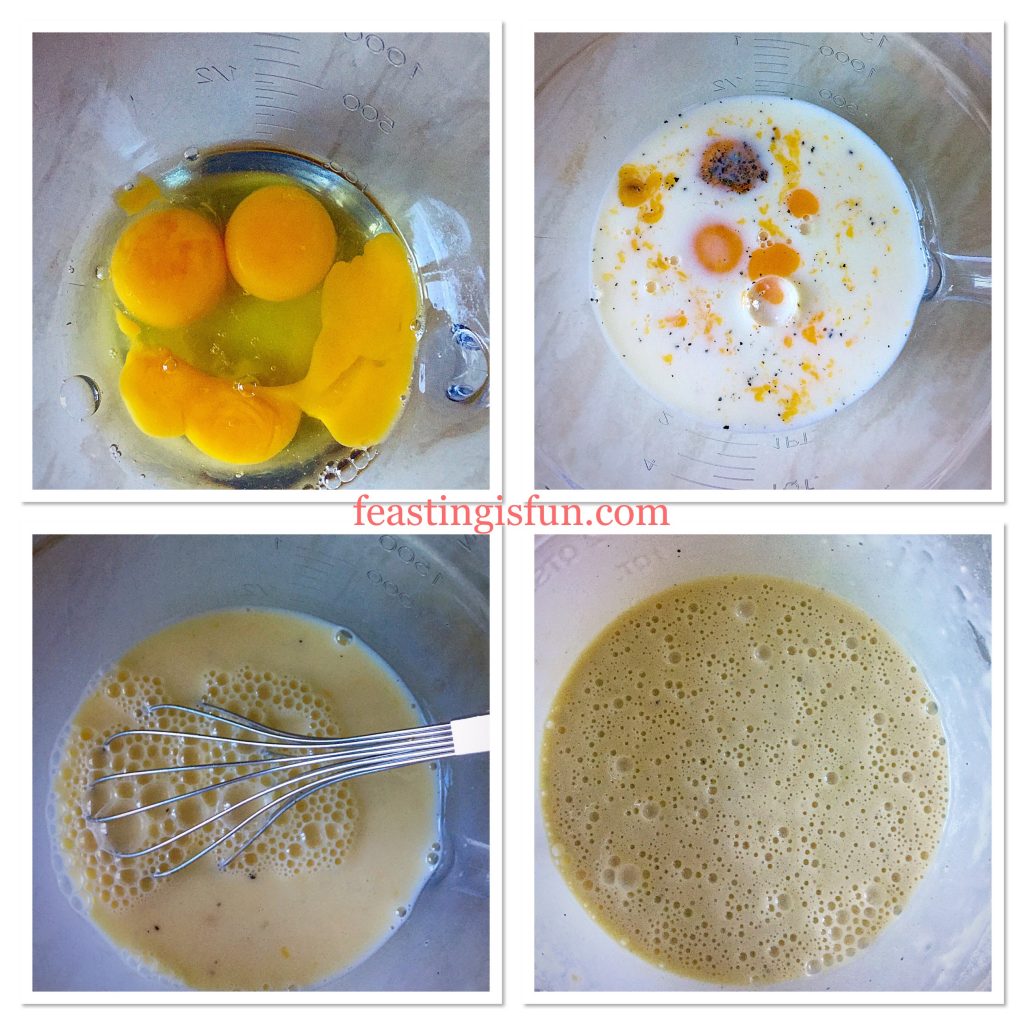
  • In a large jug add the eggs.
  • Next add the milk, salt, black pepper and sugar. Whisk using a balloon whisk until the egg and milk are thoroughly combined and there are lots of bubbles.
  • Now add the plain white flour, sugar and salt and pepper. Continue to whisk, by hand, for a couple of minutes. The batter should be completely lump free. Cover and set to one side.
FF Homemade Yorkshire Puddings
Steps showing the batter making process.

Baking The Homemade Yorkshire Puddings

  • Place a teaspoon of vegetable oil, or lard into a 12 hole muffin tin (or popover tin).
  • Put the muffin tin in the oven for 10 minutes until it is smoking hot.
  • Just prior to removing the tin from the oven, give the batter a quick whisk, in case it has settled.
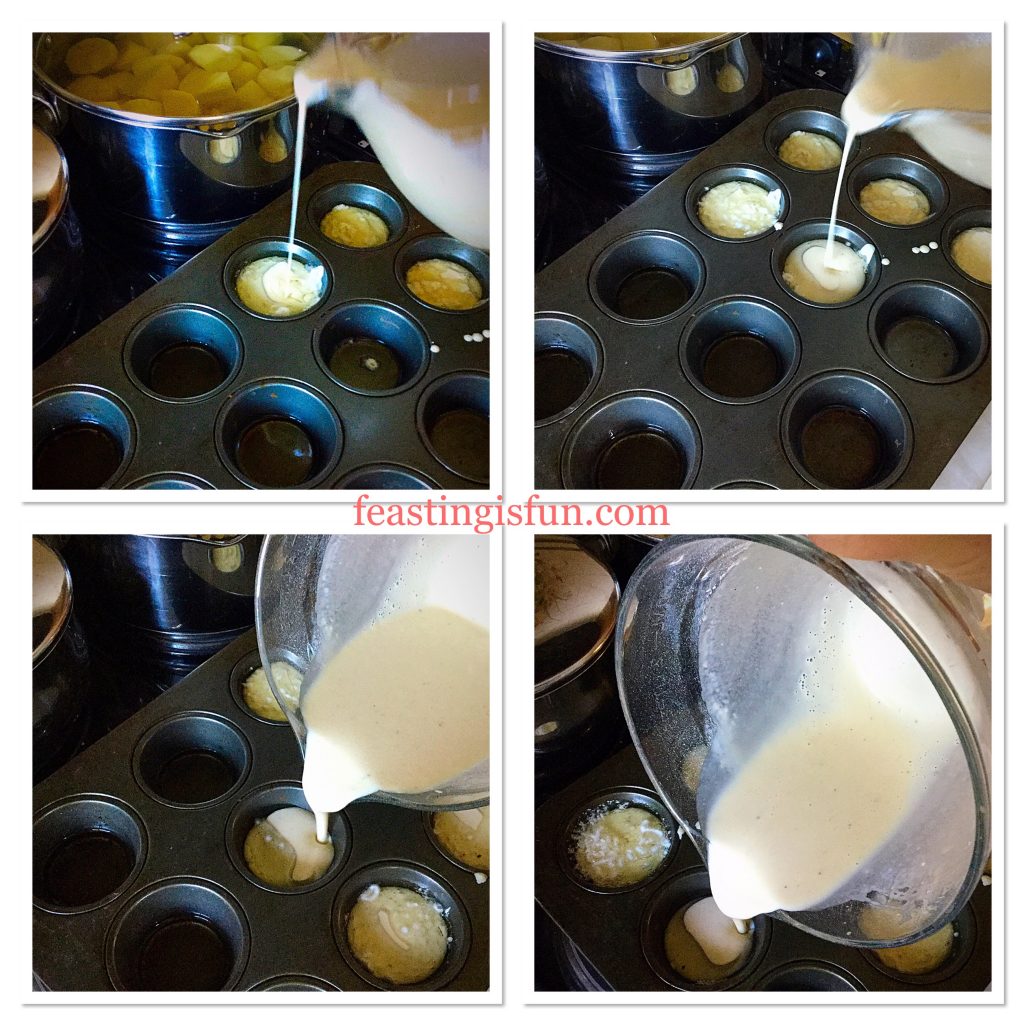
  • Working quickly, yet safely, remove the hot muffin tin from the oven and pour the batter mix into each hole. The batter should fill each muffin hole by half.
  • Return the muffin tin back into the top of the hot oven and bake for 20-25 minutes.
FF Homemade Yorkshire Puddings
Filling the muffin tin with batter.
  • As soon as the Yorkshire Puddings are well risen, golden and crispy remove from the oven.
FF Homemade Yorkshire Puddings
Homemade Yorkshire Puddings they simply cannot be beaten.

To remove the Yorkshire Puddings simply lift them out from the muffin tin. If any have slightly stuck run a butter knife between the tin and the pudding and it should release easily.

Serve straight away, or as I frequently do, place on a baking tray to cool. While  dishing up the roast potatoes, pop the Homemade Yorkshire Puddings back into a hot oven to reheat.

FF Homemade Yorkshire Puddings
Homemade Yorkshire Puddings gloriously golden.

Make Ahead And Storage Instructions

Although our kitchen isn’t small, it does lack workspace. Yet being able to make these in advance, really is a huge help, especially if we have guests joining us for dinner.

To freeze, cool thoroughly, place in a freezer proof bag and keep in the freezer for up to one month. To reheat from frozen, place on a baking tray in a hot oven for 5 minutes. Once they are reheated they will taste as if you have just made them. No one will will ever know! Actually, I always make our Christmas Yorkshire Puddings ahead of the big day and freeze them. While I love cooking, I also want to have fun and enjoy myself too.

If you have enjoyed this recipe for Homemade Yorkshire Puddings you may also like these.

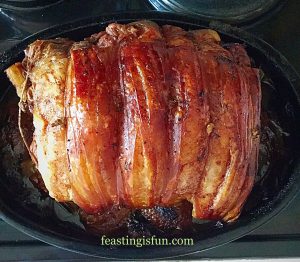
Slow Roasted Cider Pork

FF Homemade Yorkshire Puddings
Slow Roasted Cider Pork. Look at that crackling?

Garlic Rosemary Roast Potatoes

FF Homemade Yorkshire Puddings
Garlic Rosemary Roast Potatoes.

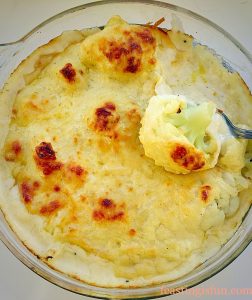
Homemade Cauliflower Cheese

FF Homemade Yorkshire Puddings
Homemade Cauliflower Cheese

Because this is such a simple recipe, im always surprised that shop bought Yorkshire Puddings so popular. Since I like the slightly softer centre that comes with Homemade Yorkshire Puddings. For such a simple recipe I am amazed at the extra ingredients needed for their pre made, shop bought counterparts.

Baking and cooking from scratch will always be my priority. I hope that you too choose to try these?

Sammie xx

No part of this post may be reproduced or duplicated without the written permission of the owner. Please see my Disclosure Policy.


Share

Facebooktwitterpinterestlinkedintumblr

Homemade Cauliflower Cheese

Share
Facebooktwitterpinterestlinkedintumblr

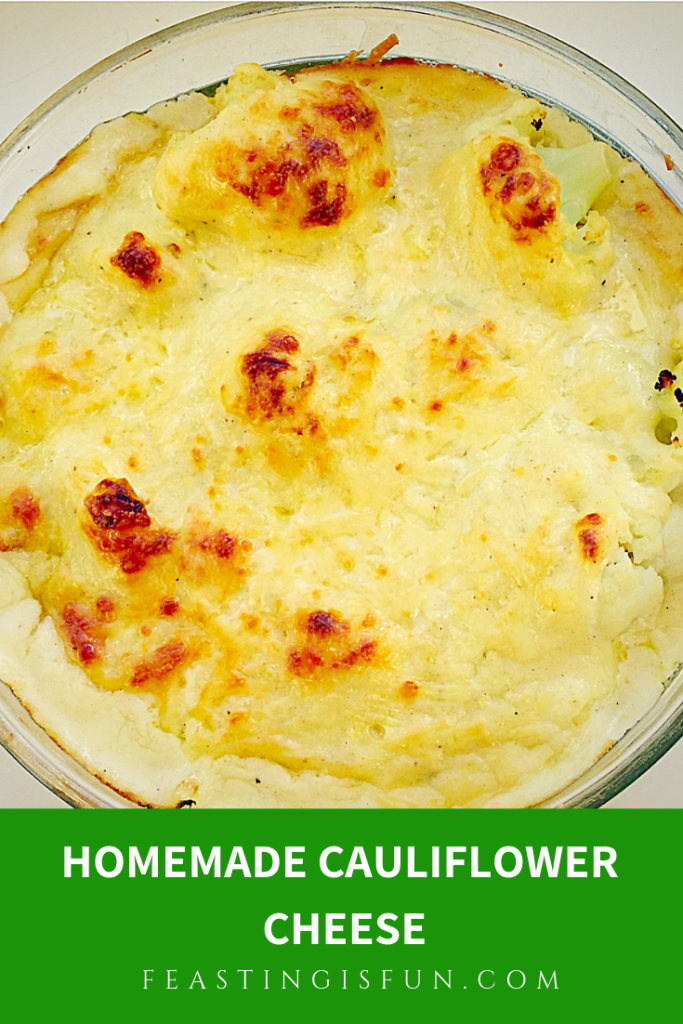
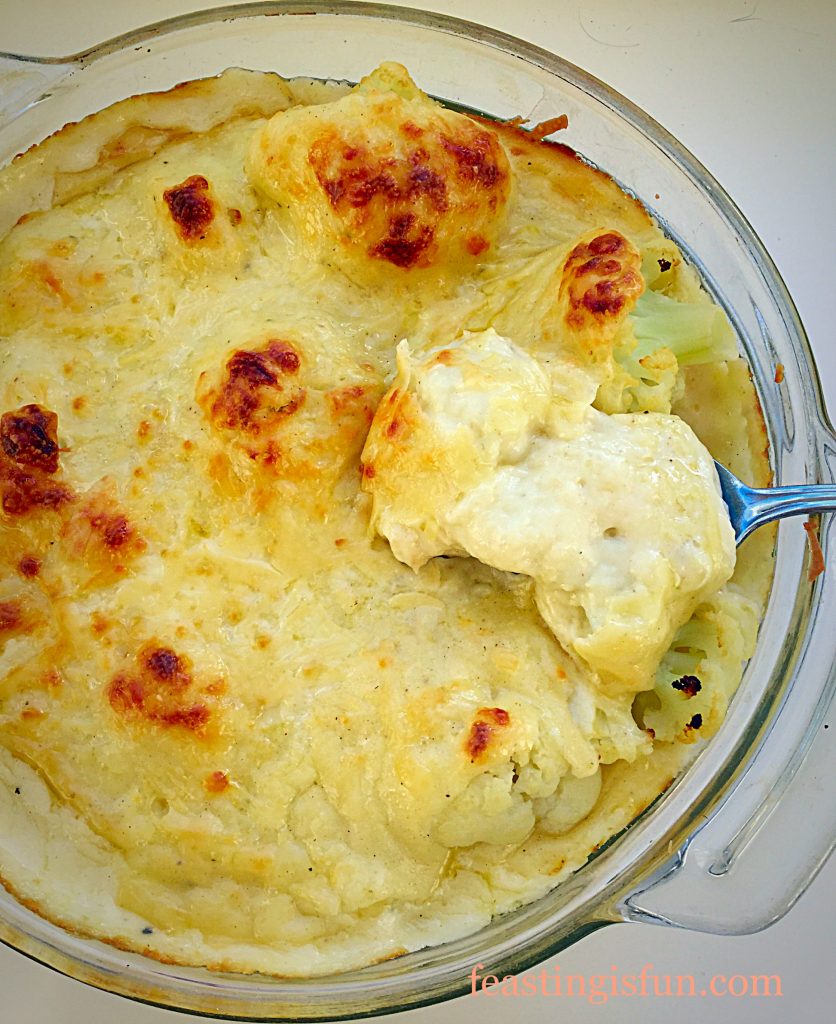
Homemade Cauliflower Cheese has to be right up there on the list of all time comfort foods. Am I right? Because this is such an easy dish to prepare it makes it even more comforting. Rather than stressing in the kitchen using a gazillion ingredients with a complex recipe, you can relax while slowly steaming cauliflower and stirring the cheese sauce. Resulting in a dish that is as good on it’s own or as a side dish.

Homemade Cauliflower Cheese

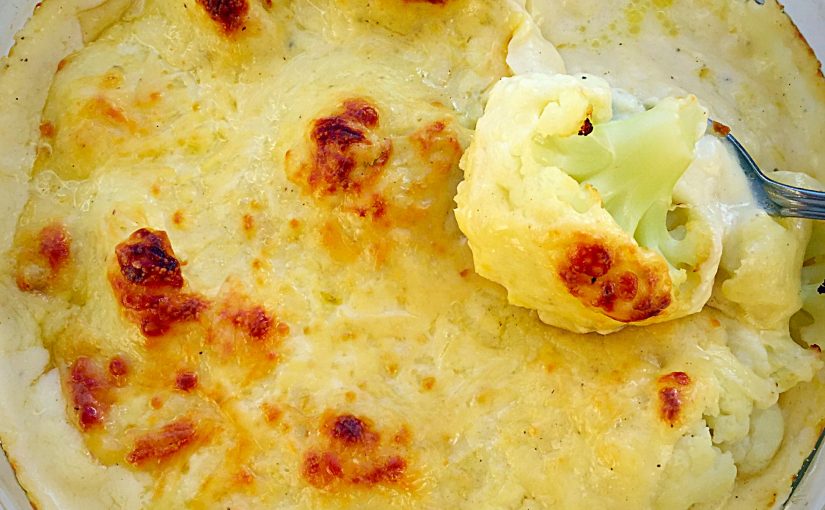
Fresh, creamy white florets of seasonal cauliflower, lightly steamed and smothered in a thick, nutmeg scented, cheese sauce. And like a fluffy duvet, or wood burning fire, it wraps you in its warm embrace and brings you home.

Friends and family recall that Homemade Cauliflower Cheese reminds them of comfort food from their childhood. Perhaps back to a time when life seemed simpler? And while it isn’t something I make, or eat that often, when the gooey cheese sauce spreads slowly over my plate I am in comfort food heaven.

FF Homemade Cauliflower Cheese
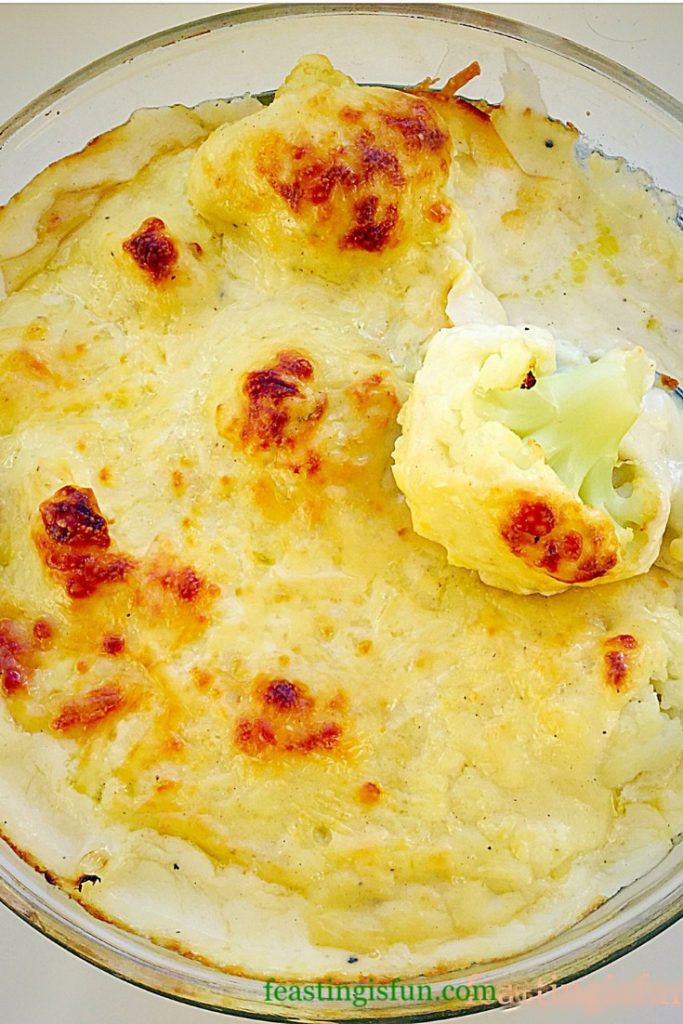
Homemade Cauliflower Cheese golden and bubbling comfort food.

The World Has Gone Crazy For Cauliflower

Since the humble cauliflower has been discovered as a carbohydrate substitute it is now used as a replacement for rice, pizza base, potato salad and other culinary substitutes. A quick look on Pinterest yields a variety of recipes. My Homemade Cauliflower Cheese recipe celebrates the humble cauliflower rather than trying to disguise it!

Tender, baked cauliflower, covered in a homemade cheese sauce, is for me one of the best ways to eat this delicious vegetable. While part of the brassica family, where cabbages, broccoli and brussel sprouts are its cousins, cauliflower has a slightly sweet flavour, not dissimilar to the thick leaves of white cabbage. And, cooked properly its texture is dense and meaty, making it a filling vegetarian dish when serving on its own.

FF Homemade Cauliflower Cheese
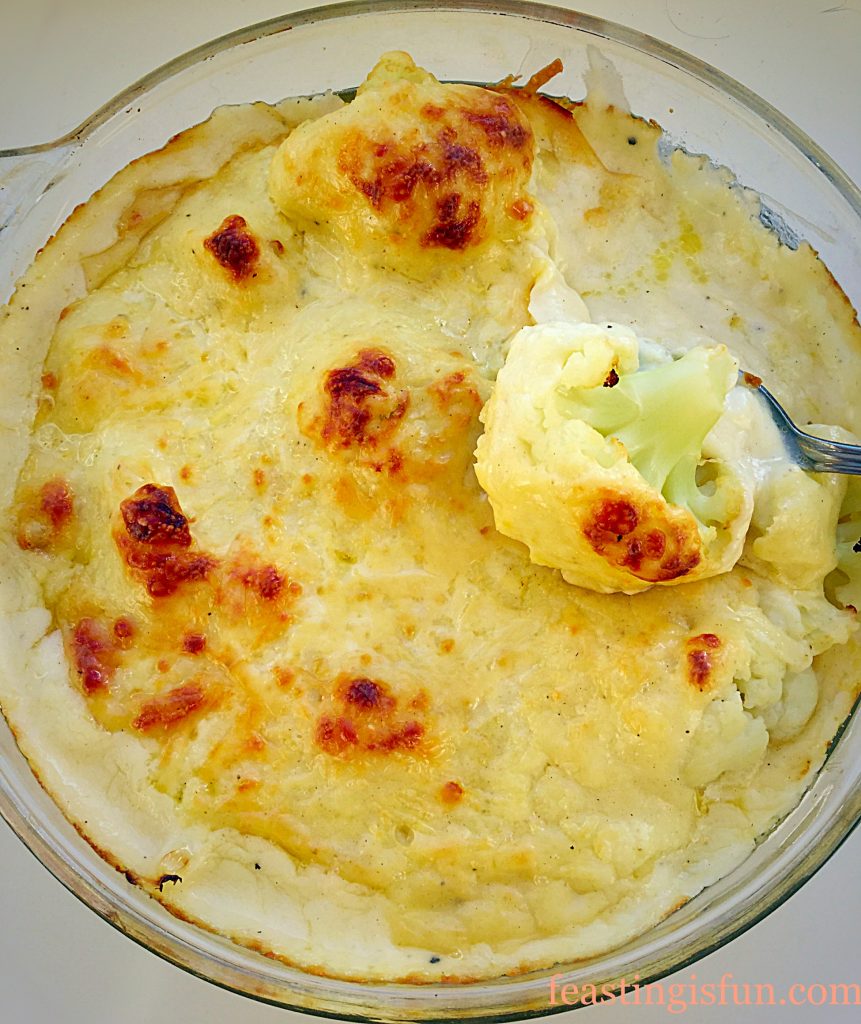
Homemade Cauliflower Cheese so temptingly delicious.

I enjoy eating Homemade Cauliflower Cheese with a roast dinner, or sausage and mash. While the bubbling cheese sauce goes so well with proper gravy dinners, it is also unbelievably good with Yorkshire puddings. Likewise, it pairs extremely well when served alongside thick slices of home cooked gammon.

Recipe: Homemade Cauliflower Cheese serves 4-6 as a side dish

1 large head of Cauliflower or 2 smaller ones

75g/3oz Unsalted Butter

75g/3oz Plain White Flour

150g/5.5oz Mature Cheddar Cheese – grated – hold back 2 tablespoons from adding to the sauce, for sprinkling over the assembled dish – I use Wyke Farms

500ml Milk Whole or Semi Skimmed

1/4tsp Freshly Grated Nutmeg – I buy Barts whole nutmegs and grate them myself on the coarse side of a box grater. Freshly grated nutmeg lifts the cheese sauce, subtly adding another level of flavour.

1/2tsp Freshly Ground Black Pepper

Method:

Making The Cheese Sauce

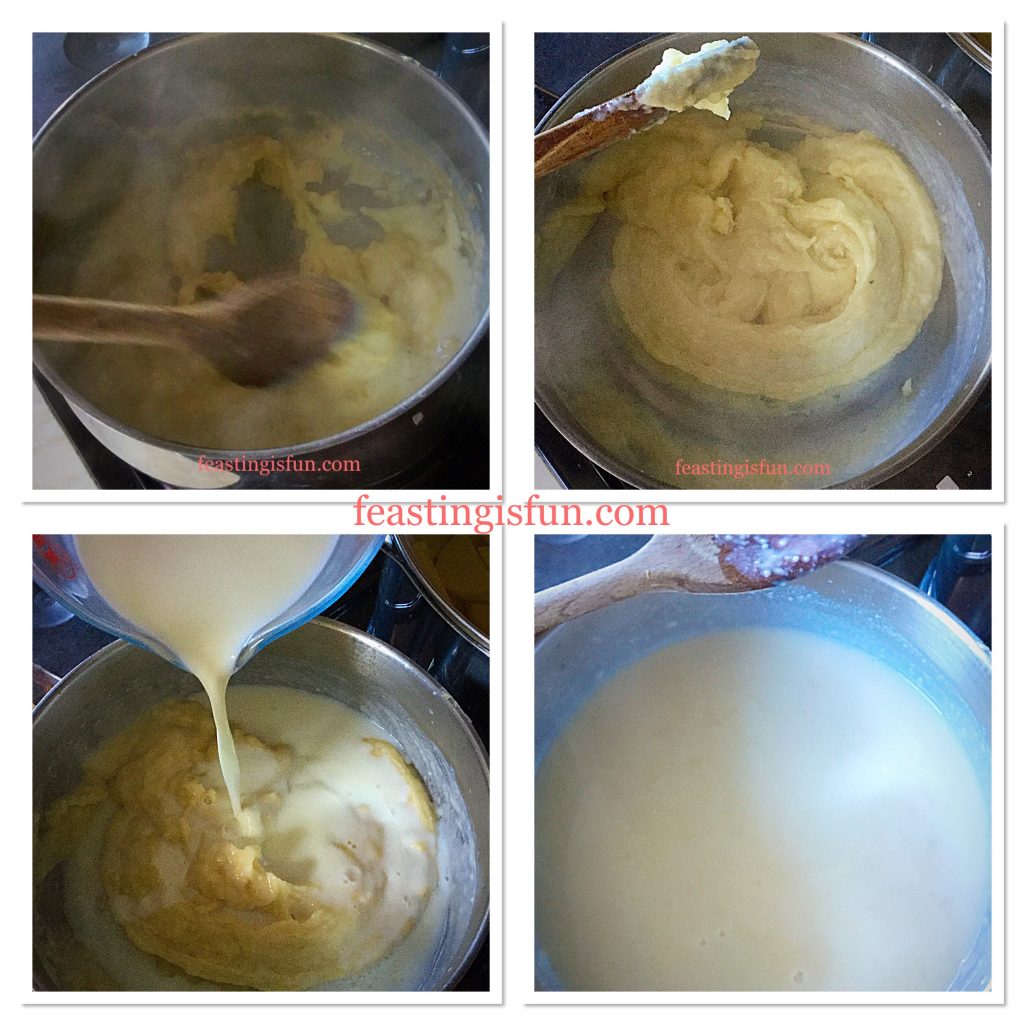
  • First of all place the butter into a heavy bottomed saucepan and melt over a medium heat.
  • Add in all the flour, stir for a couple of minutes so that the flour and butter become a bubbling paste (roux).
  • Pour in roughly 100ml of the milk and stir vigorously. The flour, butter and milk will come together to form a thick clump.
  • Add another 100mls of milk and keep stirring until all the milk is incorporated.
  • Continue as before, adding the milk in 100ml quantities, stirring thoroughly. If you are worried that some lumps will not disappear simple switch to a balloon whisk.
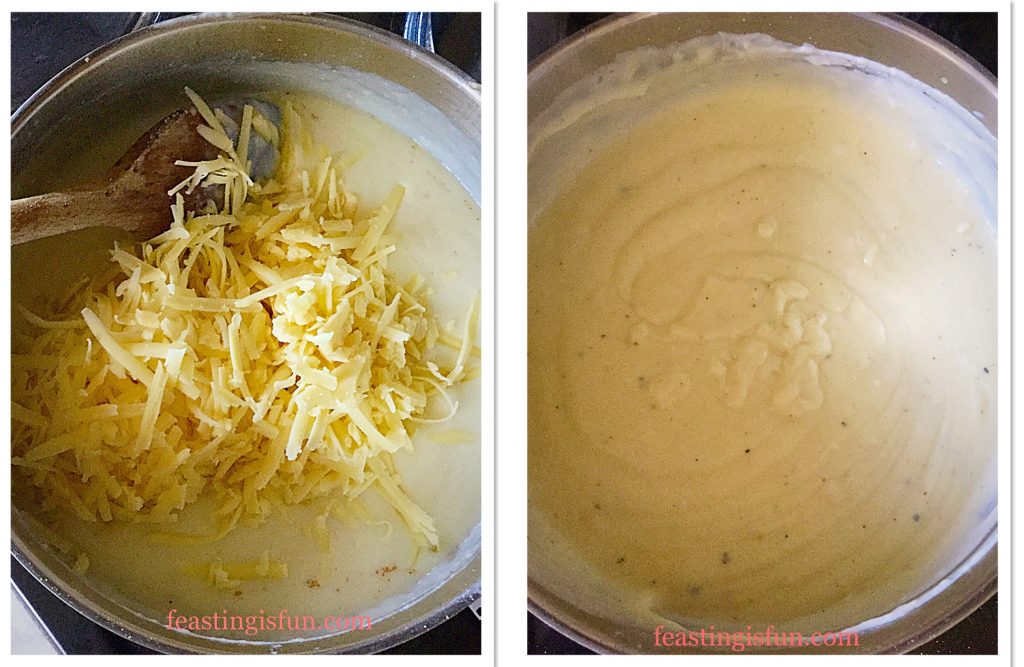
  • After adding all the milk, you will have a smooth, thick-ish white sauce.
FF Homemade Cauliflower Cheese
Showing the stages of making the white sauce.
  • Add the pepper and nutmeg to the bechemel (white sauce) and stir thoroughly. I generally don’t add salt as the cheese tends to lend its saltiness to the final flavour, however, a quick taste check once the cheese has melted will allow you to adjust the seasonings.
  • Take the saucepan off the heat and tip in the grated cheese. Stir until it is melted and you have a smooth cheese sauce.
FF Homemade Cauliflower Cheese
Delicious Cheese Sauce ready for pouring over Cauliflower and baking.

Preparing The Cauliflower And Assembling The Dish For Baking

  • Prepare the cauliflower by cutting off most of the green leaves, breaking into florets, rinsing under a tap a and then steaming for no longer than 5 minutes.
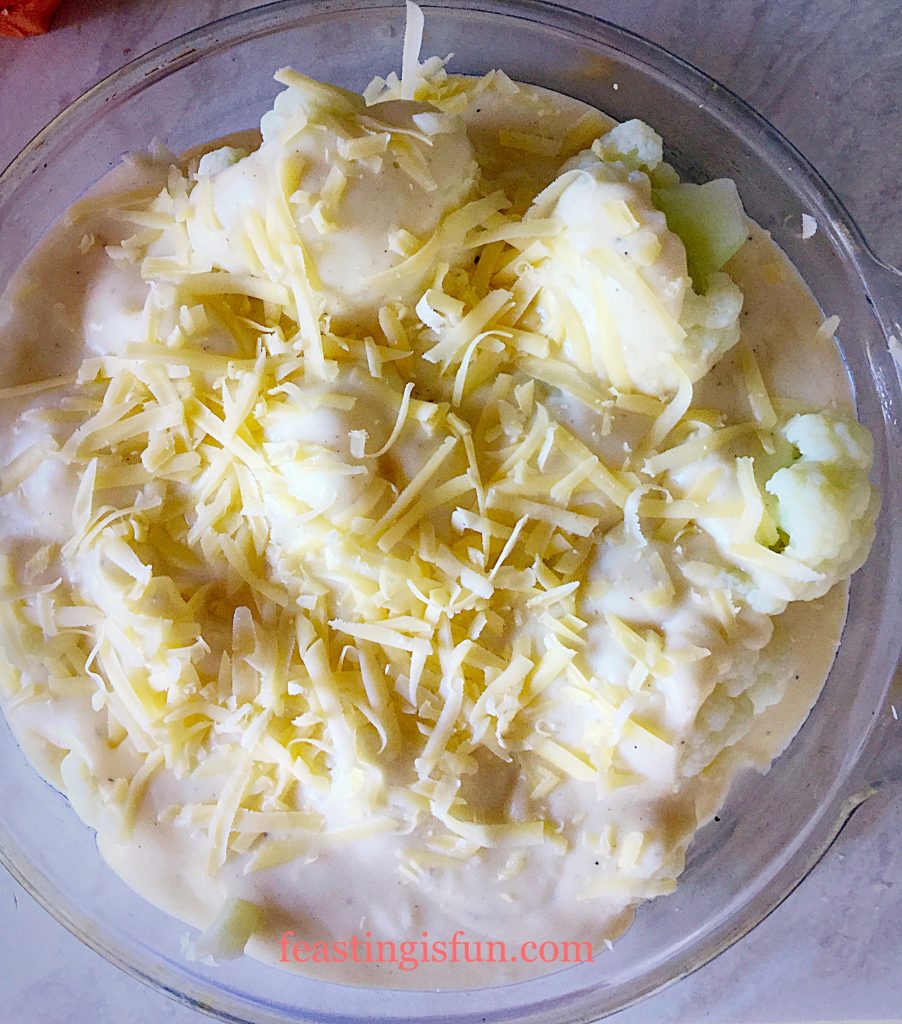
  • Place the steamed cauliflower florets into an oven proof dish and pour over the cheese sauce.
  • Sprinkle over the reserved cheese, this gives the topping extra colour and gooey cheese!
FF Homemade Cauliflower Cheese
Homemade Cauliflower Cheese ready for the oven.
  • When making ahead, allow to cool, cover in tented foil, so that the topping doesn’t stick to it. The dish can be left on the side for a couple of hours. Alternatively place in the fridge, where it will keep for up to 2 days.
  • Bake the Homemade Cauliflower Cheese in an oven, preheated to 200C/180C fan, gas mark 6, 400F, for 30-40 minutes. When the top is golden and bubbling and a fork can pierce the base of a cauliflower floret the dish is baked.
  • Once baked, remove from the oven and serve.
Homemade Cauliflower Cheese

Homemade Cauliflower Cheese also goes well with fish dishes, such as smoked haddock, or any firm, white fish, especially when served with mashed potatoes!

If you have enjoyed this recipe for Homemade Cauliflower Cheese you may also like these:

Leek Colcannon

FF Homemade Cauliflower Cheese
Leek Colcannon.

Perfectly Mashed Potatoes

FF Homemade Cauliflower Cheese
Perfectly Mashed Potatoes

Garlic Rosemary Roast Potatoes

FF Homemade Cauliflower Cheese
Garlic Rosemary Roast Potatoes

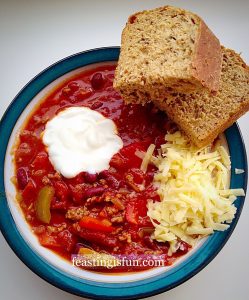
As the nights draw in, I find comfort in warming, hearty food. That isn’t to say I don’t believe in balance, I absolutely do. So, on a day when we indulge in Homemade Cauliflower Cheese, we wouldn’t have dessert. That said we rarely do eat pudding, except perhaps on a Sunday, something I am working on! When it’s hot in the summer, my body craves salads and cold food. Yet as soon as the annual September chill hits the air I long for warming meals like Steak Leek and Ale Pie or Chunky Chilli.

So, whatever you are making, baking and creating in the kitchen, enjoy preparing and sharing your feast.

Sammie xx

No part of this post may be reproduced or duplicated without the written permission of the owner. Please see my Disclosure Policy.

Share
Facebooktwitterpinterestlinkedintumblr

Red Onion Sausage Plait

Share
Facebooktwitterpinterestlinkedintumblr

This week happens to be National Picnic Week and as you’ve probably realised by now, I’m a big fan of outdoor eating. So, my Red Onion Sausage Plait is not only perfect for picnics, it’s also delicious served for dinner too! Great quality sausage meat mixed with red onion marmalade, encased in golden, all butter puff pastry. Utterly delicious.

FF Red Onion Sausage Plait
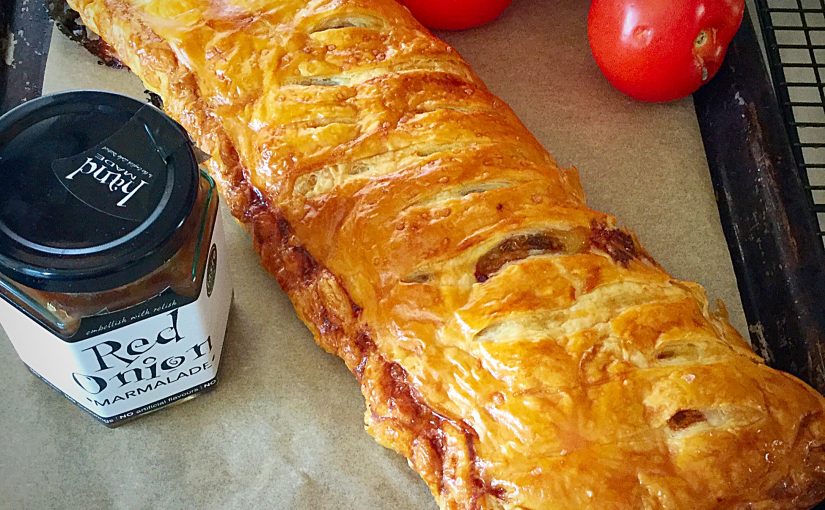
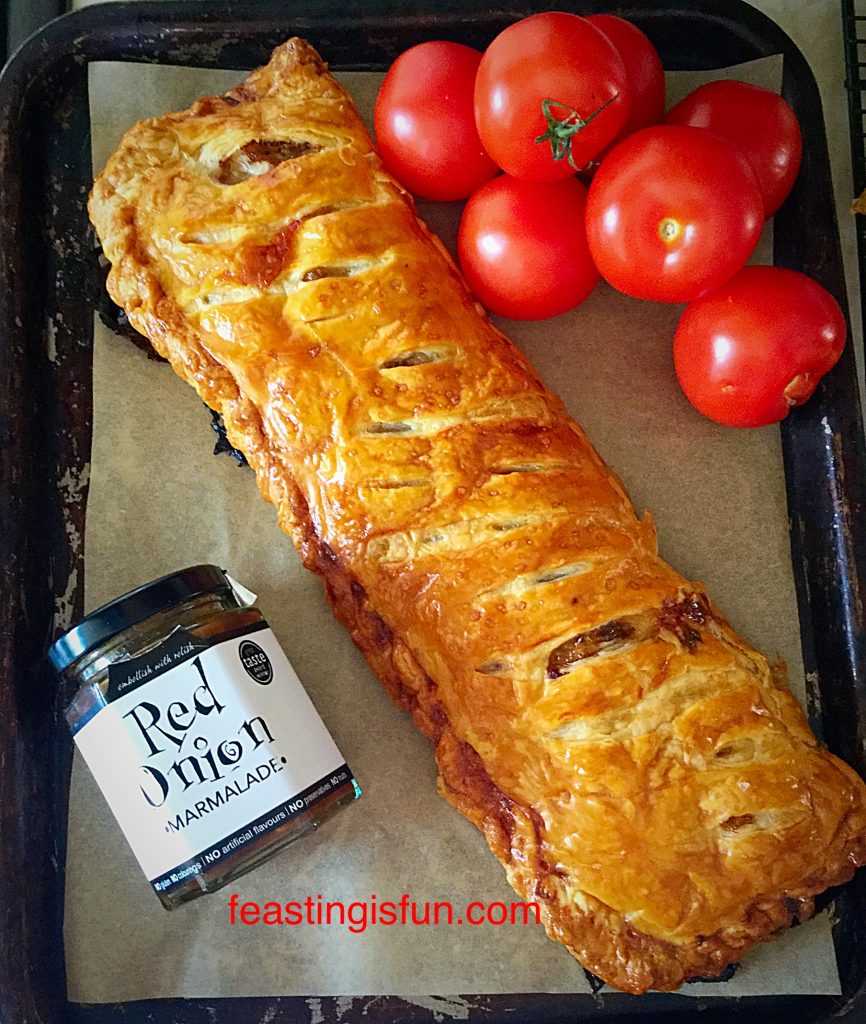
Red Onion Sausage Plait full of flavour and texture.

Using Condiments As Ingredients

The lovely people at Hawkshead Relish sent me some savoury relishes and marmalade to try out. I am a huge chutney fan, everything from jellies, to chutneys, relishes and marmalades. However, with this review, I wanted to use them as ingredients and see just how well they worked being in a dish. While also serving alongside as accompaniments.

I made this Red Onion Sausage Plait twice, as unfortunately I wasn’t able to get good pictures the first time round. Although, nobody in our house complained that I had to make this again. Since we all enjoyed the flavour and added texture from the red onion marmalade that contains raisins and crunchy pine kernels.

FF Red Onion Sausage Plait
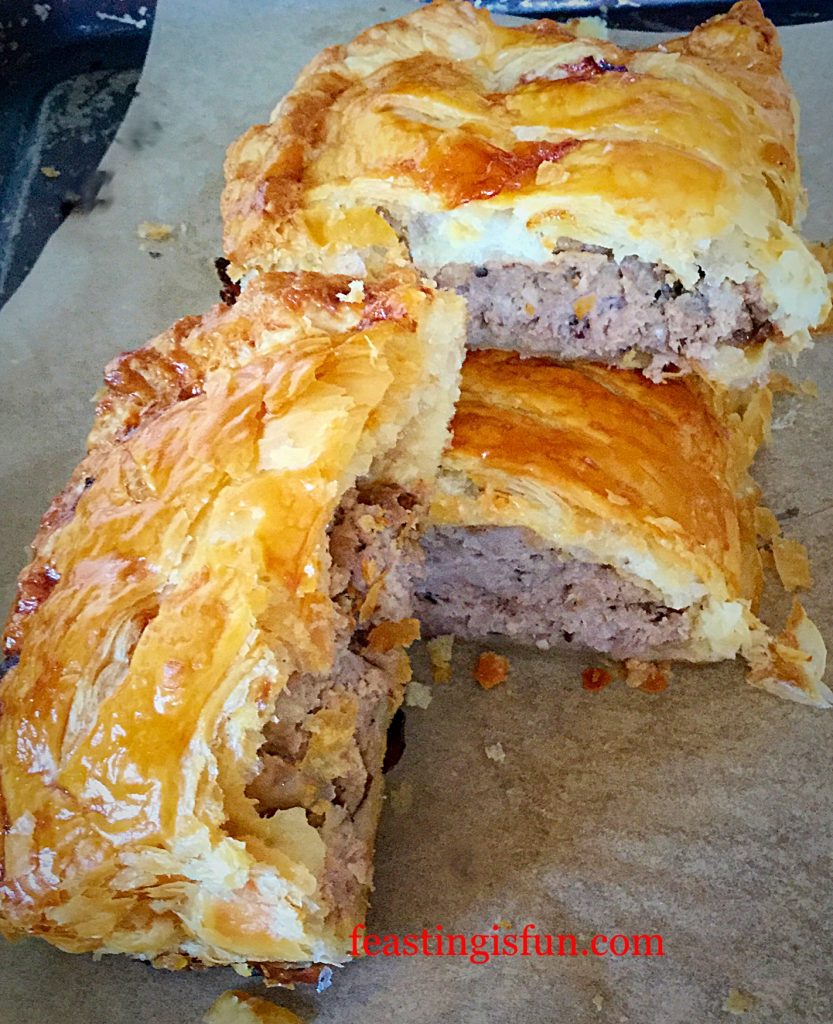
Red Onion Sausage Plait, juicy, crispy with incredible flavour.

So, I set about making another Red Onion Sausage Plait, with great enthusiasm. Because, I love, I mean absolutely, completely, adore this Red Onion Marmalade and I knew this would use the last of it. Still I cheered myself with the fact that it makes such a knockout recipe and that I’d be eating it for dinner!

FF Red Onion Sausage Plait
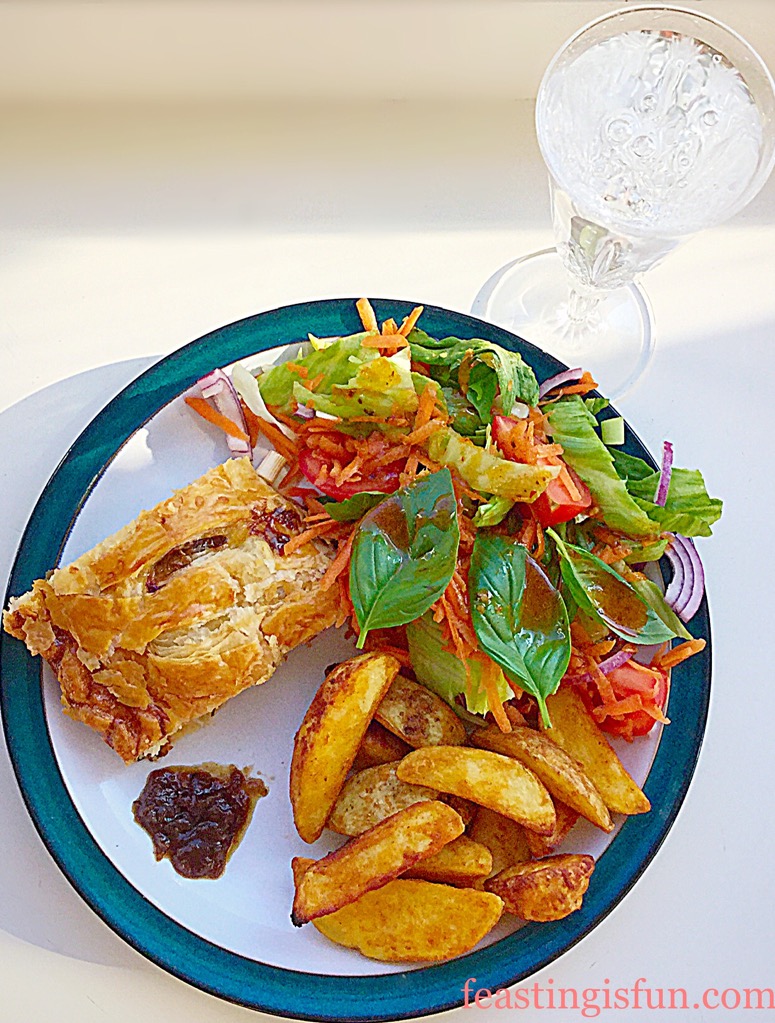
Red Onion Sausage Plait also great as a mid week meal with salad and potato wedges.

Not Only For Picnics!

Warmed and served with a huge pile of salad and some potato wedges that I had in the freezer, this Red Onion Sausage Plait really does make a tasty, weekday meal. Also, it’s easily made ahead, left uncooked, wrapped in cling film and kept in the fridge until dinner time. Since it only takes 40 minutes to cook, which is why, seeing as the oven was already on I whacked in some potato wedges from the freezer.

FF Red Onion Sausage Plait
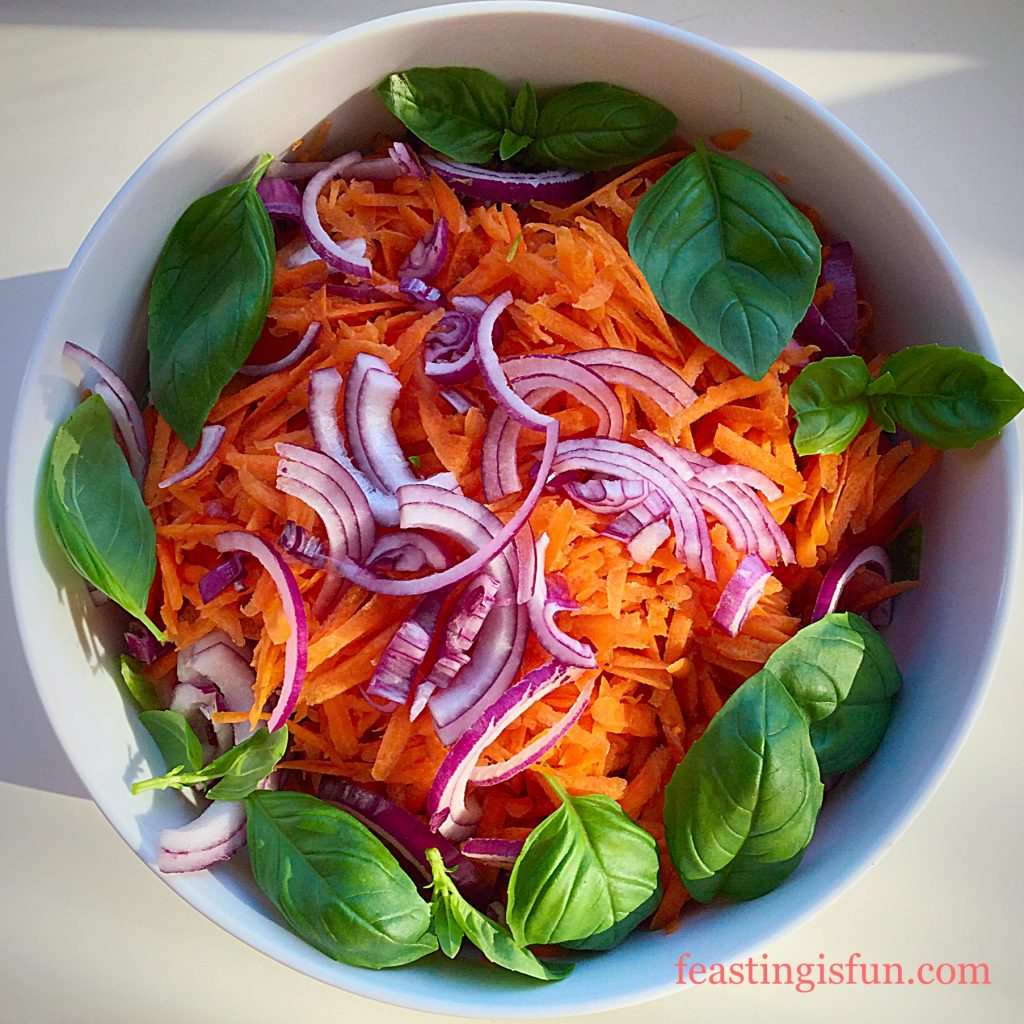
The huge bowl of salad I made to accompany the meal also had thinly sliced red onions in it which echoed the flavours in the sausage plait.

The caramelised onion flavour works so well with the meaty pork sausage. This is definitely a firm, family favourite now and is made frequently. I always look forward to eating this Red Onion Sausage Plait, whether on picnics and for dinner many times in future.

Recipe: Makes one Red Onion Sausage Plait serves 4 – 6 people

450g/1lb Good Quality Pork Sausagemeat – free range or organic for preference

3 heaped tablespoons of Red Onion Marmalade from Hawkshead Relish

320g Ready Rolled All Butter Pastry Sheet – I used JusRoll

1 Medium Free Range Egg

Pinch of Sea Salt – I use Maldon

Making The Sausage Plait

Preheat the oven to 220C/200C fan, gas mark 7, 425F.

  • First of all, line a large baking tray with baking parchment.
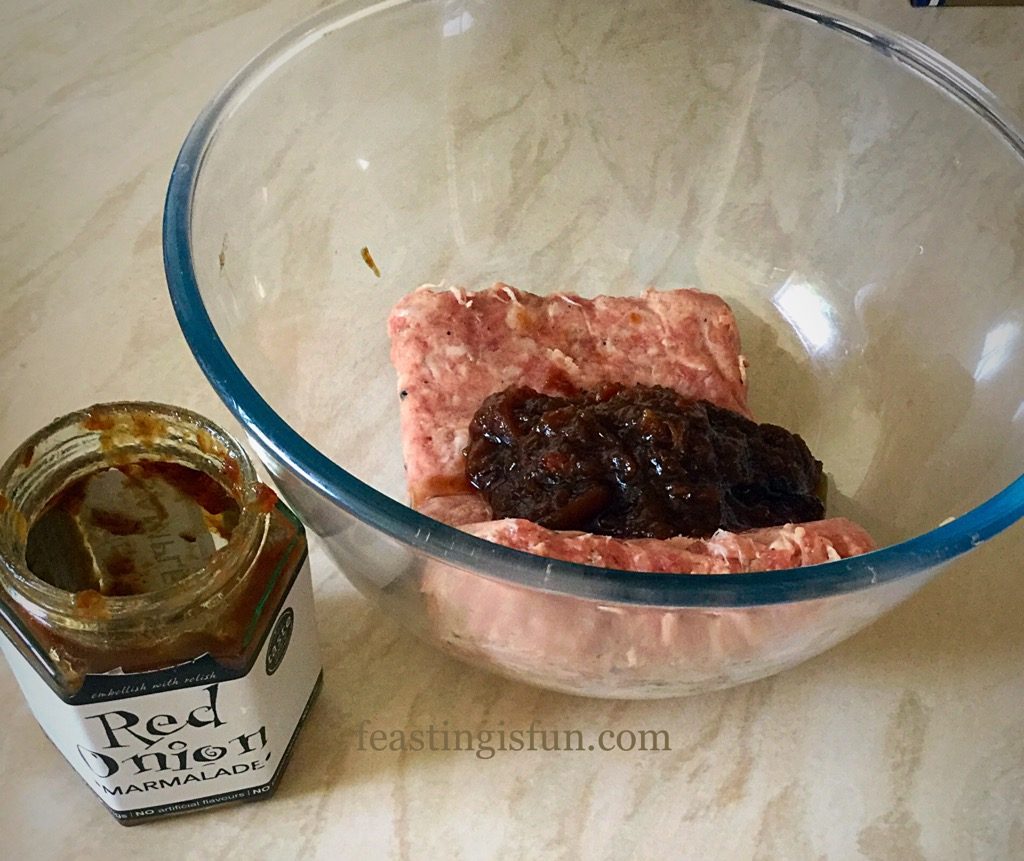
  • Place the sausage meat in a bowl with the red onion marmalade.
FF Red Onion Sausage Plait.
I enjoyed smooshing the mixture together with my hands!
  • Using clean hands smoosh the mixture together, through your fingers, until it is fully combined (a tack I particularly enjoy)! Set to one side and wash your hands.
  • On a clean work top unwrap the pastry sheet.
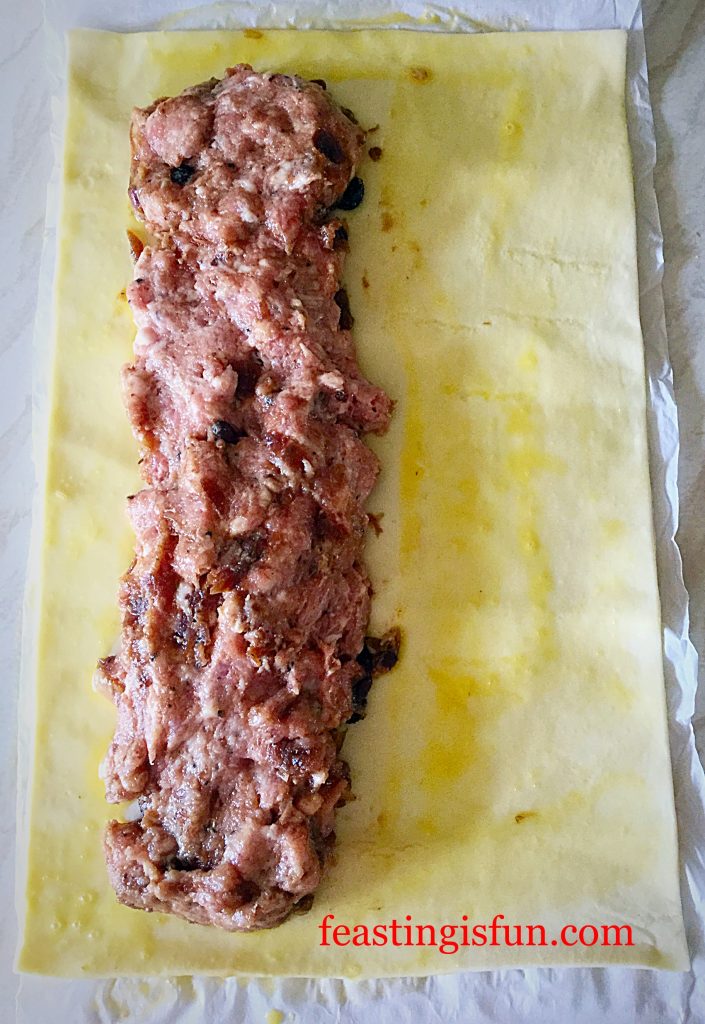
  • Place the sausage meat mixture down one side of the pastry, rather like a huge sausage roll, leaving a gap at each end and the side of at least 2.5cm.
F Red Onion Sausage Plait.
The right side of the pastry will fold over the sausage meat.
  • Crack the egg into a small bowl and whisk with a fork until well mixed. This is known as an egg wash.
  • Dip a pastry brushing into the egg wash and brush all of the visible pastry (not the sausage meat) with egg wash.
  • Bring the right side of the pastry over the sausage meat so that both side edges are together.
  • Crimp with a fork or twist all the pastry layers together, where they overlap to seal them.
  • Transfer the Red Onion Sausage Plait to the baking tray. Mine fits only when placed at an angle!
  • Brush over the entire outside of the sausage plait with egg wash. Finally sprinkle with a little sea salt.
FF Red Onion Sausage Plait
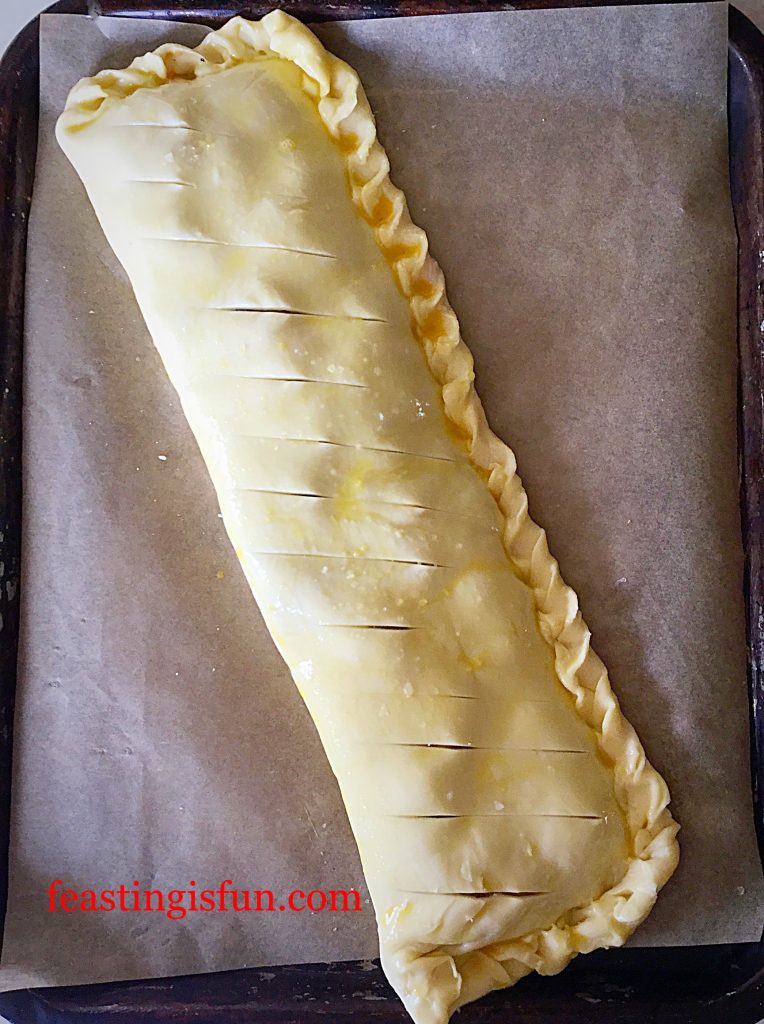
Red onion Sausage Plait with diagonal slits.
  • Using a sharp knife cut light diagonal slits through the pastry. This allows steam to escape and enhances the look of the finished bake.

Baking The Sausage Plait

  • If not baking straight away, wrap the entire tray and sausage plait in cling film and store in the fridge. For best results, bake within 24 hours.
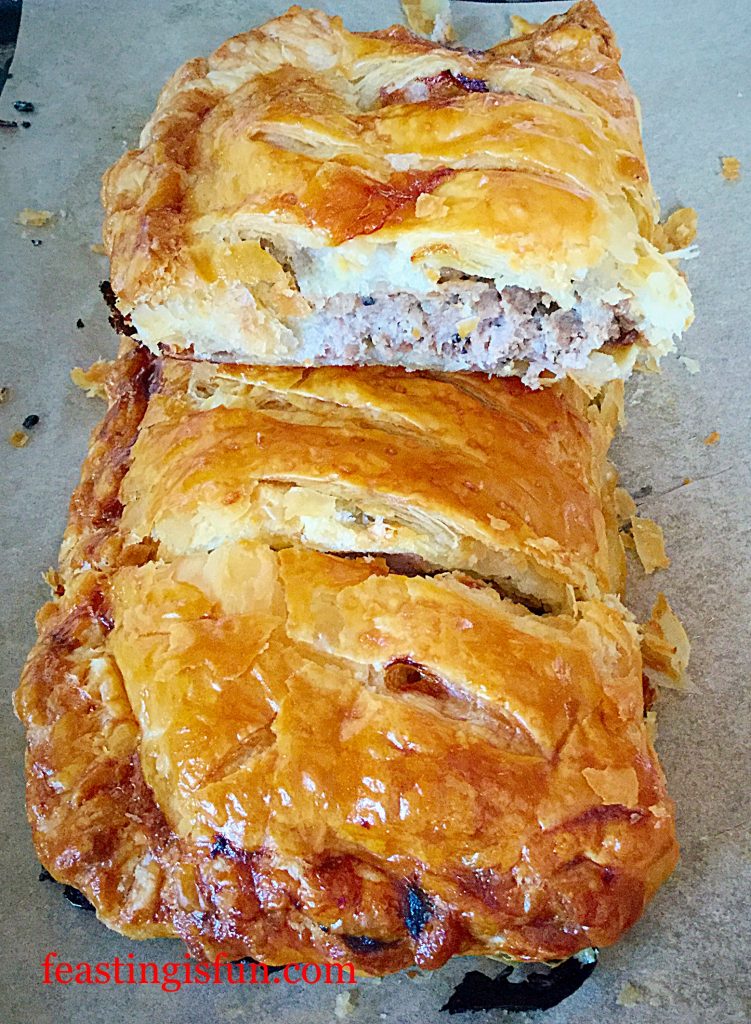
  • When baking immediately, place the baking tray in the middle of a hot, preheated oven and bake for 40-45 minutes. The sausage plait should be a deep golden colour and any juices must run clear. If there is any doubt slice a portion of the plait off of the end and check. There should be absolutely no pinkness to the sausage meat, if there is pop back into the oven for 15 minutes and reduce the heat by 20C.
  • As soon as Red Onion Sausage Plait is baked, remove from the oven and leave to cool slightly on the tray.

To serve, allow the Red Onion Sausage Plait to cool for at least 15 minutes, longer if possible. Slice into portions and serve with salad, or my Crunchy Homemade Coleslaw, new potatoes, or for ease potato wedges. Serving with my Tangy Lemon Potato Salad also compliments the sausage plait well.

FF Red Onion Sausage Plait
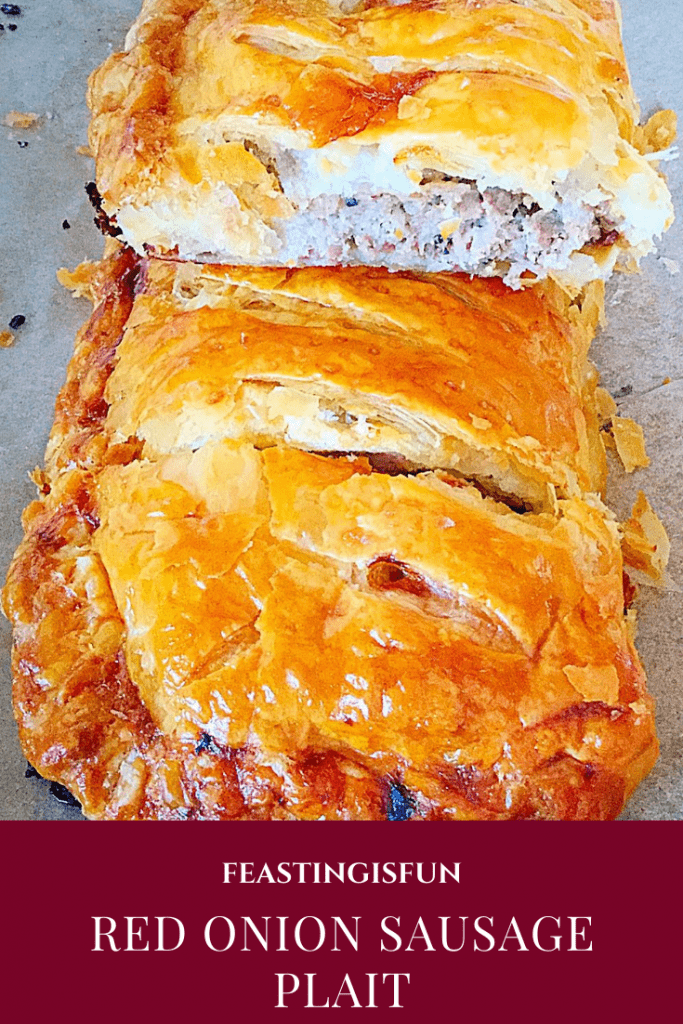
Golden pastry and sausage meat with caremelised red onion.

To store and for packing up for a picnic, allow the sausage plait to cool. Cut into slices, I find a serrated knife is best when it’s cold. Pack the slices into an airtight container, or wrap in cling film. Store in the fridge for up to 3 days.

Delighfully savoury and full of texture, slices of this Red Onion Sausage Plait also make a welcome change to packed lunches!

If you have enjoyed this recipe for Red Onion Sausage Plait then here are some others you may also want to try:

Feta Red Onion Marmalade Quiche

Feta Red Onion Marmalade Quiche

Spicy Sausage Rolls

Spicy Sausage Rolls

Sausage Plait With A Twist

Sausage Plait With A Twist

Using the Red Onion Marmalade as an ingredient, rather than just as a condiment has opened up a whole world full of flavours. I have so many more idea, from pasta dishes to soups, stews and many more.

Do you ever use condiments in your cooking? Let me know in the comments section. I’m always interested to here and learn about new recipes and cooking methods.

So, whatever you are making, baking and creating in your kitchens, have fun preparing and sharing your feast.

Sammie xx

Hawkshead Relish provided me with a sample jar of their red onion marmalade. All views and opinions are my own. All content, recipes and photographs are my own and covered by copyright law of the land. Please see my Disclosure Policy.

Share

Facebooktwitterpinterestlinkedintumblr

Chilli Lime Chicken Kebabs

Share
Facebooktwitterpinterestlinkedintumblr

During warm Summer evenings, sitting in our garden, listening to the birds chatter and chirp, the delicious smell of barbecue often fills the air. Yet I’m never going to be a cheap sausages and cheap burgers girl. Good sausages yes. Burgers that are traceable back to their origin, definitely. For me though, kebabs are the way to go. I made these Chilli Lime Chicken Kebabs last year for our daughters birthday. With a slight change to the recipe, all for the better, I now can show them to you.

FF Chilli Lime Chicken Kebabs
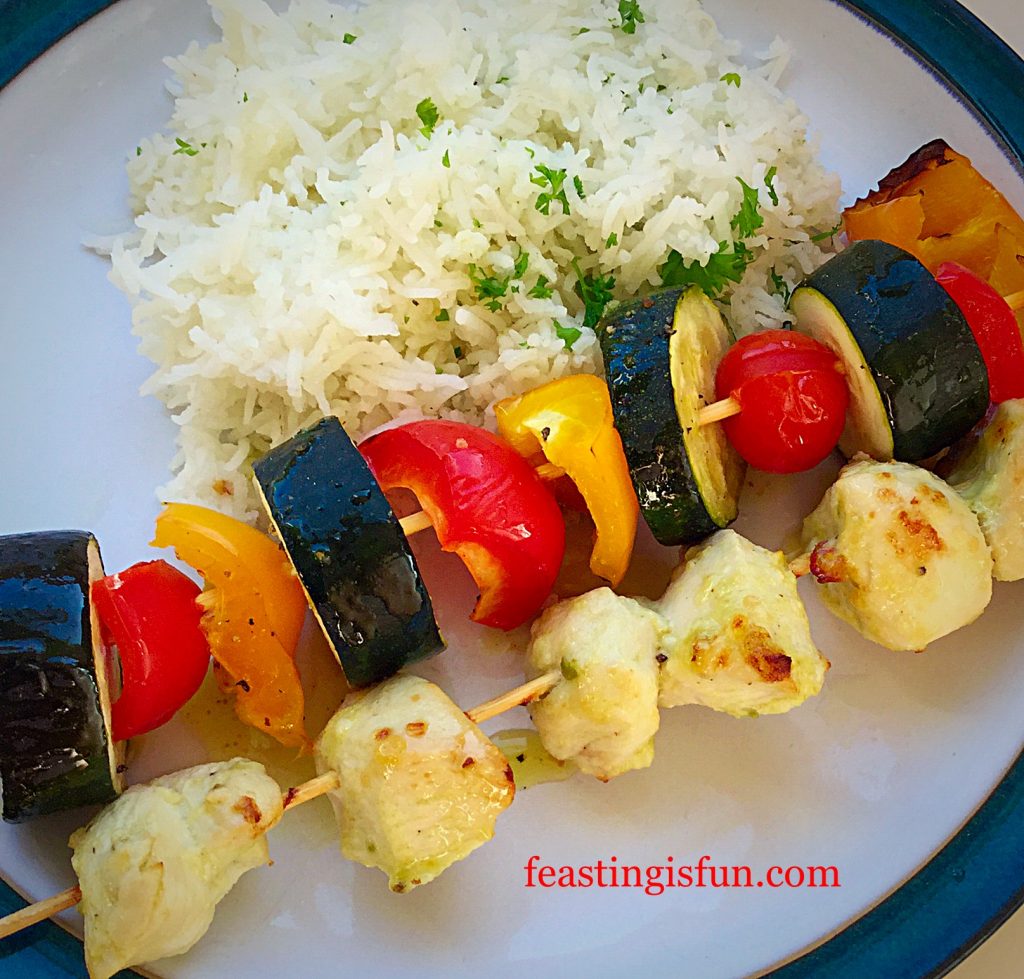
Chilli Lime Chicken Kebabs perfect cooked on the grill or in the oven.

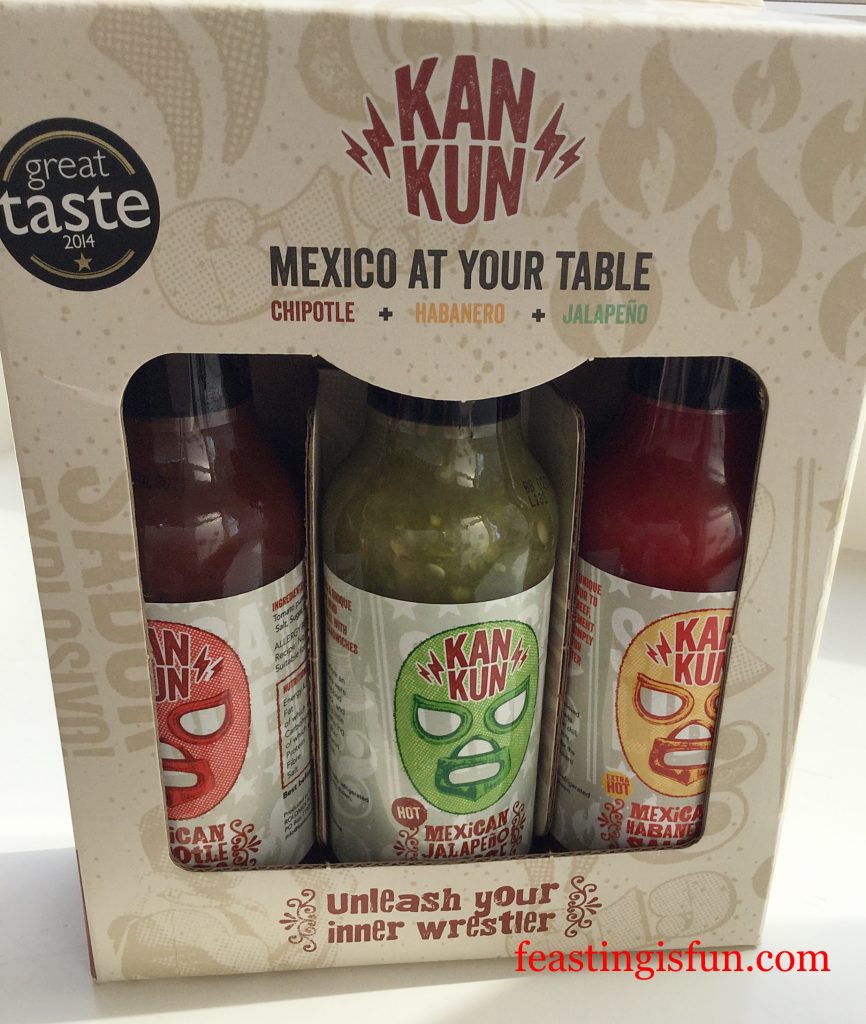
Since I’d been sent some KanKun Mexican Chilli Sauce to try, I was eager to see how the jalapeño chilli sauce would work with the kebabs I had made for last year’s birthday barbecue.

Oh wow. They are so good!

The jalapeño chilli sauce infuses a warmth into the chicken pieces without over powering them with heat. Also the lime and garlic in the marinade infuses the chicken pieces with incredible flavour as well as tenderising them with the lime juice. I love that these Chilli Lime Chicken Kebabs can be both cooked in the oven or on the barbecue. S

FF Chilli Lime Chicken Kebabs
Chilli Lime Chicken Kebabs tasty, tender chicken.

I wasn’t able to grill the on the barbecue, but the smokey, charred, flavour added by grilling them means that I will as soon as possible. Another alternative, maybe when the weather isn’t up to grilling would be to stir fry the chicken. Add in the ingredients from the vegetable kebabs and you have a quick, easy meal.

As our children ate these Chilli Lime Chicken Kebabs with us I didn’t add too much sauce. While you can certainly use it as a condiment if you want to kick the heat up a notch!

FF Chilli Lime Chicken Kebabs
KanKun Mexican Chilli Sauce range – the jalapeño sauce used for this recipe is in the middle.

I love chilli’s and am, at present growing some from seed. As soon as they are big enough I will then be transfer them  to the front garden. Since that is the driest bed and gets the most sun. Chilli’s like to be treated a bit mean whilst they are growing, although I add the odd splash of tomato food, once the chilli’s are forming does them the world of good.

For those of you who cannot or do not want to grow your own chilli’s, KanKun have a range of 3 bottles of chilli sauce – Chipotle, Habanero and Jalapeño. Each can be used in cooking (keep an eye out for my upcoming Chipotle Pulled Pork Fajita’s), or as a condiment. Just make sure that any sauce that has been in contact with raw meat is disposed of and not reused.

FF Chilli Lime Chicken Kebabs
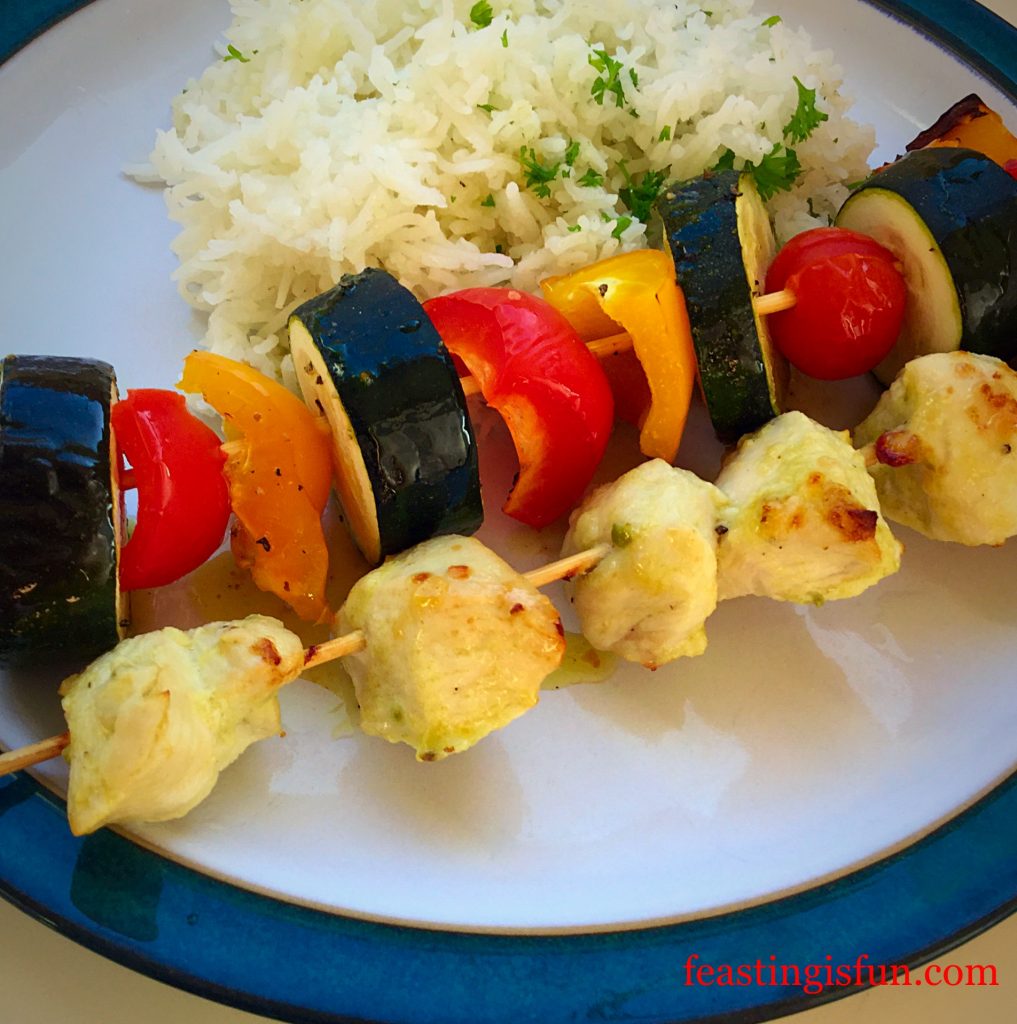
Chilli Lime Chicken Kebabs delicious served alongside vegetable kebabs.

Recipe: Makes 5 Chilli Lime Chicken Kebabs

650g/1.5lb Skinned Boneless Chicken Breast – preferably Free Range or Organic – I buy ours from Graig Farm

2tbsp Olive Oil

Juice of 1 Lime

1tbsp Mexican Jalapeño Sauce from KanKun Sauce

2 Cloves of Garlic – crushed or minced

1 Small Chilli or 1/2 Jalapeño Chilli –  sliced (seeds removed if preferred)

1/4tsp Sea Salt – I use Maldon

1/4tsp Freshly Ground Black Pepper

1 large resealable plastic food bag.

Method: Preheat the oven to 200C/180C fan, gas mark 6 or cook over a medium hot barbecue grill.

Note – Especially when handling raw meat, including chicken, ensure all utensils, work tops and hands are thoroughly washed before and after use.

  • First of all open the resealable bag and turn down the sides. This makes it easier to add things to the bag.
  • Pour in the olive oil, jalapeño sauce, juice of 1 lime and then add the crushed garlic, sliced chilli, salt and pepper.
  • Cut the chicken breast into 3cm chunks and add to the bag. I actually use sharp kitchen scissors to snip the chicken straight into the bag.
  • Seal the bag and with clean hands smoosh the chicken about in the bag, ensuring every piece is covered in the marinade. I have to admit to this being something I always enjoy, a bit of smooshing!
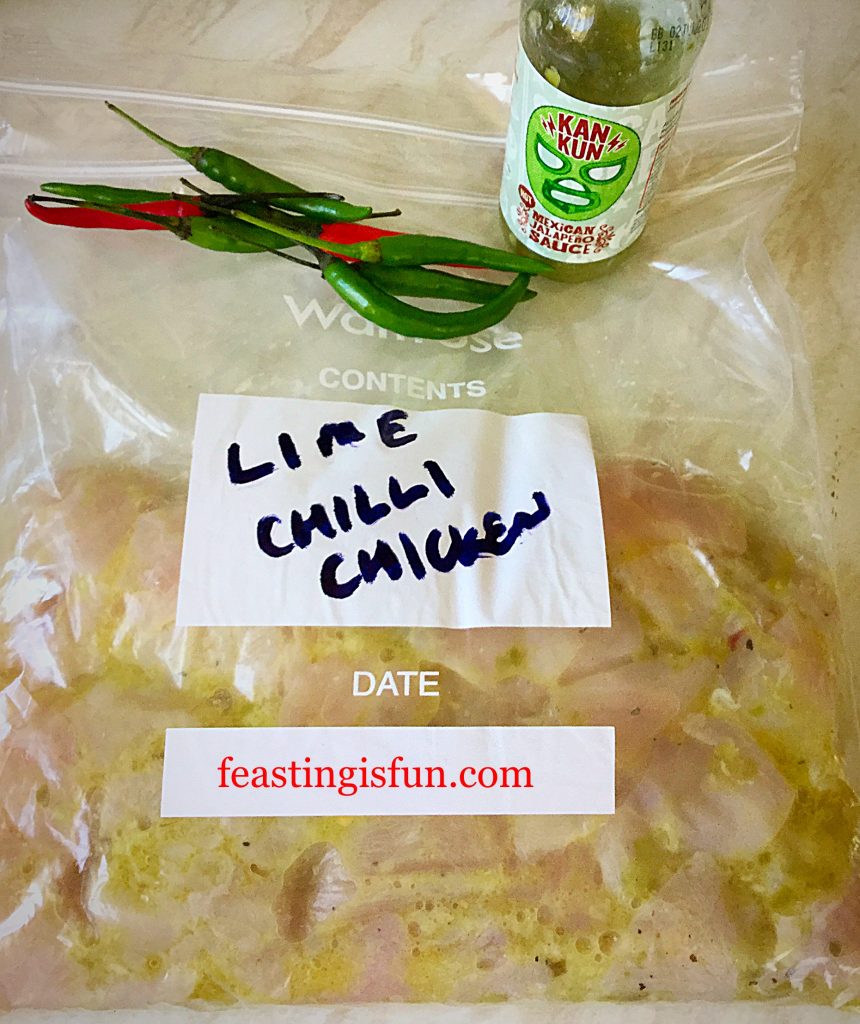
  • Label the bag and place in the bottom of the fridge for 30 minutes to 2 hours. Alternatively, prepare at the start of the day, before work and have a smile on your face knowing dinner is sorted when you finally return home!
FF Chilli Lime Chicken Kebabs
Label the bag so that others are aware that it contains raw meat.
  • While the chicken is marinating, soak the wooden skewers in cold water – so they don’t catch fire on the barbecue!
  • Cover a large baking tray with aluminium foil – this really helps with the clean up process.
  • Carefully thread 5-7 pieces of chicken on each skewer. Since the chicken takes the same amount of time to cook as the vegetable kebabs, I also add sliced courgette, cherry tomatoes and red/yellow peppers to separate skewers. Alternatively I would place whole jalapeños, chunks of red onion or shallots on to skewers as well.
  • Place the Chilli Lime Chicken Kebabs on to the foil covered tray and pour over any excess marinade.
  • Cook in the top of the oven for 30 minutes, turning halfway through the cooking time.
  • If grilling on the barbecue these Chilli Lime Chicken Kebabs should take no longer than 20 minutes on a medium/hot barbeque grill, turing halfway through cooking.
  • To check if the chicken is cooked all the way through, slide off a thicker chunk and cut in half – there should not be any pink colour, the chicken should be opaque all the way through.
  • As soon as the kebabs are cooked remove them from the oven/barbecue.
FF FF Chilli Lime Chicken Kebabs
Chilli Lime Chicken Kebabs beautifully cooked in the oven.

Serve the Chilli Lime Chicken Kebabs in warmed pitta bread with fresh salad and extra Jalapeño Sauce, or as I have done, with herb basmati rice and vegetable kebabs.

However you serve these delicious kebabs they are sure to be thoroughly enjoyed. The lime, garlic and jalapeño chilli give them a warming, fresh, vibrant flavour. For real chilli fans, serve with extra slices of jalapeño chilli’s to up the heat factor.

While I love the heat that chilli imparts to a dish, I never want to compromise on flavour. This Mexican Jalapeño Chilli Sauce is so delicious and perfectly blends with the other flavours in these Chilli Lime Chicken Kebabs.

FF Chilli Lime Chicken Kebabs
Chilli Lime Chicken Kebabs the perfect feel good meal.

If you like to add a little heat to your meals like me, try adding a dash or two of KanKun Mexican Jalapeño Sauce!

If you have enjoyed this recipe for Chilli Lime Chicken Kebabs here are some others you may like:

Easy Tex Mex Chicken

FF Chilli Lime Chicken Kebabs
Easy Tex Mex Chicken perfect to make ahead.

Chunky Chilli

FF Chilli Lime Chicken Kebabs
Chunky Chilli perfect for colder days.

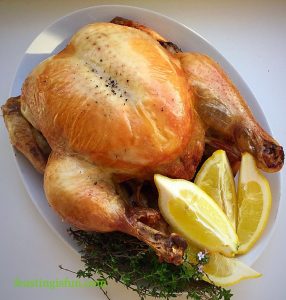
Lemon Thyme Roast Chicken

FF Chilli Lime Chicken Kebabs
Lemon Thyme Roast Chicken spice up your leftovers with some KanKun Sauce!

I love the Summer months. Having the back door open, sunlight streaming in through open windows, longer daylight hours. Let’s all make the most of this Summer. Eat outdoors, dust off the BBQ, invite friends and family round, for feasting, fun and the obligatory (in our house) water fight in the garden.

Let us all enjoy the warmth of the sun, good company, great food and having fun.

Sammie xx

KanKun Sauce sent me a pack of three of their sauces to try. All content, recipes, photographs, views and opinions are my own. I was not paid for this post. Please see my Disclosure Policy.


Share

Facebooktwitterpinterestlinkedintumblr

Strawberry Eton Mess

Share
Facebooktwitterpinterestlinkedintumblr

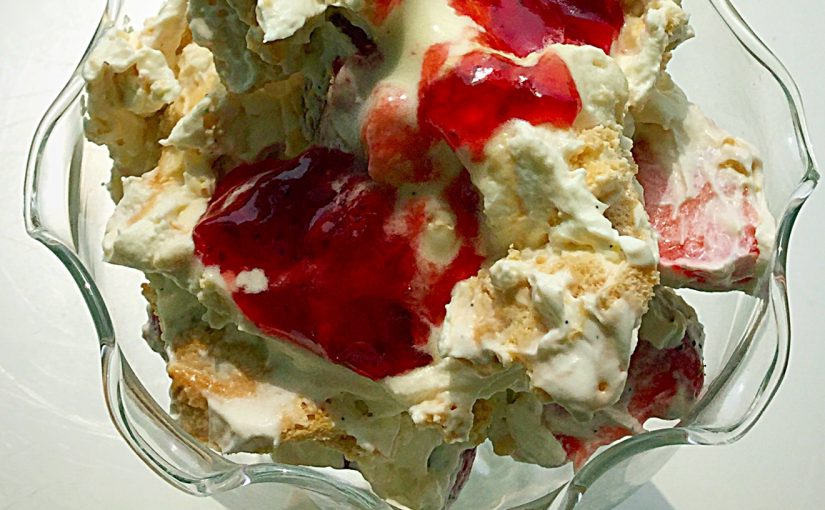
Oh how I love summer fruit. Ruby red strawberries, crimson through to black cherries, tart yet sweet raspberries and the array of different currents. I am definitely a soft fruit fan and love to eat them freshly picked, or use them in delightful, dessert recipes. This Strawberry Eton Mess is a classic English dessert, that is best made with fresh, local strawberries.

FF Strawberry Eton Mess
Strawberry Eton Mess a delicious trio of ingredients.

While homemade pavlova provides a crisp and marshmallow like texture that I’ve enveloped in lightly whipped cream, with sweet luscious strawberries.

FF Strawberry Eton Mess
Strawberry Eton Mess the perfect make ahead dessert.

Since this Strawberry Eton Mess is so easy to assemble, it is also brilliant as a make ahead dessert. The pavlova can be made the same day, or even the day before, strawberries can be hulled, quartered and left covered in a bowl and the cream takes only a couple of minutes to whisk by hand.

Finally, all of the ingredients can be assembled prior to serving, for a stress free delectable dessert!

FF Strawberry Eton MessStrawberry Eton Mess a classic English summer dessert.

True to my word, I am adding more desserts to Feasting is Fun. My family are loving the new-ish aspect to my blog!!

This Strawberry Eton Mess is probably one of my favourite desserts. The differing textures within the pavlova and the fresh local strawberries really make this a stunning dish. As with all recipes, especially those that have few ingredients, it really is worth buying the best that you can afford. Or in the case of this dessert, taking the time to make your own pavlova.

I know ready made meringues are easily available in supermarkets, they won’t give the marshmallow inner softness that a homemade pavlova yields. If you make your own ice cream like my  Strawberry Ripple Ice Cream then you will be left with 4 eggs whites. The exact amount needed for this recipe.

FF Strawberry Eton Mess
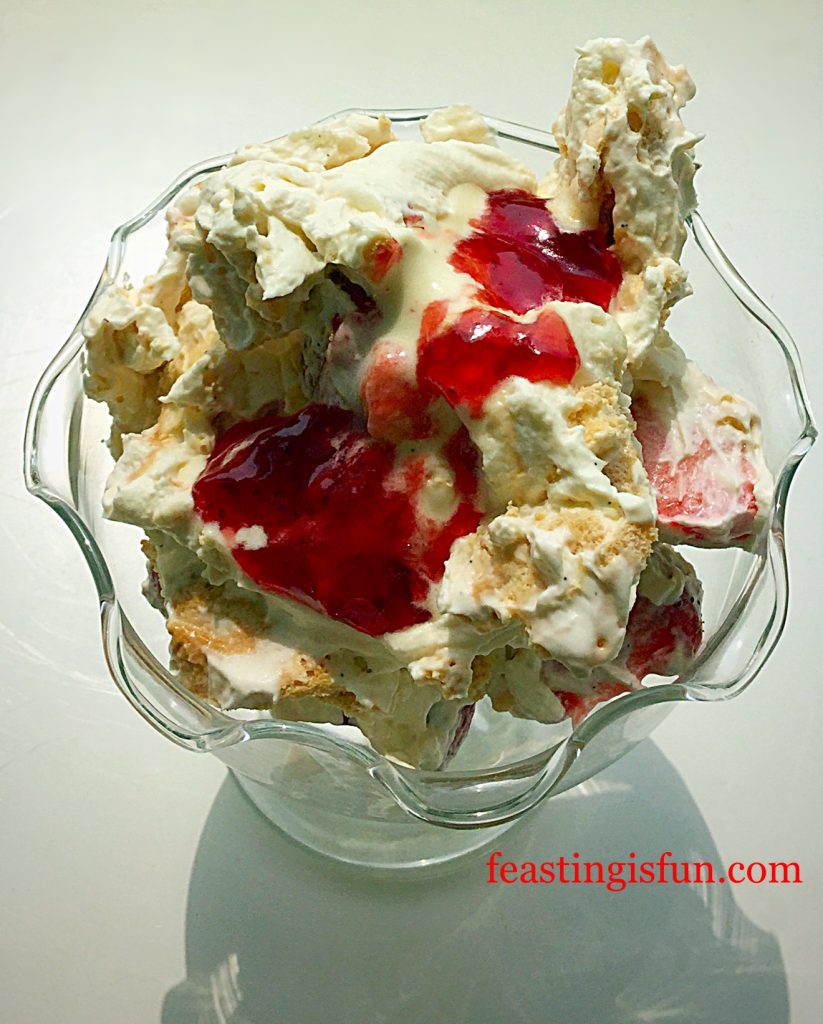
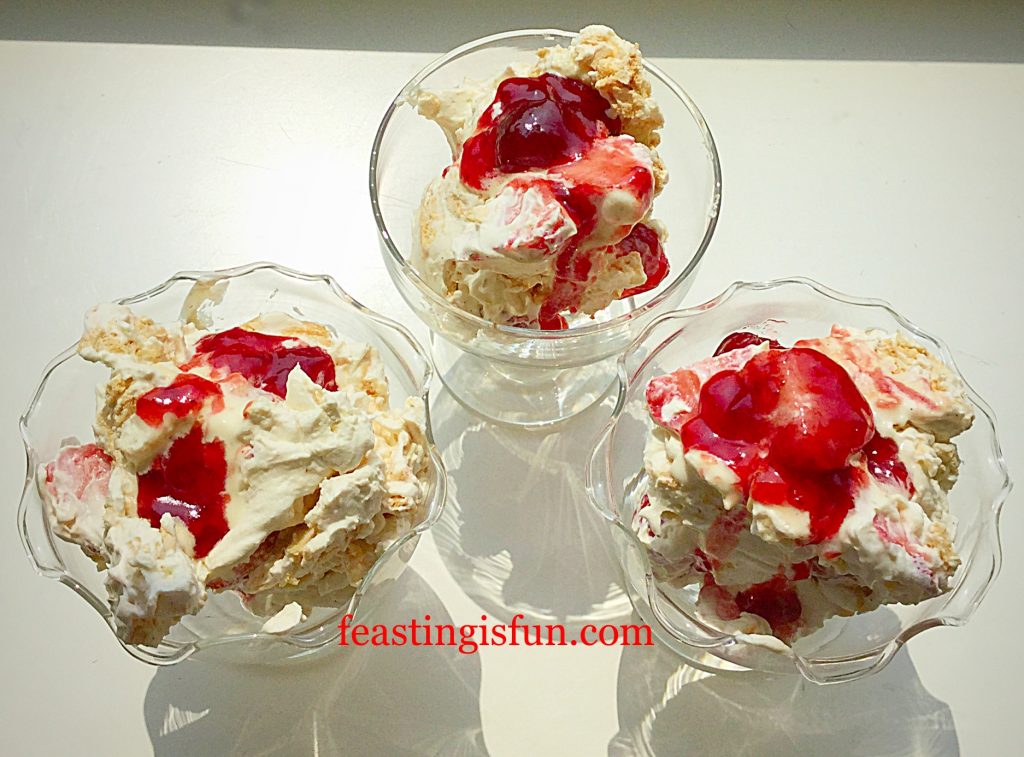
Strawberry Eton Mess topped with a drizzle of strawberry jam.

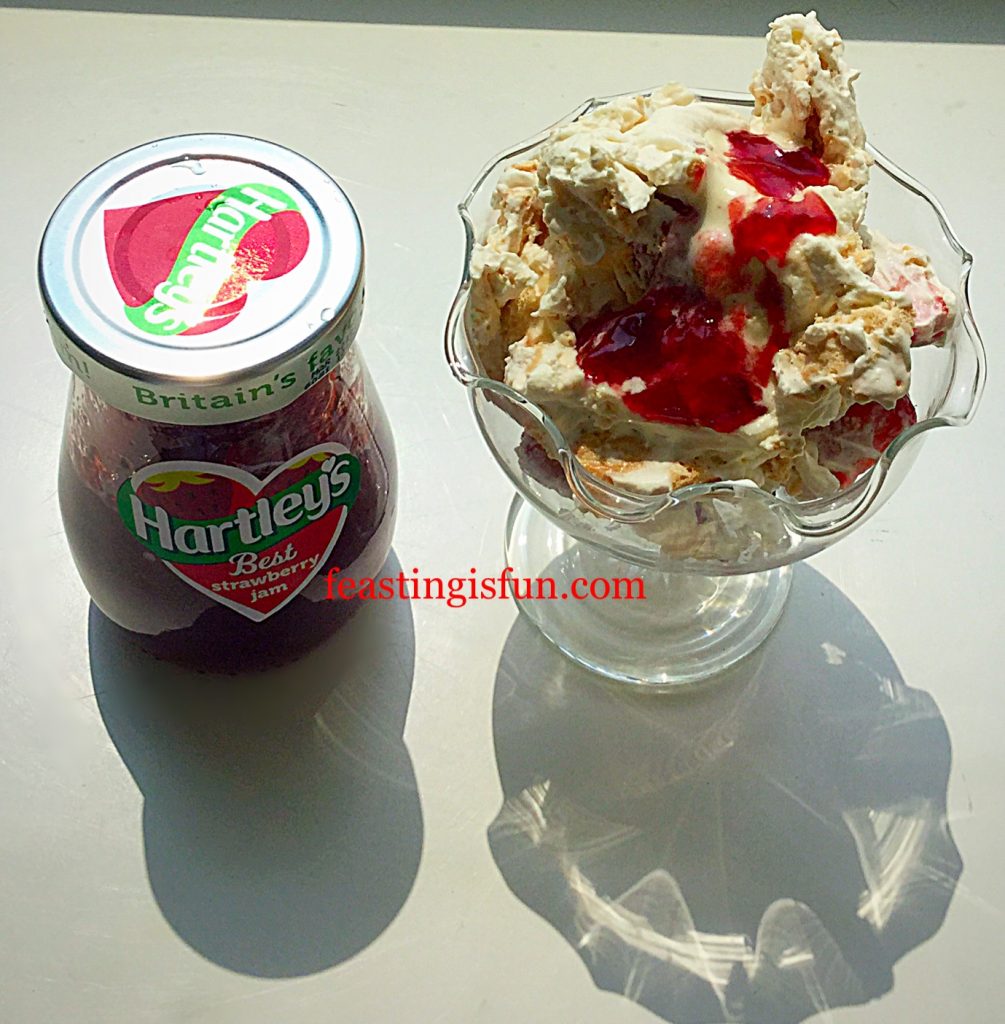
I was fortunate to win some Hartleys strawberry jam on Twitter. Warmed slightly, so that it becomes a sauce, it adds the perfect finishing touch to this dessert. The bright red colour contrasts beautifully with the pale cream meringue and it lends an extra strawberry hit as you take your first mouthful.

Recipe: Strawberry Eton Mess serves 6

For the pavlova:

4 Large Egg Whites – preferably free range or organic

150g/5oz – 1 US Cup Icing Sugar

2tsp Corn Flour – also known as corn starch

1tsp White Wine or Cider Vinegar

1/2tsp Vanilla Extract – I use –Nielsen-Massey

For the Strawberry Eton Mess:

400g/ Fresh British Strawberries

300ml Double Cream

1tsp Vanilla Bean Paste – again I use Nielsen-Massey

1tbsp Caster Sugar

1tbsp Strawberry Jam – I used Hartley’s Best Strawberry Jam – warm slightly before drizzling onto the Strawberry Eton Mess

Method: Preheat the oven to 200C/180C fan, gas mark 6

  • First of all line a large baking tray with baking parchment that has a 20cm circle, drawn in pencil, on the underside.
  • Into a spotlessly clean, large bowl place the egg whites.
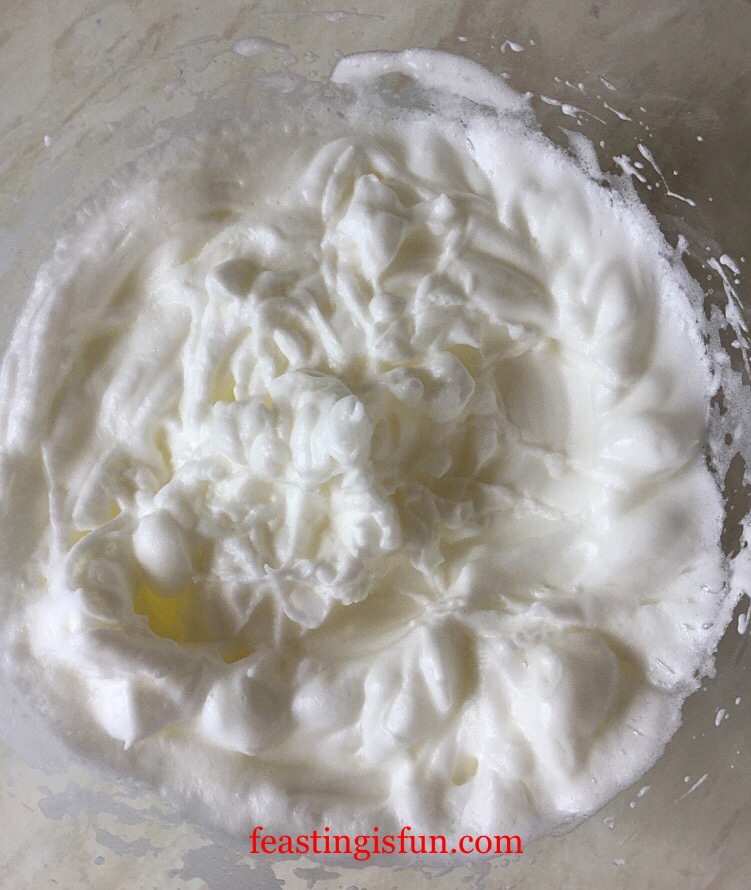
  • Whisk until the egg white hold a stiff peak.
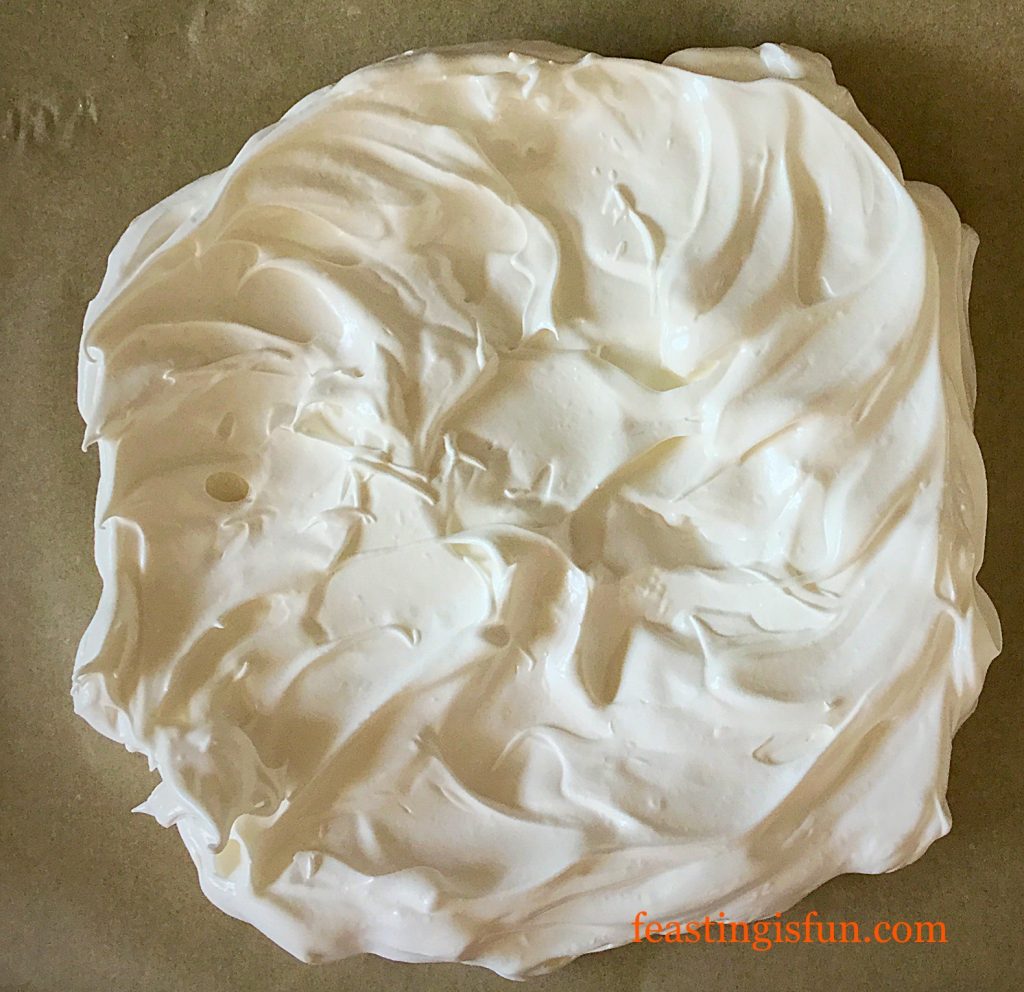
FF Strawberry Eton Mess
The meringue peaks stand proud.
  • While whisking on a medium speed gradually add the sugar. Continue whisking until the meringue is glossy and shiny.
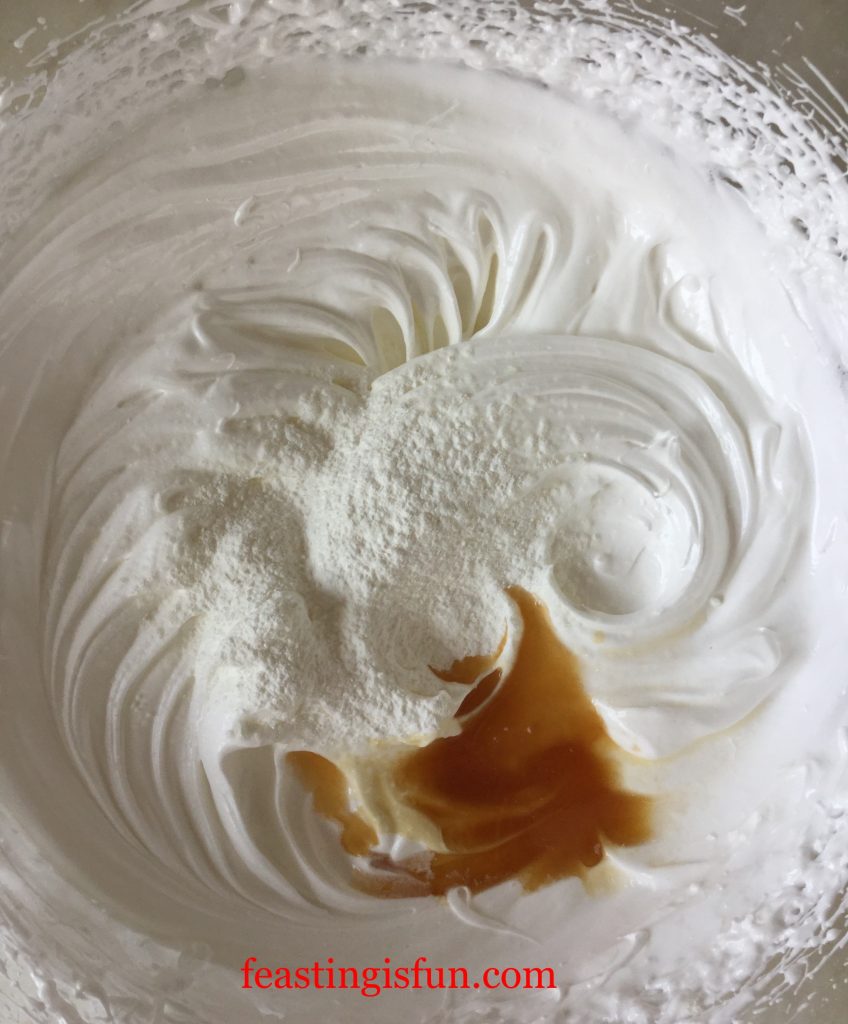
  • Sift in the cornflour and add the vanilla and vinegar.
FF Strawberry Eton Mess
Shiny, glossy meringue, ready to have the extra ingredients folded in.
  • Using a large metal spoon gently fold in the added ingredients into the meringue, turning the bowl until they are fully incorporated.
  • Spoon the meringue on to the baking parchment, keeping within the circle marked on the reverse.
  • Spread the meringue out so that it forms a circle and slightly build up the sides so that they are a little higher than the centre.
FF Strawberry Eton Mess
This pavlova is ready for the oven.
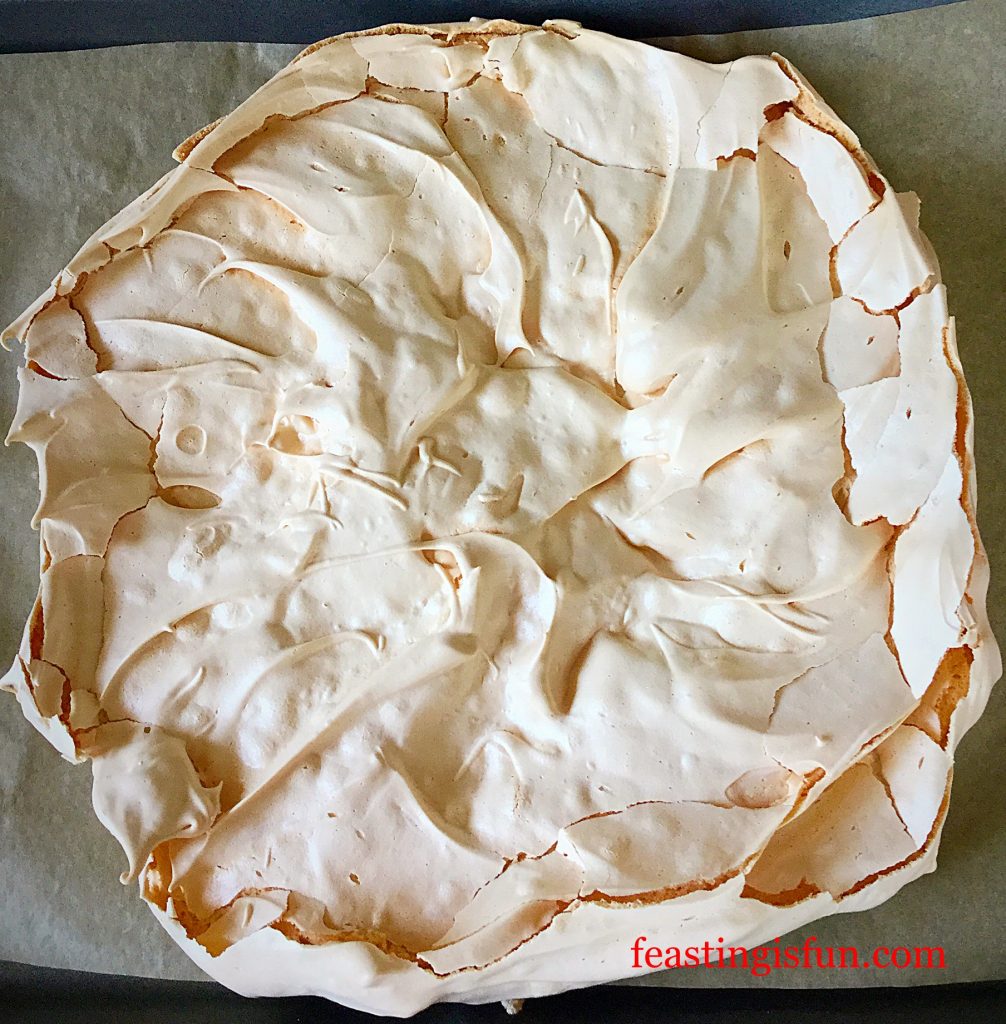
  • Place the pavlova into the centre of the oven and immediately turn the temperature down to 140C/120C fan, gas mark 1.
  • Bake for 1 and 1/4 hours. Then turn off the oven and leave the pavlova to cool inside the oven with the door very slightly ajar.
  • Once cooled removed the pavlova from the oven.
FF Strawberry Eton Mess
The cooked pavlova.
  • Cover the pavlova and baking tray in cling film until ready to use.

Assembling the Strawberry Eton Mess:

  • Hull and cut the strawberries into halves or quarters, depending on their size.
  • Into a large bowl add the cream, vanilla bean paste and caster sugar.
  • Whip the cream until it thickens, but is still floppy – not stiff.
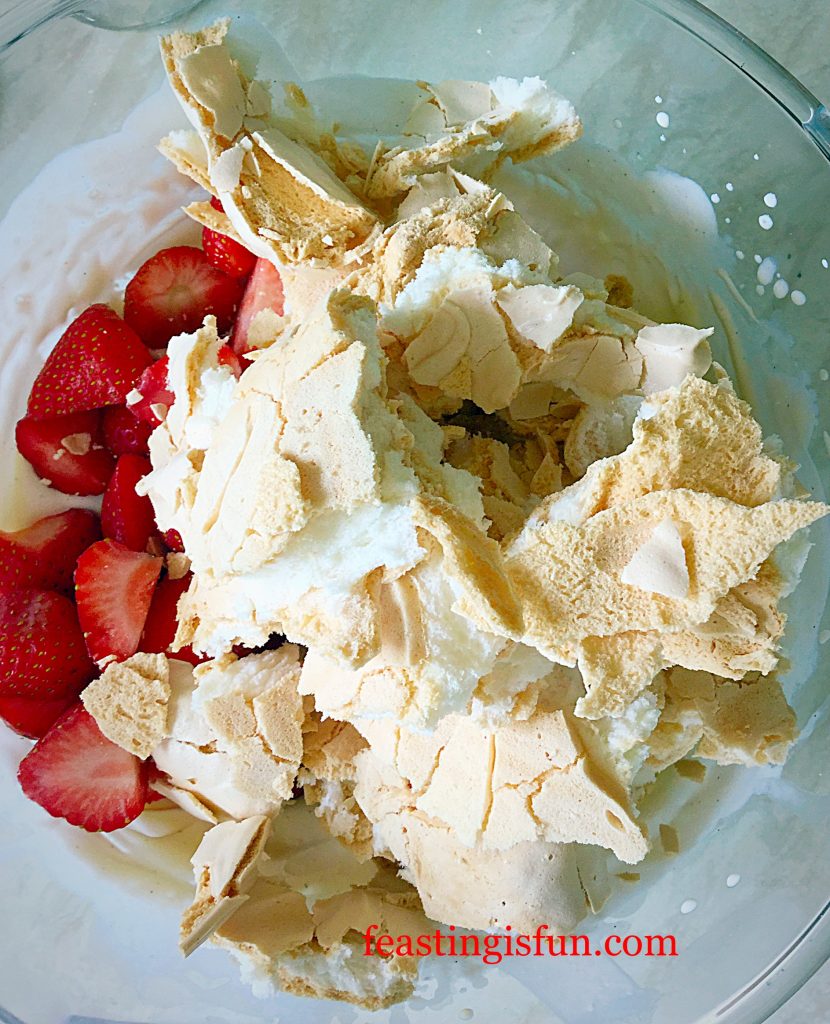
  • Add the strawberries, break the pavlova up into bite size chunks and add those too.
FF Strawberry Eton Mess
Strawberry Eton Mess you can see the marshmallow insides of the pavlova.
  • Fold all the ingredients together with a large metal spoon.
  • Serve in pretty glass bowls with a drizzle of slightly warmed strawberry jam.
FF Strawberry Eton Mess
Strawberry Eton Mess serve with a spoon and a smile.

Because this is such an easy to assemble dessert, with a little preparation beforehand, you too can sit down and enjoy eating this with family, friends, or whoever you have invited round.

Also, if you wanted to up this Strawberry Eton Mess to the next level, a drizzle of my Boozy Berry Sauce, served cold, on top would be a fantastic idea! That’s one for the adults though.

Strawberries and cream are such a classic combination and here, in this dessert, they are lifted by the presence of amazing, homemade pavlova.

Tip: The pavlova itself can be covered in whipped cream and tart berries (passionfruit is also exceptionally good). One recipe two desserts!

If you have enjoyed the recipe for this Strawberry Eton Mess here are a few others you might like:

Lemony Strawberry Pavlova

FF Straw Eton Mess
Delicious Lemon Pavlova slathered in cream, decorated with strawberries and finished with a limoncello drizzle.

Raspberry Chocolate Ice Cream Sundae

FF Strawberry Eton Mess
Vanilla ice cream layered with chocolate meringue and unbelievably good raspberry sauce.

Chocolate Brownie Raspberry Cheesecake

FF Strawberry Eton Mess
Light Raspberry Cheesecake on a Chocolate Brownie base – so good.

Do you enjoy desserts?

I hope you’ve enjoyed this post and have been encouraged to make and bake a pavlova. It doesn’t matter if they sink, or crack as it can all be covered with cream and fruit, or crumbled into the best Strawberry Eton Mess you have ever eaten!

Have fun making and baking in your kitchens. Keep the photos and comments coming, I’d especially like to see ones of you sharing your delicious feasts?

Sammie xx

This is not a sponsored post, the jam was won in a competition on Twitter.

Share
Facebooktwitterpinterestlinkedintumblr

Garlic Cheese Bombs

Share
Facebooktwitterpinterestlinkedintumblr

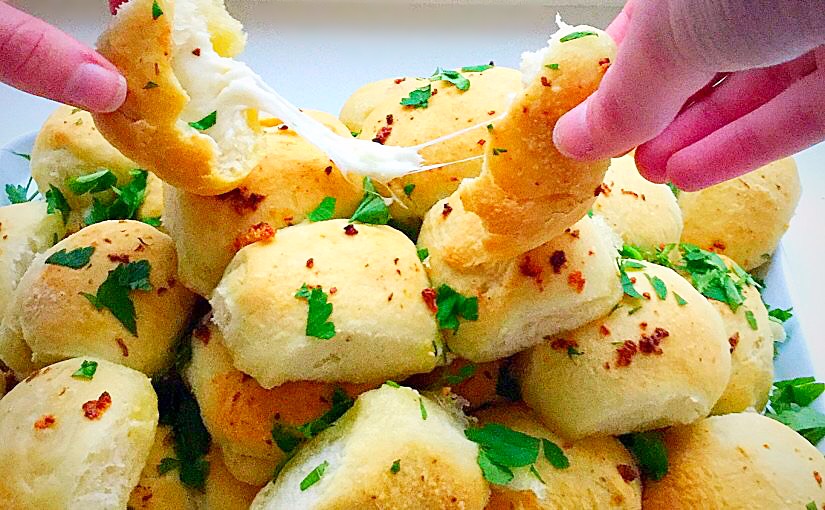
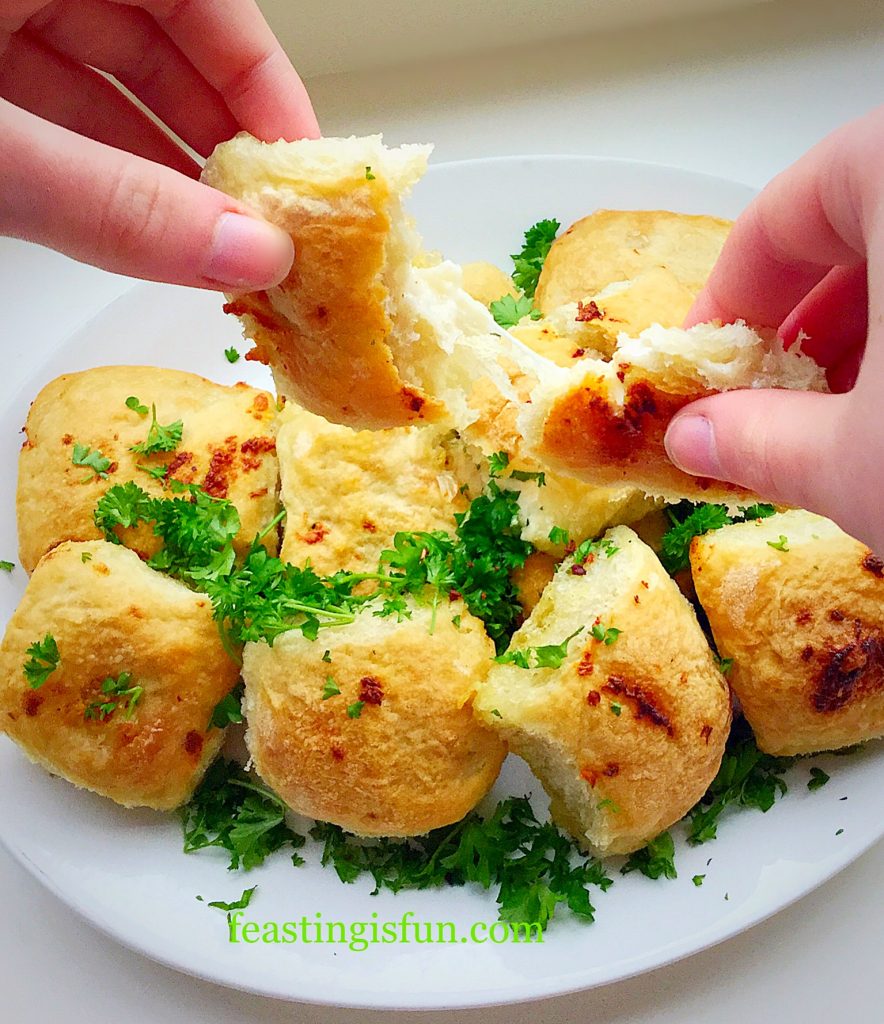
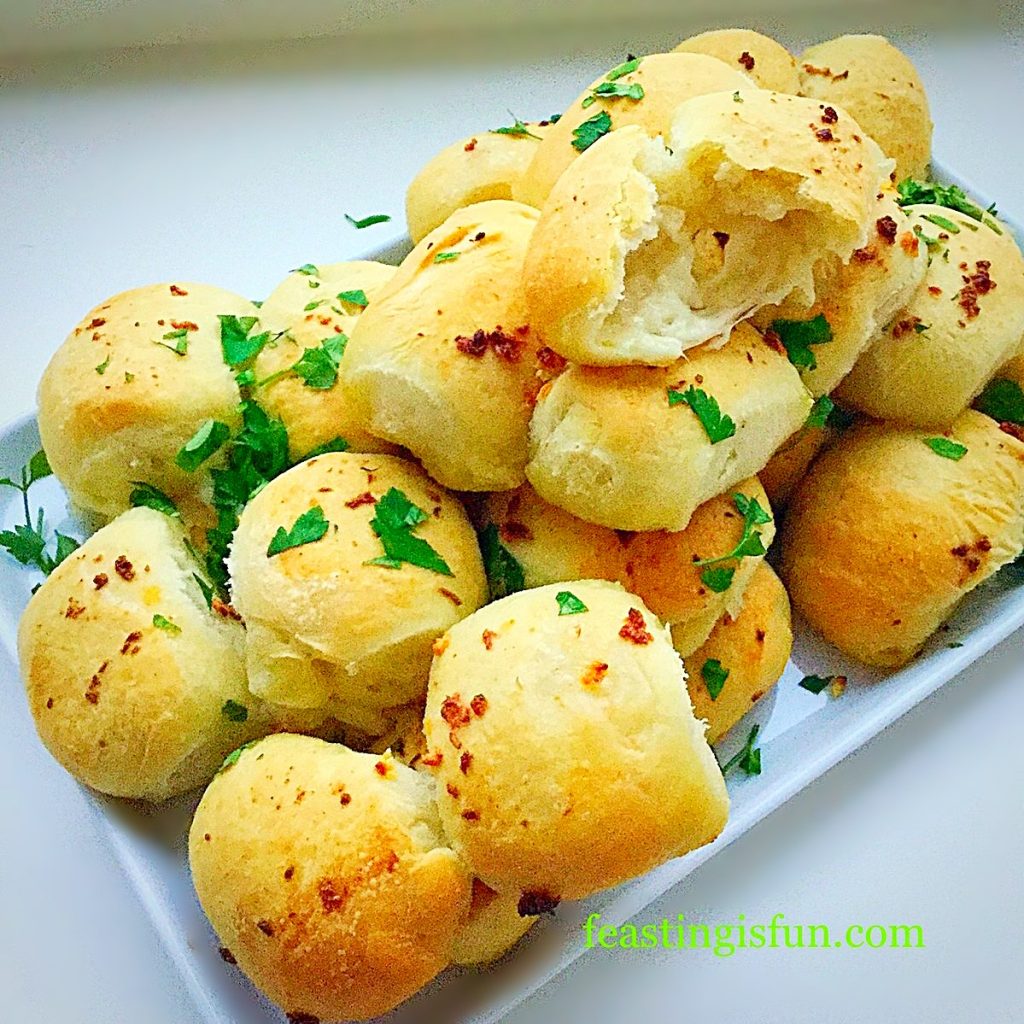
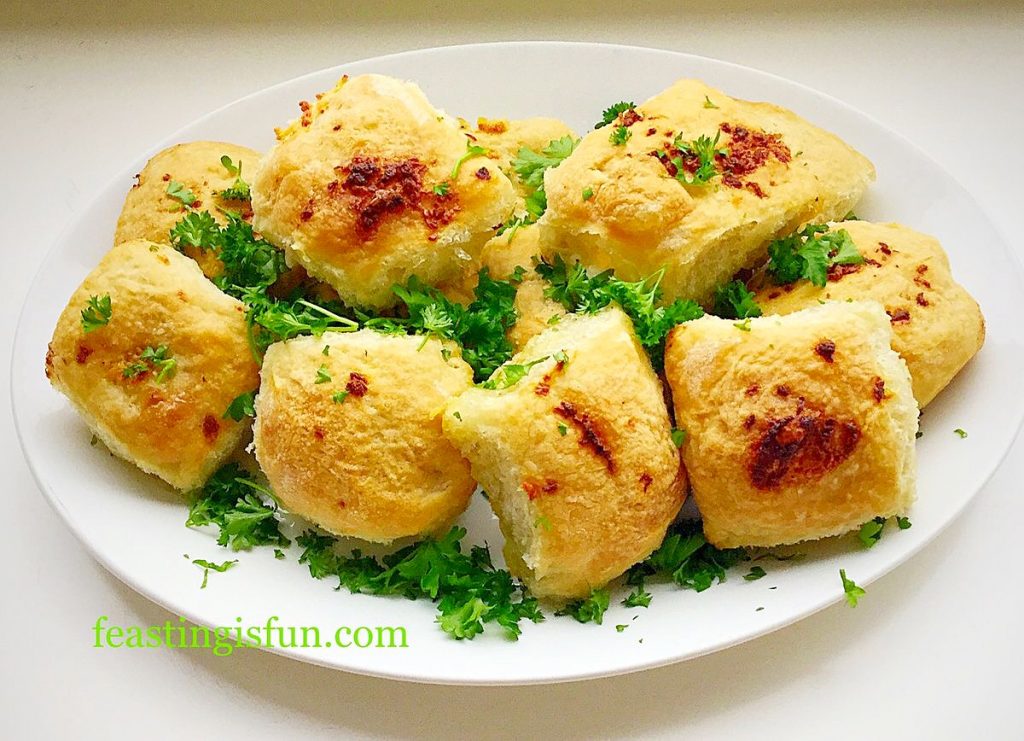
Who doesn’t love garlic bread, served alongside a great pasta dish, with a glass of something chilled? I certainly do and after seeing a fantastic foodie craze on Pinterest I knew I had to try it. Everyone is mad about these Garlic Cheese Bombs!


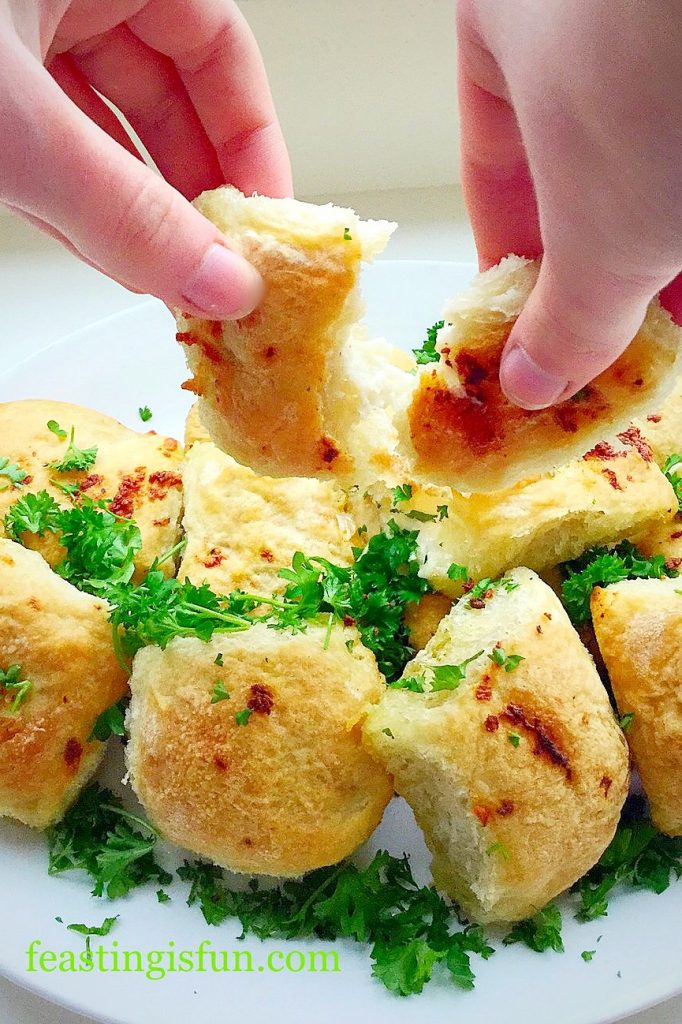
Baked mozzarella stuffed buns being pulled apart to show the gooey, melted cheese.
Garlic Cheese Bombs

In our house these are the BOMB 😉.

Everyone loves it when I make them and having successfully frozen them, uncooked, they are great to have on hand. Fresh or frozen.

Garlic Cheese Bombs
Garlic Cheese Bombs

Honestly these Garlic Cheese Bombs have become such a massive hit in our house. I’m really glad that they freeze well as my family would scoff the whole lot if I baked them all at once. I have learned from the first time I made Garlic Cheese Bombs

Garlic Cheese Bombs

Baking With Children

If you have little ones, they will thoroughly enjoy making these.

The only extra ingredient required to make the Garlic Cheese Bombs is a little patience. Making 30 – 40 individual, little cheese wrapped buns, could be seen as tedious – not here at Feasting is Fun though. We don’t do tedious!! So put on some great music or a play, clear the table and enjoy some therapeutic relaxation, whilst you play with dough!

Before you know it you’ll have two trays full of delicious, homemade, bread buns proving and you can give yourself a smug pat on the back, knowing that one tray is going to be stashed in the deep freeze.

Baking bread is a real passion of mine, second only to my faith see Important Stuff. As this week has been Real Bread Week it seemed fitting to end on a recipe that is fun to make and tastes best when feasting with family and friends.

Garlic Cheese Bombs
Garlic Cheese Bombs

Made From Scratch Versus Using A Bread Mix

I have made these Garlic Cheese Bombs using both my own dough recipe and a Wright’s bread mix. Truthfully and this almost hurts to write this, the children preferred the ones made with the bread mix.

Our children are very honest!!

Personally I think they are both great. The Wright’s bread mix is handy if you’re an infrequent bread baker, or haven’t made bread dough before and want to ensure they turn out great. My dough recipe is for those of us who are happy to make their dough from scratch. That said, there’s room in my kitchen for both.

Recipe: Makes 30 – 40 Garlic Cheese Bombs

1 quantity of dough that’s been proved and knocked back, from either my Farmhouse White Loaf or using Wright’s Baking Premium White Bread Mix

2 Tubs Mini Mozerrella Balls – there are approx 15 – 20 balls per tub

4 Fat Garlic Bulbs – or more if you want an extra garlic kick

100g/4oz Butter

4tbsp Olive Oil

1tsp Sea Salt – I use Maldon

1/2tsp Freshly Ground Black Pepper

Bunch of Fresh Parsley to garnish and add flavour

Making The Garlic Cheese Bombs

You will need a foil freezer/baking tray or 2 if you intend to freeze these.

  • Drain the mozerella balls well and count how many you have.
  • Make up the dough according to your chosen option.
  • Allow the dough to prove until doubled in size and then tip out on to a lightly floured surface.
  • For the very precise among you, weigh the bread dough and then divide that number by the number of mozerella balls. That will tell you exactly how much each piece of dough should weigh.
  • If you are more ‘laissez faire’ about things, like me, simply divide the dough evenly into 3 or 4 equal pieces (depending on whether you have 30 or 40 mozerella balls) and then divide each potion into 10.
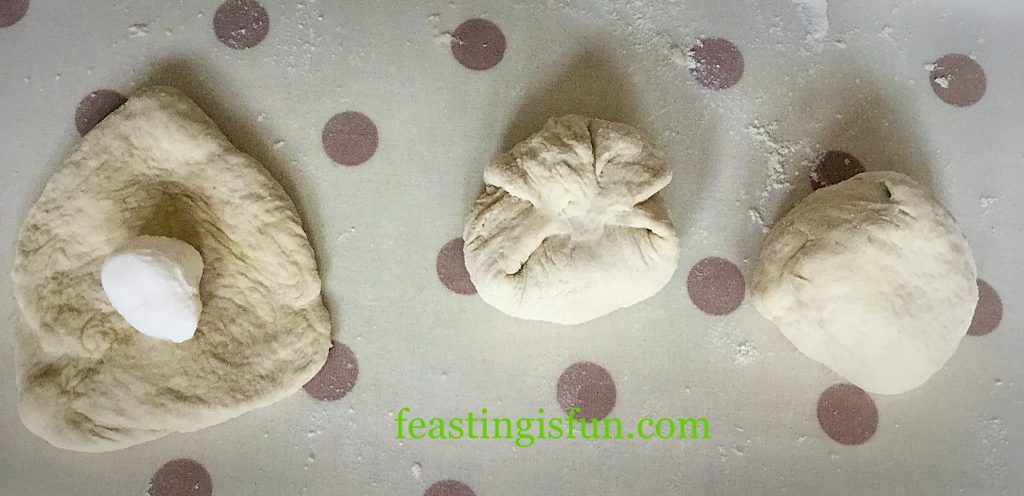
  • Flatten a small portion of dough into a rough circular shape.
  • Place the mozerella ball in the centre of the dough circle.
  • Bring the edges of the dough up so that they cover the cheese and seal by pressing together.
  • Place the Garlic Cheese Bomb seam side down on a lightly oiled baking tray.
FF Garlic Cheese Bombs
After a while you get into a rhythm and the process becomes very relaxing.
  • Continue until all of the Garlic Cheese Bombs have been made, allowing space in between each one the tray so that it has room to rise.
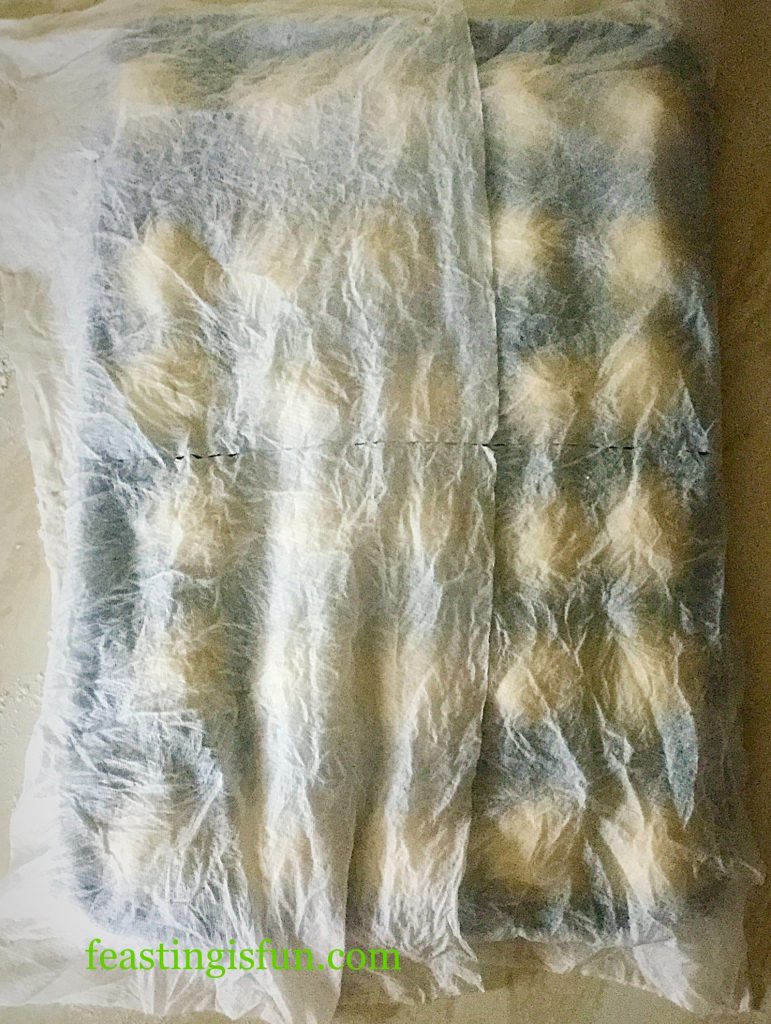
FF Garlic Cheese Bombs
Cover with damp kitchen towel or oiled cling film.


Proving The Buns

  • The Garlic Cheese Bombs in the photo above are from the first batch that I made.
  • Leave until doubled in size.
  • Whilst the rolls are proving, make the garlic butter.
  • Place the butter, oil, crushed/finely minced garlic, salt and pepper into a small saucepan over a low heat.
  • Cook until all the butter has melted. Set to one side.
  • Preheat the oven to 200C/180C fan, gas mark 6, 400F.
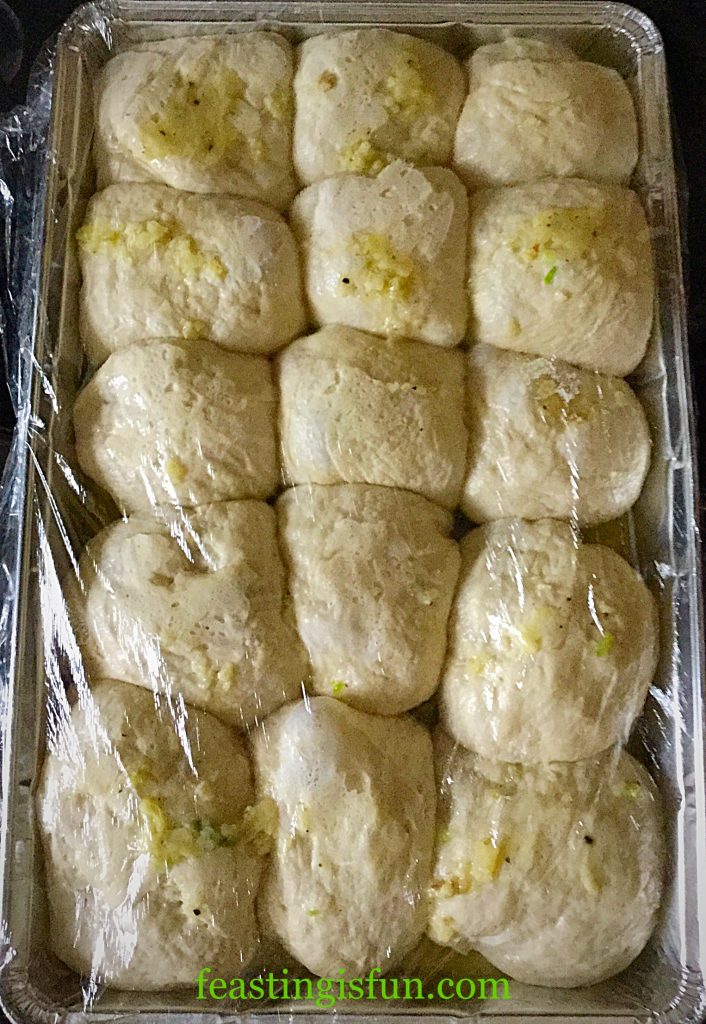
  • When the Garlic Cheese Bombs have doubled in size, remove the damp cloth/cling film and brush liberally, using a pastry brush, with the melted garlic butter.
FF Garlic Cheese Bombs
You’ll be surprised at how much these delicious rolls puff up.

Freezing The Uncooked Bread Rolls

Now is the stage at which the Garlic Cheese Bombs can be frozen. Double wrap the foil tray with freezer safe cling film, label and pop in the freezer. They should be fine for at least one month in the freezer.

Baking The Garlic Cheese Bombs

  • To bake the freshly garlic glazed buns, place into the middle of the oven and bake for 25-30 minutes, or until the rolls are golden brown.
  • When baked remove the tray from the oven and immediately transfer the individual Garlic Cheese Bombs to a serving platter. Be careful as they will be very hot.
  • Pour over any garlic butter left in the tray and garnish with roughly chopped parsley,
  • Leave for 5 minutes before serving to allow thm to cool slightly.
  • Serve with a smile and watch as people break open these golden, light, cheesy rolls, flavoured with garlic butter.

Garlic Cheese Bombs

Baking From Frozen

To bake from frozen, preheat the oven to 190C/170C fan, gas mark 5, 375F. Remove all cling film/foil. Place the frozen rolls into the middle of the oven and bake for 40-45 minutes, until golden and baked through. To test remove a roll and cut in half, if the mozerella is gooey and melted then the Garlic Cheese Bombs are baked. Serve as for freshly baked.

Making Ahead Tips

So you’ve got a party in the evening and you want to make these earlier in the day? I’d suggest making them the day, or even a few days aheadand stashing them in the freezer. Alternatively make them in the morning, glazed with garlic butter before their final prove (it’ll save you stinking of garlic as you great your guests 😉), wrap in cling film and keep in the fridge. Take them out 10 minutes before baking, whilst you preheat the oven and bake as for fresh.

Make ahead recipes are fantastic as they allow you to enjoy spending time with your guests, rather than being stuck, on your own in the kitchen!

If you have loved these Garlic Cheese Bombs, then here are some other recipes you might like to try:

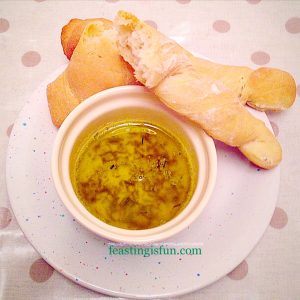
Breadsticks with Garlic and Herb Dipping Oil

Breadsticks with garlic and herb dipping oil.

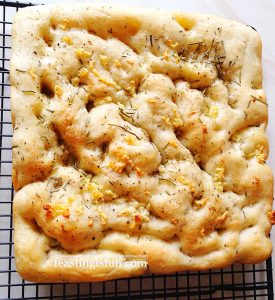
Garlic Rosemary Focaccia Bread

Garlic Rosemary Focaccia Bread

Cherry Tomato Mozzarella Basil Focaccia 

Cherry Tomato Mozzarella Basil Focaccia


I really hope you do try making your own bread. Most bread doughs can withstand a reasonable amount of mistreatment and still turn into fabulous loves, breadsticks, baguettes. The possibilities are endless and nothing, not even chocolate cake such as this White Chocolate Swirl Fudge Cake beats the smell of home baked bread.

Thank you for all you lovely comments, especially on Twitter regarding the great yeast debate – more on that in a future post! It really makes my day to see pictures of you baking my recipes and in most cases they look even better. Which I think is completely brilliant. You all inspire me to try harder and write easy to follow, delicious recipes.

Together we really do make Feasting Fun!

Sammie xx

Wright’s Baking provided me with the Premium White Bread Mix used in this recipe alongside my own bread dough recipe. All opinions, views, content and photographs are my own. Please see my Disclosure Policy.

Share
Facebooktwitterpinterestlinkedintumblr

Spicy Sausage Rolls

Share
Facebooktwitterpinterestlinkedintumblr

Sunshine, glorious sunshine. It lifts our spirits and makes everyday seem that little bit brighter – literally. Windows flung open, coats discarded, sunglasses at the ready. Who wants to eat lunch, or any meal for that matter, indoors? Not me! Even if my ‘picnic’ is sitting out in the garden with a cool glass of something refreshing and a plate of these jalapeño fired Spicy Sausage Rolls.

For those of you with a more gentle constitution, don’t worry these Spicy Sausage Rolls do not ‘blow your head off!’ Instead they have a gentle warming, fruity heat that lifts an otherwise everyday sausage roll to a whole different level.

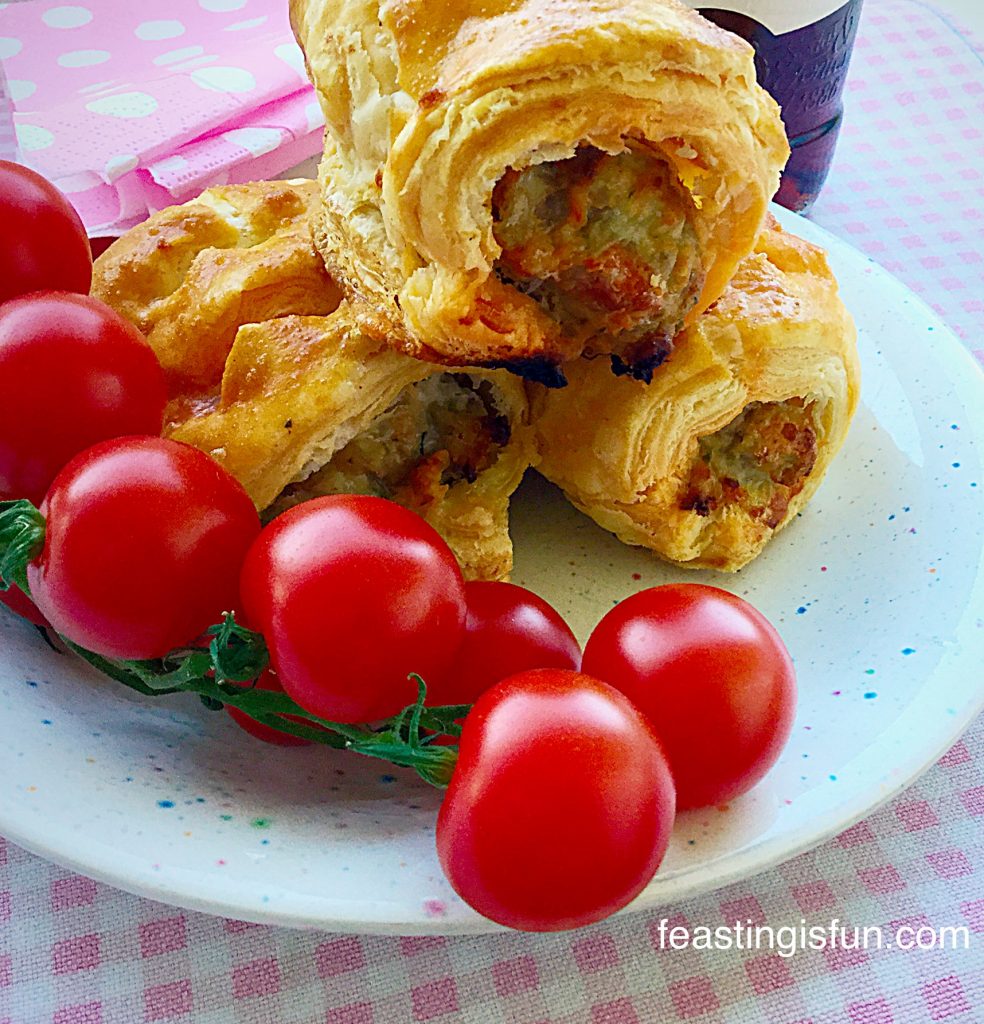
The inclusion of some paprika filled chorizo sausage, further elevates the incredible flavour of these picnic favourites. Delicious good quality sausage meat,  mixed with finely chopped jalapeño chilli and just the right amount of chorizo, encased in flaky, all butter puff pastry, makes for the perfect addition to any packed lunch, picnic or easy meal.

Spicy Sausage Rolls change up your daily packed lunch!

If you like sausage rolls, you will absolutely love these Spicy Sausage Rolls!

Spicy Sausage Rolls an easy, tasty,mid week meal.
Spicy Sausage Rolls an easy, tasty, mid week meal.

Using The Freezer To Keep Grocery Costs Down

Puff pastry is such an incredibly handy product to have stashed away in the freezer. All butter is my preferred type, especially for sweet bakes such as my Blackberry Nectarine Tart , however, I do sometimes use the mixed vegetable fat/butter for savoury bakes, especially if it is on offer!

Having chatted to a few of my Twitter friends recently, we all concluded that the cost of groceries seems to have suddenly risen. For me, this means creating recipes that stretch more expensive ingredients that little bit further and also really trying hard to keep food waste to an absolute minimum.

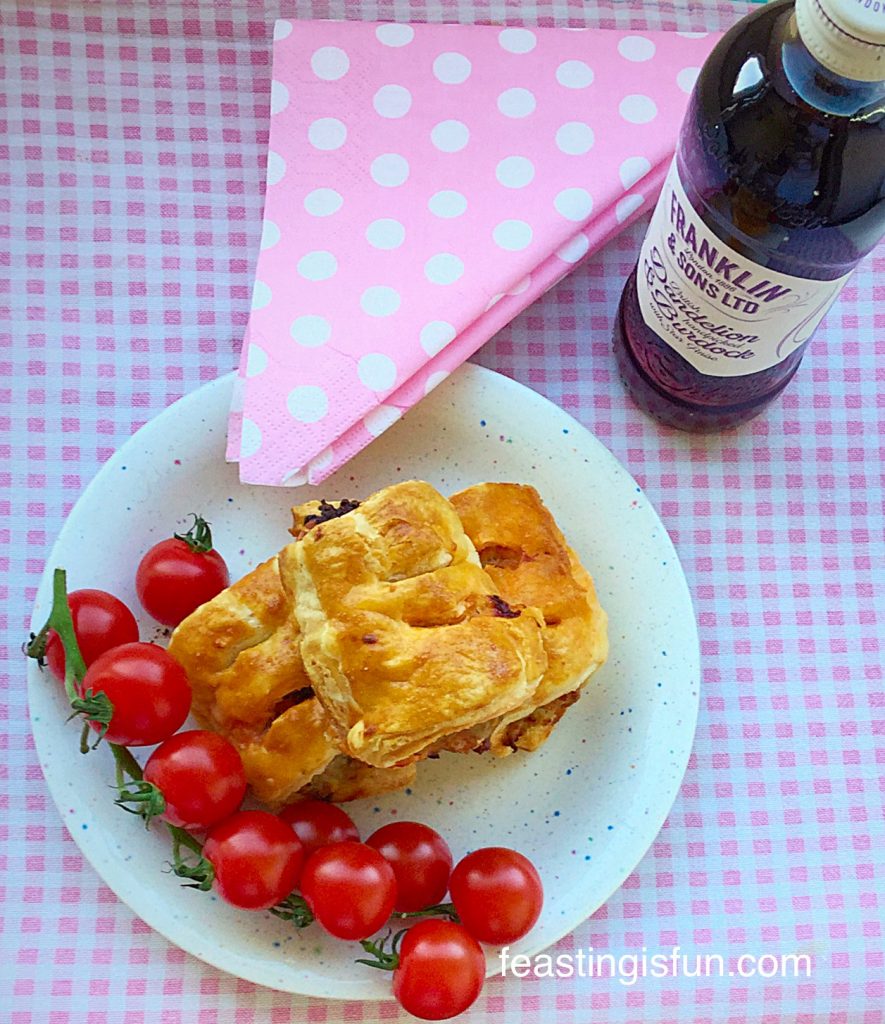
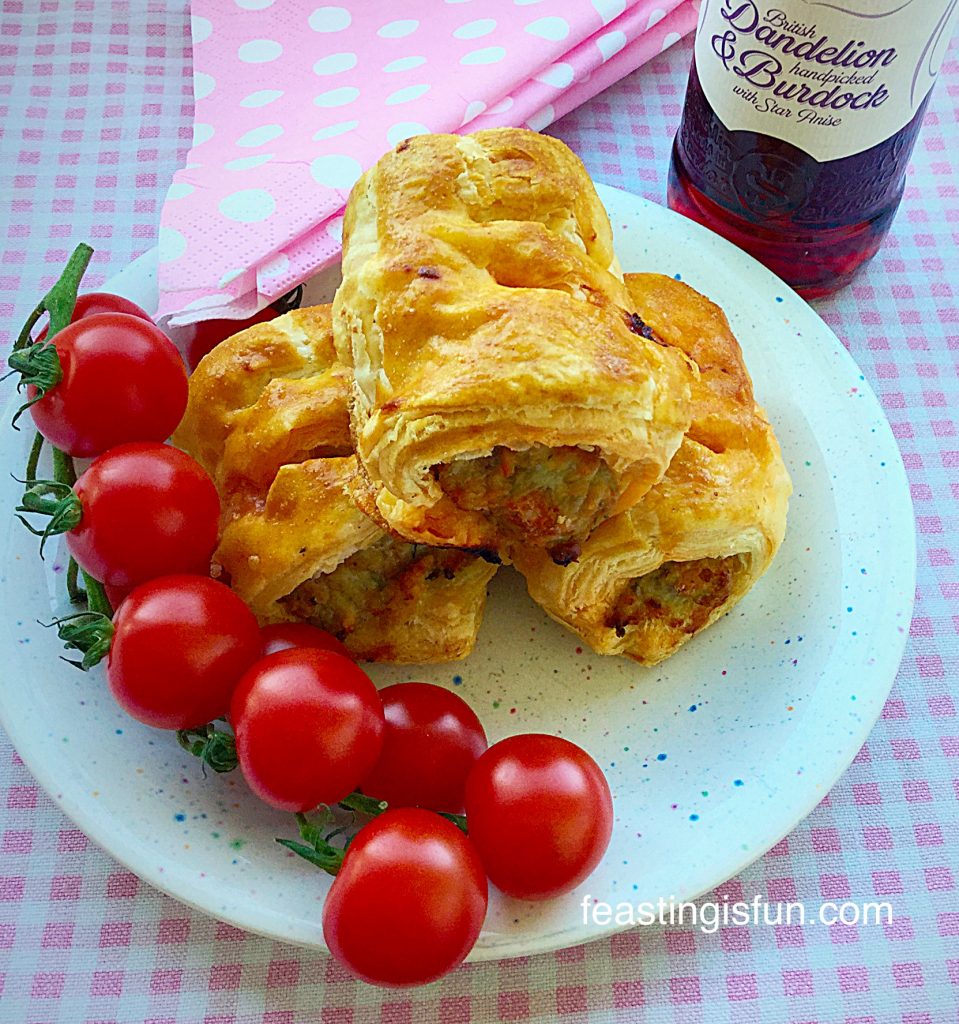
Spicy Sausage Rolls are great with a handful of cherry tomatoes off the vine.

As I spend a lot of time testing recipes and batch baking/cooking in the kitchen, the opportunity for waste can become even greater. Especially if after a few days cooking and baking I then spend the next few days in bed due to my health problems see here.

This is where the freezer becomes my best friend! Having made the Spicy Sausage Rolls on a day where I had also cooked dinner, they were in danger of getting forgotten about, boxed up in the back of the fridge. Of course we shared a couple between us to taste test them and we were not disappointed. After the photos were taken the following day, I popped the remaining sausage rolls in the freezer – keeping a couple out for our daughter and I to share for lunch.

I have no doubt that they will not stay in the freezer long, yet it saves potential waste. Which is primarily, not only good for our planet, but also our grocery budget!

Recipe: Makes 12 Spicy Sausage Rolls

350g/12oz Block of Puff Pastry all butter if possible- defrosted in the fridge overnight if frozen – I used frozen Just Rol all butter puff pastry, alternatively use my fantastic Perfect Butter Shortcrust Pastry recipe.

454g/1lb Pork Sausagemeat – good quality at least 85% Pork, any casings removed

50g/2oz Chorizo Sausage – casing removed

1 Jalapeño Chilli Pepper

1 Medium Free Range Egg – I use Burford Browns Eggs from Clarence Court

Method: Preheat the oven to 200C/180C fan, gas mark 6, 400F.

Making The Spicy Sausagemeat

  • Place the sausage meat into a bowl and add the chorizo sausage pulled into pieces.
  • Remove the seeds and membrane from the jalapeño chilli pepper and chop finely.
  • Add the chopped chilli to the bowl and squish (mix) everything together using clean hands.

Creating The Sausage Rolls

  • Roll out the puff pastry on a clean, flour dusted work top, until it is 30cm x 20cm (15″ wide by 8″ deep).
  • Trim the edges of the pastry and then divide the pastry in half width ways so that you have 2 long strips.
  • Divide the sausage meat mixture in two.
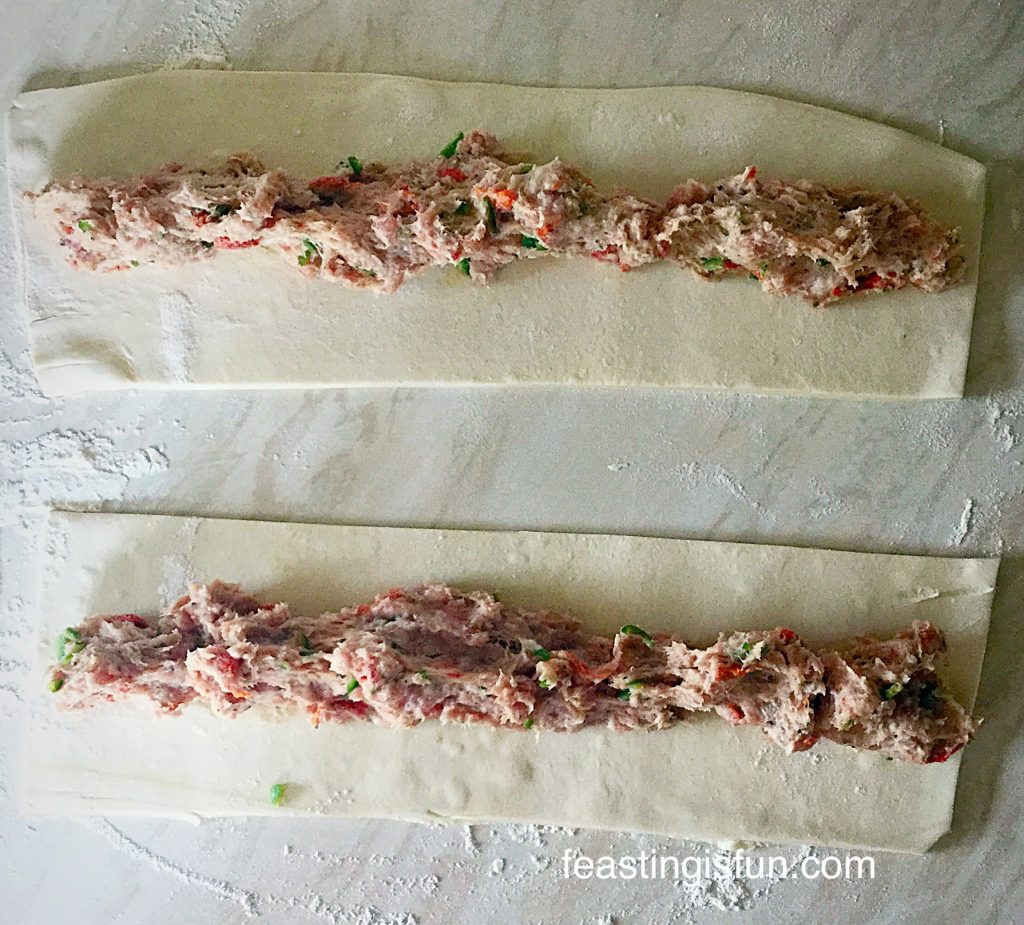
  • Evenly lay the sausage meat down the middle of each length of pastry.
You can see the flecks of green chilli and red chorizo throughout the sausage meat.
  • Crack an egg into a small bowl and whisk with a fork.
  • Using a pastry brush, brush beaten egg down the length of the pastry, either side of the sausage meat.
  • Bring the top edge of the pastry evenly over the sausage meat and continue rolling so that the pastry overlaps (and seals) underneath the sausage rolls.
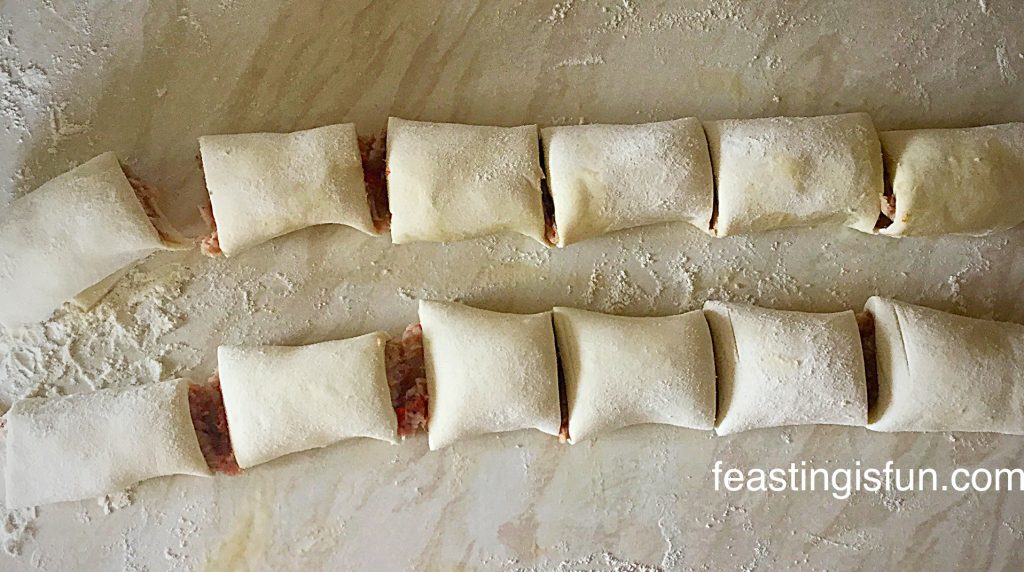
  • Using a sharp knife, cut each long roll in half and then cut each half into 3 even sized sausage rolls. In total you will have 12 medium sized sausage rolls.
Spicy Sausage Rolls ready for their egg wash and to be baked!
  • Place the sausage rolls on to a lightly oiled baking tray.
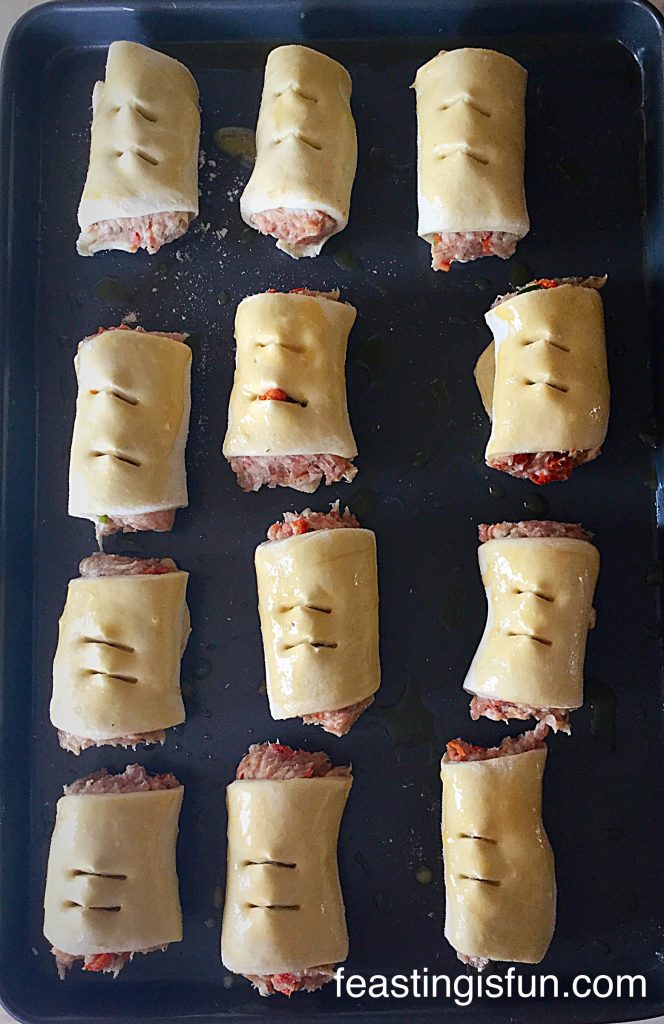
  • Brush each sausage roll with the beaten egg – this will give the pastry a wonderful, crisp, golden finish once baked.
  • Finally using a sharp, pointed pair of scissors, snip the top of each sausage roll twice – as can be seen in the picture below.
Spicy Sausage Rolls ready for the oven.

Baking The Spicy Sausage Rolls

  • Place the baking tray into the middle/top part of the oven and bake for 25-30 minutes.
  • The Spicy Sausage Rolls are cooked when the pastry is flaky and golden brown all over. If in doubt cut a sausage roll in half, the meat should be cooked all the way through.
  • Once baked remove the sausage rolls from the oven.
Golden, flaky, hot Spicy Sausage Rolls fresh from the oven.
  • Transfer the baked sausage rolls to a cooling rack and allow to cool slightly before trying!
Spicy Sausage Rolls that smell so delicious and inviting.

Perfect eaten hot or cold, with a good chutney, some cherry tomatoes and a glass of something refreshing.

To store, allow to cool completely and then pack into an airtight container and keep in the fridge for up to 5 days. Alternatively, as I did, pack into a freezer bag or box, label and keep in the freezer for one month. Defrost thoroughly and reheat until piping hot in a moderate oven.

Serving The Sausage Rolls

If fresh puff pastry has been used, not frozen, these Spicy Sausage Rolls can also be frozen uncooked. Place some baking parchment on a baking tray, put the sausage rolls on top and then place into the freezer and freeze until solid. Once frozen pack into freezer boxes, separating each layer with baking parchment. To cook, remove as many sausage rolls as required, place onto an oiled baking tray and bake in a preheated oven as before. The sausage rolls will take approximately 45 minutes to bake from frozen. This can be particularly handy over the Christmas holiday period.

Spicy Sausage Rolls
Spicy Sausage Rolls perfect for a Christmas buffet, or any buffet!!

Sorry to mention Christmas, however, in our house a buffet is incomplete without a plate of hot sausage rolls. This year we can really turn the heat up!

Obviously you can control how spicy you make these, as well as the size. I would perhaps make them a little smaller for a buffet spread.

If you have loved these Spicy Sausage Rolls as much as we have you may also enjoy these other recipes:

Quiche Lorraine

Spicy Sausage Rolls
Quiche Lorraine bacon, cheddar and egg tart.

Sausage Plait With A Twist

Spicy Sausage Rolls
Sausage Plait With A Twist

Tomato Thyme Garlic Focaccia Bread

Spicy Sausage Rolls
Tomato Thyme Garlic Focaccia Bread

If you think about it, a buffet is really an indoor picnic!

Who doesn’t love unloading a picnic hamper or walking around a buffet table tasting little morsels of yummy different foods. We have a daughter who would happily eat from a buffet table/picnic hamper most days of the year.

The sun is blazing as I write up this post. Whether you make and bake during the sunshine or snow, have fun feasting with friends, family and neighbours.

Sammie xx

Share
Facebooktwitterpinterestlinkedintumblr

Lime Couscous

Share
Facebooktwitterpinterestlinkedintumblr

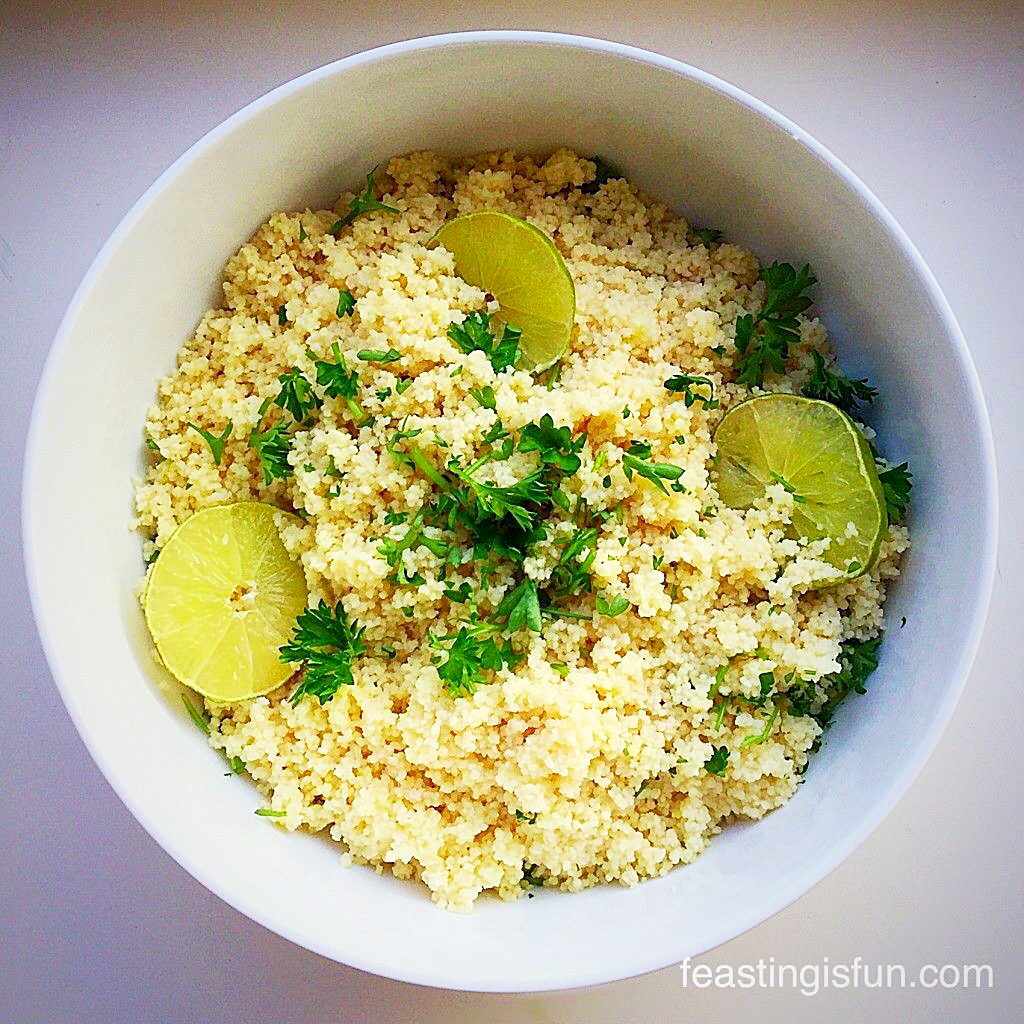
Today I have the easiest, most delicious and versatile side dish for you, my Lime Couscous.

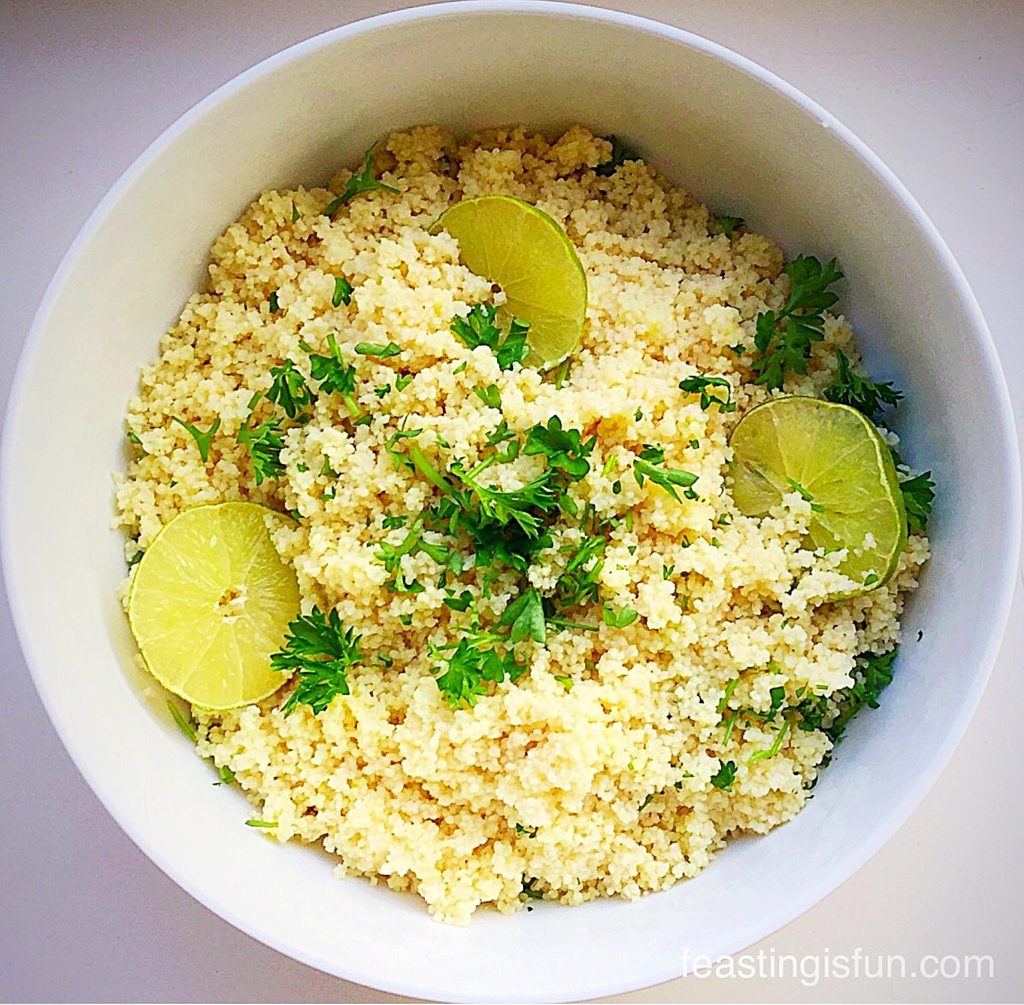
FF Lime Couscous

So, for those of you who haven’t tried couscous yet, I’ll explain what it is. Couscous is small, crushed durum wheat semolina that requires steaming or soaking in boiling water to cook. And it is traditionally served with stew, much like my Moroccan Lamb Stew. Because couscous is made from durum wheat it IS NOT gluten free.

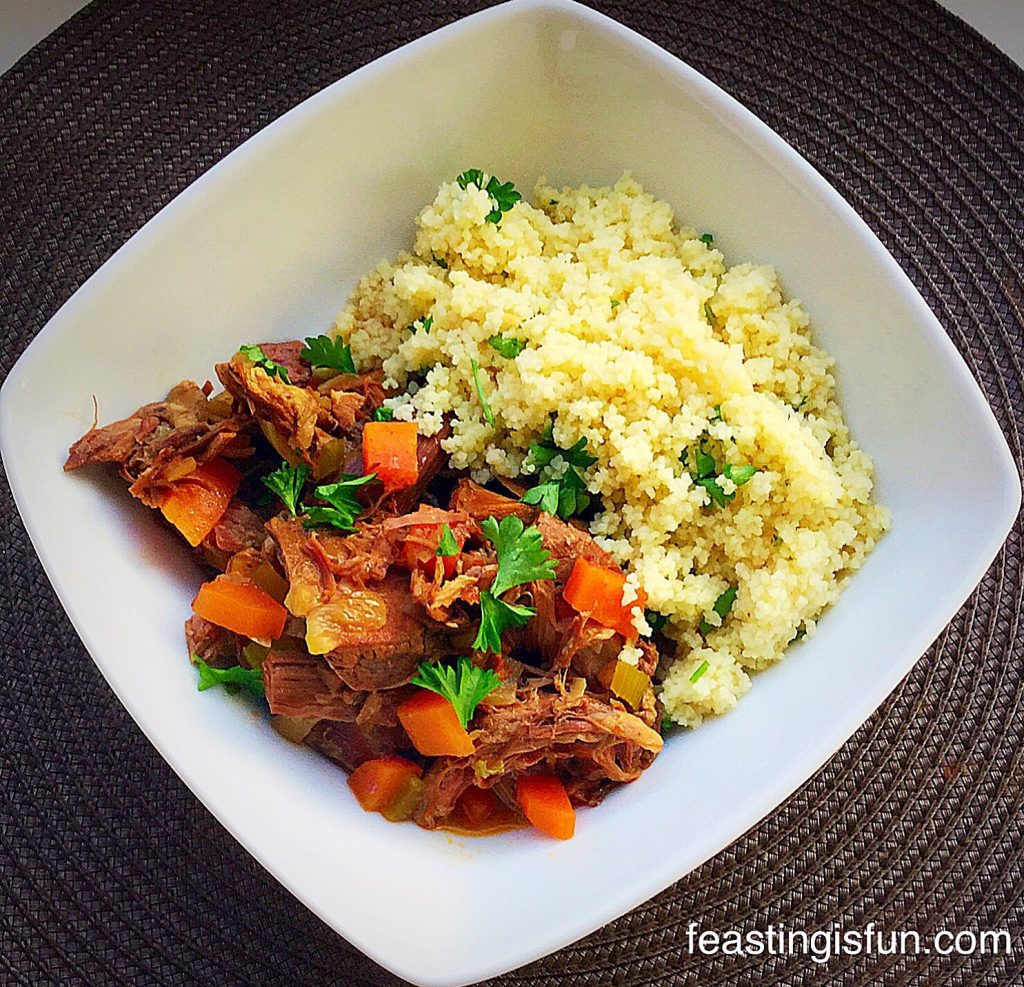
FF Moroccan Lamb Stew
Moroccan Lamb Stew served with Lime Couscous.

Since this couscous is full of fresh lime flavour and so easy to make, it will soon become part of your repertoire.

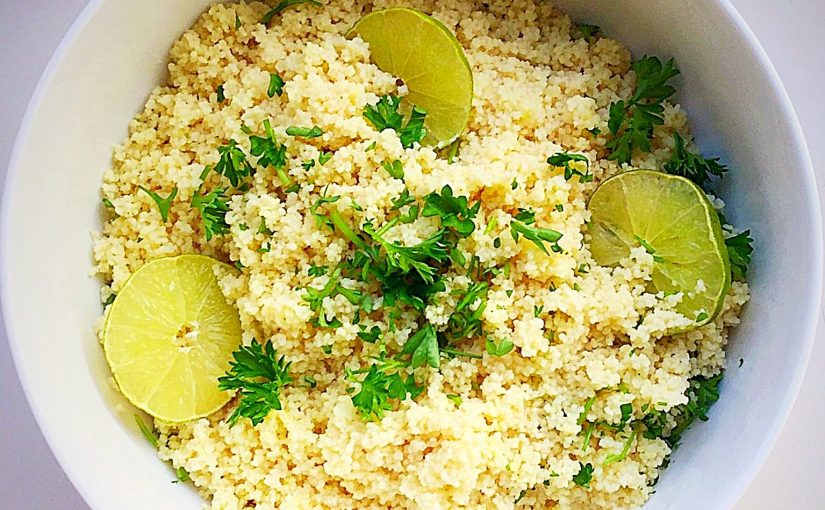
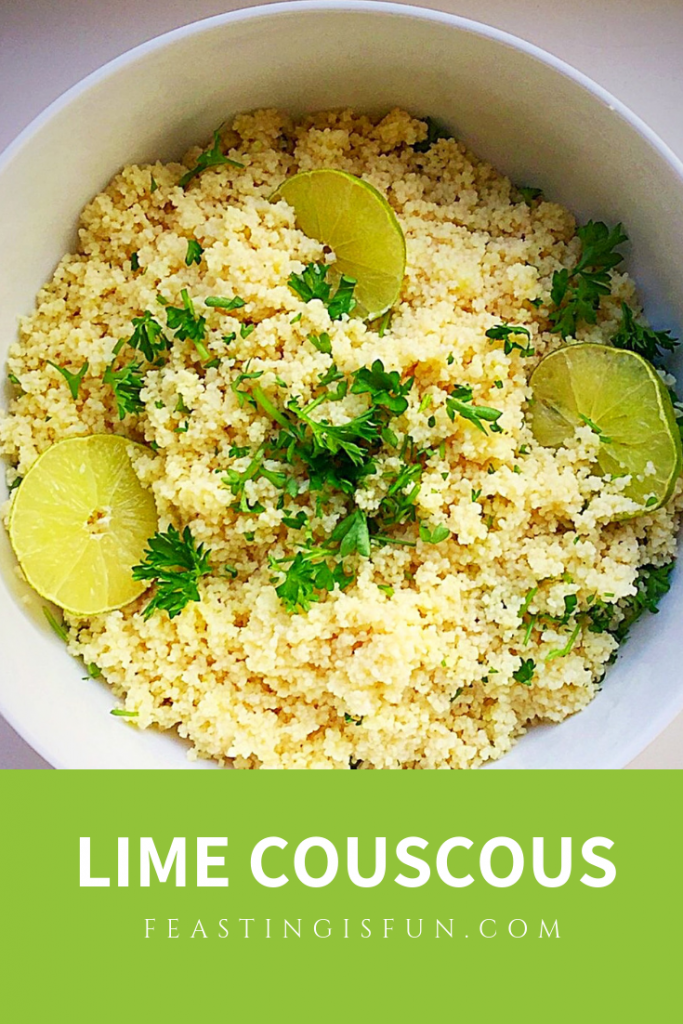
A sprinkle of fresh parsley and slices of lime give this dish the finishing touch.

And as the grains are so small it doesn’t even need cooking. Rather, it simply needs rehydrating with hot liquid.

How easy is that ?

Lime Couscous

I developed this recipe for Lime Couscous to specifically partner my Morrocan Lamb Stew. It is absolutely delicious with the stew. As it balances the fruity, spicey sauce, with its own tangy, citrus flavour.

Since couscous can be served at room temperature it is absolutely perfect for buffets and barbecues. While it’s fresh lime flavour pairs really well with fish, chicken, lamb kebabs – really the possibilities are endless. I cannot wait to try it with my Chunky Chilli.

Recipe: Lime Couscous serves 6 people.

300g/11oz Dried Couscous – allow 50g/2oz per person

2 Limes

1 Vegetable Stock Cube – I use Knorr’s

Boiling Water

Sea salt and freshly ground black pepper to taste

Method – Making The Couscous 

Note – Do not stir the Couscous at any point.

First of all, weigh out the couscous into a large, heatproof bowl.

Dissolve the stock cube in a jug of boiling water, approx 450mls/1 pint.

Squeeze the juice of one and a half limes and add this to the couscous.

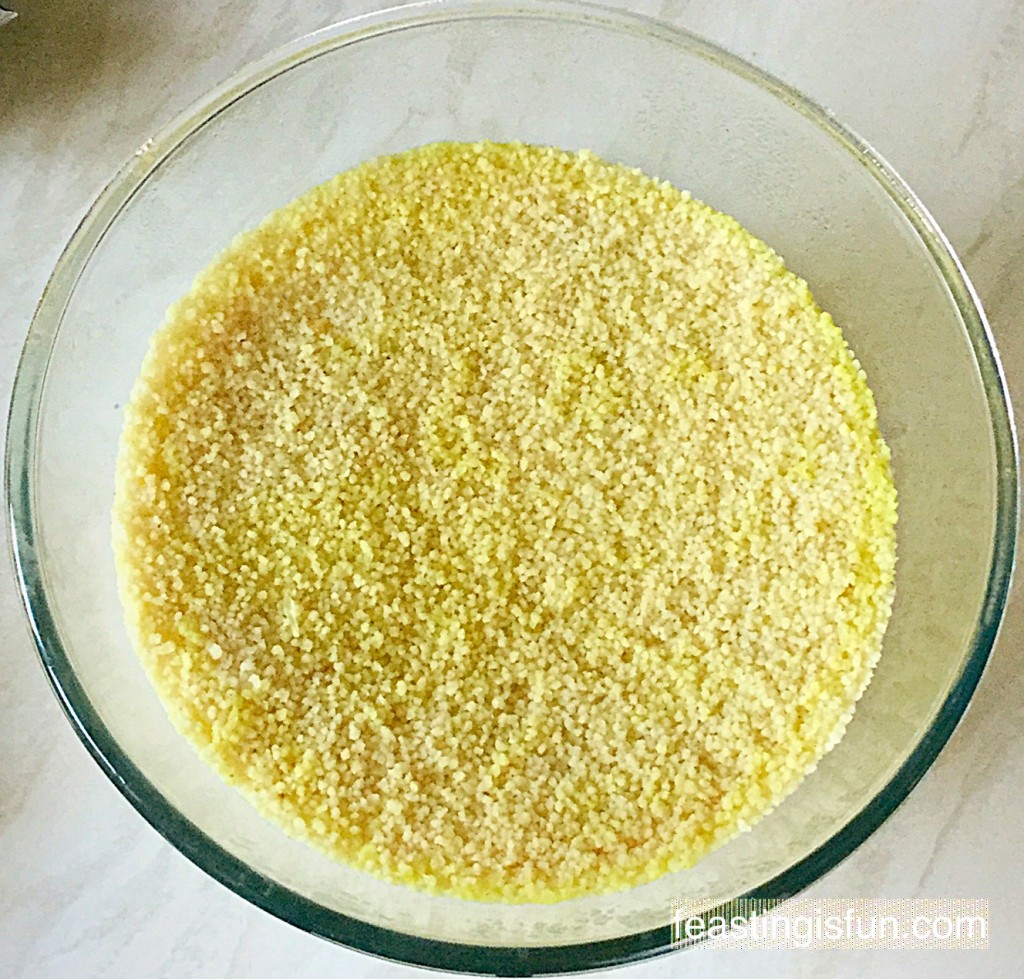
Pour the stock over the couscous and top up with boiling water so that the liquid comes 2.5cm/1″ above the top of the couscous.

Cover the bowl with cling film, or I used a plate and leave for 15 minutes.

After this time the couscous will have absorbed all of the hot liquid.

MD Lime Couscous
The couscous has absorbed all of the stock and lime juice.

Remove the cling film/ plate.

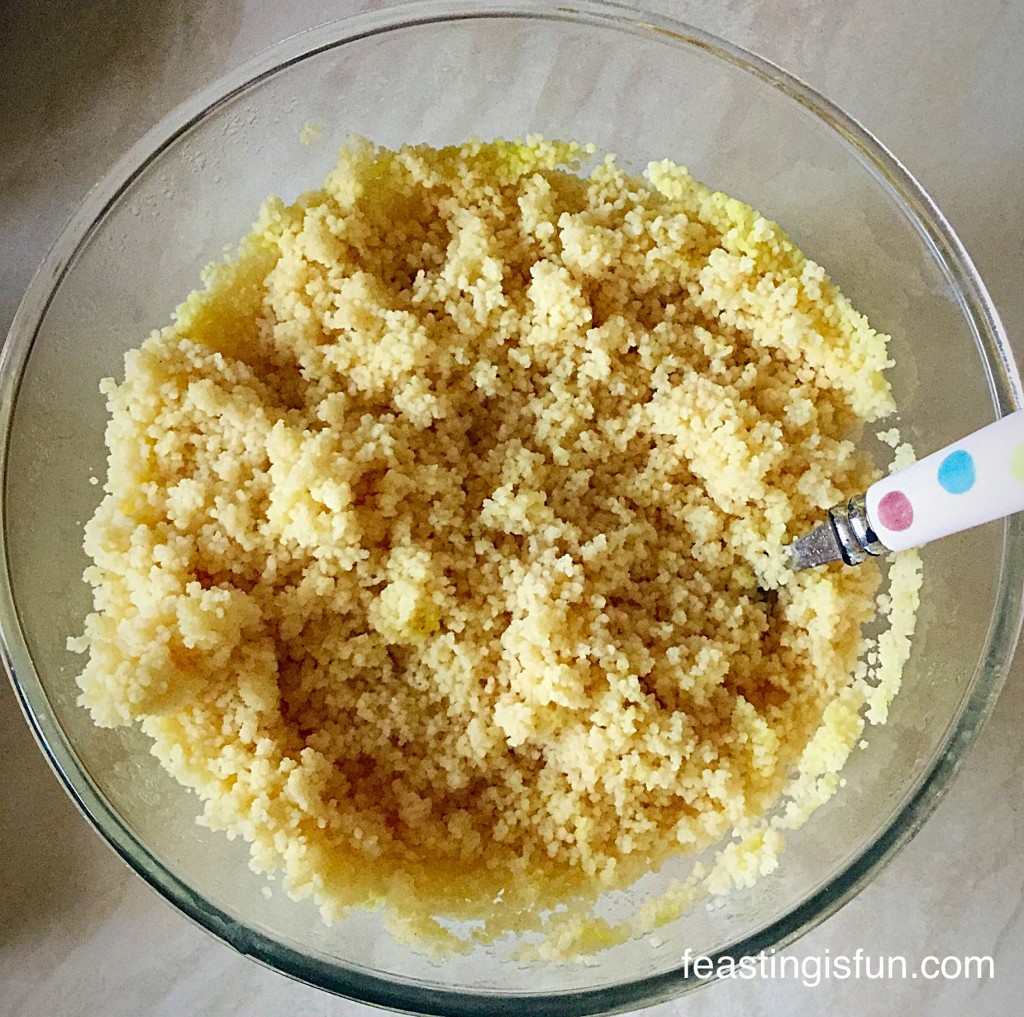
Using a fork, fluff up the couscous, like you would with rice,

MD Lime Couscous
Fluff the couscous with a fork.

Importantly, taste the Lime Couscous and check for seasoning, adjust as necessary.

Finally, roughly chop a large handful of parsley leaves. Add these to the couscous and transfer to a serving dish.

Add a final touch by popping a few slices of lime to the couscous and a final sprinkle of parsley leaves on the top.

Lime Couscous

It really is that simple to make this dish!

Since Spring is now here and the promise of warmer days beckoning, this Lime Couscous is the perfect dish to serve, as it can sit at room temperature, not taking up fridge or oven space.

However you serve this Lime Couscous, it will be enjoyed and feasted on,  because it tastes so delicious.

If you have enjoyed this Lime Couscous, here are some other recipes that you might like to try:

Leek Colcannon

GF Leek Colcannon
Leek Colcannon

Lemon Garlic Vegetable Orzo

MD Lemon Garlic Vegetable Orzo
Lemon Garlic Vegetable Orzo

Baked Garlic Herb Potato Wedges

MD Garlic Herb Potato Wedges
Garlic Herb Potato Wedges

Since couscous is so easy to prepare, the possibilities are endless. Also, although it is perfectly fine eaten hot, I much prefer it slightly warm. It is also great for packed lunches. Simply add some chopped bell peppers, spring onions and cherry tomatoes and pack into an airtight container. And there you have it, packed lunch to go.

So, whatever you are making, baking and creating  in your kitchens, have fun preparing and sharing your feast.

Sammie xx

No part of this post may be reproduced or duplicated without the written permission of the owner. Please see my Disclosure Policy.


Share
Facebooktwitterpinterestlinkedintumblr

Marshmallow Frosted Mango Cupcakes

Share
Facebooktwitterpinterestlinkedintumblr

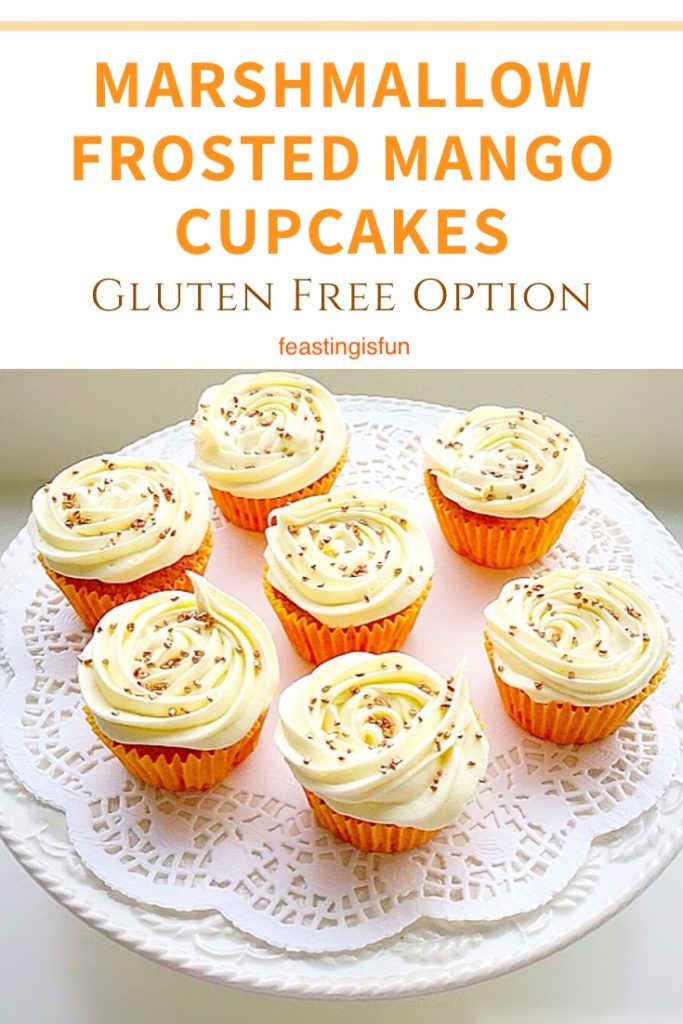
At long last, today is the first day of Spring! And as the sun shone this morning I listened to birds chirping in the garden. While people are outside in the sunshine mowing their lawns I was inspired to create a cupcake that celebrates the passing of Winter. So, here are my gluten free Marshmallow Frosted Mango Cupcakes.

FF Marshmallow Frosted Mango Cupcakes

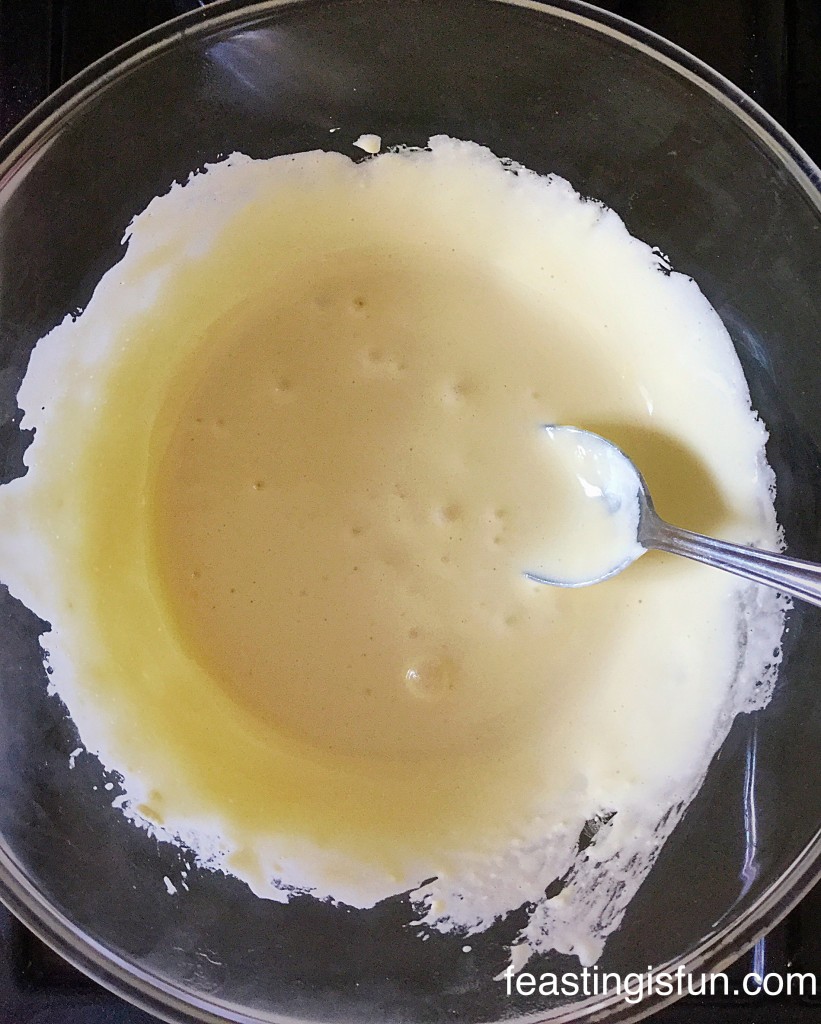
Sarah at Heavenly Marshmallows sent me a selection of her homemade, artisan marshmallows. Since the selection included nine mango and passionfruit flavour I decided to use them in a recipe.

Because the mango and passionfruit marshmallows are gluten free I decided to make a gluten free cupcake, with mango in the cake batter.

HM Marshmallow Frosted Mango Cupcakes
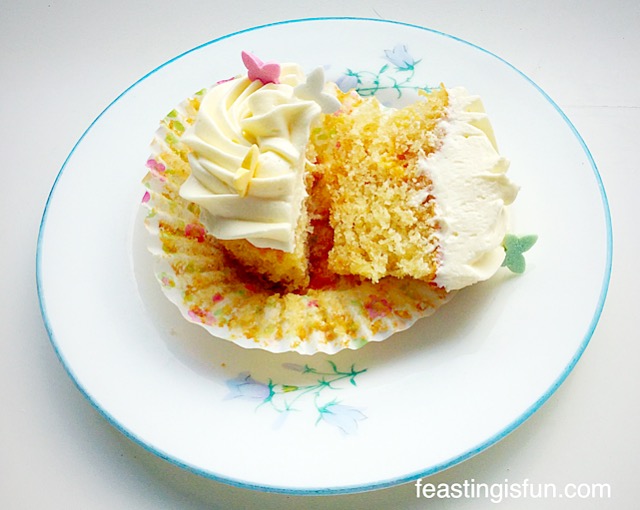
Marshmallow Frosted Mango Cupcakes

While making gluten free cupcakes was first for me, I also wanted to incorporate the delicious mango and passionfruit marshmallows into the frosting. Since I had seen lots of different marshmallow frosting ideas on Pinterest. However, after reading through a few different recipes, as usual I decided to come up with something of my own.

Marshmallow Frosted Mango Cupcakes

The Gluten Free Taste Test

So, for these Marshmallow Frosted Mango Cupcakes I decided to make two cake batters. As can be seen, the first gluten free batch of cupcakes are baked in yellow cupcake cases. Because the cupcake wrappers are yellow floral they are ideal for Spring.

While the second batch are in the orange wrappers and are made using plain flour, that is NOT gluten free. Since no one in our home is gluten intolerant, my wonderful family were to serve as ‘taste testers’, in a blind taste testing.

FF Marshmallow Frosted Mango Cupcakes
Marshmallow Frosted Mango Cupcakes

Each batch of cake batter had some mango added to it. Because I didn’t have any fresh mango, I used mango from a pot in juice. Mashing up the mango with a fork and adding it to the cake batter. And, in both bakes, the mango stayed evenly distributed throughout the baked cupcake. Finally, I had successfully made gluten free cupcakes, with a good texture.

Marsmallow In The Frosting?

The Success Of Marshmallow Frosted Mango Cupcakes

Next came the frosting, which wasn’t as daunting as I’d imagined. While the hardest part was saying goodbye to each of the 8 mango and passionfruit marshmallows as I put them in a heatproof bowl, over a double boiler.

Effectively this dreamy marshmallow frosting is buttercream, with melted marshmallows added to it.  While there’s a bit more to making it than that, it is no more difficult than making a chocolate ganache, that is then whipped and piped.

FF Marshmallow Frosted Mango Cupcakes

Rather than the sticky, sweet, frosting I’d imagined, the opposite was true. Resulting in marshmallow frosting that is the stuff of dreams, where fairies and unicorns live and rain falls like glittery sprinkles. I took myself off into my dream world there. And the result is amazing. Because, the melted marshmallows lighten the buttercream frosting. Resulting in a mallow, sponginess, that doesn’t set hard and melts, almost like sherbet on your tongue.

Recipe: Makes 12 Marshmallow Frosted Mango Cupcakes

Alternatively these cupcakes can be made with regular wheat flower. Substitute the same quantity of plain white, wheat flour instead of gluten free flour. Method and cooking times are exactly the same.

For the Mango Cupcakes

100g/4oz Unsalted Butter-at room temperature

100g/4oz Caster Sugar

2 Large Free Range Eggs

1tsp Vanilla Extract – I use Nielsen-Massey

100g/4oz Gluten Free White Flour – I use Doves Farm

1tsp Baking Powder – Waitrose Cooks’ Homebaking baking powder as it is gluten free – check yours not all brands are gluten free.

1/4 tsp Salt – I use Maldon

75g/3oz Fresh or Tinned Mango – any juice strained off and mango mashed with a fork.

For the Marshmallow Frosting

Heavenly Marshmallows Mango and Passionfruit flavour marshmallows – see note at bottom of post Art of Mallow

1tbsp Glycerine

300g/11oz Icing Sugar – sifted

150g/6oz Unsalted Butter – very soft

3tsp Boiling Water

Sprinkles of your choice

Making And Baking The Mango Cupcakes

  • First of all, place 12 cupcake cases in a cupcake or muffin tin.
  • Add the caster sugar,vanilla and butter into a medium sized bowl and whisk/beat together until pale and creamy.
  • Sift in the gluten free flour, baking powder and salt.
  • Add 2 eggs.
  • Whisk/beat until all the ingredients have come together and the batter is smooth.
  • Always take care to not over mix the cake batter.
  • Add the mashed mango and fold into the cake batter.
  • Spoon the cupcake mixture evenly into the cupcake cases.
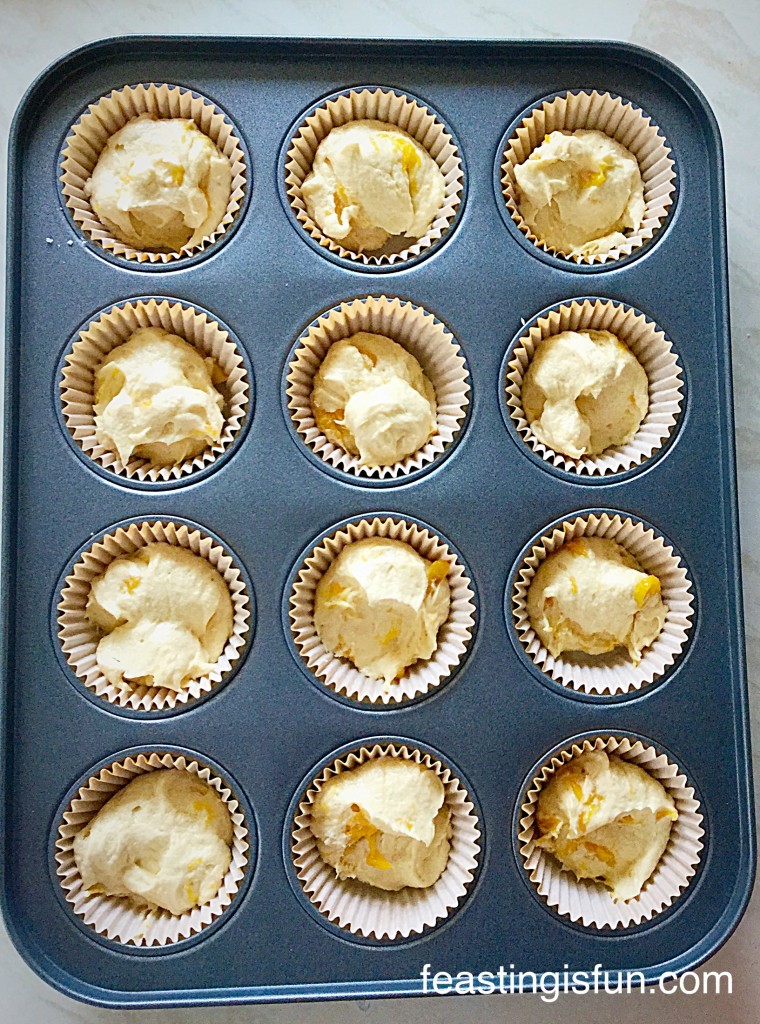
HM Marshmallow Frosted Mango Cupcakes
Mango Cupcakes ready for the oven.
  • Bake in the middle of the oven for 25-30 minutes. The low slow cooking will ensure flat tops, perfect for frosting.
  • The cupcakes are baked when they are golden brown and spring back from a light touch.
  • As soon as the cupcakes are baked remove from the oven.
  • Allow to cool for 5 minutes in the tin.
  • Remove the cupcakes from the tin and place on a cooling rack to cool completely.
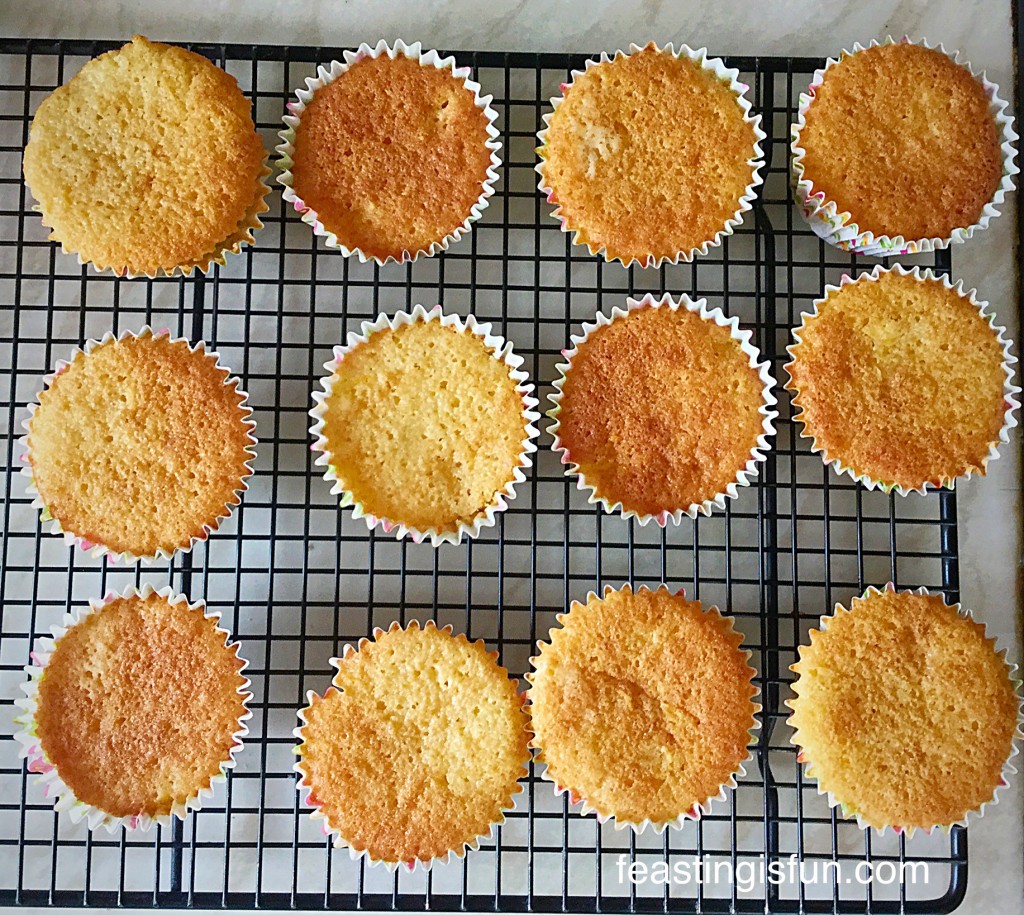
HM Marshmallow Frosted Mango Cupcakes
Gluten Free Cupcakes cooling on the rack.

Making The Marshmallow Frosting

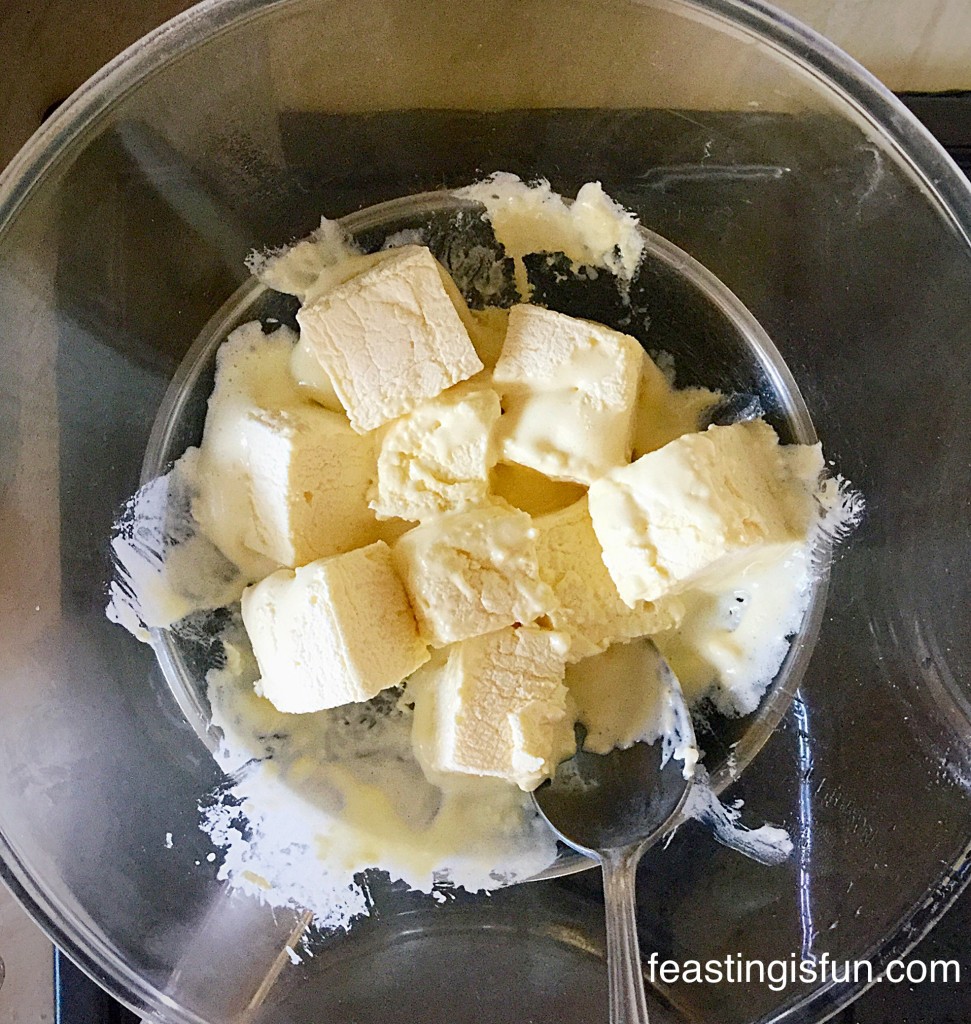
  • First of all, place the marshmallows into a heatproof bowl and place over a saucepan of barely simmering water.
HM Marshmallow Frosted Mango Cupcakes
Mango and Passionfruit Marshmallows starting to melt.
  • As the marshmallows melt it is important to keep stirring continuously.
  • As soon as they are melted remove the bowl from the saucepan and set to one side to cool.
HM Marshmallow Frosted Mango Cupcakes
Heavenly Melted Marshmallows!
  • While the melted marshmallows are cooling make the buttercream.
  • Add the softened butter and boiling water into the bowl of sifted icing sugar.
  • Whisk on a high speed until light and creamy.
  • Add the glycerine and whisk into the buttercream.
  • Pour the warm melted marshmallows into the buttercream, whilst the whisk is still mixing.
  • Continue mixing on a medium speed for 5 minutes.
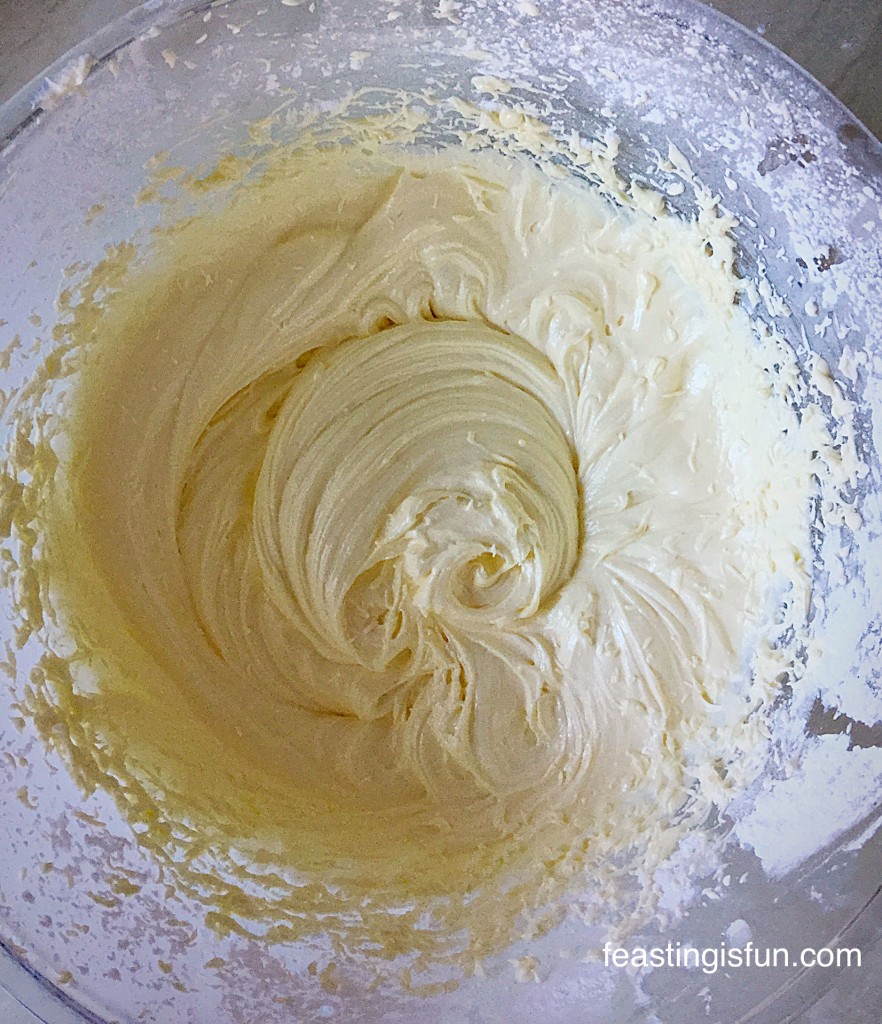
  • Resulting in the lightest frosting to pipe onto your cakes.
HM Marshmallow Frosted Mango Cupcakes
Light, creamy, marshmallow frosting.

Piping The Marshmallow Frosting

  • Fit a large piping bag with a large star tip – I used Wilton #1M
  • Place the bag inside a sturdy jug or glass, folding back the sides of the bag.
  • Fill the bag with the marshmallow frosting.
  • Pipe swirls (like ice cream in cones) or roses see here.
  • Finally, sprinkle over the topping of your choice.
FF Marshmallow Frosted Mango Cupcakes
Marshmallow Frosted Mango Cupcakes

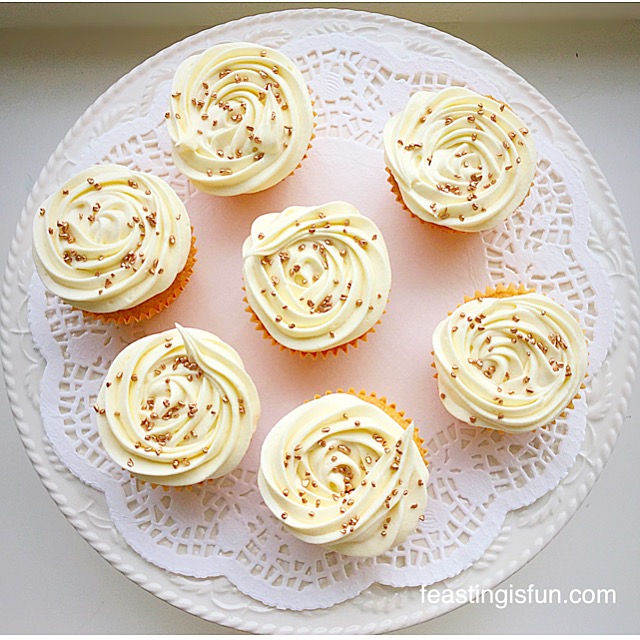
Unsurprisingly, these Marshmallow Frosted Mango Cupcakes are completely delicious and in a blind taste test the gluten free cupcakes tasted exactly the same as the regular ones! Most importantly, no difference at all was detected between the two versions. Obviously, as a recipe developer, this made me very happy.

And one part that was declared “exceptional” was the marshmallow frosting. So, this is a frosting that I will definitely be making again. Since both taste and texture are most definitely worth the extra step!

If you enjoyed this recipe for Marshmallow Frosted Mango Cupcakes You May Also Like These:

Raspberry Ripple Almond Cupcakes

Smartie Raspberry Ripple Almond Cupcakes
Raspberry Ripple Almond Cupcakes.

Springtime Vanilla Cupcakes

HM Springtime Vanilla Cupcakes
Springtime Vanilla Cupcakes

Maltesers Popping Candy Cupcakes 

FF Marshmallow Frosted Mango Cupcakes
Maltesers Popping Candy Cupcakes

So, if you make these, or indeed any of my recipes, please post a photo, if you are able, on Twitter or Instagram and tag me in. Because I really enjoy seeing your makes and bakes.

So, whatever you are making, baking and creating in your kitchens, have fun preparing and sharing your feast.

Sammie xx

Heavenly Marshmallows  provided me with the marshmallows for this recipe. All content, photographs and recipes are my own. Please see my Disclosure Policy.

Unfortunately Heavenly Marshmallows are no longer trading. So, I suggest Art of Mallow  Mango Passion Fruity Mallows, which I have tested using this recipe and are an equally good alternative.


Share
Facebooktwitterpinterestlinkedintumblr