Growing Vegetables Weeks 3-4

Share
Facebooktwitterpinterestlinkedintumblr

Wow, what a fortnight it has been. A heatwave swept through the country, leaving some in a flash of thunder and lightening. Temperatures soared here in the South East to 33 degrees Celcius. On top of the high temperatures we have also experienced some very strong winds. The combination of heat and wind has kept us on our toes caring for our fledgling container garden. Settle back and enjoy Bob and Sammie’s adventures Growing Vegetables Weeks 3-4.

FF Growing Vegetables Weeks 3-4
Growing Vegetables Weeks 3-4 Nasturtium Peach Melba

I apologise for not posting last weekend. What started out as a very nasty migraine, proved to be a sinus and ear infection, which I am still battling, but definitely feeling better than I was!

As you may recall I had been waiting for the wind to die down so that our Chilli plants could be planted out in the front garden.

FF Growing a Vegetables Weeks 3-4
Growing Vegetables Weeks 3-4 Chilli plants and borage doing well.

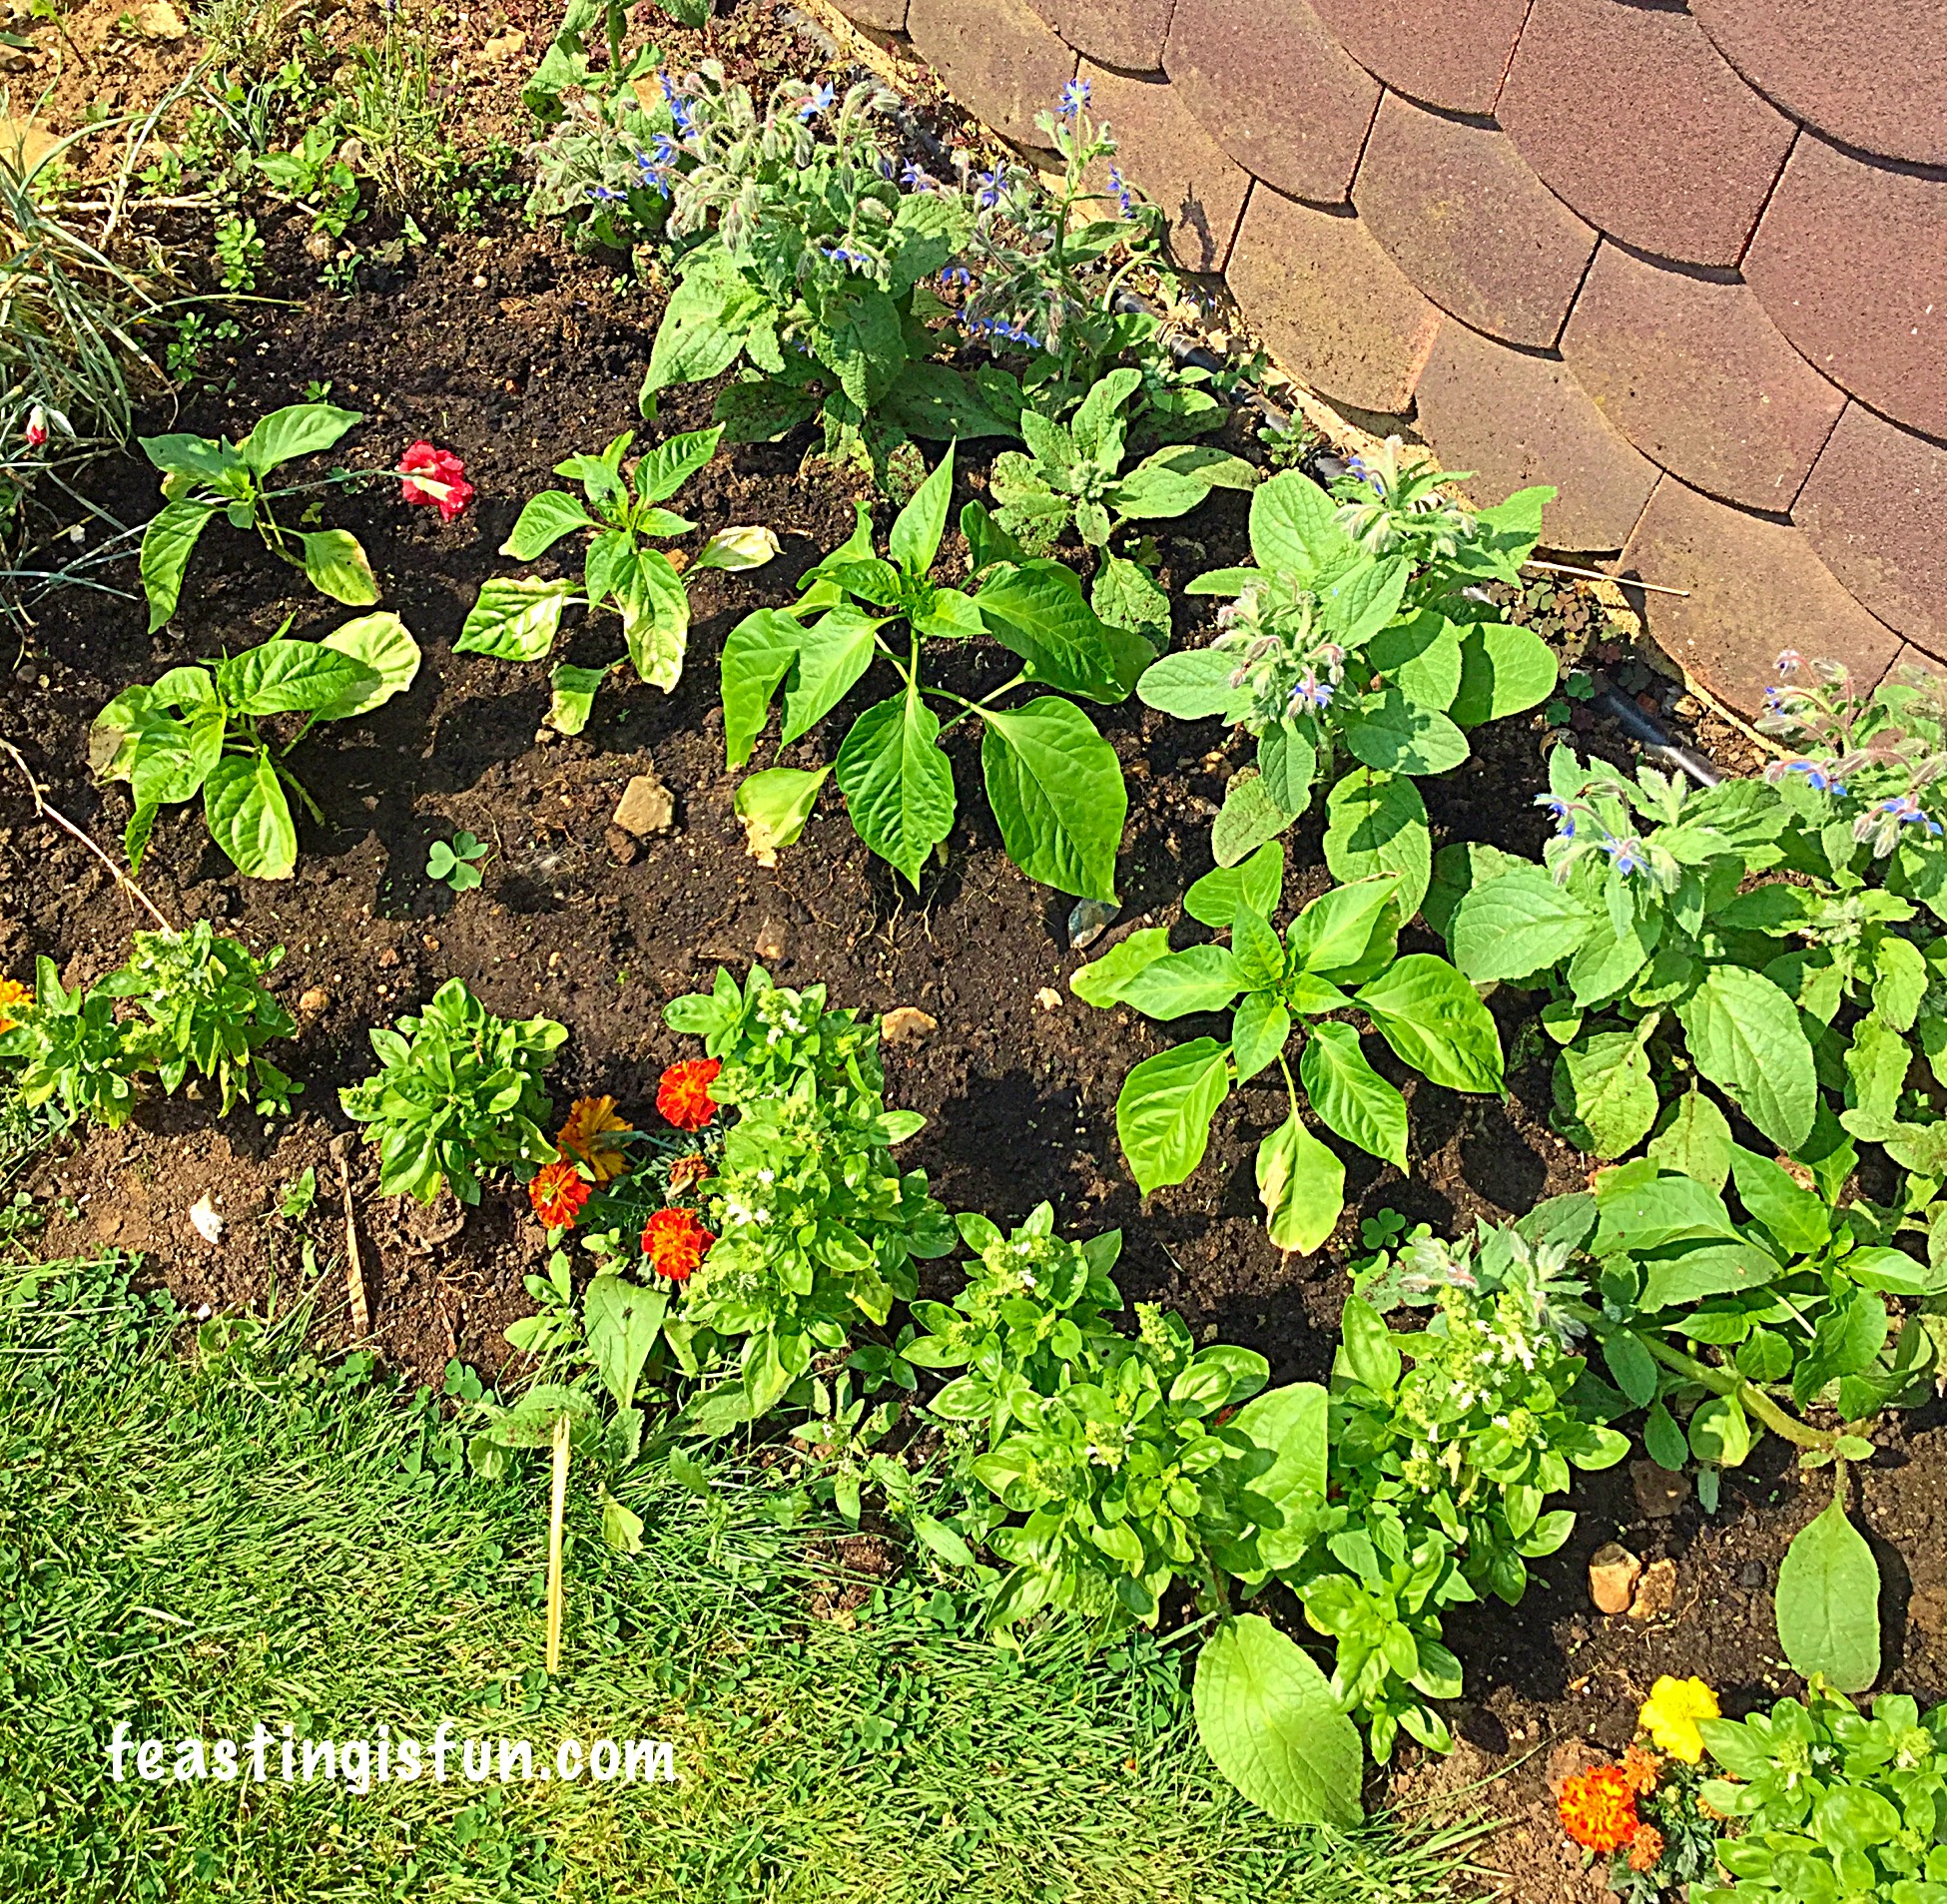
The Chilli plants were indeed planted out at 8am one morning following a period of rain, with further rain promised. Even so, they were thoroughly watered in and seemed to be doing fine – until the heatwave hit. At midday last Tuesday it looked as though we were going to lose them. The Chill and Borage plants were completely wilting under the sun’s intensity.

Bob fetched can after can of water, which was then poured directly at the base of each plant. We could only hope and wait to see if they would recover. I think we caught them just in time, as one hour later they had perked up considerably. The front garden is South facing and the tiles beneath the front window also absorb heat from the sun. The plants in this bed now get watered three times a day. Hopefully as the heat settles and the plants really get their roots into the soil we can water less often.

FF Growing Vegetables Weeks 3-4
Growing Vegetables Weeks 3-4 Our first proper harvest.

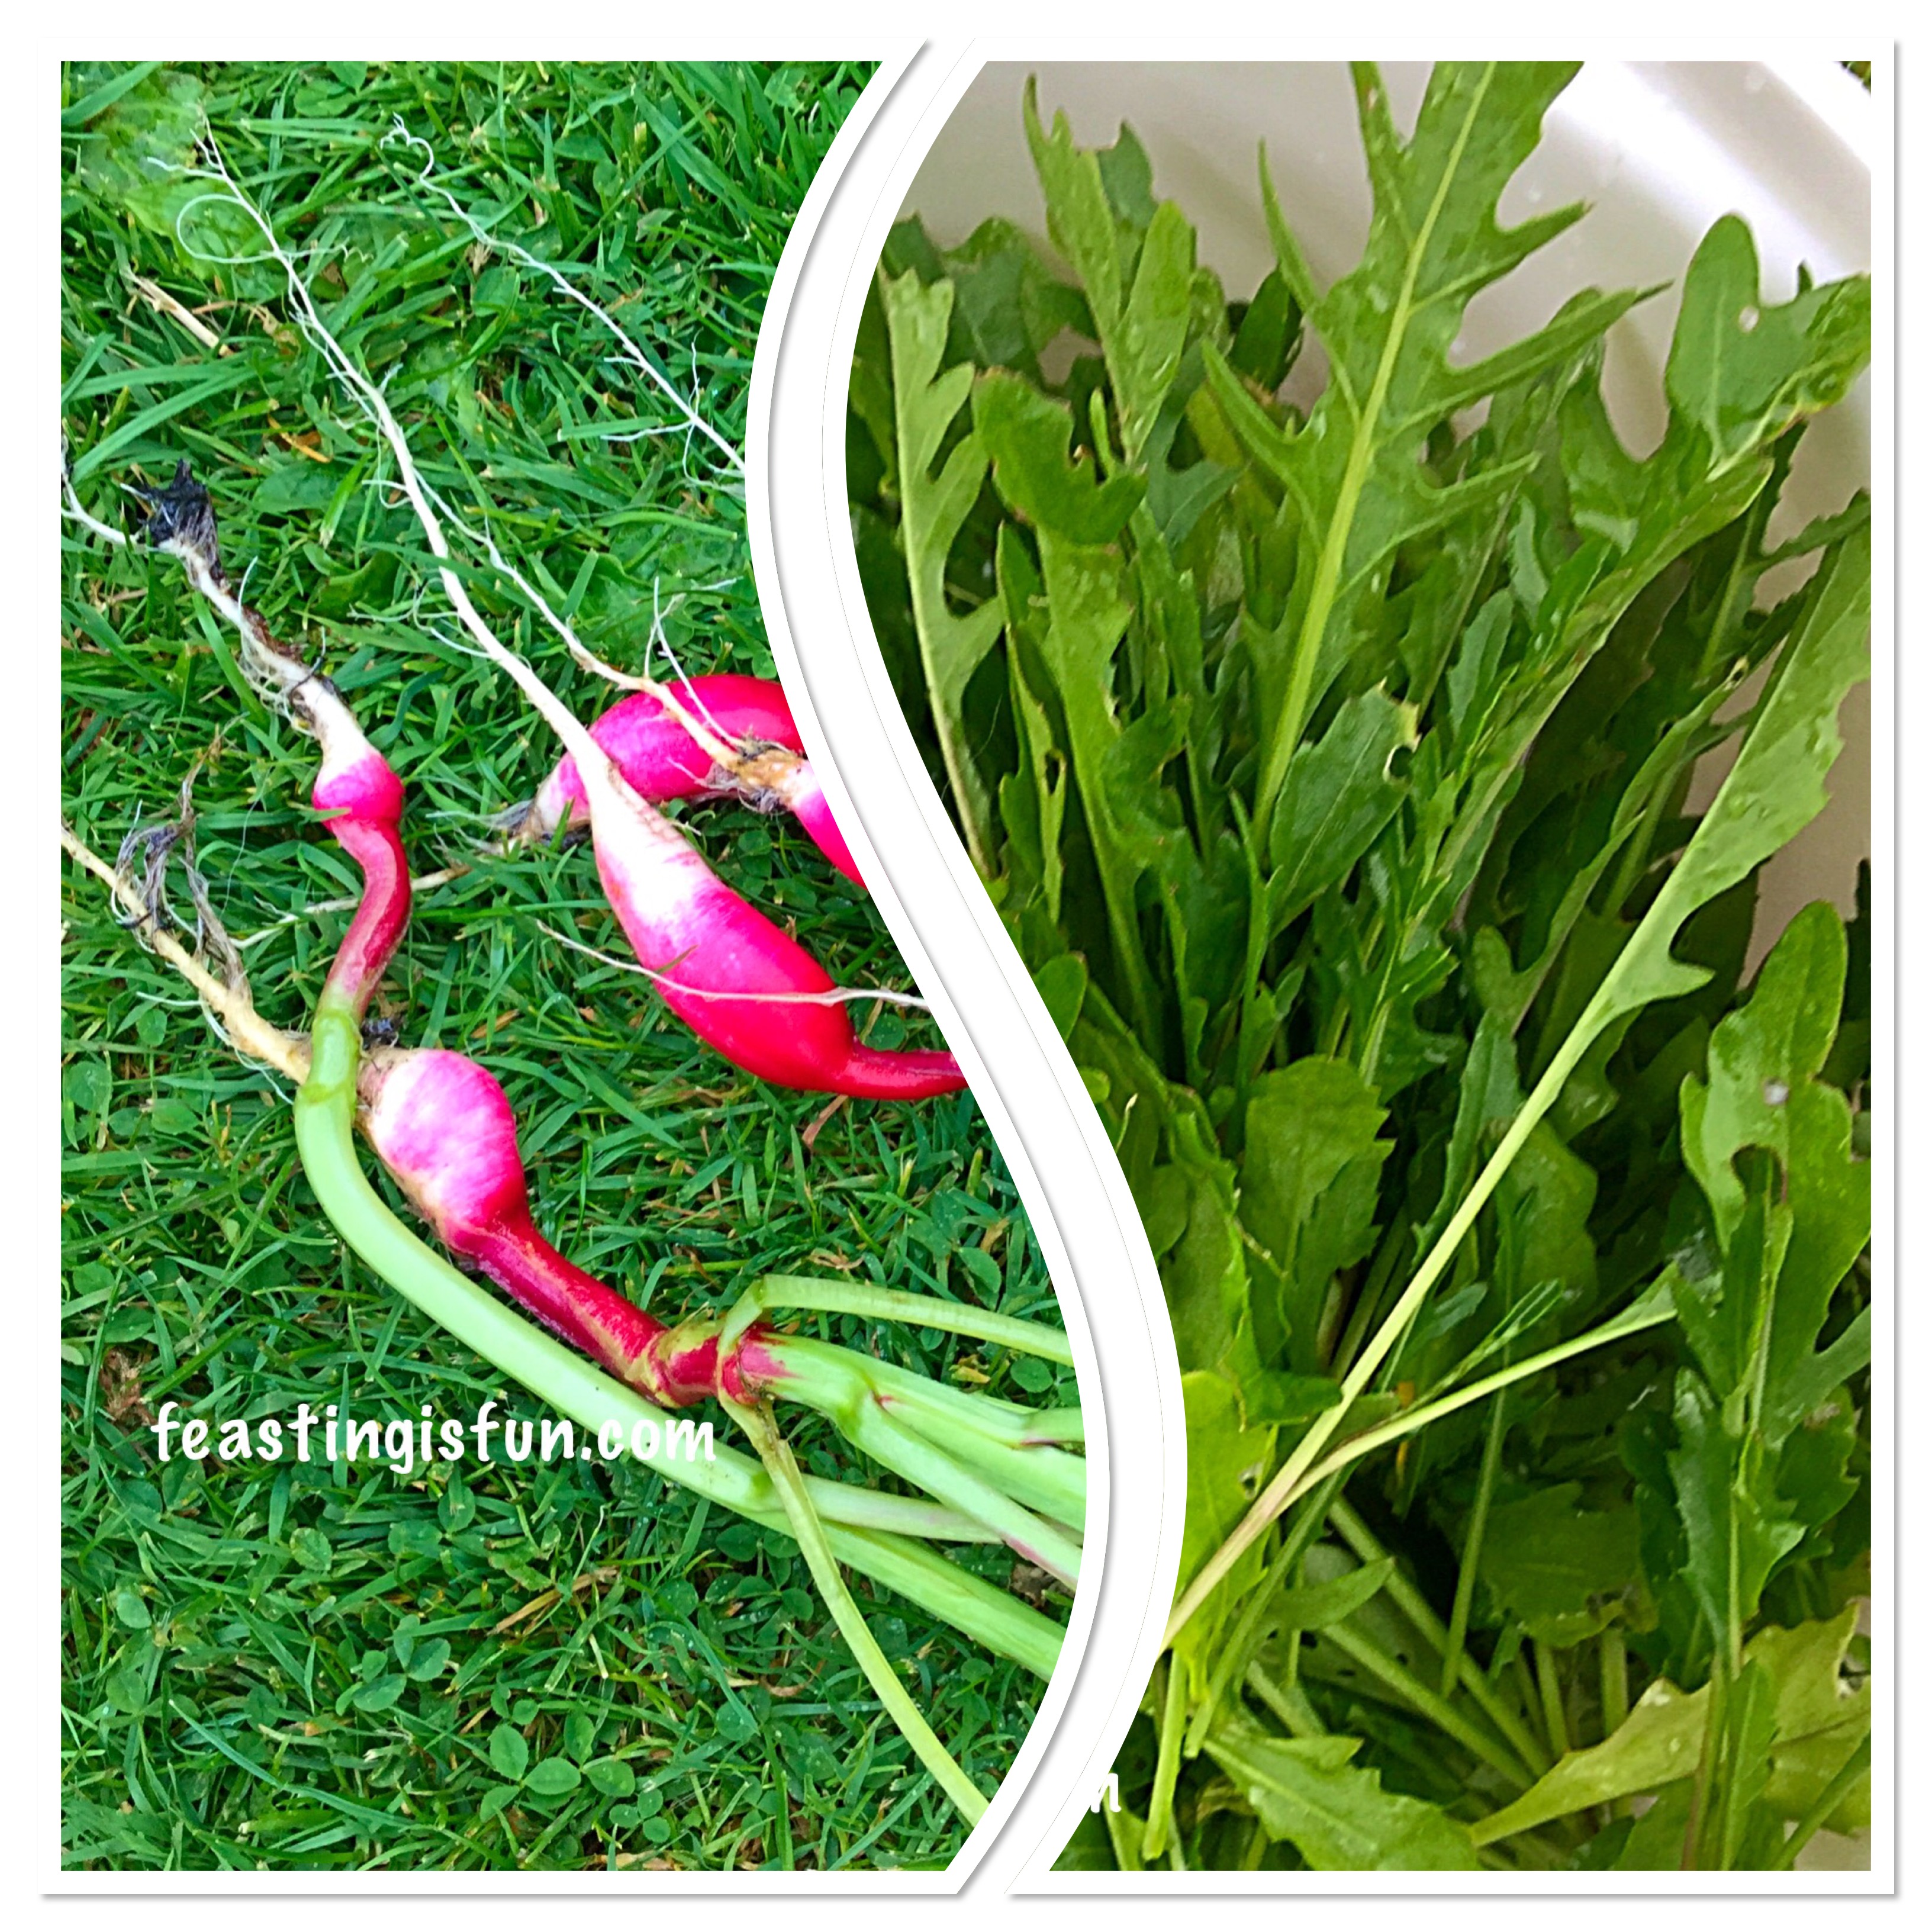
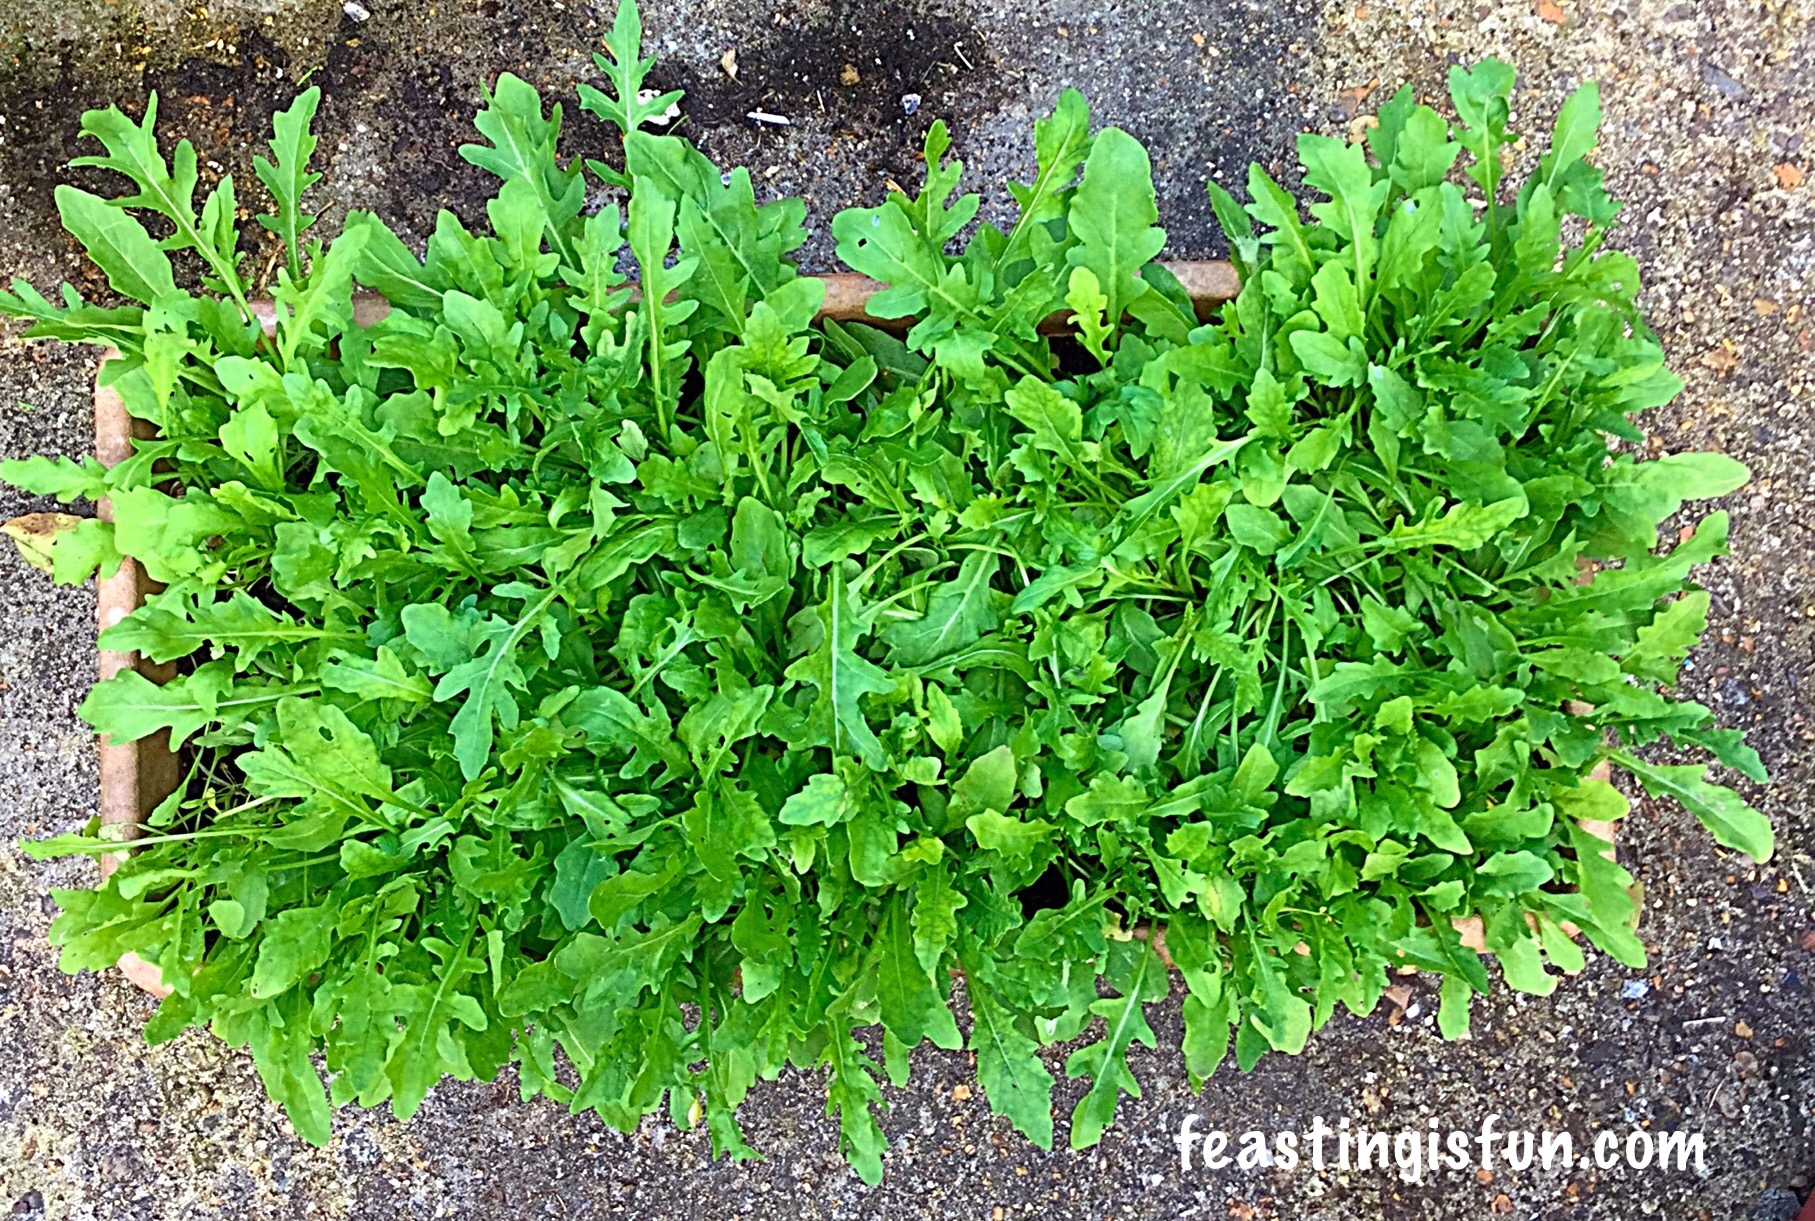
The beauty of the rain followed buy the heatwave was that we got to pick and eat our first proper harvest. French Breakfast Radishes (they are so pretty) and big handfuls of Wild Rocket. These were incorporated into our salad with quiche and new potatoes and they tasted amazing.

As we are growing organically, without the use of pesticides, we do get the odd snail which we pick off, or various bugs that like to live amongst the salad leaves. To ensure they don’t end up on our dinner plates I cut the leaves with scissors, plunge them into a bowlful of cold water and the dry them in a salad spinner. If you don’t have a salad spinner, wrapping the leaves in a tea towel and swinging it in a circular motion, preferably in the garden also works – although you may attract some funny looks from your neighbours!!!

FF Growing Vegetables Weeks 3-4
The heatwave did affect the plants.

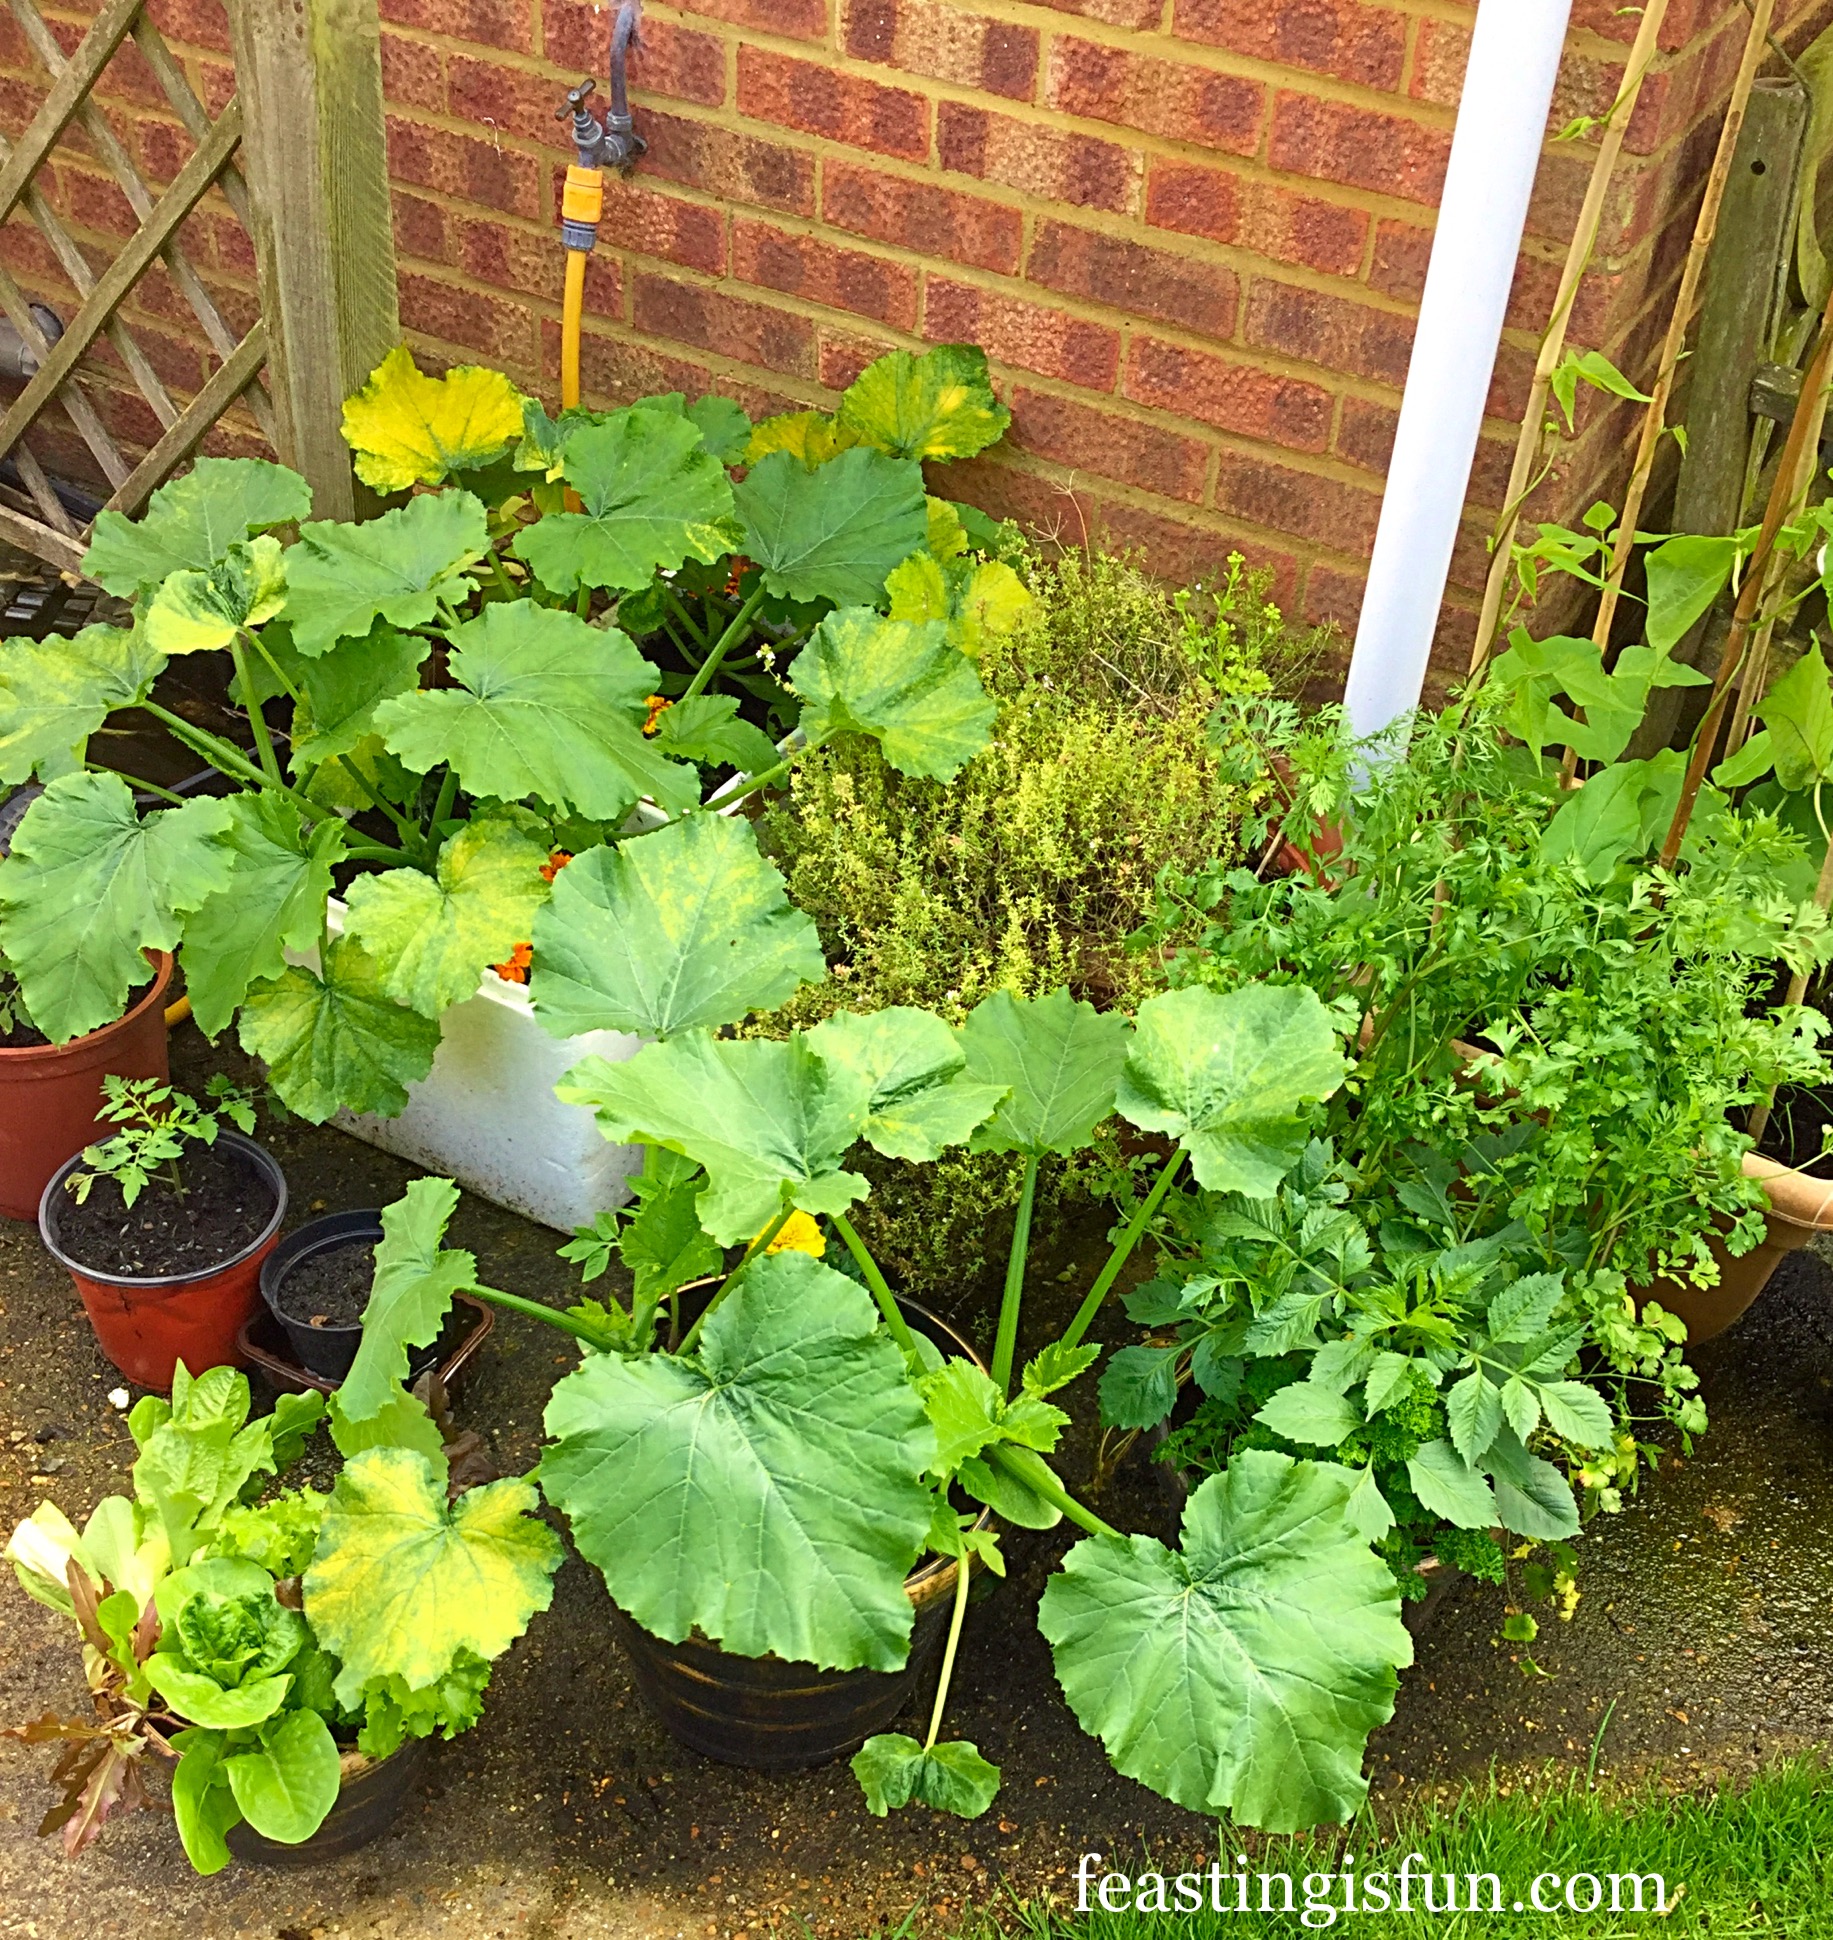
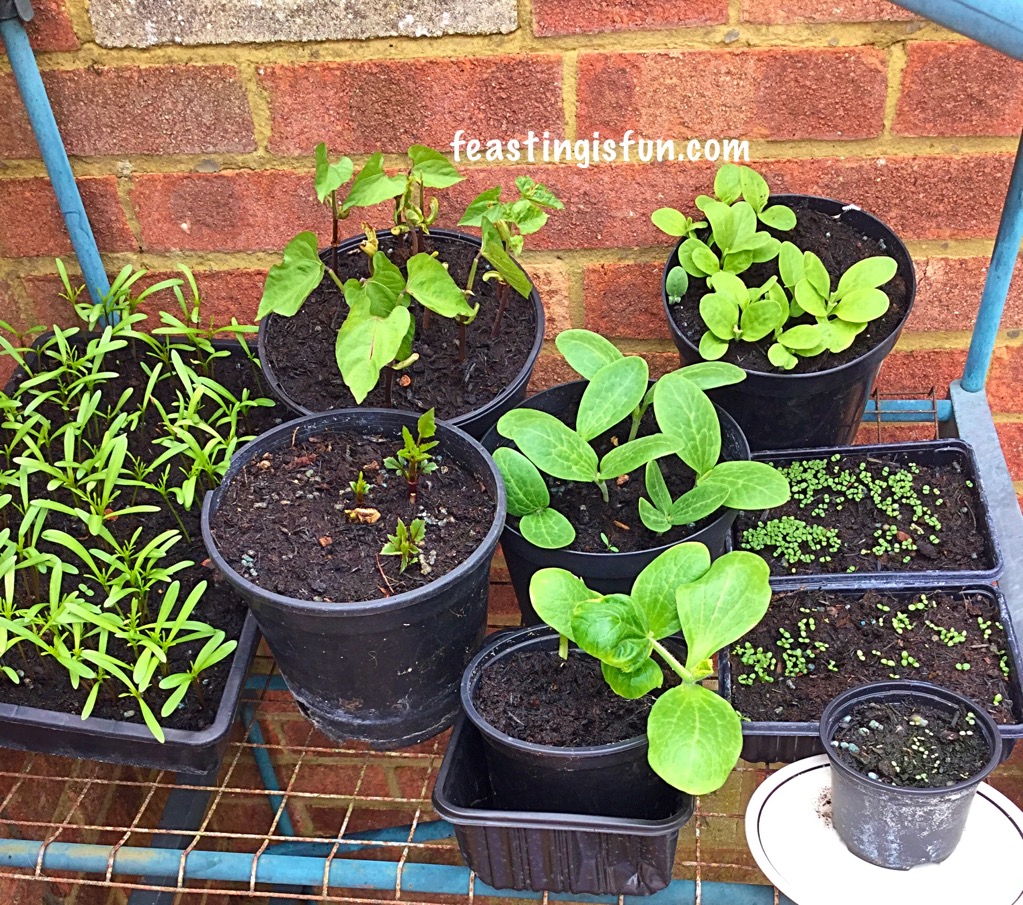
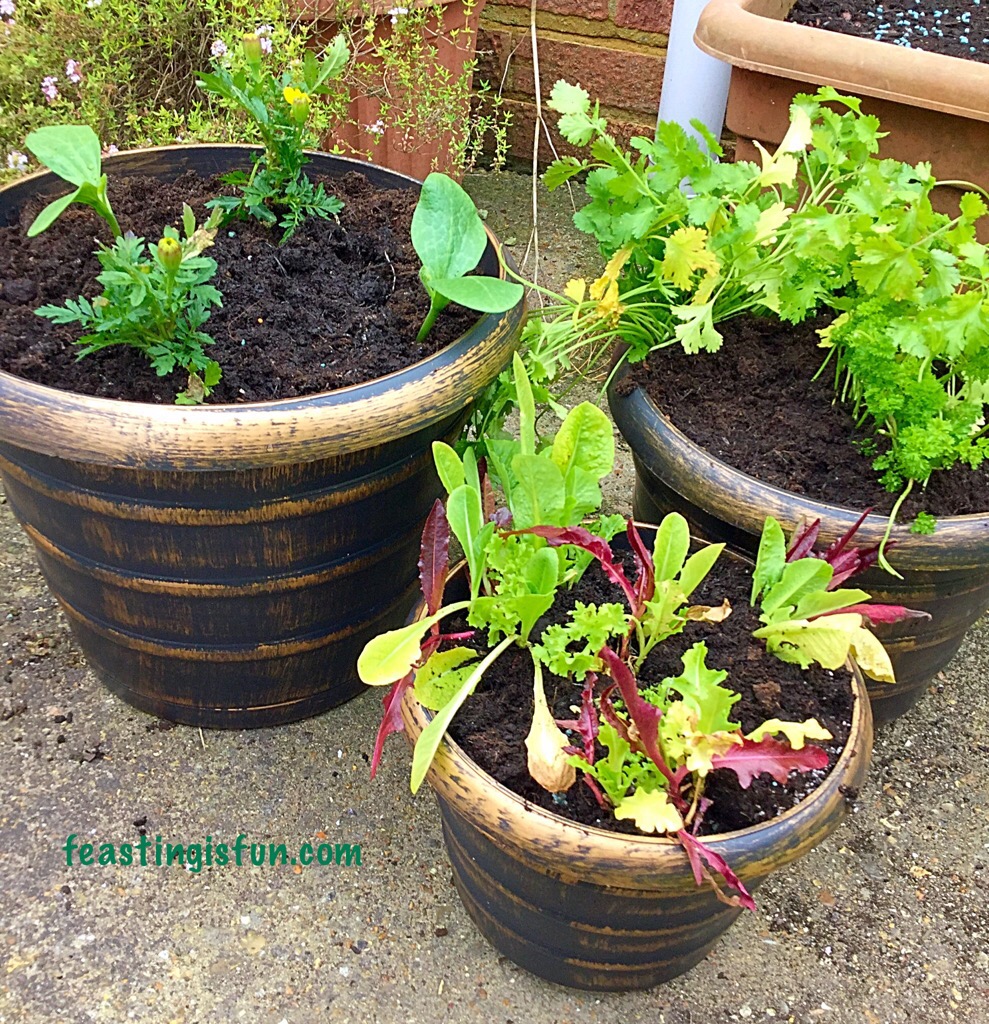
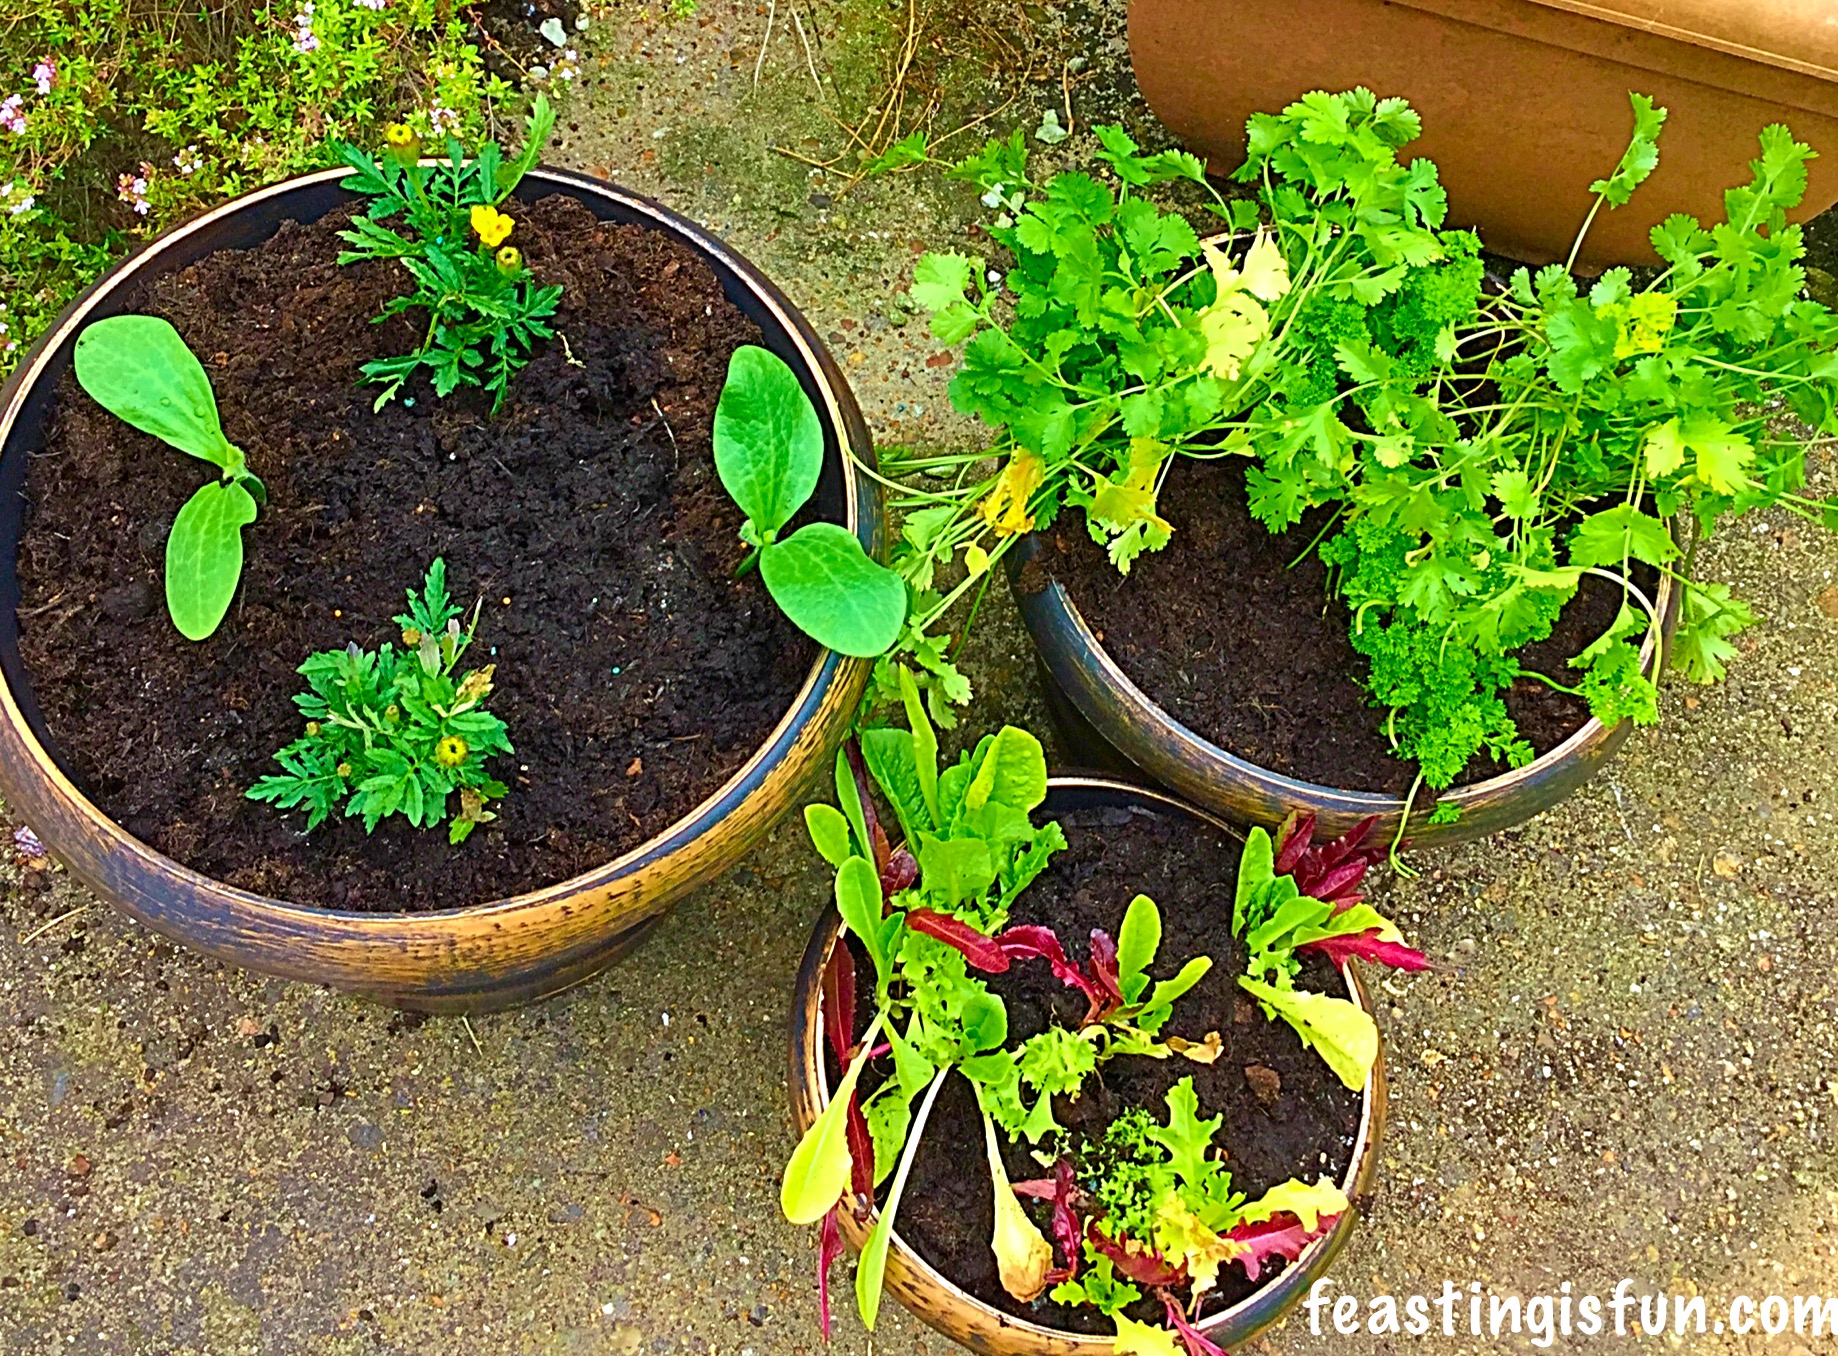
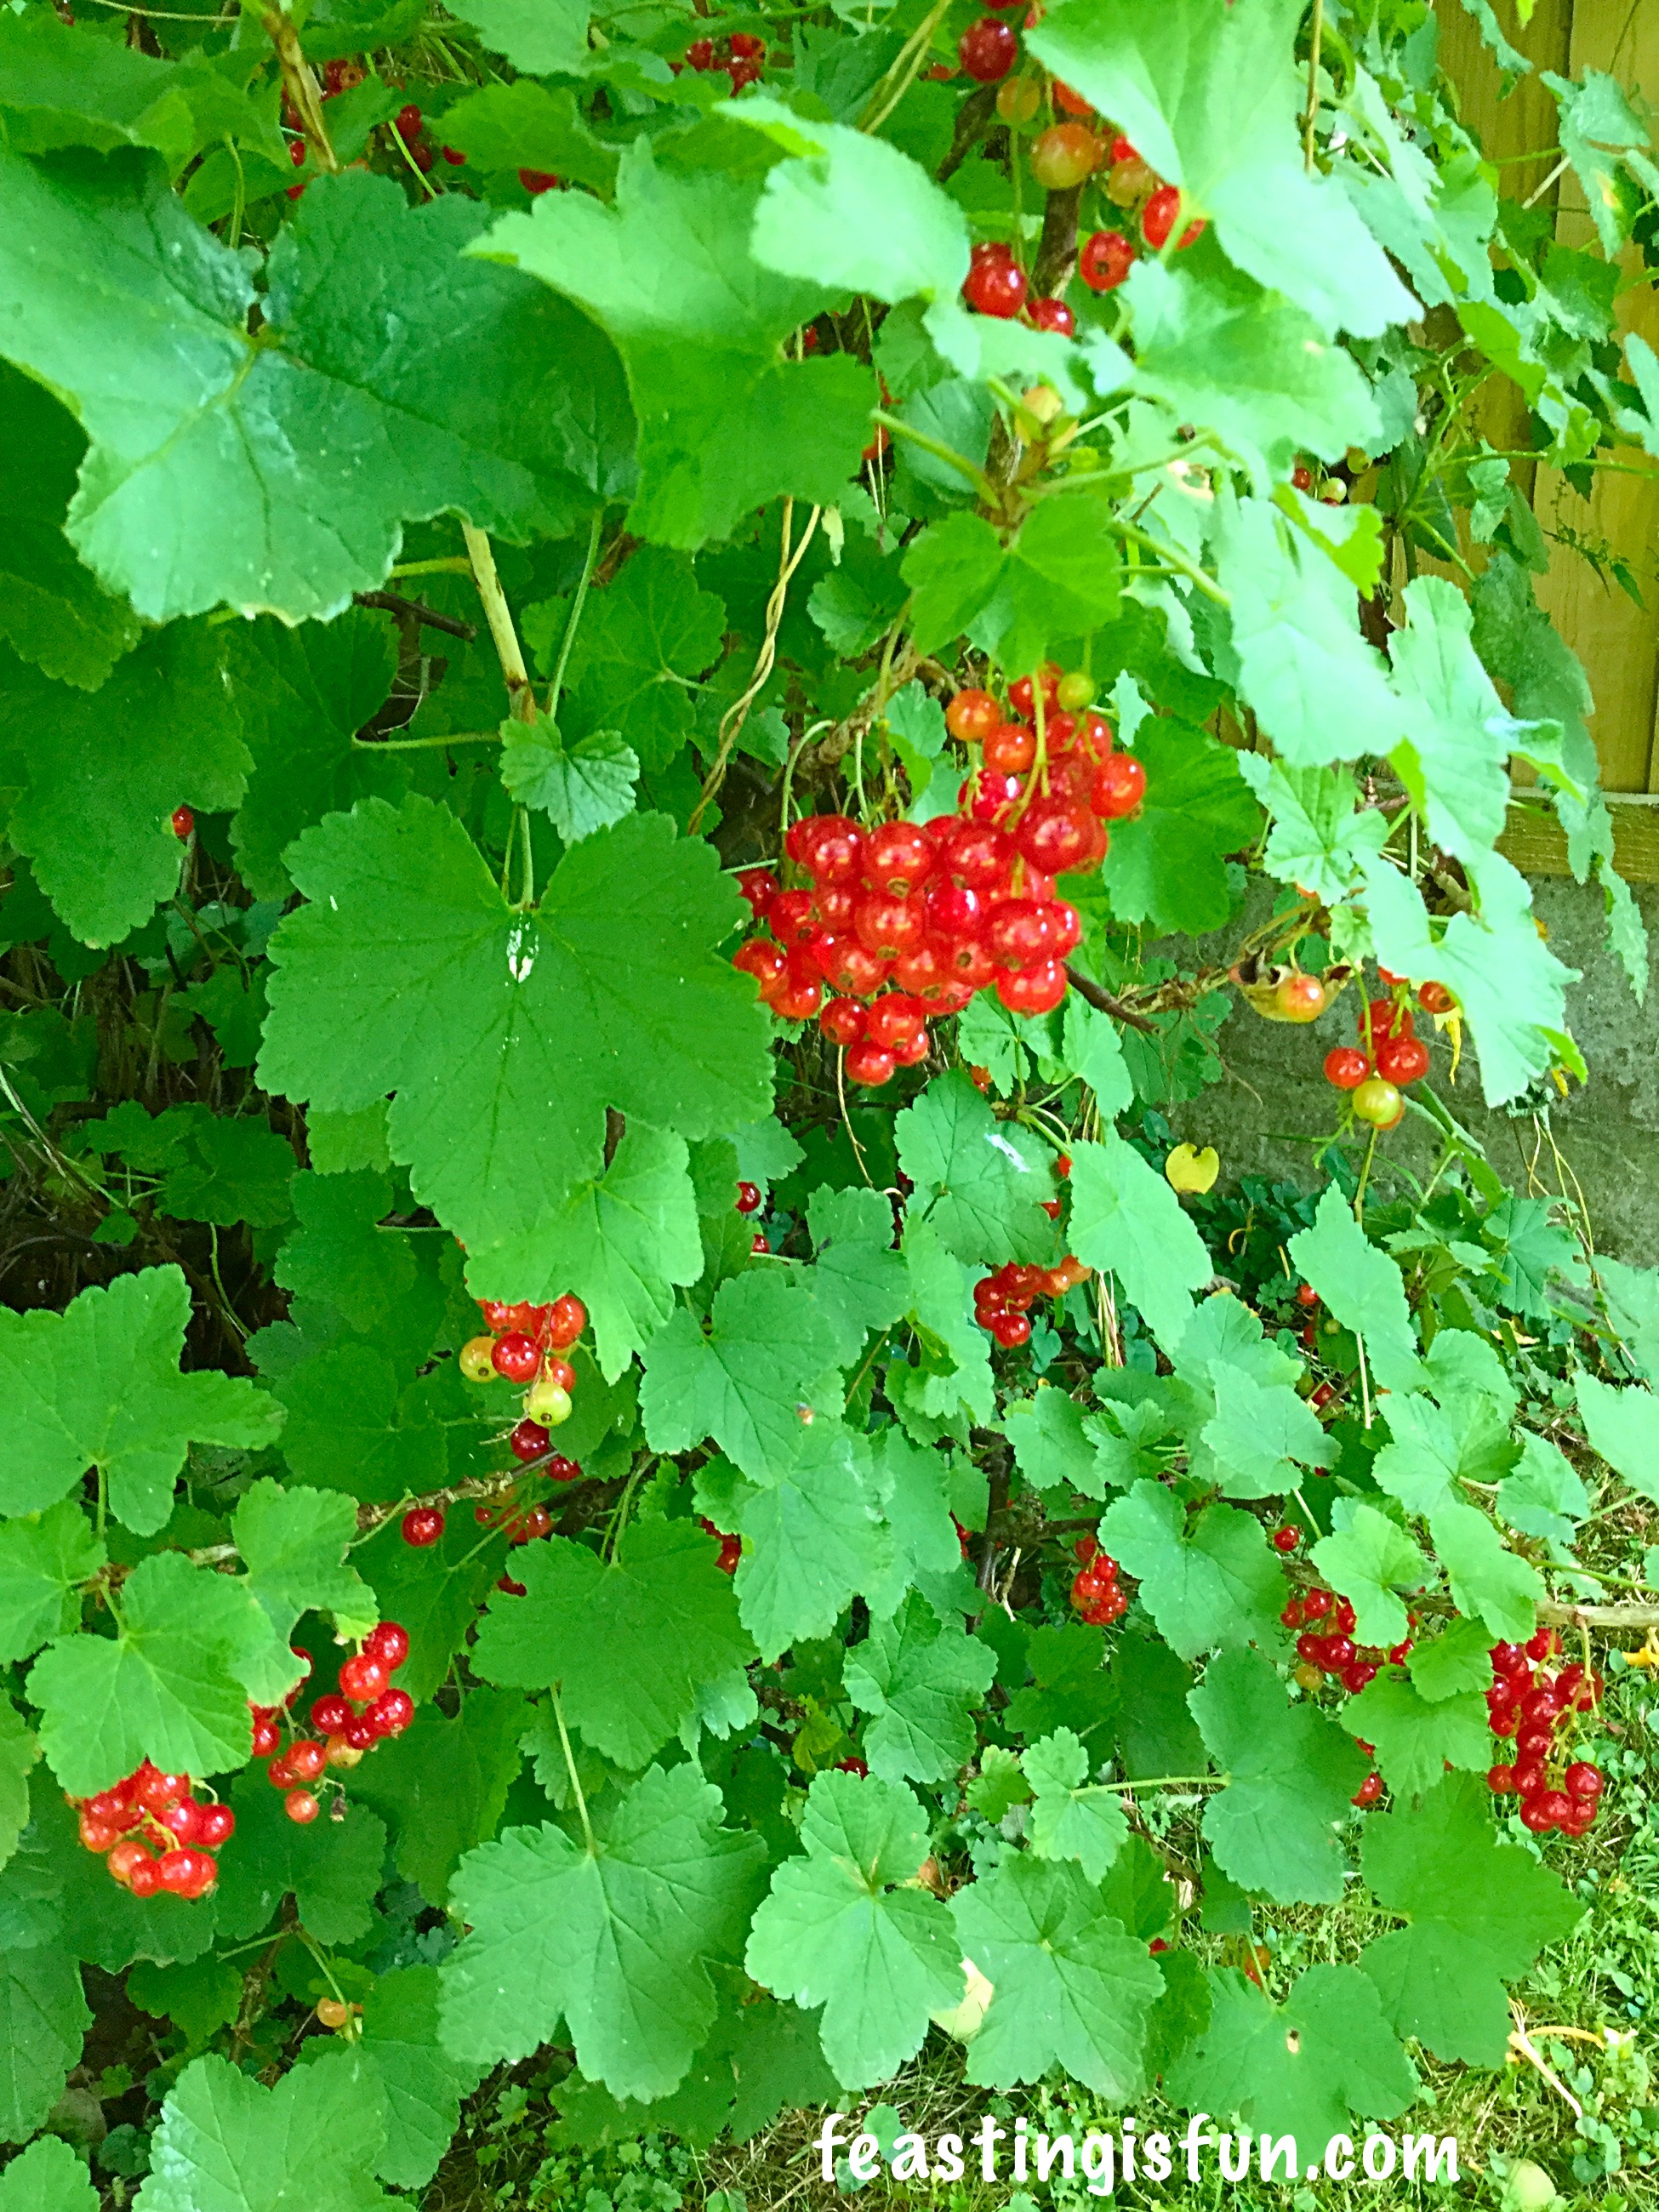
In the photo above there are Rainbow Carrots planted in a deep pot in the centre, next to my permenantly planted Chives – companion planting, to deter carrot fly with the mild smell of onion from the chives. You can also see a very pretty white flower leaning over the carrots. This is the French Breakfast Radishes that ran to seed due to the heat.

Put in very basic terms, during periods of stress, such as high temperatures or lack of water, it is not uncommon for vegetables to prematurely flower. These will then be pollinated and the plant produces seed. During the heatwave this happened not only to our radishes, but also some of our lettuces and the wild rocket. The term is called ‘bolting’ where the lettuce plant grows tall. Generally the leaves become very bitter and the plant is best removed and put on the compost heap!

Growing Vegetables Weeks 3-4
Growing Vegetables Weeks 3-4 more success!

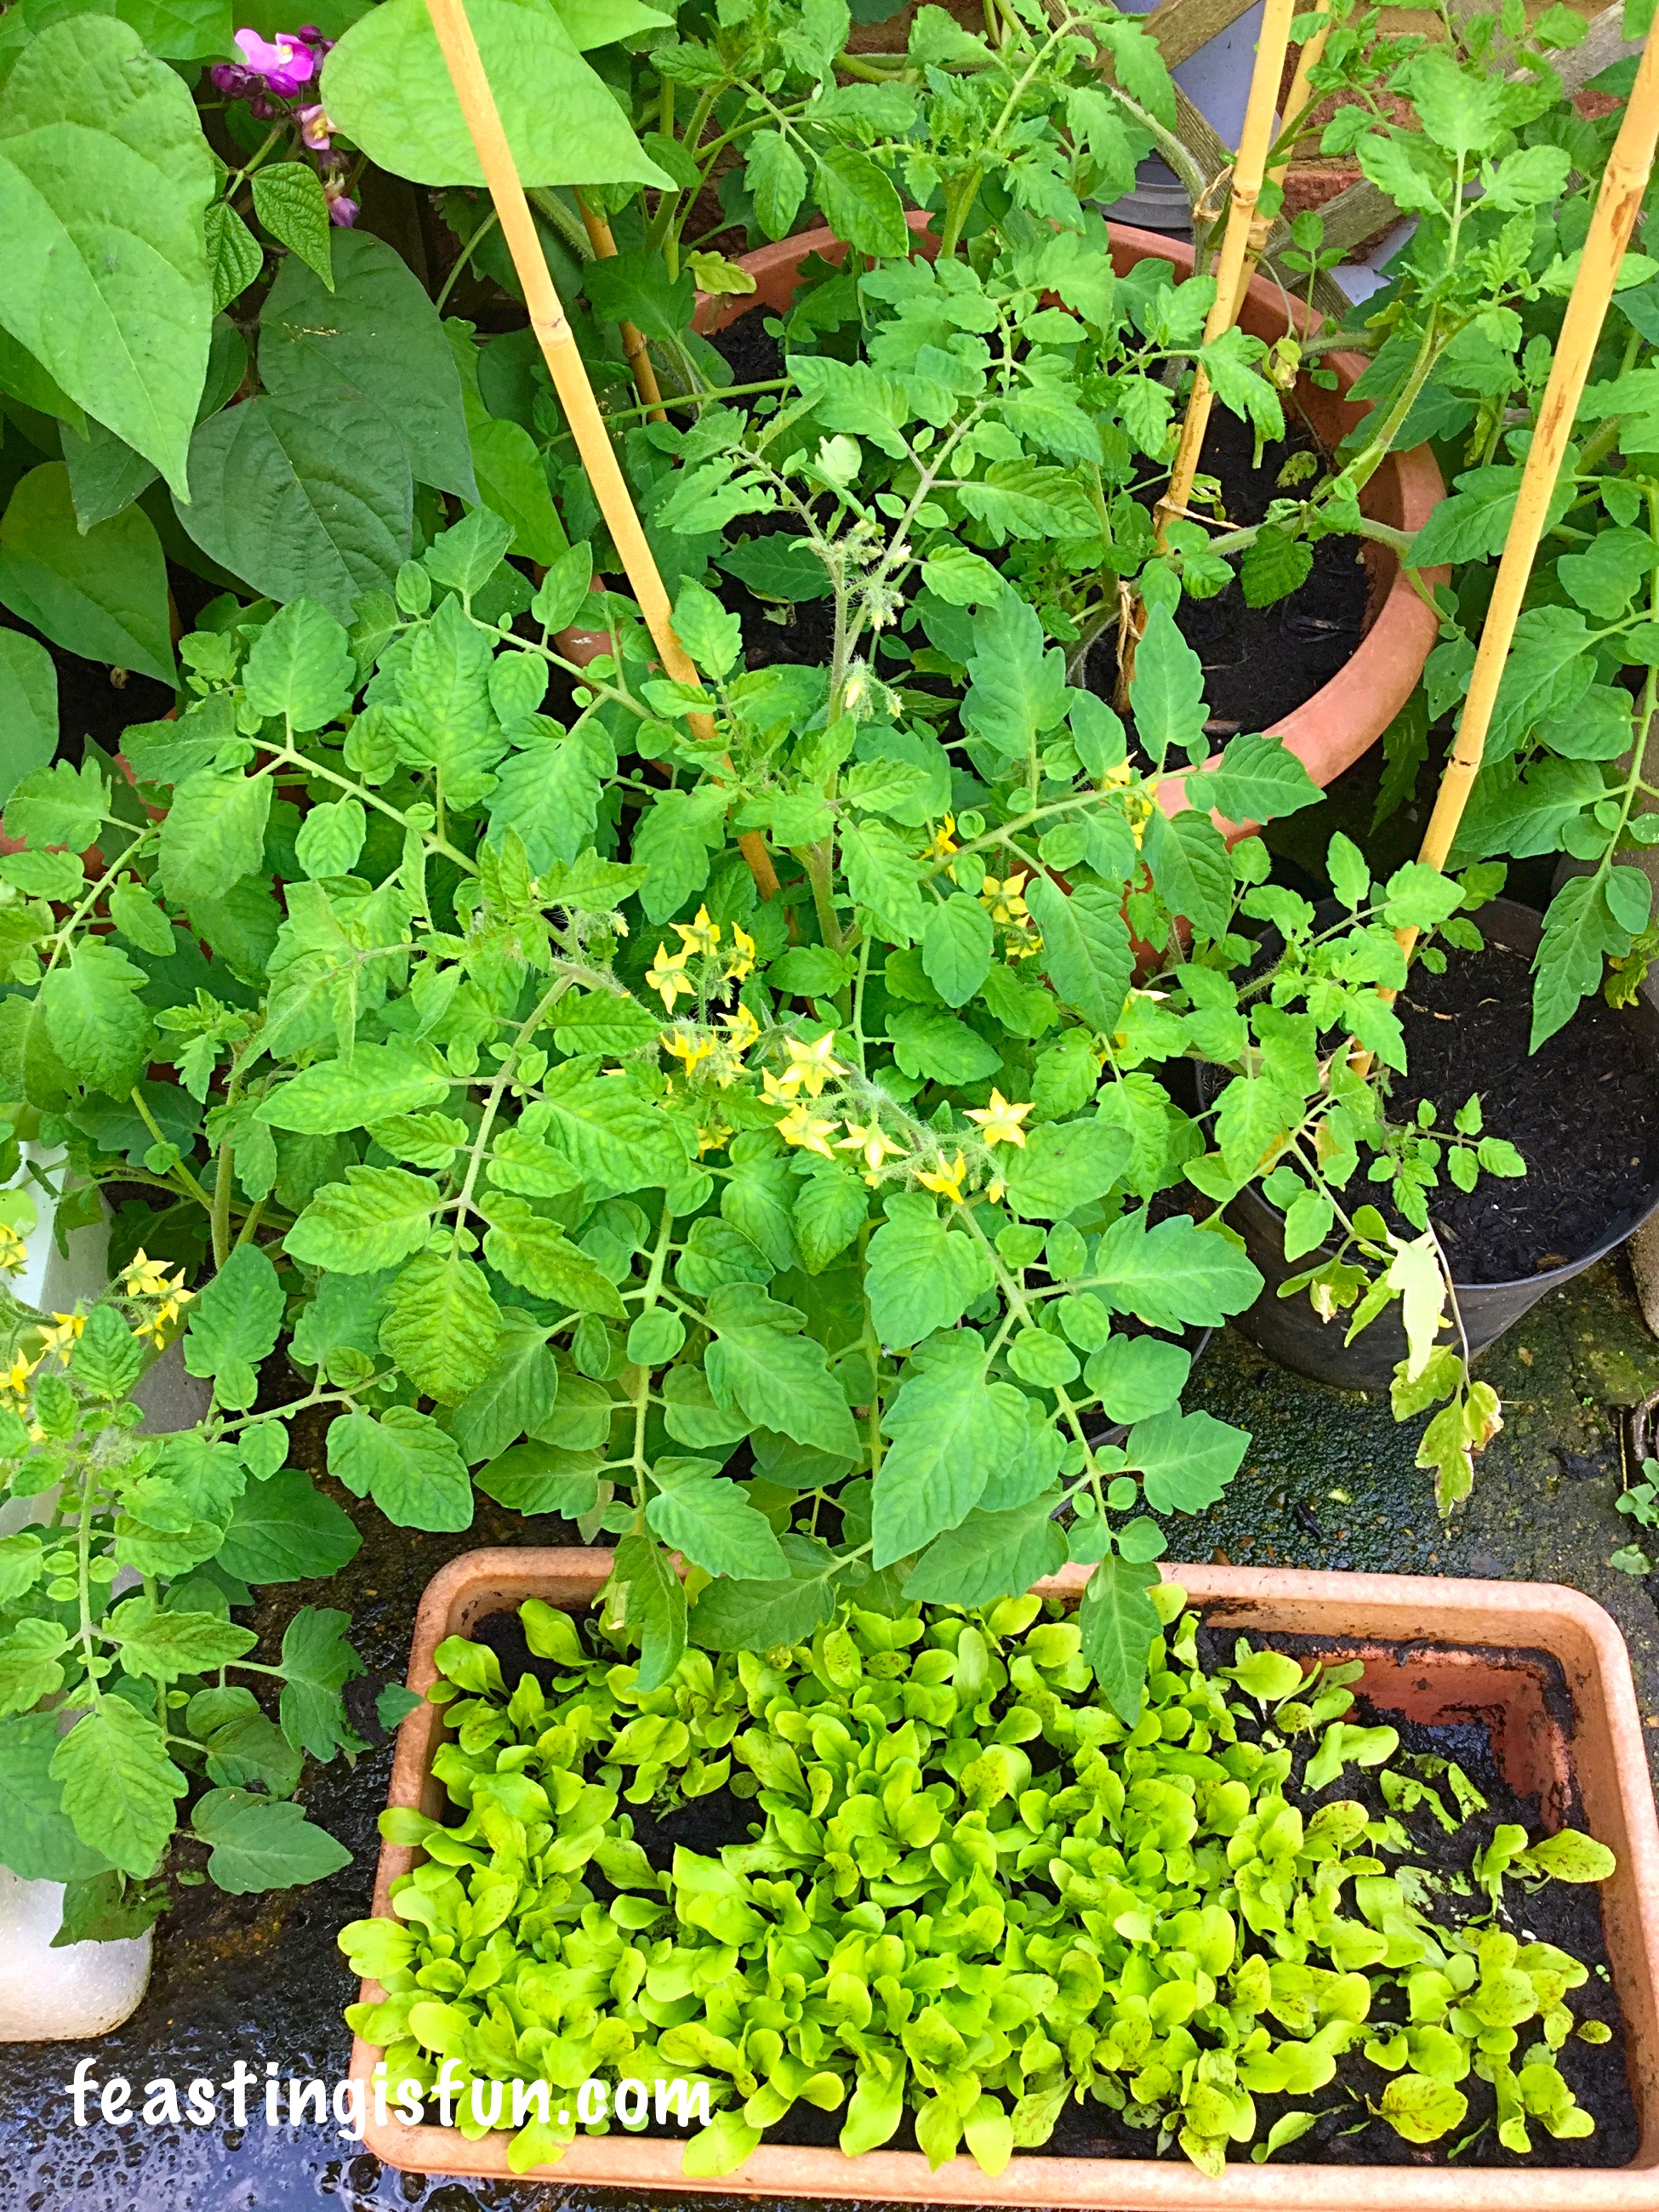
Two weeks ago Bob and I sowed some Freckles lettuce seeds from Groseeds. They are growing really well in a shadier part of the garden and should be ready to cut in another fortnight’s time. In the photograph above you can also see the Gartenpearle tomatoes are in full bloom and to the upper left you can see a beautiful purple flower.

FF Growing Vegetables Weeks 3-4
Purple Queen a semi – climbing French style bean.

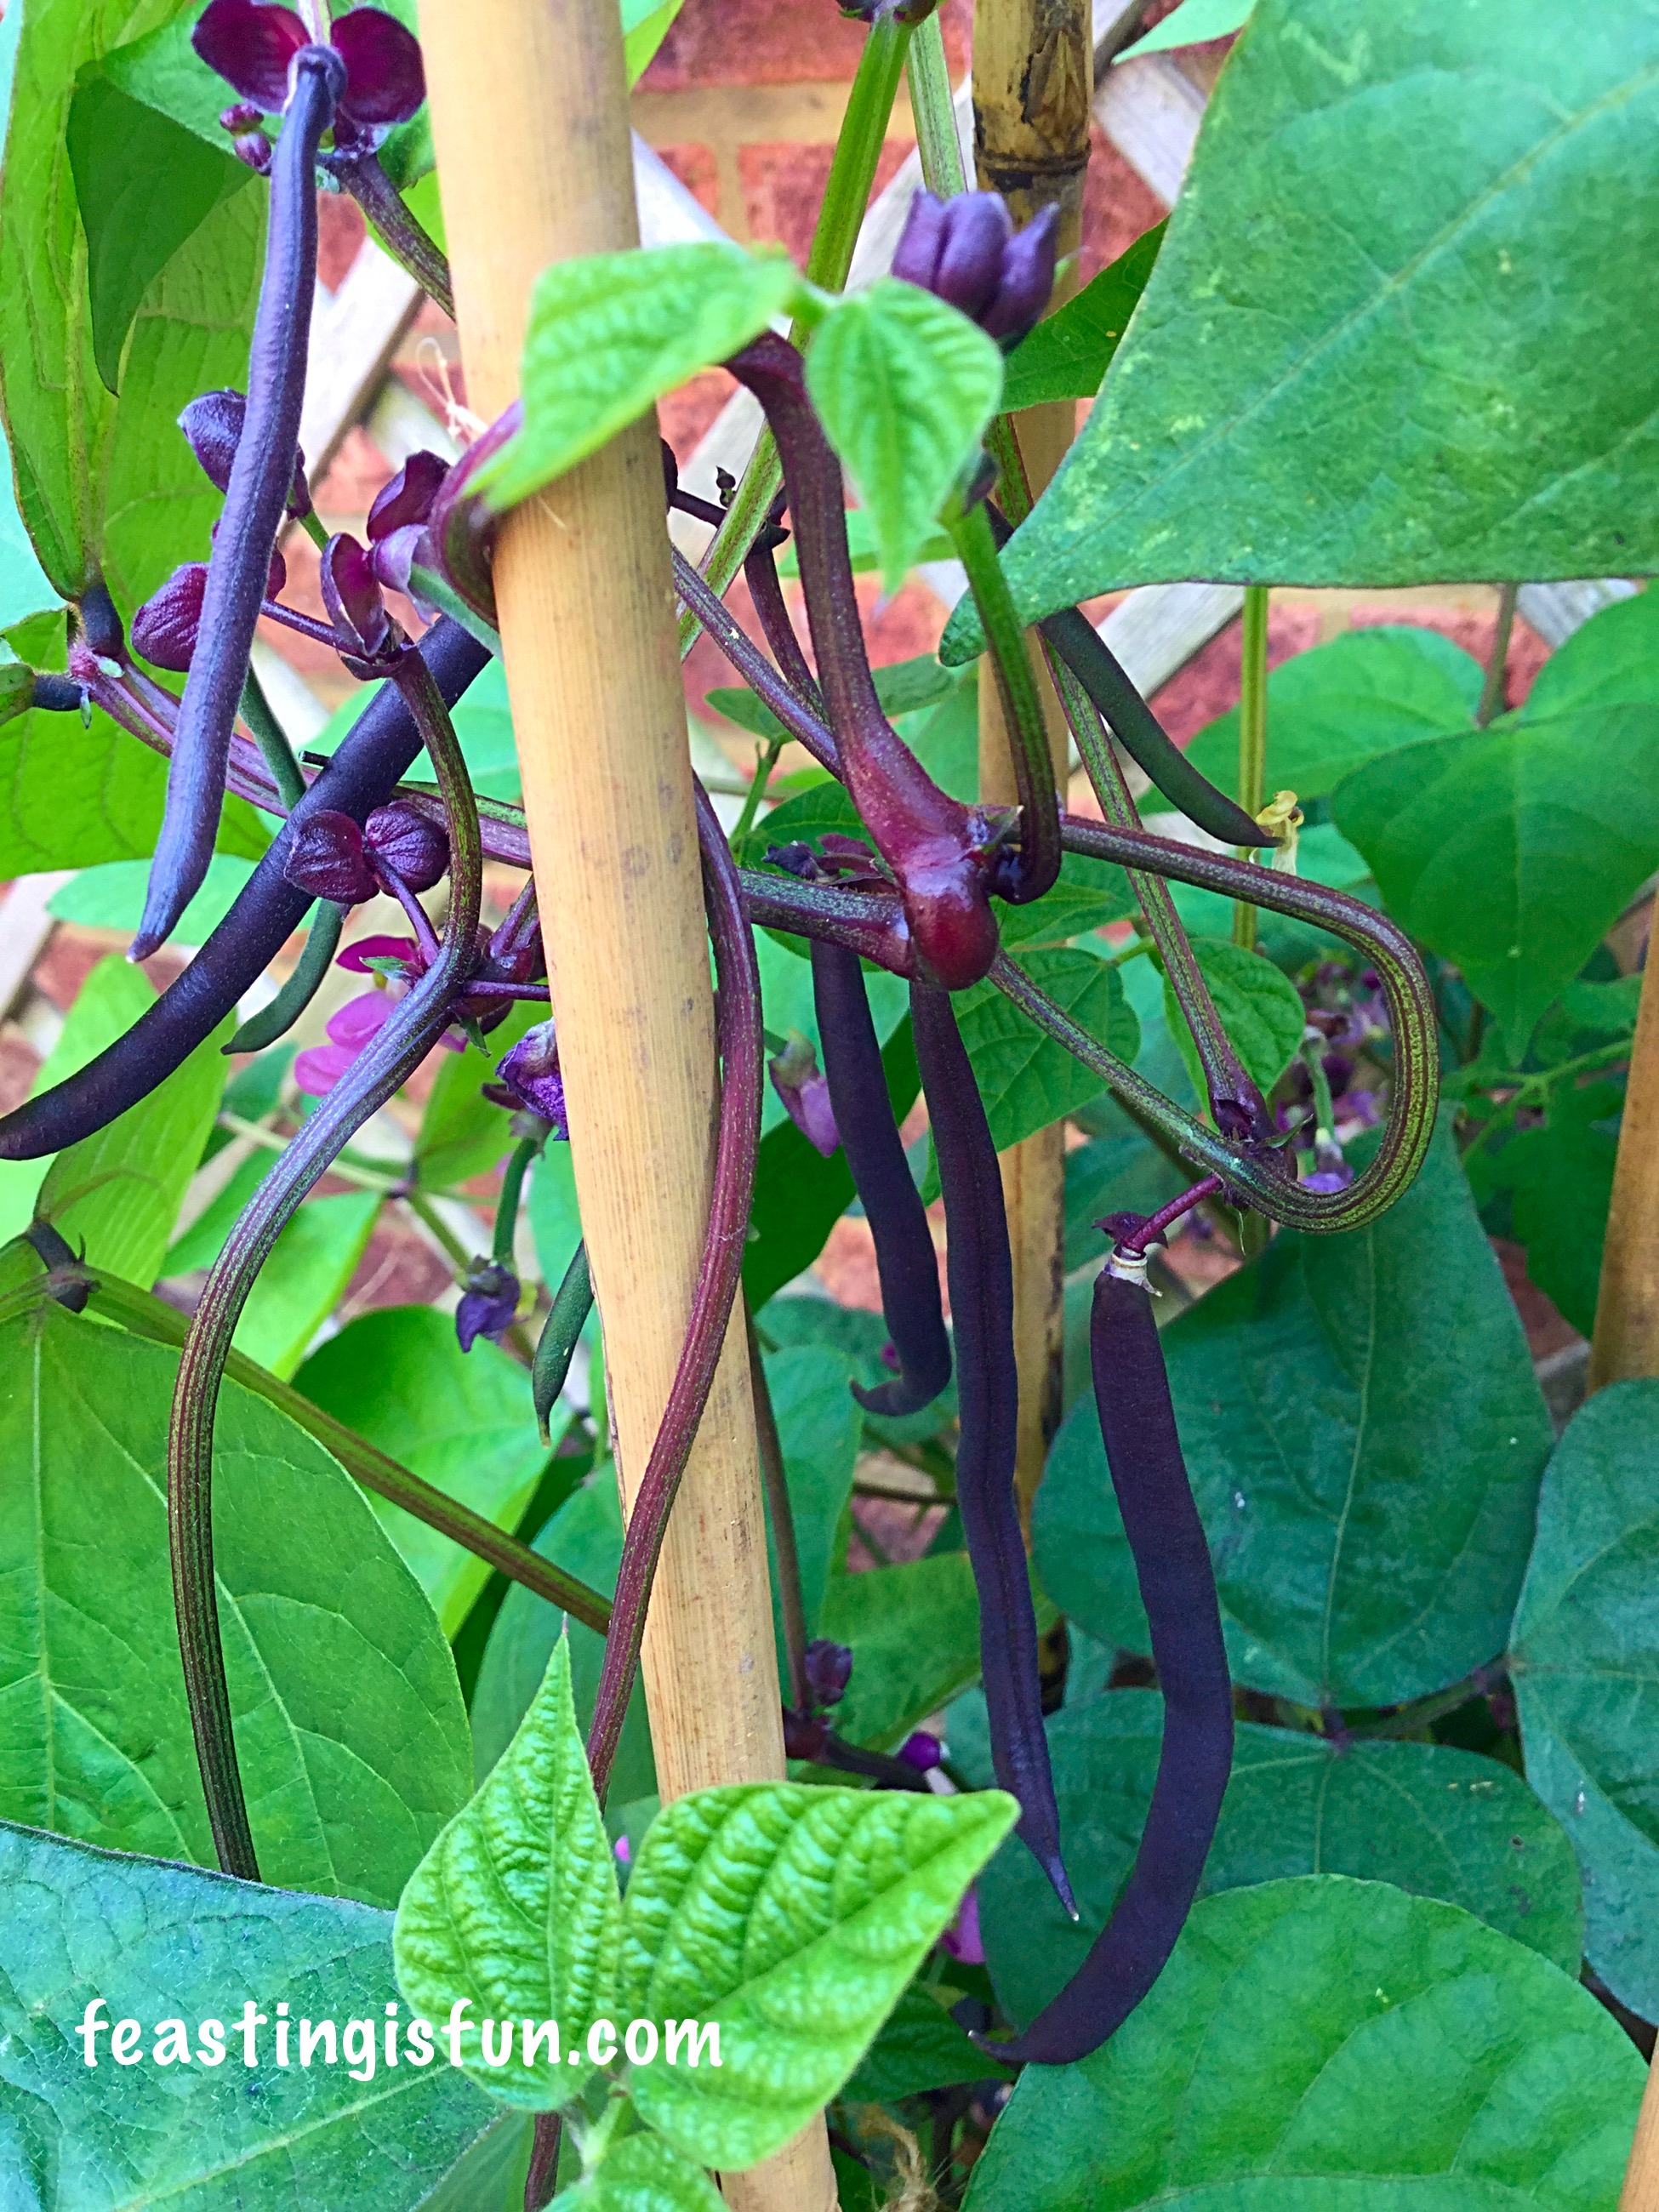
Whilst I had been unwell, Bob had been in charge of watering, our Purple Queen French Beans had been happily blooming and growing. We must be doing a good job of attracting pollinators, these beans as well as our courgettes are starting to produce vegetables. All our hard work is paying off.

It is the most thrilling feeling to have a root around your container vegetables to find mini courgettes developing and beans growing!

FF Growing Vegetables Weeks 3-4
Growing Vegetables Weeks 3-4 Golden yellow courgettes.

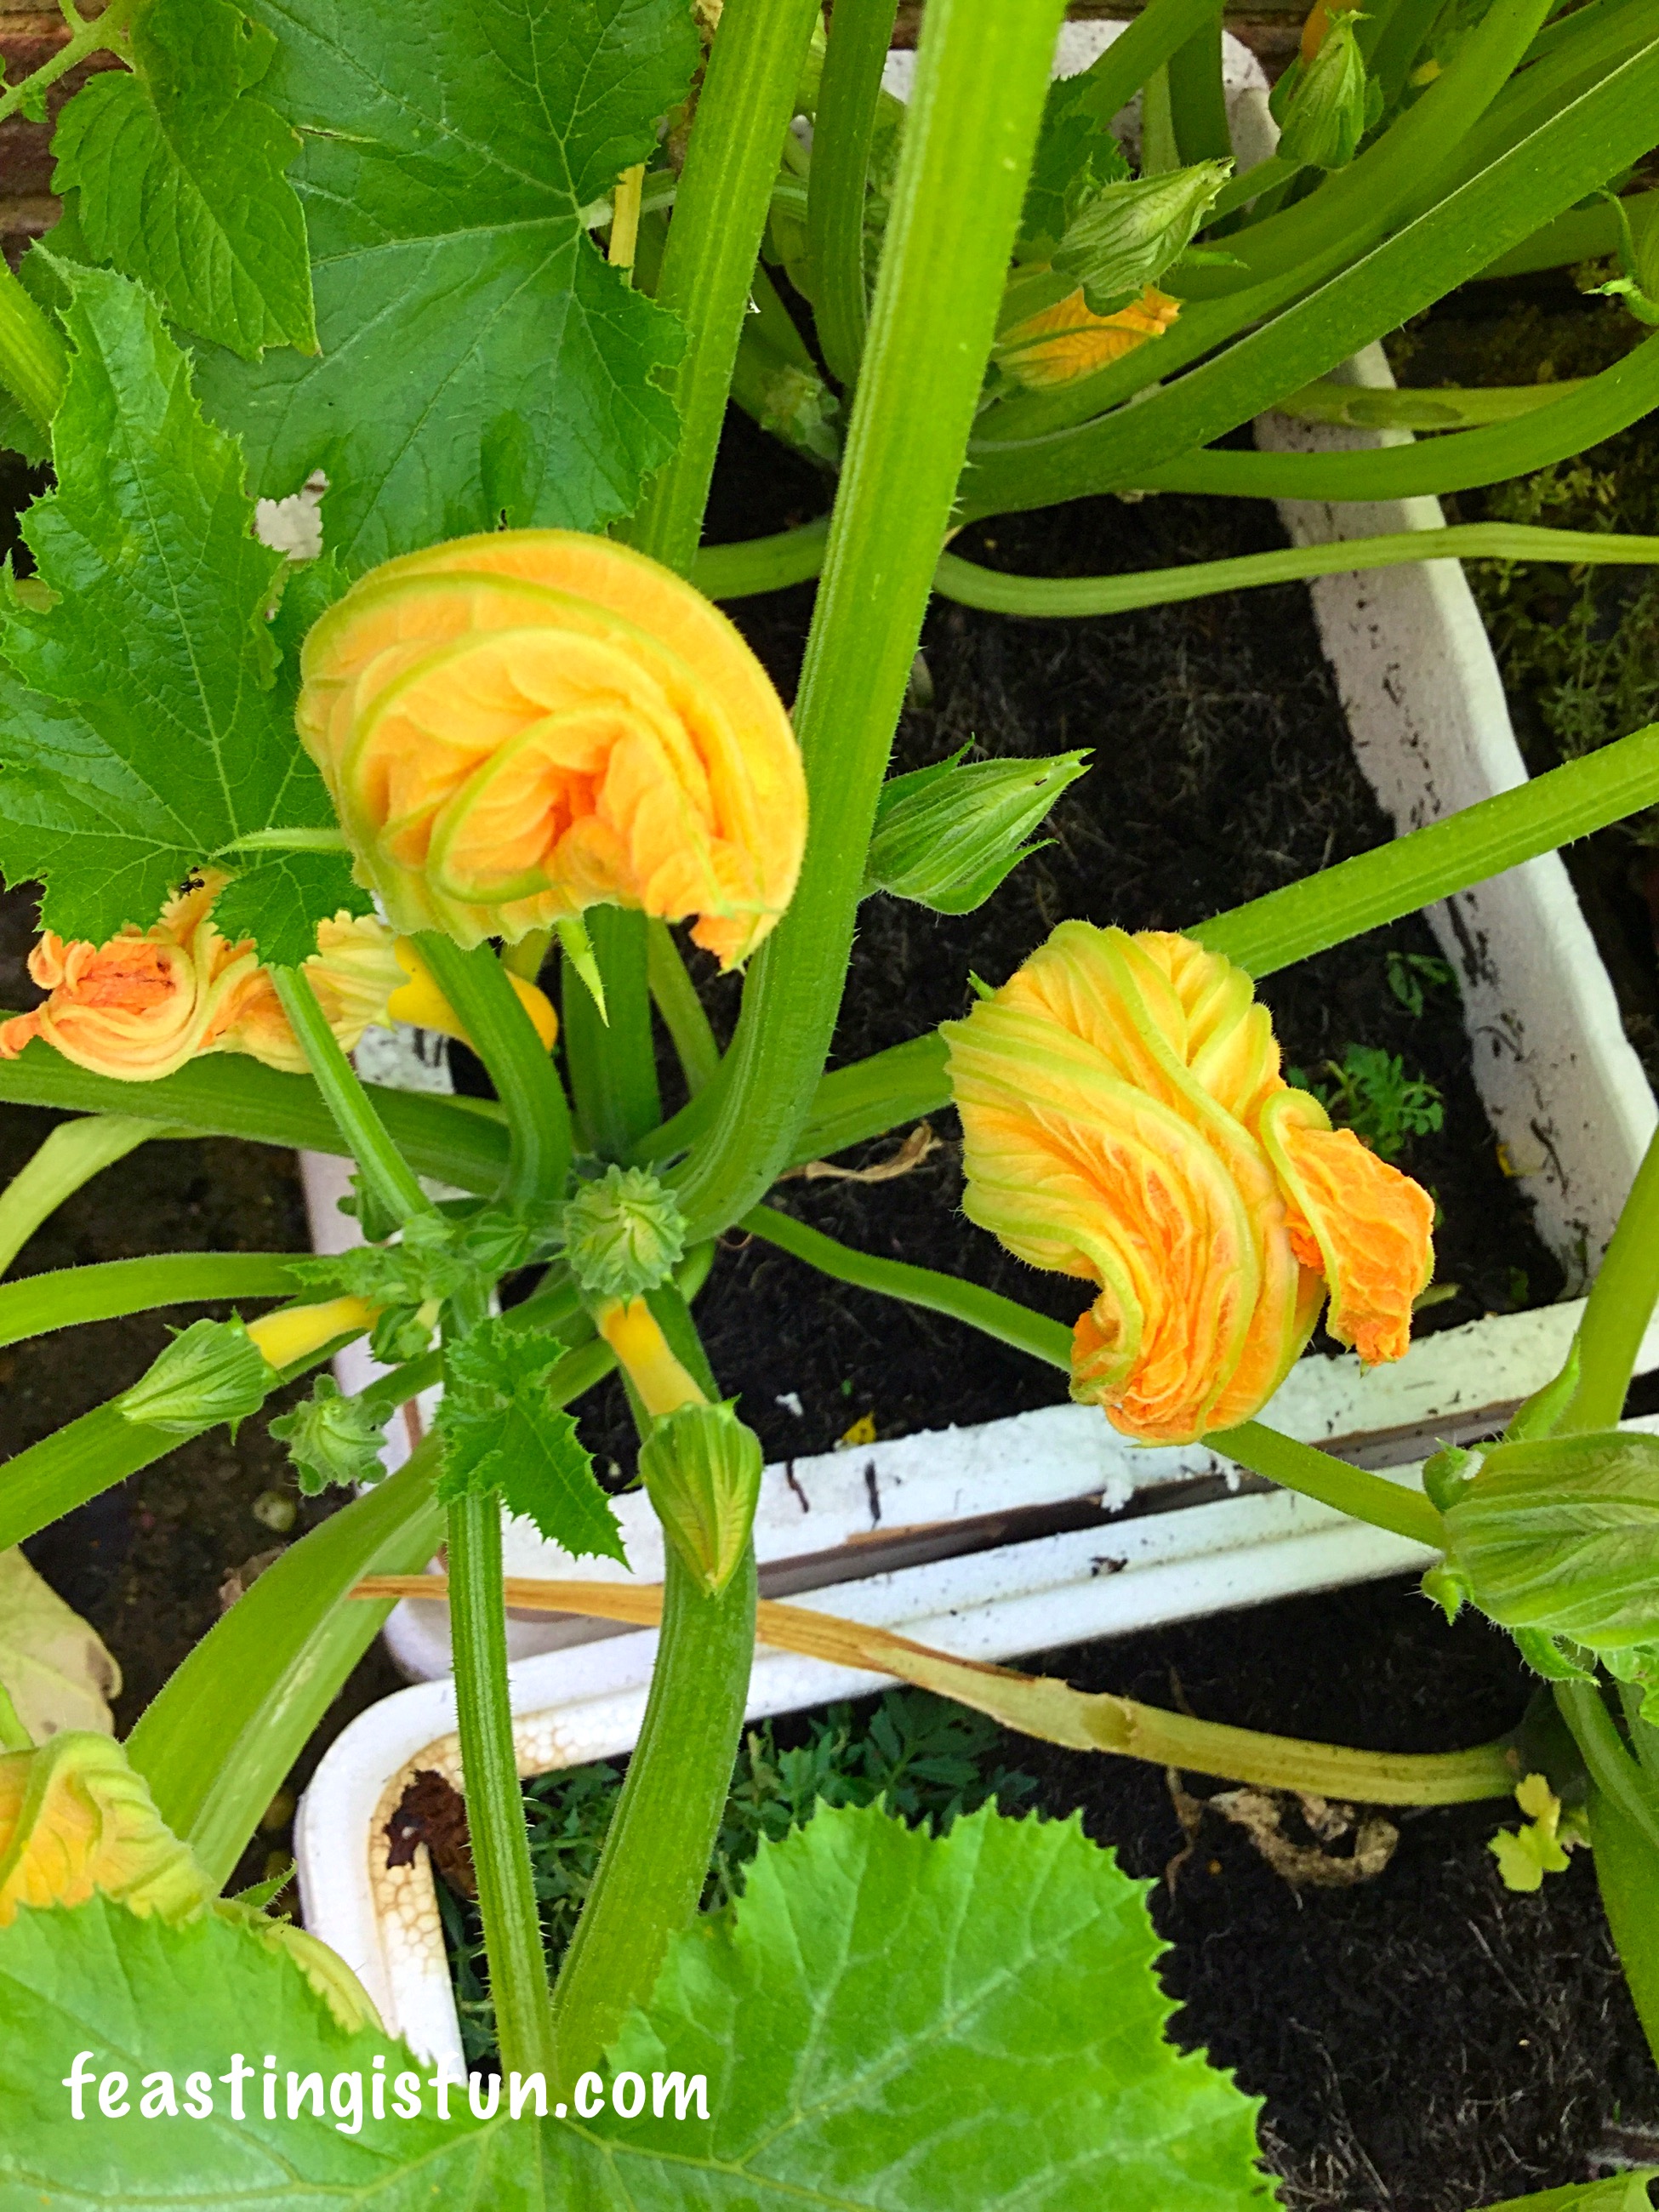
Our green courgettes are just starting to produce too! I have plans for a courgette salad with our first harvest.

FF Growing Vegetables Weeks 3-4
Our corner of productivity.

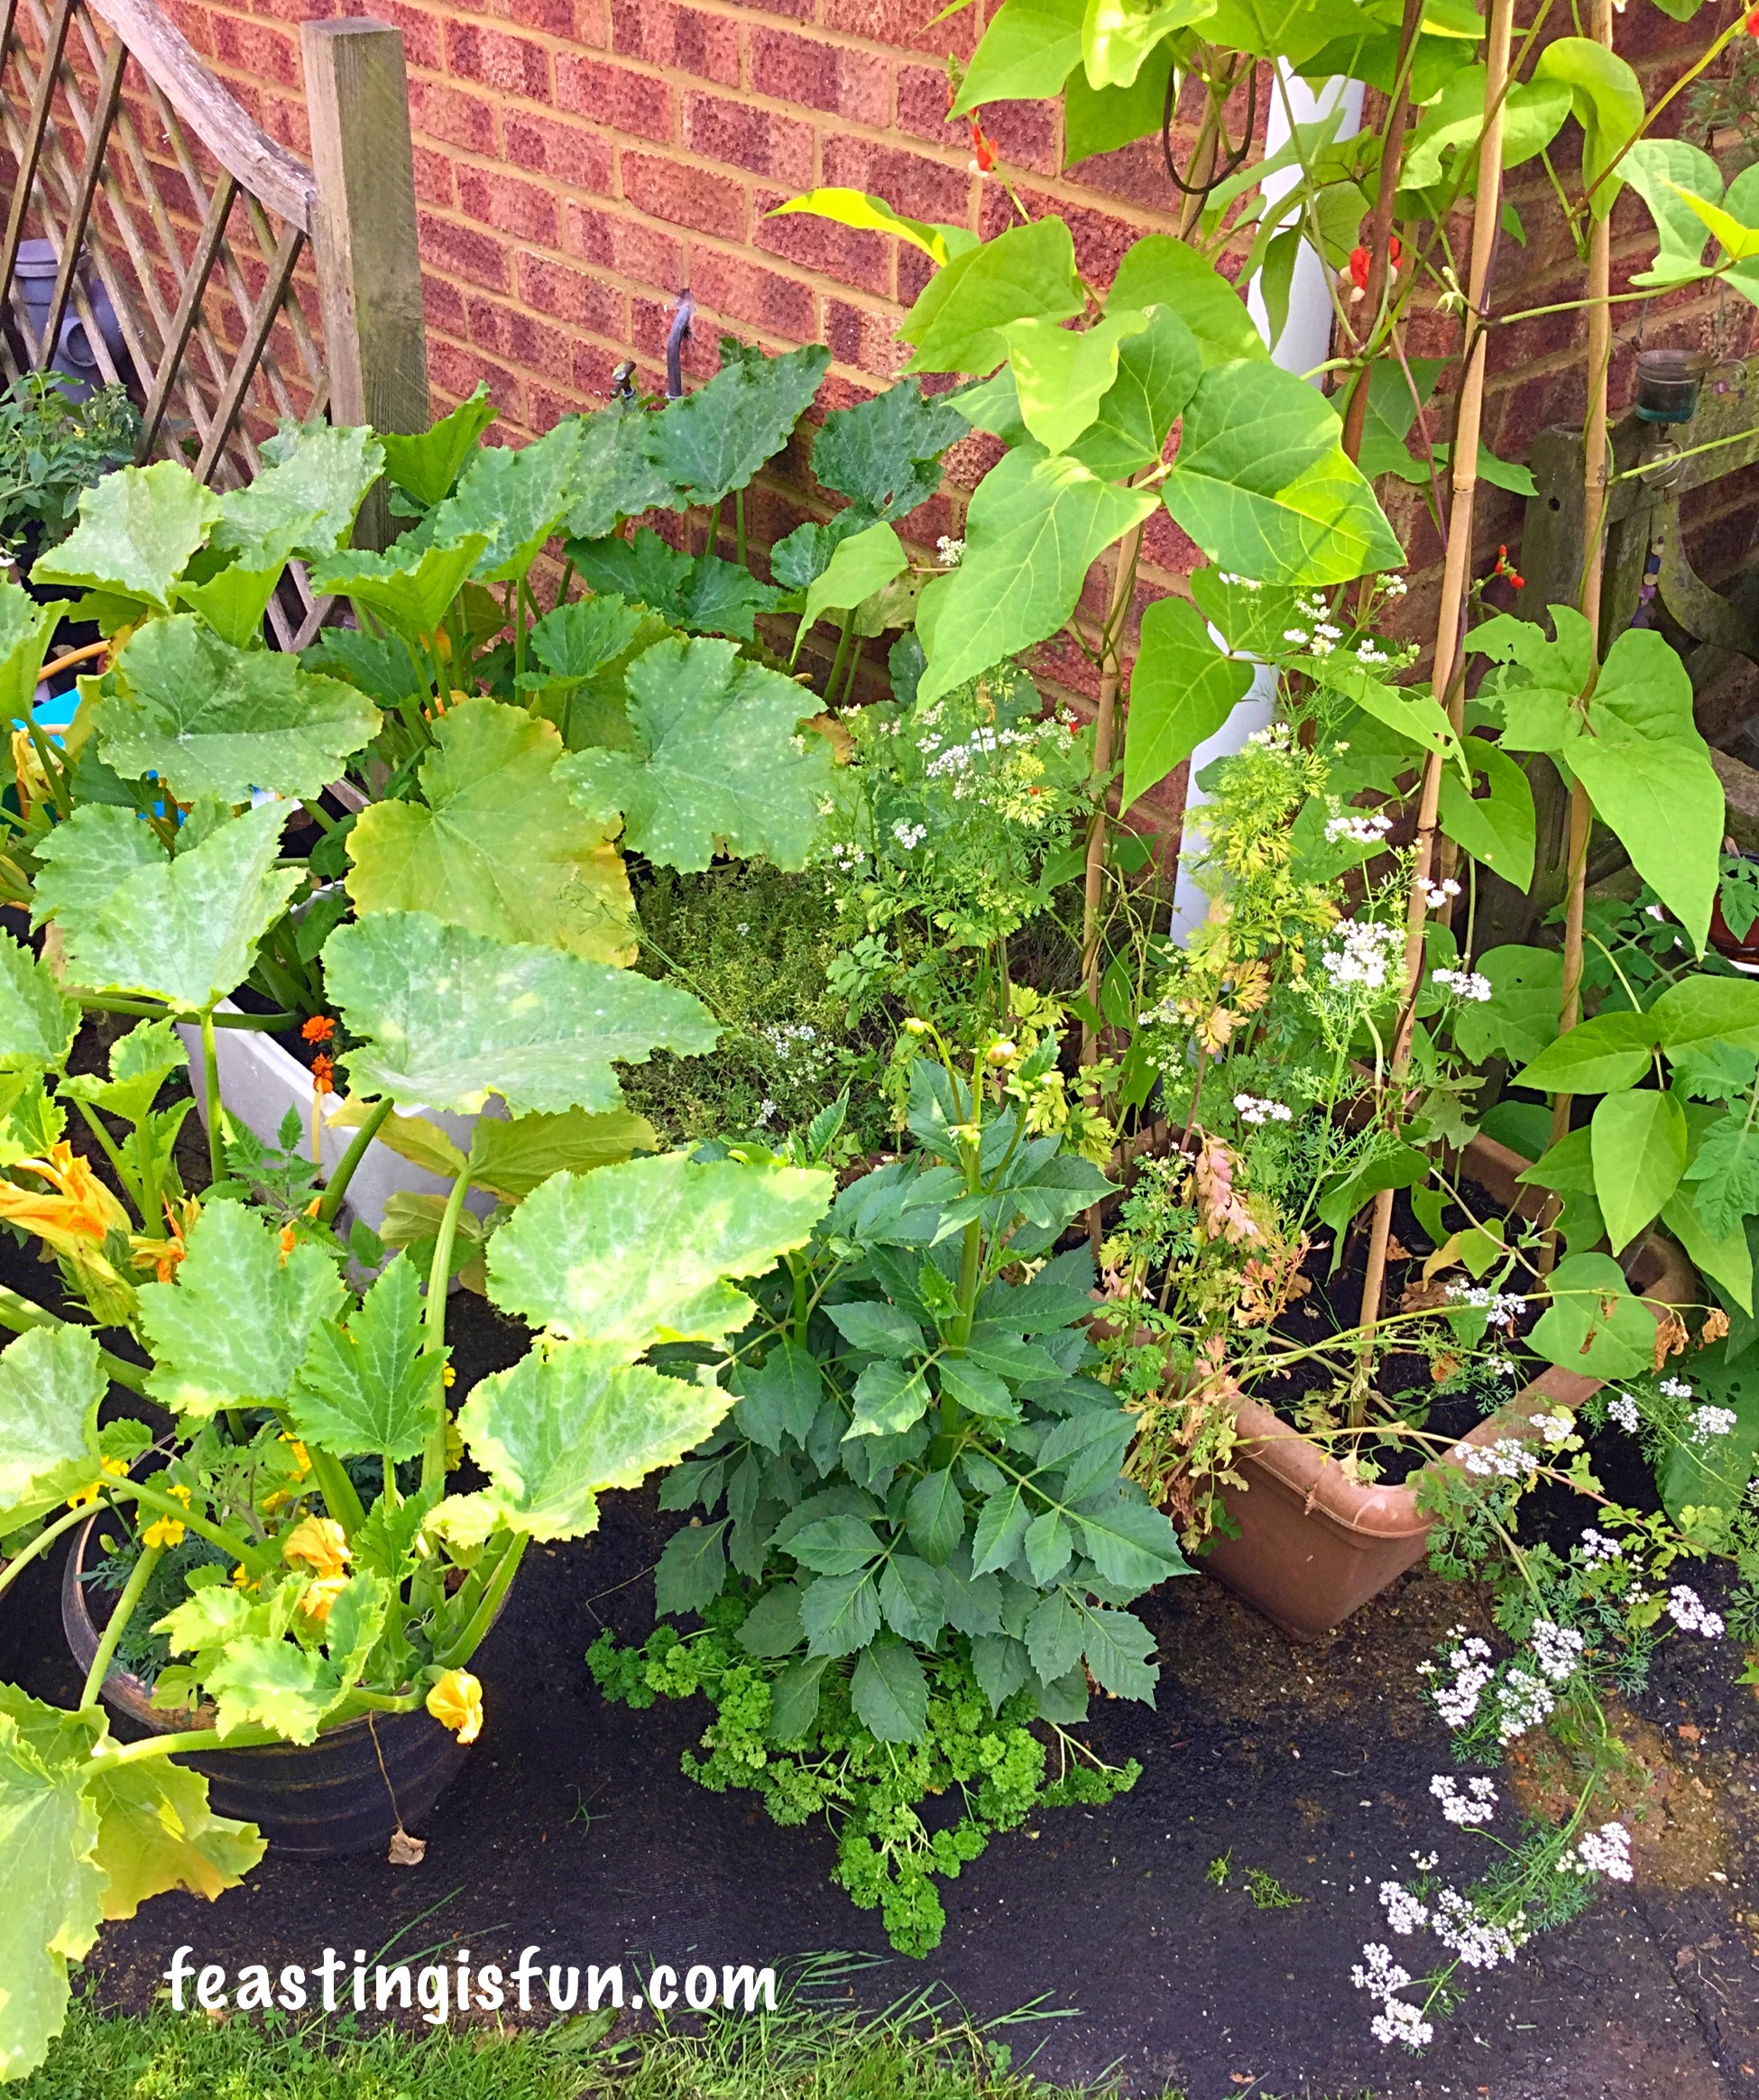
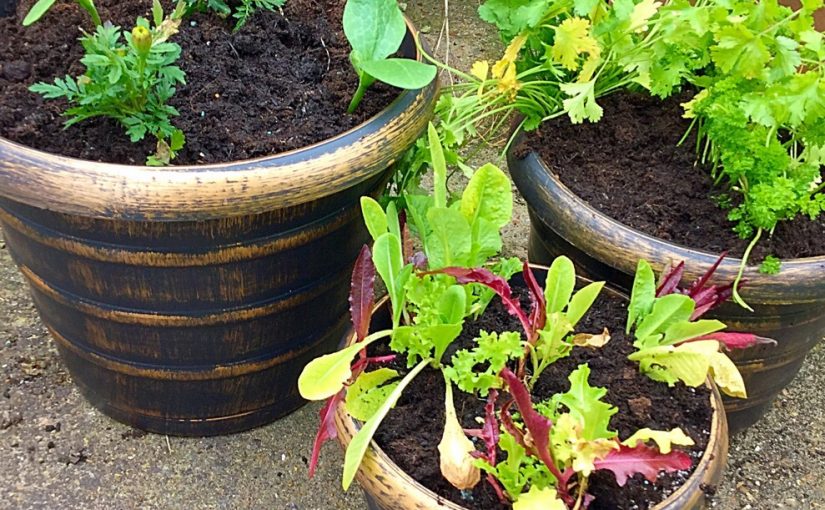
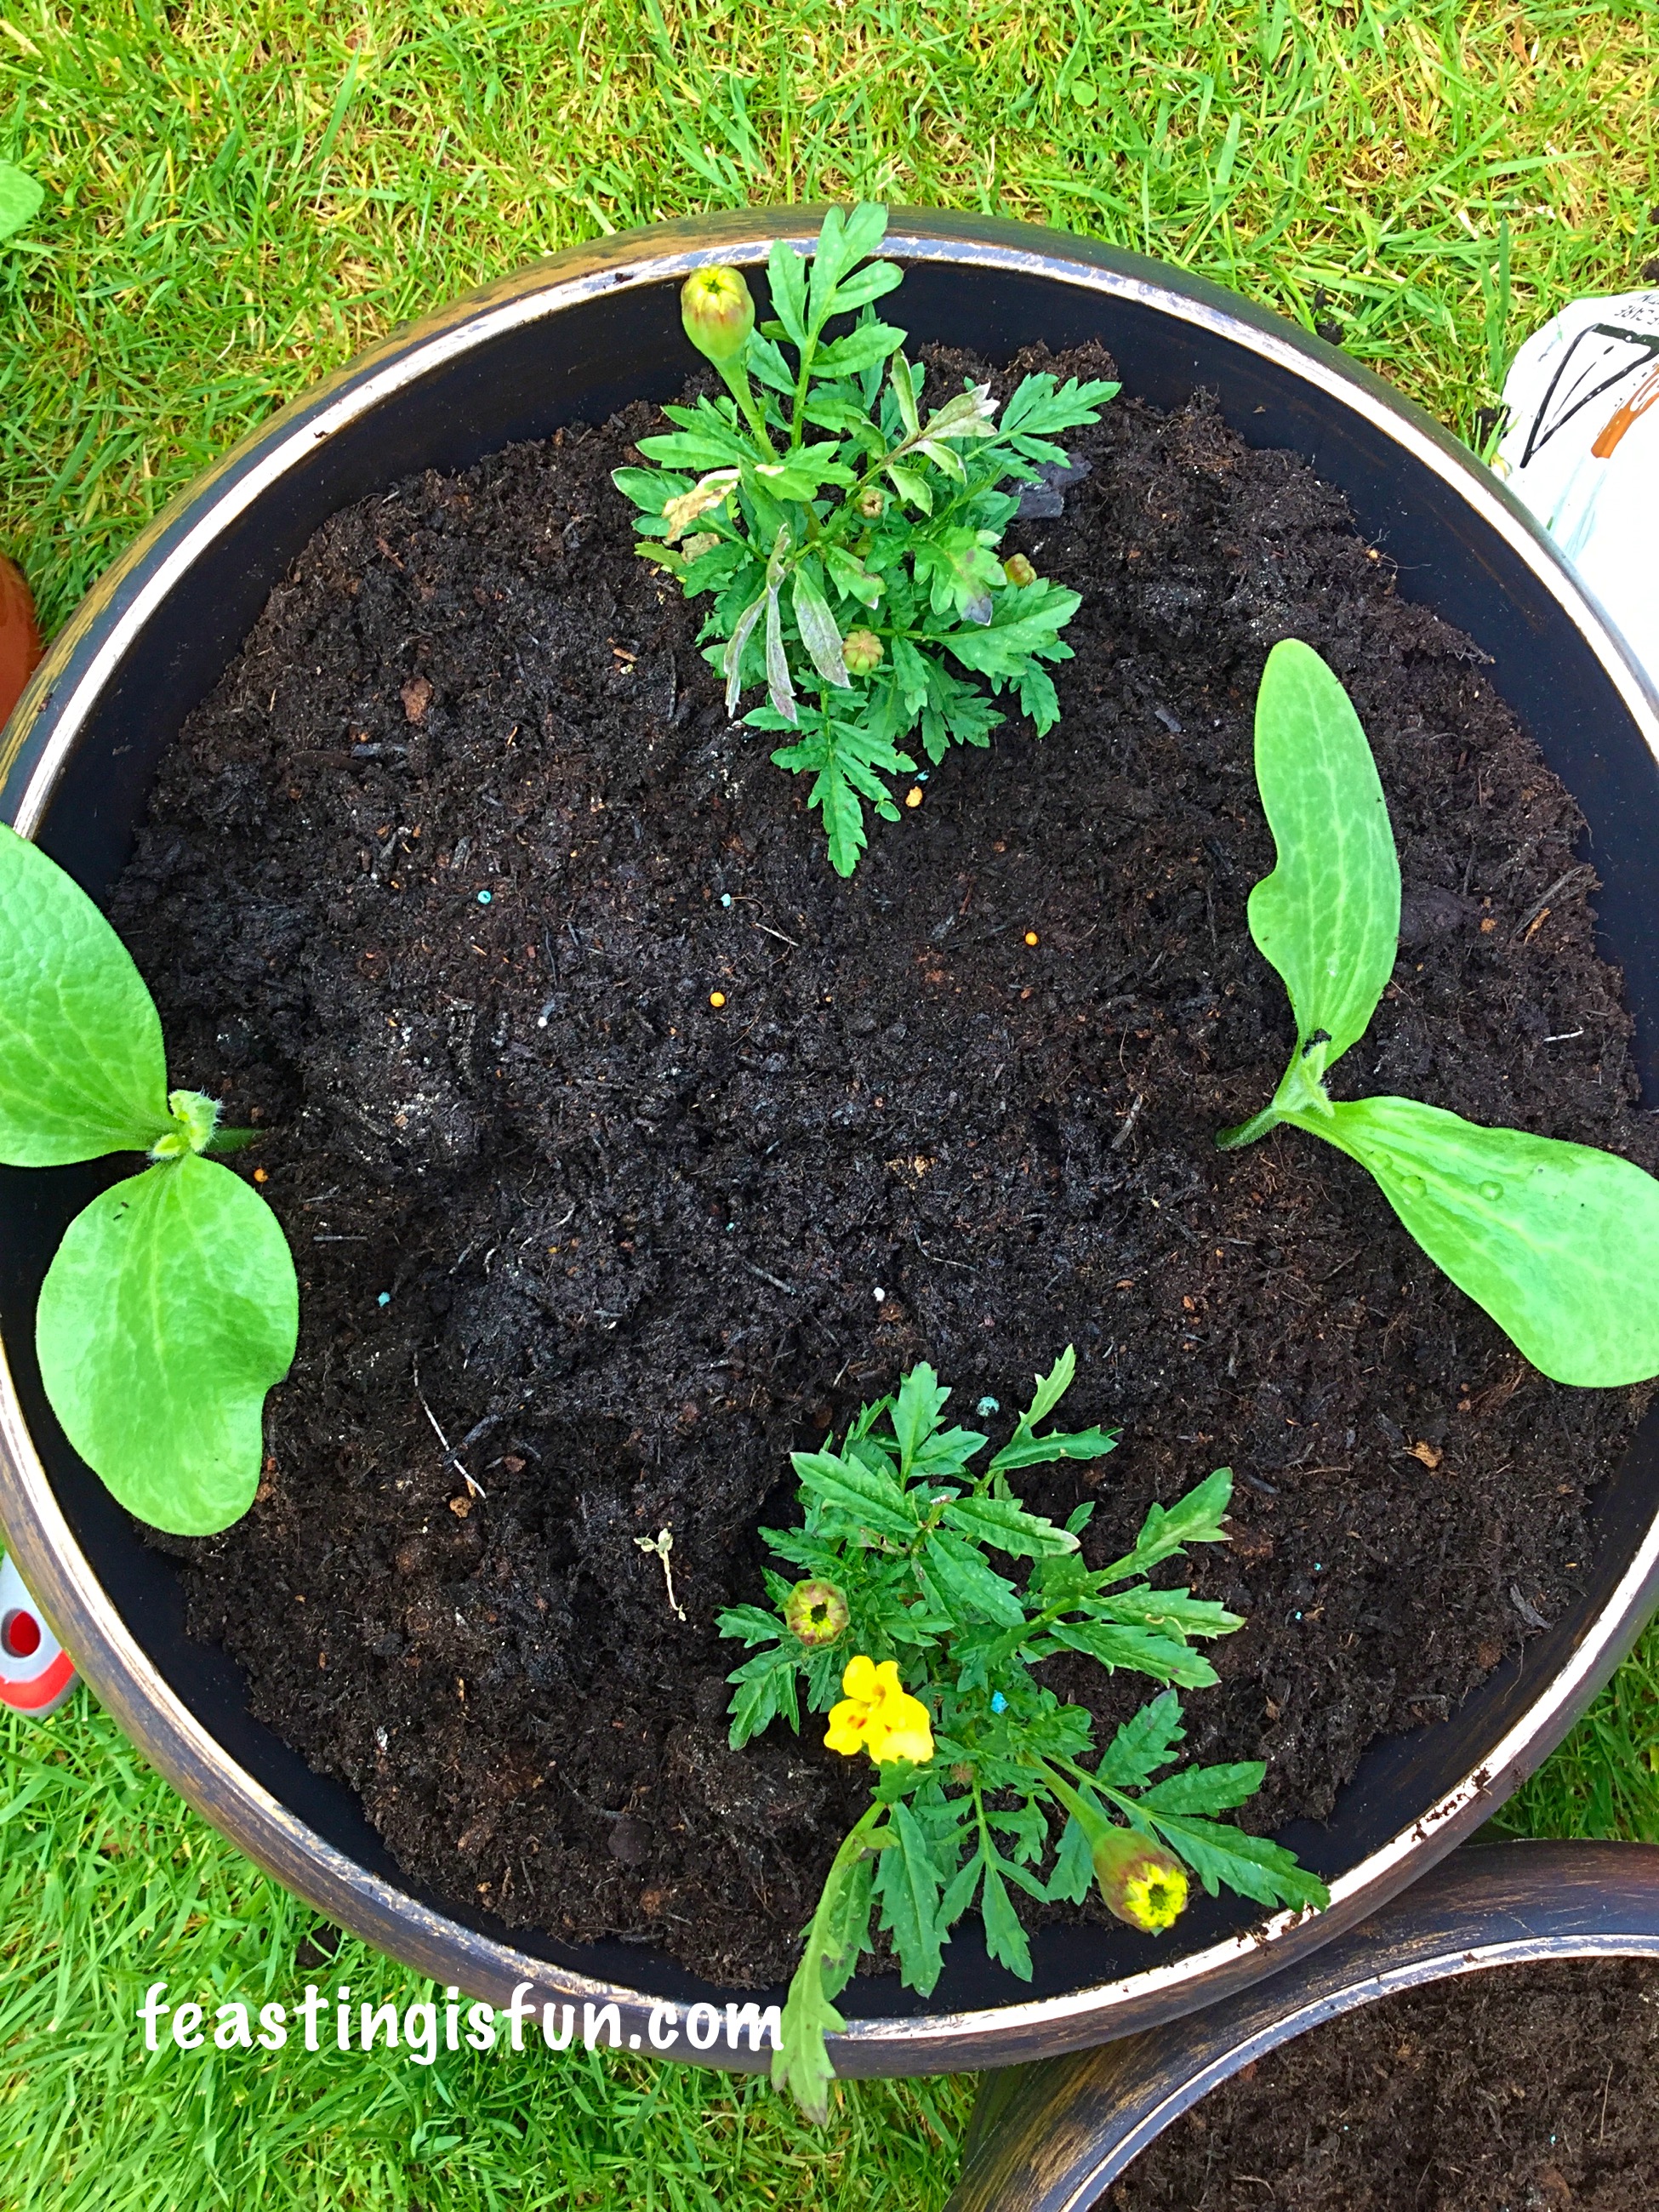
The Wilko pots are over flowing with herbs, salad and a pretty Dahlia that is yet to bloom. The Painted Lady runner beans keep being pinched out when they reach the top of the bamboo canes and the Coriander is covered in pretty white flowers, our aim is to save the seed to use in chutney and curries.

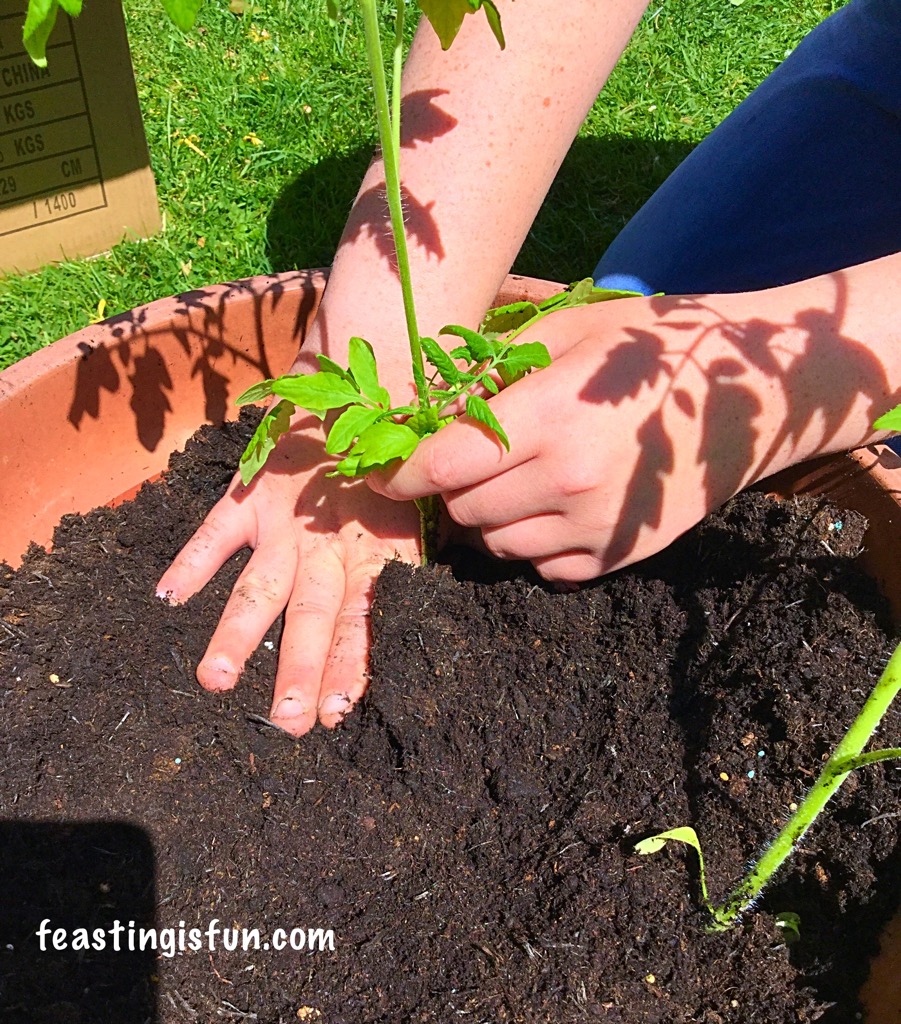
We still have more to do. Our Roma tomato plants still haven’t been planted out, however, we have a special experiment which involves those. More on that next week.

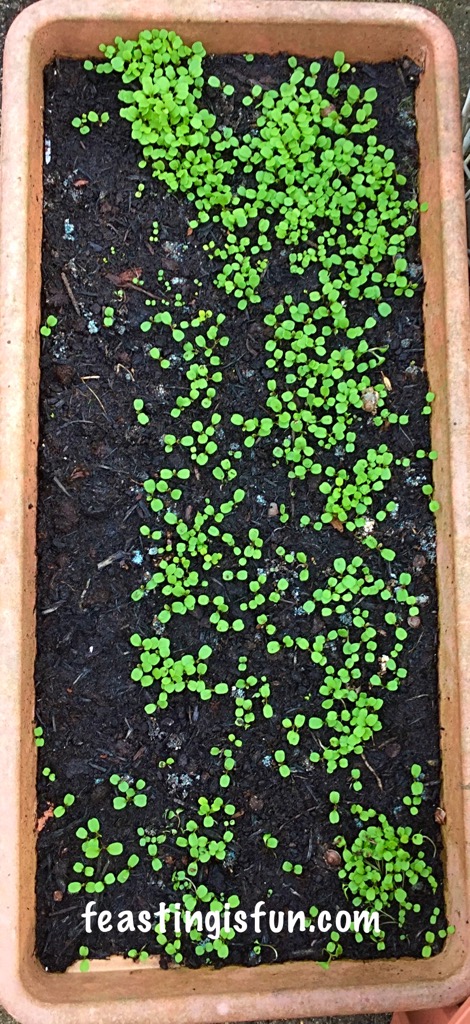
More Rainbow Carrots, French Breakfast Radishes and Beetroot have been sown into similar polystyrene containers that were used for the courgettes. Another sowing of lettuce leaves and some spring onions – which although germinated have been swamped by their companion plants – needs to be carried out. Tarragon and Thyme both need potting on and we need to sow seeds for next year.

FF Growing Vegetables Weeks 3-4
Growing Vegetables Weeks 3-4 enjoyment is key!

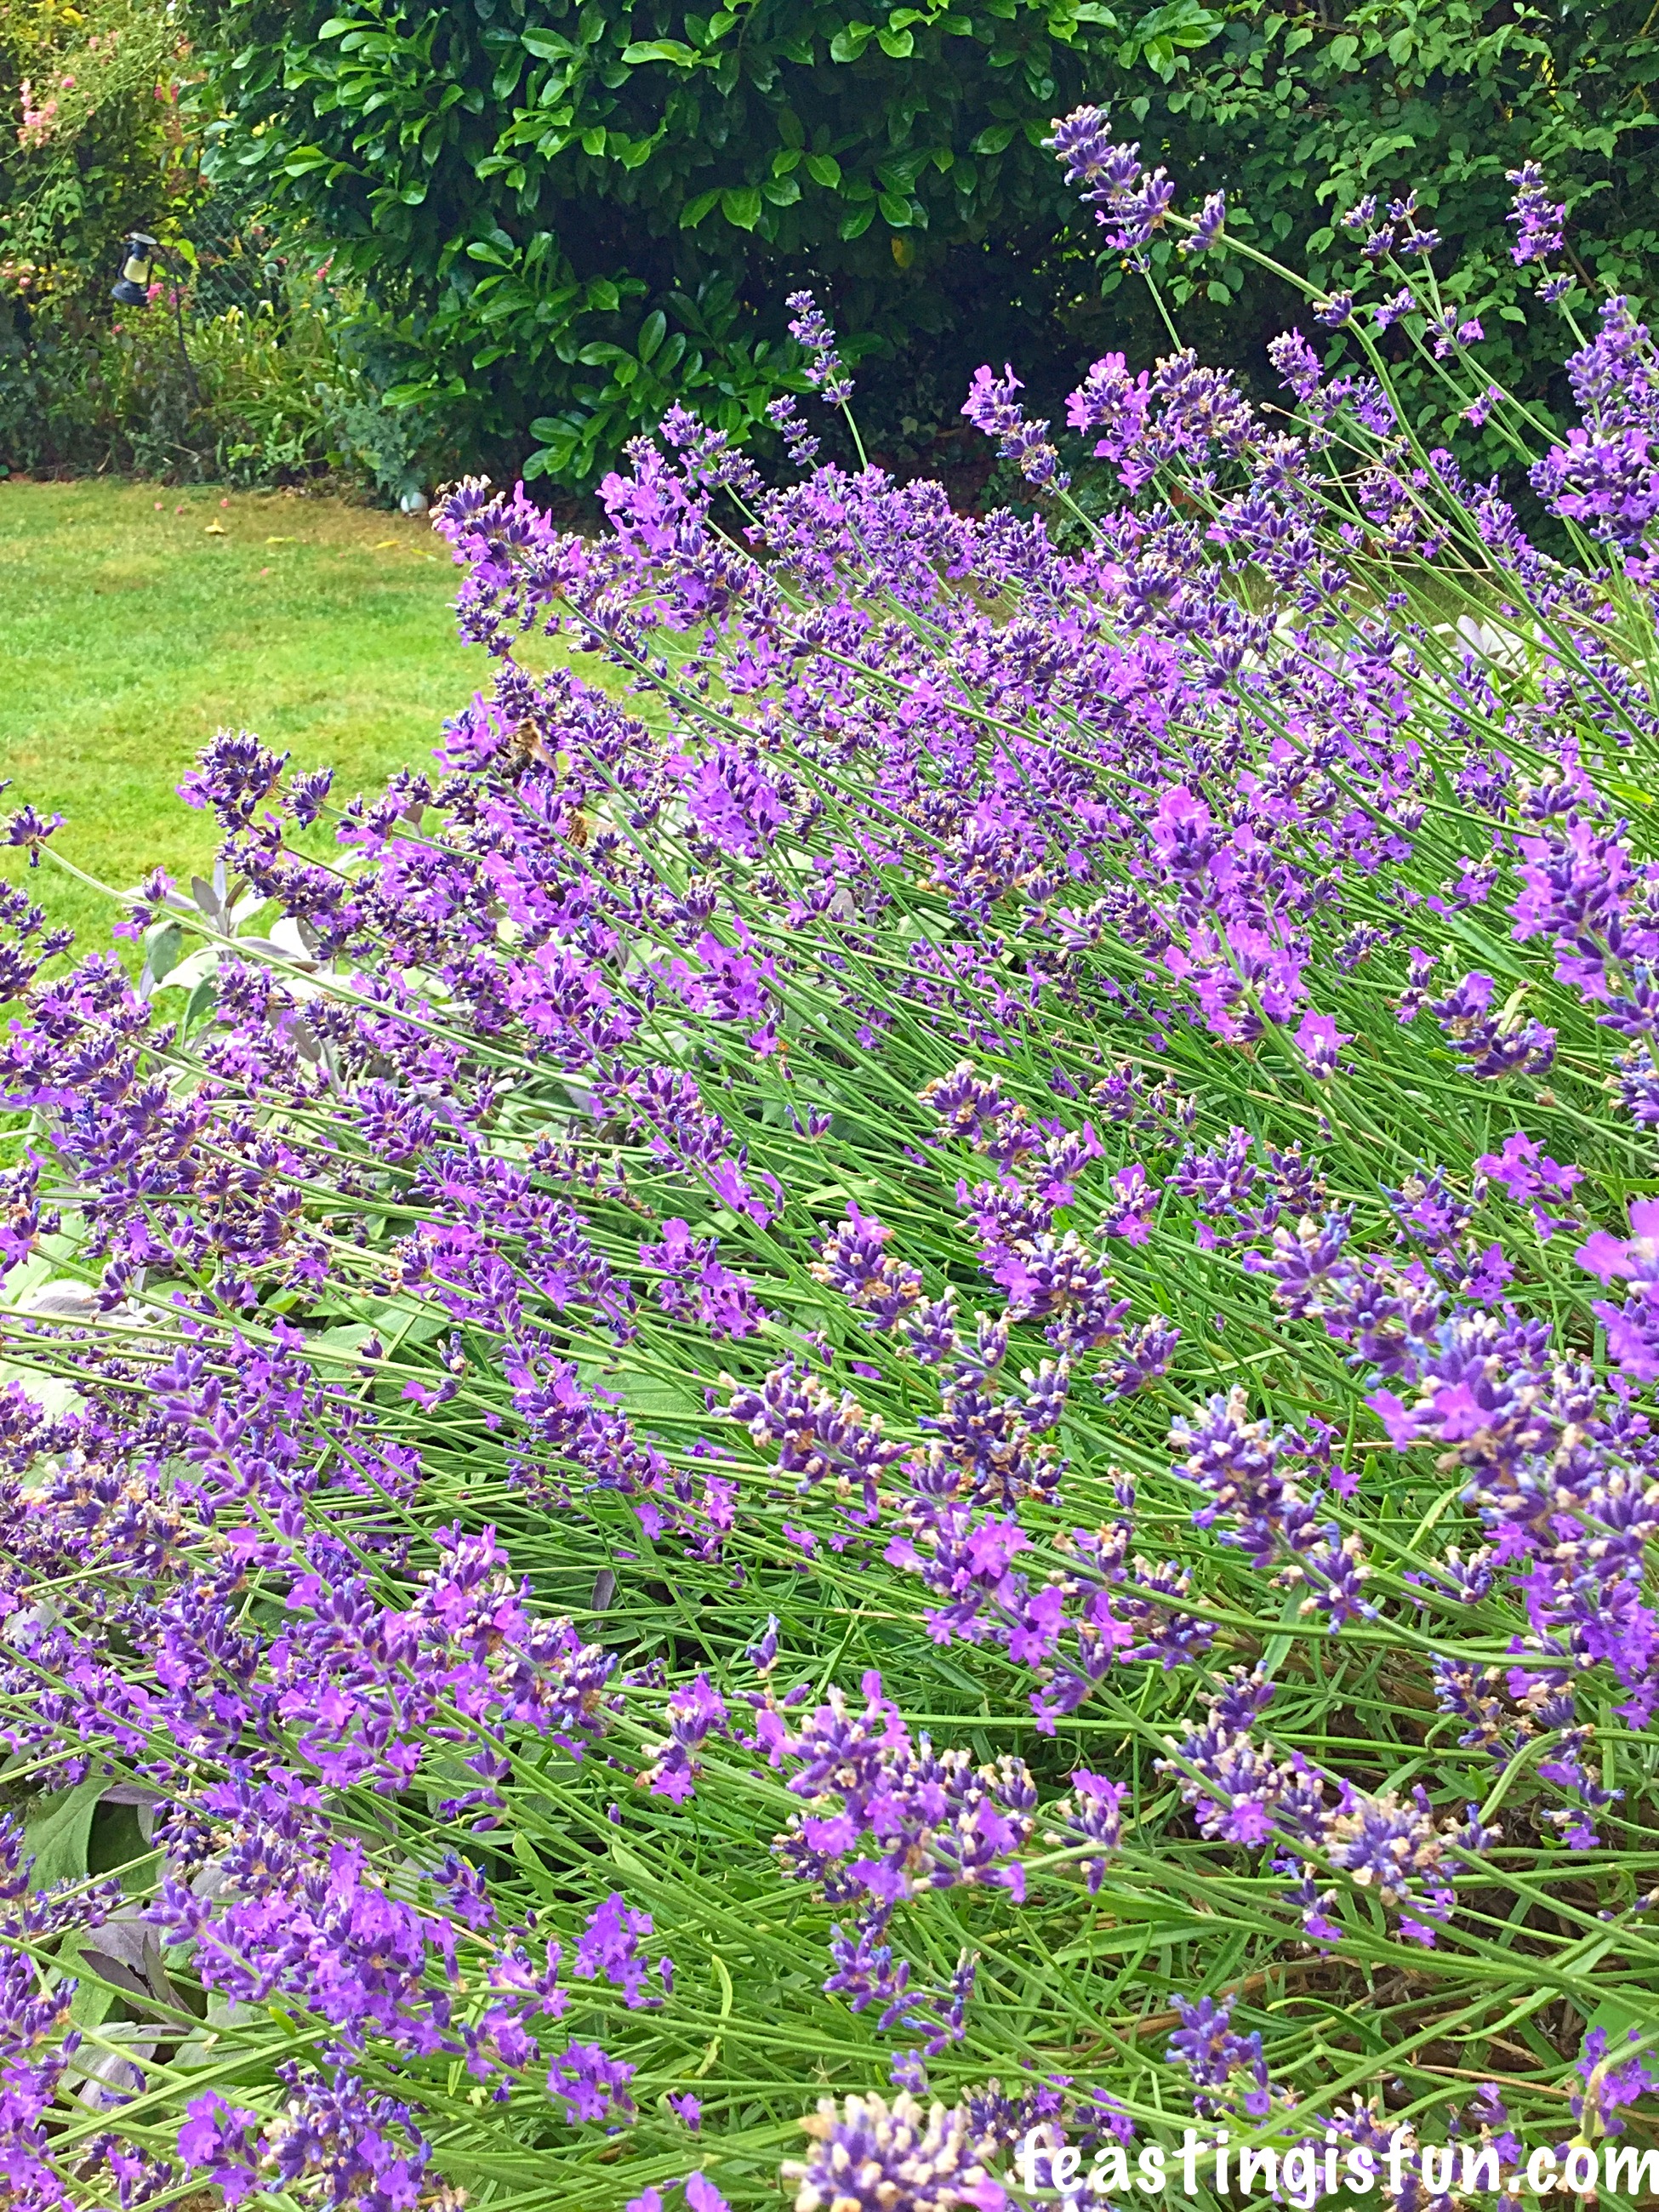
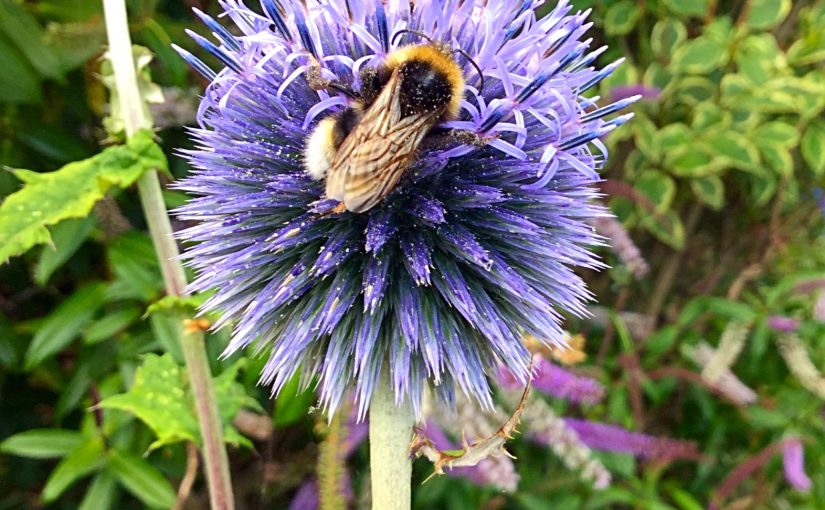
Bob and I were determined, from the start, that Growing Vegetables would be a fun venture. As I stopped to take the header photograph of the bee on an Echinops flower (which I grew from seed) I watched the bees buzzing to and fro amongst the Lavender and Hebe, all in full bloom. I smiled. The slow, drunk, pollen covered bees on the Echinops were in no hurry, the bees on the lavender wouldn’t keep still long enough for me to count them and butterflies were gone, fluttering on the breeze before I could capture them on camera.

Our garden is beautiful. It is my sanctuary. When I need peace it is where I belong. We never own a garden, we are simply caretakers. So remember to enjoy your garden. It is unique and will respond to tender loving care.

FF Growing Vegetables Weeks 3-4
Our purple corner in full bloom.

Actually our purple corner is in the middle of the garden, opposite the apple tree on the right (out of sight). It is a haven for bees, butterflies and all manner of beautiful creatures and insects. It is a place of quiet calm for me. I can lose hours watching the comings and goings of insect life.

Do you have a place of calm in your garden?

Bob and Sammie xx

To catch up if you have enjoyed reading Growing Vegetables Weeks 3-4 here are the earlier weeks:

Growing Vegetables Week 1

FF Growing Vegetables Weeks 3-4
Growing Vegetables Week 1

Growing Vegetables Week 2

Growing Vegetables Weeks 3-4
Growing Vegetables Week 2

Groseeds sponsored our attempt at growing vegetables in containers by providing us with seeds. All views, opinions, photography and content are my own. I (Sammie) am an amateur gardener, any advice followed is completely at your own risk. Please see my Disclosure Policy.

Share
Facebooktwitterpinterestlinkedintumblr

Growing Vegetables Week 1

Share
Facebooktwitterpinterestlinkedintumblr

Hi everyone, welcome to Growing Vegetables Week 1. A diary of Bob and Sammie’s (that’s me) attempt to grow some of our own fruit, vegetables and flowers at home, using mostly containers.

FF Growing Vegetables Week 1
Courgettes, herbs and runner beans all growing well in containers.

You are welcome to join us as we plant and grow through the Summer, Autumn and if we’re successful maybe the Winter too!

I must apologise as this first post really should have been published a few weeks ago. However, with the exception of chilli’s and tomatoes, most of what we are growing can still be sown now for a late summer harvest!

FF Growing Vegetables Week 1
Growing Vegetables Week 1 started with seeds.

The very lovely people at Groseeds kindly donated the seeds Bob and I would need to start our gardening adventure. They are are wonderful company with a great ethos. Pop over to there website and see the difference you can make by purchasing your seeds from Groseeds.

Groseeds packets are so practical. Not only are they waterproof, protecting them from a sudden shower or misdirected hose, they are also resealable. This keeps the seeds, which are contained within a little pouch in the packet, perfectly fresh. Some seeds can last a couple of years, but I’ve tried and failed too many times to sow seed from opened, last year packets, only to be disappointed. These Groseeds seed packets get a firm 10/10 for practicality and seed protection.

With my health problems (see Living with Seizures) I knew I would need the help of Bob, that’s his nickname, if I were to successfully sow and grow vegetables and flowers to create recipes with. Bob is incredibly hands on and practical, he reminds me of his Grandad. If something is broken he sees it not as a problem, but as a puzzle to fix! He was very happy to take part in growing our own vegetables and take on the responsibility of watering, whilst at the same time I could teach him the fundamentals of gardening. We enjoy working together and he’s a strong lad!

FF Growing Vegetables Week 1
Growing Vegetables Week 1 bare compost with tomato and chilli seeds sown.

Seeds were chosen, ordered from Groseeds and received at the start of June. I knew we were a little late off the starting block with sowing certain plants. Normally I would cheat and buy a few chilli and tomato plants from the garden centre, not this year though. Despite the horrendous weather at the start of June we managed to get;

Gartenpearle – a small tumbling/bush cherry tomato that is perfect for growing in containers.

Roma – a small plum shaped tomato that I’ve grown before and seems to do well in our North facing back garden and can also be grown in a large pot.

Orange Habonero Chilli – ooh Bob and I both like a kick to our food, so we picked a hot chilli. These will be planted in our front garden, where they will benefit from the sun all day long, as it is south facing.

Borage – grown as a companion plant for the chilli’s, to attract bees and other pollinators. Also the flowers can be eaten in salad.

FF Growing Vegetables Week 1
Growing Vegetables Week 1 a week after sowing we had germination.

As our porch is dual aspect and south facing, so I placed an old table in the corner and it doubled as a greenhouse. I also had a packet of mixed chilli peppers so we sowed some of those as well.

FF Growing Vegetables Week 1
Growing Vegetables Week 1 some plants we left to germinate outside.

Certain plants were sown and left outside to germinate.

Thyme and Tarragon – both herbs that I use a lot of can be seen in the flat trays on the right.

Courgettes – both Black Beauty and Goldy. One has a dark green skin and the other as you may have guessed is yellow.

Spaghetti Squash – having seen the huge interest in this squash on Pinterest I was interested to see if we could indeed grow our own veggie spaghetti!

FF Growing Vegetables Week 1
Growing Vegetables Week 1 wild rocket strictly speaking a spring and autumn salad leaf.

Wild Rocket – not a fan of heat, I took a chance sowing in June and thanks to the very wet weather it now looks like this:

FF Growing Vegetables Week 1
Growing Vegetables Week 1 not bad for 3 weeks growing!

This wild rocket can now be cut and used in salads, adding a wonderful peppery flavour.

So as and when I could, sometimes with Bob, more often whilst he was at school and the rain had stopped, I gradually sowed the following:

Runner Beans – Painted Lady, these grow brilliantly in containers just keep them well watered especially if the weather is windy – these also need a support to grow up, more on that next week.

Dwarf French Bean – Purple Queen a coloured bean that we wanted to try. So a new one for us.

Carrots – Rainbow, Bob liked the variation in colours & I was intrigued to see if they could be grown in a container. These were sown into the same deep pot as –

Onion – Red Baron. This is companion planting. The smell of the onion will hopefully deter the carrot fly from laying eggs and munching on our rainbow carrots.

Spring Onion – White Lisbon, one I’d grown before and also sowed a few in with the runner beans as a quick crop, however, the runner beans are growing strong so we will need to sow some more.

A variety of flowers Peach Nasturtium, the flowers are very good in salads. Limanthes, or poached egg plant to attract pollinators to the tomato plants and trailing mixed lobelia to keep the bees and other pollinators coming.

FF Growing Vegetables Week 1
Growing Vegetables Week 1 our porch today!

As you can see from the first and last photos, our Groseeds plants are growing strongly, in fact if you look through the window on the picture above, you can see the Borage already planted in the front bed.

There are plenty of veggies that can still be sown now, here’s an idea of what else we will be sowing; Fennel, mixed salad leaves, spring onions, beetroot, radishes, purple sprouting broccoli (for next Spring), hardy spring onions for next year, mustard cress and plenty more.

I hope you have enjoyed this introduction to Growing Vegetables Week 1. Our aim is to grow our plants as organically as we can. In truth the runner beans had a few slug pellets in the pot. We don’t know how great our harvest will be and we are at the mercy of the British weather.

Yet it is fun. To grow something that you are the able to eat. Today we picked our first 2 French Breakfast radishes.

FF Growing Vegetables Week 1
Growing Vegetables Week 1 our first harvest!

Crunchy with a peppery flavour, once washed these were delicious.

That’s what makes growing your own so much fun. Yes we may have to battle with snails and other critters, but hopefully, now the plants are growing on a bit they can withstand a little munch here and there.

We will not be using any insecticides on our plants. Some have had some slow release fertiliser added to the pots, to keep them growing strong through the season. This is our first proper attempt and we are bound to make mistakes along the way.

I hope you will join Bob and I again, next week for seed sowing, growing/harvesting updates and how to build a wigwam to support your runner beans.

If you’ve enjoyed Growing Vegetables Week 1 you may also like this post:

Wilko Gardening Product Review

FF Growing Vegetables Week 1
Wilko Gardening Product Review with courgettes and runner beans from Groseeds.


We hope you’ve been inspired to take a look at the Groseeds website and order a few seeds, so that you too can enjoy the pleasure of eating and feasting on what you have grown.

Sammie and Bob xx

Groseeds kindly donated the seeds for our gardening experiment. All views, opinions, photographs and content are my own. I am an amateur gardener, any advice followed is at your own risk. Please see my Disclosure Policy.

Share
Facebooktwitterpinterestlinkedintumblr

Wilko Gardening Product Review

Share
Facebooktwitterpinterestlinkedintumblr

Welcome to a new section of this blog called GROWING YOUR OWN FEAST IS FUN! Bob, my son and I are planning to grow vegetables, salads, herbs and flowers, mainly in containers, in our garden. So to kick off this new addition to my blog I’d like to invite you to my Wilko Gardening Product Review.

FF Wilko Gardening Product Review
Wilko Gardening Product Review planters and transplanters.

Having carried out a bakeware review before – see Wilko Product Review. I was excited to review a different aspect of Wilko’s, so I agreed to a Wilko Gardening Product Review.

I was asked to choose 3 items from a list sent to me, the set of 3 Bee Hive Plastic Planters immediately caught my attention. With drip trays underneath, all that I needed to do was punch through the drainage holes in the base, which I did easily with a screwdriver.

Next I asked for a transplanter trowel, because honestly, any gardener will tell you that you can never have too many of these. Fortunately for me the garden sign that was my third choice, must have been out of stock as I received 2 transplanters. This was so thrilling as it meant Bob and I could have one each.

FF Wilko Gardening Product Review.
Time to get planting, I find it’s best to have everything to hand.

I ordered compost and some Dahlia tubers from Wilko. No lugging heavy bags of compost home, for a small fee order on line and have everything delivered!

As you can see from the photograph above, the base of each Bee Hive Plastic Planter was filled with some broken polystyrene. As we have our meat delivered, the polystyrene boxes themselves make useful planters and the lids are great for breaking up. This adds drainage to the base of the container and helps the plants grow better. You can also use broken terracotta pots, however, polystyrene is light and means the pots can be easily moved.

FF Wilko Gardening Product Review.
Adding water retaining crystals and slow release plant food granules ensure the plants are feed and watered even during dry spells.

On top of the drainage fill the pots, almost full with compost. I then added some water retaining crystals and slow release plant food granules. These are then mixed throughout the compost in the pot.

By adding water retaining granules, even on really hot days, when the tubs have been watered first thing in the morning, the roots will not dry out. Similarly adding slow release plant food granules ensures that after 6 weeks, when the natural nutrients in the compost have been used up, plant food and nutrients are still slowly being released.

During the long Summer and Autumn growing season, I will not have to worry about feeding the Bee Hive Planters provided for the Wilko Gardening Product Review!

FF Wilko Gardening Product Review
Wilko Gardening Product Review I wanted Pretty and Productive.

Whilst Bob and I want to grow lots of different salads and vegetables, I still want the garden to look pretty. So I added some Dahlia tubers, that will grow up through the courgette plants to give height to the planters. We will also be sowing and growing companion plants and flowering plants that will attract pollinators.

Making a deep well in the largest planter I spread out the Dalia tubers and planted them so that the dried stem, at the top of the bulbous tubers, was level with the top of the compost. Then I planted two courgette plants either side. The courgettes will spread and hang over the side of the planter. Growing courgettes in containers has many advantages, the courgettes are free from the soil and predators, such a slugs and snails. Although growing French marigolds will attract pollinating bees, it also makes hand pollination possible – something I will address in future posts.

FF Wilko Gardening Product Review
Whilst the Bee Hive Planter may look a little bare, the courgettes will soon fill out and the Dahlia will grow above the lower vegetable leaves.

This planter’s compost top will be completely covered within a couple of weeks and a few weeks later we should be harvesting our own, homegrown courgettes. Perfect for kebabs, stir fries, sliced thinly in salads. Courgette flowers are also edible, small and raw, or covered in batter and deep fried. There will be plenty of new and interesting recipes coming from GROWING YOUR OWN FEAST IS FUN.

FF Wilko Gardening Product Review
Wilko Gardening Product Review all three containers planted.

The second largest Bee Hive Planter was planted with herbs bought with my shopping from the supermarket. Both Coriander and Curly Parsley. I split the shop bought herbs in half and planted the parsley and coriander around the edges. Although a little bedragled, within a couple of days they had settled in and perked up.

Using the transplanter trowel for this Wilko Gardening Product Review made life very easy. Planting the smallest Bee Hive Planter with small, mixed lettuce leaves, the transplanters moved the soil and transplanted the pre-grown mixed lettuces into their holes. Pressing gently with my hands, around the planted lettuce, herbs, marigolds and small courgettes settles and firms them into place.

FF Wilko Gardening Product Review
Wilko Gardening Product Review time to give these planters a good soak.

Finally give the Bee Hive Planters a gentle but thorough soaking.

They have been placed in an area of partial sunlight as all the plants suit this condition. Daily watering and snail and slug patrol are important. Placing Vaseline around the tops of the containers will help deter slugs and snails. Also placing the planters on some wire mesh works as a deterrent.

I am really impressed with the size and decoration of the beehive planters. The transplanters are sturdy and very comfortable to hold. I look forward to seeing our produce and flowers flourish, with regular watering there really shouldn’t be anything else to take care of, except for picking courgettes and cutting herbs and salad leaves as they grow.

FF Wilko Gardening Product Review.
1 week update on the Wilko planters already the herbs have filled out and the courgettes are growing fast.

Wilko sell a wide range of gardening products. I have a nemesia, that I bought from Wilko many years ago and it still blooms with tiny pink flowers ever year.

I hope this post has given you the basics on how to plant containers and encouraged you to try growing a few of your own herbs and vegetables.

Whilst I am by no means an expert, I have been gardening for as many years as I have cooked and baked. So if you have any relevant questions, please either leave a comment or send me a tweet and I will do my best to help.

Bob and I hope you enjoy GROWING YOUR OWN FEAST IS FUN and the journey we have started together?

Sammie xx

Wilko sent me the Bee Hive Planters and transplanters for the purpose of review. All other items mentioned were purchased by me. I was not paid to write this blog, all content, photographs, views, opinions and advice are my own. I do not take responsibilty for anyone acting on the advice gien in this post. Please see my Disclosure Policy.

Share
Facebooktwitterpinterestlinkedintumblr