Strawberry Sweetheart Cake

Share
Facebooktwitterpinterestlinkedintumblr

So, this Strawberry Sweetheart Cake is what I bake for my wonderful Hubby, on  Valentine’s Day. Vanilla flavoured sponge, split in two with a slathering of strawberry jam in the middle, sealed with buttercream roses. Because is a there a better way to say those three precious words ‘I Love You’ than with cake?

FF Strawberry Sweetheart Cake

Since I’ve baked and created a few chocolate recipes for Valentine’s Day like Chocolate Heart Cookies, and Chocolate Fudge Brownie Bites which are utterly delicious, for the day itself I wanted to bake a cake with simple flavours. Sugar and Crumbs sell are range of naturally flavoured icing sugars. And so to make the buttercream frosting for this cake using the Strawberry Milkshake flavour is delicious. The taste is truly like strawberry milkshake and makes this cake absolutely sing on your tastebuds. Alternatively you can use plain icing sugar and flavour it. Also, Foodie Flavours sell a great range of natural food flavourings.
Strawberry Sweetheart Cake
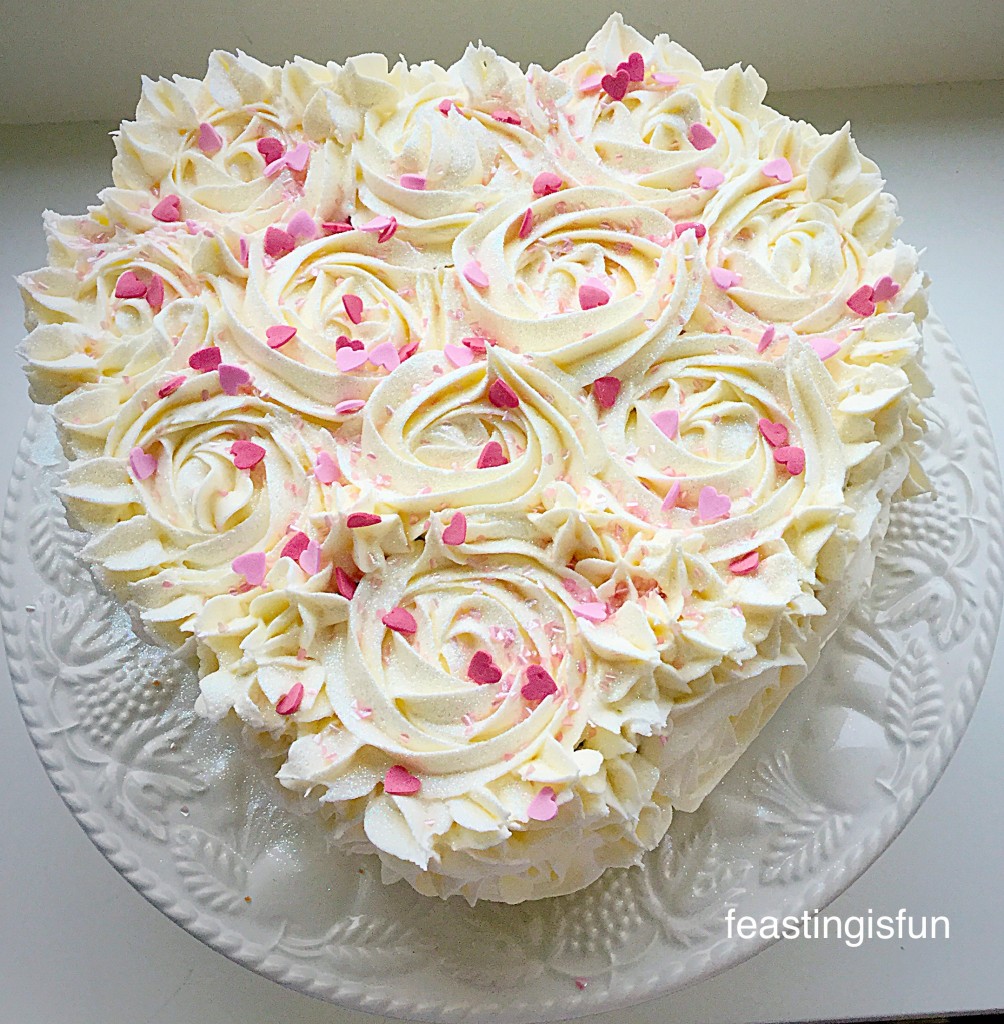
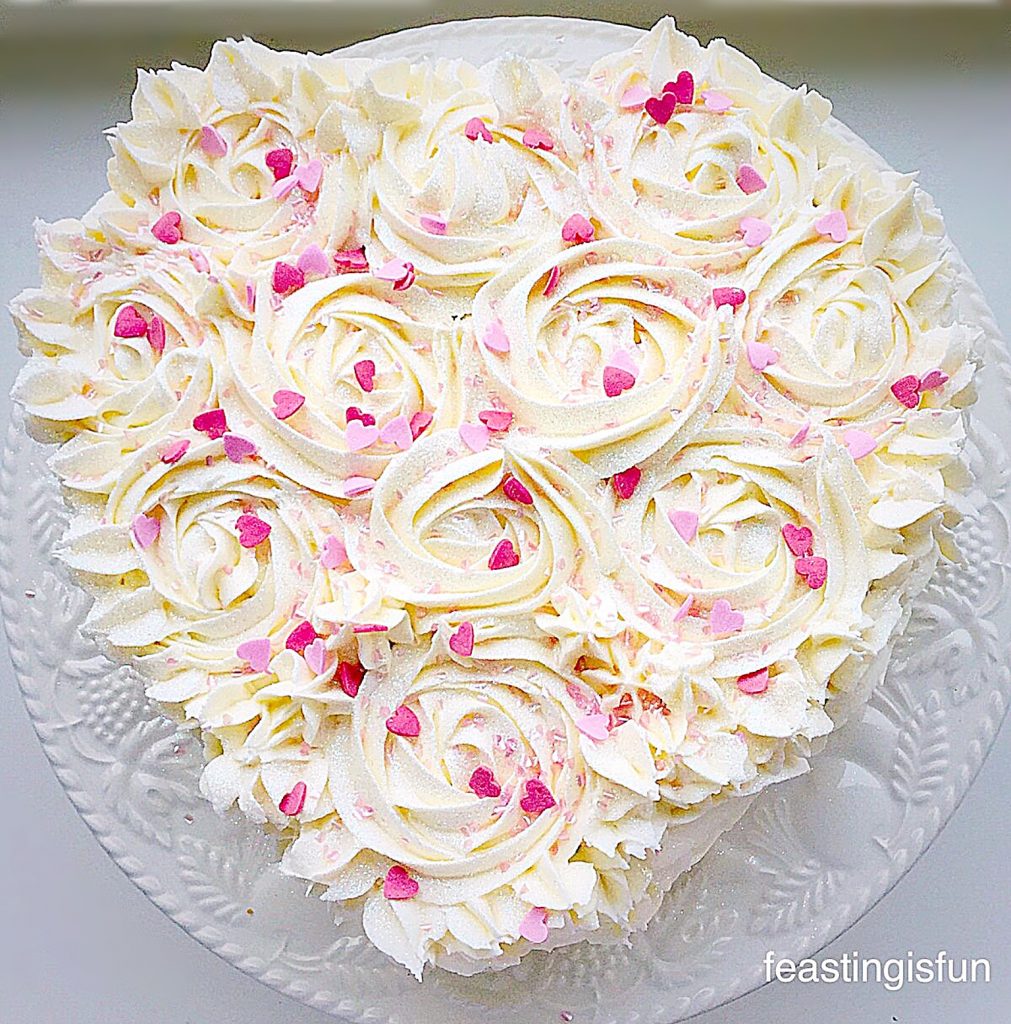
Strawberry Sweetheart Cake swirled with roses and sprinkled with love.

Rather than cover the cake with a smooth layer of buttercream I chose to pipe roses over it. Although I am not a trained cake decorator, I promise that the piped roses are not difficult. Because if I, with my wobbly hands can pipe them, you can too. And the effect of the roses gives this Strawberry Sweetheart Cake a very professional finish. While only you and I will know how easy it really is.

Piping buttercream roses:

First of all fit a large star tip (I used a Wilton 1M piping tip) to your piping bag and fill with the buttercream. Practice on a clean plate first. Imagine writing the letter e, when you get to the end of the you contine round in a complete circle. It is that easy!! A few practices, keeping the pressure on your piping bag steady and you will have piped roses! This cake is only the second time I have piped these roses! The first time was these Raspberry Ripple Almond Cupcakes.
Strawberry Sweetheart Cake
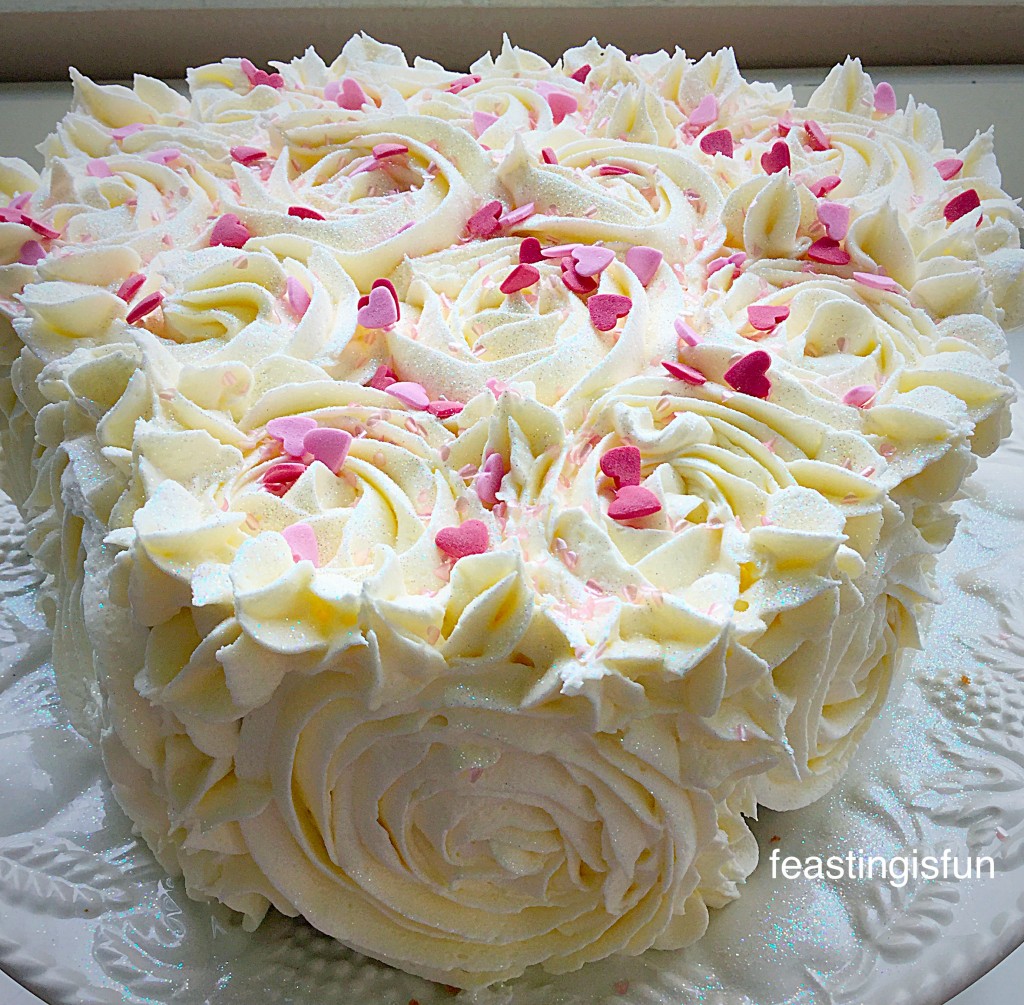
Strawberry Sweetheart Cake roses piped around the sides.

I will admit that piping the roses around the sides was a bit harder. So I piped either side of the heart first and once I’d got the hang of it piped the final rose on the point of the heart. Continuing with the same tip, I piped little stars in between the roses to fill in any gaps and then defined the heart by piping stars all the way around the top edge.
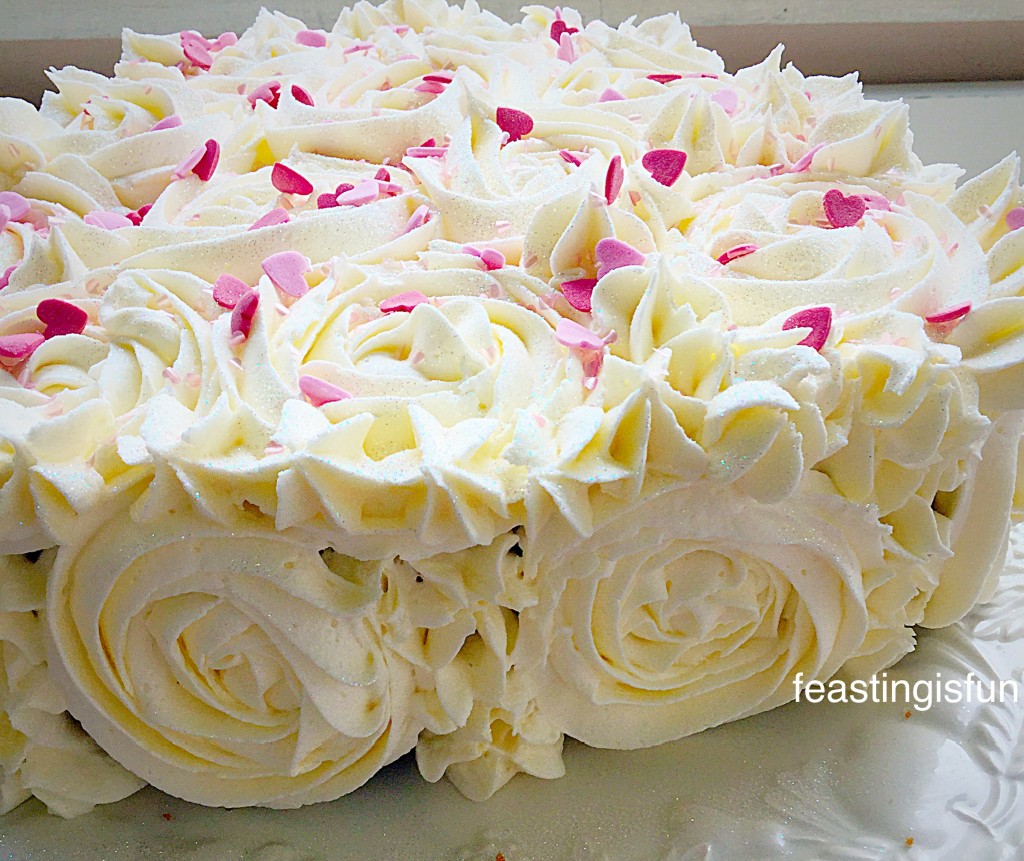
Strawberry Milkshake Sweetheart Cake
Strawberry Sweetheart Cake a view of the side – using piped stars to fill in any gaps.

A sprinkle of sparkle:

Finally, glitter, shiny hearts and more heart sprinkles finished this cake off beautifully. At least that’s what my hubby thought and this cake was made especially for him!

Baking for my family, as I’ve mentioned before, is one way I like to show them my love. This past year has been very hard on us all, due to my seizures (see here). Especially my hubby, who has looked after not only me, but our three gorgeous children, as well as holding down a demanding, full time job. Wanting to show my love for him on this particular day was very important to me and as a family, we all get to eat the cake, my way of saying thank you and I Love You all.

Recipe: Makes One Strawberry Sweetheart Cake serves 20

250g/9oz Caster Sugar

250g/9oz Unsalted Butter – at room temp.

1/4tsp Salt – I use Maldon

1tsp Vanilla Bean Paste or Vanilla Extract

250g/9oz Plain White Flour

2tsp Baking Powder

6 Large Eggs – I always use free range

200g/7oz Strawberry Jam

Assortment of sprinkles and edible glitter

For the buttercream

500g/1lb 2oz Strawberry Milkshake Icing Sugar – or alternatively use plain icing sugar and add your own flavouring to taste.

250/9oz Unsalted Butter very soft

2tbsp Boiling Water

Method: Preheat the oven to 160C/140C fan, gas mark 3, 325F – this cake is cooked low and slow.

Making the cake:

  • First of all butter and line the base of a heart shaped tin with baking parchment. If the tins are shallow split the mixture, so that it comes half way up your cake tin.
  • Into a large bowl add the butter and sugar.
  • Whisk until pale and fluffy – 5 minutes.
  • Add the vanilla and whisk to combine.
  • Sift the flour, baking powder and salt into another bowl (dry ingredients).
  • Add one third of the dry ingredients and 3 eggs.
  • Whisk slowly until combined.
  • Repeat using one third of the dry mixture and 3 eggs.
  • Whilst whisking slowly add the final third of the dry mixture.
  • Remove the whisk and give the bowl a thorough mix using a soft spatula, ensuring all the ingredients are well combined.
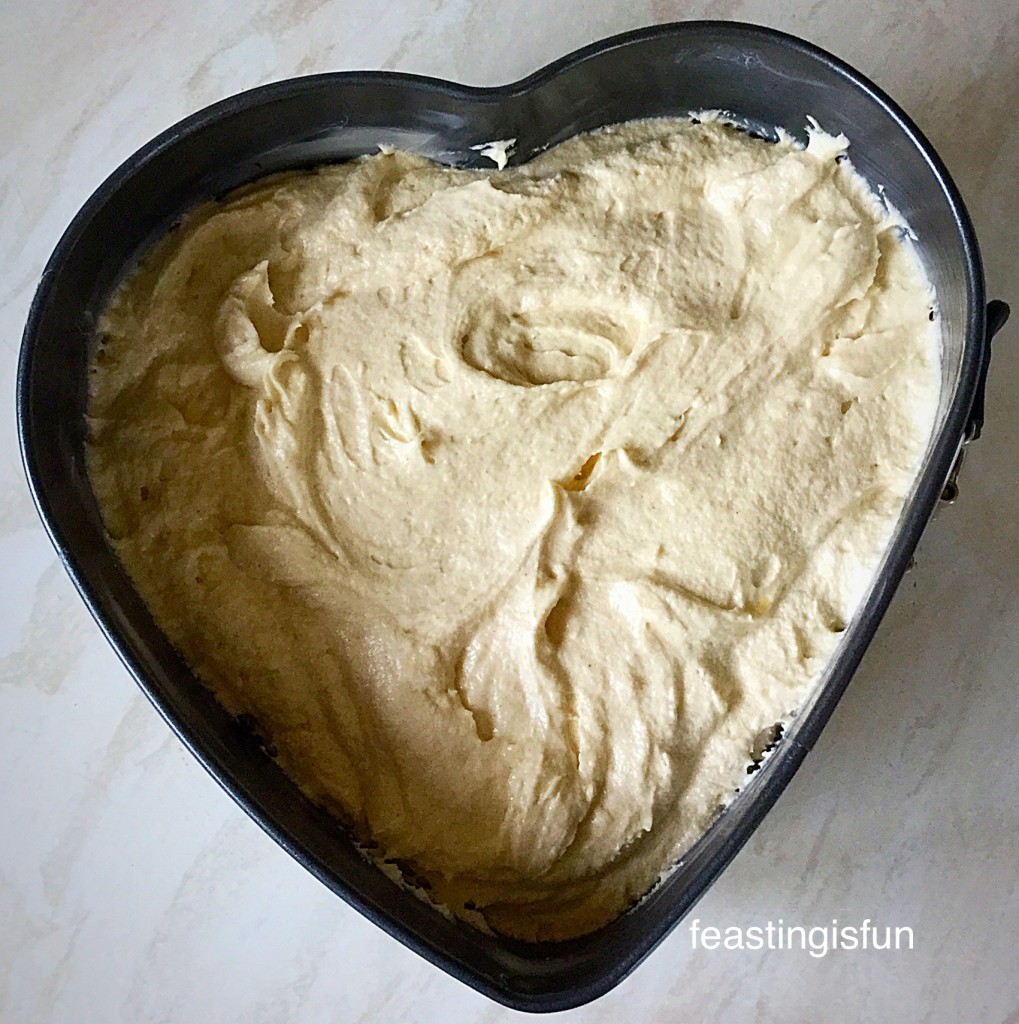
Strawberry Sweetheart Cake
Fill the tin with cake batter and smooth the top.

Baking the cake:

  • Place the cake tin in the centre of the oven and bake for 1 hour 15 – 30 minutes.
  • The cake is baked when it is golden brown, springs back from a light finger press and an inserted skewer comes out clean.

Strawberry Sweetheart Cake
Remove the cake from the oven.
  • Place the cake tin on a large trivet or cooling rack.
  • Allow the cake to cool completely in the tin.

Filling and decorating the cake:

  • Once the cake is completely cold, tip out of the cake tin and place on a cake stand or board, so that the flat bottom is uppermost.
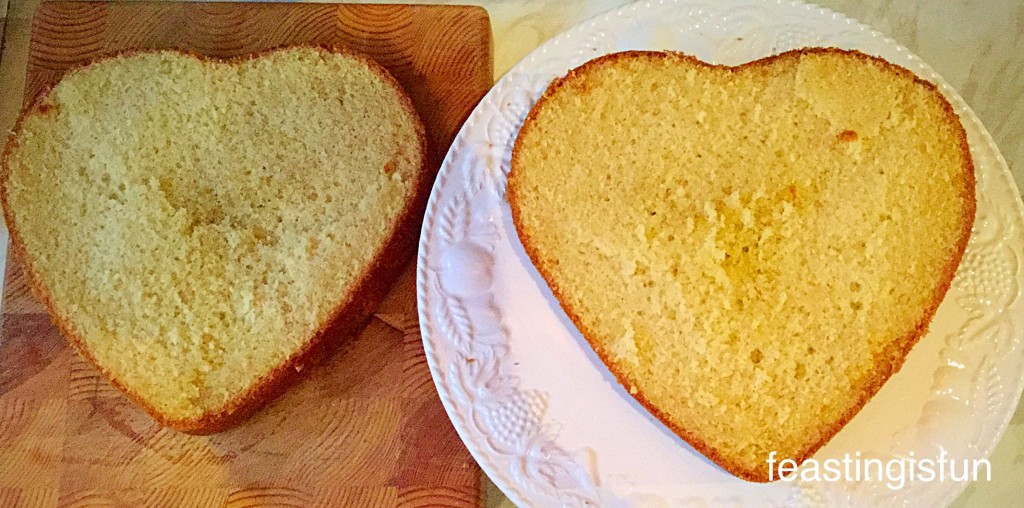
Strawberry Sweetheart Cake
Very carefully slice the cake in half.
  • Slice the cake in half.
  • Lay the uppermost half on a spare board.

Strawberry Sweetheart Cake

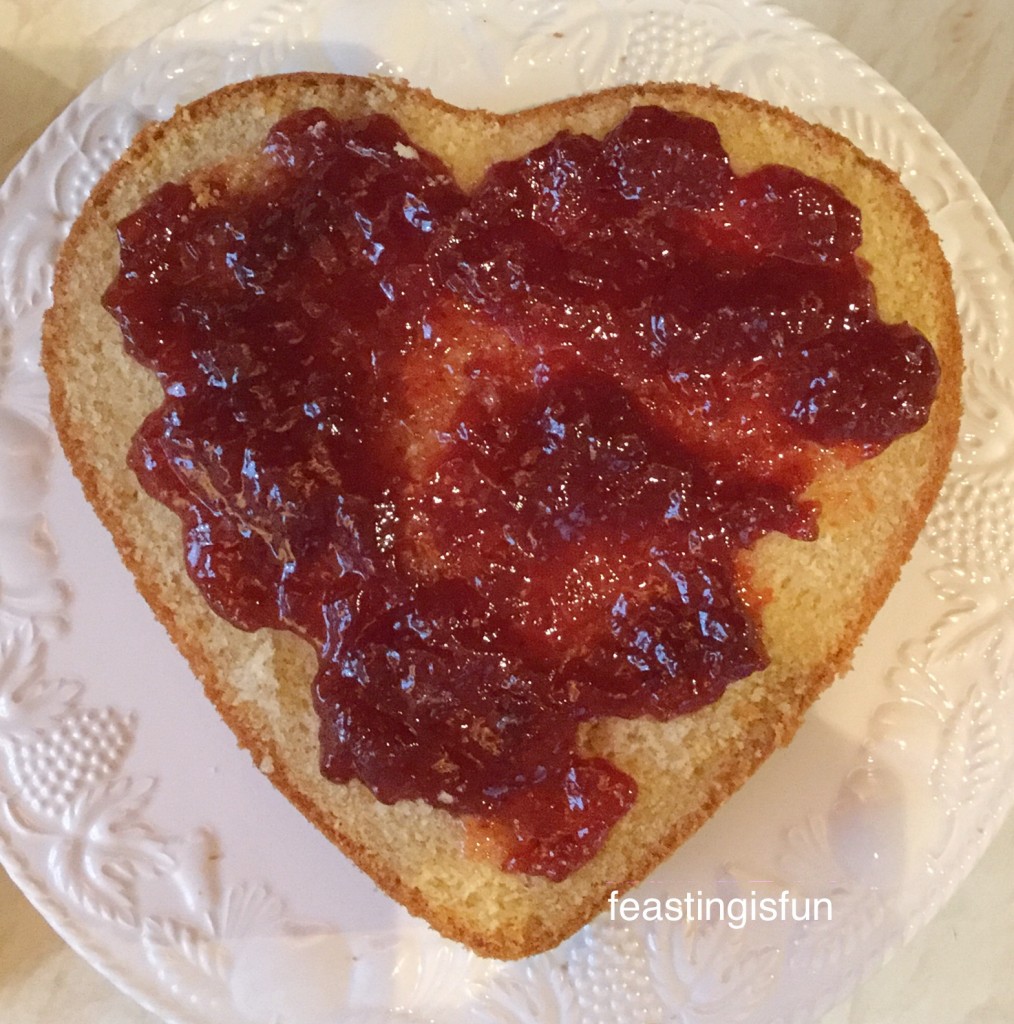
    Spread the strawberry jam over the bottom half so that it doesn’t quite reach the edge.
  • Sing a spoon spread jam on to the bottom half of the cake.
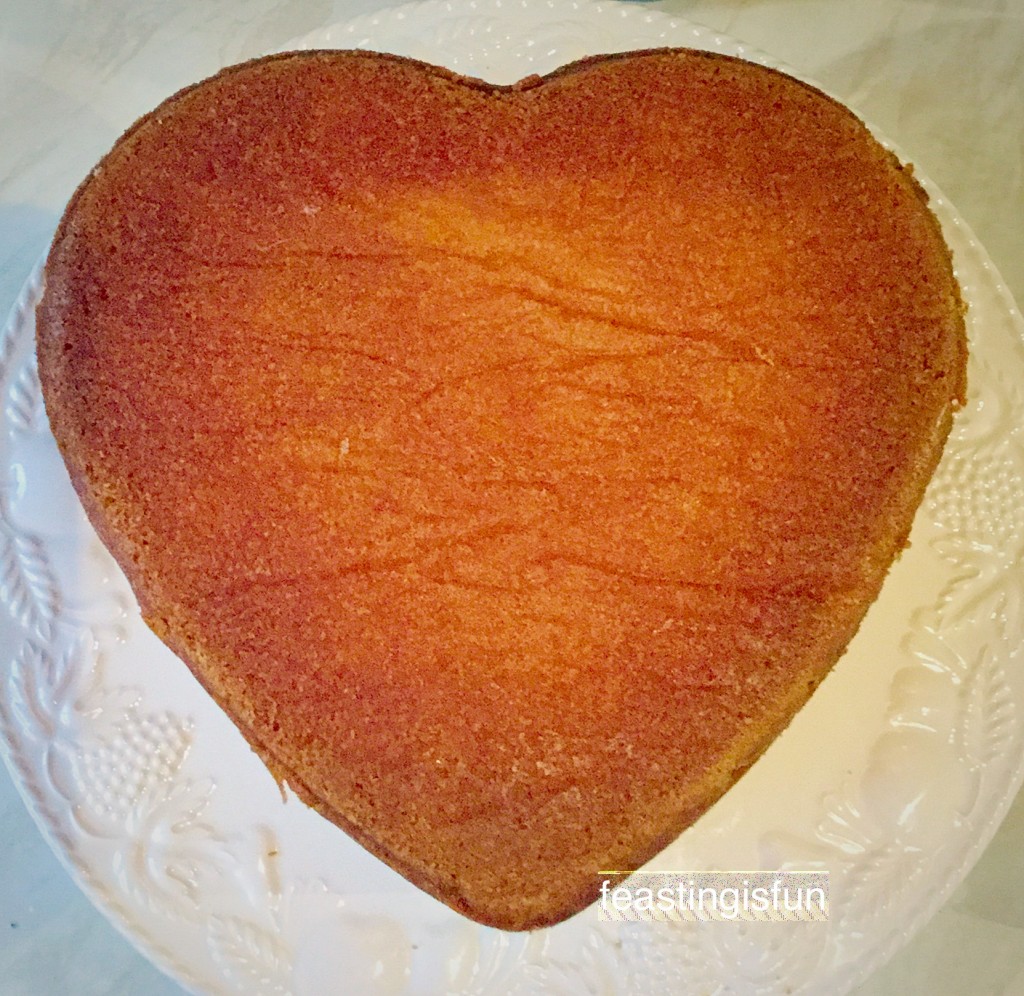
Strawberry Sweetheart Cake
Lay the top layer onto the jam covered bottom layer.

Making the buttercream:

  • Place the very soft butter into a large bowl.
  • Sift in the flavoured, or plain, icing sugar into the bowl and add 2 tablespoons of boiling water (add 1 teaspoon of vanilla extract, or th required amount of flavouring, if not using flavoured icing).
  • Starting slowly, whisk the ingredients together, increasing the speed as the icing sugar becomes fully incorporated.
  • Continue whisking for 5 minutes, this will ensure the icing is smooth and light.
  • Fit a large icing bag with a large star tip.
  • Finally, fill the icing bag with whpiped buttercream.

Icing the Strawberry Sweetheart Cake:

  • Start with the surface of the cake and pipe a rose swirl at the top, where the dip in the heart is.
  • Continue piping rose swirls symmetrically, either side, of the heart.
  • Finish with a rose swirl at the bottom point of the heart.
  • For the sides, start at the top of the heart bump, on one side and pipe rose swirls around one side and then the other, leaving the bottom point.
  • Go back to the top of the heart and pipe one rose in the heart dip and and additional rose to fill in between the two roses.
  • Repeat on the other side.
  • Now pipe a rose swirl on the bottom point of the heart.
  • Pipes stars wherever there are gaps and visible pieces of cake on the top and sides, trying to keep the pattern symmetrical – especially on the top of the cake.
  • Also pipe stars on the top of the cake around the heart outline.
Strawberry Sweetheart Cake
A beautifully covered Strawberry Sweetheart Cake.

Finishing touches:

Now you can sprinkle away. I firstly gave this beautiful cake a good dusting of white edible glitter and then sprinkled two different styles of hearts over it.
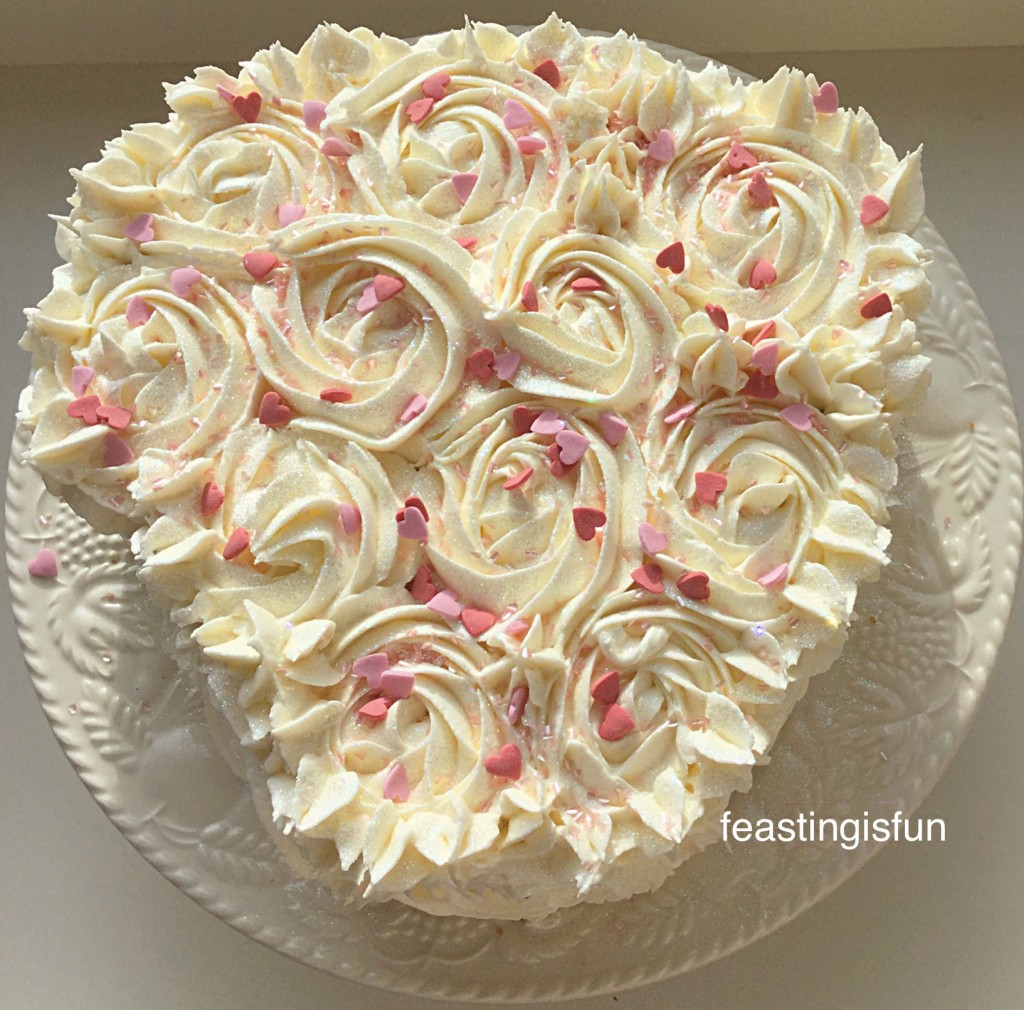
Strawberry Sweetheart Cake
Strawberry Sweetheart Cake shimmering and sparkling in the sunshine.

Place the cake somewhere cool to set for a couple of hours. This cake spent the night in our porch, since it was particularly chilly February evening.

Because of the addition of boiling water into the buttercream mixture, this buttercream will not develop a hard crust. As this not only improves the texture whilst eating the cake, but also means that the buttercream is a dream to slice through!
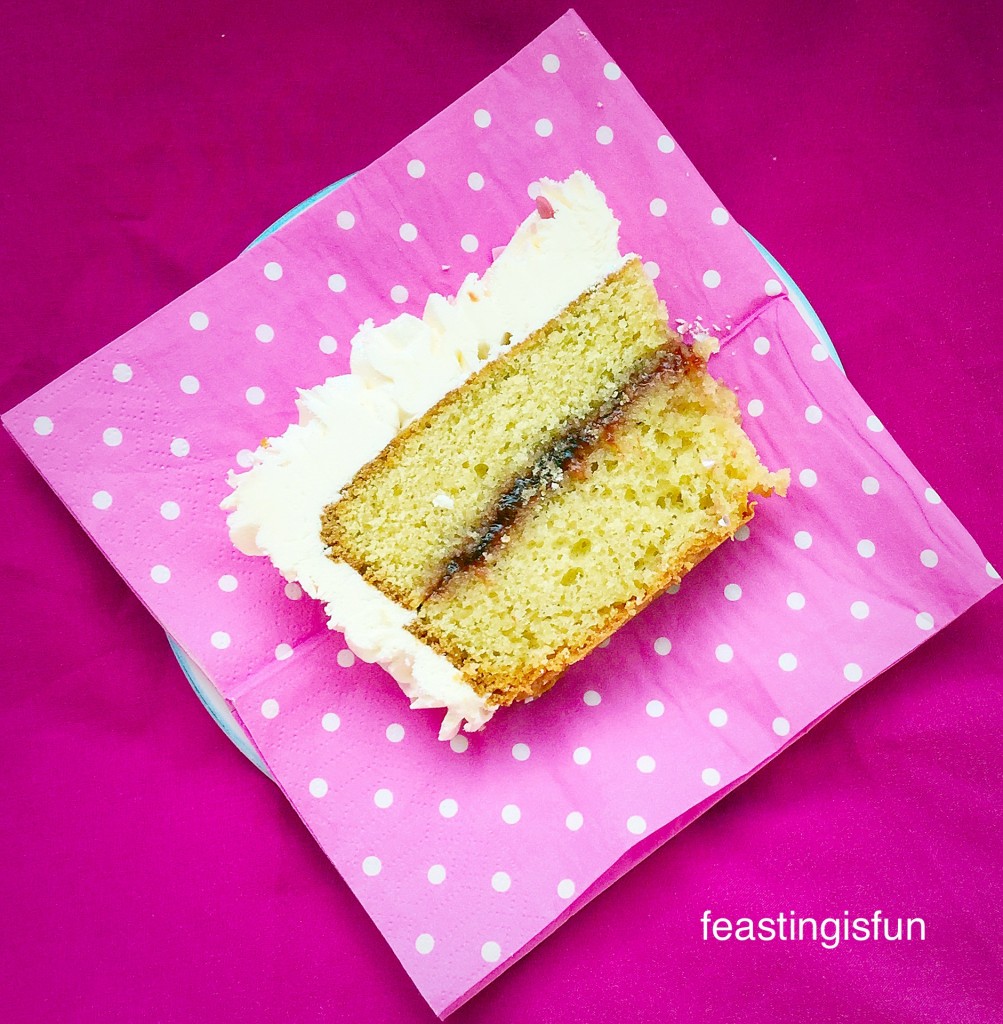
Strawberry Sweetheart Cake
Strawberry Sweetheart Cake one delicious slice – that didn’t last long!!!

This Strawberry Sweetheart Cake will keep in an airtight container, for up to 5 days, if left somewhere cool – I would advise keeping it in the fridge during the summer. Although, having just eaten a slice, I can’t imagine this cake hanging around for long, especially in our house!

Because making this cake is so beautifully easy, it would be perfect for birthdays, engagements, anniversaries and maybe even small weddings. Also, you can easily tint the buttercream with food colouring. I used Sugarflair and Wilton edible food colouring gels. You really only need a tiny (tip of a cocktail stick) amount to produce a beautiful pastel shade.

Whatever you are doing, whether alone or with others, I hope that you know you are loved, see Important Stuff.

If you have enjoyed this Strawberry Sweetheart Cake, then you may also like these:

Chocolate Heart Cake

Chocolate Heart Cake link
Chocolate Heart Cake

Heart Engagement Bundt Cake

FF Strawberry Sweetheart Cake
Heart Engagement Bundt Cake

Raspberry Lemon Celebration Layer Cake 

FF Strawberry Sweetheart Cake
Raspberry Lemon Celebration Layer Cake

While I love baking, I also recognise that I am not the world’s best cake decorator. Yet with a little practice I have perfected, the very “on trend” piped rose technique. There is truth in the saying “A little practise goes a long way.” Especially when seeing the finished results and the delight on the recipient’s face when presented with a stunning cake. Most importantly for me is the love that goes into making, baking and decorating a cake.

Sammie xxx

No part of this post may be reproduced or duplicated without the written permission of the owner. Please see my Disclosure Policy.

Share
Facebooktwitterpinterestlinkedintumblr

Oat Bran White Bread

Share
Facebooktwitterpinterestlinkedintumblr

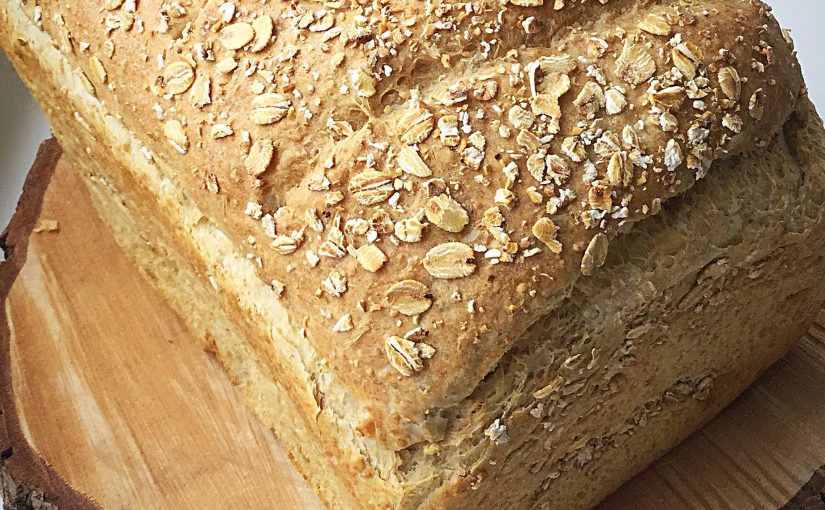
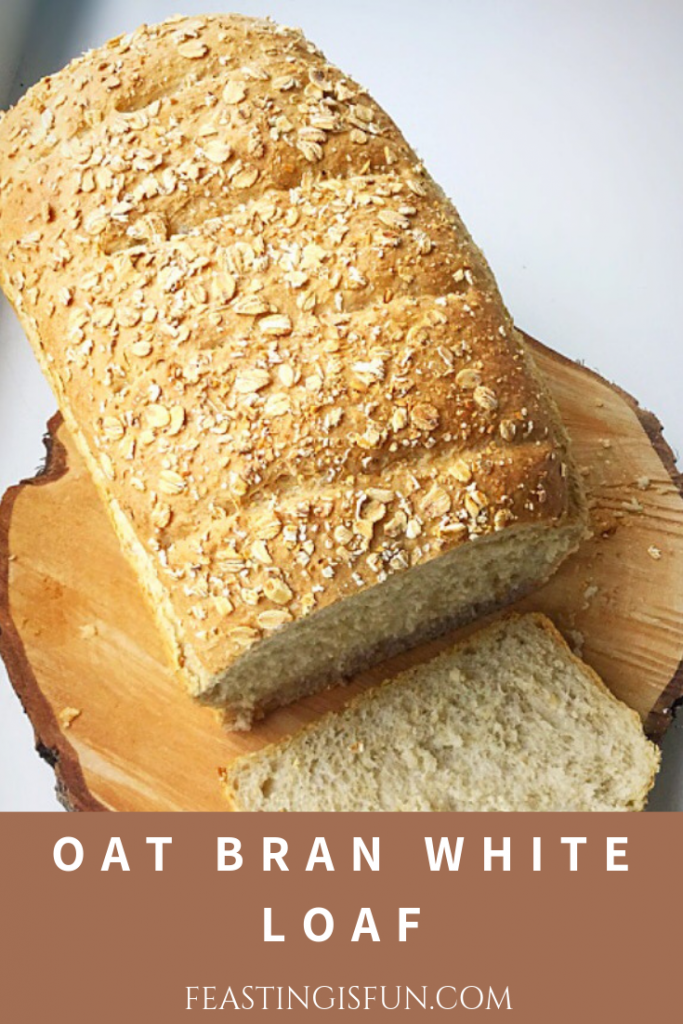
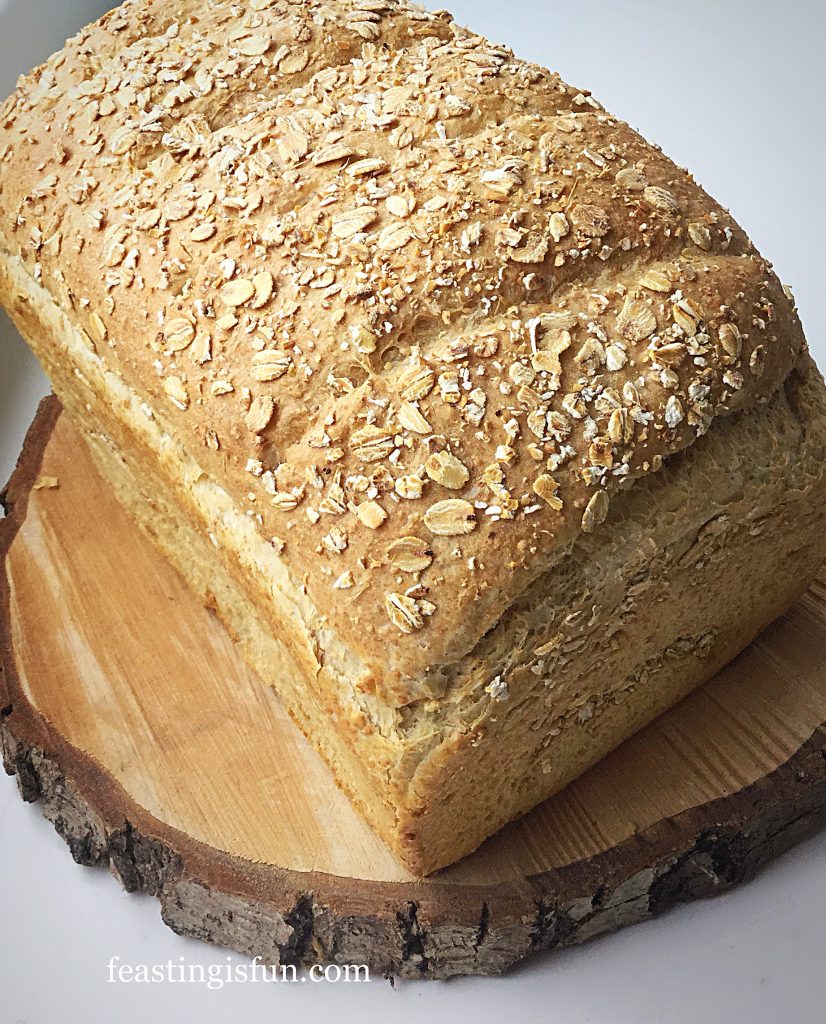
For those of you who regularly read this blog, you may have noticed a few things about the way I cook and bake. Primarily I make food that is tasty to eat using ‘natural’ ingredients. For example, I unashamedly use butter when baking and cooking and tend to avoid overly processed foods. While I have a passion for baking bread, with nuttier and seeded loaves being my preferred loaves, yet I live in the real world. In a family of five people, three prefer white bread. So here is my compromise. Oat Bran White Bread is a soft loaf without the heaviness or chewing required by its wholemeal cousin.

FF Oat Bran White Bread

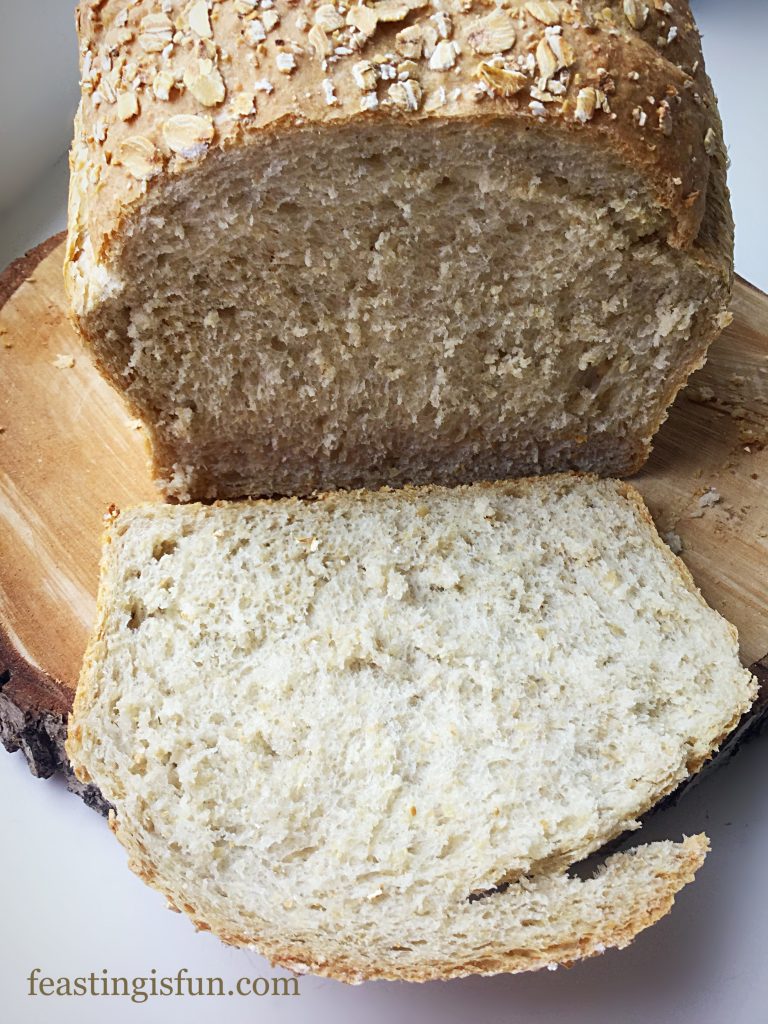
Since this bread is so soft it is perfect for sandwiches and also makes the most incredible toast. In fact, this loaf makes the best toast, in my opinion, of all the bread recipes here on Feasting is Fun. Packed full of fibre from the whole oats and oat bran, it is good for you as well as being a tasty, filling bread. Yet also having the lightness of a white loaf.

FF Oat Bran White Bread
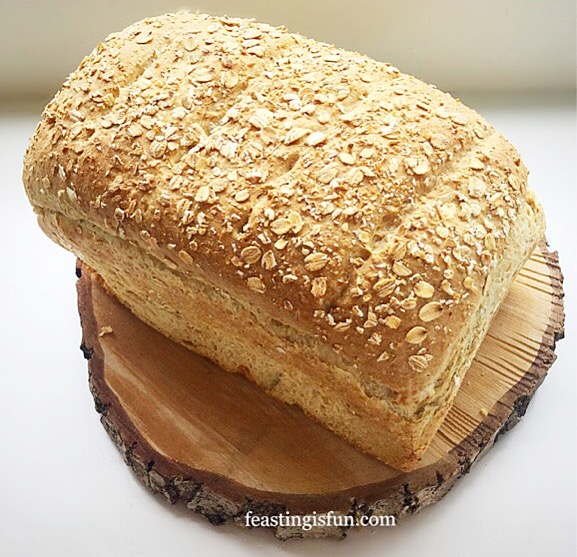
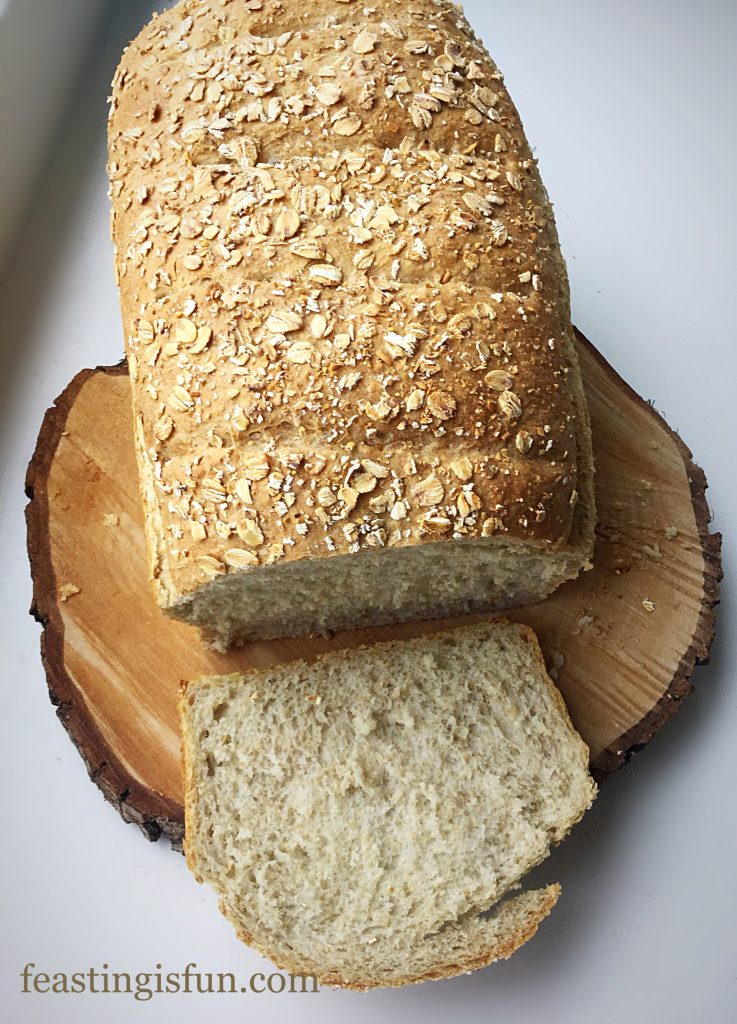
Oat Bran White Bread Loaf

Choosing To Eat Well

While I am not into faddy food, having food allergies myself means I am attempting to increase the variety recipes on this site. For example gluten free, dairy free and vegetarian. I try to use fresh local and seasonal food as much as possible in my everyday cooking and that is reflected in the recipes posted here. I am not perfect and we have standby dinners in the freezer for days when I can’t cook.

FF Oat Bran White Bread
Oat Bran White Bread

All that said, I do try to make as much of our own bread as possible. If I didn’t have a bread machine or stand mixer I simply would be unable to make bread from scratch. Kitchen machinery that earns its place will always be welcomed by me. Far better to make good quality, homemade bread with the help of a mixer, than buy its mass produced counterpart. Bread is a staple and a great tasting, fresh loaf will always be at the heart of any kitchen that I use.

FF Oat Bran White Bread
Oat Bran White Bread

A quick note about this Oat Bran White Bread: I have recently updated the recipe, replacing the butter for Rapeseed oil. First of all it gives the baked loaf a softer texture and also makes the recipe both dairy free and vegan. I am NOT jumping on the ‘vegan’ bandwagon, however, creating a loaf that more people can make and enjoy will always be a priority for me, providing there is no compromise on flavour.

Recipe:  Oat Bran White Bread

420ml Water at room temperature

450g/1lb Strong White Bread Flour – I use Shipton Mill

100g/4oz Fine Oat Bran available from health food shops and Amazon 

– alternatively blitz the equivalent weight of rolled oats in a food processor

50g/2oz Rolled Oats plus 1tbsp for sprinkling on top of the loaf

7g /1sachet Active Dried Yeast – I use the green tub/sachets from Allinson also known as fast acting dried yeast.

7g Sea Salt – I use Maldon

2 tbsp Rapeseed Oil (Canola Oil)

Making And Proving The Bread Dough

You will need a lightly oiled 3 lb loaf pan to bake this loaf of bread.

Using a bread maker or stand mixer, pour the water into the  bowl and then add the yeast.

Next add the flour, oat bran and oats.

On top of the dry ingredients add the salt and oil.

Set the bread machine to dough cycle and start.

If using a stand mixer, attach the dough hook and mix until all the ingredients come together. Continue to mix for 10 minutes. Stop mixing and remove the dough hook. Cover the bowl with a damp cloth until the dough has doubled in size, approx 1 hour.

Knocking Back And Shaping The Dough Ready For The Second Prove

Once doubled in size, remove the cloth and tip the dough out on to a lightly floured worktop so that the top of the risen dough is in on the bottom, in contact with the work surface.

Once the bread mixer has finished the dough cycle, start it again, allowing it to mix (knock back) the dough for one minute. Turn the dough out onto a lightly floured surface.

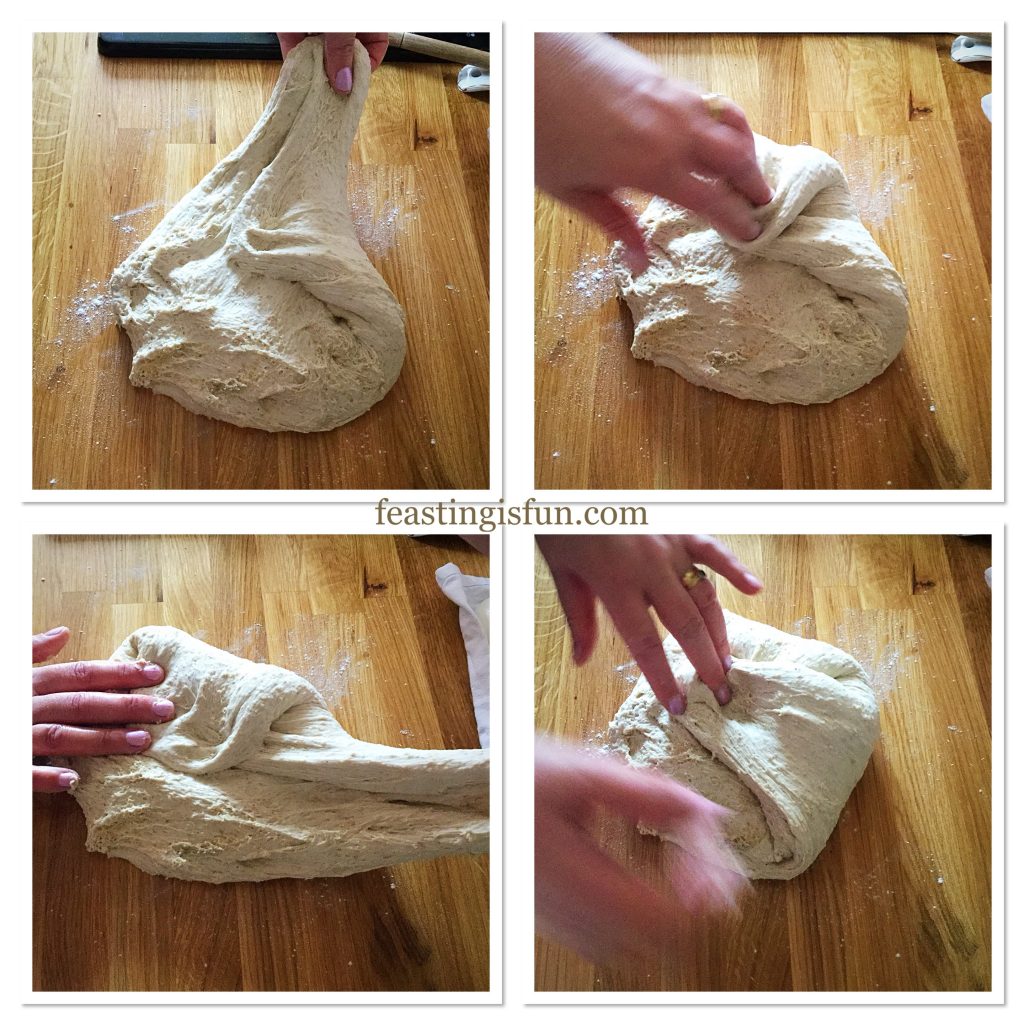
Working around the dough, take hold of the dough with your hand, pull out and then press into the centre. Continue, as in the photographs below, until you have a tight, neat lump of dough.

FF Oat Bran White Bread
Creating structure within the dough.

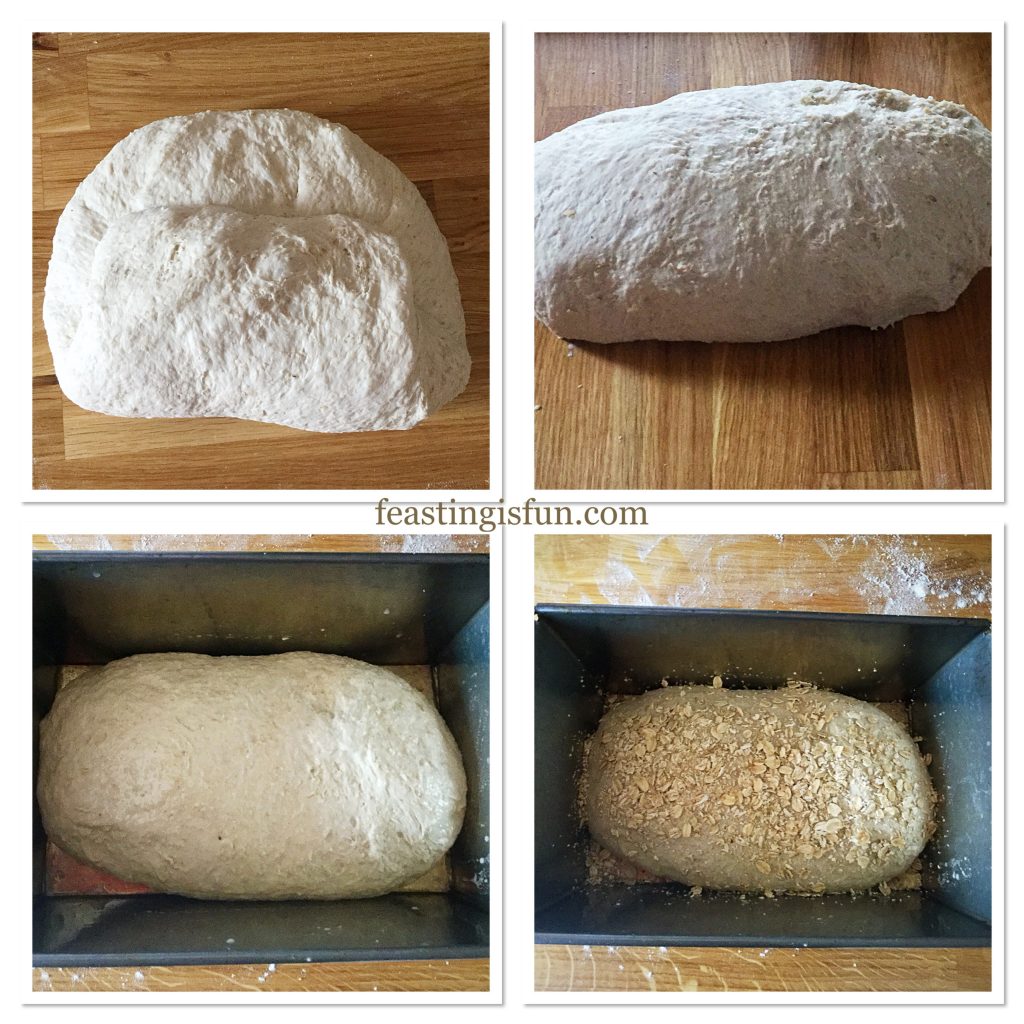
Gently, using your fingers, press the dough out to form a square shape.

Fold the bottom third of the dough up and then the top third of the dough is folded down, slighlty overlapping the seam.

Turn the dough over and place into a well greased 3 lb loaf pan.

Spray or brush with water and sprinkle over 1 tablespoon of rolled oats.

FF Oat Bran White Bread
Shaping the dough ready for the tin.

Cover with a clean tea towel, place in a straight free place and leave to rise until doubled in size.

Scoring And Baking The Oat Bran White Bread

Preheat the oven to 220C/200C fan, 425F, gas mark 7.

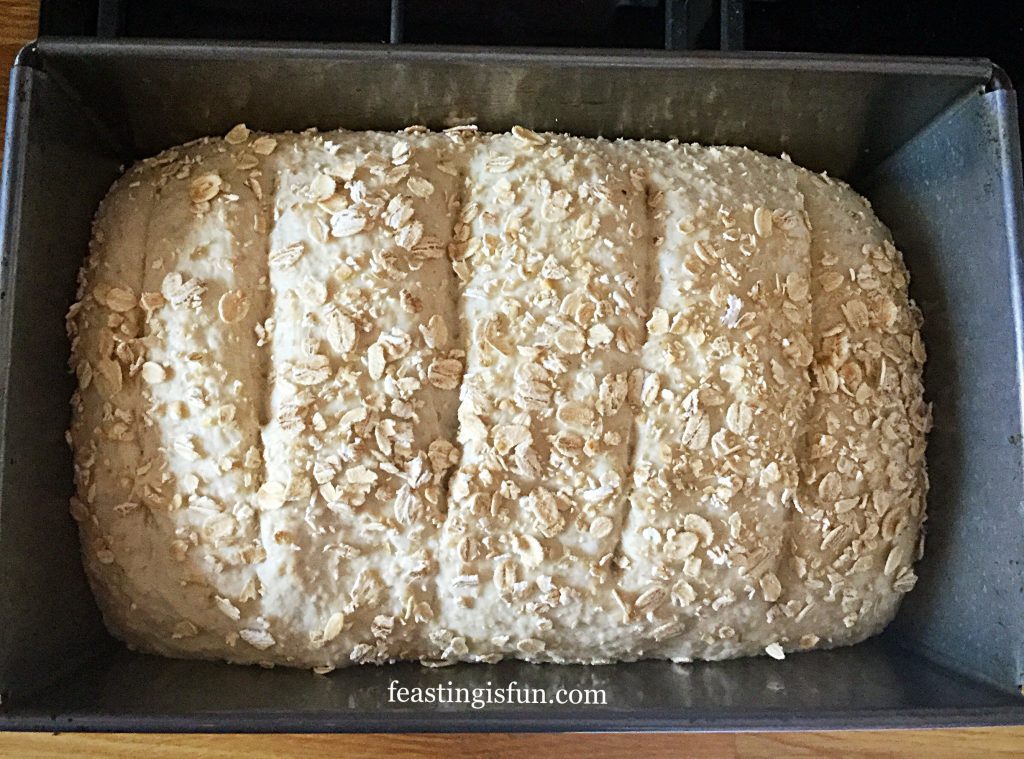
As soon as the dough has risen score across the dough with a very sharp knife or grignette 4-5 times.

FF Oat Bran White Bread
Proved and slashed Oat Bran White Bread ready for the oven.

Place the bread in the centre of the oven and bake for 30-40 minutes. The bread is baked when golden brown and carefully rapped with a knuckle and it sounds hollow.

As soon as the loaf is baked remove from the oven and turn out immediately on to a cooling rack to cool completely.

FF Oat Bran White Bread
Oat Bran White Bread

Allow the bread to cool fully before slicing.

If you have enjoyed this recipe for Oat Bran White Bread you may also like these:

Sunflower Seed Heart Cob Loaf

Sunflower Seed Heart Cob Loaf

Lighter Wholemeal Loaf

Lighter Wholemeal Bread Loaf
Lighter Wholemeal Loaf

Seeded Cob Loaf

Seeded Cob Bread
Seeded Cob Loaf

This Oat Bran White Bread loaf has a wonderful texture and flavour. While it does contain oats it certainly doesn’t taste like porridge. The oat bran lends a slight nuttiness, without the full on slog you get from a wholemeal loaf. It slices beautifully and makes equally good toast and sandwiches, although I confess to enjoying a slice with just butter on it. A really good loaf should have its own flavour and not just be a package for some cheese and ham.

If you love white bread, but want to incorporate more healthy fibre in your diet – this loaf is a great place to start!

Whatever you are making, baking and creating in your kitchens, have fun preparing and sharing your feast.

Sammie xx

No part of this post may be reproduced or duplicated without the written permission of the owner. Please see my Disclosure Policy.


Share
Facebooktwitterpinterestlinkedintumblr

Tangy Lemon Potato Salad

Share
Facebooktwitterpinterestlinkedintumblr

When the sun is shining and the temperature gauge keeps going up, cool, refreshing food is what we need. So my Tangy Lemon Potato Salad is perfect, cool and refreshing with a hint of crunch. Also this is the perfect side dish to, well, just about anything! We’re having this with fish tonight.

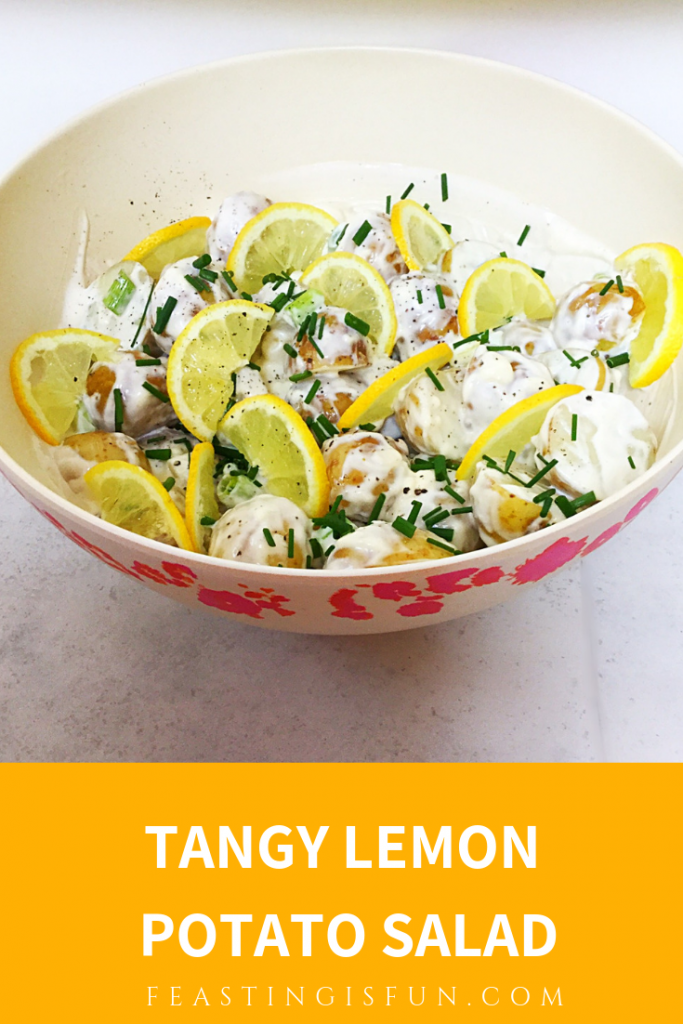
Pinterest image with descriptive graphics


While my Tangy Lemon Potato Salad does have mayonnaise in the sauce, you can easily substitute a light/lower fat mayo. The mayonnaise is thinned down with the juice of a whole lemon. And it’s this zesty juice that permeates the warm potatoes so that once chilled they take on a tongue tingling tang. Also at the same time it stops the mayonnaise from becoming gloopy.

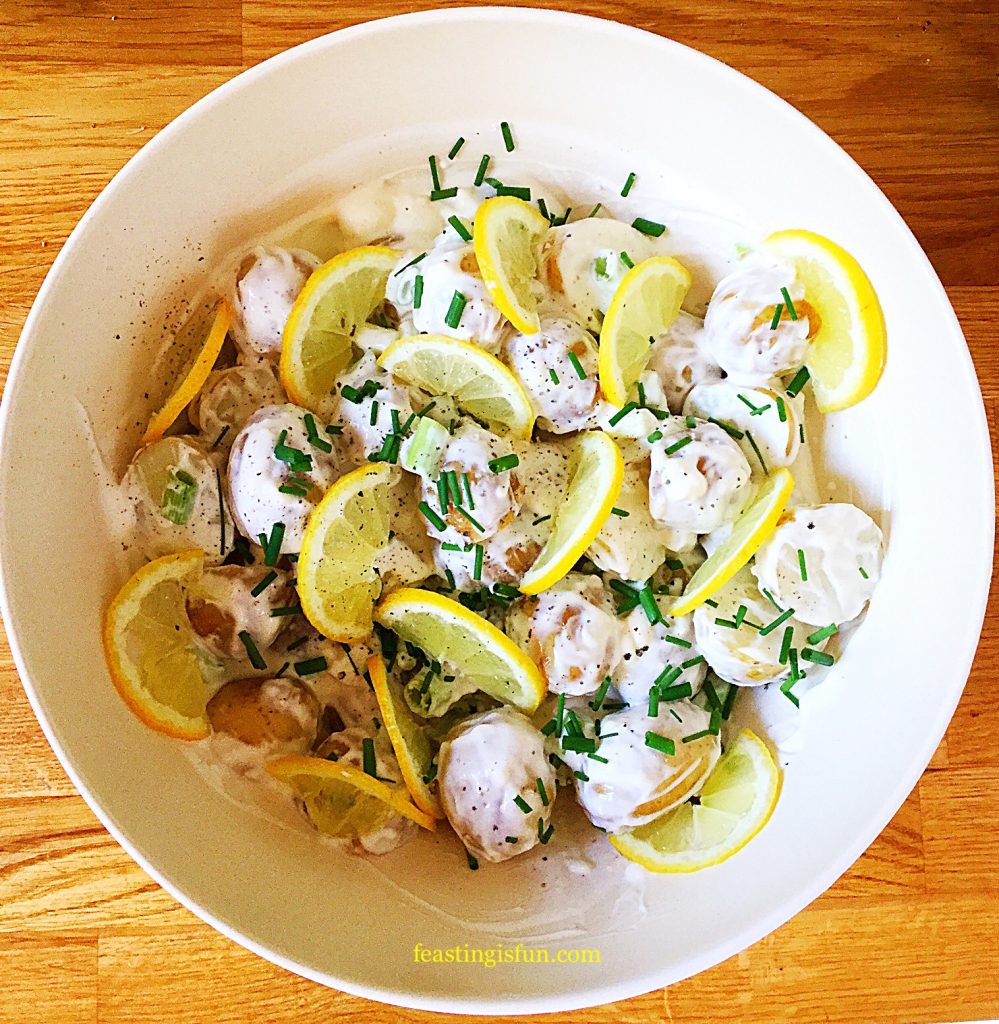
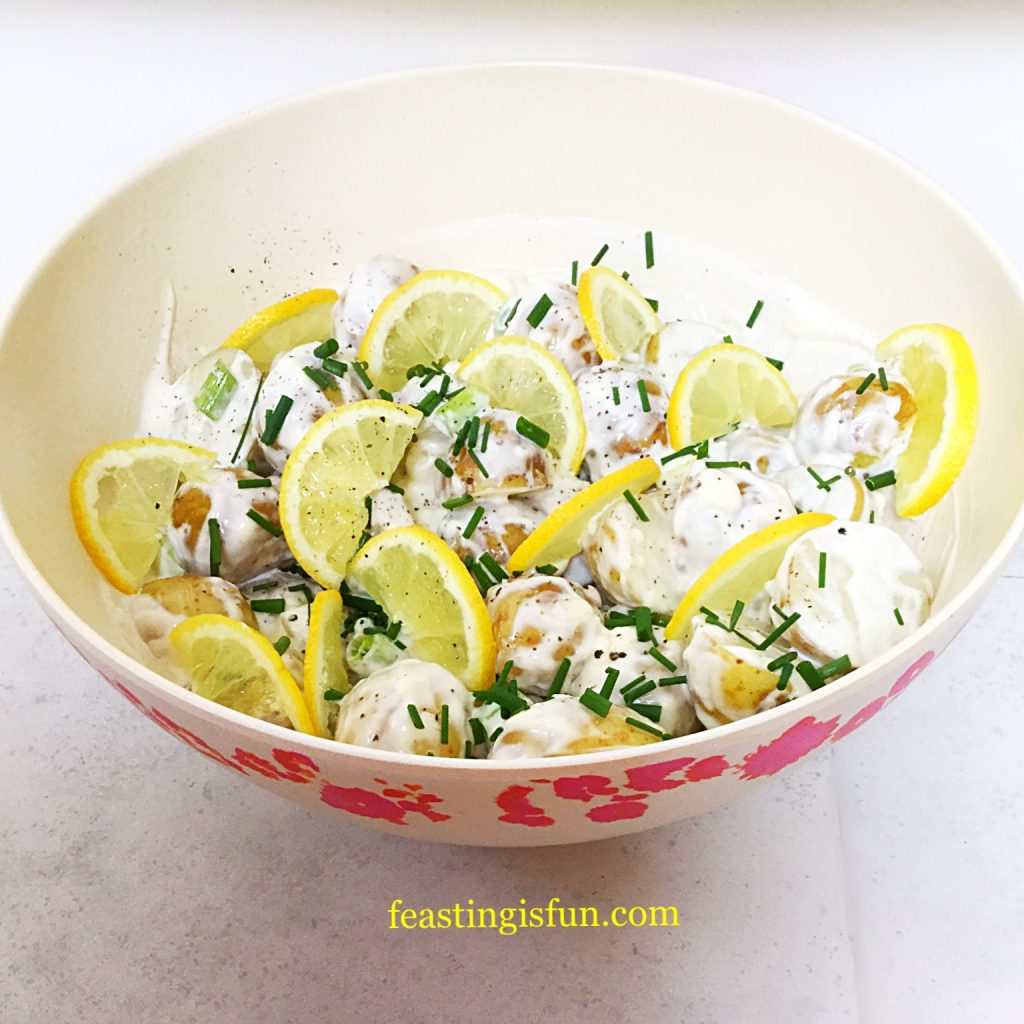
Overhead image of freshly made potato salad with lemon slices and chopped chives.
Tangy Lemon Potato Salad

If, like me you’re organised, cooking the potatoes and getting this salad made first thing in the morning, or even the night before, not only allows all the flavours to merge together, but you are also guaranteed a cold salad. Resulting in a side dish that works well with hot fish, quiche and any number of dishes including barbecues. Also it is ideal as part of a cold meal, buffet and picnic.

Close up of the pretty bowl, which has flowers around the outside rim.
Tangy Lemon Potato Salad

So I can guarantee that once you have made this Tangy Lemon Potato Salad you will want to keep making it. Especially if you take it to friends and family to share. Easy to make and perfectly portable!

Recipe : Tangy Lemon Potato Salad, serves 6 as a side dish.

1kg/2.2lb Baby New Potatoes I like Charlotte as they are available all year roundfrom most supermarkets including Waitrose and Sainsbury’s

Juice of 1 Whole Lemon

1 Lemon – for slicing

4 Heaped Tablespoons Mayonnaise

1/2tsp Sea Salt – I use Maldon, halve the quantity if using free flowing

1/2tsp Ground Black Pepper

2 Celery Sticks

3 Spring Onions

2 tbsp Chives

Making The Potato Salad

First of all, scub the potatoes to remove any dirt. Cut any larger potatoes in half so that all the potatoes are roughly the same size.

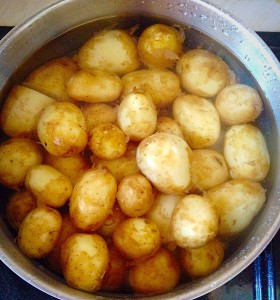
Place the potatoes in a saucepan, cover with water and bring to the boil.

Simmer the potatoes until just tender, drain, return to the pan and leave with the lid on, to finish steaming for 20-30mins.

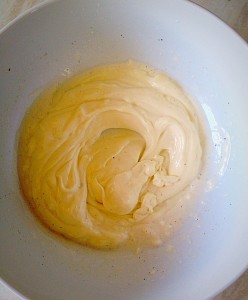
In a bowl add the juice of one lemon, mayonnaise, salt and pepper.

Stir until thoroughly combined.

Drain the potatoes and leave to steam dry in a colander for 5 minutes.

Add the potatoes to the bowl.

Chop the spring onions and celery into small dice.

Add the chopped celery and spring onions to the bowl.
Give everything a gentle mix.
Snip the fresh chives over the top of your Tangy Potato Salad.
Snip the fresh chives over the top, taste and adjust the seasoning as necessary.

Finally, if you prefer you can serve the Tangy Lemon Potato Salad as it is. Although I like to jazz it up with a few, very finely sliced lemon halves. Because they are perfectly edible (although if you just want to use them for garnish that’s fine) and taste delicious. Also the sliced lemon let’s people know that there is lemon juice in the potato salad.

Salad bowl from Emilie OConnor Home Store.

Make this Tangy Lemon Potato Salad up to a day ahead. Store in a bowl wrapped in cling film and keep refrigerated. Eat within 3 days.

If you like the bowl featured in this post, it is available from Emilie OConnor  home store. It is made using bamboo fibre and comes with a fitted chopping board lid and inset salad servers. I was very fortunate to win this eco-friendly bowl in a competition on Instagram. Check out her website, as her items are practical, beautiful and kind to the environment.

If you have enjoyed this recipe for Tangy Lemon Potato Salad then you may also like these:

Lemon Garlic Roast Chicken

FF Tangy Lemon Potato Salad
Lemon Garlic Vegetable Orzo

Crunchy Homemade Coleslaw

FF Tangy Lemon Potato Salad
Crunchy Homemade Coleslaw

Lime Couscous

FF Tangy Lemon Potato Salad
Lime Couscous

Lemons give a fresh, zesty, citrus burst to any dish they are used in, whether sweet or savoury. And a particular favourite of ours, here at home is Lemon Thyme Roast Chicken followed by Lemon Ripple Ice Cream for dessert. Sharing a feast around the table as a family is an important part of our lives.

So, whatever you are making, baking and creating in your kitchens, have fun preparing and sharing your feast.

Sammie xx

No part of this post may be reproduced or duplicated without the written permission of the owner. Please see my Disclosure Policy.


Share
Facebooktwitterpinterestlinkedintumblr