Cherry Tomato Mozzarella Basil Quiche

Share
Facebooktwitterpinterestlinkedintumblr

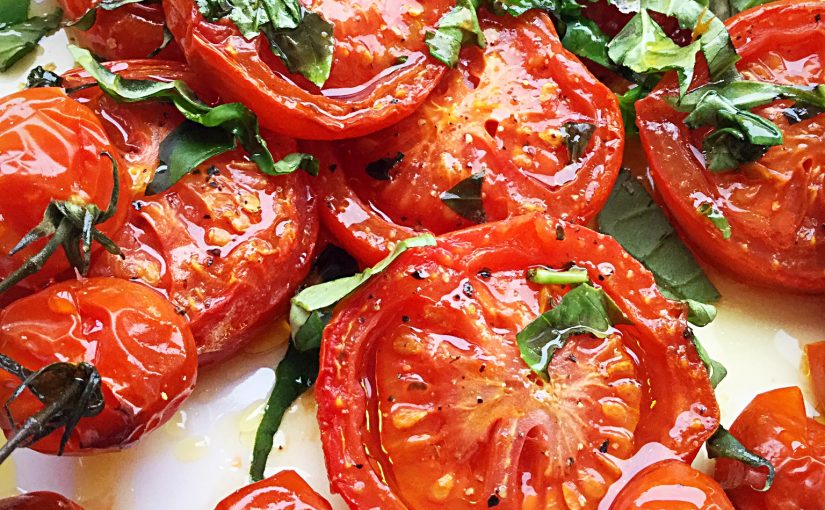
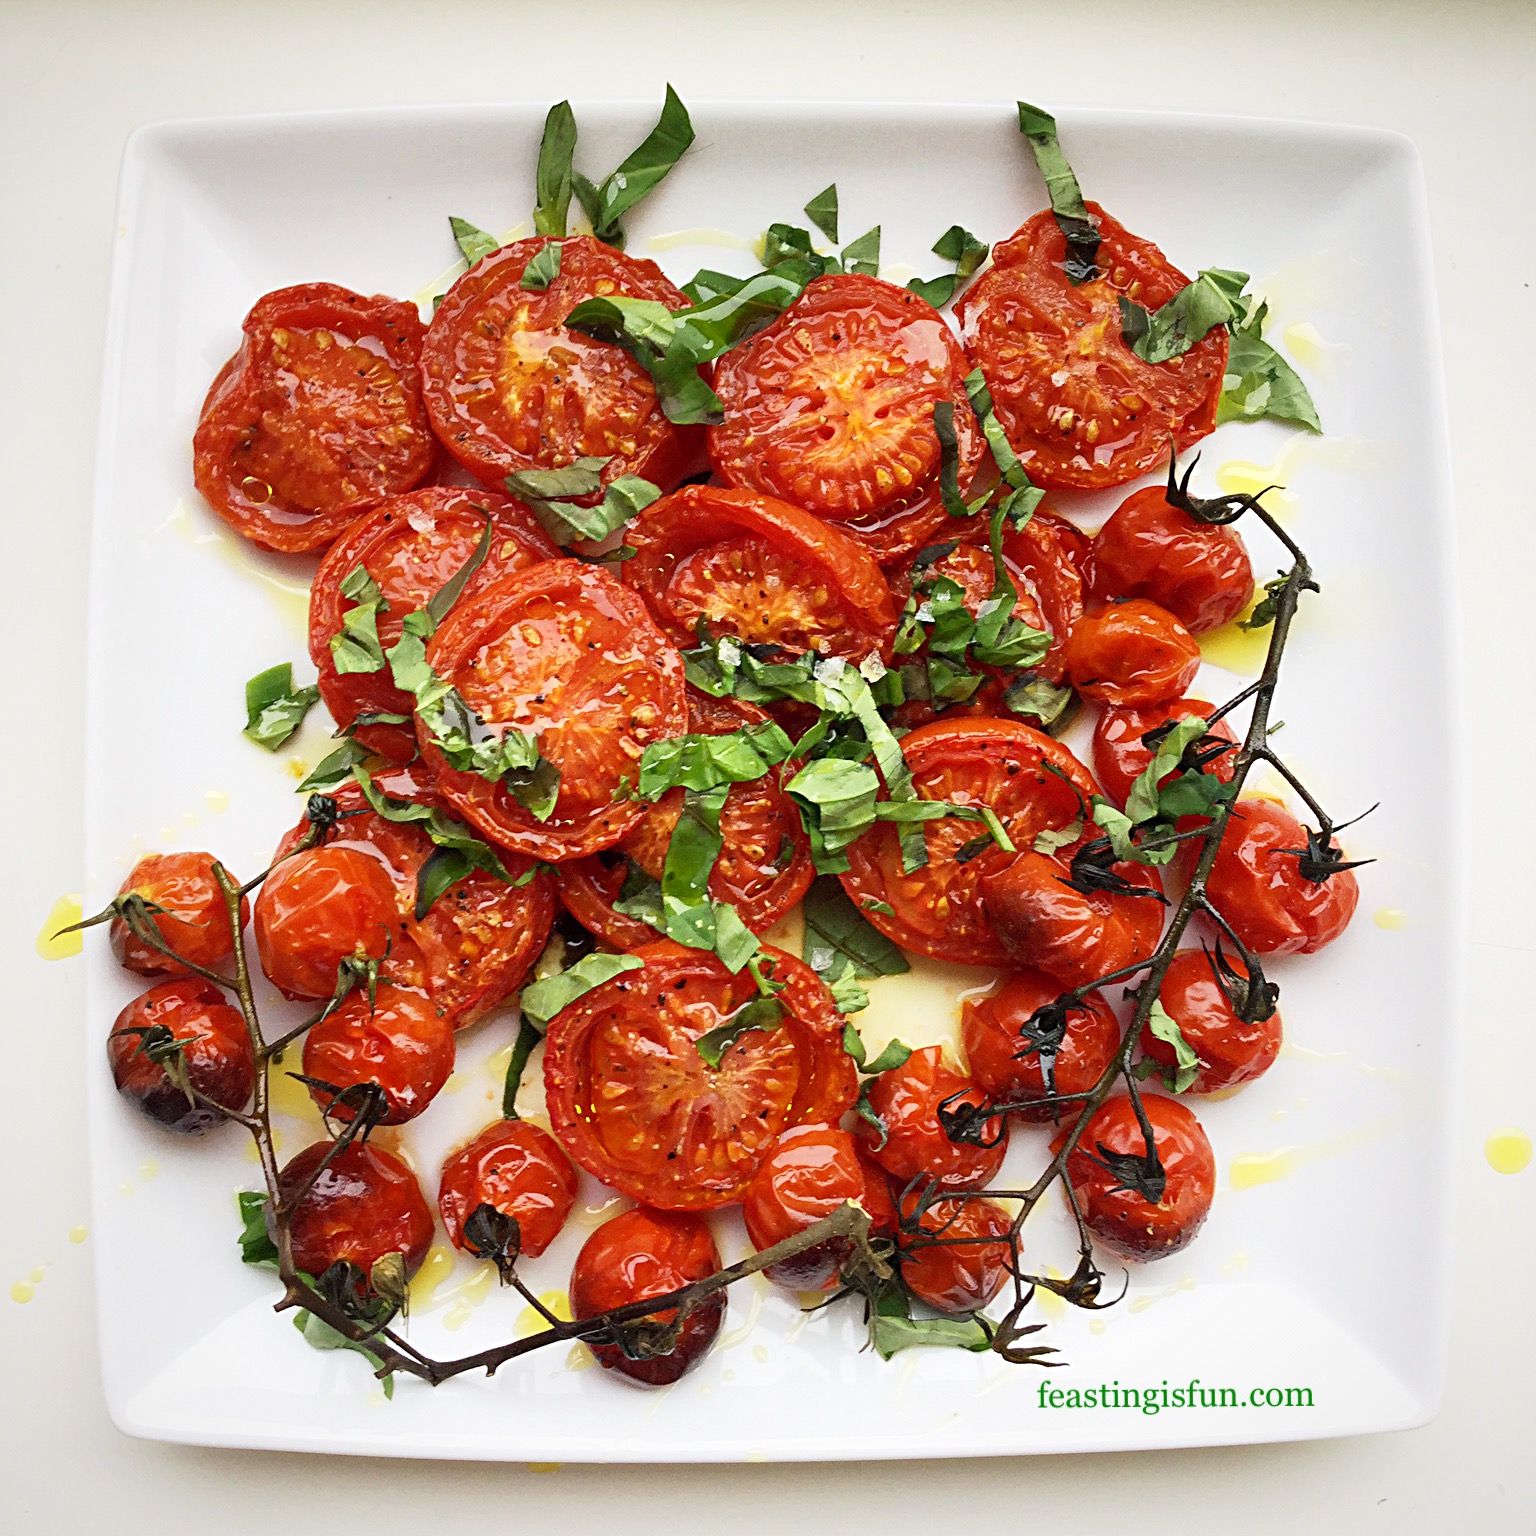
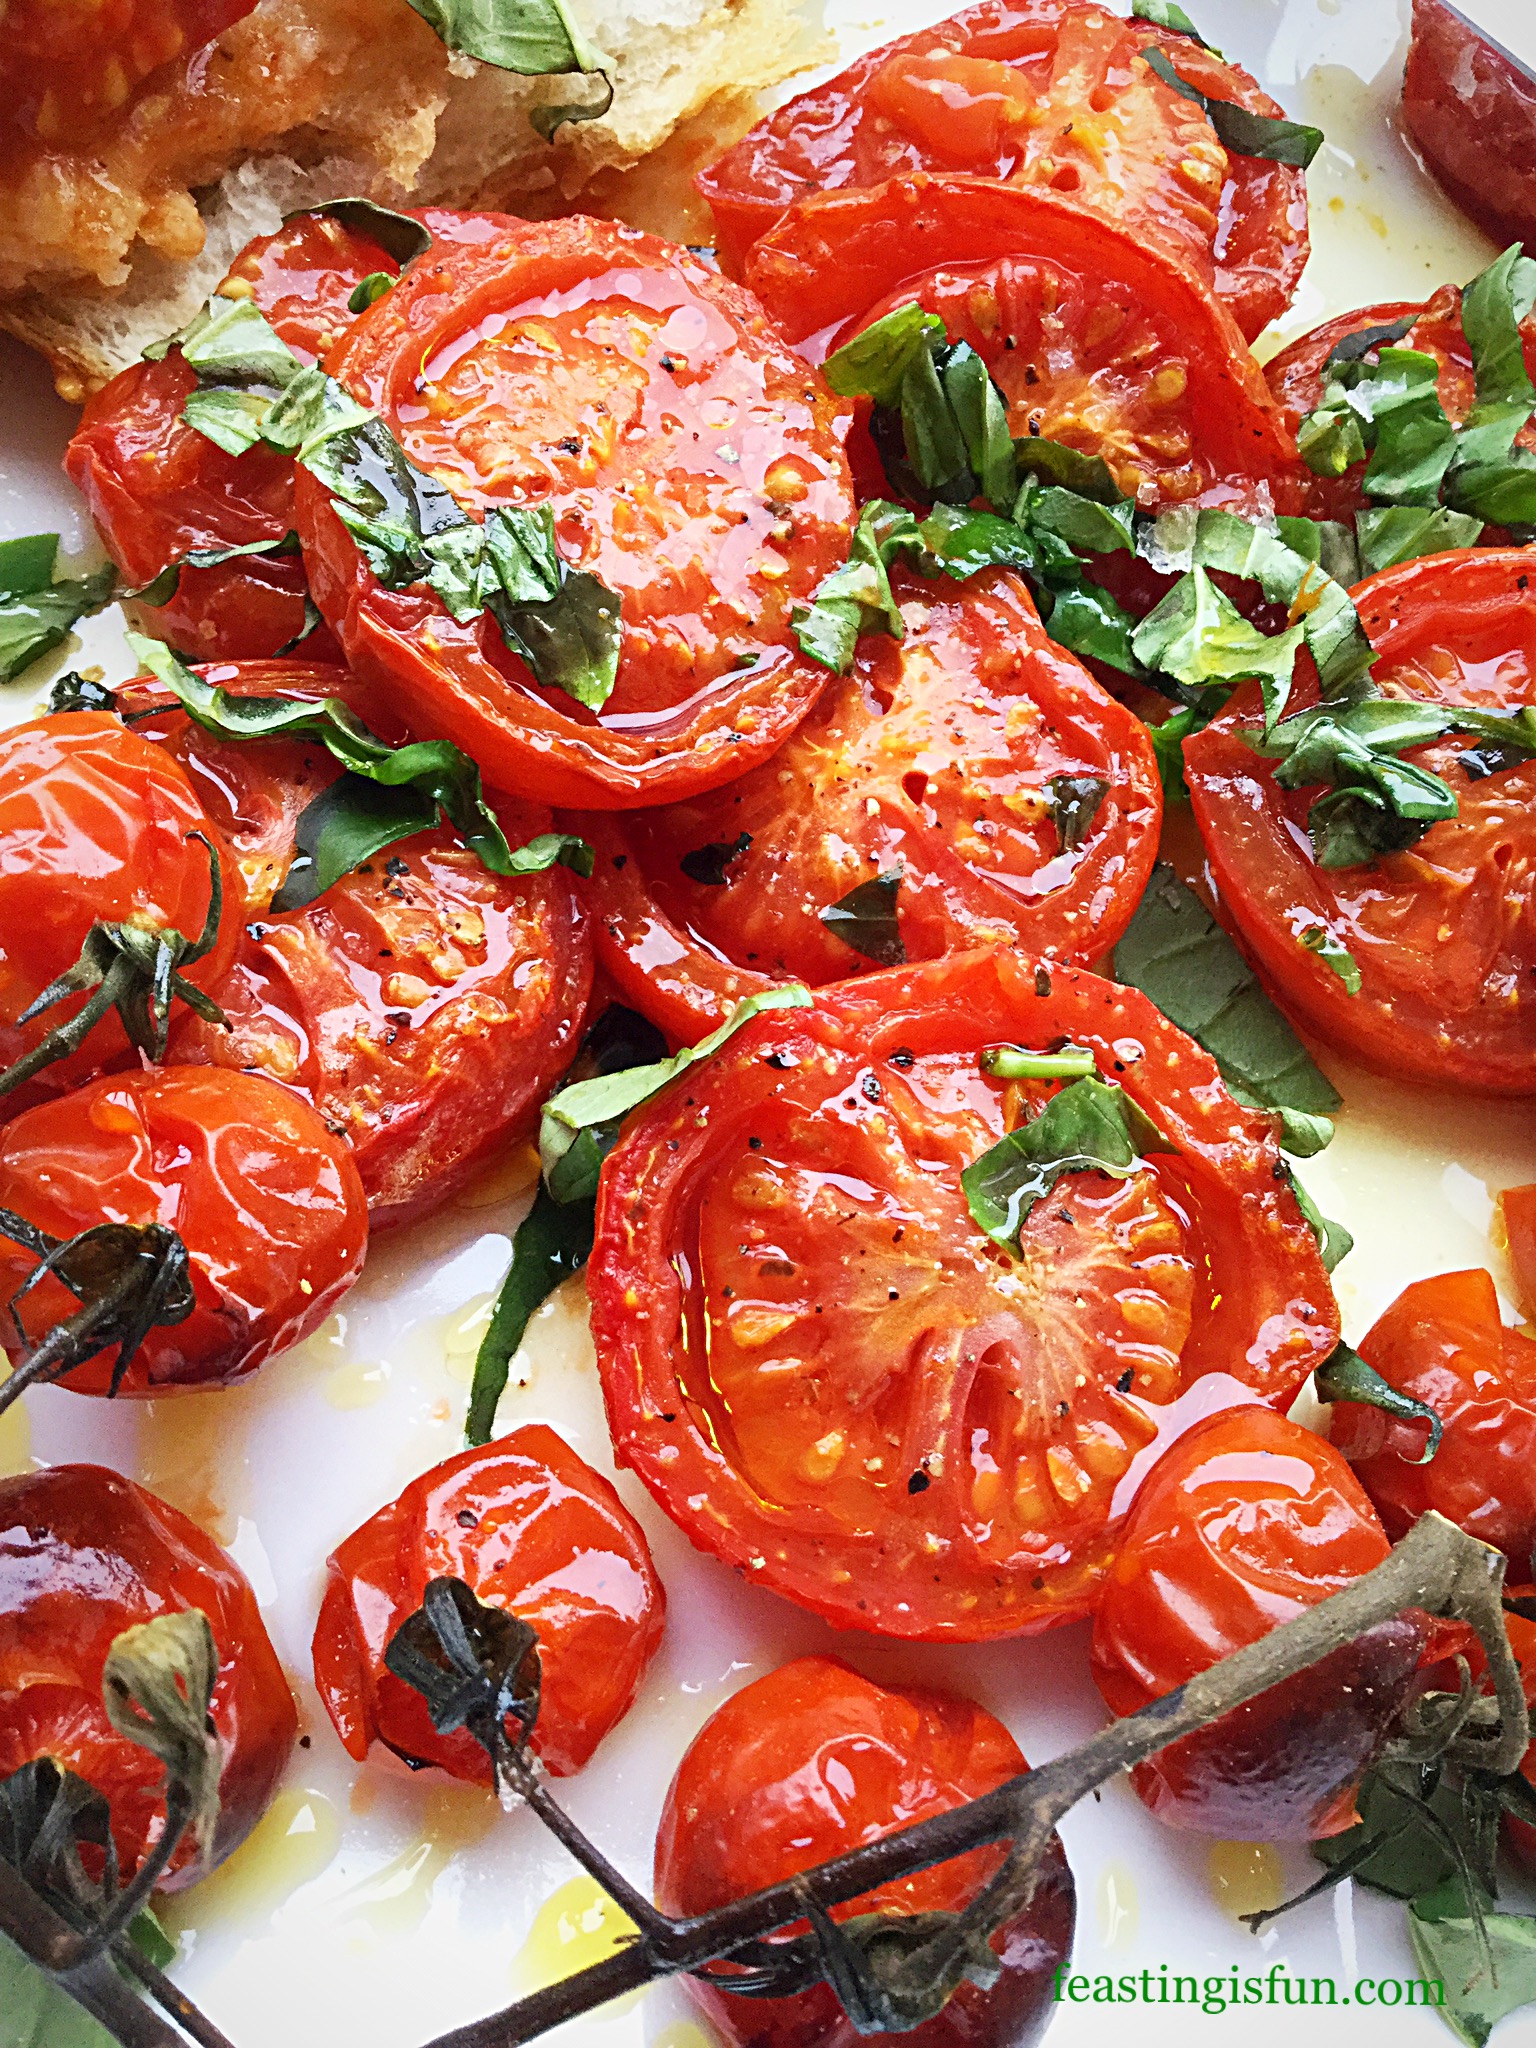
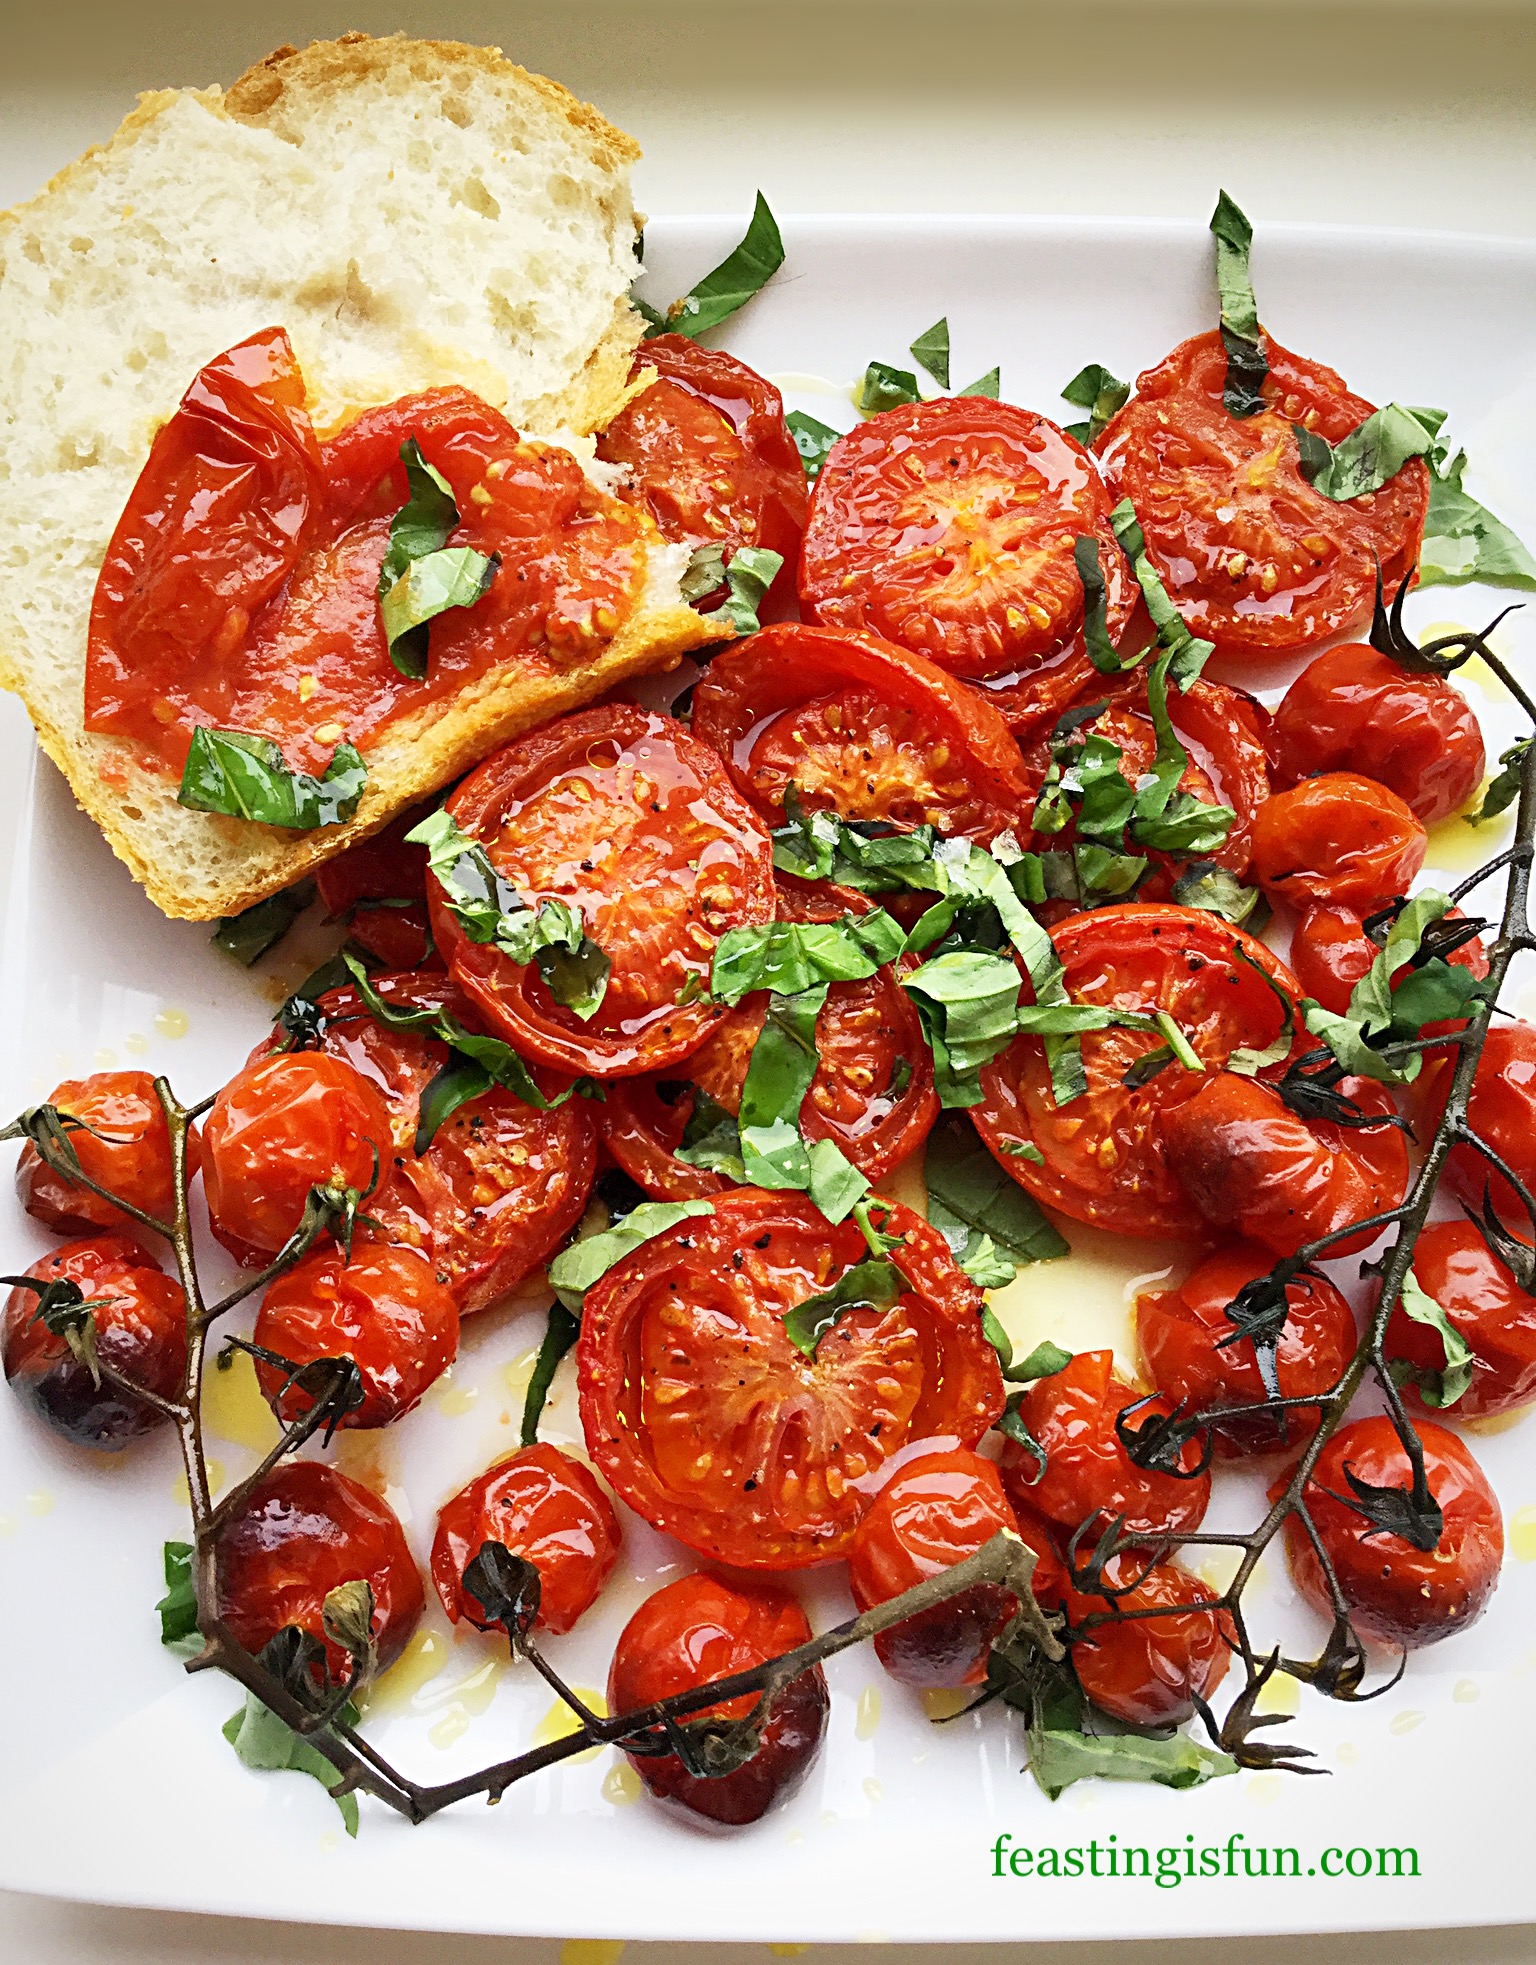
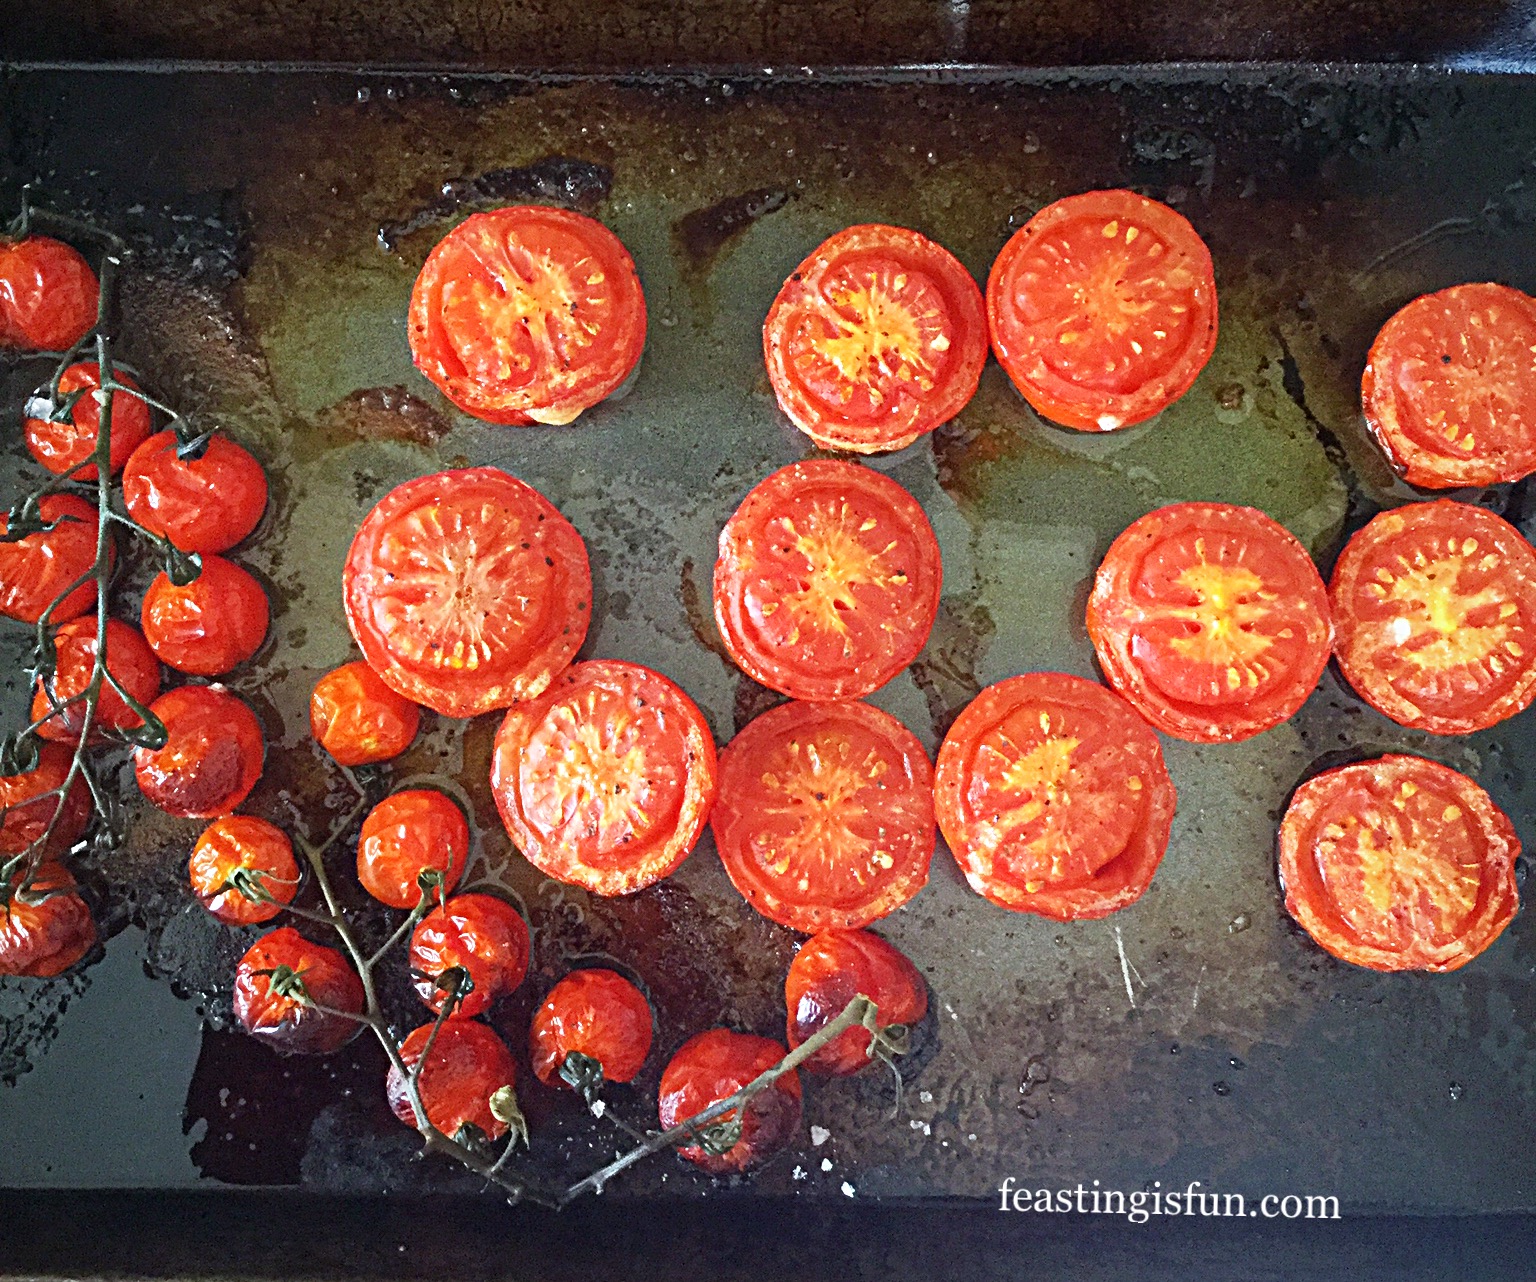
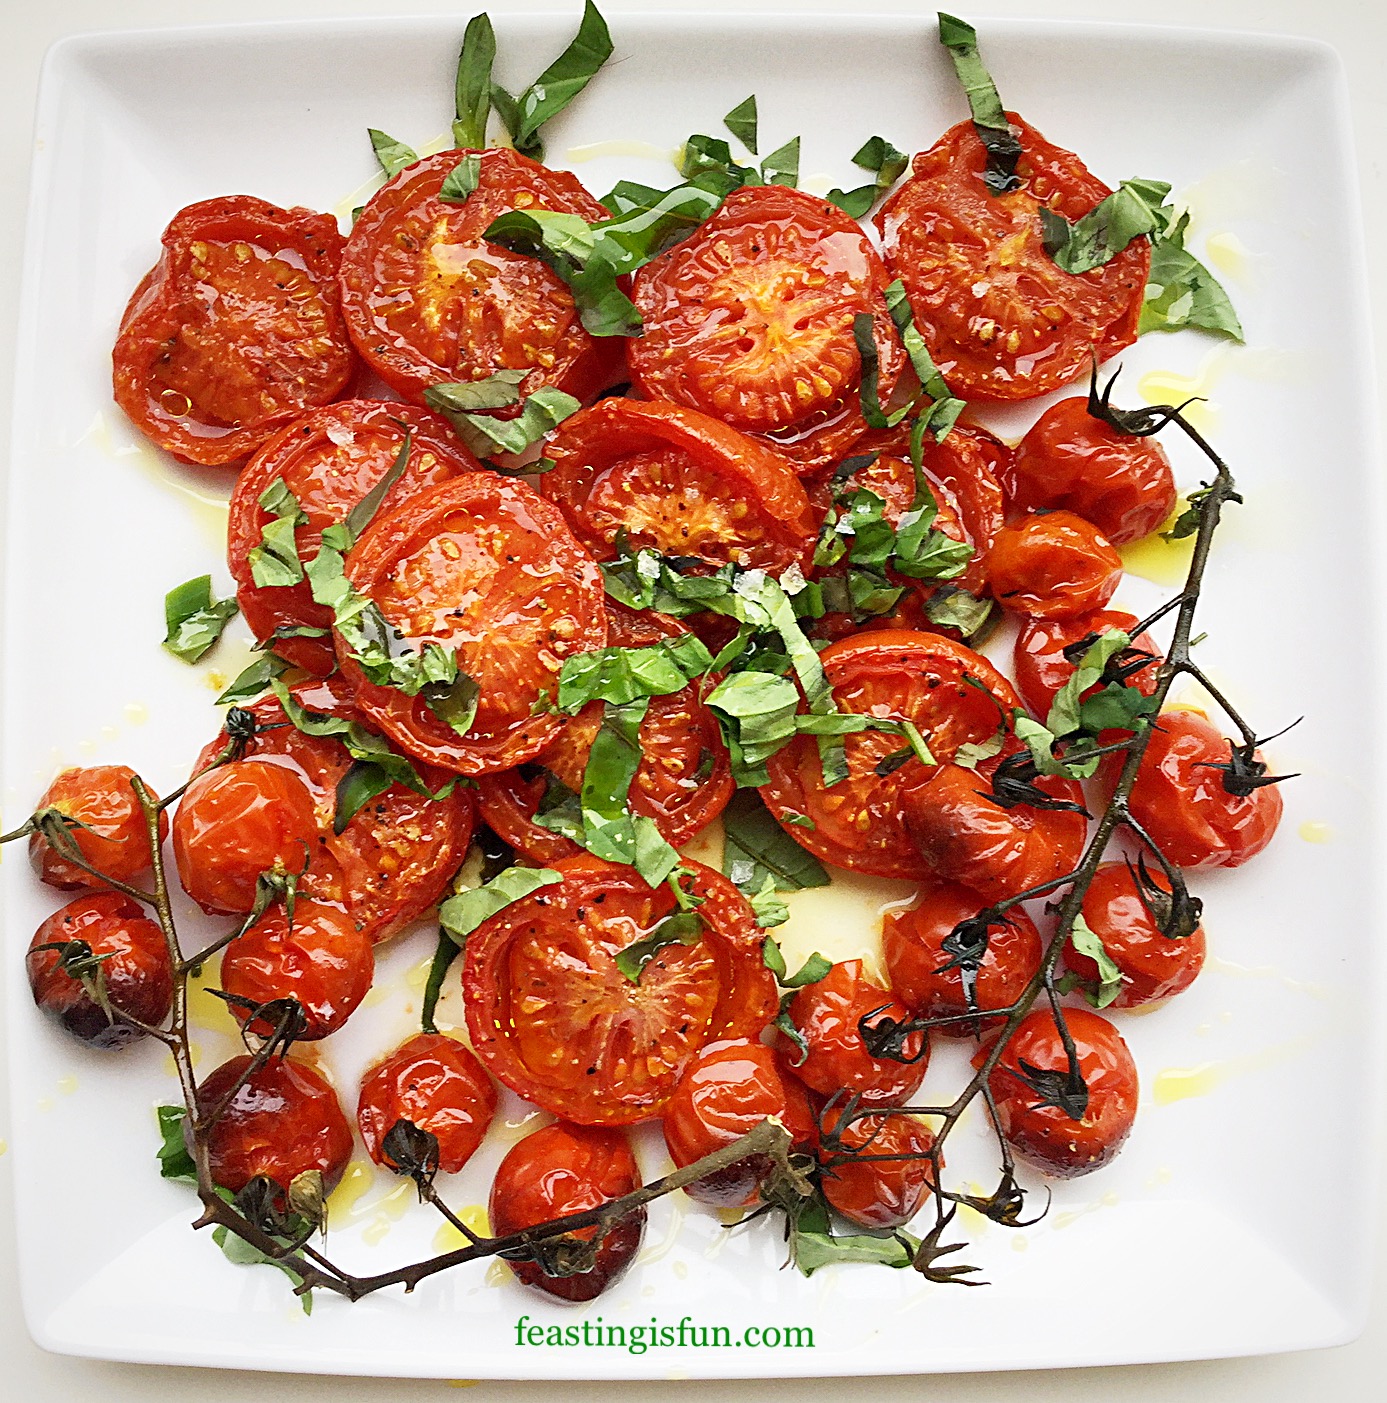
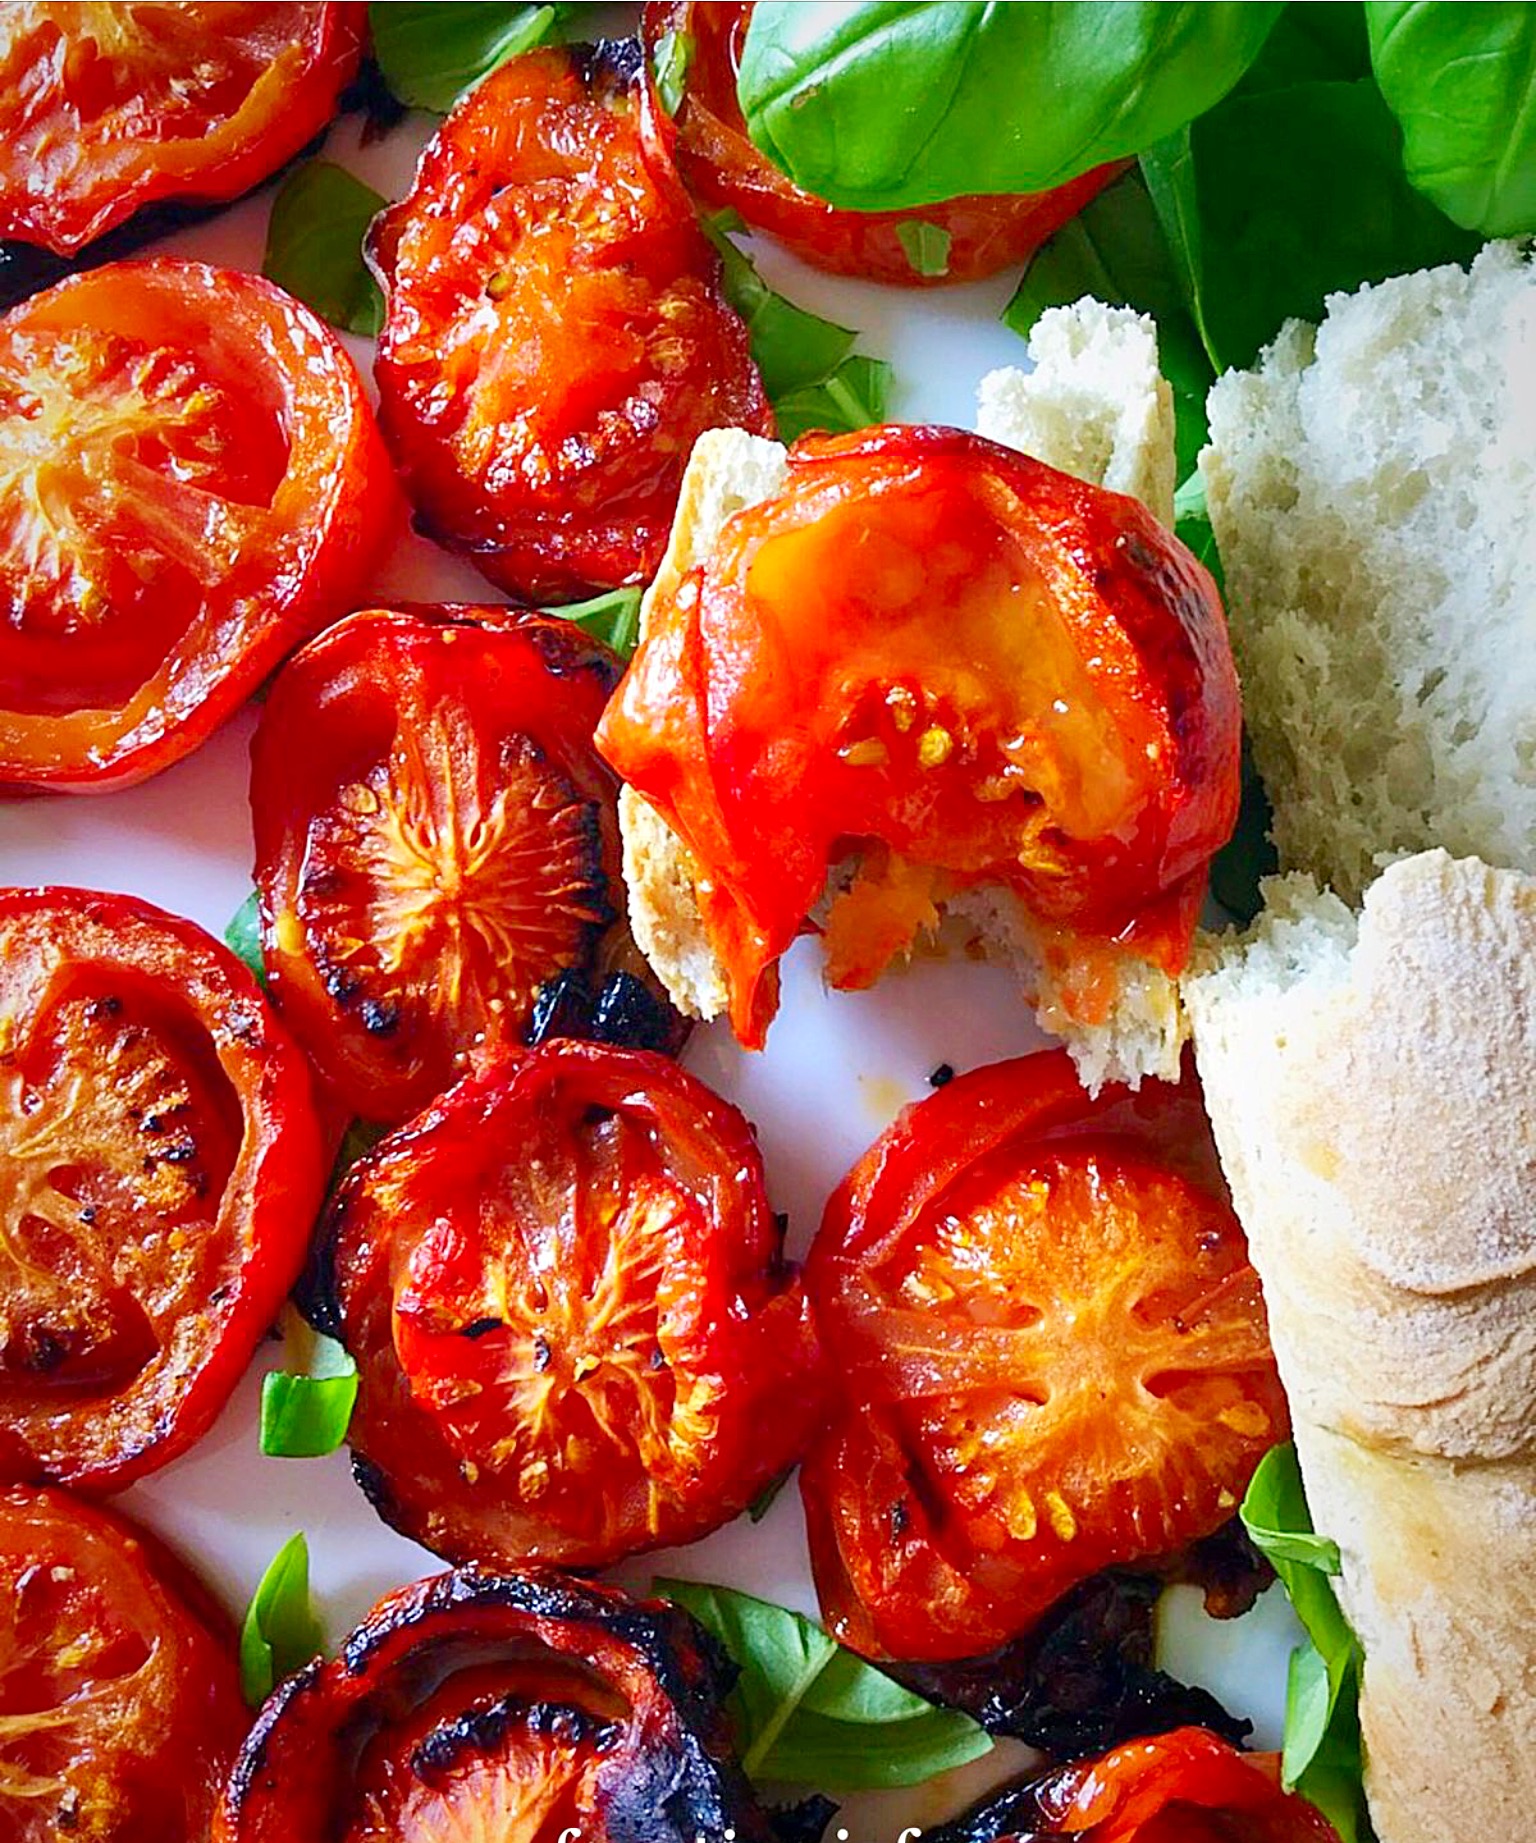
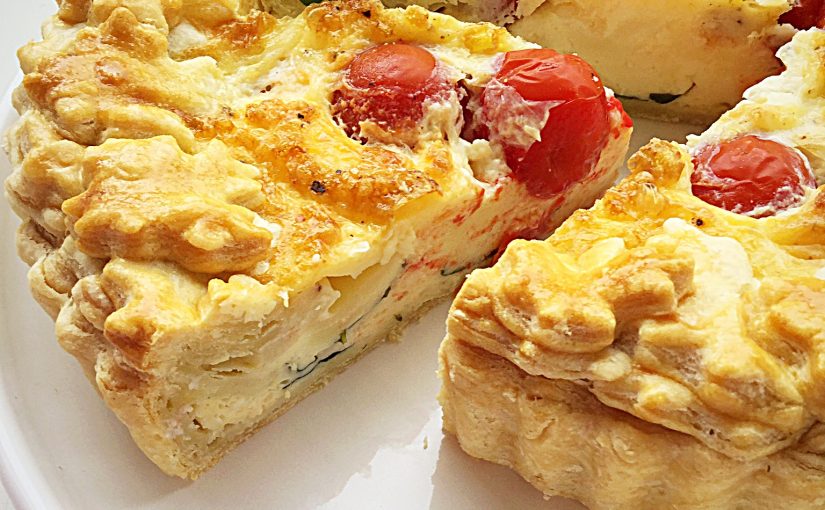
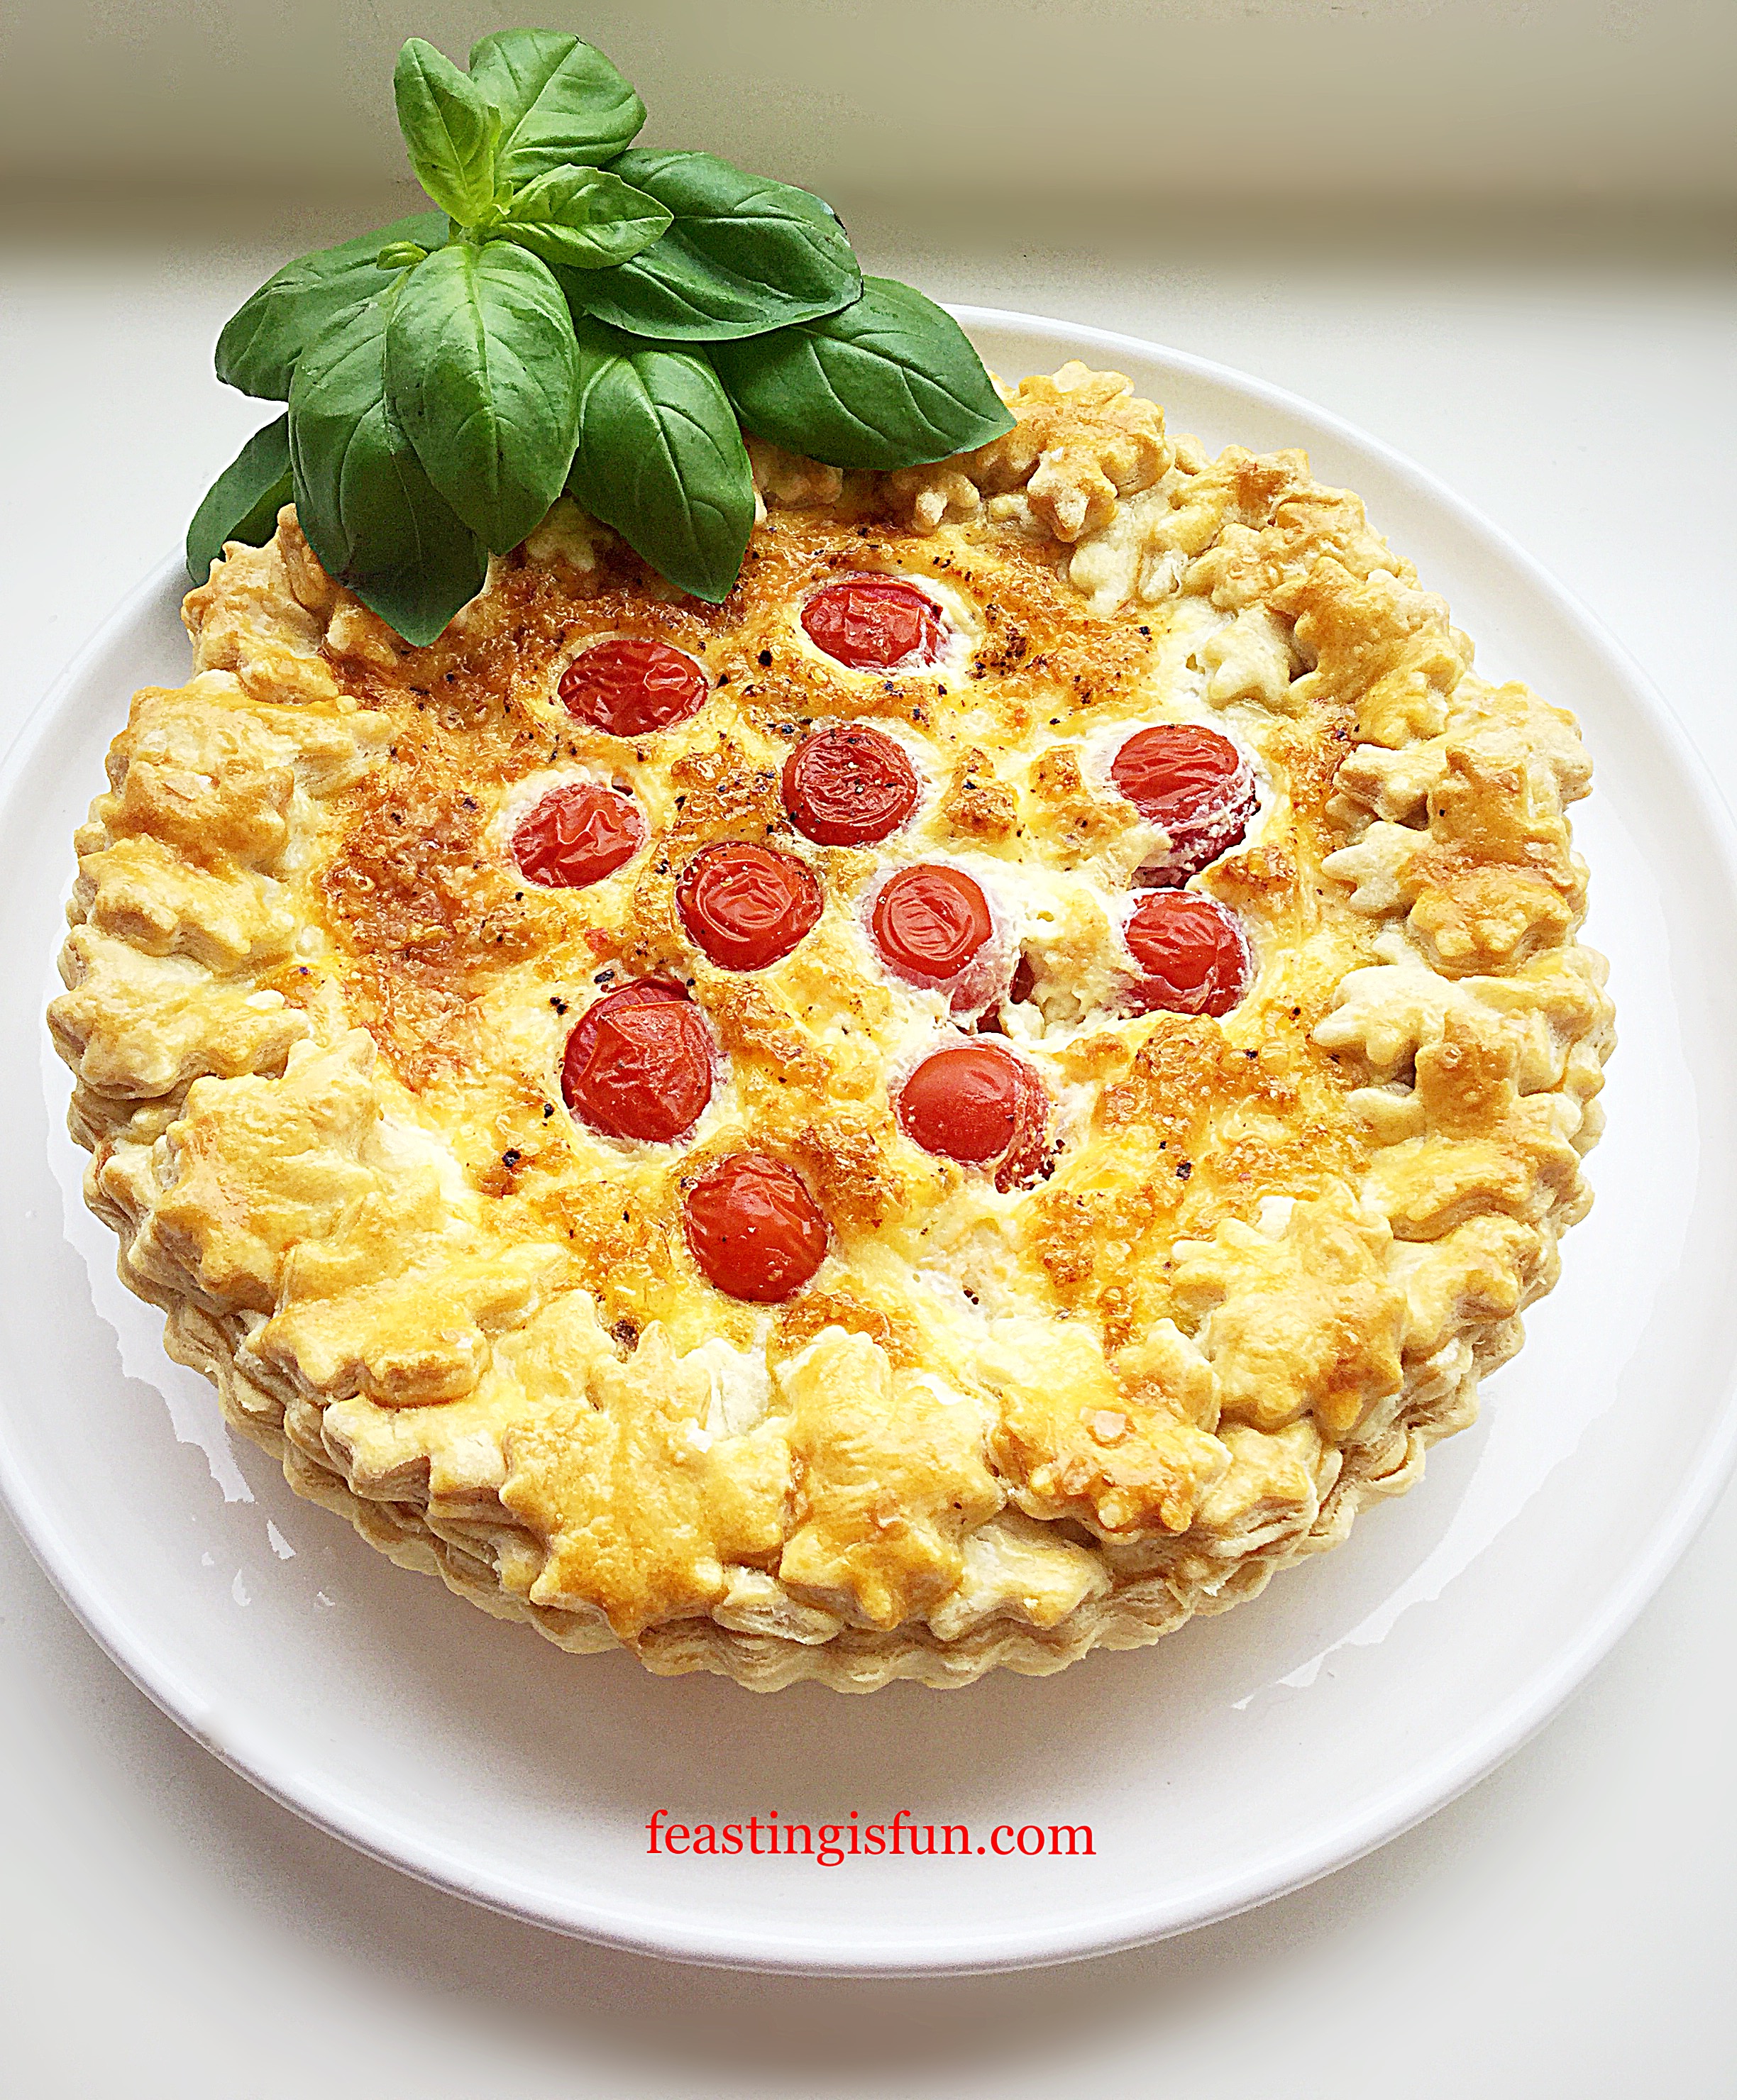
In case you missed my previous post Fresh Basil Topped Slow Roasted Tomatoes I’ll mention again that I love tomatoes. Especially locally grown, British tomatoes that are ripened on the vine and left on the worktop, not in the fridge. Sweet and savoury bursts of Summer on my tongue. Here I have baked them into a layered quiche with fresh basil and two types of cheese. So I am thrilled to bring you my Cherry Tomato Mozzarella Basil Quiche.

FF Cherry Tomato Mozzarella Basil Quiche

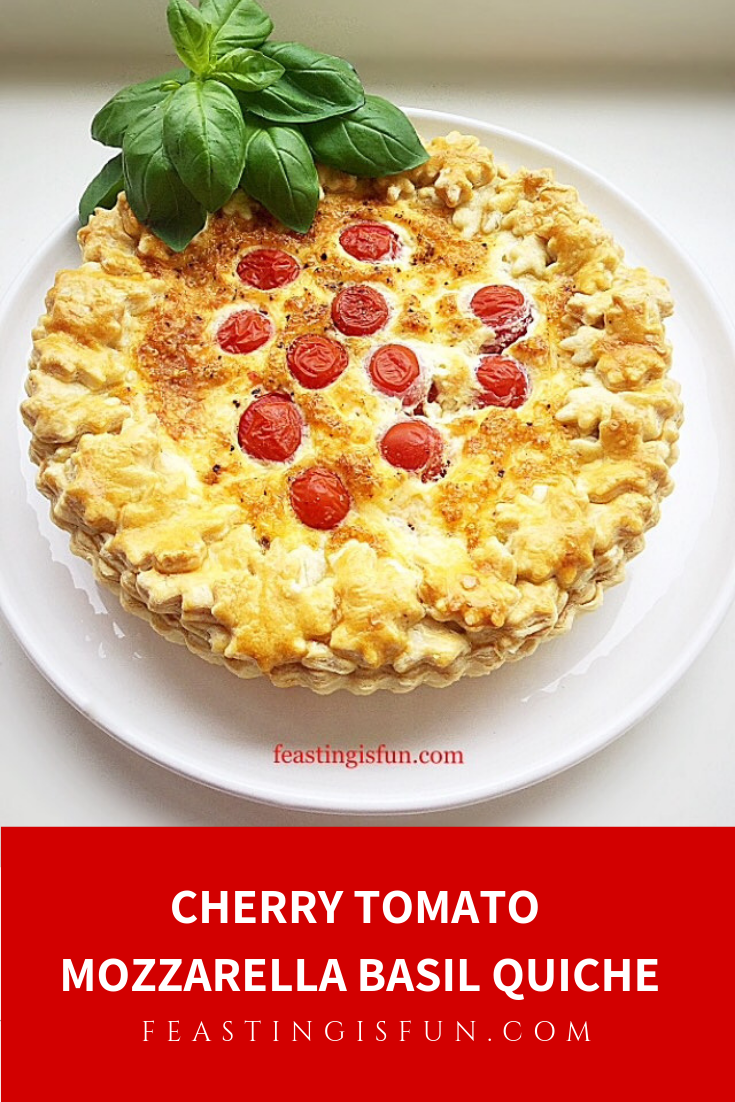
I was inspired by the classic caprese salad of fresh tomatoes, mozzarella cheese and fragrant basil to make this savoury tart. Since each element compliments the others so well as a salad the same can be said of this quiche. Also, layering the separate ingredients within an all butter pastry tart creates a delicious dish. Perfect for lunch, dinner, picnics, packed lunches and buffets. And that is how delicious this quiche is!

FF Cherry Tomato Mozzarella Basil Quiche
Cherry Tomato Mozzarella Basil Quiche

Choosing Local Produce

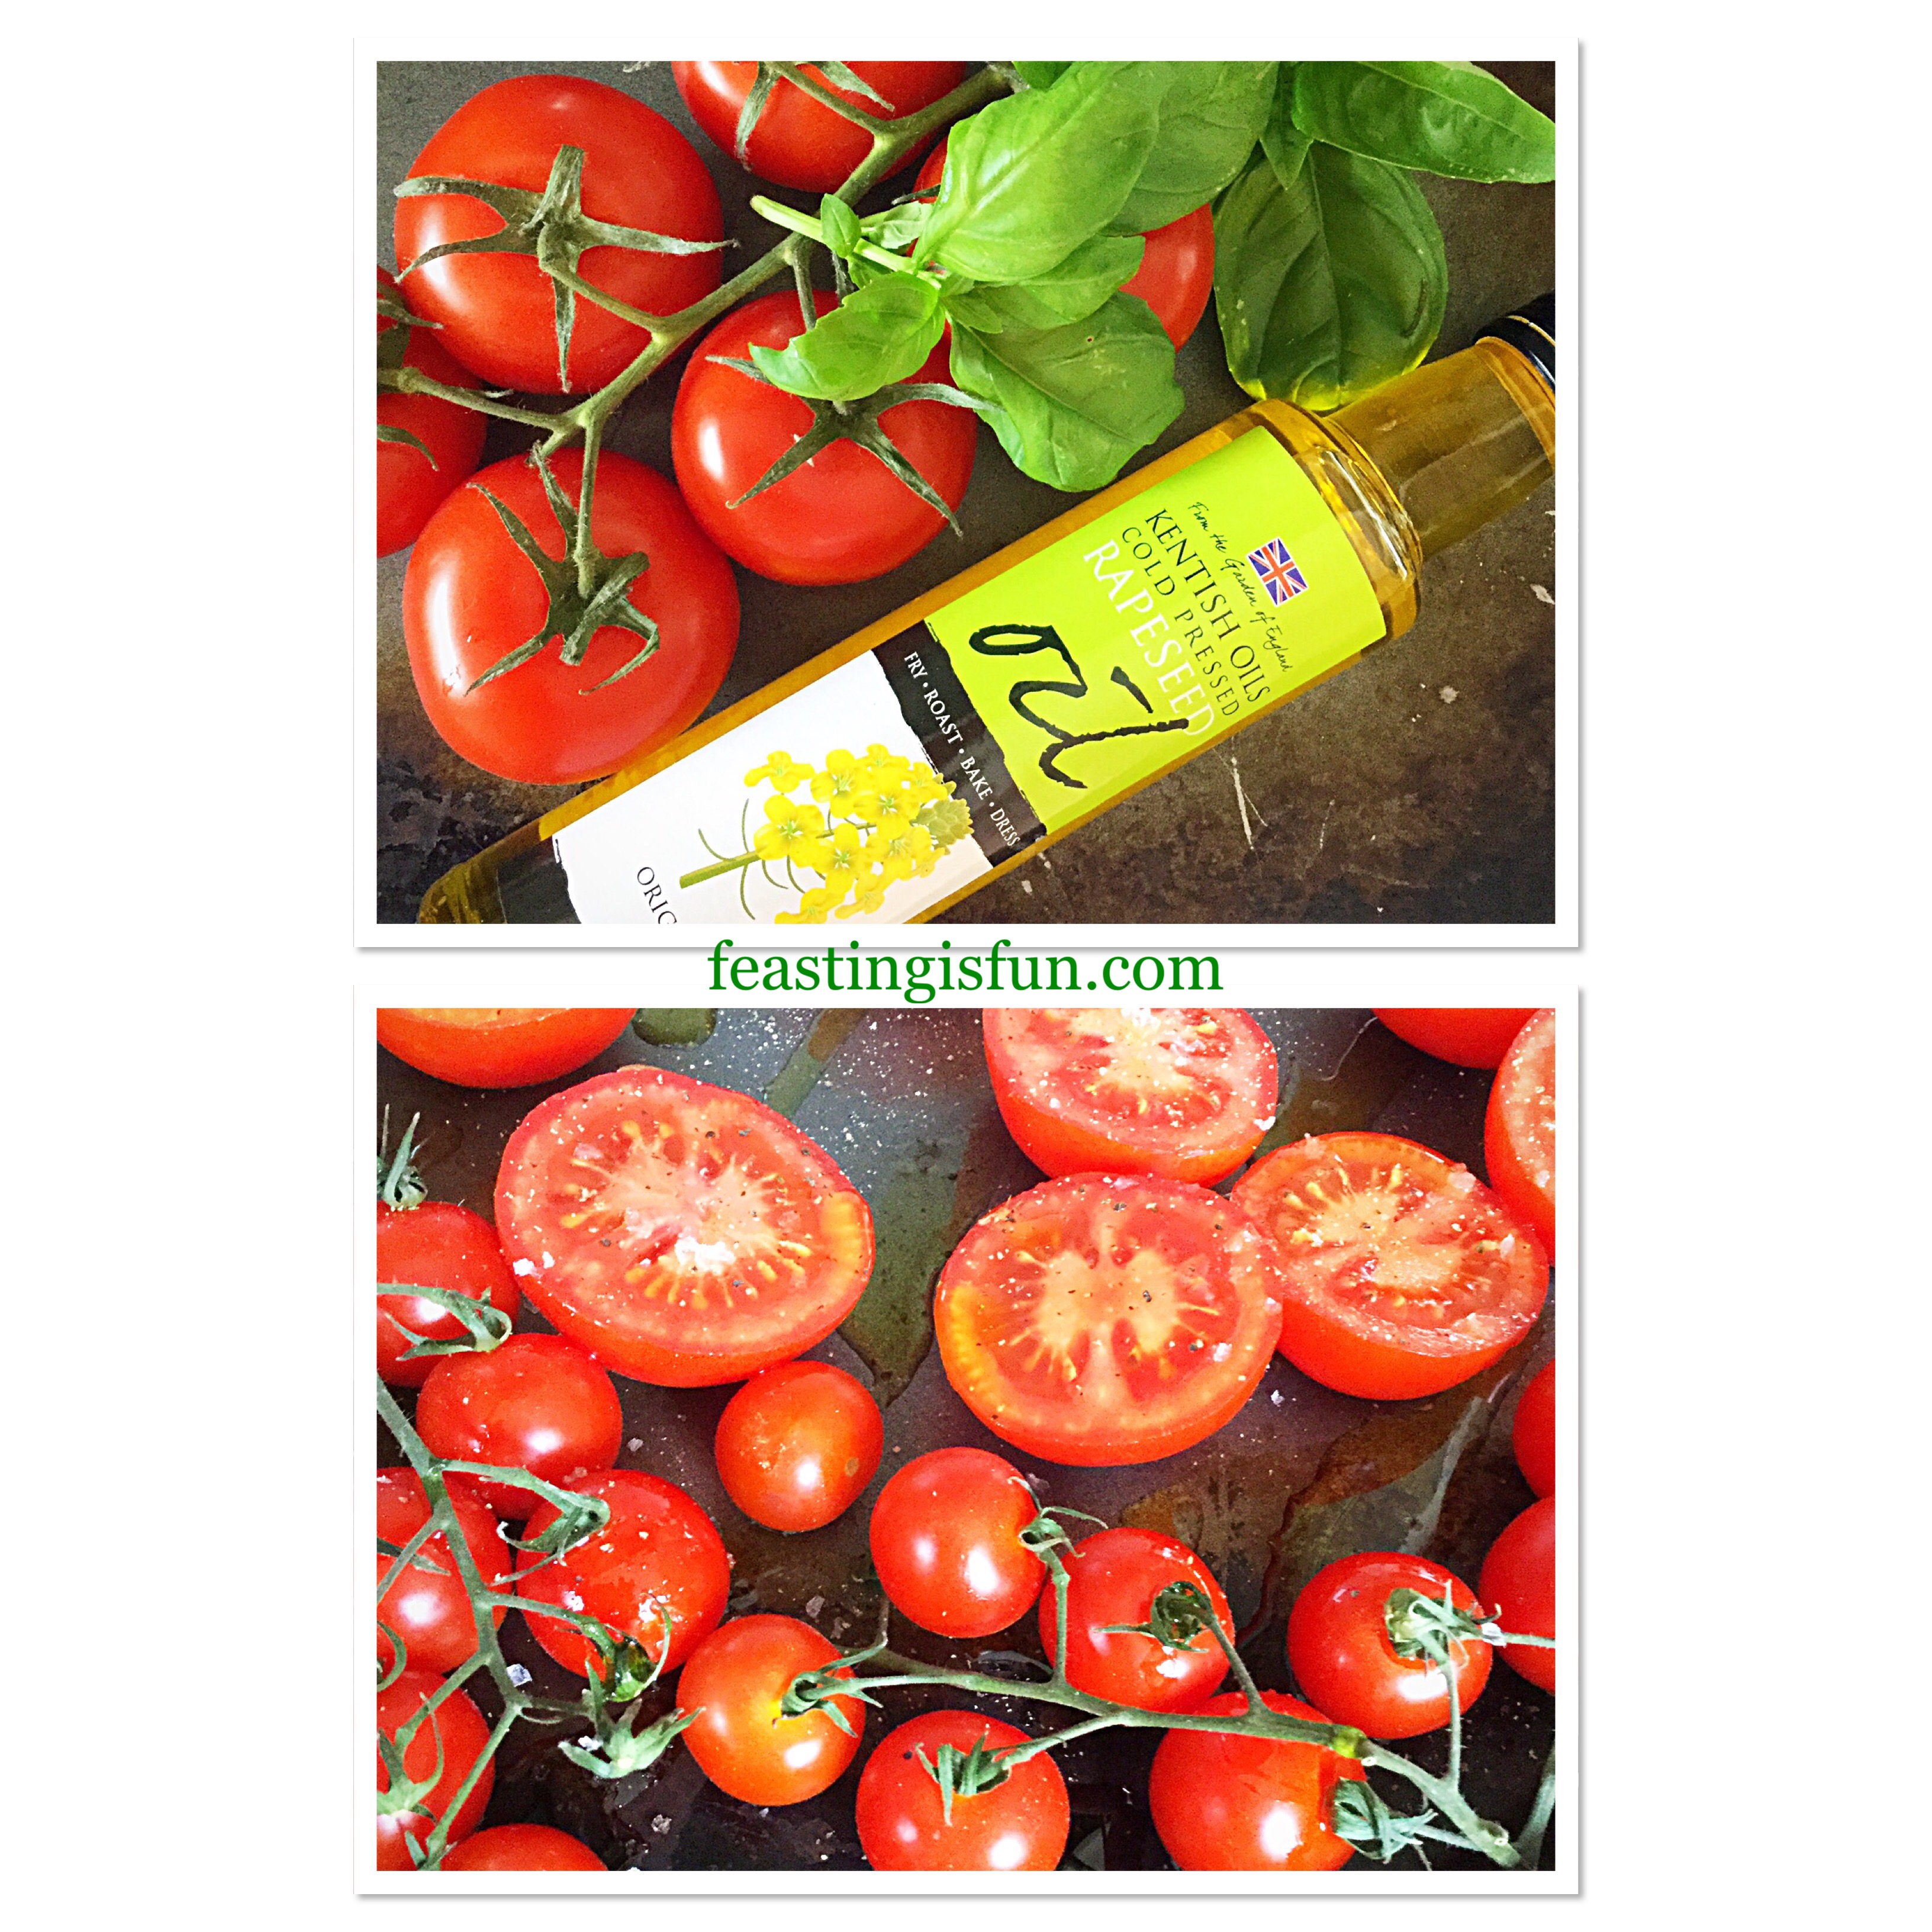
Because using local, seasonal produce is important to me, as a home cook and Food Blogger, I was delighted when I was offered a box of Sophie Jane cherry tomatoes. Locally grown by Eric Wall a local, specialist grower. The tomatoes I received are ripened on the vine and are grown without the use of pesticides. Most importantly they taste incredible. In fact just like a tomato should taste. Eaten warmed by the sun, after being left on the windowsill, they are sweet with a deeper savoury flavour. Also they weren’t very acidic as some tomatoes can be, especially tinned ones.

FF Cherry Tomato Mozzarella Basil Quiche
Cherry Tomato Mozzarella Basil Quiche

While British Tomato Fortnight has finished I firmly believe that we should all be eating flavoursome British tomatoes for as long as they are available. Because they taste so good. It really is as simple as that. I have been popping these ruby beauties into my mouth like sweeties. Eating them alongside crackers and cheese and I plan to make more recipes to share with you. All in aid of celebrating the humble tomato.

Recipe: Cherry Tomato Mozzarella Basil Quiche:

You will need a 20cm x 5cm (8” x 2”) tart tin, ideally with a loose bottom, to make this recipe.

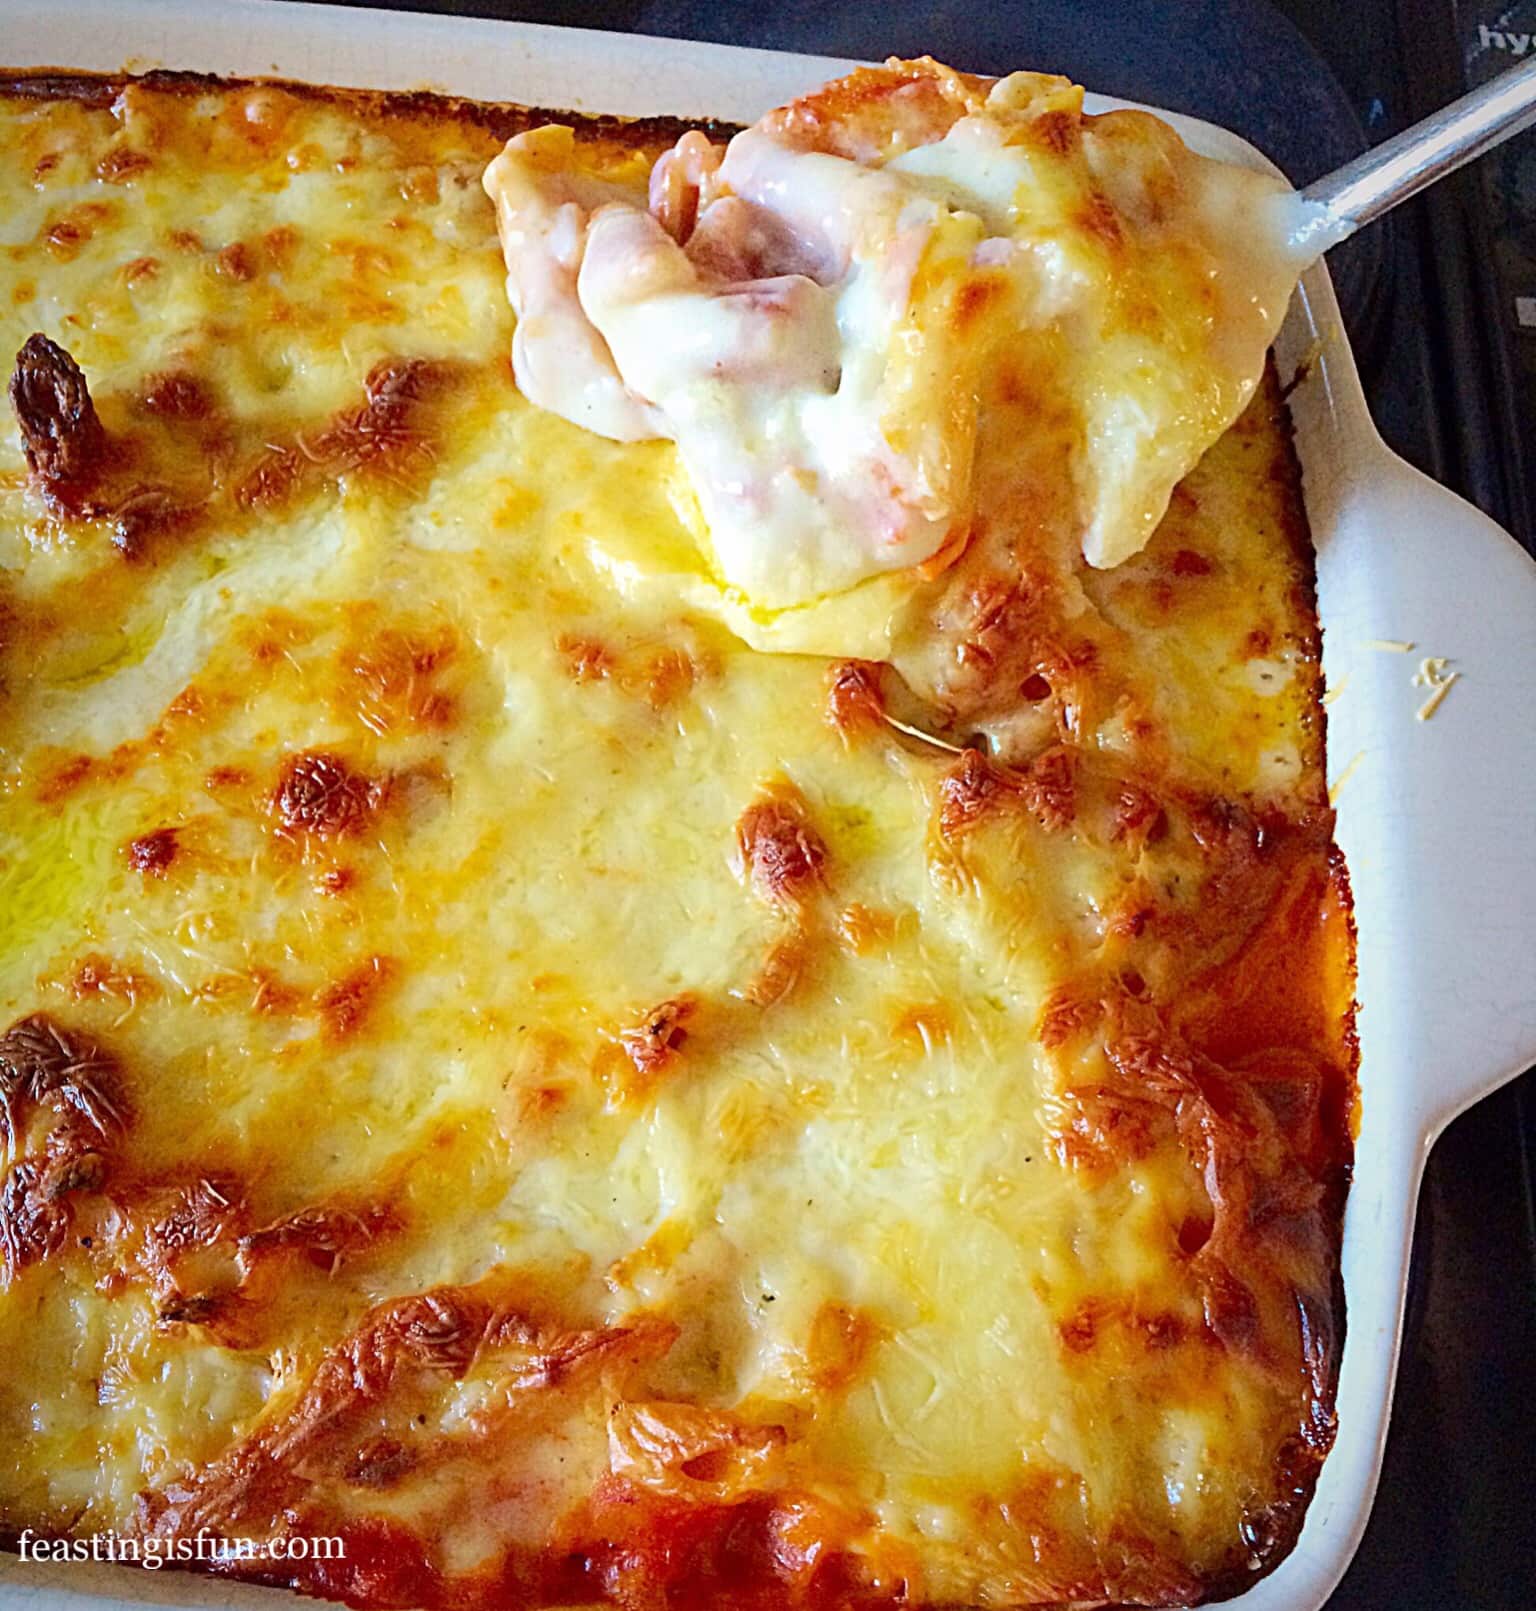
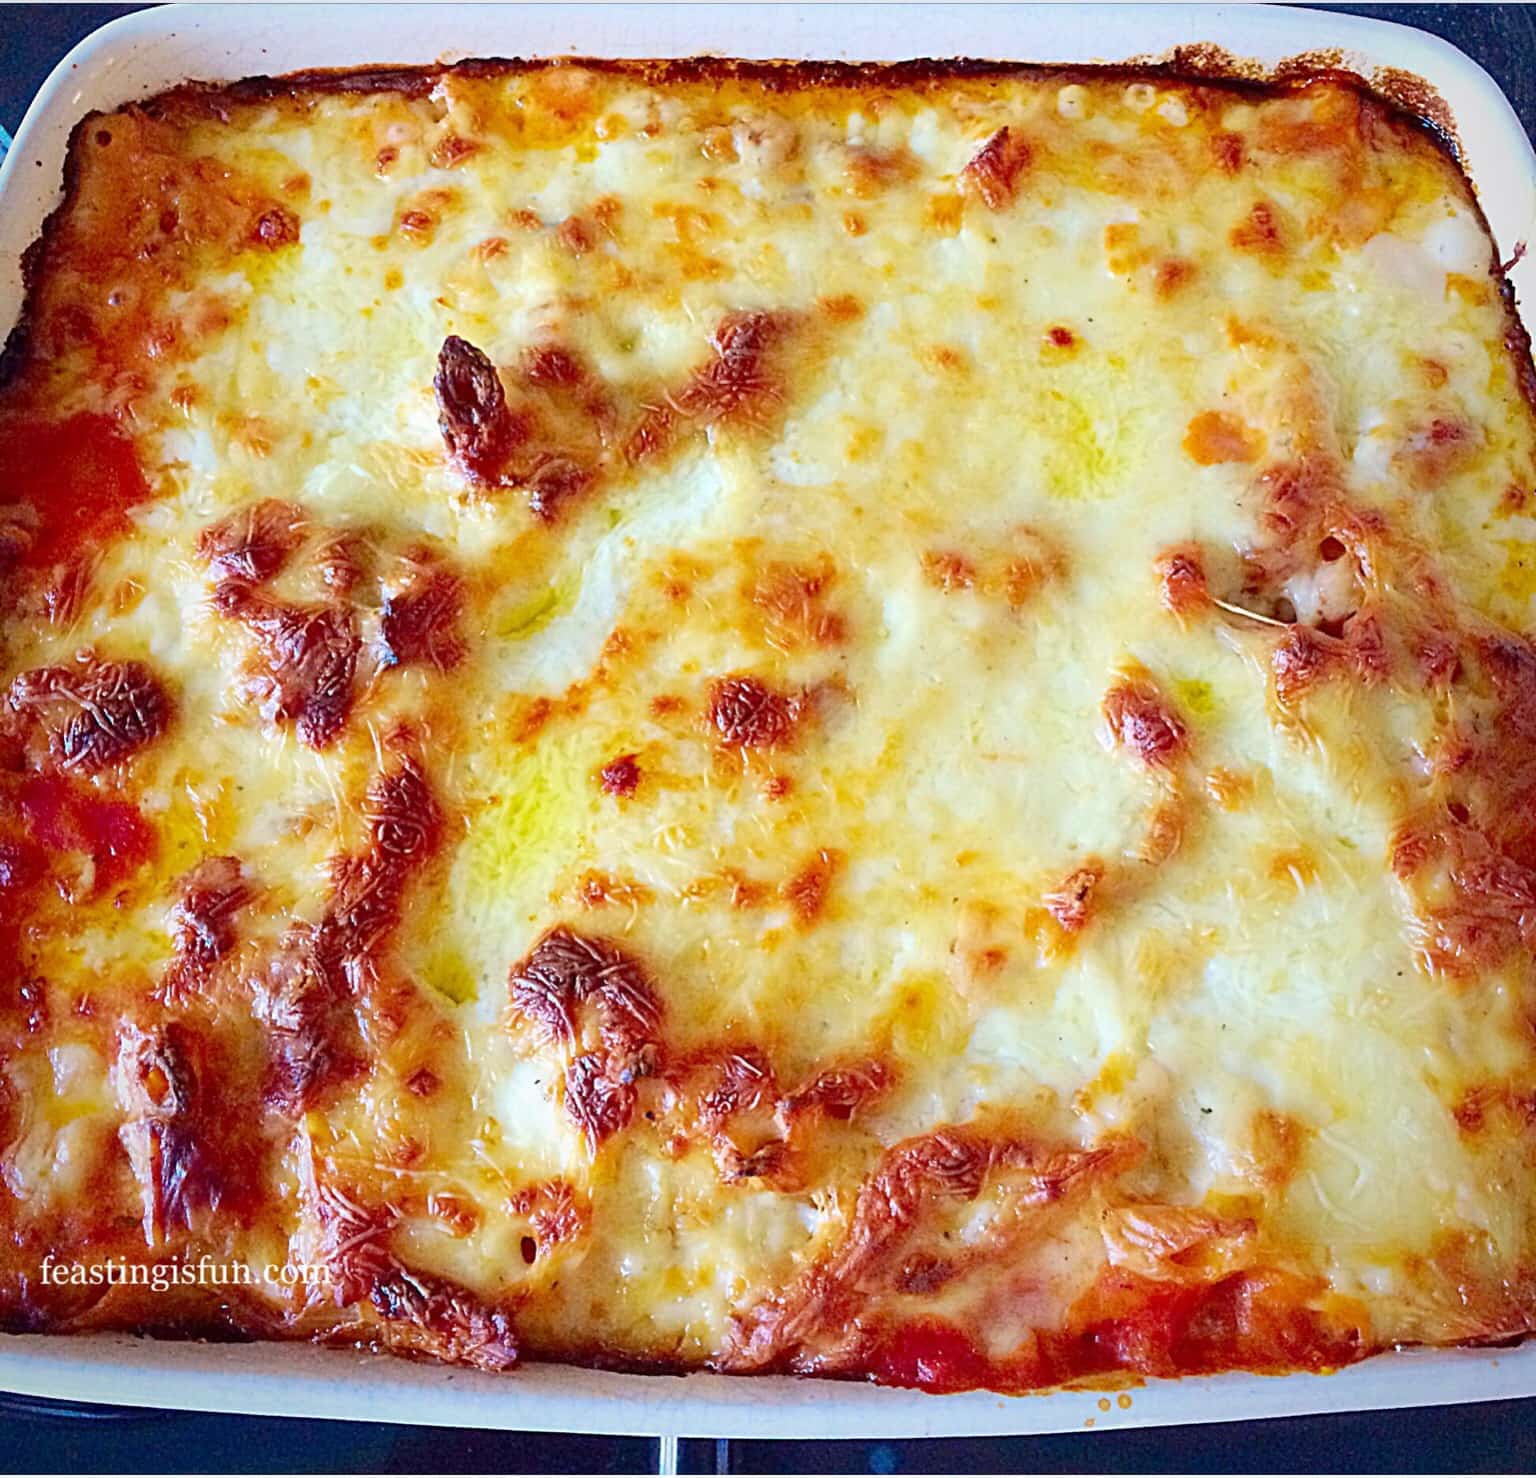
A quick note – I successfully doubled all of the quantities and made this quiche in a deeper, wider dish. Baking times need to be adjusted, aside from the initial blind baking. The larger quiche turned out perfectly and would be ideal for feeding a crowd, or a buffet.

500g/1lb 2oz Shortcrust Pastry – I use my recipe for Perfect Butter Shortcrust Pastry freezing the leftovers

225g/8oz Mozzarella Cheese – drained and with excess water squeezed out

50g/2oz Vintage or Very Mature/Sharp Cheddar – I use Wyke Farms

6 Large Free Range Eggs

225g/8oz Fresh Cherry Tomatoes

12-14 Fresh Basil Leaves – alternatively out of season use 1/2 tsp dried Thyme

1/2 tsp Freshly Ground Black Pepper

Pinch of Sea Salt Flakes – I use Maldon

Method: Preheat oven to 220C/200C fan, 425F, gas mark 7

Making And Baking The Shortcrust Pastry Tart Case

  • First of all make the pastry, wrap in cling film and chill for one hour.
  • Remove the chilled pastry from the fridge, unwrap and roll out on a lightly floured surface, so that it will fit the tart tin. See photo top left below.
  • Fold the pastry over the rolling pin, making it easier to transfer.
  • Lower the pastry into the tin, making sure that you don’t stretch it as you do.
  • Press the pastry into the tin so that it fits securely.
  • Run your rolling pin over the tart tin, this will give a clean edge to the pastry.
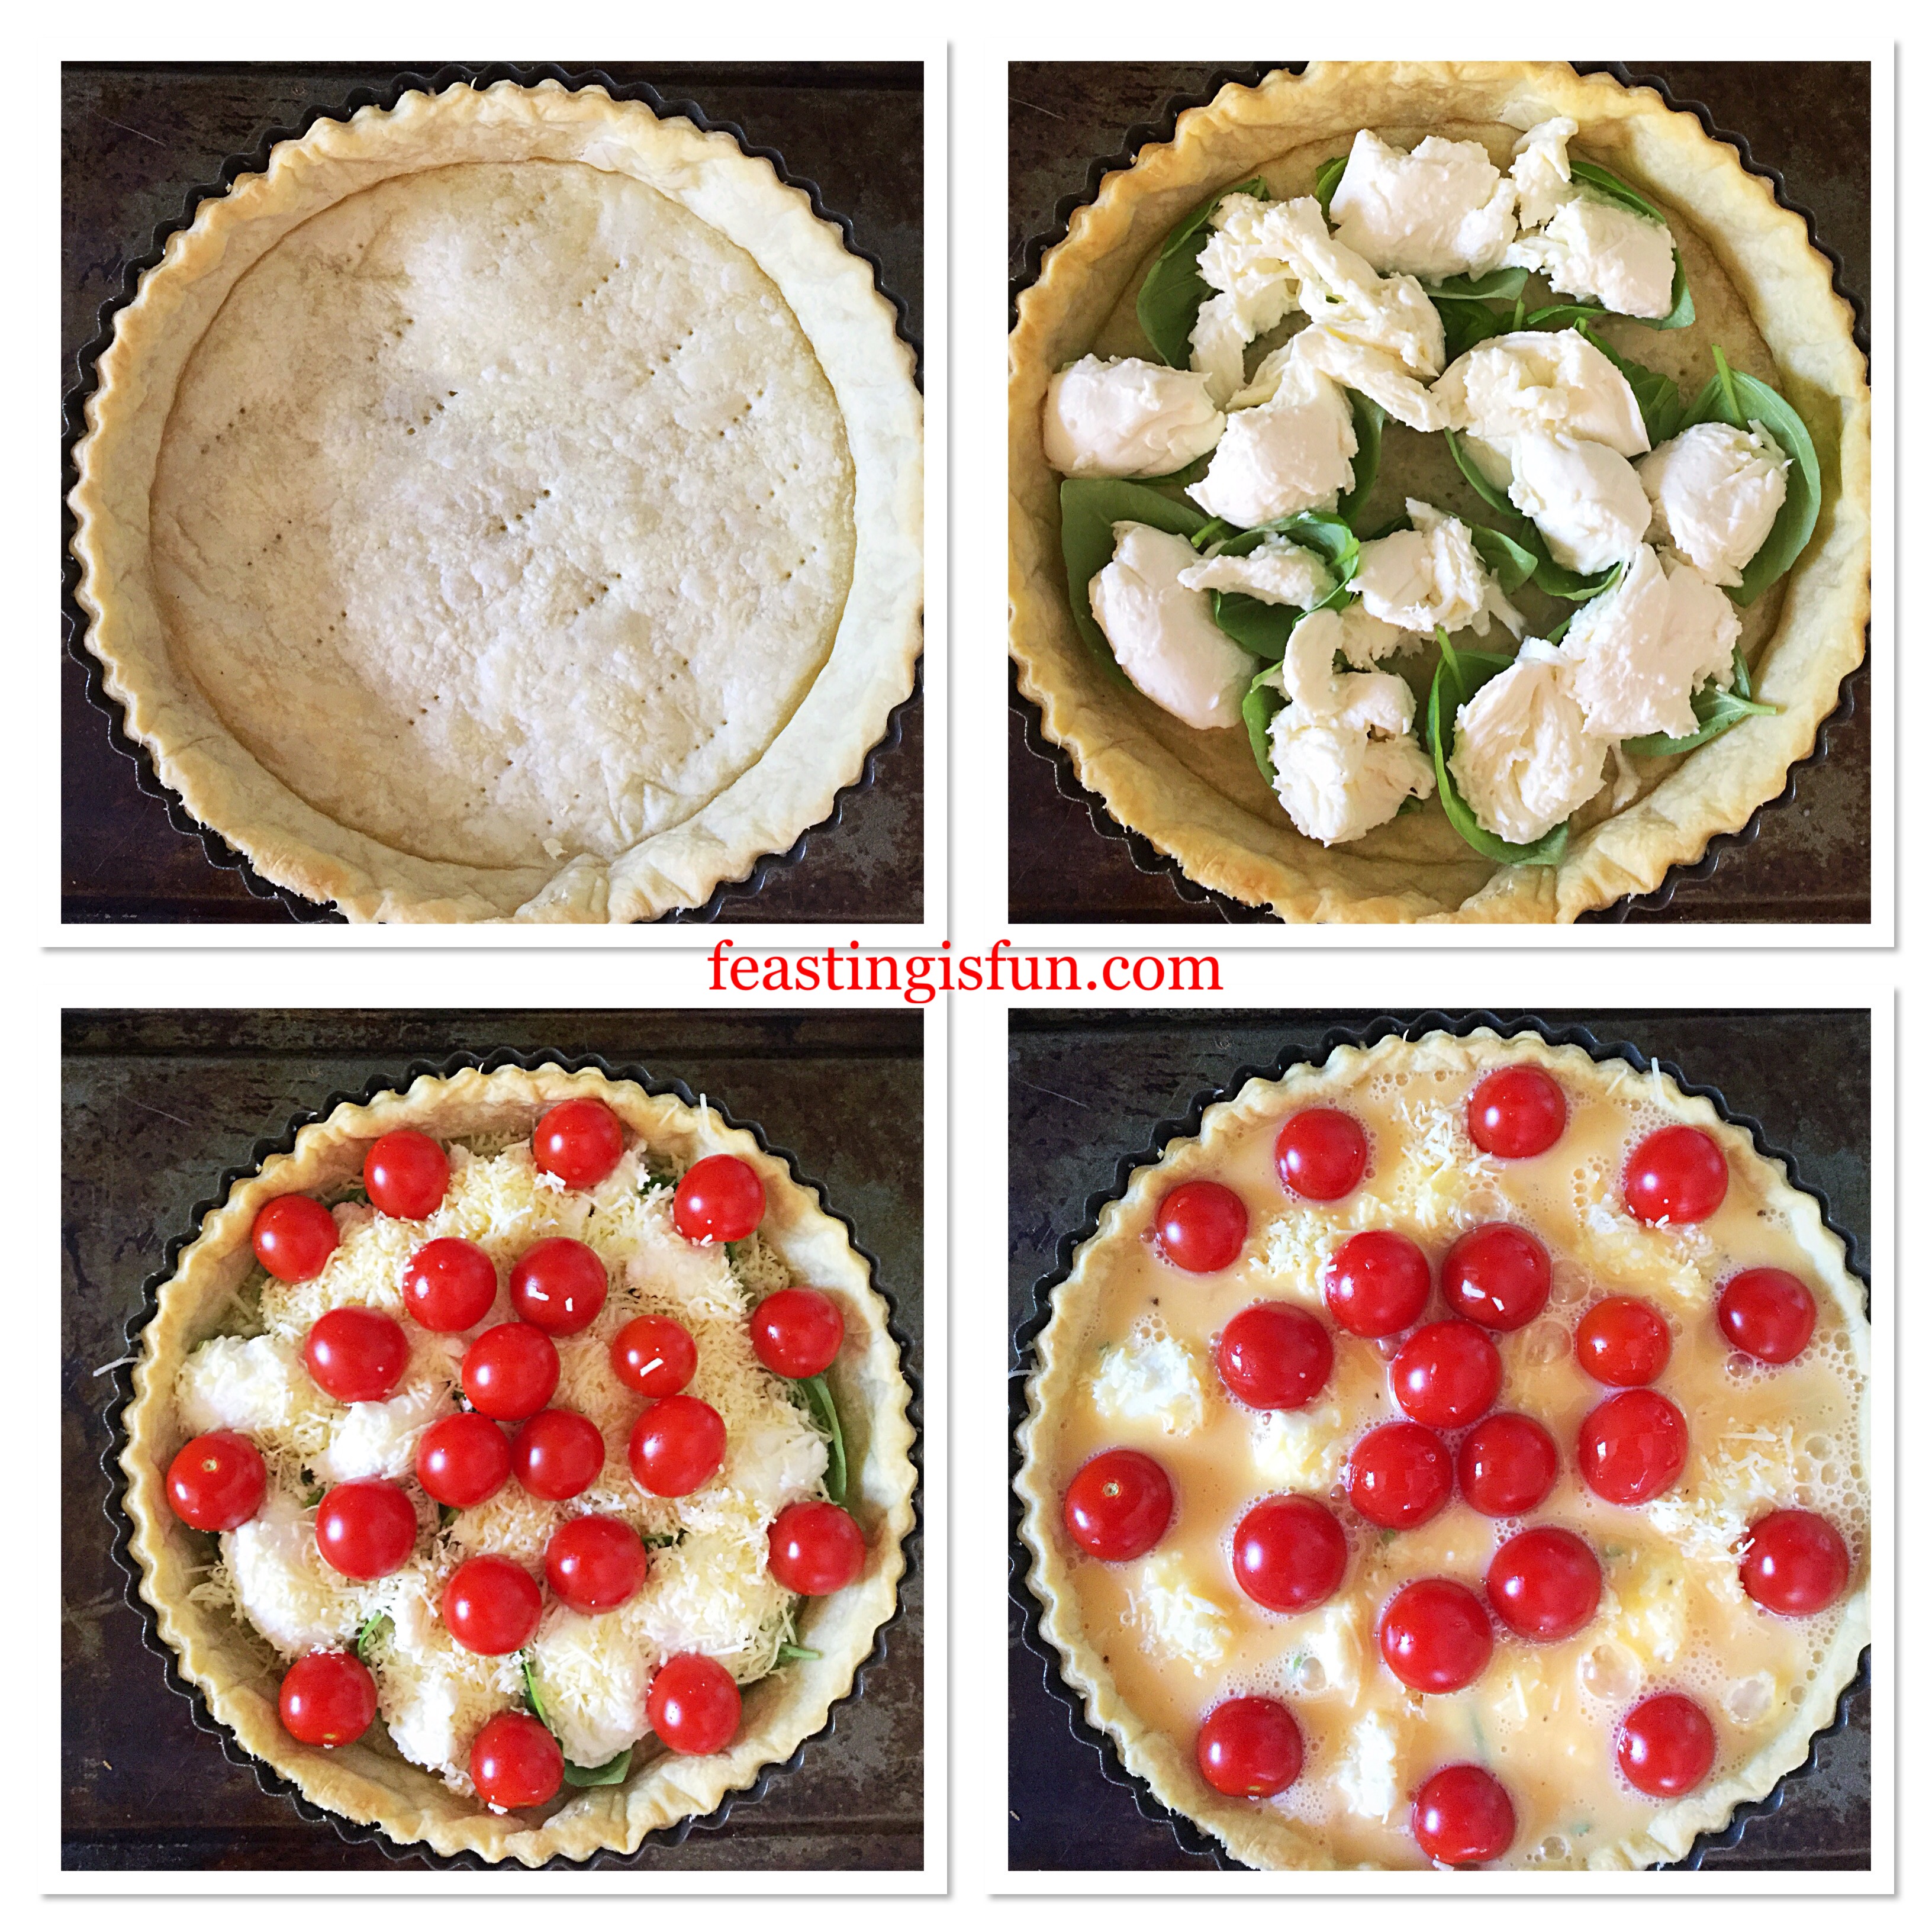
  • Place the tart tin on to a baking sheet and dock the base with a fork.
  • Now scrunch up some baking parchment and line the pastry tart with it.
  • Next fill with baking beans.
FF Cherry Tomato Mozzarella Basil Quiche
Making the pastry shell for the quiche.
  • Place in the centre of a preheated oven and bake for 15 minutes.
  • Carefully lift out the baking parchment and baking beans.
  • Return the tart to the oven for 5 minutes further baking.

Layering The Quiche Ingredients

  • Remove the tart and reduce the oven temperature to 190C/170C fan, 375F, gas mark 5.
  • Line the tart base with basil leaves.
  • Place torn chunks of mozzarella directly on to the basil.
  • Sprinkle over finely grated cheddar and then top with cherry tomatoes.
  • Reserve one egg, whisk the other five adding the black pepper. Pour the eggs into the tart.
FF Cherry Tomato Mozzarella Basil Quiche
Creating layers within the Cherry Tomato Mozzarella Basil Quiche
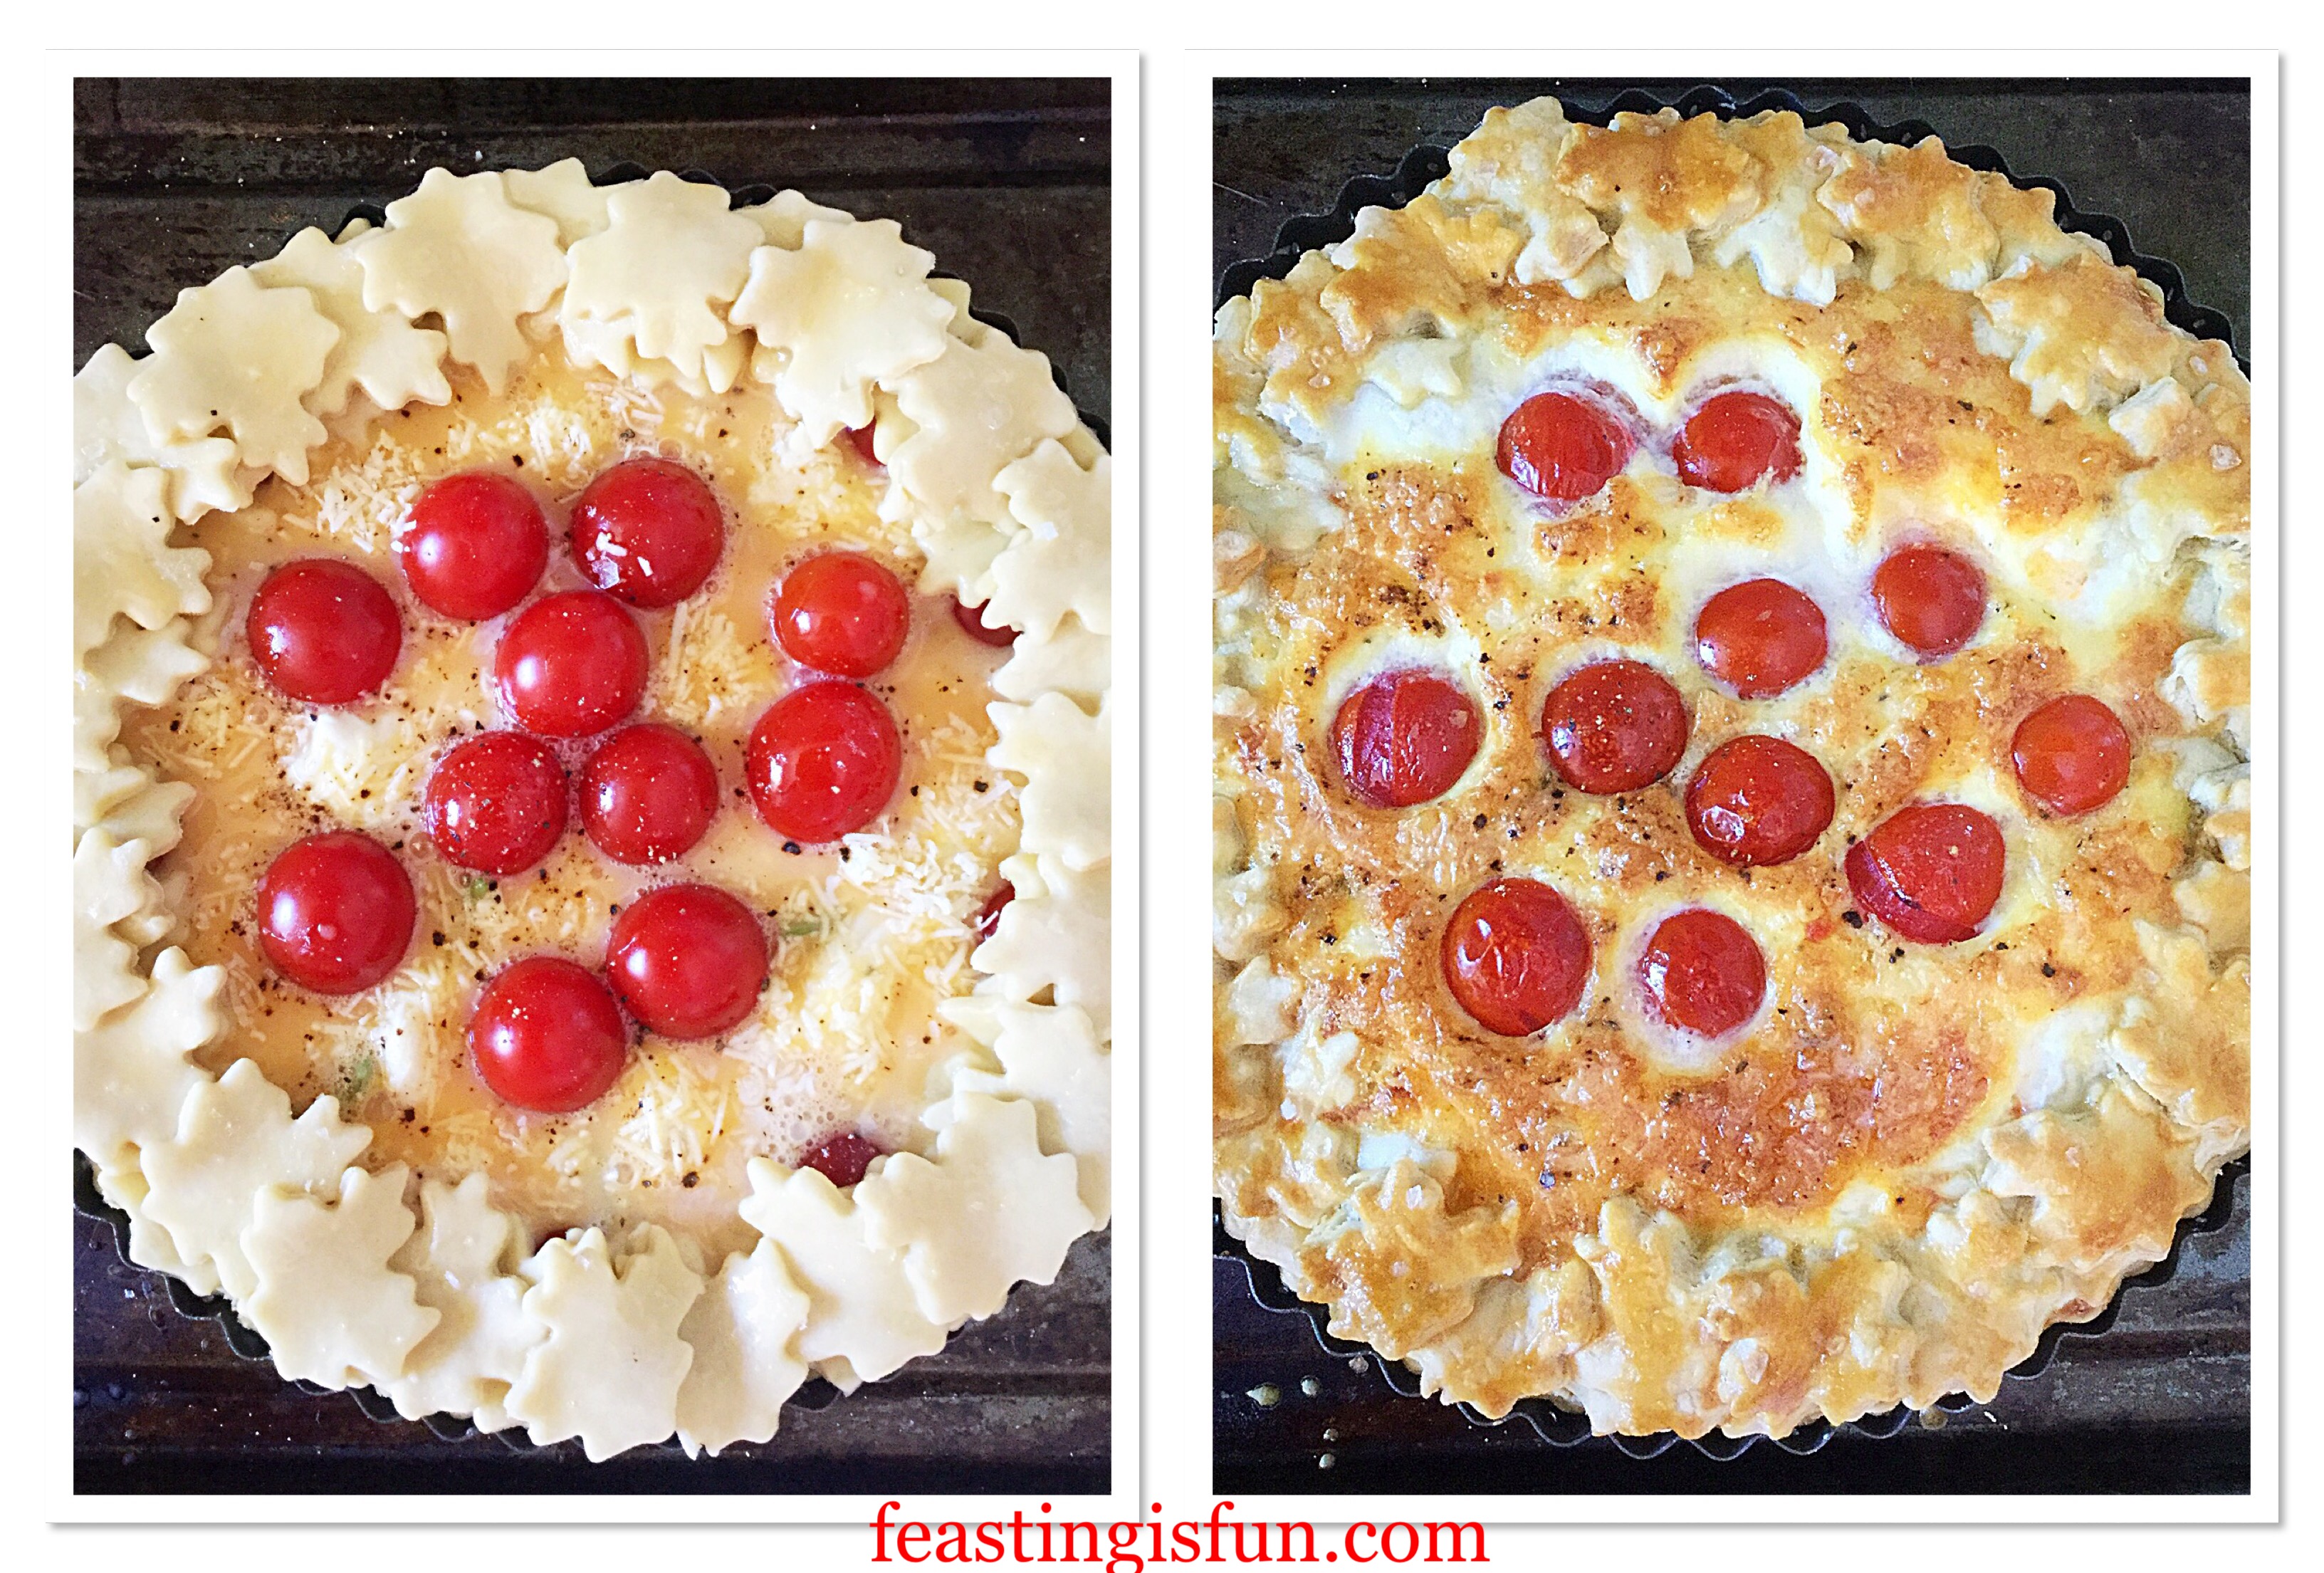
  • Roll out the remaining pastry and cut out small shapes to edge the tart. I used a oak leaf cutter which gives the edge of the quiche a frilly finish.
  • Whisk the remaining egg and brush the underside of each cutout. Stick the pastry cutouts to the edge of the pastry case. You can create a single layer or add extra cutouts to create a layered effect.
  • Brush the pastry edge with egg so that it turns golden when baked.
  • Finally sprinkle a pinch of sea salt over the top.

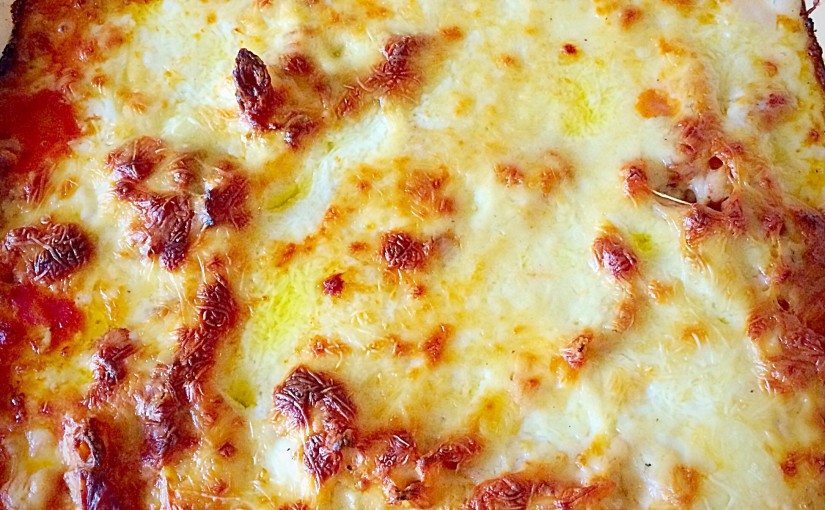
Baking The Cherry Tomato Mozzarella Basil Quiche

FF Cherry Tomato Mozzarella Basil Quiche
Before and after baking the Cherry Tomato Mozzarella Basil Quiche
  • Carefully place the filled quiche into the centre of the oven – remember to check that the heat has been reduced.
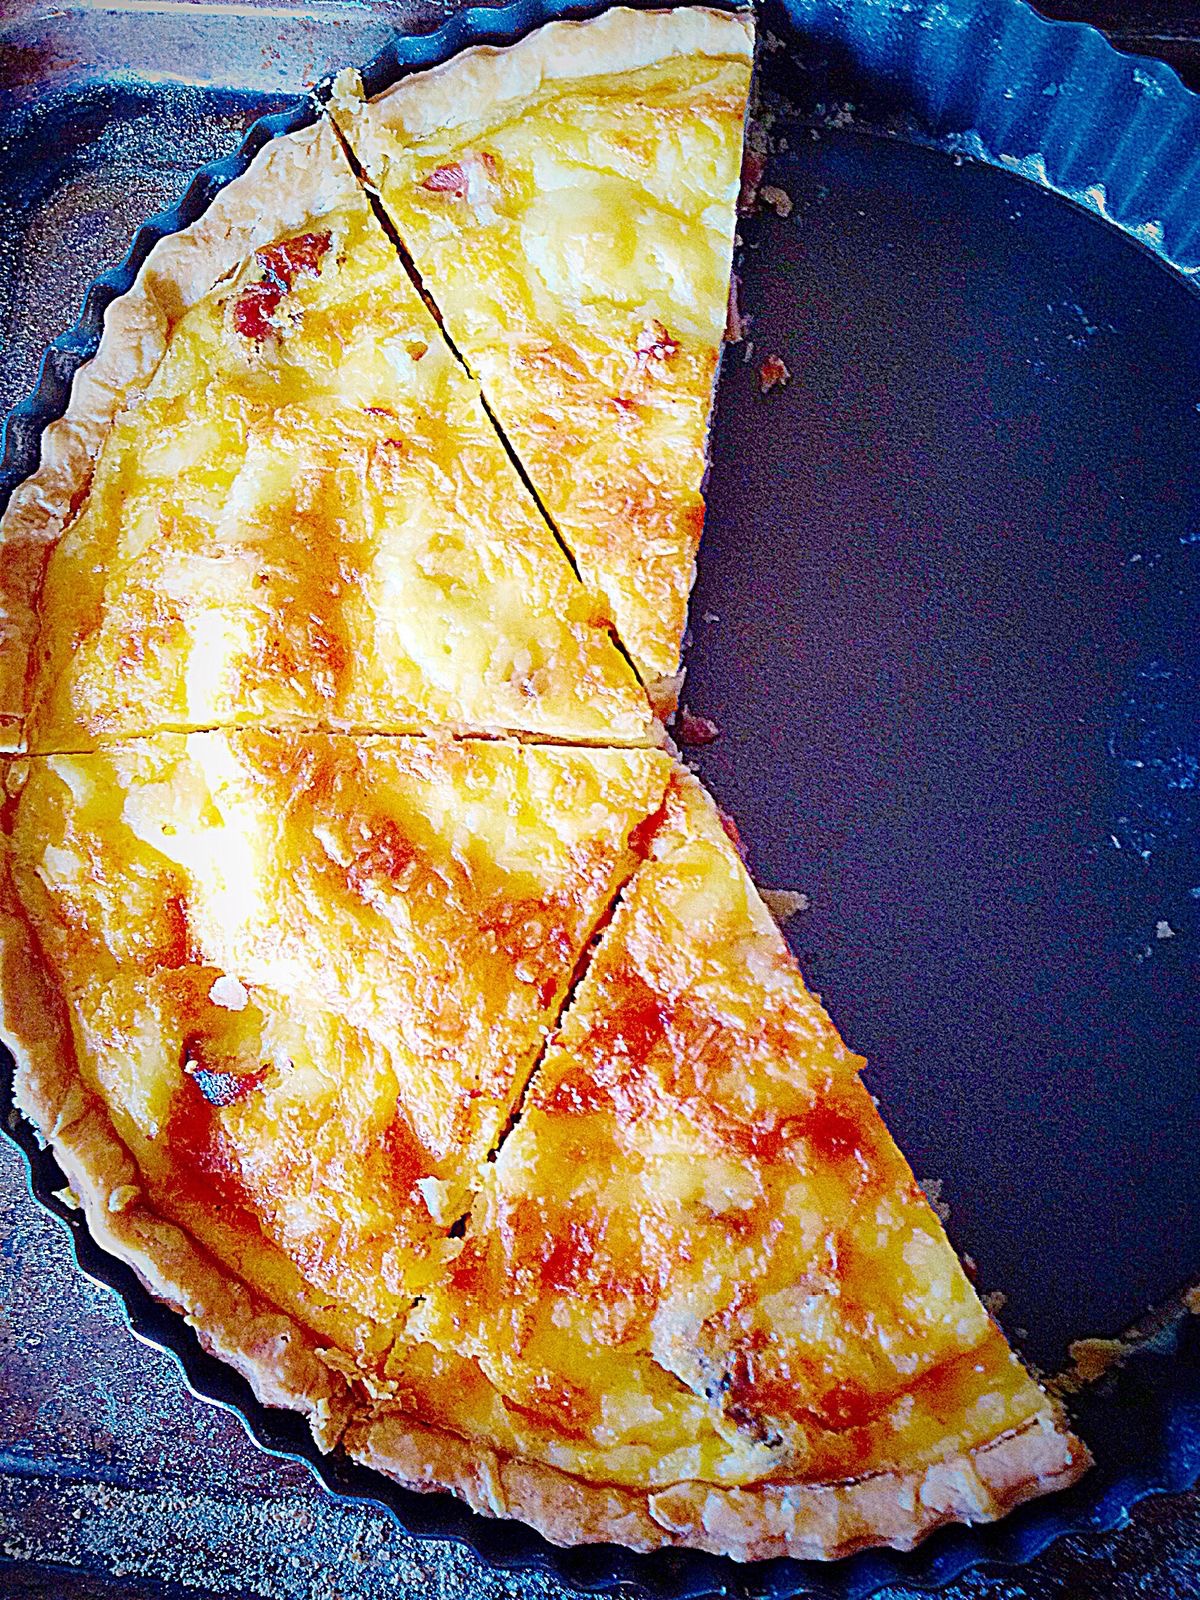
  • Bake for 40-45 minutes. The quiche is baked when it is a golden colour and there is no wobble in the centre.
  • As soon as the quiche is baked remove from the oven. Place on a cooling rack for at least 30 minutes before removing from the tin. Take care as the tomatoes will be very hot and juicy.
FF Cherry Tomato Mozzarella Basil Quiche
Cherry Tomato Mozzarella Basil Quiche

The beauty of this quiche is that it can be served warm, at room temperature or cold, straight from the fridge!

FF Cherry Tomato Mozzarella Basil Quiche
Cherry Tomato Mozzarella Basil Quiche

Because this quiche does not contain meat it is also suitable for vegetarians. Since I have made this twice it really holds it’s shape well when cold and would be perfect for taking on picnics. Most of all, when you bake this quiche make sure you share it. Especially as it is so pretty and absolutely yummy!

Make up to 2 days ahead, cool completely, double wrap in cling film and refrigerate. Due to the moisture content of the tomatoes I would not recommend freezing, unlike my Smoked Bacon Asparagus Quiche which freezes well. Although the pastry case can be made in advance and frozen.

If you have enjoyed this recipe for Cherry Tomato Mozzarella Basil Quiche you may also like these:

Quiche Lorraine 

FF Cherry Tomato Mozzarella Basil Quiche
Quiche Lorraine, smoked bacon and cheddar cheese savoury tart.

Walnut Pastry Crust Leek Stilton Tart

FF Cherry Tomato Mozzarella Basil Quiche
Walnut Pastry Crust Leek Stilton Tart

Iced Bakewell Tart

FF Cherry Tomato Mozzarella Basil Quiche
Iced Bakewell Tart

During this Summer, which I am hoping will be long and warm, I’m looking forward to creating recipes to share with you. Especially focusing on seasonal, local produce and products. Whether you live here, in Australia, Europe or the United States, I do feel that it’s important to support our local farmers. While some of you may get to visit farmers markets, if like me, it’s difficult for you to get out, take a look online. Since spending a little time researching I’ve found the equivalent of farmers markets online and they deliver! Most of all, if you remember one thing from this post – please keep your tomatoes out of the fridge, it kills their flavour!

Whatever you are making, baking and creating in your kitchens, have fun preparing you feast.

Also a huge thank you to everyone who follows me on social media and shares their creations with me.

Sammie xx

No part of this post may be reproduced or duplicated without the written permission of the owner. Please see my Disclosure Policy.

Share
Facebooktwitterpinterestlinkedintumblr

Fresh Basil Topped Slow Roasted Tomatoes

Share
Facebooktwitterpinterestlinkedintumblr

I love tomatoes. Big beefsteak tomatoes, tiny cherry tomatoes and regular slicing tomatoes, I absolutely could not be without them in my kitchen. As well as popping sweet, vine ripened cherry tomatoes in my mouth while pottering around my kitchen, tomatoes are one of the most versatile ingredients. Here, in these Fresh Basil Topped Slow Roasted Tomatoes their flavour is intensified by roasting slowly and enhanced with the addition of basil. Simple yet mouth wateringly good!

FF Fresh Basil Topped Slow Roasted Tomatoes
Fresh Basil Topped Slow Roasted Tomatoes

Beautiful British Tomatoes

Since British tomatoes are just coming into season, I want to use them as much as possible in my recipes. While I have successfully grown tomatoes of our own, blight has been a problem over the last few years, so I have stopped. Instead relying on our local farm shop and Waitrose, who stock British tomatoes for a good part of the year. Also I should add a quick thank you to all of the farmers who grow tomatoes and mange to extend the season using poly tunnels.

FF Fresh Basil Topped Slow Roasted Tomatoes
Fresh Basil Topped Slow Roasted Tomatoes

While tomatoes roast in the oven their flavour intensifies. As the heat starts to dehydrate them, so the flavours become less diluted. Given nothing more than a sprinkle of salt and pepper and a drizzle of oil, the resulting flavour is both sweet and savoury. As well as being a fantastic side dish to fish and chicken, I also enjoy  spreading warm tomatoes on to fresh bread and eating just as it is.

FF Fresh Basil Topped Slow Roasted Tomatoes
Fresh Basil Topped Slow Roasted Tomatoes

Using Local Products And Produce

One thing I should mention is that I have used cold pressed Rapeseed oil. Made locally by Kentish Oils, it is golden yellow in colour and has a soft, slightly nutty flavour. It really compliments the tomato and basil flavours, rather than competing with them. Perfect for roasting and dressing the tomatoes.

Recipe: Fresh Basil Topped Slow Roasted Tomatoes

Amounts given per 450g/1lb Fresh Tomatoes

1 tbsp Cold Pressed Rapeseed/Canola Oil plus extra for drizzling after roasting – I use Kentish Oils 

1/2tsp Sea Salt Flakes – I use Maldon

1/4tsp Freshly Ground Black Pepper

Small Handful Fresh Basil Leaves – approximately 10 leaves

Prepping And Roasting Tomatoes

Preheat oven to 180C/160C fan, 350F, gas mark 4

You will need a large baking tray for this recipe.

  • First of all wash and dry the tomatoes.
  • Cut large tomatoes in half and leaver smaller ones on the vine.
  • Place the tomatoes on to a baking tray and drizzle over the oil.
  • Sprinkle over with sea salt and freshly ground black pepper.
  • Place in the centre of the oven and roast for 45 minutes.
FF Fresh Basil Topped Slow Roasted Tomatoes
Preparing the tomatoes for roasting.
  • As soon as the tomatoes are cooked remove from the oven.
FF Fresh Basil Topped Slow Roasted Tomatoes
Slow Roasted Tomatoes ready to be topped with fresh Basil.
  • Using a fish slice or slotted spoon carefully transfer the roasted tomatoes to a serving plate.
  • Roughly chop the basil leaves and scatter over the tomatoes.
  • Finally drizzle a little oil over the tomatoes and leave until warm, not hot, before serving.
FF Fresh Basil Topped Slow Roasted Tomatoes
Fresh Basil Topped Slow Roasted Tomatoes

Because hot tomatoes will burn your mouth, it is best to leave these to cool until just warm before eating. Doing so ensures that you get the maximum flavour that these beauties have to offer. Also these tomatoes taste delicious when cold.

Any leftover tomatoes can be kept in an airtight container and refrigerated for up to 2 days.

If you have enjoyed this recipe for Fresh Basil Topped Slow Roasted Tomatoes you may also like these:

Tomato Thyme Garlic Focaccia Bread 

FF Fresh Basil Topped Slow Roasted Tomatoes
Tomato Thyme Garlic Focaccia Bread

Creamy Tomato Spinach Chicken Pasta

FF Fresh Basil Topped Slow Roasted Tomatoes
Creamy Tomato Spinach Chicken Pasta

Cheddar Sun Dried Tomato Scones

FF Fresh Basil Topped Slow Roasted Tomatoes
Cheddar Sun Dried Tomato Scones

While I happily use tinned tomatoes in my pasta dishes, such as this Cheesy Vegetable Pasta Bake, I plan to actively create more recipes with fresh tomatoes this Summer. Since we tend to eat lighter meals during the warmer months I am looking forward to the challenge. Especially as I am aware that this blog most definitely needs more savoury recipes!

So, whateverr you are making, baking and creating in your kitchens, have fun preparing and sharing your feast.

Sammie xx

Kentish Oils sent me a small bottle of cold pressed Rapeseed oil to try. All opinions and content are my own, for which I have not received any payment.

No part of this post may be reproduced or duplicated without the written permission of the owner. Please see my Disclosure Policy.


Share
Facebooktwitterpinterestlinkedintumblr

Roasted Summer Vegetable Orzo Salad

Share
Facebooktwitterpinterestlinkedintumblr

So, as we continue to enjoy our British Summer, I am celebrating the abundance of seasonal vegetables available at this time of the year. And as birds chirp early in the morning of long, sunny, warm summer days, the variety of vegetables, bought or home grown, really allows me, as a home cook to get creative in the kitchen.  Resulting in my Roasted Summer Vegetable Orzo Salad, a tasty celebration of easy summer cooking, making the most of seasonal vegetables.

FF Roasted Summer Vegetable Orzo Salad
Roasted Summer Vegetable Orzo Salad.

A Make Ahead Marvel

While packed full of roasted veggies in a lemon vinaigrette, this dish can either be served on its own, or as a colourful side dish. Since it can be served warm, it is a perfect barbecue or buffet dish. Especially, when made in advance and left to sit for a few hours, the flavours develop, enhancing the overall deliciousness. So easy to prepare and make ahead!

A bowl containing roasted vegetable pasta salad topped with chopped parsley.
Roasted Summer Vegetable Orzo Salad

Although I enjoy a crunchy pasta salad, there is something very comforting in the softened, roasted vegetables here. While roasting they become slightly sweet, with a mere hint of caramelisation. And their flavour is enhanced by the fresh lemon juice in the vinaigrette. Also orzo provides the perfect bite, complimenting the vegetables. Resulting in a dish that lets the vegetable flavours shine, without being overly bulked out with pasta.

Recipe: Roasted Summer Vegetable Orzo Salad serves 6

1 Aubergine

2 Courgettes

2 Bell Peppers – deseeded

1 Red Onion – skin removed

1 Large Fennel Bulb – or 2 small

400g Dried Orzo (ensure you use vegan pasta if making for Vegans) – I use Waitrose  own brand

20ml Olive Oil

1 Large Lemon – 20ml of juice

40ml Extra Virgin Olive Oil – I use Filippo Berio

1/2tsp Sea Salt plus 1tbsp for cooking the pasta –  I use Maldon

1/2tsp Freshly Ground Black Pepper

Handful of Fresh Parsley – flat or curly

Note: individual vegetables may be substituted according to preference.

Method: Preheat oven to 200C/180C fan, gas mark 6, 400F

Preparing And Roasting The Vegetables

  • First of all, wash and thoroughly dry the vegetables. Follow by chopping into equal 1″/2.5cm pieces.
  • Transfer to a large baking tray.
  • Drizzle over a generous tablespoon of olive oil and one quarter of a teaspoon of sea salt and freshly ground black pepper.
  • Using clean hands, toss the vegetables in the seasoned oil, taking care to cover each piece.
  • Spread the vegetables out on the tray. During the cooking process they will reduce slightly in size.
FF Roasted Summer Vegetable Orzo Salad
Prepared vegetables ready for roasting.
  • Place the baking tray into the centre of a preheated oven and roast for 30-40 minutes, turning the vegetables halfway through the roasting time.
  • While the vegetables are roasting cook the orzo and make the lemon vinaigrette.

Bringing All The Ingredients Together In One Tasty Dish

  • Place a large pan of cold water on the hob and bring to a boil. When boiling add 1 tablespoon of sea salt and then add the orzo.
  • Squeeze the fresh lemon juice into a small, clean jar that has a fitted lid. Add the extra virgin olive oil, 1/4 teaspoon of sea salt and freshly ground pepper. Place the lid securely on to the jar and shake vigorously to combine.
  • Cook the orzo according to packet instructions, removing from the heat and draining 2 minutes before the finished cooking time.
  • Place the drained orzo into a bowl and pour over the lemon vinaigrette. Fork through the orzo to ensure the vinaigrette covers each small piece, stopping the pasta from forming clumps.
  • When cooked the vegetables will be softened, allowing a fork to easily pierce. In addition, some pieces may be slightly charred at the edges.
FF Roasted Summer Vegetable Orzo Salad
Roasted summer vegetables.
  • Spoon or tip the roasted vegetables on top of the orzo.
FF Roasted Summer Vegetable Orzo Salad
Making Roasted Summer Vegetable Orzo Salad.
  • Gently, use two forks to mix the roasted vegetables into the Orzo.
  • Finally, roughly chop a handful of fresh parsley, discarding the stalks and scatter over the salad.
Roasted Summer Vegetable Orzo Salad

If making the same day as eating, cover with cling film and leave on the work top. Alternatively, when making the day before, leave out the parsley, cool, cover and store in the fridge. Finally, to serve, allow to sit at room temperature for one hour and garnish with freshly chopped parsley.

Since this salad is so versatile, it can be served alongside grilled chicken, salmon, or burgers and ribs at a barbecue. Likewise, it can also be served on its own as a tasty vegetarian or vegan meal.

If you have enjoyed this recipe for Roasted Summer Vegetable Orzo Salad you may also like these:

Lime Couscous

Lime Couscous
Lime Couscous

Roasted Pale Ale Jelly Tomatoes

Roasted Pale Ale Jelly Tomatoes

Lemon Garlic Vegetable Orzo

Lemon Garlic Vegetable Orzo

So, to sum up, when shopping in large supermarkets it’s easy to become disconnected with seasonal vegetables. Because of transportation most ‘summer’ vegetables can be easily obtained throughout the year. Since large, super greenhouses have cropped up across the country, most notably in Thanet, Kent, the effect on home grown produce has been to lengthen its season. Consequently, allowing the British public to buy British produce, rather than imported. Something I fully encourage and strongly support.

Yet, even with this consideration, there is little to rival the fun of blackberry picking in August and September. Most importantly, connecting us all to nature and the natural season of harvest.

So, whatever you are making, baking and creating in your kitchens, have fun preparing our feast.

Sammie xx

No part of this post may be reproduced without the written consent of the owner. Please see my Disclosure Policy.

FF Roasted Summer Vegetable Orzo Salad

Share
Facebooktwitterpinterestlinkedintumblr

Bath Soft Cheese Chilli Tarts

Share
Facebooktwitterpinterestlinkedintumblr

Today I have a fantastic, delicious recipe, that is easy to prepare and stunning to serve. While this recipe is ideal for a picnic or buffet it is also fancy enough for serving at a dinner party. So let me share my Bath Soft Cheese Chilli Tarts with you.

Bath Soft Cheese Chilli Tarts


A crisp, crunchy, golden filo pastry encases a layer of chilli pickle, topped with a generous layer of Bath Soft Cheese. I know, they look so tempting. While the late afternoon sunshine illuminates these Bath Soft Cheese Chilli Tarts, with their melting cheese and chilli centre.

Bath Soft Cheese is organic and suitable for vegetarians. It is made by the Bath Soft Cheese Company in Kelston near Bath. It tastes like an English version of Brie. Soft and buttery,  it matures to a ripe, full bodied cheese, that stands up well to the chilli in this recipe.

FF Bath Soft Cheese Chilli Tarts
Bath Soft Cheese Chilli Tarts incredibly simple to make and bake.

Finally, as you cut through the light, crisp filo pastry layers the melted cheese oozes out of the tart, accompanied by the spicy chilli pickle underneath. And to accompany this tart a few salad leaves and a glass of something crisp and cool.

FF Bath Soft Cheese Chilli Tarts
Bath Soft Cheese Chilli Tarts – tell me you can resist that delicious, melted cheese?

While cheese, chutney and crackers are a classic combination, it is fun and delicious using the ingredients in a different way.

Baking the chilli pickle and Bath Soft Cheese really wakes up the flavours. And when placed in a buttery, filo pastry tart, the result is a remarkably delicious dish.

Recipe: Makes 6 Bath Soft Cheese Chilli Tarts

250g Bath Soft Cheese – available from Pong Cheese

1 Packet of Filo Pastry – you will need 4-5 sheets – I used Jus Rol

100g Unsalted Butter melted and cooled

1/2 Jar Chillililli – from Hawkshead Relish

2-3tbsp Freshly Chopped Chives

1/2tsp Freshly Ground Black Pepper

Method: Preheat the oven to 180C/160C fan, gas mark 4, 350F

Creating the filo pastry tart shell:

  • First of all, place 6 loose bottom tart tins on a baking tray. I used 9cm width, between 8-10cm (3.5-4″) will be fine.
  • Brush each tart tin lightly with melted butter using a pastry brush.
  • Have a clean damp tea towel to hand as filo pastry can dry out very quickly, so it’s best to cover the spare pastry sheets.
  • Place one filo pastry sheet on to a board or pastry mat. Brush lightly with melted butter.
  • Using a sharp knife cut the filo pastry sheet into equal quarters and then cut each quarter in half, from top to bottom. You will have 8 squares/rectangles.
  • Start by laying 1 square of filo pastry in the tart tin, gently pressing it so that it sticks to the base and the sides.
  • Add another square of filo pastry, laying it slight offset from the first piece. The idea is to build up layers that form a solid tart shell with lots of edges/corners on the side, which will become golden and crisp on baking.
FF Bath Soft Cheese Chilli Tarts
See how the 5 layers of filo pastry build up to create a solid tart shell.
  • Continue building the tart case until you have used 5 separate layers of filo pastry – bottom right in the picture above.
  • I actually built 2 tart cases at a time, I wouldn’t recommend building more as each layer will dry out as you prepare the next sheet and is then likely to crack and fall apart once baked.

Layering the tart filling:

  • When all 6 tart cases have been built, spoon 2 generous teaspoons of the Chilli Pickle into the base of each one.
  • Cut the block of Bath Soft Cheese into 6 equal-ish portions – they will weigh approximately 40 grammes.
  • Place a square of cheese on top of Chilli Pickle in each tart case.
FF Soft Bath Cheese Chilli Tarts
Bath Soft Cheese Chilli Tarts are so easy to make
  • Sprinkle the top of each tart with a little freshly ground black pepper and some freshly snipped chives – reserve half of the chives for garnish once baked.
Bath Soft Cheese Chilli Tarts ready for the oven.

Baking the cheese tarts:

  • Place the Bath Soft Cheese Chilli Tarts in the top a preheated oven and bake for 15-18 minutes. The tarts are cooked when the filo pastry is crisp and golden and the cheese has melted to fill each tart.
  • As soon as they are baked remove the baking tray from the oven and allow the tarts to cool for 10-15 minutes in their tins.
Fresh from the oven!
  • The Bath Soft Cheese Chilli Tarts can then be carefully removed from their tins and are best served warm. Don’t worry if a couple of crispy pieces of filo pastry break off as you handle them. These delightful tarts are built of 5 layers of filo pastry and are actually quite strong.

Serving suggestion:

I like to serve each tart, warm, on a bed of deeply coloured, fresh lettuce leaves with an extra sprinkle of fresh chives.

Such a simple and yet flavourful appetiser or light lunch. Also these tarts tarts can be eaten cold. Store in the fridge for up to 3 days and vamp up your packed lunch.

I really would recommend the Chillililli from Hawkshead Relish. Not only does it have great flavour in this tart, it also adds a surprise texture, hidden beneath the melted cheese.

If you have enjoyed this recipe for Bath Soft Cheese Chilli Tarts then you may also like these:

Mini Sparkenhoe Red Leicester Tarts

FF Bath Soft Cheese Chilli Tarts
Mini Sparkenhoe Red Leicester Tarts.

Beauvale Cheese Walnut Scones

FF Bath Soft Cheese Chilli Tarts
Beauvale Cheese Walnut Scones.

Goddess Cheese Pine Nut Muffins

Bath Soft Cheese Chilli Tarts
Goddess Cheese Pine Nut Muffins

As you can see, I am loving creating recipes with cheese. You may also like my Cheddar Tomato Basil Quiche, which is exceptionally delicious if you substitute the Cheddar for Sparkenhoe Red Leicester cheese.

Coming up with new ideas, flavour pairings and recipes, really gives me a thrill. Also with all that my body goes through see here, it is wonderful that I can still express my creativity, through cooking and baking and in turn, share my recipes with you.

Whatever you are making, baking and creating in your kitchens, have fun. Enjoy your feast and remember, when you are able, to invite others round to share with you. It really is true that food tastes better when it is shared!

Sammie xx

Pong Cheese provided me with the cheese to create this recipe. All opinions, views, content and photographs are my own. I was not paid to write this post, please see my Disclosure Policy.

Share
Facebooktwitterpinterestlinkedintumblr

Cheesy Vegetable Pasta Bake

Share
Facebooktwitterpinterestlinkedintumblr

Hi, is everyone fed up with the clouds? Yep, me too. Although I love Autumn, it’s  endless days of rain, with no blue sky occasionally peeking through can be disheartening. And in all honesty, it makes me want to snuggle up with a good film and a big bowl of this Cheesy Vegetable Pasta Bake.

Pinterest sized image of vegetarian pasta bake with descriptive graphics.


So, this dish came about because I was too lazy to get any meat out of the freezer! Because our freezer is in our garage, with no internal interconnecting door and it was raining. Are you convinced?! Anyway enough of my laziness, what resulted was an incredibly tasty dish.

Serving the vegetarian pasta bake.
Cheesy Vegetable Pasta Bake

While we are a meat eating family, I do make a little meat go a long way. However, it is very rare that I deliberately leave meat or fish out of a dish. Big mistake! Because no one in our family, or my chief taste tester, missed the meat in this Cheesy Vegetable Pasta Bake. In fact they enjoyed a meat free meal.

I was so pleased. Firstly, I had created a great meal that everyone enjoyed – always my main aim. Secondly, I now have a great vegetarian dish in my repertoire. Also, I love to serve this with Focaccia Bread.

Complete untouched vegetarian pasta bake.
Cheesy Vegetable Pasta Bake

Since meat is usually the most expensive component in a meal, without compromising flavour, this is a fantastic, meat free, budget friendly dish. Perfect for a mid week meal. In fact why not double up on the ingredients and make this for a new mum, family or friends returning from holiday, or simply to freeze for up to 3 months. Because this is meat free, more people can enjoy this dish.

Recipe : Cheesy Vegetable Pasta Bake Serves 6 people generously

1tbsp Olive Oil – I use Filippo Berio

1 x Leek

1 x Celery Stick finely diced

2 x Large Carrots finely diced

6-8 Mushrooms White Button or Chestnut sliced thinly

3 Cloves of Garlic – crushed

4 x 400g Cans Chopped Tomatoes

1/4tsp Freshly Grated Nutmeg

1tsp Dried Mixed Herbs

Salt and Pepper to taste

500g/1lb Dried Pasta – I used Penne

Cheese Sauce see Bacon Cheese Pasta Bake – Cheese Sauce

50g/2oz Finely Grated Cheese for topping –  I use  Wyke Farms mature cheddar (both in the sauce and to top)

Note : If making this dish for vegetarians, ensure you use vegetarian cheese.

Method : Making The Pasta Bake 

First of all, cut the very dark green top and root from the leek. Slice the leek in half, lengthways and rinse thoroughly under a cold running tap. This ensures any sand or dirt trapped between the layers in the leek is washed away. Pat the leek dry with a clean cloth. Slice the leeks into 1/2 inch dice.

Pour the oil into a pan and heat up over a medium heat. Add the leeks to the pan.


Sauté the chopped leek until tender.
Add the rest of the chopped vegetables and sauté for 5 minutes.


Add the garlic and stir for 30 seconds. Pour in the tinned tomatoes.

Add all of the tinned chopped tomatoes.


Add the nutmeg and dried herbs. Bring to a simmer and cook with a lid almost covering for 1 1/2 hours.

While the vegetable sauce is cooking make the Cheese Sauce.

As soon as the vegetable sauce has cooked remove from the heat.

Cook your chosen pasta according to the package instructions, less 3 minutes.

Drain the pasta and tip into the vegetable sauce. Mix the pasta and vegetable sauce together.

Cheesy Vegetable Pasta Bake, pour the pasta/vegetable mix into a baking dish.
Pour the pasta/vegetable mix into a baking dish.
Cheesy Vegetable Pasta Bake, smother in cheese sauce and finish with a sprinkling of finely grated cheese.

You can bake the pasta dish in a medium oven, 180C/160C fan immediately, for 1hour, until golden and bubbling.

Alternatively, cover the cooled Cheesy Vegetable Pasta Bake in cling film and refridgerate for up to 3 days. If freezing, cool, wrap the entire dish in cling film and then aluminium foil.

Serving the vegetarian pasta bake.
Cheesy Vegetable Pasta Bake

Versatile Vegetarian Meals

You can switch up the veggies to whatever you have on hand. In fact this dish is a great way to use up small amounts of vegetables sitting in the fridge, before your next grocery shop!

Perfect served just as it is, or you can stretch it further by serving with some crusty bread and salad. Either way this Cheesy Vegetable Pasta Bake is sure to become a favourite in your home.

If you have enjoyed this recipe for Cheesy Vegetable Pasta Bake you may also like these:

Roasted Summer Vegetable Orzo Salad

FF Cheesy Vegetable Pasta Bake
Roasted Summer Vegetable Orzo Salad

Baked Cheese Olive Ciabatta Bread

FF Cheesy Vegetable Pasta Bake
Baked Cheese Olive Ciabatta Bread

Walnut Pastry Crust Leek Stilton Tart

FF Cheesy Vegetable Pasta Bake
Walnut Pastry Crust Leek Stilton Tart

Since this recipe is meat free it can be shared by more people. And it’s ideal for pot luck church meals. Because it is so versatile, allowing you to substitute whatever vegetables you have in the fridge, or even in the garden, it’s budget friendly too. Also to make the dish stretch further, serve with salad and some homemade Tomato Thyme Garlic Focaccia Bread. Delicious, nutritious and easy on the pocket, this vegetarian recipe ticks all the boxes.

So, whatever you are making, baking and creating in your kitchens, have fun preparing and sharing your feast.

Sammie xx

No part of this post may be reproduced or duplicated without the written permission of the owner. Please see my Disclosure Policy.


Share
Facebooktwitterpinterestlinkedintumblr