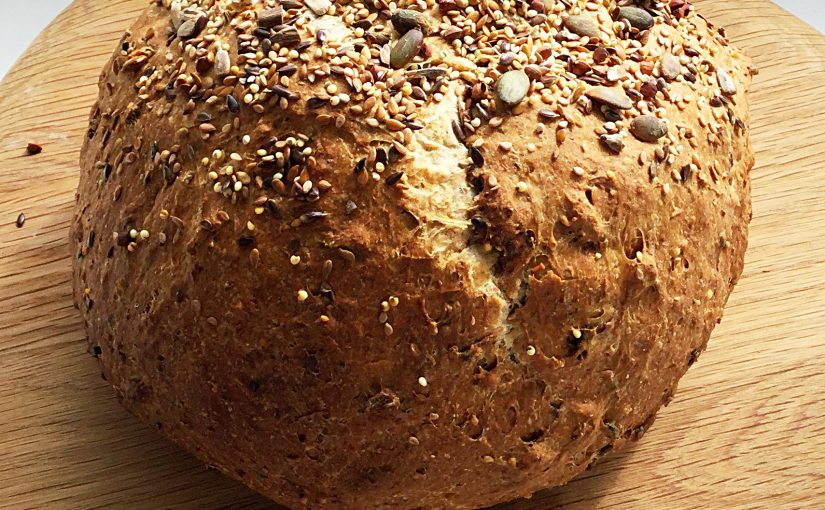
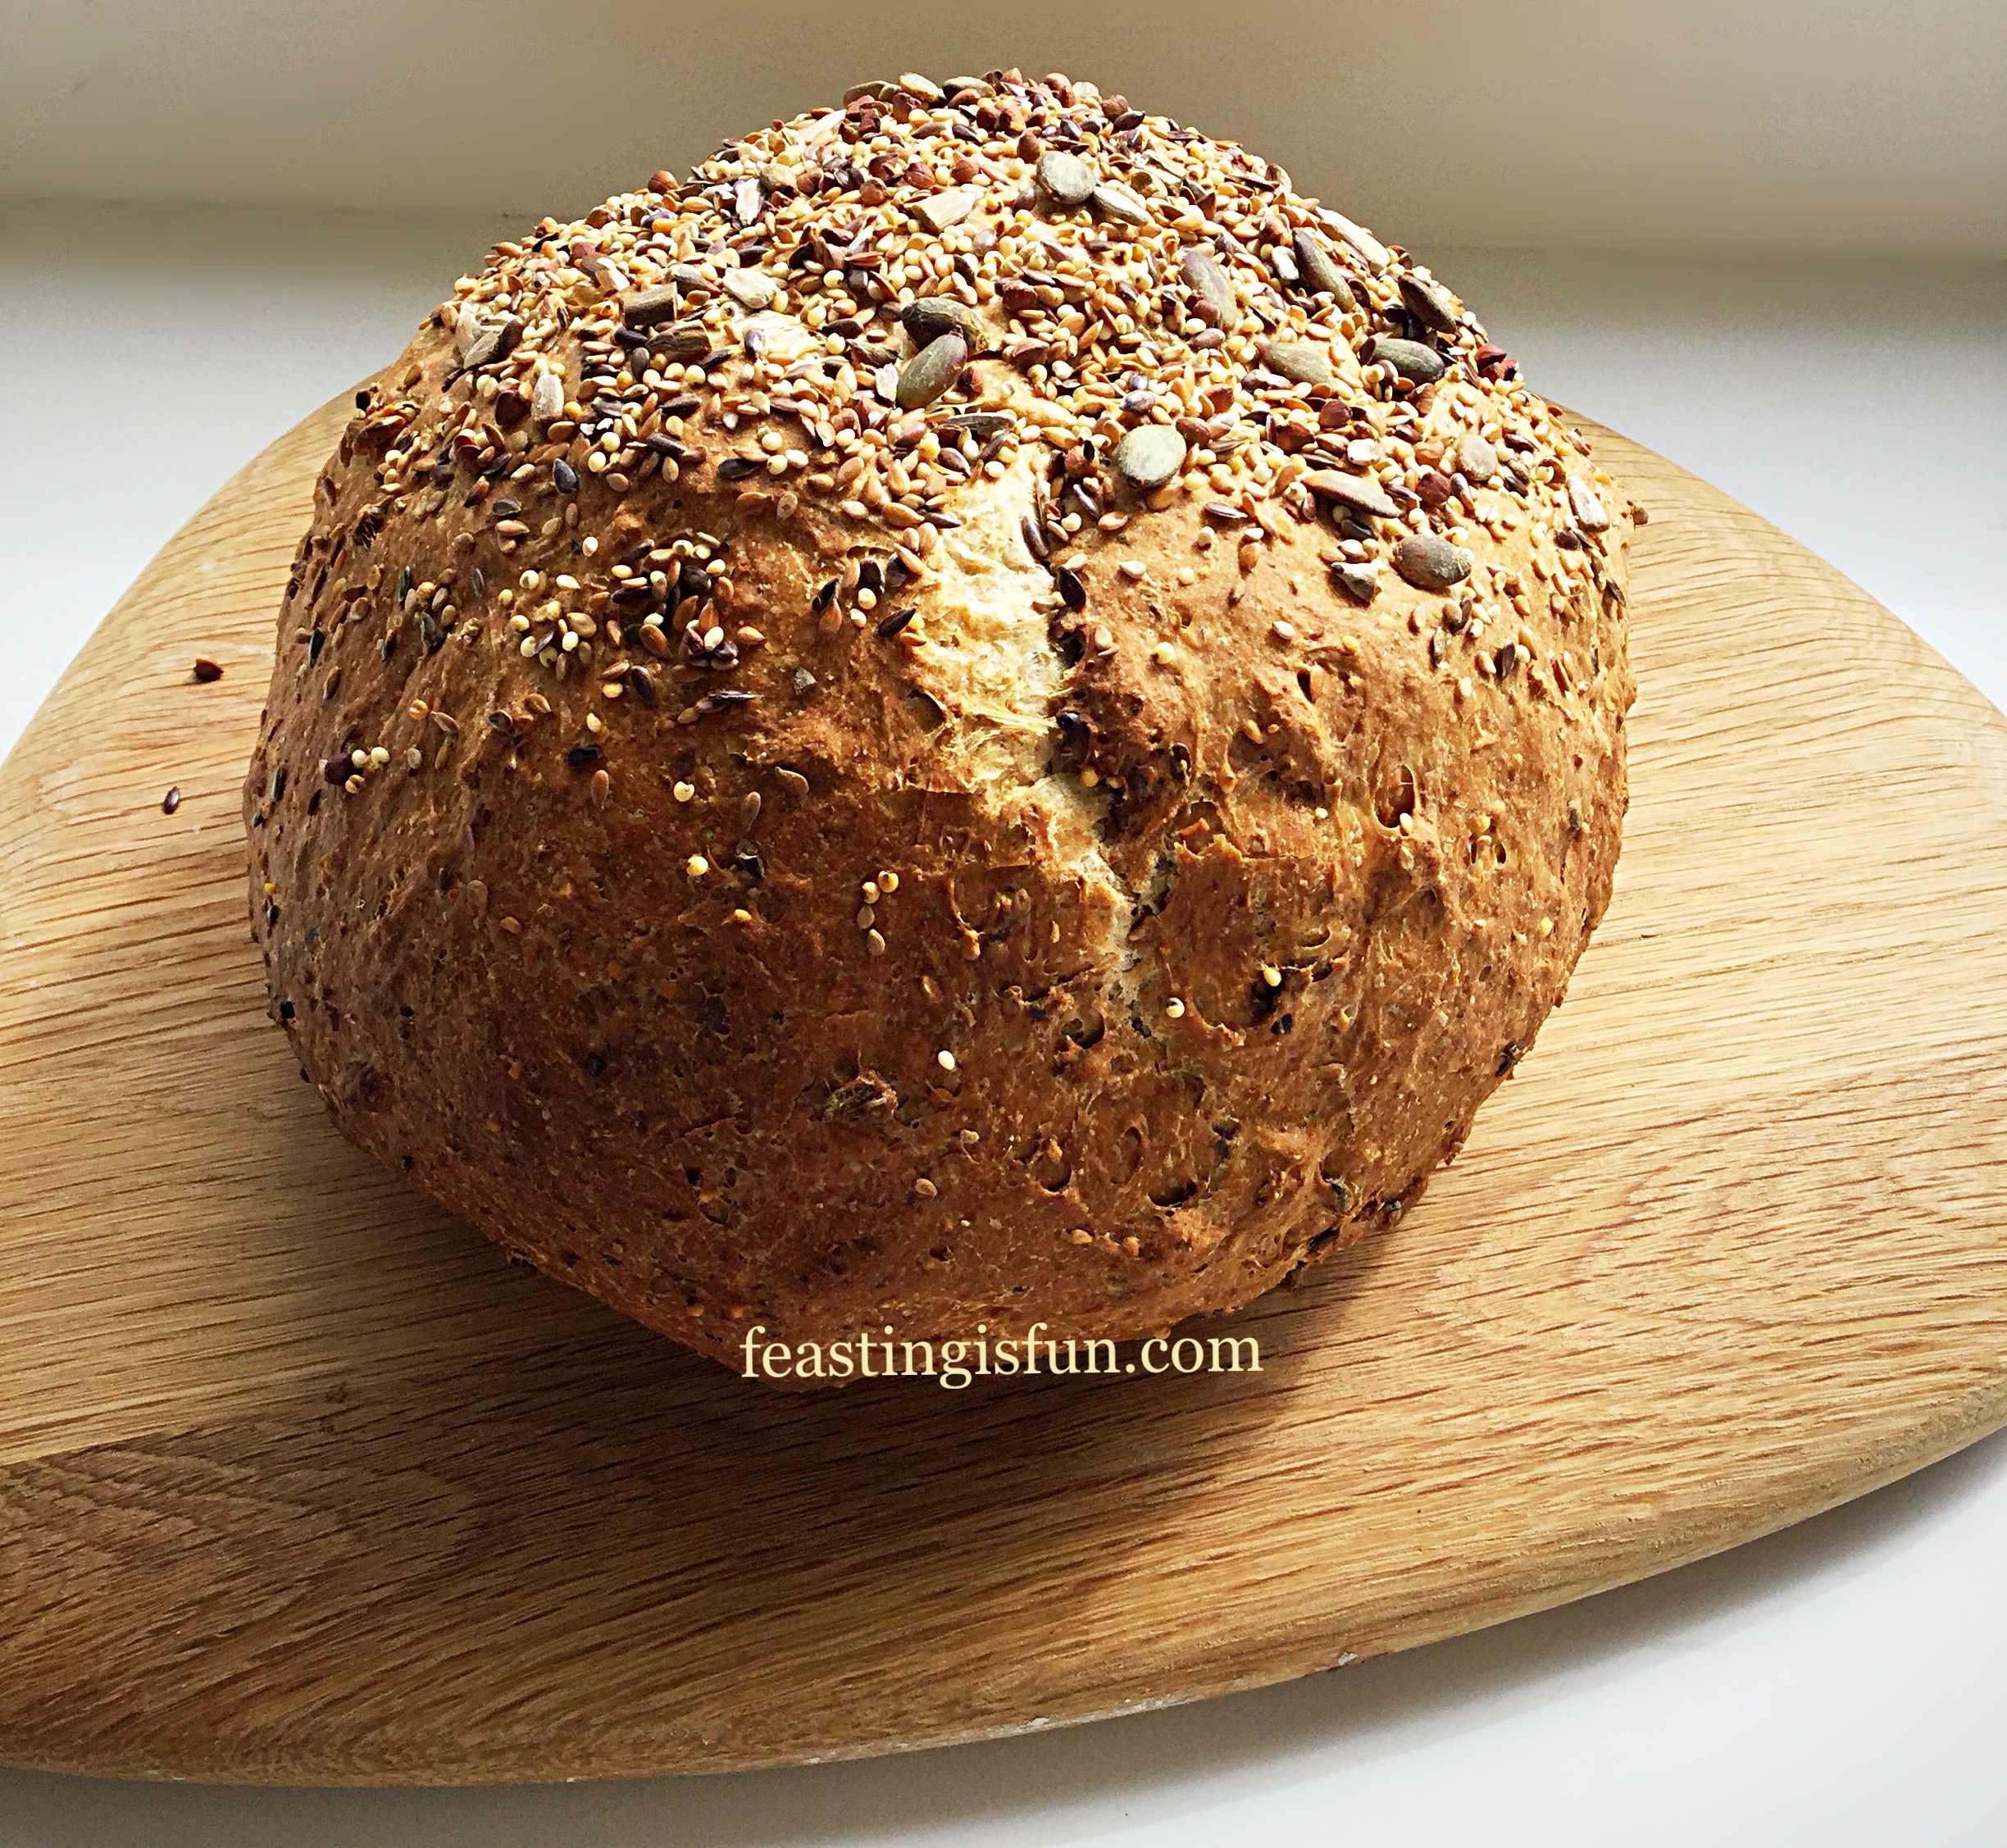
Bread is an everyday essential for most people in the Western world. And is available in different shapes, sizes and varieties. With the most popular bread, judging by the number of loaves sold each year, being sliced, predominantly white, plastic wrapped loaves. Yet what do offer in terms of flavour? In my opinion very little! Rather they are a carrier of flavours. Whether ham and mustard, egg and cress or the numerous filling combinations, the bread itself adds little to the taste or nutrition value of a sandwich. So, when you make this Seeded Cob Loaf, your world and tastebuds will open to the real flavour and texture of good, homemade bread.

Seriously, this could be called ‘Change Your Life Seeded Cob Loaf.’ Because, as soon as you make it, with your own hands, bake and then try it, you will find it hard to go back to your usual loaf. Since it not only does it have incredible flavour, it’s cheaper, far healthier and more rewarding than plastic wrapped loaves.
The Benefits Of Homemade Bread
Also, an important benefit from making bread at home, is that you, the baker, know exactly what goes into your bread. Flour, yeast, water, salt and a little unsalted butter. No preservatives, additives, flour improvers or any other number of E numbers found in mass produced bread. Simply a great tasting homemade loaf.
Personally, this is one of the very best loaves I have made. Most importantly, I check my recipe twice, baking on two different days, to check consistency. Since tasting the first slice, lightly buttered, I have been eager to share this with you. Such is the depth of flavour and ease of shaping. Credit goes to Jack at Bake With Jack . Because watching his vlogs will improve both your knowledge and technique, when making bread at home.
Recipe: Makes 1 Seeded Cob Loaf
400g Wholemeal Seeded Bread Flour I use 3 Malts Sunflower from Shipton Mill – alternatively use half Wholemeal Bread Flour and half Strong White Bread Flour (250g + 250g = 500g total flour weight)
100g White Bread Flour (do not add if making your own flour mix – see above)
7g Fast Action Dried Yeast – I use Allinson’s
340mls Room Temperature Water
50g Mixed Seeds – plus a small handful for sprinkling on the loaf
30g Softened Unsalted Butter
7g Salt – I use Maldon
Method: I use a stand mixer fitted with a dough hook, alternately this bread can be made by hand.
Note: For complete accuracy the use of digital scales is advised. Even for weighing water, 1ml is equivalent 1g.
Making The Seeded Cob Loaf Dough Using A Stand Mixer
- Into the bowl of the stand mixer weigh the water and yeast.
- Next, add both flours and the additional 50g of seeds, even if you are using seeded flour.
- On top of the flour add the salt and cubed butter.
- Lower the dough hook and mix on slow for 5 minutes, then increase the speed and mix for a further 5-10 minutes on medium. The dough is ready when it can be stretched without tearing and light can be seen through the stretched dough. This is known as the windowpane test.
- Use clean hands to scrape any dough stuck to the dough hook back into the bowl.
- Cover the bowl with a clean tea towel and place on a surface that is draught free.
- Leave the dough to prove until doubled in size. This may take between 1-2 hours, depending on the room temperature.
- While the bread is proving, grease a large baking tray with a little butter.
Knocking Back And Shaping The Dough
- After proving scatter a very small amount of flour on to the work top.
- Turn out the dough ensuring the domed top becomes the bottom and the sticky underneath is uppermost.
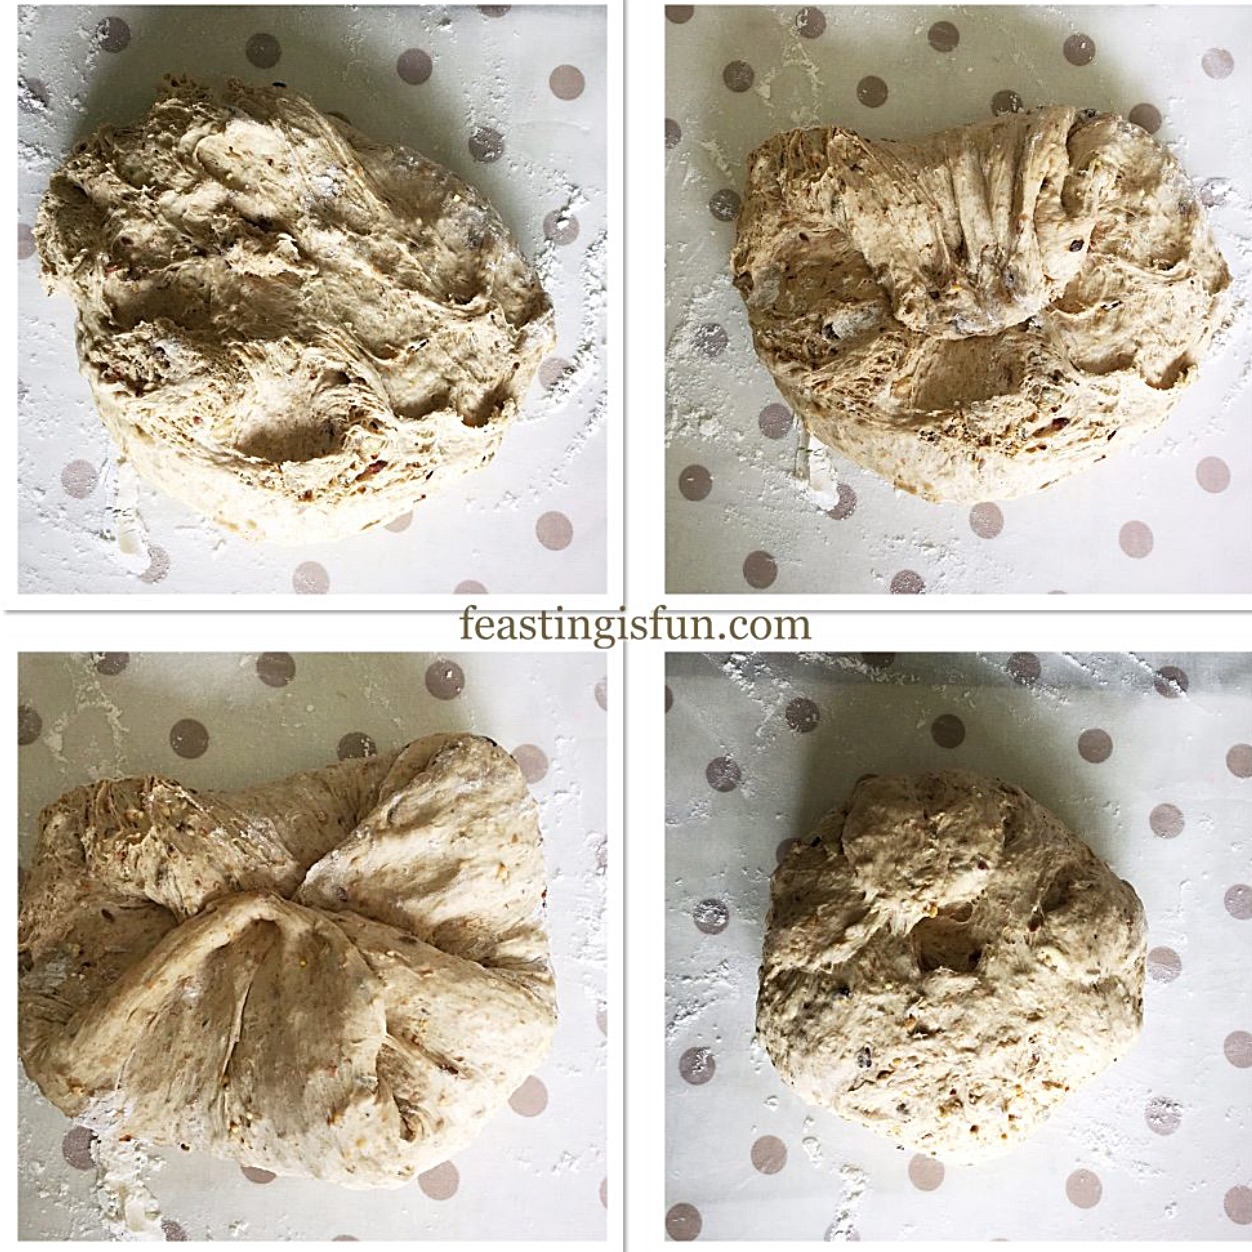
- Following the pictures above, shape the dough. First pull the edge of the dough and press it down into the sticky centre. Continue, working around the edge of the dough, pulling out and pressing in. While doing this, tension is being built across the top of the loaf, (the underneath of the dough), this helps ensure a tight ball shape that doesn’t collapse whilst proving or baking.
- Keep working around the edge of the dough until you achieve a tight ball, as seen in the left of the photo below.
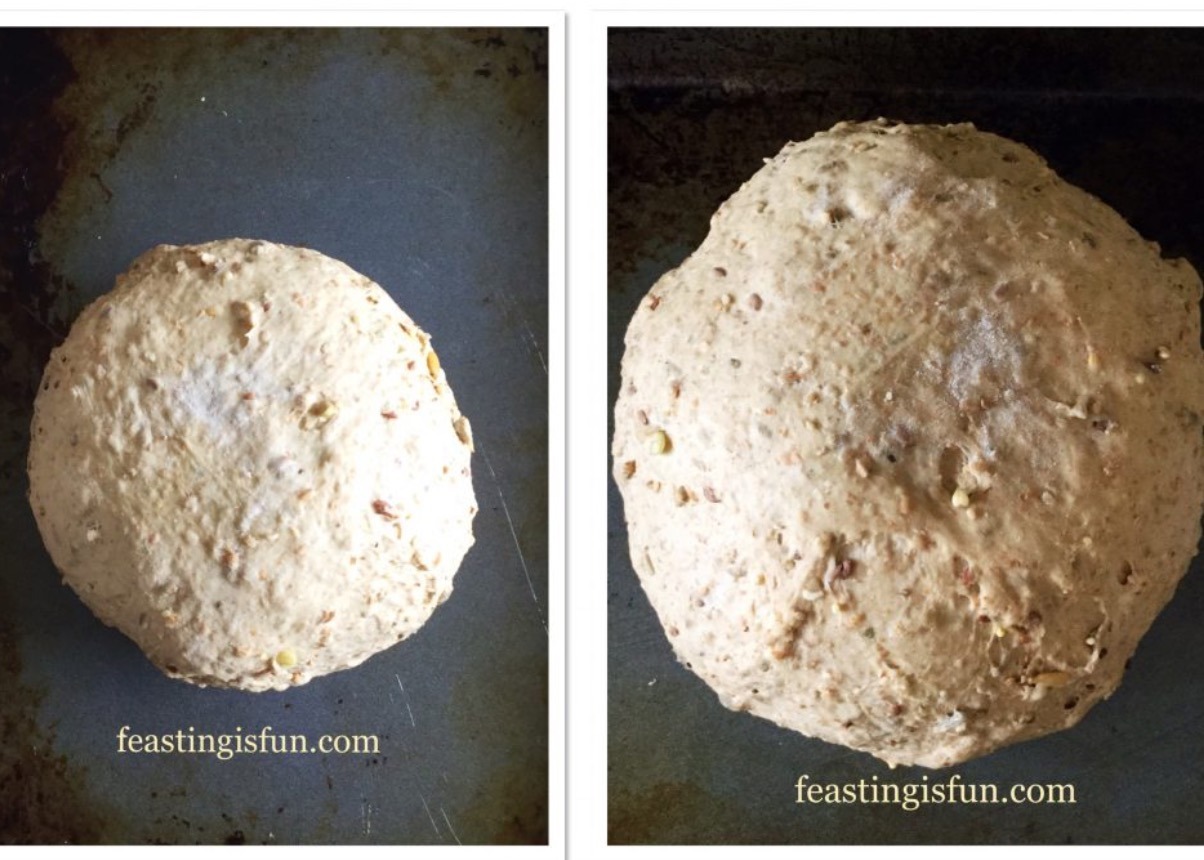
- Cover the dough ball with the tea towel and leave until doubled in size. See photo above on the right.
Baking The Cob Loaf
- While the dough is undergoing its second prove Preheat the oven to its hottest setting. Add a tray of water to the bottom of the oven. Since adding water provides steam which helps the dough to rise (oven spring) before forming a crust.
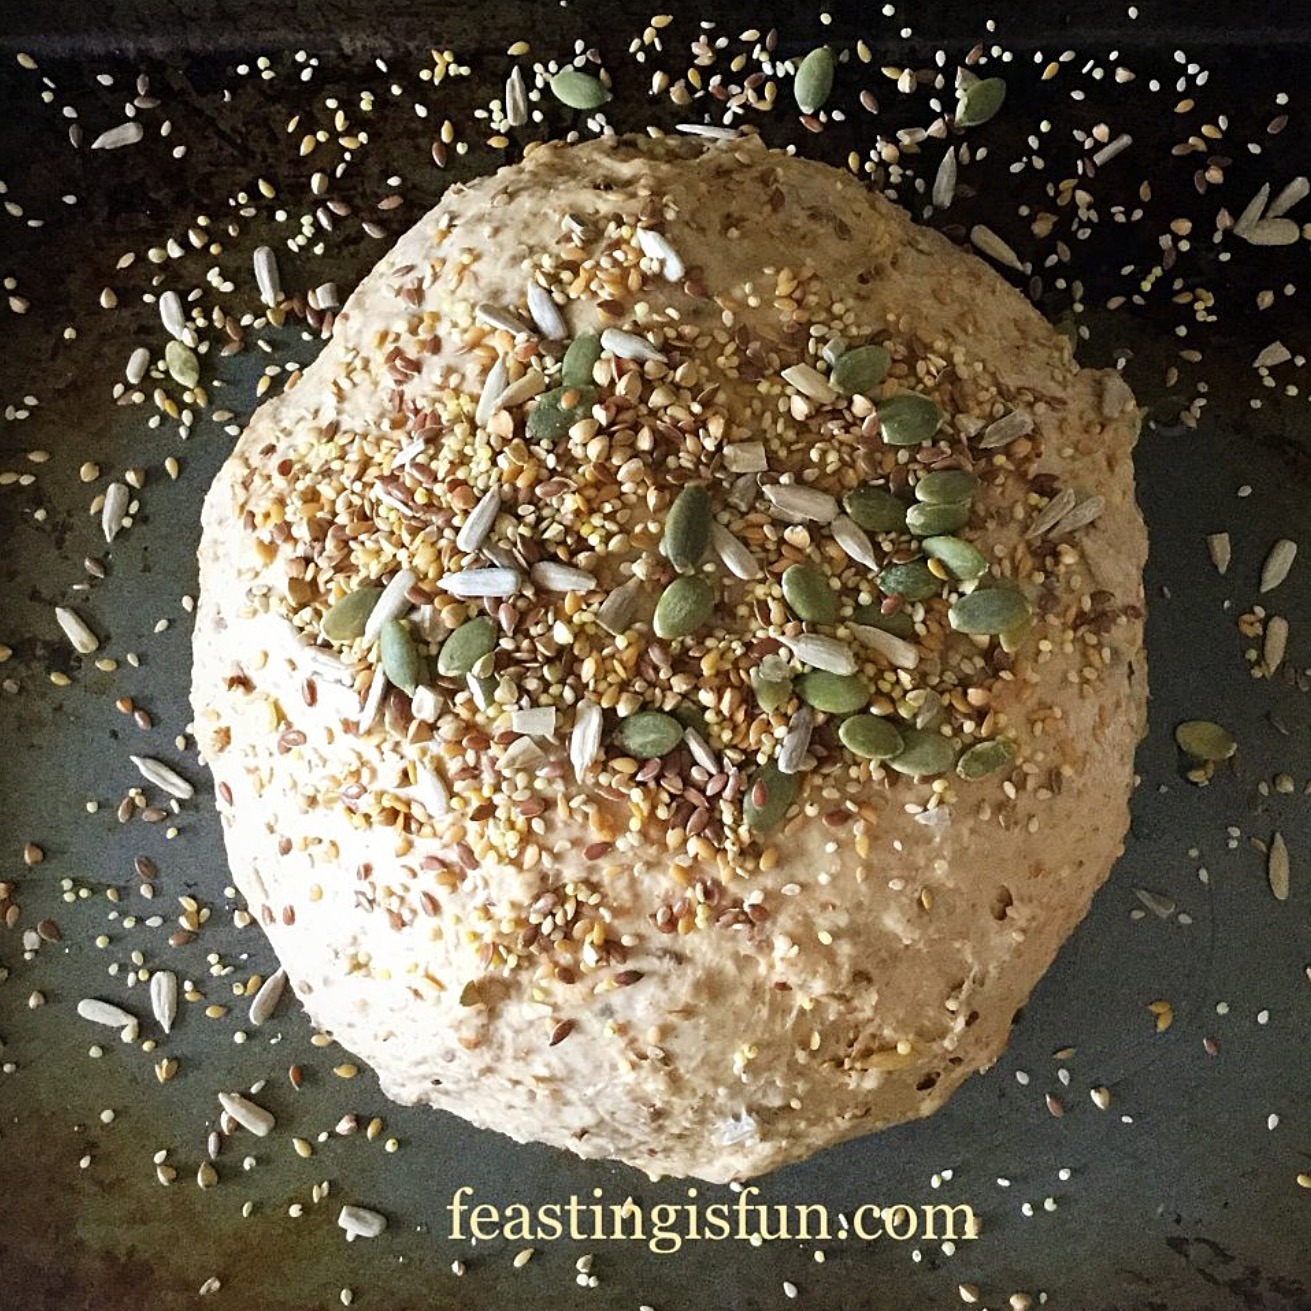
- As soon as the dough has doubled in size, it is ready to bake. Remove the tea towel and brush the top of the dough with water. Then sprinkle over the remaining seeds.
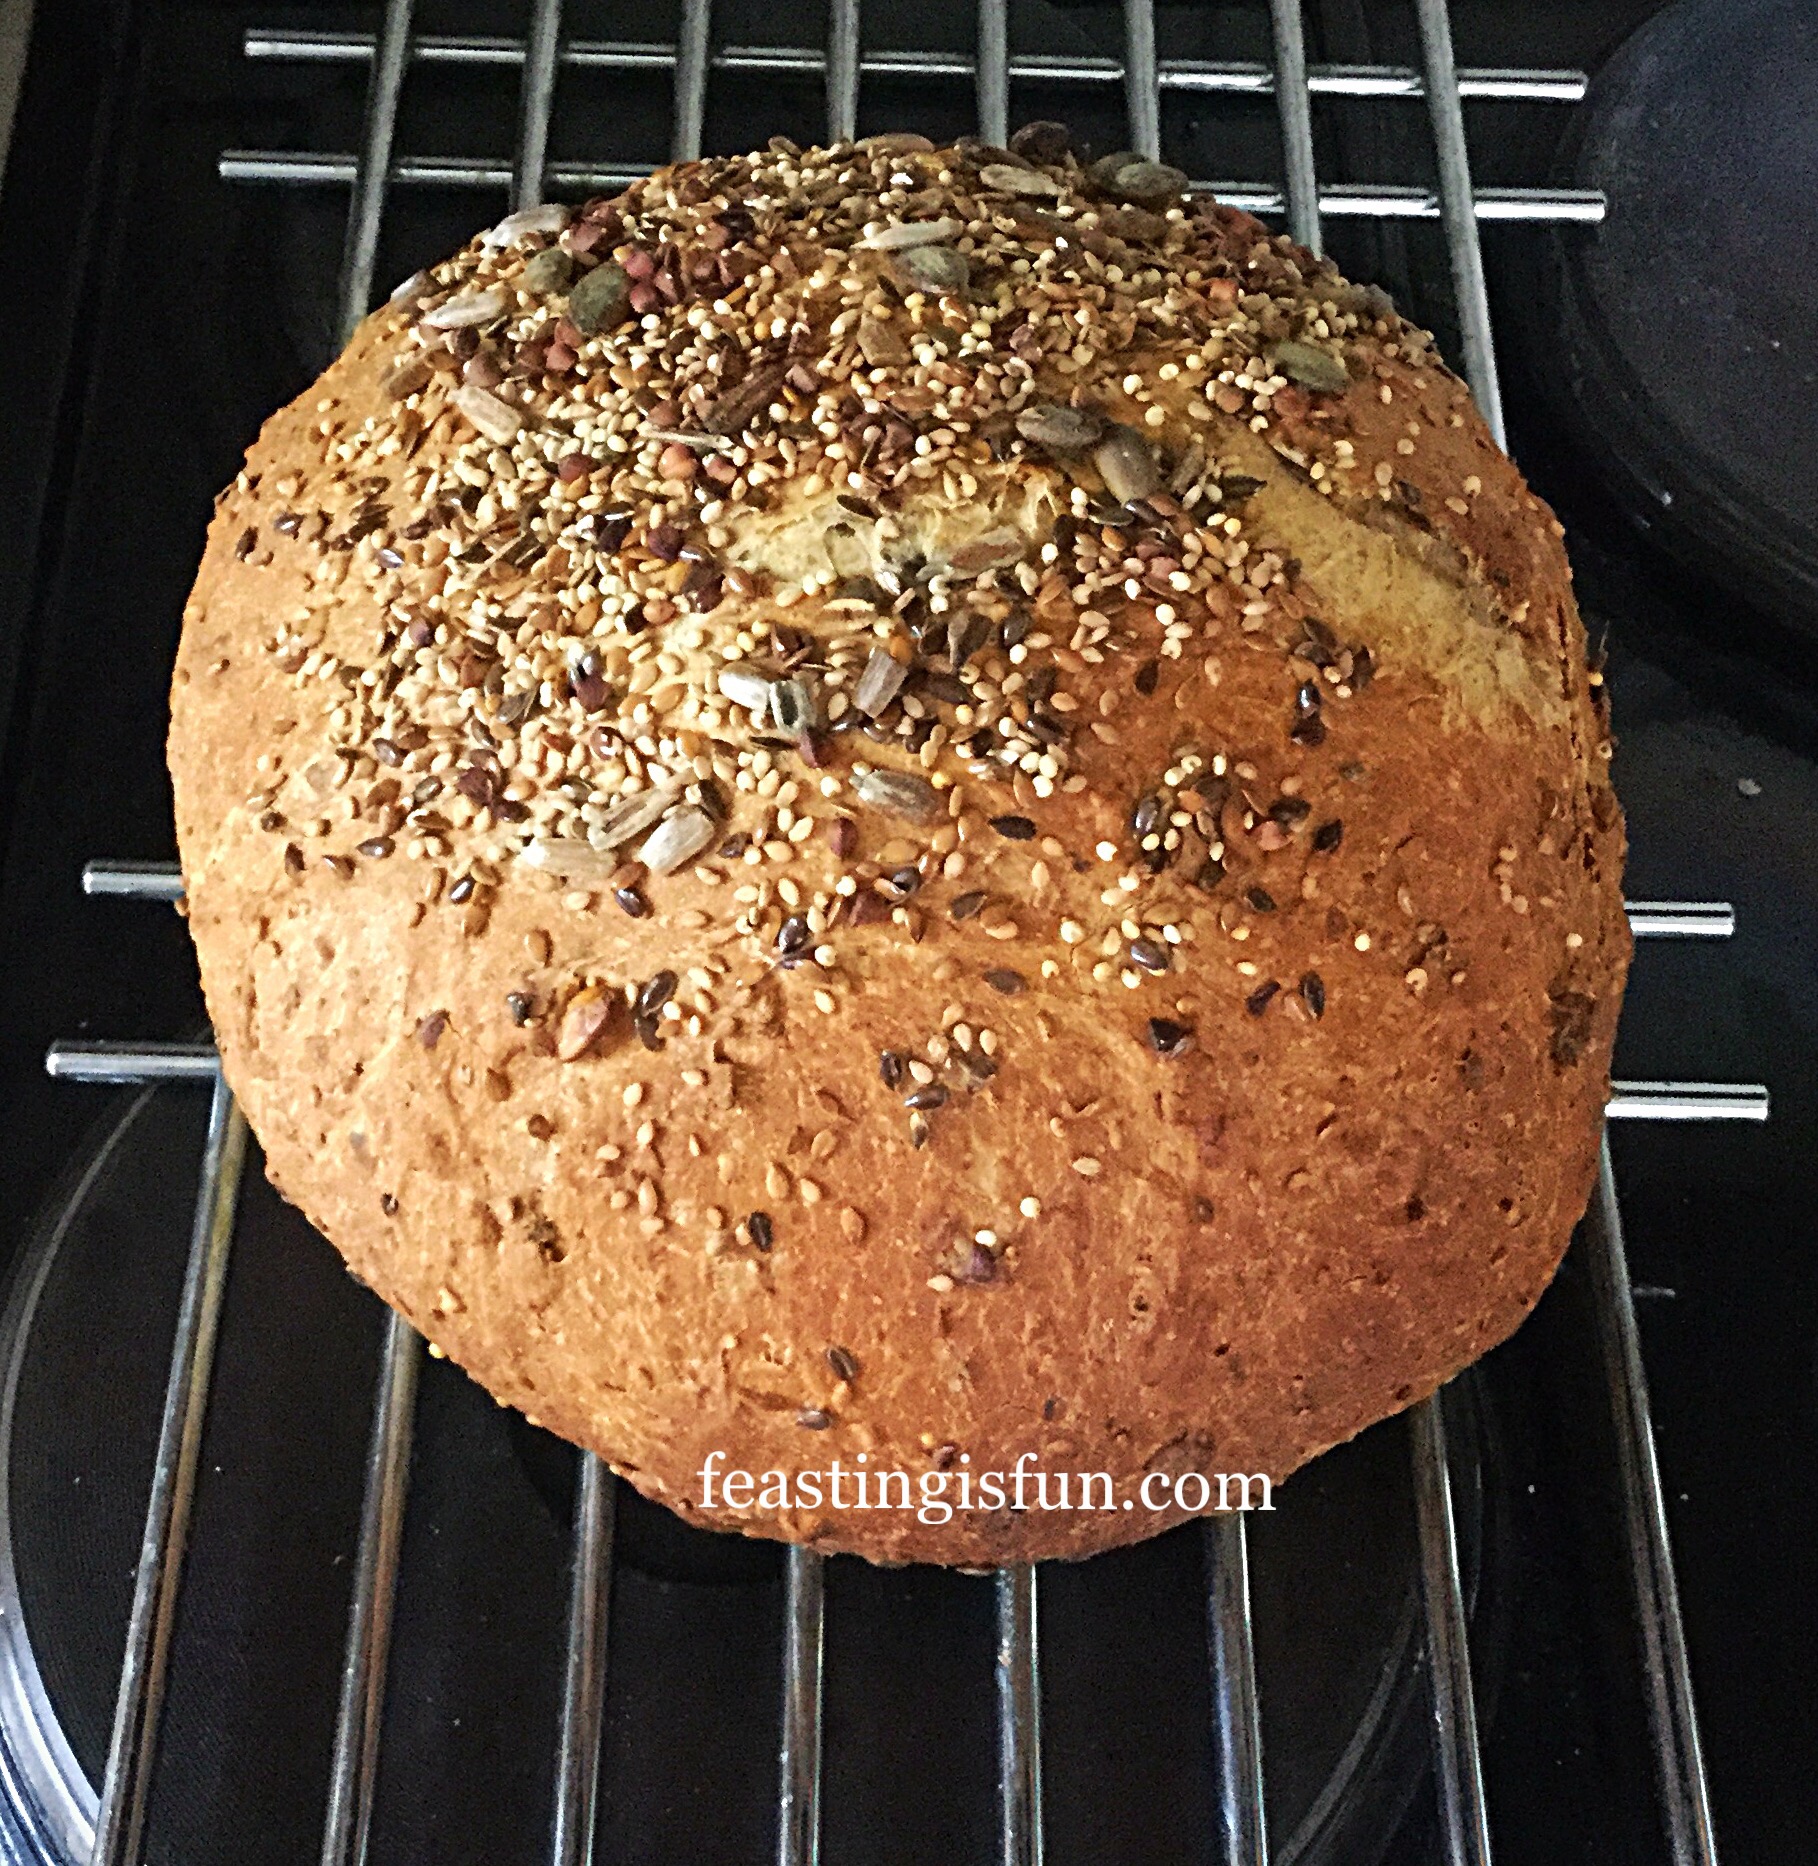
- Place the seed covered loaf into the middle of the oven.
- Immediately reduce the temperature of the oven to 220C/200C fan, gas mark 7, 425F . Note – the reduction in heat stops the seeds from burning.
- Bake for 45 minutes, remove from the oven. Take the loaf off of the baking tray and place back in the oven, directly on to the oven shelf. Continue baking for 10-20 minutes, depending on how crusty you want your bread.
- As soon as the bread is done, remove it from the oven and place on a cooling rack.
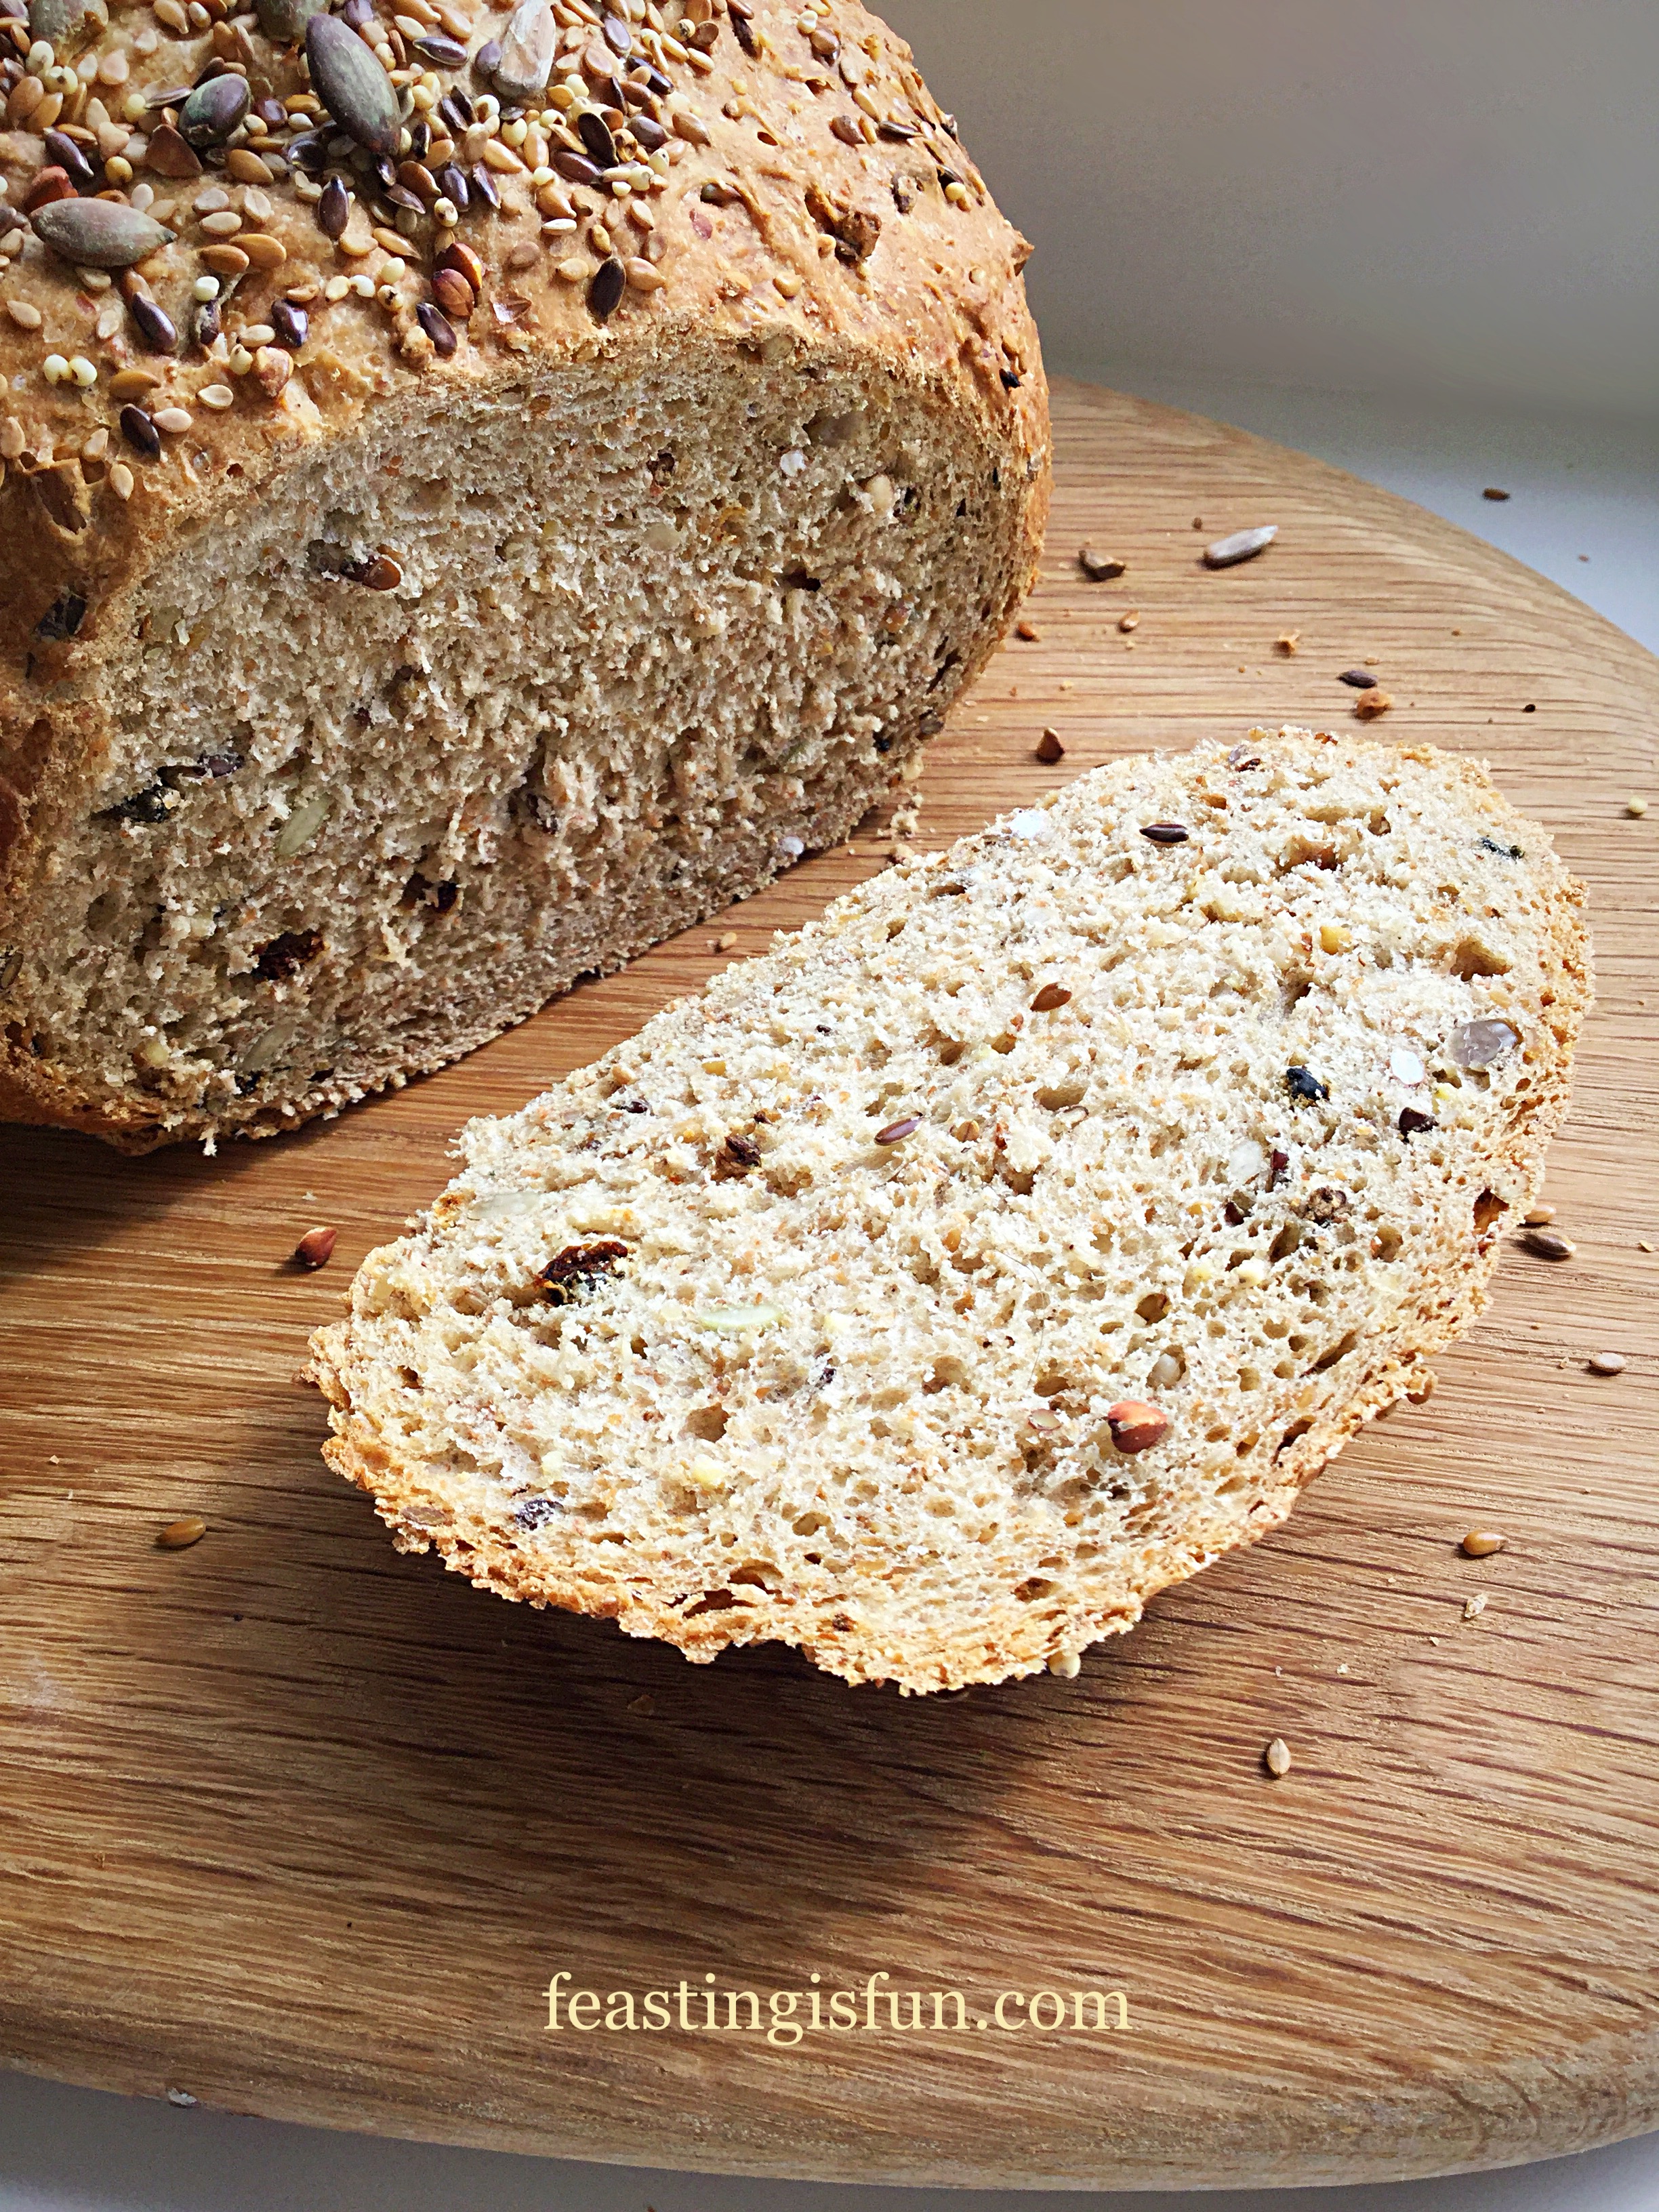
- Ensure the loaf is completely cooled before slicing.
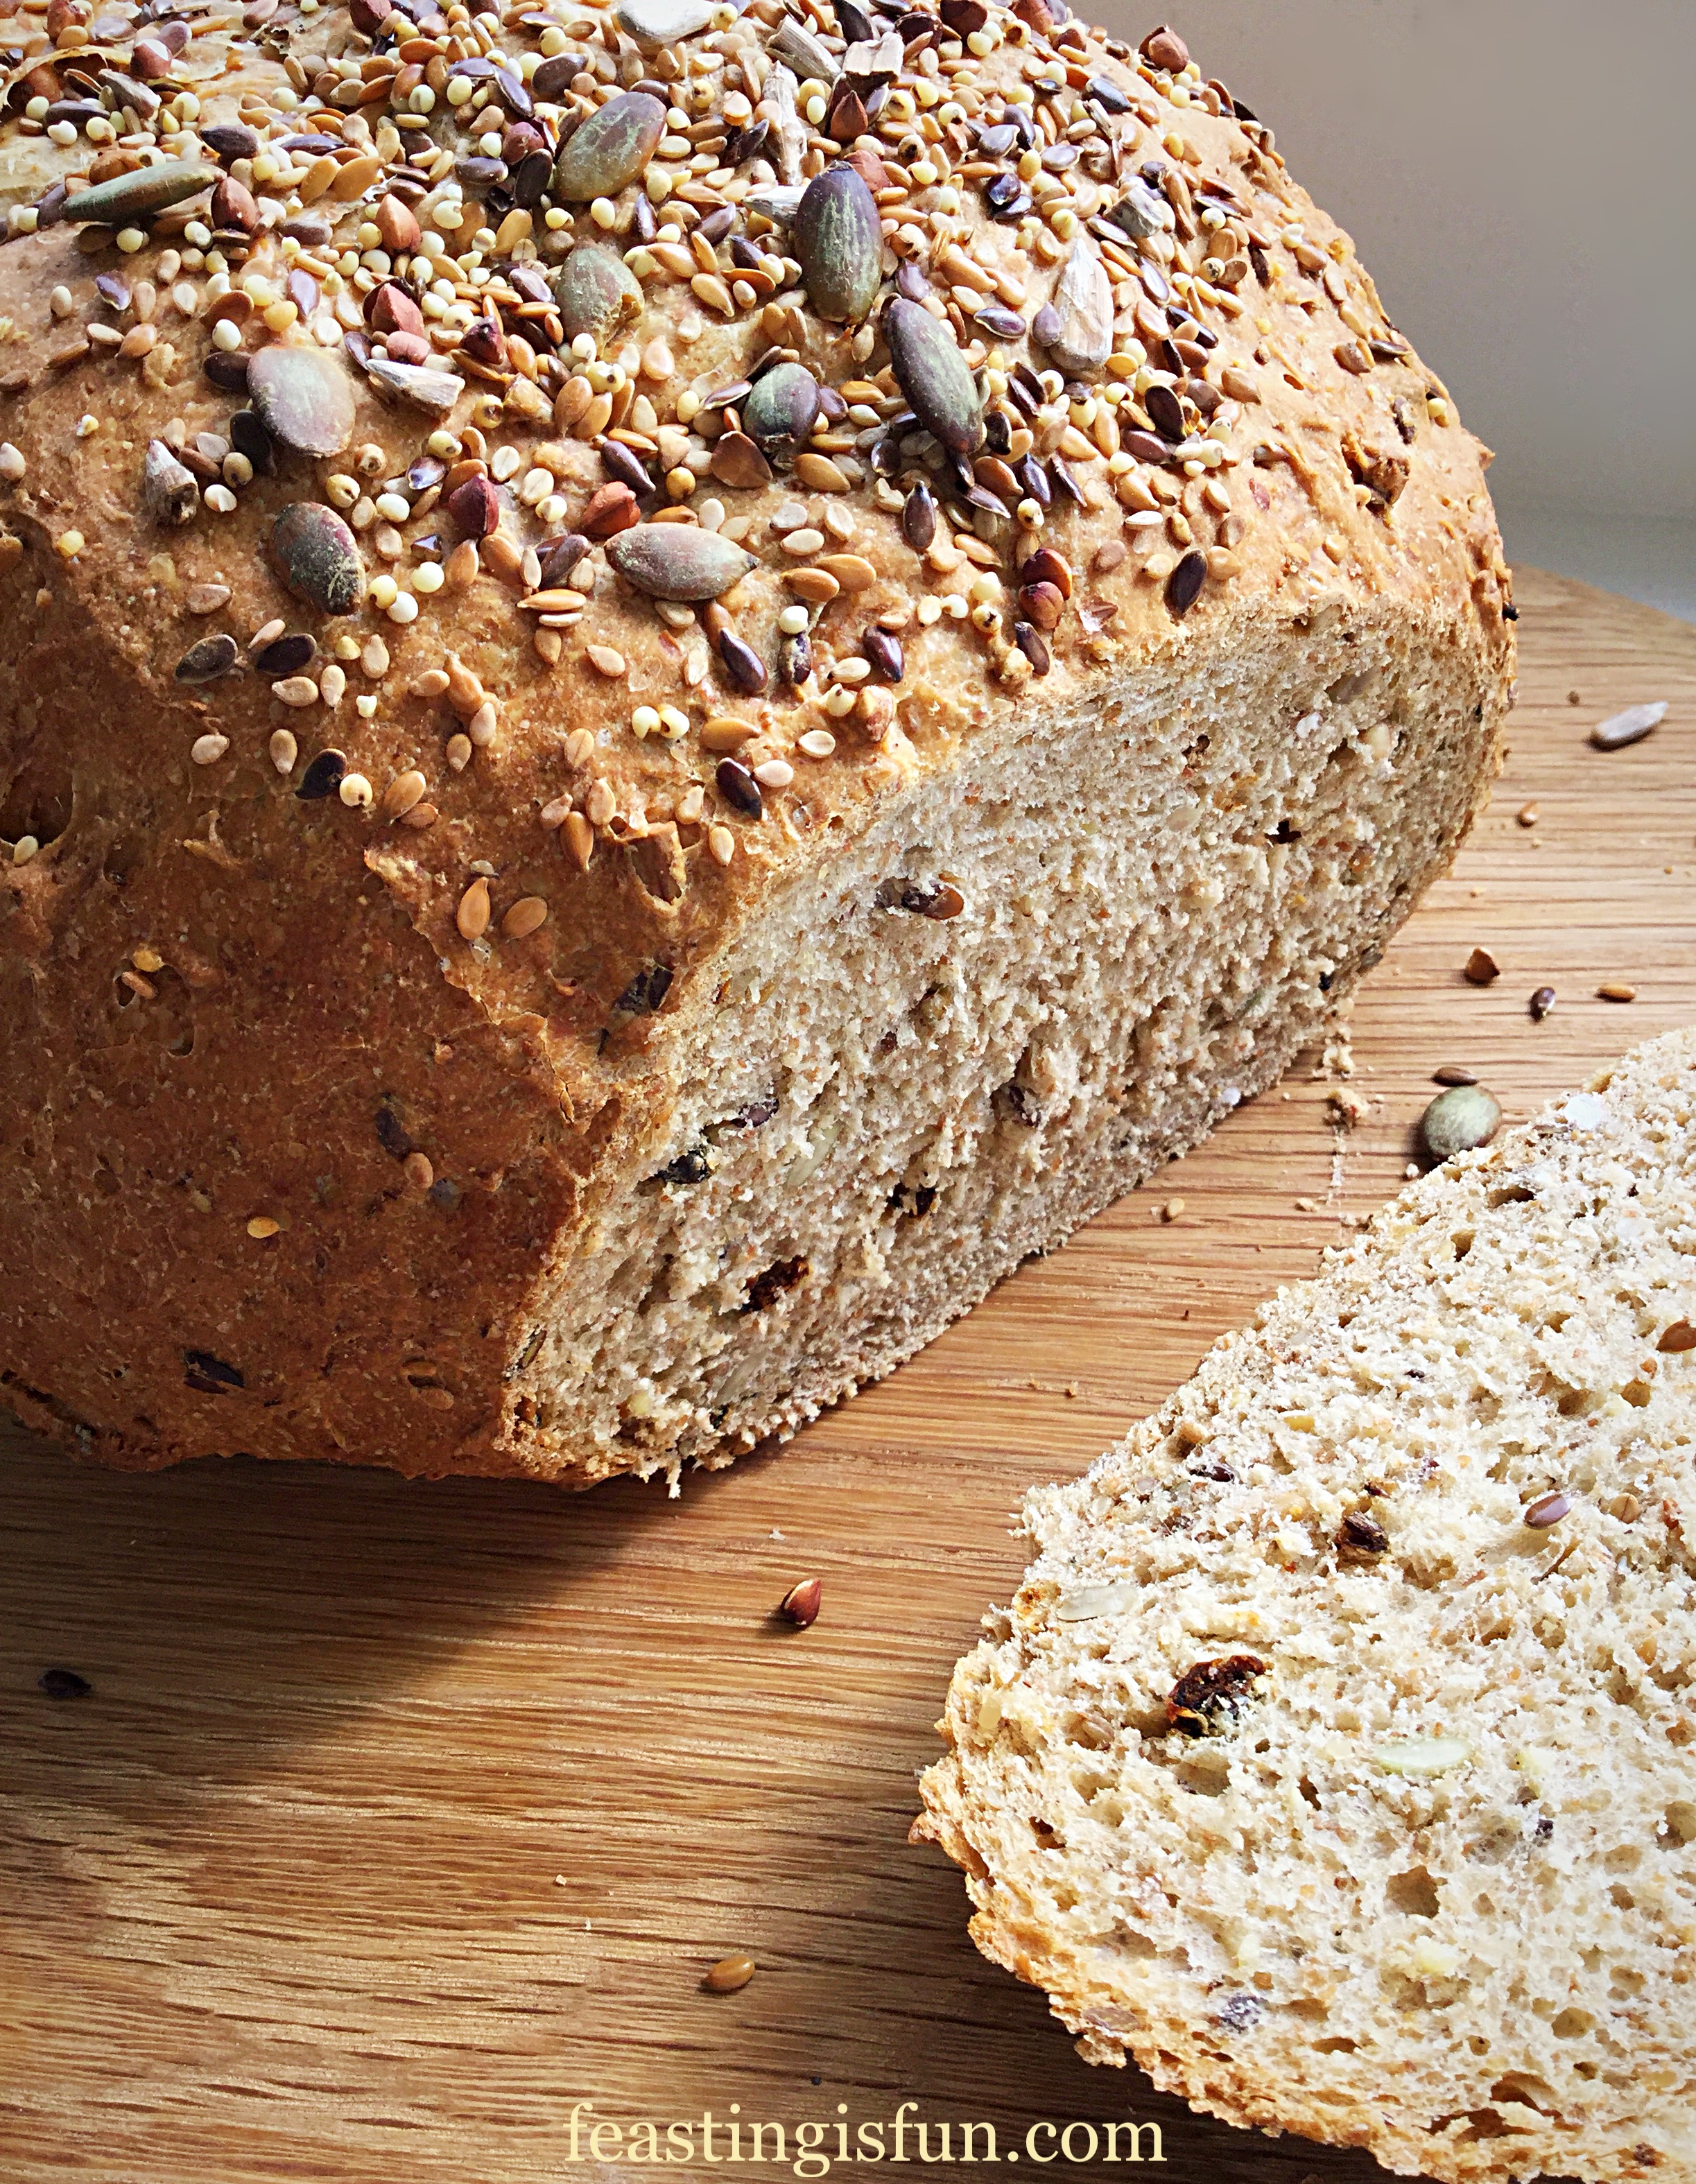
Perfect for slicing, packing up with an assortment of fillings and taking on a picnic. Alternatively simply tear into chunks and dunk in warming bowls of soup.

If you have enjoyed this recipe for Seeded Cob Loaf then you may also like these:
I find baking at home an immensely fulfilling experience. Especially the tempting aroma as a beautiful bread in baking in the oven. And if your first loaf isn’t the perfect shape, it’s taste will more than make up for its appearance. So, keep practicing and your technique will improve! Finally, baking bread at home will give you a delicious loaf and a sense of accomplishment.
Have fun, making, creating and baking in your kitchens.
Sammie xx
Please see my Disclosure Policy regarding copyright and intellectual property laws, before reproducing any copy from this blog.
Share
I was so excited to see this recipe as it’s my favourite bread.( I’ve only ever made soda bread as there’s no kneading or mixing once you have the dough. )
But I don’t have a food processor of any kind other than an old cake whisker and I’d love to try this recipe. It looks quite complicated even WITH the dough hook on the food mixer/processor.
Is there a simple recipe for those without fp?
Thank you
Hi Moyà, I refer to a stand mixer with a dough hook, not a food processor. You can easily make this bread by hand. Please let me know how you get on? Sammie.
Thank you Helen. I’d be thrilled to share it. I will set up the link asap. X
That is a beautiful loaf of bread – and you made it look so easy to make! I’d love it if you shared this post the the What’s for Dinner link up!
http://www.lazygastronome.com/whats-for-dinner-sunday-link-up-97/
Lovely loaf! I love seeds in my breads…
Thanks Kevin. It tastes great just need to check your teeth for any seeds after eating 😉X