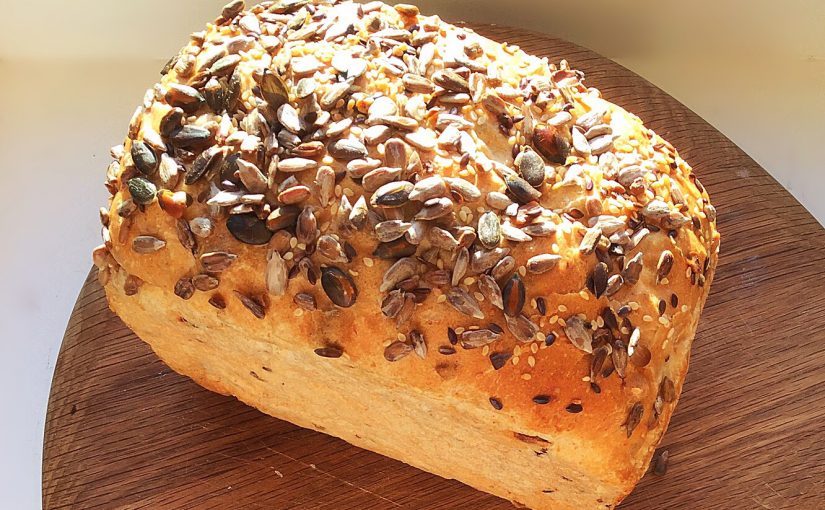
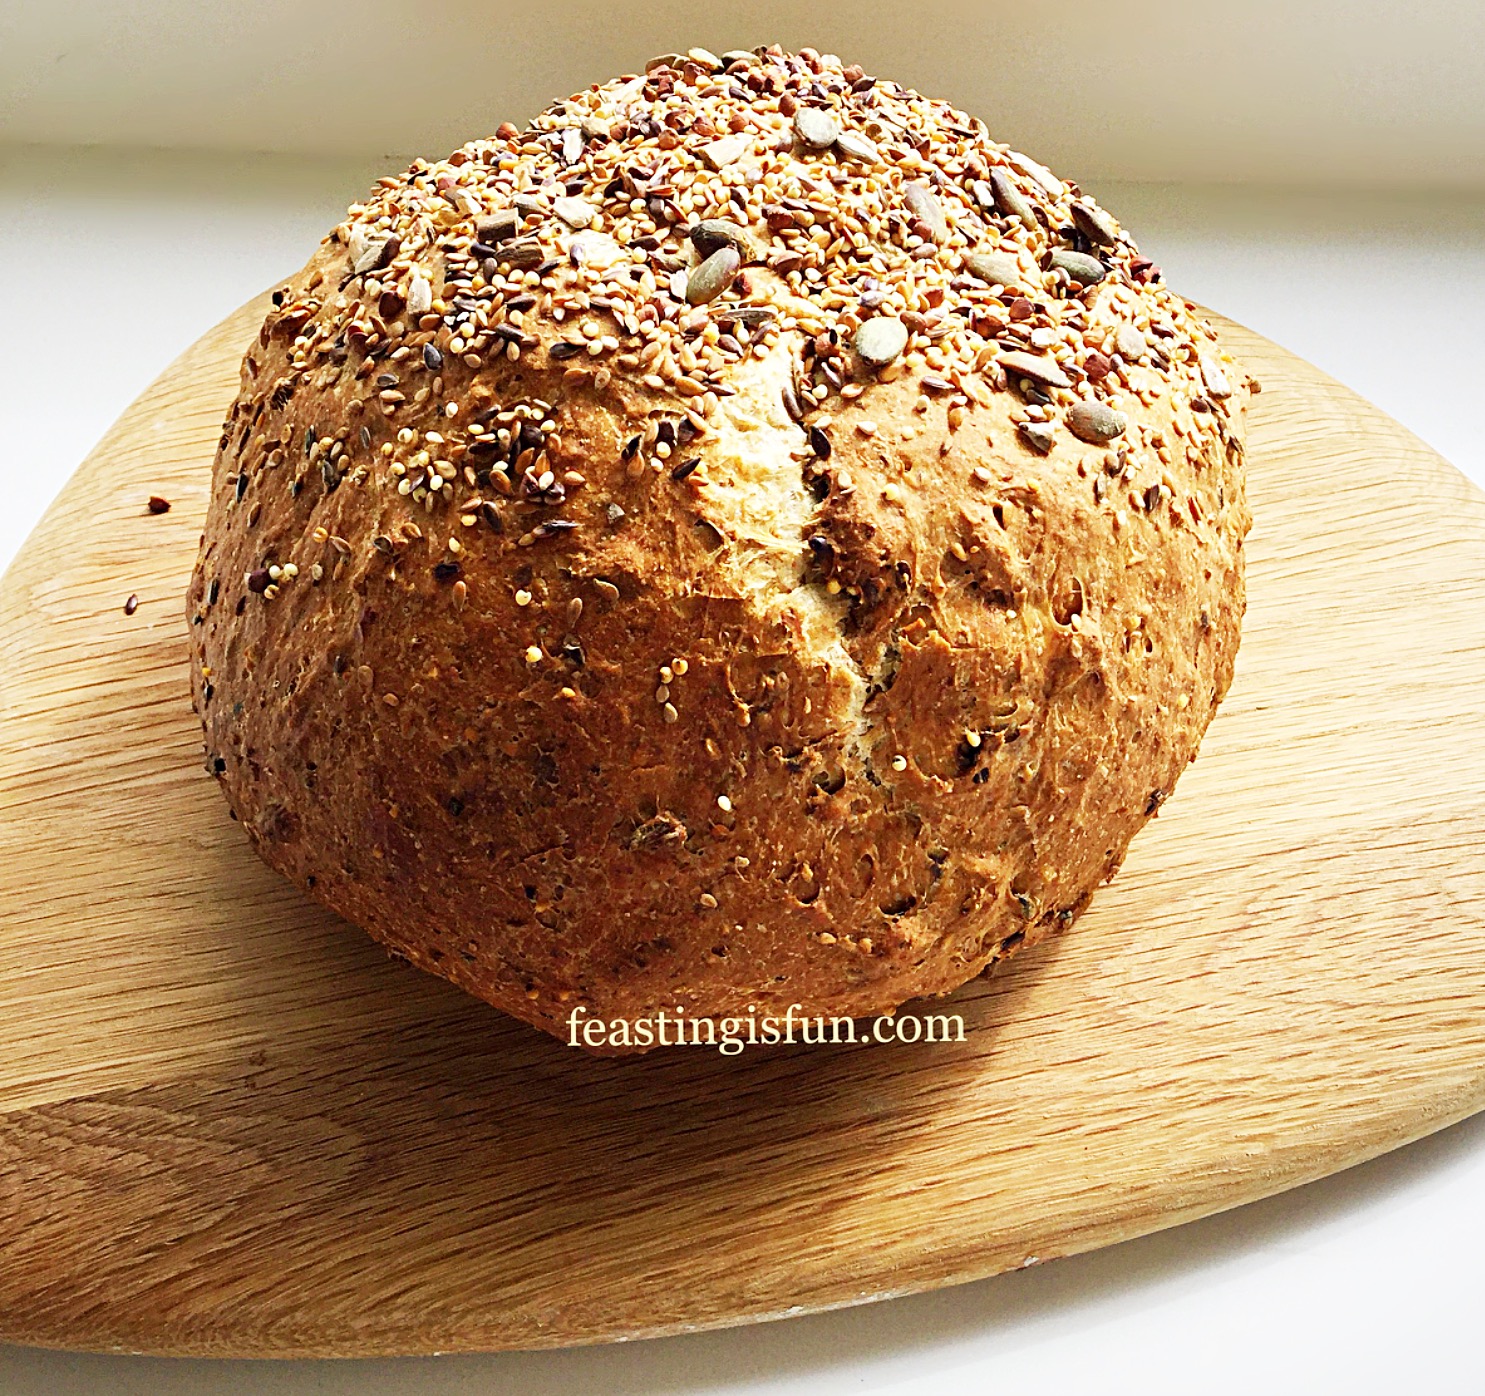
Hi there, thank you for stopping by. So today I have this Crunchy Seeded Bread recipe to share with you. And it tastes utterly amazing. Because each mouthful is filled with the taste of freshly baked bread and nutty, mixed seeds, including; poppy, sunflower, sesame and pumpkin seeds. So easy to make, either by hand, bread maker or stand mixer with dough hook attachment.
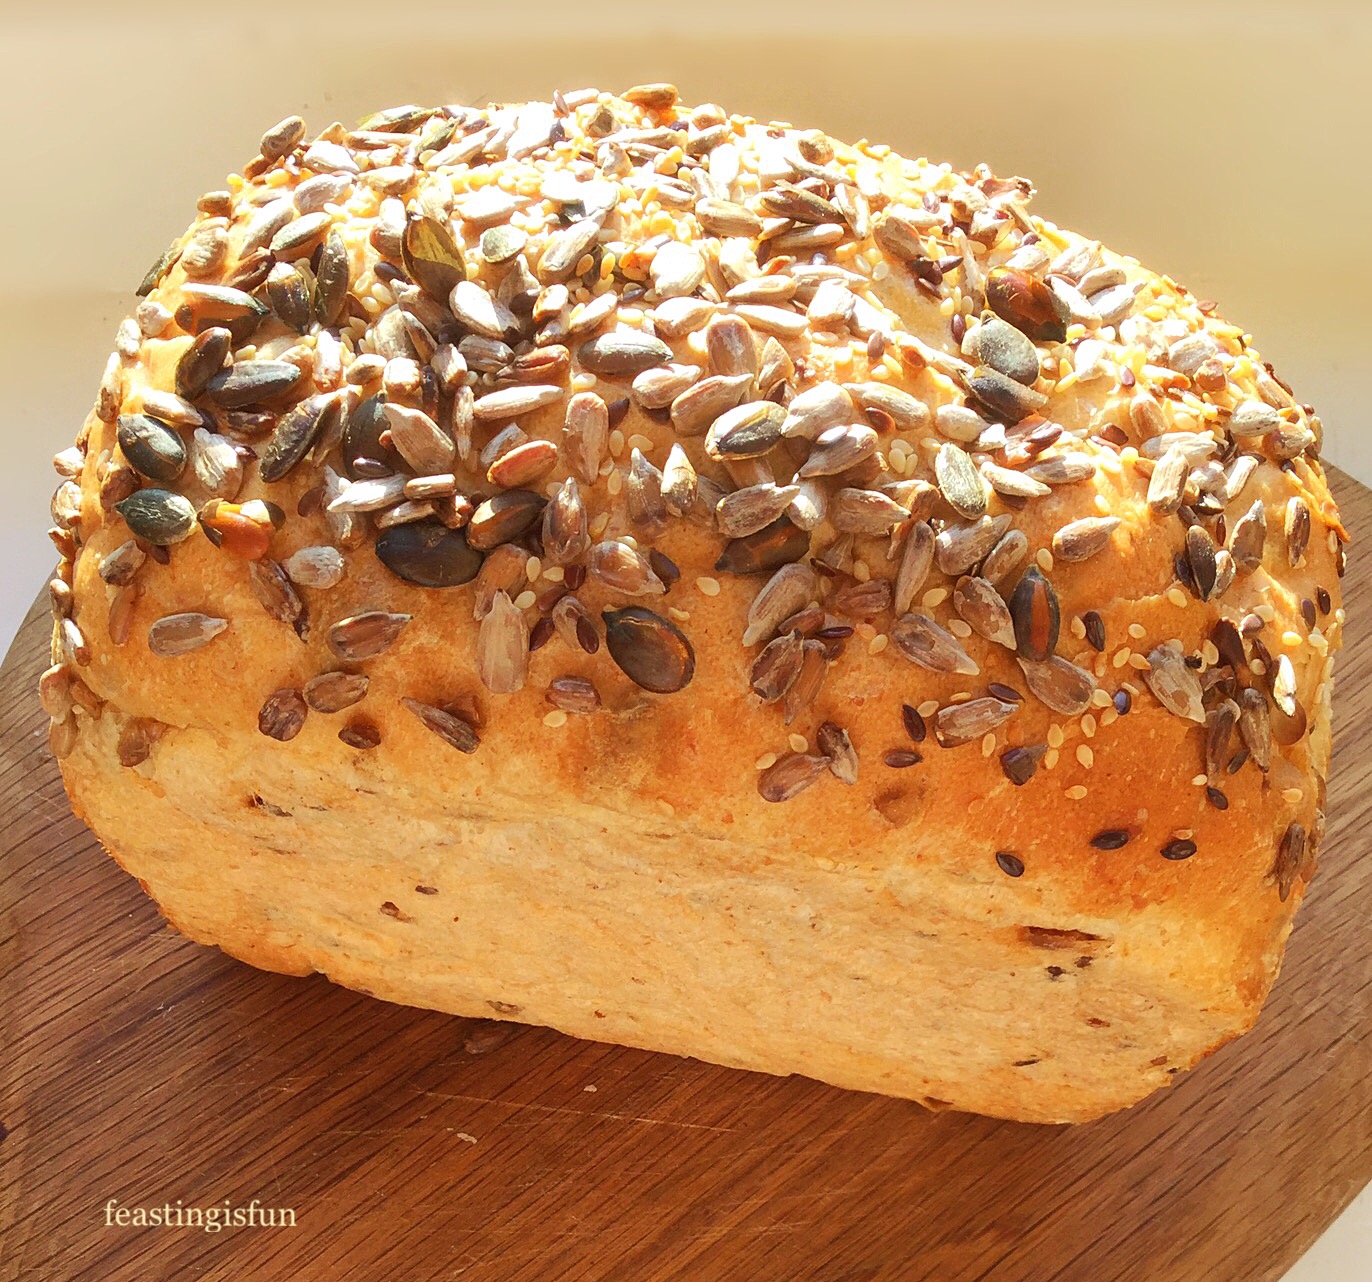
Making this bread using my bread maker, stand mixer and by hand. Especially as each method is rigorously tested and gives consistently delicious results. While the seeds give this bread incredible crunch and flavour, especially good when toasted.
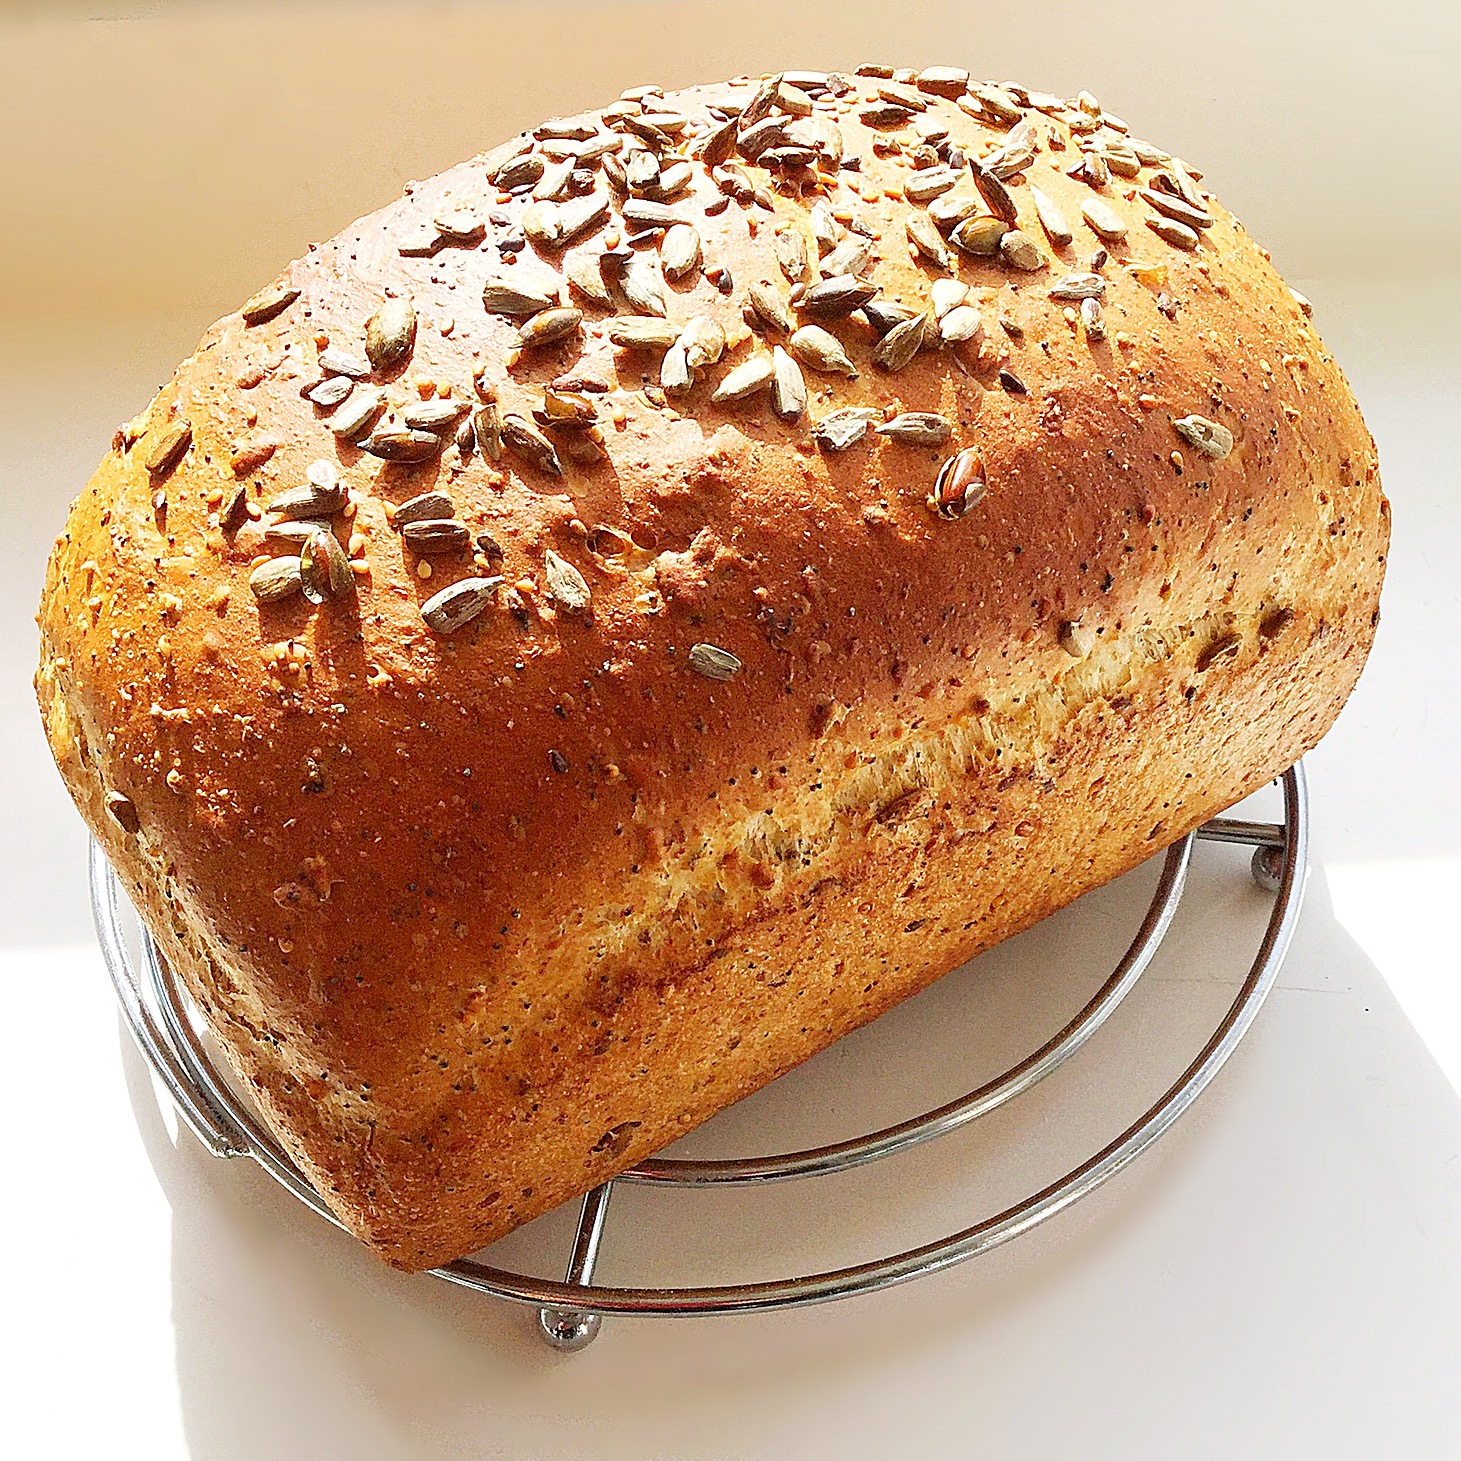
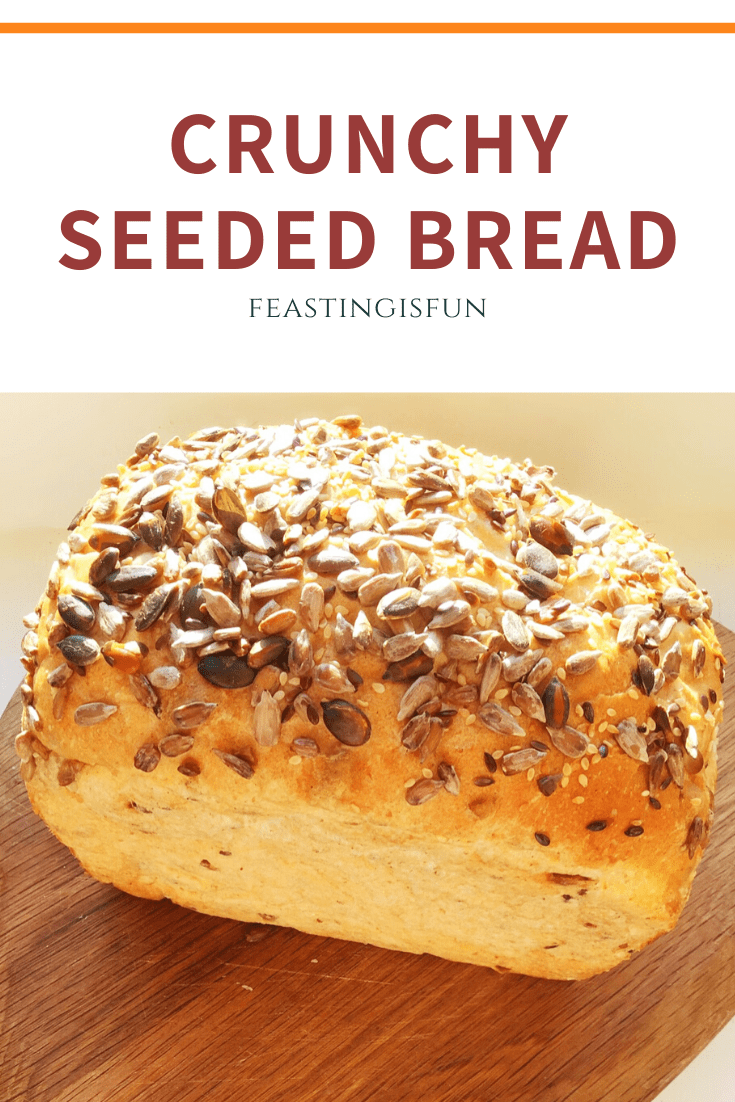
Alternatively, for a higher fibre bread loaf, as seen above, use 90g of strong wholemeal flour and 360g of strong white flour. All other ingredients and method stay unchanged.

Recipe : Makes One Crunchy Seeded Bread Loaf
260ml Water – tepid
7g Sachet Dried Yeast – I use Allinson easy bake
1tbsp Runny Honey
450g/1lb Strong White Bread Flour
4tbsp Mixed Seed (I used a mixture of poppy, sesame, sunflower and pumpkin)
1tbsp Unsalted Butter – plus extra for greasing the loaf tin
7g Salt – I use Maldon
Method :
Bowl – refers to bread maker tin, stand mixer bowl or large bowl for hand mixing.
Making The Bread Dough
First of all, place the water, yeast and honey into the bowl. Swish around with clean fingers to mix. Add the flour, butter and salt. Do not add any seeds yet.
If using a bread maker set to mix and prove. Add 3 tablespoons of mixed seeds when prompted by your machine during the mixing process.
When using a stand mixer, attach a dough hook, mix for 8 minutes. Now add 3 tablespoons of mixed seeds and continue to mix for a further 2-3 minutes. Remove dough and place in a buttered bowl cover in cling film and leave until doubled in size (1-2 hours).
And if hand mixing, bring all the ingredients together with your hand. Place on a very lightly floured worktop. Knead for a good 10 minutes. If the dough gets sticky, keep kneading and working it, because if you add extra flour the finished bread will be dry. After a good 10 minutes kneading, the dough should have a smooth elasticity. Add 3 tablespoons of mixed seeds and knead into the dough until evenly dispersed. Place the kneaded dough into a buttered bowl, cover in cling film and leave until doubled in size, 1-2 hours.
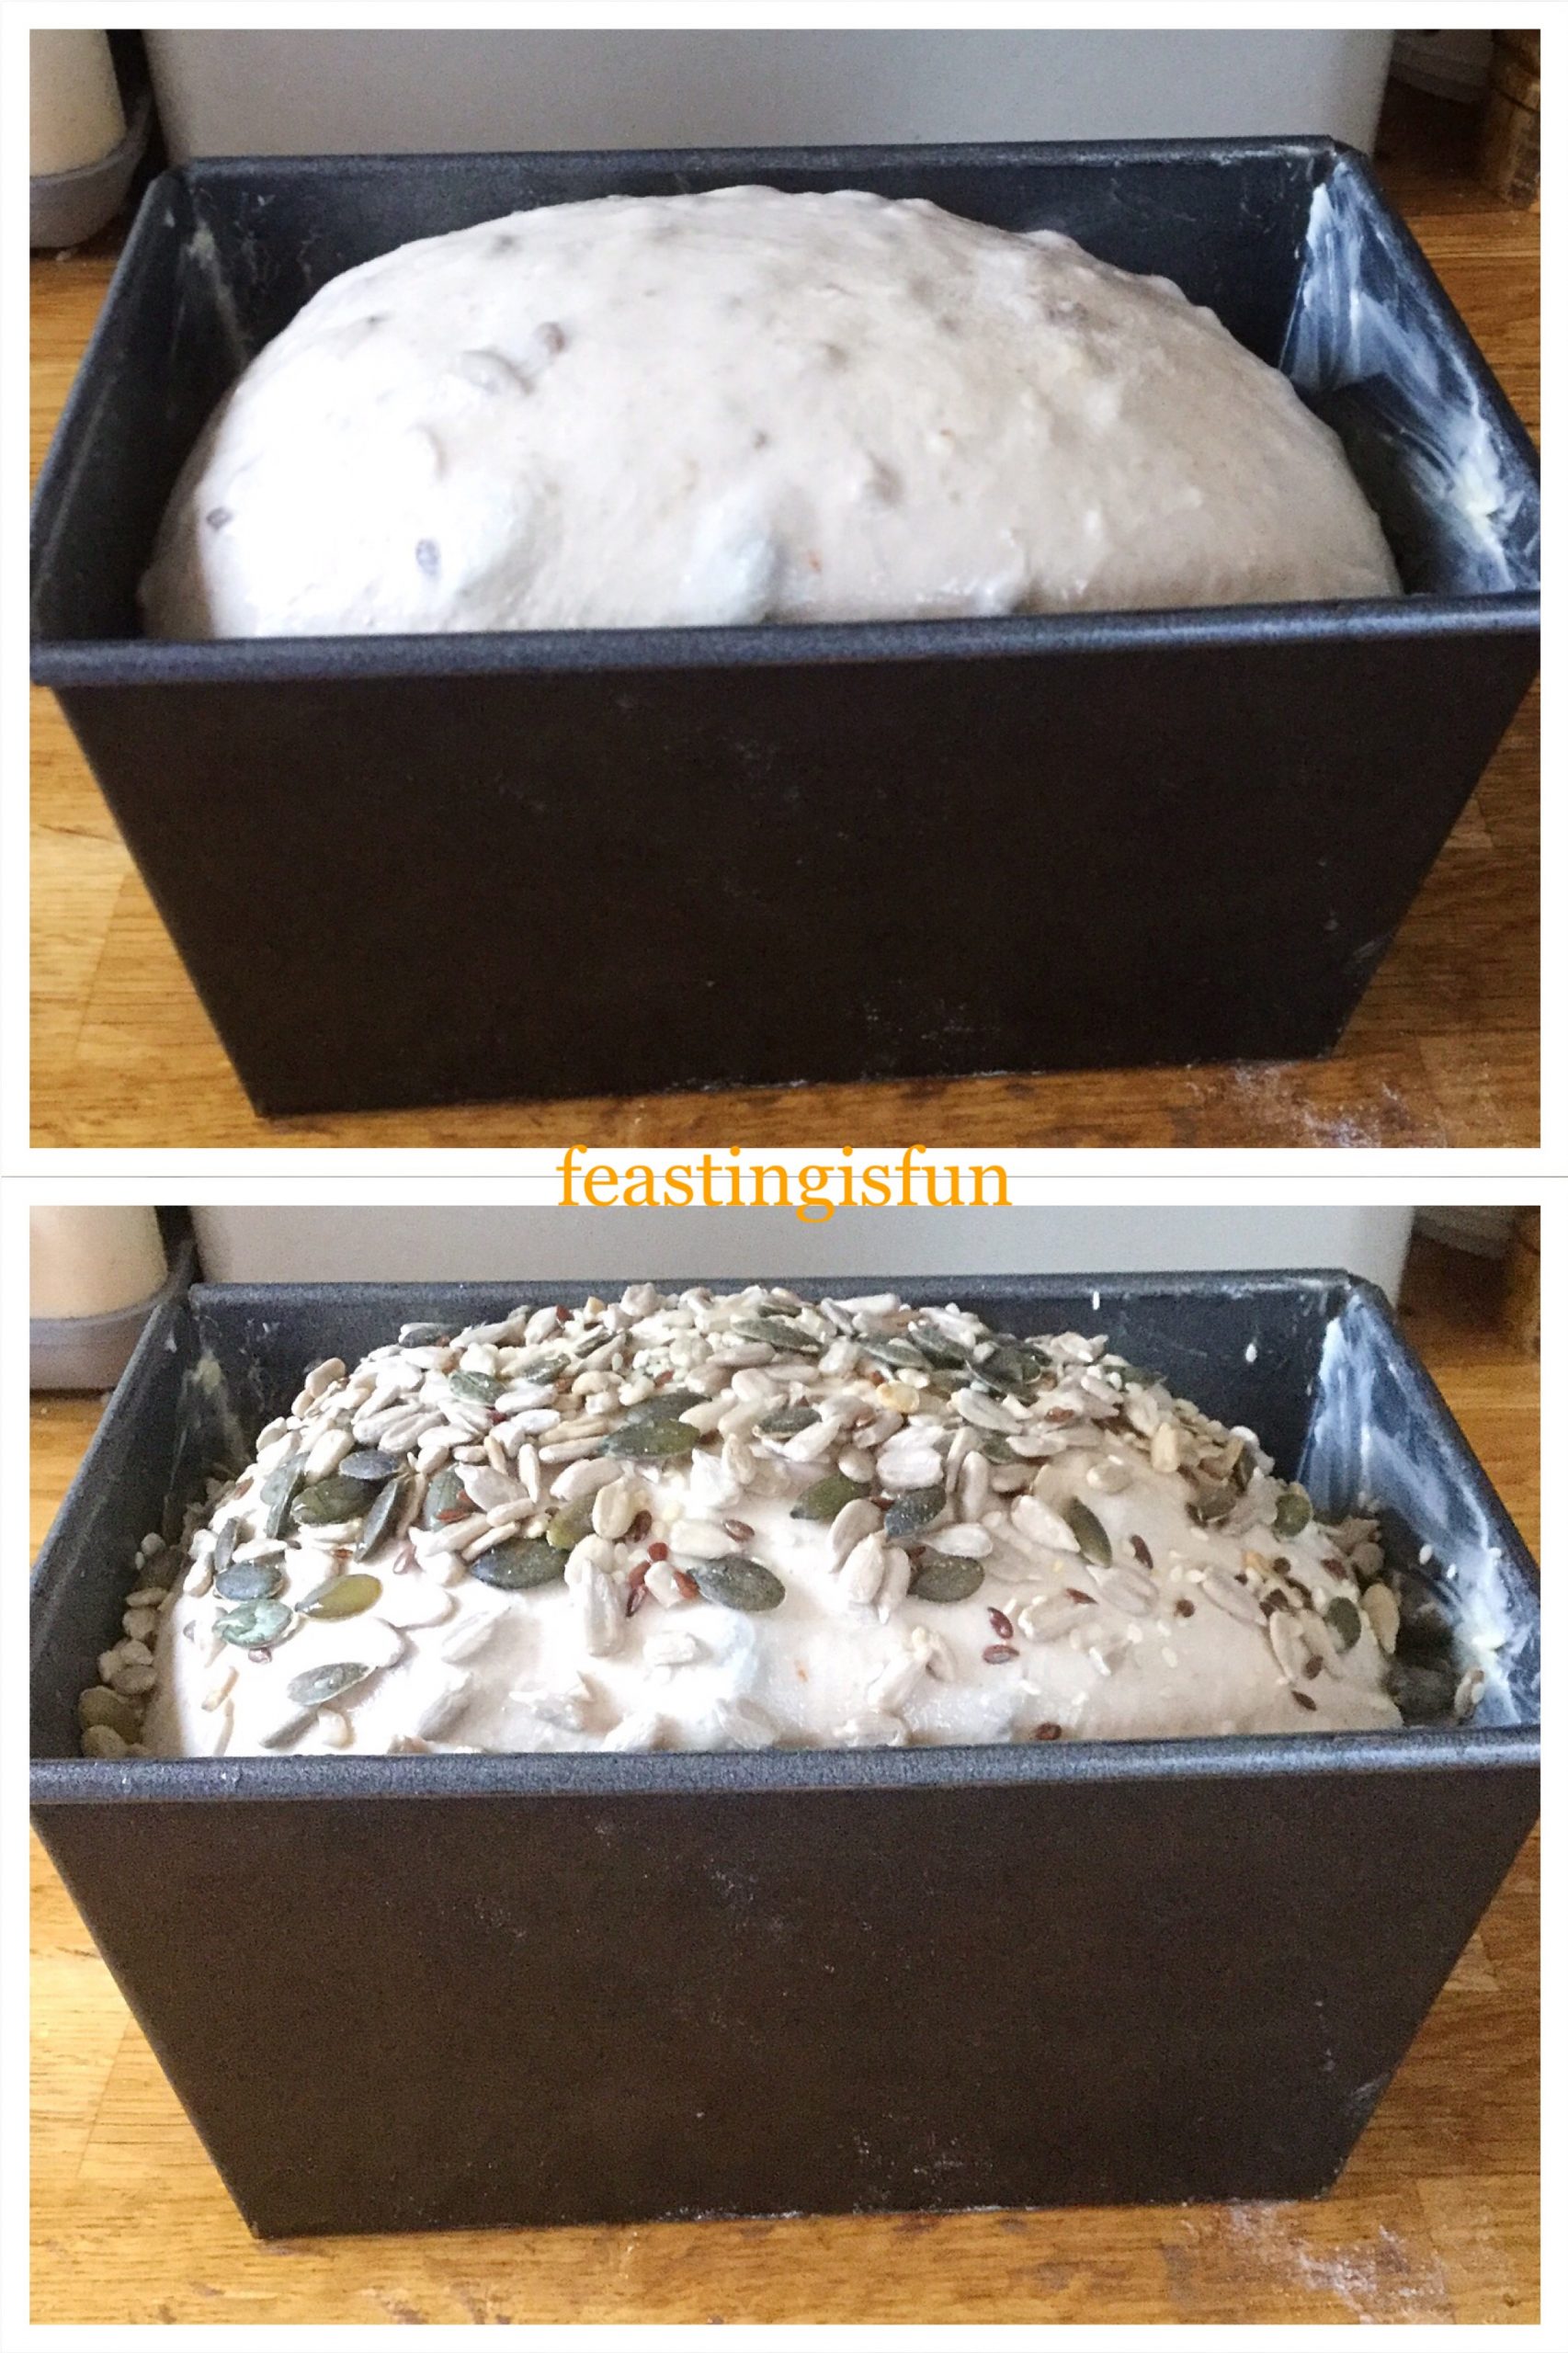
Shaping The Dough Into A Loaf
Turn the seeded bread dough out onto a lightly floured work top. Stretch the dough out and fold each end (a third of the dough) back into the centre. Turn the dough by a quarter and repeat. Turn and repeat the folding twice more (4 times in total). Doing so builds structure into your loaf.
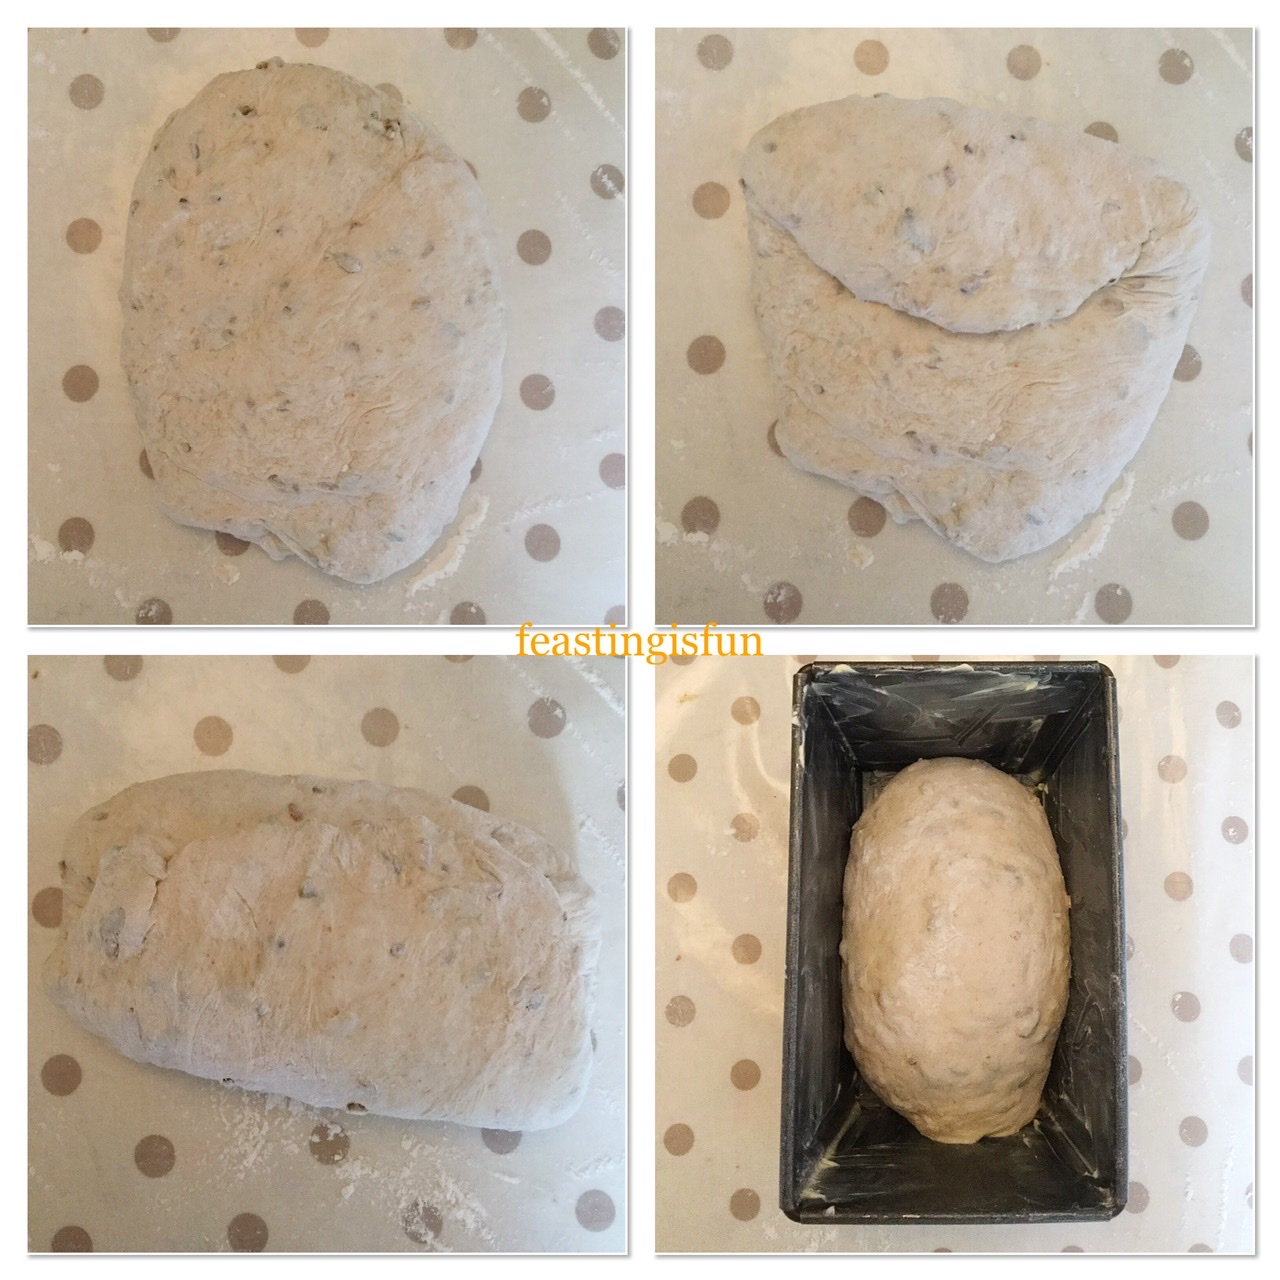
Next, place the dough into a buttered 2lb place your shaped loaf.
Cover with a clean cotton tea towel and put in a draught free place until doubled in size – 1-2 hours.
Adding The Crunchy Seeded Topping
Lightly brush the surface with water, or spray with water and sprinkle over the remaining tablespoon of mixed seeds, pressing them lightly into the top of the dough.
Preheat the oven to 220C/200C fan, gas mark 7, 425F.
Baking The Seeded Bread
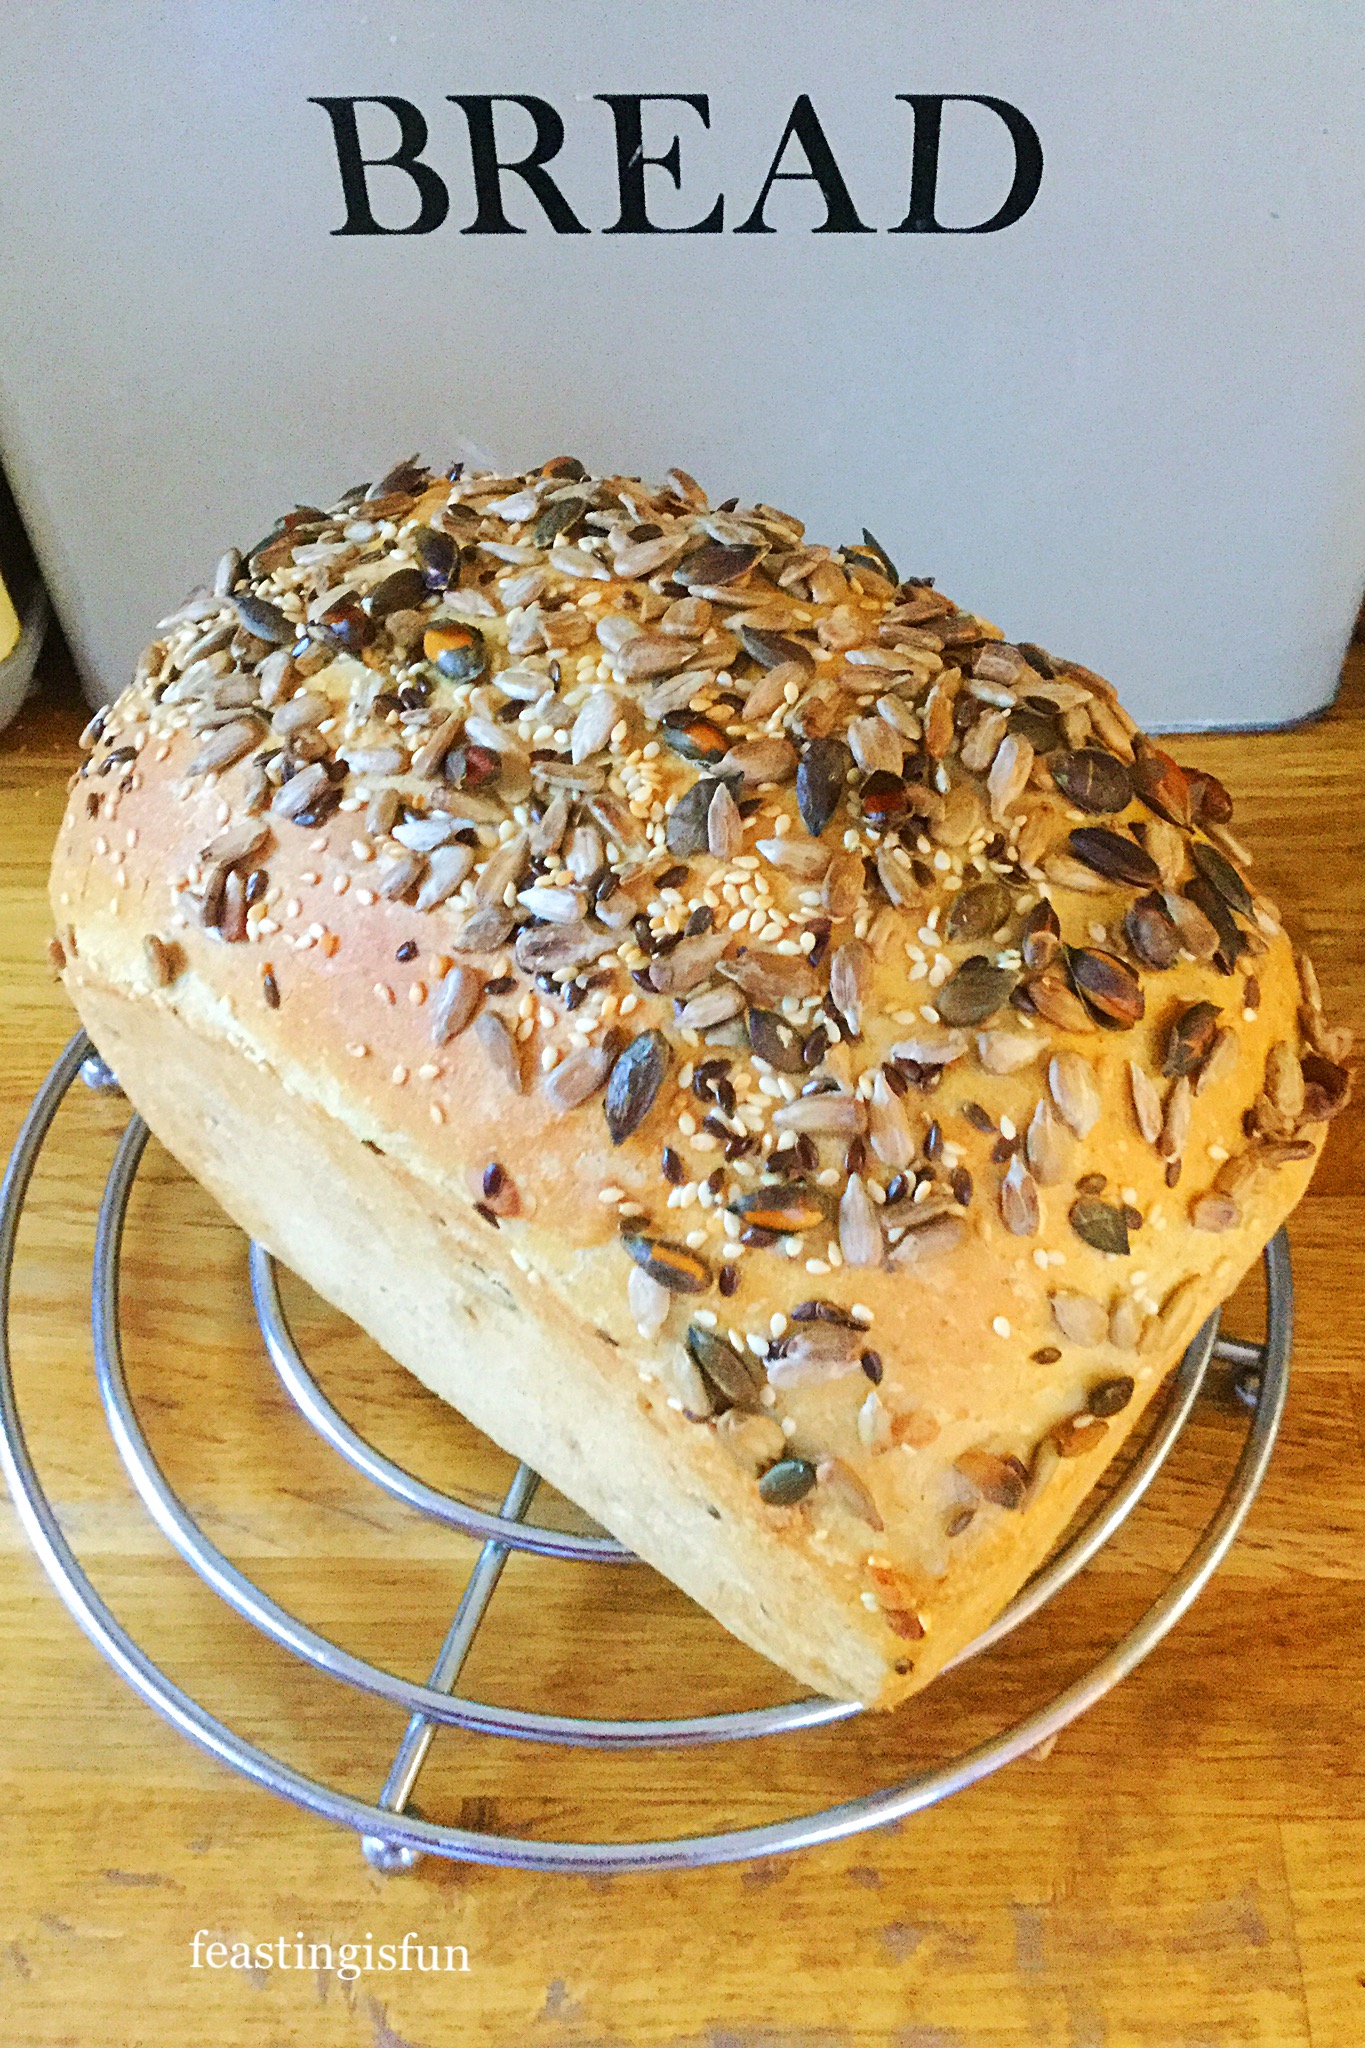
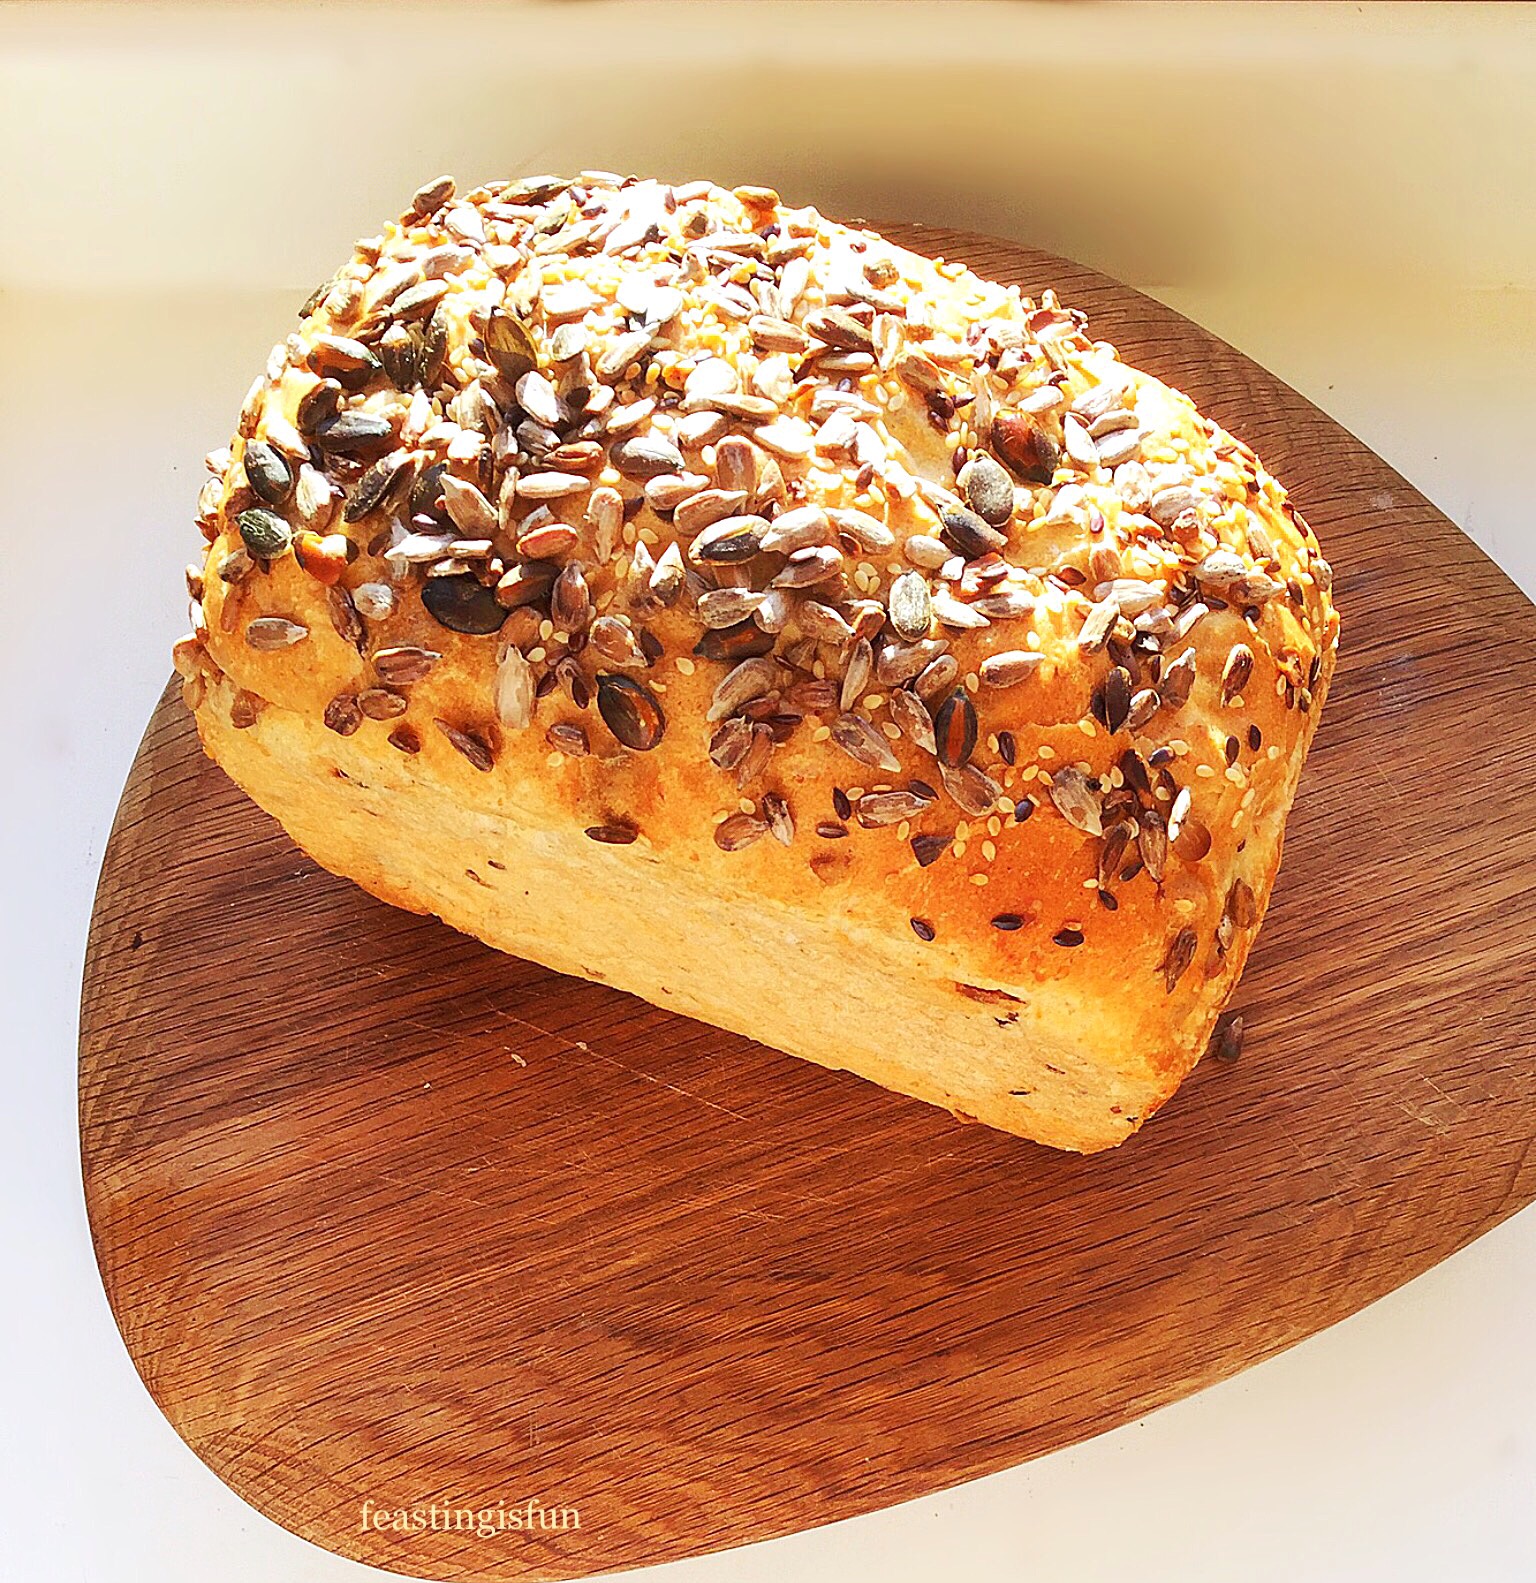
Place the proofed dough into the oven and bake for 20-25 minutes. The bread should be a golden brown and sound hollow when knocked with your knuckle on the base. For an extra crunchy crust, I turn my loaf straight out onto the oven rack to crisp up the base for a few minutes, while I quickly wash the loaf tin up. CAREFUL THE TIN IS VERY HOT!!
As soon as the Crunchy Seeded Bread is baked remove from the oven. Turn out of the tin, if not already done and place on a cooling rack. Leave to cool completely.
Breathe in deeply. It doesn’t matter how many times I bake bread, the smell is amazing!!
Most importantly you should wait until the loaf is cooled, or only just warm. Otherwise, cutting through the bread when it’s hot will result in a squished loaf! It’s worth the wait, I promise.
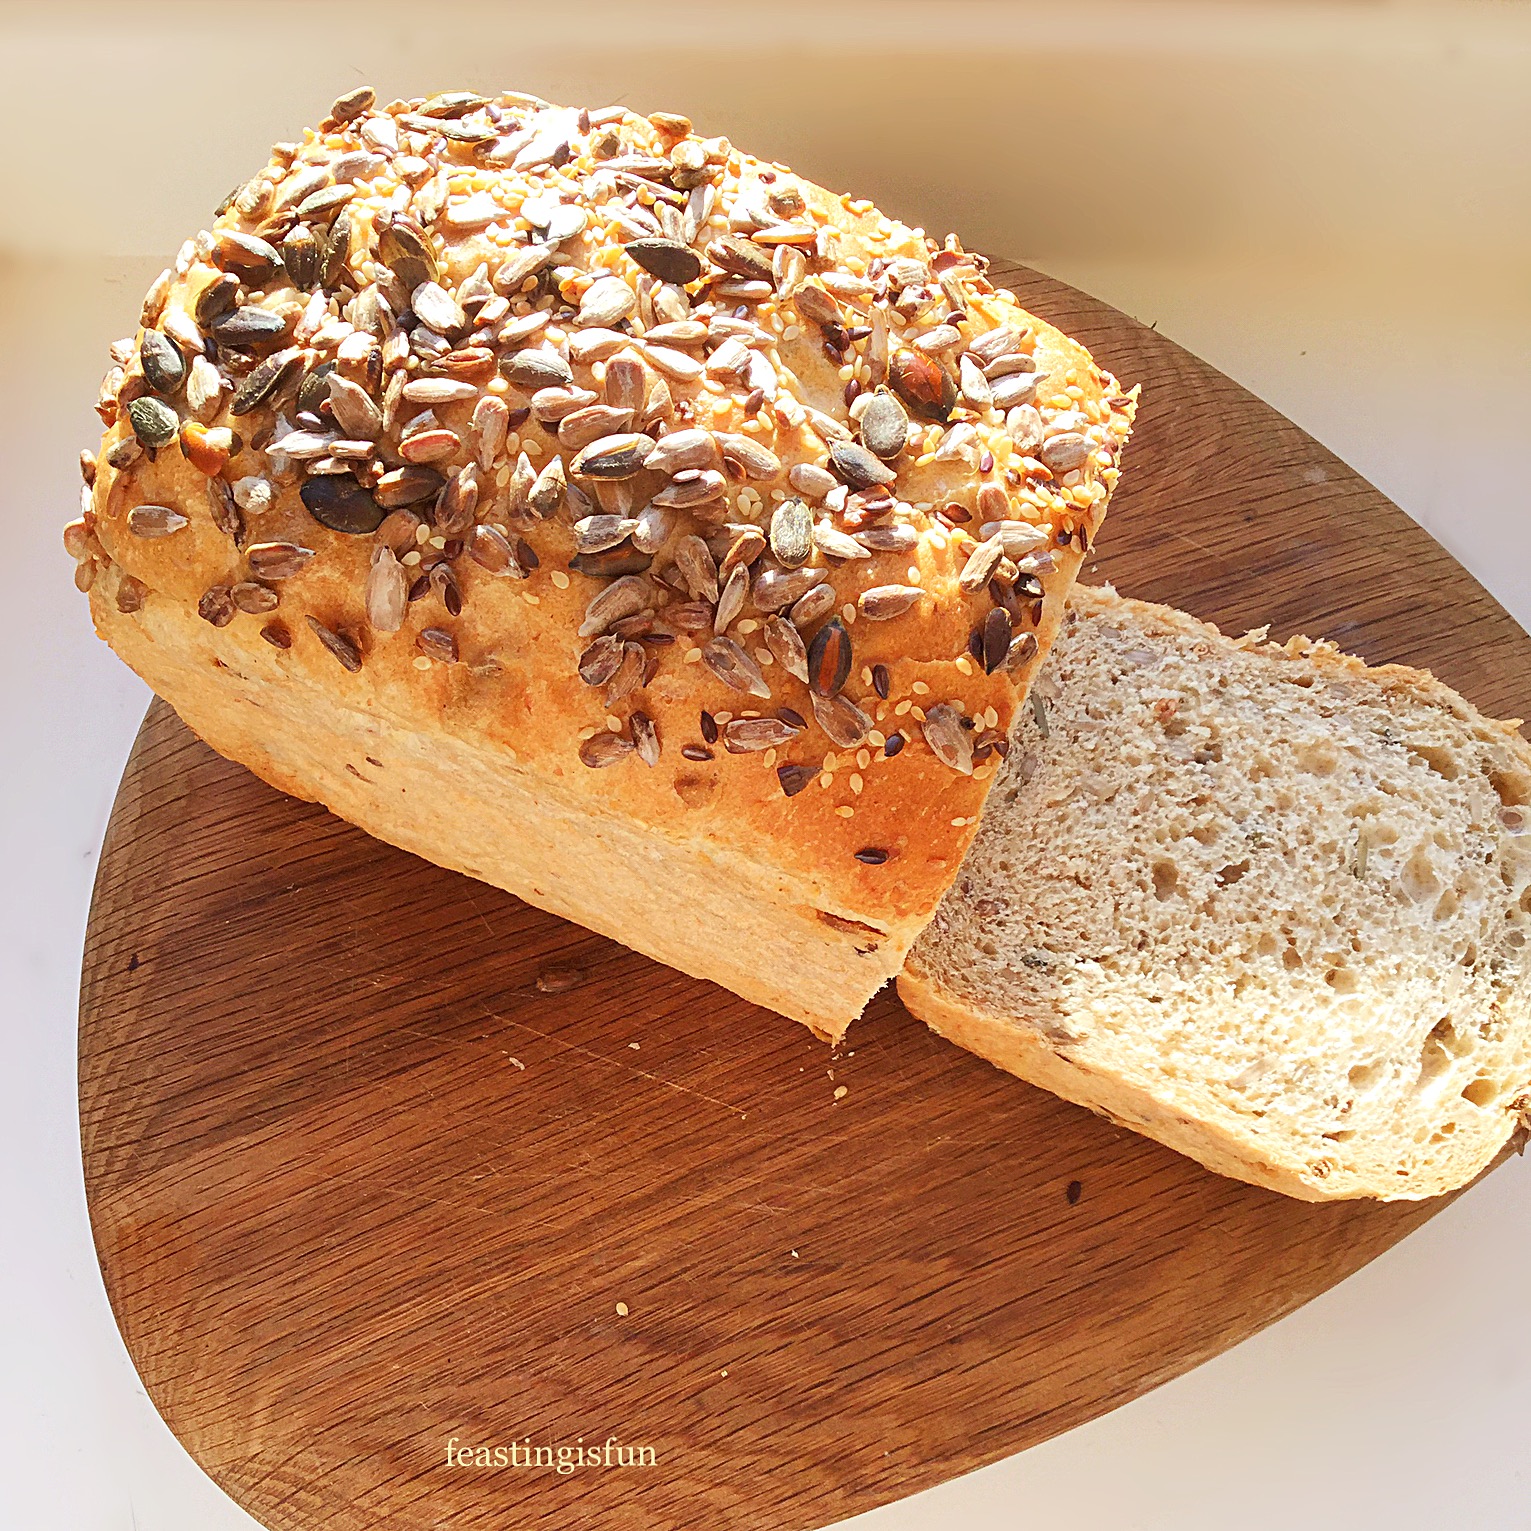
Also, allowing the bread to cool makes the crumb lighter, helps the loaf keep it’s shape and is more easily digested.
Yummy, scrummy a big bite for my rumbly tummy!

I love eating this Crunchy Seeded Bread sliced and toasted ( I know I’ve also said that about my Oat Bran White Bread – I can have two favourites?!). Also it is ideal for dunking in soup, eating with chilli – in fact this bread is perfect for any occasion which requires bread! So I guess you could call this an easy, everyday loaf, perfect for feasting and sharing!
If you have enjoyed this recipe for Crunchy Seeded Bread you may also like these:
Baking bread at home is such a rewarding experience and a great way to get children involved in the kitchen. Since it is very difficult to over work bread made by hand, dough is the perfect medium for them to practice with. Also, I find when they have had a hand in making something, such as my Better Than Takeout Pizza they are much more inclined to eat what they’ve made and also try new flavours. And this can work for adults too!
So, whatever you are making, baking and creating in your kitchens, have fun preparing and sharing your feast.
Sammie x
No part of this post may be reproduced or duplicated without the written permission of the owner. Please see my Disclosure Policy.
Erm I’m confused I always thought a 2lb loaf tin was used to make a loaf the equivalent of an 800g shop bought and a 1lb tin a 400g loaf or am I way off? Sorry I’m new at this and easily confused and forgetful. Can you advise and clarify for me please.
Regards
Hi Christa, yes I can see why it would be confusing. For a large, 800g uncut bread loaf from the supermarket it would be baked in a 4lb bread tin. Please see this recipe for guidance – https://www.feastingisfun.com/large-3-malts-sunflower-loaf/
Hi Sammie I hope you are keeping well. I’m just wanted to say how informative your recipes are and beautifully photographed.
I received a kitchenaid bread bowl/baking bowl for Christmas and so have been looking for inspiration and information on how best to make use of it. As your recipe for the snowflake cake pan was so successful for me I turned to your website and wow your bread recipes are so detailed on the method. I am really looking forward to trying them out and am more confident on what to do. (I haven’t made bread since my school days – a good while ago) So thank you for sharing your knowledge.
Wishing you a very Happy New Year
Minty x
Happy New Year Minty and thank you for your lovely comments. I hope you enjoy making bread again!
Hi there, this bread recipe is another go to recipe for me. I agree with your advising to bake out of the pan for a few minutes more to crisp up the crust, even increasing the temp to 450. I used the Emile Henri red loaf baker with no lid. It’s a good size for 450 g of flour. And, since it’s winter now, I increased the water by 2 tbsp. This bread makes the best toast!! Thank you.
Hi Mary, I am so pleased that you enjoy making this Crunchy Seeded Bread recipe too. I love this bread toasted, especially with a dippy egg!
Thank you so much for the seeded loaf recipe it turned out really good 👍
Hi Amy, thanks for your comment, I’m so pleased you enjoyed the recipe.
Hi Sammie I was lucky yesterday when I was looking for a Farmhouse loaf and found your site!! Spent the afternoon reading through as many recipes as I could find and the three at the end of each!! Sure there are many more. I am a late-sixties, now tired and took up cooking for first time after bypass a year ago. Your site is wonderful and so instructive for a novice! The Farmhouse is great though did not quite rise to the top of 3lb tin! With your recipes, or any!, is there a way to work out which tin size to use – if not shown? Eg. This bread shows a 1lb tin at start and a 2lb in the recipe! Going to make today! Also does the bread ‘crisp up’ on wire rack after releasing from tin or some other way! Sorry for long text!! Richard. Love breads and desserts!
Hi Richard thank you so much for taking the time to read my blog and to comment on my bread recipes. It’s fantastic that you are baking your own bread!
I will address each query in order:
The tin used for my Farmhouse White Loaf is a 3lb tin that is quite deep 21cm x 13cm x 12cm (LxWxD). Because your loaves aren’t rising, may I suggest checking the yeast that you’re using first of all. Also, it’s really important to ensure your dough is kept in a draught free environment – placing it somewhere warm (but not hot) will also help the yeast to work.
As for this recipe, it is one of the earliest on my site and definitely needs a rewrite! As it was written while I was still using a bread maker to mix and carry out the first dough proof. That said the recipe/quantities/timings are still good, although you may have noted that in more recent recipes I use 500g of flour. I would recommend using a 2lb or 3lb loaf tin. When I rewrite this post it will be using the standard 500g of flour and baking in a 3lb loaf tin.
I always tip my baked bread out of it’s tin and bake for a further 5-10 minutes to ensure the base and sides have a crisp finish.
As for bread tin sizes, it all depends on what size loaf you want. For example some 3lb loaf tins may be longer yet not as deep as the one I use. If the flour quantity is 500g or less – 3lb tin, 500-750g of flour – 4lb tin.
I hope that this info helps? Your comment has raised a few issues, and seeing as I bake all different types of bread on a regular basis it would perhaps be a good idea for me to write a blog post on the basics of bread making.
If you want to see more of my bakes then take a look at my Instagram account @sammiefeasting. I have a stories board of all my recent bread bakes.
Happy baking, Sammie.