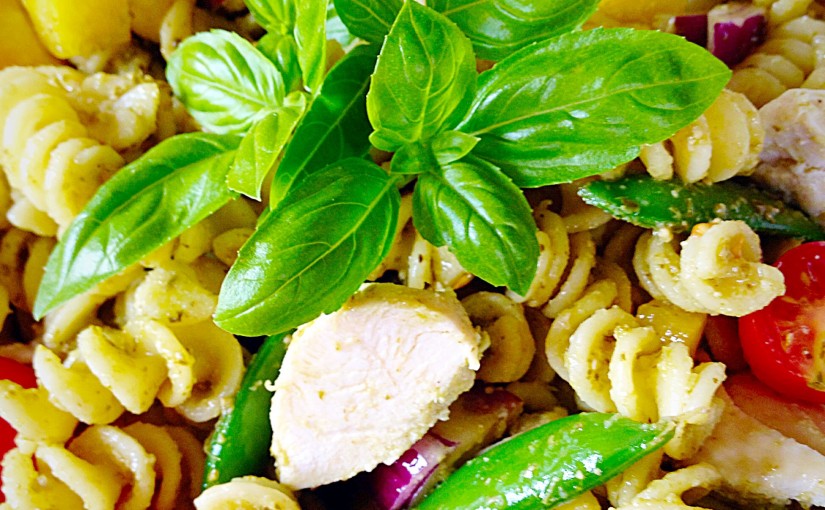
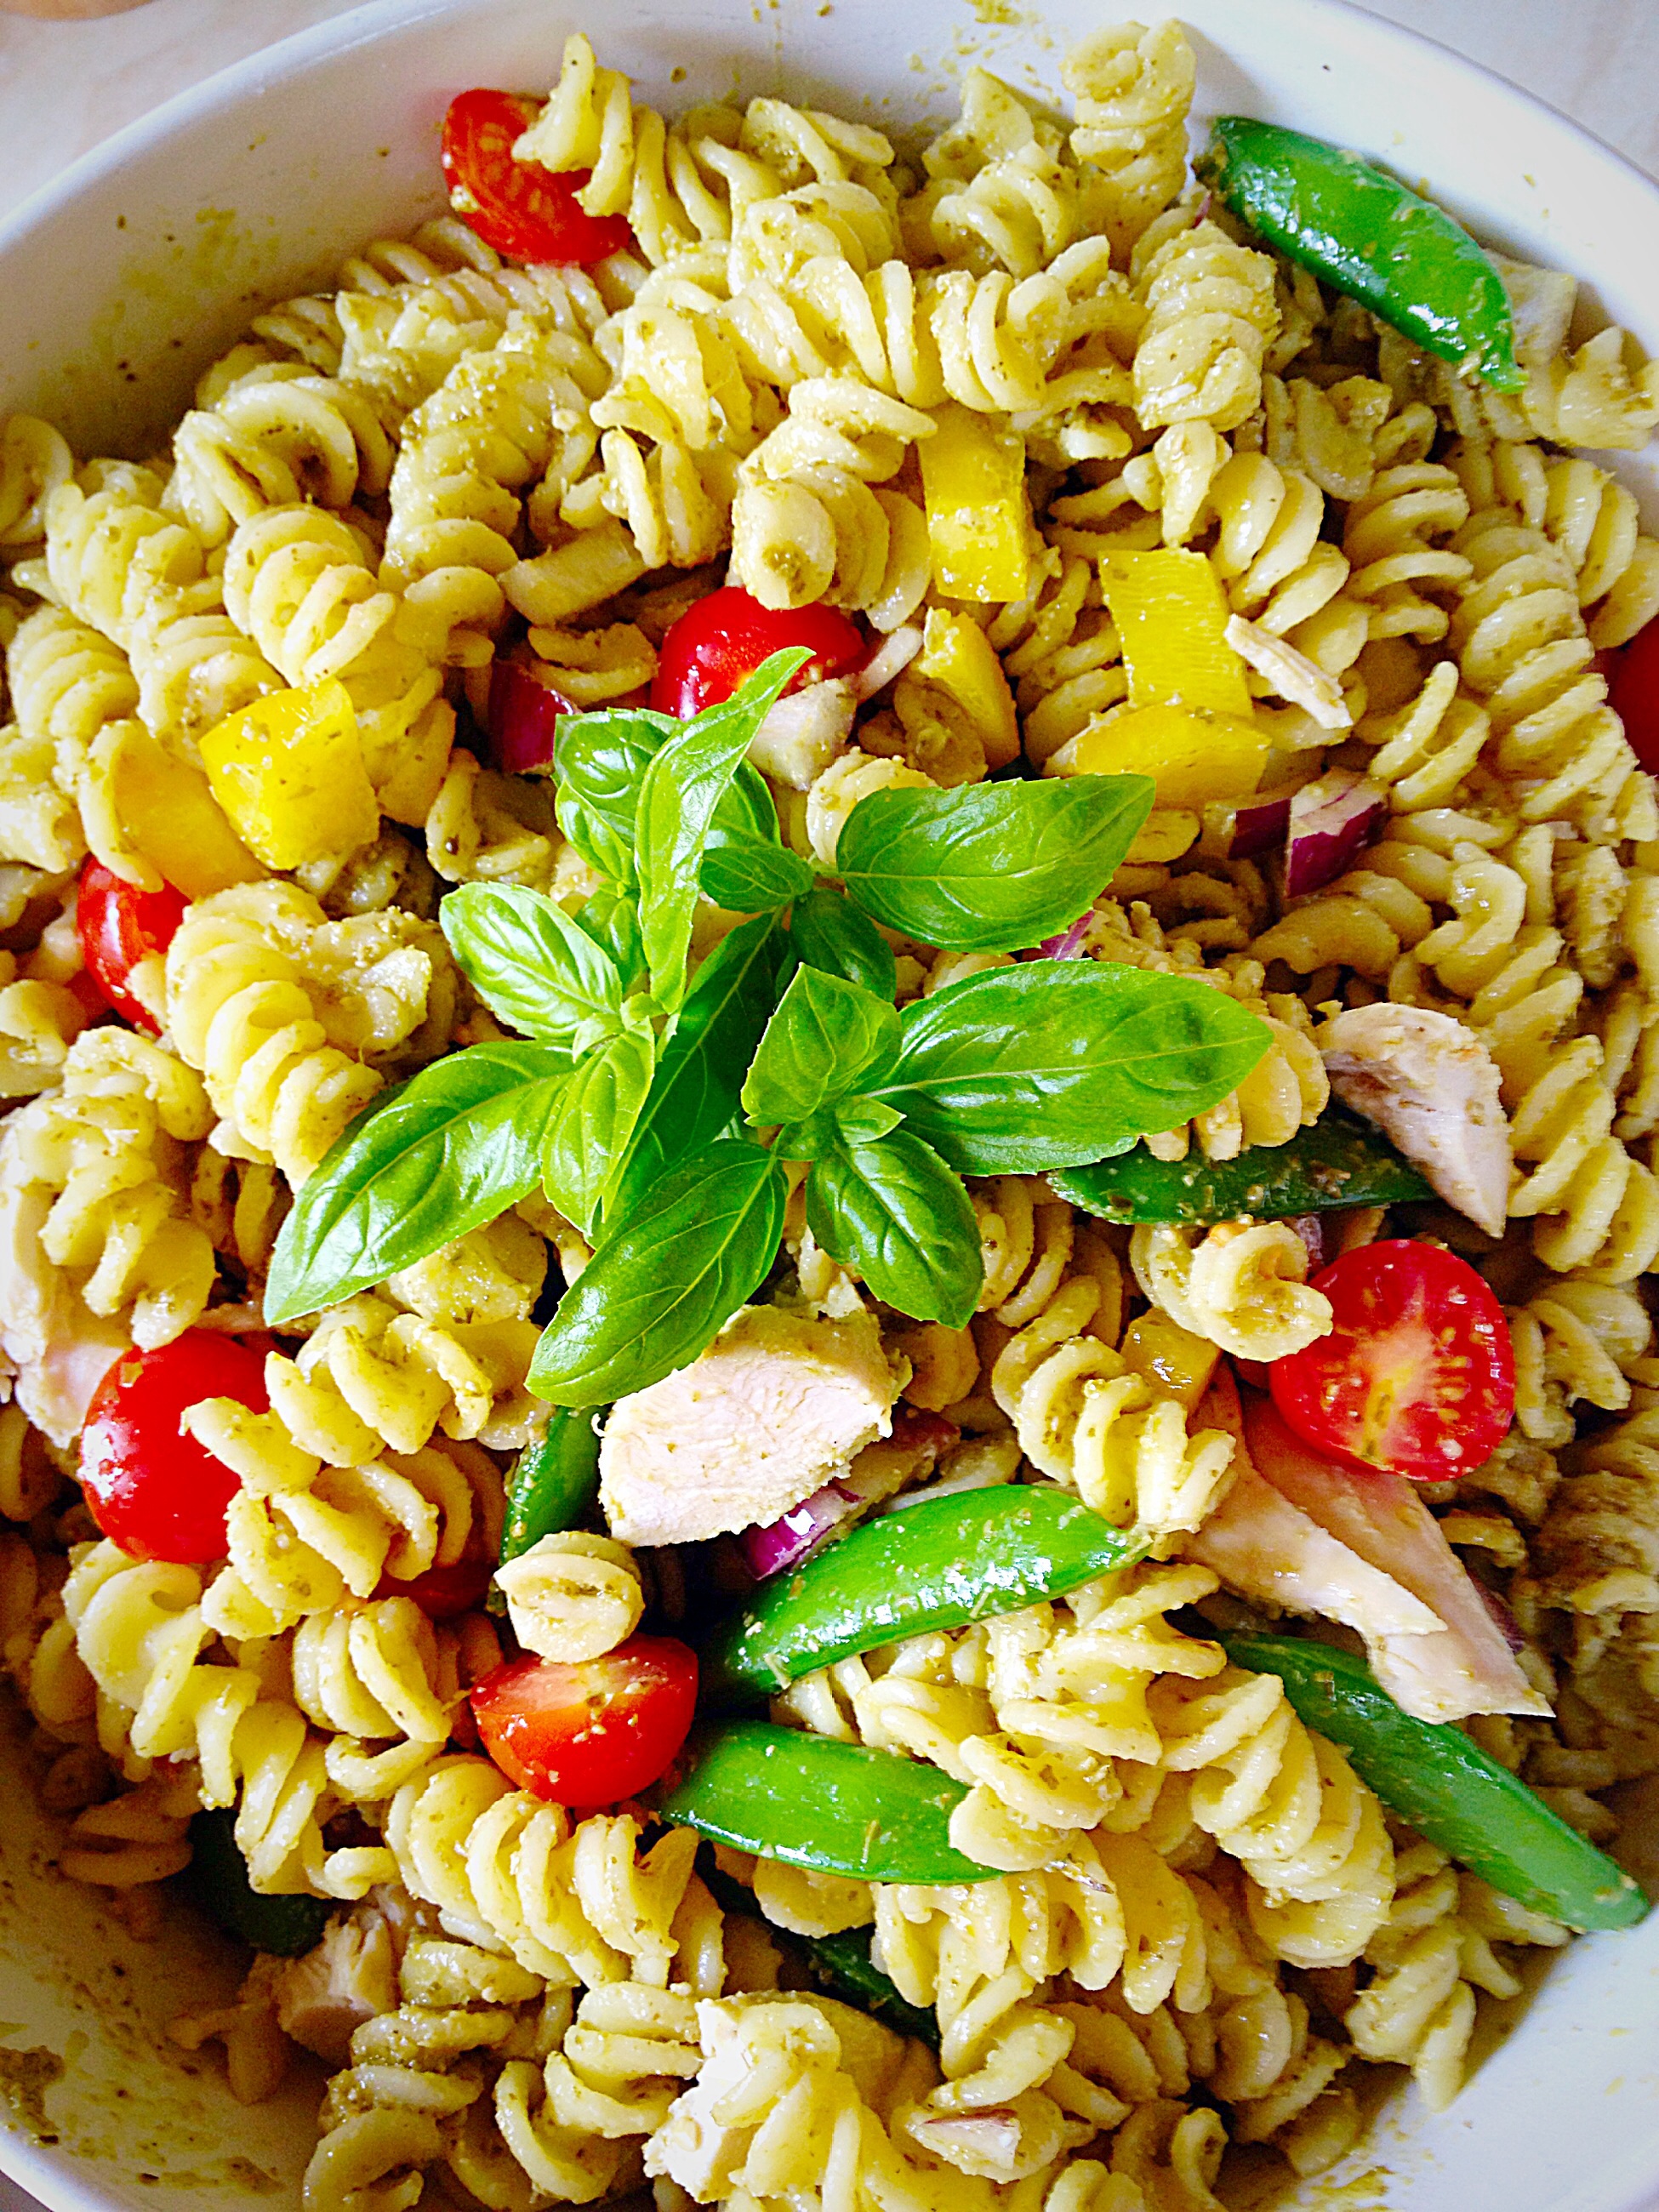
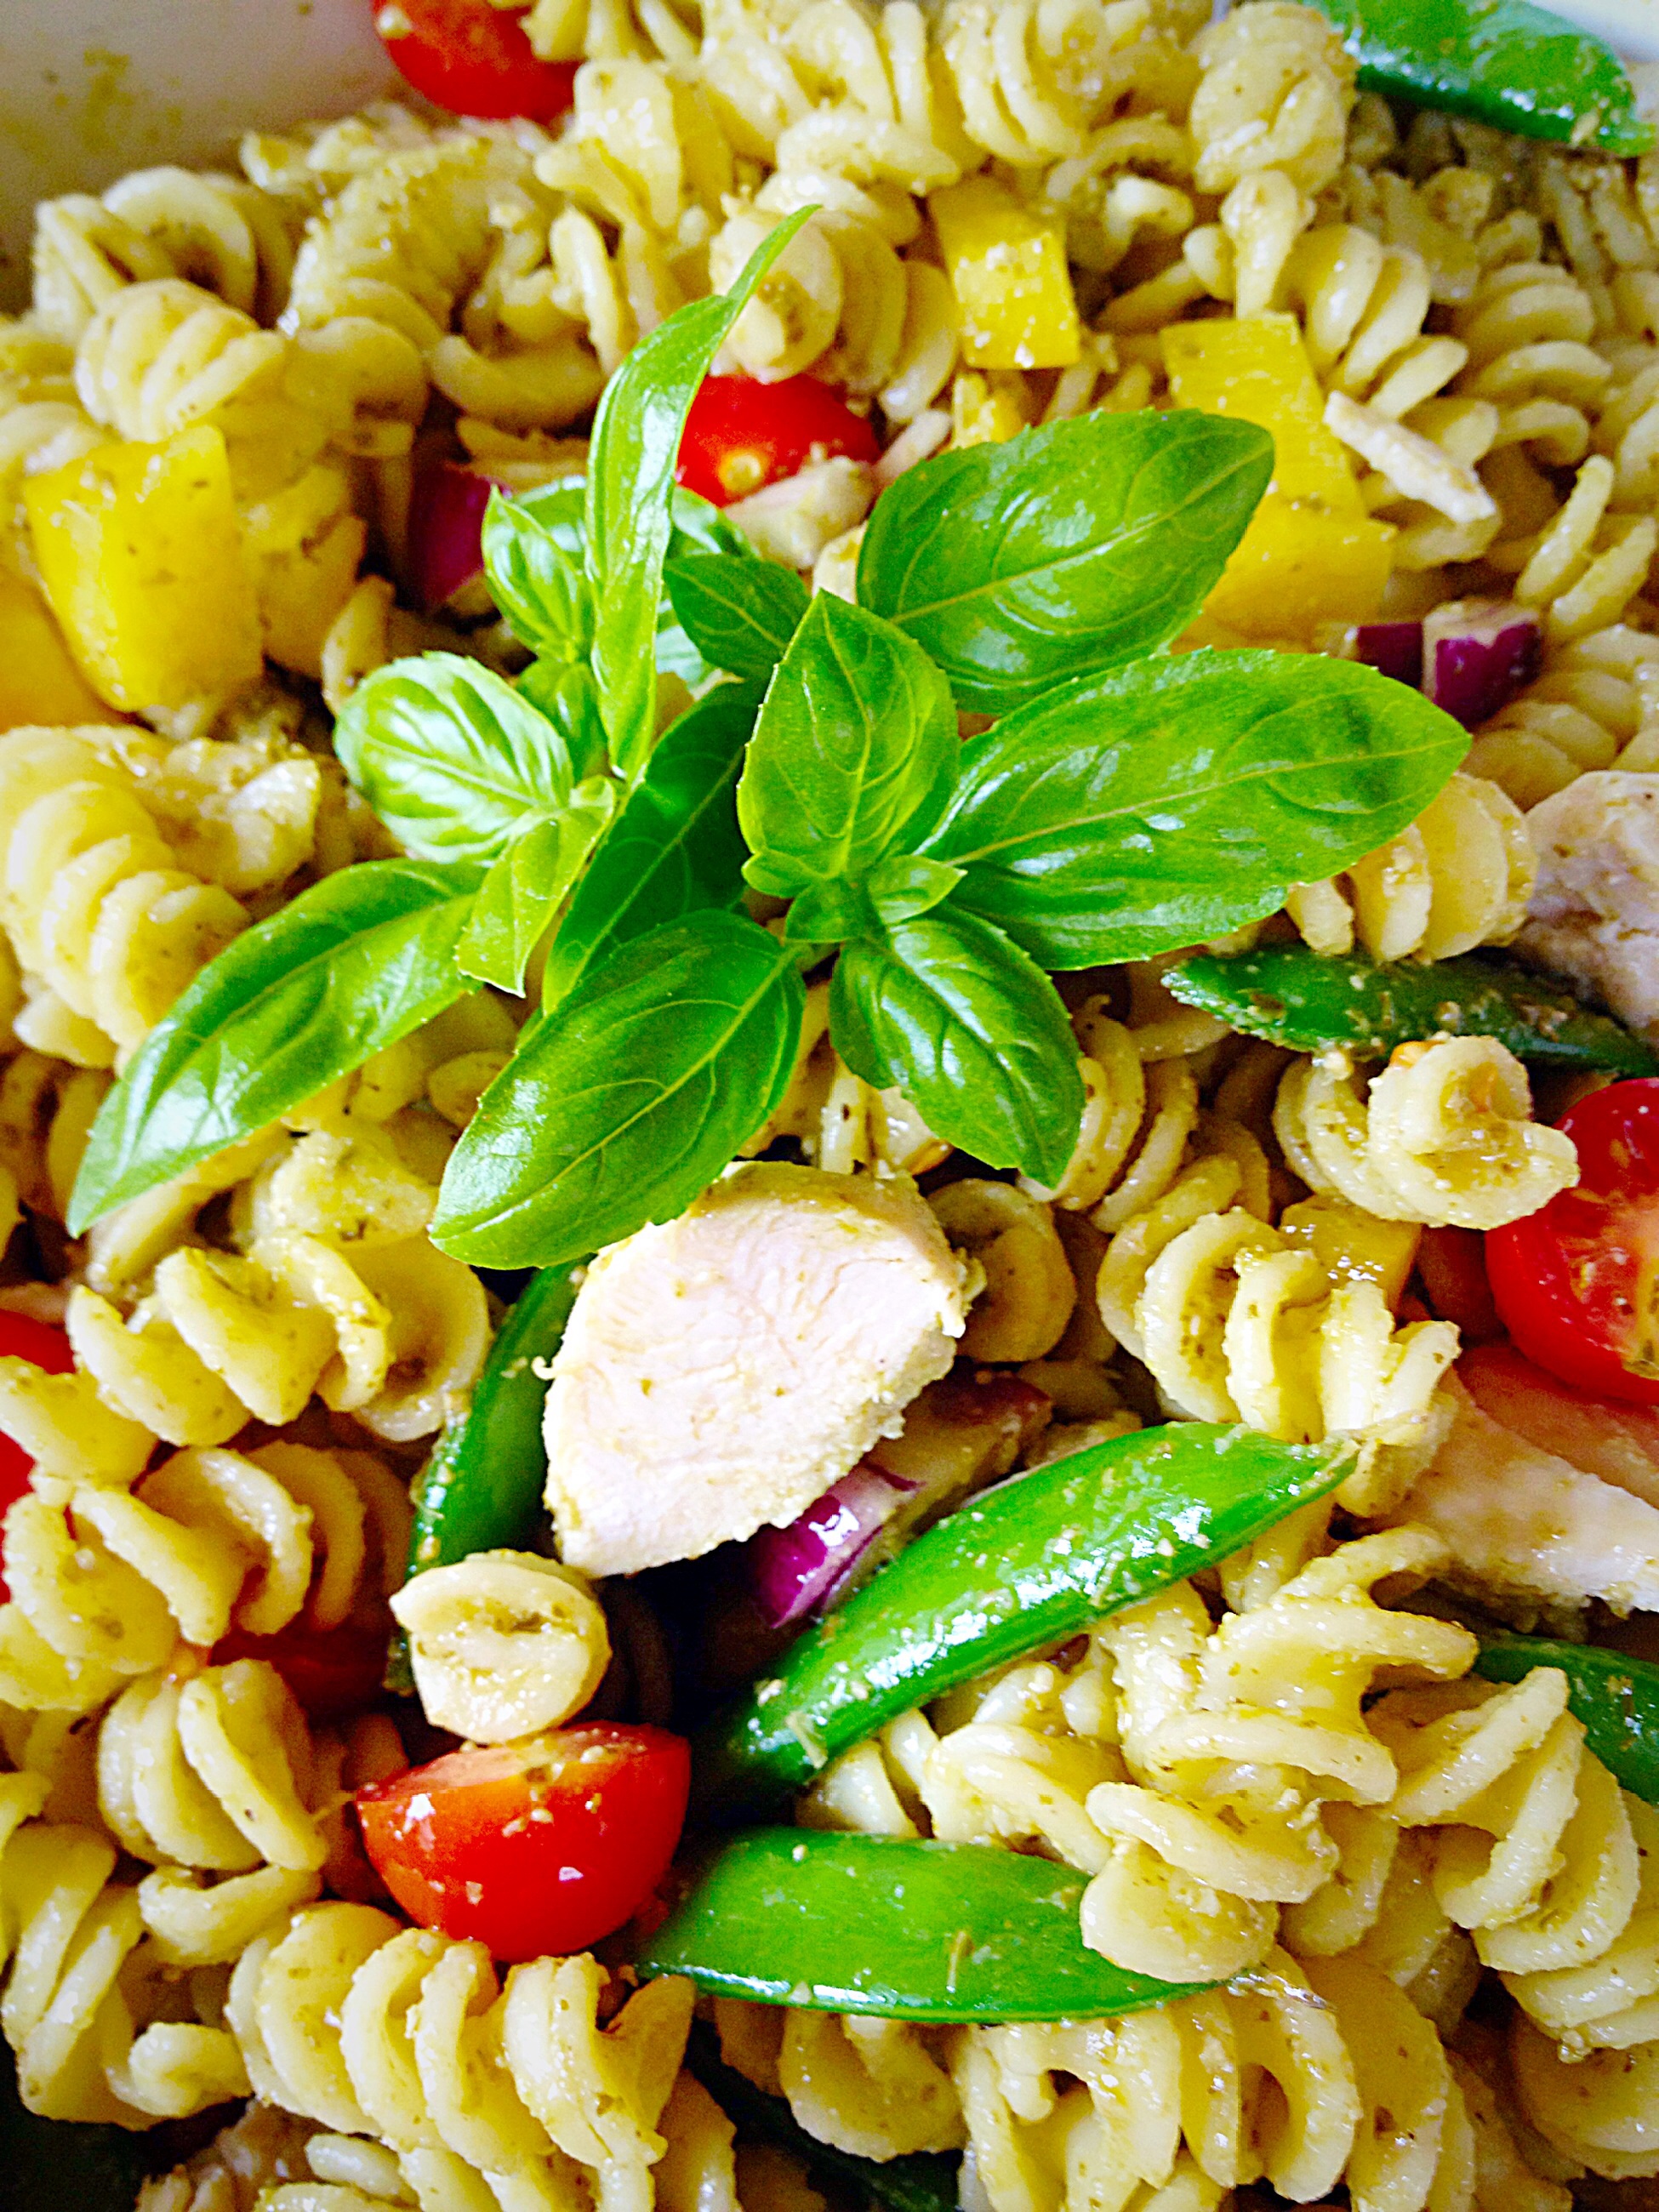
Hi, I was thinking the other day, where would we be, in our busy lives, without Pasta? Since there are so many dishes you can make using Pasta. And so today I have this Chicken Pasta Pesto Salad to share with you.
Chicken Pasta Pesto Salad – delicious, nutritious and so easy to make!
This dish takes no more than 30 minutes to make from start to finish! It’s packed full of lean chicken and crammed with crunchy veggies. Also, if you left the chicken out you could easily make this as a vegetarian dish.
Chicken Pasta Pesto Salad – crammed full of crunchy veg!
Everything about this dish makes it perfect for a quick, easy, mid-week meal, or you can make it ahead, keep it in an airtight container, in the fridge for up to three days. Also it has to be one of the easiest meals ever, prepare in advance when you have a bit of time, or cook from scratch and have it on the table in 30 minutes!
Chicken Pasta Pesto Salad – perfect for mid-week mealtimes!
Recipe : Chicken Pasta Pesto Salad serves 4-6 adults
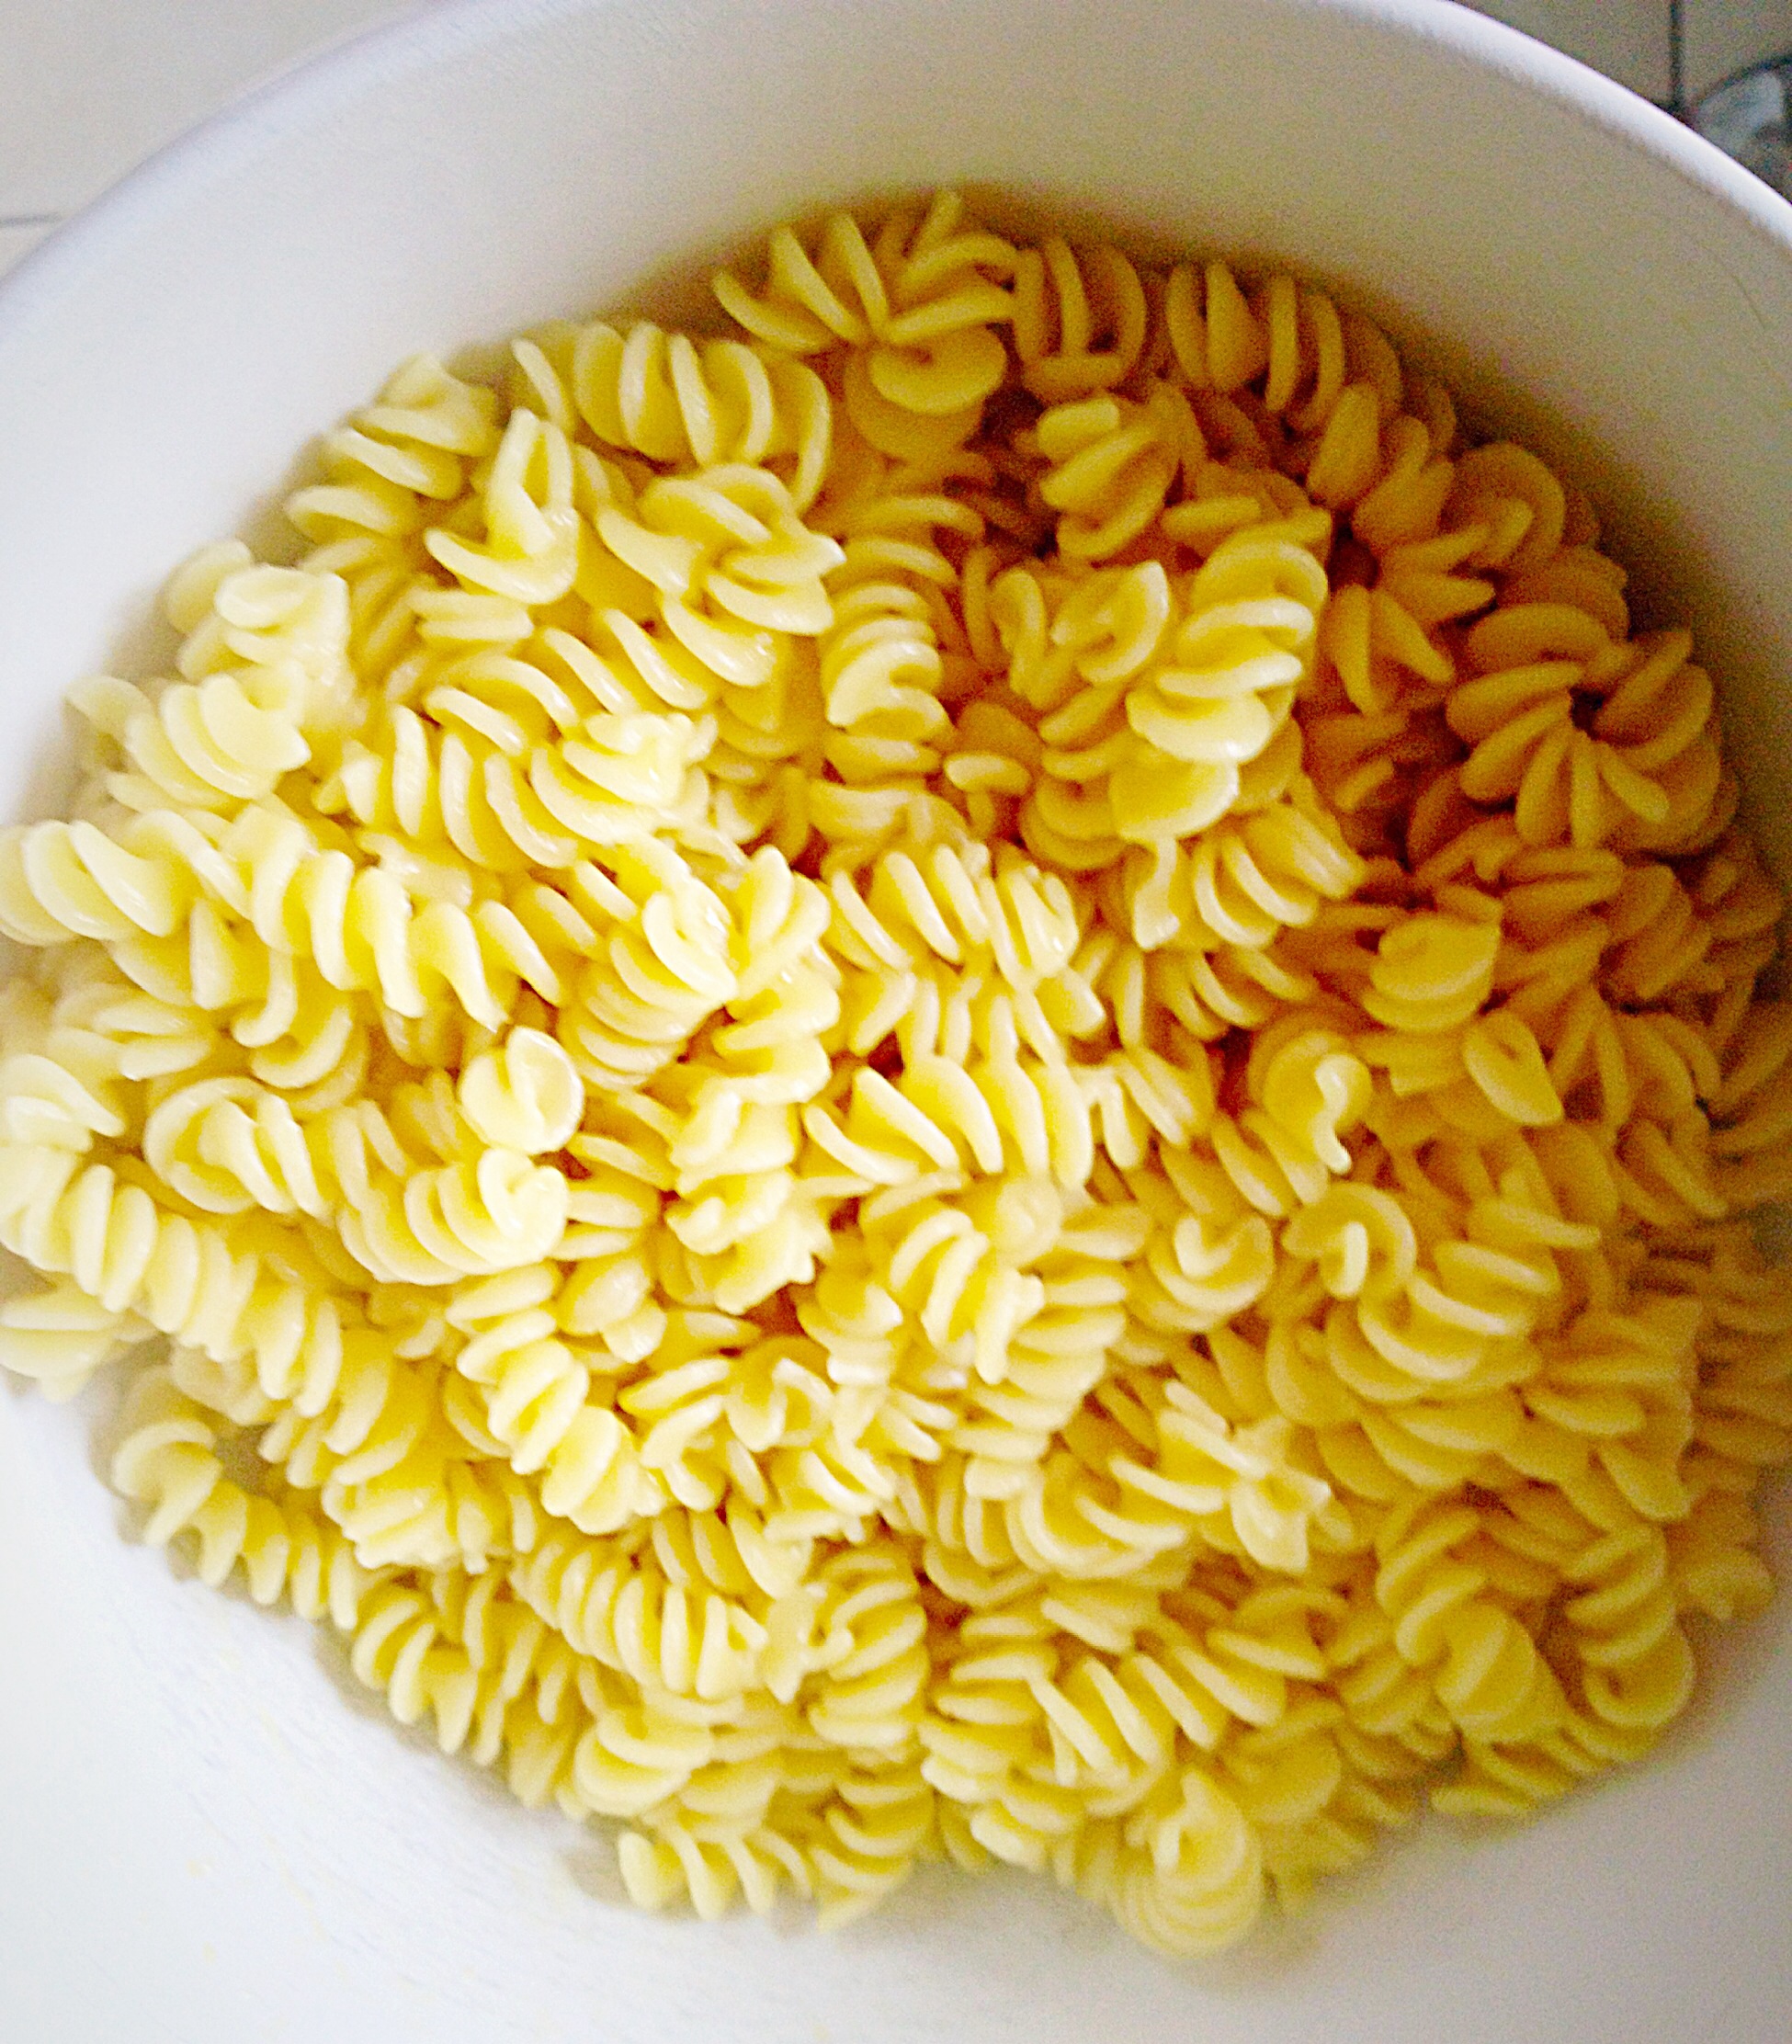
500g/1lb Packet Dried Pasta – I used fusilli
500g/1lb Boneless, skinless Chicken Breasts
1 Jar ready made Pesto Sauce – I use 190g jar Classic Pesto from Filippo Berio
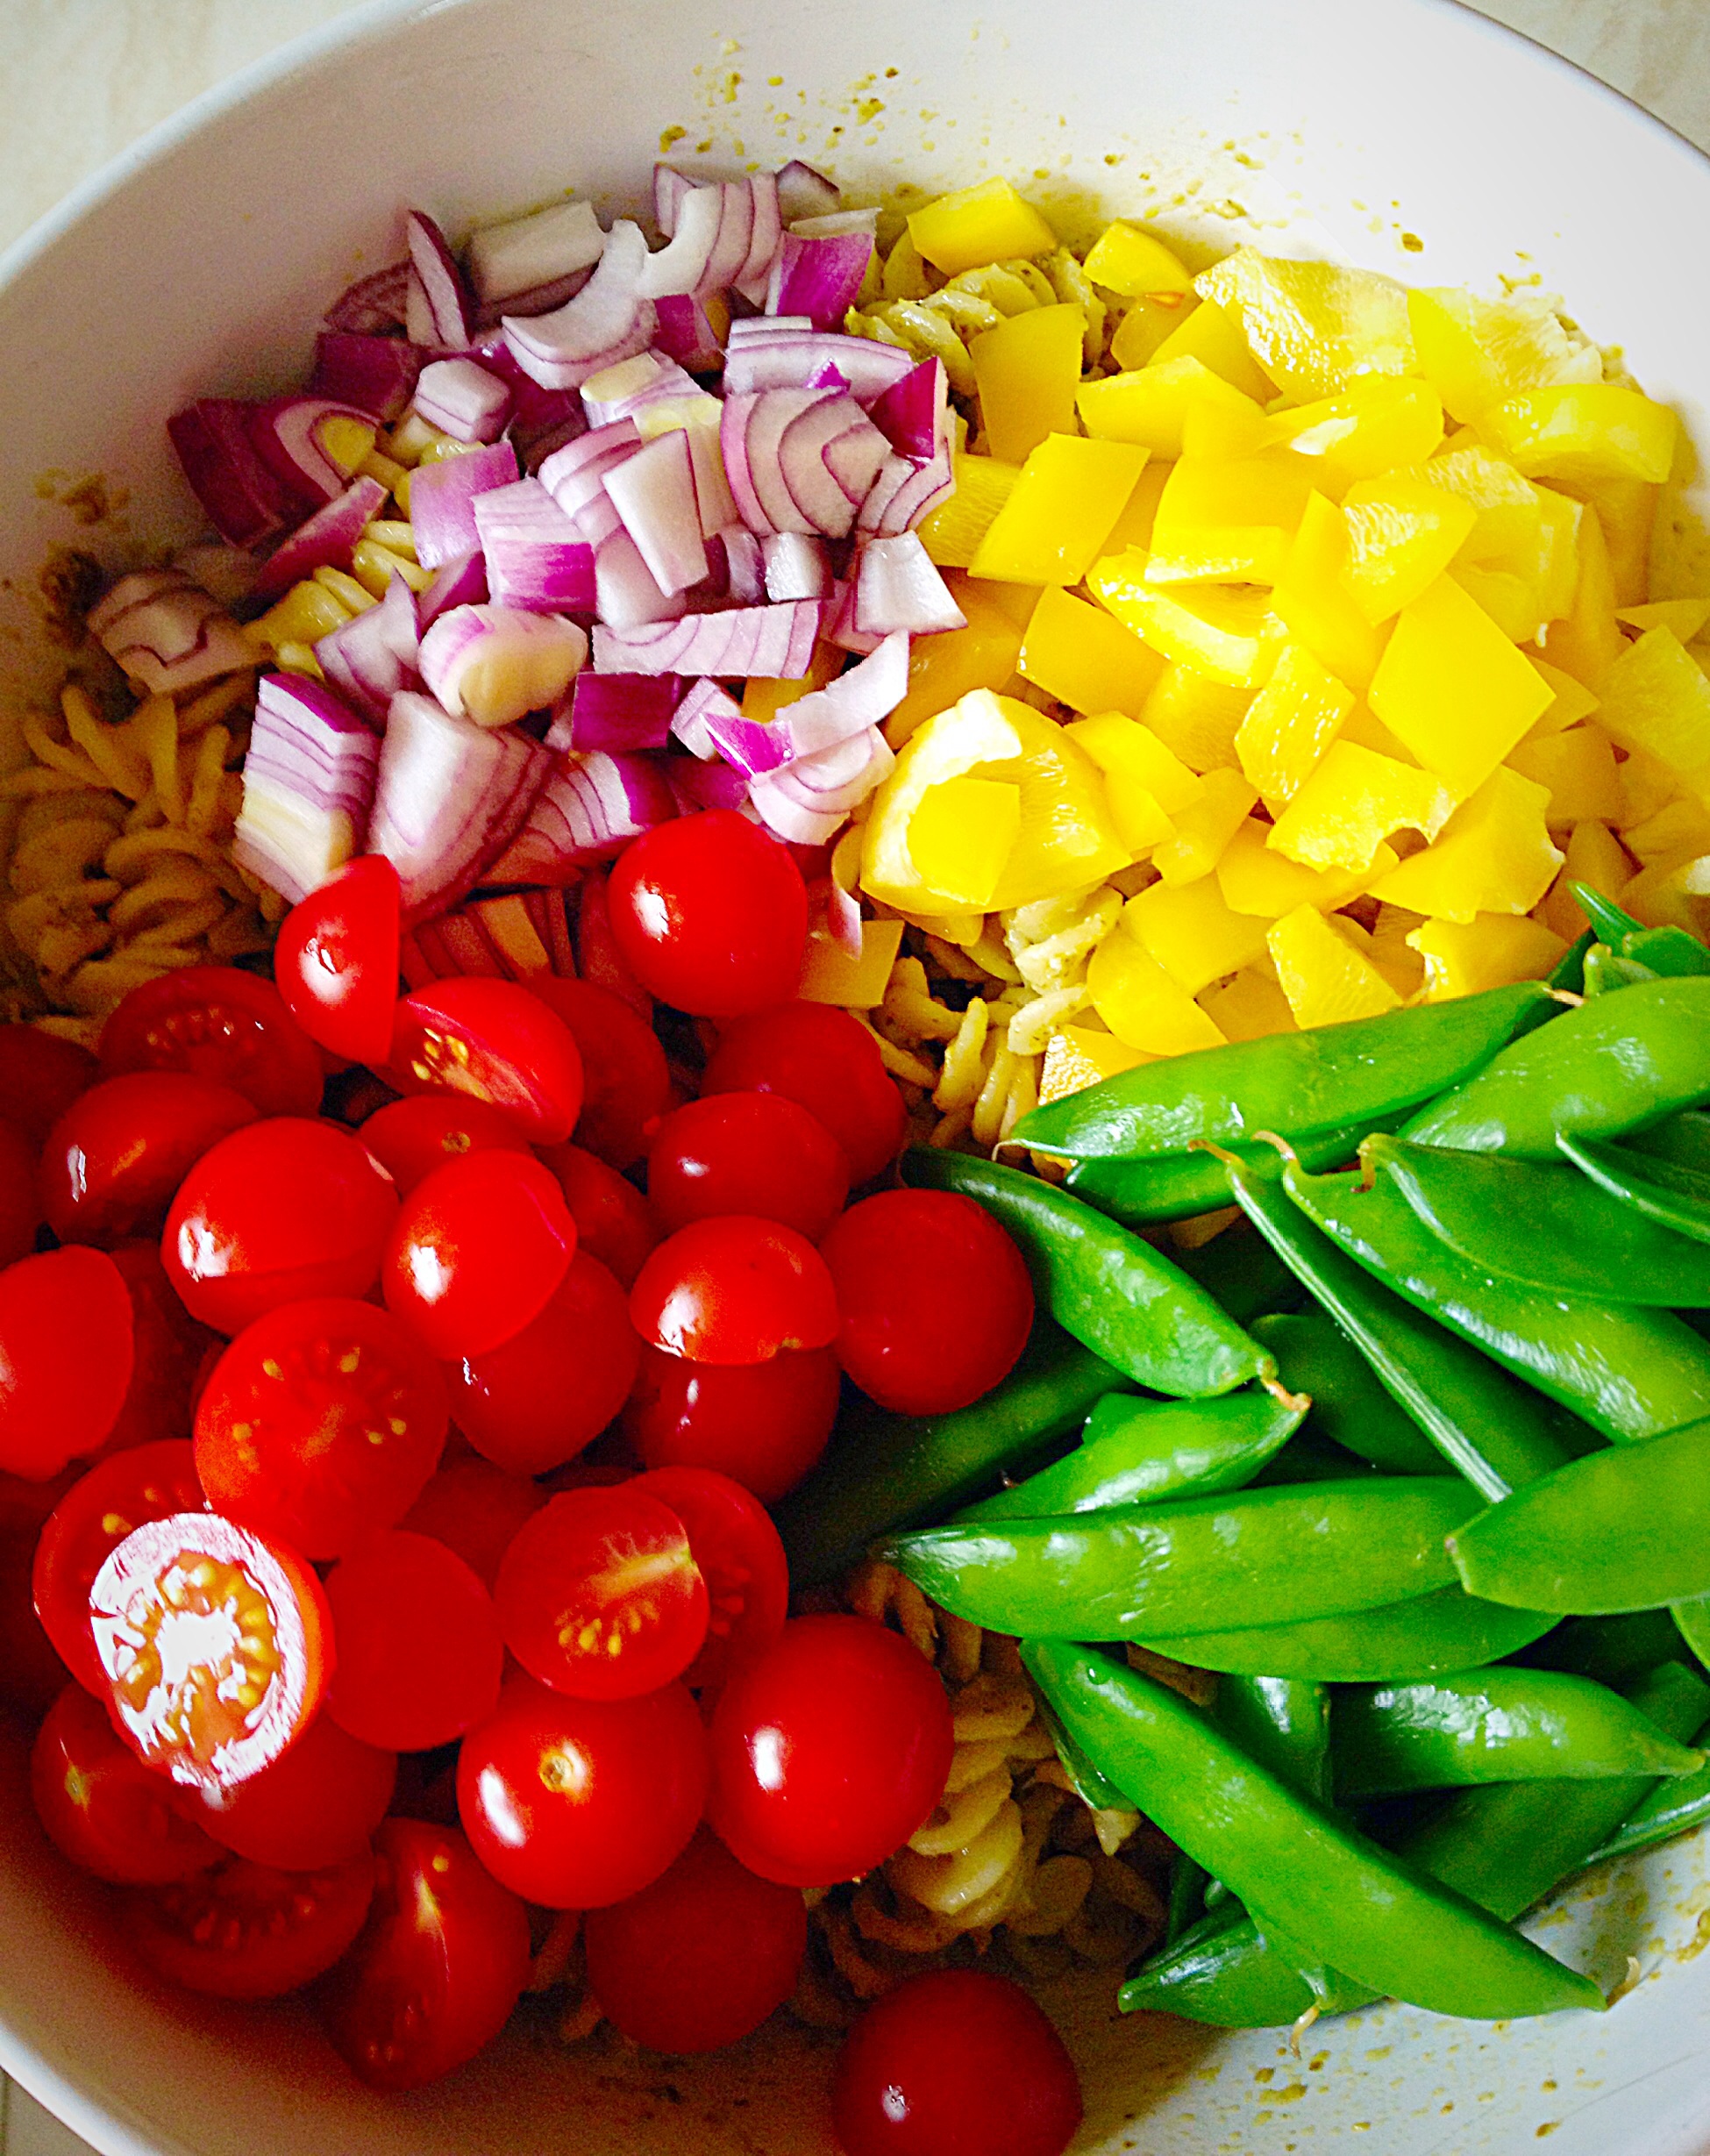
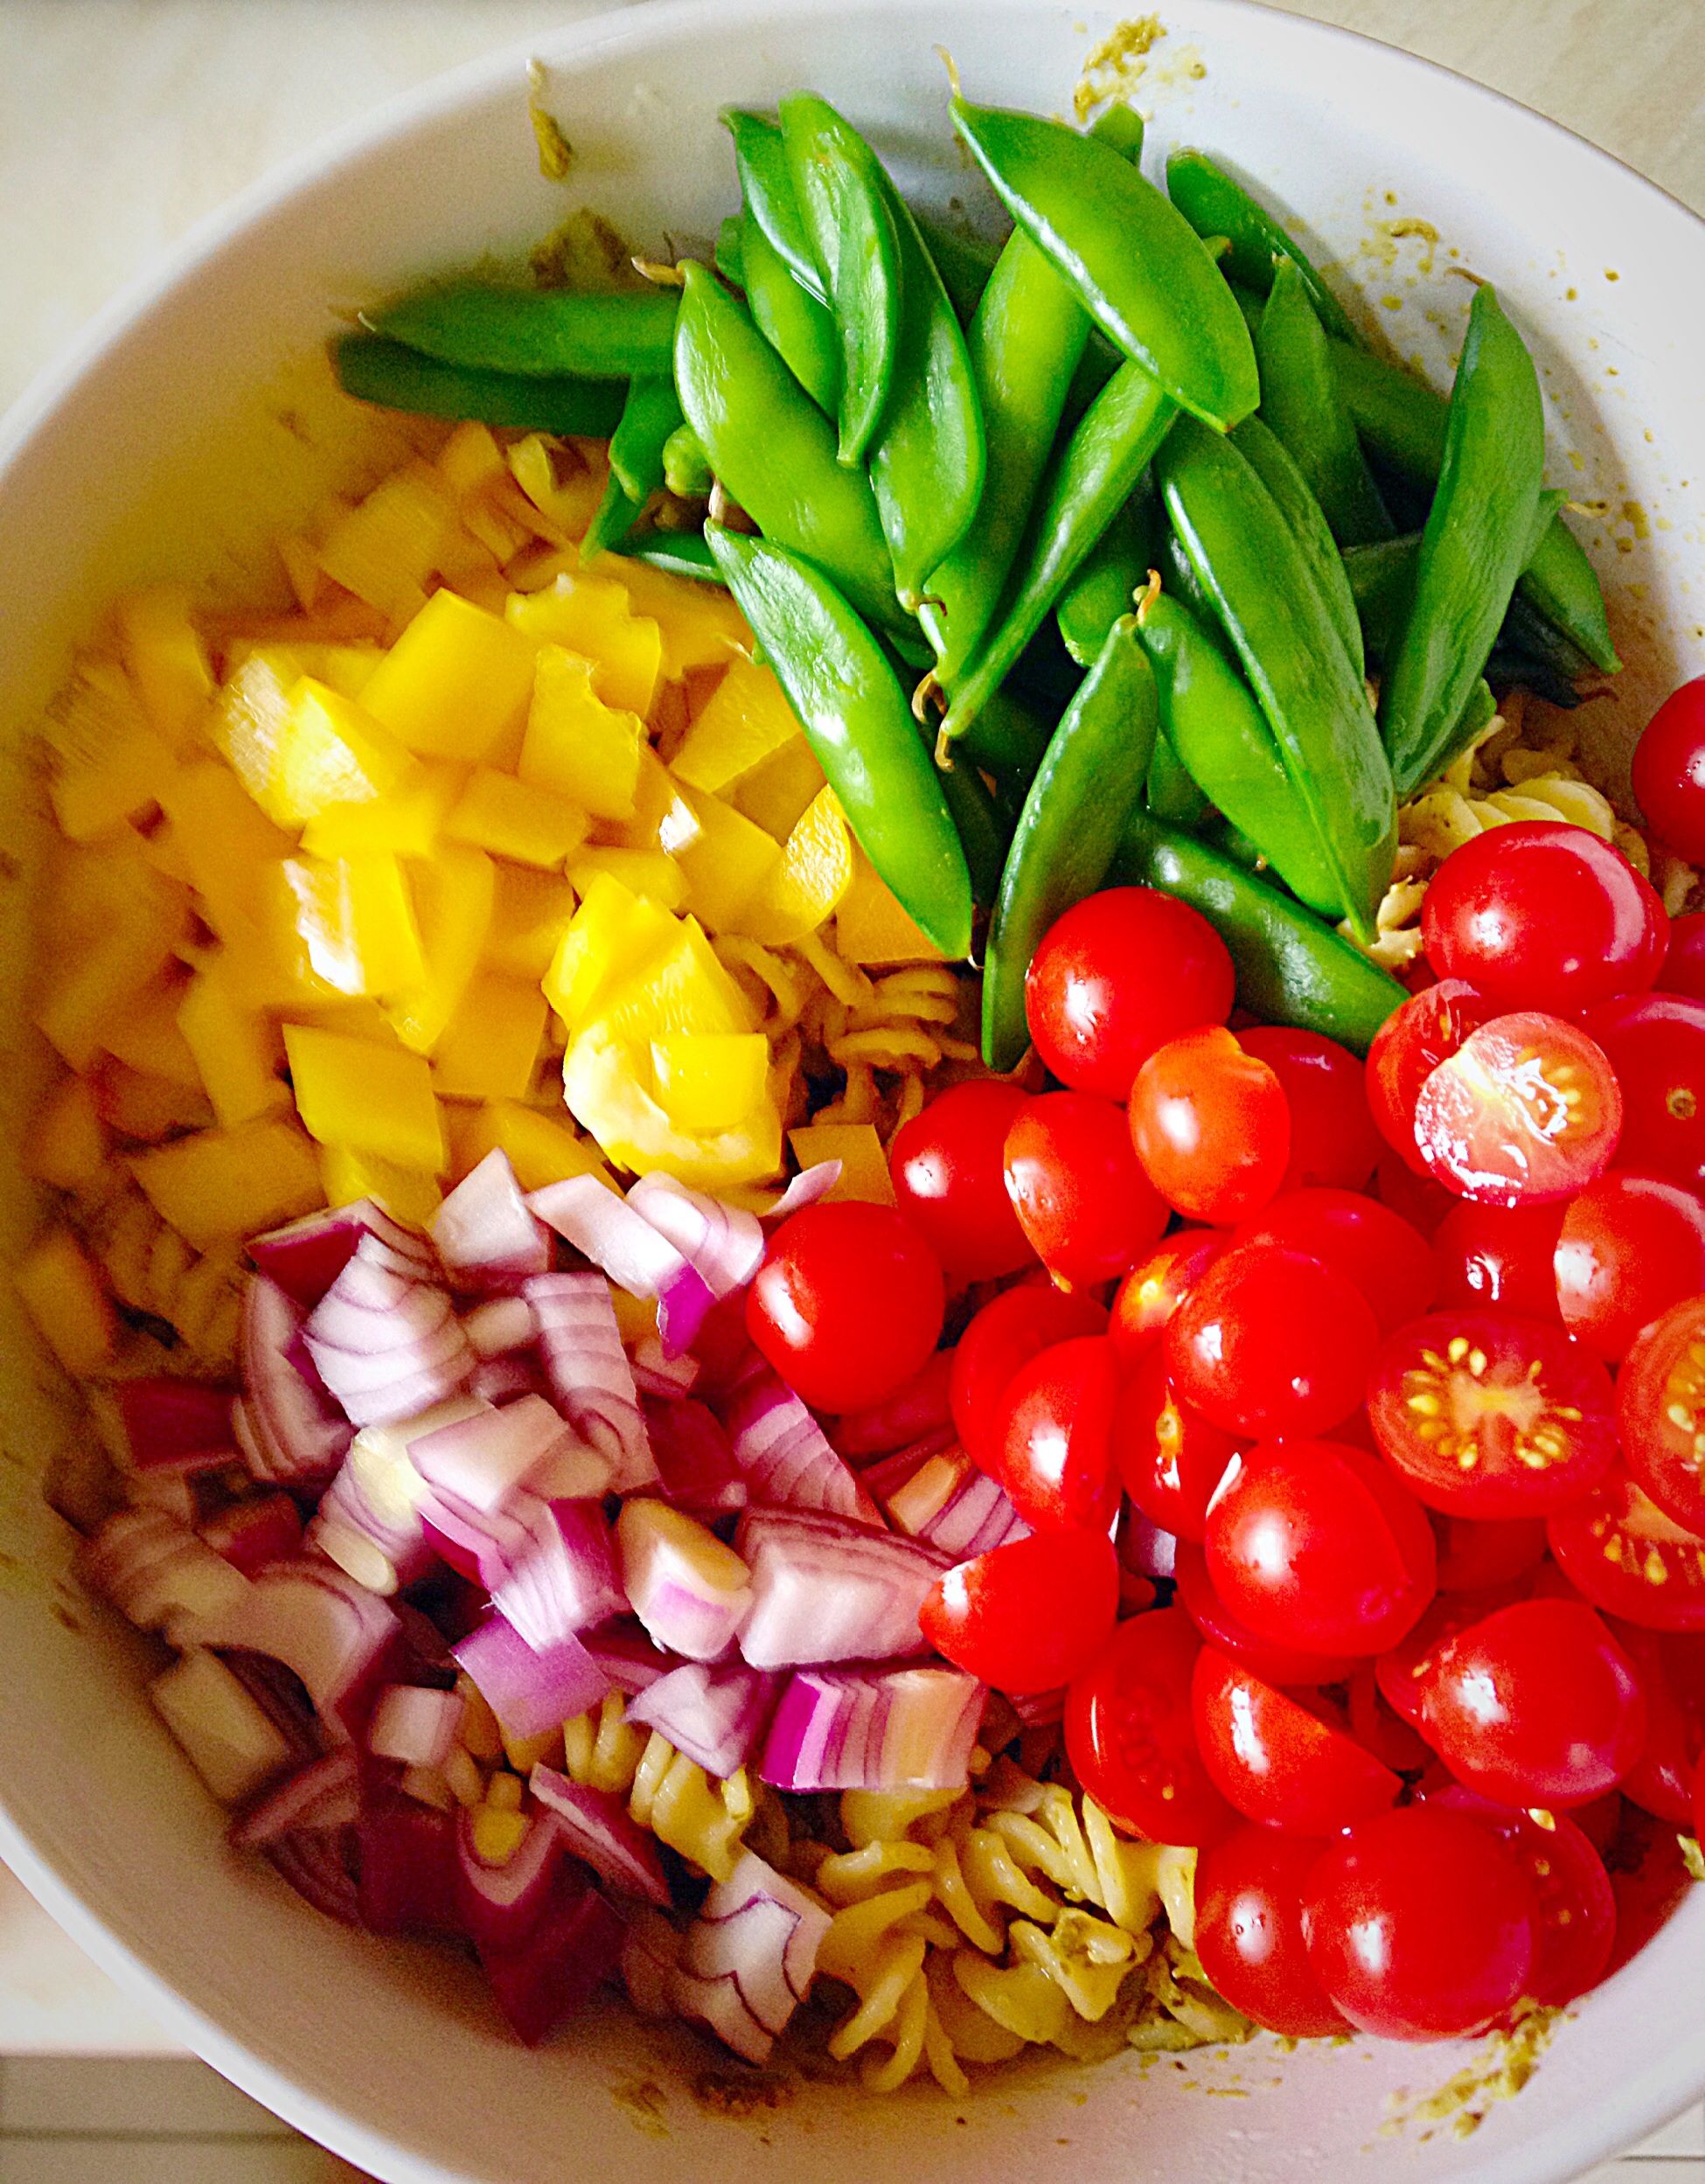
150g/5oz Sugar Snap Peas
1 Small Red Onion
1 Yellow Bell Pepper
225g/8oz Cherry Tomatoes
2 tbsp Extra Virgin Olive Oil
Salt and Pepper to taste.
Optional – Fresh Basil Leaves
Method : Making the Chicken Pasta Pesto Salad
First of all, fill a large pan with water and bring to the boil. Add 1 tablespoon of sea salt, the pasta and cook according to package instructions.
In a separate pan place the chicken breasts – if very large cut in half first. Add cold water to just cover the chicken. Bring to a gentle simmer and poach for 15-20 minutes until cooked through. I take the largest piece out, cut through the thickest part with a knife and if the chicken is white – not pink, I know it is cooked.
As soon as the pasta is cooked, drain and tip into a large bowl.
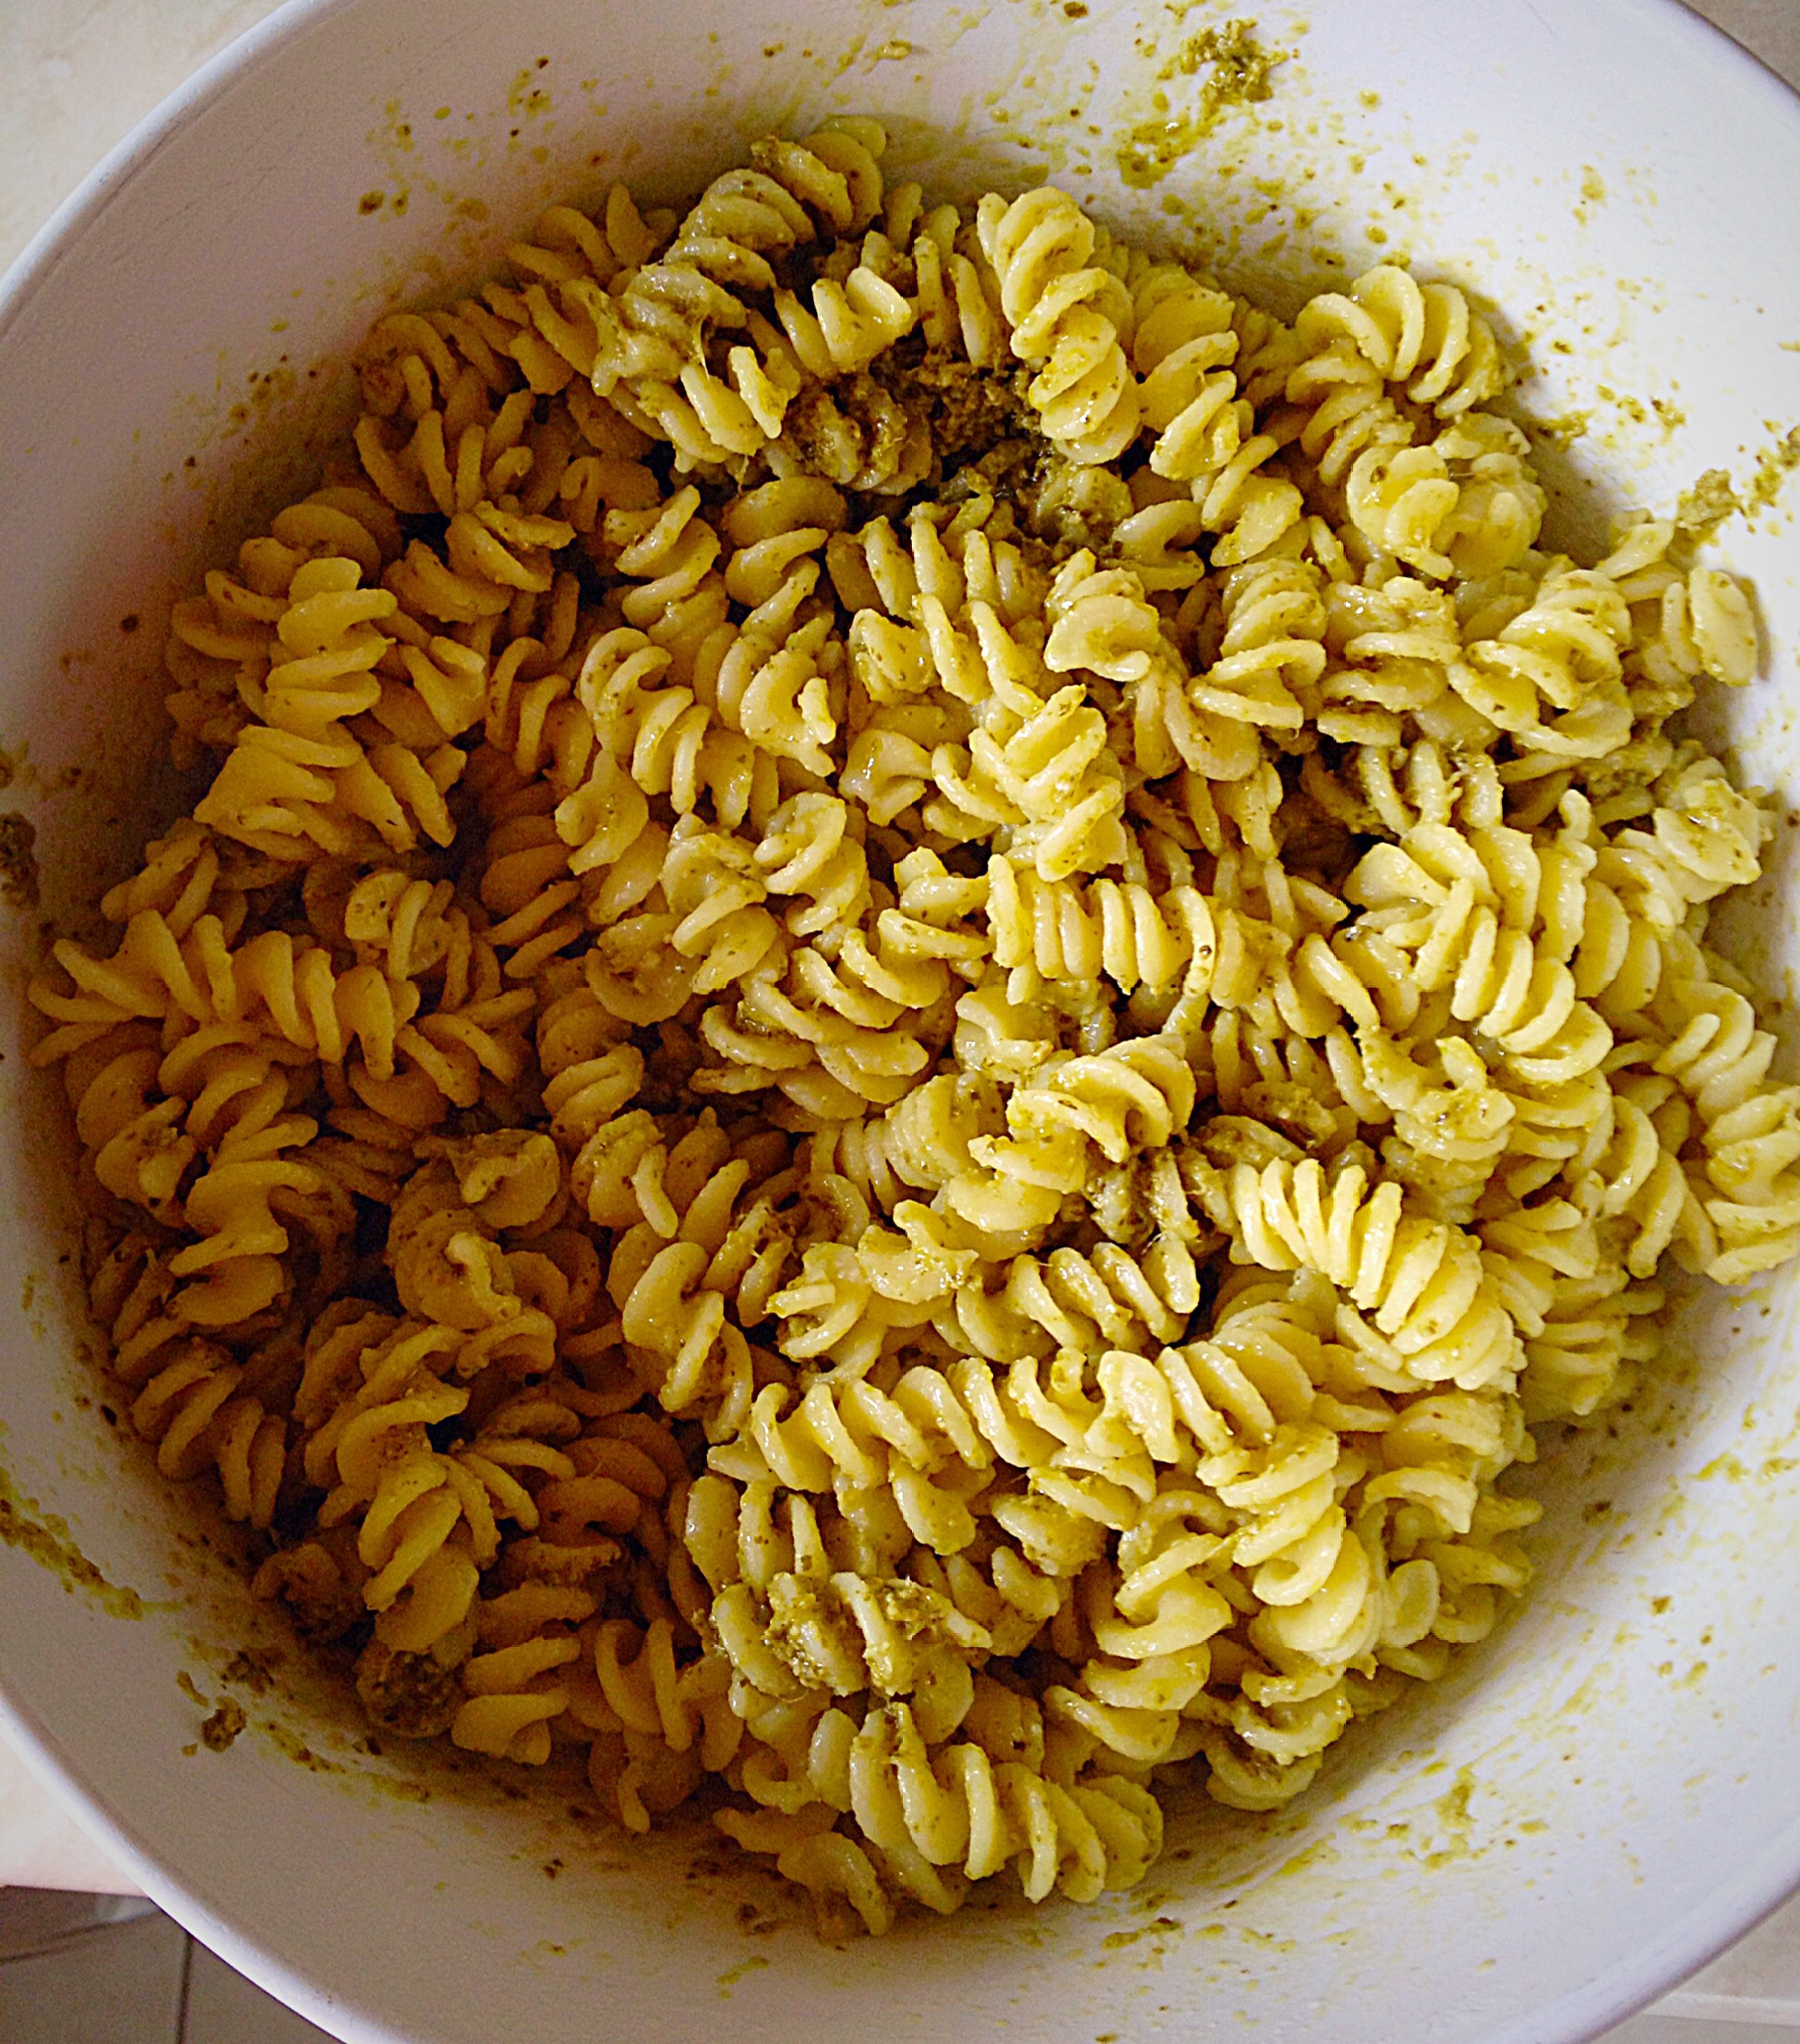
Immediately drizzle over the Olive oil and toss the pasta so that it doesn’t clump together.Add the jar of pesto sauce and mix thoroughly, ensuring all the warm pasta is coated.
Remove the poached chicken breasts, once cooked and place on a plate to cool slightly.
Into a pan of boiling water add the sugar snap peas and cook for 2 minutes. Drain and rinse under a cold tap to halt the cooking process.
Chop the cherry tomatoes in half, dice the red onion and yellow pepper.
Add all the veggies to the pasta.
When the chicken is cool enough to handle chop into bite sized pieces.
Add the chicken and then mix well. You now have …….Chicken Pasta Pesto Salad – easy and delicious!
Finally, scatter over fresh Basil leaves and then serve warm as is, or refrigerate for a delicious cool Summer salad on a hot day!
Place any leftovers in an airtight container, refrigerate and eat within 3 days.
Since this salad is very versatile, you can add whatever veggies you have on hand. While I like to use the best seasonal produce available, omit the chicken for a great vegetarian meal.
If you have enjoyed this recipe for Chicken Pasta Pesto Salad you may also like these:
I love the versatility of pasta and how it can be used is so many quick and easy dishes. Especially as a busy mum, having meals that can be prepared in advance is a huge bonus. While the weather continues to be extremely hot, here in the South East of England, making dinner first thing in the morning and stashing it away in the fridge seems to take the pressure off when it comes to mealtimes.
Finally, whatever you are making, baking and creating in your kitchens, have fun preparing and sharing your feast.
Sammie x
No part of this post may be reproduced or duplicated without the written permission of the owner. Please see my Disclosure Policy.
Hi, have I got the easiest, quickest meal for you? Yep, I have – Easy Tex Mex Chicken!
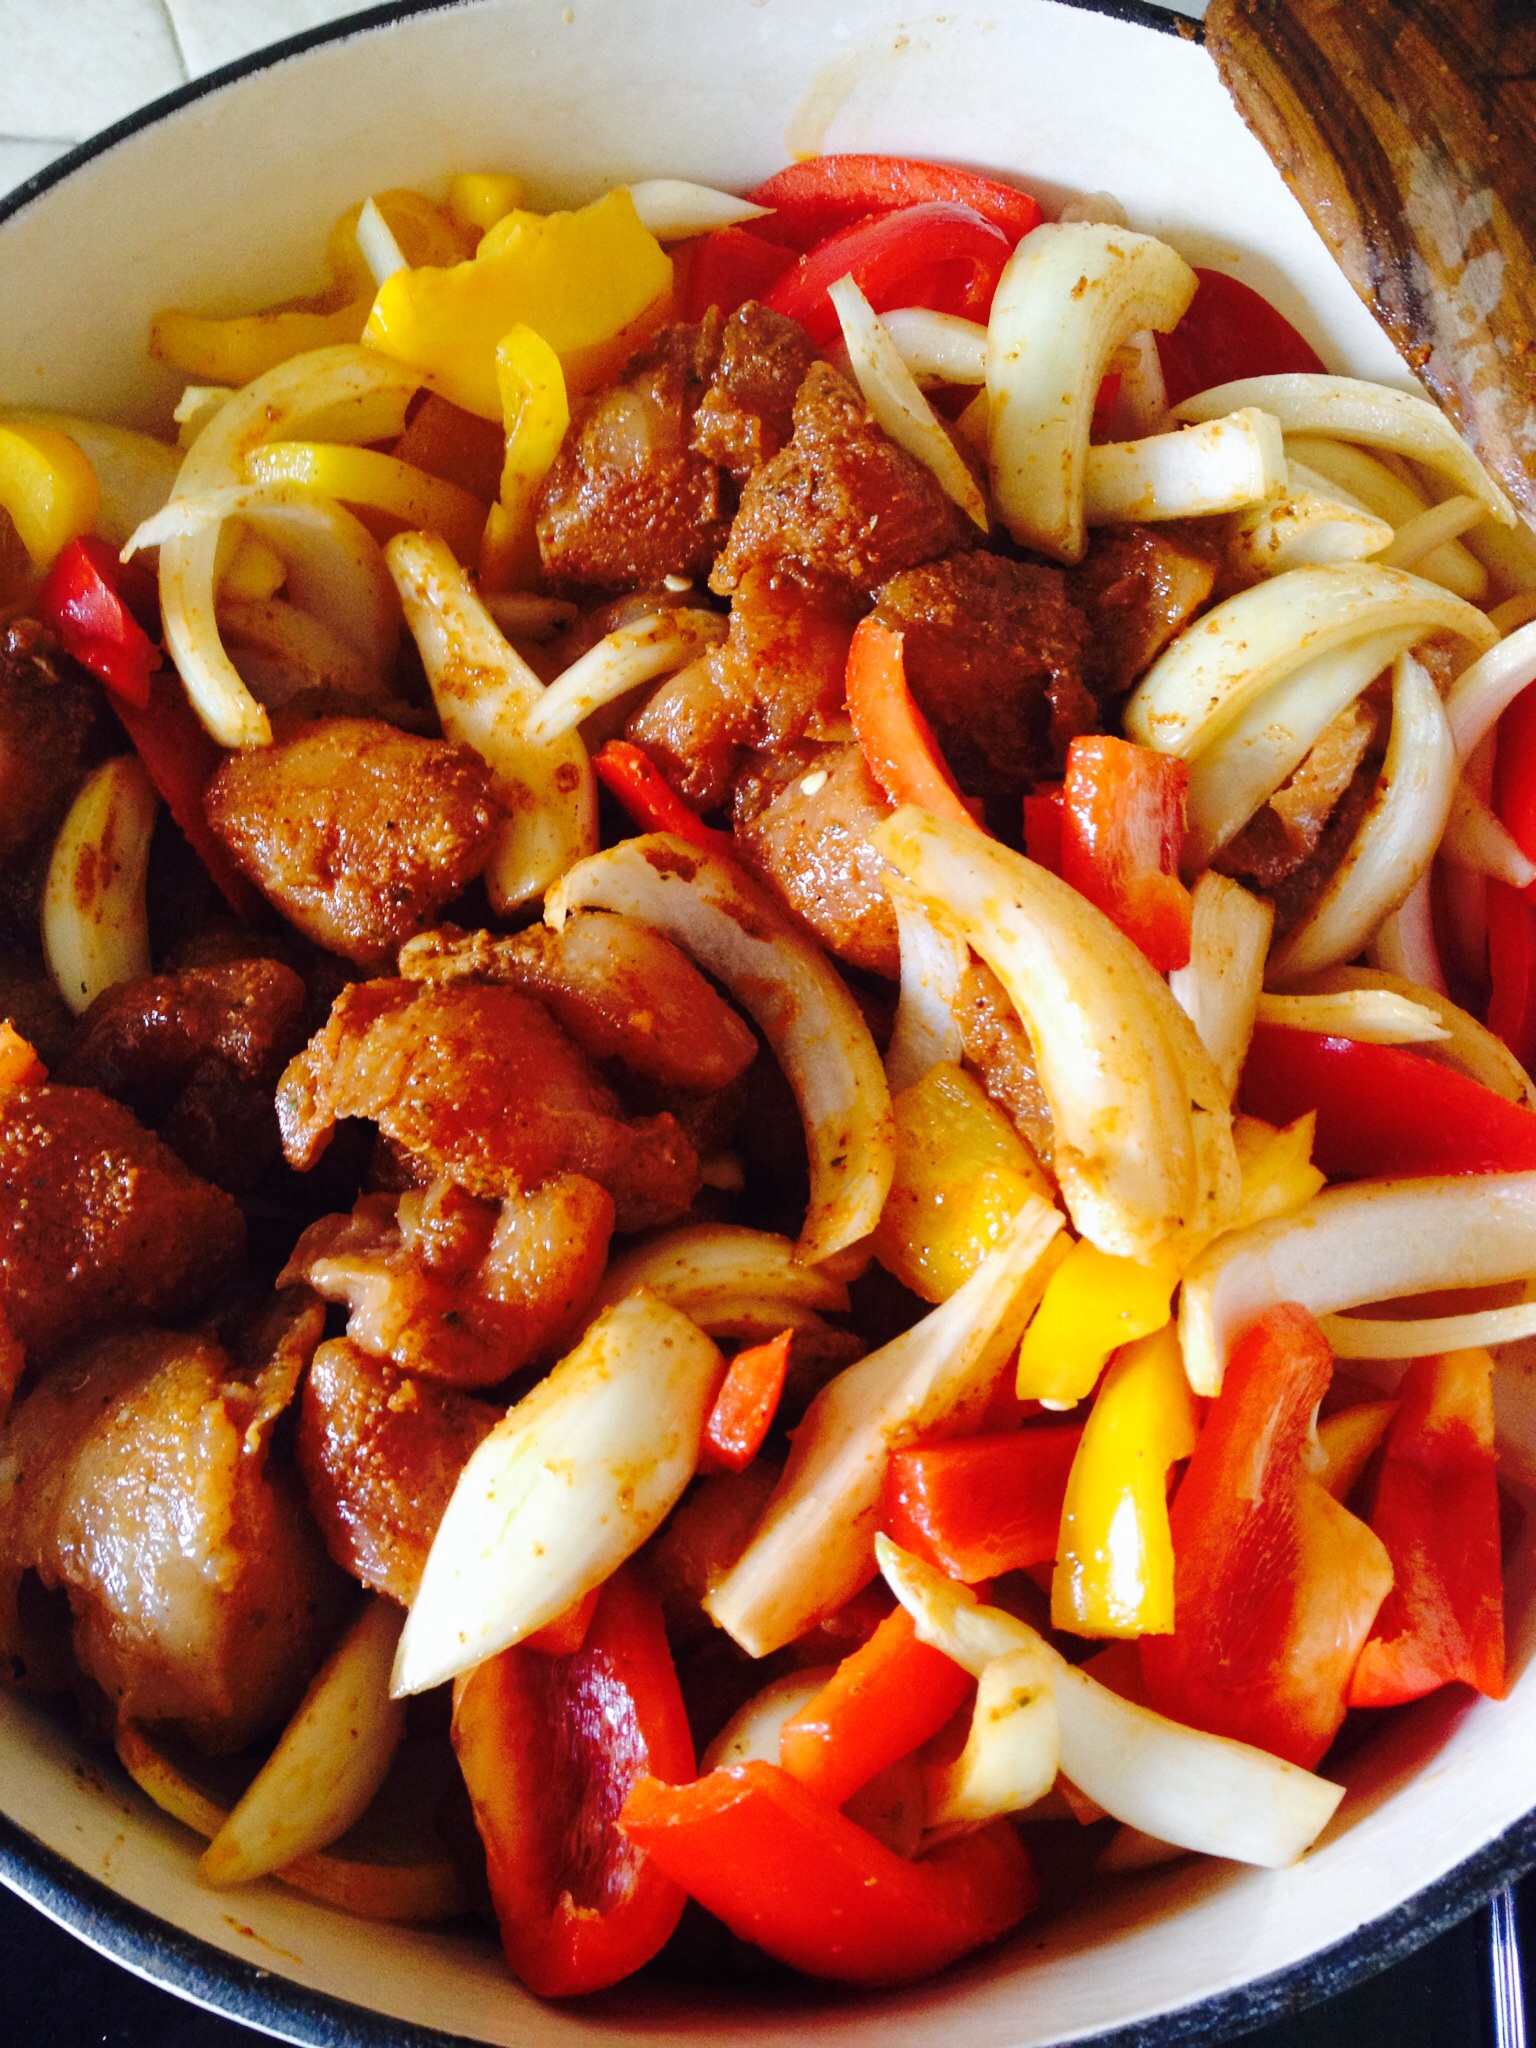
Easy Tex Mex Chicken tipped into a pan, ready for the oven.
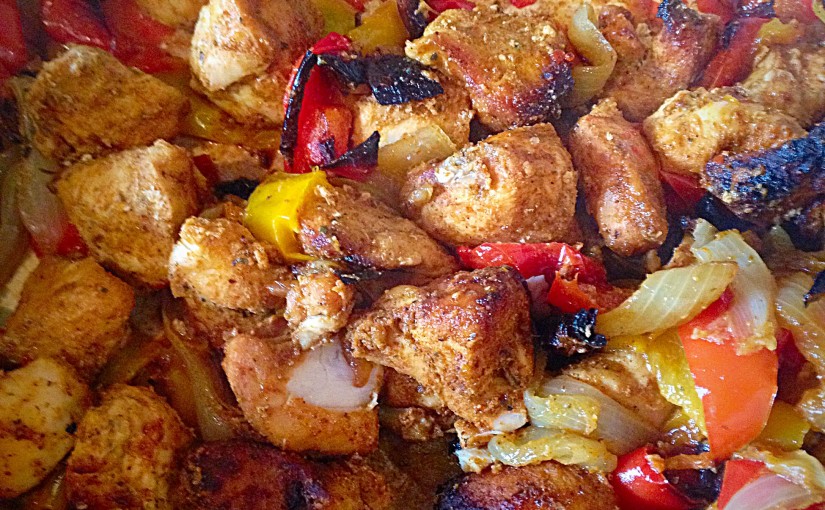
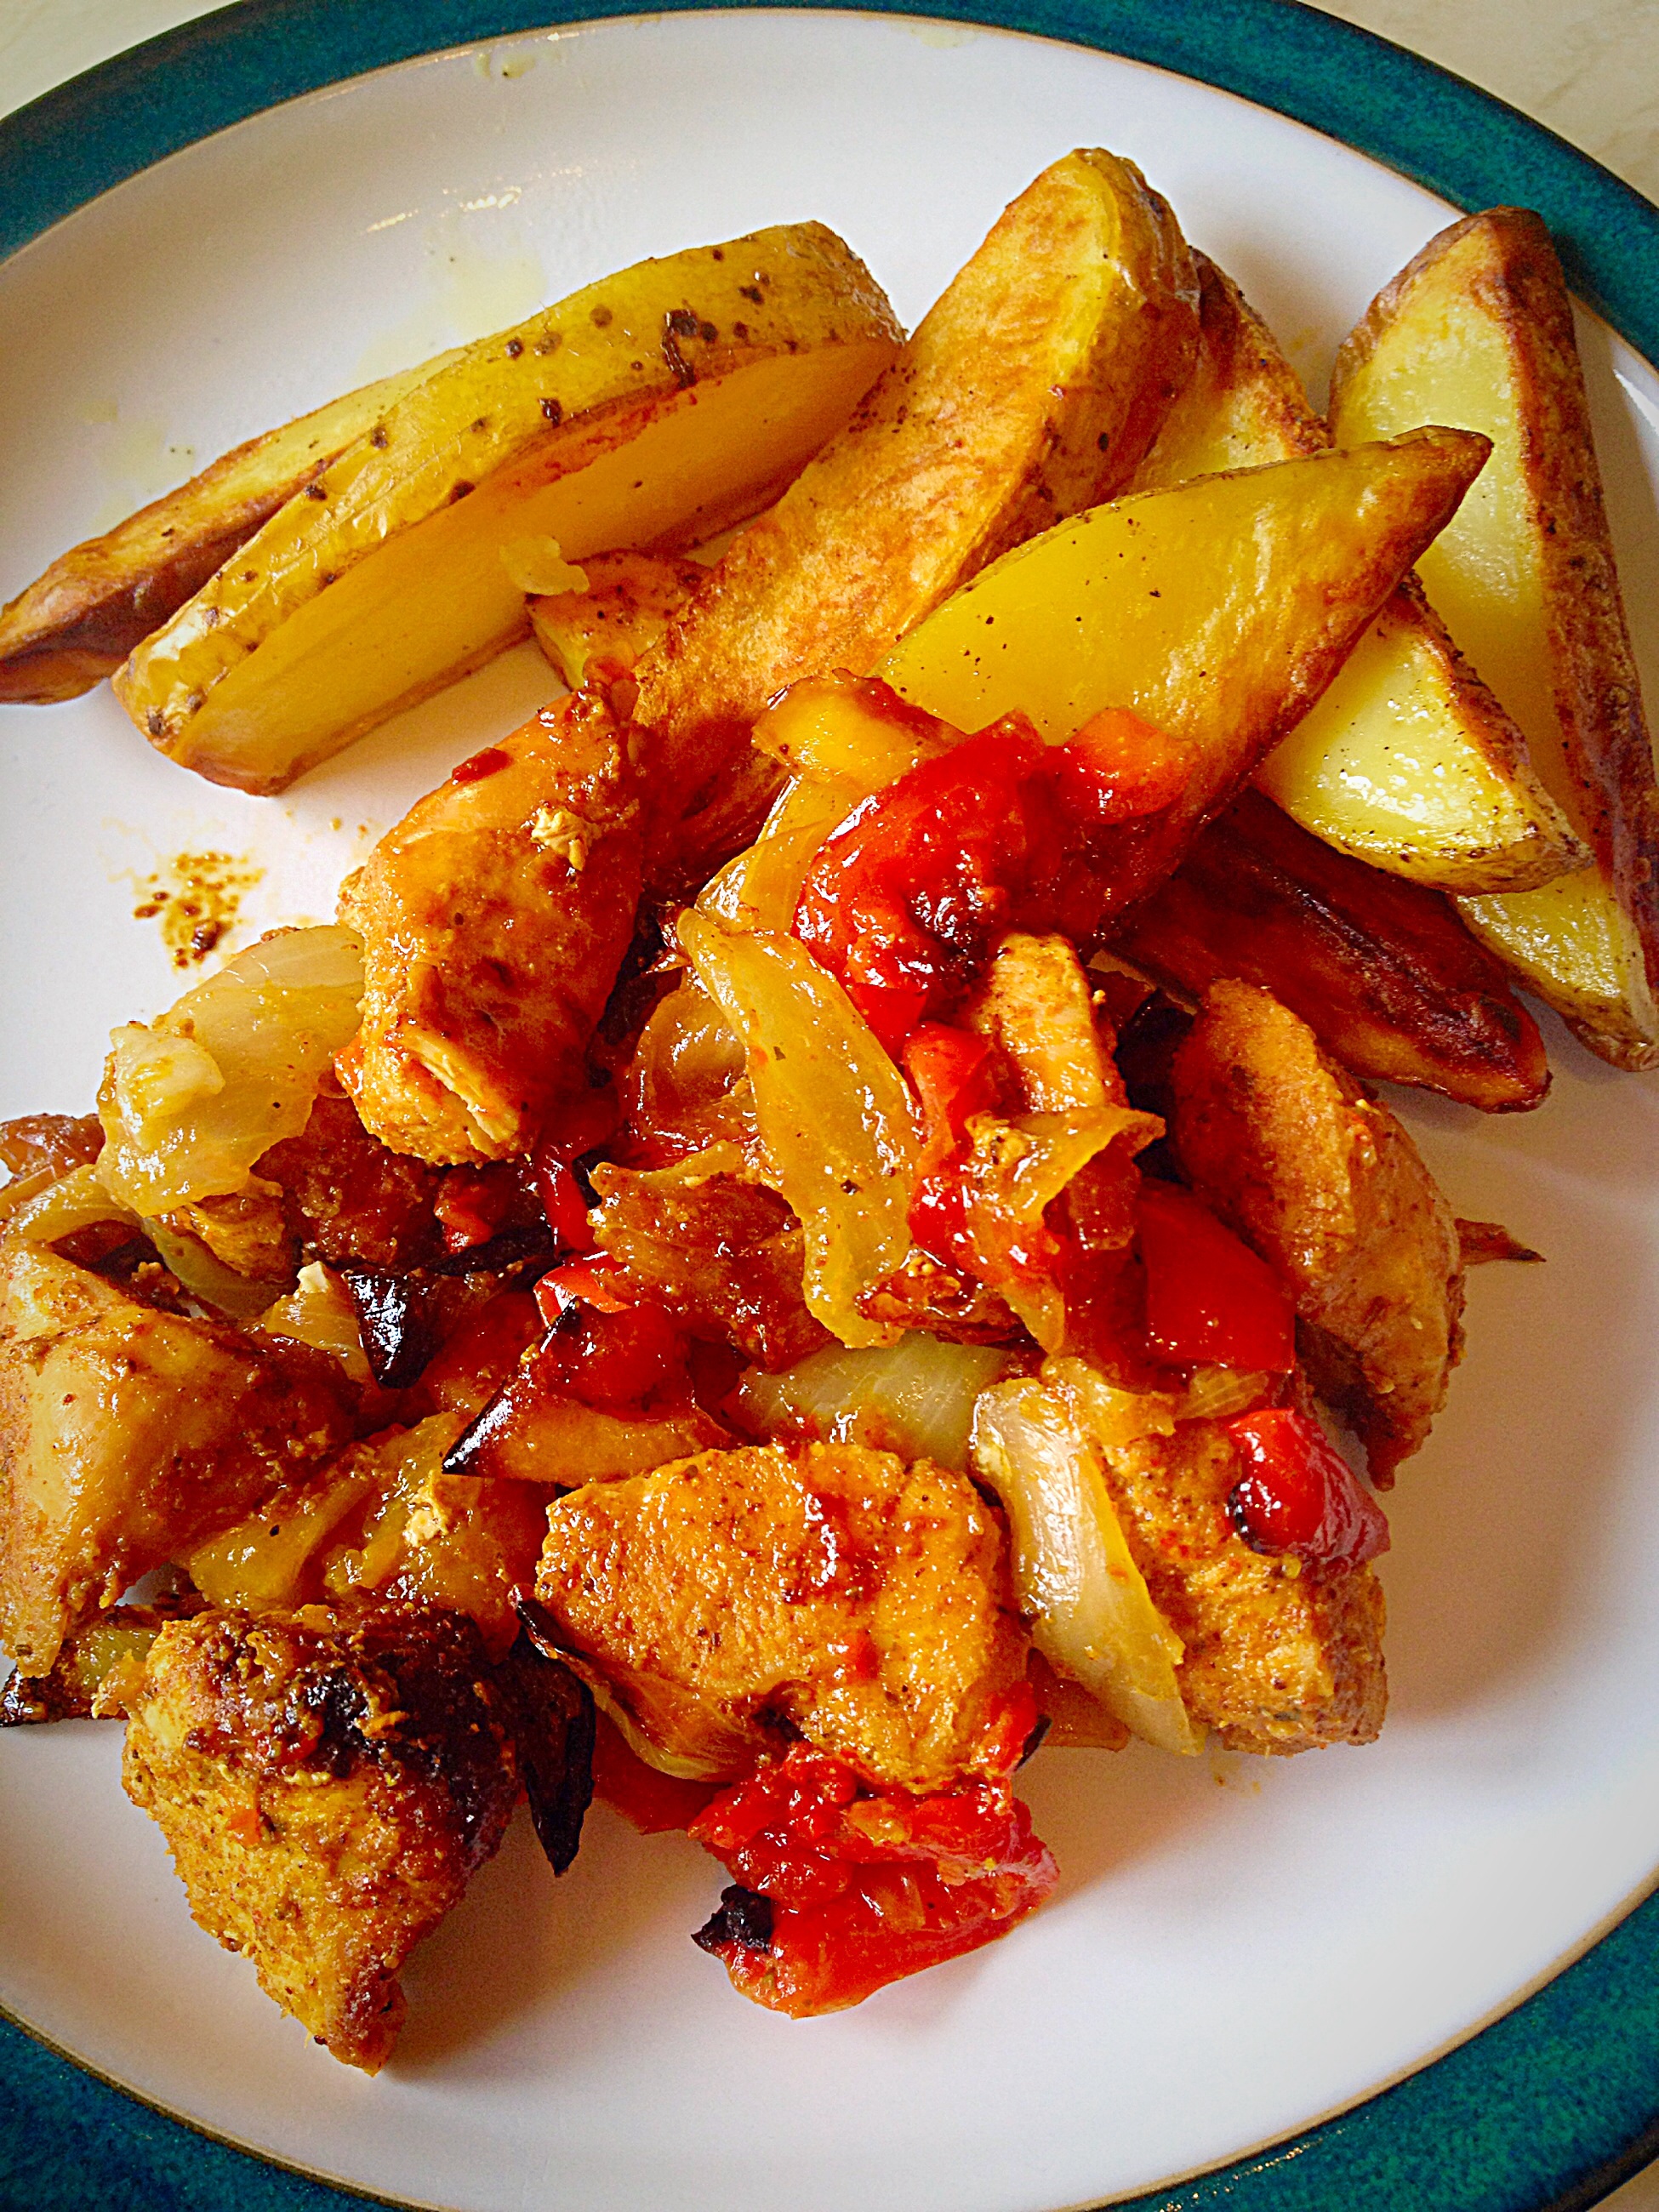
I am talking 5 minutes prep in the morning. Leave in the fridge all day and then throw in the oven for 45 mins before you want to eat. I told you it was Easy!! This delicious dish is fab served in Tortilla Wraps Fajita style, or alternatively, as I have, with potato wedges – well if you’ve got the oven already on…..
Oh my, this Easy Tex Mex Chicken served with wedges – delish!
2 tbs Olive Oil or Rapeseed Oil – I use Kentish Oils
Method :
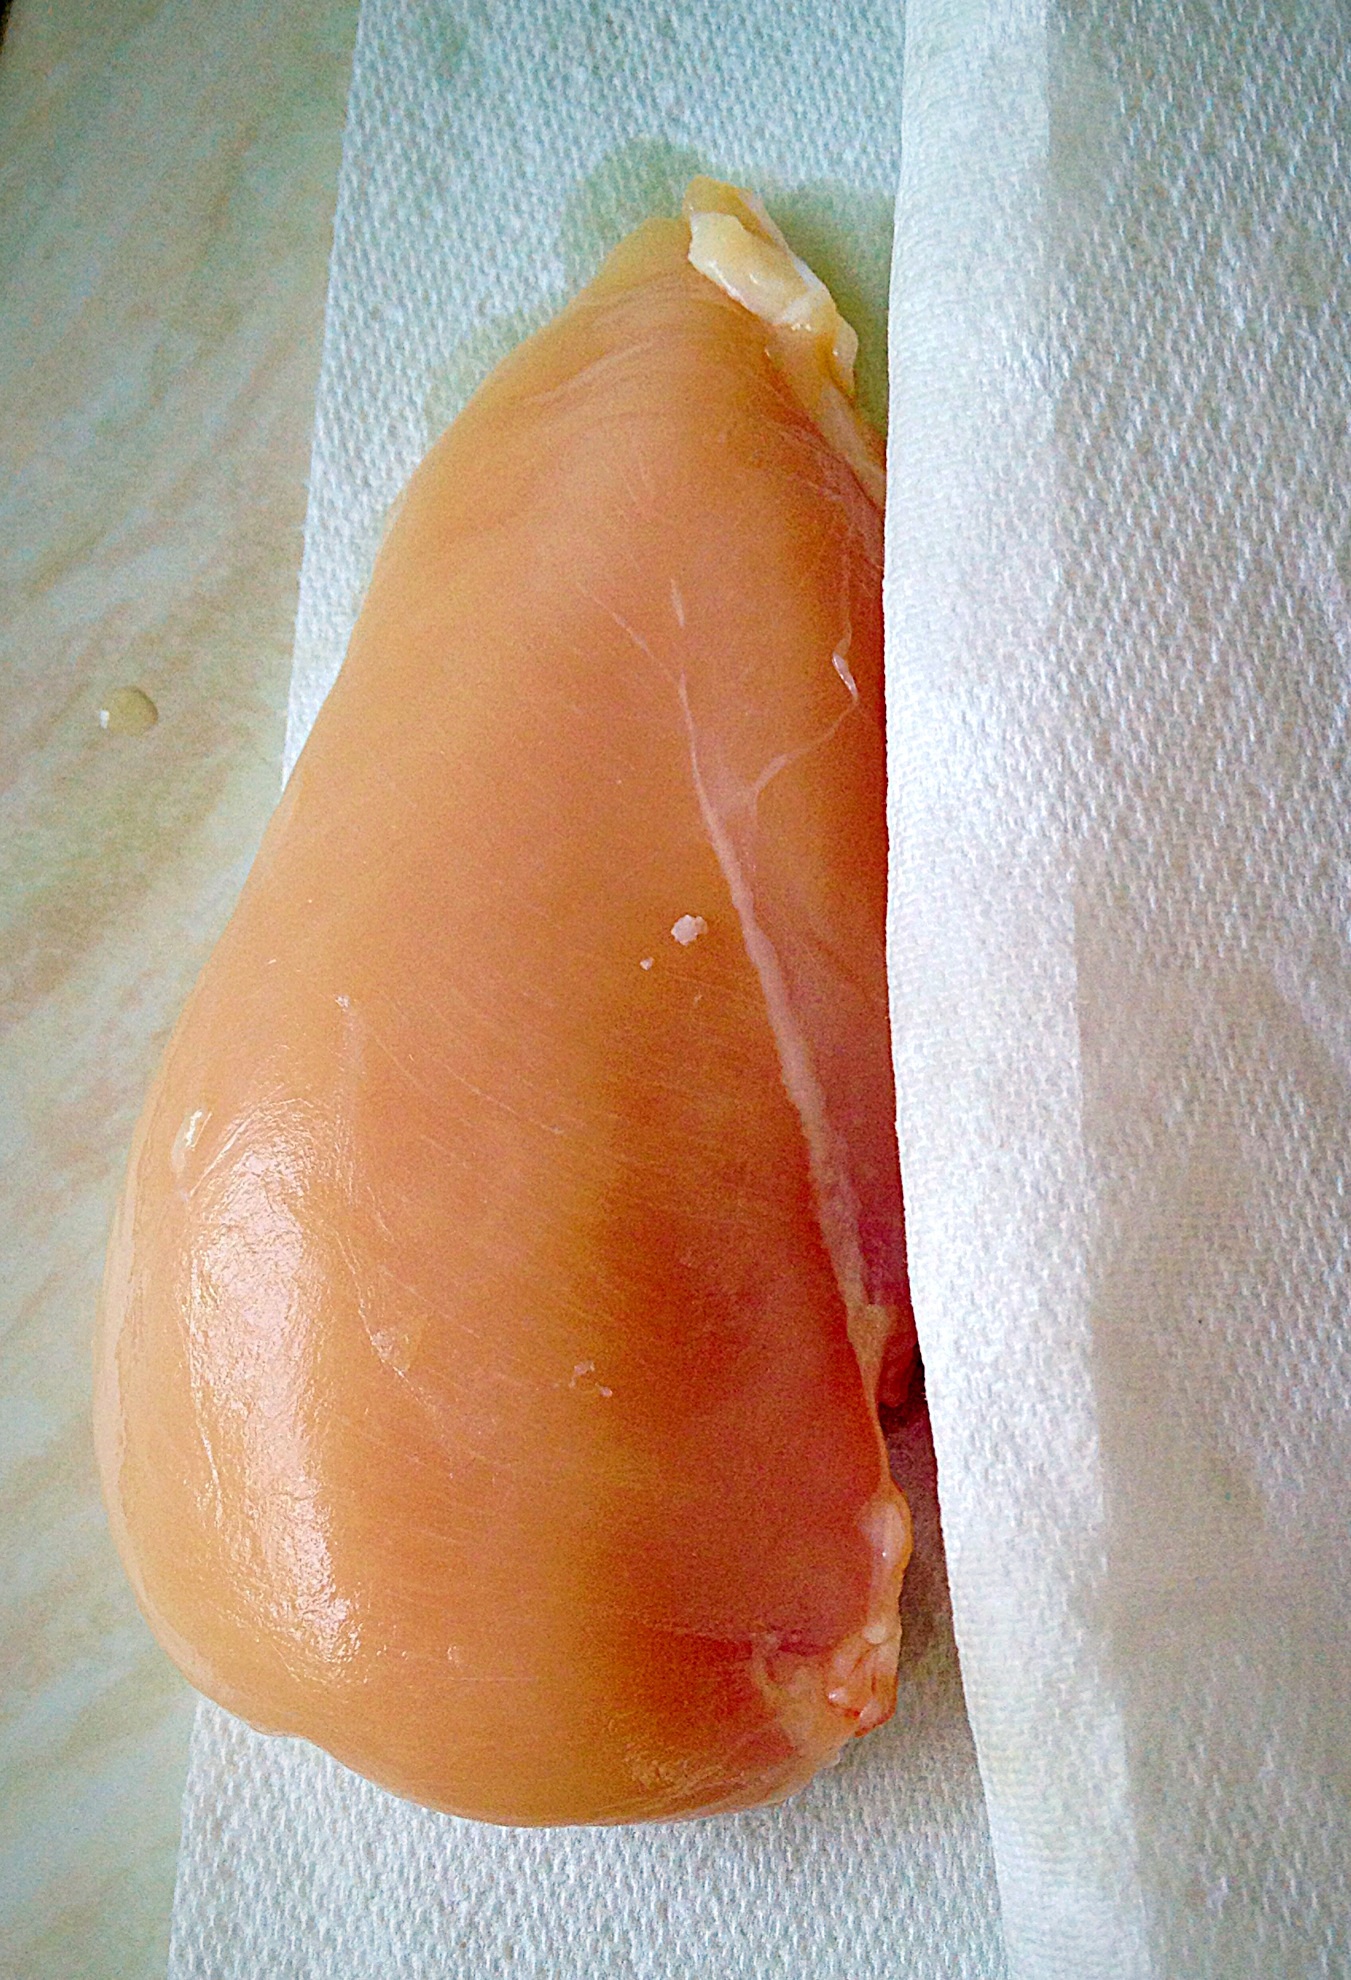
Pat dry the chicken breasts using kitchen paper.
Drying the chicken makes a real difference to the cooked dish.
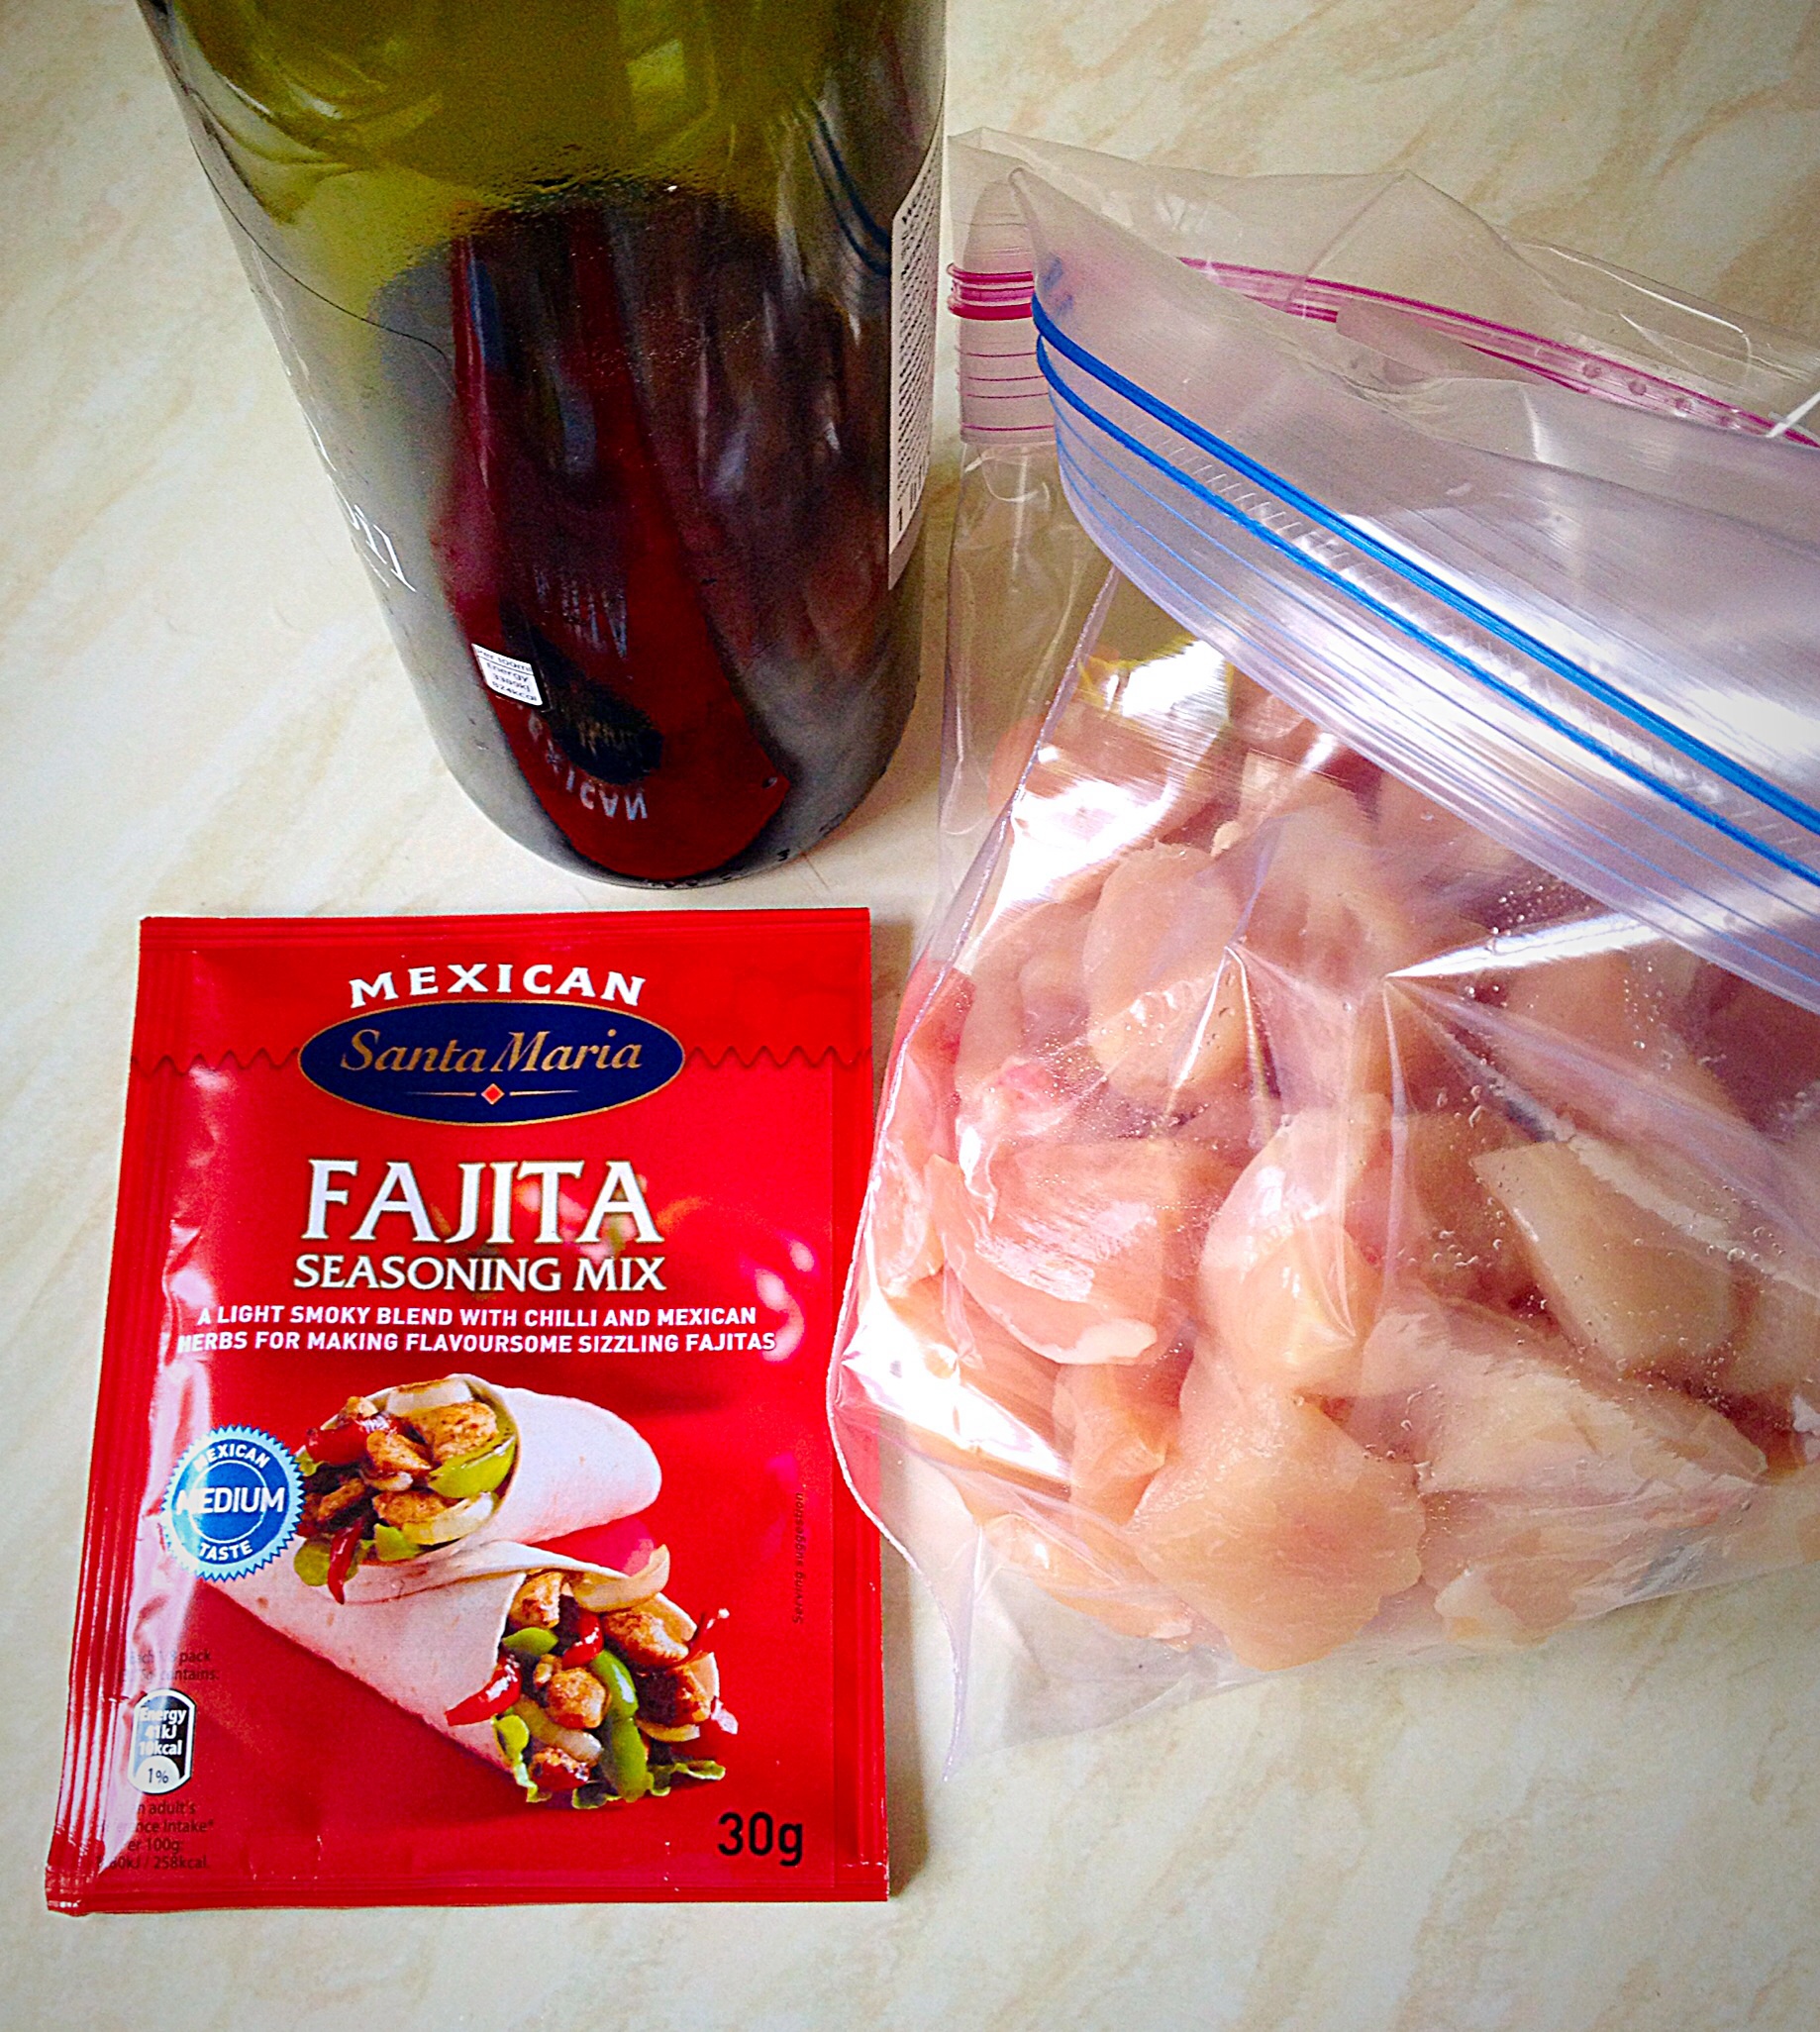
Cut up the chicken into bite sized chunks (I used scissors) and place in a large, freezer bag.
With these 3 ingredients Easy Tex Mex Chicken is just that, EASY!
Pour a couple of glugs of Olive Oil over the diced chicken then tip in the contents of a Fajita mix.
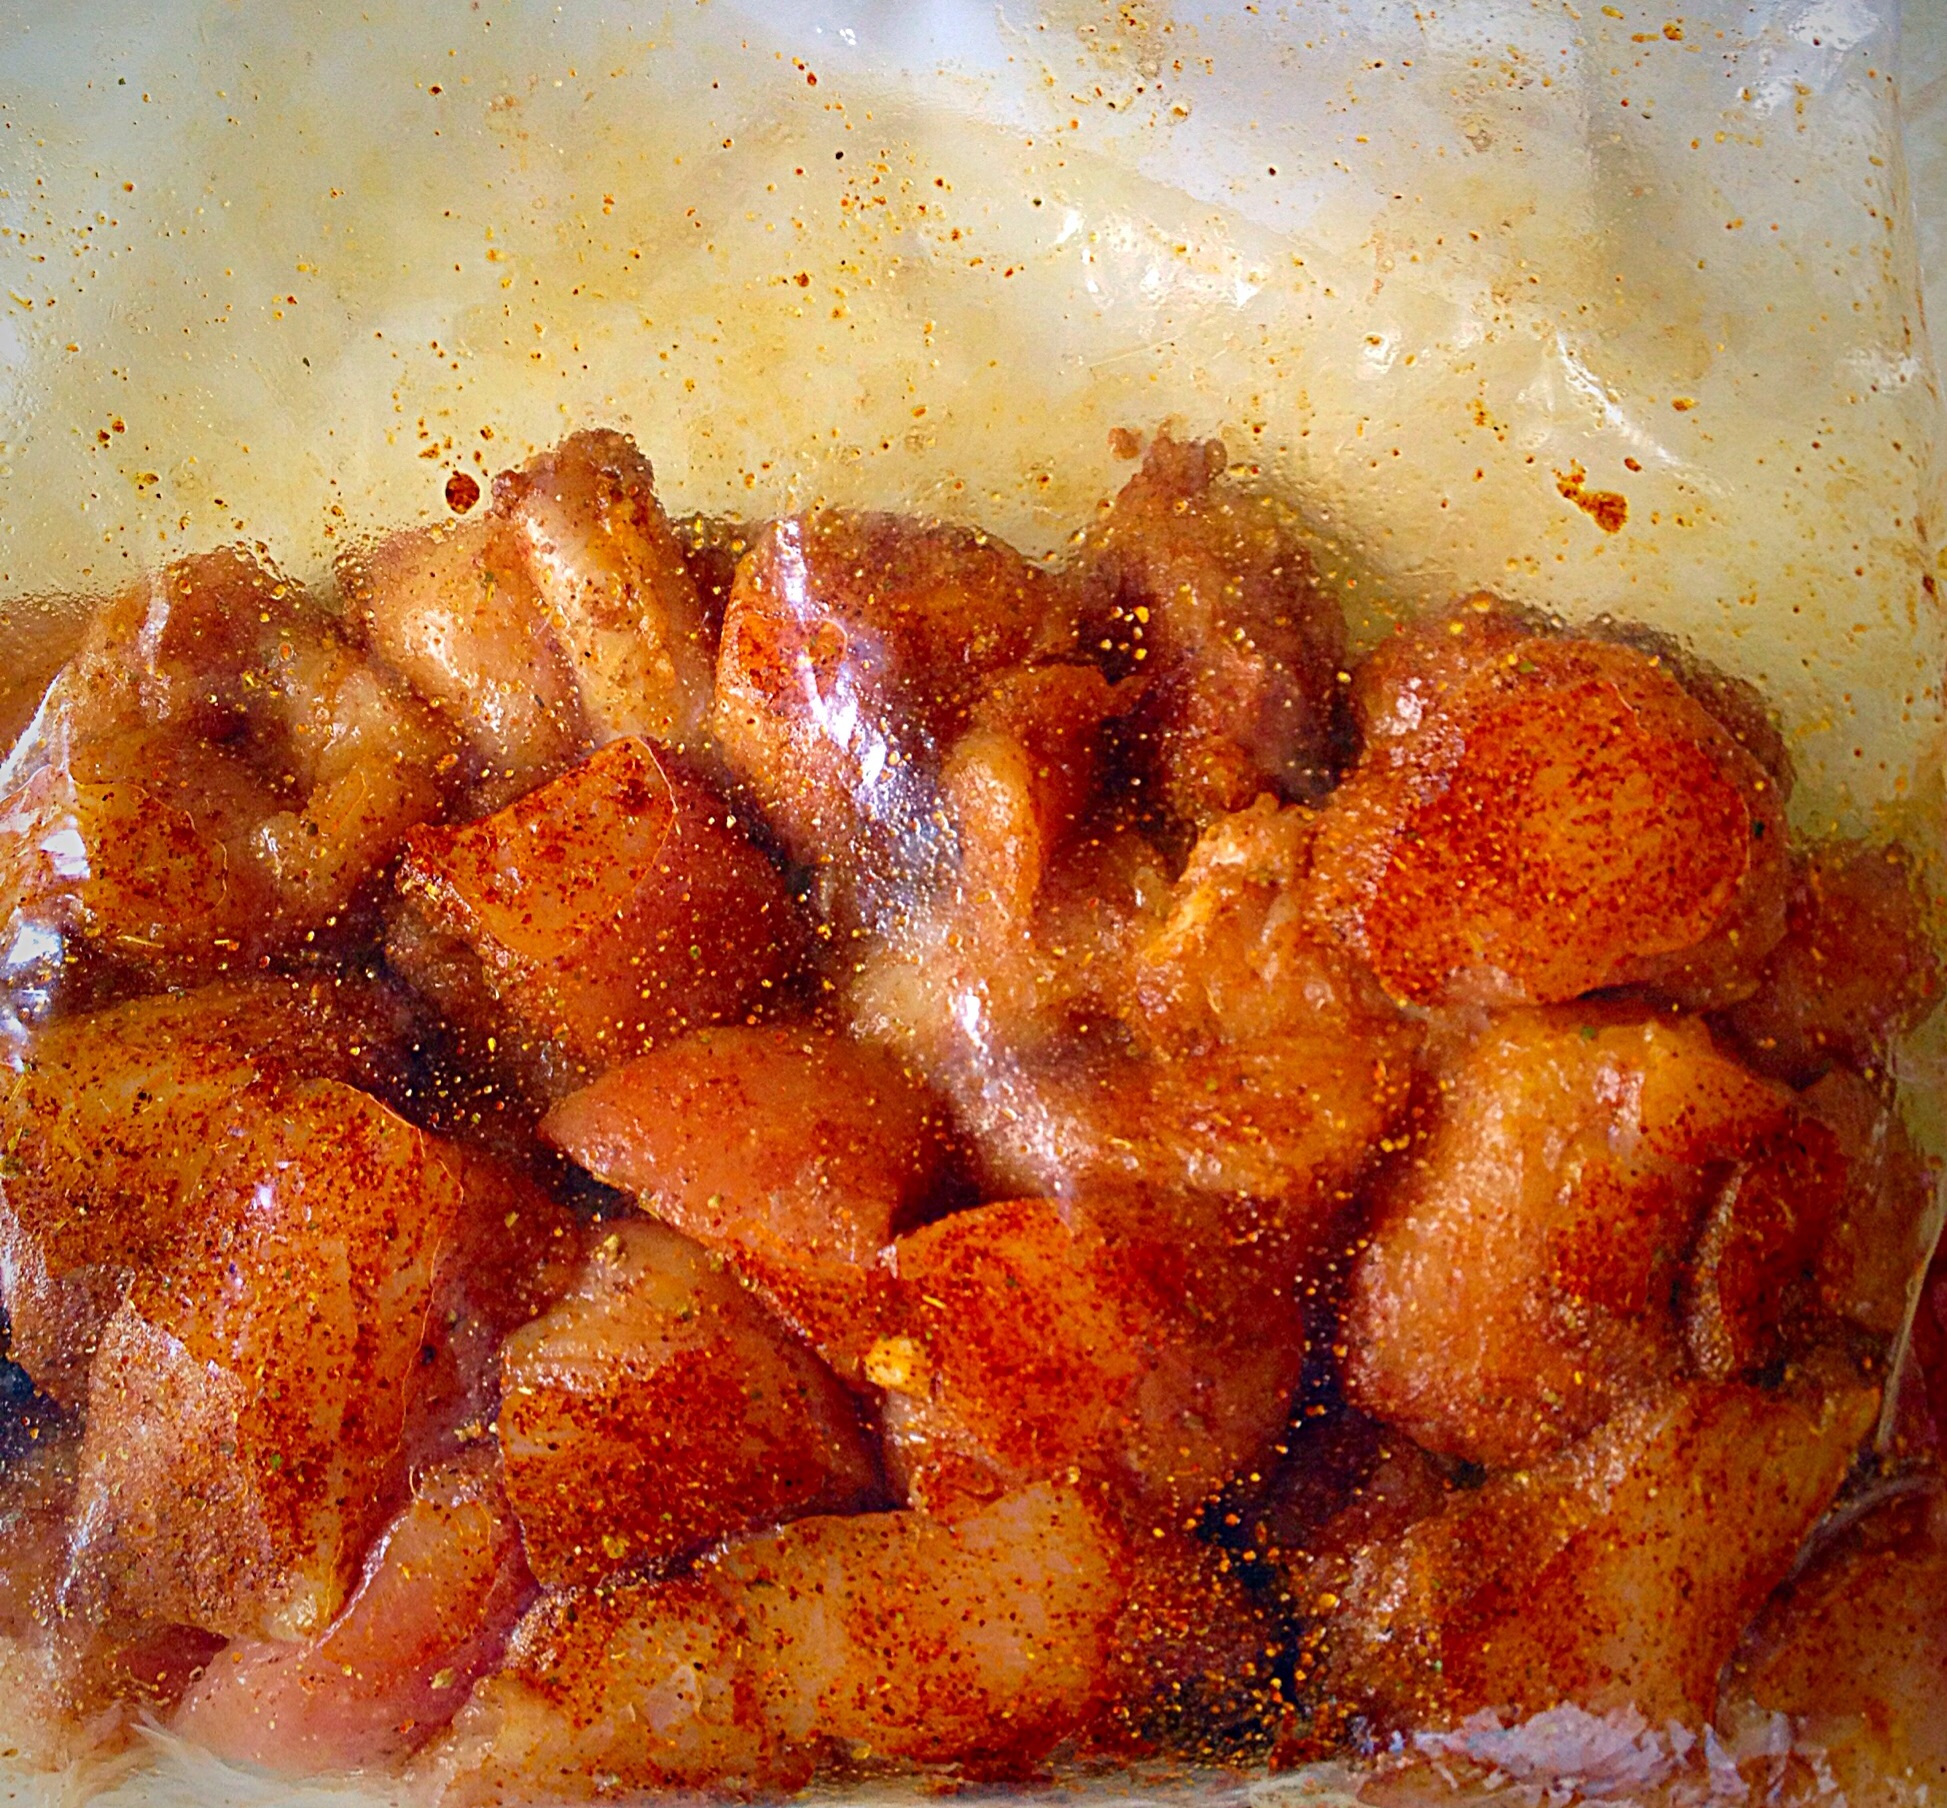
Massage the seasoning into the chicken.
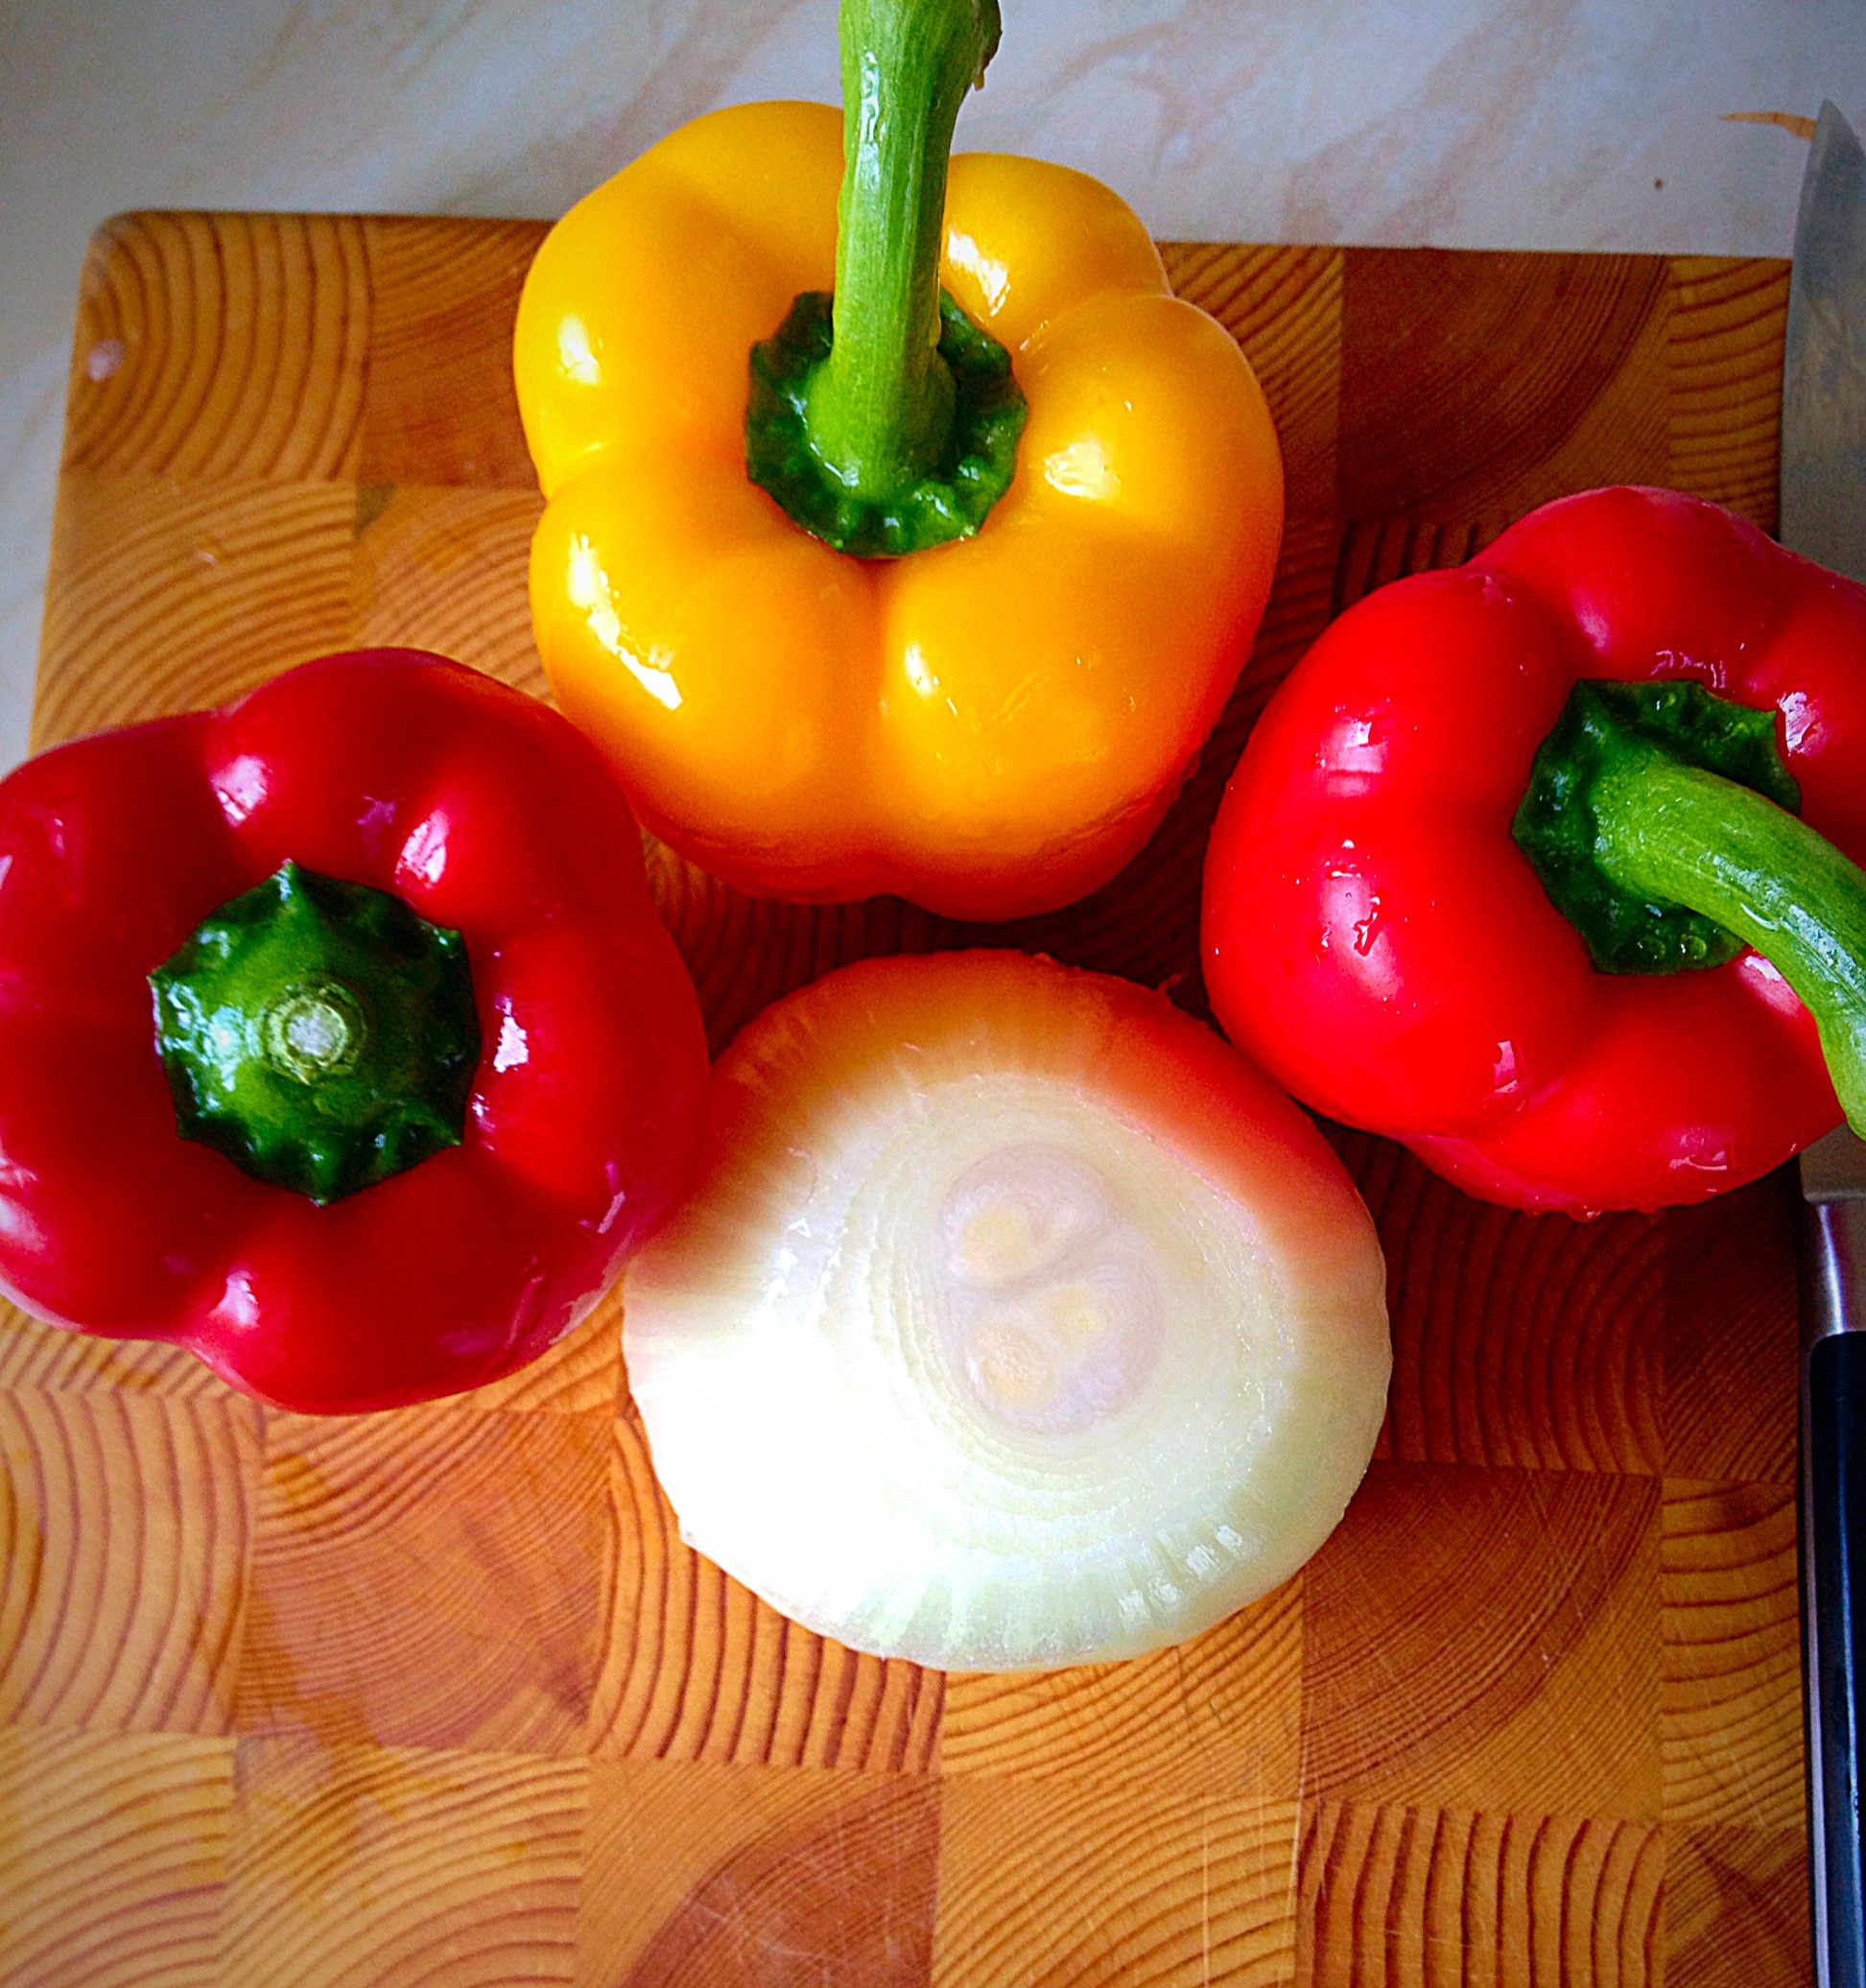
Next it’s time to get chopping!
Ooh so pretty. Choose whichever colour peppers are your favourite and…
Chop the Peppers and Onion so they are about the same size.
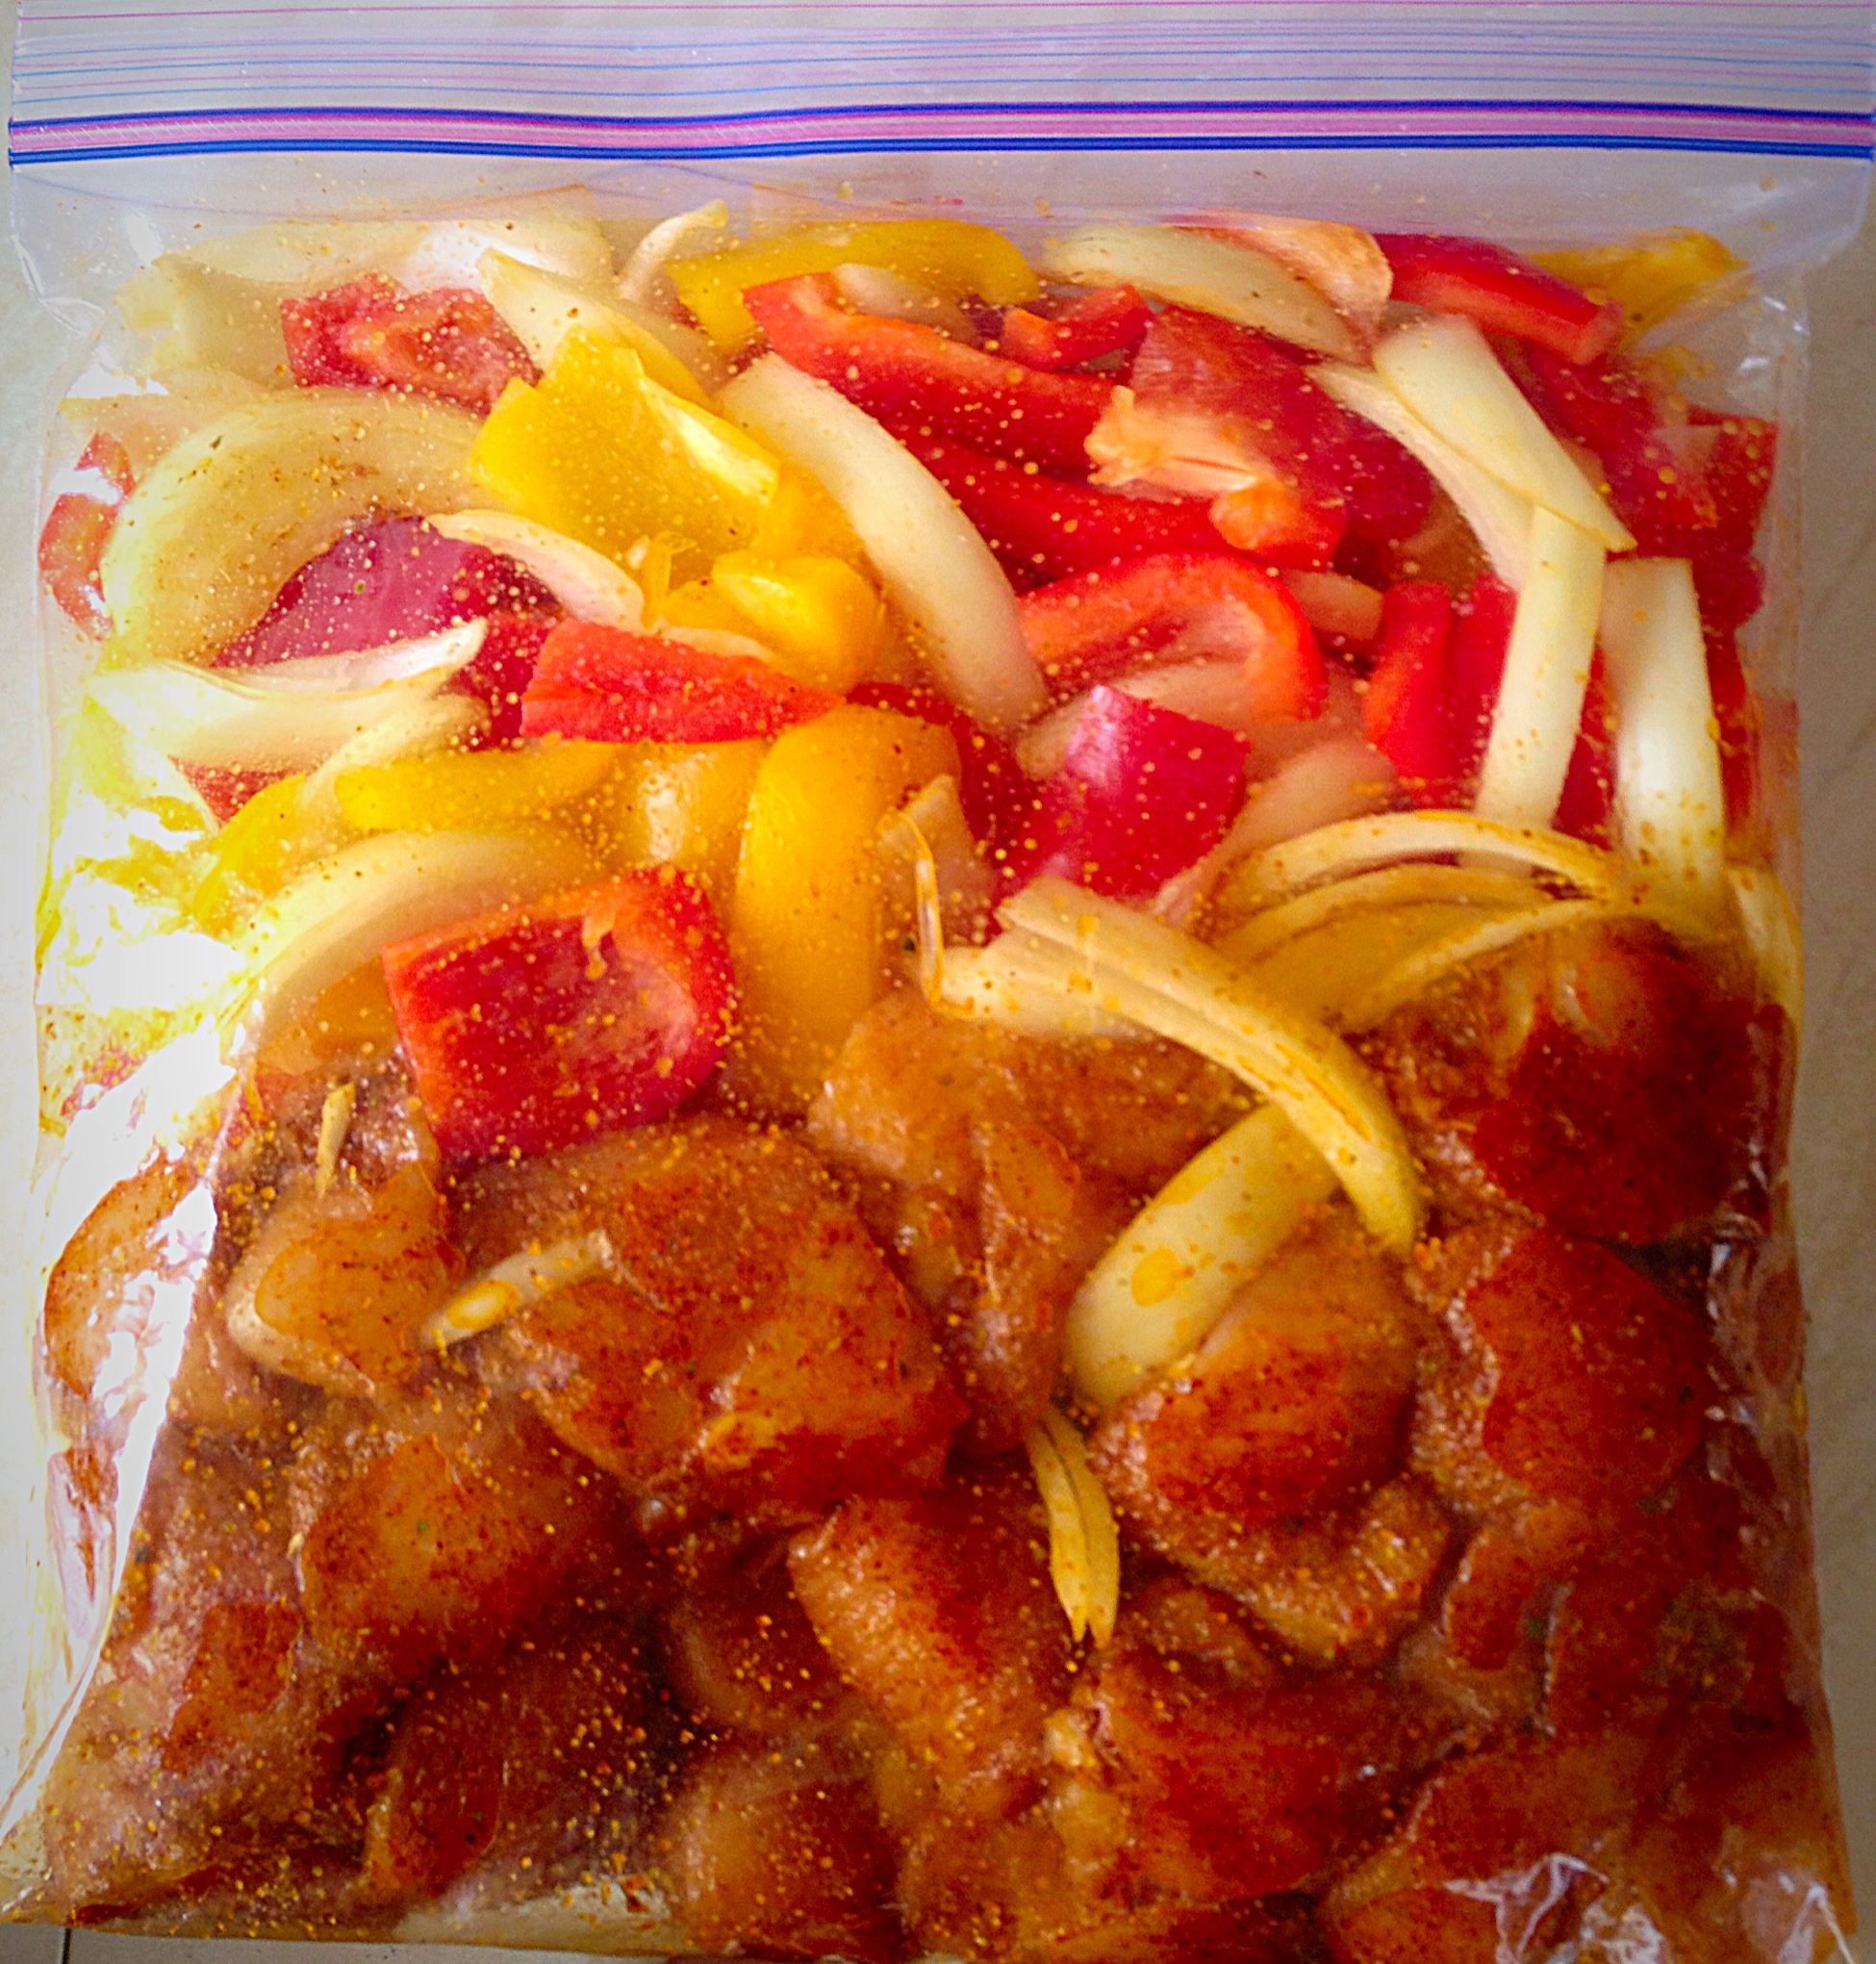
Pop the chopped veggies into the freezer bag with the seasoned chicken and smoosh about a bit so they are covered in the spicy oil.
Easy Tex Mex Chicken in a bag!!
I prepared the Easy Tex Mex Chicken in the morning and then stashed it in the fridge until dinner time.
To cook, tip the contents of the freezer bag into a shallow oven proof dish. Place in a preheated oven 200C/185C fan and cook for 45 minutes.
Easy Tex Mex Chicken with softened peppers and caramelised onions – delish!
To serve either warm some soft tortillas and load up fajita style, or, as I did tonight simply popped in some Baked Garlic Herb Potato Wedges . Since the oven is on it makes sense.
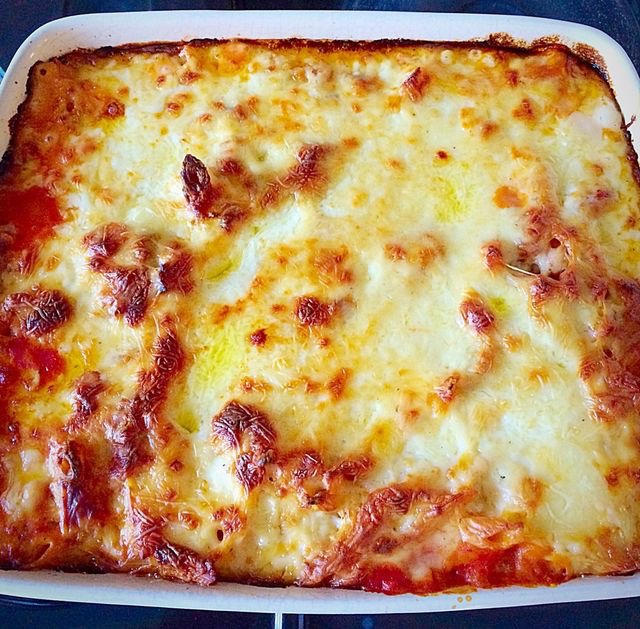
Hi, roadway I’m sharimg my recipe for Chicken Four Cheese Lasagne. It is a tasty twist on a classic dish. While there are a few steps to follow, each part of the recipe is easy to follow. And there is no need to precook the lasagne sheets. Making this recipe using minced chicken is a tasty twist on an Italian classic.
Delicious, cheese sauce topped, chicken lasagne.
As a busy household, make ahead meals are a life, or should I say a sanity saver.
A perfect, portable meal for sharing with others.
By substituting beef with minced chicken, the resulting baked lasagne becomes a lighter dish. Not lighter in calories, with the delicious four cheese sauce. Rather, not as heavy on the stomach. And the four cheese sauce was the result of me raiding the fridge for leftover Christmas cheese.
The Four Cheese Sauce tops of this lasagne perfectly!!
Since minced chicken may not be available everywhere, minced turkey is a great substitute. Alternatively, processing skinless chicken breasts, thighs or a combination in a food processor would be another way to make your own chicken mince. Another option, finely chopped chicken using a sharp knife would work and give the lasagne added texture.
Recipe : Chicken Four Cheese Lasagne Serves 6-8 portions.
1 Green Pepper – washed, deseeded and finely diced
2-3 Carrots – peeled and finely diced
3 Garlic Cloves – minced or crushed (using a garlic press)
3 x 400g Chopped Tinned Tomatoes
2tbsp Tomato Puree
1tsp Dried Mixed Herbs – or fresh basil, oregano, parsley and thyme – to taste
1tsp Sugar
Salt and Ground Black Pepper – to taste
Cheese Sauce :
3tbsp Butter
3tbsp Plain White Flour
750-800ml/Approx 26fl oz Whole Milk
6oz Hard Cheese – I used a 50/50 mixture of Mature Cheddar and Swiss Cheese cut into small cubes or grated
4.5oz/125g Riccota Cheese
250g/8.5oz Mozzarella Cheese
1 tsp Nutmeg – freshly grated if possible
Salt and Freshly Ground Black Pepper to taste.
Butter – For Greasing the Lasagne Dish
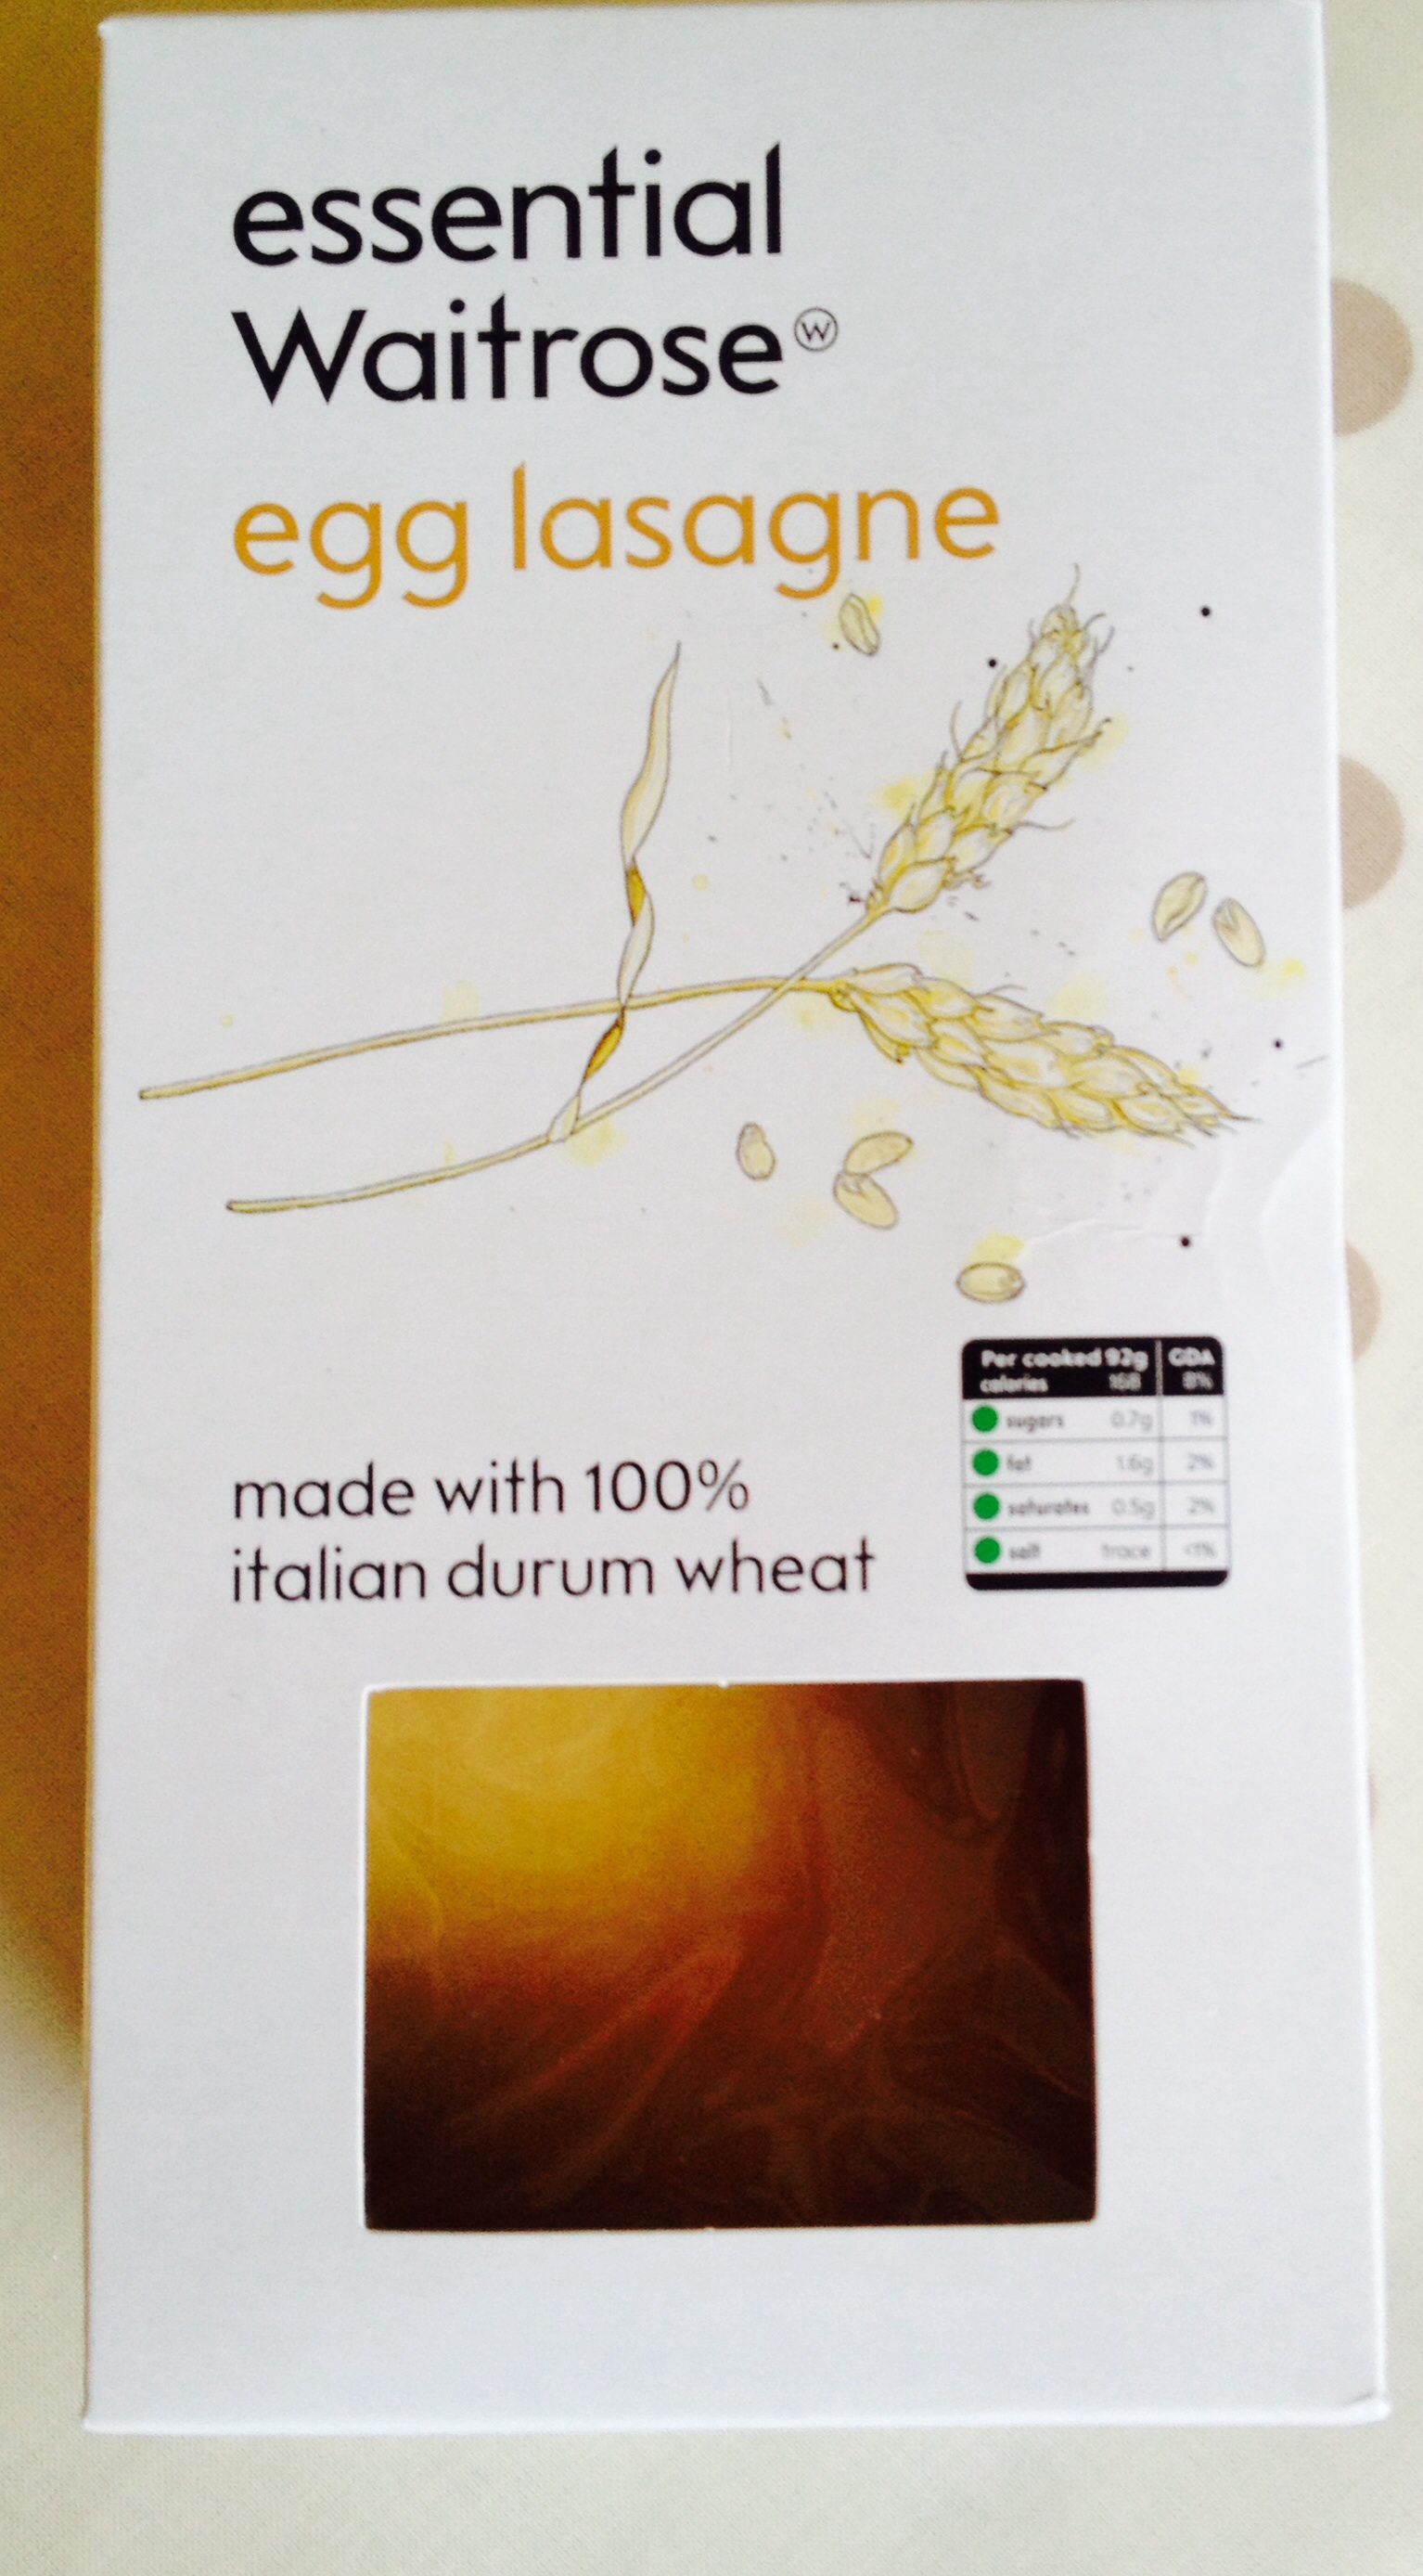
1 packet Dried Egg Lasagne Sheets 375g/13-14oz – dont worry if the packet requires pre-cooking you won’t need to.
Method:
A rectangular, ovenproof dish approximately 30cm x 20cm x 9cm (12in x 8in x 3.5in) is needed to make this lasagne.
Making The Chicken Lasagne Sauce
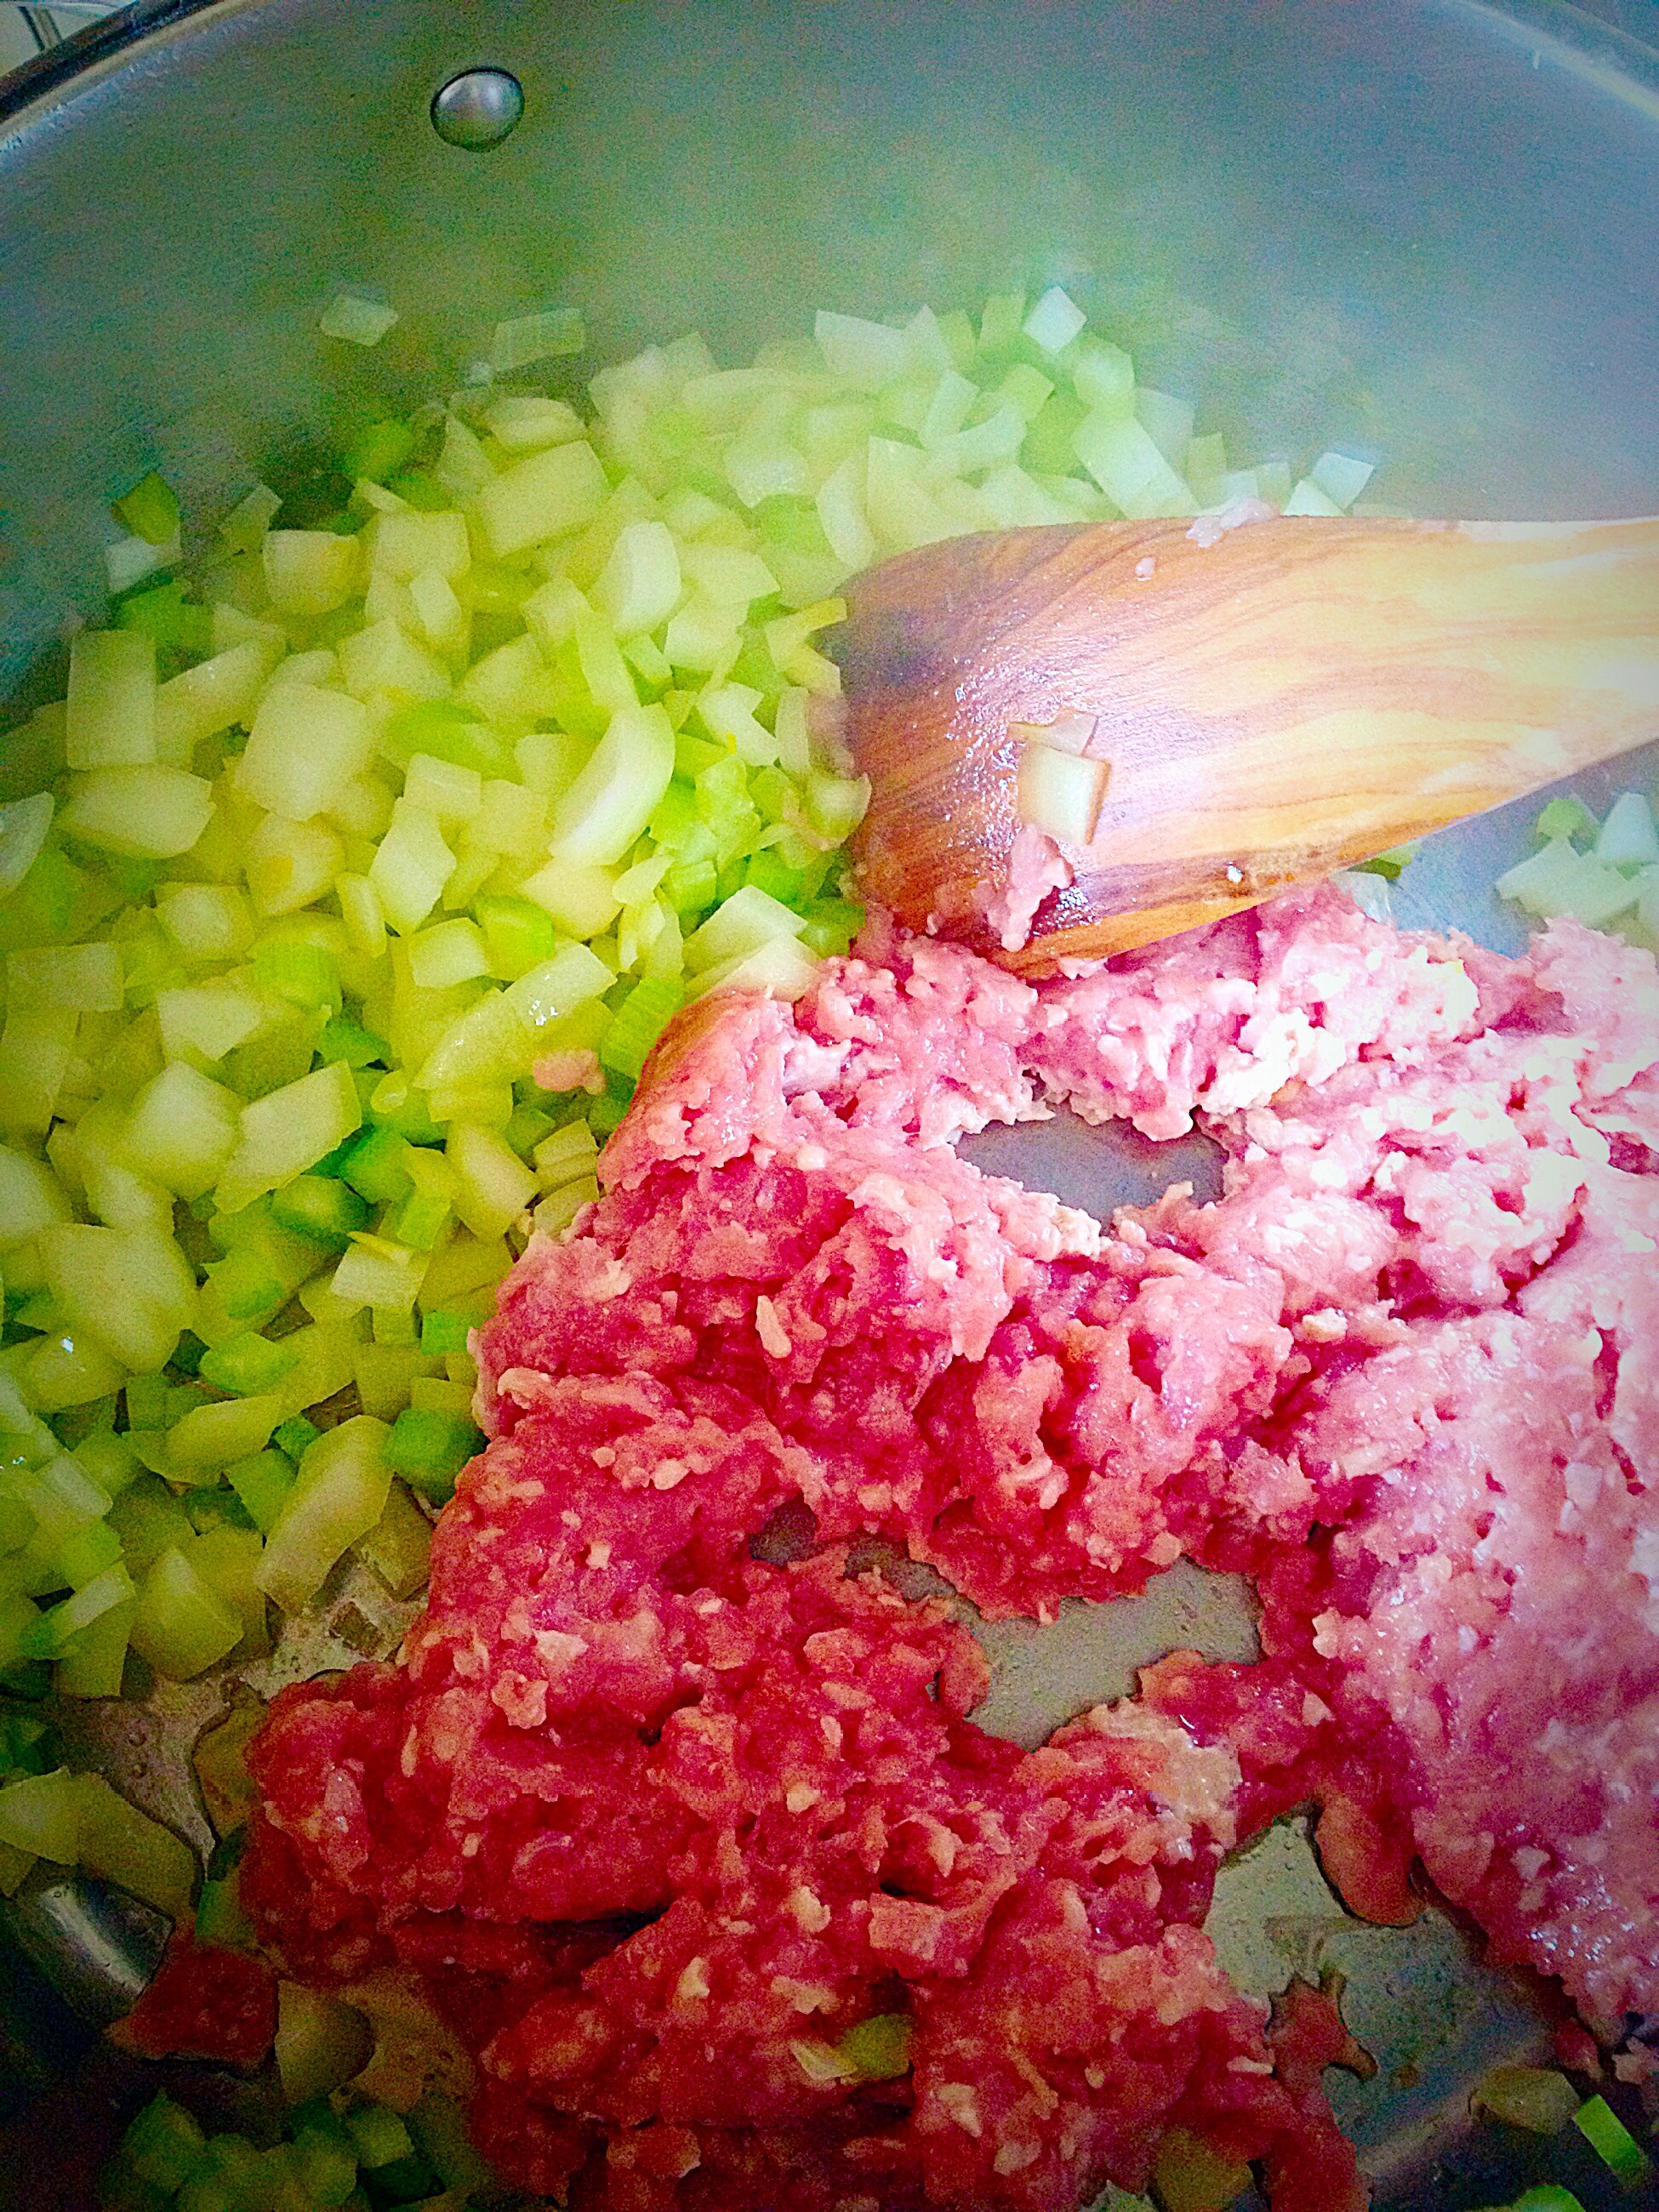
First of all finely chop the onion, celery, green pepper and carrots.
Heat the olive oil in a large sauté pan.
Add the diced onion and sauté for 5 minutes over a medium heat until the onions start to turn translucent.
Next add the diced celery to the pan and continue to sauté for a couple more minutes until the celery starts to soften.
Push the onions and celery to one side of the pan and add the Chicken mince to the other side. Alternatively if you don’t have a large sauté pan, remove the onions and celery, into a separate dish and then add the Chicken to the pan.
Cook the chicken, using a wooden spatula to break up the mince so large clumps of meat don’t form.
Having a large sauté pan means you can cook all the ingredients in one go!!!
Unlike beef mince, the chicken mince will get lighter as it cooks.
Cook the chicken turns opaque but not browned.
Now add the carrots, green pepper and the minced garlic.
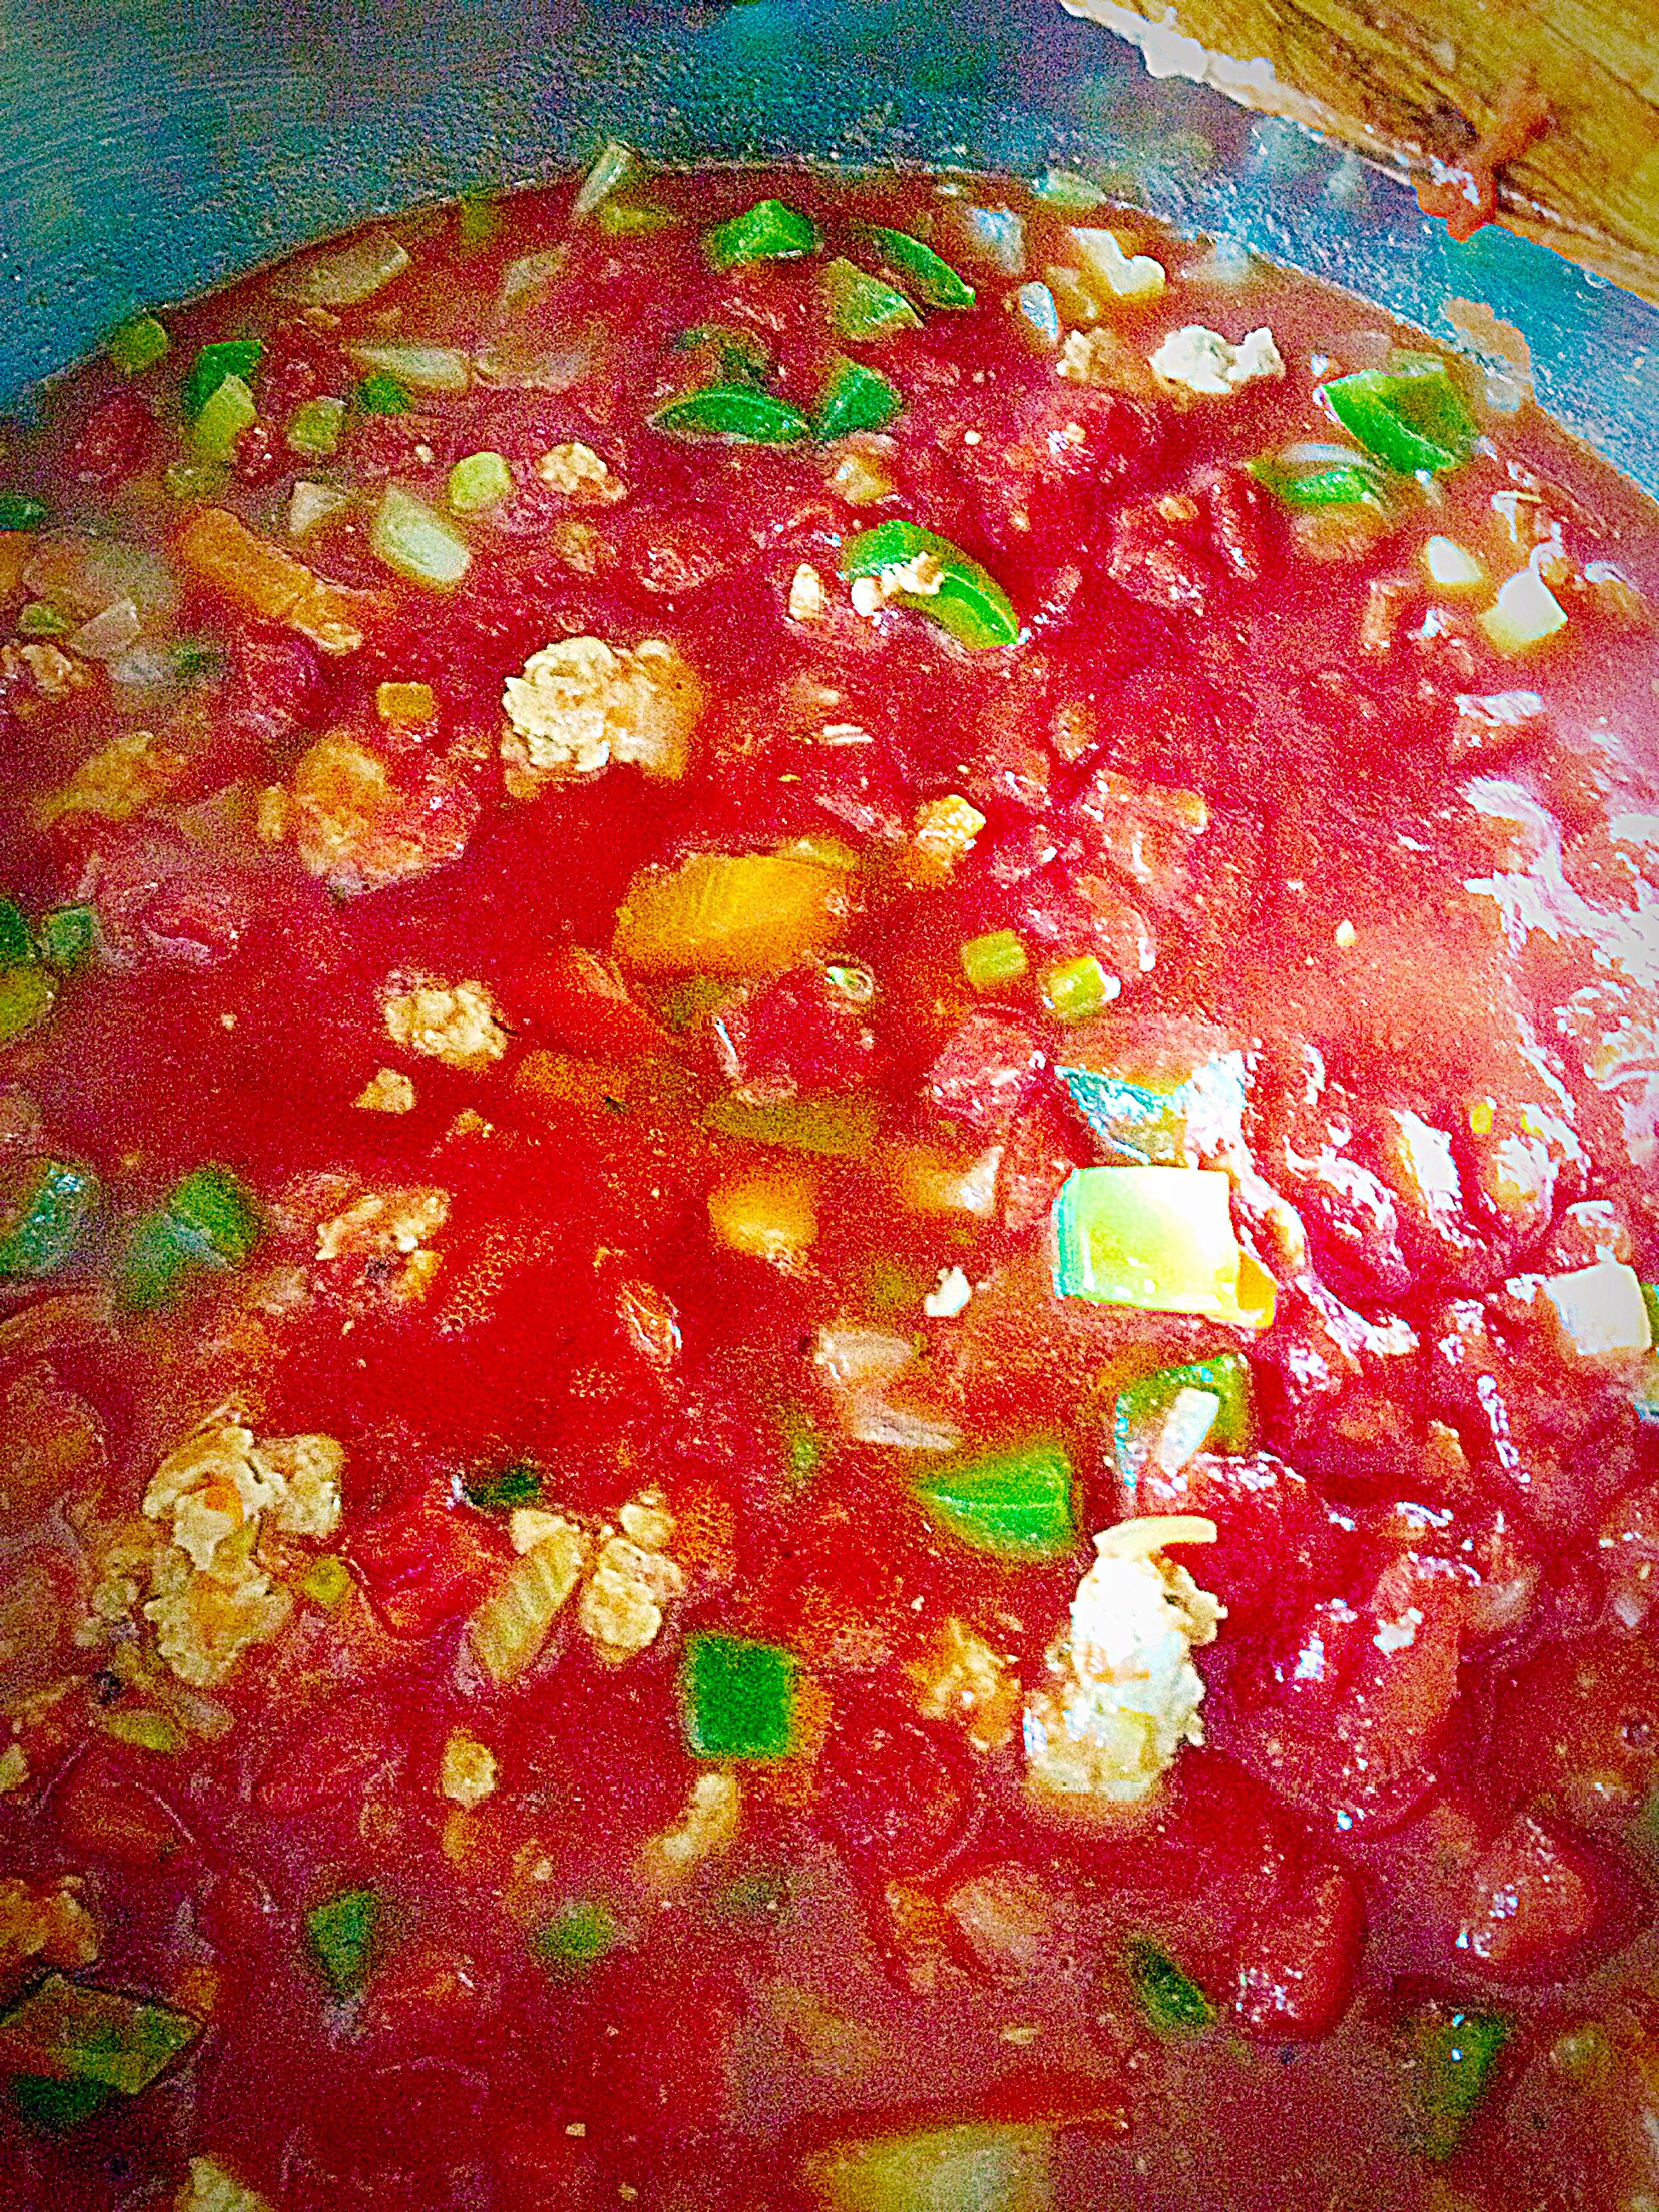
As soon as everything is mixed together add the tomatoes. Also fill each empty can almost to the top with water and add that to the pan.
Add the tomato purée, dried or fresh chopped herbs.
Give everything a good stir then add the sugar, half a teaspoon of salt and a good grinding of black pepper.
Turn the heat to medium-low and leave to gently bubble away on the stove for an hour, stirring occasionally.
Making Four Cheese Sauce Lasagne Topping
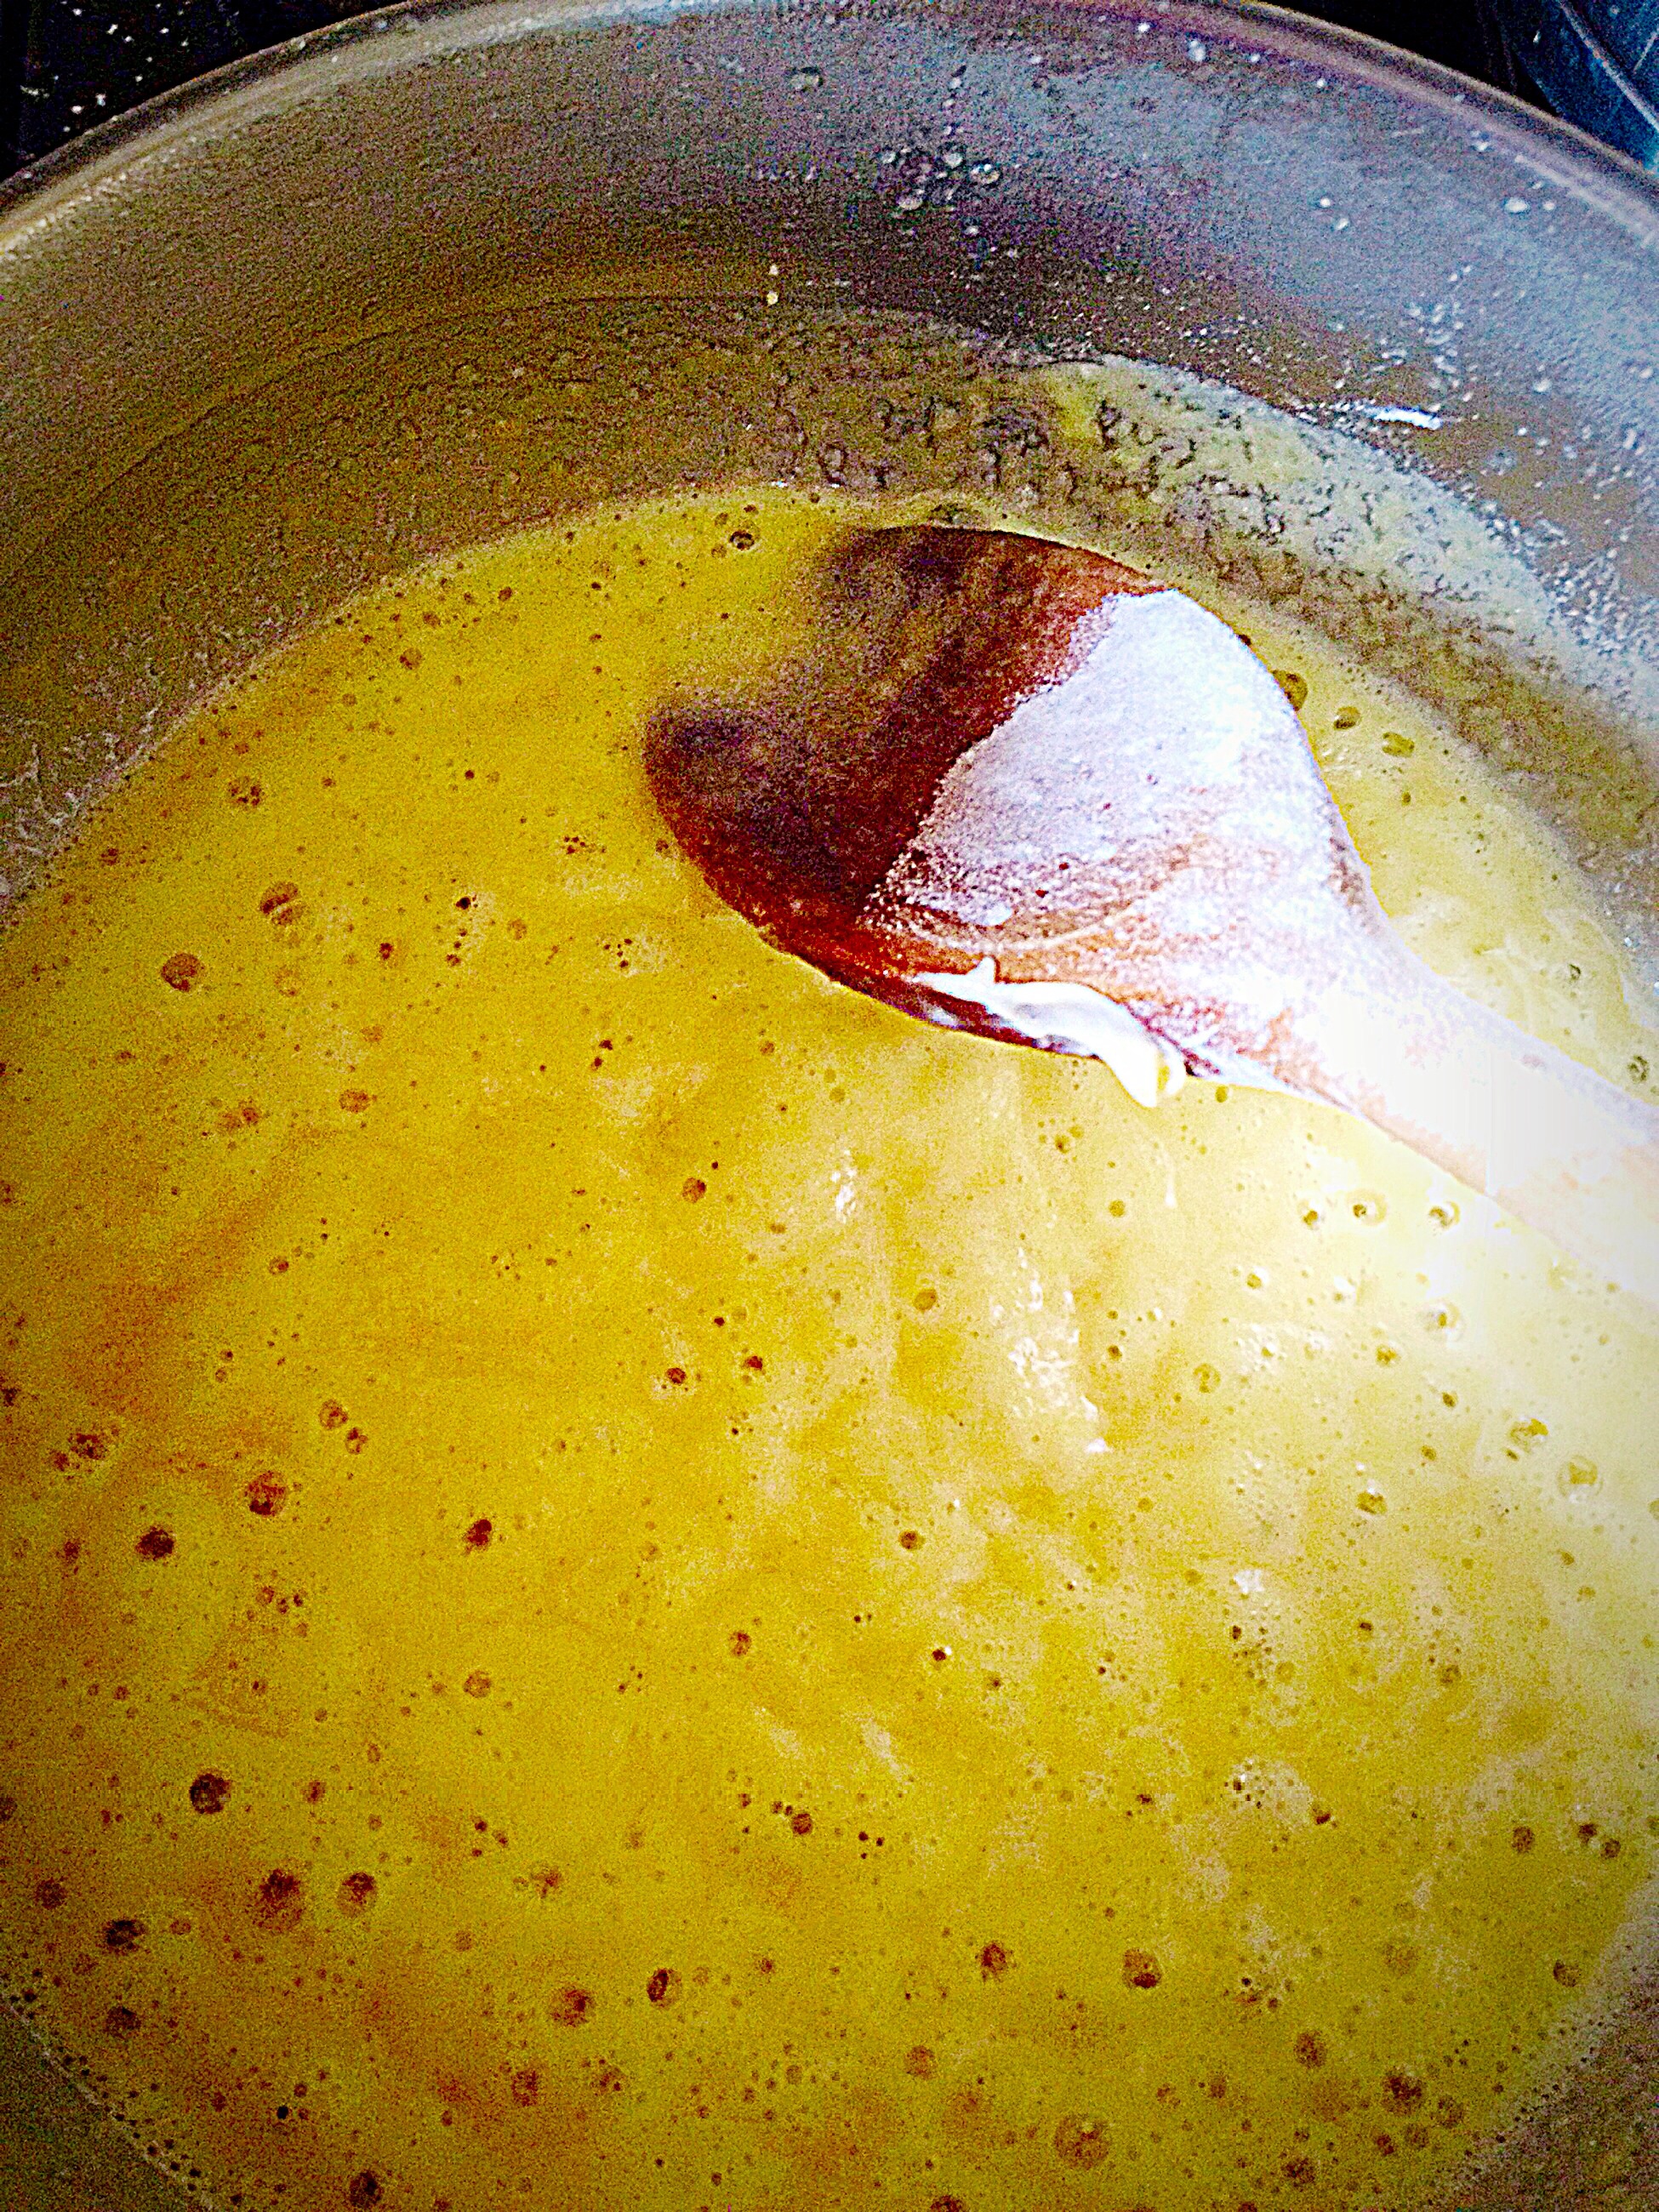
Place a medium sized pan over a gentle heat. Add the butter and cook until melted and starting to sizzle.
Next tip the flour on to the melted butter stirring constantly until combined and smooth.
Continue to cook for a couple of minutes.
This is what the butter and flour should look like.
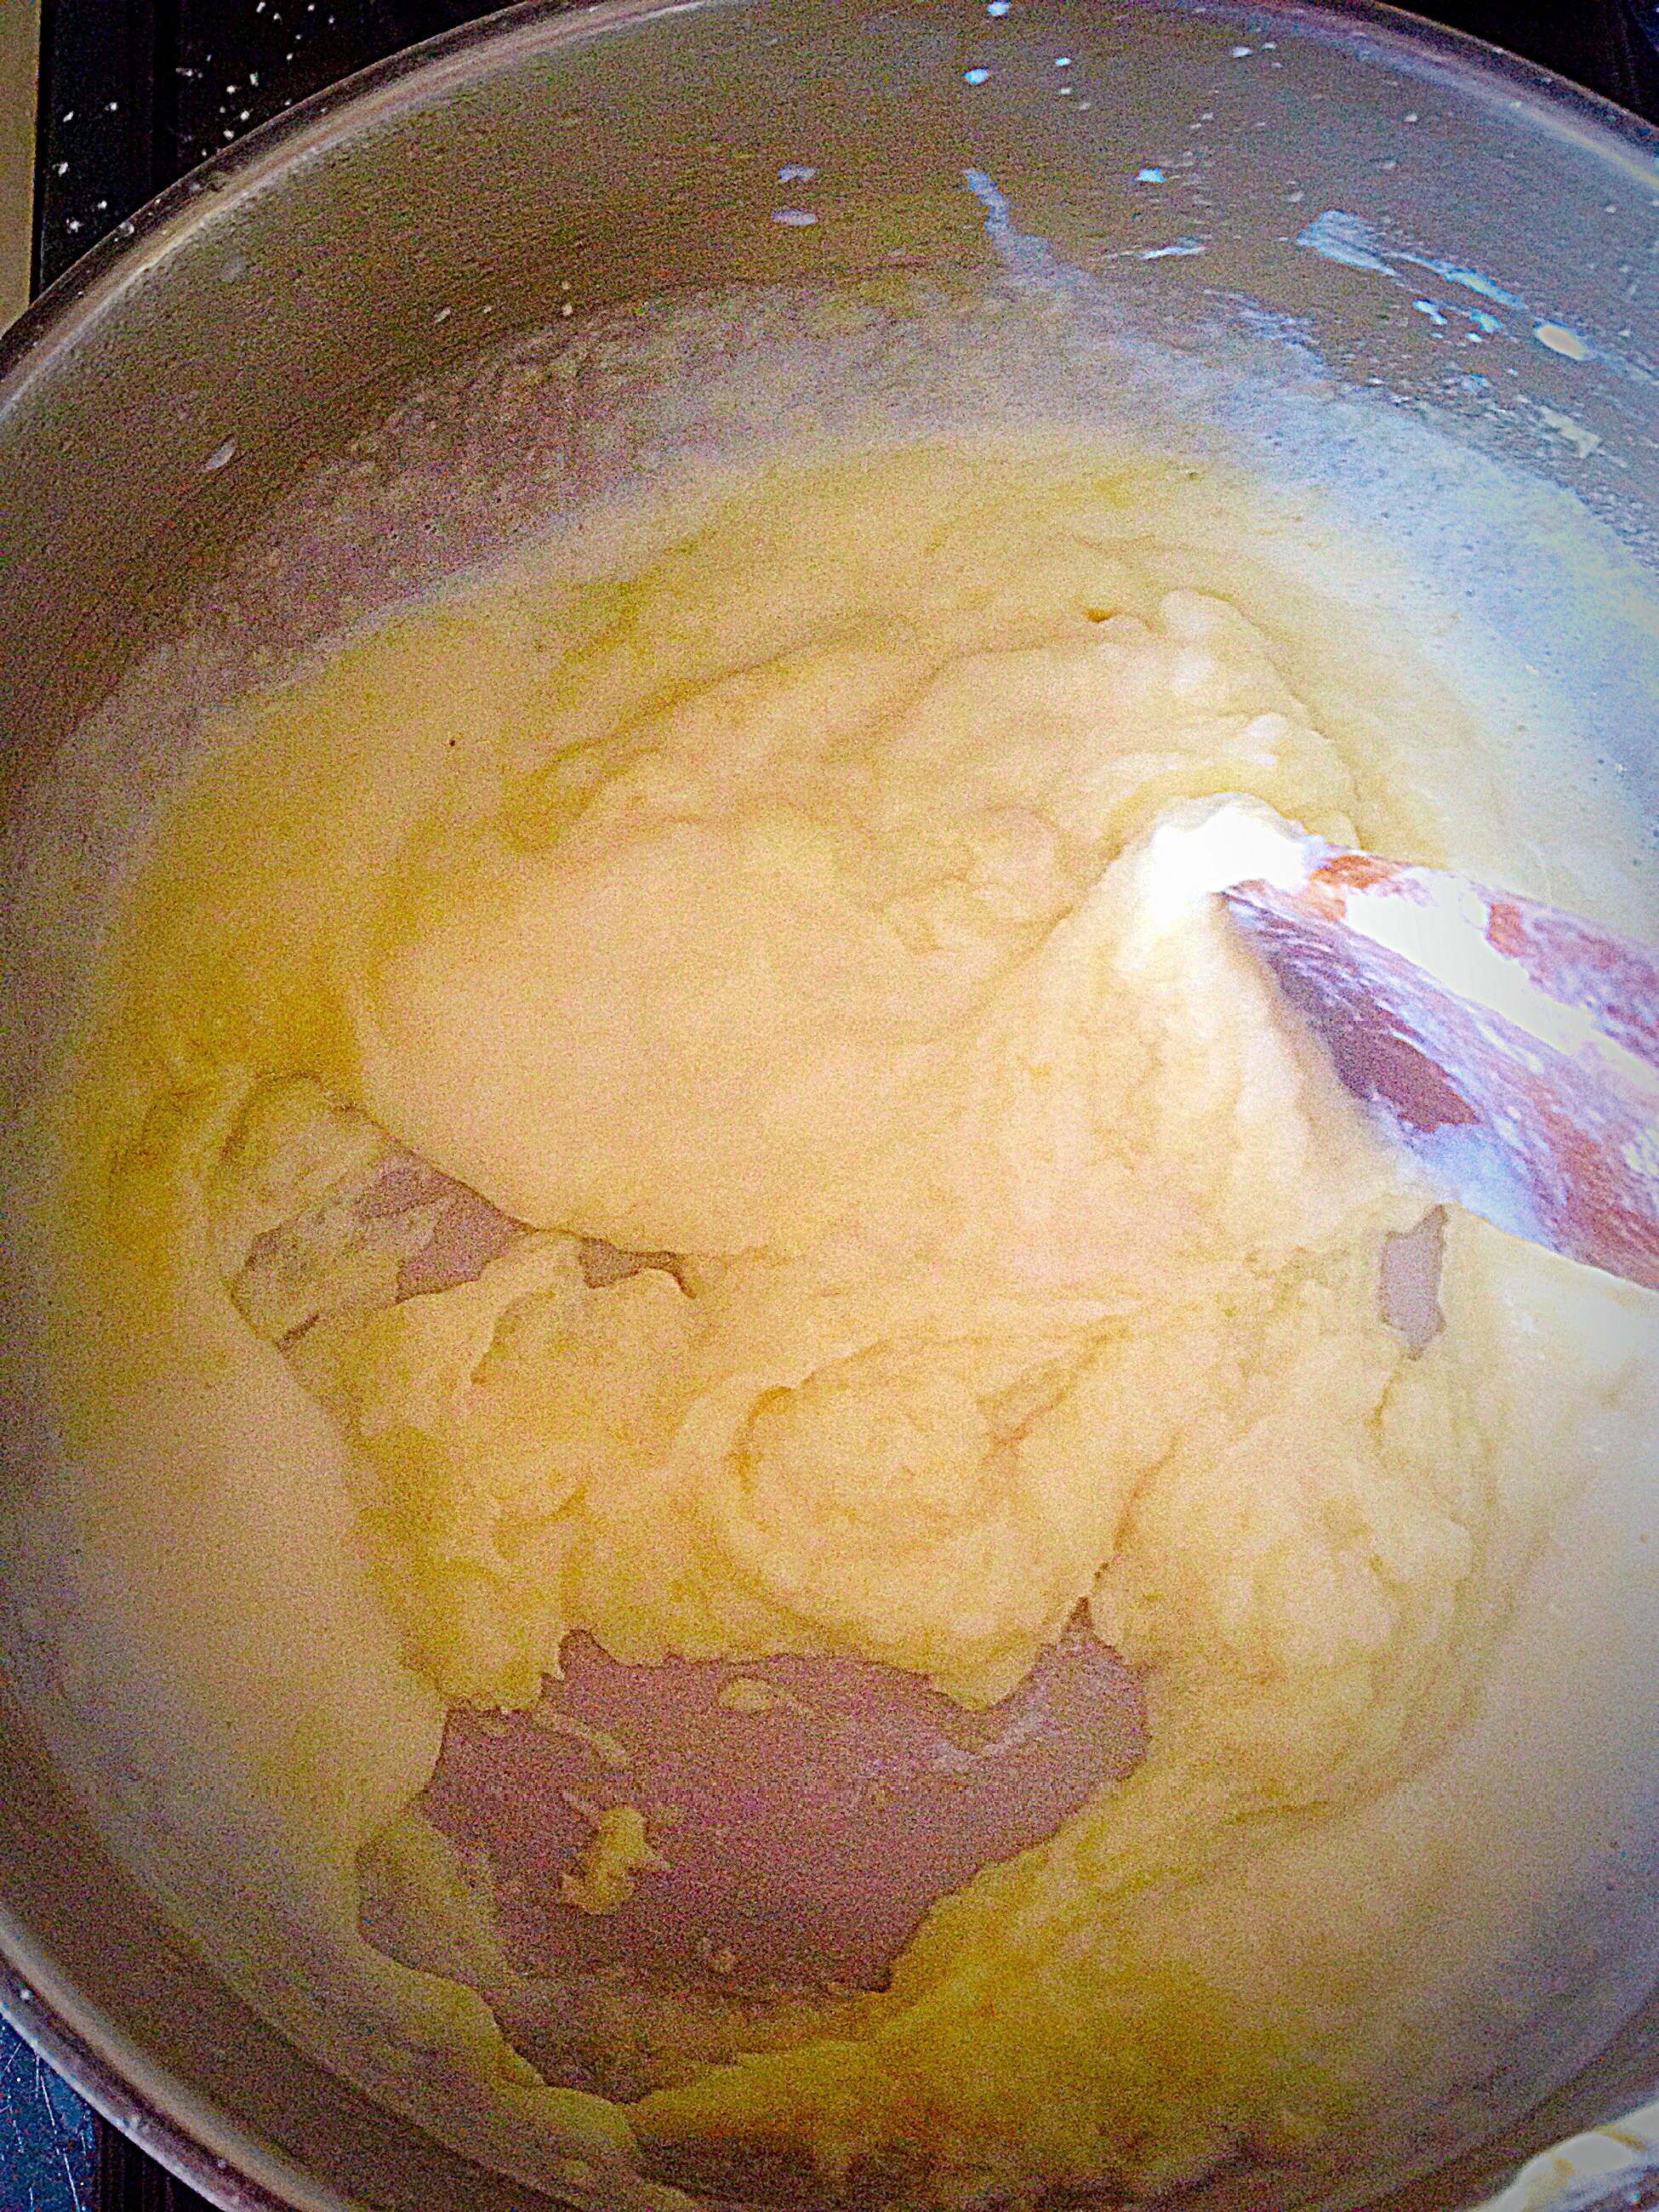
Start slowly adding the milk, stirring vigorously as the paste thickens. Continue stirring while adding small amounts of milk.
The sauce will become very thick.
As more milk is added lumps may form, switch to a balloonwhisk at this stage.
Continue until all the milk has been added and absorbed.
The sauce will be thick enough to cover the back of a spoon.
No lumps here – if you squint!!!!!!
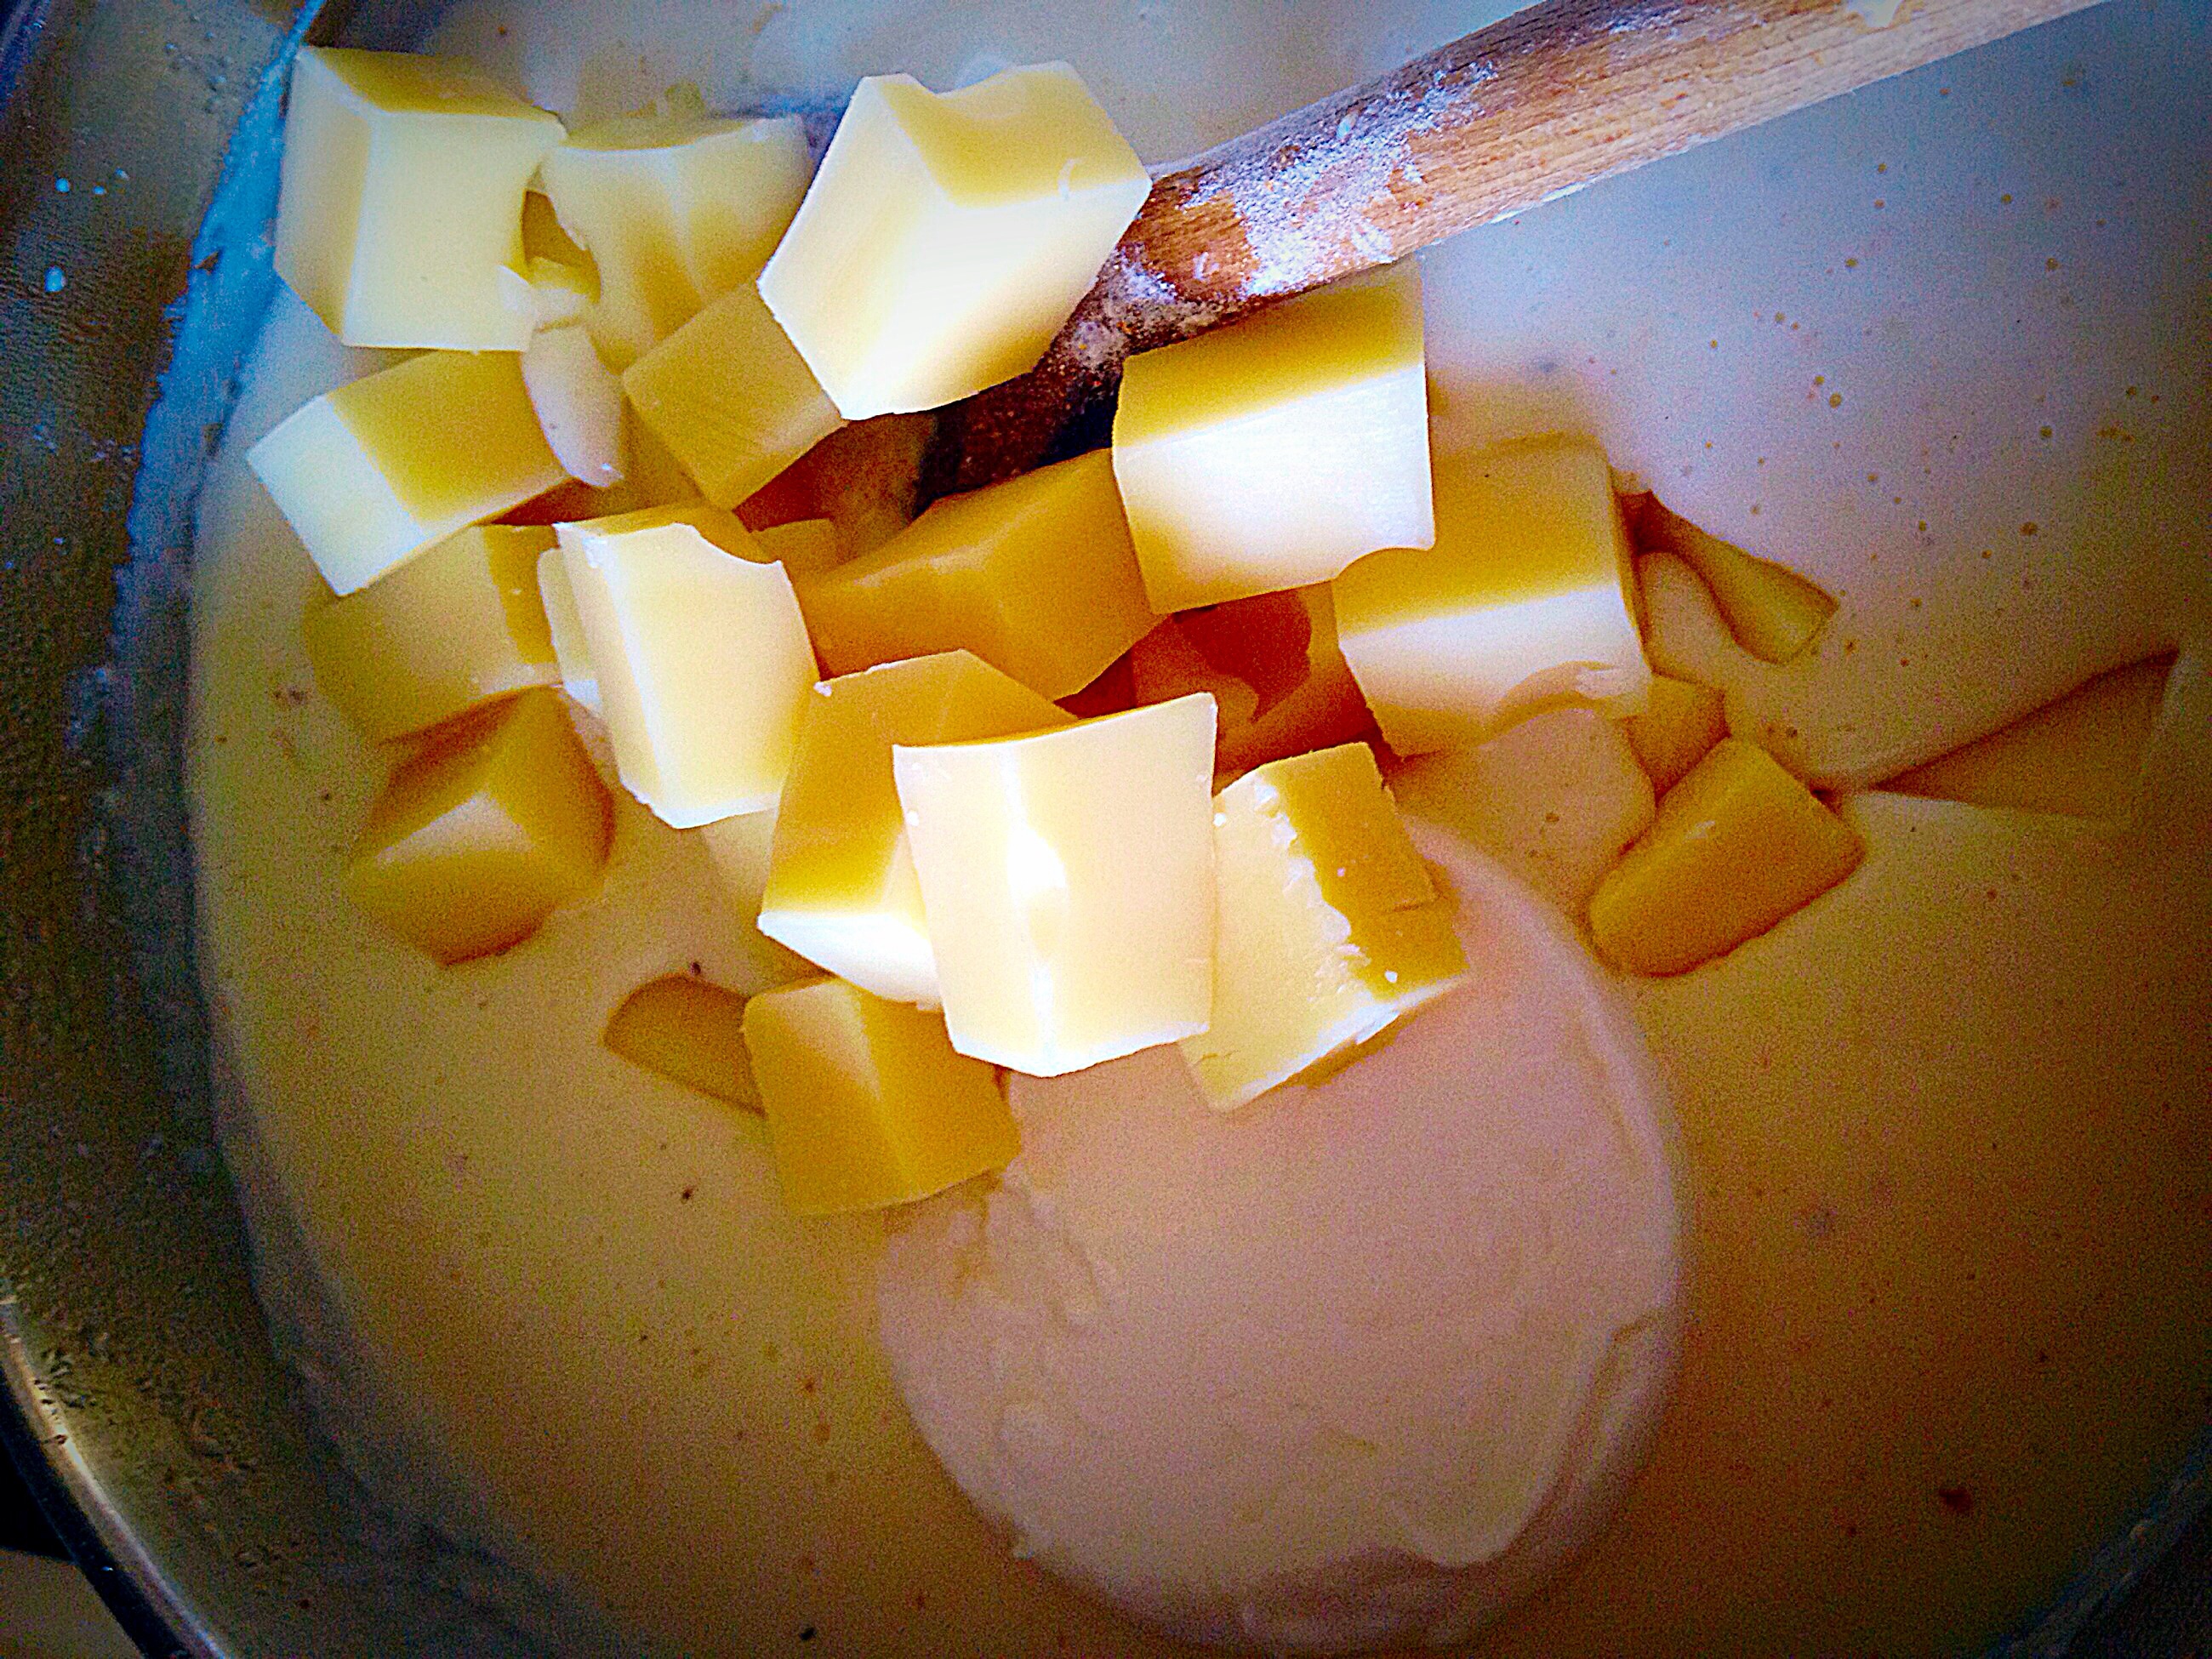
Remove the pan from the heat and add the ricotta and the other cheeses (except the mozzarella), stir vigorously.
The Ricotta gets dumped in and then add the hard cheeses.
Add the nutmeg and season with salt and pepper to taste.
Ricotta cheese will give the Four Cheese Sauce a slightly grainy texture, that’s normal. While grated cheese will melt into the sauce easily, cubed cheese will almost never become completely smooth, that’s ok as it will when it’s baked in the oven later. Also the addition of freshly ground nutmeg elevates the flavour above and beyond, but please, if you can, grate your own nutmeg.
Set to one side to cool.
Assembling The Lasagne Layers
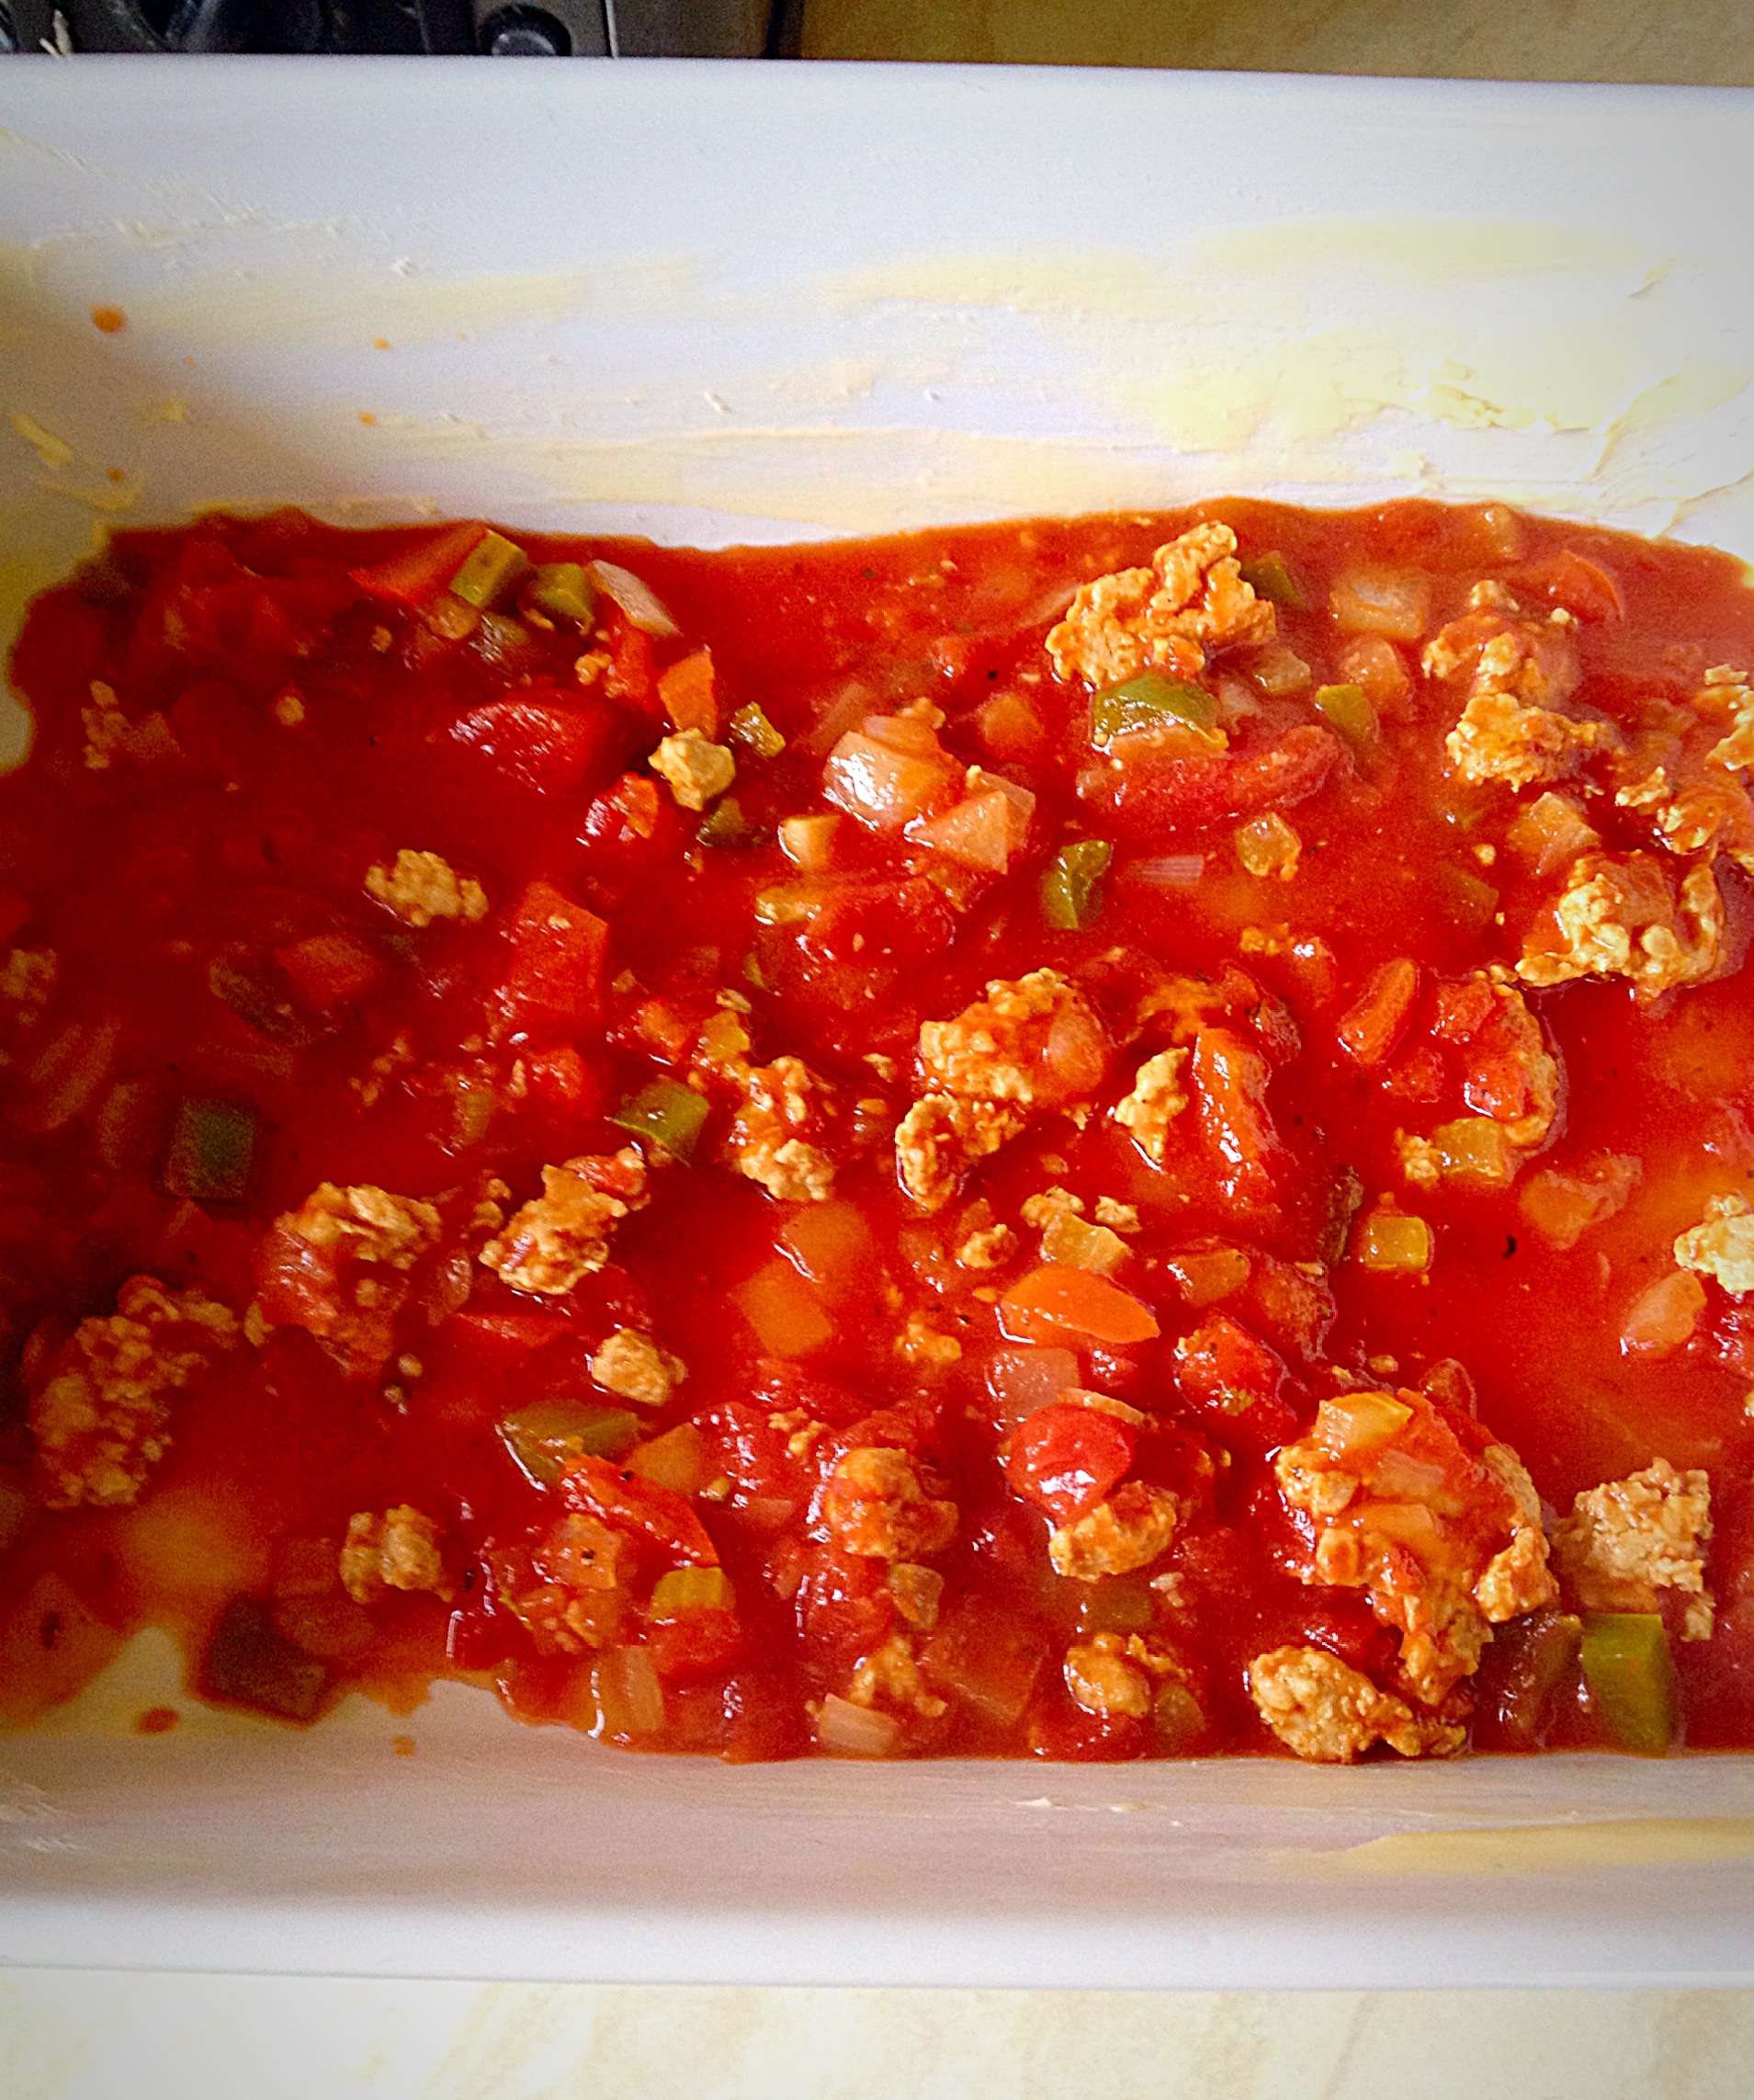
First of all liberally butter the ovenproof dish. Since I’ve made a LOT of lasagne buttering the dish before hand not only helps when serving, it also doesn’t require 3 days soaking to remove baked on lasagne.
I wasn’t joking when I said that you don’t have to precook the lasagne sheets. Since I’ve used lots of different makes, some with ruffled edges, green spinach lasagne sheets, egg versus plain AND this recipe works with all types.
These are dried lasagne sheets. Any brand will do!
As soon as you have buttered the dish place a layer of hot chicken lasagne sauce into the bottom of the dish, so that it is completely covered.
The first layer is down, time to start building!
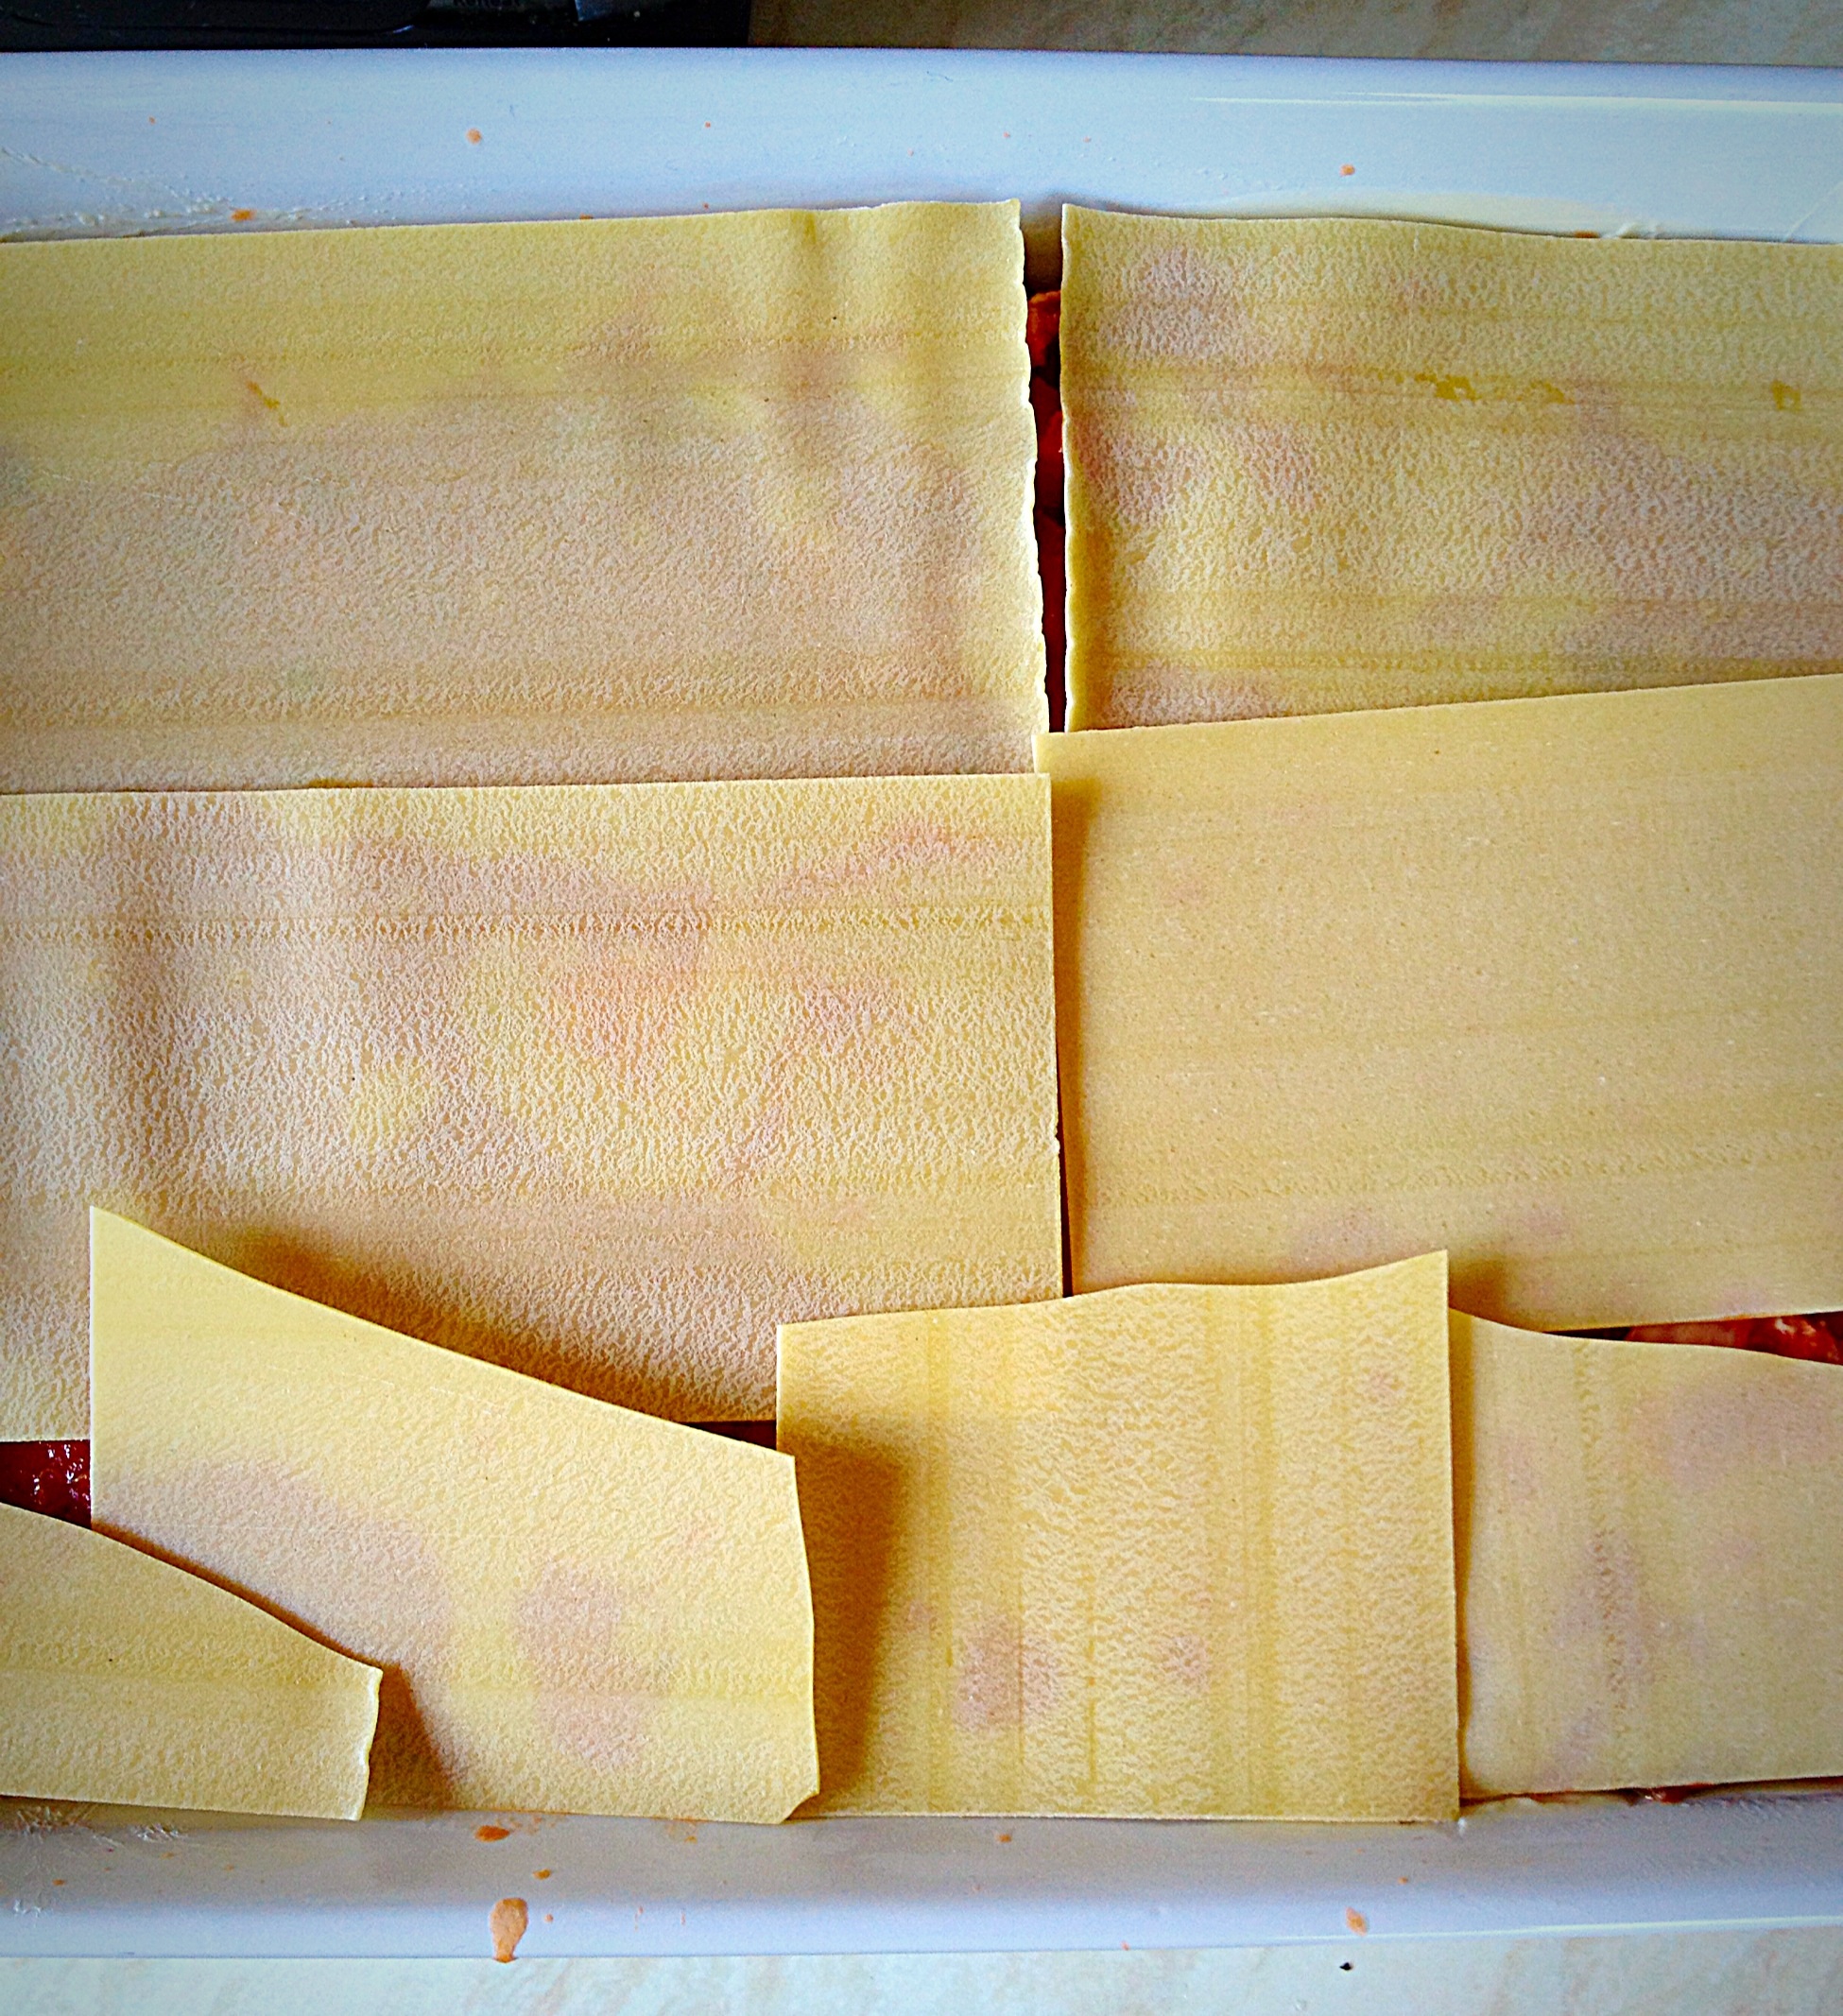
Next place enough lasagne sheets to cover the bottom layer. The layers should meet or very slightly overlap.
If your lasagne sheets don’t fit exactly, just snap bits off to adjust them.
Repeat the sauce/lasagne sheet layering twice more finishing with a sheet layer.
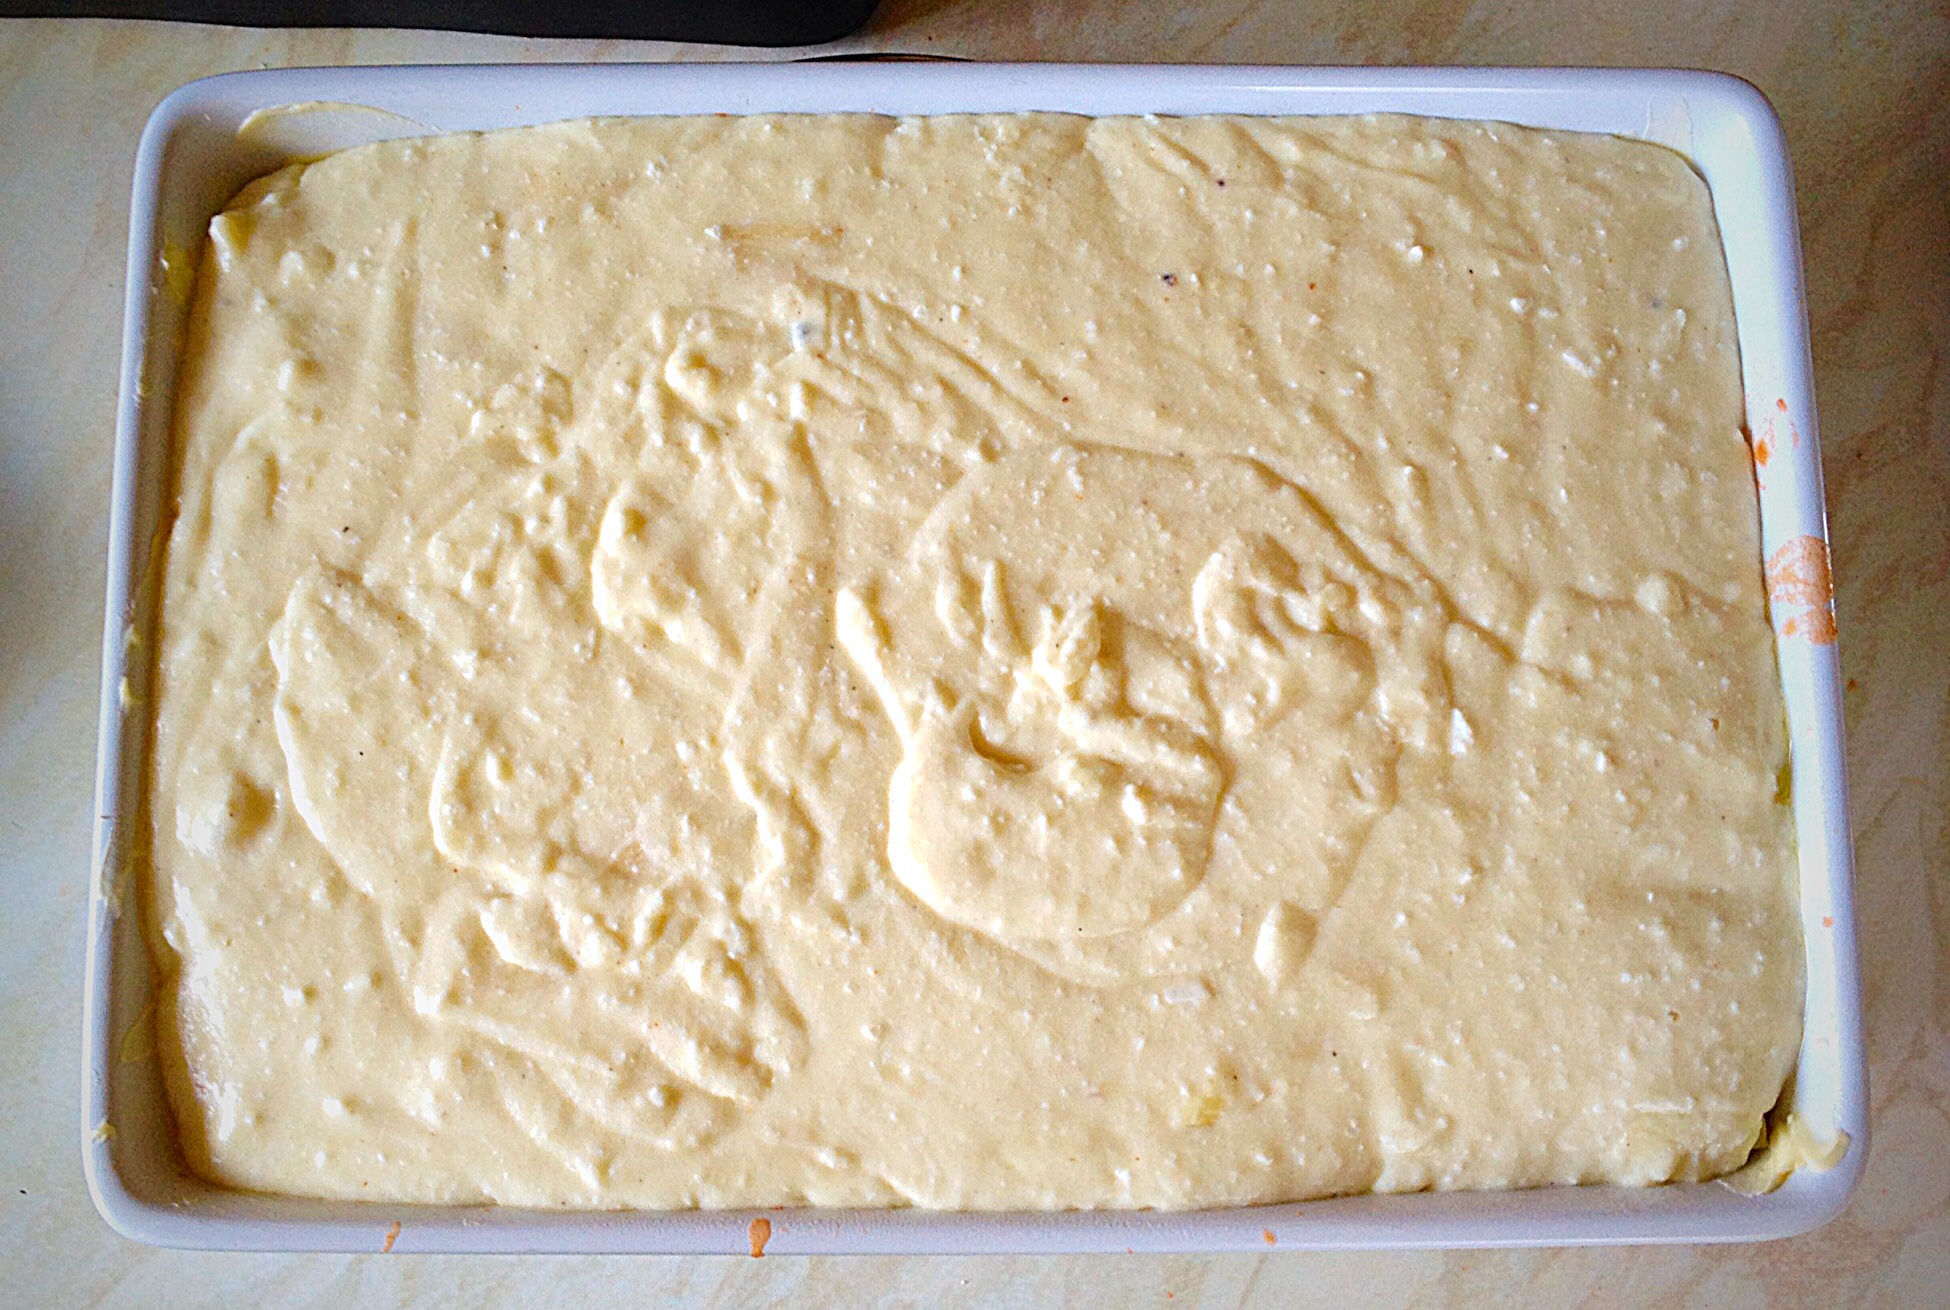
All the bits and pieces of the lasagne sheets will be covered by the Four Cheese Sauce.
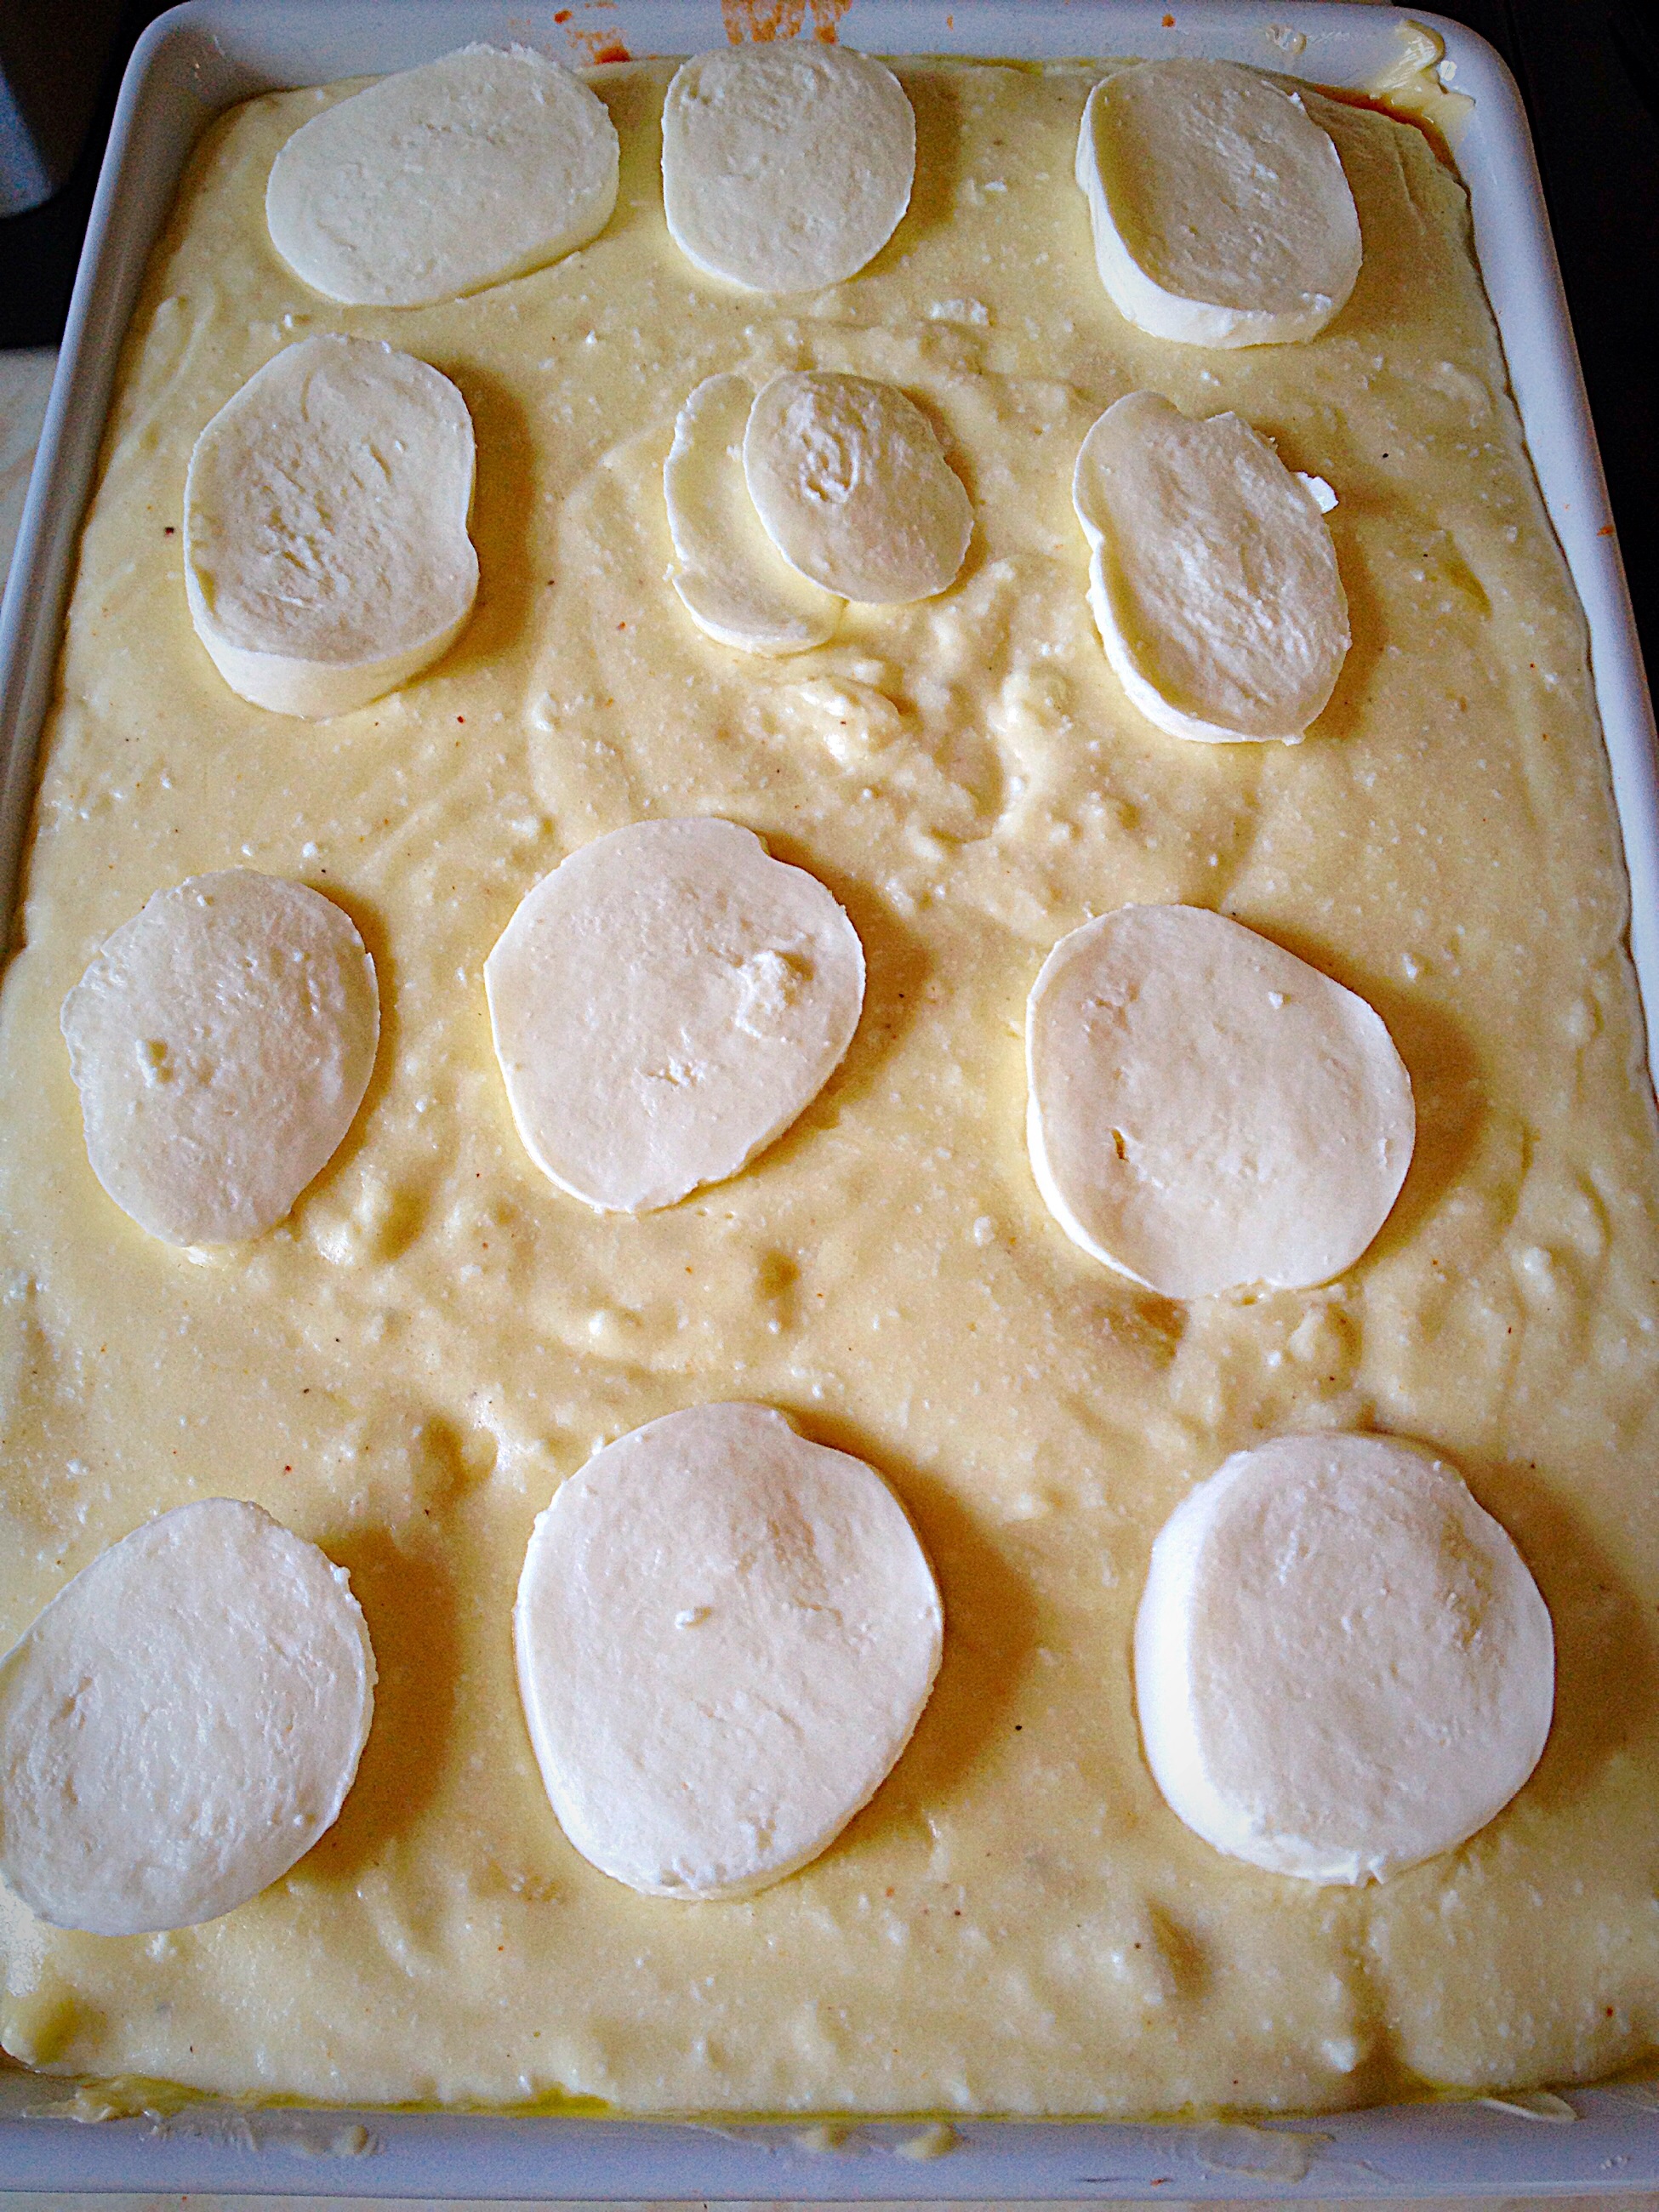
Pour the cooled cheese sauce all over the top of the lasagne sheets.
Ooh this is going to be sooooo good – look at that yummy cheese sauce layer!
Finishing The Lasagne
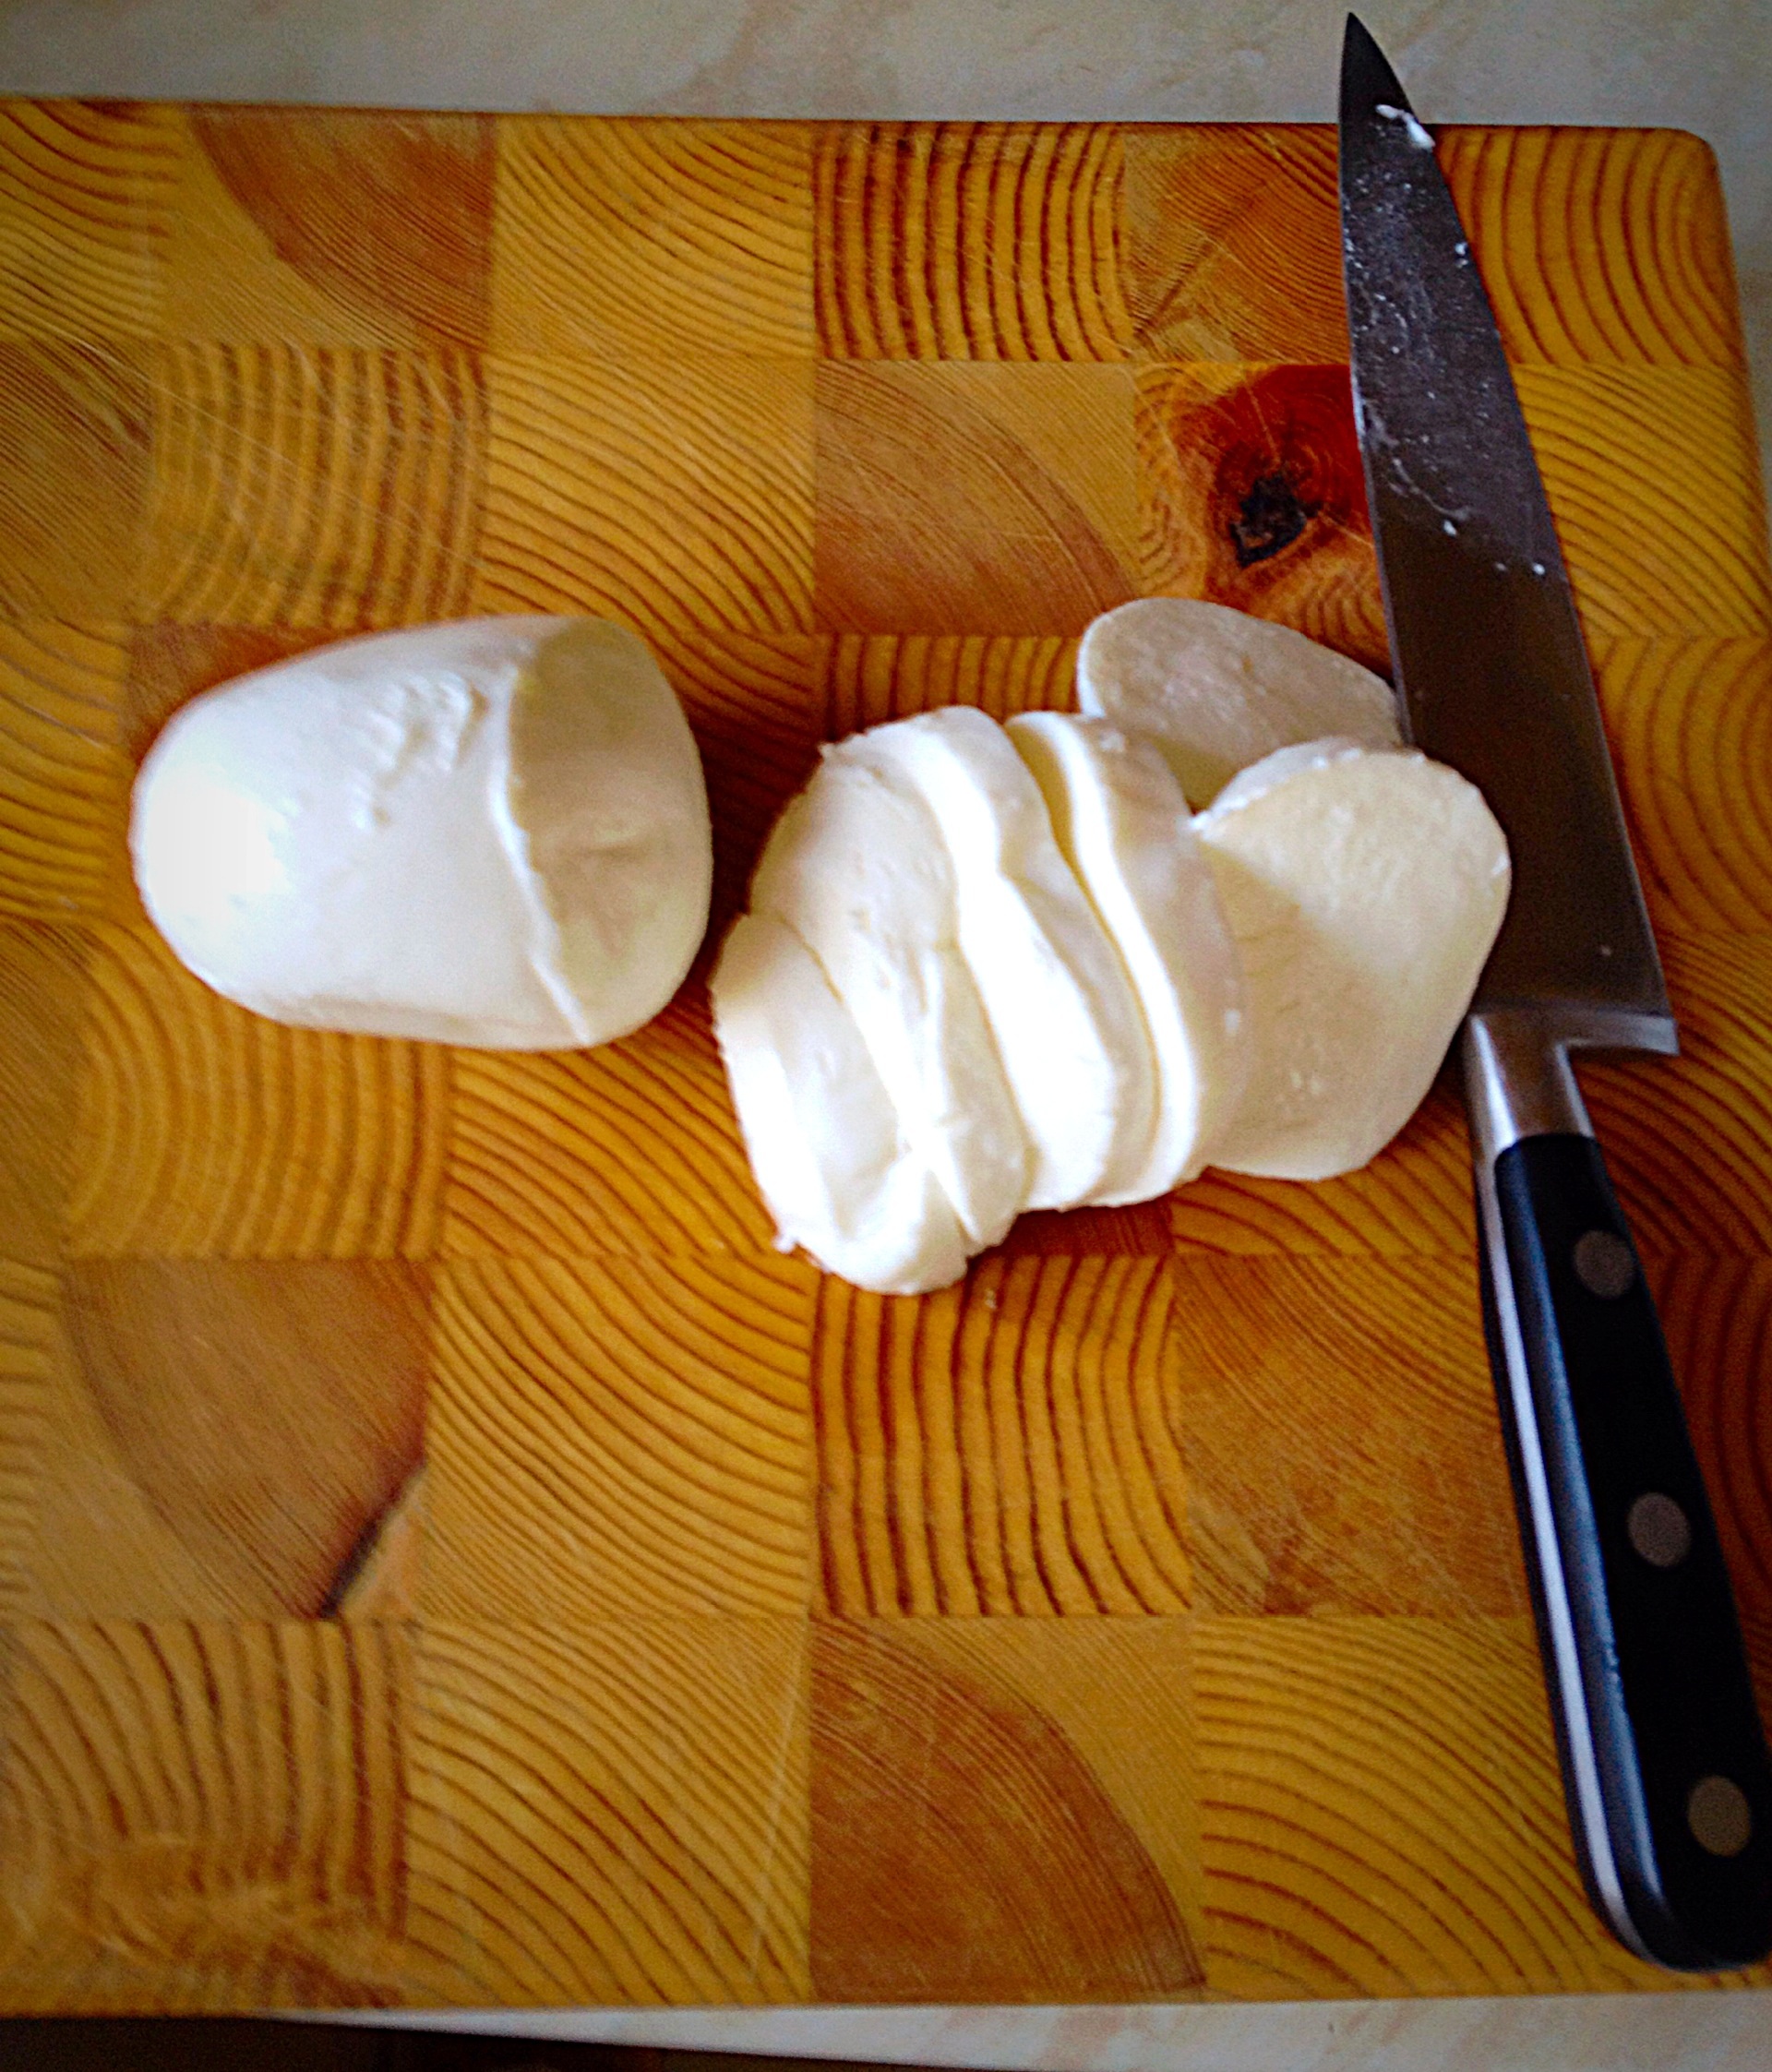
Drain and slice the mozzarella cheese.
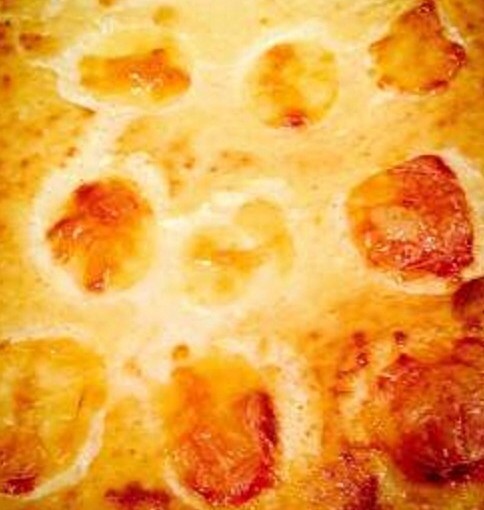
The final gooey, stringy, adornment for this fab lasagne dish!
And now arrange the mozzarella slices on top of the cheese sauce.
The Four Cheese Sauce tops off this lasagne perfectly.
Finally leave the lasagne for at least 4 hours or ideally overnight. So that the dried lasagne slices have time to absorb moisture from both sauces. Also this dish can be made 1-2 days in advance, wrapped in cling film and left in the fridge.
Baking The Lasagne
As soon as the lasagne is ready to bake preheat the oven to 180C/160C fan oven, 350F, gas mark 4.
Place the lasagne dish on to a slightly larger baking tray; this dish can bubble up and over.
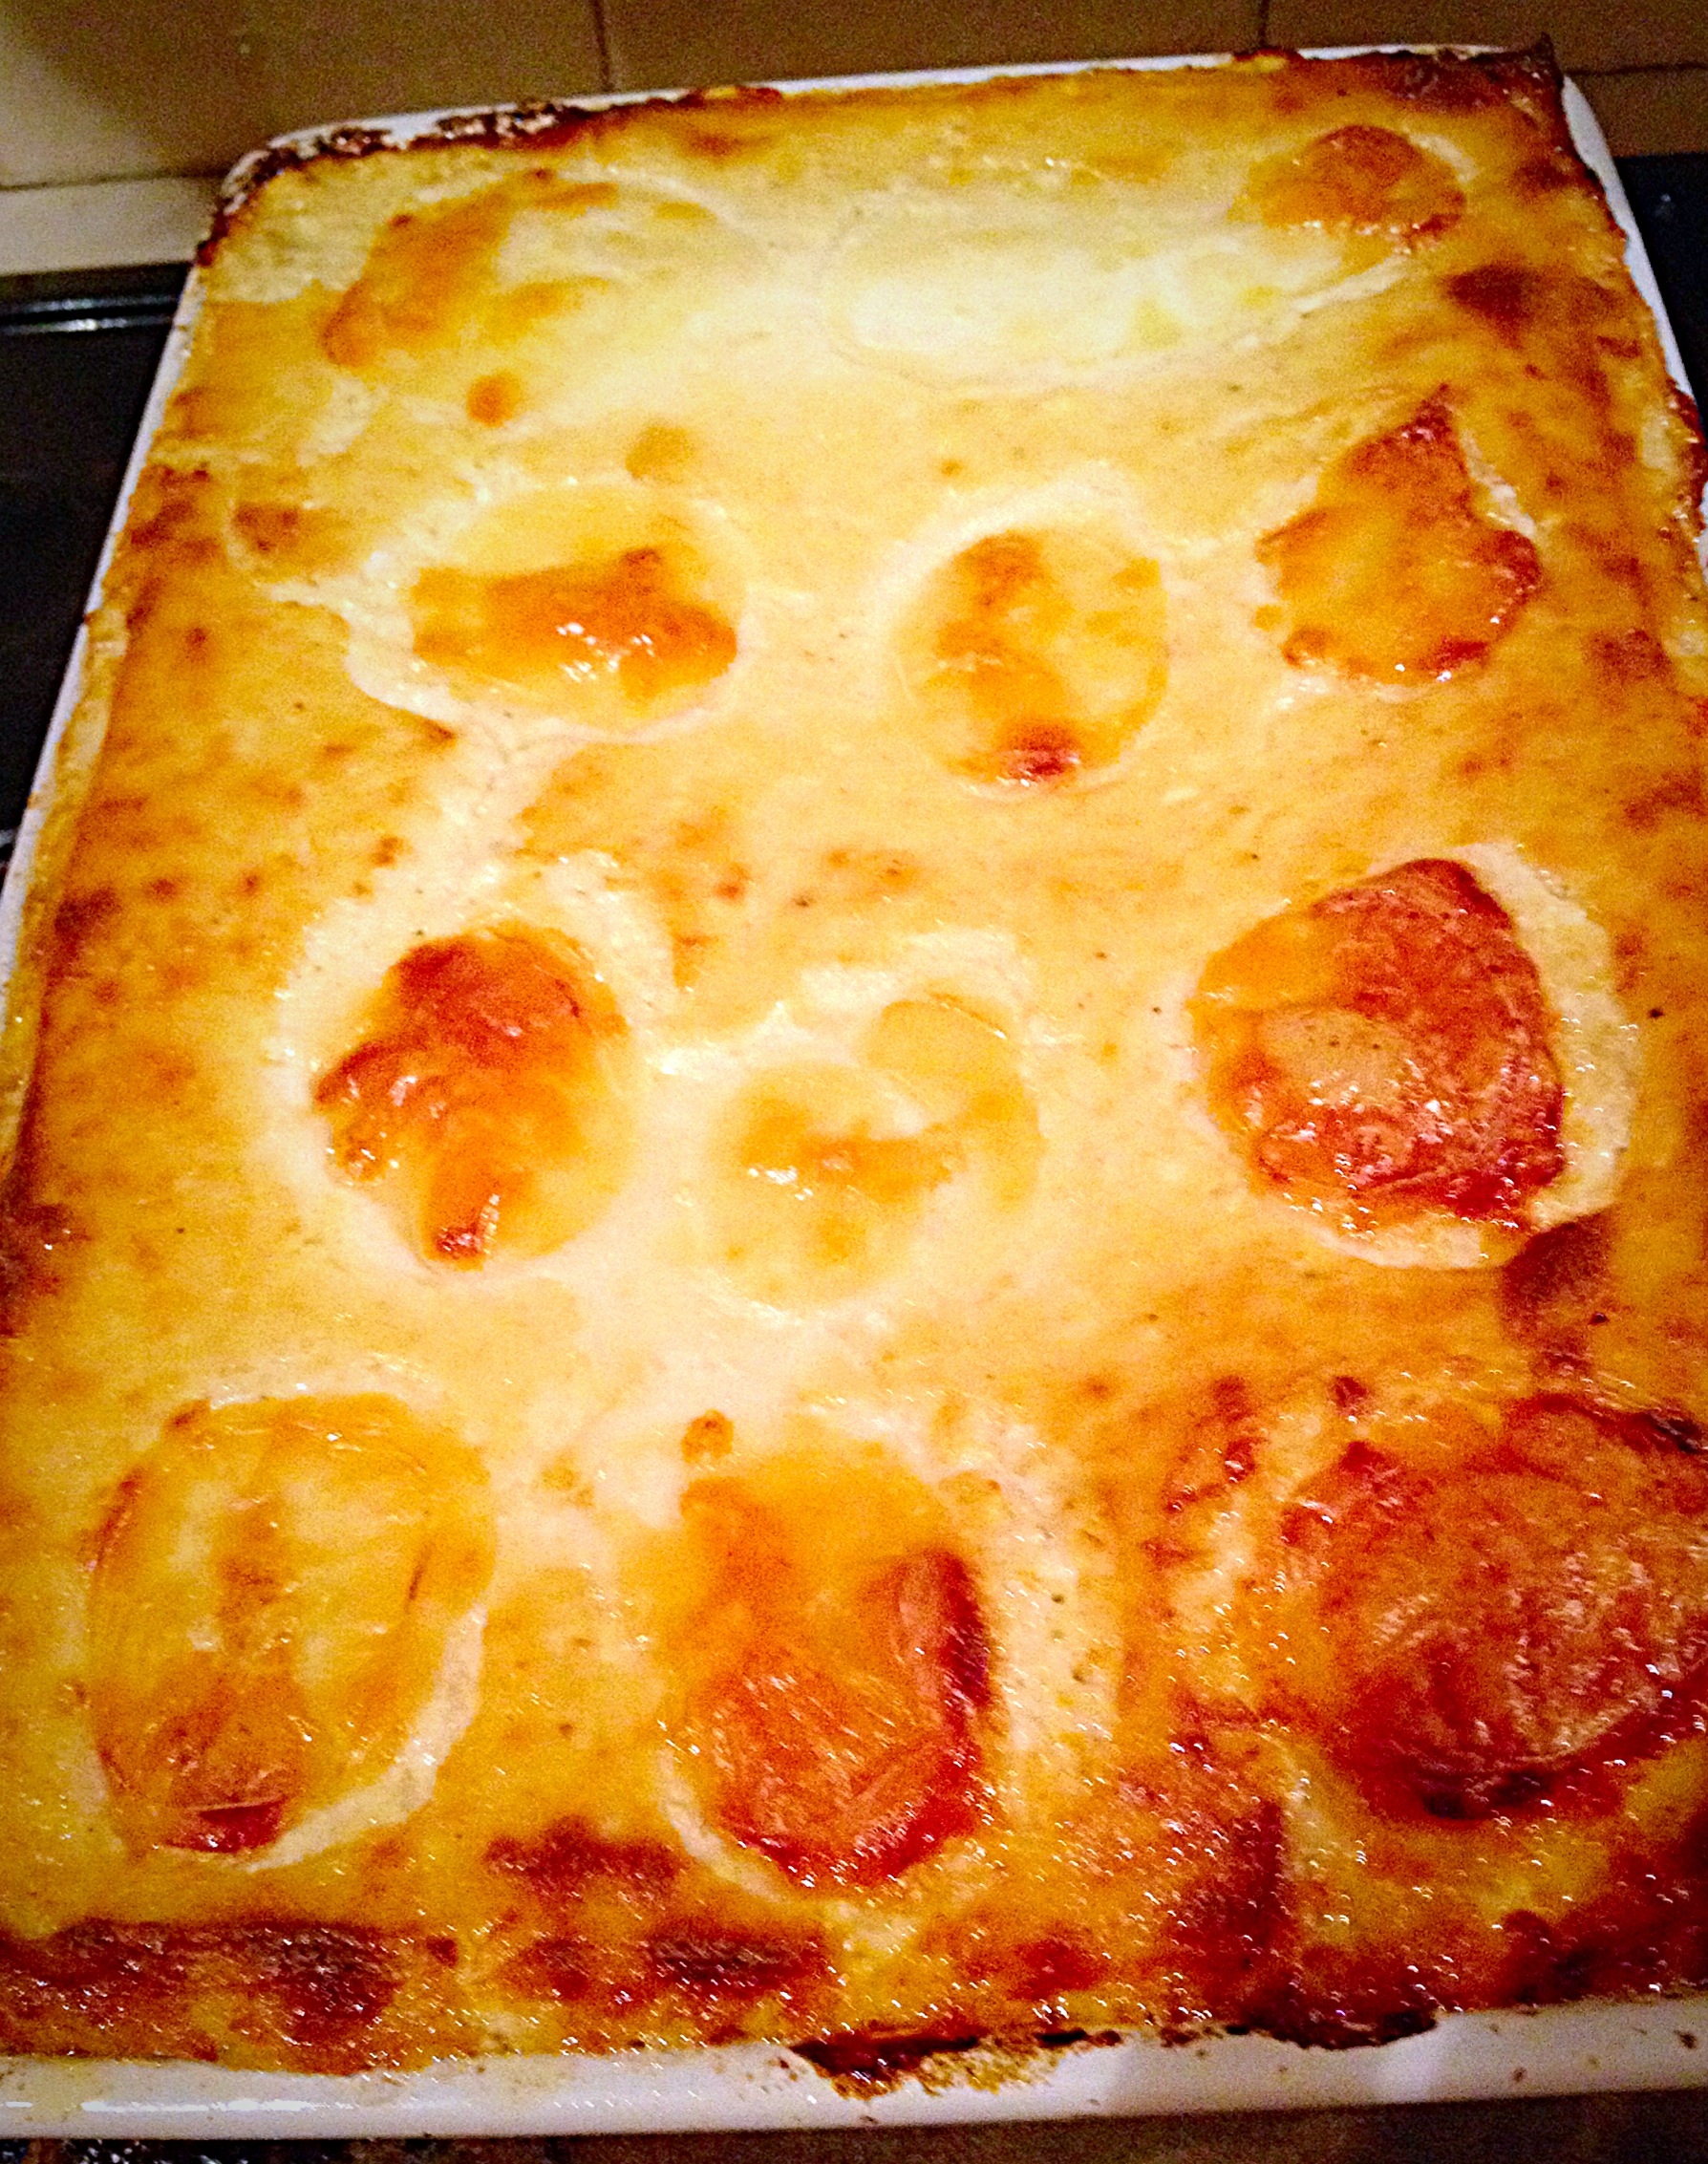
Bake the lasagne for 1 1/2 hours until piping hot all the way through and golden brown.
Remove from the oven 10-15 minutes before serving. Doing so allows the lasagne to cool slightly and more importantly, hold it’s shape when served.
This Chicken and Four Cheese Lasagne is delicious on it’s own, served with a salad and freshly baked Garlic Rosemary Focaccia Bead. Also it can be frozen at the pre-bake stage or in individual portions, wrapped tightly in foil and popped into the freezer. Or why not double the quantities and make an extra meal for the freezer?
If you have enjoyed this recipe for Chicken Four Cheese Lasagne you may also like these:
While traditional recipes will stand the test of time, importantly it’s fun to change things up. And sharing those changes is especially important as is sharing the food we make. Most of all if you know a new mum, or someone who has been ill for a while, or just a very busy family that you would like to bless, then this is THE perfect, portable, all in one meal for sharing!