Finally, Easter is only a few days away and with it come various traditions. Most importantly for me and many other Christians is attending church to celebrate the resurrection of Jesus, our risen Saviour. Also, for me and many others, taking part in Easter an egg hunt is part of our Easter celebration. While another Easter tradition is eating lamb for the main meal, usually as part of a Sunday roast dinner. So, my Slow Roasted Lamb Shoulder, is easy to prepare and pop in the oven, while we are at church, or looking for eggs in the garden!
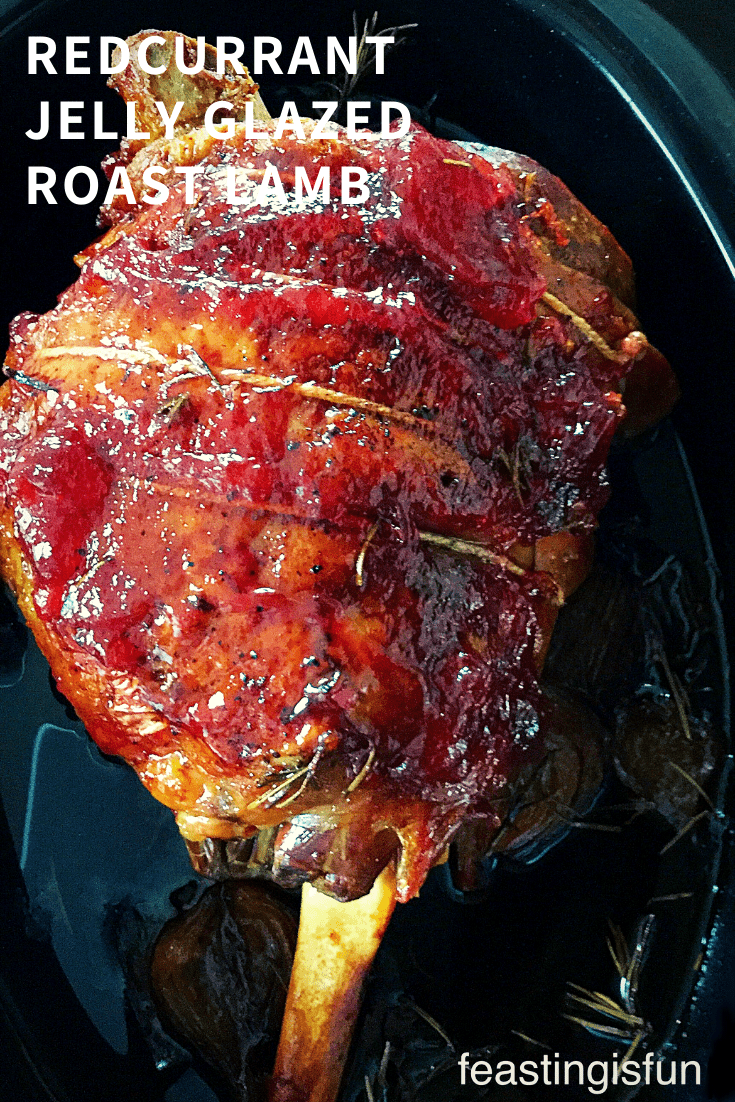
Roast lamb is a real favourite of mine. So, whenever delicious, British lamb is in season I try to stock up the freezer. However Graig Farm always has frozen lamb available. And so it is where I buy most of our lamb from, and I can honestly say it really is the most flavourful lamb available. Either cooked as Redcurrant Jelly Glazed Roast Lamb or this Slow Roasted Lamb Shoulder.
Especially, upon returning from church, when the aroma of the lamb fills the whole house and has our mouths watering!
Cooking For A Crowd
While a whole shoulder of lamb will feed six people generously, if you are cooking for more people there’s an easy solution, simply double up! Since roasting two shoulders guarantees plenty of meat for dinner and leftovers. And, cooking two Slow Roasted Lamb Shoulders takes no more effort or energy to cook and guarantees plenty of leftovers. Especially, as an idea for another recipe began taking shape in my head!
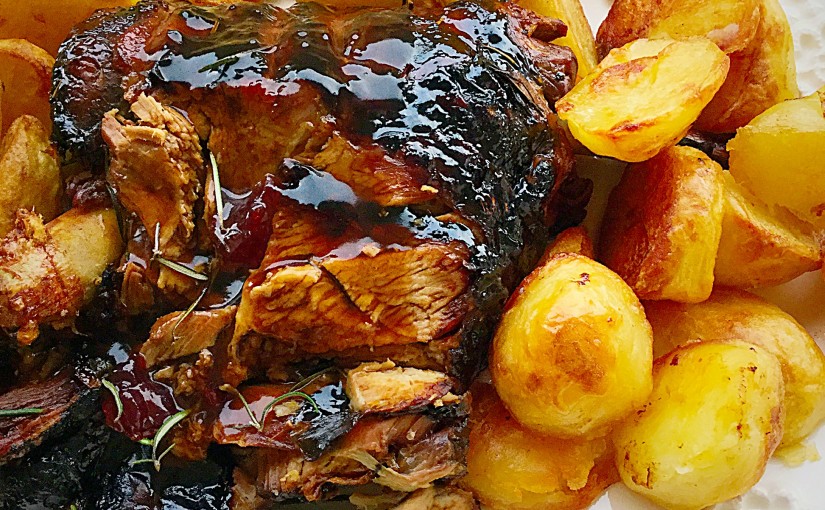
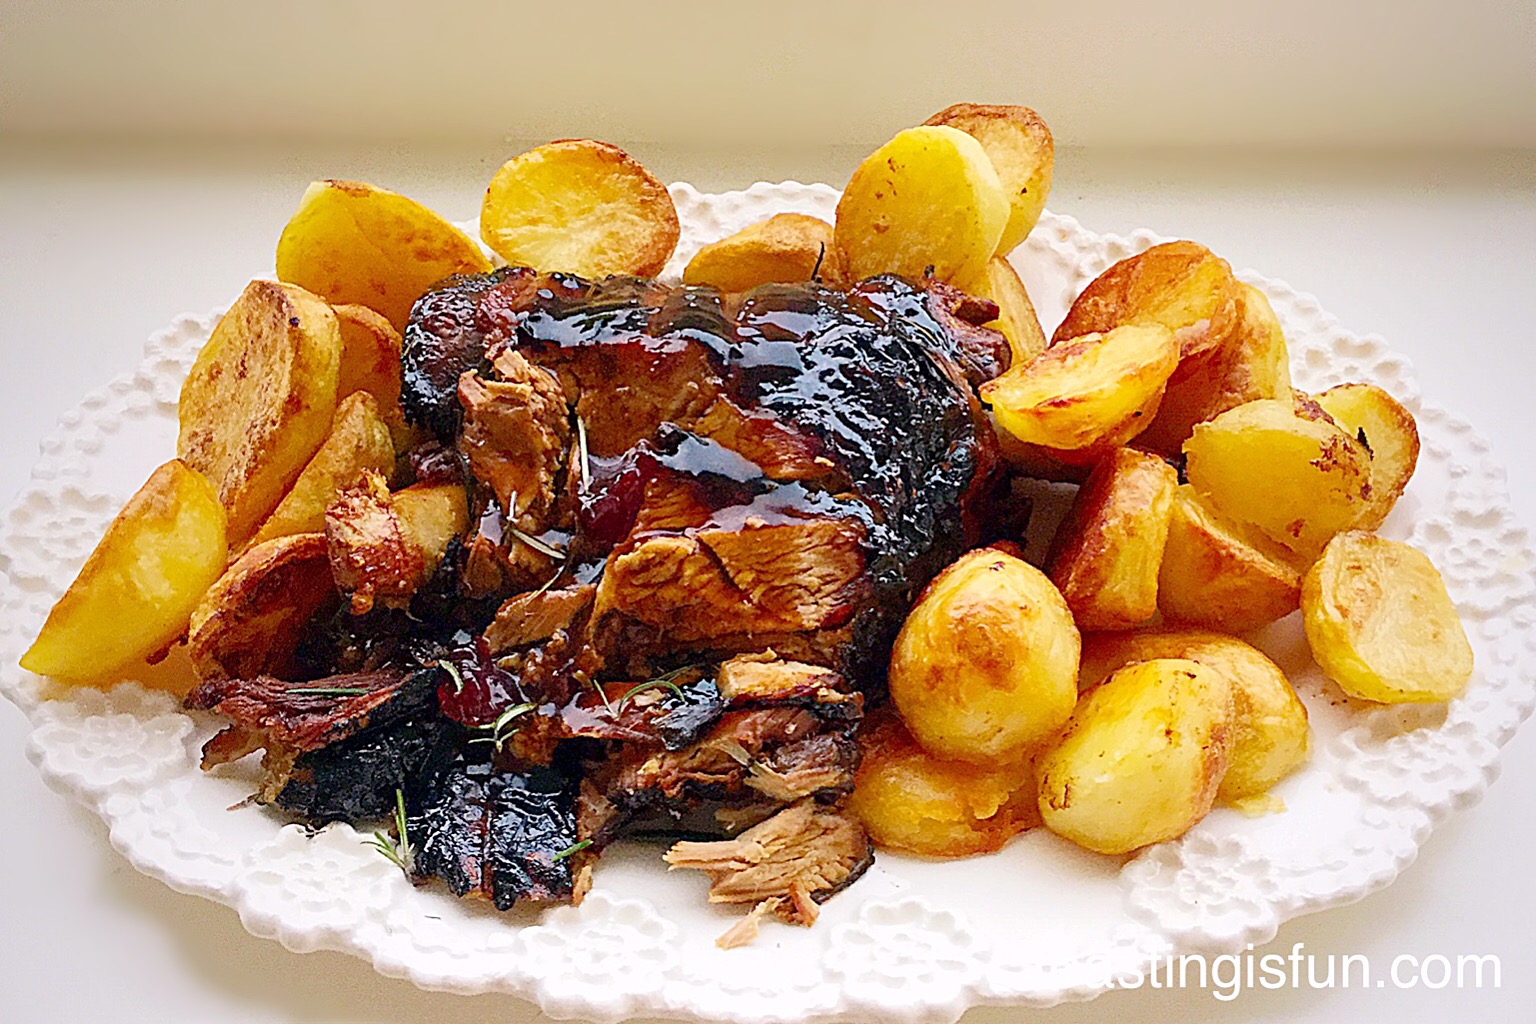
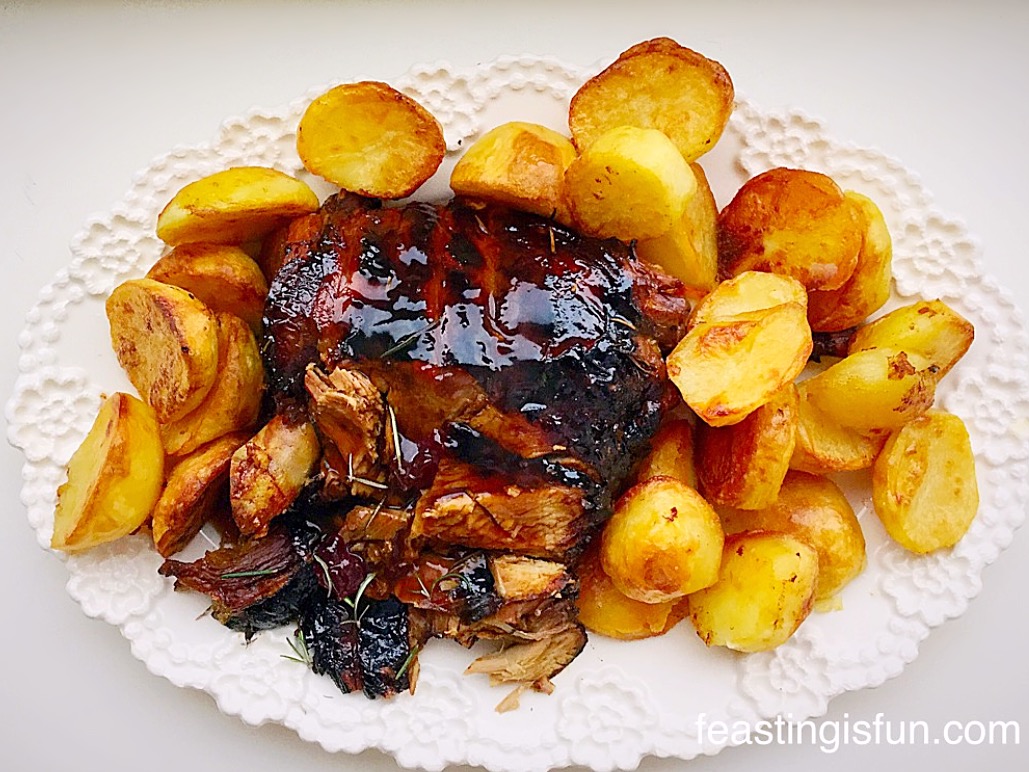
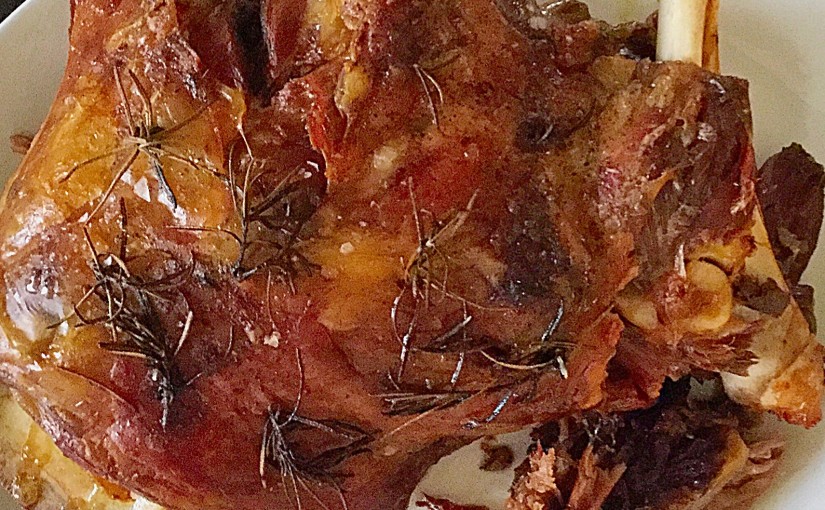
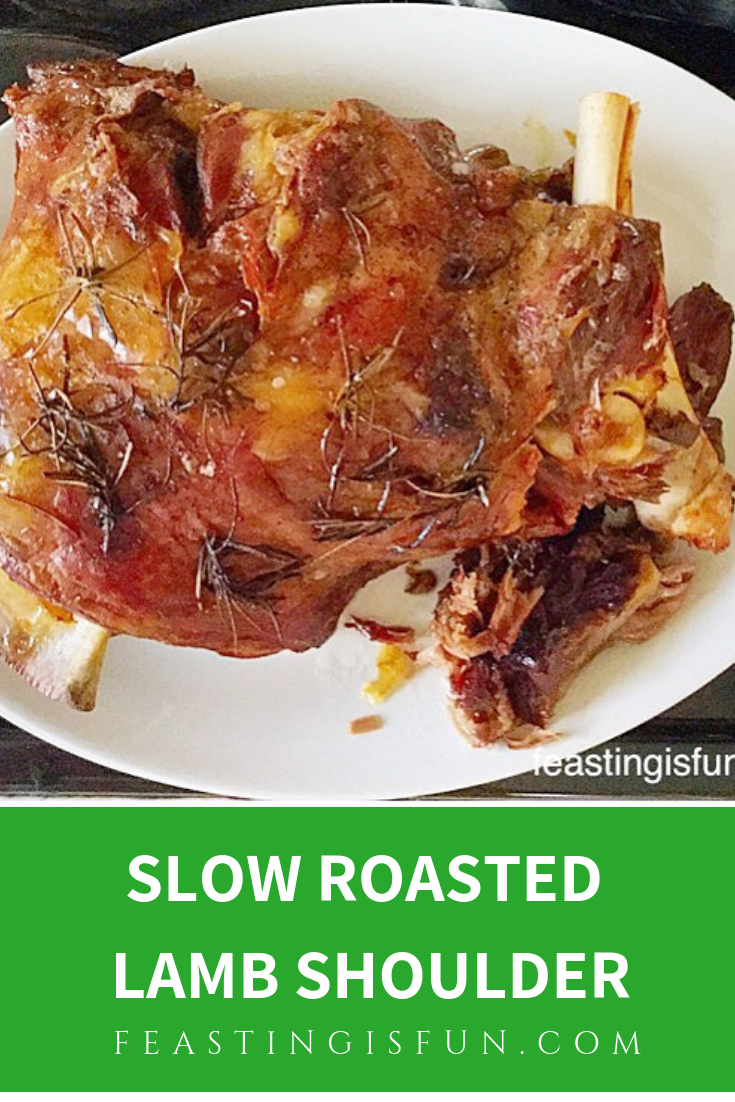
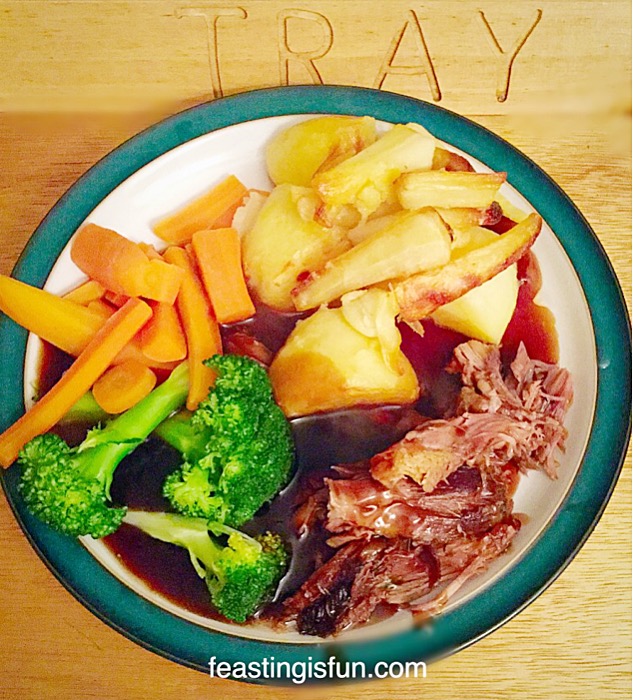
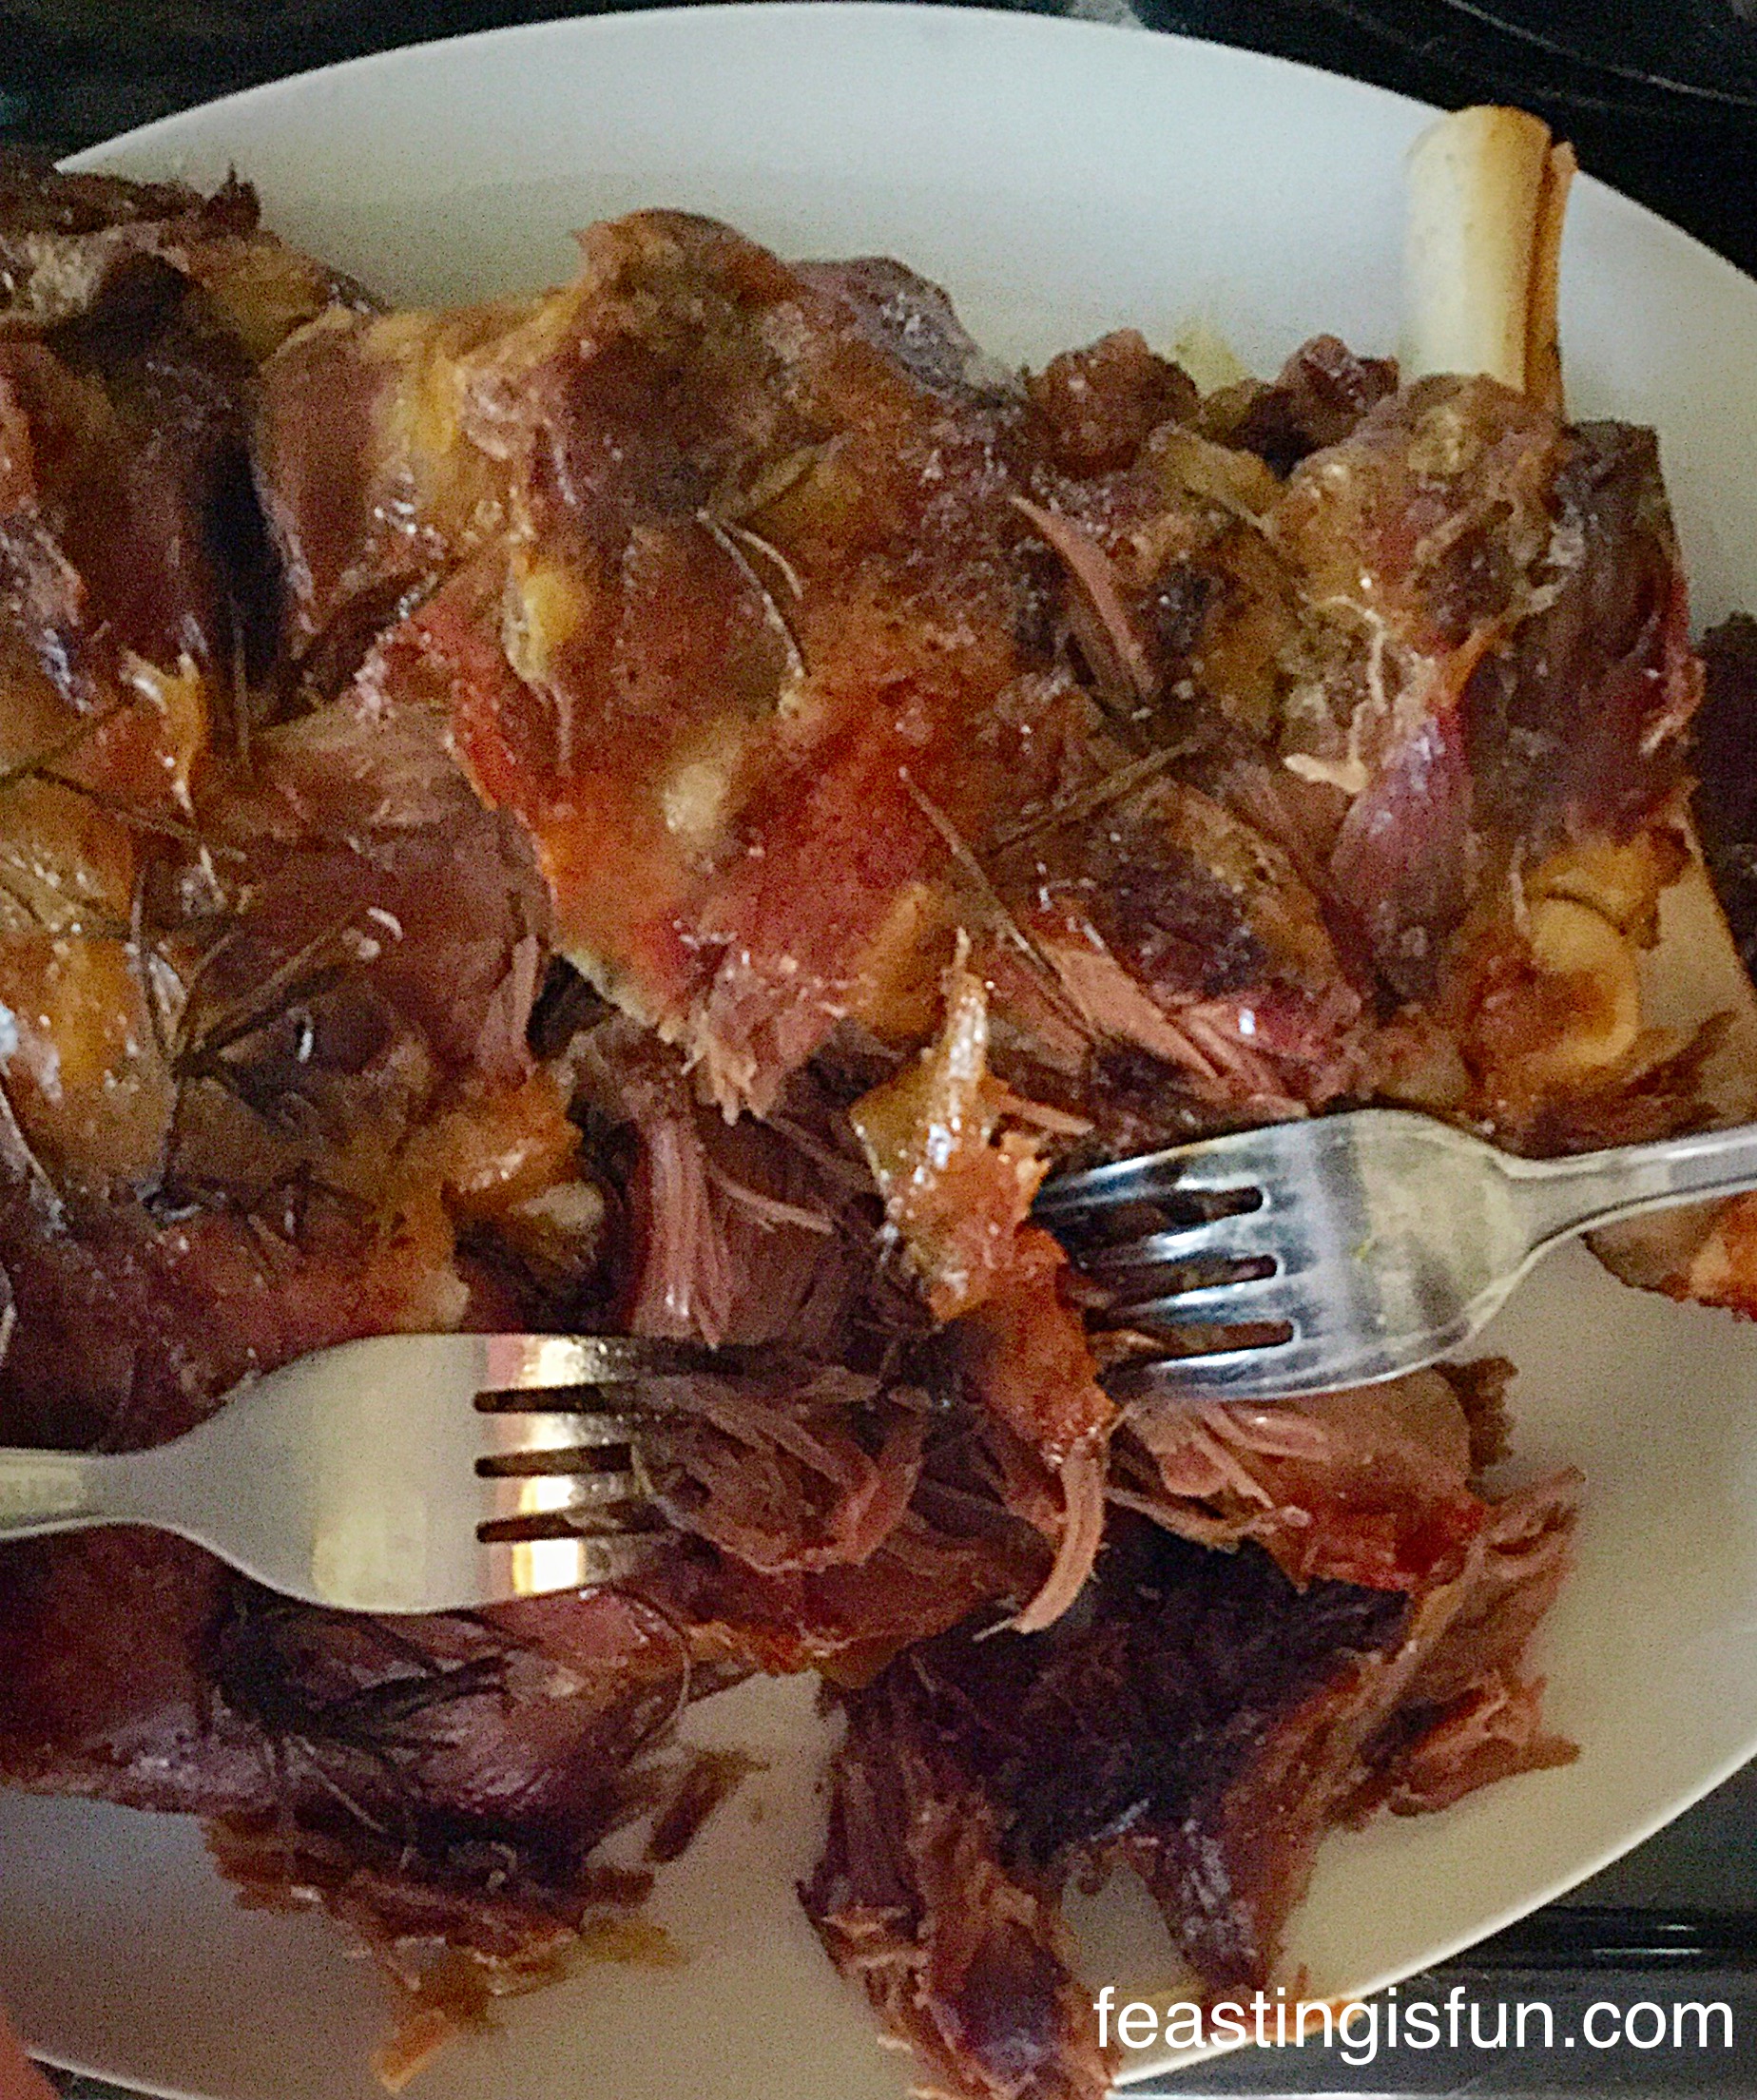
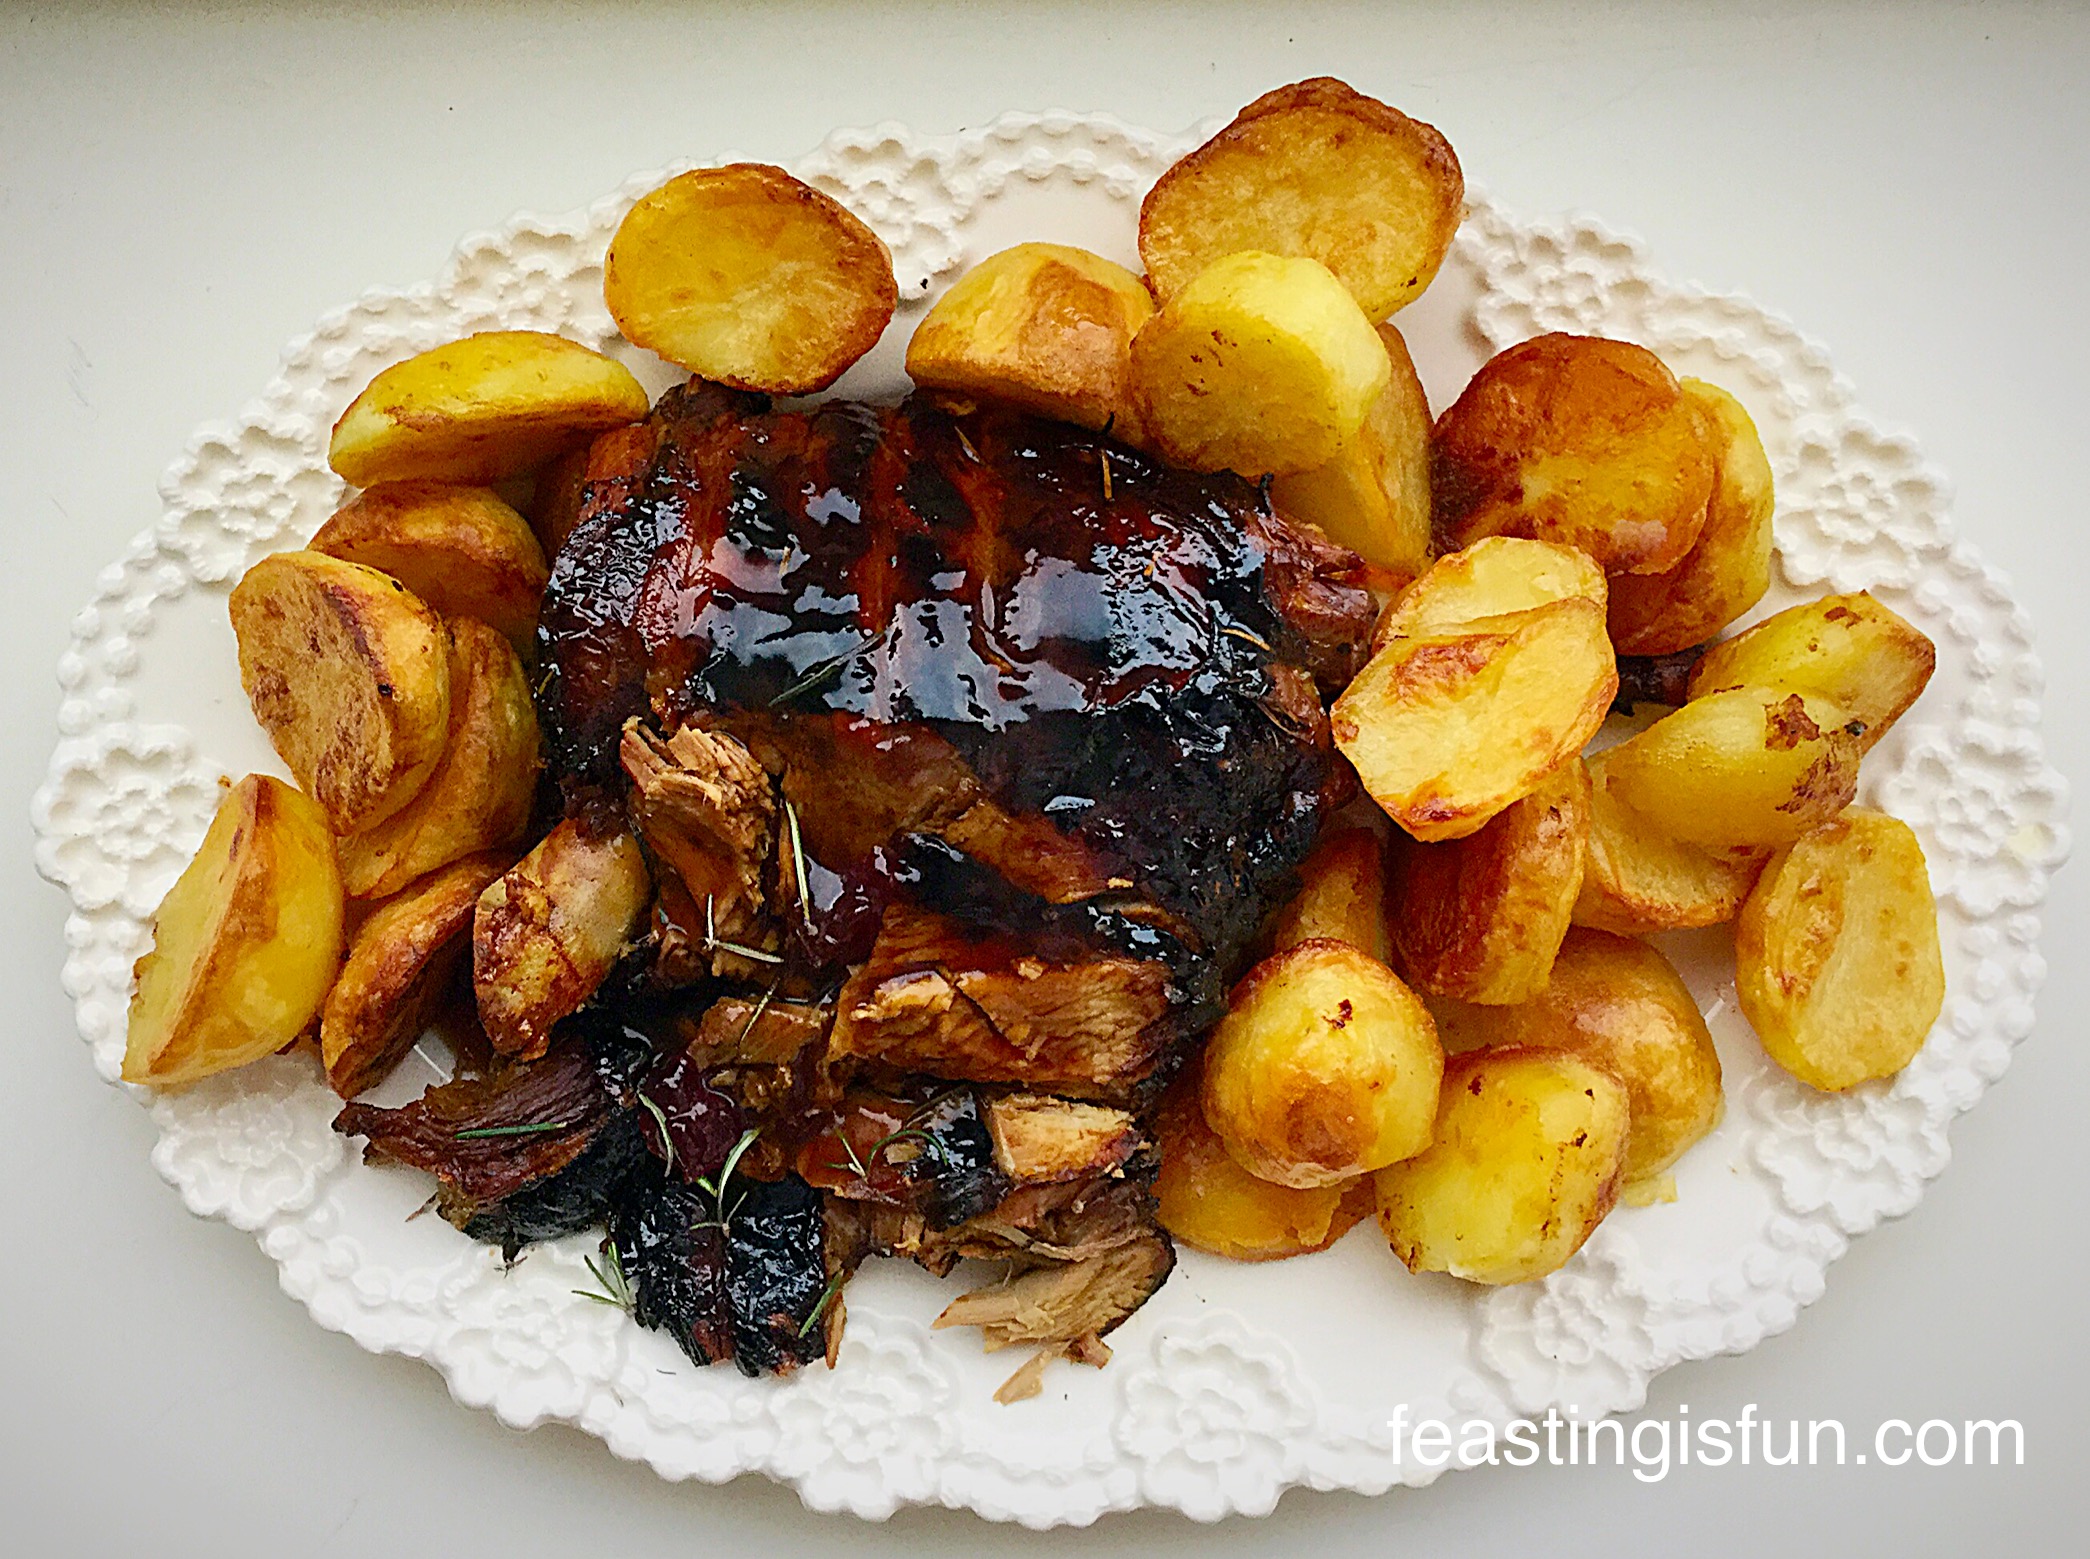
So, whenever you are feeding a crowd, this is the perfect roast for feasting on. And after slow roasting for 5 hours, you have beautiful, melt in the mouth meat. In fact I pulled our lamb apart using two forks, much like you would for pulled pork. Since the lamb comes clean away from the bone and is so moist. Serve with golden, crunchy roast potatoes or this Leek Colcannon.
Recipe: One Slow Roasted Lamb Shoulder will serve 6 adults
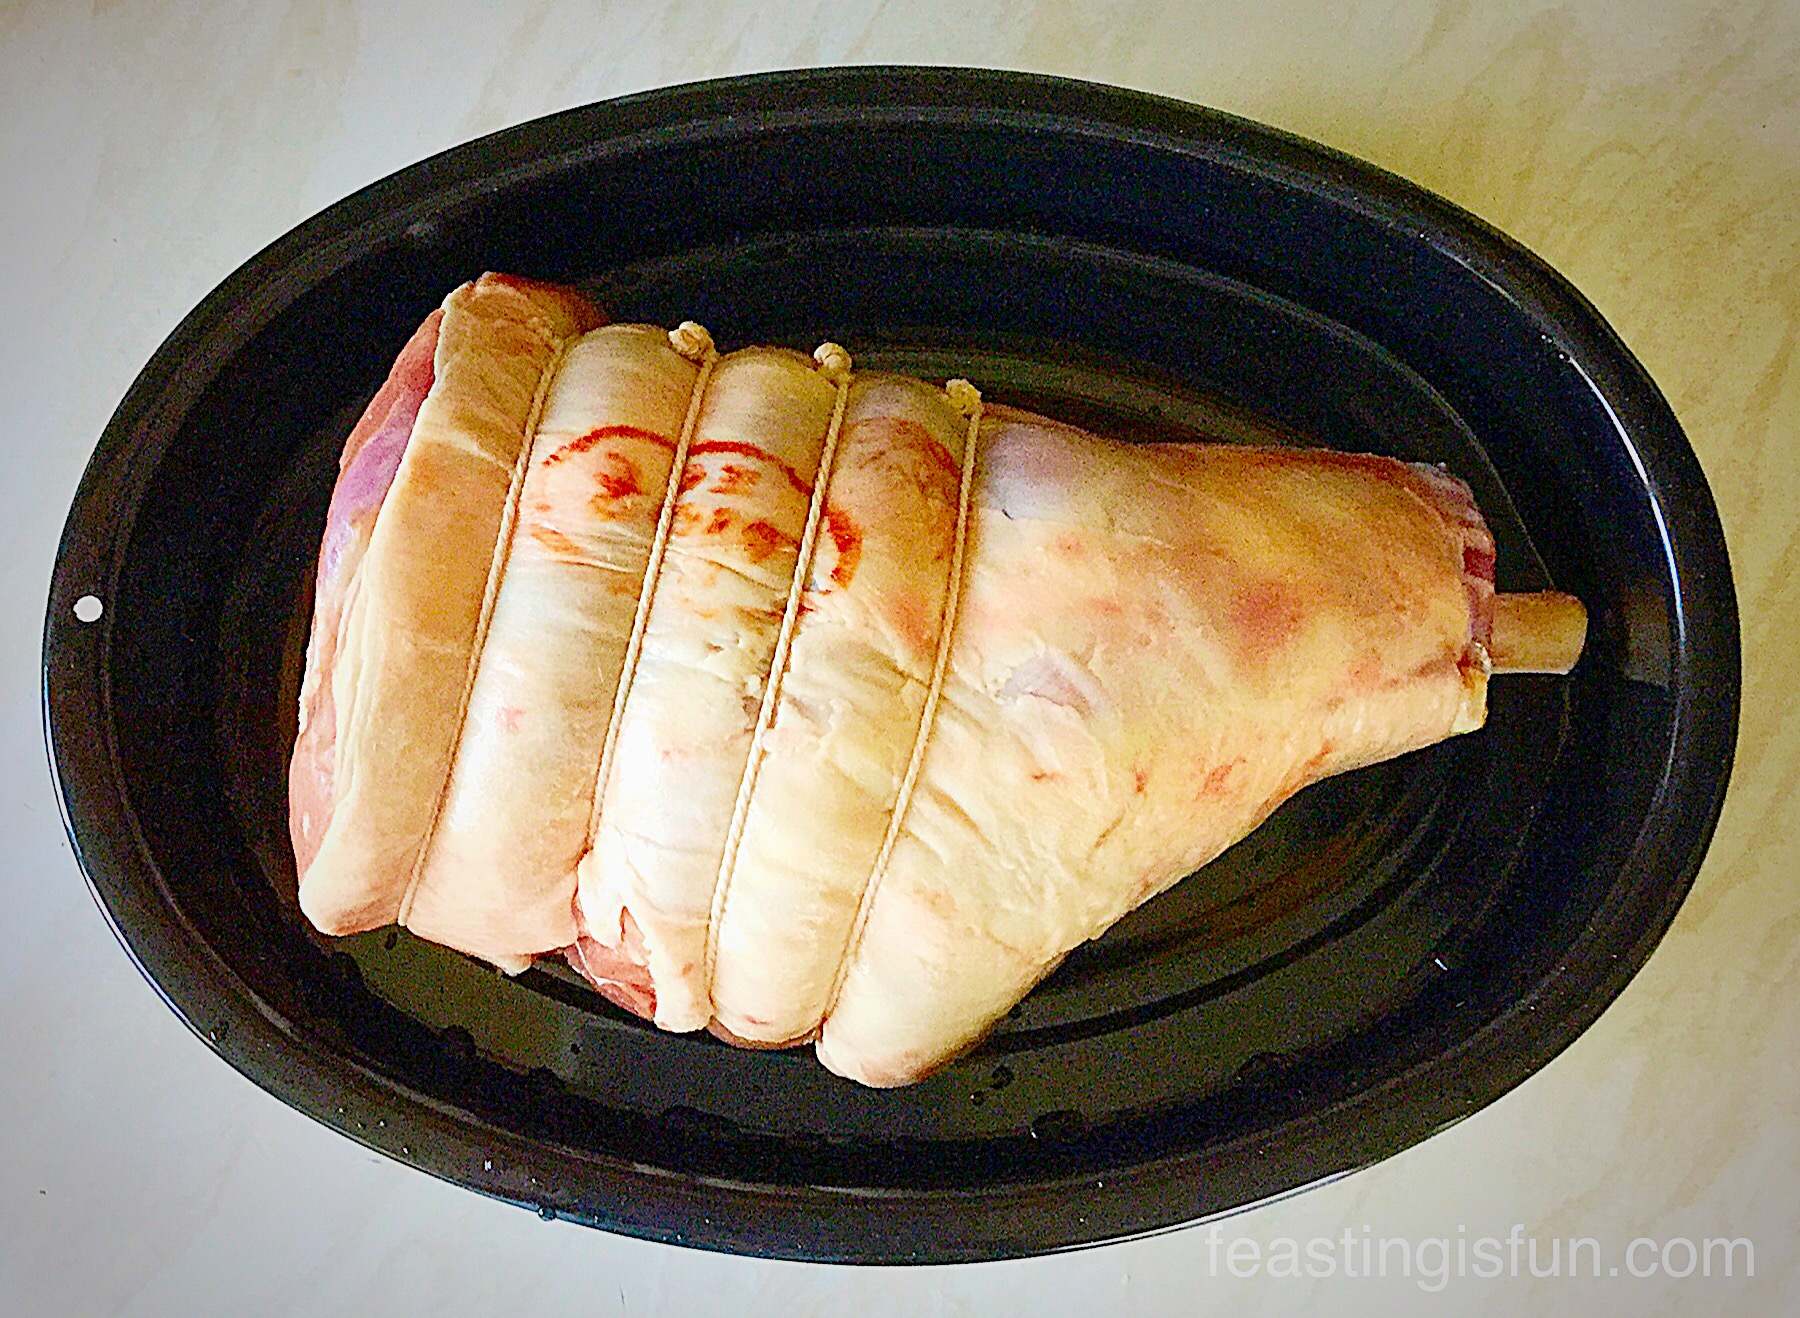
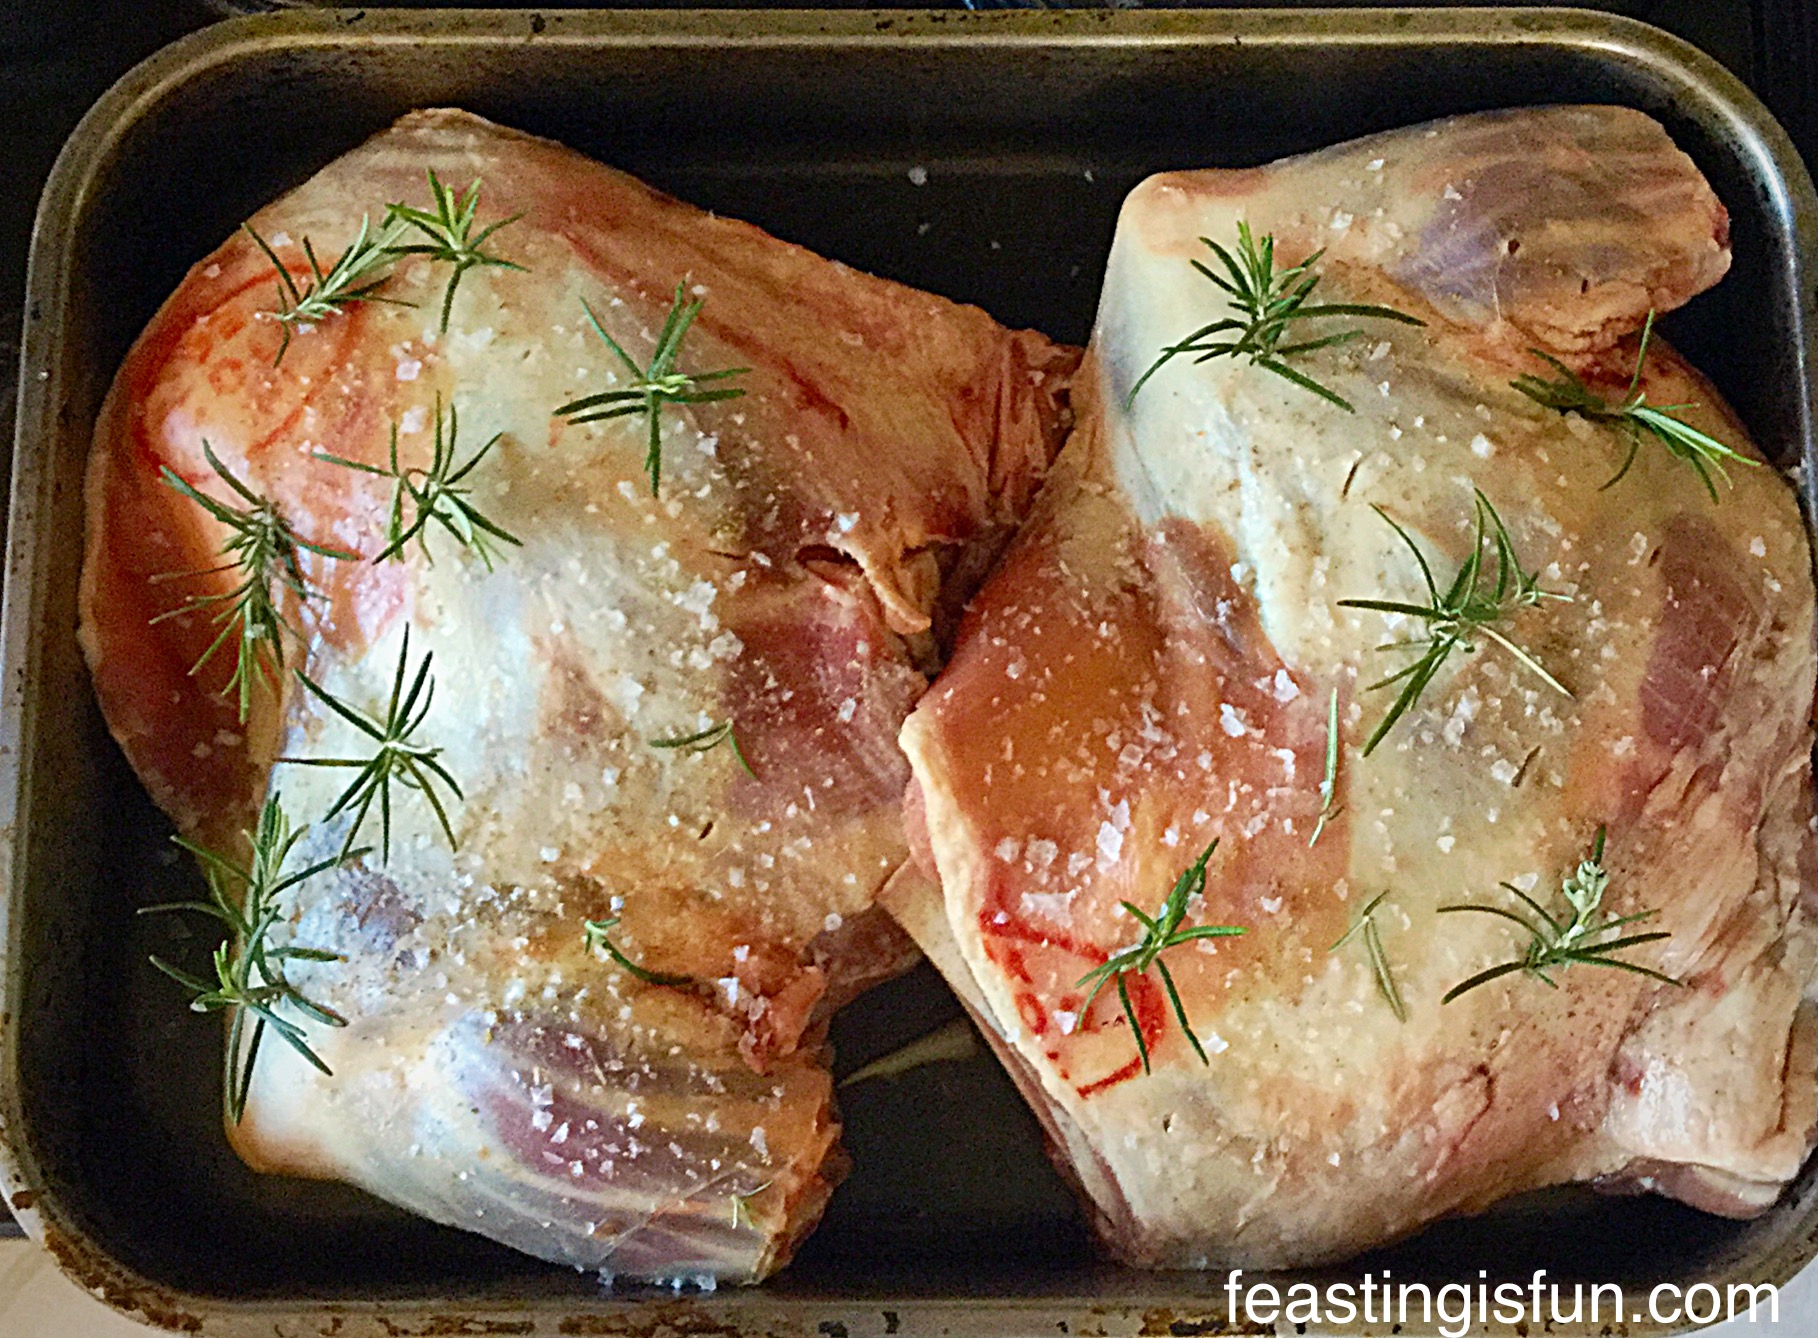
- Each shoulder of lamb weighs 2.2kg from Graig Farm
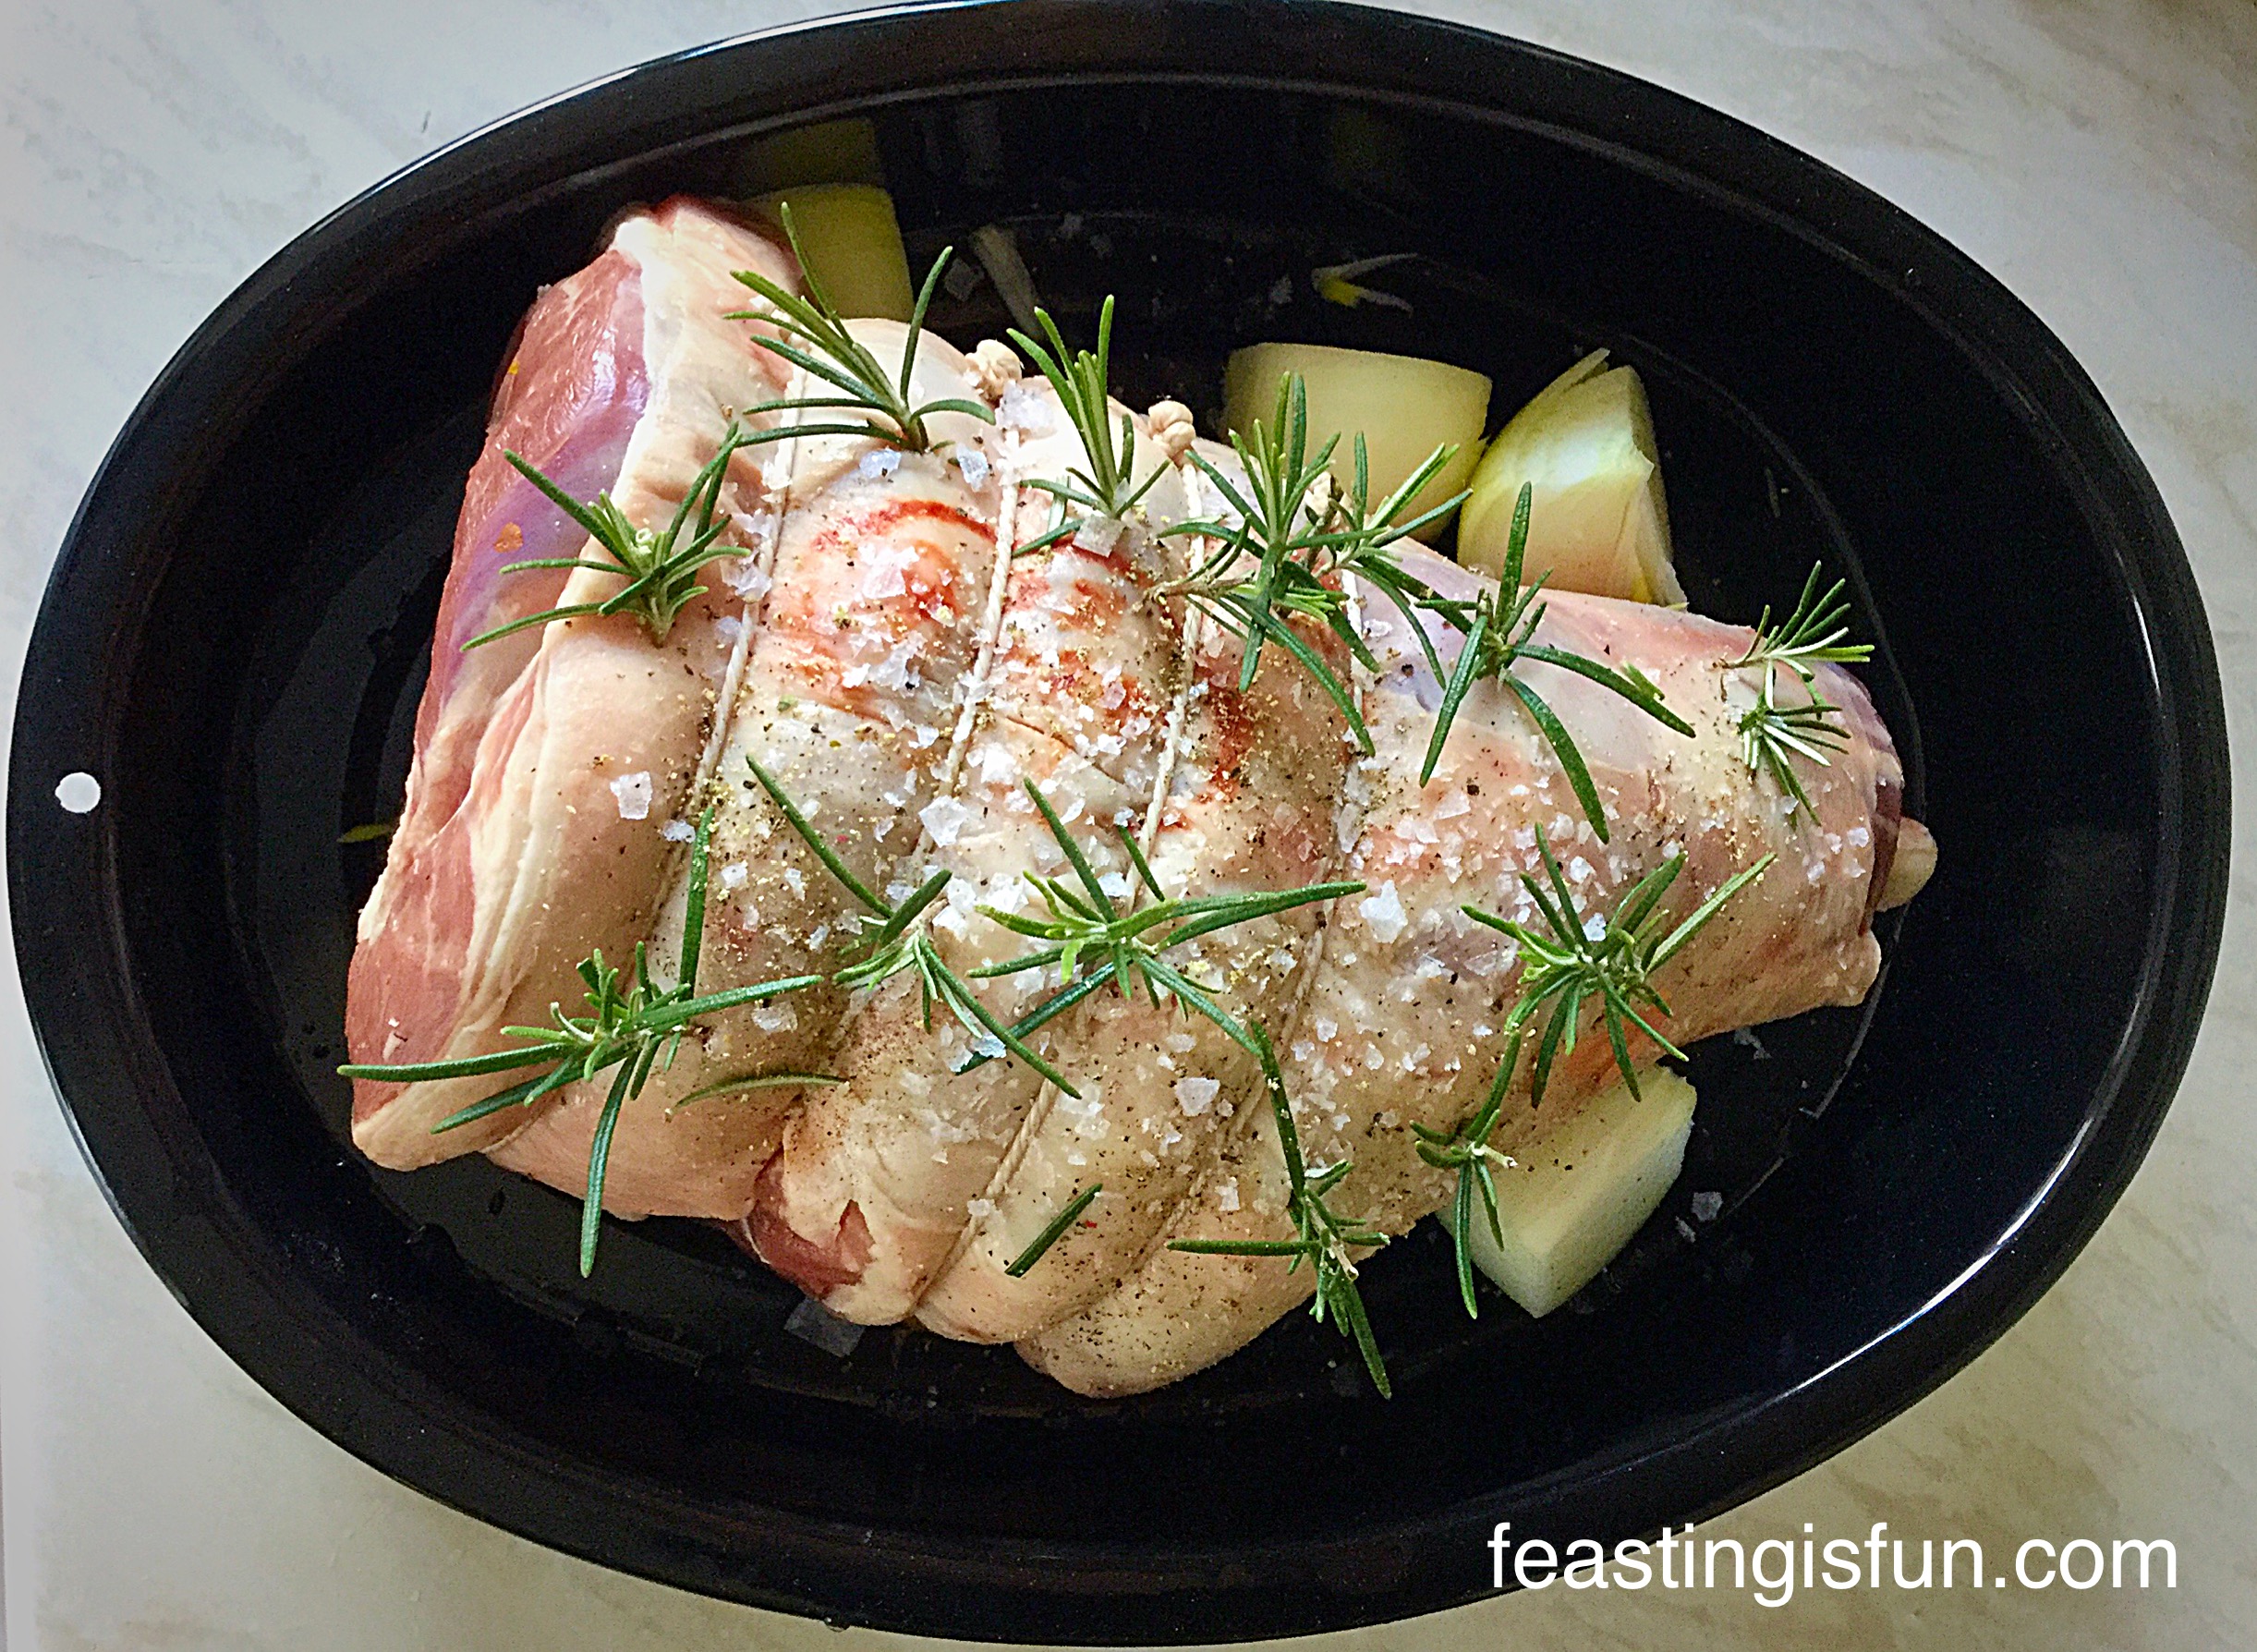
- One onion, peeled and halved per shoulder.
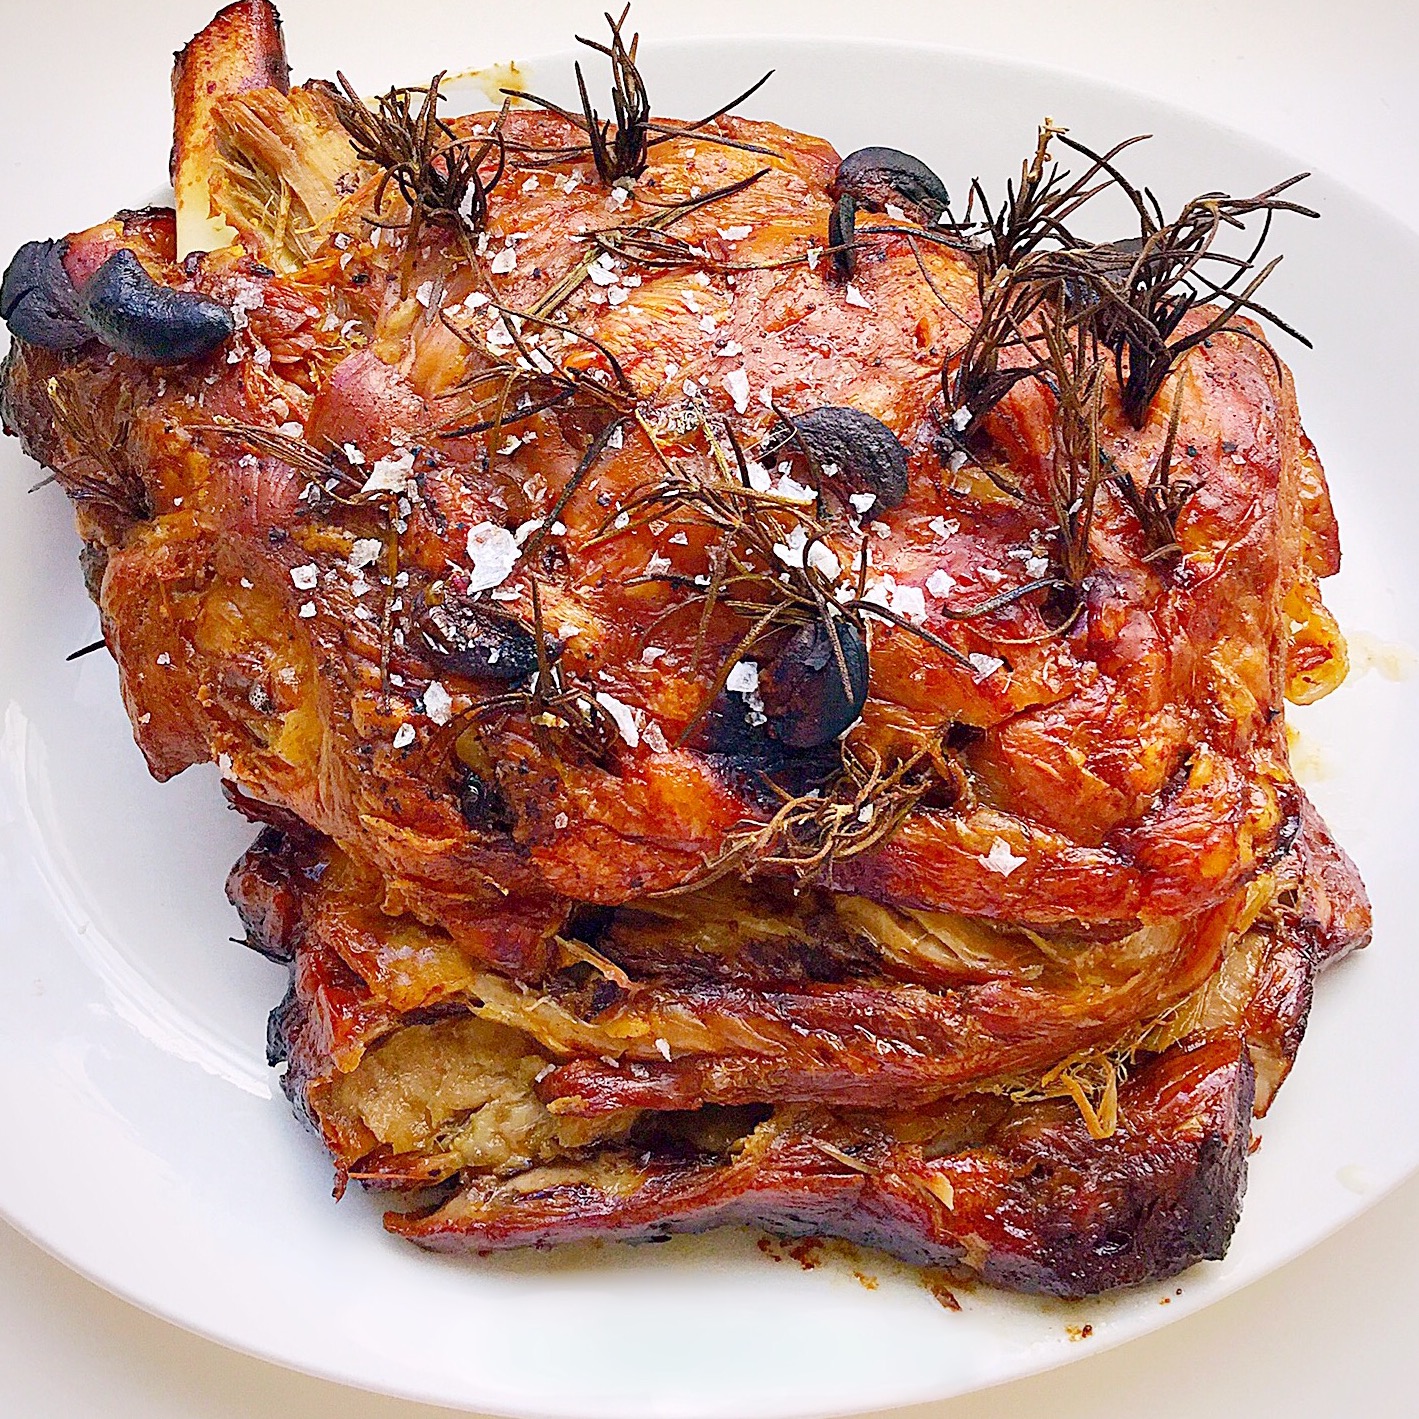
- Sprigs of rosemary.
- Sea salt (I use Maldon)and freshly ground black pepper.
- Optional – peeled garlic cloves.
Method: Preheat the oven to 160C/140C fan, gas mark 3, 325F
Preparing The Lamb For Roasting
- First of all, place the shoulder of lamb into a roasting tin that just fits.
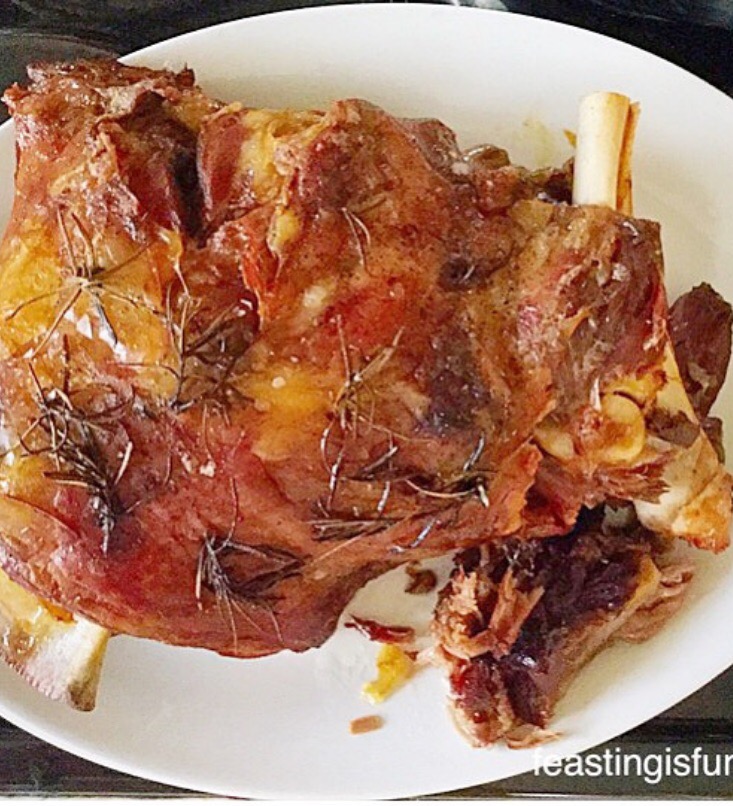
- Using a sharp knife make slashes through the skin into the shoulder of lamb.
- Push small sprigs of rosemary (and garlic, if liked) into the holes.
- Sprinkle over with sea salt and pepper.
- Place the onion halves under the lamb.
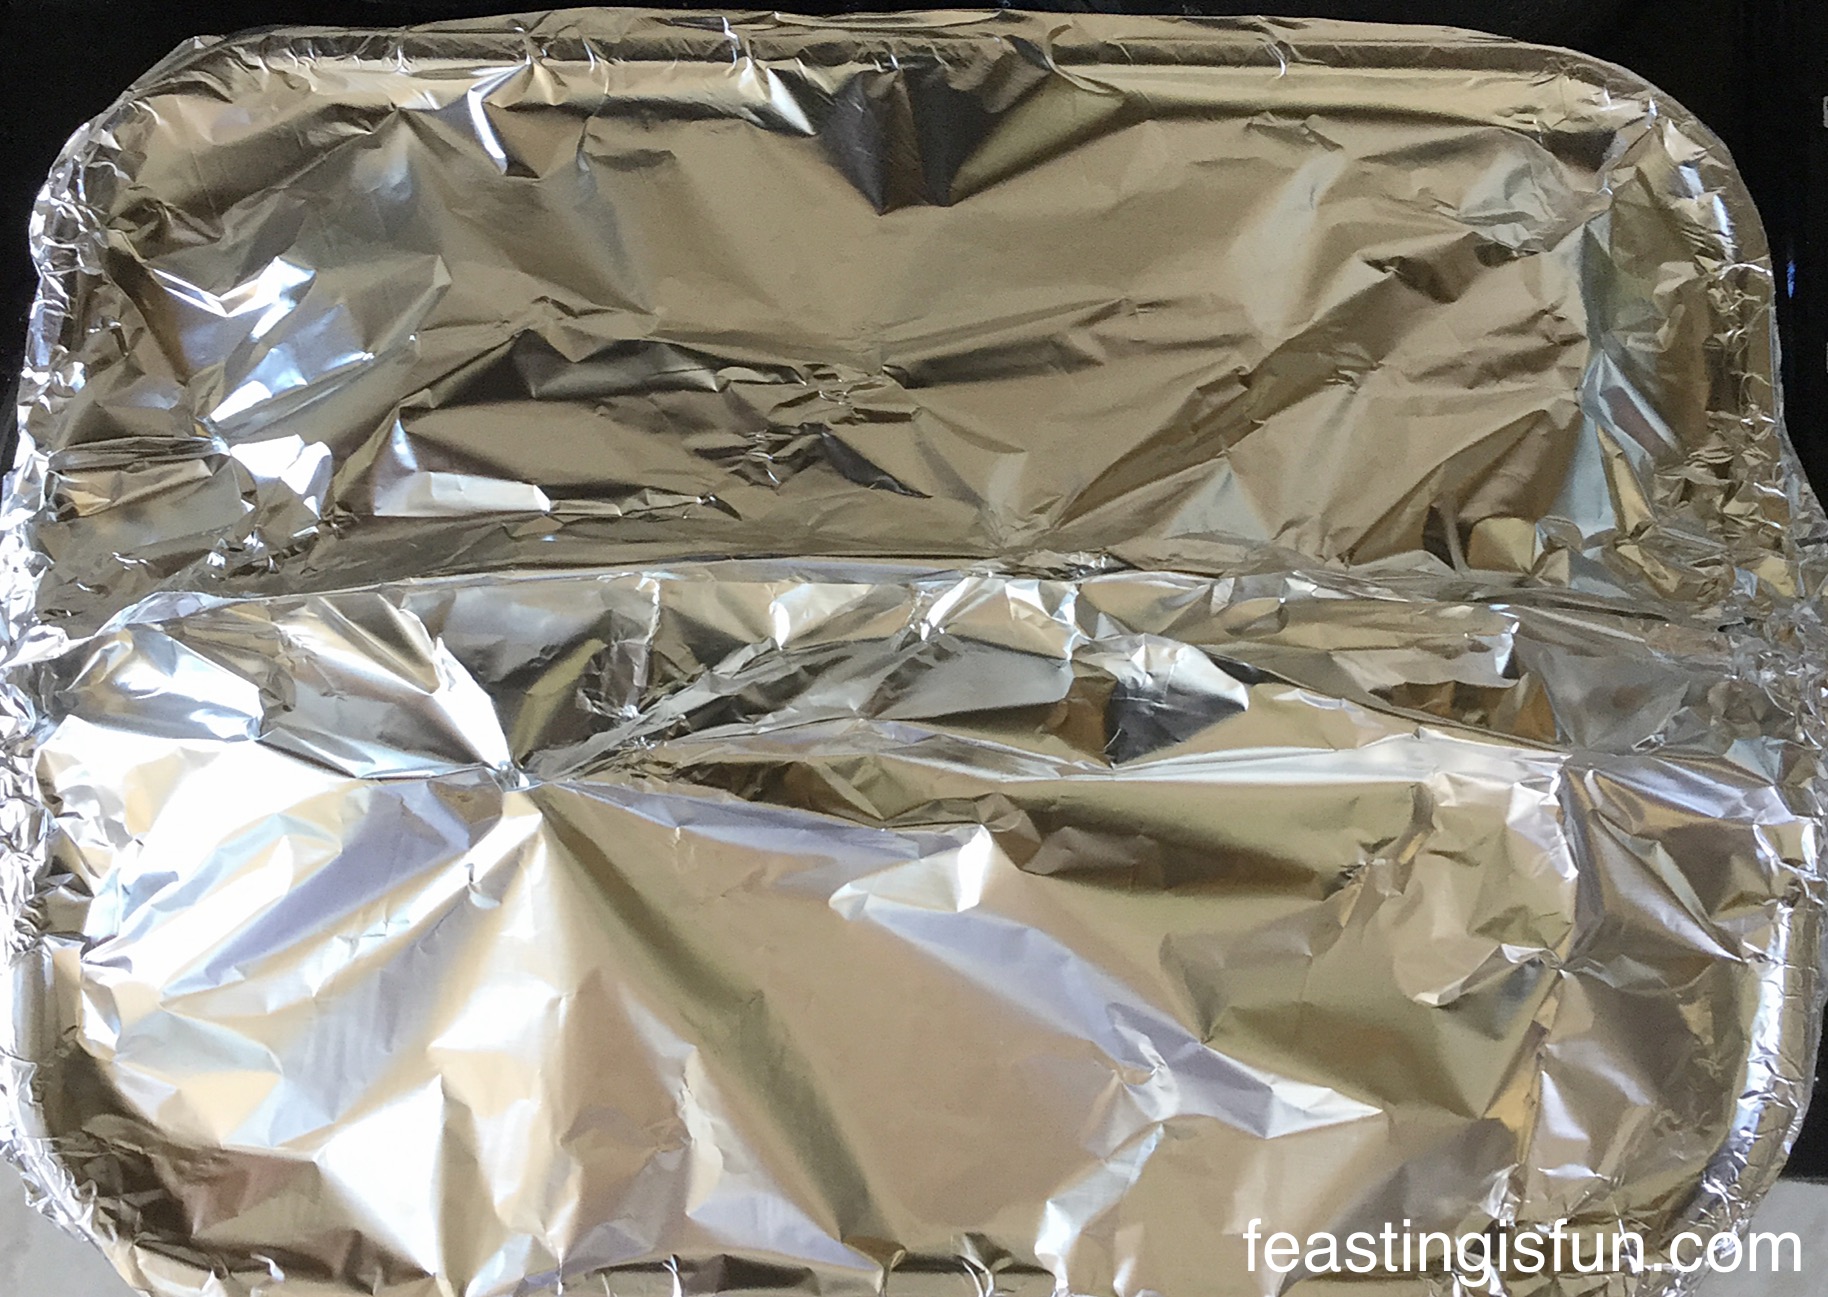
- Finally, cover the roasting tin tightly with aluminium foil. Make a folded pleat down the length of the foil and then crimp tightly to the tin. The pleat allows you to pull the foil away from the lamb, so that they don’t touch, it also gives room for steam to circulate as the lamb is slow cooking.
Slow Roasting The Lamb Shoulder
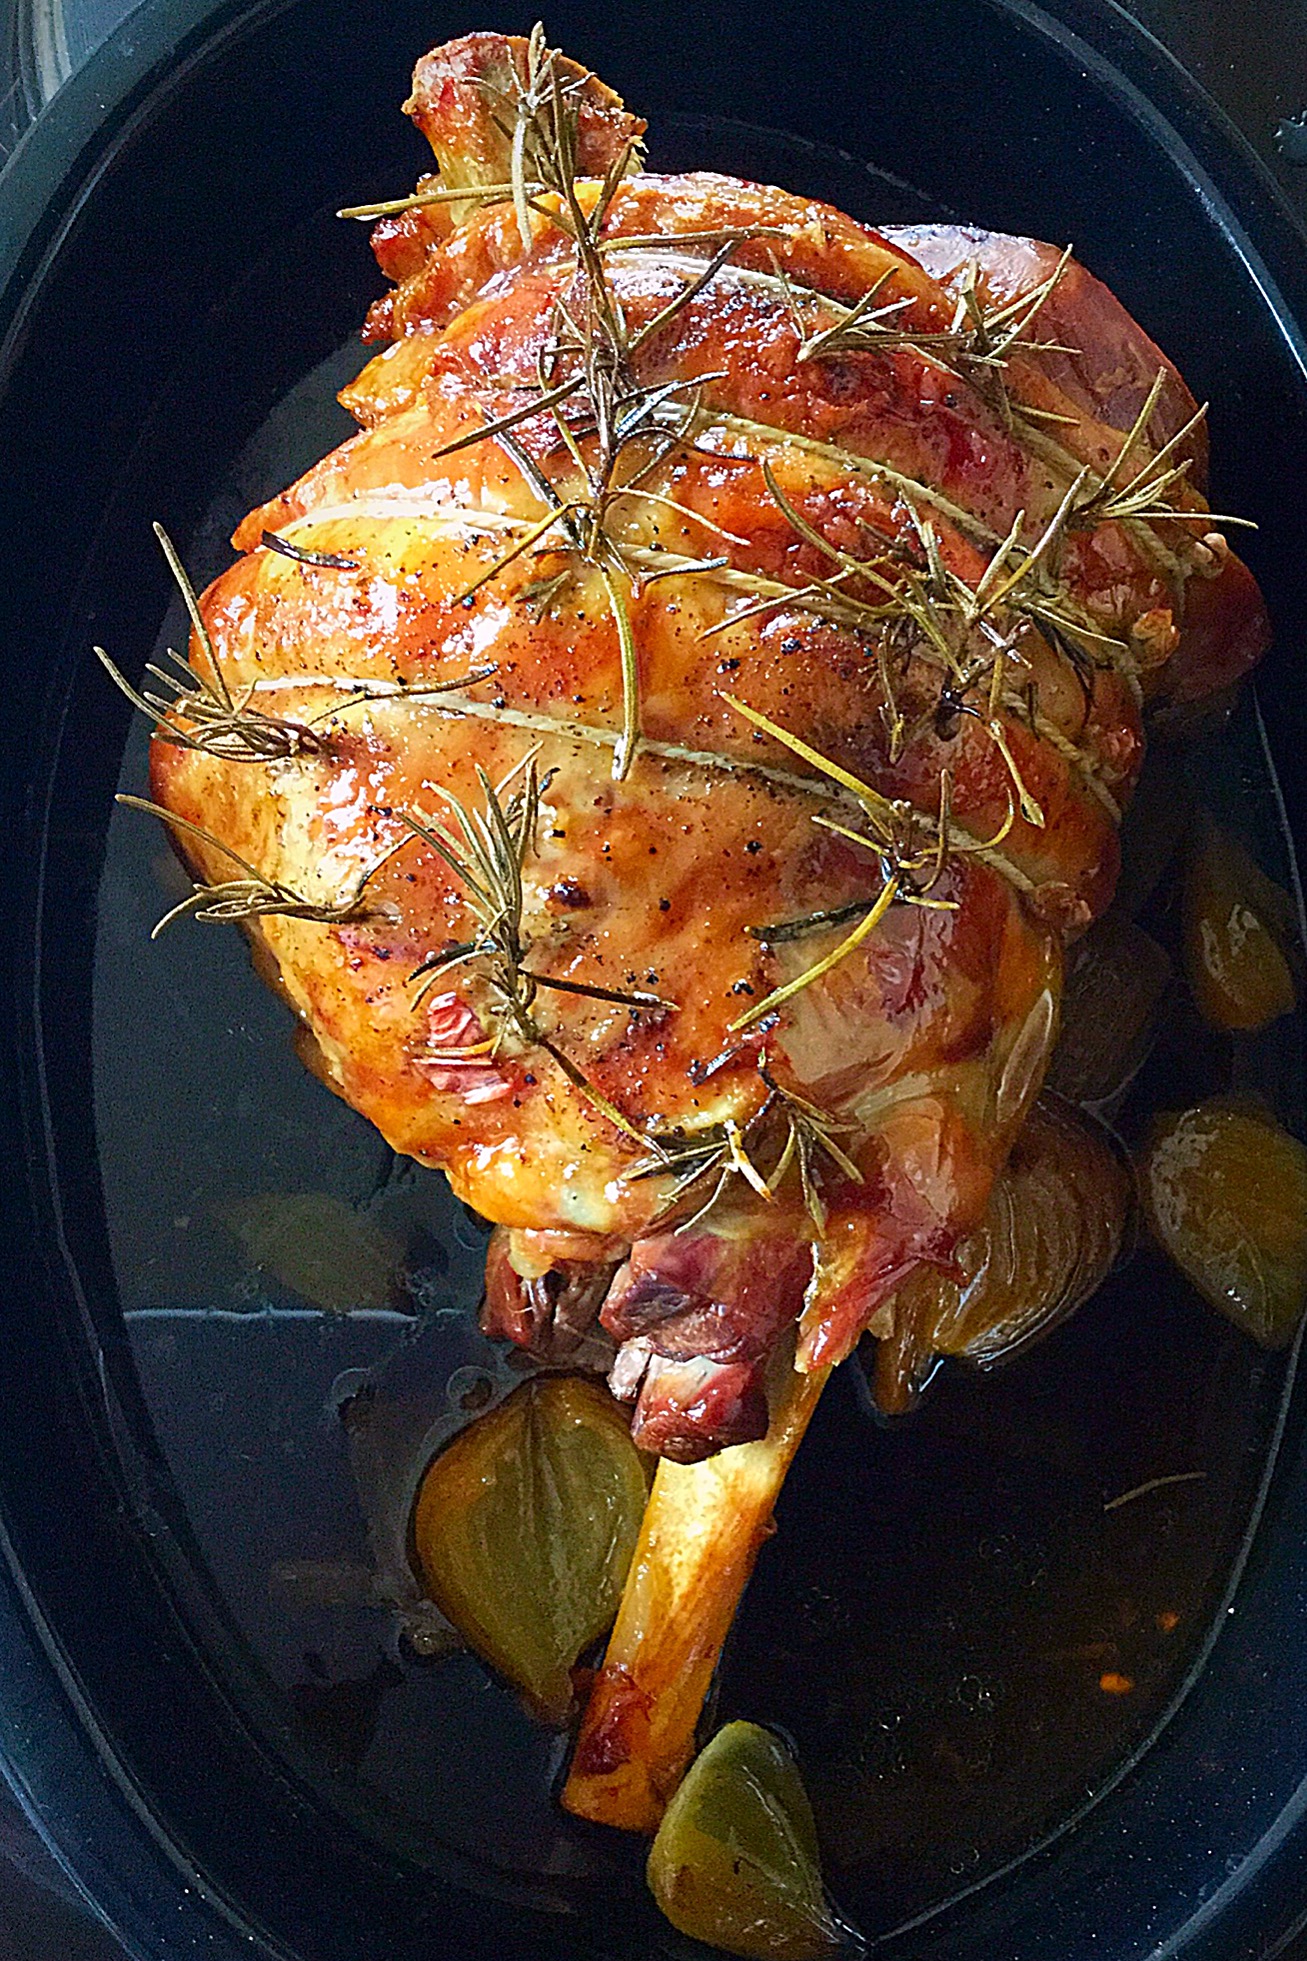
- Place the lamb into the centre of the preheated oven and cook for 5 hours.
- NOTE: All ovens vary, the cooking time is a guide only,
- The meat does not need to be basted. Because the natural fat and juices within the lamb baste it as it slow cooks.
- After the cooking time has elapsed, remove the lamb from the oven.
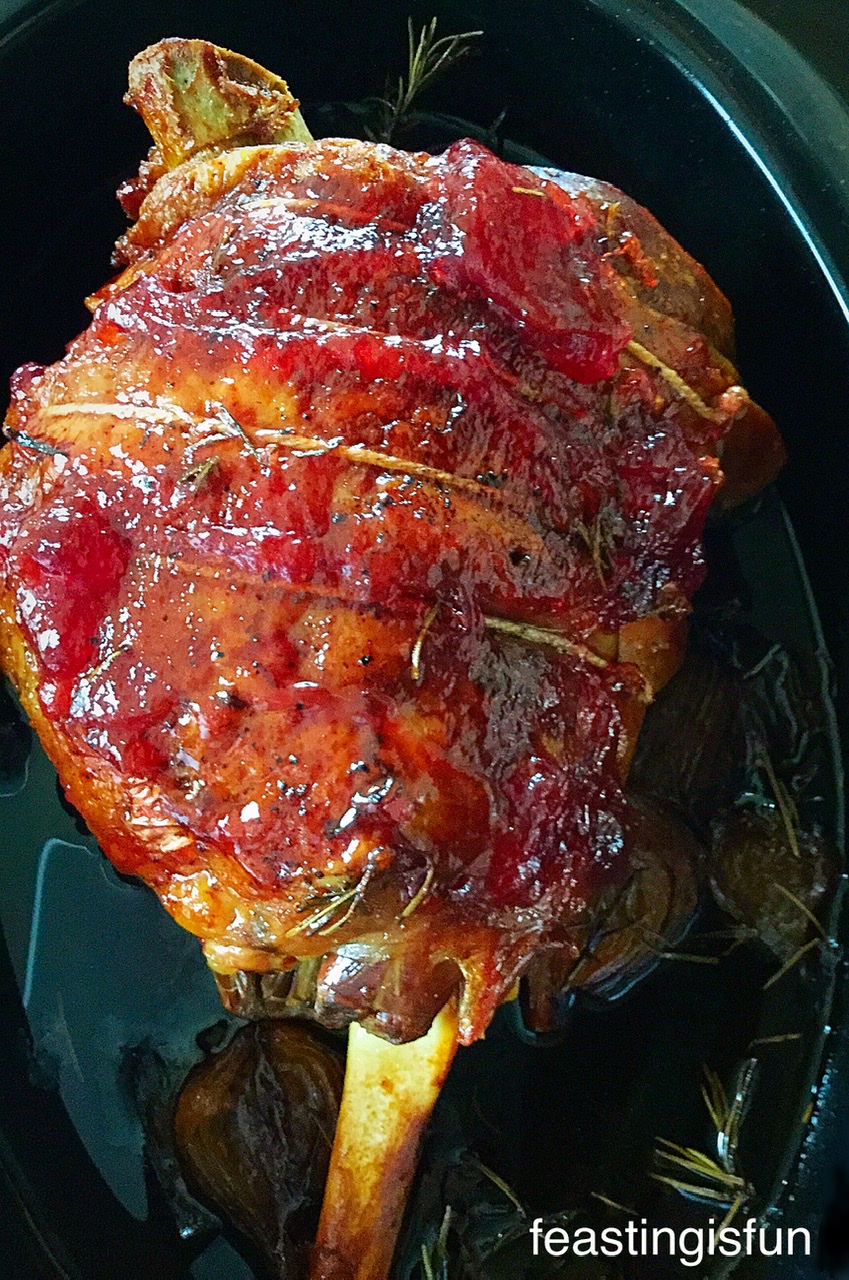
- Remove the foil and check the lamb is cooked by pulling at some of the meat with a fork. If it comes away easily the lamb is cooked.
- If the lamb is not fork tender, cover again with foil and place back into the oven, checking half hourly until cooked.
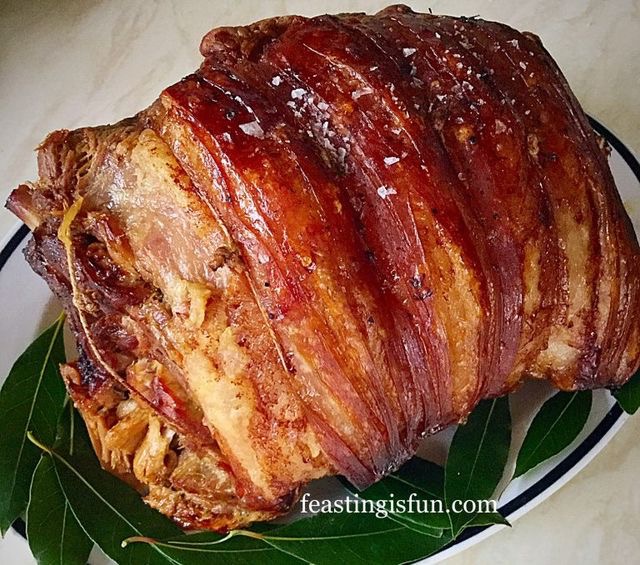
- Once cooked, if you like crispy lamb skin increase the oven temperature to 200C/180C fan, gas mark 6 and place the lamb back into the oven, leaving the foil off. Cook for 20-30 minutes, until you have golden, crispy skin.
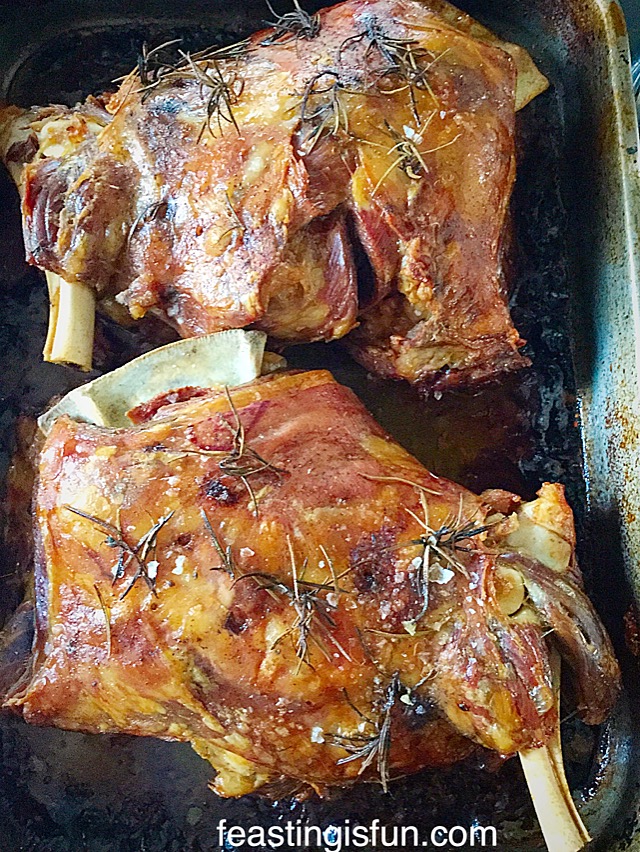
- As soon as it is cooked remove the lamb from the oven.
- Take the lamb out of the pan and place on a board, or platter, cover in foil to rest for 30-40 minutes. Enough time to finish the roast potatoes in the oven!
- To serve, pull the lamb apart into chunks, using 2 forks.
- Because this Slow Roasted Lamb Shoulder tastes so mouth-wateringly good, you’ll be back for seconds – so maybe roasting two shoulders of lamb wouldn’t be such a bad idea after all 😉.
Whatever you do this Easter, I’d encourage you to take a moment to think about why we celebrate it – see Important Stuff.
If you have enjoyed this Slow Roasted Lamb Shoulder you may also like these recipes:
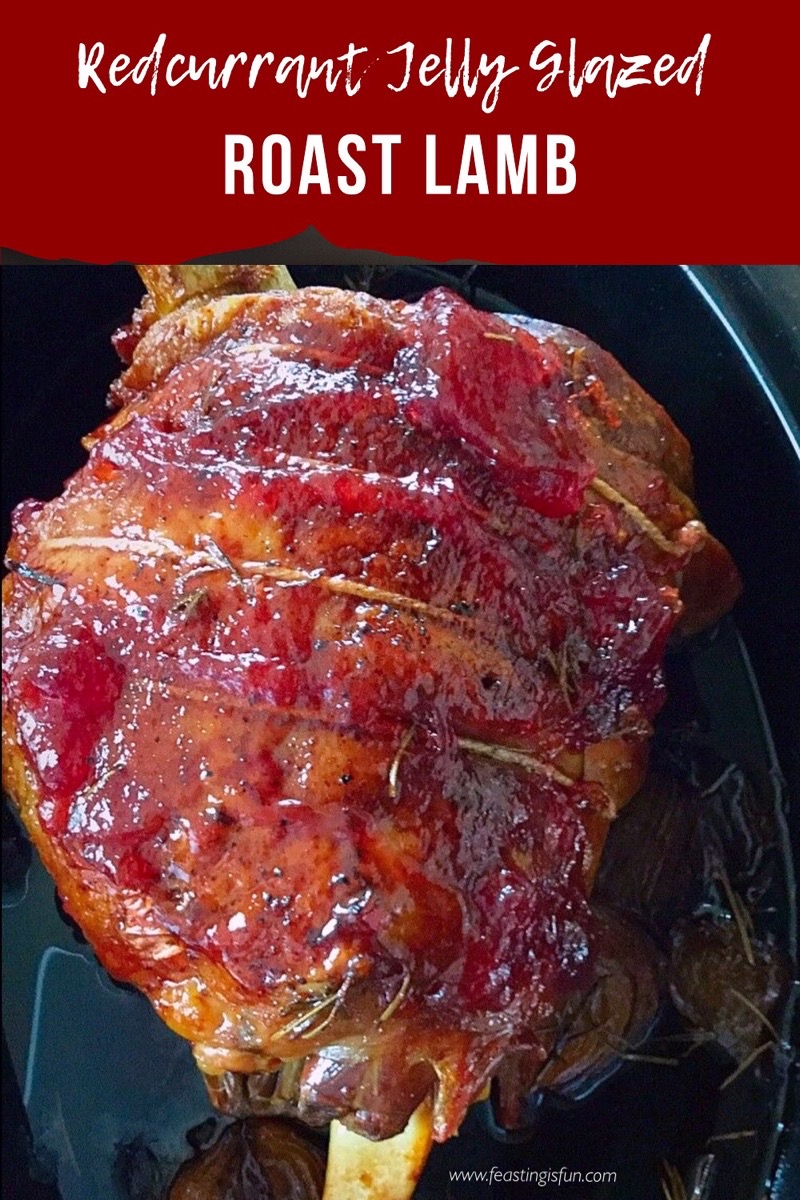
Redcurrant Jelly Glazed Roast Lamb

Since I find cooking a roast dinner fairly easy, I often make it when we have friends for dinner. While a few extra roast potatoes make any meal go further, it is ideal for last minute guest invites. Yet I know that some people really struggle with the timing.
Do you have a favourite roast? Or do you struggle to cook a certain roast and you’d like help with it?
Sammie xx
Graig Farm gifted me the lamb for this post. All opinions, views, recipe and content are my own.
No part of this post may be reproduced or duplicated without the written permission of the owner. Please see my Disclosure Policy.