Baked Parmesan Chicken Goujons

Share
Facebooktwitterpinterestlinkedintumblr

Welcome to a brand new year, 2024! I hope this coming year brings health, happiness and lots of fun to you all. As you may know by now, I love having fun in my kitchen coming up with delicious new recipes to share with you. And today I have a really delicious and easy to make recipe, my Baked Parmesan Chicken Goujons! Deliciously crispy and golden without the hassle, or added fat of frying. As soon as you taste these crispy baked chicken strips you will be making them regularly.

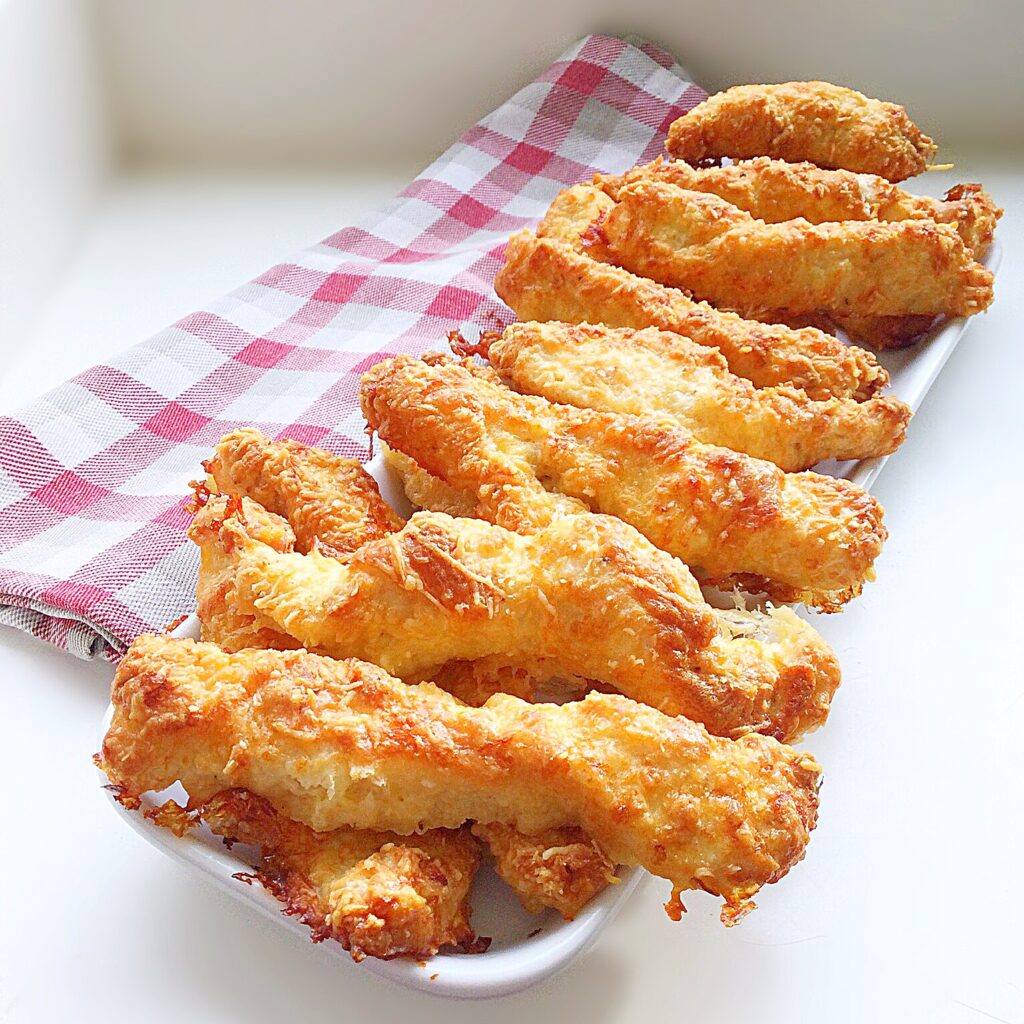
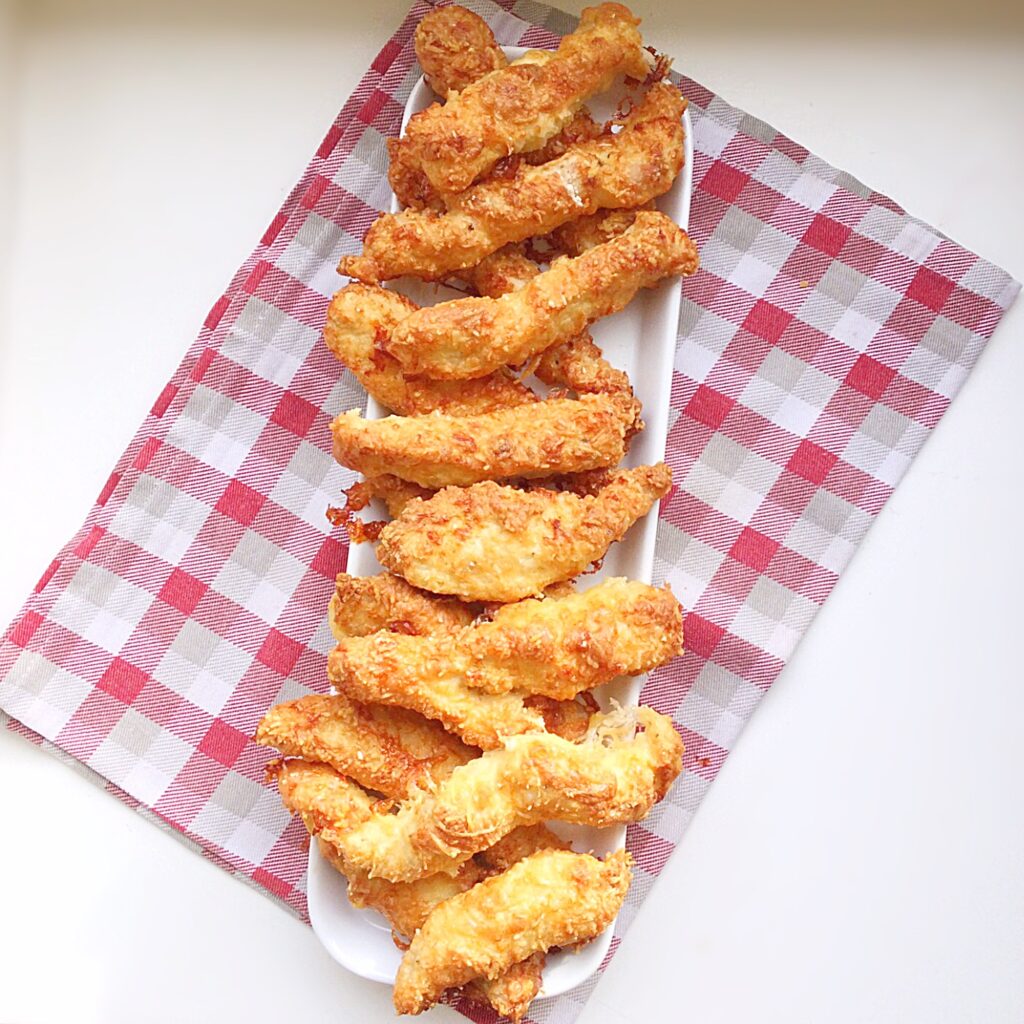
Golden, crispy, Parmesan cheese coated chicken strips on a white platter placed on a red check cloth.

And why not? Believe me, these tasty, crispy on the outside and succulent inner chicken goujons are full of flavour and will disappear fast when you share them with friends and family. Either served as part of a main meal with sweet potato fries and salad, or as part of a buffet for a family get together, these baked chicken strips hit that fried chicken spot without any of the hot oil, frying hassle!

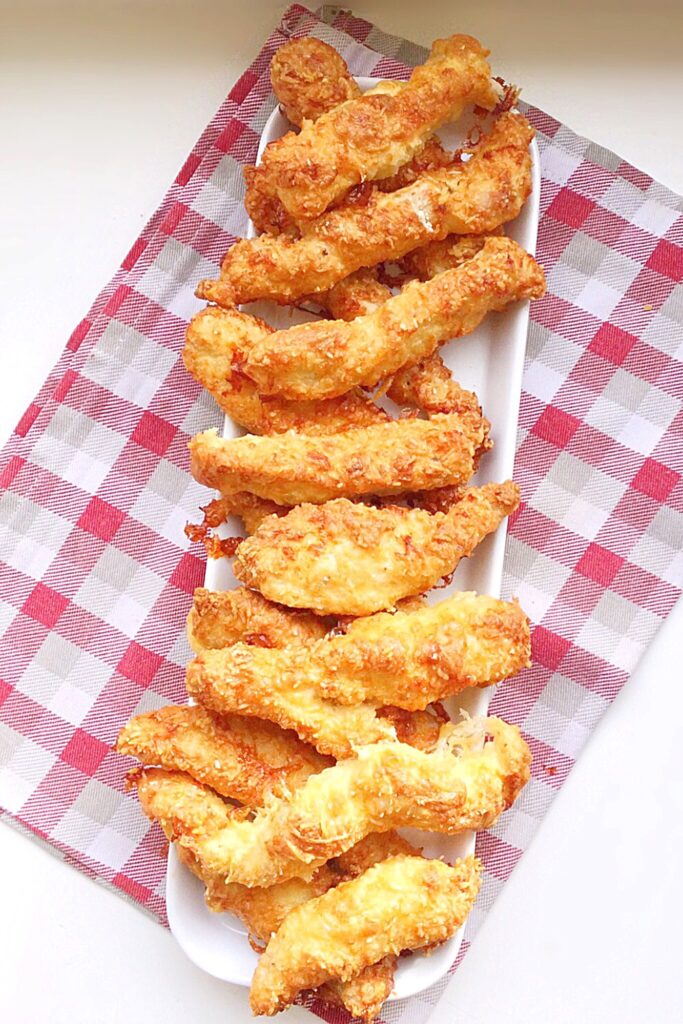
Golden, baked, Parmesan cheese coated strips of chicken on a white platter.

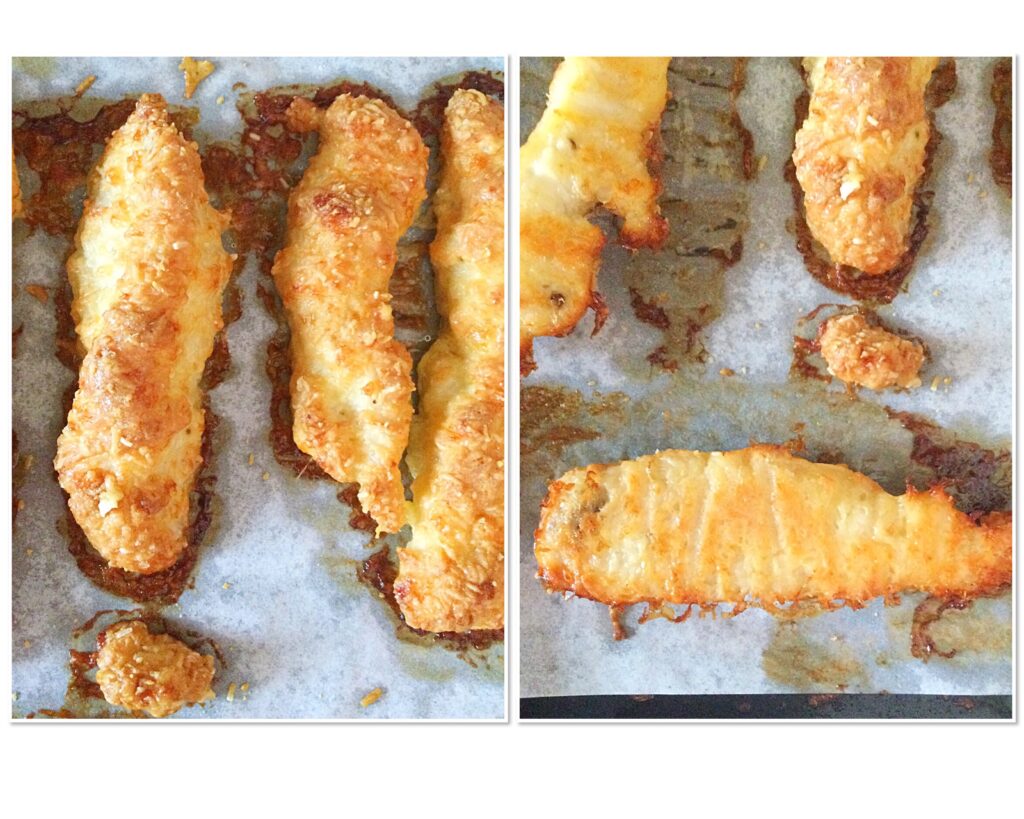
Take a look at how golden and crispy they are.

Recipe – Baked Parmesan Chicken Goujons makes approximately 30

650g/1.5lb Chicken Breast Fillets

1/2 tsp Salt – I use Maldon

1/2 tsp Freshly Ground Black Pepper

100g/4oz Plain White Flour – alternatively, for gluten free, use the same weight of gf flour or cornflour/corn starch.

2 Large Free Range Eggs

150g/5.5oz Grated Parmesan Cheese – alternatively use the same weight of grated Grana Pandano Cheese. The taste is similar and it is cheaper to buy.

Preparing The Ingredients

Before we start making the chicken goujons it’s worth reading through these tips first:

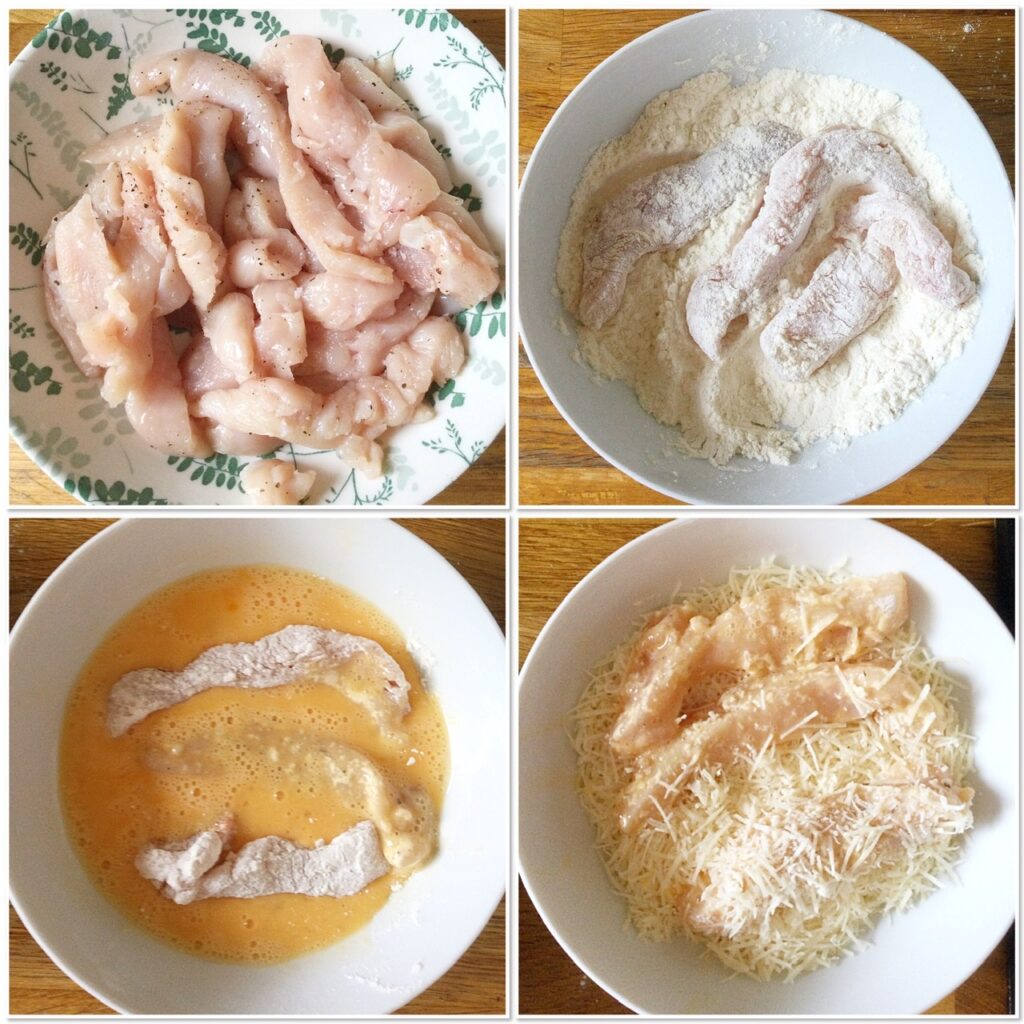
Setting up an assembly line with each ingredient will make the whole process easier, as you simply move from bowl to bowl with your chicken strips, ending with a lined baking tray. Use your fingers to coat and move the chicken through each stage, I use my left hand for dry and right hand for wet. Inevitably your hands will get sticky and messy, I see this as part of the fun! Although it’s a good idea to keep some kitchen paper near to wipe your fingers on when they become too sticky!

Also, it’s really worth grating the cheese yourself. Aim for long, thin strands of cheese, as these give the best, crispiest finish to the baked chicken.

Let’s Get Started

Preheat the oven to 220C/200C fan, 425F, gas mark 7
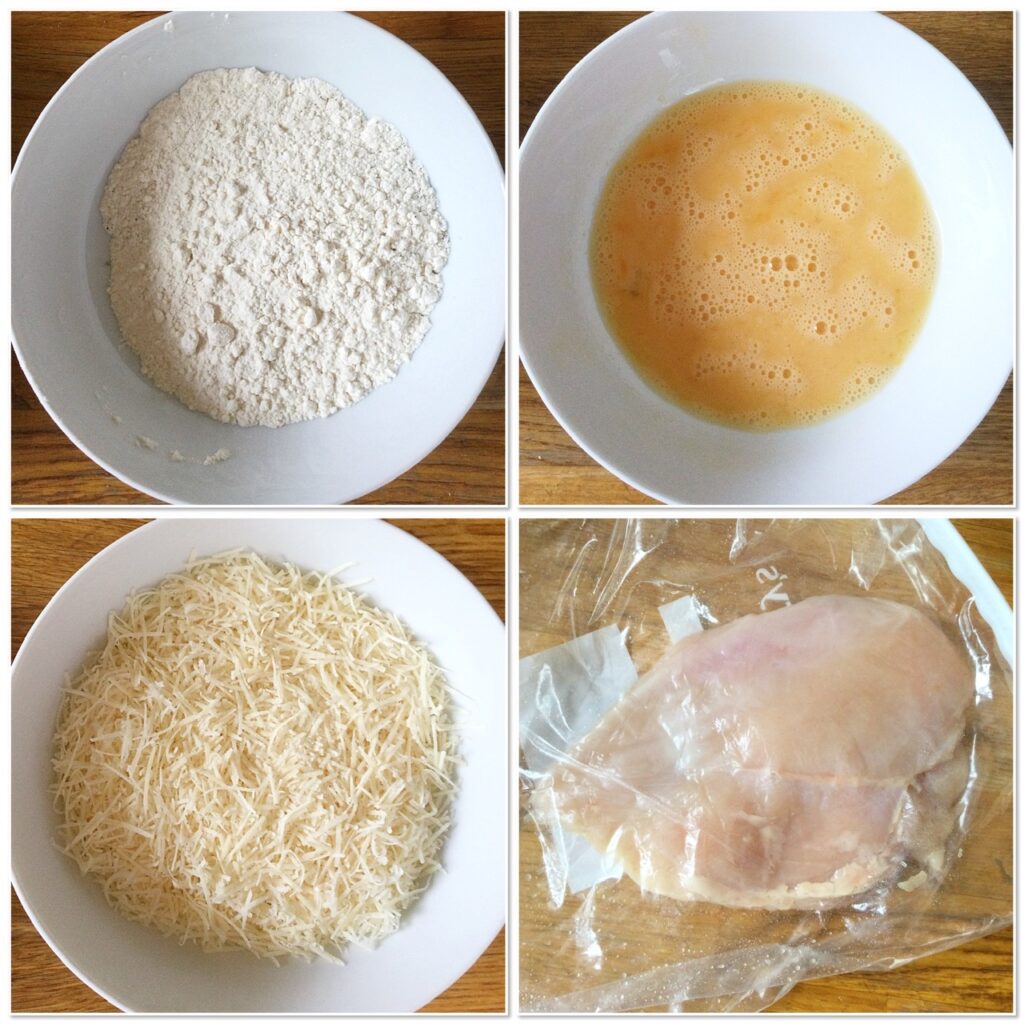
  • Place the flour and grated Parmesan cheese into shallow bowls.
  • Crack both eggs into a similar bowl and whisk together with a fork until combined.
  • Line two large baking sheets with parchment paper.
  • Place one chicken breast at a time into a freezer bag or between baking parchment and hit with a rolling pin until it is just over 1cm, or half an inch thick across the breast.
  • Using a sharp knife, or poultry scissors cut the breast into 2.5cm, or 1 inch wide strips. It is important to keep the chicken strips roughly the same size as this helps with even baking.


Bowls contains ingredients for coating the chicken.

  • Place all of the chicken strips into a shallow dish and season with the salt and pepper, tossing the chicken with your fingers until the seasoning is even.
  • Now make your assembly line, starting with the chicken strips, then the flour, followed by the eggs and then the grated Parmesan. The baking sheets should be as close as possible to the grated Parmesan dish.

Assembling The Parmesan Chicken Goujons

  • Take 3-4 strips of seasoned chicken and place in the flour. Use your fingers to toss the chicken until all strips are coated in flour.
  • Lift each strip of chicken out of the flour, giving it a little shake to remove any clumps and place into the egg. Use your other hand to turn the strips over ensuring each one is fully coated in egg.
  • Lift each strip from the egg mixture, allowing excess egg to drip off and drop into the grated Parmesan cheese. Use your flour hand to toss the chicken in cheese until covered.
  • Carefully remove the Parmesan cheese coated chicken strip and lay it on the baking tray.
  • Repeat the whole process in small batches until all of the chicken goujons are on the baking trays.

Images showing the steps to coat the chicken.

Baking The Chicken Goujons

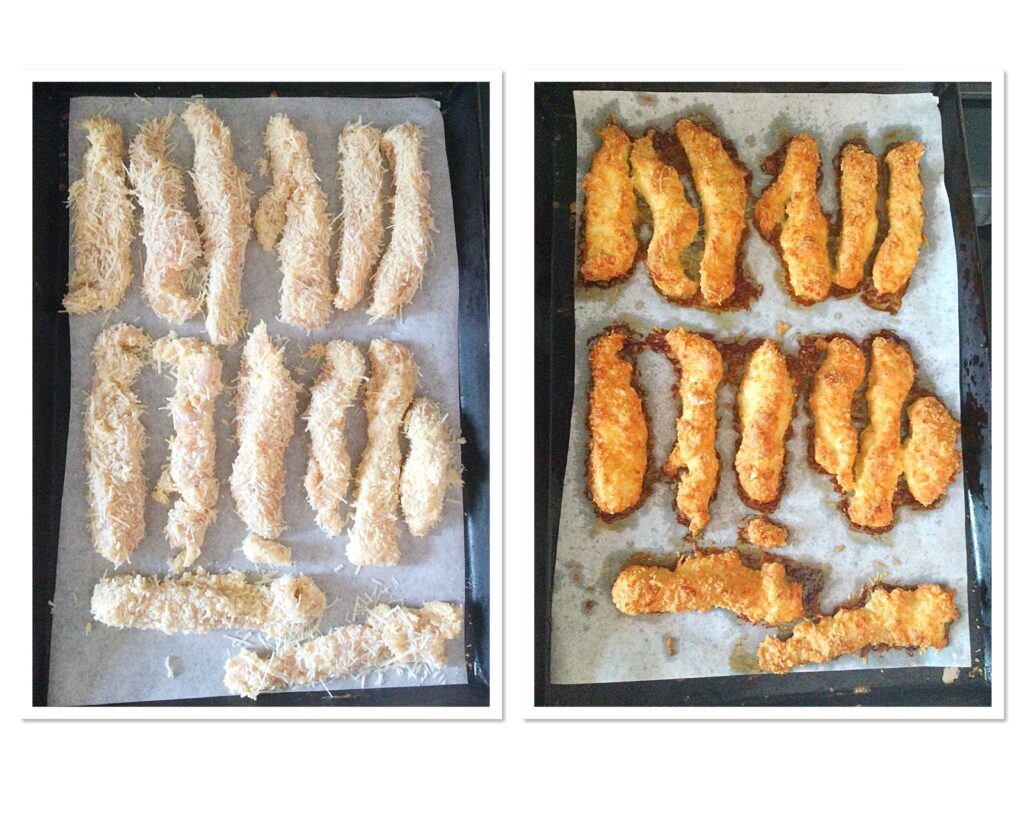
  • Place the full baking sheets into a preheated oven and bake for 30 – 35 minutes until golden and completely cooked through.
  • To check if they are thoroughly cooked carefully cut through the thickest piece of chicken. Inside should be opaque with no sign of redness.
  • As soon as the chicken is baked remove the baking trays from the oven.

The cheese coated strips before and after baking.

  • Serve immediately for a main meal using tongs to pick them up.
  • If serving hot for a buffet use tongs to place on a platter and cover with foil to keep warm.
  • For picnics or when serving cold leave the goujons to cool on the baking tray. They will still retain their crispness.

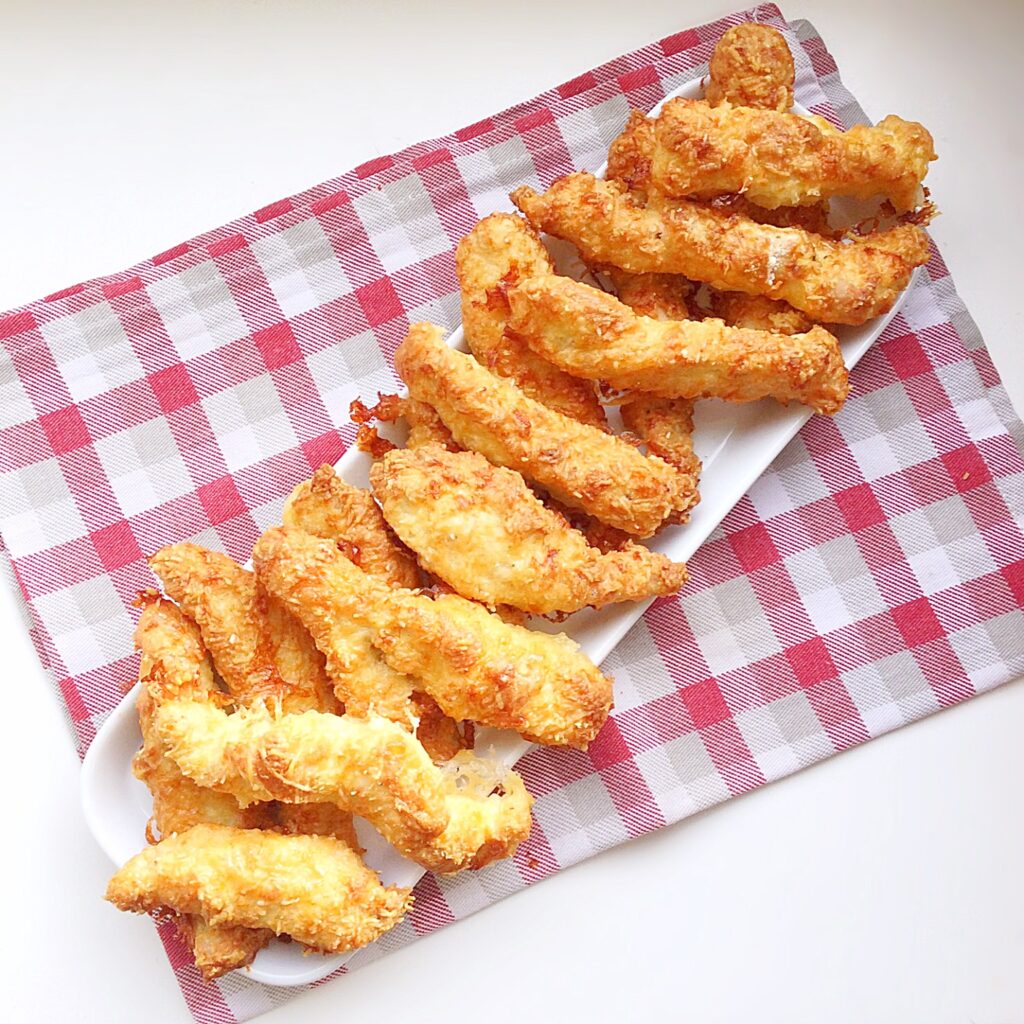
Close up images of the crispy, baked, Parmesan chicken Goujons.

Nothing beats the flavour of their savoury, golden crunch against the juicy chicken inside!
Golden and succulent chicken goujons stacked on a platter with a clear view of the inside of one strip.

While this recipe is simple, it does require a few stages. Although, thankfully not having to handle hot oil and fry them makes it worthwhile. For this reason I especially like to batch make these chicken goujons. It makes sense to double the ingredients, make the most of having the oven on and only have one, fun messy kitchen!

So, to make ahead and freeze I follow the recipe and leave the baked goujons to cool. Especially in hot weather I cool the chicken in the refrigerator. Then I place them in freezer bags and pop in the deep freeze where they will keep for 3 months, not that they ever last that long! I defrost the chicken overnight in the refrigerator and bake in the oven for 10 – 15 minutes at 200C/180C fan, 400F gas mark 6, until fully heated through. Likewise, they will keep refrigerated in an airtight container for a couple of days, reheat as given above.

Crispy, Parmesan cheese coated golden chicken strips on a white platter.

If You Have Enjoyed This Recipe For Baked Parmesan Chicken Goujons You May Also Like These:

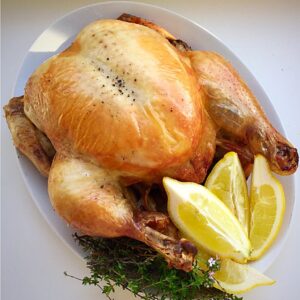
Lemon Thyme Roast Chicken 

Lemon Thyme Roast Chicken

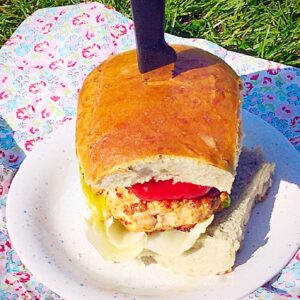
Chicken Herb Burgers

Homemade Chicken herb burgers in a bun.

Chilli Lime Chicken Kebabs

Chilli Lime Chicken Kebabs


While some people think that chicken has little flavour of its own, when cooked properly, with complimentary ingredients it can really be the star of the show. The Parmesan cheese in this recipe doesn’t give the chicken a cheesy flavour, more like a slightly salty savoury hit that lifts the succulent chicken. I’m already imagining what a pinch of cayenne pepper or paprika would add to this dish! So many ideas! Most importantly is the ideas that make it onto my blog are rigorously tested, ensuring you have success every time you make them.

So, whatever you are making, baking and creating in your kitchens, have fun preparing and sharing your feast.

Sammie x

No part of this post may be reproduced or duplicated without the written permission of the owner. Please see my Disclosure Policy.


Share
Facebooktwitterpinterestlinkedintumblr

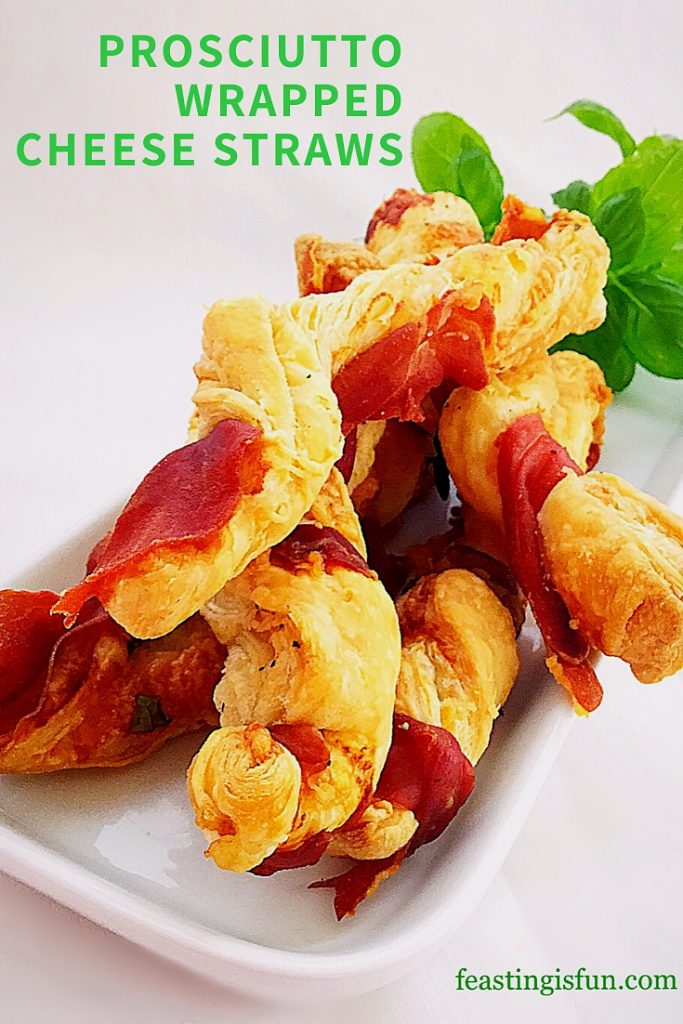
Prosciutto Wrapped Cheese Puff Pastry Straws

Share
Facebooktwitterpinterestlinkedintumblr

So, who is ready for a super easy, party food recipe? While there are plenty of sweet recipes here on the blog, I prefer food that is more savoury. Given a choice, I will usually choose a cheese board over dessert. While my family always pick a delicious, sweet treat. Also, at parties I much prefer something salty and savoury to compliment my glass of wine or sparkling water. My Prosciutto Wrapped Cheese Puff Pastry Straws tick all of my preferred flavour boxes. So much so, I ate three as soon as they were cool enough!

Easy Party Food Recipes:

Creating easy recipes is a top priority for me. These straws can be made ahead and kept refrigerated or frozen. Since party food can involve lots of little morsels, keeping the recipe simple reduces stress and leaves more room for fun. Because that’s what parties should be, fun! Whether it’s drinks with friends or a full on family bash, these straws are a perfect addition to any occasion.

FF Prosciutto Wrapped Cheese Puff Pastry Straws
Prosciutto Wrapped Cheese Puff Pastry Straws

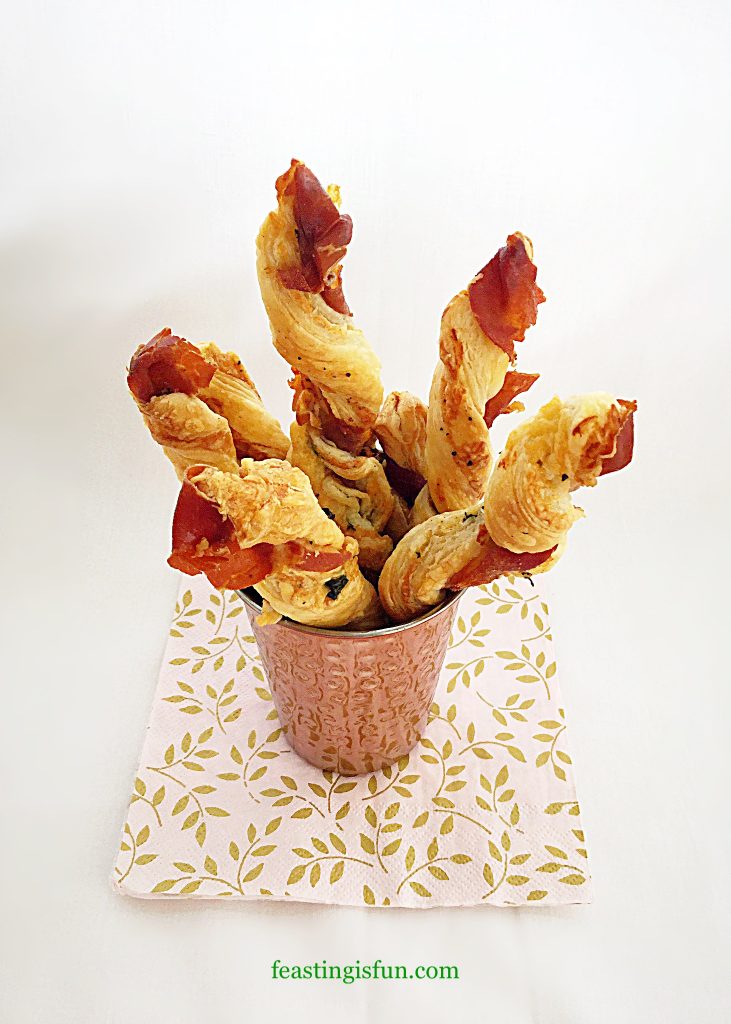
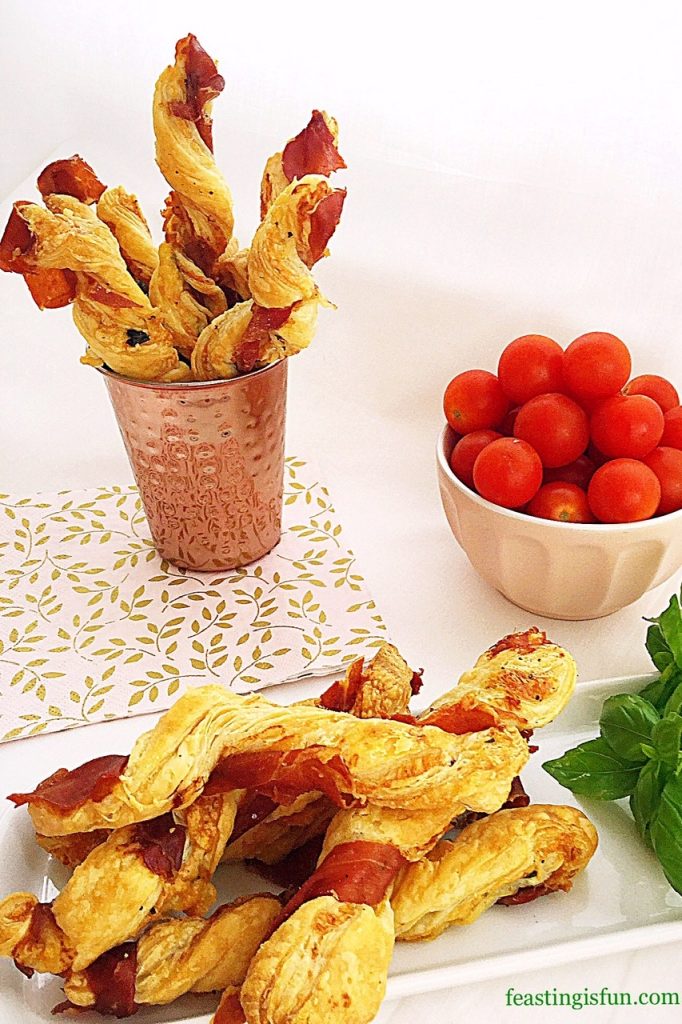
So incredibly easy to make and bake, these straws are filled with grated cheddar and fresh basil. A strip of Prosciutto ham is then twisted around the straw and then baked. As they bake the Prosciutto becomes crisp and salty on the outside with melting cheddar and fresh Basil inside.

Savoury food snacks displayed on a platter and in a copper cup.

Recipe: Prosciutto Wrapped Cheese Puff Pastry Straws – makes 24

2 x 250g/14oz All Butter Puff Pastry – I use Waitrose own brand. Alternatively use ready rolled pastry, however you may need to adjust the cheese/basil/prosciutto quantities.

100g/4oz Finely Grated Mature (Sharp) Cheddar Cheese – I use Wyke Farms

A Handful of Fresh Basil Leaves – approximately 20 leaves. Alternatively when Basil is unavailable use 1tsp finely chopped thyme or rosemary

12 Slices Prosciutto Ham

Freshly Ground Black Pepper

Making The Cheese Straws:
Preheat the oven to 200C/180C fan, 400F, gas mark 6

  • First of all line 2 large baking trays with baking parchment.
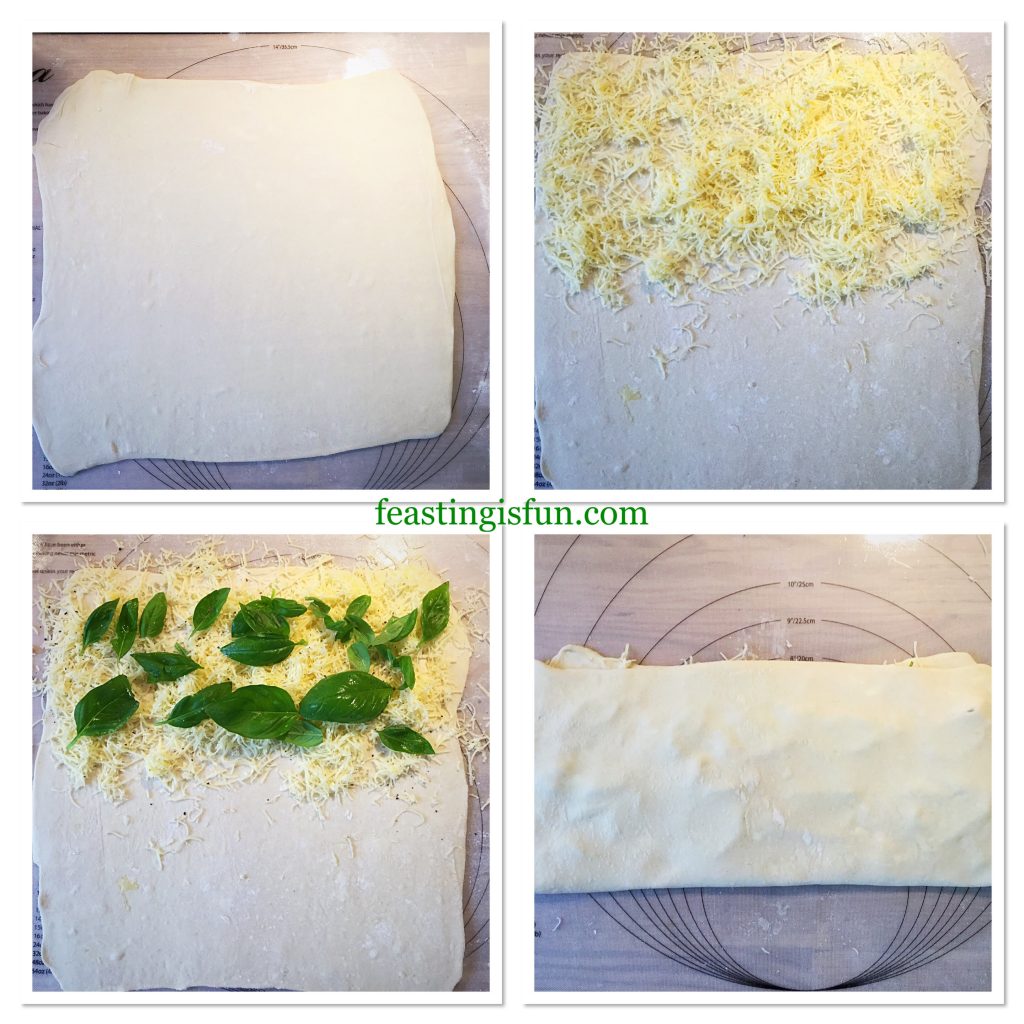
  • Roll the first block of puff pastry into a square, approximately 30cm x 30cm (12in x 12in).
  • Sprinkle half the grated cheddar over the top half of the square.
  • Place half of the fresh basil leaves on top of the cheese.
  • Add some freshly ground black pepper.
  • Fold the bottom half of the pastry up over the cheese and basil.
FF Prosciutto Wrapped Cheese Puff Pastry Straws
Filling the pastry with cheese and basil.
  • Use a rolling pin to roll the pastry so that it flattens and becomes smooth.

Portioning The Straws And Wrapping With Prosciutto:

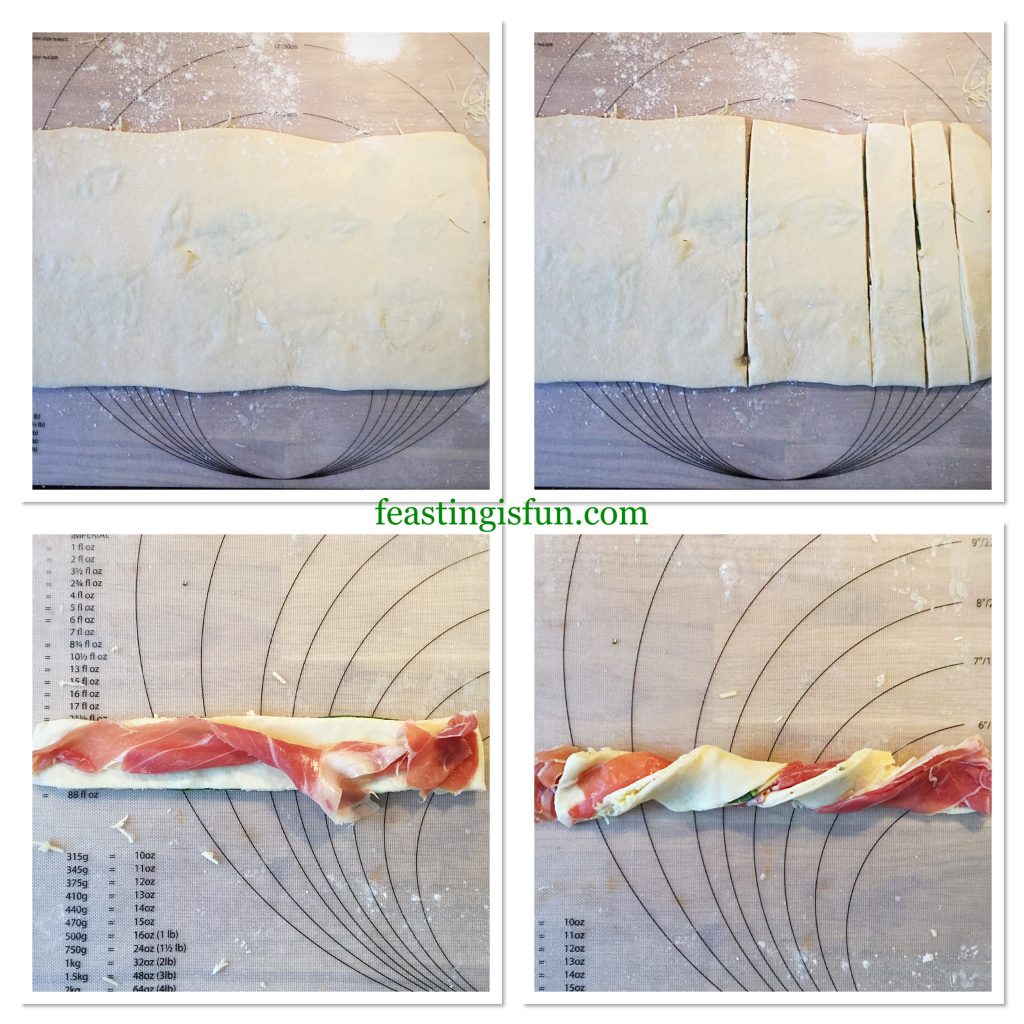
  • Divide the pastry in half using a sharp knife. Then cut each half in half again, you will have four separate pieces.
  • Cut each quarter into 3 strips. Resulting in 12 straws.
  • Tear a piece of prosciutto ham in two lengthways.
  • Place the ham on top of a straw and press at both ends so it sticks.
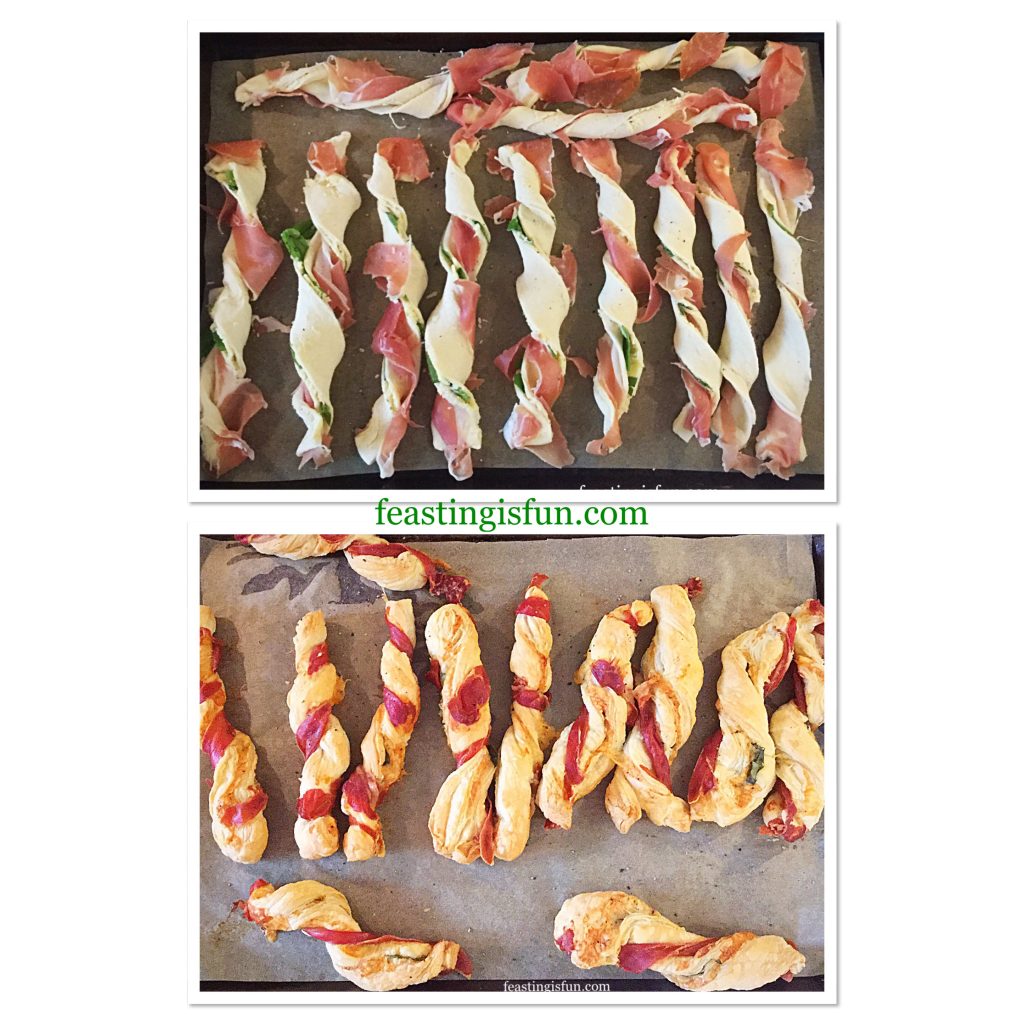
  • Using both hands twist the pastry so that the prosciutto wraps around.
  • Place the twisted pastry on to a baking sheet.
  • Repeat with the rest of the straws.
  • Roll out the second block of pastry and repeat the process again.
FF Prosciutto Wrapped Cheese Puff Pastry Straws
Cutting the straws and wrapping with Prosciutto.

Baking The Prosciutto Wrapped Puff Pastry Straws:

  • Place the baking trays into a preheated oven and bake for 20-25 minutes until the pastry is golden and the prosciutto is crisp.
  • As soon as the straws are baked remove from the oven and place on a serving plate.
  • Note – if you are planning to freeze the straws, remove from the oven 5 minutes early when the straws are baked, yet not golden..
FF Prosciutto Wrapped Cheese Puff Pastry Straws
Baking the Prosciutto Wrapped Cheese Puff Pastry Straws
  • Allow the straws to cool slightly before serving.

Cool, place in an airtight container and refrigerate for up to 2 days. To freeze place in freezer bags or boxes for up to 2 months. To reheat from frozen place in a medium oven for 5-10 minutes.

If you have enjoyed this recipe for Prosciutto Wrapped Cheese Puff Pastry Straws you may also like these:

Mini Sparkenhoe Red Leicester Tarts

FF Prosciutto Wrapped Cheese Puff Pastry Straws
Mini Sparkenhoe Red Leicester Tarts

Spicy Sausage Rolls

FF Prosciutto Wrapped Cheese Puff Pastry Straws
Spicy Sausage Rolls

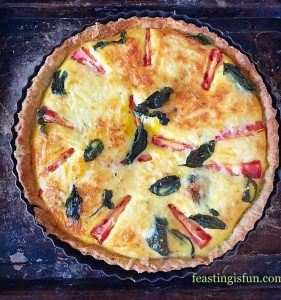
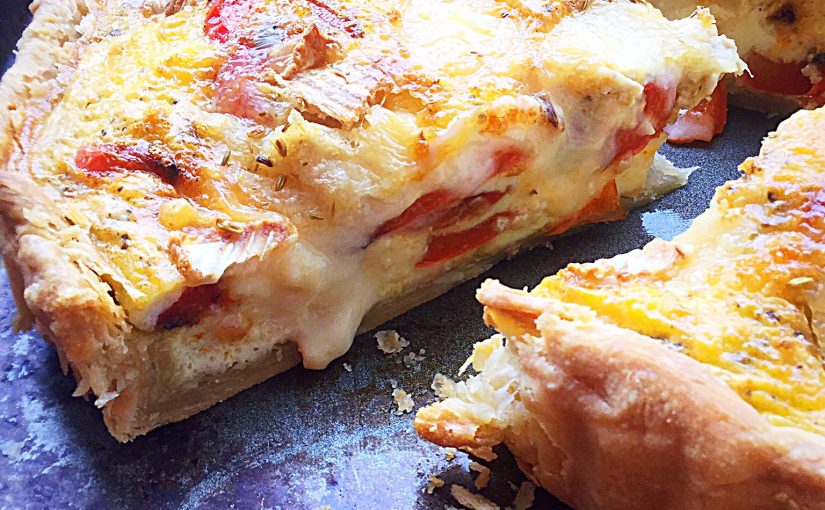
Cheddar Tomato Basil Quiche 

FF Prosciutto Wrapped Cheese Puff Pastry Straws
Cheddar Tomato Basil Quiche

Whether I’m hosting or going out, parties are fun and a great way to catch up with friends and make new ones. Recipes that are easy and also travel well make life easier. These Prosciutto Wrapped Cheese Puff Pastry Straws are ideal for making and taking to parties. Also, as they can be frozen I plan on making a big batch prior to Christmas. Bake the frozen straws into a moderate oven for ten minutes and you have a delicious snack to share with unexpected visitors.

So, whatever you are making, baking and creating in your kitchens have fun preparing and sharing your feast.

Sammie xx

No part of this post may be reproduced or duplicated without the written permission of the owner. Please see my Disclosure Policy.

Share
Facebooktwitterpinterestlinkedintumblr

Wigmore Cheese Red Pepper Tart

Share
Facebooktwitterpinterestlinkedintumblr

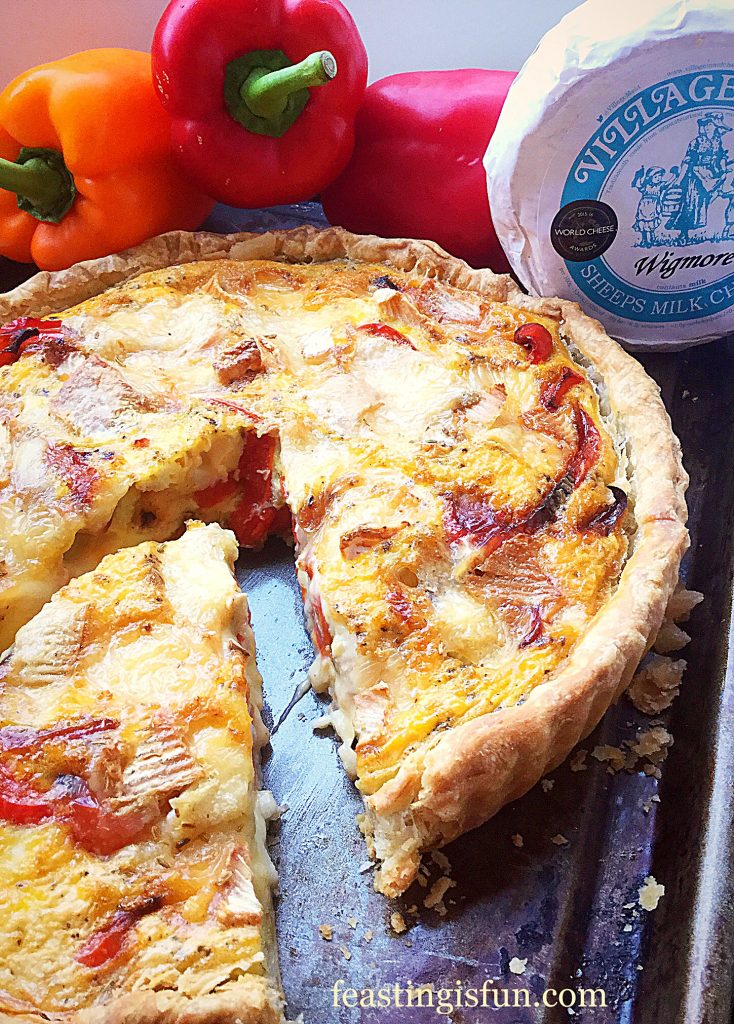
Wow the summer of 2018 has proved to be a scorcher so far. And I have to say I’m loving it! Flinging open the windows and doors and basking in the fresh, warm air. I was born in the Winter, yet I love the Summer sunshine. Because of the heat I have adjusted the way I go about my day. I’ve always been more of a morning person, however the hike in temperatures has got me organised. So I make dinner as early in the day as I can. And this Wigmore Cheese Red Pepper Tart is super easy to make, ready to be eaten at room temperature later in the day.

FF Wigmore Cheese Red Pepper Tart
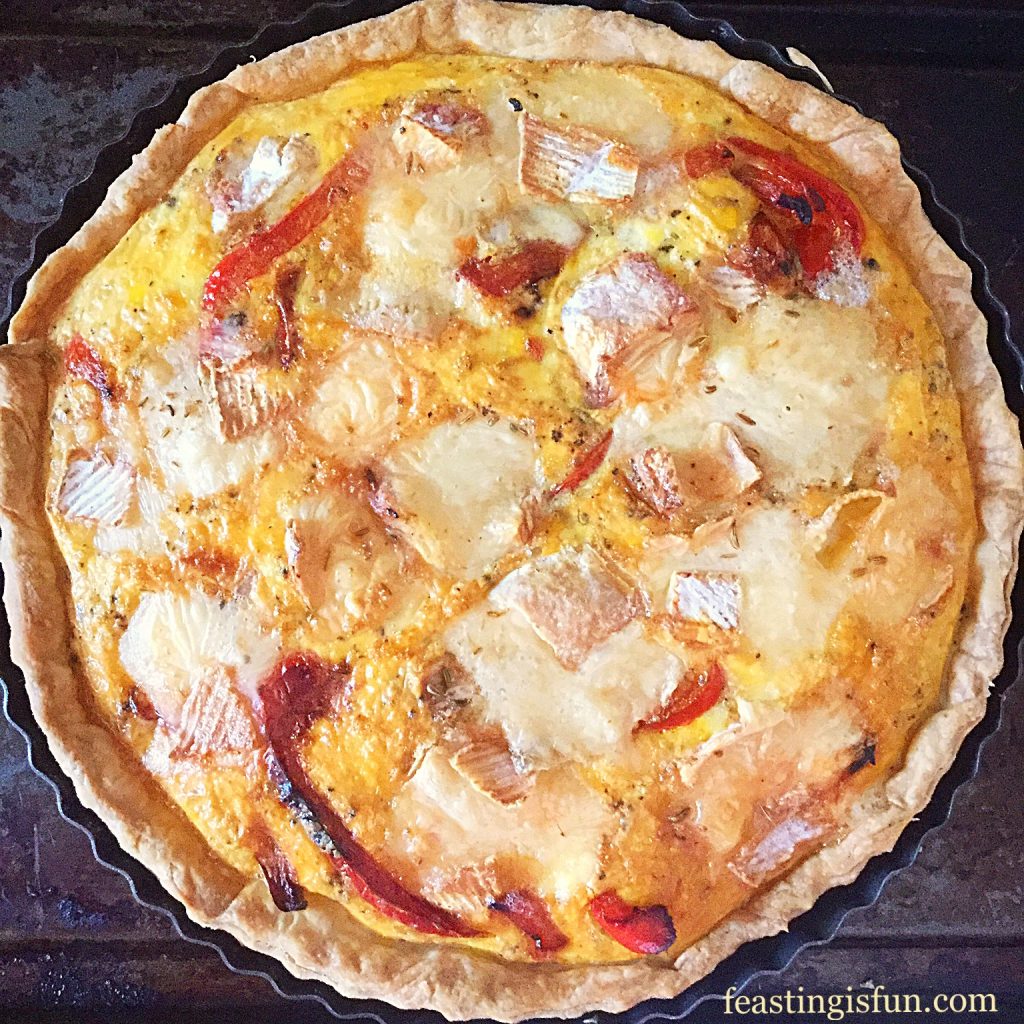
Wigmore Cheese Red Pepper Tart

Artisan Wigmore Cheese, an award winner:

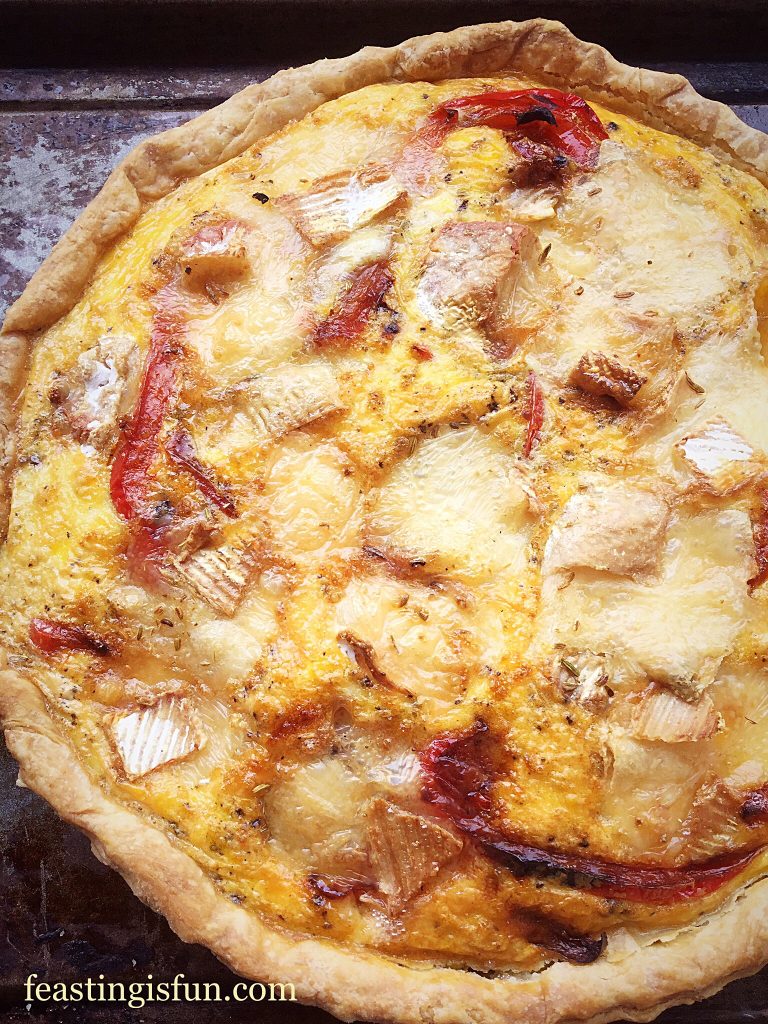
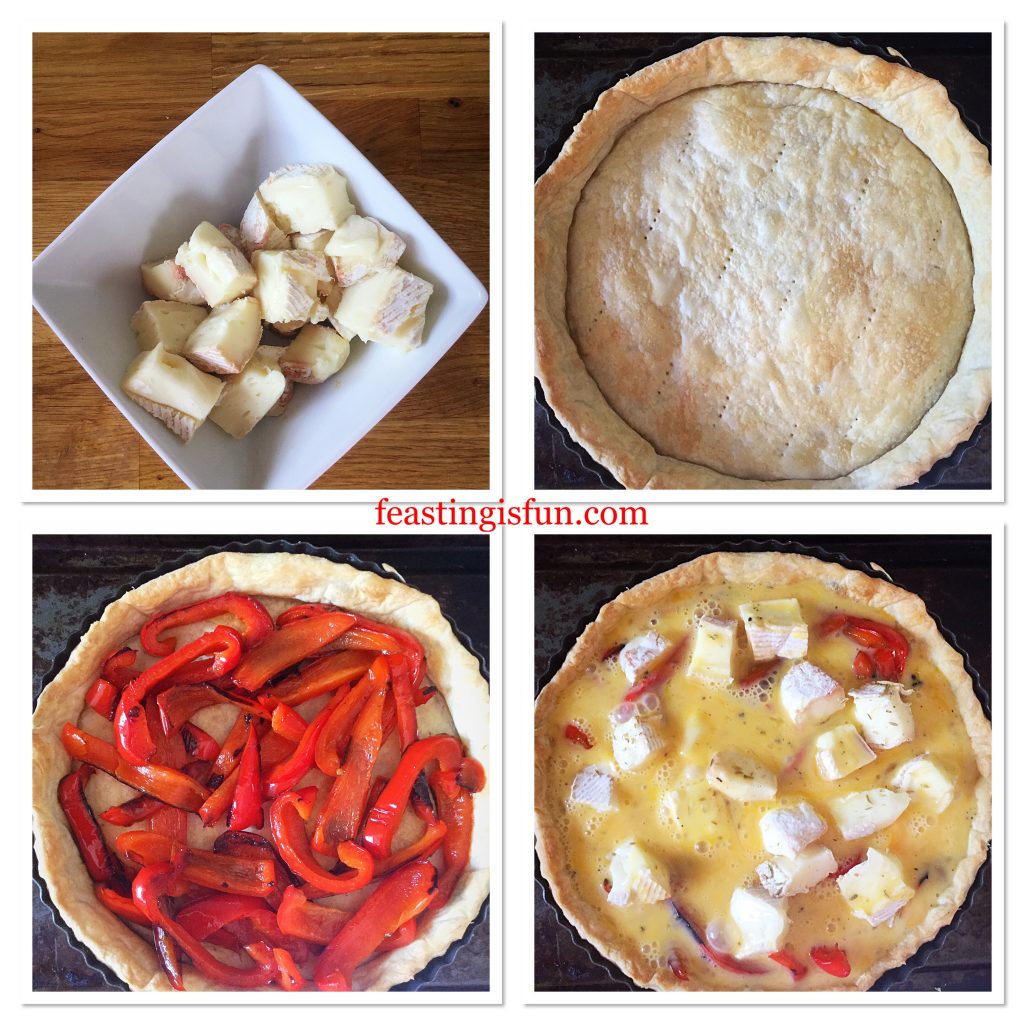
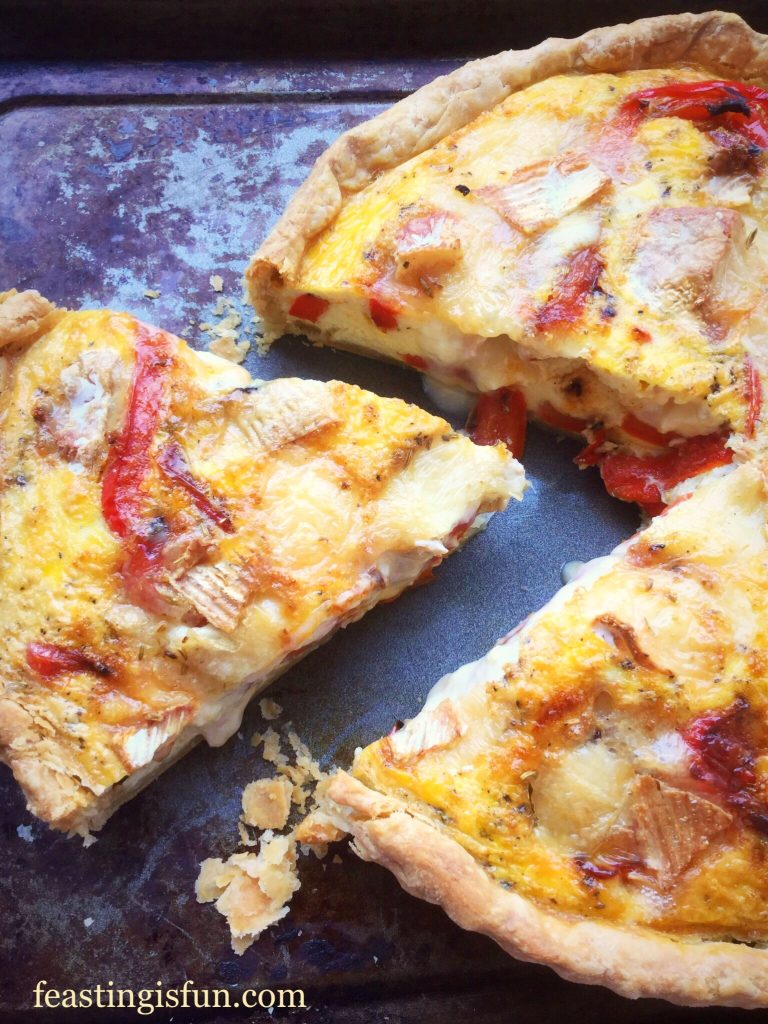
Wigmore Cheese, the dominant flavour at the heart of this tart is a semi soft, unpasteurised, ewes milk cheese. A handmade, washed curd cheese, with a flavour and texture similar to Camembert and Brie. Yet it has a flavour all of its own, slightly saltier with less of a nasal hit than a fully ripe Brie. Baked in this quiche style tart it’s flavour permeates throughout, balanced beautifully with sweet, softened red bell peppers.

FF Wigmore Cheese Red Pepper Tart
Wigmore Cheese Red Pepper Tart

Perhaps unusually, I’ve added a subtle hint of anise flavour to the tart with the addition of fennel seeds. Resulting in a Mediterranean taste to this all butter pastry tart. While you may be tempted to buy the pastry, I strongly suggest you try my recipe. It is absolutely foolproof and is consistently good. Since the recipe makes double the amount needed it’s a bonus to freeze half, knowing next time you make this tart all that’s needed is for it to be defrosted overnight in the fridge!

Recipe: Wigmore Cheese Red Pepper Tart serves 6

450g/1lb Butter Shortcrust Pastry – half the quantity of my Perfect Butter Shortcrust Pastry

200g/7oz Wigmore Semi Soft Cheese available from Village Maid Cheese if you are not in the U.K. a great substitute would be Camembert or Brie style cheeses with a soft, edible rind.

3 Red Bell Peppers (400g/14oz sliced de-seeded red pepper)

1tbsp Rapeseed/Canola Oil – I use Kentish Oils

8 Large Free Range Eggs – I use Clarence Court 

1/4tsp Freshly Ground Black Pepper

1/2tsp Lightly Ground Fennel Seeds

Method: Making the tart crust:

Note – You will need a 25cm x 5cm (10in x 2in) preferably loose bottom round tart tin for this recipe.

  • First of all if making the pastry from scratch chill it in the fridge for 2 hours before using. Especially during this super warm weather. Otherwise defrost ready made pastry in the fridge overnight.
  • Preheat the oven to 200C/180C fan, 400F, gas mark 6.
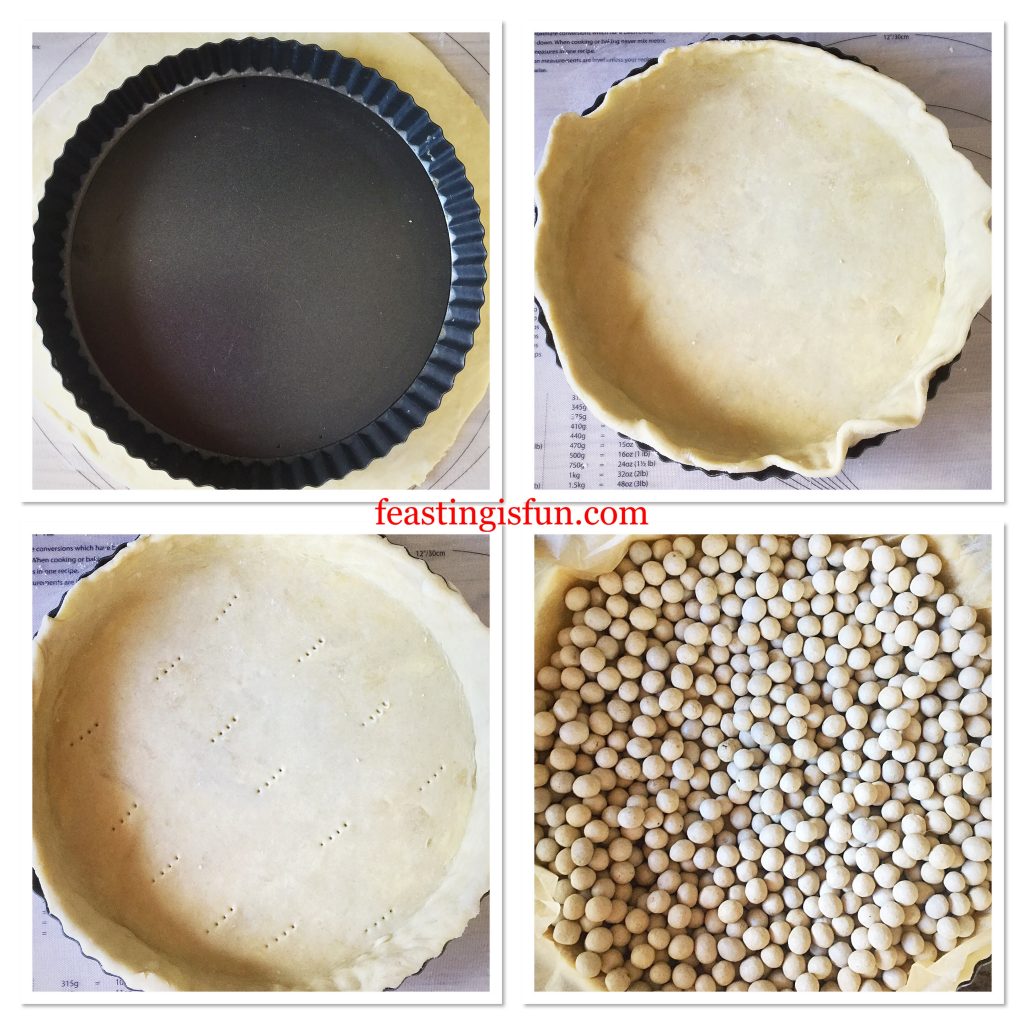
  • Lightly flour the worktop and roll out the pastry so that it is slightly bigger than the width and sides of the tart tin.
  • Roll the pastry around the rolling pin and transfer to the tin.
  • Most importantly do not stretch the pastry. Ease it gently into the tin taking care to press it into the crease between the base and sides.
  • Trim any excess pastry and then dock the base with a fork.
  • Place baking parchment directly on to the pastry and fill with baking beans.
FF Wigmore Cheese Red Pepper Tart
Creating the all butter tart crust.
  • Place the tart tin on to a baking sheet and put into the centre of the preheated oven.
  • Bake for 15 minutes, remove the baking beans and parchment paper, return the tart back to the oven for a further 10 minutes. Once baked, remove and set to one side.
  • Reduce the oven heat to 190C/170C fan, 325F, gas mark 3.

Filling the tart:

  • While the tart case is baking prepare the filling.
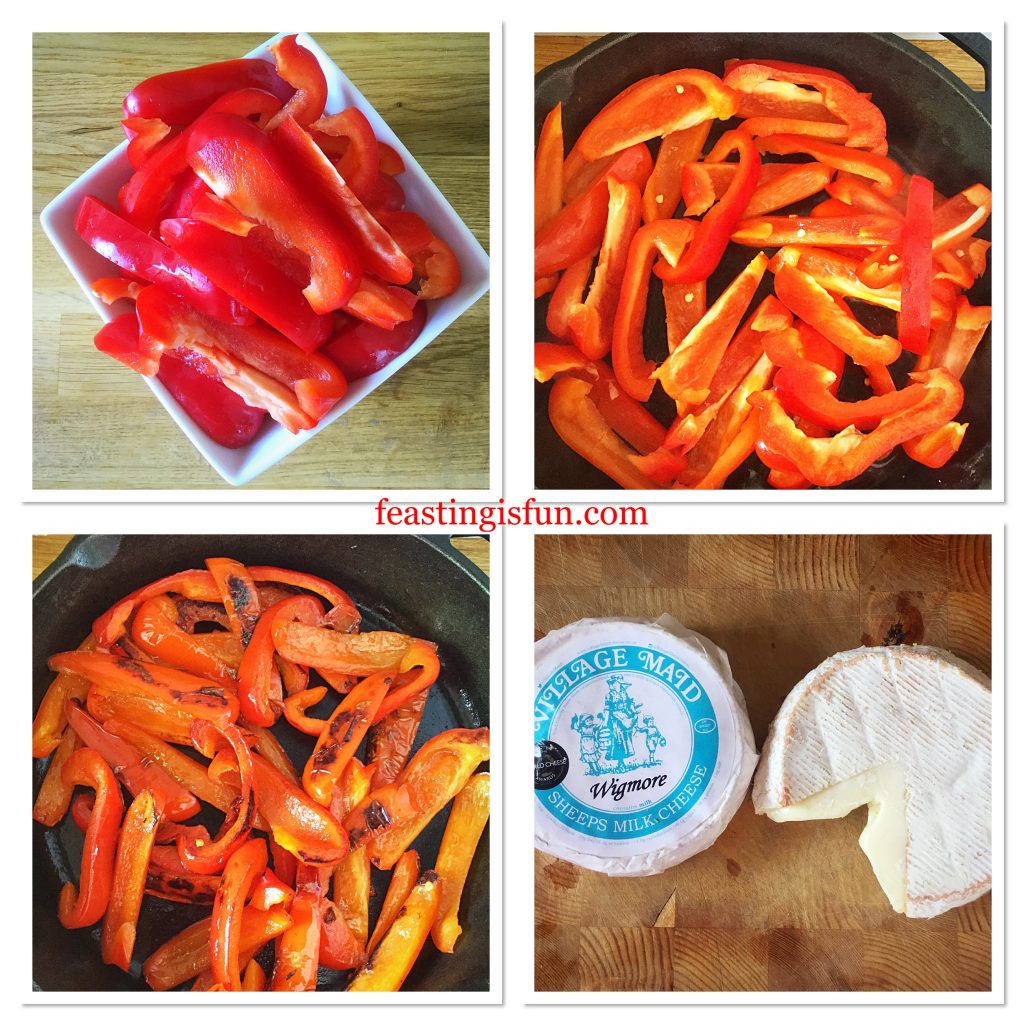
  • Remove the seeds and green part from the peppers. Slice lengthways to produce long strips.
  • Pour the oil into a pan over a medium heat. Add the peppers and sauté for 10-15 minutes until slightly softened and reduced in size.
FF Wigmore Cheese Red Pepper Tart
Sautéing the red peppers.
  • Cut up the cheese into bite size chunks. It helps if the cheese is fridge cold before cutting.
  • Into a jug add all 8 eggs, black pepper and fennel seeds. Whisk with a fork to combine.
  • Cover the base of the tart with sautéed peppers.
  • Next add the chunks of cheese, spread evenly around.
  • Finally pour over the seasoned, whisked eggs.
FF Wigmore Cheese Red Pepper Tart
Filling the Wigmore Cheese Red Pepper Tart ready for baking.

Baking the tart:

  • Place the tart into the centre of the oven and bake for 30-35 minutes.
  • The tart is baked when the top is set and there is no jiggle in the centre.
  • As soon as the Wigmore Cheese Red Pepper Tart is baked remove from the oven and set to one side.
FF Wigmore Cheese Red Pepper Tart
Wigmore Cheese Red Pepper Tart
  • If serving as soon as baked allow the tart to settle for 10 minutes before slicing.
FF Wigmore Cheese Red Pepper Tart
Wigmore Cheese Red Pepper Tart

I love serving this tart when it is warm. At the moment this means room temperature! However if making during a cooler time of the year simply reheat in a medium oven for 10 minutes to lightly warm through.

Store any leftover tart in an airtight container or wrapped in cling film and refrigerate. Eat within 3 days.

Due to the moisture content of the peppers I would advise against freezing.

If you have enjoyed this recipe for Wigmore Cheese Red Pepper Tart you may also like these:

Walnut Pastry Crust Leek Stilton Tart 

FF Wigmore Cheese Red Pepper Tart
Walnut Pastry Crust Leek Stilton Tart

Cheddar Cheese Thyme Soft Breadsticks 

FF Wigmore Cheese Red Pepper Tart
Cheddar Cheese Thyme Soft Breadsticks

Bath Soft Cheese Chilli Tarts

FF Wigmore Cheese Red Pepper Tart
Bath Soft Cheese Chilli Tarts

Making pastry and baking during this unusually hot summer may seem like the last thing anyone would want to do. Yet, by mid morning dinner is made. I quite often make my Tangy Lemon Potato Salad at the same time, as it’s absolutely delicious, fridge cold, served alongside with a salad. Also when using the tasty Wigmore Cheese, this recipe only uses half a wheel, leaving plenty for you to enjoy with apples, crackers and a cold glass of wine on a Summer’s evening.

Whatever you are making, baking and creating in your kitchens, have fun preparing and sharing your feast.

Sammie xx

Village Maid Cheese sent me the Wigmore Cheese to try. All opinions and content are my own and I was not paid to write this post. No part of this post may be reproduced or duplicated without the written permission of the owner. Please see my Disclosure Policy.


Share
Facebooktwitterpinterestlinkedintumblr

Cherry Tomato Mozzarella Basil Quiche

Share
Facebooktwitterpinterestlinkedintumblr

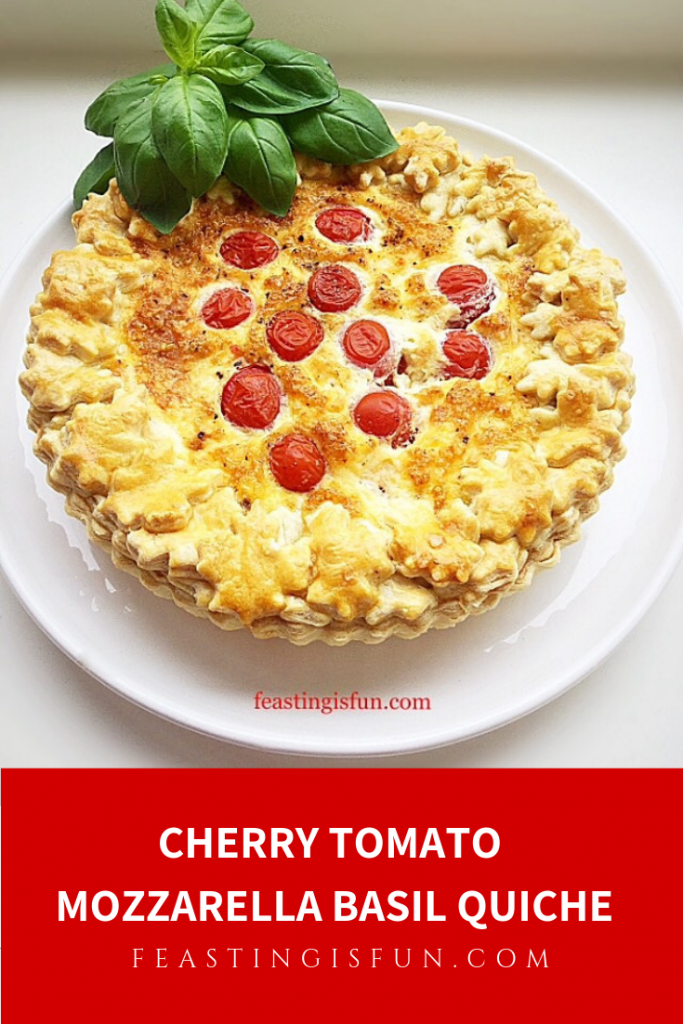
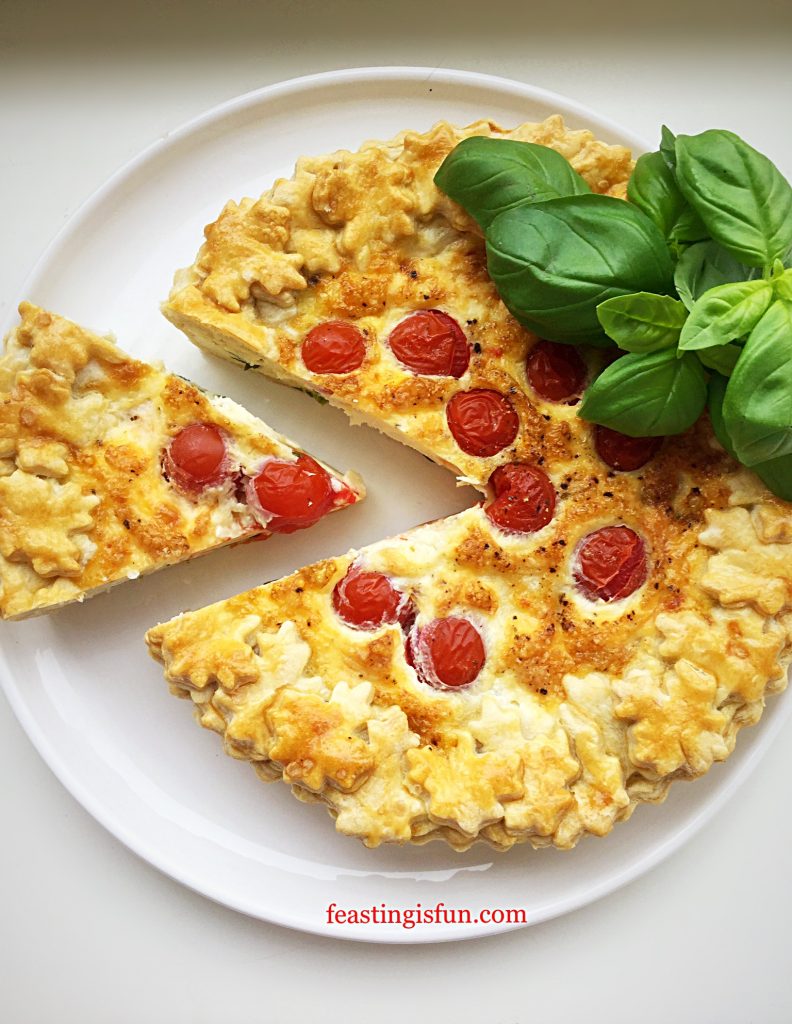
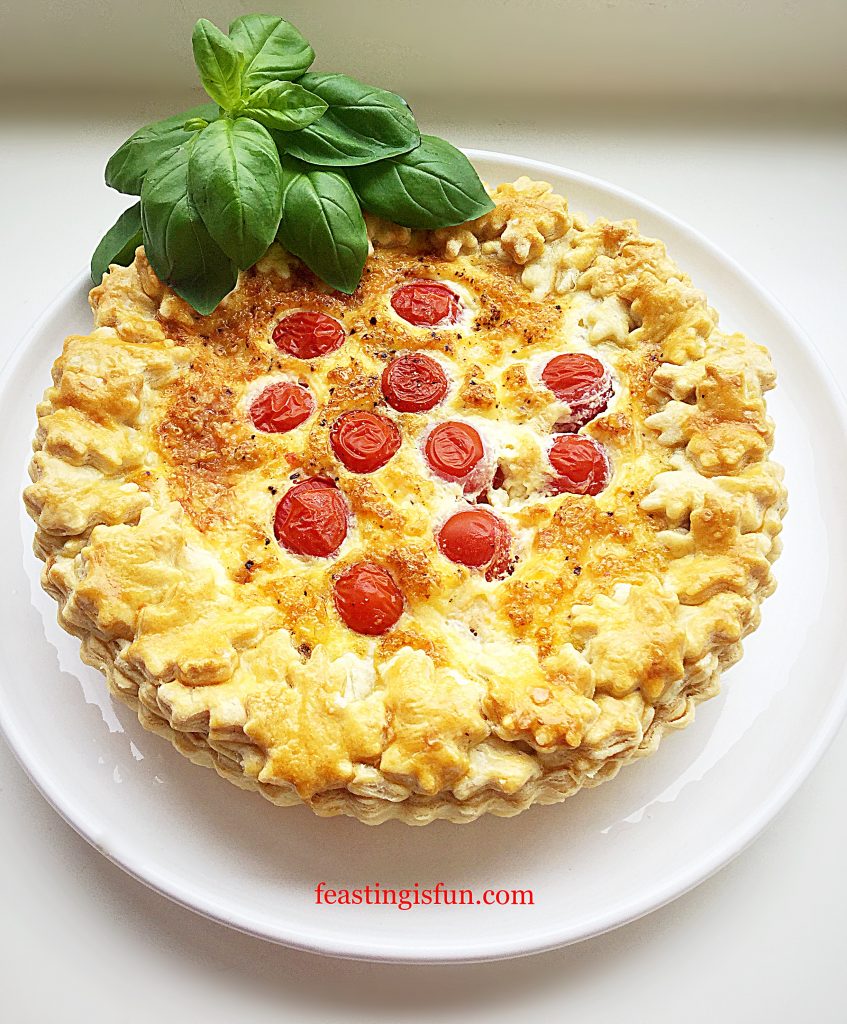
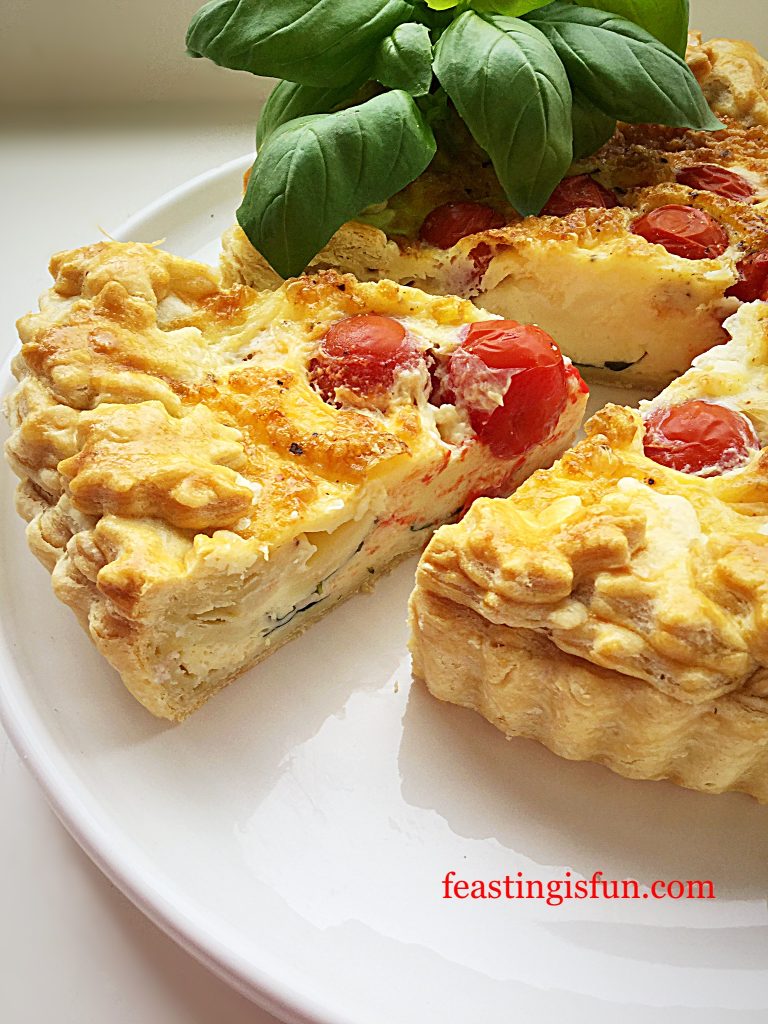
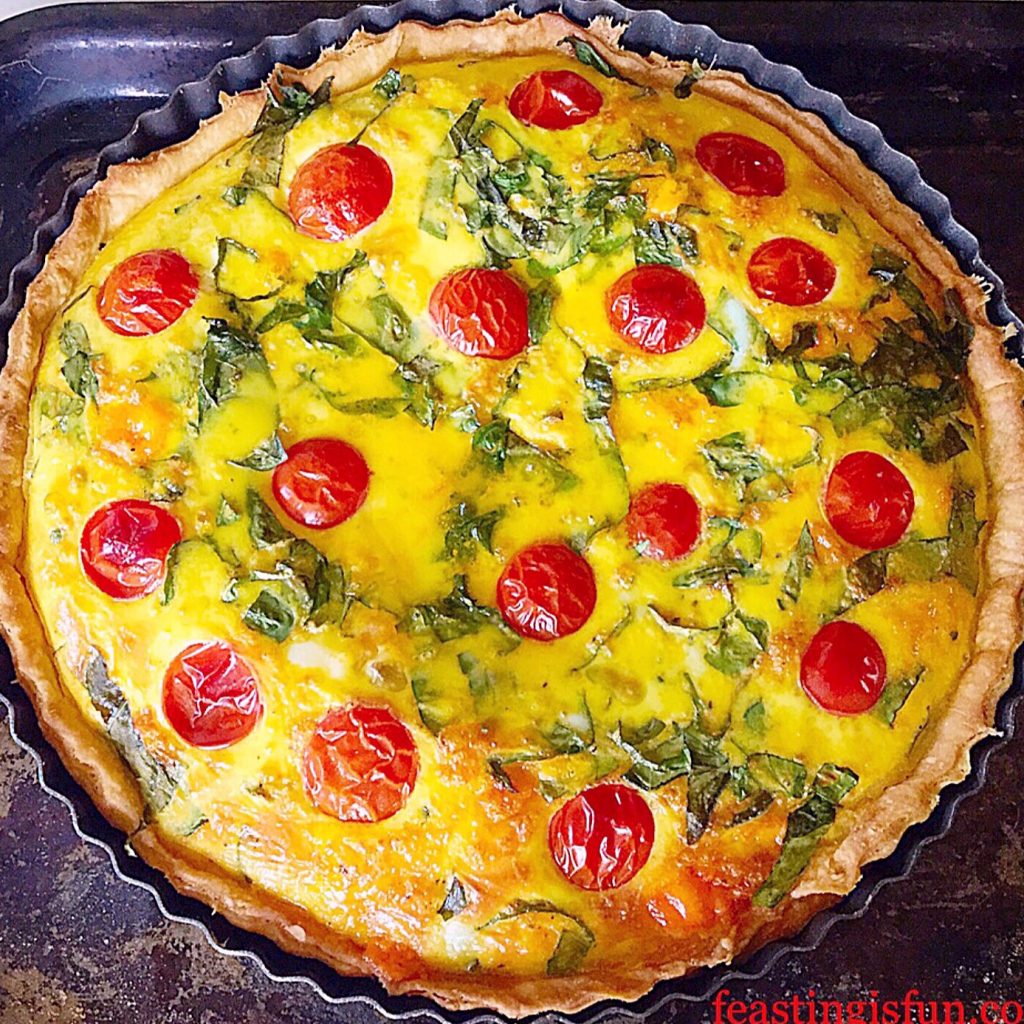
In case you missed my previous post Fresh Basil Topped Slow Roasted Tomatoes I’ll mention again that I love tomatoes. Especially locally grown, British tomatoes that are ripened on the vine and left on the worktop, not in the fridge. Sweet and savoury bursts of Summer on my tongue. Here I have baked them into a layered quiche with fresh basil and two types of cheese. So I am thrilled to bring you my Cherry Tomato Mozzarella Basil Quiche.

FF Cherry Tomato Mozzarella Basil Quiche

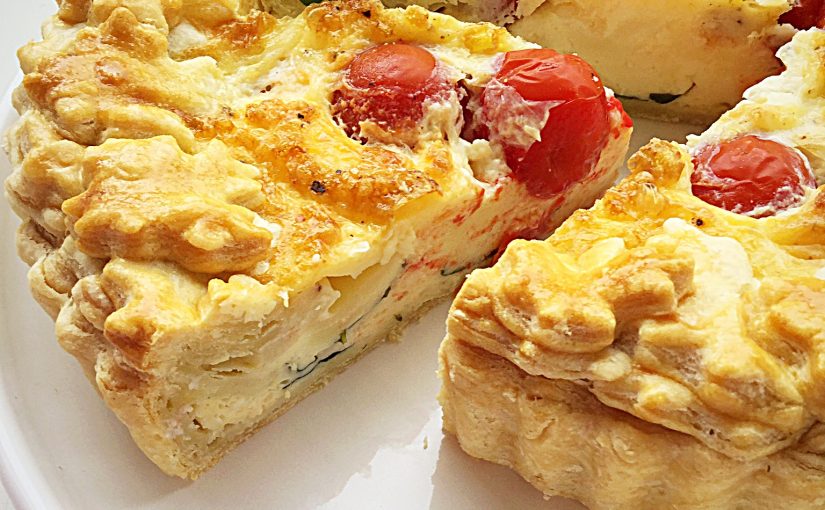
I was inspired by the classic caprese salad of fresh tomatoes, mozzarella cheese and fragrant basil to make this savoury tart. Since each element compliments the others so well as a salad the same can be said of this quiche. Also, layering the separate ingredients within an all butter pastry tart creates a delicious dish. Perfect for lunch, dinner, picnics, packed lunches and buffets. And that is how delicious this quiche is!

FF Cherry Tomato Mozzarella Basil Quiche
Cherry Tomato Mozzarella Basil Quiche

Choosing Local Produce

Because using local, seasonal produce is important to me, as a home cook and Food Blogger, I was delighted when I was offered a box of Sophie Jane cherry tomatoes. Locally grown by Eric Wall a local, specialist grower. The tomatoes I received are ripened on the vine and are grown without the use of pesticides. Most importantly they taste incredible. In fact just like a tomato should taste. Eaten warmed by the sun, after being left on the windowsill, they are sweet with a deeper savoury flavour. Also they weren’t very acidic as some tomatoes can be, especially tinned ones.

FF Cherry Tomato Mozzarella Basil Quiche
Cherry Tomato Mozzarella Basil Quiche

While British Tomato Fortnight has finished I firmly believe that we should all be eating flavoursome British tomatoes for as long as they are available. Because they taste so good. It really is as simple as that. I have been popping these ruby beauties into my mouth like sweeties. Eating them alongside crackers and cheese and I plan to make more recipes to share with you. All in aid of celebrating the humble tomato.

Recipe: Cherry Tomato Mozzarella Basil Quiche:

You will need a 20cm x 5cm (8” x 2”) tart tin, ideally with a loose bottom, to make this recipe.

A quick note – I successfully doubled all of the quantities and made this quiche in a deeper, wider dish. Baking times need to be adjusted, aside from the initial blind baking. The larger quiche turned out perfectly and would be ideal for feeding a crowd, or a buffet.

500g/1lb 2oz Shortcrust Pastry – I use my recipe for Perfect Butter Shortcrust Pastry freezing the leftovers

225g/8oz Mozzarella Cheese – drained and with excess water squeezed out

50g/2oz Vintage or Very Mature/Sharp Cheddar – I use Wyke Farms

6 Large Free Range Eggs

225g/8oz Fresh Cherry Tomatoes

12-14 Fresh Basil Leaves – alternatively out of season use 1/2 tsp dried Thyme

1/2 tsp Freshly Ground Black Pepper

Pinch of Sea Salt Flakes – I use Maldon

Method: Preheat oven to 220C/200C fan, 425F, gas mark 7

Making And Baking The Shortcrust Pastry Tart Case

  • First of all make the pastry, wrap in cling film and chill for one hour.
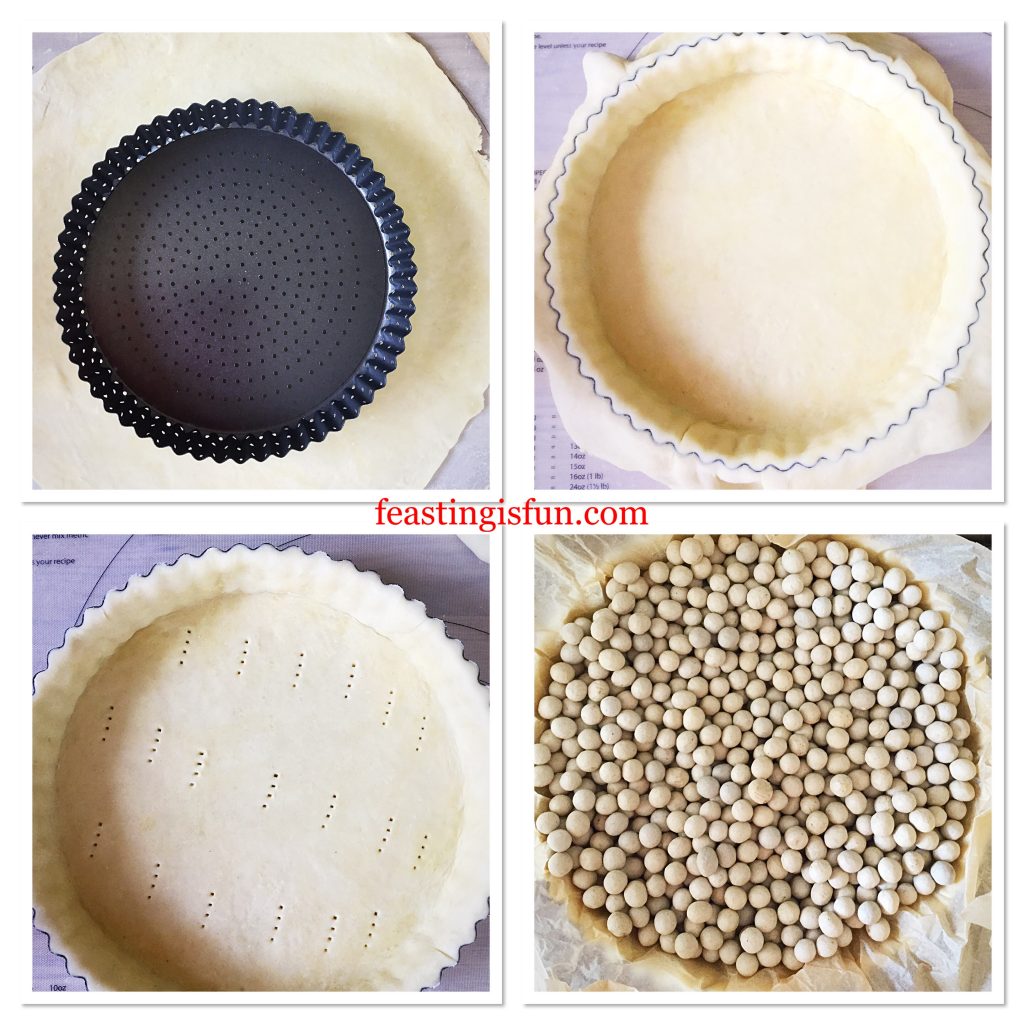
  • Remove the chilled pastry from the fridge, unwrap and roll out on a lightly floured surface, so that it will fit the tart tin. See photo top left below.
  • Fold the pastry over the rolling pin, making it easier to transfer.
  • Lower the pastry into the tin, making sure that you don’t stretch it as you do.
  • Press the pastry into the tin so that it fits securely.
  • Run your rolling pin over the tart tin, this will give a clean edge to the pastry.
  • Place the tart tin on to a baking sheet and dock the base with a fork.
  • Now scrunch up some baking parchment and line the pastry tart with it.
  • Next fill with baking beans.
FF Cherry Tomato Mozzarella Basil Quiche
Making the pastry shell for the quiche.
  • Place in the centre of a preheated oven and bake for 15 minutes.
  • Carefully lift out the baking parchment and baking beans.
  • Return the tart to the oven for 5 minutes further baking.

Layering The Quiche Ingredients

  • Remove the tart and reduce the oven temperature to 190C/170C fan, 375F, gas mark 5.
  • Line the tart base with basil leaves.
  • Place torn chunks of mozzarella directly on to the basil.
  • Sprinkle over finely grated cheddar and then top with cherry tomatoes.
  • Reserve one egg, whisk the other five adding the black pepper. Pour the eggs into the tart.
FF Cherry Tomato Mozzarella Basil Quiche
Creating layers within the Cherry Tomato Mozzarella Basil Quiche
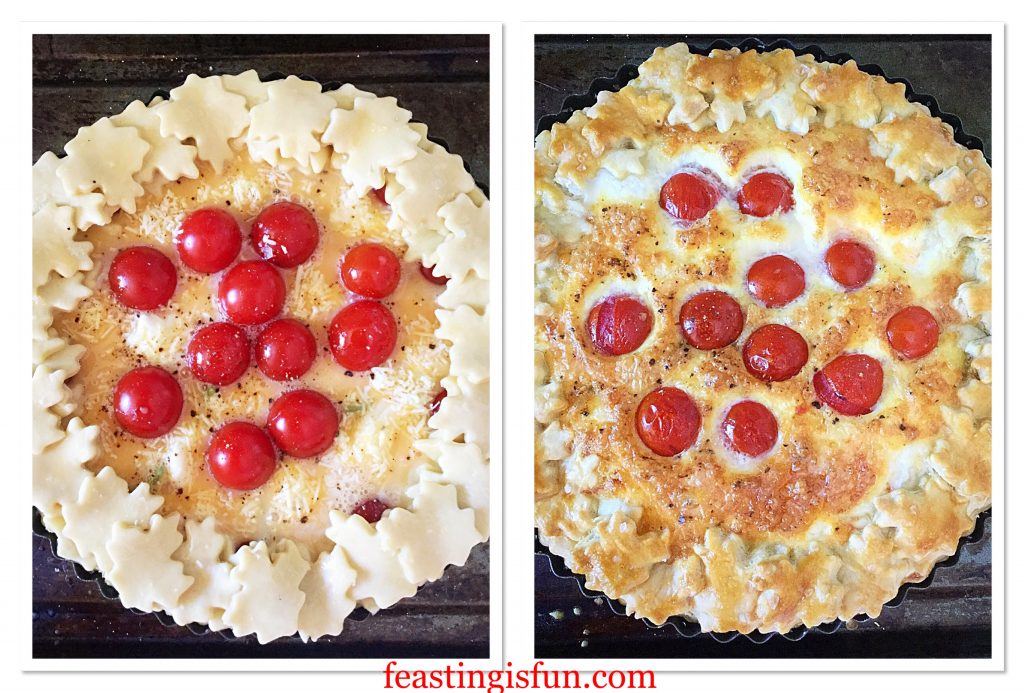
  • Roll out the remaining pastry and cut out small shapes to edge the tart. I used a oak leaf cutter which gives the edge of the quiche a frilly finish.
  • Whisk the remaining egg and brush the underside of each cutout. Stick the pastry cutouts to the edge of the pastry case. You can create a single layer or add extra cutouts to create a layered effect.
  • Brush the pastry edge with egg so that it turns golden when baked.
  • Finally sprinkle a pinch of sea salt over the top.

Baking The Cherry Tomato Mozzarella Basil Quiche

FF Cherry Tomato Mozzarella Basil Quiche
Before and after baking the Cherry Tomato Mozzarella Basil Quiche
  • Carefully place the filled quiche into the centre of the oven – remember to check that the heat has been reduced.
  • Bake for 40-45 minutes. The quiche is baked when it is a golden colour and there is no wobble in the centre.
  • As soon as the quiche is baked remove from the oven. Place on a cooling rack for at least 30 minutes before removing from the tin. Take care as the tomatoes will be very hot and juicy.
FF Cherry Tomato Mozzarella Basil Quiche
Cherry Tomato Mozzarella Basil Quiche

The beauty of this quiche is that it can be served warm, at room temperature or cold, straight from the fridge!

FF Cherry Tomato Mozzarella Basil Quiche
Cherry Tomato Mozzarella Basil Quiche

Because this quiche does not contain meat it is also suitable for vegetarians. Since I have made this twice it really holds it’s shape well when cold and would be perfect for taking on picnics. Most of all, when you bake this quiche make sure you share it. Especially as it is so pretty and absolutely yummy!

Make up to 2 days ahead, cool completely, double wrap in cling film and refrigerate. Due to the moisture content of the tomatoes I would not recommend freezing, unlike my Smoked Bacon Asparagus Quiche which freezes well. Although the pastry case can be made in advance and frozen.

If you have enjoyed this recipe for Cherry Tomato Mozzarella Basil Quiche you may also like these:

Quiche Lorraine 

FF Cherry Tomato Mozzarella Basil Quiche
Quiche Lorraine, smoked bacon and cheddar cheese savoury tart.

Walnut Pastry Crust Leek Stilton Tart

FF Cherry Tomato Mozzarella Basil Quiche
Walnut Pastry Crust Leek Stilton Tart

Iced Bakewell Tart

FF Cherry Tomato Mozzarella Basil Quiche
Iced Bakewell Tart

During this Summer, which I am hoping will be long and warm, I’m looking forward to creating recipes to share with you. Especially focusing on seasonal, local produce and products. Whether you live here, in Australia, Europe or the United States, I do feel that it’s important to support our local farmers. While some of you may get to visit farmers markets, if like me, it’s difficult for you to get out, take a look online. Since spending a little time researching I’ve found the equivalent of farmers markets online and they deliver! Most of all, if you remember one thing from this post – please keep your tomatoes out of the fridge, it kills their flavour!

Whatever you are making, baking and creating in your kitchens, have fun preparing you feast.

Also a huge thank you to everyone who follows me on social media and shares their creations with me.

Sammie xx

No part of this post may be reproduced or duplicated without the written permission of the owner. Please see my Disclosure Policy.

Share
Facebooktwitterpinterestlinkedintumblr

Cheddar Cheese Thyme Soft Breadsticks

Share
Facebooktwitterpinterestlinkedintumblr

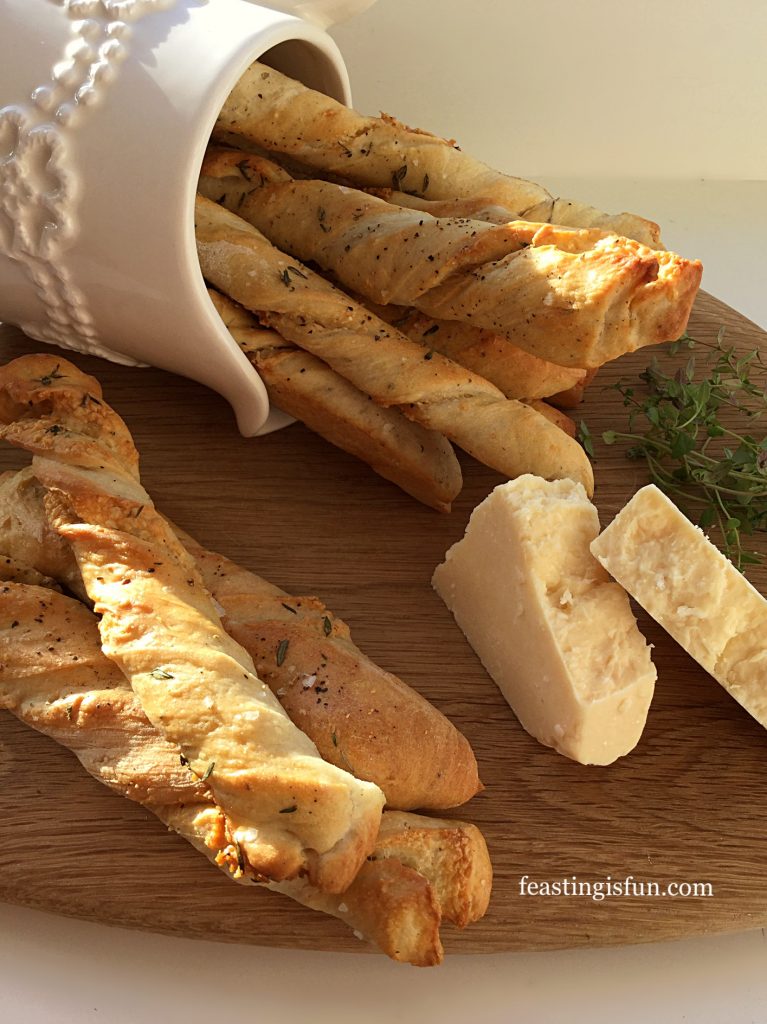
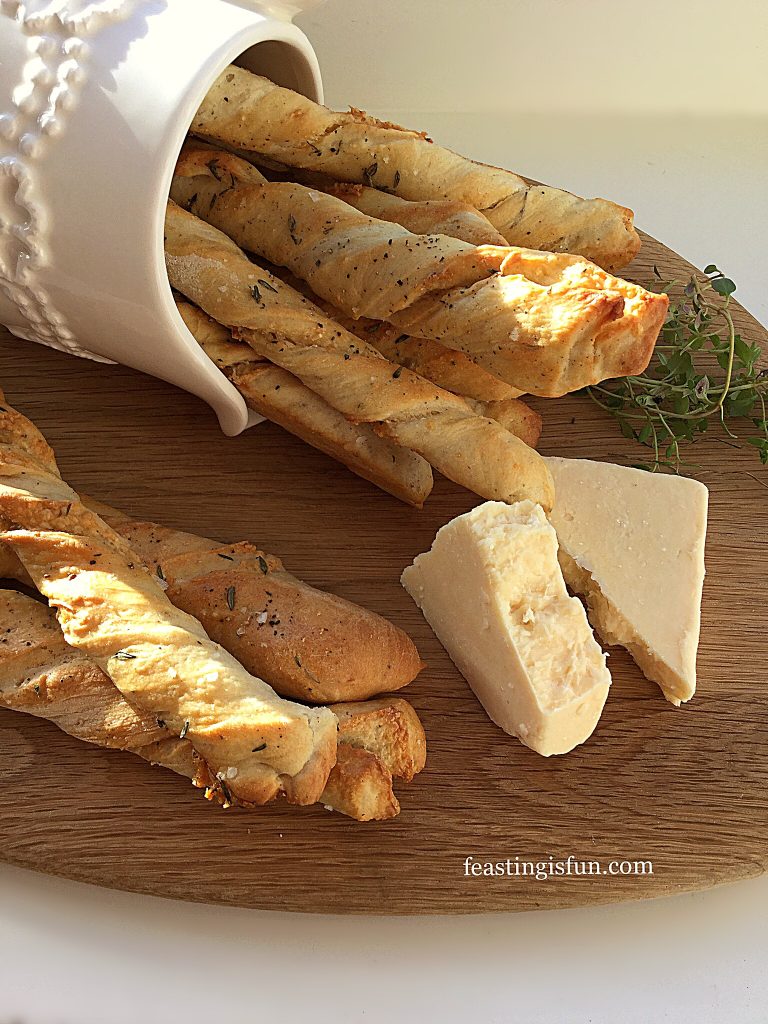
Cheddar cheese is loved by so many, me included and is such a versatile ingredient. Something magical happens to the flavour when it is heated. Becoming more savoury, salty and intense on the palette. Even when eaten with crackers it benefits vastly when left out of the fridge to come up to room temperature. Since winning some Vintage Cheddar in a Twitter competition I wanted to create a new, delicious snack recipe. These Cheddar Cheese Thyme Soft Breadsticks tick every, single, box.

FF Cheddar Cheese Thyme Soft Breadsticks

Cheesy Breadsticks – Delicious And Versatile

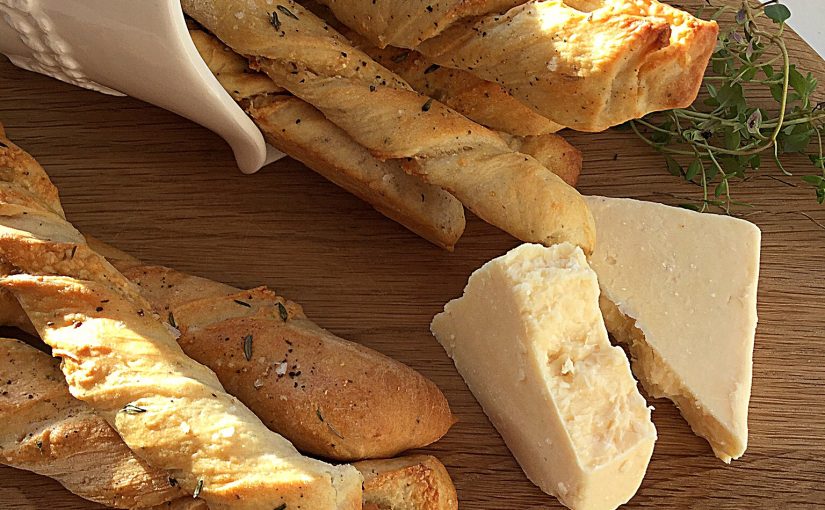
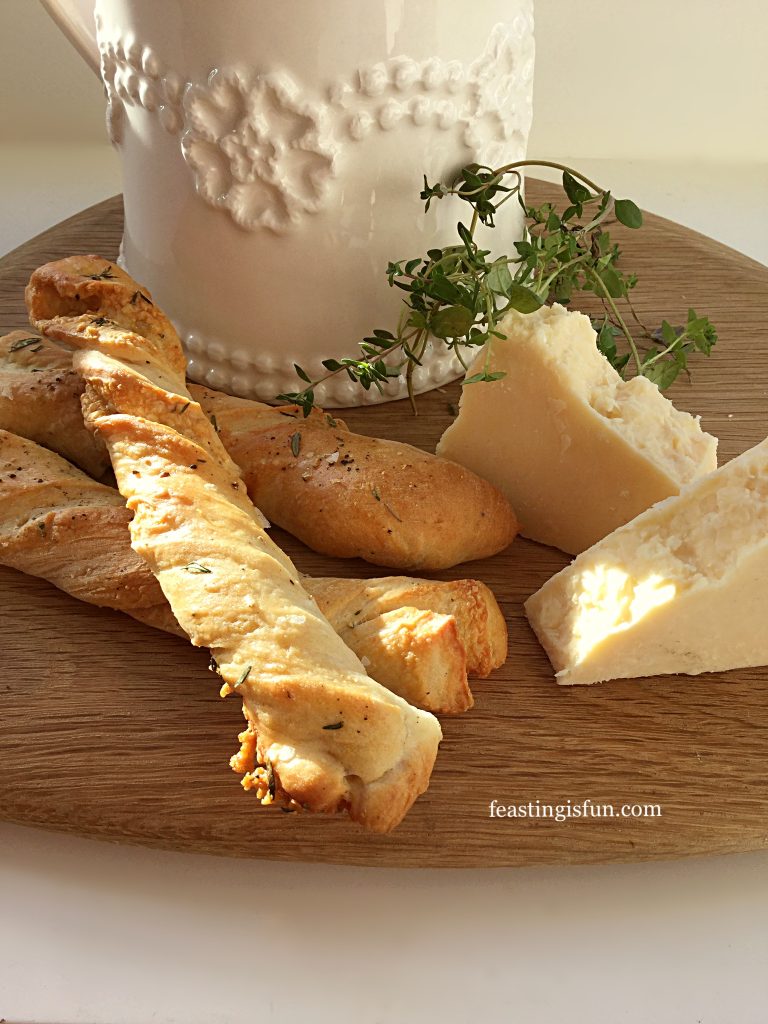
The combination of good quality mature, or vintage cheddar with fresh thyme gives a distinctly savoury flavour to these breadsticks. Also, the addition of Parmesan cheese to the bread dough enhances and reaffirms their cheesy flavour. While pastry cheese straws can be oily at times, that is not the case here. No greasy fingers whilst munching on these!

FF Cheddar Cheese Thyme Soft Breadsticks
Cheddar Cheese Thyme Soft Breadsticks

As well as tasting delicious on their own, these cheesy breadsticks also make a perfect accompaniment to soup, such as Hearty Minestrone Soup. While sounding an unlikely combination, we ate these with a simple beef casserole that had been bubbling away on the hob all day. Not so surprising when Cheddar is often used in the pastry of beef pies.

FF Cheddar Cheese Thyme Soft Breadsticks
Cheddar Cheese Thyme Soft Breadsticks

Recipe: Cheddar Cheese Thyme Soft Breadsticks makes 32

320ml Tap Water at room temperature

7g Dried Yeast – I use Allinson easy bake yeast action

500g Strong White Bread Flour

2 tbsp Olive Oil plus extra for oiling the baking trays

7g Sea Salt plus extra for sprinkling – I use Maldon

50g Parmesan Cheese finely grated

3 tsp Fresh Thyme Leaves plus an add 2 tsp for sprinkling – halve the amount if using dried

1/2 tsp Freshly Ground Black Pepper plus extra for sprinkling on to breadsticks

50g plus an additional 75g Mature Cheddar Cheese – I used Vintage Cheddar from Wyke Farms

1 Free Range Egg beaten with 2 tsp cold water to use as an egg wash

Method:

The method given uses a stand mixer with dough hook attachment to make the dough. Of course this may be made by hand.

Making The Breadstick Dough

  • First of all, weigh the water into the bowl of the stand mixer.
  • Add the dried yeast and flour.
  • Next add the olive oil and salt.
  • Lower the dough hook and mix on low speed for 10 minutes, increasing to medium speed for a further 3 minutes.
  • While the dough is mixing lightly oil 4 large baking trays. Also preheat the oven to 200C/180C fan, 400F, gas mark 6.
  • Stop mixing and check the dough. It should be able to stretch so that light can be seen through it. This is called the windowpane test. If the dough does not pass this test lower the dough hook and continue to mix on medium, stopping and checking every two minutes until it finally passes the test.
  • As soon as the dough is ready stop mixing. Add both the finely grated Parmesan cheese and 50g of the cheddar. Also add 2 teaspoons of fresh Thyme leaves and half a teaspoon of freshly ground black pepper.
  • Lower the dough hook and mix on a low speed for two minutes.
  • Stop the mixer, scrape any dough from the dough hook into the bowl, cover with a cloth and leave in a draft free place until doubled in size.

Flavouring And Shaping The Cheedar Cheese Thyme Breadsticks:

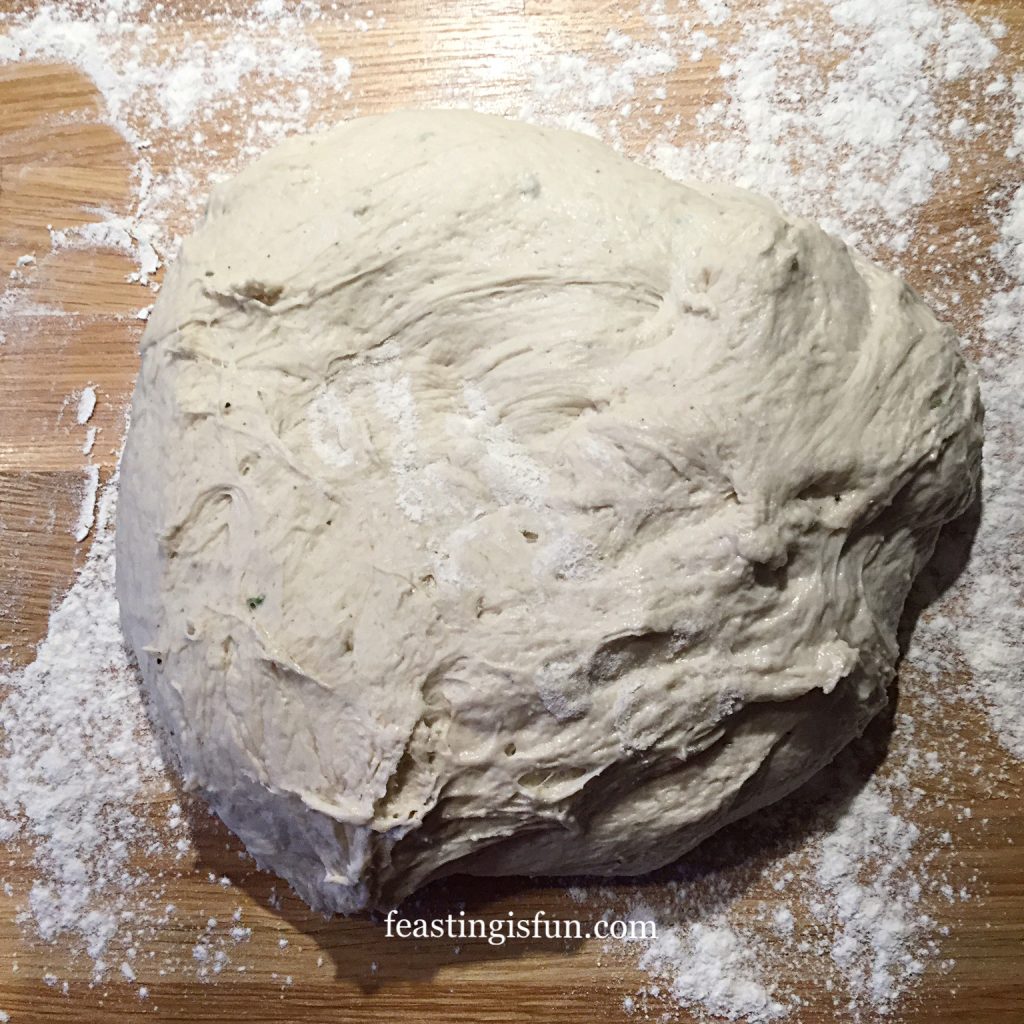
  • Lightly flour the worktop and tip out the dough, so that the top of the risen dough is in contact with the worktop.
FF Cheddar Cheese Thyme Soft Breadsticks
The Cheddar Cheese Thyme Soft Breadsticks Dough
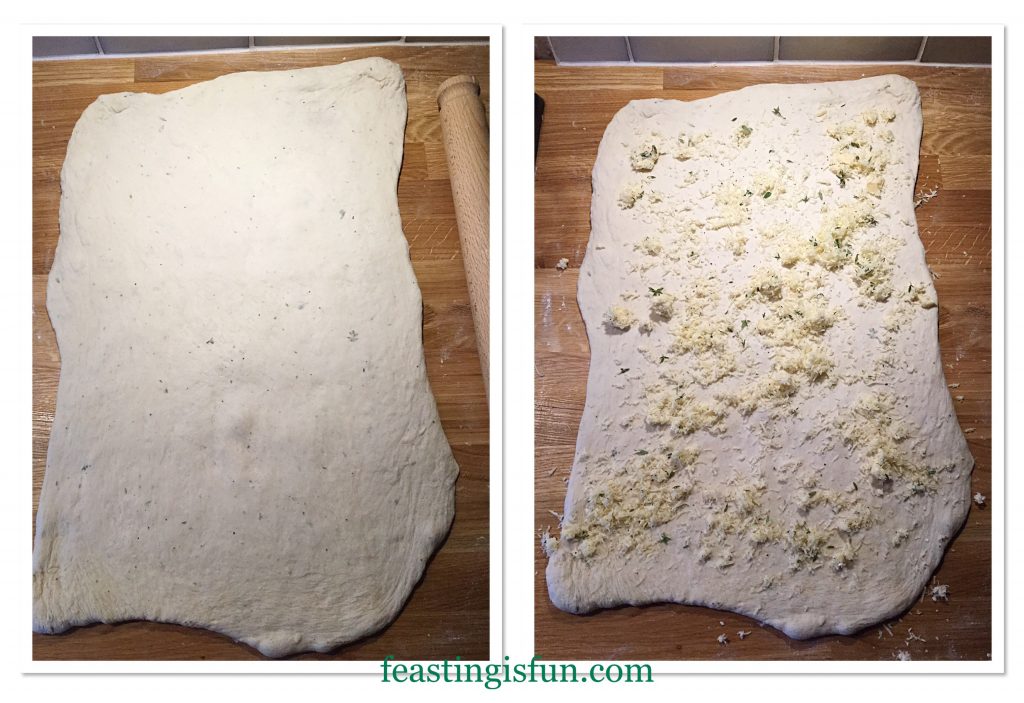
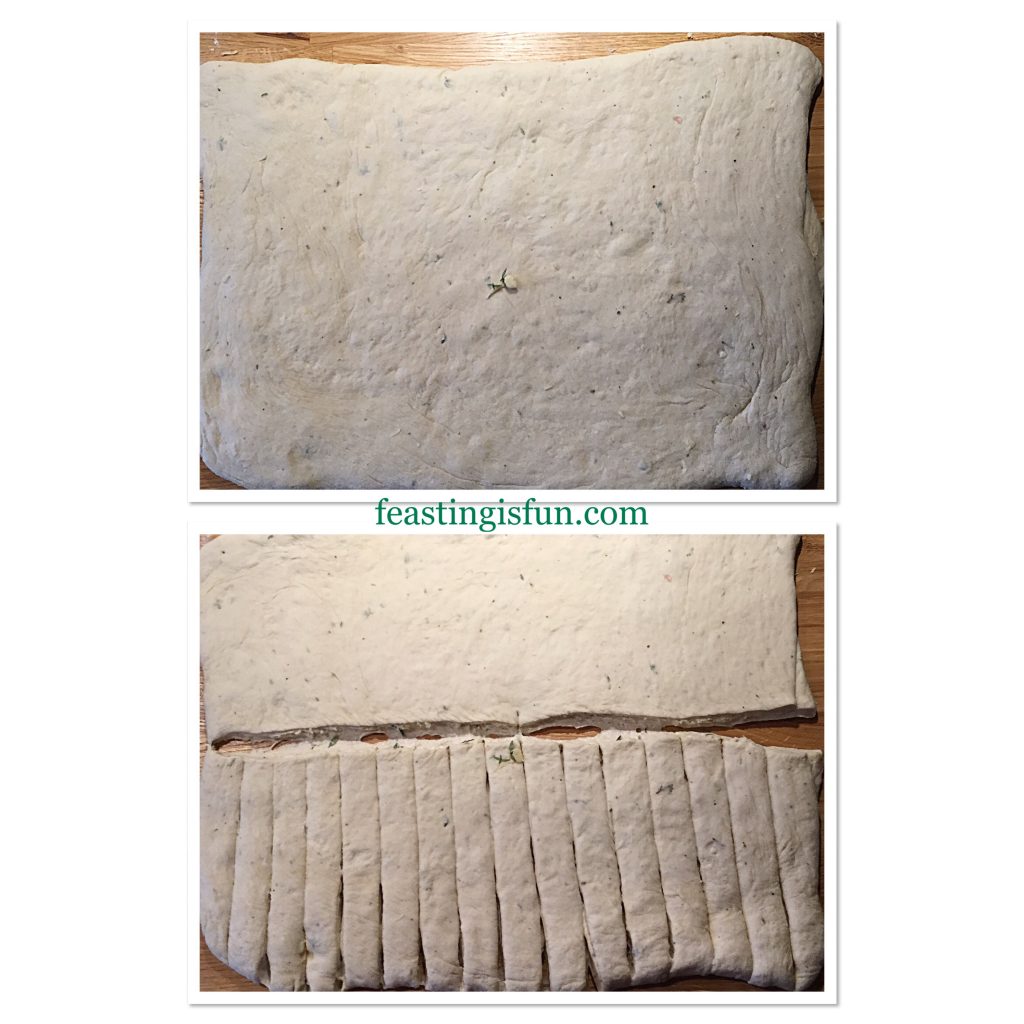
  • Dust the dough with flour and roll out to 50cm x 30cm (20in x 12in).
FF Cheddar Cheese Thyme Soft Breadsticks
Preparing the dough to become breadsticks.
  • Sprinkle over the rolled out dough, 75g finely grated cheddar and 1 teaspoon of fresh thyme leaves.
  • Fold the dough in half.
FF Cheddar Cheese Thyme Soft Breadsticks
Folding and cutting the dough into breadsticks.
  • Gently roll over the folded dough with a rolling pin, sealing the cheese inside.
  • Cut the dough in half across the middle. Next cut 1cm (1/2in) strips in the dough.
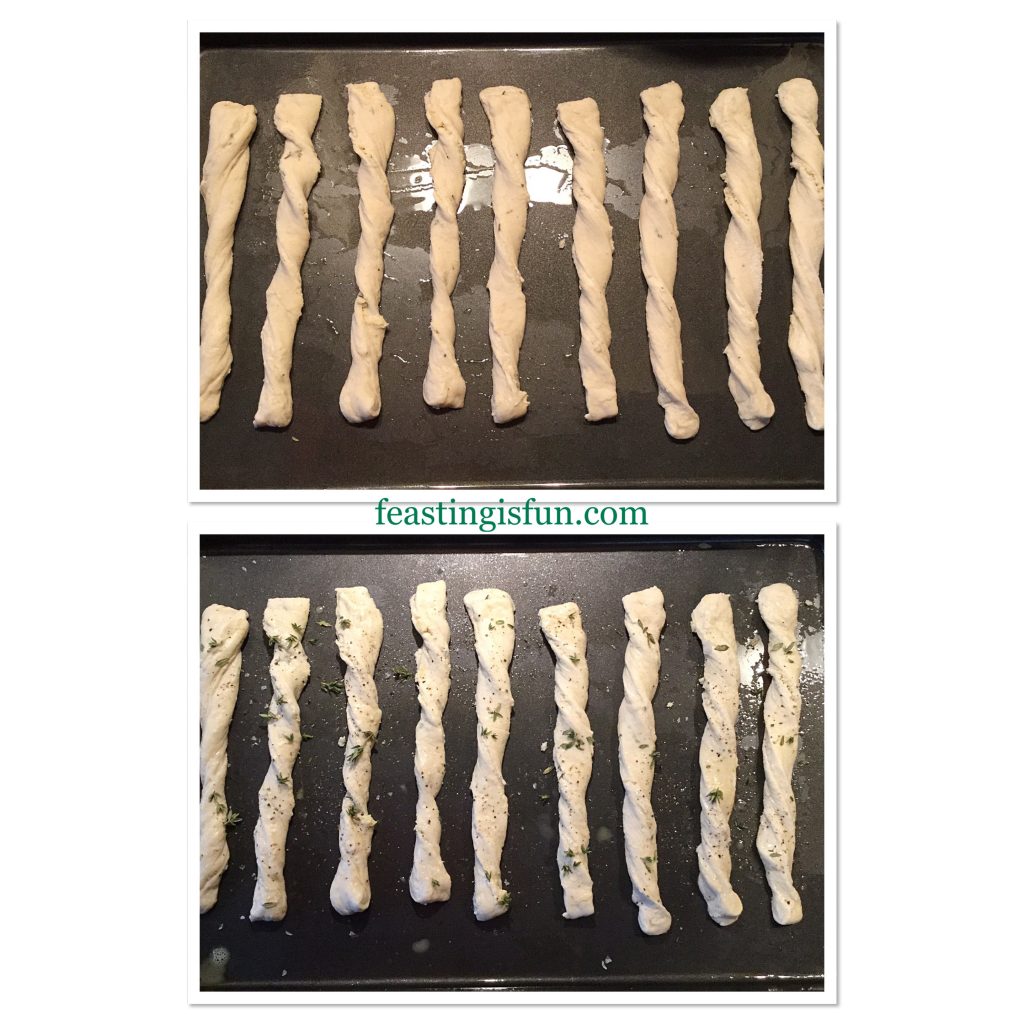
FF Cheddar Cheese Thyme Soft Breadsticks
Preparing the breadsticks for baking.
  • Remove one dough strip at a time, stretch and twist it before placing on a prepared baking tray. Press the dough on to the tray to stick, this will hold the twist in place. Place eight breadsticks on each tray.
  • Brush each breadstick lightly with egg wash and sprinkle over 1/2 teaspoon of thyme (for each eight breadsticks). Also grind black pepper and sprinkle a pinch of sea salt over the tray.
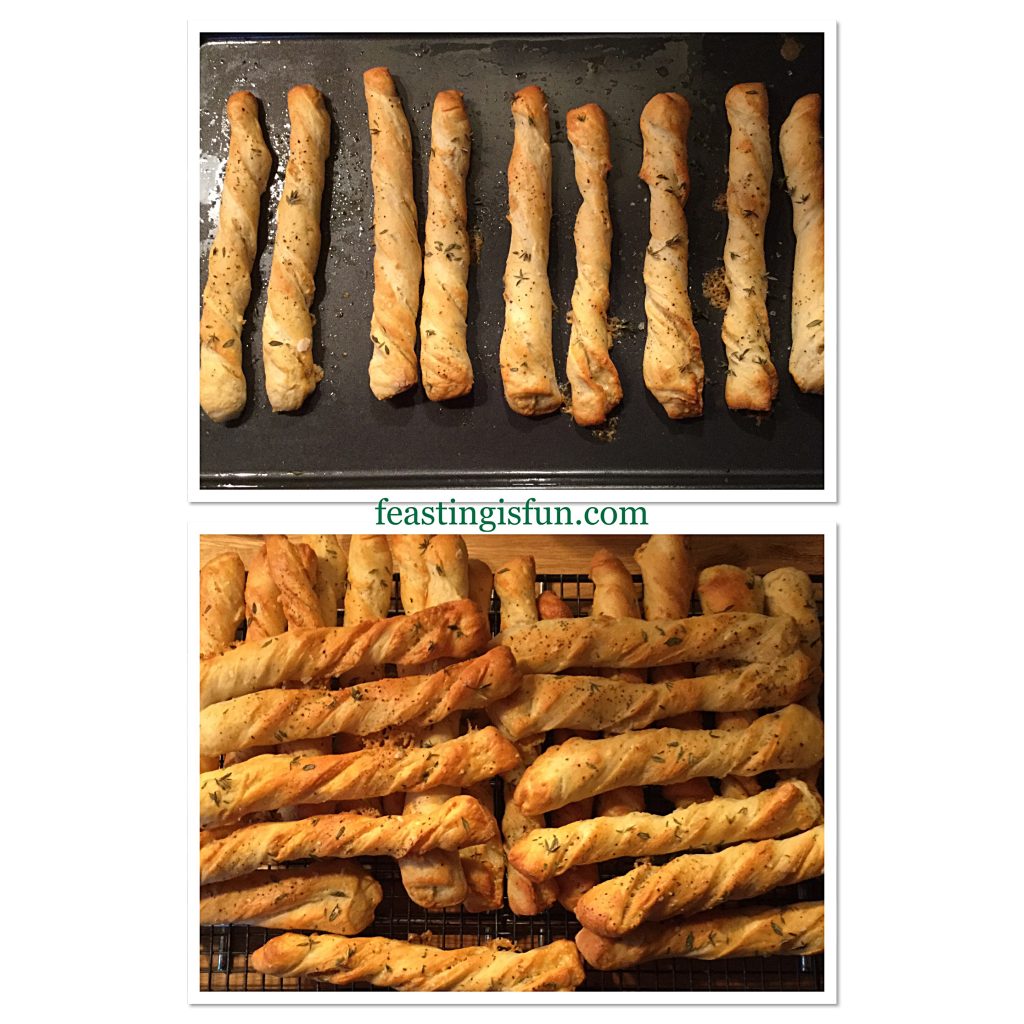
  • Place two baking sheets in the preheated oven on separate shelves and bake for 15-20 minutes.
FF Cheddar Cheese Thyme Soft Breadsticks
Freshly baked, golden, Cheddar Cheese Thyme Soft Breadsticks
  • The breadsticks are baked when they are a light golden brown.
  • As soon as the breadsticks are baked remove from the oven and place on a cooling rack.
  • Continue with the other half of the dough, cutting, twisting, egg washing and sprinkling and finally baking as before.
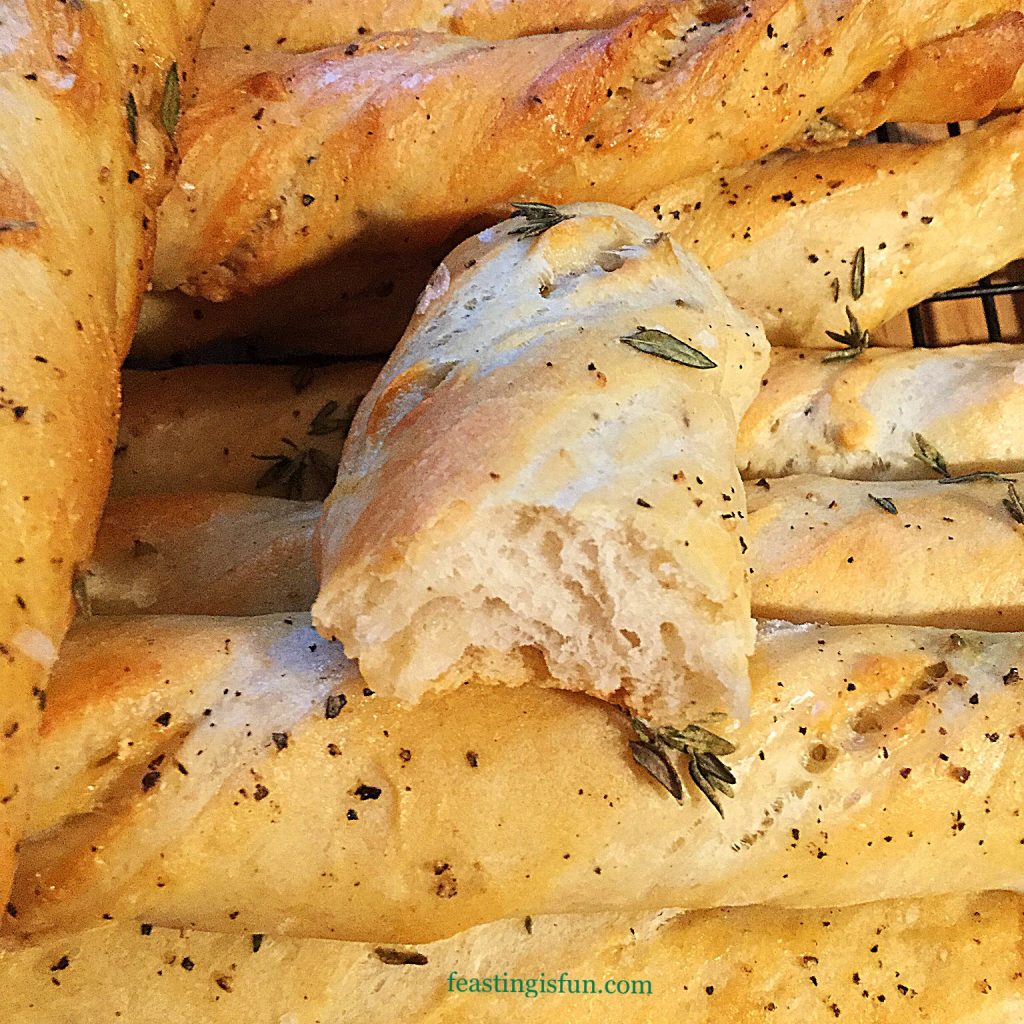
FF Cheddar Cheese Thyme Soft Breadsticks
The soft inner crumb of these Cheddar Cheese Thyme Soft Breadsticks.
  • Wait until slightly cooled before biting into one of these deliciously cheesy breadsticks, with its soft, fluffy inner.
FF Cheddar Cheese Thyme Soft Breadsticks
Cheddar Cheese Thyme Soft Breadsticks

Serving And Storing The Breadsticks

Serve slightly warm to allow for the best possible taste experience. At there best enjoyed on the day these are made.

Since this recipe makes a big batch of Cheddar Cheese Thyme Soft Breadsticks, they can be enjoyed at larger gatherings and are ideal for adding to a buffet table.

To make ahead, bake as usual, cool and freeze for up to two weeks. Remove from the freezer when needed, place on a baking tray in a warm oven for 10 minutes to defrost and warm through.

If you have enjoyed this recipe for Cheddar Cheese Thyme Soft Breadsticks you may also like these:

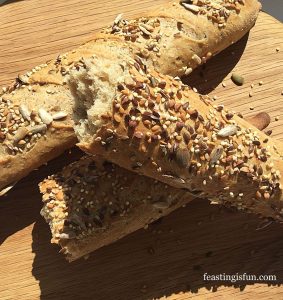
Seeded Multigrain Baguettes

FF Cheddar Cheese Thyme Soft Breadsticks
Seeded Multigrain Baguettes

Baked Cheese Olive Ciabatta Bread

FF Cheddar Cheese Thyme Soft Breadsticks
Baked Cheese Olive Ciabatta Bread

Cheddar Sun Dried Tomato Scones

FF Cheddar Cheese Thyme Soft Breadsticks
Cheddar Sun Dried Tomato Scones

Creating recipes using ingredients that compliment and enhance each other is at the heart of Feasting is Fun. As well as encouraging people to share their bakes. Baking extra to give away, to an elderly neighbour or new family, is easy. Especially when you are in the kitchen already, whipping up a batch of breadsticks, cookies or cupcakes.

Who will you share with?

Whatever you are making, baking or creating in your kitchens, enable fun preparing your feast.

Sammie xx

No part of this post may be reproduced or duplicated without the written permission of the owner. Please see my Disclosure Policy.


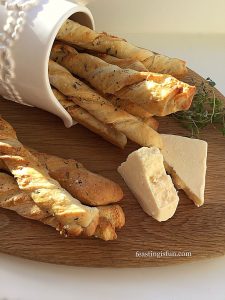
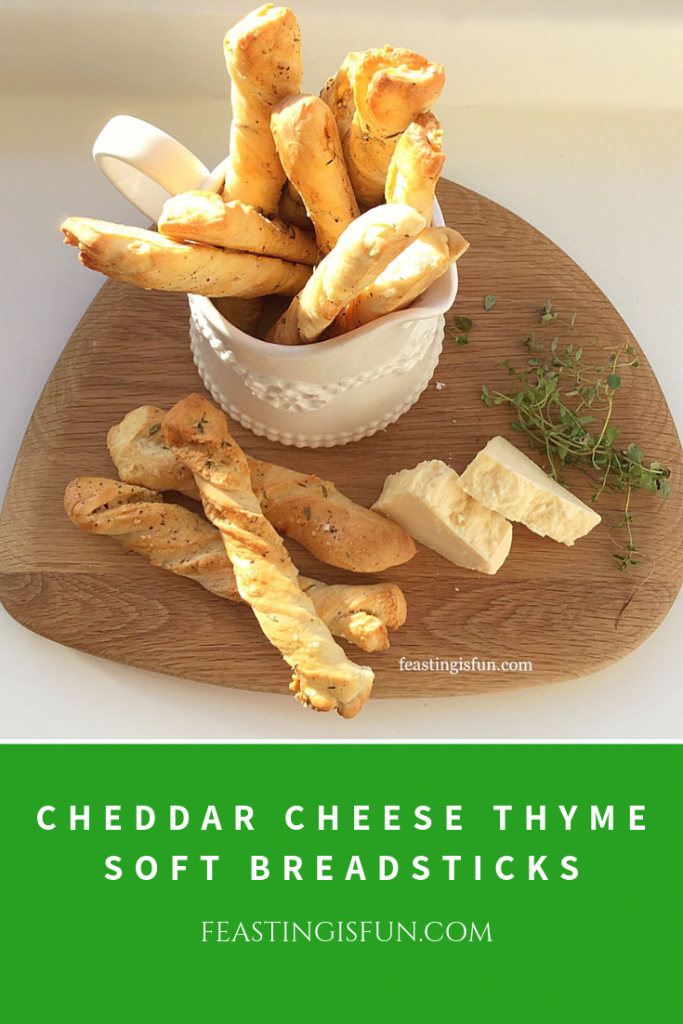
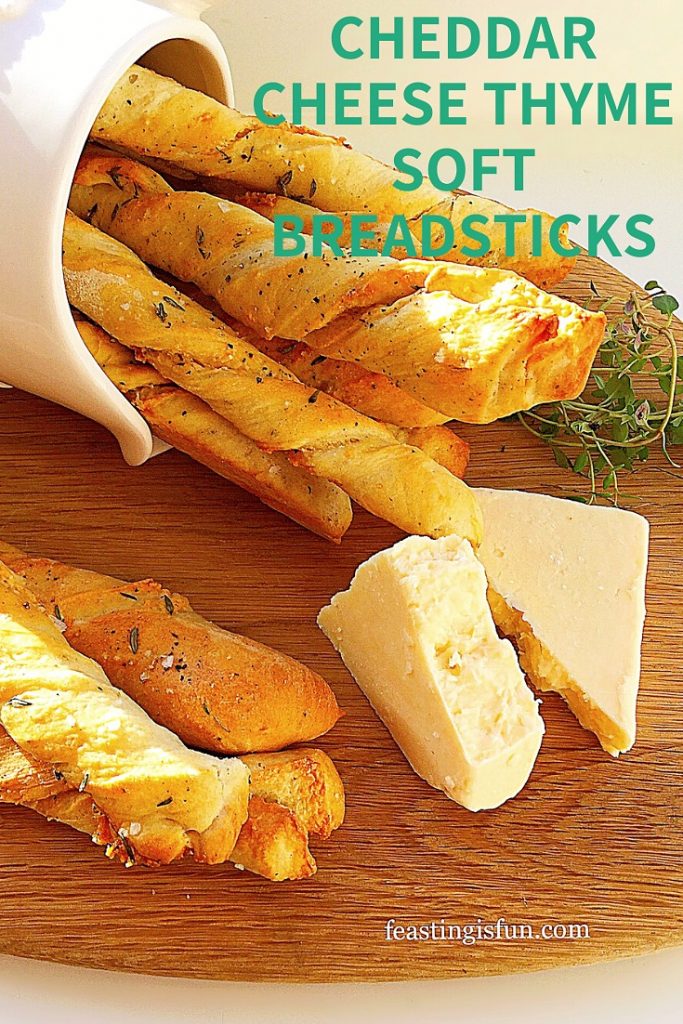
Cheddar and fresh thyme on a wooden board with breadsticks in a cream jug. Sized for Pinterest with descriptive graphics.
Cheddar Cheese Thyme Soft Breadsticks.
Share
Facebooktwitterpinterestlinkedintumblr

Roasted Summer Vegetable Orzo Salad

Share
Facebooktwitterpinterestlinkedintumblr

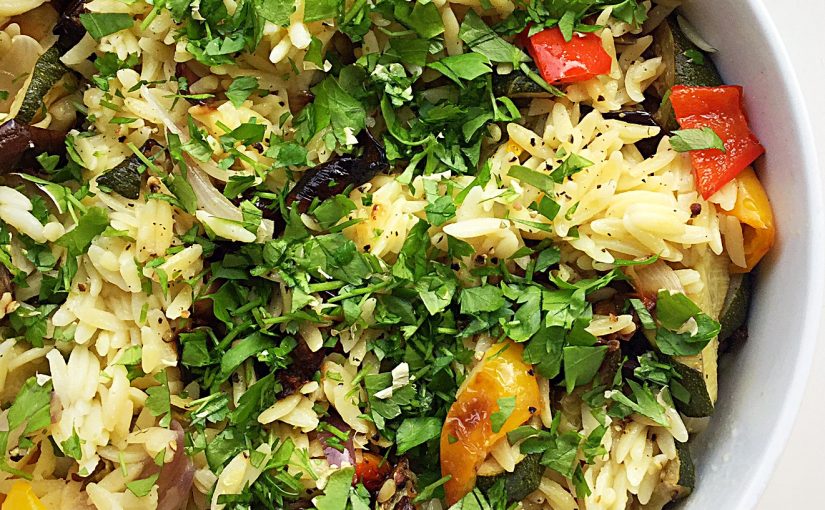
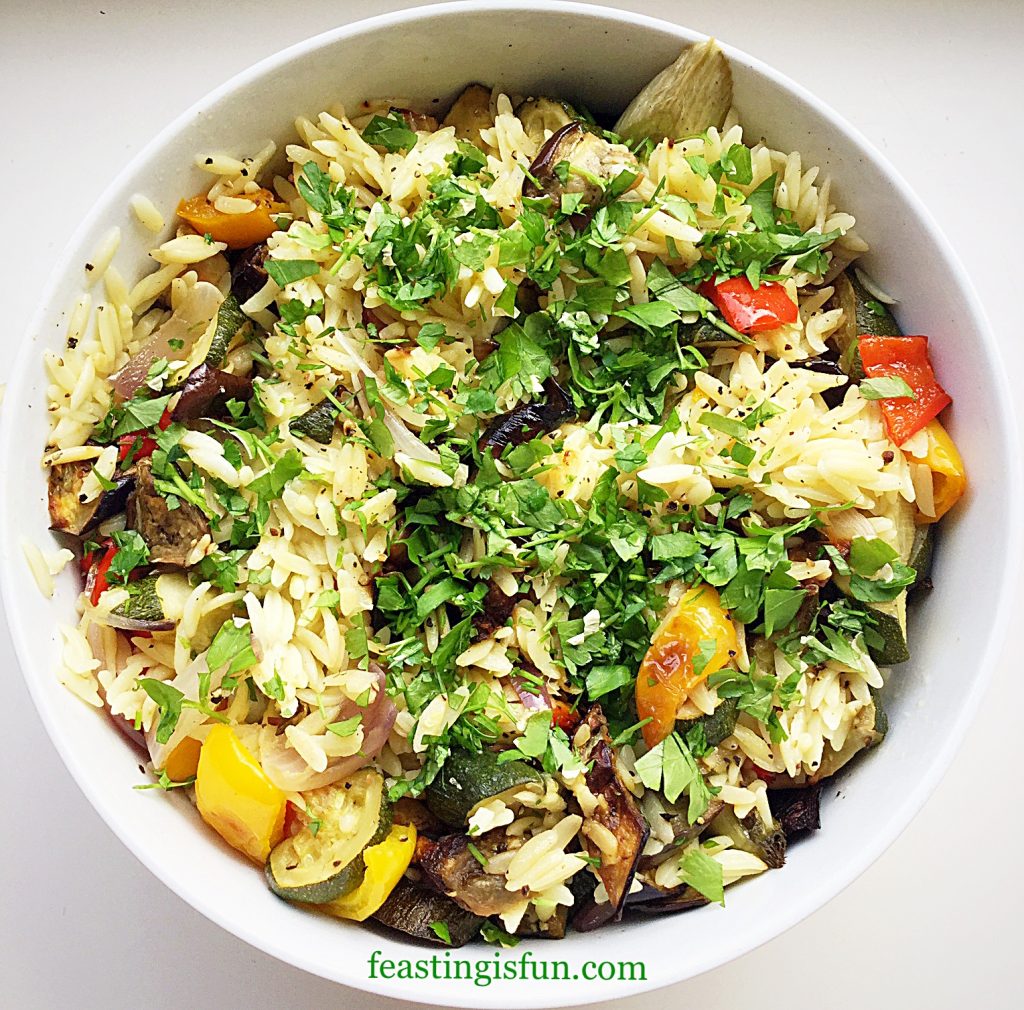
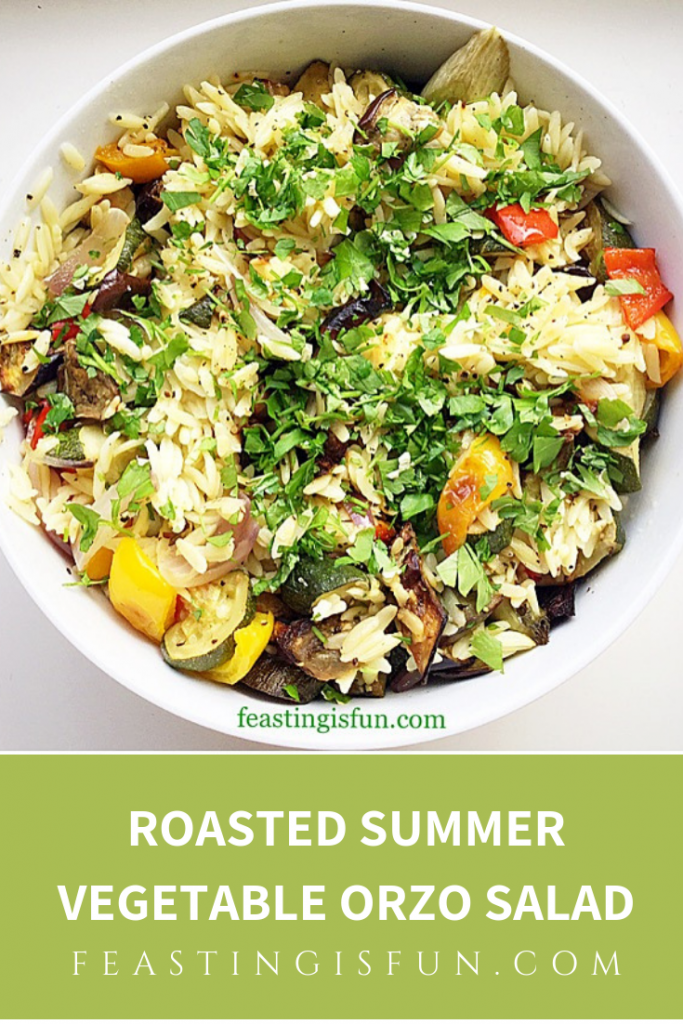
So, as we continue to enjoy our British Summer, I am celebrating the abundance of seasonal vegetables available at this time of the year. And as birds chirp early in the morning of long, sunny, warm summer days, the variety of vegetables, bought or home grown, really allows me, as a home cook to get creative in the kitchen.  Resulting in my Roasted Summer Vegetable Orzo Salad, a tasty celebration of easy summer cooking, making the most of seasonal vegetables.

FF Roasted Summer Vegetable Orzo Salad
Roasted Summer Vegetable Orzo Salad.

A Make Ahead Marvel

While packed full of roasted veggies in a lemon vinaigrette, this dish can either be served on its own, or as a colourful side dish. Since it can be served warm, it is a perfect barbecue or buffet dish. Especially, when made in advance and left to sit for a few hours, the flavours develop, enhancing the overall deliciousness. So easy to prepare and make ahead!

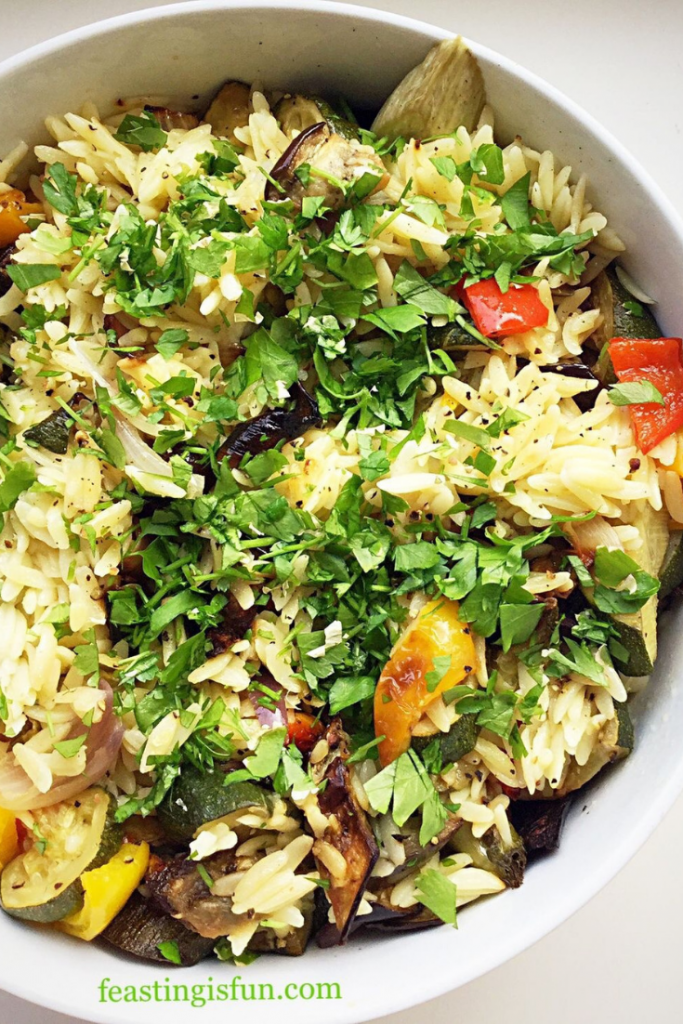
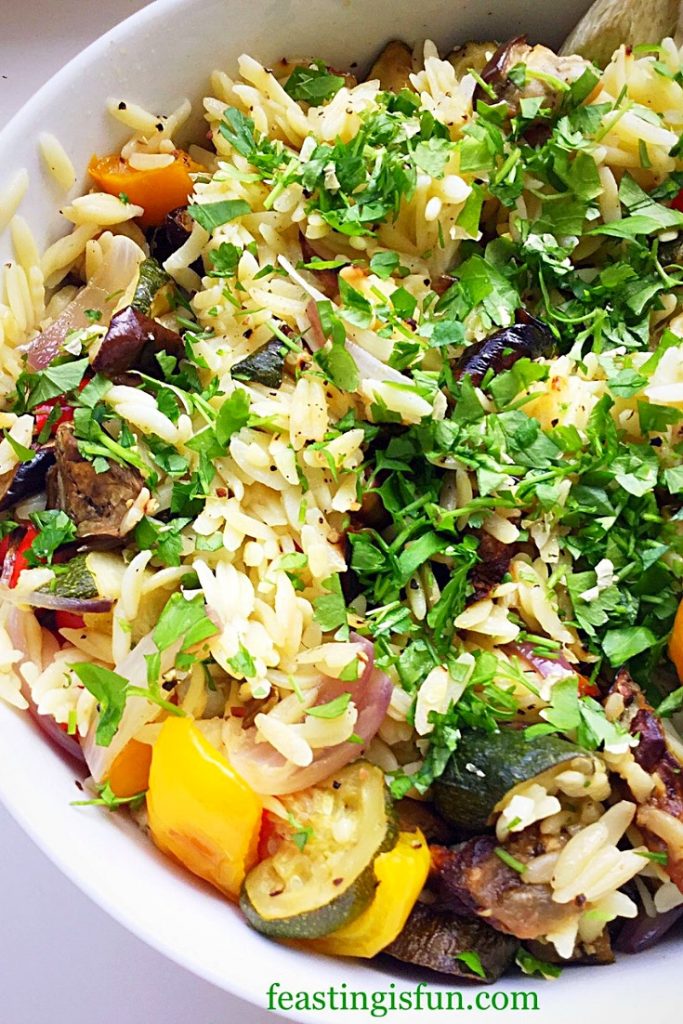
A bowl containing roasted vegetable pasta salad topped with chopped parsley.
Roasted Summer Vegetable Orzo Salad

Although I enjoy a crunchy pasta salad, there is something very comforting in the softened, roasted vegetables here. While roasting they become slightly sweet, with a mere hint of caramelisation. And their flavour is enhanced by the fresh lemon juice in the vinaigrette. Also orzo provides the perfect bite, complimenting the vegetables. Resulting in a dish that lets the vegetable flavours shine, without being overly bulked out with pasta.

Recipe: Roasted Summer Vegetable Orzo Salad serves 6

1 Aubergine

2 Courgettes

2 Bell Peppers – deseeded

1 Red Onion – skin removed

1 Large Fennel Bulb – or 2 small

400g Dried Orzo (ensure you use vegan pasta if making for Vegans) – I use Waitrose  own brand

20ml Olive Oil

1 Large Lemon – 20ml of juice

40ml Extra Virgin Olive Oil – I use Filippo Berio

1/2tsp Sea Salt plus 1tbsp for cooking the pasta –  I use Maldon

1/2tsp Freshly Ground Black Pepper

Handful of Fresh Parsley – flat or curly

Note: individual vegetables may be substituted according to preference.

Method: Preheat oven to 200C/180C fan, gas mark 6, 400F

Preparing And Roasting The Vegetables

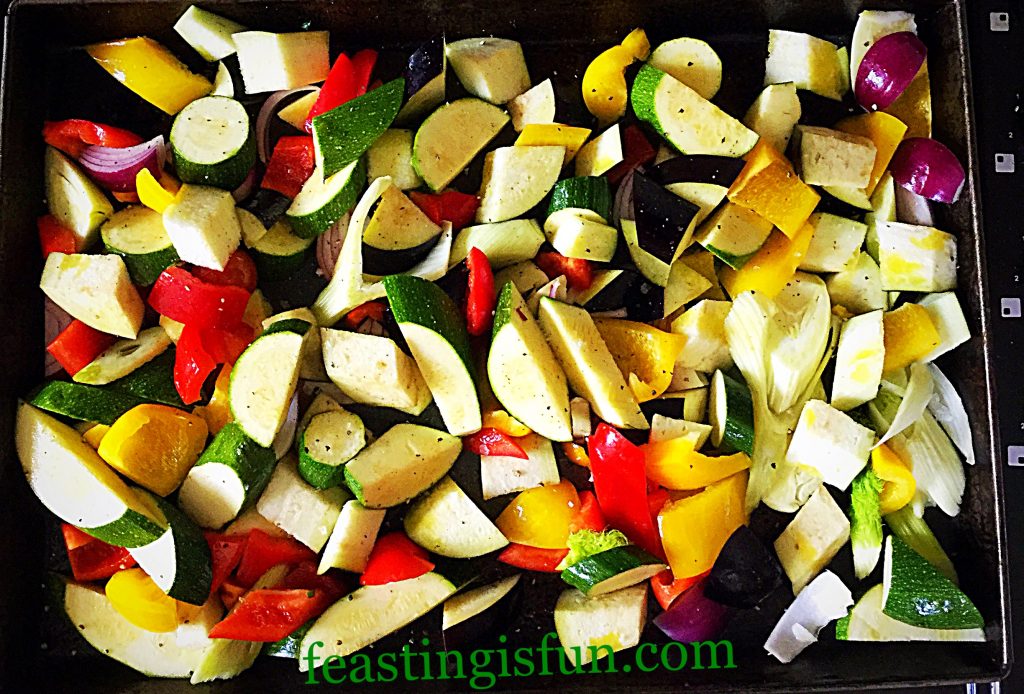
  • First of all, wash and thoroughly dry the vegetables. Follow by chopping into equal 1″/2.5cm pieces.
  • Transfer to a large baking tray.
  • Drizzle over a generous tablespoon of olive oil and one quarter of a teaspoon of sea salt and freshly ground black pepper.
  • Using clean hands, toss the vegetables in the seasoned oil, taking care to cover each piece.
  • Spread the vegetables out on the tray. During the cooking process they will reduce slightly in size.
FF Roasted Summer Vegetable Orzo Salad
Prepared vegetables ready for roasting.
  • Place the baking tray into the centre of a preheated oven and roast for 30-40 minutes, turning the vegetables halfway through the roasting time.
  • While the vegetables are roasting cook the orzo and make the lemon vinaigrette.

Bringing All The Ingredients Together In One Tasty Dish

  • Place a large pan of cold water on the hob and bring to a boil. When boiling add 1 tablespoon of sea salt and then add the orzo.
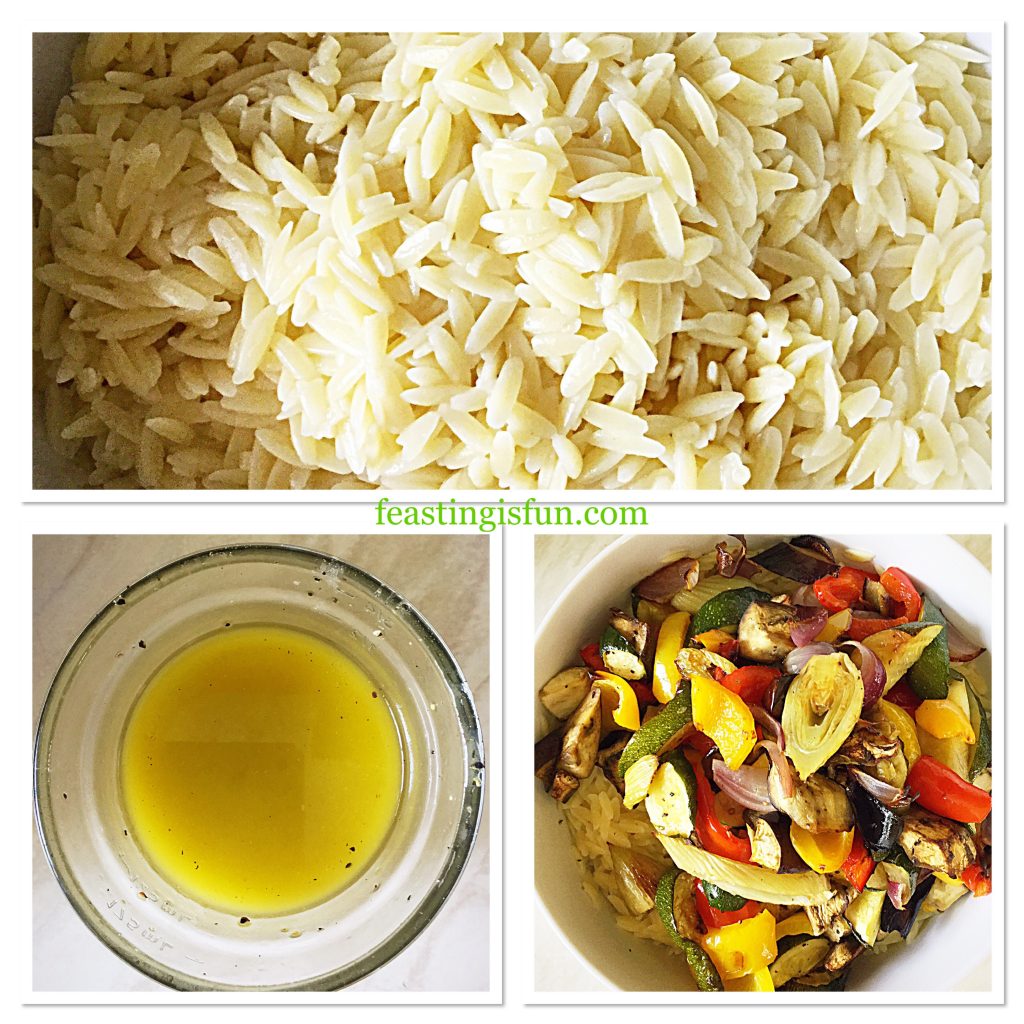
  • Squeeze the fresh lemon juice into a small, clean jar that has a fitted lid. Add the extra virgin olive oil, 1/4 teaspoon of sea salt and freshly ground pepper. Place the lid securely on to the jar and shake vigorously to combine.
  • Cook the orzo according to packet instructions, removing from the heat and draining 2 minutes before the finished cooking time.
  • Place the drained orzo into a bowl and pour over the lemon vinaigrette. Fork through the orzo to ensure the vinaigrette covers each small piece, stopping the pasta from forming clumps.
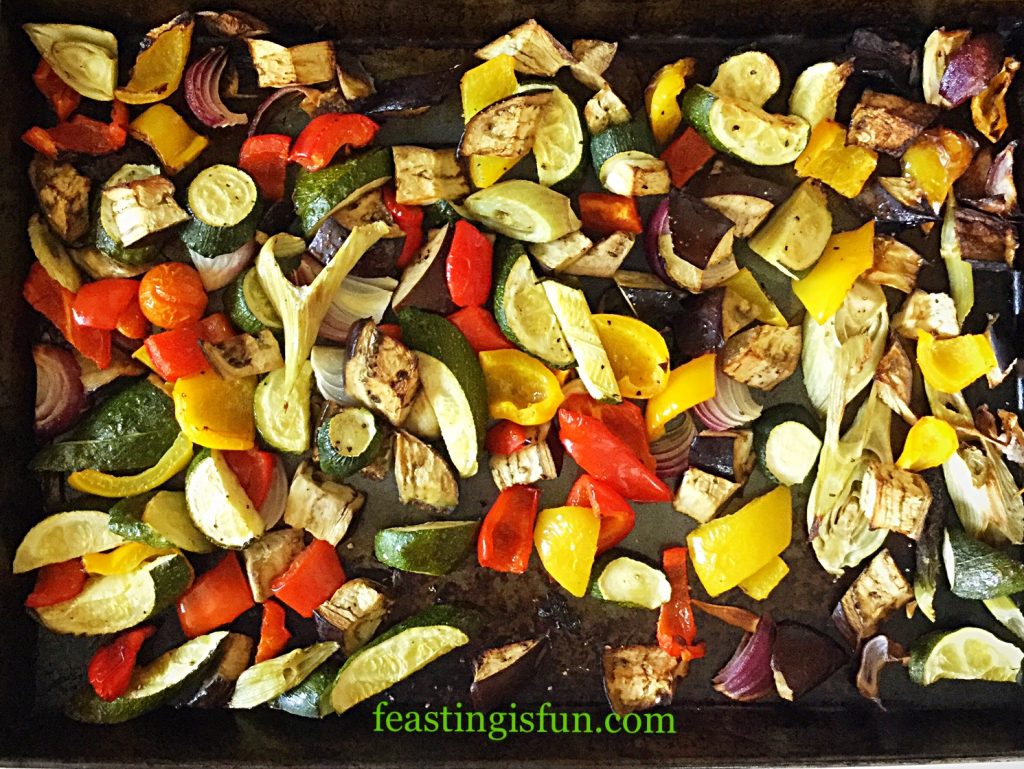
  • When cooked the vegetables will be softened, allowing a fork to easily pierce. In addition, some pieces may be slightly charred at the edges.
FF Roasted Summer Vegetable Orzo Salad
Roasted summer vegetables.
  • Spoon or tip the roasted vegetables on top of the orzo.
FF Roasted Summer Vegetable Orzo Salad
Making Roasted Summer Vegetable Orzo Salad.
  • Gently, use two forks to mix the roasted vegetables into the Orzo.
  • Finally, roughly chop a handful of fresh parsley, discarding the stalks and scatter over the salad.
Roasted Summer Vegetable Orzo Salad

If making the same day as eating, cover with cling film and leave on the work top. Alternatively, when making the day before, leave out the parsley, cool, cover and store in the fridge. Finally, to serve, allow to sit at room temperature for one hour and garnish with freshly chopped parsley.

Since this salad is so versatile, it can be served alongside grilled chicken, salmon, or burgers and ribs at a barbecue. Likewise, it can also be served on its own as a tasty vegetarian or vegan meal.

If you have enjoyed this recipe for Roasted Summer Vegetable Orzo Salad you may also like these:

Lime Couscous

Lime Couscous
Lime Couscous

Roasted Pale Ale Jelly Tomatoes

Roasted Pale Ale Jelly Tomatoes

Lemon Garlic Vegetable Orzo

Lemon Garlic Vegetable Orzo

So, to sum up, when shopping in large supermarkets it’s easy to become disconnected with seasonal vegetables. Because of transportation most ‘summer’ vegetables can be easily obtained throughout the year. Since large, super greenhouses have cropped up across the country, most notably in Thanet, Kent, the effect on home grown produce has been to lengthen its season. Consequently, allowing the British public to buy British produce, rather than imported. Something I fully encourage and strongly support.

Yet, even with this consideration, there is little to rival the fun of blackberry picking in August and September. Most importantly, connecting us all to nature and the natural season of harvest.

So, whatever you are making, baking and creating in your kitchens, have fun preparing our feast.

Sammie xx

No part of this post may be reproduced without the written consent of the owner. Please see my Disclosure Policy.

FF Roasted Summer Vegetable Orzo Salad

Share
Facebooktwitterpinterestlinkedintumblr

Walnut Pastry Crust Leek Stilton Tart

Share
Facebooktwitterpinterestlinkedintumblr

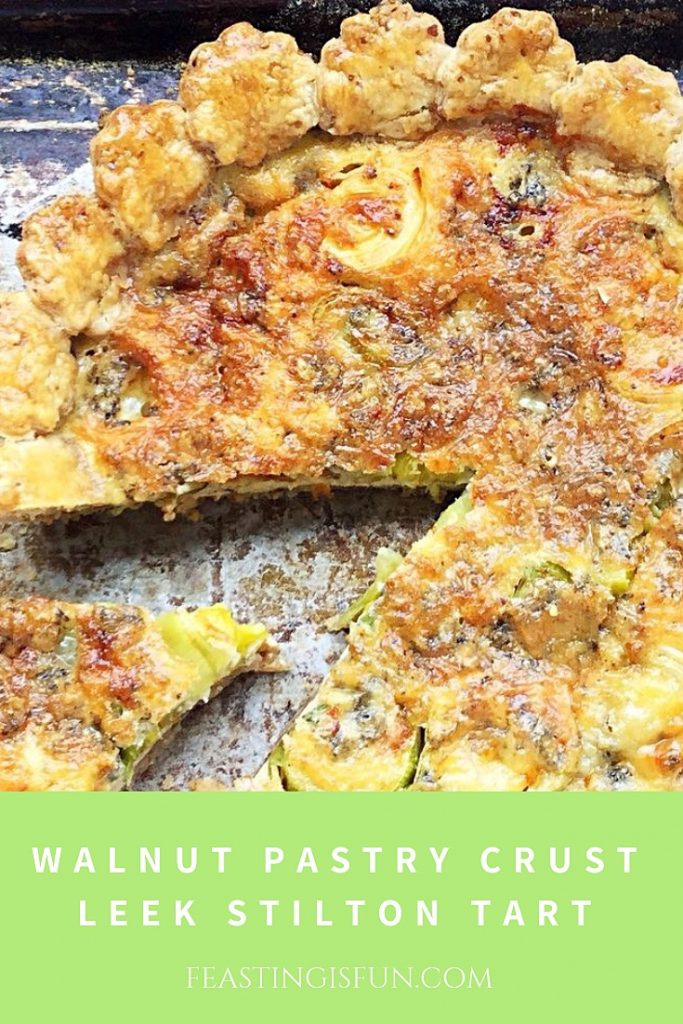
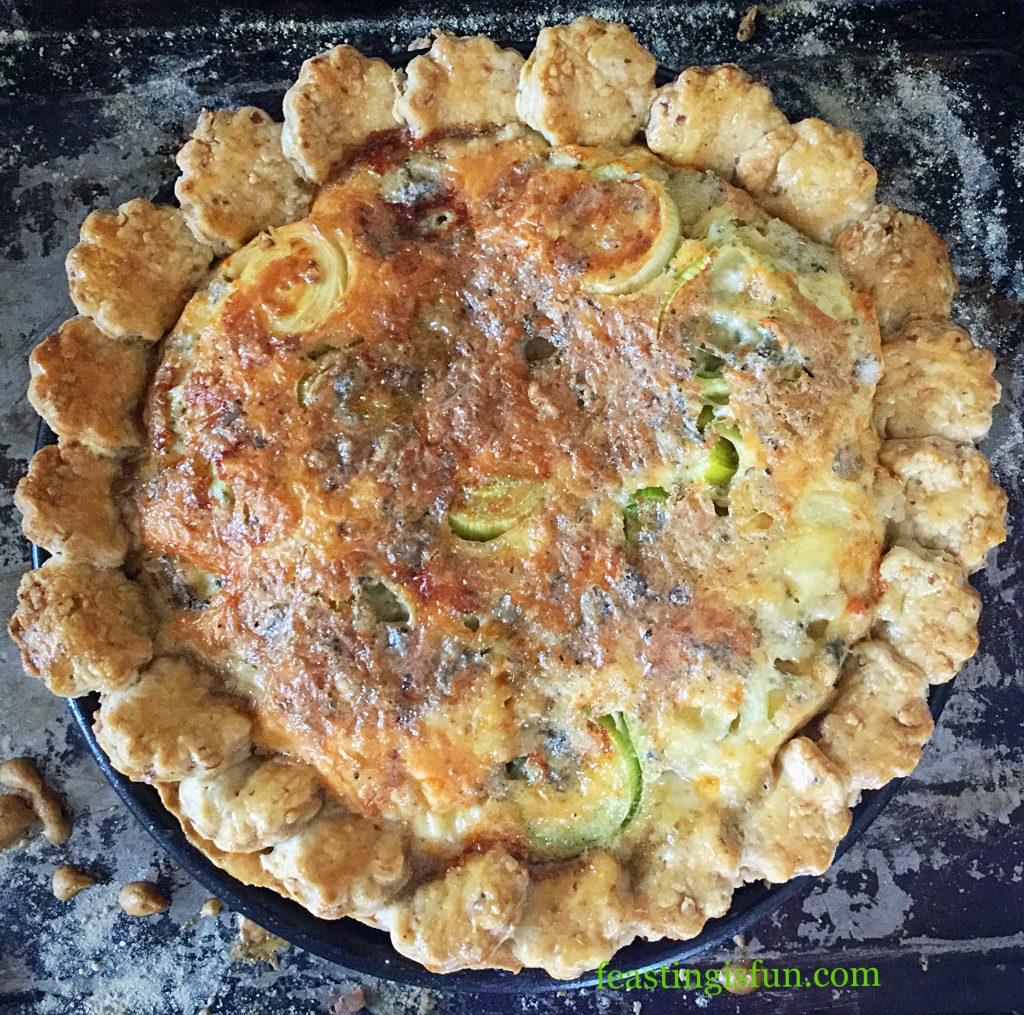
Some ingredients, when cooked together, simply bring out the best in each other. As is the case with this Walnut Pastry Crust Leek Stilton Tart. Also, the leek’s subtle onion flavour is enhanced by the crumbled Stilton cheese, in an egg and cream custard base. The nutty pastry crust provides the perfect crunchy texture and flavour. A delightful balance, that is a treat to our tastebuds.

FF Walnut Pastry Crust Leek Stilton Tart

A marriage of flavours

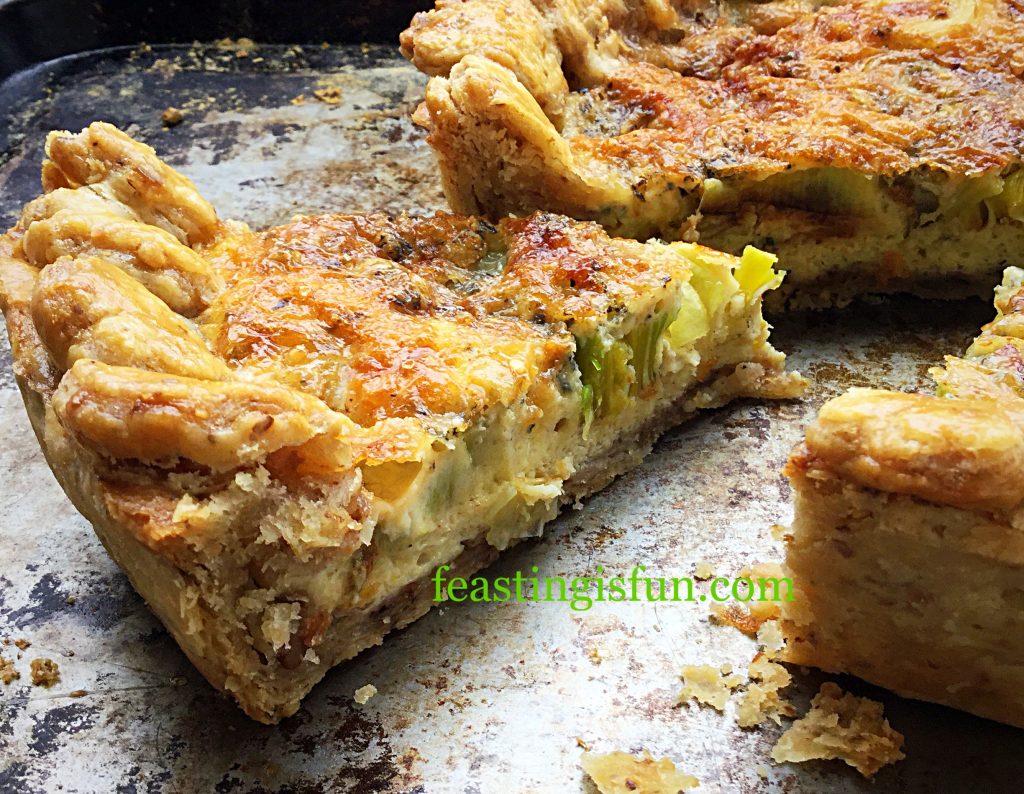
While the chopped walnuts give the pastry a rustic, wholemeal look, it is, in fact light and crumbly. Adding additional flavour to the finished bake. Likewise, the crumbled Stilton cheese mellows on baking. Providing a salty contrast to the mild egg custard. Surprisingly, the mild onion flavour of the leeks doesn’t get lost in this tart. Rather, it brings everything together and sings on the tastebuds, above the other flavours.

FF Walnut Pastry Crust Leek Stilton Tart
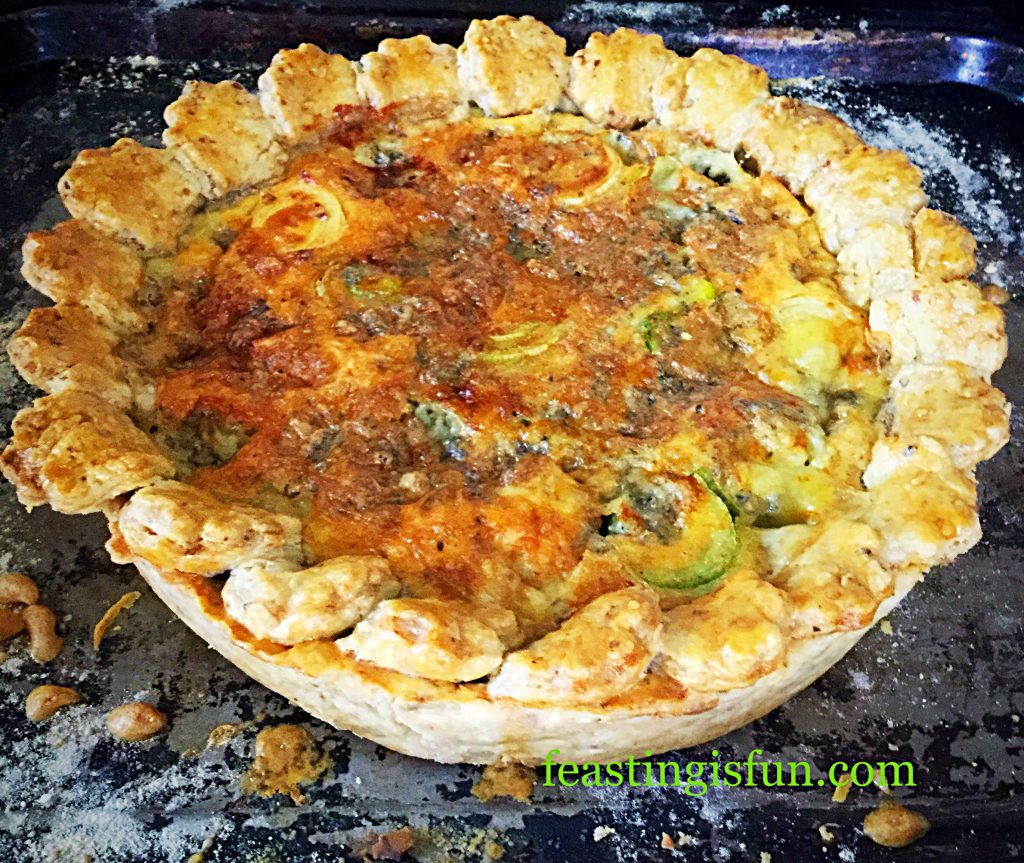
Walnut Pastry Crust Leek Stilton Tart a feast for the eyes.

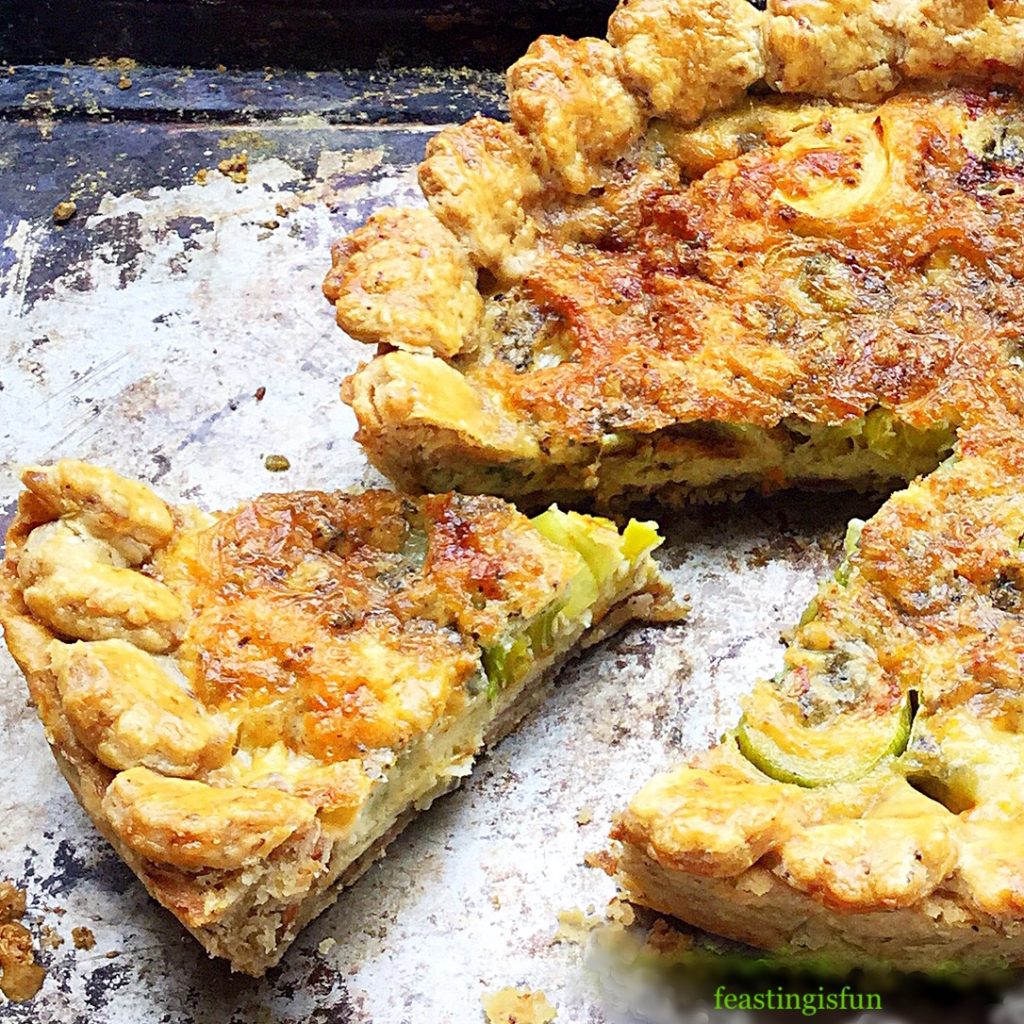
Slices of leek are sautéed gently, before placing in the tart. This not only ensures they are soft in the baked tart, but also concentrates the flavour. While baking, the rings separate and rise up through the tart. Also ensuring that each bite has tasty fresh, green leek in it.

FF Walnut Pastry Crust Leek Stilton Tart
Walnut Pastry Crust Leek Stilton Tart crunchy and creamy.


This tart is perfect for a light lunch, with salad, or as a main meal with a hot, buttered jacket potato. Also, it makes perfect picnic or buffet food, as it can be served at room temperature. The added nutmeg is barely noticeable, yet enhances all of the tart’s flavours. Leave it out and the finished bake tastes as though it is missing something. I encourage you to include it, freshly grated, if possible!

Recipe: Walnut Pastry Crust Leek Stilton Tart serves 4-6

For the pastry

200g/7oz Plain White Flour

50g/2oz Walnuts – finely chopped

1/8tsp Salt – I use Maldon

1/8tsp Freshly Ground Black Pepper

125g/4.5oz Cold Unsalted Butter

60mls Cold Tap Water

For the filling

100g/4oz Stilton Cheese

1 Large Leek

4 Large Free Range Eggs – plus 1 extra for the egg wash

3tbsp Double Cream

1/4tsp Nutmeg

1/4tsp Freshly Ground Black Pepper

Method:

A loose bottom tart tin that is approximately 25cm wide x 5cm deep or 10″ x 2″ is needed for this recipe.

Making The Walnut Pastry Crust

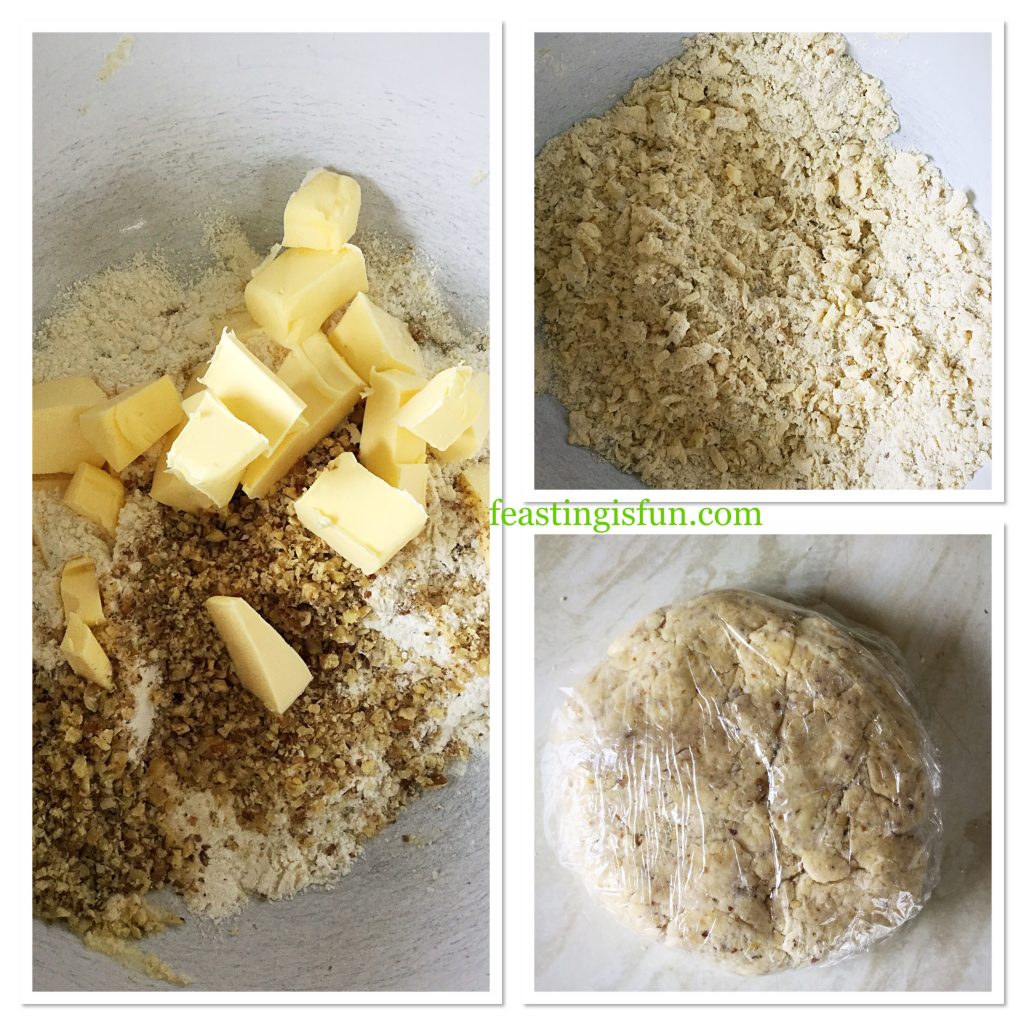
  • First of all, in a large bowl add the flour, chopped walnuts, salt, pepper and diced, cold butter. Then using your hands, or a pastry cutter, rub/cut the butter into the flour until the mixture resembles bread crumbs with pea sized chunks of butter present.
  • Now make a well in the centre of the mixture and add the cold tap water 10mls at a time. Using your hand, fingers bent and shaped like a claw, mix the dough after each addition. Work quickly to avoid the dough warming up and becoming oily. You may not need the full amount of water specified. Stop adding water once the dough comes together to form a rough ball. Set the bowl to one side.
  • Wipe the worktop with a clean, damp cloth. Then place the cling film (approximately the size of a large baking sheet) directly on to the damp surface. It will ‘stick’ and not move around.
  • Finally, tip the walnut pastry dough on to the cling film. Knead the dough lightly into a disc shape. Avoid working the pastry for too long as this will result in a hard, tough, crust.

Chilling the pastry

  • Wrap the pastry disc in the cling film and place in the fridge for at least 30 minutes, or until it is chilled. Making pastry the night before use allows it to chill thoroughly before rolling out.

FF Walnut Pastry Crust Leek Stilton Tart

    Making the Walnut Pastry Crust.
  • 10 minutes before rolling out the pastry, preheat the oven to 220C/200C fan, gas mark 7, 425F.
  • If you wish, lightly butter your tart tin, I never do. Place the tart tin on to a baking tray and put to one side.

Rolling out the pastry

  • Place the chilled pastry on to a clean worktop and roll out evenly, until it is a slightly larger circle than the combined width and depth of the tin. Approximately 30cm/11″ in width.
  • Roll the pastry around the rolling pin and transfer to the tart tin. Allow the pastry to settle into the tin. DO NOT stretch it as it will only shrink while baking.
  • Ensure the tin is fully lined and then trim away any excess pastry.
  • Dock the base of the pastry tart with a fork and then line with baking parchment. Fill the lined tart with baking beans, or ceramic balls and place into the top of the oven.
  • Bake the pastry for 15 minutes, then remove from the oven and lift out the baking parchment and beans.
  • Return the tart to the oven and bake for a further 5 minutes.

Layering the leeks and Stilton

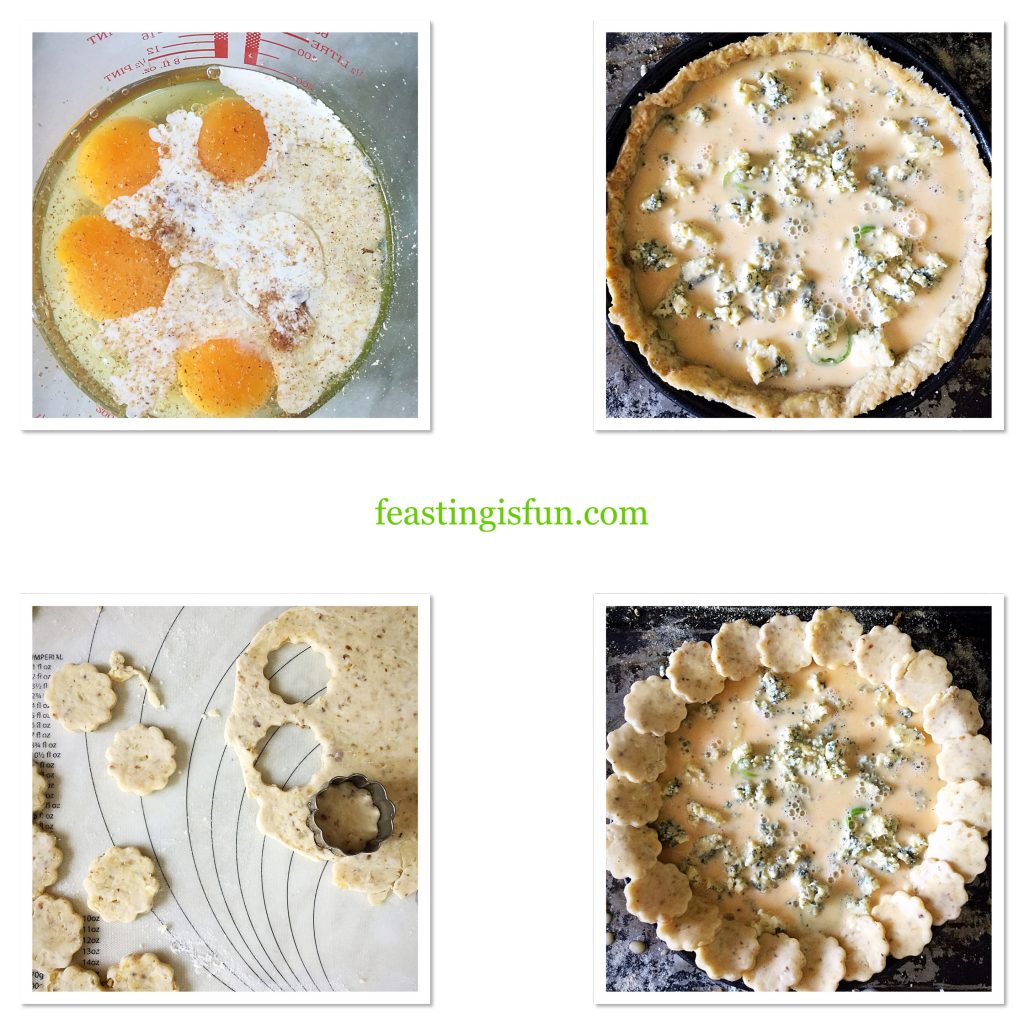
FF Walnut Pastry Crust Leek Stilton Tart
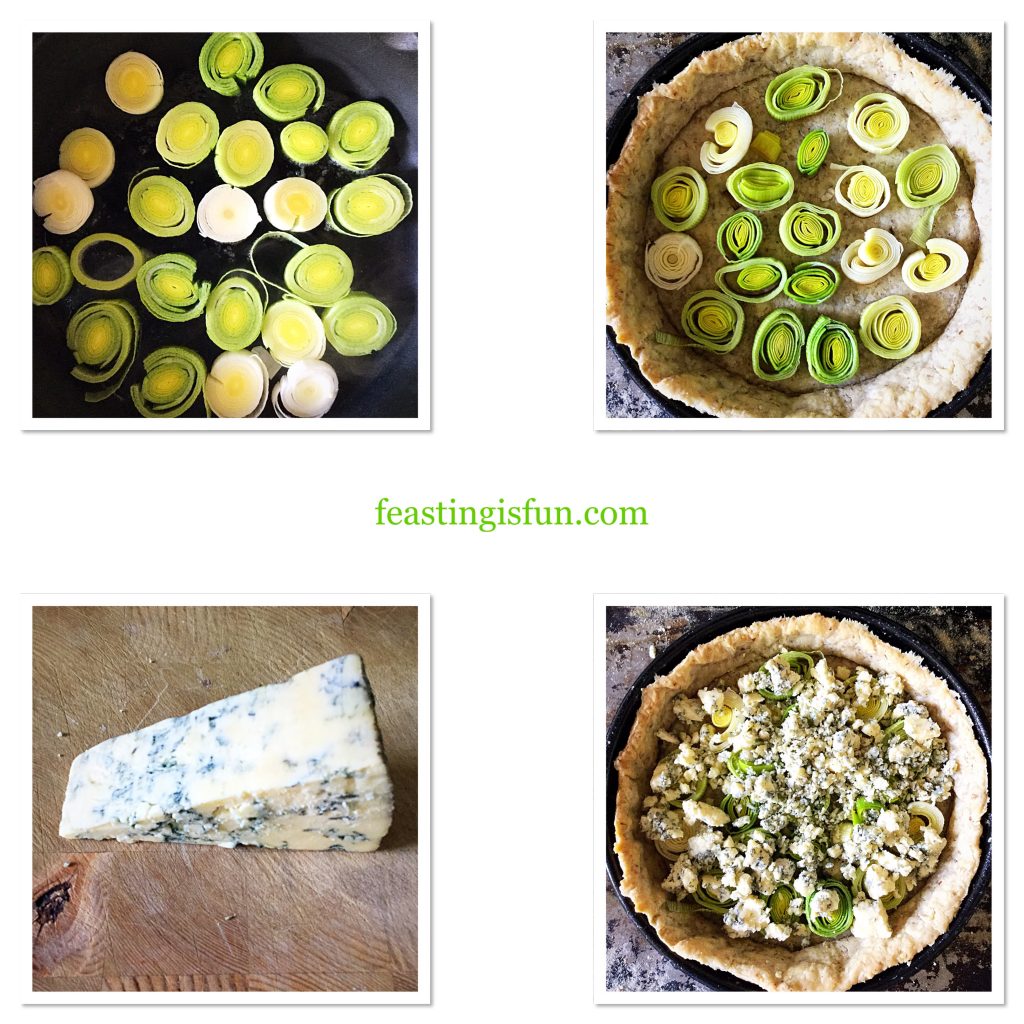
Preparing the Leek and Stilton filling.
  • While the pastry is baking, prepare the leek. Strip the outer 2 layers, cut off the root end and top, then rinse thoroughly with cold water.
  • Cut the leek into whole rings, approximately 1cm deep and the gently sauté in a dry pan over a medium/low heat for 10 minutes, or until slightly softened.
  • Remove the pastry shell from the oven when baked.
  • Carefully transfer the whole leek rings to the tart shell. Add any odd pieces of leek around the whole rings in the tart.
  • Cut the rind away from the Stilton. Now, using a fork, break up the Stilton, on a board, into crumbs. Sprinkle the crumbs over the leek  in the tart shell.
  • Reduce the oven temperature to 200C/180C fan, gas mark 6, 400F.
FF Walnut Pastry Crust Leek Stilton Tart
Preparing the egg custard and decorating the tart.

Making and adding the egg custard

  • Crack 4 eggs into a large jug. Add the double cream, nutmeg and pepper. Whisk together using a fork, until the mixture is uniform.
  • Pour the egg custard carefully into the pastry tart.
  • Carefully, as the tart is still warm, run a piece of butter around the top perimeter of the tin. This will stop any pastry decorations sticking.
  • Gather together the pastry offcuts. Roll to the thickness of a one pound coin.
  • Use a 1 inch/2.5cm approx. cutter to cut out about 25-30 circles. These will be placed around the edge of the tart.
  • Break an egg into a small bowl, add 1tsp of cream or milk and whisk together. This is the egg wash.
  • Take the first cutout and with a pastry brush, dipped in egg wash, brush both sides of the circle. Place the circle on to the edge of the tart. The centre of the circle should be in contact with the edge of the tart. Continue, using the same egg wash method and placing the 2nd circle so that just overlaps the first disc.
  • Keep going until the whole perimeter of the tart case is covered. I used 22 pastry discs. The number you need will depend on the size of your tart, how much the discs overlap and other variables.
  • Finally, when the decorations are in place, pour any leftover egg wash into the tart. As long as there is room.

Baking The Walnut Pastry Crust Leek Stilton Tart

  • Place the tart carefully into the centre of the oven and bake for 40-50 minutes. The tart is baked when there is no wobble in the centre, the filling has set and the egg custard is golden.
  • When fully baked remove the tart from the oven and allow to cool before removing from the loose bottom tart tin.
FF Walnut Pastry Crust Leek Stilton Tart
Golden Walnut Pastry Crust Leek Stilton Tart

This tart is delicious served warm for lunch or dinner, Also is is very tasty eaten cold or at room temperature, making it ideal for summer picnics and buffets.

It will keep for up to 3 days, stored in a container or, wrapped in cling film and kept in the fridge.

Leek Stilton Tart

If you have enjoyed this recipe For Walnut Pastry Crust Leek Stilton Tart you may also like these:

Smoked Bacon Asparagus Quiche

Smoked bacon asparagus quiche.
Smoked Bacon Asparagus Quiche

Bath Soft Cheese Chilli Tarts


Bath Soft Cheese Chilli Tarts

Quiche Lorraine

Quiche Lorraine
Quiche Lorraine

Homemade quiche and tarts taste a million times better than most shop bought varieties available. Seasoning, ingredients and indeed the pastry can all be tailored to our own personal tastes. While I haven’t taken on the challenge of Filo Pastry yet, shortcrust is incredibly easy, see Perfect Butter Shortcrust Pastry.

Whether served with a jacket potato and salad for a substantial meal, or grabbing a slice to eat whilst on the go, tarts and quiches are easy to make. They are also very satisfying to eat.

Do you have a favourite flavour combination for quiches and tarts?

Whatever you are making, baking and creating in your kitchens, have fun.

Sammie xx

Share
Facebooktwitterpinterestlinkedintumblr

Bath Soft Cheese Chilli Tarts

Share
Facebooktwitterpinterestlinkedintumblr

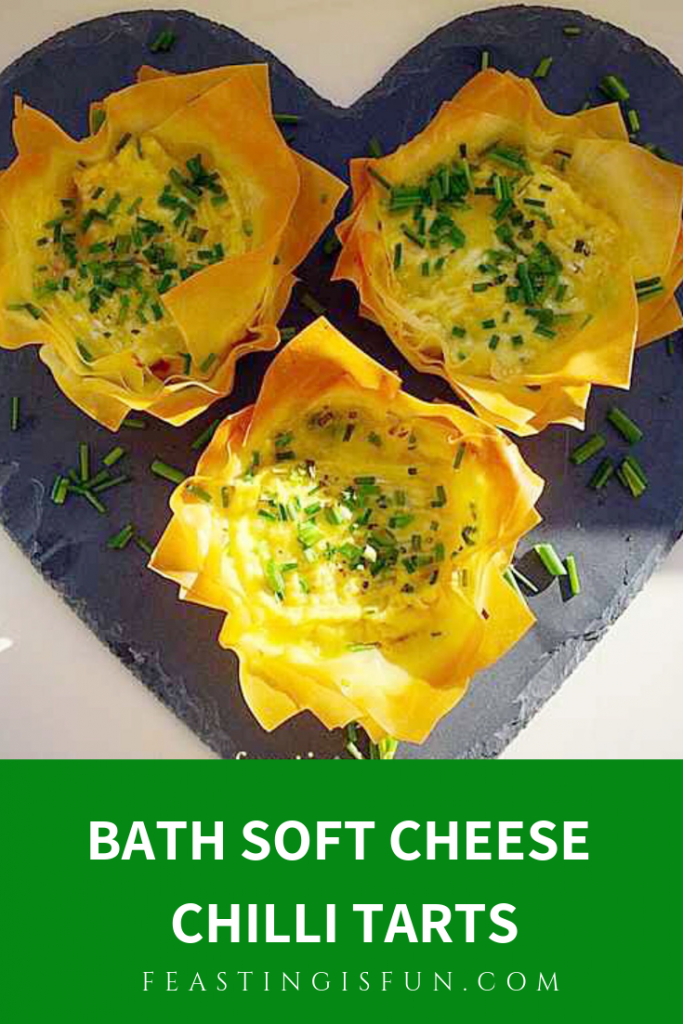
Today I have a fantastic, delicious recipe, that is easy to prepare and stunning to serve. While this recipe is ideal for a picnic or buffet it is also fancy enough for serving at a dinner party. So let me share my Bath Soft Cheese Chilli Tarts with you.

Bath Soft Cheese Chilli Tarts


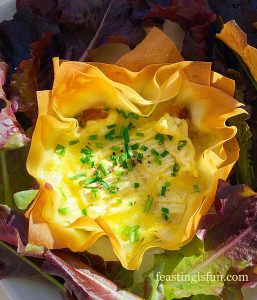
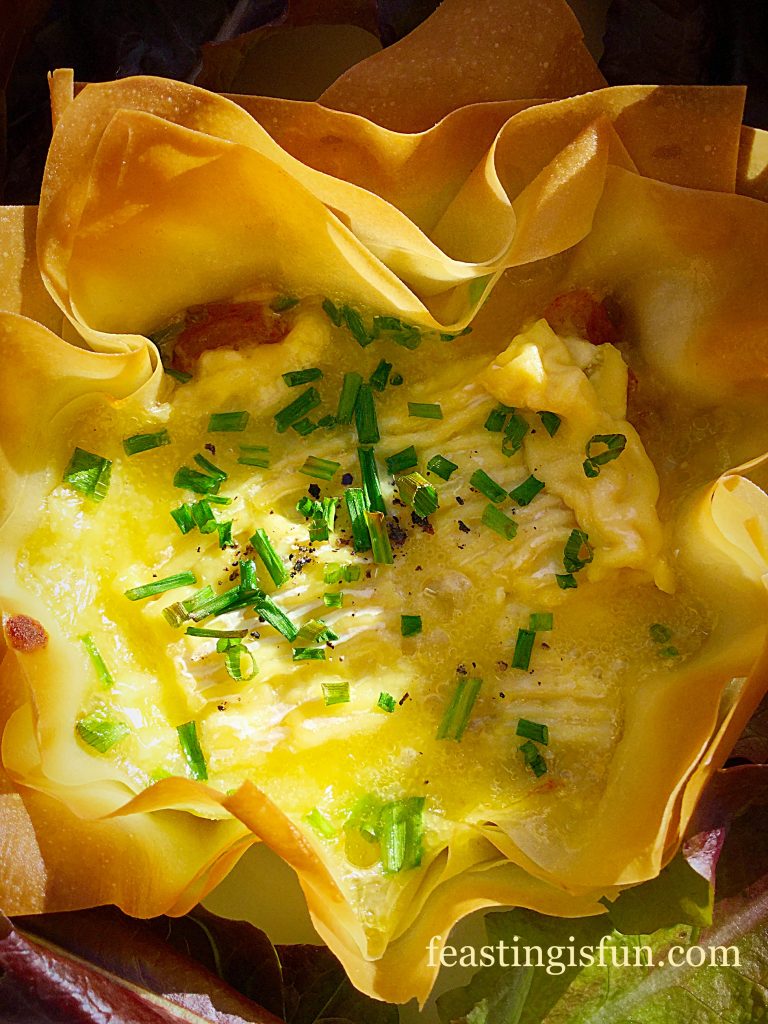
A crisp, crunchy, golden filo pastry encases a layer of chilli pickle, topped with a generous layer of Bath Soft Cheese. I know, they look so tempting. While the late afternoon sunshine illuminates these Bath Soft Cheese Chilli Tarts, with their melting cheese and chilli centre.

Bath Soft Cheese is organic and suitable for vegetarians. It is made by the Bath Soft Cheese Company in Kelston near Bath. It tastes like an English version of Brie. Soft and buttery,  it matures to a ripe, full bodied cheese, that stands up well to the chilli in this recipe.

FF Bath Soft Cheese Chilli Tarts
Bath Soft Cheese Chilli Tarts incredibly simple to make and bake.

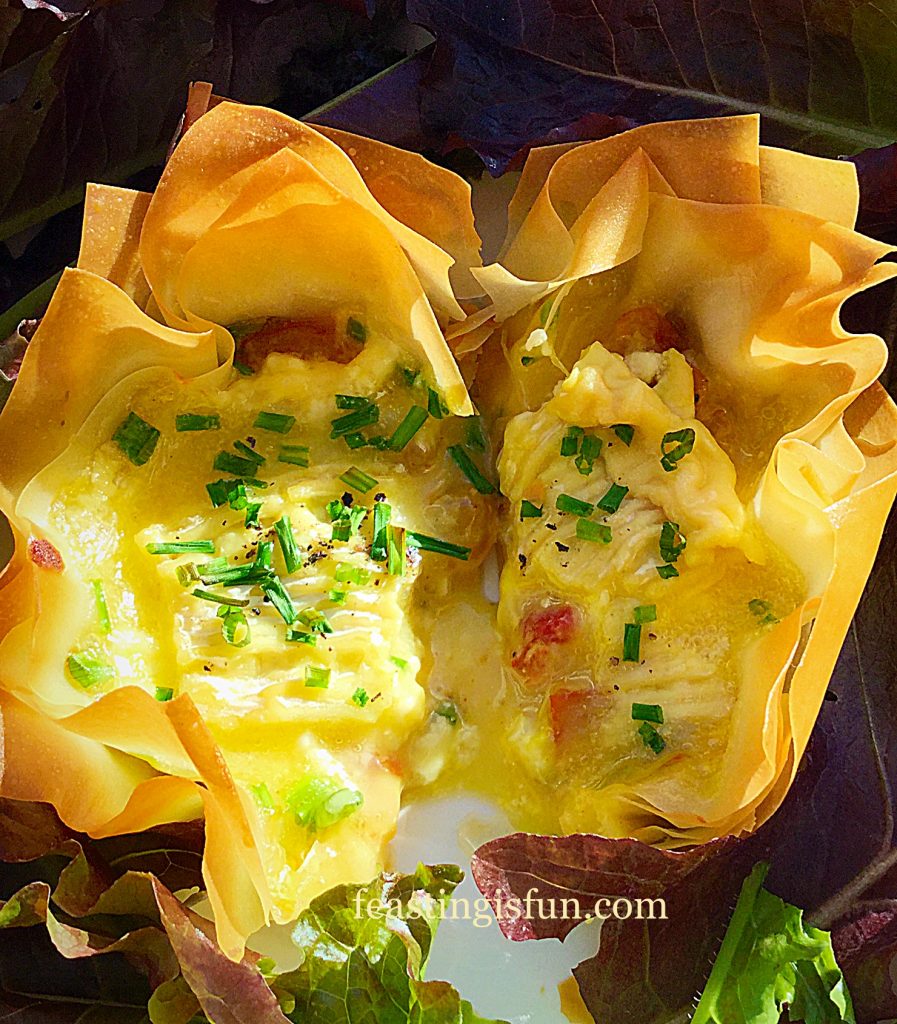
Finally, as you cut through the light, crisp filo pastry layers the melted cheese oozes out of the tart, accompanied by the spicy chilli pickle underneath. And to accompany this tart a few salad leaves and a glass of something crisp and cool.

FF Bath Soft Cheese Chilli Tarts
Bath Soft Cheese Chilli Tarts – tell me you can resist that delicious, melted cheese?

While cheese, chutney and crackers are a classic combination, it is fun and delicious using the ingredients in a different way.

Baking the chilli pickle and Bath Soft Cheese really wakes up the flavours. And when placed in a buttery, filo pastry tart, the result is a remarkably delicious dish.

Recipe: Makes 6 Bath Soft Cheese Chilli Tarts

250g Bath Soft Cheese – available from Pong Cheese

1 Packet of Filo Pastry – you will need 4-5 sheets – I used Jus Rol

100g Unsalted Butter melted and cooled

1/2 Jar Chillililli – from Hawkshead Relish

2-3tbsp Freshly Chopped Chives

1/2tsp Freshly Ground Black Pepper

Method: Preheat the oven to 180C/160C fan, gas mark 4, 350F

Creating the filo pastry tart shell:

  • First of all, place 6 loose bottom tart tins on a baking tray. I used 9cm width, between 8-10cm (3.5-4″) will be fine.
  • Brush each tart tin lightly with melted butter using a pastry brush.
  • Have a clean damp tea towel to hand as filo pastry can dry out very quickly, so it’s best to cover the spare pastry sheets.
  • Place one filo pastry sheet on to a board or pastry mat. Brush lightly with melted butter.
  • Using a sharp knife cut the filo pastry sheet into equal quarters and then cut each quarter in half, from top to bottom. You will have 8 squares/rectangles.
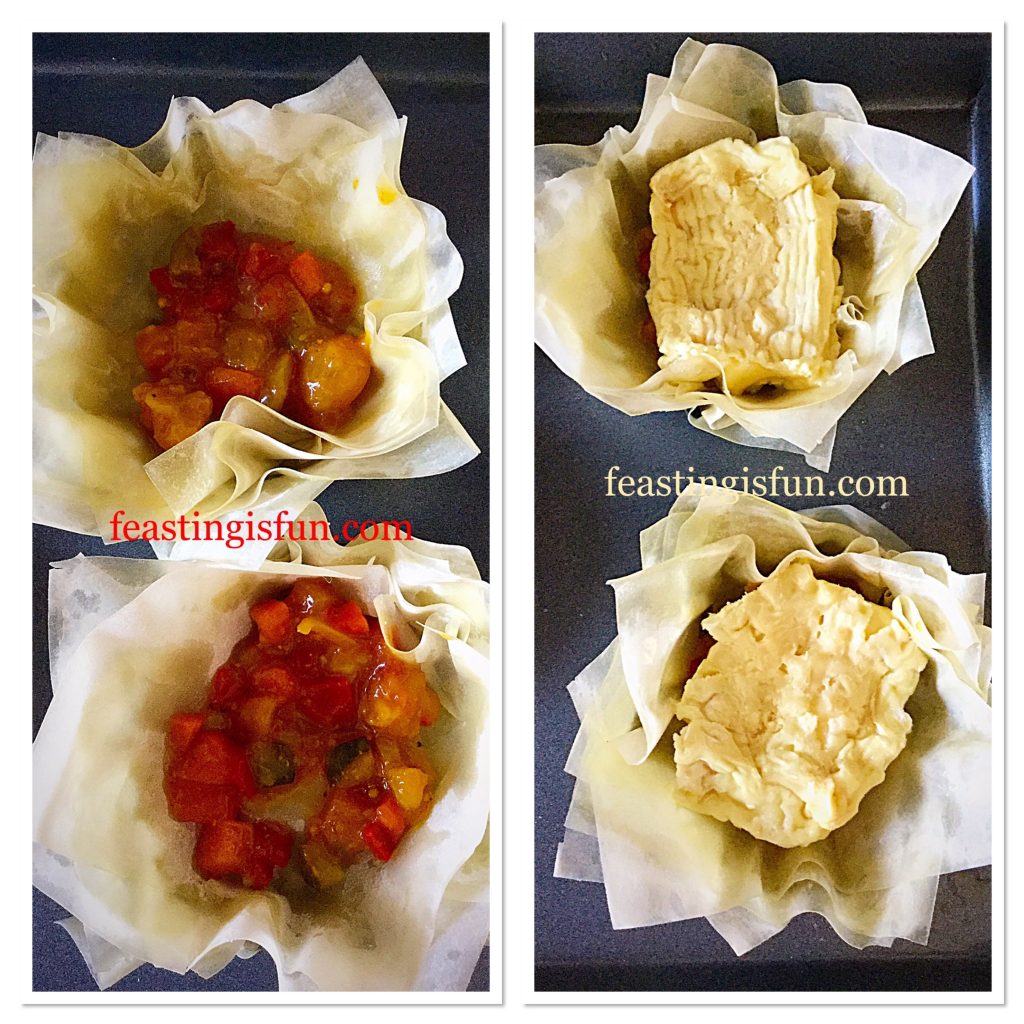
  • Start by laying 1 square of filo pastry in the tart tin, gently pressing it so that it sticks to the base and the sides.
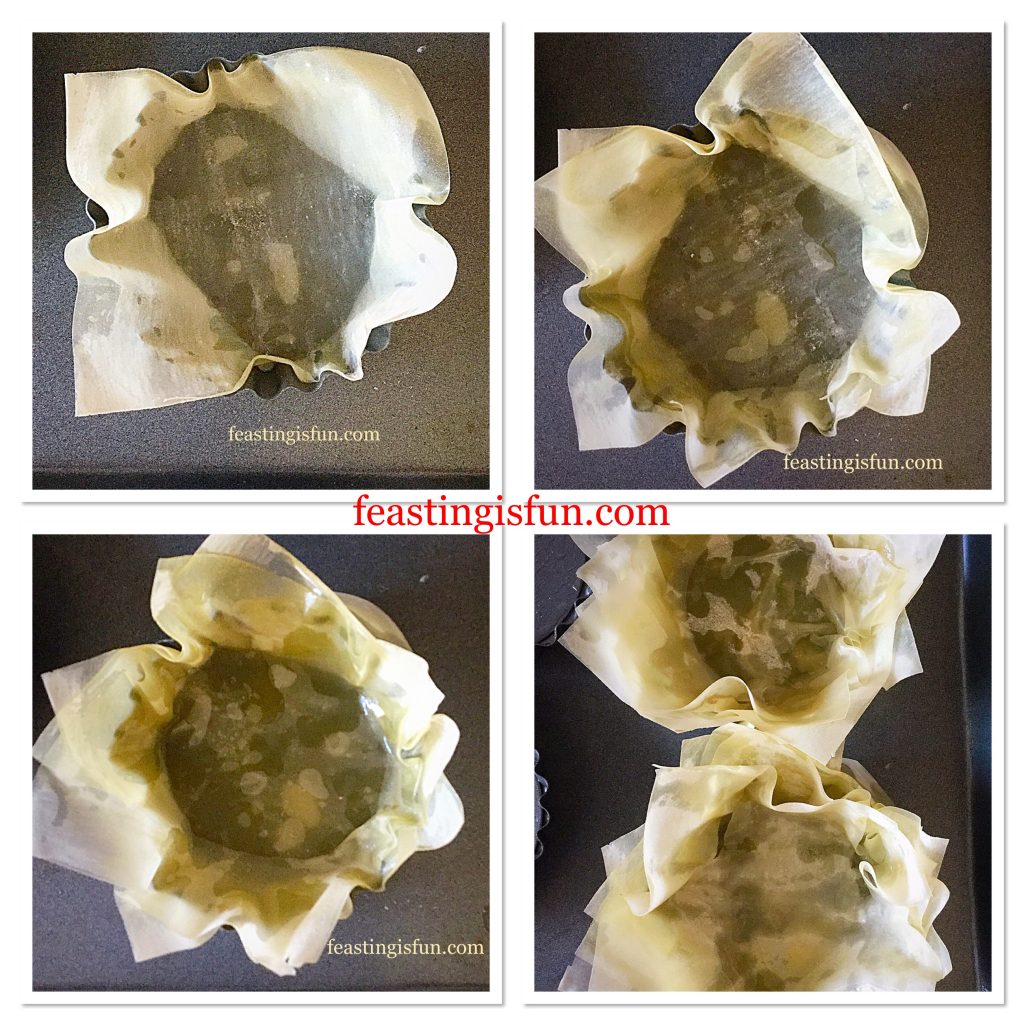
  • Add another square of filo pastry, laying it slight offset from the first piece. The idea is to build up layers that form a solid tart shell with lots of edges/corners on the side, which will become golden and crisp on baking.
FF Bath Soft Cheese Chilli Tarts
See how the 5 layers of filo pastry build up to create a solid tart shell.
  • Continue building the tart case until you have used 5 separate layers of filo pastry – bottom right in the picture above.
  • I actually built 2 tart cases at a time, I wouldn’t recommend building more as each layer will dry out as you prepare the next sheet and is then likely to crack and fall apart once baked.

Layering the tart filling:

  • When all 6 tart cases have been built, spoon 2 generous teaspoons of the Chilli Pickle into the base of each one.
  • Cut the block of Bath Soft Cheese into 6 equal-ish portions – they will weigh approximately 40 grammes.
  • Place a square of cheese on top of Chilli Pickle in each tart case.
FF Soft Bath Cheese Chilli Tarts
Bath Soft Cheese Chilli Tarts are so easy to make
  • Sprinkle the top of each tart with a little freshly ground black pepper and some freshly snipped chives – reserve half of the chives for garnish once baked.
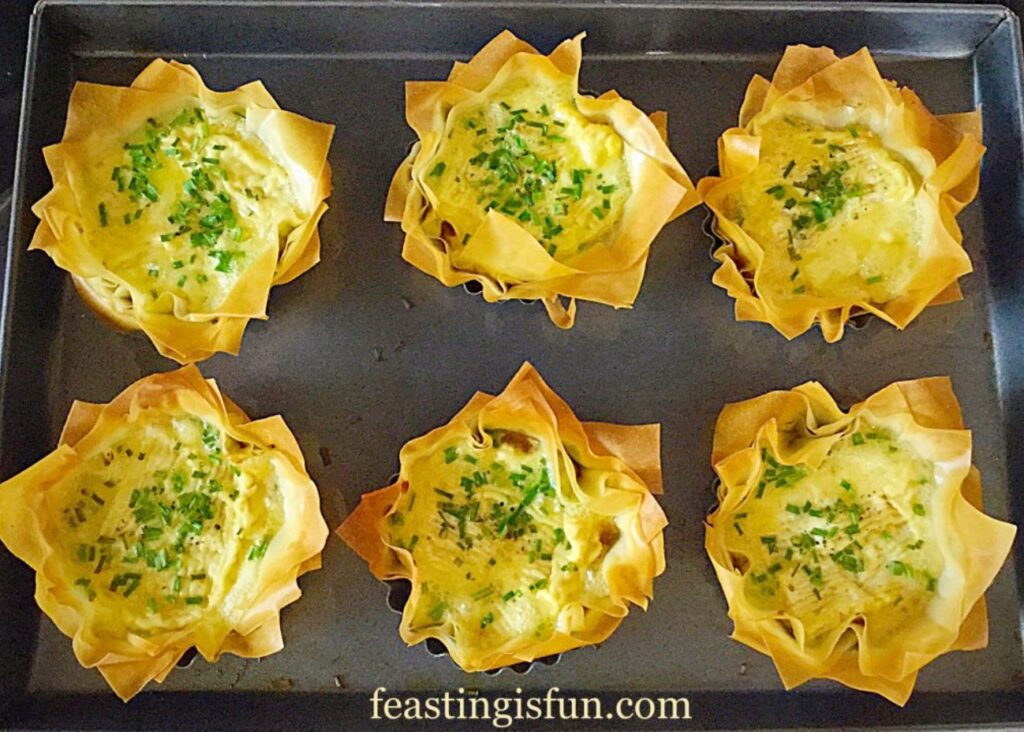
Bath Soft Cheese Chilli Tarts ready for the oven.

Baking the cheese tarts:

  • Place the Bath Soft Cheese Chilli Tarts in the top a preheated oven and bake for 15-18 minutes. The tarts are cooked when the filo pastry is crisp and golden and the cheese has melted to fill each tart.
  • As soon as they are baked remove the baking tray from the oven and allow the tarts to cool for 10-15 minutes in their tins.
Fresh from the oven!
  • The Bath Soft Cheese Chilli Tarts can then be carefully removed from their tins and are best served warm. Don’t worry if a couple of crispy pieces of filo pastry break off as you handle them. These delightful tarts are built of 5 layers of filo pastry and are actually quite strong.

Serving suggestion:

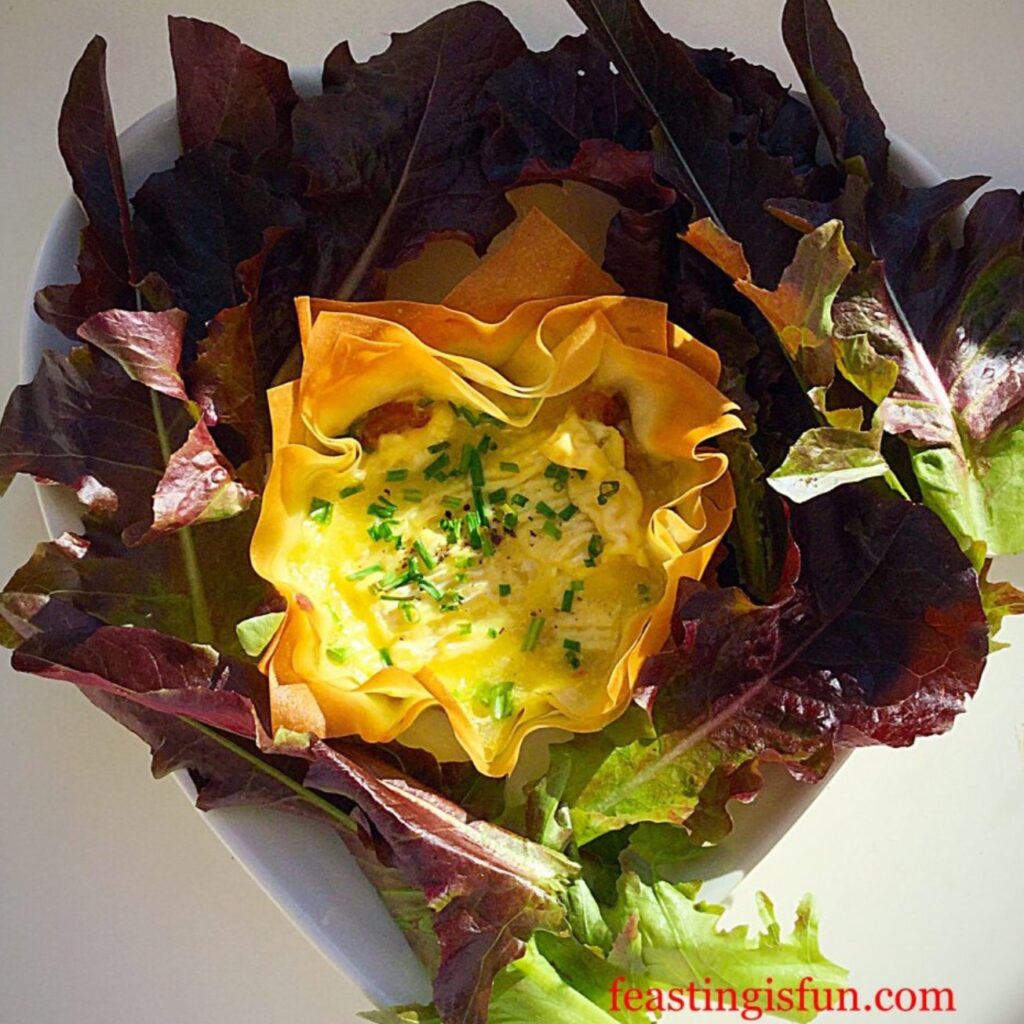
I like to serve each tart, warm, on a bed of deeply coloured, fresh lettuce leaves with an extra sprinkle of fresh chives.

Such a simple and yet flavourful appetiser or light lunch. Also these tarts tarts can be eaten cold. Store in the fridge for up to 3 days and vamp up your packed lunch.

I really would recommend the Chillililli from Hawkshead Relish. Not only does it have great flavour in this tart, it also adds a surprise texture, hidden beneath the melted cheese.

If you have enjoyed this recipe for Bath Soft Cheese Chilli Tarts then you may also like these:

Mini Sparkenhoe Red Leicester Tarts

FF Bath Soft Cheese Chilli Tarts
Mini Sparkenhoe Red Leicester Tarts.

Beauvale Cheese Walnut Scones

FF Bath Soft Cheese Chilli Tarts
Beauvale Cheese Walnut Scones.

Goddess Cheese Pine Nut Muffins

Bath Soft Cheese Chilli Tarts
Goddess Cheese Pine Nut Muffins

As you can see, I am loving creating recipes with cheese. You may also like my Cheddar Tomato Basil Quiche, which is exceptionally delicious if you substitute the Cheddar for Sparkenhoe Red Leicester cheese.

Coming up with new ideas, flavour pairings and recipes, really gives me a thrill. Also with all that my body goes through see here, it is wonderful that I can still express my creativity, through cooking and baking and in turn, share my recipes with you.

Whatever you are making, baking and creating in your kitchens, have fun. Enjoy your feast and remember, when you are able, to invite others round to share with you. It really is true that food tastes better when it is shared!

Sammie xx

Pong Cheese provided me with the cheese to create this recipe. All opinions, views, content and photographs are my own. I was not paid to write this post, please see my Disclosure Policy.

Share
Facebooktwitterpinterestlinkedintumblr

Cheddar Tomato Basil Quiche

Share
Facebooktwitterpinterestlinkedintumblr

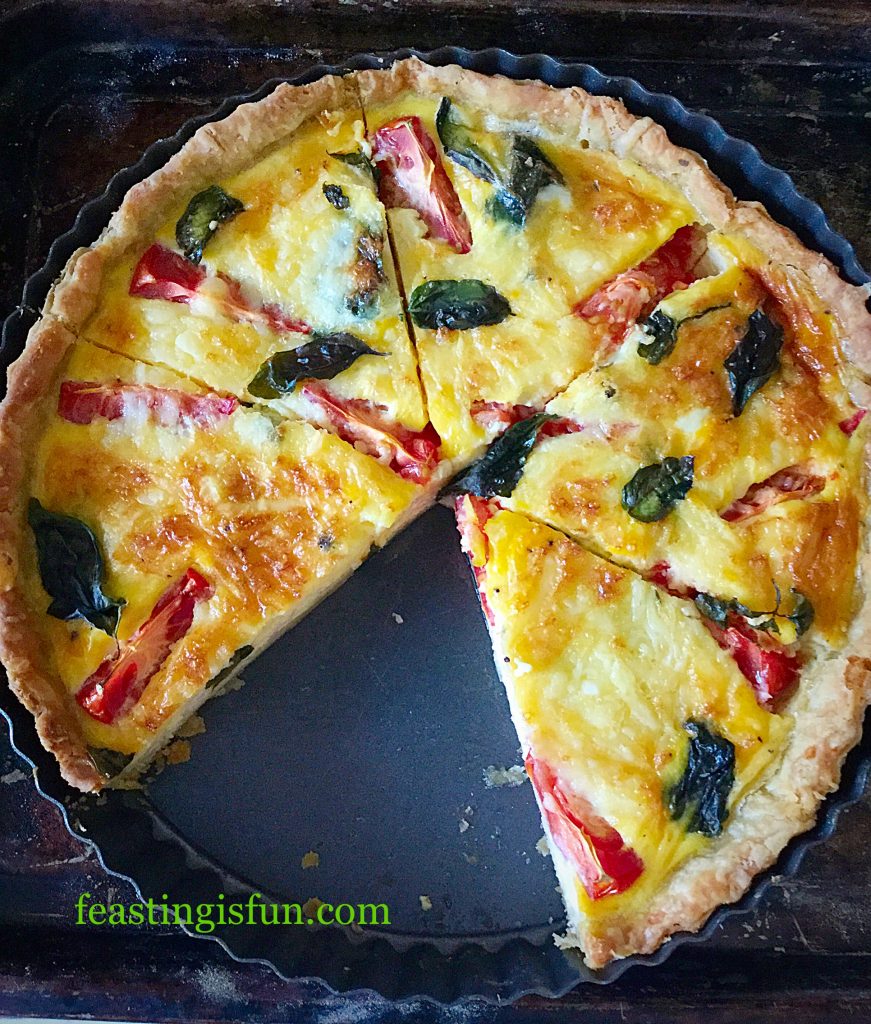
It would seem that Monday’s have become quiche days. This was not intentional, although I haven’t been cooking Sunday roasts for the last few weeks, so that may explain it. Plus we all love quiche in our house. It’s easy to make and bake in the morning, ready for a quick reheat in the evening for dinner. So today I give you my Cheddar Tomato Basil Quiche.

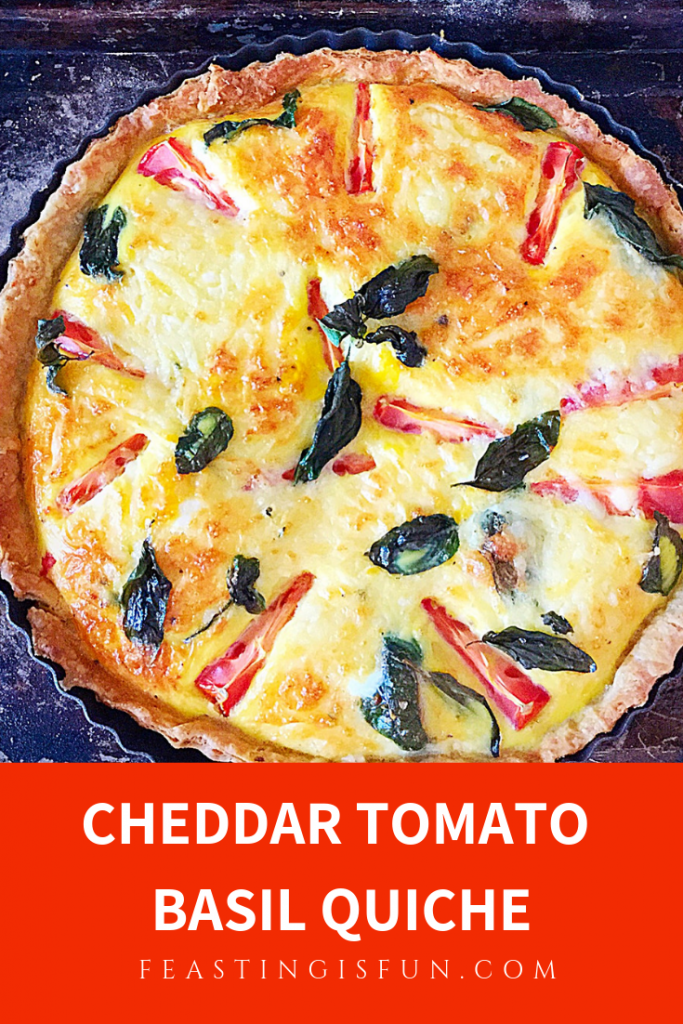
Pinterest sized image of quiche with descriptive graphics.

Now if you’re a little quirky like I am, you’ll understand why quiche is one of my most favourite pastry dishes. It’s the ratio of pastry to filling that I love. Technically a tart, a quiche has no pastry top. So this Cheddar Tomato Basil Quiche has sides and a base of delicious, homemade, all butter shortcrust pastry and lots of eggy filling.

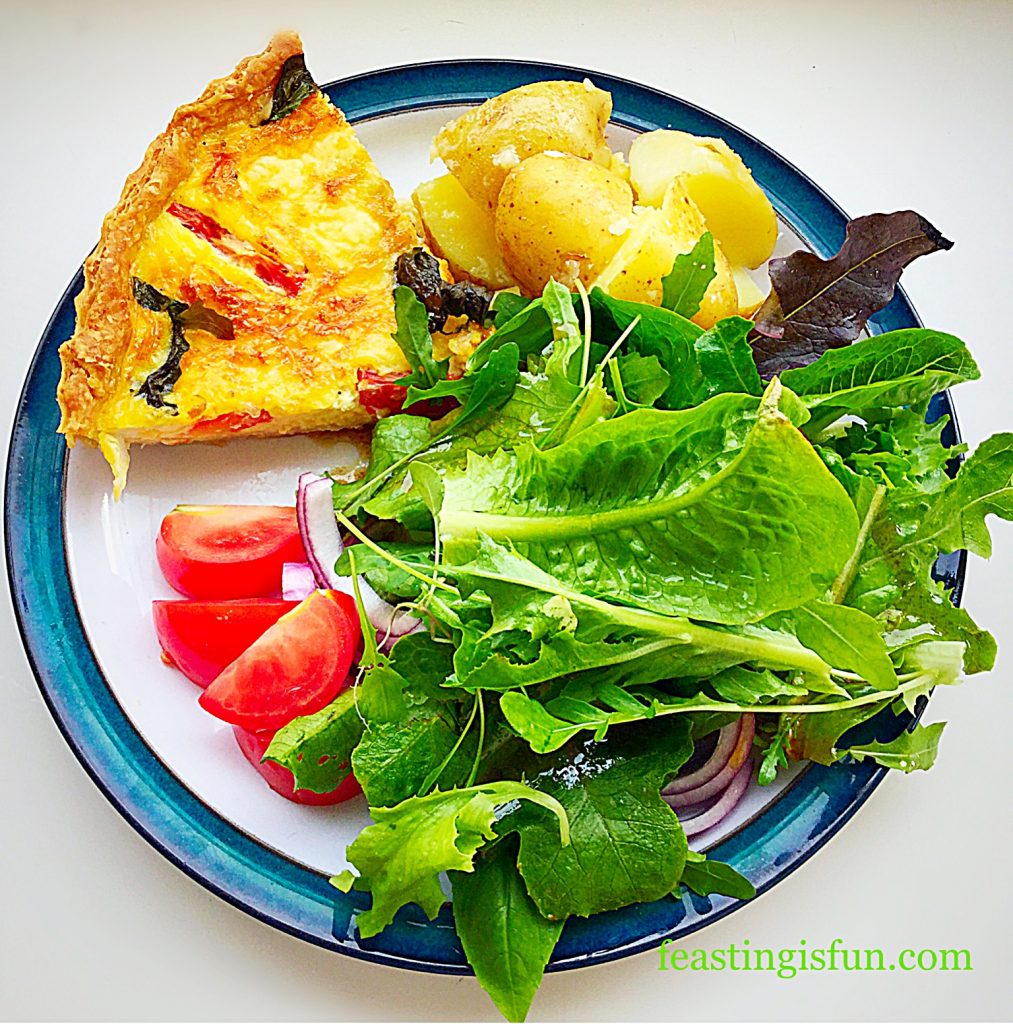
A portion of quiche served with new potatoes and salad leaves.
Cheddar Tomato Basil Quiche served with boiled new potatoes and homegrown salad leaves.

One quick word on eggs – I adore them and only ever buy free range or organic. They are my go to comfort food and also the one thing I can make myself eat when I’m tired or in pain. I still eat my boiled egg out of the chick covered eggcup holder I had when I was little. I love eggs in all guises but a really good dippy boiled egg, or soft fried egg are my favourites!

Quiche appreciation

Back to quiches and this Cheddar Tomato Basil Quiche in particular. I’ve made a few over recent weeks and I’ll link them at the bottom, but now I’m actively trying to make vegetarian ones. Twitter has a #MeatFreeMonday hashtag and so it fits in nicely with that for the time being. Most of my quiche recipes can be switched to veggie versions if you want to.

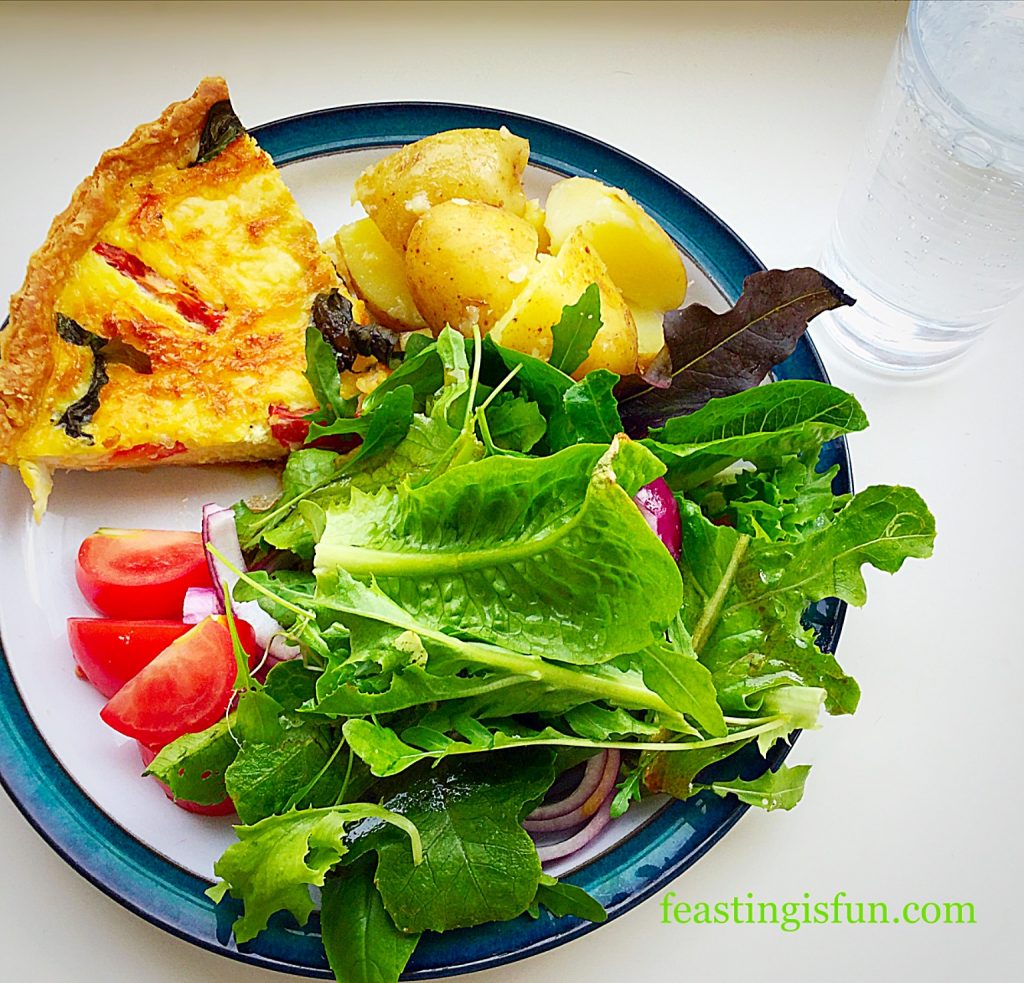
A dinner serving of quiche on a plate with new potatoes and salad.
Cheddar Tomato Basil Quiche

Pastry! I have written a recipe that is absolutely foolproof for making Perfect All Butter Shortcrust Pastry. Yes I totally get that we’ve all got busy lives and as yet, no I haven’t made my own puff pastry, but, my recipe is quick and simple. It’s also a lot cheaper than buying your own pastry, plus you know exactly what goes in it. So please be encouraged to try making it for this Cheddar Tomato Basil Quiche. You’ll have twice as much as you need and you can easily freeze the other half!

Recipe: Cheddar Tomato Basil Quiche

500g/1lb 2oz – 1/2 quantity of Perfect All Butter Shortcrust Pastry

Spare Plain Flour for dusting the work top and rolling pin

6 Large Free Range Eggs

2 Tablespoons Whole or Semi Skimmed Milk

2 Whole tomatoes – each cut into 6 wedges

150g/5oz Strong Cheddar Cheese Grated – I use Wyke Farms mature cheddar

Handful of Fresh Basil Leaves

Pinch of Salt – I use Maldon Sea Salt

Freshly Ground Pepper

Method: Peheat the oven to 220C/200C fan, gas mark 7, 425F

Making and pre-baking the tart case

  • Dust the work top with flour and rolling pin. Form the pastry into a ball.
  • Roll out from the centre of the pastry, in one direction until you have a circle slightly larger than your quiche tin.
  • Ensure the quiche tin is placed onto a baking tray.
  • Transfer the pastry to the tin by wrapping the rolled out pastry around the rolling pin.
  • Ensure the pastry is pushed, not stretched into position, pressing firmly against the sides of the tin.
  • Roll the rolling pin over the top of the tin. This creates a nice clean edge to the quiche.
  • Cut a piece of baking parchment slightly larger than the filled tin. Scrunch it up and then place on top of the pastry.
  • Fill with ceramic balls or baking beans and place in the top of a preheated oven for 15 minutes.
  • After 15 minutes baking time has elapsed remove the baking tray from the oven.
  • Using the parchment paper lift out the baking balls.
  • Return the pastry case to the oven and bake for a further 5-10 minutes until the pastry has just turned golden.
FF Cheddar Tomato Basil Quiche
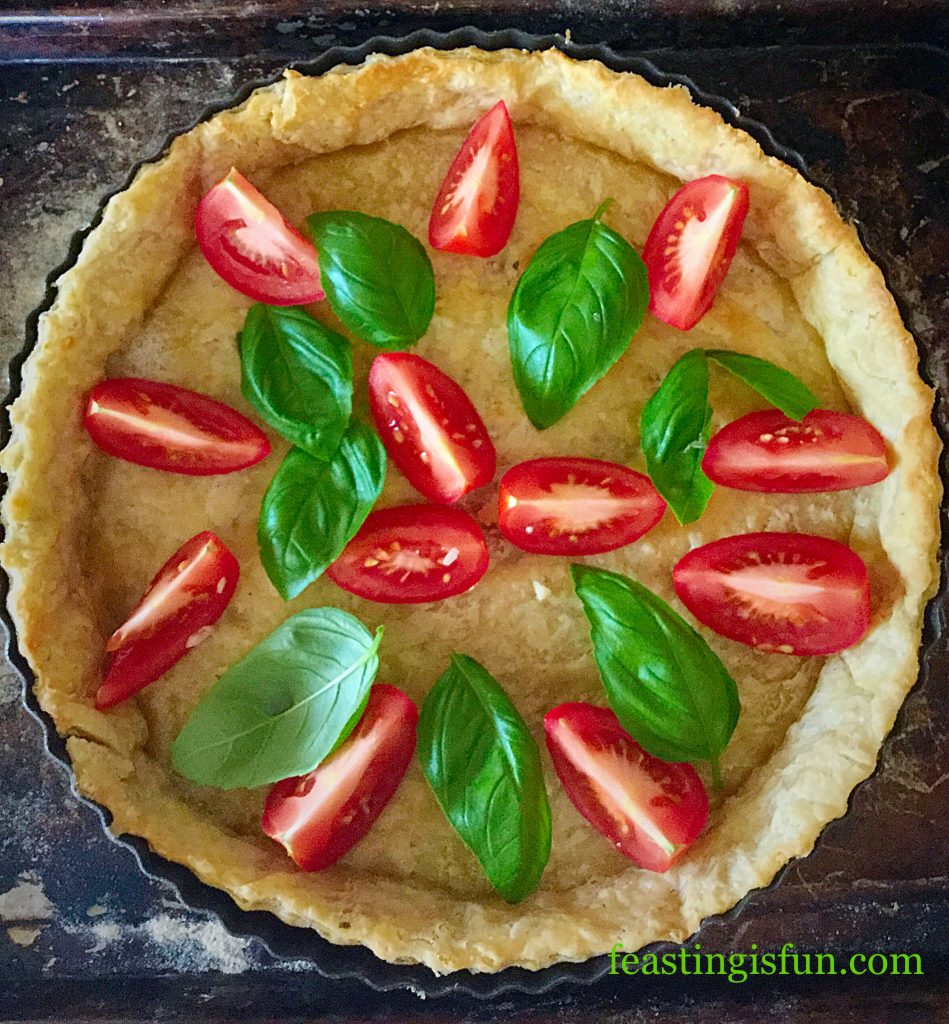
Place the tomatoes and half of the basil on the pastry base.

Filling and baking the Quiche

  • Next add the grated cheese in between the tomatoes.
  • Crack all the eggs into a large jug (I always crack mine into a separate bowl first).
  • Add the milk, salt and pepper and whisk lightly with a fork until combined.
  • Pour the egg mixture carefully over the filled quiche.
FF Cheddar Tomato Basil Quiche
Decorate the top of the quiche with the remaining basil leaves.
  • Place the quiche, still on the baking tray, into the centre of the oven and bake for 25-30 minutes.
  • The Cheddar Tomato Basil Quiche is baked when it is golden and there is no wobble to the centre of the quiche.
  • Once baked remove the quiche from the oven and allow to cool for 15 minutes.
FF Cheddar Tomato Basil Quiche
Cheddar Tomato Basil Quiche so easy to make and easy to eat.

To serve slice into 6 portions. Serve warm with salad and new potatoes for a wonderful mid week meal. Likewise this delightful quiche is delicious at room temperature and is perfect for buffets, packed lunches, picnics and food on the go.

Ensure the Cheddar Tomato Basil Quiche is cold before wrapping in cling film or foil and store in the fridge for up to 4 days.

Alternatively, why not swap Red Leicester Cheese for the cheddar and add British cherry tomatoes, for a delicious twist on this recipe!

Red Leicester and Cherry Tomato Quiche

If you have enjoyed the recipe for this Cheddar Tomato Basil Quiche here are some other recipes you may also like:

Feta Red Onion Marmalade Quiche

FF Feta Red Onion Marmalade Quiche
Feta Red Onion Marmalade Quiche delicious layers of flavour.

Smoked Bacon Asparagus Quiche

FF Smoked Bacon Asparagus Quiche
Smoked Bacon Asparagus Quiche a delightful combination of flavours.

Asparagus Proscuitto Ham Tart

FF Cheddar Tomato Basil Quiche
Asparagus Prosciutto Ham Tart made during a silicone baking mat review.


Quiches are so versatile. Layers of flavour can be built inside the egg tart. I’m particularly fond of quiches that use relish or condiments to build flavour. Likewise fresh herbs can really lift the flavour of a quiche. The basil in this Cheddar Tomato Basil Quiche turns a good quiche into a great one.

Play around with fresh herbs and good quality chutneys or relishes in your baking, especially in quiches. Their flavour can really add depth or freshness to the resulting flavour.

Whatever you are making, baking and creating in your kitchens, have fun creating your feast to share with others. Thank you for sharing photos of your amazing creations on Twitter and Instagram and for taking time to leave comments. It really makes my day to see what you come up with and how you interpret my recipes.

Sammie xx

Share
Facebooktwitterpinterestlinkedintumblr

Red Onion Sausage Plait

Share
Facebooktwitterpinterestlinkedintumblr

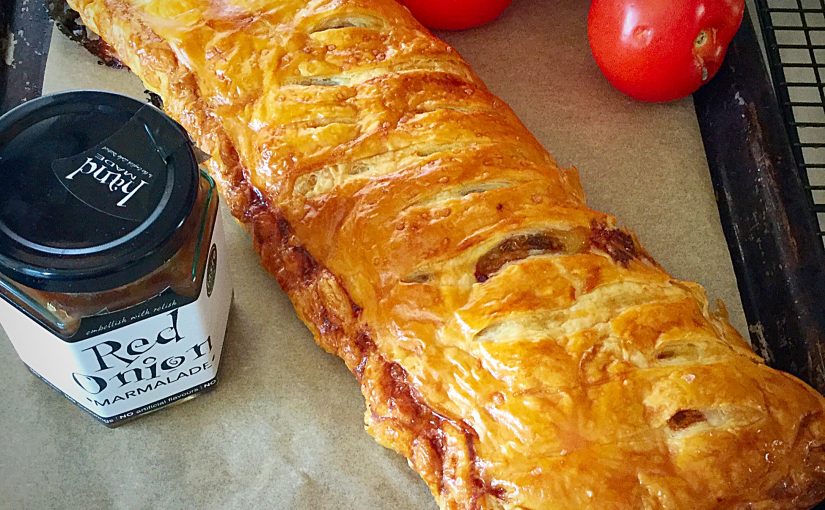
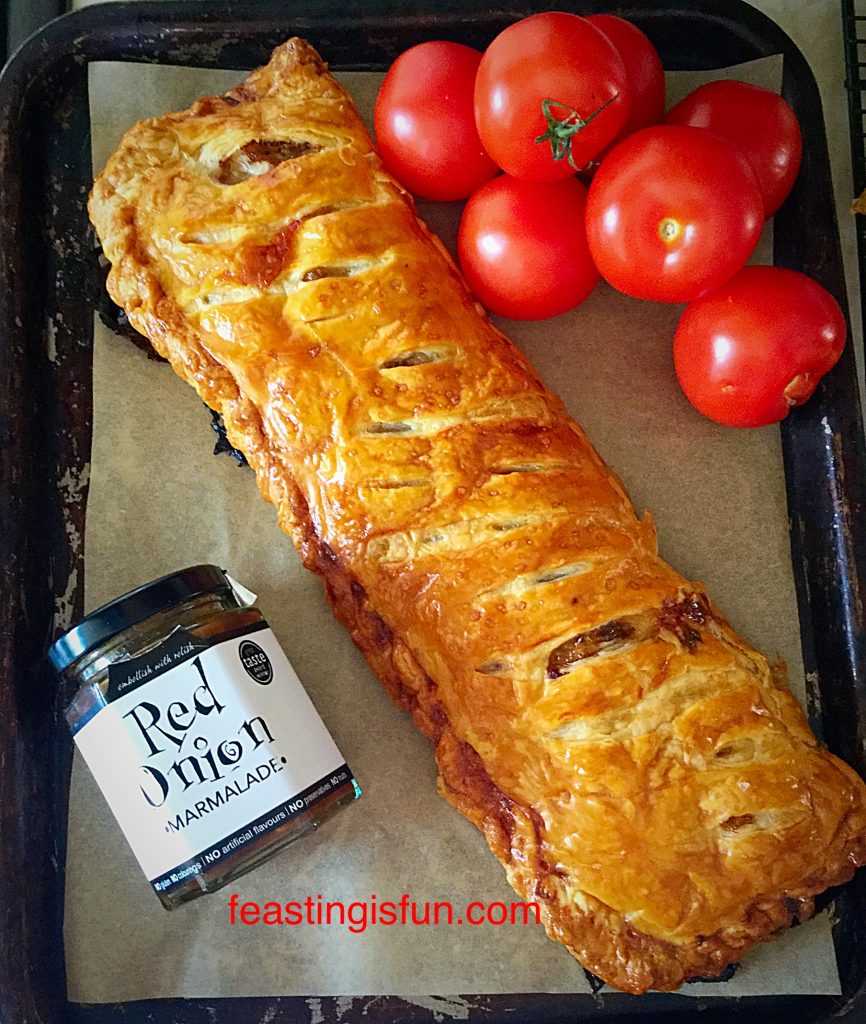
This week happens to be National Picnic Week and as you’ve probably realised by now, I’m a big fan of outdoor eating. So, my Red Onion Sausage Plait is not only perfect for picnics, it’s also delicious served for dinner too! Great quality sausage meat mixed with red onion marmalade, encased in golden, all butter puff pastry. Utterly delicious.

FF Red Onion Sausage Plait
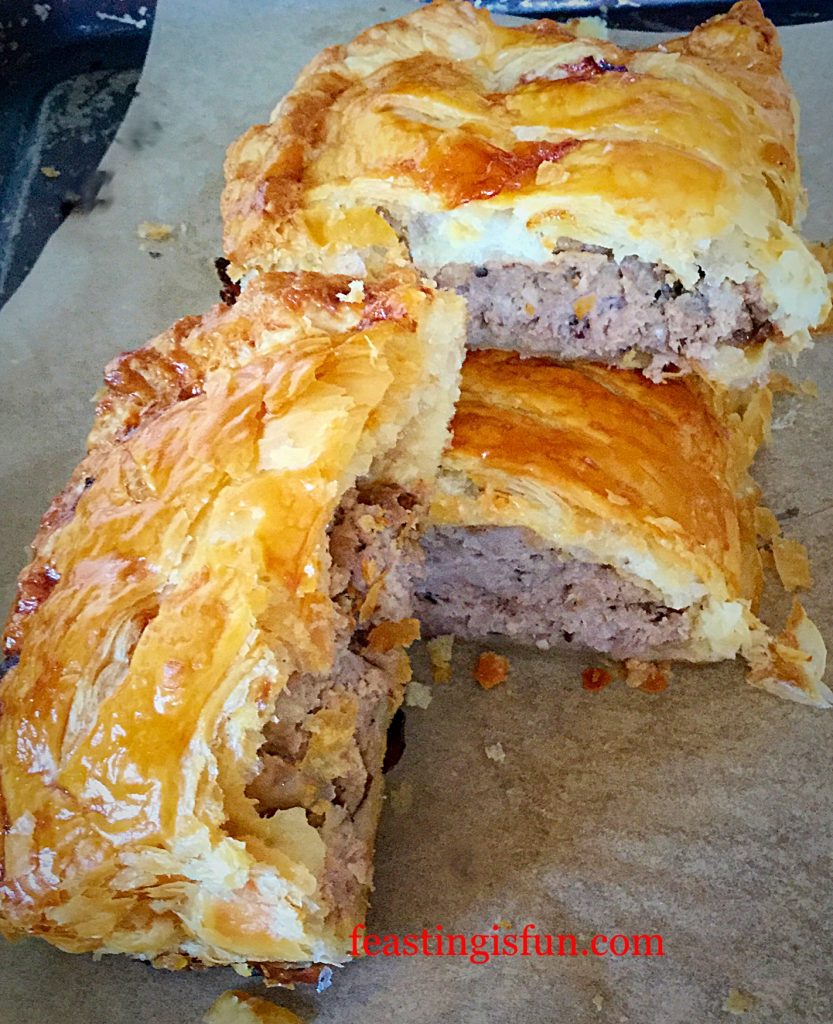
Red Onion Sausage Plait full of flavour and texture.

Using Condiments As Ingredients

The lovely people at Hawkshead Relish sent me some savoury relishes and marmalade to try out. I am a huge chutney fan, everything from jellies, to chutneys, relishes and marmalades. However, with this review, I wanted to use them as ingredients and see just how well they worked being in a dish. While also serving alongside as accompaniments.

I made this Red Onion Sausage Plait twice, as unfortunately I wasn’t able to get good pictures the first time round. Although, nobody in our house complained that I had to make this again. Since we all enjoyed the flavour and added texture from the red onion marmalade that contains raisins and crunchy pine kernels.

FF Red Onion Sausage Plait
Red Onion Sausage Plait, juicy, crispy with incredible flavour.

So, I set about making another Red Onion Sausage Plait, with great enthusiasm. Because, I love, I mean absolutely, completely, adore this Red Onion Marmalade and I knew this would use the last of it. Still I cheered myself with the fact that it makes such a knockout recipe and that I’d be eating it for dinner!

FF Red Onion Sausage Plait
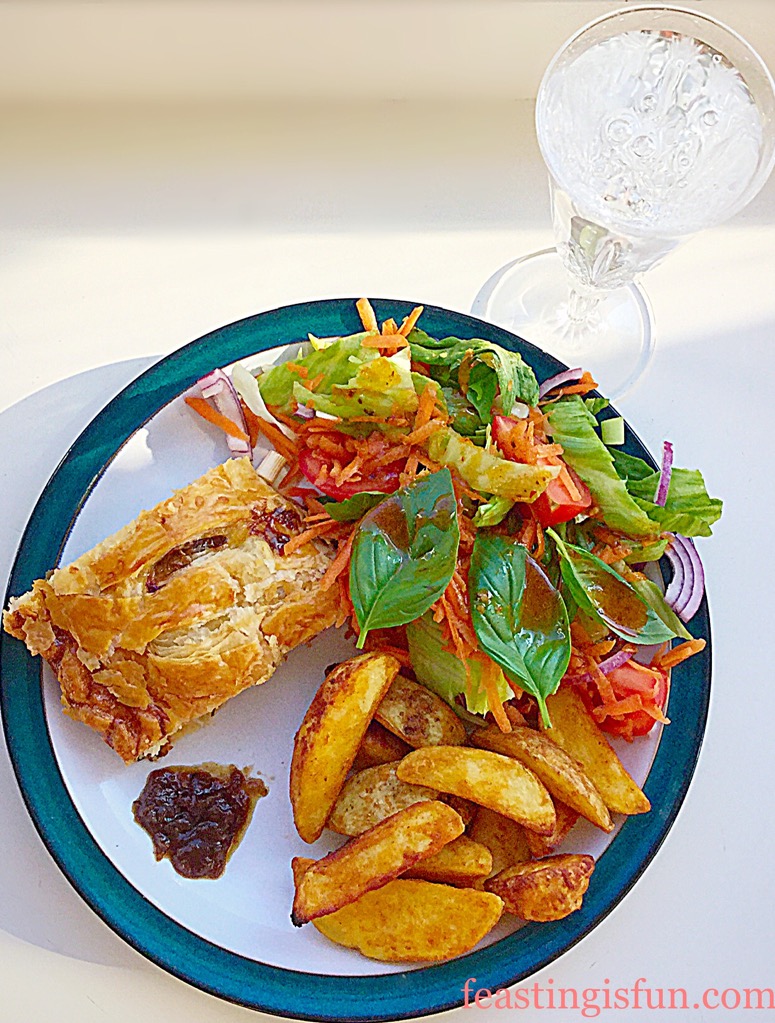
Red Onion Sausage Plait also great as a mid week meal with salad and potato wedges.

Not Only For Picnics!

Warmed and served with a huge pile of salad and some potato wedges that I had in the freezer, this Red Onion Sausage Plait really does make a tasty, weekday meal. Also, it’s easily made ahead, left uncooked, wrapped in cling film and kept in the fridge until dinner time. Since it only takes 40 minutes to cook, which is why, seeing as the oven was already on I whacked in some potato wedges from the freezer.

FF Red Onion Sausage Plait
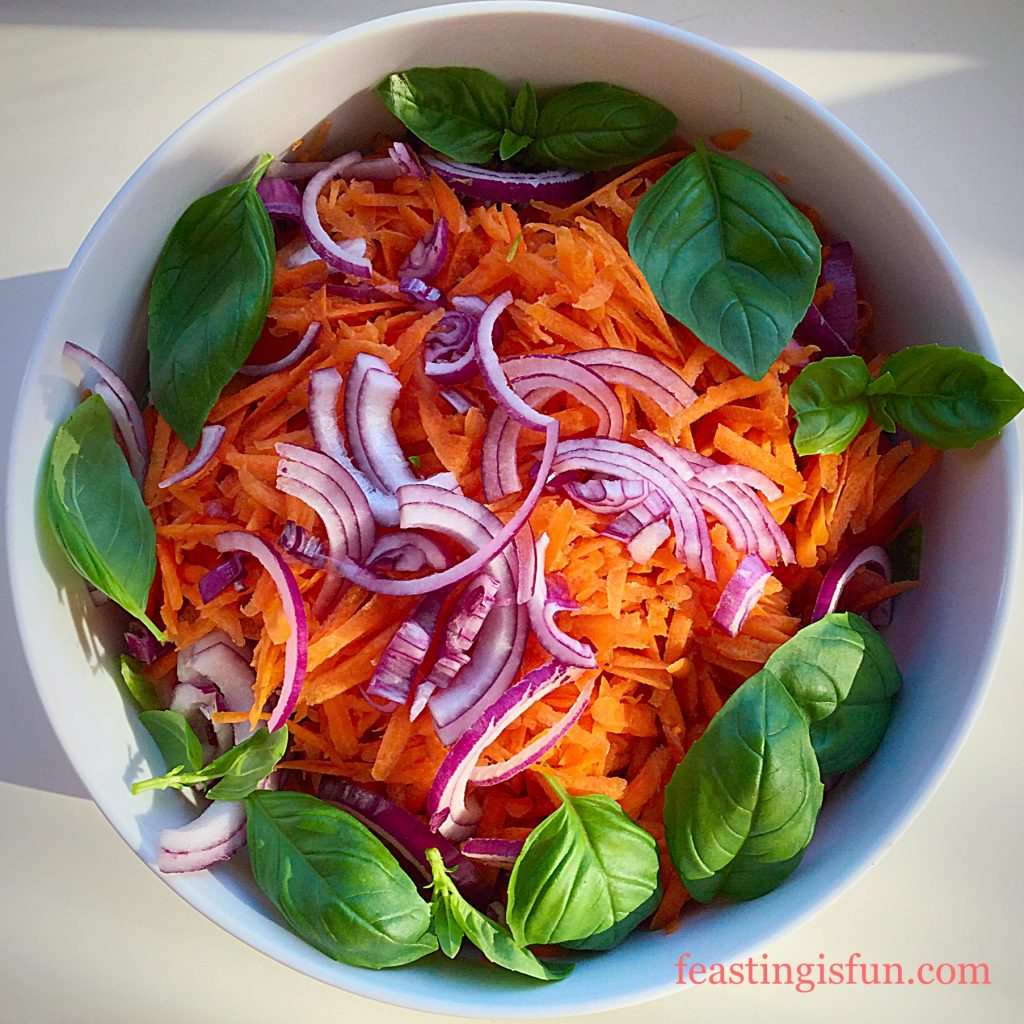
The huge bowl of salad I made to accompany the meal also had thinly sliced red onions in it which echoed the flavours in the sausage plait.

The caramelised onion flavour works so well with the meaty pork sausage. This is definitely a firm, family favourite now and is made frequently. I always look forward to eating this Red Onion Sausage Plait, whether on picnics and for dinner many times in future.

Recipe: Makes one Red Onion Sausage Plait serves 4 – 6 people

450g/1lb Good Quality Pork Sausagemeat – free range or organic for preference

3 heaped tablespoons of Red Onion Marmalade from Hawkshead Relish

320g Ready Rolled All Butter Pastry Sheet – I used JusRoll

1 Medium Free Range Egg

Pinch of Sea Salt – I use Maldon

Making The Sausage Plait

Preheat the oven to 220C/200C fan, gas mark 7, 425F.

  • First of all, line a large baking tray with baking parchment.
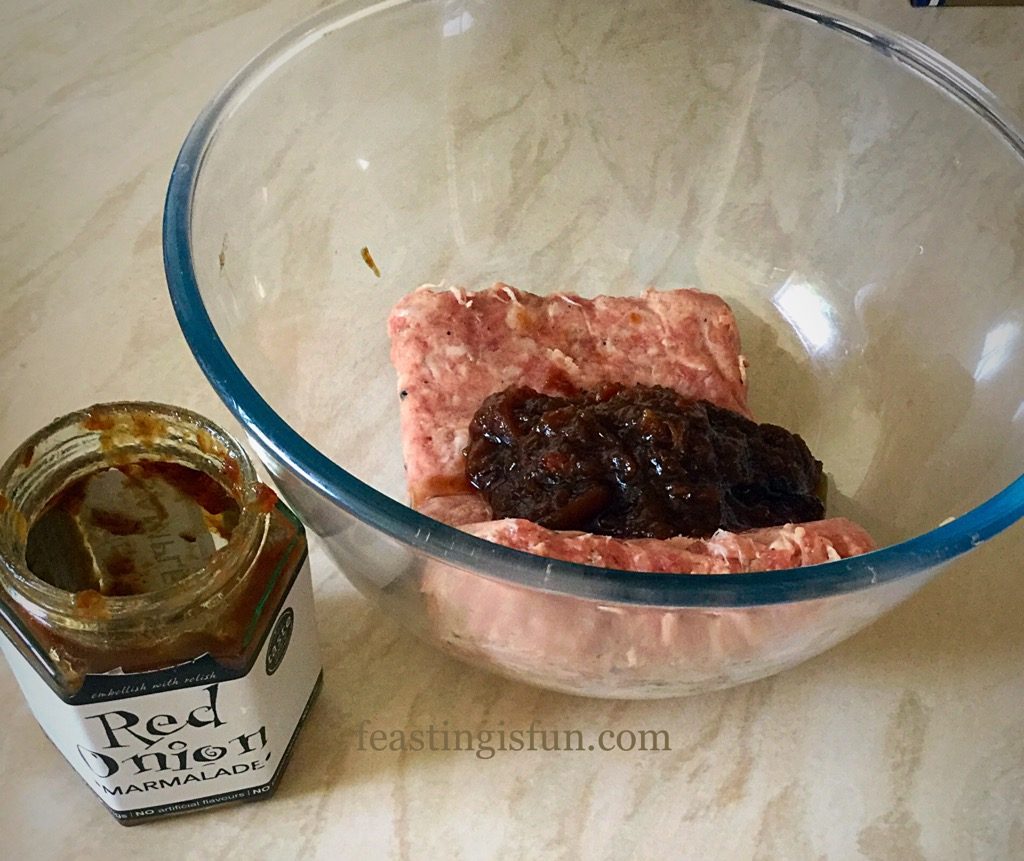
  • Place the sausage meat in a bowl with the red onion marmalade.
FF Red Onion Sausage Plait.
I enjoyed smooshing the mixture together with my hands!
  • Using clean hands smoosh the mixture together, through your fingers, until it is fully combined (a tack I particularly enjoy)! Set to one side and wash your hands.
  • On a clean work top unwrap the pastry sheet.
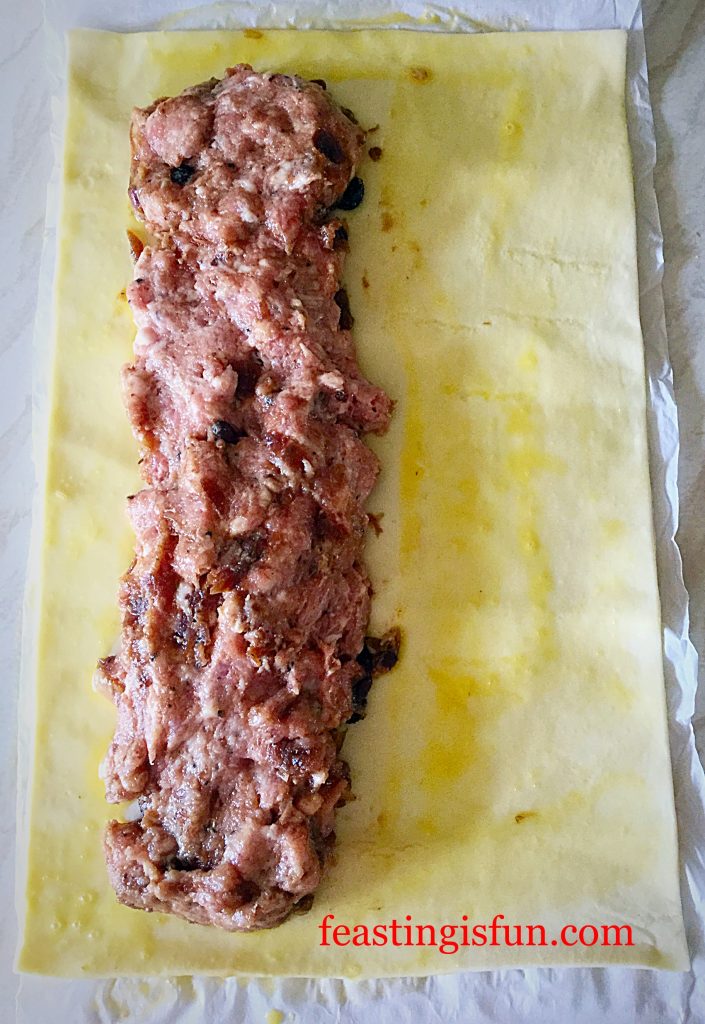
  • Place the sausage meat mixture down one side of the pastry, rather like a huge sausage roll, leaving a gap at each end and the side of at least 2.5cm.
F Red Onion Sausage Plait.
The right side of the pastry will fold over the sausage meat.
  • Crack the egg into a small bowl and whisk with a fork until well mixed. This is known as an egg wash.
  • Dip a pastry brushing into the egg wash and brush all of the visible pastry (not the sausage meat) with egg wash.
  • Bring the right side of the pastry over the sausage meat so that both side edges are together.
  • Crimp with a fork or twist all the pastry layers together, where they overlap to seal them.
  • Transfer the Red Onion Sausage Plait to the baking tray. Mine fits only when placed at an angle!
  • Brush over the entire outside of the sausage plait with egg wash. Finally sprinkle with a little sea salt.
FF Red Onion Sausage Plait
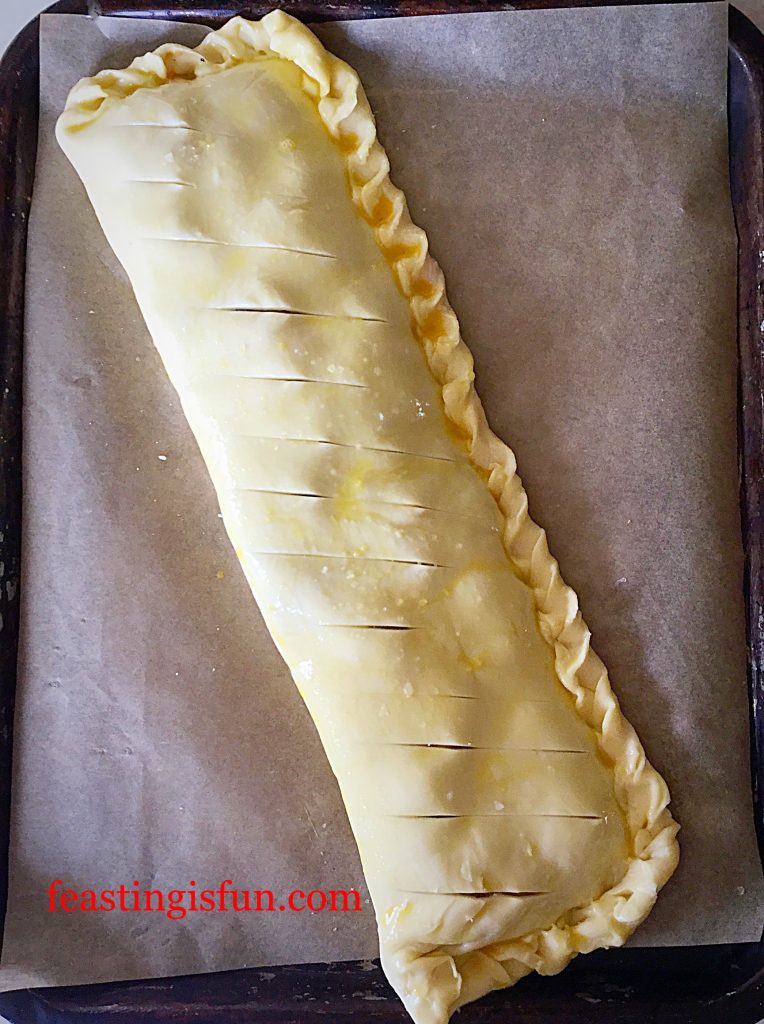
Red onion Sausage Plait with diagonal slits.
  • Using a sharp knife cut light diagonal slits through the pastry. This allows steam to escape and enhances the look of the finished bake.

Baking The Sausage Plait

  • If not baking straight away, wrap the entire tray and sausage plait in cling film and store in the fridge. For best results, bake within 24 hours.
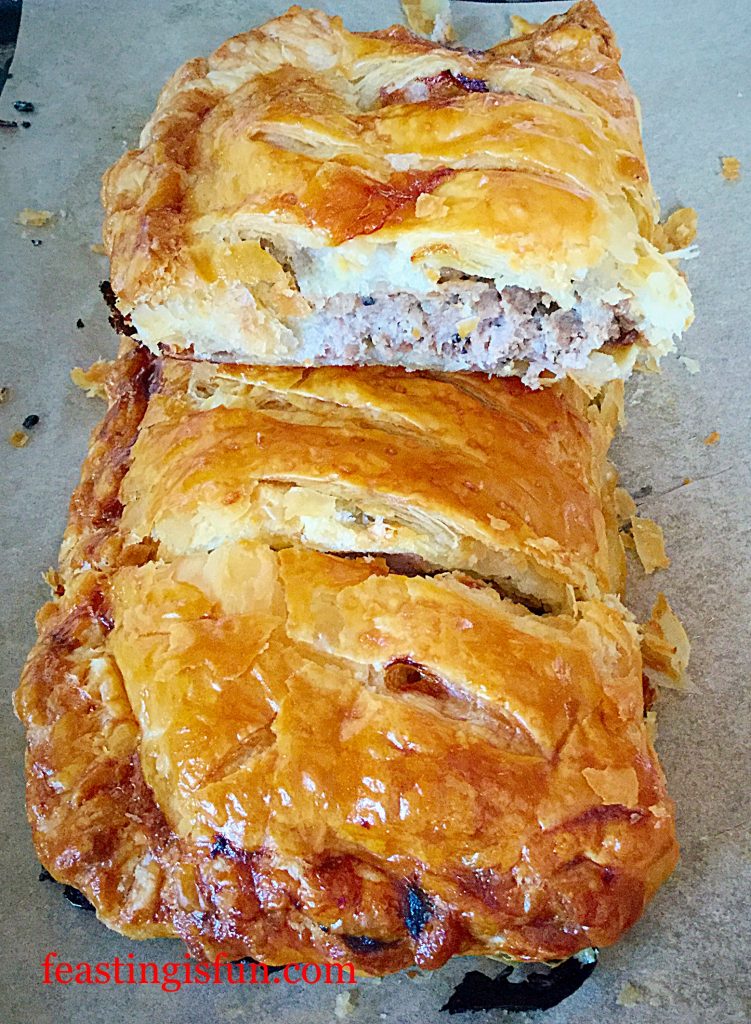
  • When baking immediately, place the baking tray in the middle of a hot, preheated oven and bake for 40-45 minutes. The sausage plait should be a deep golden colour and any juices must run clear. If there is any doubt slice a portion of the plait off of the end and check. There should be absolutely no pinkness to the sausage meat, if there is pop back into the oven for 15 minutes and reduce the heat by 20C.
  • As soon as Red Onion Sausage Plait is baked, remove from the oven and leave to cool slightly on the tray.

To serve, allow the Red Onion Sausage Plait to cool for at least 15 minutes, longer if possible. Slice into portions and serve with salad, or my Crunchy Homemade Coleslaw, new potatoes, or for ease potato wedges. Serving with my Tangy Lemon Potato Salad also compliments the sausage plait well.

FF Red Onion Sausage Plait
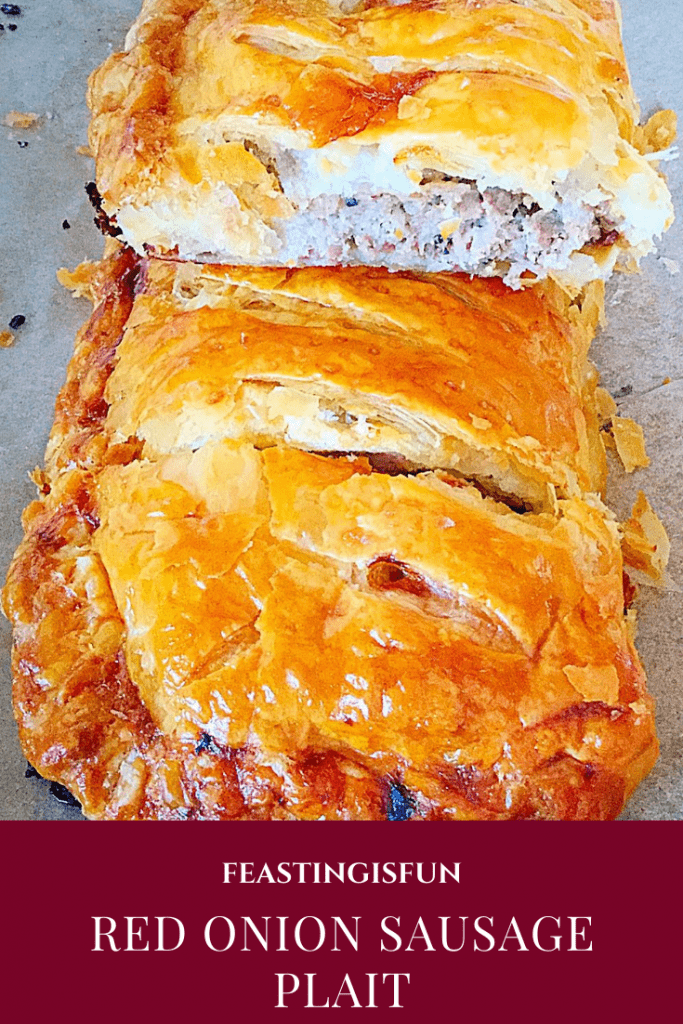
Golden pastry and sausage meat with caremelised red onion.

To store and for packing up for a picnic, allow the sausage plait to cool. Cut into slices, I find a serrated knife is best when it’s cold. Pack the slices into an airtight container, or wrap in cling film. Store in the fridge for up to 3 days.

Delighfully savoury and full of texture, slices of this Red Onion Sausage Plait also make a welcome change to packed lunches!

If you have enjoyed this recipe for Red Onion Sausage Plait then here are some others you may also want to try:

Feta Red Onion Marmalade Quiche

Feta Red Onion Marmalade Quiche

Spicy Sausage Rolls

Spicy Sausage Rolls

Sausage Plait With A Twist

Sausage Plait With A Twist

Using the Red Onion Marmalade as an ingredient, rather than just as a condiment has opened up a whole world full of flavours. I have so many more idea, from pasta dishes to soups, stews and many more.

Do you ever use condiments in your cooking? Let me know in the comments section. I’m always interested to here and learn about new recipes and cooking methods.

So, whatever you are making, baking and creating in your kitchens, have fun preparing and sharing your feast.

Sammie xx

Hawkshead Relish provided me with a sample jar of their red onion marmalade. All views and opinions are my own. All content, recipes and photographs are my own and covered by copyright law of the land. Please see my Disclosure Policy.

Share
Facebooktwitterpinterestlinkedintumblr