Roasted Summer Vegetable Orzo Salad

Share
Facebooktwitterpinterestlinkedintumblr

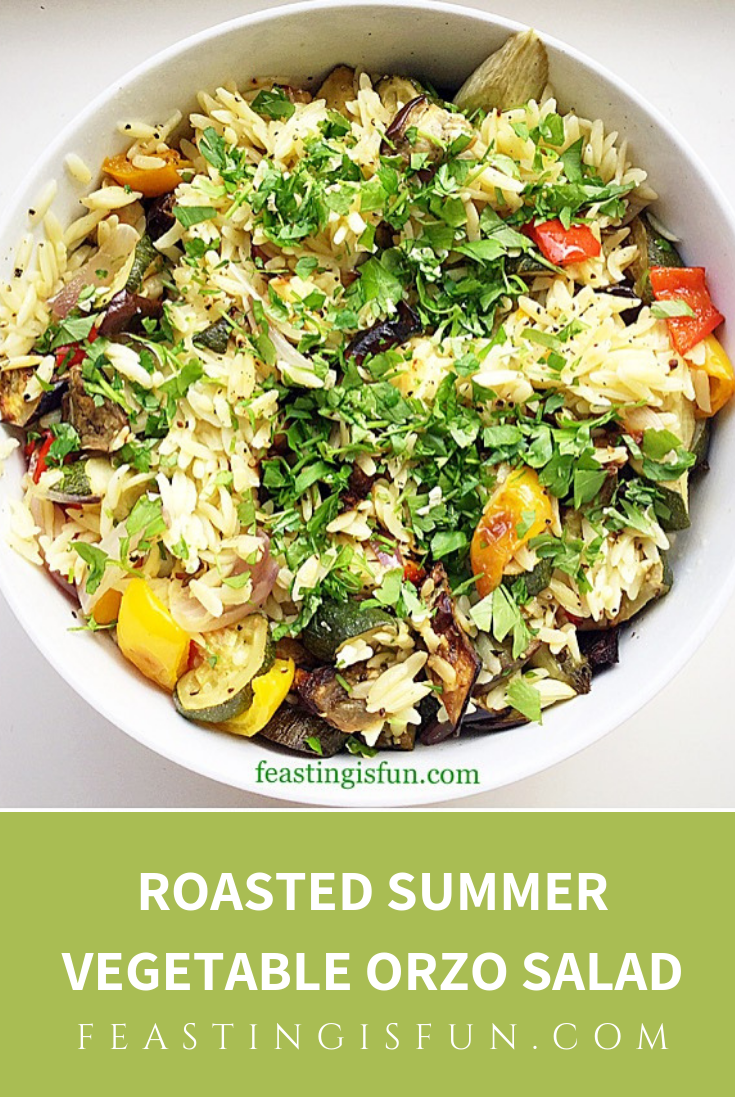
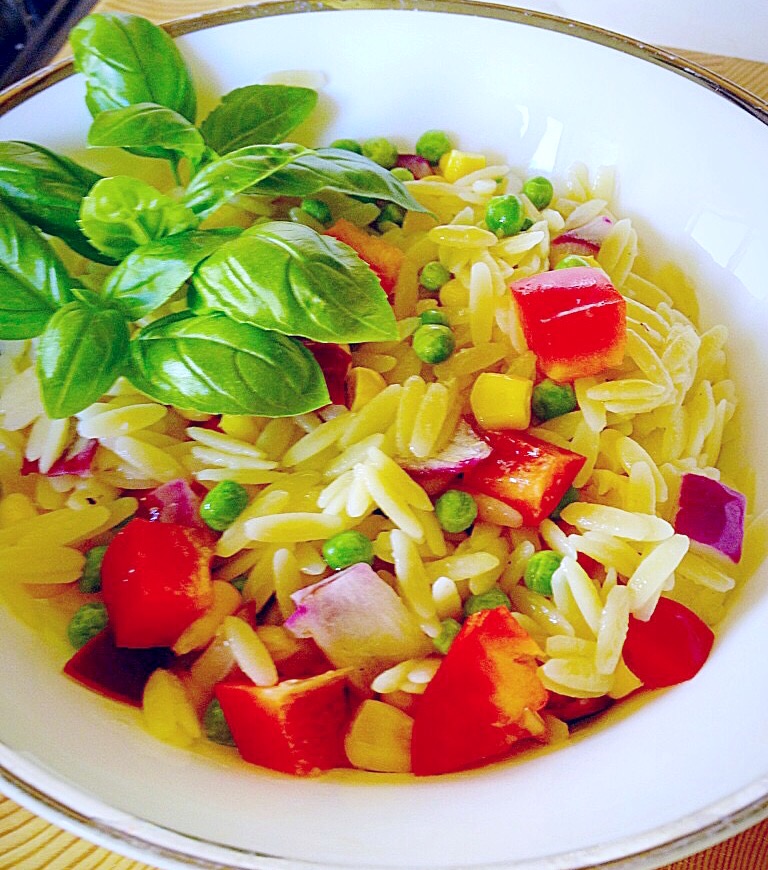
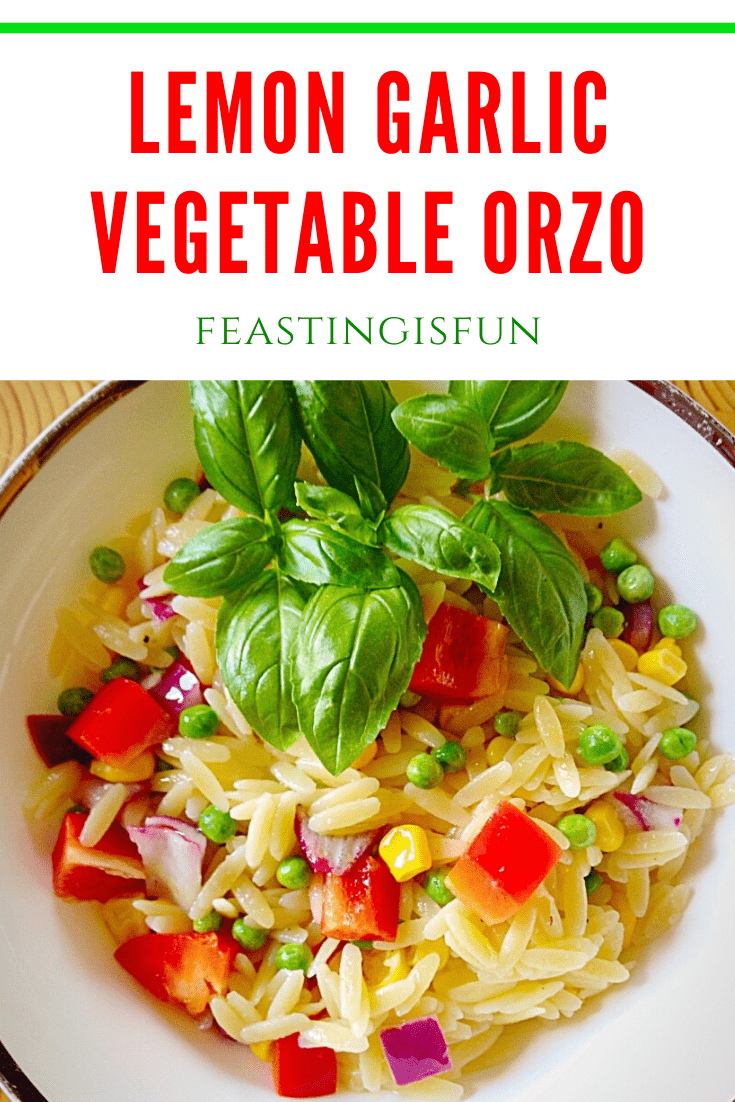
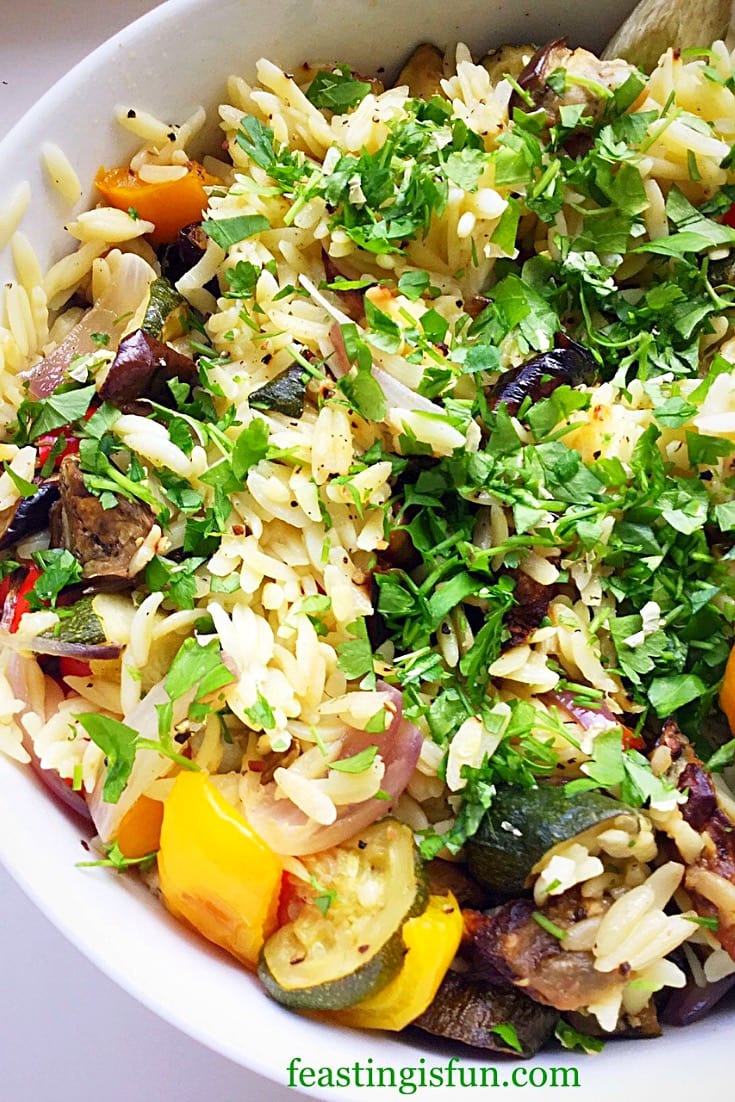
So, as we continue to enjoy our British Summer, I am celebrating the abundance of seasonal vegetables available at this time of the year. And as birds chirp early in the morning of long, sunny, warm summer days, the variety of vegetables, bought or home grown, really allows me, as a home cook to get creative in the kitchen.  Resulting in my Roasted Summer Vegetable Orzo Salad, a tasty celebration of easy summer cooking, making the most of seasonal vegetables.

FF Roasted Summer Vegetable Orzo Salad
Roasted Summer Vegetable Orzo Salad.

A Make Ahead Marvel

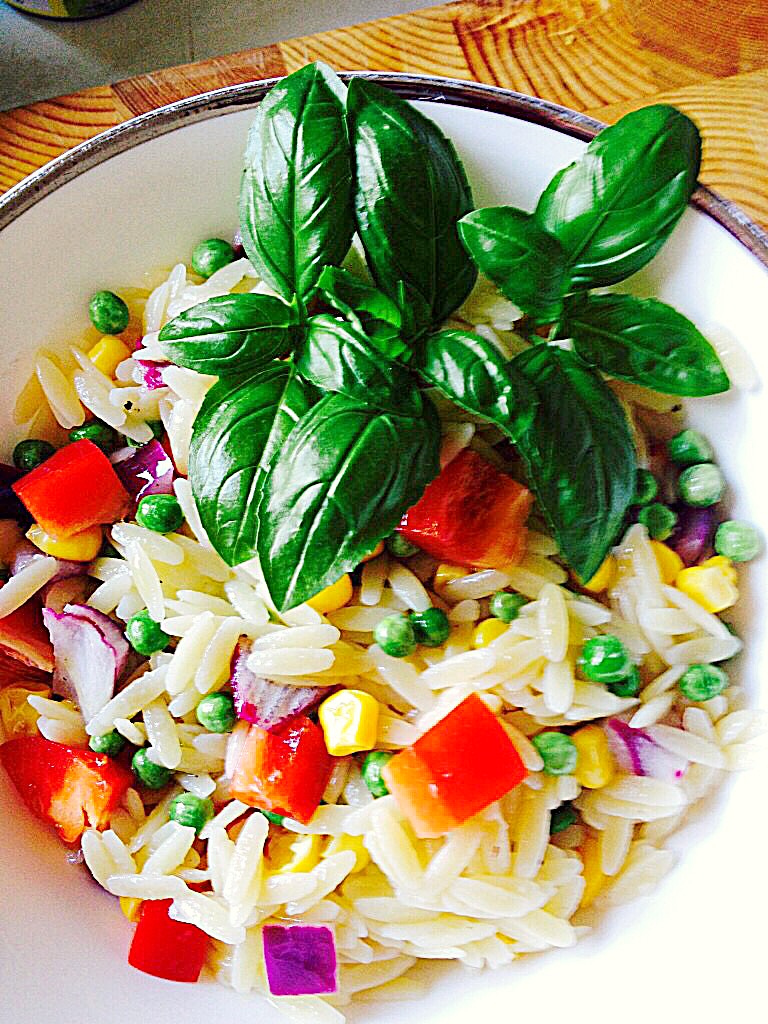
While packed full of roasted veggies in a lemon vinaigrette, this dish can either be served on its own, or as a colourful side dish. Since it can be served warm, it is a perfect barbecue or buffet dish. Especially, when made in advance and left to sit for a few hours, the flavours develop, enhancing the overall deliciousness. So easy to prepare and make ahead!

A bowl containing roasted vegetable pasta salad topped with chopped parsley.
Roasted Summer Vegetable Orzo Salad

Although I enjoy a crunchy pasta salad, there is something very comforting in the softened, roasted vegetables here. While roasting they become slightly sweet, with a mere hint of caramelisation. And their flavour is enhanced by the fresh lemon juice in the vinaigrette. Also orzo provides the perfect bite, complimenting the vegetables. Resulting in a dish that lets the vegetable flavours shine, without being overly bulked out with pasta.

Recipe: Roasted Summer Vegetable Orzo Salad serves 6

1 Aubergine

2 Courgettes

2 Bell Peppers – deseeded

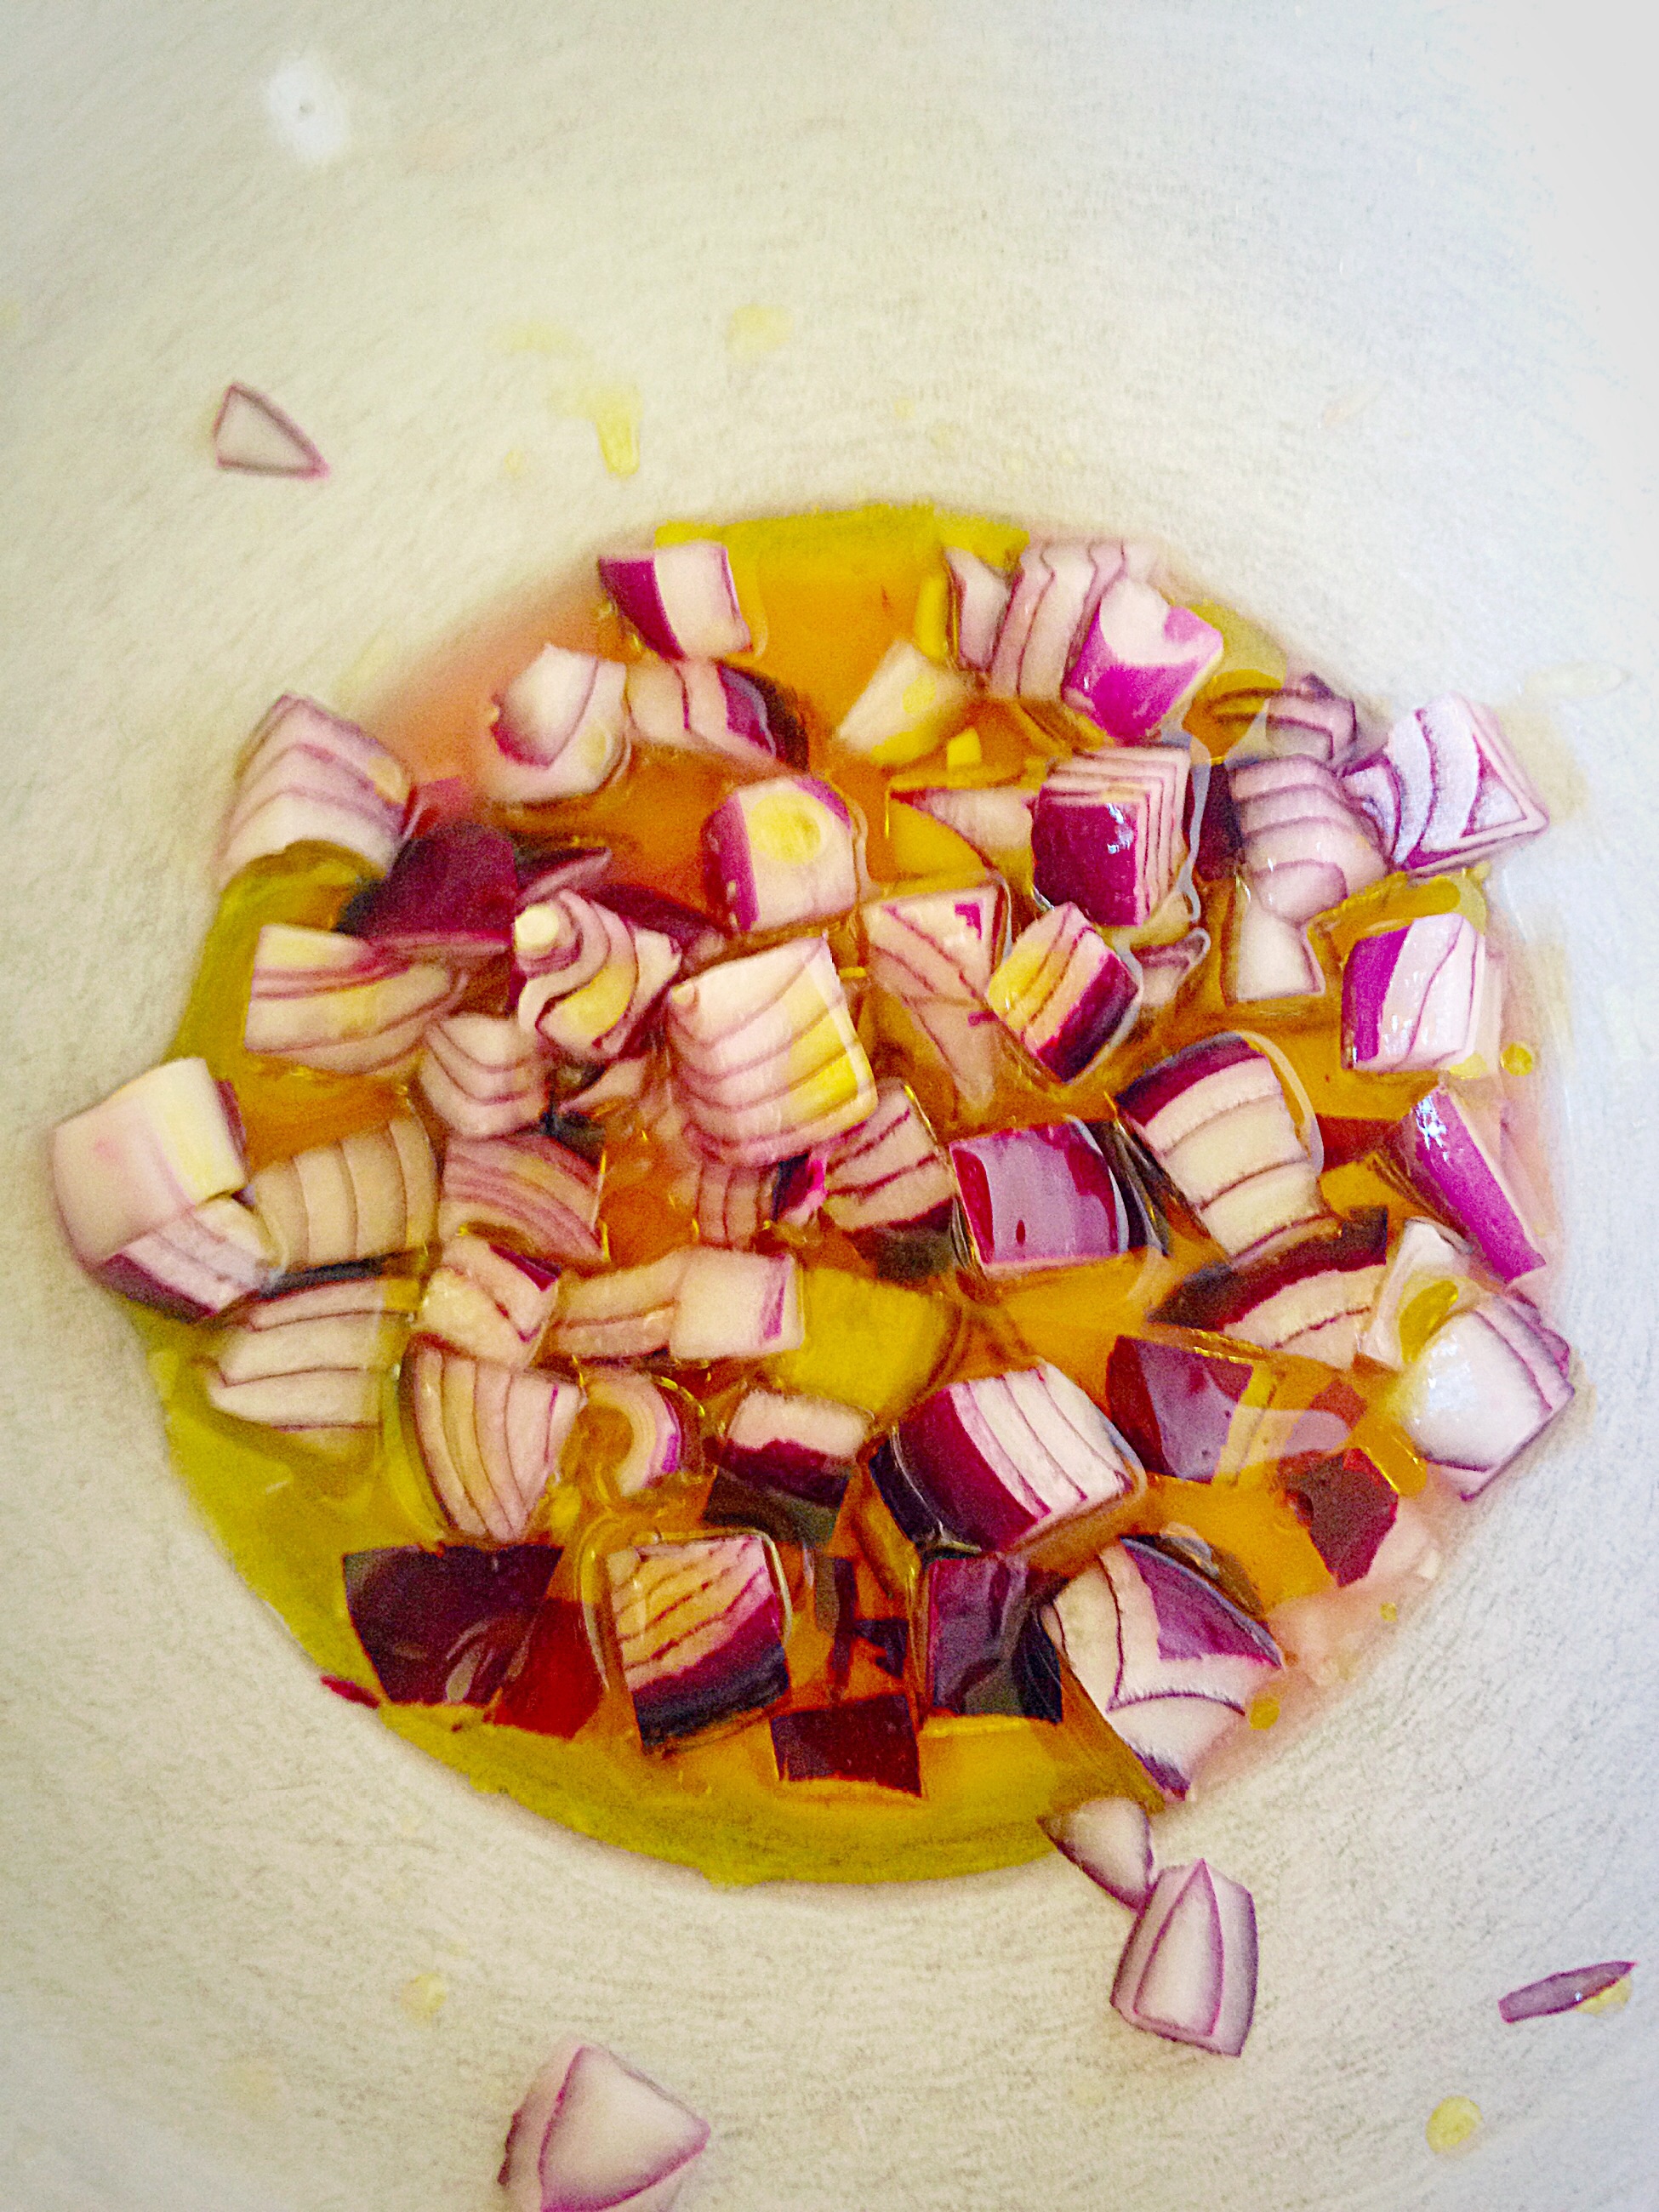
1 Red Onion – skin removed

1 Large Fennel Bulb – or 2 small

400g Dried Orzo (ensure you use vegan pasta if making for Vegans) – I use Waitrose  own brand

20ml Olive Oil

1 Large Lemon – 20ml of juice

40ml Extra Virgin Olive Oil – I use Filippo Berio

1/2tsp Sea Salt plus 1tbsp for cooking the pasta –  I use Maldon

1/2tsp Freshly Ground Black Pepper

Handful of Fresh Parsley – flat or curly

Note: individual vegetables may be substituted according to preference.

Method: Preheat oven to 200C/180C fan, gas mark 6, 400F

Preparing And Roasting The Vegetables

  • First of all, wash and thoroughly dry the vegetables. Follow by chopping into equal 1″/2.5cm pieces.
  • Transfer to a large baking tray.
  • Drizzle over a generous tablespoon of olive oil and one quarter of a teaspoon of sea salt and freshly ground black pepper.
  • Using clean hands, toss the vegetables in the seasoned oil, taking care to cover each piece.
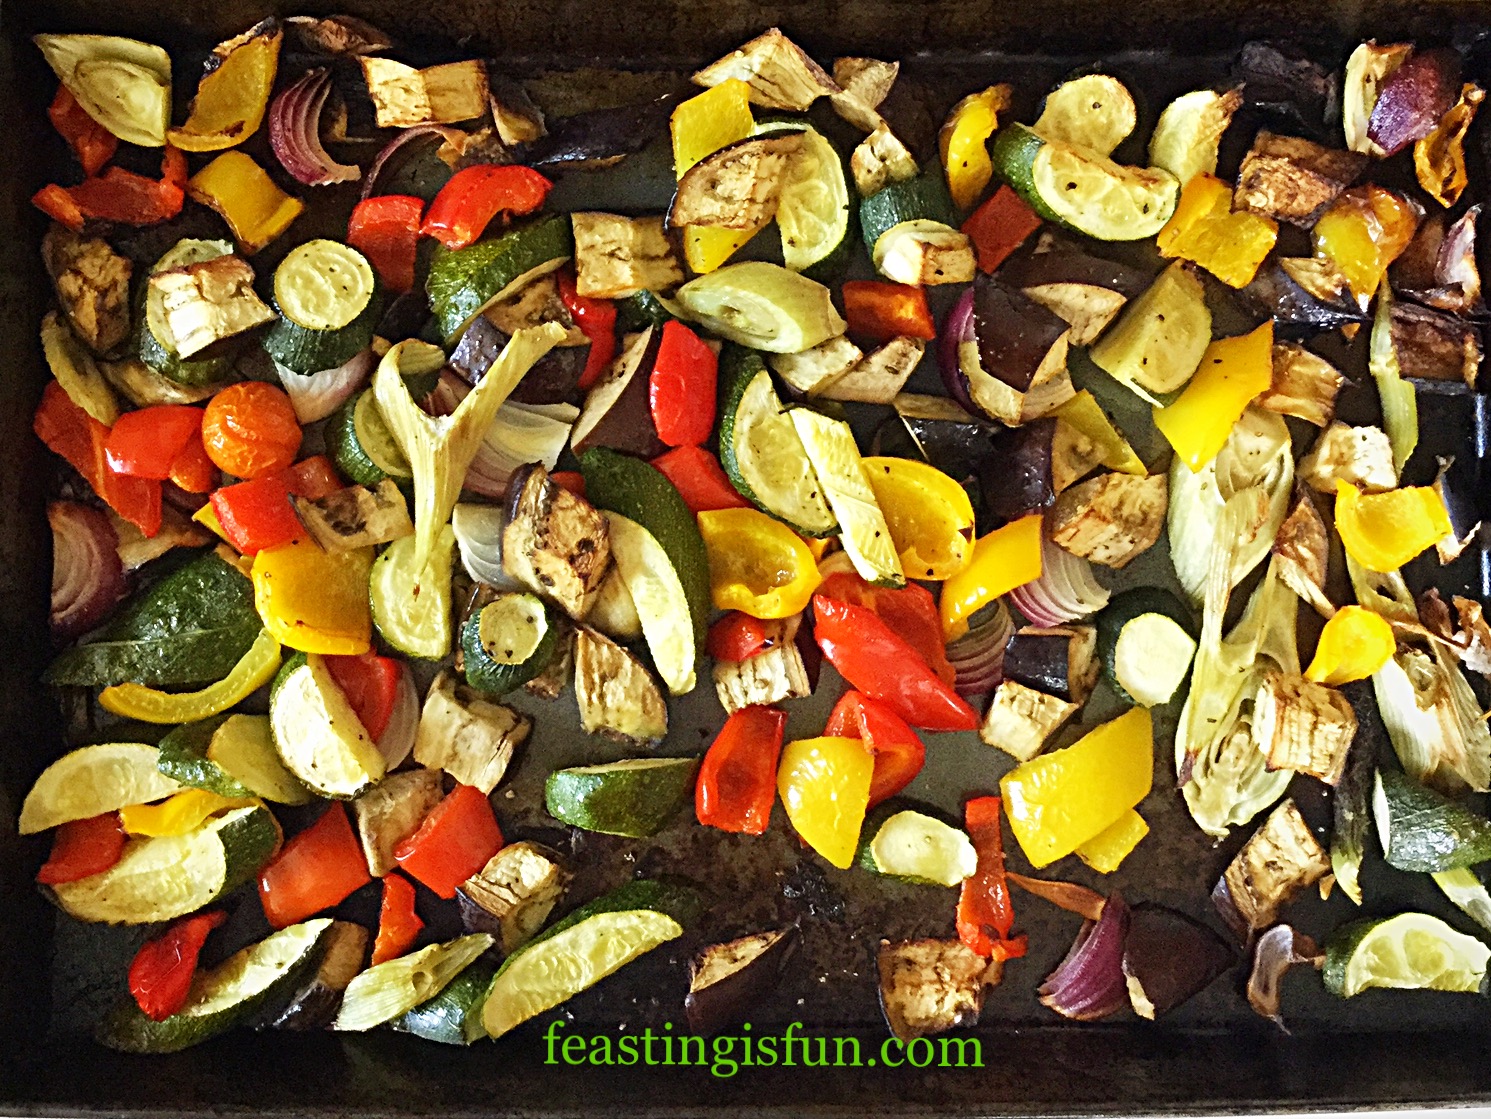
  • Spread the vegetables out on the tray. During the cooking process they will reduce slightly in size.
FF Roasted Summer Vegetable Orzo Salad
Prepared vegetables ready for roasting.
  • Place the baking tray into the centre of a preheated oven and roast for 30-40 minutes, turning the vegetables halfway through the roasting time.
  • While the vegetables are roasting cook the orzo and make the lemon vinaigrette.

Bringing All The Ingredients Together In One Tasty Dish

  • Place a large pan of cold water on the hob and bring to a boil. When boiling add 1 tablespoon of sea salt and then add the orzo.
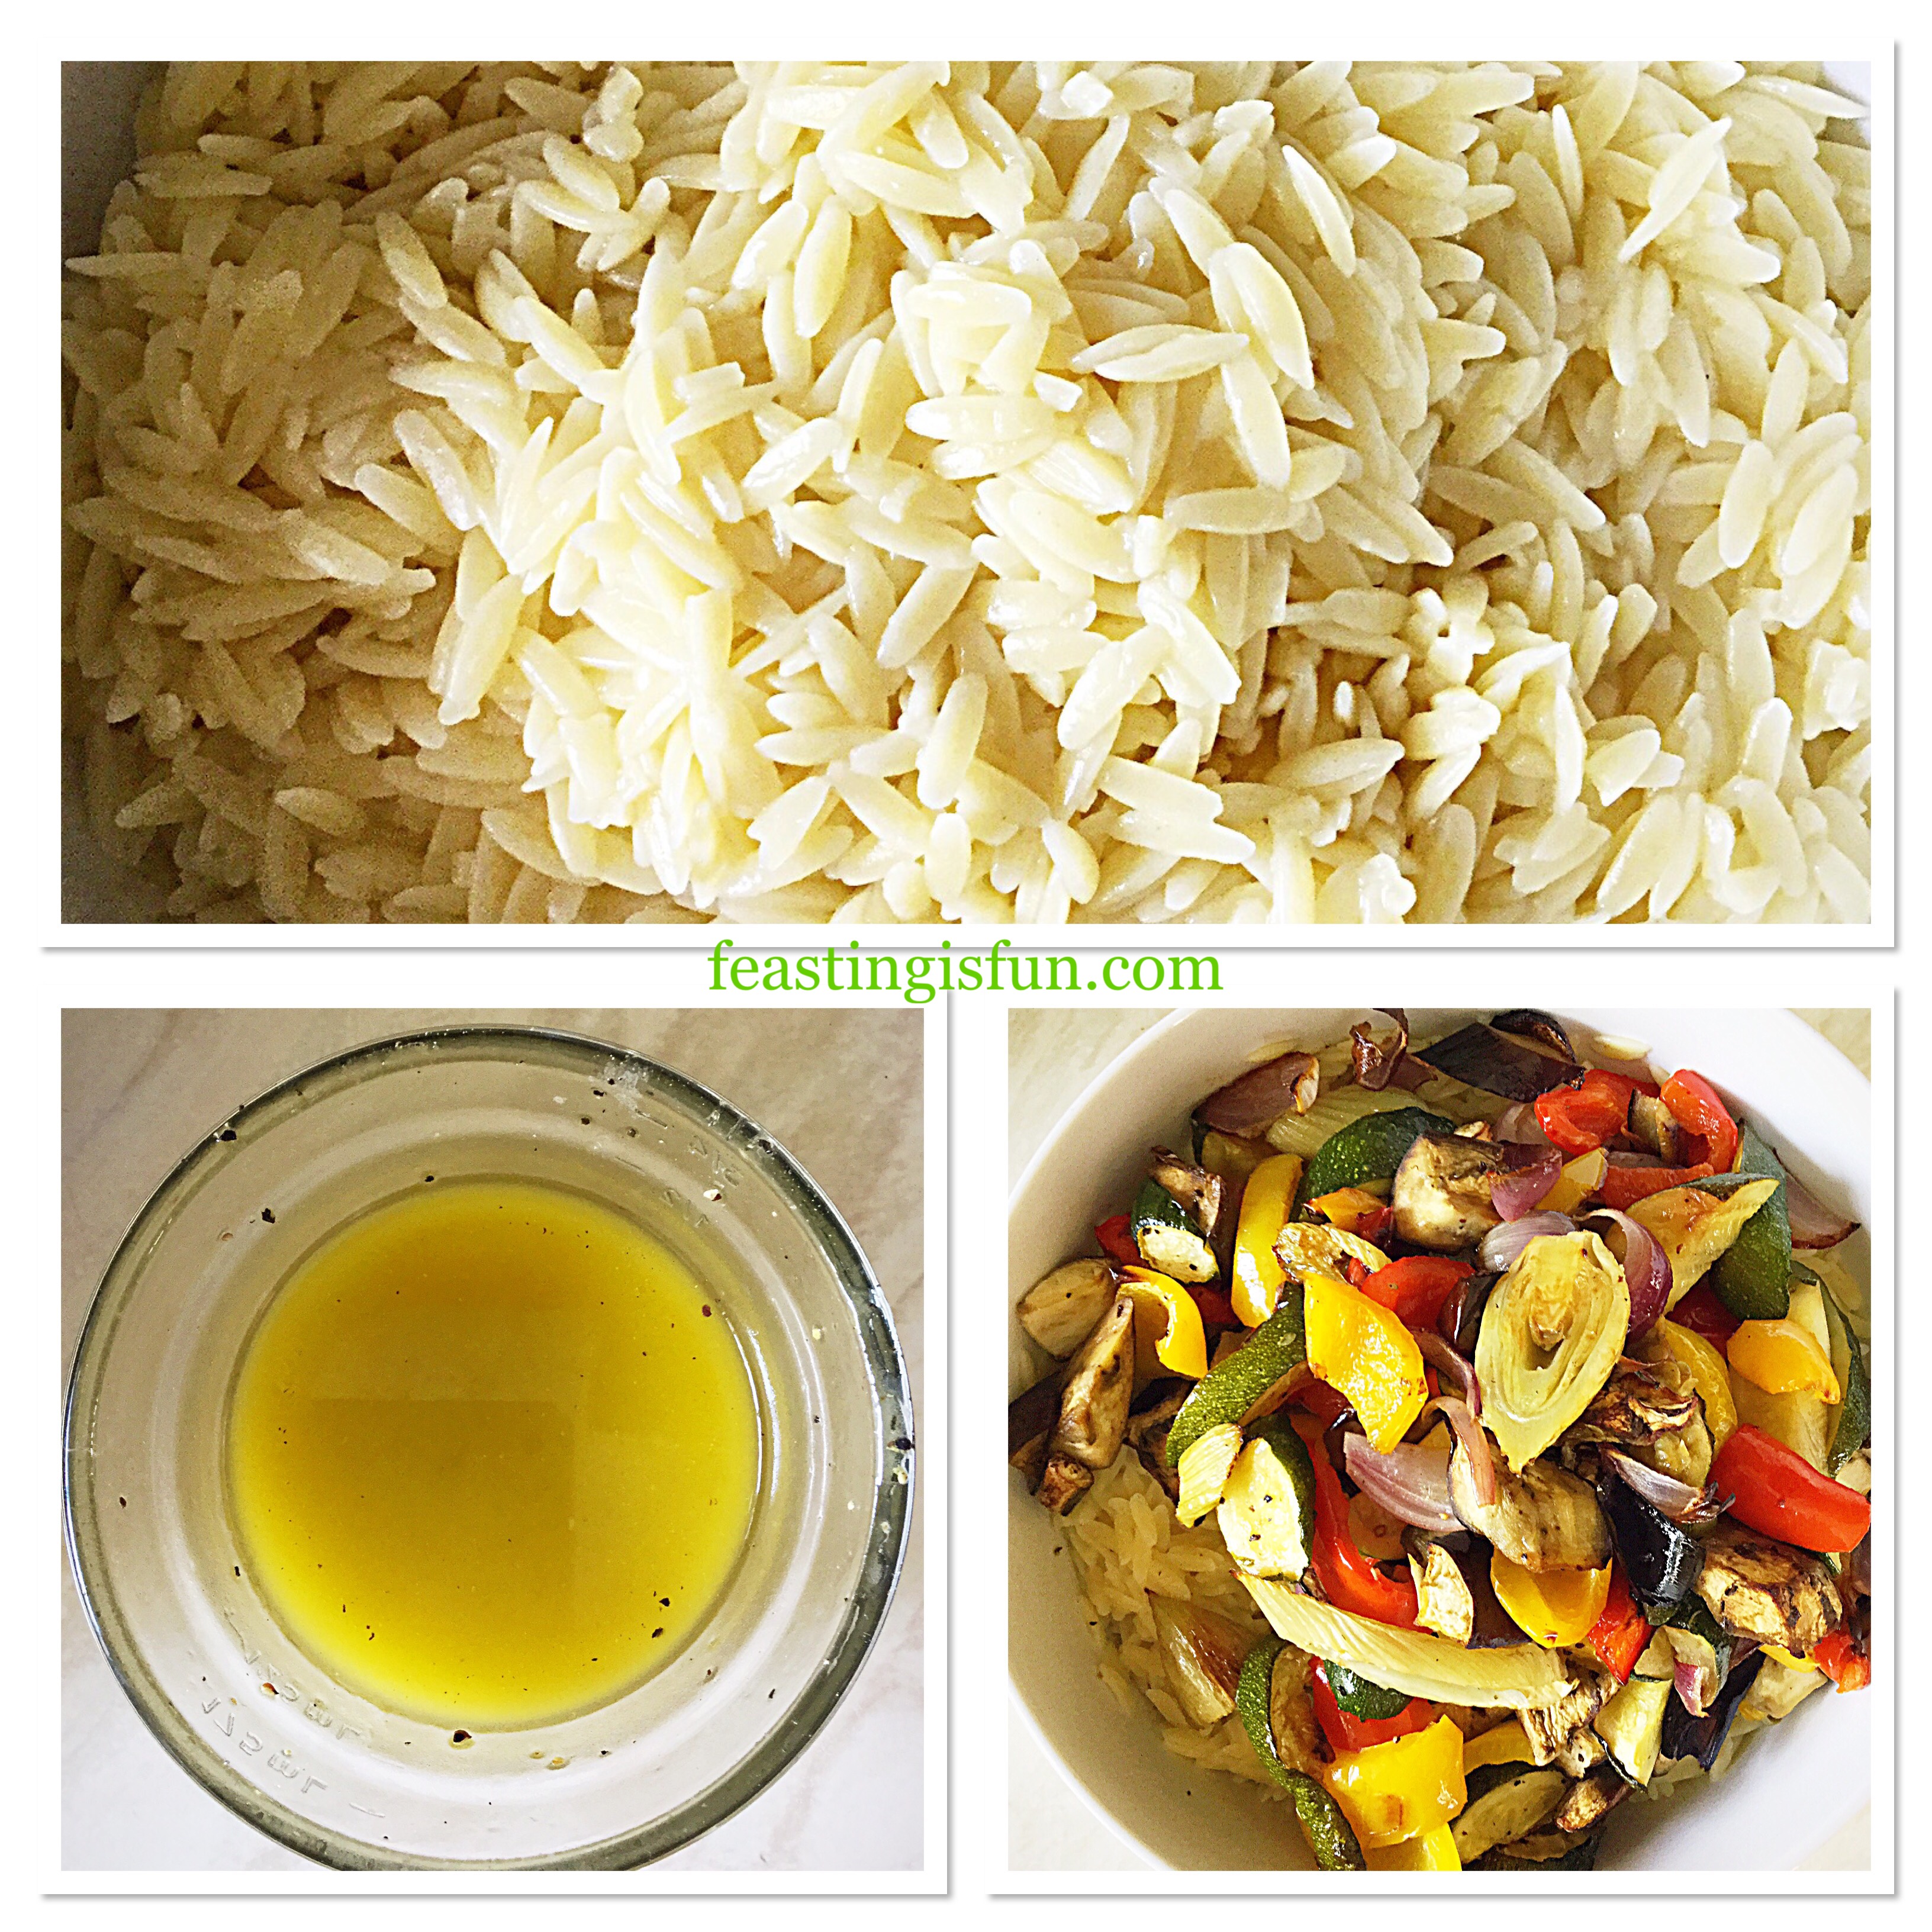
  • Squeeze the fresh lemon juice into a small, clean jar that has a fitted lid. Add the extra virgin olive oil, 1/4 teaspoon of sea salt and freshly ground pepper. Place the lid securely on to the jar and shake vigorously to combine.
  • Cook the orzo according to packet instructions, removing from the heat and draining 2 minutes before the finished cooking time.
  • Place the drained orzo into a bowl and pour over the lemon vinaigrette. Fork through the orzo to ensure the vinaigrette covers each small piece, stopping the pasta from forming clumps.
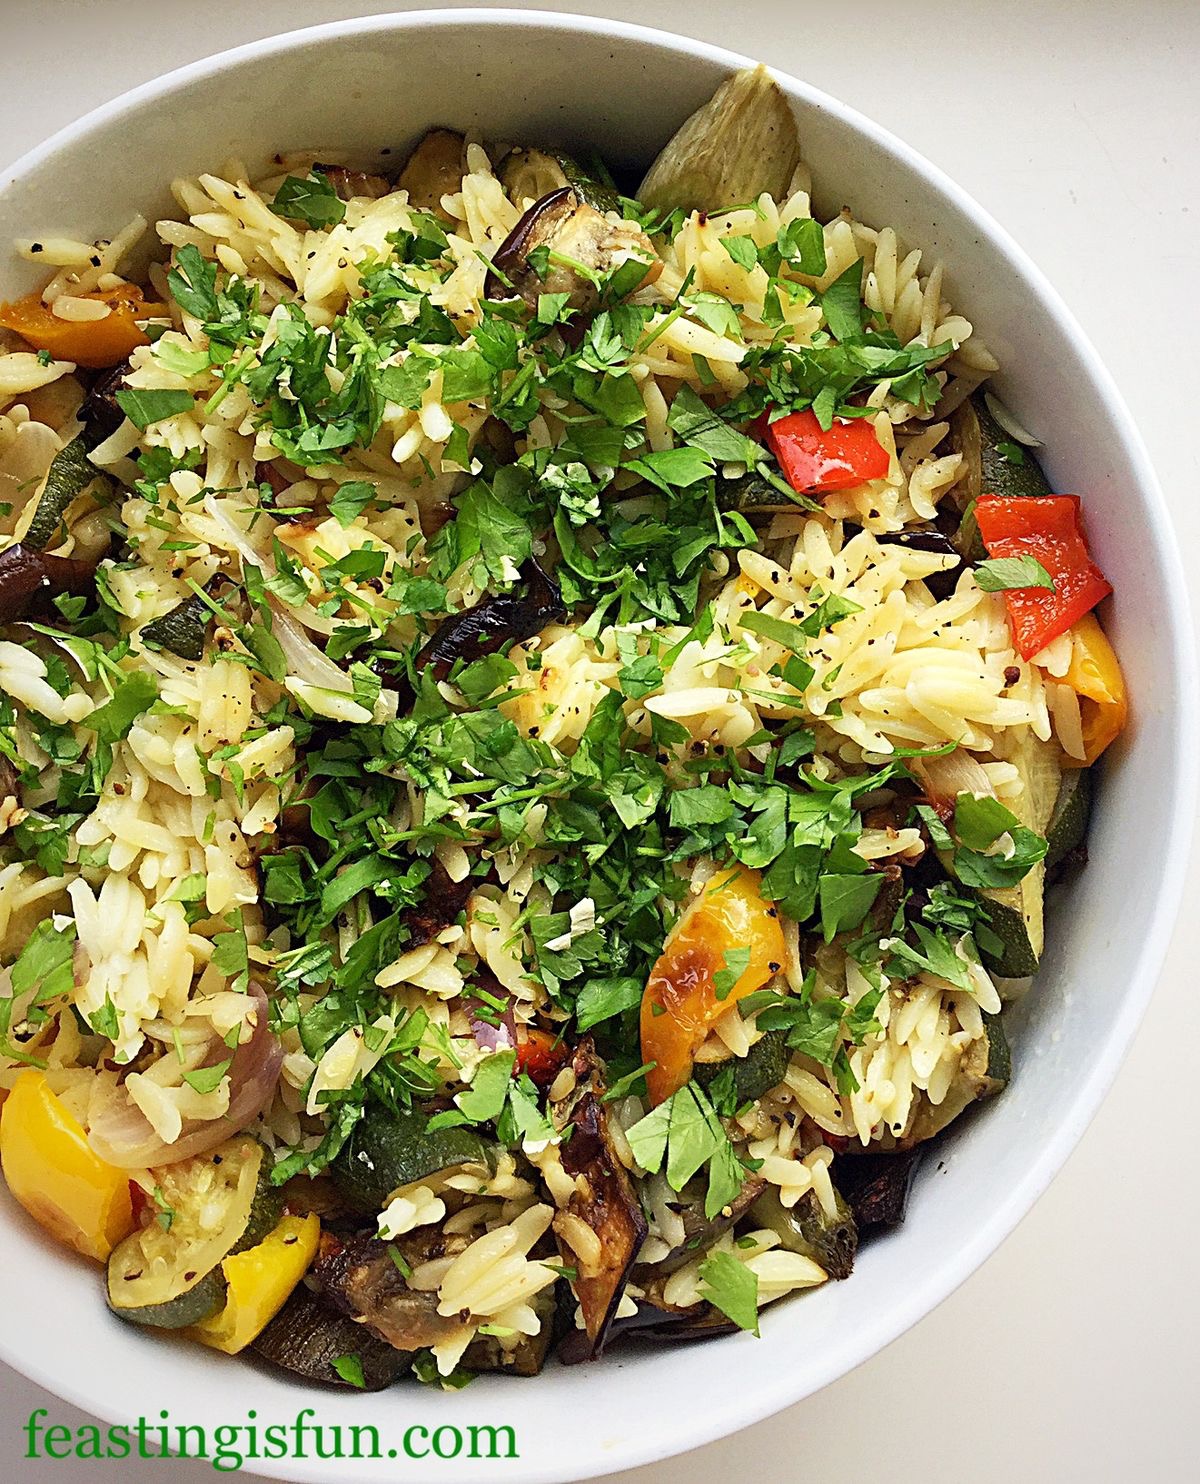
  • When cooked the vegetables will be softened, allowing a fork to easily pierce. In addition, some pieces may be slightly charred at the edges.
FF Roasted Summer Vegetable Orzo Salad
Roasted summer vegetables.
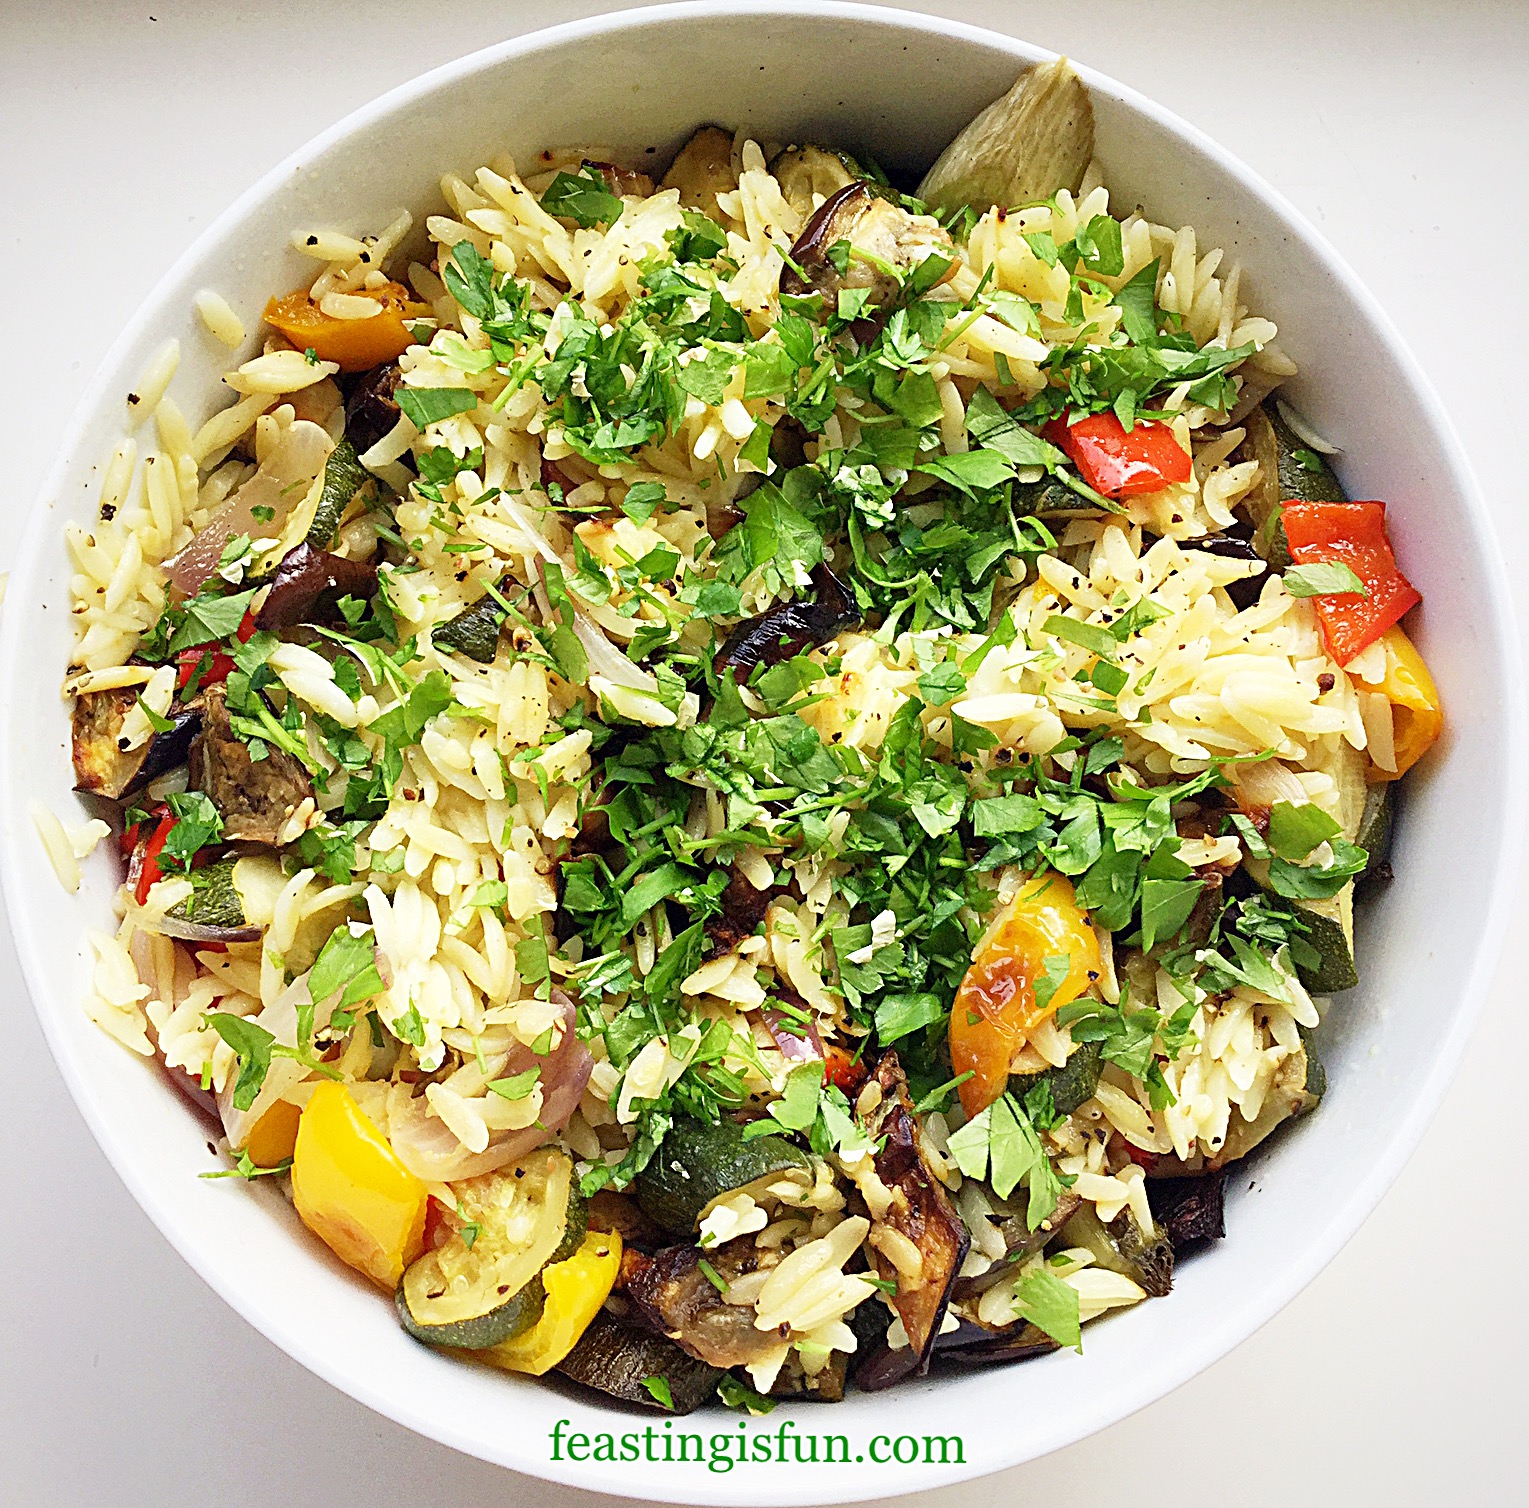
  • Spoon or tip the roasted vegetables on top of the orzo.
FF Roasted Summer Vegetable Orzo Salad
Making Roasted Summer Vegetable Orzo Salad.
  • Gently, use two forks to mix the roasted vegetables into the Orzo.
  • Finally, roughly chop a handful of fresh parsley, discarding the stalks and scatter over the salad.
Roasted Summer Vegetable Orzo Salad

If making the same day as eating, cover with cling film and leave on the work top. Alternatively, when making the day before, leave out the parsley, cool, cover and store in the fridge. Finally, to serve, allow to sit at room temperature for one hour and garnish with freshly chopped parsley.

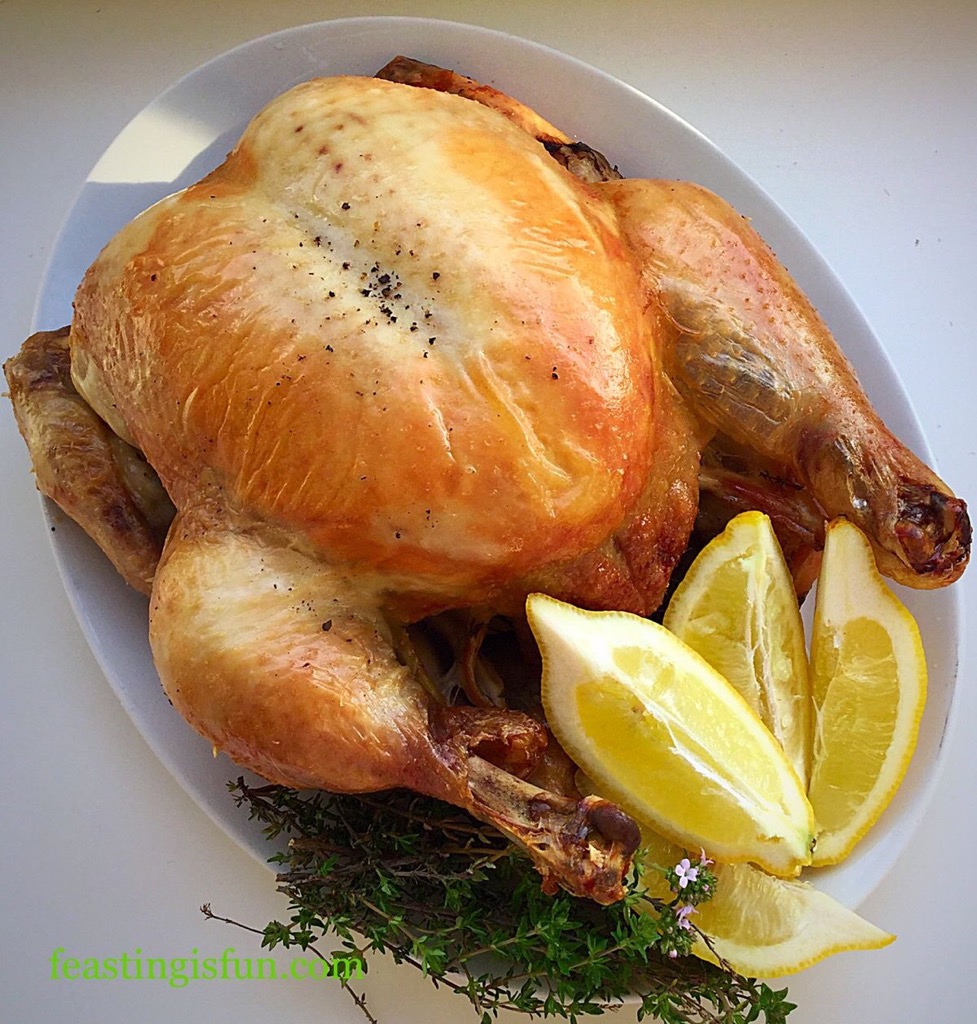
Since this salad is so versatile, it can be served alongside grilled chicken, salmon, or burgers and ribs at a barbecue. Likewise, it can also be served on its own as a tasty vegetarian or vegan meal.

If you have enjoyed this recipe for Roasted Summer Vegetable Orzo Salad you may also like these:

Lime Couscous

Lime Couscous
Lime Couscous

Roasted Pale Ale Jelly Tomatoes

Roasted Pale Ale Jelly Tomatoes

Lemon Garlic Vegetable Orzo

Lemon Garlic Vegetable Orzo

So, to sum up, when shopping in large supermarkets it’s easy to become disconnected with seasonal vegetables. Because of transportation most ‘summer’ vegetables can be easily obtained throughout the year. Since large, super greenhouses have cropped up across the country, most notably in Thanet, Kent, the effect on home grown produce has been to lengthen its season. Consequently, allowing the British public to buy British produce, rather than imported. Something I fully encourage and strongly support.

Yet, even with this consideration, there is little to rival the fun of blackberry picking in August and September. Most importantly, connecting us all to nature and the natural season of harvest.

So, whatever you are making, baking and creating in your kitchens, have fun preparing our feast.

Sammie xx

No part of this post may be reproduced without the written consent of the owner. Please see my Disclosure Policy.

FF Roasted Summer Vegetable Orzo Salad

Share
Facebooktwitterpinterestlinkedintumblr

Chilli Lime Chicken Kebabs

Share
Facebooktwitterpinterestlinkedintumblr

During warm Summer evenings, sitting in our garden, listening to the birds chatter and chirp, the delicious smell of barbecue often fills the air. Yet I’m never going to be a cheap sausages and cheap burgers girl. Good sausages yes. Burgers that are traceable back to their origin, definitely. For me though, kebabs are the way to go. I made these Chilli Lime Chicken Kebabs last year for our daughters birthday. With a slight change to the recipe, all for the better, I now can show them to you.

FF Chilli Lime Chicken Kebabs
Chilli Lime Chicken Kebabs perfect cooked on the grill or in the oven.

Since I’d been sent some KanKun Mexican Chilli Sauce to try, I was eager to see how the jalapeño chilli sauce would work with the kebabs I had made for last year’s birthday barbecue.

Oh wow. They are so good!

The jalapeño chilli sauce infuses a warmth into the chicken pieces without over powering them with heat. Also the lime and garlic in the marinade infuses the chicken pieces with incredible flavour as well as tenderising them with the lime juice. I love that these Chilli Lime Chicken Kebabs can be both cooked in the oven or on the barbecue. S

FF Chilli Lime Chicken Kebabs
Chilli Lime Chicken Kebabs tasty, tender chicken.

I wasn’t able to grill the on the barbecue, but the smokey, charred, flavour added by grilling them means that I will as soon as possible. Another alternative, maybe when the weather isn’t up to grilling would be to stir fry the chicken. Add in the ingredients from the vegetable kebabs and you have a quick, easy meal.

As our children ate these Chilli Lime Chicken Kebabs with us I didn’t add too much sauce. While you can certainly use it as a condiment if you want to kick the heat up a notch!

FF Chilli Lime Chicken Kebabs
KanKun Mexican Chilli Sauce range – the jalapeño sauce used for this recipe is in the middle.

I love chilli’s and am, at present growing some from seed. As soon as they are big enough I will then be transfer them  to the front garden. Since that is the driest bed and gets the most sun. Chilli’s like to be treated a bit mean whilst they are growing, although I add the odd splash of tomato food, once the chilli’s are forming does them the world of good.

For those of you who cannot or do not want to grow your own chilli’s, KanKun have a range of 3 bottles of chilli sauce – Chipotle, Habanero and Jalapeño. Each can be used in cooking (keep an eye out for my upcoming Chipotle Pulled Pork Fajita’s), or as a condiment. Just make sure that any sauce that has been in contact with raw meat is disposed of and not reused.

FF Chilli Lime Chicken Kebabs
Chilli Lime Chicken Kebabs delicious served alongside vegetable kebabs.

Recipe: Makes 5 Chilli Lime Chicken Kebabs

650g/1.5lb Skinned Boneless Chicken Breast – preferably Free Range or Organic – I buy ours from Graig Farm

2tbsp Olive Oil

Juice of 1 Lime

1tbsp Mexican Jalapeño Sauce from KanKun Sauce

2 Cloves of Garlic – crushed or minced

1 Small Chilli or 1/2 Jalapeño Chilli –  sliced (seeds removed if preferred)

1/4tsp Sea Salt – I use Maldon

1/4tsp Freshly Ground Black Pepper

1 large resealable plastic food bag.

Method: Preheat the oven to 200C/180C fan, gas mark 6 or cook over a medium hot barbecue grill.

Note – Especially when handling raw meat, including chicken, ensure all utensils, work tops and hands are thoroughly washed before and after use.

  • First of all open the resealable bag and turn down the sides. This makes it easier to add things to the bag.
  • Pour in the olive oil, jalapeño sauce, juice of 1 lime and then add the crushed garlic, sliced chilli, salt and pepper.
  • Cut the chicken breast into 3cm chunks and add to the bag. I actually use sharp kitchen scissors to snip the chicken straight into the bag.
  • Seal the bag and with clean hands smoosh the chicken about in the bag, ensuring every piece is covered in the marinade. I have to admit to this being something I always enjoy, a bit of smooshing!
  • Label the bag and place in the bottom of the fridge for 30 minutes to 2 hours. Alternatively, prepare at the start of the day, before work and have a smile on your face knowing dinner is sorted when you finally return home!
FF Chilli Lime Chicken Kebabs
Label the bag so that others are aware that it contains raw meat.
  • While the chicken is marinating, soak the wooden skewers in cold water – so they don’t catch fire on the barbecue!
  • Cover a large baking tray with aluminium foil – this really helps with the clean up process.
  • Carefully thread 5-7 pieces of chicken on each skewer. Since the chicken takes the same amount of time to cook as the vegetable kebabs, I also add sliced courgette, cherry tomatoes and red/yellow peppers to separate skewers. Alternatively I would place whole jalapeños, chunks of red onion or shallots on to skewers as well.
  • Place the Chilli Lime Chicken Kebabs on to the foil covered tray and pour over any excess marinade.
  • Cook in the top of the oven for 30 minutes, turning halfway through the cooking time.
  • If grilling on the barbecue these Chilli Lime Chicken Kebabs should take no longer than 20 minutes on a medium/hot barbeque grill, turing halfway through cooking.
  • To check if the chicken is cooked all the way through, slide off a thicker chunk and cut in half – there should not be any pink colour, the chicken should be opaque all the way through.
  • As soon as the kebabs are cooked remove them from the oven/barbecue.
FF FF Chilli Lime Chicken Kebabs
Chilli Lime Chicken Kebabs beautifully cooked in the oven.

Serve the Chilli Lime Chicken Kebabs in warmed pitta bread with fresh salad and extra Jalapeño Sauce, or as I have done, with herb basmati rice and vegetable kebabs.

However you serve these delicious kebabs they are sure to be thoroughly enjoyed. The lime, garlic and jalapeño chilli give them a warming, fresh, vibrant flavour. For real chilli fans, serve with extra slices of jalapeño chilli’s to up the heat factor.

While I love the heat that chilli imparts to a dish, I never want to compromise on flavour. This Mexican Jalapeño Chilli Sauce is so delicious and perfectly blends with the other flavours in these Chilli Lime Chicken Kebabs.

FF Chilli Lime Chicken Kebabs
Chilli Lime Chicken Kebabs the perfect feel good meal.

If you like to add a little heat to your meals like me, try adding a dash or two of KanKun Mexican Jalapeño Sauce!

If you have enjoyed this recipe for Chilli Lime Chicken Kebabs here are some others you may like:

Easy Tex Mex Chicken

FF Chilli Lime Chicken Kebabs
Easy Tex Mex Chicken perfect to make ahead.

Chunky Chilli

FF Chilli Lime Chicken Kebabs
Chunky Chilli perfect for colder days.

Lemon Thyme Roast Chicken

FF Chilli Lime Chicken Kebabs
Lemon Thyme Roast Chicken spice up your leftovers with some KanKun Sauce!

I love the Summer months. Having the back door open, sunlight streaming in through open windows, longer daylight hours. Let’s all make the most of this Summer. Eat outdoors, dust off the BBQ, invite friends and family round, for feasting, fun and the obligatory (in our house) water fight in the garden.

Let us all enjoy the warmth of the sun, good company, great food and having fun.

Sammie xx

KanKun Sauce sent me a pack of three of their sauces to try. All content, recipes, photographs, views and opinions are my own. I was not paid for this post. Please see my Disclosure Policy.


Share
Facebooktwitterpinterestlinkedintumblr

Chicken Herb Burgers

Share
Facebooktwitterpinterestlinkedintumblr

Ah the sunshine of the last few days has almost tempted me to get the barbecue out. Judging by the delicious aromas wafting across our garden, I am not the only one. Instead I made these Chicken Herb Burgers and we ate them outside!

FF Chicken Herb Burgers

I have never really been a fan of barbecues. The mass produced cheap sausages and burgers in limp, dry buns, has never held any appeal for me. Yet last year when went were on holiday to Devon we had a barbecue to celebrate our eldest daughter’s 16th birthday.

It was a totally awesome barbecue!

The weather was fantastic and so was the food. King prawn kebabs, free range pork sausages, unbelievably good chicken and lime kebabs – all of which I intend to make again this year and share with you. Oh and we skipped buns in favour of pita bread!

These Chicken Herb Burgers would be absolutely awesome cooked on a barbecue. They are equally fantastic cooked in a cast iron skillet, where the searing heat ensures a great golden outer, which left un-disturbed seals in all the fantastic juices and holds the burger together.

Chicken Herb Burgers

Higher Welfare Chicken

Made from 100% additive free, organic/free range, minced chicken, these burgers are meaty and juicy. The only addition is some fresh thyme, garlic and seasoning. No suspect, milky liquid escapes from the burgers whilst cooking, because the minced chicken does not have any liquid added to it, pre-sale, to bulk it out.

Chicken Herb Burgers use premium meat and boy can you taste the difference.

I am well aware that many people feel that they cannot afford to buy organic meat. Yet it is so much better for us. Happy hens fed a natural diet, allowed to roam freely and build muscle as they slowly mature are a million miles away from their mass produced, intensely reared counterparts.

My answer to the increased cost of good organic chicken is simply to eat it less often, ensure that absolutely nothing goes to waste and cherish the flavour of how real chicken should taste!

Chicken Herb Burgers

If you’ve never made your own burgers before, then this recipe for Chicken Herb Burgers is a great place to start 😉

Recipe: Makes 6-8 Chicken Herb Burgers

2 x 454g/2lb Minced Chicken from Graig Farm

3tbsp Olive Oil

1tbsp Fresh Thyme

4 Garlic Cloves

1tsp Sea Salt – I use Maldon Sea Salt Flakes

1tsp Freshly Ground Black Pepper

1tbsp Butter

Method:

Making the burgers

  • Empty both packets of chicken mince into a large bowl.
  • Add the thyme, crushed garlic, 2 tablespoons olive oil, salt and pepper.
FF Chicken Herb Burgers
You can alter the amount of garlic to your preference.
  • Using clean hands squish (mix) all the ingredients together until they are thoroughly combined.
  • Divide the chicken mixture into 6 or 8 equal portions and shape into burger patties using your hands.
  • Place the burgers on to a plate or foil container and chill in the fridge for at least an hour – this helps the Chicken Herb Burgers hold their shape whilst cooking.
FF Chicken Herb Burgers
Chicken Herb Burgers chilled and ready to cook.
  • Heat a cast iron skillet, or heavy bottomed frying pan until searing hot.
  • Add 1 tablespoon of oil and add the chicken burgers, one at a time – take care not to overcrowd the pan.
  • Turn the heat down slightly. The outside of the burgers will sear on contact with the hot pan, however, we don’t want them to burn on the outside whilst remaining raw in the centre.
  • Once placed in the pan do not disturb the burgers for at least 8 minutes. This will allow a nice crust to form on the underside of the burger.
  • After 8 minutes, using a metal spatula, flip each burger over.
FF Chicken Herb Burgers
Chicken Herb Burgers golden, cooked and ready for a brioche bun.

Cooking the Chicken Herb Burgers

  • You can see from the photo above that the chicken burgers really hold their shape well whilst cooking.
  • Cook the burgers for another 5 minutes and then add a little dot of butter to the top of each burger – trust me, this adds an extra layer of flavour and juiciness.
  • Once the butter has melted, cut halfway into a burger to check if it is cooked. The meat should be completely opaque all the way through without even a hint of pinkness – these are chicken burgers and so unlike beef or steak they must be completely cooked through.
  • Once cooked place each burger on a delicious brioche bun (recipe coming up soon) with slices of tomato, red onion and crunchy green lettuce.
  • Add the condiment of your choice – tomato ketchup for me and pop on the lid of the bun.
  • For an extra restaurant style touch secure each burger in its bun with a steak knife.

FF Chicken Herb Burgers

Homemade tastes best

Oh my, these Chicken Herb Burgers are unbelievably good!

They are a million miles away in taste from the local fast food burger joint. The butter added right at the very end of the cooking adds such a delicious buttery finishing note, which works in complete harmony with the succulent, juicy, chicken.

Making your own burgers is so much fun and you can make them as big or small as you like. You may have indeed noticed that there are only 5 Chicken Herb Burgers in this post. Well that’s because I only made 5!! This was a last minute idea for Sunday dinner and we were hungry! I make no apologies, they tasted so amazingly good.

I haven’t found anywhere else that sells chicken mince other than Graig Farm. Saying that I’ve not looked really hard because why would I? Their additive free organic and free range chicken mince is so fantastic, with freezer friendly packaging. I have no reason to look elsewhere!

FF Chicken Herb Burgers
Minced Chicken flat packed and frozen makes defrosting so easy!

Brilliantly packaged to take up minimum freezer space, this chicken mince also defrosts really quickly as well.

If you have loved this recipe for Chicken Herb Burgers you may also enjoy these:

Chicken and Four Cheese Lasagne

FF Chicken Herb Burgers
Chicken Four Cheese Lasagne

Roast Chicken Noodle Soup

FF Chicken Herb Burgers
Roast Chicken Noodle Soup a great way to make an incredible meal from leftovers.

Chicken Pasta Pesto Salad

FF Chicken Herb Burgers
Chicken Pasta Pesto Salad a great all in one dish.

Eating good quality chicken, cooked well. in one of these recipes is a taste experience you will not forget. Trust me it is worth trying – why not find out for yourself?

Thank you for spending time reading this blog. I really do appreciate you all.

Whatever you are making, baking and feasting on, remember that food tastes better when it is shared.

Sammie xx

This is not a sponsored post. I have been buying our meat from Graig Farm for the last four years now and I cannot personally recommend their produce highly enough.

Share
Facebooktwitterpinterestlinkedintumblr

Lemon Garlic Vegetable Orzo

Share
Facebooktwitterpinterestlinkedintumblr

Hi, have I got the easiest, tastiest, make ahead side dish for you? Oh yes I have! Lemon Garlic Vegetable Orzo. Also, this dish does not disappoint as it is delicious.

Lemon Garlic Vegetable Orzo

While I’ve said this is a side dish, it’s also vegetarian and makes a fabulous light lunch. Likewise, adding a few shavings of Parmesan would add extra oomph for lunch, served alongside some crusty, crunchy bread.

I’m getting hungry!

Lemon Garlic Vegetable Orzo

While I’ve used red onion, peas, sweetcorn and red bell pepper in this dish – but feel free to switch up the veggies (celery is also good) with whatever you have on hand. Most importantly, I would say that this Lemon Garlic Vegetable Orzo is best served at room temp, or even warmed – BUT NOT COLD! Because, no matter how much lemon/oil you add, when served fridge cold the Orzo clumps together and not in a good way! So there you go, an easy recipe that doesn’t take up any room in your fridge, or require any last minute fiddling. Yay!! Because, we like easy!


Orzo with vegetables and a lemon and garlic dressing.
Lemon Garlic Vegetable Orzo


Recipe : Lemon Garlic Vegetable Orzo serves 6-8 as a side dish.

500g/1lb Packet Dried Orzo – available from most supermarkets I buy mine from Waitrose 

Juice of 1 Large Lemon

1 x Small Red Onion

150ml/5fl oz Extra Virgin Olive Oil

2 x Garlic Cloves – crushed

200g/7oz Frozen Peas

Medium Can Sweetcorn

Fresh Basil

Sea Salt – I use Maldon and freshly ground Black Pepper to taste

Making The Vegetarian Orzo Dish

First of all put a large pan of water on to heat up for the Orzo.

Place the lemon juice and finely diced red onion into a large bowl. Add a pinch of salt and mix together. Also leaving the onion in the lemon juice will remove the acrid taste!

As soon as the water in the pan is boiling add salt and then the Orzo. Cook according to the packet instructions, taking care not to overcook or the Orzo will simply clump together!

While the Orzo is cooking gently heat the Olive Oil and garlic together, for approximately 2 minutes on a medium heat. This allows the garlic to infuse the oil. And also the garlic is lightly cooked. Pour the garlicky oil over the onions and lemon juice.

Lemon Garlic Onions and Oil - add salt and pepper.
Lemon Garlic Onions and Oil – add salt and pepper.


Drain the Orzo as soon as it is cooked and pour straight into the bowl. Using a large slotted spoon immediately toss the Orzo in the oil/lemon juice, this will stop the Orzo from sticking together.

Place the frozen peas (I used petit pois) in the bowl and mix in with the hot Orzo.

Add the sweetcorn (drained) and the diced, red, bell pepper. And mix together with a fork, then taste for seasoning.  Add salt and freshly ground pepper as necessary.

Take a handful of Basil leaves, roughly chop and sprinkle over.

Finally, cover with cling film and serve at room temperature.

Lemon Garlic Vegetable Orzo


This side goes fabulously with fish – Salmon especially, Chicken and Pork. Likewise, it makes a fab alternative to roast potatoes and hot veggies for a Summer roast, Also, it completely seals the deal as part of a buffet or served at a barbecue. And with very little effort needed!

If you have enjoyed this recipe for Lemon Garlic Vegetable Orzo you may also like these:

Tangy Lemon Potato Salad

FF Lemon Garlic Vegetable Orzo
Tangy Lemon Potato Salad

Crunchy Homemade Coleslaw

FF Lemon Garlic Vegetable Orzo
Crunchy Homemade Coleslaw

Roasted Summer Vegetable Orzo Salad 

FF Lemon Garlic Vegetable Orzo
Roasted Summer Vegetable Orzo Salad

Enjoy feasting on this scrumptious dish and may we have many sunny days ahead to spend with friends and family, having fun round the BBQ!

Also, making sure there are hidden ‘Super-Soakers’ primed for action if it gets too hot – or boring!!!!

So, whatever you are making, baking and creating in your kitchens, have fun preparing and sharing your feast.

Sammie x

No part of this post may be reproduced or duplicated without the written permission of the owner. Please see my Disclosure Policy.


Share
Facebooktwitterpinterestlinkedintumblr