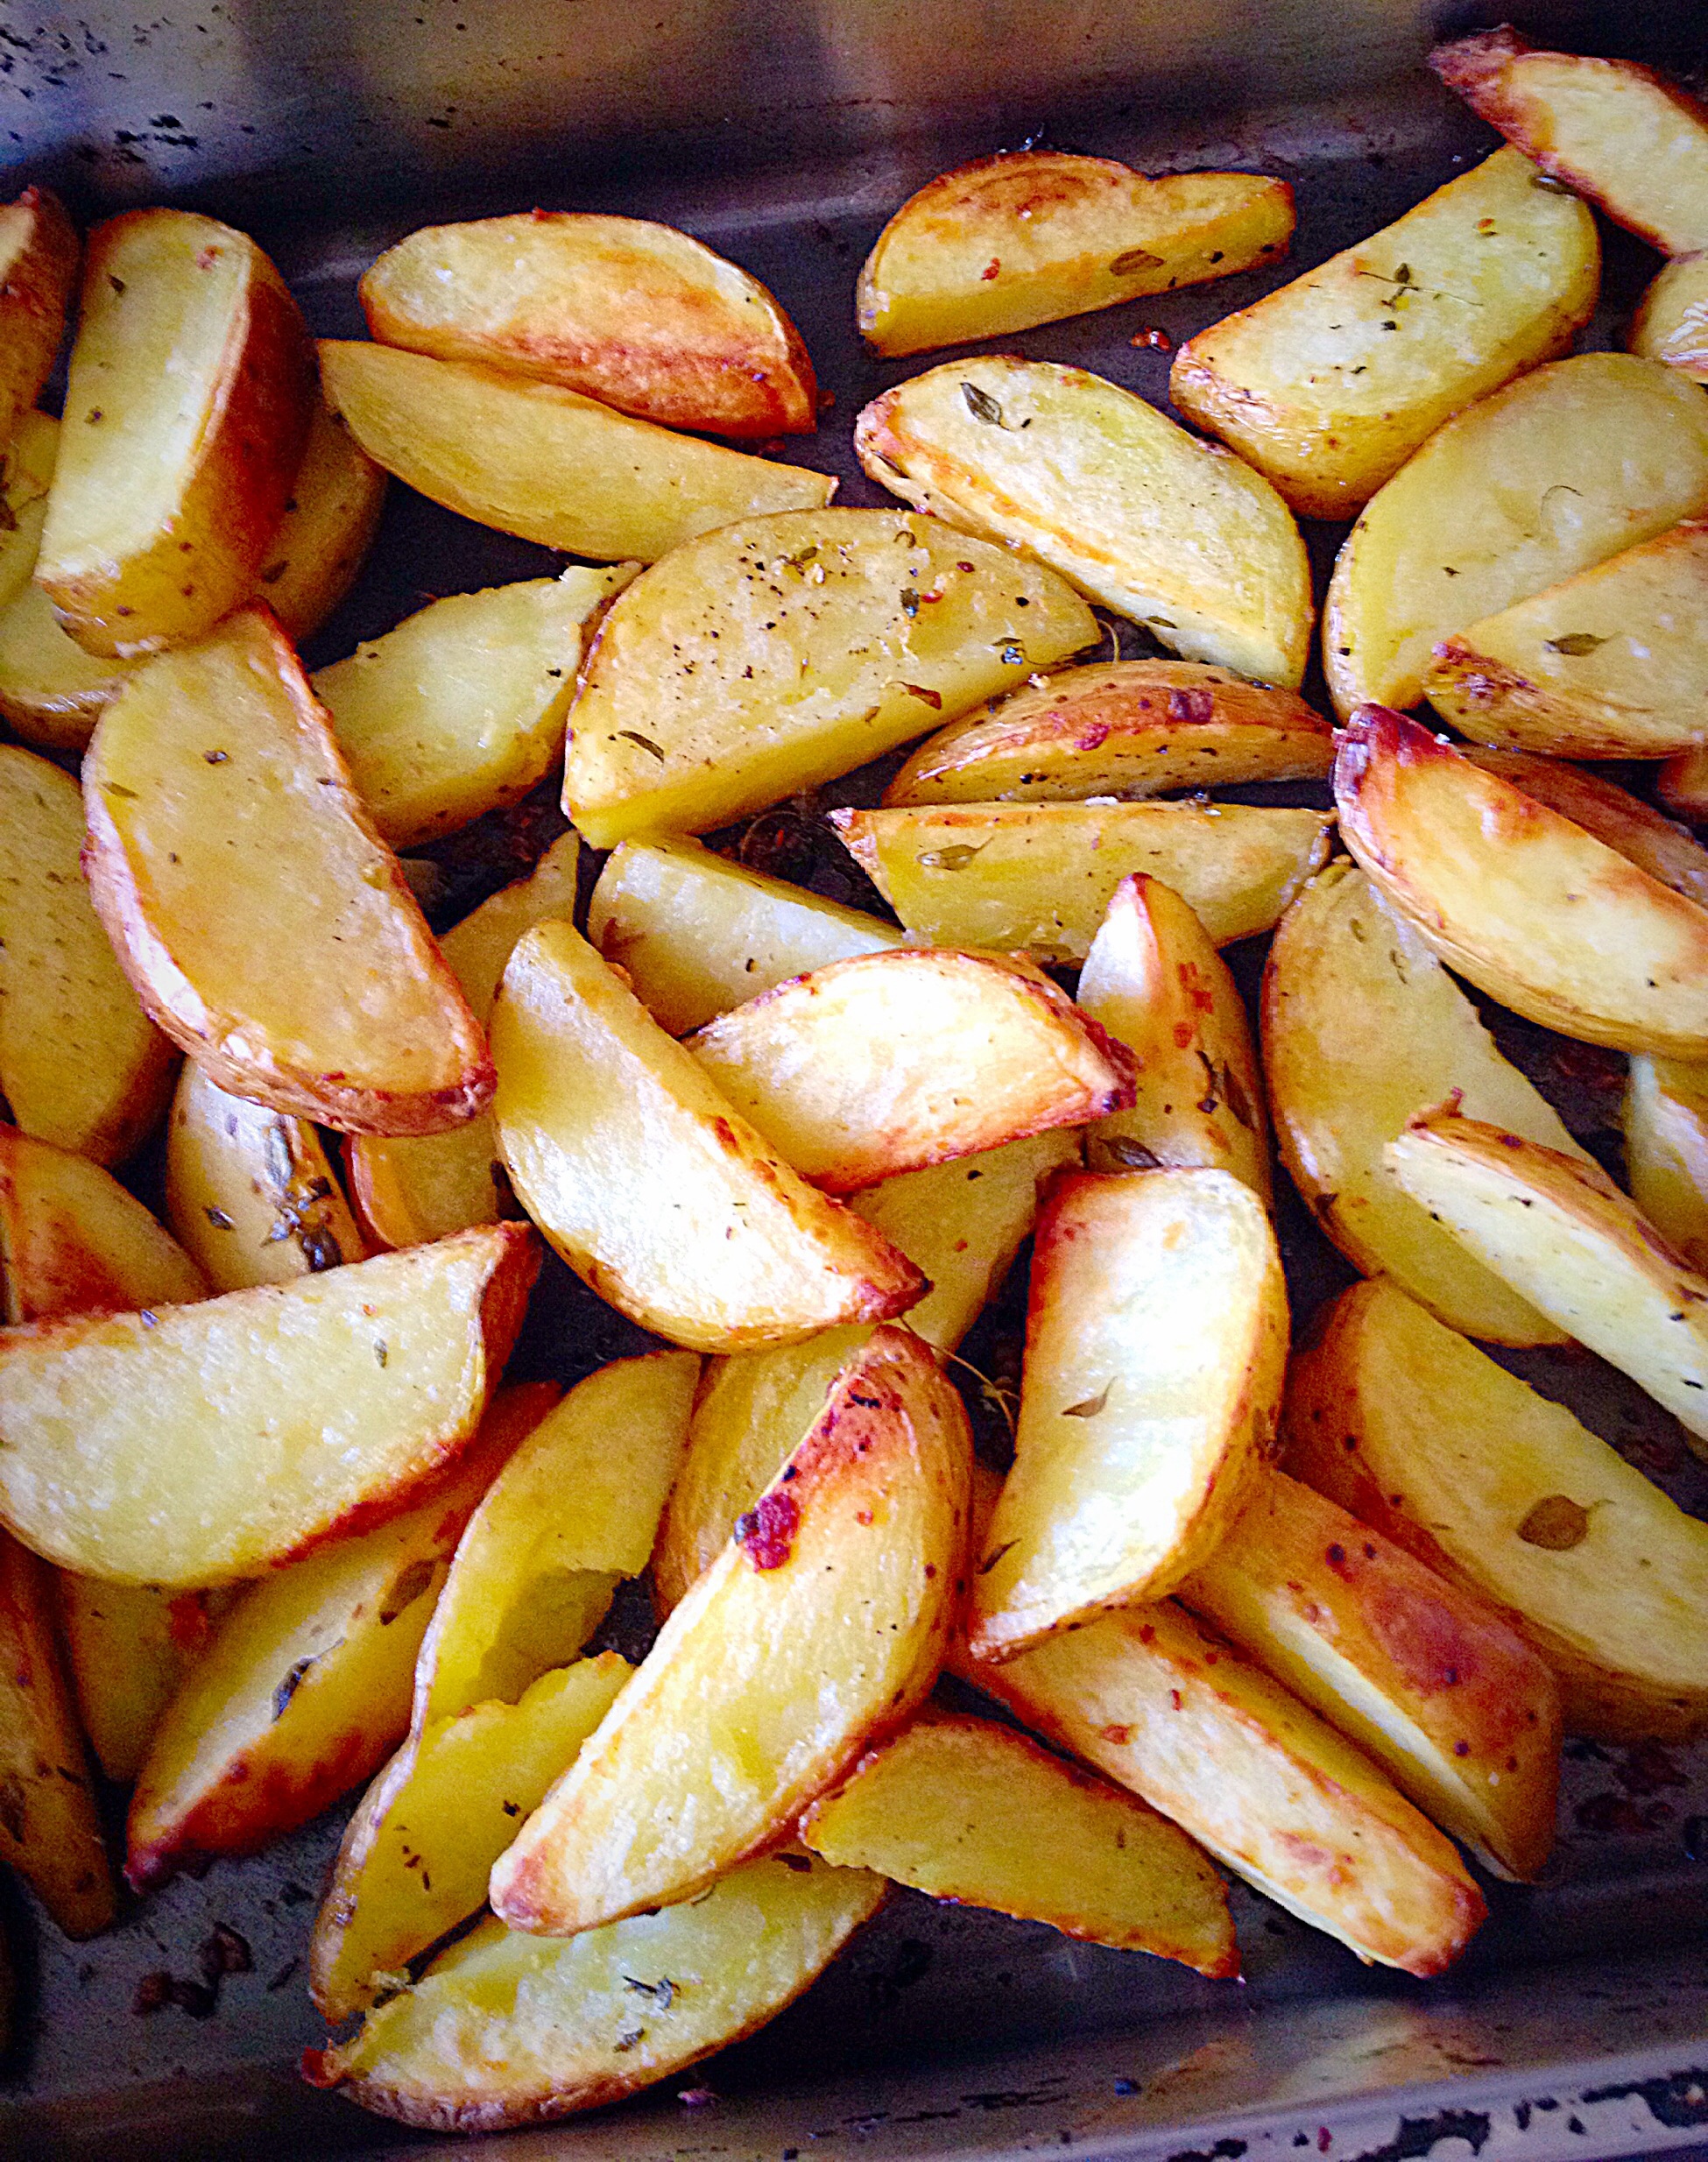
Hello there people! The sun is shining and that makes me smile. It’s amazing how a little sunshine can improve our mood, as can the right food! Ooh that rhymed!! I have another fabulously easy side dish recipe for you today Baked Garlic Herb Potato Wedges.
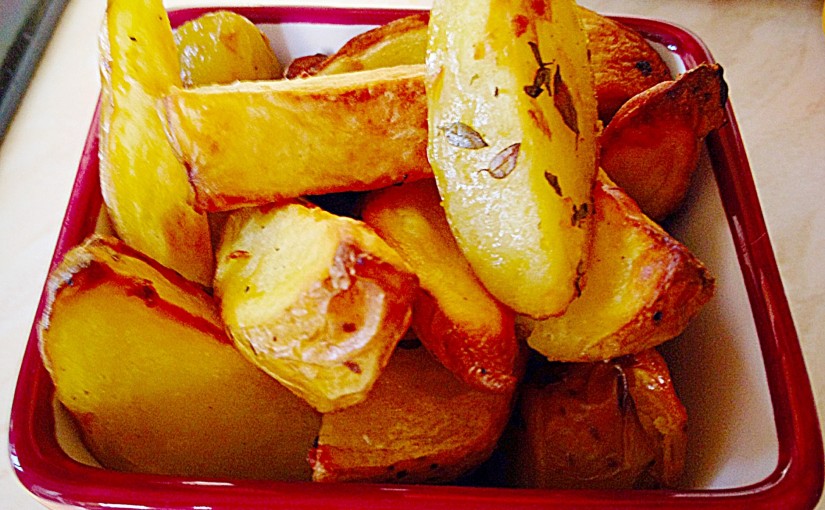
Yummy Baked Garlic Herb Potato Wedges.
Perfect on their own or as a side dish these Baked Garlic Herb Potato Wedges are a tasty alternative to oven chips. They are quick to prepare, need no attention whilst they bake in the oven and have a finger licking garlicky flavour.
Also, why is it food tastes better when eaten with our hands???
Sorry I’ll get back to the point – which is – these baked beauties go with just about anything: Roast Chicken, Fish, Quiche, Steak, Sausages…. The list is endless. Try them and let me know what you had them with?
Delicious just on their own, or dunked in a dip of your choice!
Recipe : Baked Garlic Herb Potato Wedges Serves 4-6 as a side.
1.5kg/3lb Baking Potatoes – scrubbed and dried
2-3 tbsp Olive Oil or Rapeseed Oil – I use Kentish Oils
4 Garlic Bulbs – crushed/finely minced
1 tbsp Fresh Thyme
Salt and Pepper to taste
Method :
Preheat oven to 200C/185C fan.
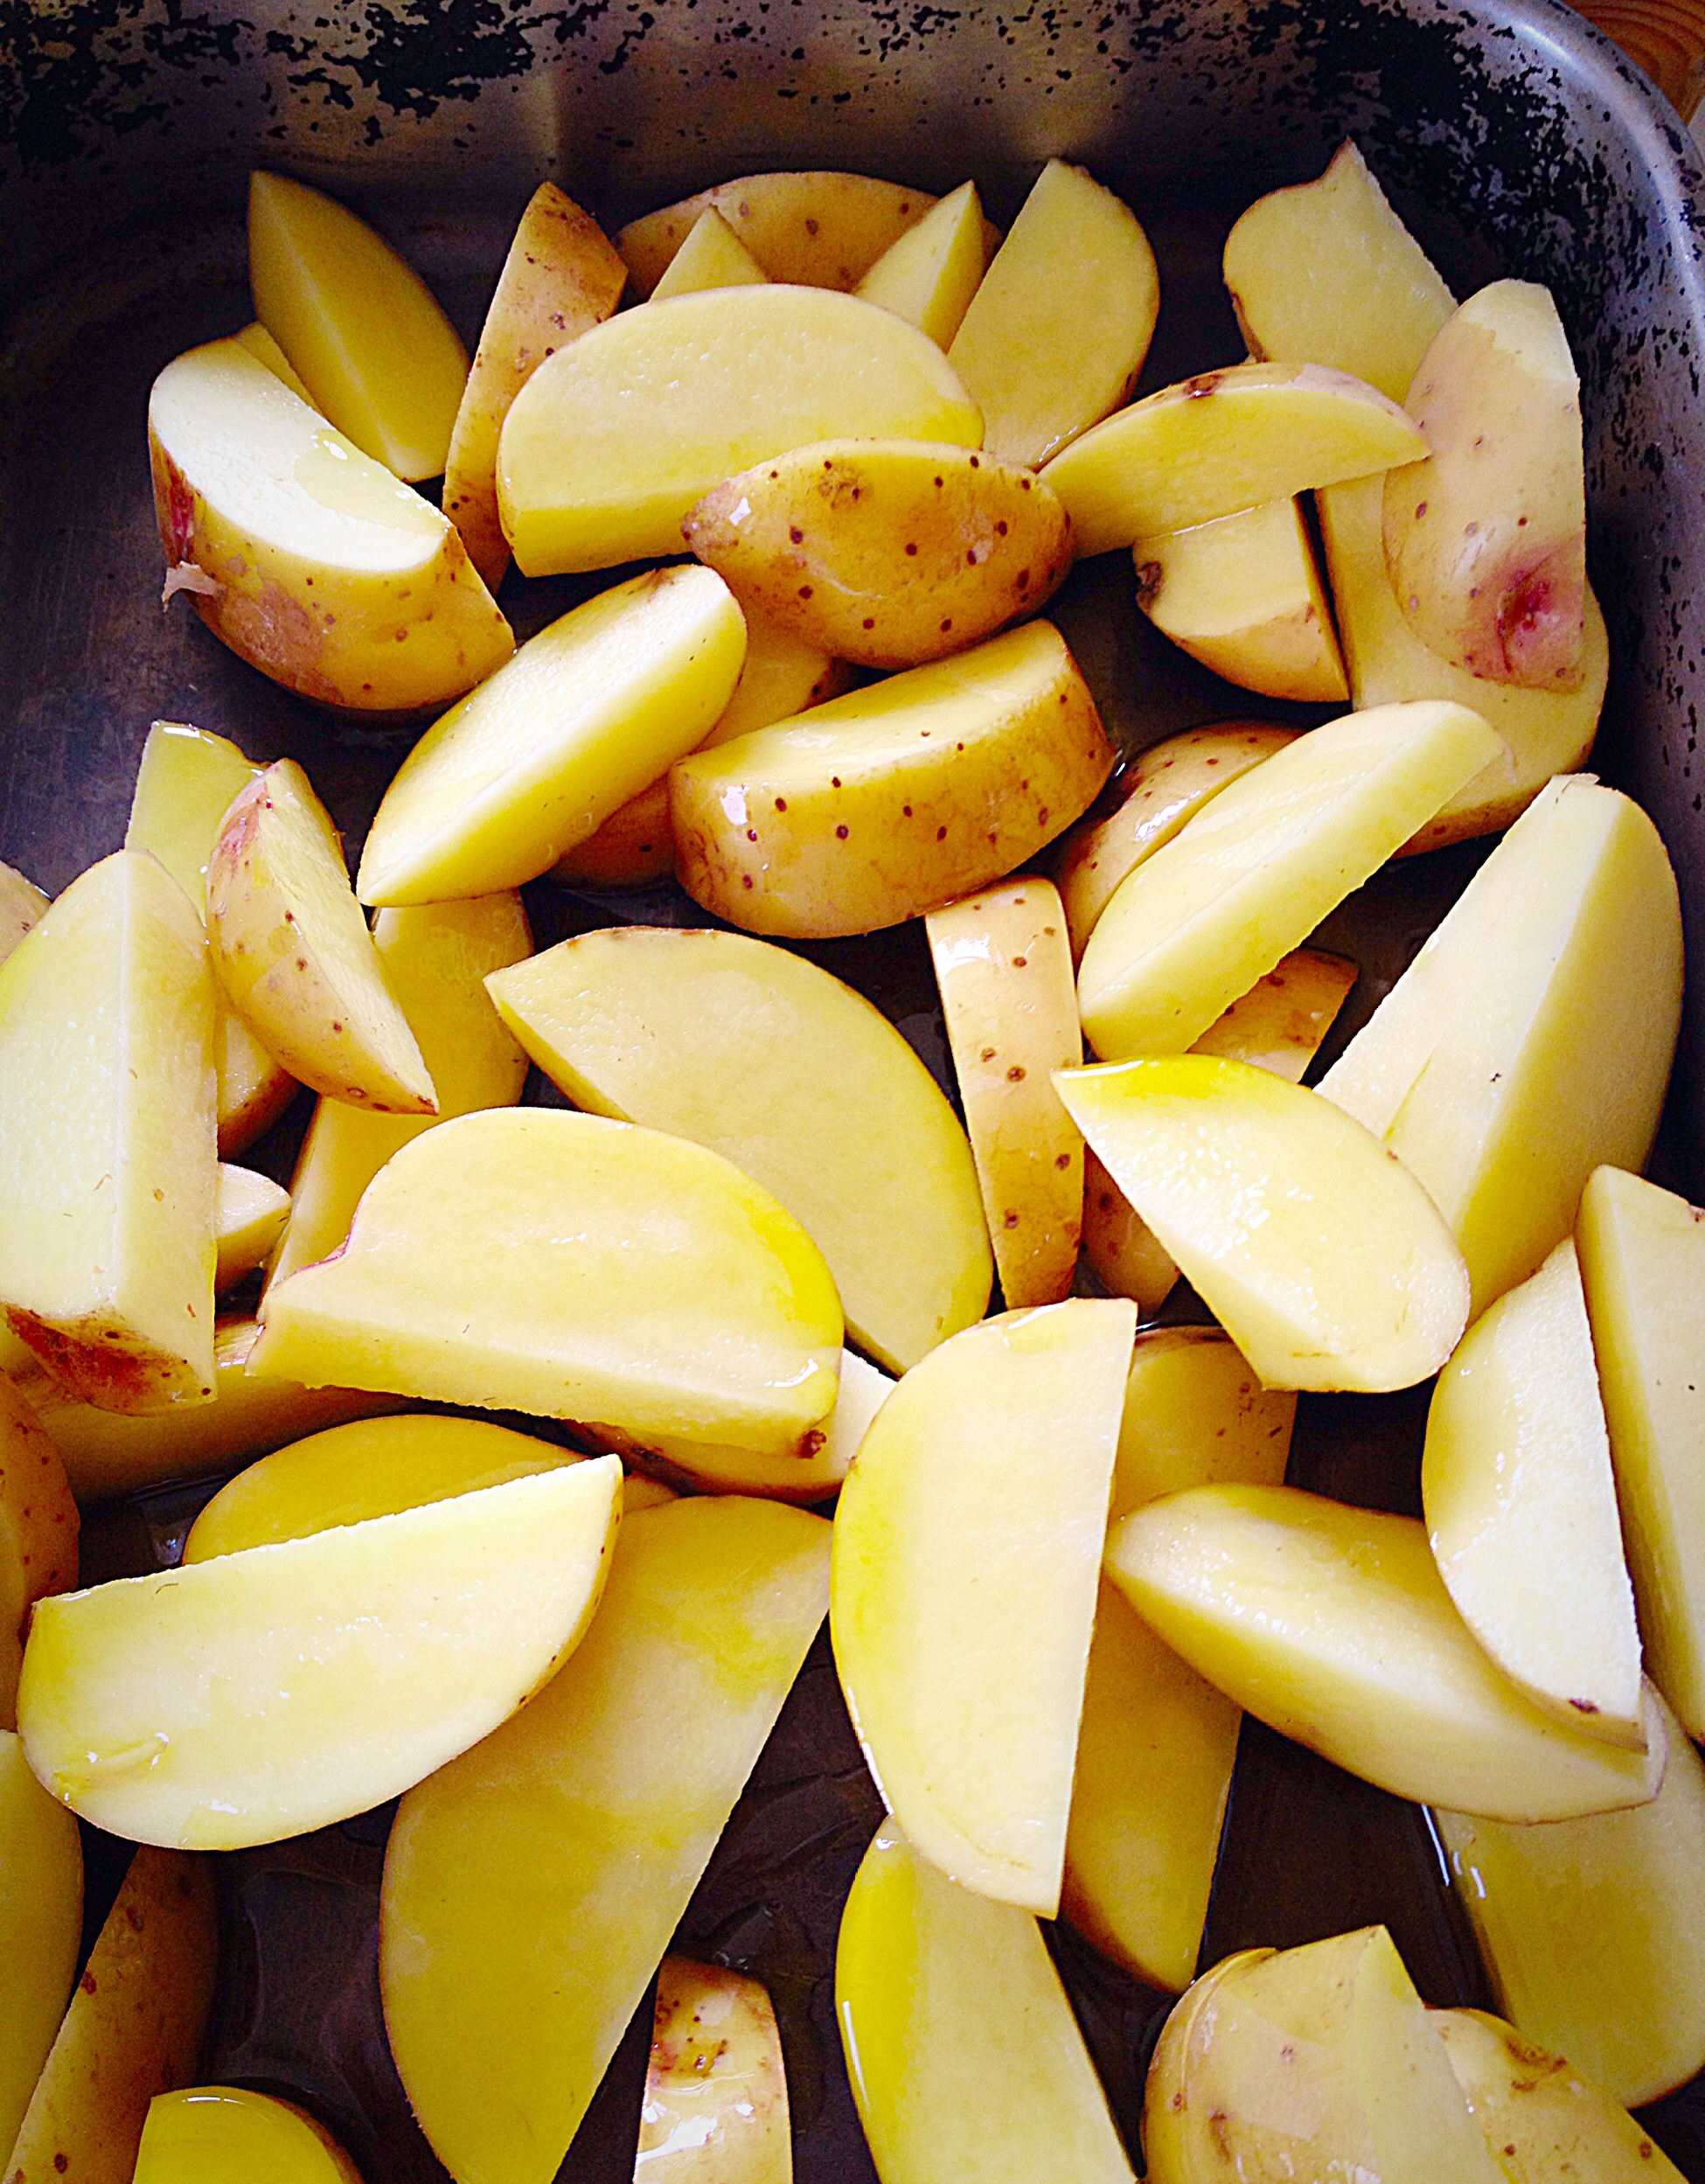
Cut each baking potato in half lengthways. Cut each half into wedges, approx 1/2 inch wide – try to keep all the potato wedges a similar size, this will ensure even cooking. Place all the potato wedges onto a large baking sheet/roasting pan.
Drizzle over the Olive Oil.I bought this pot of fresh Thyme from the supermarket and keep it on the kitchen window!Sprinkle over the Thyme and minced Garlic and then mix thoroughly so that each wedge is coated in oil, garlic and thyme.
Ensure the wedges are spread out evenly and then place in the oven.
Bake for 40 – 50 minutes until golden and cooked through (I usually test larger wedges with a knife).
Note : I give the tin a good shake halfway through cooking, to ensure they don’t stick. Also, if they do start to stick, use a fish slice to separate them and flip them over.
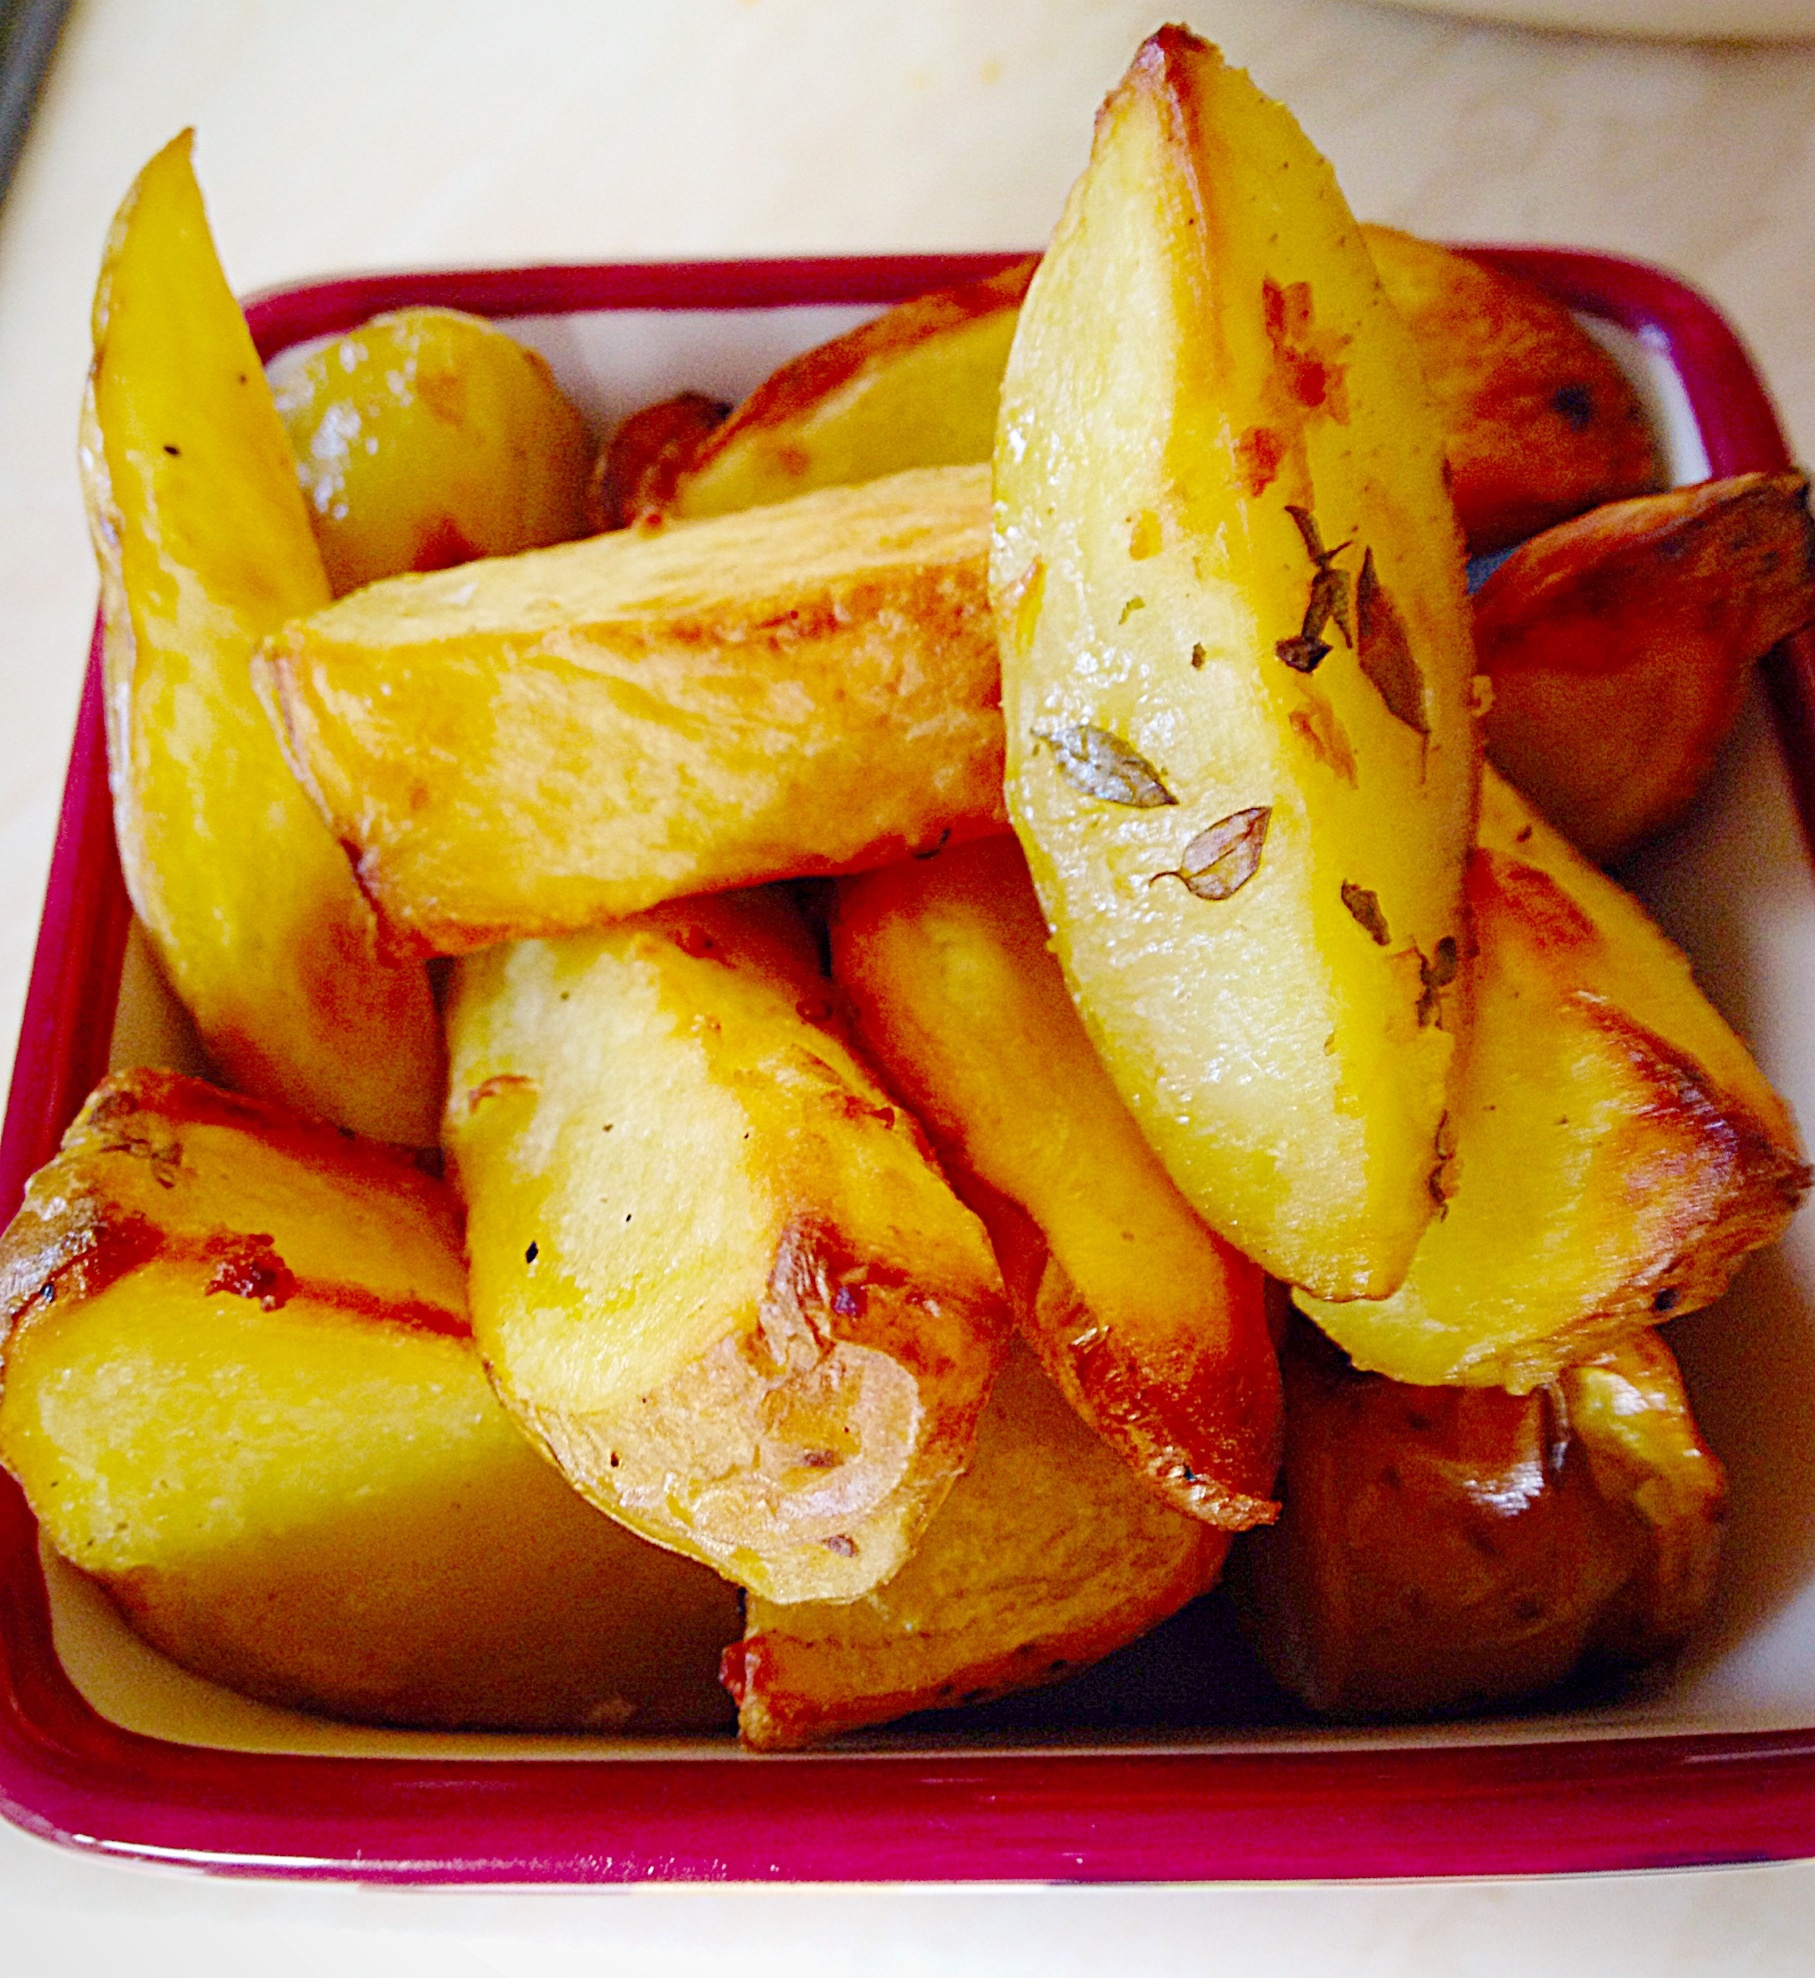
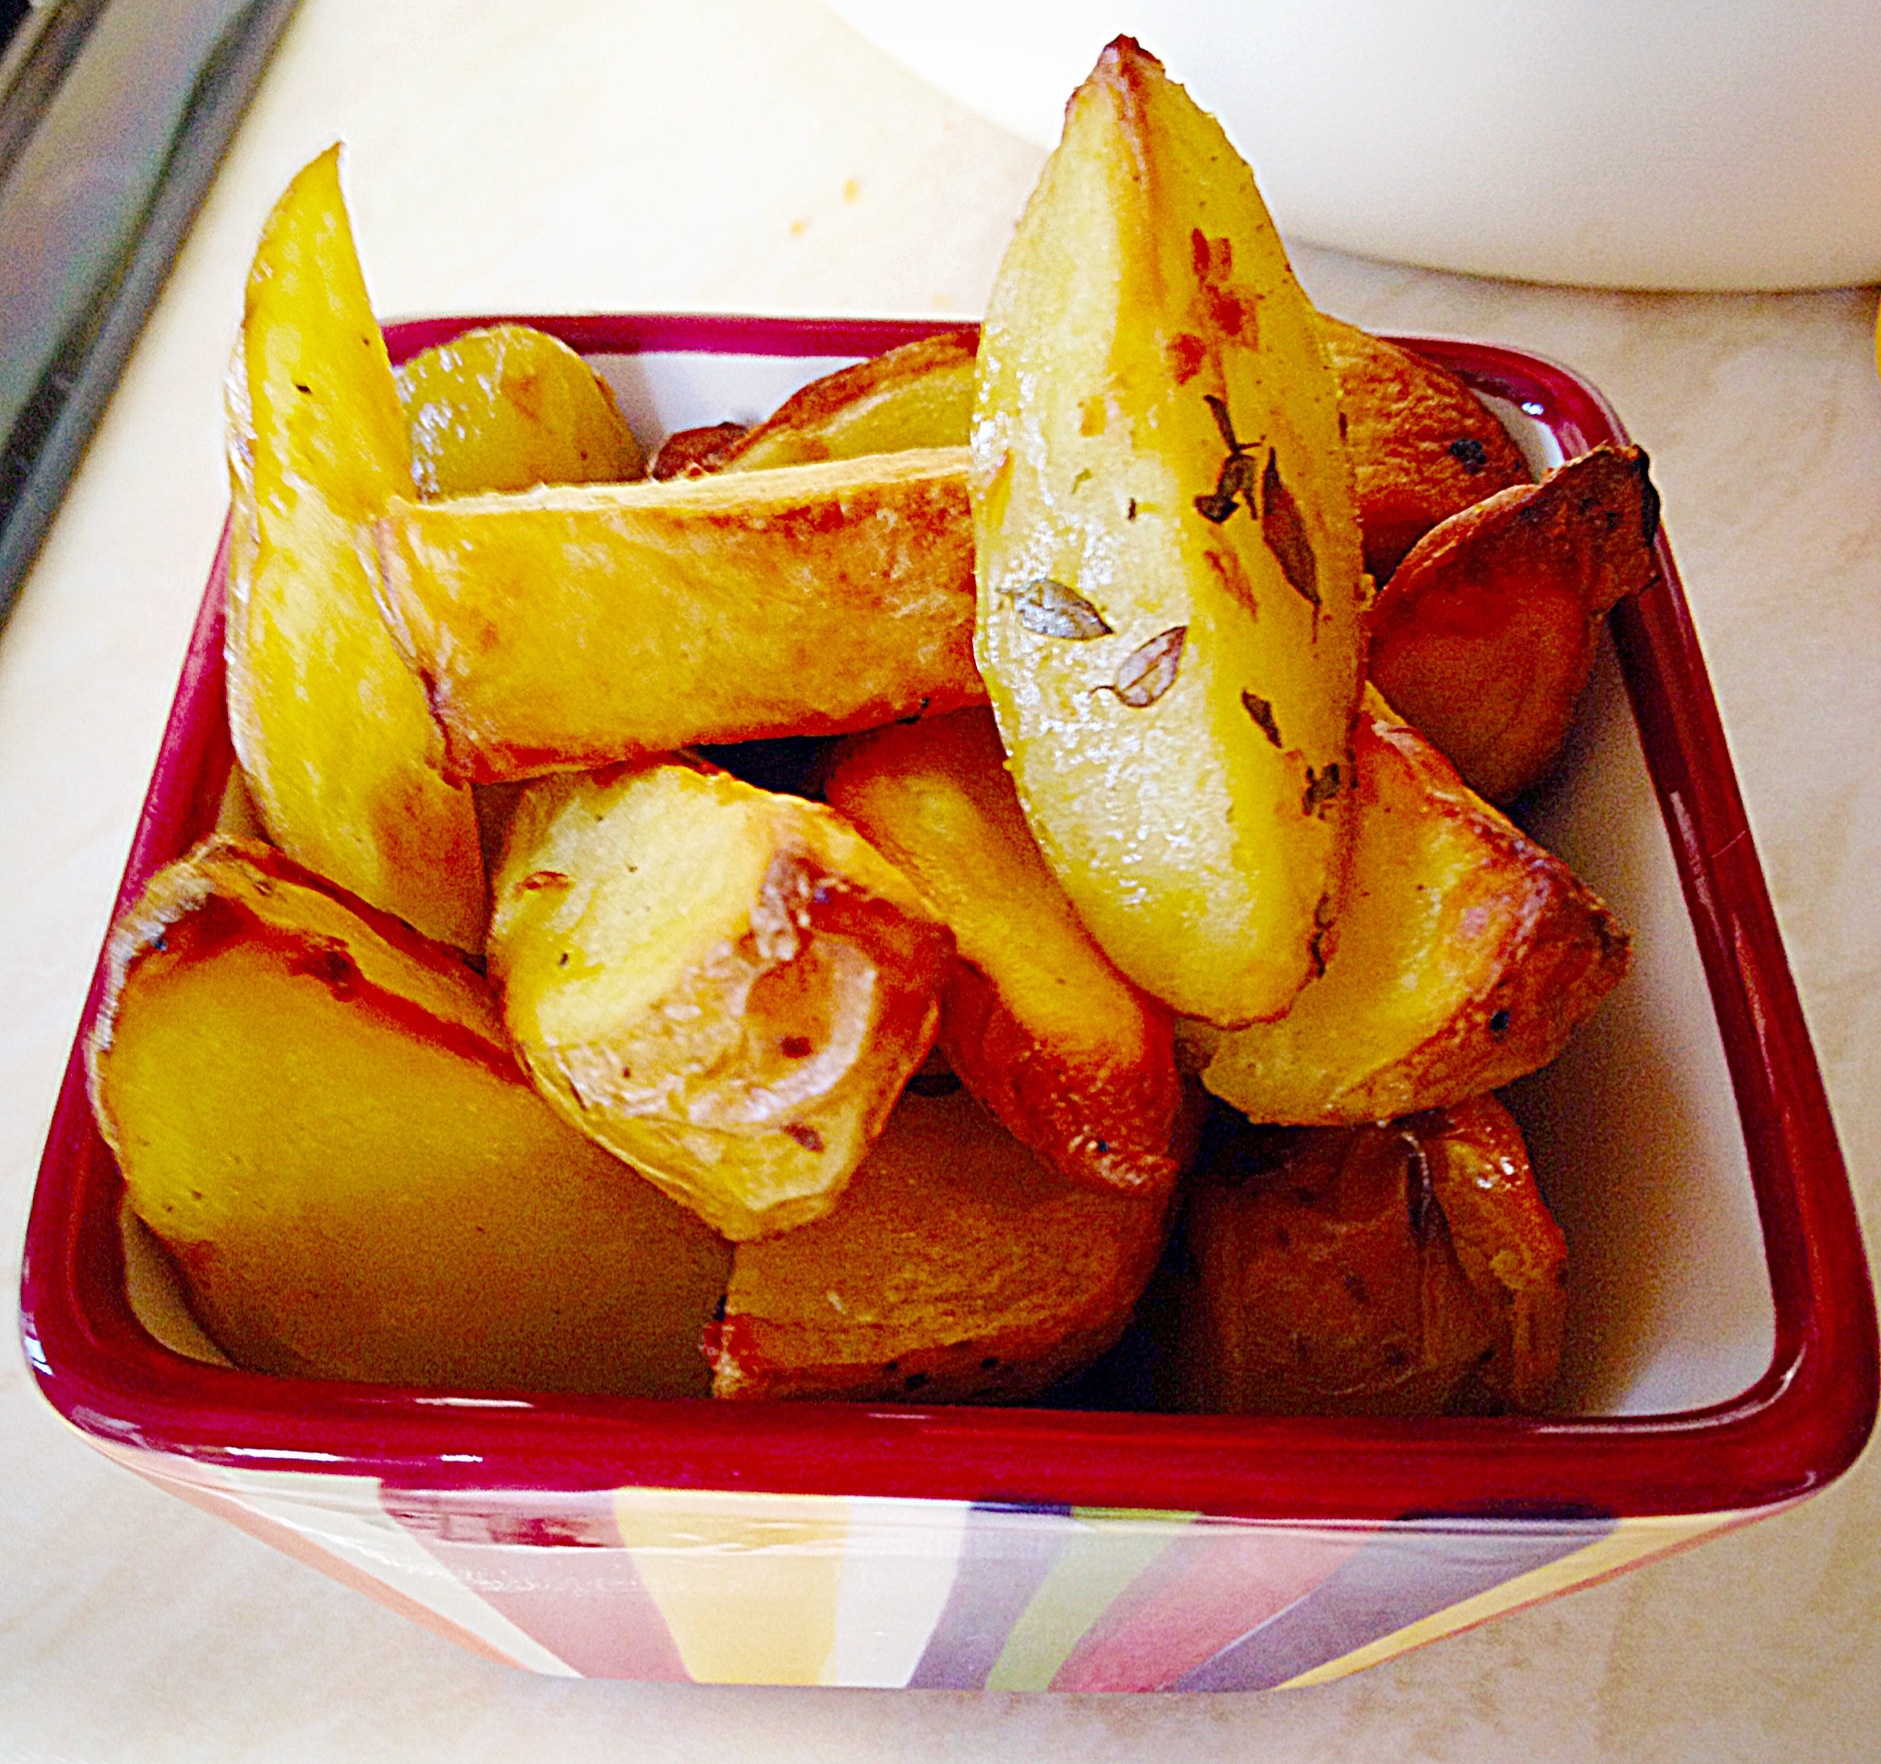
Hot Baked Garlic Herb Potato Wedges – straight from the oven.
Serve immediately with a sprinkle of crunchy sea salt and freshly ground black pepper.
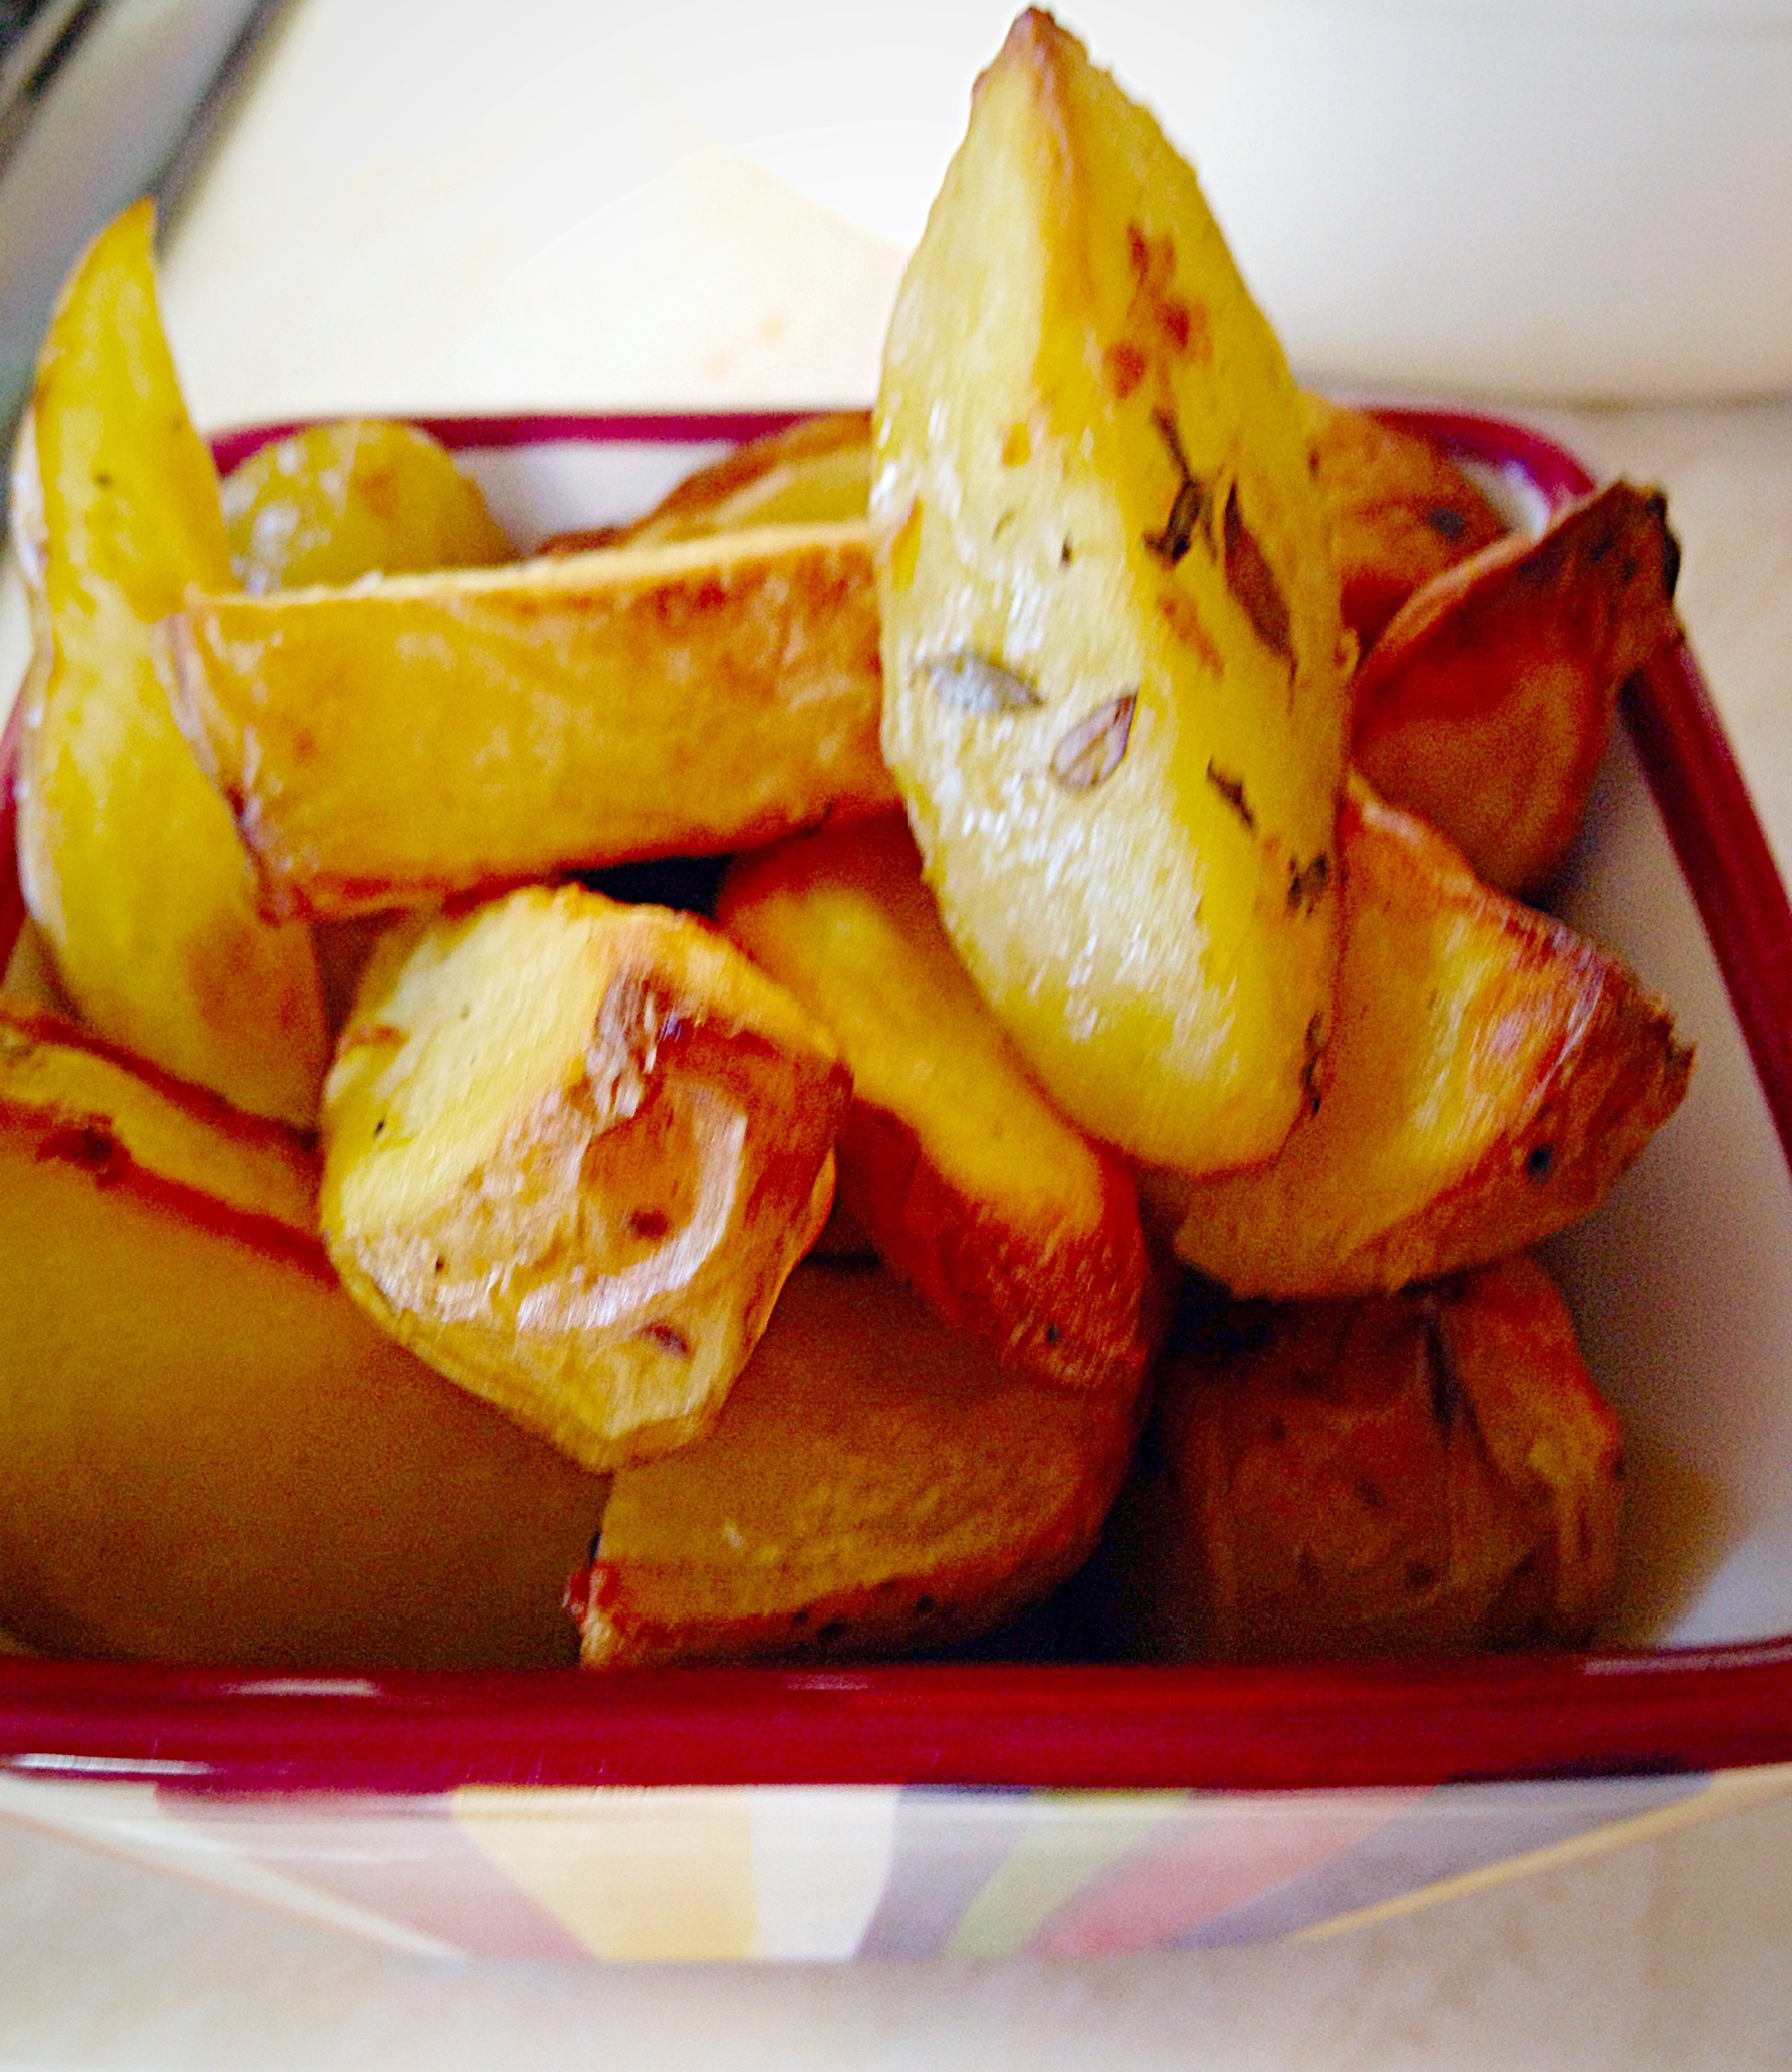
Baked Garlic Herb Potato Wedges – delish!
Also I make these using fresh, minced Rosemary in place of the Thyme. I honestly couldn’t pick a favourite – both versions are equally delicious!
I hope you enjoy trying and feasting on this dish.
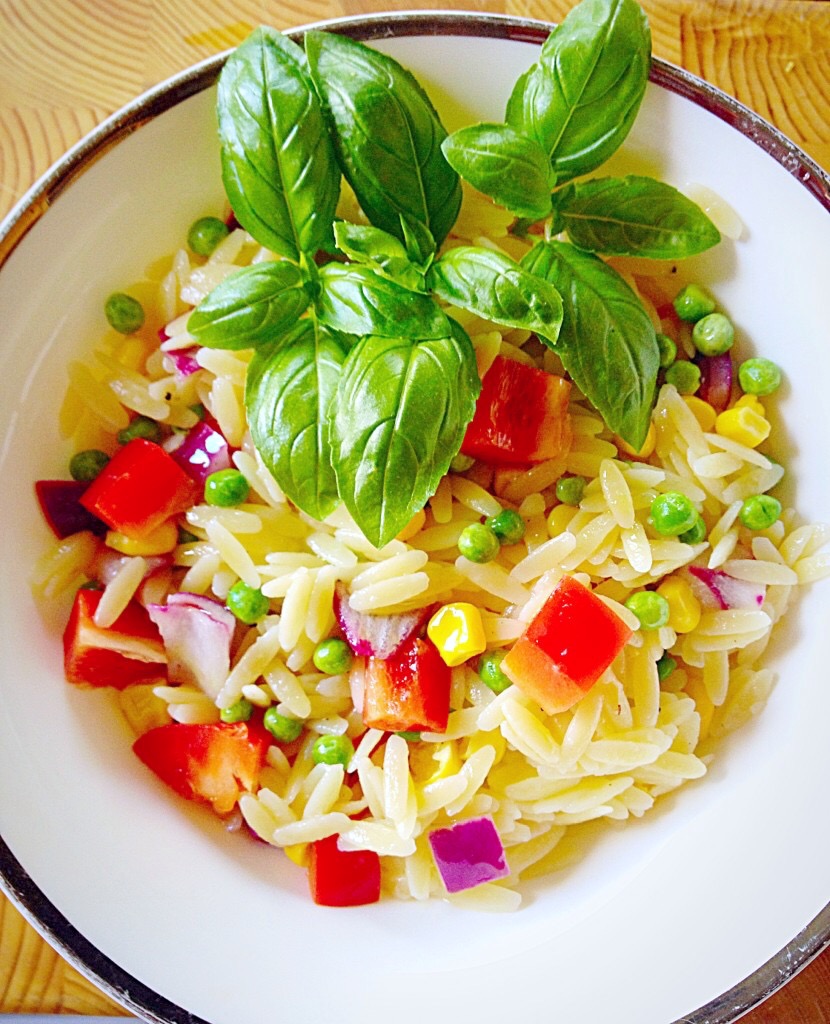
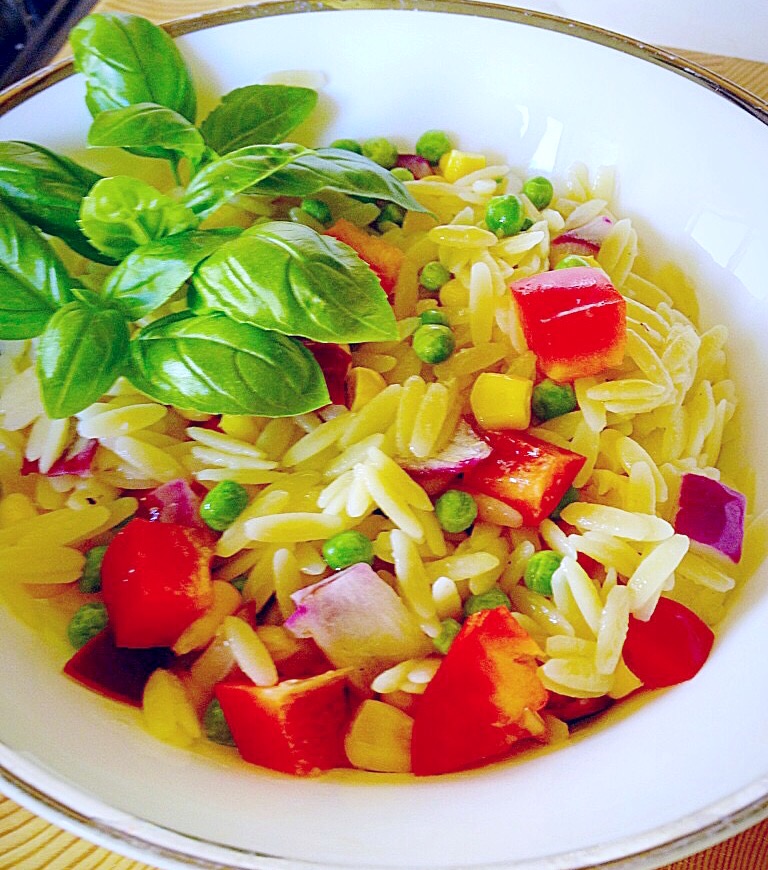
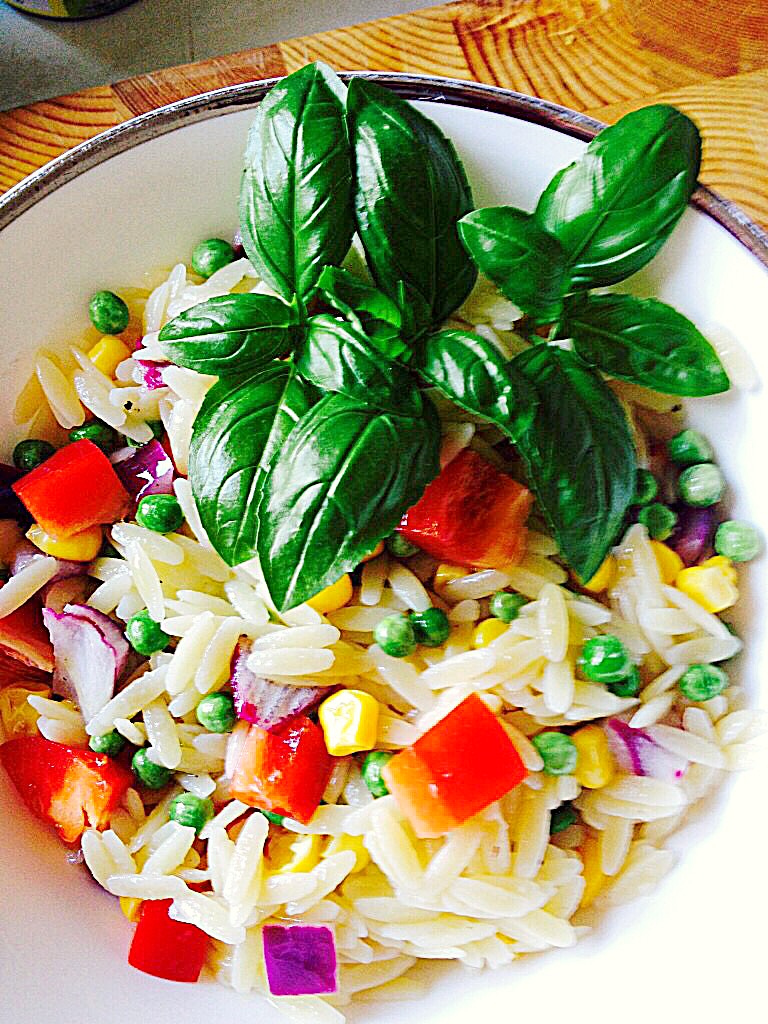
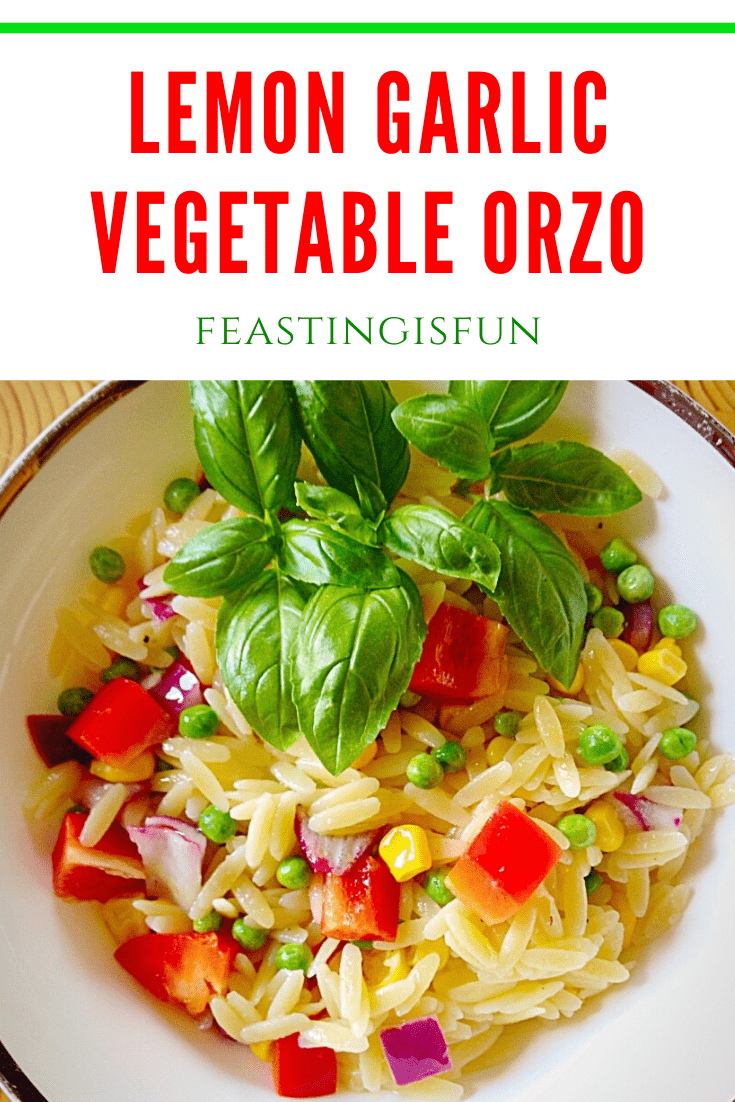
Hi, have I got the easiest, tastiest, make ahead side dish for you? Oh yes I have! Lemon Garlic Vegetable Orzo. Also, this dish does not disappoint as it is delicious.
Lemon Garlic Vegetable Orzo
While I’ve said this is a side dish, it’s also vegetarian and makes a fabulous light lunch. Likewise, adding a few shavings of Parmesan would add extra oomph for lunch, served alongside some crusty, crunchy bread.
I’m getting hungry!
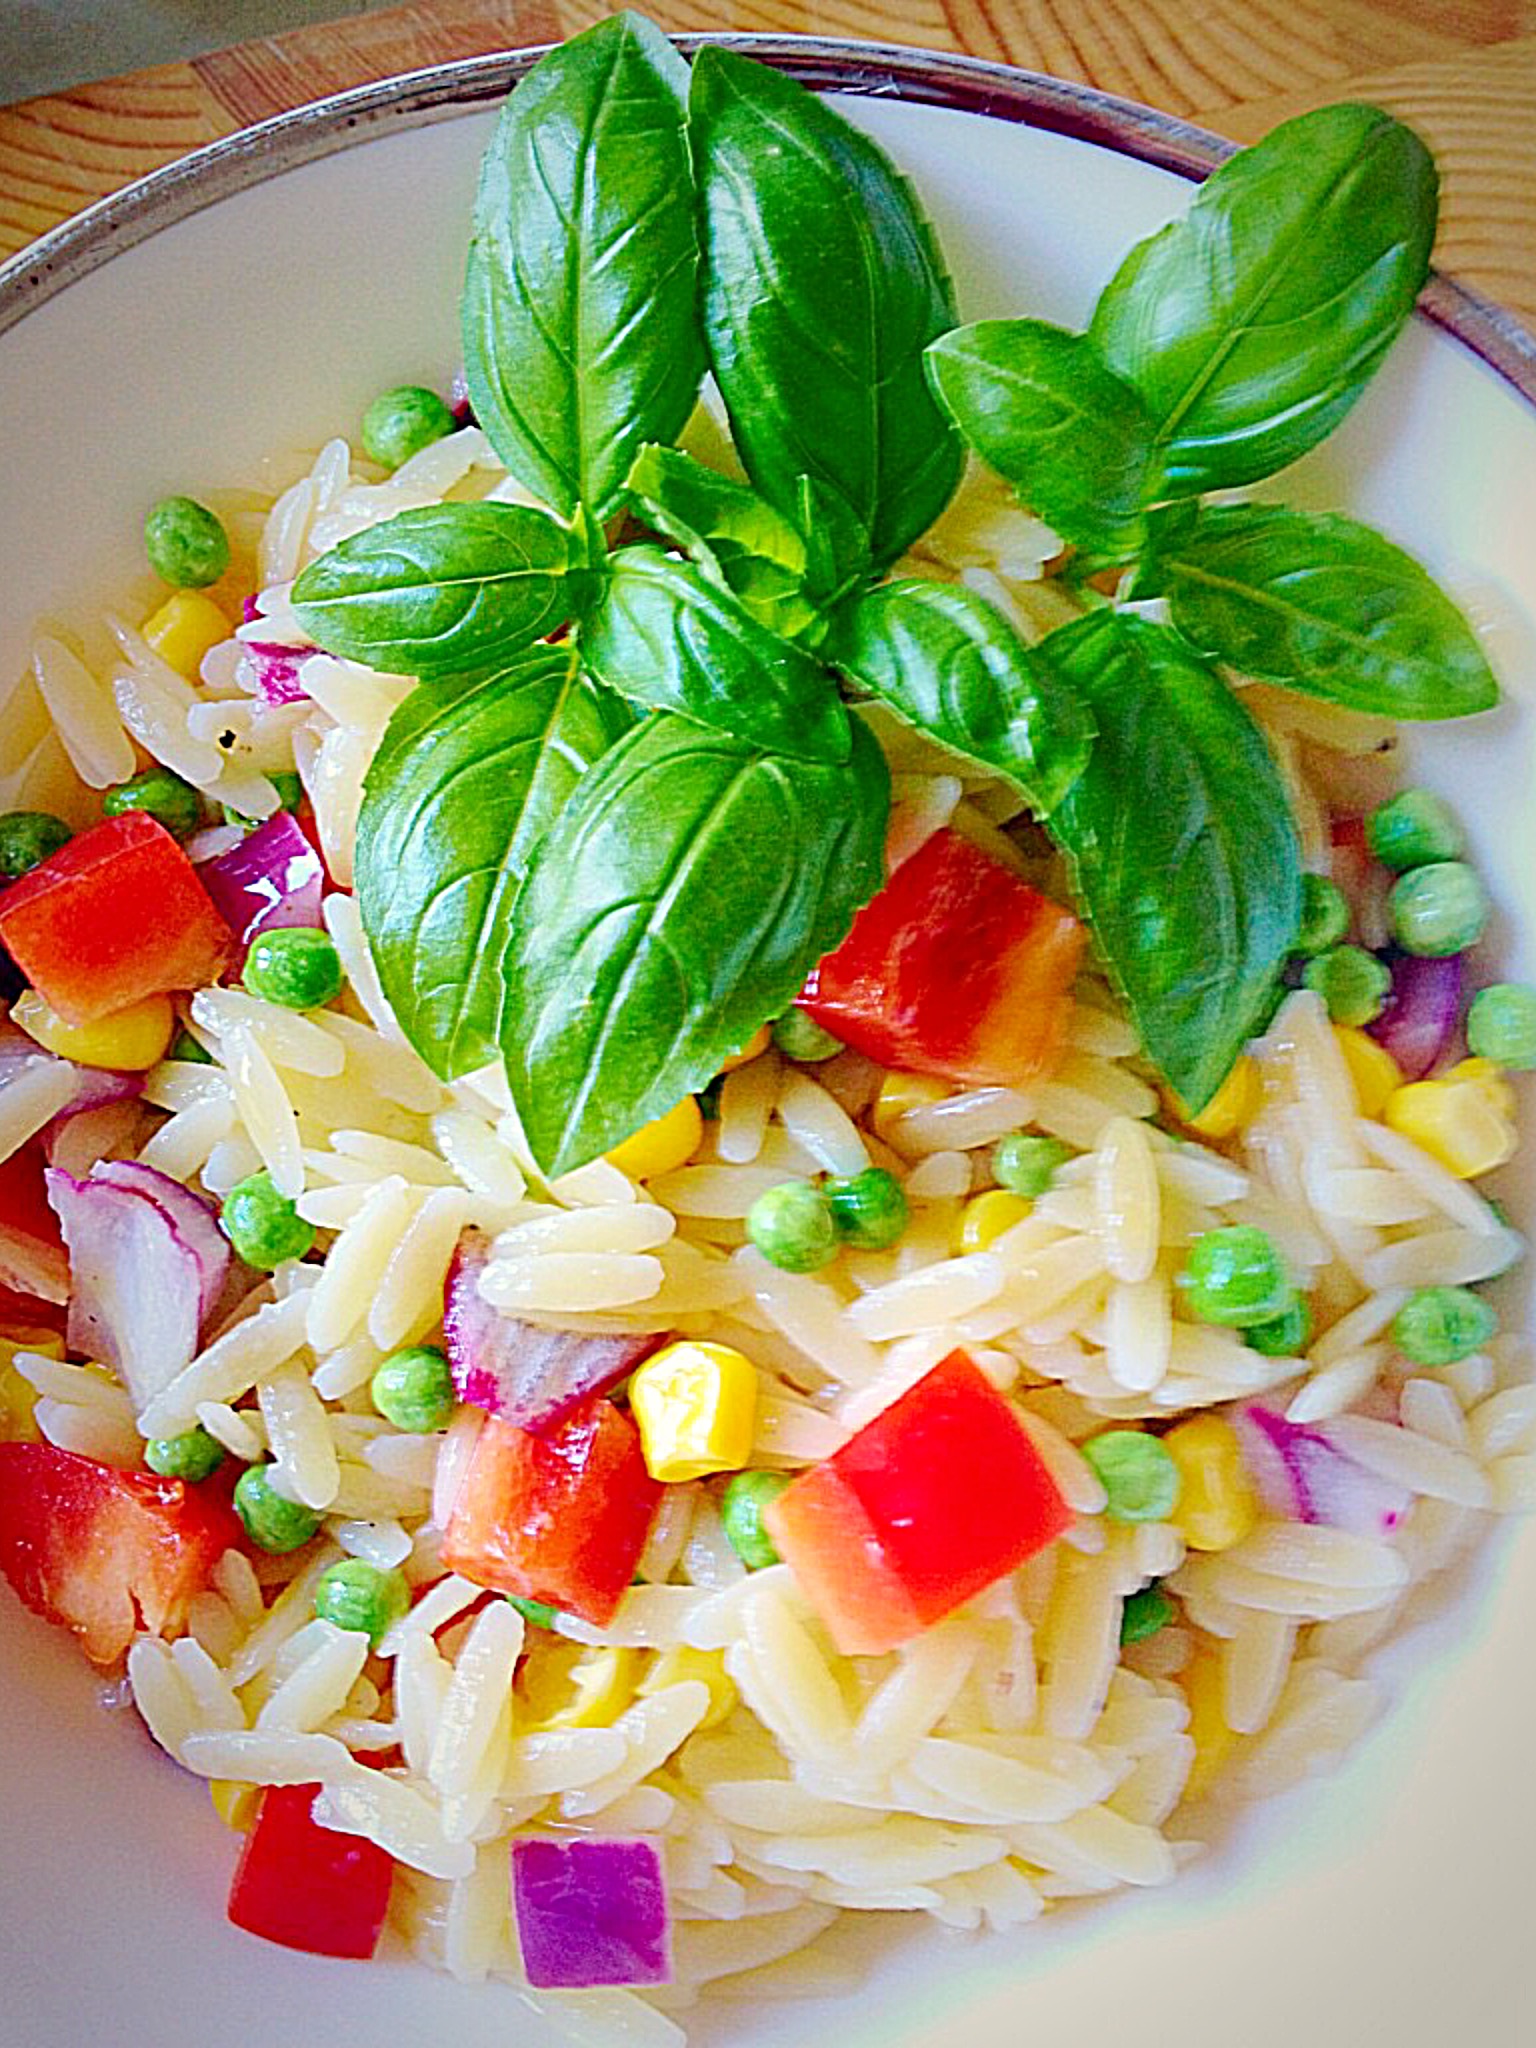
Lemon Garlic Vegetable Orzo
While I’ve used red onion, peas, sweetcorn and red bell pepper in this dish – but feel free to switch up the veggies (celery is also good) with whatever you have on hand. Most importantly, I would say that this Lemon Garlic Vegetable Orzo is best served at room temp, or even warmed – BUT NOT COLD! Because, no matter how much lemon/oil you add, when served fridge cold the Orzo clumps together and not in a good way! So there you go, an easy recipe that doesn’t take up any room in your fridge, or require any last minute fiddling. Yay!! Because, we like easy!
Lemon Garlic Vegetable Orzo
Recipe : Lemon Garlic Vegetable Orzo serves 6-8 as a side dish.
500g/1lb Packet Dried Orzo – available from most supermarkets I buy mine from Waitrose
Juice of 1 Large Lemon
1 x Small Red Onion
150ml/5fl oz Extra Virgin Olive Oil
2 x Garlic Cloves – crushed
200g/7oz Frozen Peas
Medium Can Sweetcorn
Fresh Basil
Sea Salt – I use Maldon and freshly ground Black Pepper to taste
Making The Vegetarian Orzo Dish
First of all put a large pan of water on to heat up for the Orzo.
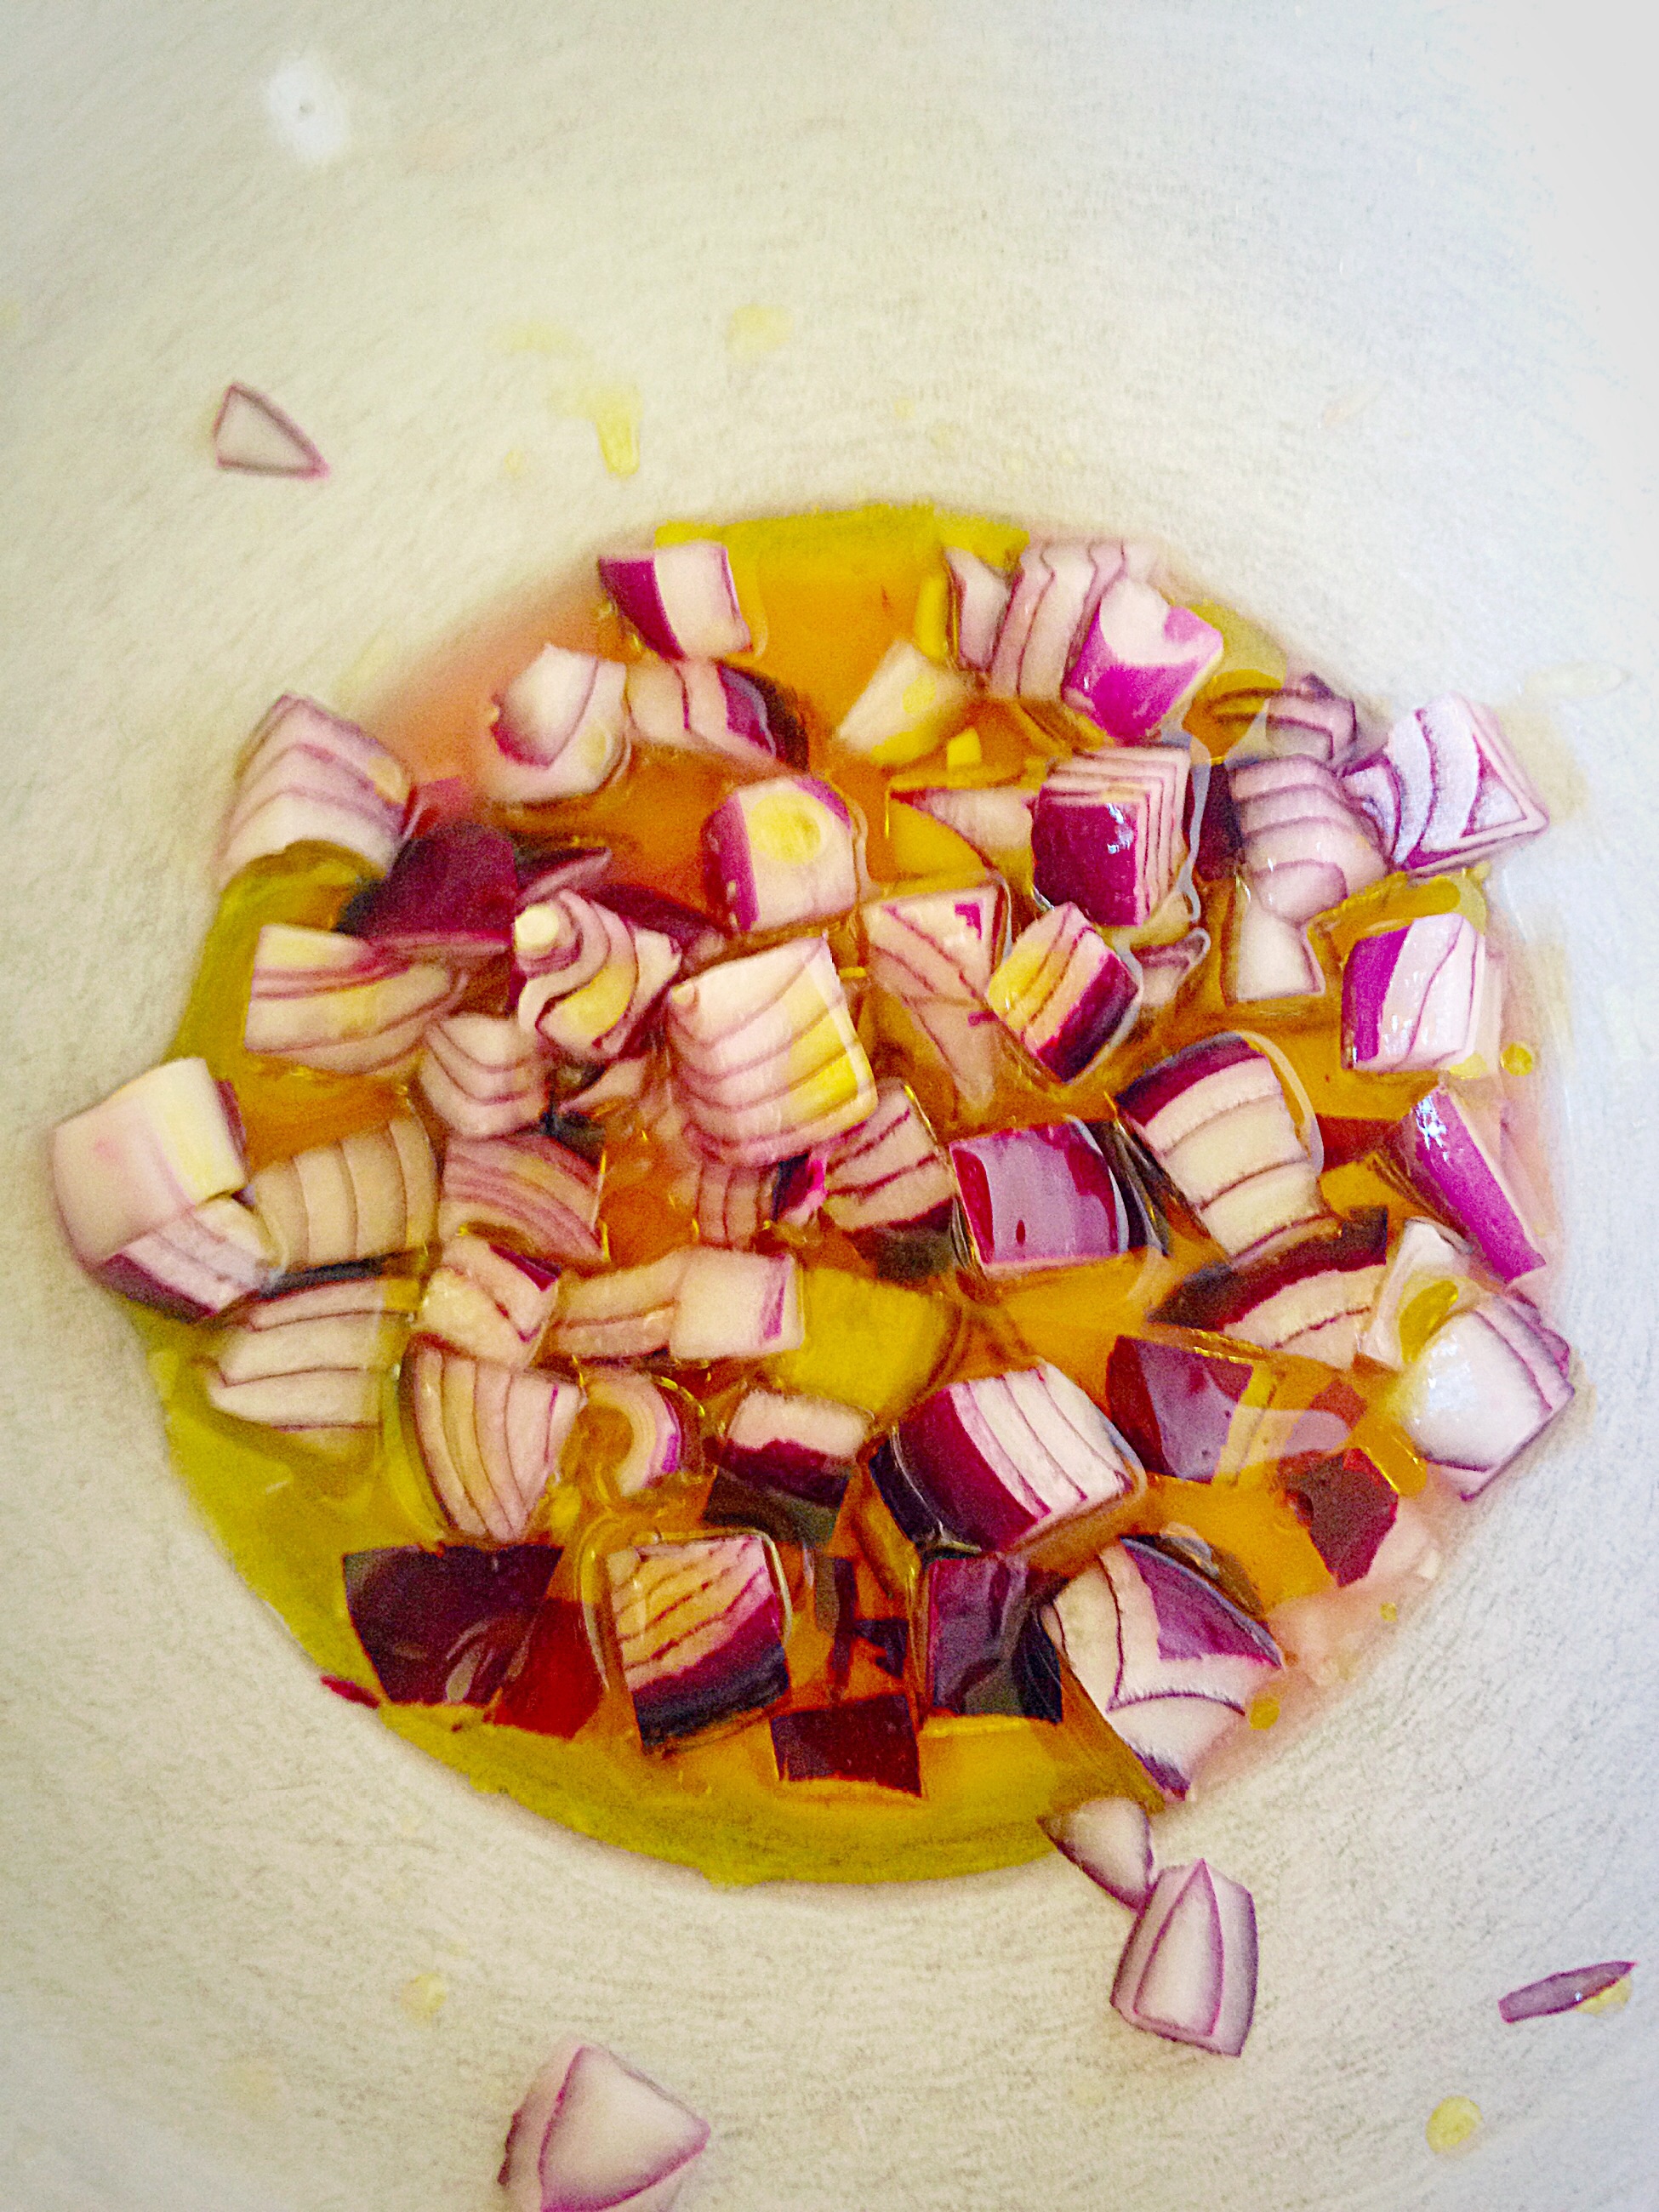
Place the lemon juice and finely diced red onion into a large bowl. Add a pinch of salt and mix together. Also leaving the onion in the lemon juice will remove the acrid taste!
As soon as the water in the pan is boiling add salt and then the Orzo. Cook according to the packet instructions, taking care not to overcook or the Orzo will simply clump together!
While the Orzo is cooking gently heat the Olive Oil and garlic together, for approximately 2 minutes on a medium heat. This allows the garlic to infuse the oil. And also the garlic is lightly cooked. Pour the garlicky oil over the onions and lemon juice.
Lemon Garlic Onions and Oil – add salt and pepper.
Drain the Orzo as soon as it is cooked and pour straight into the bowl. Using a large slotted spoon immediately toss the Orzo in the oil/lemon juice, this will stop the Orzo from sticking together.
Place the frozen peas (I used petit pois) in the bowl and mix in with the hot Orzo.
Add the sweetcorn (drained) and the diced, red, bell pepper. And mix together with a fork, then taste for seasoning. Add salt and freshly ground pepper as necessary.
Take a handful of Basil leaves, roughly chop and sprinkle over.
Finally, cover with cling film and serve at room temperature.
Lemon Garlic Vegetable Orzo
This side goes fabulously with fish – Salmon especially, Chicken and Pork. Likewise, it makes a fab alternative to roast potatoes and hot veggies for a Summer roast, Also, it completely seals the deal as part of a buffet or served at a barbecue. And with very little effort needed!
If you have enjoyed this recipe for Lemon Garlic Vegetable Orzo you may also like these:
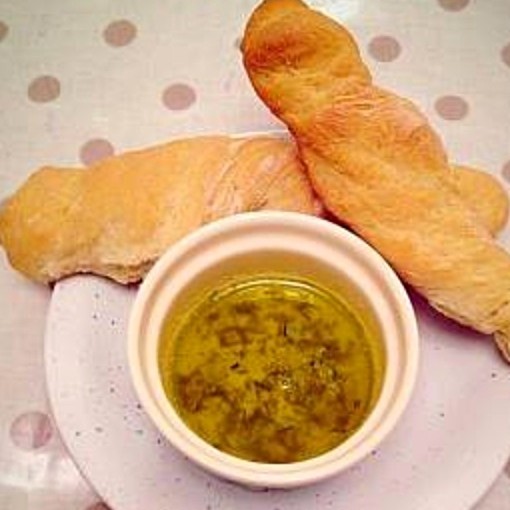
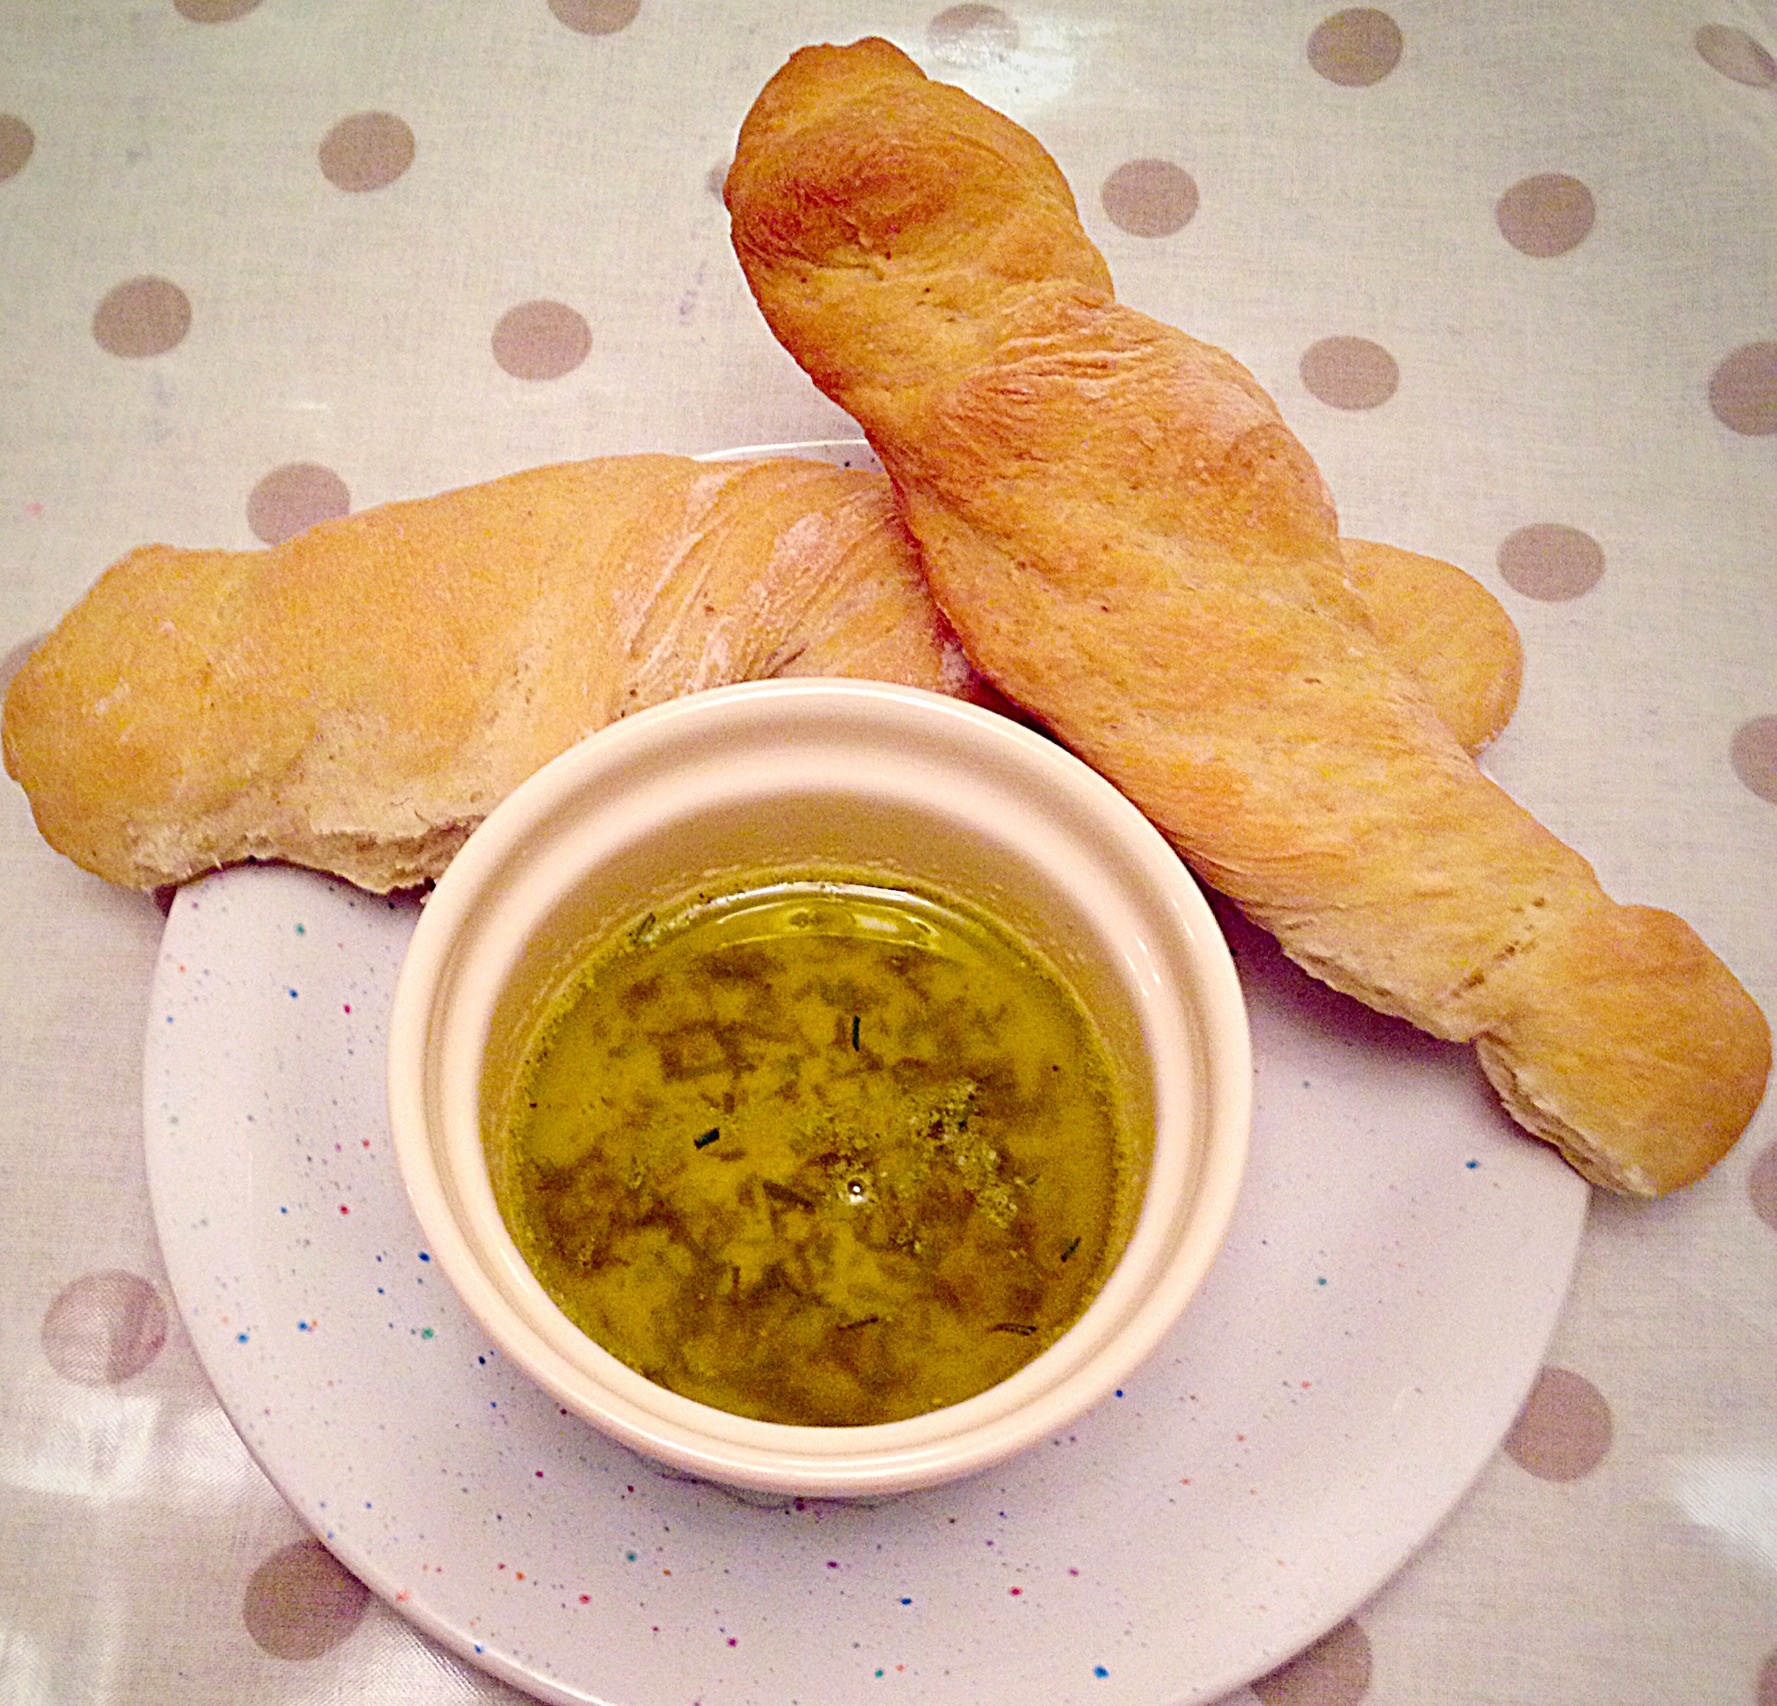
Hello there, have I got a new take on Garlic Bread for you today? Oh yes I have. Homemade BreadstickGarlic Herb Dipping Oil – deeeelish!! A fab recipe to make with the kids any day, but especially this week, during half term, here in the UK. Just like at Cafe Rouge except everyone has their own pot of dipping oil!
Crunchy Breadsticks with Garlic and Herb Dipping Oil
We first had a version of these at Cafe Rouge a few years ago and we all thought they were yummy. So my mind started whirring, thinking that these couldn’t be ‘that hard’ to make at home – and guess what, they’re not!! And, dare I say, they taste better!
THE perfect sharing food. Perfect with pasta.
Usually, when I’m feeding a crowd, I double up on the recipe and two people share one plate. But last night, with our Spag Bol we each had our own bowl of Garlic and Herb Dipping Oil and Breadsticks (some of us are getting over colds – so thought individual was best!!).
Crunchy Breadsticks, perfect for dunking in the Garlic and Herb Oil.
Firstly to make the breadsticks, for me it really is easier to have a bread maker or stand mixer. There is no way I could do all that kneading by myself, but if you’re happy to make the dough by hand, feel free.
Recipe :Breadsticks Makes 10
1lb/450g Strong White Bread Flour
2tsp Dried Fast Acting Yeast
300ml Water – Approx 37C Body Temp
2tbsp Olive Oil
3/4 tsp Sea Salt Flakes – I used Maldon
Method : see below for hand kneading
Place the warm water into the bowl of your bread maker or stand mixer with the dough hook attached. Add the dried yeast and mix with your fingers. Place the flour on top of the water/yeast. Pour the oil on top of the flour and sprinkle over the salt.
* For bread maker set cycle to knead and prove.
* For the stand mixer, mix the ingredients for 10 minutes. When the dough is soft and elastic remove to an oiled bowl, turn once, so the sides and top are slicked in oil, cover with cling film and place in a warm place to double in size (1-2 hours).
* For hand kneading, place all the ingredients into a large bowl, as per the other methods. Bring together with your hand, in the bowl, until a complete lump of dough is formed. Place the dough on a lightly floured worktop and knead by hand until the dough is smooth and elastic – proceed as for stand mixer.
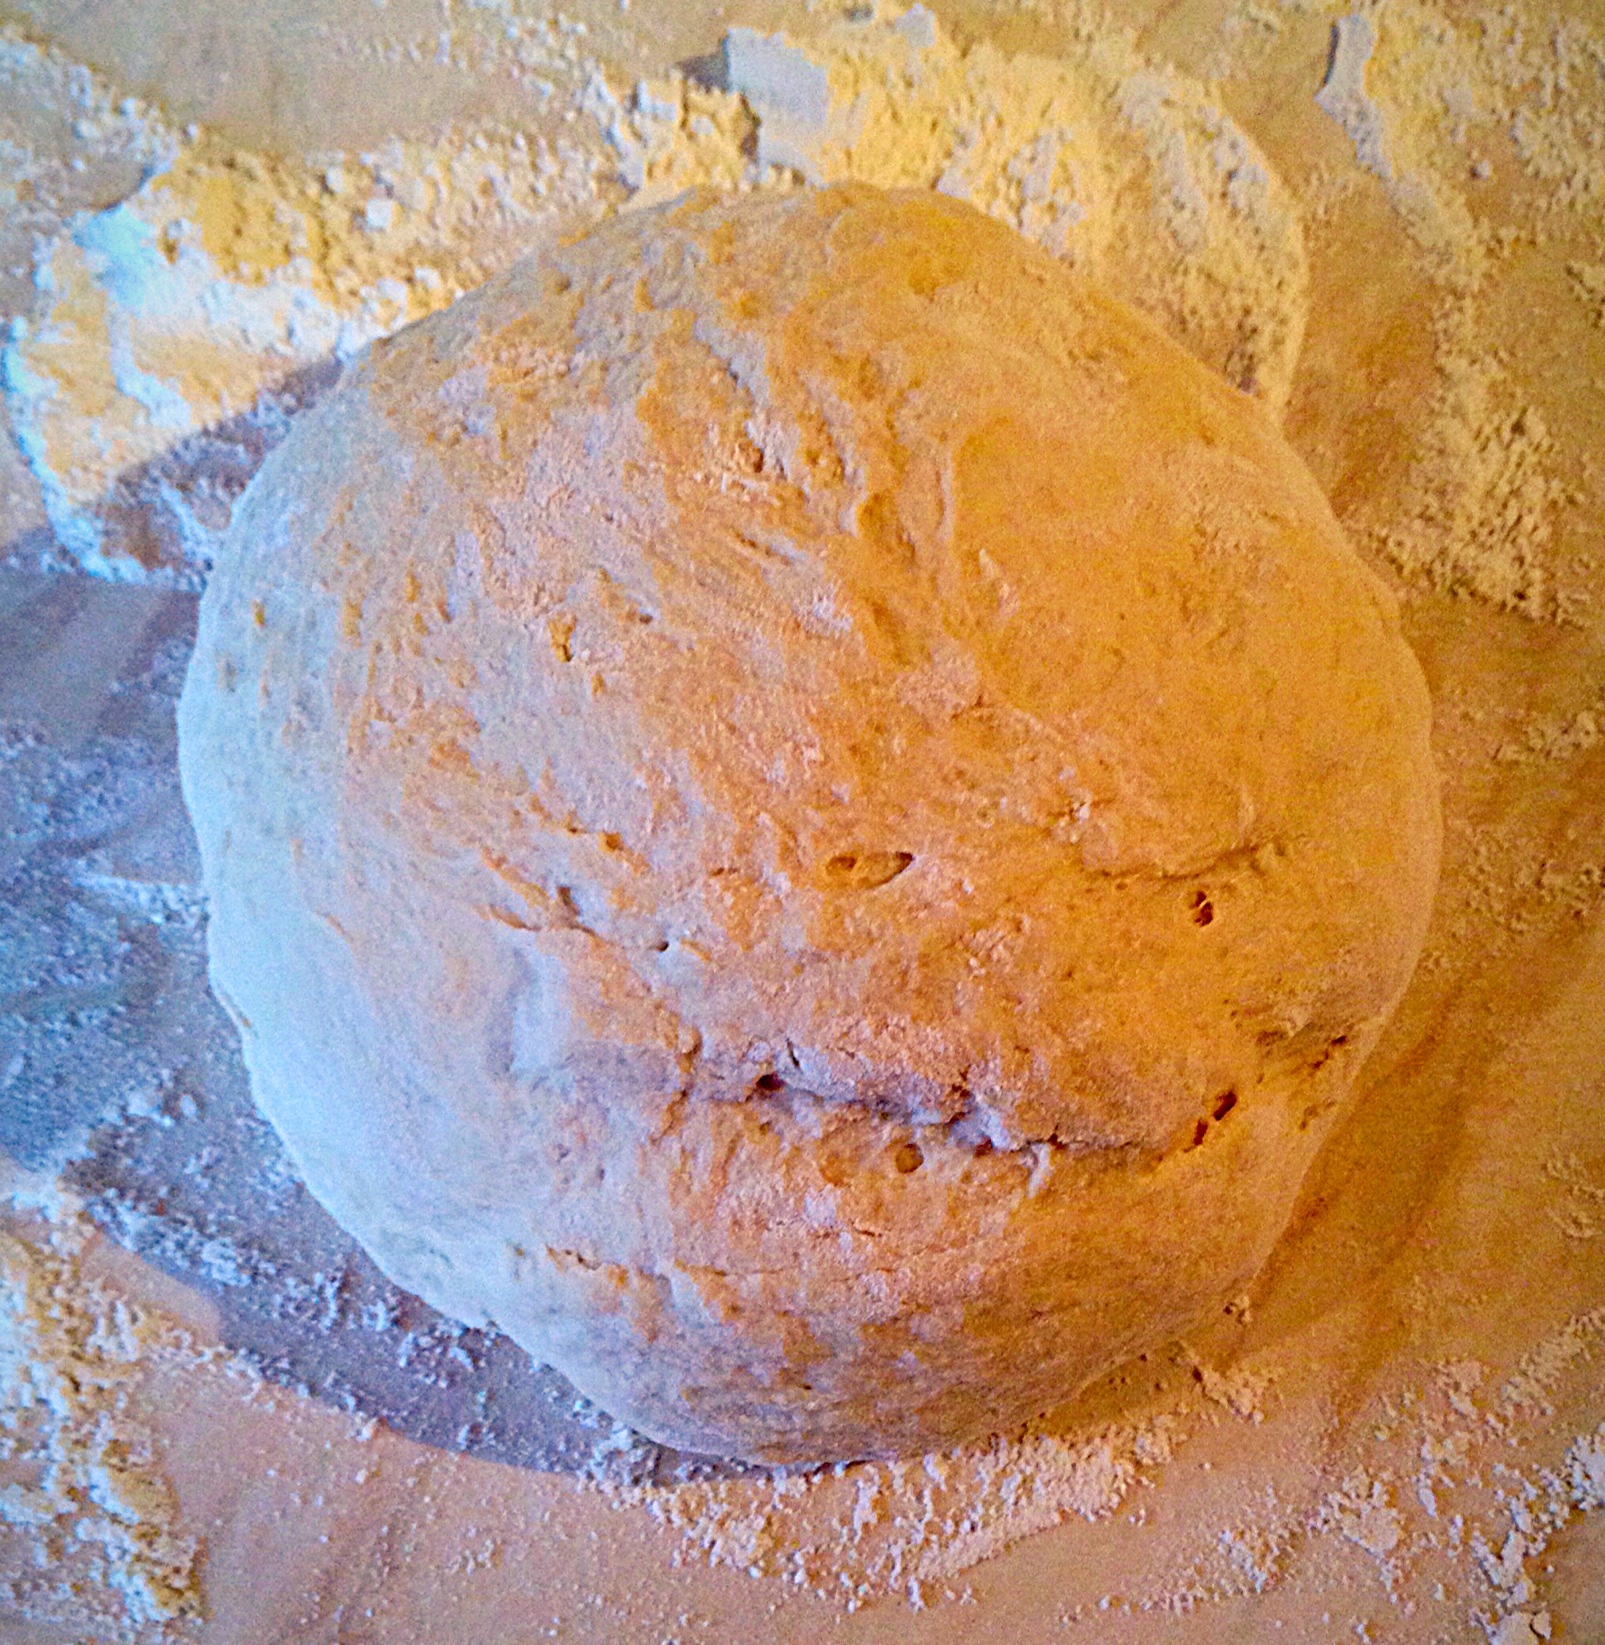
Once the dough has doubled in size knock back – gently punch down into the bowl to knock out the air (in a bread maker set to mix and allow 30 seconds of slow rotating to knock back your dough).
Tip your dough out onto a floured worktop.
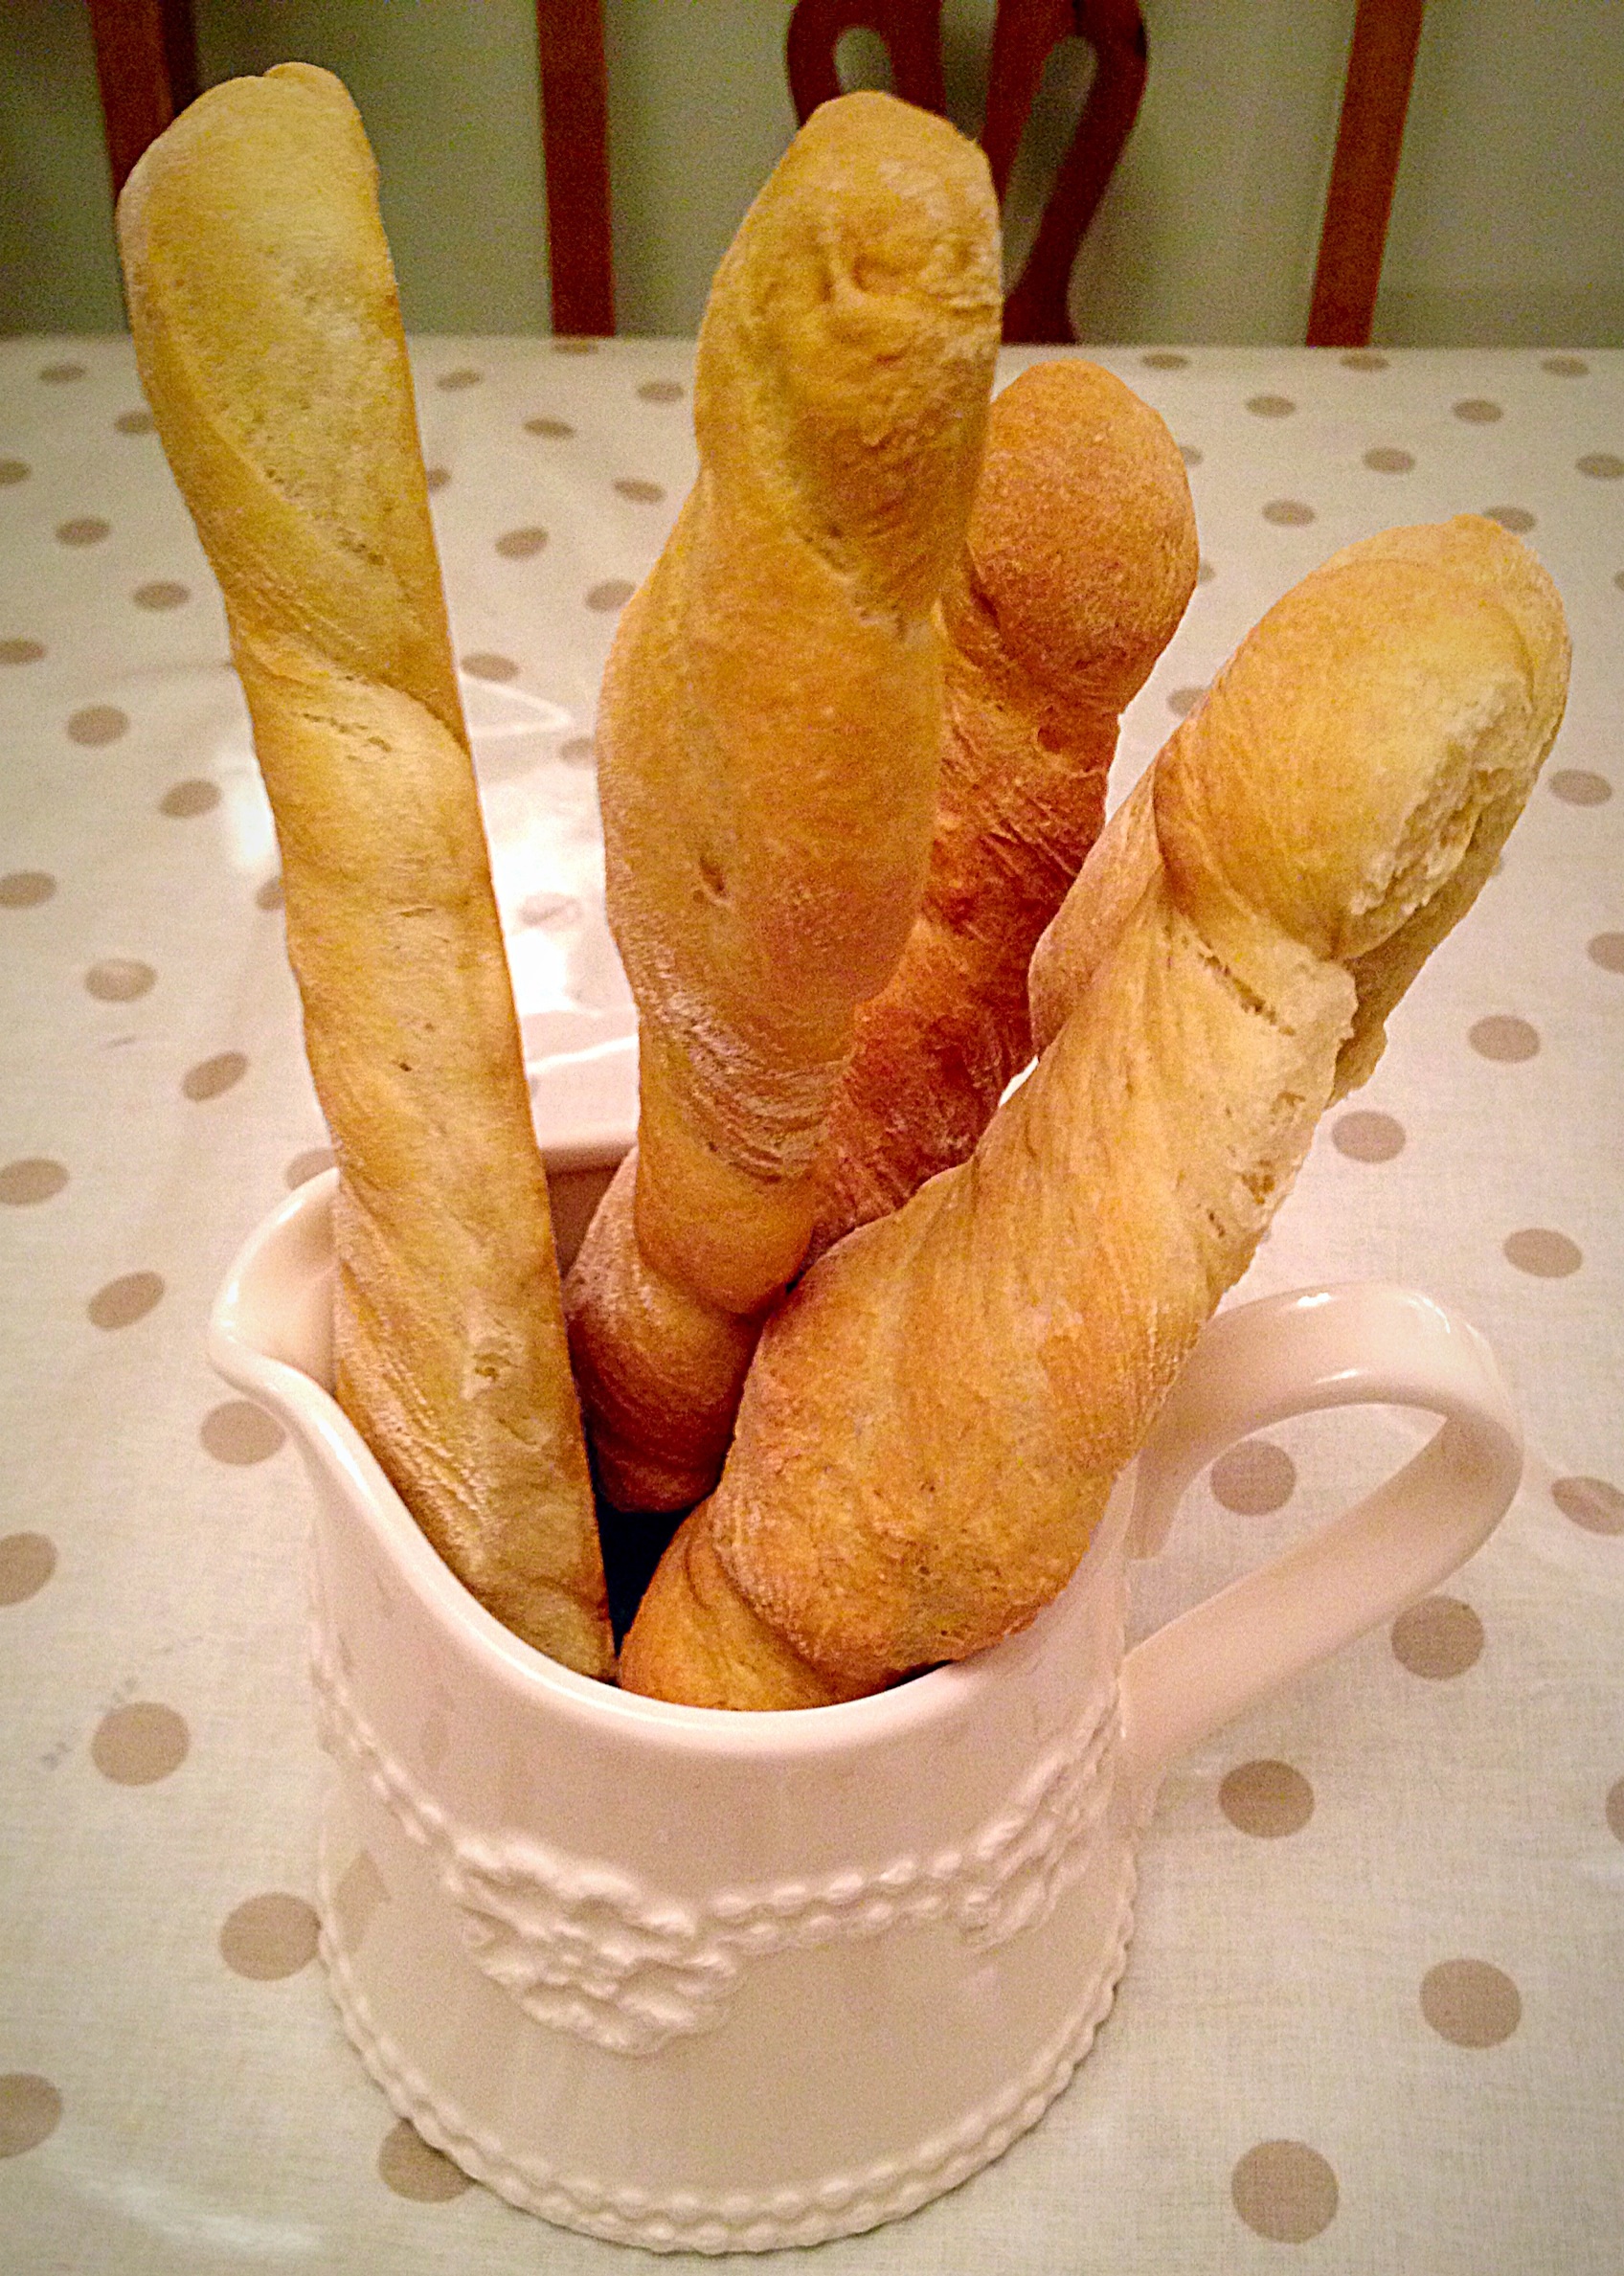
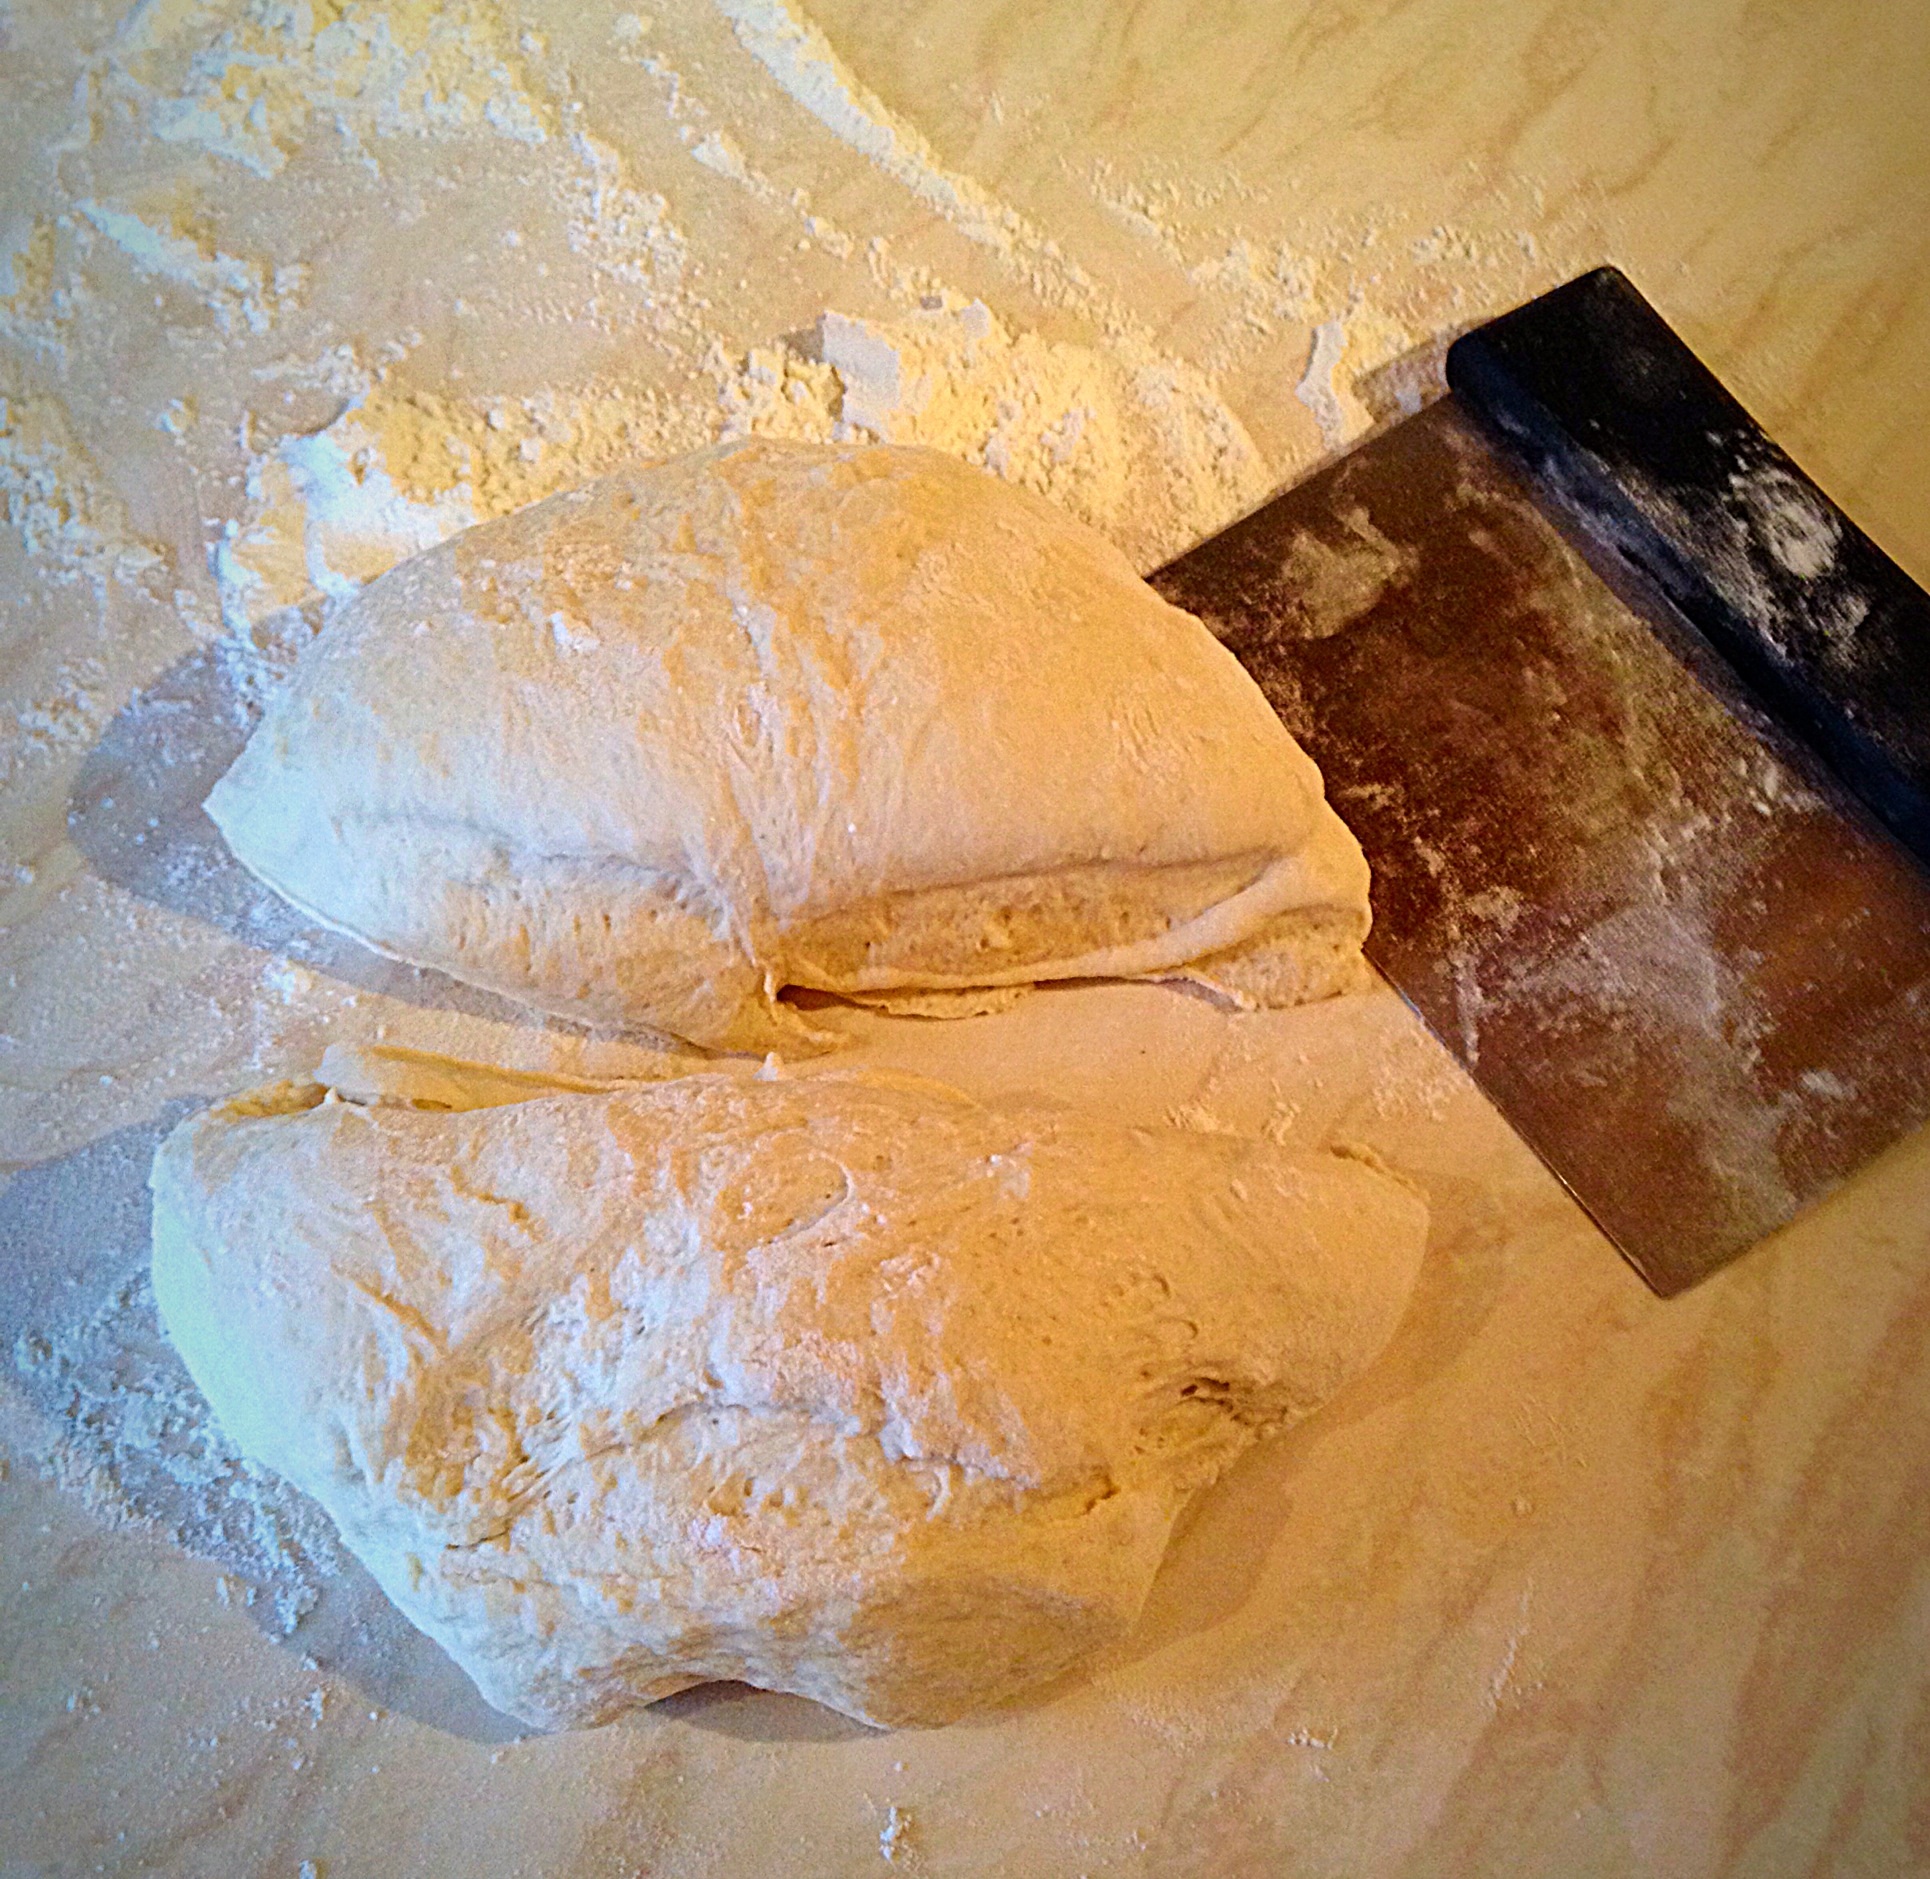
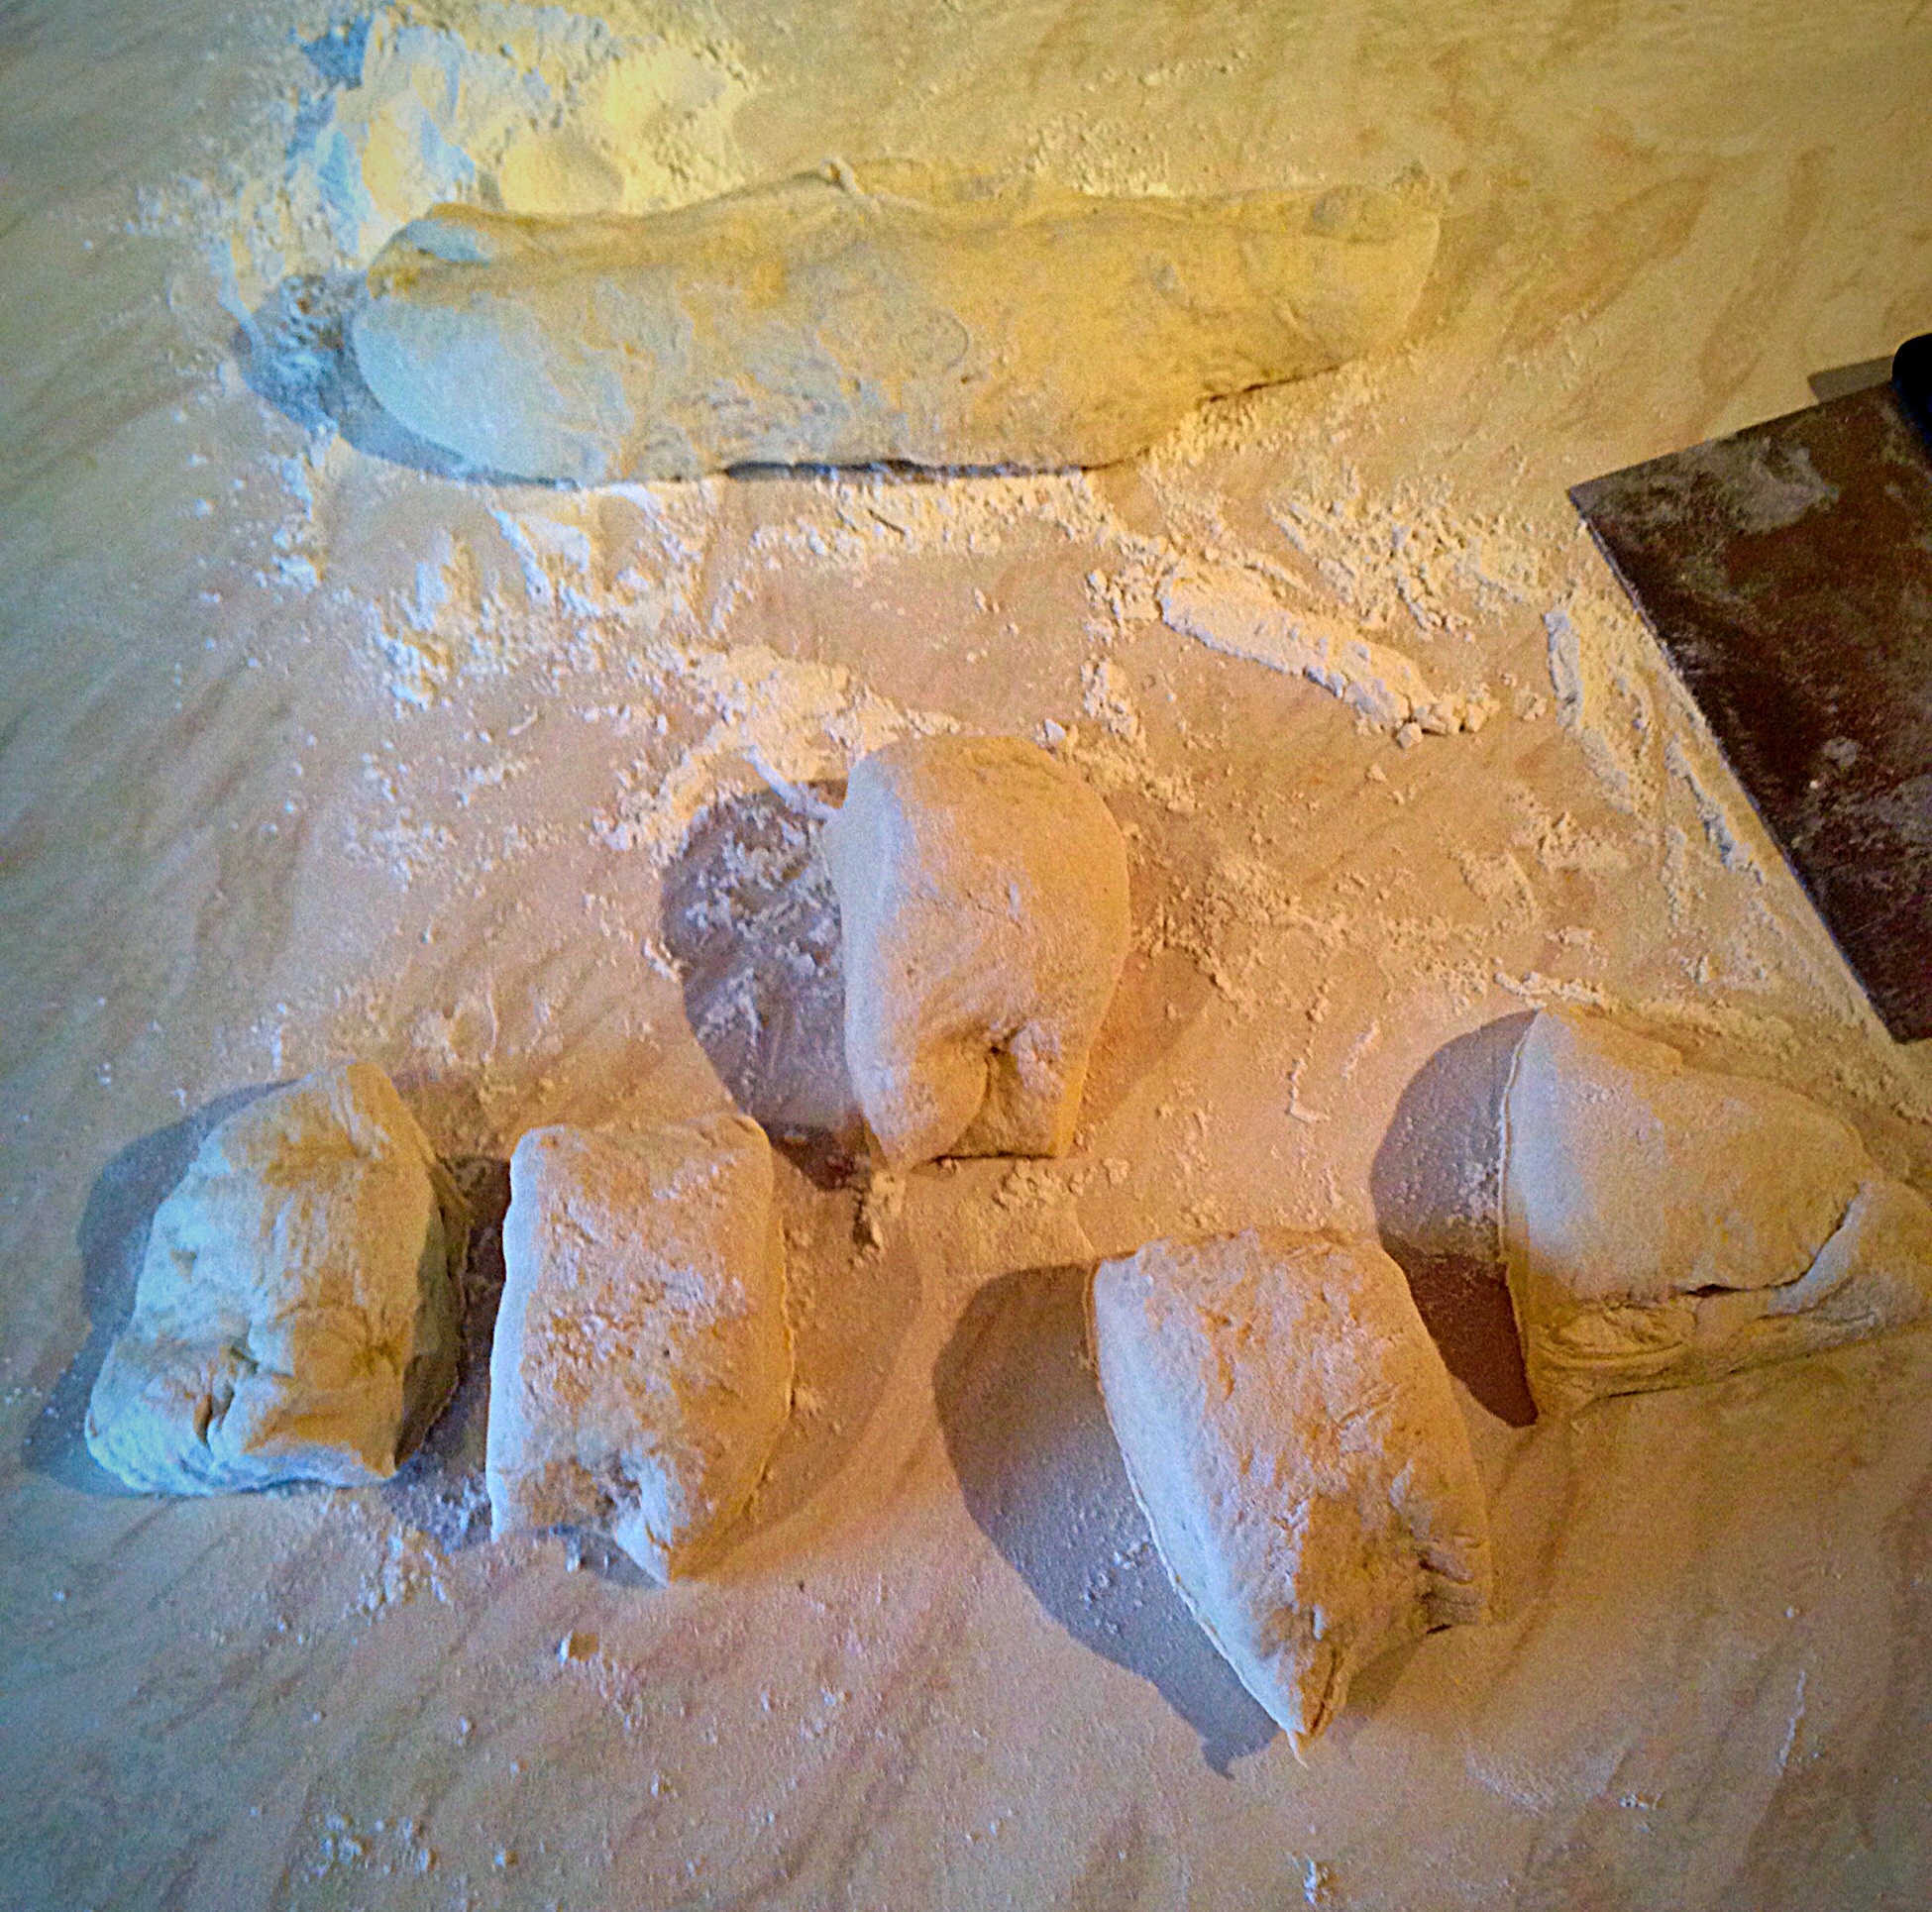
Form the dough into a flat, dome shape.Divide the dough into half – using a dough cutter or knife.Divide the first half into 5 equal pieces of dough.Pull each piece into a length.Twist each length of dough, pulling as you do so, to make a long twisted, uncooked bread stick and place on an oiled baking sheet.
Repeat the same process for the other half of the dough. Cover with a clean tea towel and leave to rise in a warm draught free place until doubled in size.
Preheat the oven to 215C (200C fan).
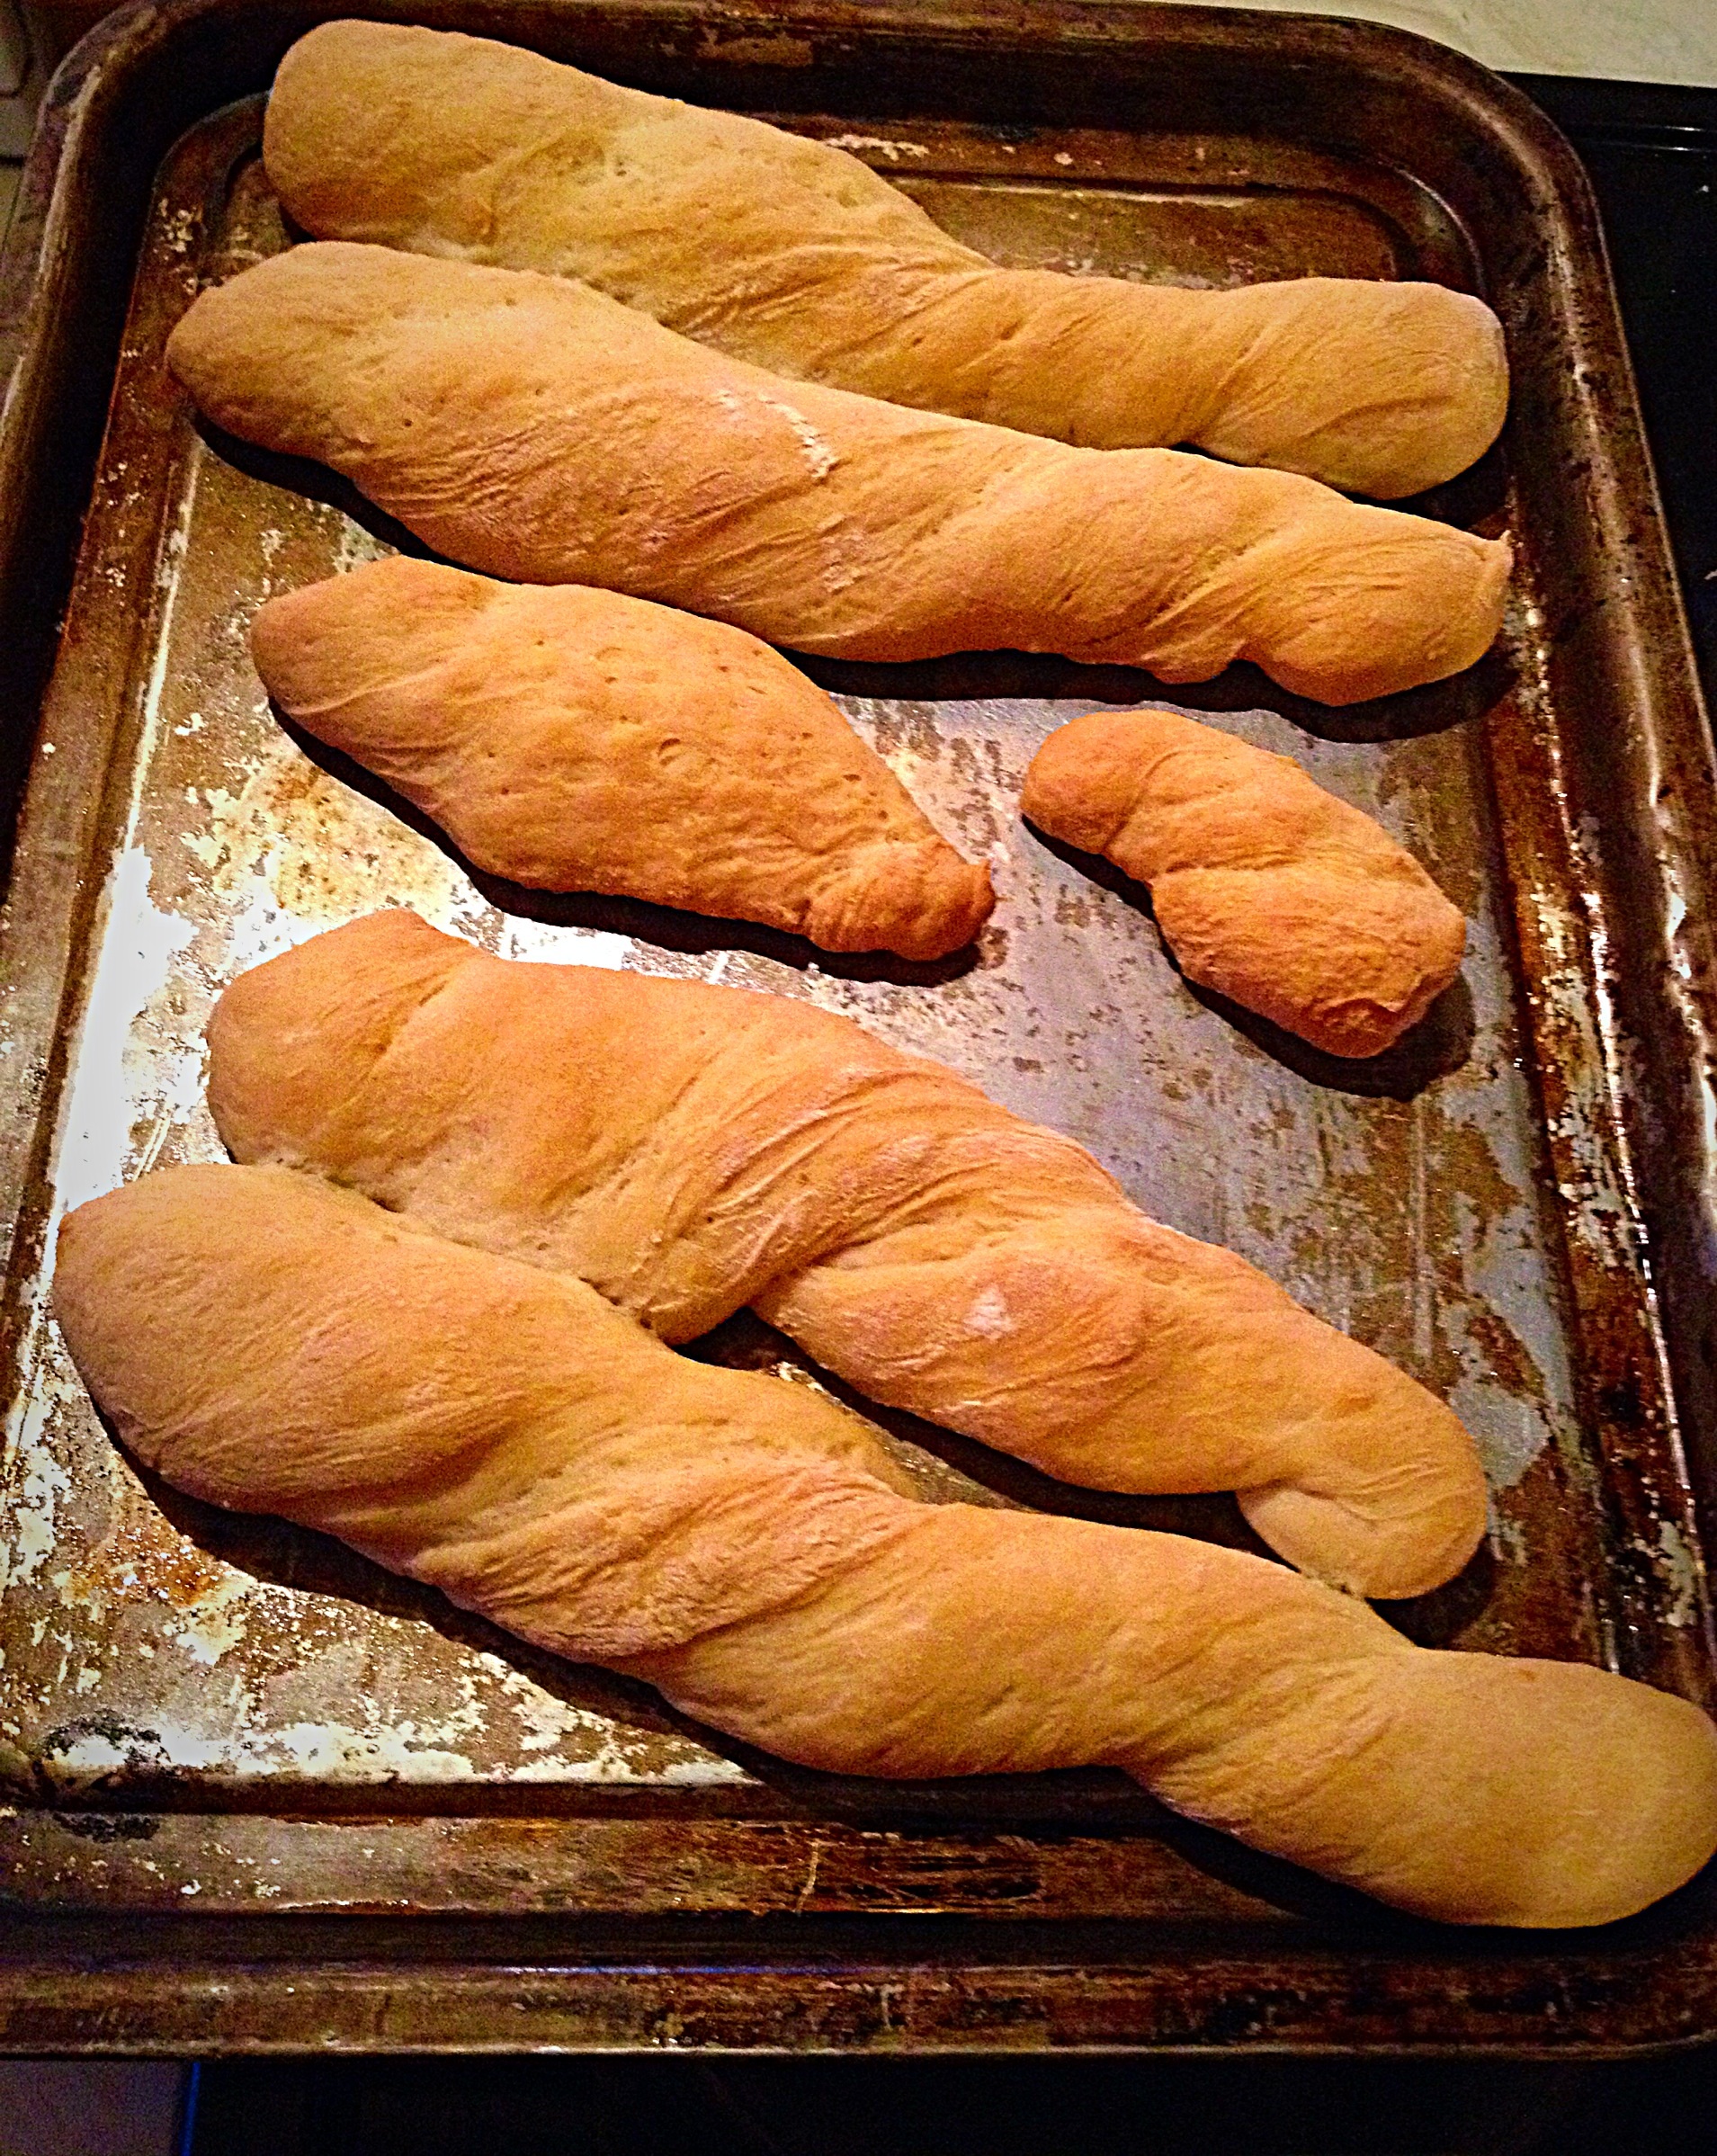
Place the baking sheets into the hot oven and bake the breadsticks for 20-25 minutes until golden brown. Remove from the oven.
Crunchy, golden breadsticks.
Place the cooked breadsticks on a cooling rack to cool.
Recipe : Garlic and Herb Dipping Oil
4tbsp Virgin Olive Oil
4tbsp Butter
3 Fat Garlic Bulbs
1tbsp Fresh Finely Chopped Herbs – I used Thyme and Rosemary – or 1tsp Mixed Dried Herbs
1/2 tsp Flaky Sea Salt
1/2 tsp Freshly Ground Black Pepper
Method :
Firstly I have to admit I didn’t actually measure the butter or olive oil when I made this!! But you are aiming for a 50:50 mix of Olive oil and butter! My laziness is your gain, as you can add more oil/butter if you want to stretch this recipe out for more servings!!! And I get called Cheeky – can’t think why?????
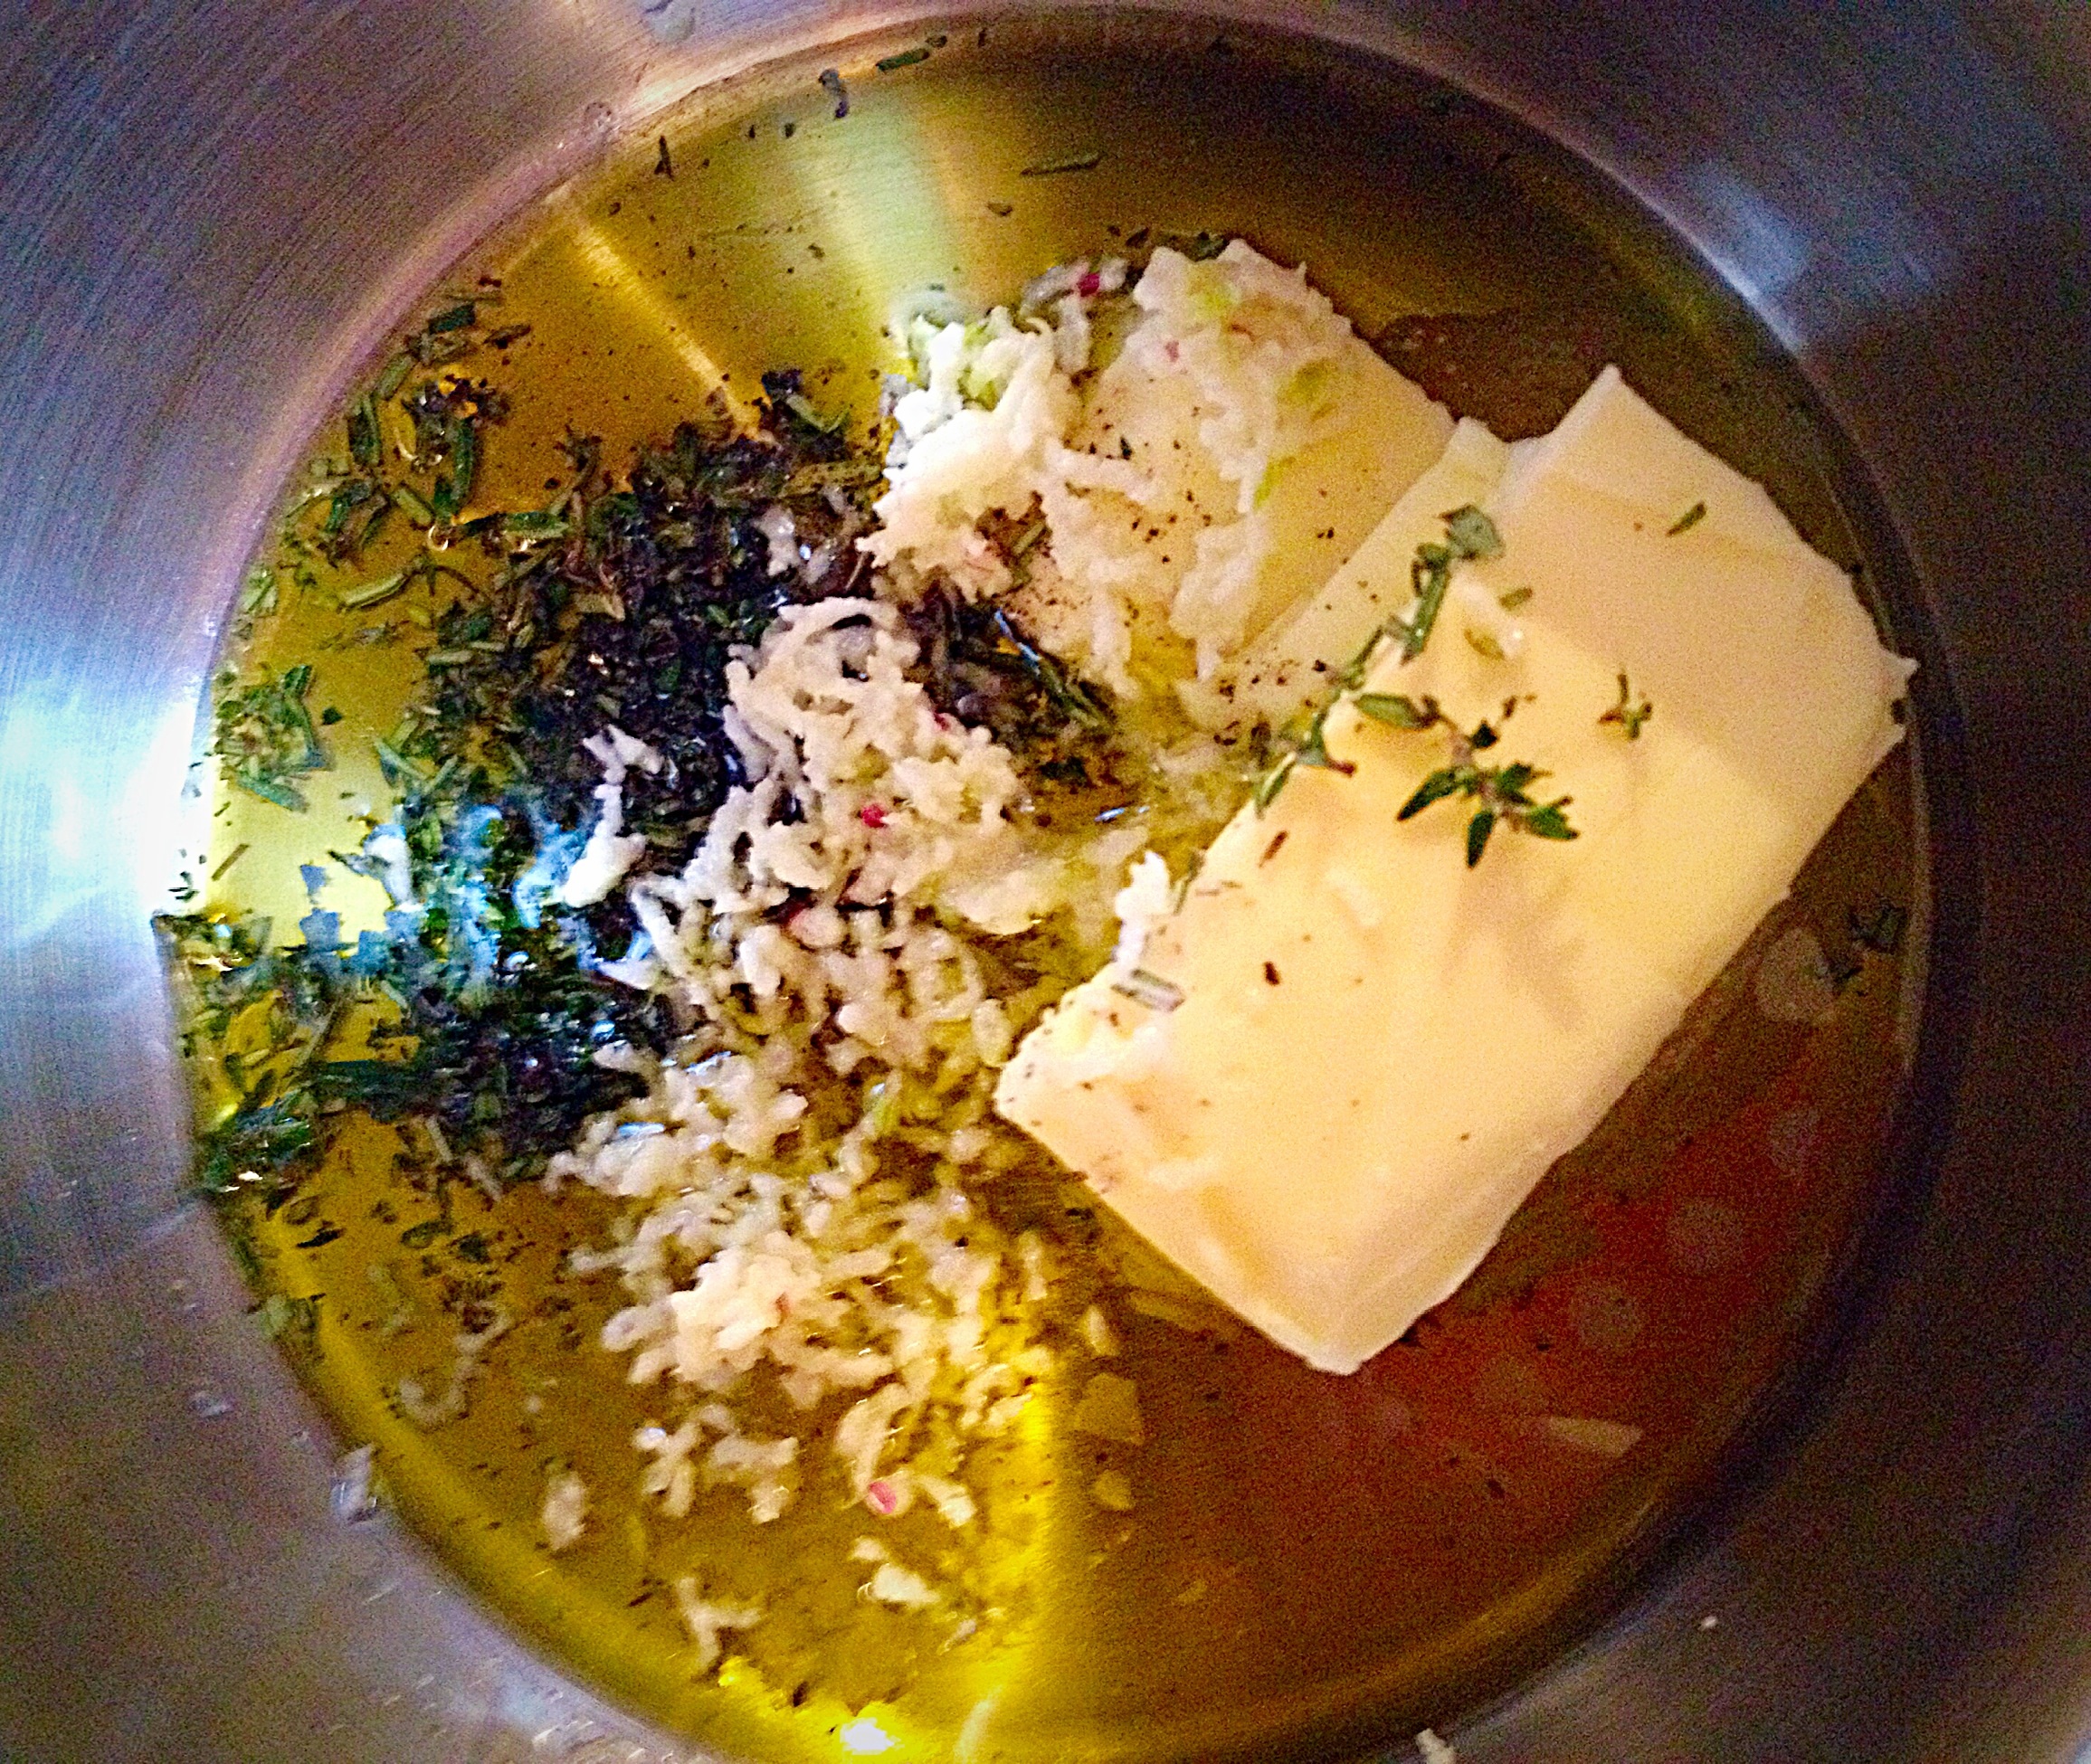
Anyway back to the dipping oil for the breadsticks! Put the Olive oil and butter into a small pan. Chop the herbs finely and add to the cold oil/butter.
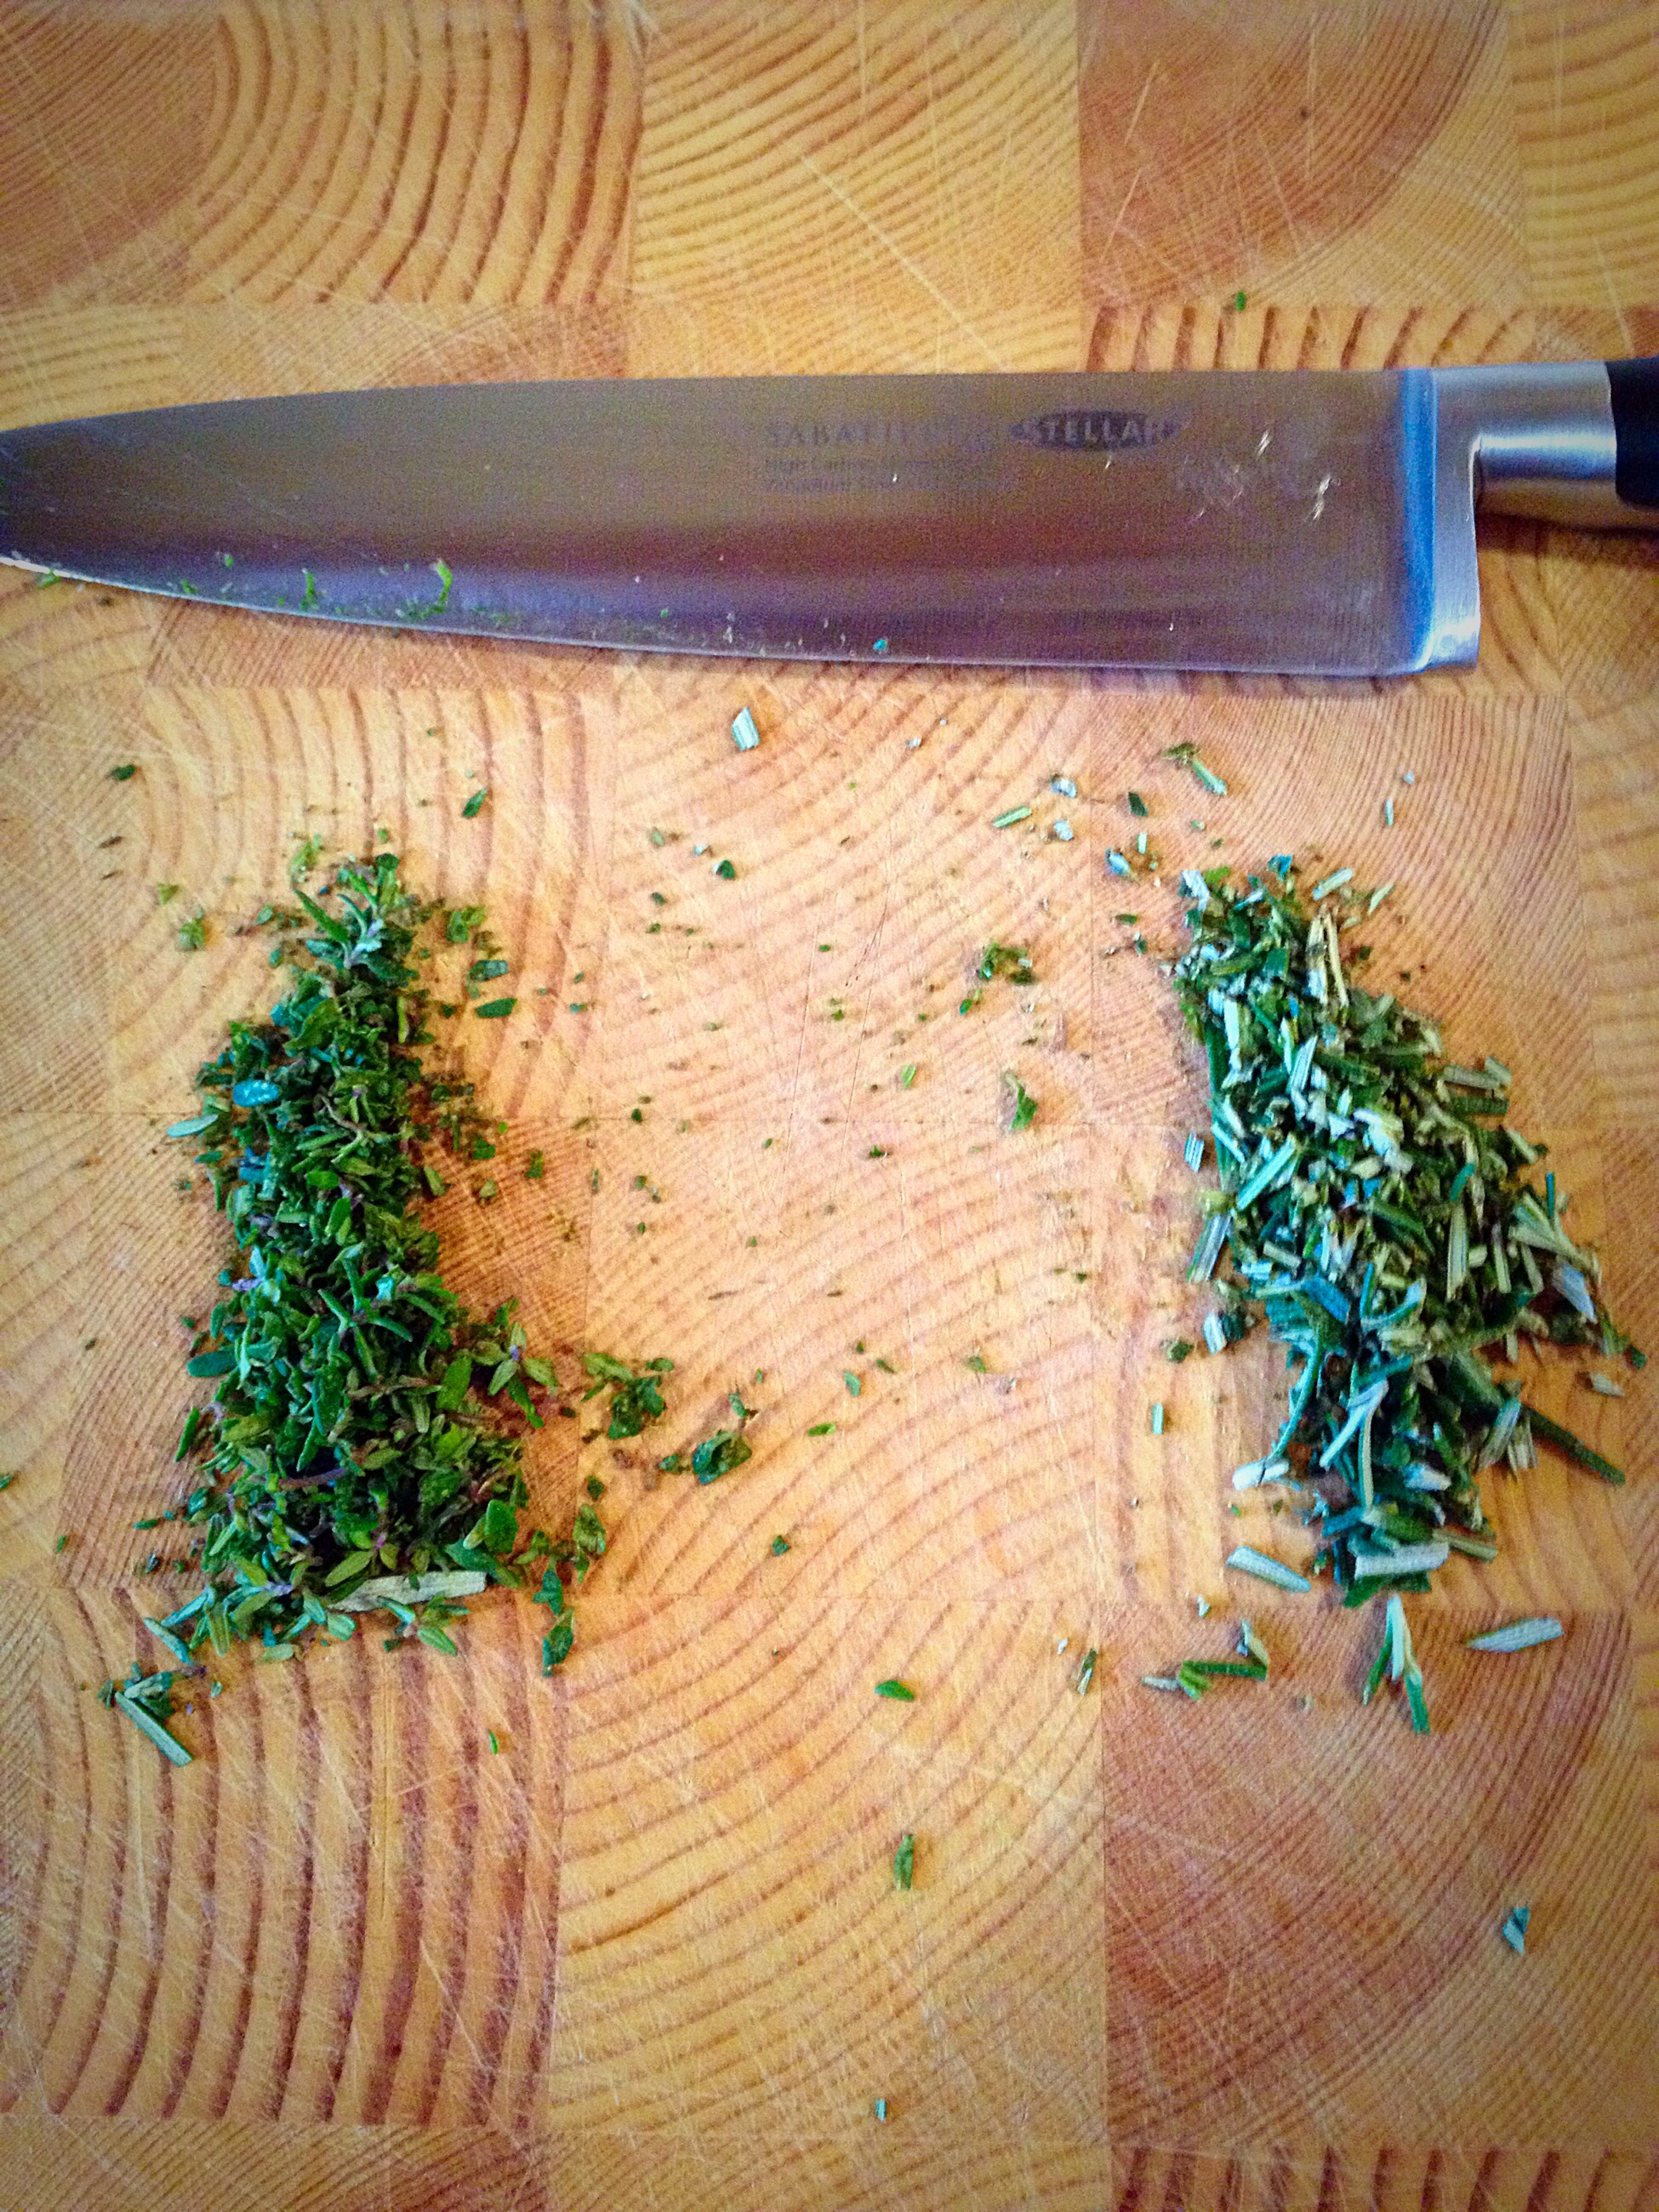
Finely chopped Thyme (left) and Rosemary (right).
Either mince finely, or use a garlic press to chop/squish the garlic bulbs and add to the pan. Finally add the salt and pepper – you can add less salt if you’ve used salted butter – too little salt however, will result in this dipping oil having a very bland flavour (sorry Cafe Rouge, but it’s the seasoning in your dipping oil that let’s it down!).
Ooh a little heat, a little time and this will become the MOST delish Garlic and Herb Dipping Oil x x x
Place the pan over a very low heat. The idea is to melt the butter, infuse the oil/butter with the garlic and herbs and of course NOT BURN THE GARLIC!!!!
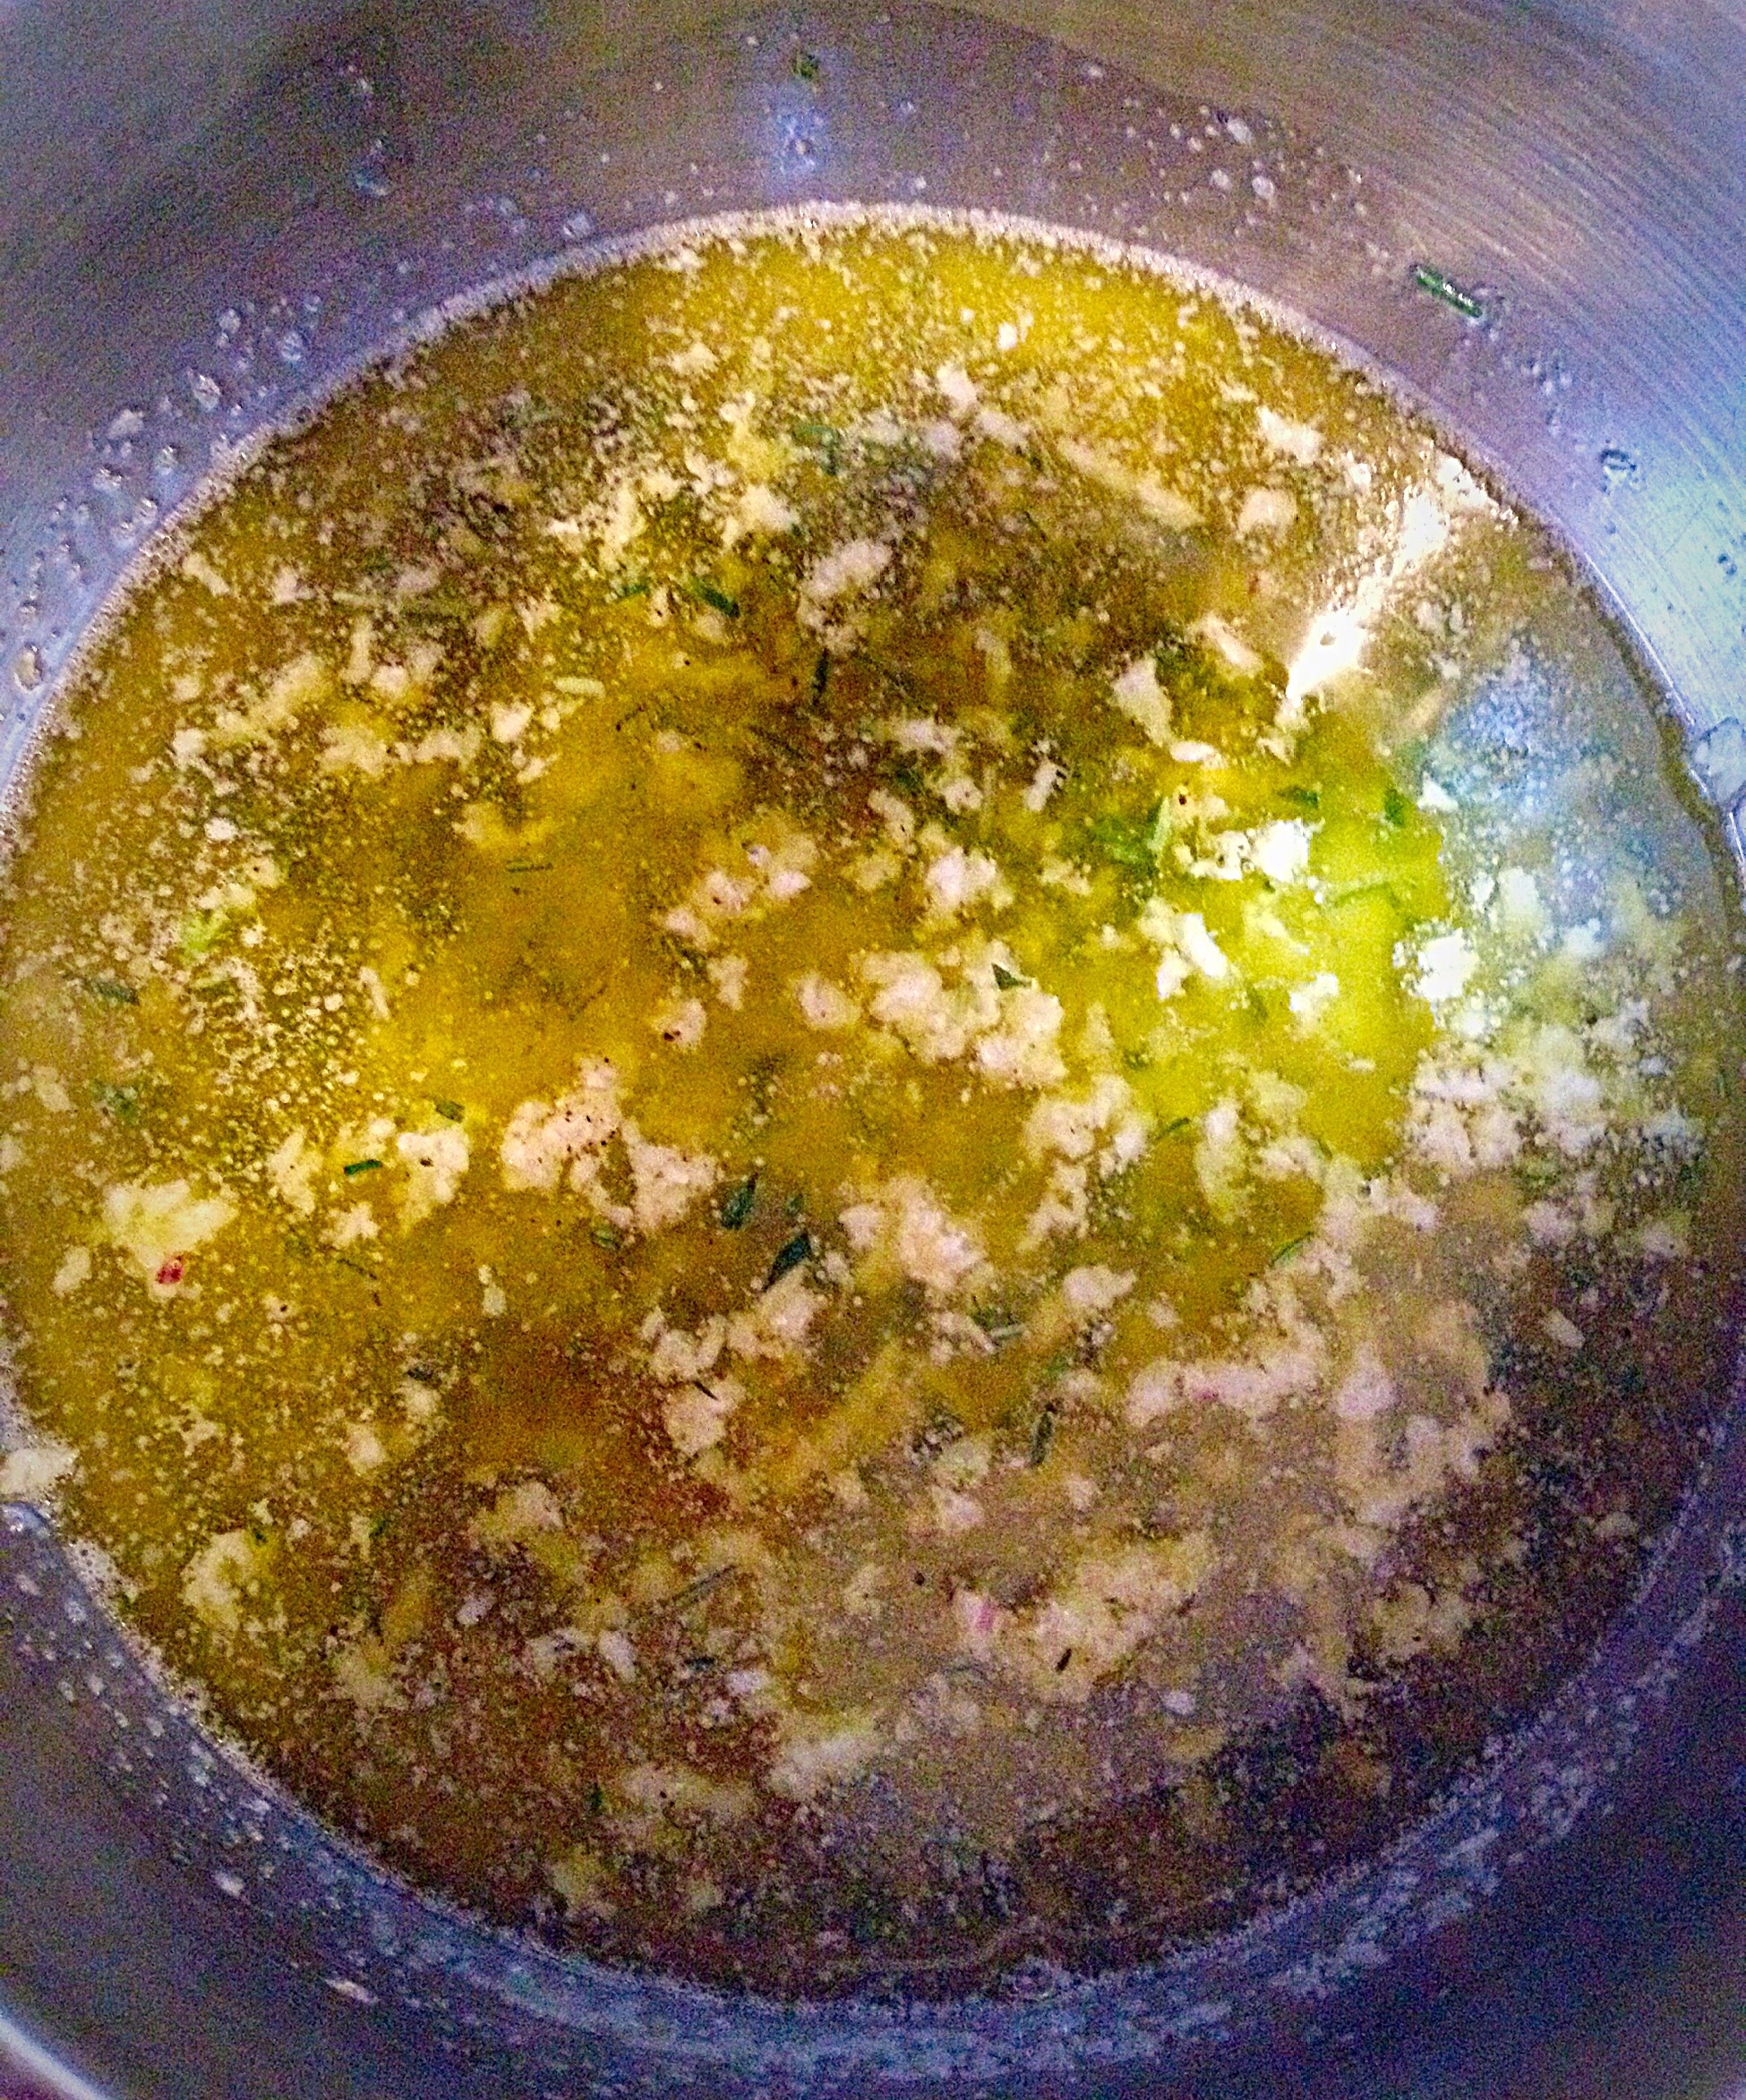
As soon as the butter is melted take the pan off the heat.
Leave the pan off the heat to sit and infuse with the Garlic and Herb flavours. Even a few minutes makes a big difference to the final oil. I made the oil whilst the Breadsticks were baking. 10 minutes before serving place the pan over a medium heat. As soon as the oil is bubbling and the Garlic is sizzling, remove from the heat and decant into individual serving bowls – I used ramekins.
THE perfect food for sharing. Perfect with pasta.
Breaking into the crunchy Breadsticks and dipping into the Garlic and Herb Oil is a taste explosion in your mouth!! It’s a fun change from the usual Garlic Bread. As always these Breadsticks go amazingly well with all pasta dishes.
NOTE: The Garlic and Herb Oil can also be spooned over Ciabatta or Baguette for a more traditional style Garlic Bread.
The Breadsticks can be made smaller (this will stretch out the number of servings), just remember to reduce the baking time – I’d start checking at 15 minutes.
Any leftover breadsticks can be frozen, in a freezer bag, for up to a month.
If you do try this recipe I’d love to hear how you get on?
Have fun making these and most of all sharing them!