Lemon Lime Meringue Pie

Share
Facebooktwitterpinterestlinkedintumblr

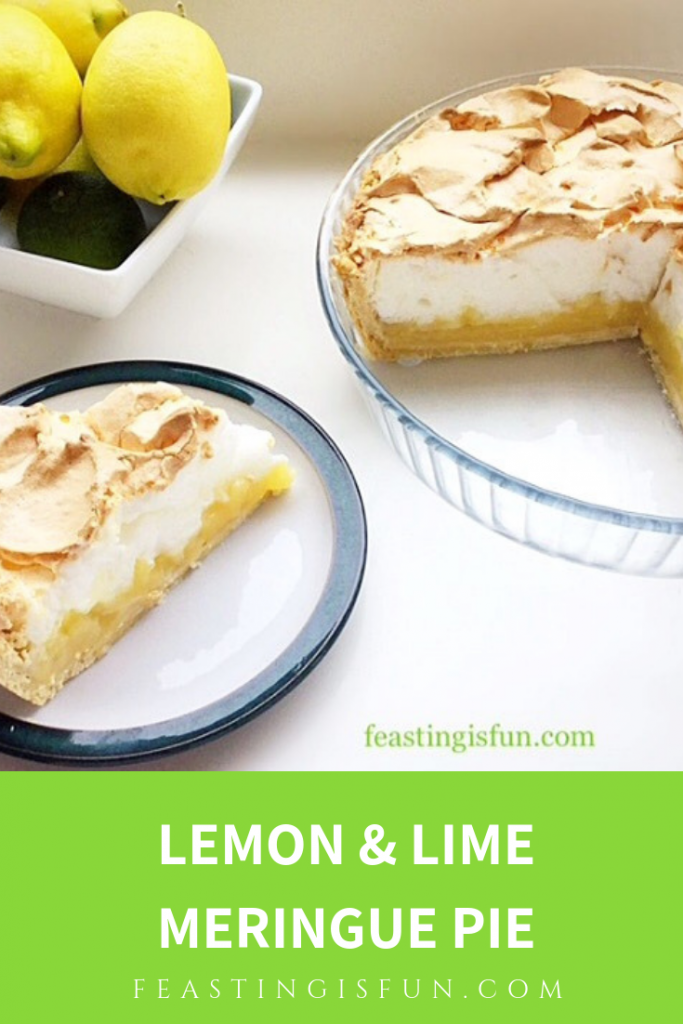
It is no secret that I love both sweet and savoury recipes that include lemon or lime. My Lemon Ripple Ice Cream is a favourite not just with me, it is also one of the most popular recipes on this blog. Lime too, with its softer and more floral flavour is also a winner, showcased here in my Lime Ripple Luxury Ice Cream. This Lemon Lime Meringue Pie combines both fruits in the curd, creating an utterly sublime dessert dish.
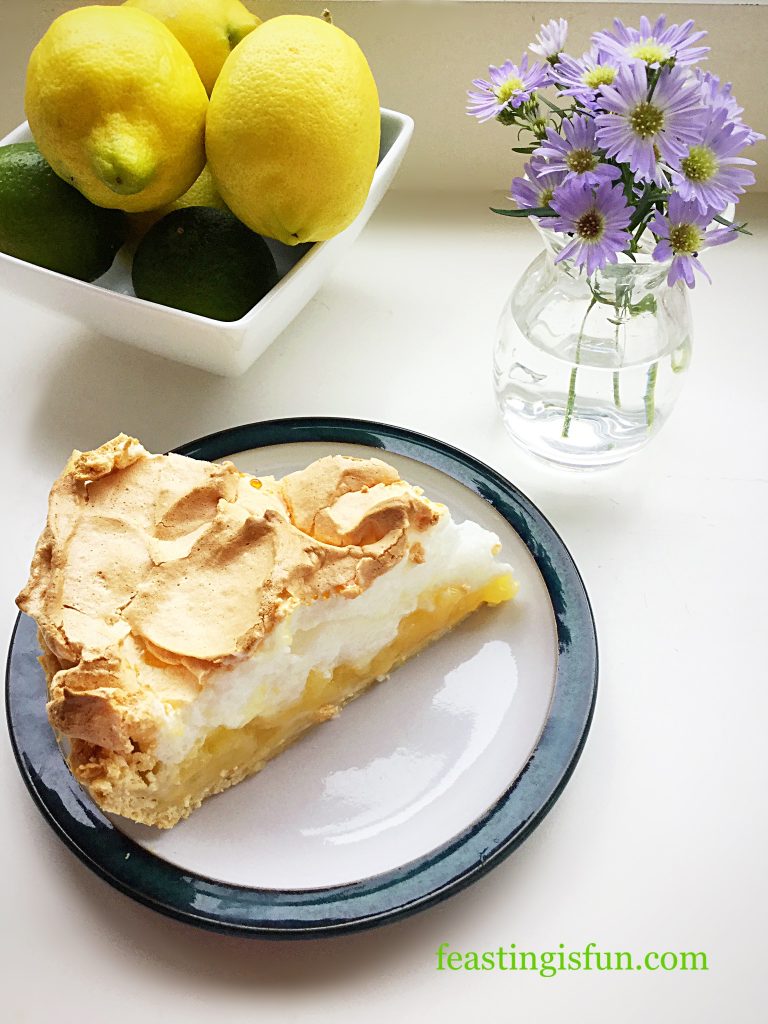
FF Lemon Lime Meringue Pie

FF Lemon Lime Meringue Pie
Lemon Lime Meringue Pie

Pyrex, quality kitchenware

I was sent a Pyrex deep 26cm glass fluted flan dish and a Pyrex 3L classic glass bowl by Maha Home and I must say that both products were well packaged. When ordering online this really is of key importance to me. As soon as they were unwrapped I was keen to make a dessert that would show off both products. Pyrex have a recipe for Lemon and Lime Meringue Pie on their website and I used this as the basis for my dish. Since I naturally tweak anything I make, the recipe given is my interpretation of the original.
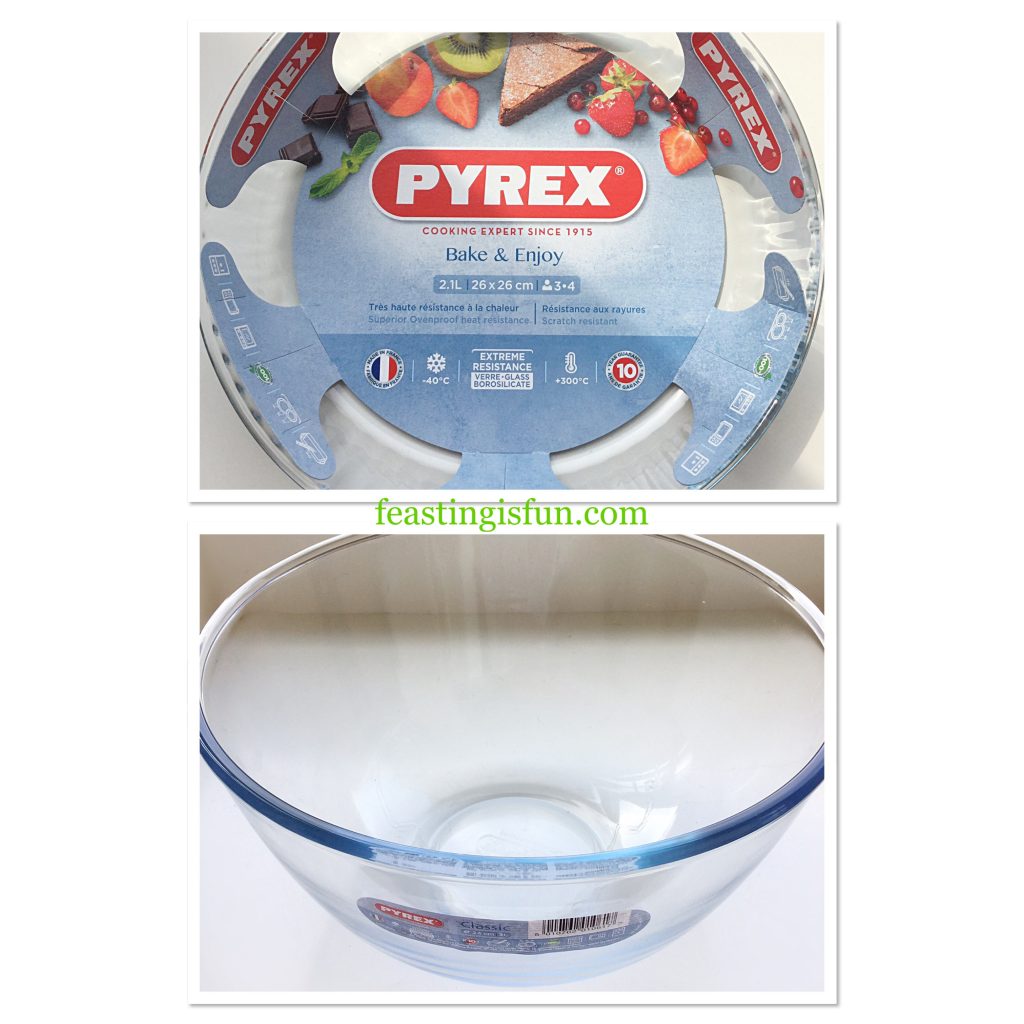
FF Lemon Lime Meringue Pie
Pyrex 26cm deep flan dish and 3L bowl.

Since I have been on the hunt for a deep flan dish I was particularly excited to try this out. As I have mentioned in previous posts, any new kitchen equipment has to earn it’s cupboard space in my home. Because, let’s face it, very few people have massive kitchens with tons of space! What Maha Home did not know, is that I already have and regularly use the 3L Pyrex glass bowl. I most certainly have room for 2 of these deep, hard wearing bowls in my kitchen.
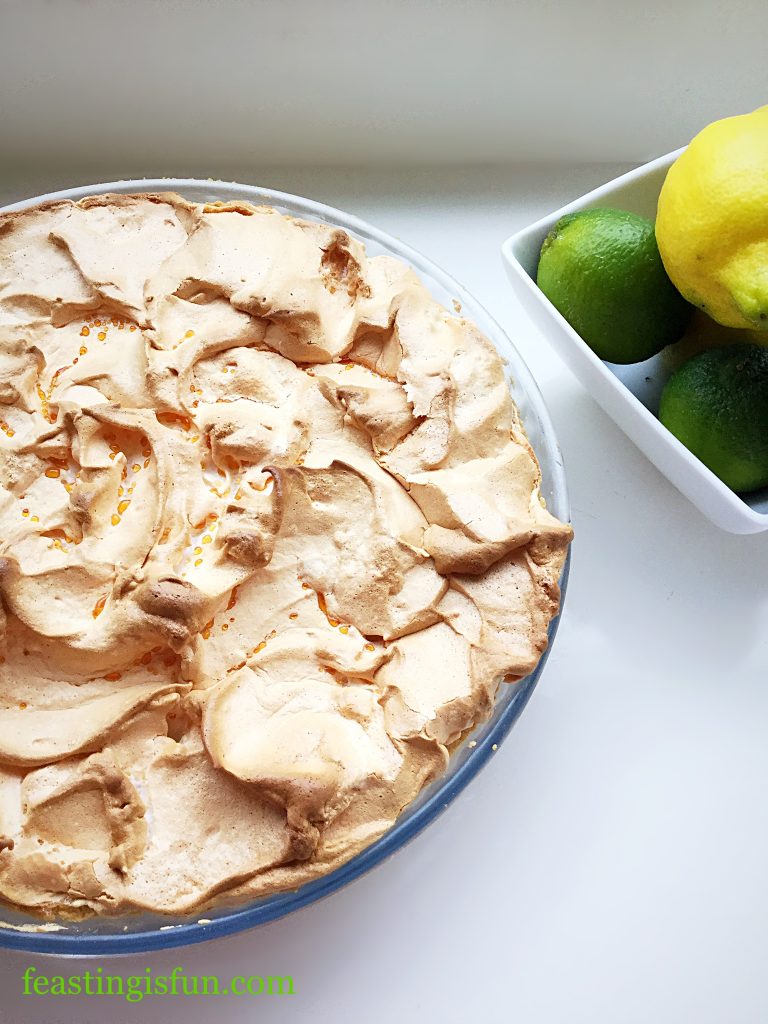
FF Lemon Lime Meringue Pie
Lemon Lime Meringue Pie

Creating The Layers In A Lemon Lime Meringue Pie

Creating the Lemon Lime Meringue Pie involves four separate stages. First of all making and baking the pie crust shell. Zesting, juicing and cooking the lemon and lime curd. Whisking up egg whites with sugar to create the light, airy, meringue topping and finally assembling and baking the pie. While there are four stages, making this pie does not feel like a chore. Since each step is relatively quick and the pie crust and curd can be made the day before, breaking the process down even further.
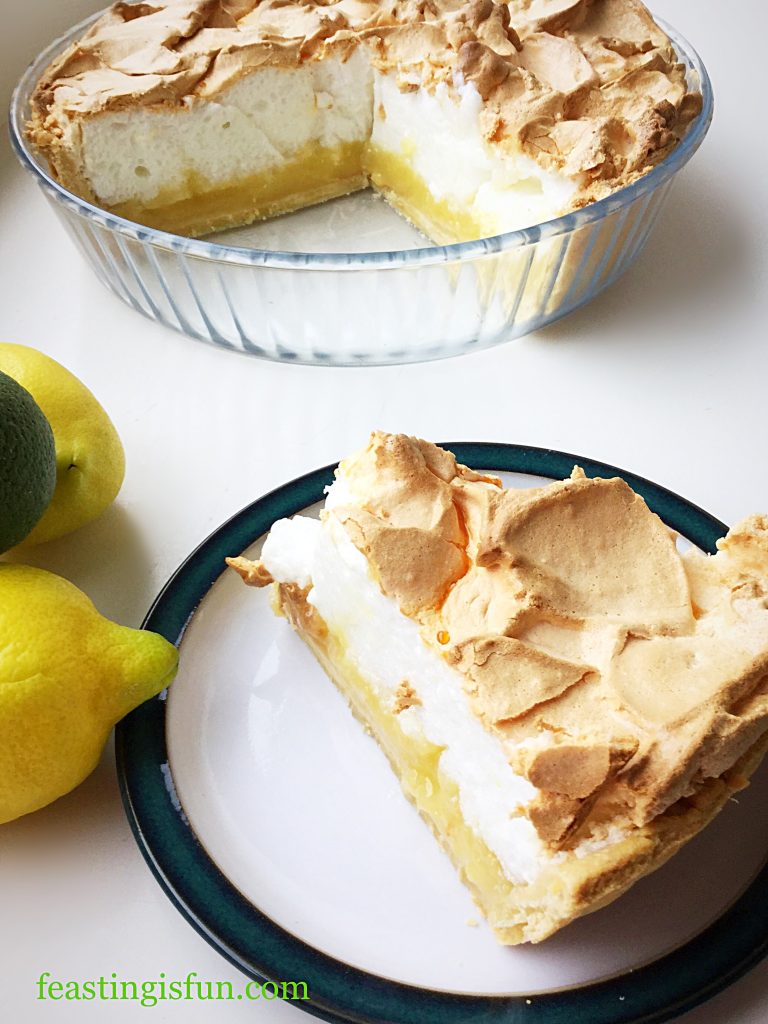
FF Lemon Lime Meringue Pie
Lemon Lime Meringue Pie

I made this pie on an extremely hot and humid day. In doing so I learned a thing or two. Most importantly is to make the meringue topping at the very last minute, literally just before it needs to be spooned on to the pie. Making it any earlier can cause it to lose volume. Also, once baked and cooled the pie must be refrigerated. Doing so allows the curd to set and makes for easier slicing. Finally, once chilled this pie is easy to transport, making it an ideal dessert to take to friends and family.

Recipe: Lemon Lime Meringue Pie serves 8-10

For the pie crust:

450g/1lb Shortcrust Pastry – I used my Perfect Butter Shortcrust Pastry recipe.  If buying ready made ensure it is all butter

1 tsp Vegetable Oil for greasing the flan dish – I used Rapeseed oil

For the filling:

3 Fresh Lemons – finely zested and juiced

2 Fresh Limes – finely zested and juiced

175g/6oz Caster Sugar

300ml/ 1/2 pint Water

6 tsp Cornflour (cornstarch) I use Doves Farm

4 Large Free Range Egg Yolks

For the topping:

4 Large Free Range Egg Whites I use Burford Brown Eggs from Clarence Court

150g/5oz Caster Sugar

3 tsp Cornflour (cornstarch)

Method: Preheat oven to 220C/200C fan, 425F,  gas mark 7

Making the shortcrust pie case

  • First of all make the pastry and place in the fridge to chill for one hour.
  • Pour one teaspoon of oil into the Pyrex flan dish. Using a clean sheet of kitchen paper ensure the inside of the dish is lightly coated in oil, taking special care around the inner rim.
  • Remove the pastry dough from the fridge and place on a lightly floured worktop.
  • Knead the dough lightly so that it becomes pliable, taking care not to overwork it as this will result in a tough pastry crust.
  • Roll out the pastry so that it is slightly bigger than the flan dish – see photo below.
  • Wrap the pastry over the rolling pin and place over the flan dish.
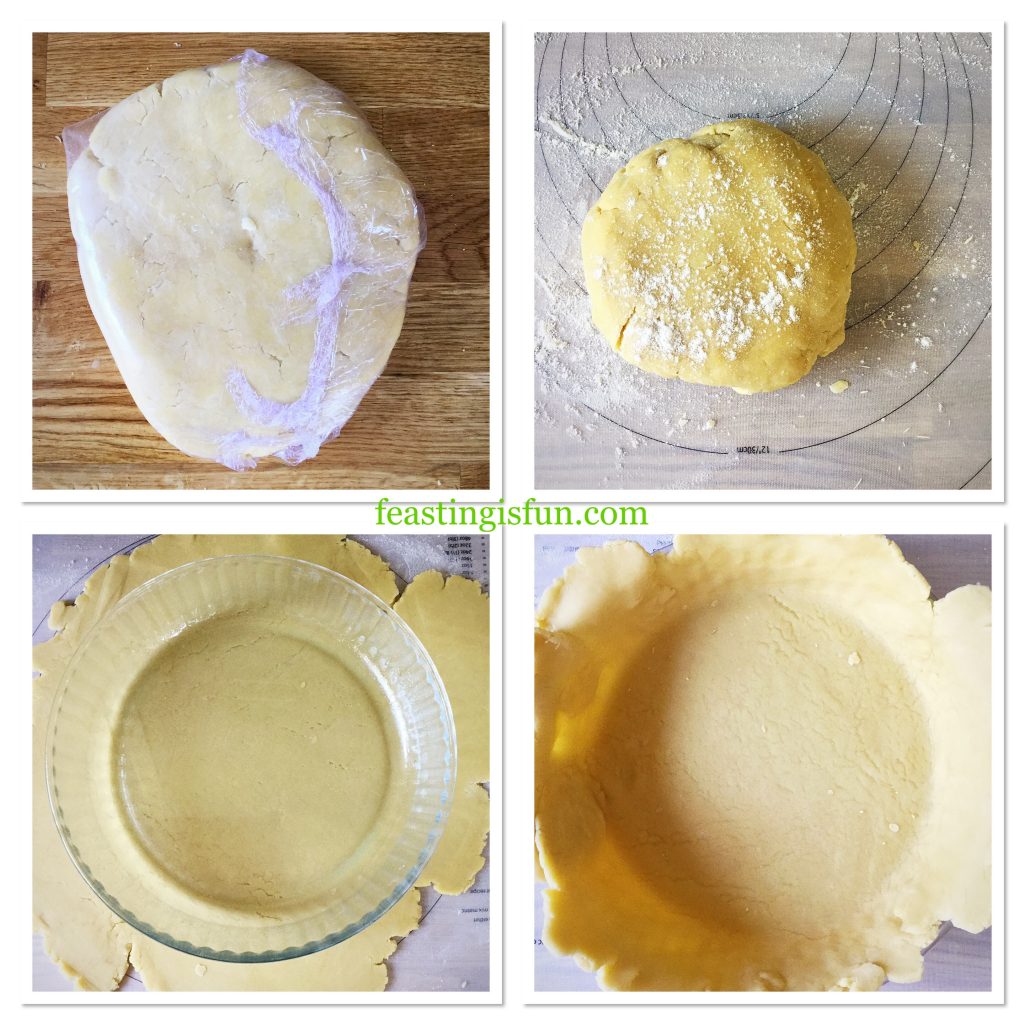
FF Lemon Lime Meringue Pie
Rolling out the chilled pastry to fit the flan dish.
  • Press the pastry into the flan dish taking care not to stretch it, as this will cause the pastry to shrink on baking. Also if the pastry tears, patch using a little of the leftover pastry with a tiny amount of water.
  • Trim the pastry and dock the bottom with a fork. Add baking parchment and baking beans.
  • Place on to a baking tray and into the centre of a preheated oven and bake for 15 minutes.
  • Remove the pie crust, immediately reduce the oven temperature to 200C/180C fan, 400F, gas mark 6.
  • Lift out the baking beans, taking care as they are hot.
  • If any cracks have appeared in the pastry patch, as before, using leftover pastry.
  • Return the pie crust to the cooler over and bake for a further 7 minutes.
  • As soon as the pie crust is baked remove from the oven.
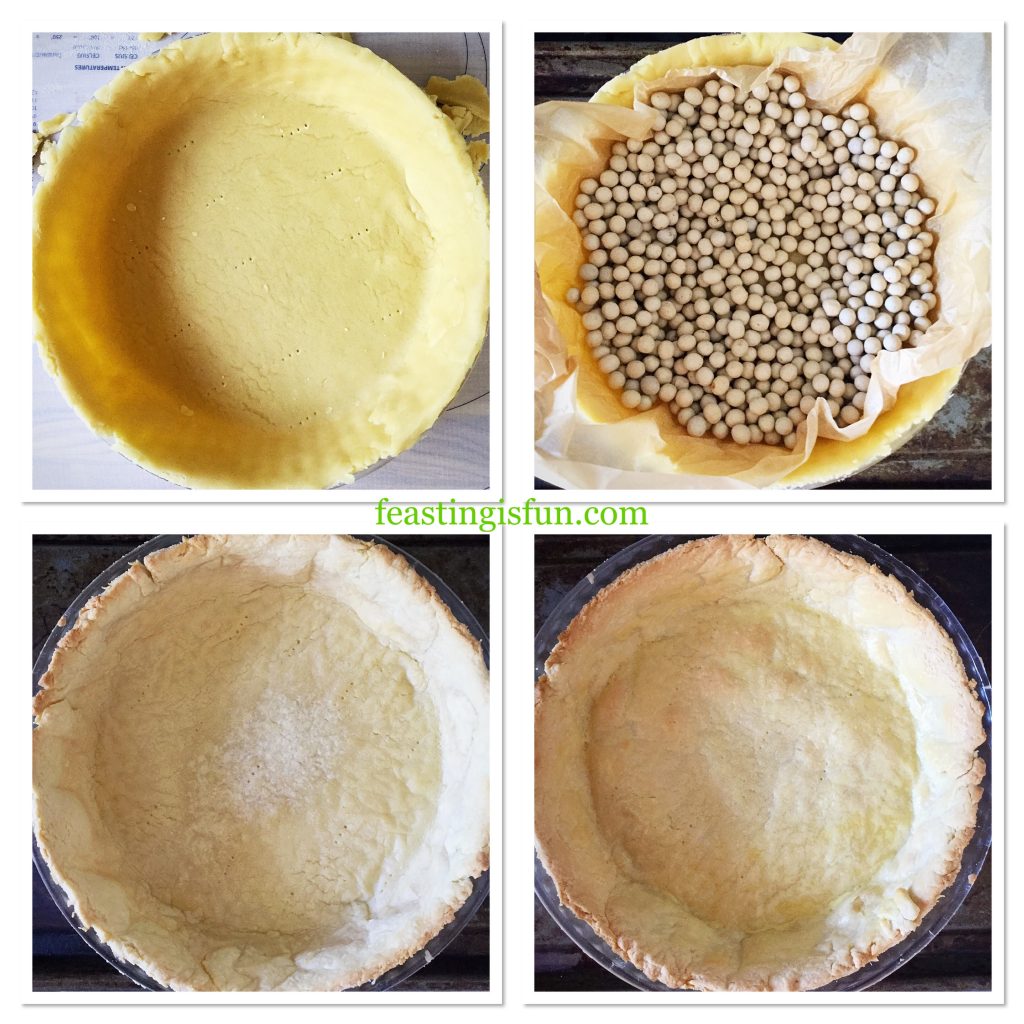
FF Lemon Lime Meringue Pie
Trimming and baking the pie crust.
  • While the pie crust is baking make the curd.

Making the lemon lime curd filling

  • Into a large, heavy bottomed saucepan add the lemon and lime zest and juice. Also add the water, sugar and cornflour. Gently mix with a whisk until there are no lumps.
  • Cook the liquid over a medium heat, stirring continuously.
  • As soon as the liquid has thickened and has turned from cloudy to clear turn off the heat.
  • Leave to cool for 5 minutes and then whisking continuously add the egg yolks one at a time.
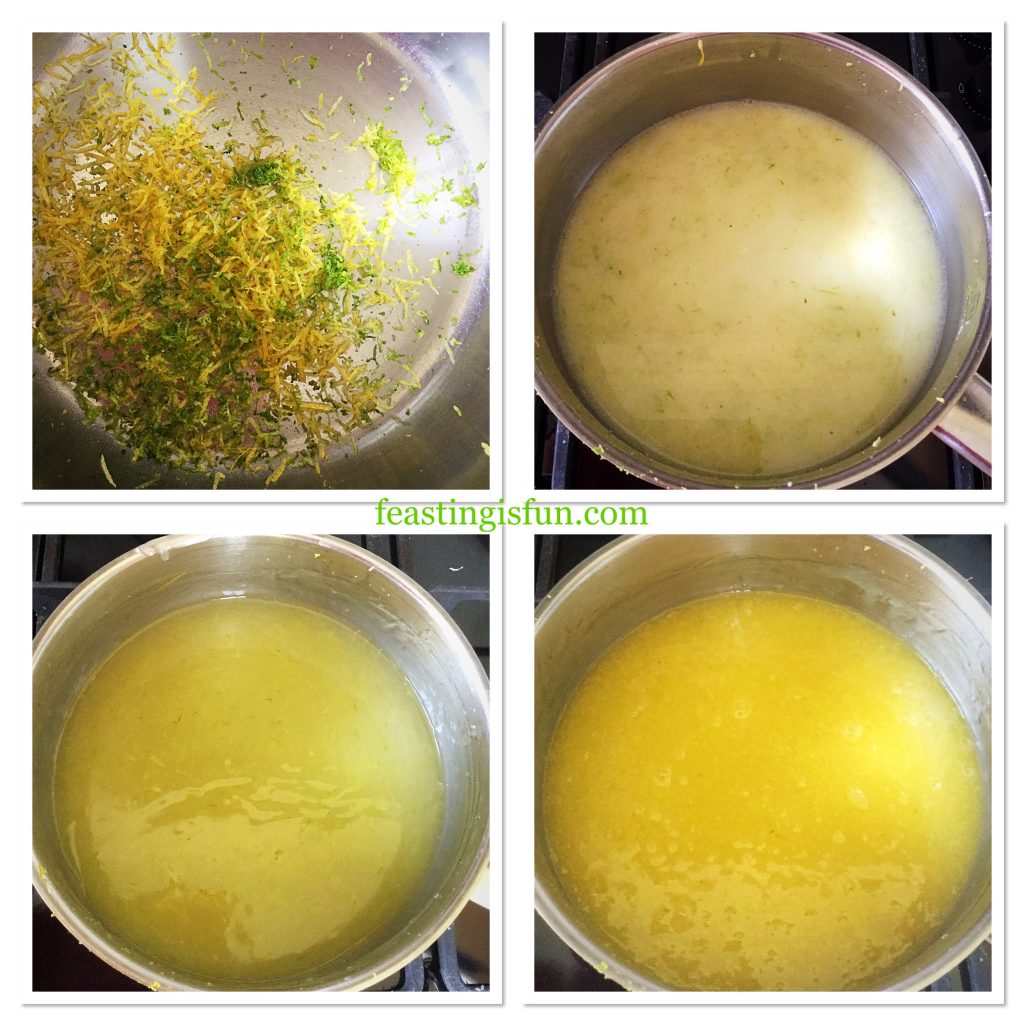
FF Lemon Lime Meringue Pie
Making the lemon and lime curd.
  • Pour the curd through a sieve into a wide jug. Press the liquid through using a clean spoon.
  • Place cling film directly on to the top of the curd, this will stop a skin from forming.
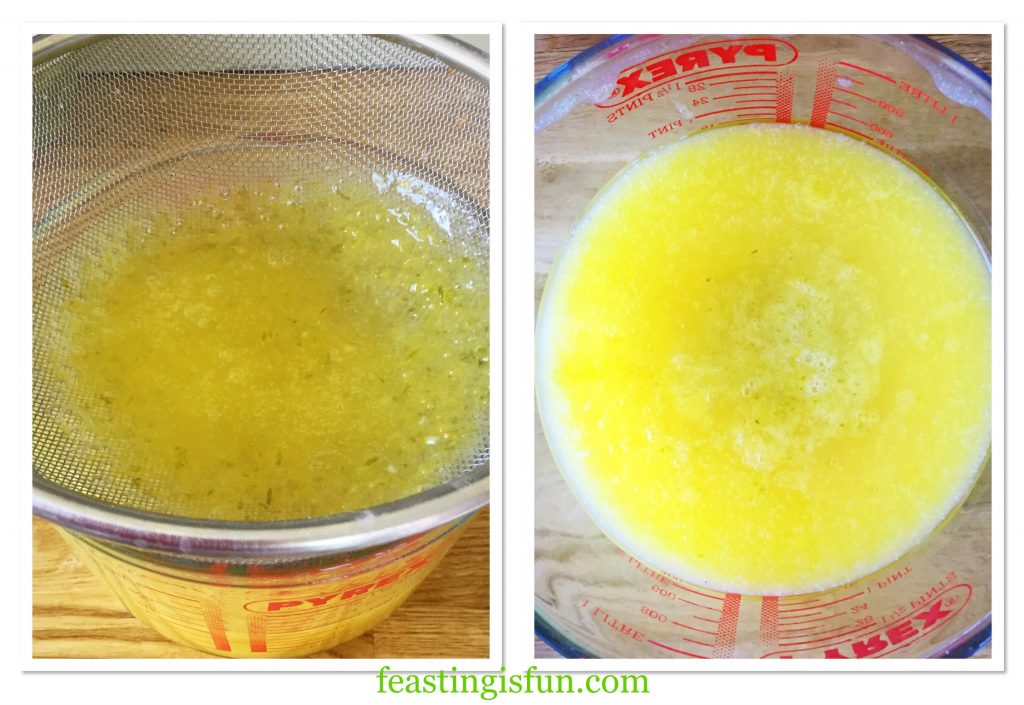
FF Lemon Lime Meringue Pie
Sieving the lemon and lime curd.
  • Just before you are about to assemble the pie make the meringue topping.

Whipping up the meringue topping

  • Into a large, scrupulously clean bowl add four large egg whites.
  • Whisk until the egg whites form stiff peaks.
  • Continue whisking adding a tablespoon of sugar at a time, until half of the sugar is incorporated.
  • Add the remaining sugar and one teaspoon of cornflour.
  • Using a large metal spoon fold the dry ingredients into the meringue, taking care not to deflate the air whisked into the meringue.
FF Lemon Lime Meringue Pie
Making the meringue topping
  • To assemble the pie ensure the oven is preheated to 200C/180C fan, 400F, gas mark 6.

Assembling and baking the pie

  • Remove the cling film from the curd and stir.
  • Pour the lemon and lime curd into the pie shell.
  • Spoon over the meringue so that the top of the pie is covered. Ensure the meringue touches the crust around the rim of the pie.
  • Place the pie on to a baking tray and put in the centre of the oven.
  • Bake for 25 minutes. If after 10-15 minutes the top is browning too quickly reduce the heat by 20C.
  • After the baking time has elapsed turn the oven off and leave the pie to cool in the oven for 30 minutes. This helps set the meringue and stop it from cracking.
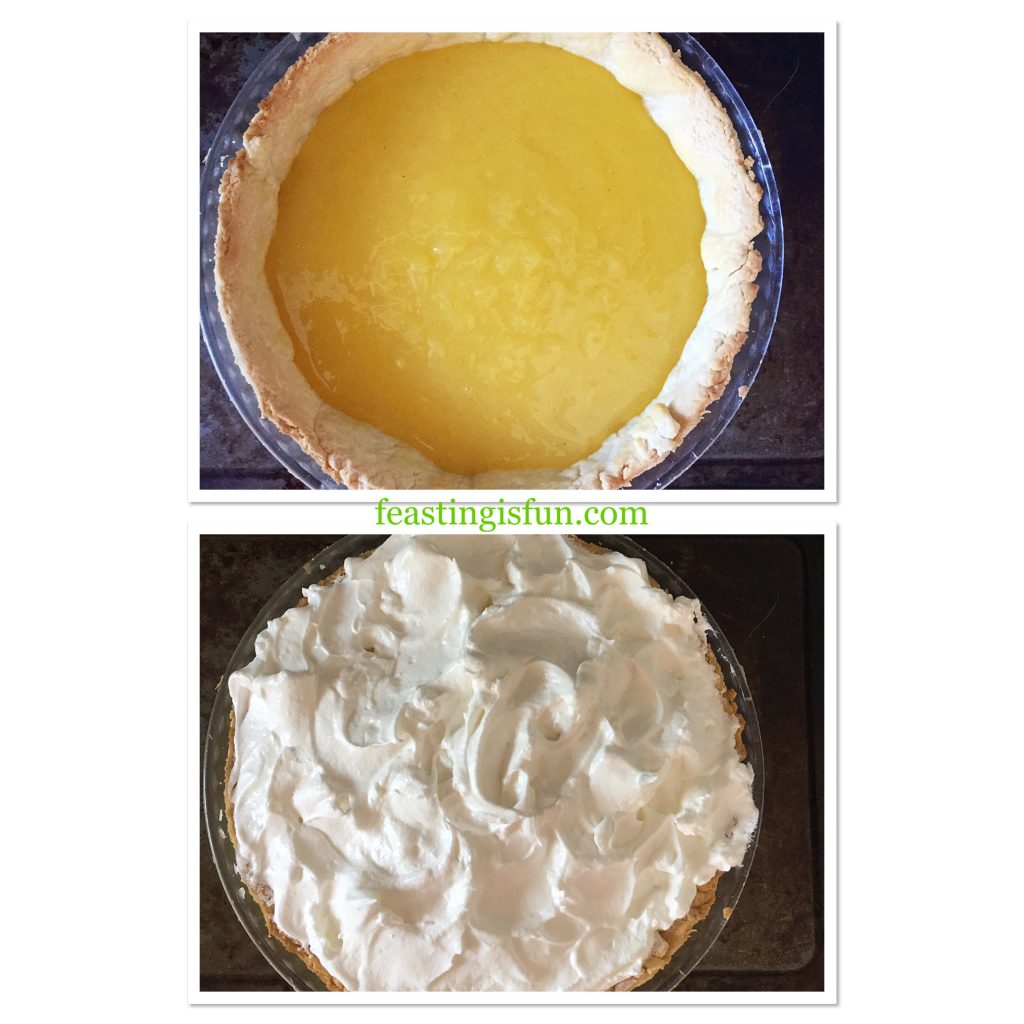
FF Lemon Lime Meringue Pie
Assembling the Lemon Lime Meringue Pie ready to bake.
  • After the oven cooling time has elapsed remove the pie from the oven and leave to cool to room temperature.
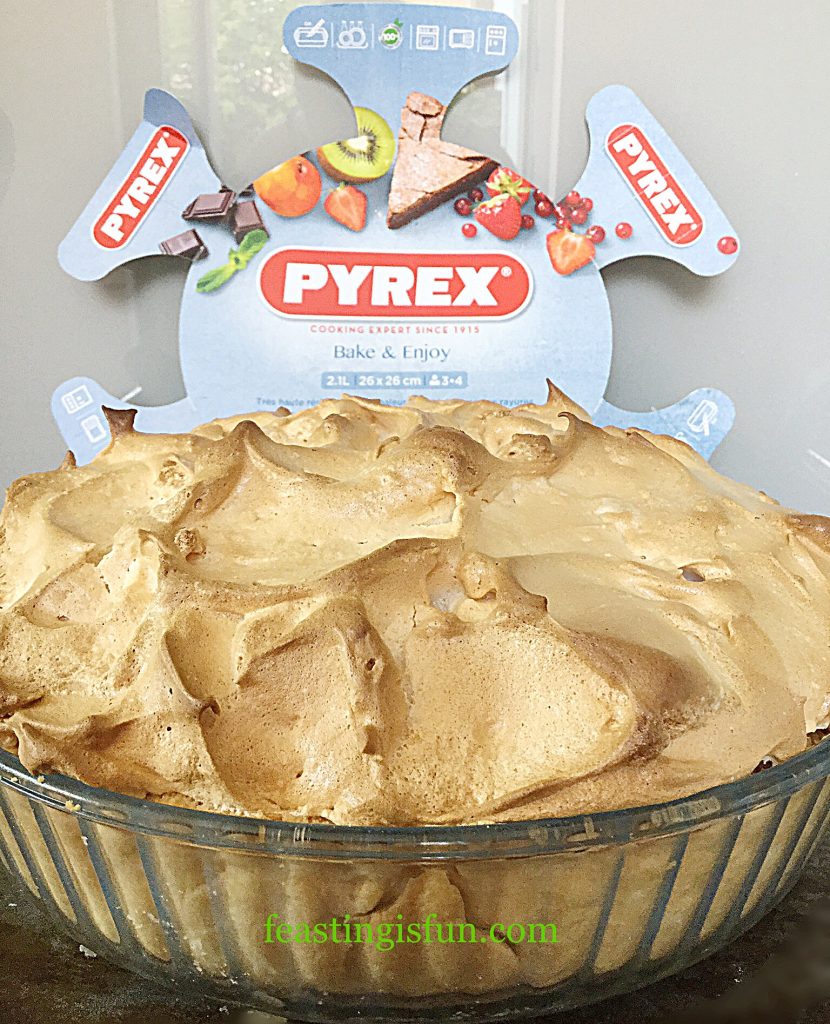
FF Lemon Lime Meringue Pie
Caramel crusted Lemon Lime Meringue Pie
  • Refrigerate the cooled pie for at least 4 hours, ideally overnight before serving.
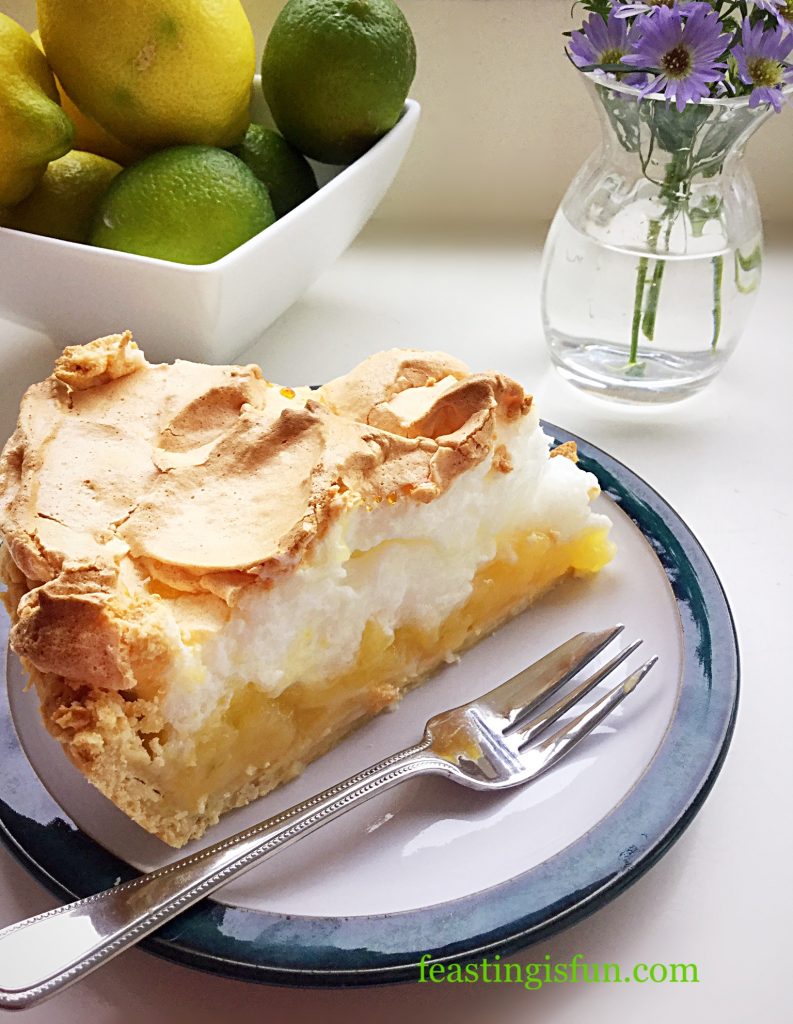
FF Lemon Lime Meringue Pie
Lemon Lime Meringue Pie

Serve slices of chilled Lemon Lime Meringue Pie as a refreshing dessert, or an afternoon treat.

Both pie crust and curd can be made a day ahead. Cool both, wrap the cold pie crust in foil and place somewhere cool and dry. Cling film the top of the jug and refrigerate the curd.

If you have enjoyed this recipe for Lemon Lime Meringue Pie you may also like these:

Raspberry Topped Lemon Curd Pavlova

FF Lemon Lime Meringue Pie
Raspberry Topped Lemon Curd Pavlova

Lemon Drizzle Cake

FF Lemon Lime Meringue Pie
Lemon Drizzle Cake 

Raspberry Lemon Celebration Layer Cake

FF Lemon Lime Meringue Pie
Raspberry Lemon Celebration Layer Cake

Lemon Curd Sponge Tart

FF Lemon Curd Sponge Tart
Lemon Curd Sponge Tart

Good quality kitchenware is essential to me in my cooking and baking. While Pyrex is a well known brand, made from toughened glass, baking with this flan dish has reminded me why it is such a vital kitchen staple. Even the jug (which is my own), used to capture the sieved curd is used daily in our house. For everything from microwaving milk for hot chocolate, to making jelly for a trifle. I will definitely be using both the bowl and flan dish frequently in my kitchen. Anyone for quiche?

Whatever you are making, baking and creating in your kitchens, have fun preparing and sharing your feast.

Sammie xx

Maha Home gifted me both the Pyrex deep flan dish and 3L large bowl for the purpose of reviewing. All opinions and views are my own. I have not been paid to write this post, neither do I receive any payment following sales of product as a result of this post.

No part of this post may be reproduced or duplicated without the written permission of the owner. Please see my Disclosure Policy.
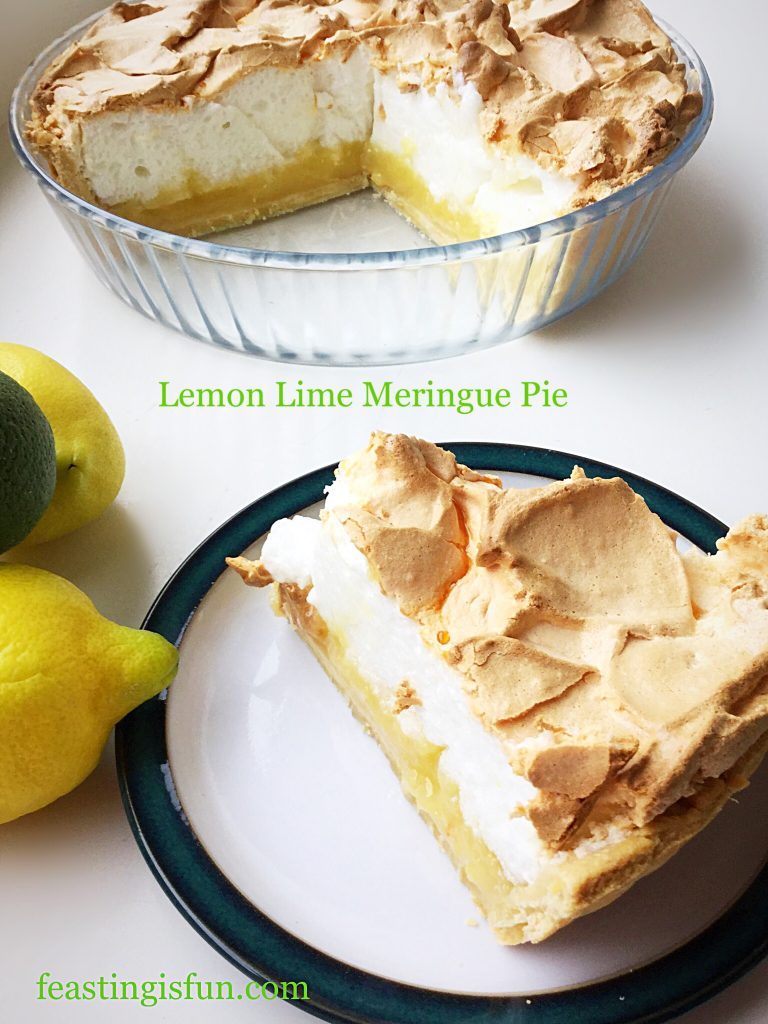
FF Lemon Lime Meringue Pie
Lemon Lime Meringue Pie


Share
Facebooktwitterpinterestlinkedintumblr

Lemon Blueberry Cupcakes

Share
Facebooktwitterpinterestlinkedintumblr

Hello, I have an incredibly delicious treat for you today, these Lemon Blueberry Cupcakes. I know, I hardly ever post cupcake recipes, except today, I had this big punnet of beautiful, juicy, blueberries sitting in the fridge, waiting to be eaten. And then I noticed the lemons. I love lemon, the flavour, the scent and these lemons are super special – they are called Eureka lemons. What a cool name. So I had a little think to myself (mostly a dangerous pursuit!) and decided it was time to make me some cupcakes.

FF Lemon Blueberry Cupcakes

Actually, when I say me I mean our family. Because all of us enjoy a cupcake and as I don’t make them very often they really are a treat. Although I must confess that two of these cupcakes didn’t make it throught to the frosting stage, because my daughter and I snaffled one each whilst they were still warm. Mmm. Totally worth it. Jammy pods of sweet, warm blueberry in a moist lemon crumb, yep no guilt felt at all. In fact you could make these and skip the frosting stage completely and they’d still be knockout delicious!

Lemon Blueberry Cupcakes

Warning, the frosting on these Lemon Blueberry Cupcakes totally sends them over the top. Since using fresh lemon juice ensures the frosting is the perfect balance to an already wonderful cupcake. And it adds another dimension of sweet/tart creaminess that simply makes these cupcakes awesome.

I actually had to resist adding some sparkles to these cupcakes, because sparkles?? I held back as the blueberry, polka dot studded frosting looked so pure and, well, perfect. However, If you want to add sprinkles or sparkles, just know I’m good with that.

Lemon Blueberry Cupcakes

Recipe : Makes 12 Lemon Blueberry Cupcakes

For The Cupcakes

175g/6oz Unsalted Butter at room temperature

175g/6oz Caster Sugar

1tsp Vanilla Extract – I use Nielsen-Massey 

1/4tsp Salt

3 Large Free Range Eggs

175g/6oz Plain White Flour

1 1/2tsp Baking Powder – I use Waitrose 

300g/11oz Fresh Blueberries

1 Lemon zest

For The Frosting 

400g/14oz Icing Sugar (Confectioners sugar)

150g/5oz Unsalted Butter at room temperature

3-4tbsp Lemon Juice (from the lemon above)

Making the cupcakes

Preheat the oven to 180C/160C fan, 350F, gas mark 4

  • First of all add the sugar, salt and butter to a large mixing bowl.
  • Whisk together until pale and creamy.

Add the sugar and butter to a bowl.

Whisk together until light and fluffy.


  • Add the vanilla extract and 2 eggs and whisk thoroughly.
  • Remove 1 tablespoon of flour, for dusting the blueberries later.
  • Sift in half the flour/baking powder and mix until just combined. I usually do this by hand, or use a low setting on a stand mixer.
  • Add the remaining egg. Stir briefly before adding the remaining sifted, dry ingredients. Mix until everything is just incorporated.

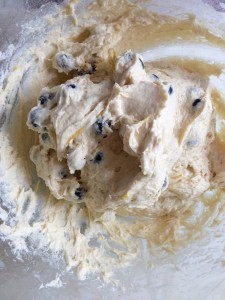
This cake batter is ready for its fruit!


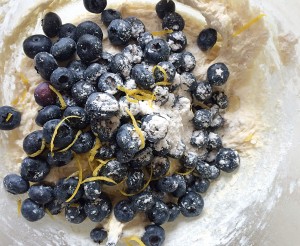
  • Keep back enough blueberries to decorate the cupcakes with. Now toss the remaining blueberries in the tablespoon of flour. This will stop them sinking to the bottom of the cupcake whilst baking.
  • Zest the lemon using a grater or, as I have, a lemon zester. Add to the bowl.
  • Stir the batter carefully by hand to avoid breaking up the blueberries.

Add the blueberries and lemon zest.


Stir the batter carefully by hand to avoid bursting the blueberries.


  • Line a muffin/cupcake tin with 12 cupcake cases.
  • Using an ice cream scoop fill the cases evenly with batter.

Lemon Blueberry Cupcakes


  • Place the Lemon Blueberry Cupcakes in the middle of the preheated oven.
  • Bake for 20 – 25 minutes. The cupcakes are baked when they are golden brown and spring back when lightly pressed.
  • I don’t suggest using a toothpick or skewer to check these particular cupcakes, as they are full of jammy blueberries, the skewer is likely to come out unclean.
  • As soon as the cupcakes are baked remove from the oven.

Lemon Blueberry Cupcakes


  • Leave the cupcakes to cool in the tin for 10 minutes.
  • Then place the cupcakes on a cooling rack.

Lemon Blueberry Cupcakes


Making the buttercream and icing the cupcakes

  • Place the icing sugar, soft butter and 3 tablespoons of lemon juice into a bowl.
  • Whisk thoroughly adding more lemon juice if the frosting is too thick.

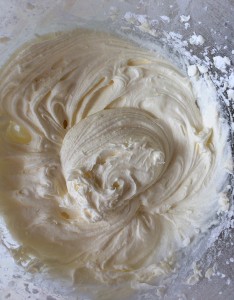
Whisk the butter, icing sugar and lemon juice together until light and fluffy.

  • The whipped buttercream.
  • Fit a nozzle of your choice (I used a large star tip) to a piping bag. I then turn over the outside edges and use a large glass or jug to put my piping bag in whilst I fill it with the frosting. I created a swirl pattern with my frosting.

Starting at the outside edge, frost the cupcake using a circular motion.

  • Start at the outside edge and keeping an even pressure on the piping bag ice the cupcake in a circular motion.
  • Repeat until all of the cupcakes are frosted.

Lemon Blueberry Cupcakes


  • Now it’s time to adorn the beautiful, creamy, frosting with the deep, dark, blue, berries that you reserved.
Lemon Blueberry Cupcakes


If not served immediately store in an airtight container. During hot weather refrigerate. Eat within 3 days.

If you have enjoyed this recipe for Lemon Blueberry Cupcakes you may also like these:

Black Forest Cupcakes 

FF Lemon Blueberry Cupcakes
Black Forest Cupcakes

Caramac Frosted Chocolate Cupcakes 

FF Lemon Blueberry Cupcakes
Caramac Frosted Chocolate Cupcakes

Fresh Raspberry Frosted Lemon Cupcakes 

FF Lemon Blueberry Cupcakes
Fresh Raspberry Frosted Lemon Cupcakes

While enjoying these Lemon Blueberry Cupcakes it is important to me to share. Seeing the pleasure on neighbours and friends faces when you pop round with one of these beauties makes me go all warm and fuzzy inside. Most importantly, it isn’t because of my actions, rather the reaction of seeing the recipient grinning. And, I honestly believe that all food tastes better when shared.

So whatever you are making, baking and creating in your kitchen, have fun preparing and sharing your feast.

Sammie x

No part of this post may be reproduced or duplicated without the written permission of the owner. Please see my Disclosure Policy.


Share
Facebooktwitterpinterestlinkedintumblr

Oat Topped Lemon Shortbread Bars

Share
Facebooktwitterpinterestlinkedintumblr

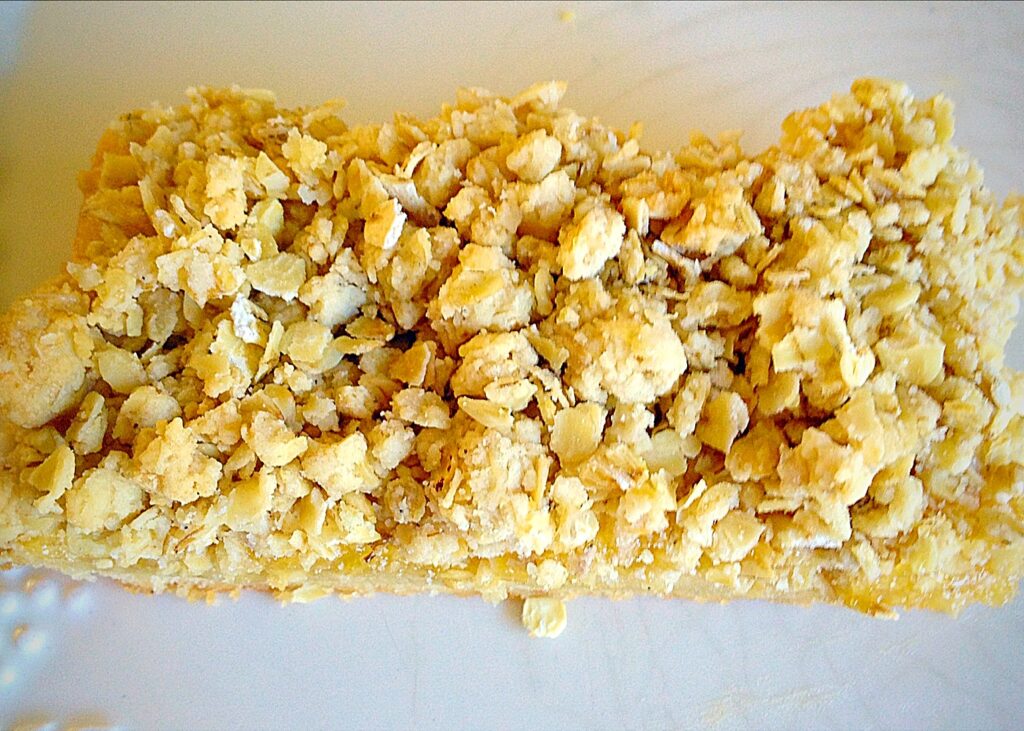
Hi and thank you for dropping by. I have a delightful treat for you today, my – Oat Topped Lemon Shortbread Bars.

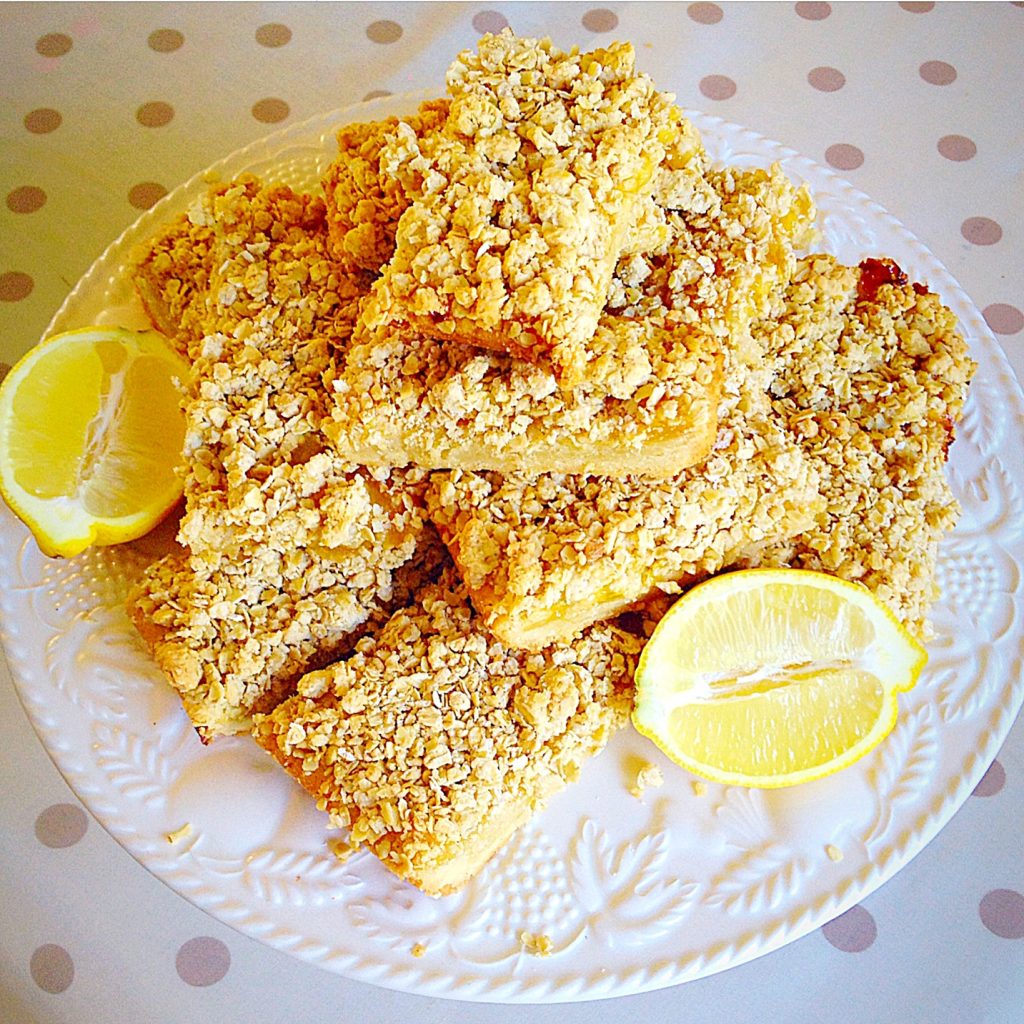
Oat topped lemon shortbread bars
Oat Topped Lemon Shortbread Bars


The other day I spotted a jar of Lemon Curd (unopened) in the cupboard. My brain started whirring with all the possibilities of how I could incorporate the Lemon Curd into my next bake. I didn’t fancy making pastry, let’s be honest, sometimes it seems like too much effort – even though it is really easy – anyhow, wasn’t feeling the pastry thing. Then I thought about a cake, but that wasn’t doing it for me either, I must’ve been having a funny day? Then I thought shortbread. But not as a biscuit, as a base. Yippee, I was finally getting somewhere. Everything good so far, shortbread base, slathered with lemon curd and then oats. Wasn’t quite sure how I was going to use them in the topping, just knew I needed oats – and that’s how these Oat Topped Lemon Shortbread Bars were born!


With the oat topping I decided to keep back a quarter of the shortbread dough and then crumble with the oats and pray that it would work – am not joking. It did! Although in all honesty, the bars were quite crumbly when I cut them up. Next time I would leave the whole tray bake intact, for at least a few hours, or even better overnight. The bars had firmed up beautifully by the next day.


Recipe : Oat Topped Lemon Shortbread Bars – makes 12

225g/8oz Unsalted Butter – room temp

150g/5oz Caster Sugar

1/4tsp Salt – I use Maldon 

1tsp Vanilla Extract

1 Large Egg Yolk – room temp

275g/10oz Plain White Flour

310g/11oz Jar Lemon Curd

175g/6oz Rolled Oats – not quick cook

Making The Shortbread Layer

Preheat the oven to 180C/160C fan, gas mark 4, 350F.

Butter and line with parchment paper a 30cm x 20cm (12″ x 8″) at least 4cm (1.5″) deep tin.

Into a large bowl whisk the butter, sugar and salt until light and fluffy.

Add the egg yolk and vanilla extract, whisk until fully incorporated.

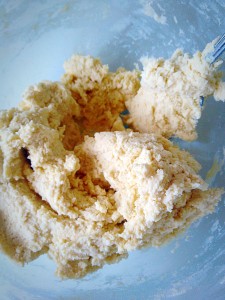
Next add the flour and stir with a spoon until just combined.

This is how your shortbread dough should look.


Reserve a quarter of the shortbread dough (for the topping).

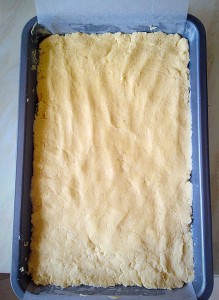
Using the remaining shortbread dough, press lightly into the pan, so it forms an even layer.
Using the remaining shortbread dough, press lightly into the tin, so it forms an even layer.


Pop the tin into the oven for 10 minutes. This will form a light crust on, but not fully cooked, the shortbread. After 10 minutes remove from the oven.

Adding The Lemon Layer

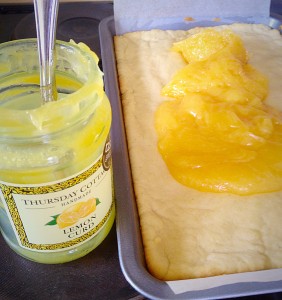
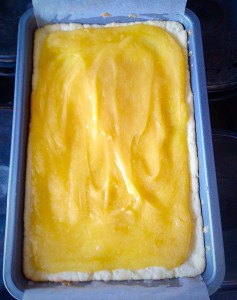
Immediately start spooning the Lemon Curd over the shortbread base
Immediately start spooning the Lemon Curd over the shortbread base.
Cover the entire shortbread base, just inside the edge.

Making And Using The Oat Crumble Topping

Set to one side whilst you make the oat topping.

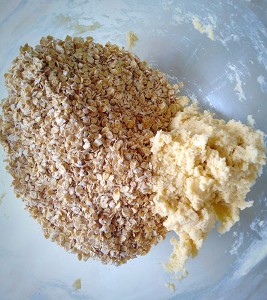
Add the oats to the remaining shortbread dough.
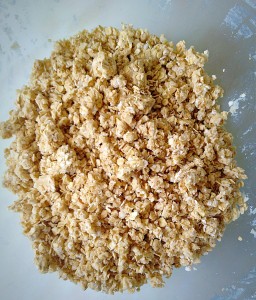
Using your fingers rub the buttery shortbread dough through the oats until you have an even crumble mix.
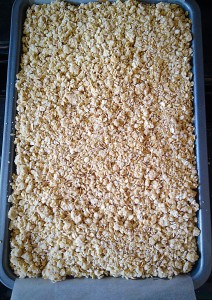
Starting at one corner sprinkle the oat crumble topping...
Starting at one corner sprinkle the oat crumble topping…
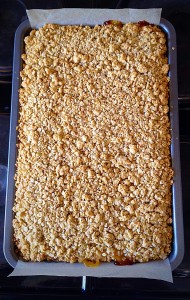
...until the entire top is covered. Very gently press down on the topping to slightly compact it.
…until the entire top is covered. Very gently press down on the topping to slightly compact it.

Baking The Oat Topped Lemon Shortbread Bars

Place in the oven for 25-30 minutes, until the oat topping is golden in colour, then remove from oven.

Oat Topped Lemon Shortbread Bars - allow to cool completely in the pan.
Oat Topped Lemon Shortbread Bars – allow to cool completely in the tin.


Once completely cooled, cut lengthways down the middle of the bake. Then cut into bars. Remove and store in an airtight container.

Oat Topped Lemon Shortbread Bars - pre-cooking the shortbread layer ensures it is cooked through with a lovely golden bottom.
Oat Topped Lemon Shortbread Bars – pre-cooking the shortbread layer ensures it is cooked through with a lovely golden bottom.


I really cannot emphasise how gorgeous these Oat Topped Lemon Bars are. The buttery shortbread, topped with good, tangy, lemon curd and then the crunch from the oat crumble topping.


Everyone who has tried these has loved them! That’s definitely a winner in my book (or blog!!!).

Perfect for sharing!

Please let me know what you think?

Sammie x

Share
Facebooktwitterpinterestlinkedintumblr

Zesty Lemon Lime Cake

Share
Facebooktwitterpinterestlinkedintumblr

Hello there, I have the perfect cake to celebrate the sunshine, Zesty Lemon Lime Cake. Perfect for picnics, packed lunches or pausing for a cuppa in the garden!

Zesty Lemon Lime Cake - perfect with lemon tea!
Zesty Lemon Lime Cake – perfect with lemon tea!


The combination of lime with lemon results in a deliciously moist, tangy cake. Using the zest of the fruits gives a delightful depth of flavour to this delicious cake.

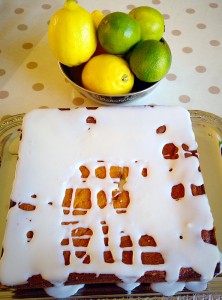
Zesty Lemon Lime Cake - sunshine in cake form!
Zesty Lemon Lime Cake – sunshine in cake form!


A gorgeous glaze made with both fresh lemon and lime juice is the perfect topping. Not too sweet, with a lovely zing!

I probably should have opted for an all over glaze instead of criss-cross!!


I love cake, especially in the summer. There’s nothing quite like opening up a tin at a picnic, with friends and family, to find a pre-cut, delicious, home made cake to tuck into. That’s when tray bakes or square cakes really come into their own – perfectly portable pudding!!

Recipe :

225g/8oz Caster Sugar

225g/8oz Unsalted Butter – room temp

1/4tsp Salt

1 x Lime

1 x Lemon

1tsp Vanilla extract

4 Large Eggs – pref. free range

150ml/5fl oz Sour Cream

225g/8oz Self Raising White Flour

225g/8oz Icing Sugar

Method : Preheat Oven to 175C/160C fan

In a large bowl whisk together the butter, sugar and salt until light and fluffy.

Add the vanilla extract, eggs, sour cream and zest of the lemon and lime and mix thoroughly – if the mixture starts to curdle add a couple of tablespoons of the flour.

You can finely grate the zest or use a zester to get long strips of zest as I have done.

Next add the flour and mix until just combined. Stir through the juice of half the lime.

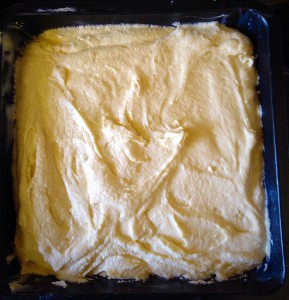
Pour the mixture into a greased and line (I only line the bottom of the tin) 21cm x 21cm (8″ x 8″) square cake tin.


Smooth over the cake top for an even finish.


Place in the oven and bake for 45-50 mins until the cake spring back when lightly pressed – or a cocktail stick comes out cleanly, when inserted into the centre of the cake.

Cooling in it's tin for 10 minutes - Zesty Lemon Lime Cake
Cooling in it’s tin for 10 minutes – Zesty Lemon Lime Cake


Once cooked remove the cake from the oven. Leave to cool for 10 minutes in the tin, then turn out onto a cooling rack.

Tip – once the cake is turned out onto the cooling rack I remove the parchment paper and the use a second rack placed over the bottom of the cake and flip it. Now my cake is the right way up!! Very handy when you want the top of the cake to be on show.

Once the cake is cooled, transfer to a serving plate, as the icing drips down the sides of the cake.

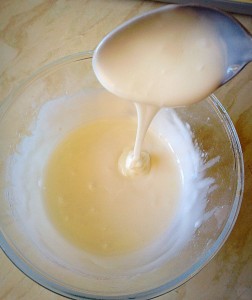
To make the icing, add the juice of half a lime and enough lemon juice to the icing sugar, in a bowl, mixing until you reach a nice smooth consistency.

Lemon lime flavoured icing, perfect for drizzling over your cake.
Drizzle the icing over the cake, encouraging some icing to drip over the sides!
I may have slightly overdone the drizzling???!!!

Allow the icing to set and then cut into squares – I made 12, but if you want larger pieces that’s fine

This Zesty Lemon Lime Cake has a lovely soft crumb texture and delicious citrus flavour. Perfect with a cup of lemon tea!

Do you have a favourite drink/cake flavour combination?

Enjoy feasting on this cake!

Sammie x


Share
Facebooktwitterpinterestlinkedintumblr

Lemon Shortbread Cookies

Share
Facebooktwitterpinterestlinkedintumblr

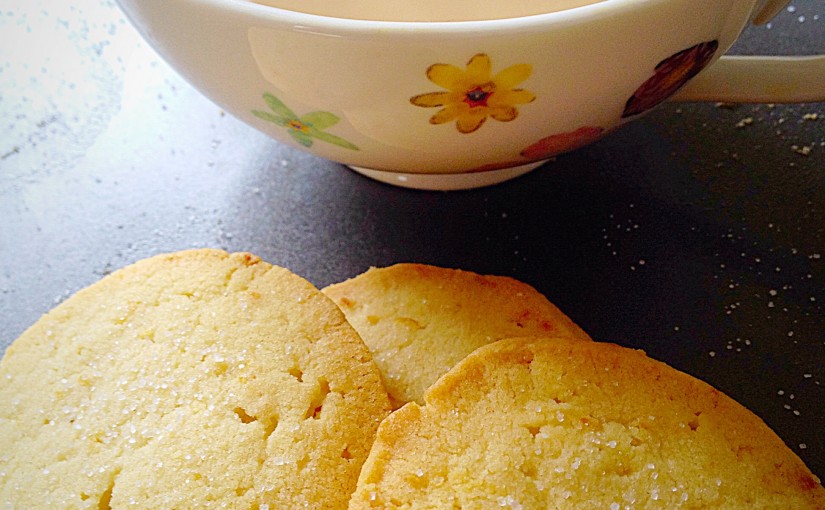
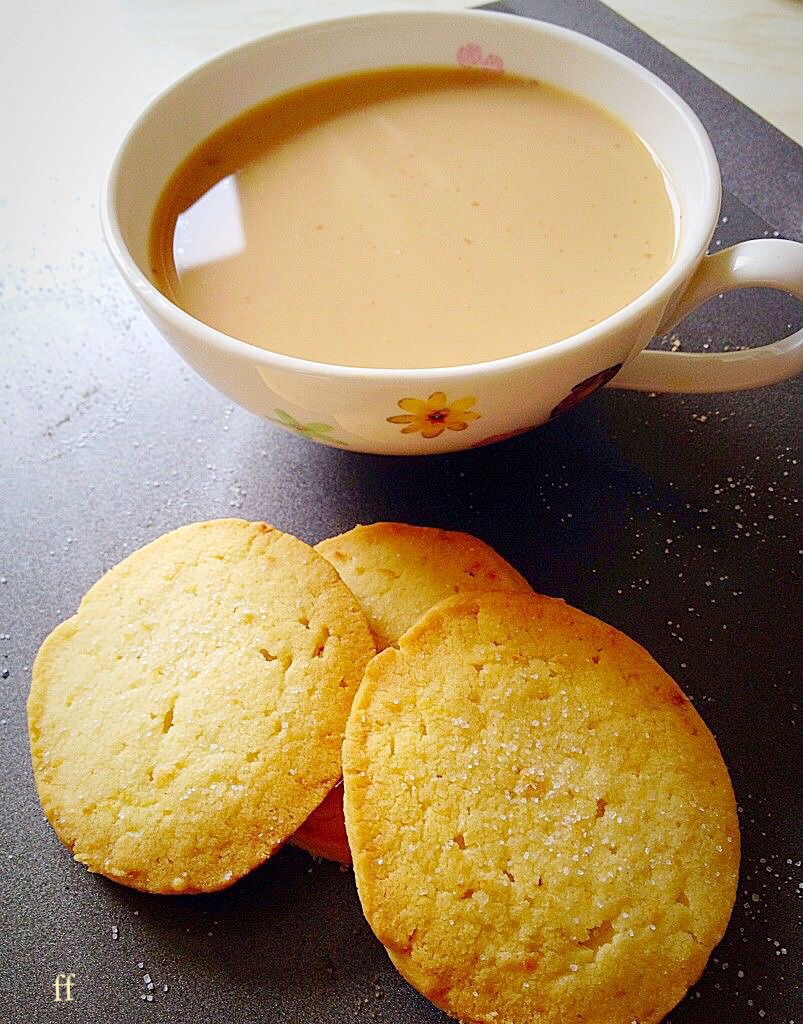
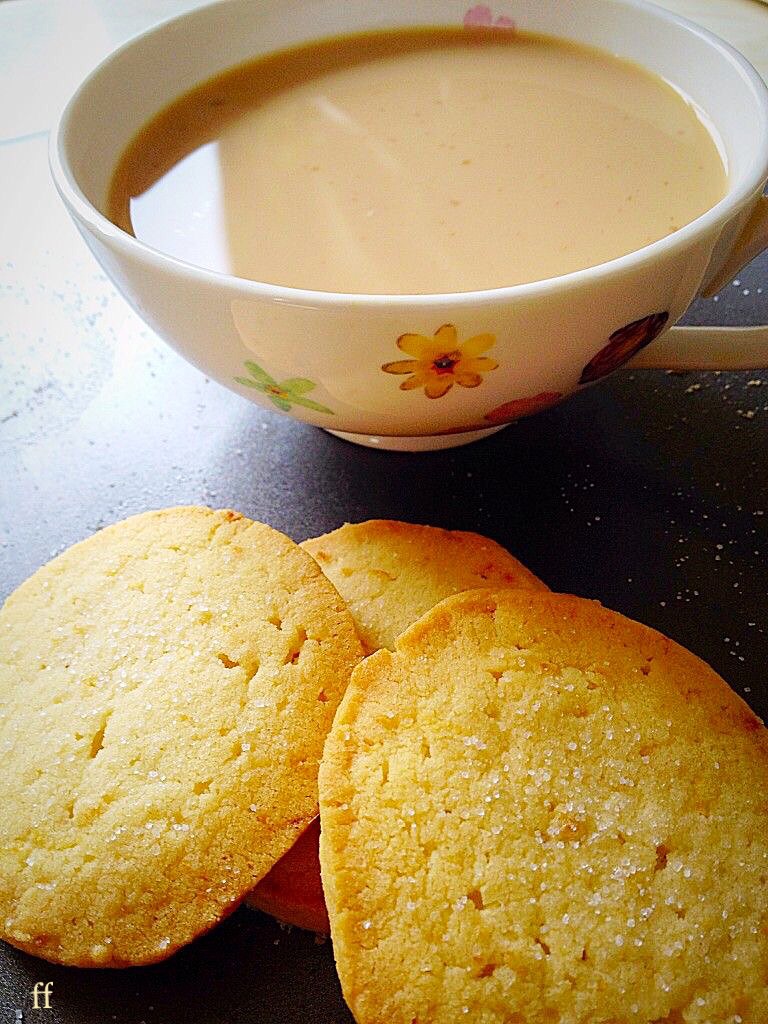
Hi, I’ve done it! I’ve managed to make  Lemon Shortbread Cookies that are utterly delicious. Light, lemony and crumbly, yet also taste like shortbread!

Lemon Shortbread Cookies


I can’t tell you how good it feels to get back to baking since my recent stay in hospital. I’m not out of the woods yet, but at least I’m on the right path! Baking relaxes me, allows my creative juices to get flowing and produces something scrummy to eat afterwards. Not bad eh?

Lemon Shortbread Cookies

Buttery, lemony, light Lemon Shortbread Cookies. The perfect biscuit, in my book anyway. I encourage you to try this recipe if you are a fan of lemon and shortbread. I think you get the picture – I LOVE THESE COOKIES!

Lemon Shortbread Cookies


Recipe : Makes 20-24 Lemon Shortbread Cookies

150g/5oz Caster Sugar

225g/8oz Unsalted Butter – room temperature

1 Large Egg Yolk – free range – the white can be frozen for up to one month

1tsp Vanilla Extract – I use Nielsen-Massey 

1tbsp Lemon Zest – finely grated (approx 1 medium lemon)

1/4 tsp Salt – I use Maldon

300g/10oz Plain White Flour

Extra Sugar for sprinkling – I use granulated sugar

Making And Chilling The Cookie Dough

Whisk the sugar and butter together until light and fluffy.

Add the room temperature egg yolk, vanilla, lemon zest and salt. Whisk until thoroughly combined.

Add the flour and mix (I do this by hand) until all the ingredients are just incorporated and the cookie dough comes together.

Place half of the cookie dough onto a piece of cling film.

Wipe the worktop with a damp, clean cloth. Lay the cling film on top and it will stay in place!

Place half of the cookie dough onto a piece of cling film.

Using your hands shape the dough into a log. Wrap tightly in the cling and repeat with the other half of the dough.

Finally, place the cookie dough logs into the refrigerator and chill until firm. Usually one hour.


These cookie dough logs need to be refrigerated until firm - approx 1 hour.

Slicing And Baking The Cookies

When ready to bake preheat the oven to 180C/160C fan oven, gas mark 4, 350F.

As soon as the dough logs are chilled remove from the refrigerator, place on a board and unwrap.

Using a sharp knife slice the log into 1cm – half inch thick rounds.


When firm, slice the log into individual rounds.

Place the cookie dough rounds onto a non stick, or baking parchment covered baking tray and lightly sprinkle with sugar.

Place the uncooked Lemon Shortbread Cookies onto a non stick baking tray and sprinkle with sugar.


Bake the Lemon Shortbread Cookies for 12-15 minutes, until golden brown and set.

As soon as the cookies are baked remove from the oven and sprinkle over a little more sugar.

Leave to cool on the tray for 10 mins then transfer to a cooling rack.

These cookies actually improve on keeping, in an airtight container, if you can wait.

Now think of someone you know, who loves lemon, pop some cooled cookies in a cellophane bag, tied with pretty ribbon and make their day!

If you have enjoyed this recipe for Lemon Shortbread Cookies you may also like these:

Cranberry Oat Cookies 

FF Lemon Shortbread Cookies
Cranberry Oat Cookies

Blueberry Lemon Shortbread Cake Bars

FF Lemon Shortbread Cookies
Blueberry Lemon Shortbread Cake Bars

Lemon Drizzle Cake Bars

FF Lemon Shortbread Cookies
Lemon Drizzle Cake Bars


As well as coming up with new recipe ideas and flavour combinations I really do enjoy baking for others. Whether it is a planned, family occasion, or a surprise, making something that I know others will appreciate and enjoy is a constant source of pleasure. An unexpected gift is a wonderful way to show someone that you care and food ALWAYS tastes better when it’s shared.

So, whatever you are making, baking and creating in your kitchens, have fun preparing and sharing your feast.

Keep smiling, Sammie x.

No part of this post may be reproduced or duplicated without the written permission of the owner. Please see my Disclosure Policy.


Share
Facebooktwitterpinterestlinkedintumblr

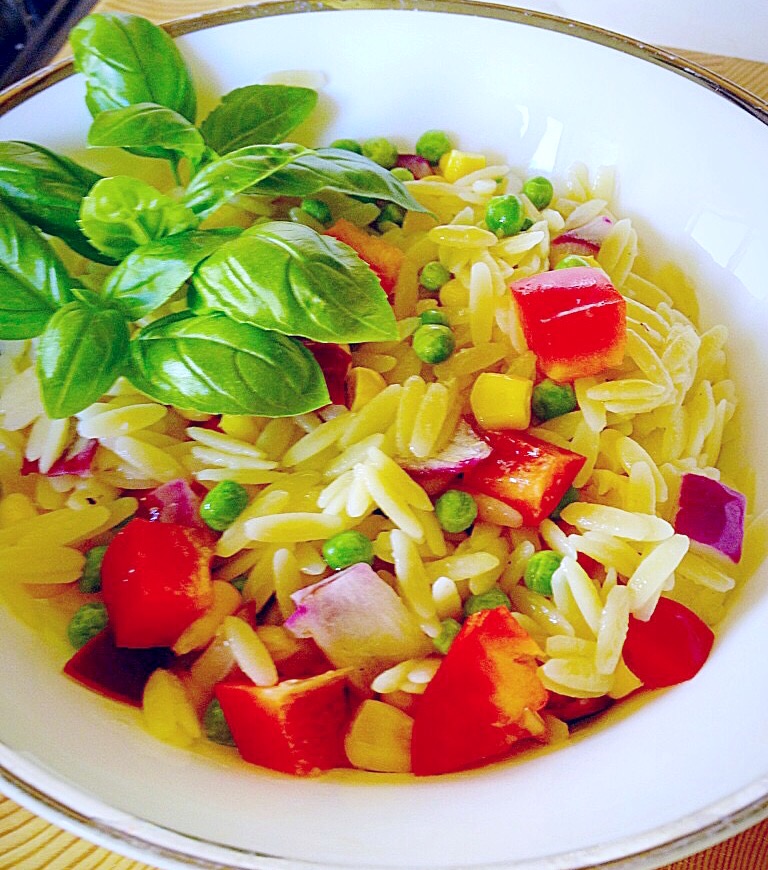
Lemon Garlic Vegetable Orzo

Share
Facebooktwitterpinterestlinkedintumblr

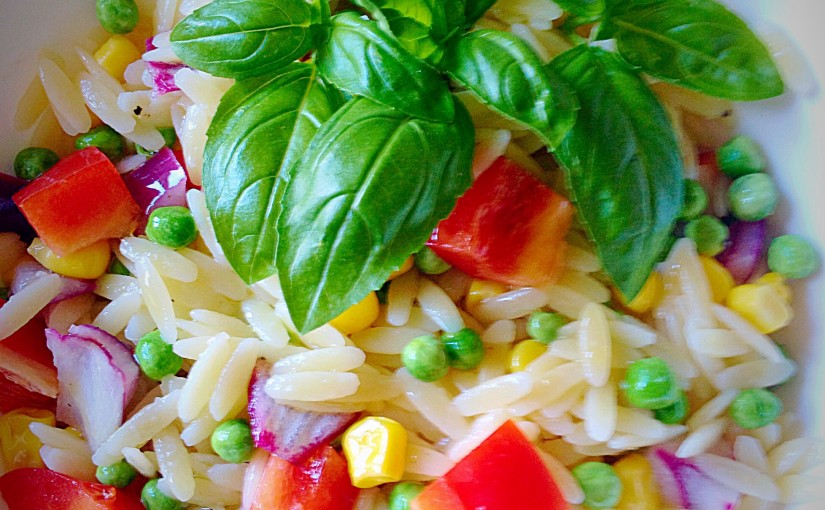
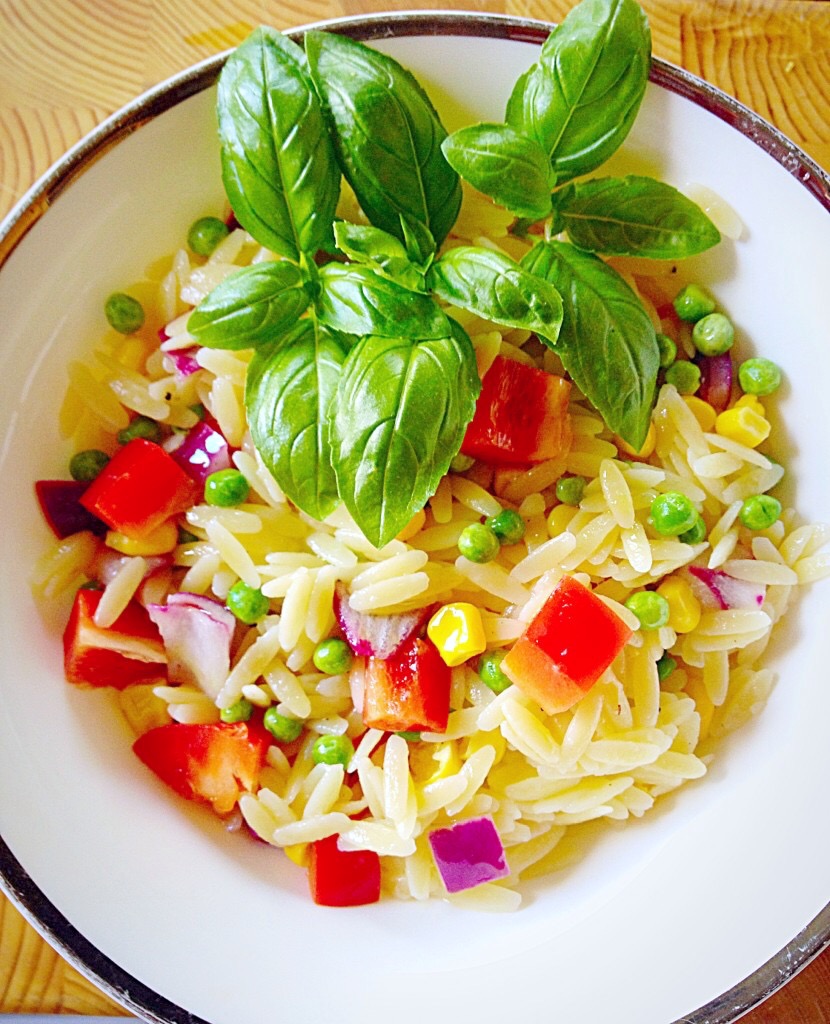
Hi, have I got the easiest, tastiest, make ahead side dish for you? Oh yes I have! Lemon Garlic Vegetable Orzo. Also, this dish does not disappoint as it is delicious.

Lemon Garlic Vegetable Orzo

While I’ve said this is a side dish, it’s also vegetarian and makes a fabulous light lunch. Likewise, adding a few shavings of Parmesan would add extra oomph for lunch, served alongside some crusty, crunchy bread.

I’m getting hungry!

Lemon Garlic Vegetable Orzo

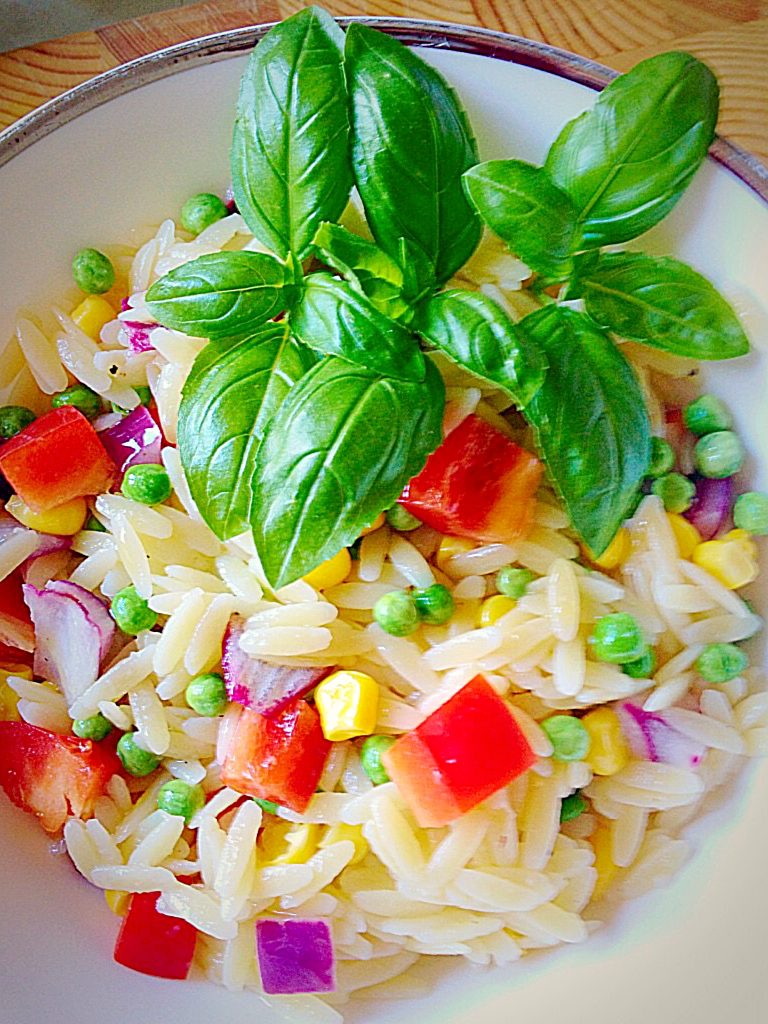
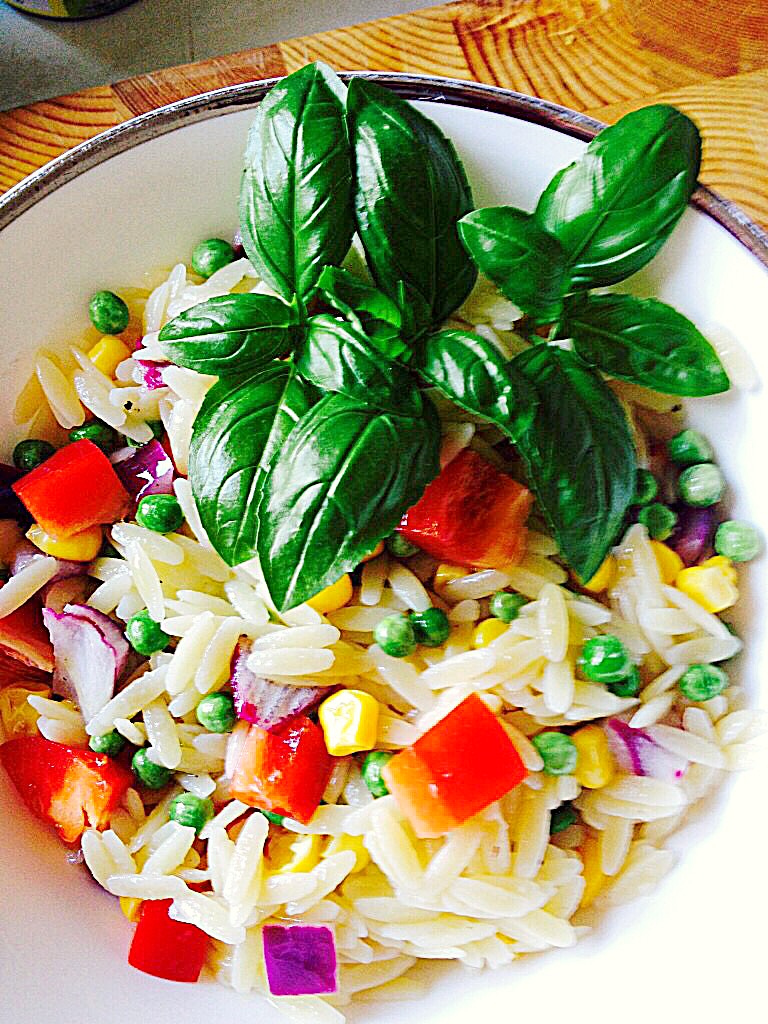
While I’ve used red onion, peas, sweetcorn and red bell pepper in this dish – but feel free to switch up the veggies (celery is also good) with whatever you have on hand. Most importantly, I would say that this Lemon Garlic Vegetable Orzo is best served at room temp, or even warmed – BUT NOT COLD! Because, no matter how much lemon/oil you add, when served fridge cold the Orzo clumps together and not in a good way! So there you go, an easy recipe that doesn’t take up any room in your fridge, or require any last minute fiddling. Yay!! Because, we like easy!


Orzo with vegetables and a lemon and garlic dressing.
Lemon Garlic Vegetable Orzo


Recipe : Lemon Garlic Vegetable Orzo serves 6-8 as a side dish.

500g/1lb Packet Dried Orzo – available from most supermarkets I buy mine from Waitrose 

Juice of 1 Large Lemon

1 x Small Red Onion

150ml/5fl oz Extra Virgin Olive Oil

2 x Garlic Cloves – crushed

200g/7oz Frozen Peas

Medium Can Sweetcorn

Fresh Basil

Sea Salt – I use Maldon and freshly ground Black Pepper to taste

Making The Vegetarian Orzo Dish

First of all put a large pan of water on to heat up for the Orzo.

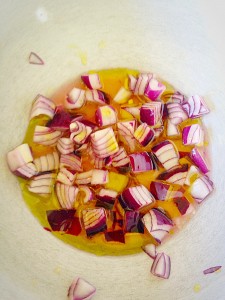
Place the lemon juice and finely diced red onion into a large bowl. Add a pinch of salt and mix together. Also leaving the onion in the lemon juice will remove the acrid taste!

As soon as the water in the pan is boiling add salt and then the Orzo. Cook according to the packet instructions, taking care not to overcook or the Orzo will simply clump together!

While the Orzo is cooking gently heat the Olive Oil and garlic together, for approximately 2 minutes on a medium heat. This allows the garlic to infuse the oil. And also the garlic is lightly cooked. Pour the garlicky oil over the onions and lemon juice.

Lemon Garlic Onions and Oil - add salt and pepper.
Lemon Garlic Onions and Oil – add salt and pepper.


Drain the Orzo as soon as it is cooked and pour straight into the bowl. Using a large slotted spoon immediately toss the Orzo in the oil/lemon juice, this will stop the Orzo from sticking together.

Place the frozen peas (I used petit pois) in the bowl and mix in with the hot Orzo.

Add the sweetcorn (drained) and the diced, red, bell pepper. And mix together with a fork, then taste for seasoning.  Add salt and freshly ground pepper as necessary.

Take a handful of Basil leaves, roughly chop and sprinkle over.

Finally, cover with cling film and serve at room temperature.

Lemon Garlic Vegetable Orzo


This side goes fabulously with fish – Salmon especially, Chicken and Pork. Likewise, it makes a fab alternative to roast potatoes and hot veggies for a Summer roast, Also, it completely seals the deal as part of a buffet or served at a barbecue. And with very little effort needed!

If you have enjoyed this recipe for Lemon Garlic Vegetable Orzo you may also like these:

Tangy Lemon Potato Salad

FF Lemon Garlic Vegetable Orzo
Tangy Lemon Potato Salad

Crunchy Homemade Coleslaw

FF Lemon Garlic Vegetable Orzo
Crunchy Homemade Coleslaw

Roasted Summer Vegetable Orzo Salad 

FF Lemon Garlic Vegetable Orzo
Roasted Summer Vegetable Orzo Salad

Enjoy feasting on this scrumptious dish and may we have many sunny days ahead to spend with friends and family, having fun round the BBQ!

Also, making sure there are hidden ‘Super-Soakers’ primed for action if it gets too hot – or boring!!!!

So, whatever you are making, baking and creating in your kitchens, have fun preparing and sharing your feast.

Sammie x

No part of this post may be reproduced or duplicated without the written permission of the owner. Please see my Disclosure Policy.


Share
Facebooktwitterpinterestlinkedintumblr

Lemon Drizzle Cake

Share
Facebooktwitterpinterestlinkedintumblr

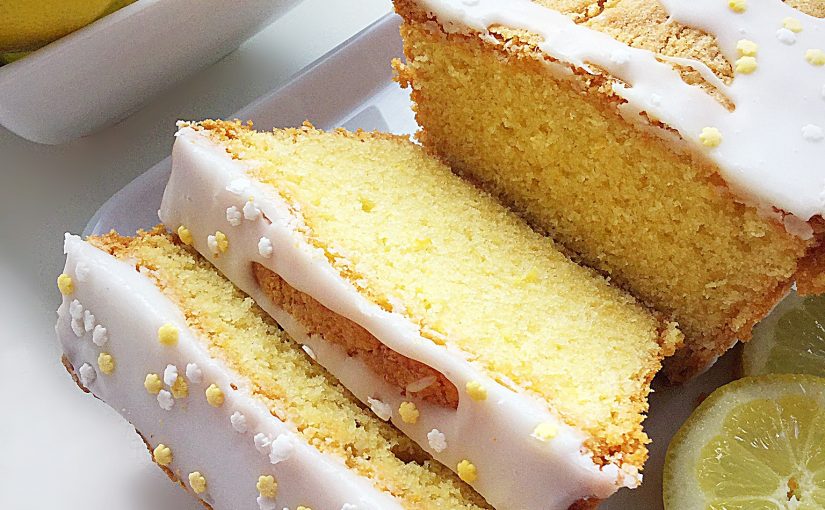
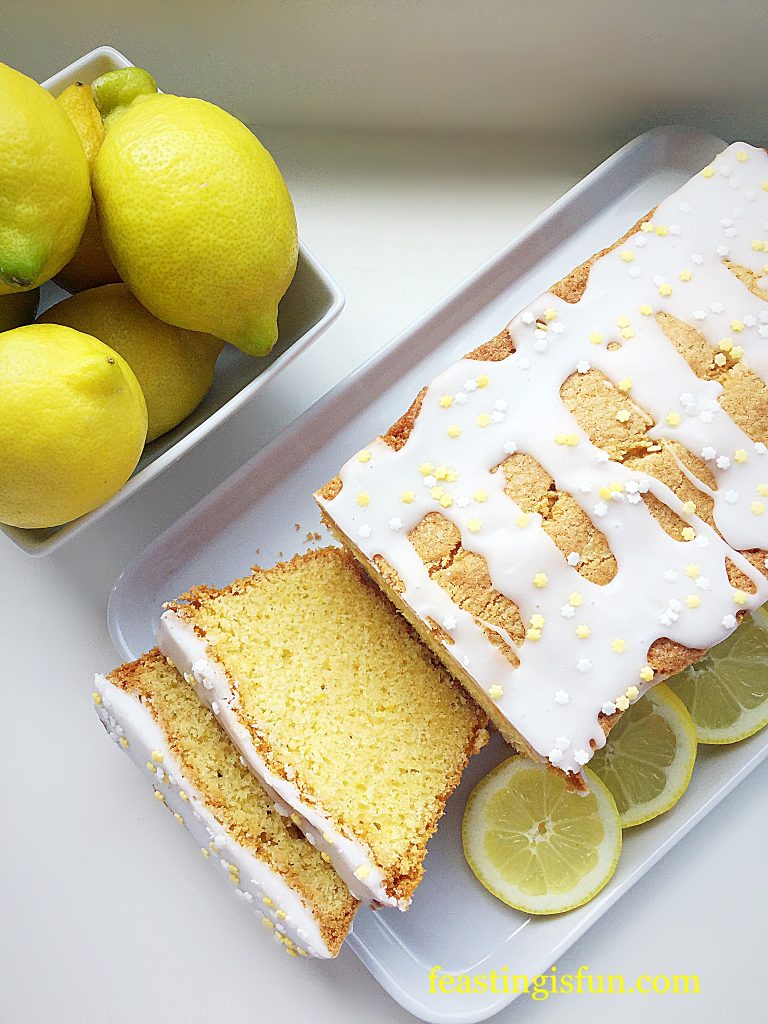
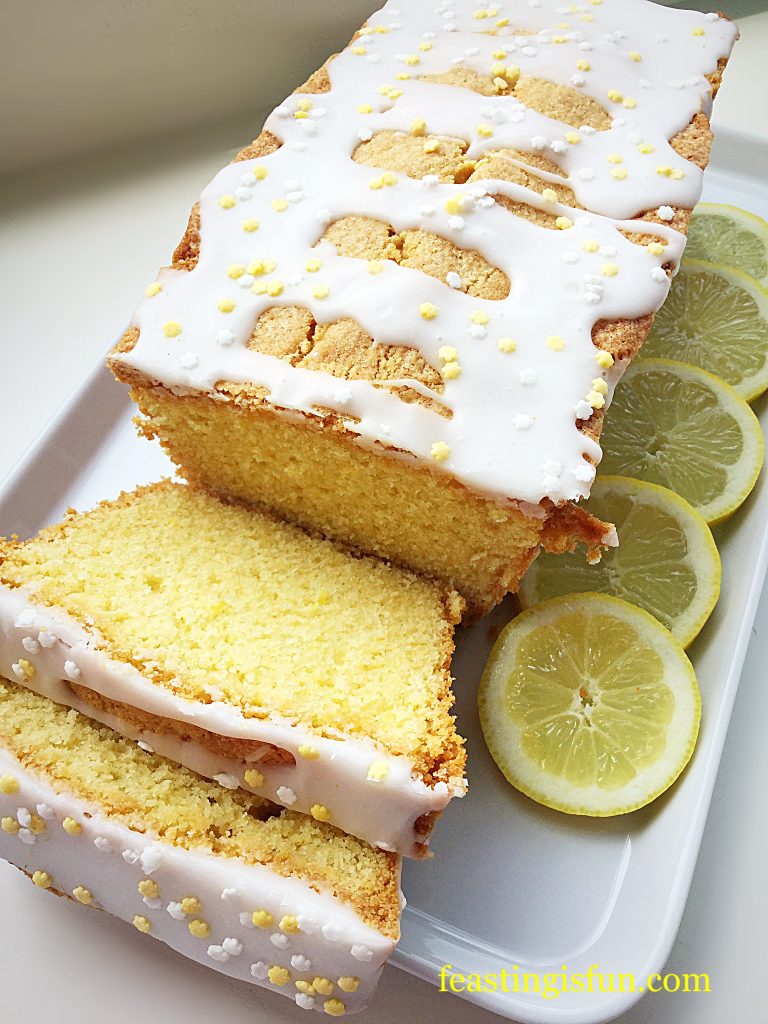
Lemon Drizzle Cake has to be one of my all time favourite cakes. While there are a gazillion recipes on the internet and in books, I wanted to add my own. Firstly because hopefully this blog will become a go-to resource for our children as they continue on their cooking and baking journey. Also, I like my lemon drizzle a certain way. That is, with a fresh lemon glacé icing draped and drizzled over the top. I hope that you enjoy my take on this classic cake?

FF Lemon Drizzle Cake

Since there are various ways to make a lemon drizzle cake, I thought I’d explore them. Traditionally a lemon sugar syrup is made and poured over the top of the cake, creating a crunchy, sugar crust as it cools. For my take on this version see these Mini Lemon Drizzle Bundt Cakes.Perfect individual portions of sunshine.

FF Lemon Drizzle Cake
Lemon Drizzle Cake

Lemons And Their Versatility In The Kitchen

Lemons are a must-have ingredient in my kitchen. Used in both sweet and savoury recipes they are essential in my Tangy Lemon Potato Salad where the un-waxed, scrubbed lemons are cut so thinly they are eaten as part of the dish. Also they are used to thin down mayonnaise for my Crunchy Homemade Coleslaw.Whether halved and added to the cavity of a roasting chicken, or simply squeezed over baked salmon, they add a burst of flavour that lifts each dish.

FF Lemon Drizzle Cake
Lemon Drizzle Cake

While lemon extract is available and I confess sometimes is used in my recipes, nothing is quite as good as using the real thing. During lemon season I buy un-waxed lemons as they tend to be slightly under ripe. However, I have had many a mouldy lemon lurking in the fridge! So, if buying waxed lemons, simply scrub under hot water with a nail brush. As a note, I lightly scrub un-waxed lemons as well if using the zest.

You will need a 25cm x 11cm x 7.5cm (10” x 4.5” x 3”) 2lb loaf tin,

Recipe: Lemon Drizzle Cake serves 8-10

225g/8oz  Unsalted Butter at room temperature

225g/8oz Caster Sugar

4 Large Free Range Egg

250g/9oz Plain White Flour

1 tsp Vanilla Extract – I use Nielsen-Massey 

2 tsp Baking Powder

1 Whole Lemon – finely zested and juiced

1/4 tsp Sea Salt – I use Maldon Sea Salt, halve quantity if using free flowing

175g/6 oz Icing Sugar

Optional – White and Yellow Sprinkles – mine are from Waitrose

Method: Preheat oven to 160C/140C fan, 325F, gas mark 3.

Making And Baking The Lemon Cake

  • Place butter, caster sugar and salt into a large bowl and whisk until pale and creamy.
  • Sift the flour and baking powder into a separate bowl.
  • Add 2 eggs, the vanilla extract and half of the sieved flour to the creamed butter and sugar. Whisk until just combined.
  • Now add the last 2 eggs, remaining flour and lemon zest.
  • Stir the ingredients together with a metal spoon until thoroughly combined.
  • Spoon the lemon cake batter into the prepared tin ensuring the top is level.
  • Place the cake into the centre of the oven and bake for 1 hour 10 minutes – 1 hour 20 minutes. My cake took 1 hour 15 minutes.
  • The cake is baked when it is golden in colour, firm to touch and an inserted skewer comes out clean.
  • As soon as the cake is baked remove from the oven and allow to cool for 20 minutes in the tin.
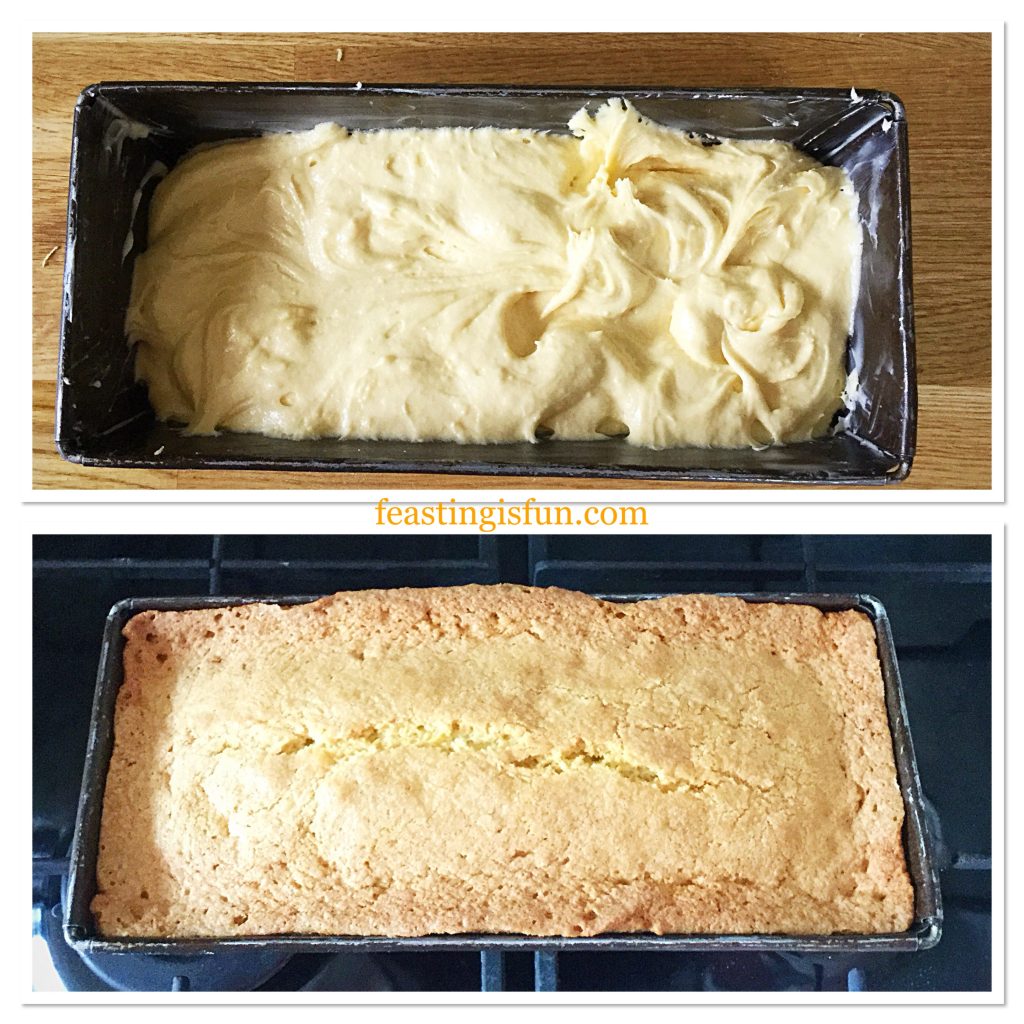
FF Lemon Drizzle Cake
Lemon Drizzle Cake before and after baking.
  • While the cake cools make the glacé icing.

Making The Fresh Lemon Icing And Decorating The Cake

  • Sieve the icing sugar into a bowl and add the lemon juice. Stir until thickly combined and completely lump free. If the icing is too thick add a few drops of water.
  • After 20 minutes cooling, run a palette knife around the outside edge of the cake. Turn the cake out – take care it will still be warm. Peel back the parchment paper from the base and discard.
  • Place the cake on to a cooling rack which is then place over a tray or plate.
  • Using a spoon drizzle the lemon icing over the cake, encouraging it to drip down the sides in places.
  • Finally scatter over some yellow and white sprinkles and leave the cake to cool completely.
FF Lemon Drizzle Cake
Freshly iced Lemon Drizzle Cake in the Spring sunshine.

Once cooled this cake is easily sliced. Serve with lemon tea for extra lemon flavour.

Keep the cake in an airtight container and eat within 5 days. Refrigerate during warmer weather.

If you have enjoyed this recipe for Lemon Drizzle Cake you may also like these:

Iced Cherry Coconut Loaf Cake

FF Lemon Drizzle Cake
Iced Cherry Coconut Loaf Cake

Raspberry Lemon Celebration Layer Cake

FF Lemon Drizzle Cake
Raspberry Lemon Celebration Layer Cake

Pomegranate Lemon Drizzle Bundt Cake

FF Lemon Drizzle Cake
Pomegranate Lemon Drizzle Bundt Cake

Since this cake is so delicious, it’s good to know that I have successfully doubled the recipe and baked two cakes at the same time. It is my firm belief that all food tastes better when shared. So, whether you are baking this cake for yourself, or alternatively as a gift, it’s definitely worth making two. In fact why not give both cakes away?

Whatever you are making, baking and creating in your kitchens, have fun preparing and sharing your feast.

Sammie xx

No part of this post may be reproduced or duplicated without the written permission of the owner. Please see my Disclosure Policy.

Share
Facebooktwitterpinterestlinkedintumblr