Blackberry Chocolate Chunk Ice Cream

Share
Facebooktwitterpinterestlinkedintumblr

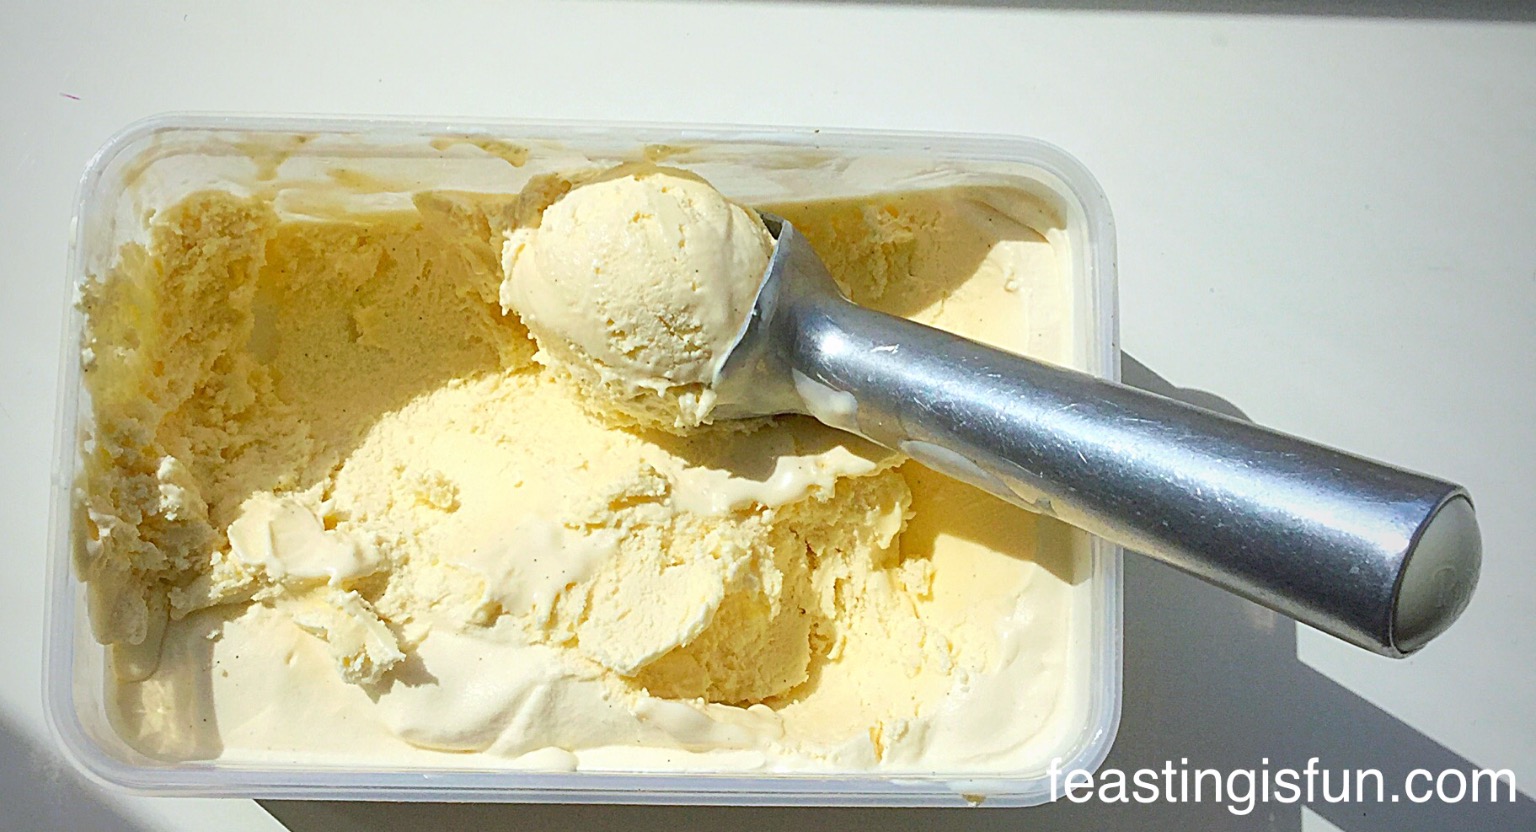
Today was so beautifully warm and sunny, I simply had to make this Blackberry Chocolate Chunk Ice Cream.

Blackberry Chocolate Chunk Ice Cream

Made with frozen blackberries from last year, this ice cream delivers massively on taste.

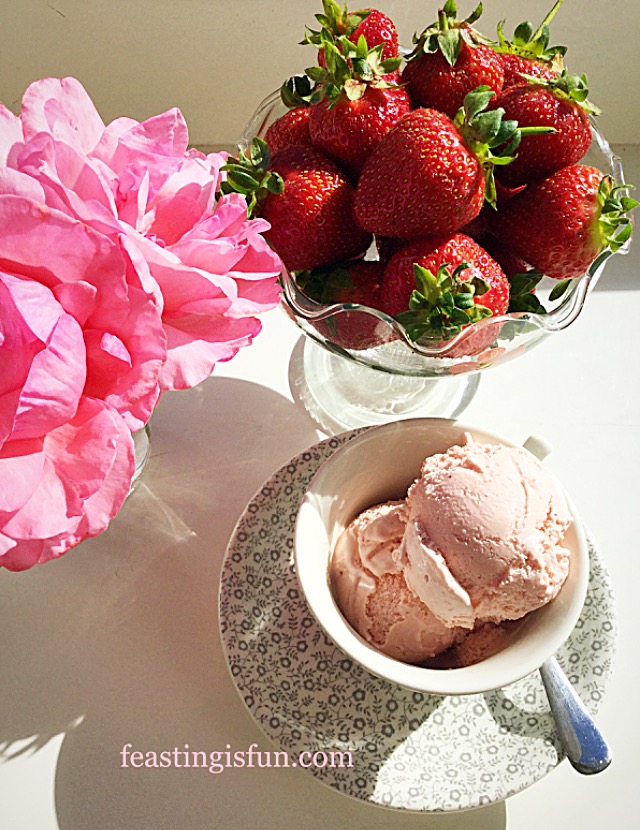
To quote Jennifer Aniston “Here’s the science bit”, when eating very cold food, such as ice cream, the flavours are dulled, due to the cold temperature. If you think of strawberries eaten straight from the fridge, they will never taste as good as those that have been left out to warm up a bit, or better, plucked straight from a sun warmed plant.

Likewise, when making ice cream, even a simple Very Vanilla Ice Cream, the flavours need to be more pronounced so that you taste them.

Blackberry Chocolate Chunk Ice Cream

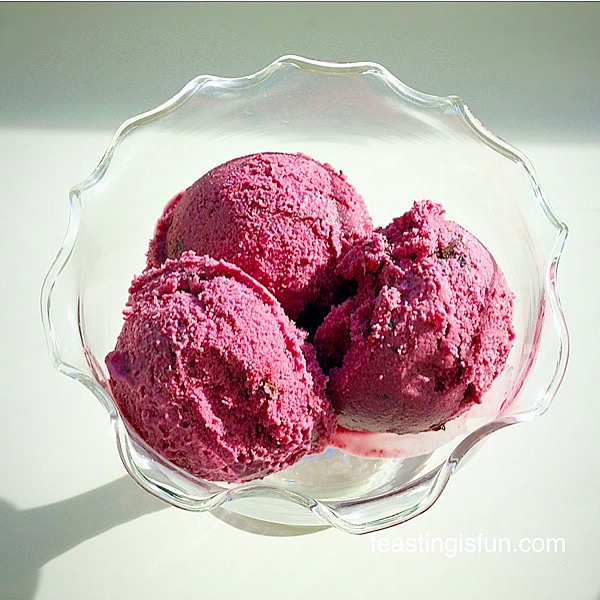
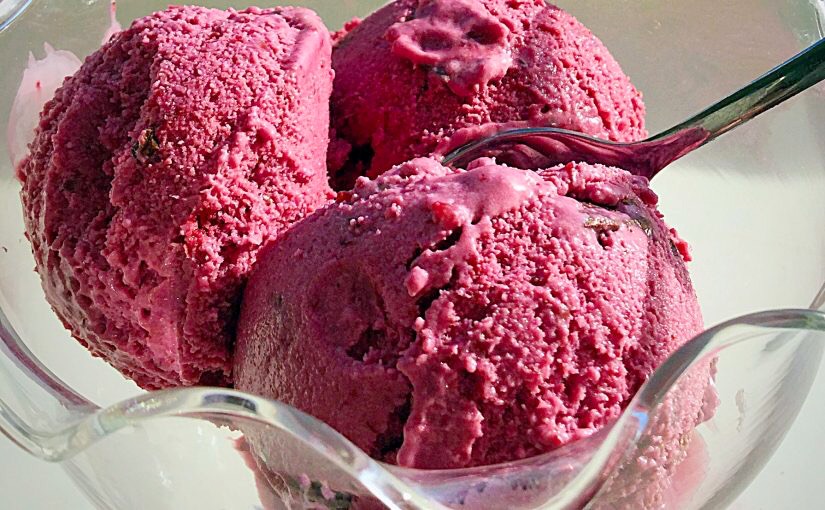
With this creamy, sharp, sweet and tangy Blackberry Chocolate Chunk Ice Cream, you taste every bit of the beautiful blackberries. Sousing them in sugar and lemon juice encourages each berry to release it’s maximum, ripe berry flavour. On it’s own the blitzed, blackberry sauce would be too tart and the berry flavour would be overwhelming, yet mixed into a delicate vanilla ice cream custard and churned until it becomes ice cream, the flavours mellow and meld together, creating one of the most exciting flavoured ice creams ever.

Blackberry Chocolate Chink Ice Cream

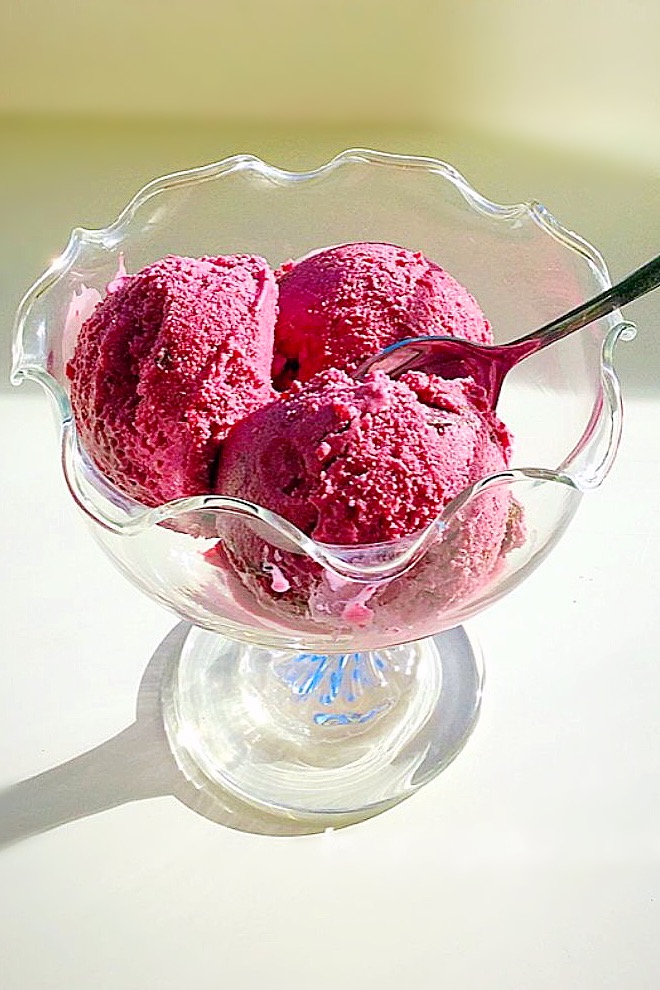
Studded with chunks of deep, dark, chocolate that lend not only a slight bitter flavour but added texture this Blackberry Chocolate Chunk Ice Cream becomes complete. Elegant enough to be served in pretty bowls at the end of a meal with nothing else to accompany it.

One thing is certain, this ice cream is certainly one of the best ice creams I have ever tried!

Recipe: Makes approx 1 litre Blackberry Chocolate Chunk Ice Cream

300ml Double Cream

300ml Whole/Semi Skimmed Milk

4 Large Egg Yolks – I always use free range eggs

1tsp Vanilla Extract – I use Nielsen Massey

7tbsp Caster Sugar

Scant pinch of salt – less than 1/4tsp

1tsp Cornflour – I use Doves Farm as it is guaranteed gluten free

Juice of 1 Lemon

300g Blackberries – I used frozen but use fresh in season

100g/4oz Good Quality Dark Chocolate minimum 65% Cocoa solids

Method: Ensure that the freezing part of the ice cream maker has been in the freezer for at least 24 hours.

Please see Very Vanilla Ice Cream for step by step photographs, showing how to make the ice cream custard.

Making The Blackberry Ice Cream Base

  • Place the cream, milk and vanilla extract into a saucepan over medium heat.
  • Add the egg yolks, sugar, salt and cornflour to a large heatproof bowl. Whisk until pale and creamy.
  • The milk/cream needs to reach scalding point. This is when little bubbles appear around the edge of the liquid.
  • When the milk/cream has reached scalding point remove the pan from the heat.
  • Whilst whisking the egg mixture, pour the hot milk/cream into the bowl – do not stop whisking.
  • Once combined tip the custard mixture back into the same saucepan, cooking over a low heat and constantly stirring, until the custard has thickened and coats the back of a wooden spoon.
  • Place a sieve over a clean, heatproof bowl and pour the custard into the bowl, through the sieve.
  • Place cling film directly over the top of the custard so that is touches it. This will prevent a skin from forming.
  • Allow to cool and then place into the fridge to chill.
  • Place the blackberries into a bowl and add the juice of one lemon and one tablespoon of caster sugar. Cover and set aside for 30 minutes.
  • Place the blackberry mixture into a blender and pulse until you have a smooth purée.
  • Pass the blackberry purée through a sieve to remove any seeds.
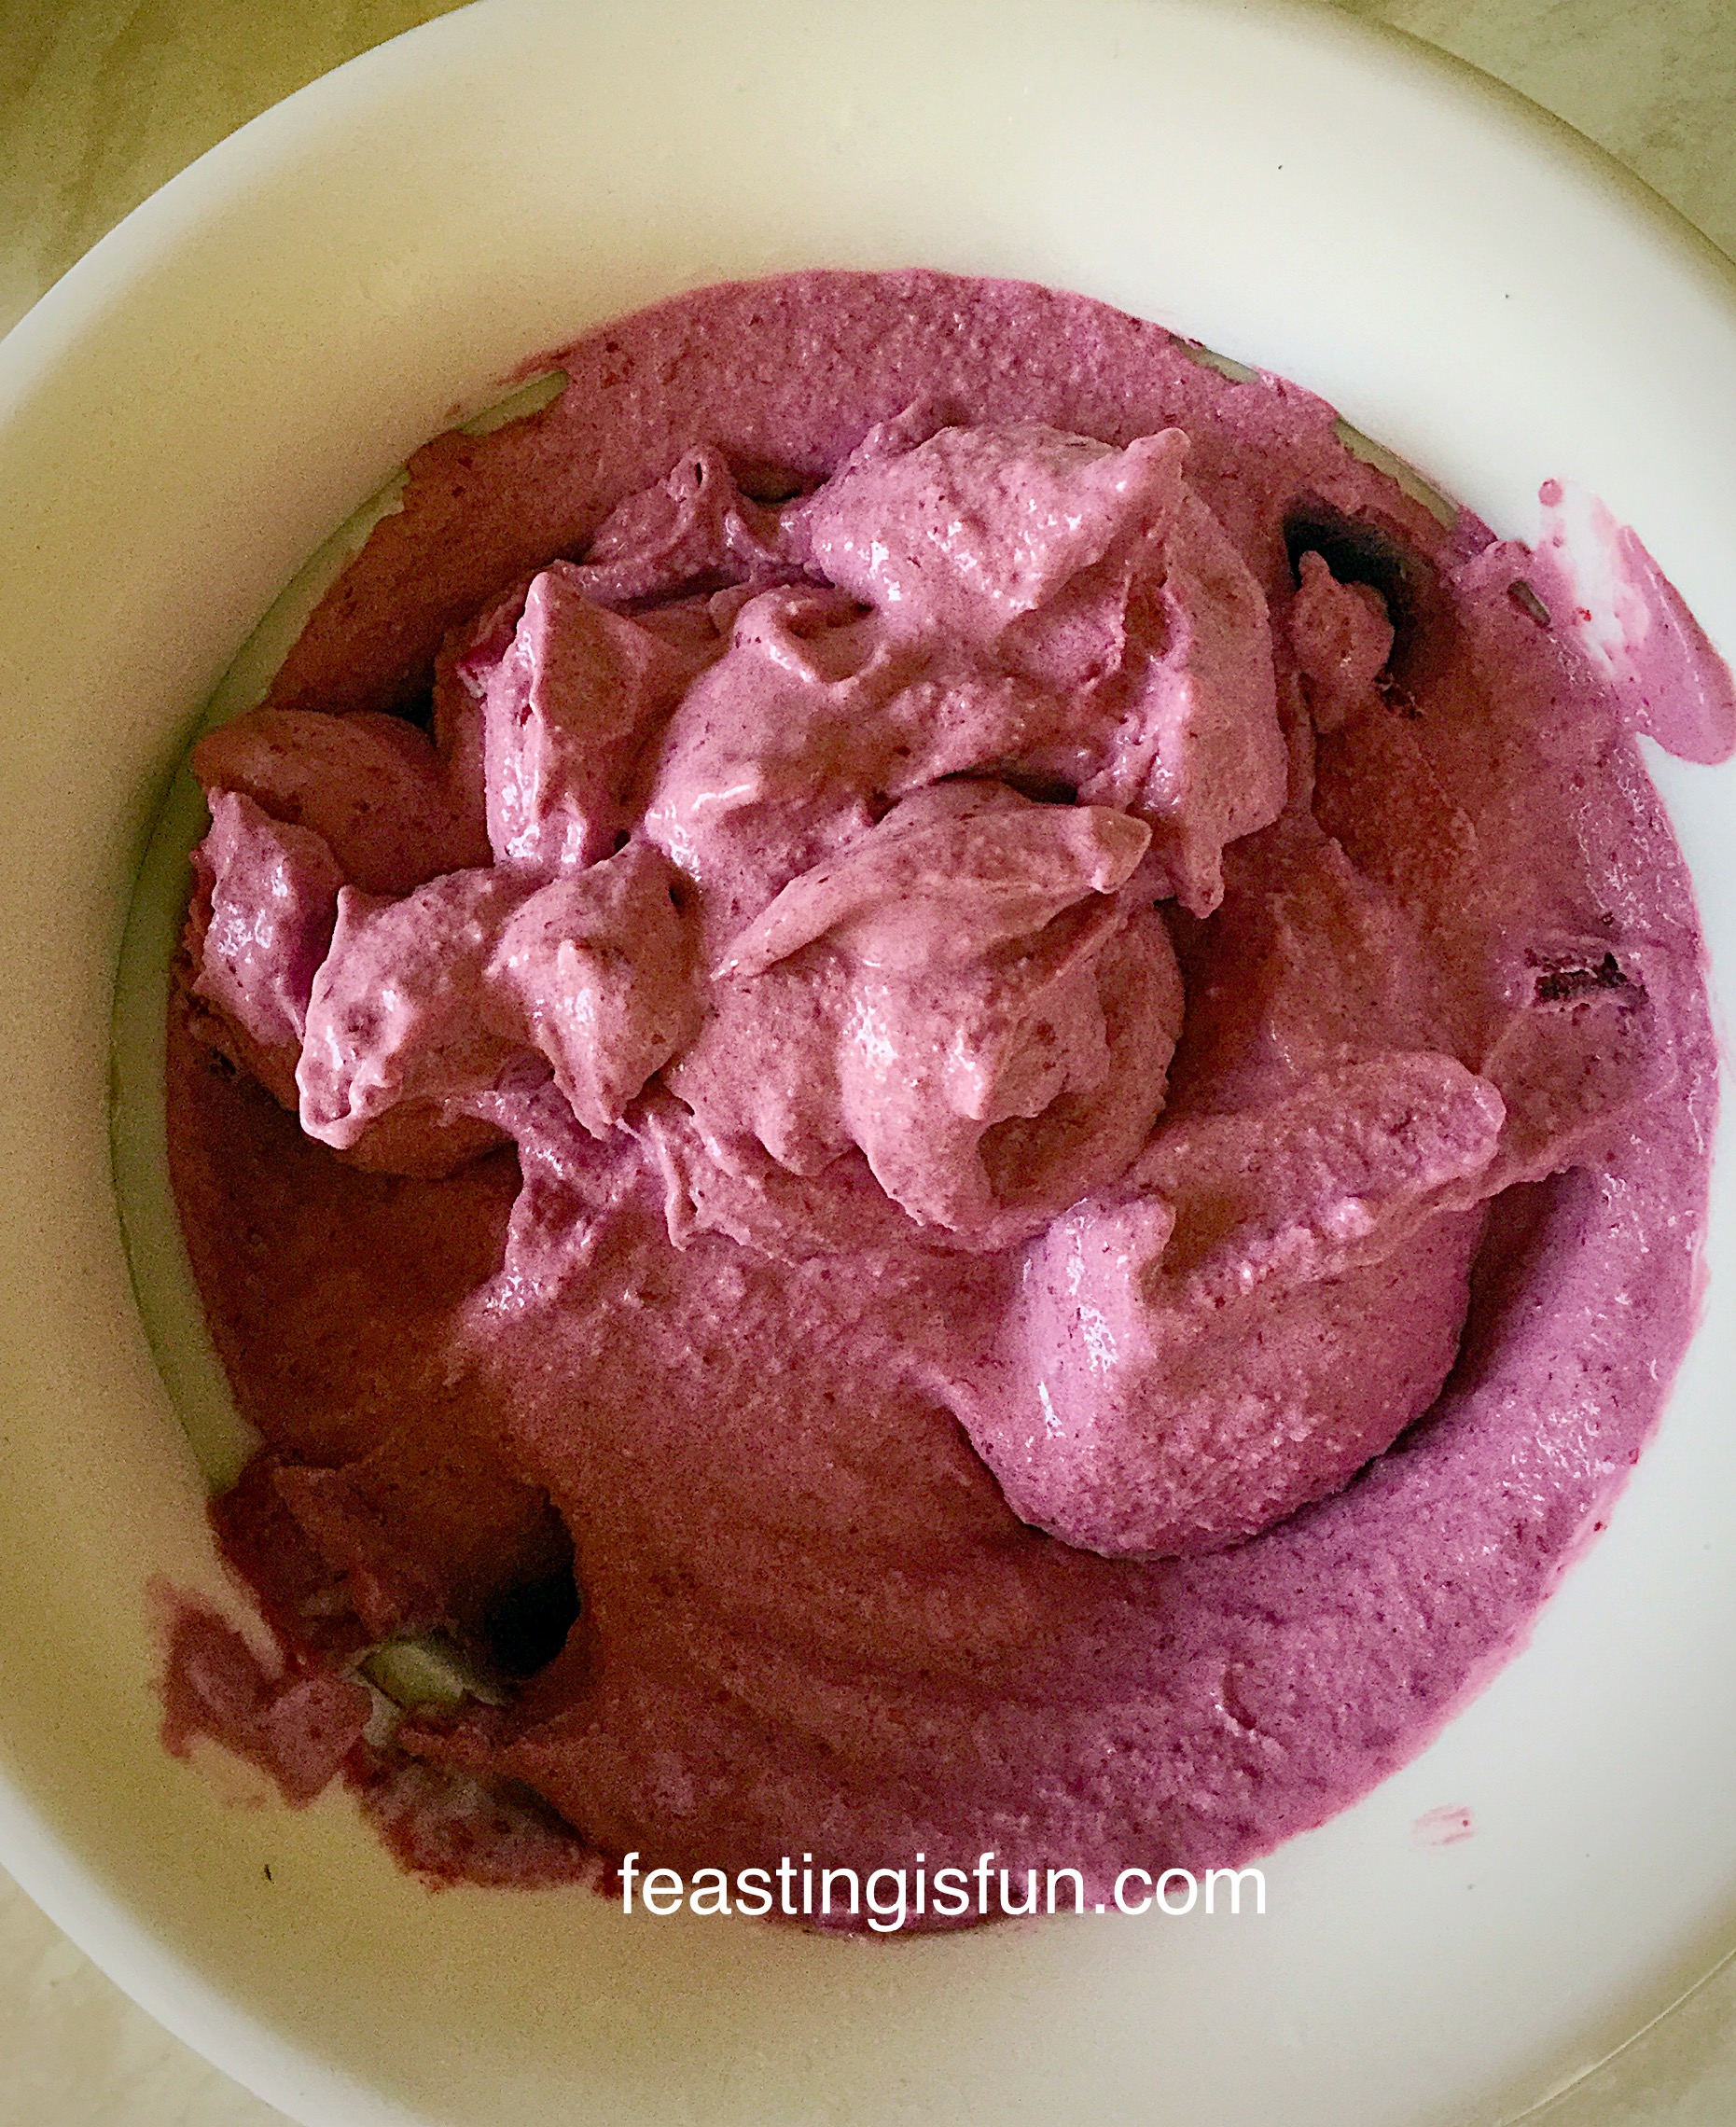
  • As soon as the ice cream base has chilled remove the cling film and add the blackberry purée.
This ice cream really does have the most beautiful colour.
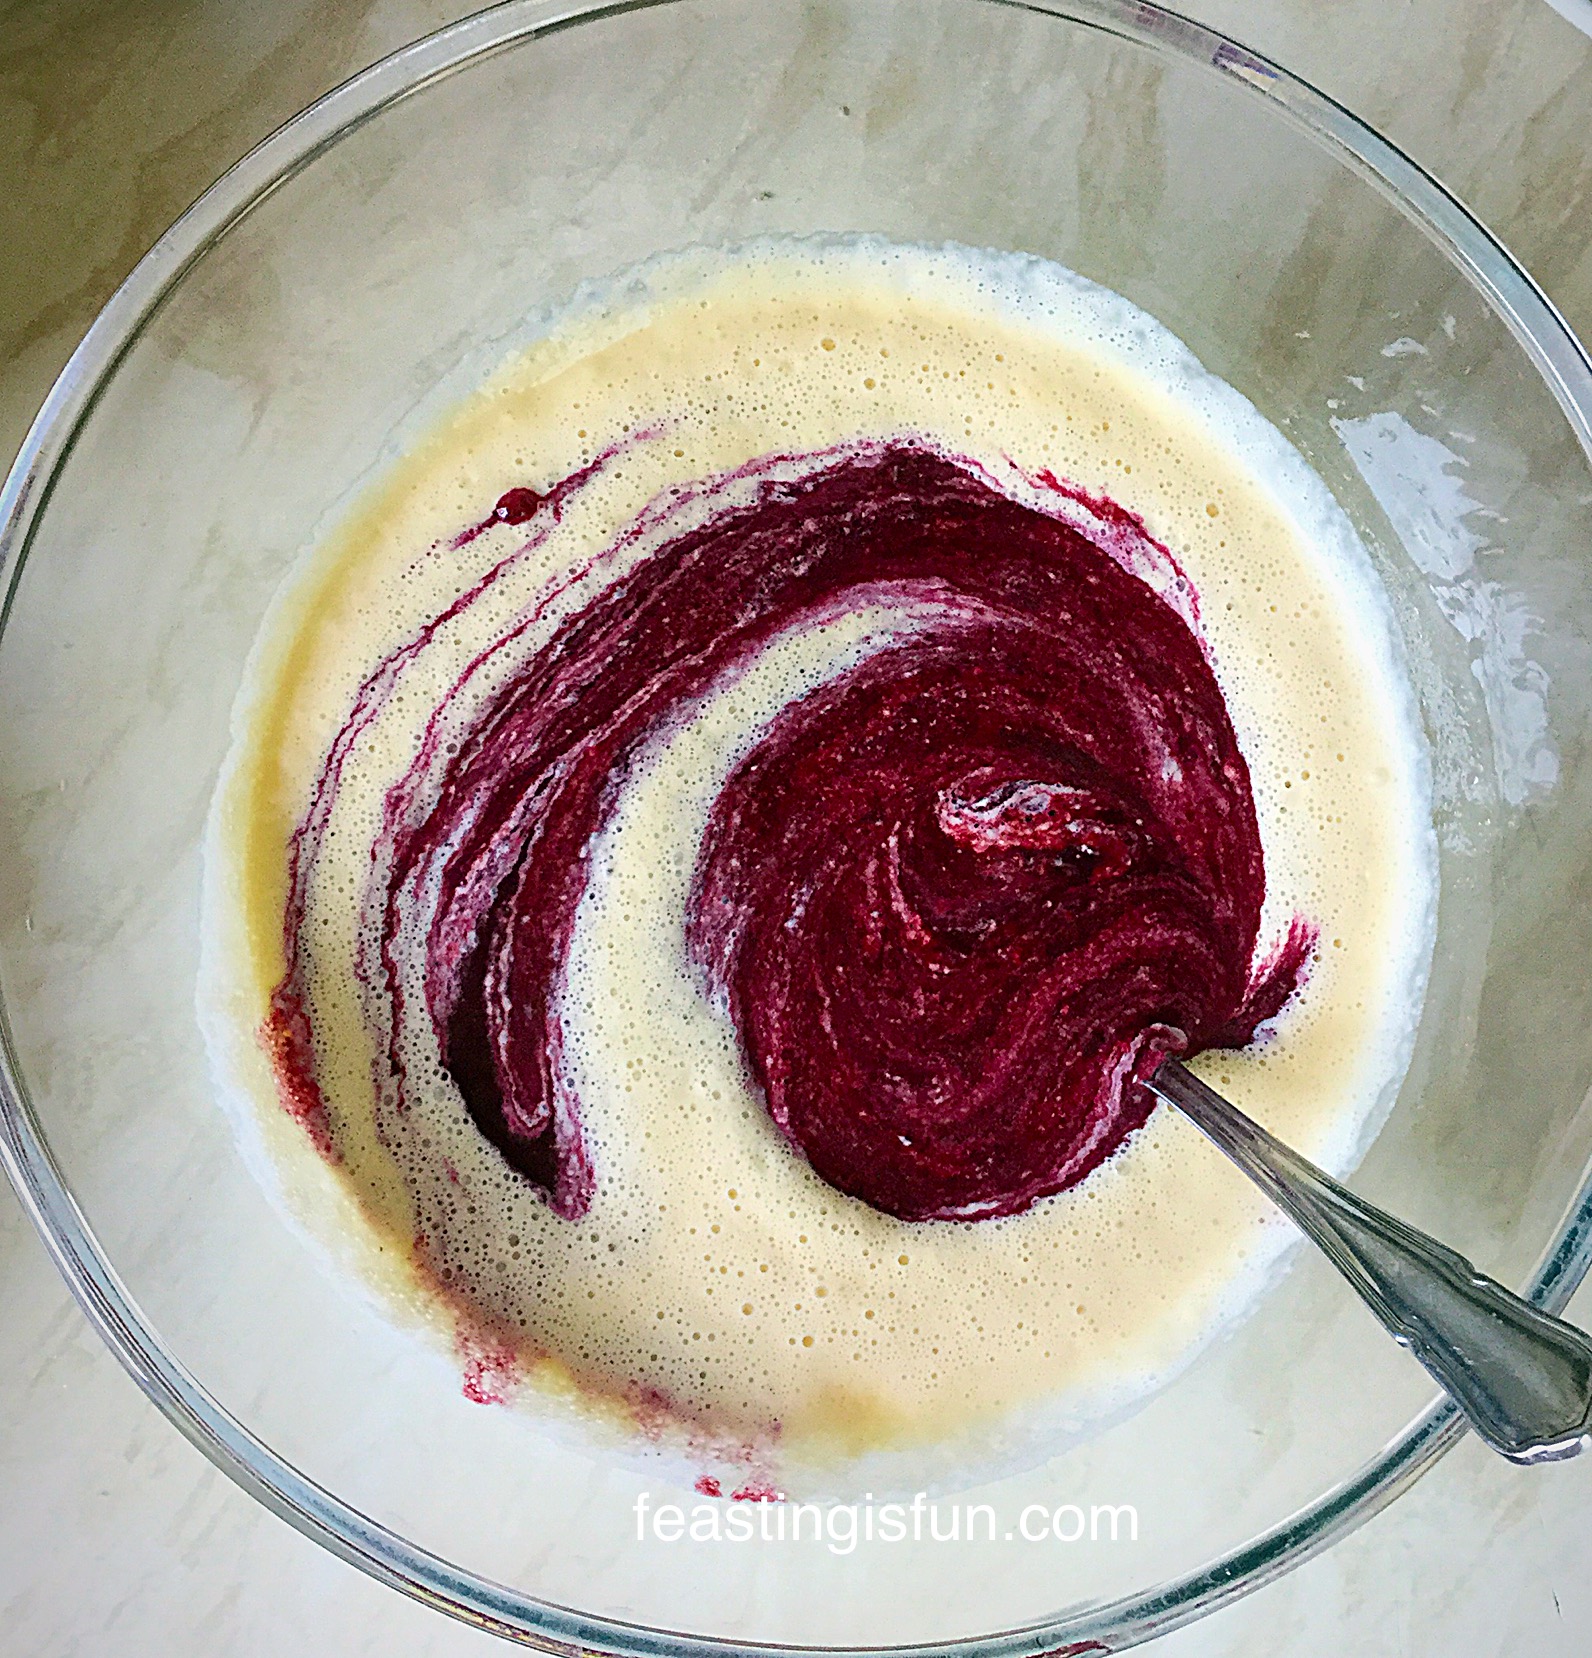
  • Mix briefly, don’t worry too much as it will be well mixed in the ice cream maker.
  • Transfer the custard mixture to a jug.

Churning Using An Ice Cream Maker

  • Pour the blackberry custard into the ice cream maker (for mine it has to already be churning – check your instructions).
  • Whilst the ice cream is churning chop the dark chocolate into 1cm-ish sized chunks.
  • Churn the Blackberry Ice Cream until it is a thickened, yet soft ice cream.
Beautifully soft whipped Blackberry Ice Cream.
  • Using a soft rubber spatula decant the softly whipped ice cream into a suitable, freezer safe, plastic tub.

Adding The Dark Chocolate Chunks

  • Add the dark chocolate chunks to the blackberry ice cream once it is in the freezer container.
Blackberry Chocolate a Chunk Ice Cream such a delicious combination.
Blackberry Chocolate Chunk Ice Cream such a delicious combination.
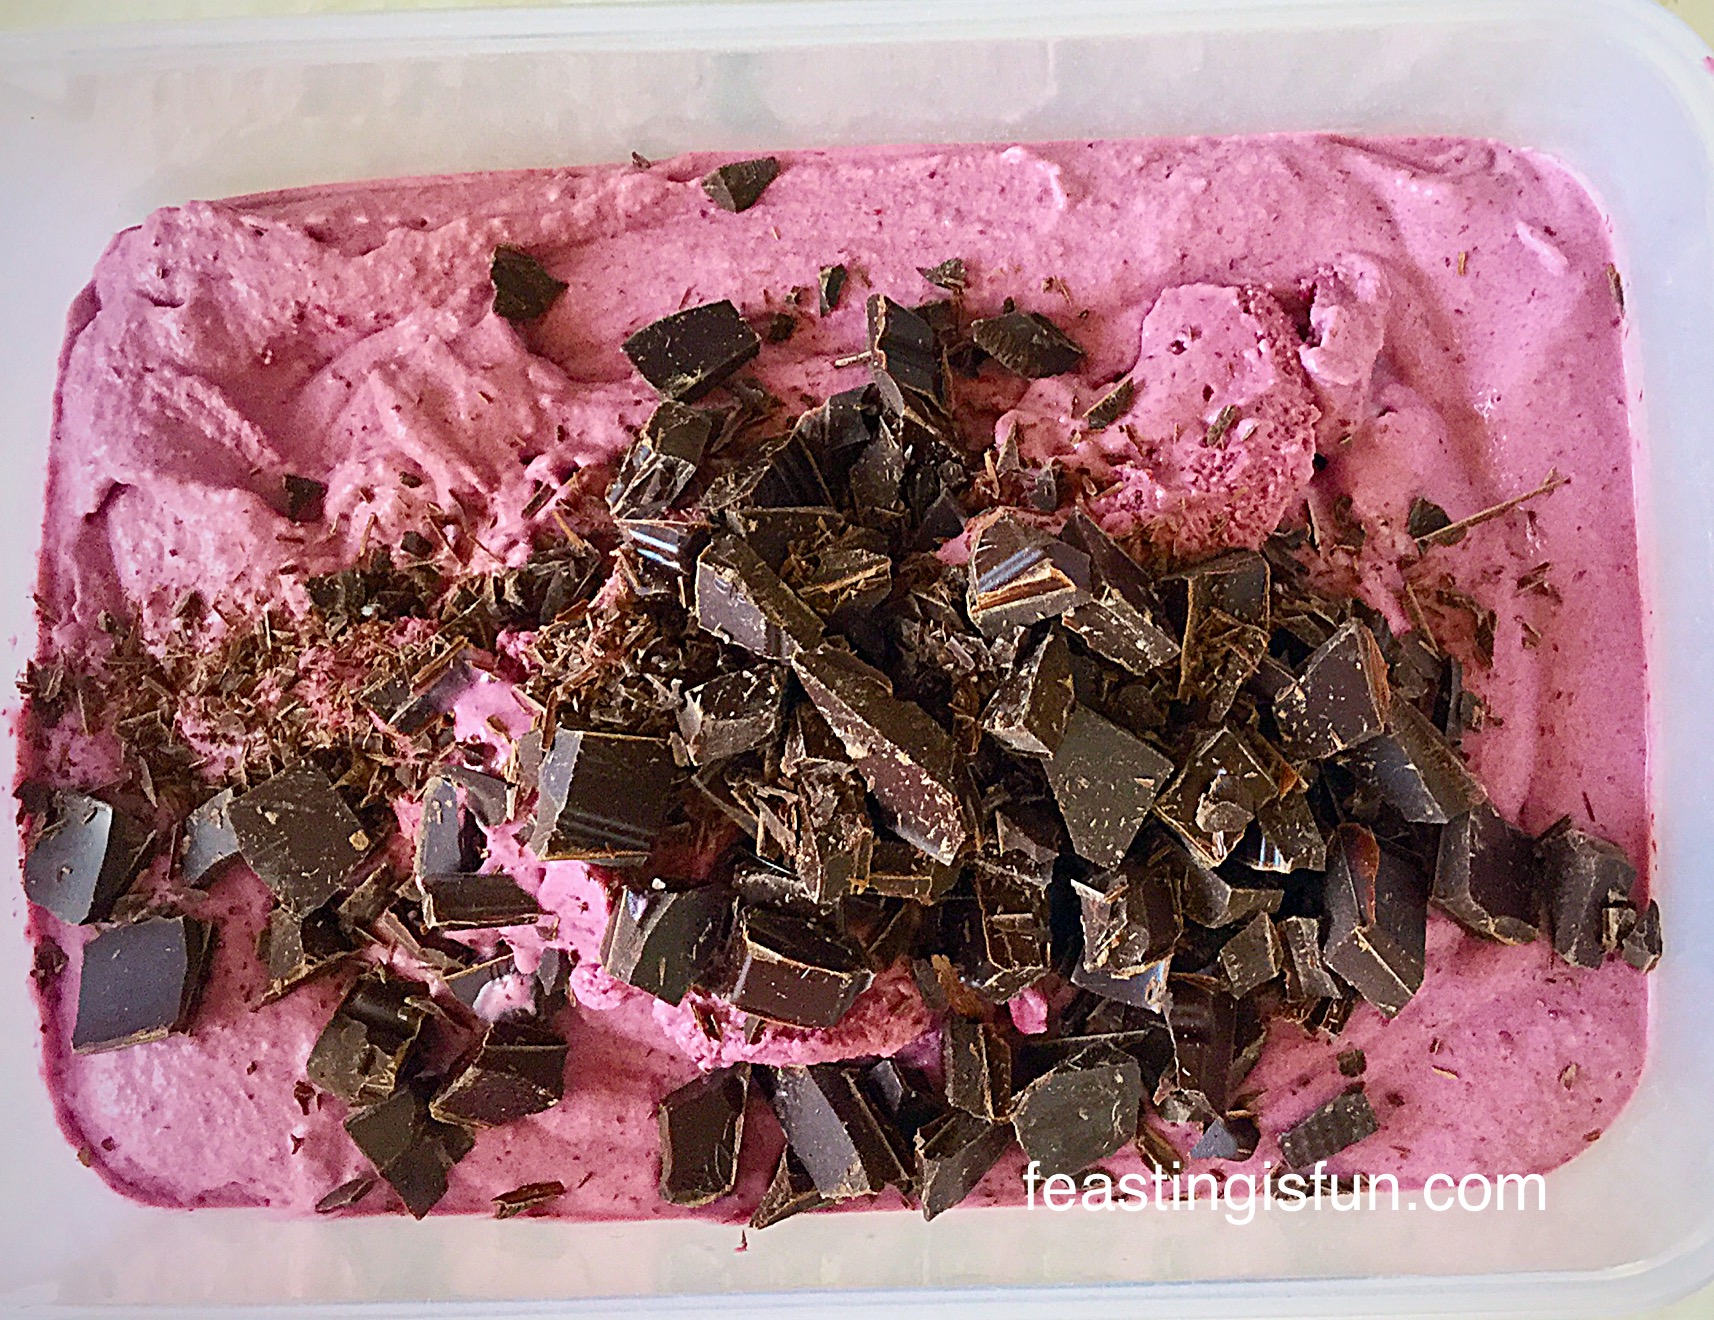
  • Stir the dark chocolate chunks through the ice cream so that they are evenly distributed.
FF Blackberry Chocolate Chunk Ice Cream
Blackberry Chocolate Chunk Ice Cream ready for the freezer.
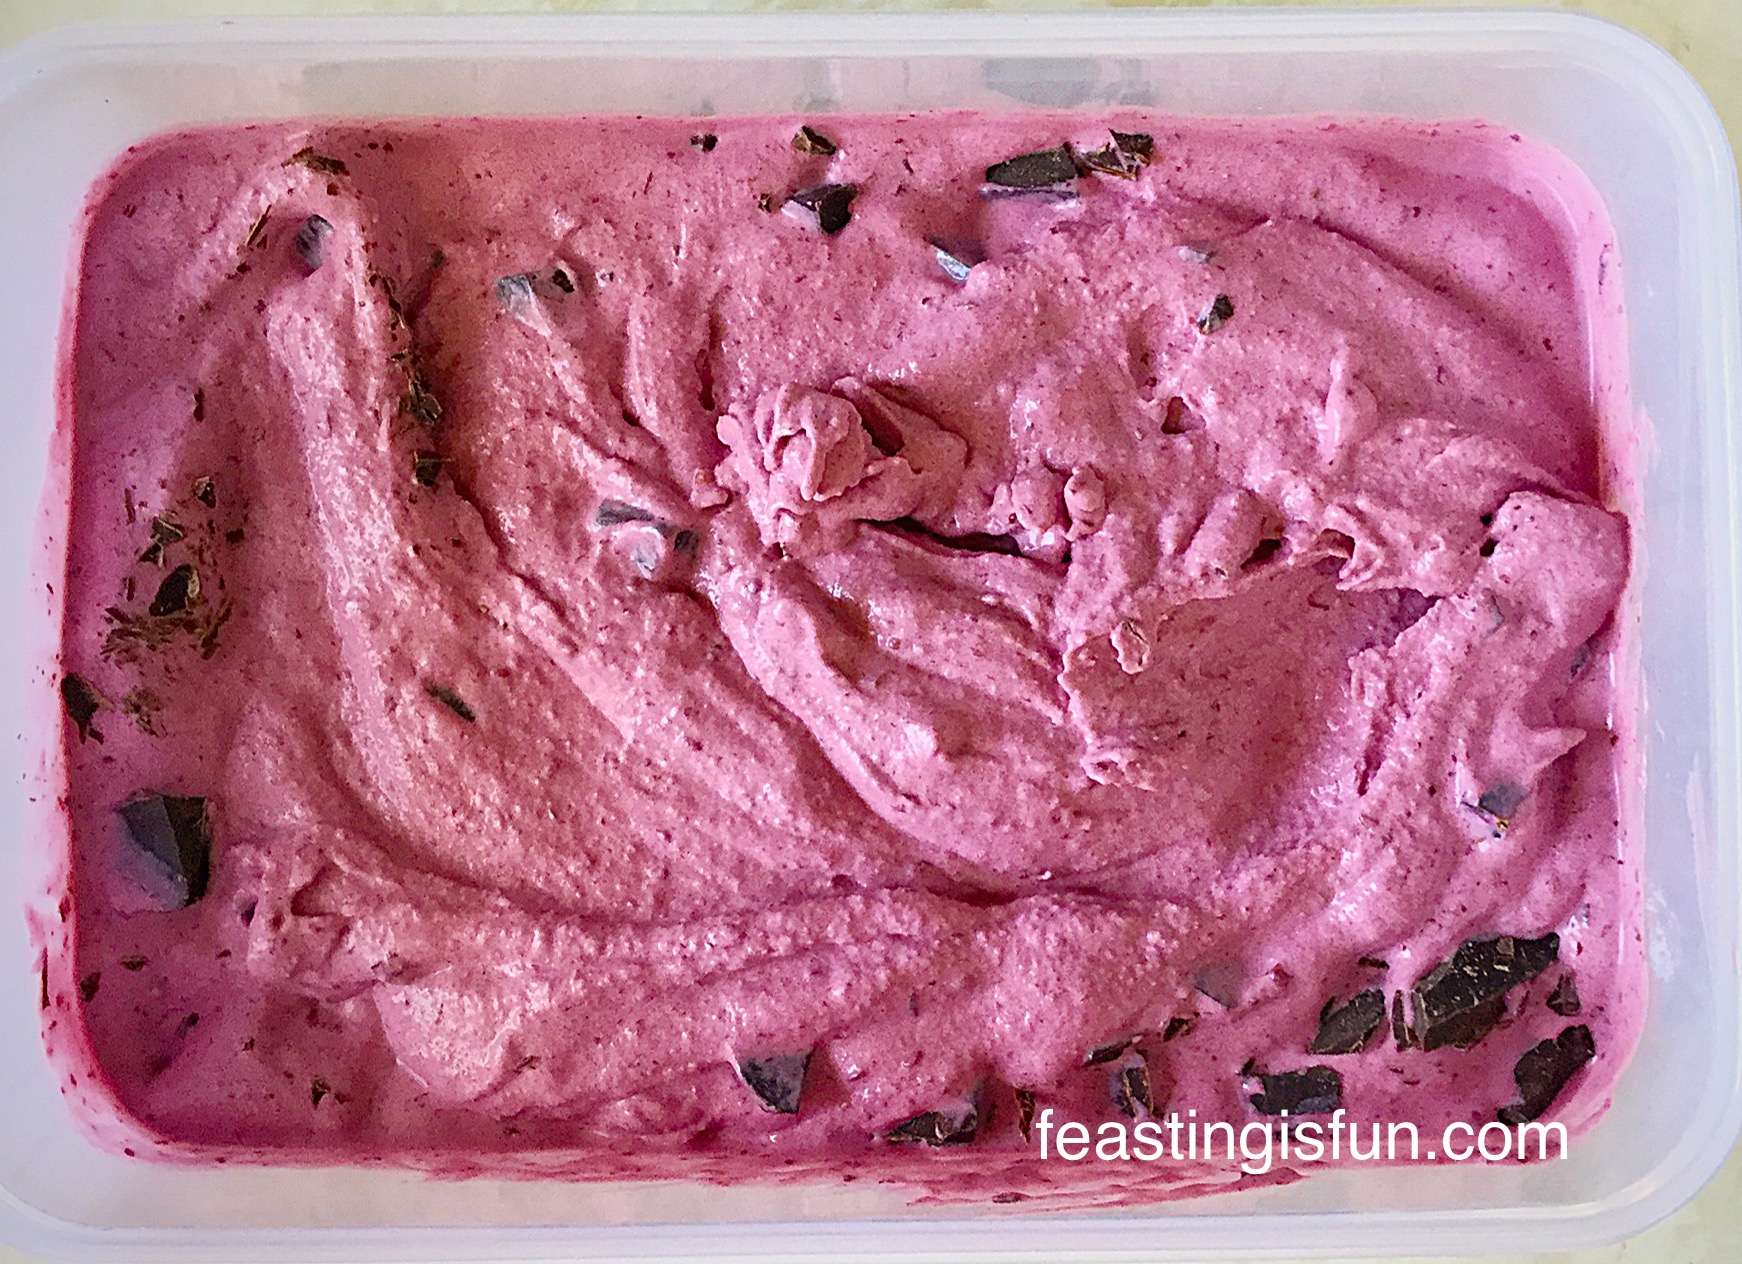
  • Clip on the lid, label and place the Blackberry Chocolate Chunk Ice Cream into the freezer to finish freezing.
  • To serve, remove this ice cream from the freezer a full 30 minutes before serving – unless it really is an extremely hot day, then 20 minutes should suffice.
FF Blackberry Chocolate Chunk Ice Cream
Blackberry Chocolate Chunk Ice Cream

I honestly cannot explain just how good this Blackberry Chocolate Chunk Ice Cream is. Whilst it may look a little more like a sorbet it is in fact delightfully creamy, with a deep berry flavour to match its beautiful colour and studded with dark chocolate crunch that adds another heavenly level of flavour and texture. It cleanses the palette and refreshes, whilst ensuring that you know you have eaten dessert.

In essence it is truly sublime. A million miles away from mass produced, sweet gloopy ice cream, this is the dessert to serve those you truly want to spoil. Not that it is expensive to make, simply that it is an ice cream worth lingering over and savouring.

If you have enjoyed this Blackberry Chocolate Chunk Ice Cream recipe, here are a few others you may enjoy:

Lemon Drizzle Ice Cream 

FF Lemon Ripple Ice Cream
Lemon Ripple Ice Cream

Very Vanilla Ice Cream

Very Vanilla Ice Cream

Strawberry Rose Ice Cream 

Strawberry Rose Ice Cream

Having an ice cream maker definitely makes the process of creating ice cream easier. It results in a much creamier, less icy, softer on the palate, cooling treat.

Unfortunaley whilst making the Blackberry Chocolate Chunk Ice Cream another little piece of the plastic on our ice cream maker broke off – it really is on its last legs. Fortunately however, I will be reviewing a brand new model by Andrew James  over the coming few months, so expect lots of chilled recipes through the summer months.

It really gives me such a thrill reading your comments and I appreciate you taking the time to leave them. Likewise seeing my recipes being baked on Twitter and Instagram literally makes my day. Sharing is the heart of this blog and seeing you share your bakes with me always gives me a boost. Thank you.

Whatever you are making and baking in your kitchens, have fun and enjoy every feast that you create.

Sammie xx

No part of this post may be reproduced or duplicated without the written permission of the owner. Please see my Disclosure Policy.


Share
Facebooktwitterpinterestlinkedintumblr

Blackberry Nectarine Tart

Share
Facebooktwitterpinterestlinkedintumblr

Hi, I’m celebrating. Because today is the first day I’ve woken up without a migraine for too long. So when I get a fairly good day I smile and give thanks, harder to do on the other days, more like clinging on by my fingertips. AND I made the easiest tart ever! This Blackberry Nectarine Tart is made with shop bought, all butter, puff pastry, a tub of blackberries (mine were frozen) and a punnet of nectarines. Alternatively you could easily use peaches.

Blackberry Nectarine Tart


So if you imagine roasting vegetables intensifies their flavour, then think what 30 minutes in a hot oven does to the fruit in this tart. Even with the addition of a sprinkle of vanilla sugar the intense fruit flavours in this Blackberry Nectarine Tart are a delight on the taste buds. While this is not a sweet tart. For me it’s a perfect balance of fruity flavour and flaky, buttery pastry.

Blackberry Nectarine Tart - beautiful and delicious.
Blackberry Nectarine Tart

Create An Easy Dessert Using Store Cupboard Staples

I really can’t emphasise how easy this tart is to make. Since the pastry and blackberries were in the freezer, the nectarines, ridiculously cheap and in season, ripening at an increasingly rapid pace, needed using. Also, given how well this tart turned out I would happily make this during the colder months using, shock, horror, tinned peaches! Yup I would, with custard poured over. I am shameless!!!

Blackberry Nectarine Tart - a perfect summer dessert, even in the winter.
Blackberry Nectarine Tart – a perfect summer dessert, even in the winter.


I hope I’ve convinced you to give this tart a try? Because as they say “The proof of the pudding, is in the eating!”

Recipe : Blackberry Nectarine Tart Serves 6

375g/13oz All Butter Puff Pastry – defrosted, if frozen, I use JusRol. Alternatively use vegetable fat puff pastry for a vegan dessert.

300g/11oz Blackberries – if frozen don’t defrost – I buy frozen punnets from Waitrose

7-8 Nectarines – peaches are a good substitute

1tbsp Vanilla Sugar

Method : Preheat oven to 220C/200C fan, 425F, gas mark 7

Grease or line with parchment paper a baking tray with shallow sides, the fruit give off juices when baked, 26cm x 39cm (10.5″ x 15.5″).

Assembling The Puff Pastry Tart

First of all, on a clean, dry, lightly floured surface, roll out the pastry so that it will just fit in the baking tray – I haven’t given dimensions, as if your baking tray size differs from mine a few centimetres either way, it won’t matter.

Using your rolling pin transfer the pastry to the baking tray.


I lightly scored the pastry approx. 1cm in from the edge with a sharp knife. This will ensure that a nice, even, crust, borders the tart.

Next slice each nectarine into 6 equal(ish) portions. If they are still firm this should be fairly easy. Because mine were very ripe so I cut out the slices, against the stone, while holding the nectarine, over a bowl to catch the juices.

Blackberry Nectarine Tart - arrange the nectarine slices in rows.
Blackberry Nectarine Tart – arrange the nectarine slices in rows.
Blackberry Nectarine Tart - sprinkle over 1 tablespoon of vanilla sugar.
Blackberry Nectarine Tart – sprinkle over 1 tablespoon of vanilla sugar.


Either buy Vanilla Sugar, or alternatively you can make your own.

Vanilla Sugar - I have a Kilner jar filled with caster sugar and a few vanilla pods. Leave for one month and the vanilla will have infused the sugar with it's delicious flavour and scent.
Vanilla Sugar – I have a Kilner jar filled with caster sugar and a few vanilla pods. Leave for one month and the vanilla will have infused the sugar with it’s delicious flavour and scent.


Tip : A light (little goes a long way) sprinkling of Vanilla Sugar over homemade popcorn is delish!!

Next arrange the blackberries on the tart, however you choose. I chose to go with the lines of the tart.

Blackberry Nectarine Tart - using frozen blackberries I think helped them retain their shape during baking.
Blackberry Nectarine Tart – using frozen blackberries I think helped them retain their shape during baking.

Baking The Fruit Tart

Place the tart in the oven and bake for 30 – 35 minutes. While some juice from the fruit leaks, I found, once the 30 minutes baking time was up, it had concentrated and did not make that part of the tart soggy.

The tart is cooked when the outside crust is golden brown and the base, when gently lifted, is golden brown too.

As soon as the tart is baked remove from the oven.

Blackberry Nectarine Tart - once baked remove from the oven.
Blackberry Nectarine Tart – once baked remove from the oven.


Transfer the Blackberry Nectarine Tart on to a cooling rack. This keeps the tart bottom and crust nice and flaky.

Blackberry Nectarine Tart - if you like a bit more sweetness a dusting of icing sugar would be perfect.
Blackberry Nectarine Tart – if you like a bit more sweetness a dusting of icing sugar would be perfect.


Serve warm or cold. This tart was perfectly complimented by a scoop a good, vanilla ice cream.

Blackberry Nectarine Tart - utter deliciousness.
Blackberry Nectarine Tart – utter deliciousness.

If you have enjoyed this recipe for Blackberry Nectarine Tart you may also like these:

Very Vanilla Ice Cream

FF Blackberry Nectarine Tart
Very Vanilla Ice Cream

Lemon Lime Meringue Pie 

FF Blackberry Nectarine Tart
Lemon Lime Meringue Pie

No Bake White Chocolate Strawberry Cheesecake 

FF Blackberry Nectarine Tart
No Bake White Chocolate Strawberry Cheesecake

If you keep pastry and fruit in the freezer regularly, I’d say this is the perfect, pull together, easy dessert.  Especially perfect for eating while snuggling on the sofa watching a film, or entertaining last minute, or even planned dinner guests!!

Because I used nectarines their tender skin doesn’t need to be removed.

What go-to freezer staples do you keep on hand. As well as ice cream!

So whatever you are making, baking and creating in your kitchens, have fun preparing and sharing your feast.

Sammie xx

No part of this post may be reproduced or duplicated without the written permission of the owner. Please see my Disclosure Policy.

Share
Facebooktwitterpinterestlinkedintumblr