Mini Sparkenhoe Red Leicester Tarts

Share
Facebooktwitterpinterestlinkedintumblr

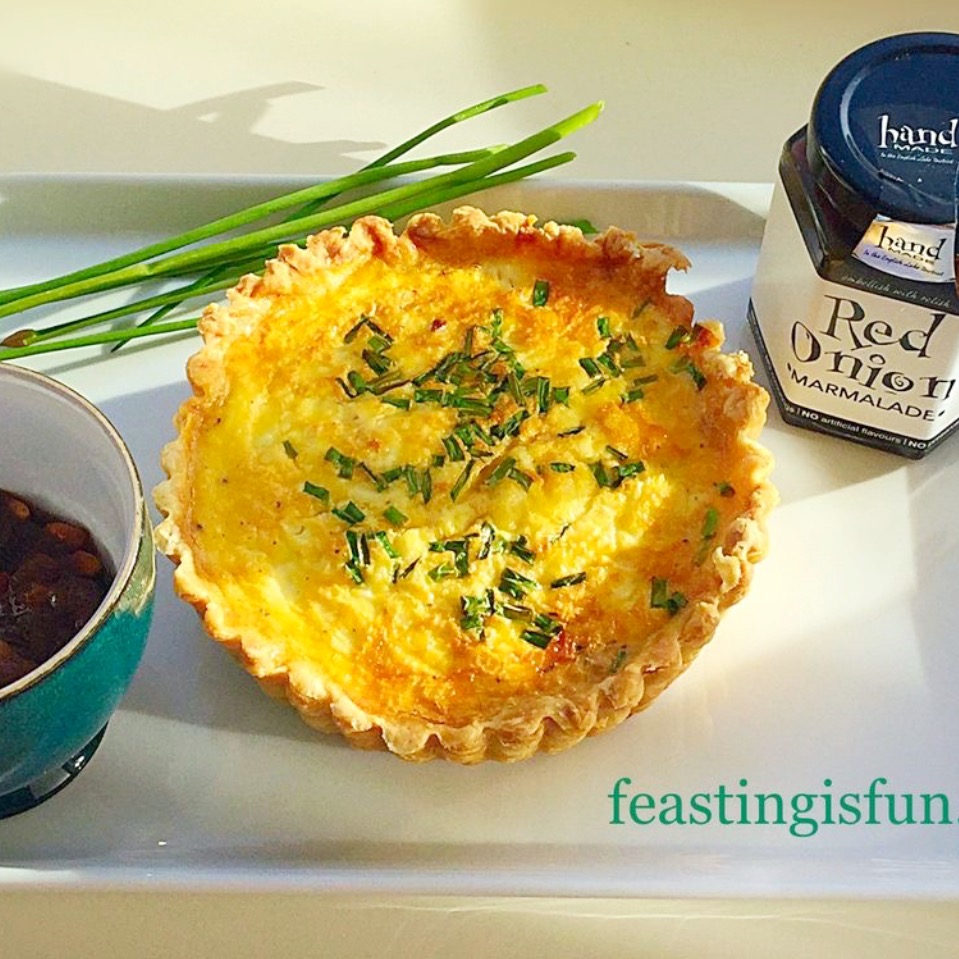
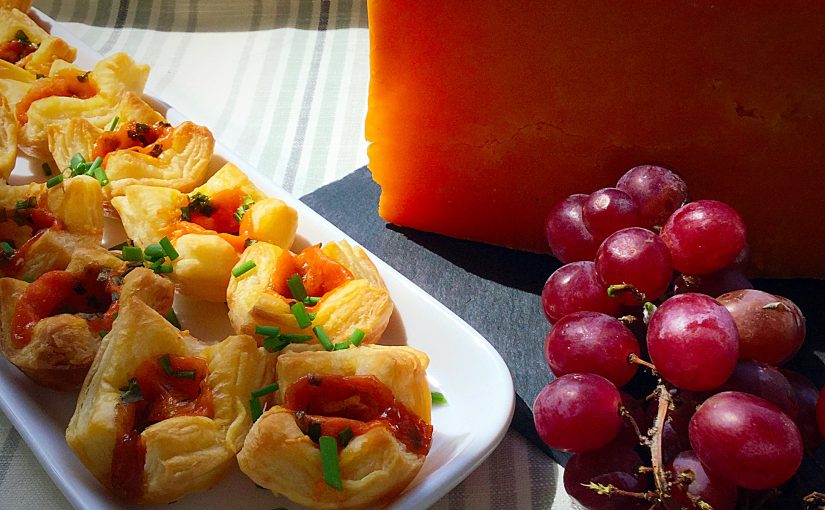
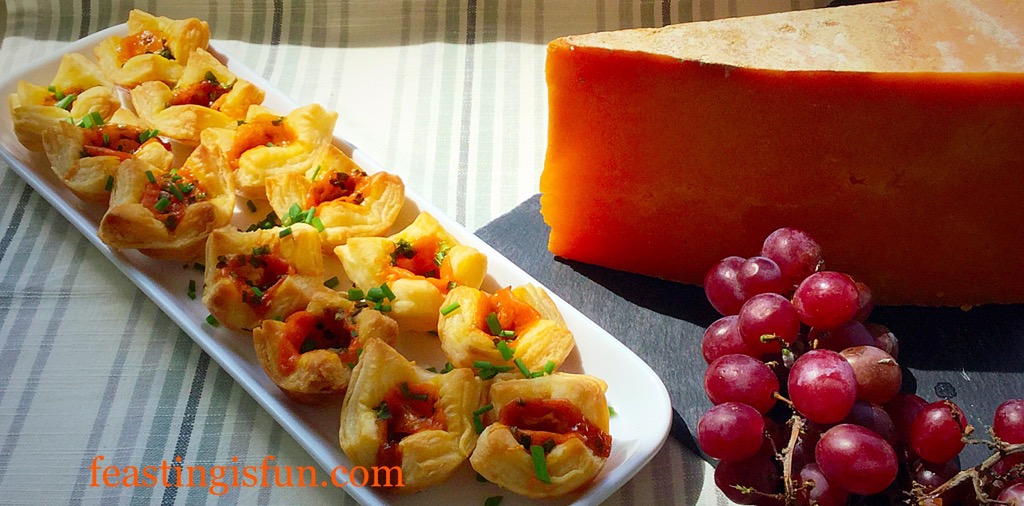
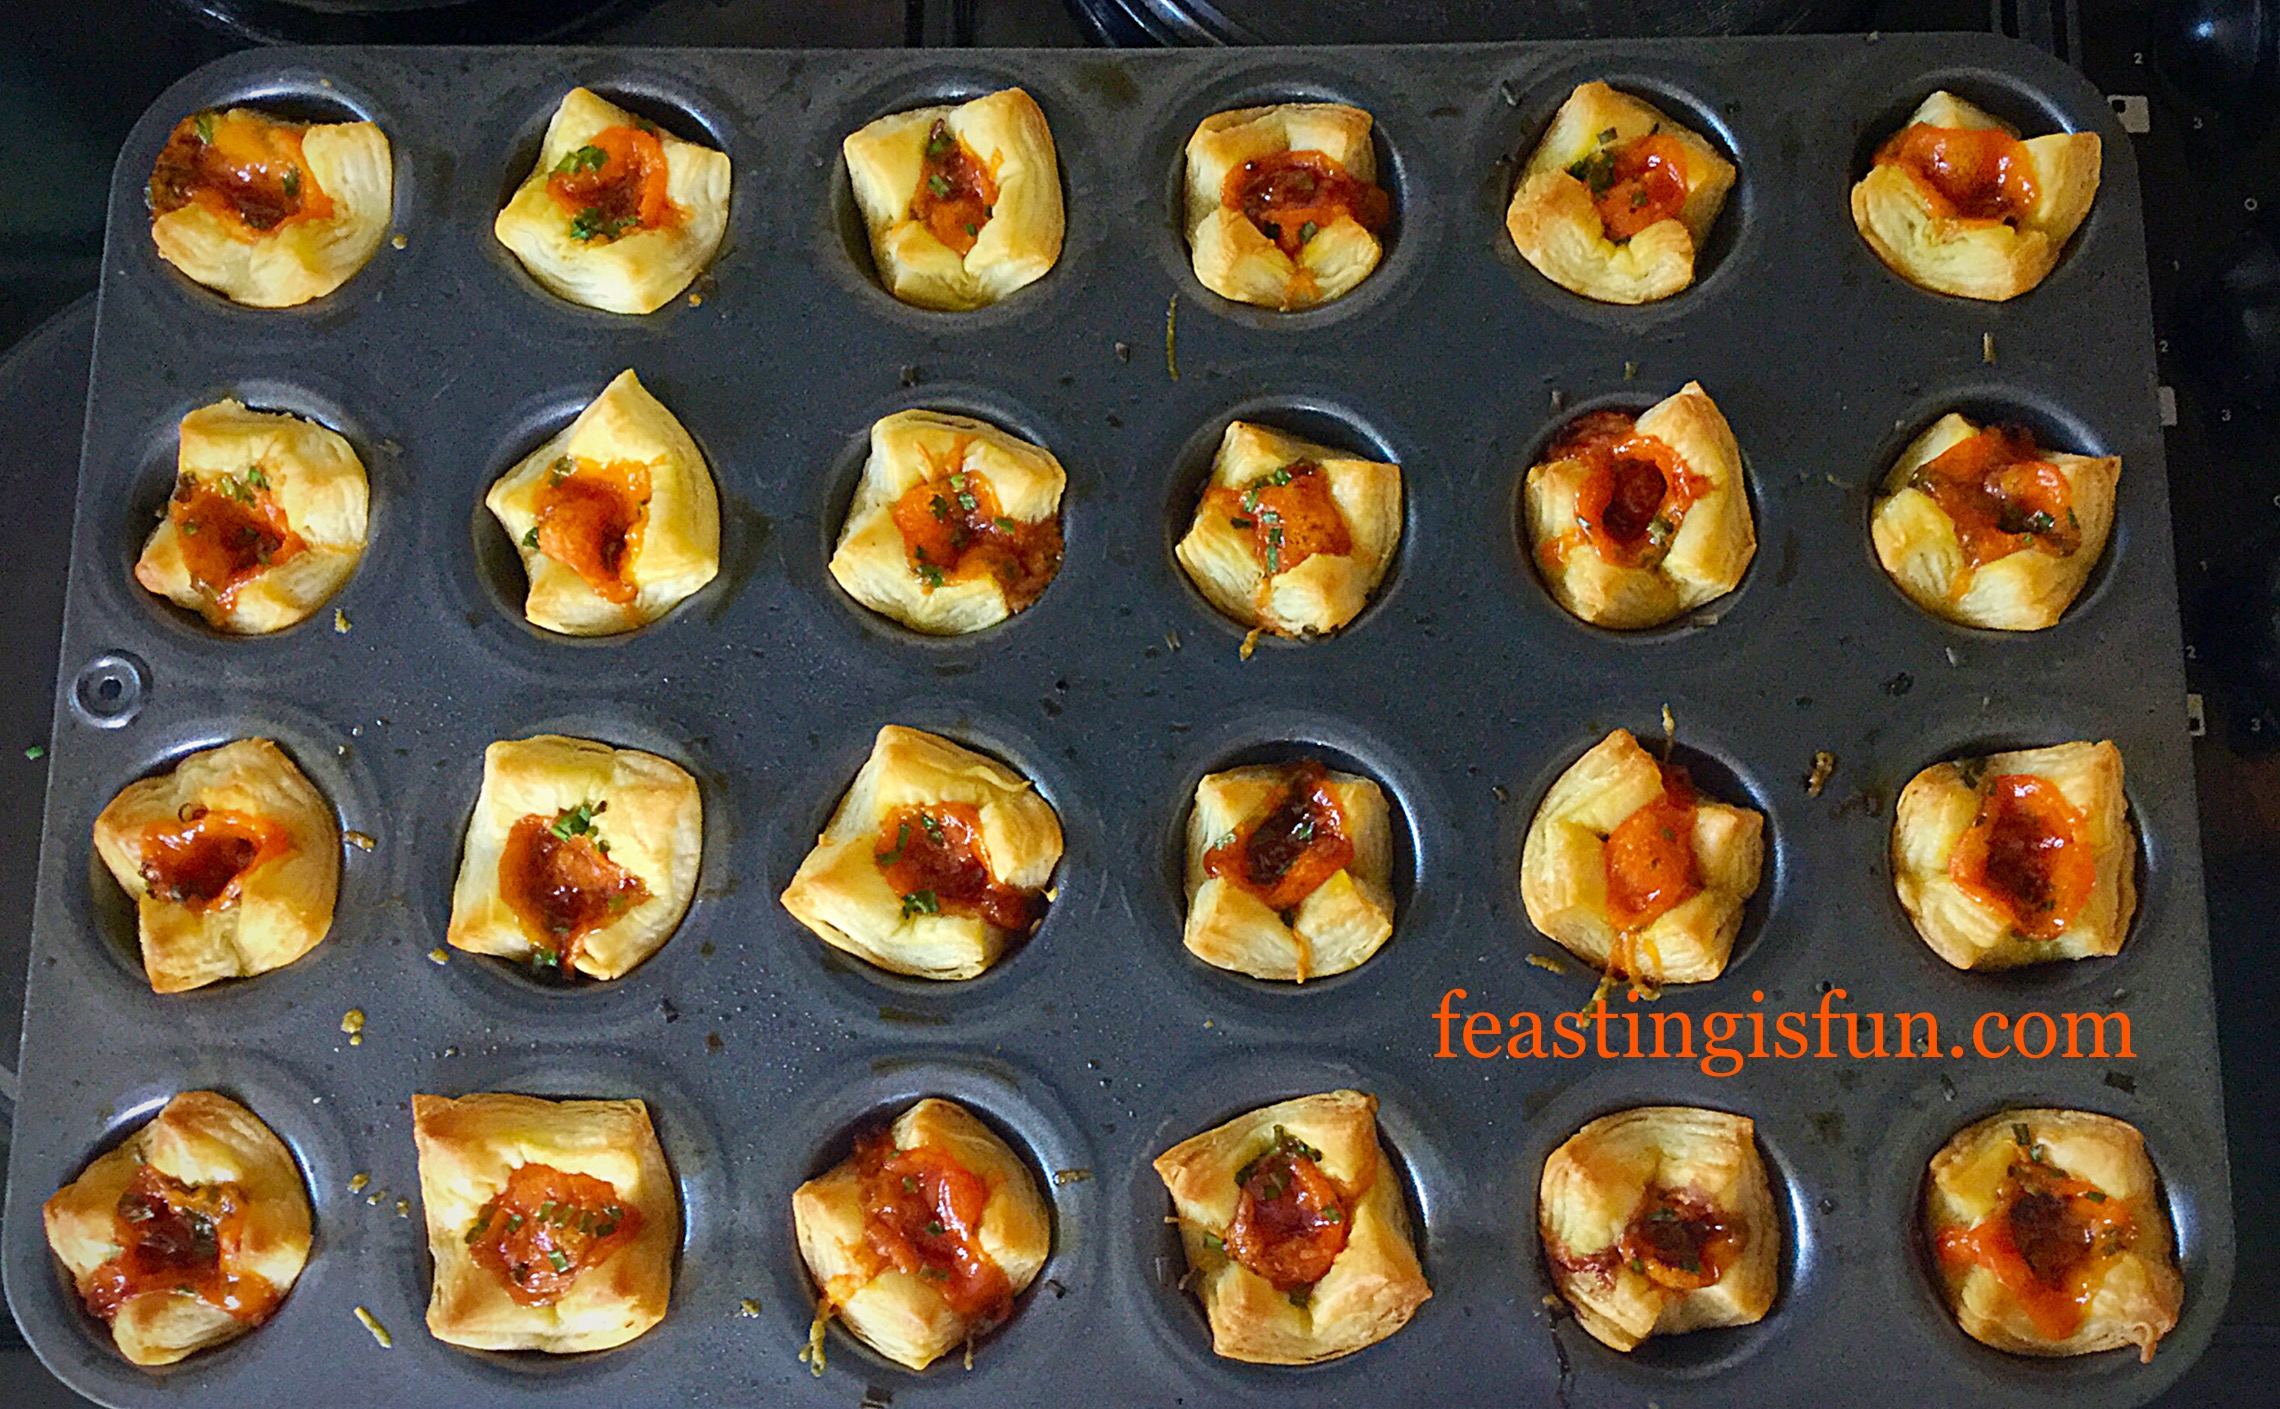
Mini Sparkenhoe Red Leicester Tarts, delicious morsels of light, flaky, puff pastry, filled with onion marmalade and topped with vibrant, melted Sparkenhoe Red Leicester cheese. Resulting in the perfect party canapé.

FF Mini Red Leicester Tarts
Mini Sparkenhoe Red Leicester Tarts perfect canapés.

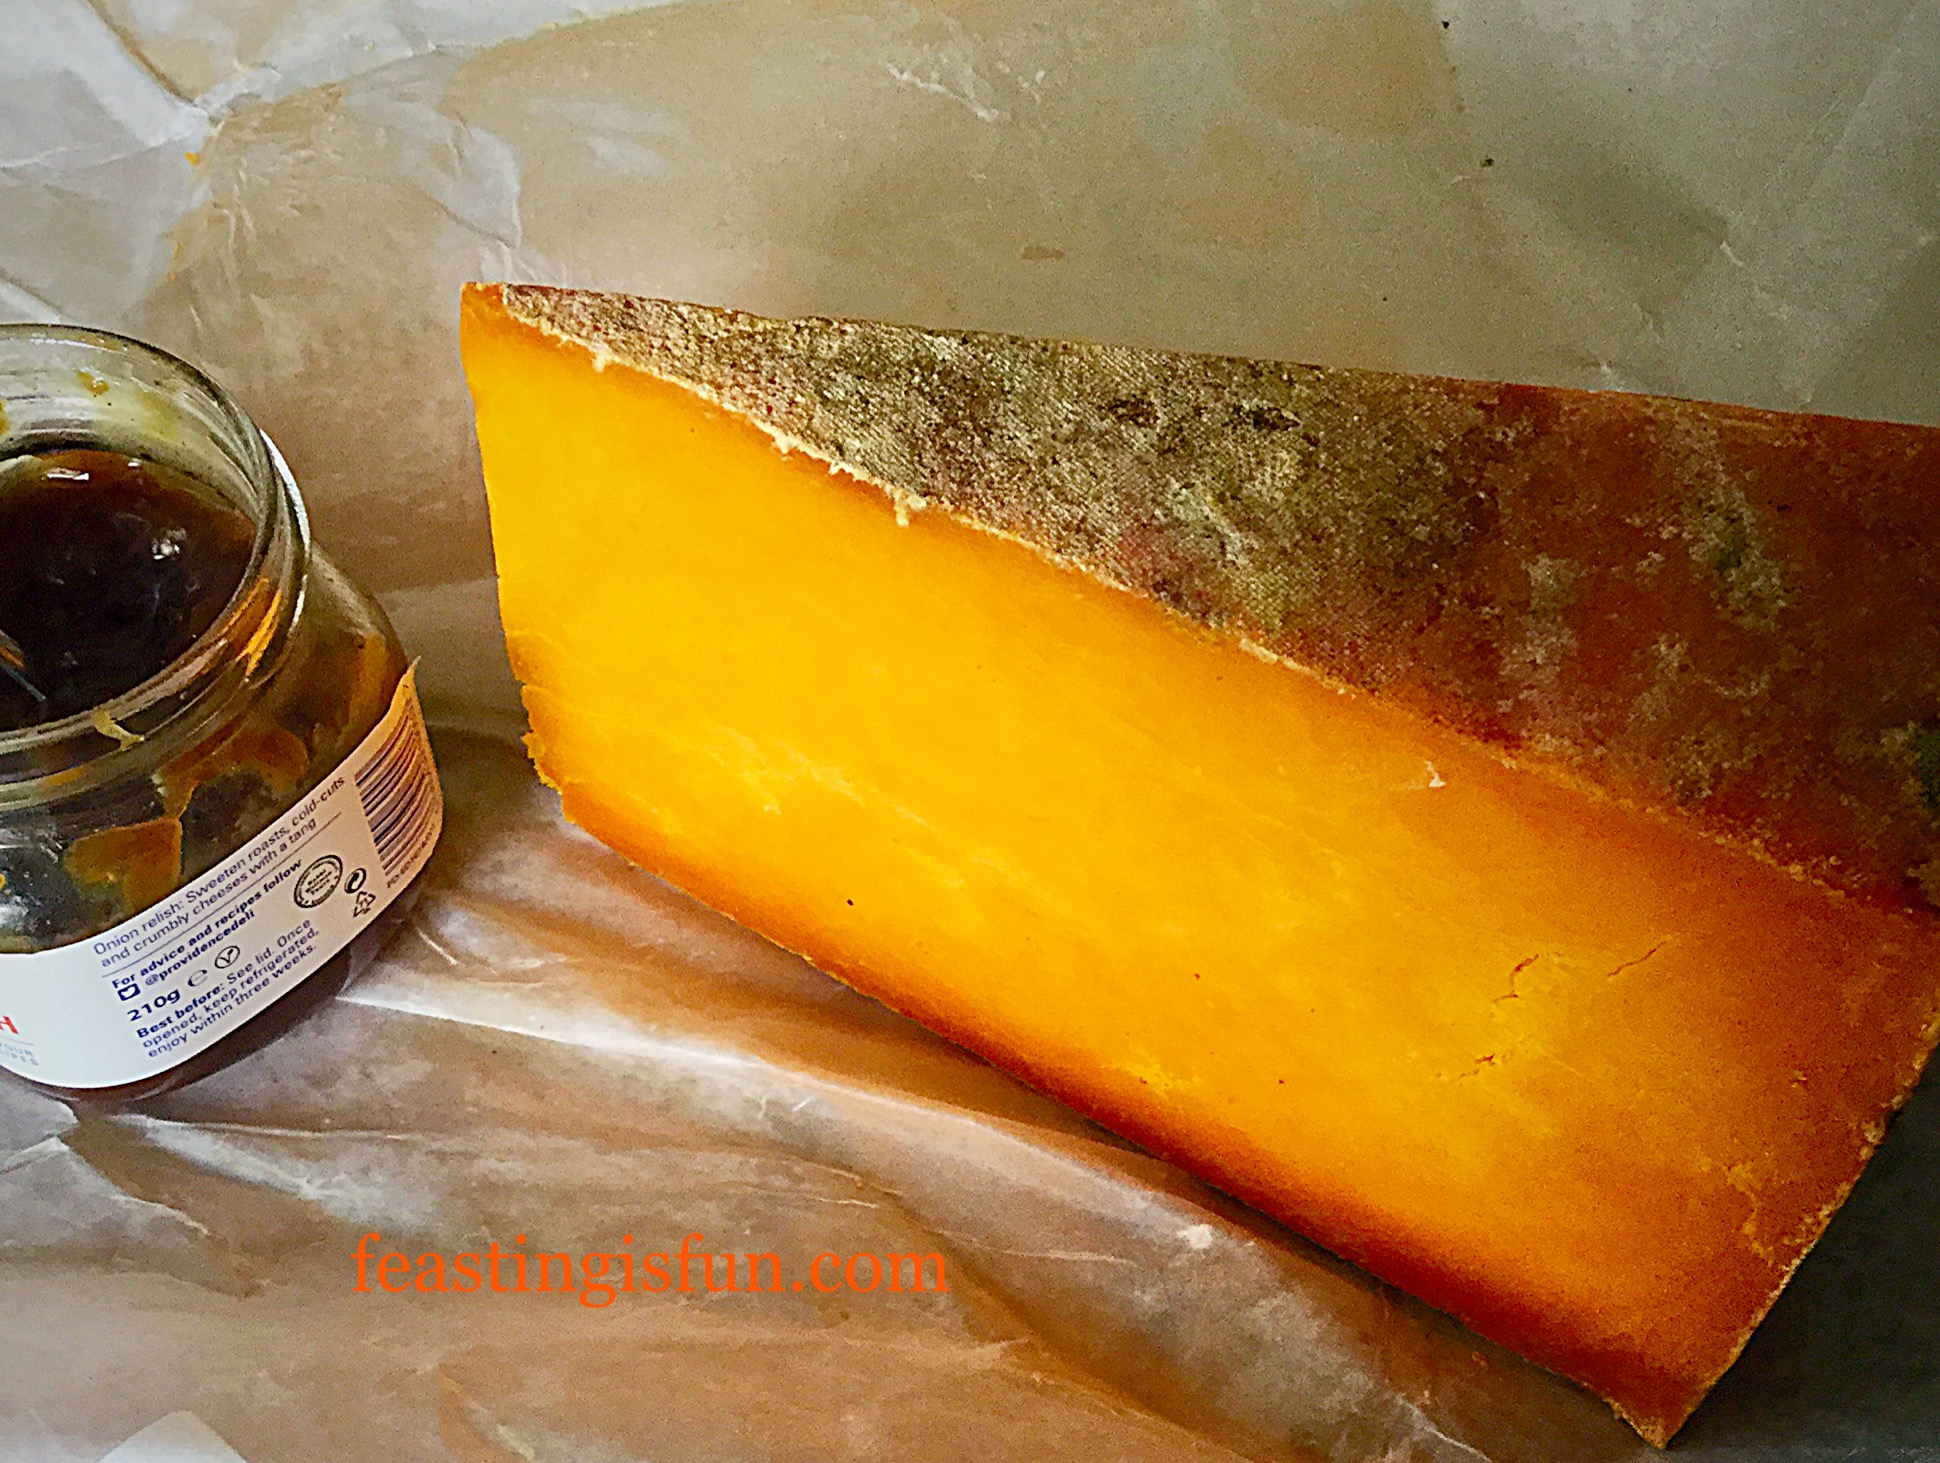
While tasting this cheese, it has a nutty, almost grassy flavour that sets it apart from any similar cheese I have tried before. And a gorgeous golden wedge of unpasteurised cheese coloured using Annatto, a natural plant based dye that imparts it’s characteristic colour. Also, it makes a dramatic addition to any cheese board.

FF Mini Red Leicester Tarts
Sparkenhoe Red Leicester gorgeously golden and full of flavour.

Since this cheese has a firm texture is perfect for slicing and finely grating. Encased in an all butter puff pastry, the grated cheese melts into the onion marmalade and creates the most delightful mini bites.

FF Mini Red Leicester Tarts
Mini Sparkenhoe Red Leicester Tarts oozing melted cheese.

Topped with chives, that both echo the mild onion marmalade and grassy flavours found in the cheese, these little tarts are perfect to serve as canapés, party food, at a buffet or just for snacking on, warm from the oven with a glass of your favourite wine.

FF Mini Red Leicester Tarts
Mini Sparkenhoe Red Leicester Tarts so easy to make.

Made in minutes, these tarts are easy to make, bake in minutes and then  ready to serve.

Recipe: Makes 28-32 Mini Sparkenhoe Red Leicester Tarts 

Note: Sparkenhoe Red Leicester Cheese is UNPASTEURISED

320g Puff Pastry – I used ready rolled puff pastry from JustRol

100g/4oz Sparkenhoe Red Leicester Cheese – available from Pong Cheese

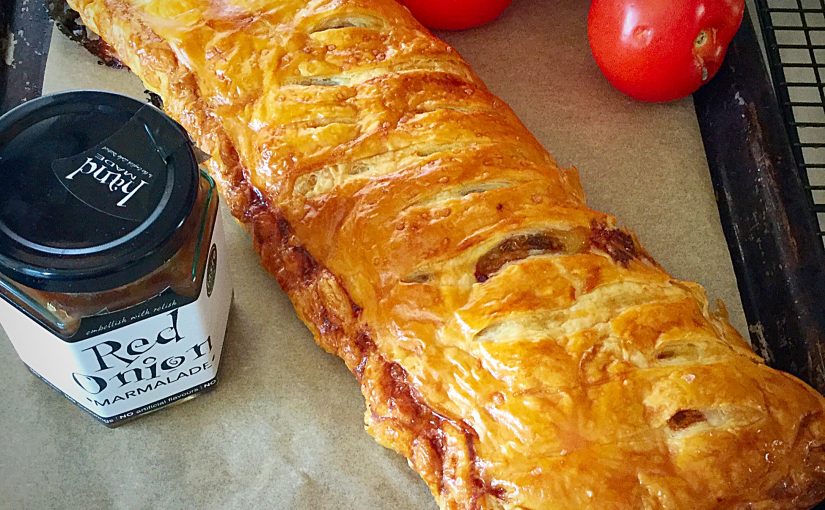
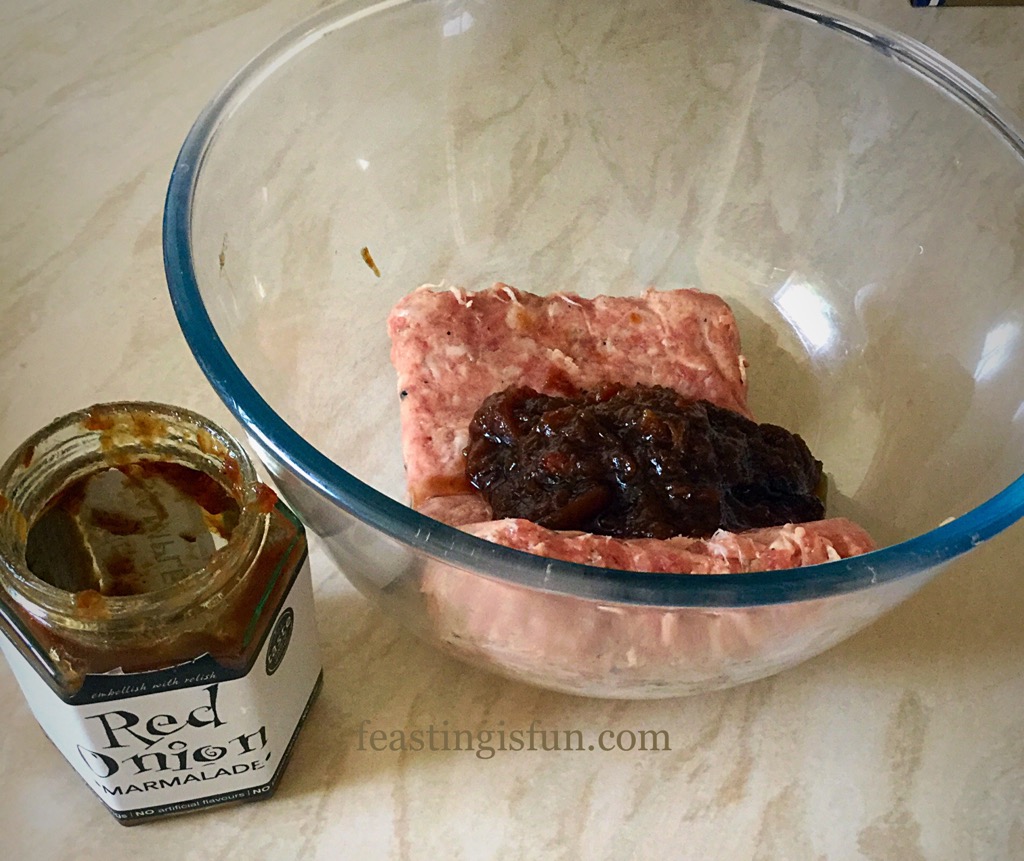
4tbsp Good Quality Onion Marmalade – I recommend Hawkshead Relish Red Onion Marmalade

3tbsp Chives – finely chopped

Method: Preheat the oven to 220C/200C fan, gas mark 7, 425F

You will need a mini muffin tin to make these Mini Sparkenhoe Red Leicester Tarts. Alternatively, use a larger tin to make larger tarts!

Making the puff pastry tarts:

  • First of all, if frozen remove the pastry from the freezer and allow to thaw in the fridge overnight.
  • Cut the rind from the cheese and finely grate.
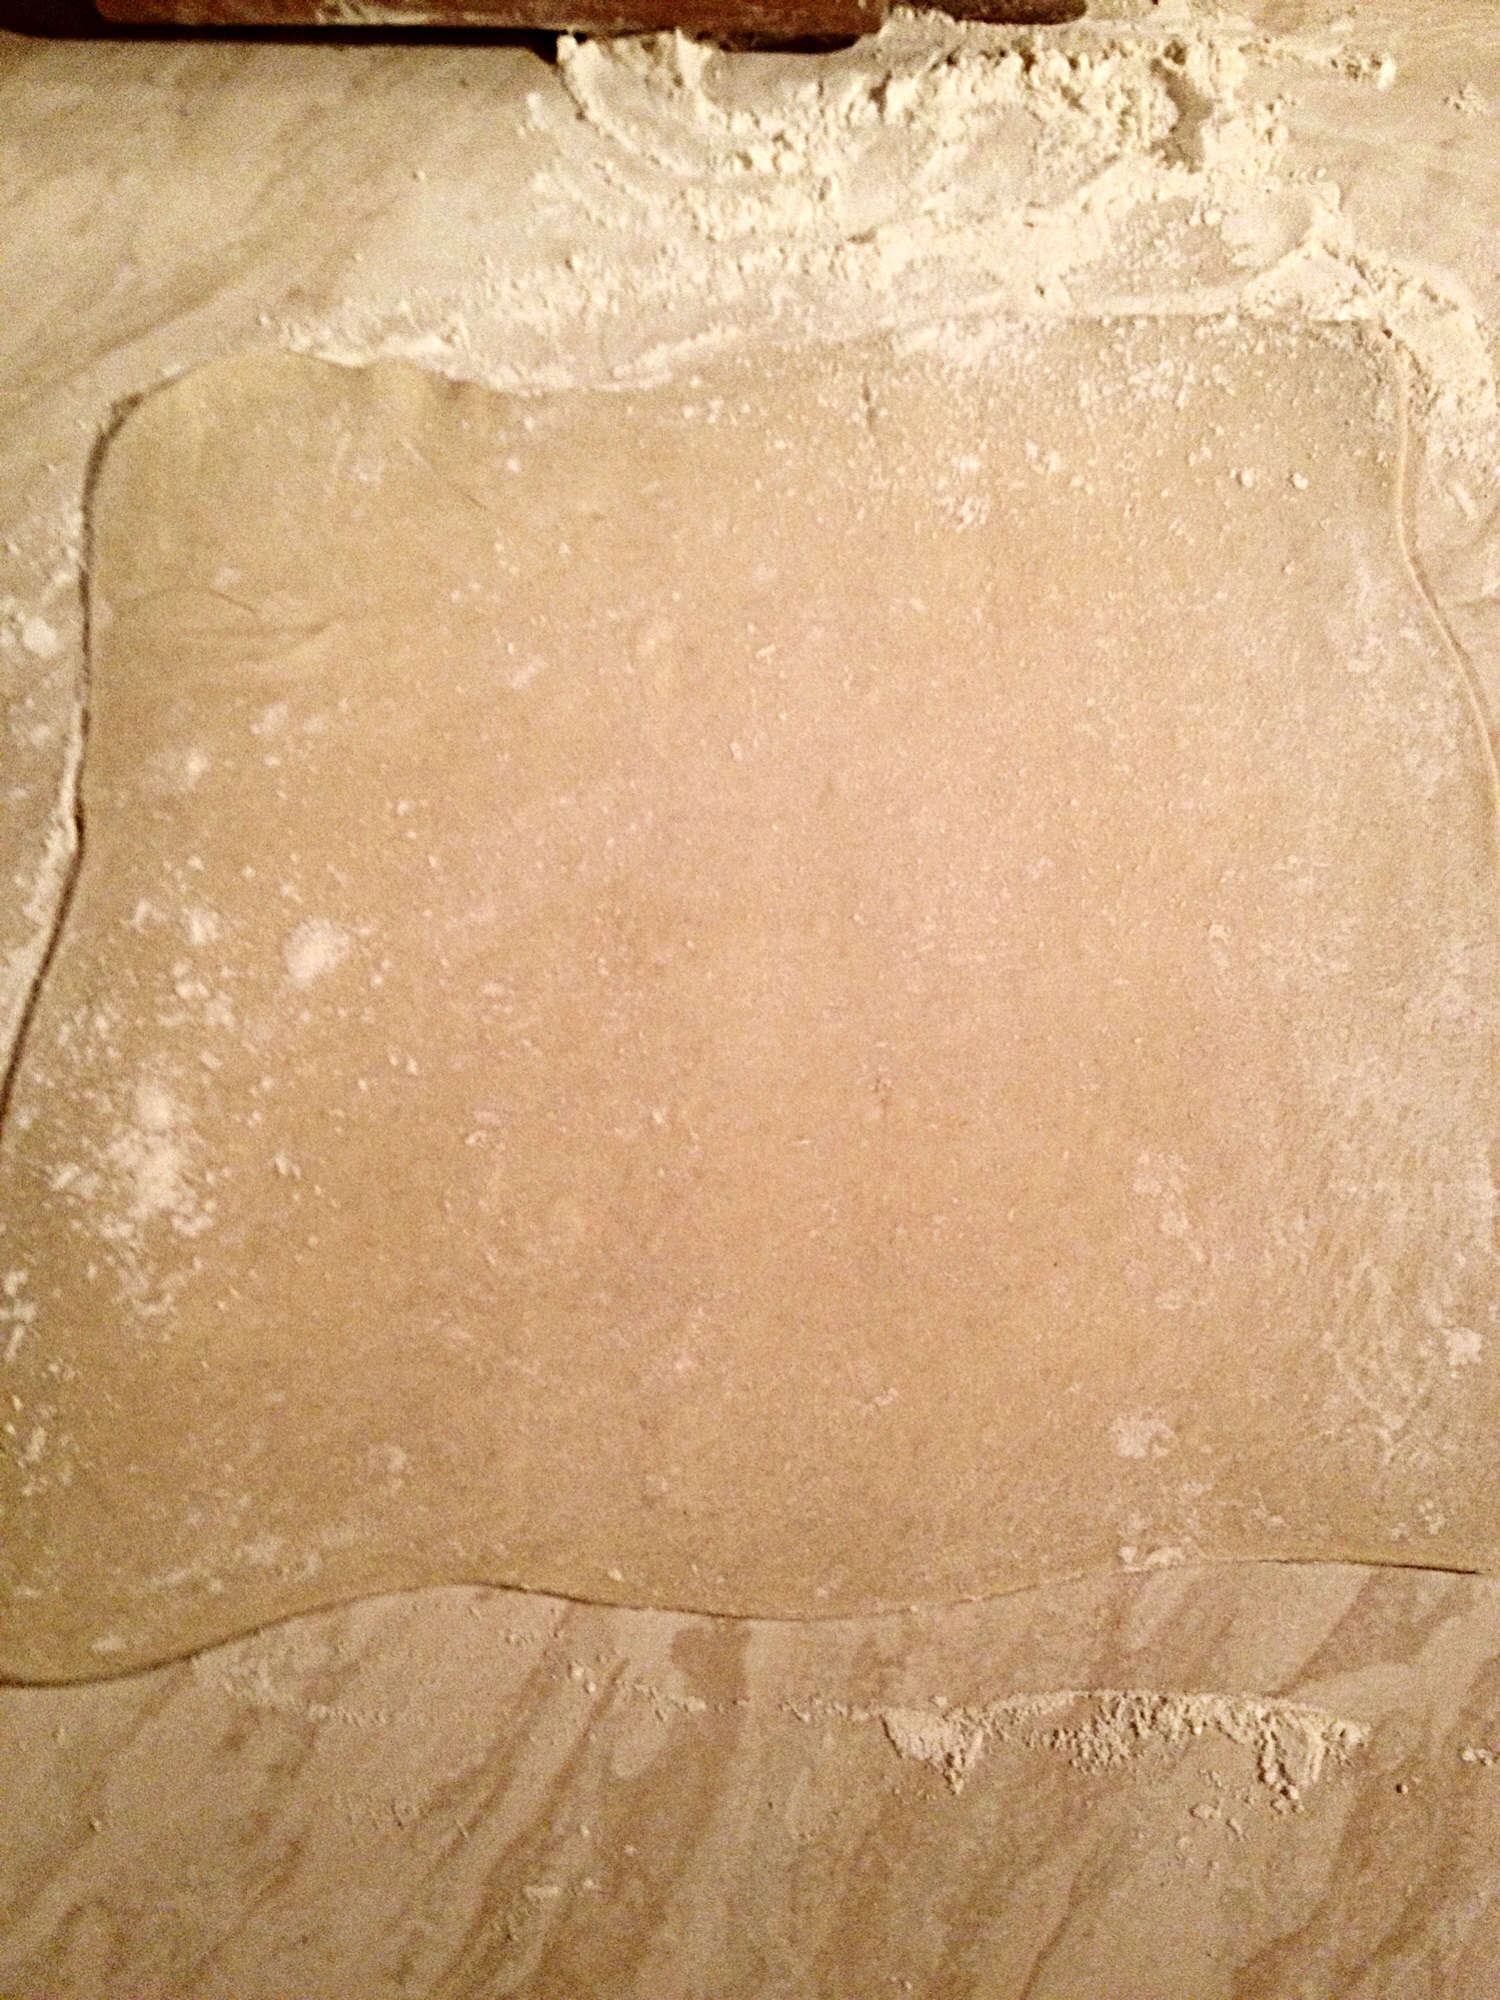
  • Unroll the pastry and cut into 5cm/2″ squares. I actually used a ruler to measure out the squares.
FF Mini Red Leicester Tarts
5cm puff pastry squares cut with a sharp knife.
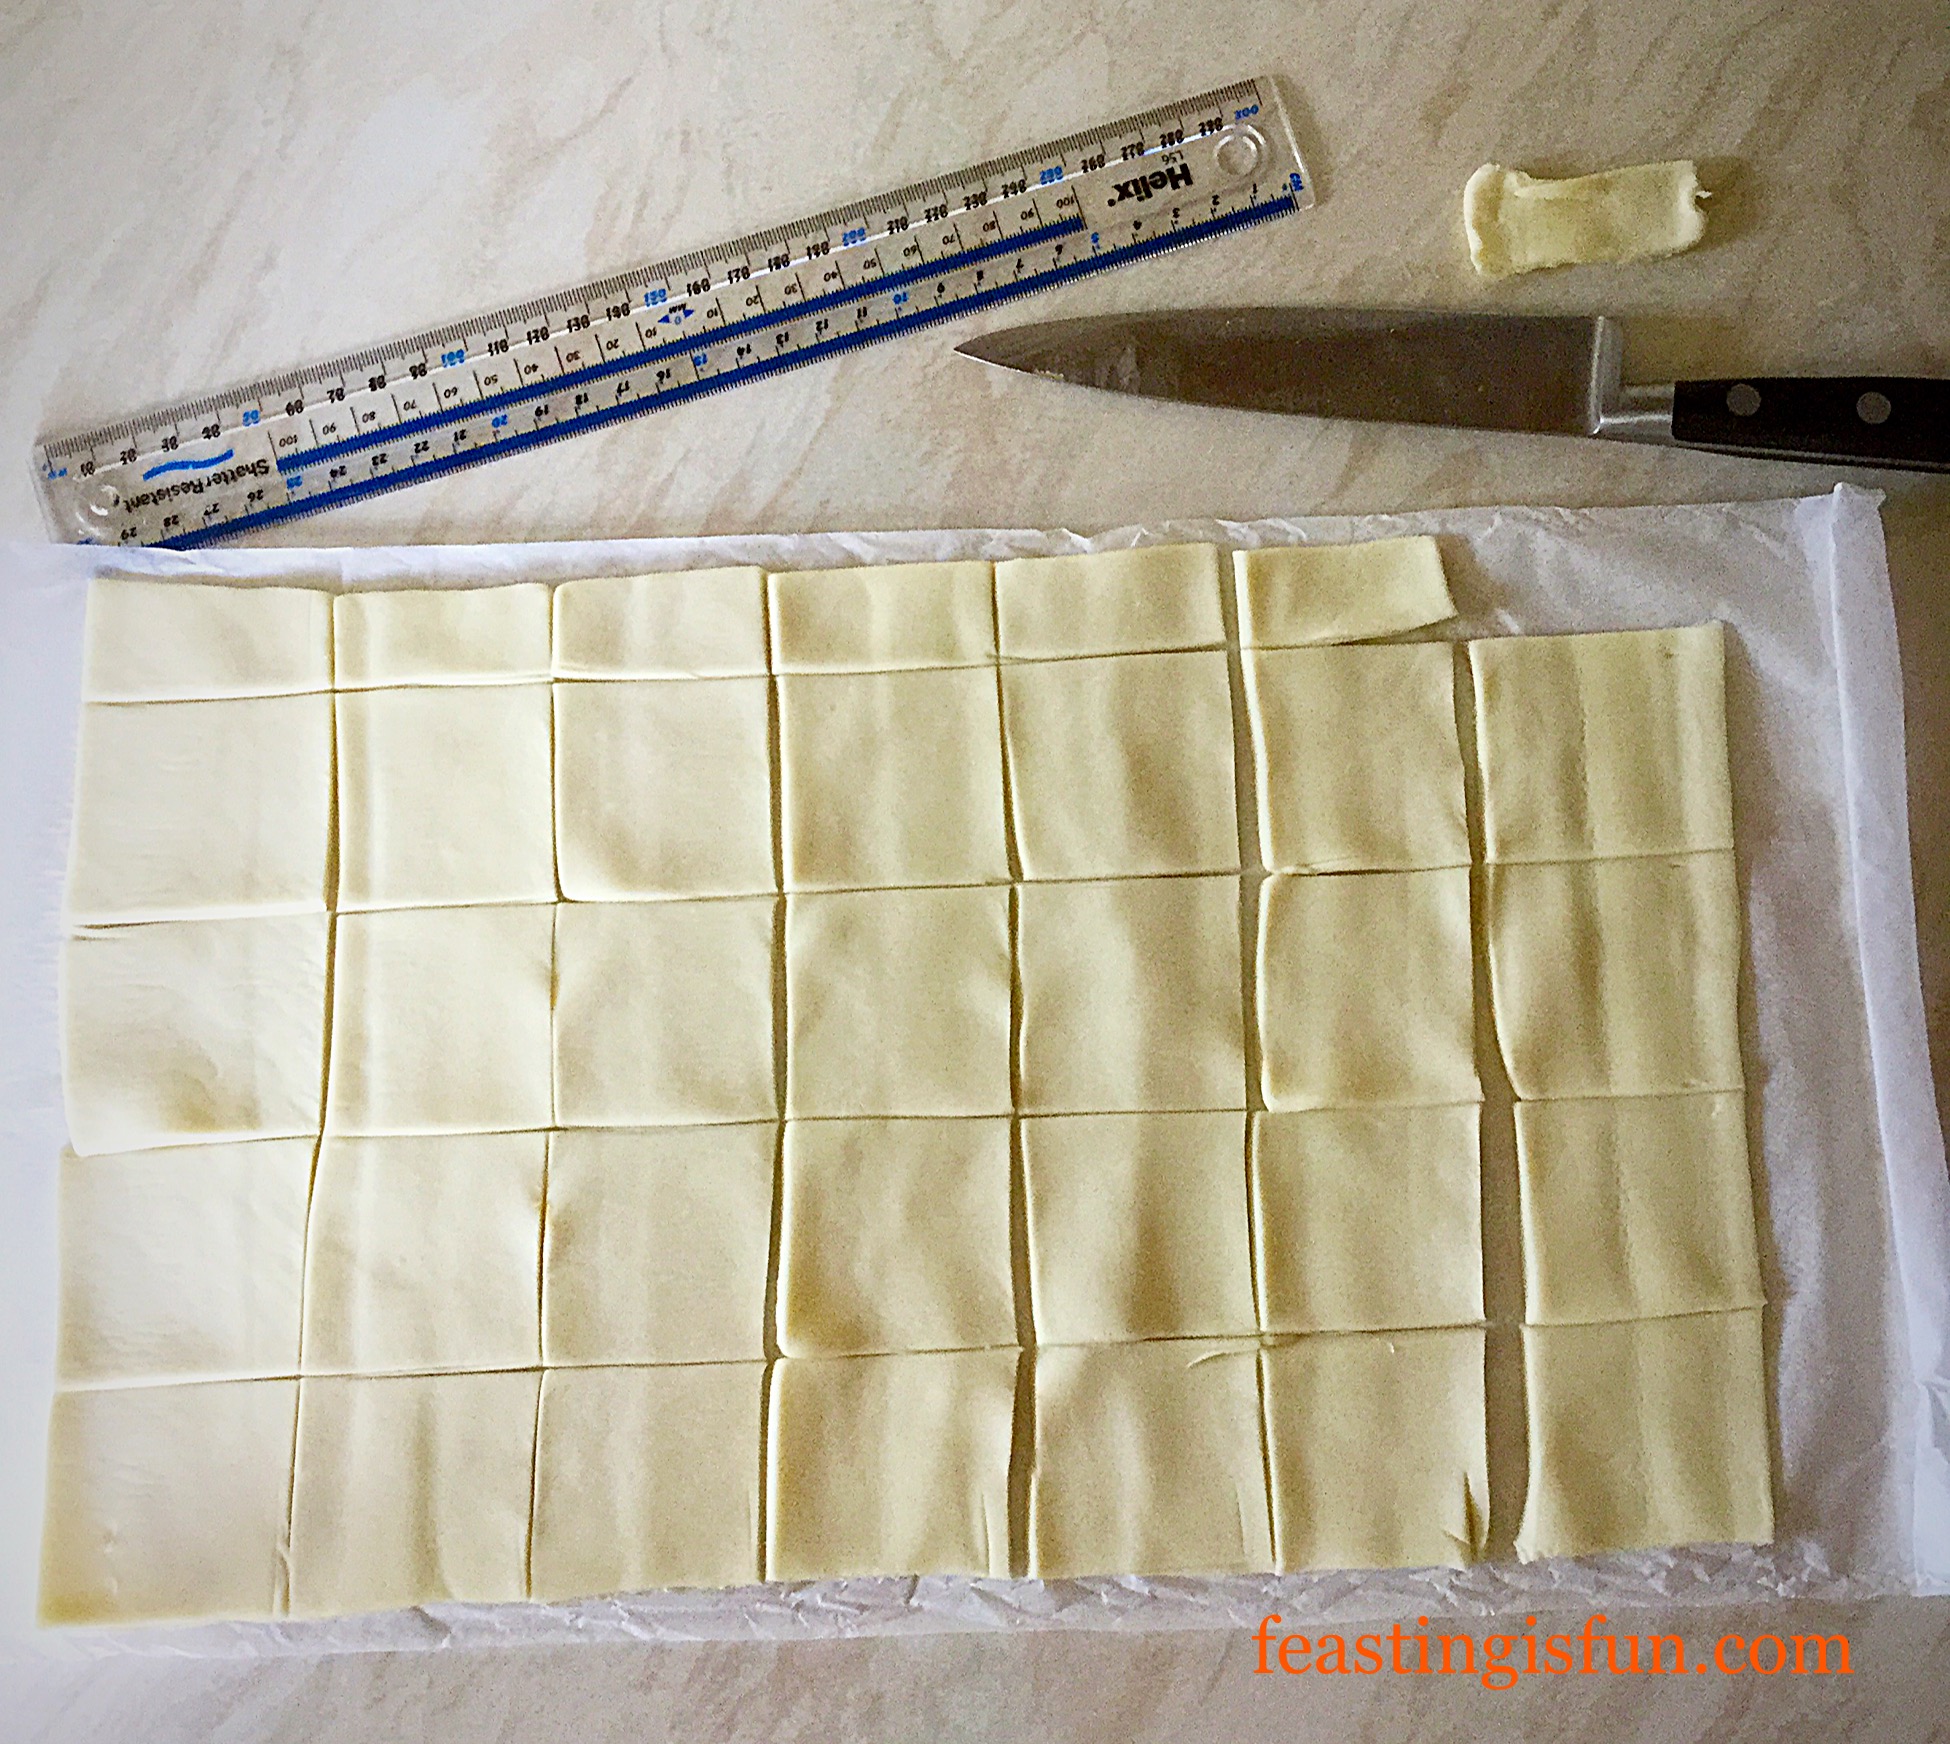
  • If your mini muffin tin is not non stick then spray with a little oil.
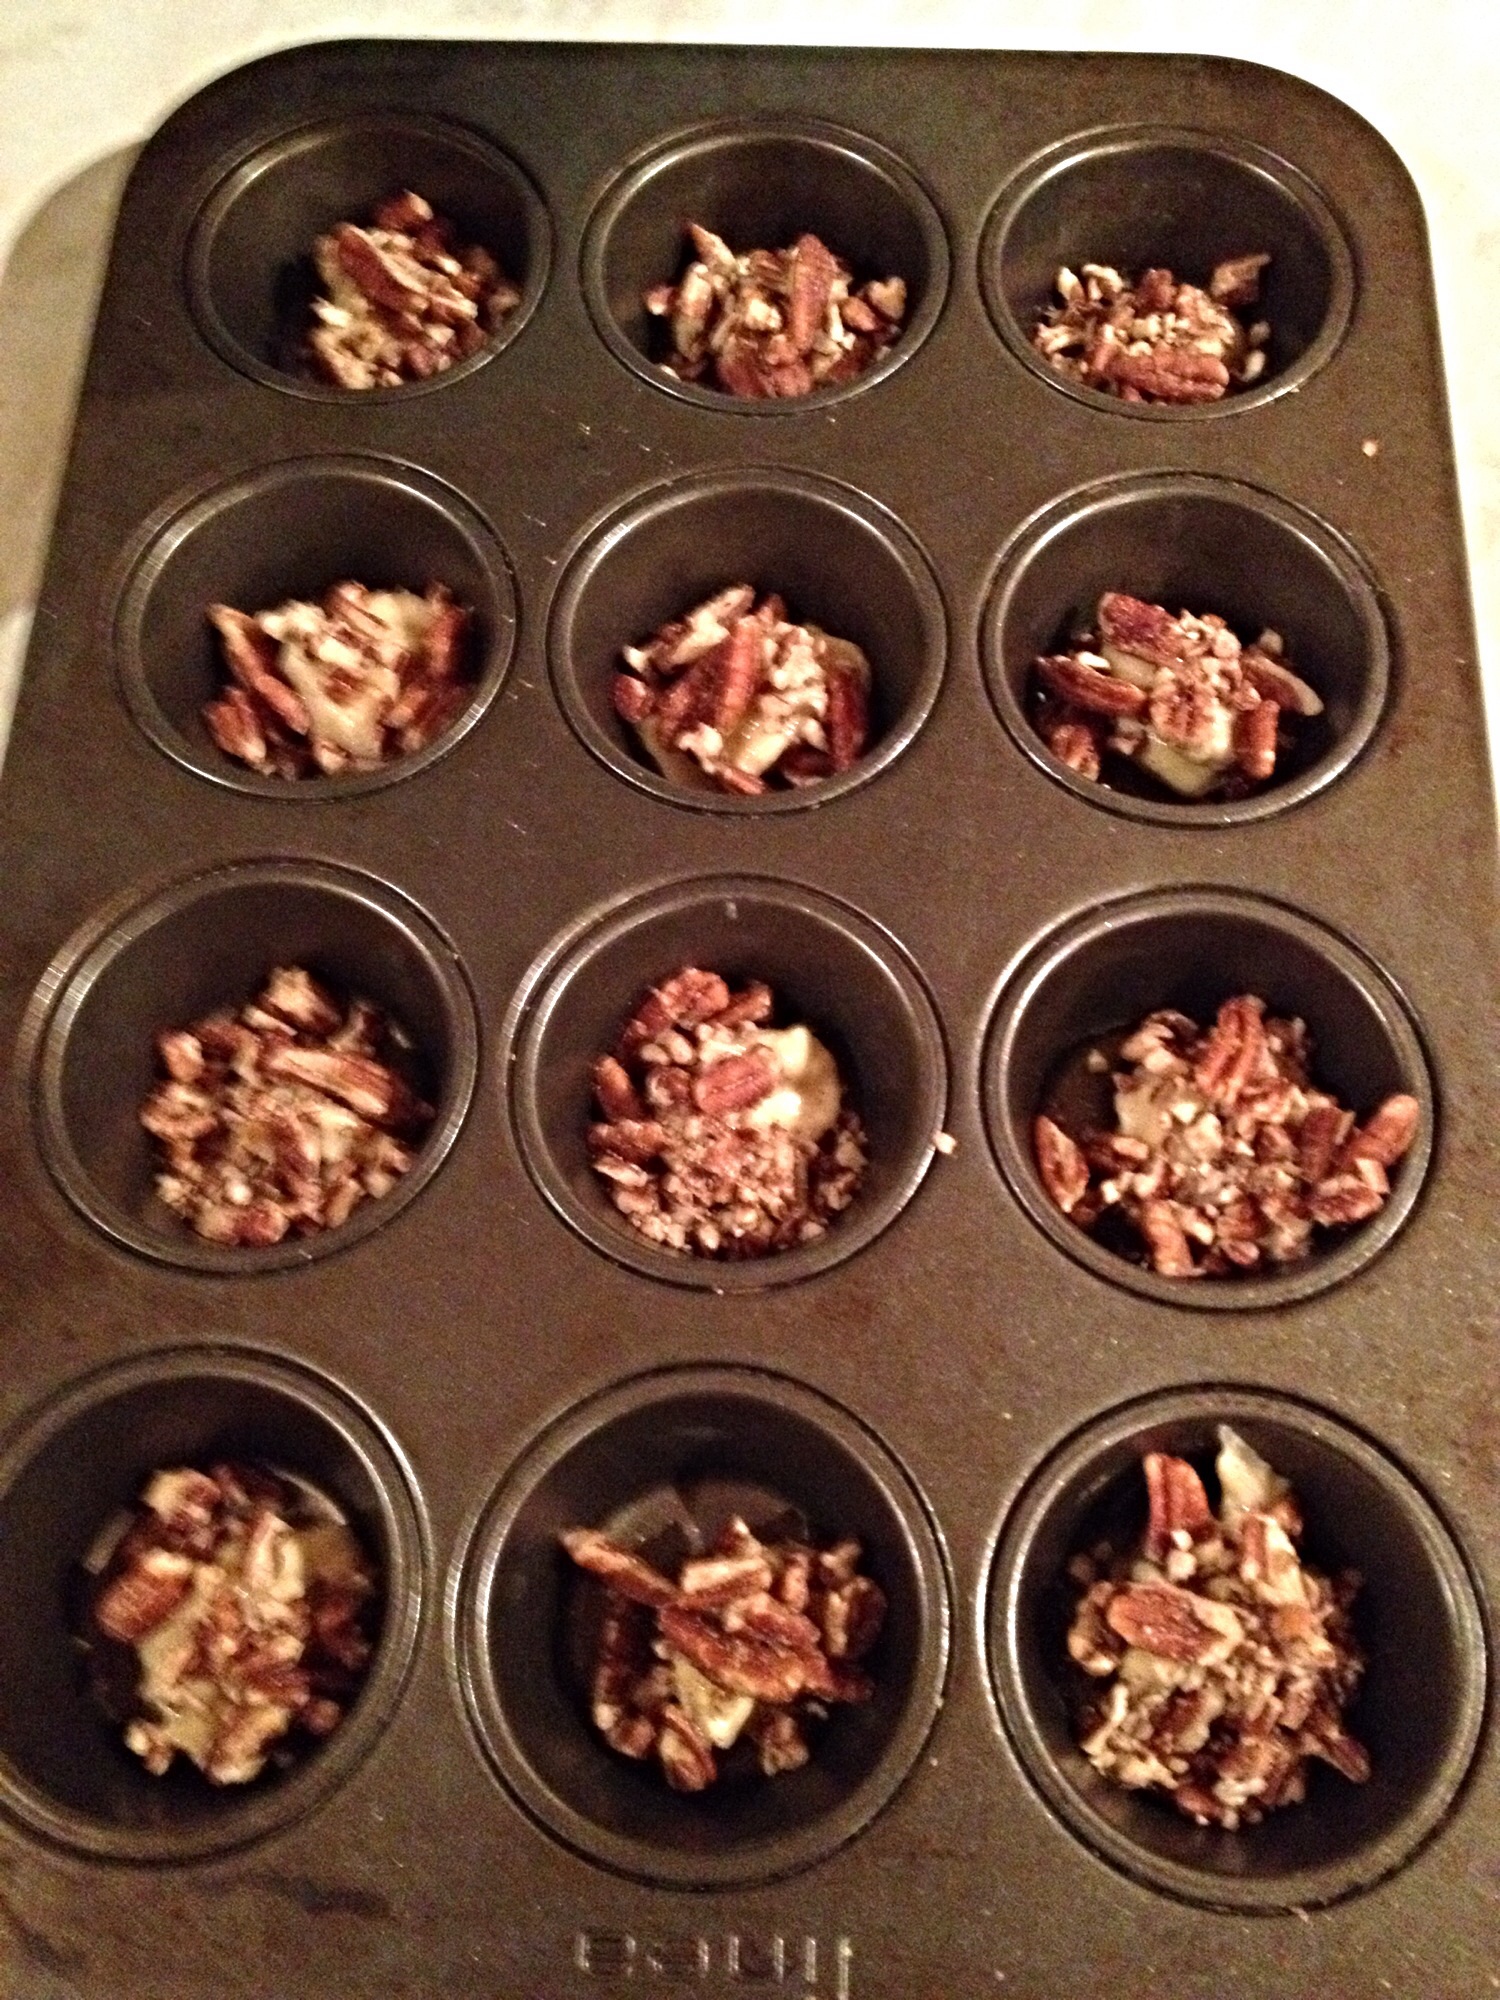
  • Place one pastry square on to each mini muffin hole and press gently so that it dips in and forms a cup.
  • NOTE – I overlapped two of the smaller pastry strips, squeezing them together, from the edge to create more tarts.
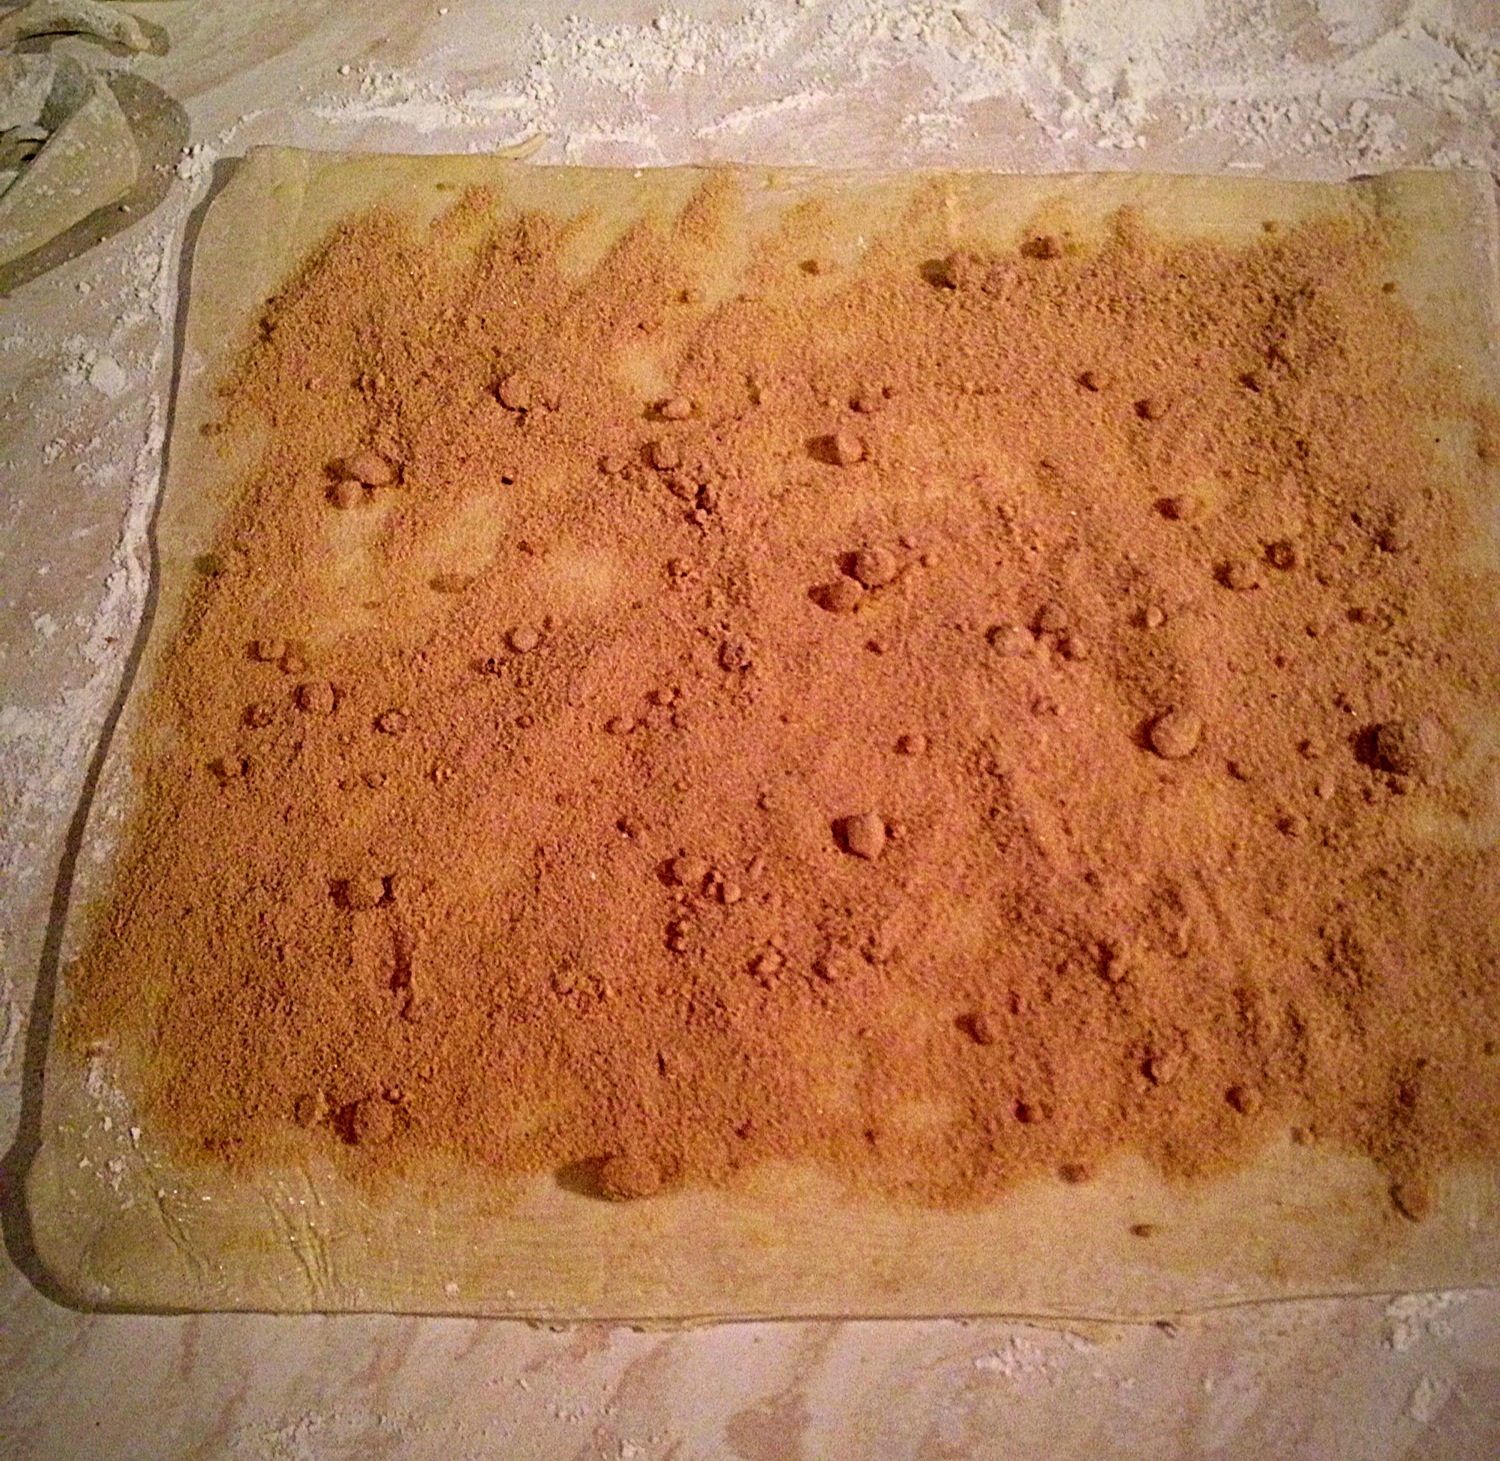
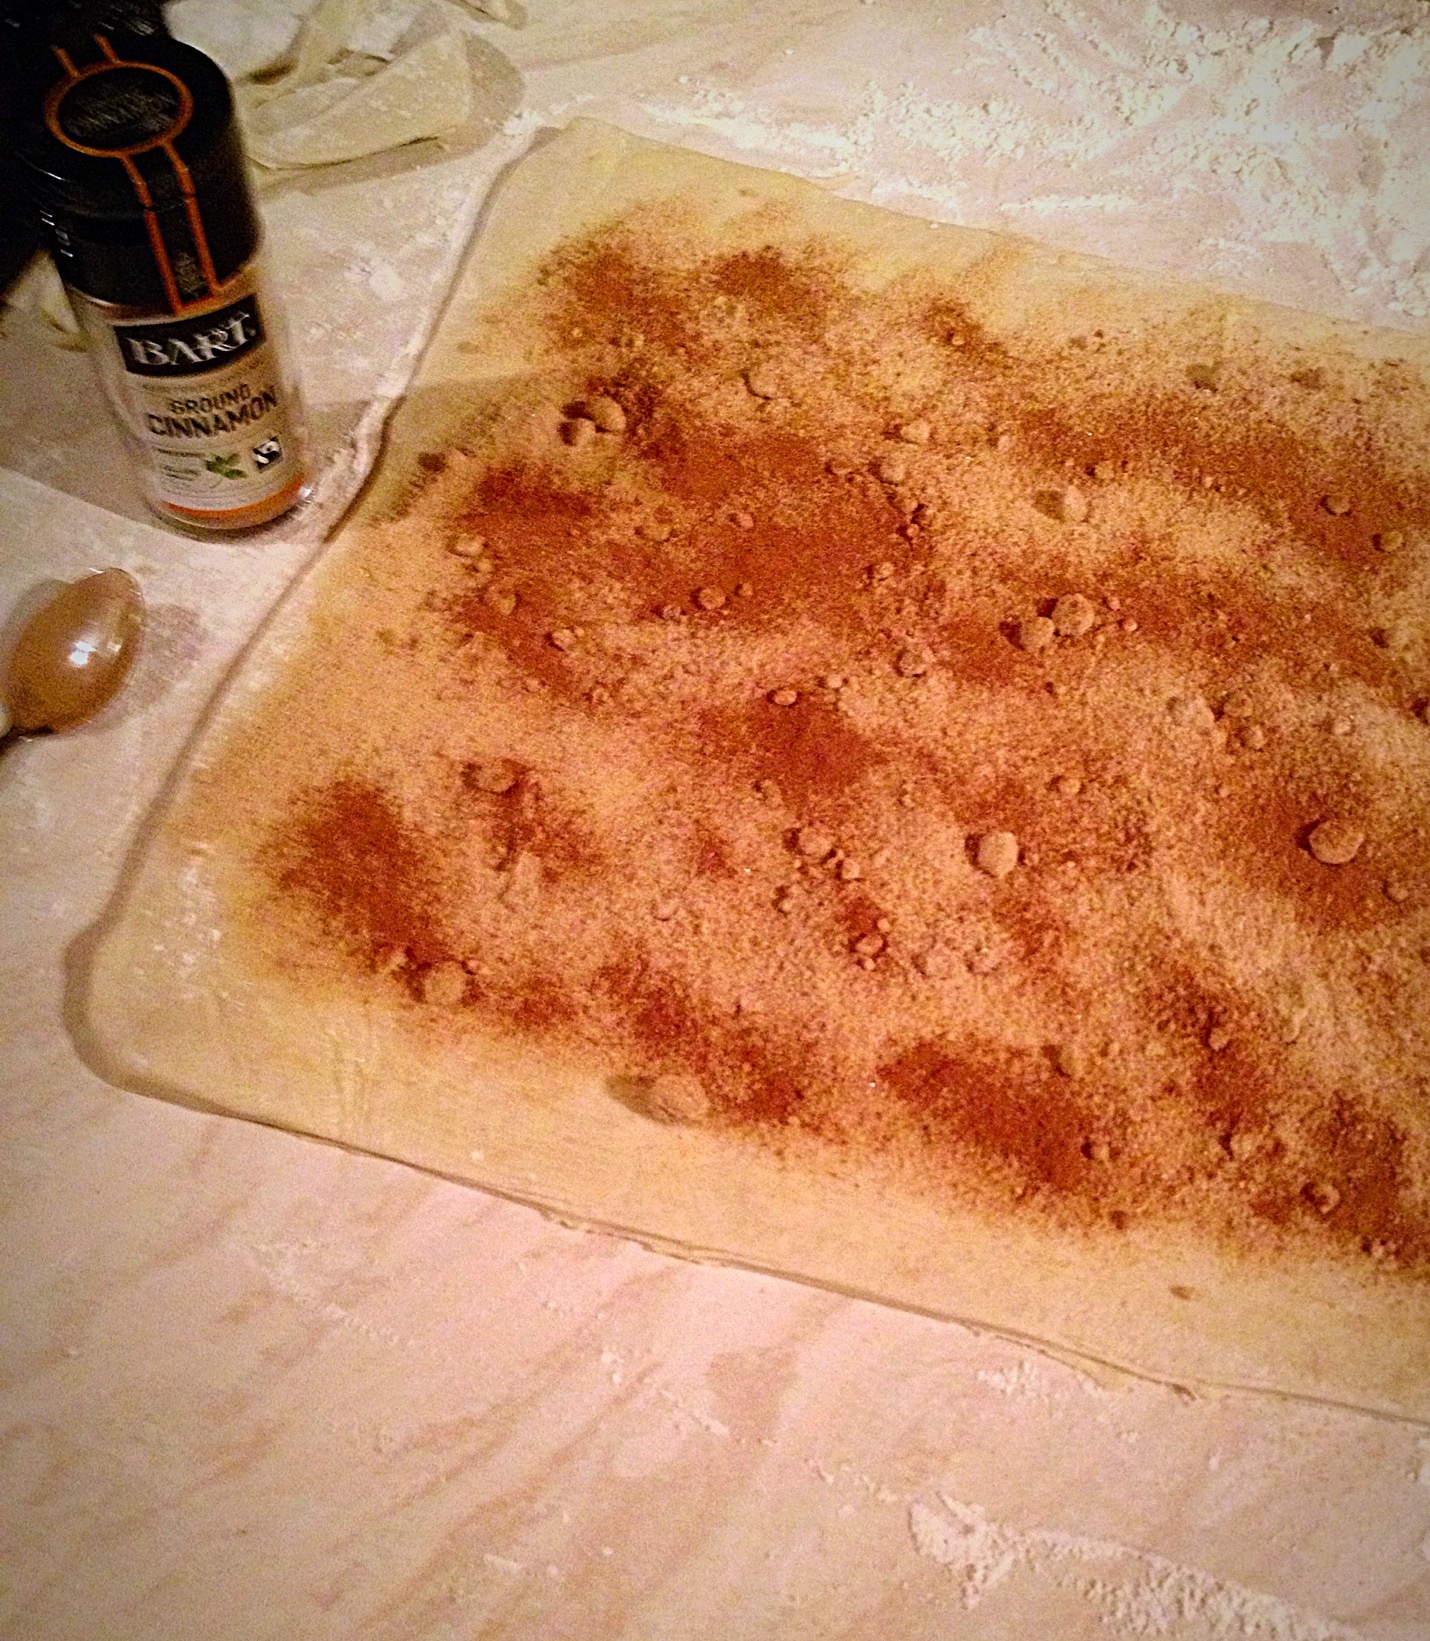
  • Add 1/4 teaspoon of onion marmalade to each pastry square.
FF Mini Red Leicester Tarts
Each pastry square forms a little tart shape.
  • Place 1 teaspoon of finely grated cheese on top of the onion marmalade.
  • Snip over a sprinkle of fresh chives.

FF Mini Red Leicester Tarts

Baking the cheesy tarts:

  • Place the tin in the middle of the preheated oven and bake the tarts for 10-12 minutes. They are baked when they are risen, golden and full of bubbling, melted cheese.
  • As soon as the tarts are baked remove from the oven.

FF Mini Red Leicester Tarts

  • Finally, remove the tarts from the tin and place on to a serving platter, if serving immediately, or on to a cooling rack for serving later.
FF Mini Red Leicester Tarts
Mini Sparkenhoe Red Leicester Tarts delicious mouthfuls of flavour heaven.

I served these tarts with a few extra chives snipped over for an extra pop of colour.

Served warm these Mini Sparkenhoe Red Leicester Tarts are at their best. Especially as the mild onion flavours pair beautifully with the warm, nutty cheese. Also to make ahead, store in an airtight container for up to three days in the fridge. Refresh by popping on to a baking sheet and into a medium, preheated oven for 5 minutes.

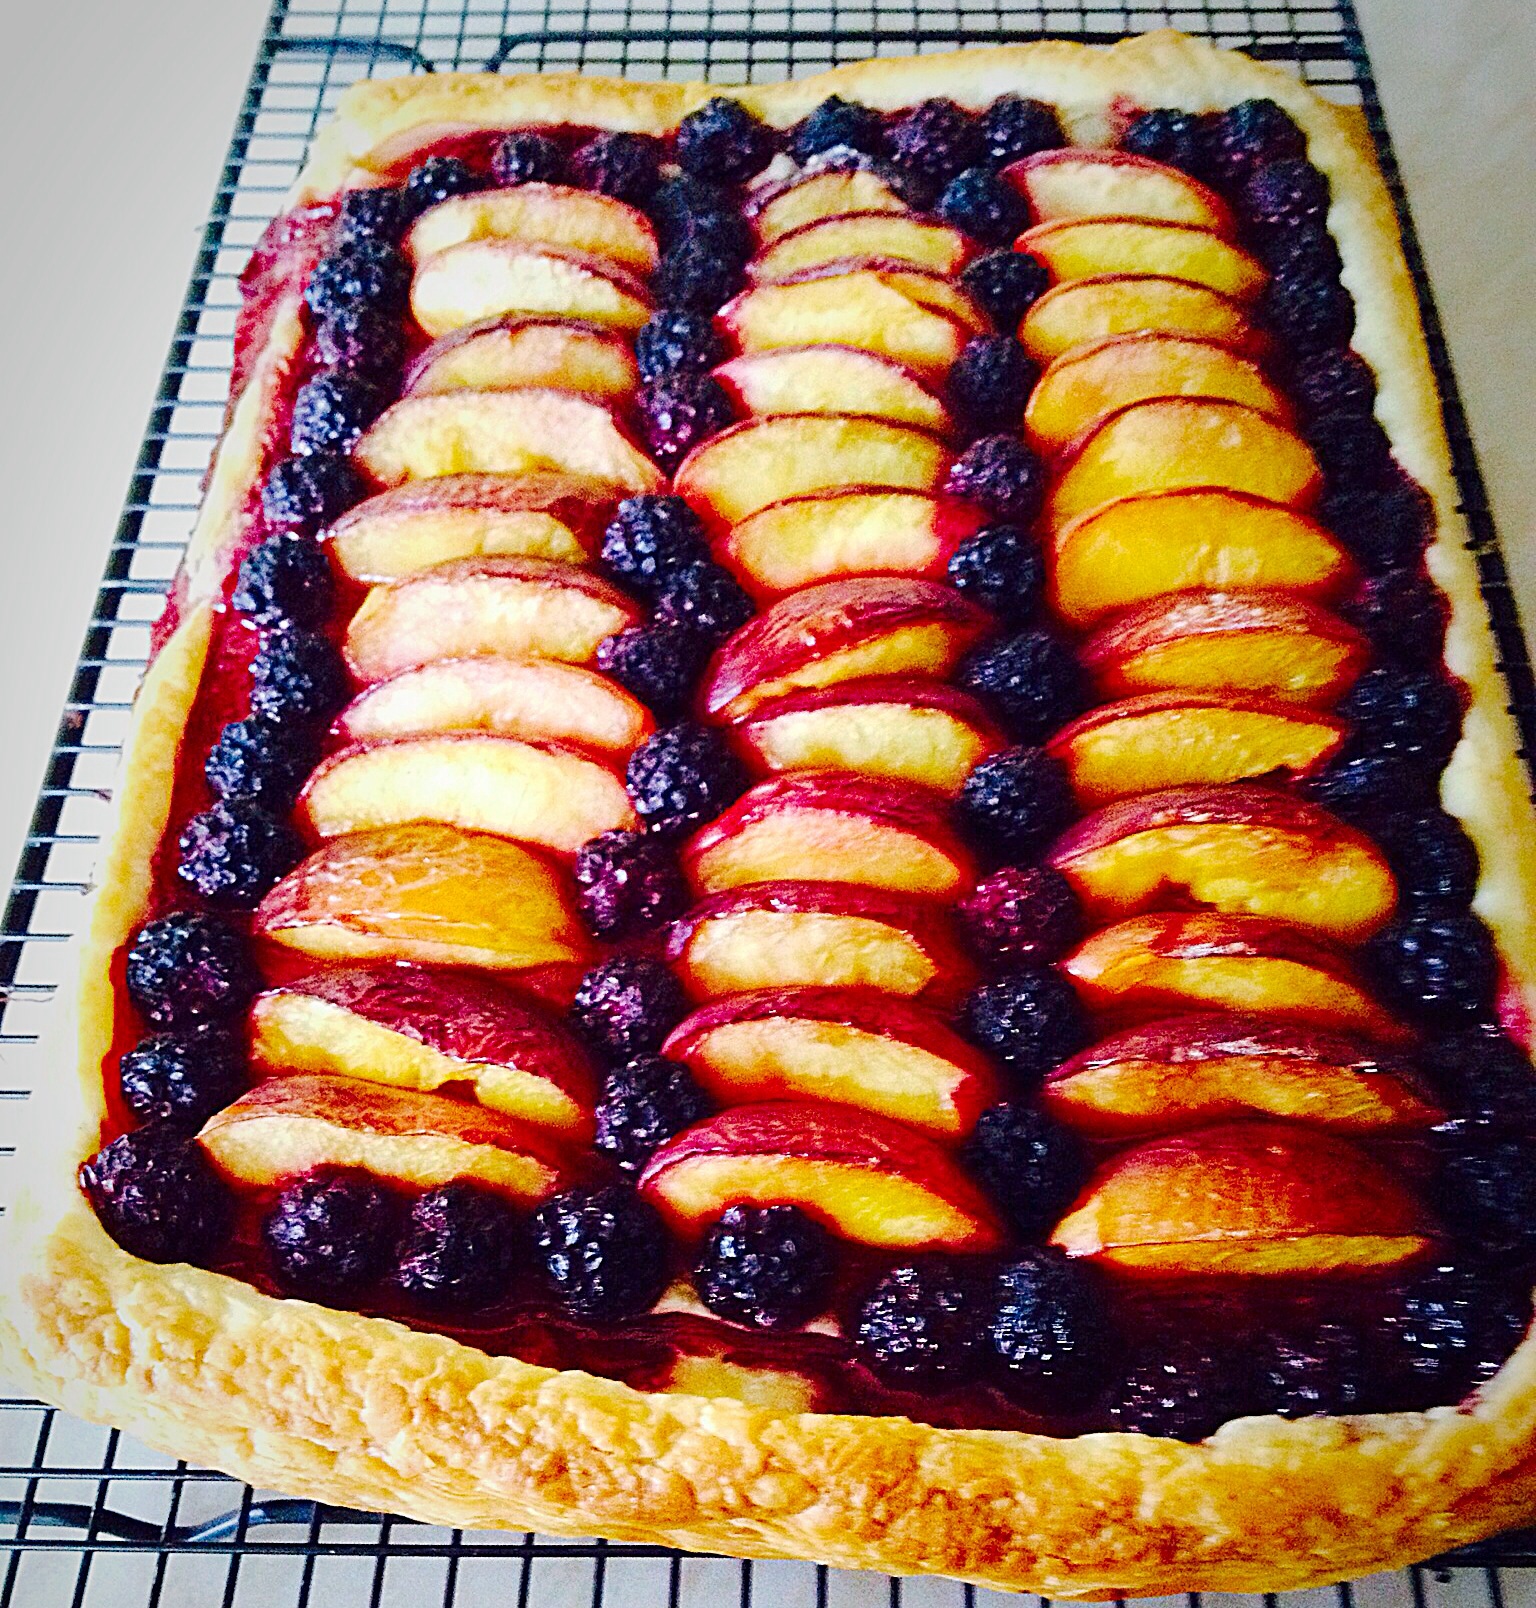
If you have enjoyed this recipe for Mini Sparkenhoe Red Leicester Tarts here are some others you may also like:

Goddess Cheese Pine Nut Muffins

FF Mini Red Leicester Tarts
Goddess Cheese Pine Nut Muffins.

Asparagus Prosciutto Ham Tart

FF Mini Red Leicester Tarts
Asparagus Prosciutto Ham Tart using Goddess Cheese.

Beauvale Cheese Walnut Scones

FF Mini Red Leicester Tarts
Beauvale Cheese Walnut Scones

Cheese comes in such a variety of textures and flavours. I am thoroughly enjoying experimenting with and using them as  ingredients to create different recipes.

I hope I have inspired you to both make and try different cheeses?

So, whatever er you are making, baking and creating in your kitchens, have fun preparing and sharing your feast.

Sammie xx

Pong Cheese provided me with the cheese for this recipe. All opinions, views, content and photography are my own. Please see my Disclosure Policy.

Share
Facebooktwitterpinterestlinkedintumblr

Red Onion Sausage Plait

Share
Facebooktwitterpinterestlinkedintumblr

This week happens to be National Picnic Week and as you’ve probably realised by now, I’m a big fan of outdoor eating. So, my Red Onion Sausage Plait is not only perfect for picnics, it’s also delicious served for dinner too! Great quality sausage meat mixed with red onion marmalade, encased in golden, all butter puff pastry. Utterly delicious.

FF Red Onion Sausage Plait
Red Onion Sausage Plait full of flavour and texture.

Using Condiments As Ingredients

The lovely people at Hawkshead Relish sent me some savoury relishes and marmalade to try out. I am a huge chutney fan, everything from jellies, to chutneys, relishes and marmalades. However, with this review, I wanted to use them as ingredients and see just how well they worked being in a dish. While also serving alongside as accompaniments.

I made this Red Onion Sausage Plait twice, as unfortunately I wasn’t able to get good pictures the first time round. Although, nobody in our house complained that I had to make this again. Since we all enjoyed the flavour and added texture from the red onion marmalade that contains raisins and crunchy pine kernels.

FF Red Onion Sausage Plait
Red Onion Sausage Plait, juicy, crispy with incredible flavour.

So, I set about making another Red Onion Sausage Plait, with great enthusiasm. Because, I love, I mean absolutely, completely, adore this Red Onion Marmalade and I knew this would use the last of it. Still I cheered myself with the fact that it makes such a knockout recipe and that I’d be eating it for dinner!

FF Red Onion Sausage Plait
Red Onion Sausage Plait also great as a mid week meal with salad and potato wedges.

Not Only For Picnics!

Warmed and served with a huge pile of salad and some potato wedges that I had in the freezer, this Red Onion Sausage Plait really does make a tasty, weekday meal. Also, it’s easily made ahead, left uncooked, wrapped in cling film and kept in the fridge until dinner time. Since it only takes 40 minutes to cook, which is why, seeing as the oven was already on I whacked in some potato wedges from the freezer.

FF Red Onion Sausage Plait
The huge bowl of salad I made to accompany the meal also had thinly sliced red onions in it which echoed the flavours in the sausage plait.

The caramelised onion flavour works so well with the meaty pork sausage. This is definitely a firm, family favourite now and is made frequently. I always look forward to eating this Red Onion Sausage Plait, whether on picnics and for dinner many times in future.

Recipe: Makes one Red Onion Sausage Plait serves 4 – 6 people

450g/1lb Good Quality Pork Sausagemeat – free range or organic for preference

3 heaped tablespoons of Red Onion Marmalade from Hawkshead Relish

320g Ready Rolled All Butter Pastry Sheet – I used JusRoll

1 Medium Free Range Egg

Pinch of Sea Salt – I use Maldon

Making The Sausage Plait

Preheat the oven to 220C/200C fan, gas mark 7, 425F.

  • First of all, line a large baking tray with baking parchment.
  • Place the sausage meat in a bowl with the red onion marmalade.
FF Red Onion Sausage Plait.
I enjoyed smooshing the mixture together with my hands!
  • Using clean hands smoosh the mixture together, through your fingers, until it is fully combined (a tack I particularly enjoy)! Set to one side and wash your hands.
  • On a clean work top unwrap the pastry sheet.
  • Place the sausage meat mixture down one side of the pastry, rather like a huge sausage roll, leaving a gap at each end and the side of at least 2.5cm.
F Red Onion Sausage Plait.
The right side of the pastry will fold over the sausage meat.
  • Crack the egg into a small bowl and whisk with a fork until well mixed. This is known as an egg wash.
  • Dip a pastry brushing into the egg wash and brush all of the visible pastry (not the sausage meat) with egg wash.
  • Bring the right side of the pastry over the sausage meat so that both side edges are together.
  • Crimp with a fork or twist all the pastry layers together, where they overlap to seal them.
  • Transfer the Red Onion Sausage Plait to the baking tray. Mine fits only when placed at an angle!
  • Brush over the entire outside of the sausage plait with egg wash. Finally sprinkle with a little sea salt.
FF Red Onion Sausage Plait
Red onion Sausage Plait with diagonal slits.
  • Using a sharp knife cut light diagonal slits through the pastry. This allows steam to escape and enhances the look of the finished bake.

Baking The Sausage Plait

  • If not baking straight away, wrap the entire tray and sausage plait in cling film and store in the fridge. For best results, bake within 24 hours.
  • When baking immediately, place the baking tray in the middle of a hot, preheated oven and bake for 40-45 minutes. The sausage plait should be a deep golden colour and any juices must run clear. If there is any doubt slice a portion of the plait off of the end and check. There should be absolutely no pinkness to the sausage meat, if there is pop back into the oven for 15 minutes and reduce the heat by 20C.
  • As soon as Red Onion Sausage Plait is baked, remove from the oven and leave to cool slightly on the tray.

To serve, allow the Red Onion Sausage Plait to cool for at least 15 minutes, longer if possible. Slice into portions and serve with salad, or my Crunchy Homemade Coleslaw, new potatoes, or for ease potato wedges. Serving with my Tangy Lemon Potato Salad also compliments the sausage plait well.

FF Red Onion Sausage Plait
Golden pastry and sausage meat with caremelised red onion.

To store and for packing up for a picnic, allow the sausage plait to cool. Cut into slices, I find a serrated knife is best when it’s cold. Pack the slices into an airtight container, or wrap in cling film. Store in the fridge for up to 3 days.

Delighfully savoury and full of texture, slices of this Red Onion Sausage Plait also make a welcome change to packed lunches!

If you have enjoyed this recipe for Red Onion Sausage Plait then here are some others you may also want to try:

Feta Red Onion Marmalade Quiche

Feta Red Onion Marmalade Quiche

Spicy Sausage Rolls

Spicy Sausage Rolls

Sausage Plait With A Twist

Sausage Plait With A Twist

Using the Red Onion Marmalade as an ingredient, rather than just as a condiment has opened up a whole world full of flavours. I have so many more idea, from pasta dishes to soups, stews and many more.

Do you ever use condiments in your cooking? Let me know in the comments section. I’m always interested to here and learn about new recipes and cooking methods.

So, whatever you are making, baking and creating in your kitchens, have fun preparing and sharing your feast.

Sammie xx

Hawkshead Relish provided me with a sample jar of their red onion marmalade. All views and opinions are my own. All content, recipes and photographs are my own and covered by copyright law of the land. Please see my Disclosure Policy.

Share
Facebooktwitterpinterestlinkedintumblr

Spicy Sausage Rolls

Share
Facebooktwitterpinterestlinkedintumblr

Sunshine, glorious sunshine. It lifts our spirits and makes everyday seem that little bit brighter – literally. Windows flung open, coats discarded, sunglasses at the ready. Who wants to eat lunch, or any meal for that matter, indoors? Not me! Even if my ‘picnic’ is sitting out in the garden with a cool glass of something refreshing and a plate of these jalapeño fired Spicy Sausage Rolls.

For those of you with a more gentle constitution, don’t worry these Spicy Sausage Rolls do not ‘blow your head off!’ Instead they have a gentle warming, fruity heat that lifts an otherwise everyday sausage roll to a whole different level.

The inclusion of some paprika filled chorizo sausage, further elevates the incredible flavour of these picnic favourites. Delicious good quality sausage meat,  mixed with finely chopped jalapeño chilli and just the right amount of chorizo, encased in flaky, all butter puff pastry, makes for the perfect addition to any packed lunch, picnic or easy meal.

Spicy Sausage Rolls change up your daily packed lunch!

If you like sausage rolls, you will absolutely love these Spicy Sausage Rolls!

Spicy Sausage Rolls an easy, tasty,mid week meal.
Spicy Sausage Rolls an easy, tasty, mid week meal.

Using The Freezer To Keep Grocery Costs Down

Puff pastry is such an incredibly handy product to have stashed away in the freezer. All butter is my preferred type, especially for sweet bakes such as my Blackberry Nectarine Tart , however, I do sometimes use the mixed vegetable fat/butter for savoury bakes, especially if it is on offer!

Having chatted to a few of my Twitter friends recently, we all concluded that the cost of groceries seems to have suddenly risen. For me, this means creating recipes that stretch more expensive ingredients that little bit further and also really trying hard to keep food waste to an absolute minimum.

Spicy Sausage Rolls are great with a handful of cherry tomatoes off the vine.

As I spend a lot of time testing recipes and batch baking/cooking in the kitchen, the opportunity for waste can become even greater. Especially if after a few days cooking and baking I then spend the next few days in bed due to my health problems see here.

This is where the freezer becomes my best friend! Having made the Spicy Sausage Rolls on a day where I had also cooked dinner, they were in danger of getting forgotten about, boxed up in the back of the fridge. Of course we shared a couple between us to taste test them and we were not disappointed. After the photos were taken the following day, I popped the remaining sausage rolls in the freezer – keeping a couple out for our daughter and I to share for lunch.

I have no doubt that they will not stay in the freezer long, yet it saves potential waste. Which is primarily, not only good for our planet, but also our grocery budget!

Recipe: Makes 12 Spicy Sausage Rolls

350g/12oz Block of Puff Pastry all butter if possible- defrosted in the fridge overnight if frozen – I used frozen Just Rol all butter puff pastry, alternatively use my fantastic Perfect Butter Shortcrust Pastry recipe.

454g/1lb Pork Sausagemeat – good quality at least 85% Pork, any casings removed

50g/2oz Chorizo Sausage – casing removed

1 Jalapeño Chilli Pepper

1 Medium Free Range Egg – I use Burford Browns Eggs from Clarence Court

Method: Preheat the oven to 200C/180C fan, gas mark 6, 400F.

Making The Spicy Sausagemeat

  • Place the sausage meat into a bowl and add the chorizo sausage pulled into pieces.
  • Remove the seeds and membrane from the jalapeño chilli pepper and chop finely.
  • Add the chopped chilli to the bowl and squish (mix) everything together using clean hands.

Creating The Sausage Rolls

  • Roll out the puff pastry on a clean, flour dusted work top, until it is 30cm x 20cm (15″ wide by 8″ deep).
  • Trim the edges of the pastry and then divide the pastry in half width ways so that you have 2 long strips.
  • Divide the sausage meat mixture in two.
  • Evenly lay the sausage meat down the middle of each length of pastry.
You can see the flecks of green chilli and red chorizo throughout the sausage meat.
  • Crack an egg into a small bowl and whisk with a fork.
  • Using a pastry brush, brush beaten egg down the length of the pastry, either side of the sausage meat.
  • Bring the top edge of the pastry evenly over the sausage meat and continue rolling so that the pastry overlaps (and seals) underneath the sausage rolls.
  • Using a sharp knife, cut each long roll in half and then cut each half into 3 even sized sausage rolls. In total you will have 12 medium sized sausage rolls.
Spicy Sausage Rolls ready for their egg wash and to be baked!
  • Place the sausage rolls on to a lightly oiled baking tray.
  • Brush each sausage roll with the beaten egg – this will give the pastry a wonderful, crisp, golden finish once baked.
  • Finally using a sharp, pointed pair of scissors, snip the top of each sausage roll twice – as can be seen in the picture below.
Spicy Sausage Rolls ready for the oven.

Baking The Spicy Sausage Rolls

  • Place the baking tray into the middle/top part of the oven and bake for 25-30 minutes.
  • The Spicy Sausage Rolls are cooked when the pastry is flaky and golden brown all over. If in doubt cut a sausage roll in half, the meat should be cooked all the way through.
  • Once baked remove the sausage rolls from the oven.
Golden, flaky, hot Spicy Sausage Rolls fresh from the oven.
  • Transfer the baked sausage rolls to a cooling rack and allow to cool slightly before trying!
Spicy Sausage Rolls that smell so delicious and inviting.

Perfect eaten hot or cold, with a good chutney, some cherry tomatoes and a glass of something refreshing.

To store, allow to cool completely and then pack into an airtight container and keep in the fridge for up to 5 days. Alternatively, as I did, pack into a freezer bag or box, label and keep in the freezer for one month. Defrost thoroughly and reheat until piping hot in a moderate oven.

Serving The Sausage Rolls

If fresh puff pastry has been used, not frozen, these Spicy Sausage Rolls can also be frozen uncooked. Place some baking parchment on a baking tray, put the sausage rolls on top and then place into the freezer and freeze until solid. Once frozen pack into freezer boxes, separating each layer with baking parchment. To cook, remove as many sausage rolls as required, place onto an oiled baking tray and bake in a preheated oven as before. The sausage rolls will take approximately 45 minutes to bake from frozen. This can be particularly handy over the Christmas holiday period.

Spicy Sausage Rolls
Spicy Sausage Rolls perfect for a Christmas buffet, or any buffet!!

Sorry to mention Christmas, however, in our house a buffet is incomplete without a plate of hot sausage rolls. This year we can really turn the heat up!

Obviously you can control how spicy you make these, as well as the size. I would perhaps make them a little smaller for a buffet spread.

If you have loved these Spicy Sausage Rolls as much as we have you may also enjoy these other recipes:

Quiche Lorraine

Spicy Sausage Rolls
Quiche Lorraine bacon, cheddar and egg tart.

Sausage Plait With A Twist

Spicy Sausage Rolls
Sausage Plait With A Twist

Tomato Thyme Garlic Focaccia Bread

Spicy Sausage Rolls
Tomato Thyme Garlic Focaccia Bread

If you think about it, a buffet is really an indoor picnic!

Who doesn’t love unloading a picnic hamper or walking around a buffet table tasting little morsels of yummy different foods. We have a daughter who would happily eat from a buffet table/picnic hamper most days of the year.

The sun is blazing as I write up this post. Whether you make and bake during the sunshine or snow, have fun feasting with friends, family and neighbours.

Sammie xx

Share
Facebooktwitterpinterestlinkedintumblr

Blackberry Nectarine Tart

Share
Facebooktwitterpinterestlinkedintumblr

Hi, I’m celebrating. Because today is the first day I’ve woken up without a migraine for too long. So when I get a fairly good day I smile and give thanks, harder to do on the other days, more like clinging on by my fingertips. AND I made the easiest tart ever! This Blackberry Nectarine Tart is made with shop bought, all butter, puff pastry, a tub of blackberries (mine were frozen) and a punnet of nectarines. Alternatively you could easily use peaches.

Blackberry Nectarine Tart


So if you imagine roasting vegetables intensifies their flavour, then think what 30 minutes in a hot oven does to the fruit in this tart. Even with the addition of a sprinkle of vanilla sugar the intense fruit flavours in this Blackberry Nectarine Tart are a delight on the taste buds. While this is not a sweet tart. For me it’s a perfect balance of fruity flavour and flaky, buttery pastry.

Blackberry Nectarine Tart - beautiful and delicious.
Blackberry Nectarine Tart

Create An Easy Dessert Using Store Cupboard Staples

I really can’t emphasise how easy this tart is to make. Since the pastry and blackberries were in the freezer, the nectarines, ridiculously cheap and in season, ripening at an increasingly rapid pace, needed using. Also, given how well this tart turned out I would happily make this during the colder months using, shock, horror, tinned peaches! Yup I would, with custard poured over. I am shameless!!!

Blackberry Nectarine Tart - a perfect summer dessert, even in the winter.
Blackberry Nectarine Tart – a perfect summer dessert, even in the winter.


I hope I’ve convinced you to give this tart a try? Because as they say “The proof of the pudding, is in the eating!”

Recipe : Blackberry Nectarine Tart Serves 6

375g/13oz All Butter Puff Pastry – defrosted, if frozen, I use JusRol. Alternatively use vegetable fat puff pastry for a vegan dessert.

300g/11oz Blackberries – if frozen don’t defrost – I buy frozen punnets from Waitrose

7-8 Nectarines – peaches are a good substitute

1tbsp Vanilla Sugar

Method : Preheat oven to 220C/200C fan, 425F, gas mark 7

Grease or line with parchment paper a baking tray with shallow sides, the fruit give off juices when baked, 26cm x 39cm (10.5″ x 15.5″).

Assembling The Puff Pastry Tart

First of all, on a clean, dry, lightly floured surface, roll out the pastry so that it will just fit in the baking tray – I haven’t given dimensions, as if your baking tray size differs from mine a few centimetres either way, it won’t matter.

Using your rolling pin transfer the pastry to the baking tray.


I lightly scored the pastry approx. 1cm in from the edge with a sharp knife. This will ensure that a nice, even, crust, borders the tart.

Next slice each nectarine into 6 equal(ish) portions. If they are still firm this should be fairly easy. Because mine were very ripe so I cut out the slices, against the stone, while holding the nectarine, over a bowl to catch the juices.

Blackberry Nectarine Tart - arrange the nectarine slices in rows.
Blackberry Nectarine Tart – arrange the nectarine slices in rows.
Blackberry Nectarine Tart - sprinkle over 1 tablespoon of vanilla sugar.
Blackberry Nectarine Tart – sprinkle over 1 tablespoon of vanilla sugar.


Either buy Vanilla Sugar, or alternatively you can make your own.

Vanilla Sugar - I have a Kilner jar filled with caster sugar and a few vanilla pods. Leave for one month and the vanilla will have infused the sugar with it's delicious flavour and scent.
Vanilla Sugar – I have a Kilner jar filled with caster sugar and a few vanilla pods. Leave for one month and the vanilla will have infused the sugar with it’s delicious flavour and scent.


Tip : A light (little goes a long way) sprinkling of Vanilla Sugar over homemade popcorn is delish!!

Next arrange the blackberries on the tart, however you choose. I chose to go with the lines of the tart.

Blackberry Nectarine Tart - using frozen blackberries I think helped them retain their shape during baking.
Blackberry Nectarine Tart – using frozen blackberries I think helped them retain their shape during baking.

Baking The Fruit Tart

Place the tart in the oven and bake for 30 – 35 minutes. While some juice from the fruit leaks, I found, once the 30 minutes baking time was up, it had concentrated and did not make that part of the tart soggy.

The tart is cooked when the outside crust is golden brown and the base, when gently lifted, is golden brown too.

As soon as the tart is baked remove from the oven.

Blackberry Nectarine Tart - once baked remove from the oven.
Blackberry Nectarine Tart – once baked remove from the oven.


Transfer the Blackberry Nectarine Tart on to a cooling rack. This keeps the tart bottom and crust nice and flaky.

Blackberry Nectarine Tart - if you like a bit more sweetness a dusting of icing sugar would be perfect.
Blackberry Nectarine Tart – if you like a bit more sweetness a dusting of icing sugar would be perfect.


Serve warm or cold. This tart was perfectly complimented by a scoop a good, vanilla ice cream.

Blackberry Nectarine Tart - utter deliciousness.
Blackberry Nectarine Tart – utter deliciousness.

If you have enjoyed this recipe for Blackberry Nectarine Tart you may also like these:

Very Vanilla Ice Cream

FF Blackberry Nectarine Tart
Very Vanilla Ice Cream

Lemon Lime Meringue Pie 

FF Blackberry Nectarine Tart
Lemon Lime Meringue Pie

No Bake White Chocolate Strawberry Cheesecake 

FF Blackberry Nectarine Tart
No Bake White Chocolate Strawberry Cheesecake

If you keep pastry and fruit in the freezer regularly, I’d say this is the perfect, pull together, easy dessert.  Especially perfect for eating while snuggling on the sofa watching a film, or entertaining last minute, or even planned dinner guests!!

Because I used nectarines their tender skin doesn’t need to be removed.

What go-to freezer staples do you keep on hand. As well as ice cream!

So whatever you are making, baking and creating in your kitchens, have fun preparing and sharing your feast.

Sammie xx

No part of this post may be reproduced or duplicated without the written permission of the owner. Please see my Disclosure Policy.

Share
Facebooktwitterpinterestlinkedintumblr

Sticky Pecan Sultana Buns

Share
Facebooktwitterpinterestlinkedintumblr

Hi there, how are you today?  These Sticky Pecan Sultana Buns are so easy to make and are perfect for weekend breakfast with a large mug of Coffee!  They truly define the meaning of Lazy Weekend Breakfast Feasting.

FF Sticky Pecan Sultana Buns
Sticky Pecan Sultana Buns

Obviously, you don’t have to restrict eating these at breakfast time or just at the weekend – although, as scrummy as they are, I wouldn’t recommend having them everyday! These Sticky Pecan Sultana Buns are treats, in fact I had them for my birthday brekkie last year (& that was mid week!).

This recipe was inspired by Ina Garten, the Barefoot Contessa herself.  After following her recipe a few times I fiddled with it a bit.  The buns were scrummy, but I wanted Pecan nuts inside my buns and preferred the use of Sultanas.  I also changed the ratio of ingredients, as I changed from American cup measures to Metric weight.  I was extremely pleased with the results, I hope you will be to and this easy recipe will inspire you to have a go at making these buns!

Pecan Sultana Sticky Buns www.feastingisfun.com

Upside down buns

Firstly, I should say that these Sticky Sultana Pecan Buns are made upside down!  That is, they are very similar, in method, to an upside down cake – meaning that you place a brown sugar/butter mixture along with Pecan nuts into the bottom of a deep muffin/cupcake tin, place the buns in top and then when cooked turn the buns out so the bottom of the bun becomes the top!

Don’t worry!  It’s not as confusing as it sounds and I am ALWAYS amazed that the buns turn out perfectly, they never stick and always look so impressive for such little effort.  In fact it really is a Ta Dah moment (I imagine a drumroll in my head!) that never ceases to amaze me and I always end up with a huge smile on my face!

Just a quick note : A proper deep muffin/cupcake tin must be used for this recipe.  A bun/fairy cake tin is too shallow, not only will it be too small for your buns, but you’ll also end up with butter dripping all over your oven.  I also place a baking sheet, a little larger than my cupcake tin, on the rack below, just in case any butter bubbles up and drips over – soo much easier to clean than the whole oven!!

Recipe : Makes 12 Sticky Pecan Sultana Buns

For the Topping:

150g/5oz  Butter – unsalted and softened

75g/3oz Light, Soft Brown Sugar

100g/4oz Pecan Nuts – roughly chopped

1/4tsp Salt – I use Maldon

For the Buns :

450g/1lb Pack Shop Bought All Butter Puff Pastry

1tbsp  Butter – melted

1 1/2tsp  Cinnamon

150g/5oz Light, Soft Brown Sugar

250g/9oz  Sultanas

100g/4oz Pecan Nuts – roughly chopped

Method :

Preheat the oven to 200C (180C fan), 400F, gas mark 6

Making The Sticky Bun Topping

Firstly, for the topping of the buns mix the softened butter, sugar and salt until well combined.

Using a teaspoon (not a teaspoon measure) scoop 1/2 a teaspoon of the butter/sugar mixture and place into the bottom of the muffin tin, repeating 11 more times.

1/2 a teaspoon is just enough!
Each muffin cup has a dollop of the sugar/butter mixture!

Next, divide the 100g of Pecan nuts between each of the muffin cups, placing them on top of the sugar/butter mixture.  Remember, although this is going into the bottom of the tin, when turned out this will become the topping of the Sticky Pecan Sultana Buns!

The Pecan nuts become caramelised, golden and sticky during cooking. Yummy!!

Assembling The Buns

Lightly dust the worktop with plain, white flour.  Roll out the all butter puff pastry, with a floured rolling pin. You need a square shape that is approx 34 x 34cm.

All butter pastry really is essential as it adds to the flaky, buttery flavour of the buns.

Next, trim the top and bottom of the pastry square and brush with the melted butter.  Then sprinkle the sugar evenly over the whole of the square.

Don't worry about the odd few lumps in the sugar, they'll just add to the stickiness of the buns!!
Don’t worry about the odd few lumps in the sugar, they’ll just add to the stickiness of the buns!!

Sprinkle the cinnamon evenly over the sugar layer.

The smell of cinnamon fills the house when these buns are baking.

Now you can sprinkle firstly the Sultanas and the the chopped Pecan nuts, so they cover the pastry evenly.

Nice and evenly spread, now it's time to get a-rolling!!!
Nice and evenly spread, now it’s time to get a-rolling!!!

Starting at the front edge of the pastry, evenly roll over the edge of the pastry, tucking it under itself ( not too tightly). Then proceed to roll until you have a log shape, with the join underneath.

A nice even roll along the front edge of the pastry.
Keep rolling so the pastry is an even log shape.
Trim the side edges of the log.

Shaping the buns

Next, using a sharp knife, mark the middle of the log. Then mark each half of the log in the middle. Now divide each marked section into 3 separate pieces. You should now have 12 buns!

Use a very sharp knife to slice through each section - so you get a nice clean edge to each bun.
Use a very sharp knife to slice through each section – so you get a nice clean edge to each bun.

Carefully place each bun, cut side up, on top of the butter/sugar/Pecan mixture in the muffin tin. Squish a little bit if needed and don’t worry if a little of the filling falls out in transit, you can always pop errant Pecans and Sultanas into any gaps once all the buns are in the muffin tin!

All ready to be popped into the preheated oven.

Baking the Sticky Pecan Sultana Buns

Place the tin into a preheated oven and bake for 30 minutes. The Sticky Pecan Sultana Buns are cooked when the pastry is golden and puffed.

Ooh yummy! But be careful, they will come out of oven very hot.

I just love to watch them bubbling and breath in their cinnamon scent when they first come out of the oven – it’s the little things in life that give me most pleasure!!!!!

Turning The Sticky Pecan Sultana Buns Out

Wait a few (3 ish but no longer than 5) minutes, then wearing oven gloves place a baking sheet (that is at least the same size as your muffin tin) over the top of the muffin tin and turn over. I promise the buns will drop out! Remove the muffin tin and stare in amazement at your gorgeous Sticky Pecan Sultana Buns– all 12 of them!! See I told you, they really are easy and they turn out every single time.

Perfectly turned out Sticky Pecan and Sultana Buns.

Leave to cool – remember all that bubbling and sizzling was butter and sugar boiling very hot!!

Serve warm with nothing but a hot drink of your choice, sit back, relax and smile!

Made for sharing

These Sticky Pecan Sultana Buns are perfect for breakfast, brunch, mid afternoon coffee. I think these are at their most delicious shared with friends and family who unexpectedly pop round! These are best served warm, so pop in a 140C oven whilst the kettle boils and serve with a steaming cup of coffee and a smile!

These scrummy Sticky Pecan Sultana Buns keep well in an airtight container for up to 5 days. They can also be frozen for up to 1 month. When needed, remove from freezer, place on a baking sheet and allow to defrost (this doesn’t take long 1-2 hrs depending on the room temperature), refresh and warm in a 180C oven for 5 minutes and serve.

FF Sticky Pecan Sultana Buns
Sticky Pecan Sultana Buns

I really hope that you give the Sticky Pecan Sultana Buns a try as not only are they easy to make, they are scrumptious and everyone who tries them has a big smile on their face!!!

Sammie x


Share
Facebooktwitterpinterestlinkedintumblr