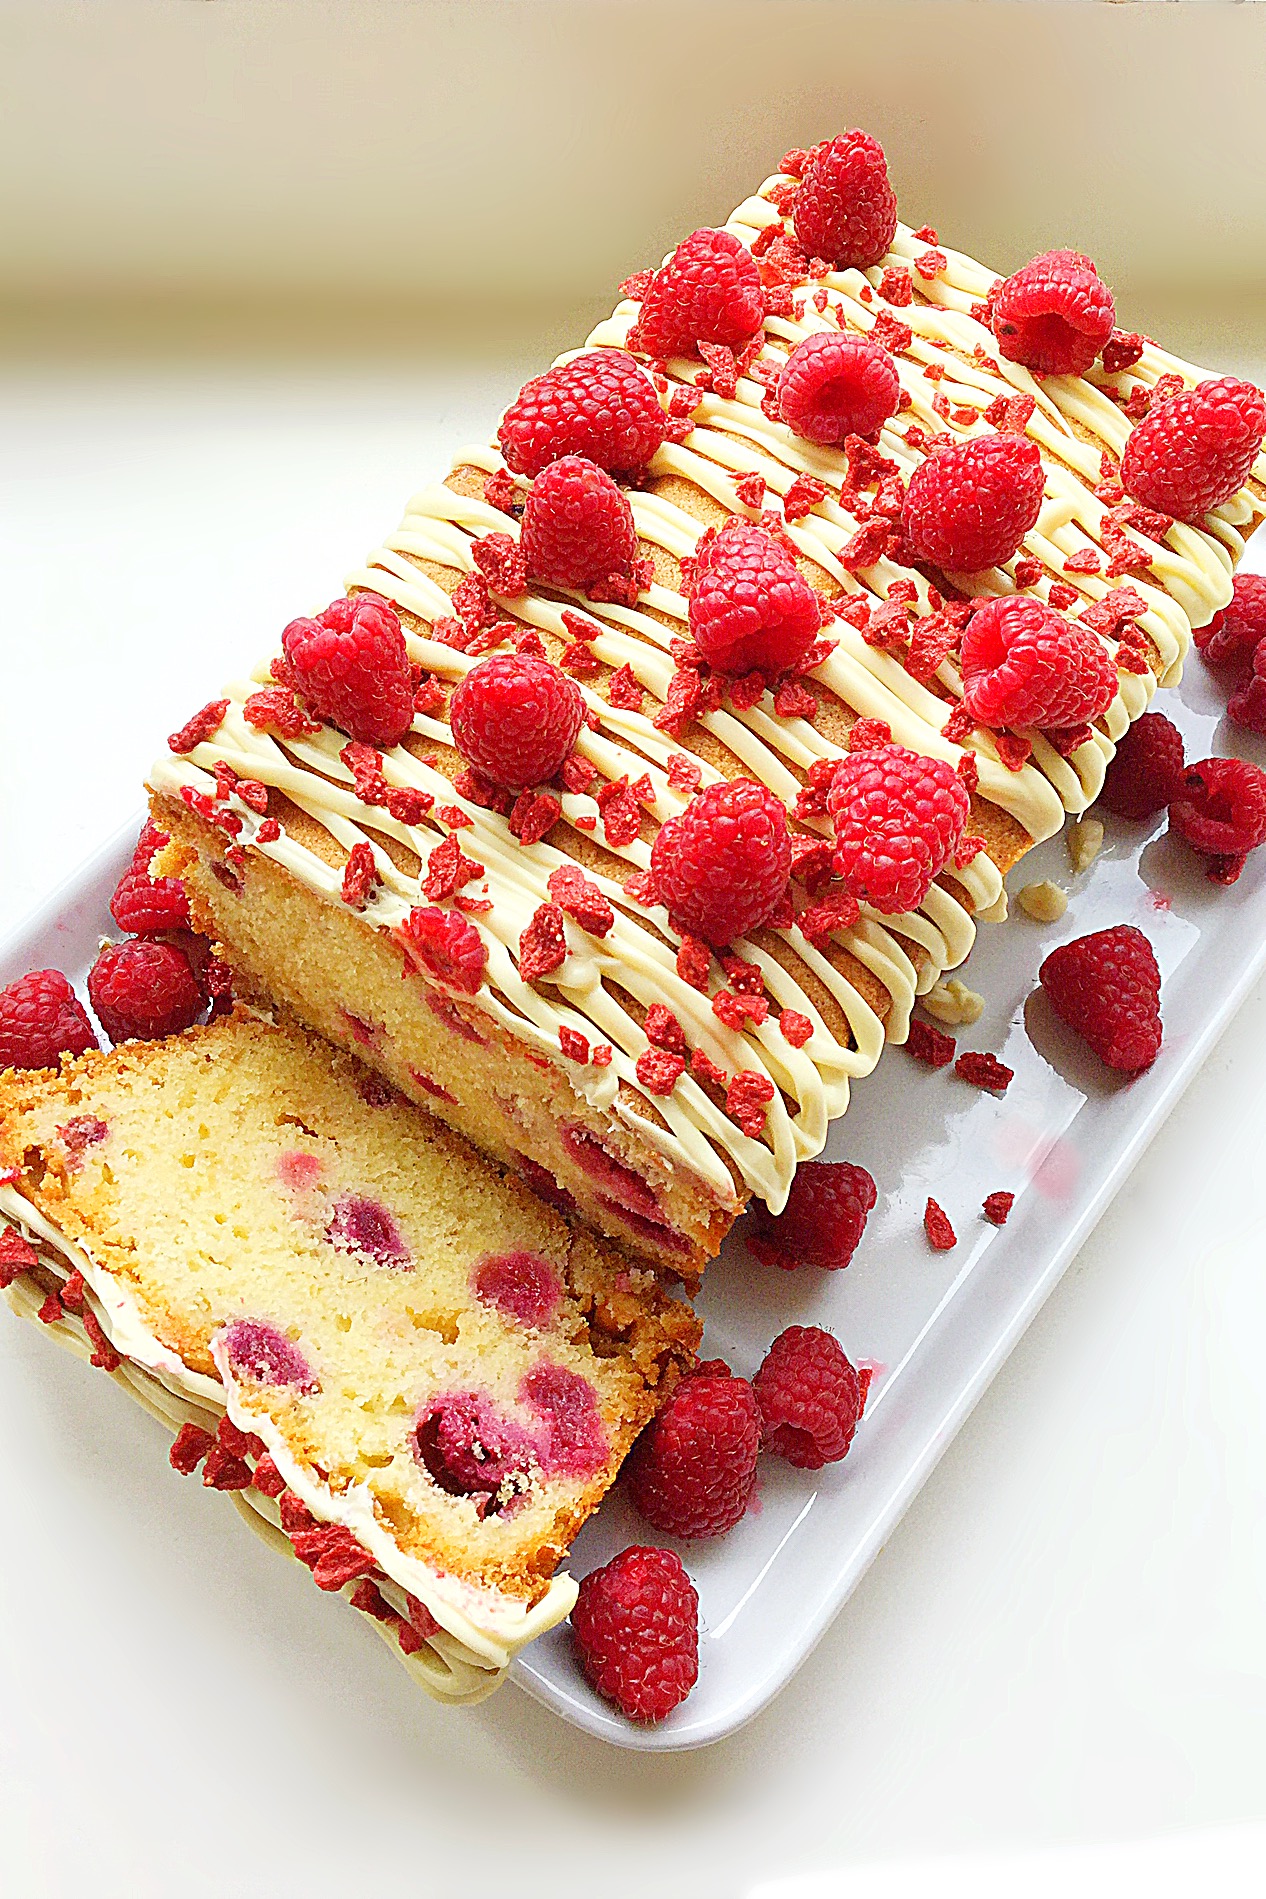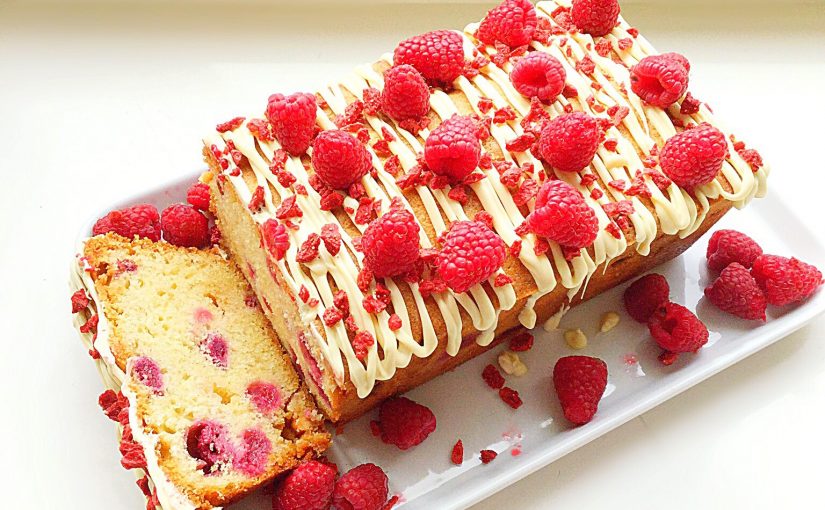
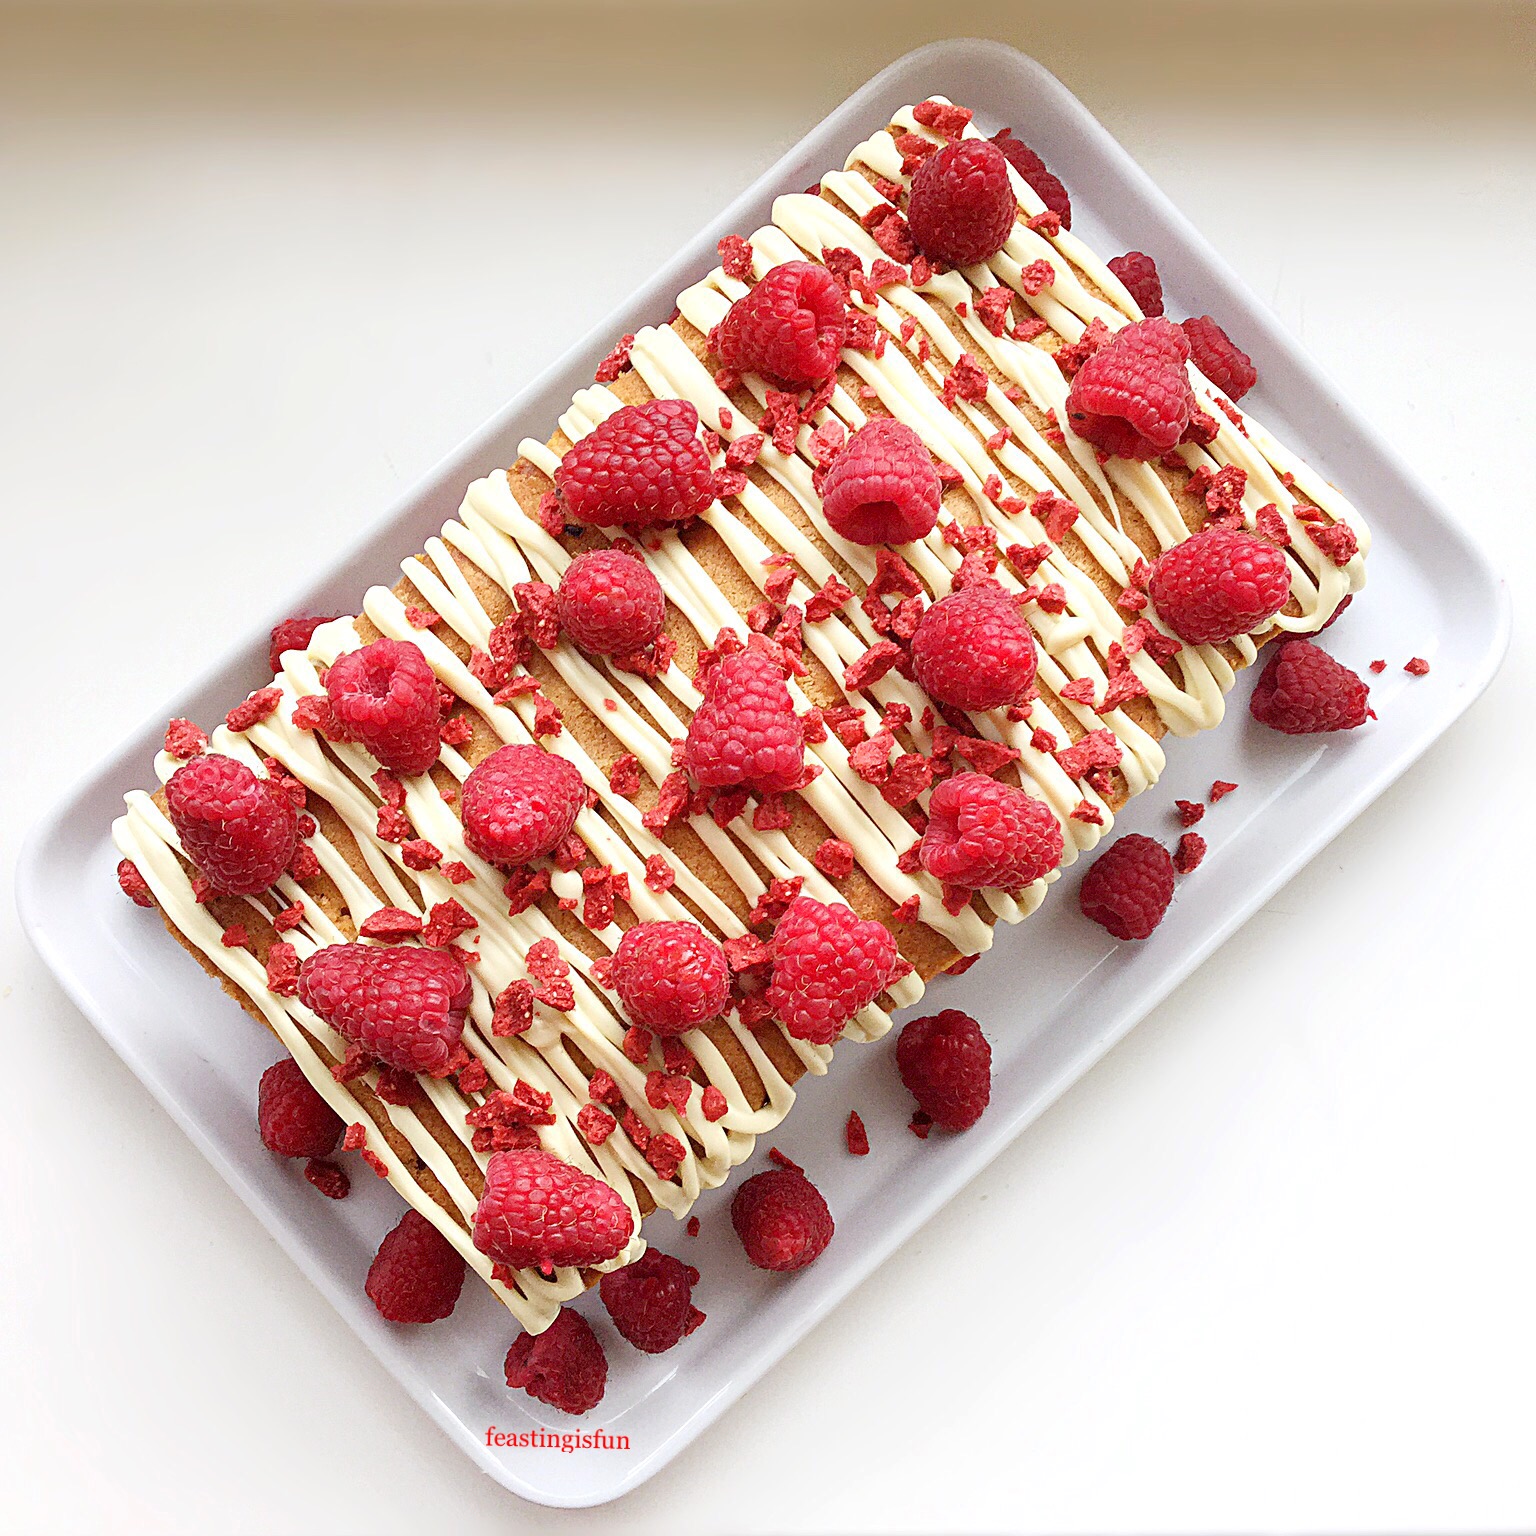
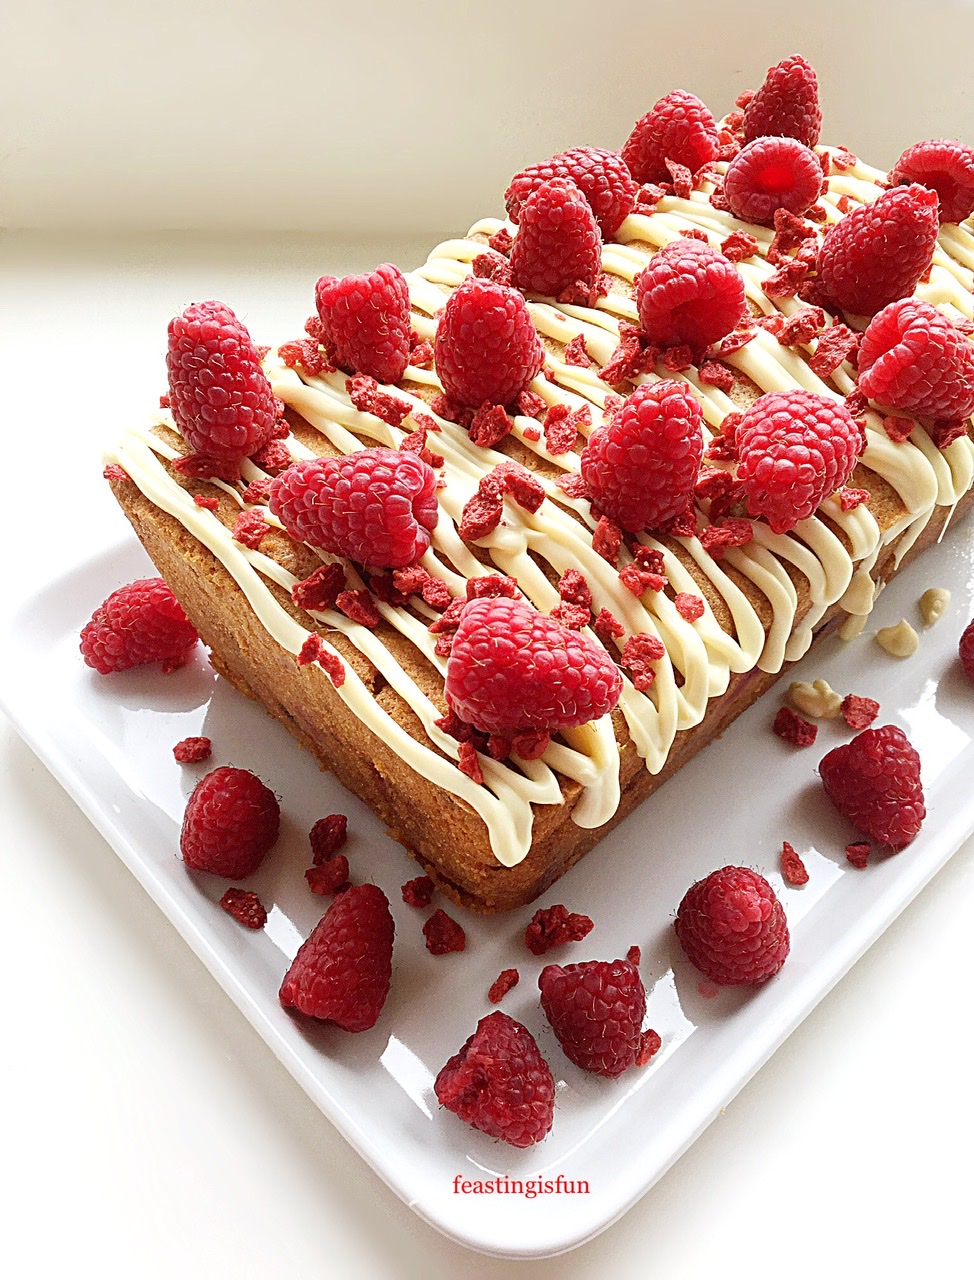
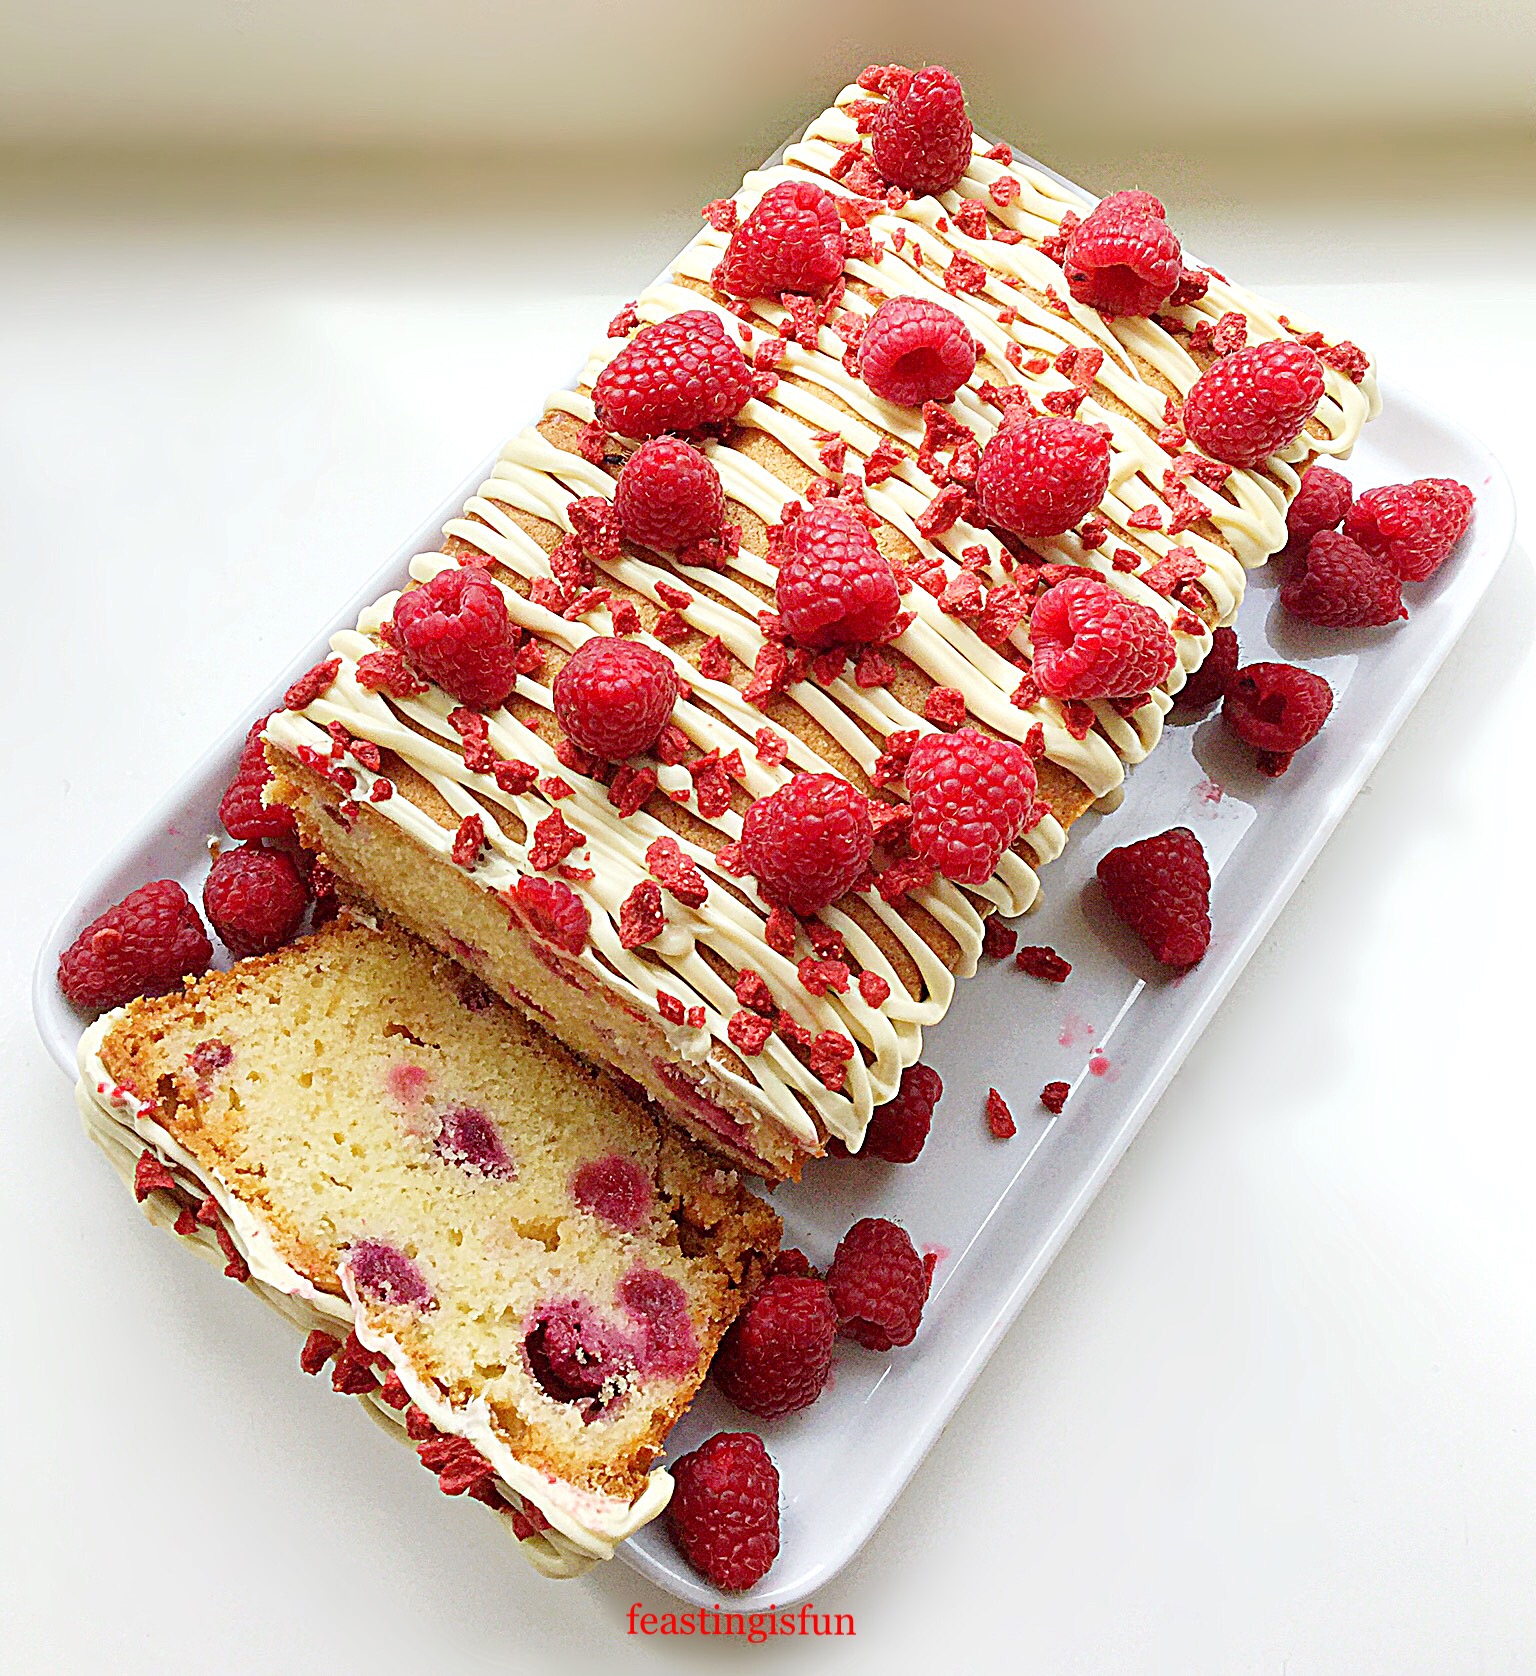
Hello lovely readers, welcome to my blog, where each recipe I create is a feast and we have fun while cooking and baking. And today’s recipe is most definitely a feast, both for the eyes and tastebuds. Welcome to my Raspberry White Chocolate Loaf Cake. A vanilla flavoured cake, studded with ruby red raspberries and topped with a white chocolate drizzle. Finally, fresh and freeze dried raspberries are sprinkled on top, creating a delicious, dessert cake.
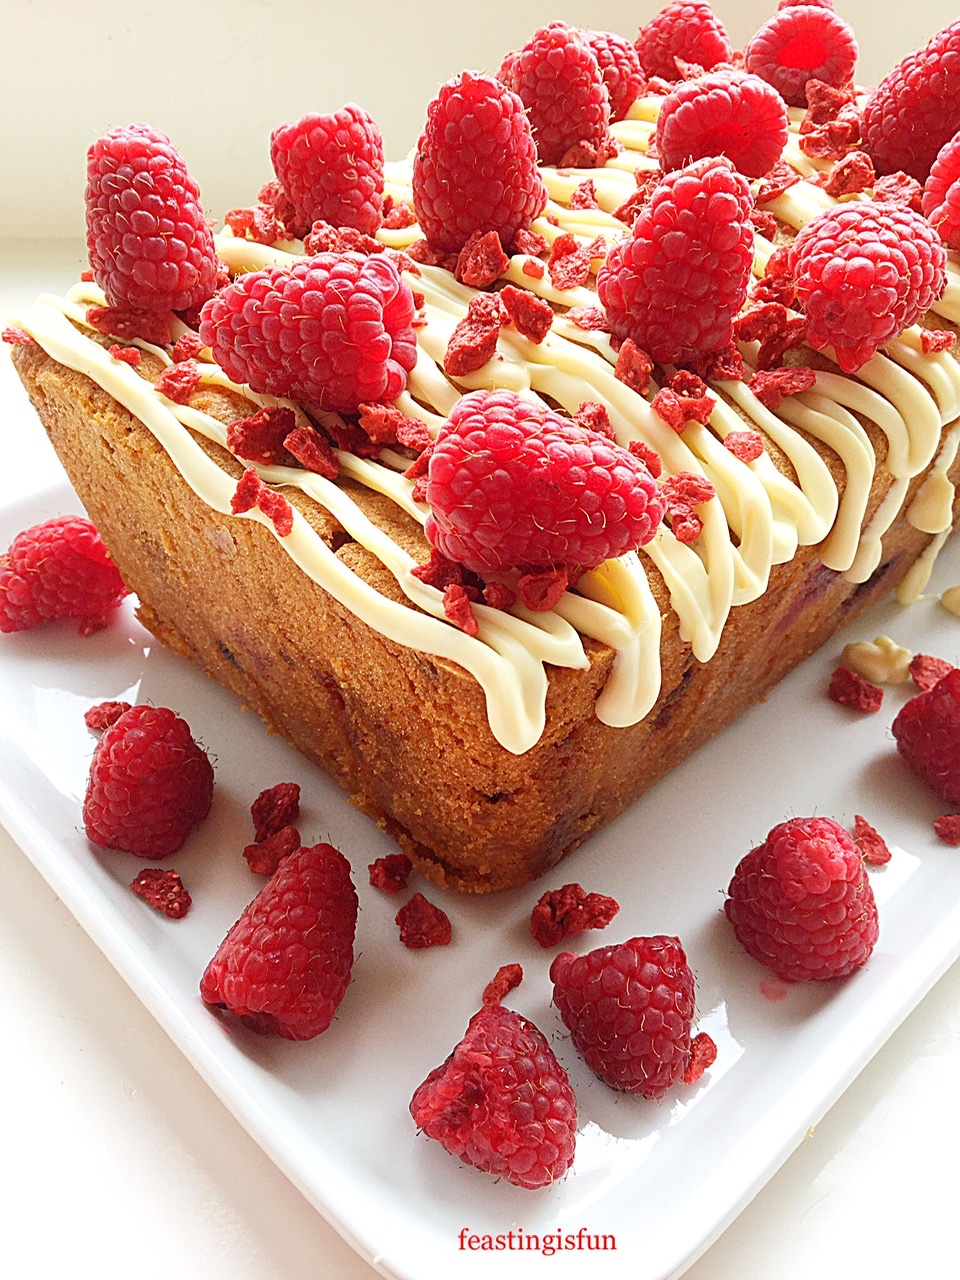
Since I first thought up the idea for this cake I have wanted to bake it and share it with you. White chocolate and raspberries are a classic, flavour combination. While the vanilla flavoured chocolate melts into and flavours the cake, bursts of semi-tart, jammy raspberries create a flavour explosion in your mouth. And I get super excited every time those words “flavour explosion” are written in a sentence. Because, it means something must taste sensational. And this cake does!
Lockdown Ingredients
Since we are currently in lockdown, here in the U.K. due to the Coronavirus, creating new recipes requires a whole new approach. As well as coming up with new recipe ideas, other things have to also be considered now. Currently, the most important aspect is ingredient availability. And even then, that can vary from region to region. So, with this recipe I have kept to ingredients that are generally either store cupboard staples, or are fairly easy to get hold of.
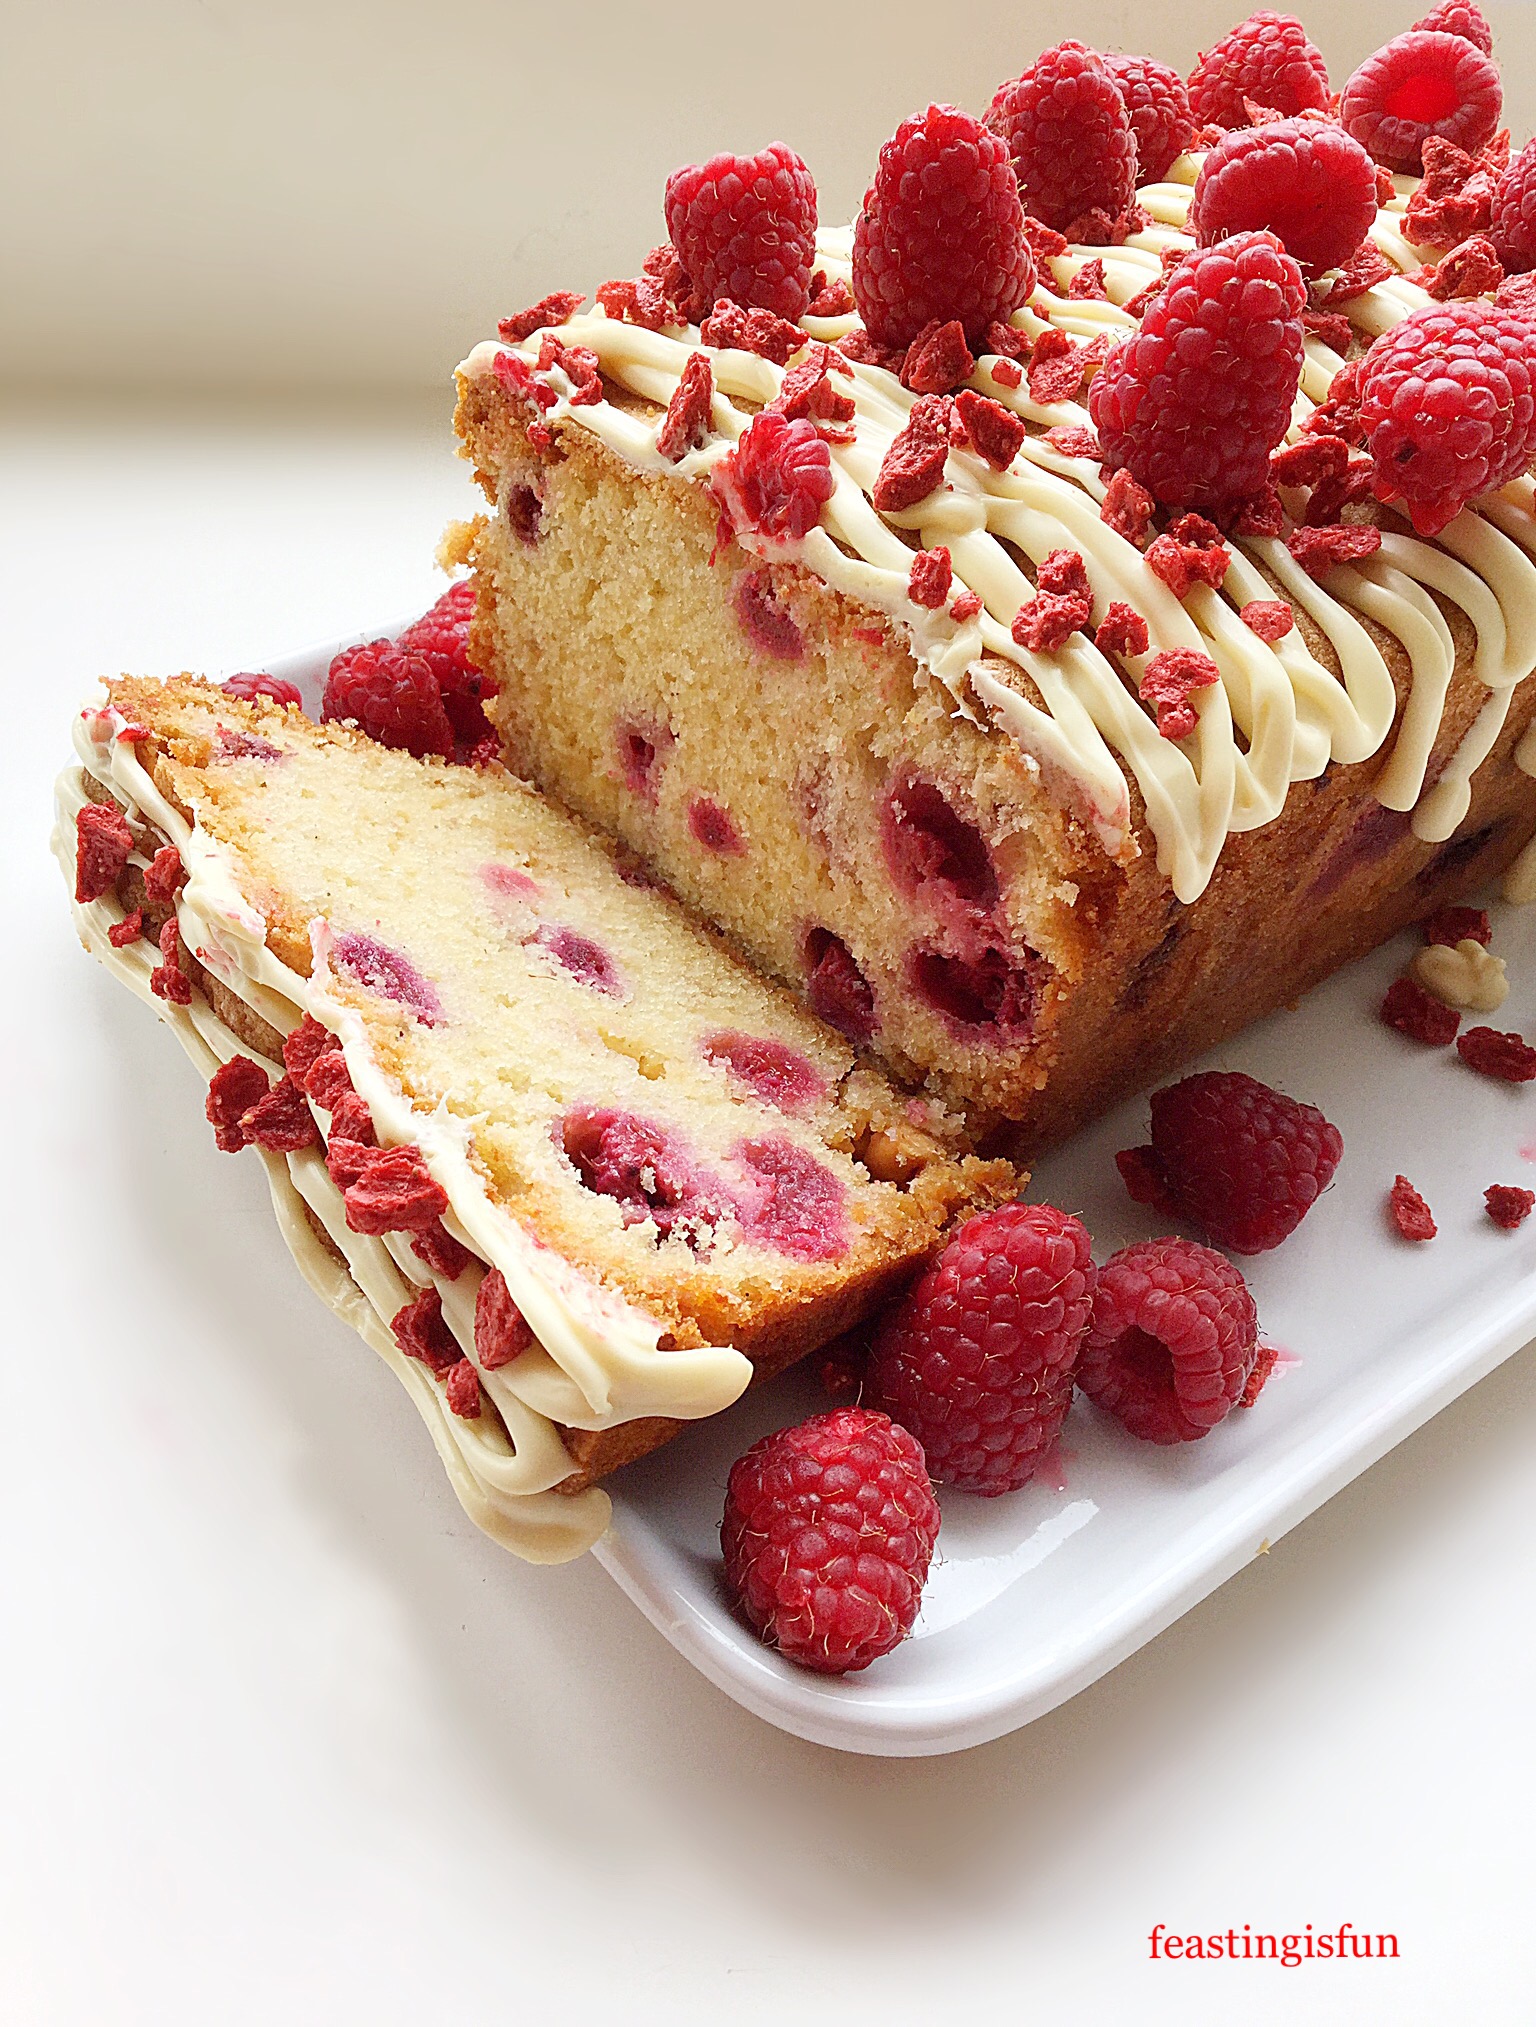
I always have a stash of berries in the freezer and a quick scout round supermarket websites showed good availability. Using frozen raspberries in this recipe may result in a longer bake time, however, they are much easier to mix into the cake batter without breaking up. And, although white chocolate is added to the batter, it melts into the cake while baking, enhancing the vanilla flavour. So don’t expect to find chunks of it in the finished cake!

Recipe: Raspberry White Chocolate Loaf Cake serves 8-10
For the cake:
225g/8oz Unsalted Butter – at room temperature.
225g/8oz Caster Sugar – regular sugar can be used see *note regarding mixing
1/4 tsp Salt – I use Maldon
2 tsp Vanilla Bean Paste – alternatively use vanilla bean extract
4 Large Free Range Eggs
275g/9.5oz Plain Flour – if using self raising flour leave out the additional baking powder
1 tsp Baking Powder
150g/5oz Frozen Raspberries – fresh raspberries can be used see ** note during baking times
100g/4oz White Chocolate cut into small chunks
For decorating the cake:
100g/4oz White Chocolate – cut into small chunks
2 tbsp Freeze Dried Raspberries – also known as GRIT available from Craic
also available from Waitrose – alternatively use some red or pink edible cake sprinkles
100g/4oz Fresh Raspberries
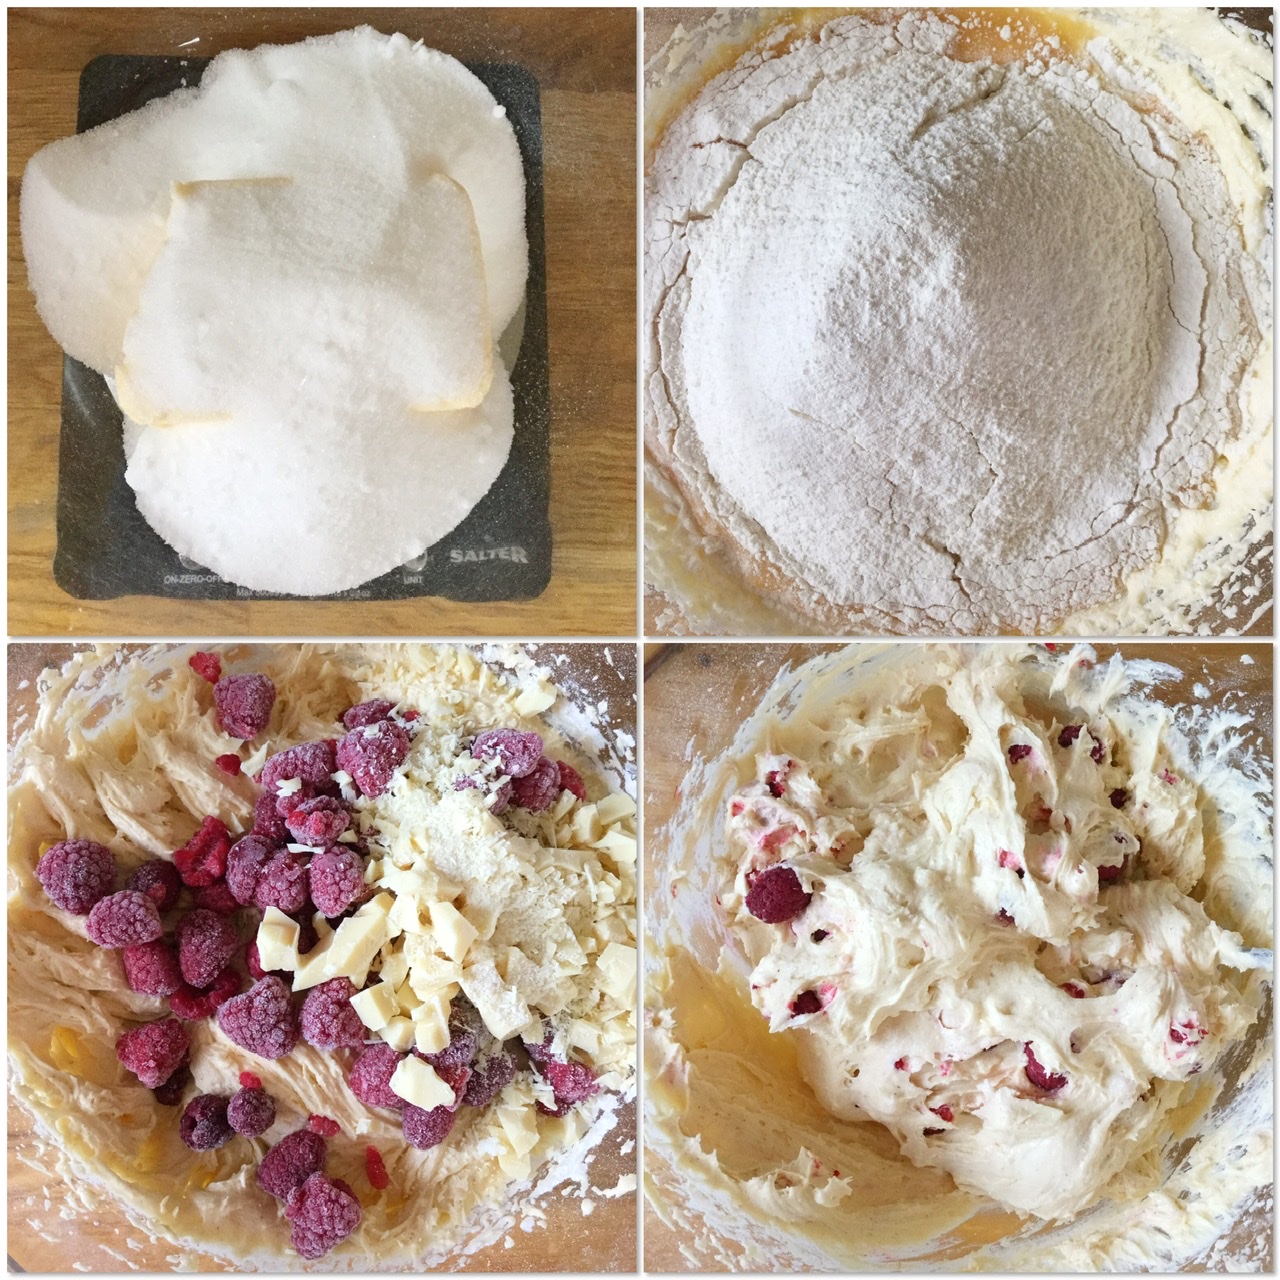
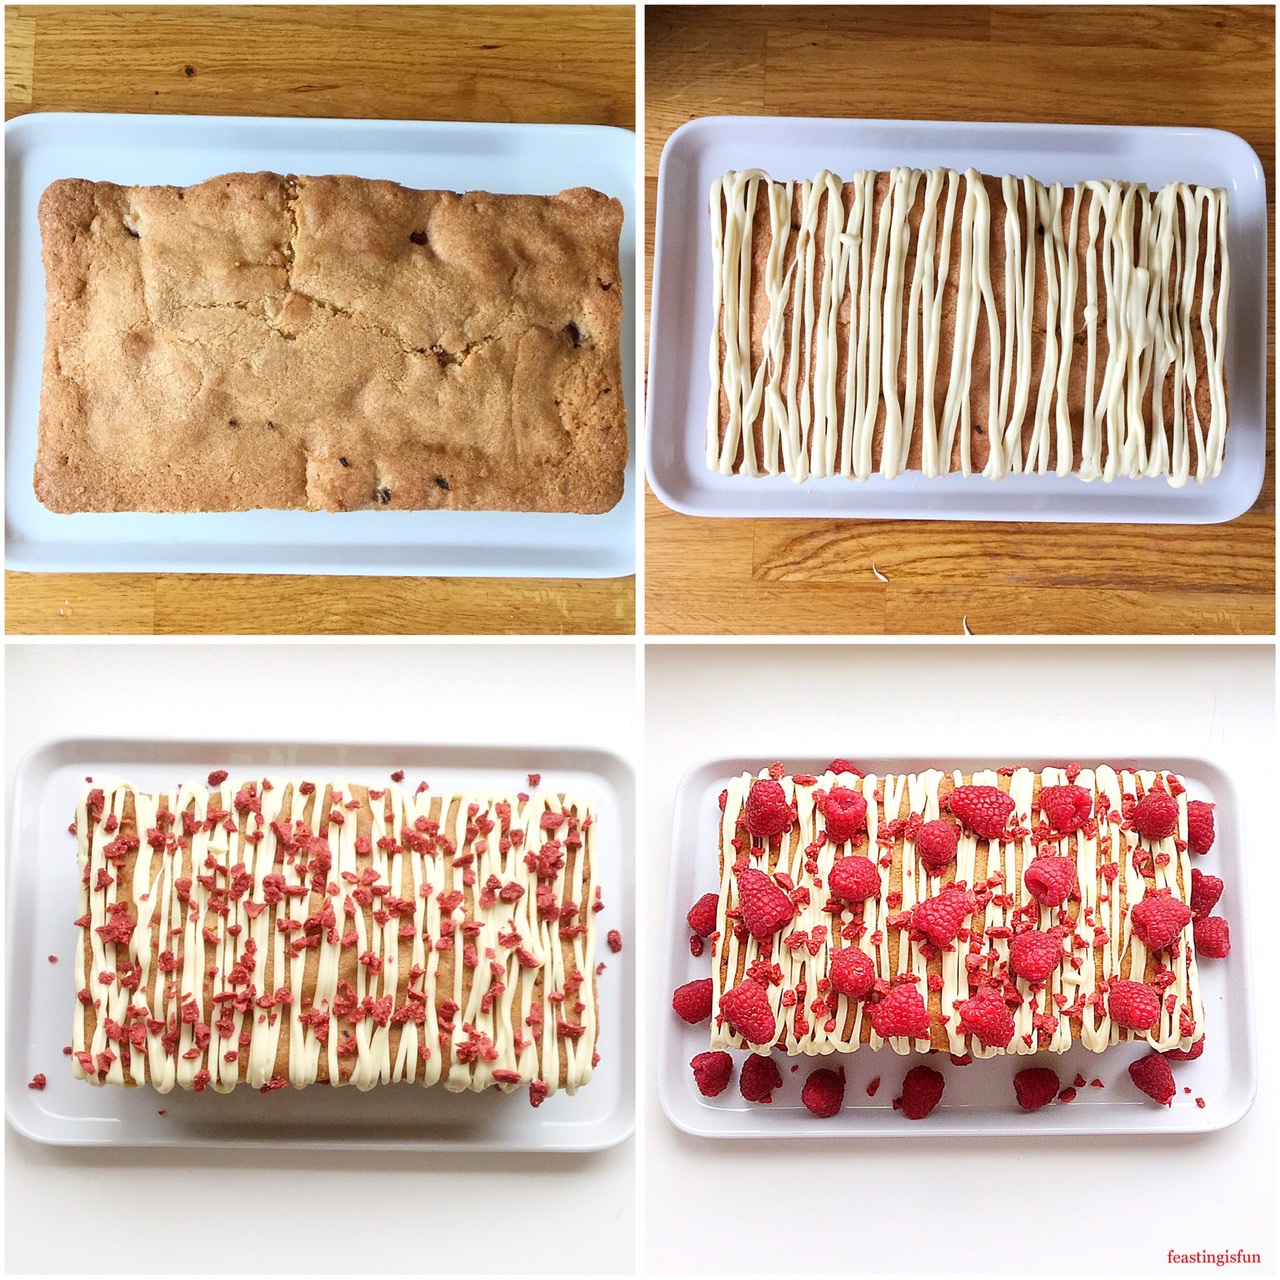
Making The Raspberry White Chocolate Cake Batter
Preheat the oven to 160C/140C fan, gas mark 3, 325F.
- First of all, butter and line the base with baking parchment of a 2lb loaf tin – 24.5cm x 14.5cm x 7cm (10in x 6in x 3in).
- Into a large bowl add the butter, sugar and salt.
- Whisk or beat until the mixture is pale and creamy. *If using regular sugar whisk the mixture for longer to obtain the same creamy consistency.
- Crack each of the four eggs into a jug and lightly beat with a fork to mix them. Pour the eggs into the bowl with the butter mixture.
- Add the vanilla bean paste.
- Sift the flour and baking powder into the same bowl.
- Whisk all the ingredients together until smooth. Take care not to over mix, as this can cause the cake to become heavy.
- Add the raspberries and chopped white chocolate into the bowl and fold into the cake batter. The cake batter will firm up due to the frozen raspberries, don’t worry!
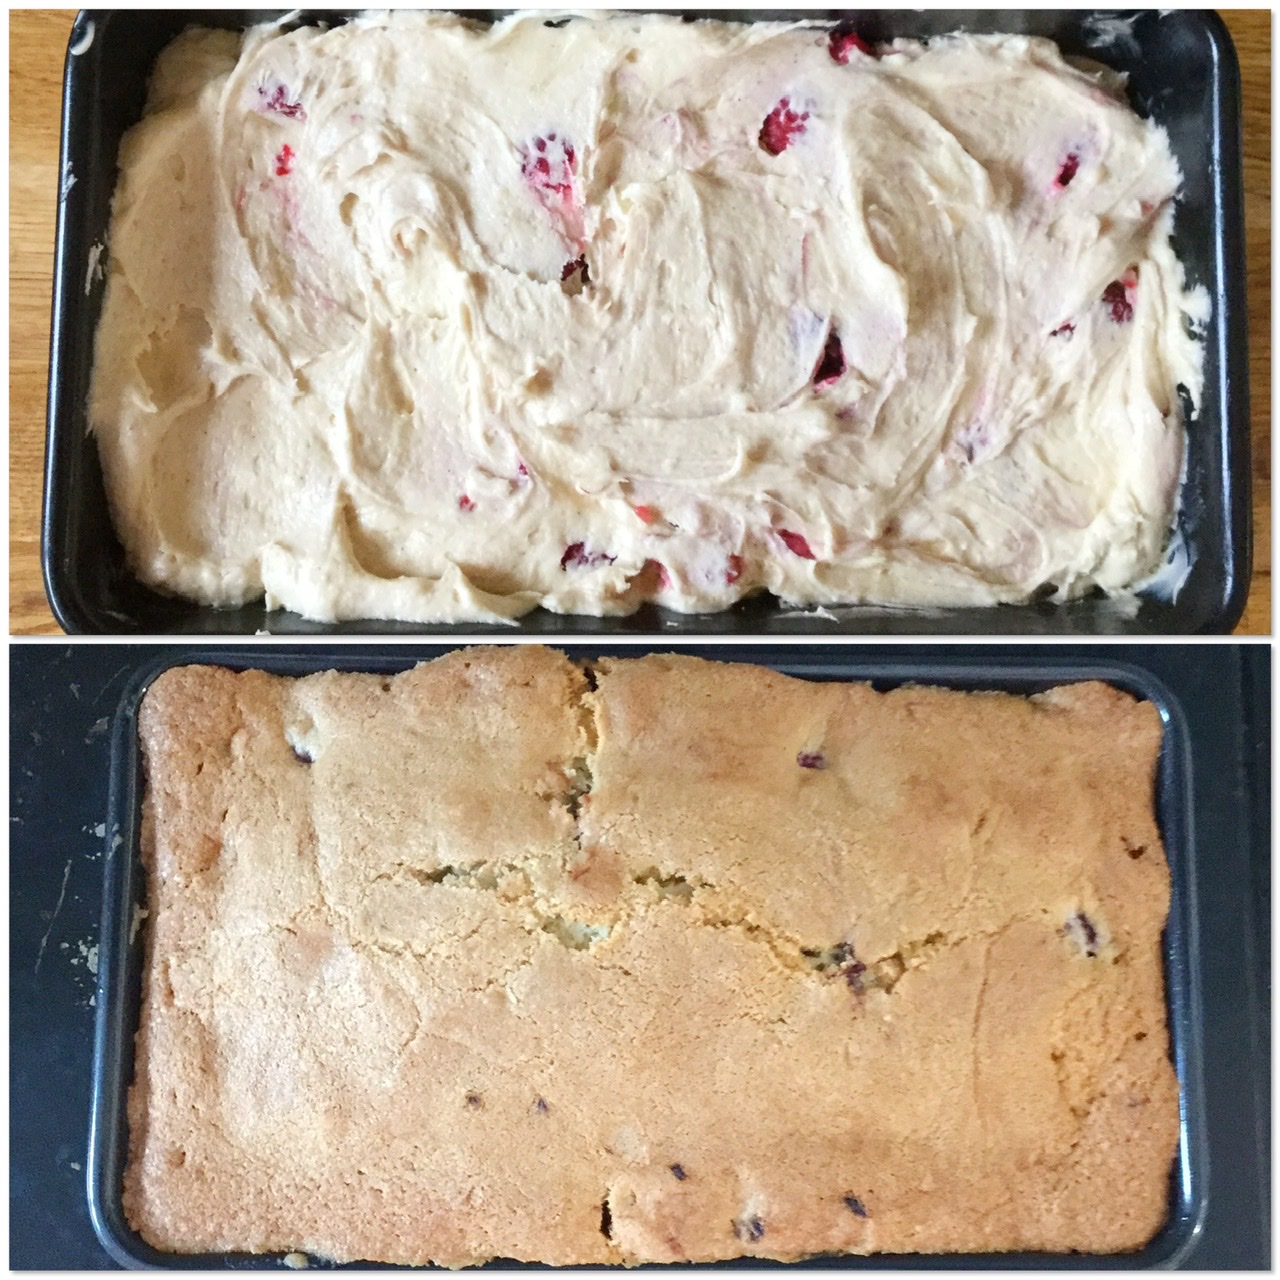
- Spoon the cake batter into the prepared loaf tin, pressing down with the spoon to ensure there are no air gaps, due to the colder, thicker, cake batter. Smooth the top of the cake using the back of a spoon.
Baking The Cake
- Place the cake into the centre of a preheated oven and bake for 1 hour 30-45 minutes.
- The cake is baked when a skewer inserted into the centre of the cake comes out clean. My cake took 1 hour 40 minutes to fully bake, initially I tested at 1 hour 30 minutes. Due to the variability of ovens and in this recipe, size of the frozen fruit and also size of loaf tin used to bake the cake, it seemed more appropriate to give a range, rather than specific bake time. **Also, if using fresh raspberries the baking time will be reduced to approximately 1 hour.
- As soon as the cake is baked remove from the oven and place the tin on a cooling rack.
- Leave the cake to cool completely in the tin.
- As soon as the cake is cooled it can be turned out of the tin. Run a palette knife between the cake and tin. Turn out the cake and carefully remove the baking parchment.

Decorating The Raspberry White Chocolate Loaf Cake
- Place the cooled cake on to the plate or board used for serving.
- Put the chopped white chocolate into a heatproof, microwaveable bowl. Zap on medium power for 20 second intervals, stirring between. As soon as the chocolate starts to melt continue stirring until fully liquid.
- Either use a spoon or small piping bag to drizzle the melted chocolate over the cake.
- While the chocolate is still unset sprinkle over the freeze dried raspberries.
- Gently press fresh raspberries on to the chocolate, which acts as an edible glue and will hold them in place on top of the cake.
- Finally, scatter fresh and freeze dried raspberries around the cake.
- Place the cake somewhere cool to set. In warmer weather refrigerate.
The ultimate dessert cake!
As soon as the chocolate is set the cake is ready to serve.
However you serve this cake, with morning coffee, afternoon tea, after dinner as dessert, remember to share it. Because, it really is too good to keep to yourself and why miss an opportunity to make your family and neighbours smile!
Store in an airtight container in the fridge and eat within three days.

If you have enjoyed this recipe for Raspberry White Chocolate Loaf Cake you may also like these:

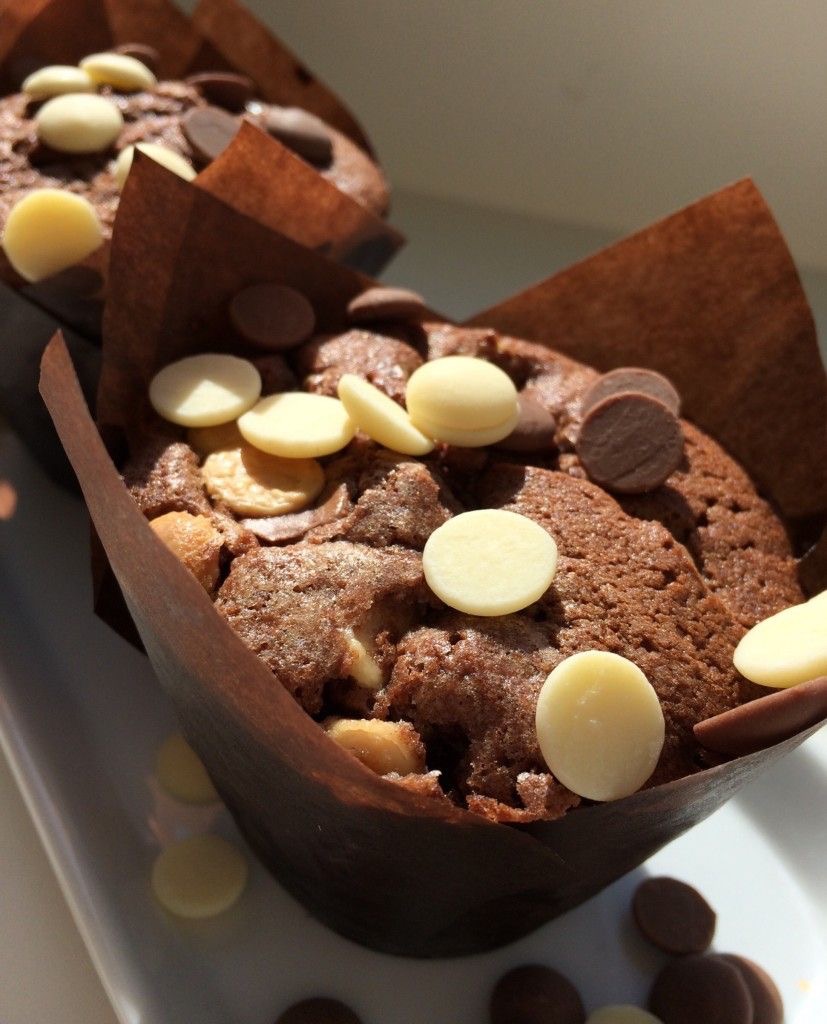
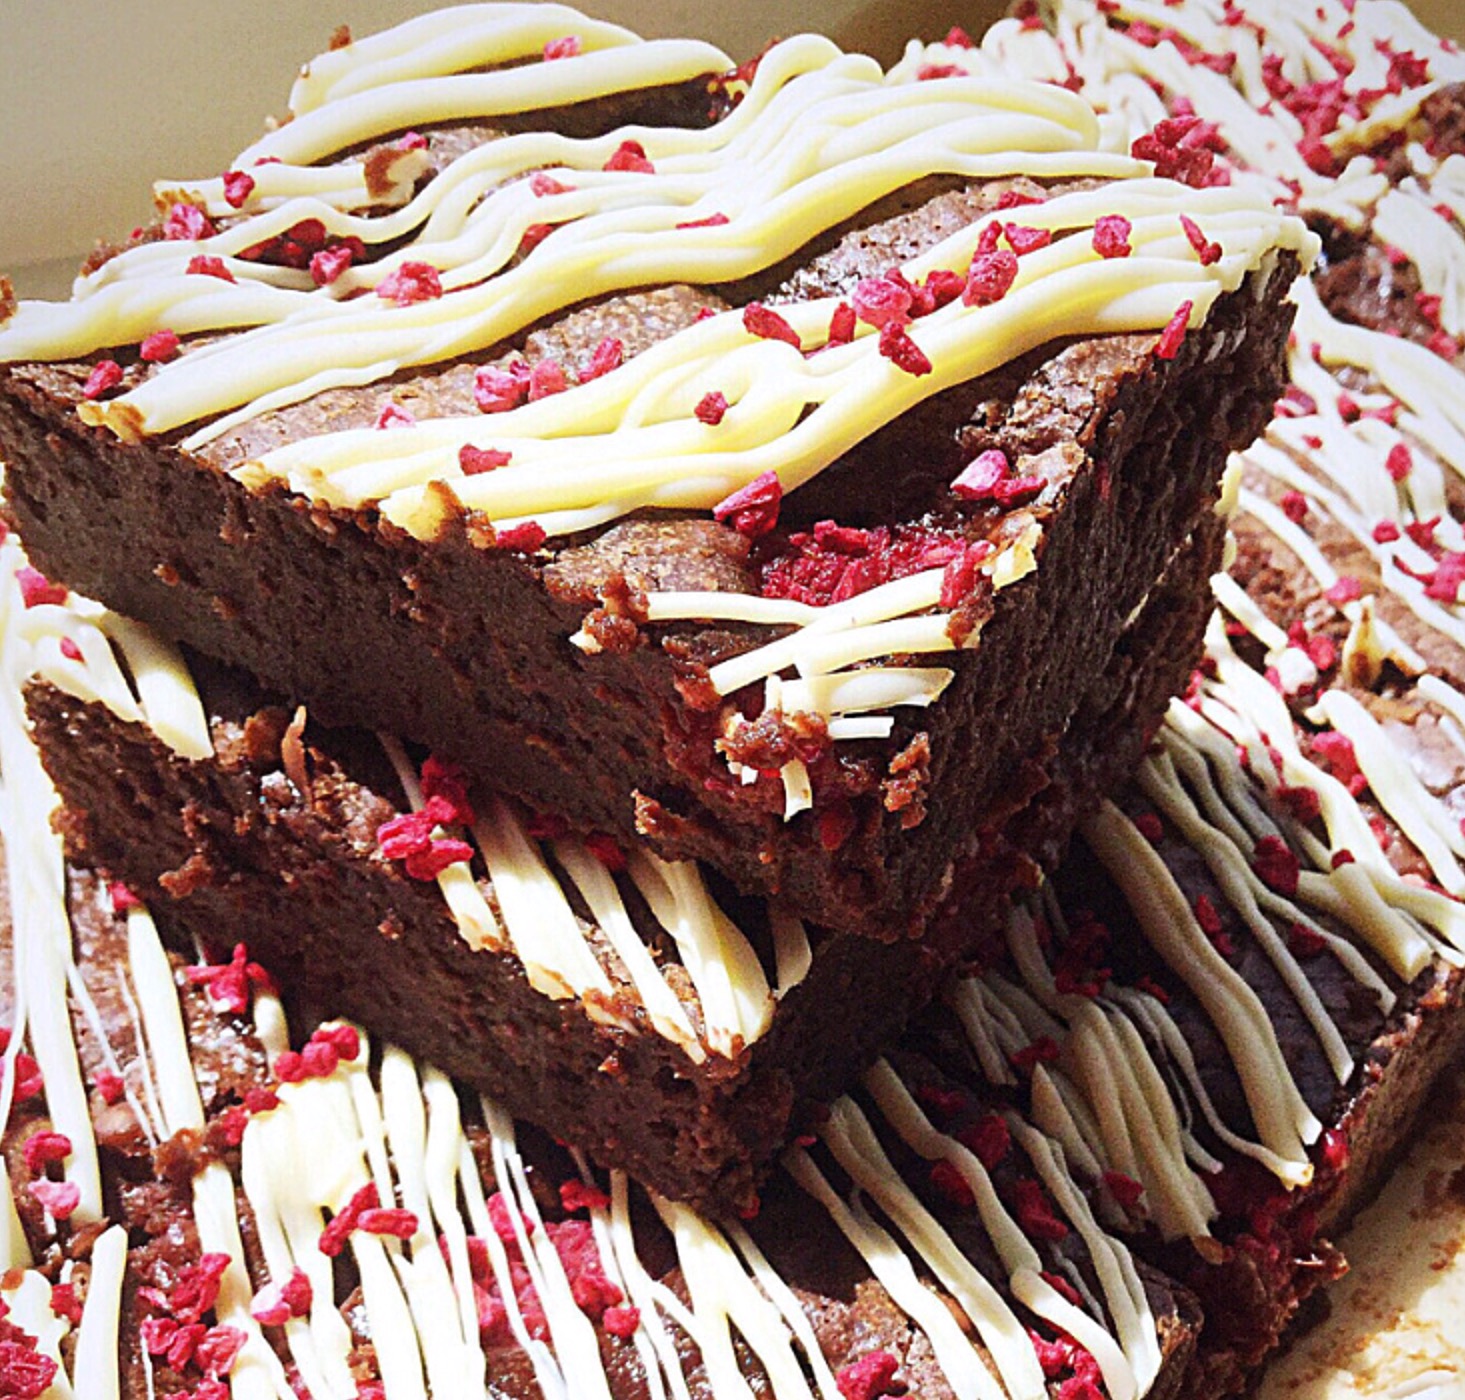
Rich Raspberry Chocolate Fudge Brownies
So far, my experience of lockdown isn’t very different to my usual daily life. Because of chronic health conditions I rarely leave our house (see here). I do, however, have wonderful relationships with our neighbours. And seeing the smile on our next door neighbour’s face as I stood two metres away and watched her pick up the cake I’d left in her porch, lit me up inside. I always feel that sharing is a completely selfish activity, because the giver gets far more out of it than the receiver.
Whatever you are making, baking and creating in your kitchens, have fun preparing and sharing your feast.
Sammie x
No part of this post may be reproduced or duplicated without the written permission of the owner. Please see my Disclosure Policy.