Lemon Sultana Buttermilk Scones

Share
Facebooktwitterpinterestlinkedintumblr

Finally, summer is here and I’m so excited. Since this season also makes life easier and more fun! Windows stay open allowing plenty of fresh air to flood our homes, washing dries easily and long, sunlit days allow eating outdoors. Whether it’s an organised picnic, cup of tea in the garden or venturing to an open air concert, Summer is THE season for outdoor fun. And these Lemon Sultana Buttermilk Scones are as ideal for Afternoon Tea as they are easy to pack up for a fun picnic.
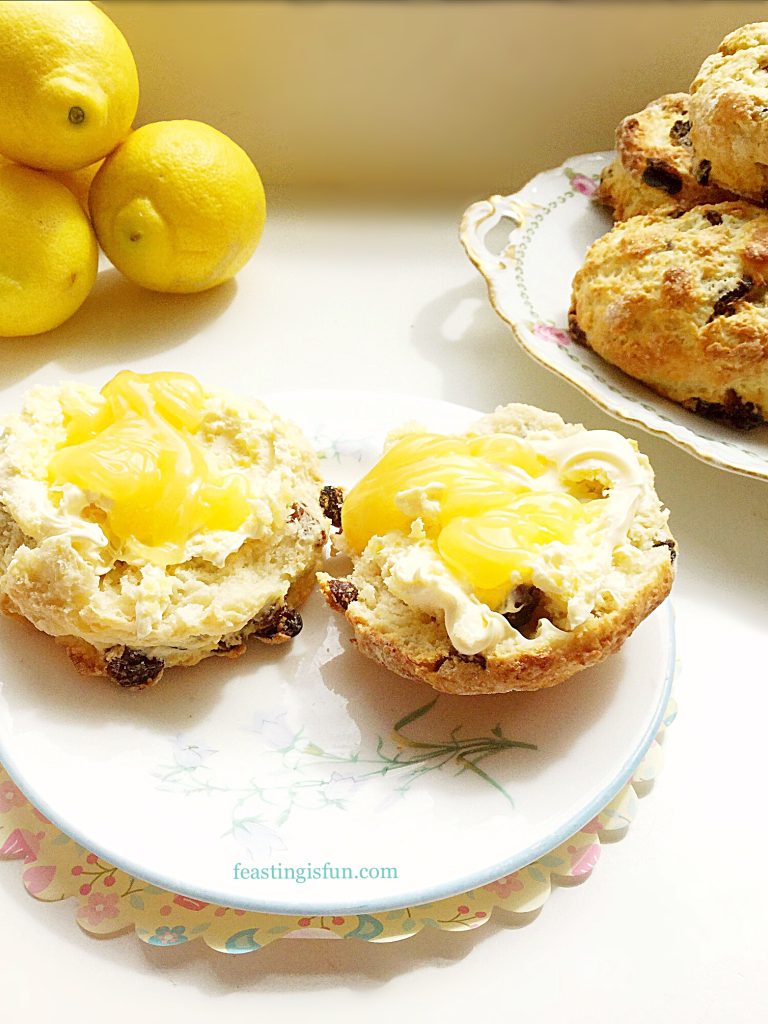
 

Cut scones topped with clotted cream and lemon curd on a pretty plate.
Lemon Sultana Buttermilk Scones

Picnics are a great way to gather friends and family together, for feasting and fun. Whether you choose to meet at a local park, or trek to the seaside, they are a fantastic way of getting people together without being restricted by space or cost. Also, most people are more than happy to bring food along with them, as well as drinks, blankets and games. And so it’s fun to organise everything in advance. Since delegating spreads the workload, it also ensures that everyone relaxes and has fun making new memories!


Pinterest image of Lemon Sultana Buttermilk Scones with descriptive graphics.

Scones; Such An Easy Bake

Scones are the number one recipe I advise people to try if they are new to baking. Since they are virtually foolproof and nobody minds an occasional, slightly wonky One! A successful bake builds a level of achievement and satisfaction in a newbie baker. As a result, they are more likely to continue baking, while learning new skills, attempting more complex recipes as confidence in the kitchen grows.
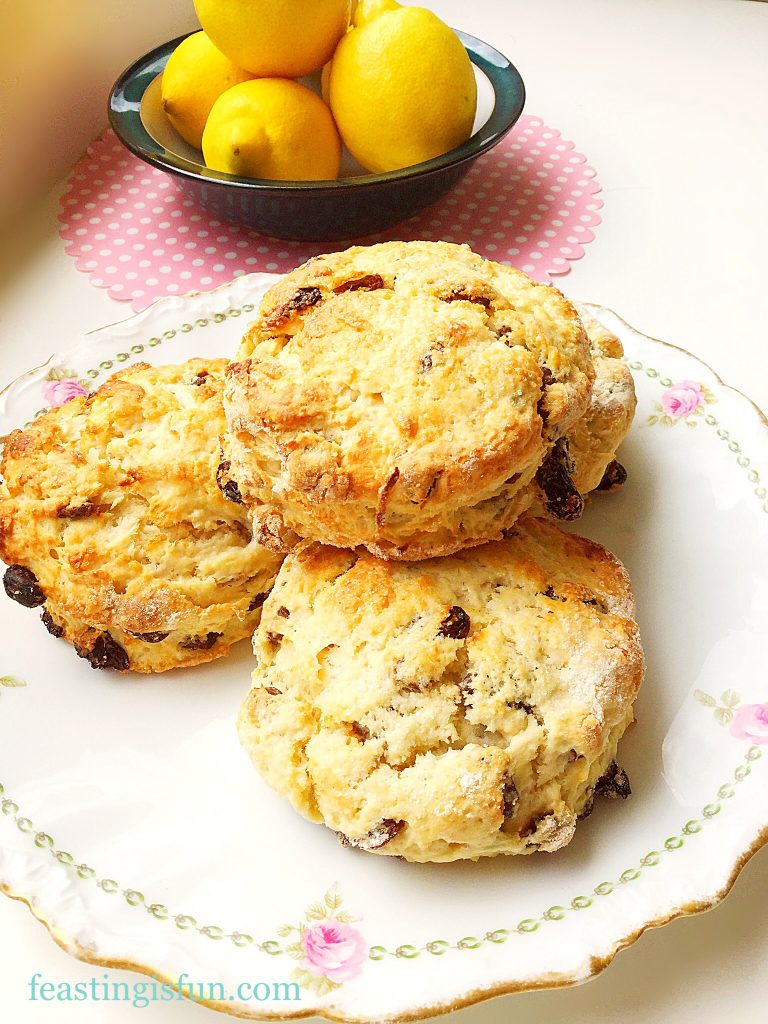
Lemon Sultana Buttermilk Scones

And now, back to these delicious. Truthfully, I must say these are my favourite scones to date! A positive result for someone who wouldn’t go near a scone until I started baking them myself! So, it is time for me to stop chatting and make these yummy, cream tea favourites.

Recipe: Lemon Sultana Buttermilk Milk Scones makes 8-10 large scones

450g/1lb Plain White Flour

3tsp Baking Powder

1/4tsp Sea Salt Flakes – I use Maldon

25g/1oz Vegetable Fat such as Trex

50g2oz Unsalted Butter

4tsp Caster Sugar – plus extra for sprinkling on top of the unbaked scones

Zest of 2 medium or 1 very large lemon (scrubbed and washed in hot water before zesting)

225g/8oz Sultanas

284ml/10fl oz Buttermilk – Alternatively, use the same quantity of whole or semi skimmed milk, add 2 teaspoons of fresh lemon juice or 1 teaspoon of white vinegar and stir. Leave for 5 minutes then stir again, the liquid should be thicker and slightly lumpy and is now ready to use.

3-4 Tablespoons of Semi or Whole Milk

Method: Preheat the oven to 220C/200C fan, gas mark 7, 425F

Note – you may notice an American dry cup measure in the photographs. Since we are decorating at the moment I was unable to locate my round cutters. So I improvised. Using a one cup measure worked perfectly for cutting out the scones. Also, if using a smaller cutter for smaller scones, remember to adjust the baking time.

Making The Buttermilk Scone Dough

  • First of all line a large baking tray with baking parchment.
  • Next, tip the flour, baking powder, salt and sugar into a large bowl.
  • Stir all the dry ingredients together with a balloon whisk.
  • Add the vegetable fat and butter in small chunks, then add the lemon zest.
  • Using a pastry cutter work the fats into the flour until it resembles breadcrumbs with some pea sized chunks of fat still visible.
  • Add the sultanas and using your fingers gently lift and drop them into the bowl so they become covered in flour.
  • Make a well in the centre of the flour mix and pour in all of the buttermilk.
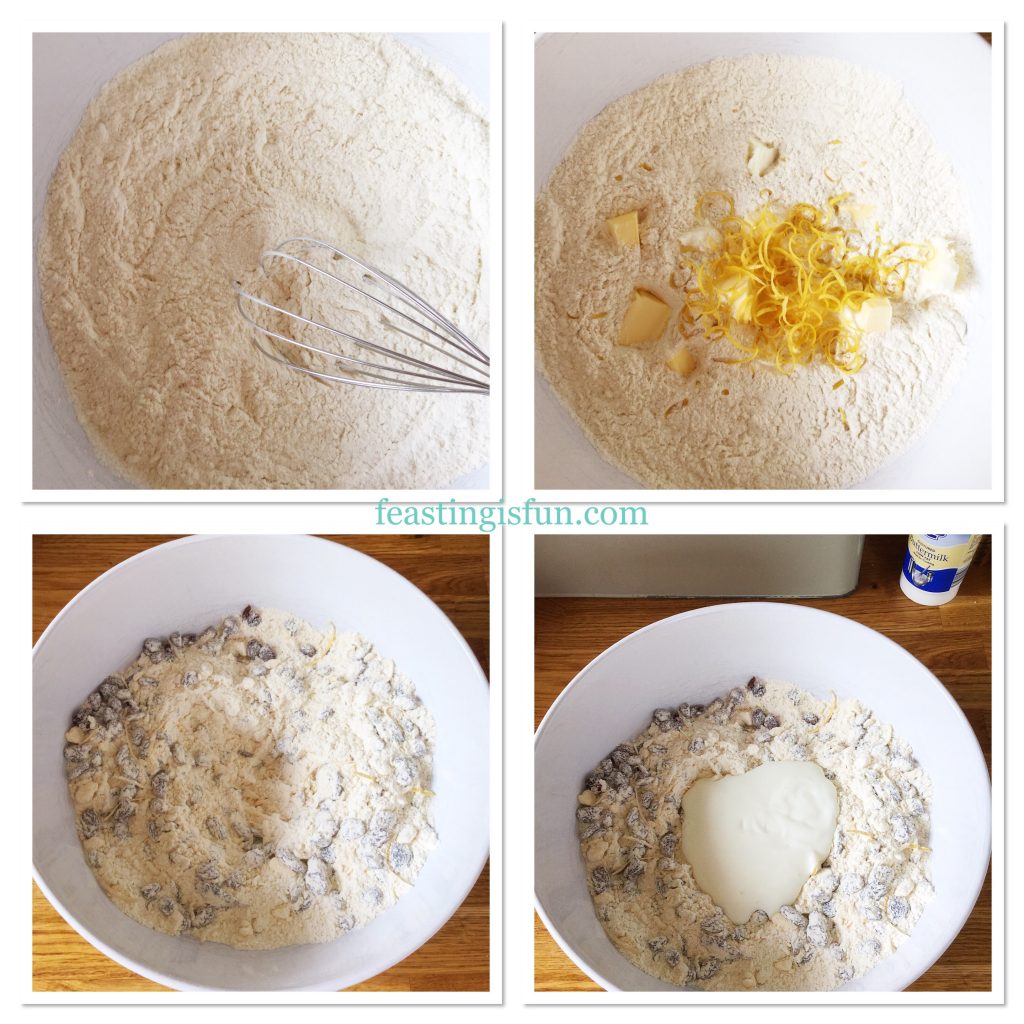
Four stages showing how to incorporate fats and fruit with flour for a recipe.
Making the scone dough.
  • Using a butter knife stir all of the ingredients together until large clumps begin to form.

Turning Out And Shaping The Dough And Cutting Out Individual Scones

  • Turn the clumpy dough out onto a floured surface. And note, the dough should be quite wet and sticky.
  • Using floured fingers bring the dough together and pat out to form a round shape that is about 1 inch (2.5cm) deep.
  • Most importantly, check that the disc of dough moves freely across the surface and is not stuck.
  • Flour a round 3 inch (7.5cm) cutter that is also at least 2 inches (5cm) deep and place it on top of the dough.
  • Press the cutter straight down onto the dough taking care not to twist it.
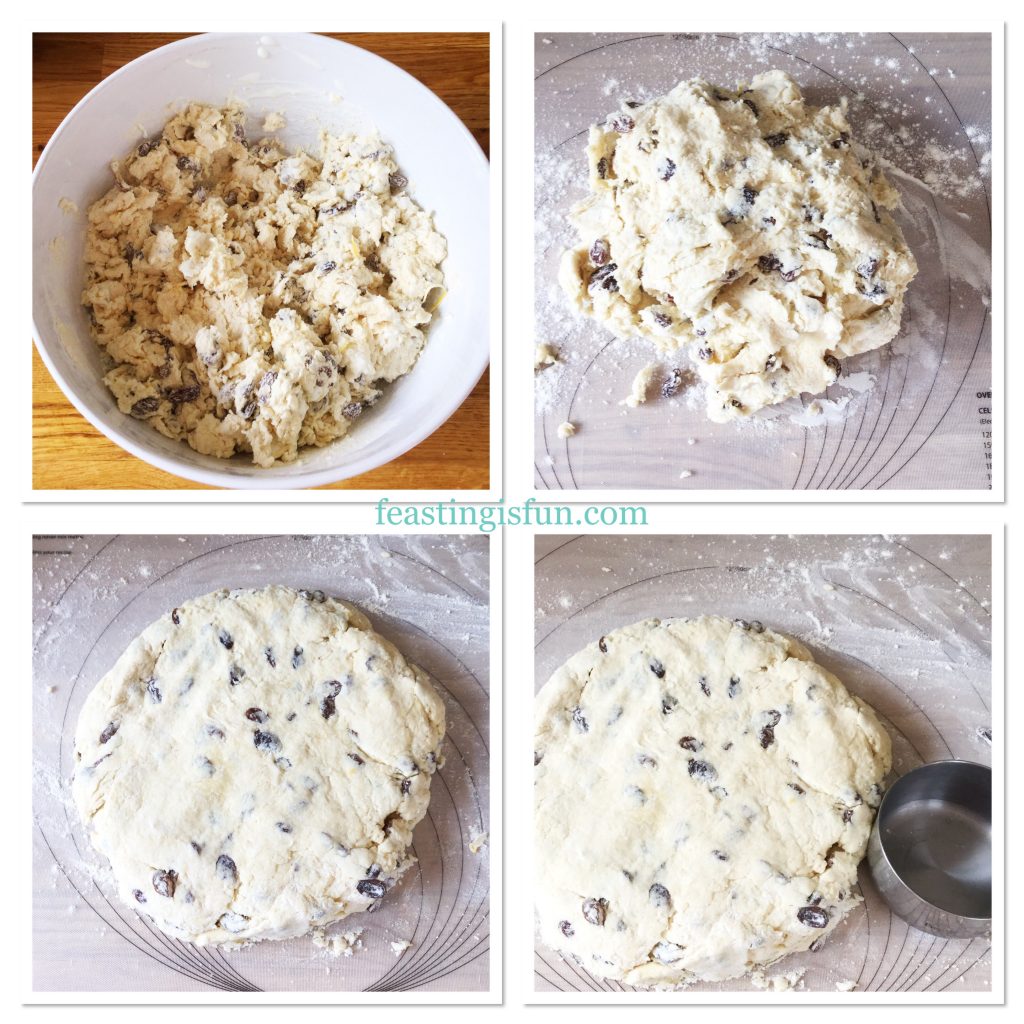
Patting the dough out onto a pastry mat, ready to be cut.
Getting the dough ready.
  • Place each cutout scone onto the baking parchment lined baking tray.
  • Brush fresh milk onto the top of each scone using a pastry brush and then sprinkle a pinch of sugar over the top.

Baking The Lemon Sultana Buttermilk Scones

  • Place the scones into the centre of the oven and bake for 15-20 minutes. Because each oven is different and other variables such as the thickness of scone dough affect the baking time, I have given a range of times. My scones took 18 minutes to bake.
  • The scones are baked when the are risen, golden in colour and sound hollow when rapped on the base with your knuckle. Similar to bread when baked.
  • As soon as the scones are baked remove them from the oven and carefully place them on a cooling rack.
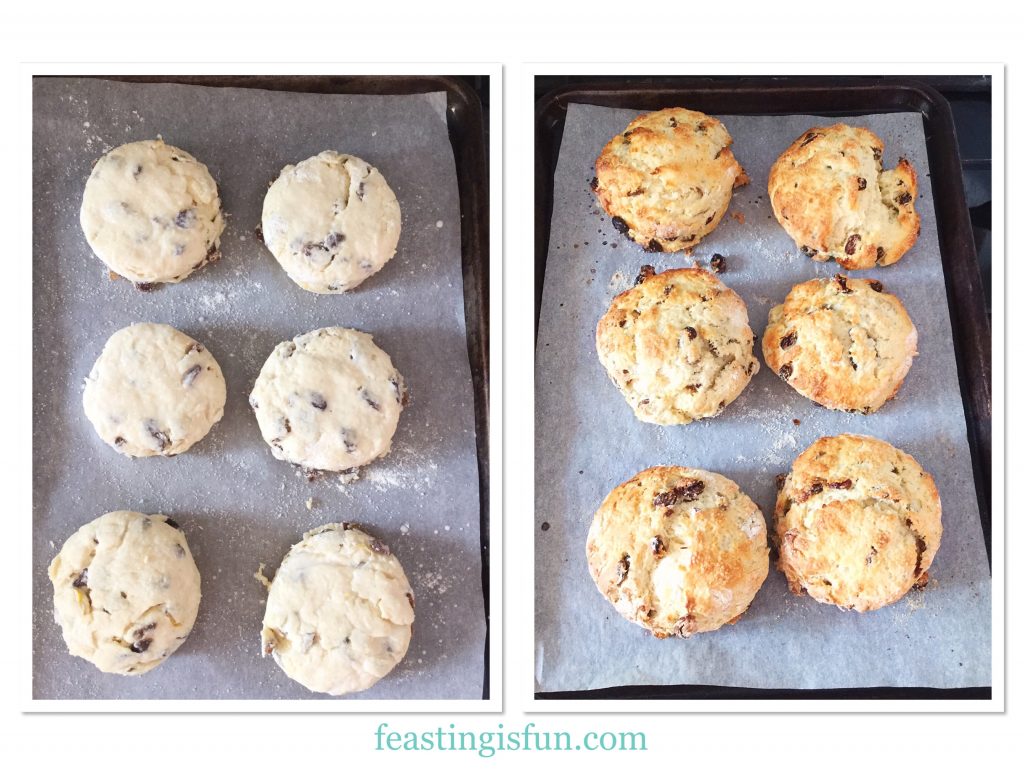
Raw and baked Lemon Sultana Buttermilk Scones
Before and after baking.

Serving And Enjoying The Scones

Eat these scones either warm or cold. Also they can be enjoyed just as they are, or split in two and topped with either clotted cream or butter.
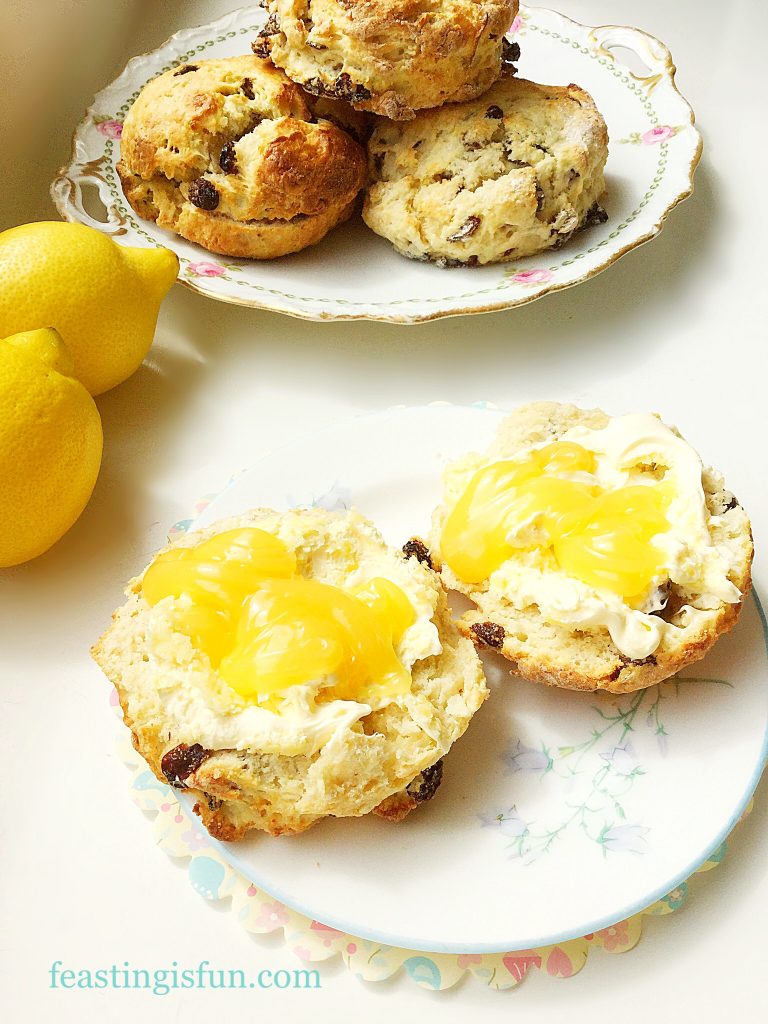
Split scones topped with clotted cream and lemon curd on a pretty plate. Fresh whole scones and lemons are in the background.
Lemon Sultana Buttermilk Scones

Topping a scone with clotted cream and lemon curd and sitting down with my favourite foodie magazine, a delicious cup of tea, and a relaxing afternoon.

Delicious magazine with a plate on top containing a tasty afternoon sweet treat.
Relax with a great foodie magazine and a clotted cream and lemon curd topped scone.

Homemade scones are usually best eaten on the day they are baked. Yet with this recipe they stayed moist for up to 3 days when kept in an airtight container.

If you have enjoyed this recipe for Lemon Sultana Buttermilk Scones you may also like these:

Super Light Scones

A platter set with small plain scones, fresh strawberries and clotted cream and jam in bowls.
Super Light Scones

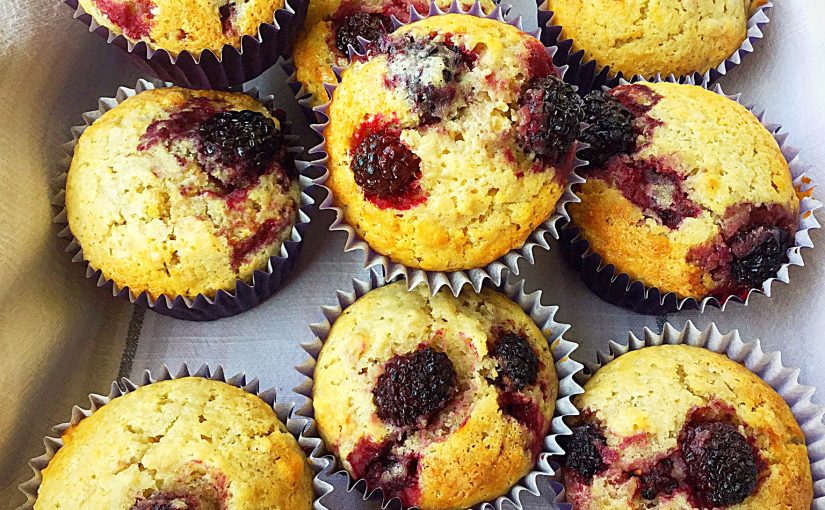
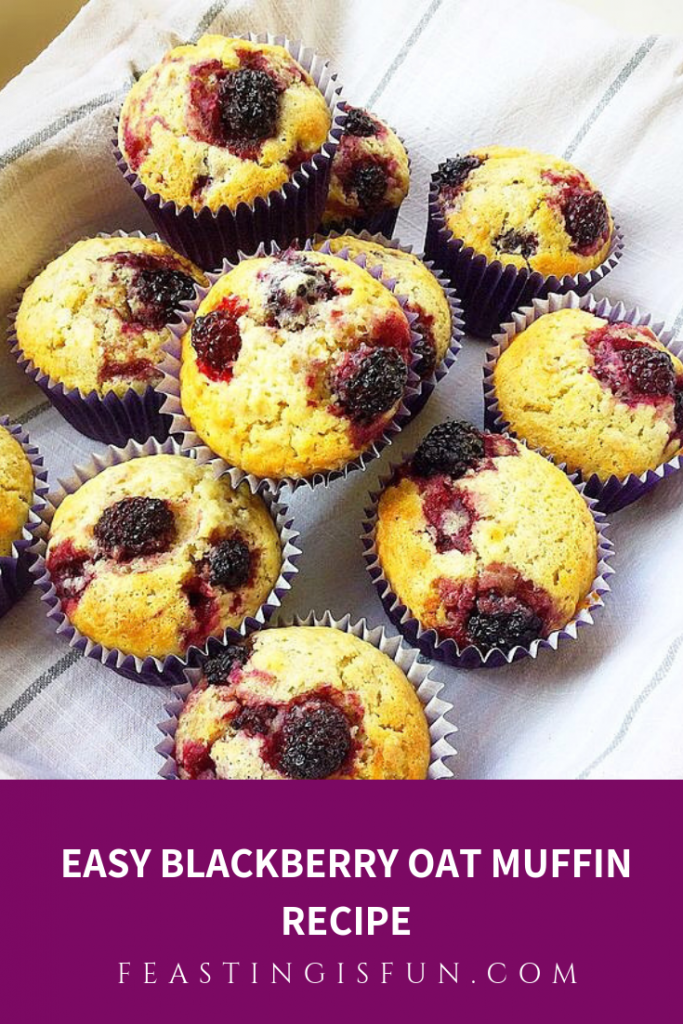
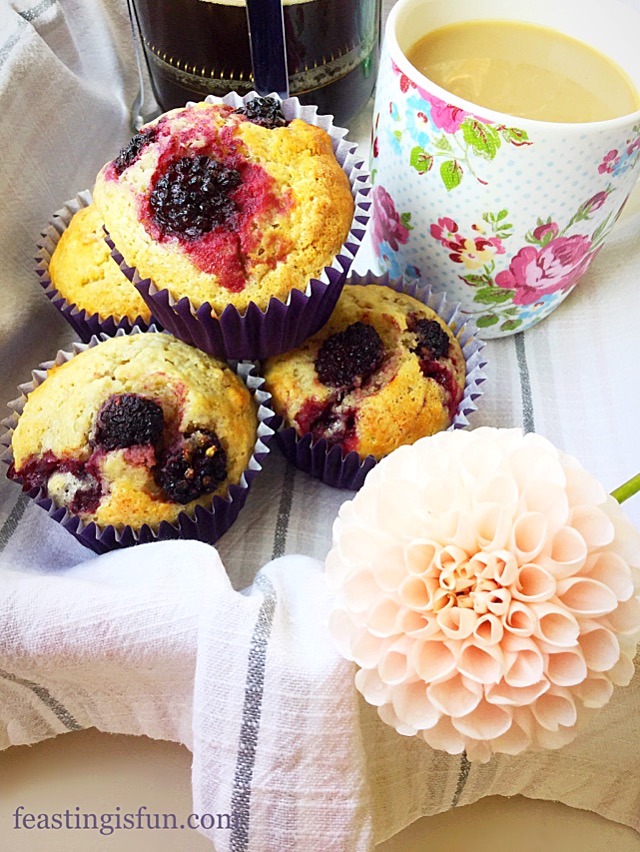
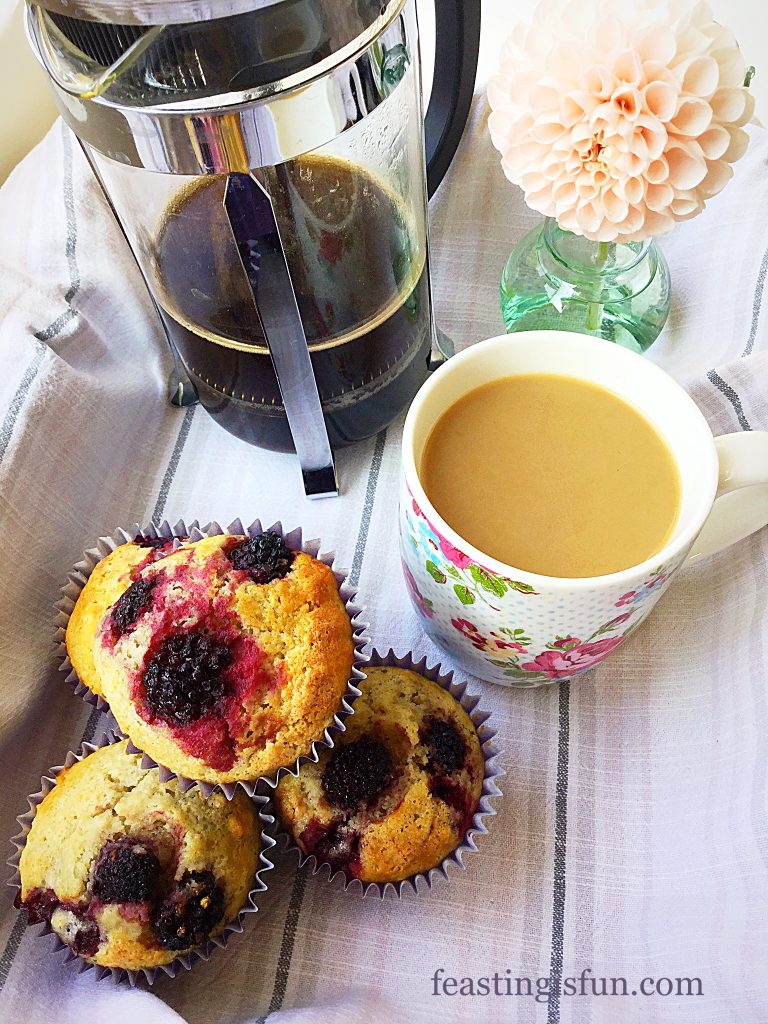
Easy Blackberry Oat Muffin Recipe

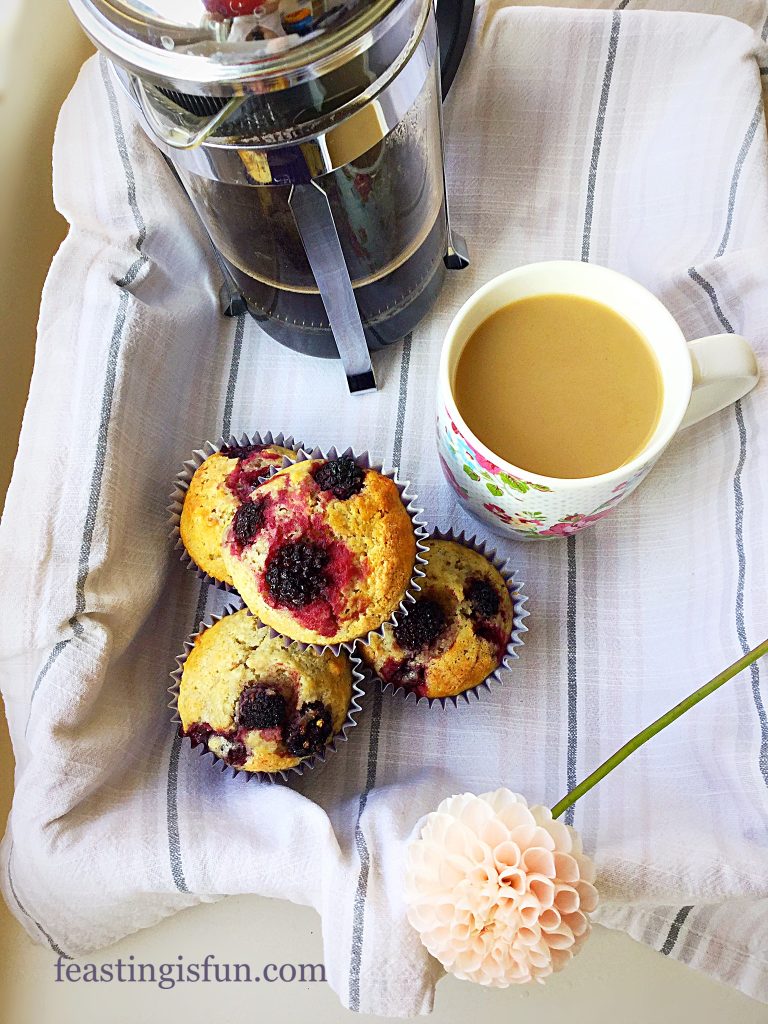
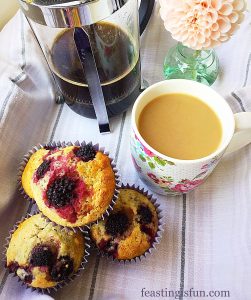
A lined breakfast tray with muffins, cafetière and mug of coffee and a blush coloured dahlia flower.
Easy Blackberry Oat Muffin Recipe

Cheddar Sun Dried Tomato Scones 

Savoury cheese scones in a lined basket with fresh tomatoes and basil and a wedge of cheddar cheese.
Cheddar Sun Dried Tomato Scones

So, is this recipe tempting you to make scones at home? Doing so is a very rewarding experience, especially when you share your bakes and receive compliments on your baking! And, aside from being a world away in taste and texture from their shop bought counterparts, you know exactly what has gone into your baking. Love cannot be bought, yet these scones were made with an extra large helping of it.

Whatever you are making, baking and creating in your kitchens, have fun preparing and sharing your feast.

Sammie x

No part of this post may be reproduced or duplicated without the written permission of the owner. This post does not contain any sponsored content. Please see my Disclosure Policy.
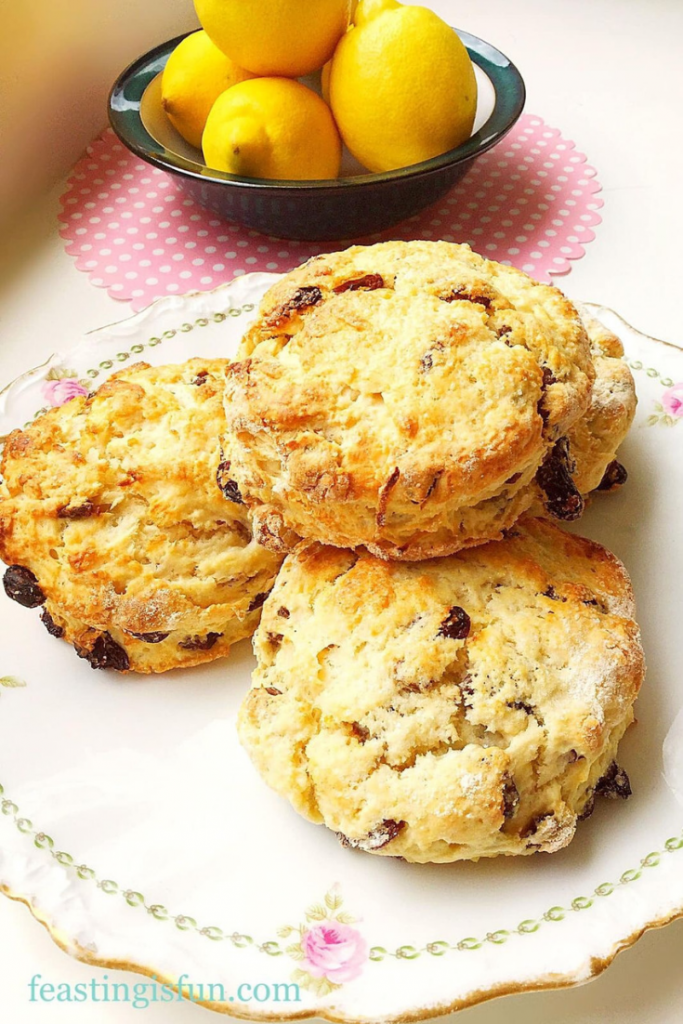
Lemon Sultana Buttermilk Scones piled on a pretty cake plate with a bowl of fresh lemons in the distance.
Lemon Sultana Buttermilk Scones perfect for Afternoon Tea.


Share
Facebooktwitterpinterestlinkedintumblr

Easy Blackberry Oat Muffin Recipe

Share
Facebooktwitterpinterestlinkedintumblr

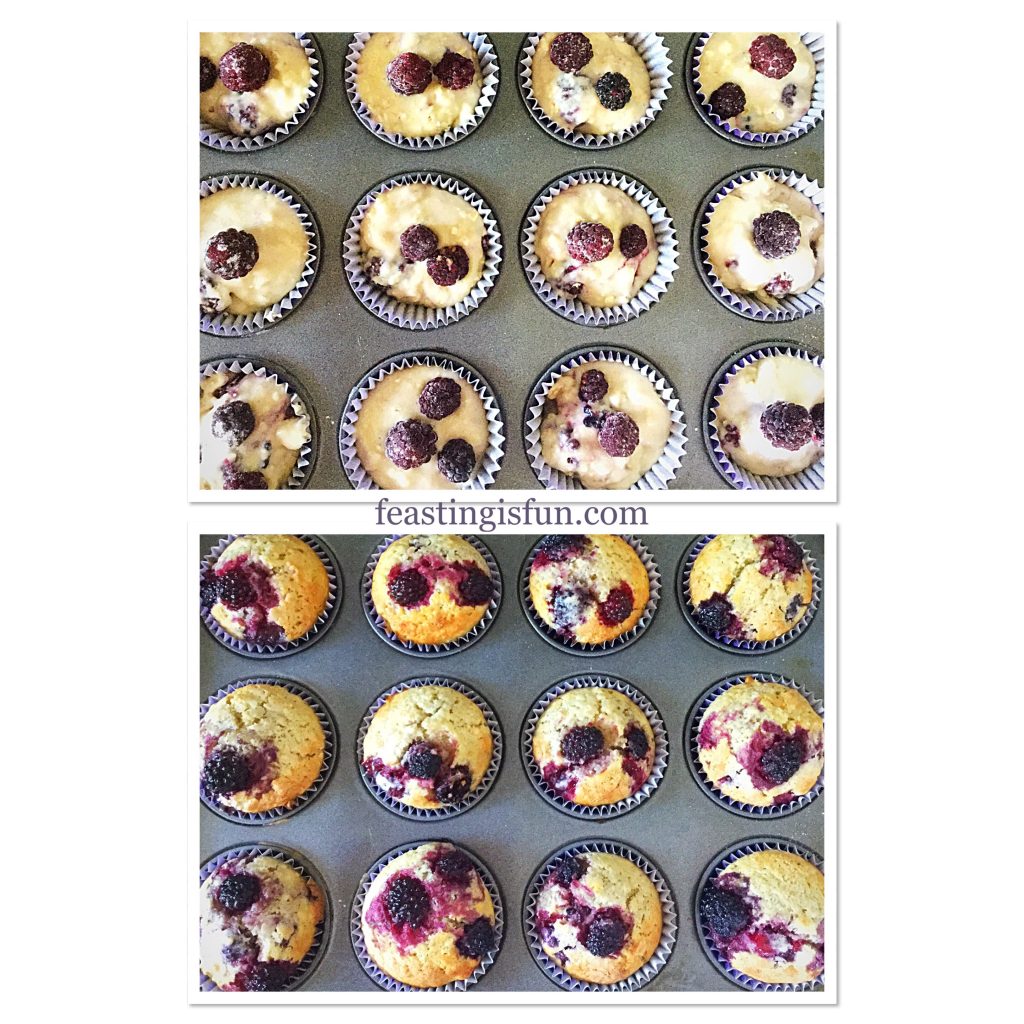
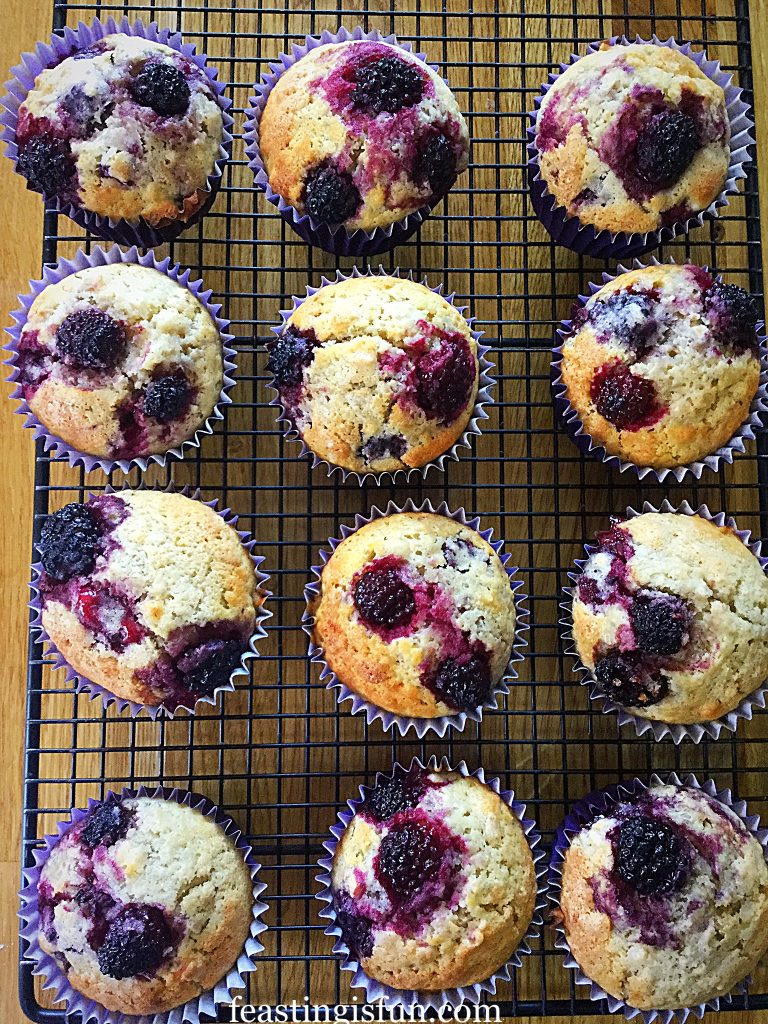
September is here and after the long, hot summer I am ready for Autumn. While walking around the garden this morning I noticed some ripe blackberries on my thornless plant. Although, to be clear, I should mention I’d forgotten to put my glasses on. Expecting a great harvest I hurried back to the kitchen to collect a modest size bowl. Also I grabbed my glasses. Five ripe blackberries. Five! So, consoling myself I plundered our freezer, where fortunately I had a stash. Finally I can now share my Easy Blackberry Oat Muffin Recipe.

FF Easy Blackberry Oat Muffin Recipe

While I find it very satisfying to use produce picked from our garden I am also a realist. Because of the very hot and dry summer some of our fruiting plants have suffered. And while our cherry tree had a bumper crop this year, we haven’t any plums and as I mentioned the blackberries are small and scant. Although I am hopeful for a reasonable apple harvest. Even if they are a little smaller this year, I’m sure they will be sweet.

FF Easy Blackberry Oat Muffins Recipe
Easy Blackberry Oat Muffins Recipe

I am glad that I had the foresight to buy punnets of British blackberries and freeze them. Especially as most berries freeze well, with the exception of strawberries. While strawberries defrost to a mushy mess, frozen blackberries, raspberries, red and blackcurrants can be used in place of fresh fruit when it is out of season. Whether you buy and freeze the fruit yourself or buy it ready frozen, it means that we need not be denied luscious berries in the depths of winter.


FF Easy Blackberry Oat Muffin Recipe
Easy Blackberry Oat Muffin Recipe

Recipe: Easy Blackberry Oat Muffin Recipe

100g/4oz Unsalted Butter – melted

200ml/6.5fl oz Whole Milk

2 Large Free Range Eggs

1tsp Vanilla Extract – I use Nielsen-Massey 

250g/9oz Plain White Flour

50g/2oz Rolled Oats (Porridge Oats – not quick cook)

2tsp Baking Powder

100g/4oz Caster Sugar

1/4tsp Sea Salt

300g/10.5oz Blackberries – fresh or frozen Waitrose sell frozen British fruits all year round – the berries can be used frozen

Preheat the oven to 200C/180C fan, 400F, gas mark 6

Making the muffin batter:

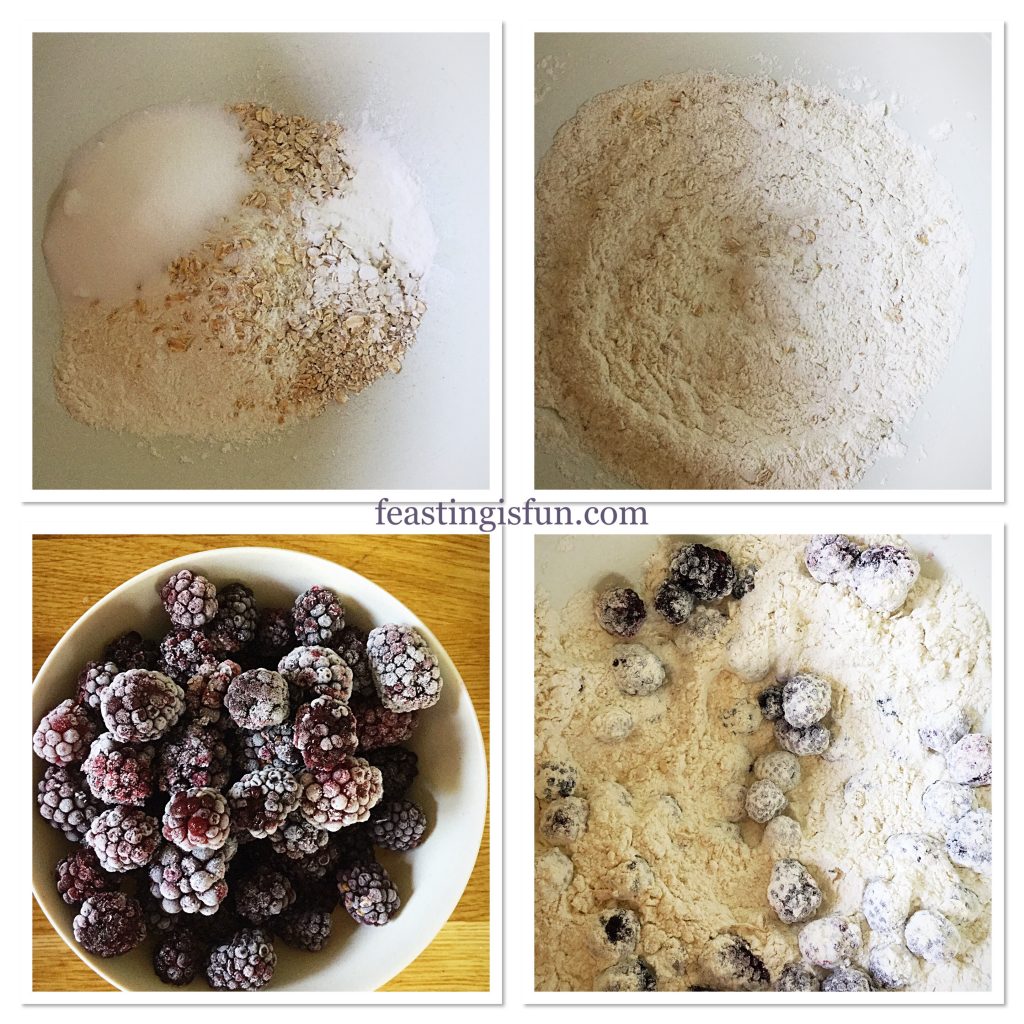
  • First of all into a large bowl add the flour, oats, sugar, baking powder and salt.
  • Usng a balloon whisk mix all of the dry ingredients together – dry mix.
  • Hold back 12 blackberries for topping the muffins and tip the remaining blackberries into the dry mix. Gently cover with the flour mixture to coat.
FF Easy Blackberry Oat Muffin Recipe
The dry part of the muffin mix.
  • Into a separate jug measure out the milk.
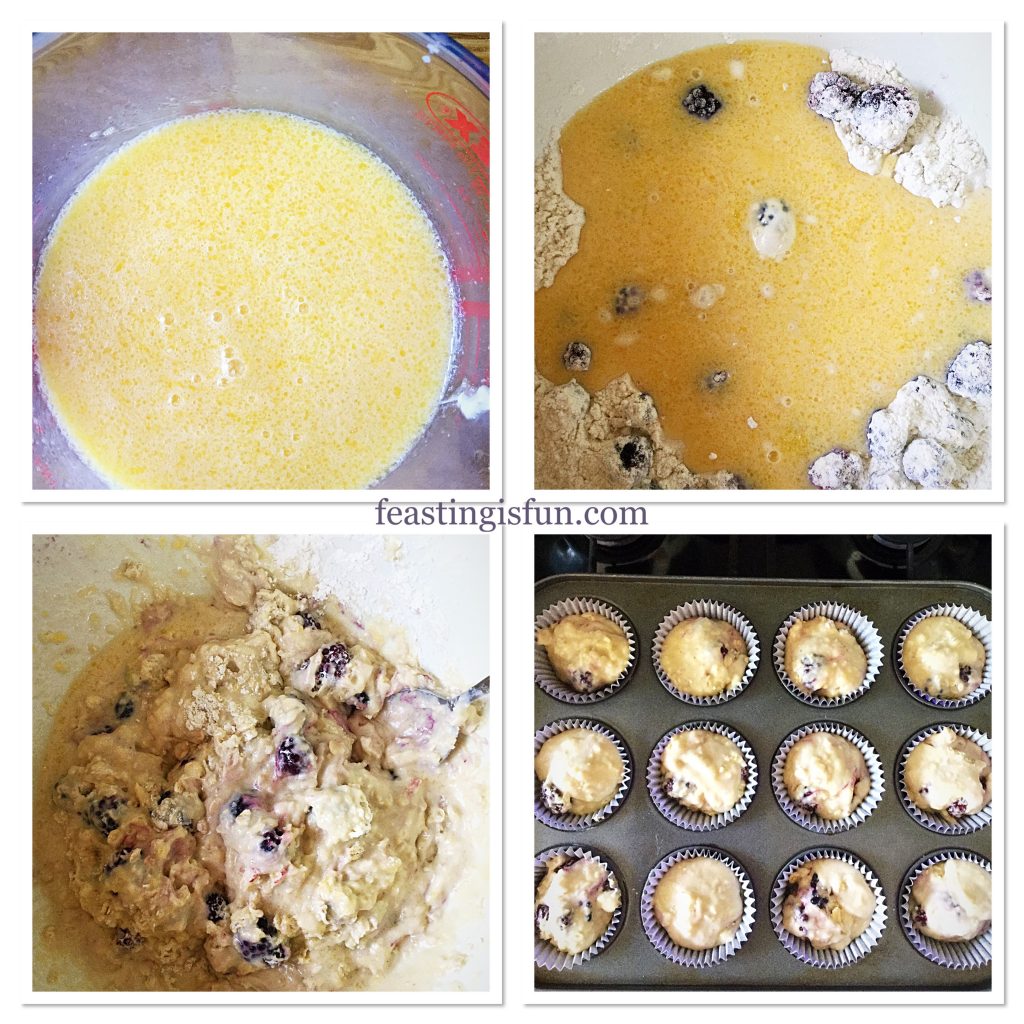
  • Add the eggs, melted butter and vanilla extract and beat with a fork to combine – wet mix.
  • Make a well in the centre of the dry mix and pour the wet mix in.
  • Stir the mixture (approximately 10 times) with a spoon to almost combine, taking care not to break up the berries.
  • A few flour streaks are acceptable. Over mixing will almost certainly result in tough muffins.
  • Line a muffin tin with paper liners. Alternatively tulip style muffin wrappers used in my Spiced Pumpkin Walnut Muffins also can be used.
  • Use an ice cream scoop to divide the muffin mixture evenly between the 12 cases.
FF Easy Blackberry Oat Muffin Recipe
Combining the wet and dry to make the batter.
  • Place a blackberry (from those held back) on top of each muffin.
  • Finally, use a teaspoon and tap a light dusting of caster sugar on top of each muffin.
  • Place the muffin tin into the centre of a preheated oven and bake for 25-30 minutes.
FF Easy Blackberry Oat Muffin Recipe
Topping the muffins before baking.
  • The muffins are baked when risen, golden and firm to touch.
  • As soon as the muffins are baked remove from the oven.
  • Immediately remove the muffins from the tin and place on to a cooling rack – take care as the muffins will be hot.


FF Easy Blackberry Oat Muffin Recipe
Easy Blackberry Oat Muffin Recipe
  • Allow the muffins to cool slightly before serving.
FF Easy Blackberry Oat Muffin Recipe
Easy Blackberry Oat Muffin Recipe


If you have enjoyed my Easy Blackberry Oat Muffin Recipe you may also like these:

Blueberry And Lemon Muffins 

FF Easy Blackberry Oat Muffin Recipe
Blueberry And Lemon Muffins

Raspberry White Chocolate Chip Muffins 

FF Easy Blackberry Oat Muffin Recipe
Raspberry White Chocolate Chip Muffins

Chocolate Madness Muffins 

FF Easy Blackberry Oat Muffin Recipe
Chocolate Madness Muffins

Freshly baked muffins are best eaten on the day they are made. Although you can store them in an airtight container for up to two days, refrigerate in warm weather and then refresh in a medium oven for 5 minutes. Especially delicious eats to start the day and also fill hunger gaps throughout the day. Since these muffins truly are delicious served warm from the oven, why not bake them with the intention to share. Neighbours, friends and family are always delighted with a surprise delivery of freshly made muffins. And it is a fact that food always tastes better when shared!

So, whatever you are making, baking and creating in your kitchens have fun preparing and sharing your feast.

Sammie xx

No part of this post may be reproduced or duplicated without the written permission of the owner. Please see my Disclosure Policy.


Share
Facebooktwitterpinterestlinkedintumblr

Raspberry White Chocolate Chip Muffins

Share
Facebooktwitterpinterestlinkedintumblr

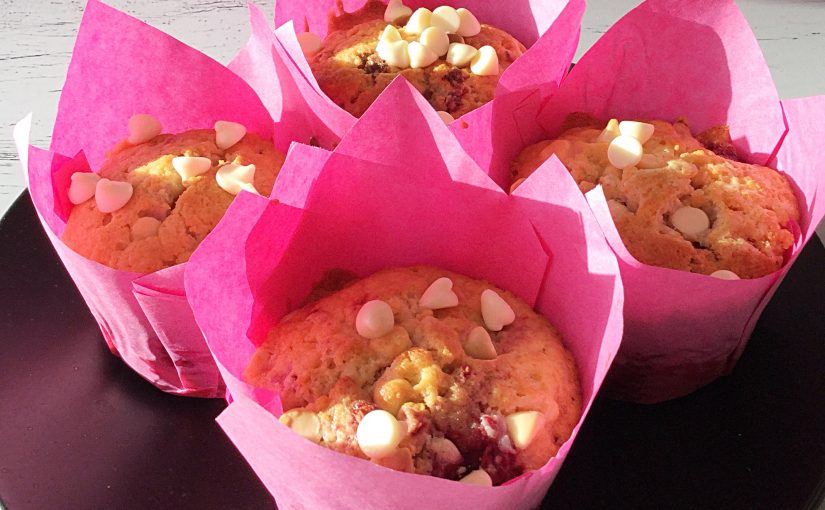
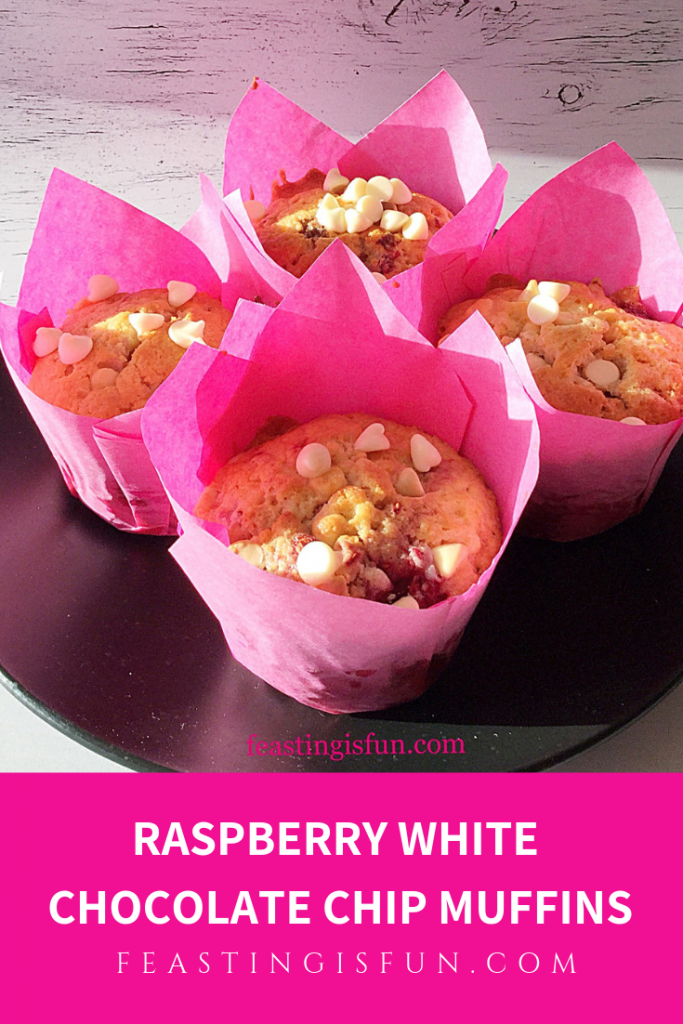
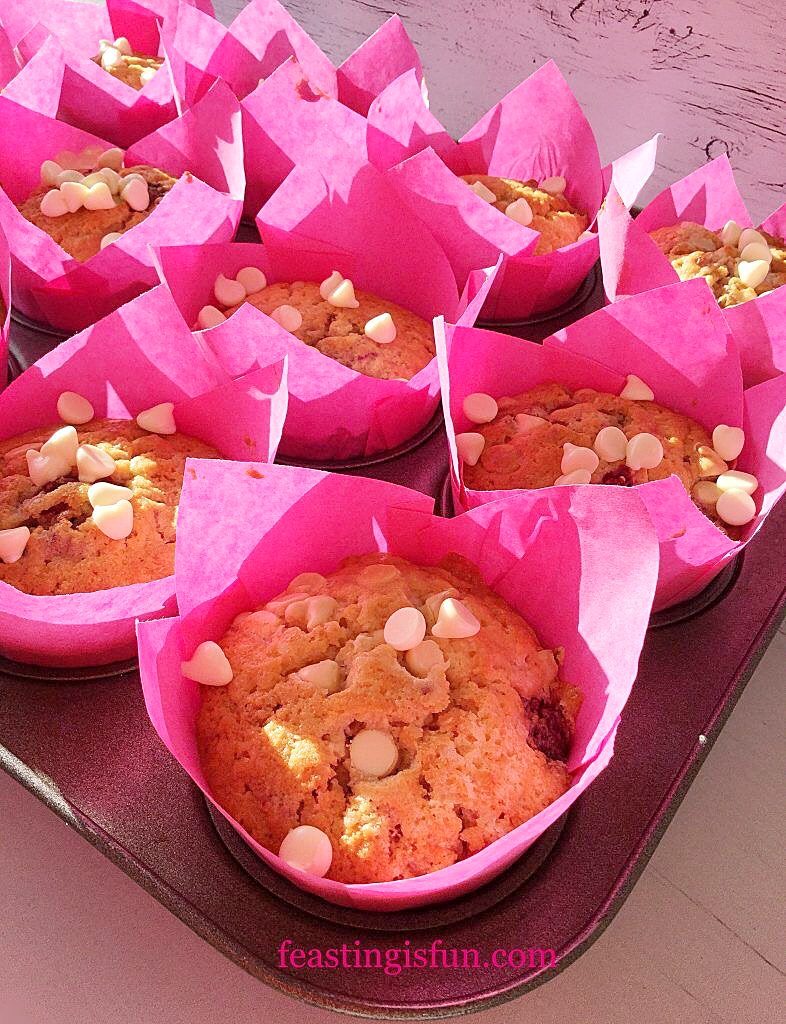
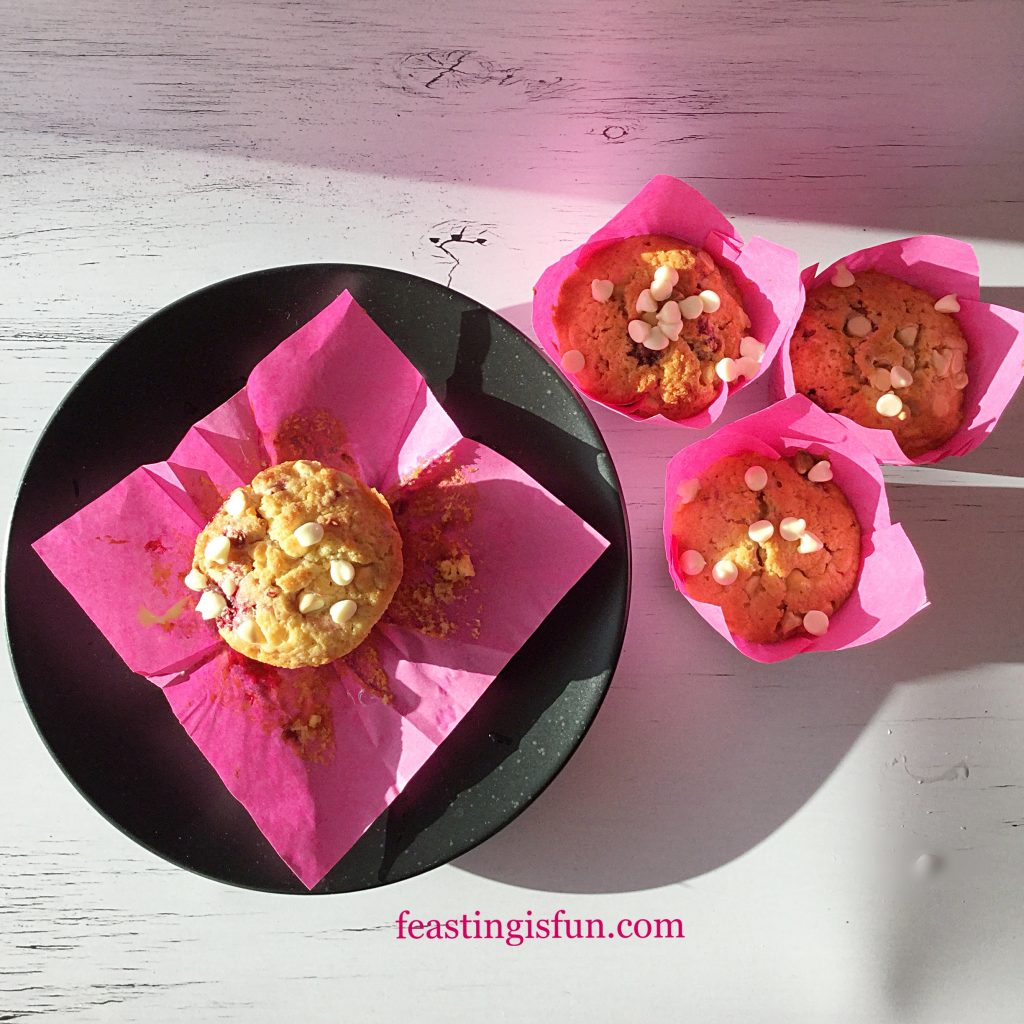
Coffee shop style muffins, it would seem, are here to stay. Big, light, tulip wrapped delights, packed full of chocolate or fruit. Why fight a trend that is clearly doing so well? Since we enjoy this style of muffin too, I have embraced everything about them and come up with my own recipes. So these Raspberry White Chocolate Chip Muffins are utterly delicious.

FF Raspberry White Chocolate Chip Muffins

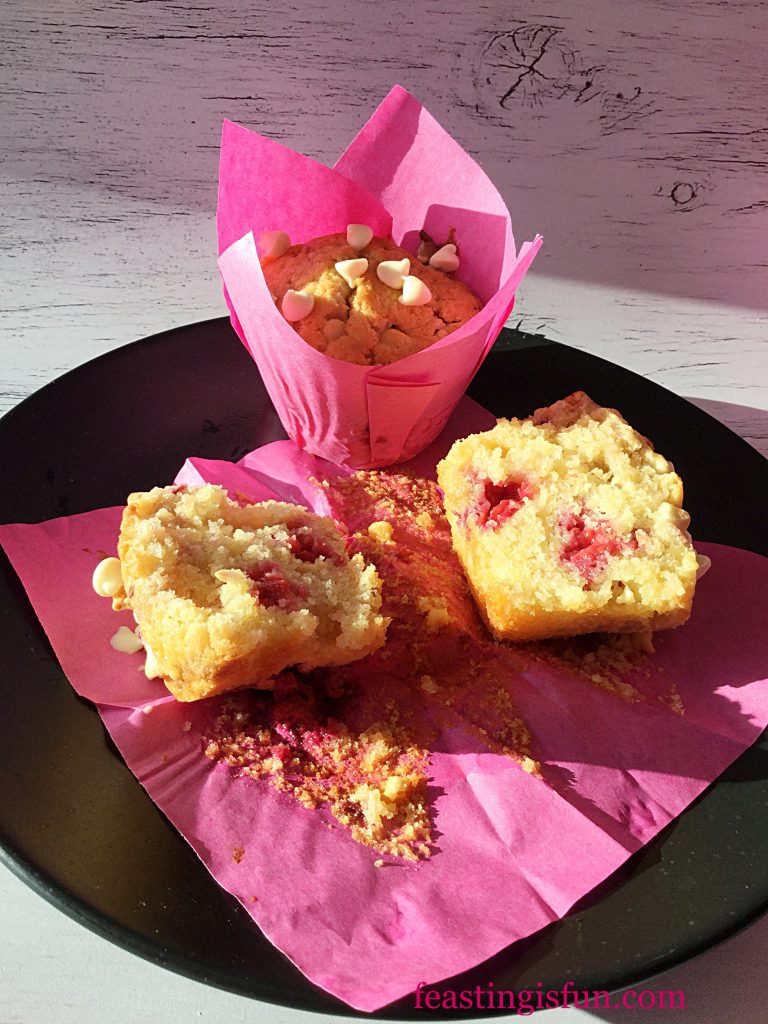
While the texture has more in common with a cake, than a true muffin such as Cheese Bacon Breakfast Muffins , there is room for both in our home. Because not everyone is keen on whipped buttercream that tops most cupcakes, these light, raspberry filled treats are a great alternative. As well as being not-too-sweet, the raspberries on baking become jammy pods within the muffin.

FF Bakery Style Muffins
Raspberry White Chocolate Chip Muffins


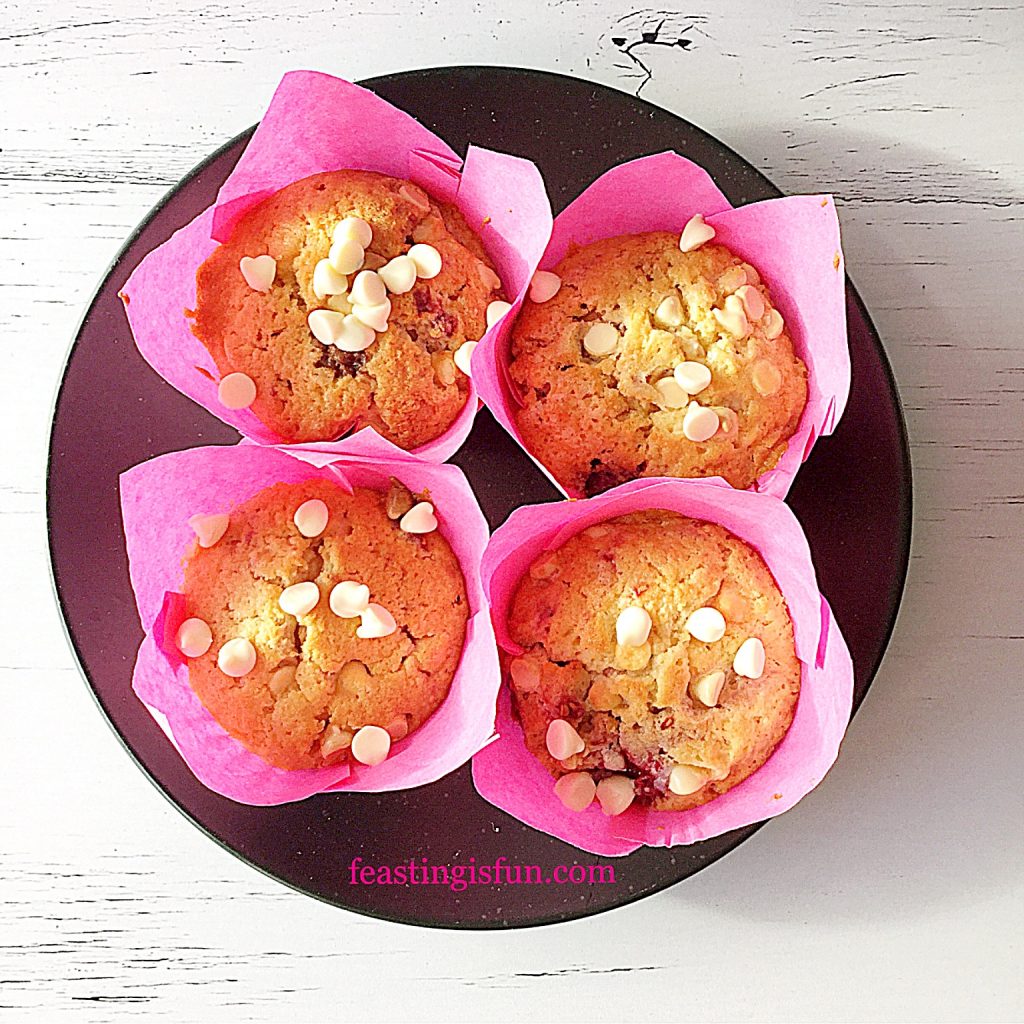
White chocolate chips within and on top of the muffin, provide small, sweet burst of vanilla chocolate flavour. While balancing the slightly tart flavour given by the raspberries. Together they create a delightful flavour pairing within the lightest of muffins. Perfect for grabbing and eating for breakfast or brunch when rushed in the morning. Likewise they also travel well in packed lunches and as part of a picnic.


FF Raspberry White Chocolate Chip Muffins
Raspberry White Chocolate Chip Muffins


Baking the Raspberry White Chocolate Chip Muffins in tulip wrappers allows for a generously sized muffin. Also it adds to the coffee shop style of these muffins. If not using tulip wrappers to bake with, use the deepest muffin cases and fill two thirds full. As a result the baked muffins may bake over the muffin cases. If this happens, simply run a blunt butter knife between the muffin and tin to release.


FF Raspberry White Chocolate Chip Muffins
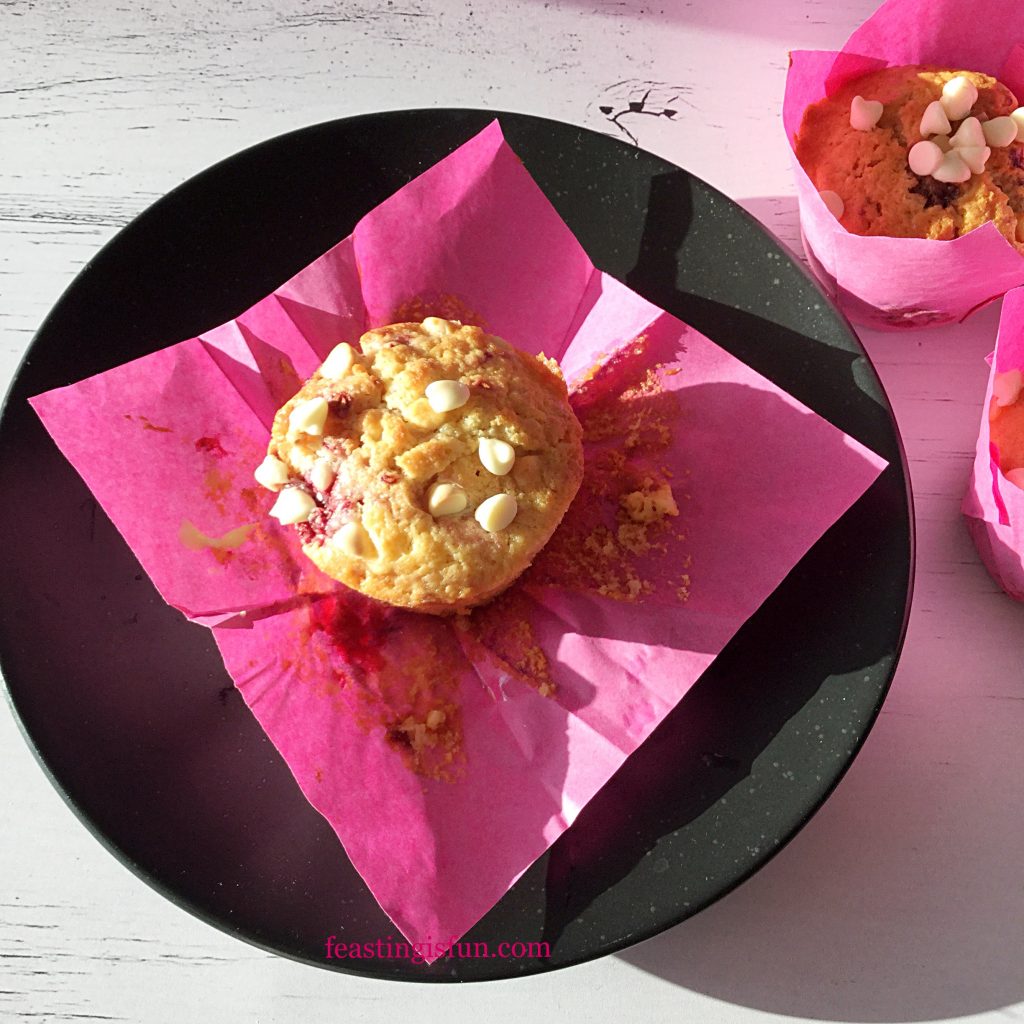
Tulip wrappers pull away easily revealing the baked muffin.

Recipe: Raspberry White Chocolate Chip Muffins makes 26-30

225g/8oz Unsalted Butter at room temperature

225g/8oz Caster Sugar

1/4tsp Sea Salt – I use Maldon

4 Large Free Range Eggs

100g/4oz Full Fat Yoghurt – I use Yeo Valley

1tsp Vanilla Extract – I use Nielsen-Massey

1.5tsp Baking Powder

275g/10oz Plain White Flour

125g/4.5oz White Chocolate Chips – I use Callebaut

150g/5oz Raspberries – I used frozen

Method: Preheat the oven to 180C/160C fan, 350F, gas mark 4

Making The Raspberry Muffin Batter

  • First of all line a 12 hole muffin tin with tulip wrappers or muffin cases.
  • Into a large bowl add the butter, sugar, salt and whisk until well combined.
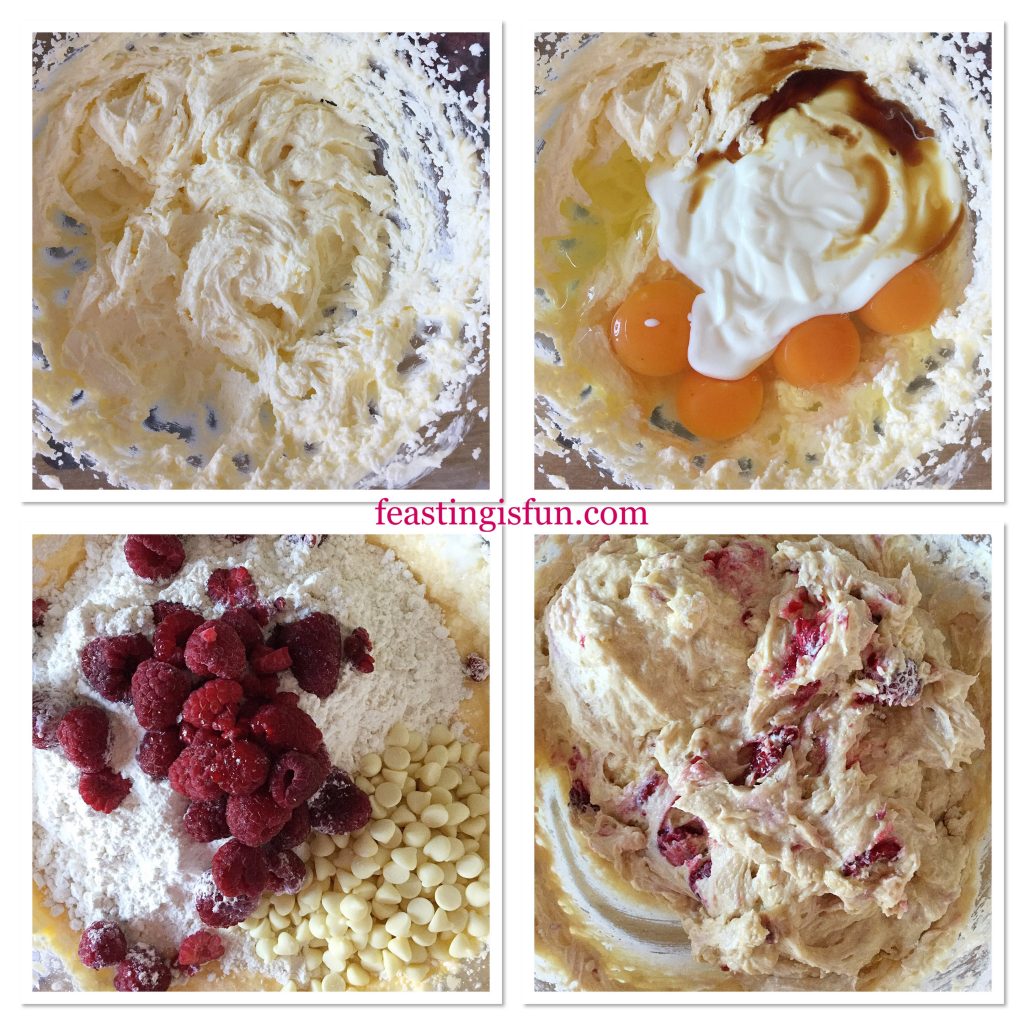
  • Then add the eggs, vanilla extract and yoghurt. On top of these wet ingredients sift in the flour and baking powder. Finally add the raspberries and 100g/4oz of the white chocolate chips.
  • Using a large spoon gently fold all of the ingredients together until just combined.  Take care not to break up the raspberries.
FF Raspberry White Chocolate Chip Muffins
Making the batter for Raspberry White Chocolate Chip Muffins
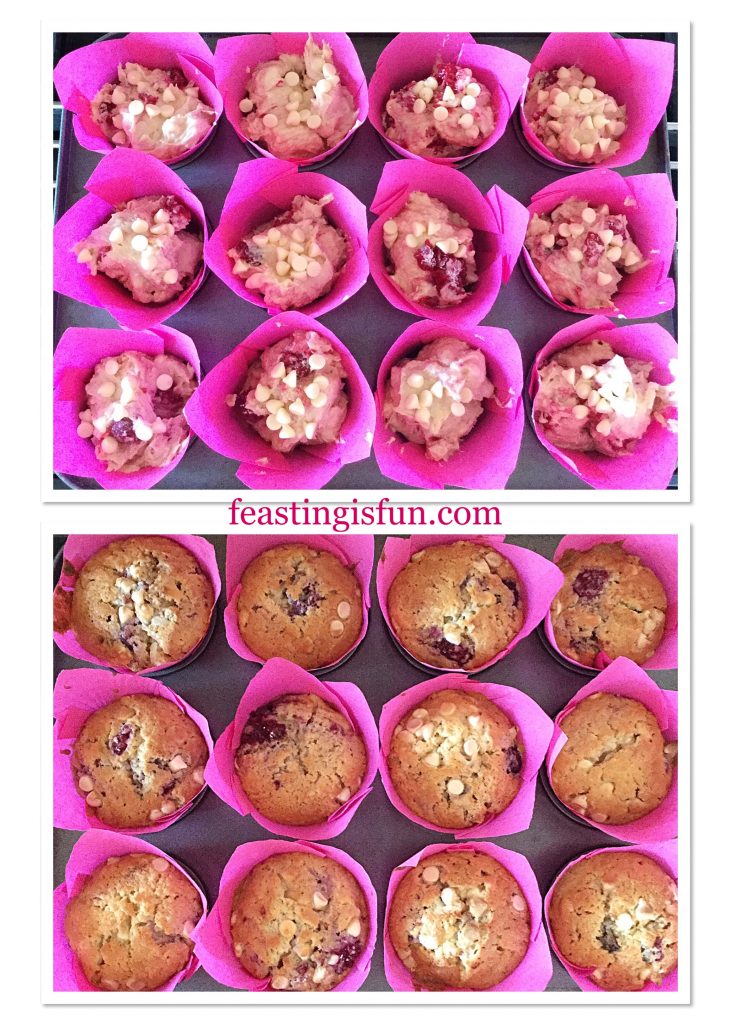
  • Spoon the batter into the wrappers, dividing equally between them.
  • Finish by sprinkling over the remaining white chocolate chips on to the surface of the un-baked muffins.

Baking The Bakery Style Muffins

  • Place the muffins into the centre of a preheated oven and bake for 25-35 minutes.
  • The muffins are baked when they are golden, just firm to touch and an inserted cocktail stick comes out clean, without any batter attached.
FF Raspberry White Chocolate Chip Muffins
Filling and baking the Raspberry White Chocolate Chip Muffins
  • As soon as the muffins are baked remove from the oven and allow to cool in the tin if using tulip wrappers. Otherwise, if using muffin cases, cool for 10 minutes in the tin then remove and place on a cooling rack to finish cooling.
FF Raspberry White Chocolate Chip Muffins
Raspberry White Chocolate Chip Muffins

I like to serve these muffins warm. While the chocolate chips are still slightly melted. Although they are fine to serve cold as well.

These muffins are best eaten within 24 hours of being made. Yet they can be stored, once cooled, in an airtight container for up to 3 days. Keep refrigerated during warm weather.


FF Raspberry White Chocolate Chip Muffins
The whole raspberries distribute evenly throughout the muffin.

Another delicious bake that uses the same flavours as these muffins is my Raspberry White Chocolate Loaf Cake. Also great for transporting to share with others

If you have enjoyed this recipe for Raspberry White Chocolate Chip Muffins you may also like these:

Double Strawberry Almond Muffins

Double Strawberry Almond Muffins

Chocolate Madness Muffins

Triple chocolate madness muffins
Chocolate Madness Muffins

Double Cherry Drizzle Oat Bars

Double Cherry Drizzle Oat Cake Bars
Double cherry drizzle oat cake bars.

Since actually making these muffins took mere moments, why not try them yourself? Making use of frozen raspberries allowed the fruit to keep its shape more easily. Yet, if fresh raspberries are in abundance or growing in the garden absolutely use those. Deep blush streaked muffins, warm from the oven taste good any day of the year!

So whatever you are making, baking and creating in your kitchens, have fun preparing and sharing your feast.

Sammie xx

No part of this post may be reproduced or duplicated without the written permission of the owner. Please see my Disclosure Policy.


Share
Facebooktwitterpinterestlinkedintumblr

Double Chocolate Chip Iced Buns

Share
Facebooktwitterpinterestlinkedintumblr

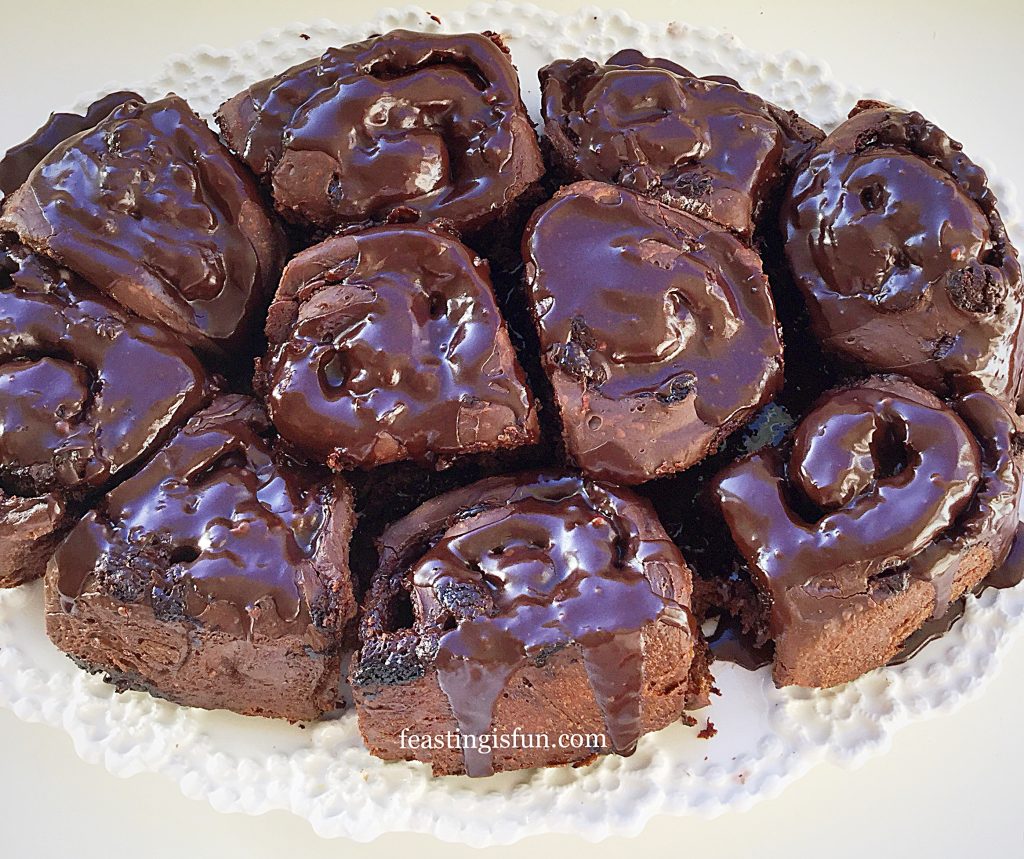
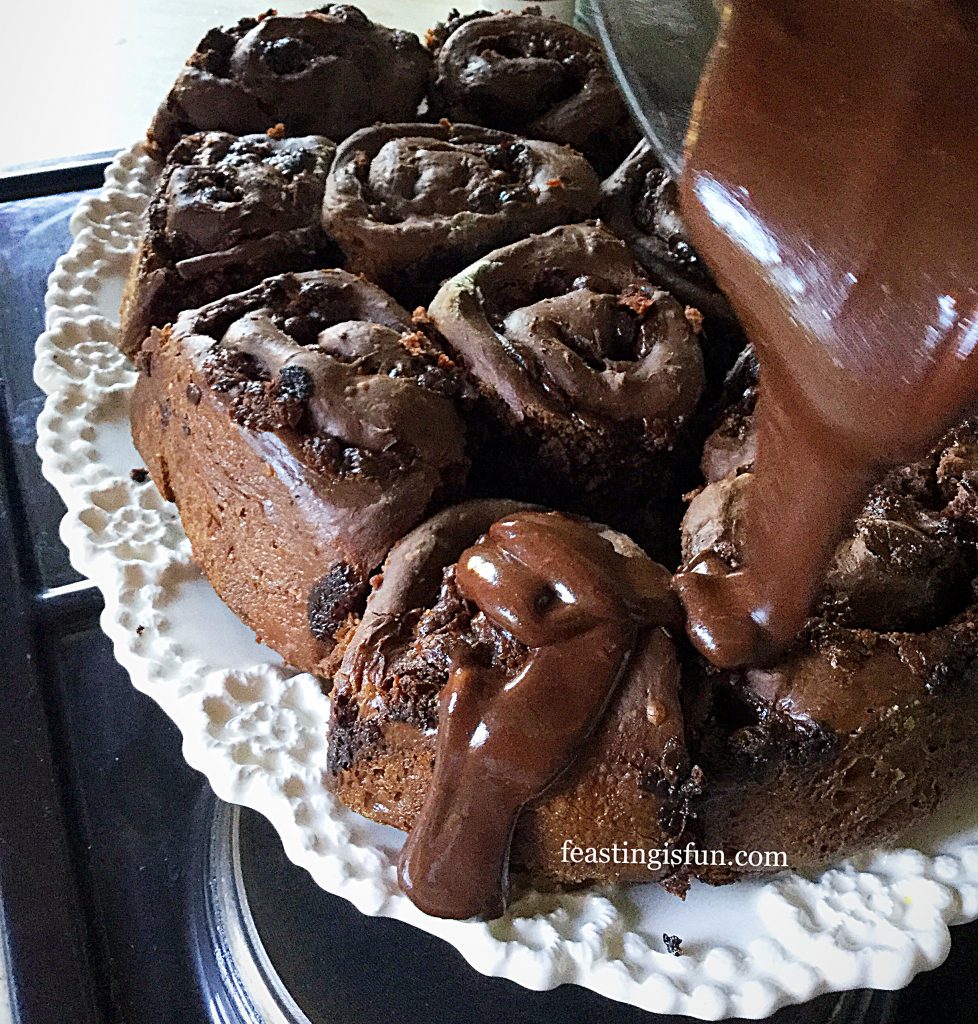
Christmas will soon be upon us and among the festive food chocolate plays a prominent role.  Whether in advent calendars, selection packs, gold coins or the many foil wrapped, boxed and displayed chocolate treats, it is central to celebration feasting.  Therefore these Double Chocolate Chip Iced Buns are the perfect treat to share and enjoy over the holiday season, or any special occasion.

FF Double Chocolate Chip Iced Buns
Double Chocolate Chip Iced Buns

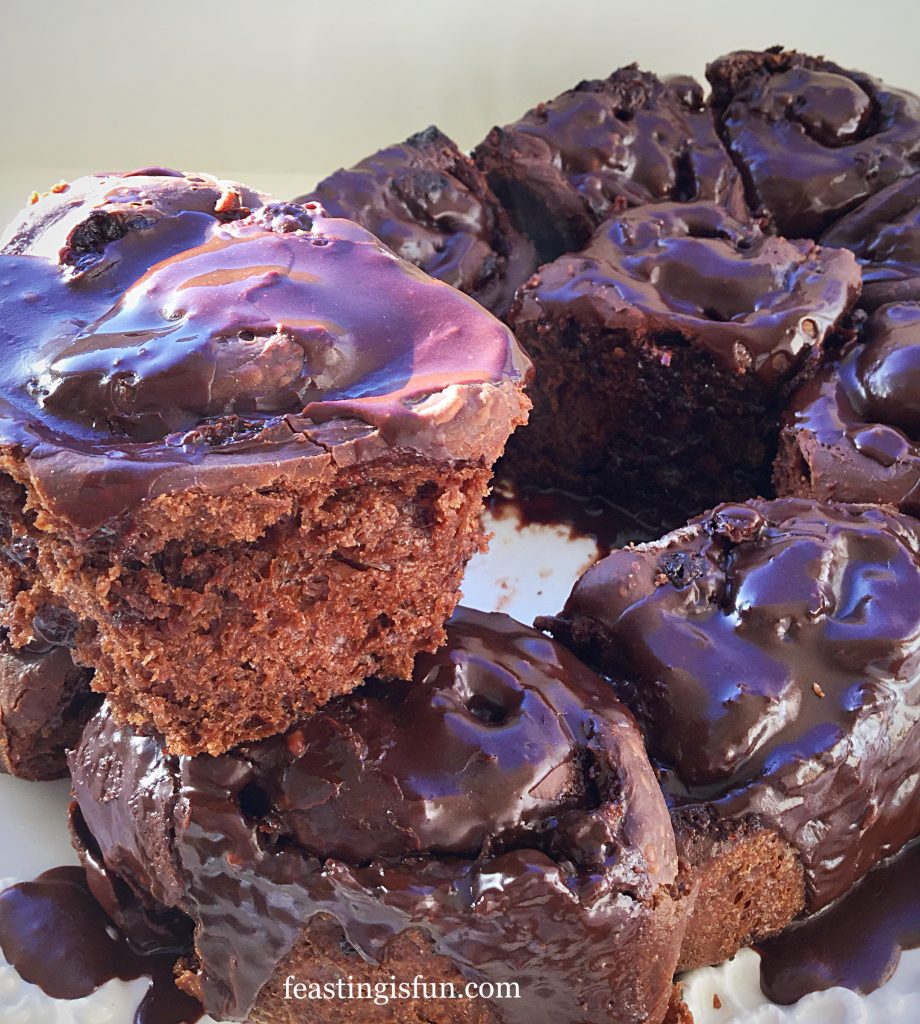
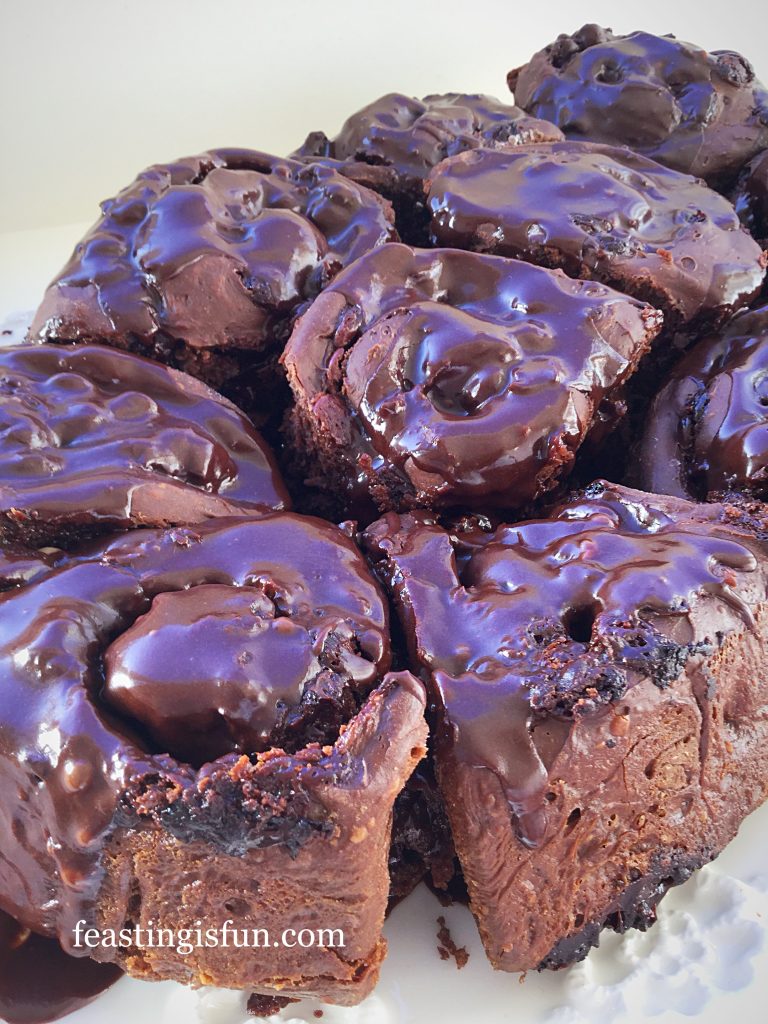
Since, if you’re going to make a chocolate bun it really should be THE BEST tasting chocolate bun ever.  While light and fluffy these buns are packed with chocolate chips and finished with a thick chocolate icing.  Also these buns tick every box , not too sweet, not too rich, simply the perfect balance of flavour and texture baked into the very best tasting breakfast bun.  Alternatively eaten with coffee as an afternoon treat, these buns need no excuse to be eaten!

FF Double Chocolate Chip Iced Buns
Double Chocolate Chip Iced Buns

Chocolate Buns – the ultimate breakfast – dessert

While these incredible tasting, chocolate packed buns were made with Christmas in mind, there really is no reason at all to stop you baking them at other times.  Any chocolate lover would appreciate a birthday breakfast of Double Chocolate Chip Iced Buns.  Especially if you have friends staying, sleepovers, special occasions, all the perfect excuse to bake.  Finally, they are made and left to prove overnight, so all that’s left to do is bake and glaze in the morning.  Easy.

FF Double Chocolate Chip Iced Buns
Double Chocolate Chip Iced Buns

As soon as my chief taste testers, here at Feasting headquarters had tasted these buns, success was proclaimed.  Even from the harshest of my critics.  Yummy, mmm are there more, escaped from messy chocolate mouths.  As for me, the harshest judge of all, well, I am impressed.  All of the attempts at making the perfect chocolate swirl bread have paid off.  Flavour and texture in perfect chocolate swirled harmony.

FF Double Chocolate Chip Iced Buns

Recipe: Double Chocolate Iced Buns makes 10

300ml/10.5fl oz Whole Milk

75g/3oz Unsalted Butter

7g Dried Yeast

2tsp Vanilla Extract – I use Nielsen-Massey

1tsp Caster Sugar

2 Large Free Range Eggs

50g/2oz Cocoa Powder – I use Callebaut

500g/1lb 2oz Strong White Flour

7g Salt – I use Maldon

250g/9oz Milk Chocolate Chips or chopped chocolate – do not use stabilised chocolate chips, as you would for chocolate chip cookies, the chocolate should melt when baked.

Glaze:

250g/9oz Icing Sugar

50g/2oz Cocoa Powder

Method:

Note: I strongly recommend using a stand mixer with dough hook attachment for mixing the dough.  The chocolate dough has a high butter content and is extremely sticky.  Using a stand mixer ensures thorough mixing of the dough.

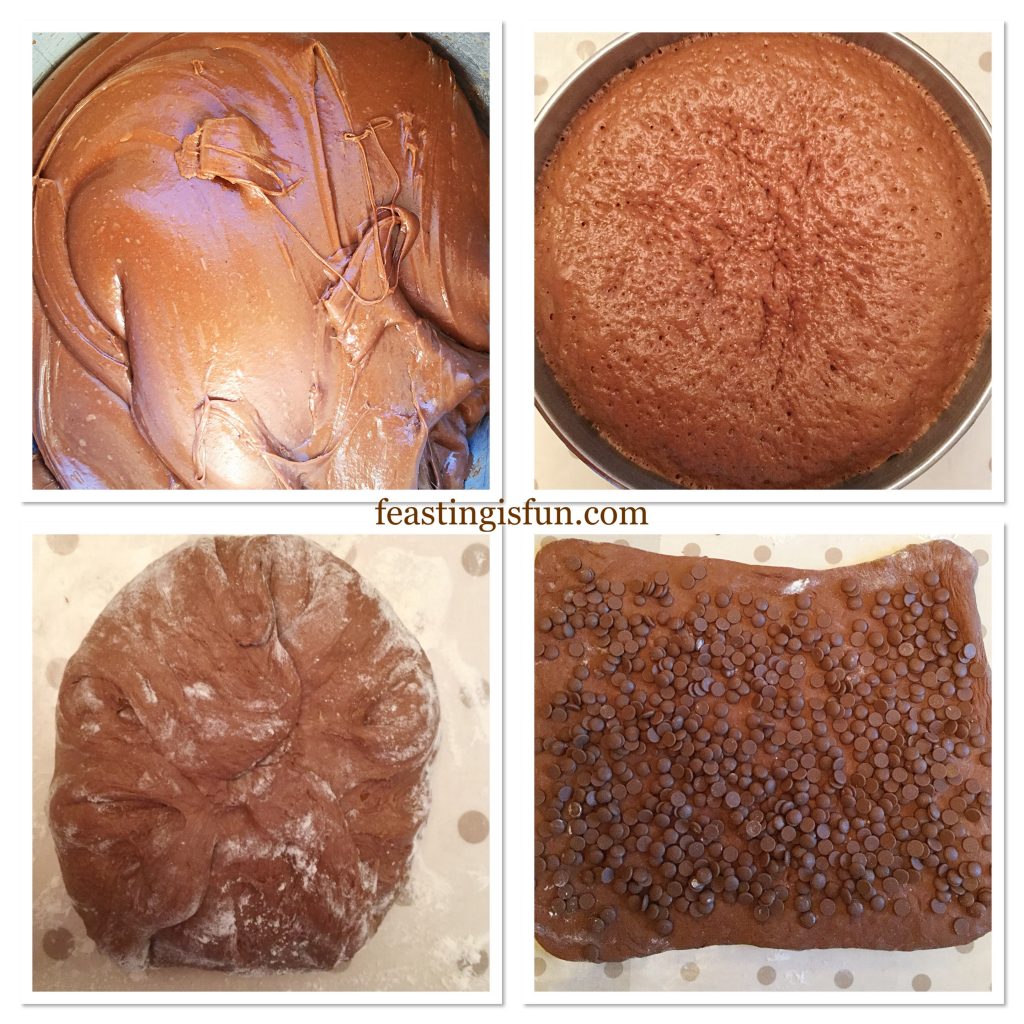
Making the chocolate brioche dough

  • Measure the milk into a microwaveable jug and then add the butter broken into small pieces.  Zap in the microwave until the milk is slightly warmed.  It should feel the same as body temperature.  Also the butter will soften and start to melt.
  • Pour the warmed milk/butter into the bowl of the stand mixer.
  • Add the yeast, sugar, vanilla extract and both eggs to the bowl.
  • Next add the flour, cocoa powder and salt.
  • With the dough hook attached mix slowly until the ingredients are combined into a dough.  Continue mixing on medium speed for a further 20 minutes.
  • Stop the mixer, lift the dough hook and scrape any dough back into the bowl. Cover the bowl with cling film and leave in a draft free place until doubled in size.  This first prove may take up to 2 hours.

Shaping the chocolate dough into rolls

  • As soon as the dough is ready, turn out on to a lightly floured worktop.  A plastic scraper will help release all of the dough from the bowl.
  • Using the technique shown in Easy Homemade Cottage Loaf, pull out the dough and press into the centre. Continue around the edge until the dough is neat and smooth.
  • Roll the dough out until it is 30.5cm D x 35.5cm W (12” x 14”) rectangle.
  • Sprinkle the chocolate chips/chopped chocolate evenly over the dough.
FF Double Chocolate Chip Iced Buns
Making the dough and preparing the chocolate buns.
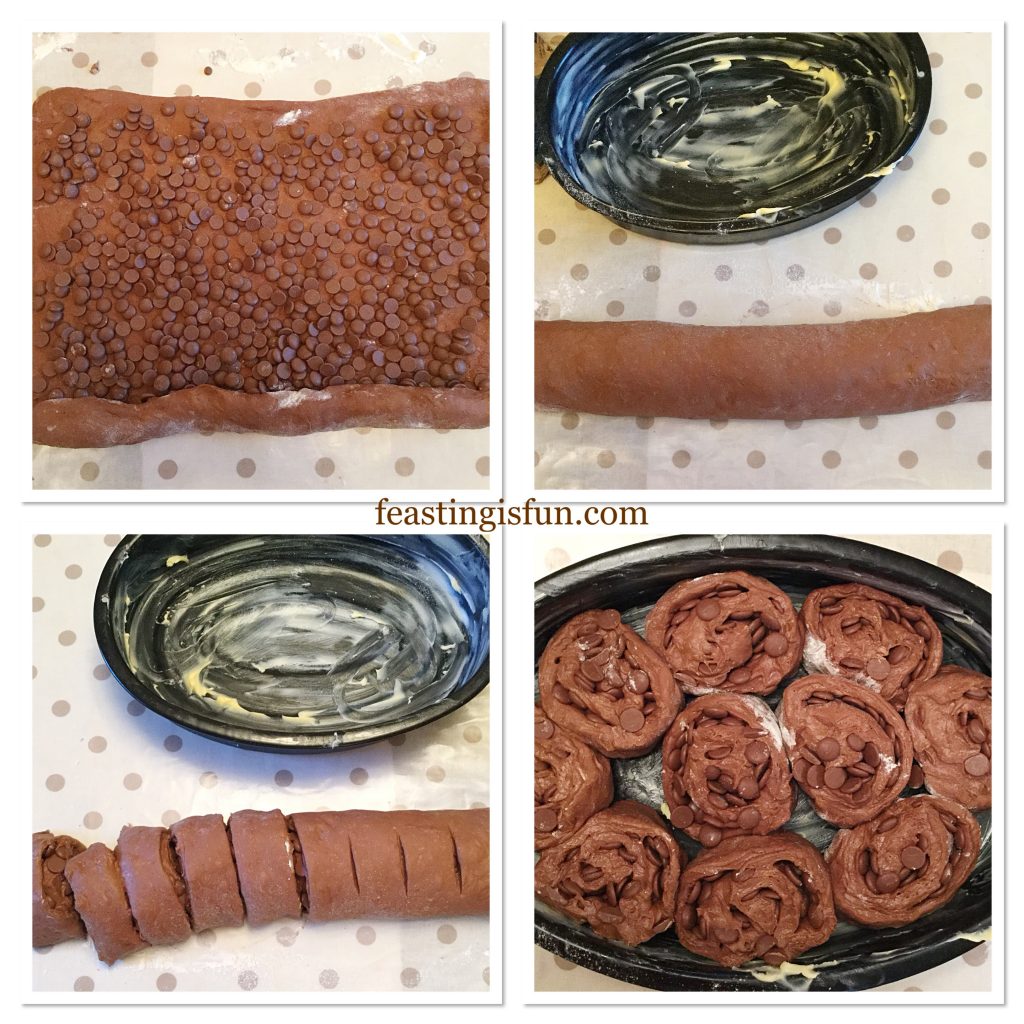
  • Rolling from the wide side of the dough, take the front edge, starting at one side, roll and tuck the chocolate and dough.  Continue across the front edge of the dough until you have formed the beginning of a roll.  Evenly roll the entire dough, tucking and ensuring it is even.  Finish with the seam underneath the finished roll.
  • Using a sharp knife cut off the uneven sides.  Divide the roll in half and then cut 5 even potions from each half.  Saw through the dough, using the blade to cut through.
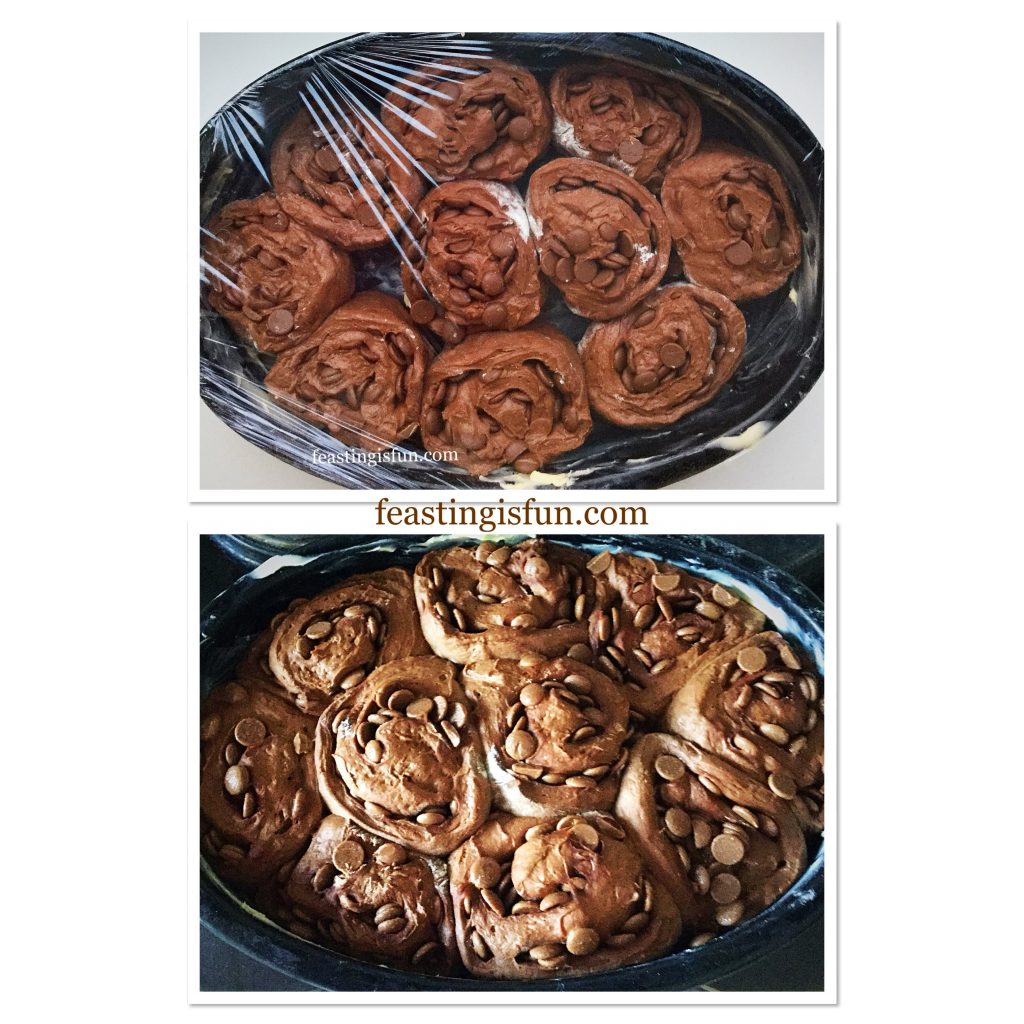
  • Place the buns into a large, well buttered baking tin with deep sides. Alternatively  butter 2 deep 8 inch cake tins and place 5 chocolate buns into each.  Cover with cling film and refrigerate overnight.  The dough will prove very slowly in the cold fridge.
Creating the perfect chocolate swirl.

Baking The Double Chocolate Chip Buns

  • The next morning remove the chocolate buns from the fridge and allow to come up to room temperature, approximately 30 minutes.
  • While the buns are warming preheat the oven 200C/180C fan, 400F, gas mark 6.
FF Double Chocolate Chip Iced Buns
Double Chocolate Chip Iced Buns before and after an overnight prove.
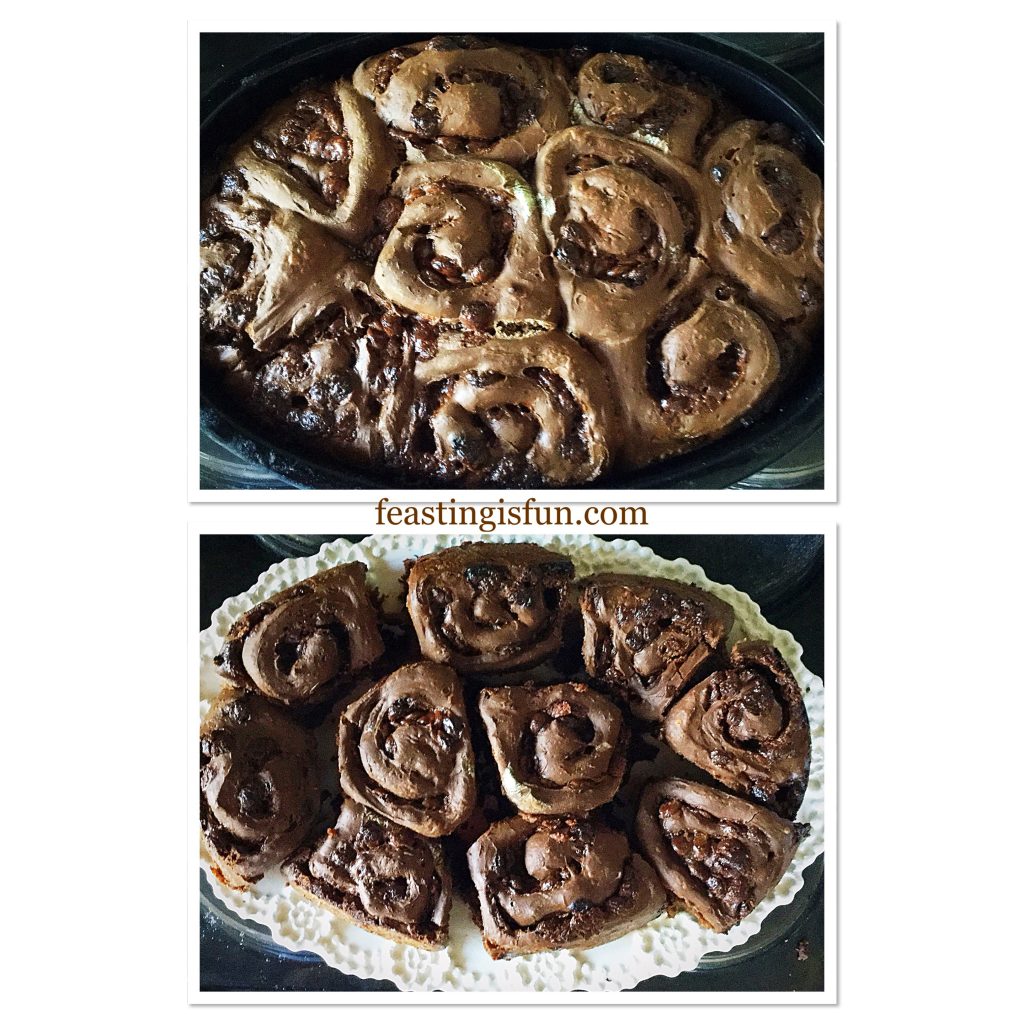
  • As soon as the buns have warmed place in to the centre of the oven and bake for 30-35 minutes.
  • While the buns are baking make the chocolate icing glaze.  Weigh the icing sugar and cocoa into a large jug.  Add approximately 6 tablespoons of hot water and stir to mix. The icing should be thick yet still able to pour.  If needed add extra hot water one tablespoon at a time.  Note – the icing will thicken on cooling.
  • Check the buns after 30 minutes.  They are baked when the top of the buns are firm and sounds hollow when tapped.
  • Once baked remove from the oven.
  • Run a palette knife around the outside edge of the buns, carefully lifting the edge of the buns as you do so.
  • Place a large board, (I use a chopping board) over the top of the baking tin. Using oven gloves to protect from the heat turn the buns out of the tin.
  • Again place a serving dish over the board flip over and the chocolate buns will be right side up, ready to be glazed.
  • Use a knife to gently cut through where each bun joins the next.  Move the buns so there is a small gap between them, this ensures the glaze can drip down the sides.
FF Double Chocolate Chip Iced Buns
Baking and turning out the buns.

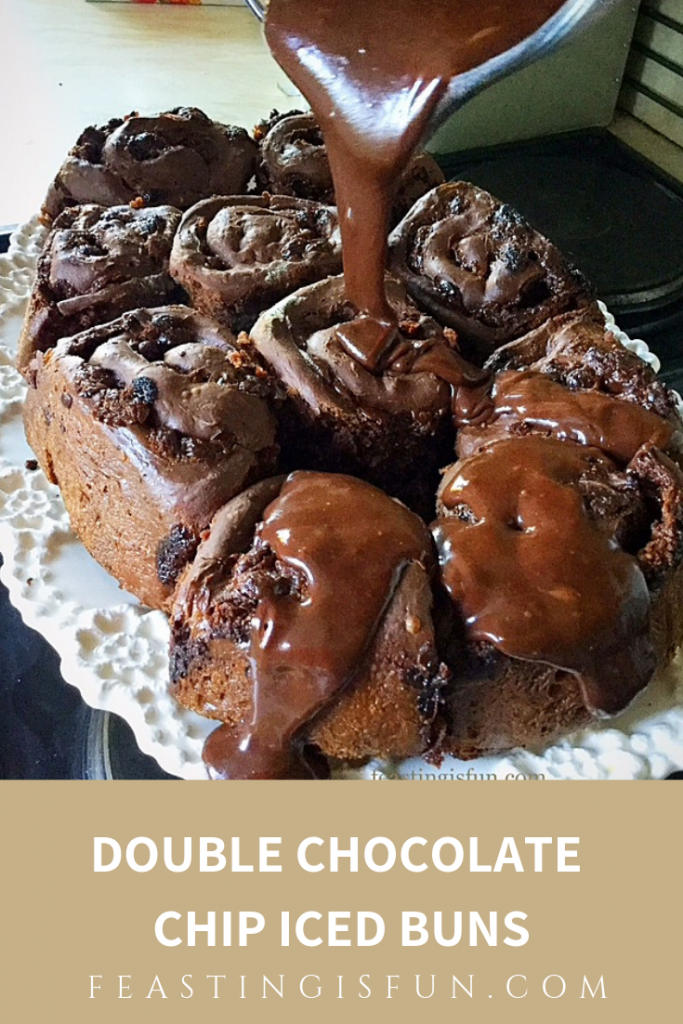
Pouring on the icing

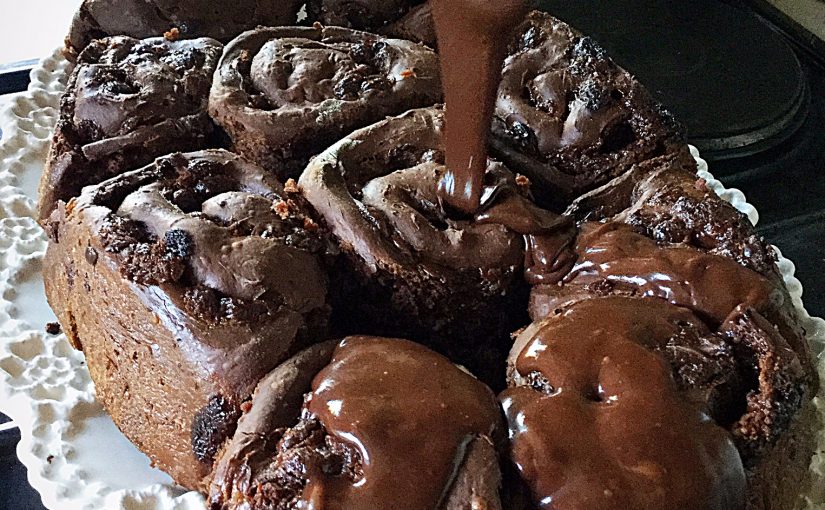
  • While the buns are still hot pour over the thick, glossy, chocolate icing.
FF Double Chocolate Chip Iced Buns
Glazing the Double Chocolate Chip Iced Buns

Serve the buns warm for breakfast as an extra special treat.  While these buns are best eaten on the day they are baked they will keep for 2 days in an airtight container.  A quick 10 second zap in the microwave warms cold buns ready to eat.

If you have enjoyed this recipe for Double Chocolate Chip Iced Buns you may also like these:

Homemade Chelsea Buns

FF Homemade Chelsea Buns
Homemade Chelsea Buns

Cinnamon Plaited Brioche Bread

FF Double Chocolate Chip Iced Buns
Cinnamon Plaited Brioche Bread

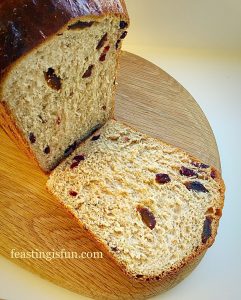
Christmas Spiced Fruit Loaf

FF Double Chocolate Chip Iced Buns
Christmas Spiced Fruit Loaf

Make ahead recipes  are a great way to enjoy incredible feasts without having to get up early or spend all day in the kitchen. Because spending time with family and friends enjoying food together is always more important than being stuck in the kitchen, away from the fun. While it is fun to bake and cook together, not everyone has large, open plan kitchens that make this possible. Therefore having this recipe enables you to serve freshly baked buns with minimal effort.

Would you like more make ahead recipes, here on Feasting is Fun?

Whatever you are making, baking and creating in your kitchens, have fun preparing your feast

Sammie xx

No part of this post may be reproduced or duplicated without the written permission of the owner. Please see my Disclosure Policy.

Share
Facebooktwitterpinterestlinkedintumblr

Double Strawberry Almond Muffins

Share
Facebooktwitterpinterestlinkedintumblr

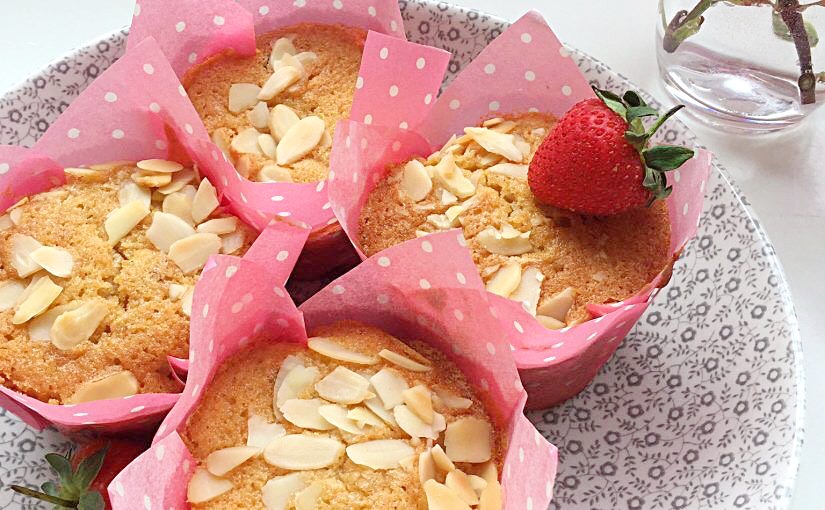
As you may have noticed from recent posts, I am having a full blown love affair with strawberries this Summer.  Whether it’s eating them warmed by the sun, just as they are, or, creating new recipes such as Strawberry Rose Ice Cream, I cannot seem to get enough of them. While looking for inspiring ingredients on Amazon U.K., I found some baked strawberries for sale. Imagine a more intense strawberry flavour with a chewy texture. Sourcing fresh strawberries locally, finally resulted in the creation of my Double Strawberry Almond Muffins.

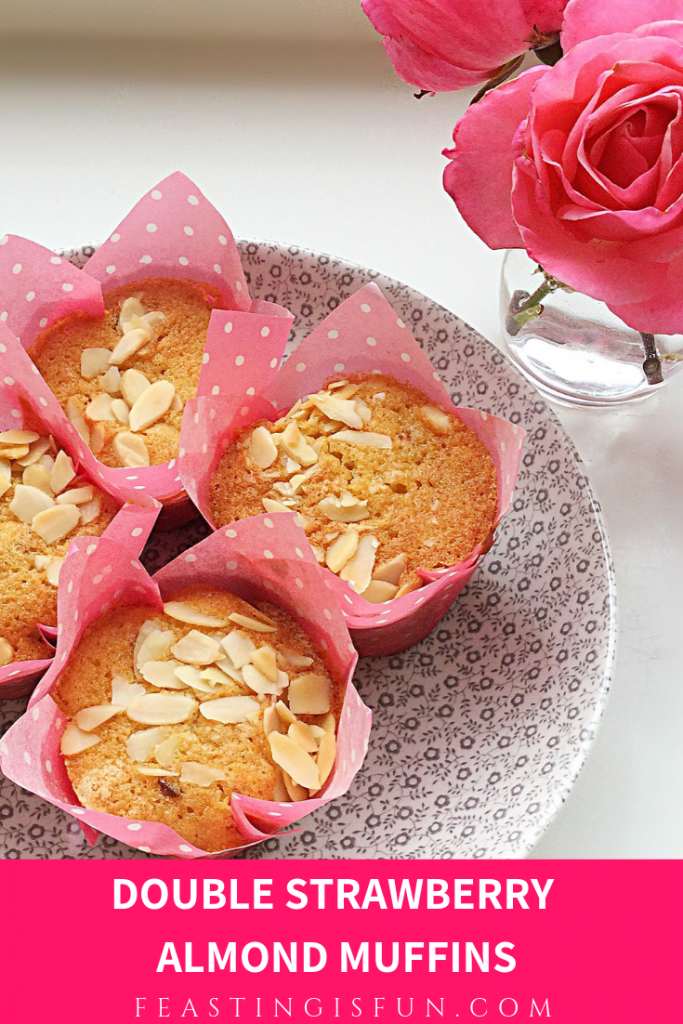
Pinterest image of strawberry muffins with descriptive graphics.

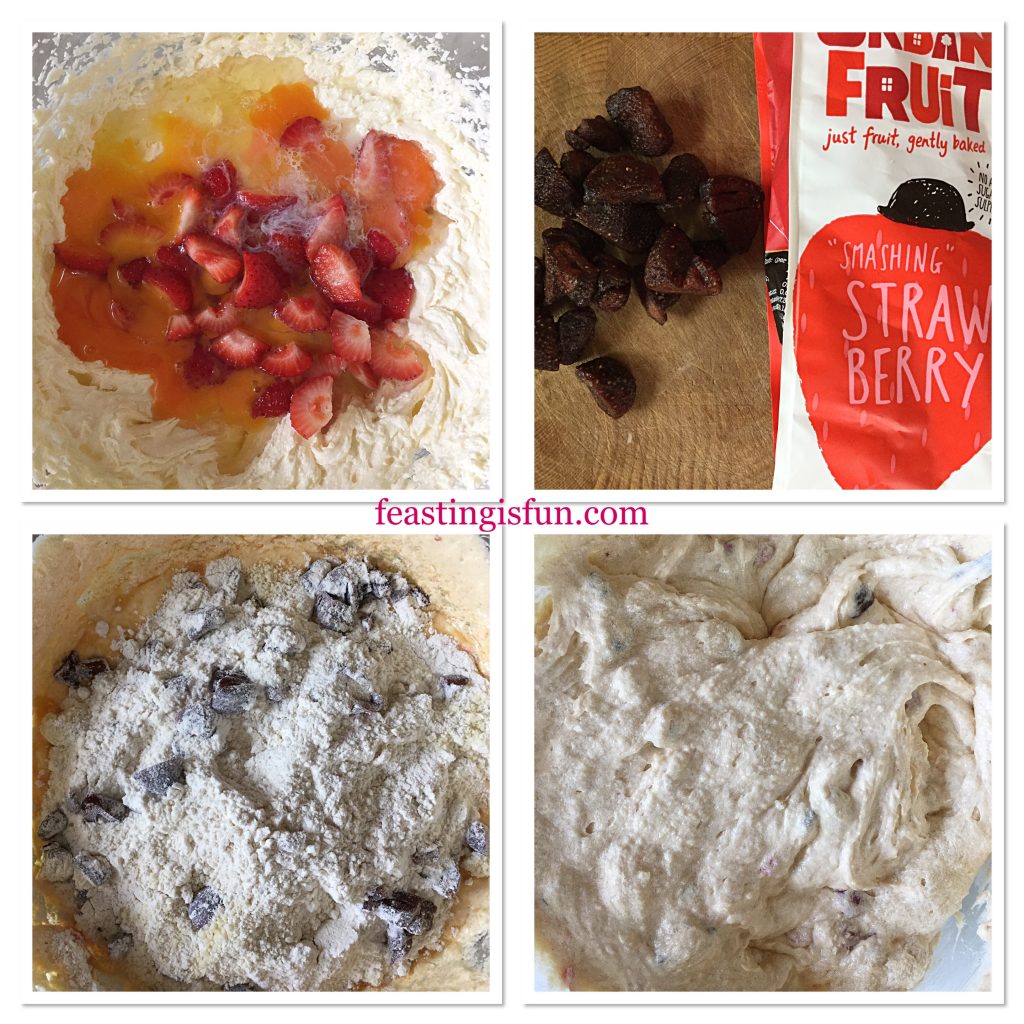
Since the name ‘baked’ strawberries seems, a little misleading, they will be referred to as dried strawberries. Not freeze dried strawberries, which are an entirely different product altogether.  Similar to dried apricots in texture, dried strawberries are chewy, rather like gummy bears, with a more intense, strawberry flavour. While also free from other added ingredients. Resulting in a perfect snack size strawberry, untainted by additives.

Teapot, cup of tea, muffin on a plate and pink roses in a small vase.
Double Strawberry Almond Muffins

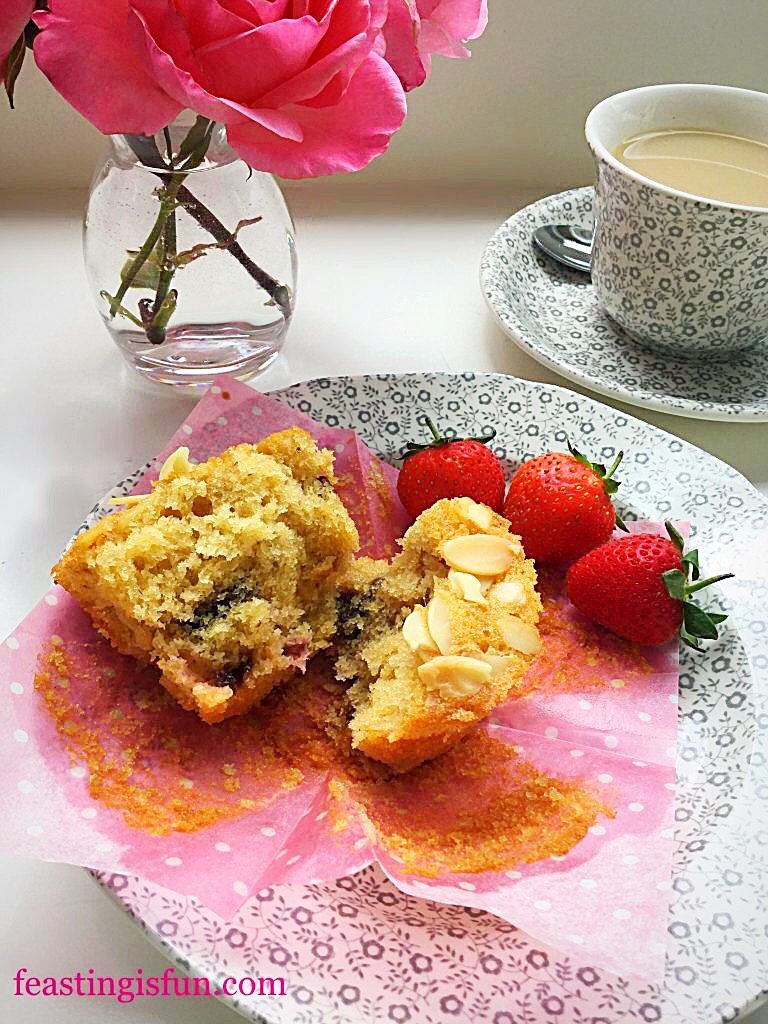
While the muffins bake the fresh strawberries become absorbed into the batter.  Yet dried strawberries absorb moisture from the cake batter. During the baking process they lose their chewy texture. Resulting in gooey, jam like, pools of delicious strawberry within each muffin.

Muffin pulled in half to show even distribution of fruit.
Strawberries evenly distributed throughout the muffin.

A light open texture of each muffin is visible in the photo above. Having checked a few muffins, the strawberries are dispersed evenly throughout. Since previously having difficulty including fresh strawberries into a bake, I didn’t want to weigh the batter down with their water content. That said, extra chopped, dried strawberries could be added to the top, with the flaked almonds, prior to baking.

Recipe: Makes 12 Double Strawberry Almond Muffins

200g/7oz Unsalted Butter at room temperature

200g/7oz Caster Sugar

1tsp Vanilla Extract – for all extracts I use Nielsen-Massey

1/2tsp Almond Extract

4 Large Free Range Eggs

1/4tsp Sea Salt – I use Maldon

100g/4oz Ground Almonds

150g/5oz Plain White Flour

1.5tsp Baking Powder

100g/4oz Fresh Strawberries hulled and diced

50g/2oz Dried or Baked Strawberries roughly chopped – I use Urban Fruit

50g/2oz Flaked Almonds

Method: Preheat the oven to 160C/140C fan, gas mark 3, 325F.

Note: Tulip wrappers must be used in a deep muffin, or cupcake tin. When using regular cupcake cases, fill two thirds full and expect to make 18 muffins from this recipe. Also, the length of time baking will also need to be adjusted, please see guidelines in the method.

Making The Strawberry Muffin Batter

  • First of all, line a deep muffin tin with 12 tulip wrappers.
  • Whisk together the butter, sugar and salt in a large bowl, until pale and creamy.
  • Add the eggs, vanilla and almond extract and the chopped fresh strawberries to the bowl. Whisk together.
  • Next add the ground almonds, flour, baking powder and chopped dried strawberries. Tossing the strawberries in the flour will help stop them from sinking to the bottom of the muffin.
  • Mix all of the ingredients together so that they are fully combined. Over mixing will cause the muffins to become tough.
FF Double Strawberry Almond Muffins
Making the muffin batter.

Filling The Tulip Muffin Cases

  • Using a large, 5cm/2″ ice cream scoop, add one scoop of batter to each tulip case. Divide any remaining batte evenly between the 12 cases.
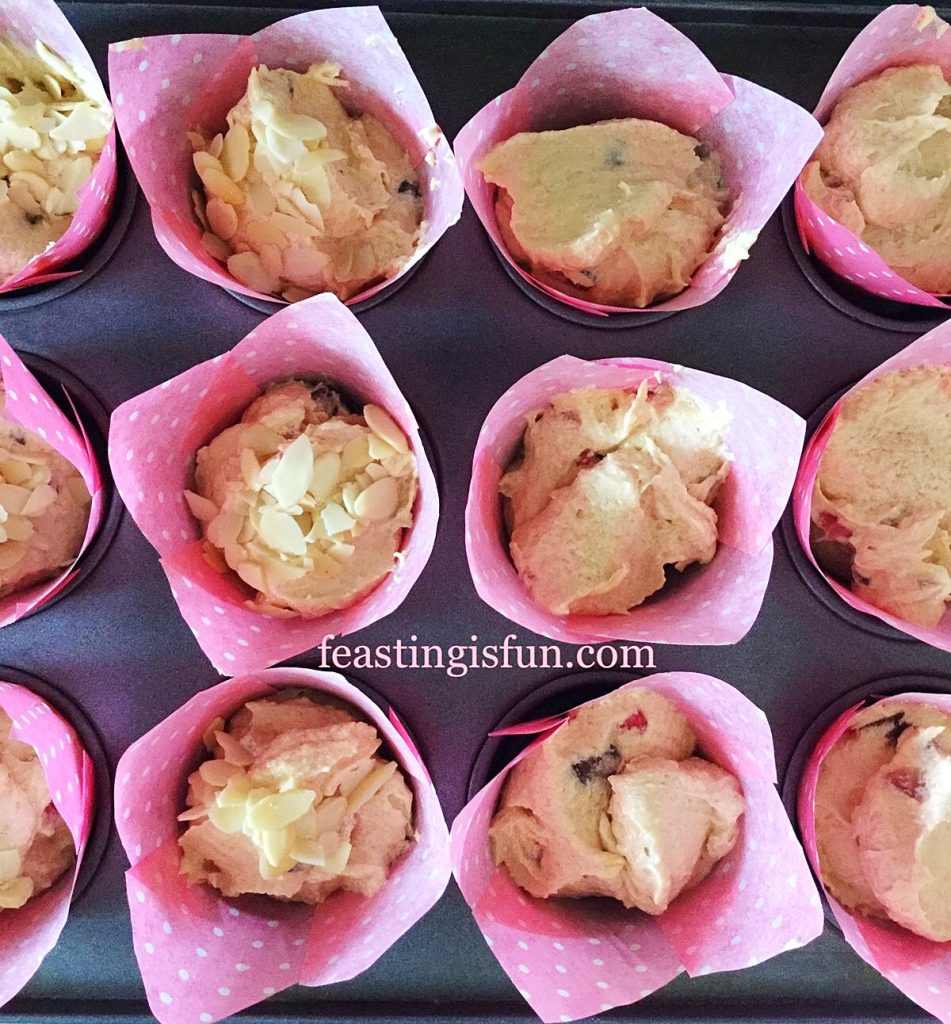
  • Sprinkle some flaked almonds on top of each unbaked muffin. Again dividing the almond flakes, so each muffin has an equal amount.
Adding flaked almonds to the top of the muffins before baking.
Adding flaked almonds to the top before baking.

Baking The Muffins

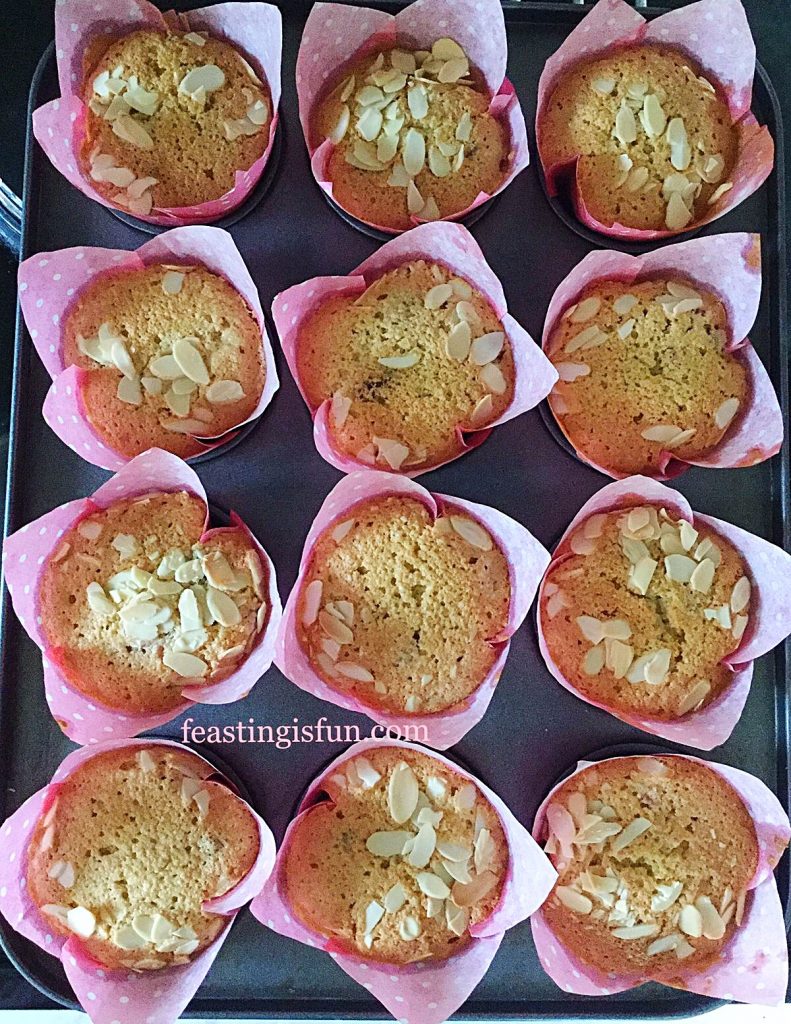
  • Place the muffin tin into the centre of the oven and bake for 40-45 minutes.
  • The muffins are baked when they turn golden brown and are firm to a light touch. Over cooked muffins will be dry so start checking at 35 minutes.
  • Note: if baking using smaller cases, the baking time will need to be reduced.
Muffins in tulip wrappers cooling in the tin.
Freshly baked muffins cooling in the tin.
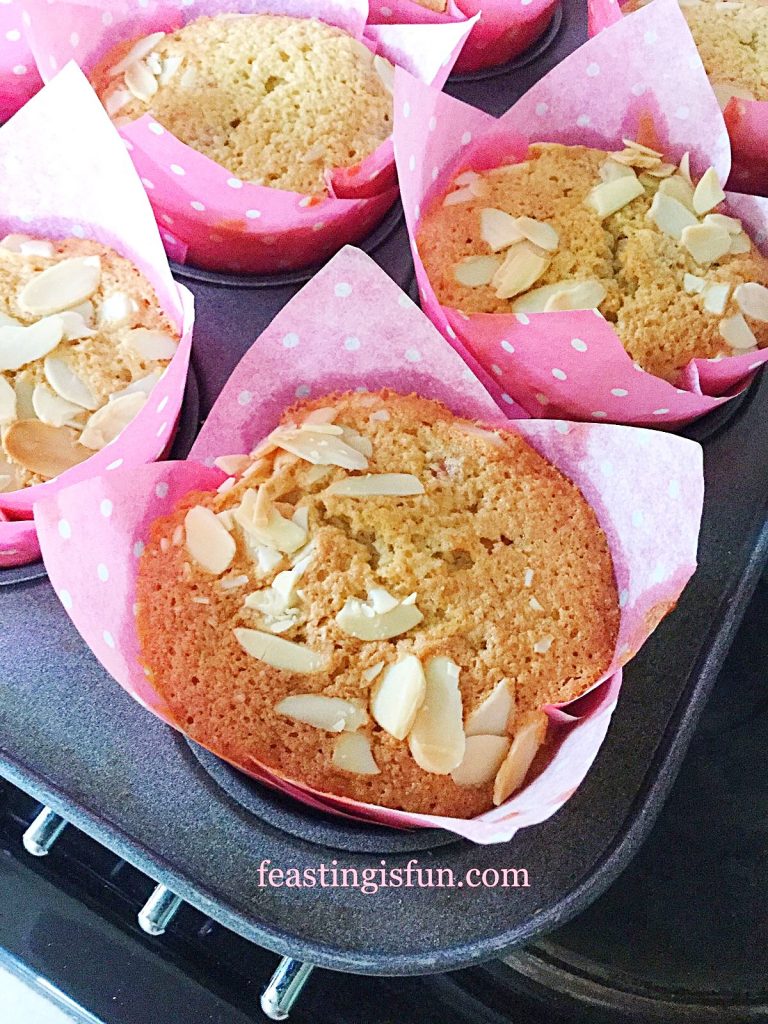
  • When using tulip cases leave the muffins to cool completely in the tin. For muffin/cupcake cases, leave to cool for 10 minutes in the tin and then transfer to a cooling rack.
Muffins baked in a muffin tin.
Double Strawberry Almond Muffins

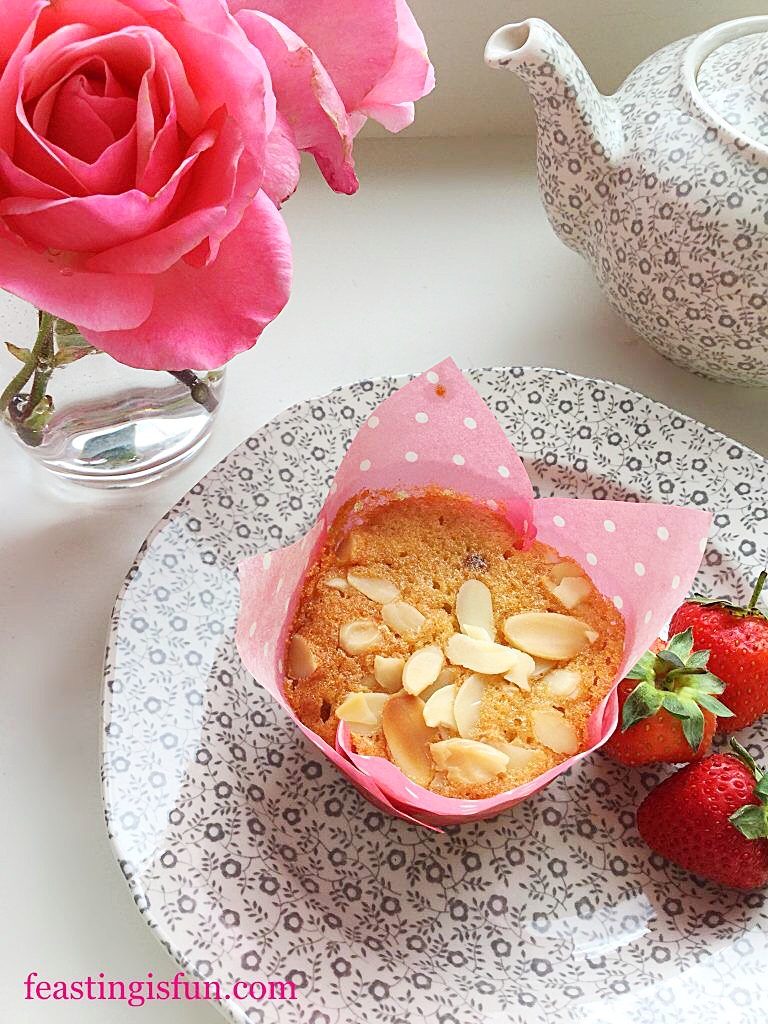
Double Strawberry Almond Muffins are best served slightly warm, or cold. Also serve with a cup of tea, or fresh fruit juice.

Muffin served with fresh strawberries.
Double Strawberry Almond Muffins

Muffins are great for breakfast, packed lunches and beating late afternoon hunger pangs.

Muffins containing fresh fruit are best eaten within 3 days of making. Store in an airtight container, placed in the fridge during hot weather.

If you have enjoyed this recipe for Double Strawberry Almond Muffins you may also like these:

Blueberry Lemon Shortbread Cake Bars

Blueberry Lemon Shortbread Cake Bars

Cheese Bacon Breakfast Muffins

Cheese Bacon Breakfast Muffins

Cherry Bakewell Cookies

Cherry Bakewell Cookies

Because these muffins take less than ten minutes to make, they really are a quick, delicious, breakfast treat. Knowing that, whilst at school, college or work, my family has good, wholesome food is important to me.

Dried strawberries are widely available from supermarkets, including Ocado, Waitrose and Amazon U.K.

So, whatever r you are making, baking and creating in your kitchens have fun preparing your feast.

Sammie xx

No part of this post may be reproduced without the explicit, written consent of the owner. For more details please see my Disclosure Policy.


Share
Facebooktwitterpinterestlinkedintumblr

Extra Fruity Hot Cross Buns

Share
Facebooktwitterpinterestlinkedintumblr

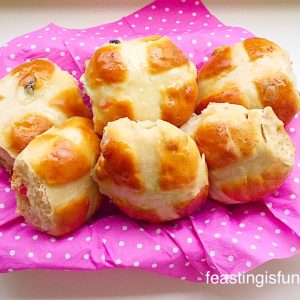
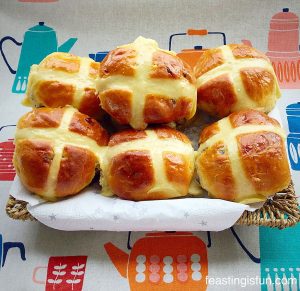
These Extra Fruity Hot Cross Buns really do take the humble, yet delicious and traditional Easter Bun to another level. As their spiced aroma escapes the kitchen, it fills the whole house with warmth. Turning a house into a welcoming home. While neighbours, out in their gardens, stop, wondering whose house the aromatic aroma originates from.

FF Extra Fruity Hot Cross Buns

Homemade – You Know What’s In These Buns

Easy to make and bake, these Extra Fruity Hot Cross Buns are so worth the little effort required. These are not the small, pappy, squidged into a ball, cheap supermarket versions. Instead they are filled with fruit, in a good sized bun, that also contains a small amount of wholemeal flour. Indeed, one bun is a substantial breakfast.

FF Extra Fruity Hot Cross Buns
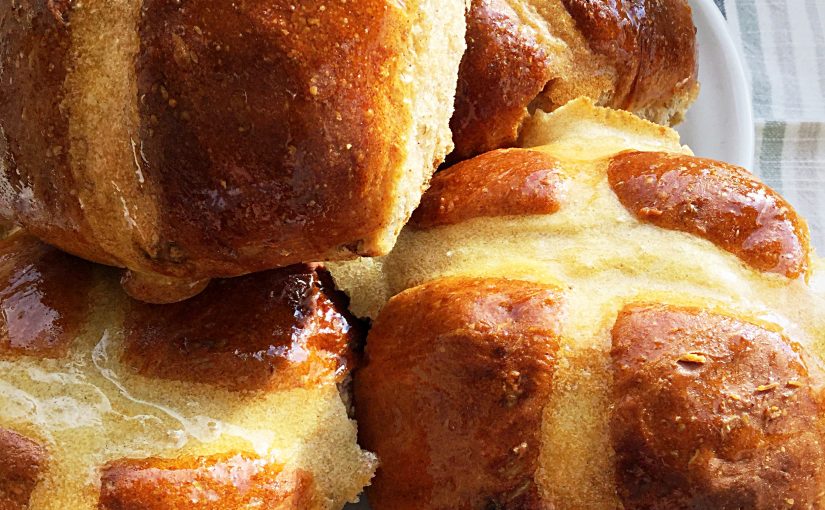
Extra Fruity Hot Cross Buns deliciously good for you.

Since these Easter buns are homemade, we know every ingredient they contain. Yet, what they don’t have is any artificial ingredients. Also they work out much cheaper to make, than bought ones. Plus, the extra smell when you split and toast them, is priceless!

FF Extra Fruity Hot Cross Buns
Anyone hungry?

The absolute thrill for me, when developing a new recipe, is my family’s reaction. Good or bad, I know it can be trusted. Words like “yummy”, “can I have another one please?” and “have you taken the photographs yet?” all feed into my sense of recipe security. As I’m going to be sharing the recipe with my readers, it needs to be robust and reliable. Hence only tried and tested recipes make their way on to this blog.

Recipe: Extra Fruity Hot Cross Buns makes 12

  • 150ml Tap Water
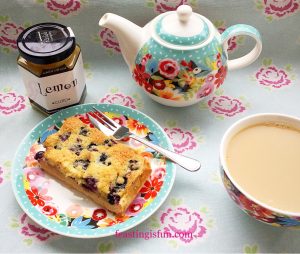
  • 150ml Whole Milk – slightly warmed to body temperature
  • 2 Large Free Range Eggs
  • 10g Fast Action Dried Yeast – I use Allinson in the green pot or sachets
  • 1tbsp Honey
  • 450g/1lb Strong White Flour – I use Shipton Mill
  • 50g/2oz Strong Wholemeal Flour
  • 10g Salt – I use Maldon
  • 50g/2oz Unsalted Butter cut into small cubes
  • 200g/7oz Mixed Dried Fruits – Sultanas/Raisins/Currants
  • 4tsp Cinnamon
  • 1tsp Ginger
  • 50g/2oz Plain White Flour and 50mls Tap Water for the crosses.
  • For the glaze:
  • 3tbsp Runny Honey plus 1tsp water

Method:

Making And Proving The Enriched Dough

  • Into the bowl of a stand mixer add the water, milk, eggs, honey and yeast.
  • Next, on top of the liquids add the strong white and wholemeal flour.
  • Then add the salt and butter.
  • Fit the stand mixer with a dough hook and then lock the bowl into place.
  • Lower the dough hook and start mixing on a slow speed. Continue mixing at this speed for 5 minutes.
  • After 5 minutes has elapsed gradually increase the mixer speed to moderately high. Again mix for a further 5 minutes, then stop the mixer and lift the dough hook.
  • Remove a small piece of dough and stretch it until you can see light through it. This is known as the windowpane test. If the dough tears continue mixing, checking every couple of minutes until it passes the windowpane test.
  • Once it has finished kneading, turn the speed on the mixer to low and add the spices and fruit. Mix for a further 2 minutes to incorporate the fruit and spices.
  • Following this, stop the mixer, raise the dough hook and scrape any dough into the bowl using your fingers.
  • Unlock the bowl, cover with a clean tea towel and place somewhere draught free.
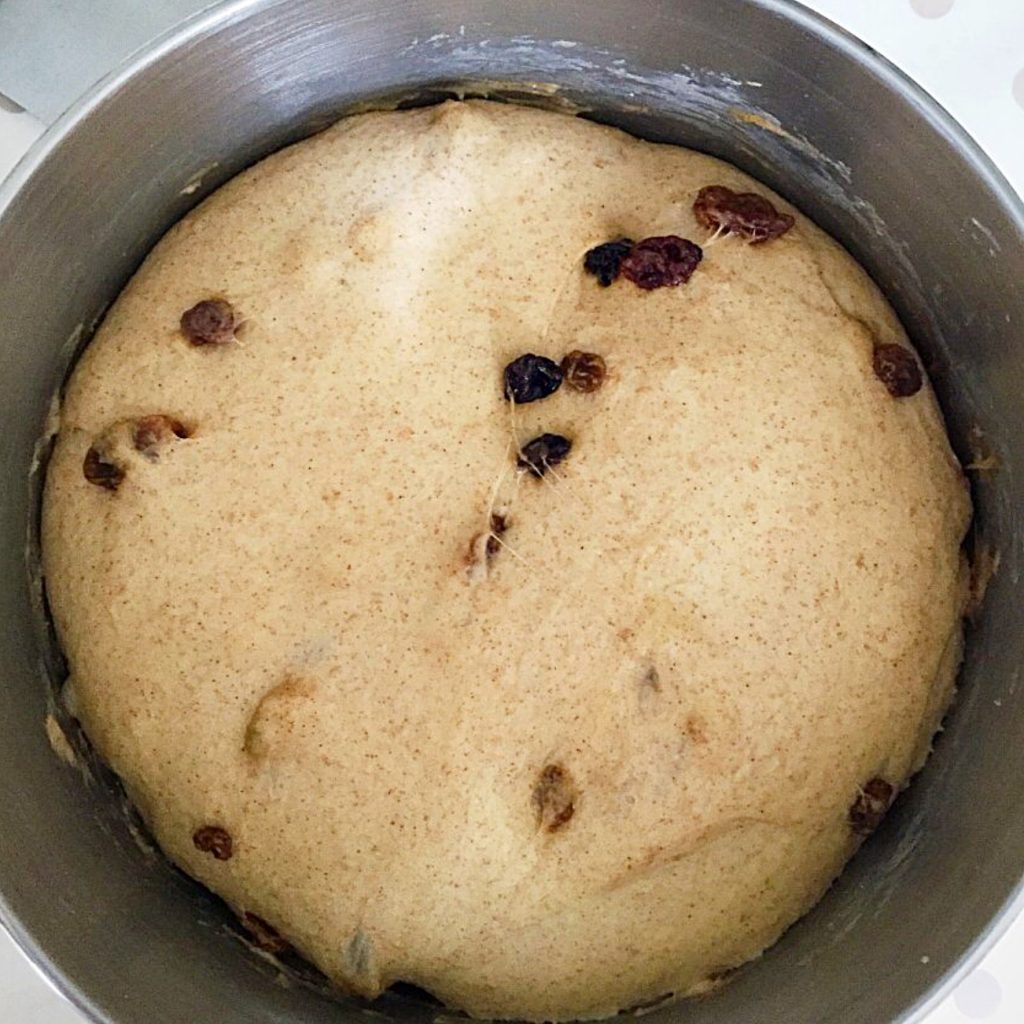
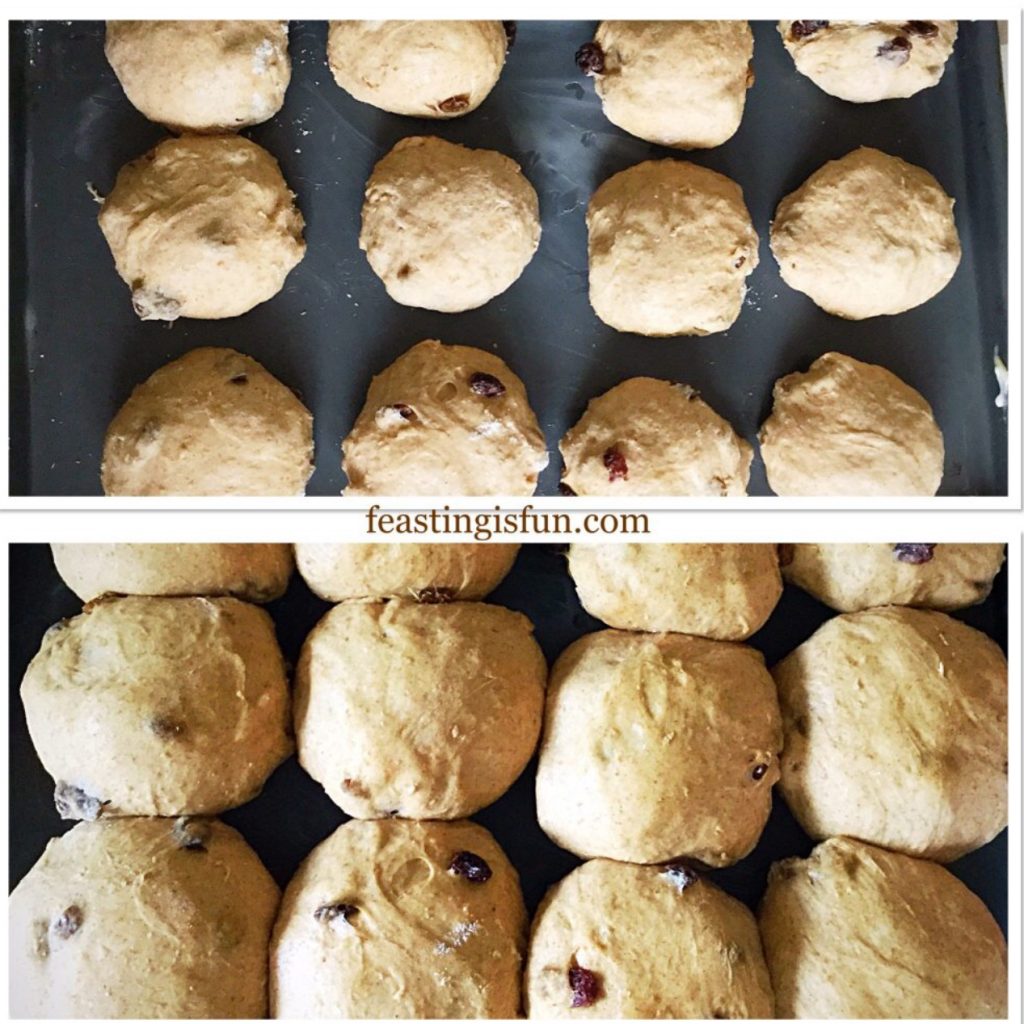
The dough has more than doubled in size.

For detailed set by step photos please see Hot Cross Buns

Shaping The Individual Buns And Giving Then A Second Prove

  • Tip the dough out on to a lightly floured surface, it will be quite sticky. Knead the dough lightly to form a ball and then weigh it. I place baking parchment on flat, digital scales. Note the weight and then divide it by 12, leaving the parchment on the scales.
  • Now cut the dough in half. As each bun is weighed this doesn’t have to be exact.
  • Follow by forming each dough half into a log shape. Cut each dough log into six.
  • Weigh the first piece of dough and adjust as necessary to obtain the correct weight.
  • Hold the dough in one hand while using the other to turn and tuck the underneath in, creating a tight ball shape. Place the ball on to the baking tray. Continue until all 12 balls have been made.
  • Cover the tray with a clean tea towel and place in a draught free place until doubled in size.

Making And Piping The Crosses

  • While the buns have their second prove, make the paste for the crosses. Place the flour and water into a bowl, mix until lump free. Spoon the white flour paste into a small piping bag, secure the top with a peg/rubber band and stand the bag in a glass until needed.
  • Preheat the oven to 220C/200C fan, gas mark 7.
The dough buns and after the second proof.
  • Once doubled in size, snip off the very end of the piping bag.
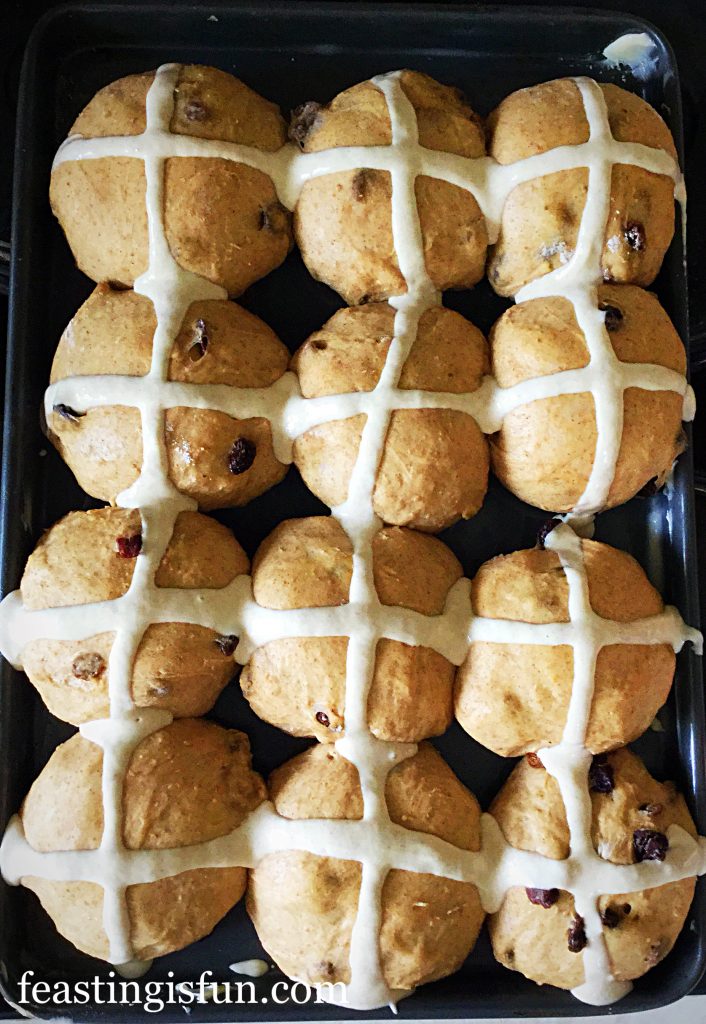
  • Pipe straight lines of paste. First of all piping across the tray and then down the tray.
FF Extra Fruity Hot Cross Buns
Pipe each separate row continuously for neat crosses.

Baking And Glazing The Hot Cross Buns

  • Bake in the preheated oven for 25-35 minutes. When baked they will be golden brown and sound hollow when rapped on the base with a knuckle.
  • Once baked remove from the oven. Remove the buns from the tray on to a cooling rack, with a clean baking tray underneath.
  • Measure the honey and water into a small microwaveable bowl. Heat in the microwave until bubbling. Remove carefully as it will be hot.
  • Stir the honey and water to mix.
  • Use a pastry brush to cover each hot bun in honey.
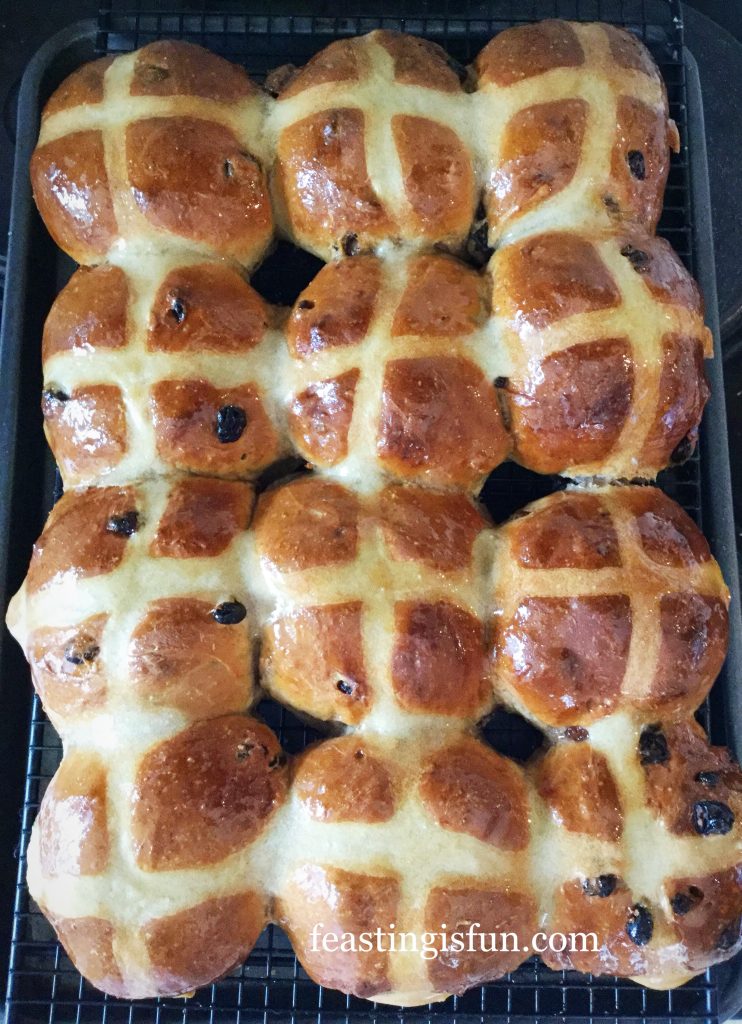
FF Extra Fruity Hot Cross Buns
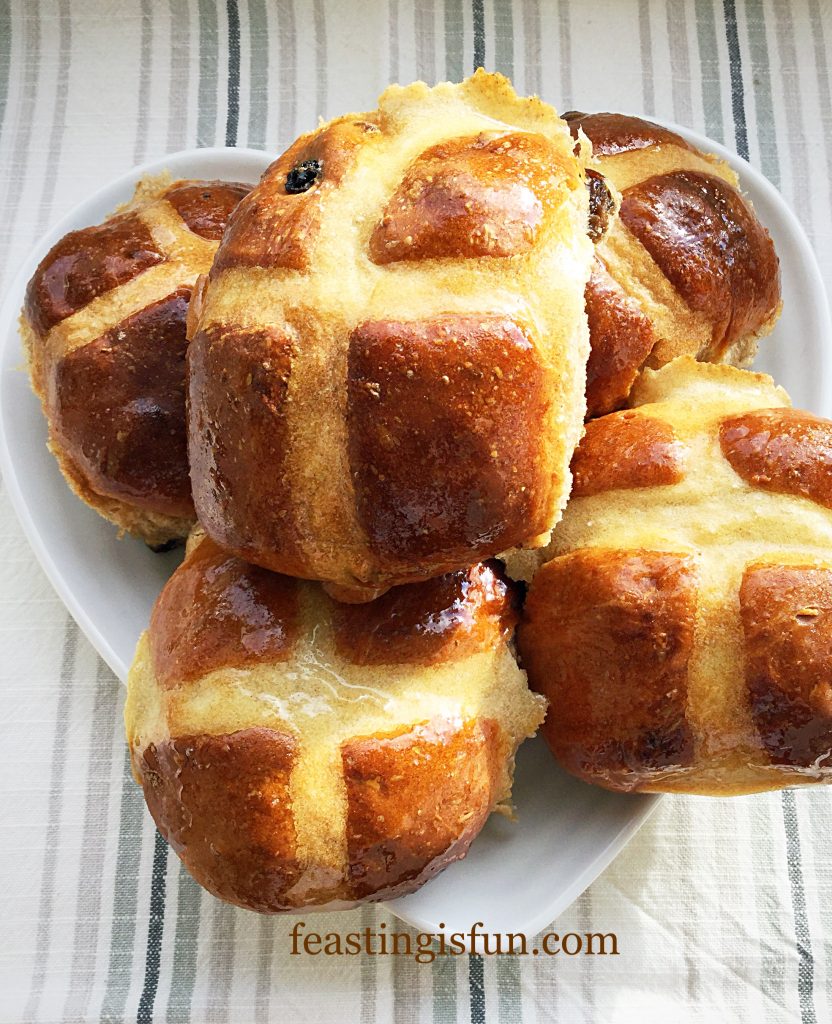
Sticky, cooling, Extra Fruity Hot Cross Buns.

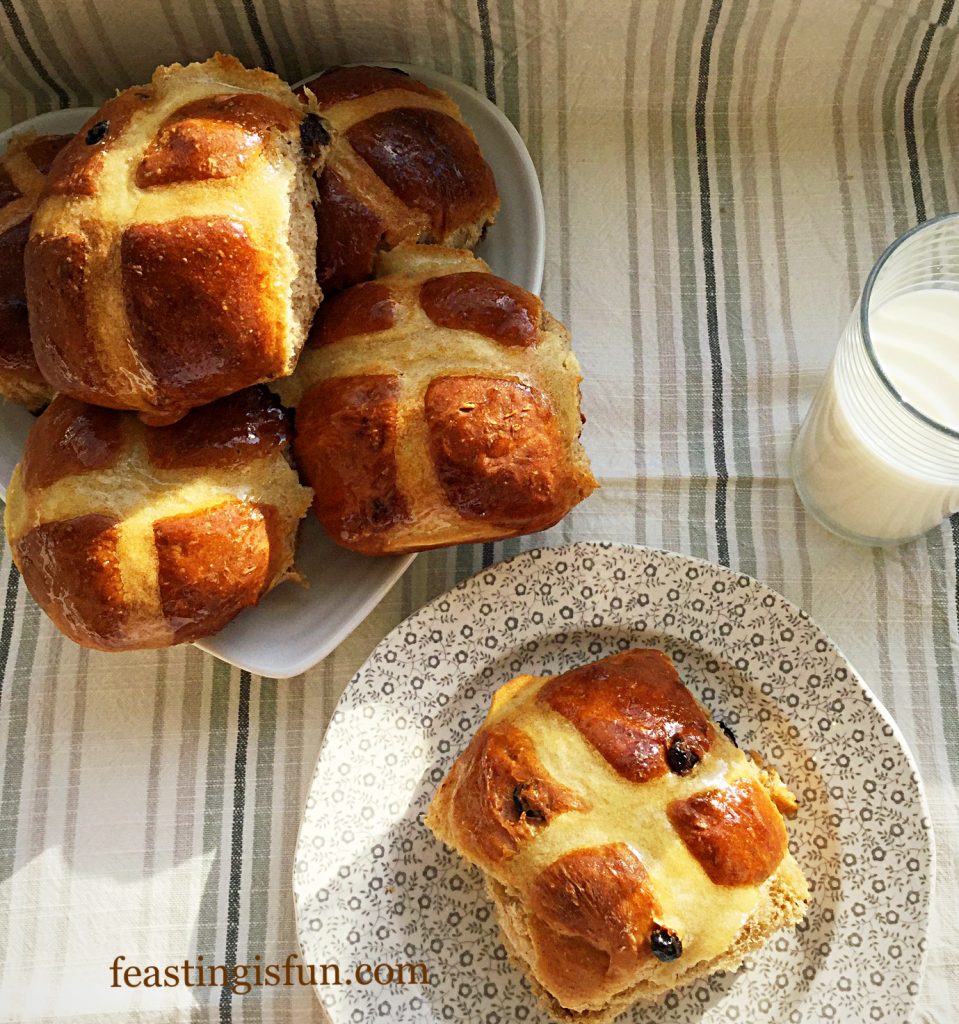
Wait for the buns to cool before eating. Then serve as is or toasted and buttered with a big smile.

FF Extra Fruity Hot Cross Buns
Extra Fruity Hot Cross Buns delicious fresh from the kitchen.

The buns will keep for 3 days if toasted. Also they freeze extremely well for up to one month.

If you have enjoyed this Easter recipe for Extra Fruity Hot Cross Buns then you may also like other Easter bakes:

Ginger Date Hot Cross Buns

Ginger Date Hot Cross Buns.

Cherry Bakewell Hot Cross Buns

Cherry Bakewell Hot Cross Buns

Chocolate Mini Egg Brownies

Chocolate Mini Egg Brownies

It would be very easy to double up on this recipe and share homemade Extra Fruity Hot Cross Buns with friends, neighbours and family over the Easter period.

Whatever you are making, baking and creating in your kitchens, have fun preparing your feast.

Sammie xx

No part of this post may be reproduced or duplicated without the written permission of the owner. Please see my Disclosure Policy.


Share
Facebooktwitterpinterestlinkedintumblr

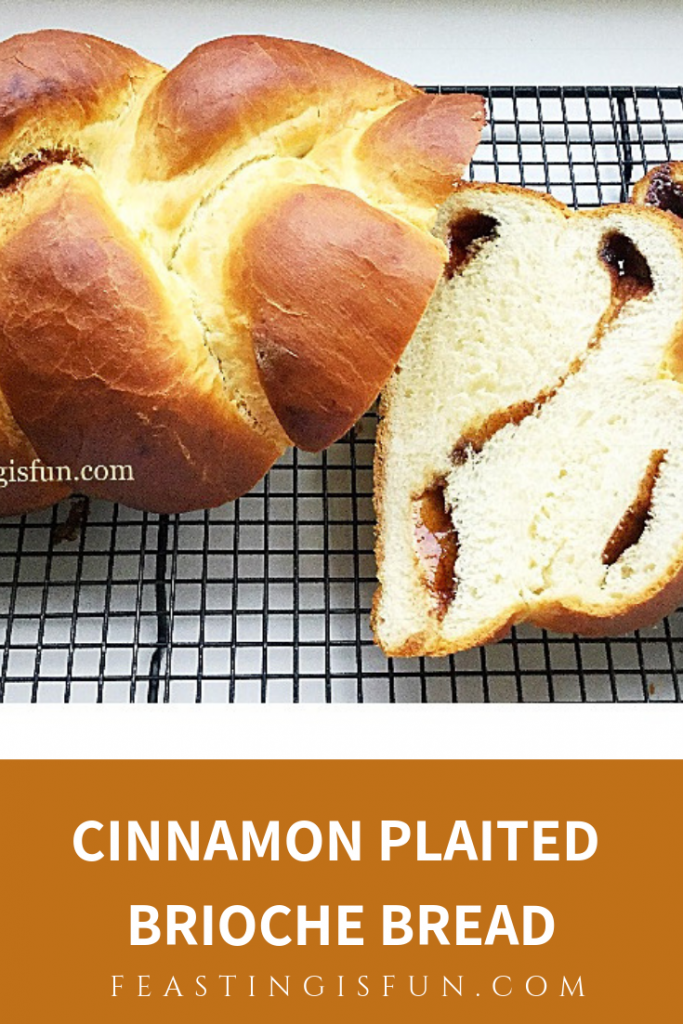
Cinnamon Plaited Brioche Bread

Share
Facebooktwitterpinterestlinkedintumblr

If you are a frequent visitor to this blog, you will know how much I enjoy making bread. While I am very happy to let kitchen appliances carry out the hard work, indeed for this loaf they are necessary, shaping the dough is always fun to do by hand. Since I first tried an eight strand plaited loaf last year, I have become hooked on intertwining lengths of dough and observing the final, baked result. This Cinnamon Plaited Brioche Bread is delicious and easy to make.

FF Cinnamon Plaited Brioche Bread
Cinnamon Plaited Brioche Bread a delicious breakfast.

Having re-tested the recipe and technique I have full confidence that you too can make this delicious bread. Even if you have never plaited before, the step by step photographs will show you how. Such a small amount of extra effort and you will be rewarded with a stunning loaf. While the smell of cinnamon dough, baking, will have you counting the minutes until your first slice!

FF Cinnamon Plaited Brioche Bread
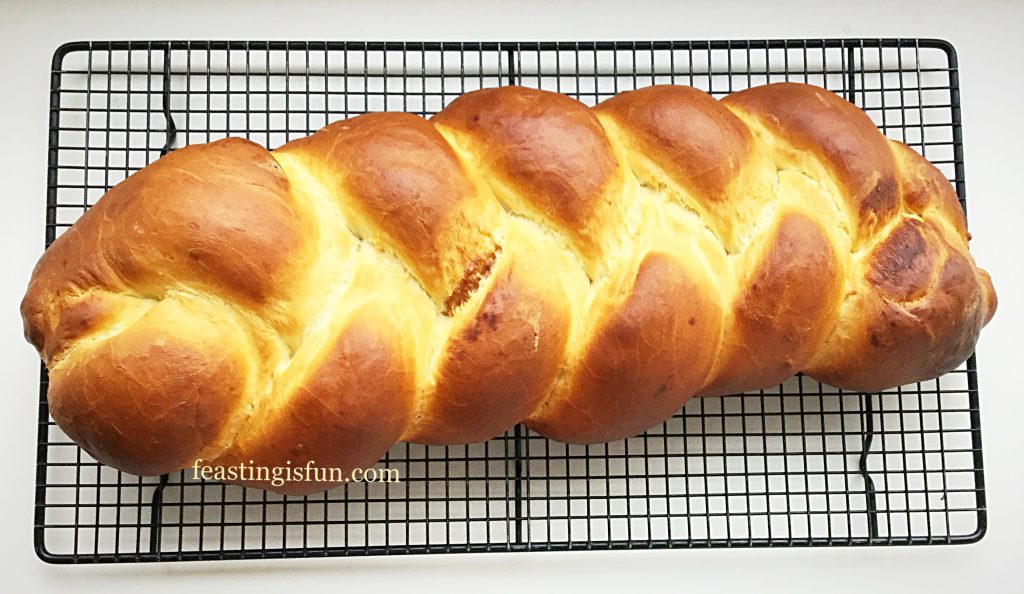
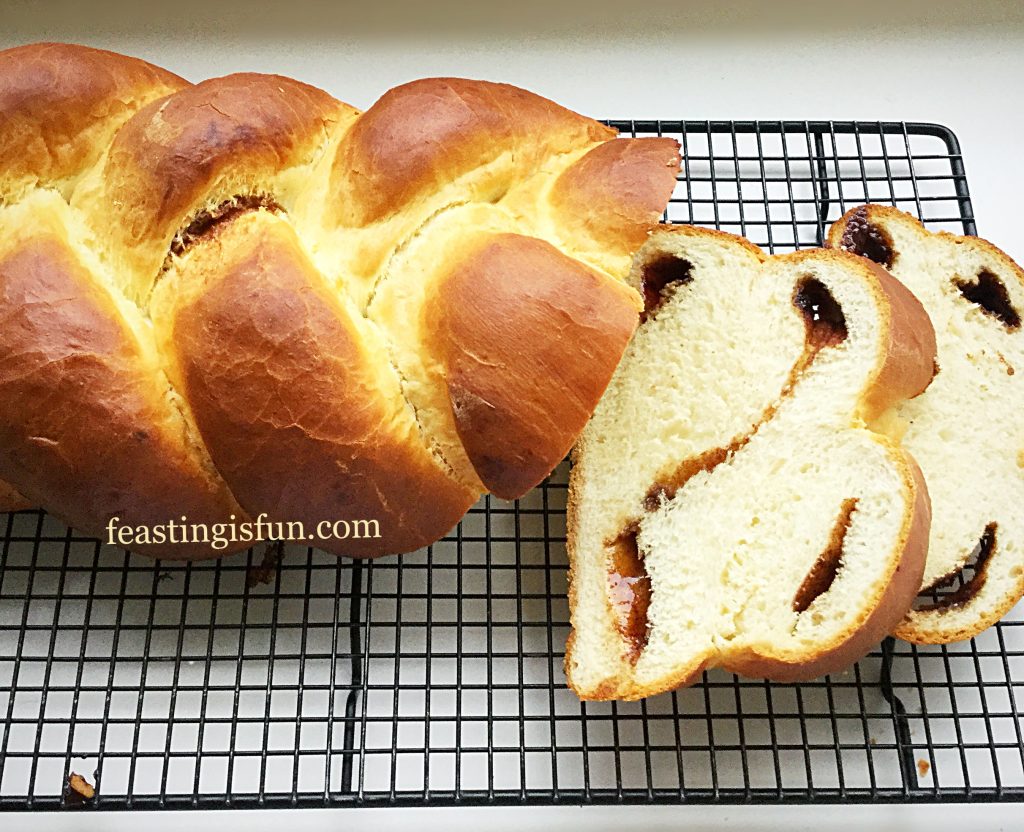
Cinnamon Plaited Brioche Bread golden and bronzed with a hidden inner.

How Ingredients Affect The Final Bake

When baking, it always pays to use the very best ingredients available. However, not everyone’s budget can stretch to premium ingredients. If you can make one change here, I strongly recommend using free range, or organic eggs. Their golden yolks are what help give this loaf its amazing colour. Both in the bread itself and the egg wash, brushed on before baking. Resulting in both the golden and bronzed baked crust.

FF Cinnamon Plaited Brioche Bread
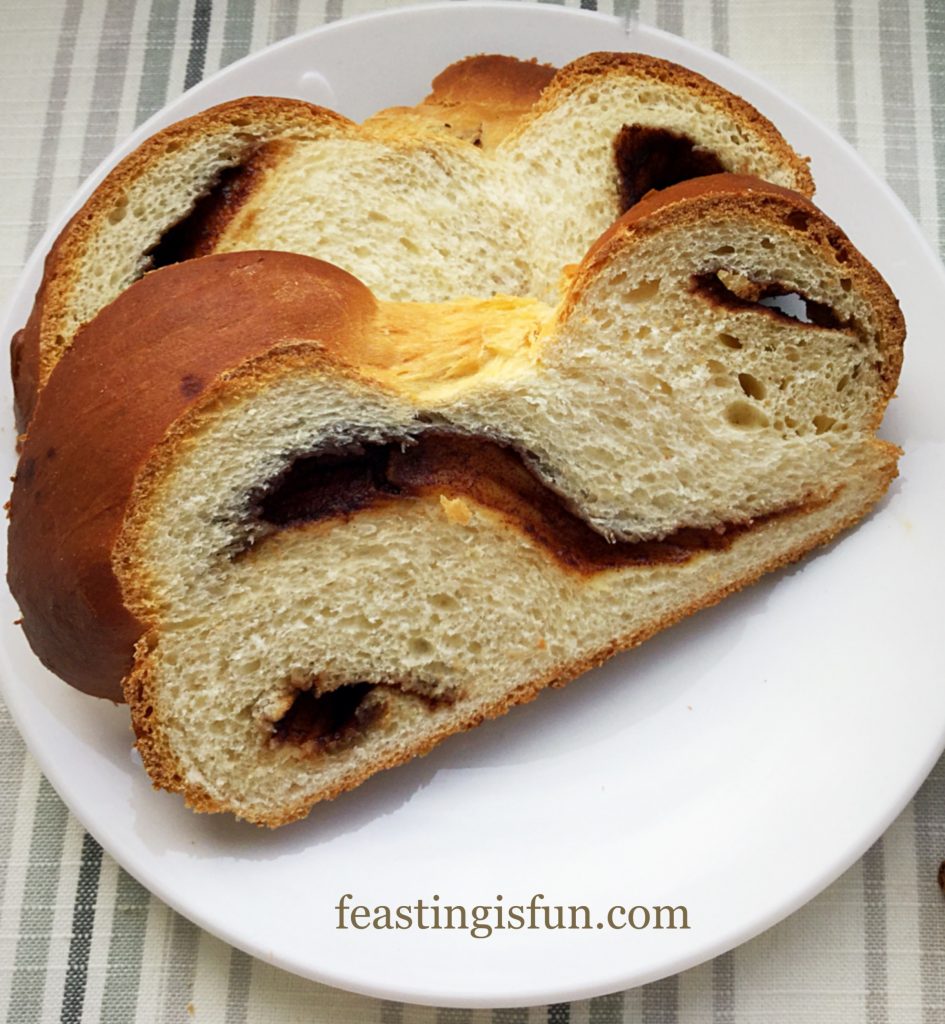
Cinnamon Plaited Brioche Bread beautiful inside and out.

Serving this bread, sliced for breakfast or as an afternoon treat with a hot drink, is sure to brighten anyone’s day. Since it is a large loaf, why not take it to work, pre-sliced and share with your colleagues? Since all food tastes better when it is shared, that is the only way to improve this bread. Simply by sharing it.

FF Cinnamon Plaited Brioche Bread
Cinnamon Plaited Brioche Bread simply delicious.

Recipe: Cinnamon Plaited Brioche Bread 

300mls Whole Milk

2 Large Free Range Eggs

1tsp Caster Sugar

10g Dried Yeast – I use Allinson in the green tub or sachets

600g/1lb 5oz Strong White Bread Flour – I use Shipton Mill

50g/2oz Unsalted Butter

10g Salt – I use Maldon

For the cinnamon filling:

75g/3oz Light Muscavado Sugar – I use Billington’s

4tsp Cinnamon

1 free range egg plus 1tbsp milk to brush over the loaf.

Method:

The method given for making this Cinnamon Plaited Brioche Bread uses a dough hook fitted to a stand mixer. The enriched dough is very, very sticky, prior to its first prove. Using a stand mixer ensures that the dough is kneaded properly. Resulting in a light textured crumb once baked.

Making The Brioche Bread Dough

  • First of all ensure that your kitchen is warm. It will really benefit the yeast, during the dough making process.
  • Measure the milk into a jug and warm in a microwave for 20 seconds. Ideally the milk should be body temperature 37C. However, do not overheat as it may kill the yeast.
  • Pour the milk into the bowl of a stand mixer.
  • Crack 2 eggs into the jug and add these to the milk in the bowl. I always break eggs into a separate container first. If any shell escapes it can then be removed and also, extremely occasionally, should an egg be bad, it will not spoil the whole recipe.
  • Next add the sugar and yeast. Swish the liquid about with clean fingers to break up the eggs and mix lightly.
  • On top of the liquid mix add the flour.
  • Now add the butter and salt.
  • Lower the dough hook into the bowl and mix on the slowest speed for 5 minutes. Then, gradually increase the speed to medium and mix for a further 5 minutes.
  • After the mixing time has elapsed stop the mixer.

The Windowpane Test

  • Remove a small piece of dough and stretch it between your fingers. The dough is kneaded when it can be stretched so thinly that light can be seen through it. This is called the windowpane test.
  • If the dough tears before it can be fully stretched, lower the dough hook and continue mixing, checking every 3 minutes, until it passes the windowpane test.
  • Once the dough passes the windowpane test it is ready to prove. Scrape the dough from the dough hook and allow to drop into the bowl. Cover the bowl with a clean tea towel and place somewhere warm and drought free.
  • Allow the dough to prove until doubled in size – approximately 1 hour.
  • While the dough is proving grease a large baking tray with butter. Also, into a small bowl, weigh out the sugar and add the cinnamon. Stir to mix and break up any large sugar lumps using your fingers. Set to one side.

Shaping The Dough And Adding The Cinnamon Mix

  • Once doubled in size turn the dough out on to a lightly floured surface. Use your hand, or a dough scraper to remove all of the dough.
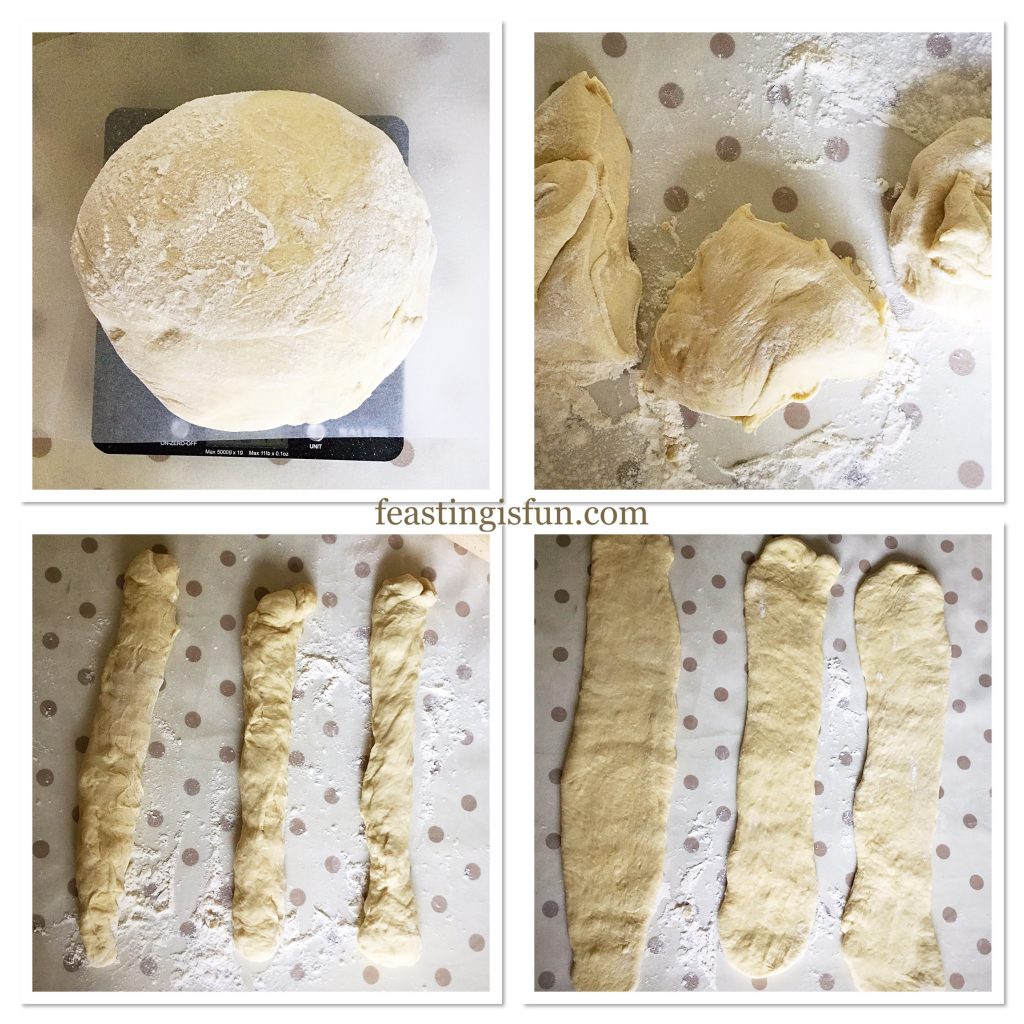
  • Shape the dough into a round and then weigh it. I use digital scales, placing the dough on to a piece of baking parchment. Make a note of the weight of the dough. Now divide that figure in 3.
  • Cut the dough into 3 pieces that are equal in weight.
  • Roll each piece of dough into a length and then flatten, using your hands or a rolling pin. Each flattened length of dough should measure 50cm/20″.
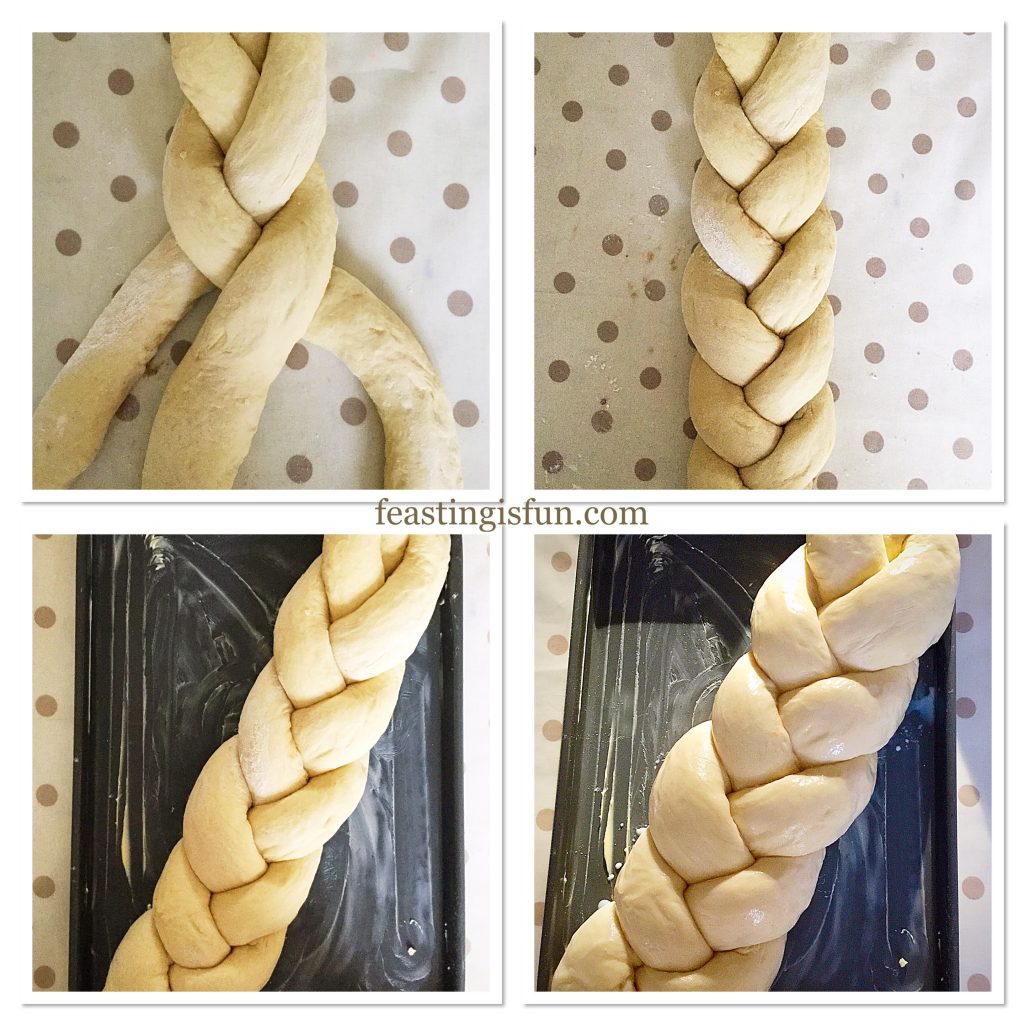
FF Cinnamon Plaited Brioche Bread
Preparing three dough strands for the cinnamon/sugar filling.
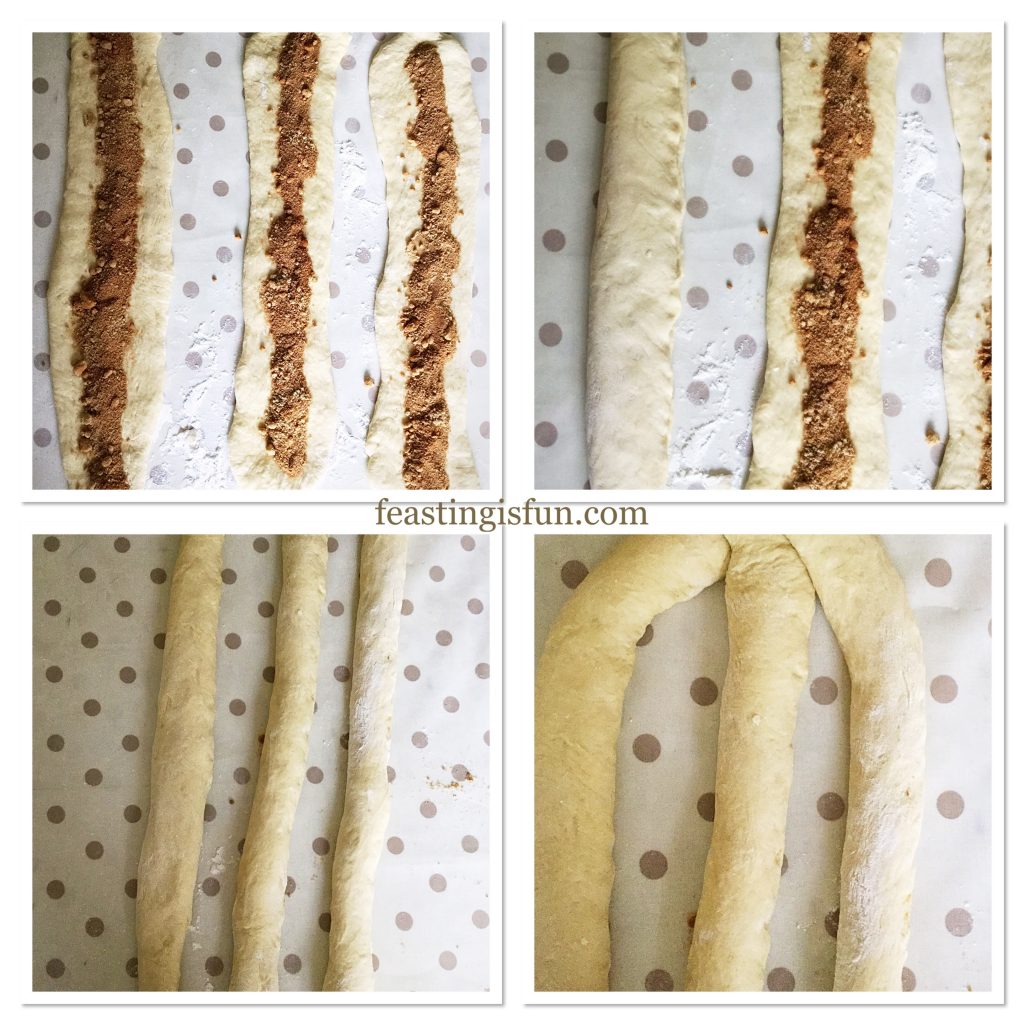
  • Sprinkle the sugar/cinnamon mixture down the middle of each piece of dough. Dividing it equally between three strands.
  • Dab a little tap water down the right side of the first strip of dough. Now bring the left side over and pinch to secure the sides together. Similar to making a sausage roll.
  • Continue until all three lengths of dough have their filling securely encased.
  • Roll each length of dough so that the join is underneath and not visible.
  • Join all three lengths of dough at the top. Place on top of each other and pinch together to secure.
FF Cinnamon Plaited Brioche Bread
Filling, securing and attaching the top of the plait.

Plaiting The Cinnamon Brioche Bread

  • Starting from left to right, number the strands 1, 2 and 3. Number 1 strand will always be to the left, 2 in the middle and 3 on the right.
  • Pass strand 1 over strand 2.
  • Now pass strand 3 over strand 2. Ensure the strands are not pulled tight and there should be no gaps.
  • Repeat the past two steps until the plait is finished. (Strand 1 over 2, then strand 3 over strand 2 and repeat.)
  • Pinch the bottom 3 strands together so that they are secure and look tidy.
  • Lift the plait using both hands at either end and place diagonally on to the greased baking tray.
  • Cover with a clean tea towel and leave, as before, in a draught free place.
  • While the plaited dough is proving preheat the oven to 240C/220C gas mark 9, 475F. Break an egg into a bowl, add the tablespoon of milk and whisk with a fork to mix.
  • Once the plaited dough has doubled in size use a soft pastry brush and carefully brush the egg wash over.
FF Cinnamon Plaited Brioche Bread
Plaiting and placing the brioche on to a baking tray before the egg wash.

Baking The Cinnamon Plait

  • Place the egg washed Cinnamon Plaited Brioche Bread into the centre of the preheated oven and bake for 10 minutes. Then reduce the oven temperature to 220C/200C fan, gas mark 7, 425F. Continue to bake for a further 15-20 minutes.
  • The bread is baked when a deep, golden crust has formed and the base sounds hollow, when rapped with a knuckle.
  • Once baked remove the bread from the oven.
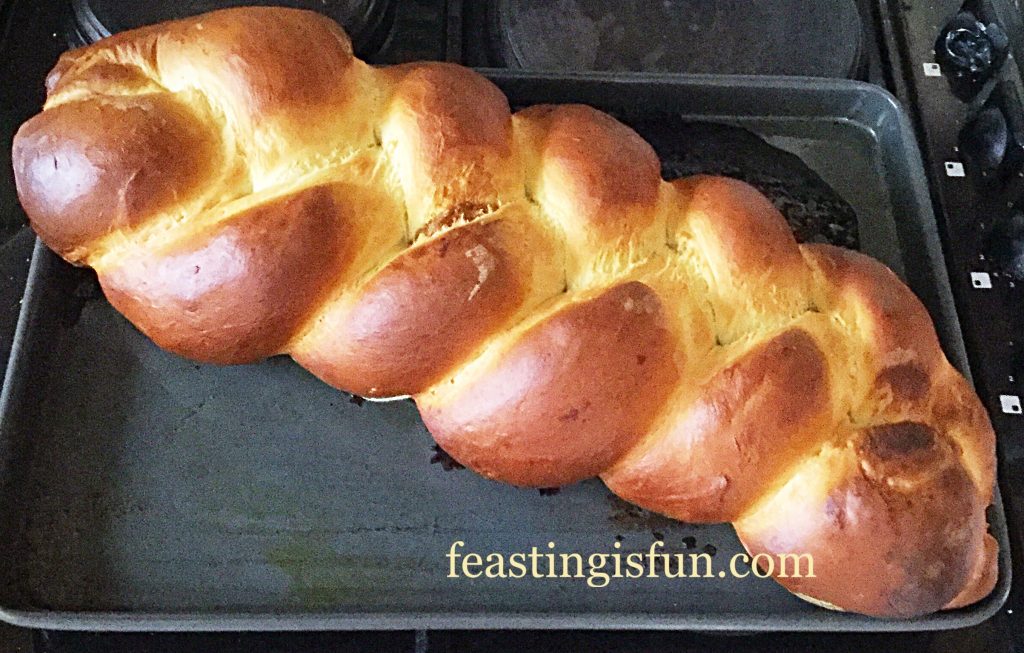
FF Cinnamon Plaited Brioche Bread
Beautifully baked Cinnamon Plaited Brioche Bread.
  • Slide a pallet knife under the baked bread, then carefully transfer to a cooling rack.
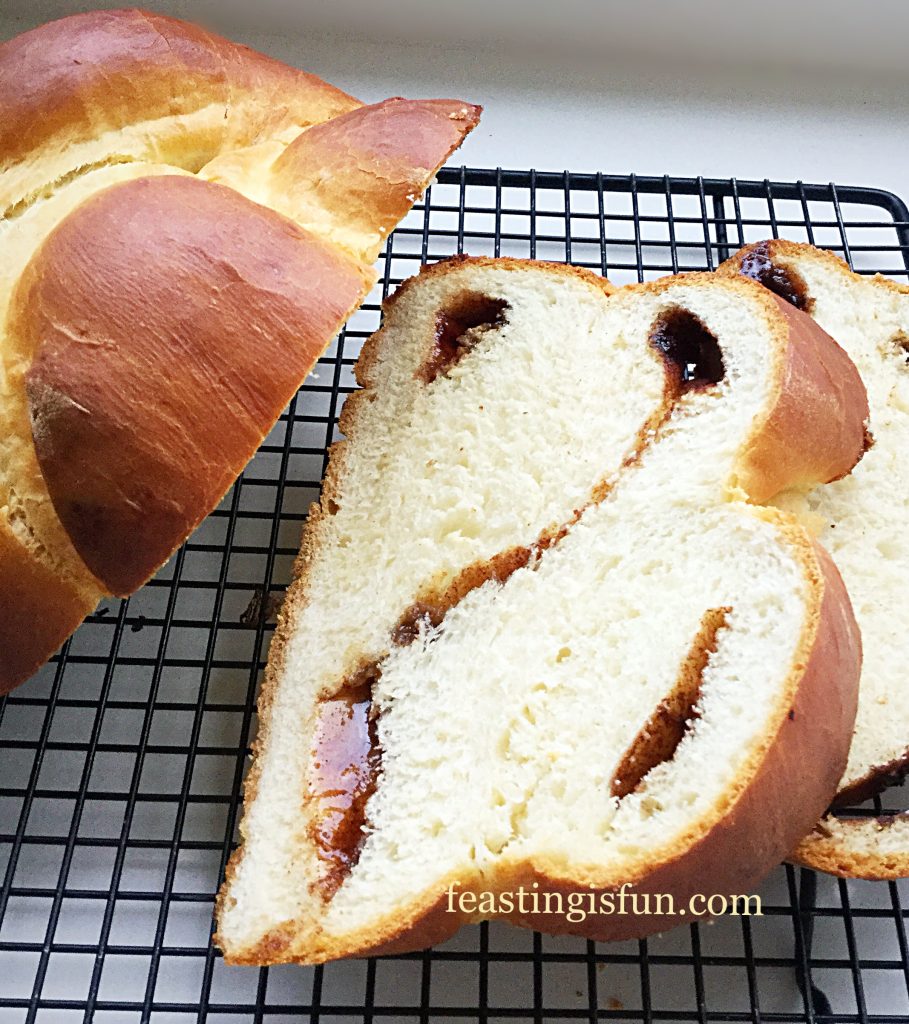
FF Cinnamon Plaited Brioche Bread
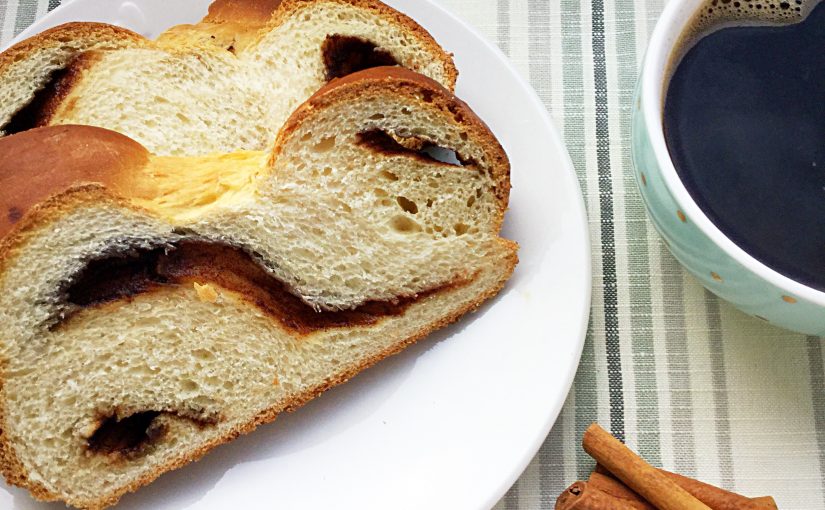
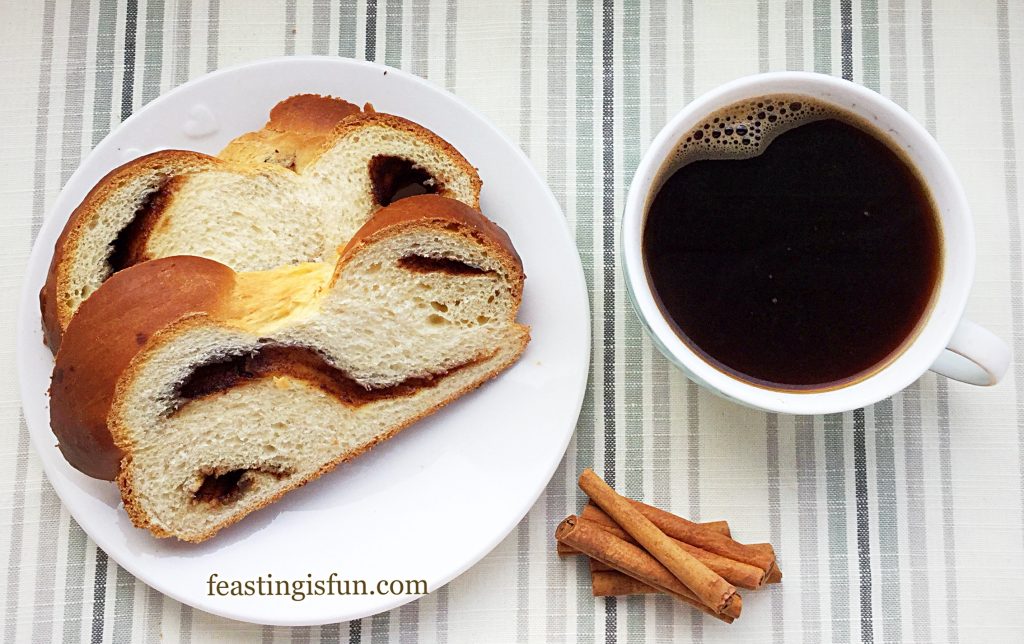
Cinnamon Plaited Brioche Bread cooled and sliced, revealing the hidden centre of each strand.

Allow the loaf to cool to body temperature before slicing. Attempting to slice while the bread is still hot will compact the bread. Also eating freshly baked, hot bread, is not good for our digestion!

Serve sliced with a smile and a complimenting drink.

FF Cinnamon Plaited Braided Brioche Bread

Placed in a bread bin, or wrapped loosely in foil, once fully cooled, this loaf will last up to three days. It can be toasted, although I’d advise not to use a toaster due to the sugar present. Under a grill, or even better, in front of a log fire, this bread makes excellent toast!

If you have enjoyed this recipe for Cinnamon Plaited Brioche Bread you may also like these:

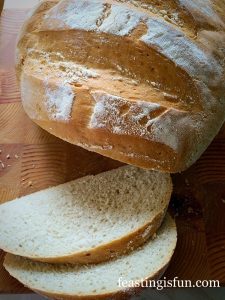
Large White Bloomer

FF Cinnamon Plaited Brioche Bread
Large White Bloomer

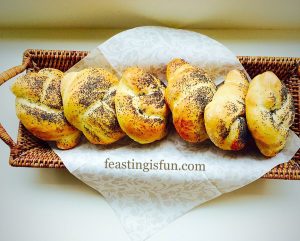
Knotted Poppyseed Rolls

FF Cinnamon Plaited Brioche Bread
Knotted Poppyseed Rolls

Ginger Date Hot Cross Buns

FF Cinnamon Plaited Brioche Bread
Ginger Date Hot Cross Buns

Homemade bread is the most luxurious food, for me, to bake. Enticing smells as it is baking, make our house feel like a home. Appreciative comments when a fresh loaf is on the table, to be served with dinner, or for breakfast, make me smile. Not for the accolade, or indeed achievement, from others, of having made my own loaf. Simply the fact that I am giving my family, delicious, additive free, tasty bread, is enough to keep me baking.

So, whatever you are making, baking and creating in your kitchens, have fun preparing and sharing your feast.

Sammie xx

No part of this post may be reproduced or duplicated without the written permission of the owner. Please see my Disclosure Policy.

Share
Facebooktwitterpinterestlinkedintumblr

Cherry Bakewell Soda Bread

Share
Facebooktwitterpinterestlinkedintumblr

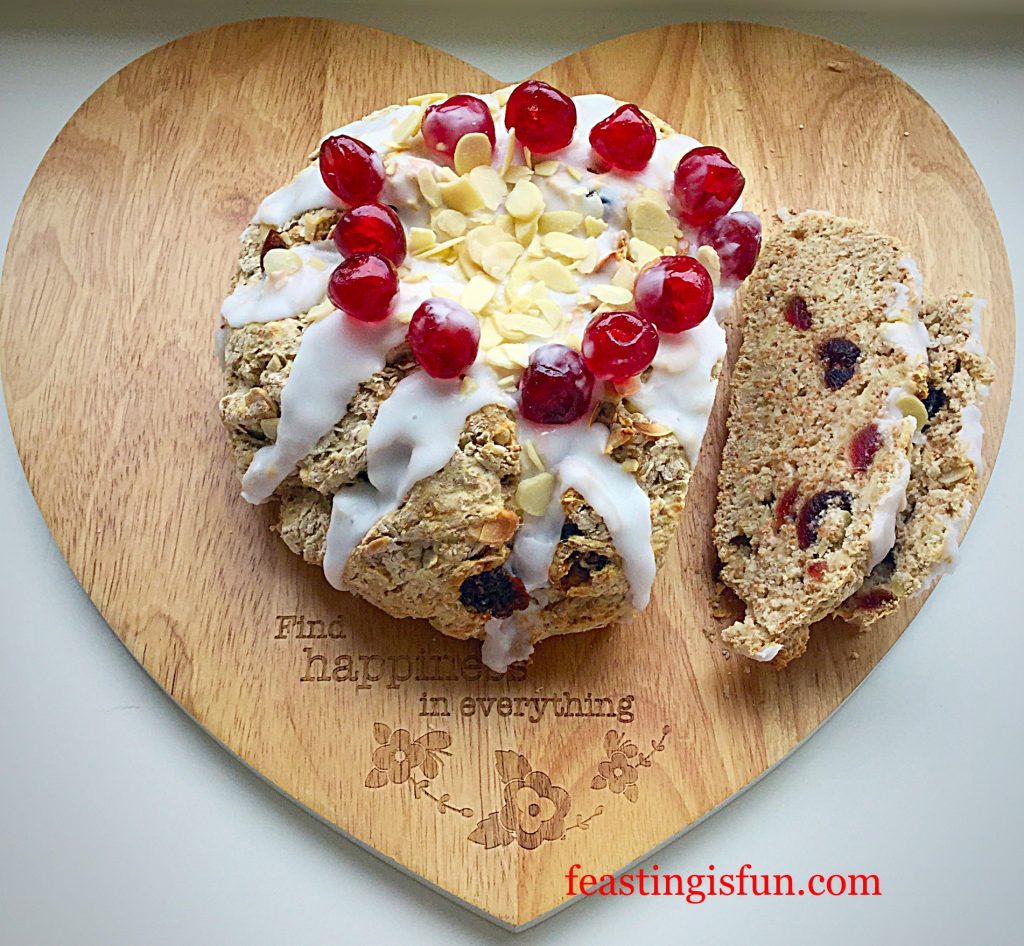
Nothing smells better than the aroma of homemade bread, baking in the oven. As many of my regular readers will know, I adore making bread. Yet sometimes, time is the enemy. Especially if it’s needed for breakfast and we have run out. The solution is to bake this beautiful and delicious Cherry Bakewell Soda Bread.

FF Cherry Bakewell Soda Bread
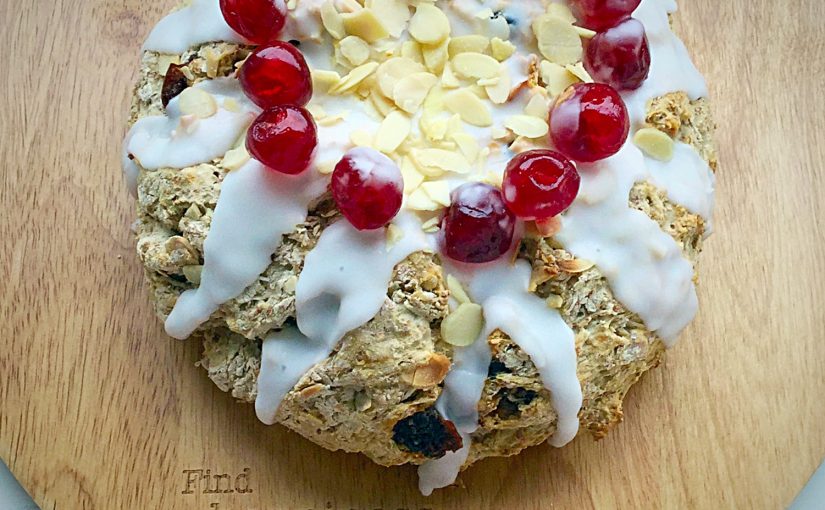
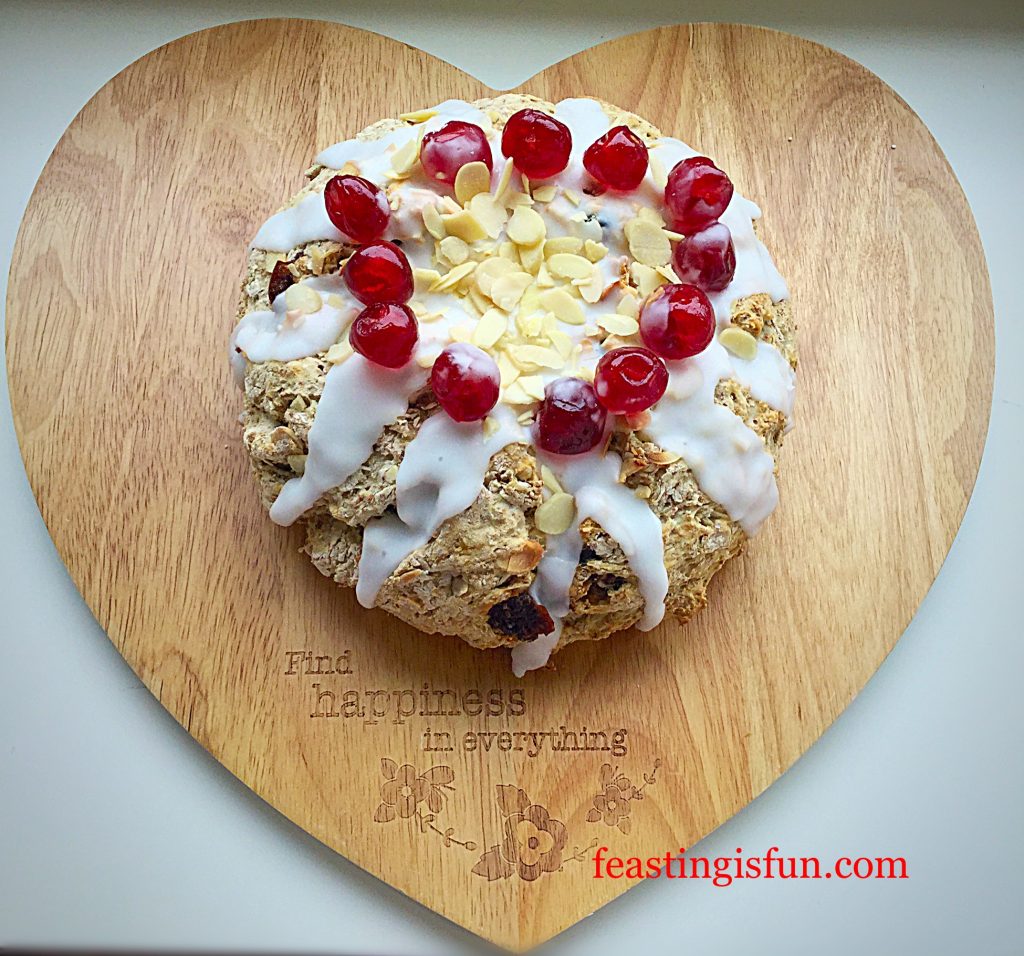
Cherry Bakewell Soda Bread crowned with cherries.

An un-yeasted bread, made even easier by using a packet of Wrights Scofa Bread Mix. All this tasty loaf requires is a little mixing, shaping and popping in a preheated oven to bake. The addition of cherries and flaked almonds gives this loaf the wow factor. Especially with the almond flavour icing, temptingly drizzled over the loaf and finished with ruby red, glacé cherries.

FF Cherry Bakewell Soda Bread
Cherry Bakewell Soda Bread hearty and delicious.

Since this loaf takes less than 45 minutes from start to baked, it is perfect for lazy weekend breakfasts. Still, if you are in a real rush, ditch the icing and crown of cherries and serve this sliced, warm from the oven, with butter if desired.

FF Cherry Bakewell Soda Bread
Cherry Bakewell Soda Bread perfect for afternoon tea.

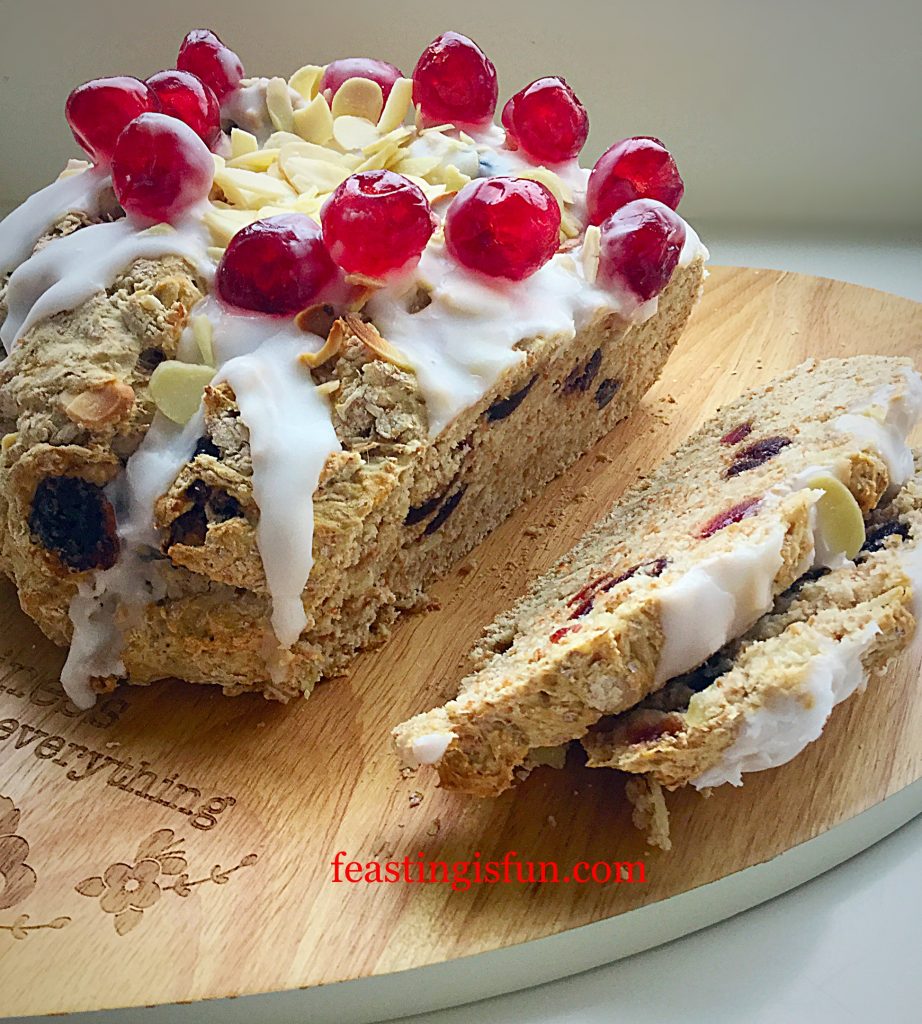
While this bread can be made and baked in under an hour, leaving to cool allows for simple, yet stunning decoration. Thick, almond icing, draped over the rustic loaf, simply topped with jewelled cherries. Creating a sensation for the eyes as well as the palette. Cooled and sliced, I found this delicious, hearty loaf needed no further addition. Each bite full of almonds, cherries and rustic, wholemeal bread.

Recipe: Cherry Bakewell Soda Bread

1 Packet Scofa Bread Mix available from Wrights Baking

Cold Water

150g/5oz Glacé Cherries

100g/4oz Flaked Almonds

3tsp Almond Extract – I use Nielsen-Massey

200g/7oz Sifted Plain Icing Sugar

Method: Preheat the oven to 220C/200C fan, gas mark 7.

  • First of all, remove 12 whole glacé cherries and set them to one side for decoration.
  • Next cut all the remaining cherries in half.
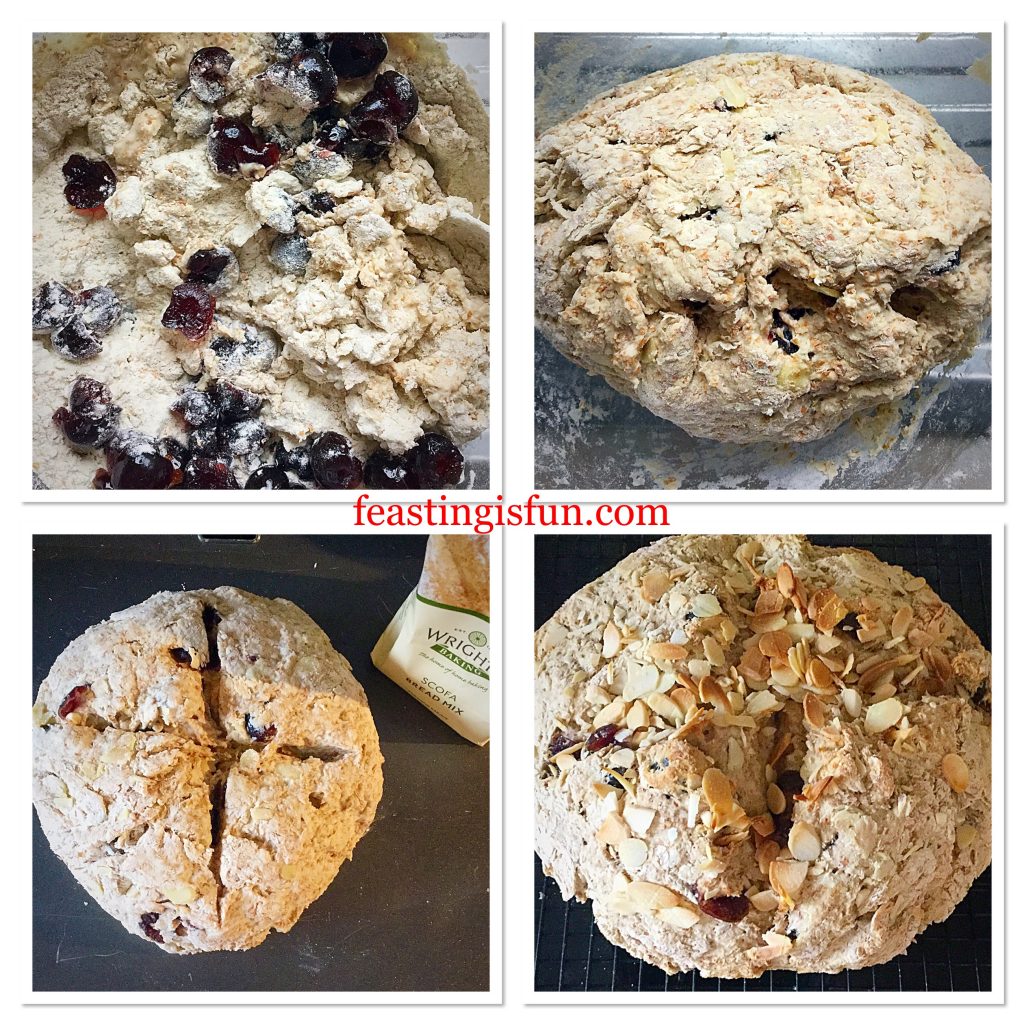
  • Place the volume of water, as specified on the packet, into a large bowl.
  • Add 1 teaspoon of almond extract to the water. Swirl to mix.
  • Add the entire packet of Scofa Bread Mix.
  • Now add the cherry halves on top of the bread mix, lightly dusting them with the mix to stop them sticking together.
  • Reserve one tablespoon of flaked almonds for decoration and add the rest to the bowl.
  • Use a wooden spoon to stir the mixture until it comes together.
  • Tip the dough out on to a lightly floured work top and shape into a round.
  • Place the shaped dough on to a greased baking sheet.
  • Cut a deep cross into the dough, if not icing, sprinkle the remaining almonds over the bread.
  • Next place in the centre of a preheated oven.
  • Bake the bread for 30-35 minutes. Once baked it will sound hollow when rapped on the base with your knuckle. Note – this baking time is slightly longer than specified on the packet. This is due to the addition of cherries and almonds.
  • Once baked remove the bread from the oven and place on a cooling rack.
FF Cherry Bakewell Soda Bread
Making, shaping and baking the Cherry Bakewell Soda Bread
  • Note – the bread doesn’t change colour very much whilst baking.
  • Allow the bread to completely cool before icing and decorating.
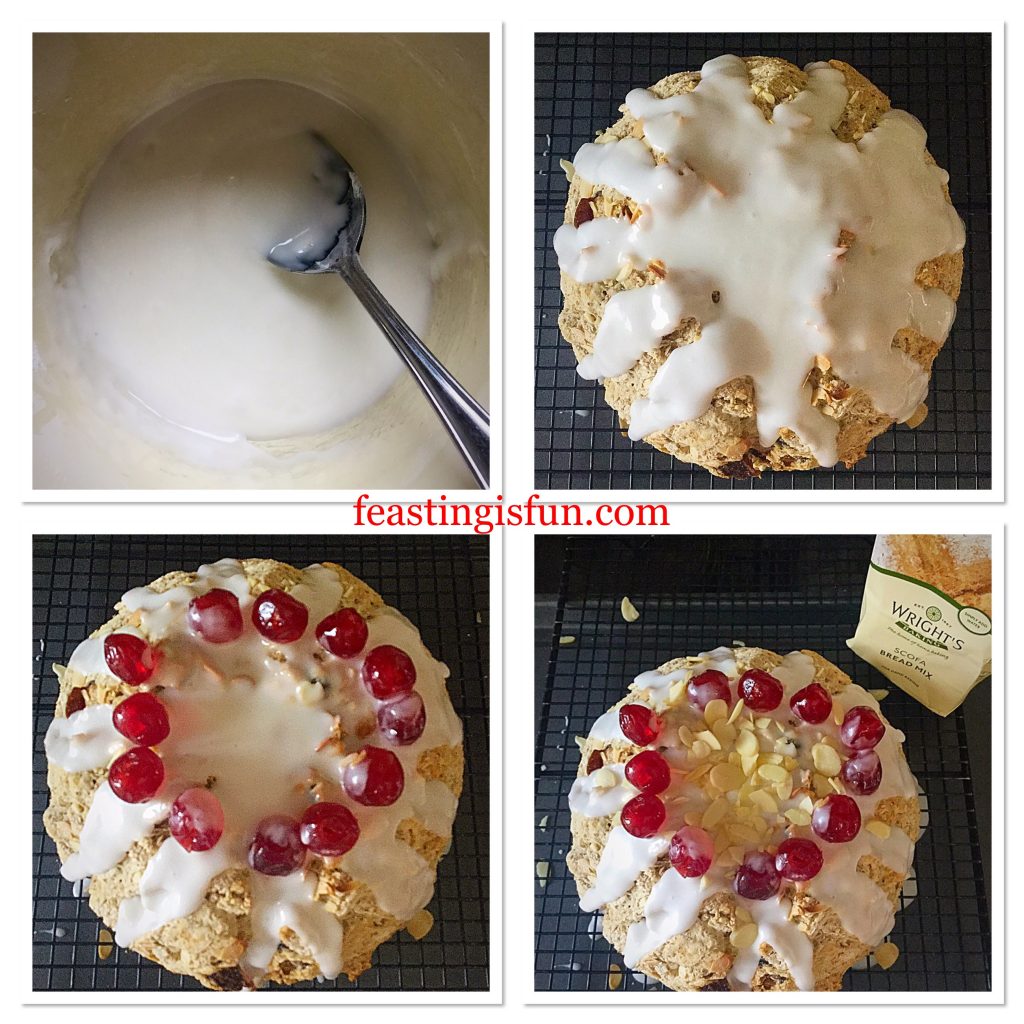
  • To make the icing: Add 2 teaspoons of almond extract to the sieved icing sugar. Now add enough water, approximately one tablespoon, to the icing and stir. It should be a thick paste that can hold a figure of eight for a few seconds.
  • Place the cooling rack with the bread on it, over a baking tray, to catch any drips.
  • Start in the centre. Spoon thick icing over the bread, encouraging it to drape down over the sides of the loaf.
  • Continue until the bread is evenly drizzled with the icing.
  • Next, place the reserved cherries on top of the bread, forming a crown-like circle.
  • Finally, scatter the reserved almond flakes over the bread.
FF Cherry Bakewell Soda Bread
Icing and decorating the Cherry Bakewell Soda Bread
  • Set the decorated bread to one side to allow the icing to set.
FF Cherry Bakewell Soda Bread
Cherry Bakewell Soda Bread deliciously easy to make.

Serve this delicious bread sliced, for breakfast, lunch of afternoon tea. In fact, it is perfect for anytime of the day.

Store in an airtight container. This bread is at its best when eaten wishing 24 hours of baking. That shouldn’t be too much of a problem!

If you have enjoyed the recipe for this Cherry Bakewell Soda Bread you may also like these:

Ginger Date Hot Cross Buns

FF Cherry Bakewell Soda Bread
Ginger Date Hot Cross Buns

Christmas Spiced Fruit Loaf

FF Cherry Bakewell Soda Bread
Christmas Spiced Fruit Loaf

Toffee Banoffee Waffles

FF Cherry Bakewell Soda Bread
Toffee Banoffee Waffles

Making something different for breakfast at the weekend is a real treat. Whilst most of my baking is made from scratch, the convenience of having good quality packet mixes in the cupboard cannot be denied. Balancing time spent together as a family with, the time it takes to create a feast, is important.

Do you make breakfast more of a treat at the weekend?

After all, it is the most important meal of the day?

Sammie xx

Wrights Baking supplied me with the mix to create this recipe. All views, content and photography are my own. Please see my Disclosure Policy.

Share
Facebooktwitterpinterestlinkedintumblr

Baked Pumpkin Spiced Doughnuts

Share
Facebooktwitterpinterestlinkedintumblr

Autumn is such a beautiful season. As leaves change through a rainbow of green, yellow, gold, orange and rust. Low sunlight casting a golden glow on days that are spared from wind and rain ravaged storms. Because Autumn is a season of transition. Summer salads gradually disappear, replaced by comforting soups, stews and roasts. While these Baked Pumpkin Spiced Doughnuts not only look autumnal, they warm the senses with long since forgotten spices.

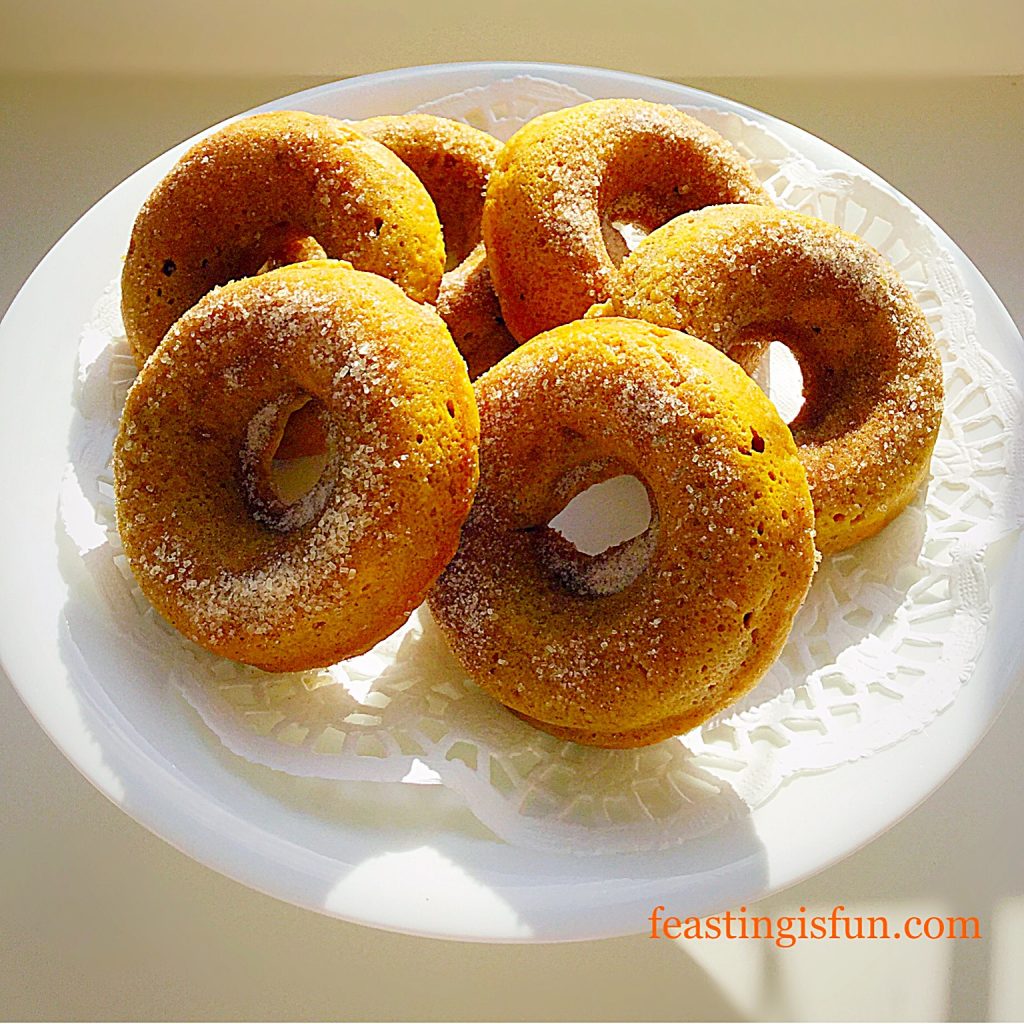
Autumn squash donuts displayed on a small white cake stand.
Baked Pumpkin Spiced Doughnuts

Baking Blogger Inspiration:

Inspiration hit to make these Baked Pumpkin Spiced Doughnuts after reading a similar recipe from Baker By Nature. Although I had never baked with pumpkin purée before, the first batch had me hooked. Since, as is the nature of most bakers, after testing, the recipe needed a little tweaking to accommodate our family’s taste preference, a second batch was the made the following day.

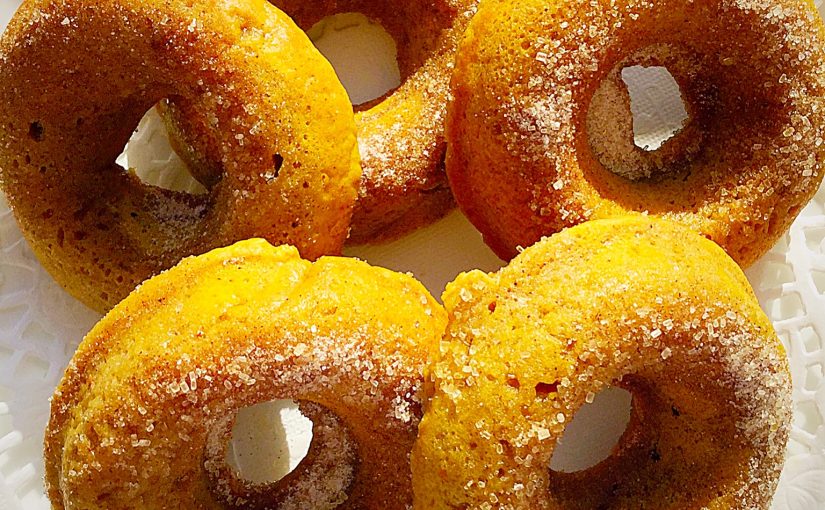
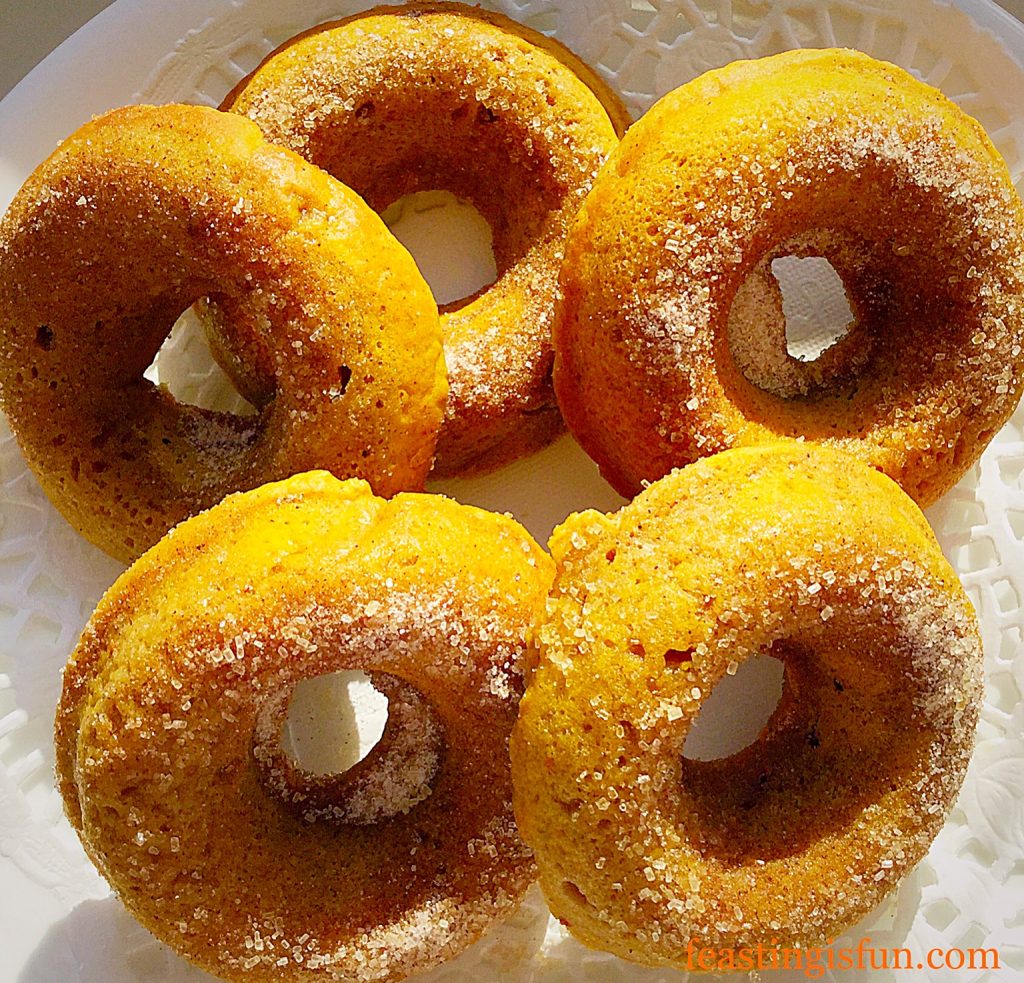
Baked Pumpkin Spiced Doughnuts really are the beautiful ochre colour that can been seen in the photographs. Also the spiced sugar sparkles in the low afternoon sunlight. So, for once there wasn’t a temptation to sprinkle with glitter!

Baked pumpkin donuts close up for recipe header.
Baked Pumpkin Spiced Doughnuts

Pumpkin love

While the inhabitants of North America’s continent have been using pumpkin in pies, cakes and bakes for many years, over the pond we have been missing out. It seems that here in the U.K. we tend to carve out a stinky, cabbage smelling pumpkin at Halloween, without a thought to eating the flesh. Yes I know we eat butternut squash, in fact I put it in this Roasted Garlic Butternut Squash Soup. Yet, I cannot feel as though we are losing out.

Pumpkin purée lends a tenderness to the crumb of these doughnuts that has to be tasted to be believed. Because the flavour is subtle, it allows the pumpkin spice mix to compliment, rather than overwhelm it. Finishing with a sprinkle of cinnamon spiced sugar creates the contrast in texture and awakens the senses. Resulting in a not quite as light as a fried doughnut, yet delicious in its own right.

Becky’s recipe for Pumpkin Pie Spice Mix:

4 tbsp Ground Cinnamon

3tsp Ground Ginger

2 tsp Ground Nutmeg

2 tsp Ground Allspice

1 tsp Ground Cloves

Mix together and store in an airtight jar.

Making the Baked Pumpkin Spiced Doughnuts:

Recipe: Makes 7-8 Baked Pumpkin Spiced Doughnuts

50g Unsalted Butter – melted and cooled plus extra butter for greasing the doughnut tin.

80g Pumpkin Purée – available at Sainsbury’s

145g Full Fat Natural Yoghurt – I use Yeo Valley

1 Large Free Range Egg

185g Plain White Flour

1tsp Baking Powder

1/8tsp Salt -I use Maldon

1.5tsp Pumpkin Spice Mix – Becky’s recipe

75g Soft Light Brown Sugar

To coat the Doughnuts:

60g Unsalted Melted Butter

75g Granulated Sugar

2tsp Ground Cinnamon

Method: 

Preheat the oven to 180C/160C fan, gas mark 4, 350F.

Making The Pumpkin Spiced Doughnut Batter:

  • The baked doughnut tins I use are from Wilton and on testing did not need greasing. However, brushing the doughnut tin with melted butter is recommended.
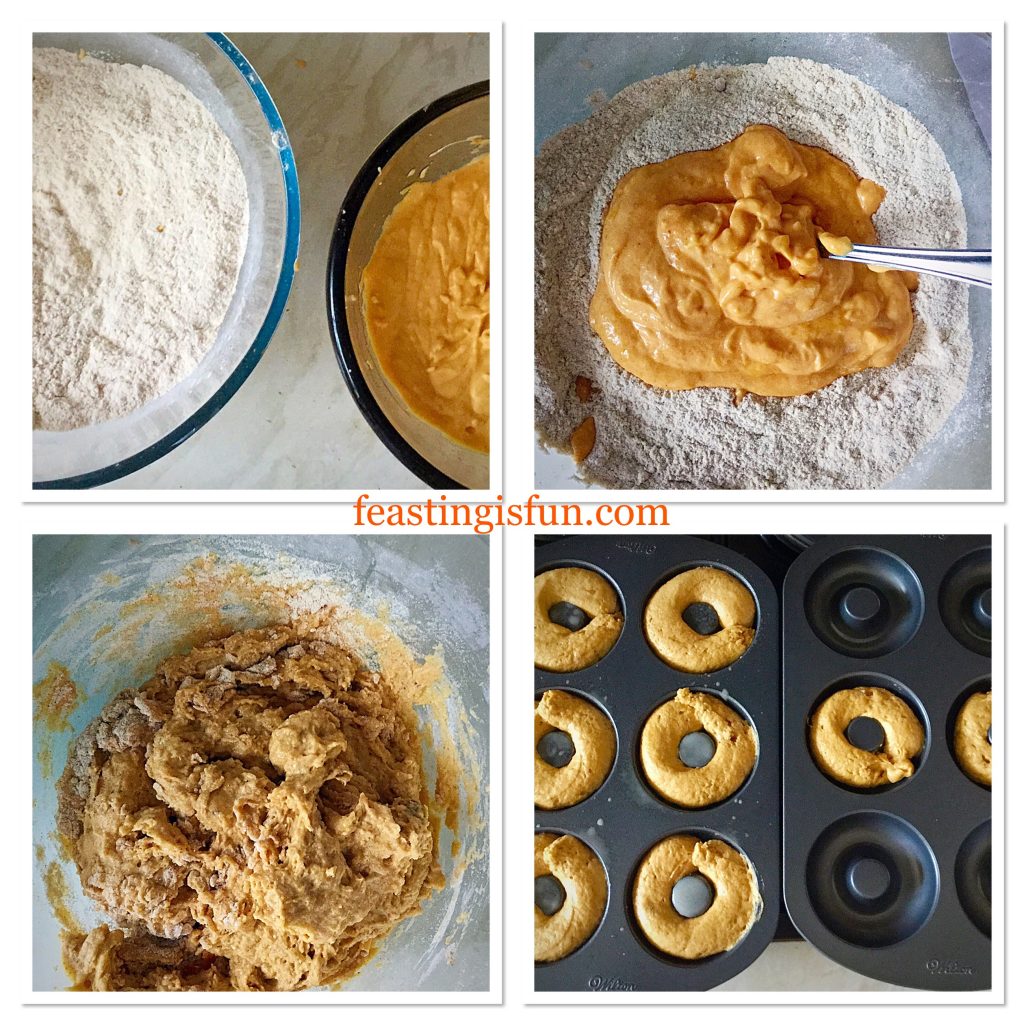
  • In a large bowl add the flour, sugar, baking powder, salt and pumpkin spice. Stir with a balloon whisk, breaking up any lumps in the sugar. Dry ingredients.
  • In a jug or smaller bowl add the pumpkin, yoghurt, egg and melted butter. Whisk together lightly with a fork until the mixture is a uniform orange colour. Wet ingredients.
  • Make a well in the centre of the dry ingredients and pour the wet ingredients in. Stir with a spoon until just combined. Similar to making a muffin mix.
  • Fill a piping bag, fitted with a circular nozzle, approximately 1.5 – 2 cm diameter, with the doughnut batter.
  • Pipe 7-8 doughnuts into the tins.
FF Baked Pumpkin Spiced Doughnuts
Baked Pumpkin Spiced Doughnuts in the making.

Baking The Doughnuts:

  • Place the doughnut tins in the centre of the oven and bake for 13-15 minutes – mine took 13 minutes.
  • The doughnuts will be firm, with a little spongy give when pressed, slightly golden and look a little crinkled on top when baked.
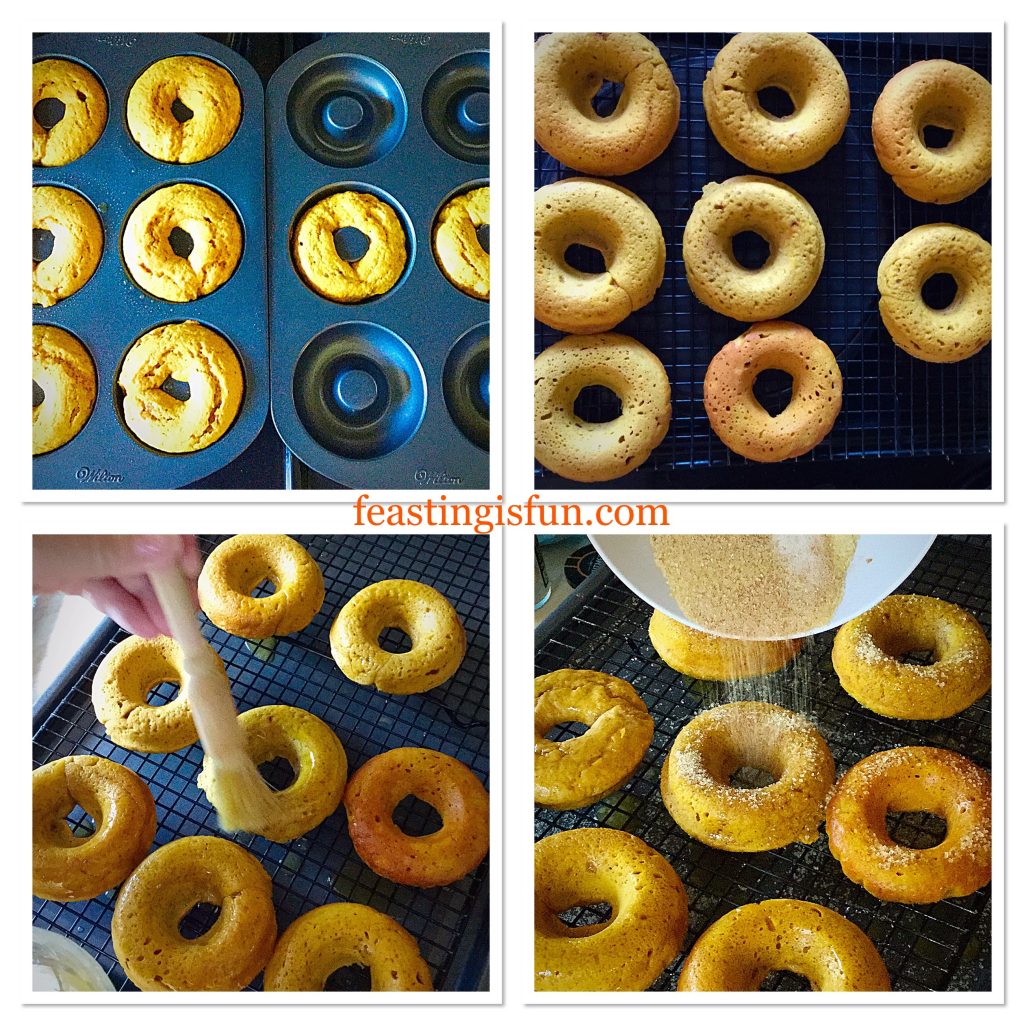
  • As soon as the doughnuts are baked remove from the oven and immediately tip out on to a cooling rack.

Coating The Baked Pumpkin Spiced Doughnuts:

  • While the doughnuts are cooking melt the butter to dip them in. 30 seconds on medium was sufficient in our microwave. Ensure the bowl is big enough to take a  complete doughnut if you choose to dunk.
  • Next place the sugar and cinnamon in a bowl, ensuring it is big enough as before and mix to combine.
  • While the doughnuts are still warm, dunk, or as I did, brush all over with melted butter. Remembering to turn the doughnut to ensure even coverage.
  • Immediately after, either dunk the doughnut in the spiced sugar, or sprinkle over the sugar while the doughnuts are on the rack.
FF Baked Pumpkin Spiced Doughnuts
Coating the Baked Pumpkin Spiced Doughnuts in butter and spiced sugar.
  • Since trying both dunking and brushing/sprinkling methods, the second method is my preference.
  • In reality, brushing with butter used exactly the same amount as dunking them. The choice really is yours.
  • As a family, although utterly delicious, we decided that the first batch of doughnuts were too sugary. Yes that really is possible 😉.
  • Finally, when dunking the doughnuts in the sugar, the butter makes the spiced sugar damp. An example of this can be seen in the photograph below. Therefore, I decided to sprinkle them with sugar, resulting in less sugar sticking, whilst keeping its sparkly appearance.
FF Baked Pumpkin Spiced Doughnuts
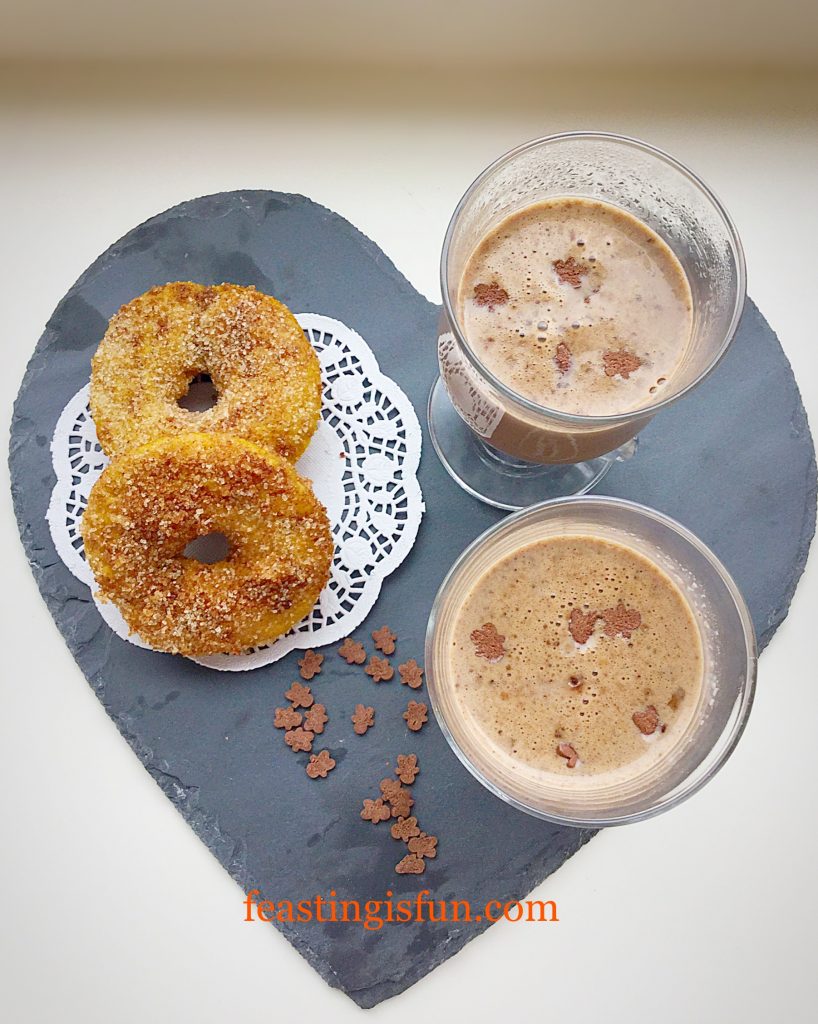
Baked Pumpkin Spiced Doughnuts accompanied by hot mocha drinks with a dash of ginger syrup.

Serve immediately, with a warming drink.

Cafe culture at home

I heated a Chocolate Chip Latte Milkshake in a jug with a little extra milk, poured into fancy glasses and given a splash of ginger syrup. The drinks were then topped with mini gingerbread sprinkles. Resulting in a Cafe Culture experience at home. Alternatively, make a hot chocolate and add a sprinkle of cinnamon or ginger spices.

Finally, for those of you who would rather not, or cannot, go out, especially when the weather is bleak, this is the ultimate, at home, Cafe Culture treat!

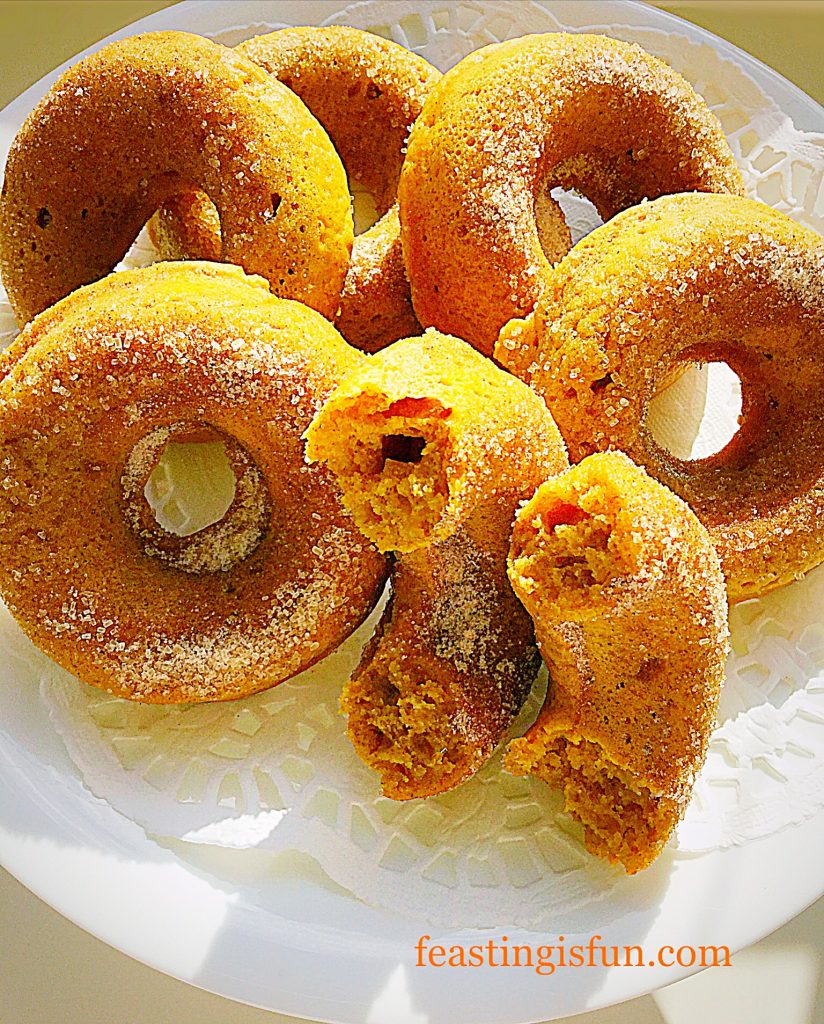
Pumpkin spiced donuts broken in half to show light and airy texture.
So light and fluffy.


If you have enjoyed the recipe for Baked Pumpkin Spiced Doughnuts you may also enjoy these:

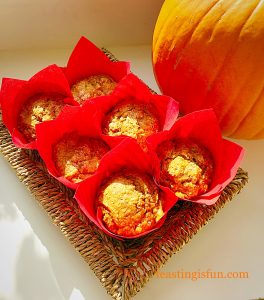
Spiced Pumpkin Walnut Muffins

Spiced pumpkin walnut muffins in a basket.
Spiced Pumpkin Walnut Muffins

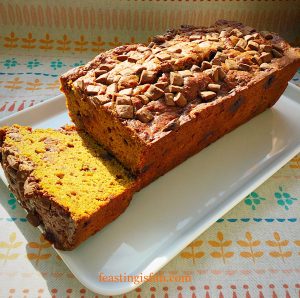
Chocolate Chip Pumpkin Loaf Cake 

Chocolate chip pumpkin loaf cake with one end sliced so the interior can be seen.
Chocolate Chip Pumpkin Loaf Cake

Easy Blackberry Oat Muffin Recipe 

Blackberry oat muffins served with coffee in a lined tray.
Easy Blackberry Oat Muffin Recipe


When served slightly warm I think that these doughnuts truly are at their best. While the recipe makes 8 individual Baked Pumpkin Spiced Doughnuts unless you are baking for more I really wouldn’t recommend doubling it. Because the preparation time is scarcely 10 minutes max and these are definitely better eaten the day they are made. That said, kept in an airtight container they will last an extra day. Pinged for 10 seconds in the microwave and they are almost back to freshly baked tenderness.

So, whatever you are making, baking and creating in your kitchens, have fun preparing and sharing your feast.

Sammie xx

Why not take a look at my friend Becky’s blog?

It’s full of fantastic recipes and is written in a step-by-step style. Also, you are sure to enjoy her Pumpkin Spice Pumpkin Bisuits.


Share
Facebooktwitterpinterestlinkedintumblr

Fruity Orange Waffles

Share
Facebooktwitterpinterestlinkedintumblr

Today is National Waffle Day – as if we need a special day to eat delicious waffles – right 😉? So in the true spirit of Feasting is Fun, I decided to test Wright’s Baking new Orange Cake Mix out in my waffle maker. Oh boy are you going to be glad I did. These Fruity Orange Waffles are simply amazing!

FF Fruity Orange Waffles
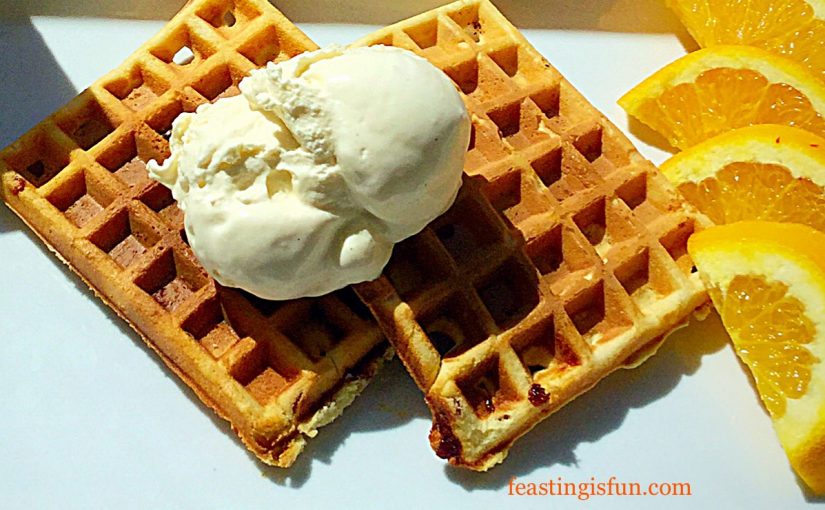
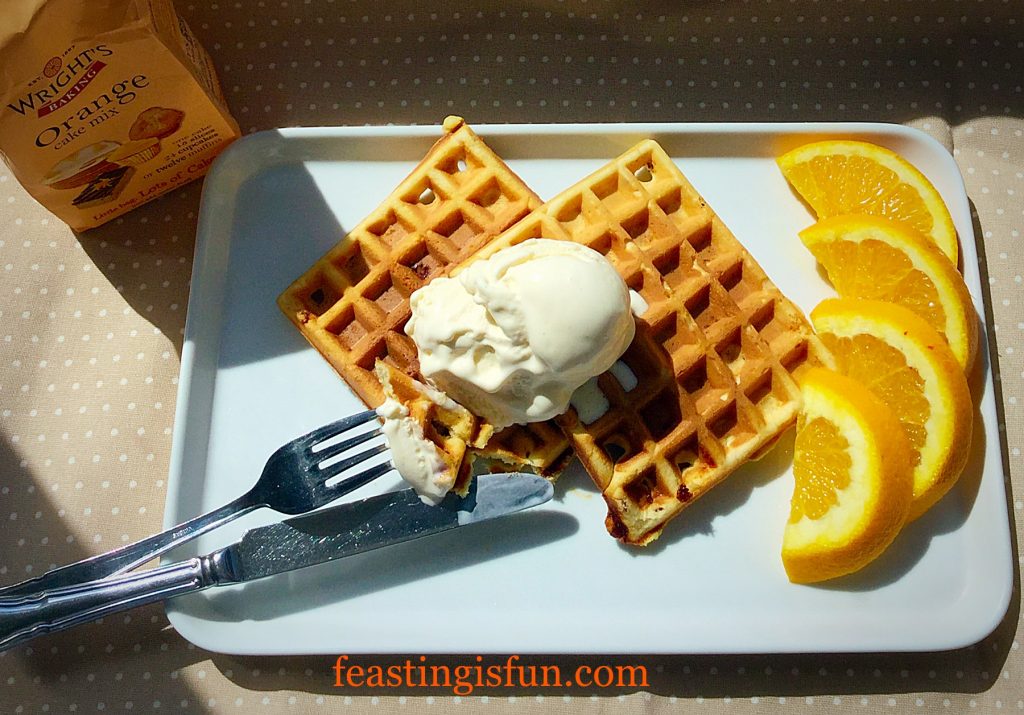
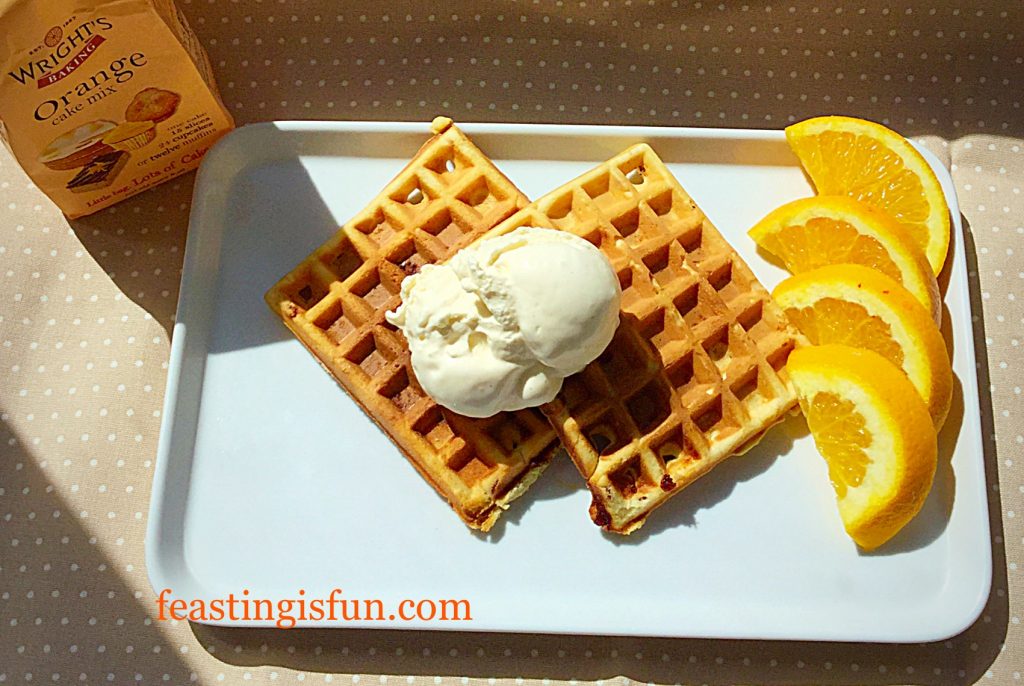
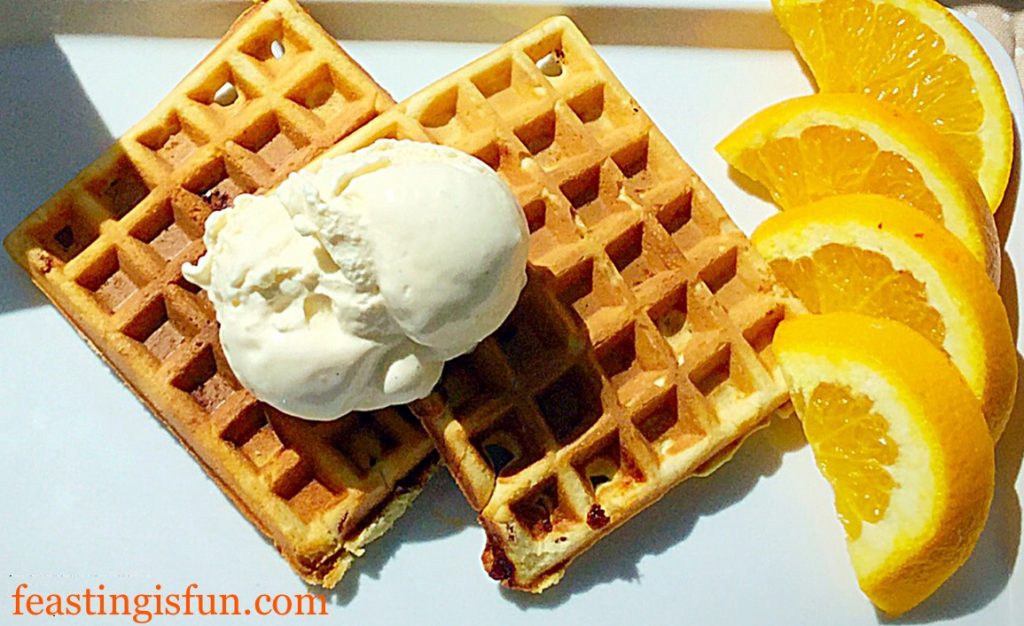
Fruity Orange Waffles delicious with ice cream.

Not only are they an absolute whizz to make – literally 2 minutes and you’ve got Fruity Orange Waffles batter ready to go, they cook beautifully in the waffle maker.

FF Fruity Orange Waffles
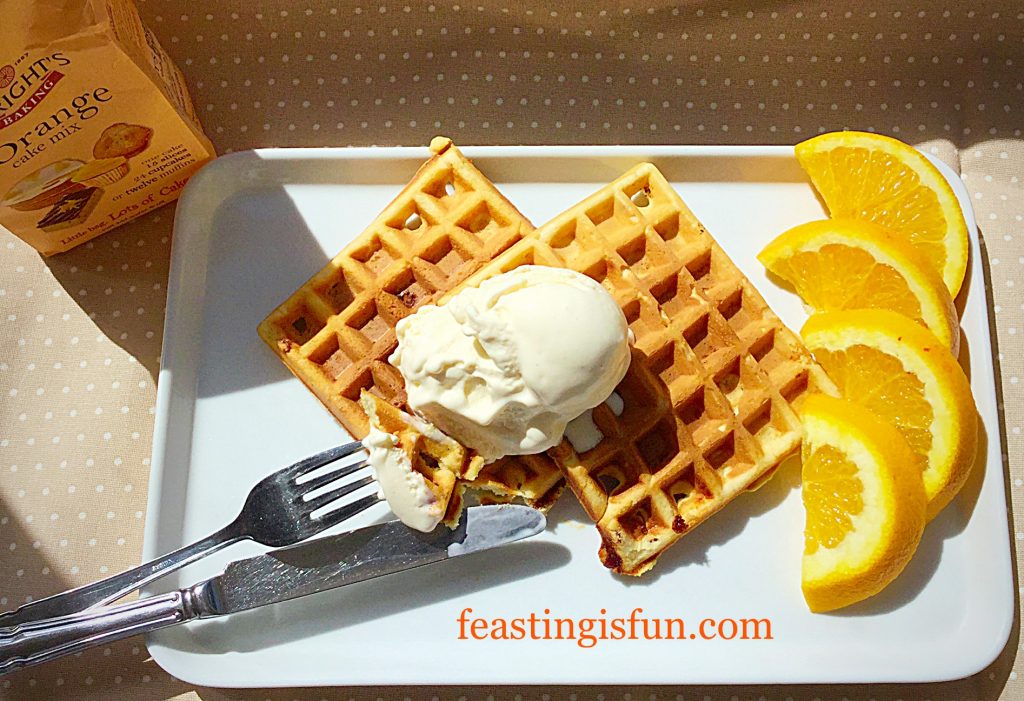
Fruity Orange Waffles an easy, delicious treat!

We had these for brunch this morning and I was so pleased I didn’t have to cook. Ok I switched the waffle maker on see Andrew James Waffle Maker Review, but it didn’t take long to cook 9 waffles from one packet of mx. Plenty for the four of us, oh and with a tub of homemade Very Vanilla Ice Cream, fresh oranges and strawberries. We had a Feast!

FF Fruity Orange Waffles
Fruity Orange Waffles perfect any time of the year.

It is now 30C outside – at least!

We may well be having waffles for dinner if the house gets any hotter!!

Recipe: Fruity Orange Waffles makes 8-10

1 Orange Cake Mix Packet from Wright’s Baking

100g Melted Unsalted Butter – cooled

200mls Tap Water

Method: Prepare your waffle maker according to it’s manufacturer’s instructions.

  • With my waffle maker I brush the cold waffle plates with cooled, melted butter, prior to heating, hence the additional butter in the recipe.
  • Switch the waffle maker on and allow to fully heat, until the ready light comes on.
  • Whilst the waffle maker is heating up, in a medium bowl add 200mls of water and 60mls of melted butter.
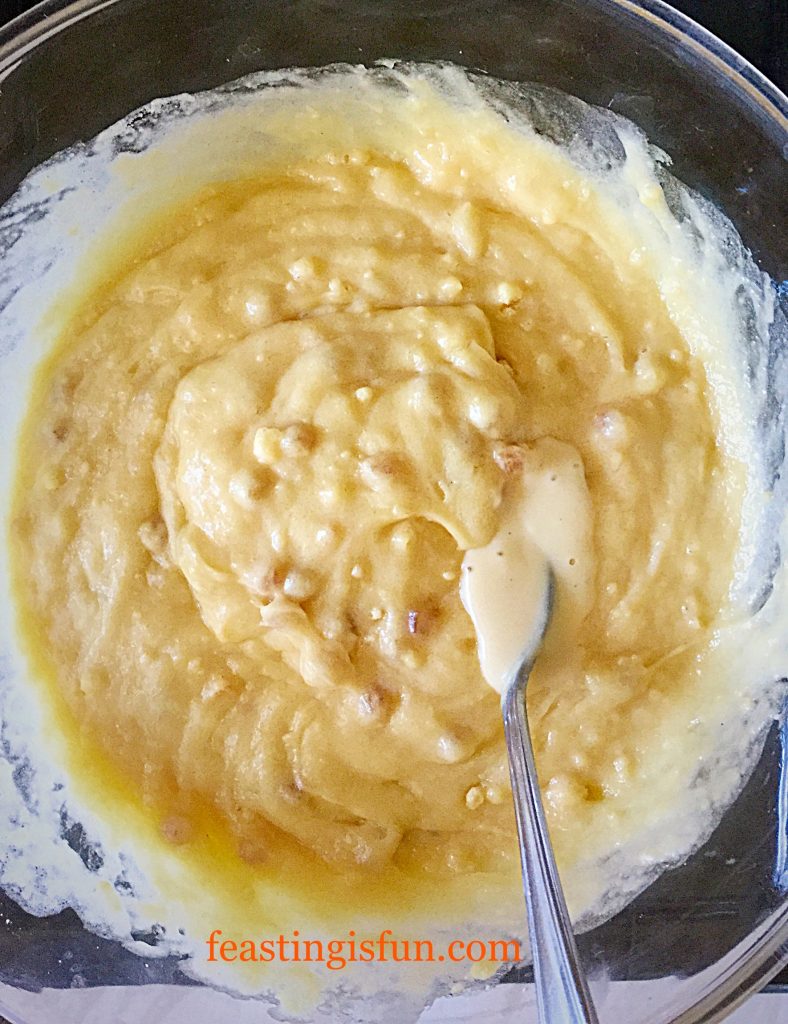
  • Next add the Orange Cake Mix and stir until the batter appears smooth – note, the cake batter has pieces of fruit in it so there will be small lumps, that is normal.
FF Fruity Orange Waffles
This is how the waffle/cake batter will look.
  • When the waffle maker is ready, remembering to protect your hands with oven gloves, open it and spoon a dessert spoon (like the spoon in the picture above) in the centre of each waffle plate.
  • Close the waffle maker and cook for exactly 4 minutes. It really is worth setting a timer, especially if in four minutes you get little jobs done in the kitchen! Just sayin’ I’ve not burnt a waffle yet – for a reason 😉.
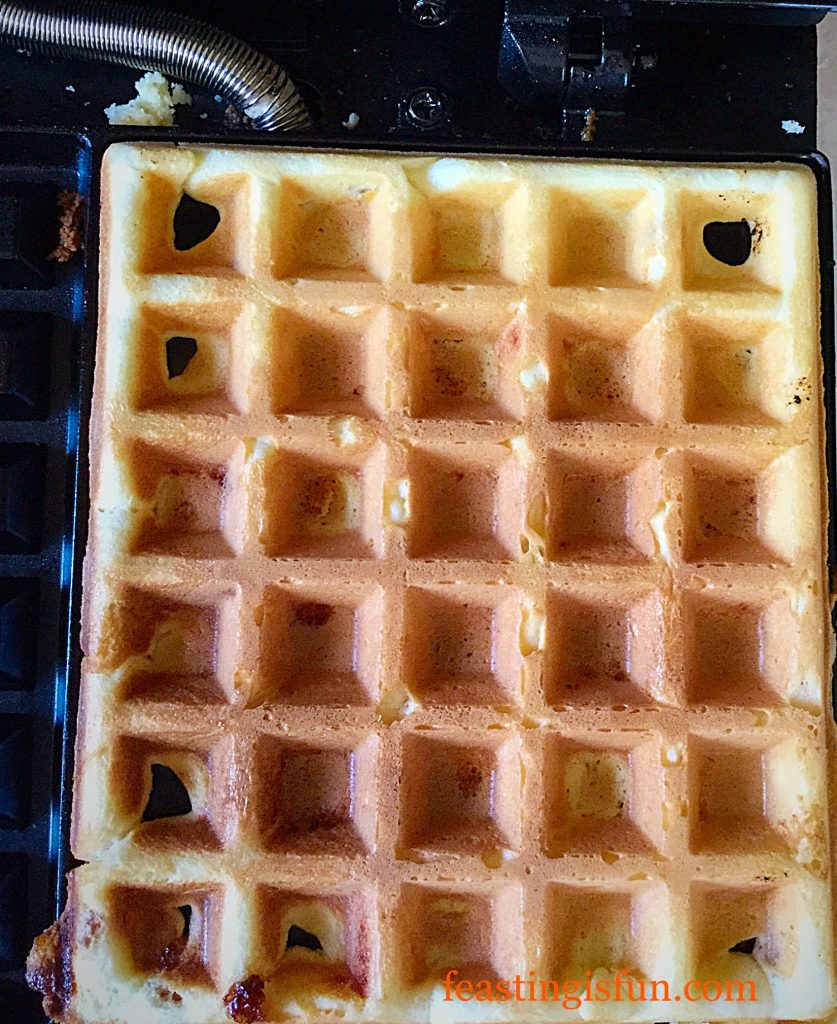
  • After 4 minutes open the waffle maker (again protect yourself with gloves). The waffles will be fully cooked but not hard.
FF Fruity Orange Waffles
Fully cooked Fruity Orange Waffles ready to be removed from the waffle maker.
  • I use a wooden spatula to gently lift the waffle from the waffle maker. The Fruity Orange Waffles harden slightly on cooling and can easily be picked up by hand – just in case you want to try it dunked in your coffee/hot chocolate 😉.
  • Repeat the process of spooning batter on to the waffle plates until it is all used up.
  • Top Tip: I would much rather have a waffle with slightly frilled edges, where not quite enough batter has been added, than a perfectly square one with waffle batter oozing out of the side of the waffle maker. I got lucky with the waffles I made, cleaning gooey, stuck waffle batter is no fun!
FF Fruity Orange Waffles
Fruity Orange Waffles add ice cream, fresh fruit and your imagination!

These delicious Fruity Orange Waffles can be served warm or cold. They will keep for up to 3 days in an airtight container and can be popped in the toaster to warm up.

I like to serve these with cold vanilla ice cream and plenty of fresh fruit. You choose how to serve yours. They are deliciously light with delightful pieces of fruit that lend texture and extra flavour. If you like waffles you will love these.

If you have enjoyed the recipe for Fruity Orange Waffles you may also like these:

Toffee Banoffee Waffles

FF Fruity Orange Waffles
Toffee Banoffee Waffles also made using Wright’s Toffee Cake Mix.

Chocolate Dunking Waffles

FF Fruity Orange Waffles
Chocolate Dunking Waffles everyone should try these at least once in their lives.

Vanilla Bean Waffles

FF Fruity Orange Waffles
Vanilla Bean Waffles so delicious and versatile.

Waffles are such an amazingly fun food. They can be sweet or savoury and topped with a myriad of different things. Let your imagination run wild and make waffles. Not just because it is National Waffle Day, but because they are so much fun and so tasty!!

Sammie xx

Wright’s Baking  provided me with the cake mix to make these waffles. All opinions, views, content and photography are my own. I was not paid to write this post please see my Disclosure Policy.

Share
Facebooktwitterpinterestlinkedintumblr