Cherry Tomato Mozzarella Basil Focaccia

Today is the first of June and finally it is beginning to feel like Summer. And, of course my mind immediately turns to all the lovely fresh produce that this season yields. Since we are currently celebrating British Tomato Fortnight I am creating recipes that celebrate the diversity of this tasty little fruit. So with caprese salad as my inspiration let me introduce you to my Cherry Tomato Mozzarella Basil Focaccia.

Pinterest sized image of Cherry Tomato Mozzarella Basil Focaccia Bread with descriptive graphics.

Focaccia is a bread with Italian origins. At its simplest it is a flat, white, airy bread, drizzled with olive oil and having a dimpled appearance. Serve it with salad, soup, pasta or as part of antipasti, the key is in the lightness of its crumb. In comparison, this cherry tomato and mozzarella topped bread with layers of basil hidden within the bread, is almost a meal in itself.

Two images of Cherry Tomato Mozzarella Basil Focaccia showing the light, airy crumb of the bread and the gooey, stringy cheese.
Cherry Tomato Mozzarella Basil Focaccia a feast that really is fun to make and eat!

As the bread bakes the fresh basil and garlic permeate throughout creating an incredible savoury flavour. Also, the fresh, vine ripened tomato flavour intensifies in the heat of the oven. Resulting in a joyfully flavoursome bread that is perfect for sharing, Italian style, around a table full of friends, family and food.
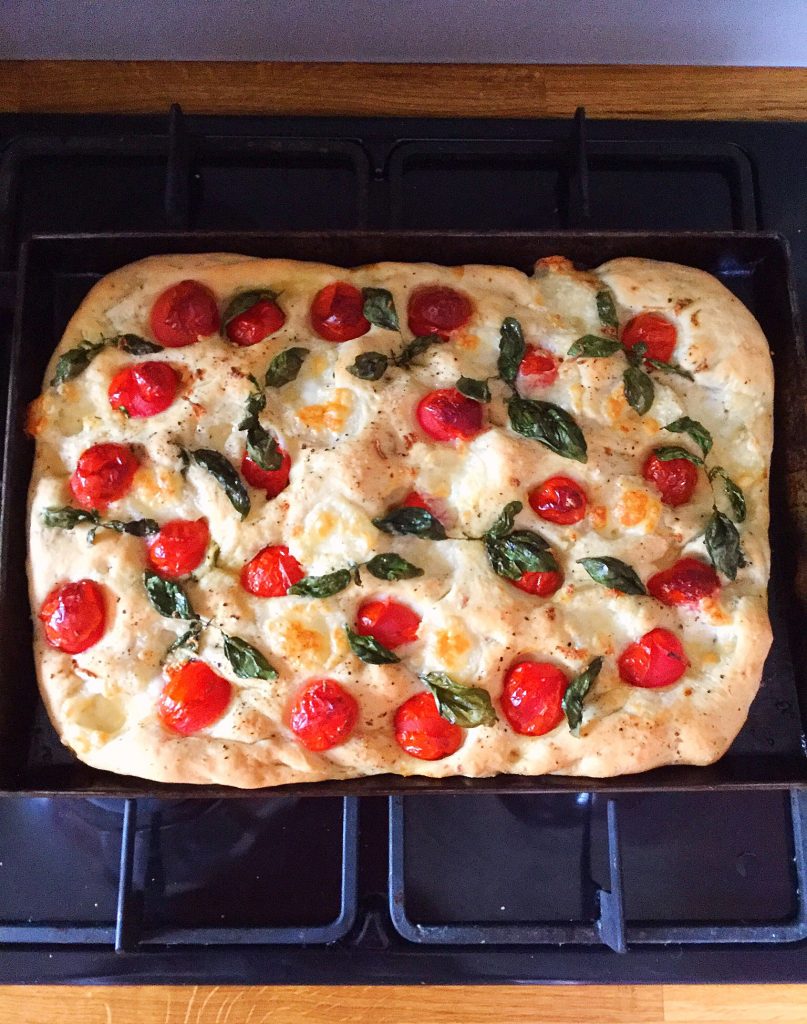
Baked Cherry Tomato Mozzarella Basil Focaccia fresh out of the oven
Cherry Tomato Mozzarella Basil Focaccia

If you haven’t made bread before, please do not worry. Because, as I am writing a recipe I always imagine the person reading it is standing next to me. Since I am a natural chatter-box, I describe each part of the process in easy to understand language and include photos for every step of the recipe. So you can be confident as you start your baking process.

Recipe: Cherry Tomato Mozzarella Basil Focaccia

For The Focaccia Dough

250ml Tap Water – at room temperature

7g Dried Yeast – I use Allinson 

1tbsp Runny Honey

350g/12oz Strong White Bread Flour – I use Wright’s 

5g Salt – I use Maldon sea salt

2 Garlic Cloves – finely minced or crushed

2tbsp Olive Oil

Filling And Topping The Focaccia 

2 Generous Handfuls Of Fresh Basil Leaves (approximately 25-30) – one handful for folding into the dough and the second for topping the focaccia

12 Mini Plum Tomatoes – cut in half. Alternatively use 24 small round cherry tomatoes

150g/5oz Approximately 20 Mini Mozzarella Balls – drained

1-2 Garlic Cloves

2tbsp Olive Oil

Pinch of sea salt and freshly ground pepper

Method:

Making The Focaccia Dough

I use a stand mixer with the dough hook attachment for the first part of mixing and proving the dough. Alternatively you can make the dough by hand. Large bowl in the instructions refers to the stand mixer bowl or the bowl used for hand mixing. Also, it is important to weigh all of the ingredients accurately to ensure a successful bake.

  • First of all add the tepid water to a large bowl and add the olive oil and then the honey. Adding the olive oil first ensures that the honey releases easily from the oiled tablespoon.
  • Next add the yeast.
  • Add the flour so that it covers all of the liquid ingredients.
  • Finally add the salt and minced garlic.
  • Fit the bowl to the stand mixer and lower the dough hook.
  • Mix on a low speed until all the ingredients are combined. Increase to a medium speed for approximately 10 minutes until the dough passes the windowpane test. To carry out the test stop mixing/kneading. Remove a small piece of dough and stretch it between your fingers. To pass the test the dough should stretch without tearing until light is visible through the dough. If the dough tears continue mixing/kneading for a further 2 minutes and test again.
  • As soon as the dough passes the windowpane test stop mixing/kneading and scrape any dough from the dough hook into the bowl.
  • Form the dough into a ball, place back into the bowl and cover with a clean tea towel.
  • Place the bowl in a draught free place and leave until the dough is doubled in size.

Knocking Back The Dough And Adding The Fresh Basil Leaves

  • As soon as the dough is doubled in size, turn it out of the bowl onto a lightly floured worktop. Most importantly, ensure the top of the risen dough is in contact with the worktop and the sticky underneath is now on top.
  • Pull out part of the dough with your hand and then tuck it into the centre of the dough.
  • Turn the dough clockwise, approximately 10 minutes if it were a clock and repeat the pulling and tucking technique. Repeat this process until the dough is smooth and not sticky to touch. See bottom right photo.
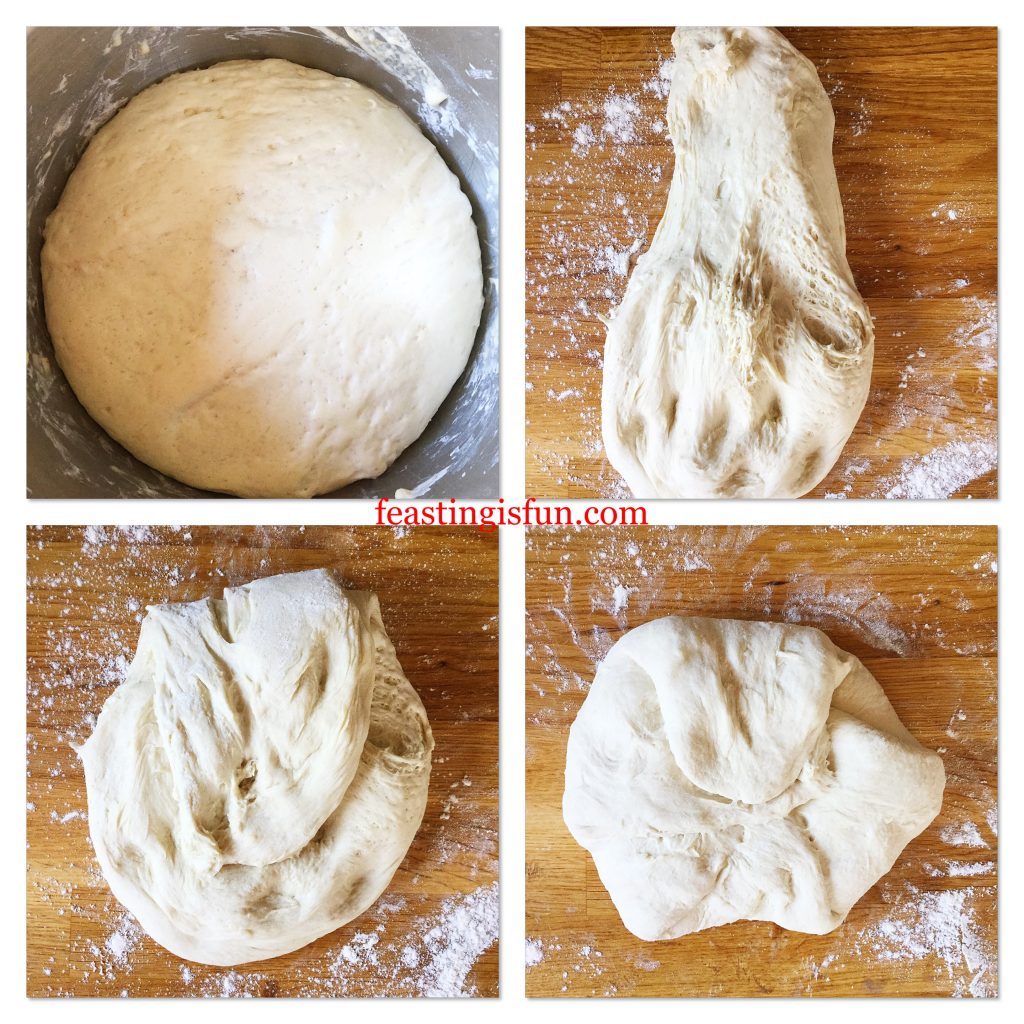
Four images showing each stage of shaping bread.
Building structure within the focaccia dough.
  • Turn the dough over and press out using your fingertips until it is a roughly square shaped approximately 10”/25cm.
  • Lay one handful of fresh basil leaves on top of the dough.
  • Fold the top third of the dough down and then fold the bottom third of the dough up and over.
  • Turn the dough by a quarter and repeat the folding step.
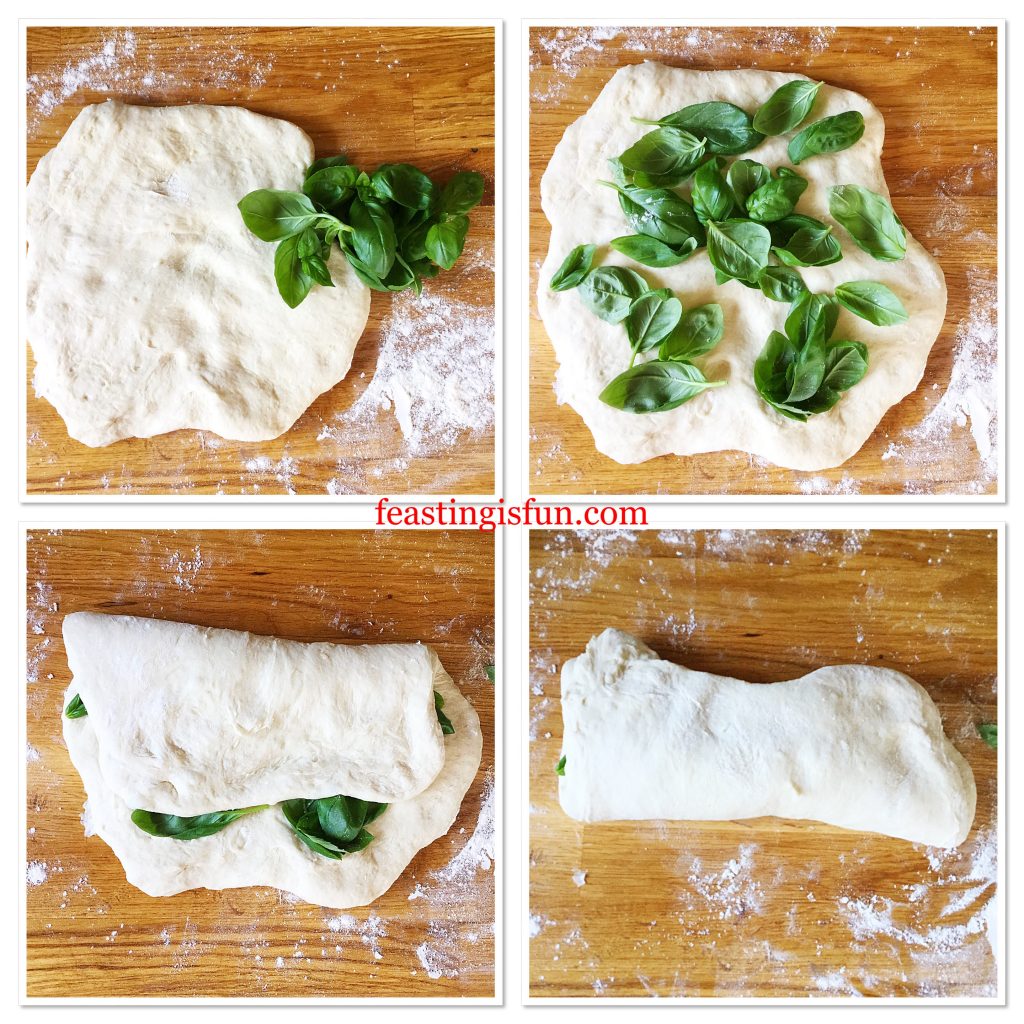
Detailed images showing fresh basil being folded into bread dough
Folding fresh basil into the bread dough.

Pressing Out The Focaccia Dough And Adding The Toppings

  • Turn the dough over and place onto a lightly oiled baking tray.
  • Drizzle 1 tablespoon of olive oil over the dough and use your fingers to press out the focaccia dough, taking care to keep the basil leaves within the dough.
  • Press the halved mini plum tomatoes into the dough.
  • Likewise add the mini mozzarella balls in the same manner.
  • Scatter over the minced garlic and last handful of basil leaves.
  • Finally drizzle lightly with olive oil and add a pinch of sea salt and black pepper.
  • Leave in a draught free place to rise and preheat the oven to 200C/180C fan, gas mark 6, 400F.
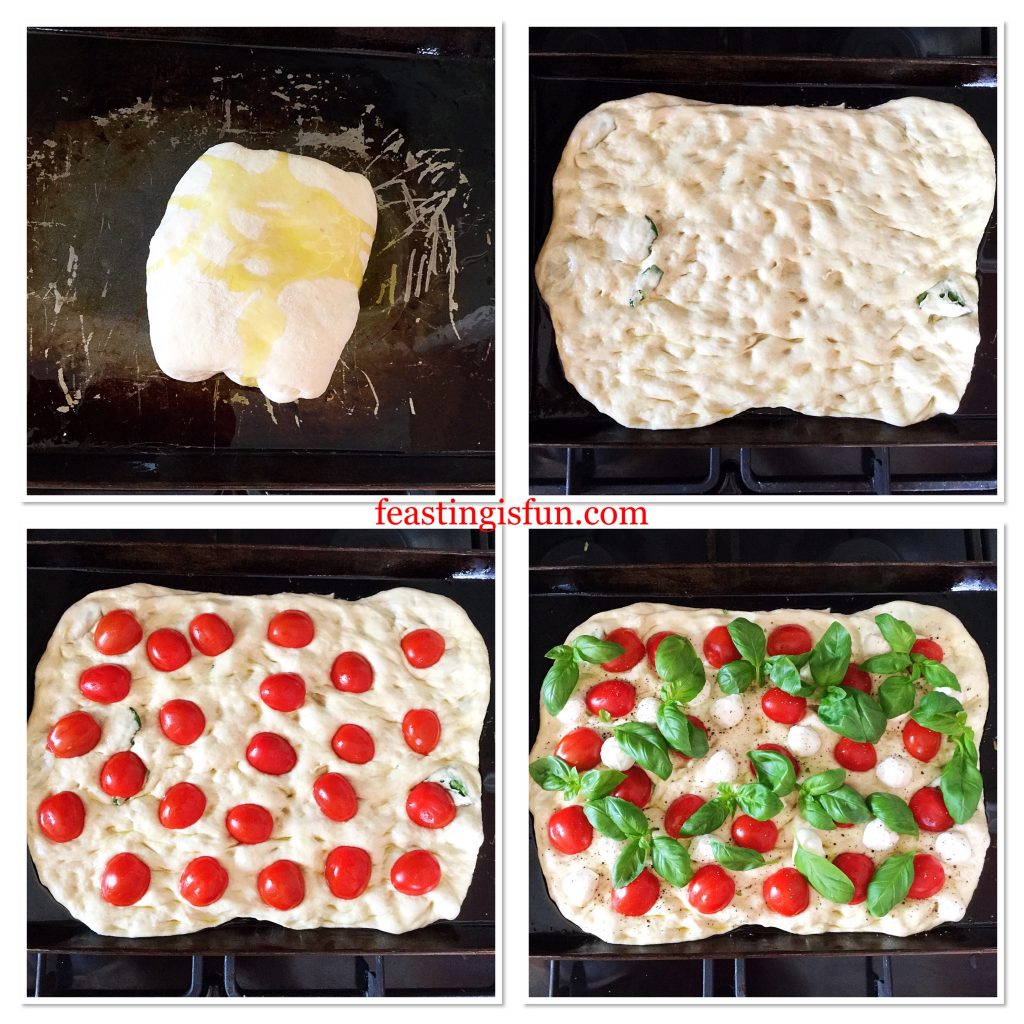
Four images showing the focaccia and adding the toppings
Shaping the focaccia bread and adding the toppings.

Baking The Cherry Tomato Mozzarella Focaccia

  • As soon as the focaccia has plumped up around the tomatoes and basil, while doubling in size, it is ready to be baked.
  • Place the focaccia into the centre of the oven and bake for 25-35 minutes.
  • The bread is baked when it is golden on top and underneath, use a palette knife to lift a corner.
  • And once baked remove from the oven.
Cherry Tomato Mozzarella Basil freshly baked.
  • Leave the focaccia to cool for 5-10 minutes before serving.
  • Alternatively, bake earlier in the day and reheat in a moderate oven for 10 minutes prior to serving.

To serve this focaccia I ran a pizza wheel across it at various angles to create interesting shapes and portions.
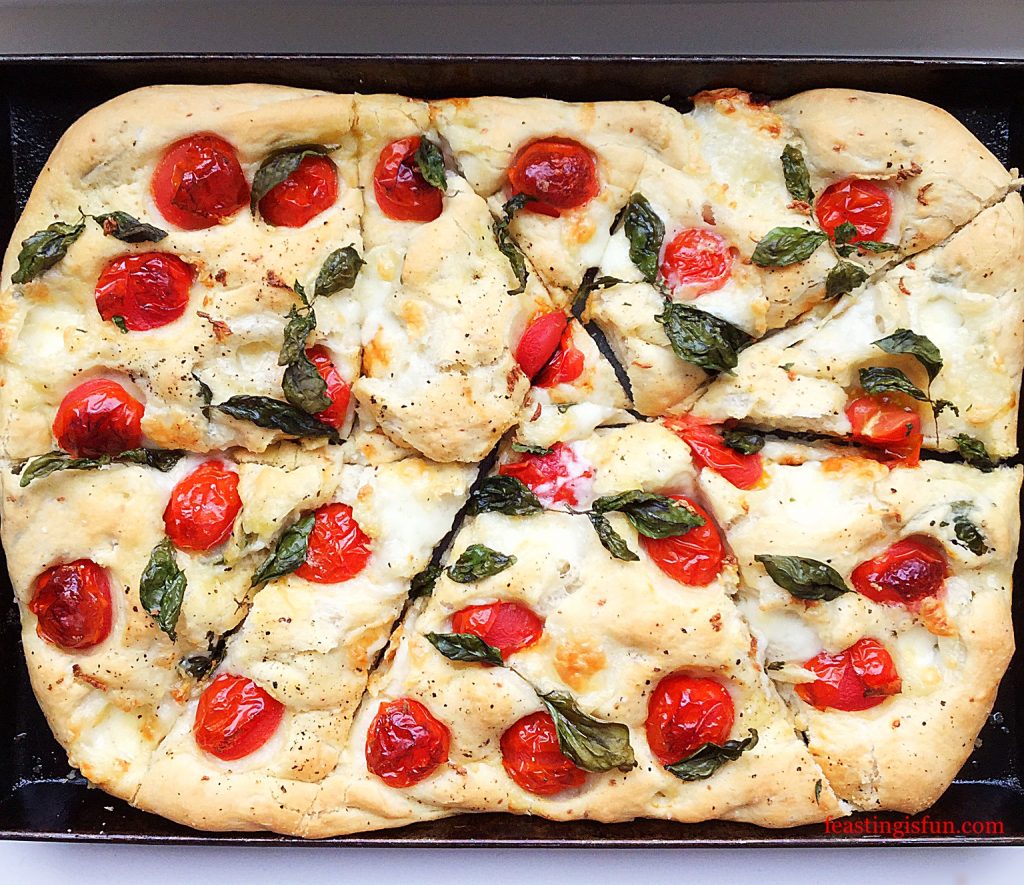
A pizza wheel is used to divide the Italian bread into portions for serving.
Cherry Tomato Mozzarella Basil Focaccia divided into portions.

This bread can be made a day in advance, including the toppings. Cover with cling film and refrigerate. To bake, remove from the fridge, allow the dough to come up to room temperature and puff up and then bake as per the recipe.

Any leftover focaccia can be placed in an airtight container and refrigerated for one day. Also, freezing the focaccia is not recommended due to the fresh tomatoes.

If you have enjoyed this recipe for Cherry Tomato Mozzarella Basil Focaccia you may also like these:

Baked Cheese Olive Ciabatta Bread
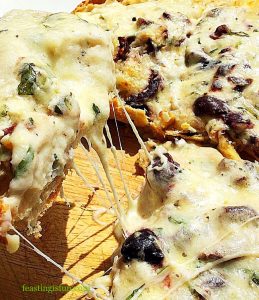
Baked cheese olive ciabatta bread being pulled apart to show the gooey cheese.
Baked Cheese Olive Ciabatta Bread

Tomato Thyme Garlic Focaccia Bread
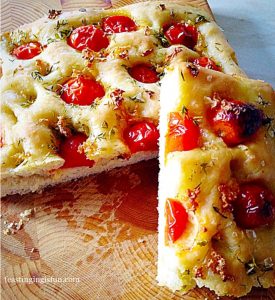
Tomato thyme garlic focaccia bread cut in half.
Tomato Thyme Garlic Focaccia Bread

Garlic Cheese Bombs

Garlic cheese bombs mini bread rolls filled with mozzarella image shows one being pulled apart showing the gooey cheese.
Garlic Cheese Bombs

Because, when I bake, I use the very best ingredients I can afford, this always has an impact on the final flavour. And including locally grown, British produce give me a sense of pride at how incredible our farmers are here in the U.K. Supporting British farmers and also British businesses, such as Room Forty who provide an Afternoon Tea service, is something that I am passionate about. Our country has a wealth of talented people who produce an amazing array of produce and products. While they may be a little more expensive than mass produced imports, what they have in abundance is love and care. Resulting in far higher quality produce grown and made by people who are passionate about what they do.

Do you consider where your food comes from when grocery shopping?

Whatever you are making, baking and creating in your kitchens, have fun preparing and sharing your feast.

Sammie xx

The British Tomato Association gifted me the tomatoes produced by Eric Wall to sample and taste during British Tomato Fortnight #BTF19. I have not been paid or received any financial gain for writing this blog post. All opinions, views and content are my own. No part of this post may be reproduced or duplicated without the written permission of the owner. Please see my Disclosure Policy.
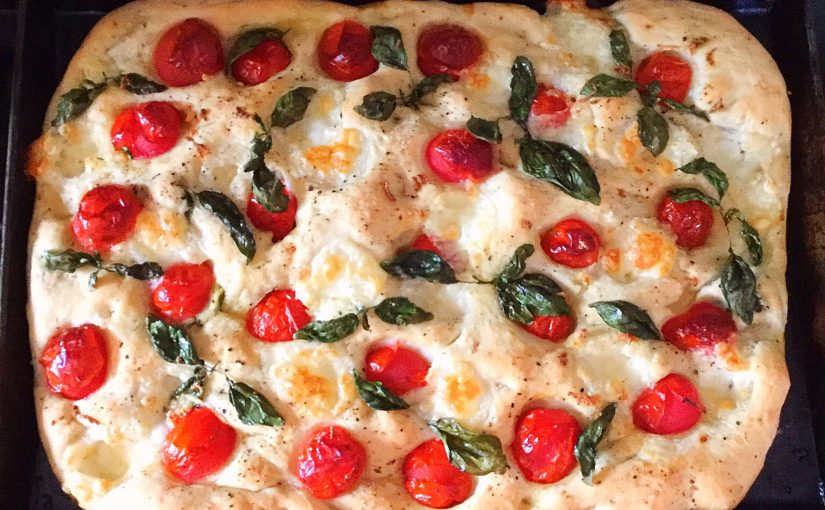


Lemon Ripple Ice Cream

Lemon Ripple Ice Cream, this is THE ice cream I have wanted to make throughout my entire life. Creamy with tart lemon curd rippled through. If you love lemon, like I do, then trust me when I say you need to make this luscious ice cream.

FF Lemon Ripple Ice Cream

This luscious Lemon Ripple Ice Cream really is a dream come true for me. I adore lemons. Also, I heard Jamie Oliver once say that if there weren’t lemons in his kitchen he’d give up cooking. I doubt he meant it quite to that extreme, but I do understand his passion for them.

Happily I  use them in savoury recipes such as my Tangy Lemon Potato Salad and sweet recipes such as this delightful Lemony Strawberry Pavlova. Their flavour is so transferable between both sweet and savoury dishes.

FF Lemon Ripple Ice Cream
Lemon Ripple Ice Cream

Here, in this Lemon Ripple Ice Cream, there is a wonderful soft, creamy lemon background flavour, with bursts of tart, intense citrus lemon. The combination of both the subtle and vibrant creates a tastebud sensation that draws you into a dreamy world of lemony loveliness.

FF Lemon Ripple Ice Cream
Lemon Ripple Ice Cream all you need is a soon.

The Benefit Of Homemade Ice Cream

While you absolutely could eat this ice cream in a cone, for me, I wanted nothing to interrupt the pure creamy sensation of eating it with just a spoon. I wasn’t disappointed!

This Lemon Ripple Ice Cream is deceptively yummy. I feared whilst churning it yesterday in my new Andrew James Ice Cream Maker, that none would actually make it to the freezer. Happily I restrained myself. I am so glad that I did. Tasting it today, frozen, yet softened enough to scoop, was reward for my patience and restraint!

Just a quick note on ingredients; if you don’t have lemon extract, which is available online and in good supermarkets, don’t worry, the lemon curd added during the churning process will still provide a great lemon flavour. As for the lemon curd, use a good quality tart one, without bits. I love lemon curd with real peel in it, but this is not the place to use it.

Recipe: Makes 750ml Lemon Ripple Ice Cream

300ml Double Cream

300ml Whole or Semi Skimmed Milk

4 Large Free Range Egg Yolks

1tsp Corn Flour

1/8 tsp Salt – I use Maldon

6tbsp Caster Sugar

1tsp Vanilla Extract – I use Nielsen Massey

1tsp Lemon Extract – I use Nielsen-Massey 

300g Best Quality Lemon Curd – I used Waitrose new waitrose 1 lemon curd, it is beautifully tart

Method: Ensure the frozen ‘bowl’ of your ice cream maker has been in the freezer for 24 hours or according to the manufacturers instructions.

Note – For step by step photos of the custard base cooking process please see Very Vanilla Ice Cream

Making The Ice Cream Base

  • First of all pour the cream and milk into a large saucepan on a medium heat.
  • Heat until just before the liquid boils, you will see little bubbles form around the outside rim – this is known as the scalding point, once reached remove from the heat.
  • In a large bowl whisk together the egg yolks, sugar, extracts and corn flour until pale and thickened.
  • With the whisk still running on low, slowly pour the hot cream into the egg mixture.
  • Tip the entire mixture back into the saucepan, place over a medium/low heat stirring constantly until it thickens and coats the back of a wooden spoon.
  • Remove from the heat.
  • Pour the hot custard through a sieve into a large bowl.
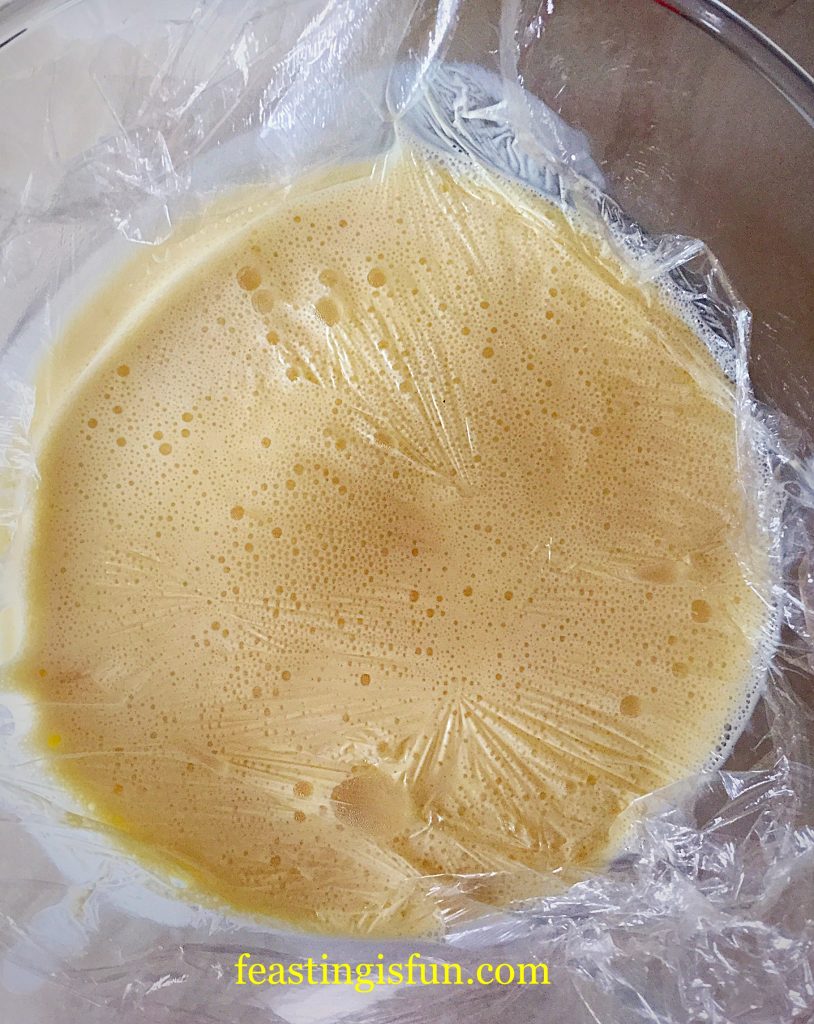
  • Place cling film directly on to the surface of the custard to prevent a skin from forming.
FF Lemon Ripple Ice Cream
Leave the custard base to cool.
  • Leave to cool and then chill in the fridge. Once chilled transfer to a jug.

Churning The Ice Cream Base And Adding The Lemon Ripple

  • Set up your ice cream maker and if it is like mine, it will need to be switched on and churning before pouring in the custard.
  • Pour in the custard through the shoot and leave to churn until softly frozen.
  • Add half of the lemon curd, I use a teaspoon and added it one teaspoon at a time, through the hole, so that it slowly becomes incorporated within the ice cream.
  • When the ice cream is soft but can hold its shape stop the ice cream maker.
  • Transfer the ice cream to a freezer proof tub.
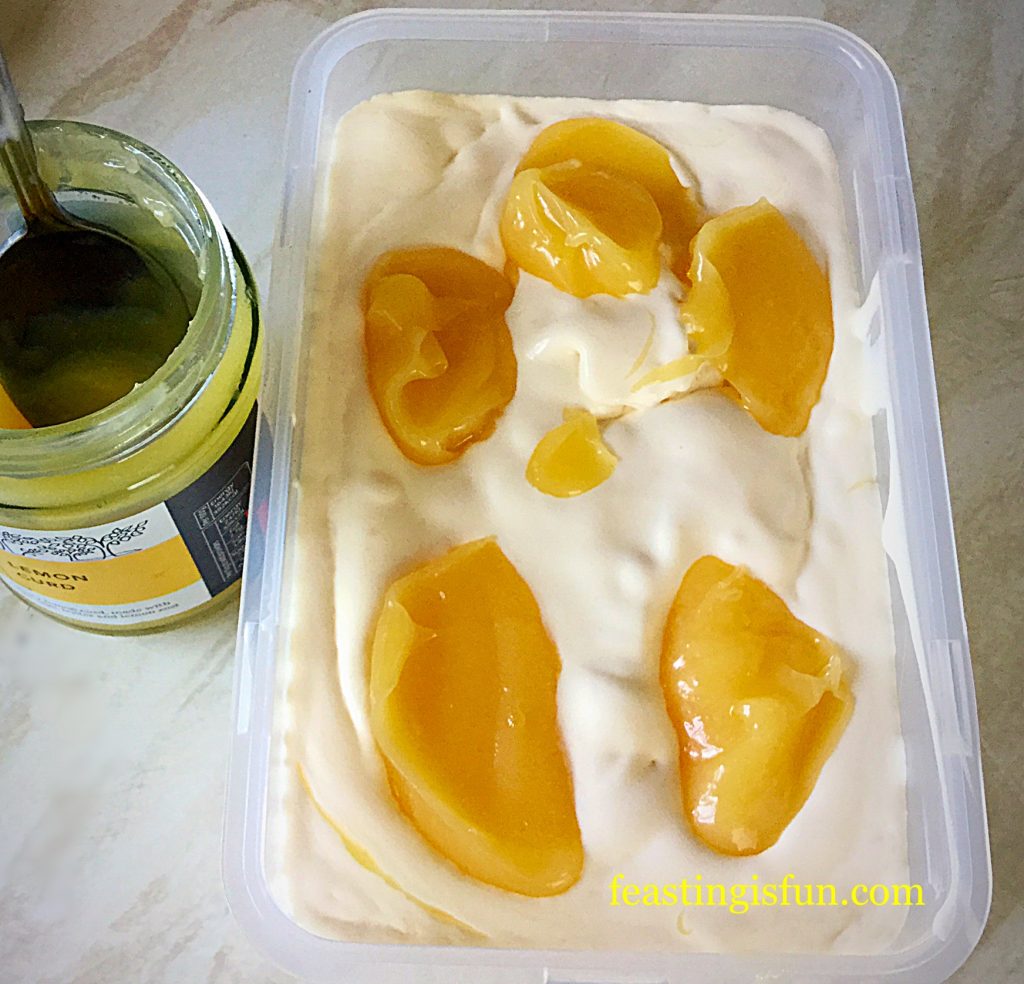
  • Spoon the remaining lemon curd on to the ice cream.
FF Lemon Ripple Ice Cream
Lemon Ripple Ice Cream ready to be rippled.
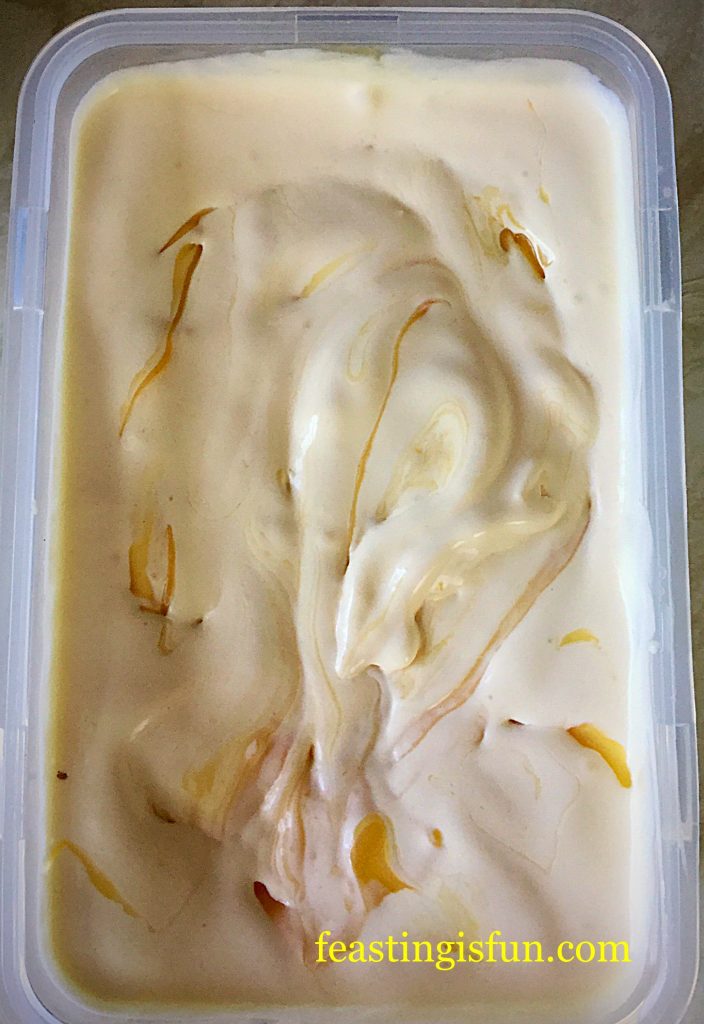
  • Use a spoon to gently ripple the lemon curd through the ice cream.
FF Lemon Ripple Ice Cream
Lemon Ripple Ice Cream ready for the freezer.
  • Resist the urge to just dive in with a spoon, as this really tastes better once it is properly frozen.
  • Pop the lid on and place in the freezer for 12 hours or ideally overnight. Why ideally? Because then you’ll be asleep and not thinking about the ice cream.
  • To serve, remove the tub from the freezer 15 minutes before scooping to allow it to soften.

Serving And Enjoying Homemade Ice Cream

Serve scooped into elegant dessert bowls or enjoy in an ice cream cone. Either way prepare yourself to fall completely, head over heels in love, with a new flavour of ice cream – Lemon Ripple Ice Cream.

FF Lemon Ripple Ice Cream

Lemon Ripple Ice Cream is very much a dreamily, creamy ice cream, not in any way a sorbet – which by the way I love and am working on a recipe.

This ice cream would make the perfect dessert after a spicy, hot meal. Refreshing, creamy and palette cleansing, yet you still feel like you’ve had dessert.

However and whenever you eat this delicious ice cream, be sure to enjoy it with others. Listen to the oohs and aahs of your loved ones enjoying something really, really good. It will make you smile 😀

If you have enjoyed this Lemon Ripple Ice Cream recipe here are some others that you may also want to try:

Strawberry Ripple Ice Cream

Strawberry ripple strawberry ripple ice cream in a cone.
Strawberry Ripple Ice Cream

Chocolate Orange Ice Cream

Chocolate orange ice cream scoops in a bowl.
Chocolate Orange Ice Cream

Strawberry Rose Ice Cream

Strawberry rose ice cream being scooped from a container.
Strawberry Rose Ice Cream

I love being able to create my own ice cream flavours at home. Having an ice cream maker makes it so easy. Preparing the custard takes 15 minutes, then the custard is left to cool. Churning takes about 20 minutes and you can eat the ice cream scooped from the ice cream maker, if you want a soft set ice cream. Otherwise overnight in the freezer and you have any flavour ice cream you like!

That can never be a bad thing eh???

Thank you for your comments, photos on social media, I absolutely love seeing your makes and bakes. It still thrills me every time someone uses one of my recipes.

Have fun feasting, sharing and making people smile.

Sammie xx

Andrew James provided me with an ice cream maker to review. All views, opinions, content, recipes and photographs are my own. Please see my Disclosure Policy.

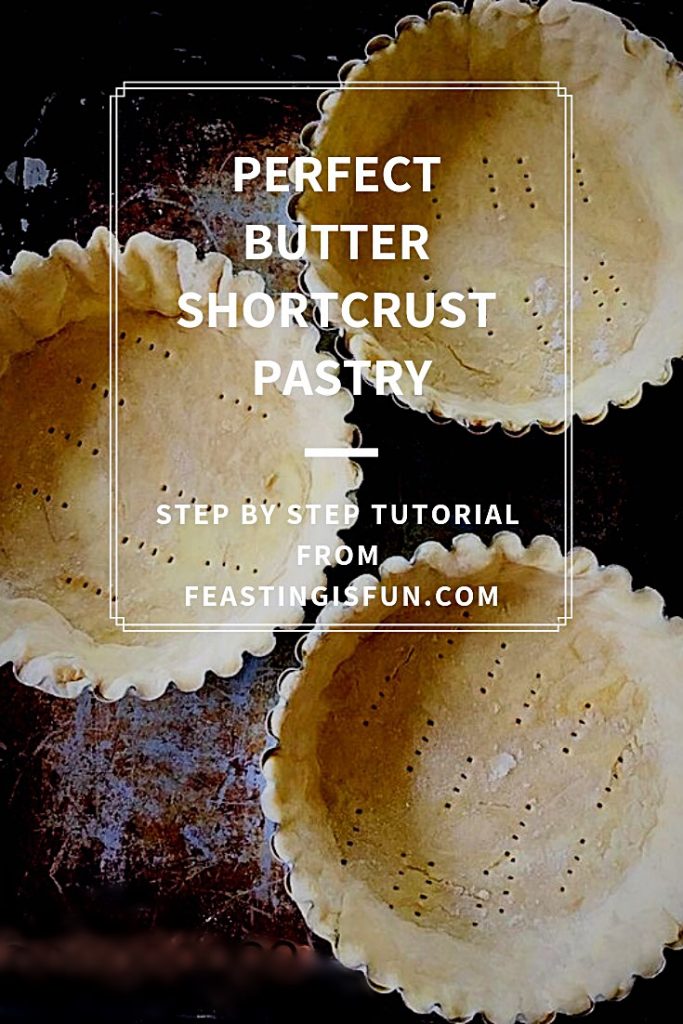
Perfect Butter Shortcrust Pastry

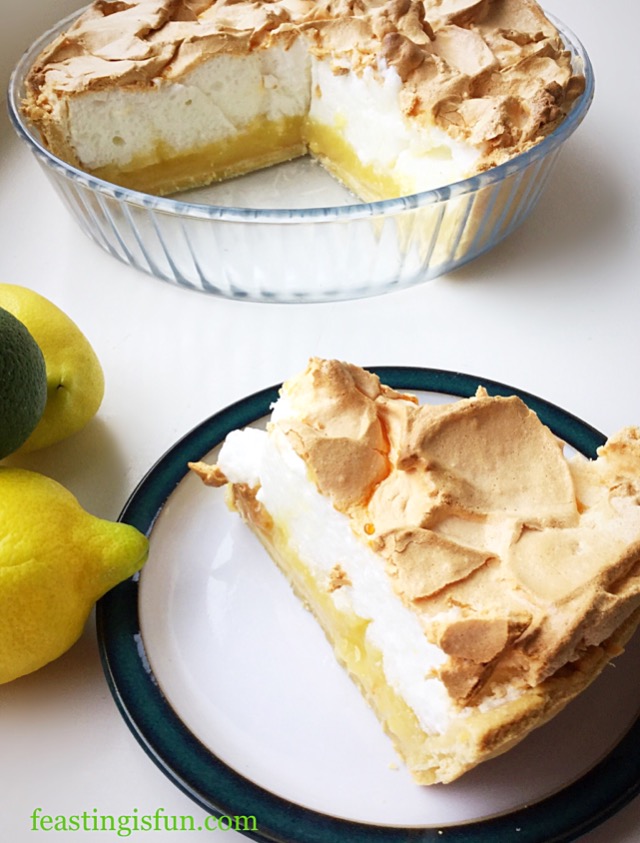
Is the prospect of making your own pastry daunting? Because, for many people it is. Therefore, today I am going to show you how to make foolproof, Perfect Butter Shortcrust Pastry, that works for both sweet such as this Lemon Lime Merigue Pie and savoury bakes like this Smoked Bacon Asparagus Quiche

FF Perfect Butter Shortcrust Pastry

Since being taught to make pastry from an early age, I wonder if the fear that surrounds making it is simply that the skill is not being passed down, through the generations like it used to be. Another reason could be that Home Economics and cooking are not taught as widely as they once were. Likewise, commercially made pastry is readily available in most grocery shops. Yet nothing compares to the crisp, buttery flavour of homemade pastry.

FF Lemon Lime Meringue Pie
Lemon Lime Meringue Pie

Watching cookery programmes, where they may portray the ‘art’ of pastry making as a complicated process can be off putting. So it is understandable that some people are terrified to make pastry and therefore never attempt it. Today, in this tutorial, you will learn how simple it is to make Perfect Butter Shortcrust Pastry, that turn’s out beautifully every single time.

FF Perfect Butter Shortcrust Pastry
Perfect Butter Shortcrust Pastry great for quiches.

Keeping Things Simple

First of all, to reassure you, no kitchen machinery is used. Not even a food processor. Because, if I’m being completely honest, setting the food processor up in my kitchen takes longer than actually making the pastry by hand. So I really can’t be bothered with the hassle. Rather, the only two pieces of equipment I use are a dinner knife and pastry cutter.

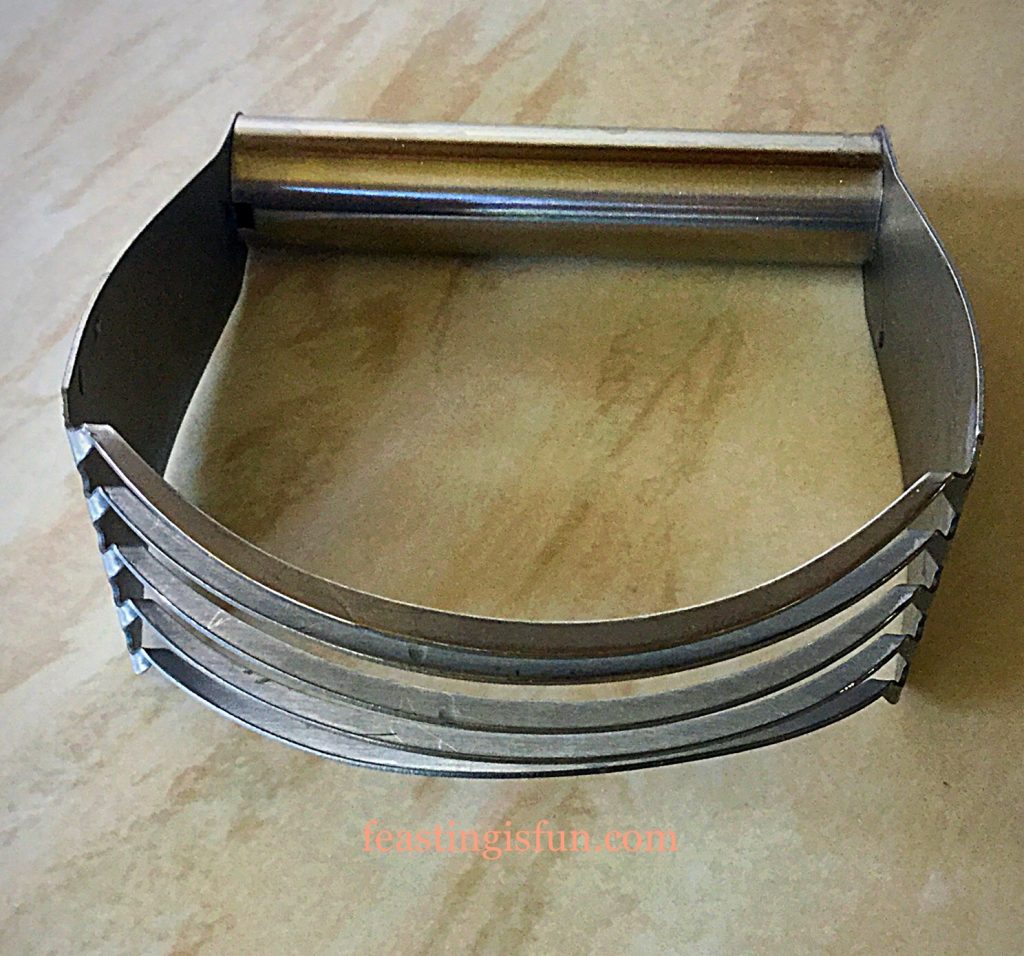
If you haven’t seen or heard of a pastry cutter, they look like this.

FF Perfect Butter Shortcrust Pastry
Pastry Cutter

They can be purchased inexpensively from Amazon or kitchenware shops. And a quick glance on the internet has assured me that the cost is £5 or under.

Keeping It Chilled

Most importantly, the simple key to making good pastry, is to work quickly and yet not rush, while keeping everything as cold as possible. Please, please do not become neurotic about it, as I have seen with some people.

Since my personal experience is that whenever I am stressed, rushed or uptight about something, if I bake, it inevetiably goes wrong. Or at least isn’t my best baking. Therefore, making pastry while relaxed and using a reliable recipe should guarentee good results.

FF Perfect Butter Shortcrust Pastry
Fabulous pastry for all your tarts and quiches.

Choosing The Best Ingredients

So that’s mindset and equipment sorted, next are ingredients. I use unsalted butter in all of my baking as it tends to be better quality than salted and also allows me to control the amount of salt in the recipe. Organic, stoneground flour and organic or free range eggs will always produce the tastiest pastry. Finally, adding salt is more important than you may think as it enhances the pastry’s flavour.  And in comparison, very little is added to commercially available, ready made pastry.

Also, the quantity of cold water added, is a guide, as different batches of flour, butter and the weather, can all affect how much water is needed to bring the dough together.  Don’t panic I will walk you through every step.

Recipe: Make 900g/2lb Perfect Butter Shortcrust Pastry

Enough to make 2 x 25cm/10in tart cases.

400g/14oz Plain White Flour

200g/7oz Unsalted Butter – cold from the fridge and cut into cubes

1/4tsp Sea Salt Flakes – I use Maldon

2 Large Free Range Egg Yolks – I use Waitrose own brand

Approx 180-200ml Cold Tap Water

Making The Perfect Butter Shortcrust Pastry Dough

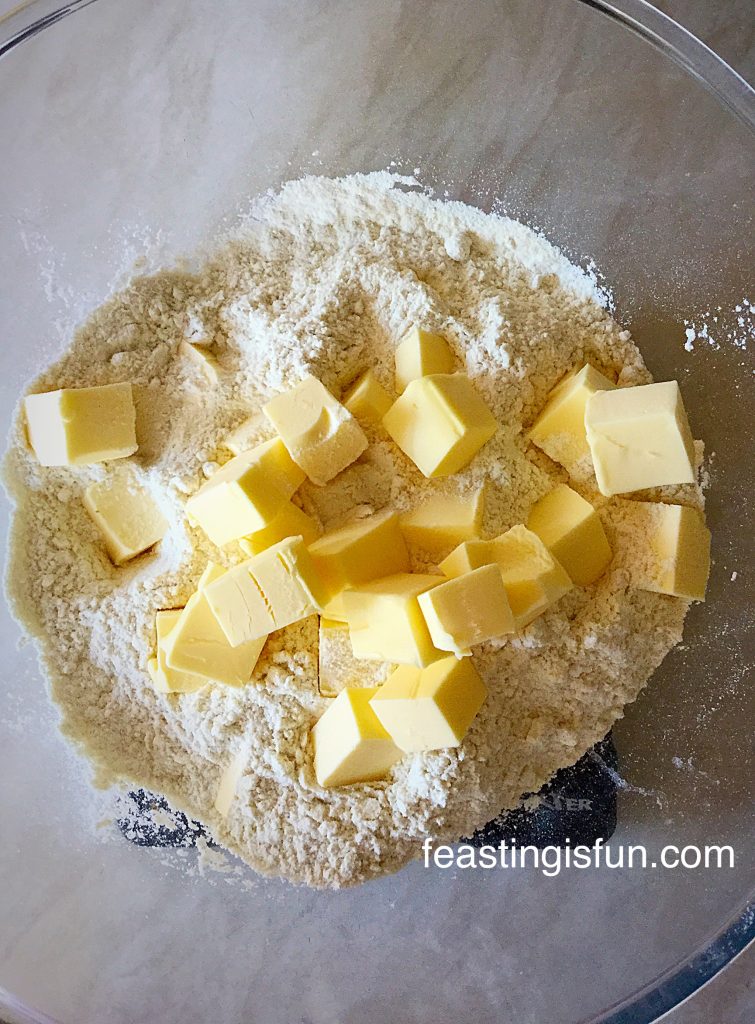
  • First of all, into a large bowl add the flour, salt and cold cubed butter.

Ready to start 'cutting in' the butter.

  • Using the pastry cutter, push and twist it into the flour, rotating the bowl occasionally. Scrape any butter that has become stuck on the pastry cutter off using a regular dinner knife.
  • Keep cutting the butter into the flour until it is about the size of peas.

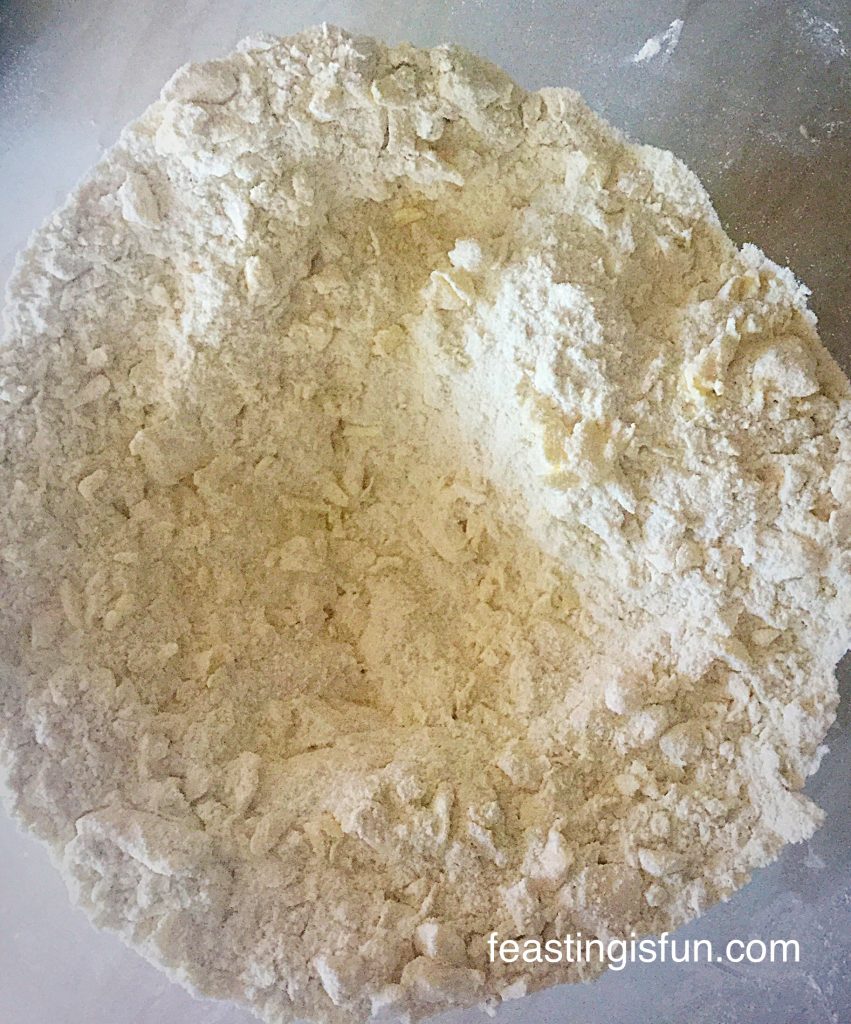
You can clearly see pieces of butter throughout the flour.

  • Note: the flour does not look like breadcrumbs. Traditionally this is how pastry making is taught, to rub, or cut into the flour until it resembles breadcrumbs. If you do this your pastry will be okat. Yet, if you leave pea sized pieces of butter in the flour you will end up with crisp, Perfect Butter Shortcrust Pastry.
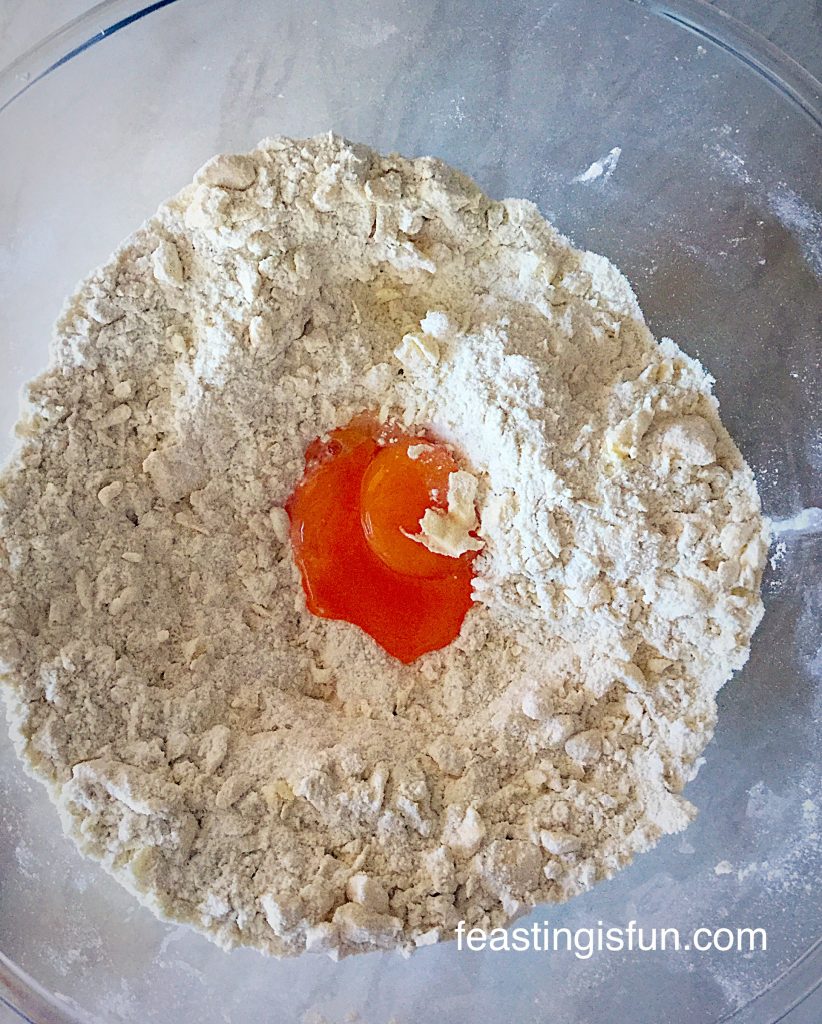
  • Next add the 2 egg yolks into the centre of the mix.

Look how beautifully golden the free range egg yolks are?

  • Add 150ml of cold tap water and stir the mixture using a dinner knife.
  • Continue adding water, in small amounts, 10mls, at a time, stirring with the knife until the pastry starts to come together.
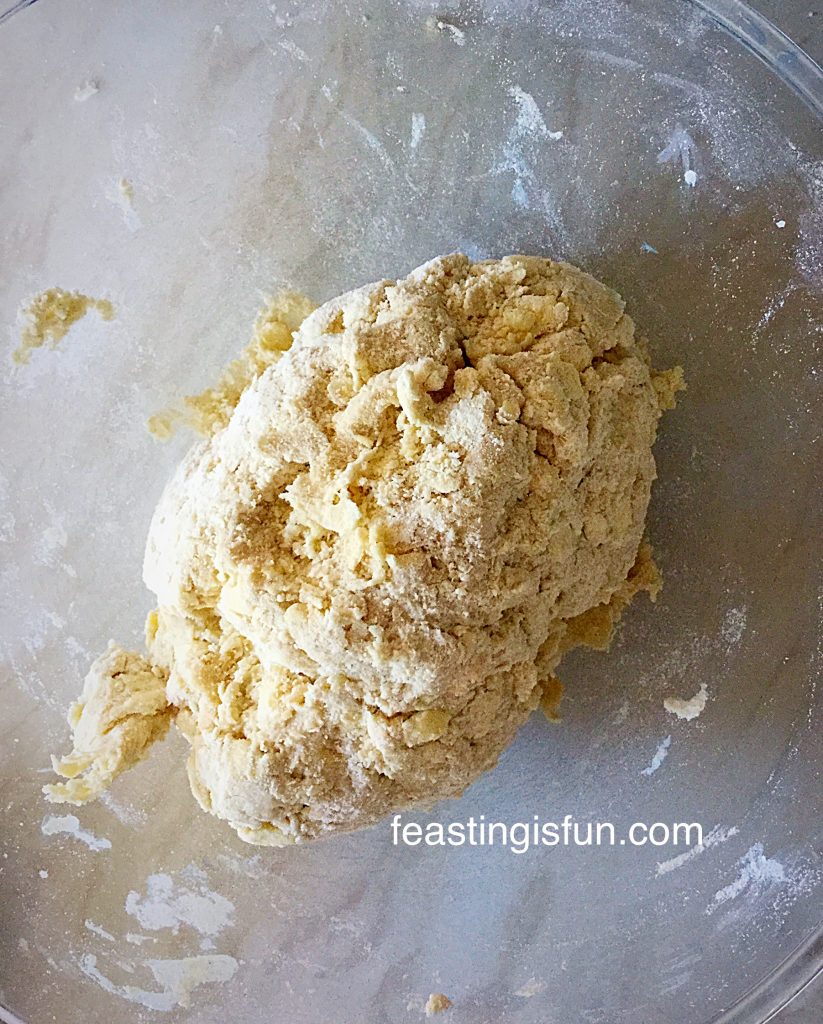
  • Now switch to using your hands. Create a claw-like figure with your fingers. Gently bring the dough together, adding a little more water as necessary, until it just holds together in a rough ball shape.

The perfect All Butter Shortcrust Pastry ball.

  • Wipe the worktop surface with a clean, damp cloth, then lay over a large piece of cling film – the wet surface helps the cling film to stick and not move about.
  • Tip out the ball of pastry onto the cling film.
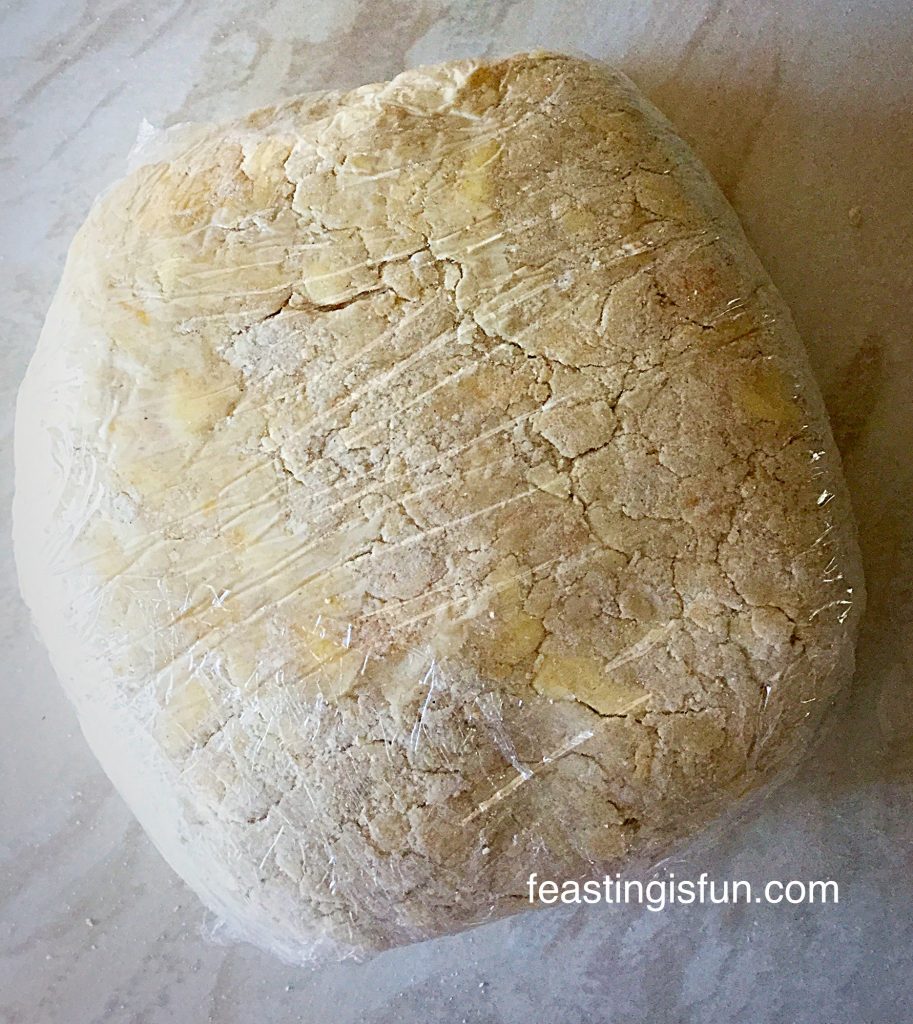
  • Wrap and shape into a large disc.

Your All Butter Shortcrust Pastry is now ready for some relaxation time!

Resting The Pastry

  • Place the wrapped pastry into the fridge and chill for at least one hour.
  • And now put the kettle on and congratulate yourself on making Perfect Butter Shortcrust Pastry.

This recipe makes enough pastry to bake a 2 x 25cm/10in quiches.

  • While the Perfect Butter Shortcrust Pastry is resting in the fridge, it is an ideal time to prepare the filling.

Rolling Out The Shortcrust Pastry

  • Remove the pastry from the fridge. Place on a lightly floured surface and knead lightly.
  • Weigh the pastry where a recipe calls for a specific amount. Alternatively cut in half when making a quiche.
  • Shape one piece of the pastry into a ball.
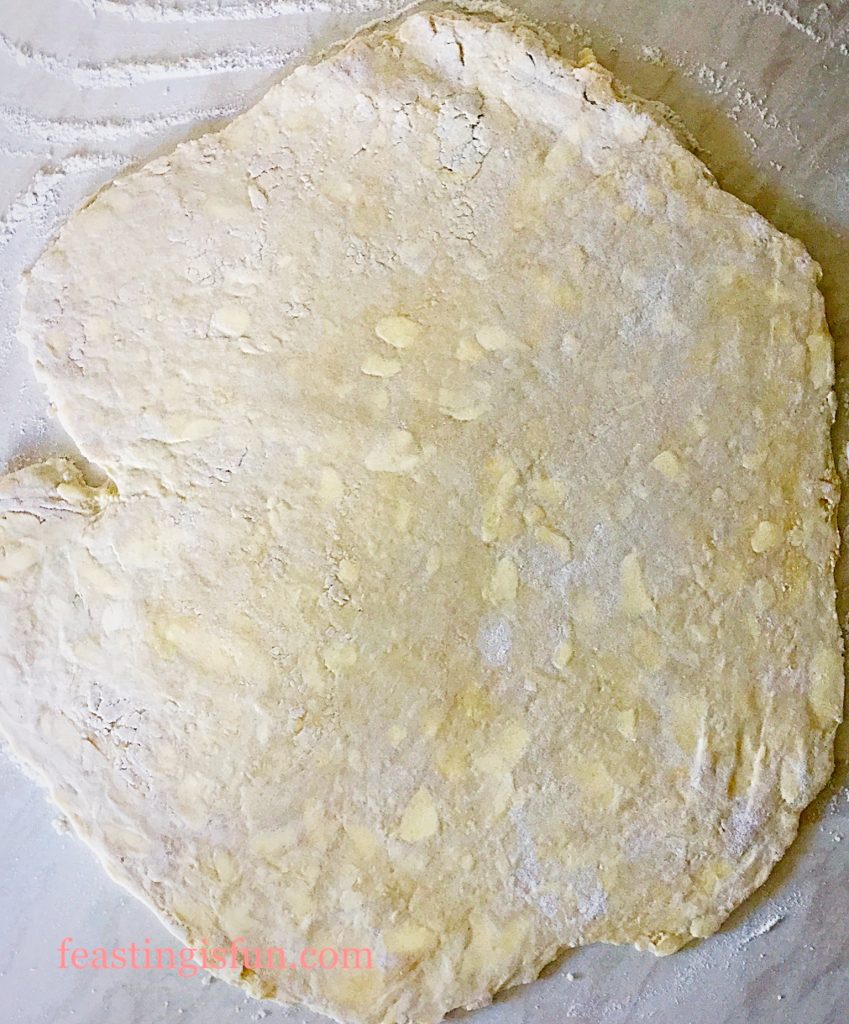
  • Roll out gently from the centre of the pastry to the edge. Ensure the pastry keeps moving by dusting underneath lightly with flower.
  • Ideally the pastry should be about the thickness of a £1 coin – approx 1/4 inch.
Rolling out the pastry.

Lining A Tin With Pastry

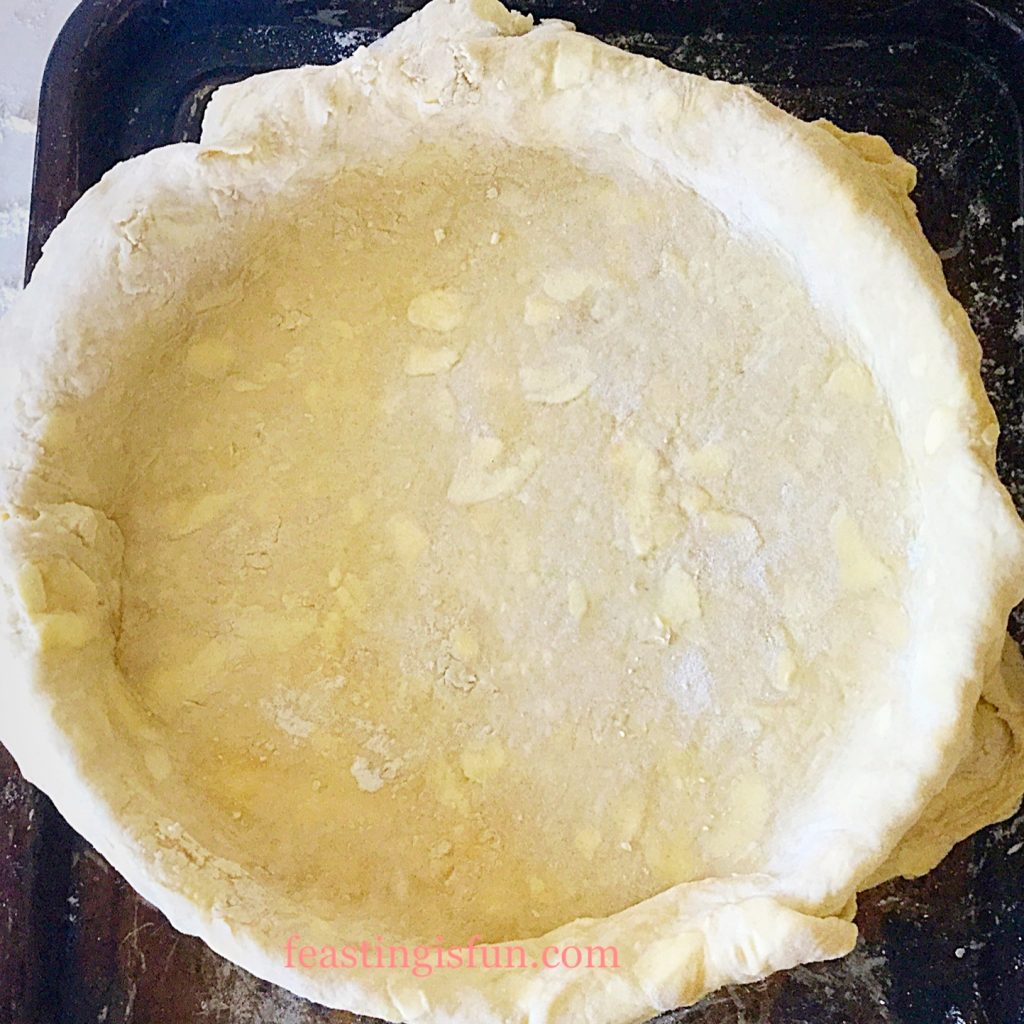
  • Loop the pastry around the rolling pin, this makes moving it easier and stops it stretching.
  • Gently allow the pastry to loosely fill your tin and then remove the rolling pin.
  • Ease the pastry into the tin, if it is fluted be sure to press the pastry into each of the flutes. Most importantly avoid stretching the pastry, as this will result in the pastry shrinking during baking.

  • Roll your rolling pin over the top of the tin and it will cut the edge of the pastry perfectly.
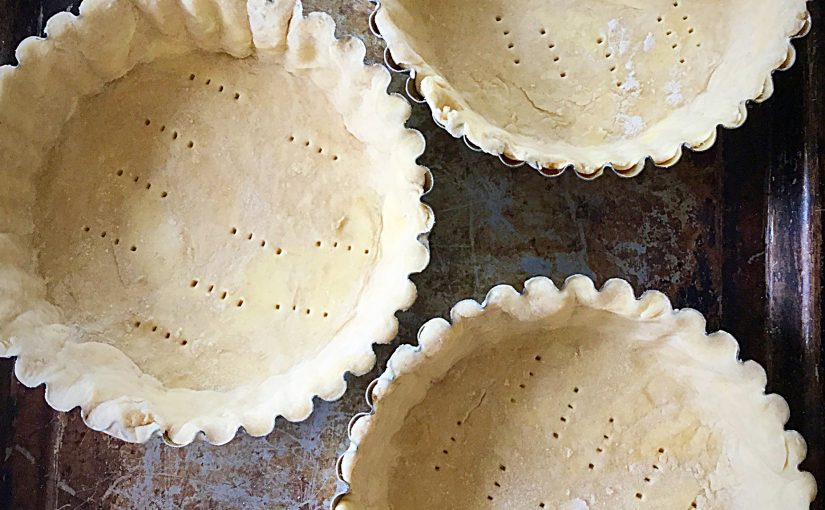
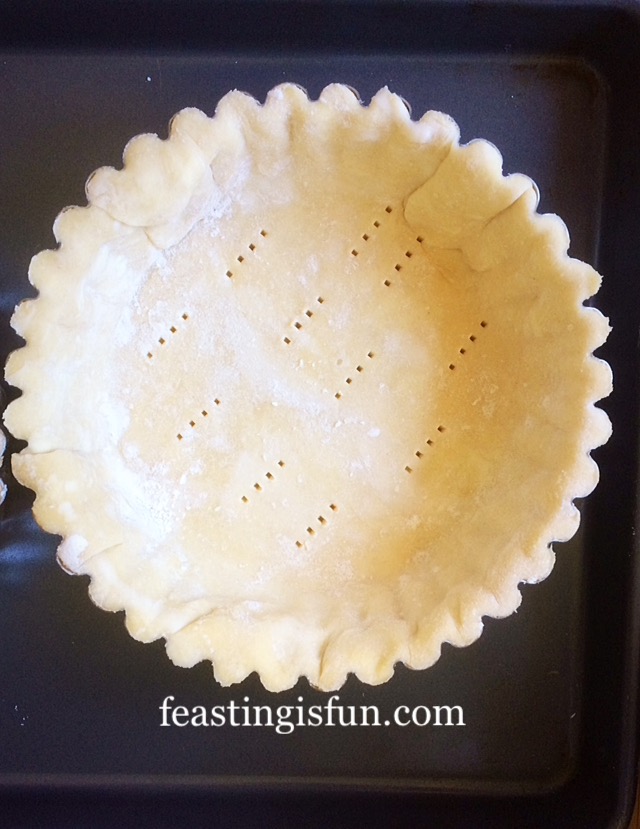
  • Dock (press with a fork) the pastry base, as this helps steam escape and creates a flat base.
Docked un-cooked Perfect Butter Shortcrust Pastry tart.
  • Place the tart tin back in the fridge for 30 minutes, this really helps the pastry keep it’s shape when being baked.
  • Cut some baking parchment larger than the width of your tin.
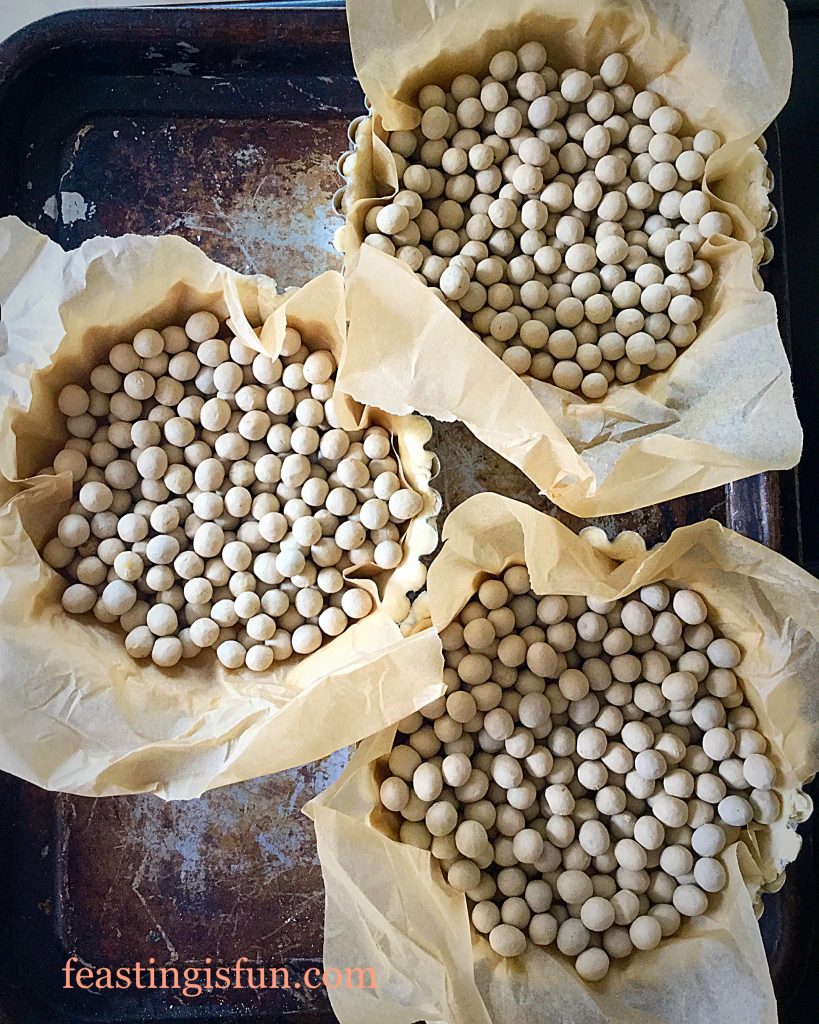
  • Scrunch up and then lay on top of the pastry in the tin. Fill the baking parchment with ceramic baking balls.
FF Perfect ButterShortcrust Pastry
The ceramic baking balls keep the pastry’s shape as it bakes in the oven.

Blind Baking The Pastry

  • Place the pastry lined tins onto a baking tray and put in a preheated oven at 200C/180C fan, gas mark 6. Bake for 15 minutes.
  • As soon as the baking time has finished remove the tin from the oven.
  • Using the baking parchment, lift the baking balls free from the pastry lined tin.
  • Place the baking balls in a heatproof bowl to cool.
  • Put the tart tins back in the oven and bake for another 5 minutes if using for a filled tart or quiche. If baking the tart shell until cooked, depending on size, bake for a further 15 minutes or until the pastry is golden brown and cooked through.
FF Perfect Butter Shortcrust Pastry.
Beautifull be golden tart shell.

Look at the gorgeous Perfect Butter Shortcrust Pastry crust. Deliciously light, crisp and buttery.

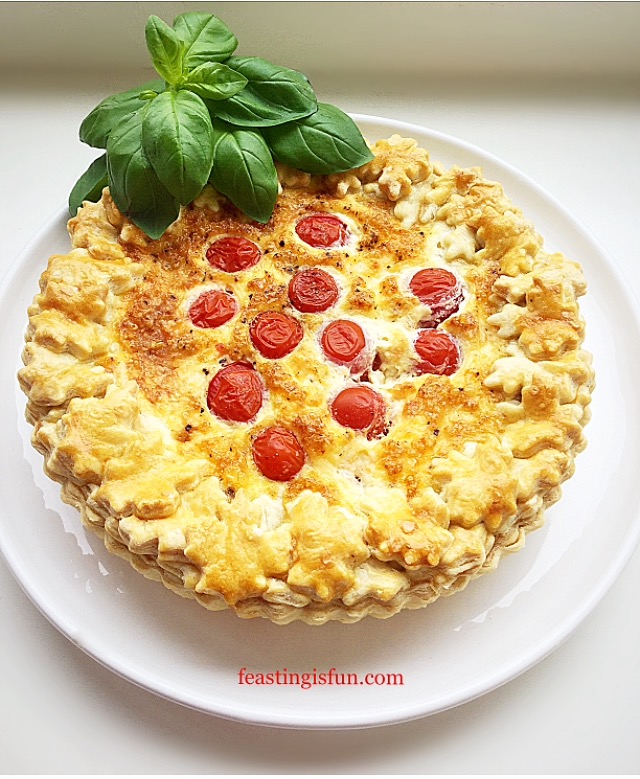
FF Cherry Tomato Mozzarella Basil Quiche
Cherry Tomato Mozzarella Basil Quiche

As you can see from the photos this recipe really does produce Perfect Butter Shortcrust Pastry. Also, the pastry has such a delicious flavour of it’s own, becoming part of the dish, not just a carrier of other flavours.

Unused Perfect Butter Shortcrust Pastry can be kept wrapped in cling film, in the fridge for up to 2 days, or it can be frozen, wrapped in cling film and popped into a freezer bag for up to 3 months.

Top Tip: Freeze any leftover pastry and after a while you’ll have enough for a recipe!

If you have enjoyed this Perfect Butter Shortcrust Pastry here are some other recipes you may like to try:

Quiche Lorraine

FF Perfect Butter Shortcrust Pastry
Smoked ham and cheese create a classic Quiche Lorraine.

Cheddar Tomato Basil Quiche 

FF Cheddar Tomato Basil Quiche
Cheddar Tomato Basil Quiche

Iced Bakewell Tart

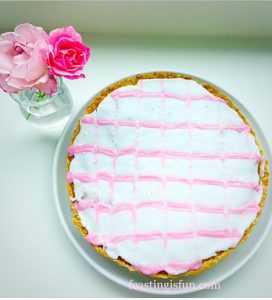
FF Iced Bakewell Tart
Iced Bakewell Tart

Lemon Curd Sponge Tart

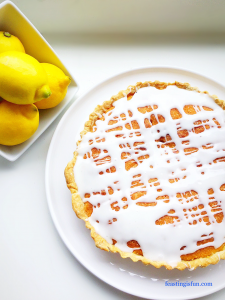
FF Lemon Curd Sponge Tart
Lemon Curd Sponge Tart

As with anything new, practising will improve your technique and consequently the pastry that you make. Since homemade pastry requires only a few ingredients, it is handy to know how to make your own. Whether it is for sweet or savoury bakes, this pastry recipe works beautifully. Also, it is much cheaper to make your own from scratch compared to buying ready made. And you know exactly what has gone into making it.

So whatever you are making, baking and creating in your kitchens, have fun preparing and sharing your feast.

Sammie xx

No part of this post may be reproduced or duplicated without the written permission of the owner. Please see my Disclosure Policy.