Easy White Cob Loaf

Share
Facebooktwitterpinterestlinkedintumblr

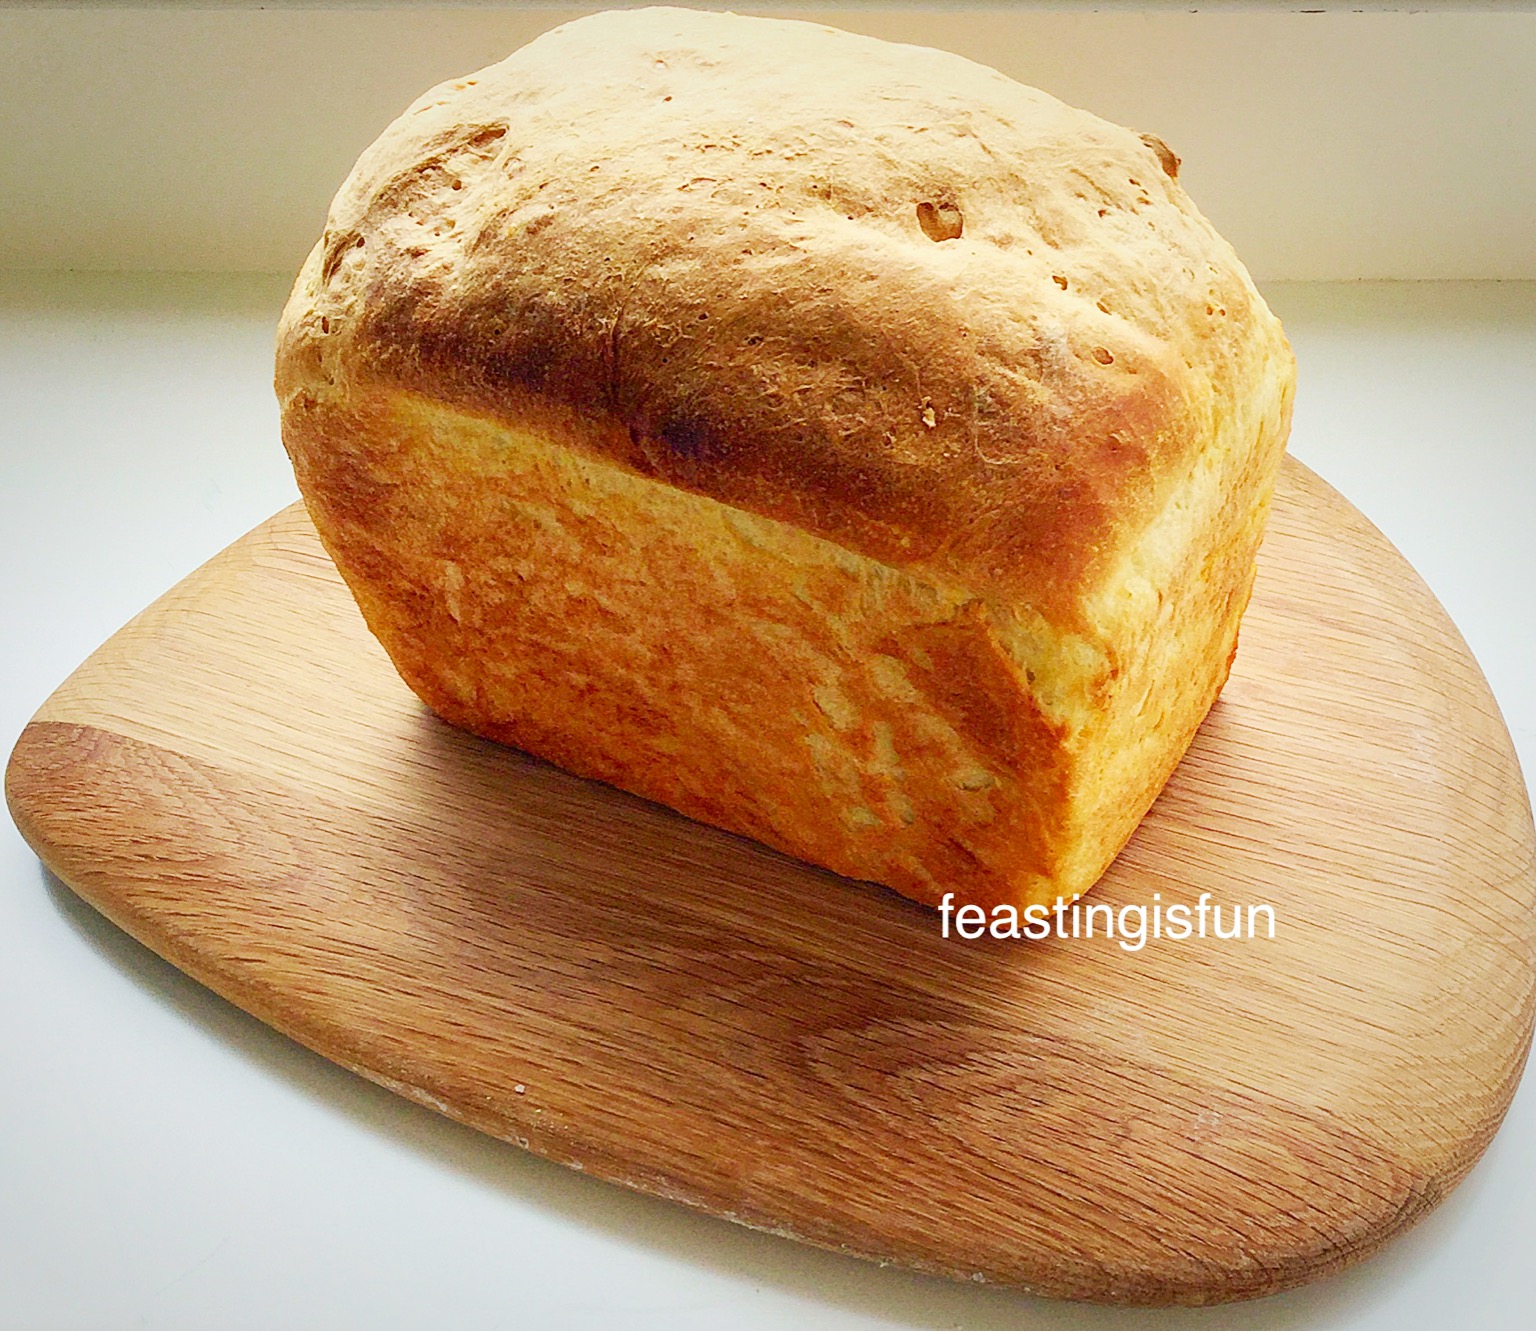
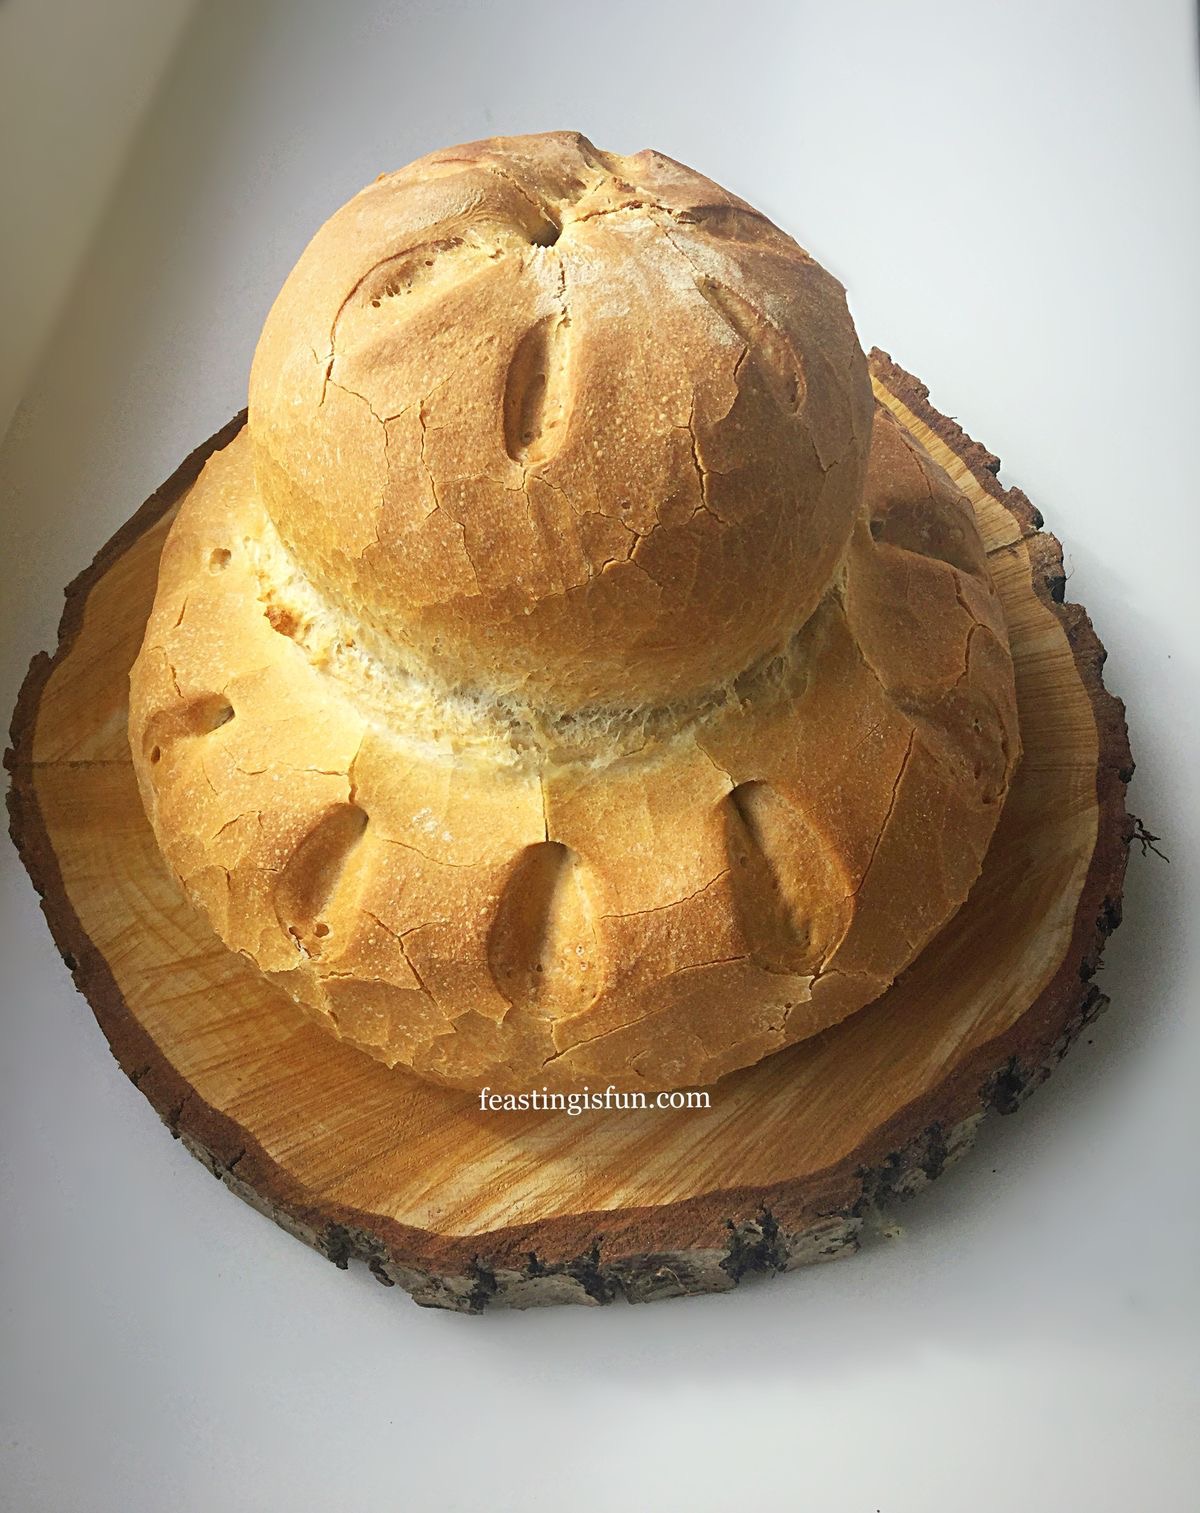
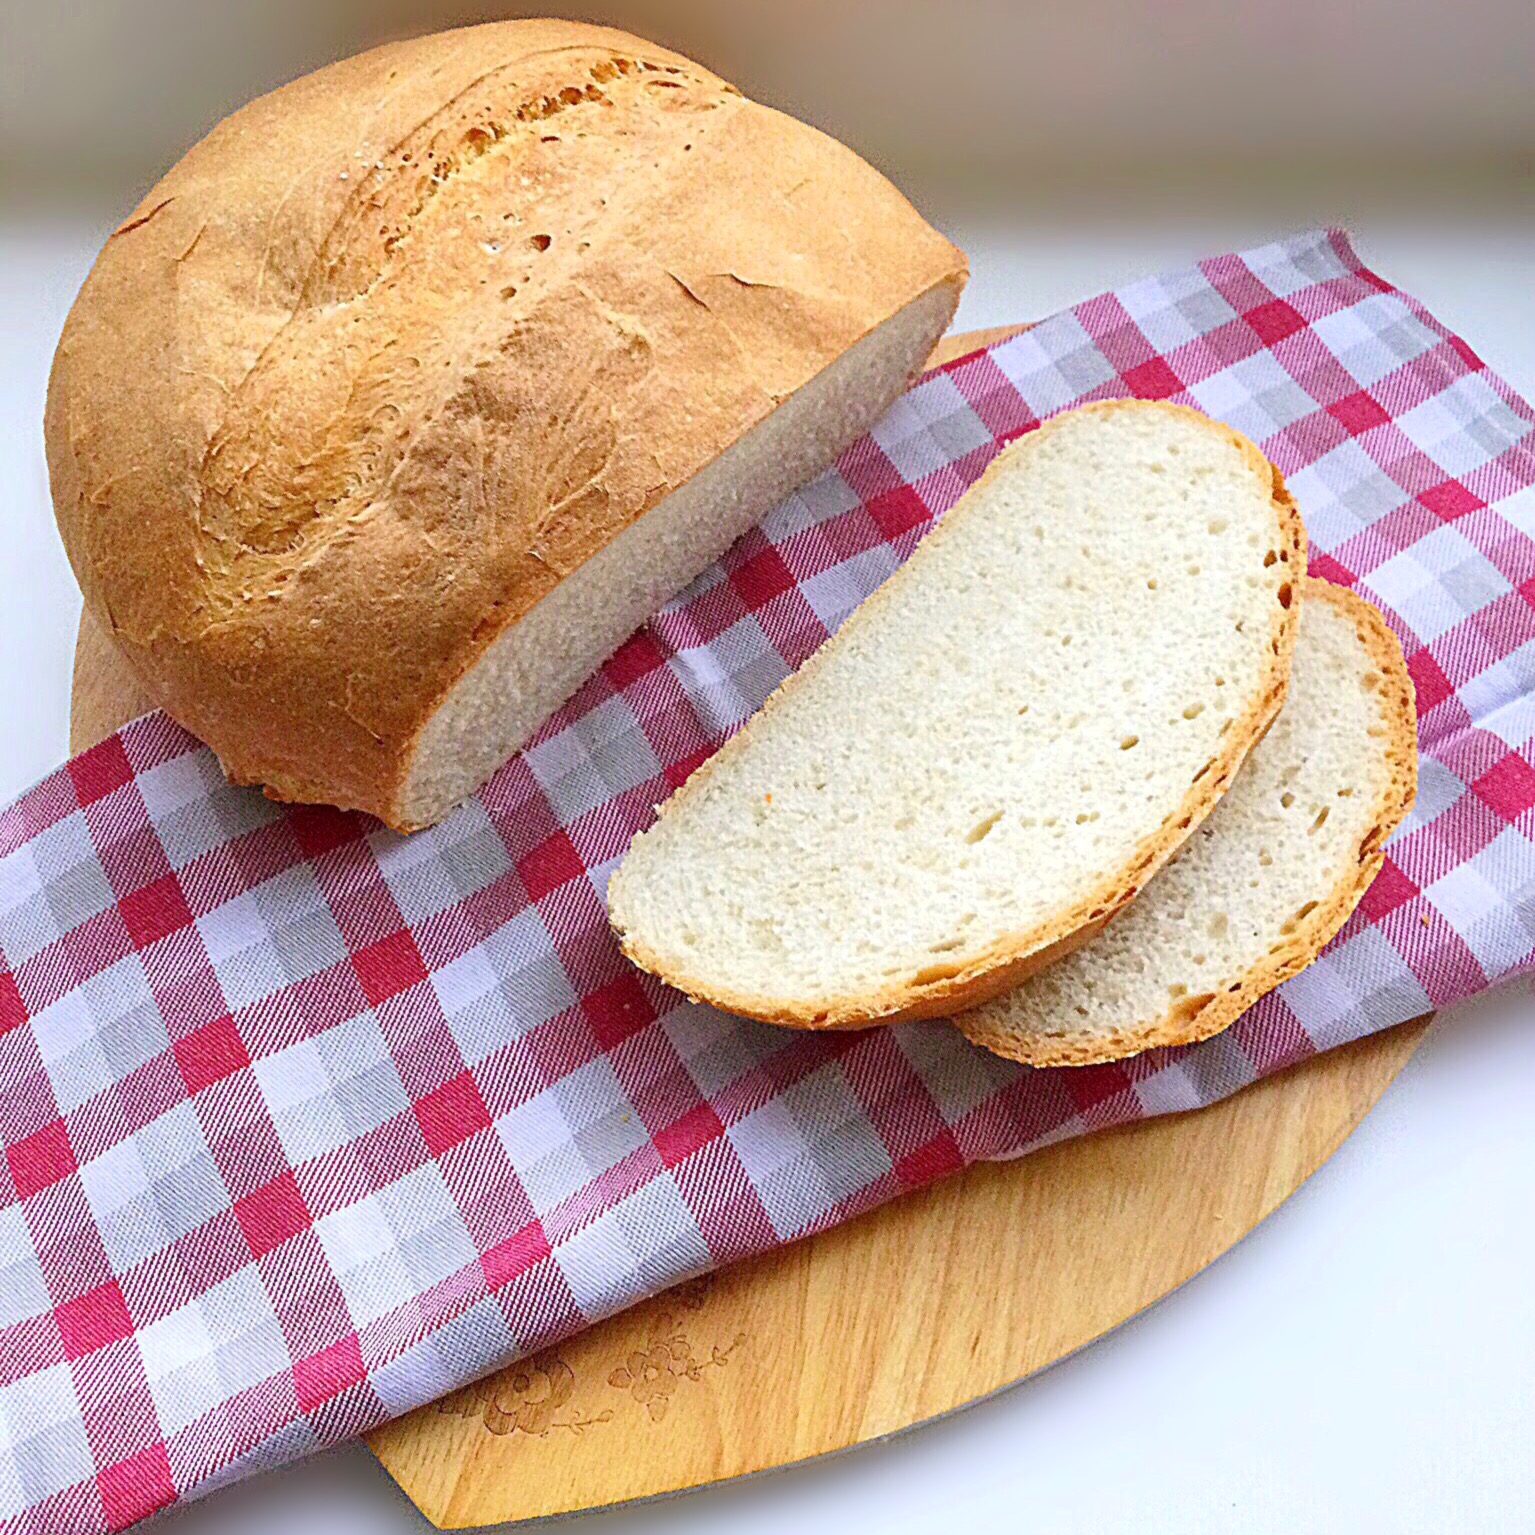
Welcome to Autumn here in the U.K. A time when storms rip across the land, pulling leaves from trees, tousling our manicured summer gardens. While shadows lengthen as the days shorten and golden sunshine illuminates the changing colours of our landscape. As temperatures begin to drop thoughts turn to indoors where we crave comfort and being cosy. The kitchen, no longer churning out endless salads that quench summer heat, now become our sanctuary. And baking bread again becomes a pleasure, as the house fills with welcoming aromas and our appetites are satiated. Crusty and delicious this Easy White Cob Loaf is the simplest bread to make, requiring no special tin to bake it in.

Cut loaf of bread on a board.

Taking The Hard Work Out Of Making Bread

Crusty bread is so appealing. Whether toasted and slathered in jam, or buttered and served with soup, it never fails to deliver on taste and texture. Made using simple ingredients; flour, water, yeast, salt and a little butter or oil, it only requires the minimum handling when using a stand mixer to mix and knead the dough. So, for those who struggle with painful hands due to arthritis, as I do, this recipe is simple and easy to make. Alternatively, this recipe can easily be made by hand for those who prefer to knead bread themselves.

Sliced crusty white bread on a wooden board.

Easy Bread Making For Everyone

Whether this is your first time making bread or the millionth, the simplicity of this recipe is so rewarding. Since we use the same bowl to mix the ingredients together and prove the dough. And when using a stand mixer all of the kneading also takes place in this bowl. A baking tray is necessary and a dough scraper recommended. Finally, a sharp knife to score the dough and you’re all set!

Easy White Cob Loaf freshly baked and cooling on a round trivet.

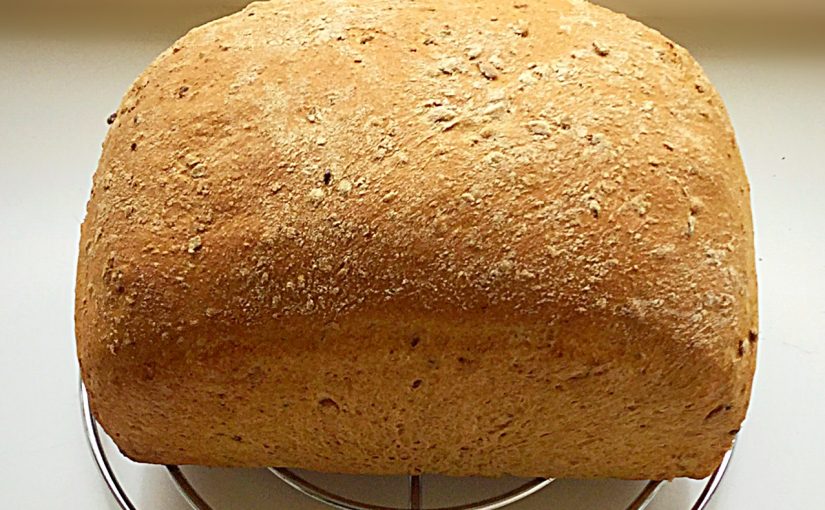
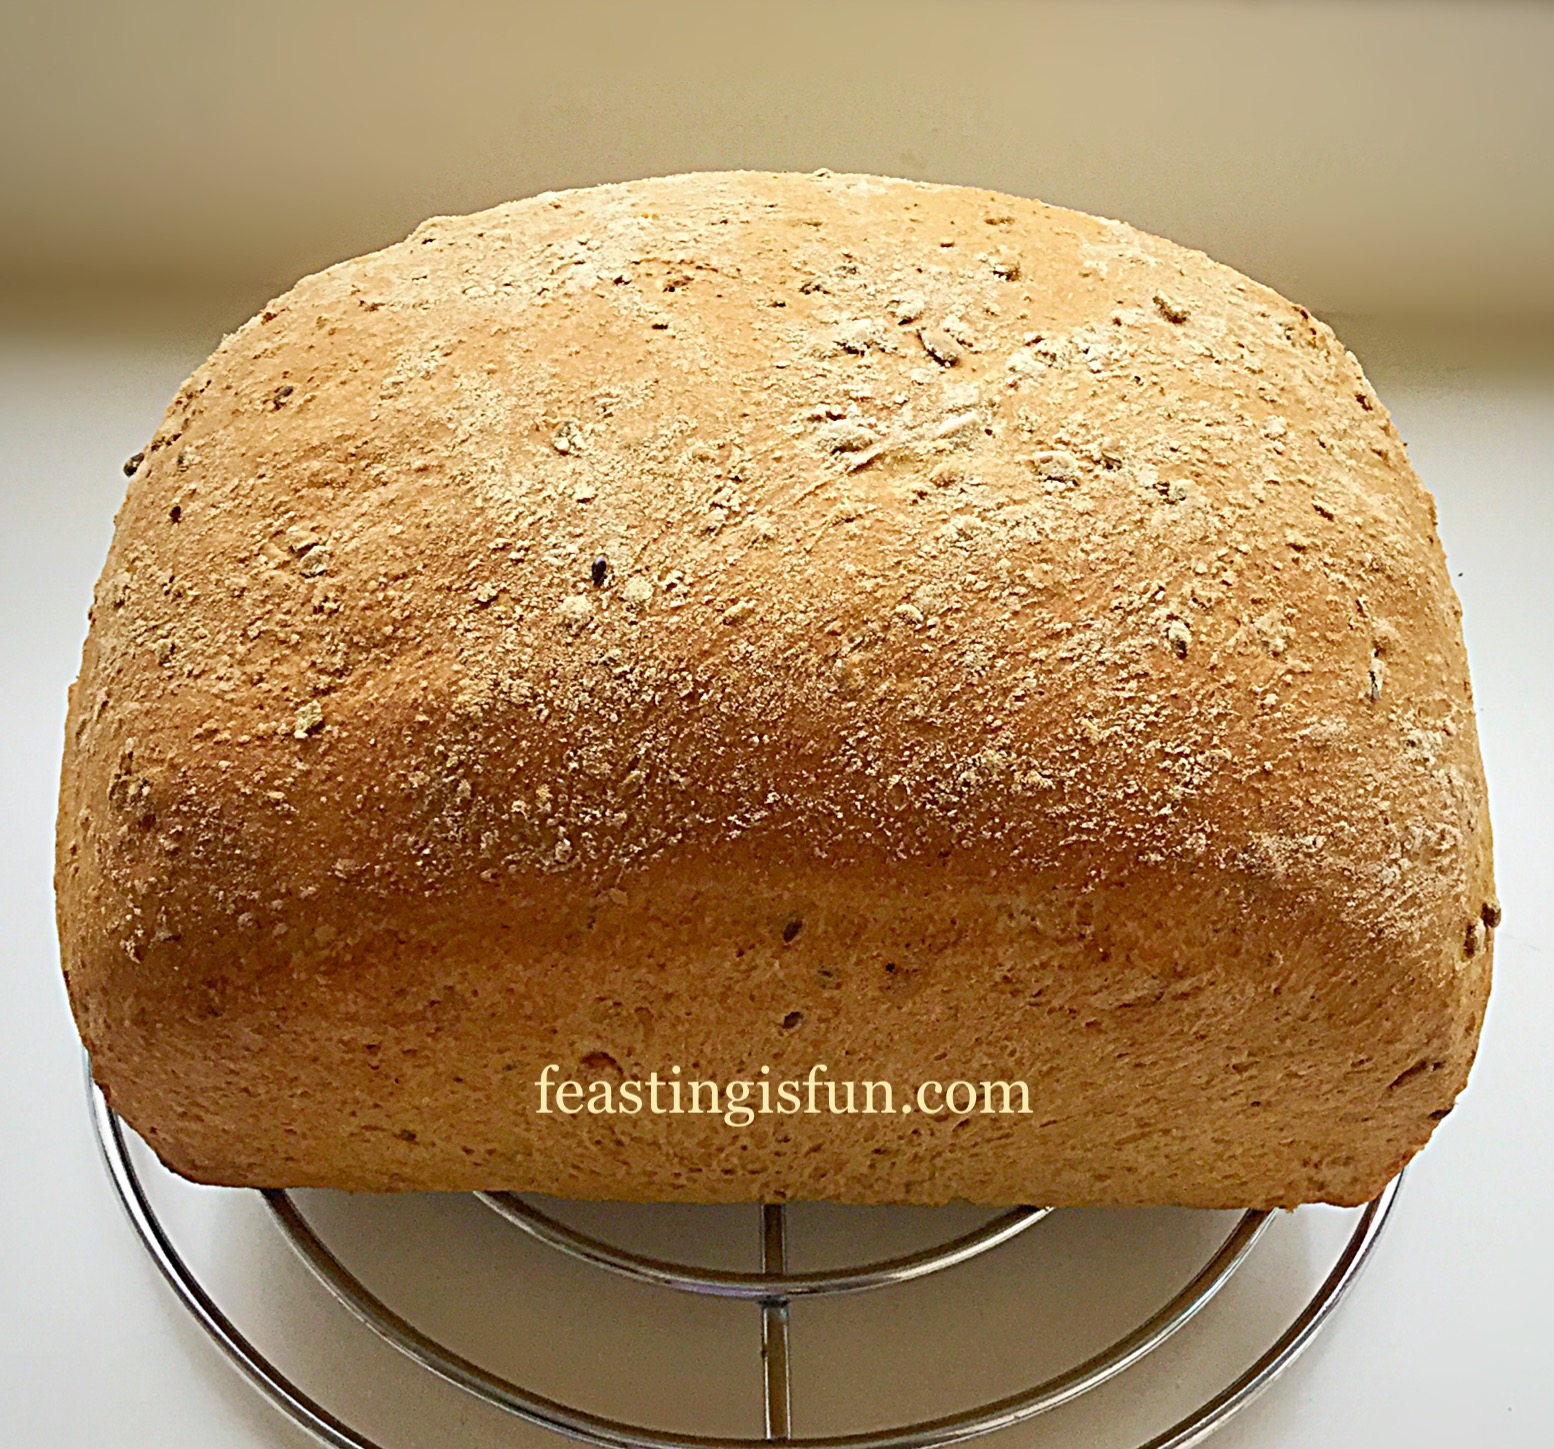
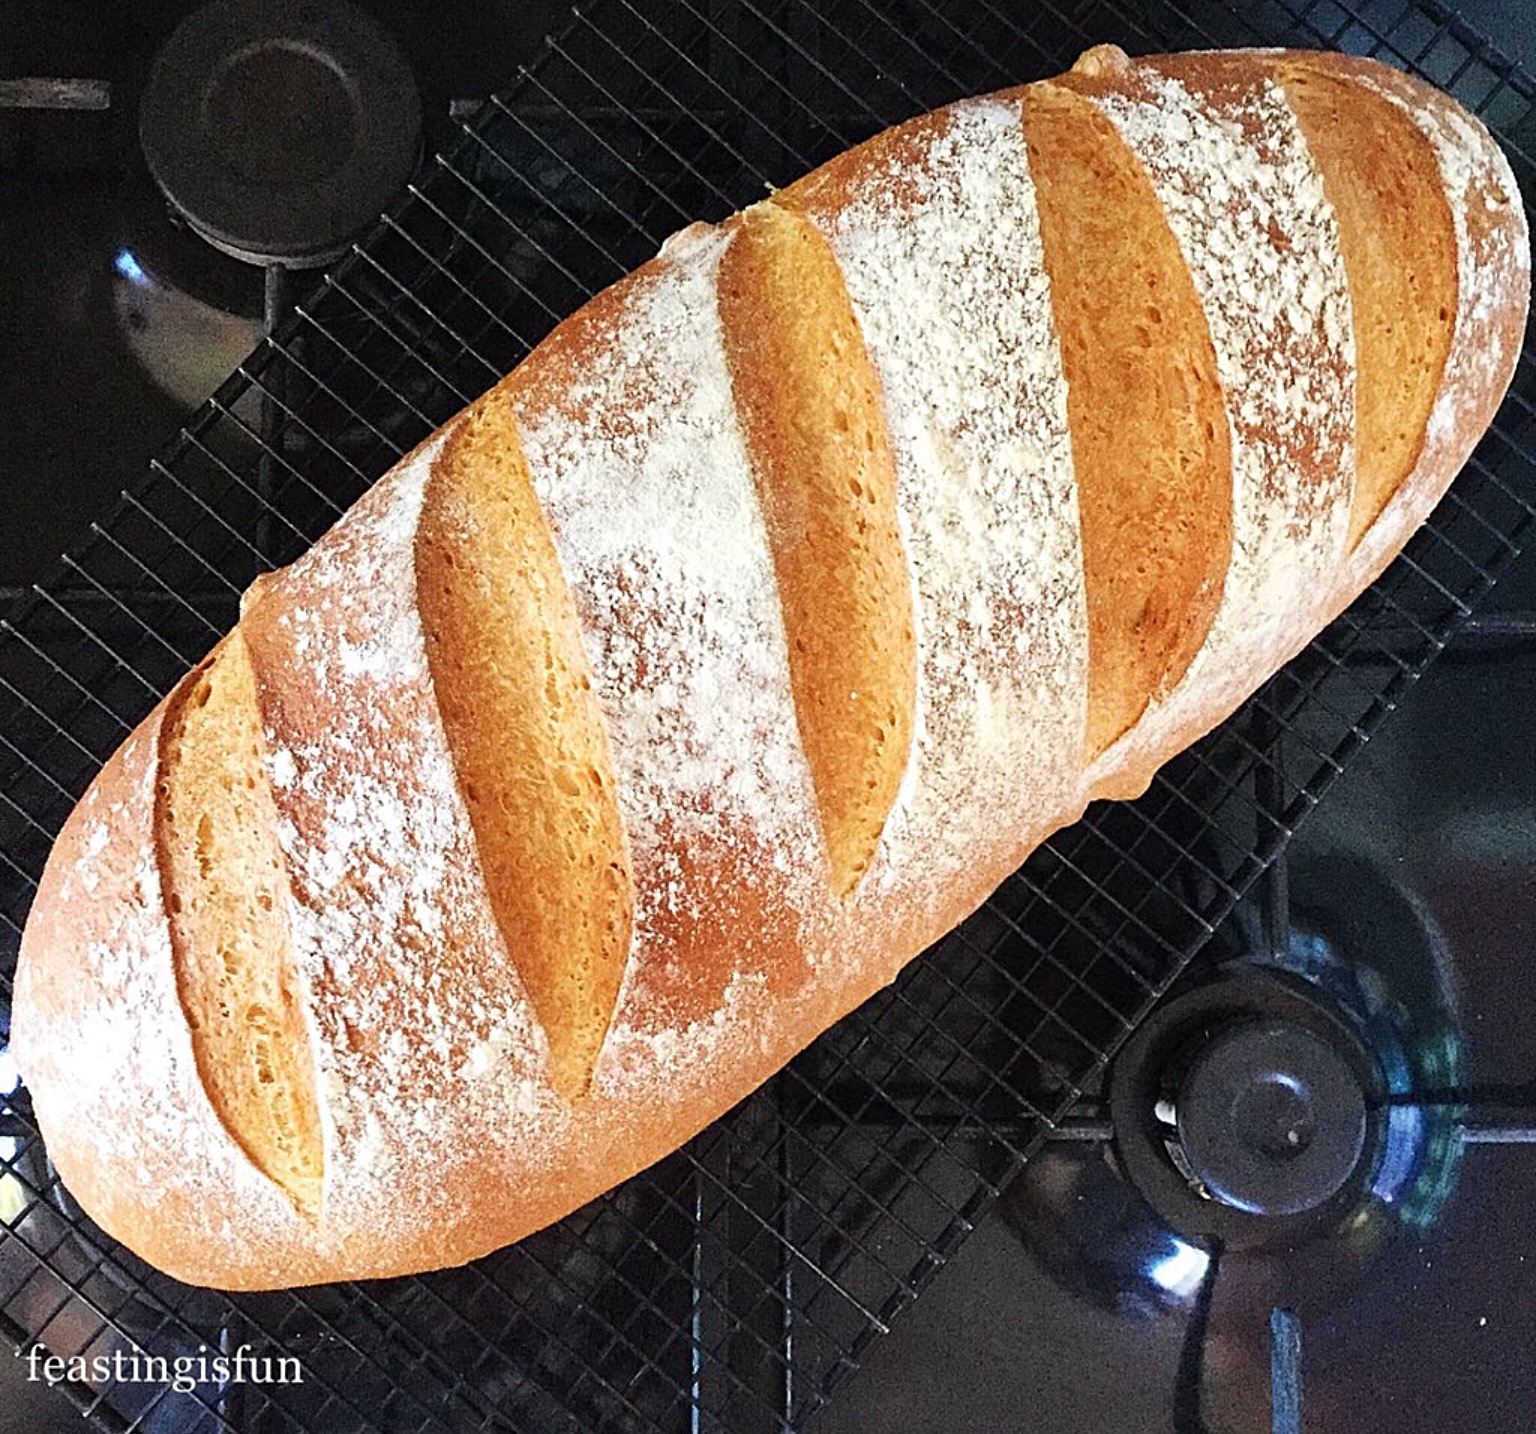
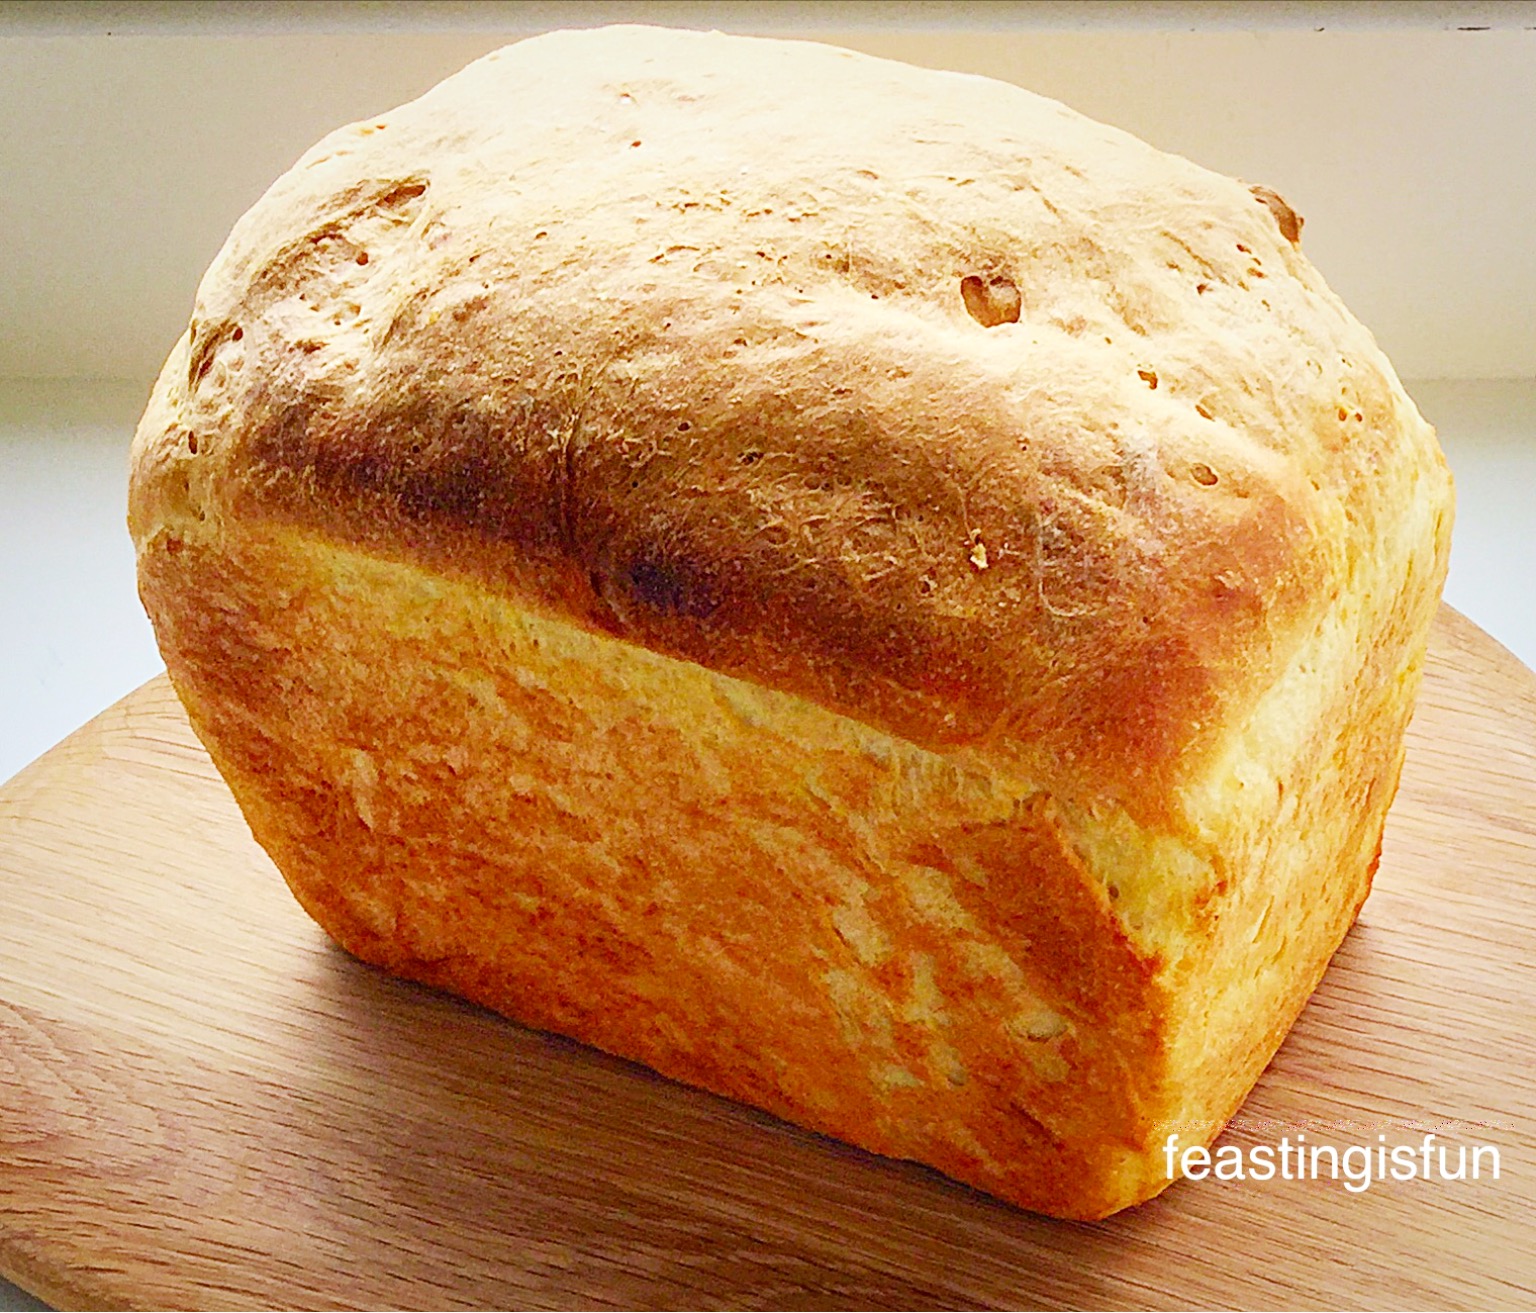
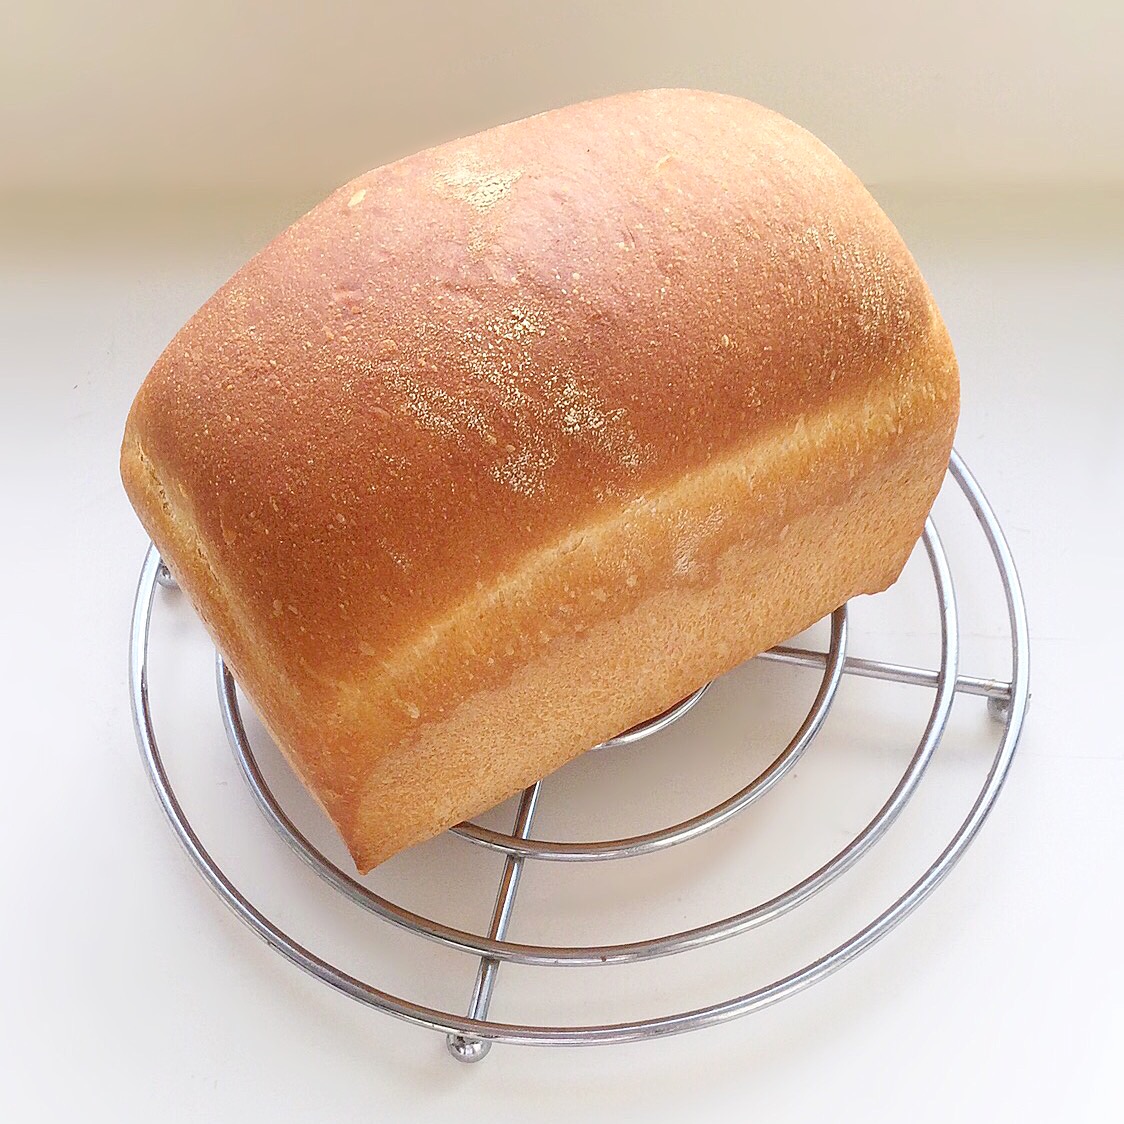
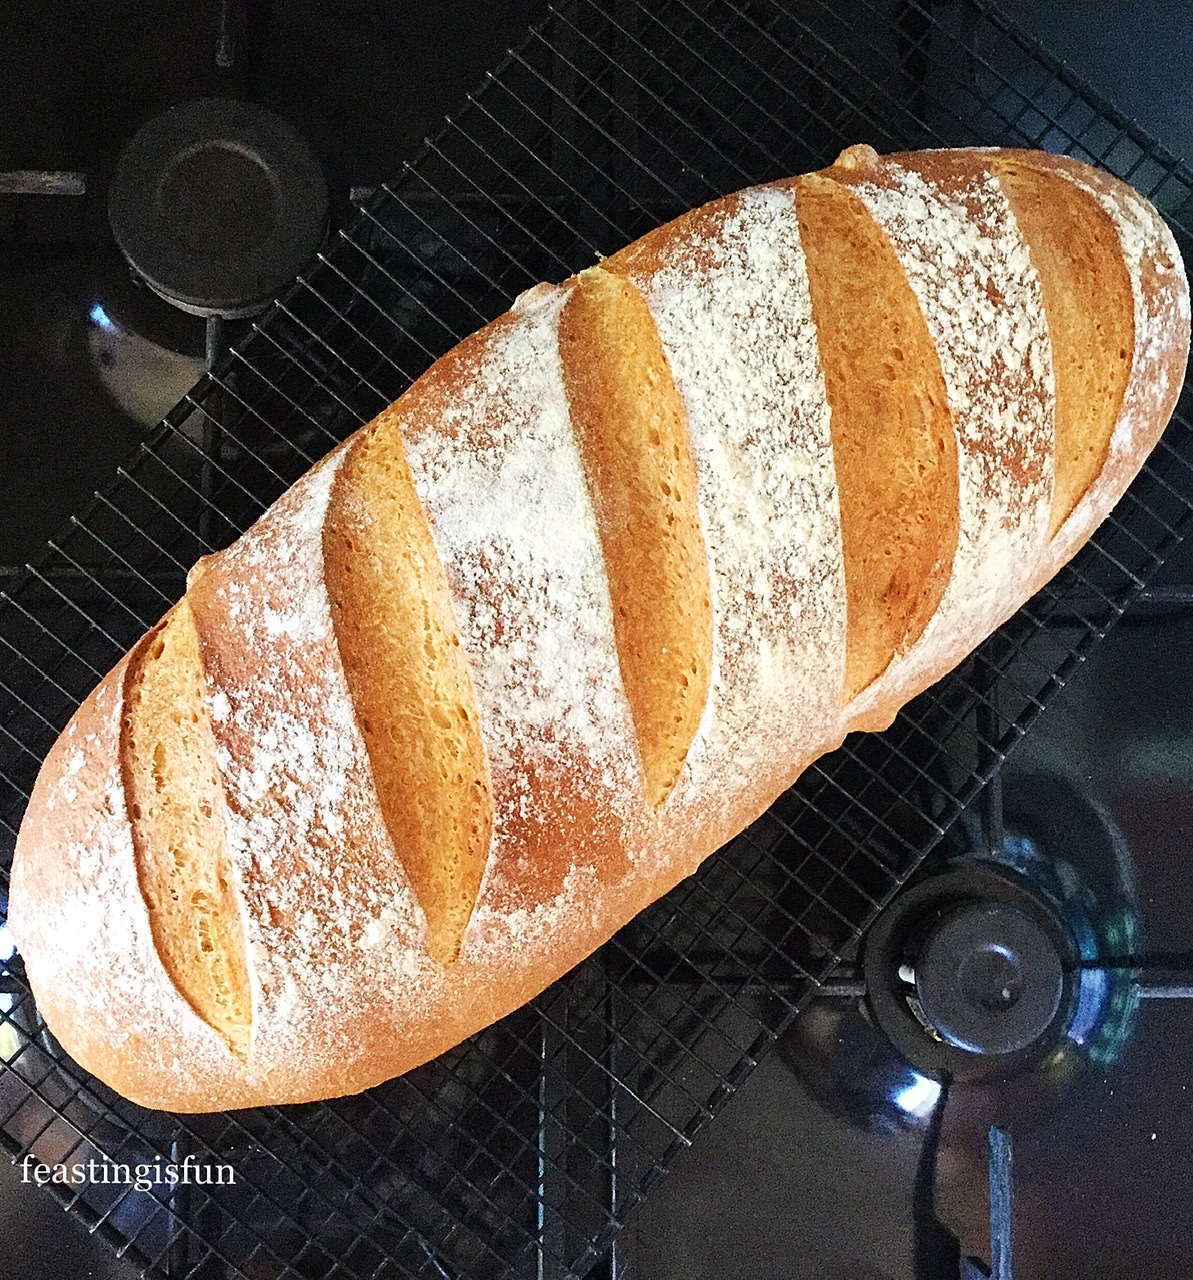
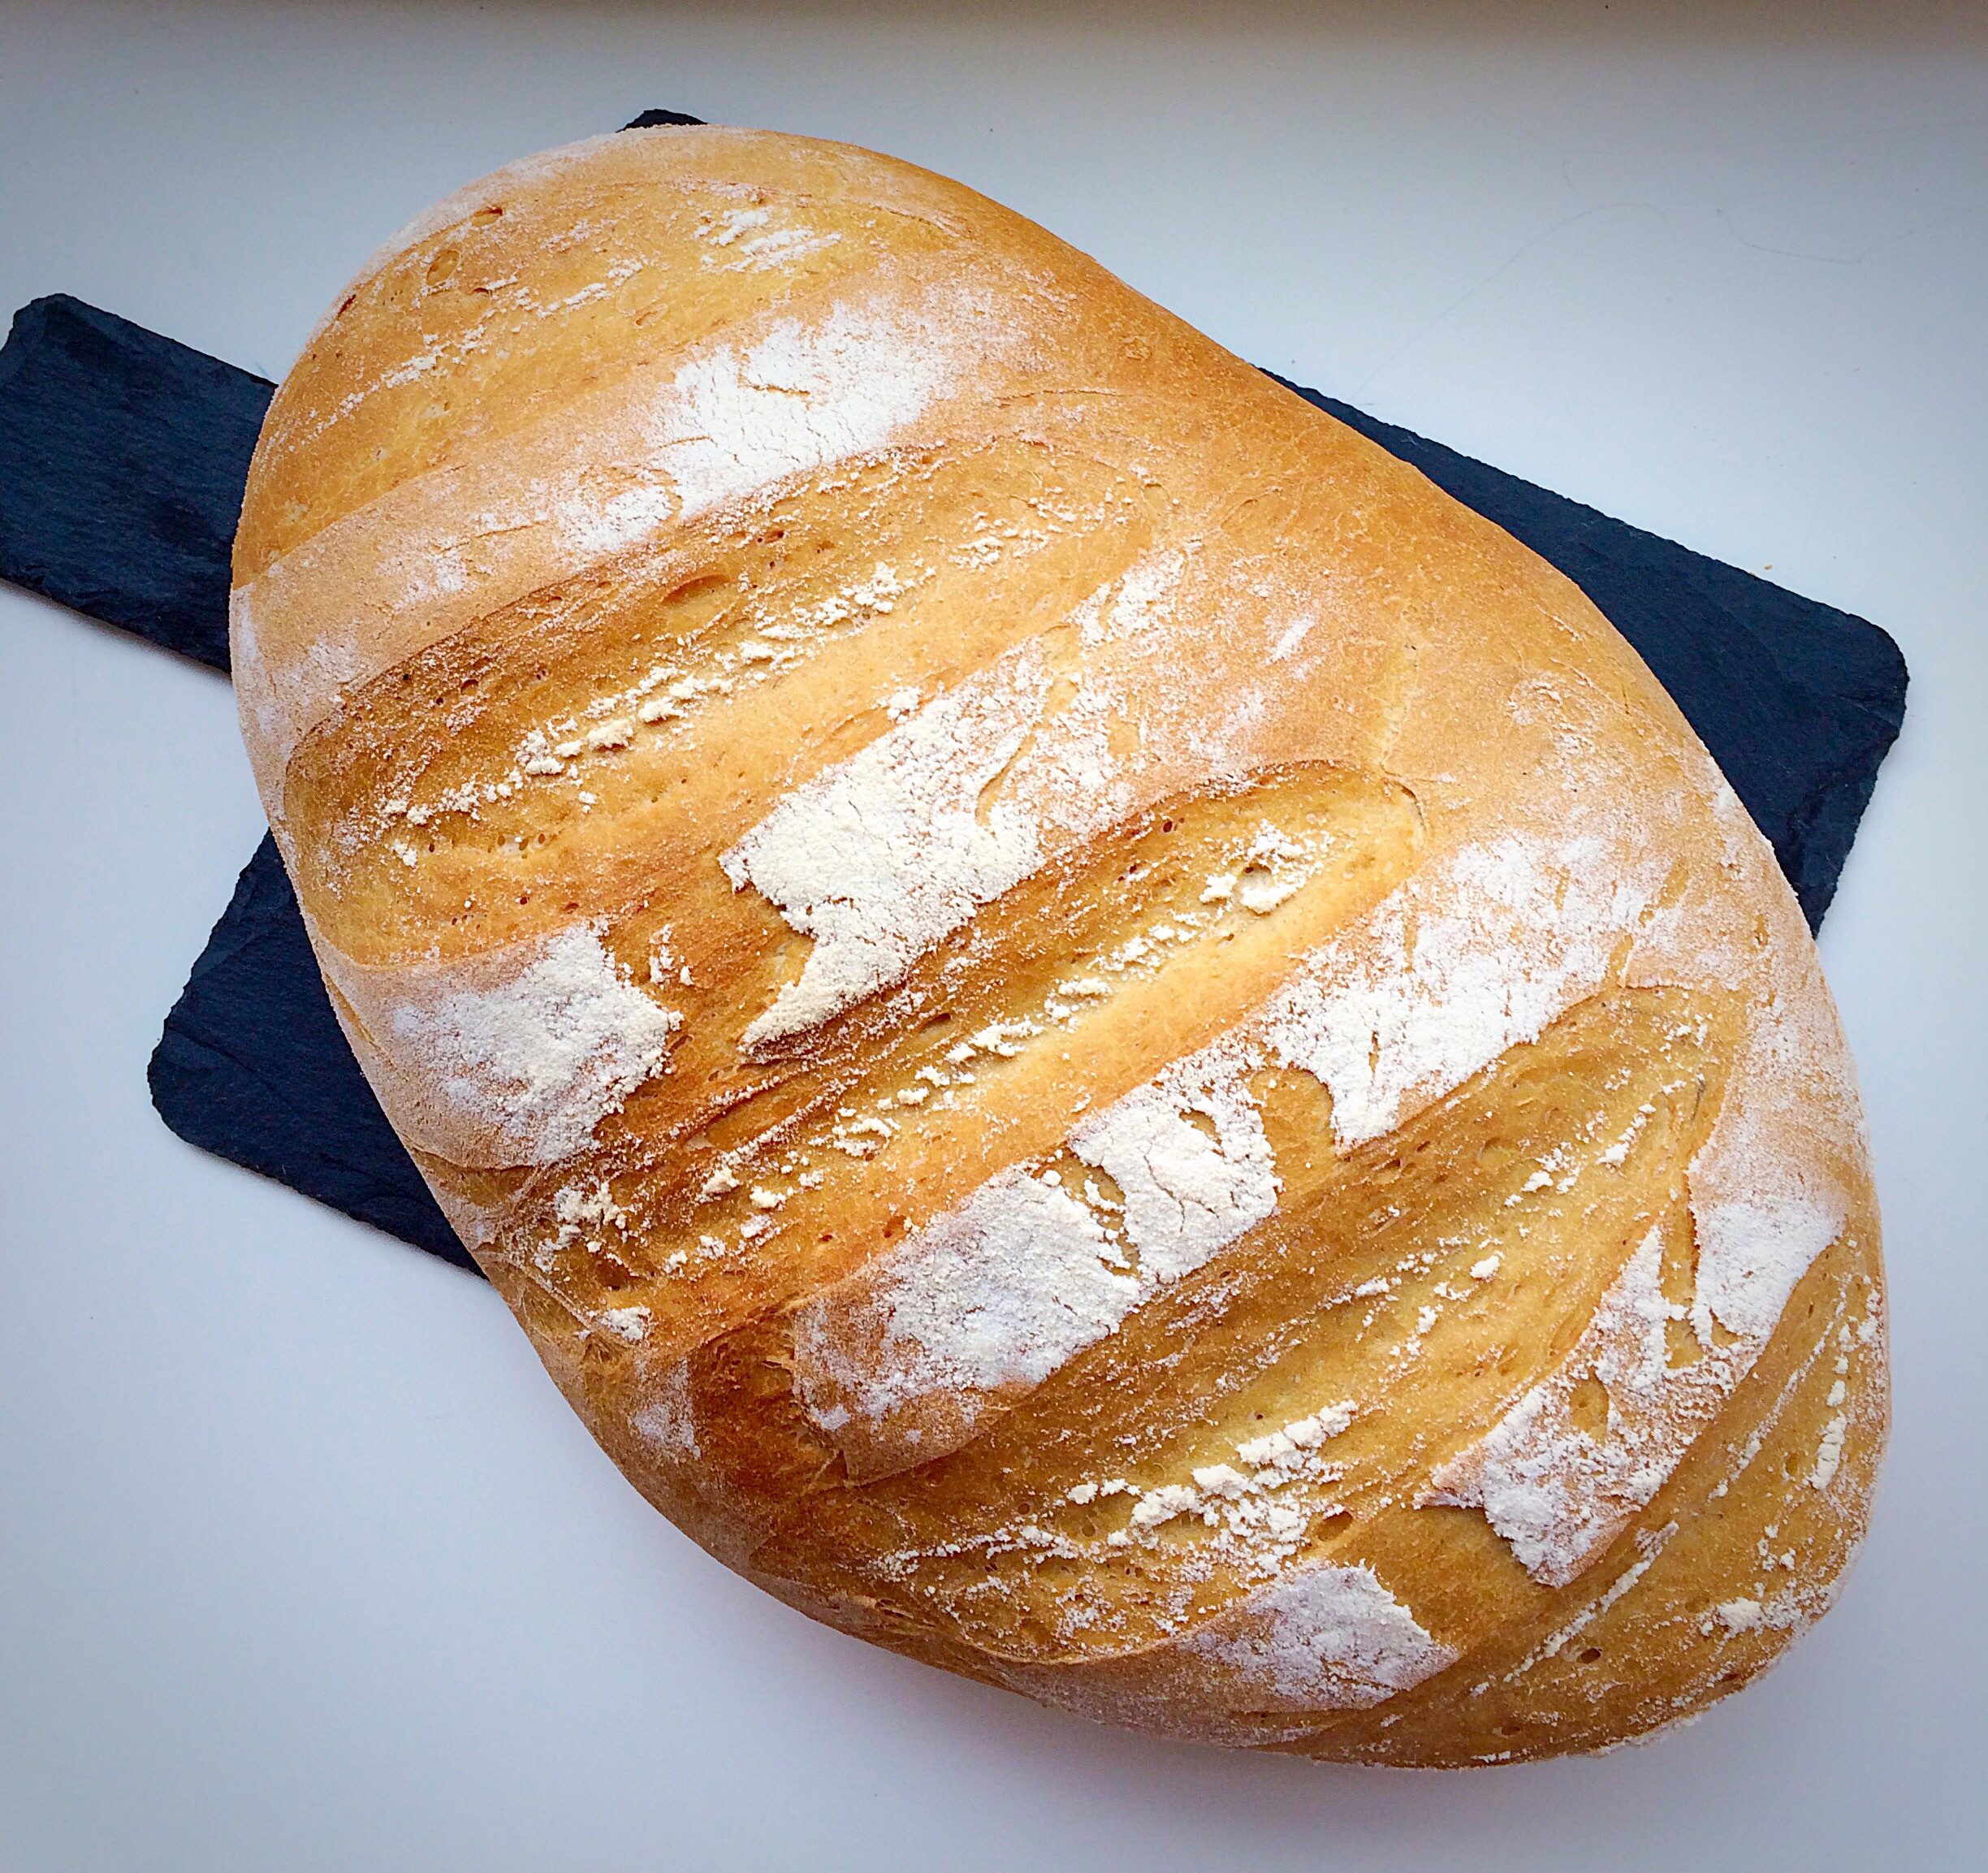
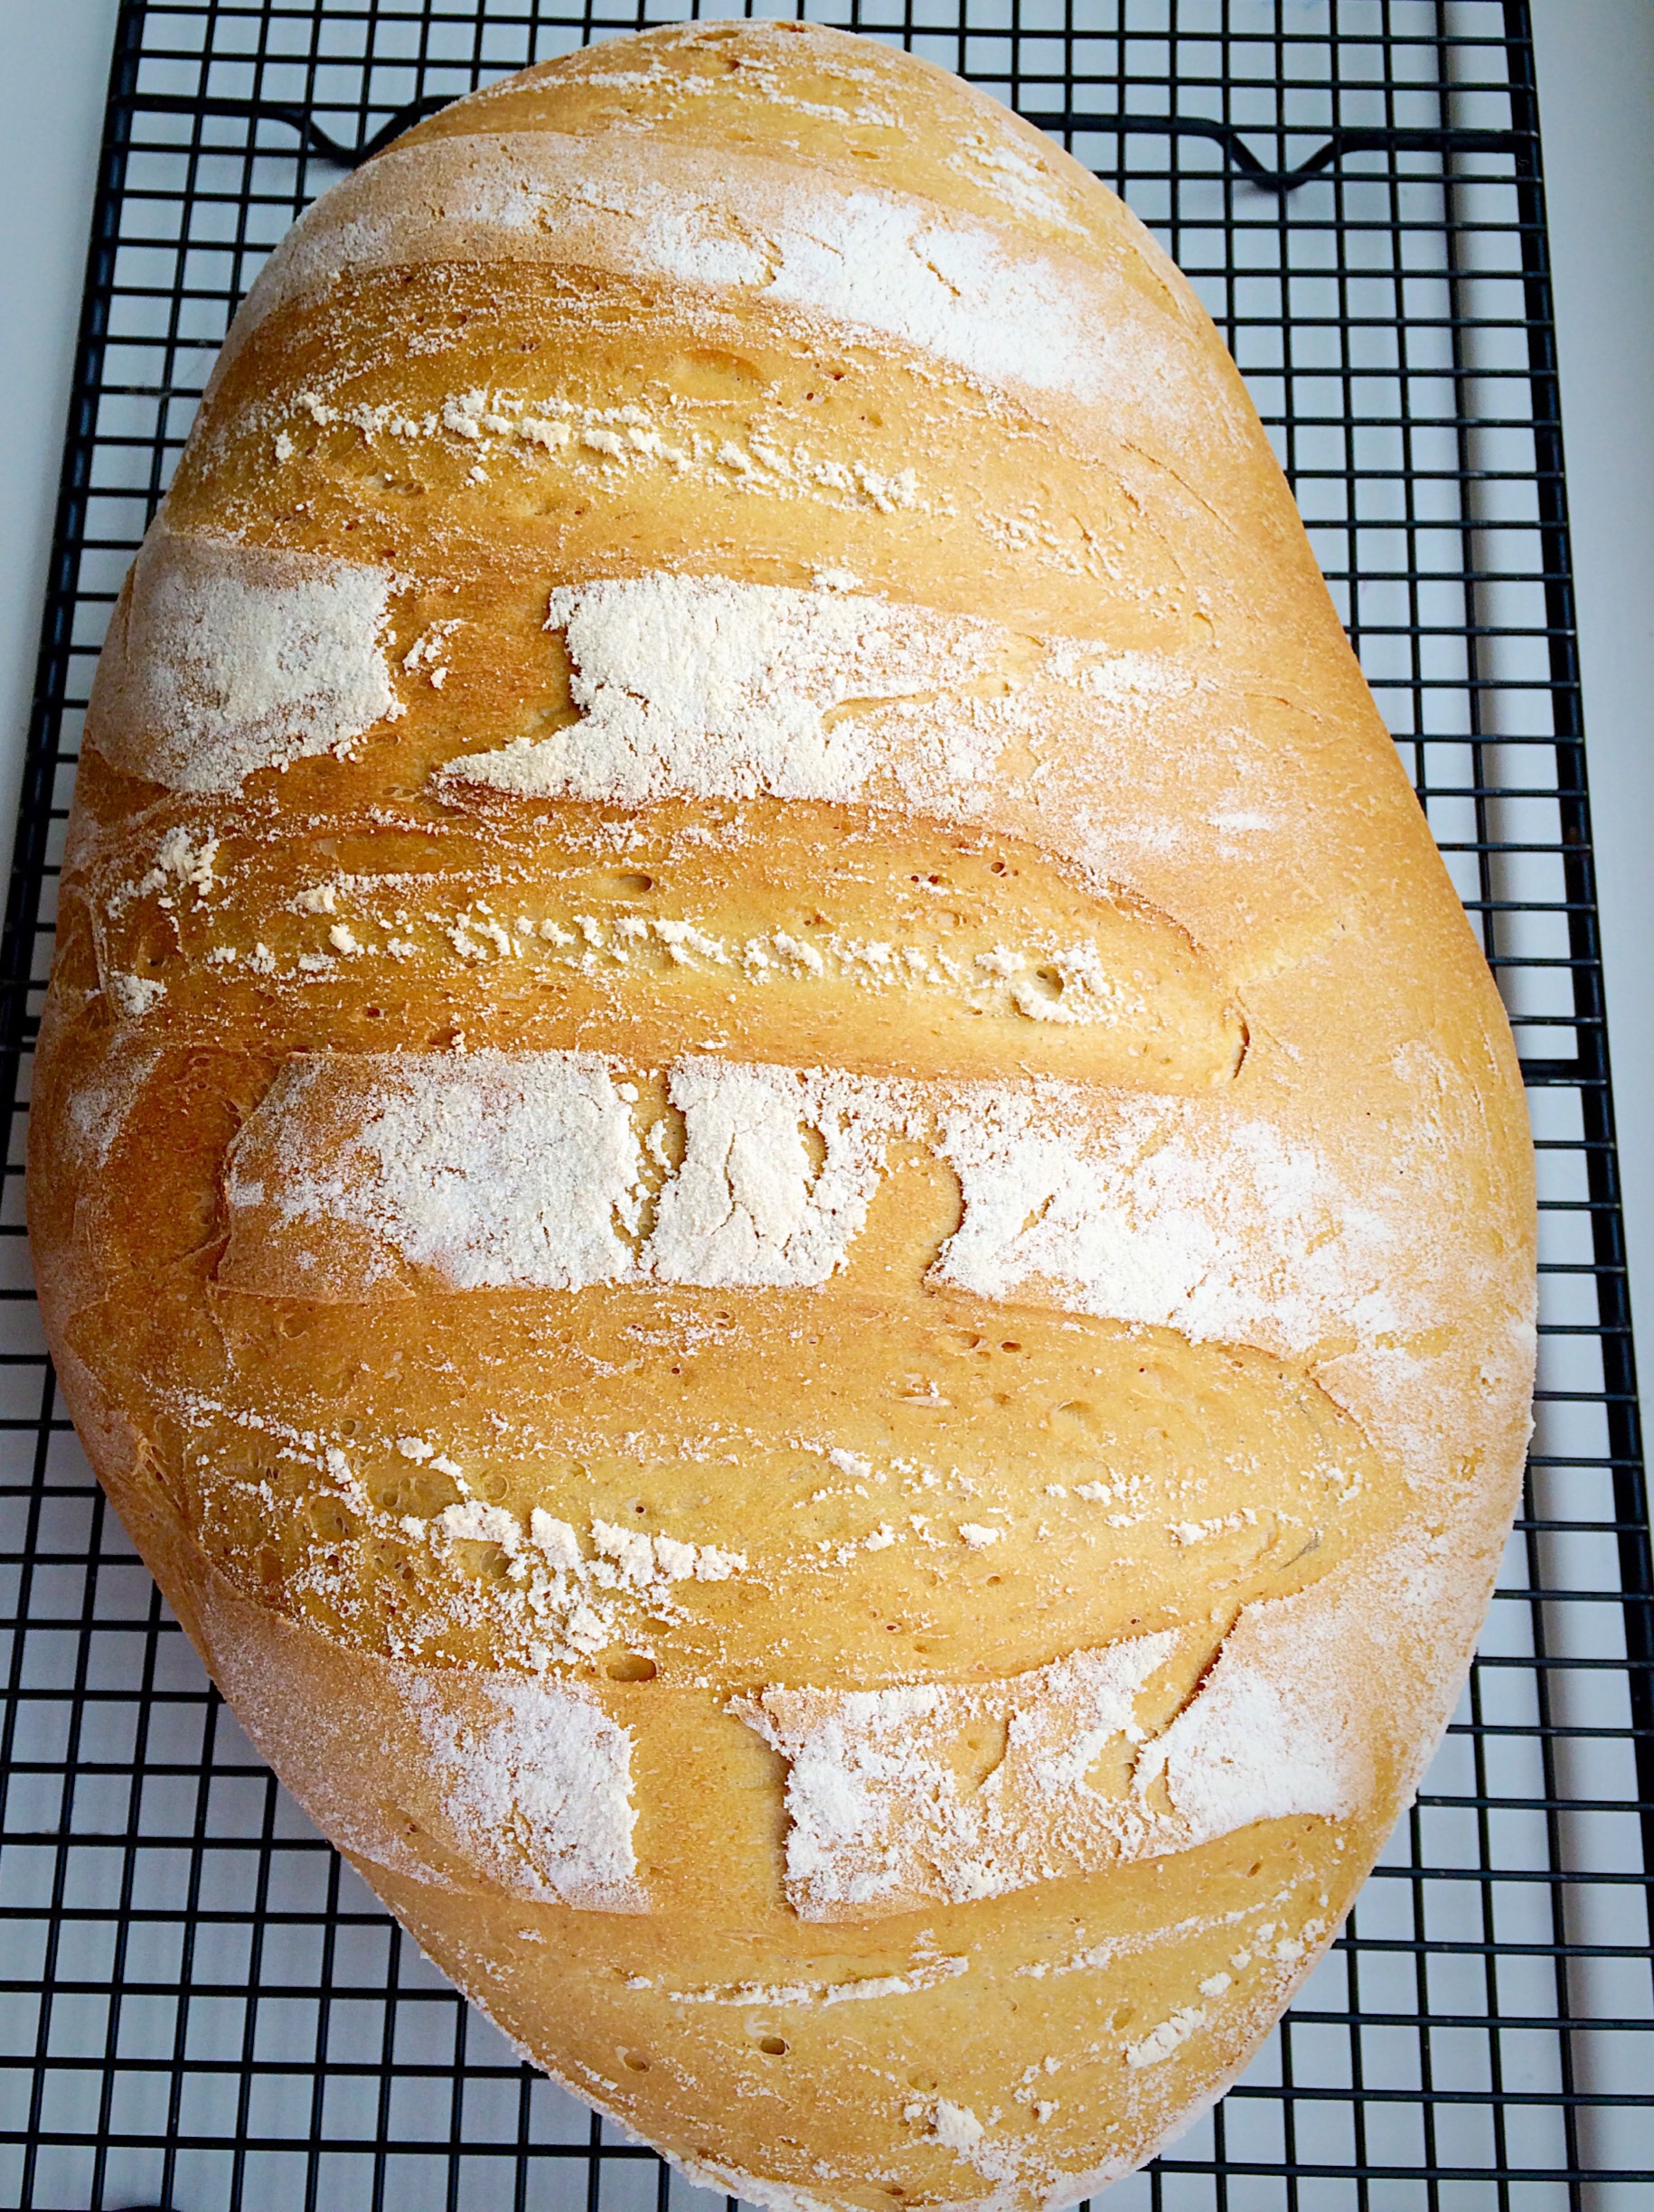
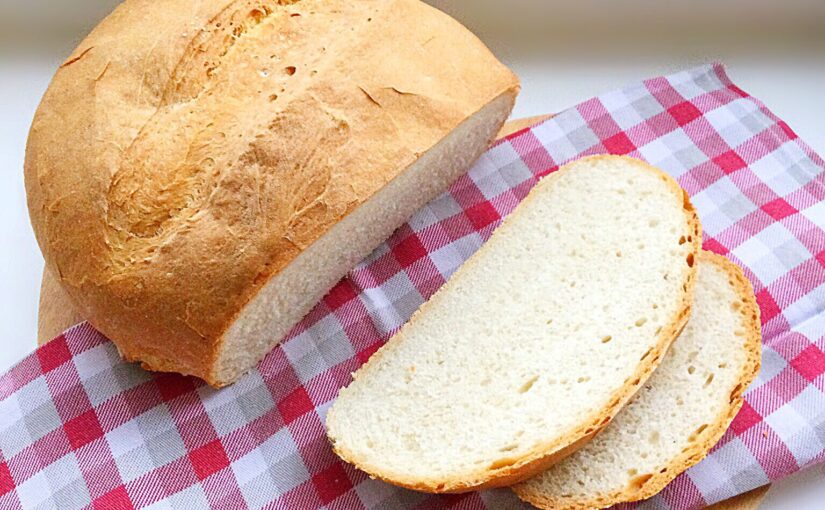
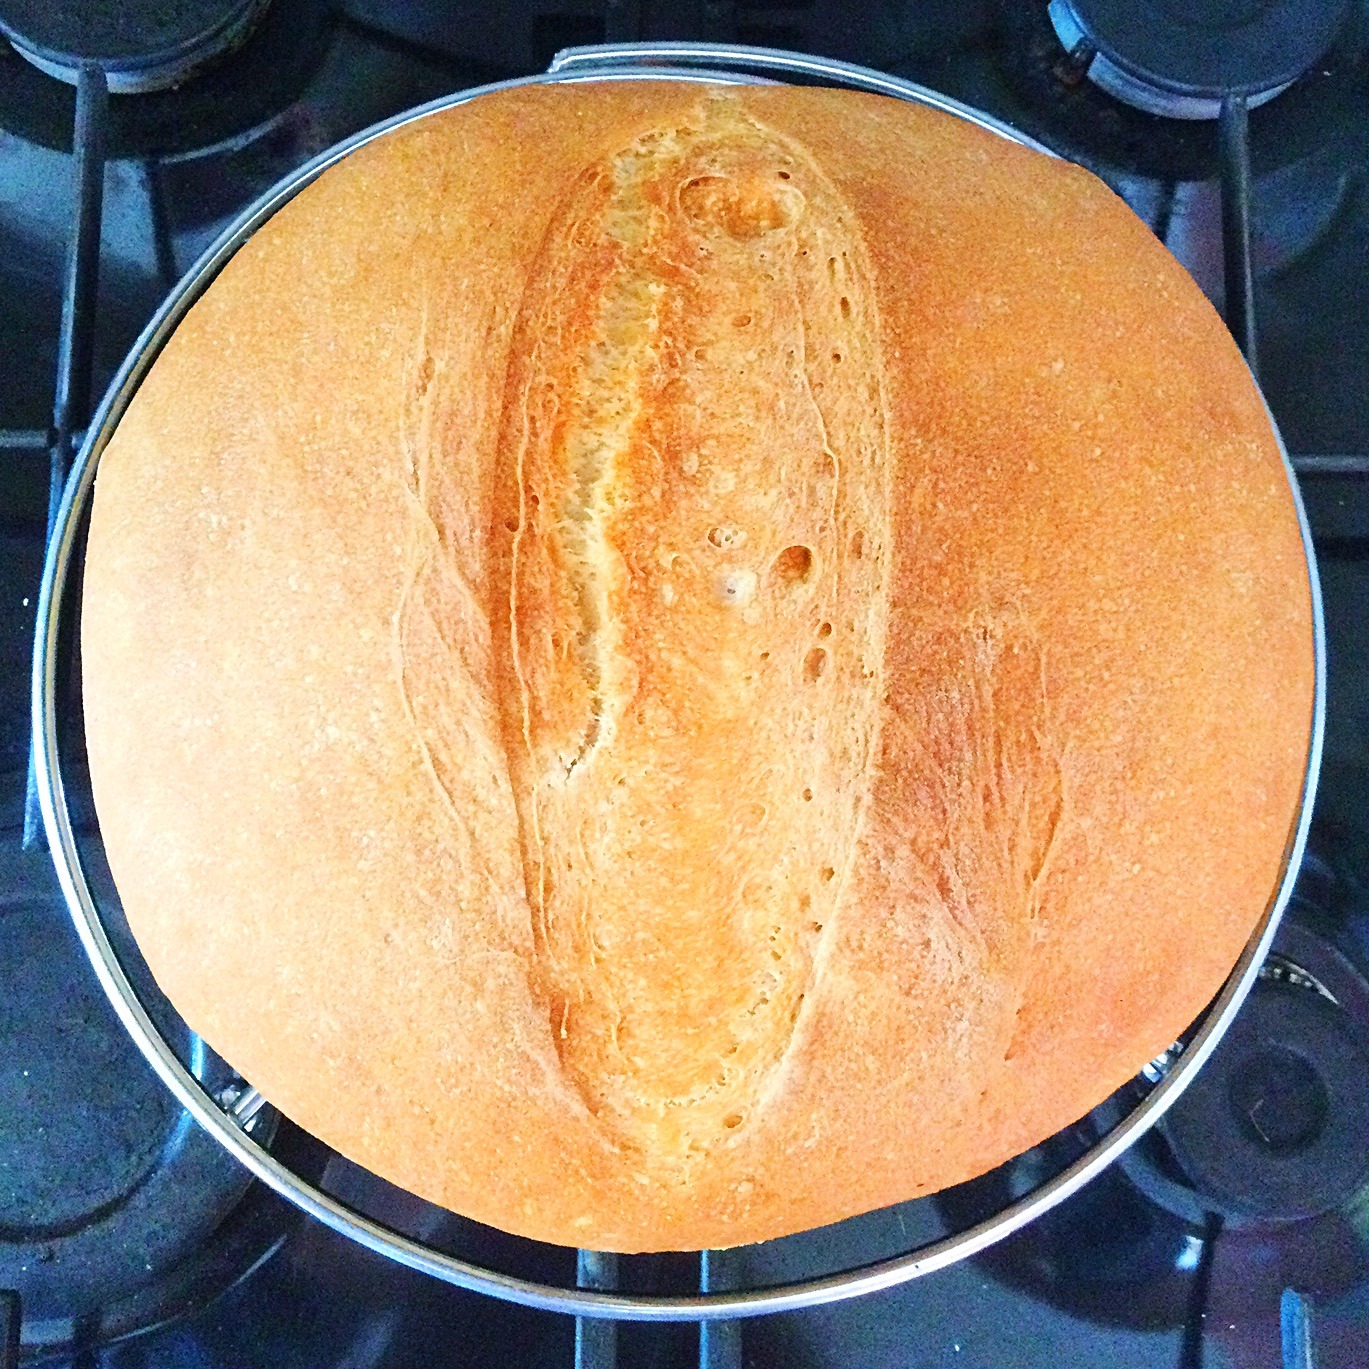
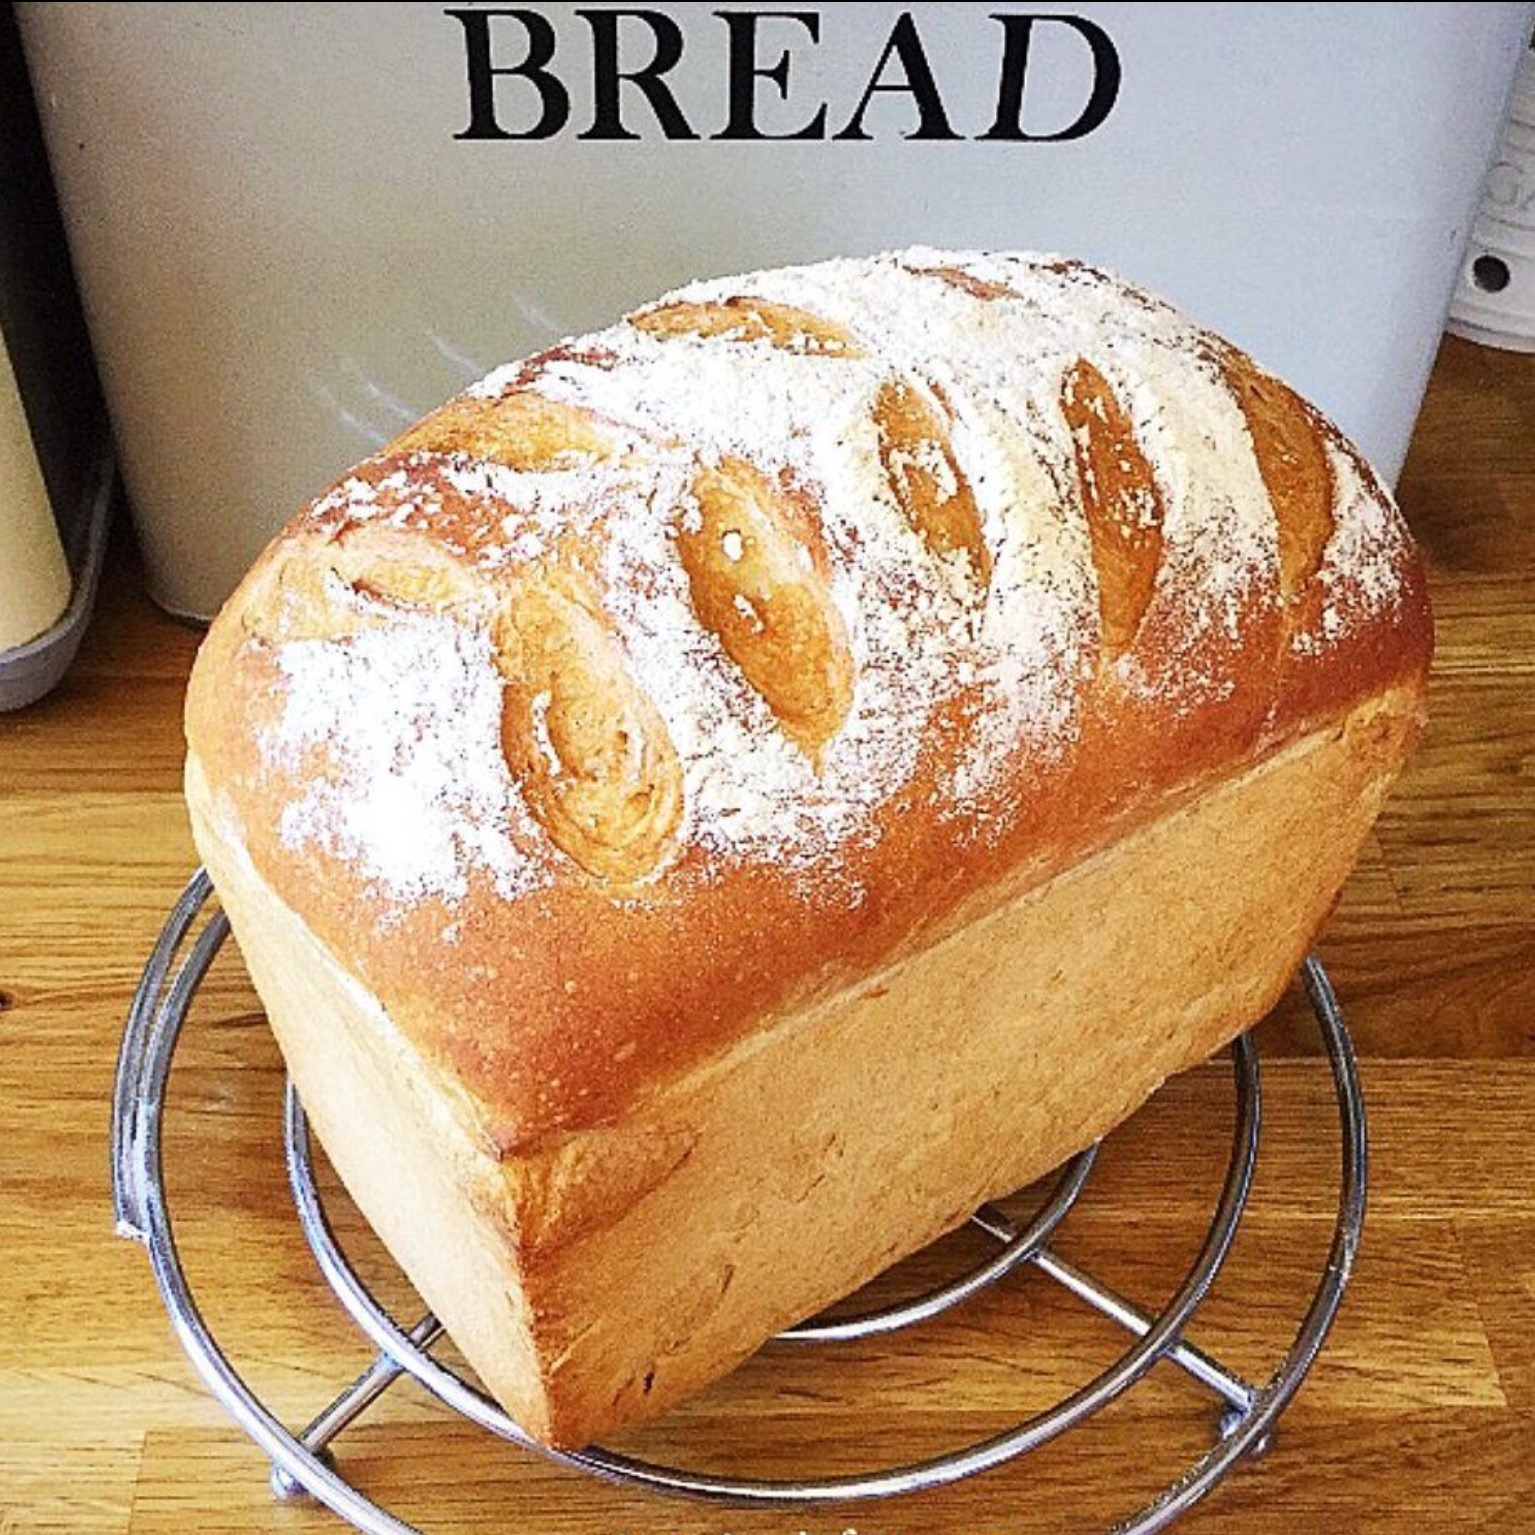
A beautiful, golden, crusty Cob Loaf.

Recipe: Easy White Cob Loaf

400ml/13.5fl oz  Water at body temperature 37C/98.5F

7g  Fast Action Dried Yeast – I currently use Doves Farm

600g/1lb 5oz Strong White Bread Flour – I use Organic White Bread Flour from Shipton Mill plus a little extra for dusting the worktop

7g Salt – I use Maldon Salt as it doesn’t contain any other chemicals

25g/1oz  Unsalted Butter at room temperature. Alternatively use 1tbsp rapeseed oil – plus a little extra for greasing the baking tray.

Making And Proving The Easy White Cob Loaf Dough

  • First of all add the water to the stand mixer bowl. I prefer to weigh it as it is more accurate.
  • Next add the yeast and then the flour.
  • Add the salt on top of the flour.
  • With a dough hook attachment slowly (speed 1 on a Kitchenaid mixer) mix the ingredients for 5 minutes.
  • Following the initial mixing add the butter or oil and turn the speed of the mixer up slightly (speed 2 on a Kitchenaid mixer).
  • Continue to mix the dough for a further 10 minutes.
  • Finally stop the mixer and using clean wet hands form the dough into a ball shape.
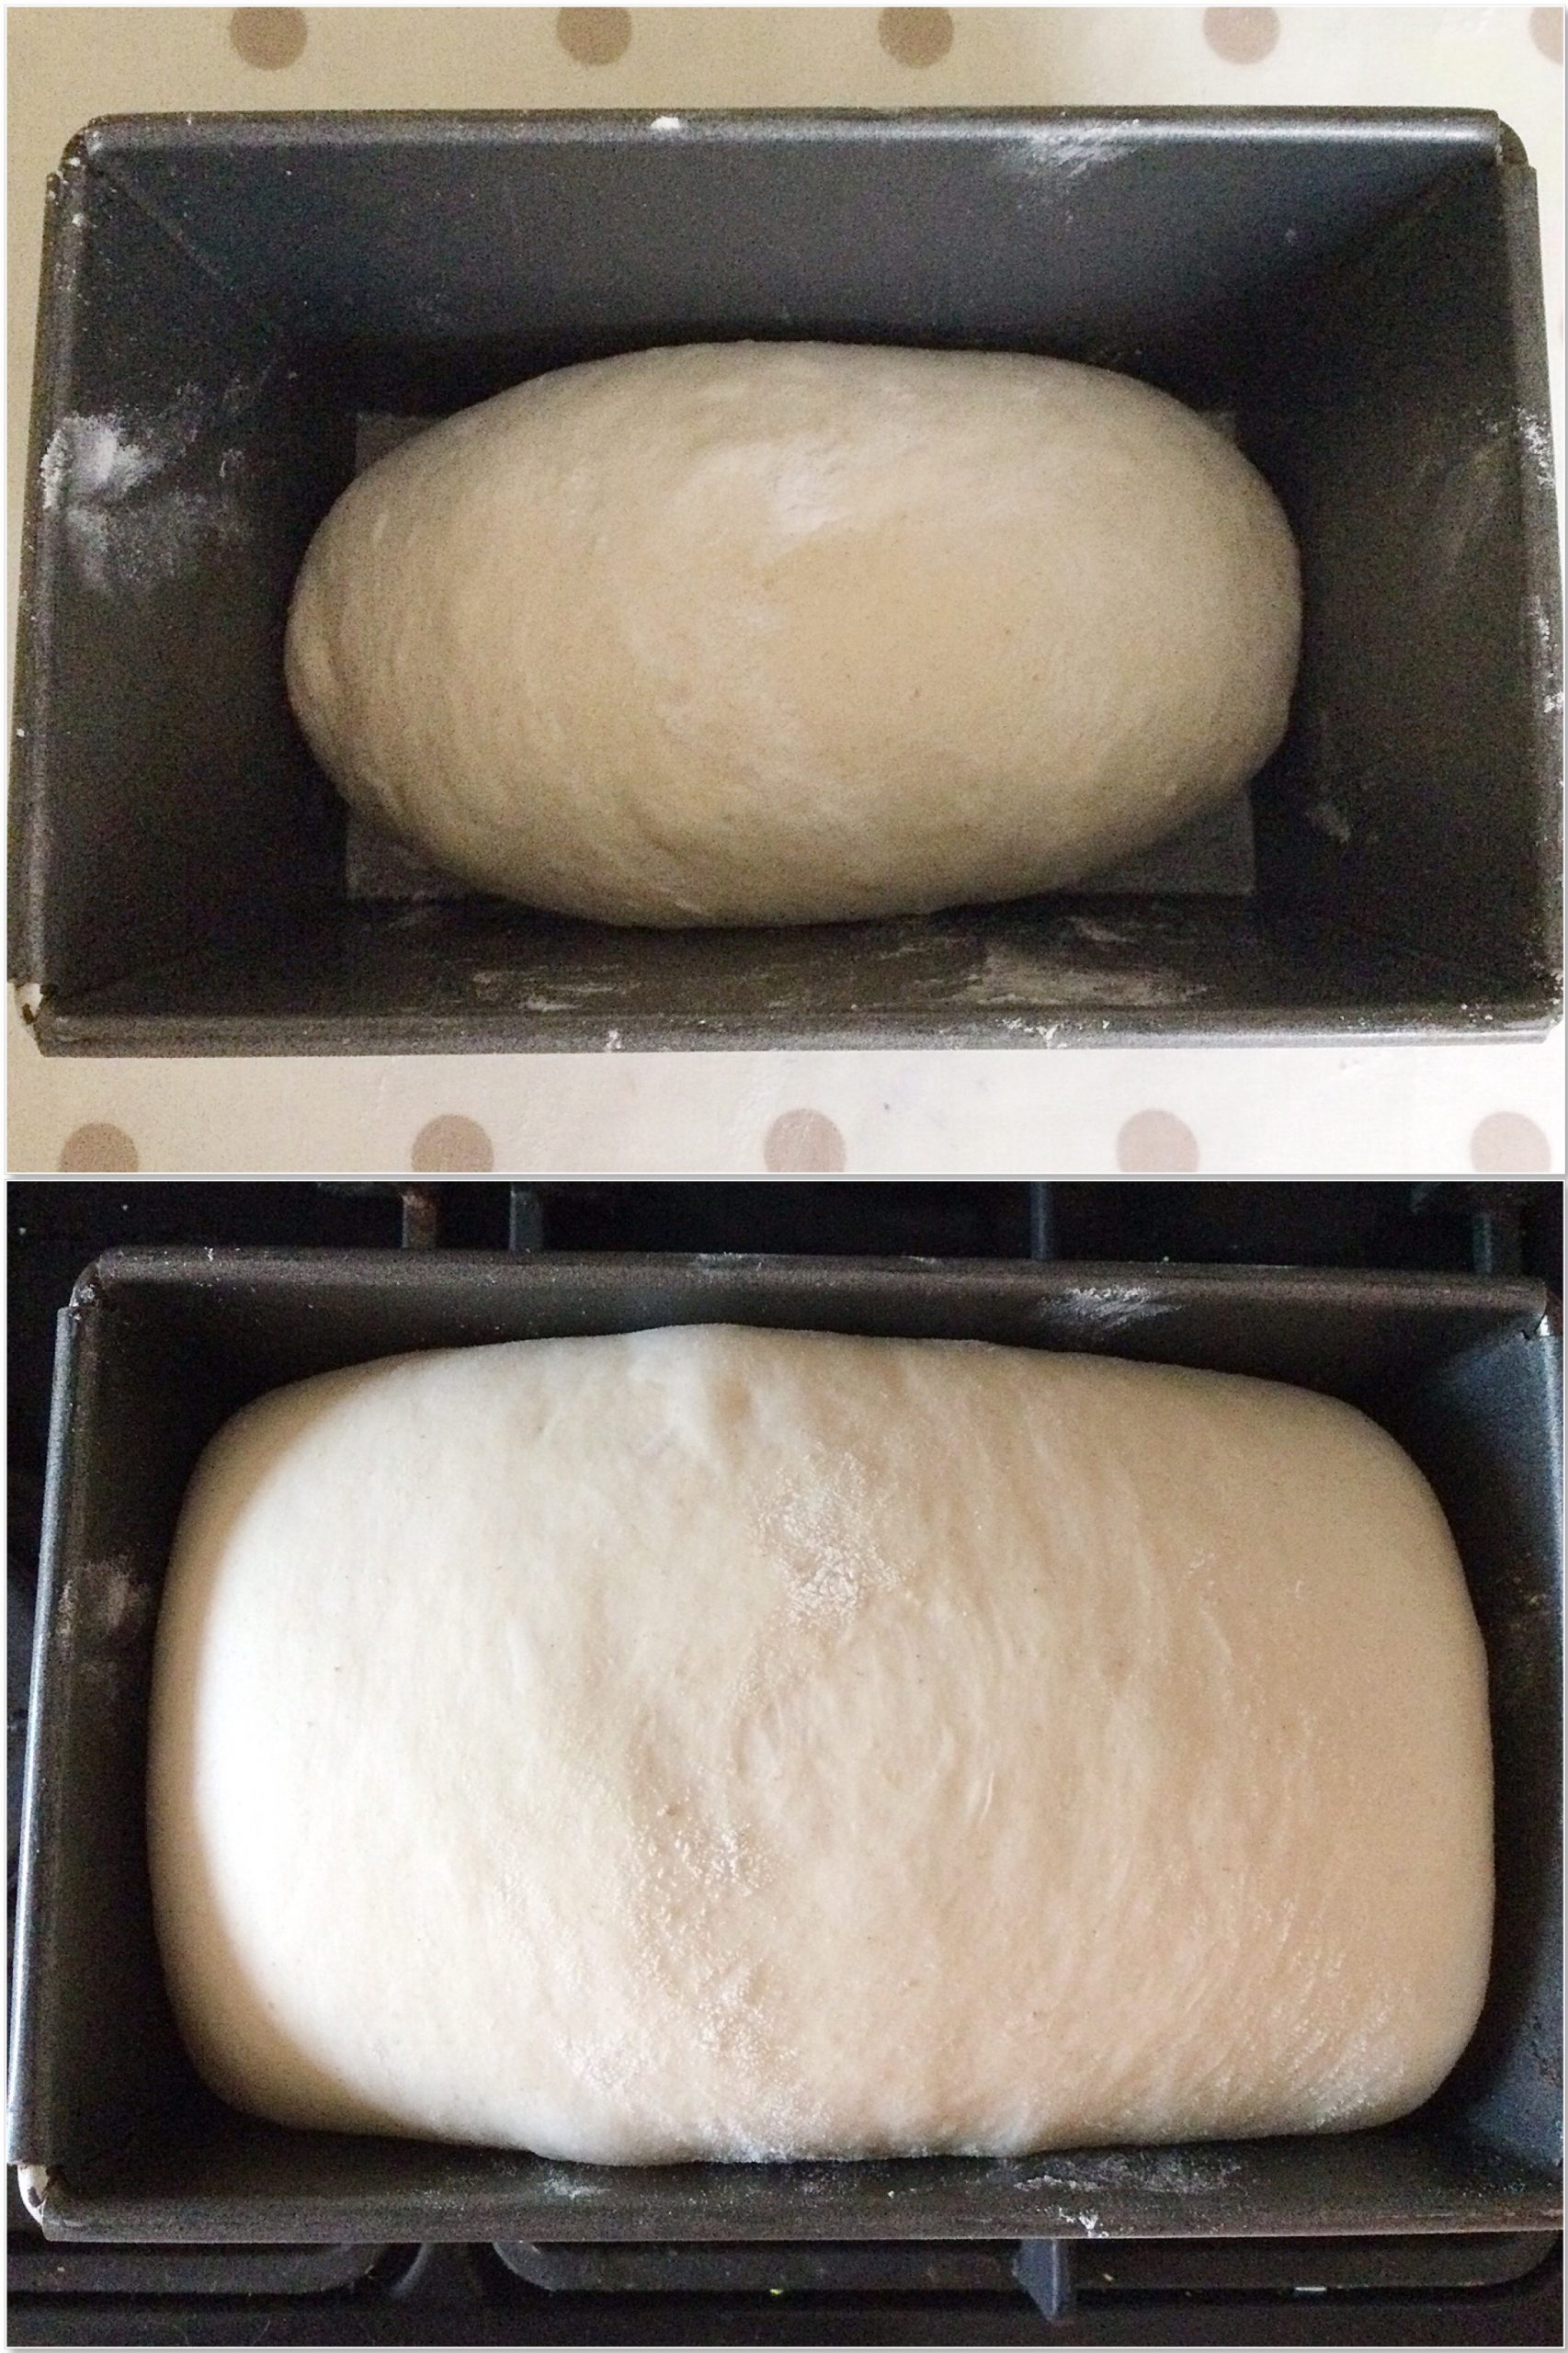
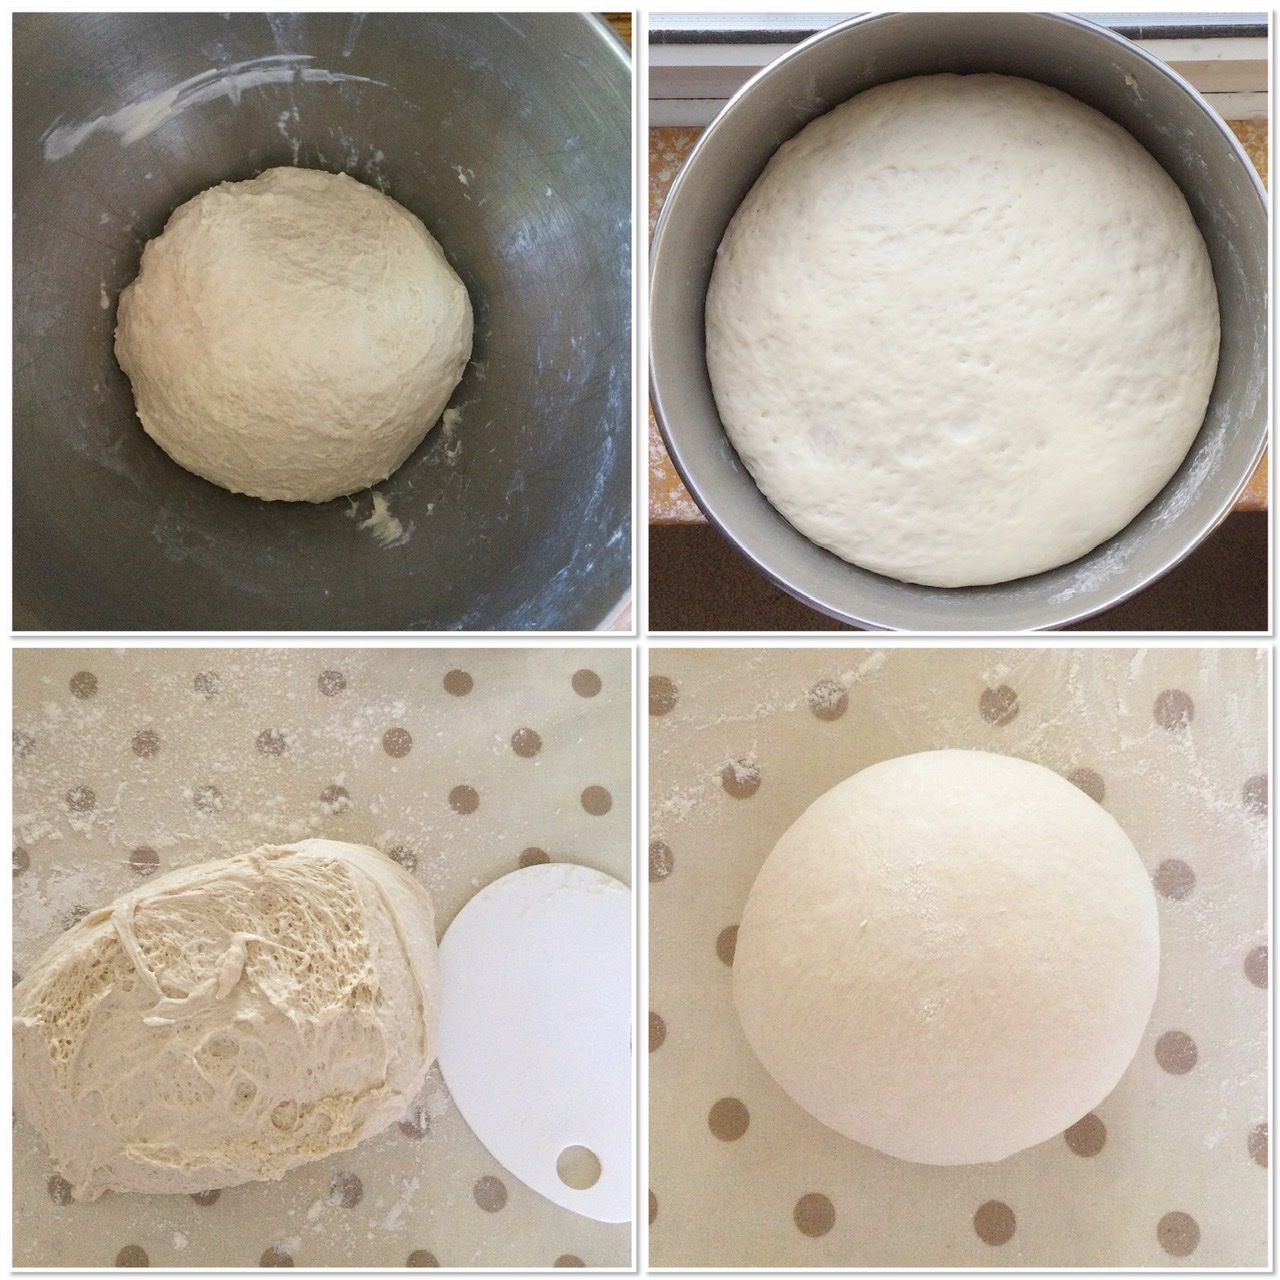
  • *Cover the bowl with a clean tea towel and leave to prove until doubled in size.
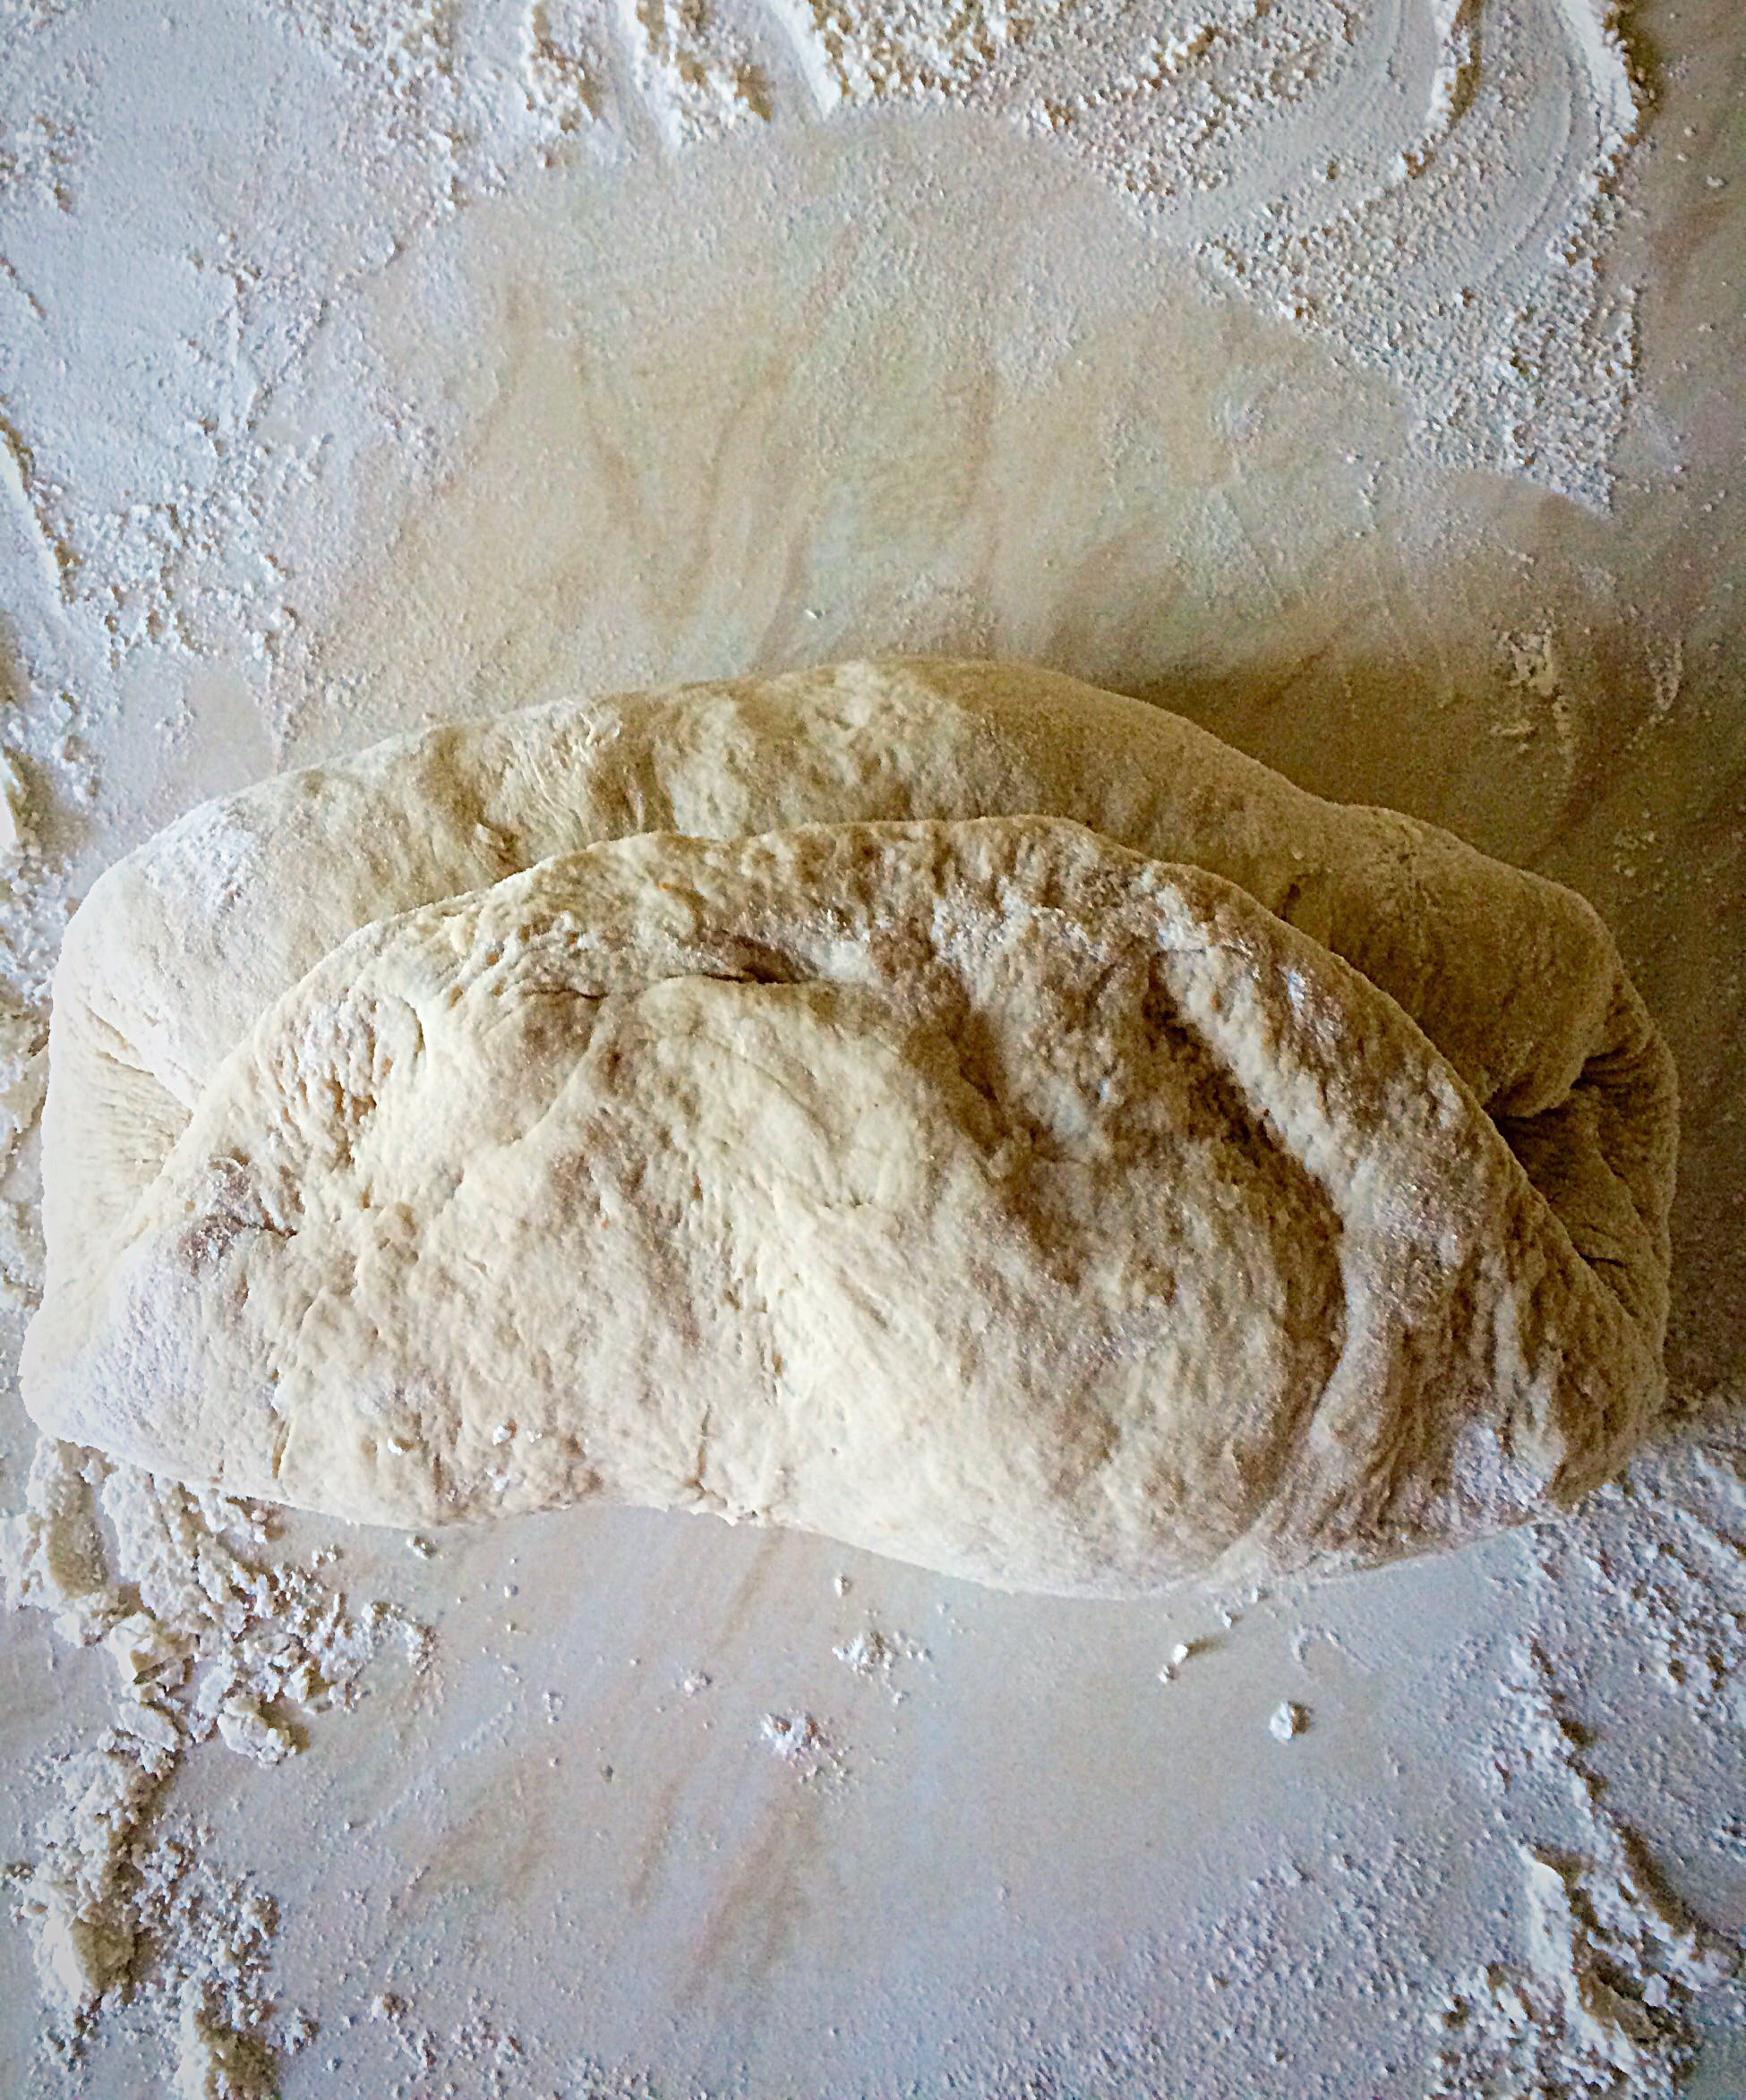
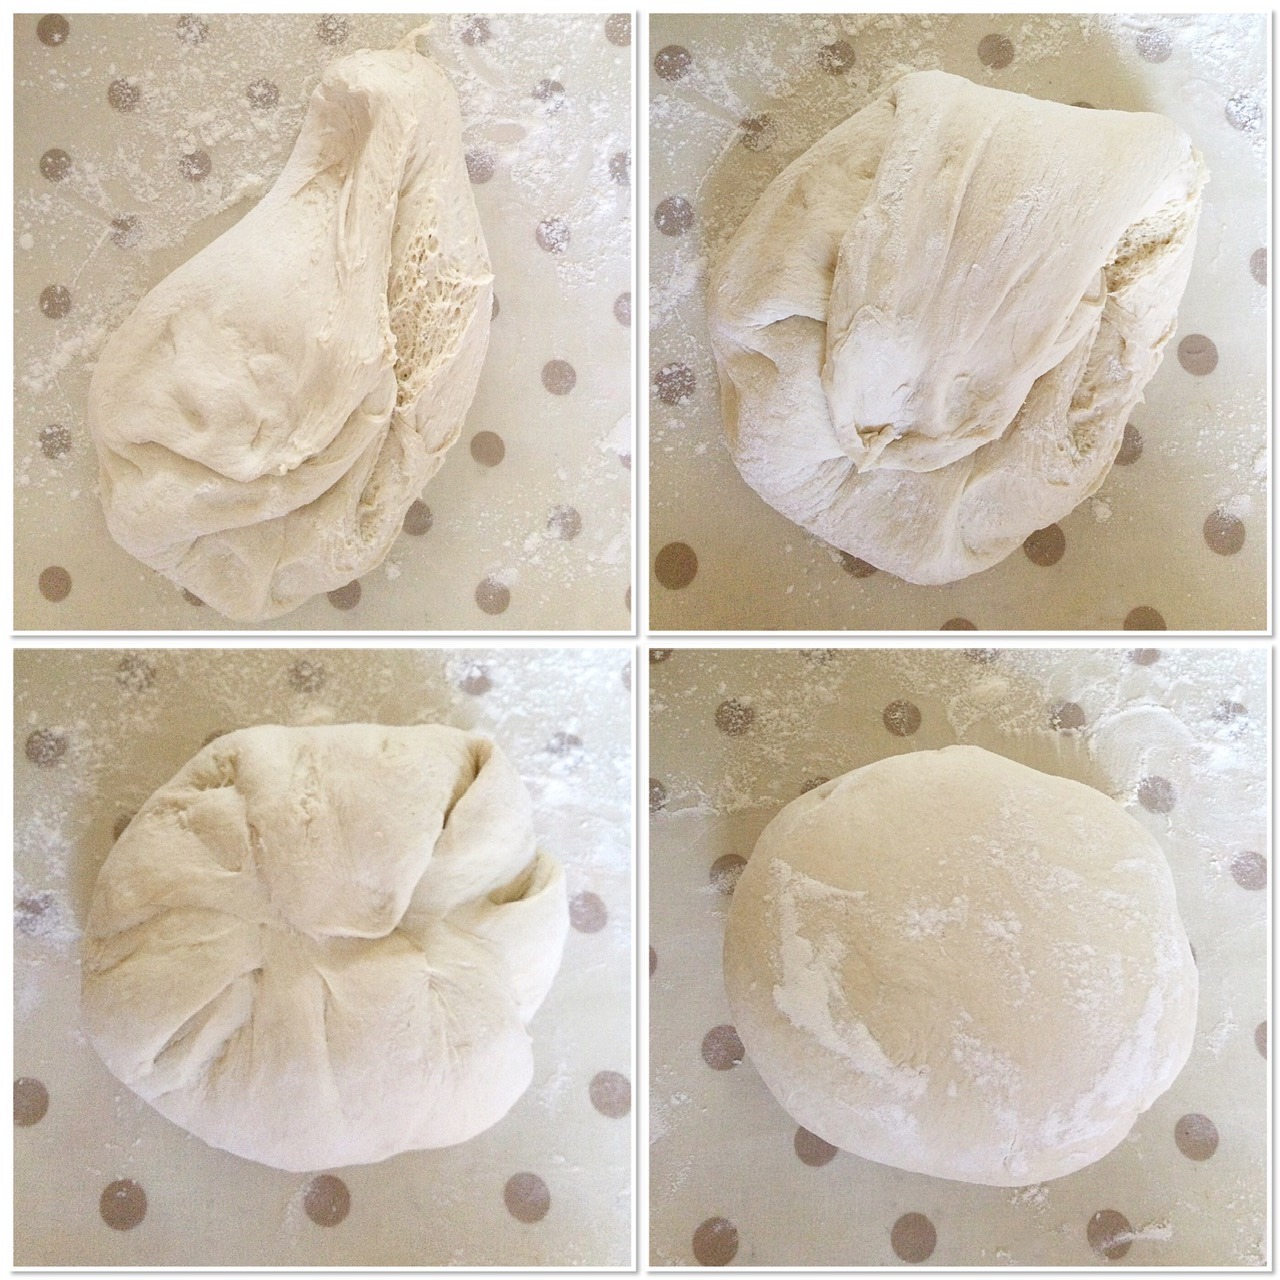
  • Lightly dust a clean worktop with flour. Using the dough scraper release the dough from the bowl so that the top of the dough is now underneath. This is important as we build tension across the dough as we shape it.

Making Bread By Hand

  • Alternatively, add the ingredients to a bowl as previously mentioned and mix by hand adding the butter/oil as the dough comes together, then turn out onto a lightly floured surface and knead by hand for 10 minutes. Shape into a ball and place back into the bowl. Carry on from step *.
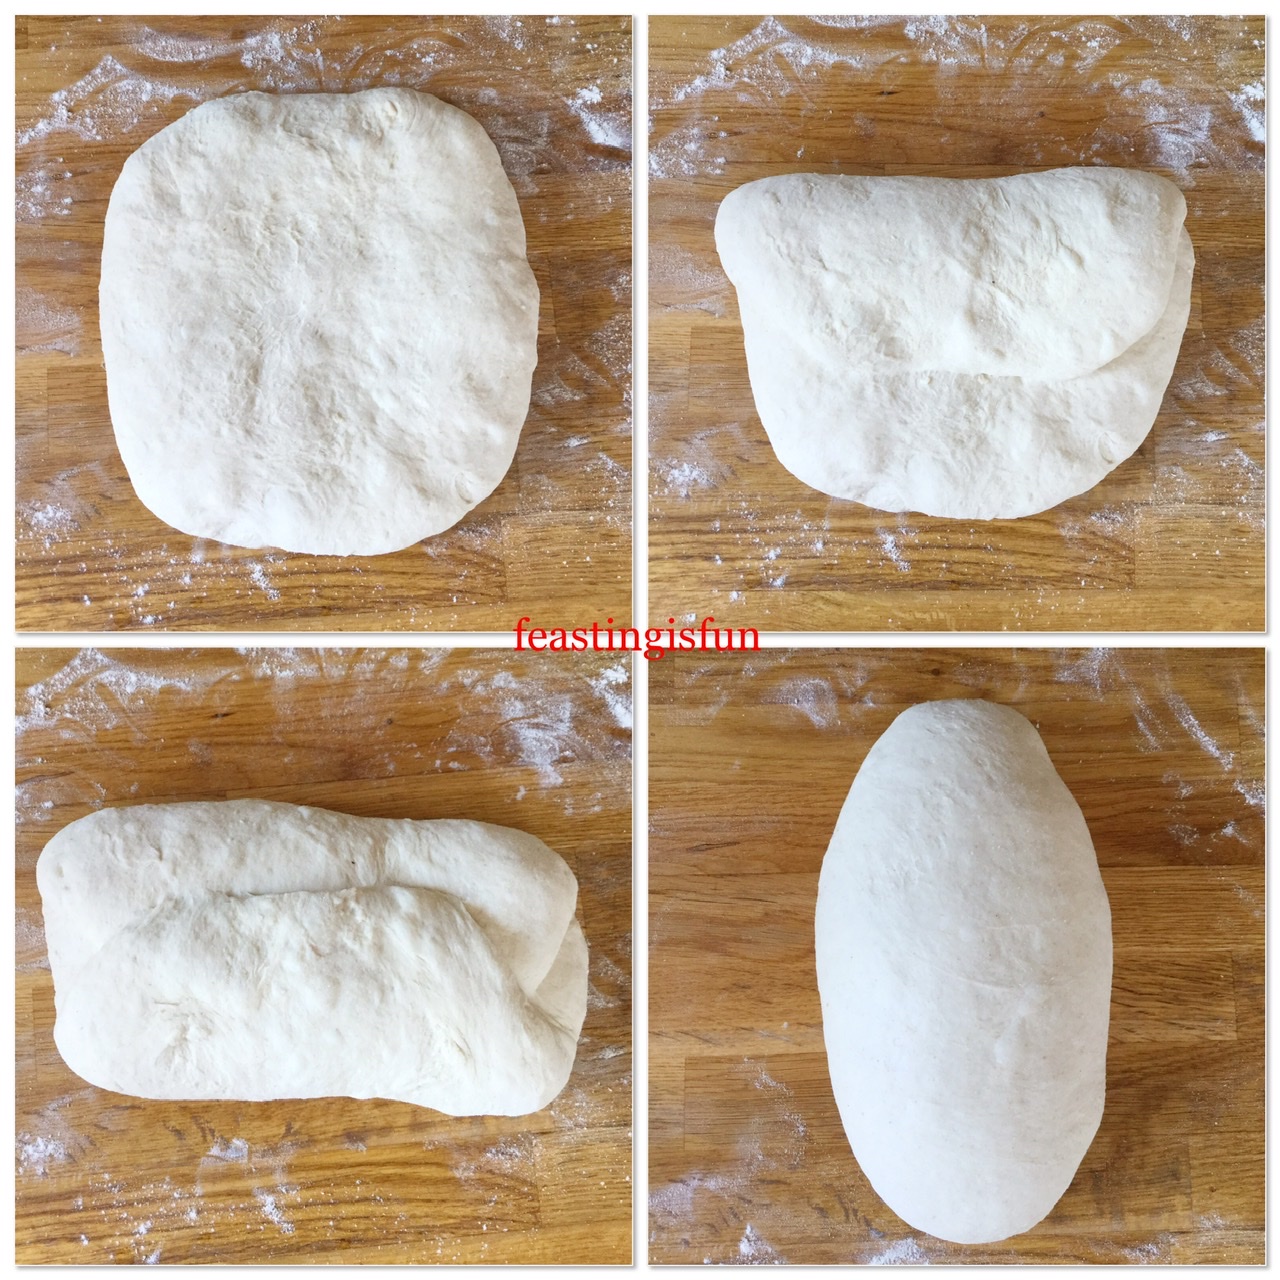
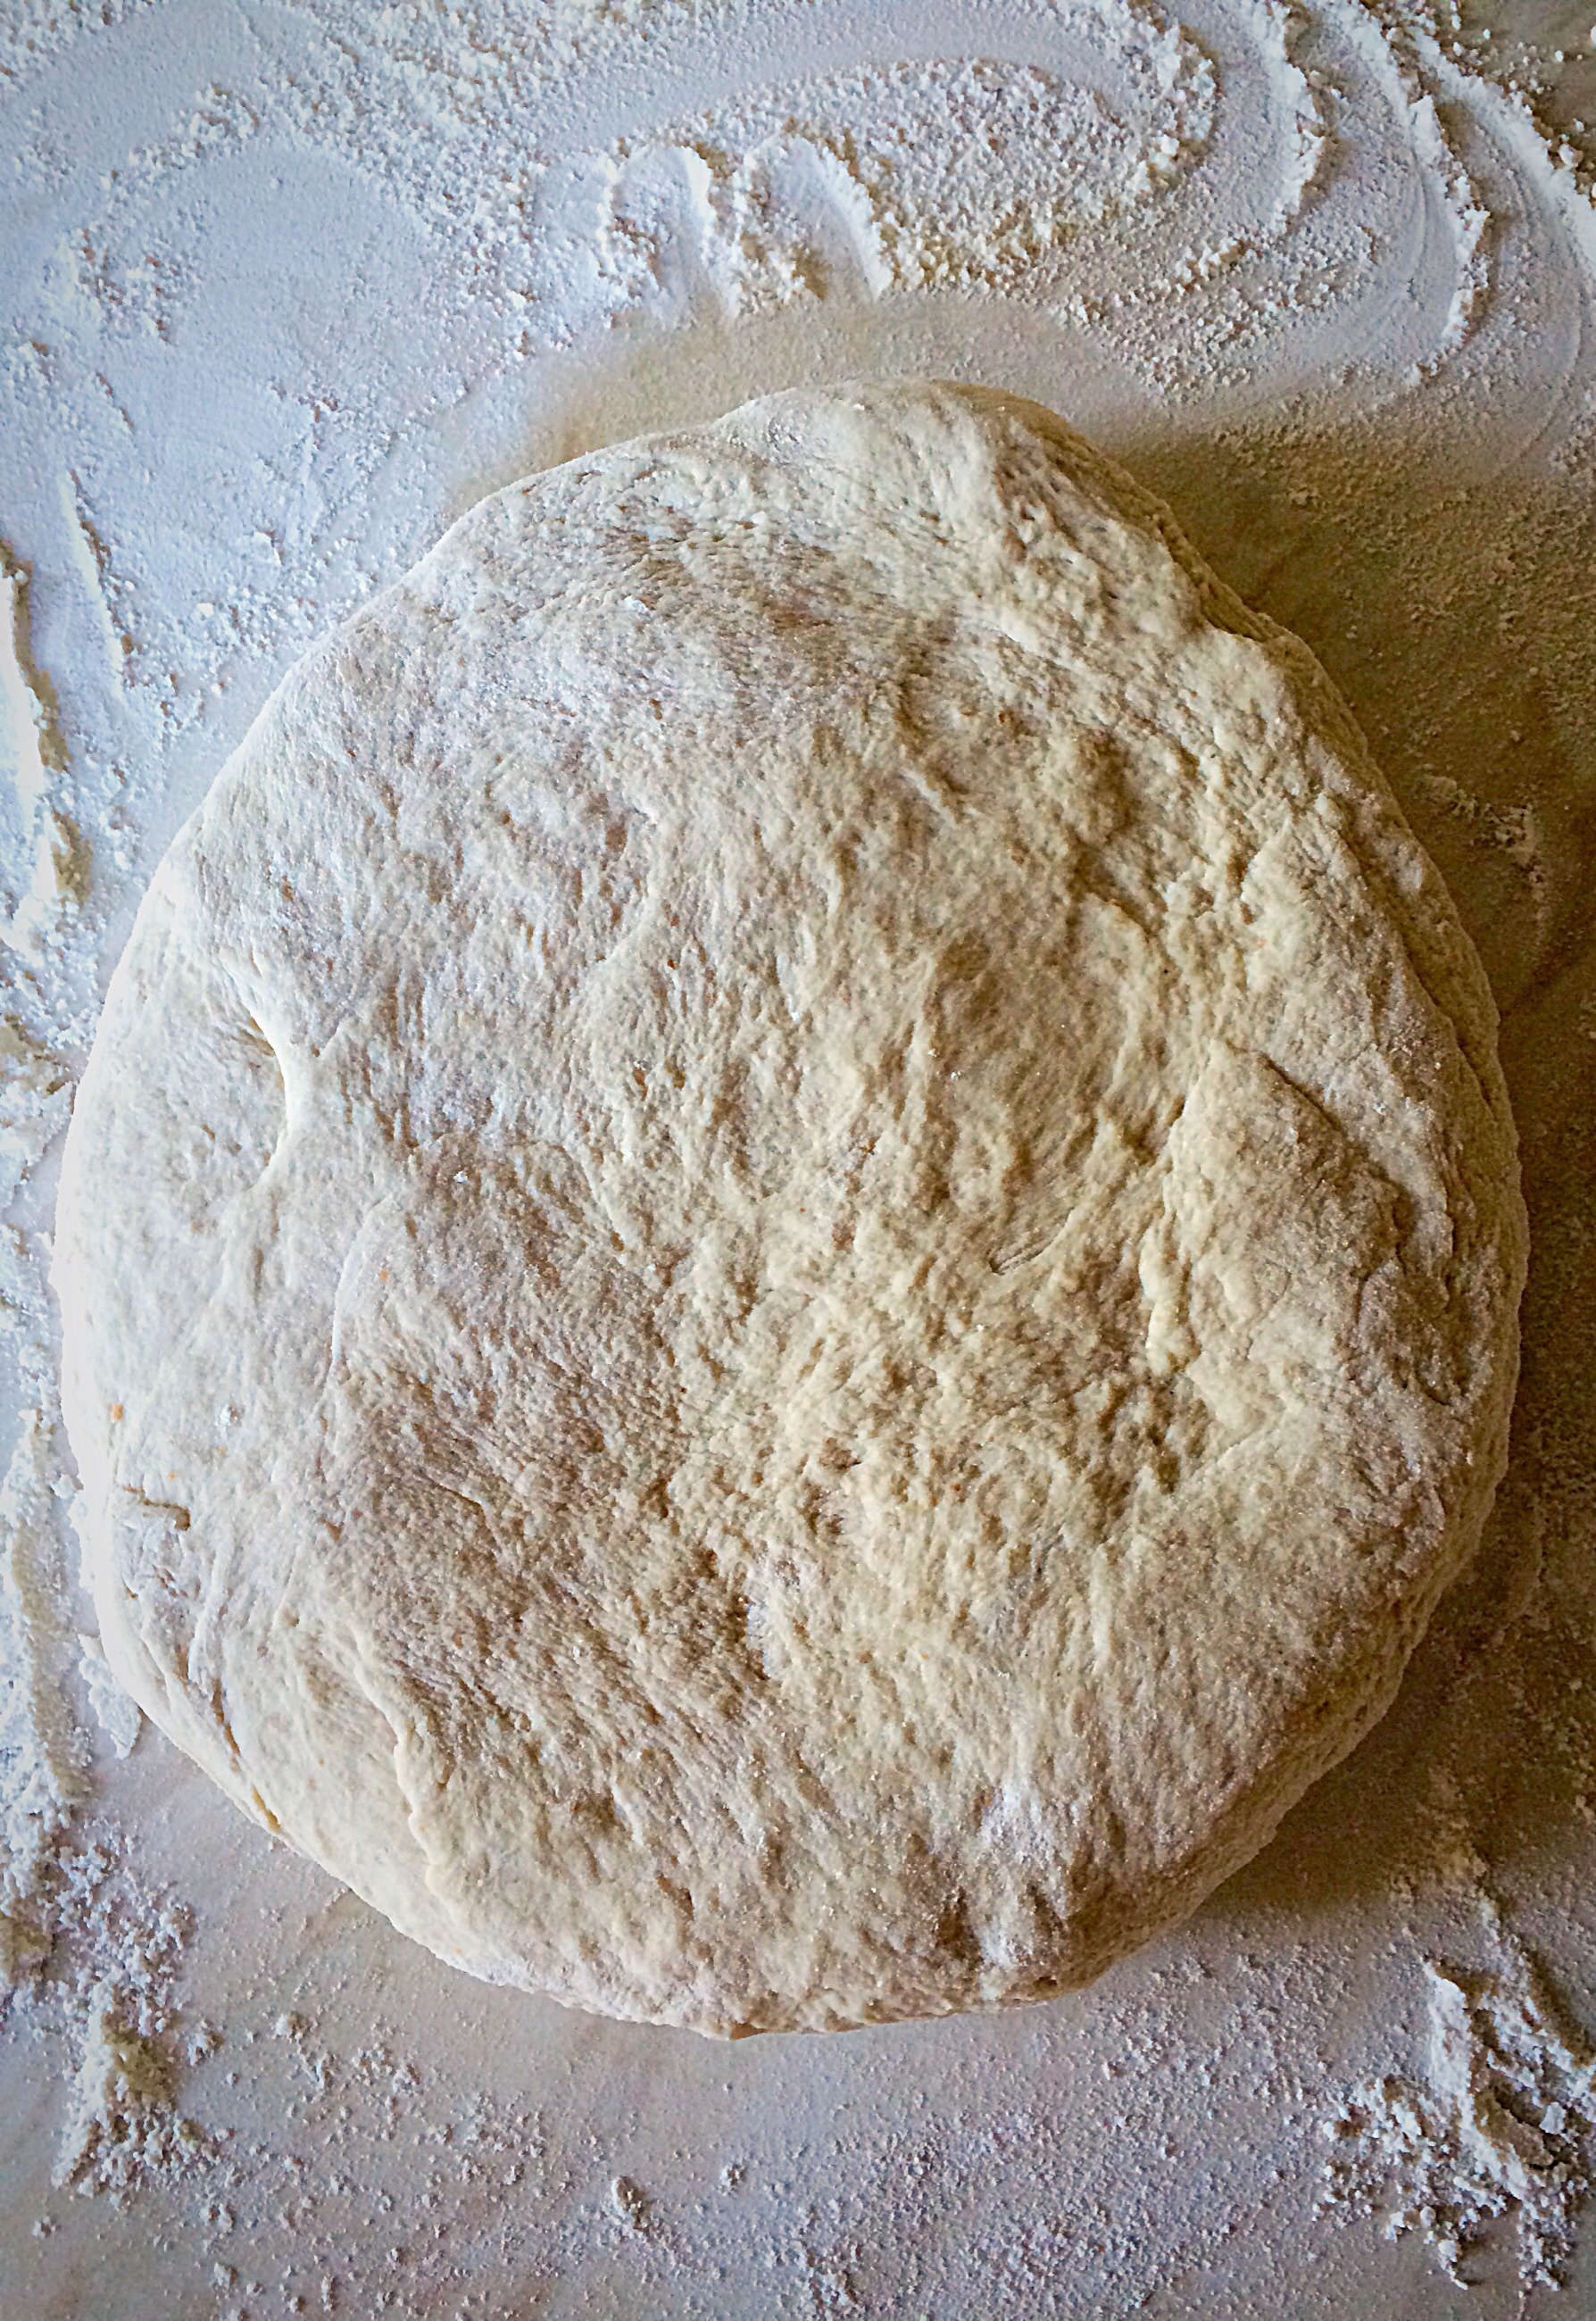
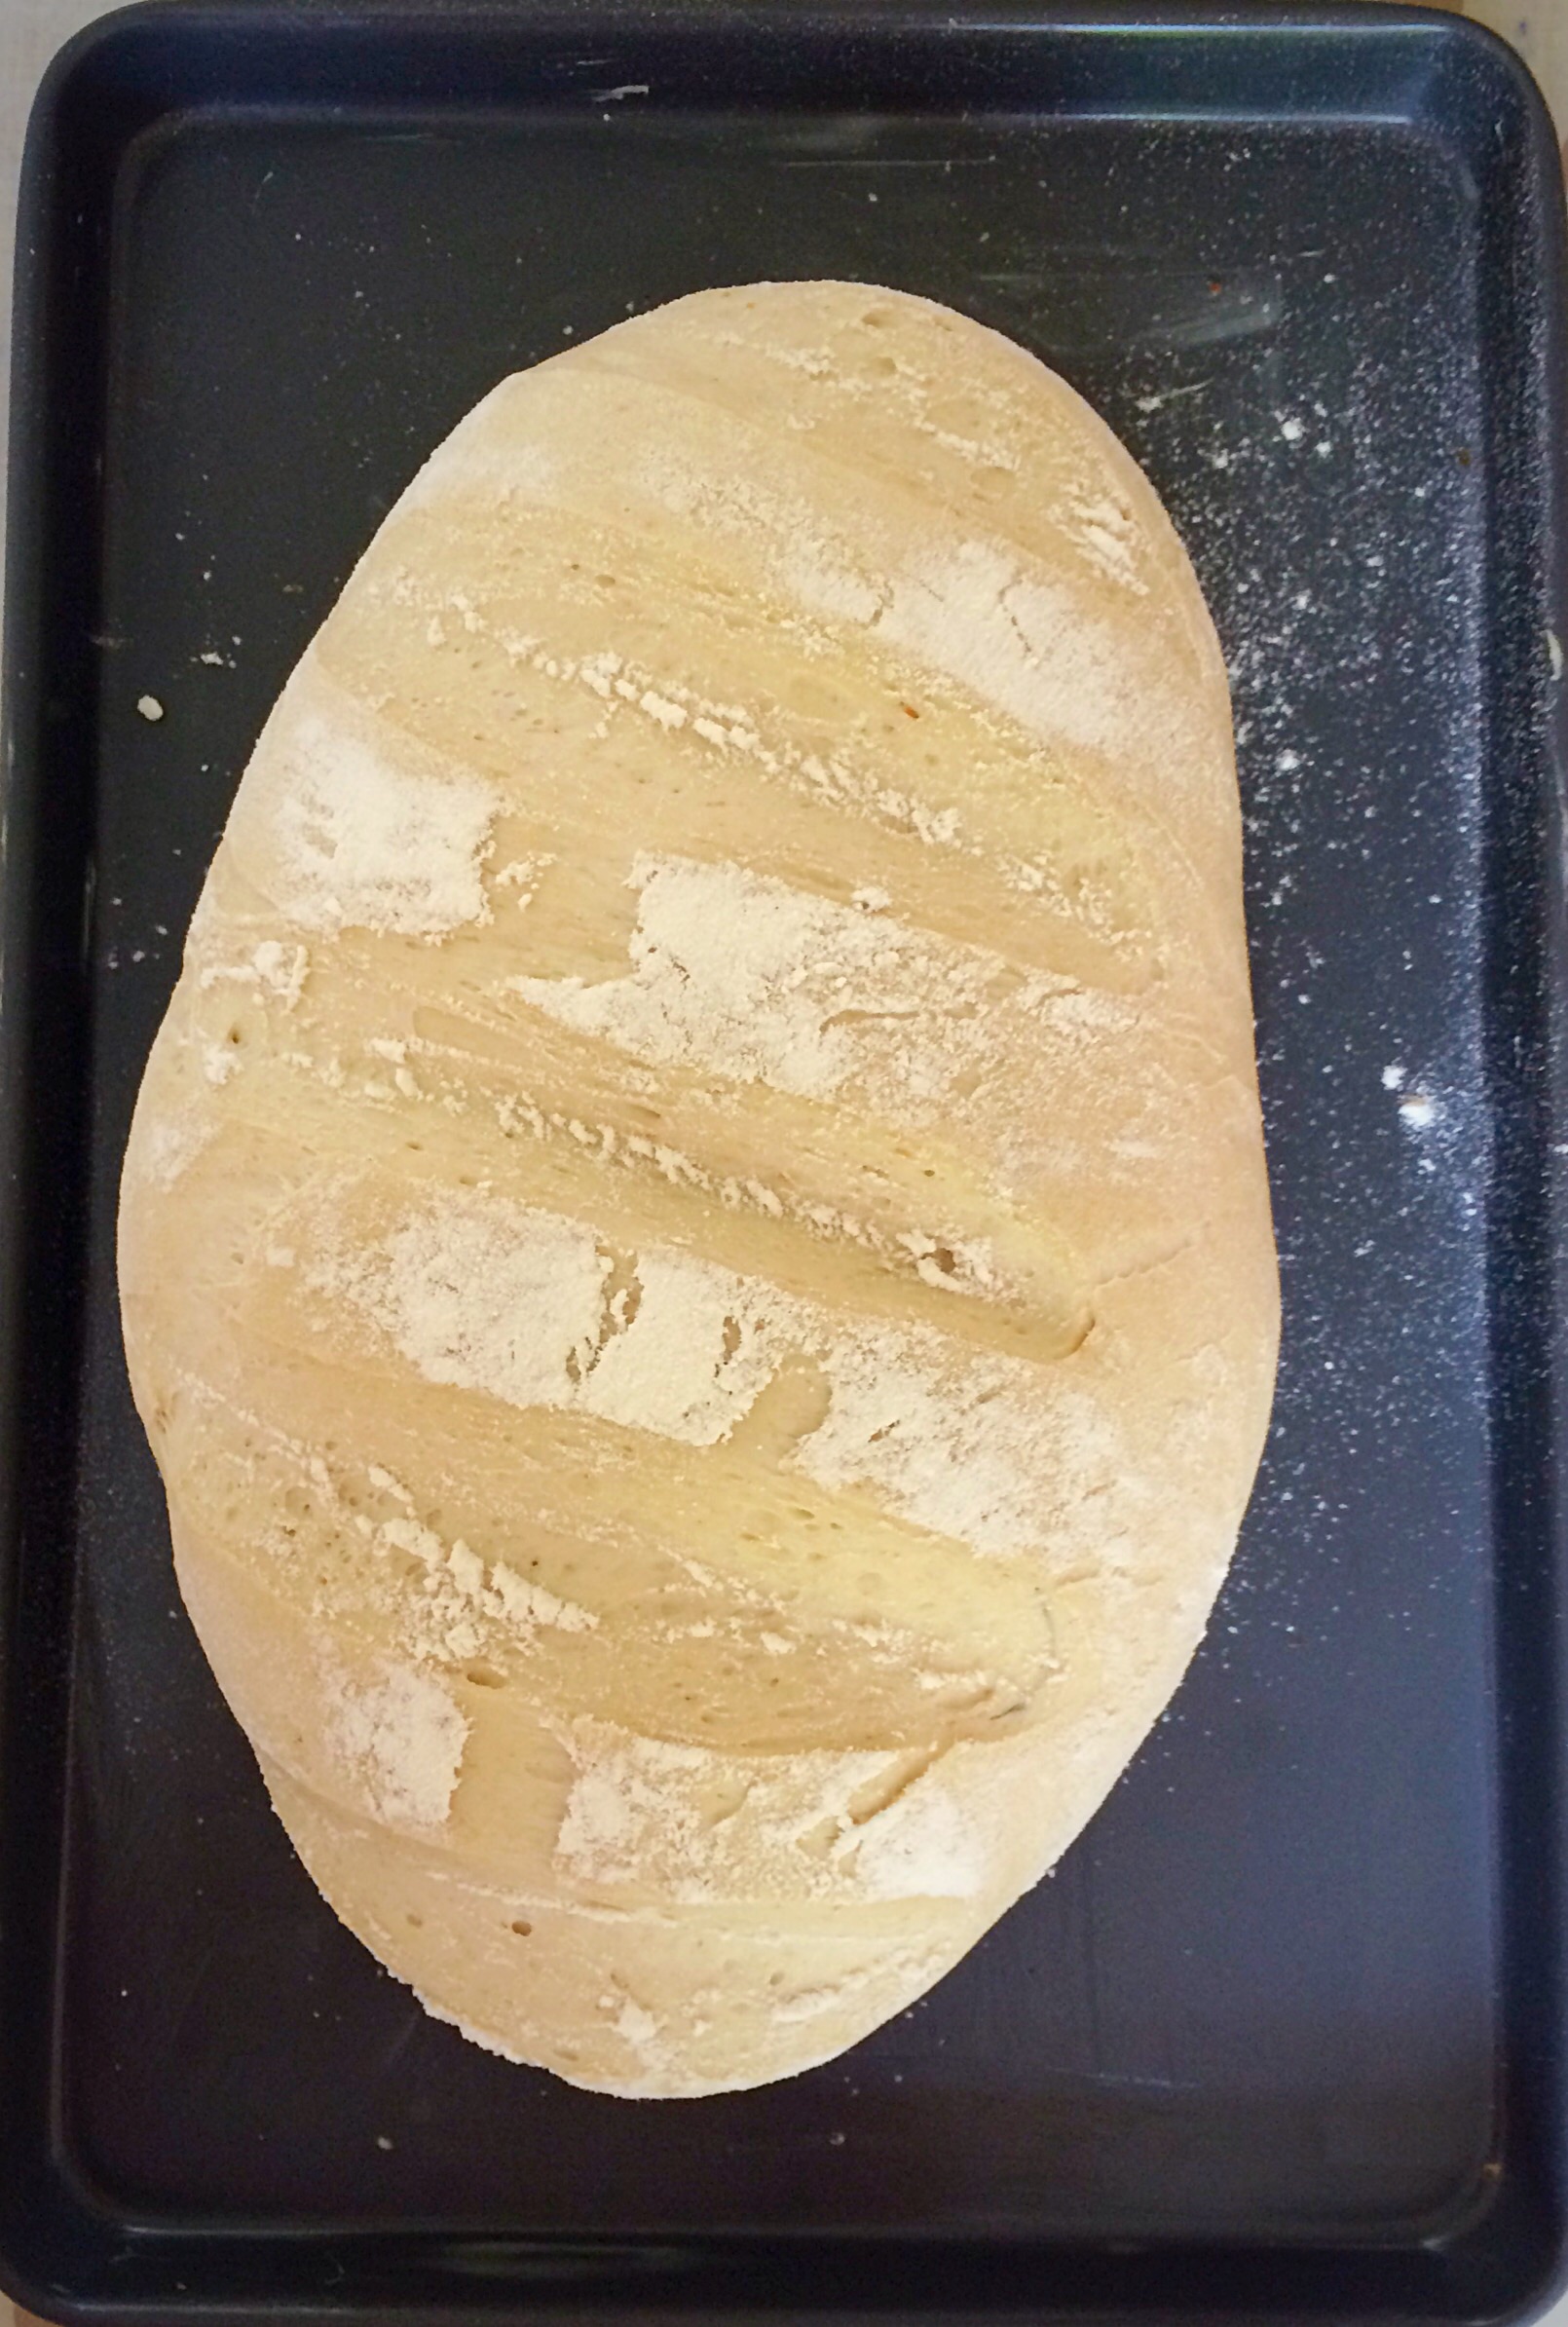
Four images showing dough being proved during bread making.Shaping The Dough

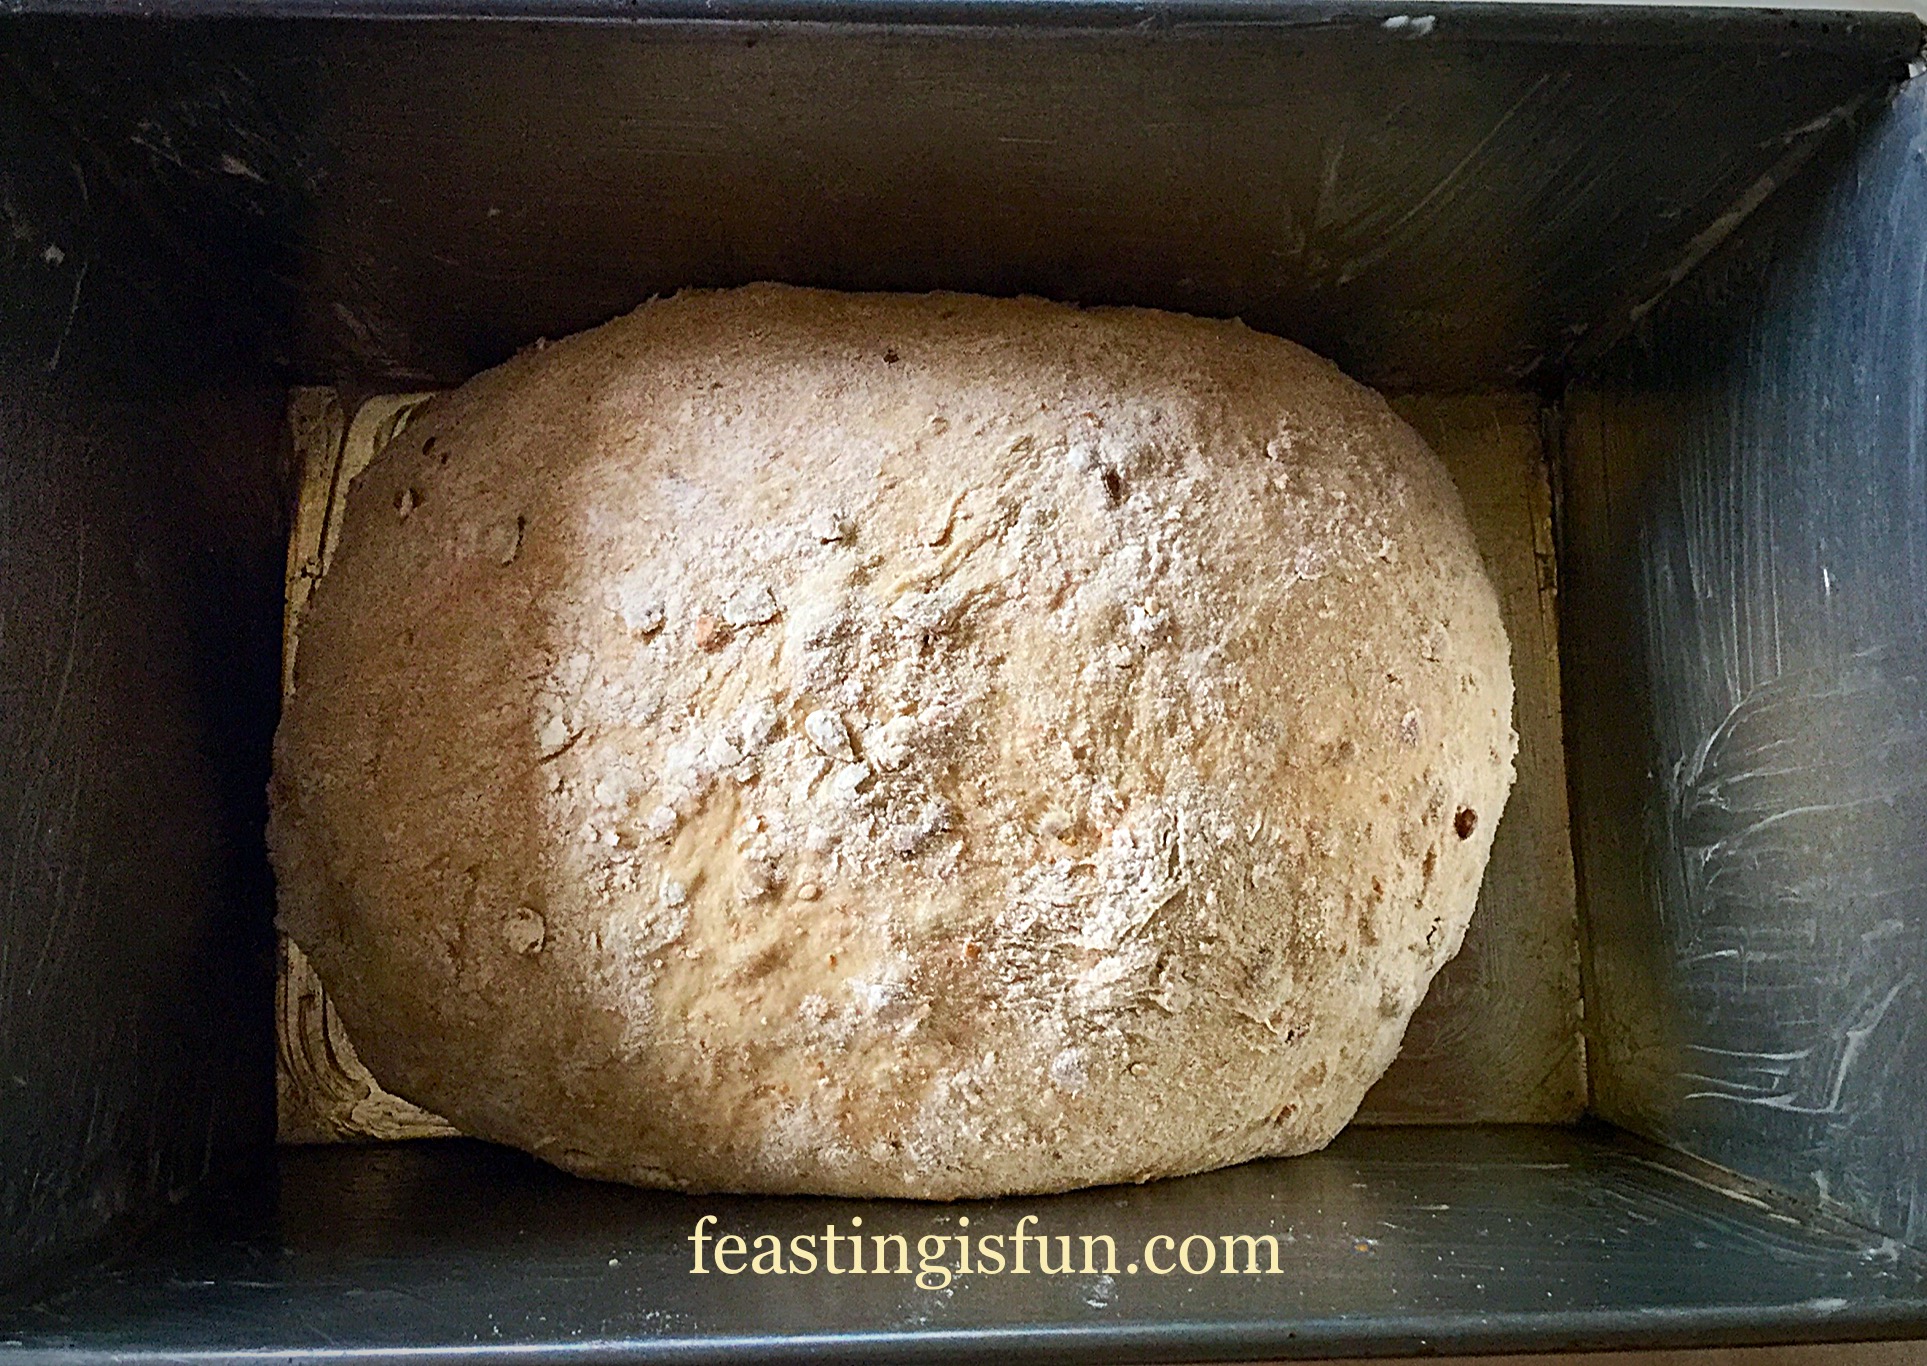
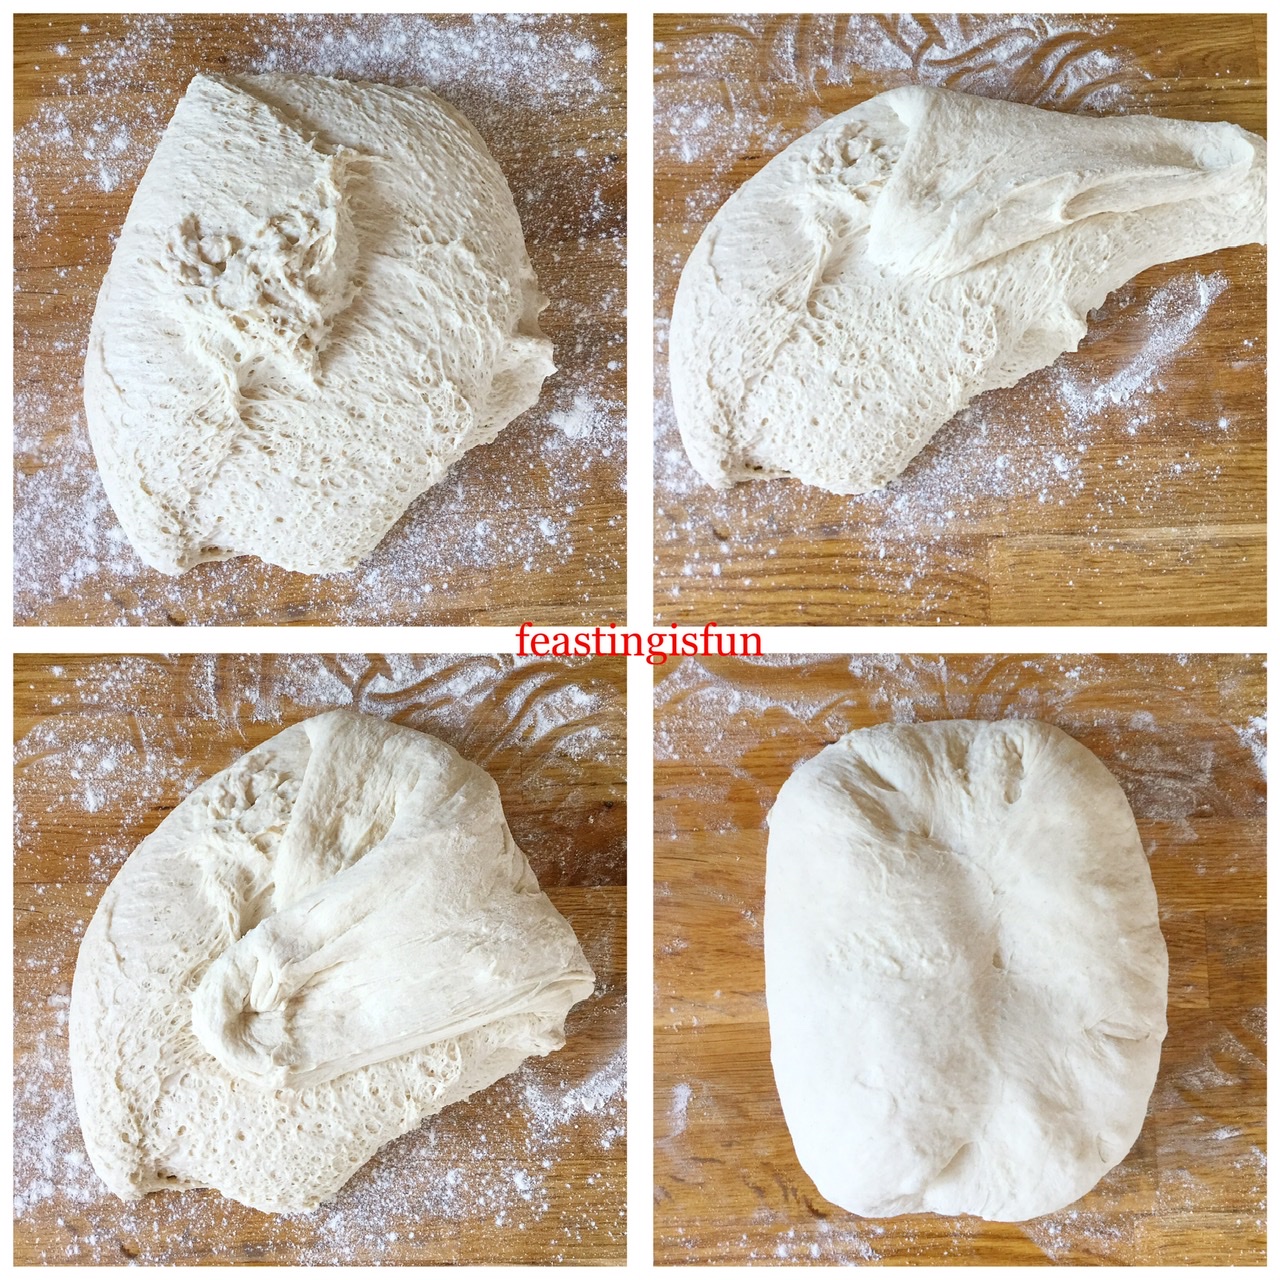
  • In the image above you can see the unshaped dough turned out of the bowl and a perfectly round, shaped dough ready for the second prove. The following steps will teach you how to shape and build tension across the dough so that it keeps it’s shape during baking.
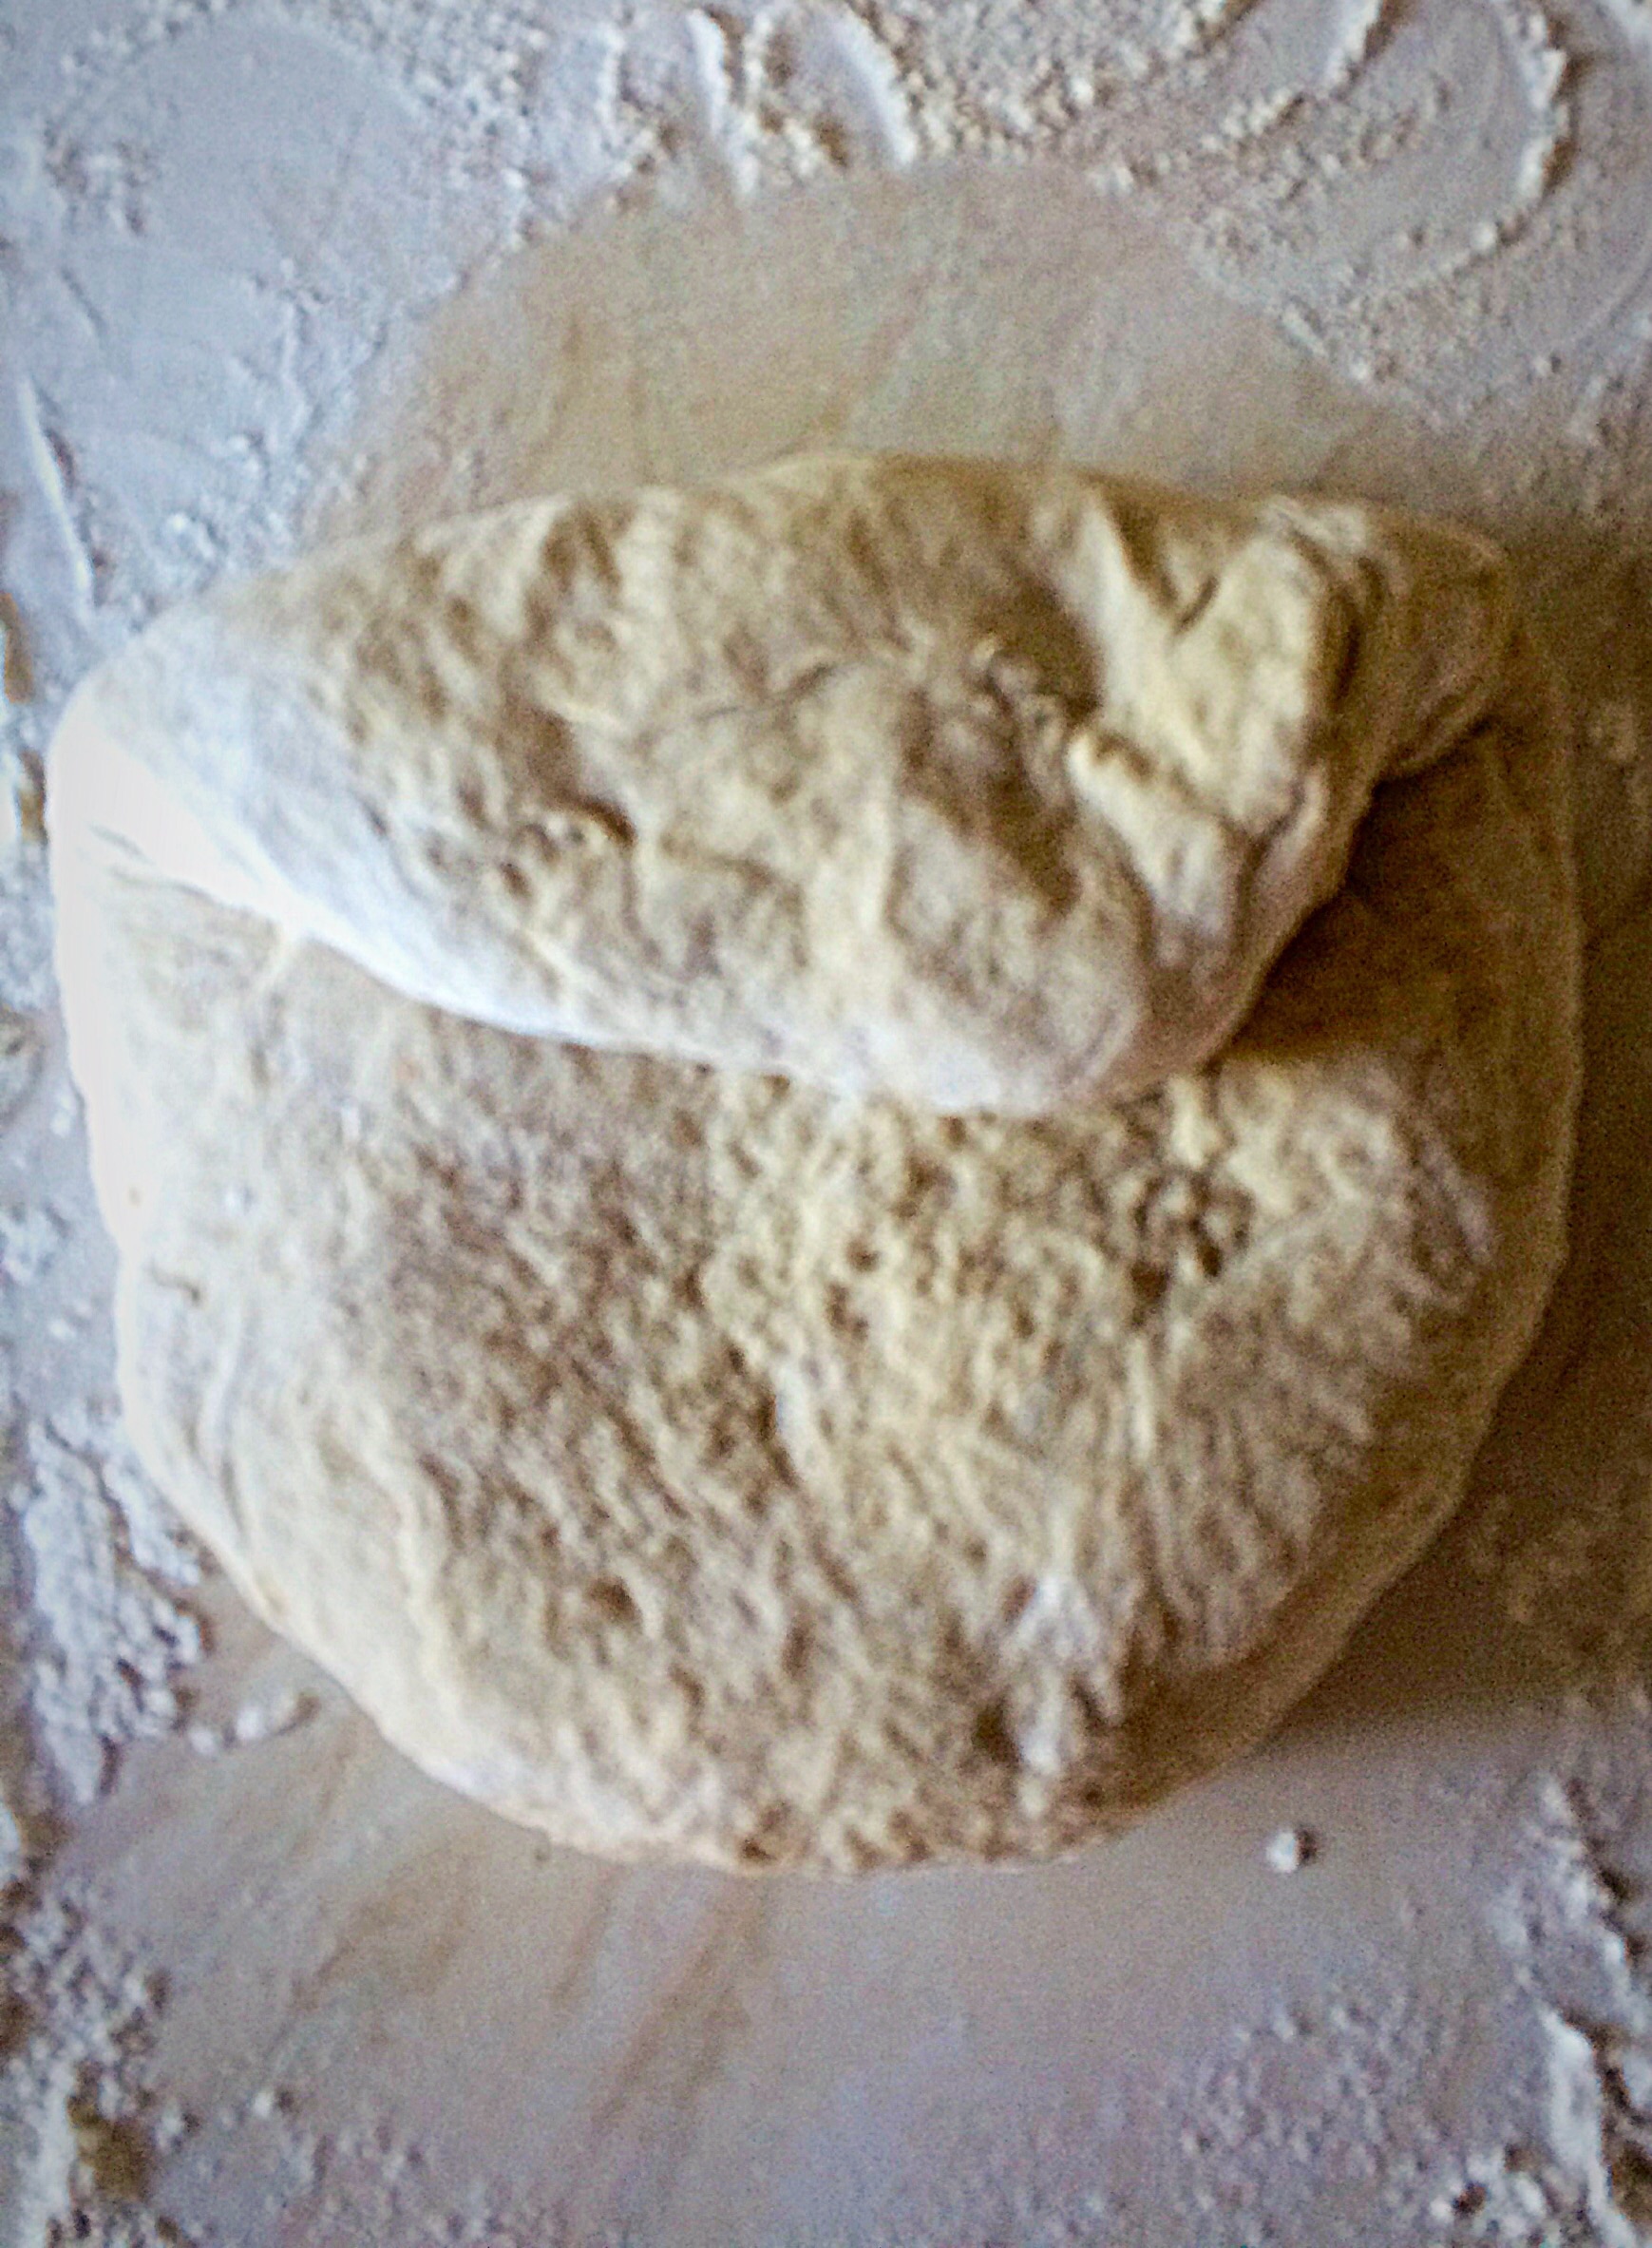
  • First of all, dust your hands with flour.
  • Pull out part of the dough and then press it back into the centre. See the images below.
  • Turn the dough and repeat the last step. While you are doing this you are creating tension across the base of the dough.
  • Continue turning the dough, pulling and pressing into the centre until you have a tight, roundish shape.

Four stages showing how to shape dough for a cob loaf.

Creating The Perfect Cob Loaf Shape

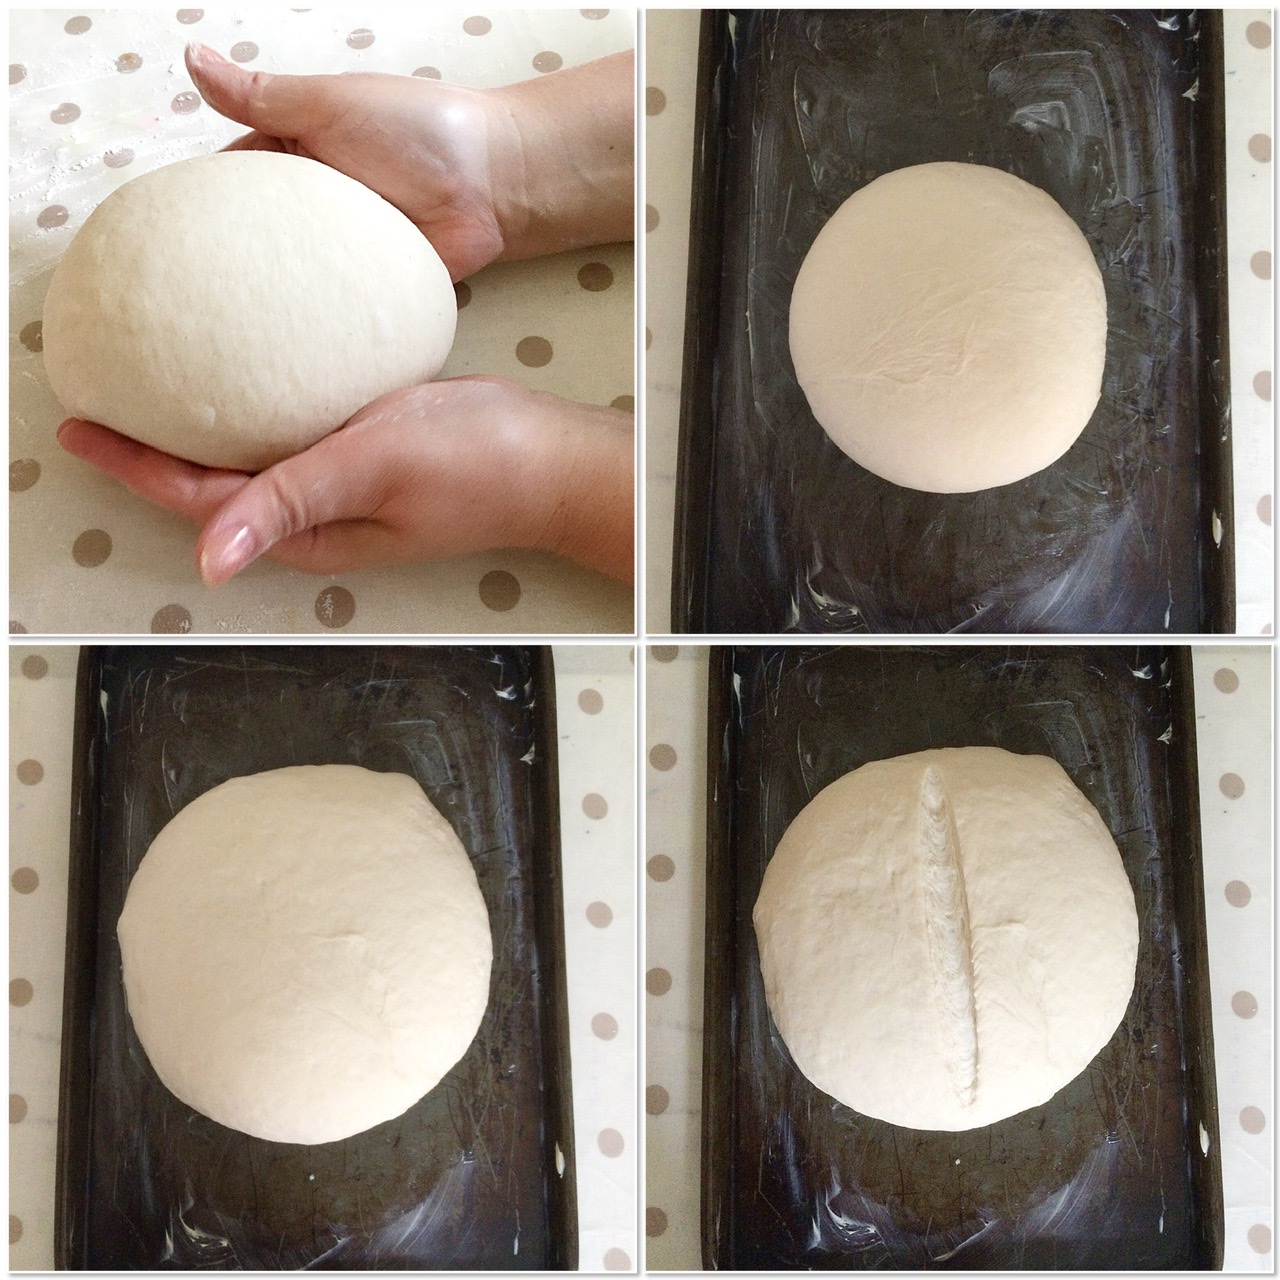
  • Flip the dough over and use your hands to cup and twist the dough.
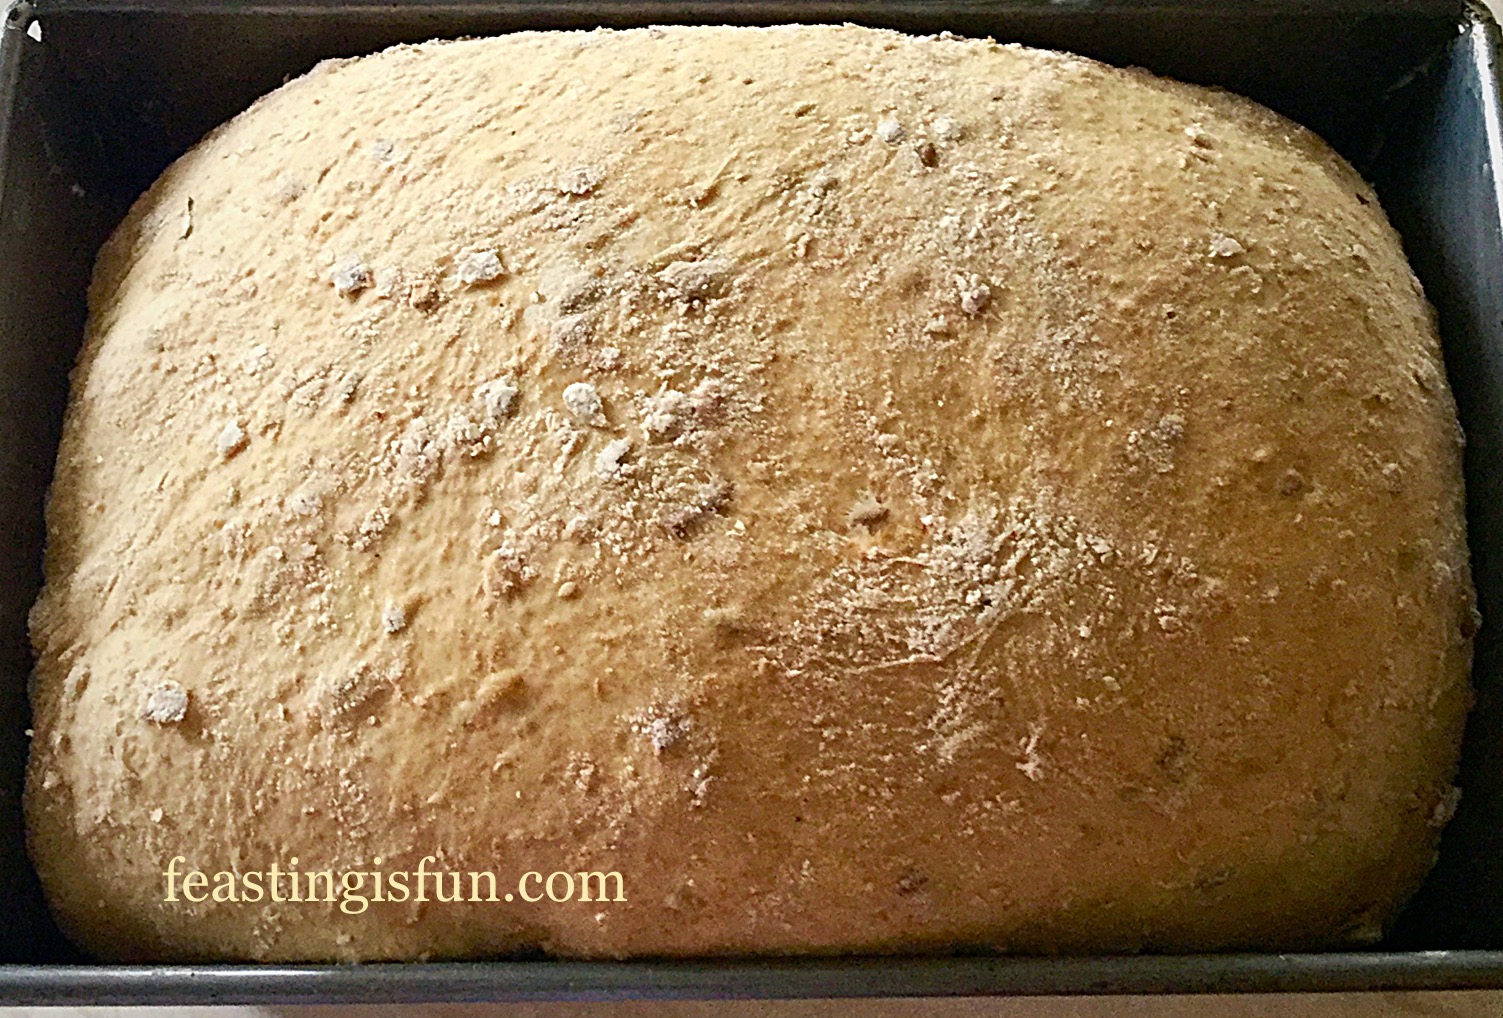
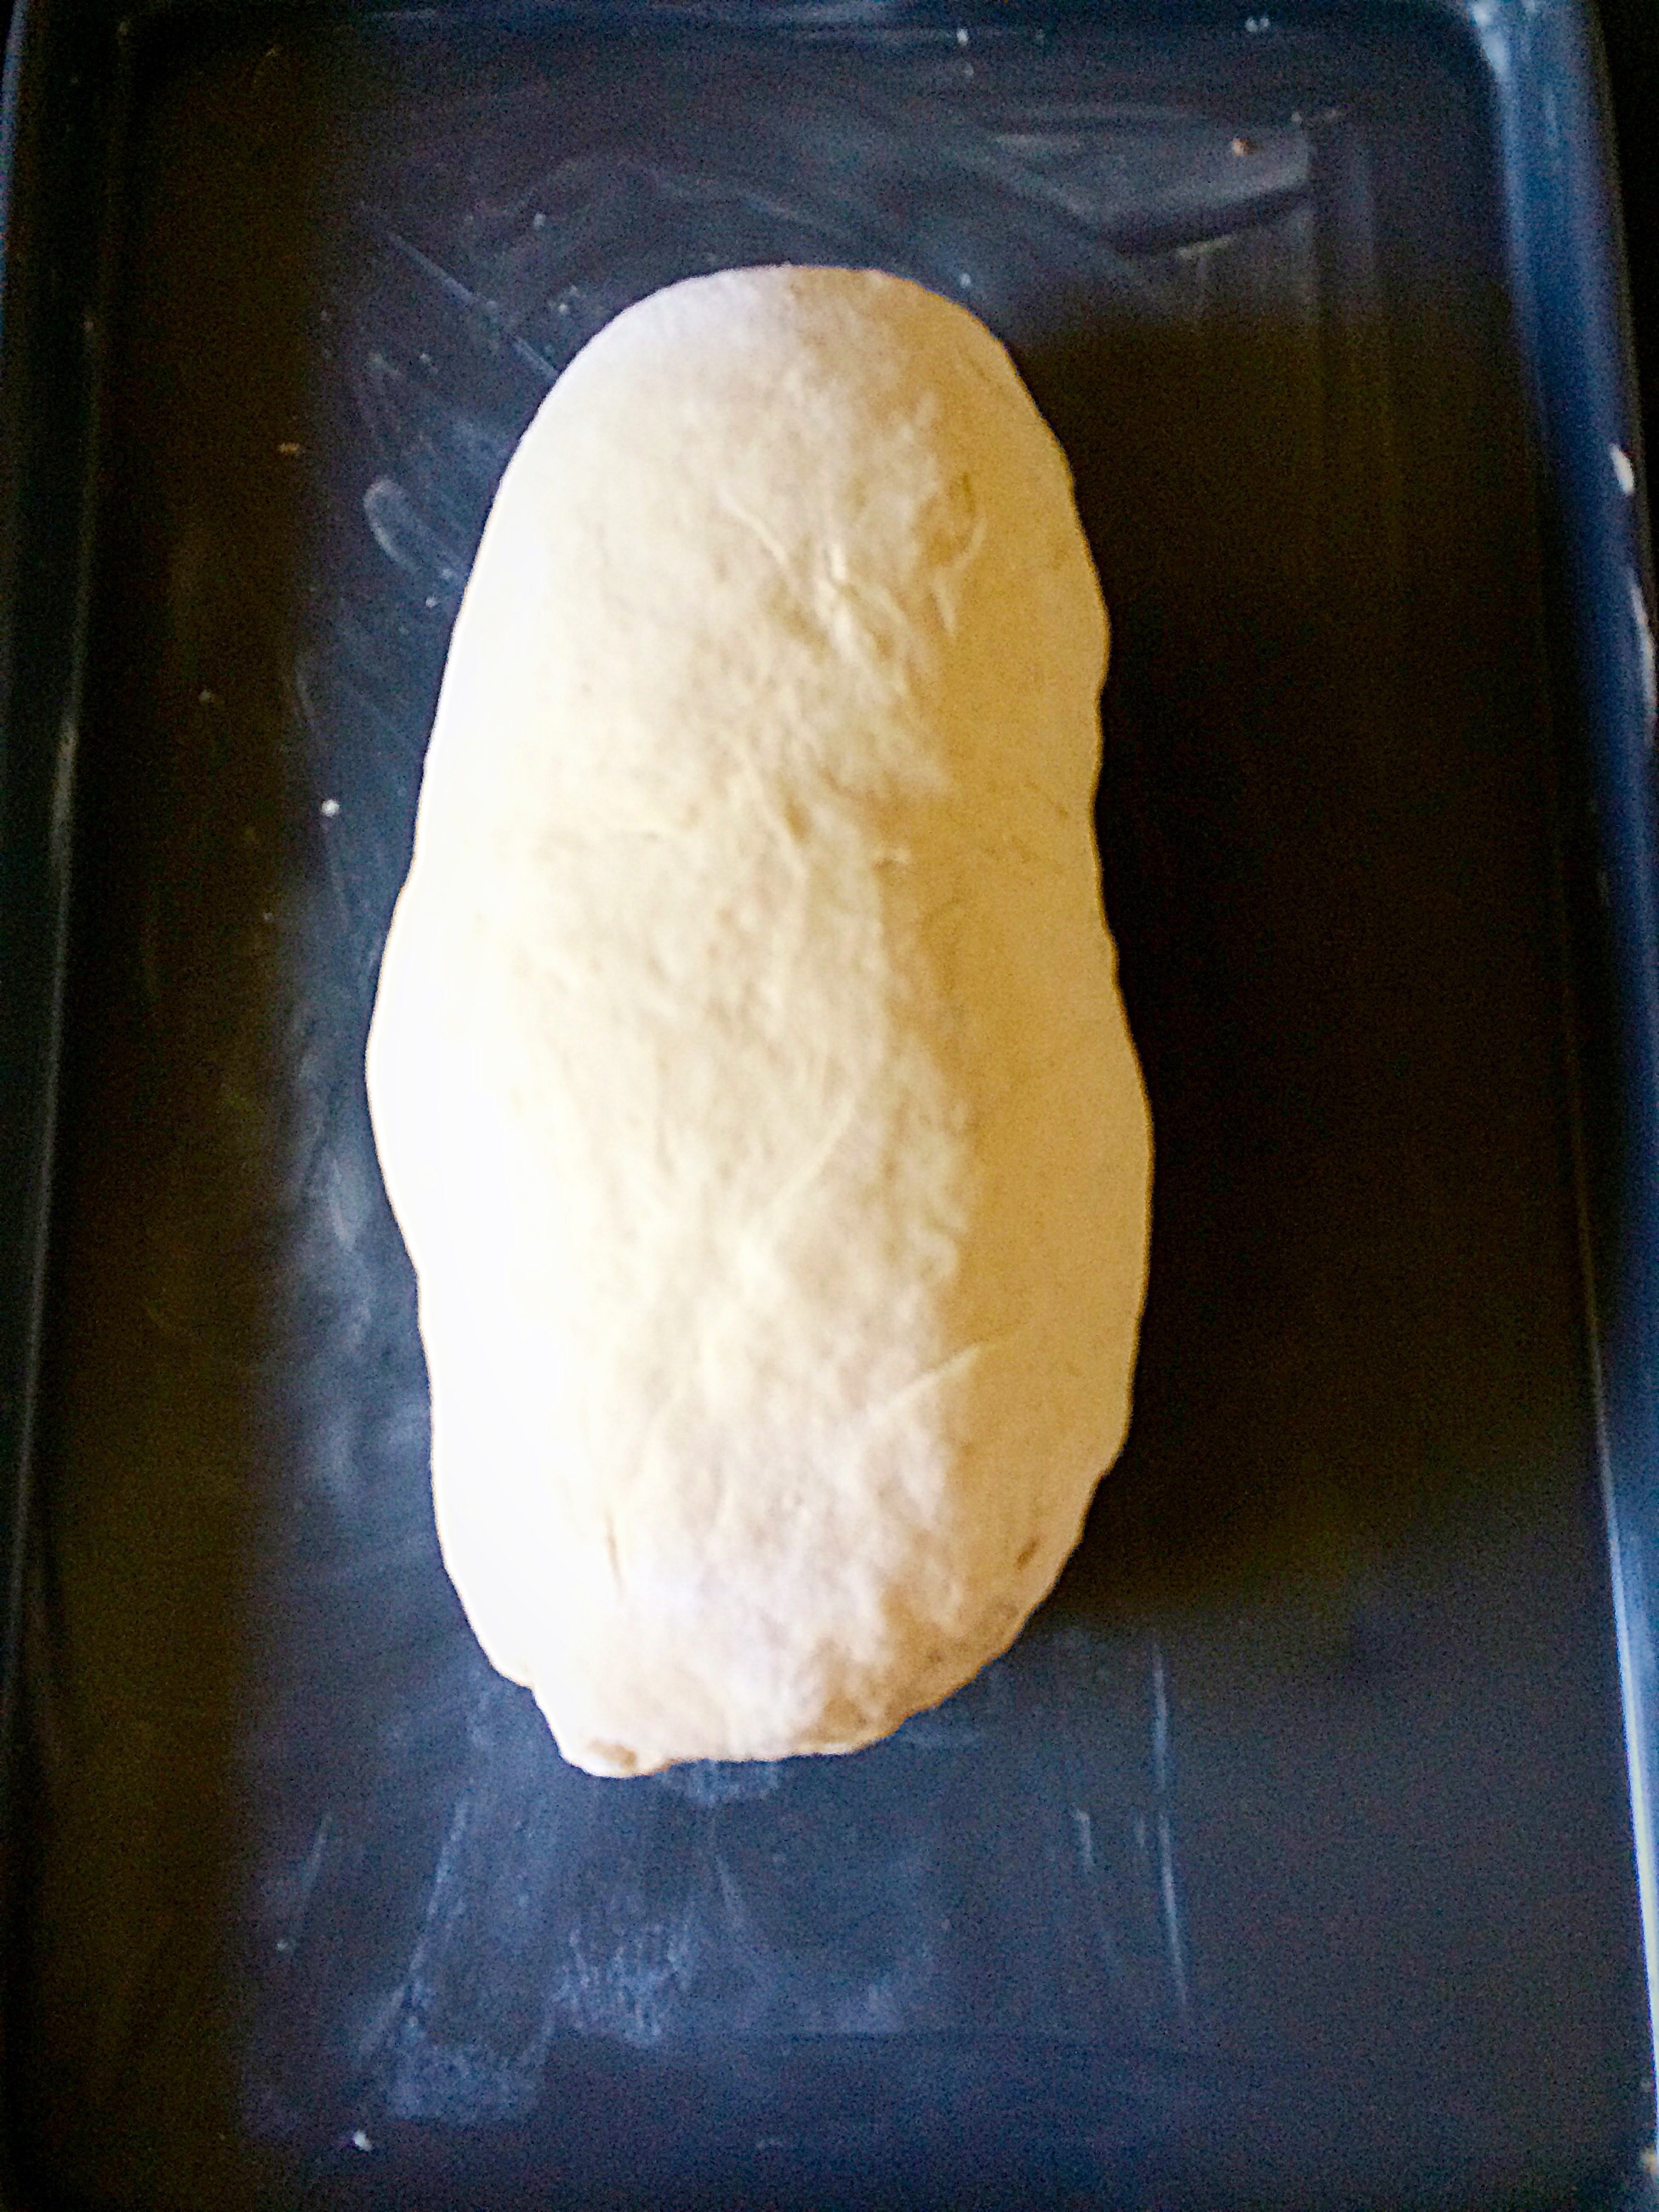
  • Continue until you have a neat, tight, dough ball.
  • Finally place the dough ball onto a greased baking tray, cover with a tea towel and leave to prove for 20 minutes.
  • PRE HEAT your oven to 220C/200C fan, 425F, gas mark 7. Place a shallow, ovenproof dish with water in it on the bottom shelf of the oven.
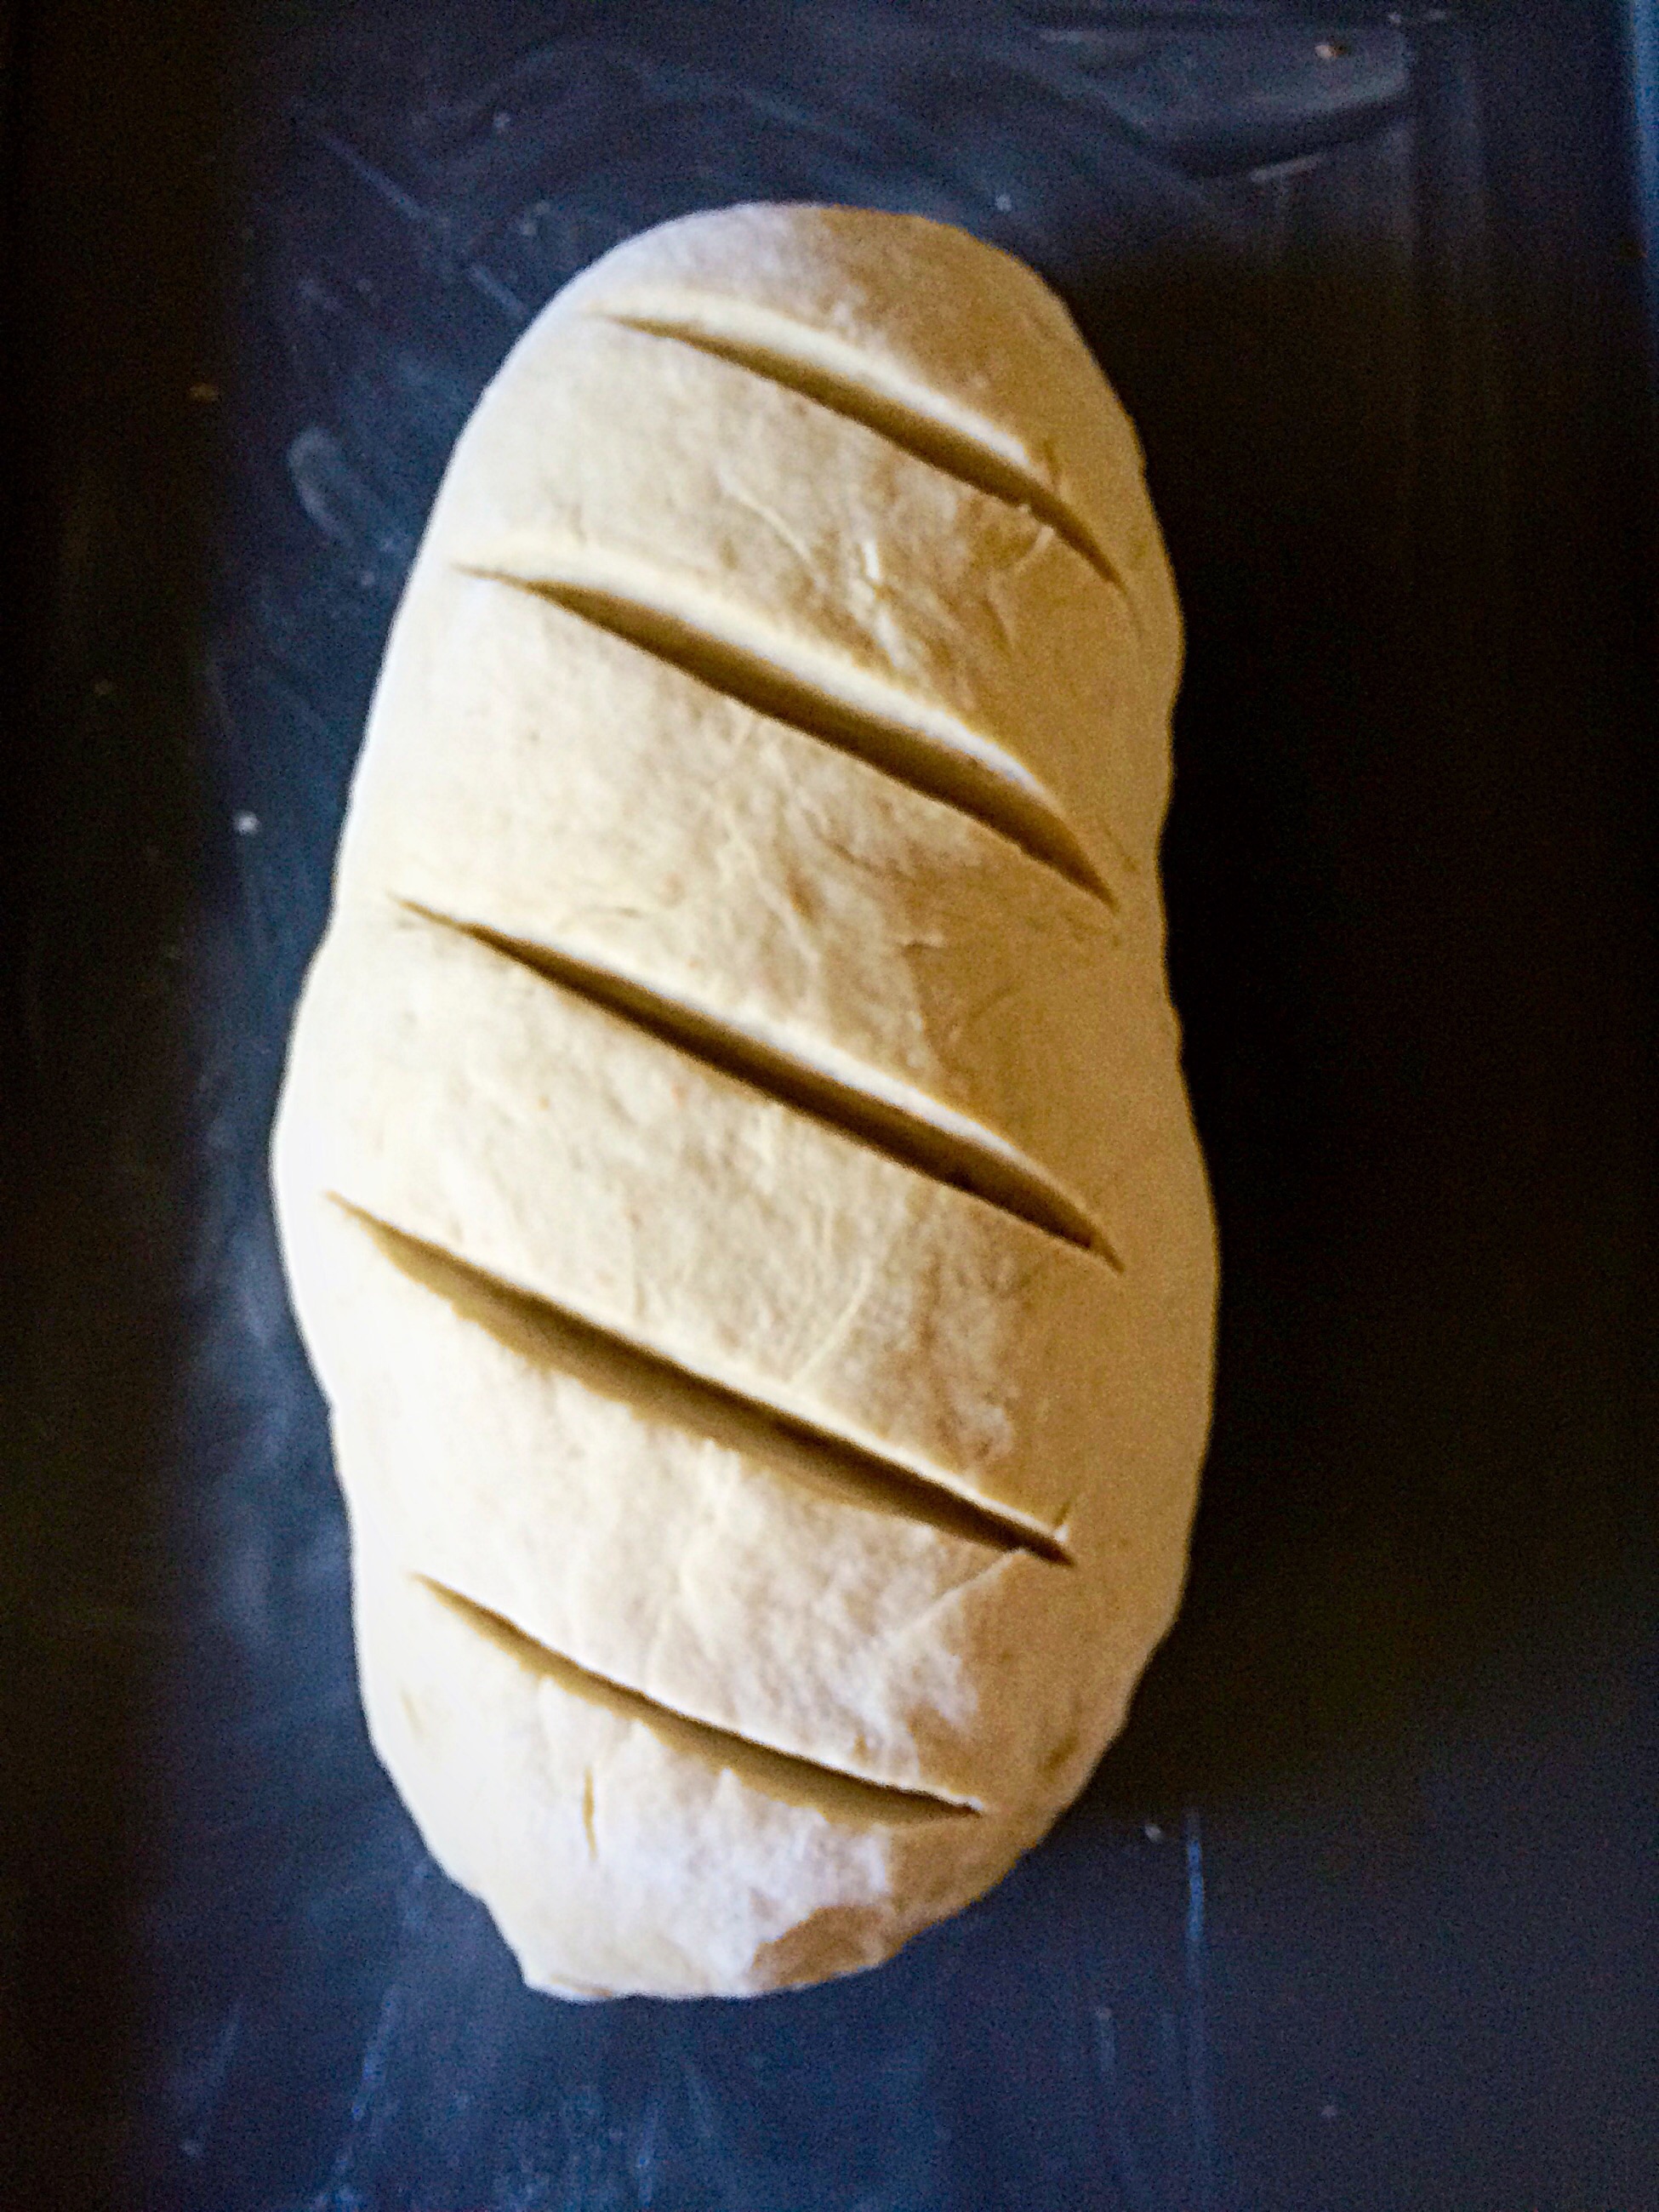
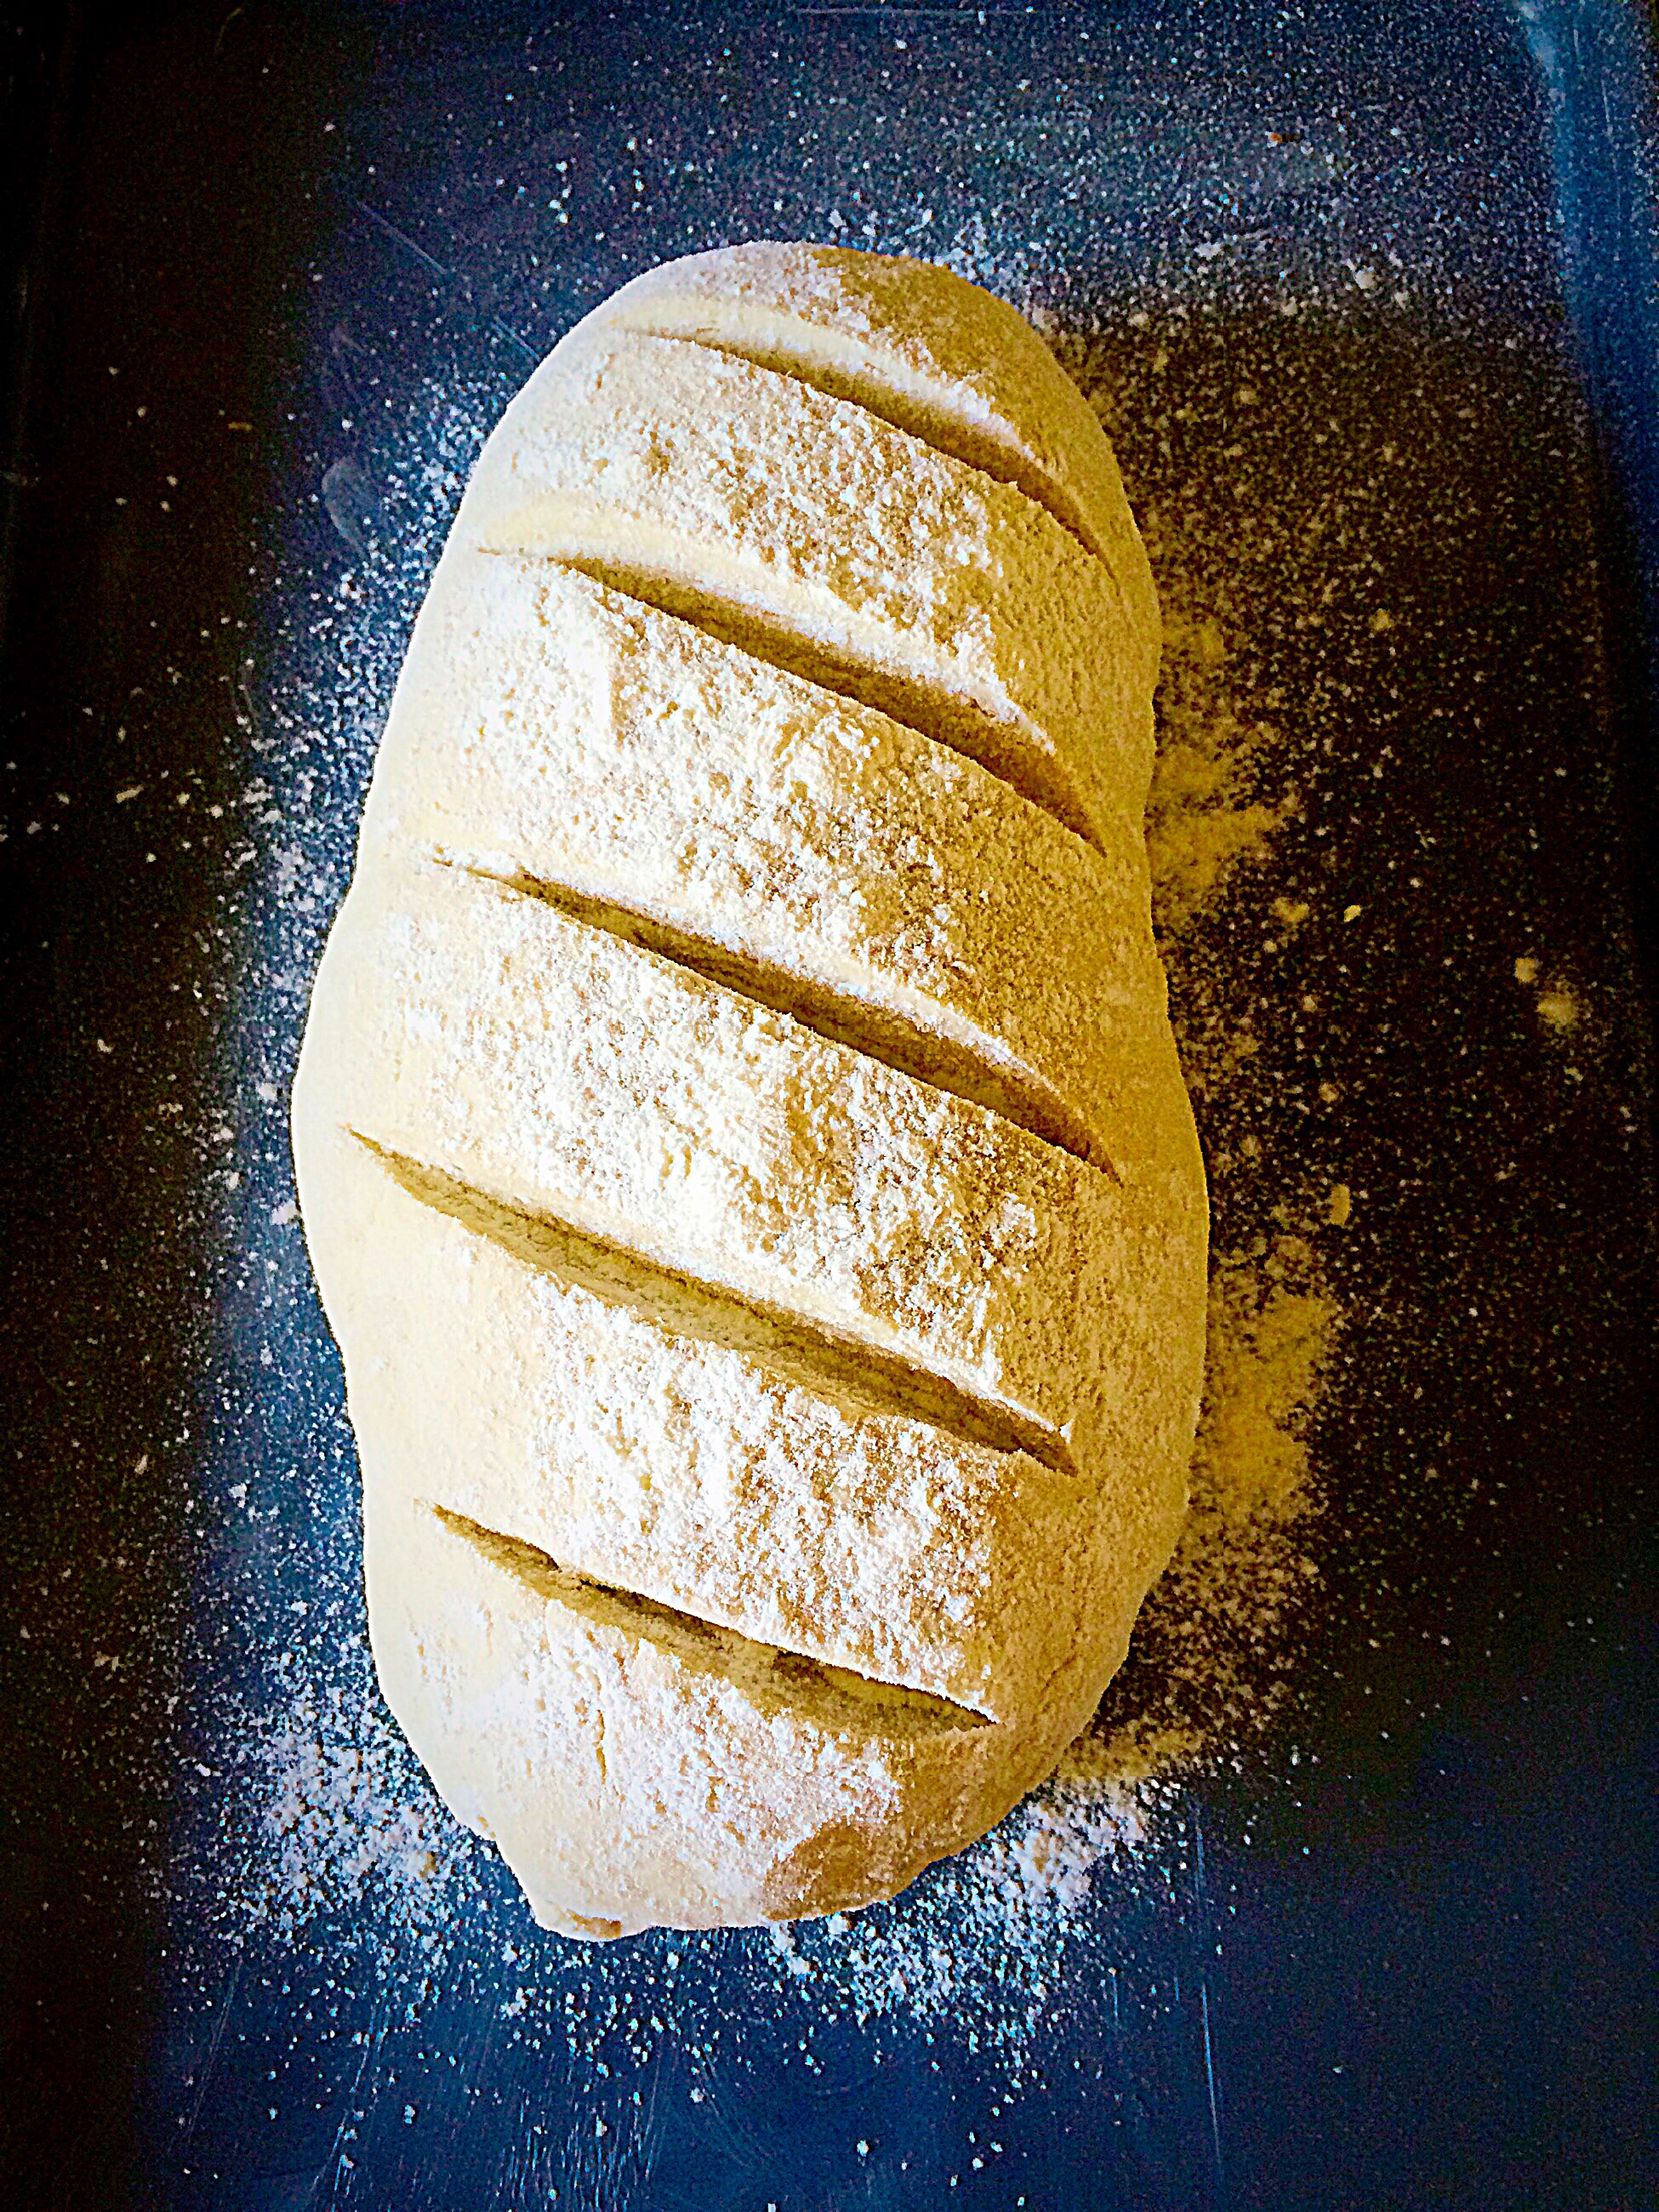
  • After 20 minutes of proving use the blade of a sharp knife to score down the middle of the dough.

Shaping, proving and scoring dough for a cob loaf.

Baking The Easy White Cob Loaf

  • Preheating the oven with water in it creates a steamy environment that allows the dough to expand more before setting a crust.
  • Place the baking tray in the middle of the oven.
  • Bake the bread for 50-55 minutes.
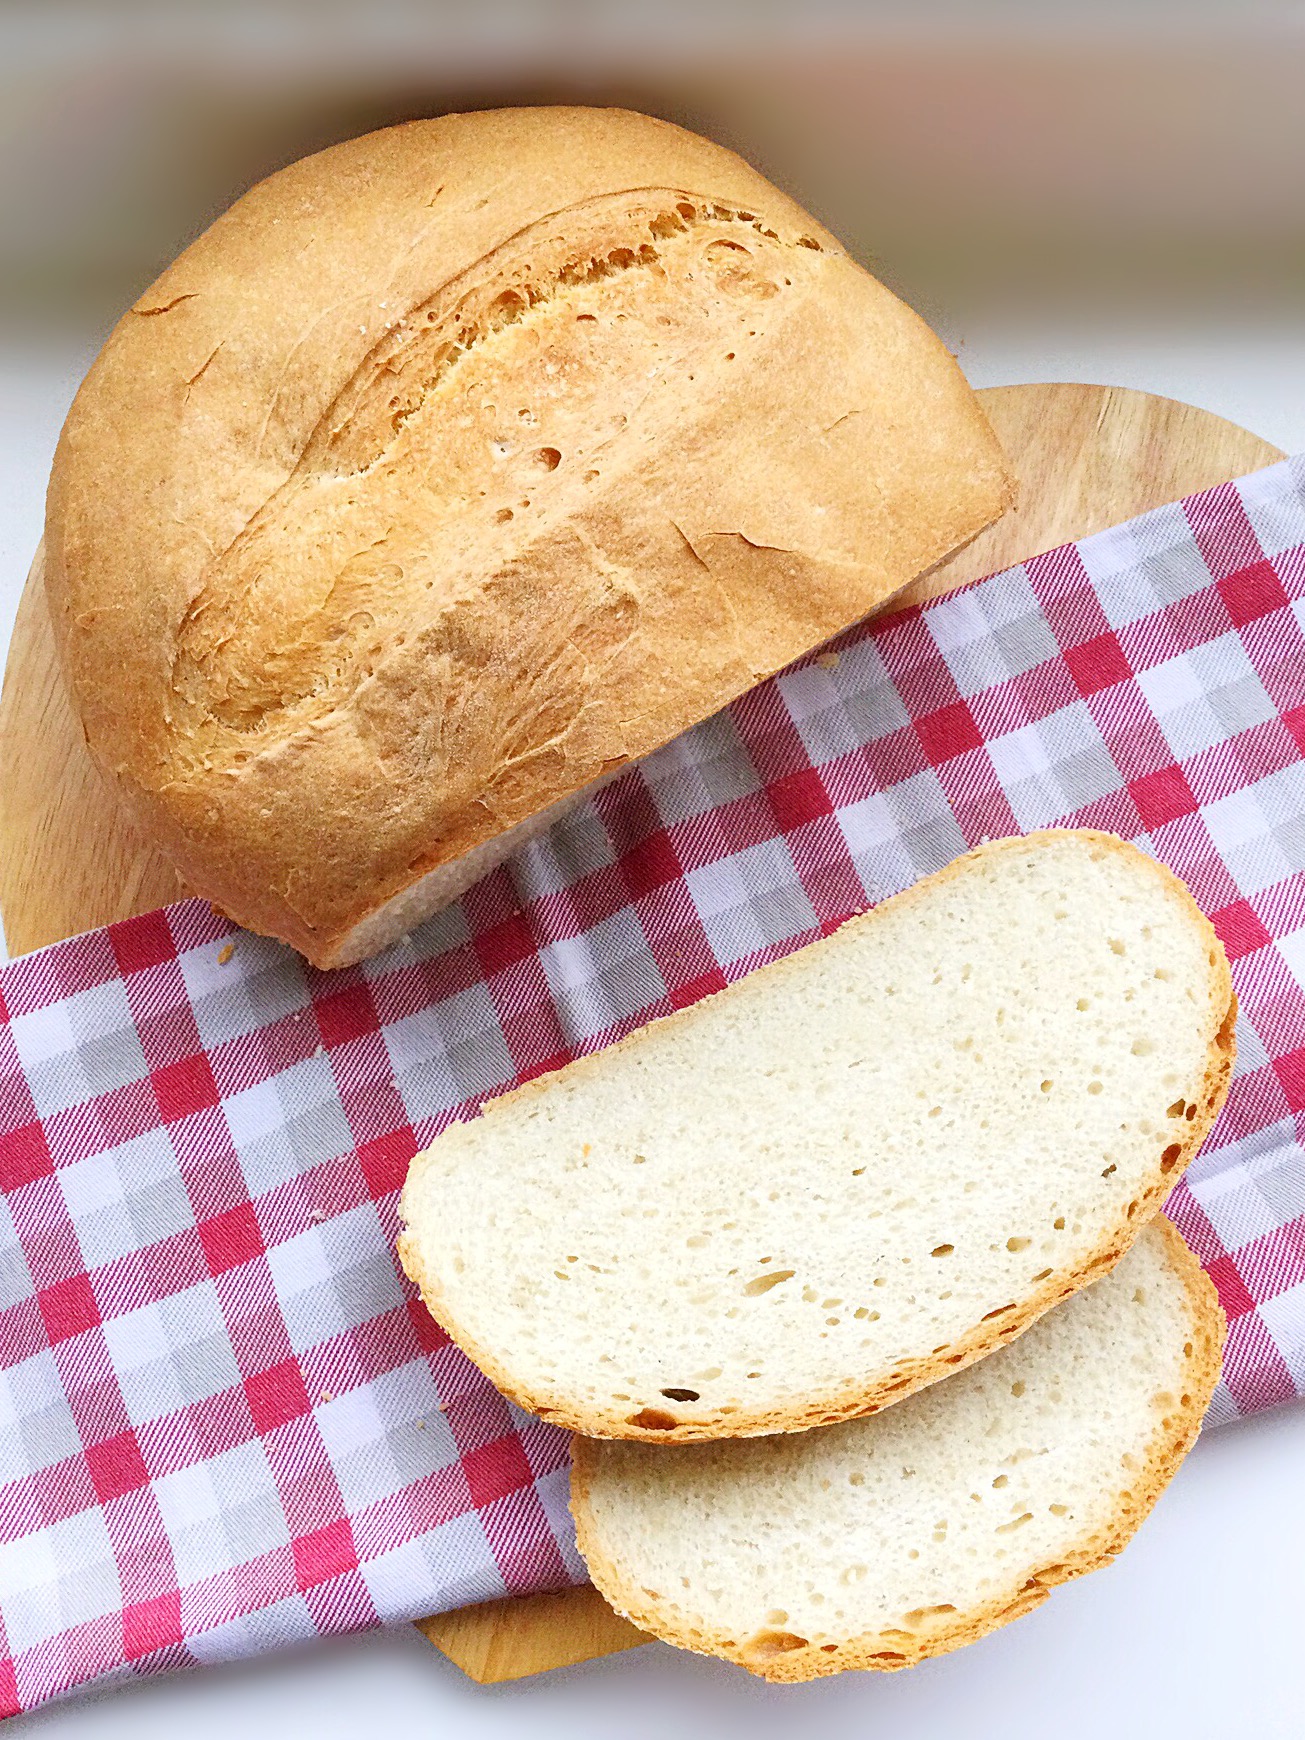
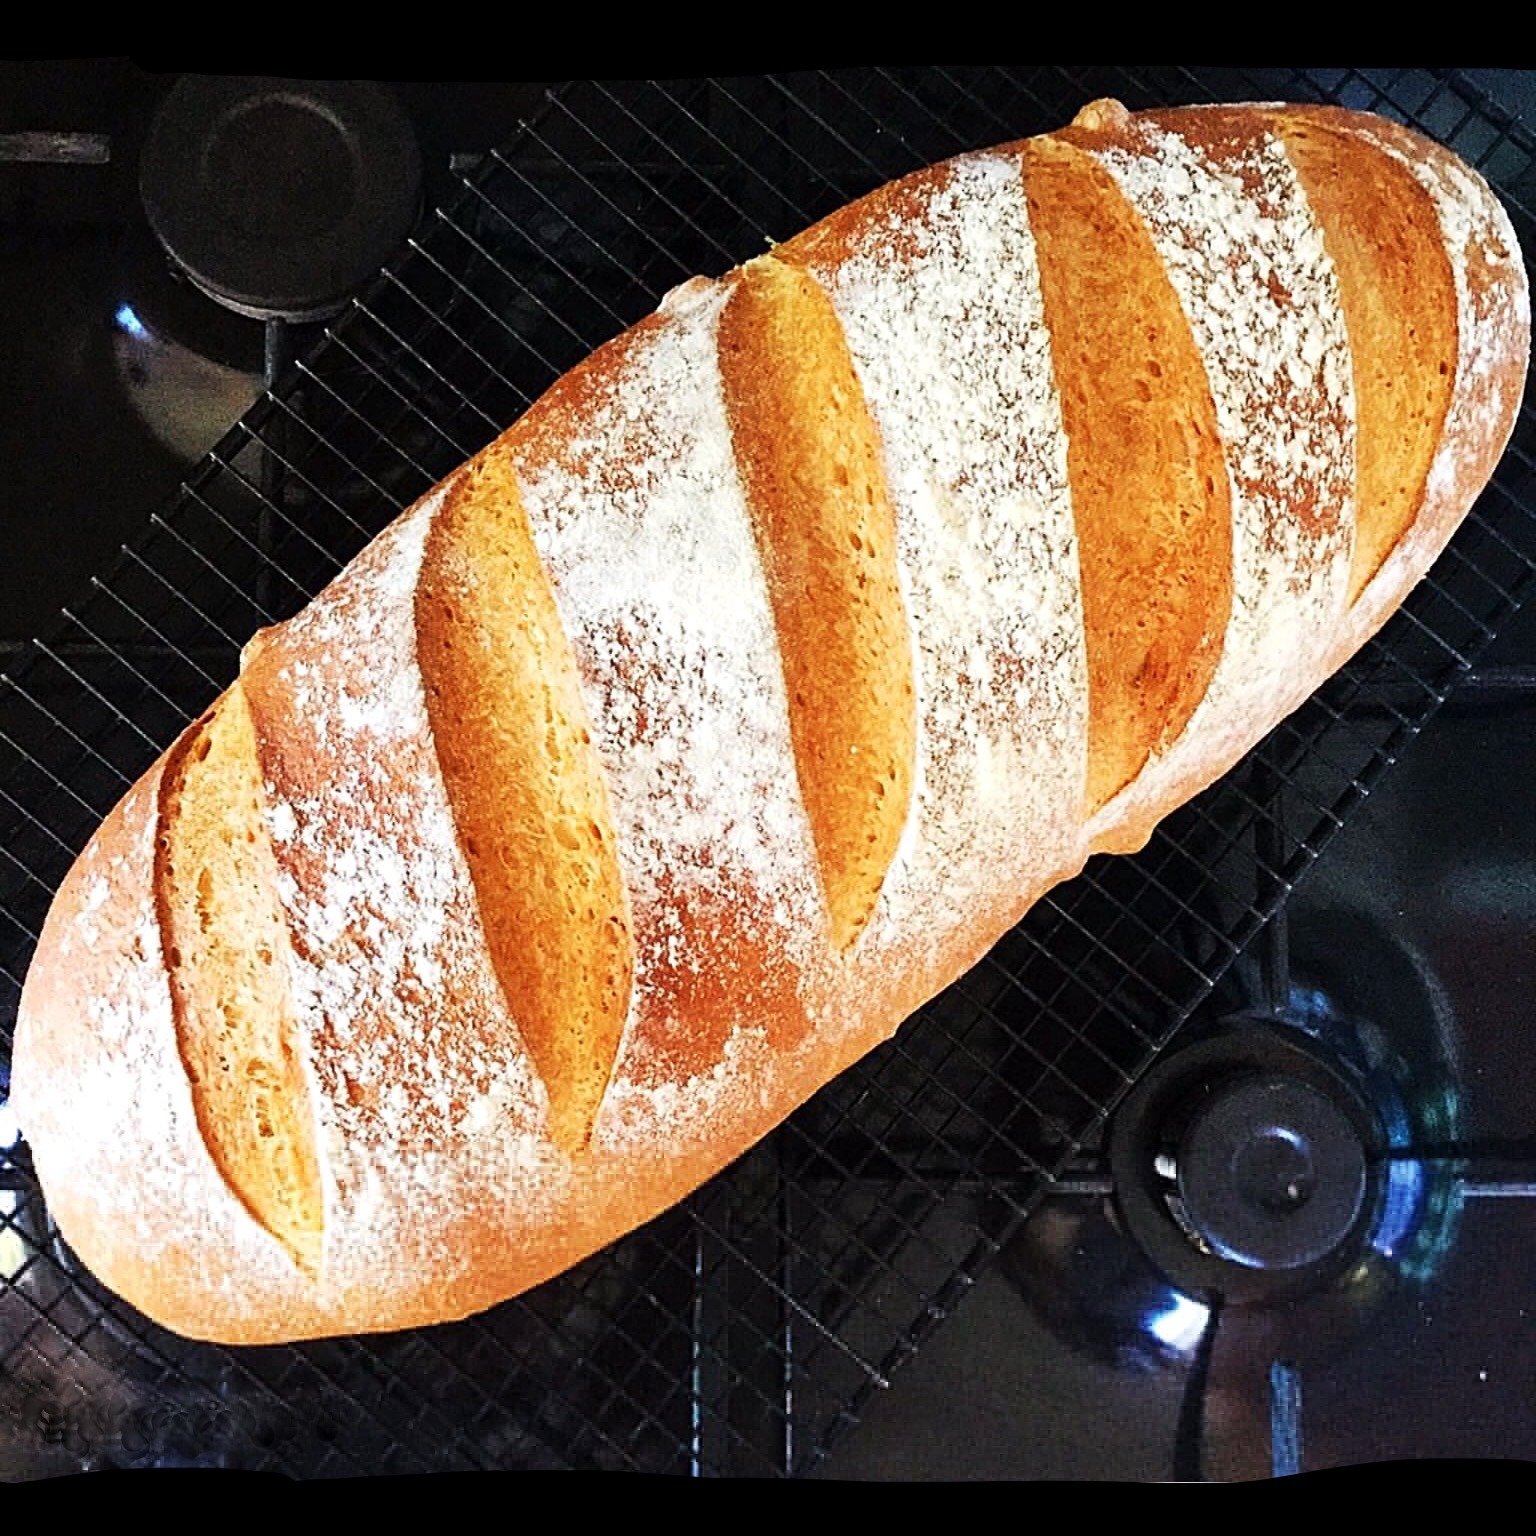
  • The loaf should be golden in colour and sound hollow when rapped on the base with a knuckle (take care it will be hot).
  • As soon as the bread is baked remove it from the oven and place on a cooling rack or trivet to cool completely.

Freshly baked easy white cob loaf.

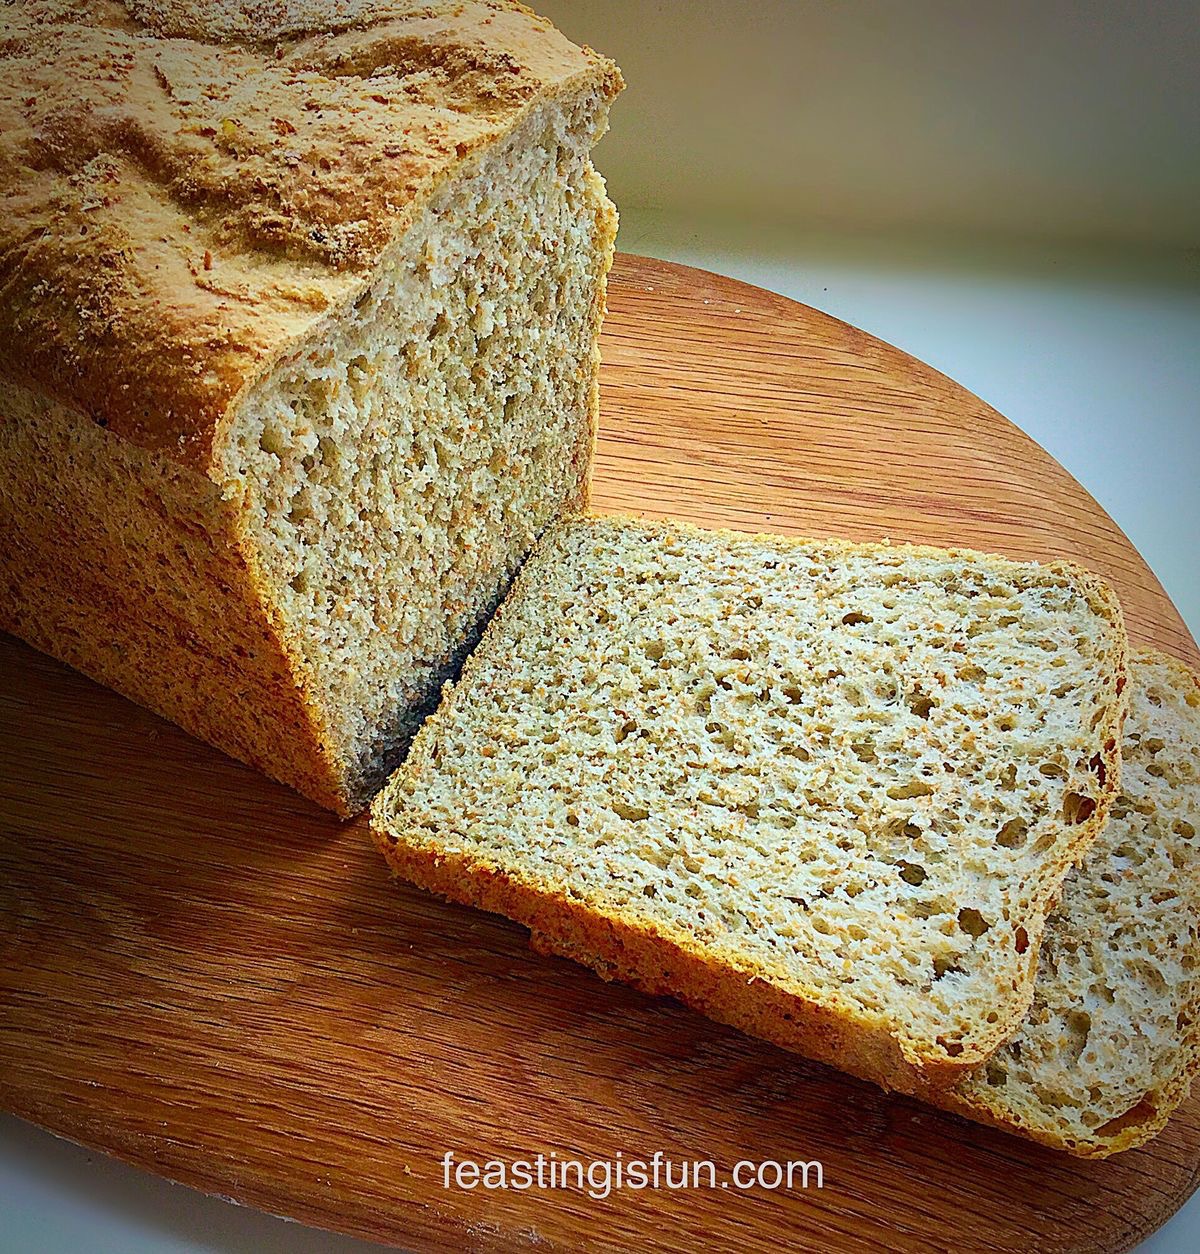
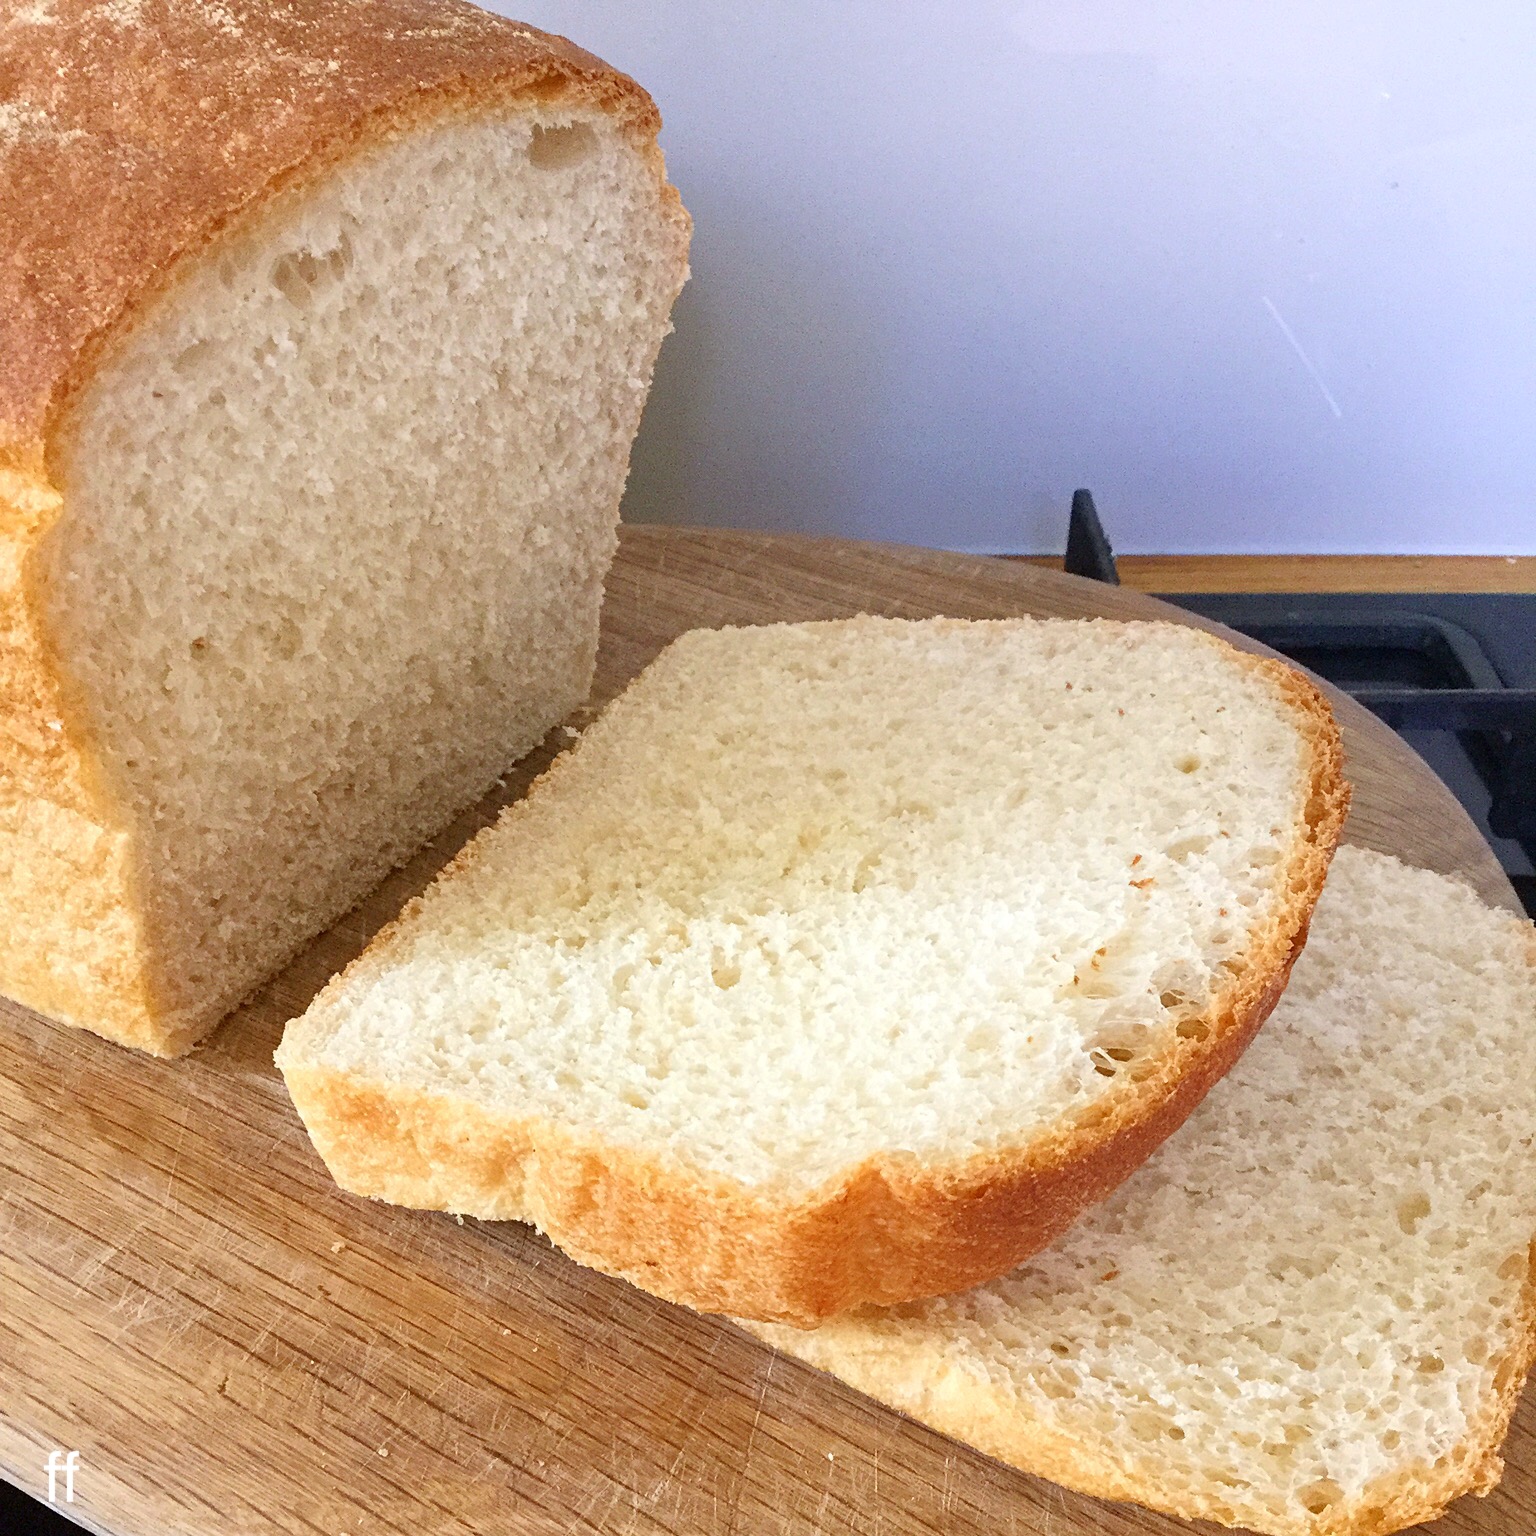
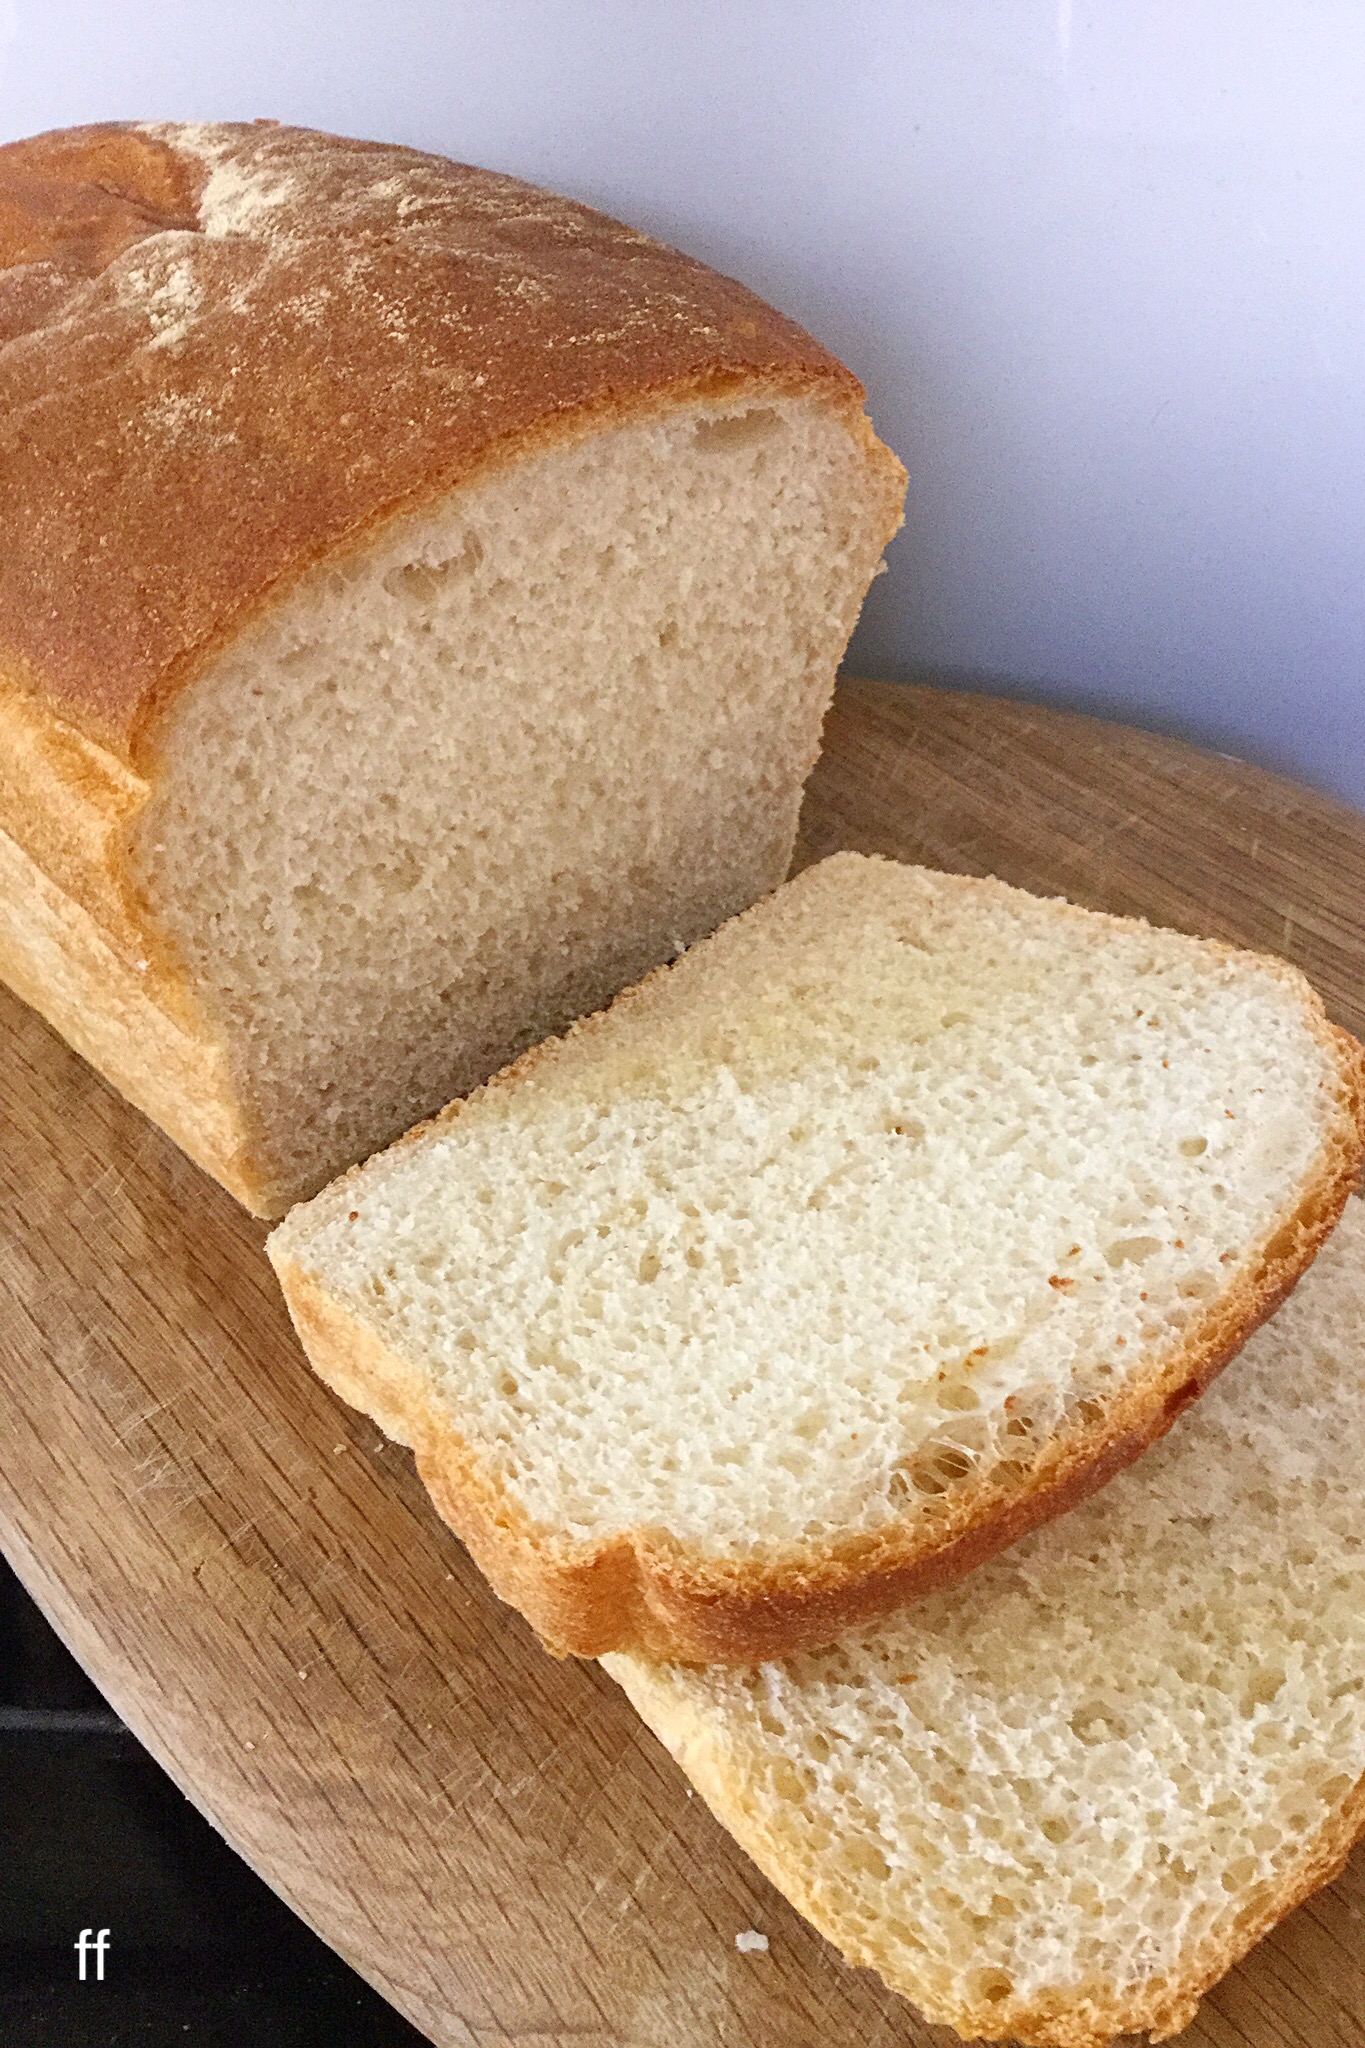
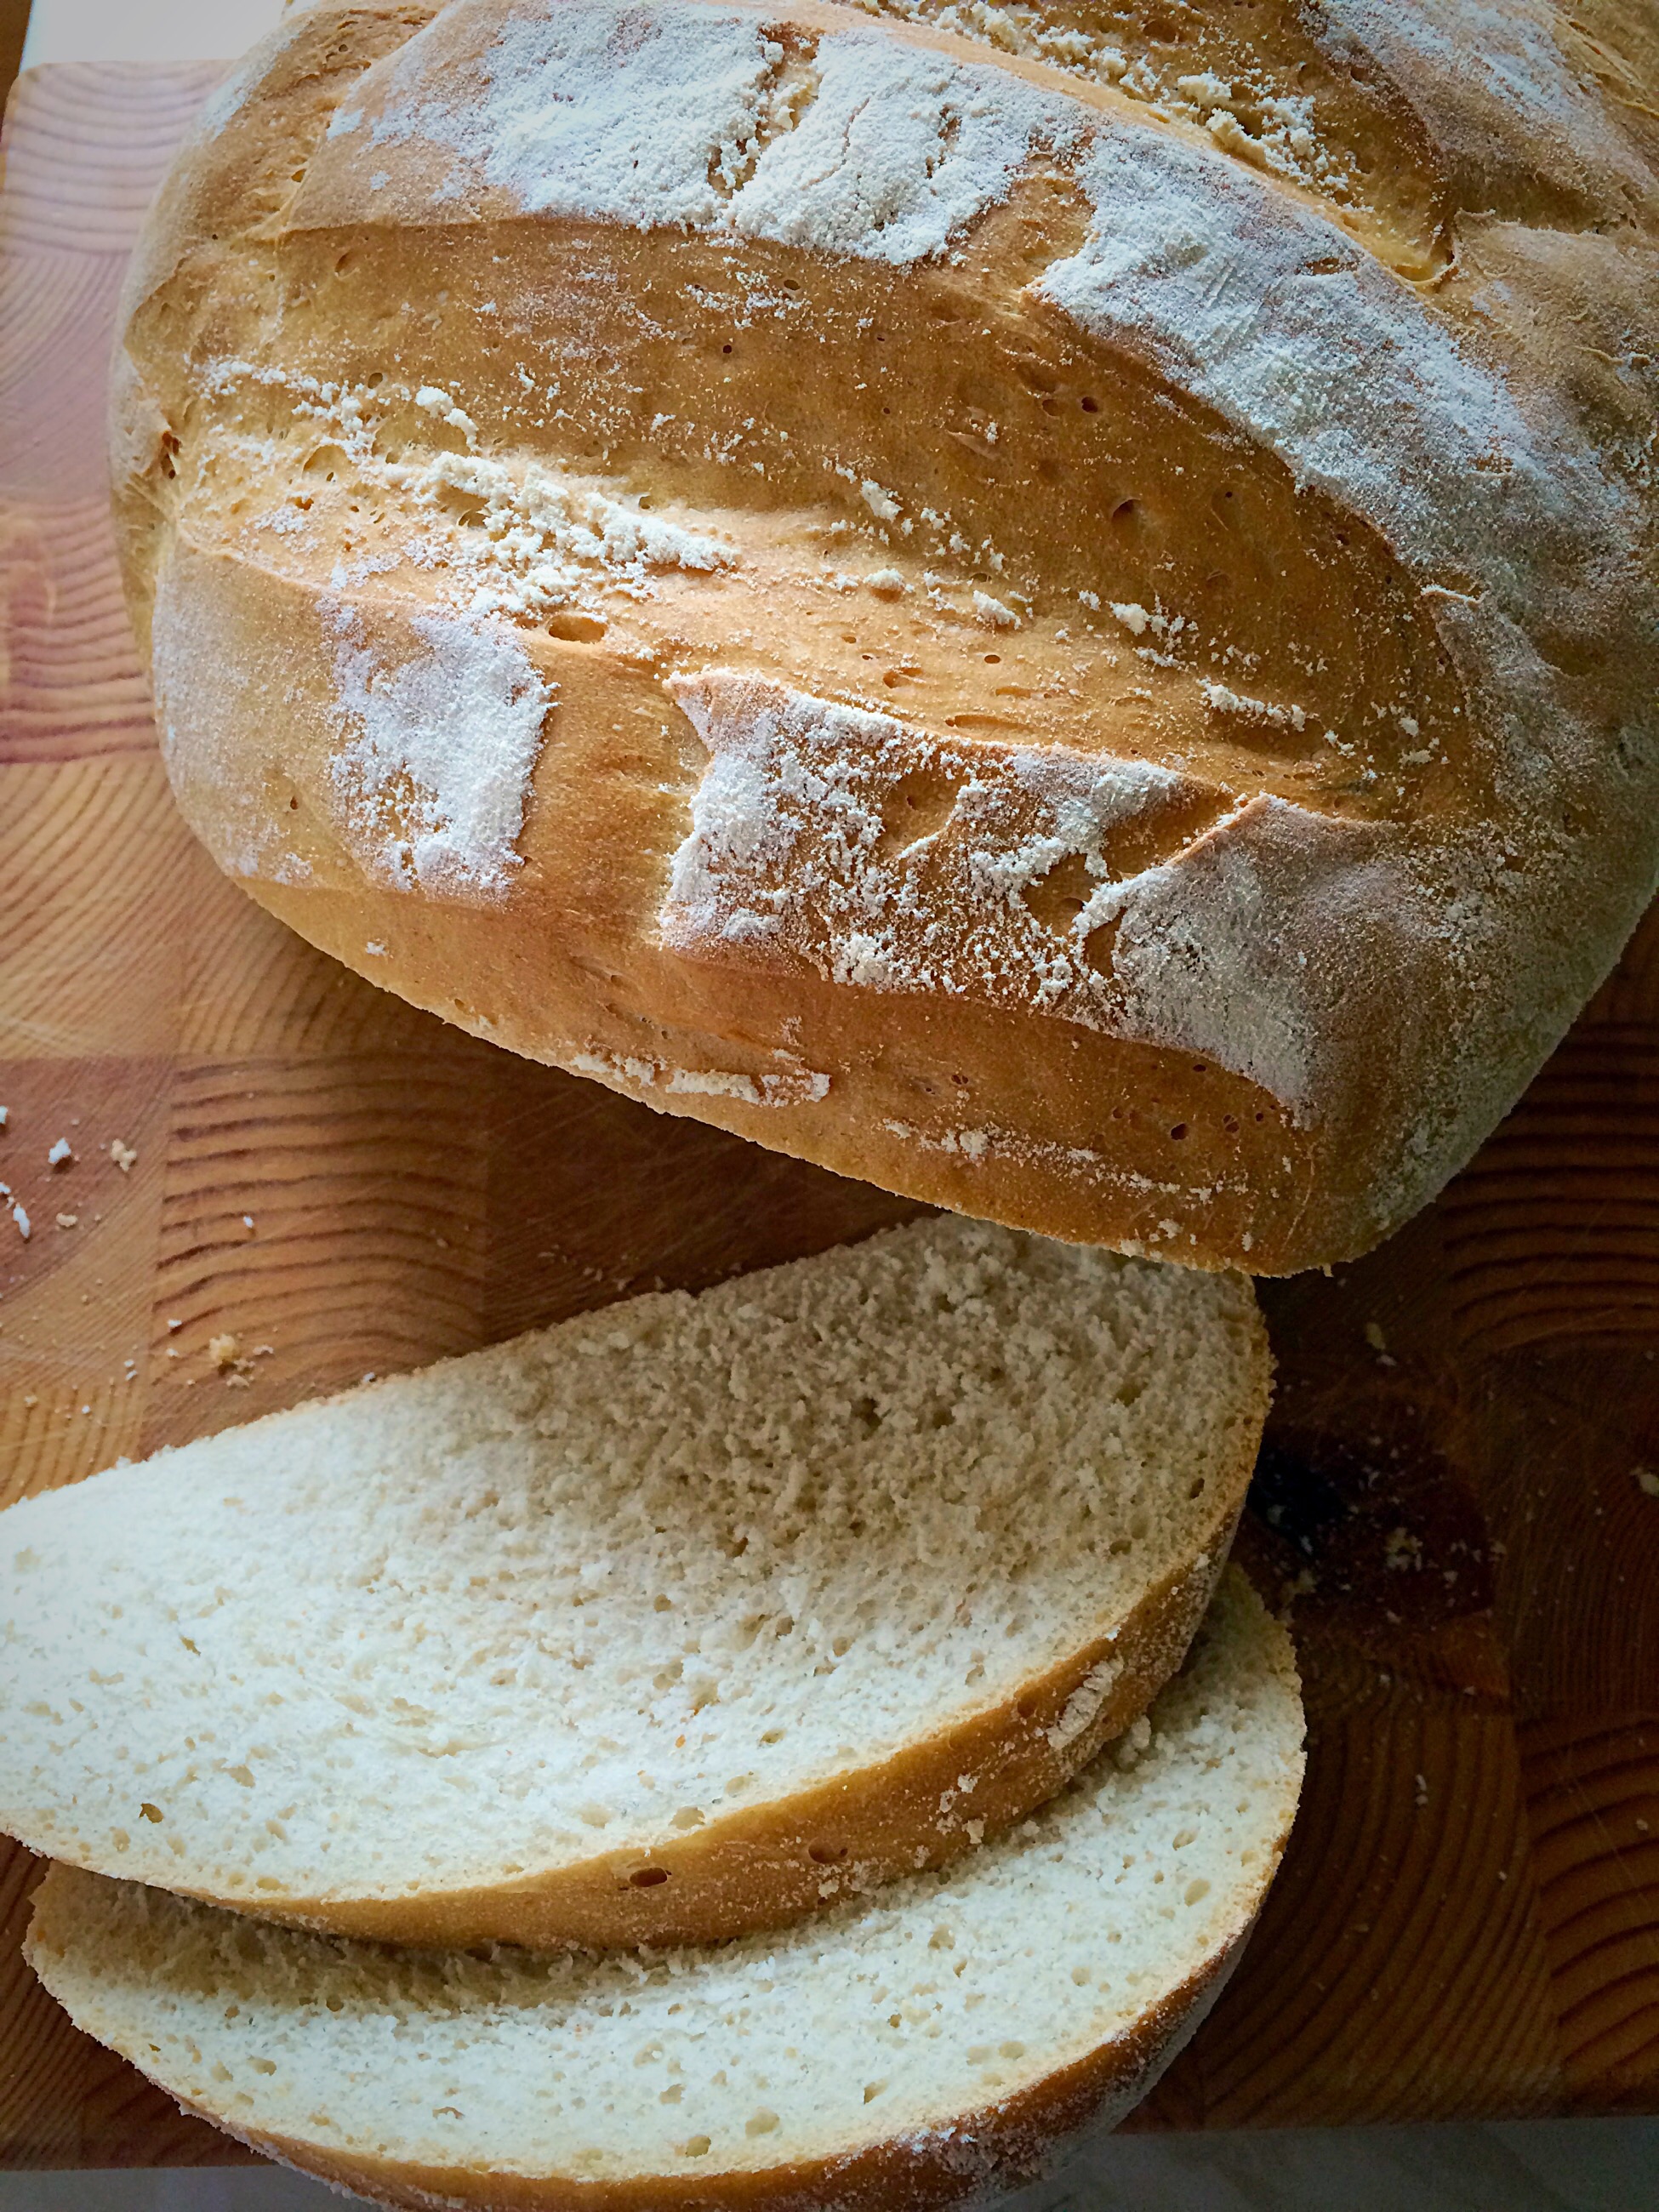
Leave the bread to completely cool before cutting it.

Easy white cob loaf sliced on a wooden board.

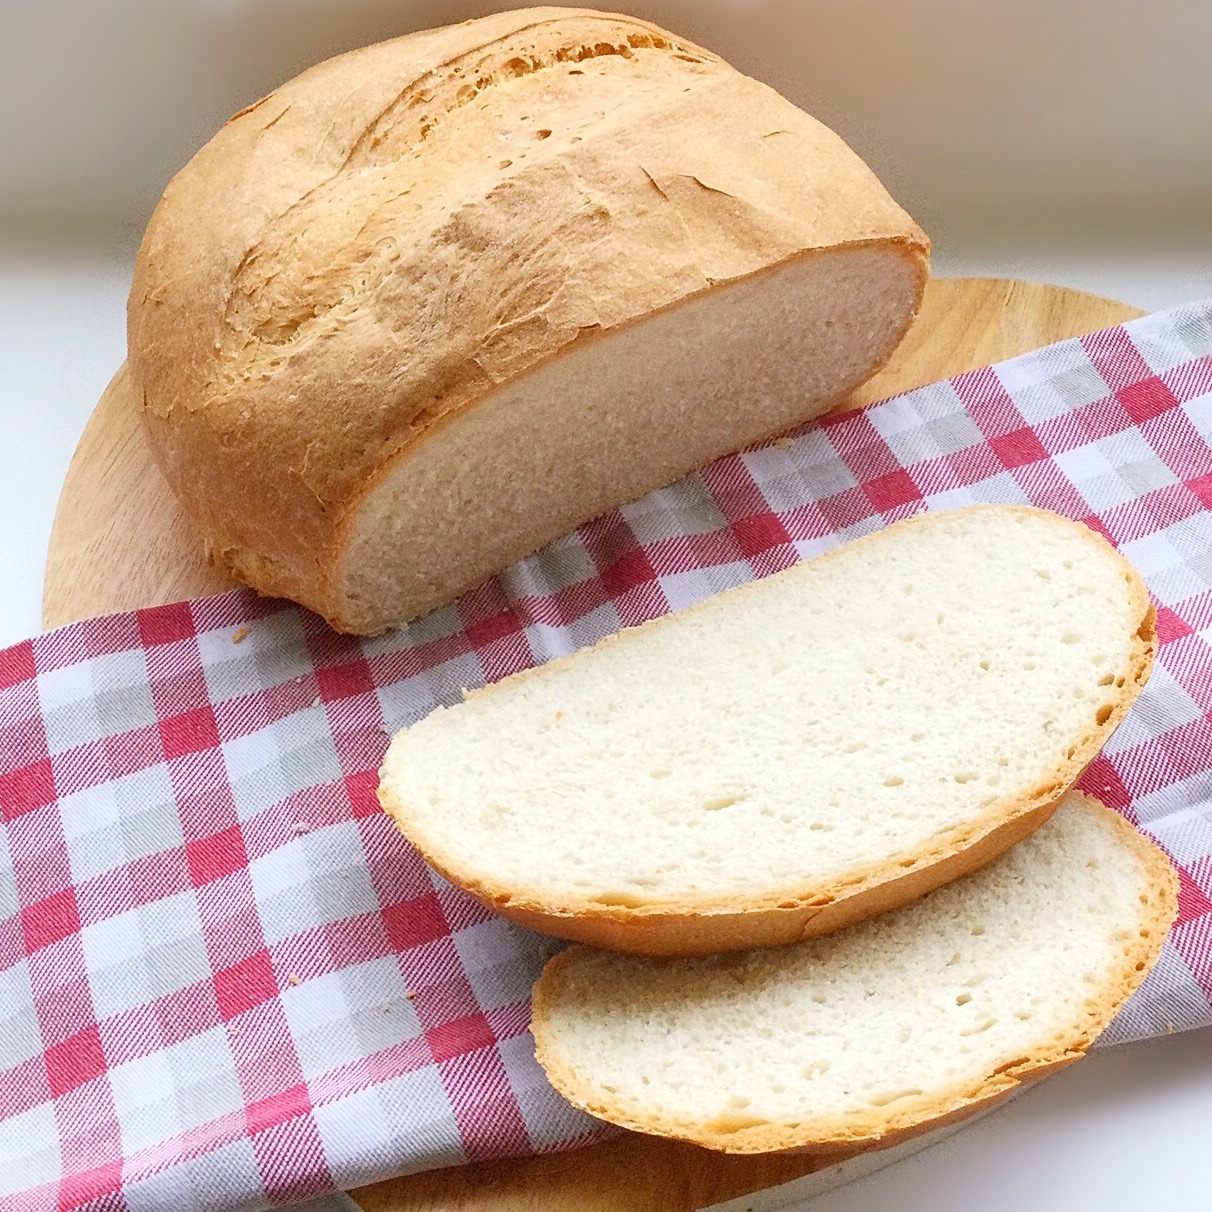
Attempting to cut hot or warm bread will cause it to lose it’s structure and collapse as it’s cut.

Easy white cob loaf - crusty bread sliced on a wooden board.

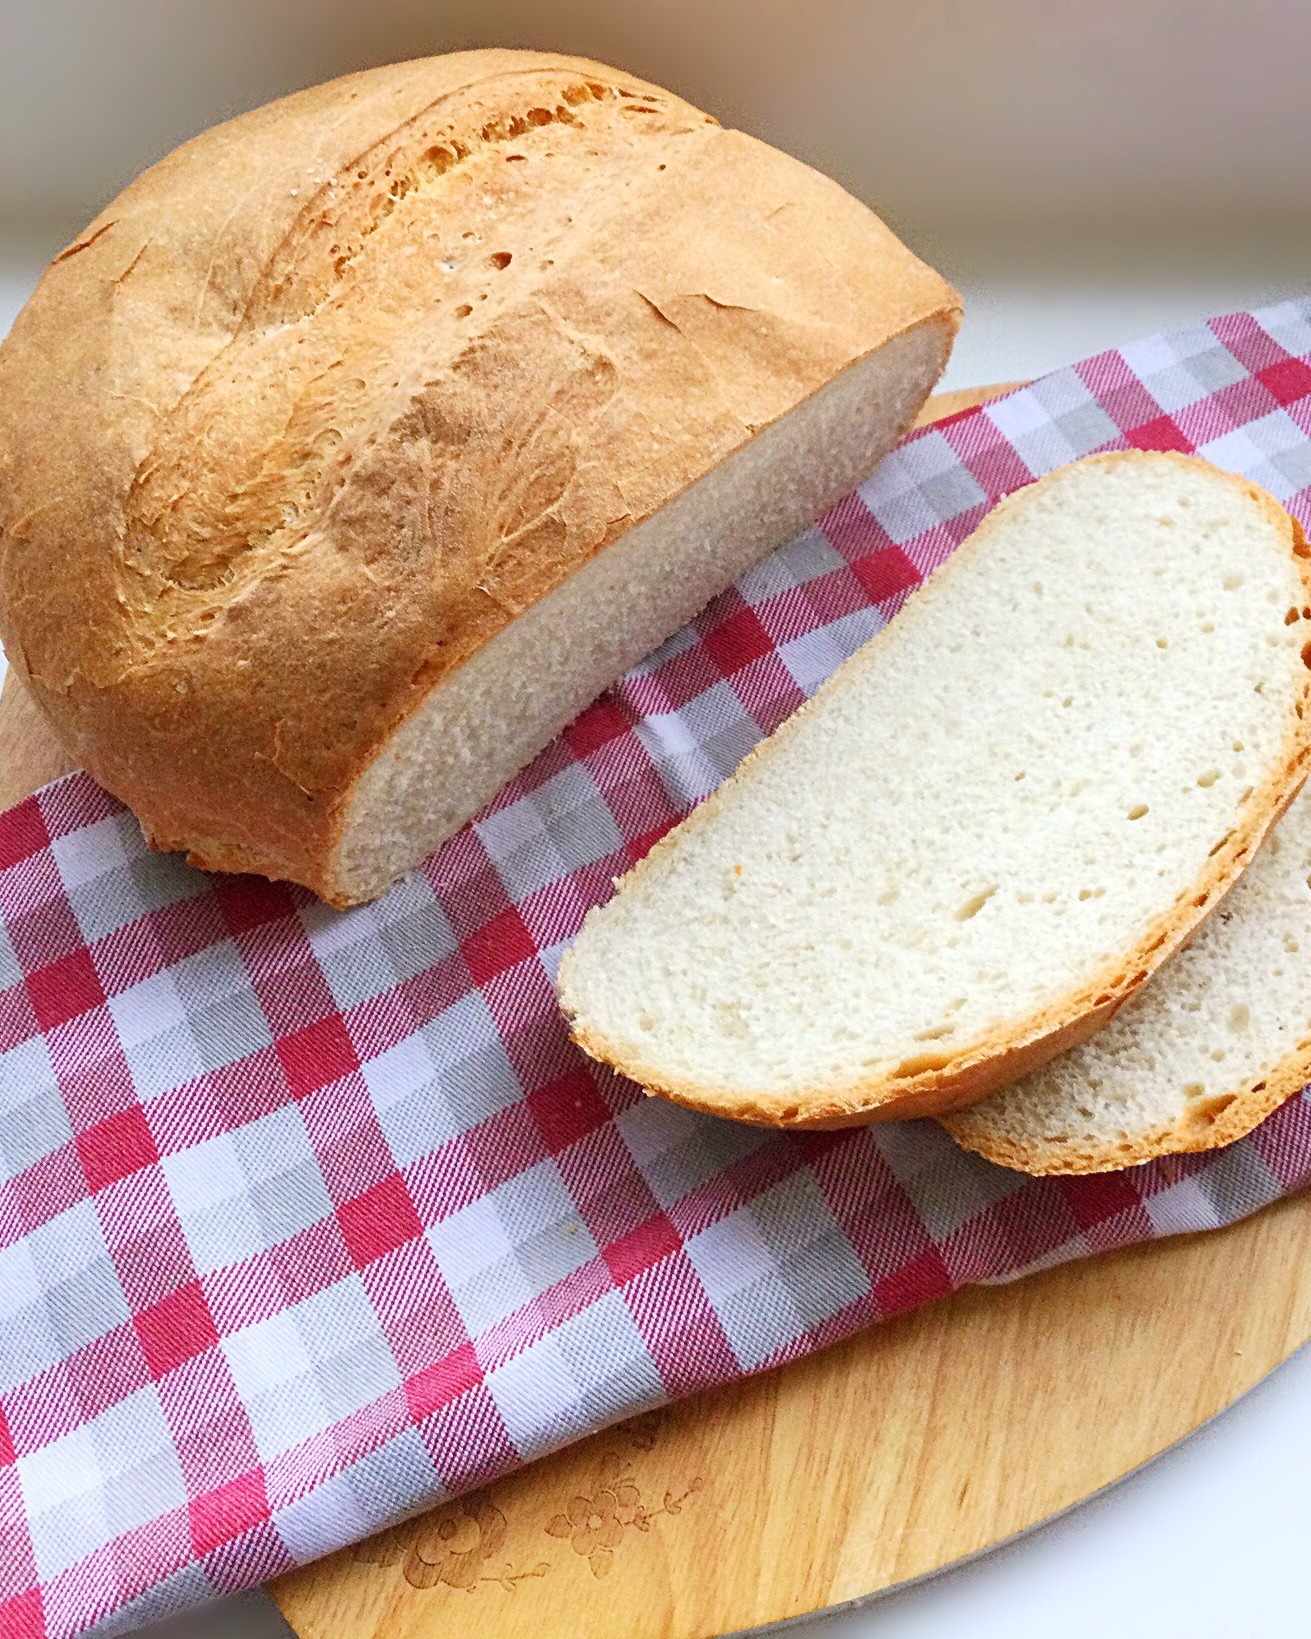
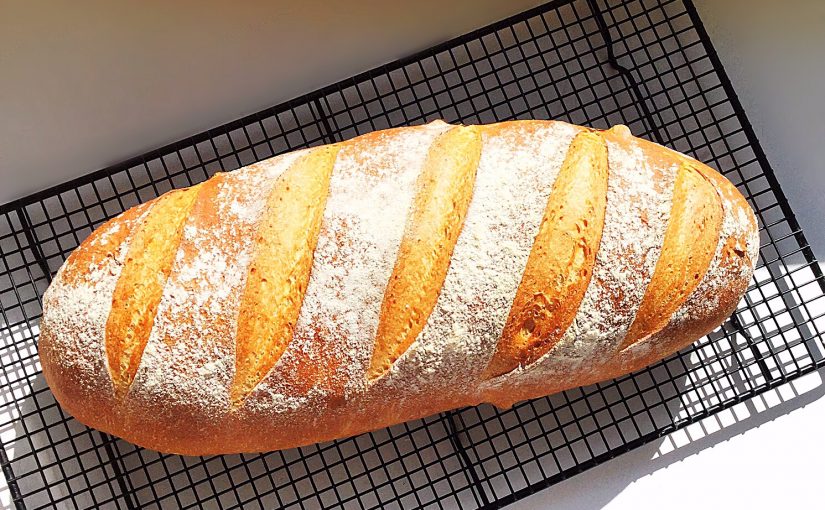
Beautiful, easy to cut, crusty bread.

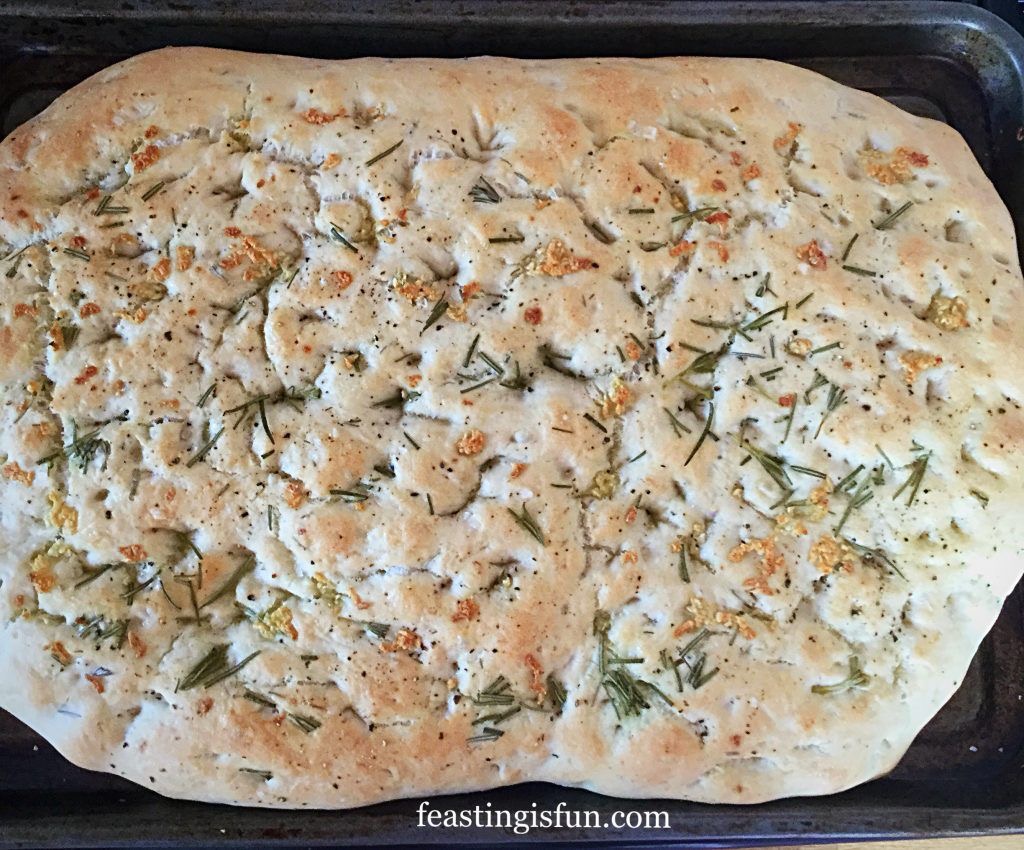
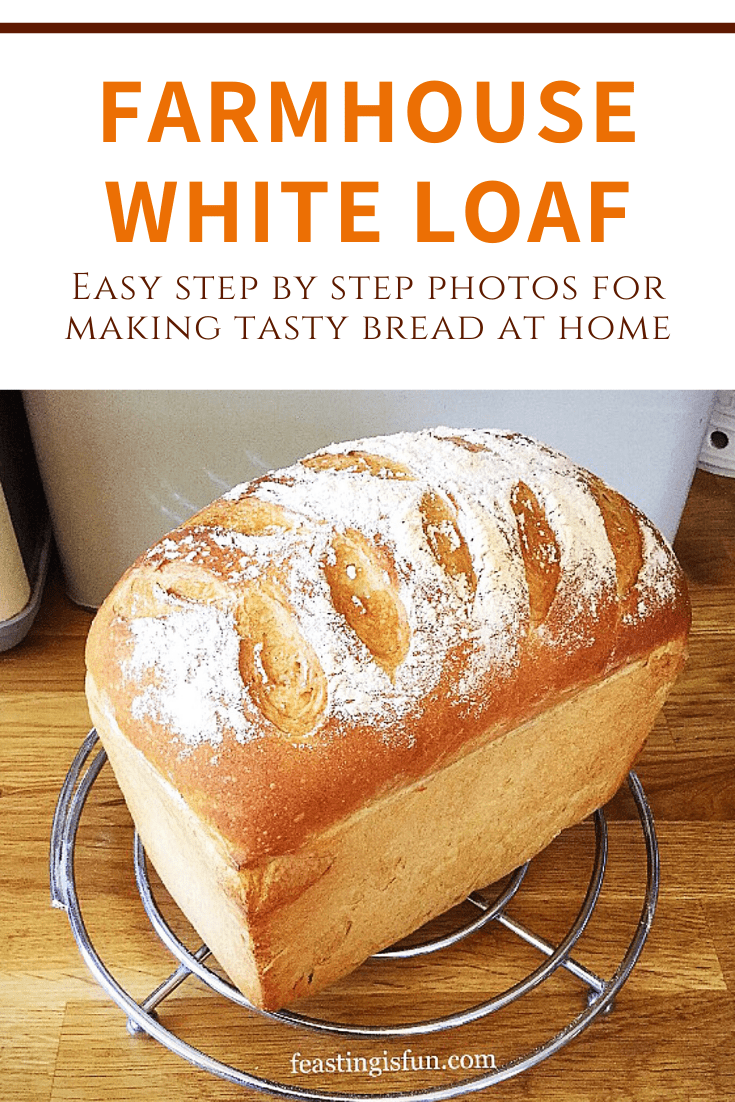
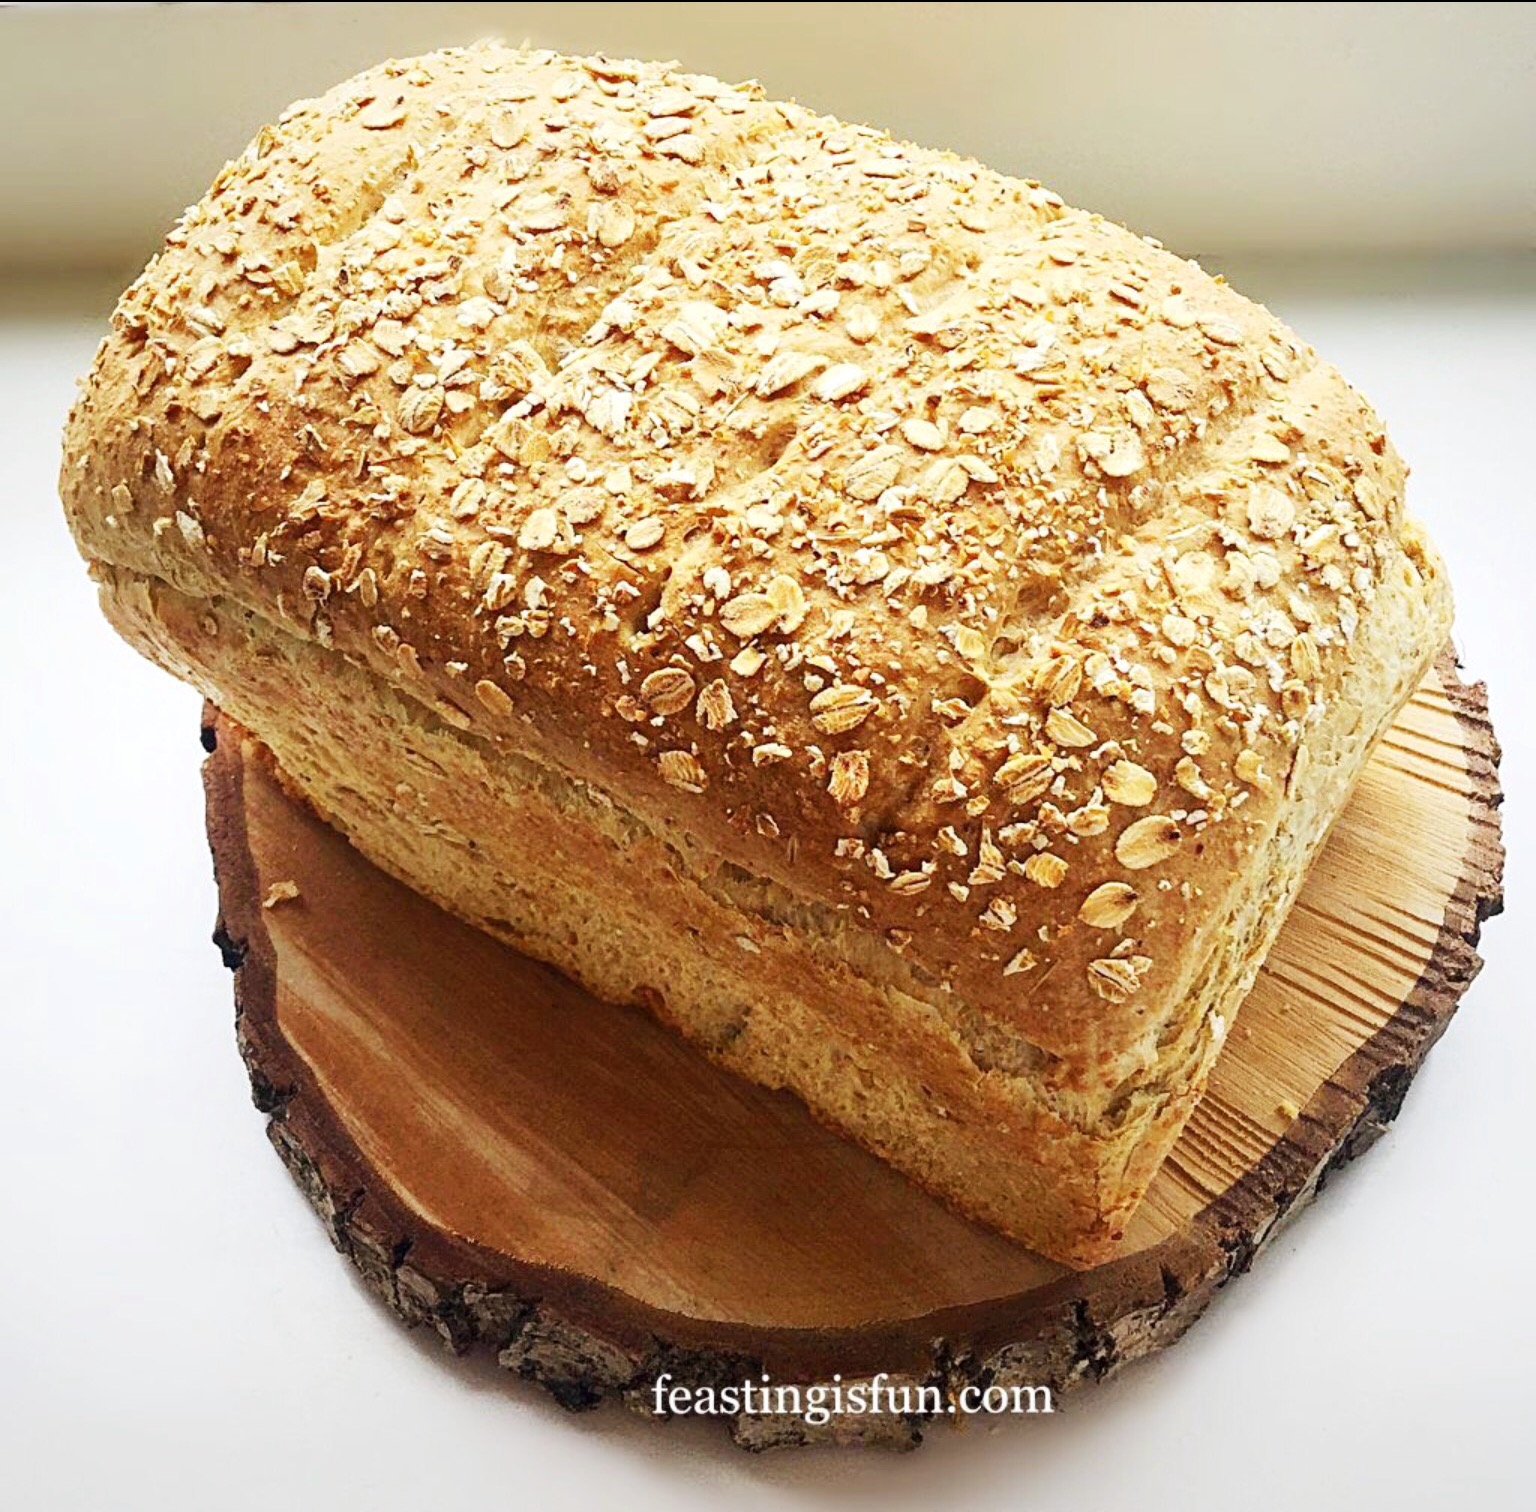
If you have enjoyed this recipe for Easy White Cob Loaf you may also like these:

Seeded Cob Loaf

Seeded Cob Loaf on a wooden board.
Seeded Cob Loaf

Farmhouse White Loaf

Farmhouse White Loaf

Large White Bloomer

Large White Bloomer on a cooling rack.
Large White Bloomer

Since making bread is a passion of mine, sharing recipes, with you the reader, is important to me. Everyone who wants to should be able to make bread using simple, affordable ingredients. Equally important are clear, concise recipes with photographs. Together these aid confidence in the baker through each stage of the recipe, turning fear into fun!

So, whatever you are making, baking and creating in your kitchens, have fun preparing and sharing your feast.

Sammie x

No part of this post may be reproduced or duplicated without the written permission of the owner. Please see my Disclosure Policy.


Share
Facebooktwitterpinterestlinkedintumblr

Large 3 Malts Sunflower Loaf

Share
Facebooktwitterpinterestlinkedintumblr

Many of you may have realised by now, that I love baking bread. Especially as the smell and taste, is far superior to any supermarket loaf. Also, no unnecessary additives are added to home baked breads. Finally, having been asked numerous times for the recipe to make my Large 3 Malts Sunflower Loaf here it is! A tasty, family sized loaf of bread that’s ideal for sandwiches and toast.

FF Large 3 Malts Sunflower Loaf
Large 3 Malts Sunflower Loaf utterly delicious.

Since I have been asked a few times if I’m sponsored by Shipton Mill I will set the record straight, I am not. Yet their’s is simply THE best bread flour I have ever used. And I adore that their 3 Malts with Sunflower flour blend gives the loaf a chewy, nutty, malt flavour, without the heaviness of 100% wholemeal Flour.

Likewise, this Seeded Cob Loaf is also a tasty, semi wholemeal bread, that’s easy to make and bake and highly recommended.

Since I’ve baked this Large 3 Malts Sunflower Loaf a number of times now, I’ve found it to be consistently good. Resulting in a fantastic, family sized bread, that slices well and tastes great toasted, made into sandwiches, or buttered and served with soup.

Recipe: Makes one Large 3 Malts Sunflower Loaf

Note: A large plain white loaf can also be made using this recipe. Substitute an equal quantity of Strong White Bread Flour and follow the recipe and method as given.

750g 3 Malts with Sunflower Flour from – Shipton Mill – Alternately use a malted bread flour mix and add 3tbsp of sunflower seeds.

530mls Tepid Water

12g Fast Action Dried Yeast – I use Allinson Easy Bake Yeast

1.5tsp Runny Honey – alternatively use either the equivalent of Maple Syrup, or  sugar for a Vegan loaf

40g Softened Unsalted Butter – alternately use 2tbsp Rapeseed Oil (Canola Oil)

10g Sea Salt – I use Maldon

You will need a large 4lb loaf tin that’s been buttered for this recipe.

Making, Shaping And Proving The Malted Dough

  • First of all, place the water, honey and yeast into the bowl of a stand mixer with a dough hook attached.
  • Add the 3 Malts flour on top of the wet mixture in the bowl.
  • Next add the salt and butter – broken into small pieces.
  • Lower the dough hook and mix on low speed for ten minutes. The dough should be stretchy and coming clean away from the sides of the bowl.
  • Lift up the dough hook and scrape any dough off, using your fingers, into the bowl.
  • Remove the dough hook and cover the bowl with a clean tea towel.
  • Leave the dough to prove in a draught free place until it is doubled in size.
  • Lightly dust the worktop with flour.
  • As soon a the dough has doubled in size, using a clean, flour dusted hand, tip the dough on to the work top, easing it out of the bowl with your hand.
  • Flatten the dough slightly and fold the bottom third up and the just over the top third down. Rotate 90 degrees and repeat.
  • Turn the dough over and tuck any edges underneath so that you have an oval shaped piece of dough.
  • Place the shaped dough into the buttered bread tin and cover with a clean tea towel.
FF Large 3 Malts Sunflower Loaf
Shaped and tucked into it’s tin.
  • Place the covered dough in a warm, draught free place until doubled or tripled in size.
    As this loaf starts to rise above the tin put the oven on to preheat at 230C/210C fan, gas mark 8, 450F.

Making The Large 3 Malts Sunflower Loaf

  • As soon as the loaf has risen well and is above the edge of the pan place in the centre of the hot oven and bake for 30 minutes.
FF Large 3 Makts Sunflower Loaf
Large 3 Malts Sunflower Loaf 3 times its original size and ready for the oven.
  • You can check your loaf at 25 minutes. It is baked when golden brown and sounds hollow when rapped on the base with your knuckle.
  • For a deeper, darker crust, tip the loaf out of the tin and bake for a further 10 minutes directly on the oven shelf.
  • Once baked to your liking, remove the bread from the oven and place on to a cooling rack.
FF Large 3 Malts Sunflower Loaf
Freshly baked Large 3 Malts Sunflower Loaf.

You simply cannot get the smell of freshly baked bread at home, well, without freshly baking it yourself!

During the summer, I cover the loaf with a net food tent to keep flies and bugs off.

Finally, leave the bread to cool completely before slicing. Not only will the bread slice better, it is also said to be better for digestion.

FF Large 3 Malts Sunflower Loaf
Large 3 Malts Sunflower Loaf so flavourful.

I had a delicious slice of this bread toasted, with jam, for breakfast this morning. Sitting and relaxing in our garden, cup of coffee in hand, watching the bees and butterflies, while munching away!

Note: For a smaller loaf use the weights and timings for the Lighter Wholemeal Loaf.

Homemade bread is so easy using a stand mixer. Alternatively, you can by always make this loaf by hand.

If you have enjoyed the recipe for this Large 3 Malts Sunflower Loaf here are some others you may enjoy too:

Lighter Wholemeal Loaf

FF Large 3 Malts Sunflower Loaf
Lighter Wholemeal Loaf a balance between white and wholemeal bread.

Large White Bloomer

Family sized white bloomer loaf cooling on a rack.
Large White Bloomer

Farmhouse White Loaf

FF Large 3 Malts Sunflower Loaf
Farmhouse White Loaf the best everyday white bread you’ll ever need!

Importantly, the process of making bread, for me, is really enjoyable and fun. Also, if you look at the ingredient list on any standard, plastic wrapped loaf and compare it to mine, prepare yourself for a shock!

As you begin to routinely make your own bread, it will become easier to double the recipe and make two loaves. Resulting in an extra loaf for the freezer and lessening the need to buy a loaf from the supermarket. Most importantly, the nutritional quantity and flavour homemade bread is far superior and less expensive than it’s supermarket counterpart.

So, whatever you are making, baking and creating in your kitchens, have fun preparing and sharing your feast.

Sammie xx

No part of this post may be reproduced or duplicated without the written permission of the owner. Please see my Disclosure Policy.

Family size malted bread with seeds.

Share
Facebooktwitterpinterestlinkedintumblr

Farmhouse White Loaf

Share
Facebooktwitterpinterestlinkedintumblr

Is there anything better than the smell and taste of freshly baked bread? This Farmhouse White Loaf is utterly delicious. If you’ve never baked bread before, read on and let me encourage you to give it a go.

Baking your own bread is such a rewarding experience. From a few simple ingredients, mixed together, the bread literally grows before your eyes.

This Farmhouse White Loaf is the perfect recipe to start with, if you have never made your own bread before.

You will need a loaf tin to bake your bread in. I recently reviewed a British company, that sells British manufactured bakeware you can read it here.

British Bakeware sell a range of loaf tins, my favourite and the one used for baking this loaf is the 3lb deep farmhouse loaf tin.

Farmhouse white bread loaf


Farmhouse White Loaf – Bread Baked In A Regular Oven

The advantage of having a deep loaf tin is, no muffin topped loaves. In the past I have baked bread in tins that weren’t as deep as this one and the bread rose and billowed out, like a mushroom. I’d have to cut away the sides of the bread, where it had stuck to the outside of the tin. Not they way to bake a great looking loaf!

The instructions given below for making this bread are, by hand (which everyone should do at least once in their lifetime), or using a stand mixer/bread maker to carry out the mixing, kneading and knocking back.

Personally I prefer bread baked in the oven. I have baked many a loaf in a bread maker, however, I never seem to get the gorgeous, crunchy crust, that I achieve with an oven baked loaf. Plus bread maker bread is always a little soft for my liking and there’s the inevitable hole in the bottom of the loaf where the mixing paddle is!

Bread dusted with flour and lightly scored to create a pretty finish once baked.
Farmhouse White Loaf

Bread As It Should Be – Without Unnecessary Additives

If you like baking bread in a bread maker I am most certainly not going to judge you. Any bread baked at home is infinitely better than plastic wrapped, pre-sliced, mass produced bread! Aside from speciality breads like my Tomato Thyme Garlic Focaccia, bread should contain nothing more than flour, water, yeast, salt, water and a little oil or butter.

Read the ingredients on the back of a shop bought loaf and you will be amazed at all the additives.

Baking your own bread is easy, once you get into a routine. Even when baking by hand, it still only takes 20 minutes, hands on time, to get a loaf ready to be baked. Once you taste real, homemade bread, it’s hard to go back to the bought stuff – that said, I’m a realist and I usually have a bought loaf stashed in the deep freeze for days when my body is playing up (see here). So I won’t judge!!

Farmhouse White Bread Loaf

Helpful Bread Making Tips

Just a quick tip: if you do start to bake bread regularly, it can pay to bulk buy your bread flour. I use organic flour that is stone ground, from Shipton Mill currently I buy it through Amazon UK using their subscribe and save, although Shipton Mill now have their own online shop. Buying in bulk, through Amazon UK, 5 x 2.5kg bags, means that we eat good quality, organic, stone ground British flour, for about 60 pence a loaf!

While I love baking with fresh yeast, the shelf life is very short, so I have used 7g sachets of fast action dried yeast. Alternatively, if you do use fresh yeast, simply double the quantity stated for dried.

Farmhouse White Bread Loaf

Recipe: Makes 1 Large Farmhouse White Bread Loaf

500g/1lb 2oz Strong White Bread Flour – I use Shipton Mill organic white flour

1 x  7g Sachet Fast Action Dried Yeast – I use Allinson Easy Bake in the green packet or pot

1tbsp Honey – alternatively use 1tsp regular sugar

320ml/11oz Tepid Tap Water (approx body temp)

7g Salt – I use Maldon Sea Salt

1 tbsp Rapeseed Oil (Canola Oil) – I use Kentish Oils alternatively add 25g/1oz of unsalted butter.

Farmhouse White Loaf – Making The Bread Dough

The ‘bowl’ is either a large bowl, with which to mix the bread by hand, or the stand mixer/bread maker bowl.

For all methods:

Pour the water into the bowl. Add the honey and yeast. Swish about with clean fingers to activate the yeast.

Add the flour on top of the liquid.

Add the salt and the oil/butter.

Bread Maker

If using a bread maker, set to dough cycle and start the program. Once the cycle is completed re-start for 2 minutes. This ‘knocks back’ the dough. Then remove the dough, shape into an oval/ball and place into a buttered loaf tin. Cover with a damp cloth, leave in a draught free place until doubled in size.

Stand Mixer – with dough hook attachment

If using a stand mixer, attach the dough hook and mix on medium speed until all the ingredients are combined. Continue to mix for a further 5 minutes, until the dough is smooth and elastic. Stop mixing. Scrape the dough from the dough hook and combine with the dough in the bowl. Form into a ball, place back into the bowl. Cover with a damp cloth and leave in a draught free place until doubled in size (approx. 1hour). Once doubled remove the cloth, mix for 2 minutes on medium speed using the dough hook. This ‘knocks back’ the dough. Remove the dough and form into an oval/ball shape, place into a buttered loaf tin. Cover with a damp cloth, leave in a draught free place until doubled in size.

By Hand

If hand mixing, bring all the ingredients together with your hand until they form a doughy mess! Place this dough onto a very lightly floured worktop. Knead for a good 10 minutes. If the dough gets sticky, keep kneading and working it – if you add extra flour the finished bread will be dry. After a good 10 minutes kneading, the dough should have a smooth elasticity. Place the kneaded dough into a buttered bowl, cover with a damp cloth and leave in a draught free place until doubled in size, 1-2 hours.

Shaping The Dough Ready For The Second Proof

Ensure the area that you are shaping your dough is draught free.

First of all lightly dust the work surface with flour

Tip out the dough, from its bowl, so the top of the dough is directly in contact with the worktop. This will help as we start to build tension within the dough.

Lightly flour your hands and pull out part of the sticky dough, then press it into the centre of the dough, as seen in the photos below.

Continue this process all the way around the outside of the dough until you have a smooth, rectangular shape, with no sticky sides.

Creating tension across bread dough after the first proof.

Shaping The Loaf

Using your fingers, lightly press the dough out into a square shape, roughly the same width as the length of your dough tin.

Fold the top third of the dough onto itself and then repeat with the bottom third of the dough, pulling it so that it overlaps the first fold.

Flip the folded dough over and tuck in the top and bottom to create an oval shape.

Shaping bread dough in stages.

Place the shaped dough, with the seams underneath, into the loaf tin.

Cover with a clean tea towel and leave in a draft free place until doubled in size.

Shaped bread dough in tin before and after second rise.

Baking Your Farmhouse White Loaf

10 minutes before the dough is ready to bake, preheat the oven to 220C/200C fan, gas mark 7, 425F. Also, place an inch (2.5cm) of water in a container and place on the bottom of the oven. This will create steam which allows the bread to rise more (known as oven spring ) before forming a crust.

Also, if desired, score the loaf before placing in the oven.

Place the loaf tin into the middle of the oven. Bake for 30 – 40 minutes. Tip the loaf out of the tin.

The bread is cooked when it has a deep golden crust and sounds hollow when rapped on the base with your knuckle.

For an extra crusty loaf place the bread directly on the oven shelf and bake for a further 5-10 minutes. Remove from the oven and place on a cooling rack.

Enjoy the wonderful aroma of baking bread as it fills your kitchen. That alone is worth baking this bread for!

Farmhouse White Bread Loaf

Enjoying Your Farmhouse White Loaf At It’s Best

Allow the Farmhouse White Loaf to cool completely before slicing. I know it is sooo tempting to tear into the hot, freshly baked loaf, but if you do the bread will all squidge (is that a word??) together and be very hard to slice.

Give yourself a big pat on the back for making a cracking loaf!

You deserve it.

White Sandwich Bread sliced
Farmhouse White Loaf

This was not a sponsored post. All opinions are my own and recommendations for products are purely from my own personal experience.

Bread is a staple in so many homes, treat yourself to a home baked loaf and I promise you won’t regret it.

FF Farmhouse White Loaf
A Farmhouse White Loaf slashed after the second prove.

Here To Help You Bake The Perfect Bread

I do not presume to be an expert, however, I have baked a fair few loaves over the years. Please ask if you are having any problems, need guidance or reassuring?

Either leave a comment or tweet (@sammiefeasting) me a question. I will do my very best to help.

If you have enjoyed this recipe for Farmhouse White Loaf you may like to try these:

Oat Bran White Bread

FF Farmhouse White Loaf
Oat Bran White Bread

Easy Homemade Cottage Loaf

FF Farmhouse White Loaf
Easy Homemade Cottage Loaf

Garlic Rosemary Focaccia Bread 

FF Farmhouse White Loaf
Garlic Rosemary Focaccia Bread

While baking bread is not only a satisfying and tasty experience, it can also work out much cheaper than buying a standard loaf at the shops. Also, you know exactly what has gone into your home baked bread. And, the more bread you make, the better you will become at making it. As you become confident baking a  white loaf you can get creative and try other bread recipes. Although, I should issue a warning, bread making can become addictive!

So, whatever you are making, baking and creating in your kitchens, have fun preparing and sharing your feast.

Sammie xx

No part of this post may be reproduced or duplicated without the written permission of the owner. Please see my
Disclosure Policy.

Freshly baked white bread with descriptive graphics.

Share
Facebooktwitterpinterestlinkedintumblr

Large White Bloomer

Share
Facebooktwitterpinterestlinkedintumblr

Hello and thank you for stopping by. I’m so excited to share my recipe for a Large White Bloomer bread today. Because, this bread is easy to make and even easier to eat!

Freshly baked crusty, organic, white bread on a cooling rack.
Large White Bloomer

I was inspired to make this Large White Bloomer by a loaf I saw on Twitter. Ooh it looked good and I knew I had to try and make my own loaf. And I am so glad that I did. Because now I get to share the recipe with you.

Large White Bloomer

You may wonder why you should make your own bread? Since most supermarkets sell freshly baked bread and most high streets still have a bakery. Yet, I can honestly say that nothing beats the taste and smell of fresh, homemade bread. Also, you know exactly what has gone into your loaf. Have you looked at the ingredient list on plastic wrapped bread lately? Even supermarket bakery bread contains flavour enhancers, flour improvers and all manner of other additives that aren’t present in a home baked loaf.

While you may not bothered by the additives in shop bought bread, what about the cost? My Large White Bloomer is made with organic, stone ground flour and costs no more than £1.00 to make! Have I got your attention now?


Large White Bloomer www.feastingisfun.com


A Tasty And Cost Effective Bake

Since we are a family of five we eat a lot of bread. So, it is simply too cost effective for me NOT to make our own bread. No we don’t eat all organic food. And yes, I do occaisionally buy bread. Although, everytime I do it reminds me why I bake my own. It takes very little time, especially if you use a bread maker or stand mixer to do the kneading/mixing part for you. Even if you knead by hand, double up on this recipe, pop one loaf in the freezer and timewise you’re quids in.

Have I convinced you? What I love about this Large White Bloomer is, the only piece of baking equipment you need is a baking tray. Also you will be able to make and bake my Seeded Cob Loaf.

Recipe : Makes 1 Large White Bloomer

400ml/14 fl oz Warm Water – body temp.

10g/3tsp/1.5 Sachet Dried Easy Bake Yeast – I use Allinson

2tsp Honey

675g/1.5lb Strong Plain White Flour, plus extra for dusting and rolling

10g/1.5tsp Salt – I use Maldon

25g/1oz Unsalted Butter – alternatively use 1 tbsp Rapeseed Oil (Canola Oil)

Method :

Note : if making by hand, knead the dough for 10-15 minutes before proving. The dough will be sticky to start but continue kneading and it will transform into a soft, pliable dough.

The ‘bowl’ refers to a large bowl for hand mixing, a stand mixer bowl, or a bread maker pan.

Making The Dough

Place the water into a bowl. Add the yeast and honey. Use your clean fingers to swish and mix everything together.

Add the flour. On top add the salt and butter.

In all methods stir the ingredients with the end of a wooden spoon 10 times.

Set your bread maker to dough cycle and start. When the dough cycle is complete, restart the mixing cycle on your bread maker. Allow to mix and knock back your dough for 5 minutes. Follow instructions with the photographs.

Attach a dough hook to a stand mixer. Mix on low – medium speed for 15 minutes. Stop the mixer, clean the dough off of the hook, form into a ball, place back into the bowl and cover with a damp cloth. Leave in a draught free place until doubled in size.

If mixing by hand bring all the ingredients together using one hand and proceed as above for kneading. Form the dough into a ball, place into a bowl and proceed as for stand mixer.

Shaping The Large White Bloomer

For stand mixer or hand mixed dough, once the dough is doubled in size, punch down into the bowl to knock back the dough. Hand knead the dough on a lightly floured surface for 5 – 10 minutes until the dough is elastic and smooth.

Whichever method you use, as soon as the dough has been knocked back and mixed or kneaded, place on a lightly floured surface.

On a floured surface form the dough into a ball.
Roll the dough out until it is 2.5cm/1" thick.
Roll the dough out until it is 2.5cm/1″ thick.
Fold the top third, like an envelope.
Fold the bottom third up and over the top third.
Turn the dough over, you should have a lovely bloomer shape. Place on a greased baking tray.
Using a sharp knife cut 4-5 slashes across the dough.
Dust the loaf with flour.

Proving The Shaped Loaf

I actually used the excess flour from the worktop to dust my loaf with. Because waste not want not!

Cover the loaf with a clean , dry cloth and leave again in a draught free place until doubled in size, mine took 45 minutes on a warm day, don’t worry if it takes longer. Because, the longer bread takes to rise (prove) the deeper the flavour.

15 minutes before your loaf is ready to bake, place a tray/grill pan in the bottom of the oven and fill with water. Preheat your oven to its hottest – 230C/210C fan, gas mark 8, 450F. 

When your loaf is doubled in size remove the towel.

Large White Bloomer ready for the oven.


Baking The Bread

Place your loaf in the middle of the preheated, steamy oven. Immediately turn the heat down to 220C/200C fan oven, gas mark 7, 425F and bake for 20 – 30 minutes depending on how dark you like your crust. My loaf was baked for 25 minutes.

When golden and crusty remove your Large White Bloomer from the oven.

Taking care, as the bread is extremely hot, turn it over and rap your knuckle against the base. The bread is baked if you hear a hollow sound.

Large White Bloomer a gorgeous, golden loaf.


Cooling The Bread – An Important Step

Transfer your bread to a cooling rack. Doing so will avoid it getting a soggy bottom. Breathe in deeply. And remember the smell. Because this is the wonderful smell of homemade bread and can’t buy that!

Large White Bloomer leave to cool on a cooling rack.


While it may be tempting to slice straight into your loaf, it’s better to leave it to cool completely as it will slice better. If you can’t resist tearing a chunk off go ahead. Also it may be a good idea to bake another loaf, as warm bread is addictive and easily snaffled!

Large White Bloomer golden crust, white crumb delicious www.feastingisfun.com
Large White Bloomer


Large White Bloomer homemade bread is the BEST! www.feastingisfun.com
Large White Bloomer homemade bread is the BEST!

For a healthier, lighter wholemeal bloomer use the following quantities:

  • 275g Strong Wholemeal Flour
  • 400g Strong White Flour

Make as per the instructions given above. To create the diamond effect score diagonally left to right and then repeat scoring from right to left. The bread may need 5-10 minutes longer baking time. The bread is baked when rapped on the base and sounds hollow.

Wholemeal Bloomer bread with criss cross scoring.

If you have enjoyed this recipe for a Large White Bloomer you may also like these:

Farmhouse White Loaf

Farmhouse White Loaf

Crunchy Seeded Bread 

Crunchy Seeded Bread

Oat Bran White Bread

Oat Bran White Bread


When I make bread for people as a gift (and I use the word make in it’s loosest term as my bread maker does the hard stuff) it always receives a rapturous welcome. And out of everything I bake it is probably the MOST appreciated.

If you make this loaf I’d love to see it. Find me on Twitter @sammiefeasting.

So, whatever you are making, baking and creating in your kitchens, have fun preparing and sharing your feast.

Sammie x

No part of this post may be reproduced or duplicated without the written permission of the owner. Please see my Disclosure Policy.

Extra Bread Shaping Tips

To make a longer, more uniform bloomer loaf, follow these steps.

Following the last fold of the dough, turn it over and roll the dough using both hands, while gently encouraging the dough to lengthen. Doing so will even out the dough, resulting in a longer, more uniform shape.

Place the dough onto a greased baking tray and cover with a clean tea towel. Leave to prove for 30 minutes, dust lightly with flour and then score across the dough five times.

Leave the dough to prove for a further 15 minutes and then bake in a preheated oven as given in the recipe.

Showing how to score dough to create beautiful baked bread.
Scoring through the dough.

Also, scoring the dough allows the bread to expand while baking. Not scoring the dough is likely to cause the bread to burst at its weakest point while baking, creating an irregular shaped loaf.

Pinterest image of a crusty bread loaf.

Share
Facebooktwitterpinterestlinkedintumblr