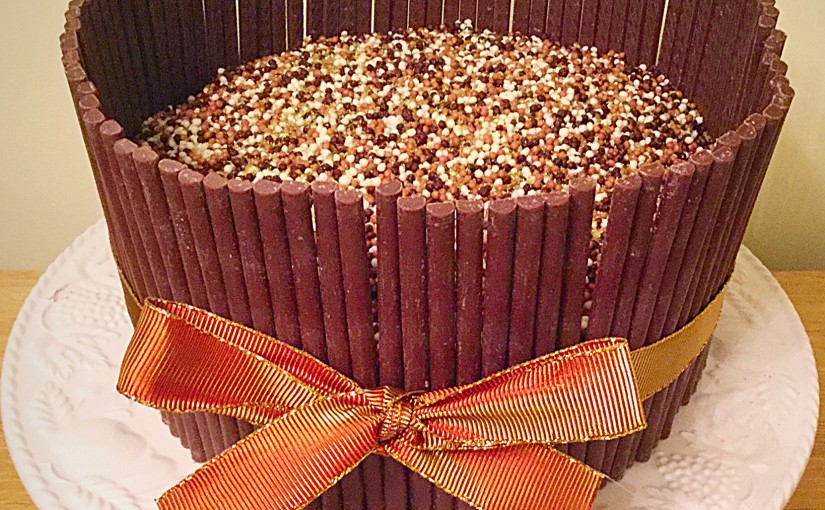
Today is Mothering Sunday, also known as Mother’s Day. A day set aside to give thanks and show love to those who have born and birthed us. Yet with surrogacy, adoption, step mothers, fostering and many other types of parenting, for me this day represents so much more. First of all, for me personally, the title of Mum, Mam, Mother or Mom, does not come with any accolade simply because a woman has carried and given birth to a child. It is a title earned through endless, sleep deprived nights, countless cuddles and reassurance. Most importantly though it is earned through the act of selfless love, loving so hard and still letting go. And today those are the women I celebrate and am celebrated with. So raise your glass and enjoy a slice of my Raspberry Lemon Celebration Layer Cake.
Thankful For My Family
While I am sitting here, enjoying a delicious slice of this Raspberry Lemon Celebration Layer Cake, I am also taking a moment to be thankful for being a Mum. Thankful for the laughter and fun that comes alongside the hard work and at times pain. The knowledge that I am part of a family unit, that starts with my husband and I and reaches out through our children, our siblings and what is to come. Most importantly knowing that I am unconditionally loved and accepted by my Heavenly Father, who is both mother and father to me.
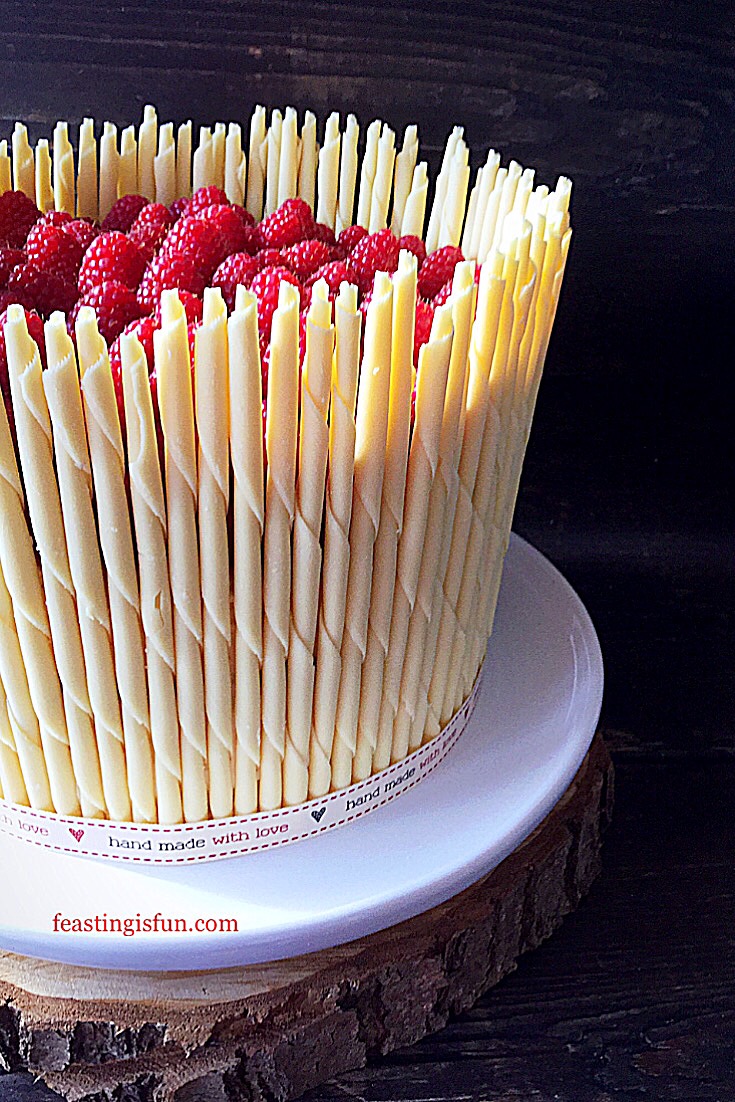
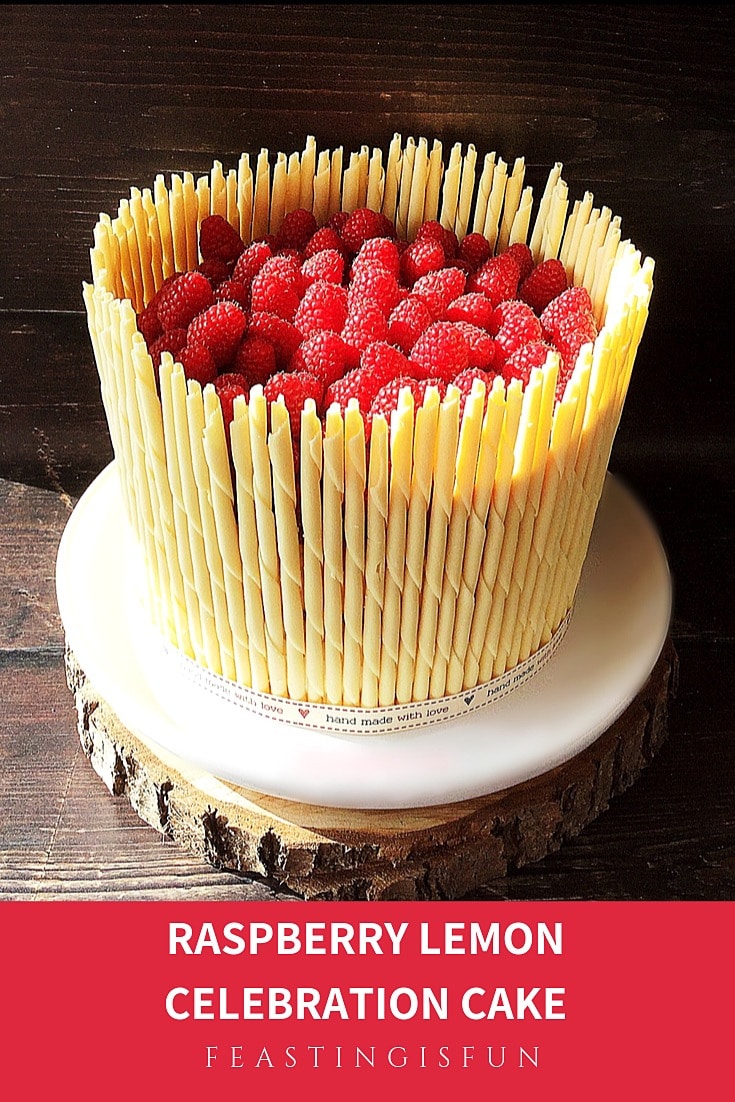
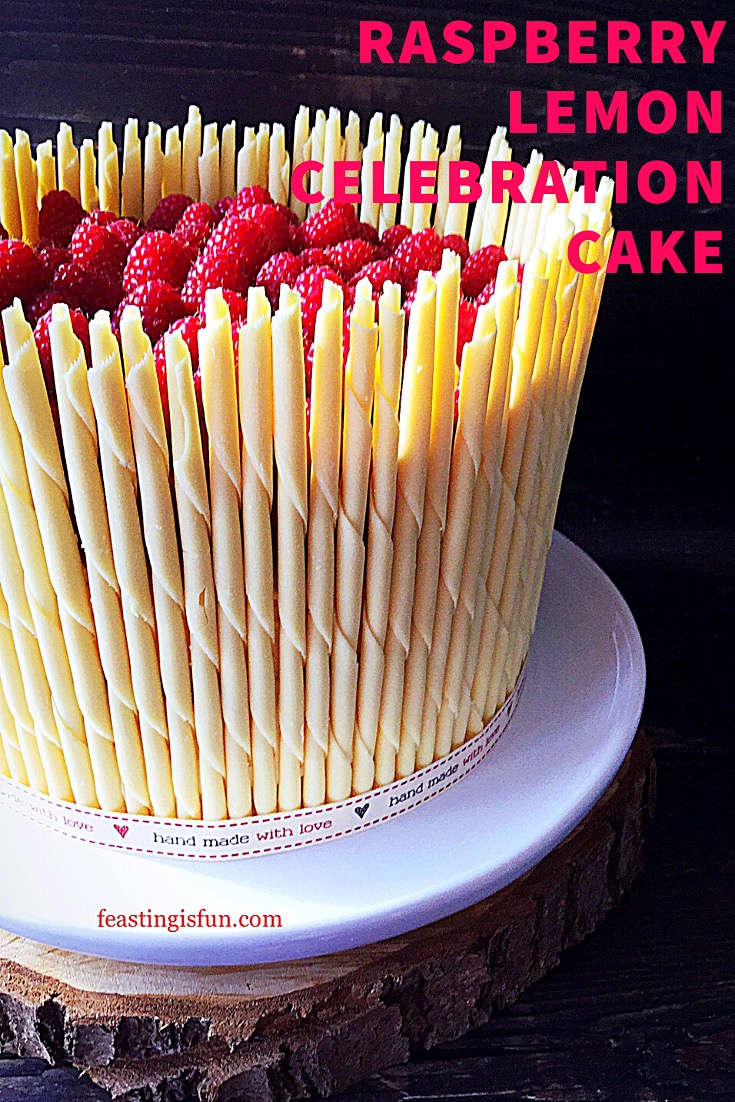
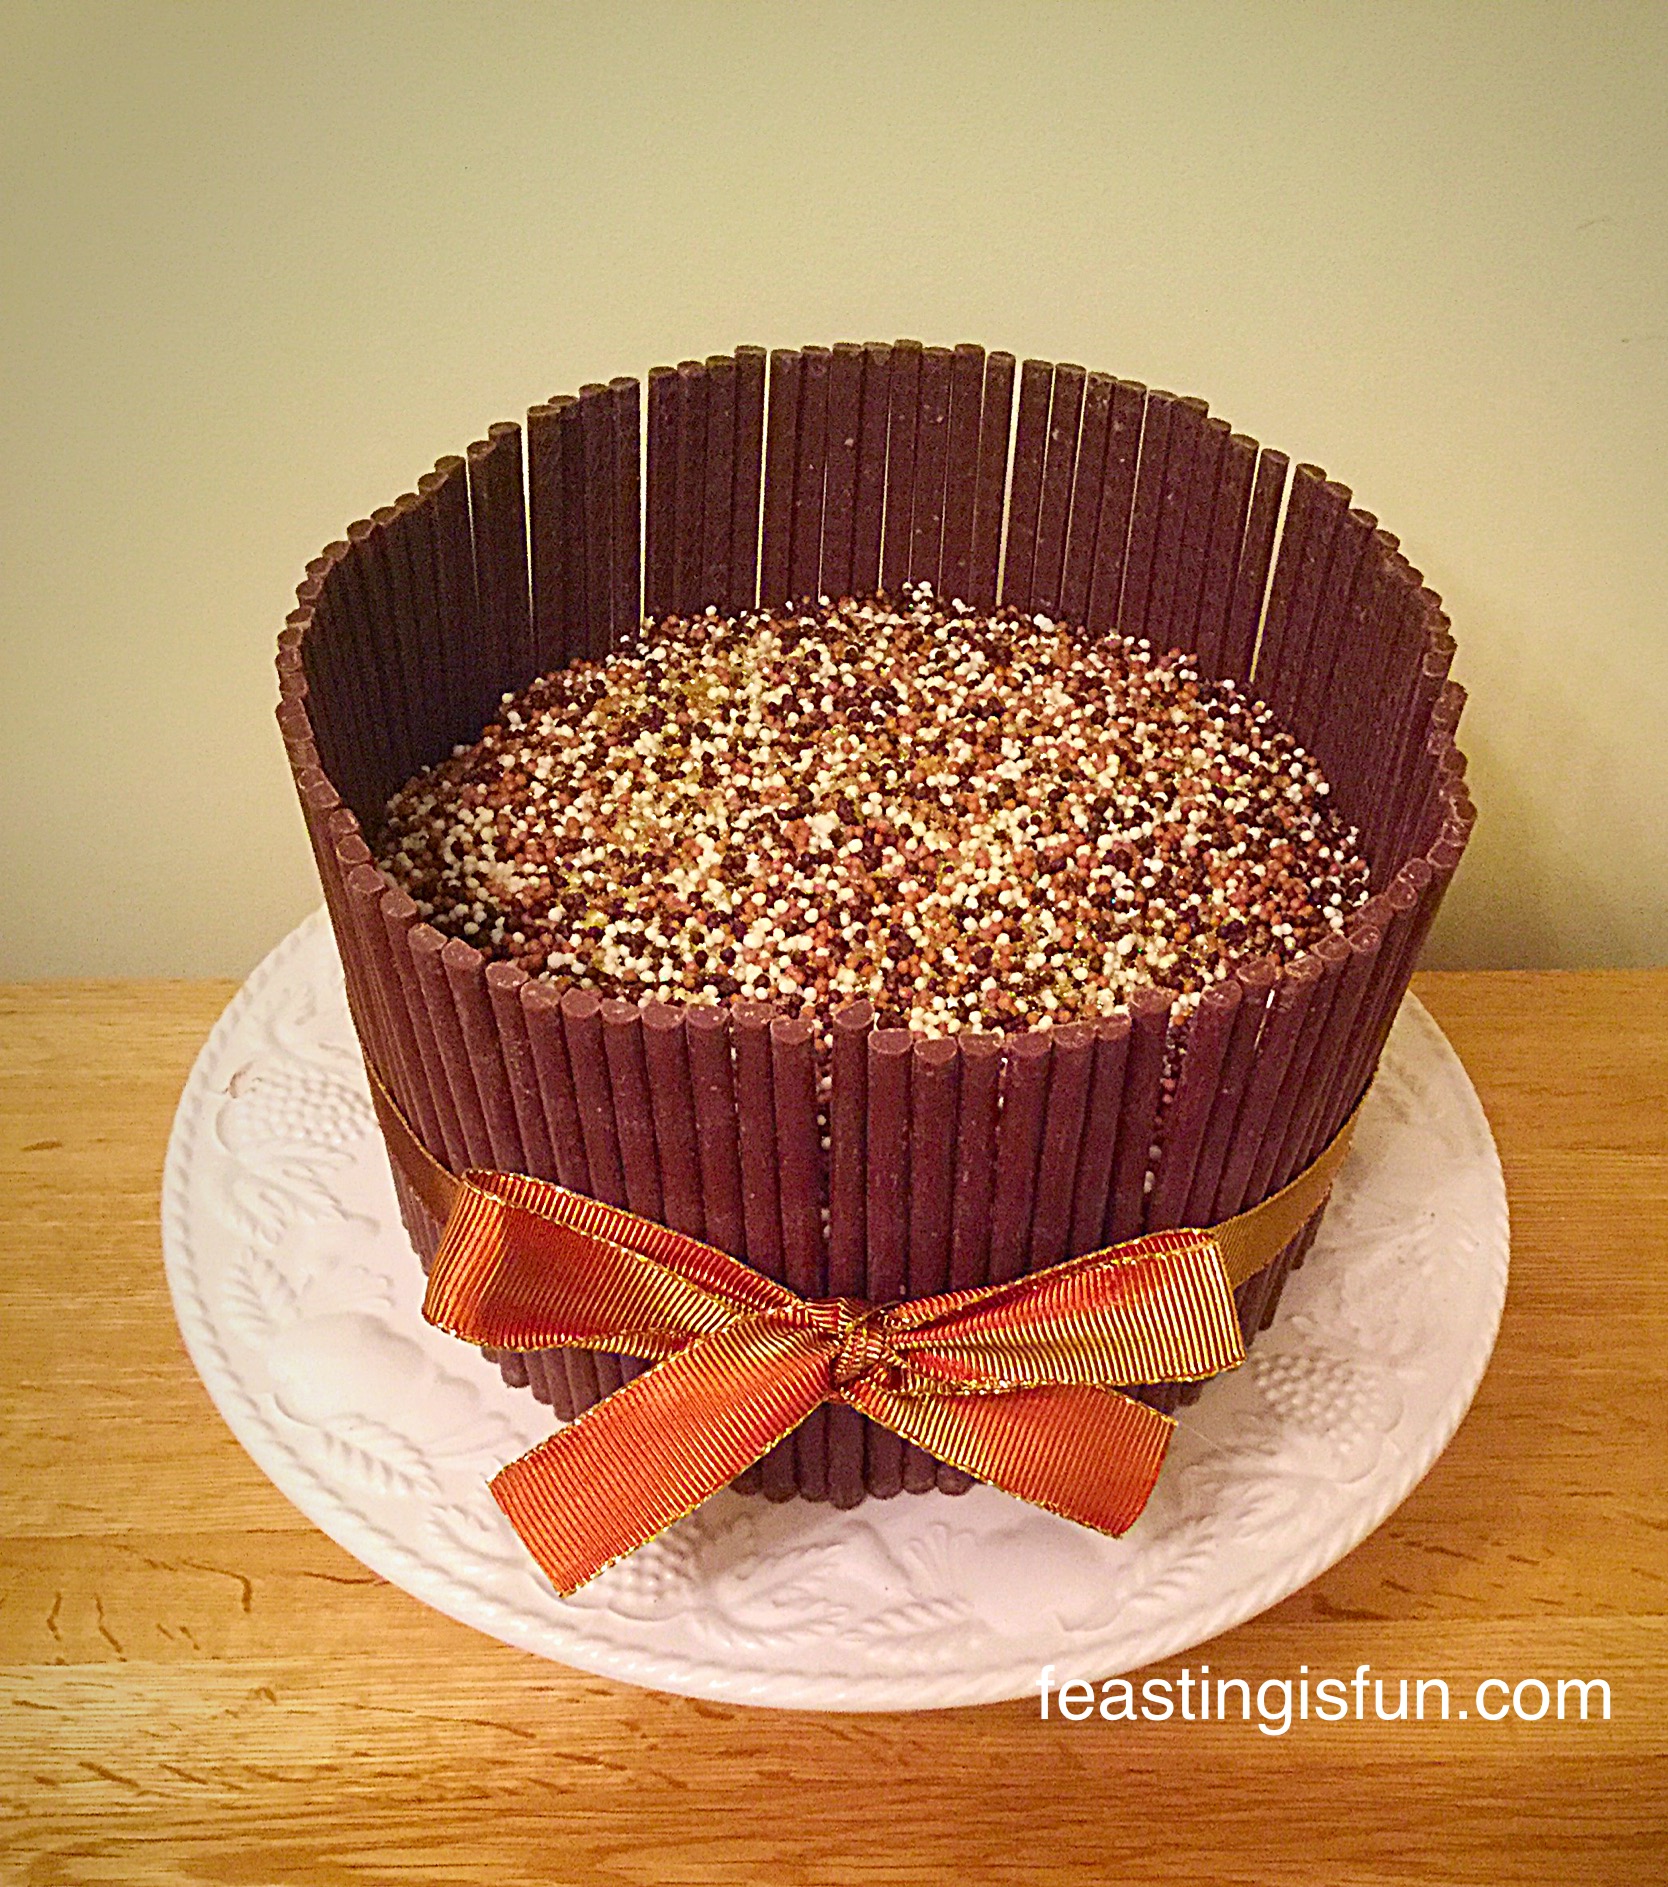
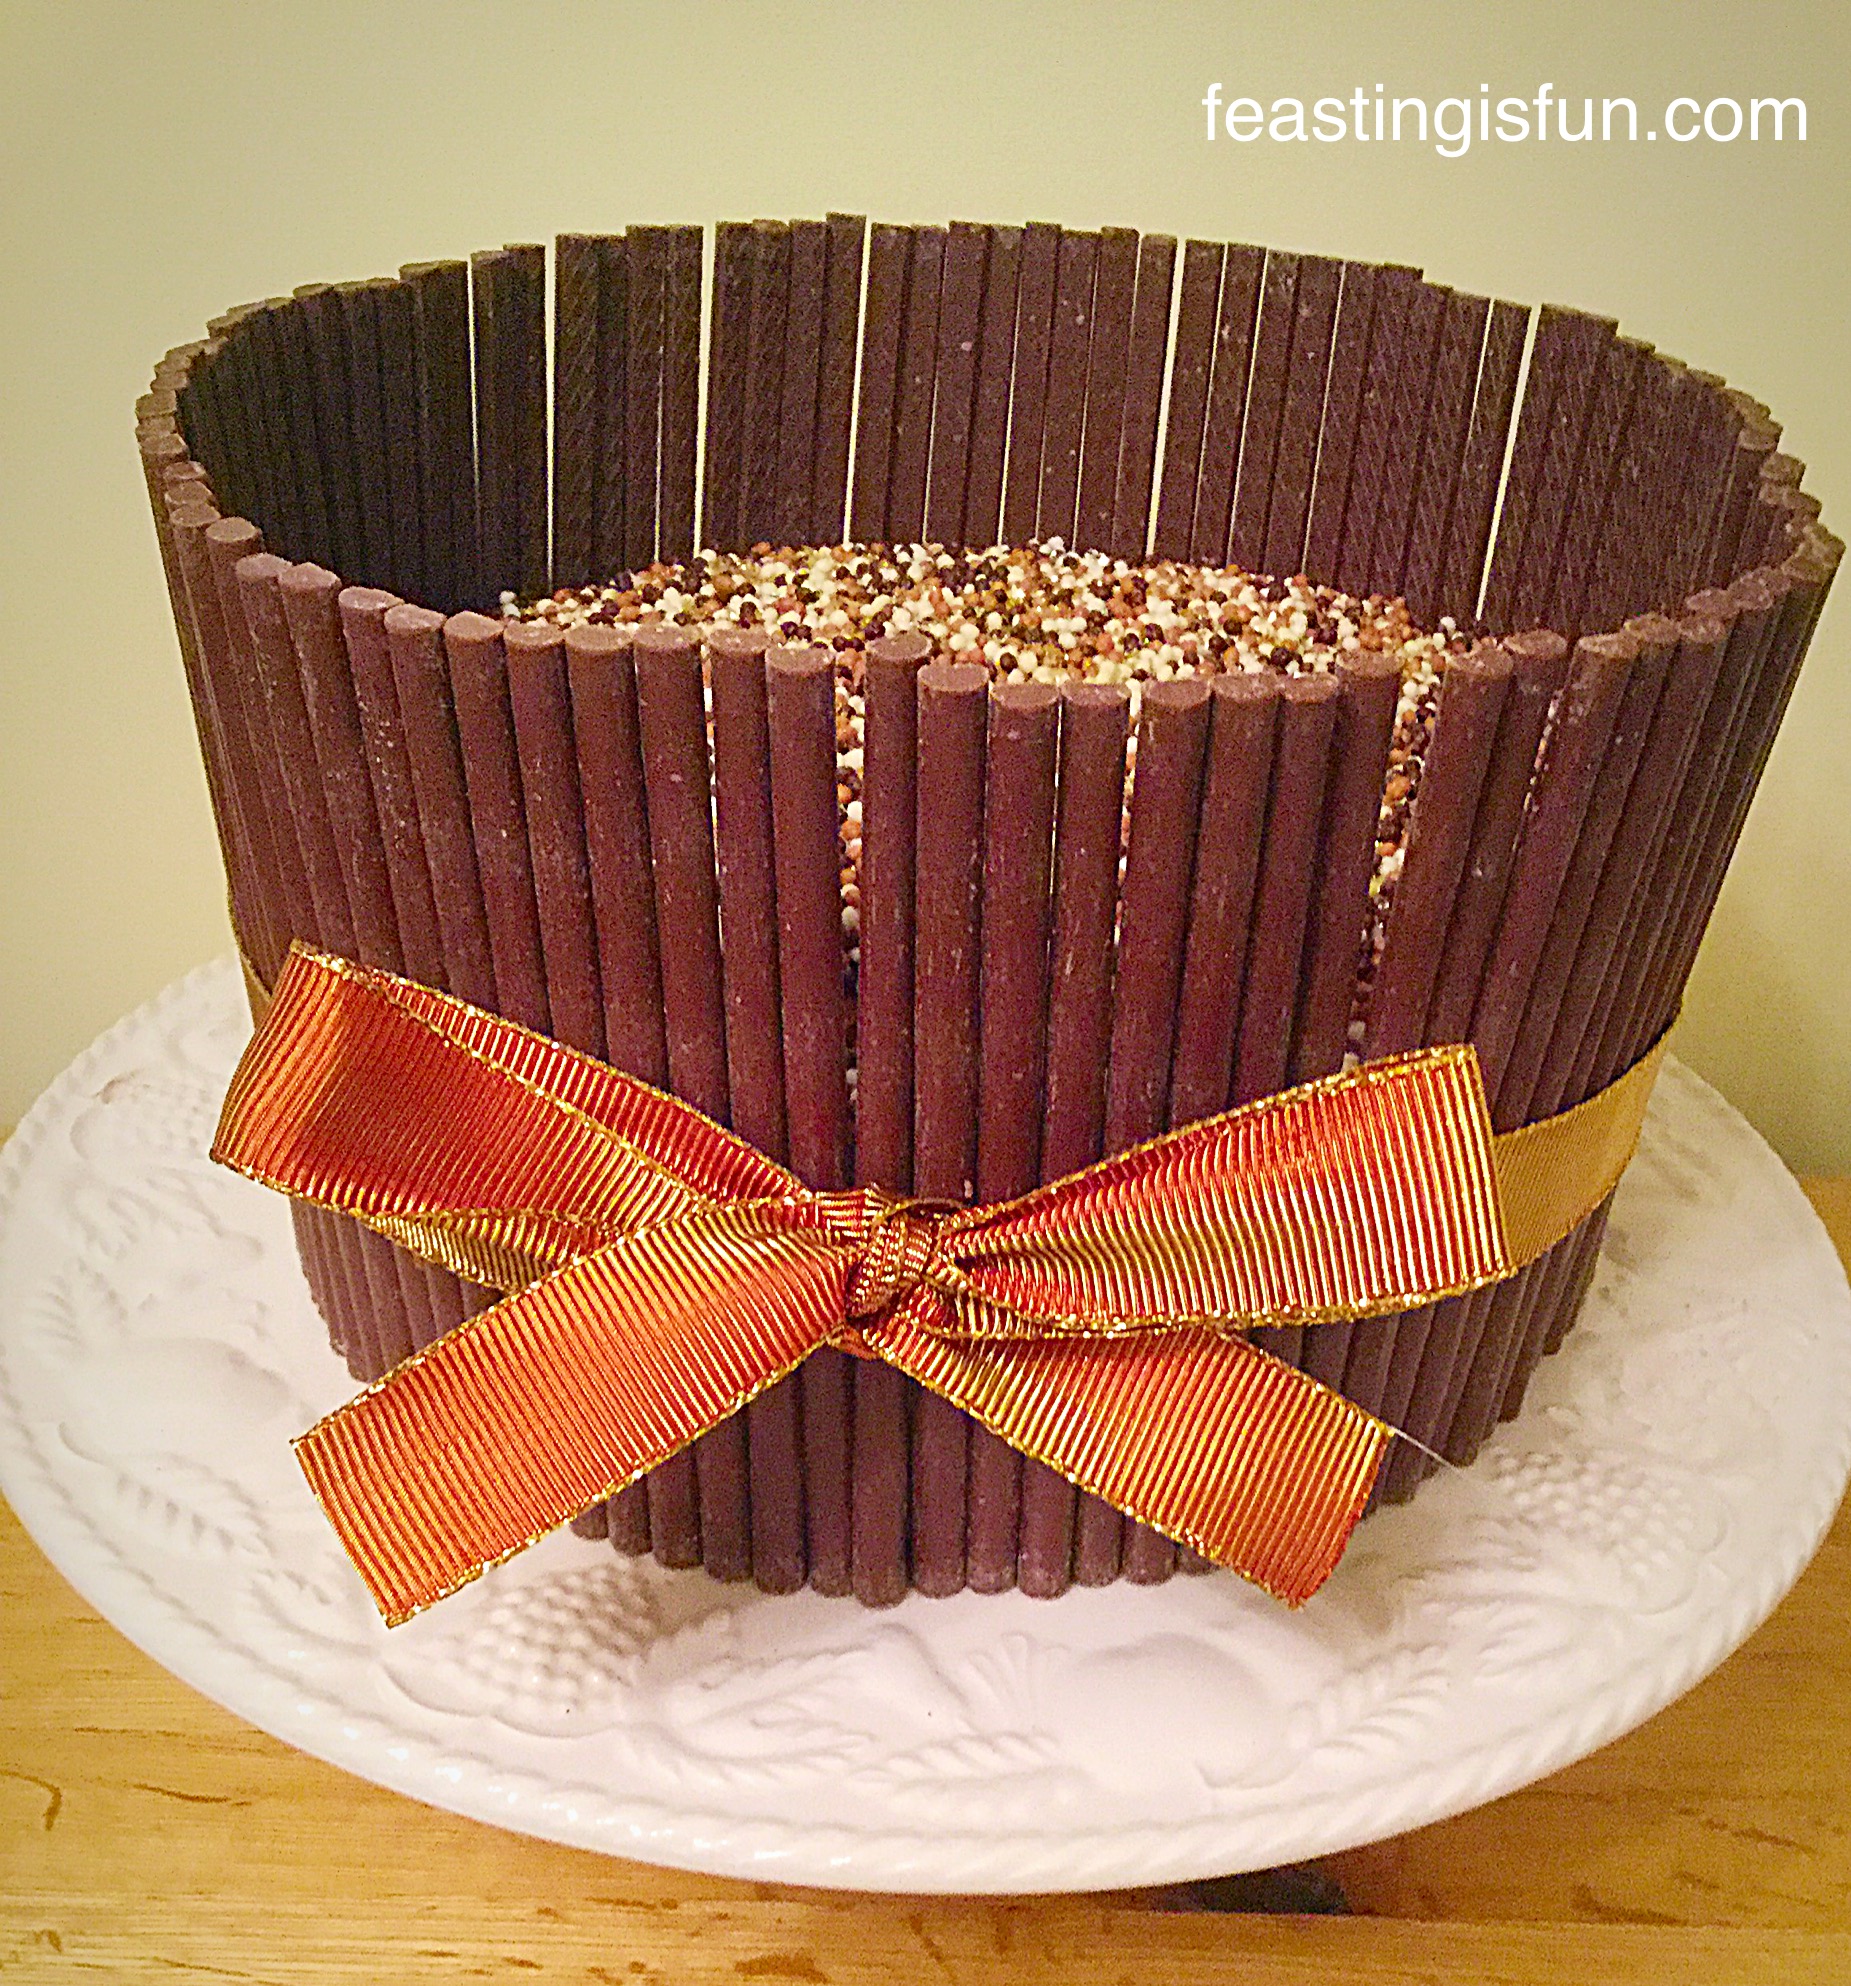
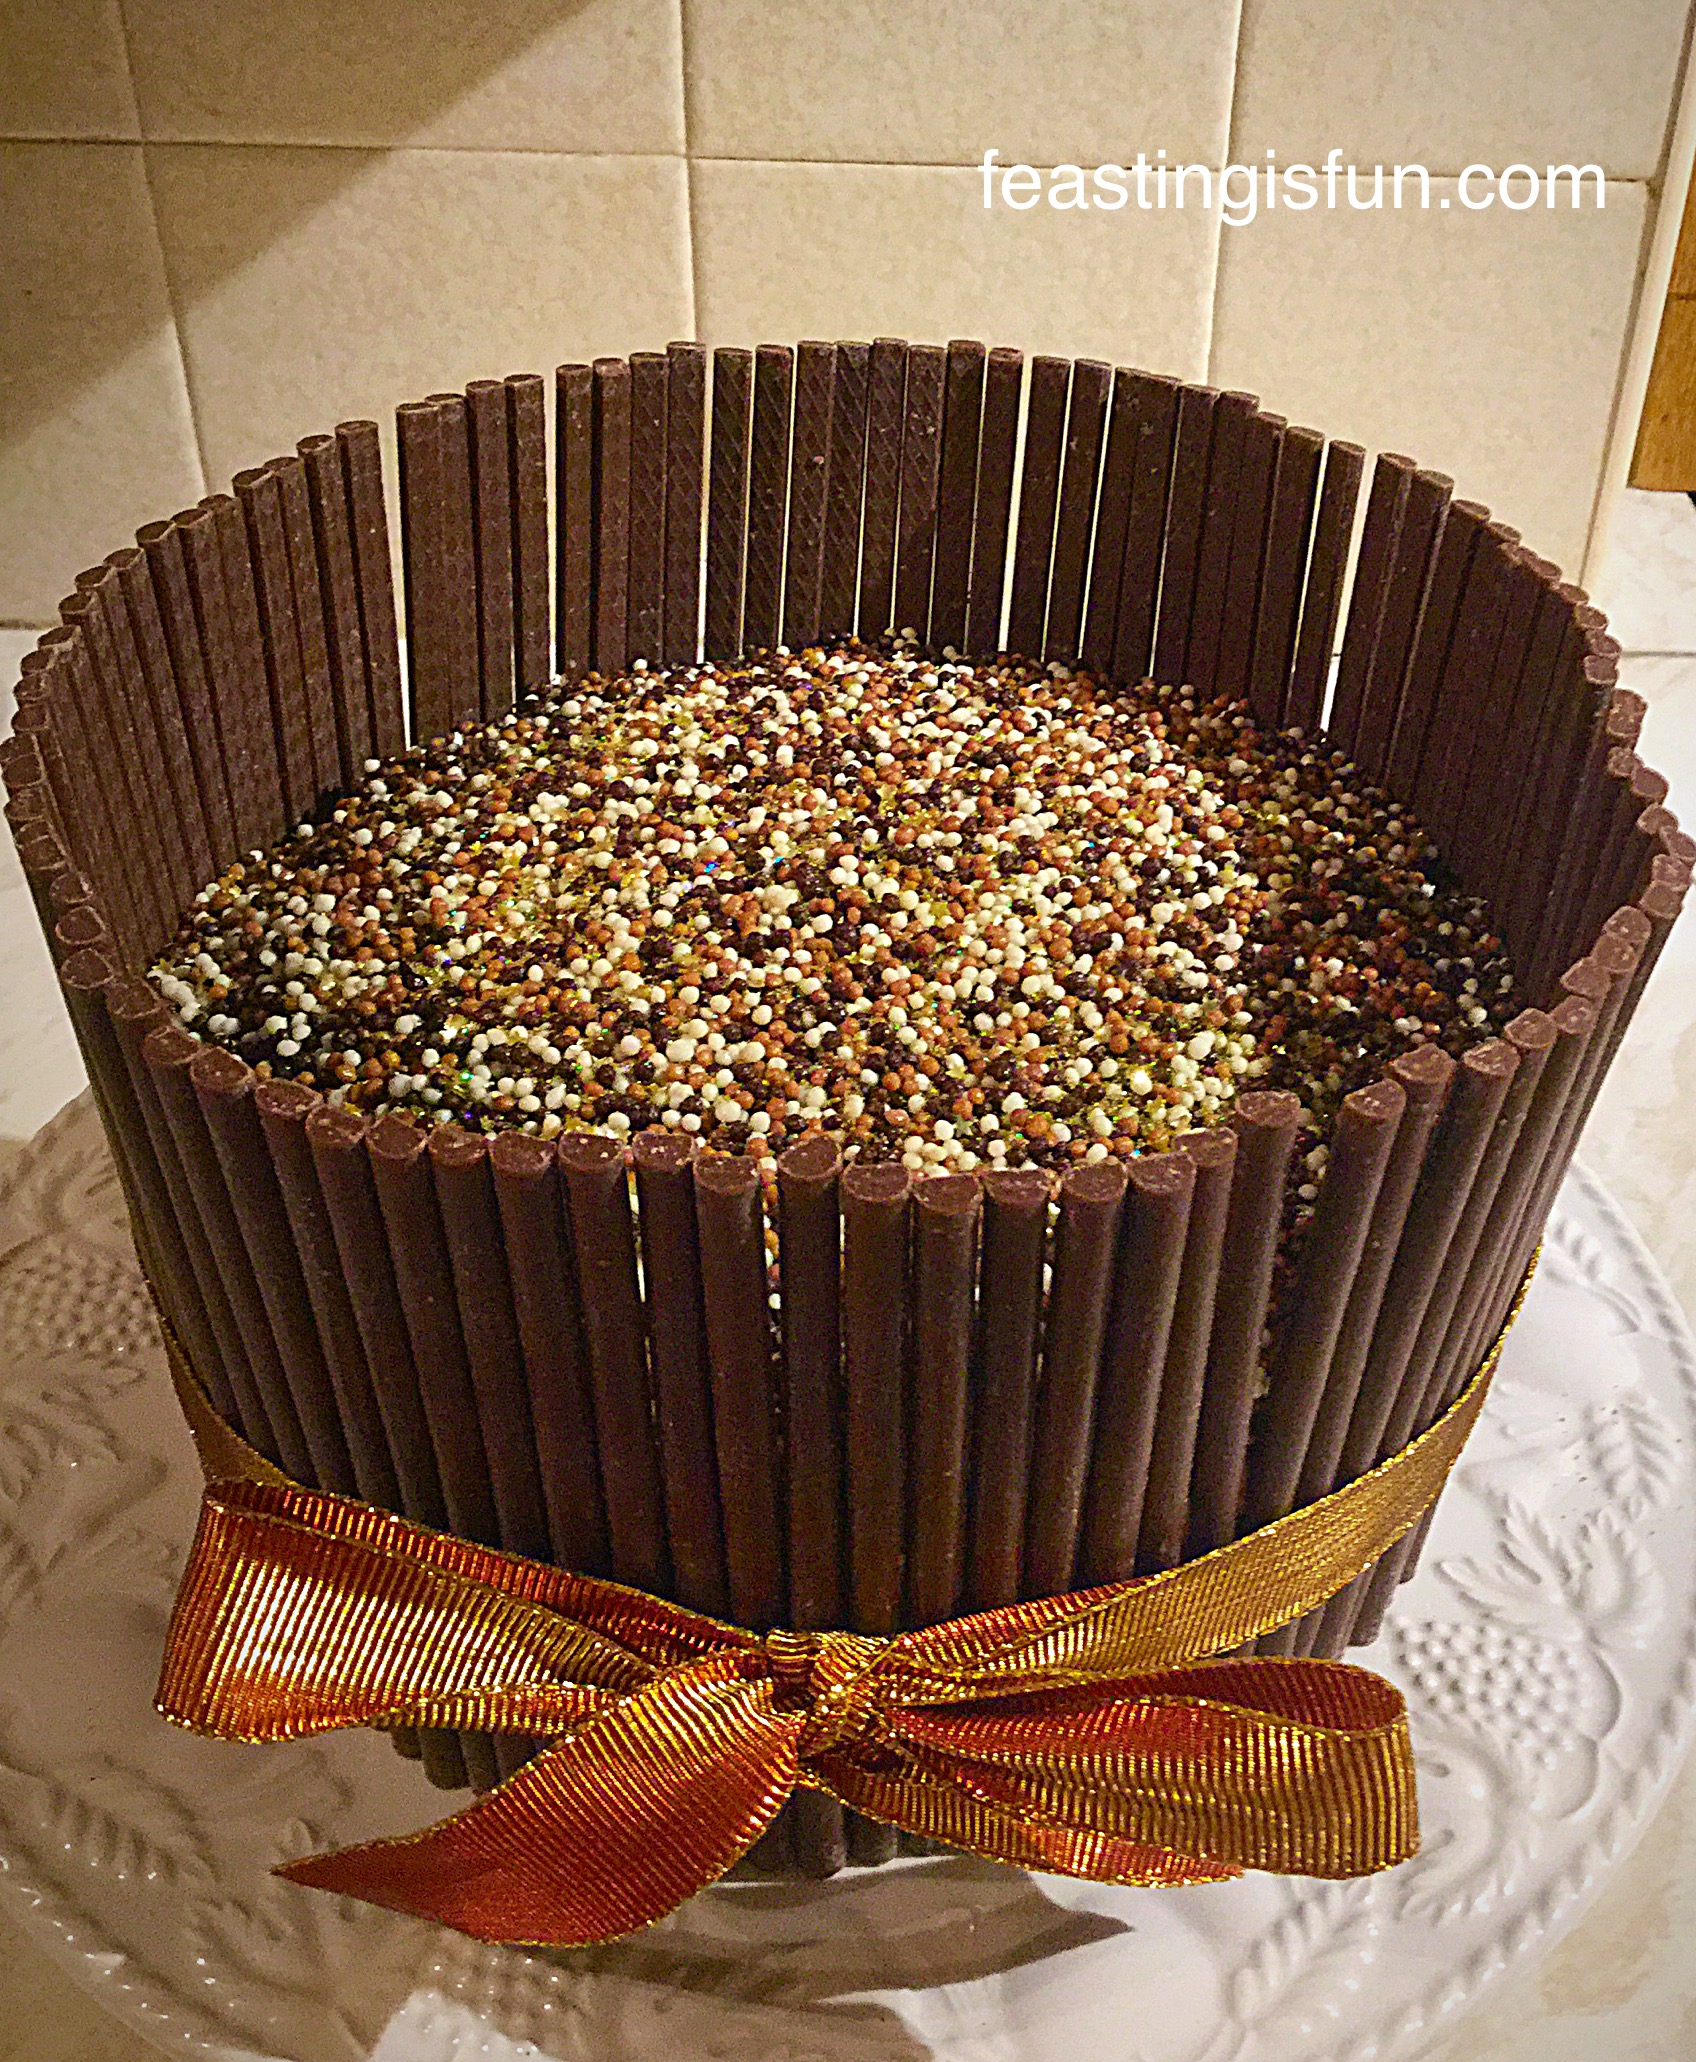
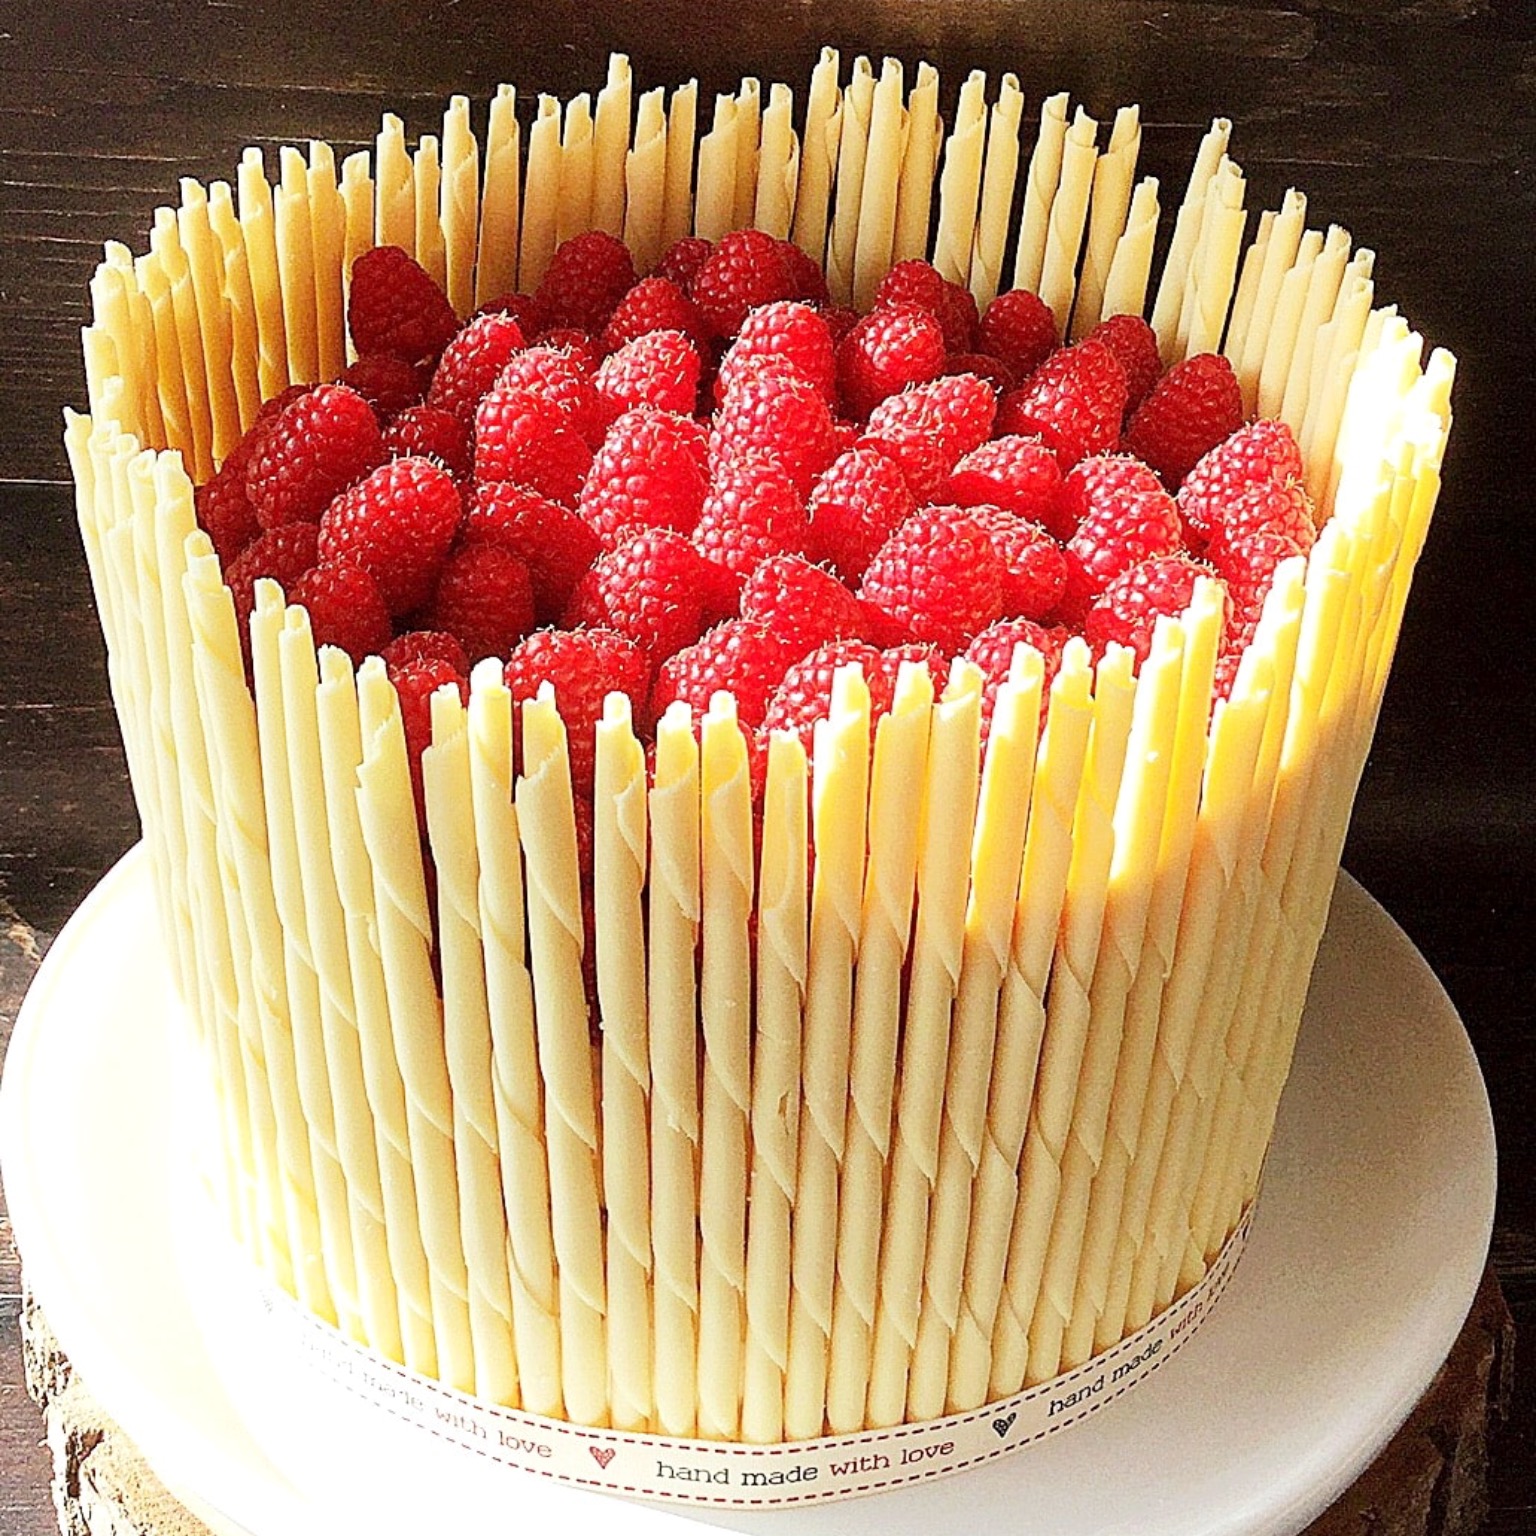
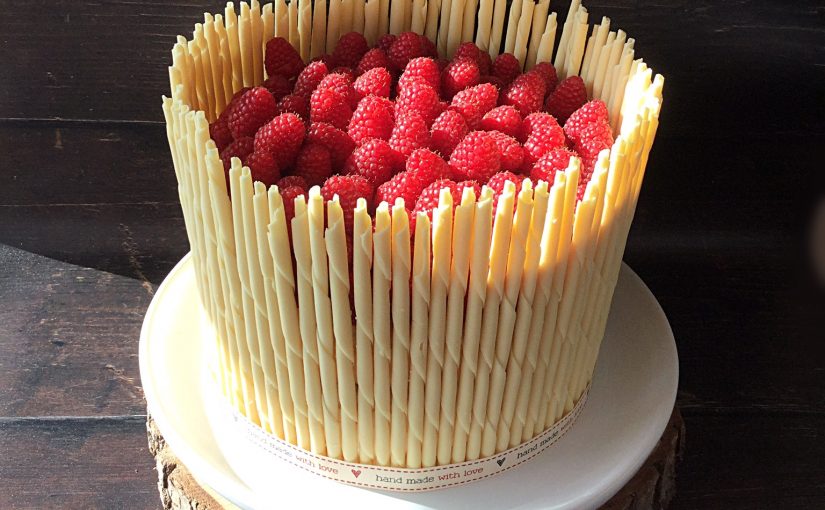
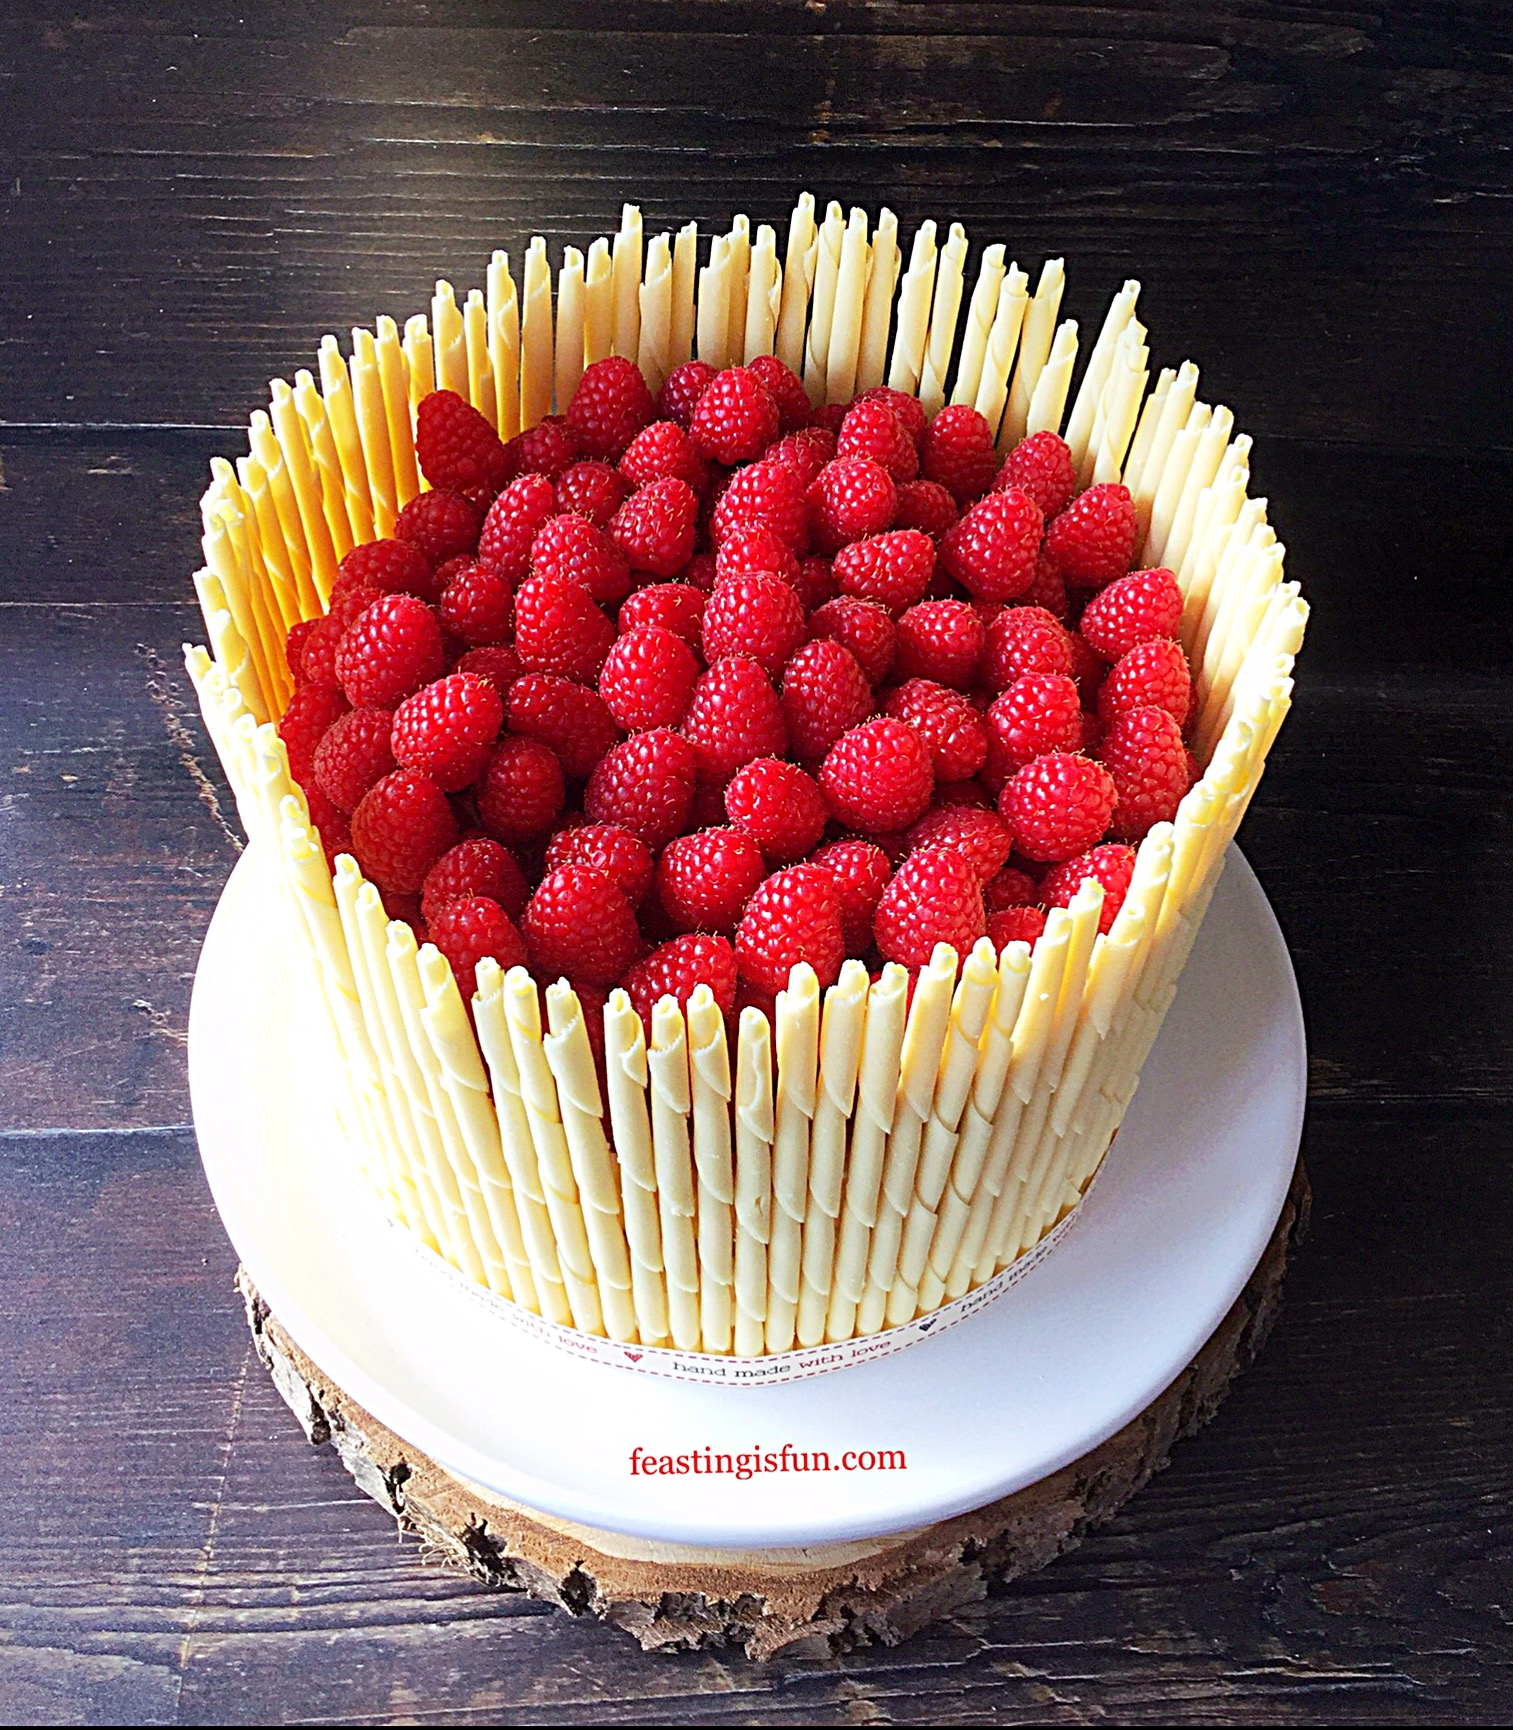
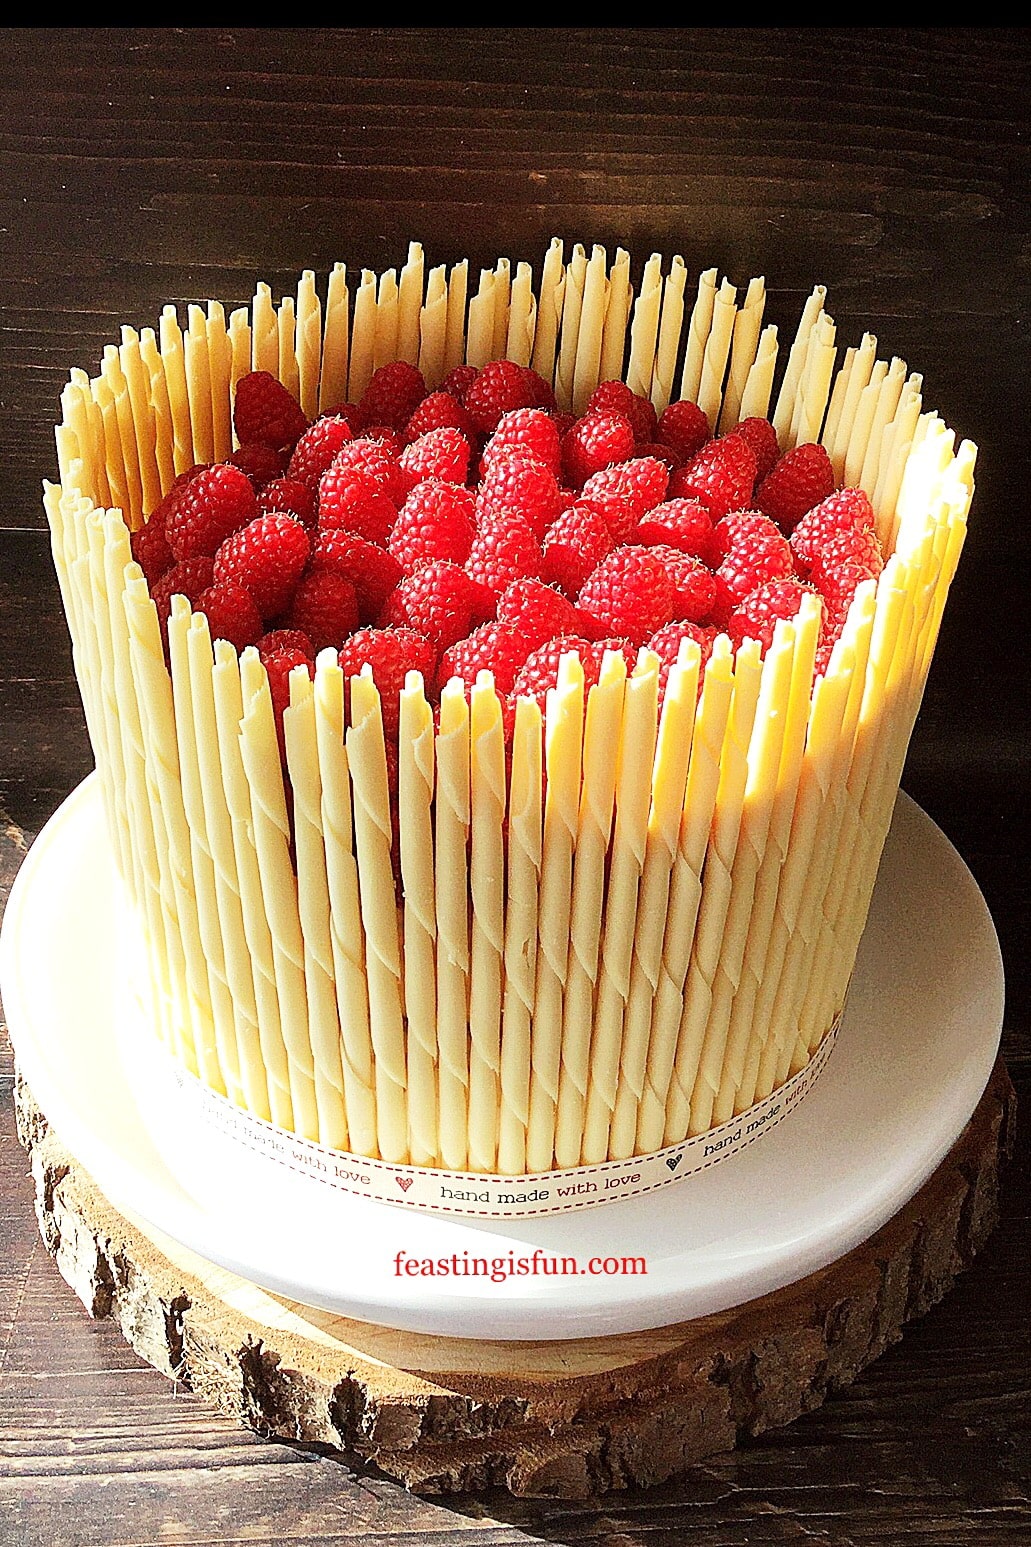
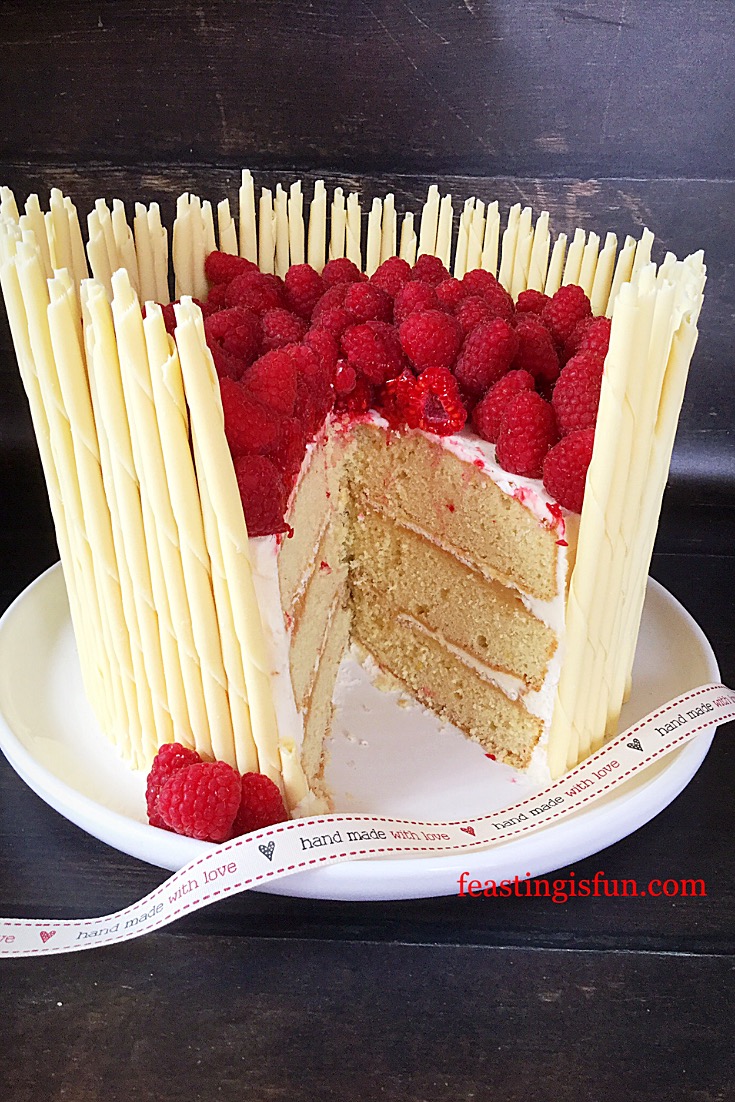
Since we are celebrating, what better occasion than to make a cake. Light lemon sponge layered with the very best lemon curd and lemon buttercream. Surrounded with swirled white chocolate pencils and topped with fresh, deep red, raspberries. The sum of this Raspberry Lemon Celebration Layer Cake is so much more that the total of it’s separate parts.

While magnificent to look at, do not be daunted at the prospect of making this cake. Inspired by Lorraine Pascal and a baking programme I watched, trust me when I state that if I can make this cake, you can too. Also, the very lovely Maria Whitehead who runs Hawkshead Relish with her husband and daughter, remarked that my recipes are approachable and ‘un-cheffy’! Which, I took as a compliment and also used as influence when designing this cake.
Recipe: Raspberry Lemon Celebration Layer Cake serves 12
For the cake sponges:
225g/8oz + 115g/4oz Unsalted Butter at room temperature – plus a little extra for greasing the tins
225g/8oz+ 115g/4oz Caster Sugar
1/2tsp + 1/4tsp Sea Salt (halve for free flowing) – I use Maldon
1tsp + 0.5tsp Vanilla Extract – I use Nielsen-Massey
4 + 2 Large Free Range Eggs
225g/8oz + 115g/4oz Plain Flour
2tsp + 1tsp Baking Powder
Zest of 2 Fresh Lemons
For the buttercream:
250g/9oz Unsalted Butter at room temperature
500g/1lb 2oz Icing Sugar (confectioner’s sugar)
1/4tsp Sea Salt
7tsp Freshly Squeezed Lemon Juice (approximately the juice from 1 medium lemon)
Also needed:
6-7 tbsp Good Quality Lemon Curd – I use Hawkshead Relish
1 Box White Chocolate Pencils – I use Callebaut
600g/1lb 5oz Fresh Raspberries
Method: Preheat oven to 160C/140C fan, 325F, gas mark 3
Note: The cake is baked in three separate layers. Since a 20cm (8in) sandwich tin is required for each sponge the recipe is split. The first amount given is sufficient for two layers. While the second amount is for a single layer. If you have three equal sized tins, combine the first and second amounts, dividing equally between three tins. Baking times may need to be adjusted.
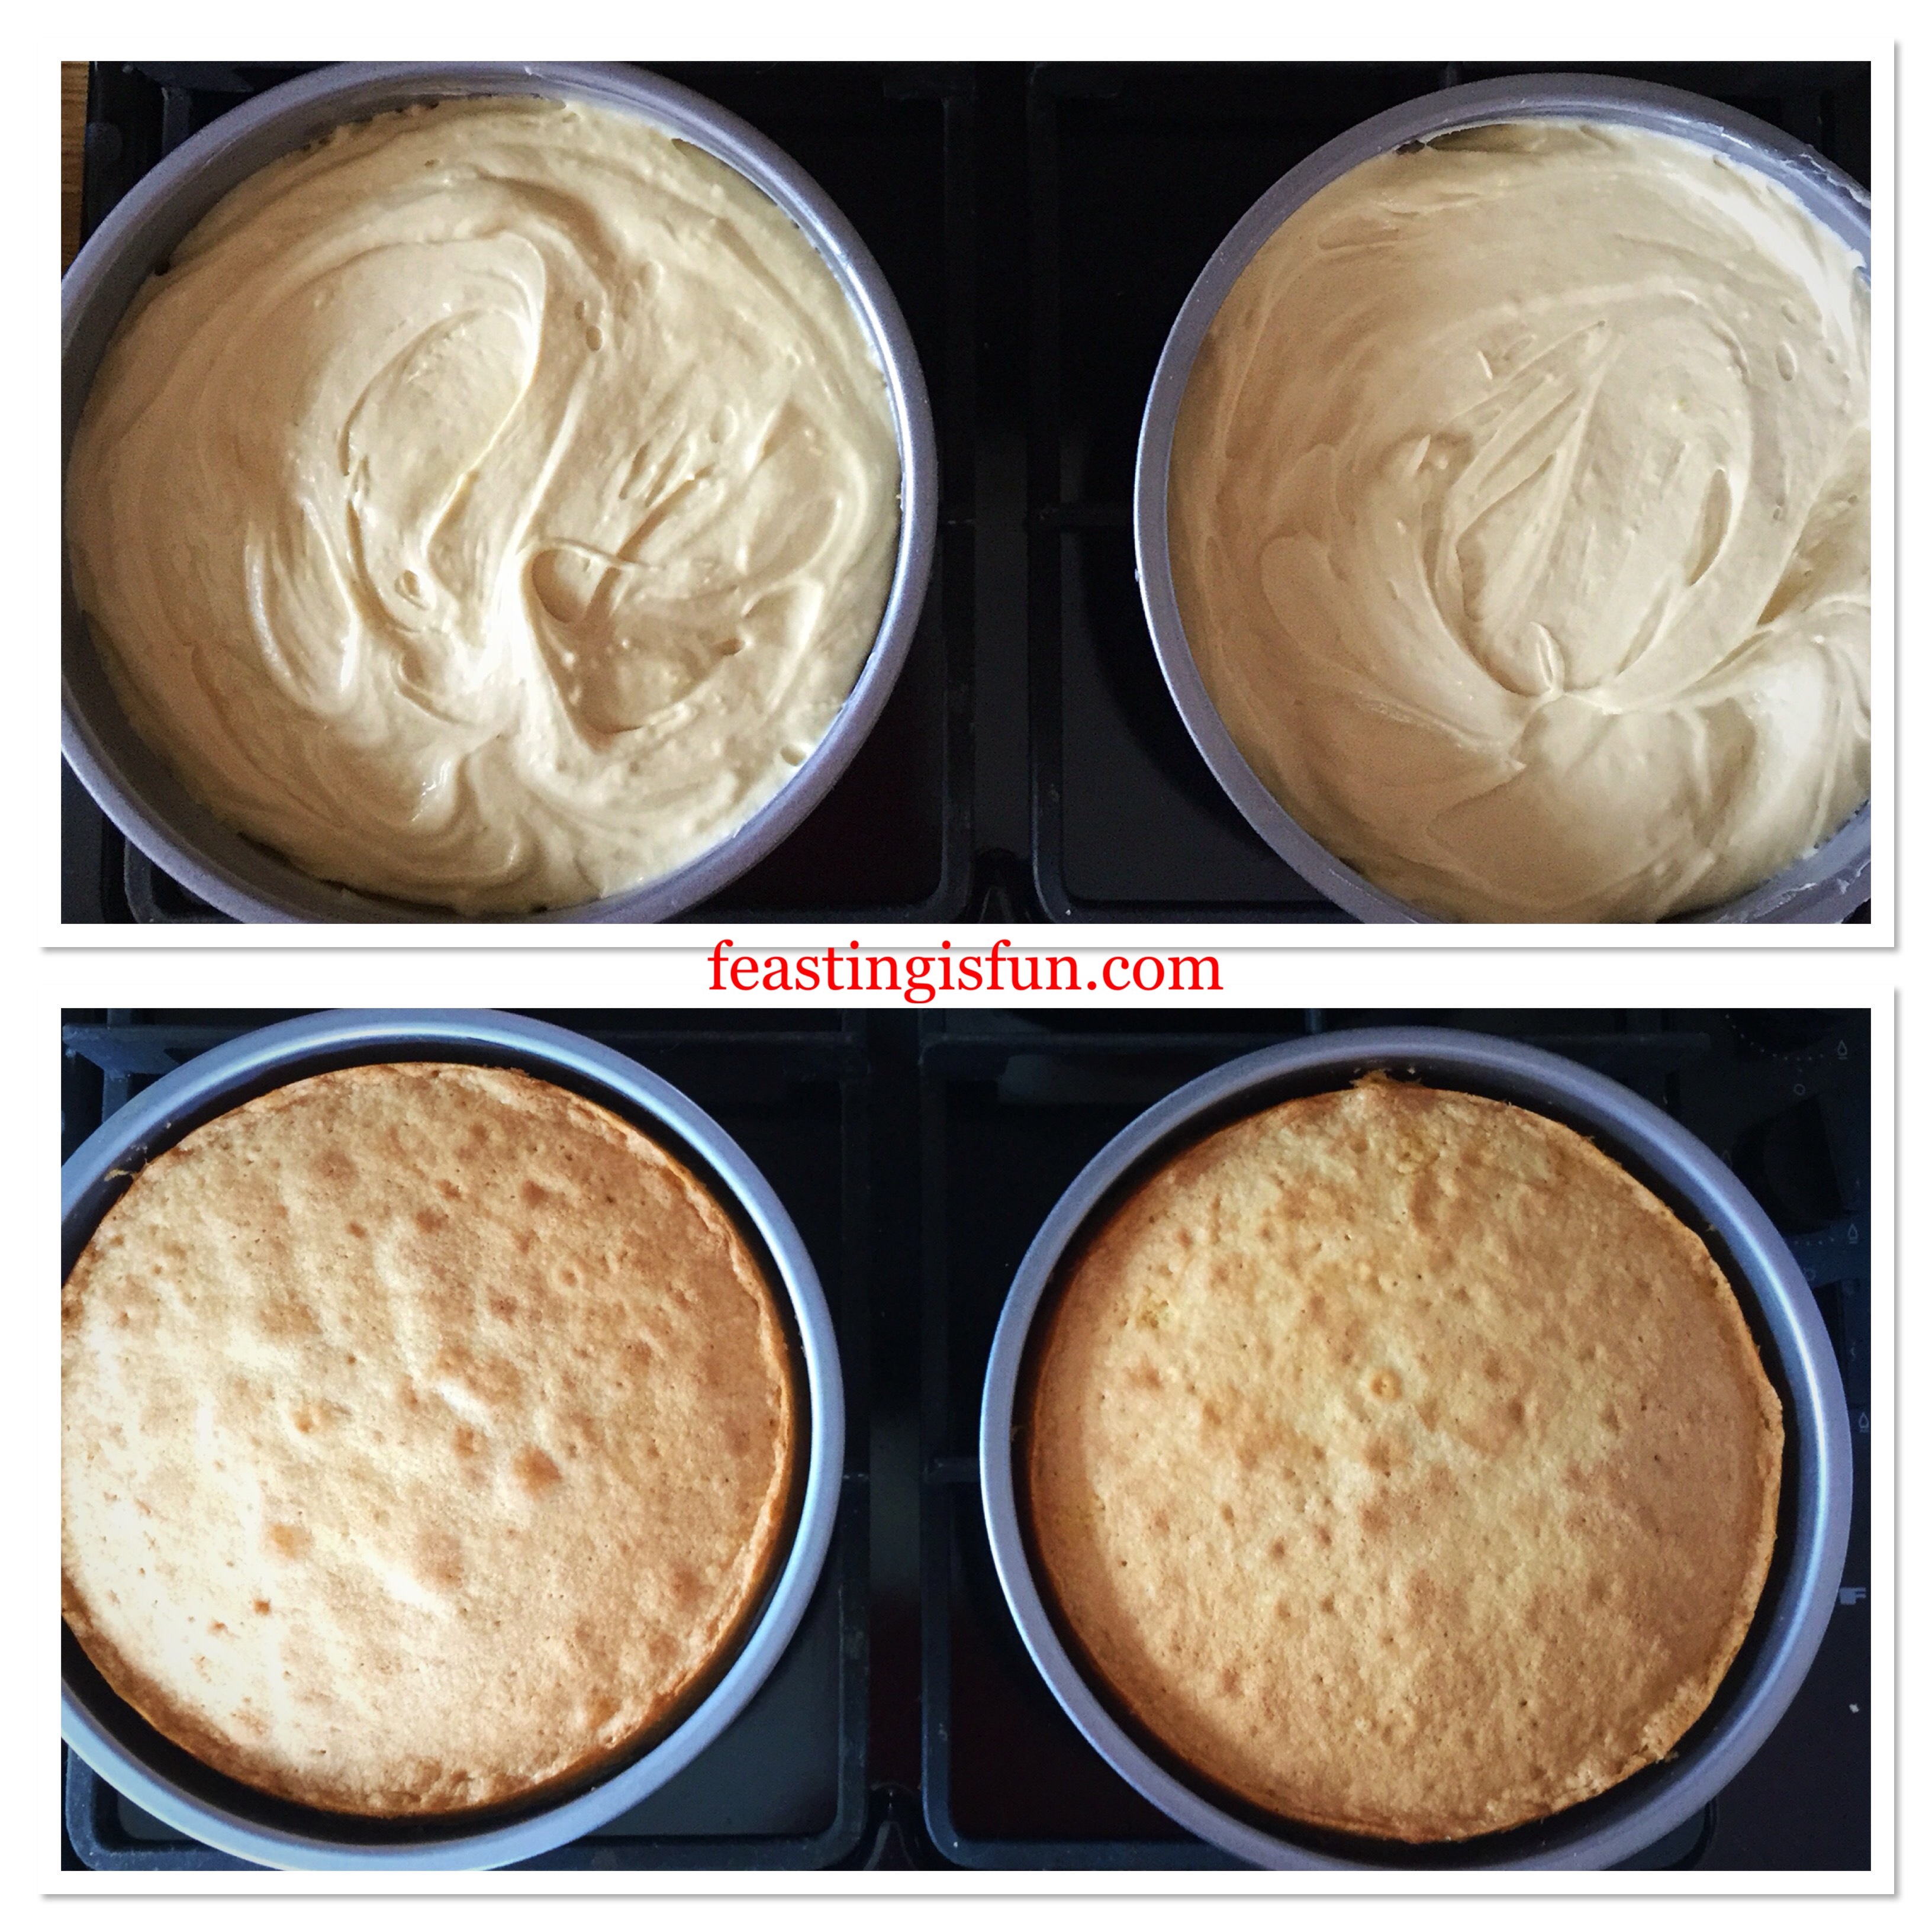
Making and baking the cake layers.
- First of all grease and line the base of each sandwich tin with baking parchment.
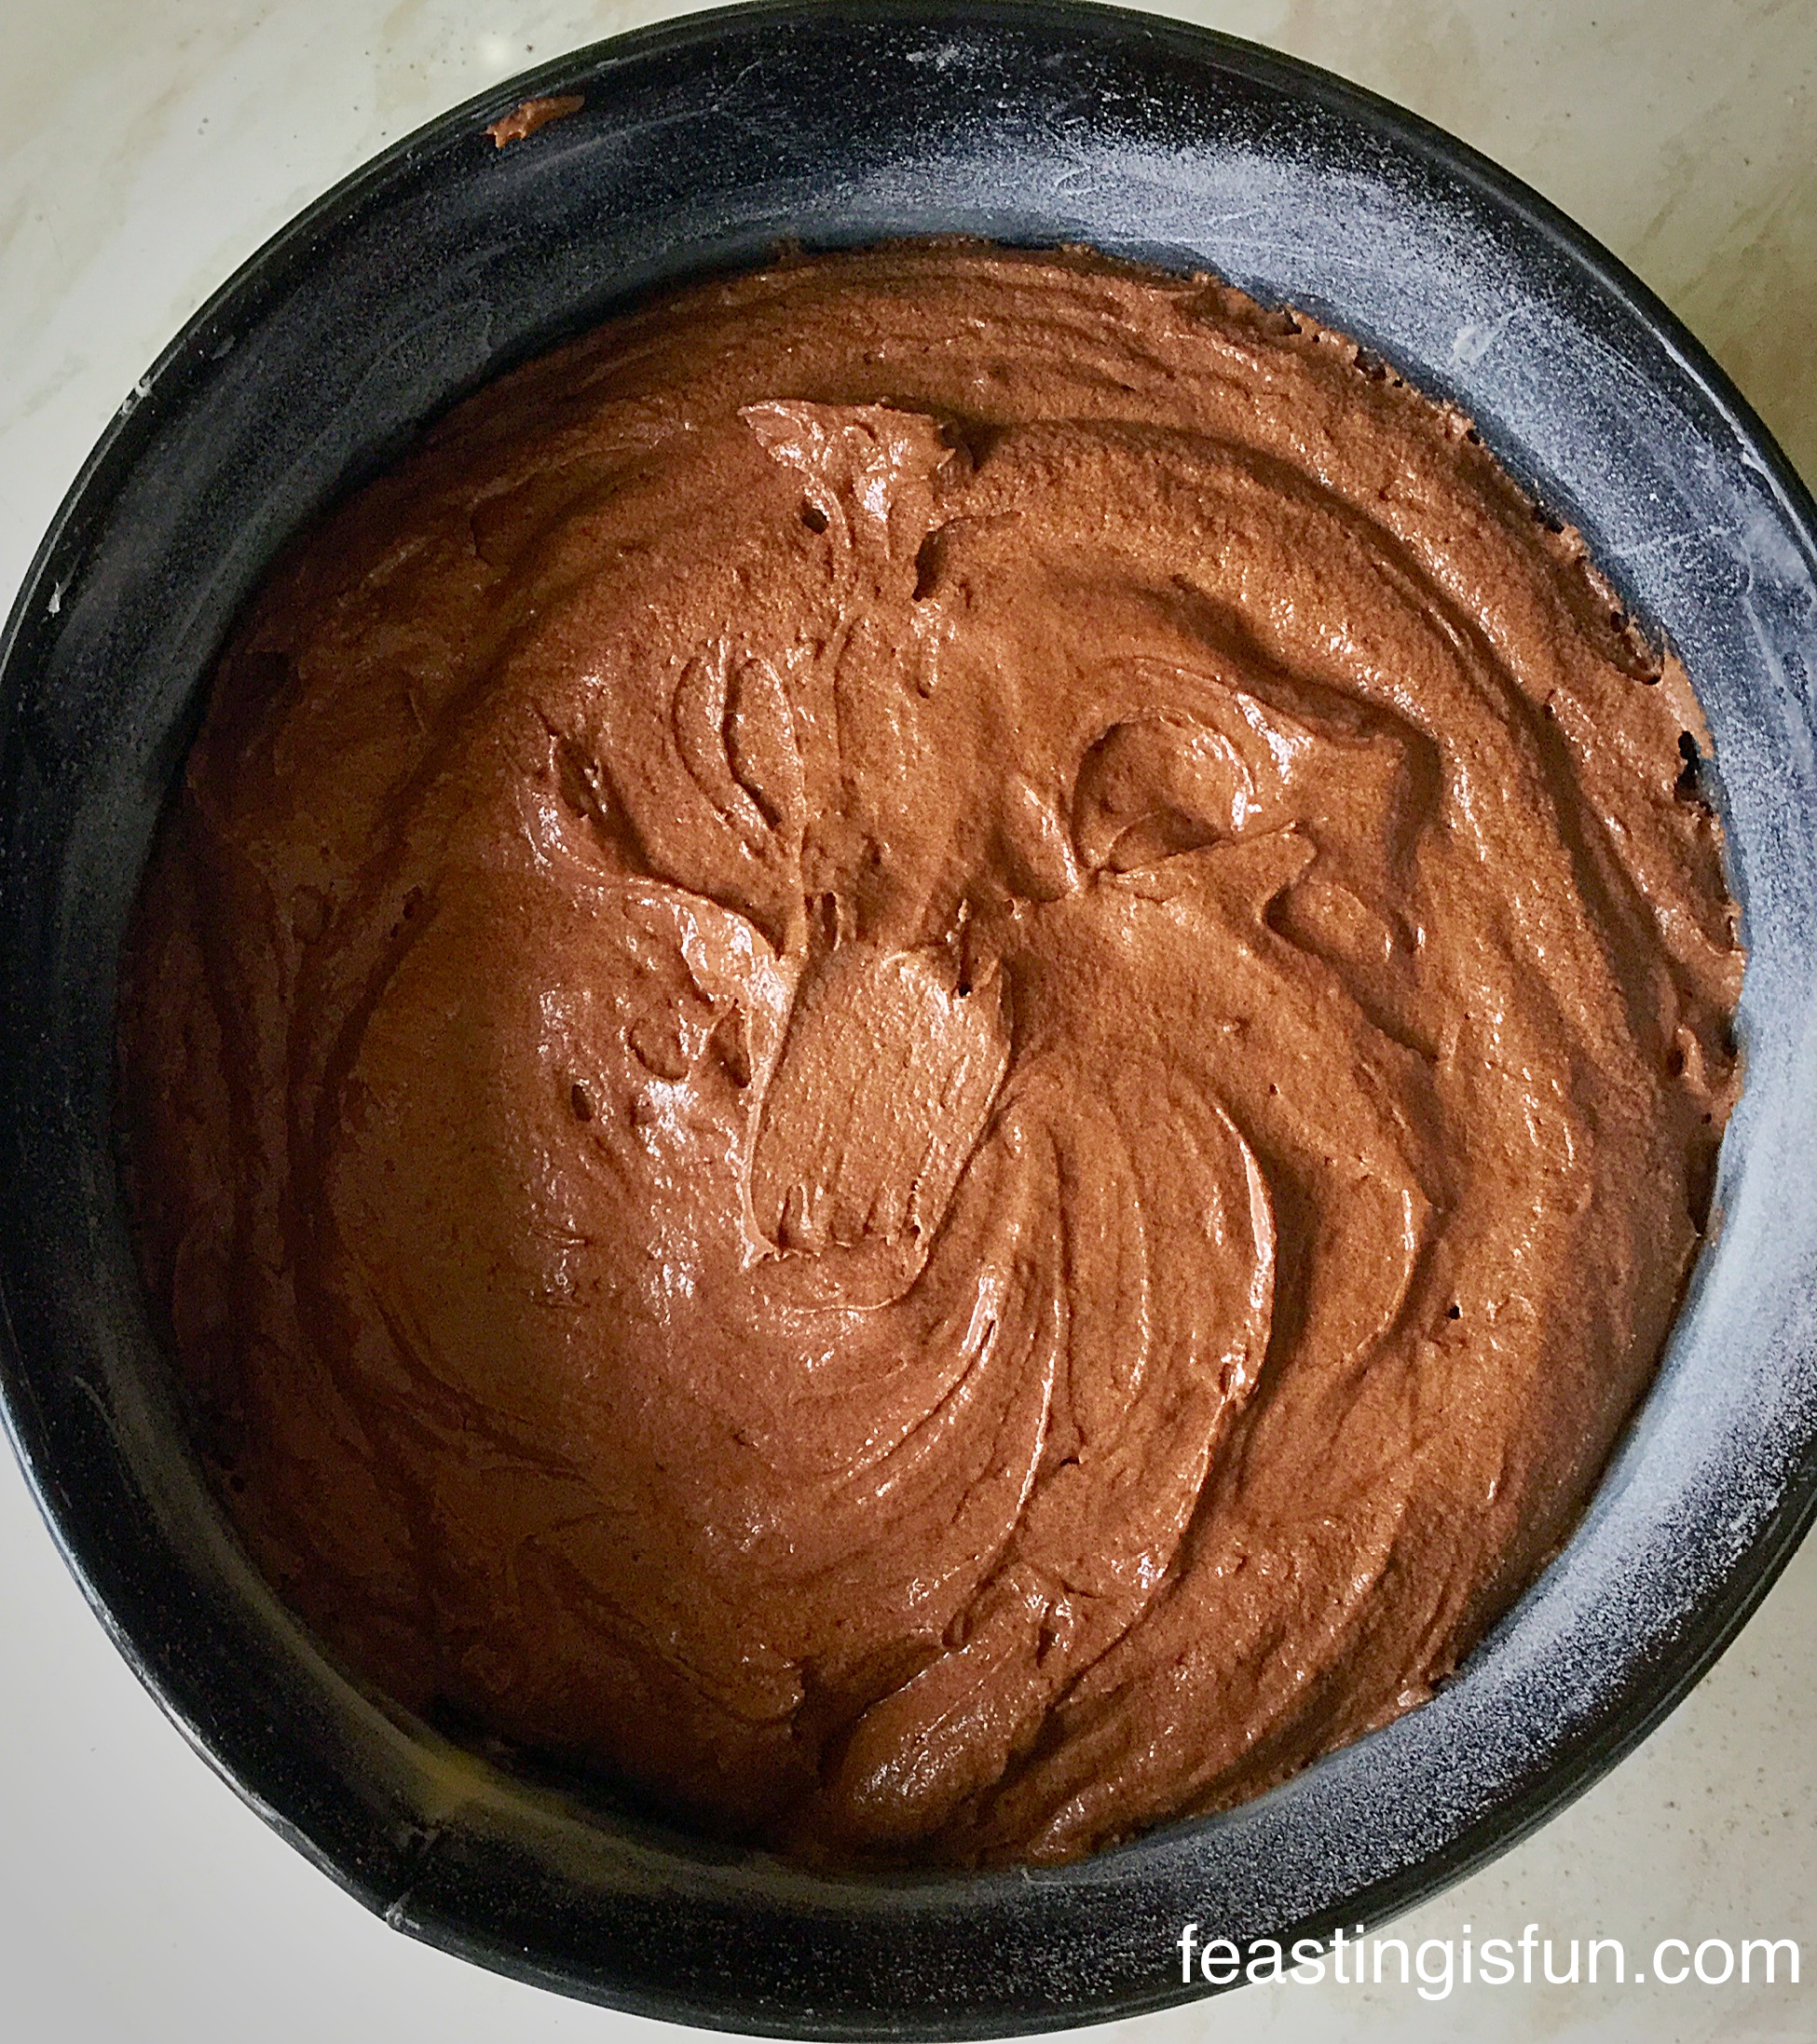
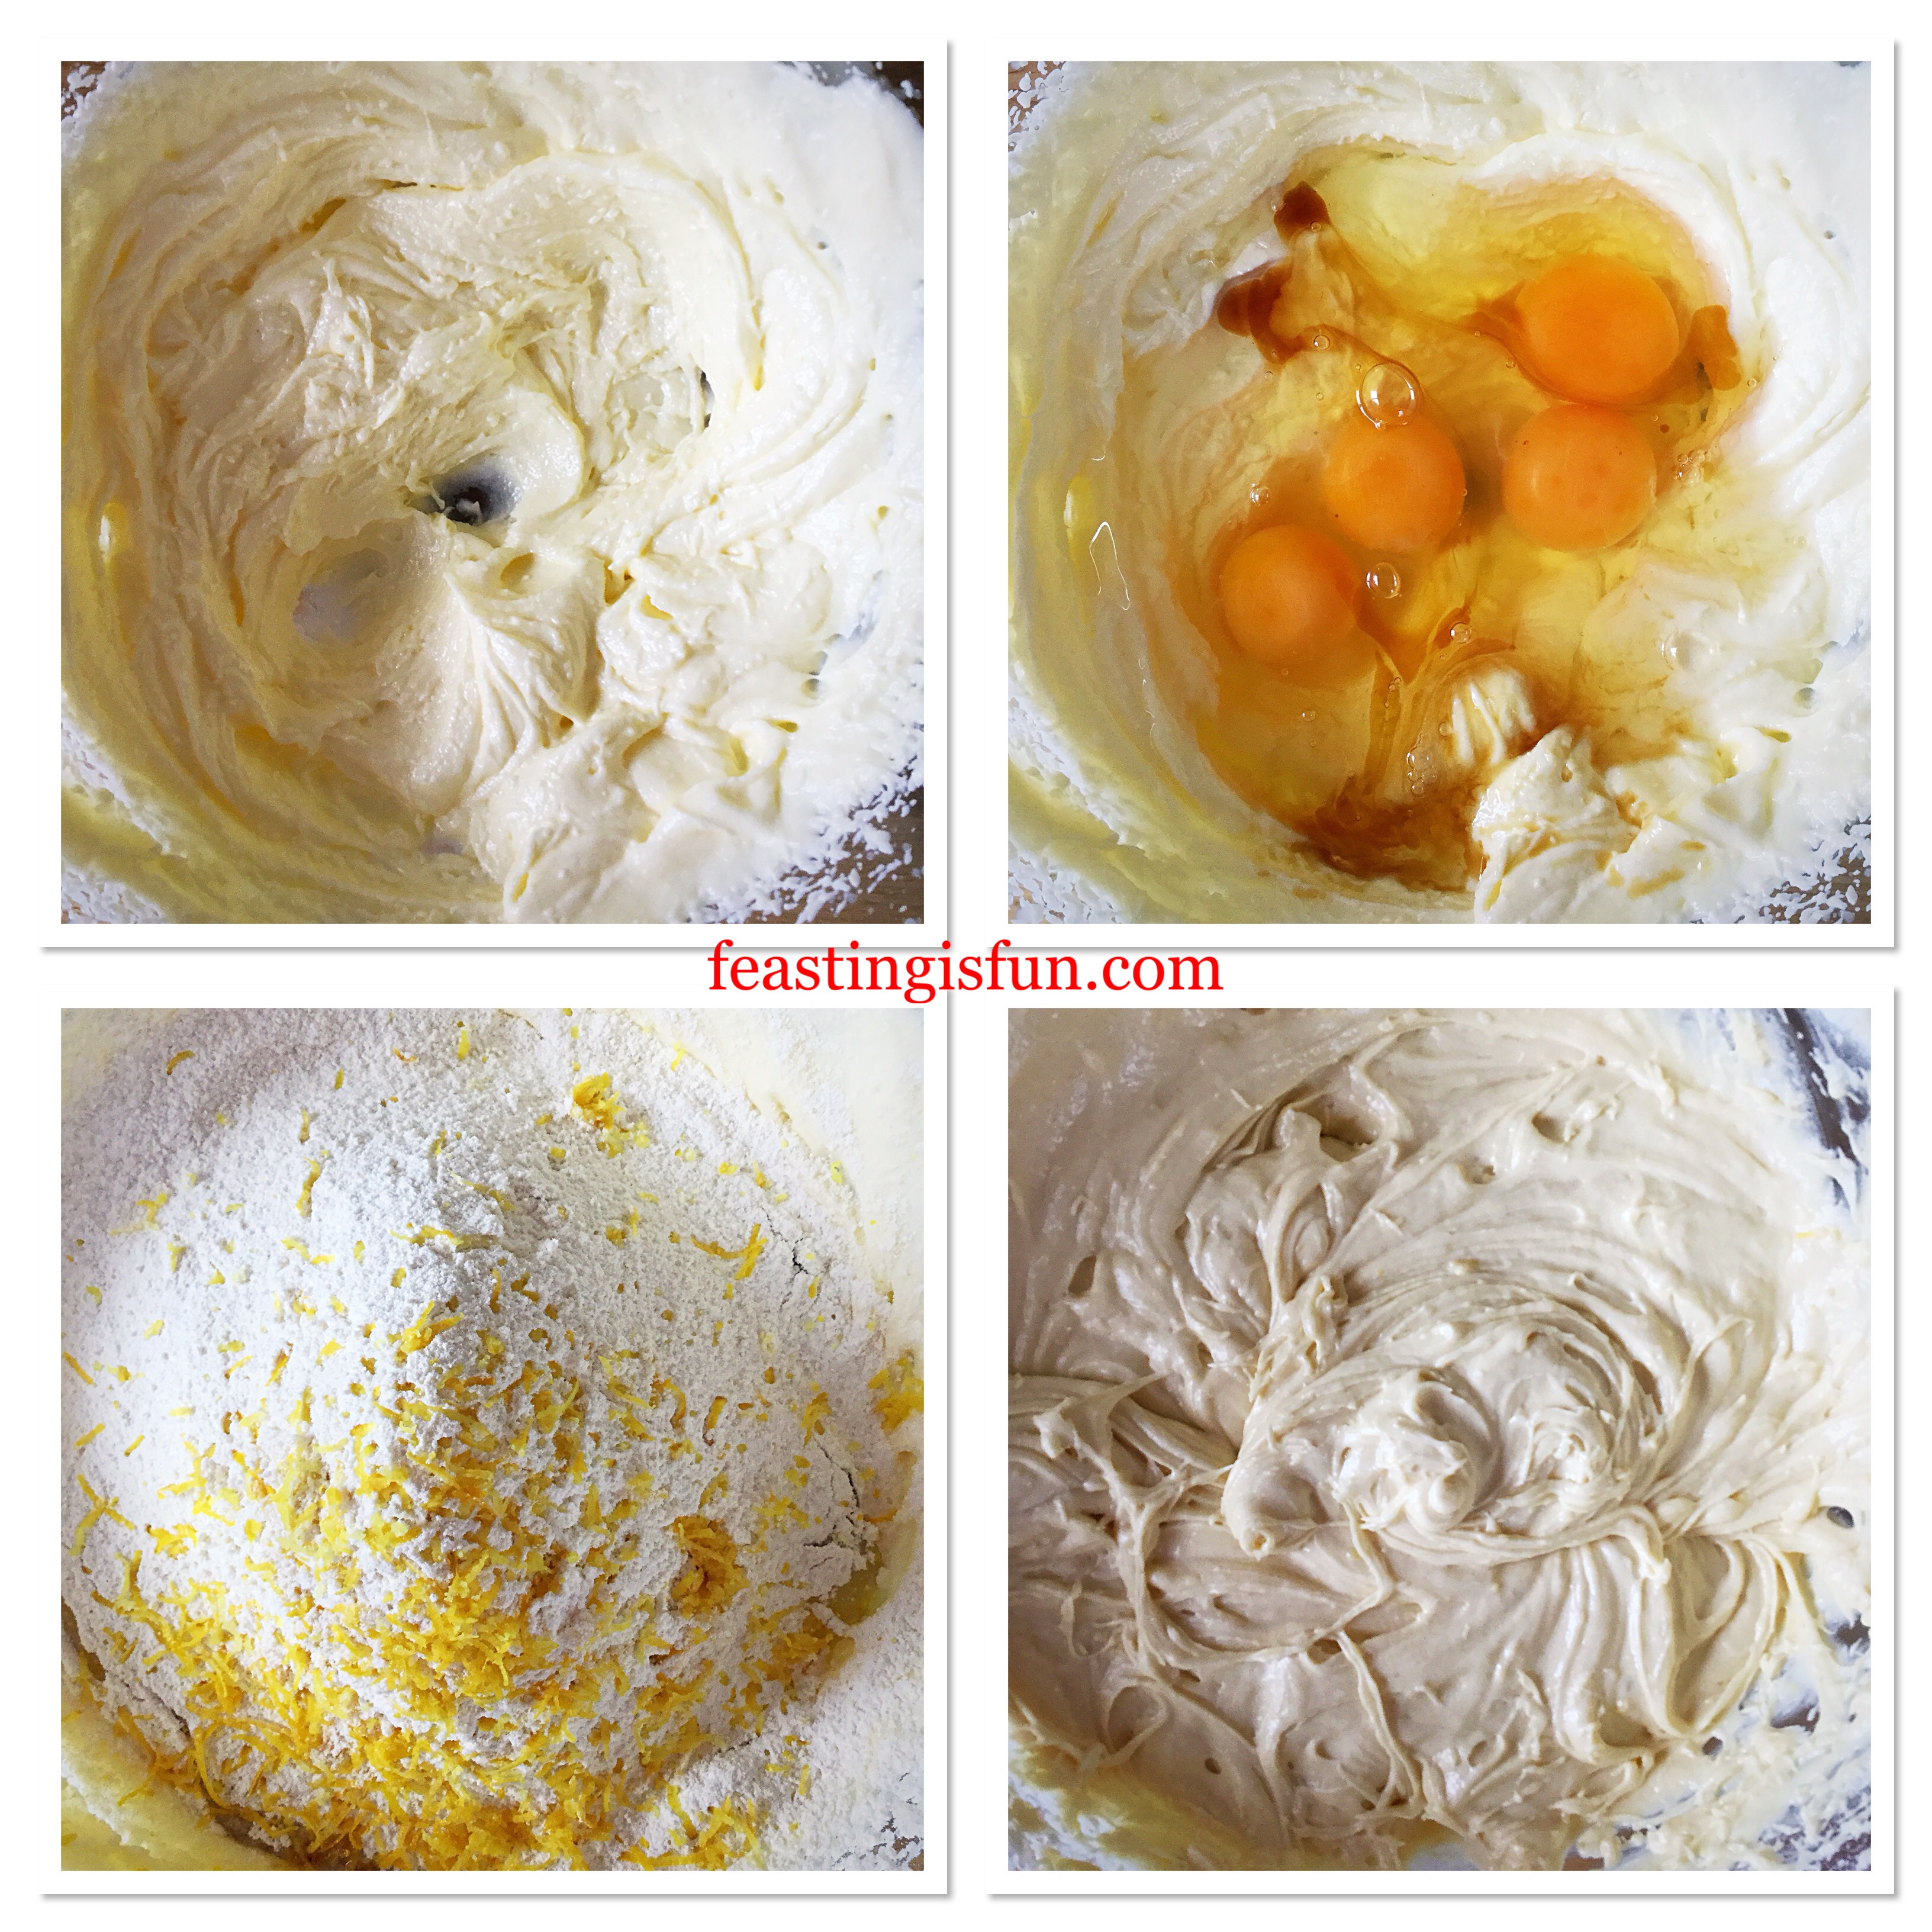
- Into a large bowl add the first amount given for butter, sugar and salt. Whisk the ingredients together until pale and creamy.
- Next add 4 eggs and 1 teaspoon of vanilla extract. Sift the flour and baking powder on top and then add the zest of one and one third of lemon.
- Whisk the ingredients together until just combined, yet free of lumps.
- Divide the cake batter evenly between the two prepared sandwich tins and smooth the tops.
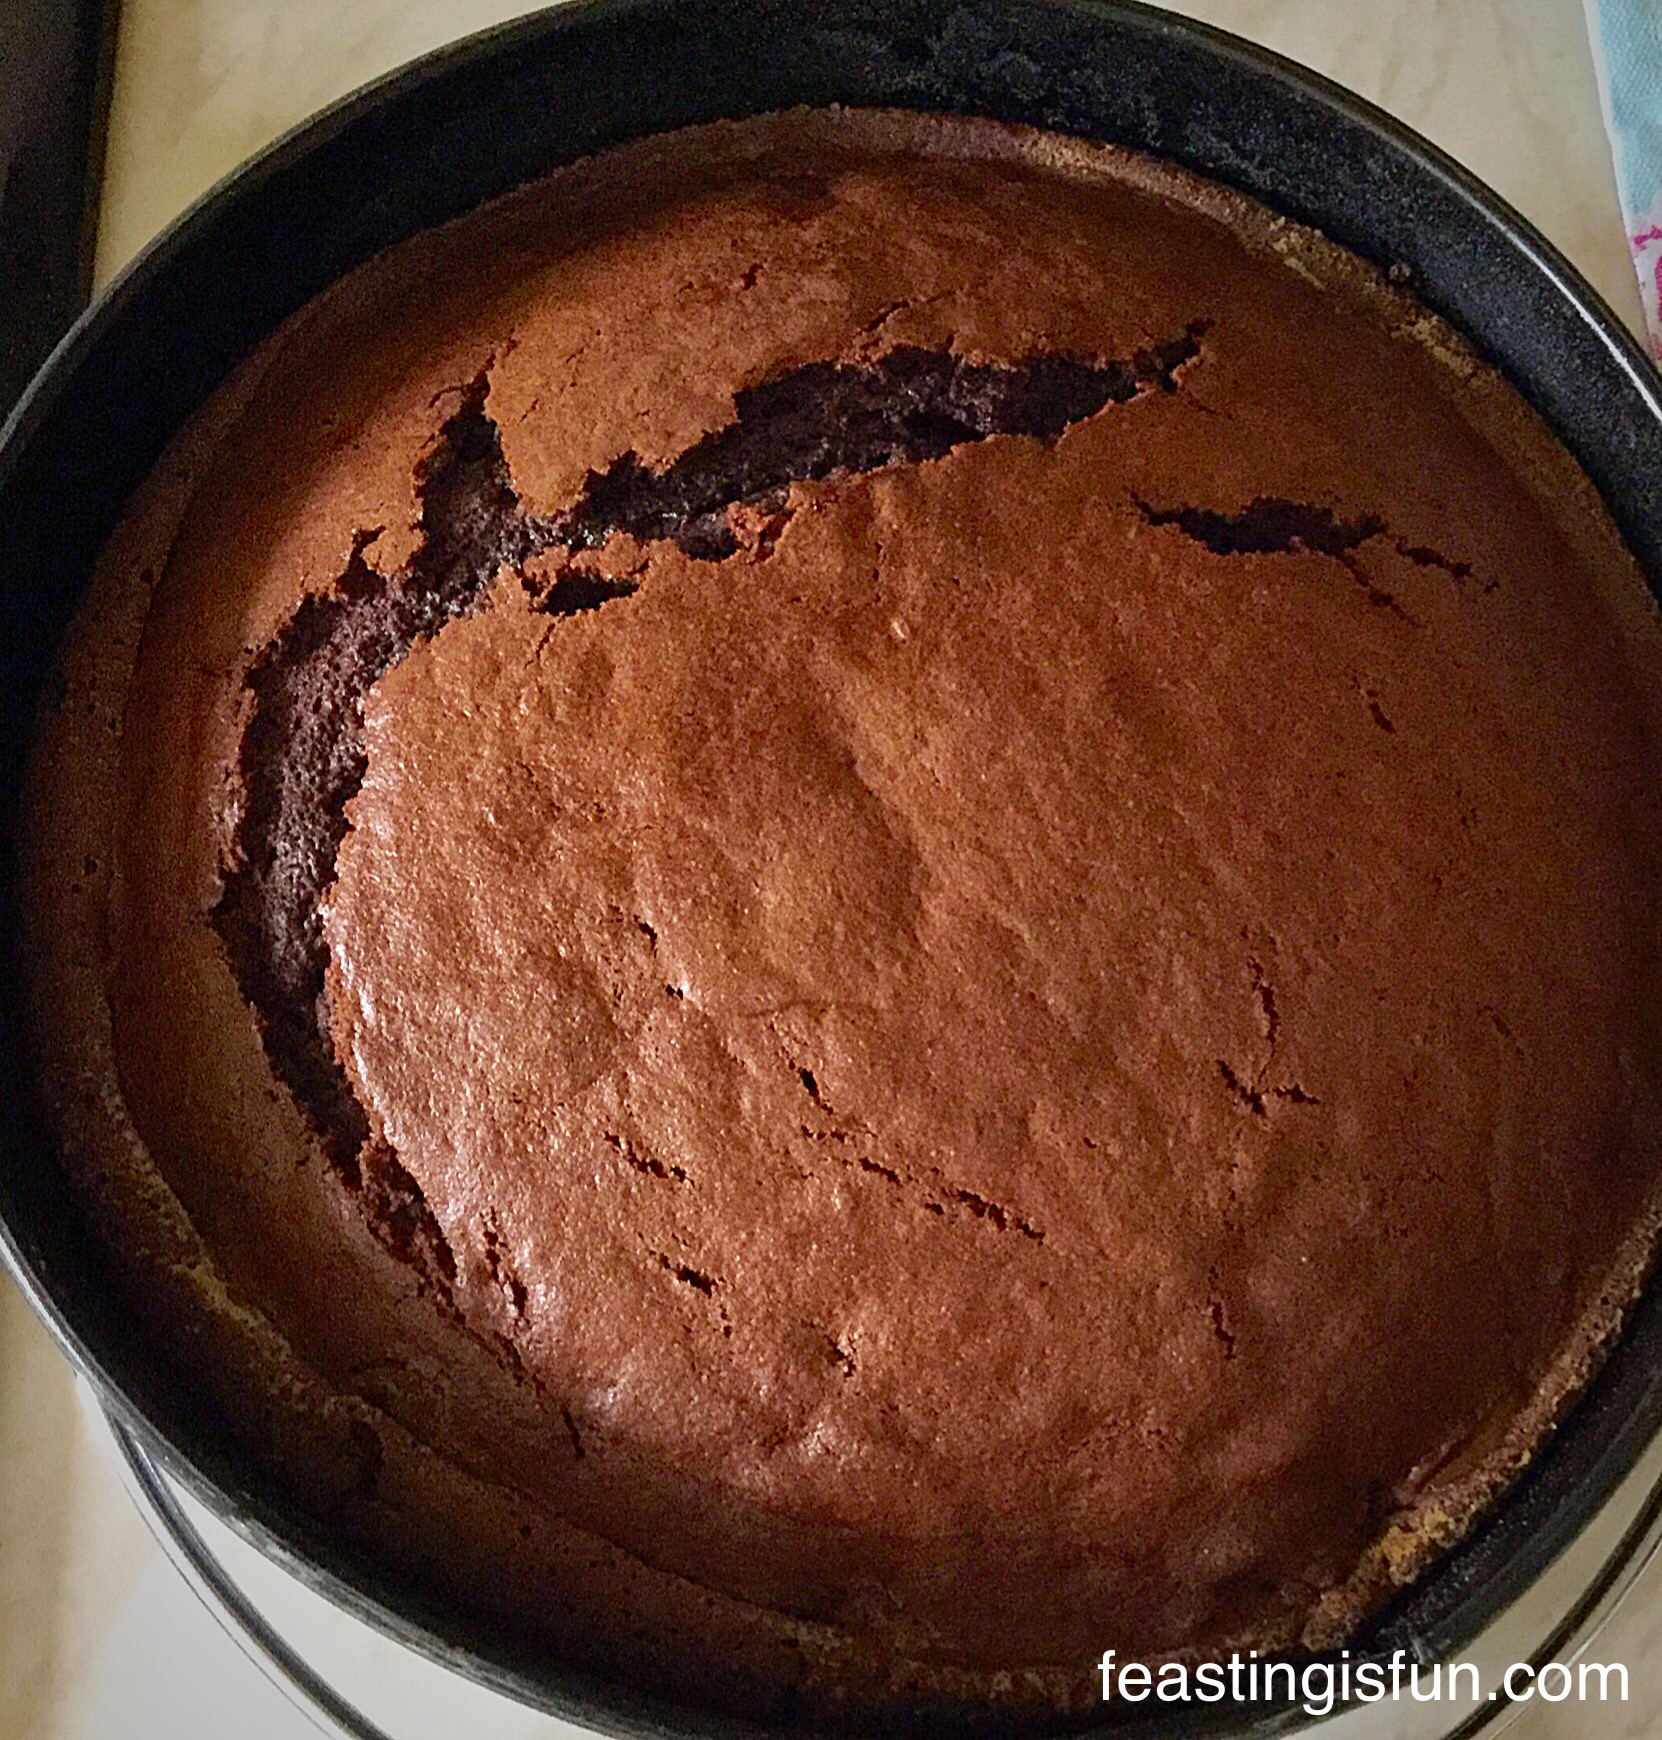
- Place both tins in the centre and lower parts of the oven and bake for 40-50 minutes.
- The cake sponge is fully baked when golden, springs back from a light touch and an inserted skewer comes out clean.
- As soon as the cakes are baked remove from the oven. Leave to cool in the tin for 10 minutes and then turn out, removing the baking parchment from the base of each sponge.
- Leave to cool on a cooling rack.
- Wash up a sandwich tin, grease and line as before. Make the batter for one sponge following the method given, using the second quantity given in the recipe. Fill the tin and bake as before.
- While the last sponge is cooling make the lemon buttercream.
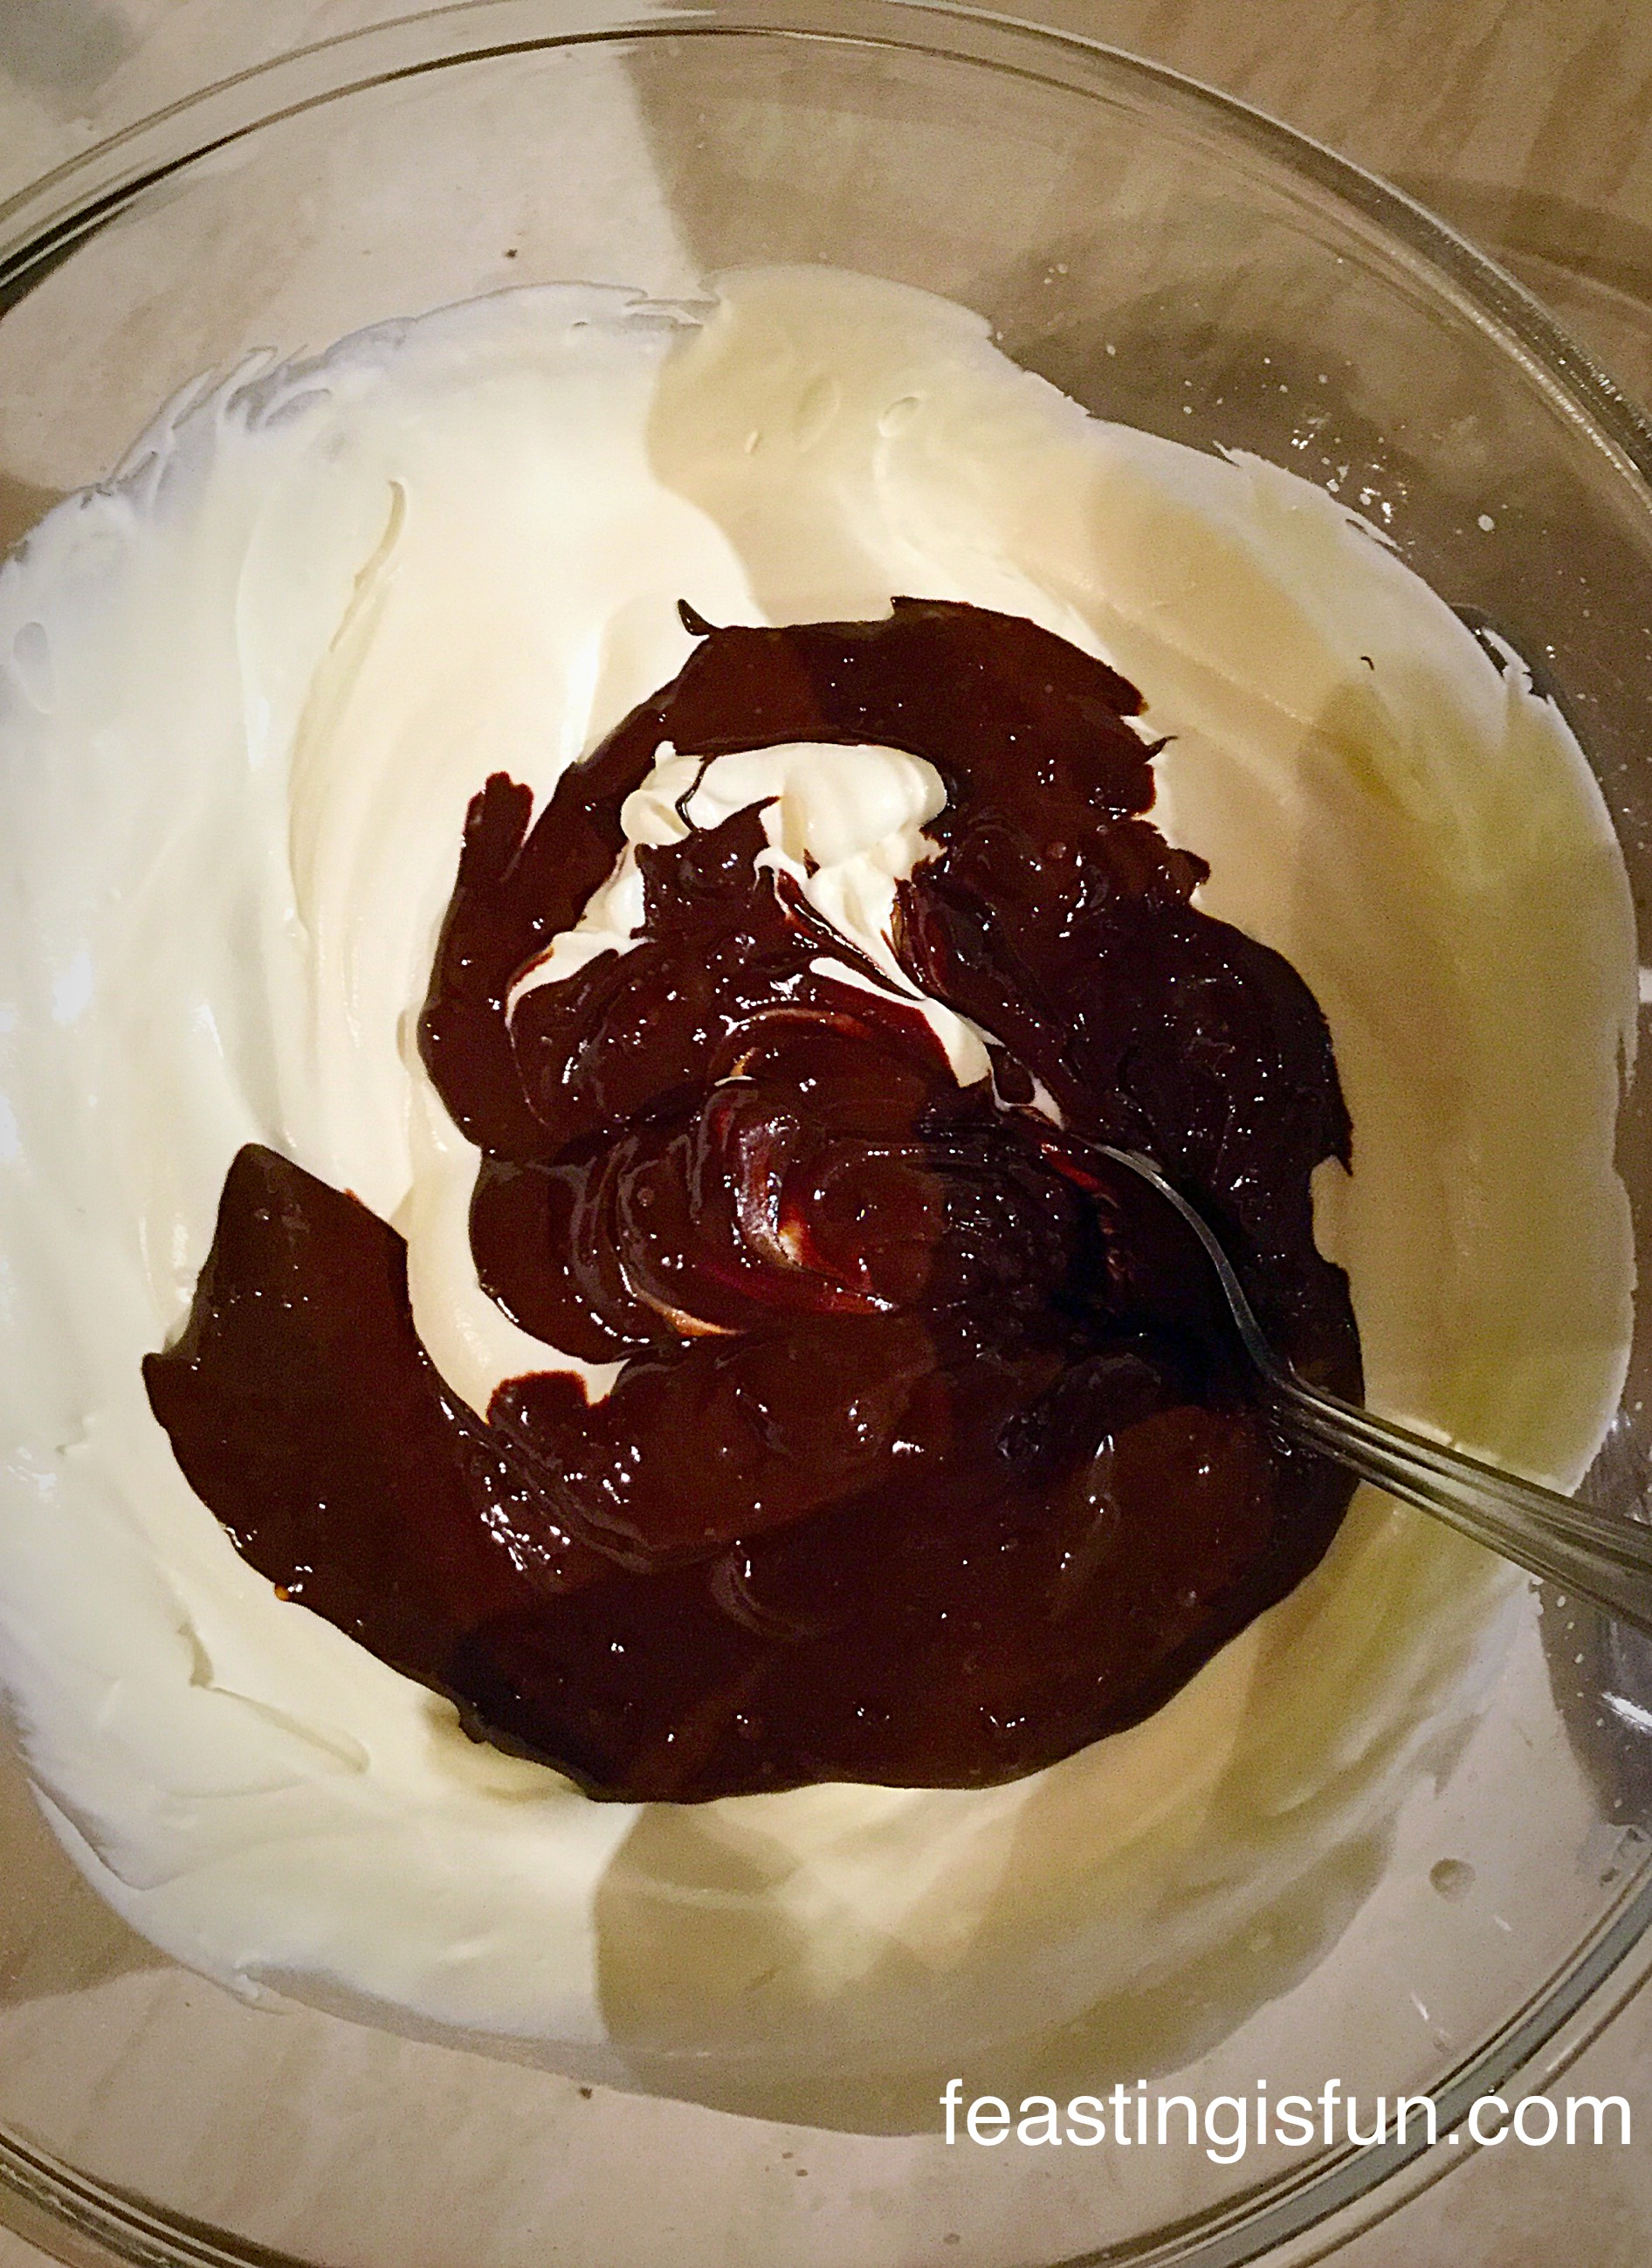
- Into a large bowl add butter, icing sugar, salt and lemon juice.
- Stating on a low speed whisk the ingredients together, increasing the speed until the buttercream is light and creamy.
- Spoon the buttercream into a large piping bag without a nozzle fitted. If using a disposable bag cut a 1cm opening at the bag’s tip.
Filling and covering the cake:
- Pipe one tablespoon of buttercream on to the plate/board used for the cake.
- Place one cake sponge, flat side facing up, on top of the buttercream.
- Spoon 3 tablespoons of lemon curd on to the cake and spread to cover evenly.
- Pipe 3-4 tablespoons of buttercream on to the top of the next sponge. Spread to cover the sponge evenly.
- Flip the sponge and place on top of the lemon curd covered sponge.
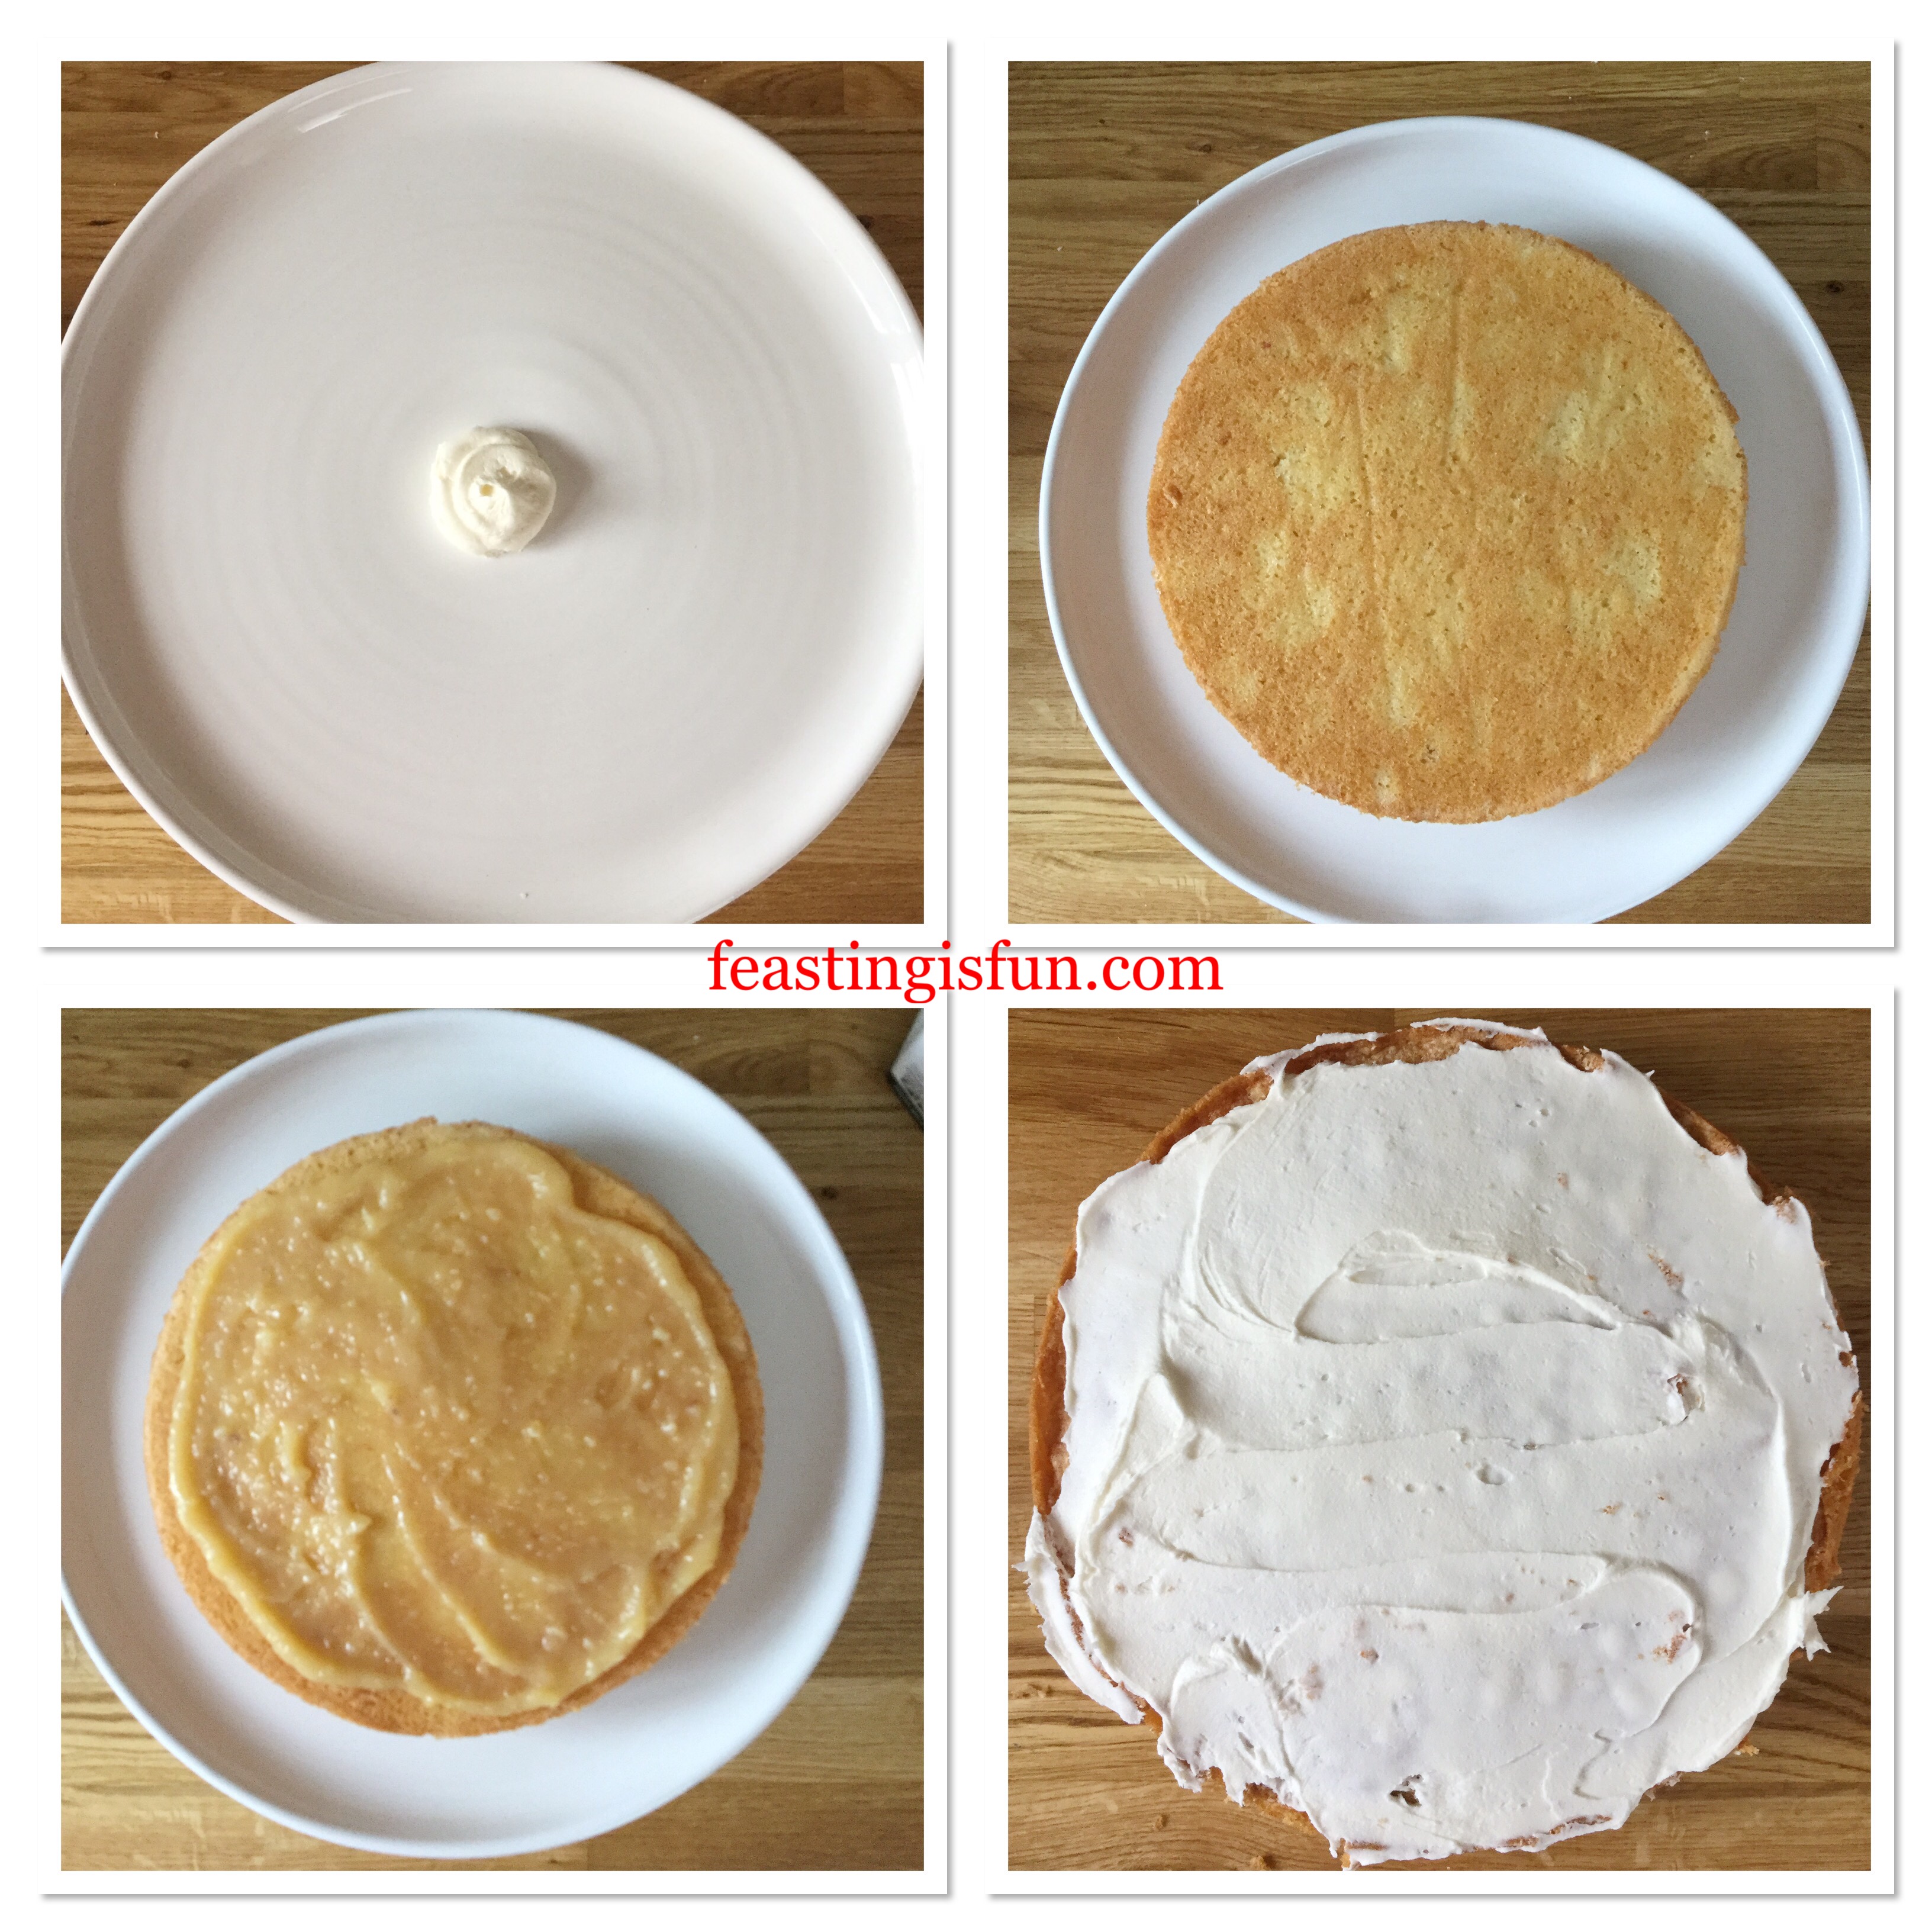
- Spoon 3 tablespoons of lemon curd on the top of the sponge, spread to cover evenly as before.
- Pipe 3-4 tablespoons of buttercream on to the flat side of the third sponge. Again, spread to cover evenly.
- Flip the sponge and place, flat side down, on to the second, lemon curd covered sponge.

- Place the cake plate/board on to a cake decorating turntable if you have one.
- Pipe buttercream between each layer and on the top of the cake.
- Use an offset palette knife to spread the buttercream evenly around and on top of the cake. Since the cake is to be covered the finish of the buttercream does NOT have to be perfect. Aim for a neat, smooth finish.

Decorating the cake:
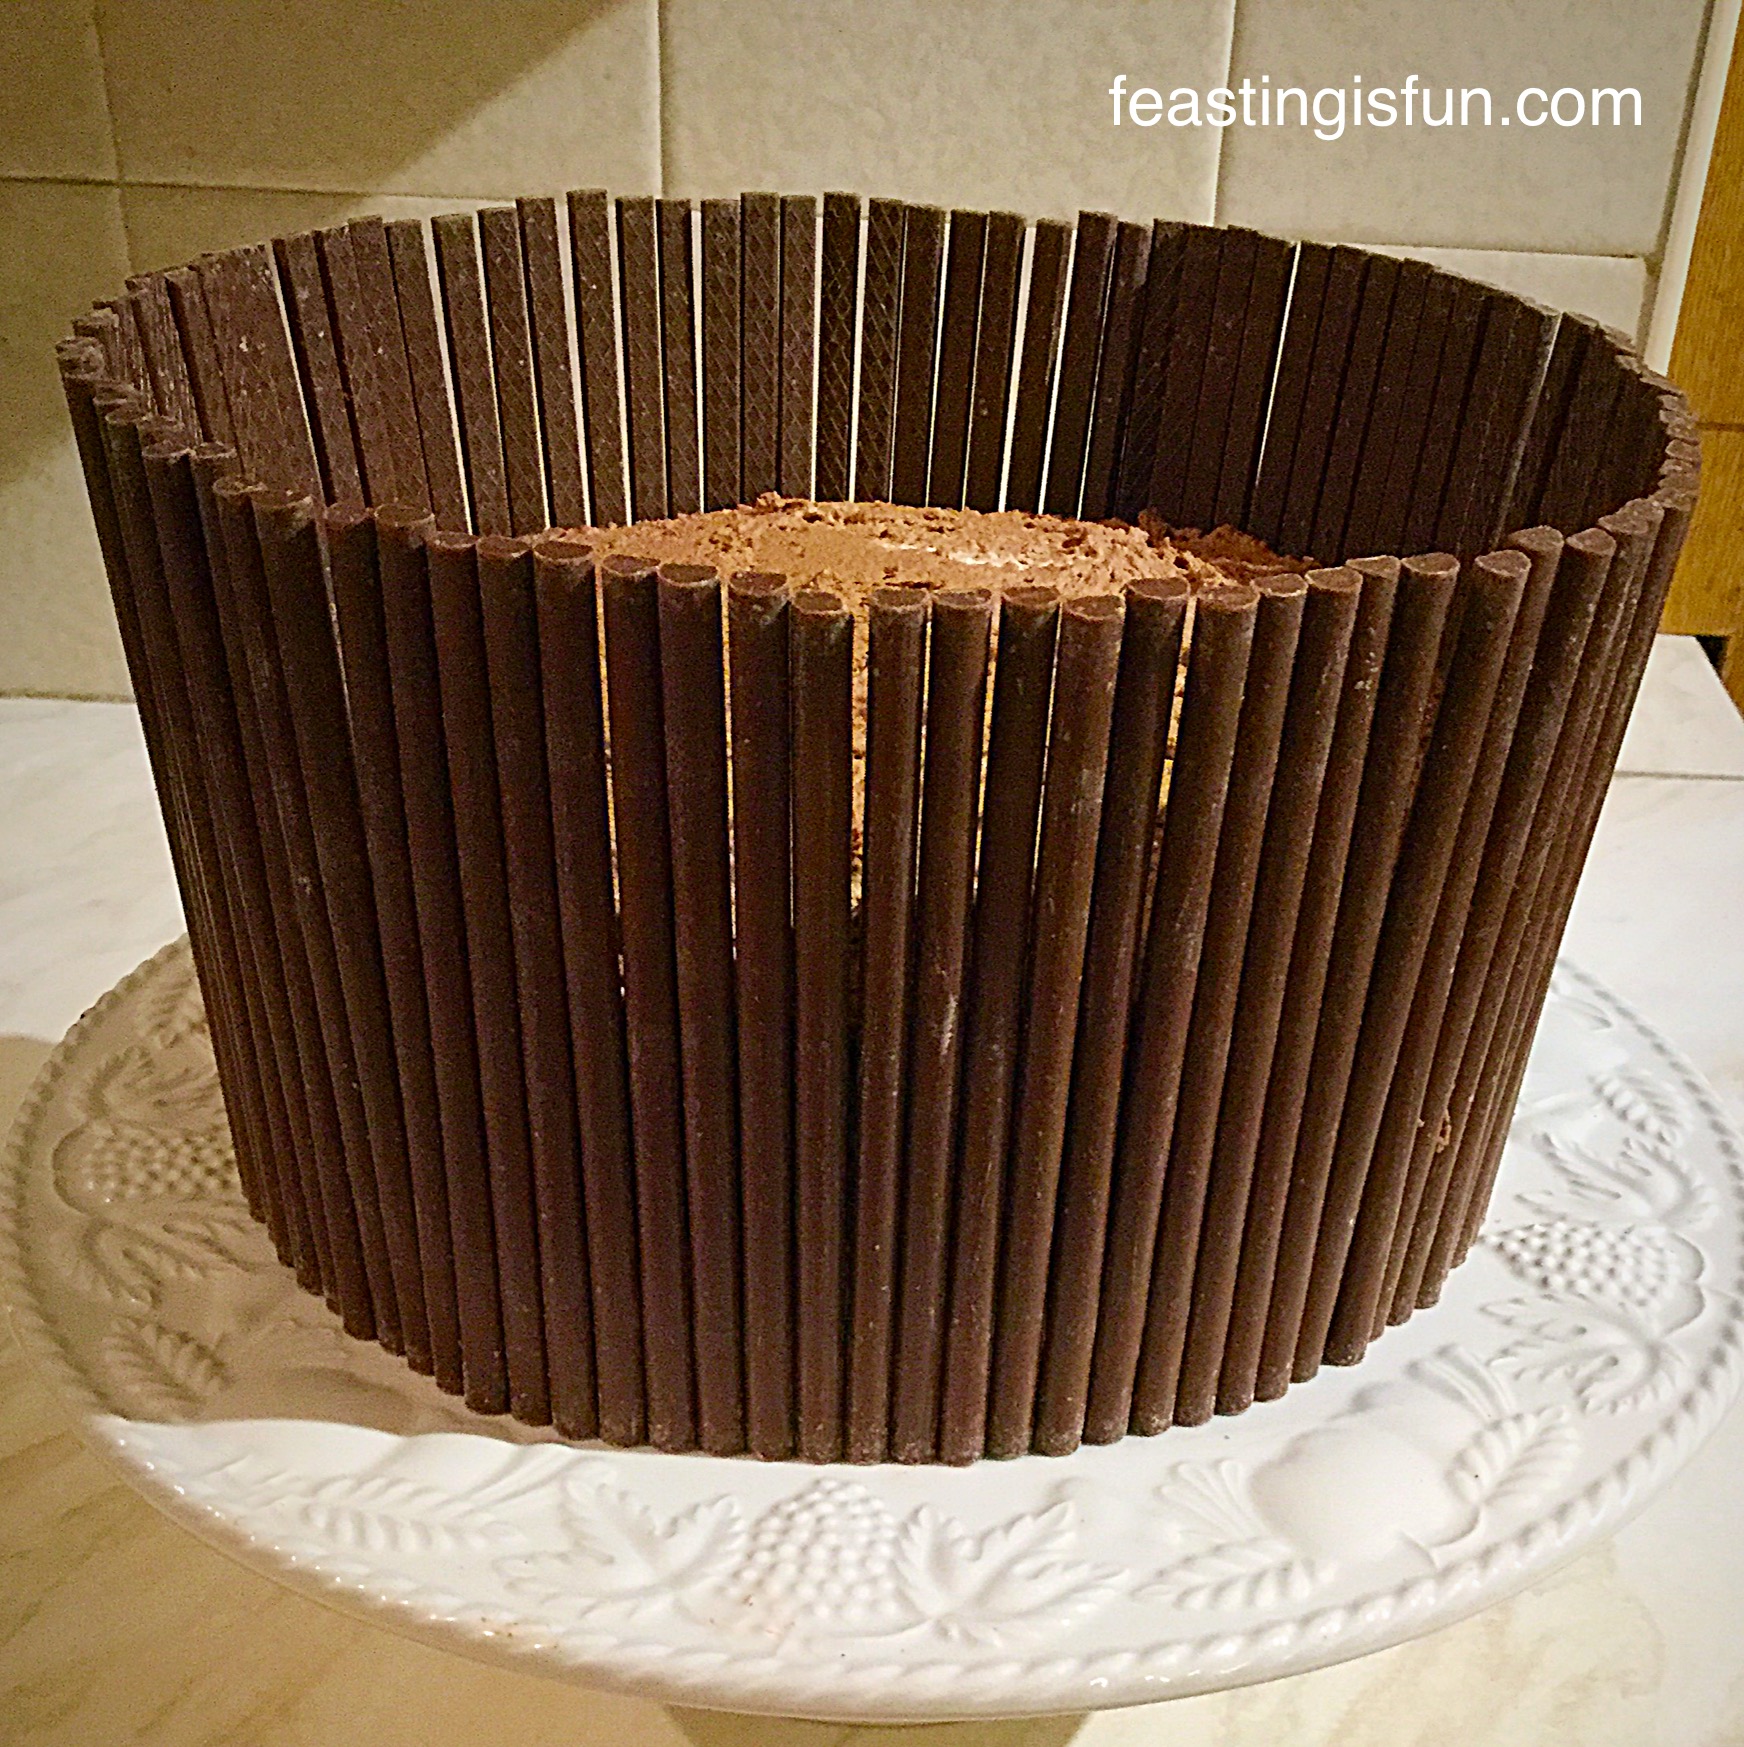
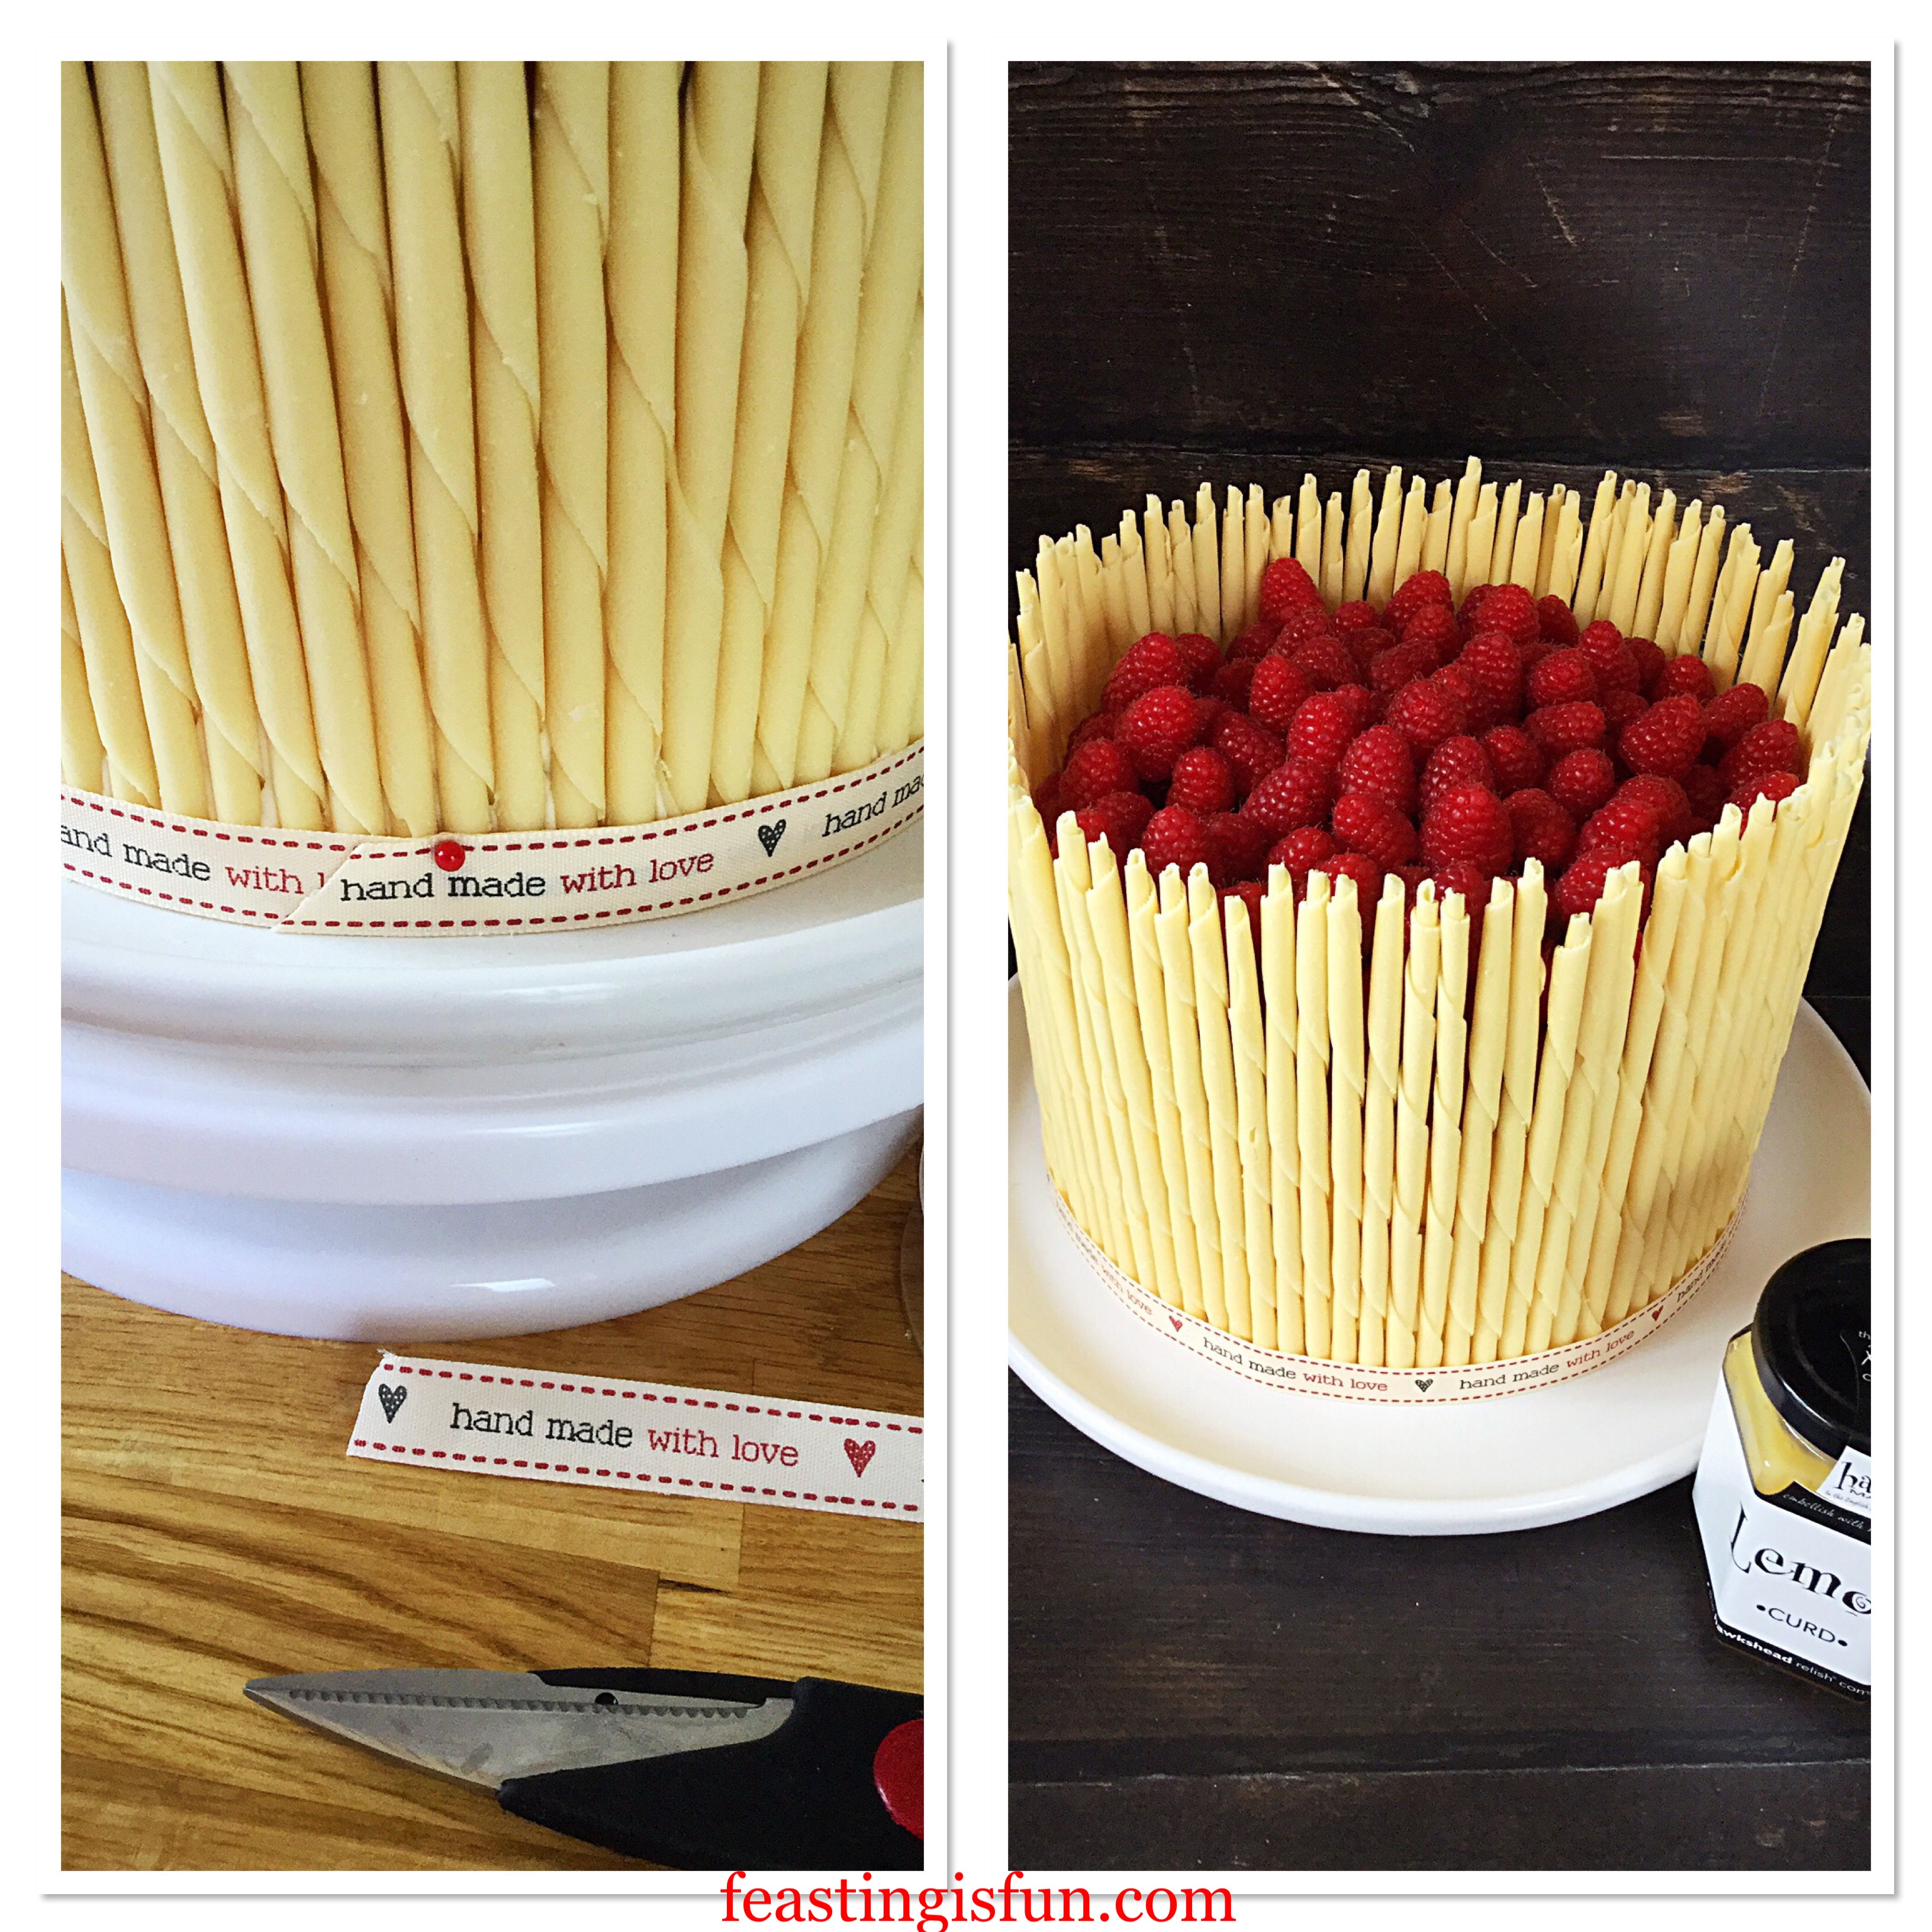
- First of all take a full size pencil, measure it against the height of the cake. 10cm or 4 inches is the desired height of excess pencil from the top of the cake.
- Trim a pencil to the length needed and measure against the cake to double check.
- Make any adjustments and keep the pencil as a guide for cutting the remaining pencils.
- Cut a few pencils at a time. Carefully take the first one placing vertically against the side of the cake. Gently push it into the buttercream.
- Continue with the next pencil, placing as close as possible next to the first pencil.
- Work around the outside of the cake, adding pencils until the entire cake is surrounded.
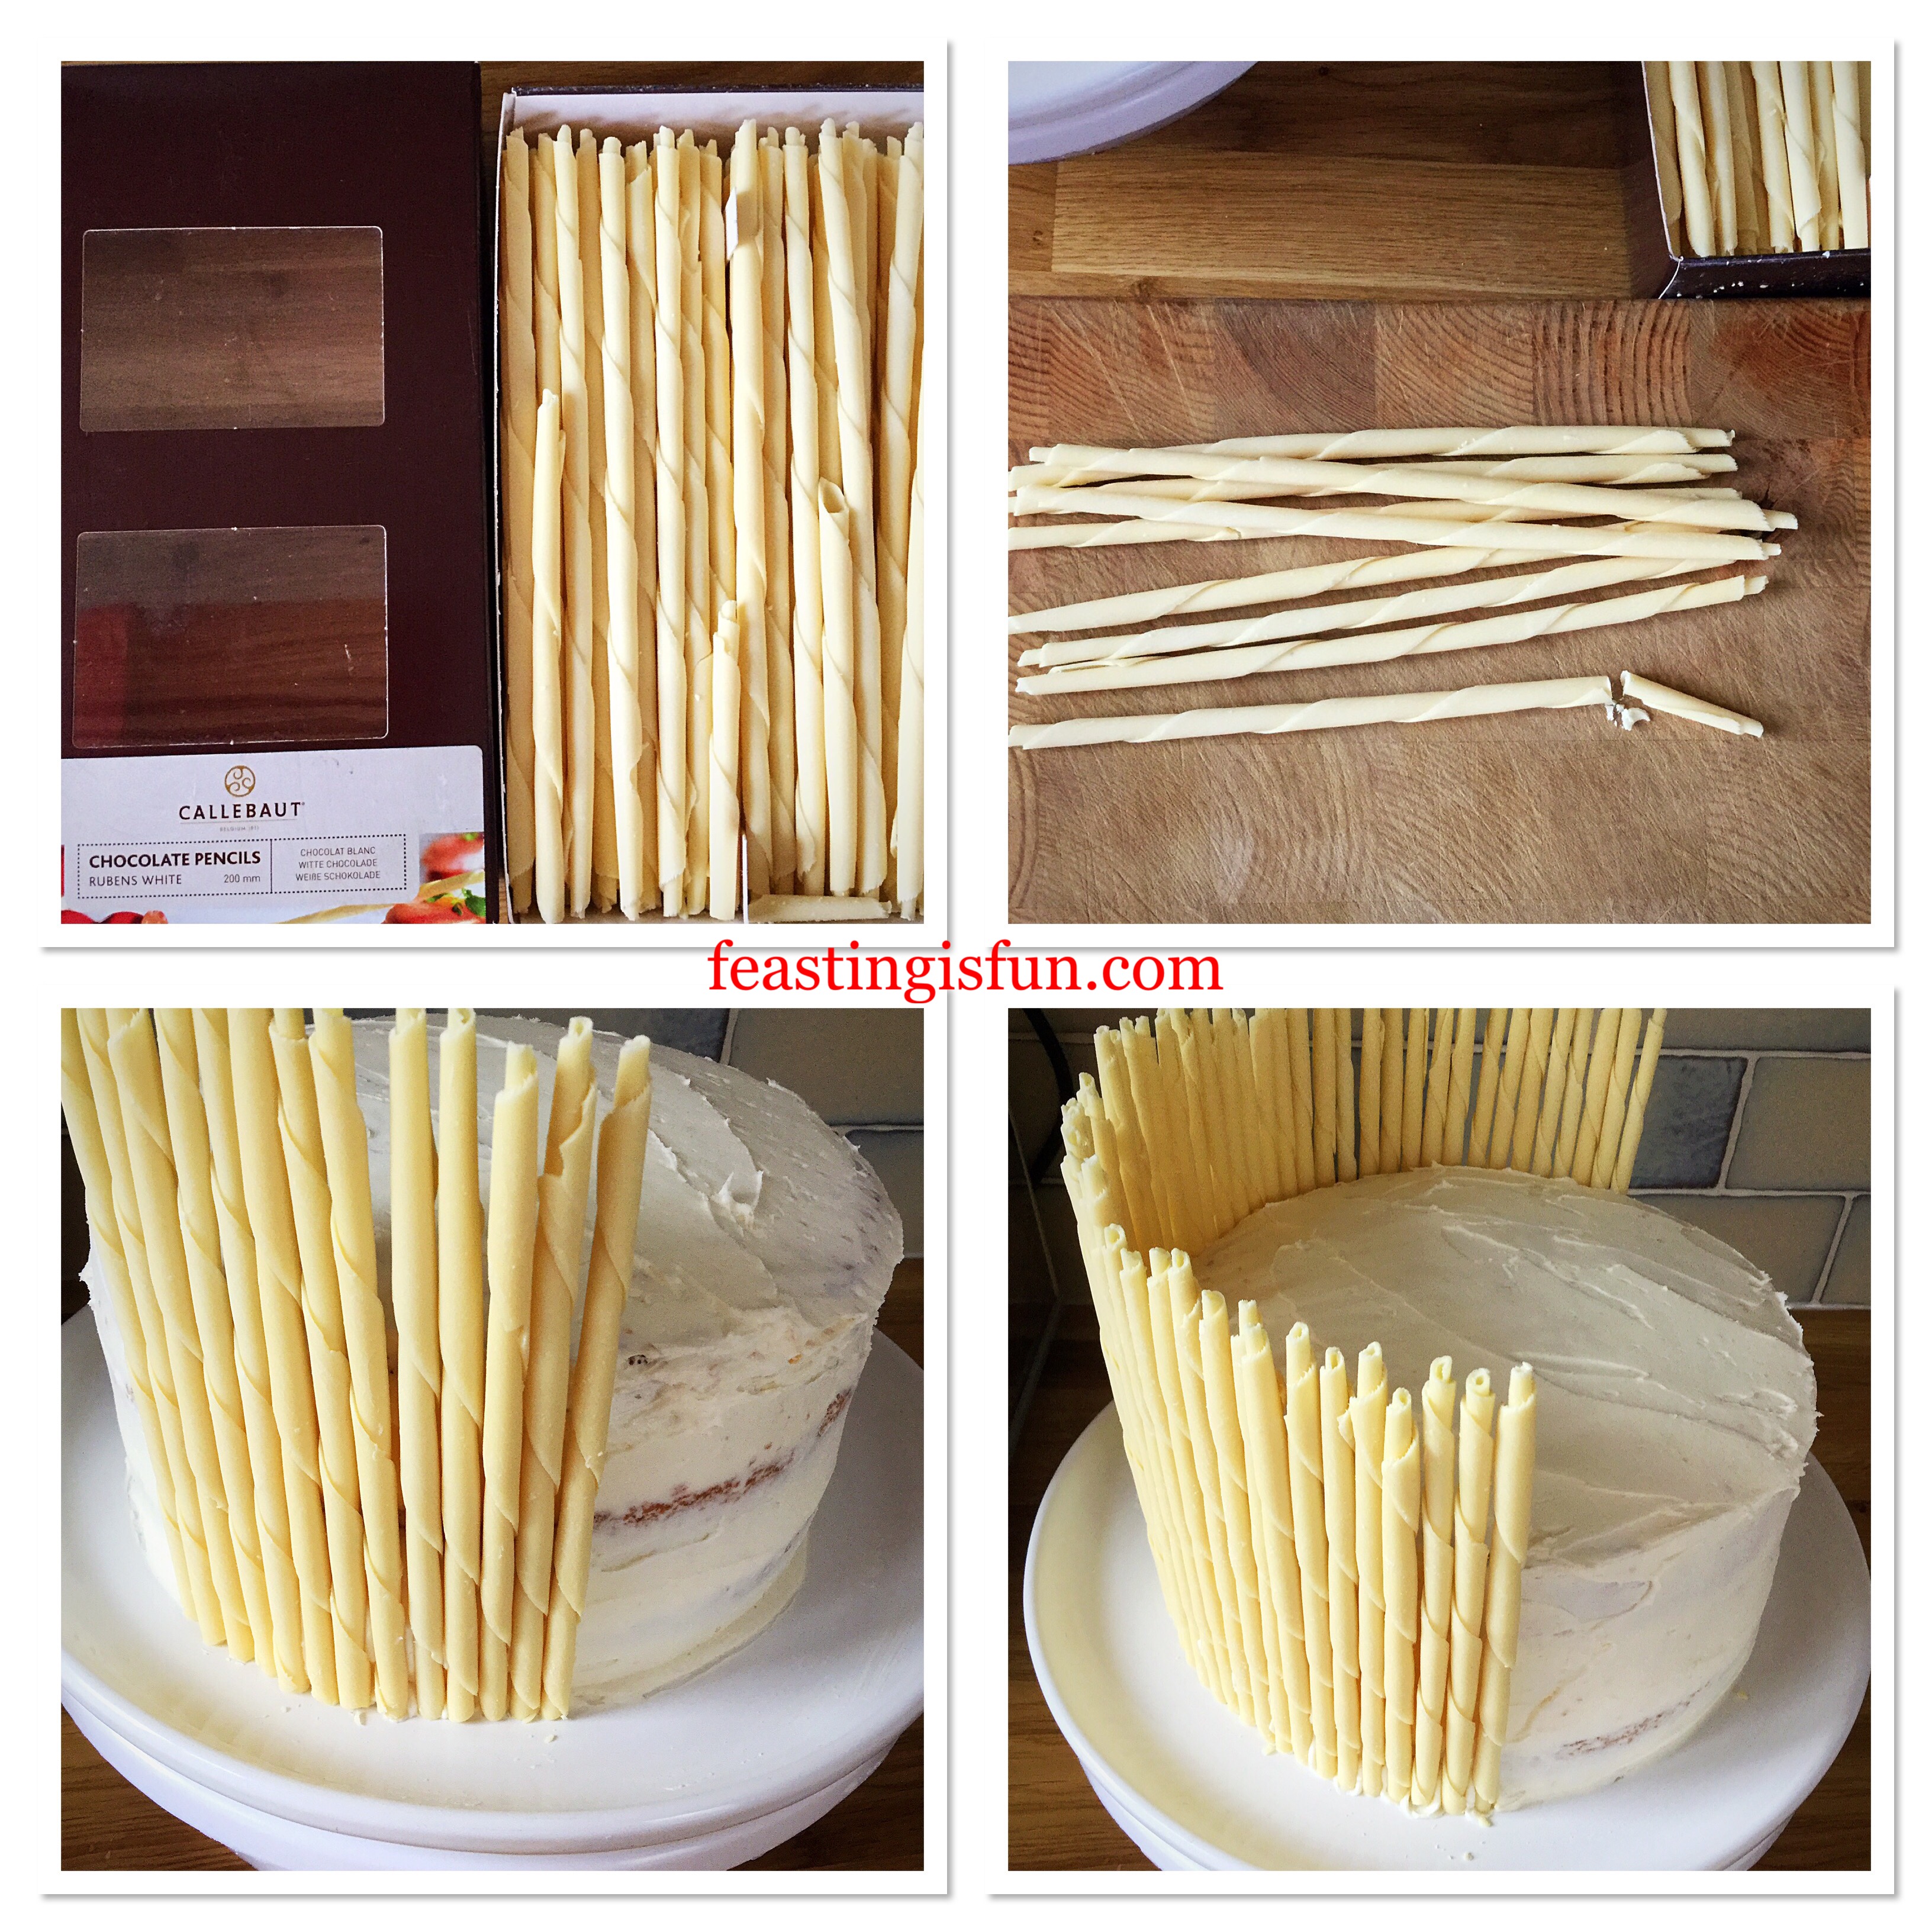
- Turn the cake, check from each angle, ensuring the pencils are uniform.
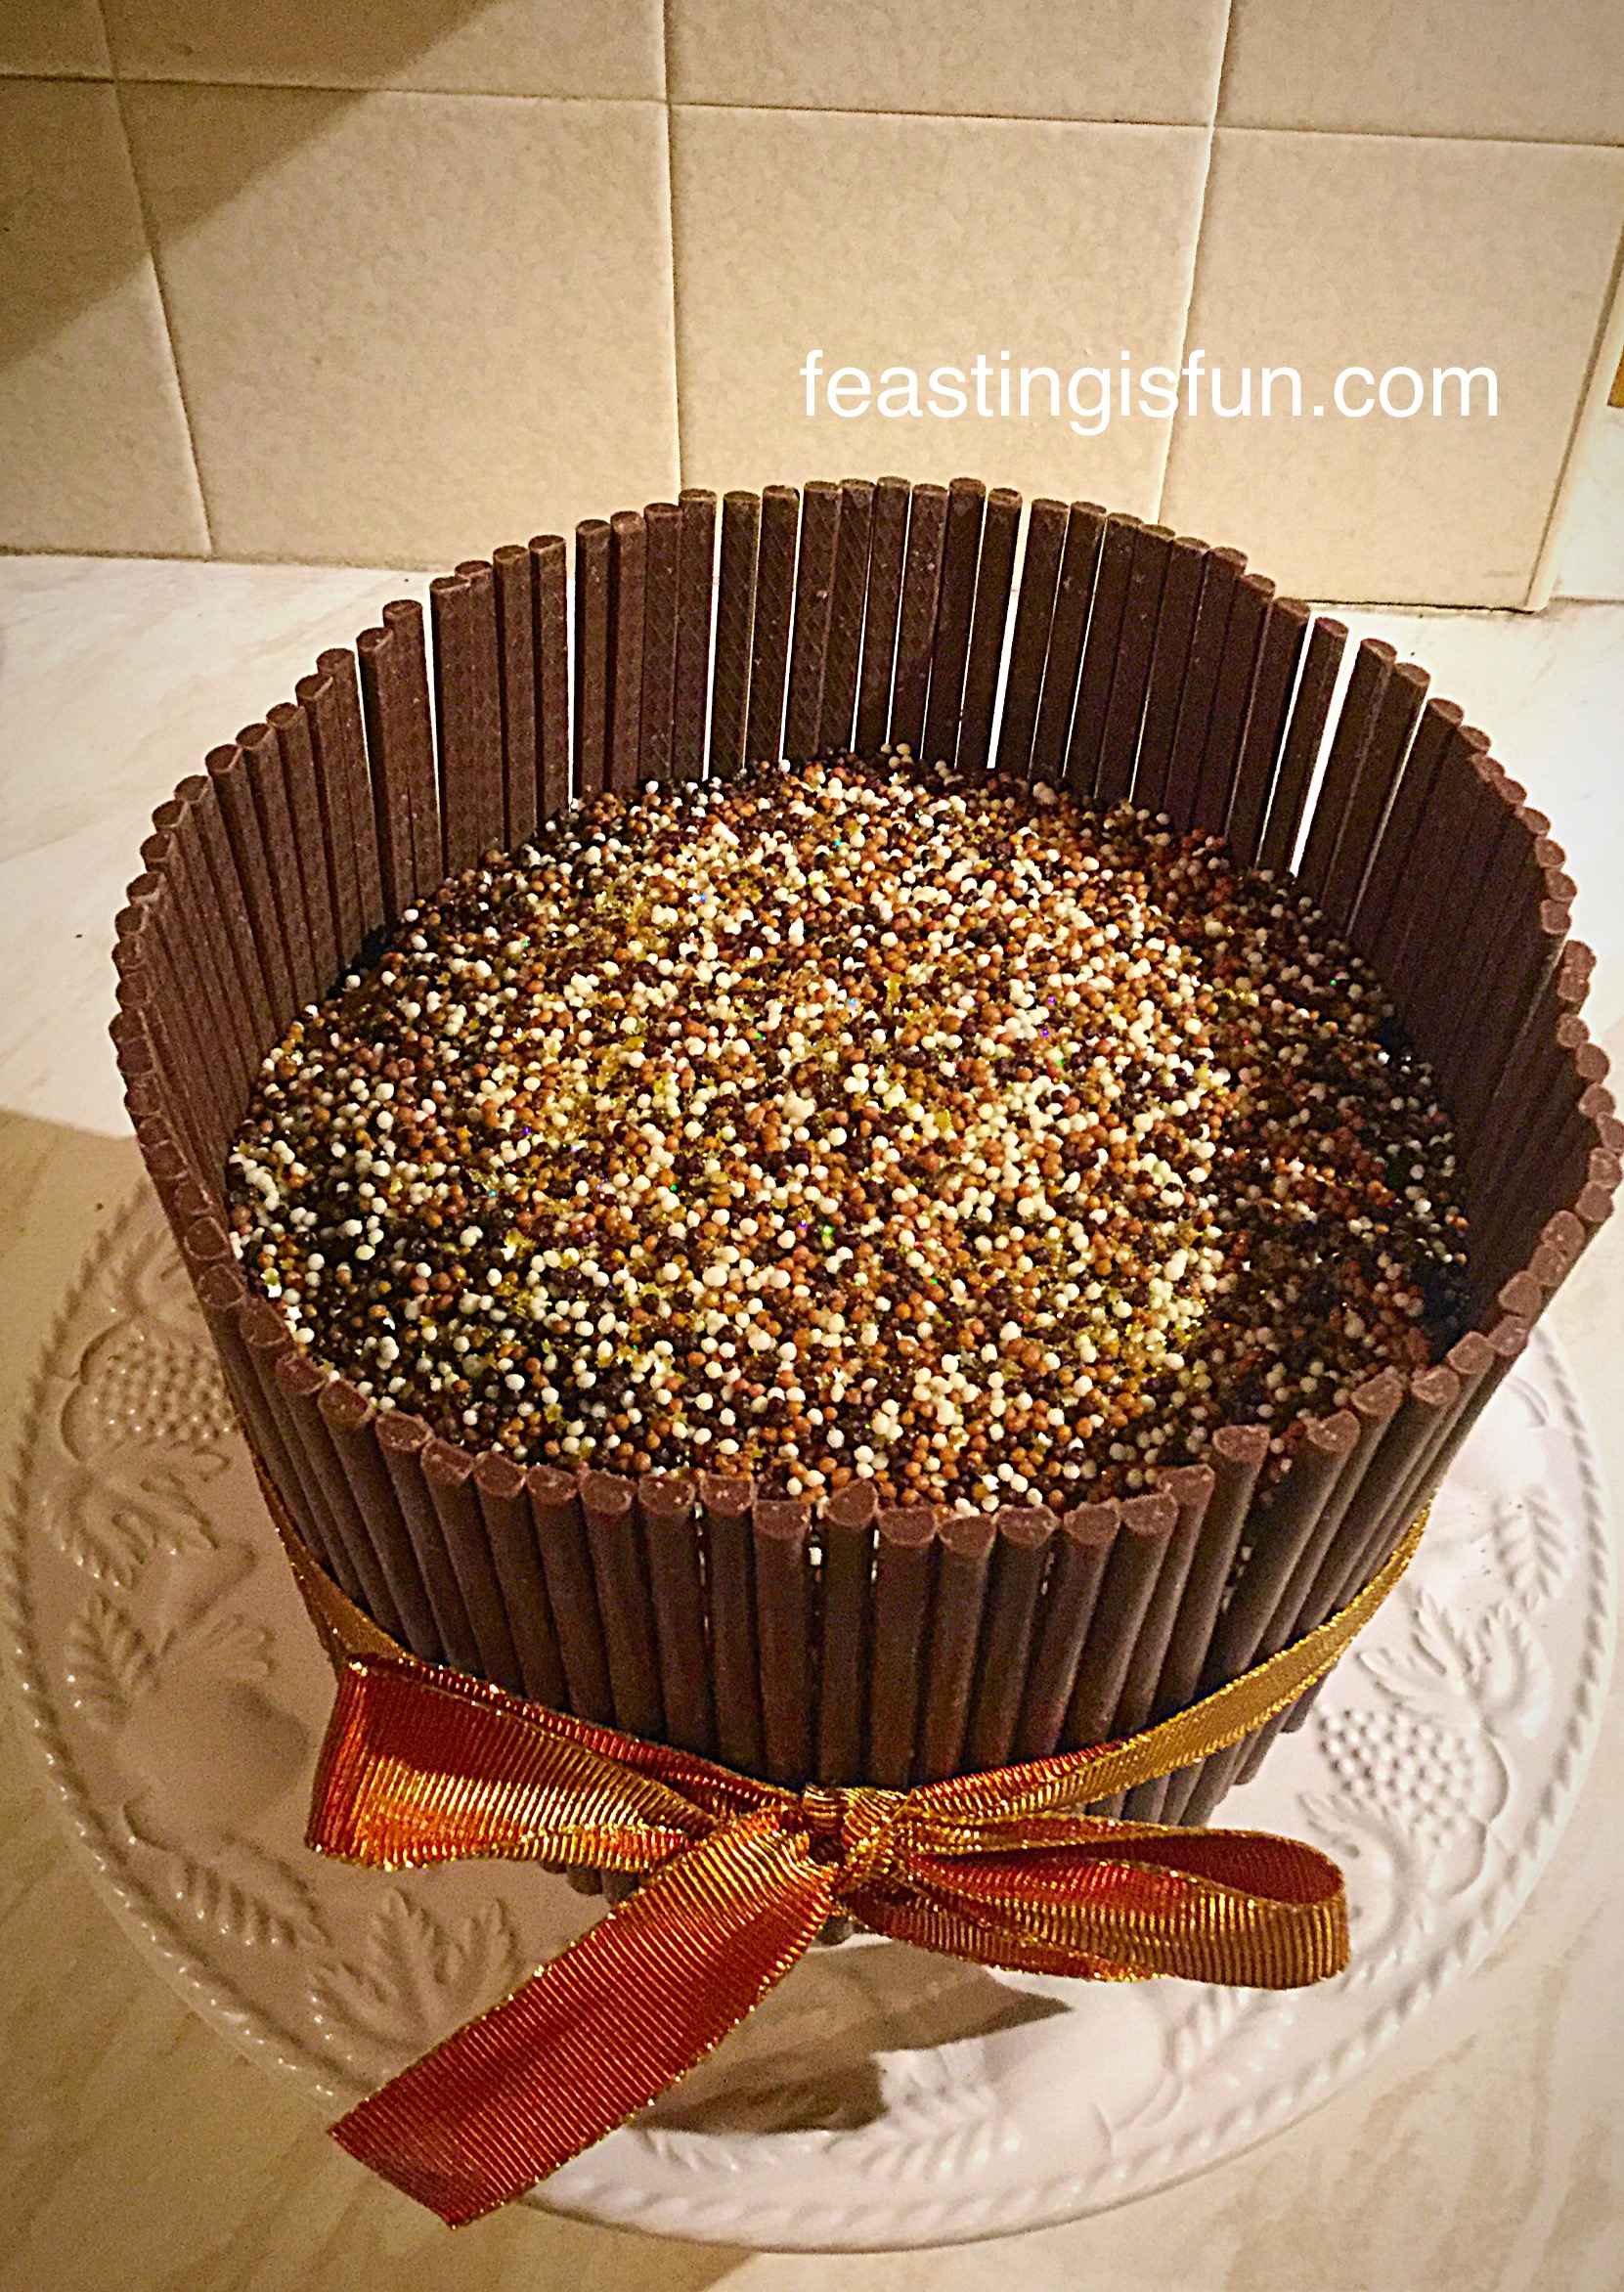
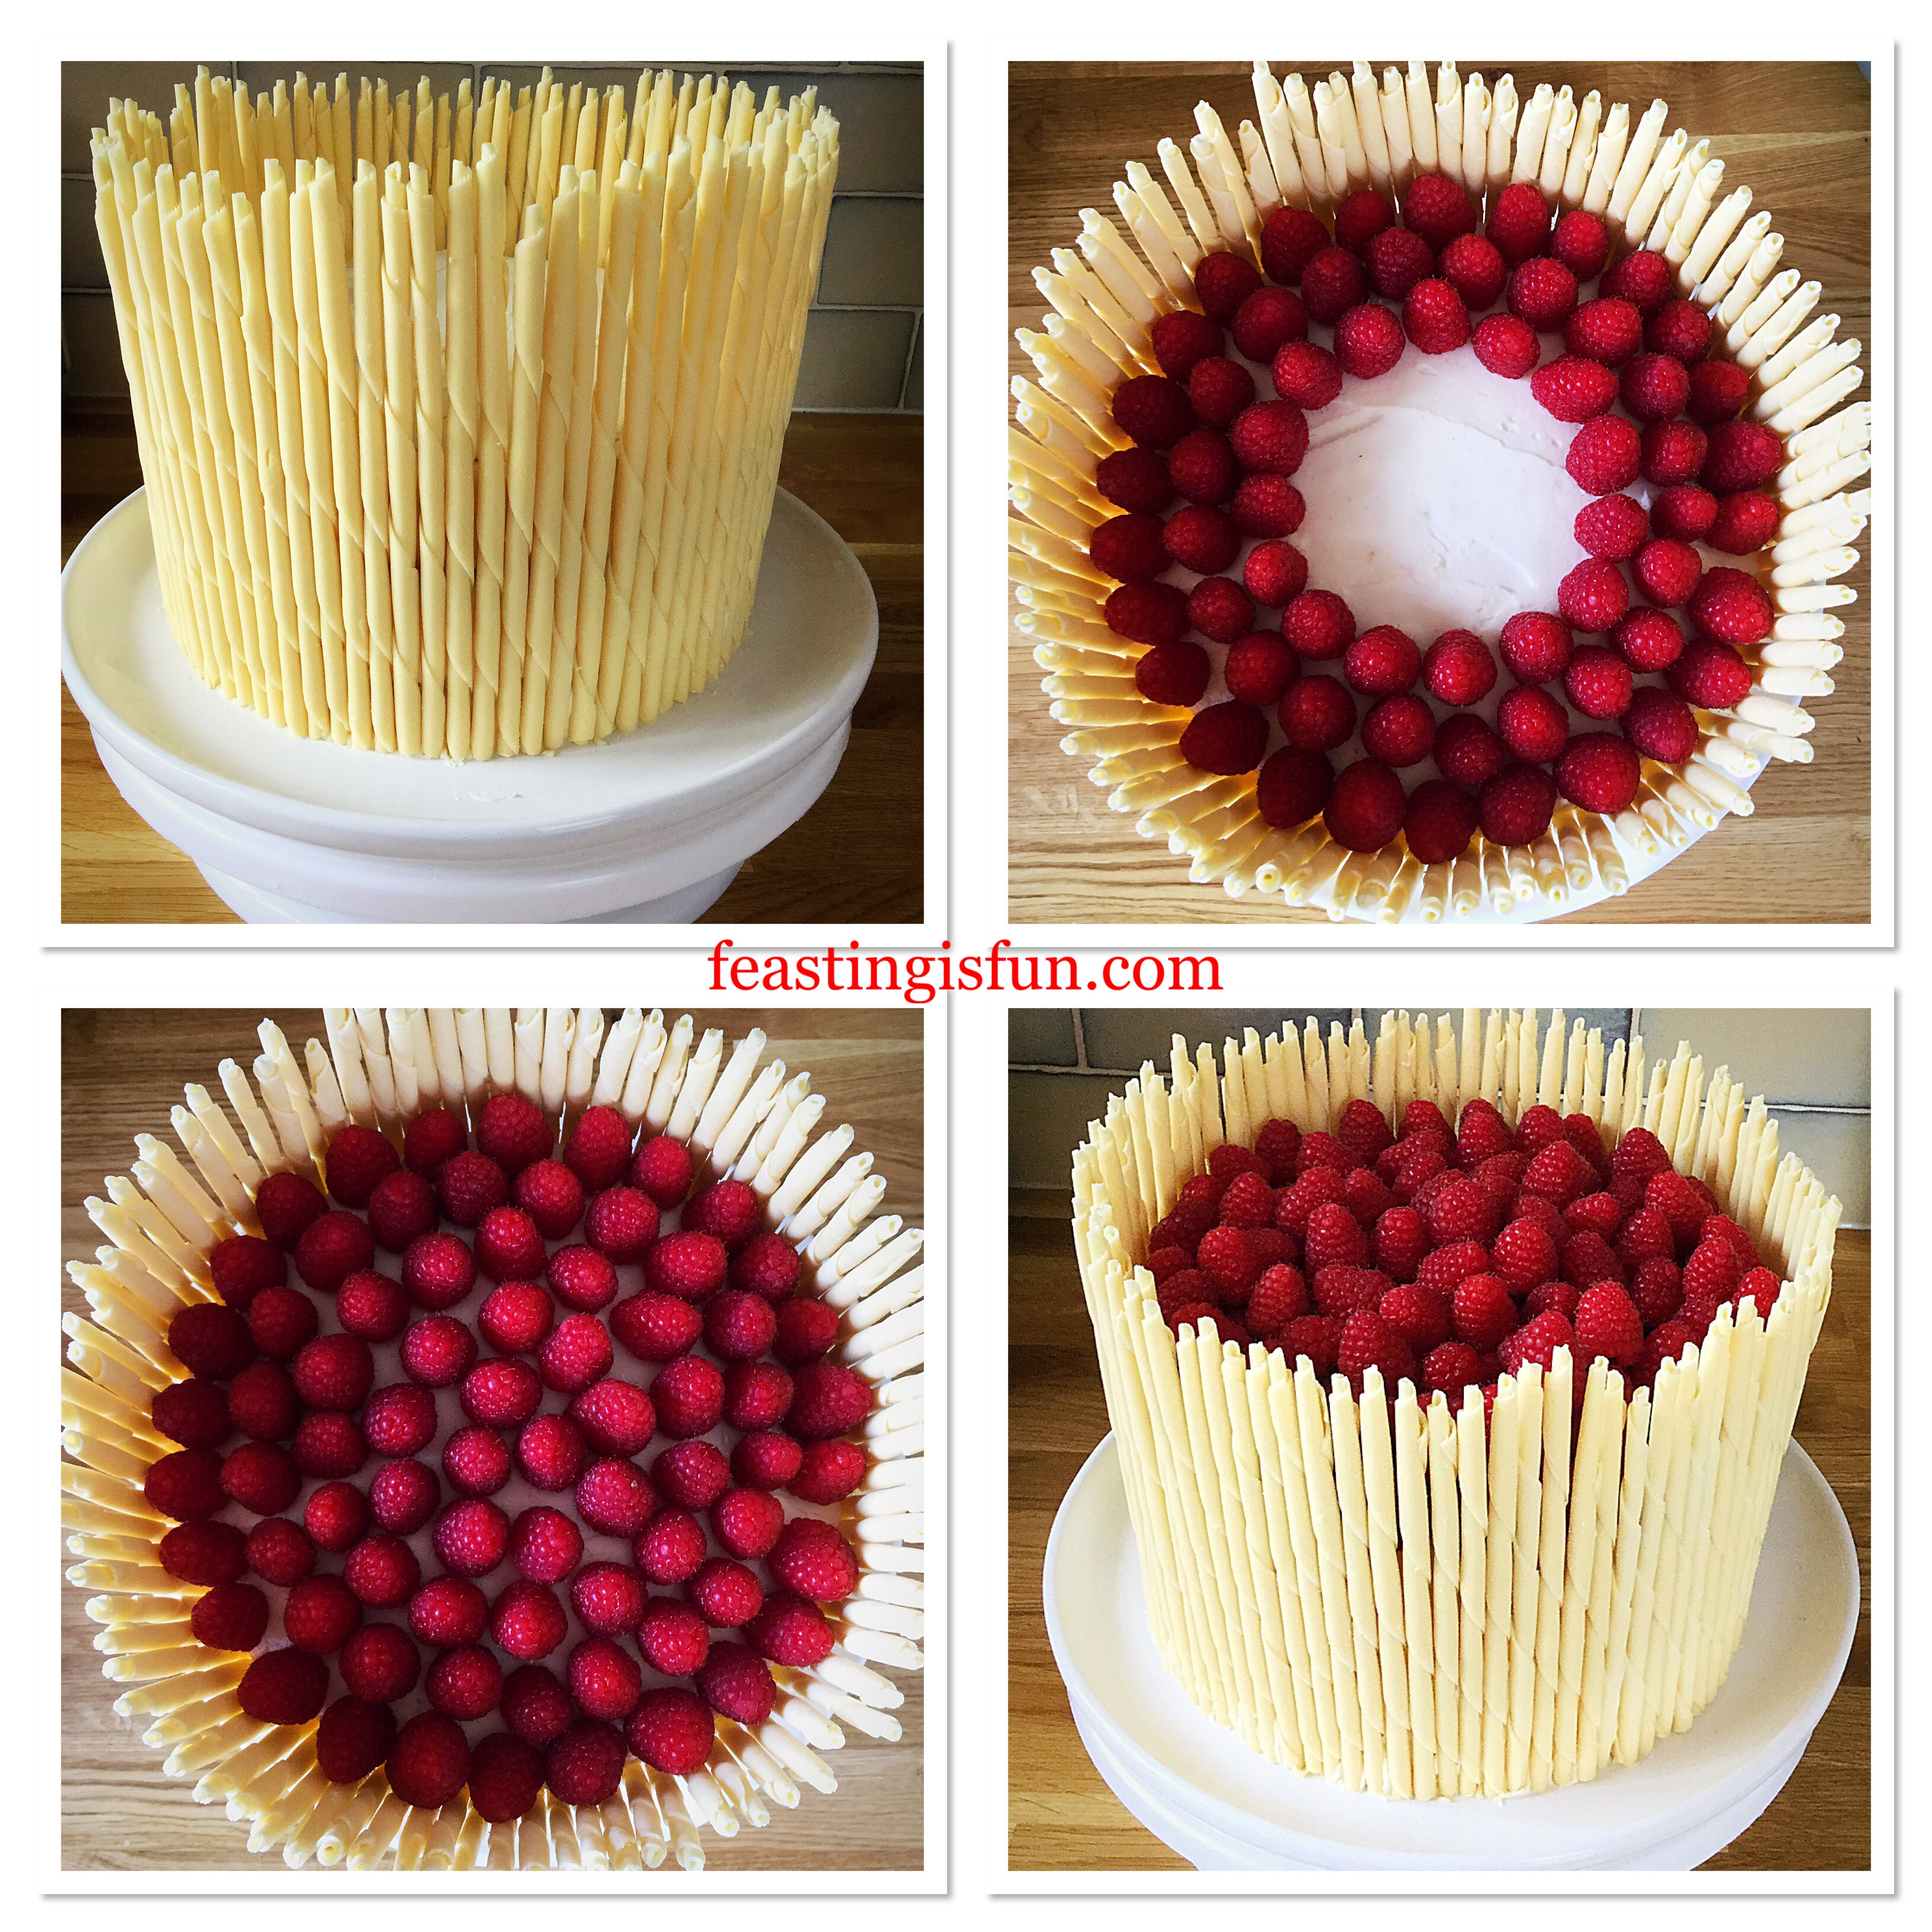
- Starting at the outside rim, place raspberries as close together as possible.
- Work in circles towards the cake’s centre, until the first layer of raspberries is complete.
- Place the remaining raspberries on top, in a circular fashion, finishing at the cake’s centre.
- Finally, measure a length of ribbon around the base of the, so that it just overlaps.
- Cut and fix the ribbon in place with a pin. Ensure the join is at the back.
Chill the cake for one hour before serving. Doing so ensures that the cake is easy to slice.
Remove the ribbon before cutting.
Store any remaining cake in an airtight container, ideally in the fridge. Eat within 5 days of making.
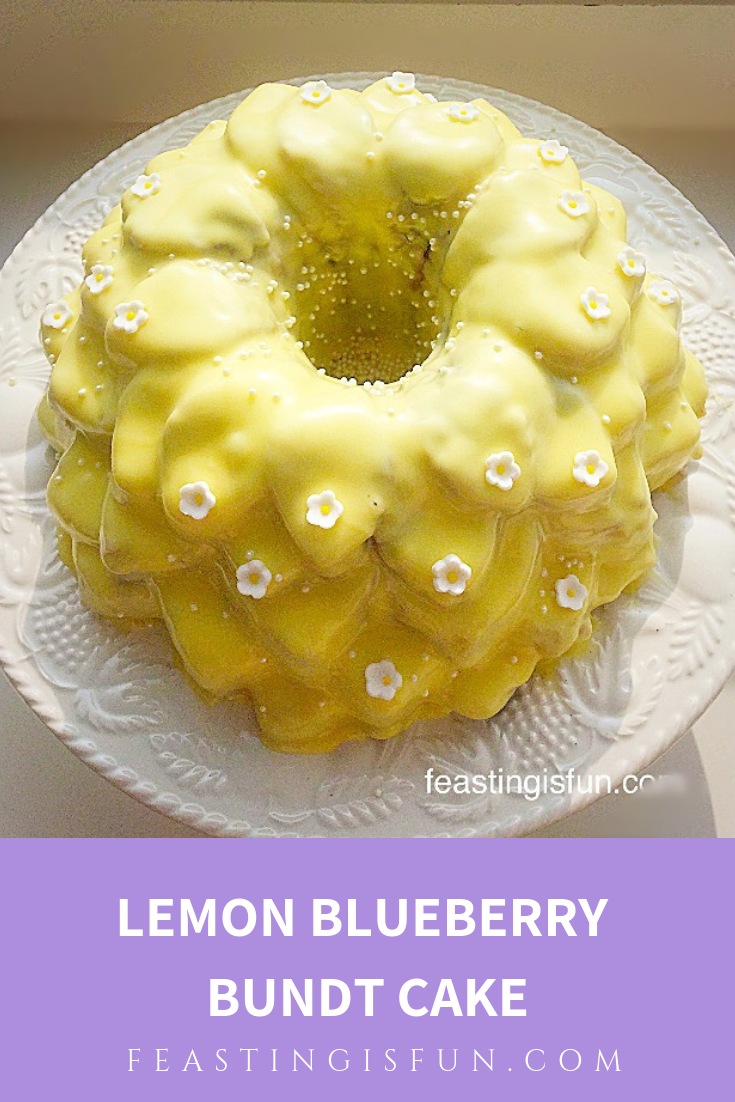
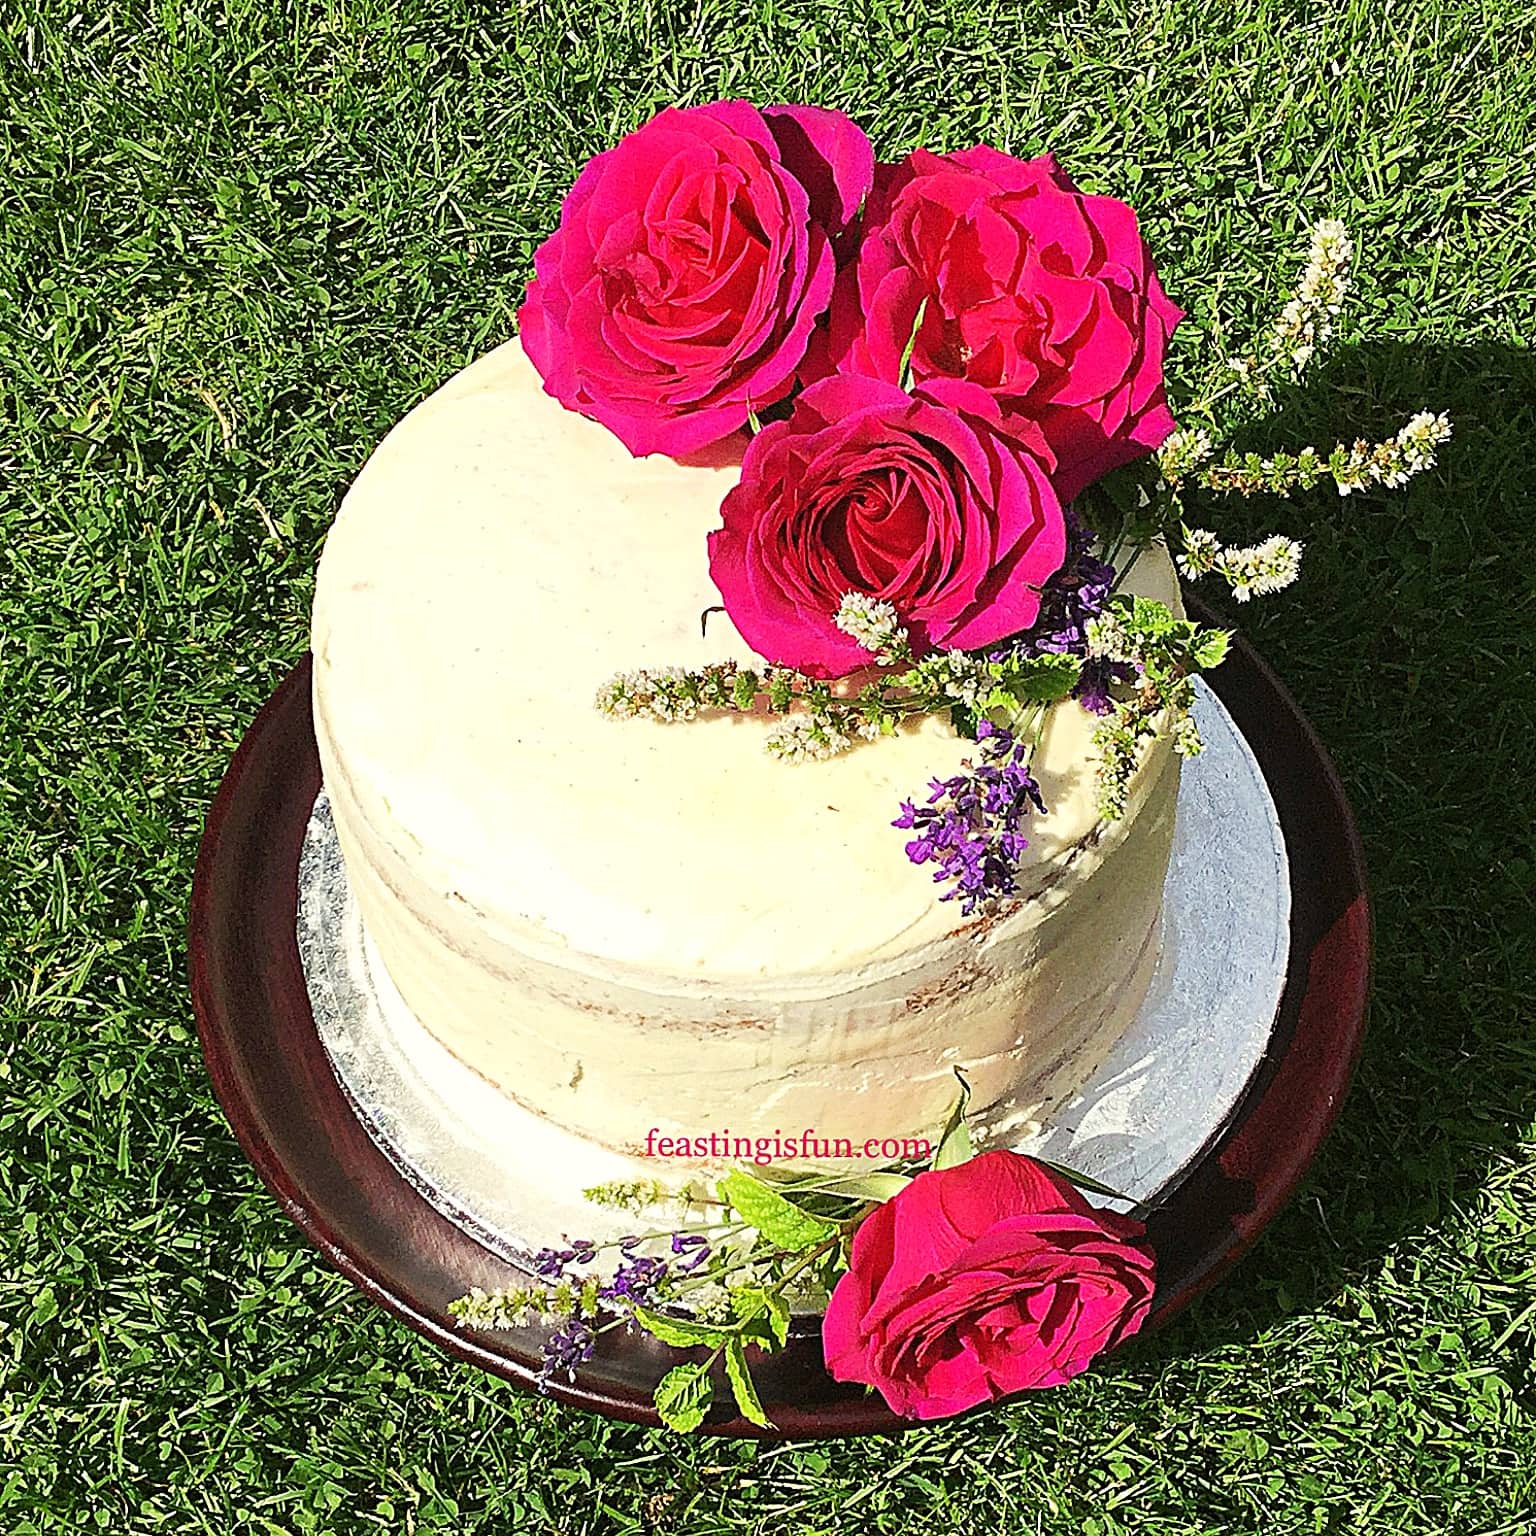
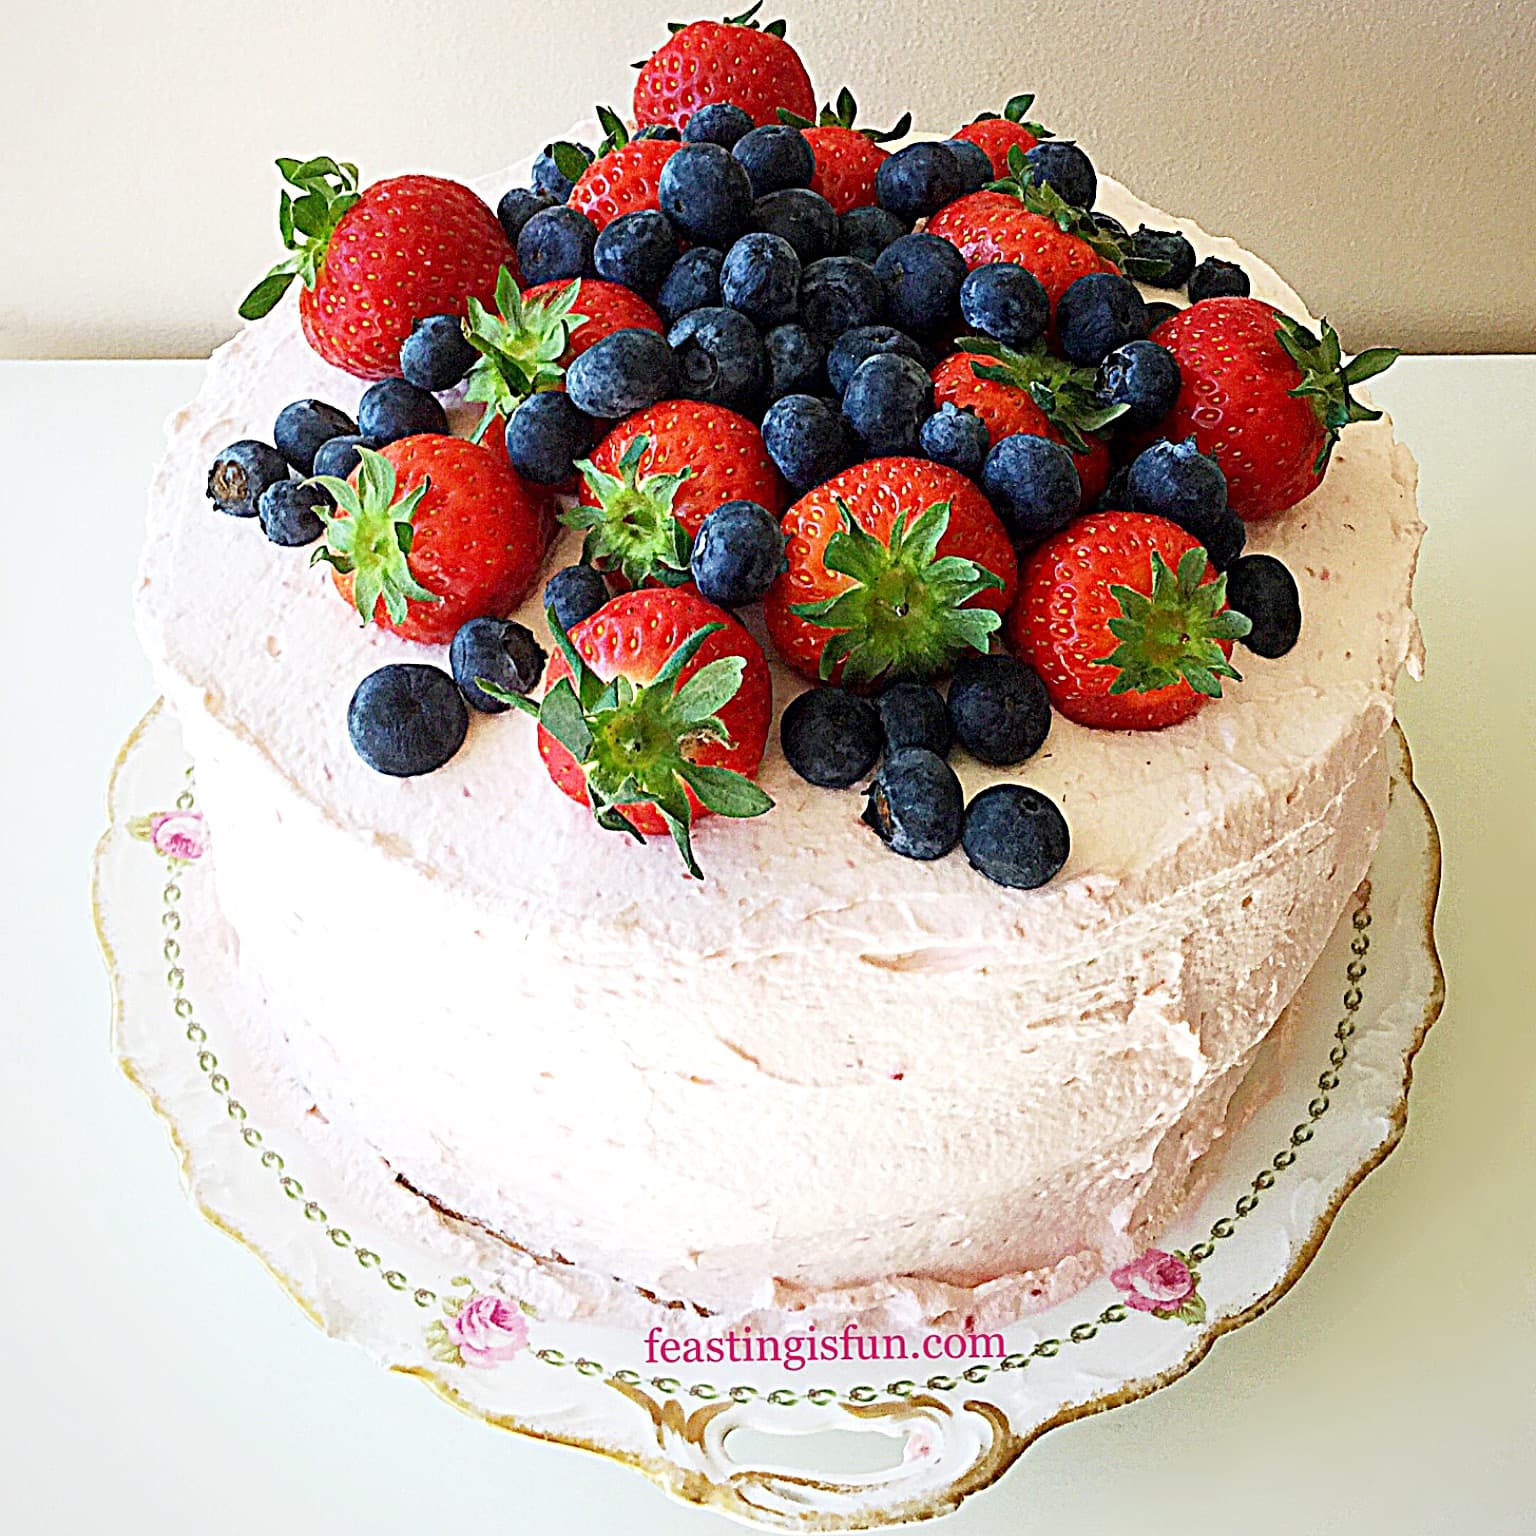
If you have enjoyed this recipe for Raspberry Lemon Celebration Layer Cake you may also like these:
Raspberry Vanilla Naked Celebration Cake
Summer Mixed Berry Sponge Cake
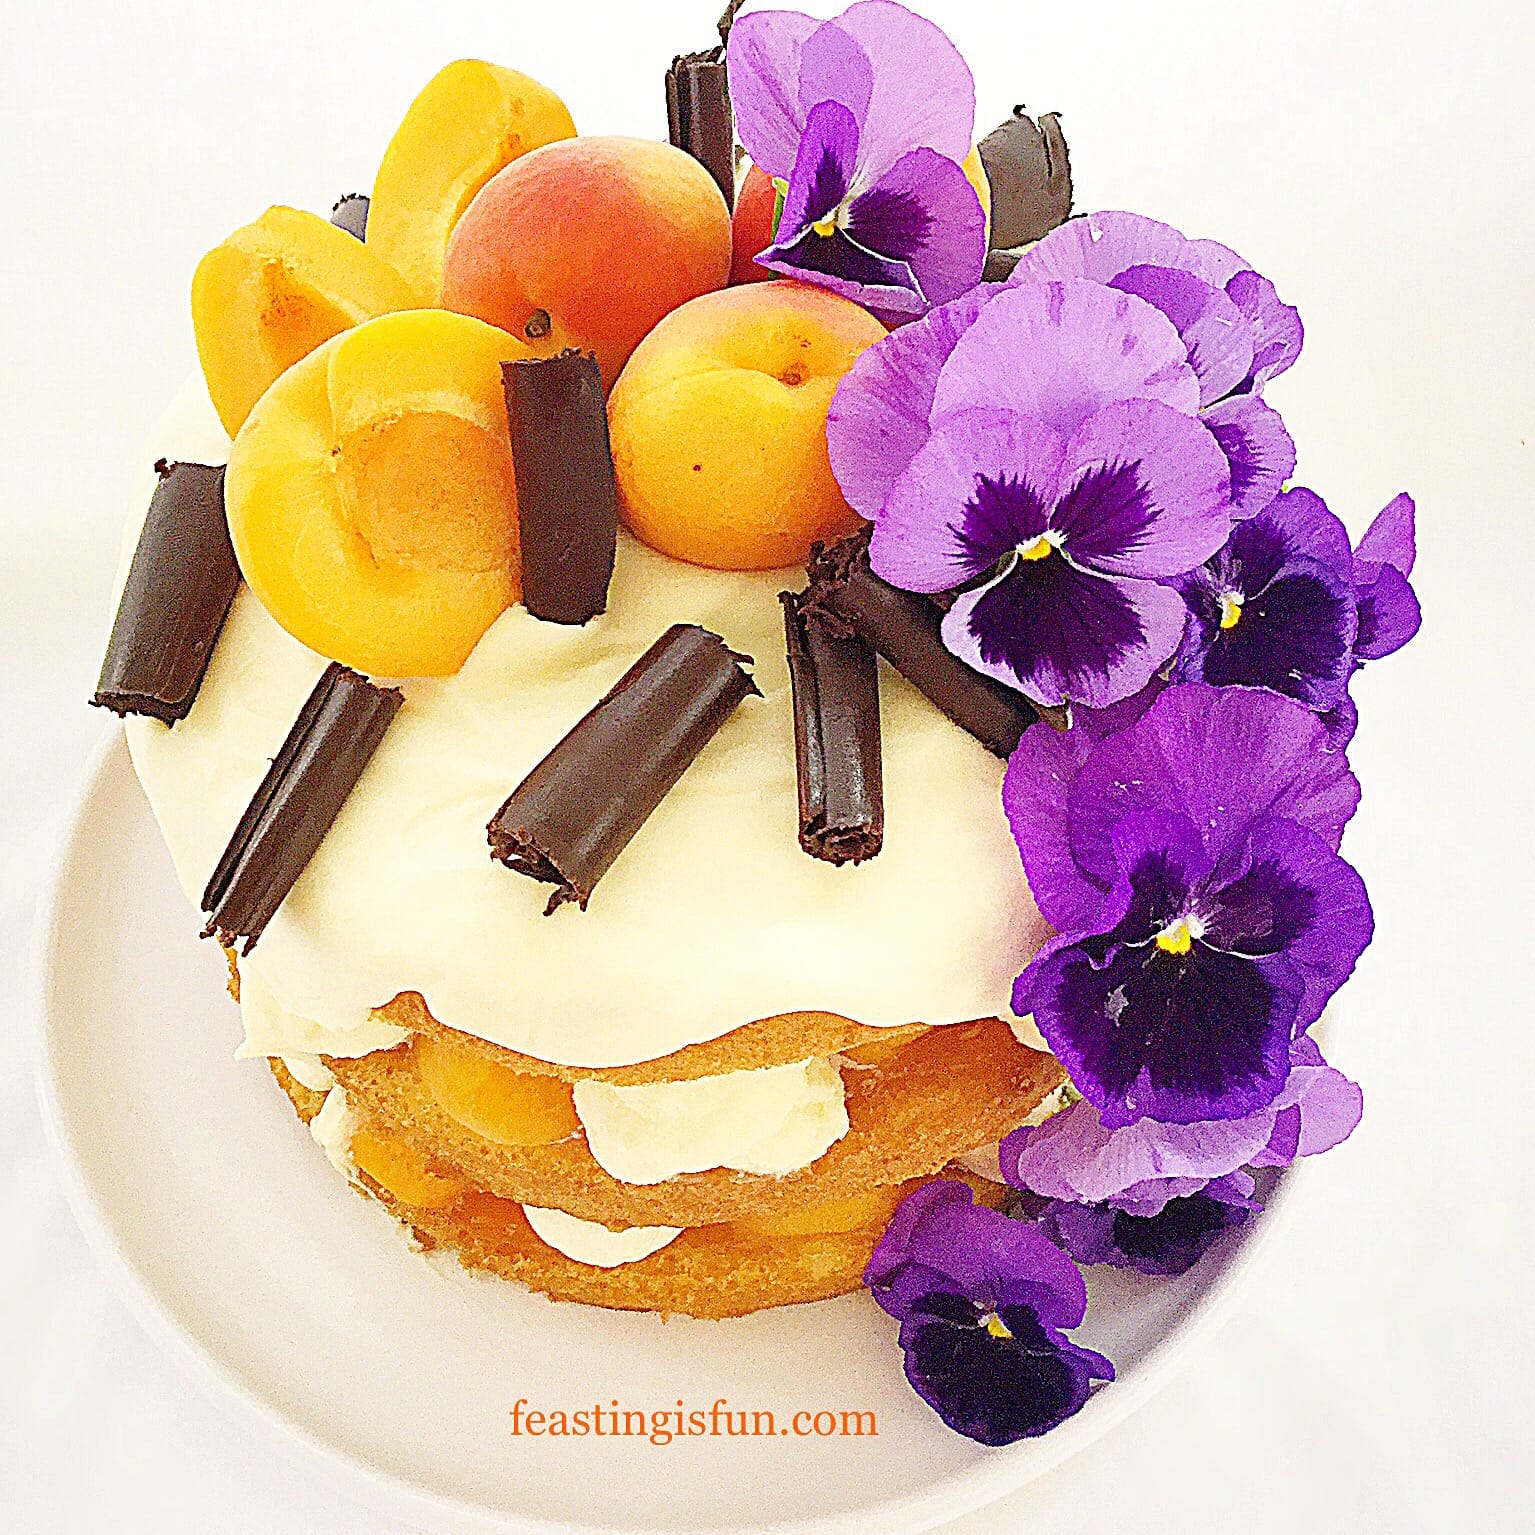
Apricot White Chocolate Triple Sponge Cake
To be a Mother is to be part of a family. Above all that really is the best part for me. Loving and being loved back. Because that is what fills me with joy. Even more so laughing and having people to laugh with. Feasting and sharing with those who love and enjoy life. Finally, if you too would like to be part of a family see Important Stuff.
So, whatever er you are making, baking and creating in your kitchens, have fun preparing and sharing your feast!
Sammie xx
Hawkshead Relish supplied the lemon curd for this recipe. All content and opinions are those of the writer. No payment has been received for this post. No part of this post may reproduced or duplicated without the written permission of the owner. Please see the Disclosure Policy.