Raspberry Lemon Celebration Layer Cake

Share
Facebooktwitterpinterestlinkedintumblr

Today is Mothering Sunday, also known as Mother’s Day. A day set aside to give thanks and show love to those who have born and birthed us. Yet with surrogacy, adoption, step mothers, fostering and many other types of parenting, for me this day represents so much more. First of all, for me personally, the title of Mum, Mam, Mother or Mom, does not come with any accolade simply because a woman has carried and given birth to a child. It is a title earned through endless, sleep deprived nights, countless cuddles and reassurance. Most importantly though it is earned through the act of selfless love, loving so hard and still letting go. And today those are the women I celebrate and am celebrated with. So raise your glass and enjoy a slice of my Raspberry Lemon Celebration Layer Cake.

Thankful For My Family

While I am sitting here, enjoying a delicious slice of this Raspberry Lemon Celebration Layer Cake, I am also taking a moment to be thankful for being a Mum. Thankful for the laughter and fun that comes alongside the hard work and at times pain. The knowledge that I am part of a family unit, that starts with my husband and I and reaches out through our children, our siblings and what is to come. Most importantly knowing that I am unconditionally loved and accepted by my Heavenly Father, who is both mother and father to me.
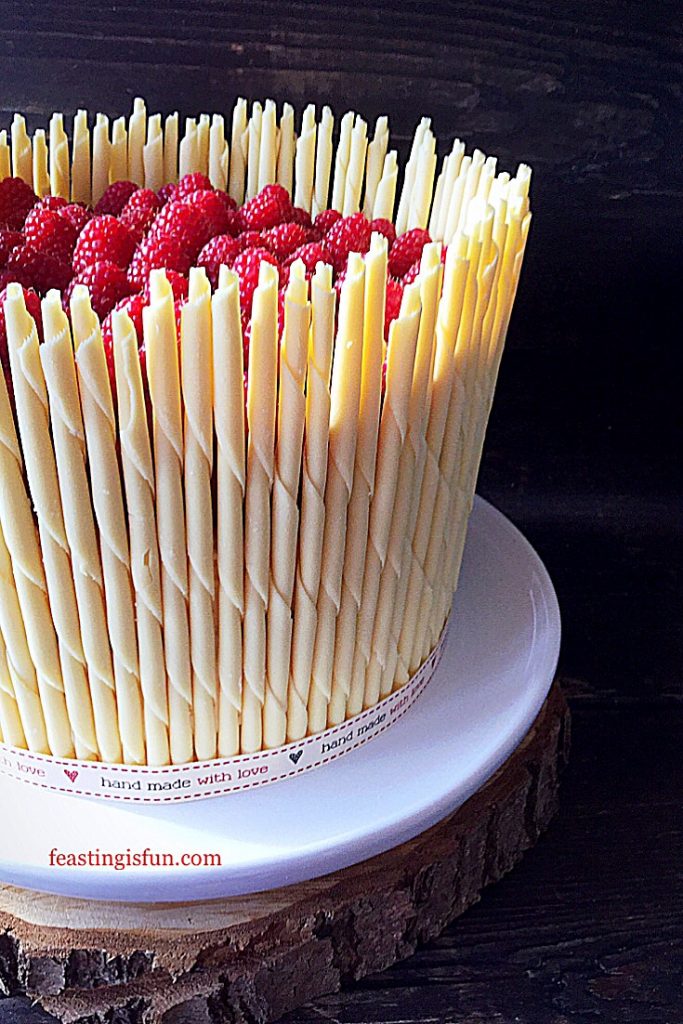
FF Raspberry Lemon Celebration Layer Cake
Raspberry Lemon Celebration Layer Cake

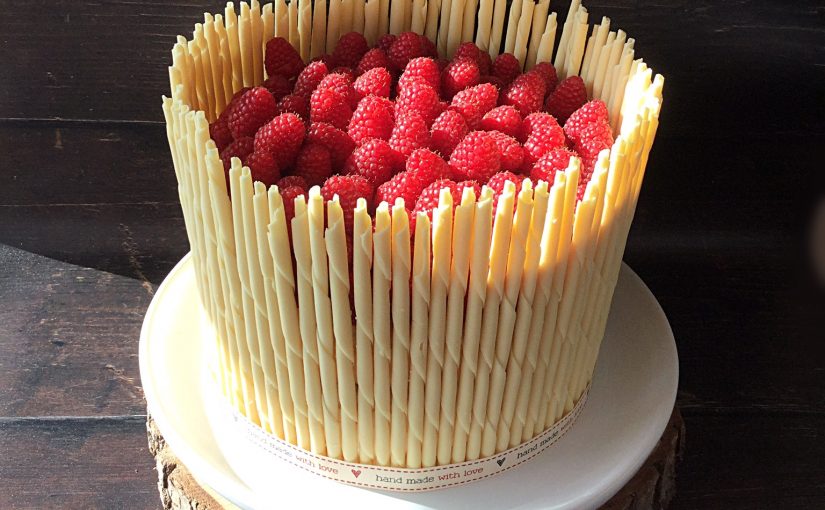
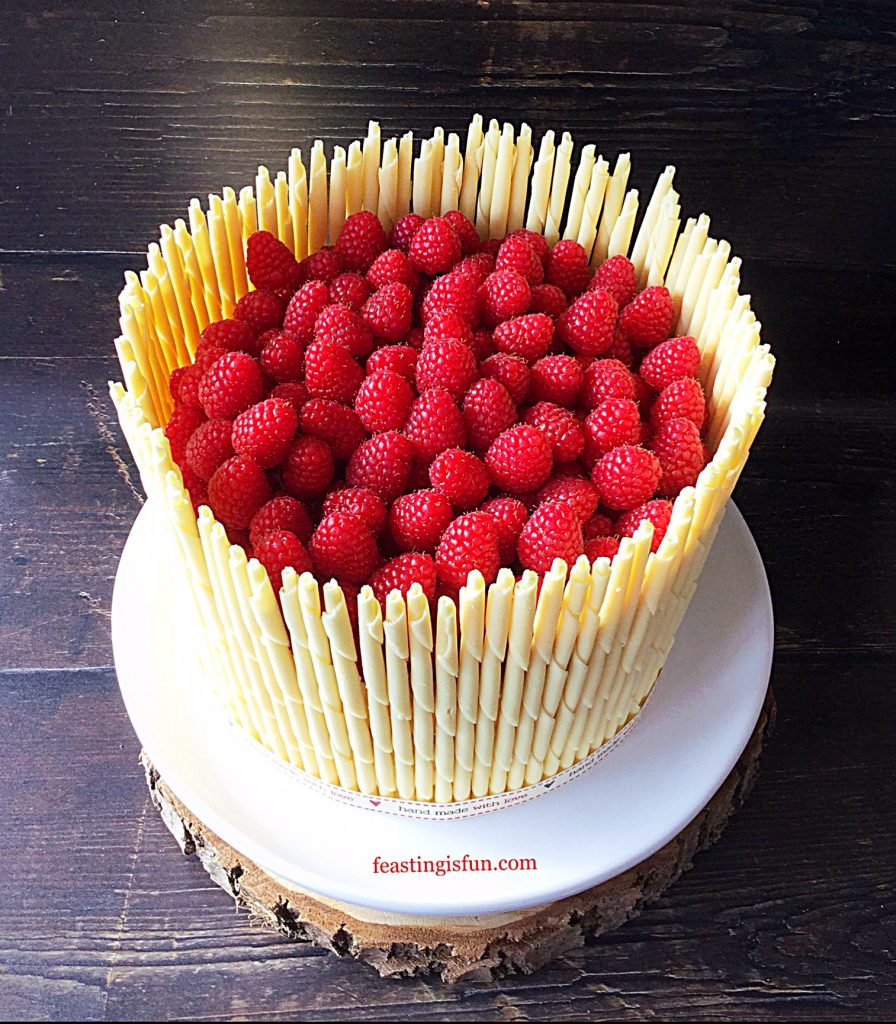
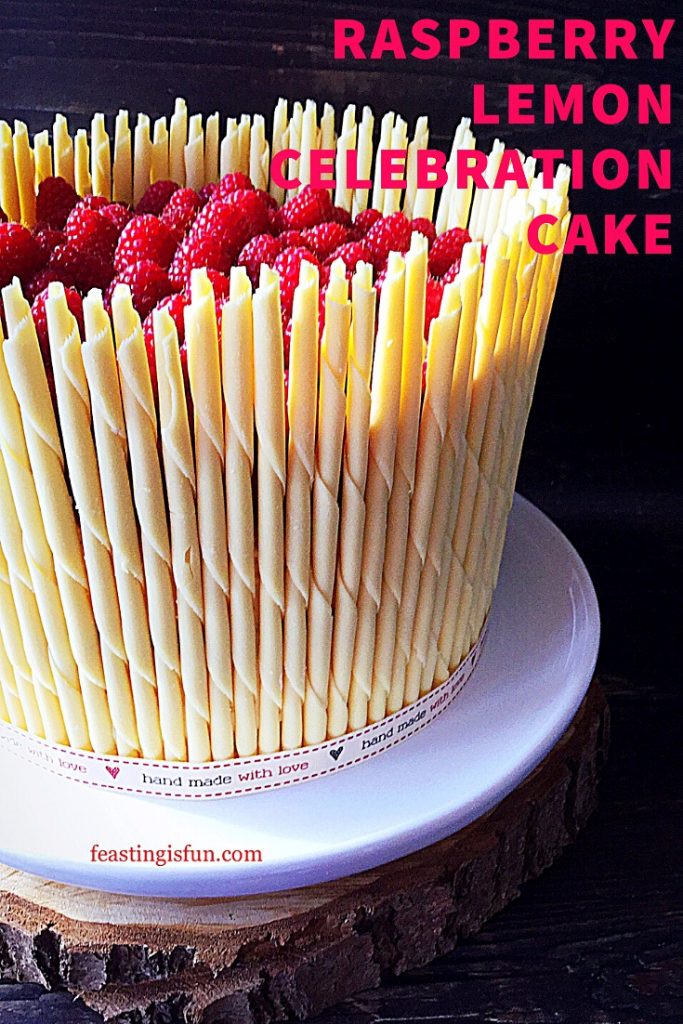
Since we are celebrating, what better occasion than to make a cake. Light lemon sponge layered with the very best lemon curd and lemon buttercream. Surrounded with swirled white chocolate pencils and topped with fresh, deep red, raspberries. The sum of this Raspberry Lemon Celebration Layer Cake is so much more that the total of it’s separate parts.
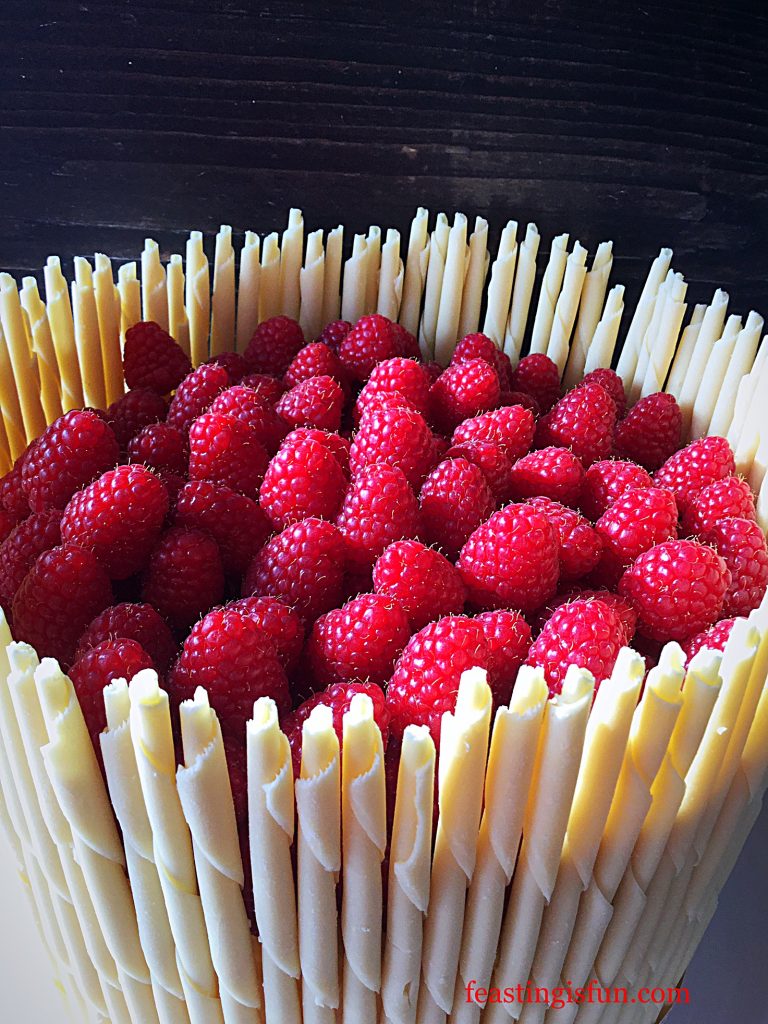
FF Raspberry Lemon Celebration Layer Cake
Raspberry Lemon Celebration Layer Cake

While magnificent to look at, do not be daunted at the prospect of making this cake. Inspired by Lorraine Pascal and a baking programme I watched, trust me when I state that if I can make this cake, you can too. Also, the very lovely Maria Whitehead who runs Hawkshead Relish with her husband and daughter, remarked that my recipes are approachable and ‘un-cheffy’! Which, I took as a compliment and also used as influence when designing this cake.
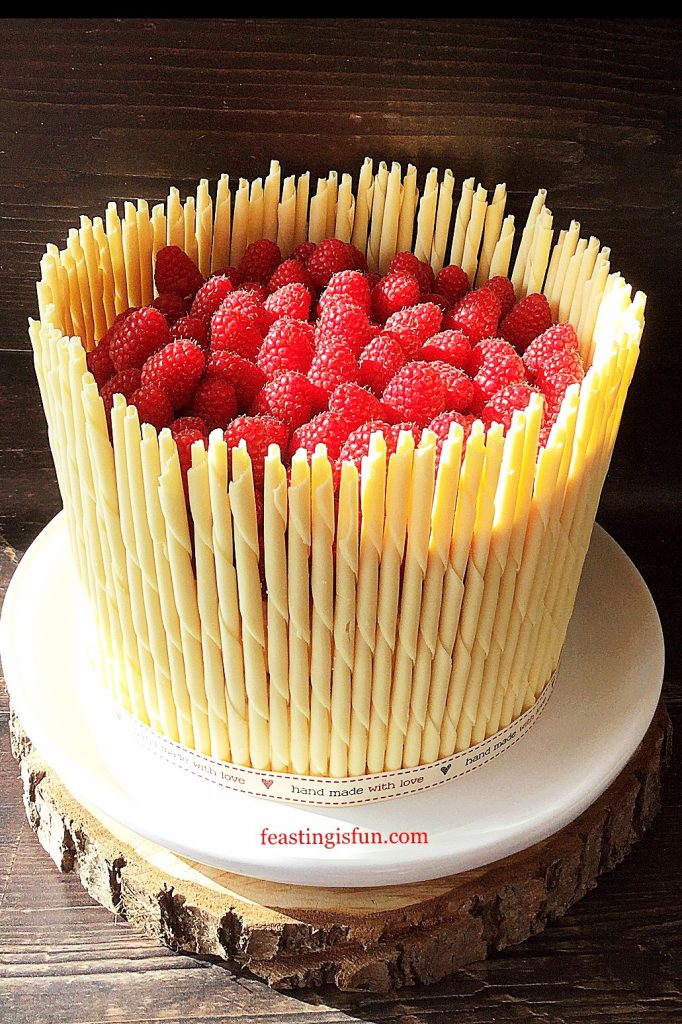
A white chocolate pencil surrounded, fresh fruit filled three sponge dessert.
Raspberry Lemon Celebration Cake

Recipe: Raspberry Lemon Celebration Layer Cake serves 12

For the cake sponges:

225g/8oz + 115g/4oz Unsalted Butter at room temperature – plus a little extra for greasing the tins

225g/8oz+ 115g/4oz Caster Sugar

1/2tsp + 1/4tsp Sea Salt (halve for free flowing) – I use Maldon

1tsp + 0.5tsp Vanilla Extract – I use Nielsen-Massey

4 + 2 Large Free Range Eggs

225g/8oz + 115g/4oz Plain Flour

2tsp + 1tsp Baking Powder

Zest of 2 Fresh Lemons

For the buttercream:

250g/9oz Unsalted Butter at room temperature

500g/1lb 2oz Icing Sugar (confectioner’s sugar)

1/4tsp Sea Salt

7tsp Freshly Squeezed Lemon Juice (approximately the juice from 1 medium lemon)

Also needed:

6-7 tbsp Good Quality Lemon Curd – I use Hawkshead Relish

1 Box White Chocolate Pencils – I use Callebaut

600g/1lb 5oz Fresh Raspberries

Method: Preheat oven to 160C/140C fan, 325F, gas mark 3

Note: The cake is baked in three separate layers. Since a 20cm (8in) sandwich tin is required for each sponge the recipe is split. The first amount given is sufficient for two layers. While the second amount is for a single layer. If you have three equal sized tins, combine the first and second amounts, dividing equally between three tins. Baking times may need to be adjusted.

Making and baking the cake layers.

  • First of all grease and line the base of each sandwich tin with baking parchment.
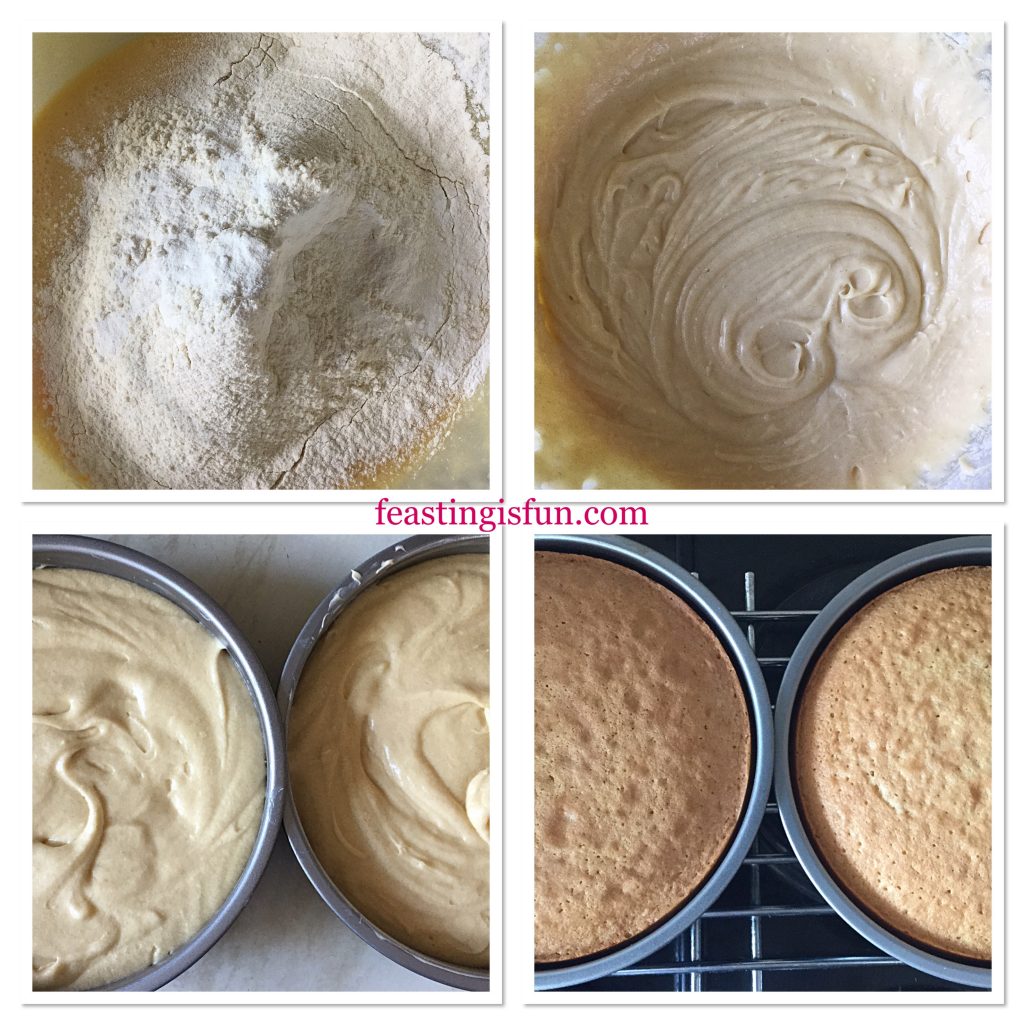
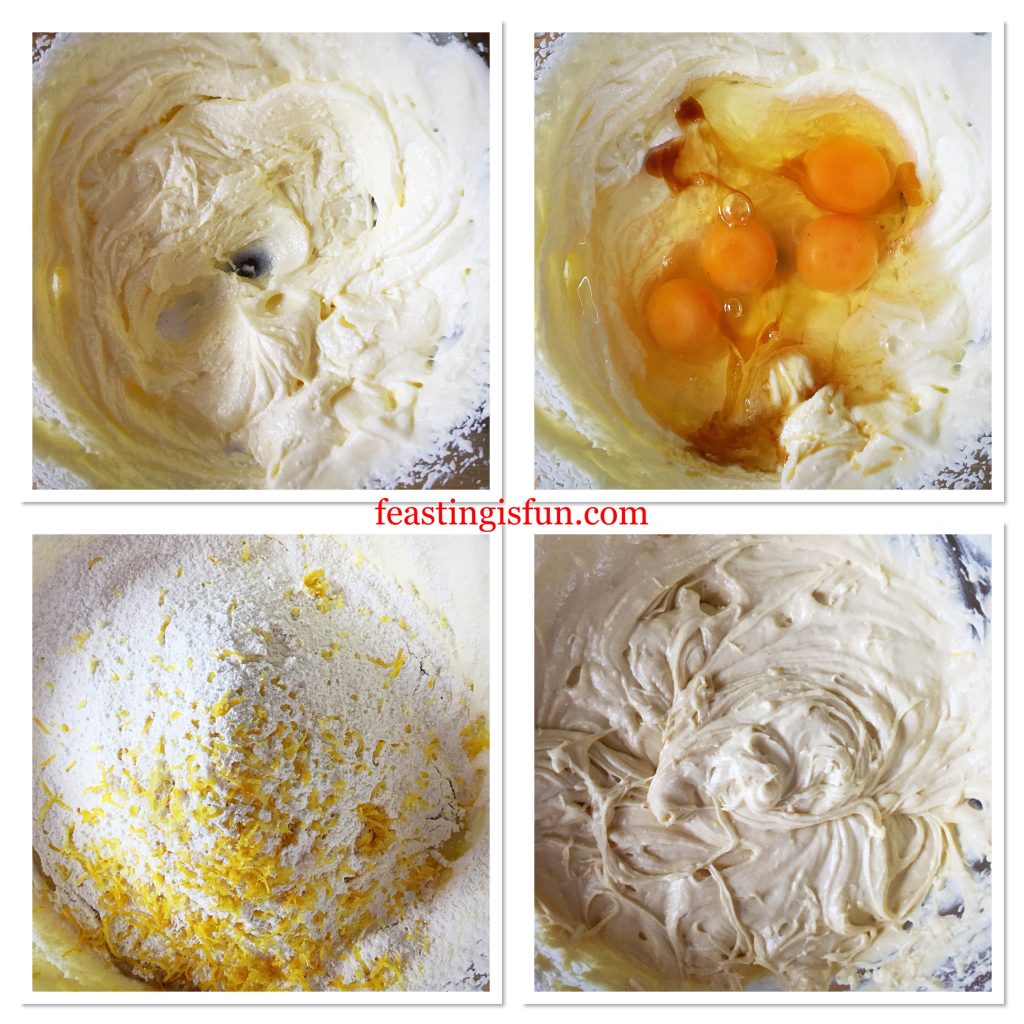
  • Into a large bowl add the first amount given for butter, sugar and salt. Whisk the ingredients together until pale and creamy.
  • Next add 4 eggs and 1 teaspoon of vanilla extract. Sift the flour and baking powder on top and then add the zest of one and one third of lemon.
  • Whisk the ingredients together until just combined, yet free of lumps.
FF Raspberry Lemon Celebration Layer Cake
Making the lemon sponge cake batter.
  • Divide the cake batter evenly between the two prepared sandwich tins and smooth the tops.
  • Place both tins in the centre and lower parts of the oven and bake for 40-50 minutes.
  • The cake sponge is fully baked when golden, springs back from a light touch and an inserted skewer comes out clean.
  • As soon as the cakes are baked remove from the oven. Leave to cool in the tin for 10 minutes and then turn out, removing the baking parchment from the base of each sponge.
  • Leave to cool on a cooling rack.
  • Wash up a sandwich tin, grease and line as before. Make the batter for one sponge following the method given, using the second quantity given in the recipe. Fill the tin and bake as before.
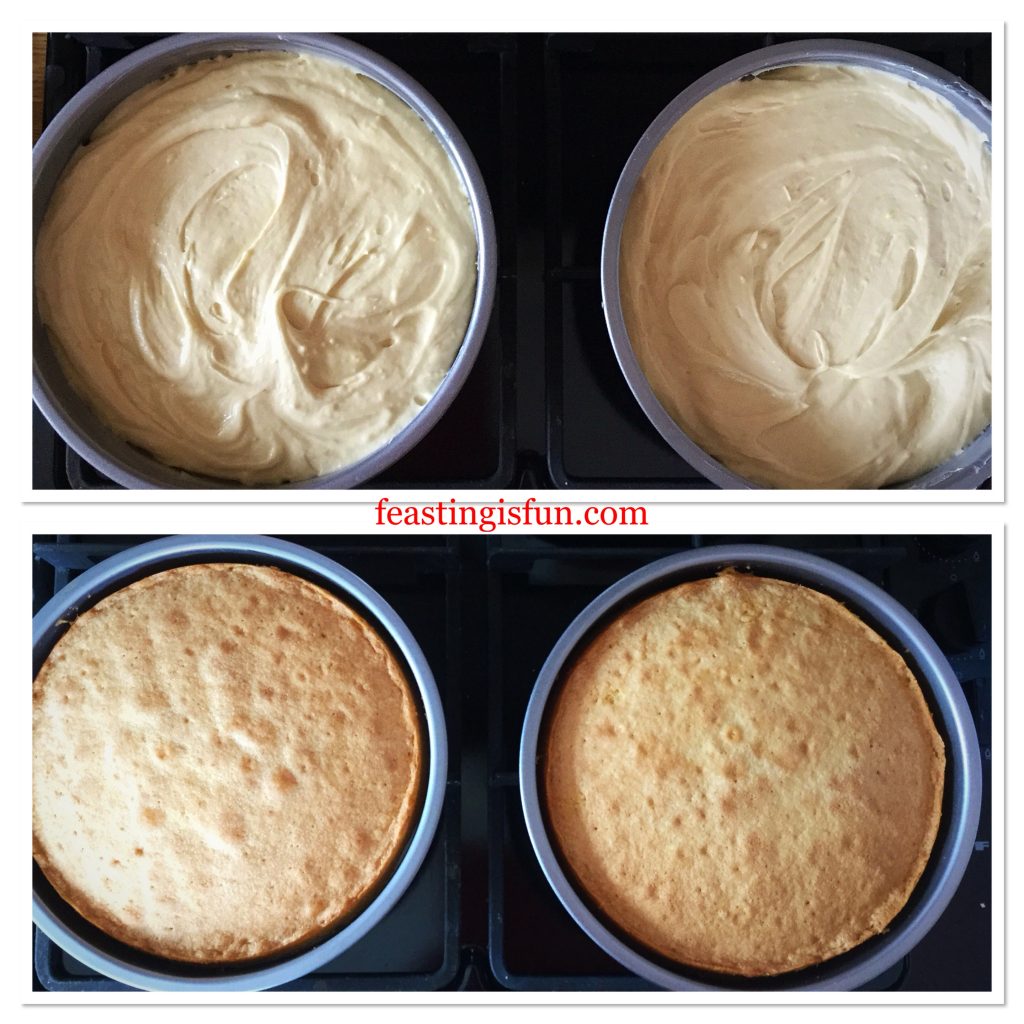
FF Raspberry Lemon Celebration Layer Cake
Preparing and baking the cake sponges.
  • While the last sponge is cooling make the lemon buttercream.
  • Into a large bowl add butter, icing sugar, salt and lemon juice.
  • Stating on a low speed whisk the ingredients together, increasing the speed until the buttercream is light and creamy.
  • Spoon the buttercream into a large piping bag without a nozzle fitted. If using a disposable bag cut a 1cm opening at the bag’s tip.

Filling and covering the cake:

  • Pipe one tablespoon of buttercream on to the plate/board used for the cake.
  • Place one cake sponge, flat side facing up, on top of the buttercream.
  • Spoon 3 tablespoons of lemon curd on to the cake and spread to cover evenly.
  • Pipe 3-4 tablespoons of buttercream on to the top of the next sponge. Spread to cover the sponge evenly.
  • Flip the sponge and place on top of the lemon curd covered sponge.
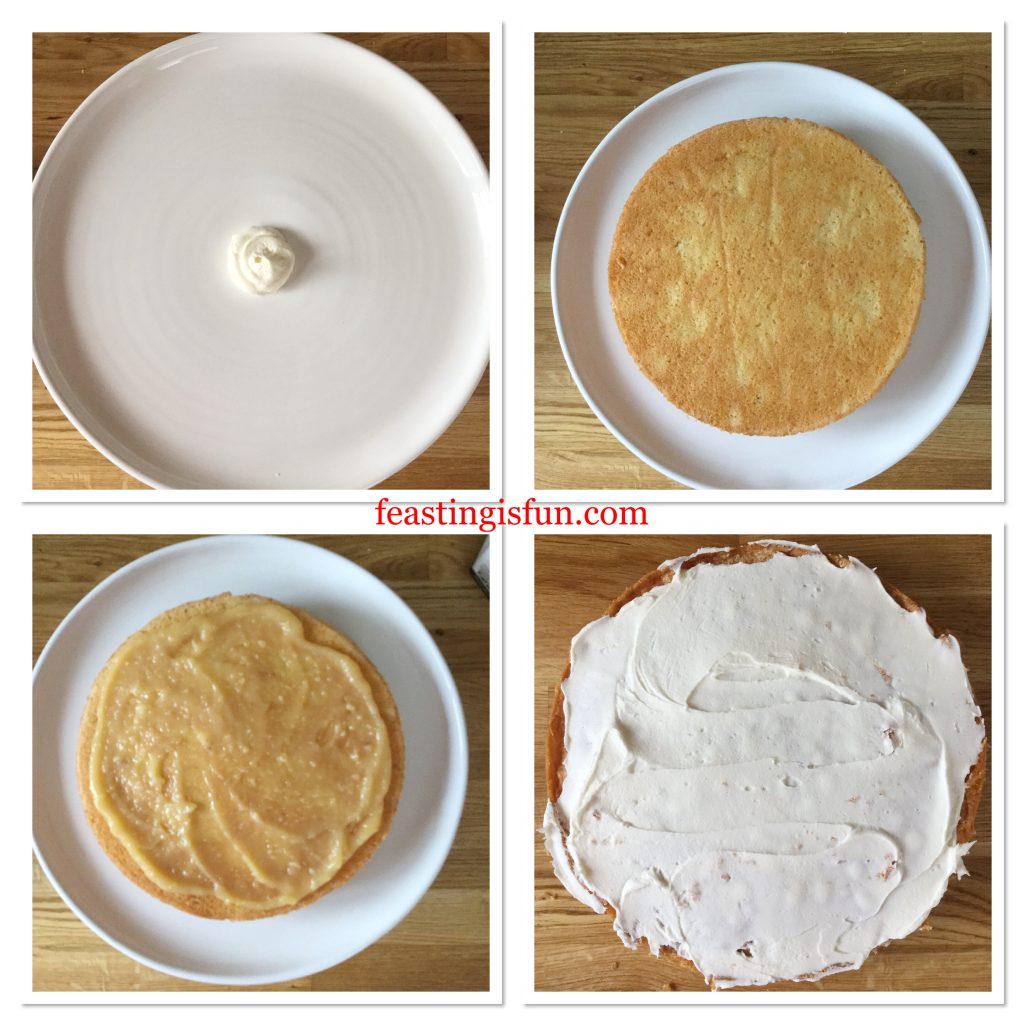
FF Raspberry Lemon Celebration Layer Cake
Stacking the cake layers.
  • Spoon 3 tablespoons of lemon curd on the top of the sponge, spread to cover evenly as before.
  • Pipe 3-4 tablespoons of buttercream on to the flat side of the third sponge. Again, spread to cover evenly.
  • Flip the sponge and place, flat side down, on to the second, lemon curd covered sponge.
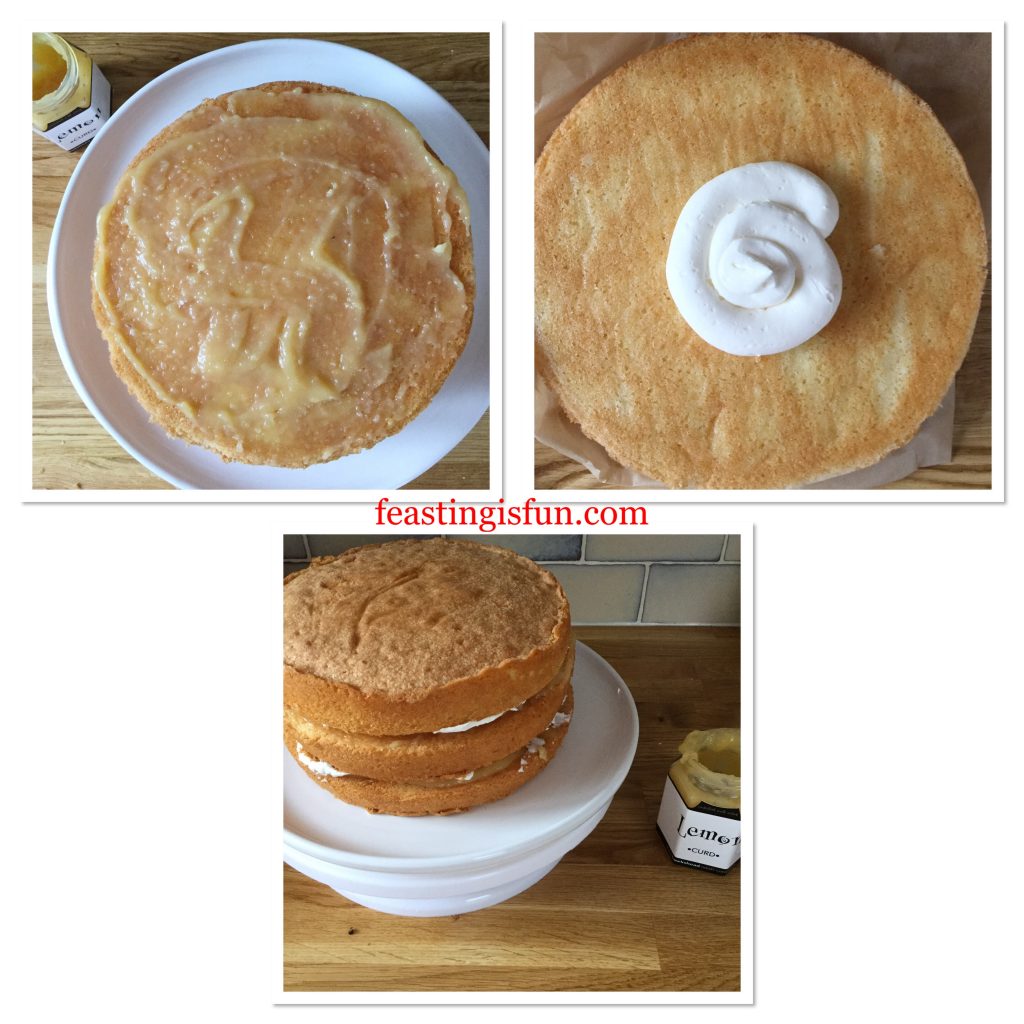
FF Raspberry Lemon Celebration Layer Cake
Layering the cake with lemon curd and buttercream.
  • Place the cake plate/board on to a cake decorating turntable if you have one.
  • Pipe buttercream between each layer and on the top of the cake.
  • Use an offset palette knife to spread the buttercream evenly around and on top of the cake. Since the cake is to be covered the finish of the buttercream does NOT have to be perfect. Aim for a neat, smooth finish.
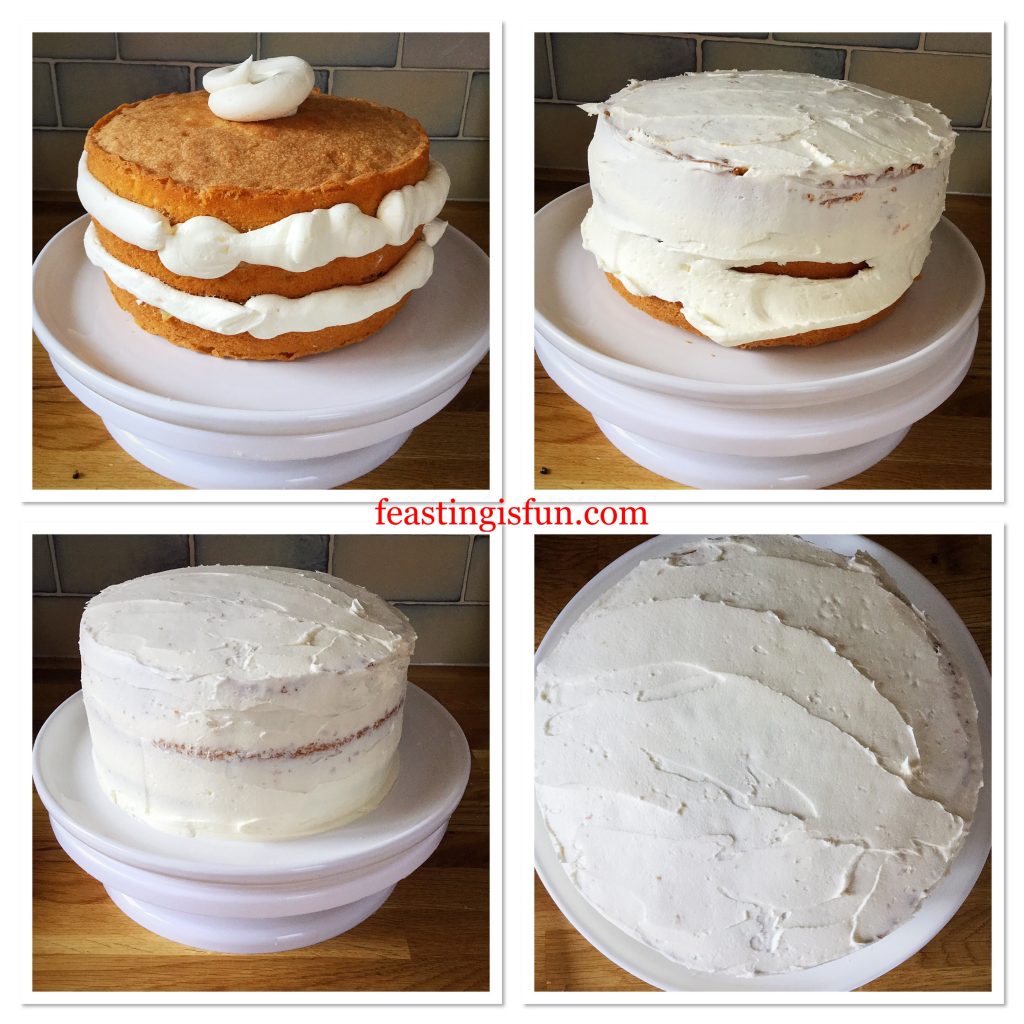
FF Raspberry Lemon Celebration Layer Cake
Covering the layered cake with buttercream.

Decorating the cake:

  • First of all take a full size pencil, measure it against the height of the cake. 10cm or 4 inches is the desired height of excess pencil from the top of the cake.
  • Trim a pencil to the length needed and measure against the cake to double check.
  • Make any adjustments and keep the pencil as a guide for cutting the remaining pencils.
  • Cut a few pencils at a time. Carefully take the first one placing vertically against the side of the cake. Gently push it into the buttercream.
  • Continue with the next pencil, placing as close as possible next to the first pencil.
  • Work around the outside of the cake, adding pencils until the entire cake is surrounded.
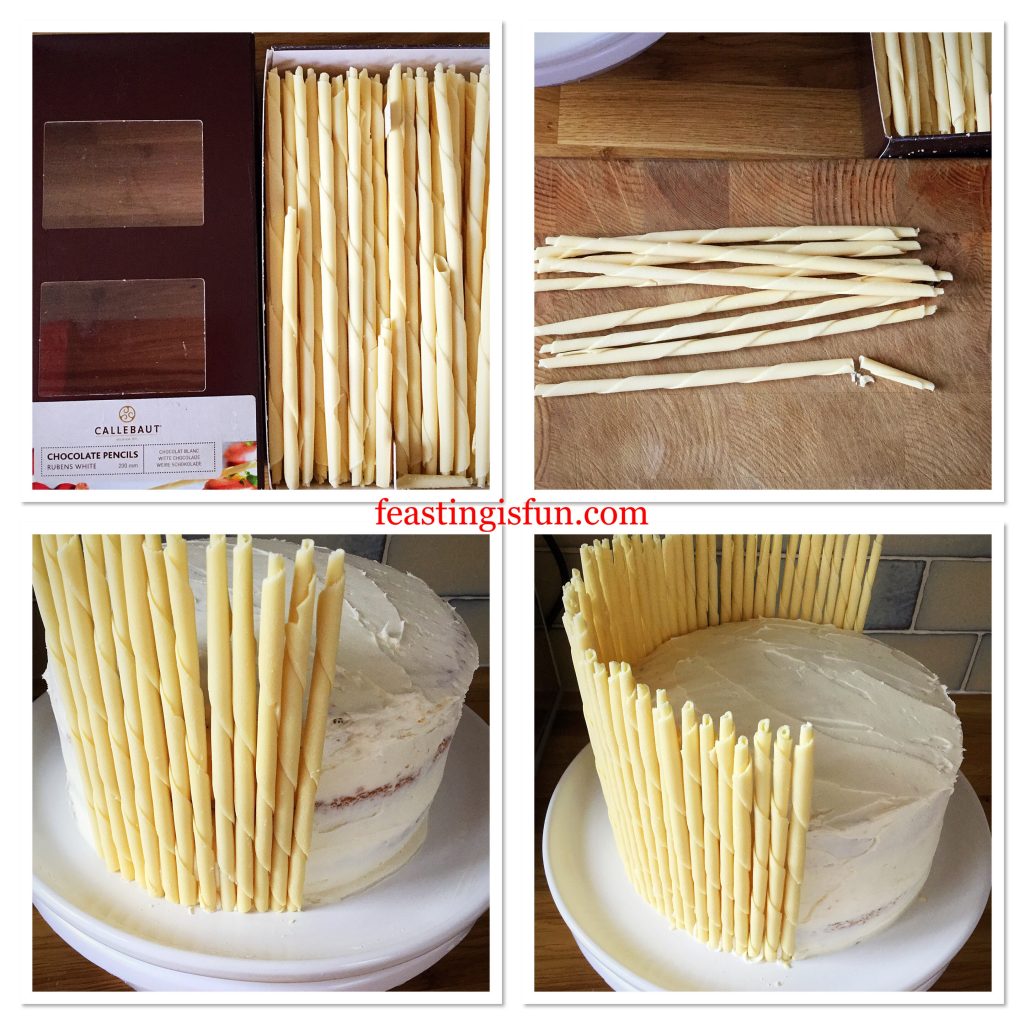
FF Raspberry Lemon Celebration Layer Cake
Decorating the cake using white chocolate pencils.
  • Turn the cake, check from each angle, ensuring the pencils are uniform.
  • Starting at the outside rim, place raspberries as close together as possible.
  • Work in circles towards the cake’s centre, until the first layer of raspberries is complete.
  • Place the remaining raspberries on top, in a circular fashion, finishing at the cake’s centre.
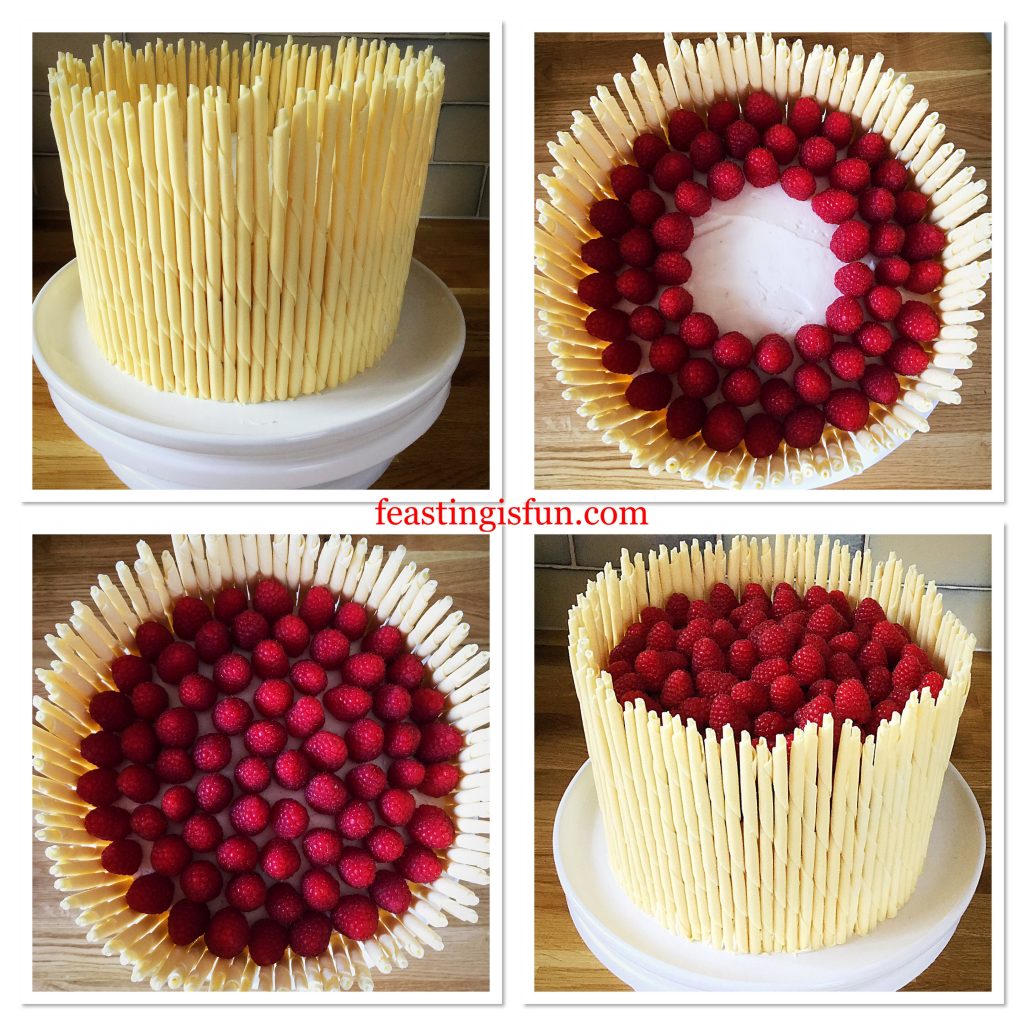
FF Raspberry Lemon Celebration Layer Cake
Raspberry Lemon Celebration Layer Cake – topping with fresh raspberries
  • Finally, measure a length of ribbon around the base of the, so that it just overlaps.
  • Cut and fix the ribbon in place with a pin. Ensure the join is at the back.
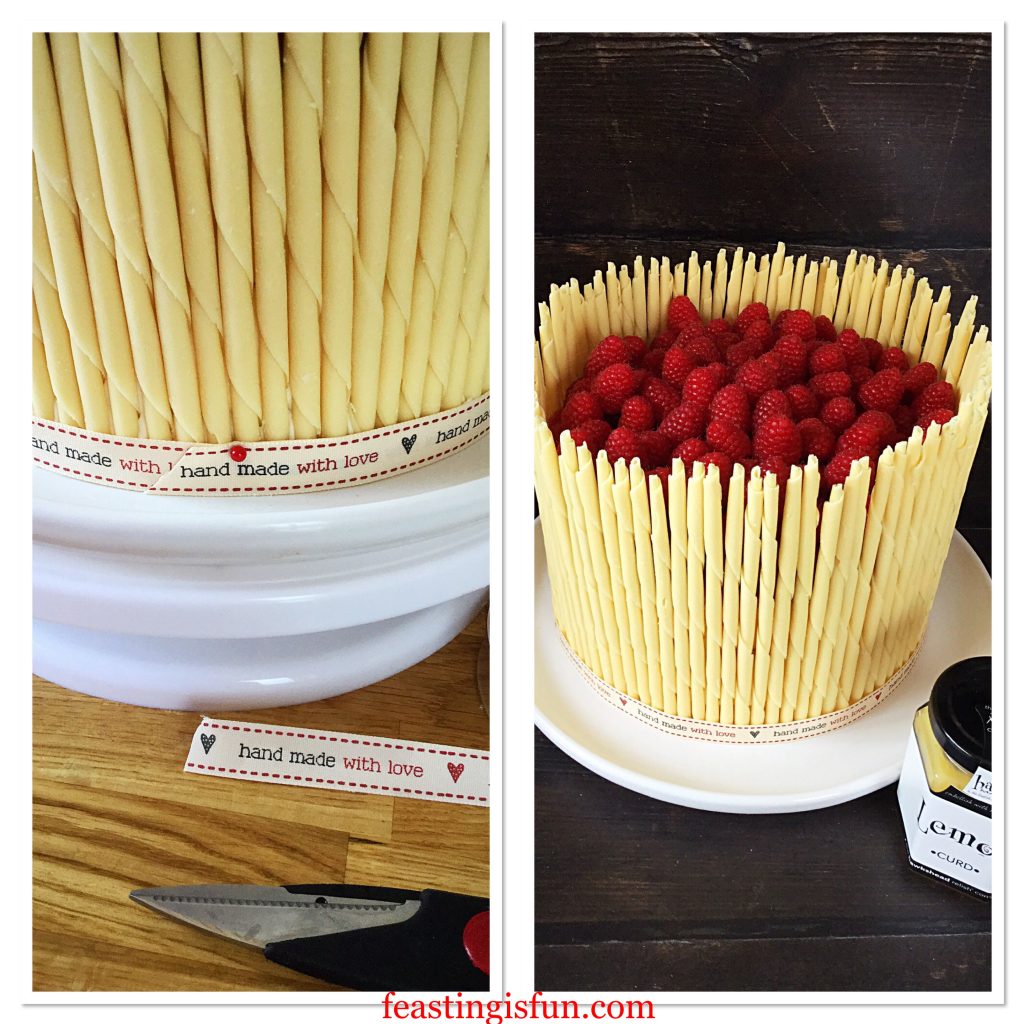
FF Raspberry Lemon Celebration Layer Cake
Raspberry Lemon Celebration Layer Cake adding the finishing touches.

Chill the cake for one hour before serving. Doing so ensures that the cake is easy to slice.

Remove the ribbon before cutting.
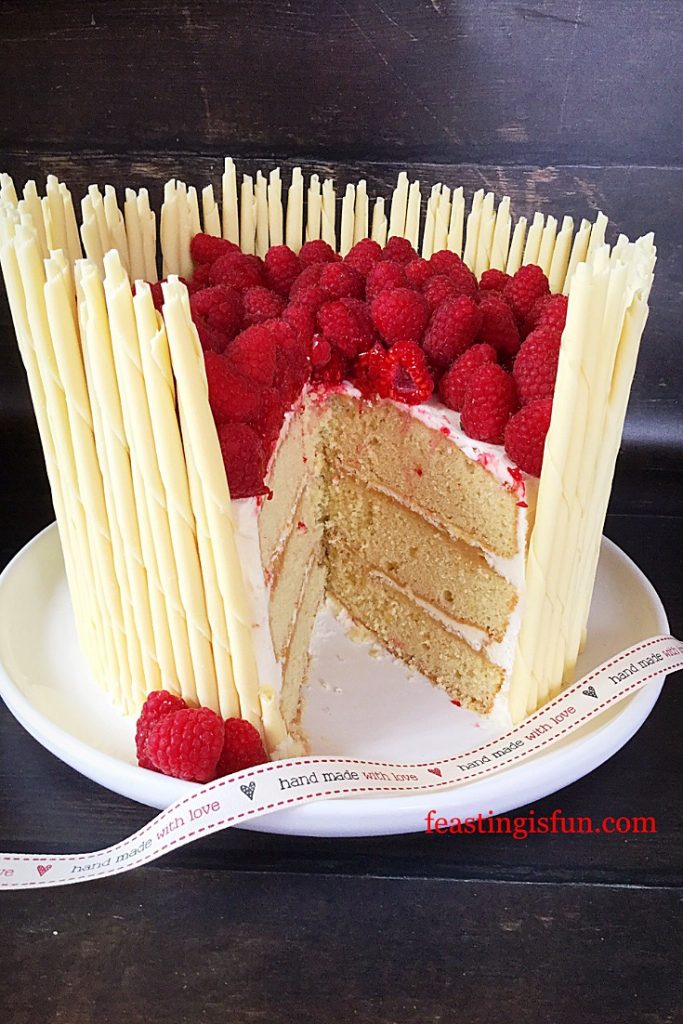
FF Raspberry Lemon Celebration Layer Cake
Raspberry Lemon Celebration Layer Cake

Store any remaining cake in an airtight container, ideally in the fridge. Eat within 5 days of making.

If you have enjoyed this recipe for Raspberry Lemon Celebration Layer Cake you may also like these:

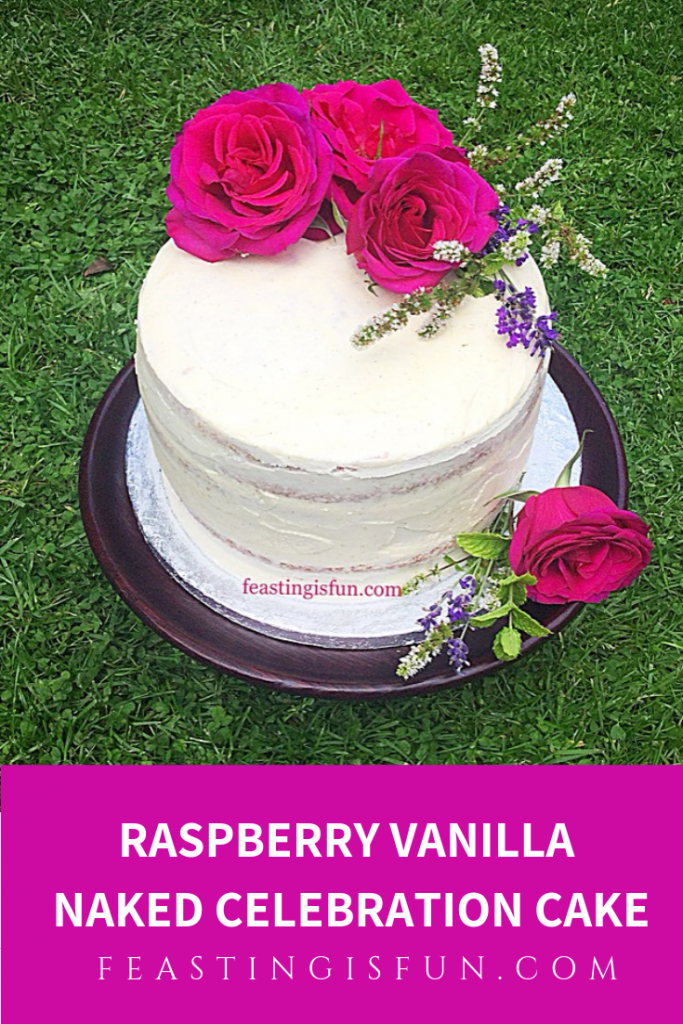
Raspberry Vanilla Naked Celebration Cake
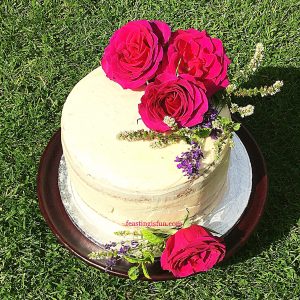
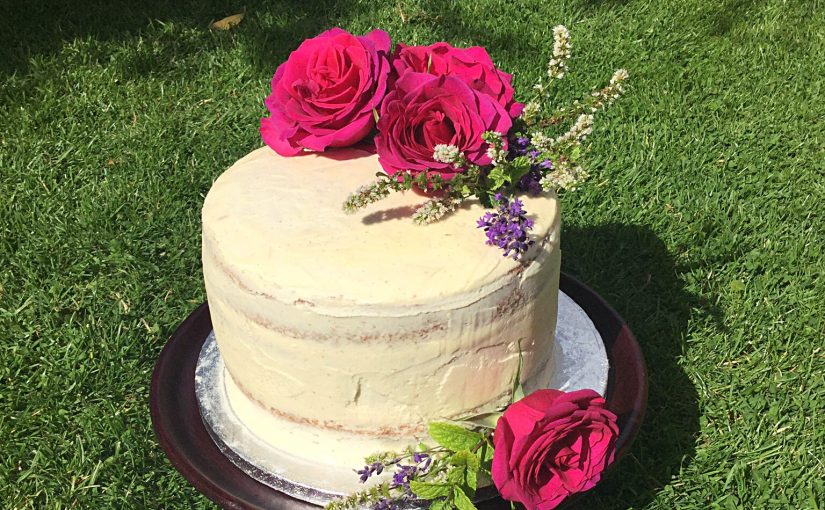
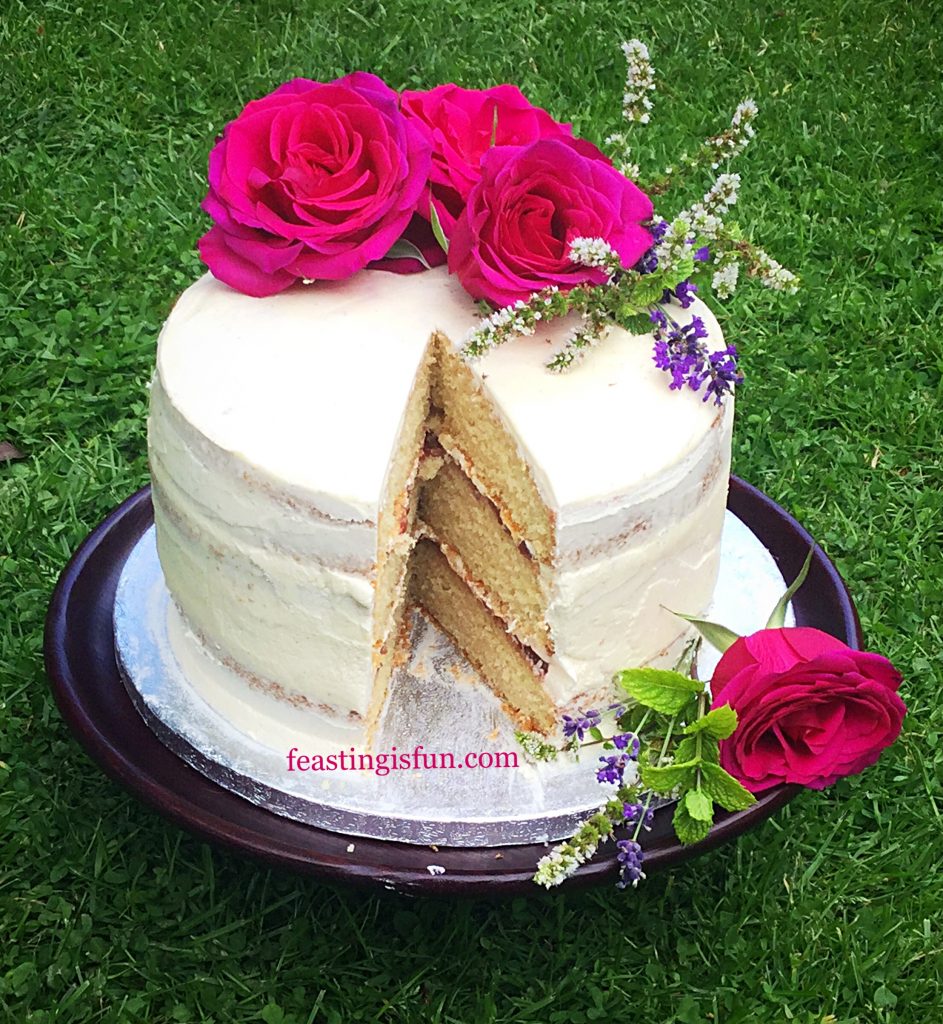
Three layer sponge filled with fresh jam and whipped vanilla buttercream and decorated with fresh roses. The dessert is set on a stand in a garden for garden parties and celebrating.
Raspberry Vanilla Naked Celebration Cake

Summer Mixed Berry Sponge Cake
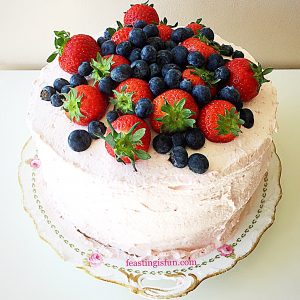
Summer mixed berry sponge covered with fresh fruit whipped cream and topped with an assortment of fresh fruit.
Summer Mixed Berry Sponge Cake

Apricot White Chocolate Triple Sponge Cake
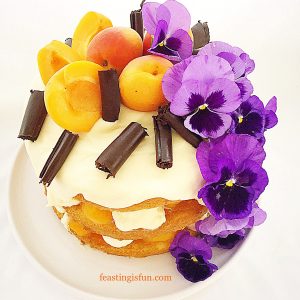
Three layer sponge filled with white chocolate ganache and apricots. Topped with fresh apricots, dark chocolate curls and vivid purple fresh pansies
Apricot White Chocolate Triple Sponge Cake

To be a Mother is to be part of a family. Above all that really is the best part for me. Loving and being loved back. Because that is what fills me with joy. Even more so laughing and having people to laugh with. Feasting and sharing with those who love and enjoy life. Finally, if you too would like to be part of a family see Important Stuff.

So, whatever er you are making, baking and creating in your kitchens, have fun preparing and sharing your feast!

Sammie xx

Hawkshead Relish supplied the lemon curd for this recipe. All content and opinions are those of the writer. No payment has been received for this post. No part of this post may reproduced or duplicated without the written permission of the owner. Please see the Disclosure Policy.
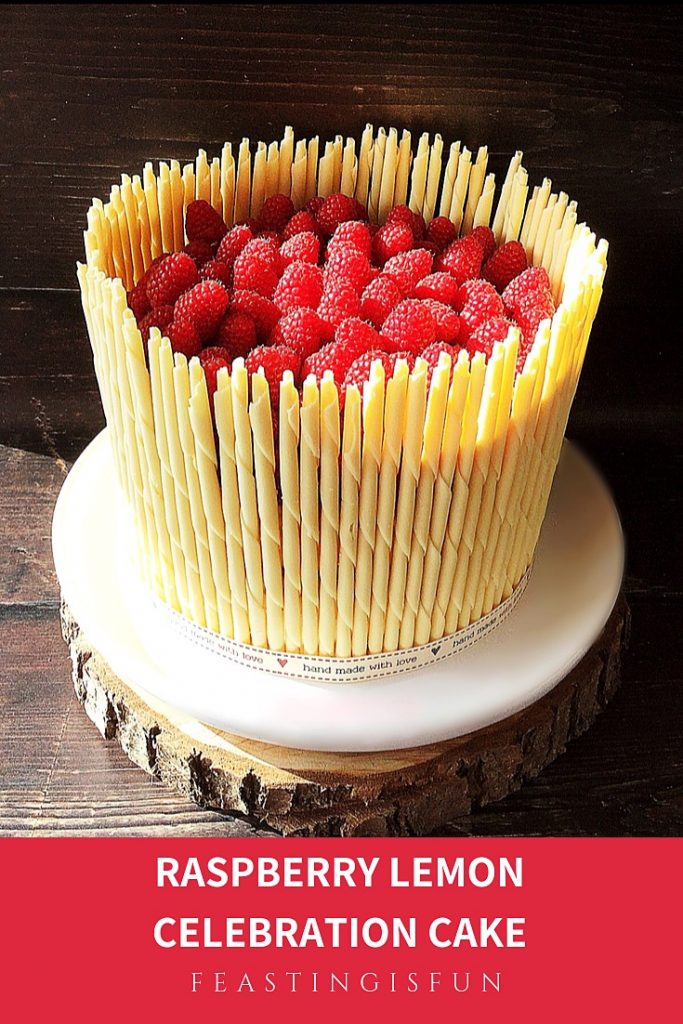
A white chocolate pencil surrounded, fresh fruit filled three sponge dessert. Ideal for parties and celebrating.
Raspberry Lemon Celebration Cake


Share
Facebooktwitterpinterestlinkedintumblr

Raspberry Vanilla Naked Celebration Cake

Share
Facebooktwitterpinterestlinkedintumblr

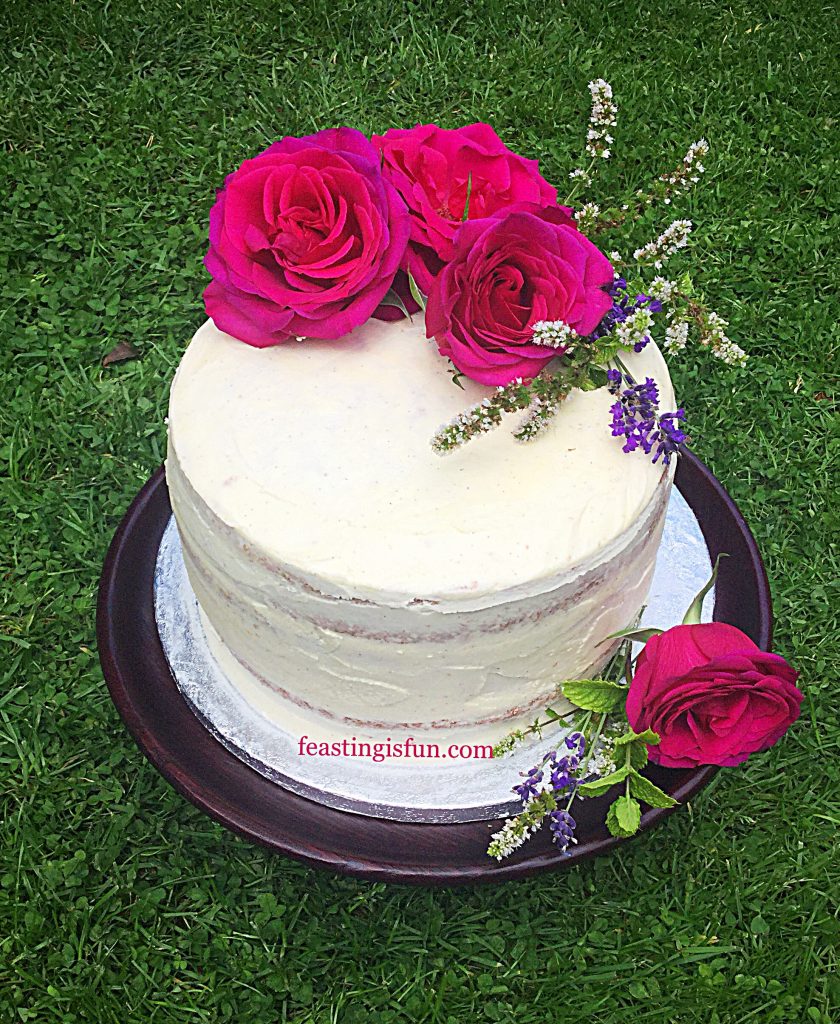
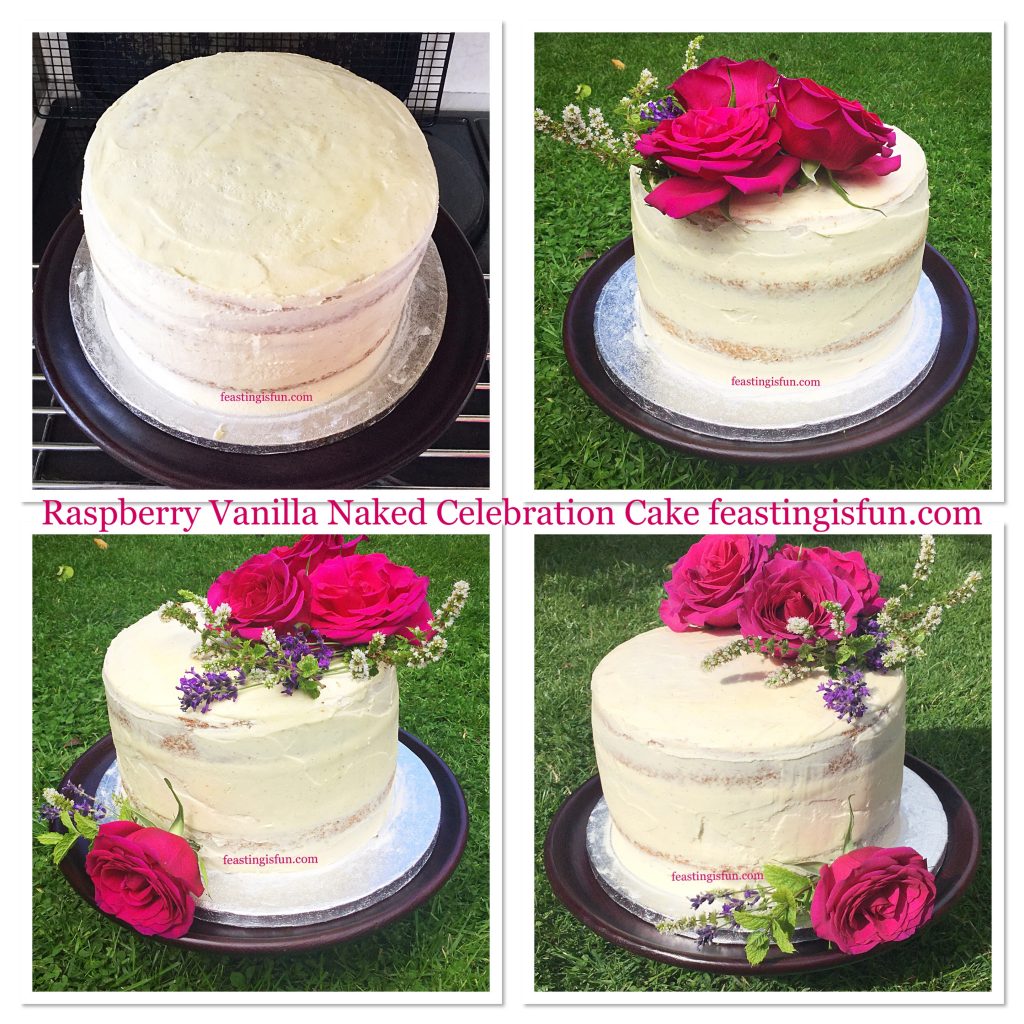
Someone once said “A celebration without cake is just a meeting.” How right they were. Whether it is birthdays, weddings, christenings, or any other form of celebration, cakes almost always feature.  Hawkshead Relish recently won Small Business Of The Year 2017. After reviewing and using their delicious jams, chutneys and more recently spreads, I am absolutely thrilled for them. To celebrate their award I offered to make a cake featuring their best selling Raspberry and Vanilla Jam. Here is the Raspberry Vanilla Naked Celebration Cake made in celebration of such an amazing achievement.

FF Raspberry Vanilla Naked Celebration Cake
Raspberry Vanilla Naked Celebration Cake.

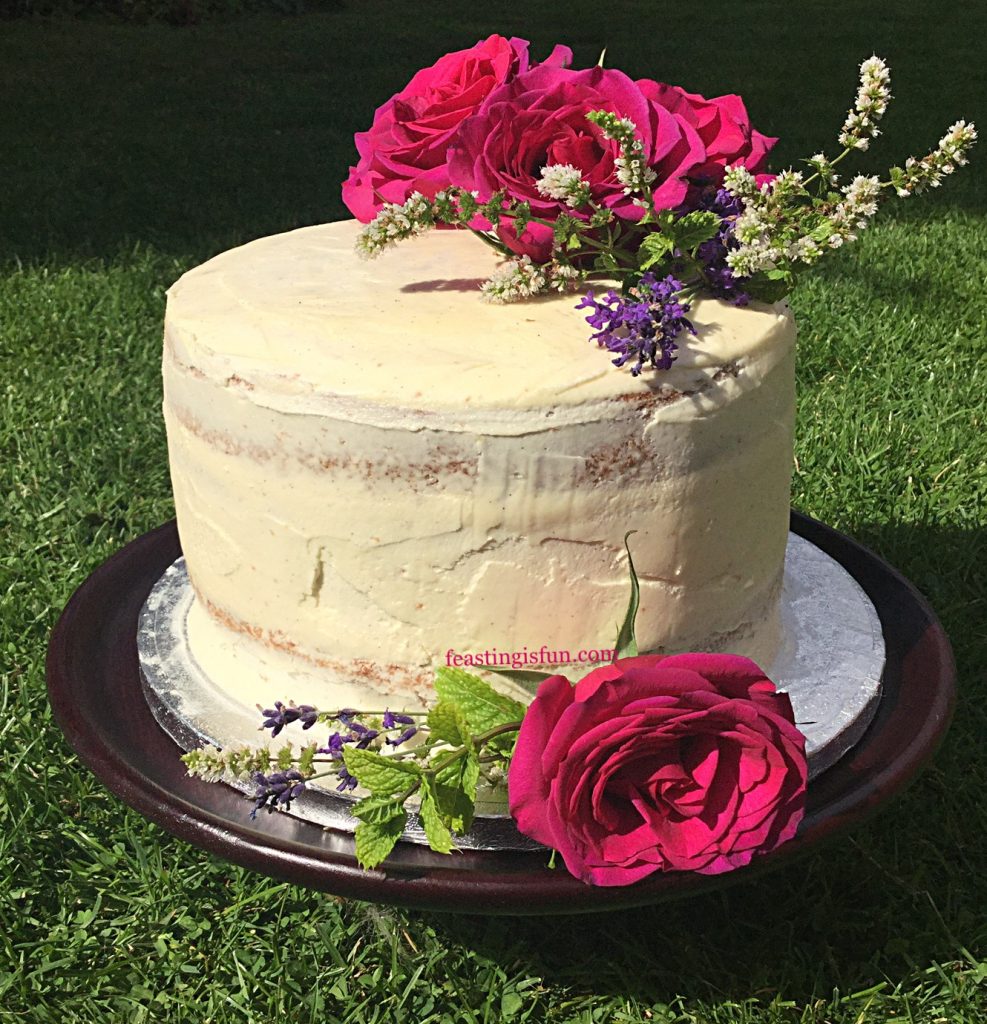
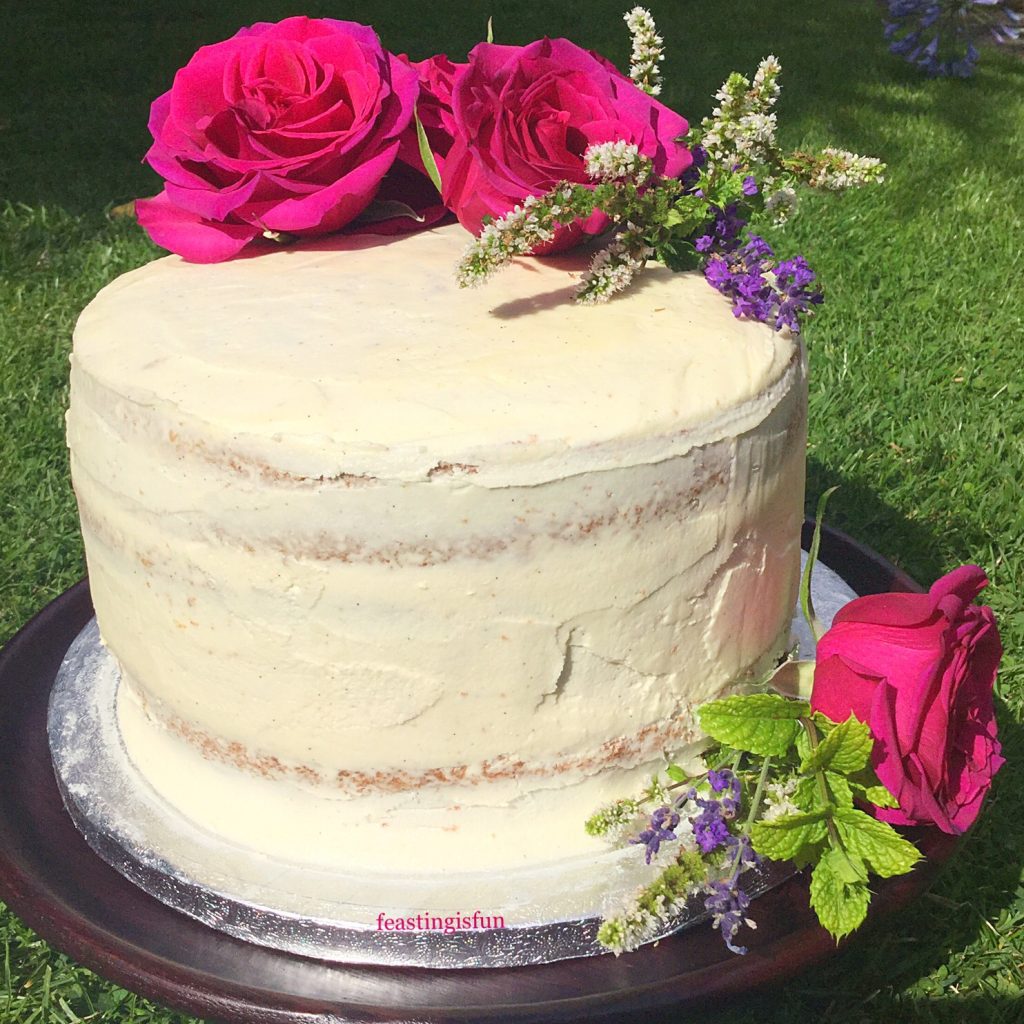
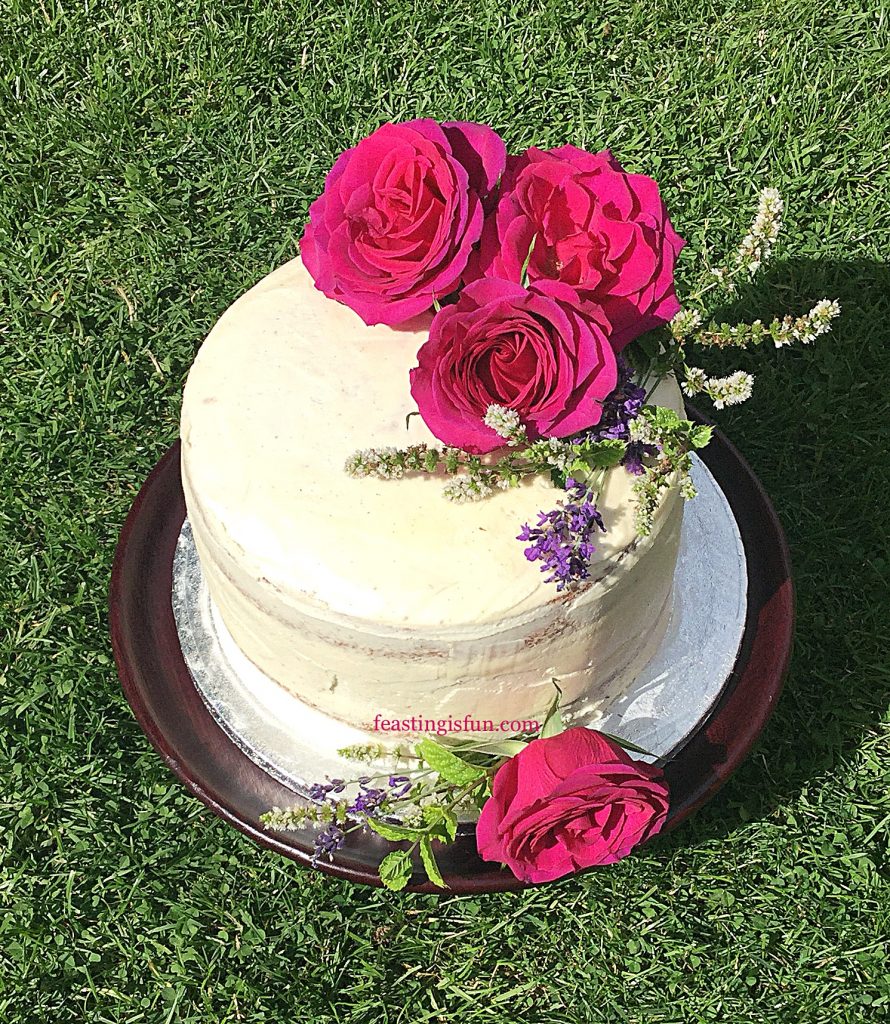
Three layers of light, vanilla sponge, sandwiched together with vanilla bean buttercream and raspberry vanilla jam. Covered lightly, yet incompletely with the same buttercream. Most of all, giving a very ‘on trend’ semi-naked finish to the cake. Finished with edible garden flowers, from my garden, that reflect the geographic location of Hawkshead Relish, situated in the historic village of Hawkshead within the English Lake District.

FF Raspberry Vanilla Naked Celebration Cake
Raspberry Vanilla Naked Celebration Cake in the sunshine.

Embellish with relish

Using locally sourced ingredients Hawkshead Relish do not use any artificial additives or preservatives. Completely free from nuts, their range is also suitable for vegetarians. Holding 50 Great Taste awards, each product is made in small batches using traditional methods. Resulting in outstanding taste and quality, from a family run business.

FF Raspberry Vanilla Naked Celebration Cake
Raspberry Vanilla Naked Celebration Cake layered with buttercream and the very best jam.

Using the Hawkshead Relish motto “Embellish with Relish,” I’ve enjoyed creating recipes using their products. Especially when including them as ingredients in their own right. When creating my Red Onion Sausage Plait, using their Red Onion Marmalade is a vital to the flavour of the finished bake. So unique are the flavours of their chutneys and sauces, they deserve more than to be spooned on to the side of a plate. Since including relish within recipes, a whole world of flavour combinations became unlocked.

Recipe: Raspberry Vanilla Naked Celebration Cake serves 14-16

  • To make the 3 cake sponges:
  • 275g/10oz Unsalted Butter + 100g/4oz both at room temperature
  • 275g/10oz Caster Sugar + 100g/4oz
  • 3tsp Vanilla Extract – I use Nielsen-Massey
  • 1/4tsp + 1/8tsp Sea Salt  – I use Maldon
  • 6 Large Free Range Eggs + an additional 3
  • 275g/10oz Plain White Flour + 100g/4oz
  • 2.5tsp Baking Powder + 1tsp
  • To make the buttercream:
  • 500g/12oz Icing Sugar
  • 250g/9oz Unsalted Butter softened to room temperature
  • 2tsp Vanilla Bean Paste
  • 2  Jars Raspberry and Vanilla Jam from – Hawkshead Relish
  • 2-3tbsp Very Hot Water from a recently boiled kettle
  • To decorate the cake:
  • A selection of organic, pesticide free edible flowers. Both mint and lavender flowers were sourced from our garden.

Method: Preheat the oven to 160C/140C fan, gas mark 3, 325F

Making and baking the cake:

You will need 3 x 18cm/7″ approx 7cm/2.5″ deep, loose bottom sponge tins. Since most people own only 2 tins, this method is written with that taken into account. Therefore, two separate bakes are included. First of all, making the batter and baking two sponges. Followed by making the batter and baking one sponge. Finally, if you own and have oven space for three sponges to be made and baked together, simply follow the steps, using the total ingredients.

  • First of all, lightly butter the baking tins. Cover the base in baking parchment.
  • Into a large bowl add the first amount of sugar, butter and salt.
  • Whisk together until pale and creamy.
  • Next add 2 teaspoons of vanilla extract and 6 whole eggs.
  • Whisk everything together until combined.
  • Follow by sieving in the flour and baking powder.
  • Whisk the ingredients together until combined. Always take care not to over beat, or the resulting cake will be tough.
  • Divide the cake batter equally between 2 greased and lined tins. If using the entire mix divide between 3 tins.
  • Place the tins in the top and centre of the oven and bake for 40-45 minutes.
FF Raspberry Vanilla Naked Celebration Cake
Preparing and baking the cake sponges.
  • When they have turned golden brown and spring back from a light touch the cakes are fully baked.
  • Remove from the oven, allowing each cake to cool in the tin for 10 minutes before turning out on to a cooling rack.
  • Wash up one cake tin and follow the steps given to make a single sponge cake.
  • Make and bake as before. Each of the 3 sponges must be fully cooled before icing.

Building The Raspberry Vanilla Naked Celebration Cake:

During the cake icing process, chilling of the iced cake in a fridge is required. Therefore a cake board, or flat plate is needed for transferring the cake. Also a cake decorating turntable is helpful for ensuring a smooth even finish to the buttercream. Alternatively use a cake stand large enough to accommodate the cake board/plate. A palette knife and large piping bag are also required.

Making the vanilla buttercream:

  • Into a large bowl add the softened butter and vanilla bean paste.
  • Sieve the icing sugar into the same bowl.
  • Add 2 tablespoons of very hot water from the kettle and start whisking the ingredients on a low speed.
  • Continue whisking until the buttercream has turned very pale and has a light, creamy consistency.
  • Place the cake board on to the cake stand.
  • Next, put a small dollop of buttercream on to the centre of the board. Spread the icing so that it is slightly smaller than the diameter of a cake sponge.
  • Lay the first sponge, flat side uppermost on to the board. The buttercream anchors the cake to the board, providing a stable base.
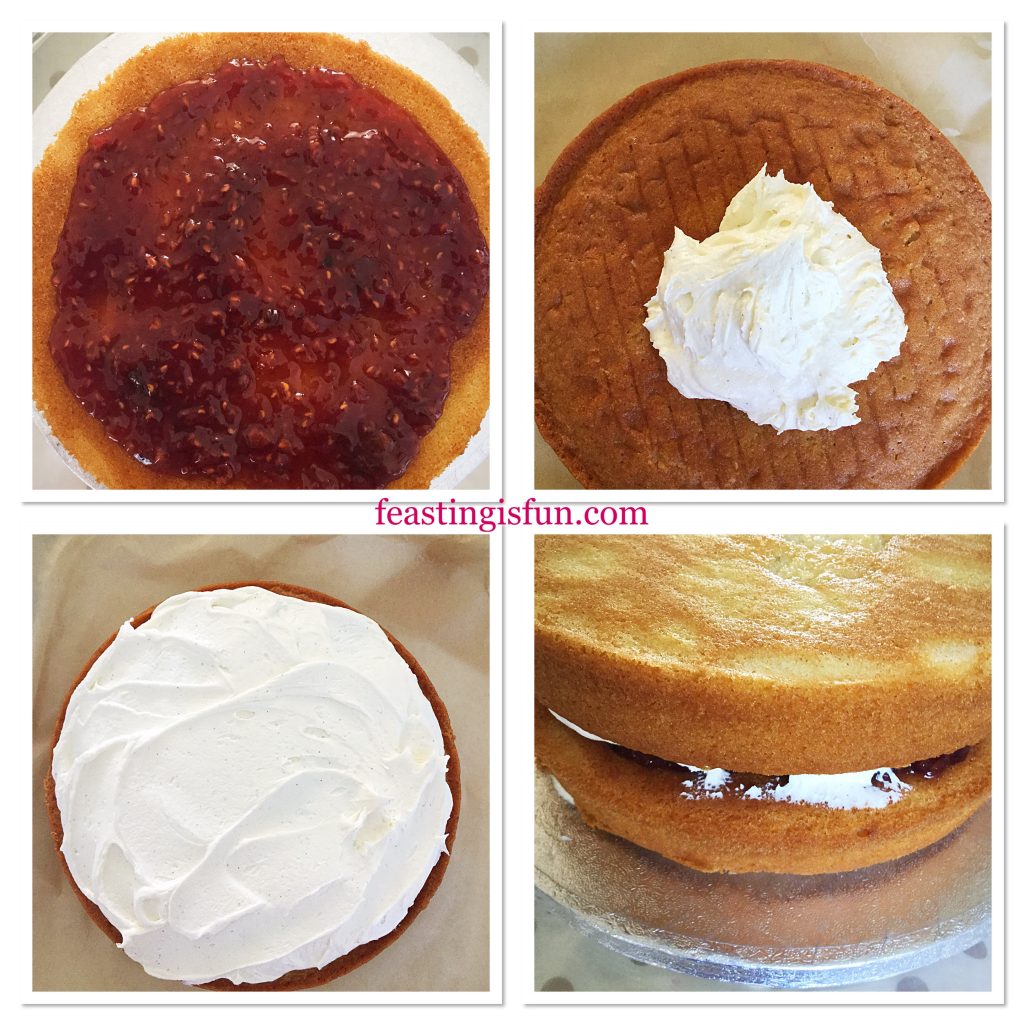
  • Spread 4 generous tablespoons of jam on to the cake. Leave a 2cm gap between the jam and the edge of the cake.
  • Next, take a separate sponge and add a generous dollop/4tbsp of buttercream to the top.
  • Using a palette knife, spread the buttercream evenly so that it covers the sponge.
  • Carefully lift and flip the sponge, placing it on top of the jam sponge, buttercream side facing down. See the photos below for guidance.
FF Raspberry Vanilla Naked Celebration Cake
Layering each sponge with jam and buttercream.
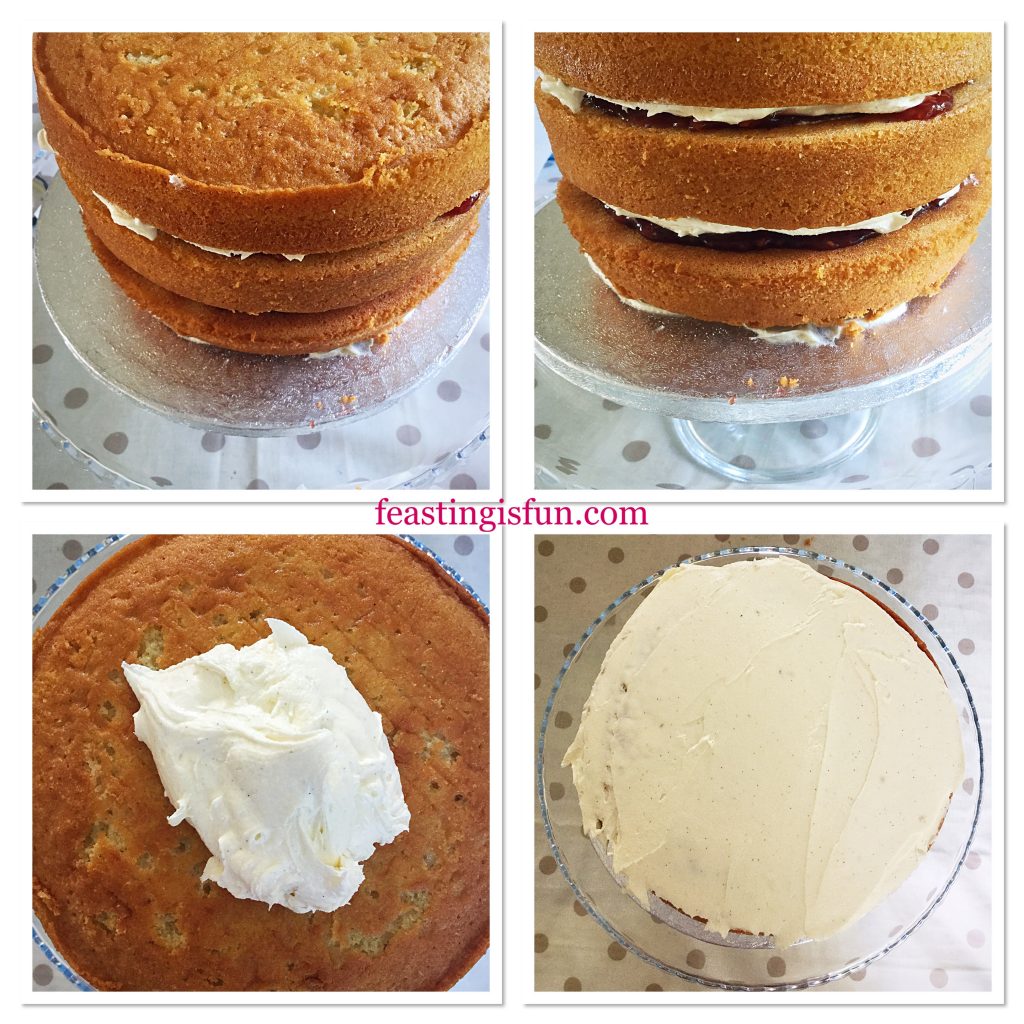
  • Repeat the last steps, with the remaining sponge. However, this time the sponge should be placed flat side down. Hence leaving the finished, stacked cake with a natural top.
FF Raspberry Vanilla Naked Celebration Cake
3 sponge cake layers stacked. Also covering the top in buttercream.

Creating a (semi) naked effect:

  • Spoon a generous amount/5tbsp of buttercream on to the top of the cake.
  • Again, using a palette knife, spread the buttercream so that it covers the top of the cake evenly.
  • Fill a large, disposable piping bag with the remaining buttercream. Snip the end of the bag to give a 1cm opening. A nozzle is not required.
Covering the side of the cake with buttercream.
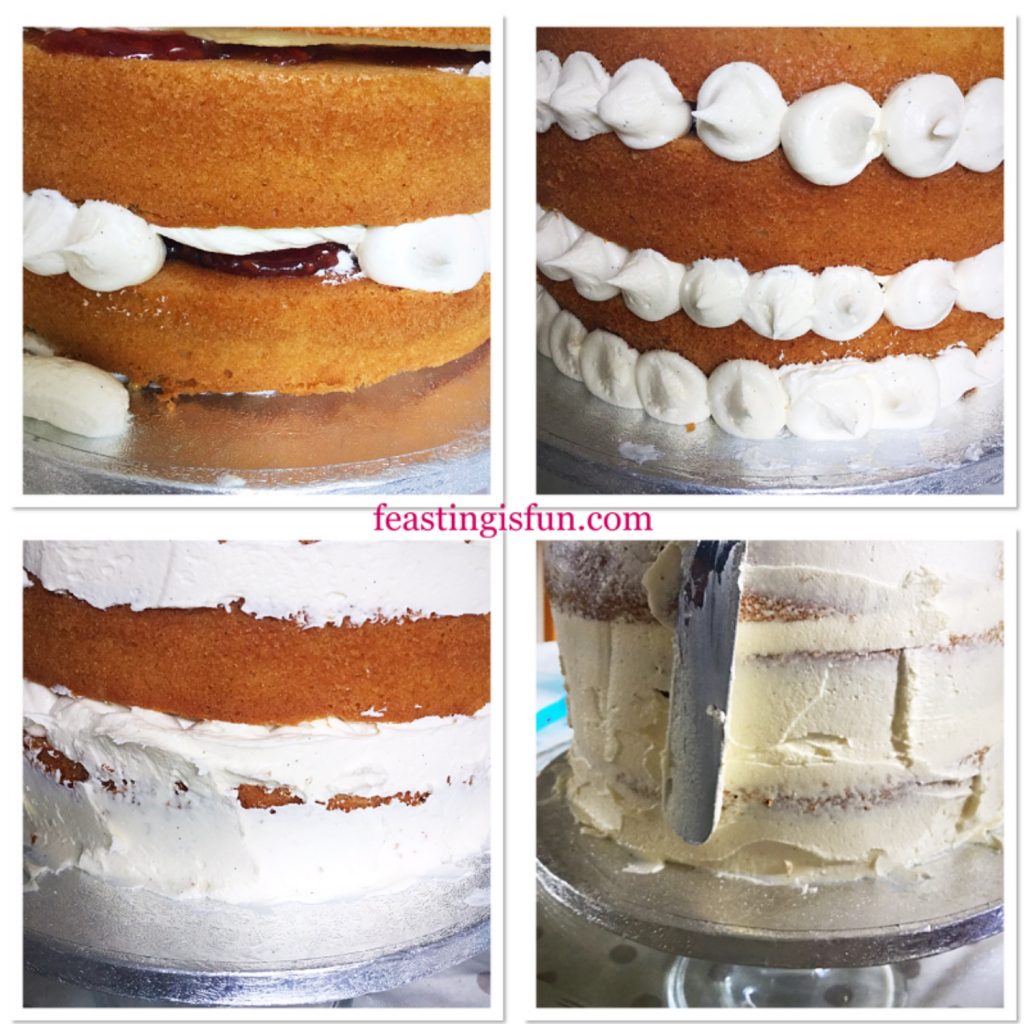
  • The purpose of piping buttercream is to fill in any gaps. Similar to plastering, buttercream is added and then smoothed on to the cake sides. During this process buttercream will be added and then taken off. Resulting in a ‘naked cake’ finish.
  • Pipe the buttercream in between each layer of the cake, including the base and the cake board. Take care not to get jam mixed with the buttercream.
  • Holding a palette knife at a slight angle to the side of the cake, slowly turn the cake stand. As the buttercream spreads across the cake it will also accumulate on the palette knife. Scrape the palette knife against the side of the butter bowl to remove any excess.
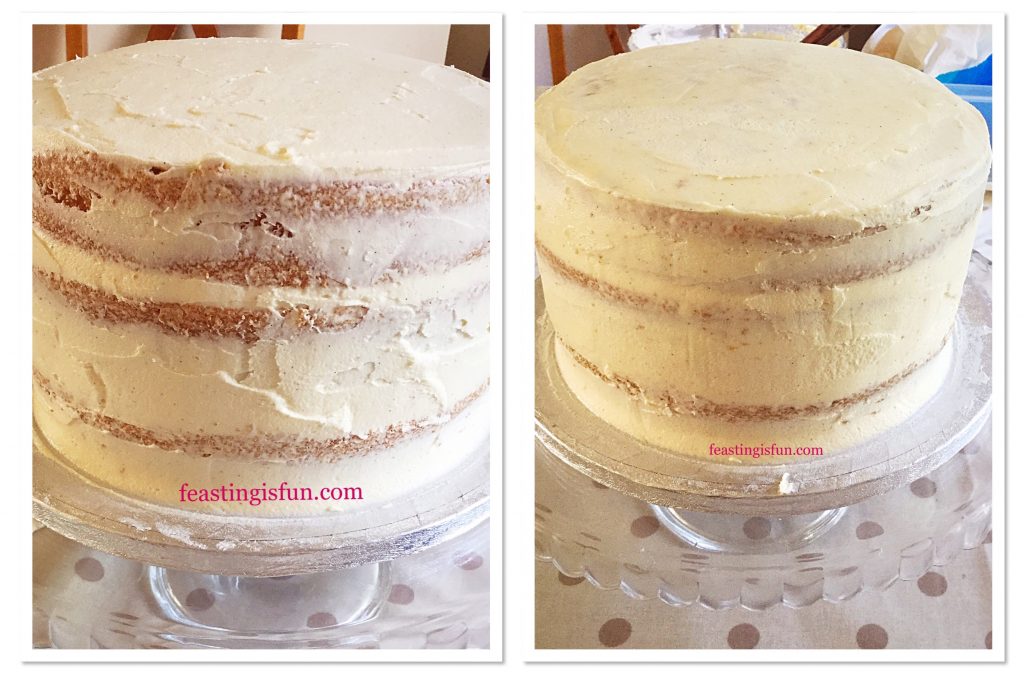
  • Continue turning the cake, piping buttercream on to any bare spots, until the sides of the cake are roughly covered. See bottom left photo above.

Creating a smooth finish:

  • The next stage is creating a smooth, even finish across the entire cake.
  • Fill a jug with very hot water. Wipe any buttercream from the palette knife and then place it in the hot water. Since the heat of the knife melts buttercream, it is very helpful in creating the smoothest finish.
  • Remove the palette knife, wipe off any water and then hold it flat against the side of the cake. Rotate the cake slowly. When you start to feel a dragging sensation, turn the knife over and repeat. Creating a completely smooth cake requires a lot of repetition of these steps. Repeat until the sides of the cake are smooth.
  • Now use the same technique for smoothing the cake top. As soon as the cake top is smooth, run a hot palette knife around the outside of the top cake layer. Creating a smooth top and sides is the aim.
  • While it is tempting to keep going, there does come a point at which the cake is satisfactorily smoothed. Part of the beauty of naked cakes, is their imperfect finish.
  • Clean off any buttercream on the cake board.
FF Raspberry Vanilla Naked Celebration Cake
Raspberry Vanilla Naked Celebration Cake before and after smoothing with a hot palette knife.
  • Chill the cake, uncovered, in the fridge for an hour. Chilling sets the buttercream prior to decorating.

Decorating the cake using fresh, edible flowers:

  • If using fresh flowers it is important to decorate the cake on the day it is to be served.
  • While the cake is chilling prepare the flowers for decoration. Remove lower leaves on stalks and trim flowers so that they can sit on top, or to the side of the cake.
  • Decorate using your chosen flowers. It is important to consider the cake from every angle when adding the flowers.
FF Raspberry Vanilla Naked Celebration Cake
Roses and herbs reflect the rural and natural products made by Hawkshead Relish.

Finally the Raspberry Vanilla Naked Celebration Cake is ready to be served.

FF Raspberry Vanilla Naked Celebration Cake
Raspberry Vanilla Naked Celebration Cake.

Store any leftover cake, floral decorations removed, in an airtight container, ideally refrigerated and eat within 3 days.

FF Raspberry Vanilla Cake Decorated With Fresh Flowers

If you have enjoyed this Raspberry Vanilla Naked Celebration Cake recipe, you may also like these:

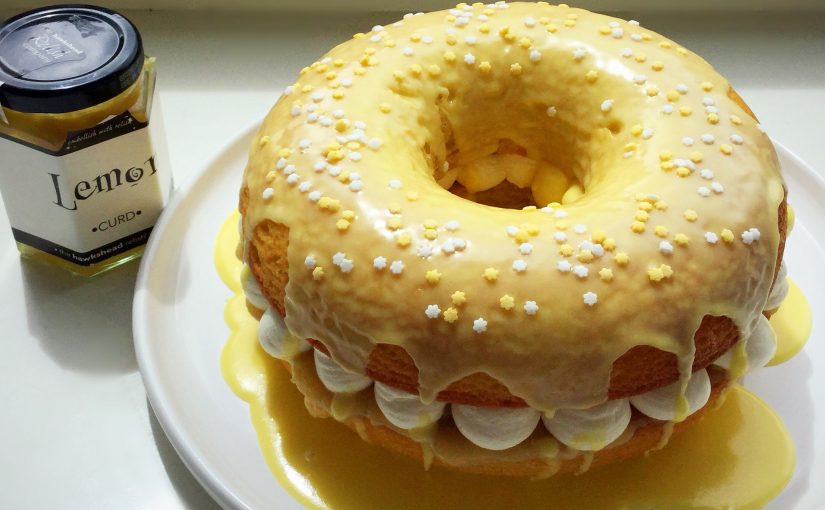
Lemon Drizzle Whipped Cream Filled Giant Doughnut

Lemon Drizzle Whipped Cream Filled Giant Doughnut

Strawberries And Cream Cake

Strawberries and cream sponge cake
Strawberries And Cream Cake

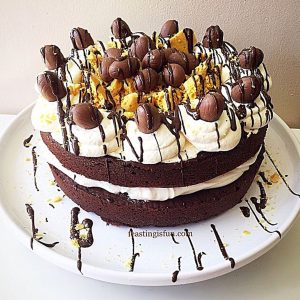
Chocolate Honeycomb Sponge Cake 

Chocolate honeycomb sponge cake decorated with milk chocolate Lindt mini eggs.
Chocolate Honeycomb Sponge Cake

Celebrating a event, such as Hawhead Relish’s achievement, with cake, marks the occasion as special. Also, other desserts such as cheesecakes and pavlova’s can make an impressive alternative. Especially as different dietary requirements may need catering for. All the Pavlova recipes created for Feasting is Fun are specifically gluten free, for that very reason. Because, including as many people as possible in a celebration is so important to me.

Whatever you are making, baking and creating in your kitchens, have fun creating your feast.

Sammie xx

Hawkhead Relish kindly gifted me the jam used in this recipe. All opinions, views, content including photography are my own. No part of this post may be reproduced without the express written permission of its owner. Please see my Disclosure Policy.

Share
Facebooktwitterpinterestlinkedintumblr

Lemon Drizzle Whipped Cream Filled Giant Doughnut

Share
Facebooktwitterpinterestlinkedintumblr

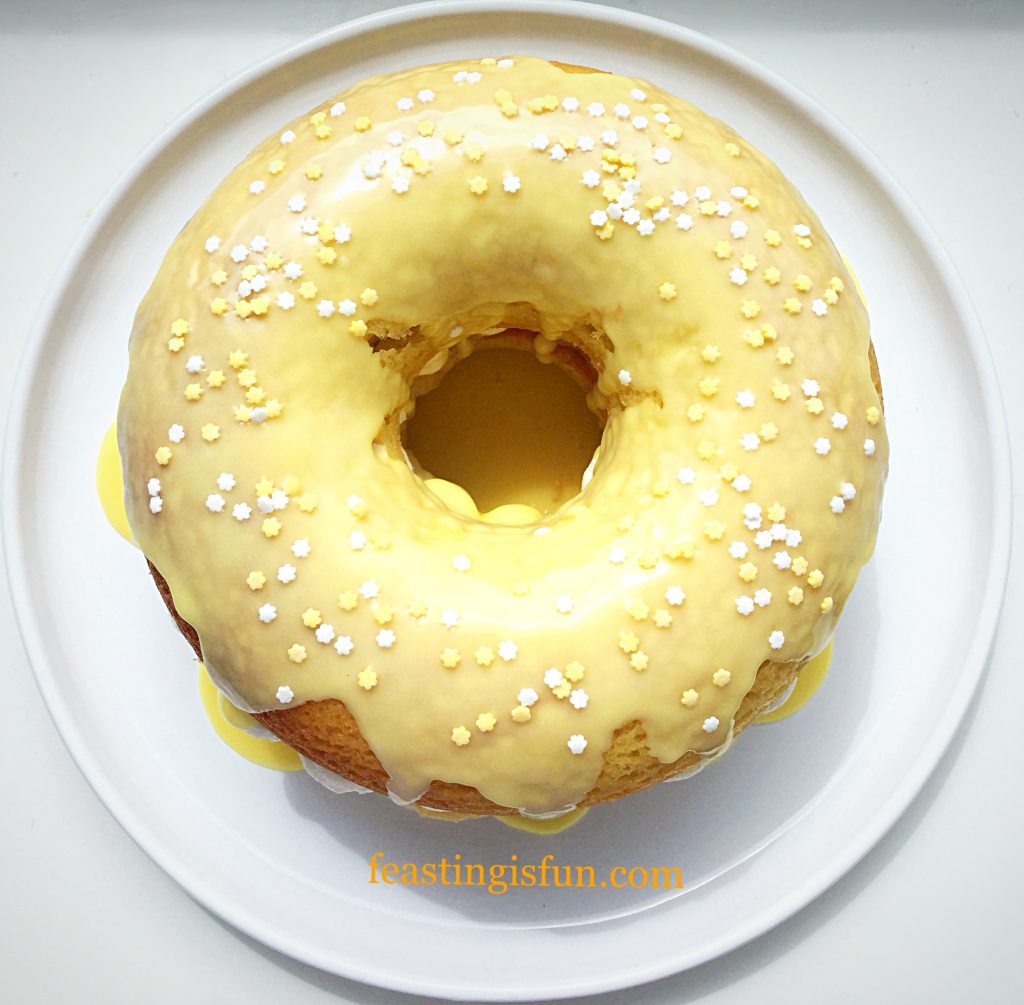
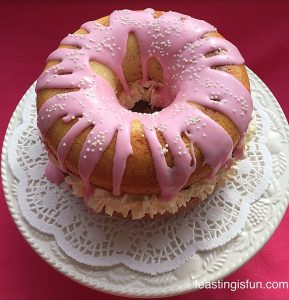
Lemon Drizzle Whipped Cream Filled Giant Doughnut, perfect any time of the year. Most especially when shared with friends and a great cup of tea. Recently having seen a list of the most popular cakes depending on season, there wasn’t any surprise when Lemon Drizzle made all four lists.

FF Lemon Drizzle Giant Doughnut

Lemon Drizzle A National Favourite

Since this week is National Doughnut Week, a baked giant doughnut was the desired way to celebrate in our home. Honestly though, it’s never difficult eating a doughnut! Still this had to be a celebratory doughnut. As mentioned before, lemon drizzle is not only the Nation’s favourite, it is ours too, here at home.

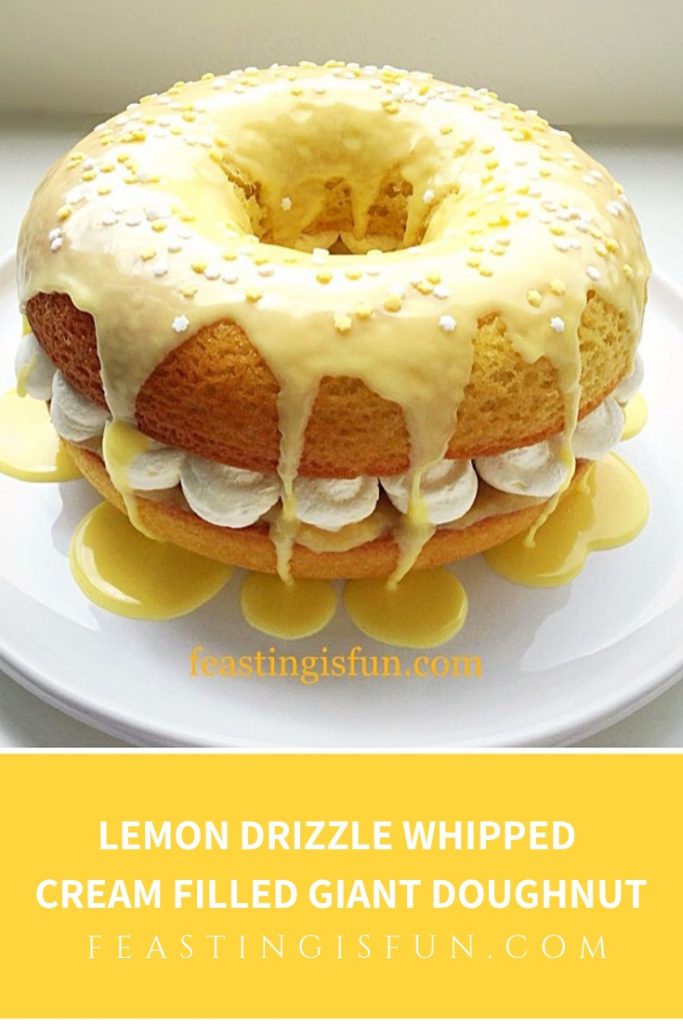
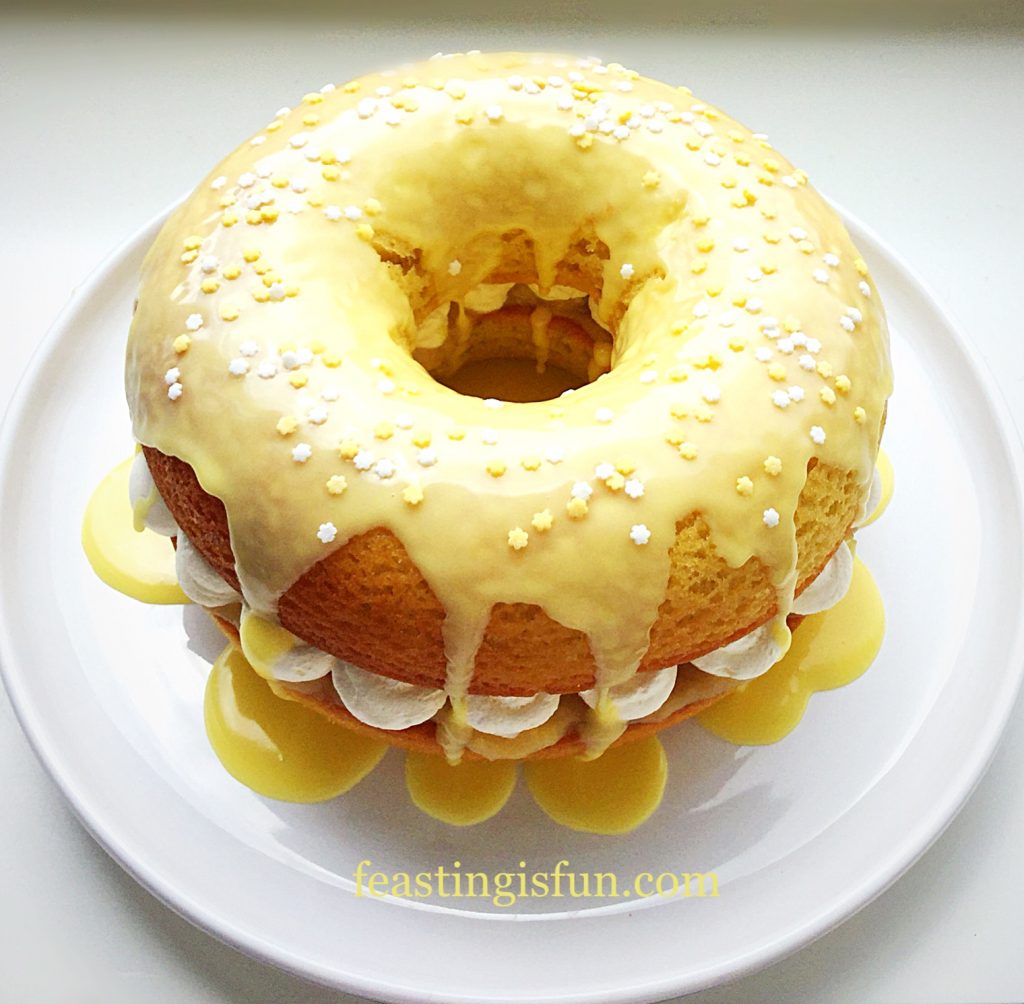
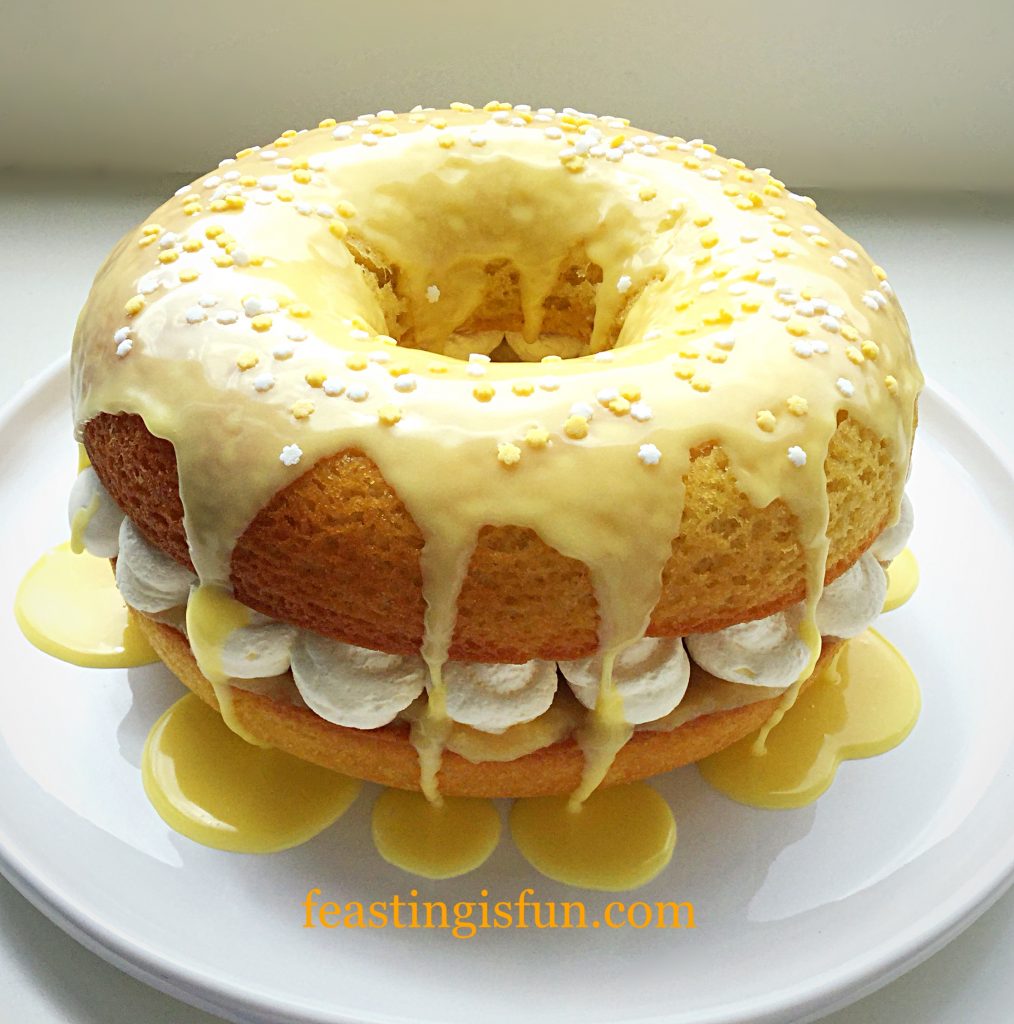
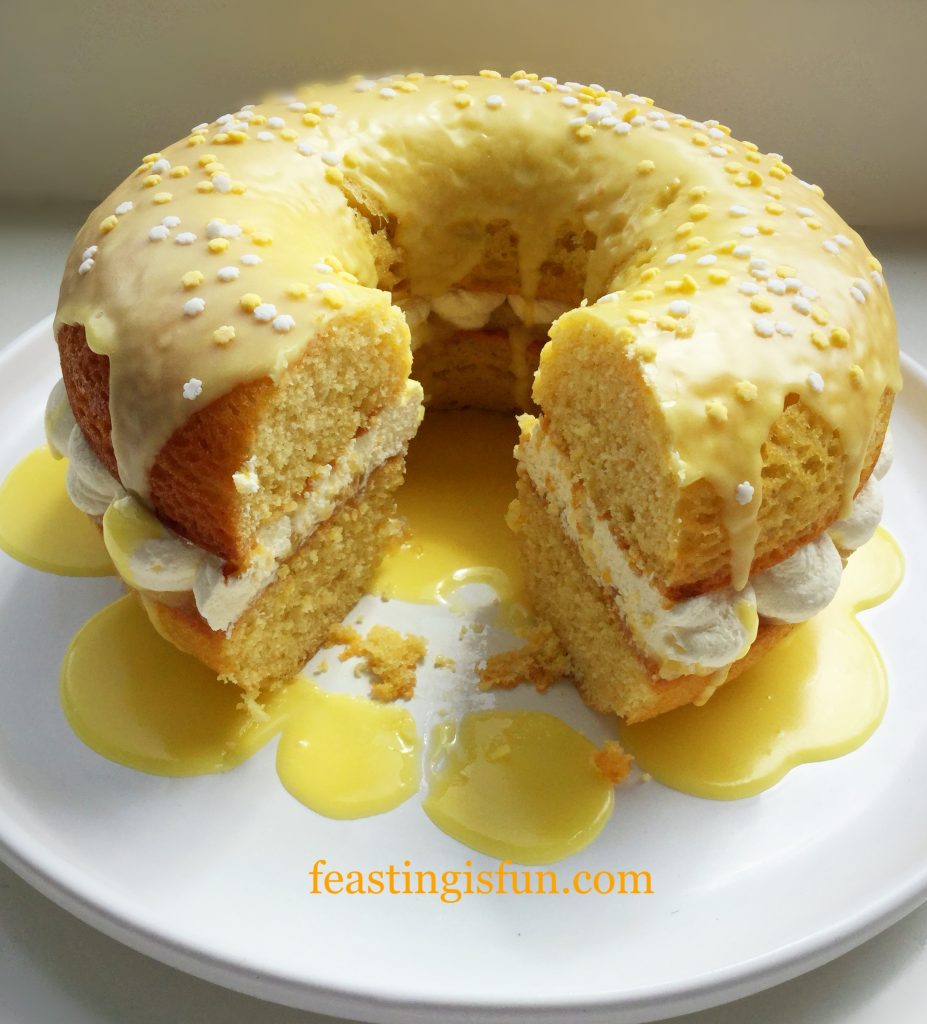
Large baked lemon doughnut filled with whipped cream and topped with a lemon drizzle icing.
Lemon Drizzle Whipped Cream Filled Giant Doughnut

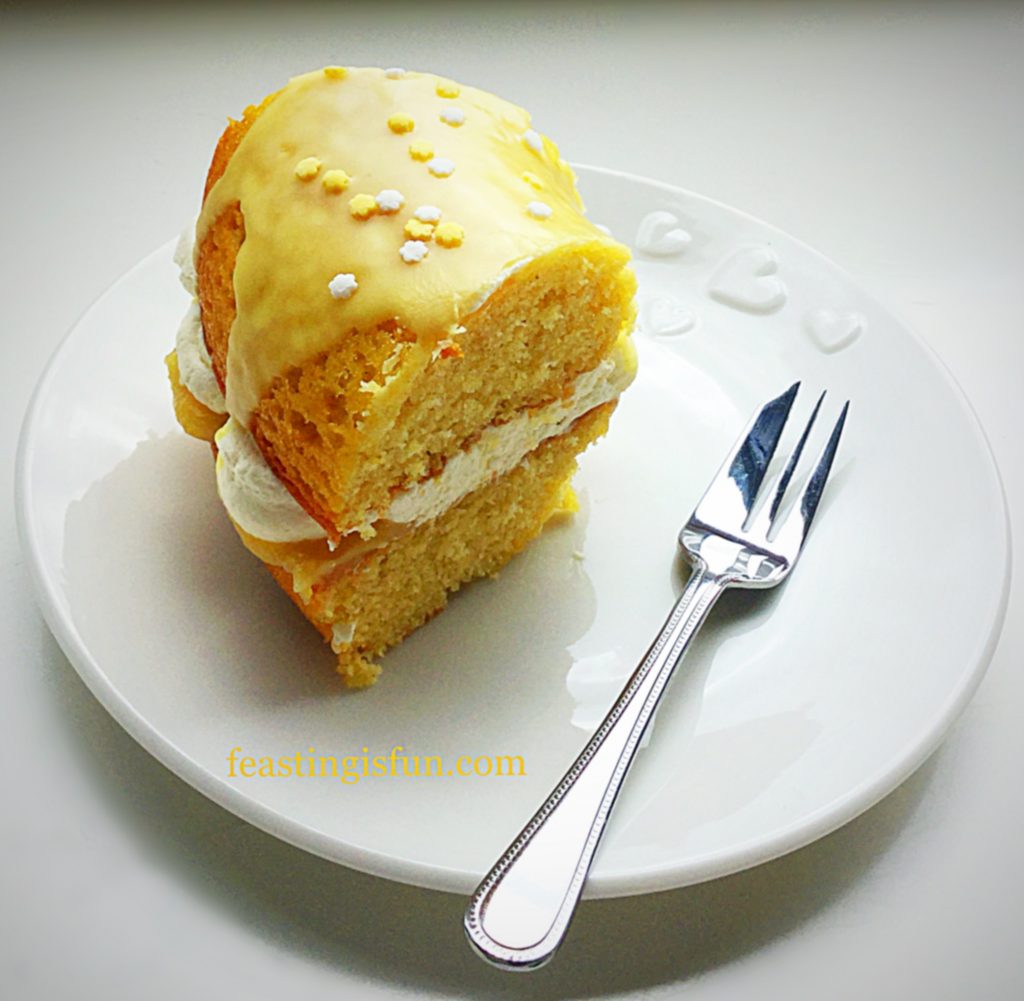
Light, lemon sponge, filled with the best lemon curd from Hawkshead Relish piped, whipped cream. Topped with another deliciously lemon sponge and then drizzled in fresh lemon icing. Finally, finished with colour co-ordinating sprinkles, for fun and added crunch.

FF Lemon Drizzle Whipped Cream Filled Giant Doughnut
The whipped cream cuts through the delicious tart lemon flavours.

Giant Doughnut Or Sandwich Cake?

The silicone moulds needed to bake this giant doughnut are available online, Amazon or from Lakeland. Inexpensive and easy to use, I can guarantee you will not regret buying. Alternatively, this doughnut can also be baked in two 7-8″ sandwich, cake tins. Perhaps add the moulds to a birthday or Christmas list?

FF Lemon Drizzle Whipped Cream Filled Giant Doughnut
Lemon Drizzle Whipped Cream Filled Giant Doughnut dessert anyone?

Due to the flavour and presentation of this bake, it is perfect to serve for dessert, or any time you have friends or family pop round.

Recipe: Lemon Drizzle Whipped Cream Filled Giant Doughnut serves 8-10

200g/7oz Unsalted Butter softened to room temperature – plus a little extra to grease the moulds

200g/7oz White Caster Sugar

1/8th tsp Salt – I use Maldon

5 Large Free Range Eggs

1tsp Vanilla Extract – I use Nielsen-Masey

200g/7oz Plain White Flour

2tsp Baking Powder – note Waitrose is gluten free

1 Large Lemon scrubbed clean – zest of whole lemon and juice of half used in the Sponge batter

Filling and Icing:

3-4 tbsp Lemon Curd – I use Hawkshead Relish

1/2 juiced lemon – see above

200g/7oz Icing Sugar

Optional – Yellow Gel Food Colouring – I use Wilton

300ml Double/Heavy Cream

Sprinkles of your choice

Method: Preheat the oven to 160C/140C fan, gas mark 3, 325F

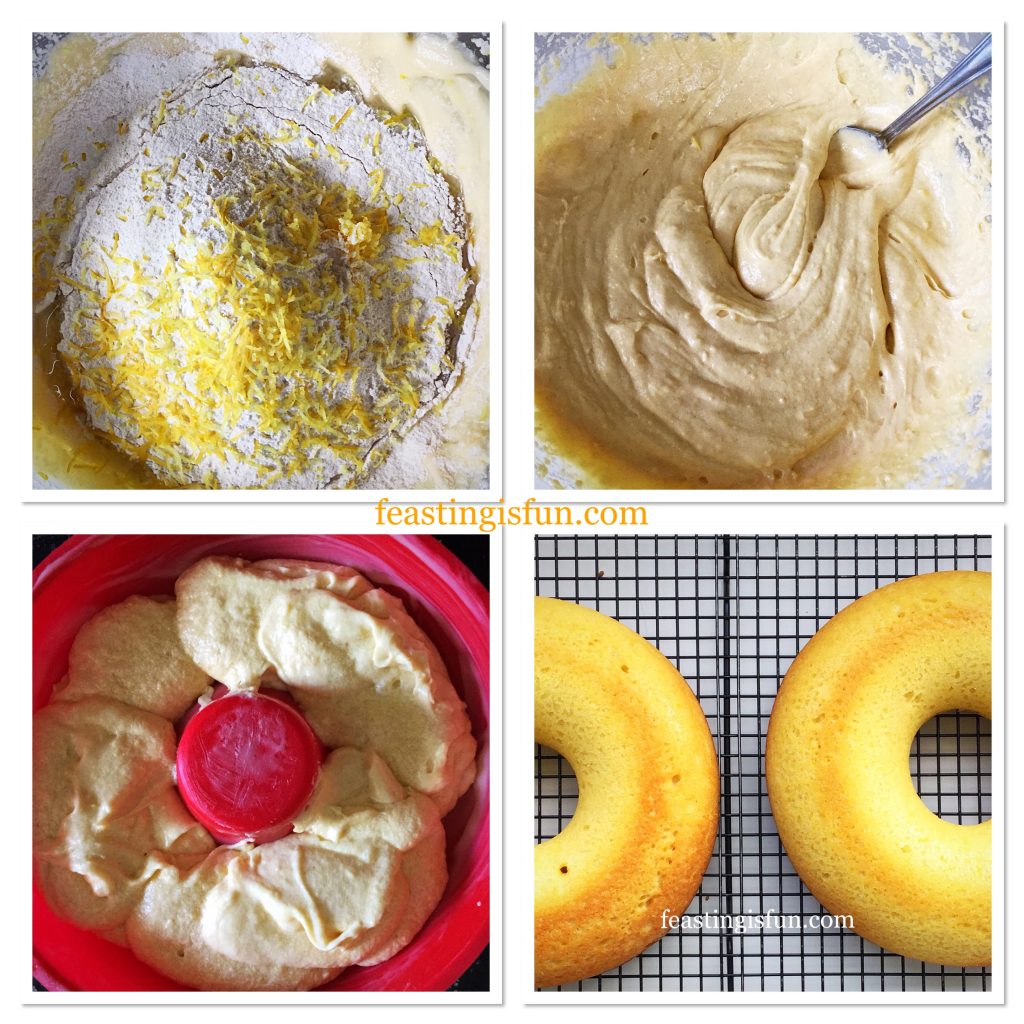
Making And Baking The Lemon Doughnut Halves

  • First of all, grease the silicone moulds well, with softened butter.
  • Now into a large bowl add the caster sugar, butter and salt. Whisk/beat until very pale and fluffy.
  • Next, add the vanilla extract, lemon juice and sift in the flour and baking powder. Lastly add the lemon zest.
  • Finally mix all of the ingredients on slow, or by hand. This is called the all-in-one method and works particularly well with this recipe.
  • Divide the mixture between the two moulds and place them on separate baking trays.
  • Place the baking trays, evenly spaced in the preheated oven.
  • The doughnut sponge will take between 30 and 40 minutes to bake.
  • The sponge is baked when golden in colour and springs back from a light touch.
  • Once baked remove the moulds from the oven. Allow to cool for 5 minutes and then turn out the doughnut sponge halves onto a cooling rack.
  • While the sponges are cooling, the lemon drizzle icing can be made.
FF Lemon Drizzle Whipped Cream Filled Giant Doughnut
Creating, making and baking the giant doughnut.

Decorating The Lemon Drizzle Whipped Cream Filled Giant Doughnut

  • Weigh the icing sugar into a bowl containing the juice of half a lemon.
  • If desired add the tip of a cocktail stick, which has been dipped in yellow gel food colouring.
  • Stir vigorously, ensuring a uniform colour. If the icing seems too thick to drizzle add a drop more lemon juice or cold tap water.
  • Cover the icing with cling film placed directly in contact with the top of the yellow icing. Doing so stops the icing from drying out.
  • For the whipped cream, pour 300mls of cold cream into a bowl. Whisk lightly until the cream just holds a stiff peak.
  • Place the whipped cream into a piping bag fitted with a round piping nozzle, approximately 1cm diameter. Place the piping bag into the fridge until needed.
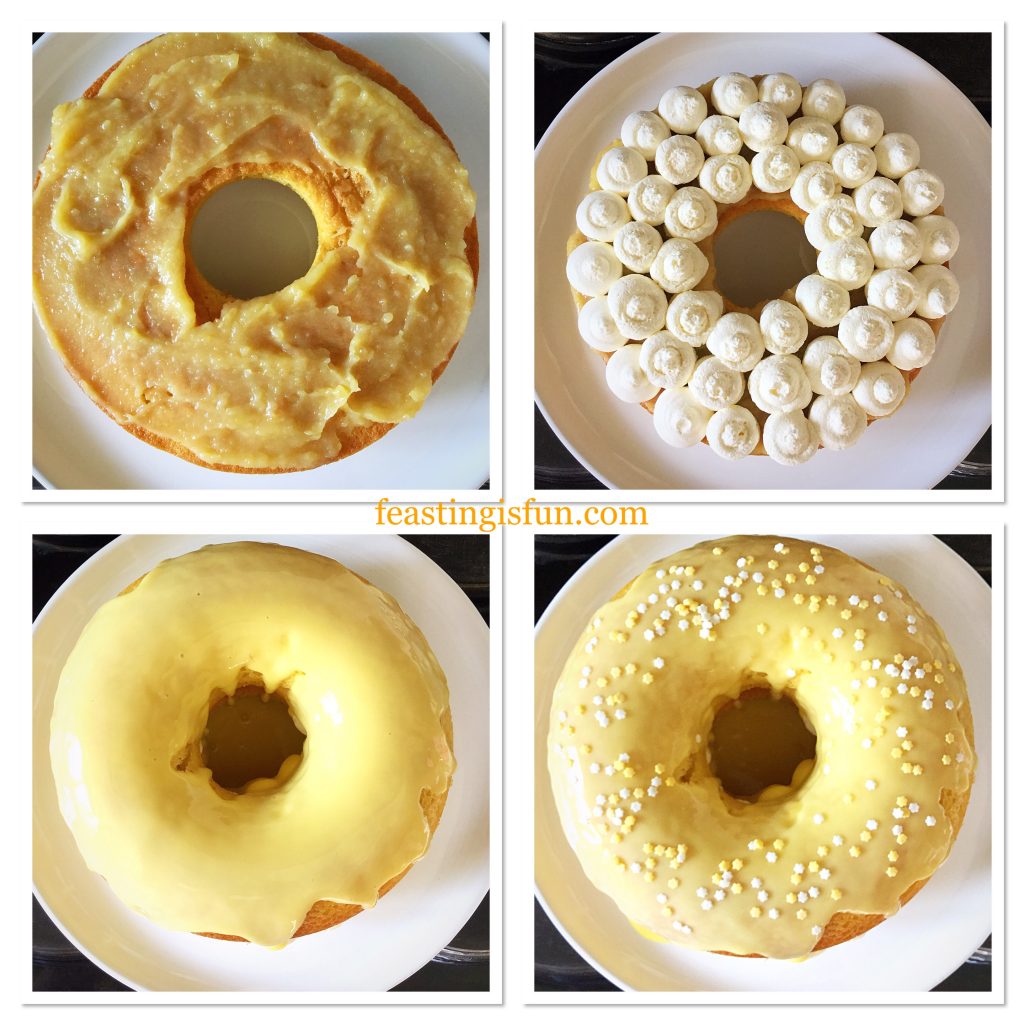
  • When the sponges are completely cool, decide which one will be the top and the bottom of the doughnut.
  • Place the bottom doughnut sponge, flat side up on a serving plate.
  • Spoon the lemon curd on top and spread with a knife so that it covers evenly.
  • To pipe the whipped cream, firstly see the picture below. Start just inside the outside edge, piping single ‘blobs’ around the outside. Continue with two more rows of piped cream, until the base is prettily covered.
  • Now place the top of the doughnut evenly on to the base.
  • Spoon the lemon drizzle on to the top sponge, leaving any drips as they add to the finished look.
  • Scatter sprinkles over the drizzle icing while it is still wet.
FF Lemon Drizzle Whipped Cream Filled Giant Doughnut
Building and decorating the Lemon Drizzle Whipped Cream Filled Giant Doughnut.
  • Serve this delicious doughnut chilled and with a smile.
FF Lemon Drizzle Whipped Cream Filled Giant Doughnut
A generous slice of Lemon Drizzle Whipped Cream Filled Giant Doughnut.
FF Lemon Drizzle Whipped Cream Filled Giant Doughnut
Lemon Drizzle Whipped Cream Filled Giant Doughnut

If you have enjoyed this recipe for a Lemon Drizzle Whipped Cream Filled Giant Doughnut then you may also like these:

Strawberry Whipped Cream Giant Doughnut

FF Lemon Drizzle Whipped Cream Filled Giant Doughnut
Strawberry Whipped Cream Giant Doughnut comes with a Gluten Free recipe included.

Chocolate Hazelnut Baked Giant Doughnut

FF Lemon Drizzle Whipped Cream Filled Giant Doughnut
Chocolate Hazelnut Baked Giant Doughnut.

Raspberries and Cream Giant Doughnut

FF Lemon Drizzle Whipped Cream Filled Giant Doughnut
Raspberries Cream Giant Doughnut.

I hope these delicious recipes have shown how versatile the silicone doughnut moulds can be?

The gluten free recipe for the Strawberry Doughnut, also works well for both the Raspberry and Lemon Drizzle doughnuts. Please ensure that any decorations, baking powder are certified gluten free. I am sure that anyone on a restricted diet, would be thrilled with a giant doughnut as a birthday cake!

So, whatever you are making, baking and creating in your kitchens, have fun preparing and sharing your feast.

Sammie xx

No part of this post may be reproduced or duplicated without the written permission of the owner. Pleased see my Disclosure Policy.

National Doughnut Week is 11-18 May 2019. And proceeds from doughnuts sold during this week are donated to The Children’s Trust, which supports children with brain injury. Why not bake some doughnuts and take them to work, selling slices to colleagues and donating the proceeds?


Share
Facebooktwitterpinterestlinkedintumblr

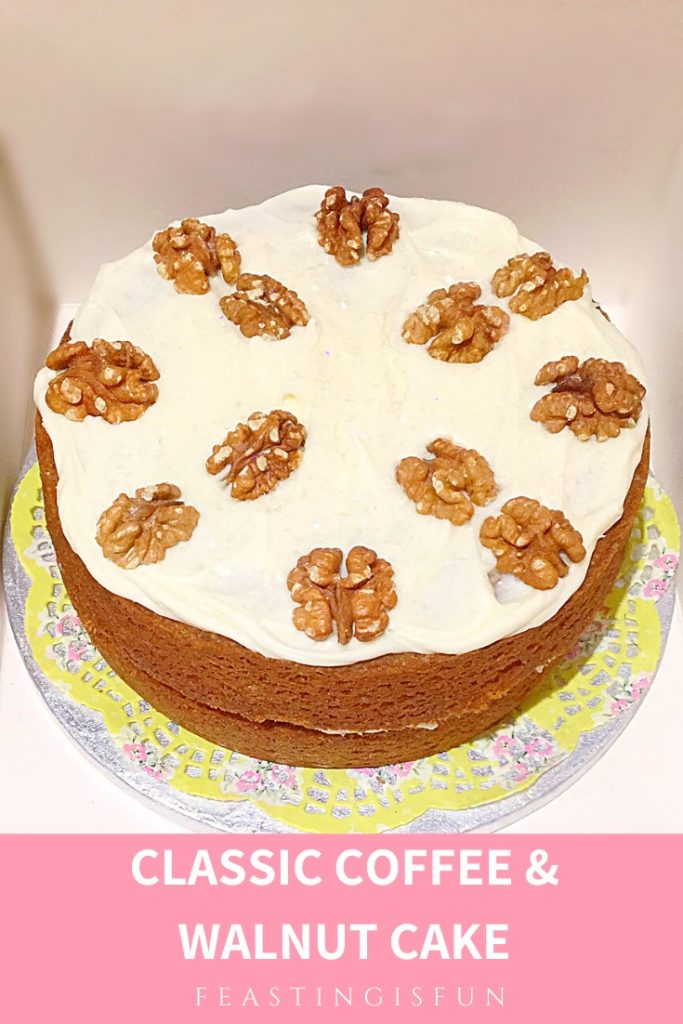
Classic Coffee Walnut Cake

Share
Facebooktwitterpinterestlinkedintumblr

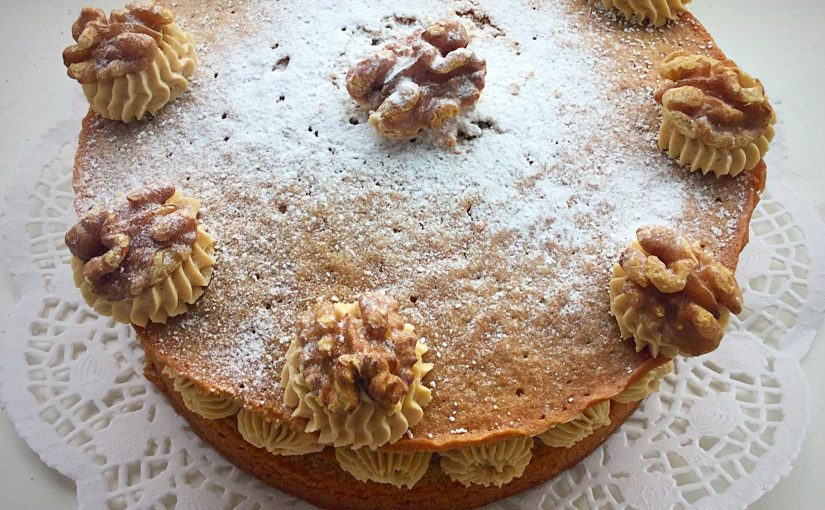
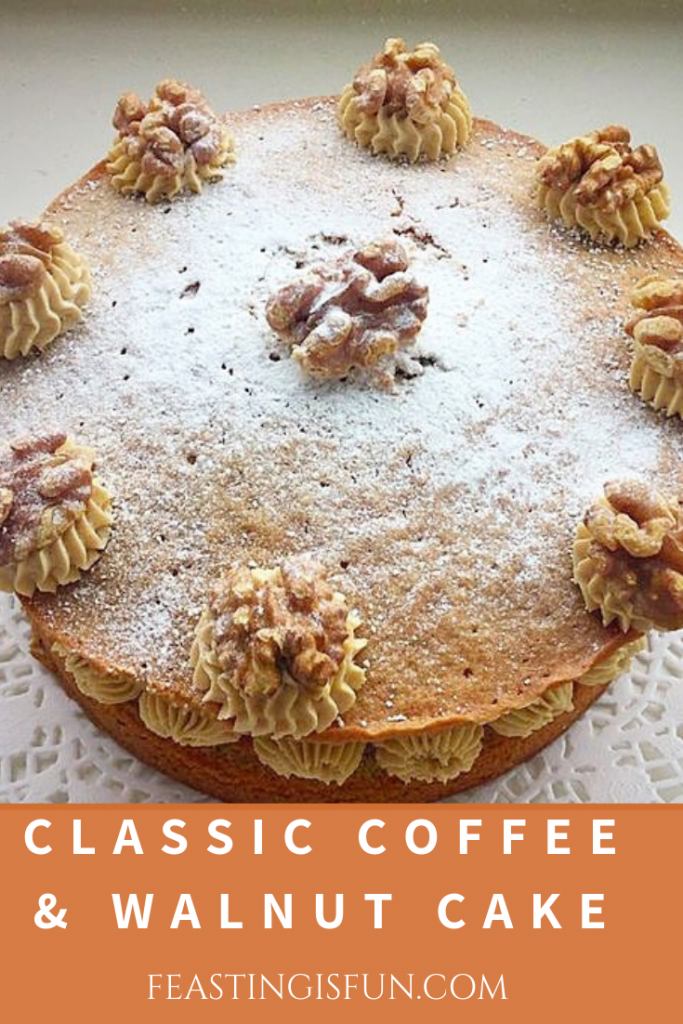
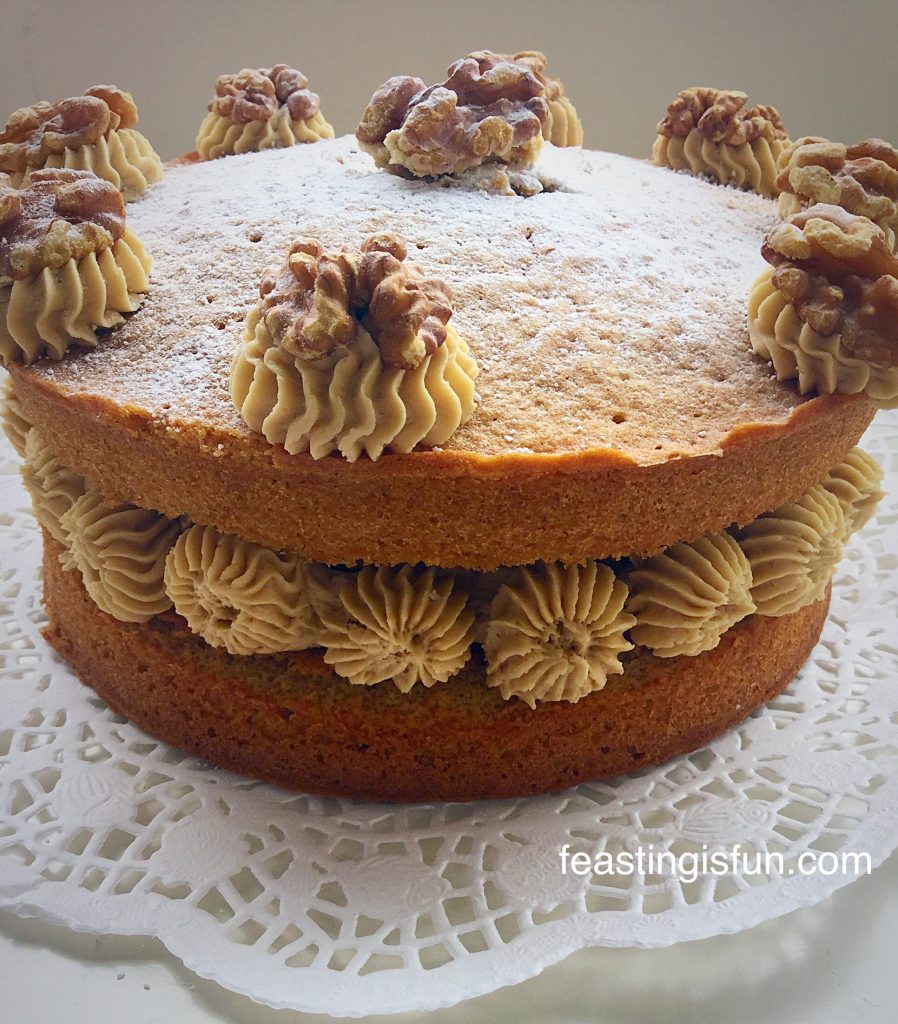
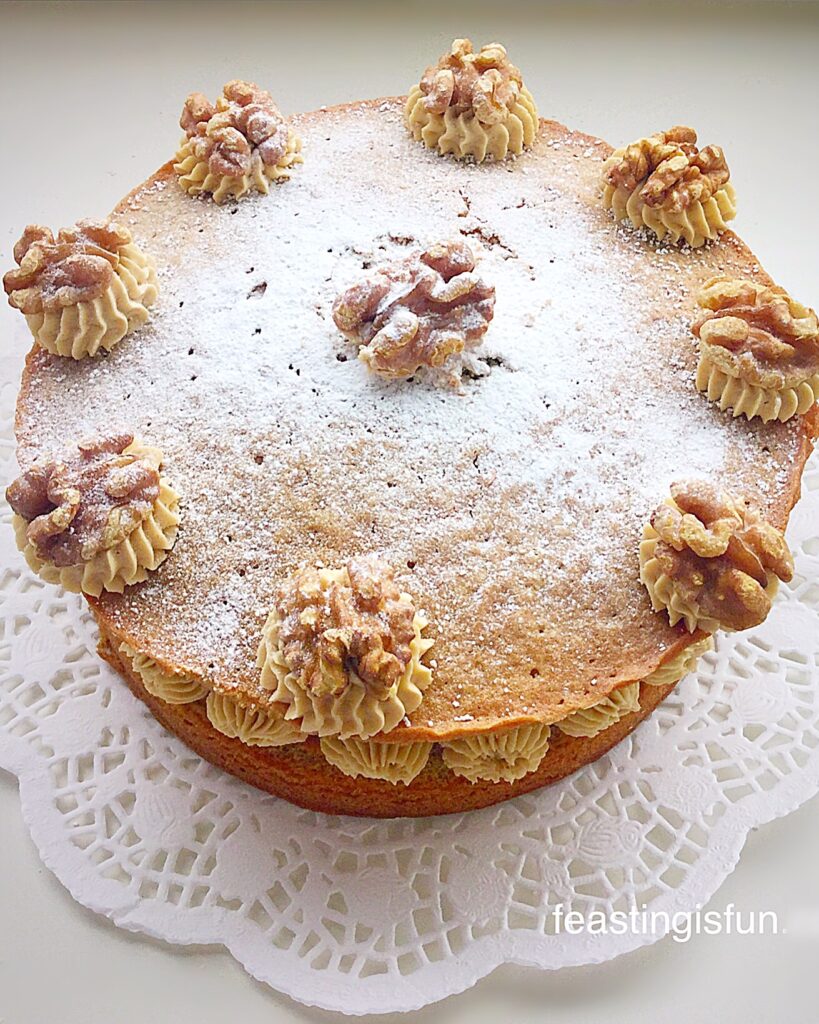
There are many classic flavour combinations; strawberries and cream, rhubarb and custard, apple and cinnamon. And they don’t need tinkering with because they work so well together. Rather like this delicious Classic Coffee And Walnut Cake.

FF Classic Coffee Walnut Cake

However, recently a few people have asked if I have a Classic Coffee Walnut Cake recipe and while it’s a cake that I’ve baked many times over the years, I realised it wasn’t on here. So, in a attempt to rectify that and make my Father in law’s favourite cake, here it is.

FF Classic Coffee Walnut Cake
Classic Coffee Walnut Cake a real treat.

Baking Cakes To Share

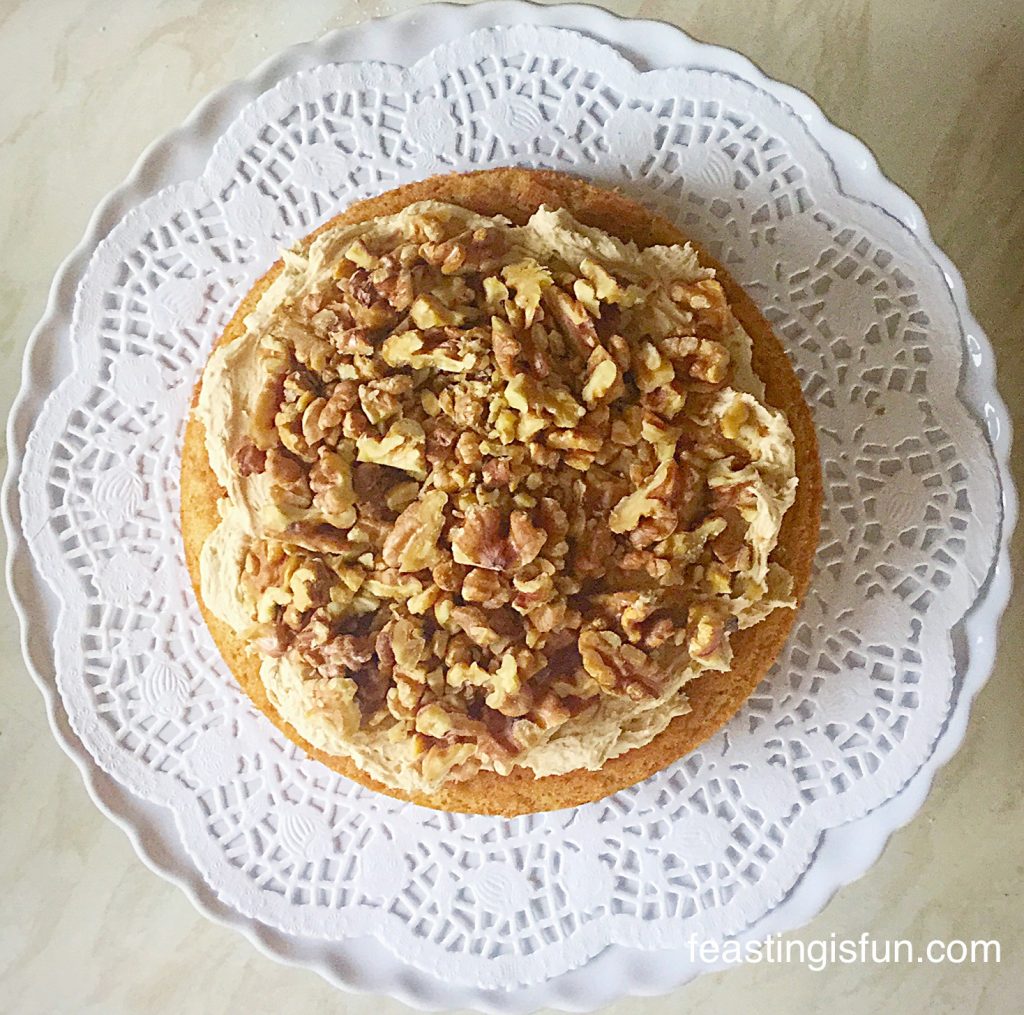
While I tried to make this cake relatively small as it will be shared between two people, in reality I failed! Although this cake was baked in my small 7 inch sandwich tins, I have packed so many walnuts into the centre, this Classic Coffee Walnut Cake will easily feed 8 people!

Alternatively, if you would prefer a slightly smaller cake (don’t laught at me) I suggest cutting down on the walnuts, not the cake!

FF Classic Coffee Walnut Cake
Classic Coffee Walnut Cake a delicious thank you gift.

Baking; A Form Of Therapy

Hubby is, as I write this, undergoing a hospital procedure and as a way of distracting myself and thanking my wonderful in laws for taking him, I made this cake. Also I’m trying to distract myself by writing this post. Although, I’ll have to see how much editing is needed at the end to know how well I managed.

As I mentioned I have made lots of coffee and walnut cakes over the years and I do usually add chopped walnuts to the cake batter. Yet, in this instance, especially as the cake sponges are quite small, I decided to pack chopped walnuts into the centre of the sandwich cake. Because this cake was made to be given away, now I’ve made it I really fancy a slice! Expect another coffee cake recipe on here soon.

FF Classic Coffee Walnut Cake
Classic Coffee Walnut Cake plenty of delicious, toasted, chopped walnuts fill the centre of this cake.

The Beauty Of Buttercream Icing

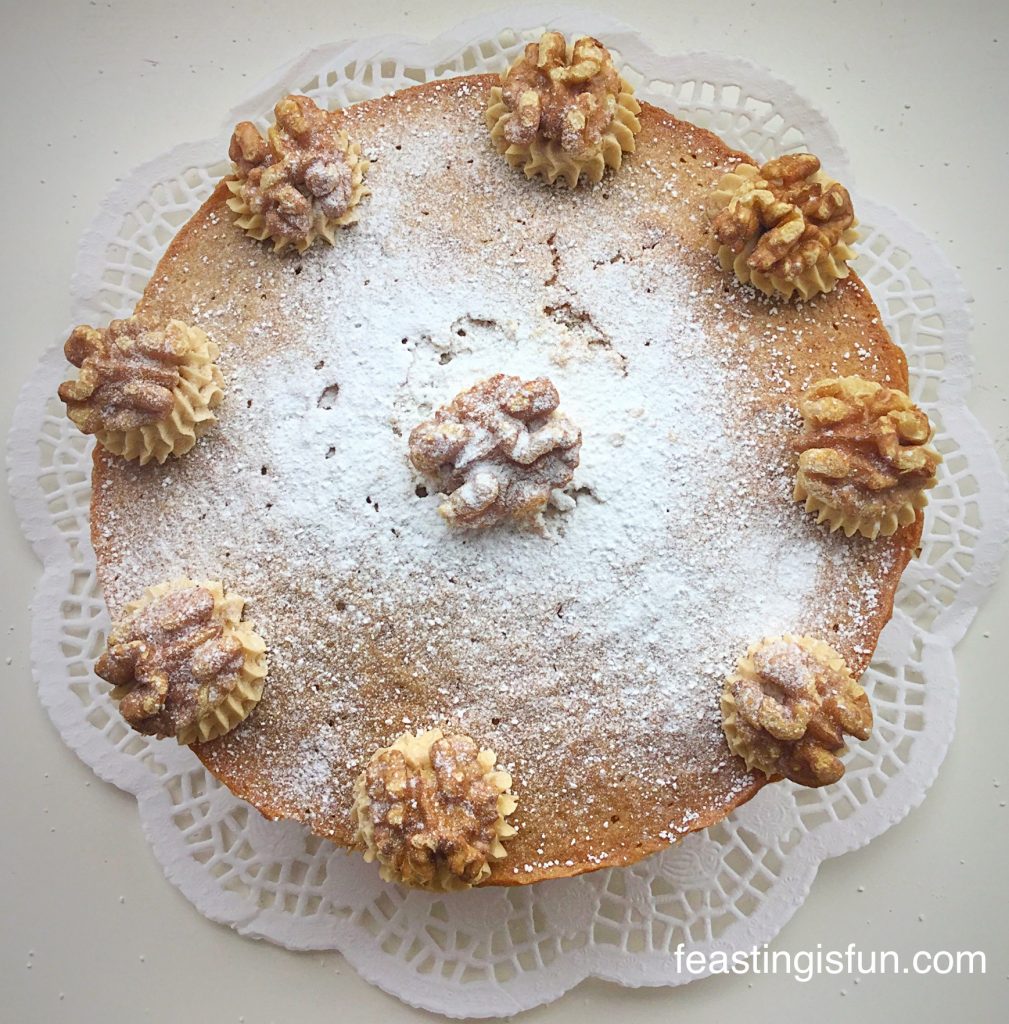
Also, I made a mistake whilst decorating this cake. After piping the 8 swirls around the edge, I piped a monstrously hideous circle in the centre. While I photographed the cake I became more and more disheartened by this huge swirl of buttercream spoiling the look of the cake. Fortunately, this is where buttercream is a dream to work with, using a small palette knife it lifted right off the cake. And I then dusted the cake with icing sugar and replaced a single walnut half, with a dob of buttercream in the centre.

Sometimes less is more (never with glitter) and that was definitely the case with this Classic Coffee Walnut Cake.

I have shown you a photograph of the centre of the cake as this could easily be the top. However, if you aren’t confident piping buttercream just use half in the middle and spread half on top of the cake. There are plenty of walnuts in the recipe, enough for you to chop and cover both the middle and top layers and your cake will still look delicious and inviting.

Recipe: Makes one Classic Coffee Walnut Cake – serves 8

For the cake sponges:

150g/5oz Unsalted Butter

150g/5oz Caster Sugar

3 Large Free Range Eggs

2tsp Instant Coffee dissolved in 2tbsp/30ml boiling water

1tsp Vanilla Extract I use NIELSEN-MASSEY

1/4tsp Salt – I use Maldon

150g/5oz Plain Flour – self raising can be substituted DO NOT add extra baking powder

1tsp Baking Powder

For the buttercream:

2tsp Instant Coffee liquid – leftover from sponge recipe (or 1tsp vanilla extract)

150g/5oz Unsalted Butter

300g/11oz Icing Sugar Sifted plus 2 teaspoonful for dusting the cake

125g/4.5oz Walnut Halves

Method: preheat oven to 160C/140C fan, gas mark 3, 325F

Making And Baking The Coffee Cake Sponges

  • First of all butter 2 x 7″ (17cm) sandwich tins and line with baking parchment.
  • Place the instant coffee into a cup and add 30ml of boiling water. Stir to dissolve and set to one side to cool.
  • In a large bowl add the butter and sugar. Whisk/beat until pale and creamy.
  • Next add the 3 eggs, vanilla extract and 3 teaspoons of the cooled liquid coffee. Whisk/beat for 2 minutes until combined.
  • Sift the flour, baking powder and salt into the bowl.
  • Fold the dry ingredients into the wet until just incorporated. This will ensure a very light sponge.
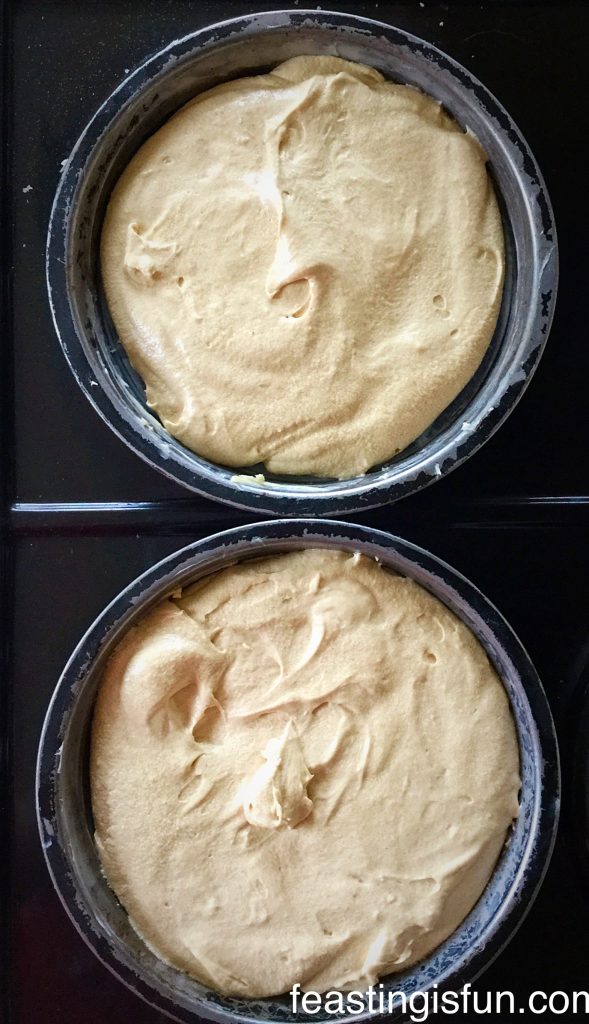
  • Divide the batter equally between the 2 prepared cake tins. Use may use digital scales to ensure your quantities are even, or just eyeball it as I did.
FF Classic Coffee Walnut Cake
Two coffee cakes ready for the oven.
  • Bake the cakes in the centre of the oven for 25-30 minutes.
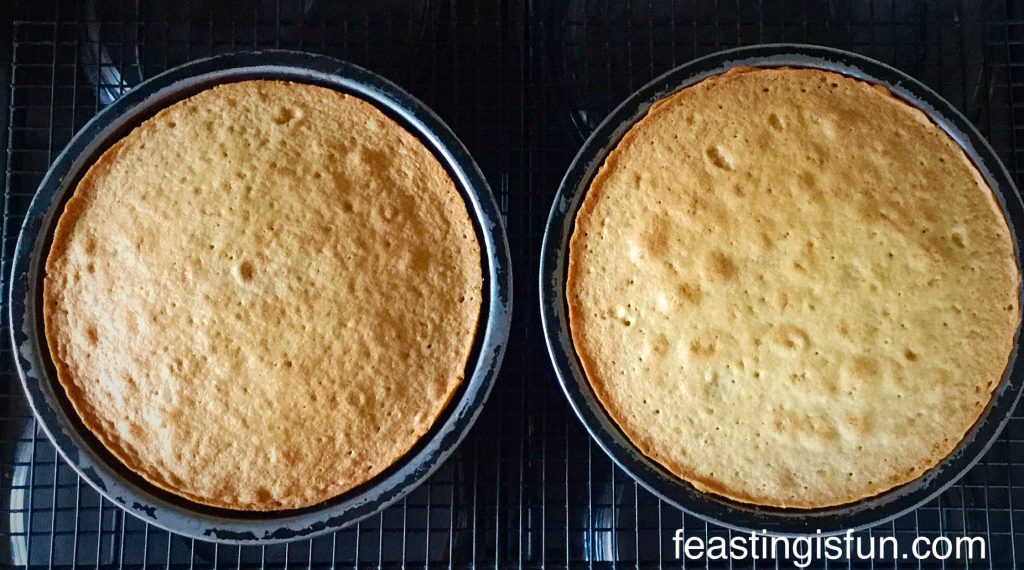
  • The sponges are baked when they are golden brown and spring back from a light touch.
  • As soon as the cakes are baked remove from the oven, place the tins on a cooling rack and leave to cool in the tins for 10 minutes.
FF Classic Coffee Walnut Cake
Beautiful cooked coffee cakes.
  • When they are cool enough to handle turn the cakes out of their tins, ensuring one sponge is the right way up, for the top of the cake.
  • Allow the turned our sponges to cool completely before assembling the cake.
  • Place the walnut halves on to a baking tray and place in the hot oven for 5 minutes to toast. Remove and leave to cool on the baking tray.

Making The Icing And Decorating The Coffee And Walnut Cake

  • Place the butter, sifted icing sugar and 3 teaspoons of liquid coffee into a large bowl.
  • Whisk until pale and creamy. Taste the buttercream, add more coffee if desired.
  • When cooled place the bottom half of your cake, flat side up, onto a cake stand or board.
  • Using a palette knife spread half of the buttercream over the sponge, not quite reaching the edges.
  • Set aside 10 nice walnut halves to decorate the top of the cake ( it’s always good to have one spare).
  • Roughly chop the remaining walnuts and place on top of the buttercream.
  • Place the top half of you cake, rounded side up, on top of the bottom half.
  • Fit an icing bag with a French star tip (or whatever tip you prefer).
  • Fill the icing bag with the remaining buttercream.
  • Pipe 8 small swirls equally around the top edge of the cake. Pipe the same small swirl in the centre.
  • Top the buttercream swirls with walnut halves.
  • Pipe little swirls around the middle of the cake, where it is sandwiched together for a pretty finish.
  • Dust with a little icing sugar.

Classic Coffee Walnut Cake such a beautifully delicious, easy cake to make and the perfect gift for any coffee cake lover.

Store the cake in an airtight container, in the fridge during hot weather. Eat within four days.

Thank you

I love my husbands parents very much. Hubby and I will be celebrating our 20th wedding anniversary this year. My relationship with my in – laws has not always been smooth or plain sailing. We have been through a lot together and I honestly love and respect them as if they were my own parents.

Thank you Ma and Pa, we couldn’t have gotten through the last 20 years and especially the last year without you x.

I really enjoy baking for other people. It’s such a fantastic feeling when you see the look of surprise and joy on their face when I give them a cake, or whatever goody I have baked. Finally, hubby should be home soon and I have managed to keep myself distracted whilst he has been gone.

Do you enjoy baking for others?

If you’ve enjoyed this Classic Coffee Walnut Cake then you may also want to take a peek at these recipes:

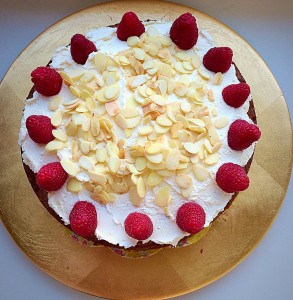
Raspberry Almond Cream Cake

FF Raspberry Almond Cream Cake
Raspberry Almond Cream 

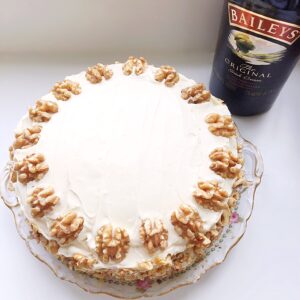
Baileys Coffee And Walnut Cake

Bailey’s Coffee And Walnut Cake
Baileys Coffee And Walnut Cake

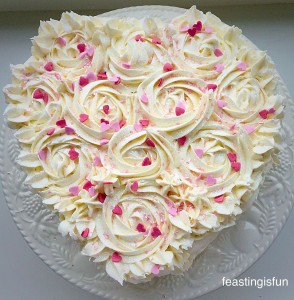
Strawberry Sweetheart Cake 

MT Strawberry Sweetheart Cake
Strawberry Sweetheart Cake

I’d love to see photos of any bakes that you have made as gifts. Please pop a pic on Twitter or Instagram and tag me in. Likewise, do you have a story linked to a special bake? Also tell me about it in the comments section, I love reading all of your comments.

So, whatever you are making, baking and creating in your kitchens, have fun preparing and sharing your feast.

Sammie xx

No part of this post may be reproduced or duplicated without the written permission of the owner. Please see my Disclosure Policy.


The cake below features vanilla icing and a sprinkle of edible holographic glitter. Substitute the coffee in the buttercream icing recipe for one teaspoon of vanilla extract. While the addition of sparkles is your choice!


Vanilla buttercream iced coffee and walnut cake finished with edible holographic glitter.

Share
Facebooktwitterpinterestlinkedintumblr

Strawberries And Cream Cake

Share
Facebooktwitterpinterestlinkedintumblr

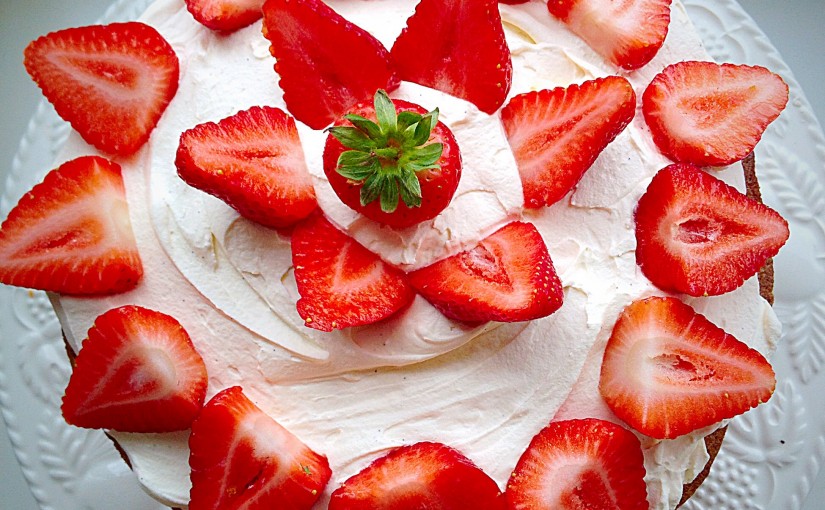
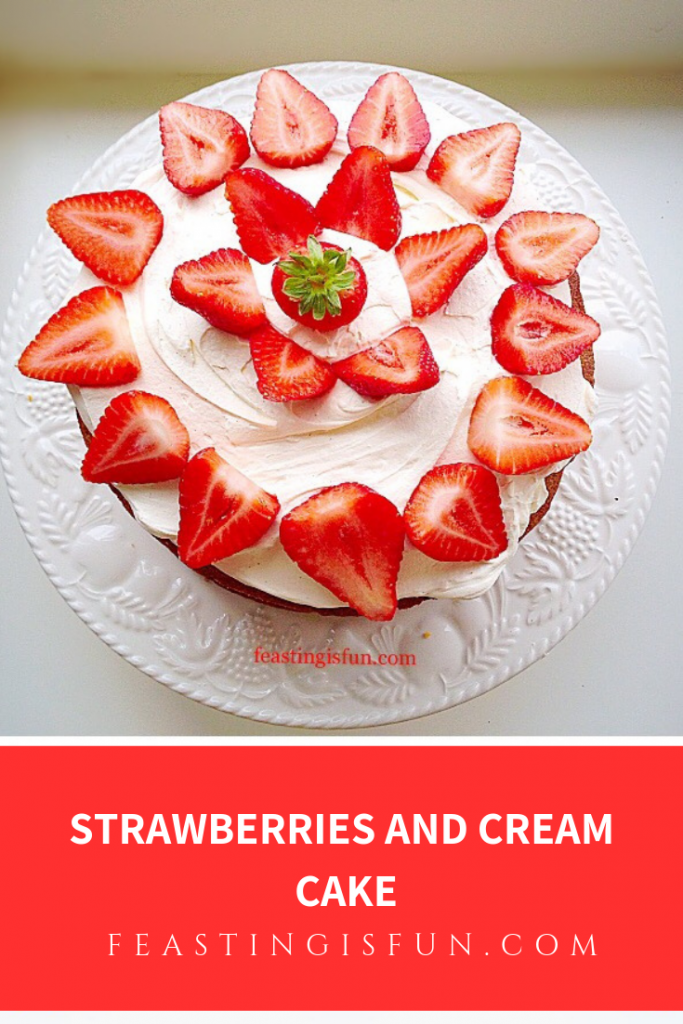
Hi, thank you for stopping by to look at this scrumptious Strawberries And Cream Cake! I hope the sight of it puts a smile on your face. Strawberries in Spring remind me of the promise of sunshine, picnics in the park and days at the beach. Ultimately I think that strawberries are a celebration of warm, sun drenched days, to be shared with friends and family.

FF Strawberries And Cream Cake

Because this cake is so easy to make and looks so beautiful, it easily turns any occasion into a Feast! Since I found strawberries on special offer I baked this cake. Because, they were so sumptuous they deserved celebrating!

FF Strawberries And Cream Cake
Strawberries And Cream Cake

Sometimes during Summer when it is hot, too hot for cake (yes there is such a thing in my world), we eat strawberries as they are, warm from the sun, or refreshingly churned into the most delicious ice cream, see my Strawberry Ripple Ice Cream. While cooler days allow for the indulgence of cake, with vanilla whipped cream and ruby red strawberries.

Recipe : Strawberries And Cream Cake serves 8

For the cake:

225g/8oz Caster Sugar

225g/8oz Unsalted Butter – room temperature (plus a little extra for greasing the tins)

4 Large Free Range Eggs

1/4tsp Salt – I use Maldon 

225g/8oz Self Raising White Flour – alternatively use the same quantity of Plain White Flour plus 2tsp baking powder

1tsp Vanilla Extract – I use Nielsen-Massey

For the filling:

450g/1lb Strawberries – hulled and sliced, save 1 pretty strawberry for the top

400ml/3/4 pint Double Cream

1 tsp Vanilla Bean Paste – alternatively use vanilla extract

1 tbsp Sugar – optional

Method : Preheat the oven to 180C/160C fan, 350F, gas mark 4

While using the ‘All in one’ technique for this cake, which usually involves placing all of the ingredients into a bowl and whisking, I have added an extra step.

Making and baking the sponge cakes

  • First of all grease 2 x 7in (17.5cm) sandwich tins and line the base of each with baking parchment.
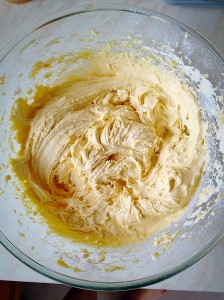
  • Next add the butter, sugar and salt into a large mixing bowl. Whisk the ingredients together until pale and creamy.
  • Add the vanilla extract and eggs; Note – I always crack eggs into a separate bowl first, any shell is easily removed and one bad egg cannot spoil the cake batter. Also sift the self raising flour (or plain flour and baking powder) into the same bowl.
  • Whisk all of the ingredients together until just combined and smooth. Take care not to overmix the cake batter, as this can result in a heavy sponge.
The All-In-One-Method is a whizz
The All-In-One-Method is a whizz.


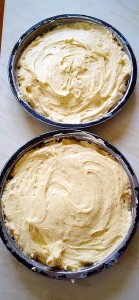
  • Divide the mixture evenly between the 2 prepared sandwich tins. Smooth the top of the cake batter using the back of a spoon.
Place the tins into the oven and bake for 20-25 minutes.
Ready for the oven
  • Place the tins into the centre and lower parts of the oven and bake for 20-25 minutes.
  • The sponges are baked when they are golden and spring back when lightly pressed in the centre. Also an inserted skewer will come out clean.
  • As soon as the cakes are baked remove from oven and allow to cool for 10 minutes in their tins.
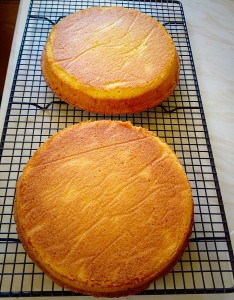
  • Turn the cakes out on to a cooling rack and leave to cool completely before filling and decorating. Carefully remove the baking parchment.
Cooling cakes, waiting to be transformed....
Cooling cakes, waiting to be transformed….

Filling and decorating the cake

  • As soon as the cakes have cooled they can be filled and decorated.
  • In a large bowl whisk together the cream, sugar and vanilla bean paste until the cream holds it’s shape. Also, take care not to overmix as this can cause the cream to split, creating butter!
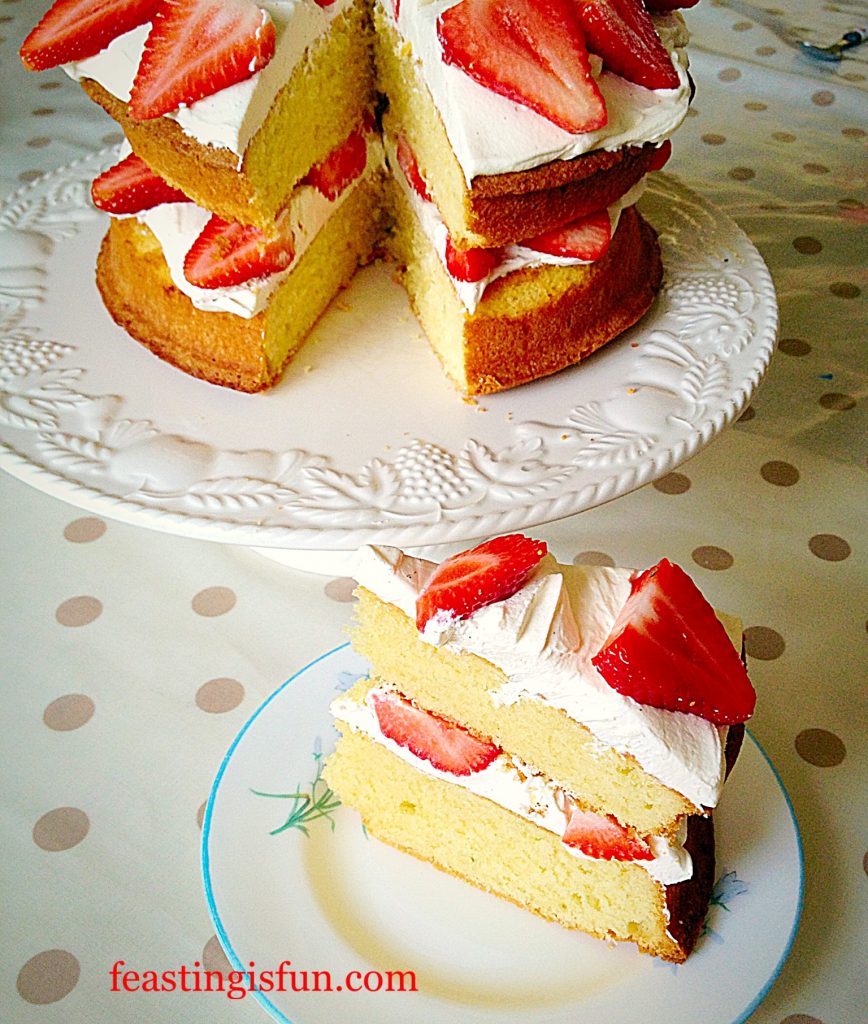
Spread half of the cream onto the bottom cake layer, flat side up.
Bottom half of the cake
  • Place one cake sponge on to a plate or board, flat side up.
  • Spoon half of the whipped cream on to the cake and spread so that it almost comes to the edge.
  • Add a layer of sliced strawberries on to the cream.
Arrange the sliced strawberries over the cream.
Strawberries and cream
  • Now place the other cake on top, flat side facing down.
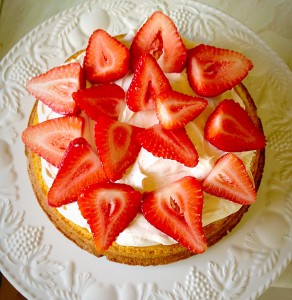
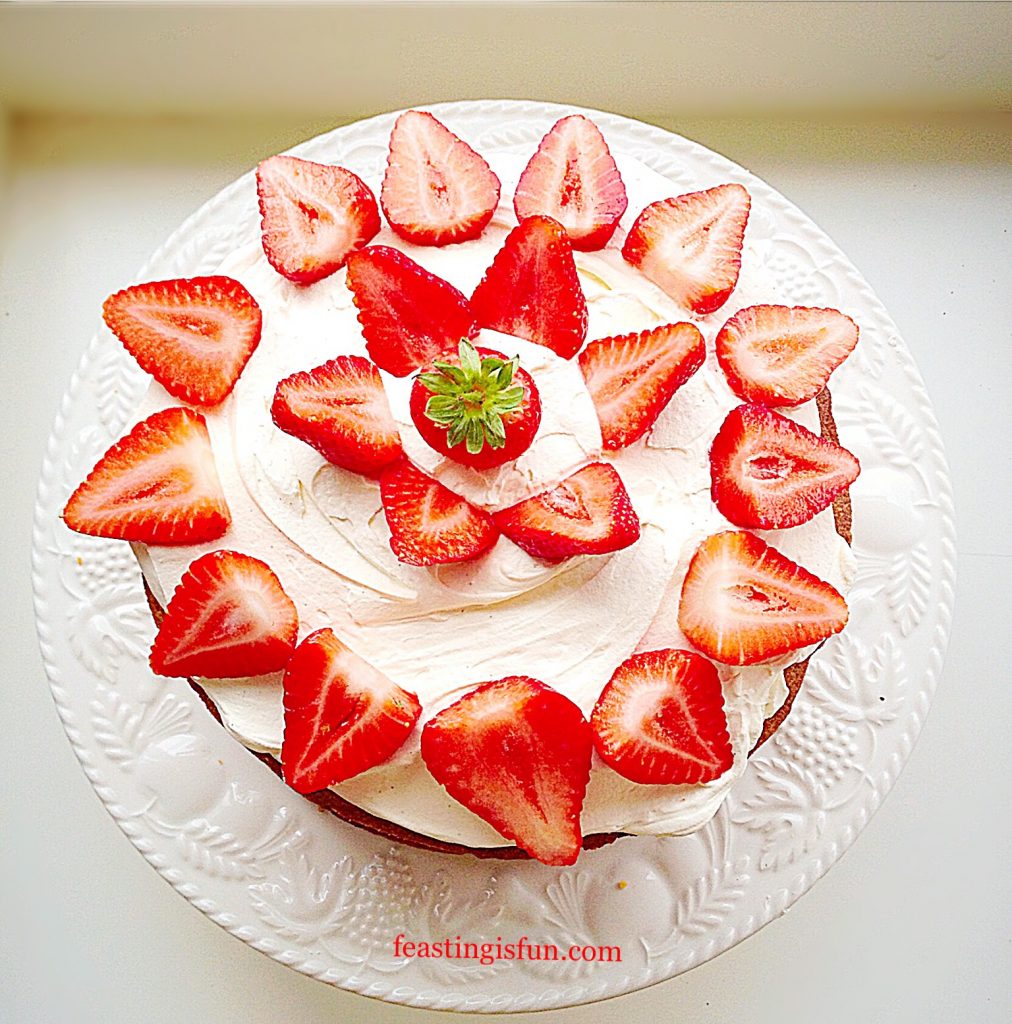
  • Cover the top with the rest of the cream and decorate with sliced strawberries, placing a whole strawberry in the middle.
FF Strawberries And Cream Cake
Strawberries And Cream Cake

Place the finished cake into the fridge for 1 hour, as this allows the cream to firm up and makes slicing easier.

I serve this cake sliced and placed on my best china, with a cup of tea served in a cup and saucer. You may slice and serve this cake however you wish.

Both cake sponges can be made a day ahead, cool and store in an airtight container, using baking parchment to separate them. Yet the cake is best assembled on the day of eating.

As with all cream cakes they are at their best on the day they are made. Wrap any leftover cake in cling film, alternatively place in an airtight container and store in the fridge. Eat within 2 days of assembling.

If you have enjoyed this recipe for Strawberries And Cream Cake you may also like these:

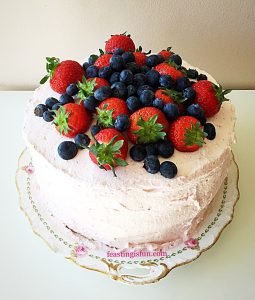
Summer Mixed Berry Sponge Cake 

FF Strawberries And Cream Cake
Summer Mixed Berry Sponge Cake

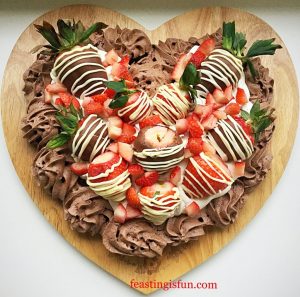
Strawberry Topped Chocolate Heart Pavlova 

FF Strawberries And Cream Cake
Strawberry Topped Chocolate Heart Pavlova

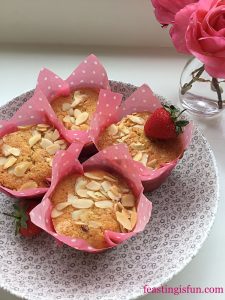
Double Strawberry Almond Muffins 

FF Strawberries And Cream Cake
Double Strawberry Almond Muffins


While I love baking, sharing my finished bakes gives me the most pleasure. Since, I delight in seeing the anticipation and a happy face as someone enjoys something I’ve made. Finally, remember, before slicing into this cake I urge you to take a photo! Because, when you look at this cake in the deepest, darkest, depths of an icy winter, it will remind you that sunny days are ahead. Hope is powerful, even when it is in the form of cake!

So, whatever you are making, baking and creating in your kitchens, have fun preparing and sharing your feast.

Sammie x

No part of this post may be reproduced or duplicated without the written permission of the owner. Please see my Disclosure Policy.

Share
Facebooktwitterpinterestlinkedintumblr