Summer Mixed Berry Sponge Cake

Share
Facebooktwitterpinterestlinkedintumblr

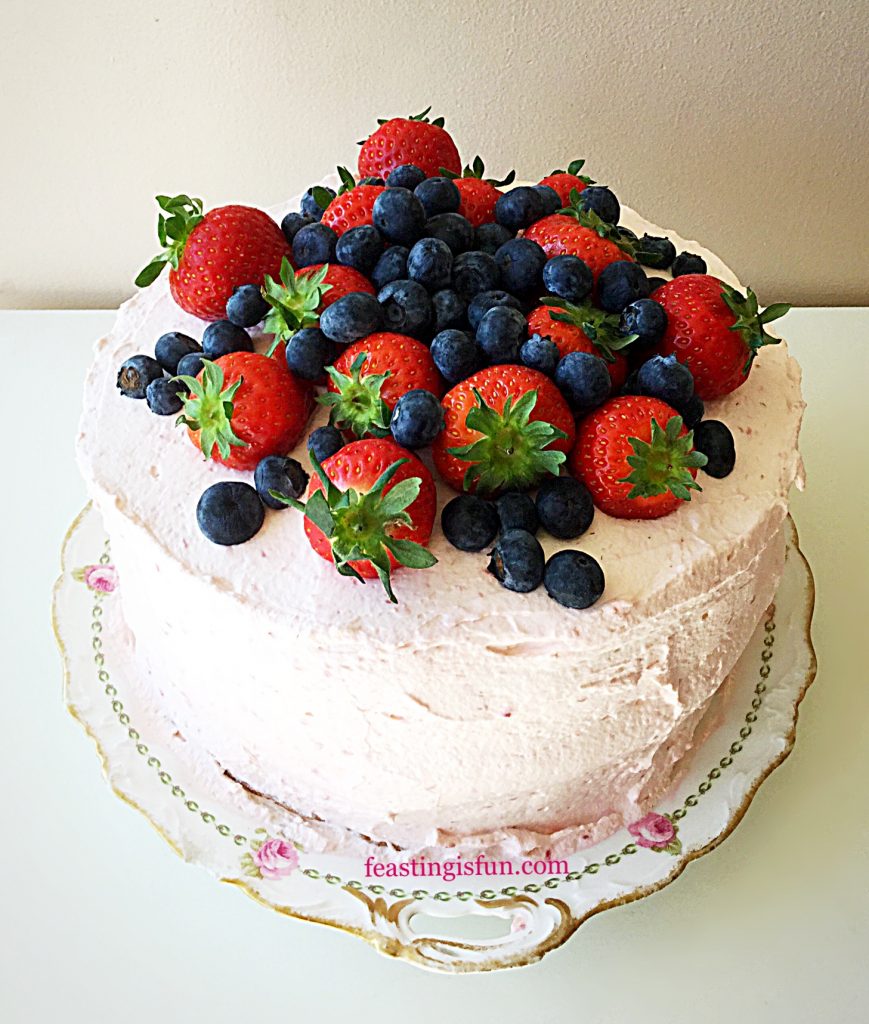
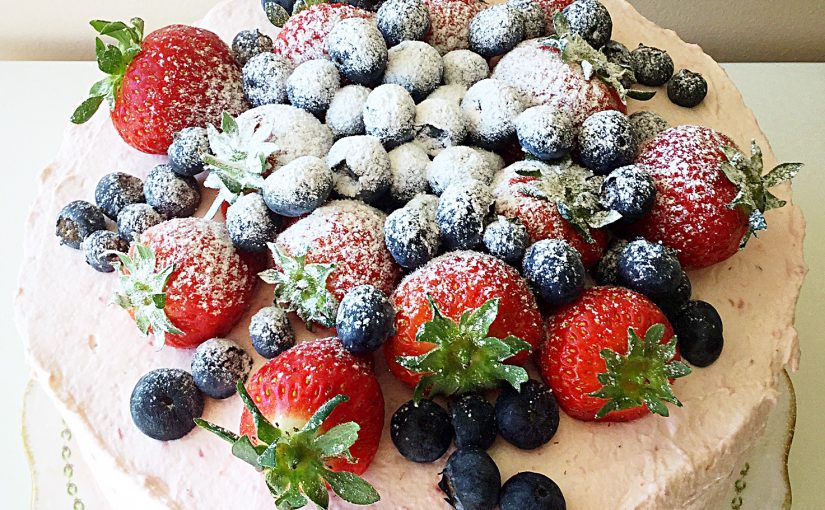
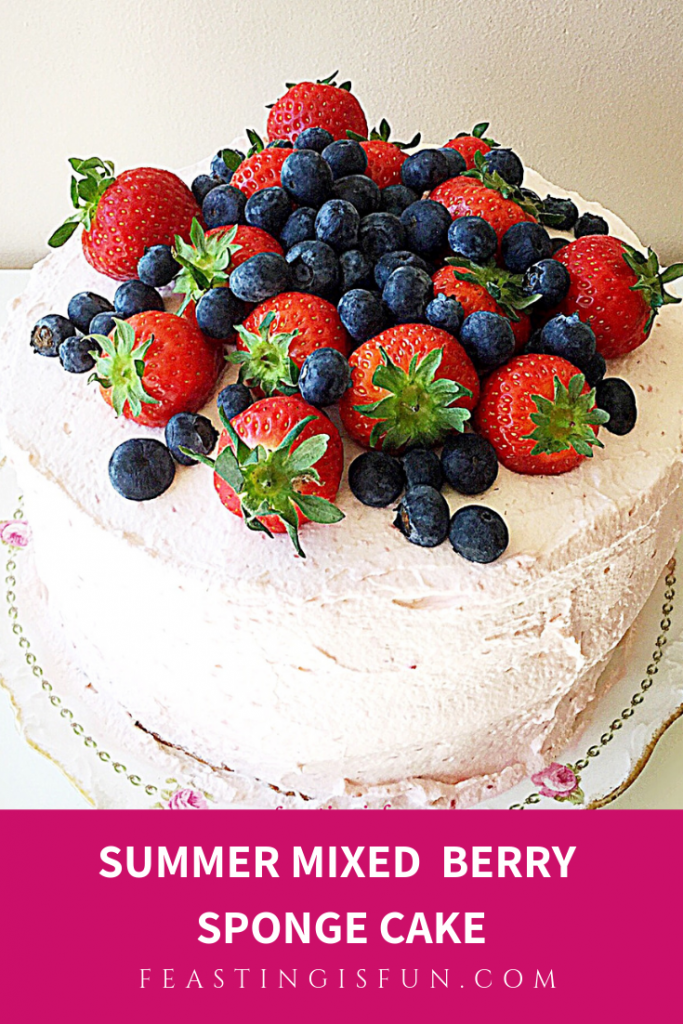
I adore the variety and abundance of fresh fruit available during the warmer months of the year. So, if I can restrain myself from simply eating them as they are I love to use them in recipes. And here in my Summer Mixed Berry Sponge Cake they are given centre stage. Freshly made raspberry and blueberry jam sandwiched between the two sponges with fresh raspberry whipped cream covering the entire cake. Finally topped with more fresh blueberries and strawberries this cake is a celebration of summer fruit.
FF Summer Mixed Berry Sponge Cake
Summer Mixed Berry Sponge Cake

Since not everyone here at Feasting headquarters is a fan of sweet frosting, I decided to use something different to cover this cake. And fresh raspberries added to whipped cream are utterly delicious. While the raspberries are tart, when whipped into the cream they lend a sweetness and very light raspberry flavour. Also, as the cream is used between the sponges and to cover the cake it adds a very pretty pink colour to the finished creation.
FF Summer Mixed Berry Sponge Cake
Summer Mixed Berry Sponge Cake

Seasonal fruits

Finally the cake it topped with a tumble of seasonal strawberries and blueberries. Alternatively switch up and swap around the fruits according to what is abundant, available and in season. Since I have blackberry, raspberry, tayberry, redcurrant, blackcurrant, strawberries AND a cherry tree in our garden I will have different choices as the season progresses. Also I am sure that strings of redcurrants dripping over the side of this cake will look really pretty.
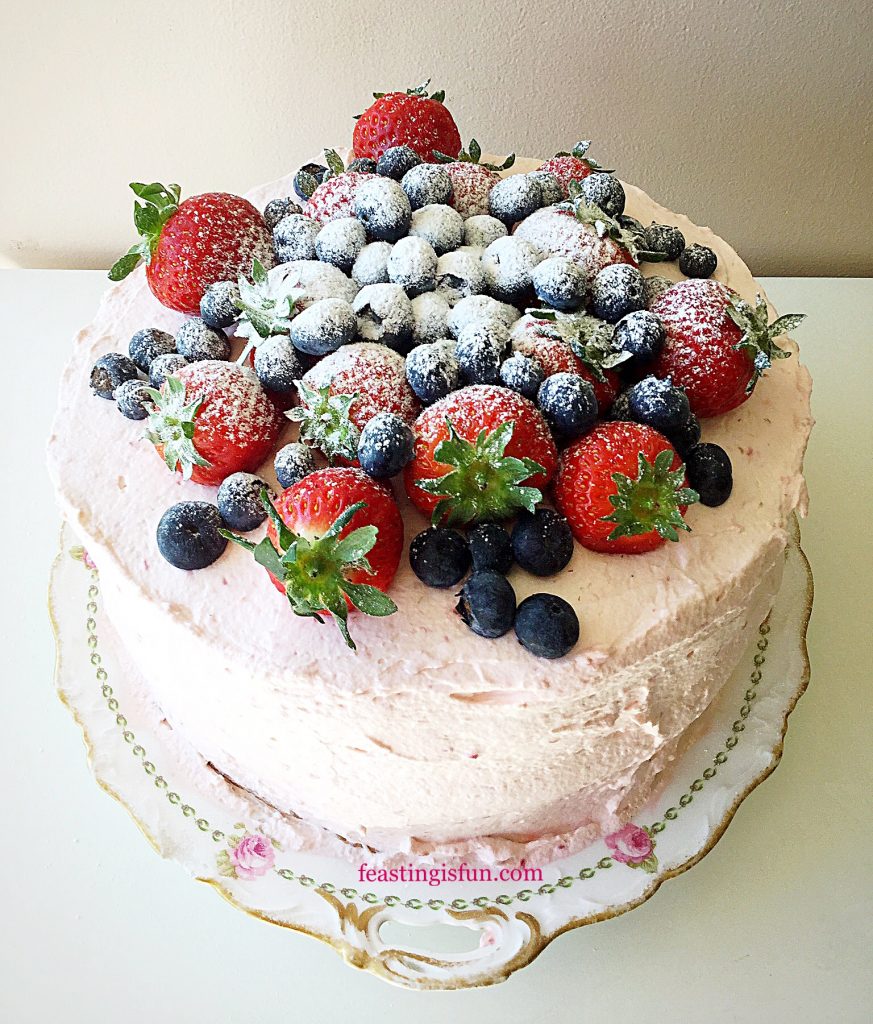
FF Summer Mixed Berry Sponge Cake
Summer Mixed Berry Sponge Cake

A guide for changing up the fruit is to keep at least one ‘sweet’ fruit for the top. Also I would be careful about adding strawberries to the whipped cream. Since they can be quite watery and may cause it to split. If in doubt, scoop a spoonful of whipped cream on to a plate and mash in a small amount whichever fruit you want to use. And the fruit should mix easily into the cream. Alternatively, if the mixture splits try a different fruit.

Recipe: Summer Mixed Berry Sponge Cake serves 8-10

For the sponge cakes:

275g/10oz Unsalted Butter at room temperature – plus a little extra to grease the cake tins

275g/10oz Caster Sugar

1 tsp Vanilla Extract – I use Nielsen-Massey 

1/4 tsp Sea Salt Flakes – halve if using free flowing

5 Large Free Range Eggs

275g/10oz Plain White Flour

3 tsp Baking Powder

1 Large Lemon – scrubbed and finely zested

To fill and cover:

225g/8oz Fresh Fruit Jam – to make fresh raspberry jam please see the recipe on Victoria Sponge Cake substitute half of the raspberries for blueberries for the jam I used here

450ml/1 pint Double Cream (heavy cream)

100g/4oz Fresh Raspberries

25g/1oz Caster Sugar

1 tsp Vanilla Extract

To decorate:

150g/5oz Fresh Blueberries – alternatively use blackberries

225g/8oz Fresh Strawberries – alternatively use raspberries

Optional – 1 tsp Icing Sugar to dust

Method: Preheat oven to 160C/140C fan, 325F, gas mark 3.

You will need two 20cm/8in sandwich tins, buttered and the base lined with baking parchment.

Making and baking the sponge cakes

  • First of all, into a large mixing bowl add the butter, sugar and salt. Whisk everything together until pale and creamy.
  • Now add 2 eggs, vanilla extract and half of the flour. And whisk until just combined.
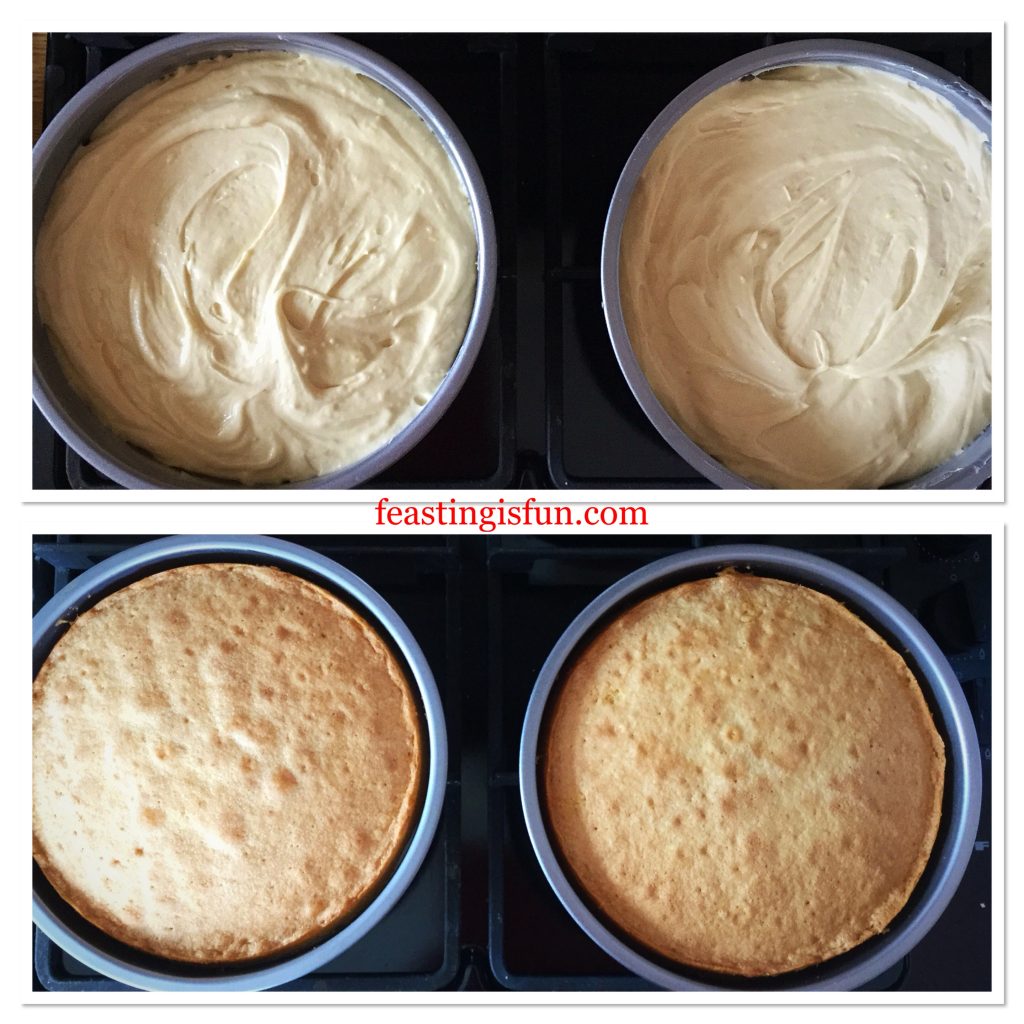
  • Finally add the remaining flour and baking powder, 3 eggs and the lemon zest. Whisk together until everything is just combined.  Over mixing will cause the cake to be dense.
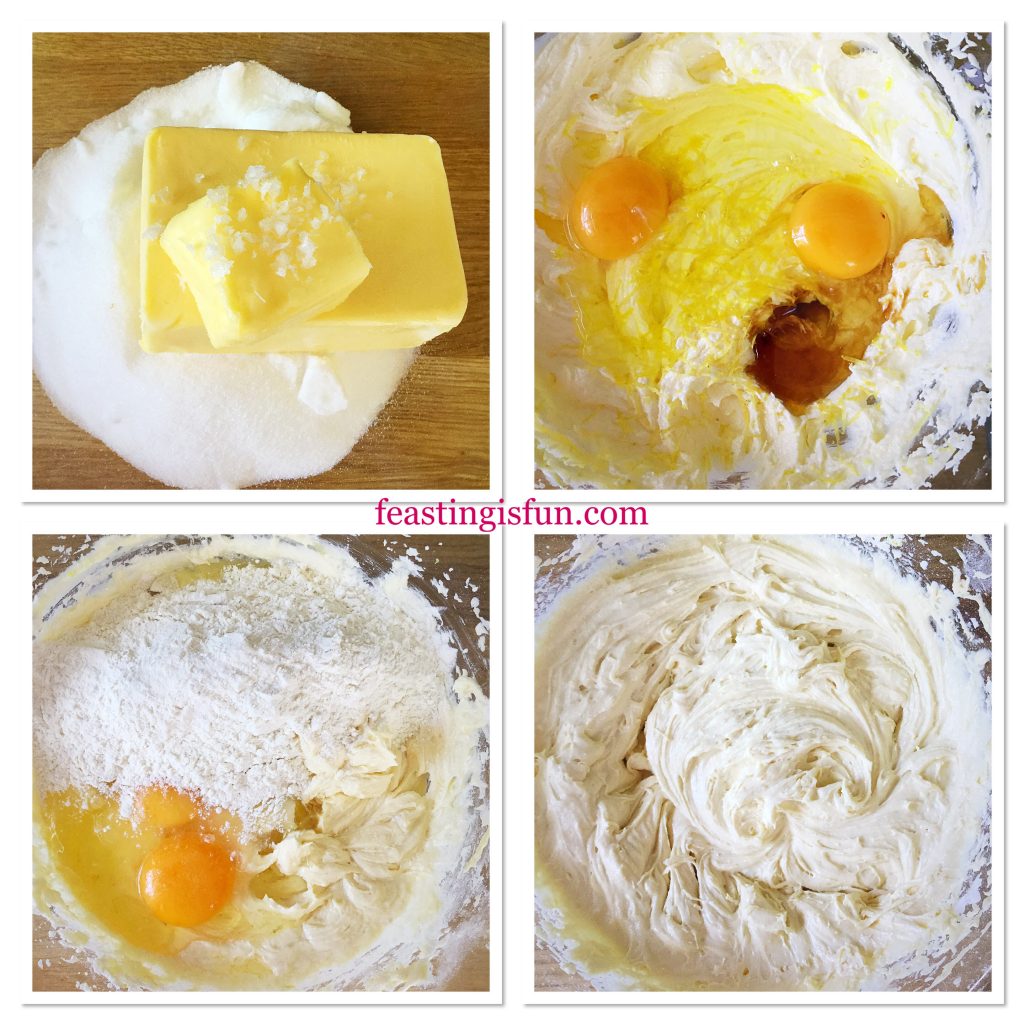
FF Summer Mixed Berry Sponge Cake
Making the sponge cake batter
  • Divide the cake batter evenly between the sandwich tins.
  • Place into the centre of the oven and bake for 35-40 minutes.
  • The sponge cakes are baked when golden in colour and firm to a light touch. Also an inserted skewer will come out clean.
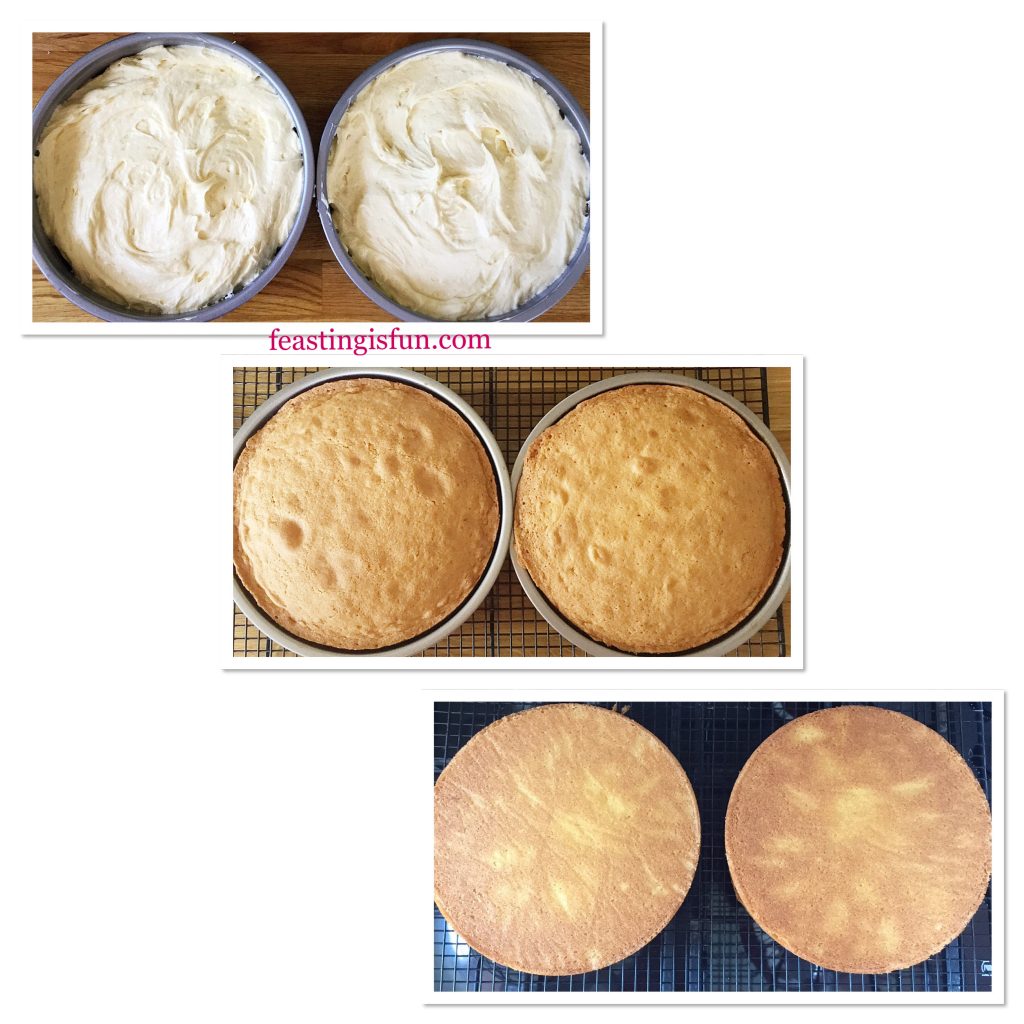
FF Summer Mixed Berry Sponge Cake
Filling the cake tins, baking and cooling the cakes
  • As soon as the cakes are baked remove from the oven and place the tins on to a cooling rack.
  • Leave the cakes to cool in the tin for 10 minutes, then turn the cake out carefully removing the baking parchment.
  • Allow the cakes to fully cool on the rack.
FF Summer Mixed Berry Sponge Cake
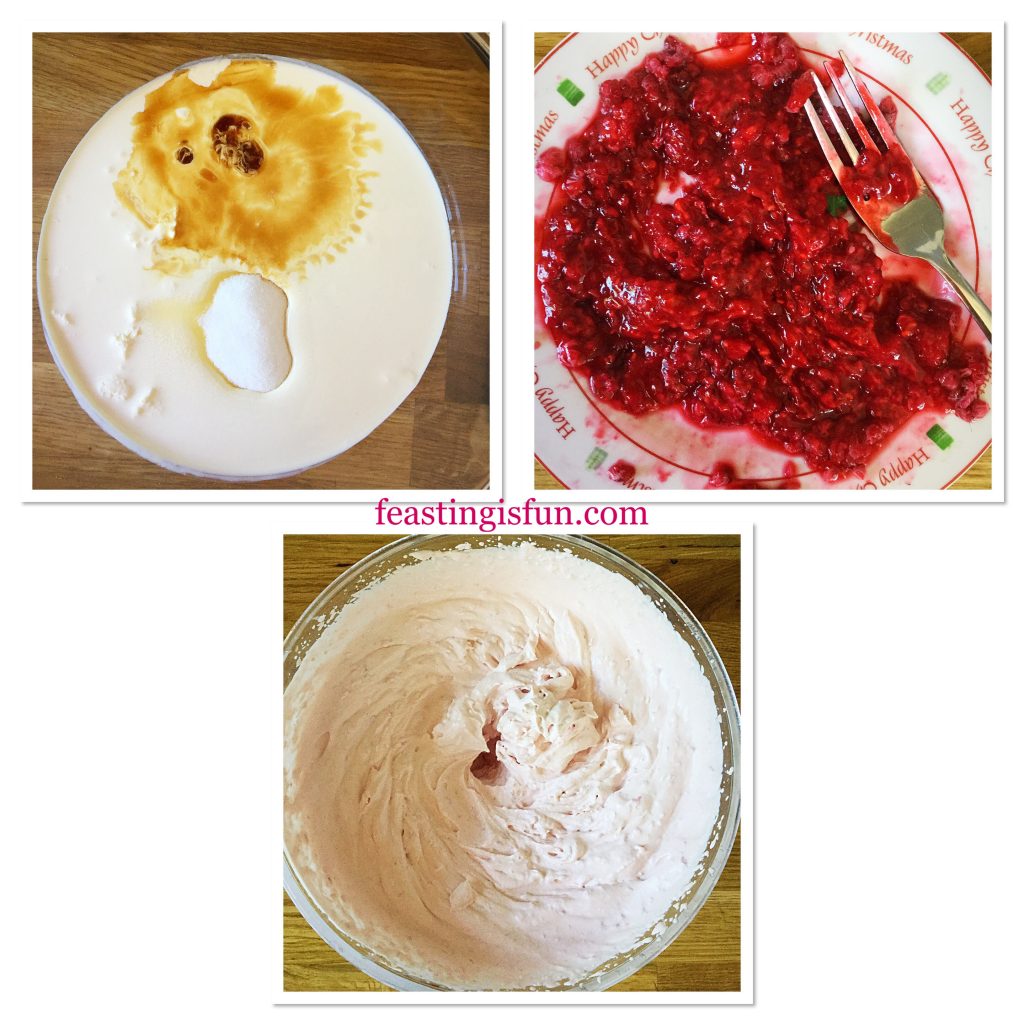
Making the raspberry whipped cream

Making the raspberry whipped cream

  • As soon as the cakes have cooled make the raspberry whipped cream.
  • Place the fresh raspberries on to a plate and mash with a fork.
  • Pour the cream, vanilla extract and sugar into a bowl and whisk until thickened but still floppy, not stiff.
  • Add the mashed raspberries to the cream and continue to whisk until the cream has thickened and holds it’s shape.
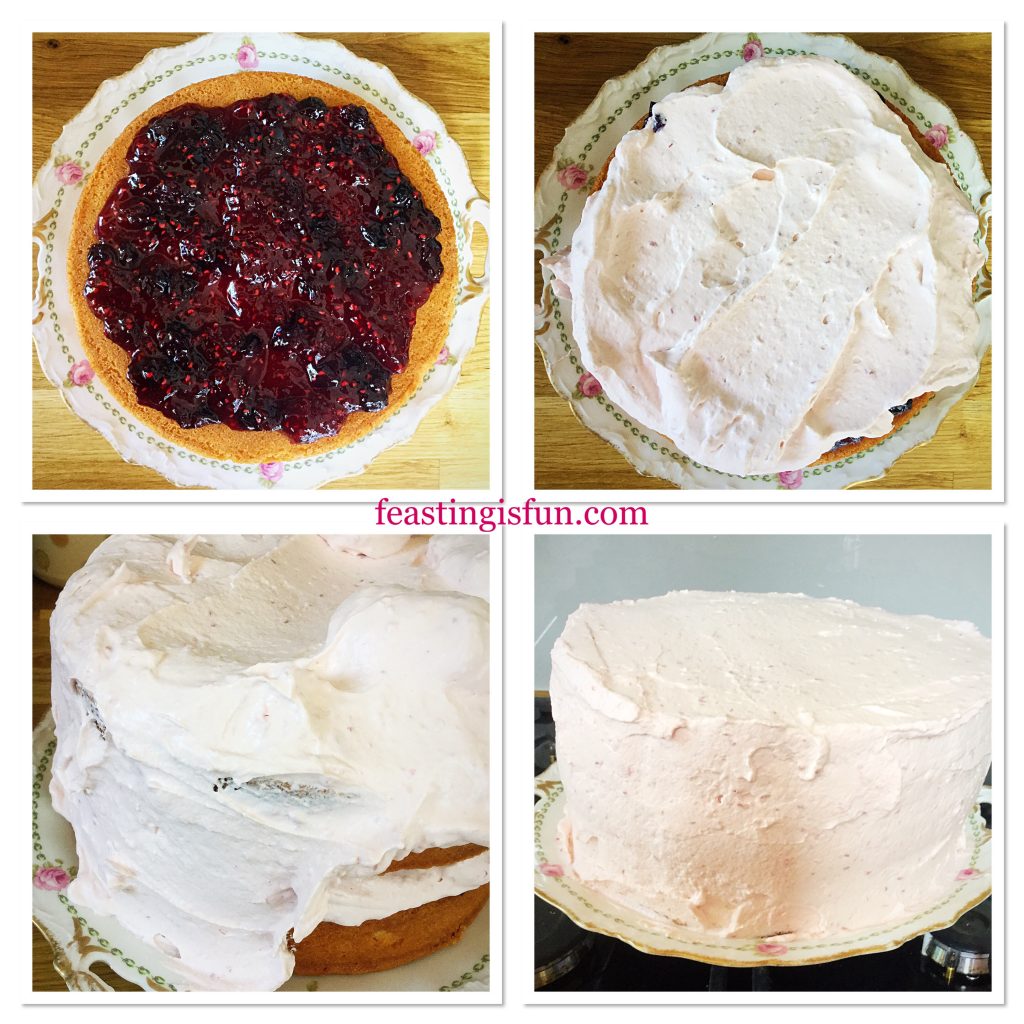
FF Summer Mixed Berry Sponge Cake
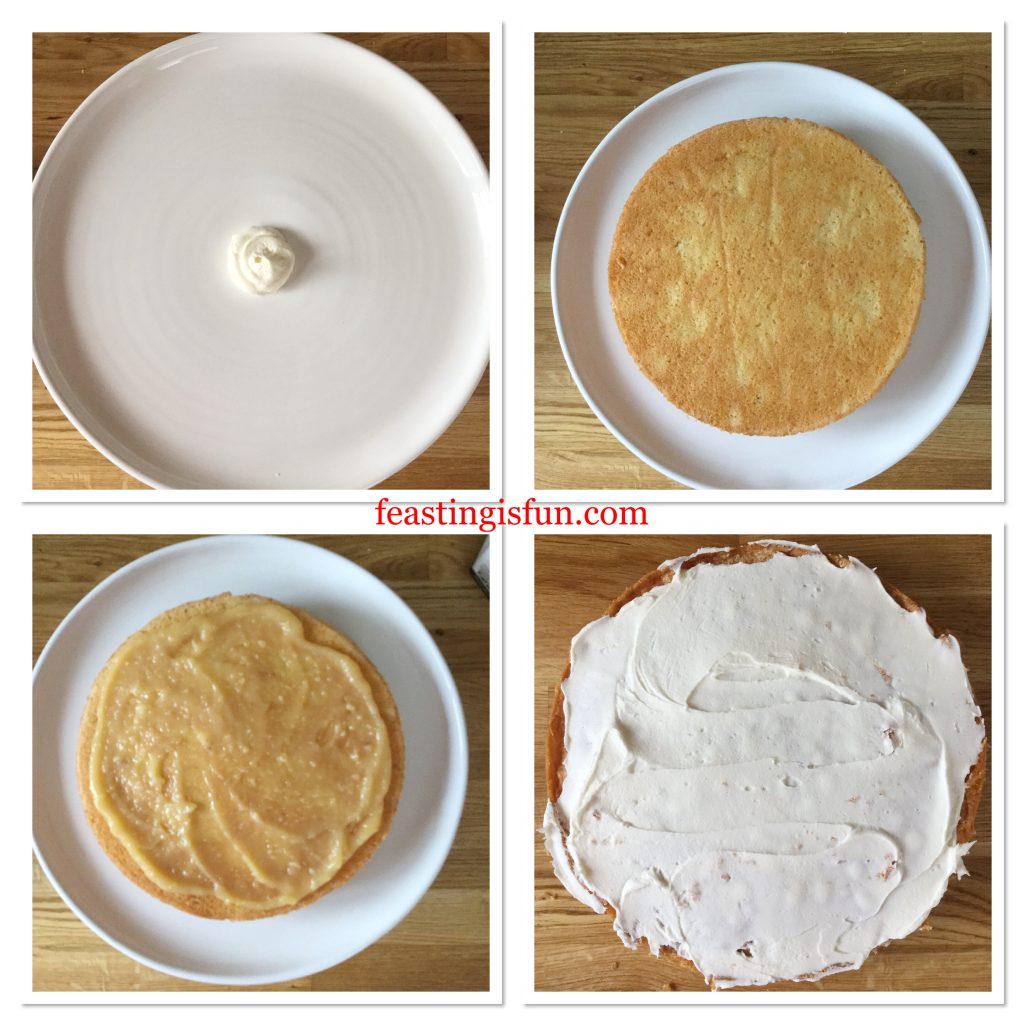
Filling and covering the cake

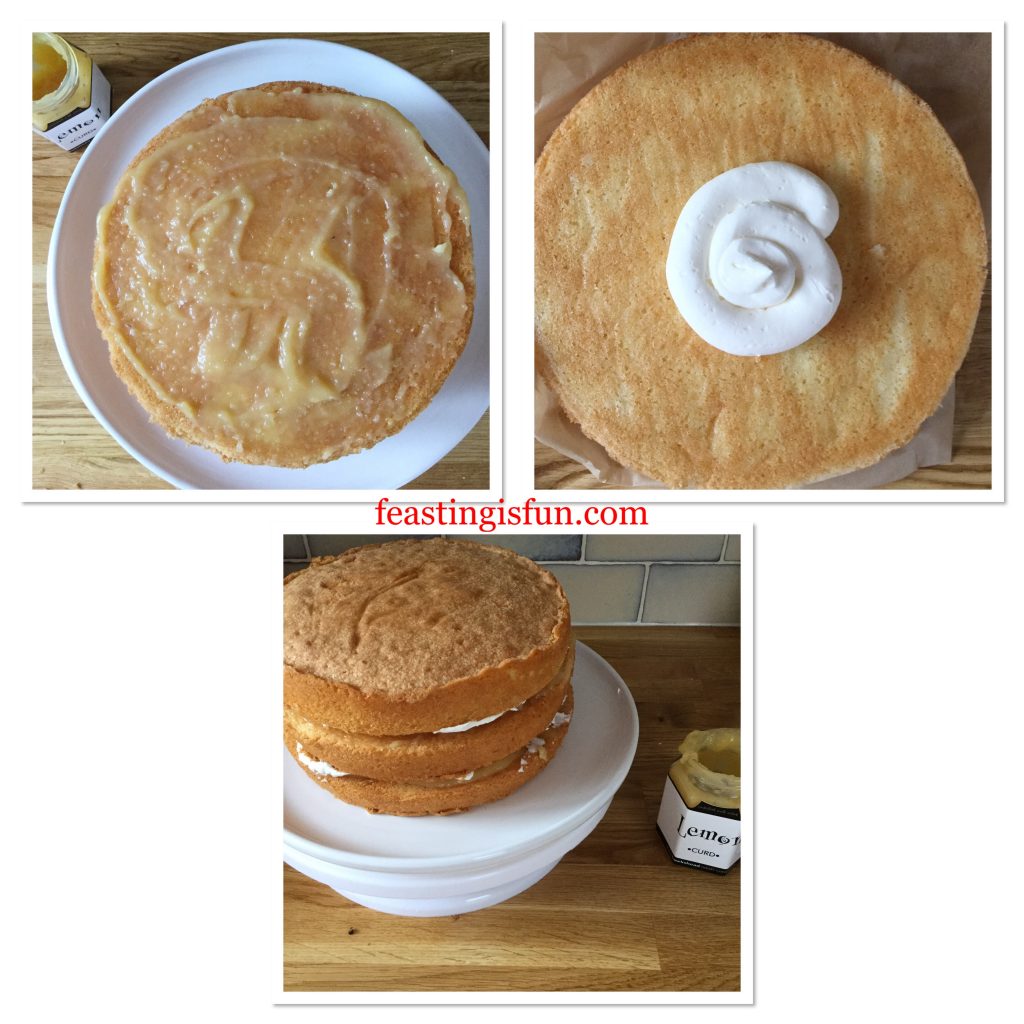
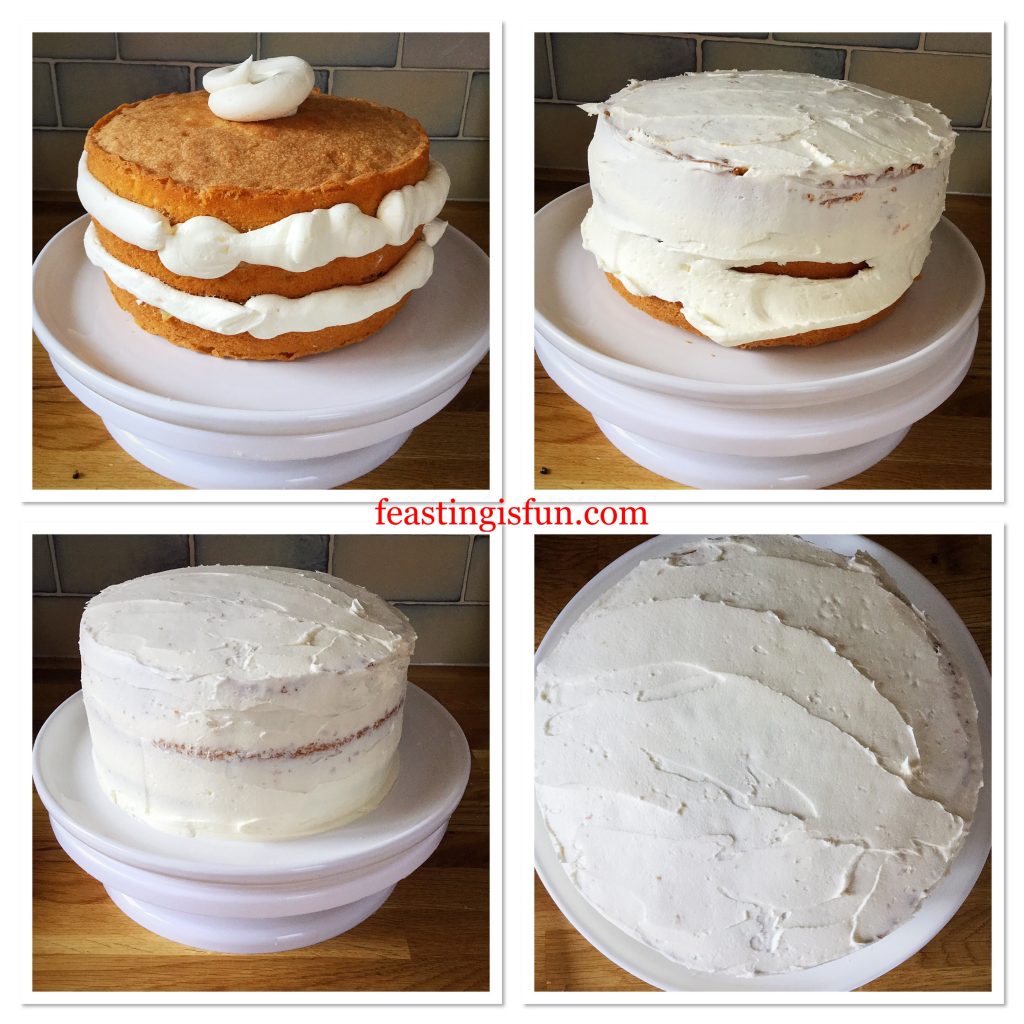
Filling and decorating the cake

  • Place the first sponge, flat side up on to a plate or board.
  • Spoon jam on to the sponge and spread to almost the edge. Leaving a small gap around the rim of the sponge.
  • Now spoon some of the raspberry cream on top of the jam. Spread the cream to the edge of the cake.
  • Place the other sponge, flat side down, on top of the bottom sponge.
  • Spoon plenty of raspberry cream on to the top of the cake. Using a palette knife push the cream on to the side of the cake. See photos above.
  • Once all of the cake is covered with raspberry cream smooth the top and sides using a palette knife.
  • Finally, with a clean piece of kitchen towel, wipe around the base of the cake, removing any excess cream.
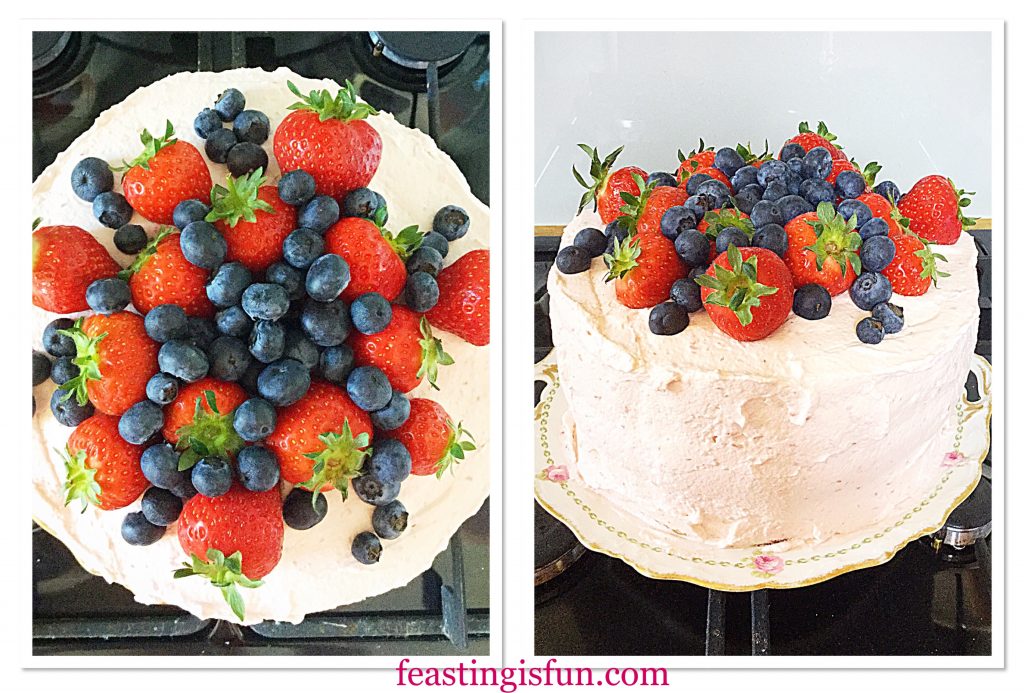
FF Summer Mixed Berry Sponge Cake
Arranging the fruit on top of the Summer Mixed Berry Sponge Cake
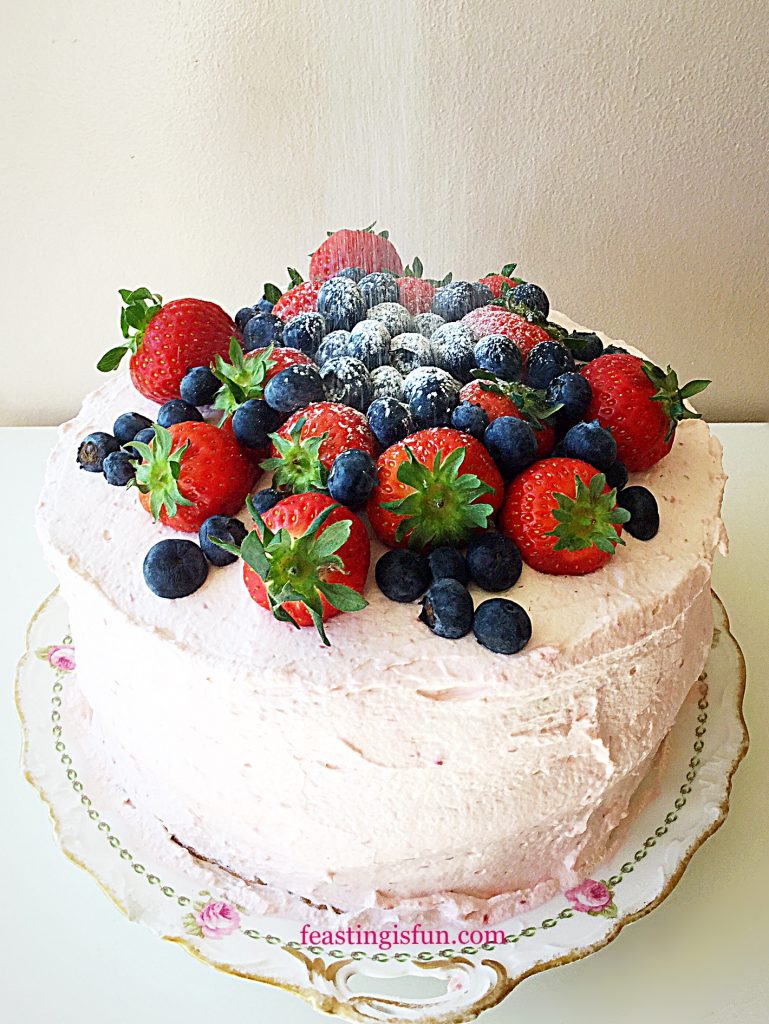
  • To finish the cake add fruit to the top. Importantly aim for a little height in the centre.
  • Finally dust the top of the cake with icing sugar if desired.
  • Place the finished cake into the fridge to chill for one hour.
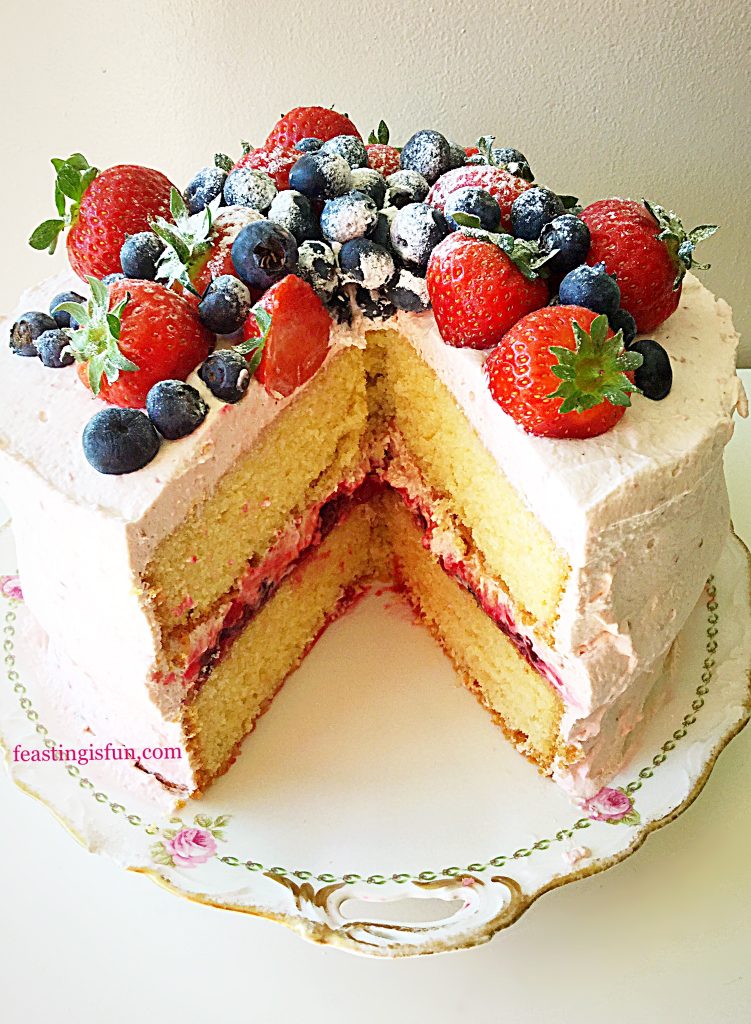
FF Summer Mixed Berry Sponge Cake
Summer Mixed Berry Sponge Cake

As soon as the cake is chilled it can be sliced and served. Also a useful tip is to wipe the cutting knife with kitchen paper after each cut. Since doing so keeps the cake slices clean.
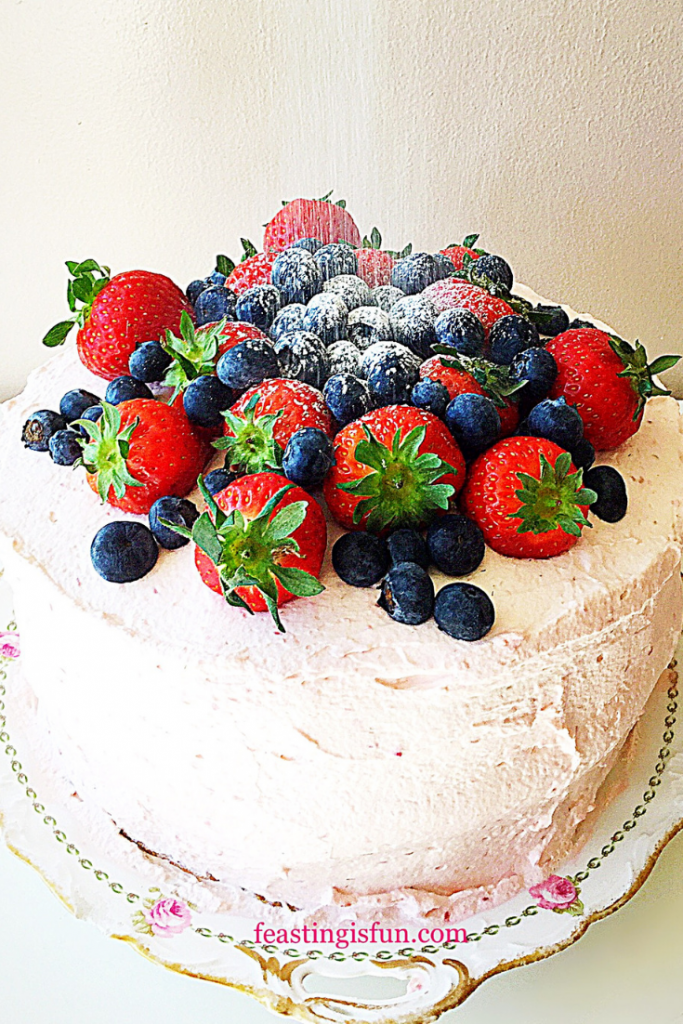
Three layer sponge cake sandwiched together with jam and raspberry whipped cream and topped with fresh berries.
Summer Mixed Berry Sponge Cake

While the sponges can be made one day ahead and stored in an airtight container. Ideally this cake is best eaten the day it is assembled. Store leftover cake in an airtight container in the fridge and eat within 3 days.

FF Summer Mixed Berry Sponge Cake

If you have enjoyed this recipe for Summer Mixed Berry Sponge Cake you may also like these:

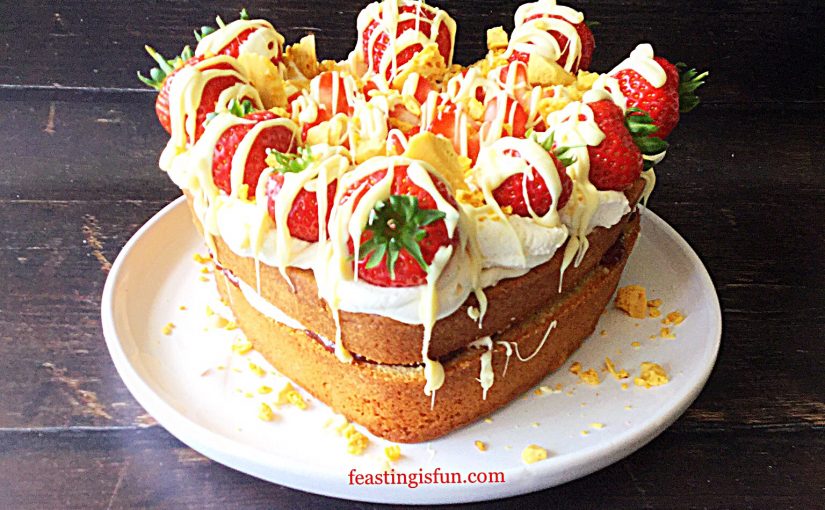
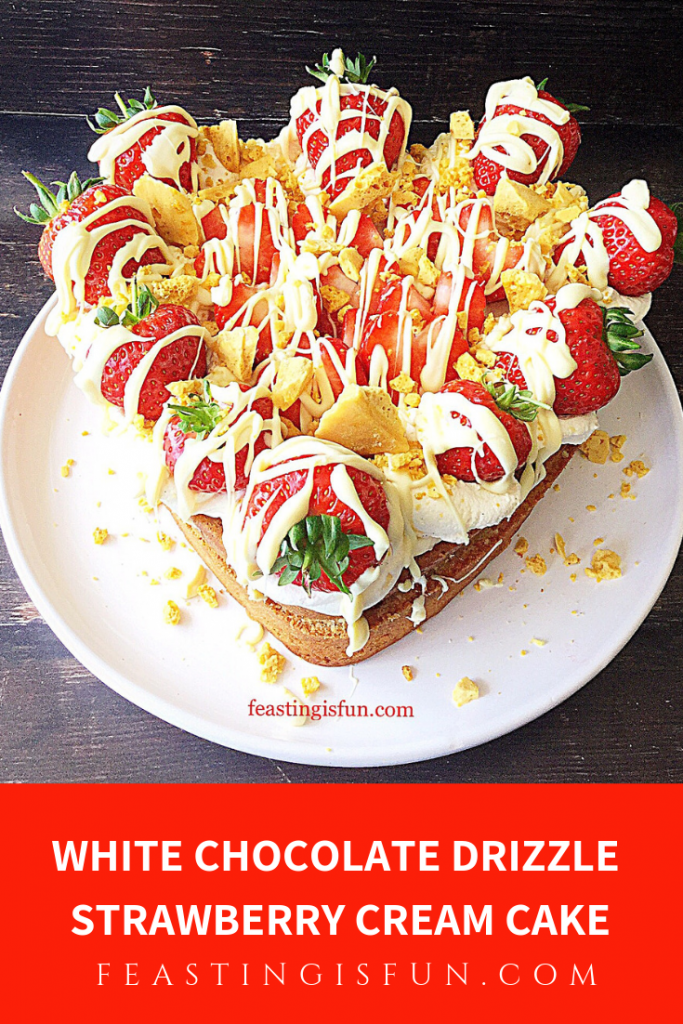
White Chocolate Drizzle Strawberry Cream Cake

Heart shaped white chocolate drizzle strawberry cream cake
White Chocolate Drizzle Strawberry Cream Cake

Fresh Raspberry Frosted Lemon Cupcakes 
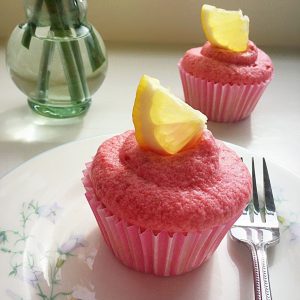
Fresh Raspberry Frosted Lemon Cupcakes

Raspberry Vanilla Naked Celebration Cake 
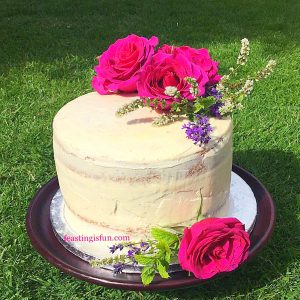
Raspberry Vanilla Semi Naked Cake
Raspberry Vanilla Naked Celebration Cake

Sharing this cake with friends and family gives me a real buzz. Because I do not sell anything that is made for this blog it also helps to keep our family healthy. While I can see how people may think we eat cake all of the time. We don’t! As a family cakes are treats for us too.

So, whatever you are making, baking and creating in your kitchens, I hope you have fun preparing and sharing your feast.

Sammie xx

No part of this post may be reproduced or duplicated without the written permission of the owner. Please see my Disclosure Policy.
Share
Facebooktwitterpinterestlinkedintumblr

White Chocolate Drizzle Strawberry Cream Cake

Share
Facebooktwitterpinterestlinkedintumblr

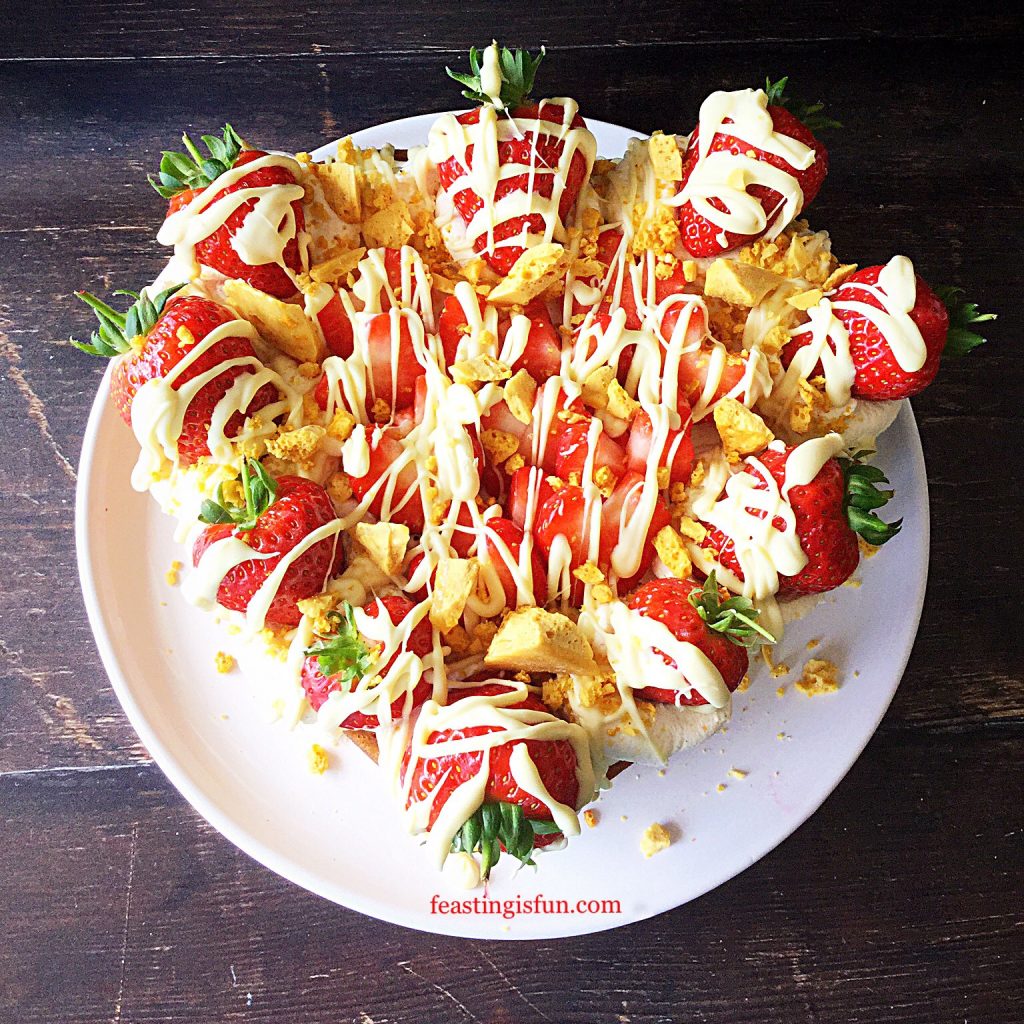
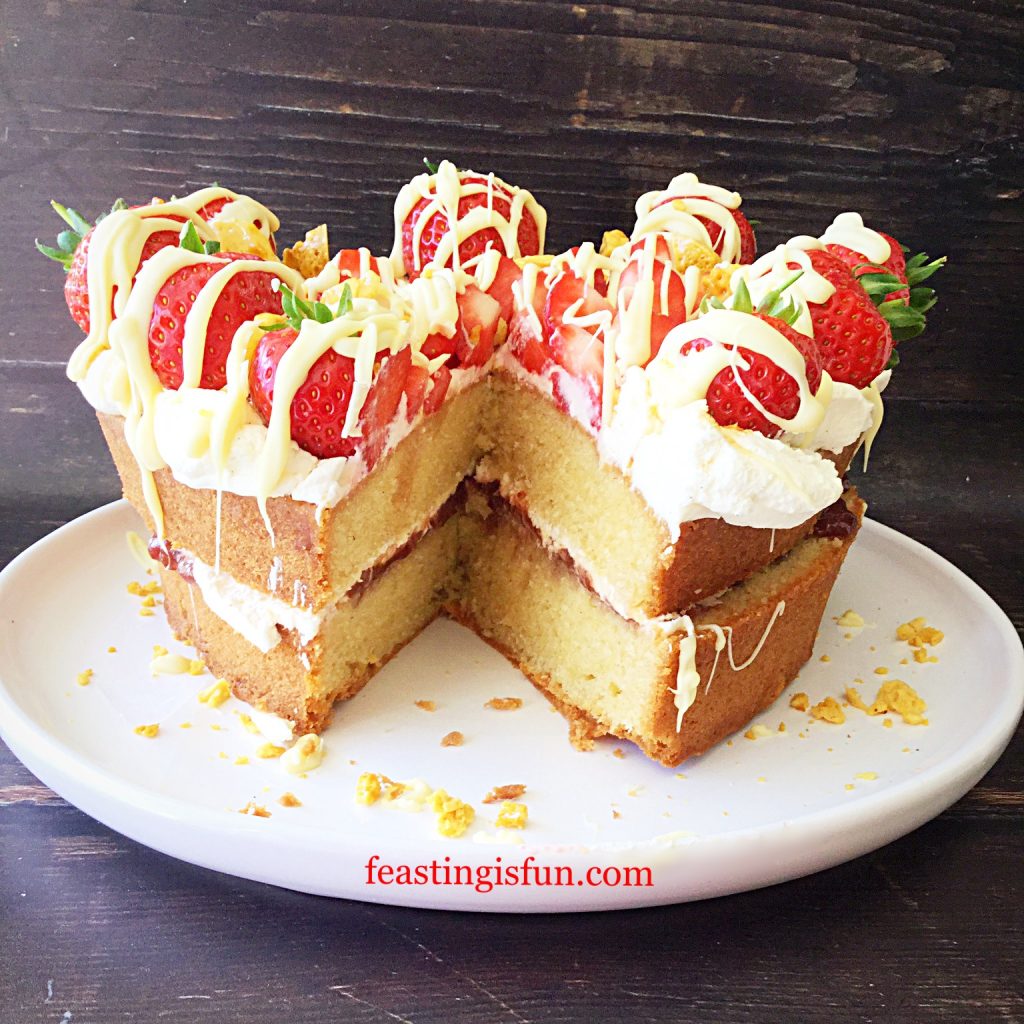
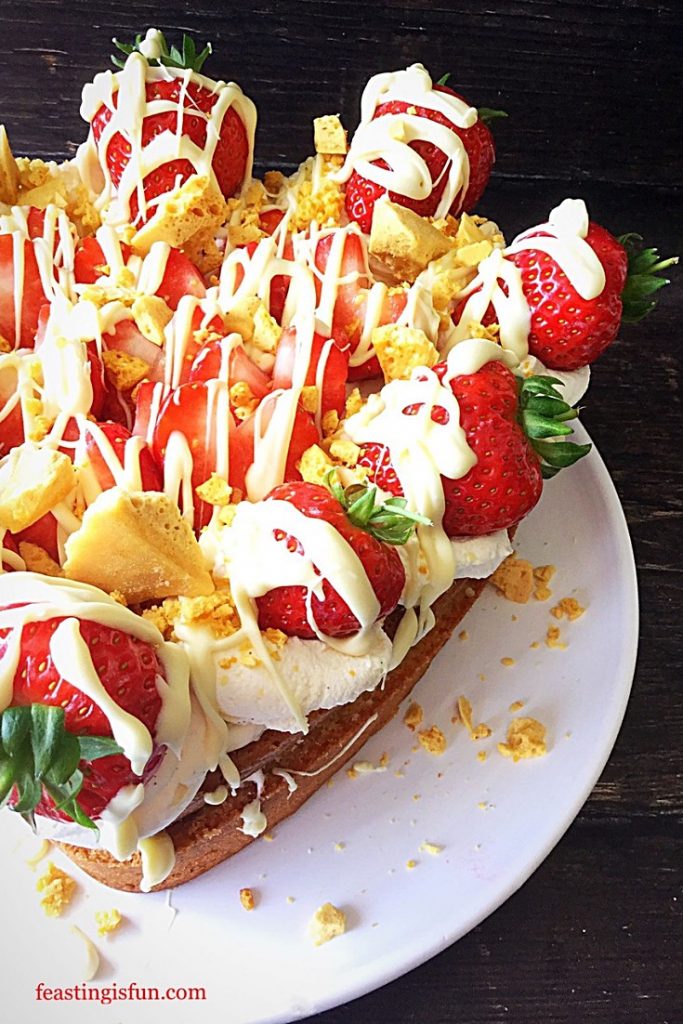
In my last post Chocolate Honeycomb Sponge Cake, I confessed my love for cream cakes. So, I decided to make another one! A delicious White Chocolate Drizzle Strawberry Cream Cake. Golden sponge sandwiched together with cream and strawberry daiquiri jam, topped with more cream, fresh strawberries a white chocolate drizzle and finally a sprinkling of honeycomb. One bite of this cake and you too will be smitten.

FF White Chocolate Drizzle Strawberry Cream Cake

Since the very earliest of our Kent strawberries are becoming available I simply couldn’t resist buying some. Together with fresh cream they make the perfect combination. However, when used to decorate this cake, with white chocolate and crushed honeycomb, these strawberries are elevated to true celebration feasting status. And the first strawberries of the season should, most definitely, be celebrated.

FF White Chocolate Drizzle Strawberry Cream Cake
White Chocolate Drizzle Strawberry Cream Cake


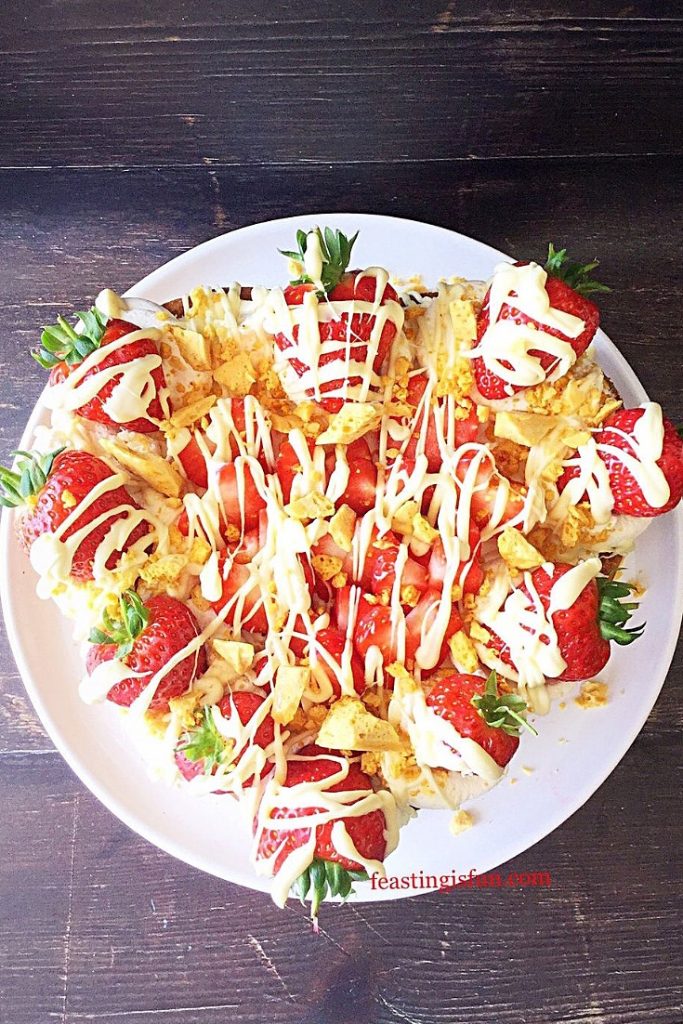
Using a heart shaped tin to bake this cake creates an elegant shape. Also it reflects the romantic side of my personality. If you do not have a heart cake tin then a round tin will be perfectly suitable. While removing the Strawberry husks I cut either side to create a ‘V’ shape. Resulting in sliced strawberries that look like love hearts.

FF Overhead shot of heart shaped cake.
White Chocolate Drizzle Strawberry Cream Heart Shaped Cake

Finally, using a good quality strawberry jam really adds to the finished flavour of the cake. I used a strawberry daiquiri jam with its subtle hint of white rum and lime juice. It definitely adds to the luxurious finish of this cake. Alternatively mix in a couple of teaspoons of raspberry jam. Doing so will add a hint of tartness and elevate the flavour from good to great!

Recipe: White Chocolate Drizzle Strawberry Cream Cake serves 10

275g/10oz Unsalted Butter at room temperature plus a Extra for greasing the tin

275g/10oz Caster Sugar

1/2 tsp Sea Salt – I use Maldon halve quantity if using free flowing salt

1 tbsp Vanilla Bean Paste/Vanilla Extract – I use Nielsen-Massey

6 Large Free Range Eggs

275g/10oz Plain White Flour

2 tsp Baking Powder

450ml/1 pint Double Cream (heavy cream)

1 tsp Vanilla Bean Extract/Vanilla Extract

350g-400g/12-14oz Fresh Strawberries

275g/10oz Jar Strawberry Jam – I used Strawberry Daiquiri Jam available from Hawkshead Relish

100g/4oz White Chocolate

Optional – Honeycomb – I use Art of Mallow

Method: preheat oven to 160C/140C fan, 325F, gas mark 3

Note – you will need a 22.5cm x 22.5cm/9” x 9” (approximately) heart tin that is at least 7.5cm/3” deep. I use a springform tin which allows for easy release of the cake. The tin I have is from Steamer Trading. Alternatively use a deep 22.5cm/9 inch round tin, or slightly shallower 20cm/8 inch round tin.

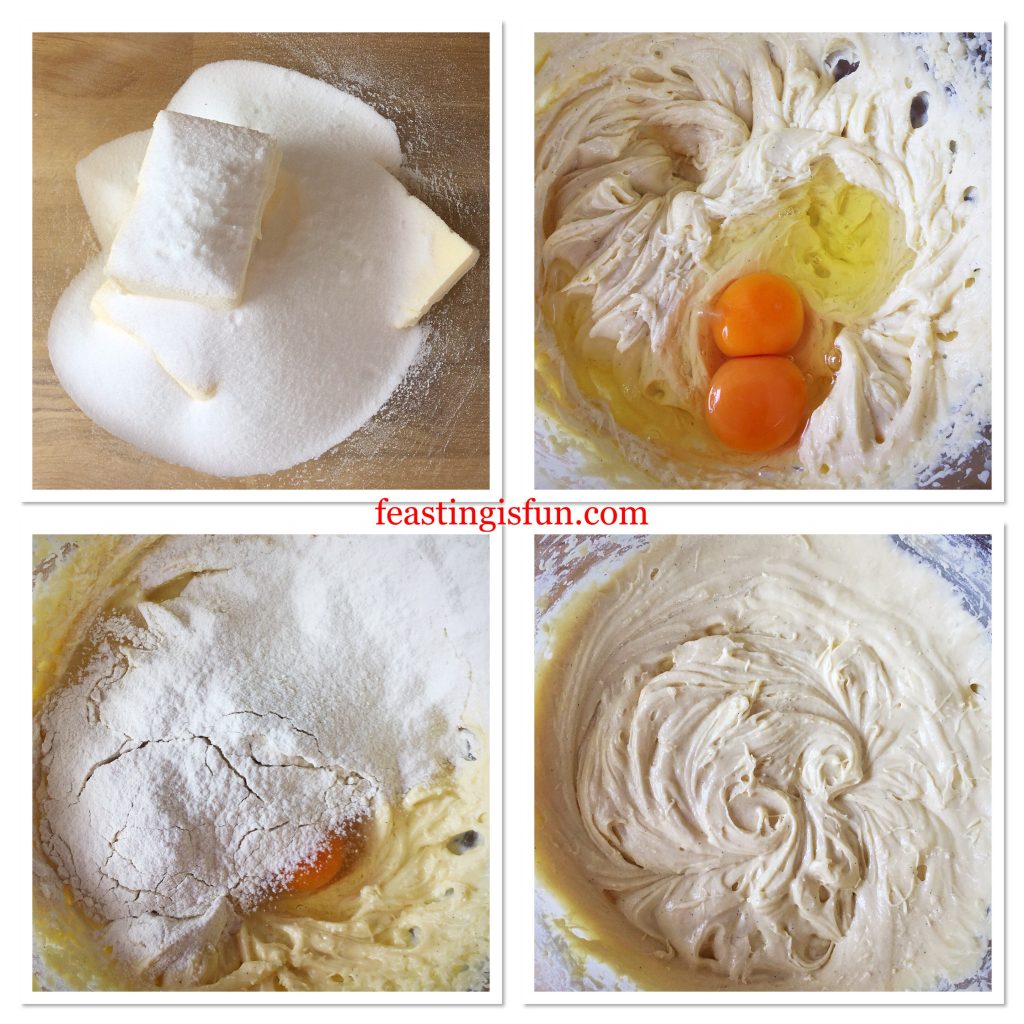
Making The Vanilla Cake Batter

  • First of all grease the tin with butter and line the base with baking parchment.
  • Add the butter, sugar and salt to a large bowl. Whisk until pale and creamy.
  • While whisking add the vanilla.
  • Next add 2 eggs and one third of the flour. Whisk until just combined.
  • Repeat the last step.
  • Add the last 2 eggs, the remaining flour and baking powder. Whisk until fully combined, taking care not to over mix as this can cause the baked cake to become tough.
FF White Chocolate Drizzle Strawberry Cream Cake
Making the cake batter.

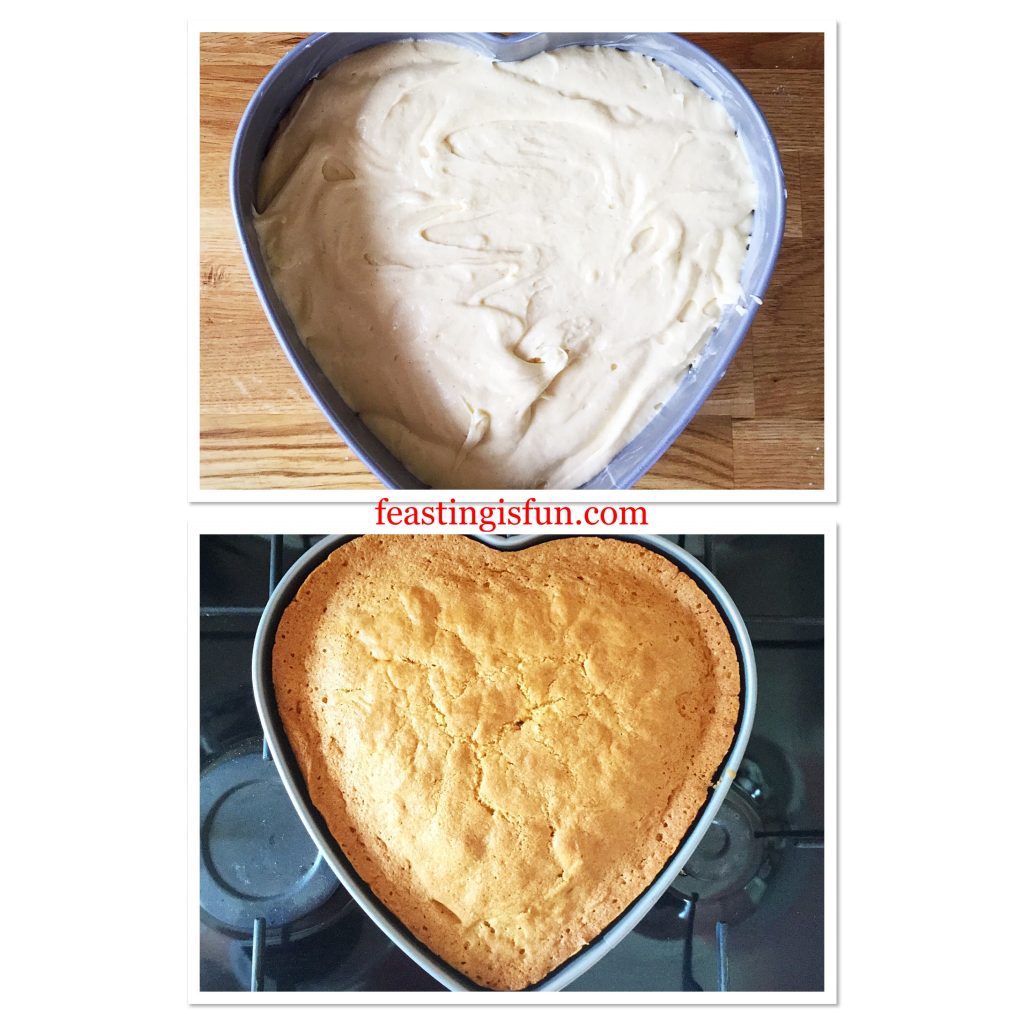
Filling The Heart Shaped Tin And Baking The Cake

  • Spoon the cake batter into the prepared tin. Smooth the surface of the batter.
  • Place the cake tin into the centre of the oven and bake for 1 hour 20 minutes – 1 hour 40 minutes. My cake took exactly 1 hour 30 minutes, however as ovens differ start checking at the earlier time.
  • The cake is baked when it is golden brown, springs back from a light touch and an inserted skewer comes out clean.
  • As soon as the cake is baked remove from the oven and place the tin on a cooling rack.
  • Allow the cake to fully cool in the tin.
FF White Chocolate Drizzle Strawberry Cream Cake
Filling a heart shaped cake tin and baking the cake.
  • When the cake is fully cooled release from the tin.

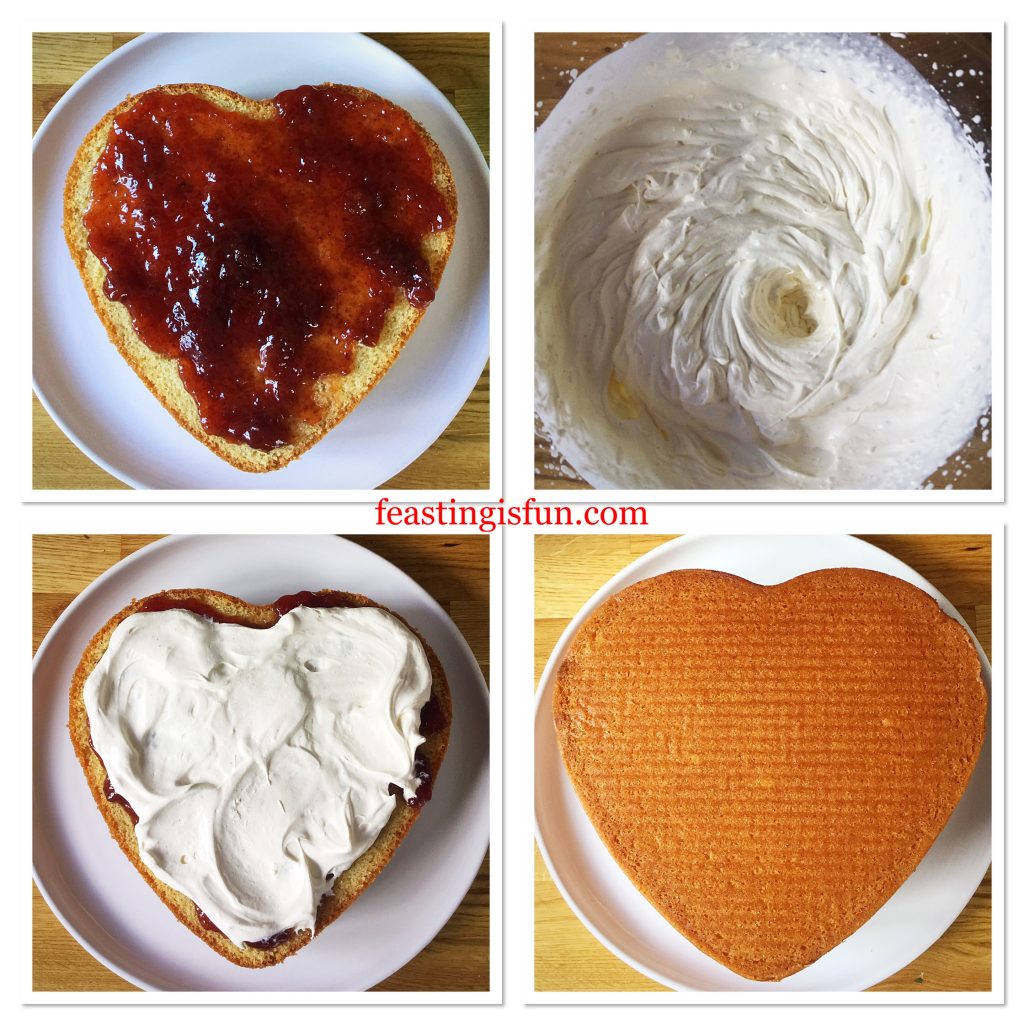
Cutting The Cake In Half And Filling With Jam And Cream

  • Use a long, serrated knife to cut through the middle of the cake, creating two layers.
  • Place the top layer of the cake face down on to a plate or board.
  • Spoon the jam on to the sponge and spread out so that it covers almost to the edges.
  • Pour the cream and vanilla into a bowl and whisk until it just holds it’s shape.
  • Spoon three large dollops of cream on top of the jam. Spread the cream out to cover the jam.
  • Place the bottom half of the cake, cut side down, on to the jam and cream covered sponge.
FF White Chocolate Drizzle Strawberry Cream Cake
Splitting in two and filling the cake.

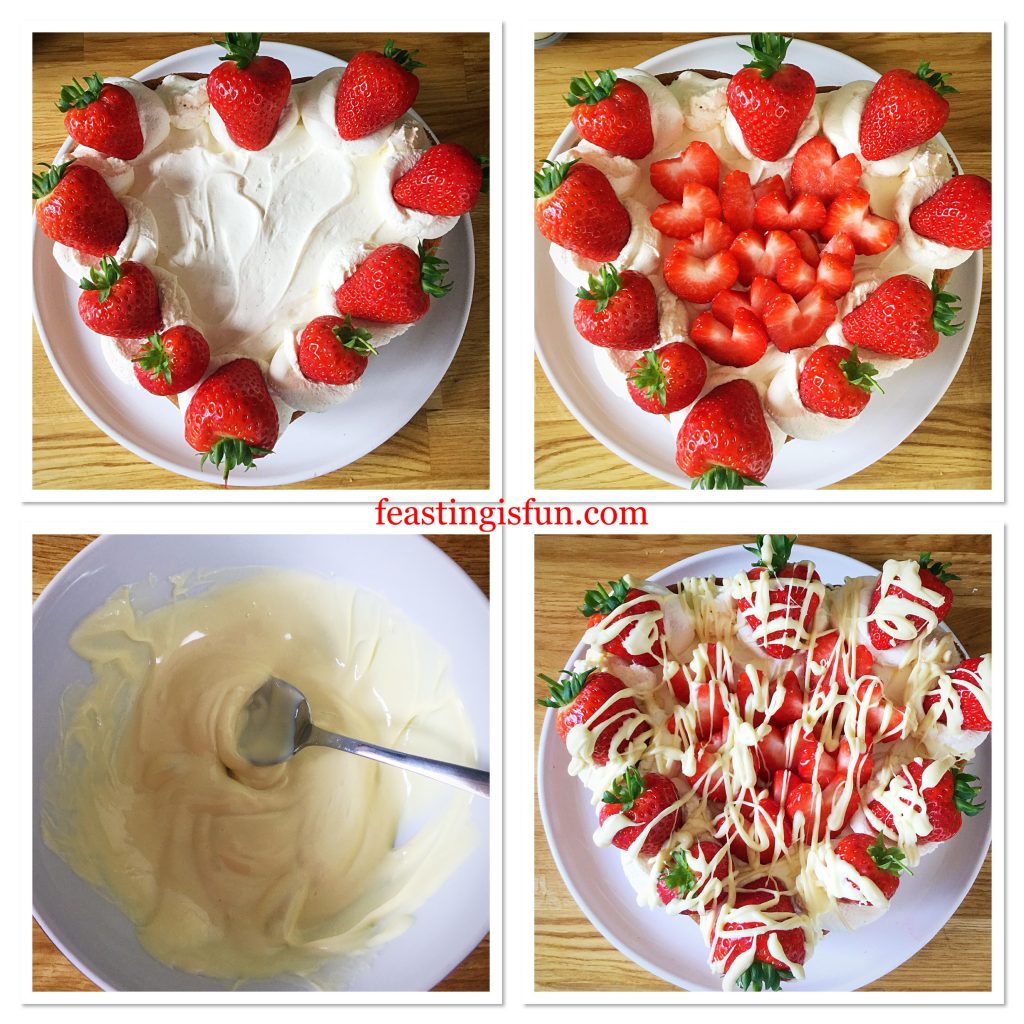
Decorating The Heart Shaped Cake

  • Fill a piping bag, without a piping tip fitted, with the remaining whipped cream.
  • If using a disposable piping bag cut the tip off to leave a 1cm opening.
  • Pipe approximately half of the cream on to the sponge.
  • Spread the cream to cover using a palette knife.
  • Pipe swirls around the outside edge of the cake.
  • Top the whipped cream swirls with a fresh strawberry.
  • Remove the green part (hull) of the remaining strawberries by cutting diagonally down either side creating a ‘V’ shape.
  • Slice each strawberry into 4-5 mini red hearts.
  • Place the strawberry hearts in the centre of the cake.
  • Break/chop up the white chocolate and place in a heatproof, microwaveable bowl. Zap for 20 seconds at a time until the chocolate just starts to melt. Remove the bowl from the microwave and stir continuously until all of the chocolate has melted.
  • Pour the melted white chocolate into a small, disposable, piping bag. Cut the very end of the tip off, leaving a small opening.
  • Pipe white chocolate over the strawberries and then over the entire cake, encouraging some chocolate to drip from the cake.
FF White Chocolate Drizzle Strawberry Cream Cake
Decorating the White Chocolate Drizzle Strawberry Cream Cake
  • Finally sprinkle over some broken up, golden honeycomb.
  • Refrigerate the cake for 30 minutes, or longer, until the white chocolate has set.
White Chocolate Drizzle Strawberry Cream Cake

Serving The Heart Shaped White Chocolate Drizzle Strawberry Crean Cake

To serve, cut the cake in half from top to bottom, this makes it easier to portion slices.

FF White Chocolate Drizzle Strawberry Cream Cake
White Chocolate Drizzle Strawberry Cream Cake

Enjoy with friends, family and loved ones. For a special occasion serve with a glass of chilled champagne.

This cake is best enjoyed the day it is decorated. The sponge can be made up to 2 days ahead. Wrap the uncut cake in cling film and store in an airtight container.

Store the finished cake in the fridge and eat within 2 days.

If you have enjoyed this recipe for White Chocolate Drizzle Strawberry Cream Cake you may also like these:

Chocolate Heart Cake

FF White Chocolate Drizzle Strawberry Cream Cake
Chocolate Heart Cake

Mascarpone Topped Carrot Cake

FF White Chocolate Drizzle Strawberry Cream Cake
Mascarpone Topped Carrot Cake

Raspberry Lemon Celebration Layer Cake

FF White Chocolate Drizzle Strawberry Cream Cake
Raspberry Lemon Celebration Layer Cake


When strawberries are in season, warmed by the sun and picked straight from the plant they need nothing else to celebrate their sweet, juicy flavour. Yet adding them to desserts such as Pavlovas, Cream Cakes and other delights, showcases their versatility and beauty. So I get very excited about the start of the strawberry season, poly tunnels and super greenhouses making local, British fruit available earlier in the year and extending the season. While they might be available in the supermarkets all year long, which does have its benefits, nothing beats homegrown or farm fresh berries.

So whatever you are making, baking and creating in your kitchens, have fun preparing and sharing your feast.

Sammie xx

No part of this post may be reproduced or duplicated without the written permission of the owner. Please see my Disclosure Policy.
Heart shape sponge cake for Valentines Day.

Share
Facebooktwitterpinterestlinkedintumblr

Fresh Raspberry Frosted Lemon Cupcakes

Share
Facebooktwitterpinterestlinkedintumblr

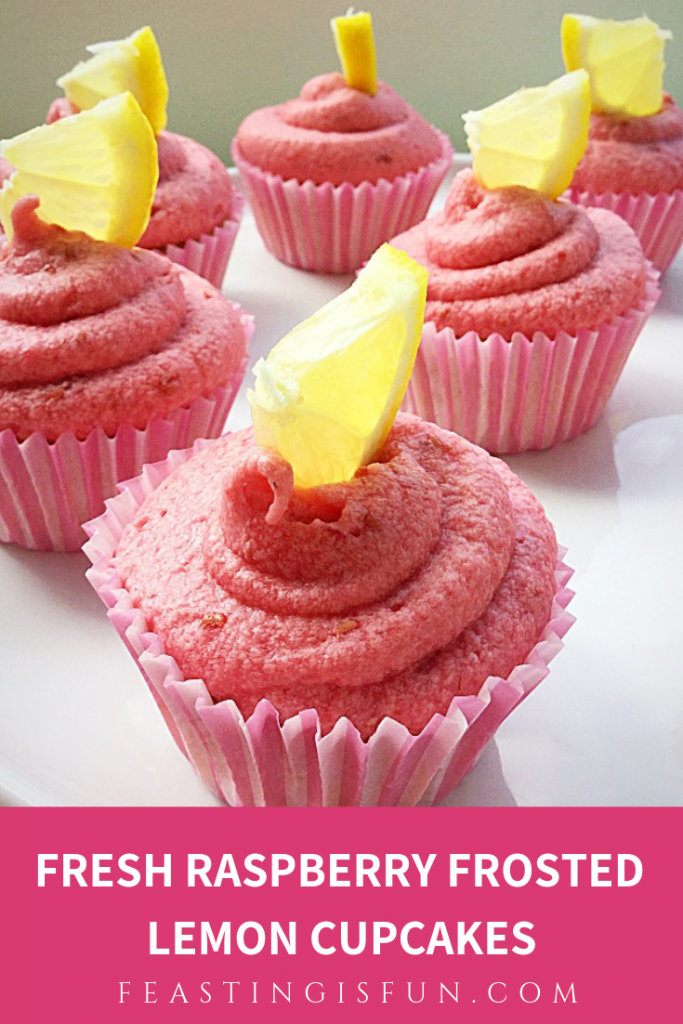
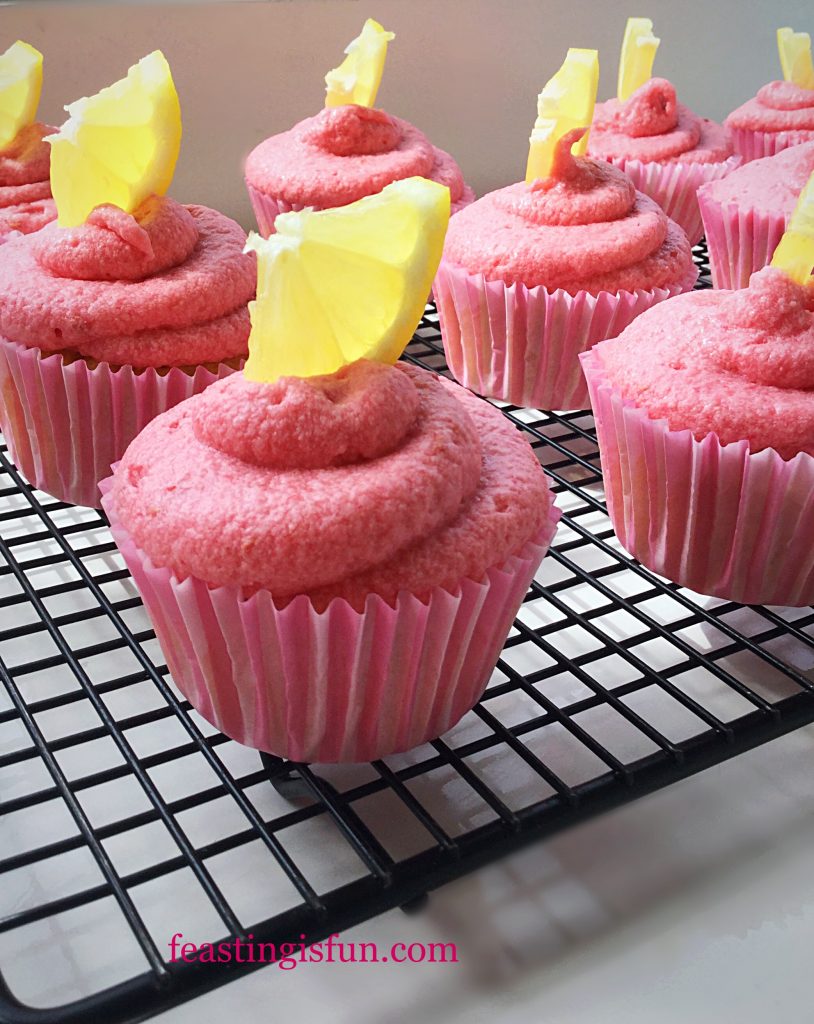
Finally Spring has finally arrived! And following what has seemed a very long, very cold and very dark Winter, daffodils are now lighting up the landscape with their cheery yellow faces.  Bird song is abundant, especially as long shut windows have now been flung open. So in celebration of this beautiful season I have created a fruit packed cupcake that will bring sunshine to your day even when the rain clouds descend. Enjoy these Fresh Raspberry Frosted Lemon Cupcakes at anytime of the year.

FF Fresh Raspberry Frosted Lemon Cupcakes
Fresh Raspberry Frosted Lemon Cupcakes

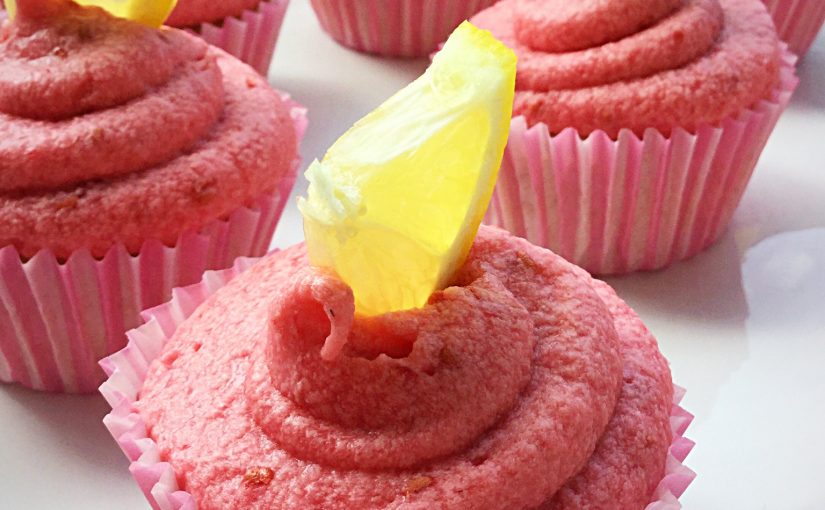
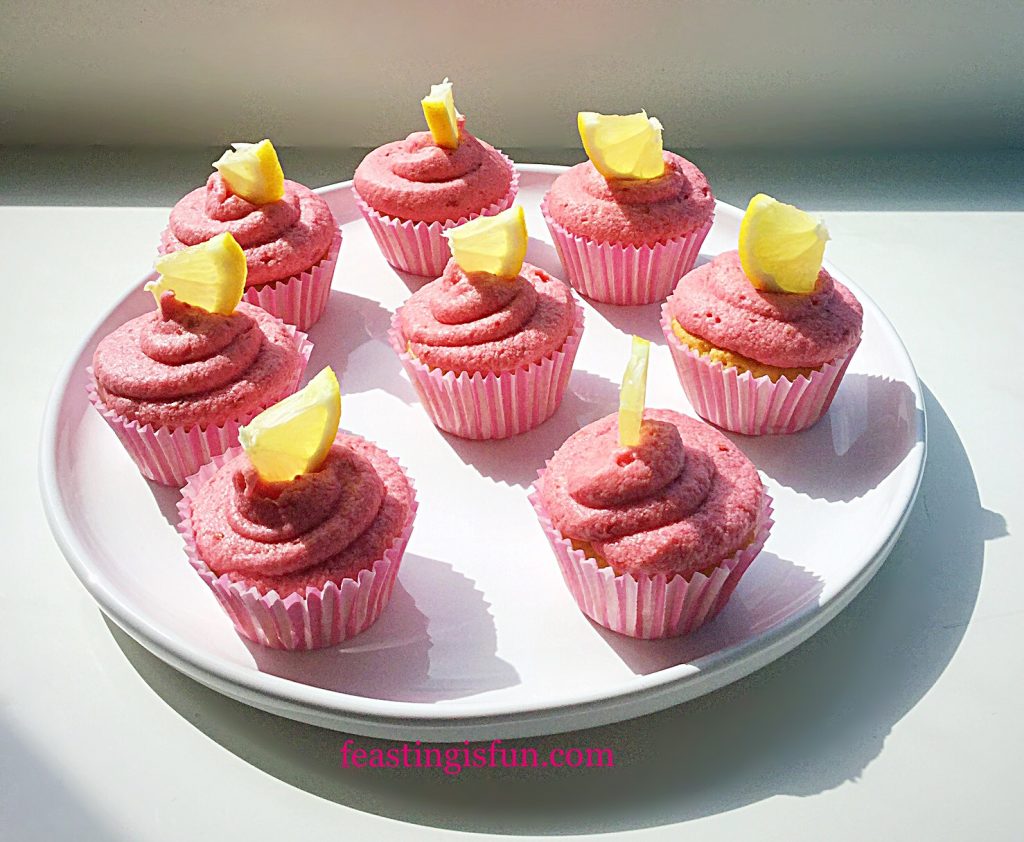
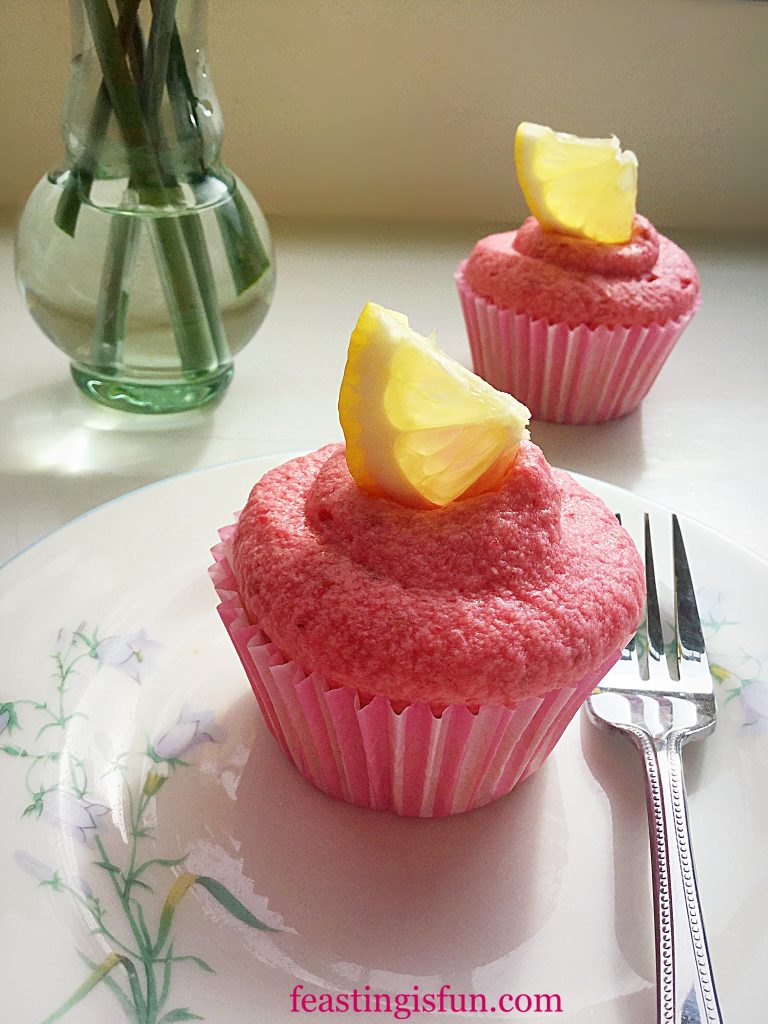
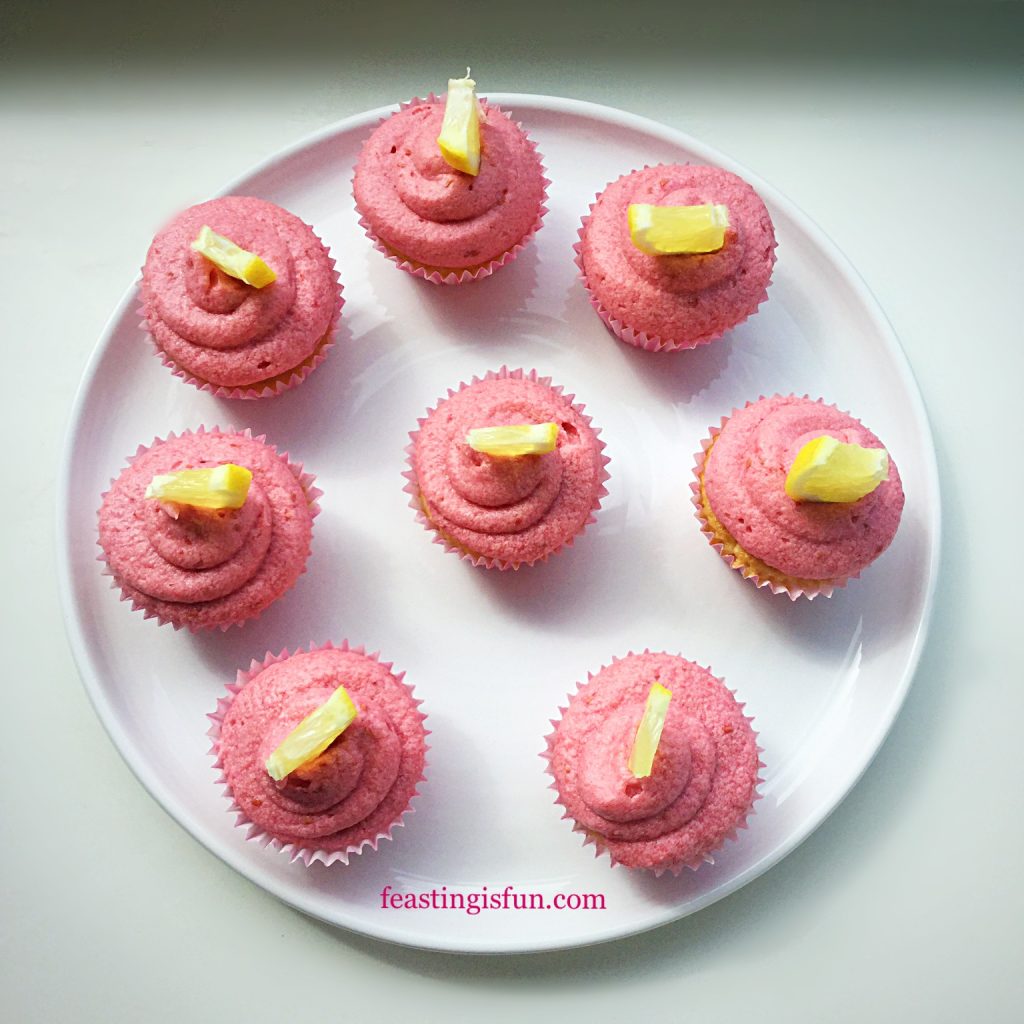
Light, lemon flavoured cupcakes topped with a fresh (frozen out of season), vibrant pink raspberry buttercream. Since both fruits used in this recipe can be tart to the palette, the combination is very refreshing. Also using fresh raspberries, as opposed to raspberry jam, results in the frosting having an almost sherbet like flavour. Resulting in a subtle, yet delicious change from a regular, sweet cupcake.

FF Fresh Raspberry Frosted Lemon Cupcakes
Fresh Raspberry Frosted Lemon Cupcakes

Simply looking at these cupcakes reminds me of sunshine. Something that has been in scant supply these past few months. So I say, when the clouds gather, you simply have to bake the sunshine into your day. While you are making these, why not double up and make some to share among neighbours, friends or work colleagues? And they are certain to cheer anyone’s day as food always tastes better when shared.

FF Fresh Raspberry Frosted Lemon Cupcakes
Fresh Raspberry Lemon Frosted Cupcakes

Note – when making the frosting don’t worry if it looks like it has curdled. It hasn’t! Rather it is the addition of fresh raspberries that give it a slightly mottled appearance.

FF Fresh Raspberry Frosted Lemon Cupcakes

Recipe: Fresh Raspberry Frosted Lemon Cupcakes – makes 12

For the cupcakes:

100g/4oz Unsalted Butter at room temperature

100g/4oz Caster Sugar

1/8 tsp Sea Salt – I use Maldon

2 Large Free Range Eggs

1/2 tsp Vanilla Extract – I use Nielsen-Massey

100g/4oz Plain White Flour

1 tsp Baking Powder

Finely Grated Zest of 1 Large Lemon – approximately 1 tsp

For the frosting:

100g/4oz Raspberries – if using frozen include defrosting juice in weight

150g/5.2oz Unsalted Butter at room temperature

300g/10.5oz White Icing Sugar (confectioners sugar)

To decorate:

3 slices of fresh lemon

Method: preheat oven to 160C/140C fan, 325F, gas mark 3

Making And Baking The Lemon Cupcakes

  • First of all line a muffin tin with 12 pretty cupcake cases.
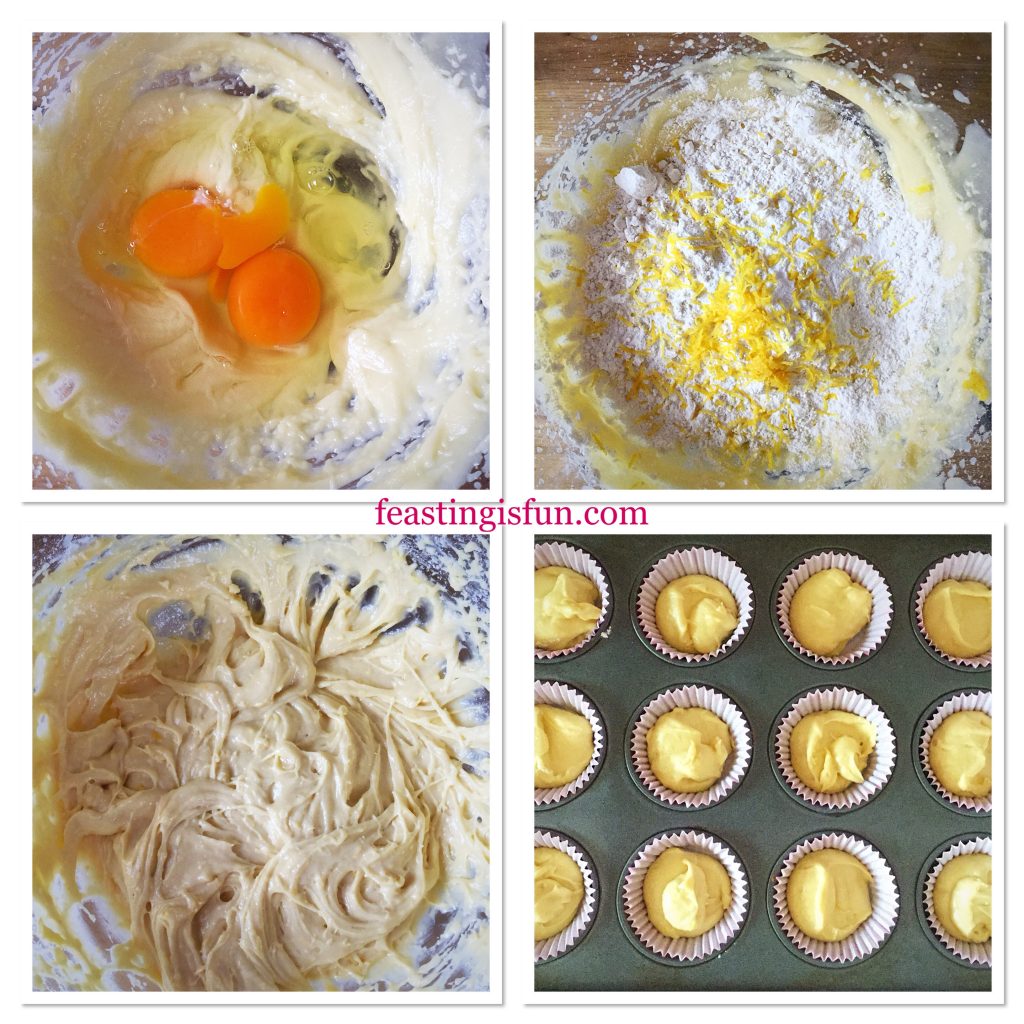
  • Into a bowl add the butter, sugar, salt and vanilla extract. Whisk together until pale and creamy.
  • Next add the two eggs and then sift in the flour and baking powder. Finely add the finely grated zest of a lemon.
  • Whisk all the ingredients together until they are combined. Importantly, avoid over mixing as this can lead to a tough cake when baked.
  • Divide the mixture equally between the 12 cupcake cases .
FF Fresh Raspberry Frosted Lemon Cupcakes
Making the lemon cupcake batter.
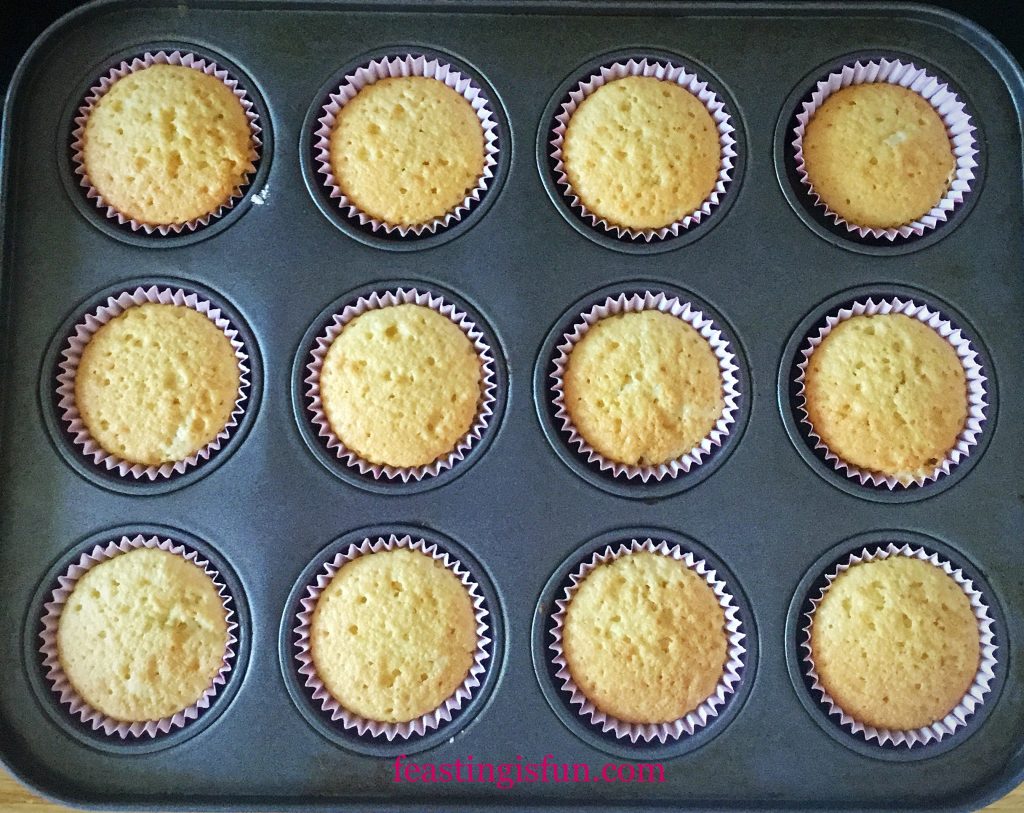
  • Place the cupcakes in the centre of the oven and bake for 30 minutes.
  • Additionaly, baking at a low temperature for a longer time results in well risen, flat topped cupcakes.
  • The cupcakes are baked when risen, golden and spring back from a light touch.
  • As soon as the cupcakes are baked remove from the oven.
FF Fresh Raspberry Frosted Lemon Cupcakes
Baked cupcakes.
  • Leave to cool in the tin for 5 minutes then remove and place the cupcakes on a cooling rack to completely cool.
  • While the cupcakes cool make the fresh raspberry frosting.

Making The Fresh Raspberry Buttercream Frosting

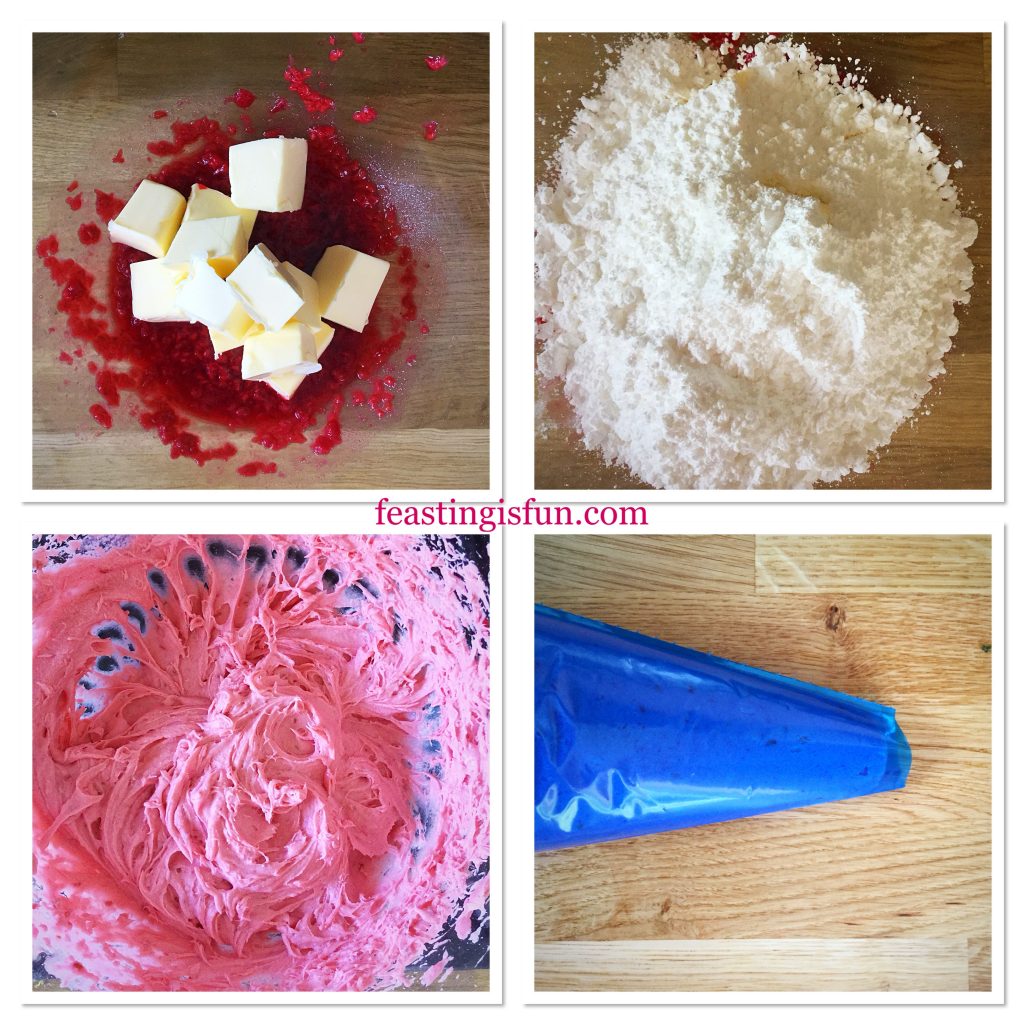
  • Place the raspberries into a bowl and mash using a fork.
  • Add the butter and icing sugar to the mashed raspberries and whisk together – approximately 5 minutes. resulting in a frosting that should be shocking pink in colour and have a light airy texture.
  • Decant the frosting into a piping bag that has not been fitted with a piping nozzle. If using a disposable bag cut the end to leave a 1cm opening.
FF Fresh Raspberry Frosted Lemon Cupcakes
Preparing the pink fresh raspberry frosting.
  • Before piping on to the cupcakes cut 3 slices of lemon. Cut each slice into 4 portions. Each will decorate the top of the frosted cupcakes.
  • To pipe the swirls on to the cupcakes: start at the outside edge of the cupcake, keep an even pressure on the bag and pipe a double swirl.
  • Top each frosted cupcake with a lemon segment.
FF Fresh Raspberry Frosted Lemon Cupcakes
Fresh Raspberry Frosted Lemon Cupcakes

Vibrant, fresh raspberry frosting topped with a luminous lemon segment.

FF Fresh Raspberry Frosted Lemon Cupcakes
Fresh Raspberry Frosted Lemon Cupcakes

Serve with lemon tea or freshly made lemonade. And where possible, enjoy sitting outside in the garden listening to the birdsong.

If you have enjoyed this recipe for Fresh Raspberry Frosted Lemon Cupcakes you may also like these:

Marshmmallow Frosted Mango Cupcakes

FF Fresh Raspberry Frosted Lemon Cupcakes
Marshmallow Frosted Mango Cupcakes

Pink Heart Topped White Chocolate Cupcakes

FF Fresh Raspberry Frosted Lemon Cupcakes
Pink Heart Topped White Chocolate Cupcakes

Malteser Popping Candy Cupcakes

FF Fresh Raspberry Frosted Lemon Cupcakes
Maltesers Popping Candy Cupcakes

Baking and sharing are at the very heart of Feasting is Fun. While I thoroughly enjoy creating new recipes to share with you my readers, encouraging you to share what you have made is as important. Especially as there are many lonely people in this world. Because simple gift of a cake, or meal such as this  Chicken and Four Cheese Lasagne, given with a smile can lift an entire day for a stay at home mum with young children. Just one example of how you can help.

So whatever you are making, baking and creating, have fun preparing and sharing your feast.

Sammie xx

No part of this post may be reproduced or duplicated without the written permission of the owner. Please see my Disclosure Policy.
Share
Facebooktwitterpinterestlinkedintumblr

Raspberry Lemon Celebration Layer Cake

Share
Facebooktwitterpinterestlinkedintumblr

Today is Mothering Sunday, also known as Mother’s Day. A day set aside to give thanks and show love to those who have born and birthed us. Yet with surrogacy, adoption, step mothers, fostering and many other types of parenting, for me this day represents so much more. First of all, for me personally, the title of Mum, Mam, Mother or Mom, does not come with any accolade simply because a woman has carried and given birth to a child. It is a title earned through endless, sleep deprived nights, countless cuddles and reassurance. Most importantly though it is earned through the act of selfless love, loving so hard and still letting go. And today those are the women I celebrate and am celebrated with. So raise your glass and enjoy a slice of my Raspberry Lemon Celebration Layer Cake.

Thankful For My Family

While I am sitting here, enjoying a delicious slice of this Raspberry Lemon Celebration Layer Cake, I am also taking a moment to be thankful for being a Mum. Thankful for the laughter and fun that comes alongside the hard work and at times pain. The knowledge that I am part of a family unit, that starts with my husband and I and reaches out through our children, our siblings and what is to come. Most importantly knowing that I am unconditionally loved and accepted by my Heavenly Father, who is both mother and father to me.

FF Raspberry Lemon Celebration Layer Cake
Raspberry Lemon Celebration Layer Cake

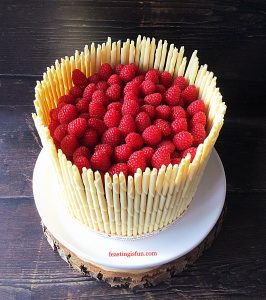
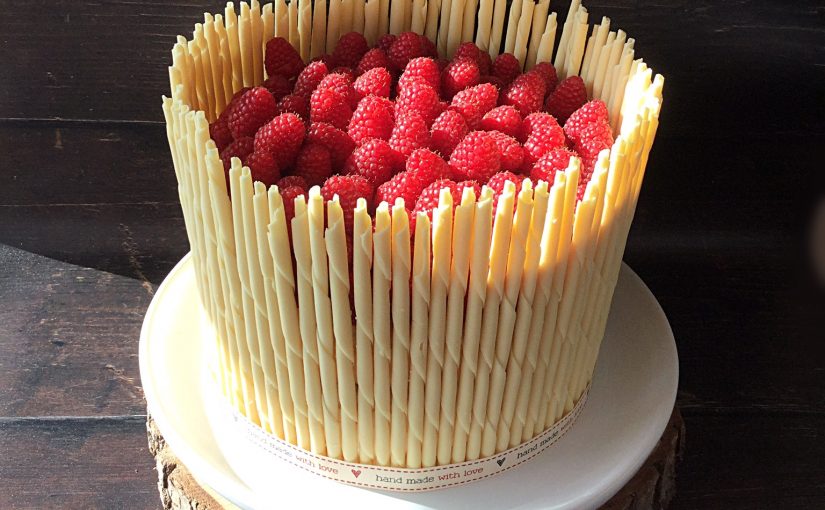
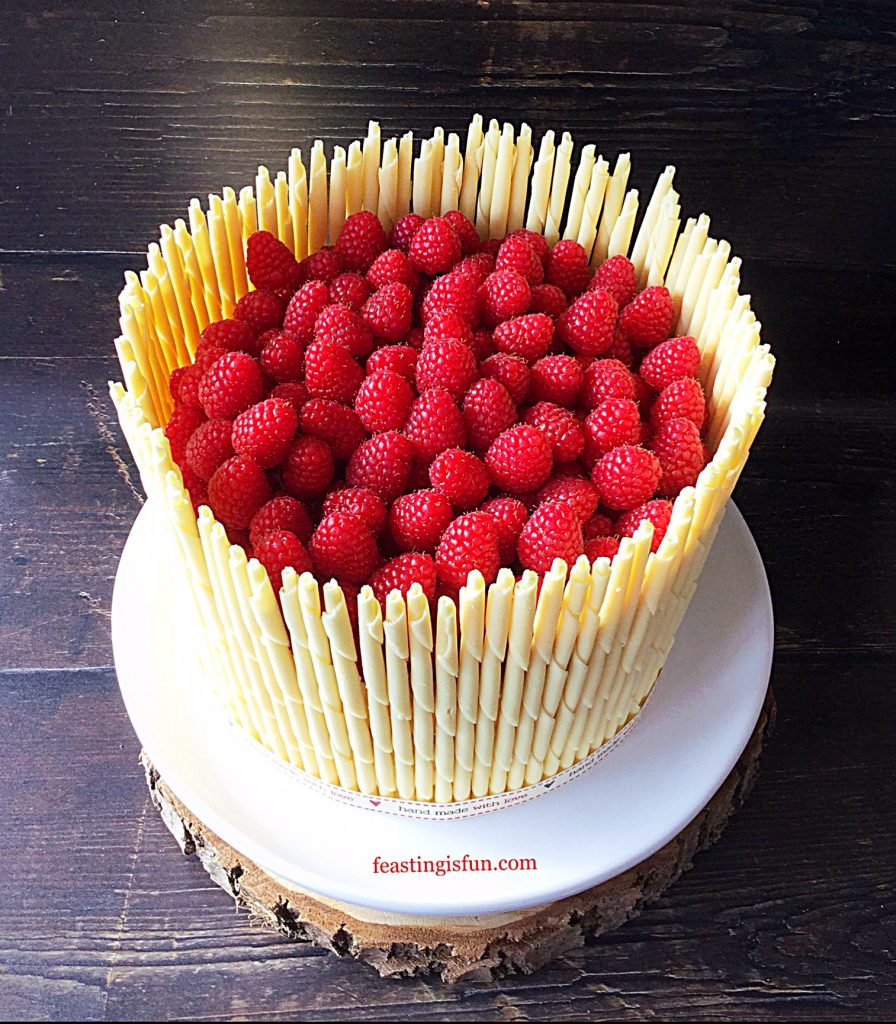
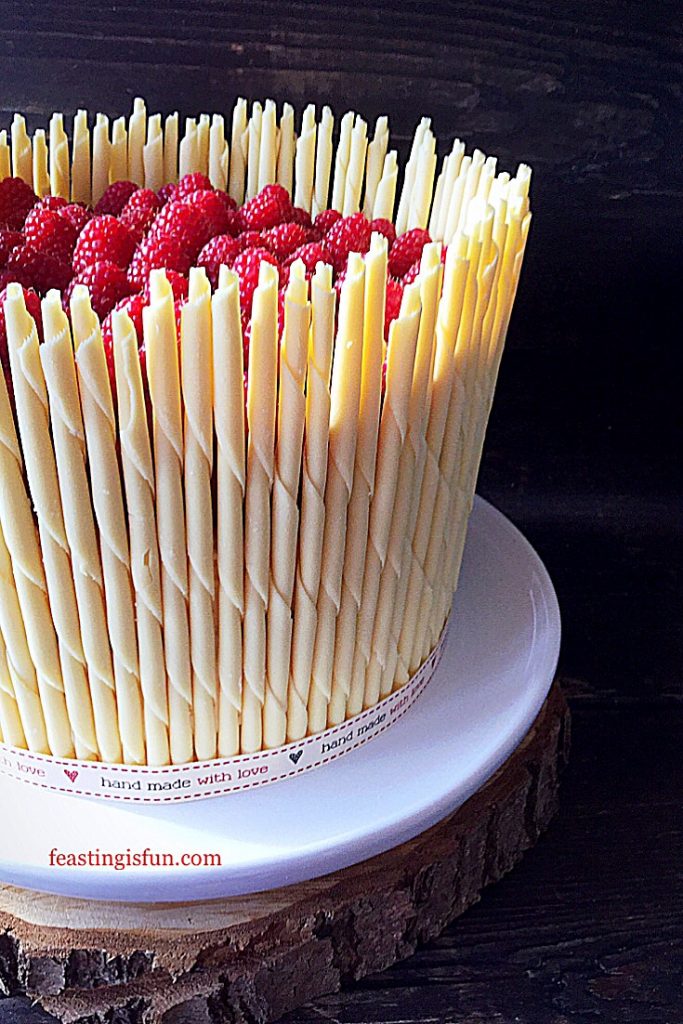
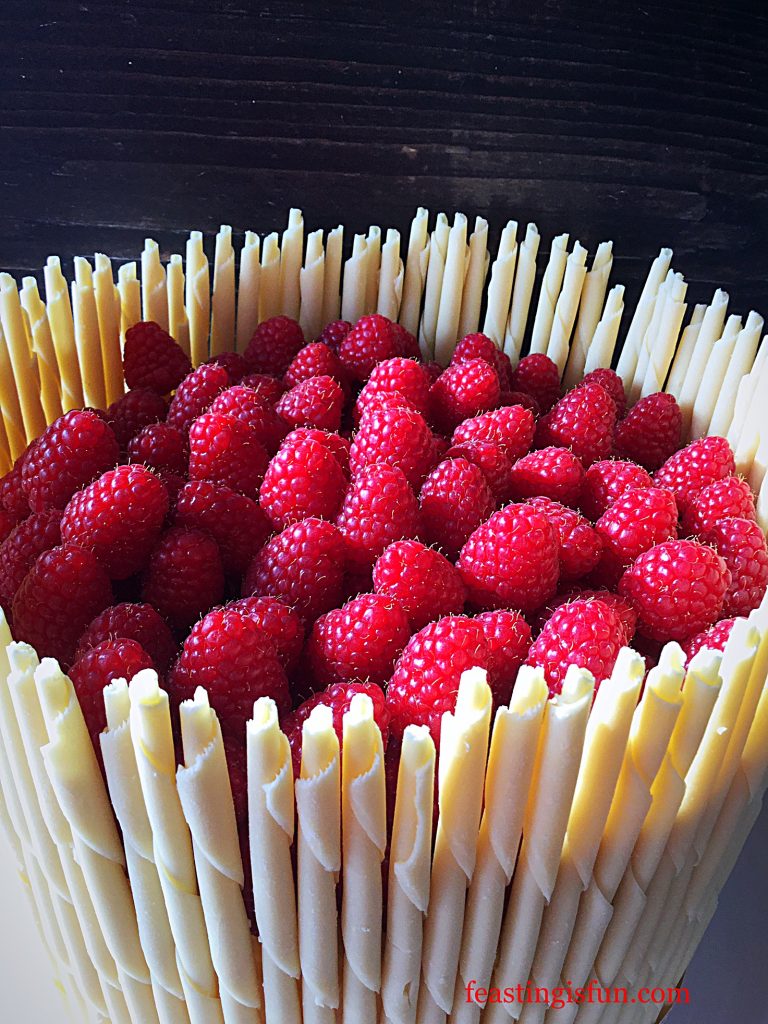
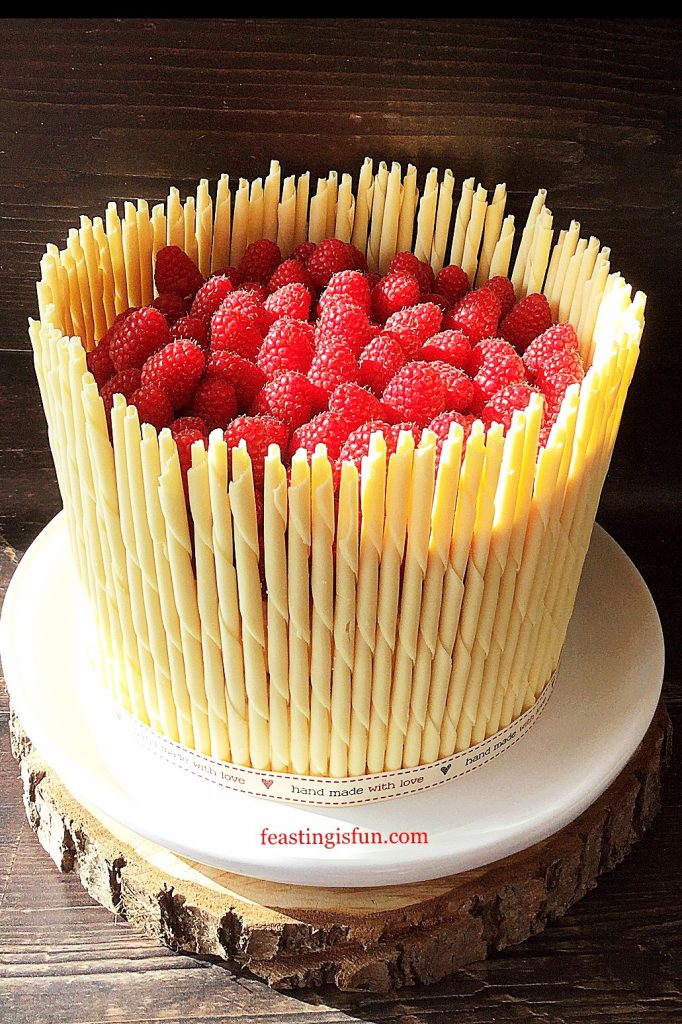
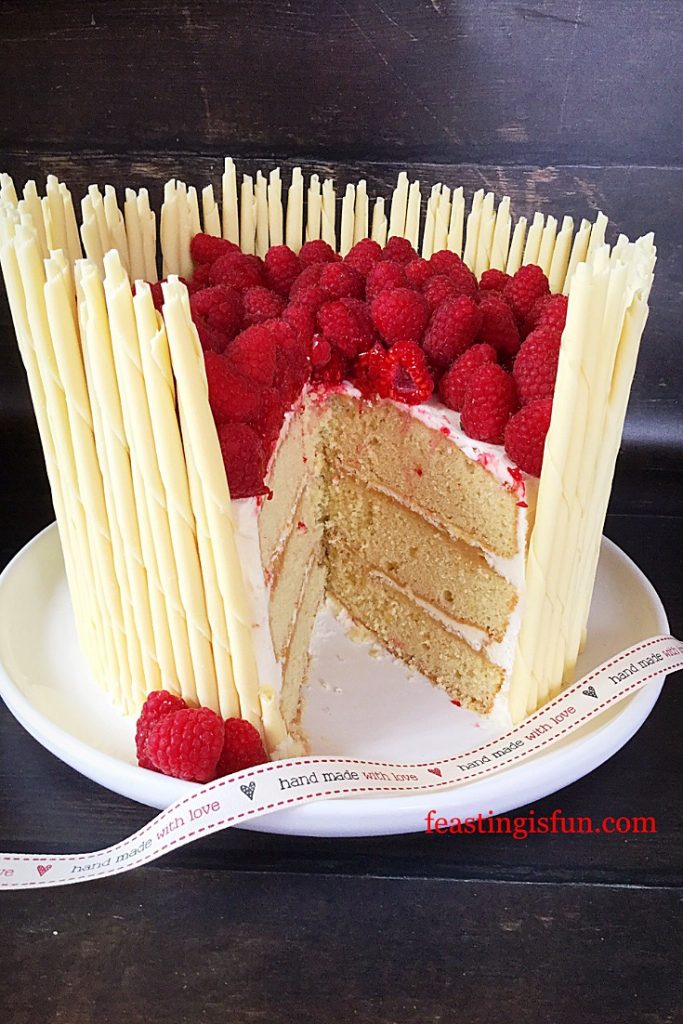
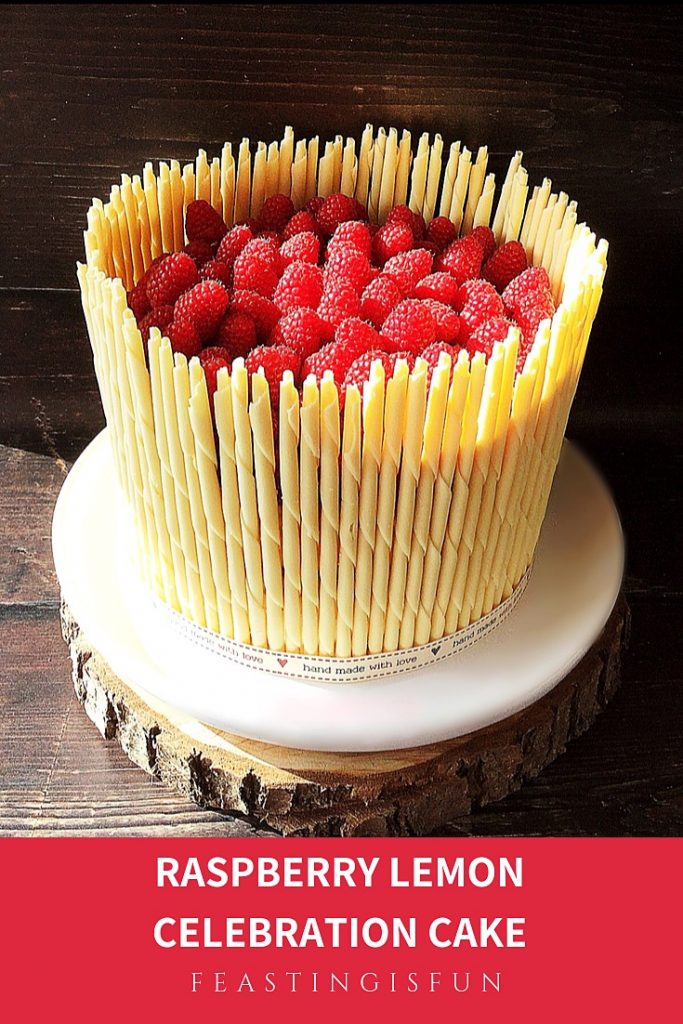
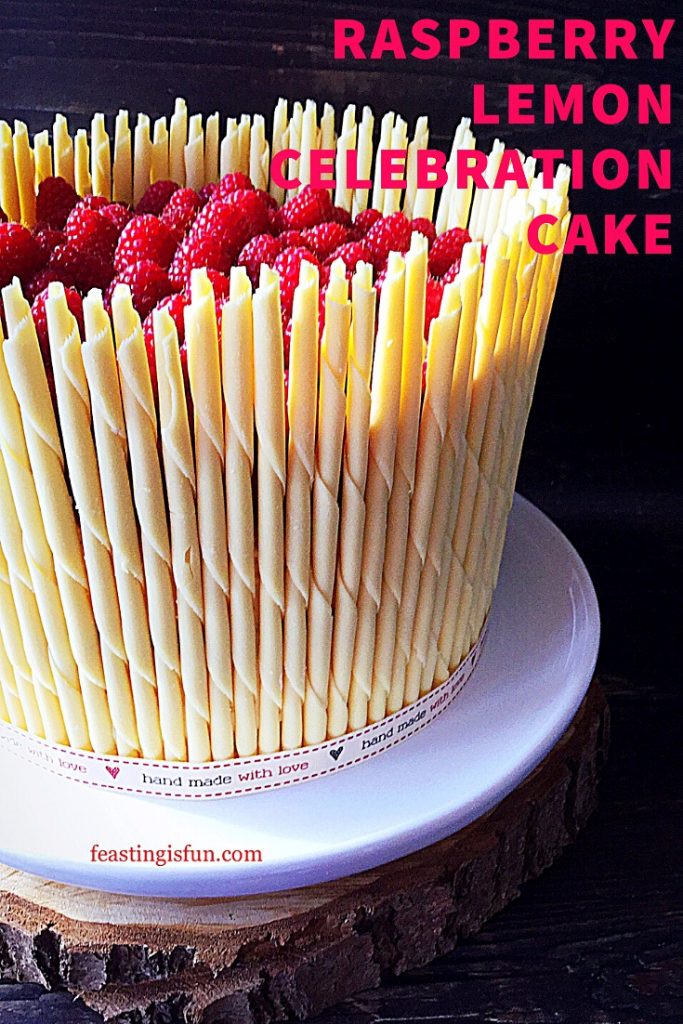
Since we are celebrating, what better occasion than to make a cake. Light lemon sponge layered with the very best lemon curd and lemon buttercream. Surrounded with swirled white chocolate pencils and topped with fresh, deep red, raspberries. The sum of this Raspberry Lemon Celebration Layer Cake is so much more that the total of it’s separate parts.

FF Raspberry Lemon Celebration Layer Cake
Raspberry Lemon Celebration Layer Cake

While magnificent to look at, do not be daunted at the prospect of making this cake. Inspired by Lorraine Pascal and a baking programme I watched, trust me when I state that if I can make this cake, you can too. Also, the very lovely Maria Whitehead who runs Hawkshead Relish with her husband and daughter, remarked that my recipes are approachable and ‘un-cheffy’! Which, I took as a compliment and also used as influence when designing this cake.

A white chocolate pencil surrounded, fresh fruit filled three sponge dessert.
Raspberry Lemon Celebration Cake

Recipe: Raspberry Lemon Celebration Layer Cake serves 12

For the cake sponges:

225g/8oz + 115g/4oz Unsalted Butter at room temperature – plus a little extra for greasing the tins

225g/8oz+ 115g/4oz Caster Sugar

1/2tsp + 1/4tsp Sea Salt (halve for free flowing) – I use Maldon

1tsp + 0.5tsp Vanilla Extract – I use Nielsen-Massey

4 + 2 Large Free Range Eggs

225g/8oz + 115g/4oz Plain Flour

2tsp + 1tsp Baking Powder

Zest of 2 Fresh Lemons

For the buttercream:

250g/9oz Unsalted Butter at room temperature

500g/1lb 2oz Icing Sugar (confectioner’s sugar)

1/4tsp Sea Salt

7tsp Freshly Squeezed Lemon Juice (approximately the juice from 1 medium lemon)

Also needed:

6-7 tbsp Good Quality Lemon Curd – I use Hawkshead Relish

1 Box White Chocolate Pencils – I use Callebaut

600g/1lb 5oz Fresh Raspberries

Method: Preheat oven to 160C/140C fan, 325F, gas mark 3

Note: The cake is baked in three separate layers. Since a 20cm (8in) sandwich tin is required for each sponge the recipe is split. The first amount given is sufficient for two layers. While the second amount is for a single layer. If you have three equal sized tins, combine the first and second amounts, dividing equally between three tins. Baking times may need to be adjusted.

Making and baking the cake layers.

  • First of all grease and line the base of each sandwich tin with baking parchment.
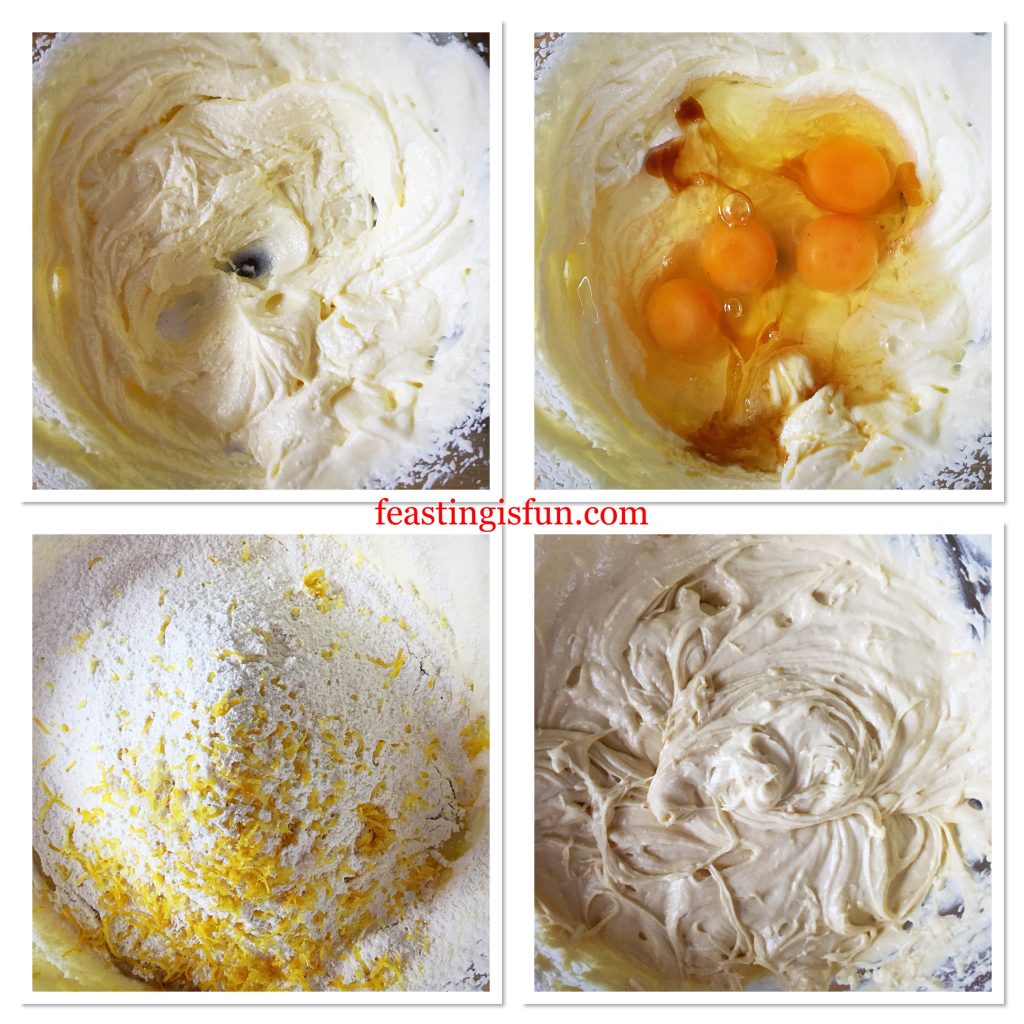
  • Into a large bowl add the first amount given for butter, sugar and salt. Whisk the ingredients together until pale and creamy.
  • Next add 4 eggs and 1 teaspoon of vanilla extract. Sift the flour and baking powder on top and then add the zest of one and one third of lemon.
  • Whisk the ingredients together until just combined, yet free of lumps.
FF Raspberry Lemon Celebration Layer Cake
Making the lemon sponge cake batter.
  • Divide the cake batter evenly between the two prepared sandwich tins and smooth the tops.
  • Place both tins in the centre and lower parts of the oven and bake for 40-50 minutes.
  • The cake sponge is fully baked when golden, springs back from a light touch and an inserted skewer comes out clean.
  • As soon as the cakes are baked remove from the oven. Leave to cool in the tin for 10 minutes and then turn out, removing the baking parchment from the base of each sponge.
  • Leave to cool on a cooling rack.
  • Wash up a sandwich tin, grease and line as before. Make the batter for one sponge following the method given, using the second quantity given in the recipe. Fill the tin and bake as before.
FF Raspberry Lemon Celebration Layer Cake
Preparing and baking the cake sponges.
  • While the last sponge is cooling make the lemon buttercream.
  • Into a large bowl add butter, icing sugar, salt and lemon juice.
  • Stating on a low speed whisk the ingredients together, increasing the speed until the buttercream is light and creamy.
  • Spoon the buttercream into a large piping bag without a nozzle fitted. If using a disposable bag cut a 1cm opening at the bag’s tip.

Filling and covering the cake:

  • Pipe one tablespoon of buttercream on to the plate/board used for the cake.
  • Place one cake sponge, flat side facing up, on top of the buttercream.
  • Spoon 3 tablespoons of lemon curd on to the cake and spread to cover evenly.
  • Pipe 3-4 tablespoons of buttercream on to the top of the next sponge. Spread to cover the sponge evenly.
  • Flip the sponge and place on top of the lemon curd covered sponge.
FF Raspberry Lemon Celebration Layer Cake
Stacking the cake layers.
  • Spoon 3 tablespoons of lemon curd on the top of the sponge, spread to cover evenly as before.
  • Pipe 3-4 tablespoons of buttercream on to the flat side of the third sponge. Again, spread to cover evenly.
  • Flip the sponge and place, flat side down, on to the second, lemon curd covered sponge.
FF Raspberry Lemon Celebration Layer Cake
Layering the cake with lemon curd and buttercream.
  • Place the cake plate/board on to a cake decorating turntable if you have one.
  • Pipe buttercream between each layer and on the top of the cake.
  • Use an offset palette knife to spread the buttercream evenly around and on top of the cake. Since the cake is to be covered the finish of the buttercream does NOT have to be perfect. Aim for a neat, smooth finish.
FF Raspberry Lemon Celebration Layer Cake
Covering the layered cake with buttercream.

Decorating the cake:

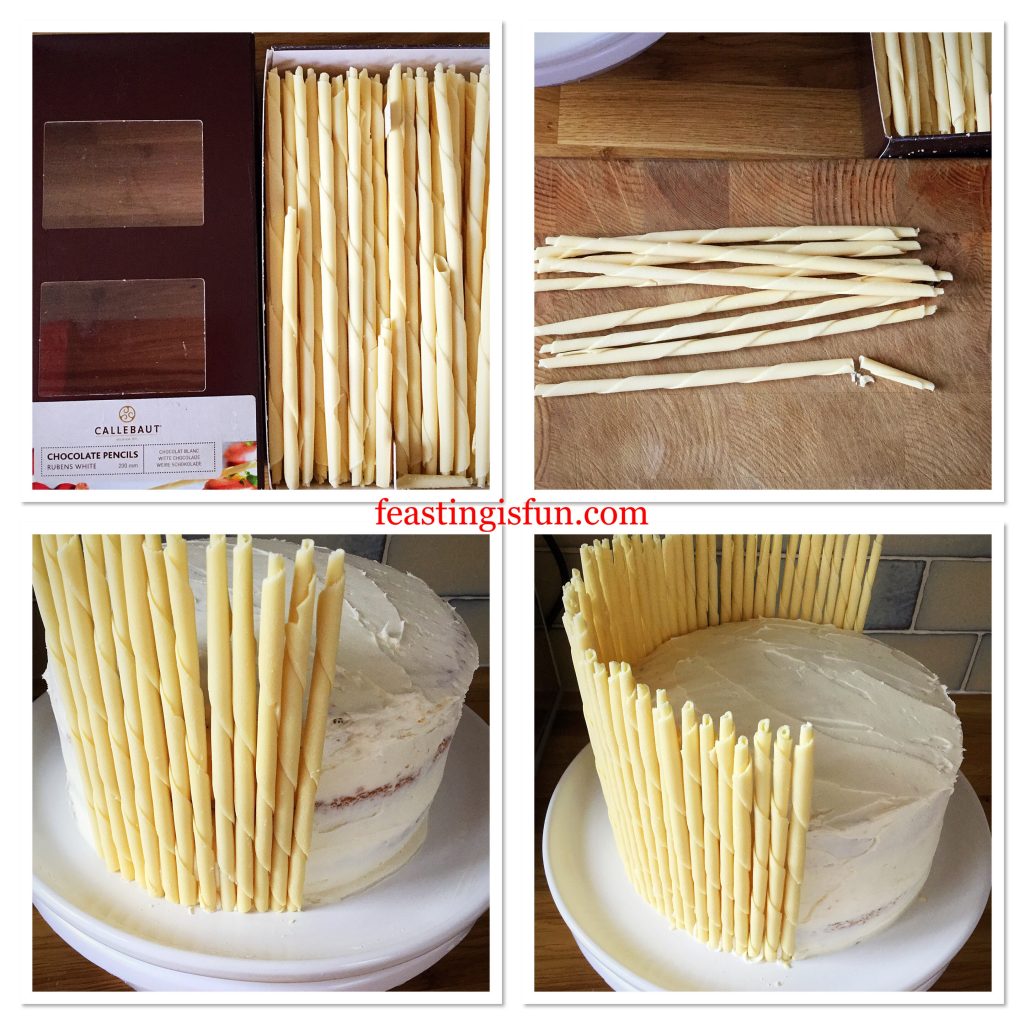
  • First of all take a full size pencil, measure it against the height of the cake. 10cm or 4 inches is the desired height of excess pencil from the top of the cake.
  • Trim a pencil to the length needed and measure against the cake to double check.
  • Make any adjustments and keep the pencil as a guide for cutting the remaining pencils.
  • Cut a few pencils at a time. Carefully take the first one placing vertically against the side of the cake. Gently push it into the buttercream.
  • Continue with the next pencil, placing as close as possible next to the first pencil.
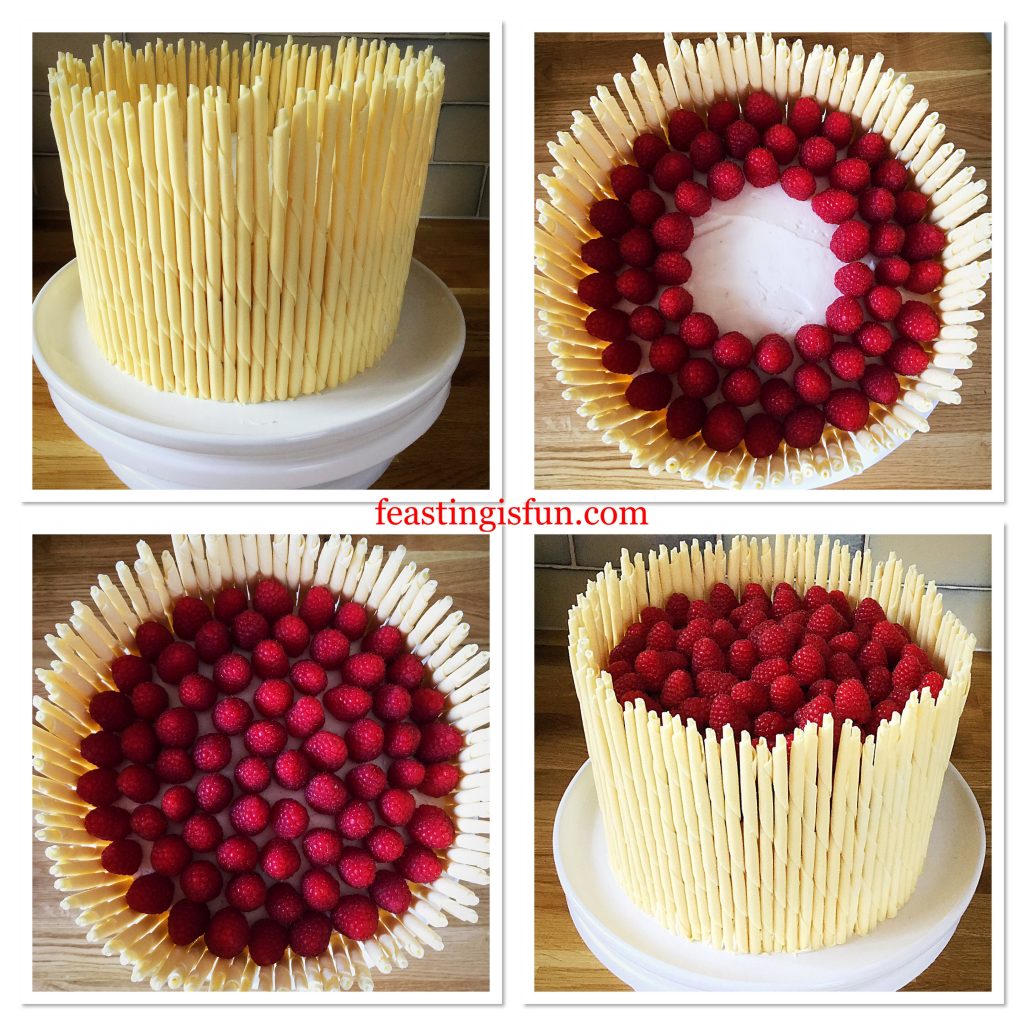
  • Work around the outside of the cake, adding pencils until the entire cake is surrounded.
FF Raspberry Lemon Celebration Layer Cake
Decorating the cake using white chocolate pencils.
  • Turn the cake, check from each angle, ensuring the pencils are uniform.
  • Starting at the outside rim, place raspberries as close together as possible.
  • Work in circles towards the cake’s centre, until the first layer of raspberries is complete.
  • Place the remaining raspberries on top, in a circular fashion, finishing at the cake’s centre.
FF Raspberry Lemon Celebration Layer Cake
Raspberry Lemon Celebration Layer Cake – topping with fresh raspberries
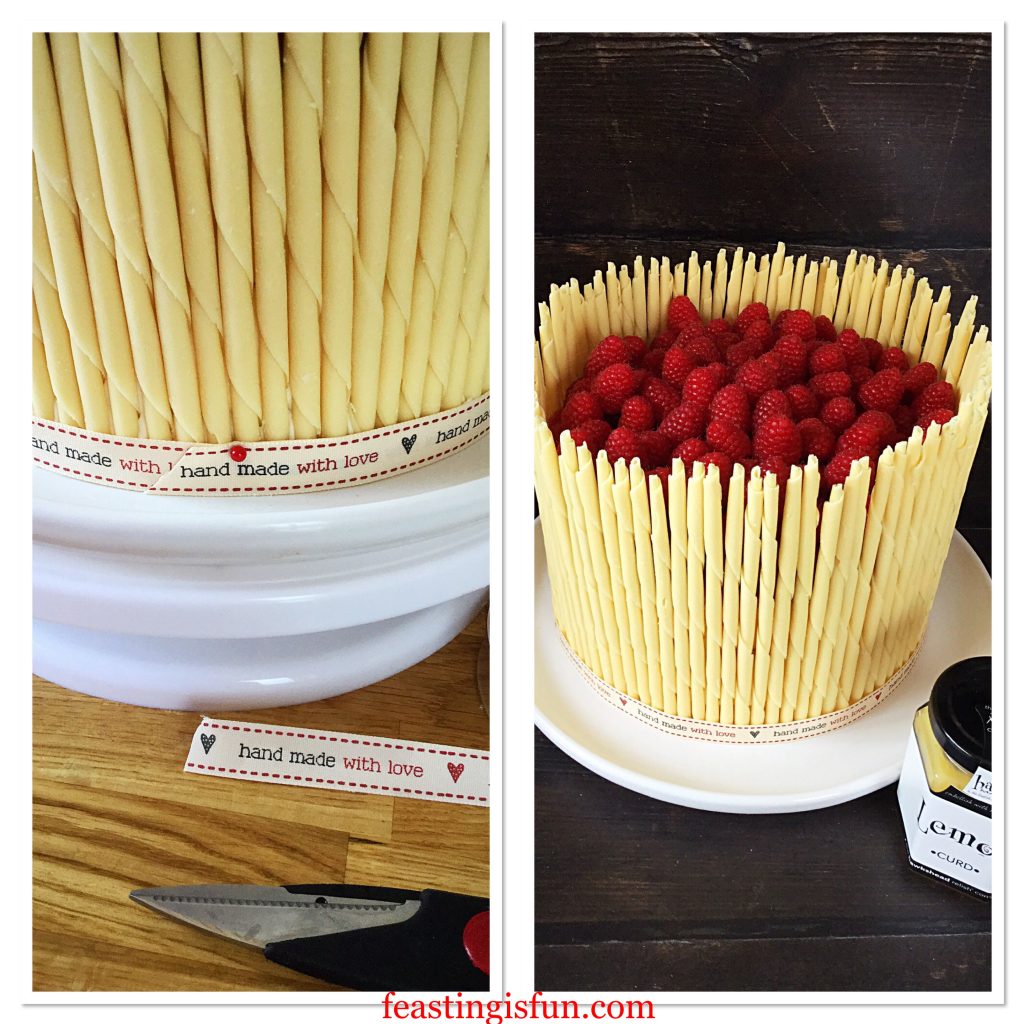
  • Finally, measure a length of ribbon around the base of the, so that it just overlaps.
  • Cut and fix the ribbon in place with a pin. Ensure the join is at the back.
FF Raspberry Lemon Celebration Layer Cake
Raspberry Lemon Celebration Layer Cake adding the finishing touches.

Chill the cake for one hour before serving. Doing so ensures that the cake is easy to slice.

Remove the ribbon before cutting.

FF Raspberry Lemon Celebration Layer Cake
Raspberry Lemon Celebration Layer Cake

Store any remaining cake in an airtight container, ideally in the fridge. Eat within 5 days of making.

If you have enjoyed this recipe for Raspberry Lemon Celebration Layer Cake you may also like these:

Raspberry Vanilla Naked Celebration Cake

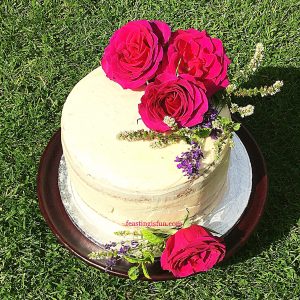
Three layer sponge filled with fresh jam and whipped vanilla buttercream and decorated with fresh roses. The dessert is set on a stand in a garden for garden parties and celebrating.
Raspberry Vanilla Naked Celebration Cake

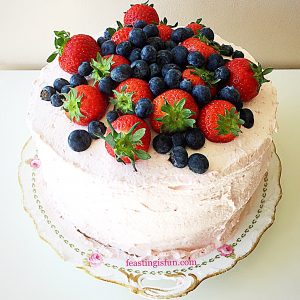
Summer Mixed Berry Sponge Cake

Summer mixed berry sponge covered with fresh fruit whipped cream and topped with an assortment of fresh fruit.
Summer Mixed Berry Sponge Cake

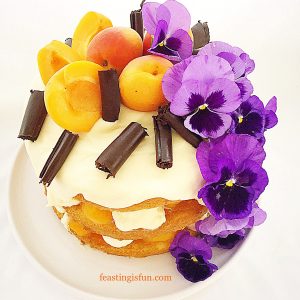
Apricot White Chocolate Triple Sponge Cake

Three layer sponge filled with white chocolate ganache and apricots. Topped with fresh apricots, dark chocolate curls and vivid purple fresh pansies
Apricot White Chocolate Triple Sponge Cake

To be a Mother is to be part of a family. Above all that really is the best part for me. Loving and being loved back. Because that is what fills me with joy. Even more so laughing and having people to laugh with. Feasting and sharing with those who love and enjoy life. Finally, if you too would like to be part of a family see Important Stuff.

So, whatever er you are making, baking and creating in your kitchens, have fun preparing and sharing your feast!

Sammie xx

Hawkshead Relish supplied the lemon curd for this recipe. All content and opinions are those of the writer. No payment has been received for this post. No part of this post may reproduced or duplicated without the written permission of the owner. Please see the Disclosure Policy.

A white chocolate pencil surrounded, fresh fruit filled three sponge dessert. Ideal for parties and celebrating.
Raspberry Lemon Celebration Cake


Share
Facebooktwitterpinterestlinkedintumblr

Pomegranate Lemon Drizzle Bundt Cake

Share
Facebooktwitterpinterestlinkedintumblr

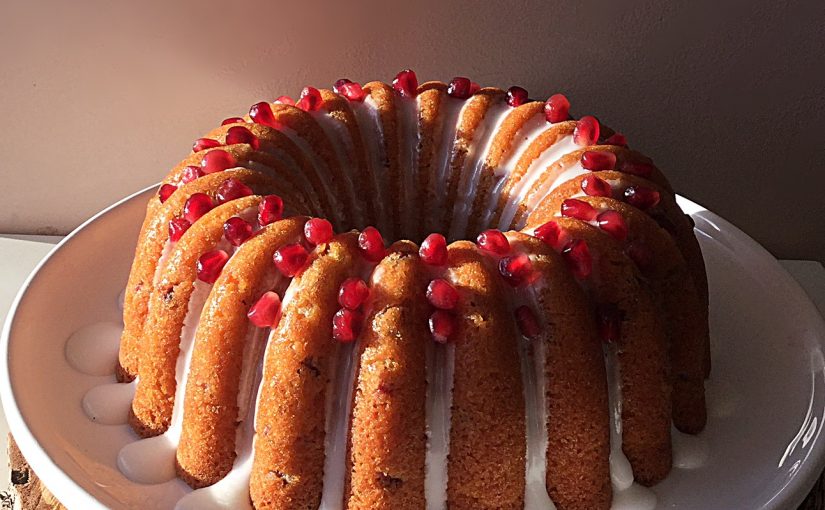
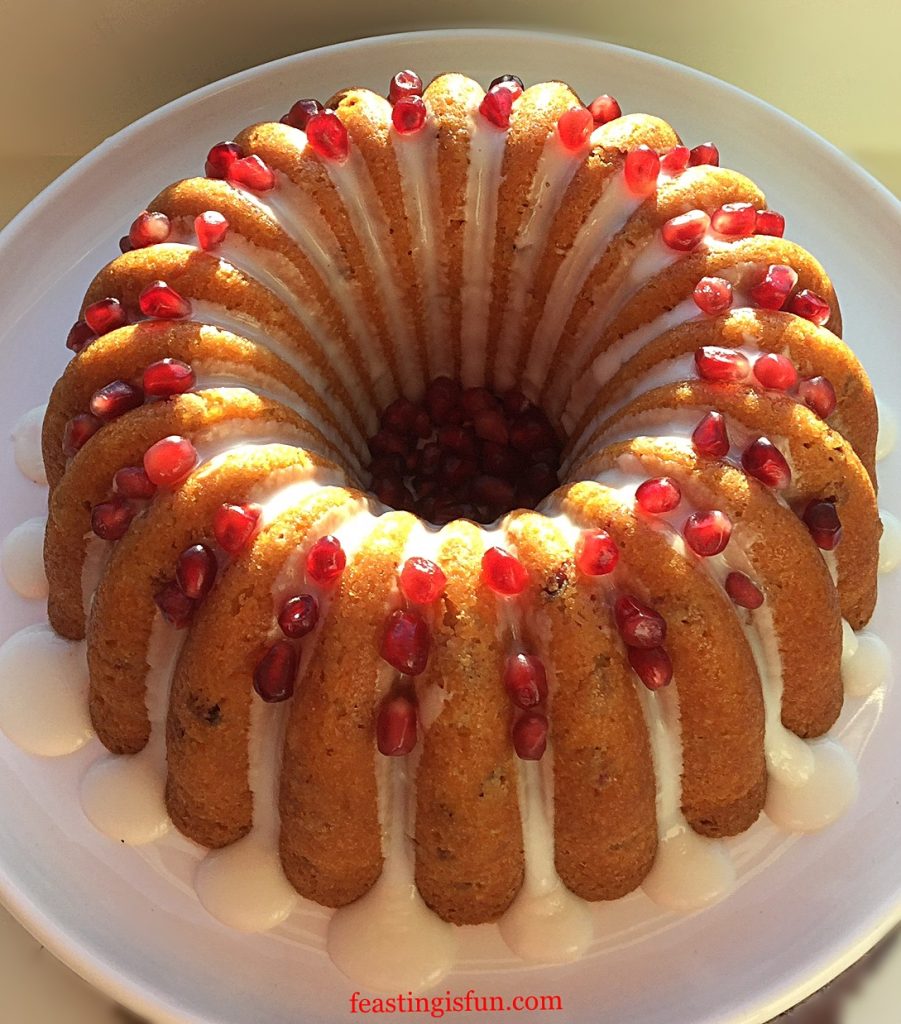
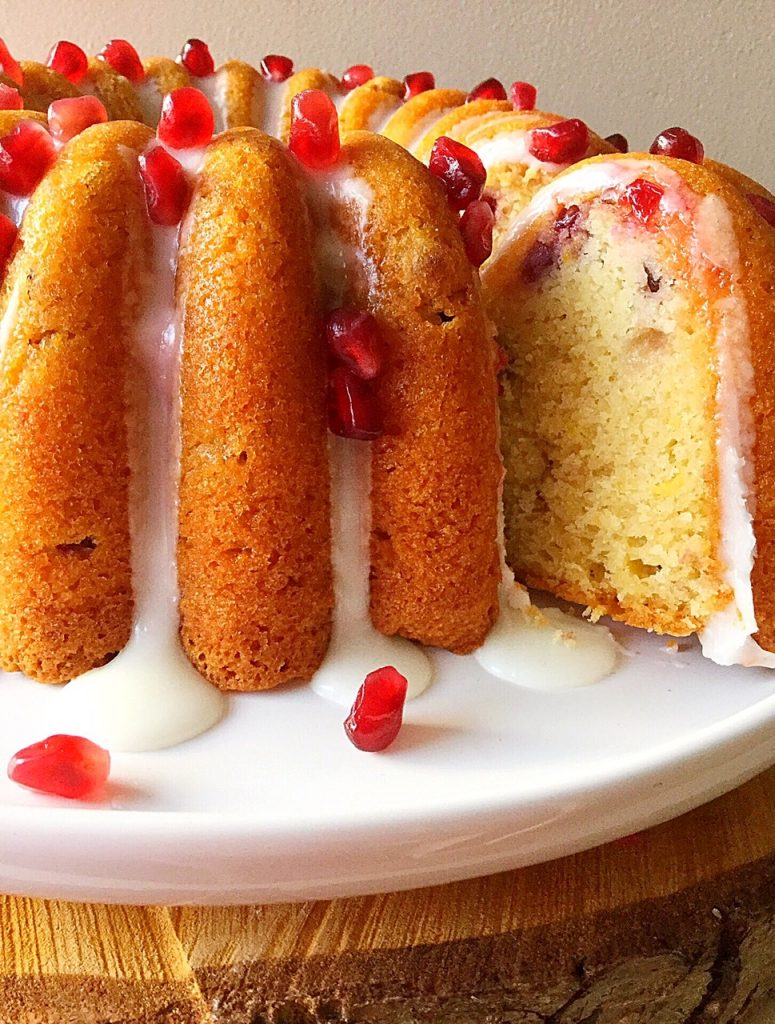
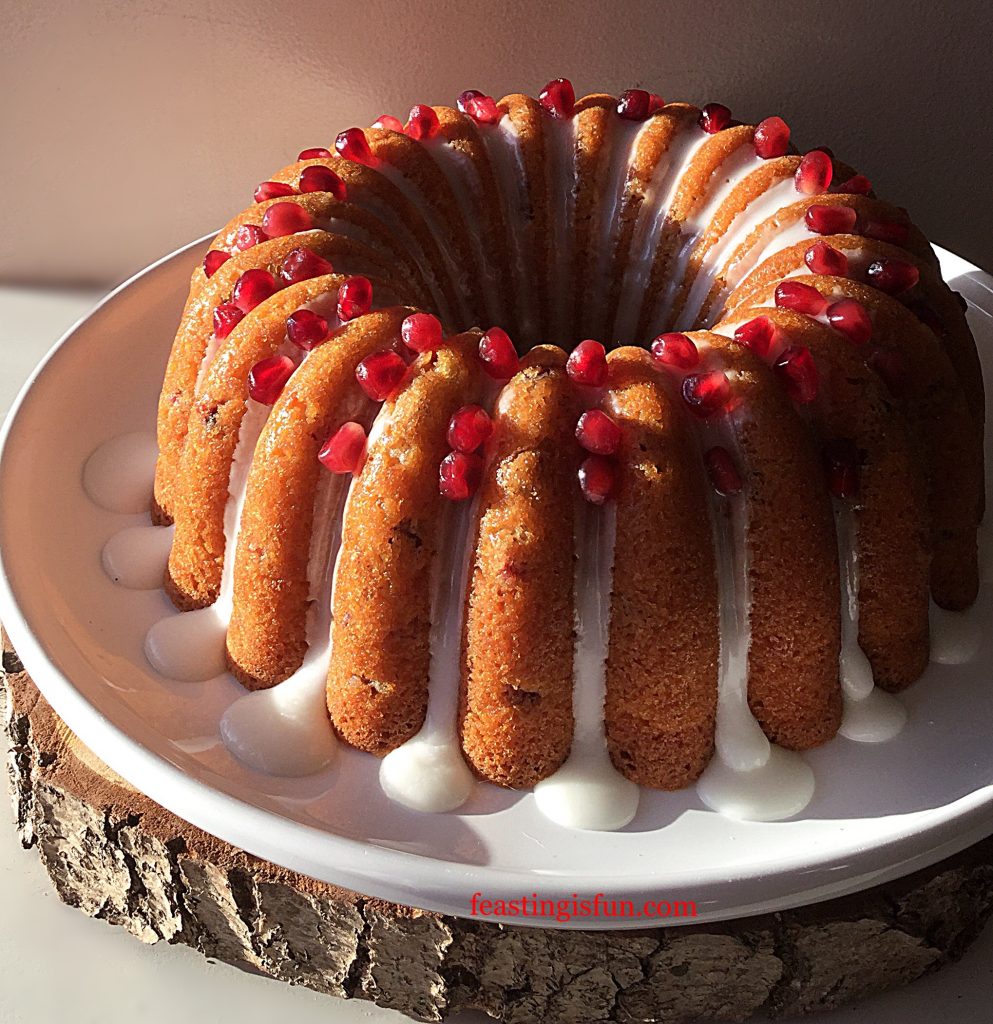
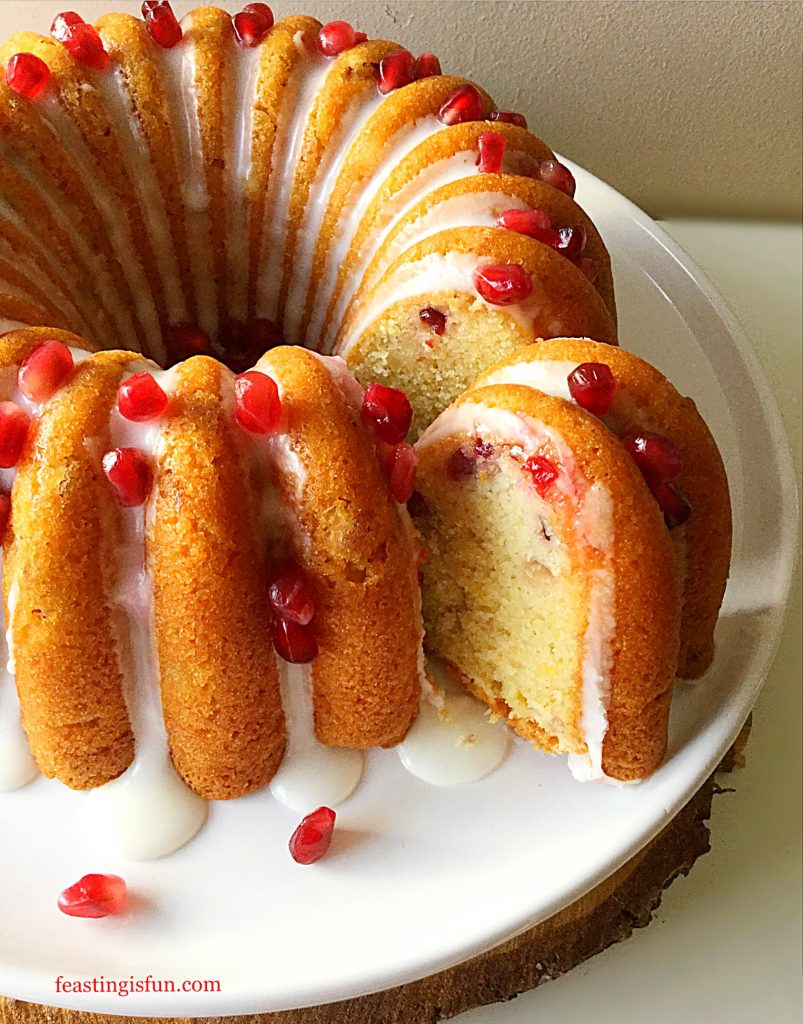
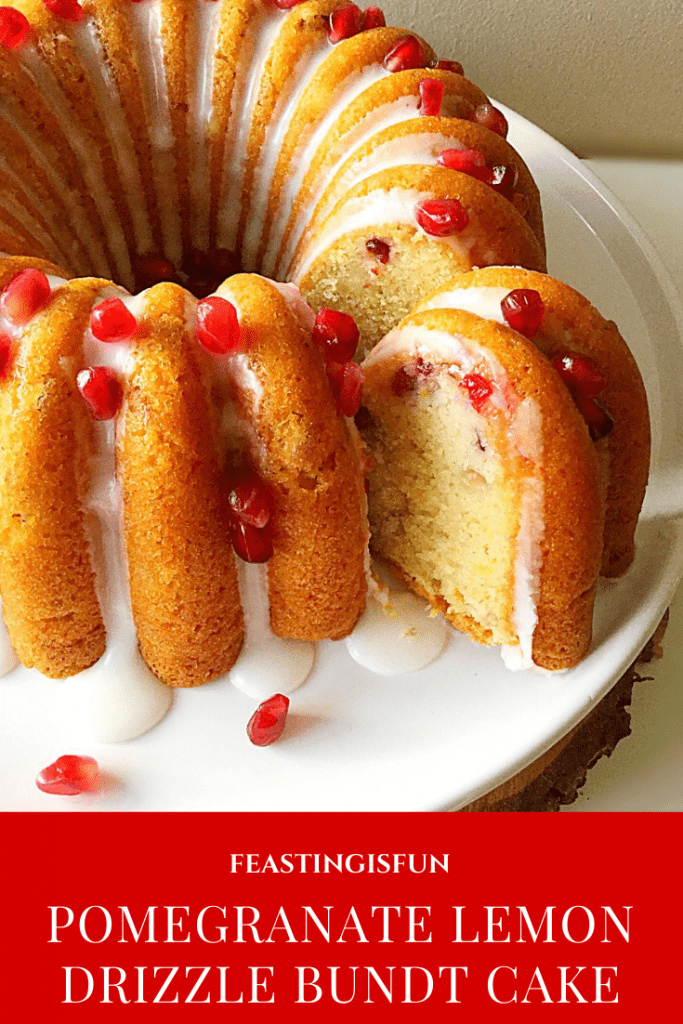
Hello and welcome to a New Year, where I look forward to sharing a whole host of new recipes and product reviews, here on Feasting is Fun. So, as we ease into 2018 I have created a simple, yet stunning and delicious bake, my Pomegranate Lemon Drizzle Bundt Cake. Especially created to make the most of seasonal pomegranates which are readily available in most larger shops at this time of year. Also added is a healthy dose of lemon, helping our bodies fight off any nasty bugs. We are almost making a health food here!


FF Pomegranate Lemon Drizzle Bundt Cake
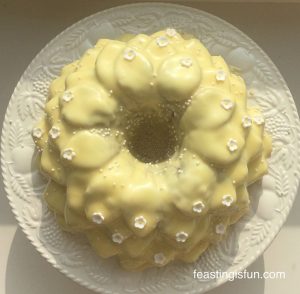
Pomegranate Lemon Drizzle Bundt Cake

Since this cake has such a light texture the additional crunch from the pomegranate seeds provides added texture and flavour. While they bake inside the cake their juices release, complimenting the lemon zest. Also, the garnet seeds, used for decoration, provide an unexpected fresh burst of juice. Meanwhile the lemon drizzle lends an intense, lemon tang on the tongue.

FF Pomegranate Lemon Drizzle Bundt Cake
Pomegranate Lemon Drizzle Bundt Cake

The beauty of Bundt pans

Each bundt pan is different. Yet some share similar moulding, creating a range of pans. Lemon Lime Gin Heart Bundt Cake uses the elegant heart pan which has the same deep grooves as the elegant party Bundt used here. Deep, regular grooves define the entire shape of the baked cake. Indeed a light dusting of icing sugar would enhance, in a much simpler way, the outline of this bundt cake. Especially useful, should the drizzle icing be a step too far!

FF Pomegranate Lemon Drizzle Bundt Cake
Pomegranate Lemon Drizzle Bundt Cake

Recipe: Pomegranate Lemon Drizzle Bundt Cake serves 10-12

For The Cake:

225g/8oz Unsalted Butter – softened to room temperature

225g/8oz Caster Sugar

1/4tsp Sea Salt – I use Maldon

4 Large Free Range Eggs

3tbsp Sour Cream

1tsp Vanilla Extract – I use Nielsen-Massey

225g/8oz Plain White Flour

2tsp Baking Powder

2 Whole Lemons – finely zested

125g/4.5oz Pomegranate Seeds – *I bought 2 packs 125g each from Waitrose

Glaze and decoration:

200g/7oz Icing Sugar – sifted

Juice of 1 Lemon

Pomegranate Seeds please see * above

Helpful Tips

You will need a 10 cup Bundt Pan (tin) for this recipe. Most importantly, when using a smaller tin, ensure that it is not filled more than two thirds full. Also, for guaranteed release of the cake once baked I highly recommend using Wilton cake release. Spray or brush on to the inside of the bundt pan, most importantly take care to cover every part of the pan.

Making the Bundt Cake

Preheat the oven to 160C/140C fan, gas mark 3, 325F

  • First of all prepare the Bundt pan as detailed above.
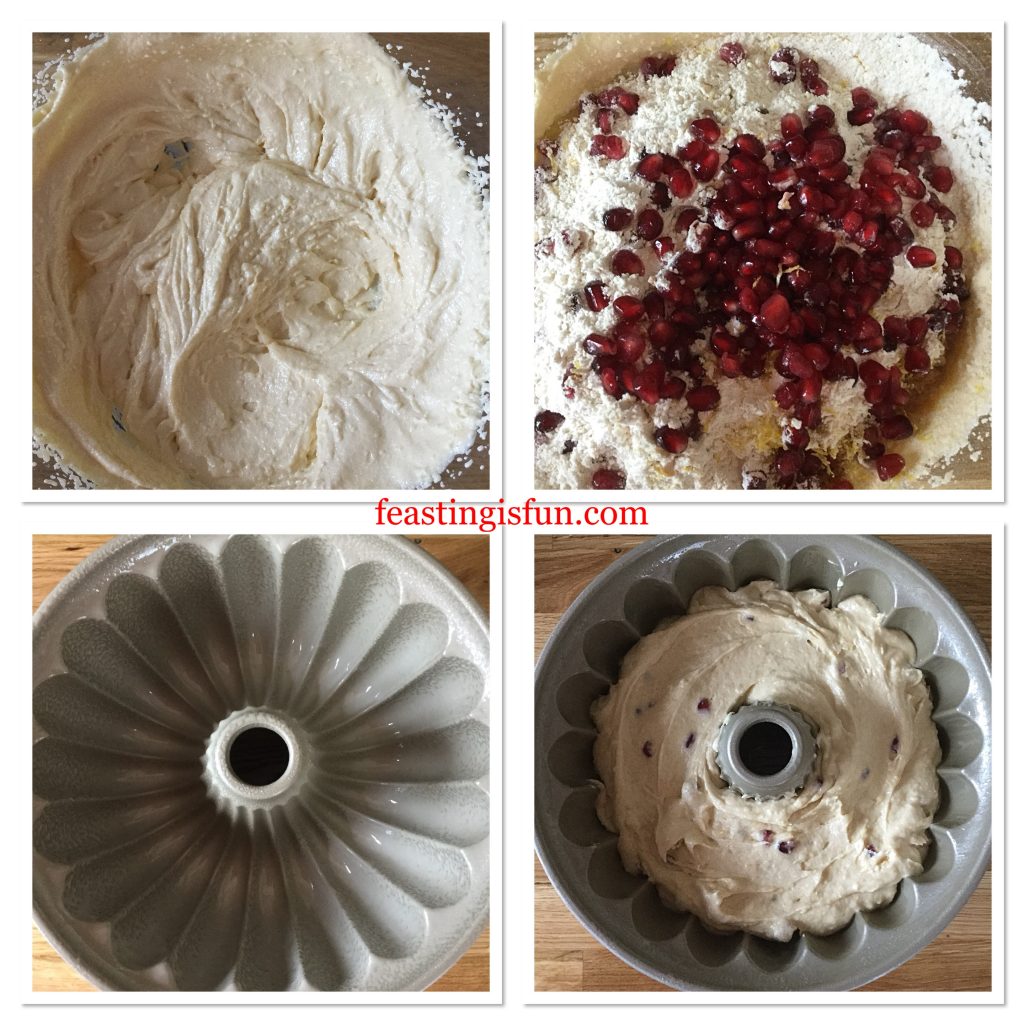
  • Place the butter, sugar and salt into a large bowl. Whisk together until pale and creamy.
  • Next add all 4 eggs, sour cream and vanilla extract. Sift the flour and baking powder on top of the wet ingredients. Finally add the finely grated zest of two lemons and 125g of pomegranate seeds.
  • Carefully fold the ingredients together until fully combined.
  • Spoon the cake batter into the prepared Bundt pan. Smooth the top for an even finish.
FF Pomegranate Lemon Drizzle Bundt Cake
Making the cake batter.
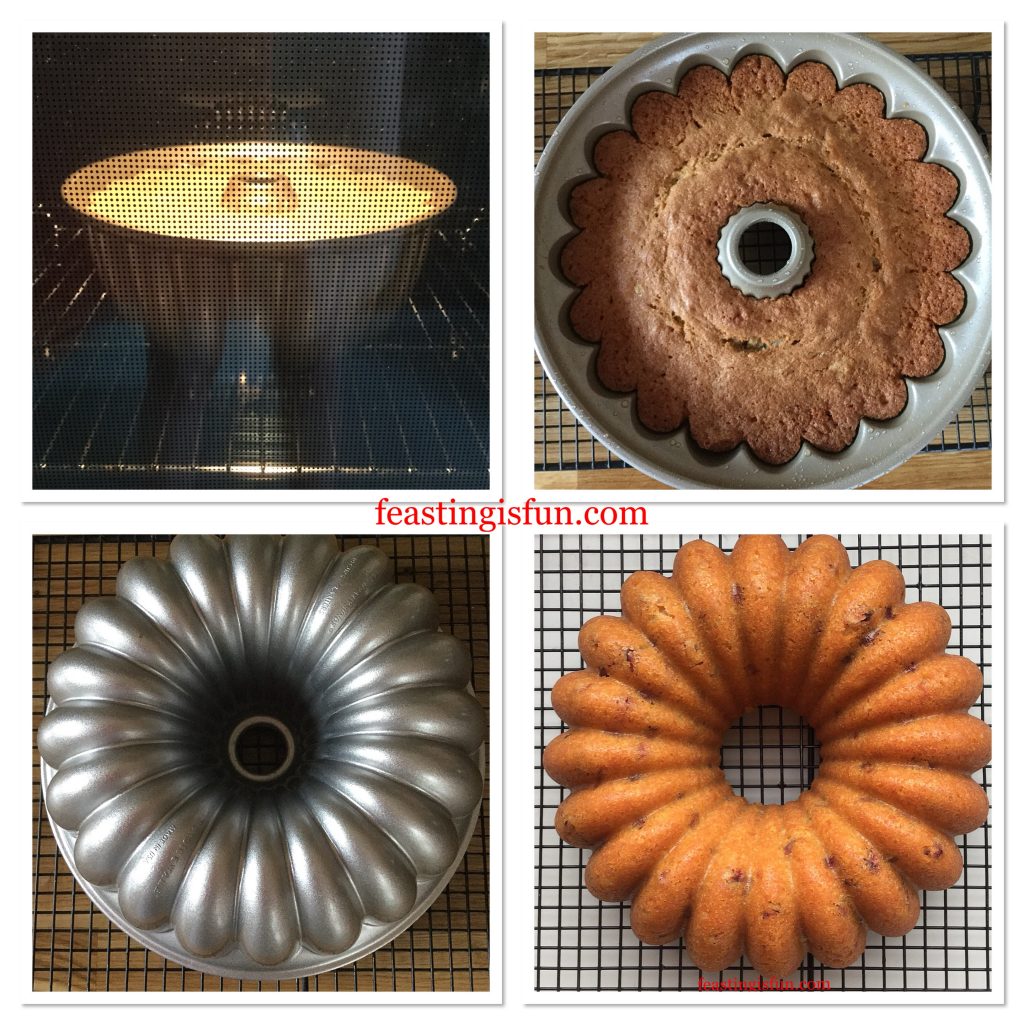
  • Place the cake into the centre of a preheated oven and bake for 1 hour 15 minutes – 1 hour 30 minutes.
  • The cake is baked when it is golden in colour, shrinking away from the sides of the tin and an inserted skewer comes out clean.
  • As soon as the cake is baked remove the oven and allow to cool in the tin for 10 minutes.
  • After the initial cooling time has passed turn out the cake on to a cooling rack.
  • Leave to cool completely before decorating.
FF Pomegranate Lemon Drizzle Bundt Cake
Baking and turning out the bundt cake.
  • While the cake is finishing cooling prepare the lemon drizzle.
  • Into a bowl containing the sifted icing sugar add the juice of one lemon. Stir until thoroughly combined and free from any lumps.
  • As soon as the cake is cool it can be decorated.

Decorating the Bundt Cake

  • Place the cake on to a plate or board.
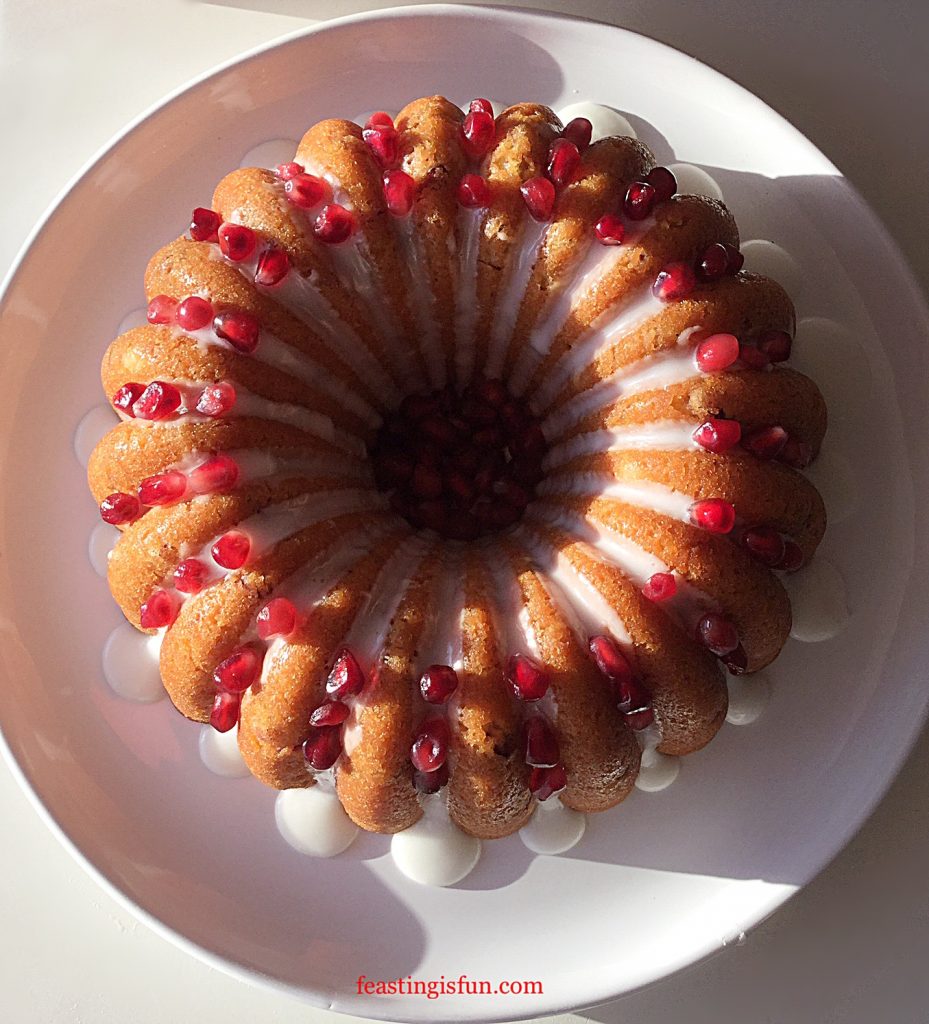
  • To decorate, use a teaspoon to pour approximately 1/2 a tsp of lemon drizzle on to each groove of the cake. Start at the top of the cake and work around until each groove has icing reaching the base both on the inside and outside.
  • Top each indent on the cake with a pomegranate seed, adding an additional two seeds, or more, to each groove.
Pomegranate Lemon Drizzle Bundt Cake

Serve the cake sliced with a complimentary drink (lemon tea goes well, as does chilled limoncello) and a smile.

Store the cake covered securely in cling film, or alternatively in an airtight container and eat within 5 days. During warmer weather it is advisible to refrigerate this cake.

If you have enjoyed this recipe for Pomegranate Lemon Drizzle Bundt Cake you may also like these:

Chocolate Cherry Chiffon Bundt Cake

Chocolate Cherry Bundt Cake

Maple Syrup Iced Coffee Bundt Cake

Maple Syrup Iced Coffee Bundt Cake

Lemon Blueberry Bundt Cake

Lemon Blueberry Bundt Cake

Bundt Cakes are a real favourite of mine. Although the pans may be on the pricey side, look on eBay for special offers, they produce outstandingly beautiful cakes with very little effort required from the baker. While further decoration isn’t  actually needed for a Bundt cake, it can be fun to play around with icing and additional decorations, as seen in the examples above. Finally, when baking a Bundt cake, a show stopping cake is guaranteed every, single, time.

So, whatever you are making, baking and creating in your kitchen, have fun preparing your feast.

Sammie xx

No part of this blog post may be reproduced or replicated without the written permission of the own. Please see my Disclosure Policy  for full details.

Share
Facebooktwitterpinterestlinkedintumblr

Double Strawberry Almond Muffins

Share
Facebooktwitterpinterestlinkedintumblr

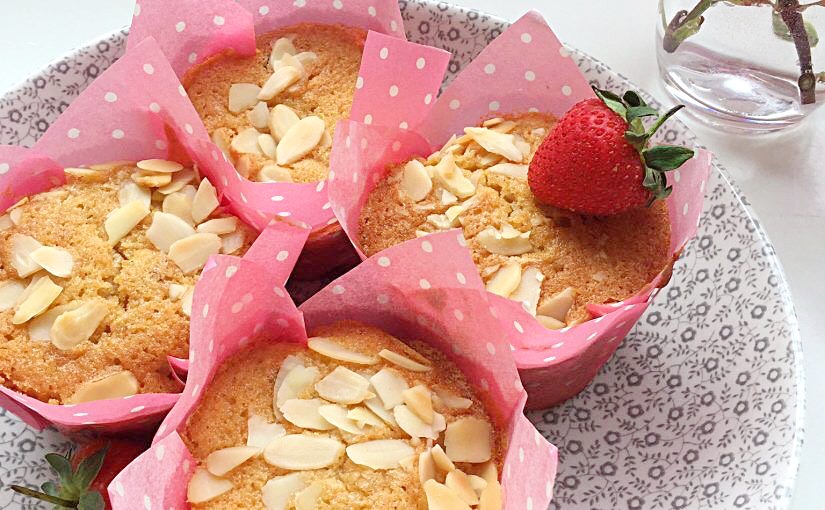
As you may have noticed from recent posts, I am having a full blown love affair with strawberries this Summer.  Whether it’s eating them warmed by the sun, just as they are, or, creating new recipes such as Strawberry Rose Ice Cream, I cannot seem to get enough of them. While looking for inspiring ingredients on Amazon U.K., I found some baked strawberries for sale. Imagine a more intense strawberry flavour with a chewy texture. Sourcing fresh strawberries locally, finally resulted in the creation of my Double Strawberry Almond Muffins.

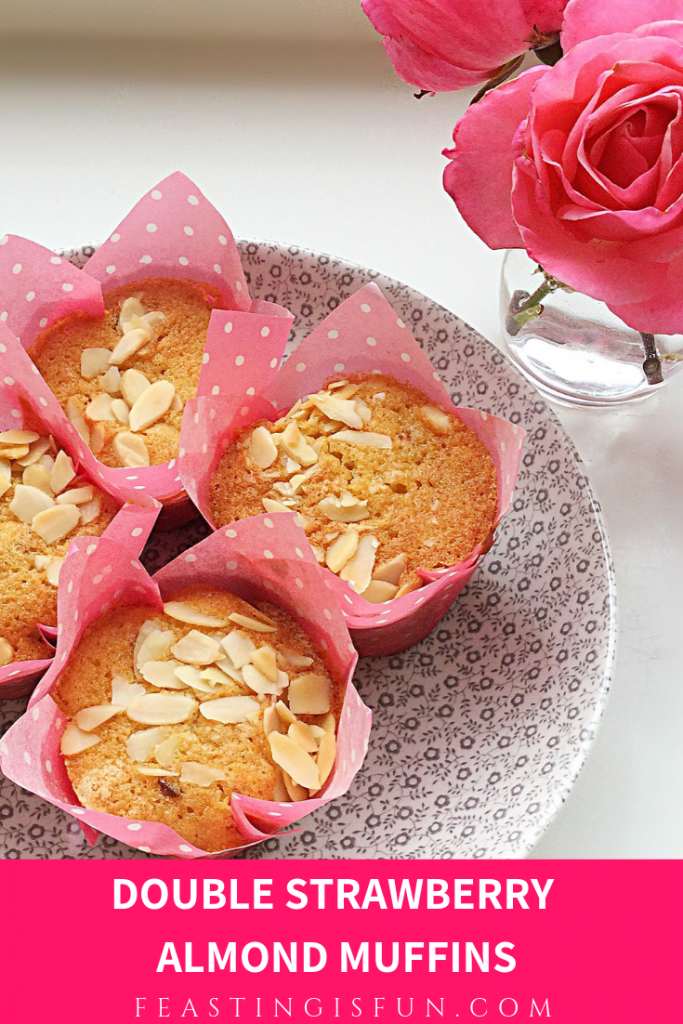
Pinterest image of strawberry muffins with descriptive graphics.

Since the name ‘baked’ strawberries seems, a little misleading, they will be referred to as dried strawberries. Not freeze dried strawberries, which are an entirely different product altogether.  Similar to dried apricots in texture, dried strawberries are chewy, rather like gummy bears, with a more intense, strawberry flavour. While also free from other added ingredients. Resulting in a perfect snack size strawberry, untainted by additives.

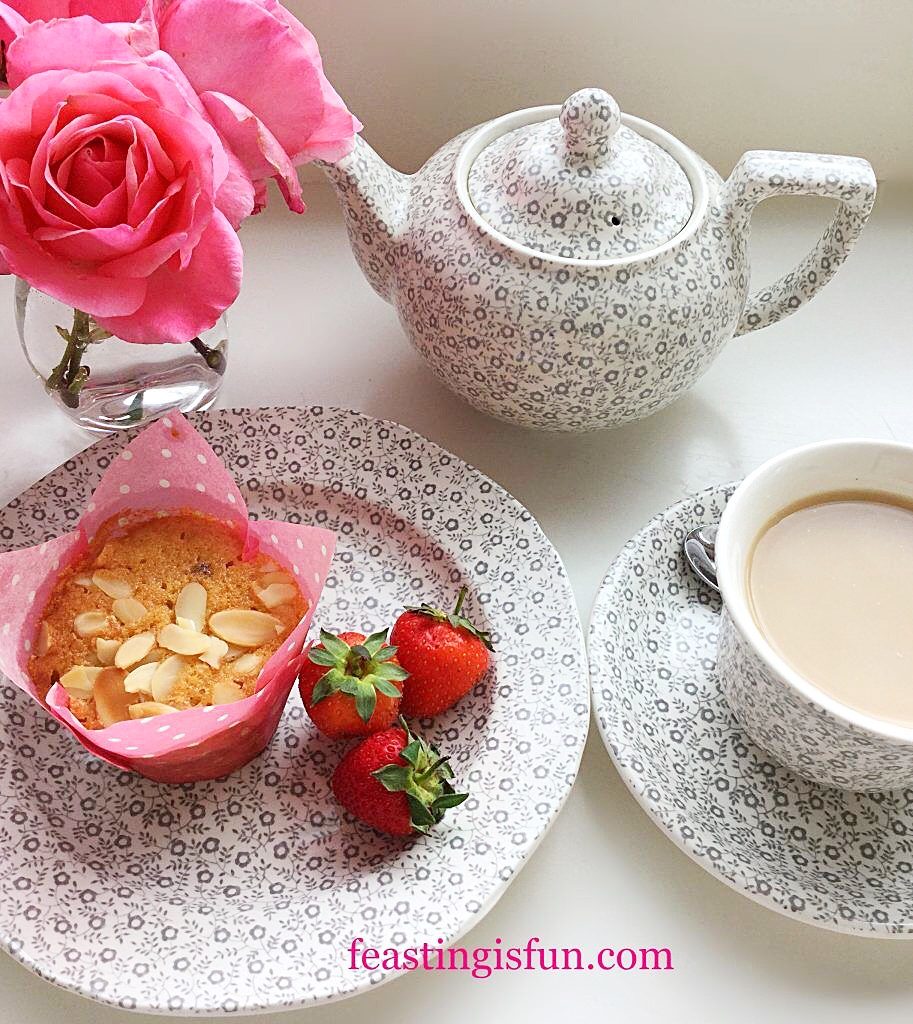
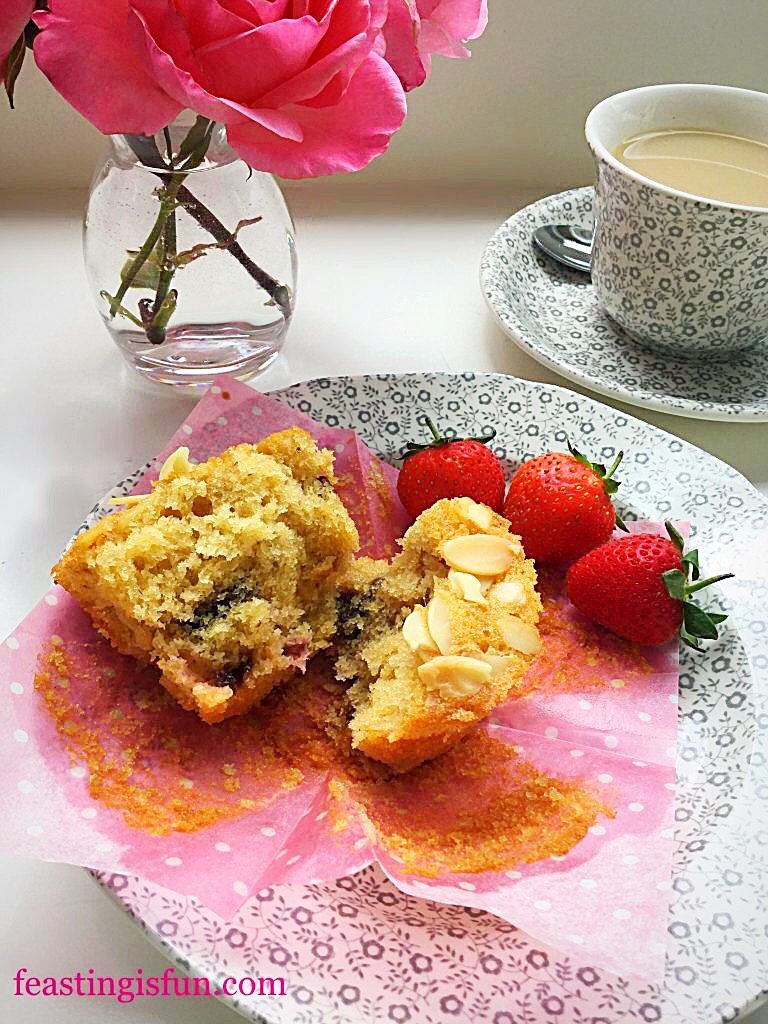
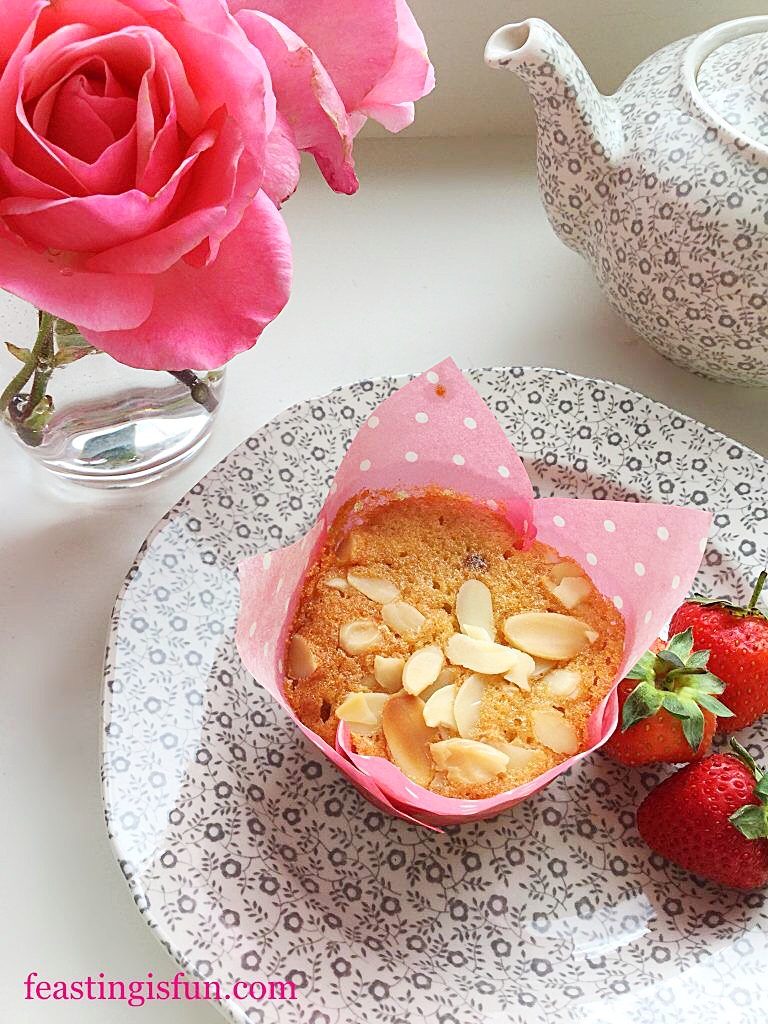
Teapot, cup of tea, muffin on a plate and pink roses in a small vase.
Double Strawberry Almond Muffins

While the muffins bake the fresh strawberries become absorbed into the batter.  Yet dried strawberries absorb moisture from the cake batter. During the baking process they lose their chewy texture. Resulting in gooey, jam like, pools of delicious strawberry within each muffin.

Muffin pulled in half to show even distribution of fruit.
Strawberries evenly distributed throughout the muffin.

A light open texture of each muffin is visible in the photo above. Having checked a few muffins, the strawberries are dispersed evenly throughout. Since previously having difficulty including fresh strawberries into a bake, I didn’t want to weigh the batter down with their water content. That said, extra chopped, dried strawberries could be added to the top, with the flaked almonds, prior to baking.

Recipe: Makes 12 Double Strawberry Almond Muffins

200g/7oz Unsalted Butter at room temperature

200g/7oz Caster Sugar

1tsp Vanilla Extract – for all extracts I use Nielsen-Massey

1/2tsp Almond Extract

4 Large Free Range Eggs

1/4tsp Sea Salt – I use Maldon

100g/4oz Ground Almonds

150g/5oz Plain White Flour

1.5tsp Baking Powder

100g/4oz Fresh Strawberries hulled and diced

50g/2oz Dried or Baked Strawberries roughly chopped – I use Urban Fruit

50g/2oz Flaked Almonds

Method: Preheat the oven to 160C/140C fan, gas mark 3, 325F.

Note: Tulip wrappers must be used in a deep muffin, or cupcake tin. When using regular cupcake cases, fill two thirds full and expect to make 18 muffins from this recipe. Also, the length of time baking will also need to be adjusted, please see guidelines in the method.

Making The Strawberry Muffin Batter

  • First of all, line a deep muffin tin with 12 tulip wrappers.
  • Whisk together the butter, sugar and salt in a large bowl, until pale and creamy.
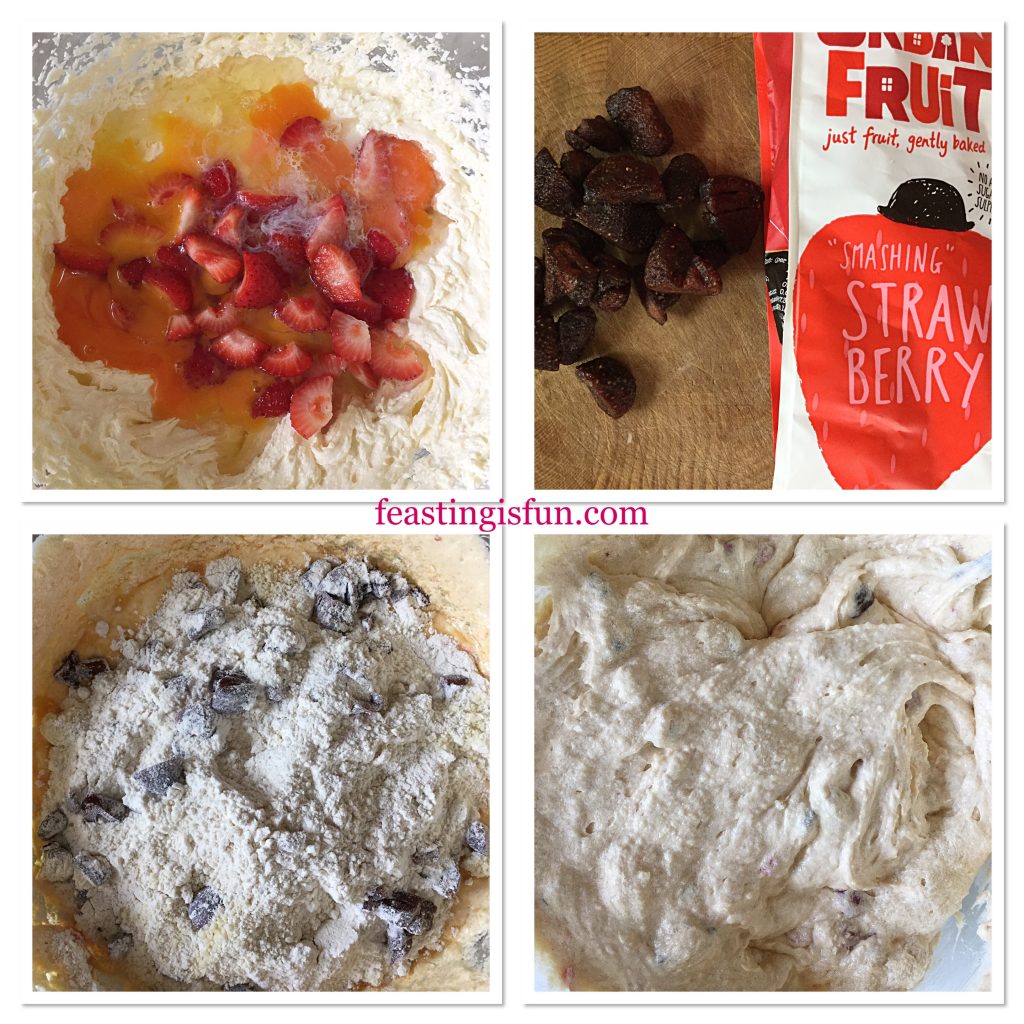
  • Add the eggs, vanilla and almond extract and the chopped fresh strawberries to the bowl. Whisk together.
  • Next add the ground almonds, flour, baking powder and chopped dried strawberries. Tossing the strawberries in the flour will help stop them from sinking to the bottom of the muffin.
  • Mix all of the ingredients together so that they are fully combined. Over mixing will cause the muffins to become tough.
FF Double Strawberry Almond Muffins
Making the muffin batter.

Filling The Tulip Muffin Cases

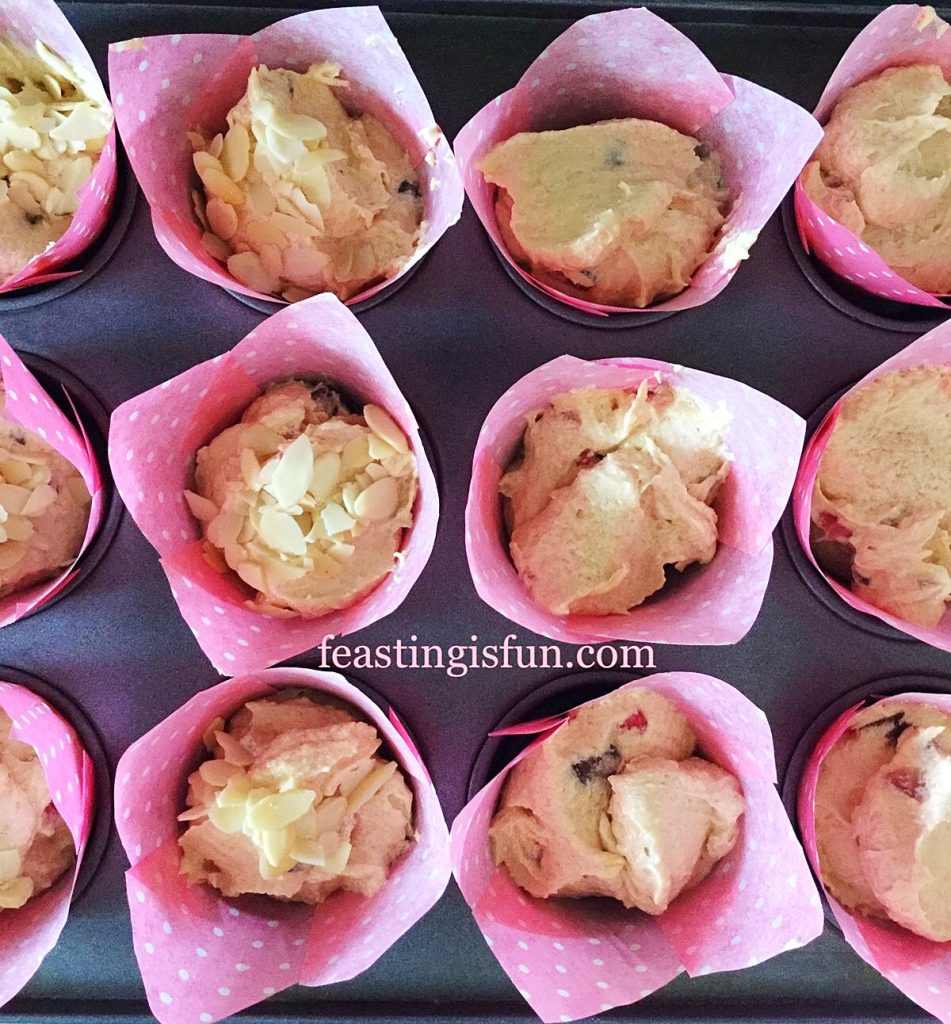
  • Using a large, 5cm/2″ ice cream scoop, add one scoop of batter to each tulip case. Divide any remaining batte evenly between the 12 cases.
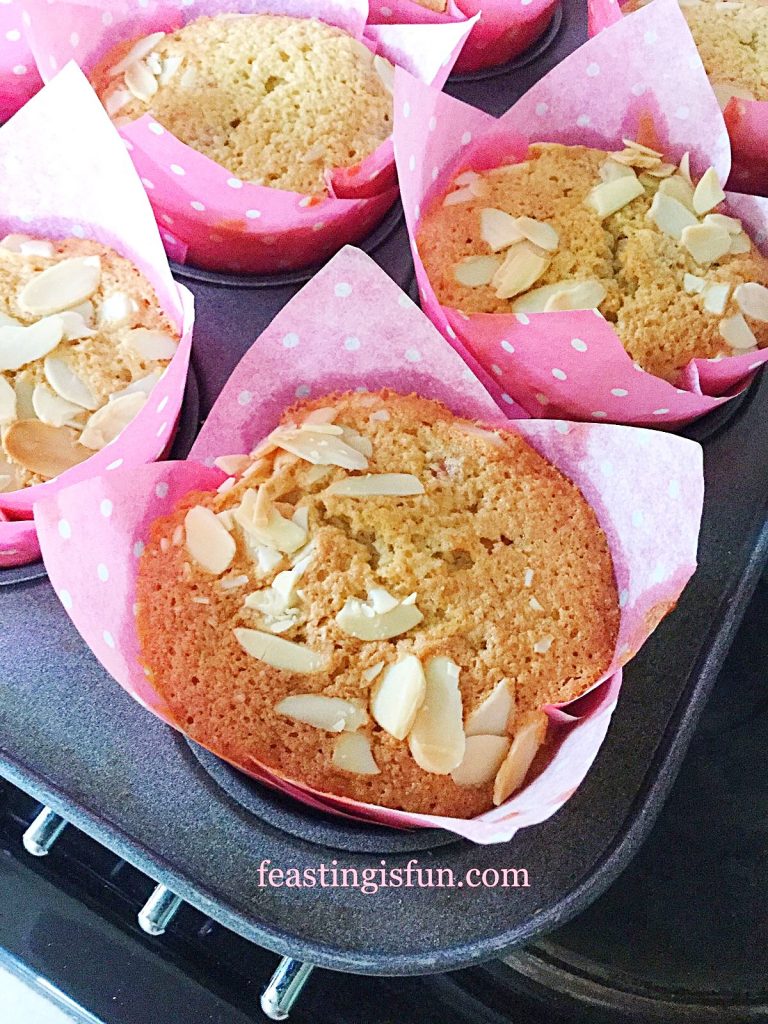
  • Sprinkle some flaked almonds on top of each unbaked muffin. Again dividing the almond flakes, so each muffin has an equal amount.
Adding flaked almonds to the top of the muffins before baking.
Adding flaked almonds to the top before baking.

Baking The Muffins

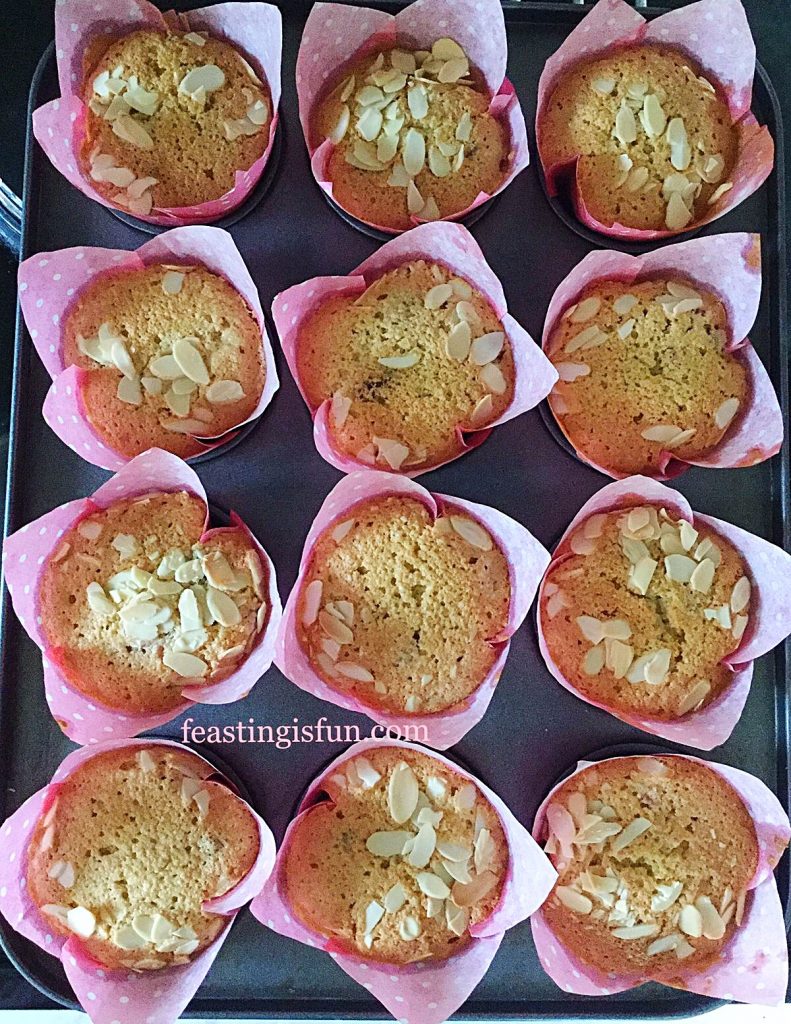
  • Place the muffin tin into the centre of the oven and bake for 40-45 minutes.
  • The muffins are baked when they turn golden brown and are firm to a light touch. Over cooked muffins will be dry so start checking at 35 minutes.
  • Note: if baking using smaller cases, the baking time will need to be reduced.
Muffins in tulip wrappers cooling in the tin.
Freshly baked muffins cooling in the tin.
  • When using tulip cases leave the muffins to cool completely in the tin. For muffin/cupcake cases, leave to cool for 10 minutes in the tin and then transfer to a cooling rack.
Muffins baked in a muffin tin.
Double Strawberry Almond Muffins

Double Strawberry Almond Muffins are best served slightly warm, or cold. Also serve with a cup of tea, or fresh fruit juice.

Muffin served with fresh strawberries.
Double Strawberry Almond Muffins

Muffins are great for breakfast, packed lunches and beating late afternoon hunger pangs.

Muffins containing fresh fruit are best eaten within 3 days of making. Store in an airtight container, placed in the fridge during hot weather.

If you have enjoyed this recipe for Double Strawberry Almond Muffins you may also like these:

Blueberry Lemon Shortbread Cake Bars

Blueberry Lemon Shortbread Cake Bars

Cheese Bacon Breakfast Muffins

Cheese Bacon Breakfast Muffins

Cherry Bakewell Cookies

Cherry Bakewell Cookies

Because these muffins take less than ten minutes to make, they really are a quick, delicious, breakfast treat. Knowing that, whilst at school, college or work, my family has good, wholesome food is important to me.

Dried strawberries are widely available from supermarkets, including Ocado, Waitrose and Amazon U.K.

So, whatever r you are making, baking and creating in your kitchens have fun preparing your feast.

Sammie xx

No part of this post may be reproduced without the explicit, written consent of the owner. For more details please see my Disclosure Policy.


Share
Facebooktwitterpinterestlinkedintumblr

Strawberry Rose Ice Cream

Share
Facebooktwitterpinterestlinkedintumblr

Strawberries are THE taste of Summer. While I love eating strawberries with a tiny sprinkle of sugar and splash of cream, or fresh from the plant warmed by the sun, I also wanted to make a beautiful ice cream with them. Except with a twist! Because summer, is also synonymous with roses blooming in our garden, I decided that would be the additional flavour to compliment the strawberries in this ice cream. And, the addition of rose extract elevates the final flavour to another level. One taste and you are transformed into a bygone era, where life seemed easier, simpler and slower. So, whatever you do this summer, don’t miss out on making this Strawberry Rose Ice Cream.

FF Strawberry Rose Ice Cream
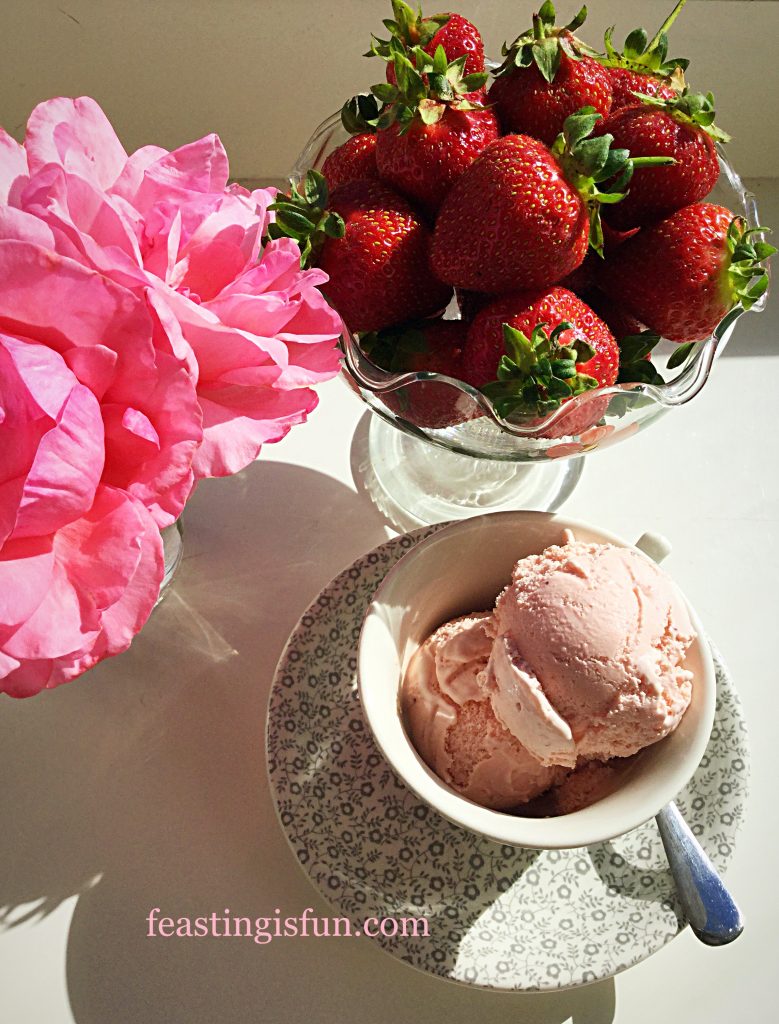
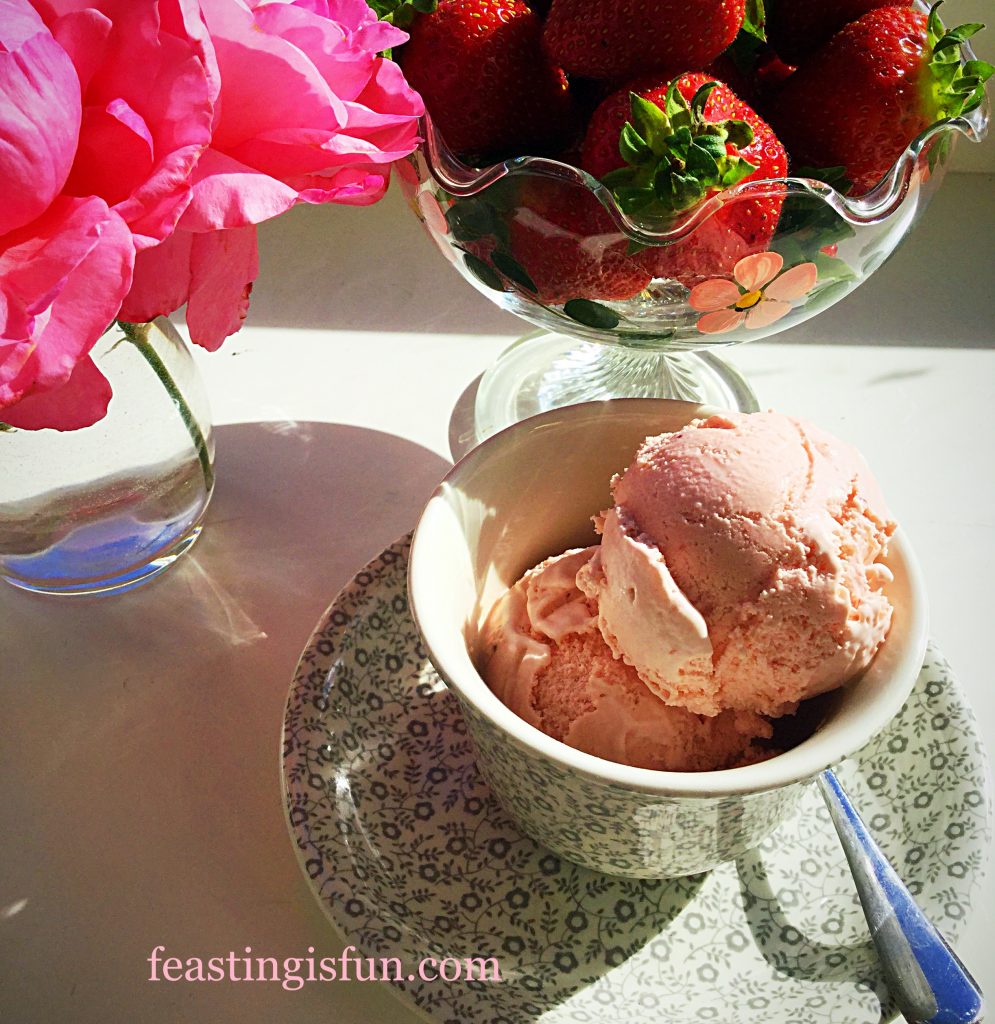
Strawberry Rose Ice Cream served in a tea cup.

A Summer Dessert Of Your Dreams

Removing all the pips are during the making of this dreamy dessert, ensures the ice cream has silky texture that lingers on the tongue. As both fresh strawberry and rose flavours meld together, they create a unique flavour experience. Likewise, this truly is a dream ice cream where the finished recipe is so much more than the addition of its component parts. Sieving the strawberries is very important in creating the smooth, finish.  And as this small, important step only takes a couple of minutes, it is worth it to ensure the final ice cream has the silky, smooth, texture.

FF Strawberry Rose Ice Cream
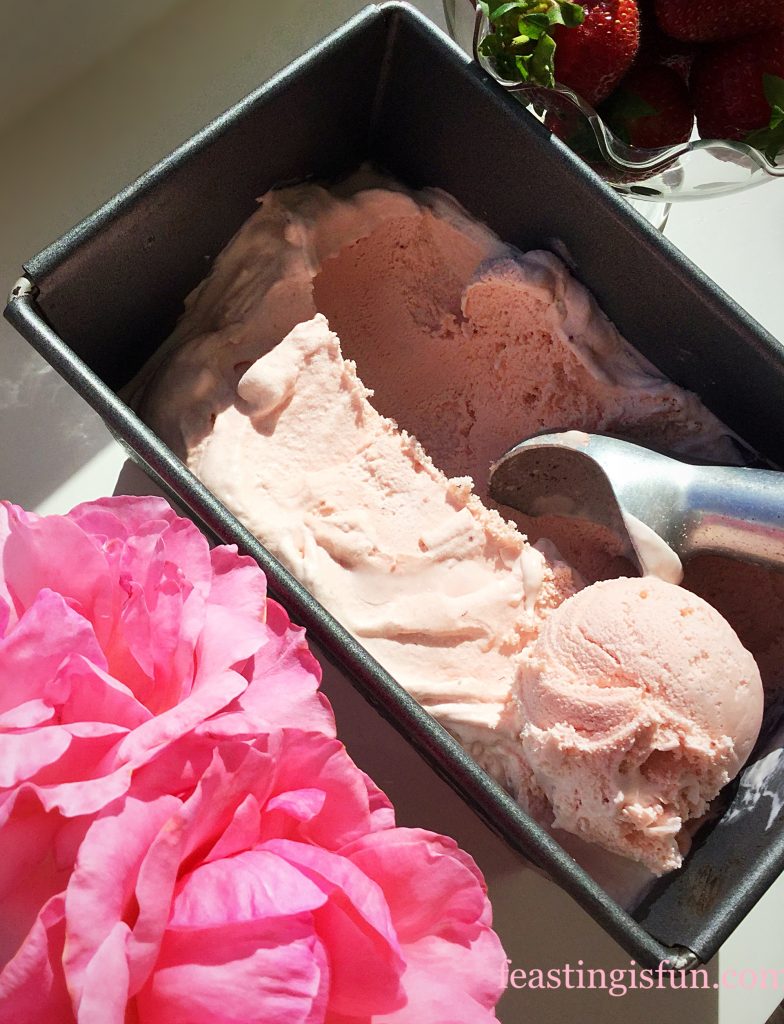
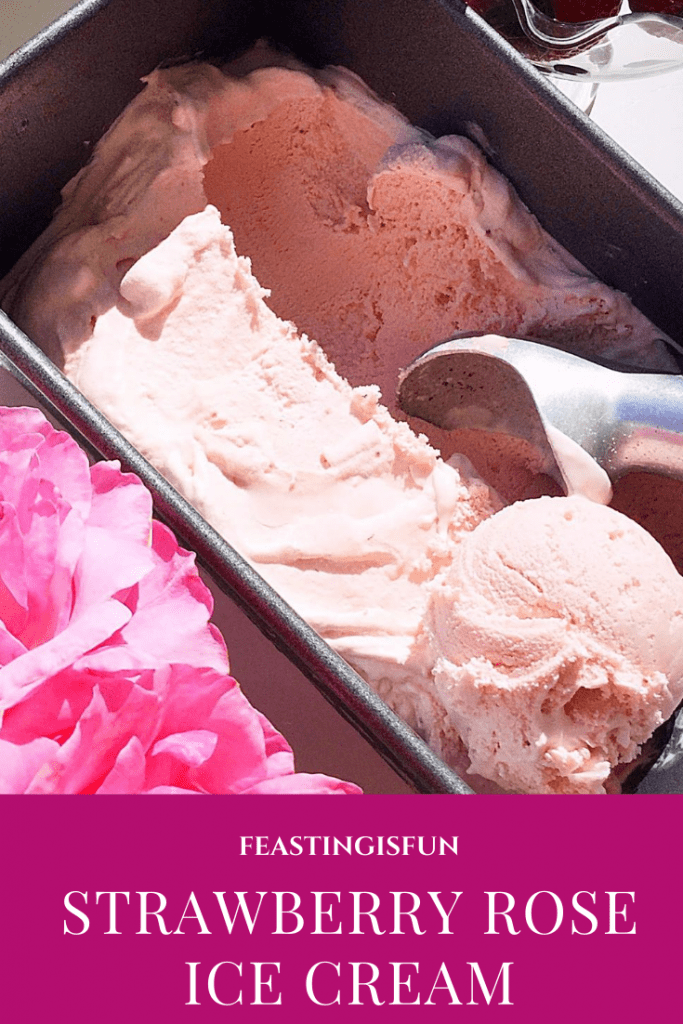
Strawberry Rose Ice Cream exceptionally easy to scoop.

Finally, this ice cream is the epitome of summer in a dessert. And as summer is the season when strawberries and roses are celebrated as being at their best, what better way to celebrate them. While all roses included in the pictures for this post, are from our own garden, I haven’t gone as far as to make my own Rose Extract. That process can safely be left in the hands of Nielsen-Massey , the professionals. Rather, the roses in the photos hint at their presence within the ice cream.

FF Strawberry Rose Ice Cream
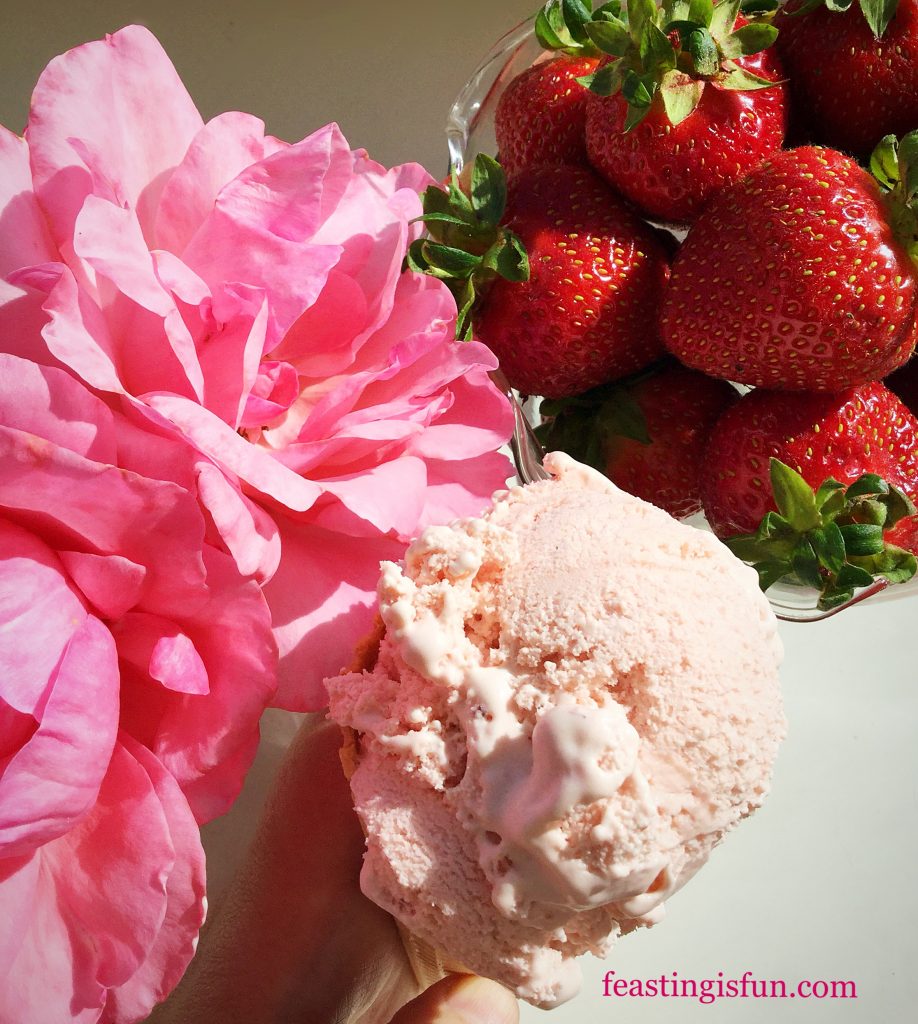
Strawberry Rose Ice Cream delicious in a cone.

Note: Prior to starting this recipe ensure that the frozen bowl of the ice cream maker is placed in the freezer overnight for at least 8 hours. Or as per manufacturer’s instructions.

Recipe: Strawberry Rose Ice Cream makes approx. 1L

400g Punnet of Strawberries hulled and larger ones cut in half

3tbsp Sugar

4tbsp Tap Water

Scant 1/4tsp Rose Extract- I use Nielsen-Massey

20-30mls Freshly Squeezed Lemon Juice

4 Large Free Range Egg Yolks

1tsp Cornflour – I use Doves Farm as this is guarenteed gluten free

5tbsp Caster Sugar

300mls Double Cream

300mls Whole Milk

1tsp Vanilla Extract

Method:

For full step by step instructions with photos on how to make the custard ice cream base, please see Very Vanilla Ice Cream.

Making The Strawberry Puree

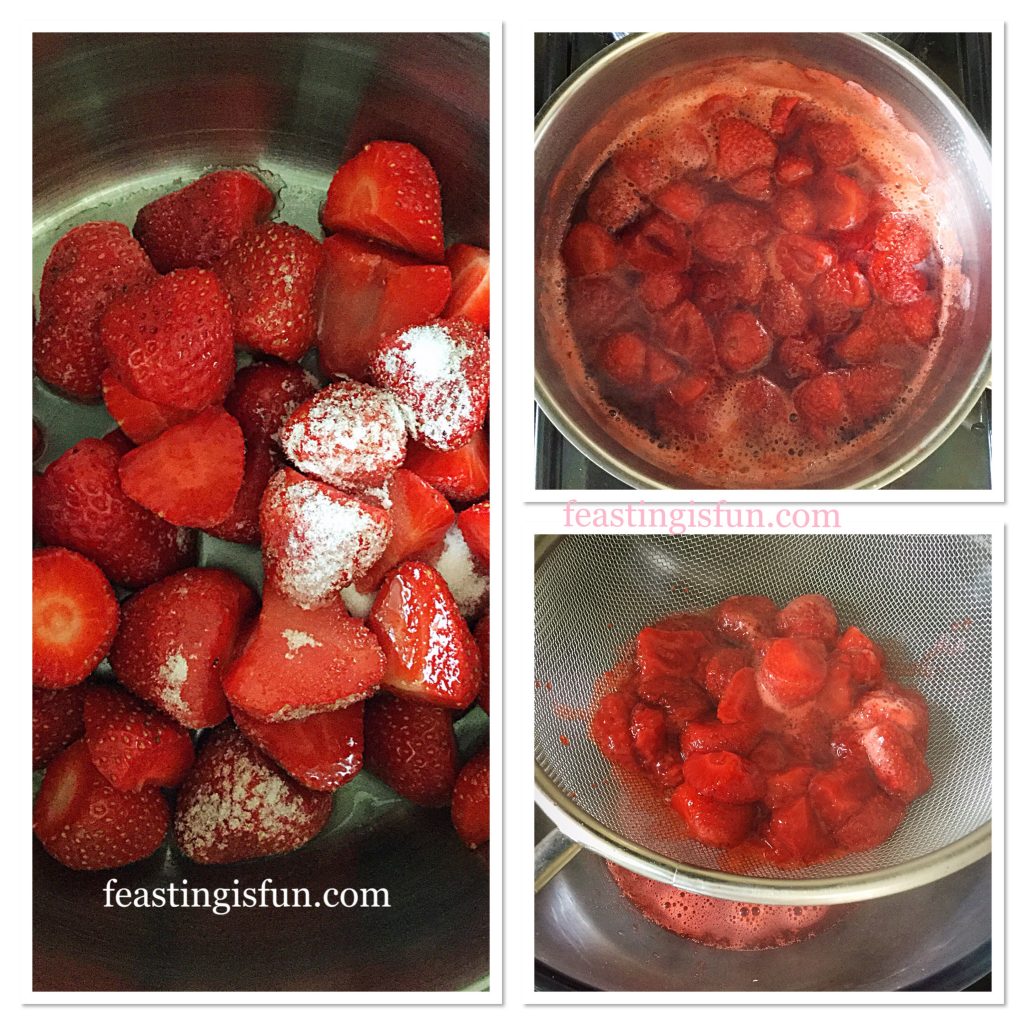
  • First of all place the prepared strawberries into a heavy bottom, medium sized saucepan. Sprinkle over 3 tablespoons of sugar and 4 tablespoons of tap water.
  • Place the pan over a medium heat and cook the strawberries until the liquid starts bubbling.
  • Swirl the pan to ensure that the sugar is dissolved and then let the strawberries cook for a further 5 minutes.
  • While the strawberries are cooking place a sieve over a heatproof bowl.
  • Once cooked pour the strawberries and liquid on to the sieve.
FF Strawberry Rose Ice Cream
Cooking and sieving the strawberries.
  • Use the back of a dessert spoon and gently press the strawberries into the sieve. The juices and flesh will pass through the sieve. Keep running the back of the spoon over the pulp until all that’s left are seeds and the remaining strawberry fibres.
  • Scrape the underneath of the sieve with a clean spoon. This ensures all of the strawberry that’s passed through the sieve goes into the bowl underneath.
  • Discard the seeds and pulp left in the sieve.
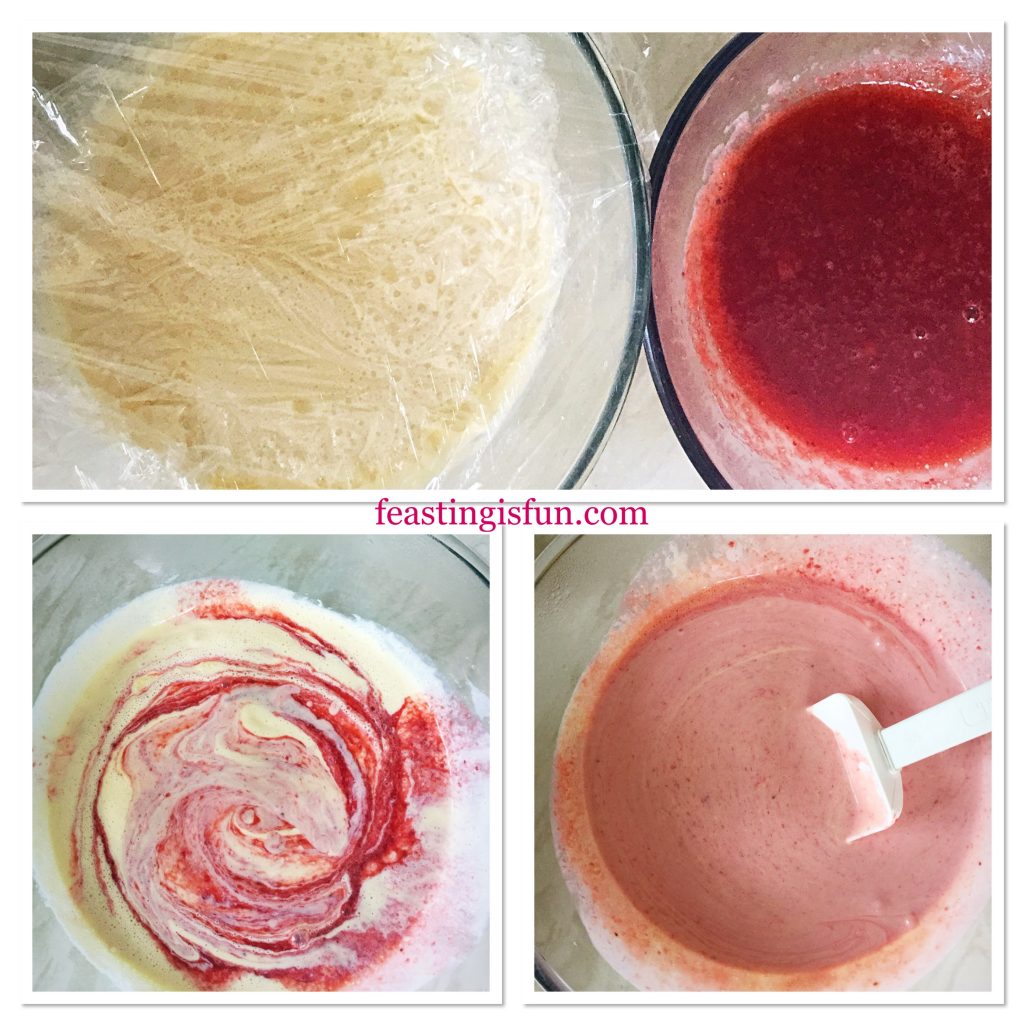
  • Cover the bowl with cling film and chill.
FF Strawberry Rose Ice Cream
Preparing the ice cream base prior to churning.

Making The Ice Cream Base

  • To make the ice cream base, first place the cream and milk into a heavy bottom saucepan over a medium heat. Heat to scalding point, where little bubbles form around the rim prior to boiling.
  • While the cream mix is heating place the egg yolks, cornflour, sugar and vanilla extract into a large heatproof bowl. Whisk together until thickened.
  • As soon as the milk and cream have reached scalding point remove from the heat.
  • With the whisk on slow gently pour the hot liquid into the egg mix, increasing the whisk speed to medium.
  • Pour the custard base back into the saucepan over a medium heat. Stir until the custard is thickened and coats the back of a wooden spoon.
  • Once cooked pour the custard through a sieve into a heatproof bowl.
  • Place cling film directly on to the custard to stop a skin from forming.
  • Leave the custard to cool before placing in the fridge to chill.
  • Once the strawberry juice has cooled add the Rose extract. Take care not to add more than the recipe indicates, as the finished result will taste soapy. Also add the juice of a small lemon 20-30mls and stir.
  • As soon as the custard base is chilled, remove the cling film and add the strawberry mix, then stir.

Churning And Freezing The Strawberry Rose Ice Cream

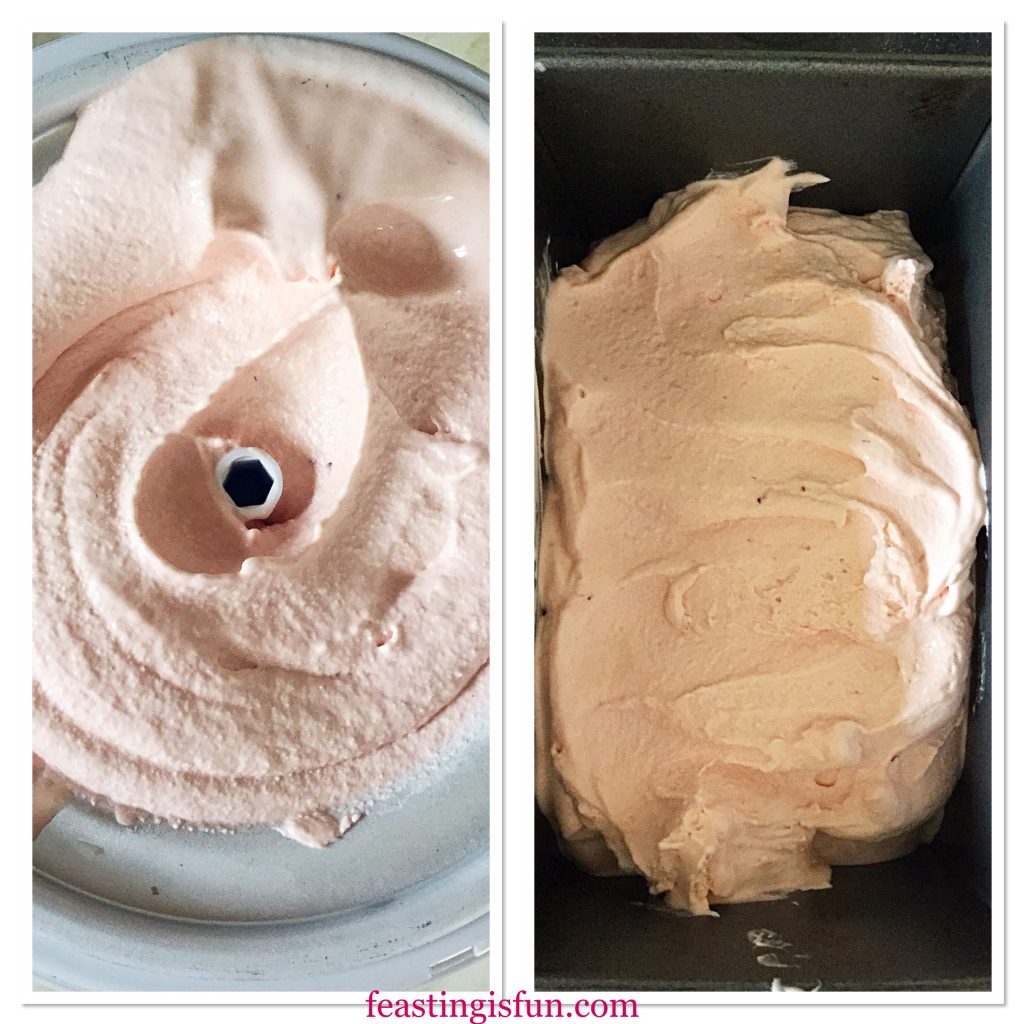
FF Strawberry Rose Ice Cream
Churning and storing the Strawberry Rose Ice Cream
  • Set up the ice cream maker as per manufacturer’s instructions.
  • With the machine switched on pour in the flavoured custard base and churn until softly frozen. Similar in consistency to whipped ice cream in a cone.
  • When the right consistency has been reached switch off the ice cream maker and dismantle.
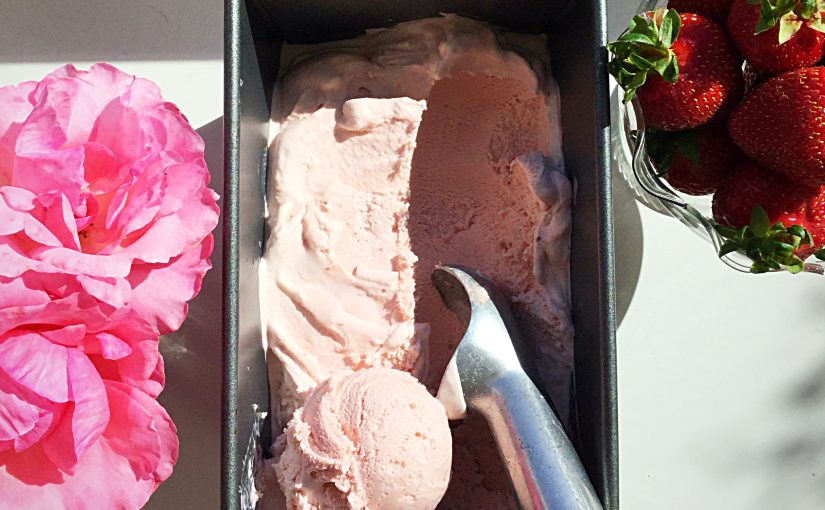
  • Spoon the churned ice cream into a freezer proof container with an airtight lid. I used a clean loaf tin to store the ice cream. This was purely for the photos, having seen similar images on Pinterest! The tin was then double wrapped in freezer proof cling film.
  • Place the container into the freezer and leave overnight, or for at least 12 hours, to allow the ice cream to fully freeze.
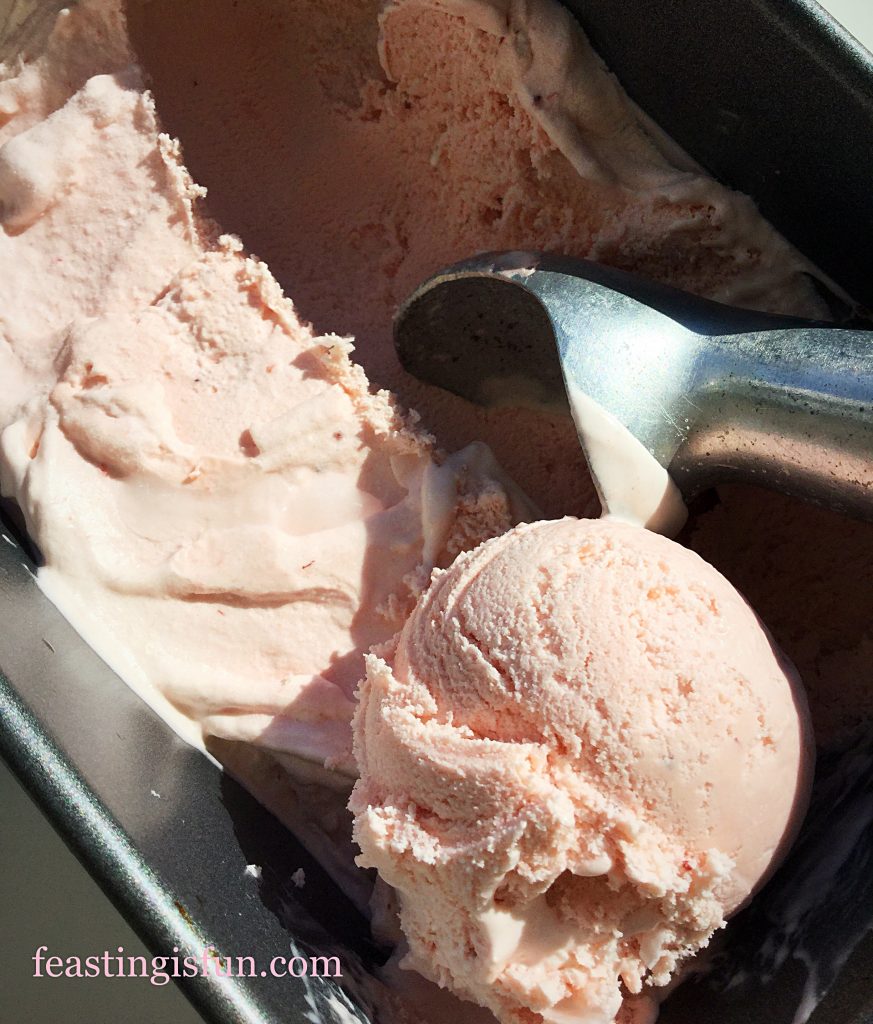
  • To serve, remove the ice cream from the freezer 10-20 minutes prior. As there are no artificial, only natural selection ingredients, this allows the ice cream to soften, so that it can be easily scooped.
FF Strawberry Rose Ice Cream
Strawberry Rose Ice Cream

So easy to scoop!

FF Strawberry Rose Ice Cream
Strawberry Rose Ice Cream served as dessert in a tea cup.

Serve in tea cups for dessert or afternoon tea. Likewise, scoop into cones for a delicious fun treat. Also, by using a certified gluten free cornflour, the ice cream is naturally gluten free.

If you have enjoyed this recipe for Strawberry Rose Ice Cream you may also like these:

Amaretto Creamy Ice Cream

Amaretto Creamy Ice Cream

Lemon Ripple Ice Cream

Lemon Ripple Ice Cream

Triple Chocolate Chunk Ice Cream

Triple Chocolate Chunk Ice Cream

Making ice cream at home, is such a creative and fun process. As you  choose flavour combinations the possibilities become endless. Also by only using certain ingredients, homemade ice cream can easily be made gluten free. Finally, I would not be without an ice cream maker now, using it to make countless different flavours.

Whatever you are making, baking and creating in your kitchens, have fun!

Sammie xx

Please note that no part of this post may be reproduced or replicated without the specific, written permission of the owner. Please see my Disclosure Policy.


Share
Facebooktwitterpinterestlinkedintumblr

Blueberry Lemon Shortbread Cake Bars

Share
Facebooktwitterpinterestlinkedintumblr

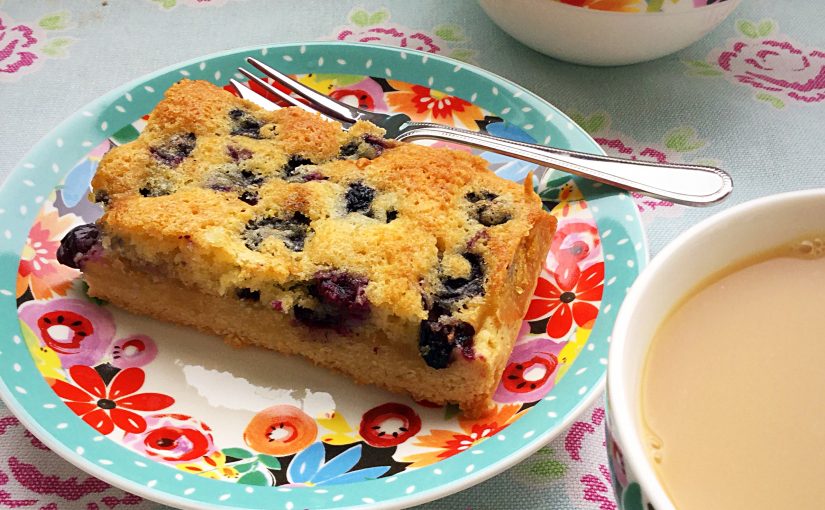
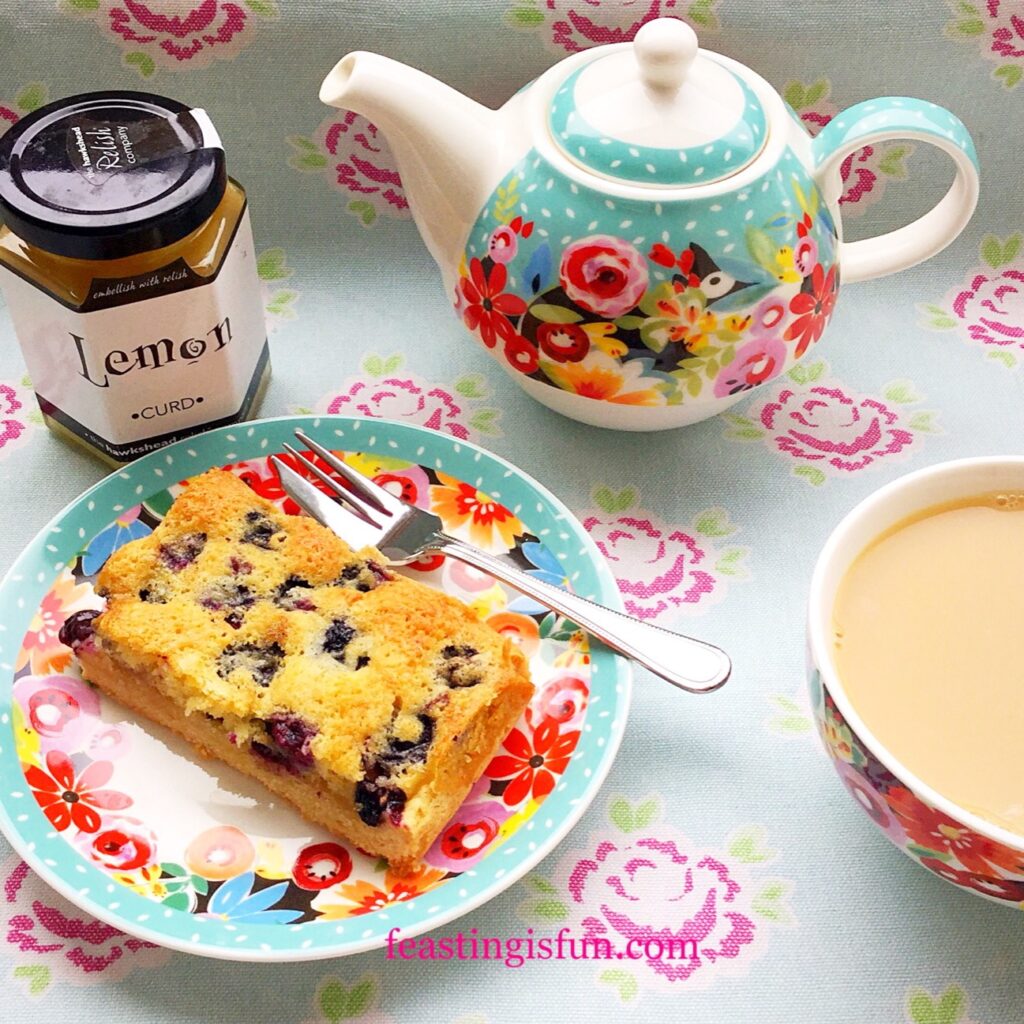
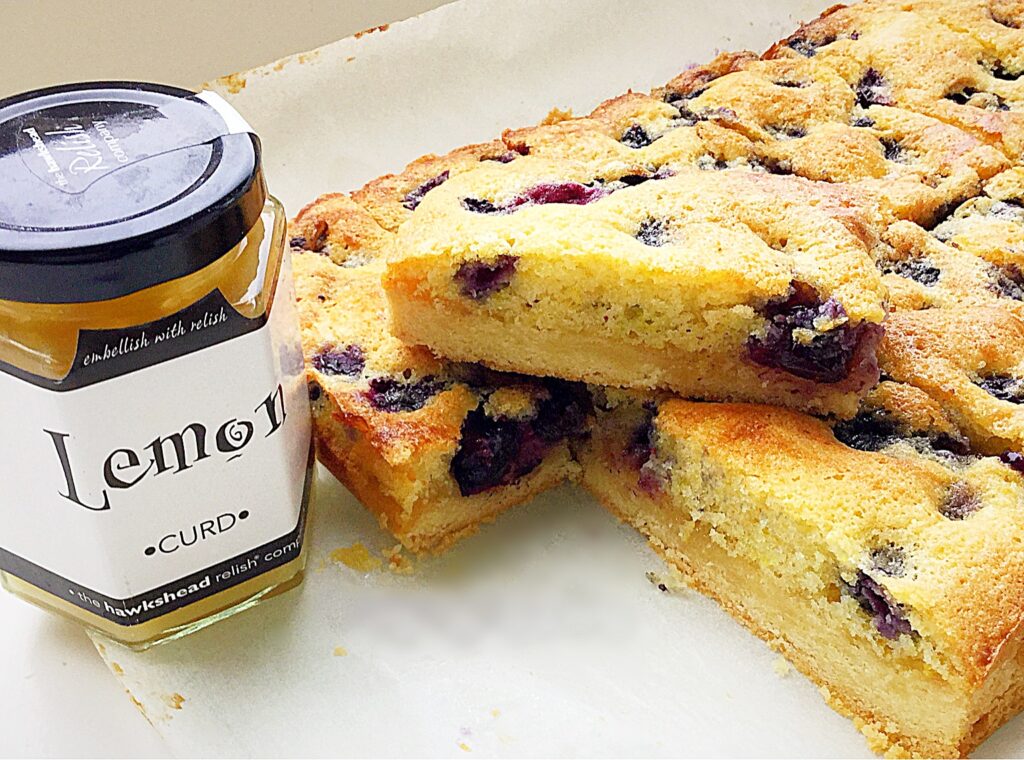
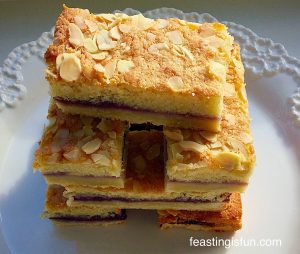
In an ideal world, all food consumed by myself and our family would be homemade. Yet reality dictates that is not always feasible. However, certain products, made with natural ingredients make that dream, a step closer. For example, the lemon curd used in my Blueberry Lemon Shortbread Cake Bars, tastes as good, if not better than that made at home. Resulting in a delicious recipe, made one stage easier by a product already available.

Afternoon tea for one, with descriptive graphics.


Bakes That Travel Well

Creating bakes that are sturdy enough to withstand transport in a school backpack or briefcase can have its challenges. However, these shortbread base bars easily remain intact during transit. Since hubby does not always have time for a set lunch break, knowing he has something he can munch with a coffee makes me happy. And, of course, he functions better when his energy is topped up too.

There are a variety of traybakes here, on Feasting is Fun, including Lemon Drizzle Cake Bars and Macadamia Apricot Flapjacks. While some are considered more ‘healthy’ than others. With respect, anything cooked at home, using good quality ingredients and made with love, is, in my opinion far better than a mass produced product with a shelf life of months!

Biting into a bar really is a taste and texture sensation for your tongue and tastebuds. And each blueberry, when baked, turns into its own little pod of jam. Yet without the added sweetness of preserves. Finally, the cake layer, moist and light contrasts beautifully with the tang of lemon and defined shortbread base. Resulting in a complete mouthful of joy with each bite.

Recipe: Blueberry Lemon Shortbread Cake Bars makes 12

Shortbread Base

225g/8oz Unsalted Butter softened

150g/5oz Caster Sugar

1/4tsp Salt I use Maldon

275g/10z Plain White Flour

1tsp Vanilla Extract I use Nielsen-Massey

1 Large Free Range Egg Yolk

For the Sponge Topping

4-5 tbsp Lemon Curd I use Hawkshead Relish

100g/4oz Unsalted Butter softened

100g/4oz Caster Sugar

2 Large Free Range Eggs

100g/4oz Plain White Flour

1tsp Baking Powder

200g/7oz Fresh Blueberries

Finely Grated Zest of 1 Lemon

Method: Preheat the oven to 160C/140C fan, gas mark 3, 325F

Line a 20cm x 28cm x 5cm (8″ x 11″ x 2″) tin with baking parchment, ensuring the parchment is higher than the sides of the tin. The tin does not need to be greased first.

Making And Baking The Shortbread Base:

  • Place the softened butter, salt and sugar into a large bowl. Whisk or beat until the mixture is pale and creamy.
  • Next, add the egg yolk and vanilla extract. Continue to beat until all ingredients are completely incorporated.
  • Now sift the flour into the bowl and then, using a spoon gently mix all the ingredients until they just come together.
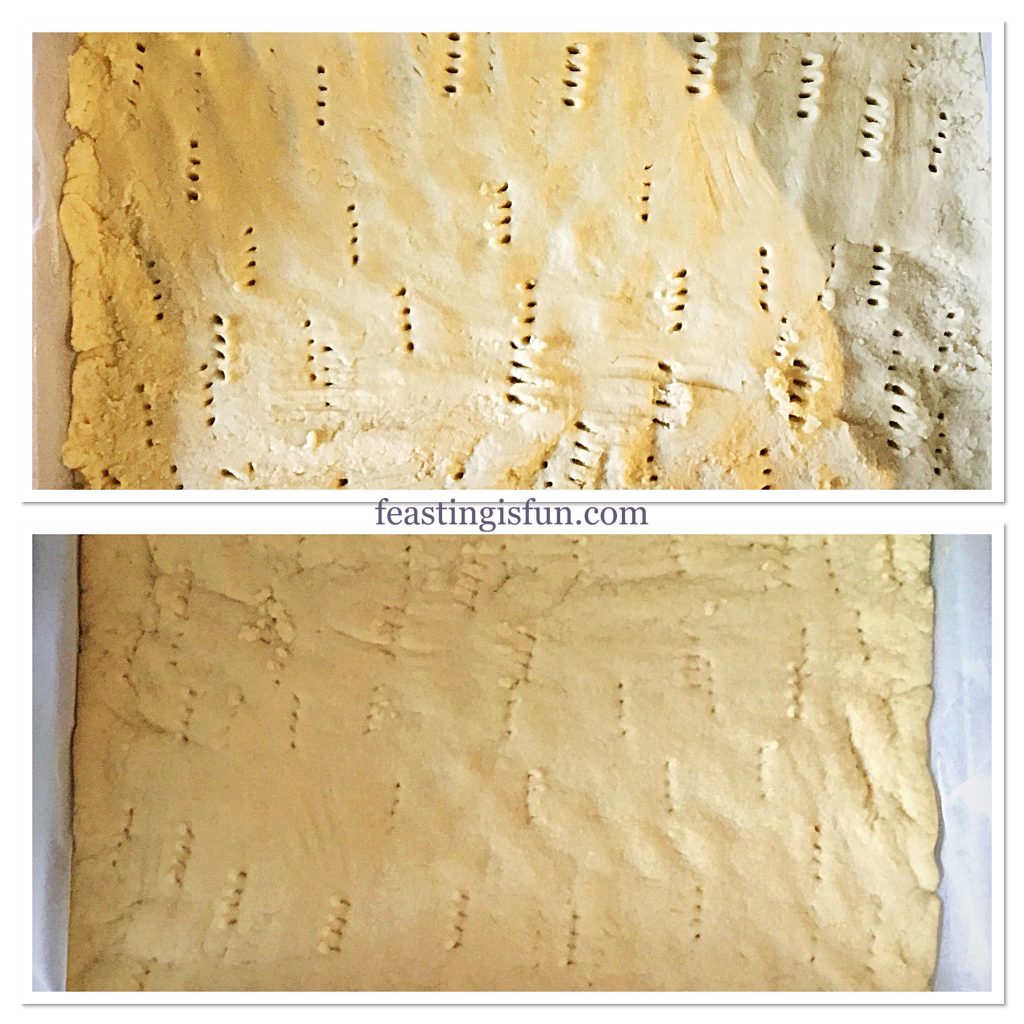
  • Spoon the shortbread mixture into the lined tin and then press into an even layer using your fingers. Use a fork to prick holes, known as docking, into the shortbread. This allows any steam to escape and create a golden base.
  • Place the tin into the centre of a preheated oven and bake for 25 minutes. Until the top is just turning golden.
  • While the shortbread is baking make the sponge topping – see below for instructions.
  • As soon as the shortbread is baked remove from the oven. It is important to note that the shortbread is not fully cooked at this point.

FF Blueberry Lemon Shortbread Cake Bars

Making the Sponge Topping

  • While the shortbread is baking the cake batter can be made.
  • Into a large bowl, as before, add the butter and sugar. Whisk/beat until pale and creamy.
  • Next add the two eggs and continue whisking until the mixture is completely combined.
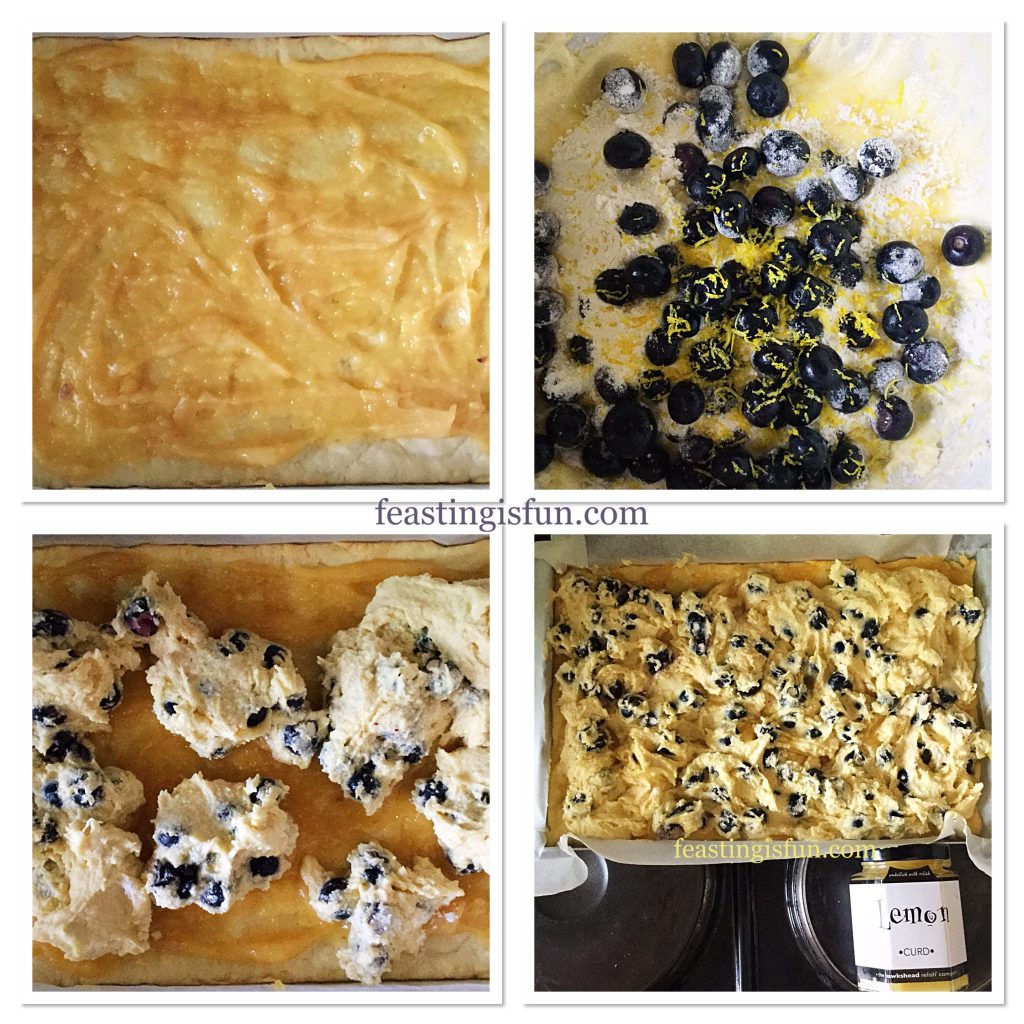
  • Now sift the flour and baking powder into the same bowl. Then add the blueberries and the lemon zest.
  • Using a metal spoon, fold the ingredients together gently, to minimise breaking up the blueberries. Set to one side.

Assembling And Baking The Blueberry Lemon Shortbread Cake Bars

  • As soon as the shortbread base is baked allow to cool for 5 minutes. Then spoon over the lemon curd, spreading so that it covers the base, yet doesn’t quite reach the edges.
  • Spoon over the cake batter. Dolloping it fairly evenly across the base. Finally, gently spread the batter so that it covers the base. Pay particular attention to the edges. Aiming to seal in the lemon curd, by ensuring the cake batter is in contact with the shortbread around the entire edge.

FF Blueberry Lemon Shortbread Cake Bars

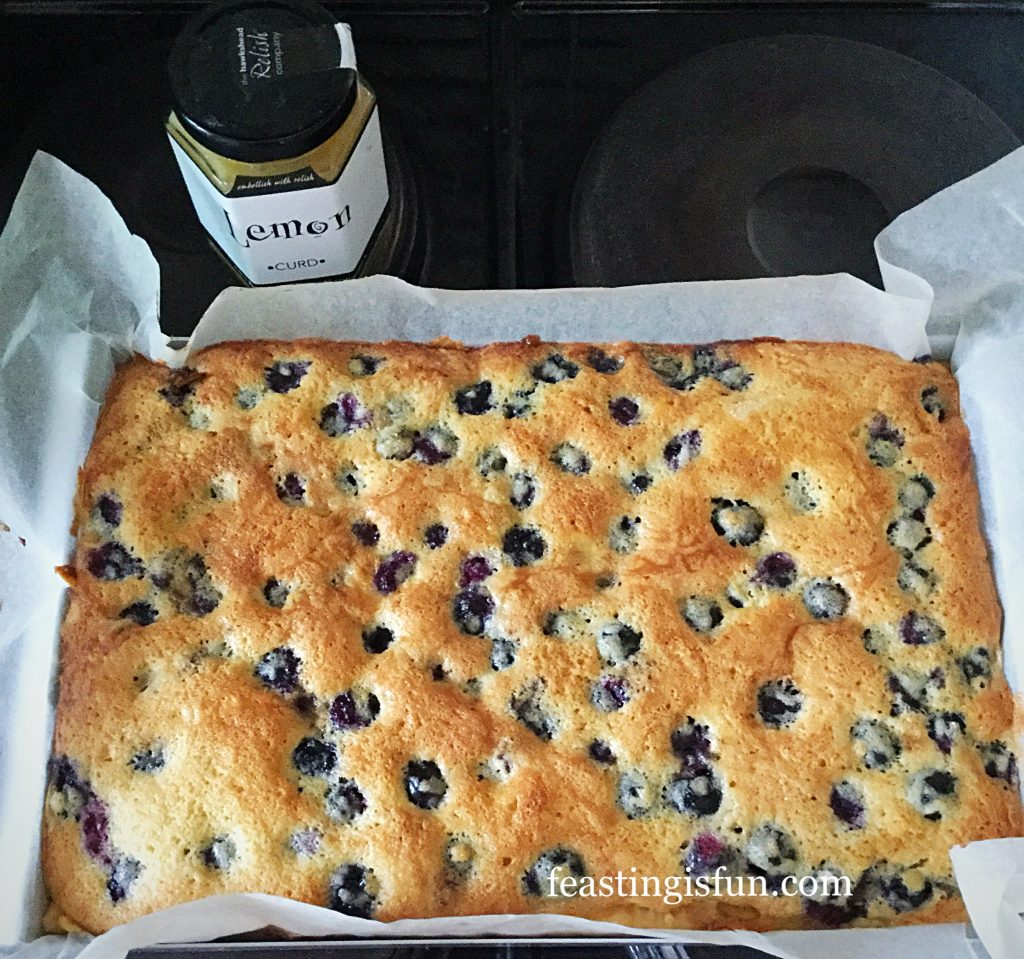
  • Place the tin back into the centre of the oven and bake for 40-50 minutes. The lower and longer baking results in an even bake with a flat surface.
  • The Blueberry Lemon Shortbread Cake Bars are baked when the top is golden in colour and is firm to touch. As soon as it is baked remove from the oven and allow to cool in the tin.
FF Blueberry Lemon Shortbread Cake Bars
The finished bake cooling

Cutting The Bars Into Individual Portions

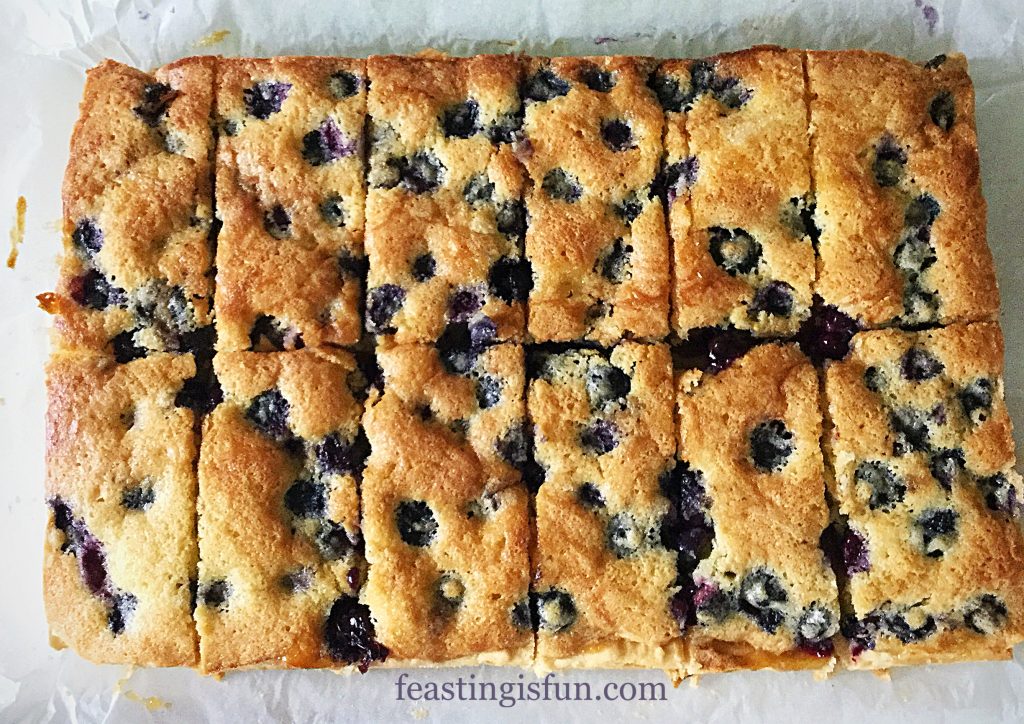
  • When completely cooled, remove the entire traybake from the tin. A fish slice or large palette knife is useful. Ease the knife under the bake, using it to lift and support as you move the traybake to a flat surface.
  • Using a sharp knife cut halfway through the width of the bake. Wipe the knife between each cut, this avoids spoiling the bake.
  • Following this first cut, now cut downwards, dividing the bake into four equal quarters.
  • Finally, cut each quarter into three equal sized bars.

FF Blueberry Lemon Shortbread Cake Bars

The lemon curd is perfect in these bars.

FF Close up image.
Blueberry Lemon Shortbread Cake Bars

Serve the Blueberry Lemon Shortbread Cake Bars with a cup of tea, on some cheerful china, with a smile.

FF Blueberry Lemon Shortbread Cake Bars

Store in an airtight container. They will keep for 4 days. During warm weather, storing in the fridge is advised.

If you have enjoyed this recipe for Blueberry Lemon Shortbread Cake Bars you may also like these:

Cranberry Walnut Flapjacks

FF Blueberry Lemon Shortbread Cake Bars
Cranberry Walnut Flapjacks

Double Cherry Drizzle Oat Bars

FF Blueberry Lemon Shortbread Cake Bars
Double Cherry Drizzle Oat Bars

Bakewell Shortbread Bars

FF Blueberry Lemon Shortbread Cake Bars
Bakewell Shortbread Bars


Baking and cooking good, wholesome food for my family is very important to me. It truly is one of the ways that I show them my love. Knowing in the middle of a busy day that my hubby has something made with love, by me, to help him through. Well, it doesn’t get better than that when we are apart from each other. The oohs and aahs as each family member returns at the days end, to the comforting kitchen aromas, ensures they know that they are truly home.

Love, inquisitiveness and creating are the main motivational factors behind all of my cooking. What are yours?

Sammie xxx

Please see my Disclosure Policy.


Share
Facebooktwitterpinterestlinkedintumblr

Baked Lemon Drizzle Doughnuts

Share
Facebooktwitterpinterestlinkedintumblr

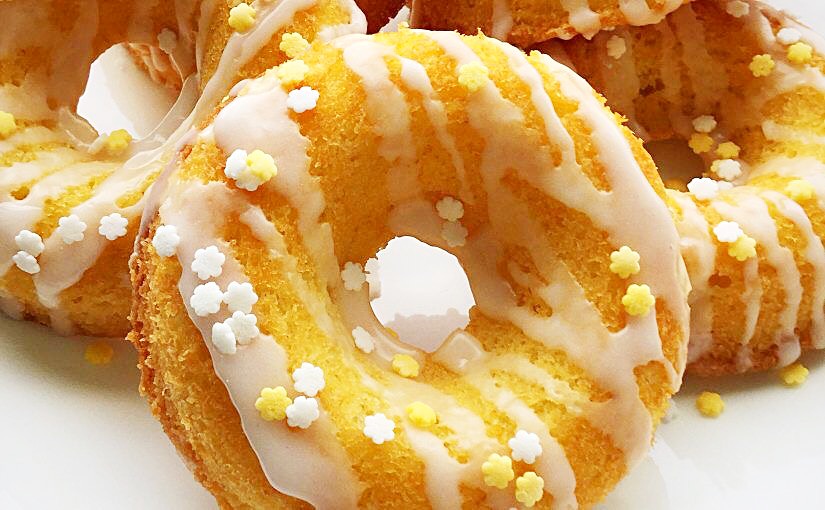
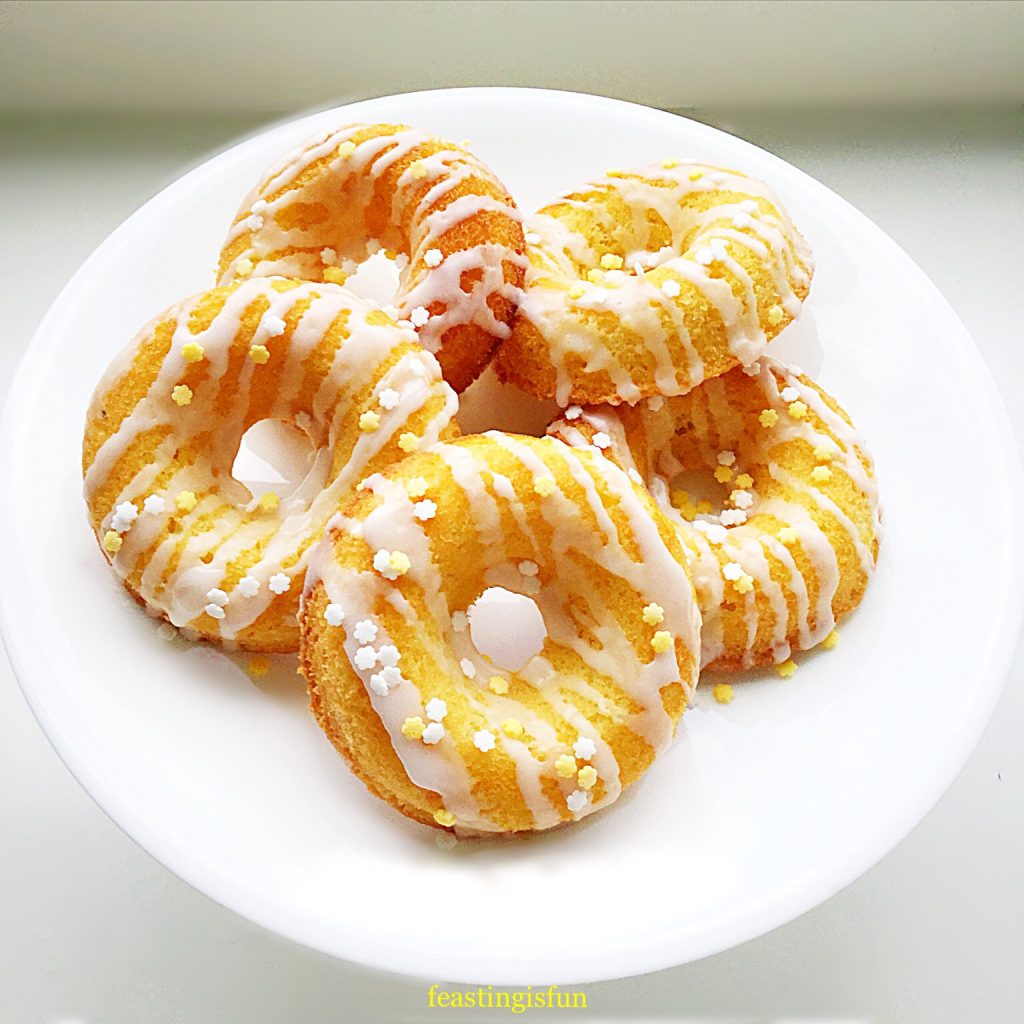
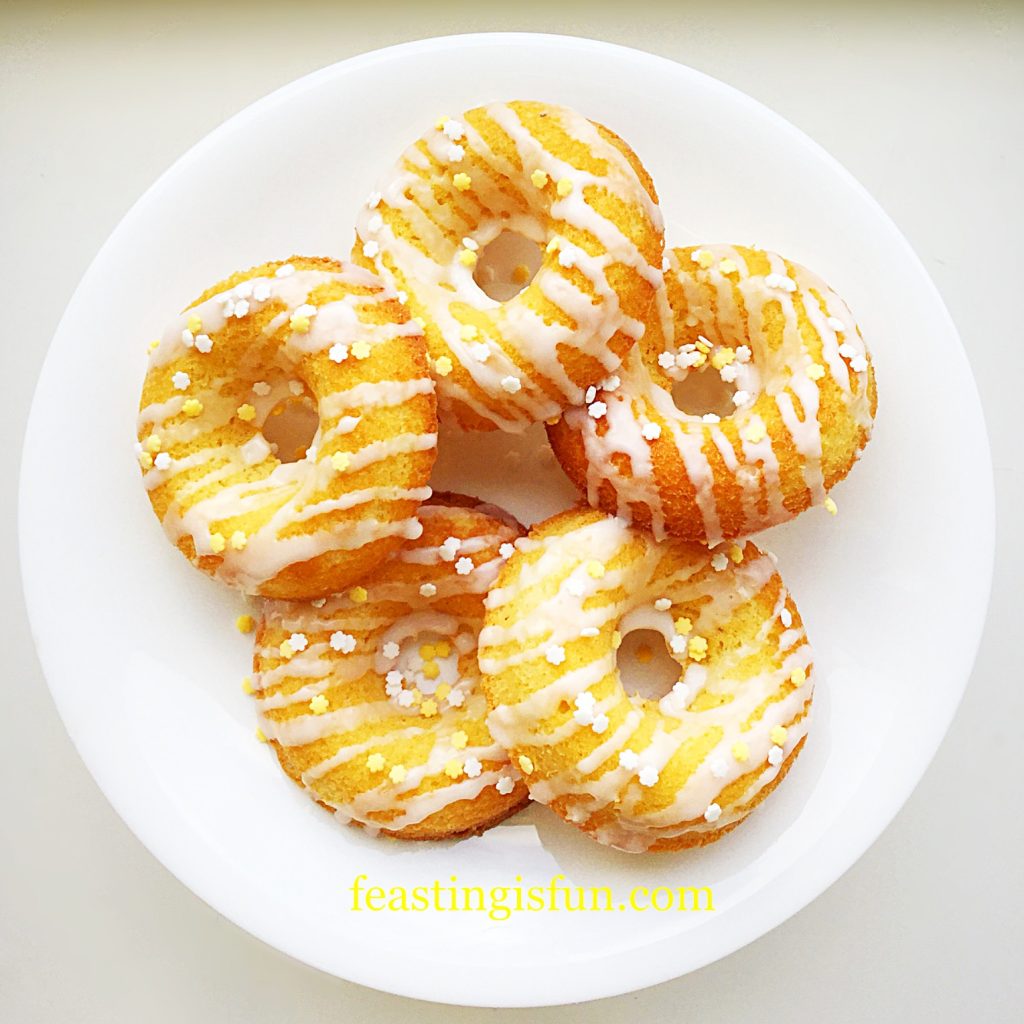
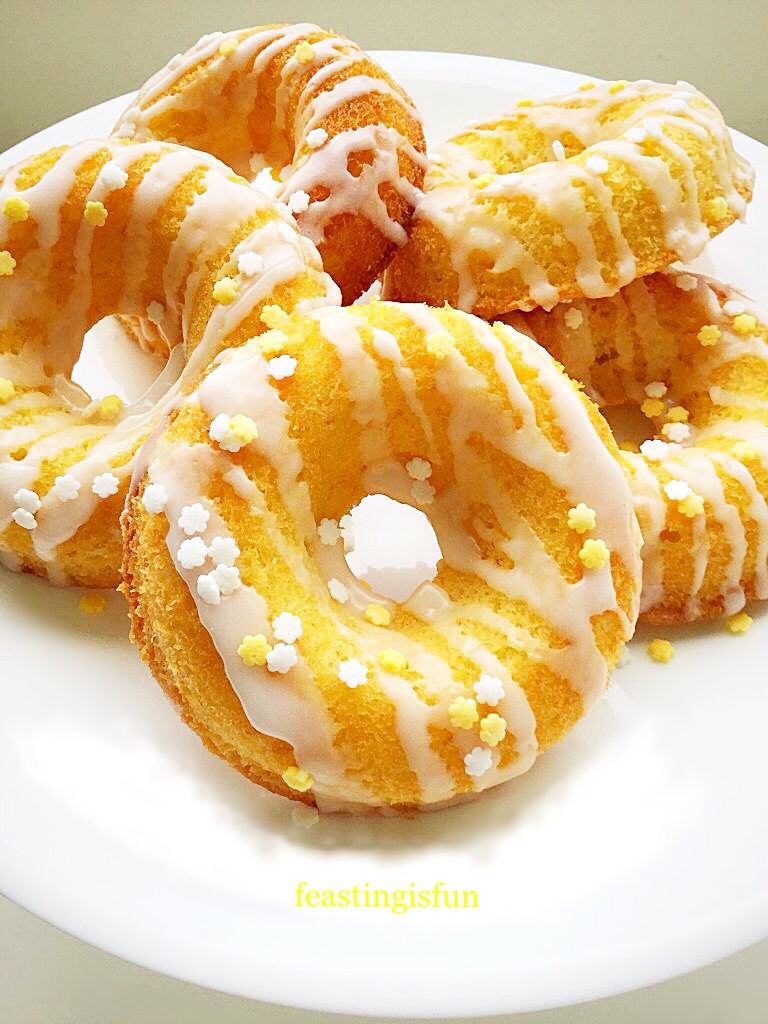
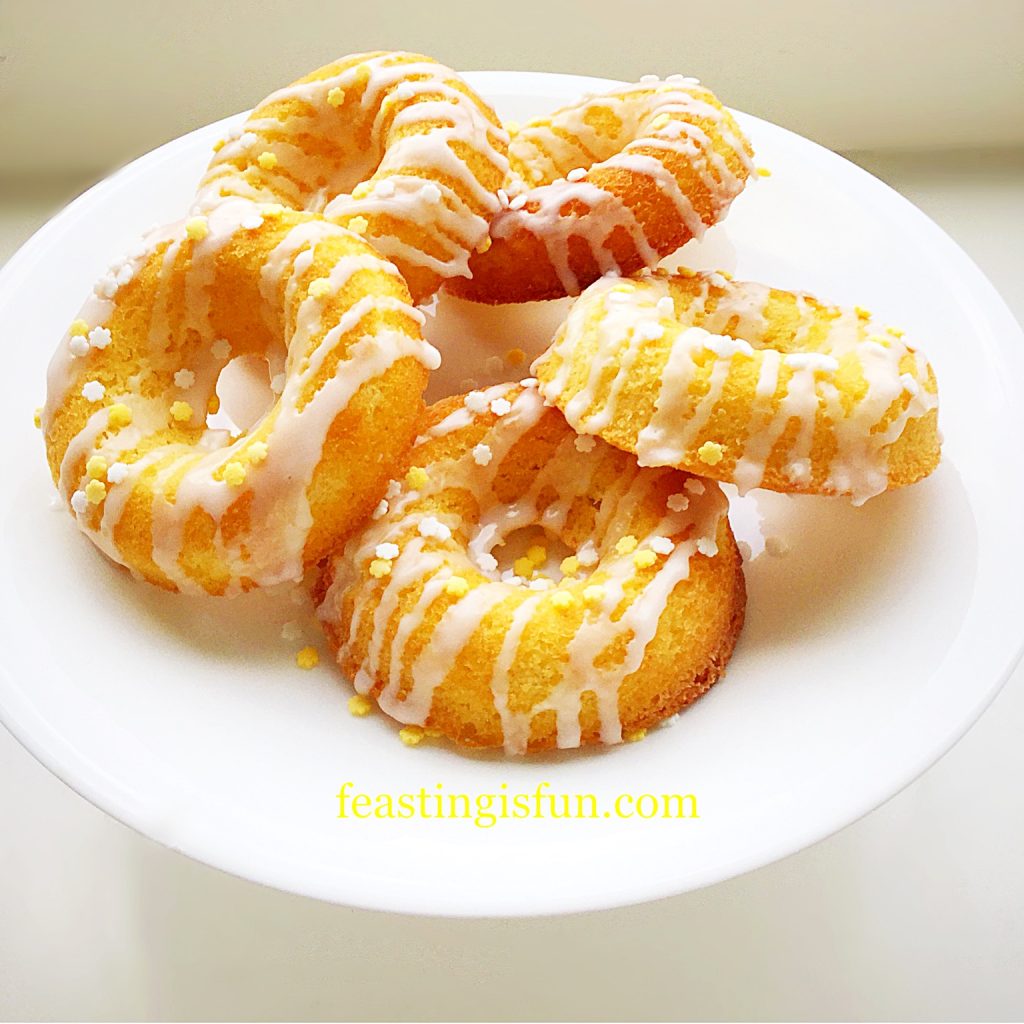
Winter is finally here and with it, all the coughs, colds and horrible bugs, that have been waiting for an opportunity to attack our immune systems. Perhaps that is a bit of an over statement. Still, with half the household coughing and sneezing, it gave me an idea of what to bake. Rich in Vitamin C, these Baked Lemon Drizzle Doughnuts are saturated in fresh, immune fighting, lemon juice, or so I like to believe! So, don’t let anyone tell you that cake’s not good for you.

Baked Lemon Drizzle Doughnuts

Lemon Love

These doughnuts are tangy and light, providing goodness in a fun way. Even our son’s tastebuds, dulled by the bug he is fighting off, tasted the tart lemon juice present in the lemon drizzle icing. While the crumb of the doughnut is tender enough not to aggravate his very sore throat. All in all, a complete hit, that produced a much longed for smile.

Baked Lemon Drizzle Doughnuts

Being re-introduced to the foggy, sleep deprived world, caused by administering medicine and love, throughout the night to a child, sent shockwaves throughout my body. Something I thought was well in my past! Being re-aquatinted with the hunger surge that comes, for me, from broken nights, means, these delicious doughnuts provide the perfect pick-me-up, mid afternoon, as the slump set in!

Baked Lemon Drizzle Doughnuts

Much as I hope that you can enjoy these Baked Lemon Drizzle Doughnuts for the delicious delights that they are, it is also nice to know that they are a good for you treat!

How To Bake Doughnuts

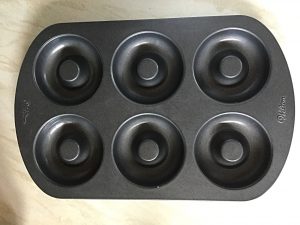
A quick note about the recipe – do not over fill the doughnut pan with batter. You should fill the rings to two thirds of their depth. Also, ensure that you grease the doughnut pan well. I use Wilton cake release. Because, the pans were not greased for the first attempt, even though they are non stick, the doughnuts stuck firm. There are two reasons for this, firstly, I overfilled them and secondly, the buttermilk in the recipe caused the doughnuts to stick.

The pan I use is a Wilton 6 hole doughnut pan. I have two as they are so good and I highly recommend them.

FF Baked Lemon Drizzle Doughnuts
Wilton 6 hole non stick doughnut pan.

Recipe: Baked Lemon Drizzle Doughnuts makes approximately 15-18

For The Doughnuts

175g/6oz Unsalted Butter softened

175g/6oz Caster Sugar

1/4tsp Salt- I use Maldon

3 Large Free Range Eggs

1.5tsp Lemon Extract or finely grated zest of 1 Whole Lemon – I use Nielsen-Massey  lemon extract

75g/3.5tbsp Buttermilk

200g/7oz Plain White Flour

2tsp Baking Powder

For the Drizzle:

200g/7oz Icing Sugar – sifted

Juice of 1 Whole Lemon

Yellow/White sprinkles for decoration

Making And Baking The Doughnuts

Preheat the oven to 180C/160C fan, gas mark 4, 350F 

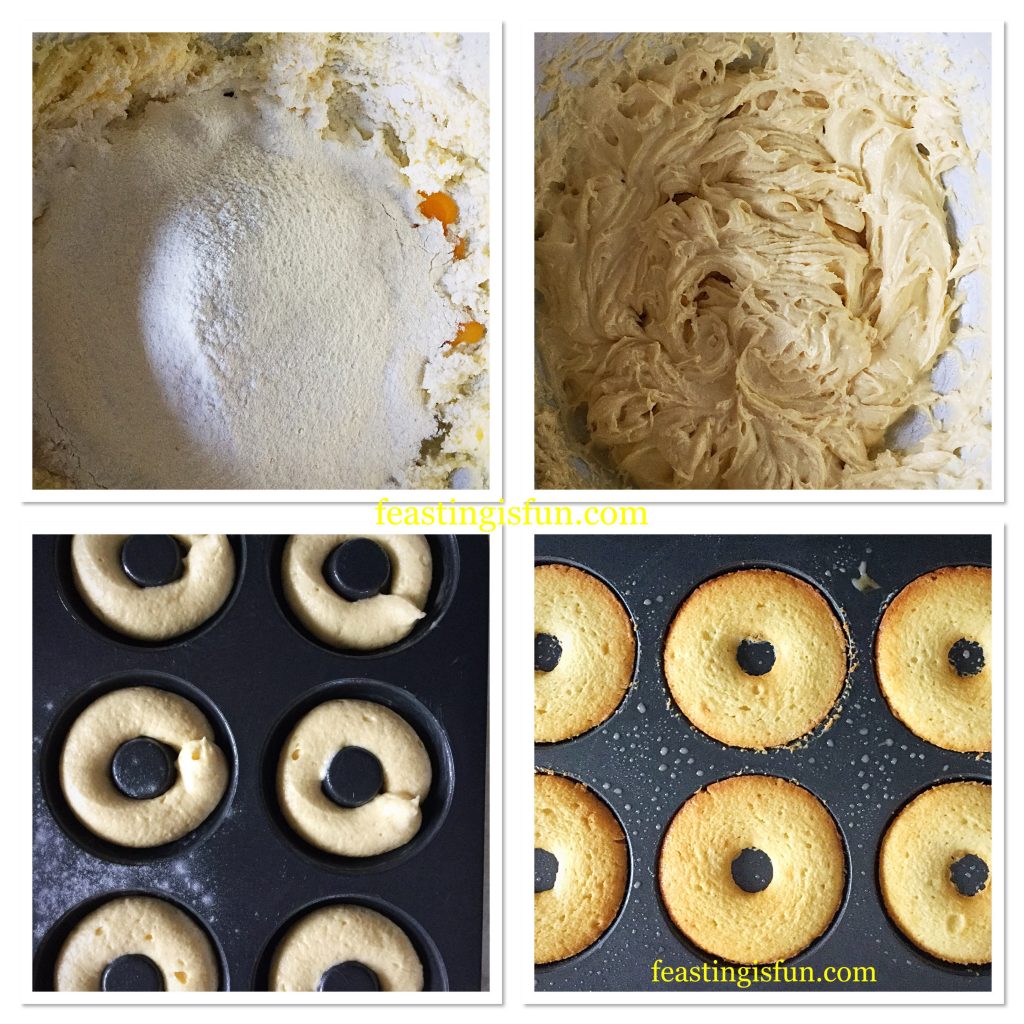
  • First of all prepare the doughnut pans. Thoroughly brush the inside of the doughnut rings with either cake release, or melted butter.
  • Next, into a large bowl add the butter, sugar and salt. Whisk the ingredients together until they are pale and creamy.
  • Now add the eggs, lemon extract/zest and the buttermilk. Sift the flour and baking powder on top of these ingredients.
  • Whisk everything together until it is completely combined.
  • Finally, use a silicone spatula to stir the batter through a couple of times.
  • Fill a large piping bag, fitted with a circle piping tip (if using), with the doughnut batter. Snip the end of the disposable bag off, so that it it approximately 1cm wide.
  • Carefully pipe circles into the doughnut pan, taking care not to overfill.
  • Once the pan is piped place in the centre of the preheated oven and bake for 12-15 minutes.
  • The doughnuts are baked when they are a golden colour and firm to touch – a pressed finger should not leave any indentation.
FF Baked Lemon Drizzle Doughnuts
Preparing, piping and baking the doughnuts.
  • As soon as the doughnuts are baked remove them from the oven.
  • Tip the doughnuts out on to a cooling rack.
  • Wash up, dry and re-grease the doughnut pan and continue as before, unto all of the batter is used.

Decorating The Doughnuts With Lemon Drizzle

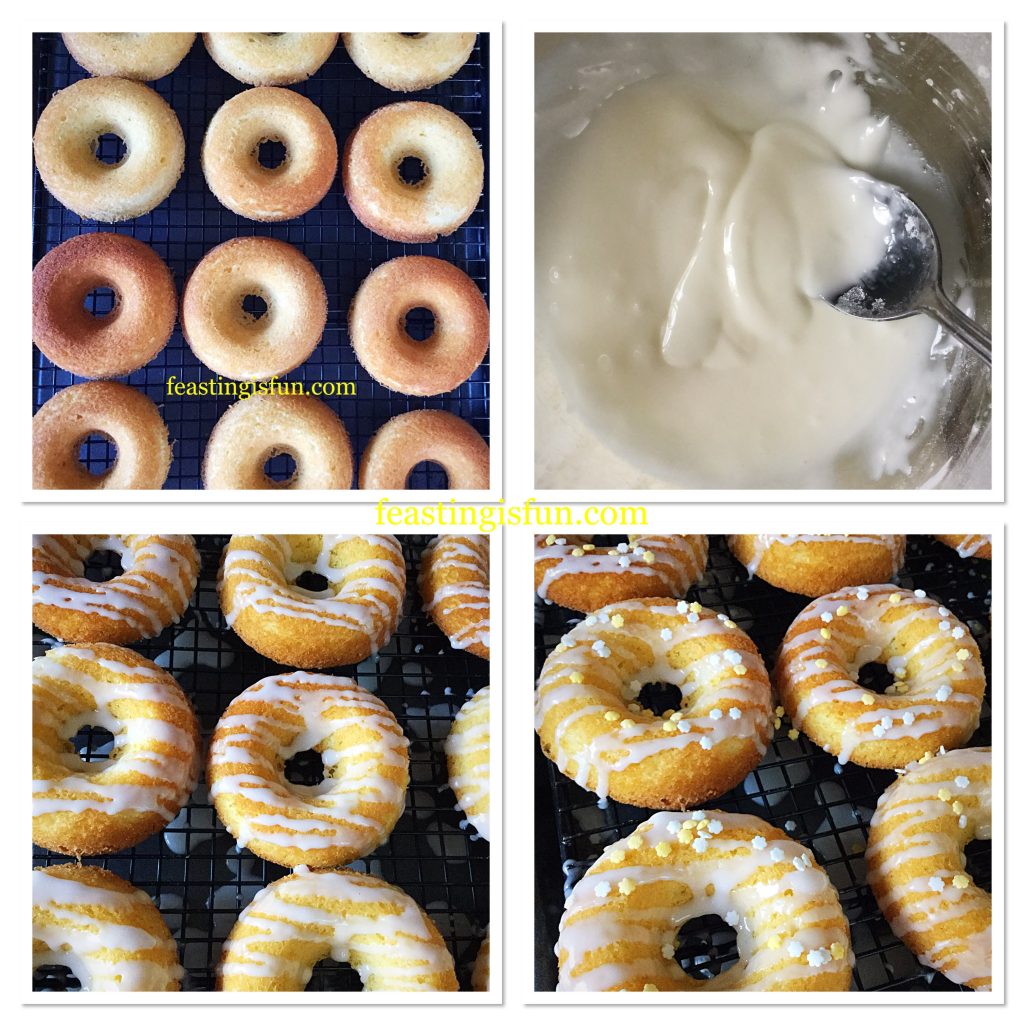
  • While the doughnuts are cooling the lemon drizzle icing can be made.
  • Into the bowl of sifted icing sugar add the juice of one lemon. Stir thoroughly to mix, ensuring there are no lumps. The icing should be fairly thick, but still be able to pour, ensuring it can be drizzled.
  • Fill a small piping bag with the icing. Snip the end of the bag off to create a very small hole. Alternatively, you can use a teaspoon to drizzle over the icing.
  • First, place the cooling rack over a baking tray to catch any drips.
  • The doughnuts should be completely cooled before icing.
  • Keeping an even pressure on the piping bag, pipe back and forth, across each doughnut, until they are all iced.
  • While the icing is still wet scatter over sprinkles.
  • Place the doughnuts to one side to allow the icing to set.
FF Baked Lemon Drizzle Doughnuts
Cooling, piping and decorating the doughnuts.

Thinking of sneaking a doughnut to ‘taste test’? I won’t tell 😉.

Baked Lemon Drizzle Doughnuts

As these doughnuts are so yummy, don’t expect them to hang around for long. They will keep in an airtight container for up to 3 days, however, they are at their best within the first 24 hours.

A sunny, refreshing treat, that is perfect served at anytime of the year.

If you have enjoyed the recipe for these Baked Lemon Drizzle Doughnuts you may also like these:

Lemon Ripple Ice Cream

Lemon Ripple Ice Cream scoops served in a glass bowl.
Lemon Ripple Ice Cream

Mini Lemon Drizzle Bundt Cakes

Mini lemon drizzle Bundt cakes on a white cake stand with fresh lemons.
Mini Lemon Drizzle Bundt Cakes.

Baked Pumpkin Spiced Doughnuts

FF Baked Lemon Drizzle Doughnuts
Baked Pumpkin Spiced Doughnuts


As well as creating a treat that can help boost the immune system, these Baked Lemon Drizzle Doughnuts brought smiles to faces that were suffering. While not advocating these as a health food, there is something to be said for the power of feeling good. Rather than simply accepting things as they are and waiting for them to pass, small presents, or treats can make the process more bearable.

Whatever you are making, baking and creating in you kitchens, I wish you a happy, healthy and fun 2017.

Sammie xx

No part of this post may be reproduced or duplicated without the written permission of the owner. Please see my Disclosure Policy.


Share
Facebooktwitterpinterestlinkedintumblr

Maple Drizzled Apple Blueberry Loaf Cake

Share
Facebooktwitterpinterestlinkedintumblr

As a family we eat a fairly balanced diet, with lots of fruit and vegetables and the occasional takeaway. Because balance is everything, in life, as it is in cooking and eating. While I cook most of our meals from scratch I’m also realistic. So in our freezer there is usually a bag of oven chips, frozen peas and some good quality sausages. Occasionally though it’s treat time and my Maple Drizzled Apple Blueberry Loaf Cake  is not only delicious it’s also packed full of fresh fruit.

FF Maple Drizzled Apple Blueberry Loaf Cake

To be clear, I am not advocating that this cake is a ‘health food’. Rather, that anything homemade firstly, has to be better than a mass produced, long shelf life product and secondly, while cooking and baking, we become more aware of the ingredients that go into our food.

FF Maple Drizzled Apple Blueberry Loaf Cake
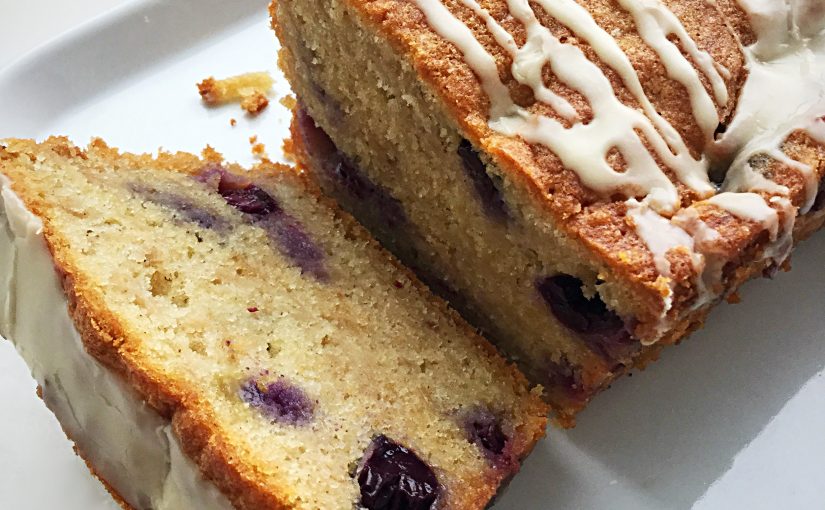
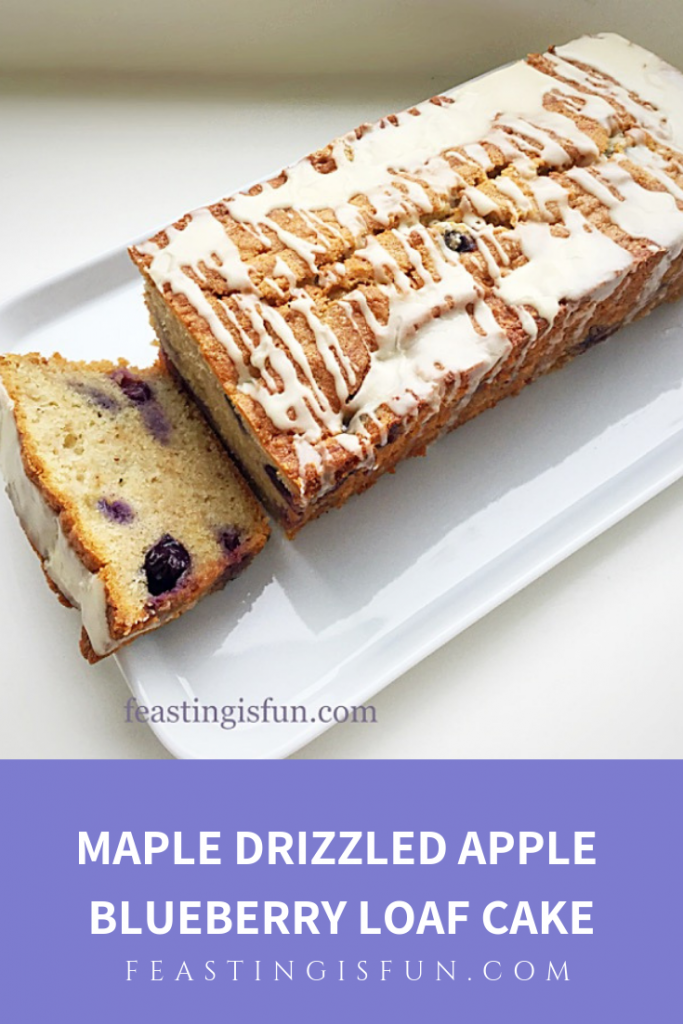
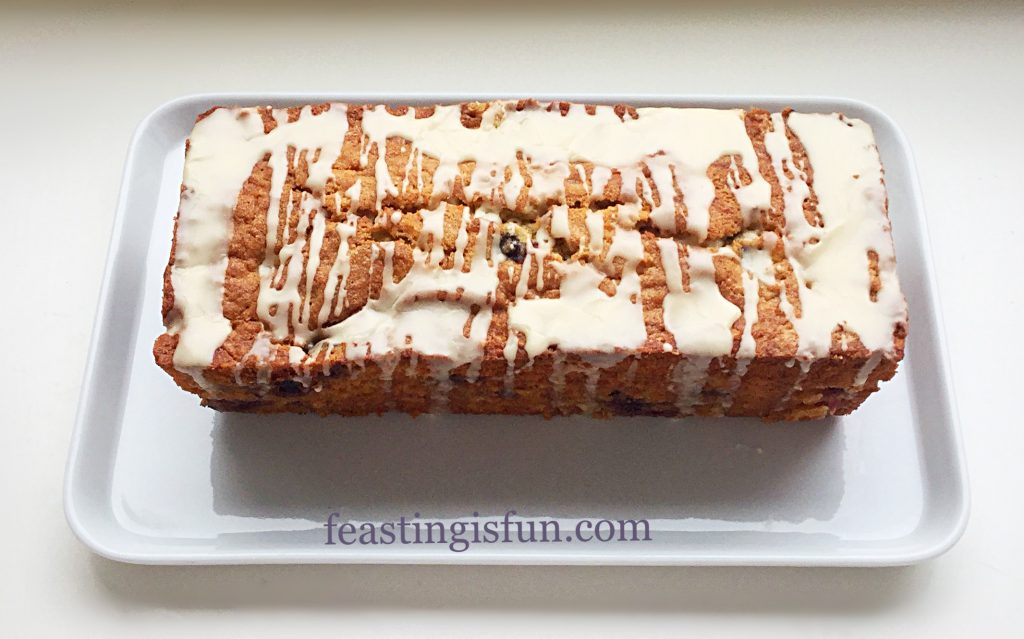
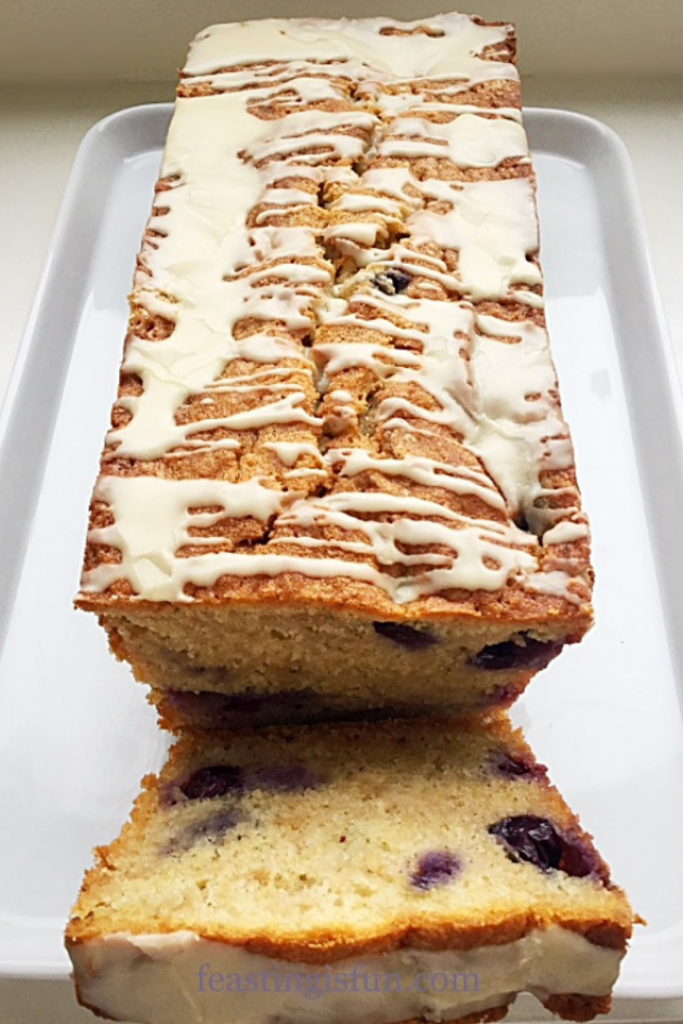
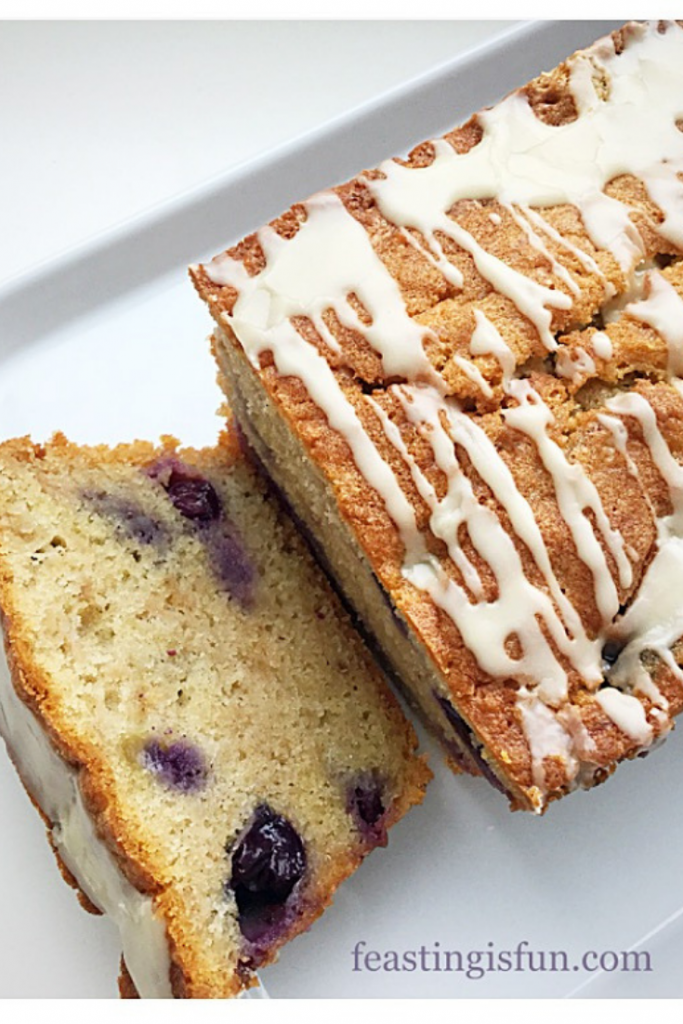
Maple Drizzled Apple Blueberry Loaf Cake perfect for sharing.

Because there is a large portion of fruit packed into this cake, it is extremely and deliciously moist. Ideal for slicing, wrapping and adding to a packed lunch. Yet equally enticing, shared with friends or neighbours over a mid morning cup of coffee. Since all food tastes better when shared, why not bake this cake and take it with you to work? Sharing does not have to be confined to our homes!

Maple Drizzled Apple Blueberry Loaf Cake

A quick note before making this cake: similar to Maple Syrup Frosted Apple Cupcakes, the cake batter is made before grating and adding the apple. Because a sweeter variety works best, unlike Granny Smith’s which are more acidic, this helps to ensure the apple browns as little as possible. Also, the skins are left on the apple quarters whilst grating.

Recipe: Maple Drizzled Apple Blueberry Loaf Cake serves 8

175g/6oz Unsalted Butter softened

150g/5oz Caster Sugar

1/8tsp Salt – I use Maldon

50g/2.5tbsp Maple Syrup I use – Pure Maple

1tsp Vanilla Extract I use – Nielsen-Massey

3 Large Free Range Eggs

225g/8oz Plain White Flour

2tsp Baking Powder

1/4tsp Cinnamon

225g/8oz Grated Apple preferably a sweeter variety

125g/4.5oz Blueberries

75g/3oz Icing Sugar

2tbsp Maple Syrup

Method: Preheat the oven to 160C/140C fan, gas mark 3, 315F

First of all grease a 2lb loaf tin, 26cm x 12cm x 7cm (approx. 10″ x 5″ x 3″). Line the base with baking parchment.

Making The Apple And Blueberry Filled Cake Batter

  • Into a bowl sift the flour, baking powder, cinnamon and salt – dry ingredients. Set this to one side.
  • Next, in a large bowl add the softened butter, caster sugar and 2.5 tablespoons of maple syrup. Beat until pale and creamy. Rub the mixture between your finger and thumb, it should feel smooth. If it feels gritty continue mixing until the sugar is fully combined with the butter.
  • Add the vanilla extract and beat to incorporate.
  • Now add all 3 eggs and then the sieved, dry ingredients. Gently mix until just combined.
  • To grate the apple set a bowl on to digital scales. Cut one apple at a time into quarters, removing the core. Use a box grater and grate the apple, using the coarse grater, until only skin remains. Continue until the whole apple has been grated. Add the grated apple to the bowl on the scales, this will give you an idea of how much each grated apple yields.
  • Continue grating the apples, as before, until you have the desired weight.
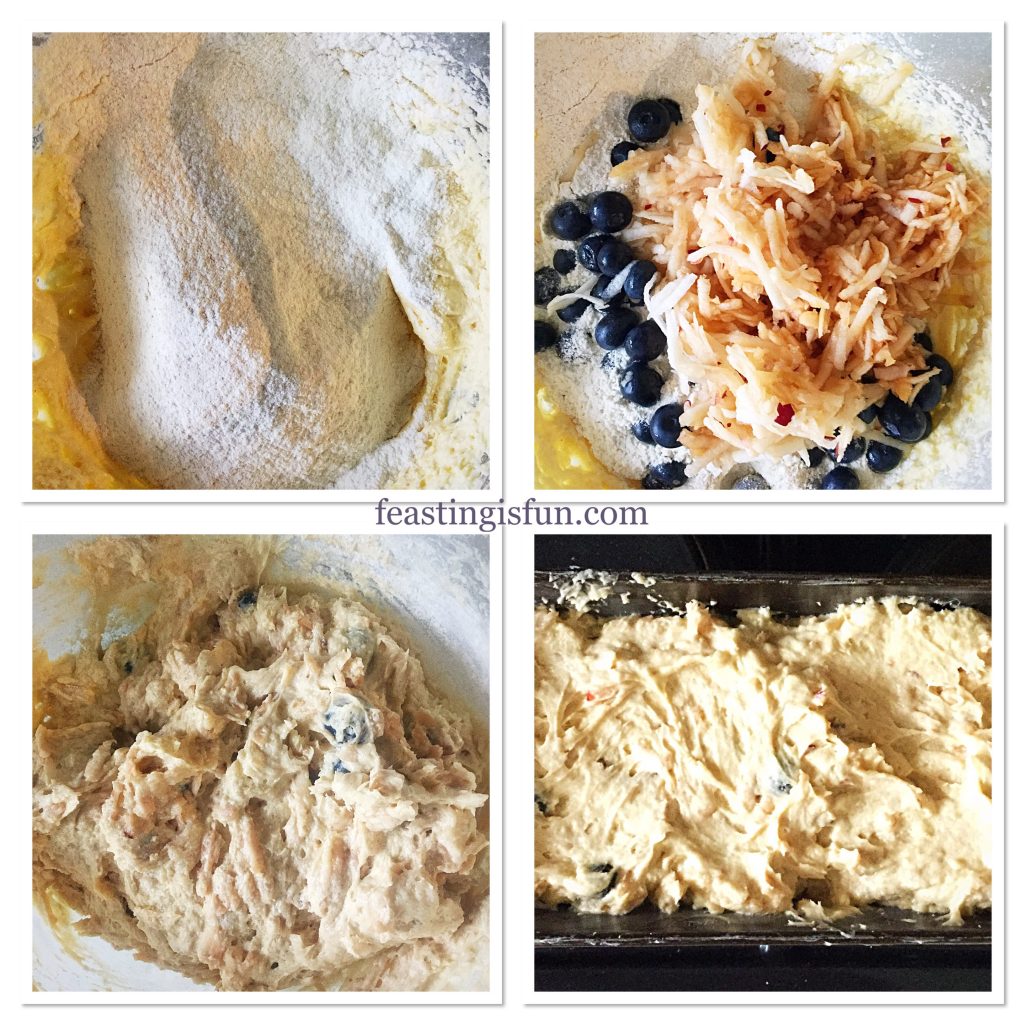
  • Tip the grated apple and whole blueberries into the cake batter.
  • Fold the fruit into the batter using a spoon and taking care not to break up the blueberries.
  • Spoon the cake batter into the prepared loaf tin and smooth the surface using the back of a spoon.
Ff Maple Drizzled Apple Blueberry Loaf Cake
Creating the delicious, fruit filled cake batter.

Baking The Loaf Cake

  • Place the tin into the centre of the oven and bake for 1 hour – 1 hour 20 minutes.
  • The cake is baked when an inserted skewer comes out clean.
  • As soon as the cake is baked remove from the oven and allow the cake to cool completely in the tin.
  • When the cake is cooled, use a palette knife to run around between the cake and the inside of the tin, releasing any sticky bits.
  • Now turn the cake out on to a cooling rack and gently peel away the baking parchment.
  • Place the cooling rack over a clean baking tray.


Making The Maple Syrup Drizzle And Decorating The Cake

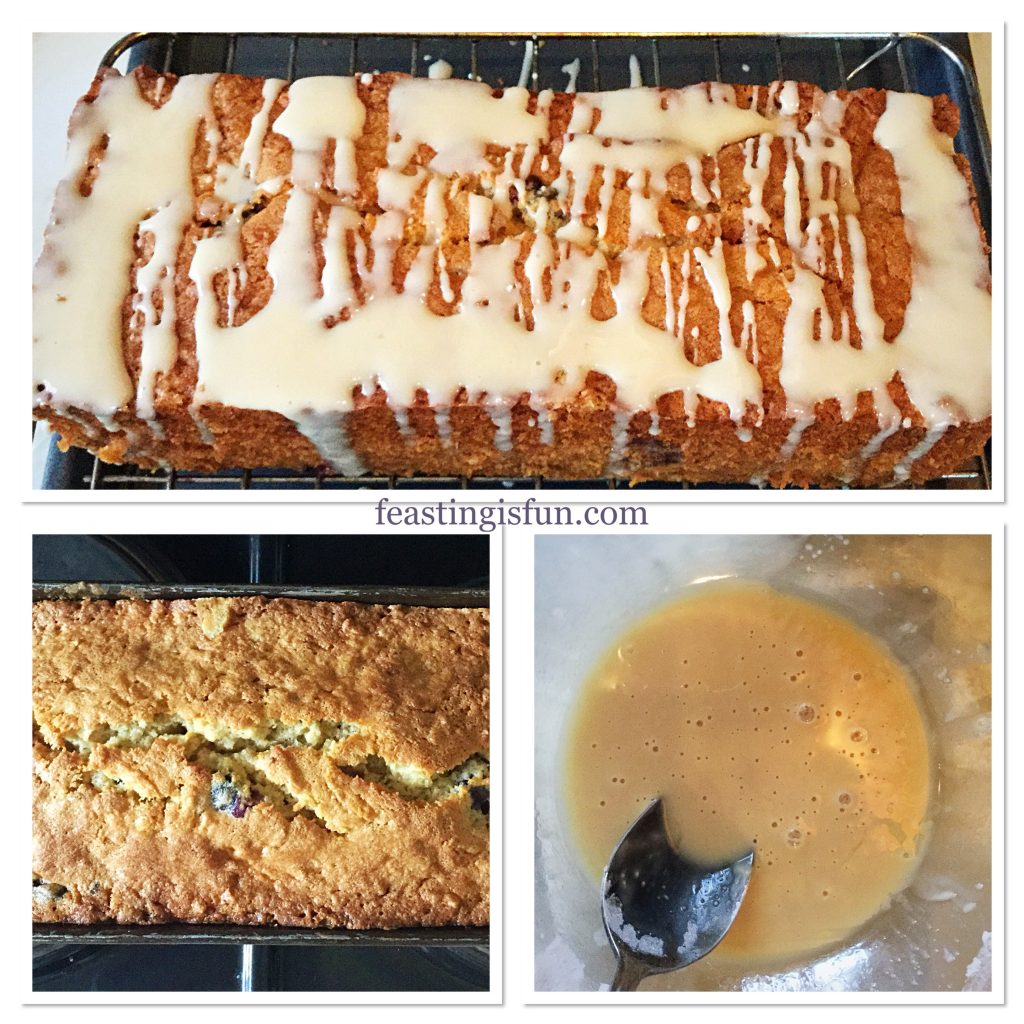
  • Sift the icing sugar into a bowl. Then add 2 tablespoons of maple syrup and stir until the icing has a smooth consistency.
  • Use a spoon to drizzle the icing across the cake. Also encouraging the icing to drip down the sides of the cake.
  • Leave the cake to set.
FF Maple Drizzled Apple Blueberry Loaf Cake
Creating the drizzle effect on the cooled, baked cake.

While the icing is setting, put the kettle on and invite your neighbours round!

Maple Drizzled Apple Blueberry Loaf

Since this delicious cake was made a little while ago, it is very tempting to jump through the screen and grab a slice!

Serve this cake sliced and with a smile. It will keep in an airtight container for 3 days. During warmer weather store in the fridge.

If you have enjoyed this Maple Drizzled Apple Blueberry Loaf Cake you may also enjoy these:


Chocolate Chip Pumpkin Loaf Cake

FF Maple Drizzled Apple Blueberry Loaf Cake
Chocolate Chip Pumpkin Loaf Cake

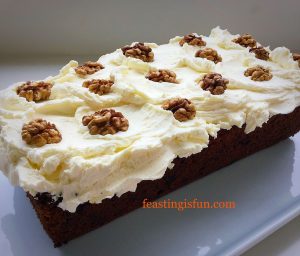
Mascarpone Topped Carrot Cake

FF Maple Drizzled Apple Blueberry Loaf Cake
Mascarpone Topped Carrot Cake

Lemon Blueberry Bundt Cake

FF Maple Drizzled Apple Blueberry Loaf Cake
Lemon Blueberry Bundt Cake

Adding fresh fruit to cakes makes them deliciously moist. And fruit filled cakes are a million miles away from dry, moisture sucking, mass produced alternatives that are readily available in the shops. Most of all, home baked cakes not only taste so good, their flavour is far superior to most bought cakes.

Whatever you are making, baking and creating in your kitchens, have fun preparing your feast.

Sammie xx

No part of this post may be reproduced or duplicated without the written permission of the owner. Please see my Disclosure Policy.
 

Share
Facebooktwitterpinterestlinkedintumblr