Vanilla Fudge Chocolate Brownies

Share
Facebooktwitterpinterestlinkedintumblr

Who doesn’t love a delicious brownie? I know I do. So, when I received a small selection of fudge to try out, I knew where the vanilla version was heading, straight into these very tasty Vanilla Fudge Chocolate Brownies.
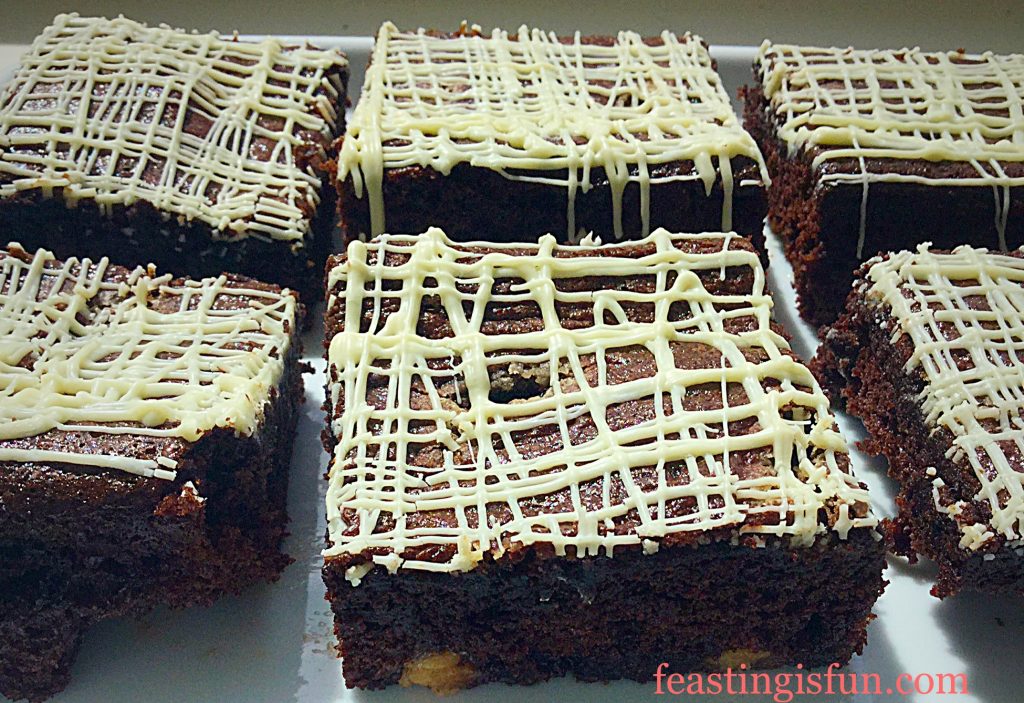
FF Vanilla Fudge Chocolate Brownies
Vanilla Fudge Chocolate Brownies dots of gold fudge throughout the brownie.

The Vanilla Fudge from Fudge Angels, is creamy with a definite vanilla taste, not just sweetened sugar and cream. So I kept with a deeply chocolate brownie recipe, allowing the fudge to ‘sing’ as it hits your tastebuds.

Also, I received a delicious Strawberry Pavlova Fudge, which was very popular with our eldest daughter, in truth a little too sweet for me, although it did leave a delightful strawberry flavour in my mouth. In contrast, the Smooth Ginger Fudge was delicious. So, if you love ginger, which I do, then you will enjoy this fudge. I can imagine using it in some ginger cookies, if I don’t snaffle it all beforehand!
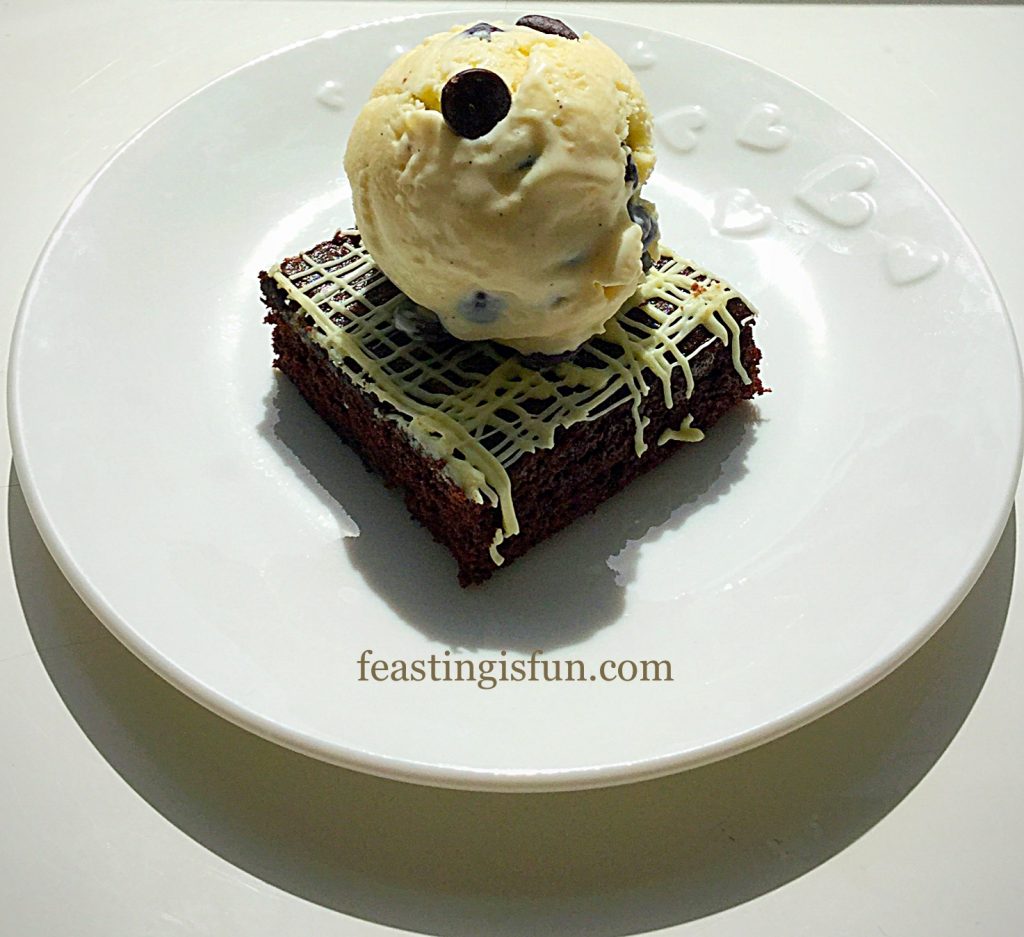
FF Vanilla Fudge Chocolate Brownies
Vanilla Fudge Chocolate Brownies topped with the perfect complimentary ice cream.

These Vanilla Fudge Chocolate Brownies are perfectly delicious on their own.

However, here at Feasting is Fun, I wanted to turn them into a fantastic dessert.

Brownies And Ice Cream – A Great Dessert Combo

What goes better with brownies than ice cream. And not any ice cream, one created to perfectly compliment the flavours found within these Vanilla Fudge Brownies, Dark Chocolate Chip Vanilla Ice Cream.

See how good I am to you!

While they are both perfectly delicious on their own, bring them together and we have a taste bud party starting baby 😉
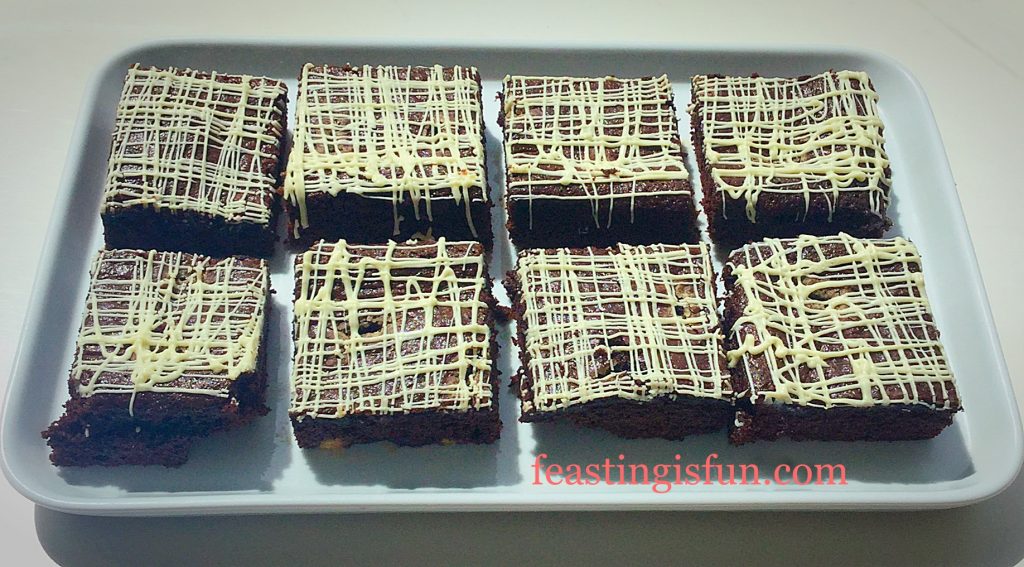
FF Vanilla Fudge Chocolate Brownies
Vanilla Fudge Chocolate Brownies – how will you eat one 😉

Such an easy traybake, turned into a jaw dropping, beautiful dessert!

Finally, a drizzle of white chocolate on top of the brownies echoes the flavours of the vanilla fudge within. So you can be assured, if you have no desire to make your own ice cream, that the brownies are still, one hundred per cent, top class.

Our youngest daughter gave these a 10!

I wish there was a way of putting that in BIG FLASHING LIGHTS. Because she rarely awards a 10 for my efforts. I am literally cock-a-hoop with joy.

Did I mention the 10?

Ok I’ll leave it for now.

TEN OUT OF TEN – yup I’m done 😉
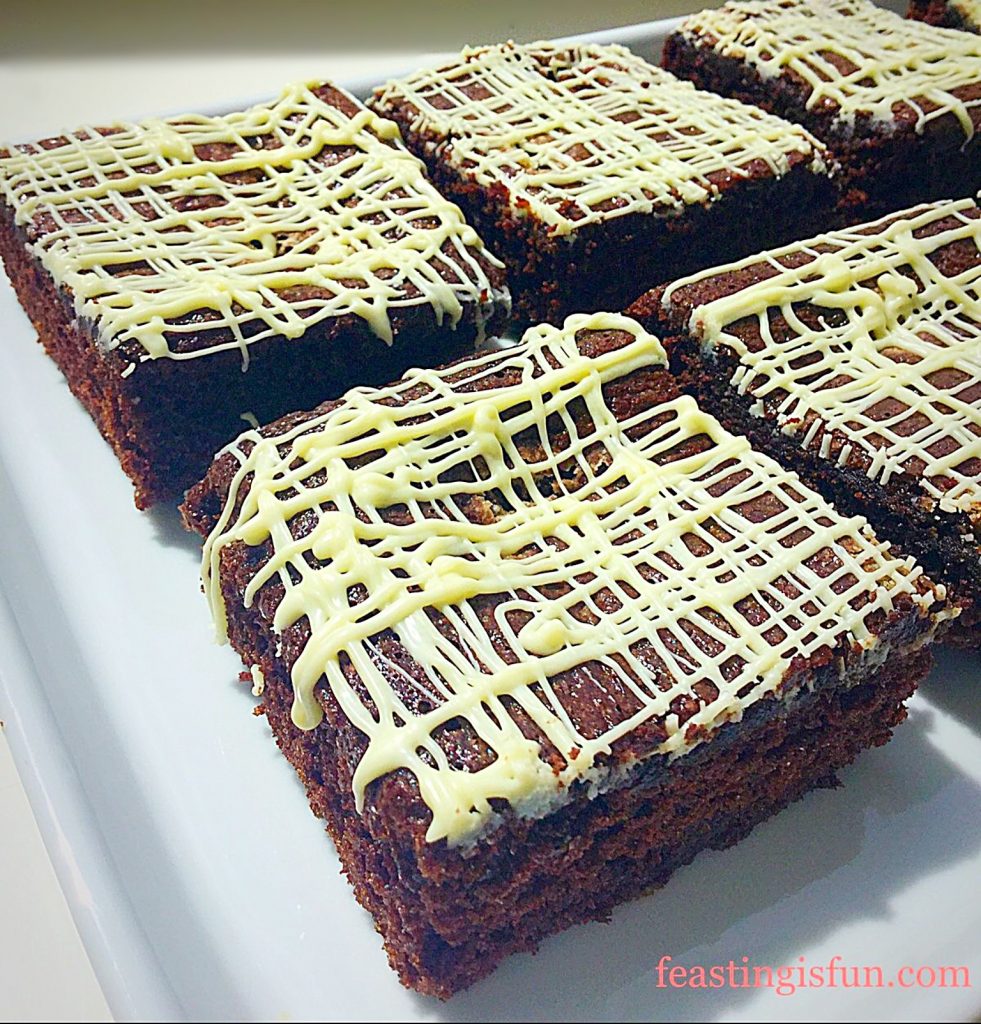
Vanilla Fudge Chocolate Brownies

Also, something else I should tell you before you make these, is that all the preparation, mixing etc. is carried out in a saucepan. And (I know your not supposed to start sentences with and – but I got a 10!!!), you line the swiss roll tin with foil, so there is very little clean up.

You’re welcome xx.

Recipe: Makes 15 Vanilla Fudge Chocolate Brownies

275g/10oz Dark Brown Muscavado Sugar

150g/5oz Unsalted Butter

50g/2oz Cocoa Powder

150g/5oz Plain White Flour

1tsp Bicarbonate of Soda

1/4tsp Salt – I use Maldon

1tsp Vanilla Bean Extract or Vanilla Extract – I use Nielsen-Massey

4 Large Free Range Eggs

100g/4oz Vanilla Fudge – from Fudge Angels

50g/2oz White Chocolate for drizzling over the top

Making The Vanilla Fudge Chocolate Brownies

Preheat the oven to 180C/160C fan, gas mark 4, 350F.

  • First of all, line a 28cm x 20cm x 5 cm (12″ x  8″ x 2″) swiss roll tin with aluminium foil.
  • Place the butter, sugar and salt into a large heavy bottomed saucepan, over a medium heat.
  • Gently melt the butter and sugar together, stirring constantly with a wooden spoon until melted.
  • Move the saucepan from the heat and add the cocoa powder. Stir in immediately and the cocoa will combine easily with the melted sugar and butter.
  • Add the flour and bicarb and mix in.
  • Crack the eggs into a jug and add the vanilla bean paste. Beat lightly with a fork to combine.
  • Pour the egg mixture into the warm chocolate mix in the saucepan stirring constantly. Don’t worry everything will come together into a smooth batter.
  • Tip the brownie batter into the foil lined swiss roll tin.
  • Lift the tin and rap it hard against the worktop a couple of times. This brings any bubbles within the batter to the surface – remember brownies aren’t cake, so we want to encourage density in the bake.
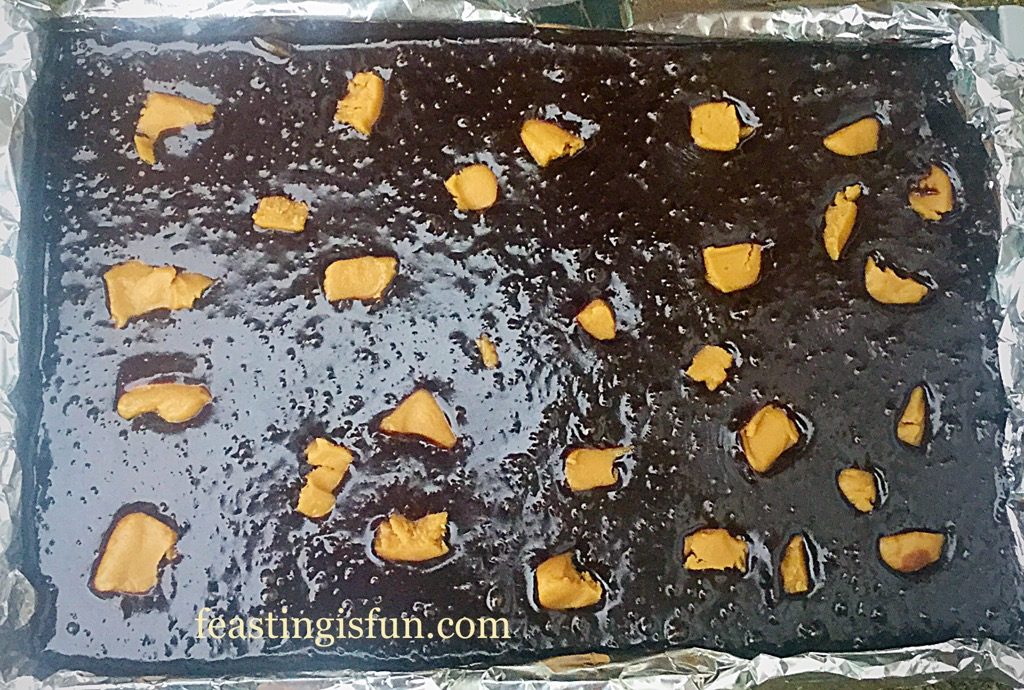
  • Break off small pieces of the vanilla fudge and dot them on to the top of the uncooked brownie.
FF Vanilla Fudge Chocolate Brownies
Vanilla Fudge Chocolate Brownies ready for the oven.

Baking The Brownies

  • Place the brownies in the centre of the oven and bake for 20-25 minutes.
  • Halfway through the cooking time, open the oven and rap the tin against the oven shelf. Again this stops the brownies from rising and becoming cake like.
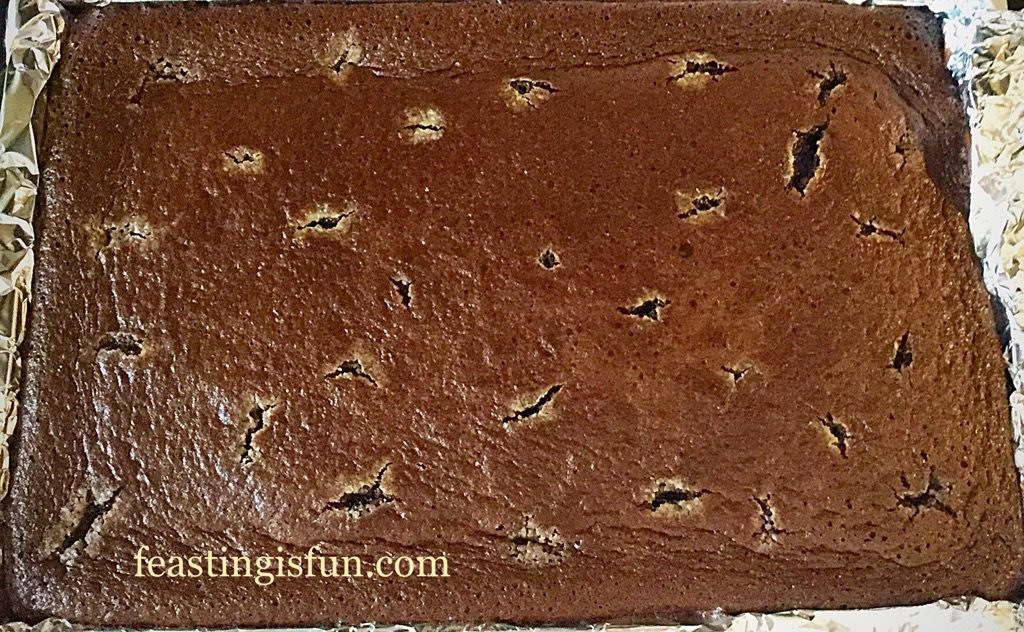
  • The brownies are cooked when the surface has a sugary sheen and has a very slight wobble in the centre.
  • As soon as they are baked remove the Vanilla Fudge Chocolate Brownies from the oven.
FF Vanilla Fudge Chocolate Brownies
Vanilla Fudge Chocolate Brownies you can see where the fudge has baked through brownie.
  • Allow the brownie to completely cool in the tin. I actually left this brownie, once cooled, wrapped in foil for 2 days post baking, due to illness and it kept beautifully.
  • As soon as they are cooled remove the big slab of brownie from the tin and place on to a board.
  • Meanwhile, melt the white chocolate in the microwave, taking care not to overheat it.
  • Pour the melted chocolate into a small, disposable piping bag. Snip the very end off to create a small hole.
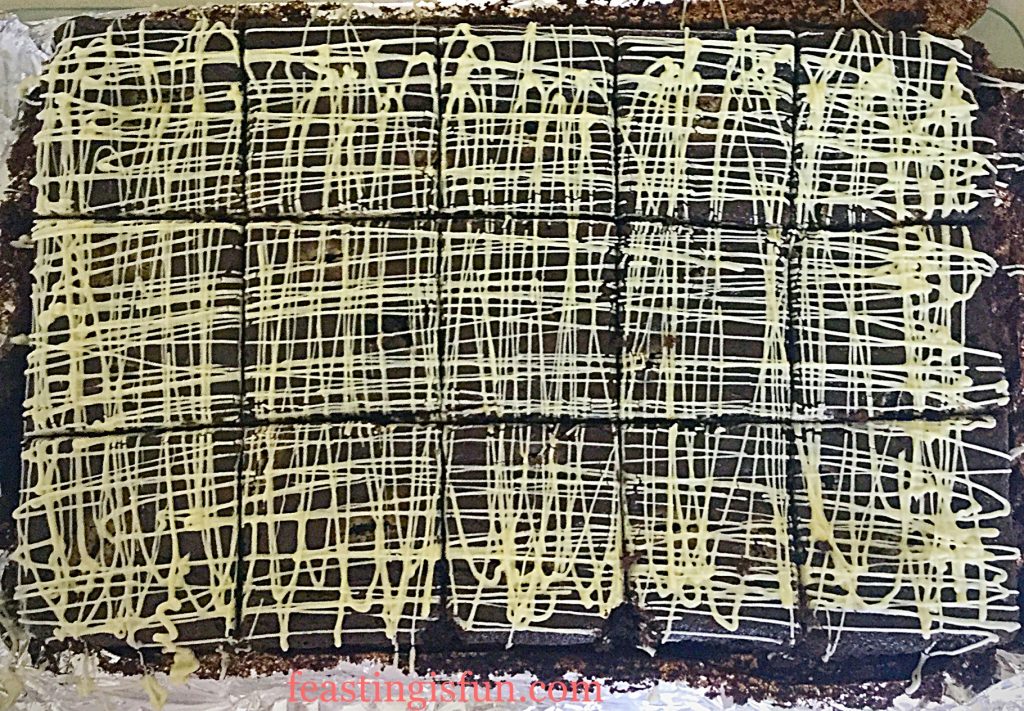
  • Drizzle or pipe the top of the brownie slab, however you like, with the melted chocolate.
  • Finally, place the brownie to one side to set. In very warm weather pop the bake into the fridge to allow the chocolate to set.
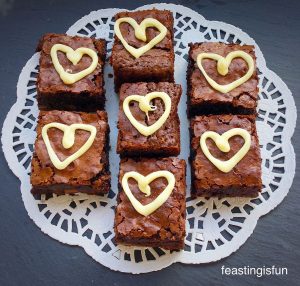
FF Vanilla Fudge Chocolate Brownies
Once set cut the brownies into 15 squares.

To serve, use a pallet knife to slide beneath the base of the brownies and the foil. This ensures that any fudge at the bottom of the brownies sticks to the brownies, not the foil!

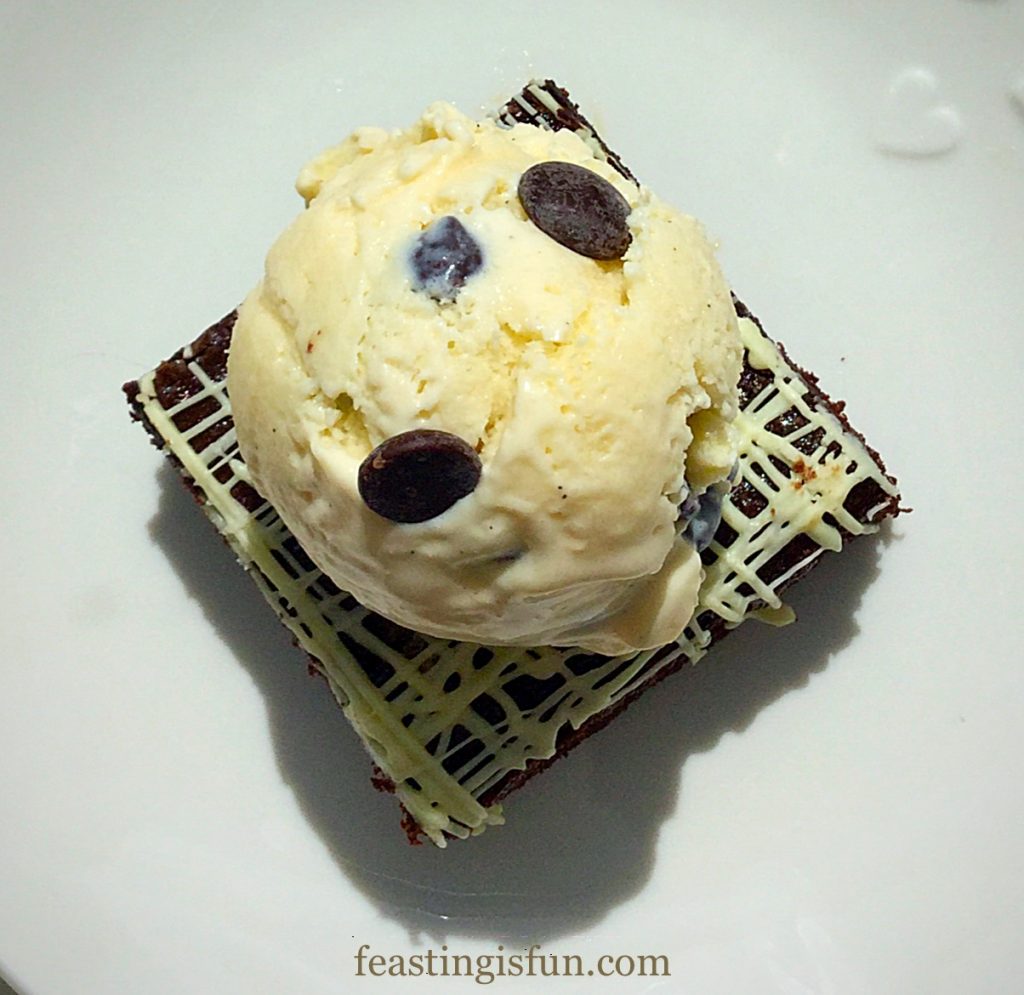
Serve the brownies as they are or with a delicious scoop of ice cream on top.
FF Vanilla Fudge Chocolate Brownies.
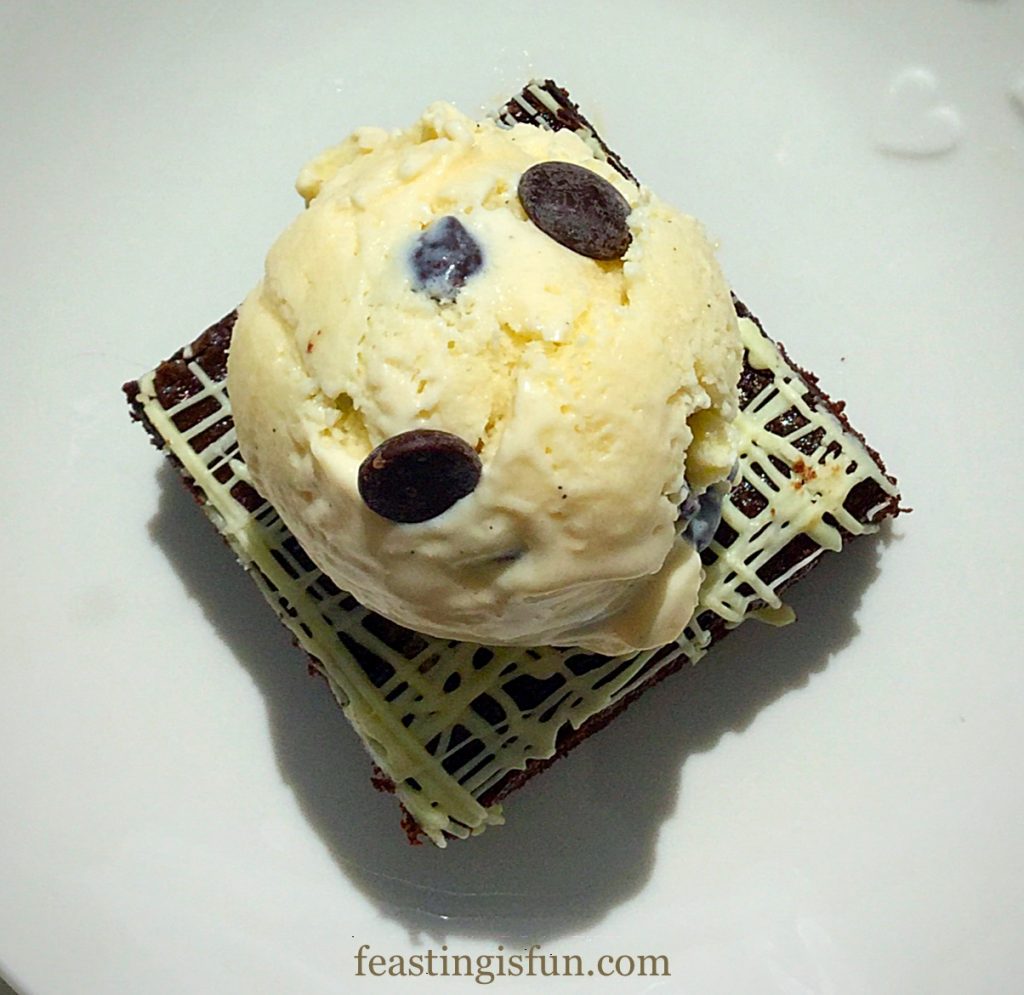
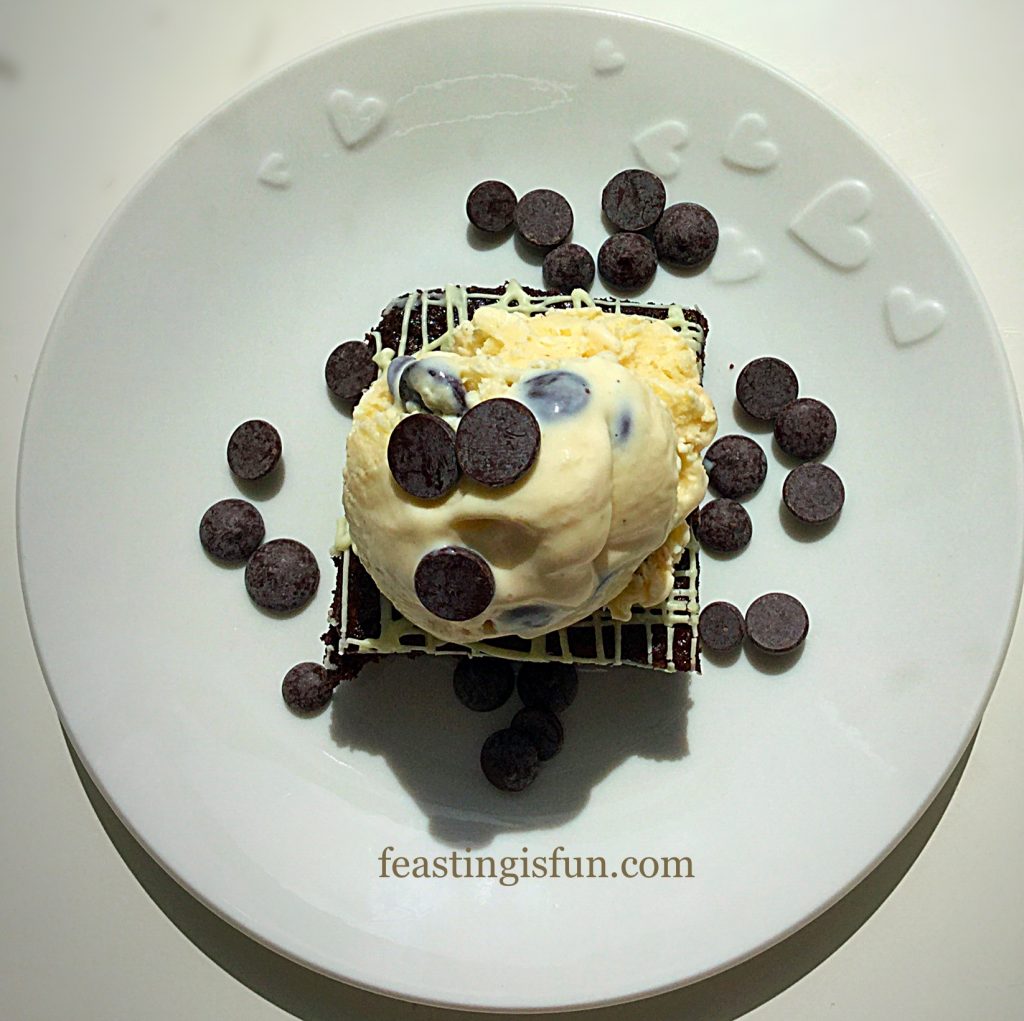
Vanilla Fudge Chocolate Brownies deliciously topped with homemade ice cream.

An easy traybake transformed into an elegant dessert.

If you have enjoyed this recipe for Vanilla Fudge Chocolate Brownies you may also like these:
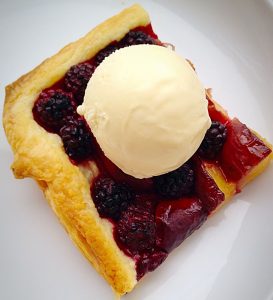
Blackberry Nectarine Tart

FF Vanilla Fudge Chocolate Brownies
Blackberry Nectarine Tart topped with vanilla ice cream.

Chocolate Fudge Brownie Bites

FF Vanilla Fudge Chocolate Brownies
Chocolate Fudge Brownie Bites

Almond Blackberry Pear Crumble

FF Vanilla Fudge Chocolate Brownies
Almond Blackberry Pear Crumble gluten free

I love dual purpose bakes. For example, creating these delicious brownies and then turning them into a fabulous dessert. And with the weather looking good for a few days, why not have a go at making your own ice cream? So, you too can adorn your delicious bakes with homemade ice cream too. Because Feasting really is Fun!

So, whatever you are making, baking and creating in your kitchens, have fun preparing and sharing your feast.

Sammie xx

Fudge Angels sent me 3 different types of flavoured fudge to try. All opinions, views, content and photographs are my own. Please see my Disclosure Policy.

Share
Facebooktwitterpinterestlinkedintumblr

Dark Chocolate Chip Vanilla Ice Cream

Share
Facebooktwitterpinterestlinkedintumblr

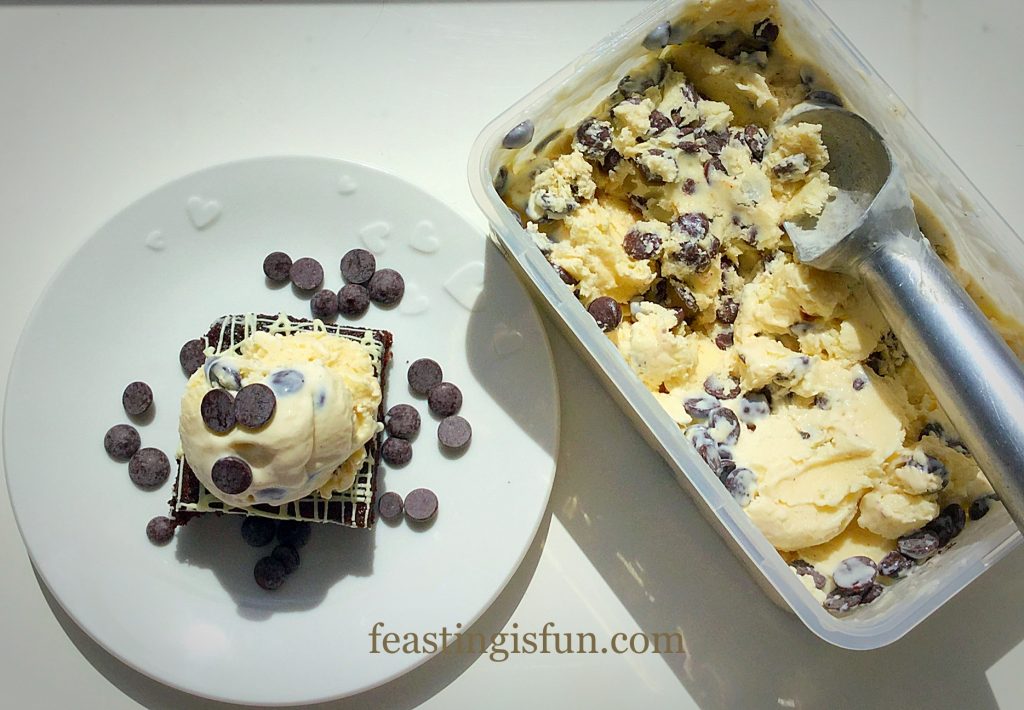
Dark Chocolate Chip Vanilla Ice Cream, perfect on it’s own or to accompany  sweet, hot, fudge brownies.

FF Dark Chocolate Chip Vanilla Ice Cream
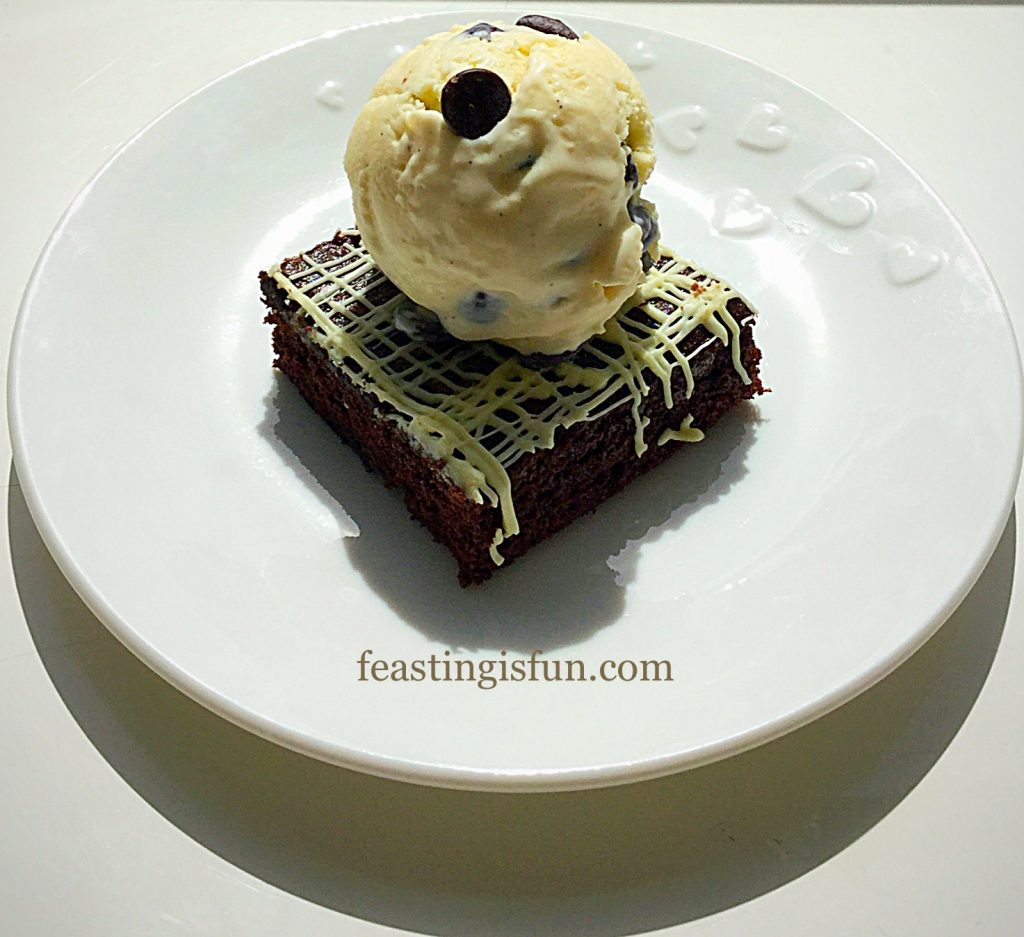
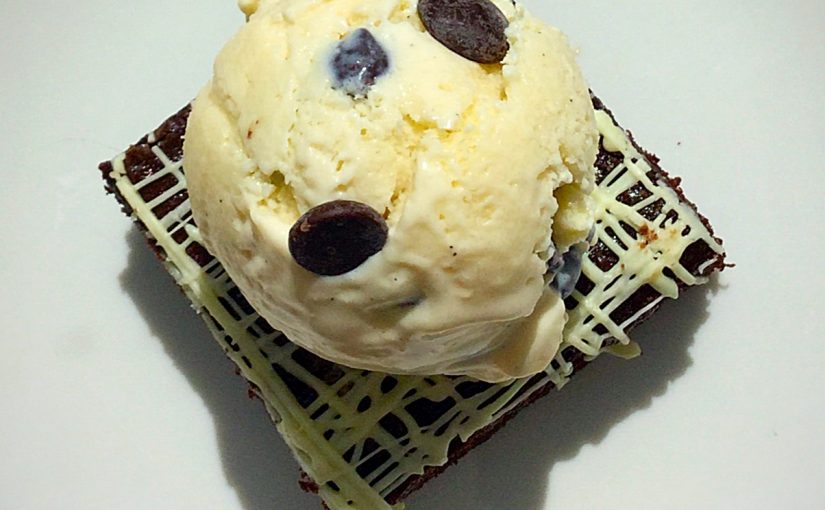
Dark Chocolate Chip Vanilla Ice Cream crowning a delicious homemade chocolate brownie.

Using Callebaut Dark Chocolate Belgian Chips ensures this ice cream has more than a touch of luxury to it.

Vanilla bean speckled ice cream, crammed full of dark chocolate chips is the perfect treat for those who enjoy a not-too-sweet-treat. It also is the perfect accompaniment for a sweet treat, such as my Vanilla Fudge Chocolate Brownies. Balancing out and complimenting the sweet, chocolate and vanilla fudge brownie with dark chocolate chips in a vanilla ice cream.

FF Dark Chocolate Chip Vanilla Ice Cream
Dark Chocolate Chip Vanilla Ice Cream so delicious.

Ok so that’s the technical side to things, in my mind there is only one way to improve a brownie and that is by warming it slightly, 10 secs on medium, in the microwave and crowning it with one great big scoop of ice cream!!!!

The ultimate combination.

FF Dark Chocolate Chip Vanilla Ice Cream
Dark Chocolate Chip Vanilla Ice Cream crunchy chocolate against the velvety ice cream.

So much so, I actually created this Dark Chocolate Chip Vanilla Ice Cream to go with Brownies. By all means serve it in a cone or bowl, but my recommendation is to serve it on top of a homemade Chocolate Macadamia Nut Brownies.

Just a quick note about the chocolate chips – I use chocolate chips that are designed for melting, that is they are not the chocolate chips you find in the baking isle with added stabilisers to make them bake stable. Alternatively use a couple of bars of good quality (70% cocoa) chocolate chopped up into chunks.

Recipe: Makes 750ml Dark Chocolate Chip Vanilla Ice Cream

300ml/ 1/2pint Double Cream

300ml/ 1/2pint Milk – Whole or Semi Skimmed – not skimmed

1tsp Vanilla Bean Paste – I use Nielsen-Massey

4 Large Free Range Egg Yolks – freeze the whites in bags for meringues, for up to one month in the freezer.

6tbsp Caster Sugar

1tsp Corn Flour – I used certified gluten free by – Doves Farm

250g/9oz Dark Chocolate Chips – I use Callebaut

Method: Ensure the freezing compartment of your ice cream maker has been in the freezer overnight, or according to the manufacturers instructions.

For step by step photographs showing how to make the ice cream custard base please see Very Vanilla Ice Cream

  • Place the cream and milk together in a large, heavy bottomed saucepan, over a medium heat. Heat to scalding point – this is just before boiling and you will see a ring of bubbles appear around the rim of the liquid. Once scalding point is reached remove from the heat.
  • Meanwhile in a large bowl whisk together the egg yolks, vanilla bean paste, sugar and corn flour until pale and creamy.
  • With the whisk running on slow, gradually add the hot cream mixture to the egg mixture in the bowl.
  • Once combined pour the custard base back into the saucepan and place over a medium heat.
  • Stir constantly with a wooden spoon, until the custard is thickened and coats the back of the spoon.
  • Pour the cooked custard, through a sieve, into a clean bowl.
  • Cover the top of the custard base with cling film, so that it is in direct contact with the liquid, this prevents a skin from forming.
  • Allow the liquid to cool on the work top, I place the bowl on a trivet to aid air circulation.
FF Dark Chocolate Chip Vanilla Ice Cream
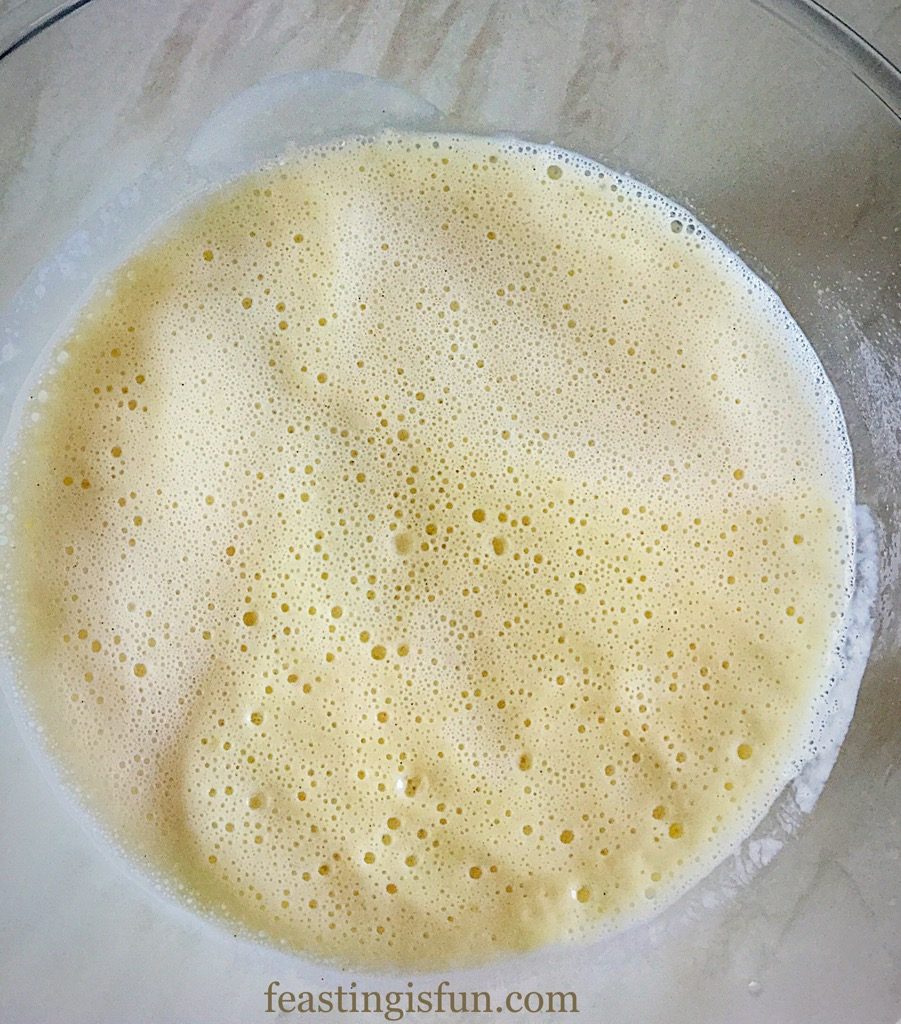
The vanilla custard base cooling on the worktop.
  • When the liquid is just warm place the bowl into the fridge until chilled.
  • Set up your ice cream maker according to the manufacturers instructions.
  • With my Andrew James ice cream maker the machine must be churning as the liquid is poured in. If it is easier, transfer the custard base to a jug for pouring.
  • Pour the liquid into the ice cream machine and churn until you have a soft set ice cream.
  • Stop the machine, remove any paddle and scoop the contents into a freezer proof, sealable container.
  • Add most of the dark chocolate chips to the soft ice cream and swirl through using the handle of a wooden spoon.
  • Sprinkle the remaining dark chocolate chips on to the surface of the ice cream. Clamp on the lid and place in the deep freeze until fully frozen.
FF Dark Chocolate Chip Vanilla Ice Cream
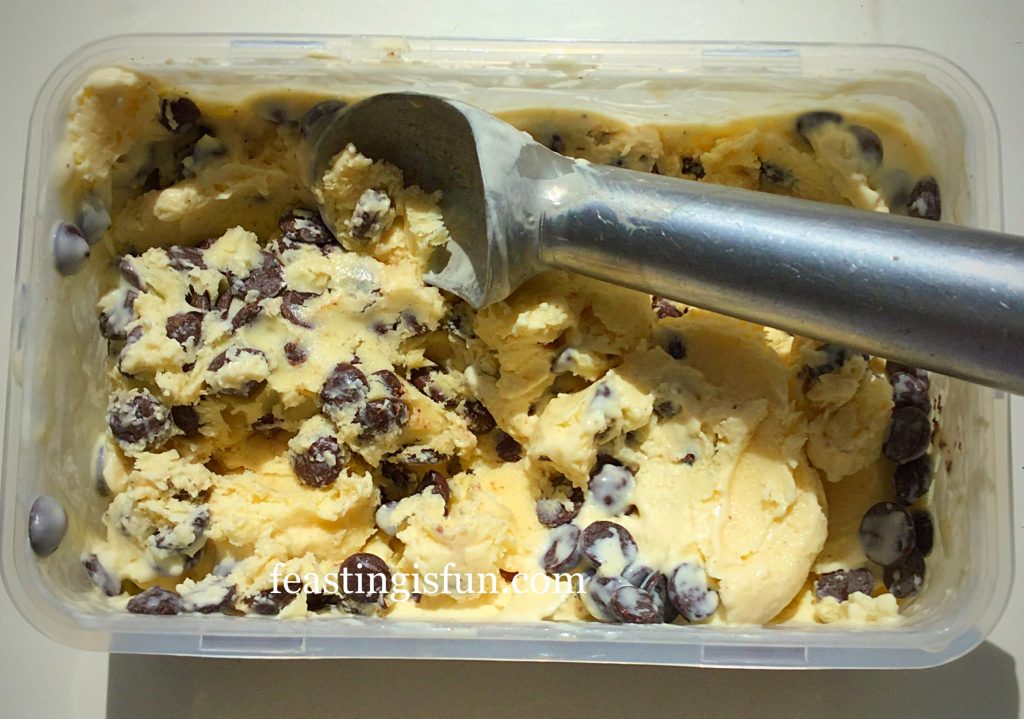
Dark Chocolate Chip Vanilla Ice Cream needs a few minutes out of the freezer to soften.

To serve, remove the Dark Chocolate Chip Vanilla Ice Cream from the freezer 10-20 minutes before needed, so that it can soften and be easily scooped. One of the fantastic advantages of making your own ice cream at home, is, that no preservatives or additives are present. Yes this means waiting for the ice cream to soften a little prior to scooping. For me I’m willing to wait!

FF Dark Chocolate Chip Vanilla Ice Cream
Dark Chocolate Chip Vanilla Ice Cream perfect in a cone as well as with a brownie.

The contrast between the clattering, crunchy chocolate chips and the smooth, velvety, vanilla ice cream simply creates one of the best ice creams I have tasted so far. Trust me, that says a lot.

I have made plenty of ice creams this year with my beloved Which Best Buy Andrew James Ice Cream Maker, some haven’t made it on to the blog yet as they either haven’t delivered on taste and texture, or simply need tweaking. I really am tough on the recipes that I’m willing to post. They have to be excellent, not just ok!

Trust me this Dark Chocolate Chip Vanilla Ice Cream is excellent.

If you have enjoyed this recipe for Dark Chocolate Chip Vanilla Ice Cream then you may also like these:

Strawberry Ripple Ice Cream

FF Dark Chocolate Chip Ice Cream
Strawberry Ripple Ice Cream

Chocolate Orange Ice Cream

FF Dark Chocolate Chip Vanilla Ice Cream
Chocolate Orange Ice Cream

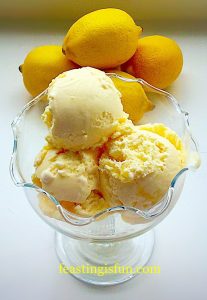
Lemon Ripple Ice Cream

FF Dark Chocolate Chip Vanilla Ice Cream
Lemon Ripple Ice Cream

Making ice cream at home is so simple, the range of flavours are limitless and the cost of the ice cream maker justified by the quality of ice cream you can make at home.

I have put this Andrew James Ice Cream Maker, which has been awarded a Which Best Buy, through rigorous testing and I thoroughly recommend it.

Have fun, making, creating and baking in your kitchens.

Sammie xx

Andrew James provided me with the ice cream maker for the purposes of a review. All opinions, views, recipes, content and photographs are my own. please see my Disclosure Policy.

Share
Facebooktwitterpinterestlinkedintumblr

Strawberry Whipped Cream Giant Doughnut

Share
Facebooktwitterpinterestlinkedintumblr

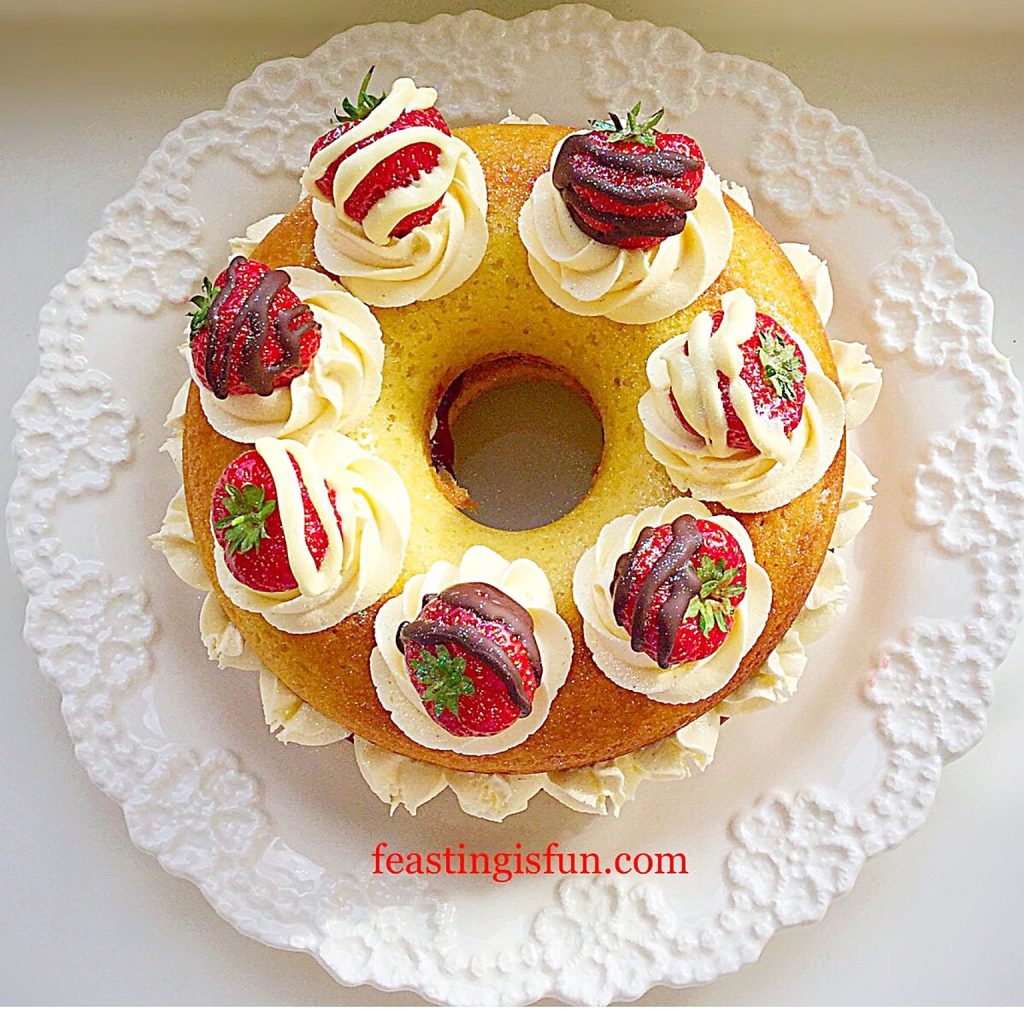
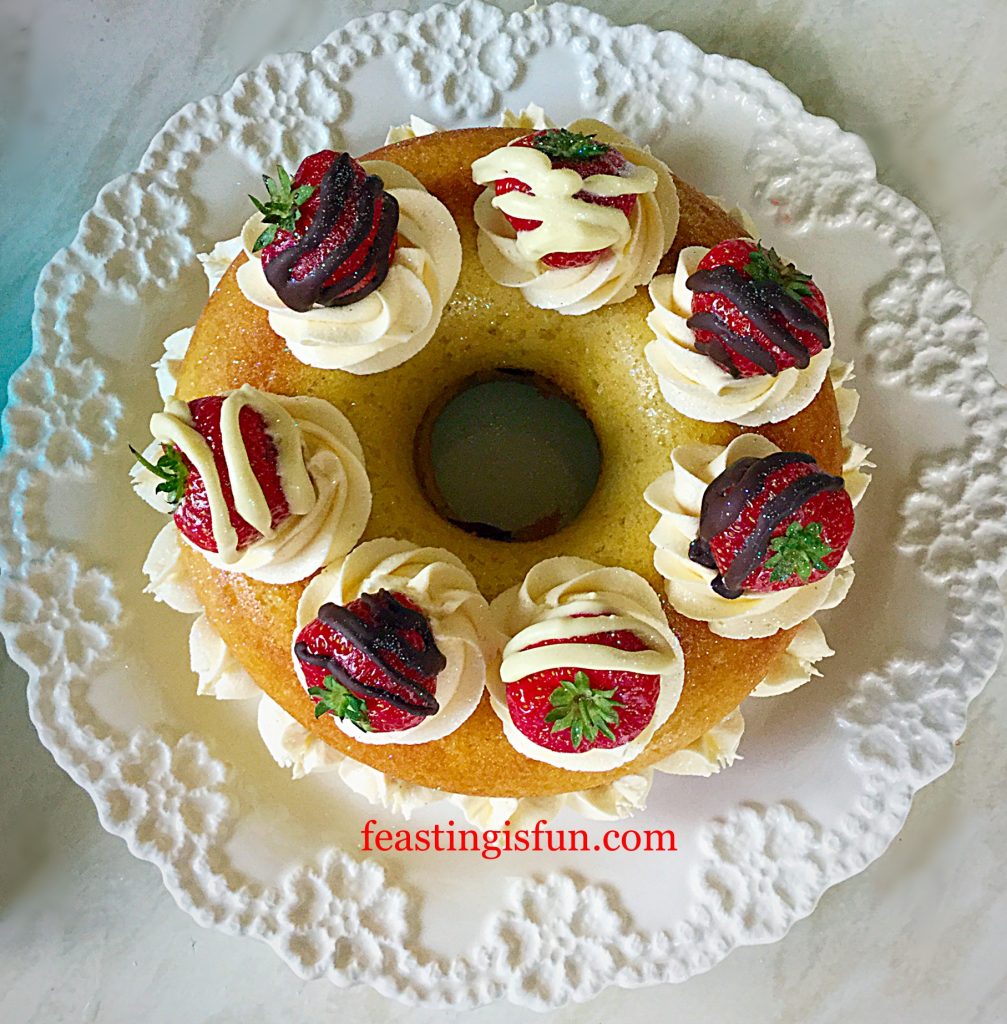
Ooh this Strawberry Whipped Cream Giant Doughnut has been made twice now, once using regular flour and then using gluten free flour. Nobody could tell the difference! Delicious, light vanilla sponge, sandwiched with strawberry jam, whipped cream and topped with chocolate piped strawberries.

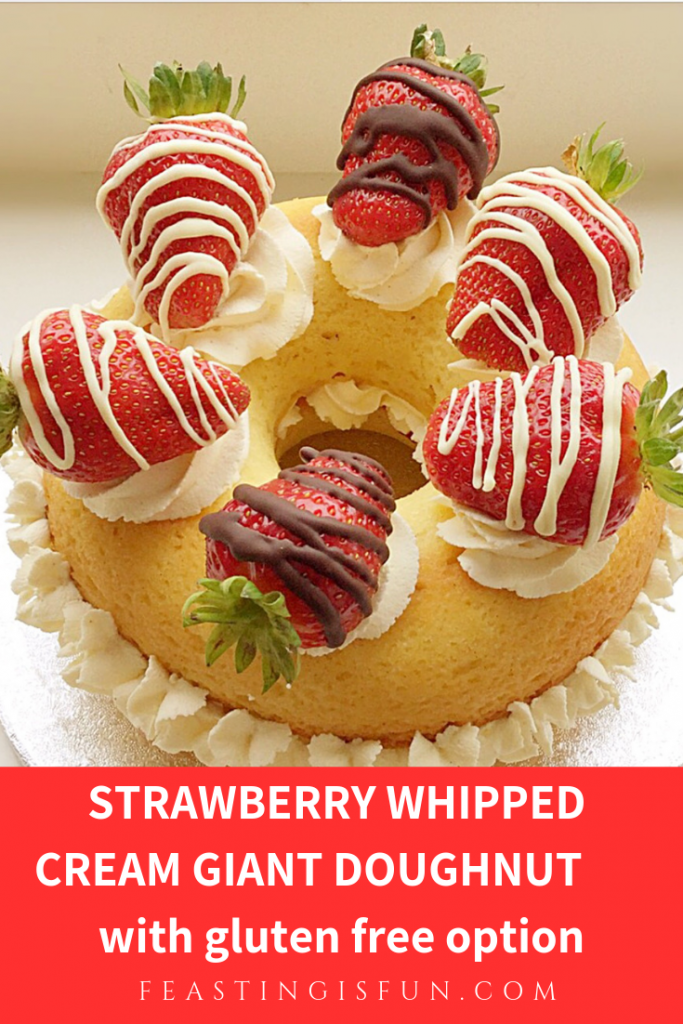
Image sized for Pinterest with descriptive graphics.

Piping the strawberries with white and dark chocolate takes this cake to the next level in terms of prettiness. That said, beautiful, lush summer strawberries, left un piped would still look fabulous.

FF Strawberry Whipped Cream Giant Doughnut
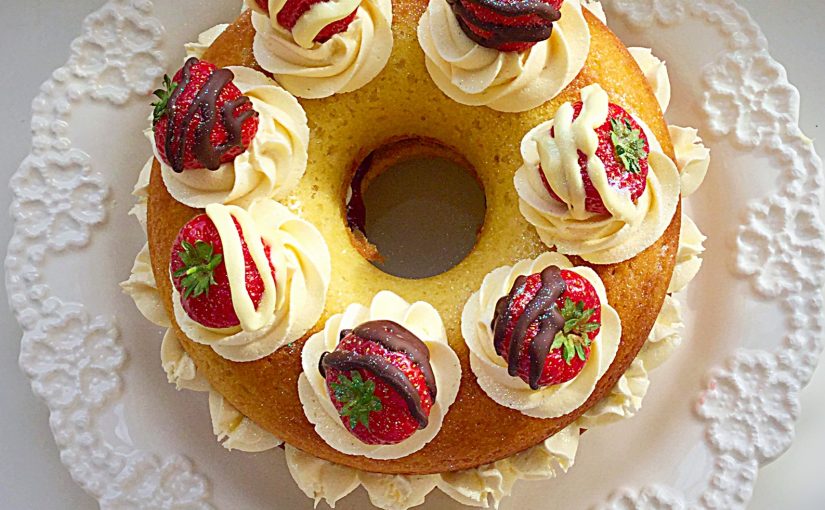
Strawberry Whipped Cream Giant Doughnut such a pretty cake.

Having made this cake with both whipped cream and whipped buttercream, I have to say we all preferred the whipped cream. I have given quantities for buttercream in the recipe for those who prefer it.

I don’t know about you, but I love making the most of our delicious, homegrown, seasonal strawberries in summer. Yes I am guilty of buying the occasional punnet of imported ones during the colder months. With the invention of poly tunnels and huge greenhouses, we are increasingly able to buy British grown berries over a longer period. Thank you farmers!

Large, baked doughnut filled with whipped cream and decorated with chocolate strawberries.
Strawberry Whipped Cream Giant Doughnut

Going Gluten Free

As you can see from the photographs there is no real visual difference between the gluten free and regular Strawberry Whipped Cream Giant Doughnut. Only the size of the strawberries! The ones in the photo above were huge, which made them easier to pipe. Whereas the smaller ones were more tricky. If possible choose longer strawberries as they look more effective with the piping on. That said, I’d definitely choose flavour over size any day. The strawberries above may have been big, but they were also utterly delicious!

How do I tell if they are going to taste good? I smell them. If the punnet smells of warm summer strawberries they will taste delicious, however, if you can barely detect that delicious strawberry smell, move on as they will be bland.

Both of these giant doughnuts were made to go with afternoon tea and they were a huge hit. So, whether you are on a restricted diet or not, you can make this Strawberry Whipped Cream Giant Doughnut and feast!

Recipe: Strawberry Whipped Cream Giant Doughnut serves 8-10

225g/8oz  Plain White Flour – or gluten free flour I used Doves Farm

2tsp Baking Powder – ensure certified gluten free

225g/8oz Unsalted Butter at room temperature – plus a little extra for greasing the silicone doughnut moulds.

225g/8oz Caster Sugar

1/4tsp Salt I use Maldon

5 Large Free Range Eggs

1tsp Vanilla Bean Paste – or Vanilla Extract – I use Nielsen-Massey

10 Good Quality Strawberries

2tbsp Good Quality Strawberry Jam – I used Hartleys Best Strawberry Jam

300mls Cold Double Cream – alternatively for buttercream use 300g/11oz icing sugar and 150g/5oz butter and a drop of vanilla extract

50g/2oz White Chocolate

50g/2oz Dark Chocolate

Optional – edible glitter

Method: Preheat the oven to 160C/140C fan, gas mark 3

Making The Cake Batter And Baking The Doughnut

  • Grease both the silicone doughnut moulds thoroughly with butter. Place on a large baking tray.
  • Into a large bowl add the butter, sugar and salt.
  • Whisk/beat for a good few minutes – 5 minutes ideally – until pale and creamy.
  • Add in the vanilla bean paste (or extract) and beat until incorporated.
  • Next add all 5 eggs. Continue whisking/beating until the mixture is pale and creamy. If the mix looks as though it has split (curdled) add 1 tablespoon of the weighed flour, continue mixing and it will pull back together.
  • Sift in the flour (gluten free or regular) and the baking powder.
  • Fold in the flour until just combined.
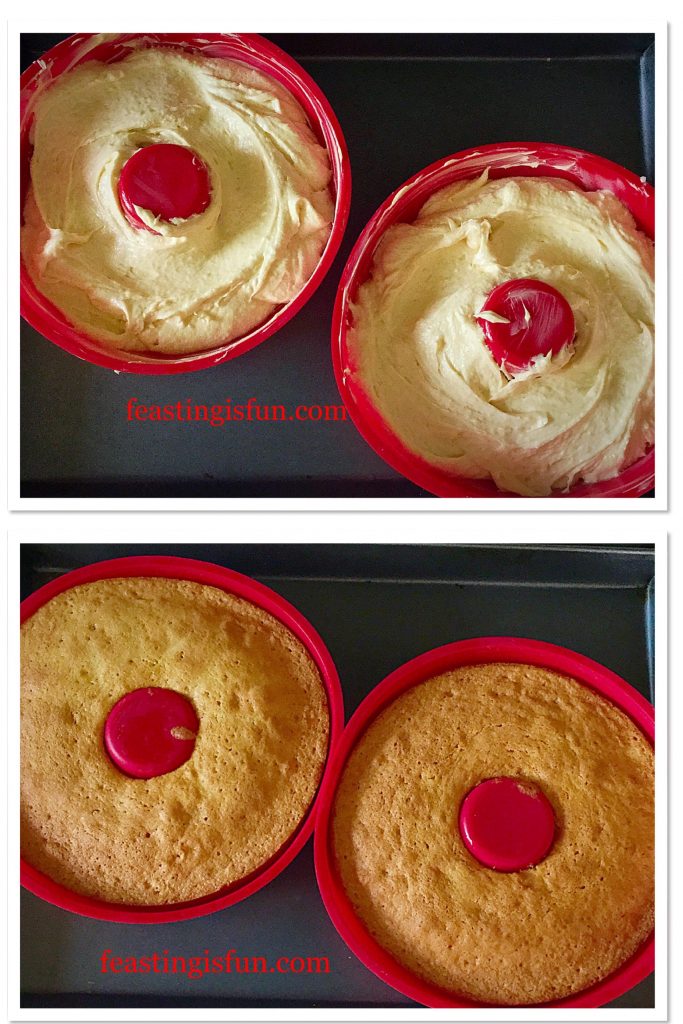
  • Divide the batter equally between the 2 doughnut moulds.

FF Strawberry Whipped Cream Giant Doughnut

    These silicone doughnut moulds from Lakeland are so easy to use.
  • Place the baking tray into the centre of the oven and bake for 30-40 minutes.
  • The sponge is baked when it is a golden colour and springs back when lightly pressed – note – the gluten free doughnut was slightly paler than the regular doughnut, this is nothing to worry about.
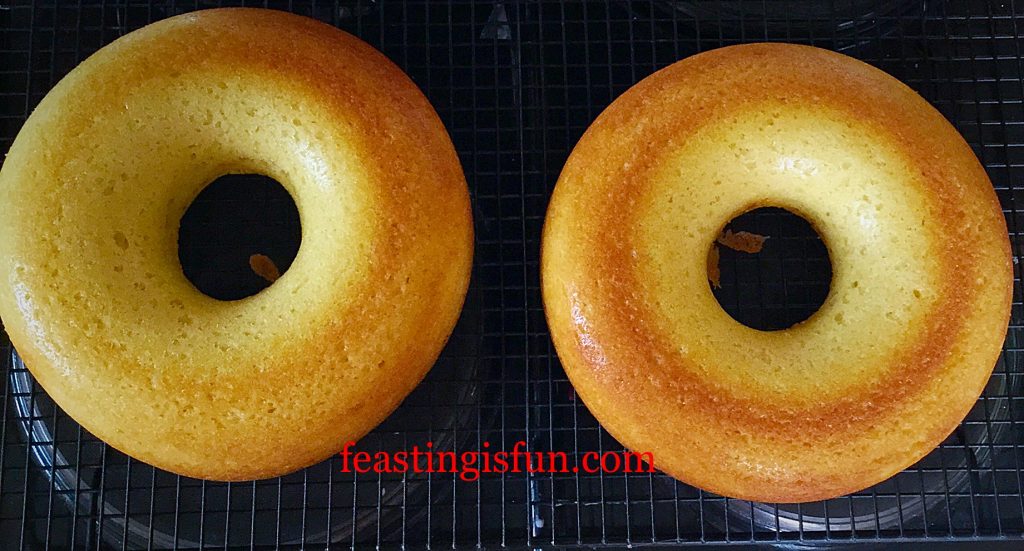
  • As soon as they are baked remove the baking tray from the oven and allow the doughnuts to cool for 10 minutes before turning them out on to a cooling rack.
FF Strawberry Whipped Cream Giant Doughnut
Leave the doughnut halves to cool completely on the rack.

Filling And Decorating The Doughnut

  • Whilst the doughnut’s are cooling, break up the white and dark chocolate and place into separate heatproof, microwaveable bowls. Zap until just melting and stir until completely melted. Fill 2 small disposable piping bags with each melted chocolate. Snip off the very end, leaving a small hole. Place the strawberries on baking parchment or a silicone mat placed on a baking tray (helpful if you need to move them). Pipe some with white chocolate zig zags and others the same using dark chocolate. Allow to set, in hot weather pop in the fridge for a few minutes to set.
  • When completely cooled place one doughnut half, flat side up on to a board or plate.
  • Whisk the cream (or icing sugar/butter/vanilla) until it holds its shape (or until the buttercream is pale and creamy).
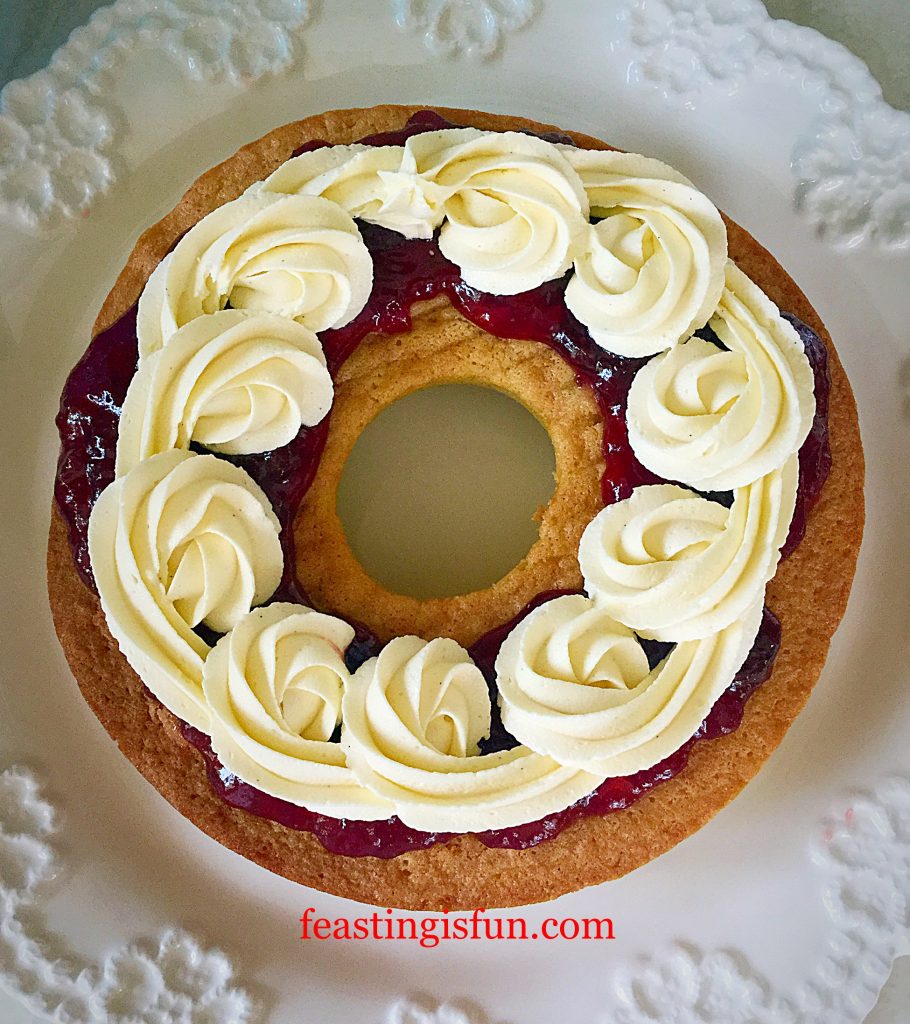
  • Spoon the strawberry jam on to the base of the doughnut and spread so that it almost reaches the edges.
  • Fill a disposable piping bag, fitted with a large star tip, with the cream/buttercream.
  • Pipe some cream on top of the jam.
FF Strawberry Whipped Cream Giant Doughnut
Strawberry Whipped Cream Giant Doughnut – luscious swirls of cream inside the doughnut!
  • Place the other half of the doughnut, flat side down, on top of the base.
  • Pipe swirls of cream/buttercream around the doughnut and then pipe stars around the centre, on the side.
  • Top the swirls with chocolate piped strawberries and sprinkle with edible glitter.
FF Strawberry Whipped Cream Giant Doughnut
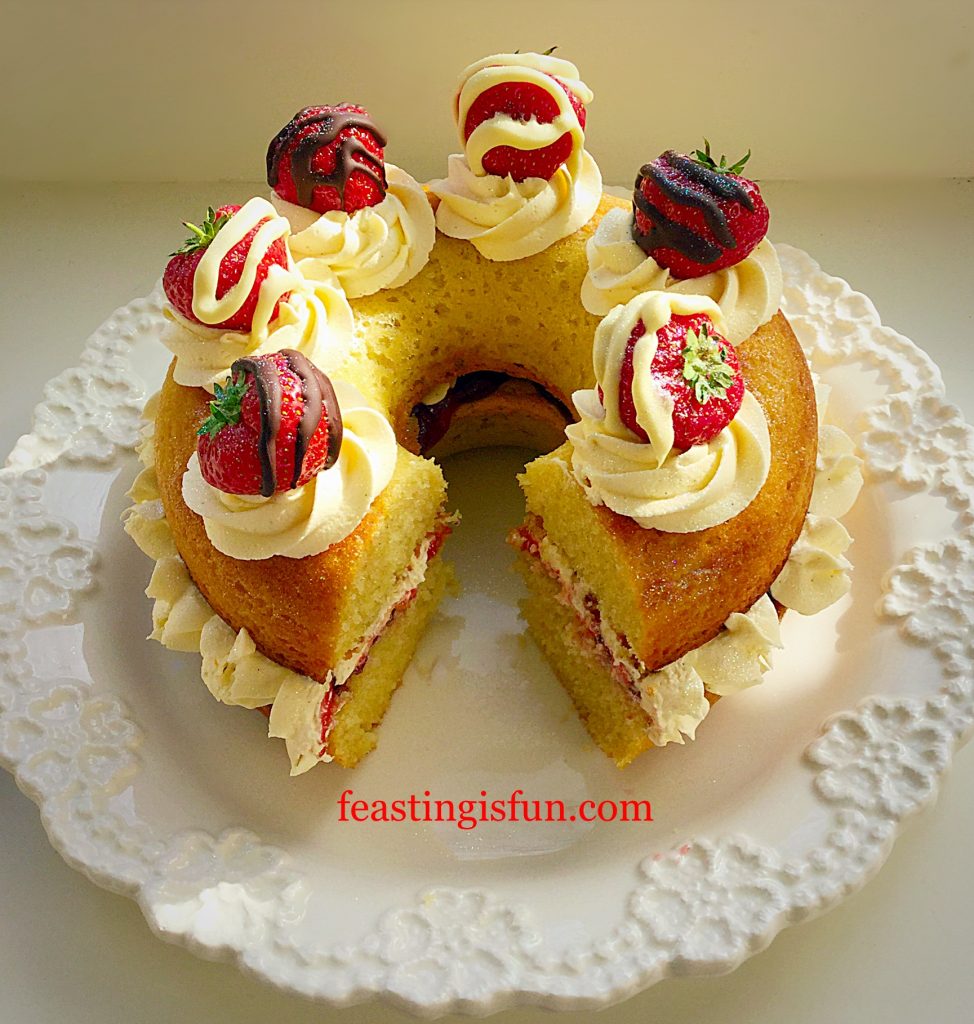
Beautiful swirls of whipped cream are topped with chocolate piped strawberries.

Serving The Giant Doughnut

Make sure you take a photo of your beautiful Strawberry Whipped Cream Giant Doughnut, as once it is assembled I can guarantee that it will not last long!

I have specified more strawberries in the recipe than you see on the cake. This is so that everyone gets a delicious, chocolate piped strawberry with their slice.

Served with a proper cup of tea, I can think of no better way than feasting on this delicious treat any afternoon.

I bought the giant doughnut silicone mould from Lakeland at a silly price in the sale. That said, they are so much fun, I’d happily pay full price for one!

If you have enjoyed the recipe for Strawberry Whipped Cream Giant Doughnut then you may like these too:

Raspberry and Cream Giant Doughnut

FF Strawberry Whipped Cream Giant Doughnut
Raspberry and Cream Giant Doughnut

Black Forest Giant Doughnut

FF Strawberry Whipped Cream Giant Doughnut
Black Forest Giant Doughnut

Loveliest Lemon Curd Cake

FF Strawberry Whipped Cream Giant Doughnut
Loveliest Lemon Curd Cake

The idea of Afternoon Tea really appeals to me. Even if I can’t be fussed to make finger sandwiches and the like, making a treat for Sunday afternoon, where we sit down and enjoy as a family, is becoming a tradition.

Quite often I will bake the cake/giant doughnut on the Saturday, ready for icing the following day. We give a lot of the sweet treats that I make away. Primarily because as a family we love sharing, we are also conscious of our health too.

If you have family traditions I’d love to hear about them. Leave a comment for me to read in the comments section?

Whatever you are making, baking and creating in your kitchens, have fun preparing and sharing your feast.

Sammie xx

No part of this post may be reproduced or duplicated without the written permission of the owner. Please see my Disclosure Policy.

Share
Facebooktwitterpinterestlinkedintumblr