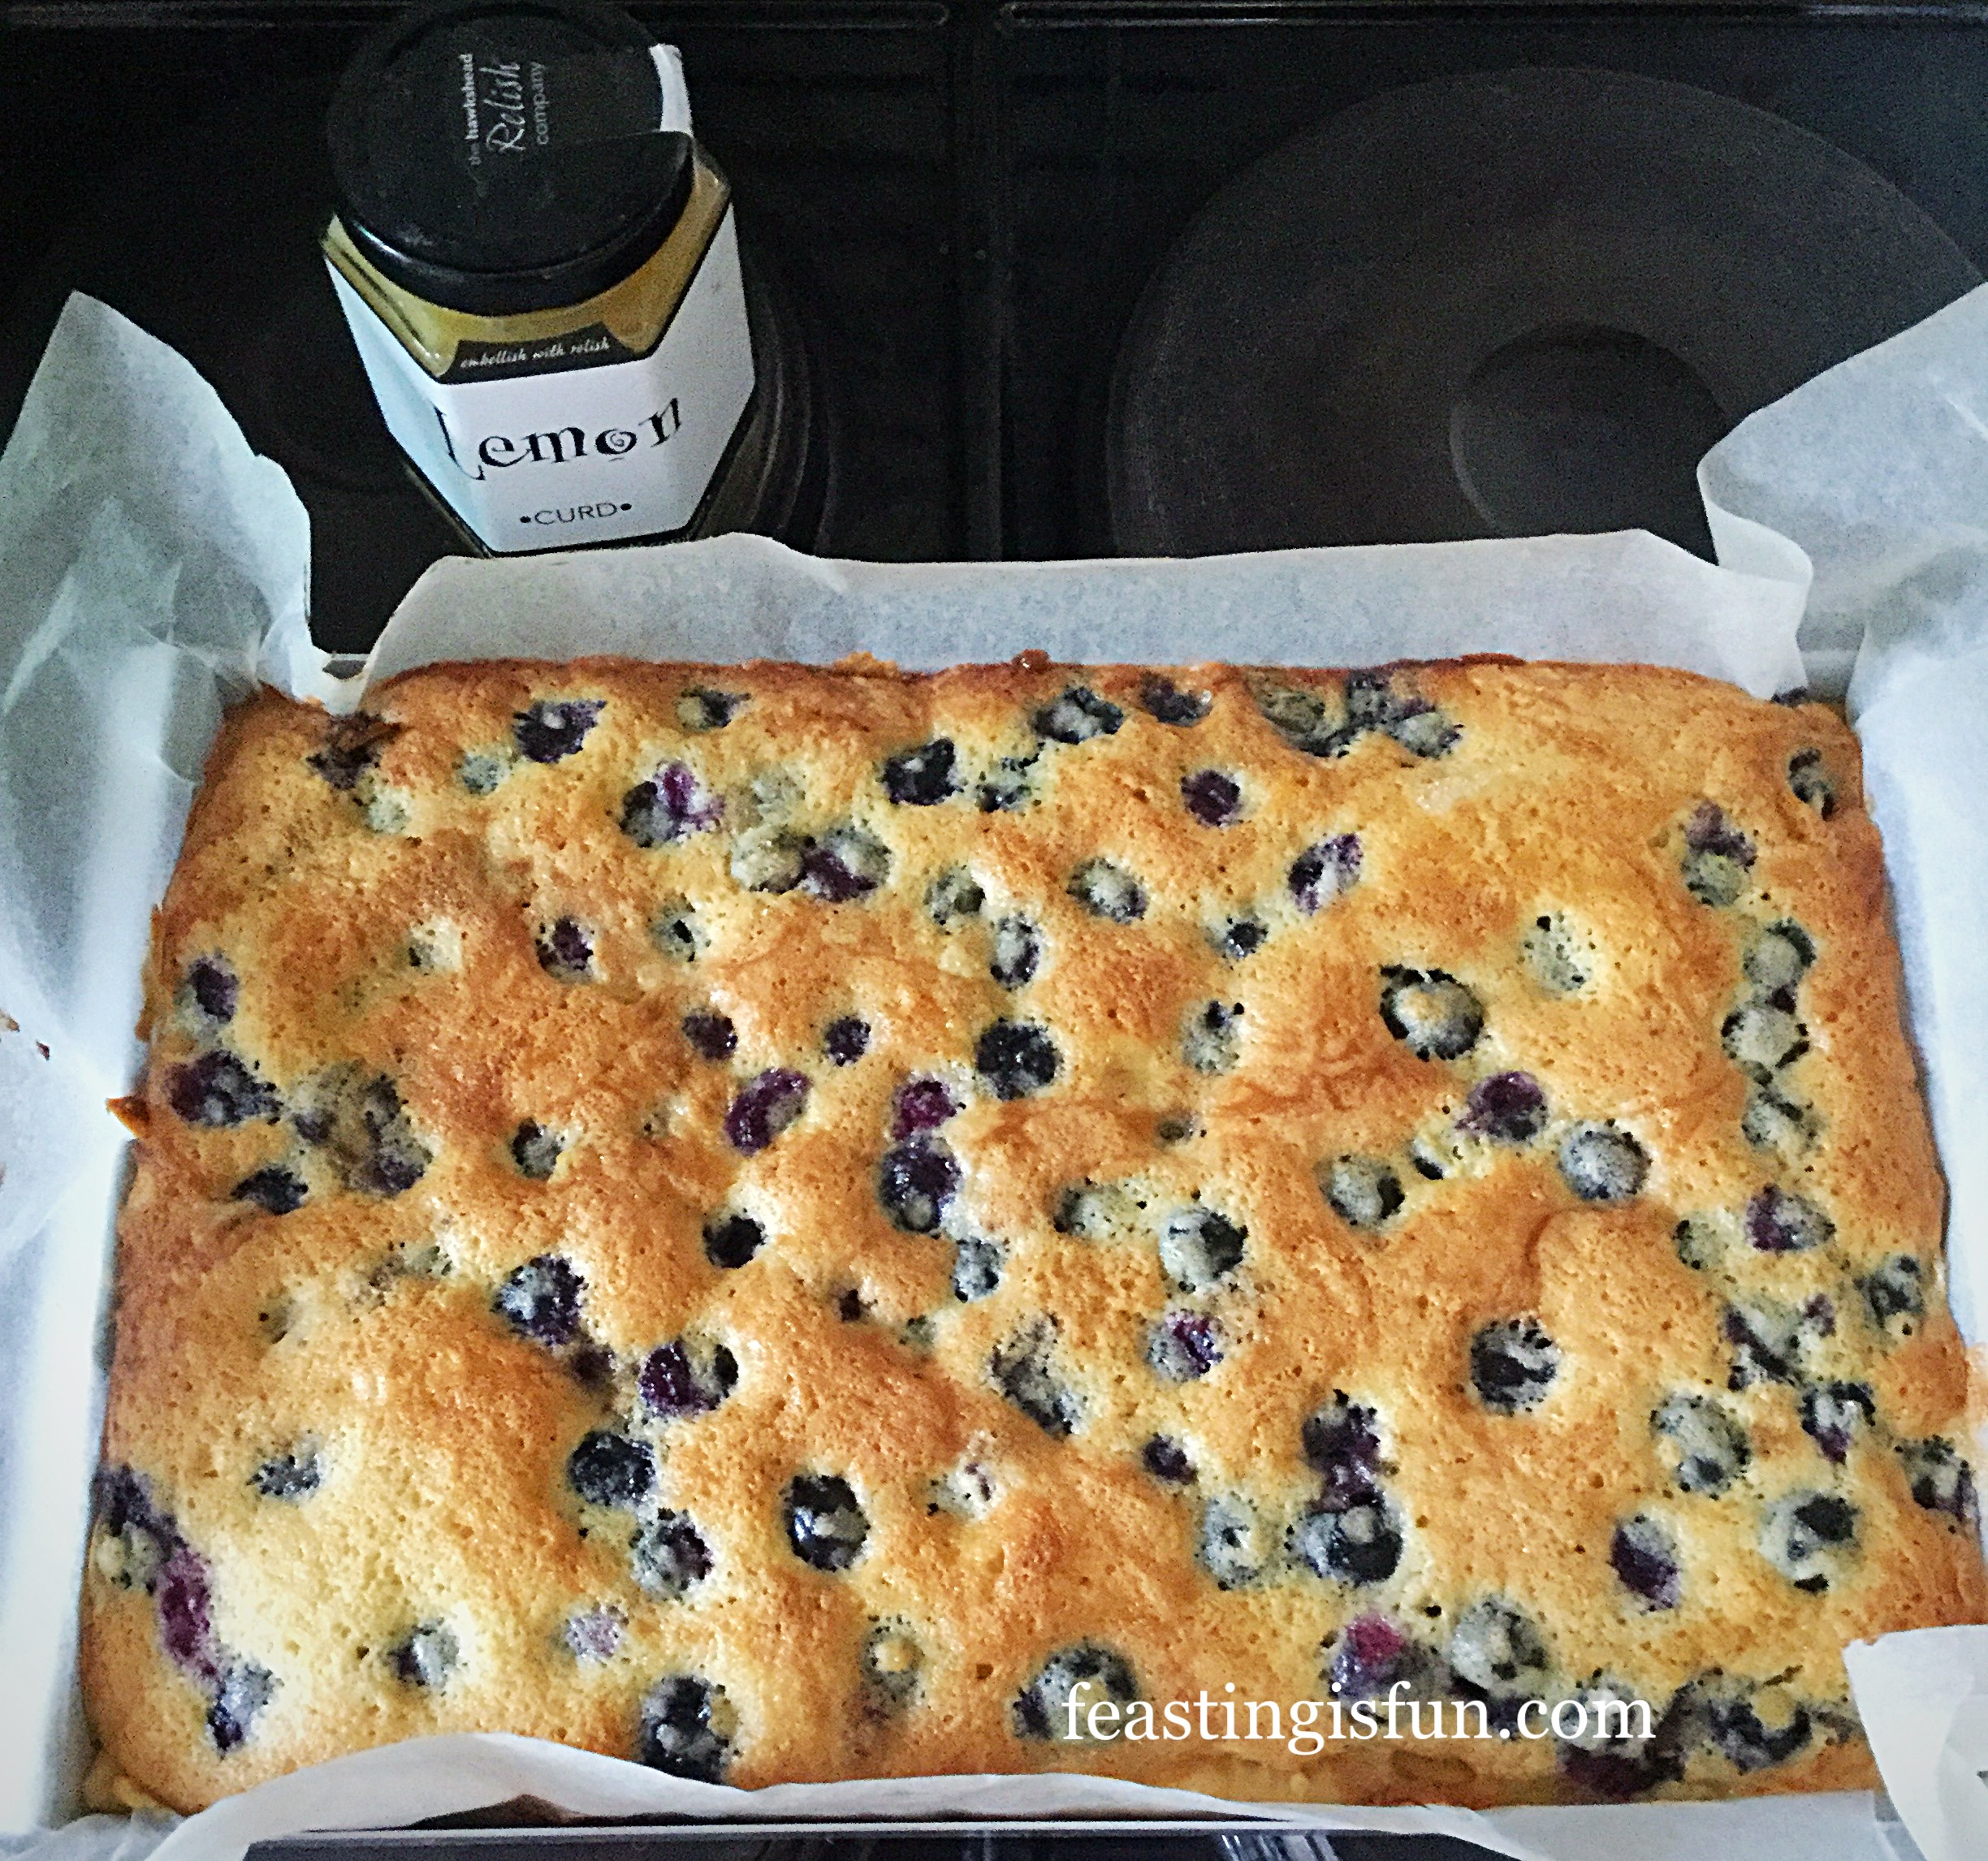
So, I’d like to wish a Happy Easter everyone. And welcome to the first, new blog post in well over a year! Finally, I am thrilled to be sharing my recipe for Mini Egg Millionaires Shortbread squares with you. Also, I am equally excited at finally having all the dots join up so that I can create a recipe, make and test it, photograph it, edit the photos, write the blog post and then publish it!
So, as previously mentioned, there is a lot that goes into creating content that is up to standard for my blog. And I sure have a corker of a recipe for you today.
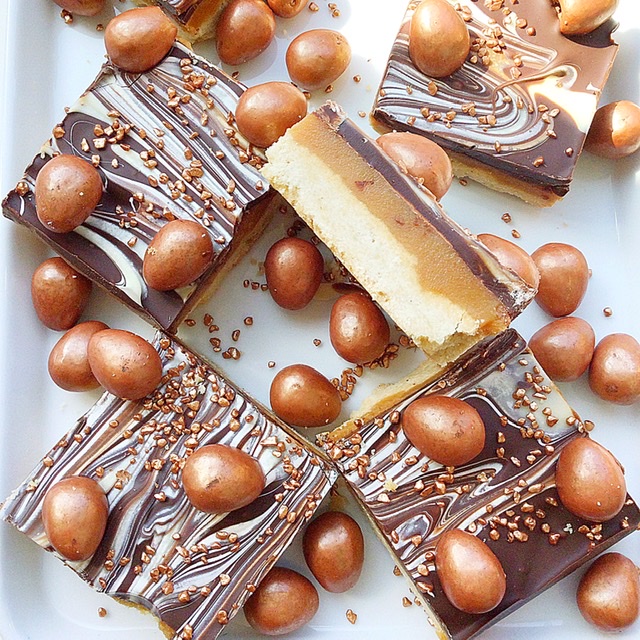

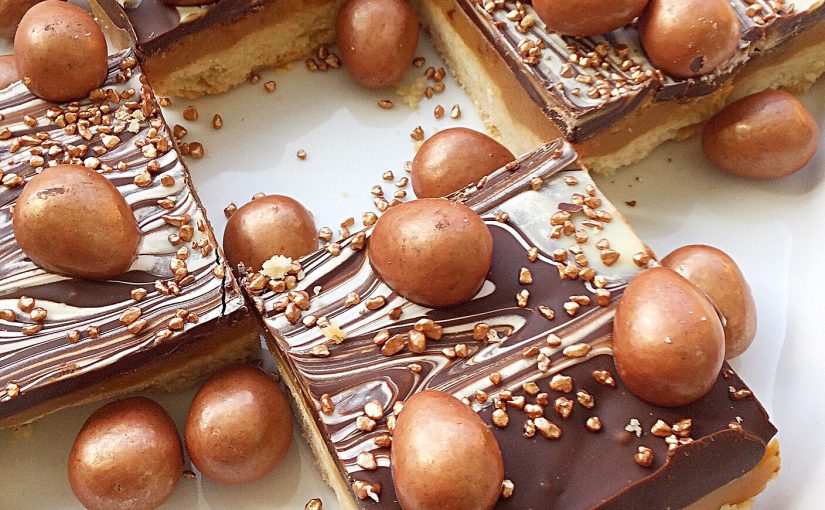
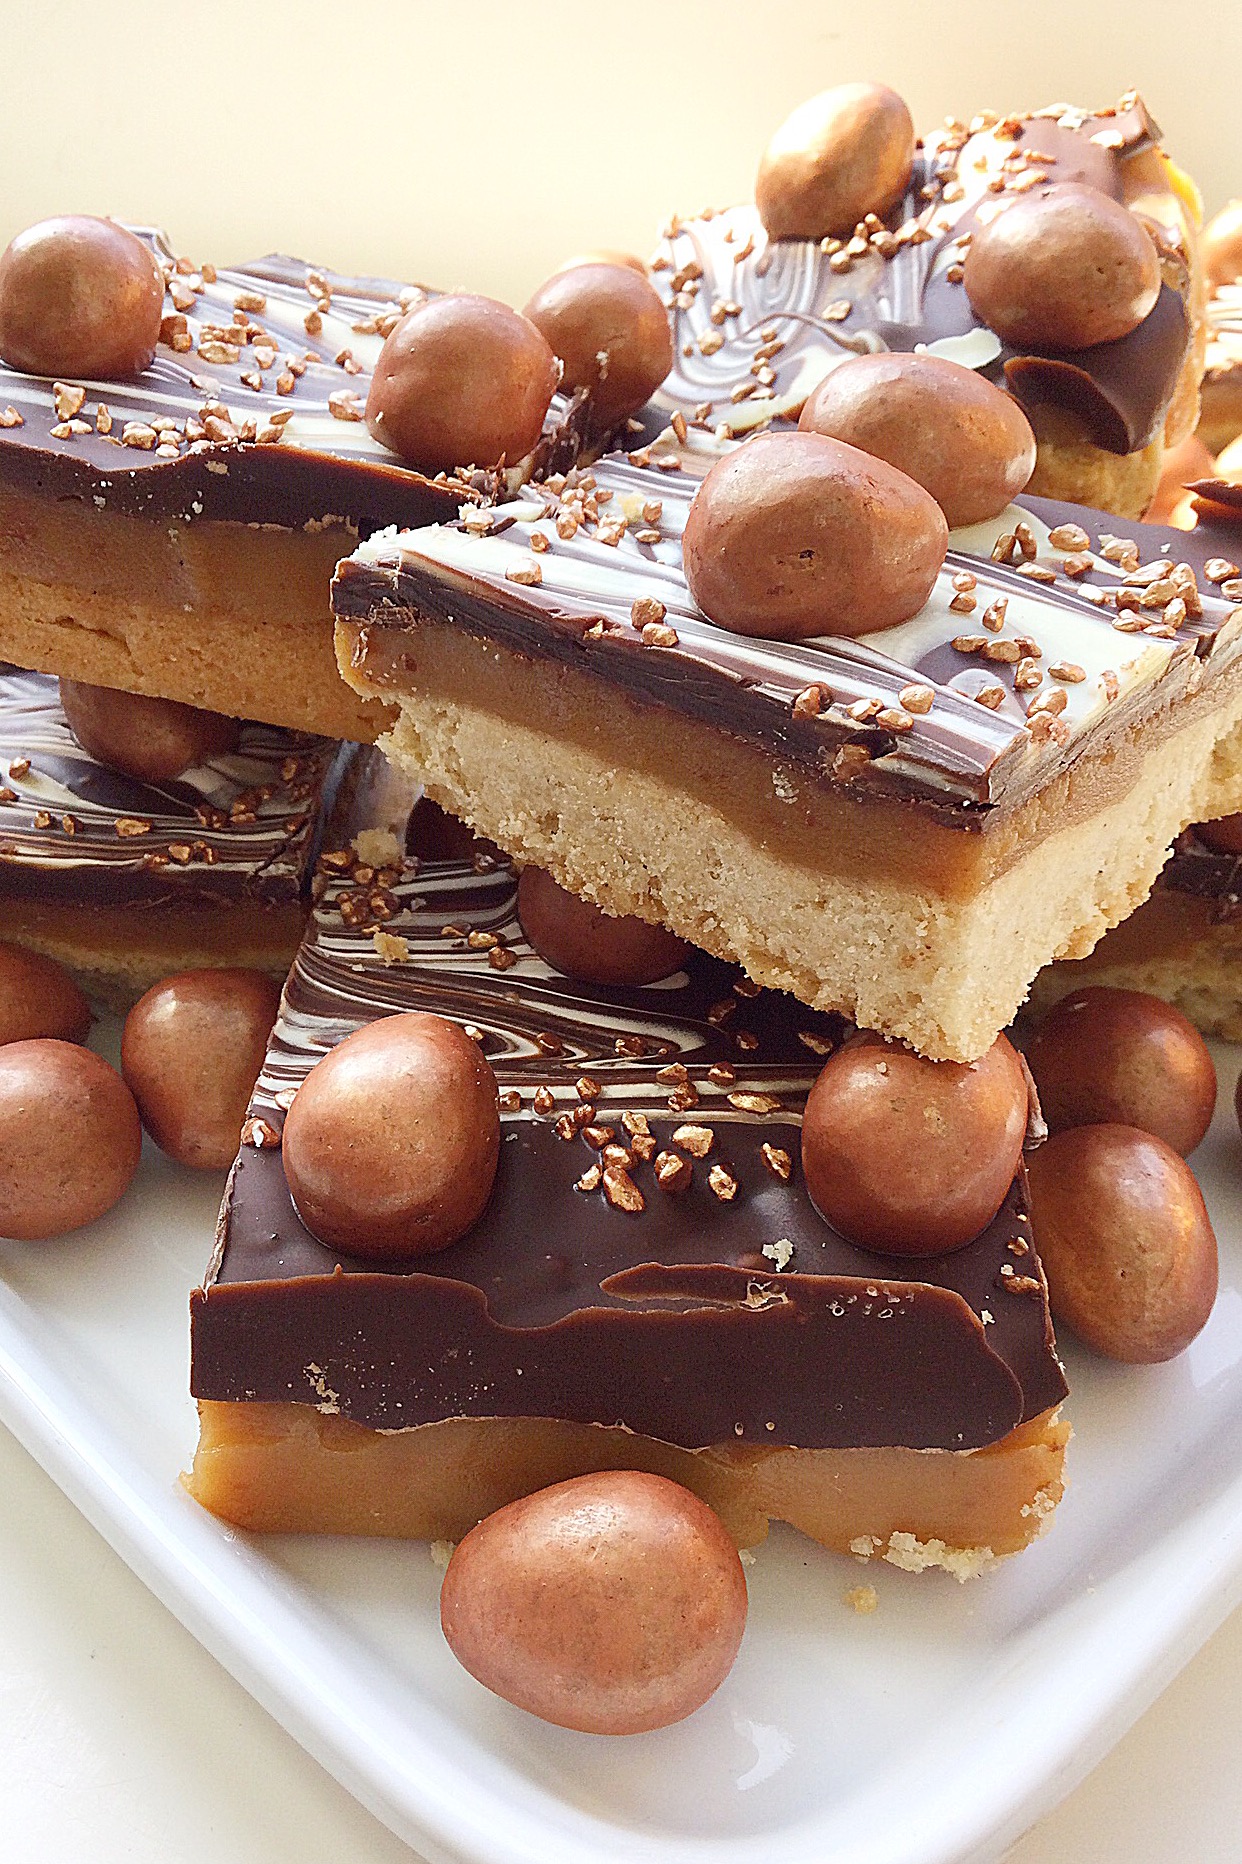
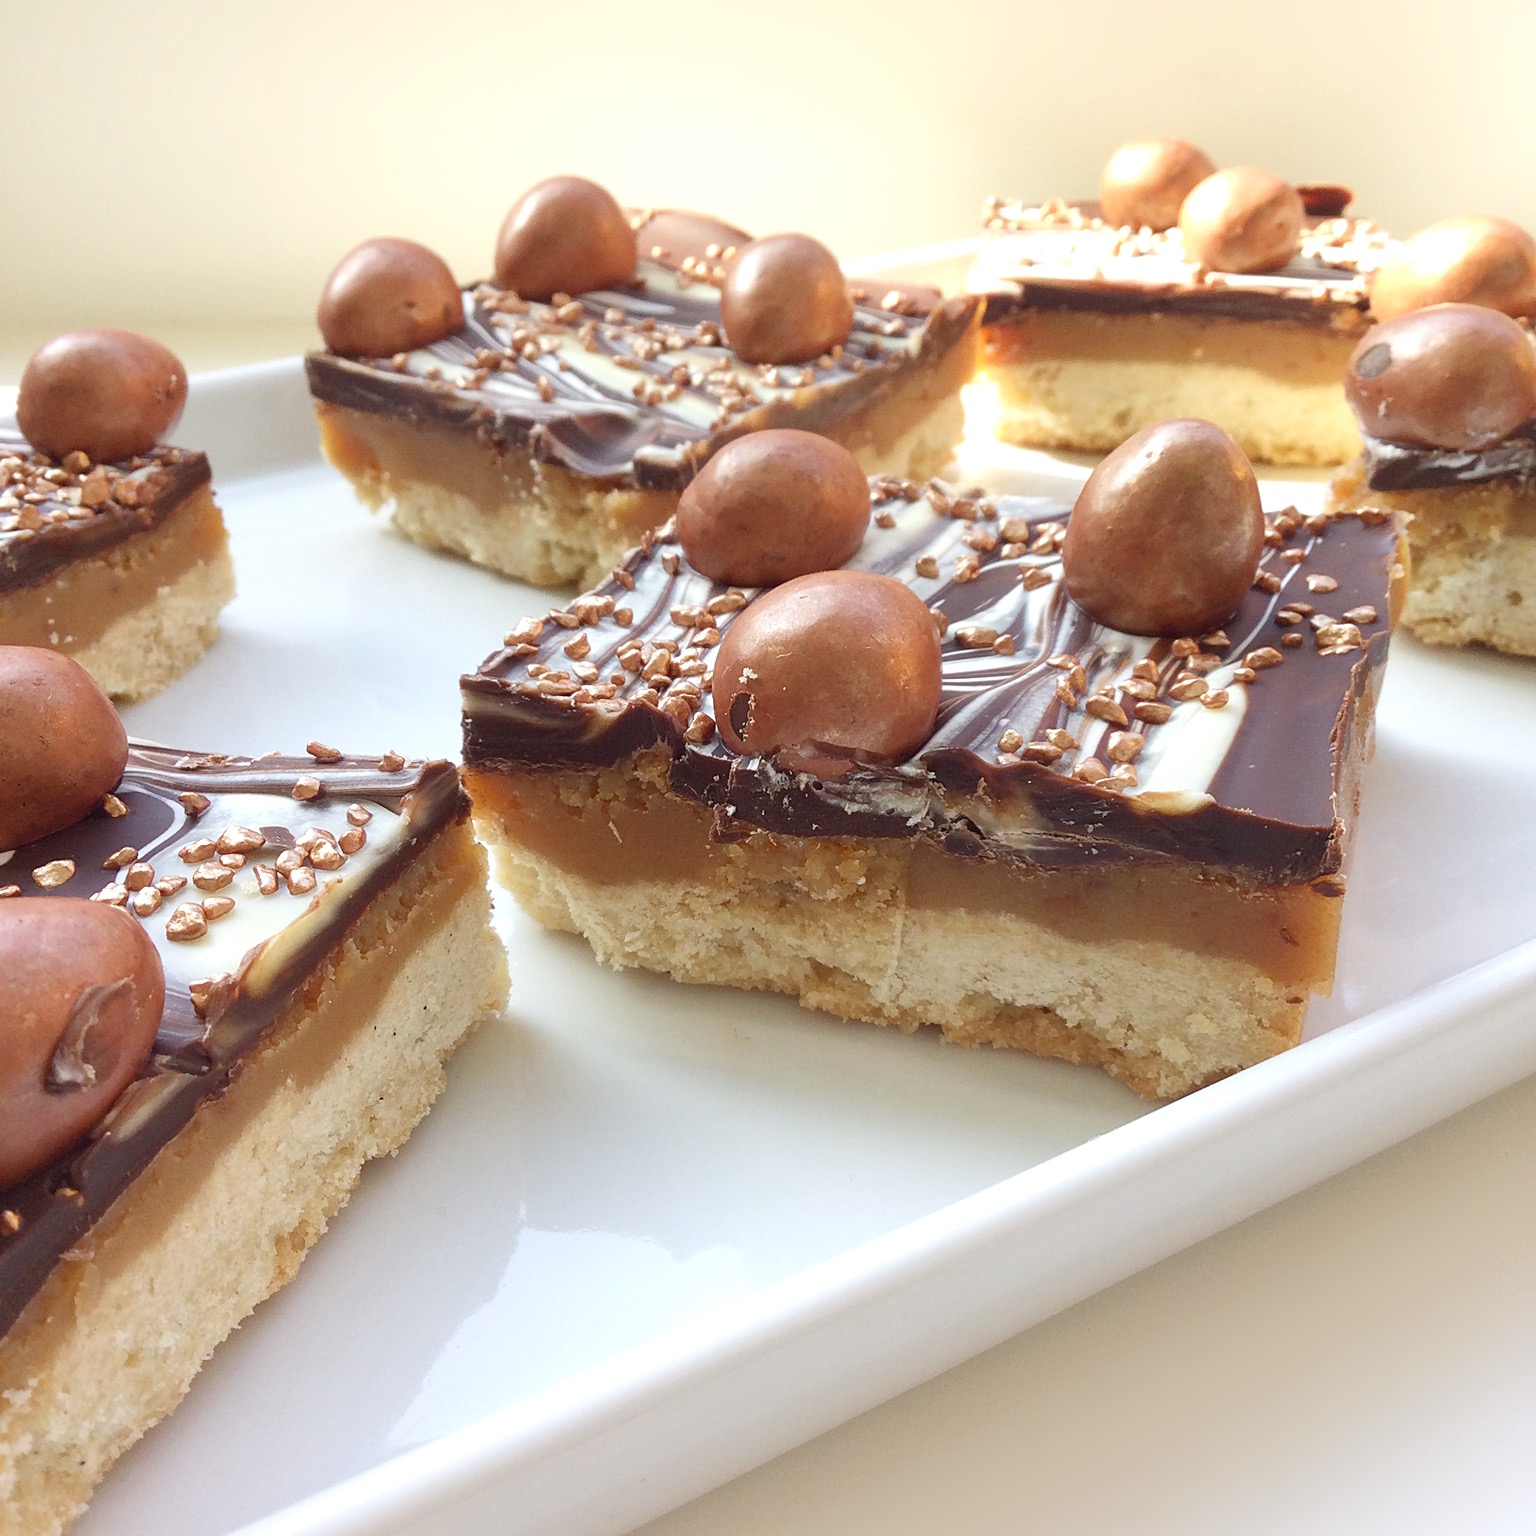
What Is Millionaires Shortbread?
Because, these Mini Egg Millionaires Shortbread squares are absolutely scrumptious, sharing the recipe seems only fair. And, I say that as someone who’s not generally a fan of anything too sweet. Especially caramel! So, to create an Easter treat that I could enjoy too I made some adjustments to the final recipe.
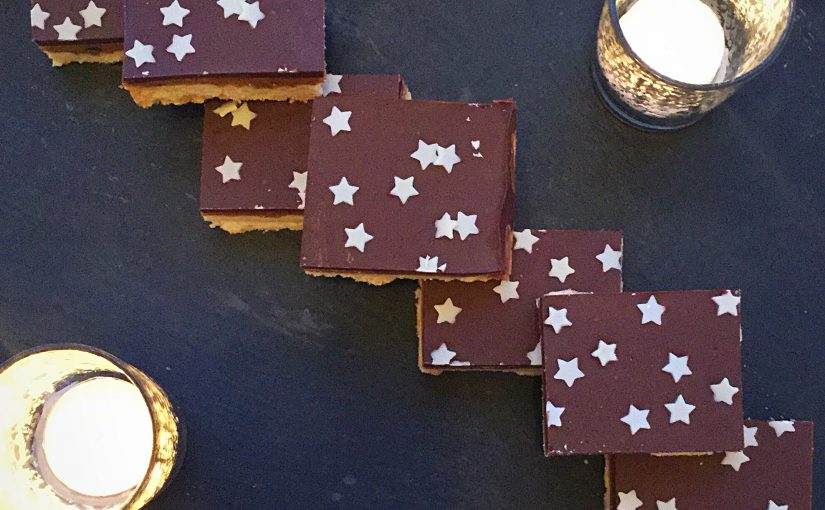
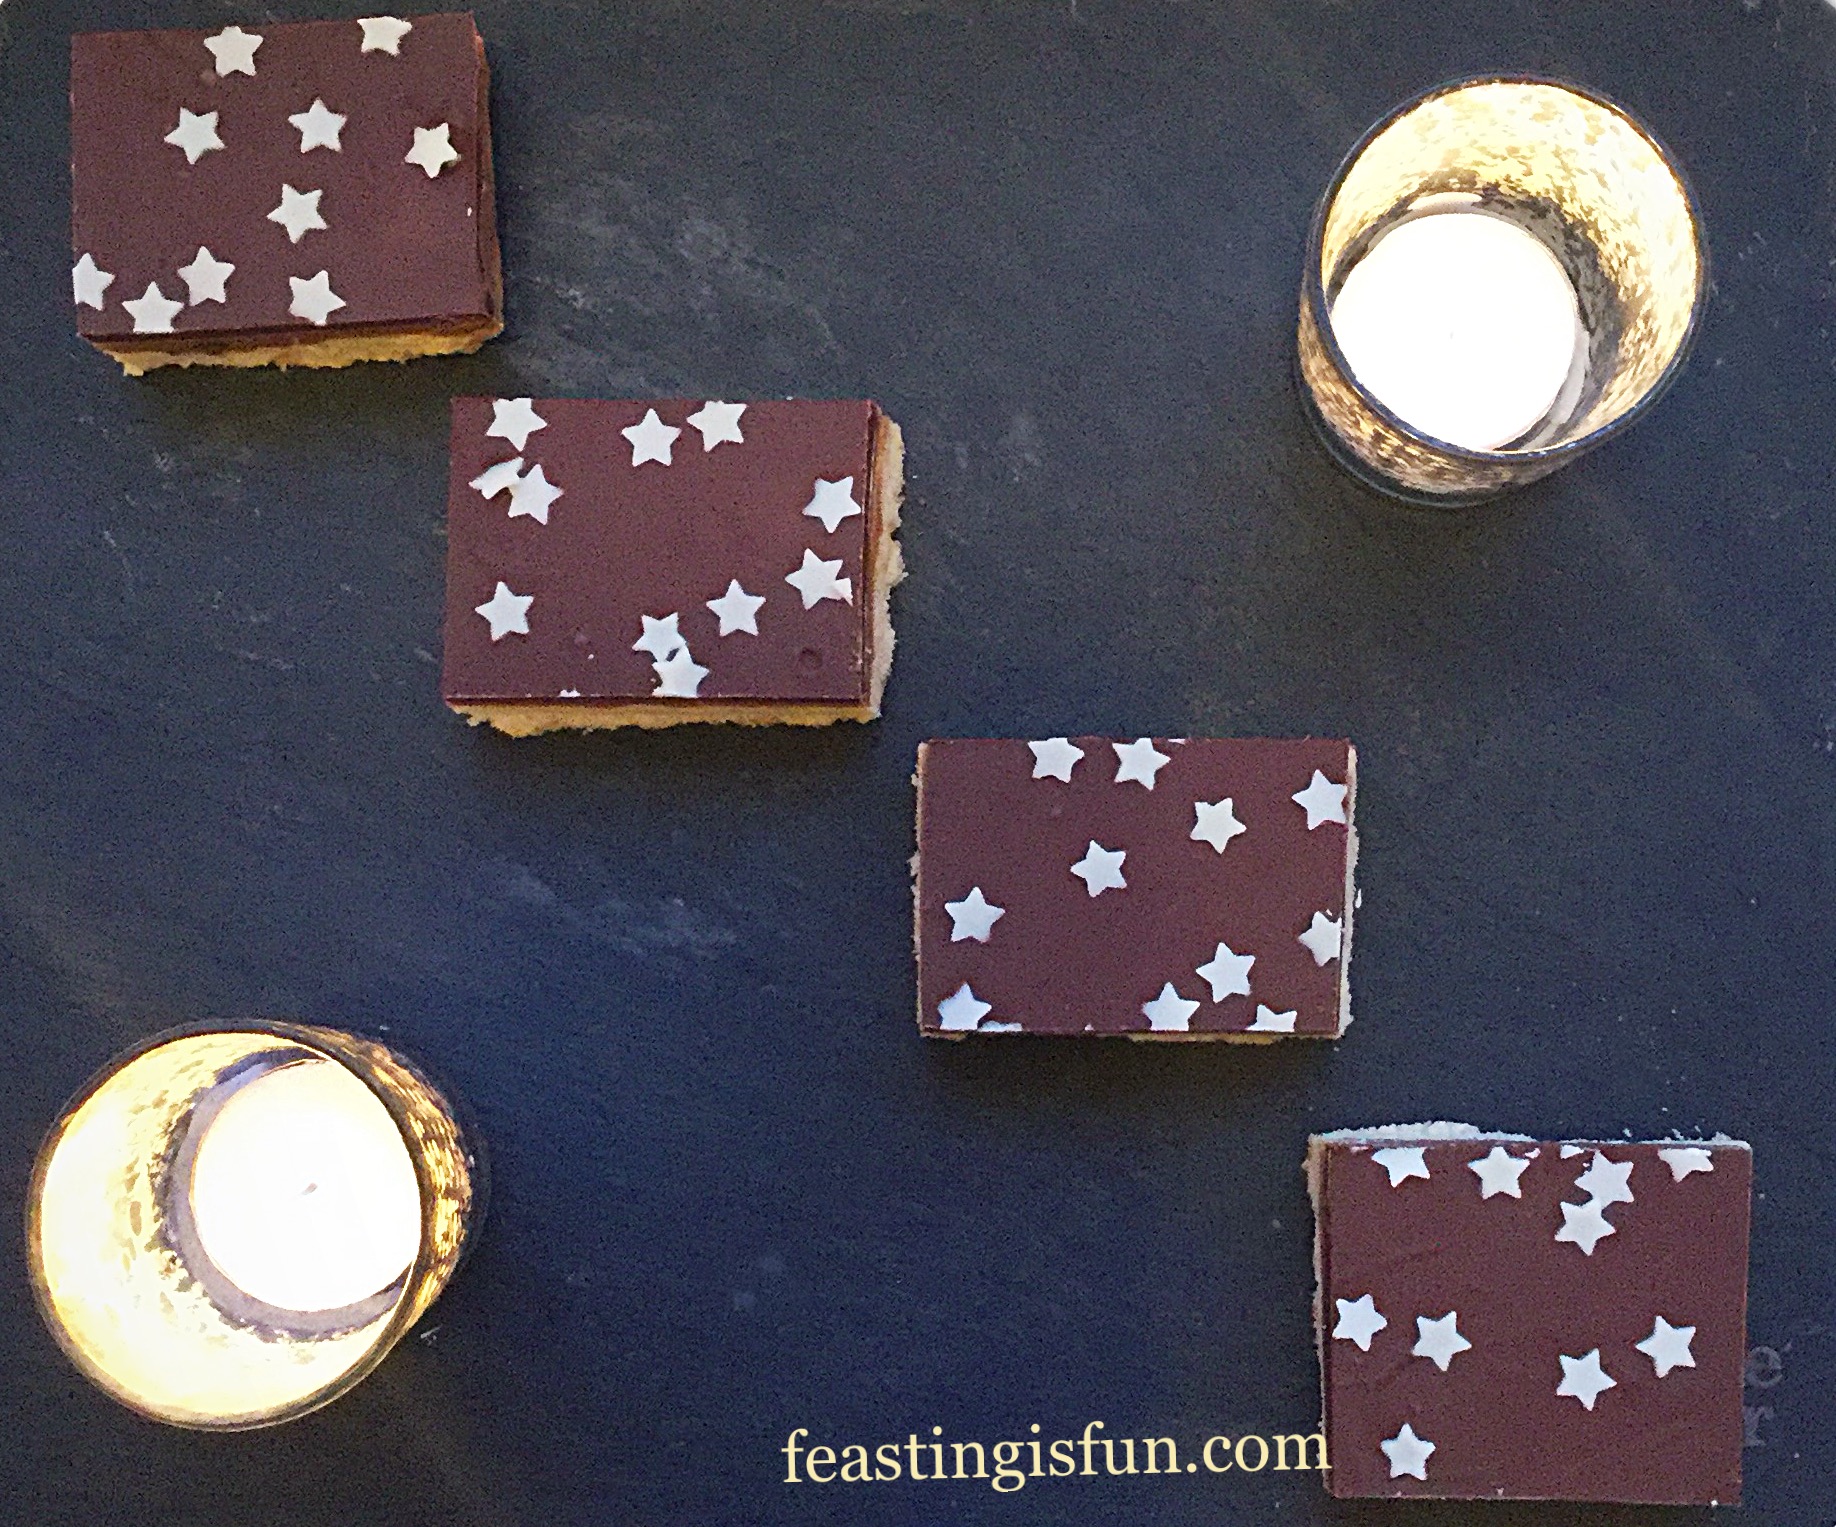
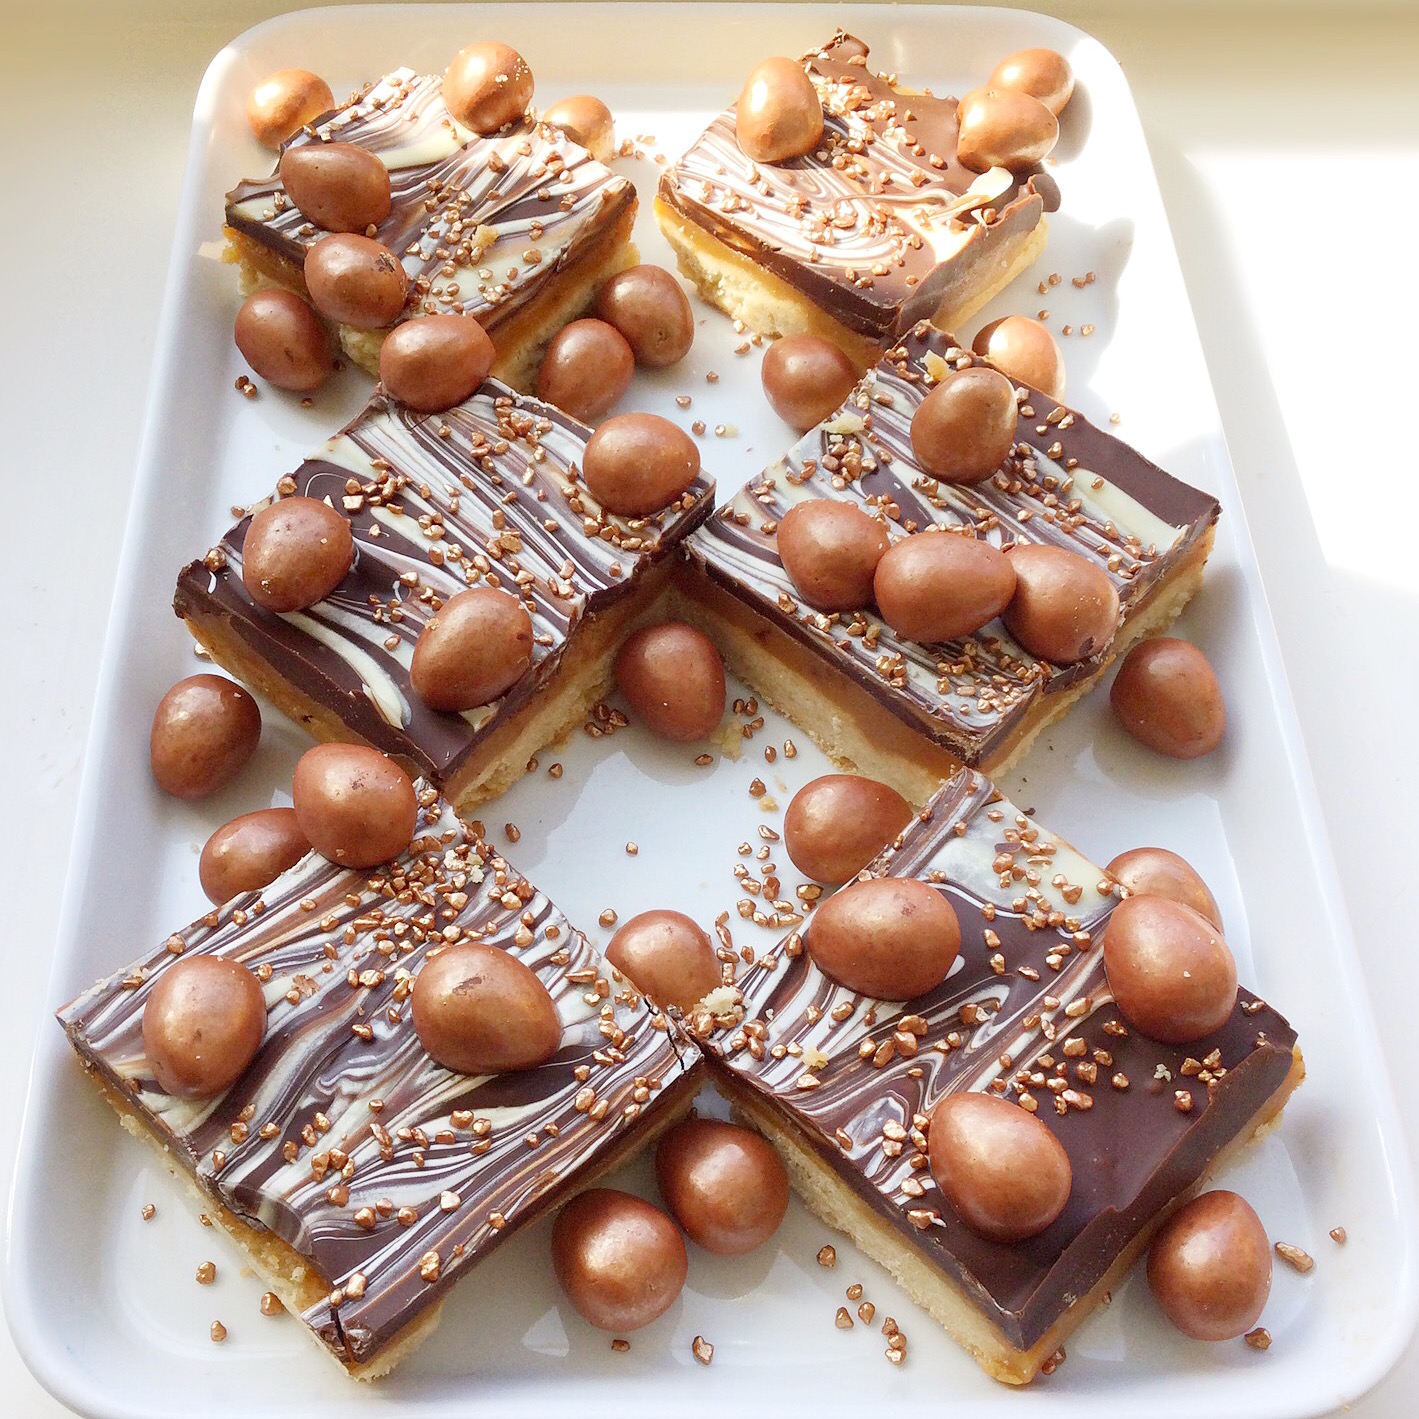
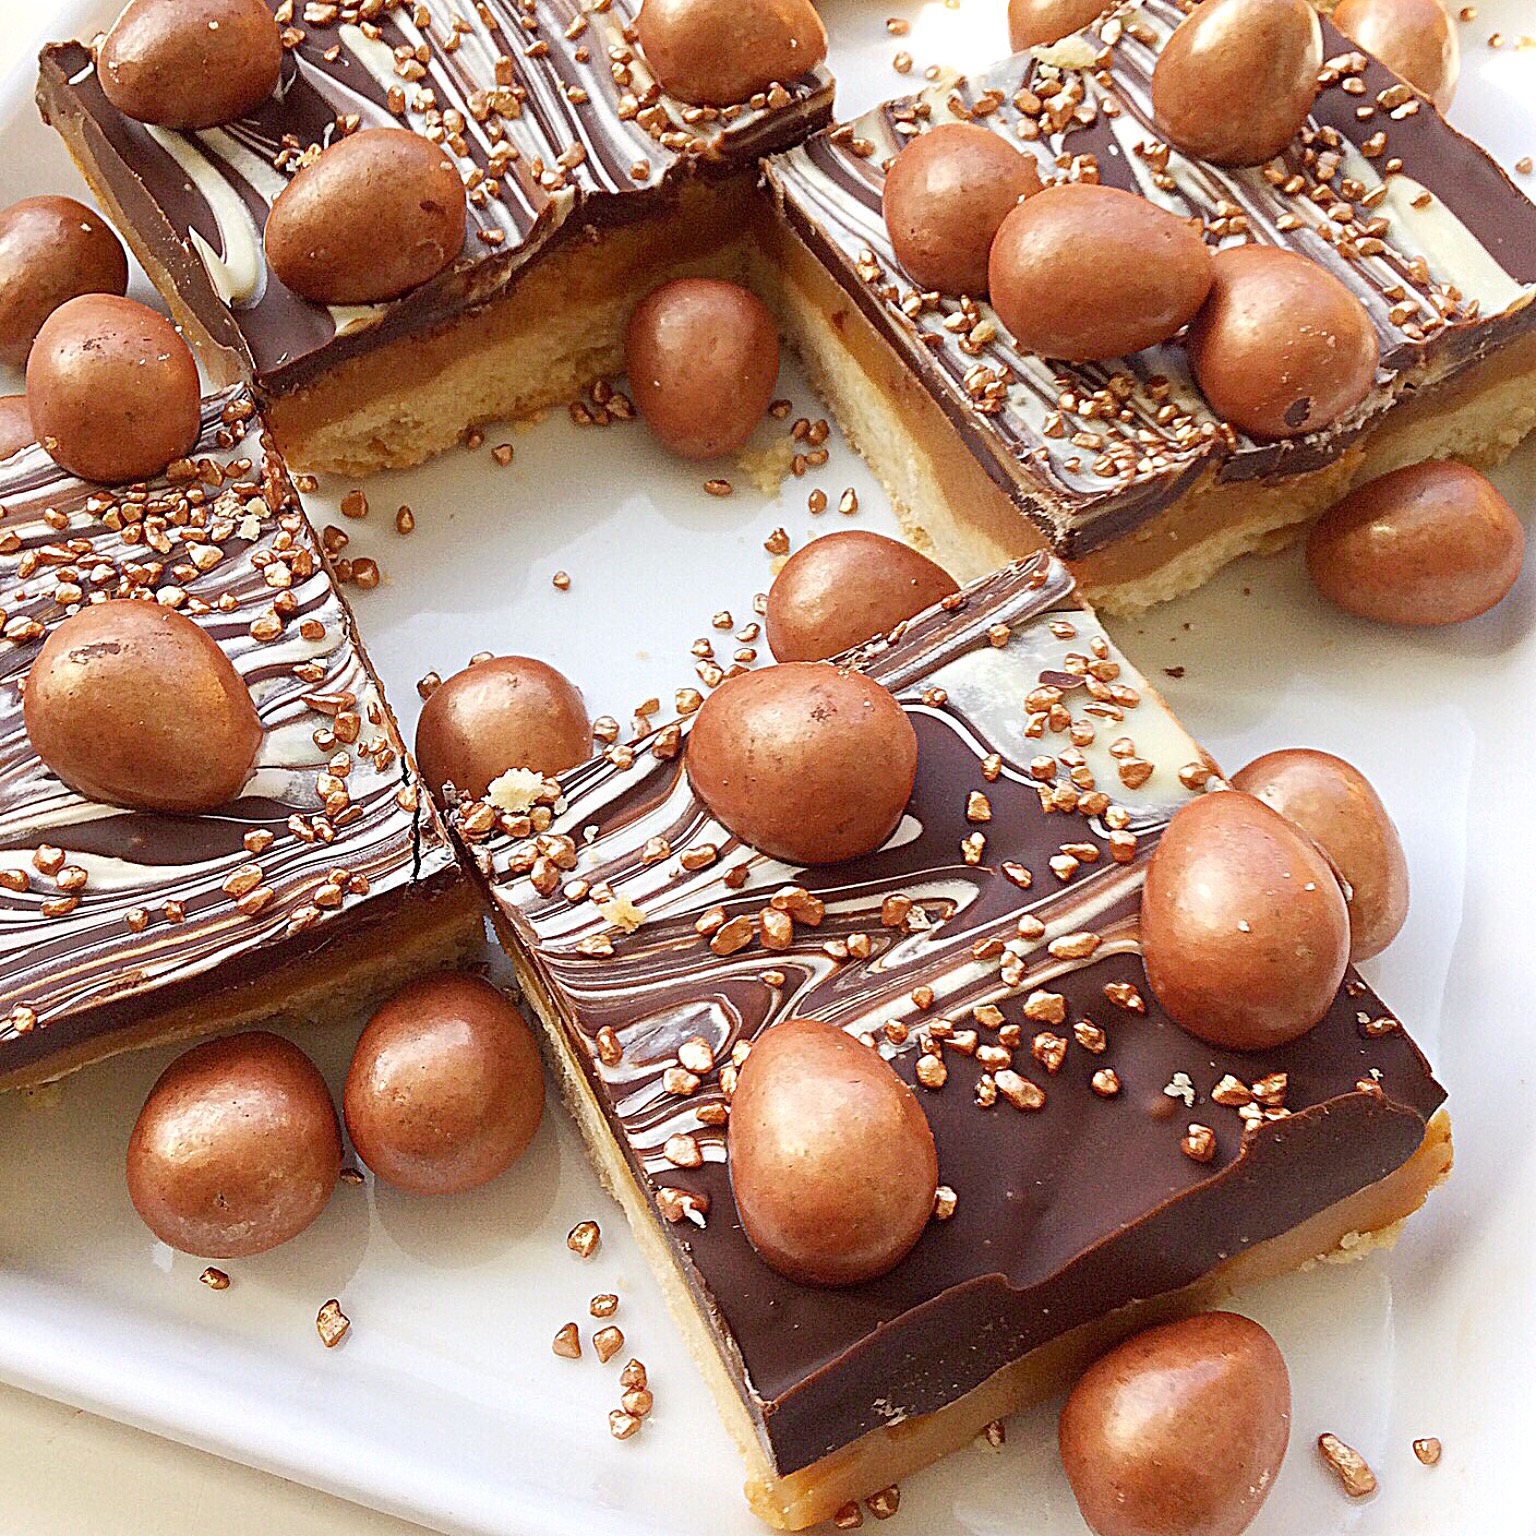
Millionaires Shortbread comprises of three layers; a shortbread base, topped with caramel and then covered in chocolate. When cut into squares they are the ultimate, sweet tooth lover’s favourite treat. So, to add a little balance, I added some sea salt to the caramel and mixed dark and milk chocolate together for the topping. While the white chocolate is sweeter, there is only a small amount as it is used to create a beautiful marble effect.
Why Use Galaxy Mini Eggs
There are so many different types of chocolate mini eggs available to buy nowadays, it really makes Easter baking so much fun. And, it’s there in the name of this blog, when we bake, we want it to be fun and delicious! So, I found some mini eggs that seemed the perfect topping to Millionaires Shortbread. They are made by Galaxy and the packaging says “they’re Galaxy chocolate with crunchy caramel rolled in rose gold.”
I love mini eggs, it’s a thing, if you know you know and well if you don’t that means more for me!! And I love a bit of bling. Tasteful, rose gold with tones of bronze bling. Chocolate is a given and caramel, well?? Not normally, but these mini eggs are very subtle on the caramel and the crunch is literally the icing on the cake. So that’s what I did, literally, use them as the perfect decoration for my Easter Mini Egg Millionaires Shortbread.
The combination of flavours and textures will have your mouth singing and your heart dancing.
Recipe for Mini Egg Millionaires Shortbread – makes 15 squares
For The Shortbread Base:
300g/10oz Plain White Flour
200g/7oz Softened Unsalted Butter
100g/4oz Caster Sugar
1 Large Free Range Egg
1/4tsp Salt – I use Maldon
2tsp Vanilla Extract – I use Nielsen-Massey
For The Caramel Middle:
150g/5oz Unsalted Butter
100g/4oz Golden Syrup
379g Can of Condensed Milk – I use Carnation
1/4tsp Sea Salt
For The Chocolate Topping And Decoration:
200g/7oz Milk Chocolate
100g/4oz Dark Chocolate
50g/2oz White Chocolate
2 x 80g Packets of Galaxy Enchanted Eggs – available from most supermarkets
Bronze crunch sprinkles – available from Waitrose
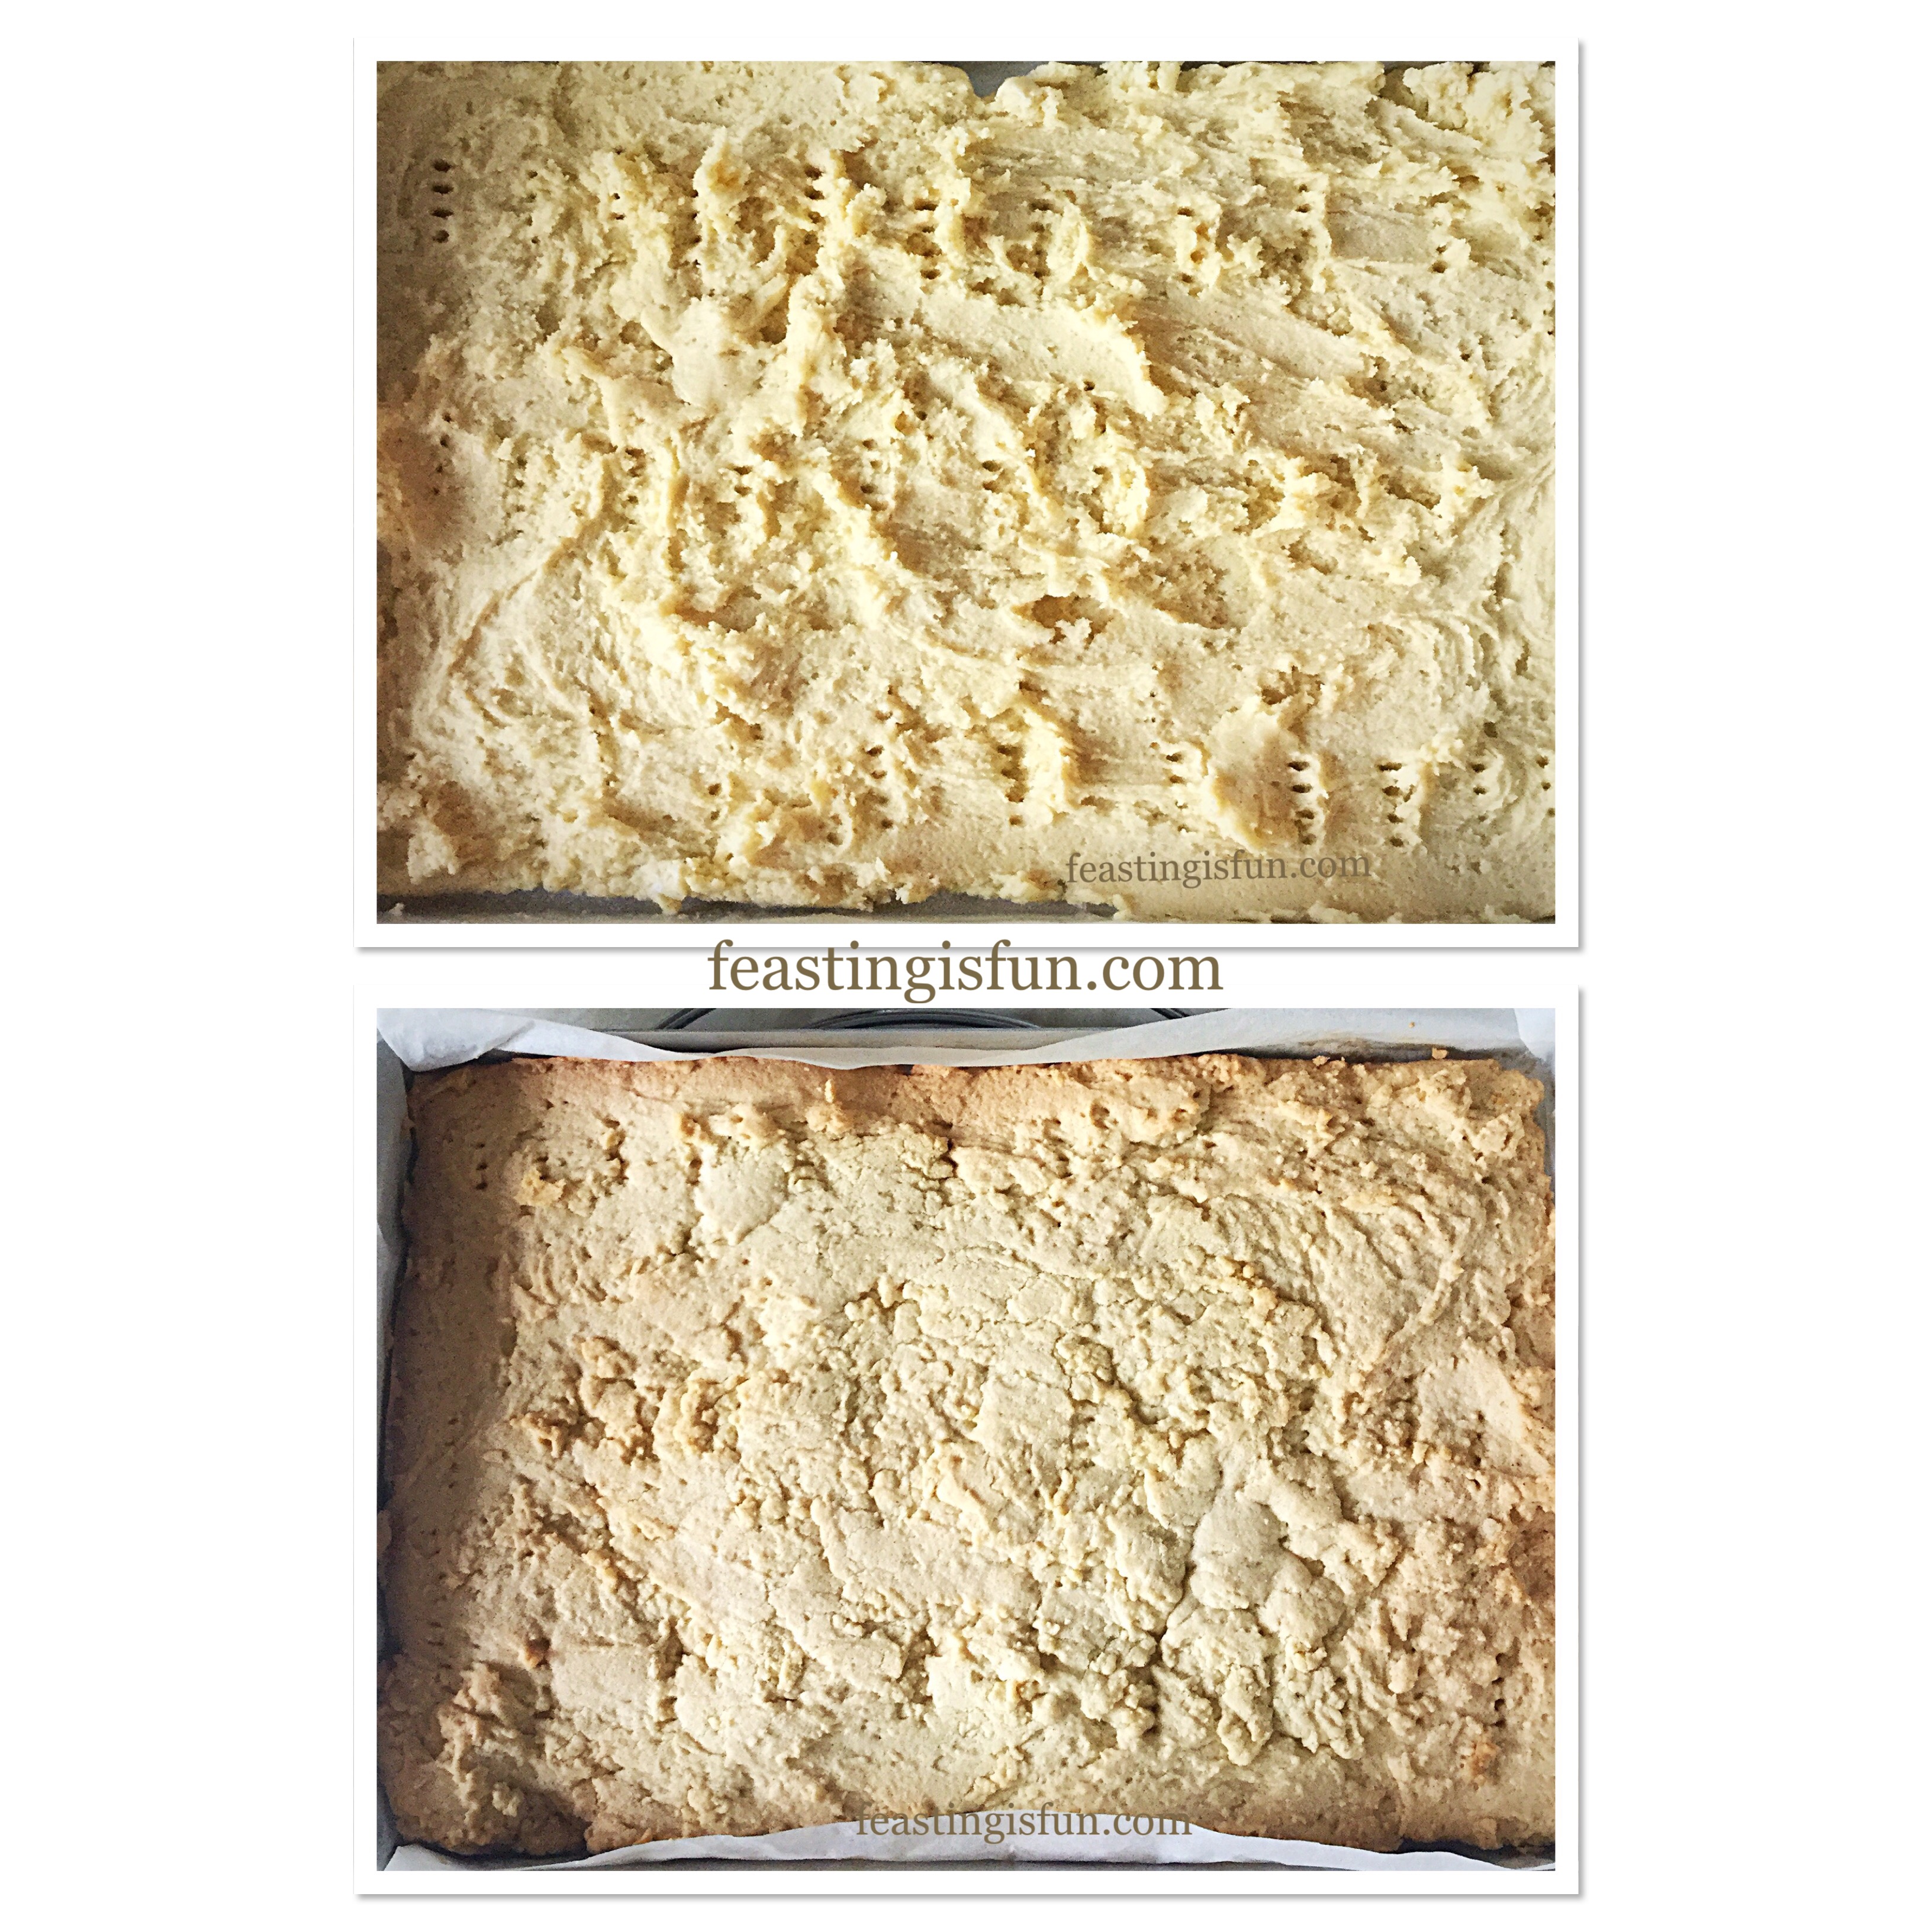
Making The Shortbread Base
Preheat the oven to 170C/150C fan, gas mark 3, 325F.
- First of all, lightly butter a 28cm x 20cm x 5cm (11″x 8″x 2″) swiss roll tin and line with baking parchment.
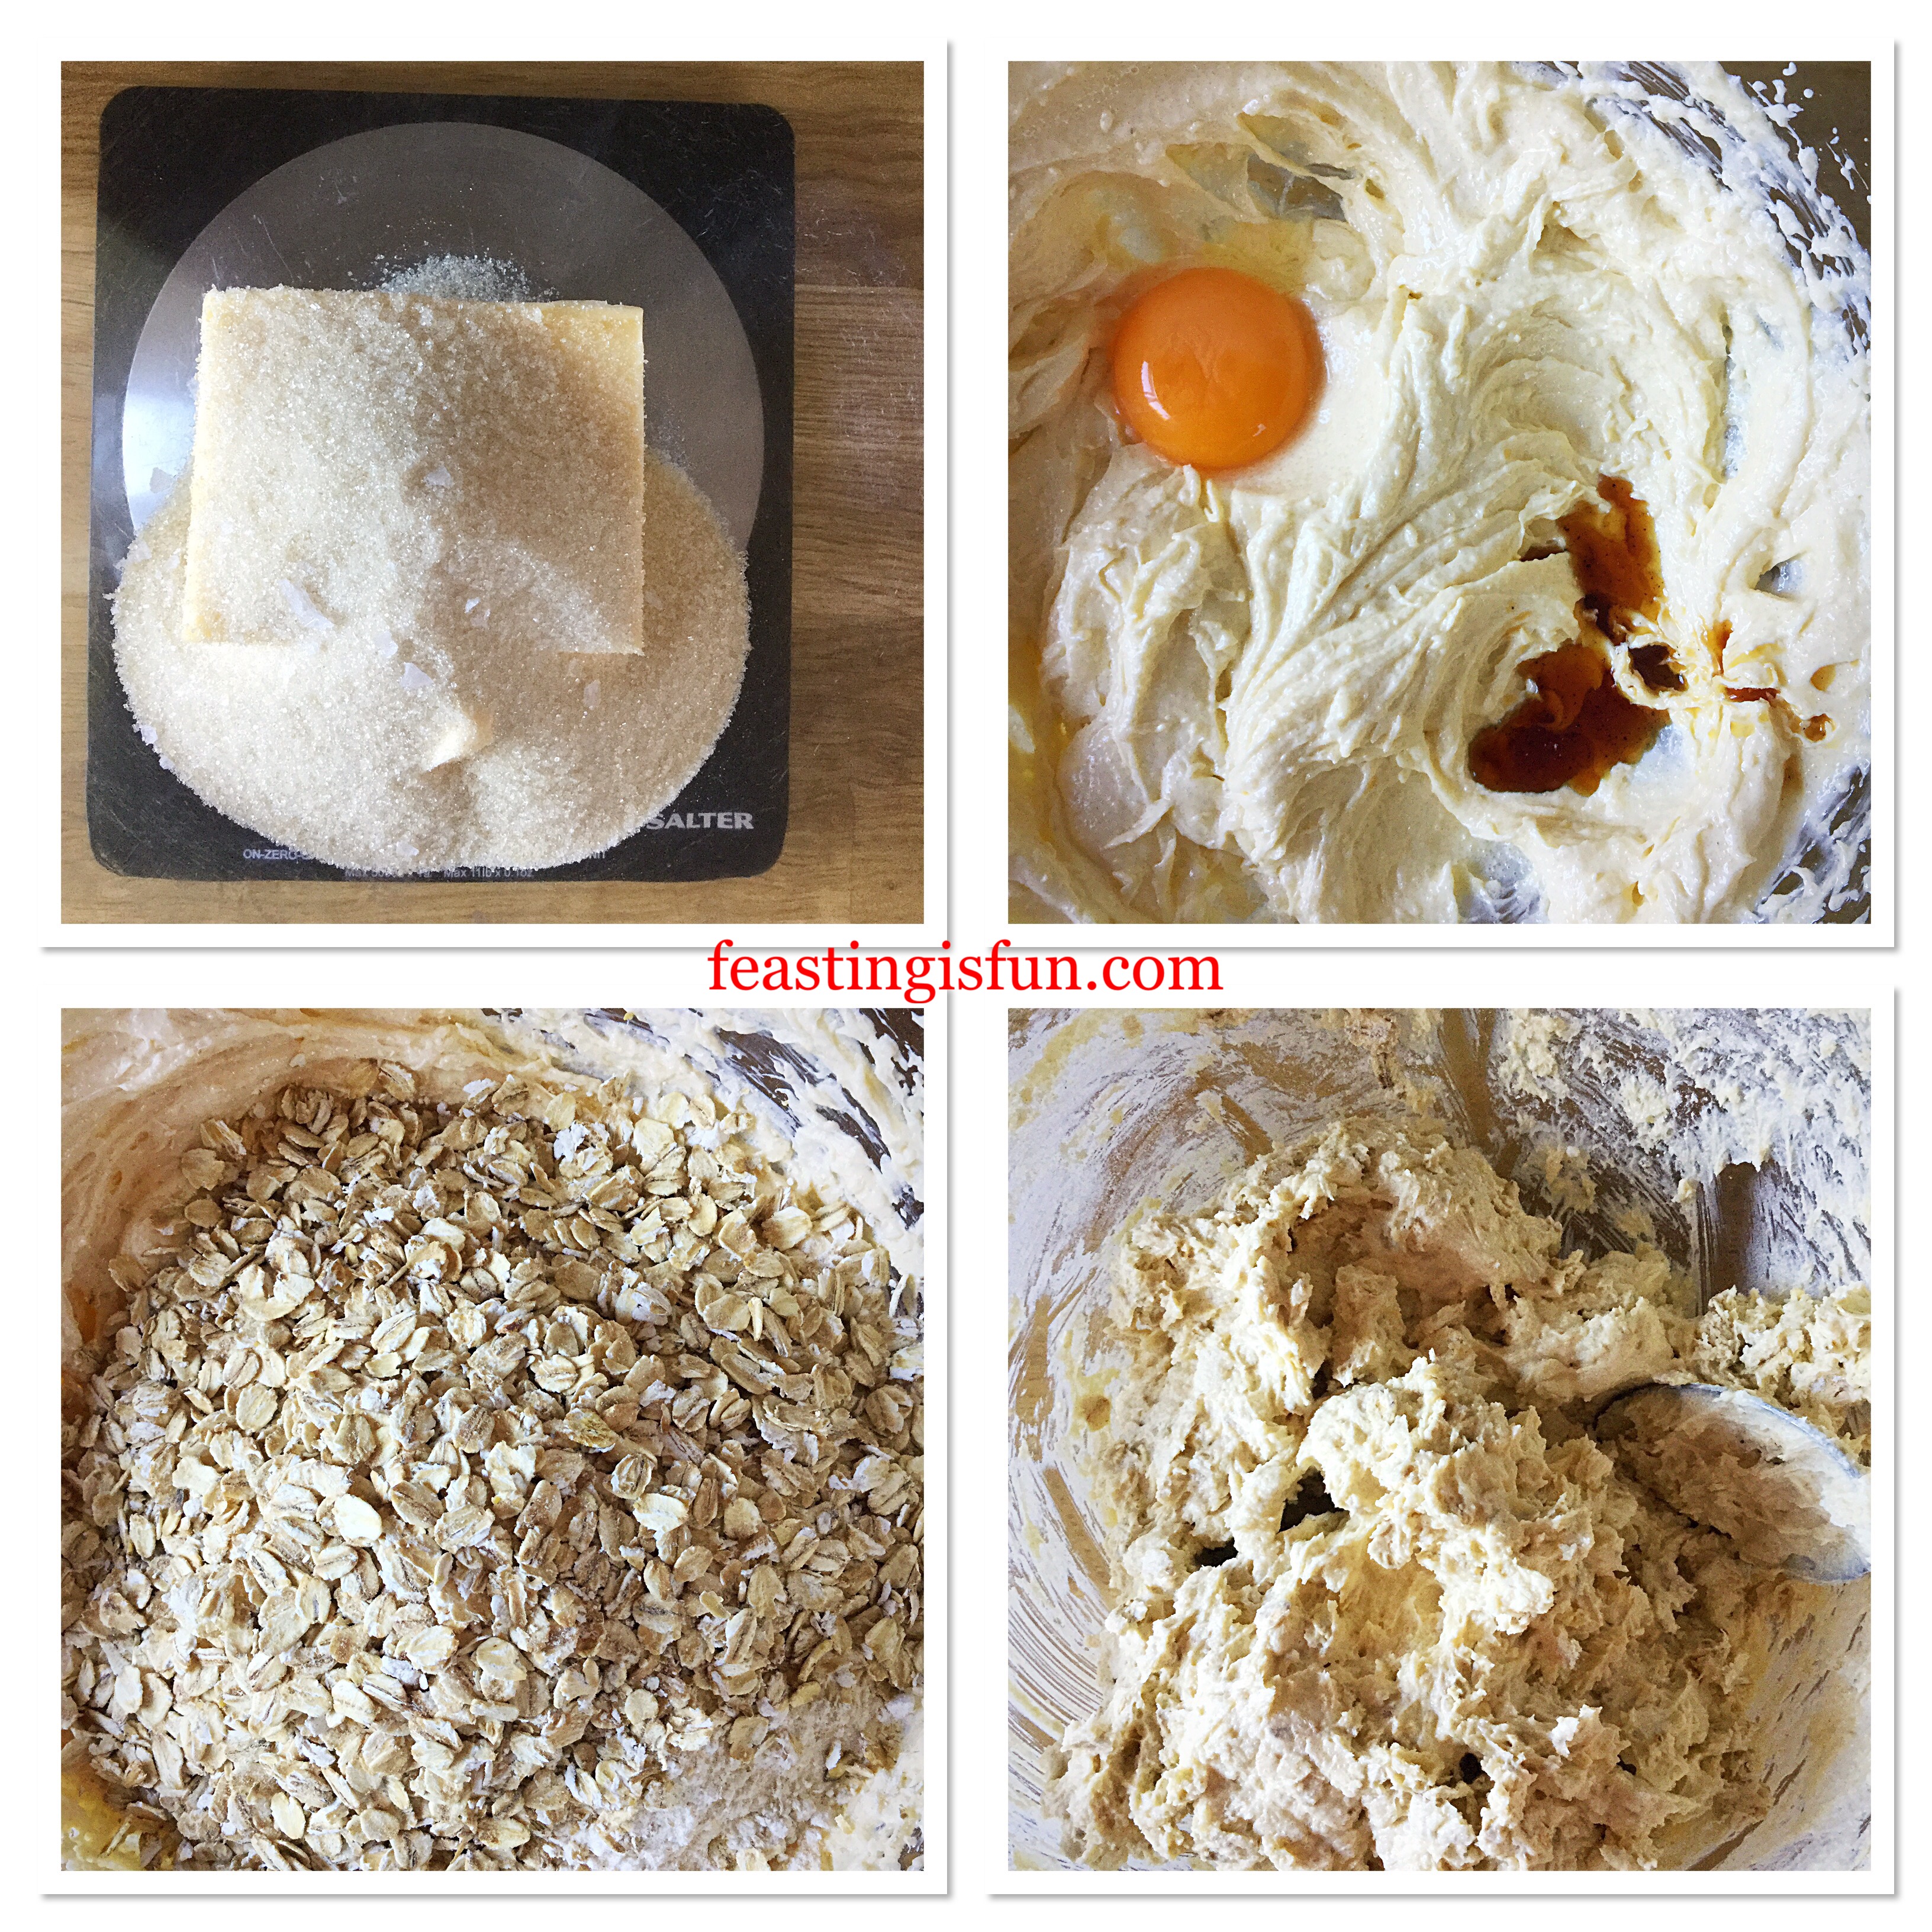
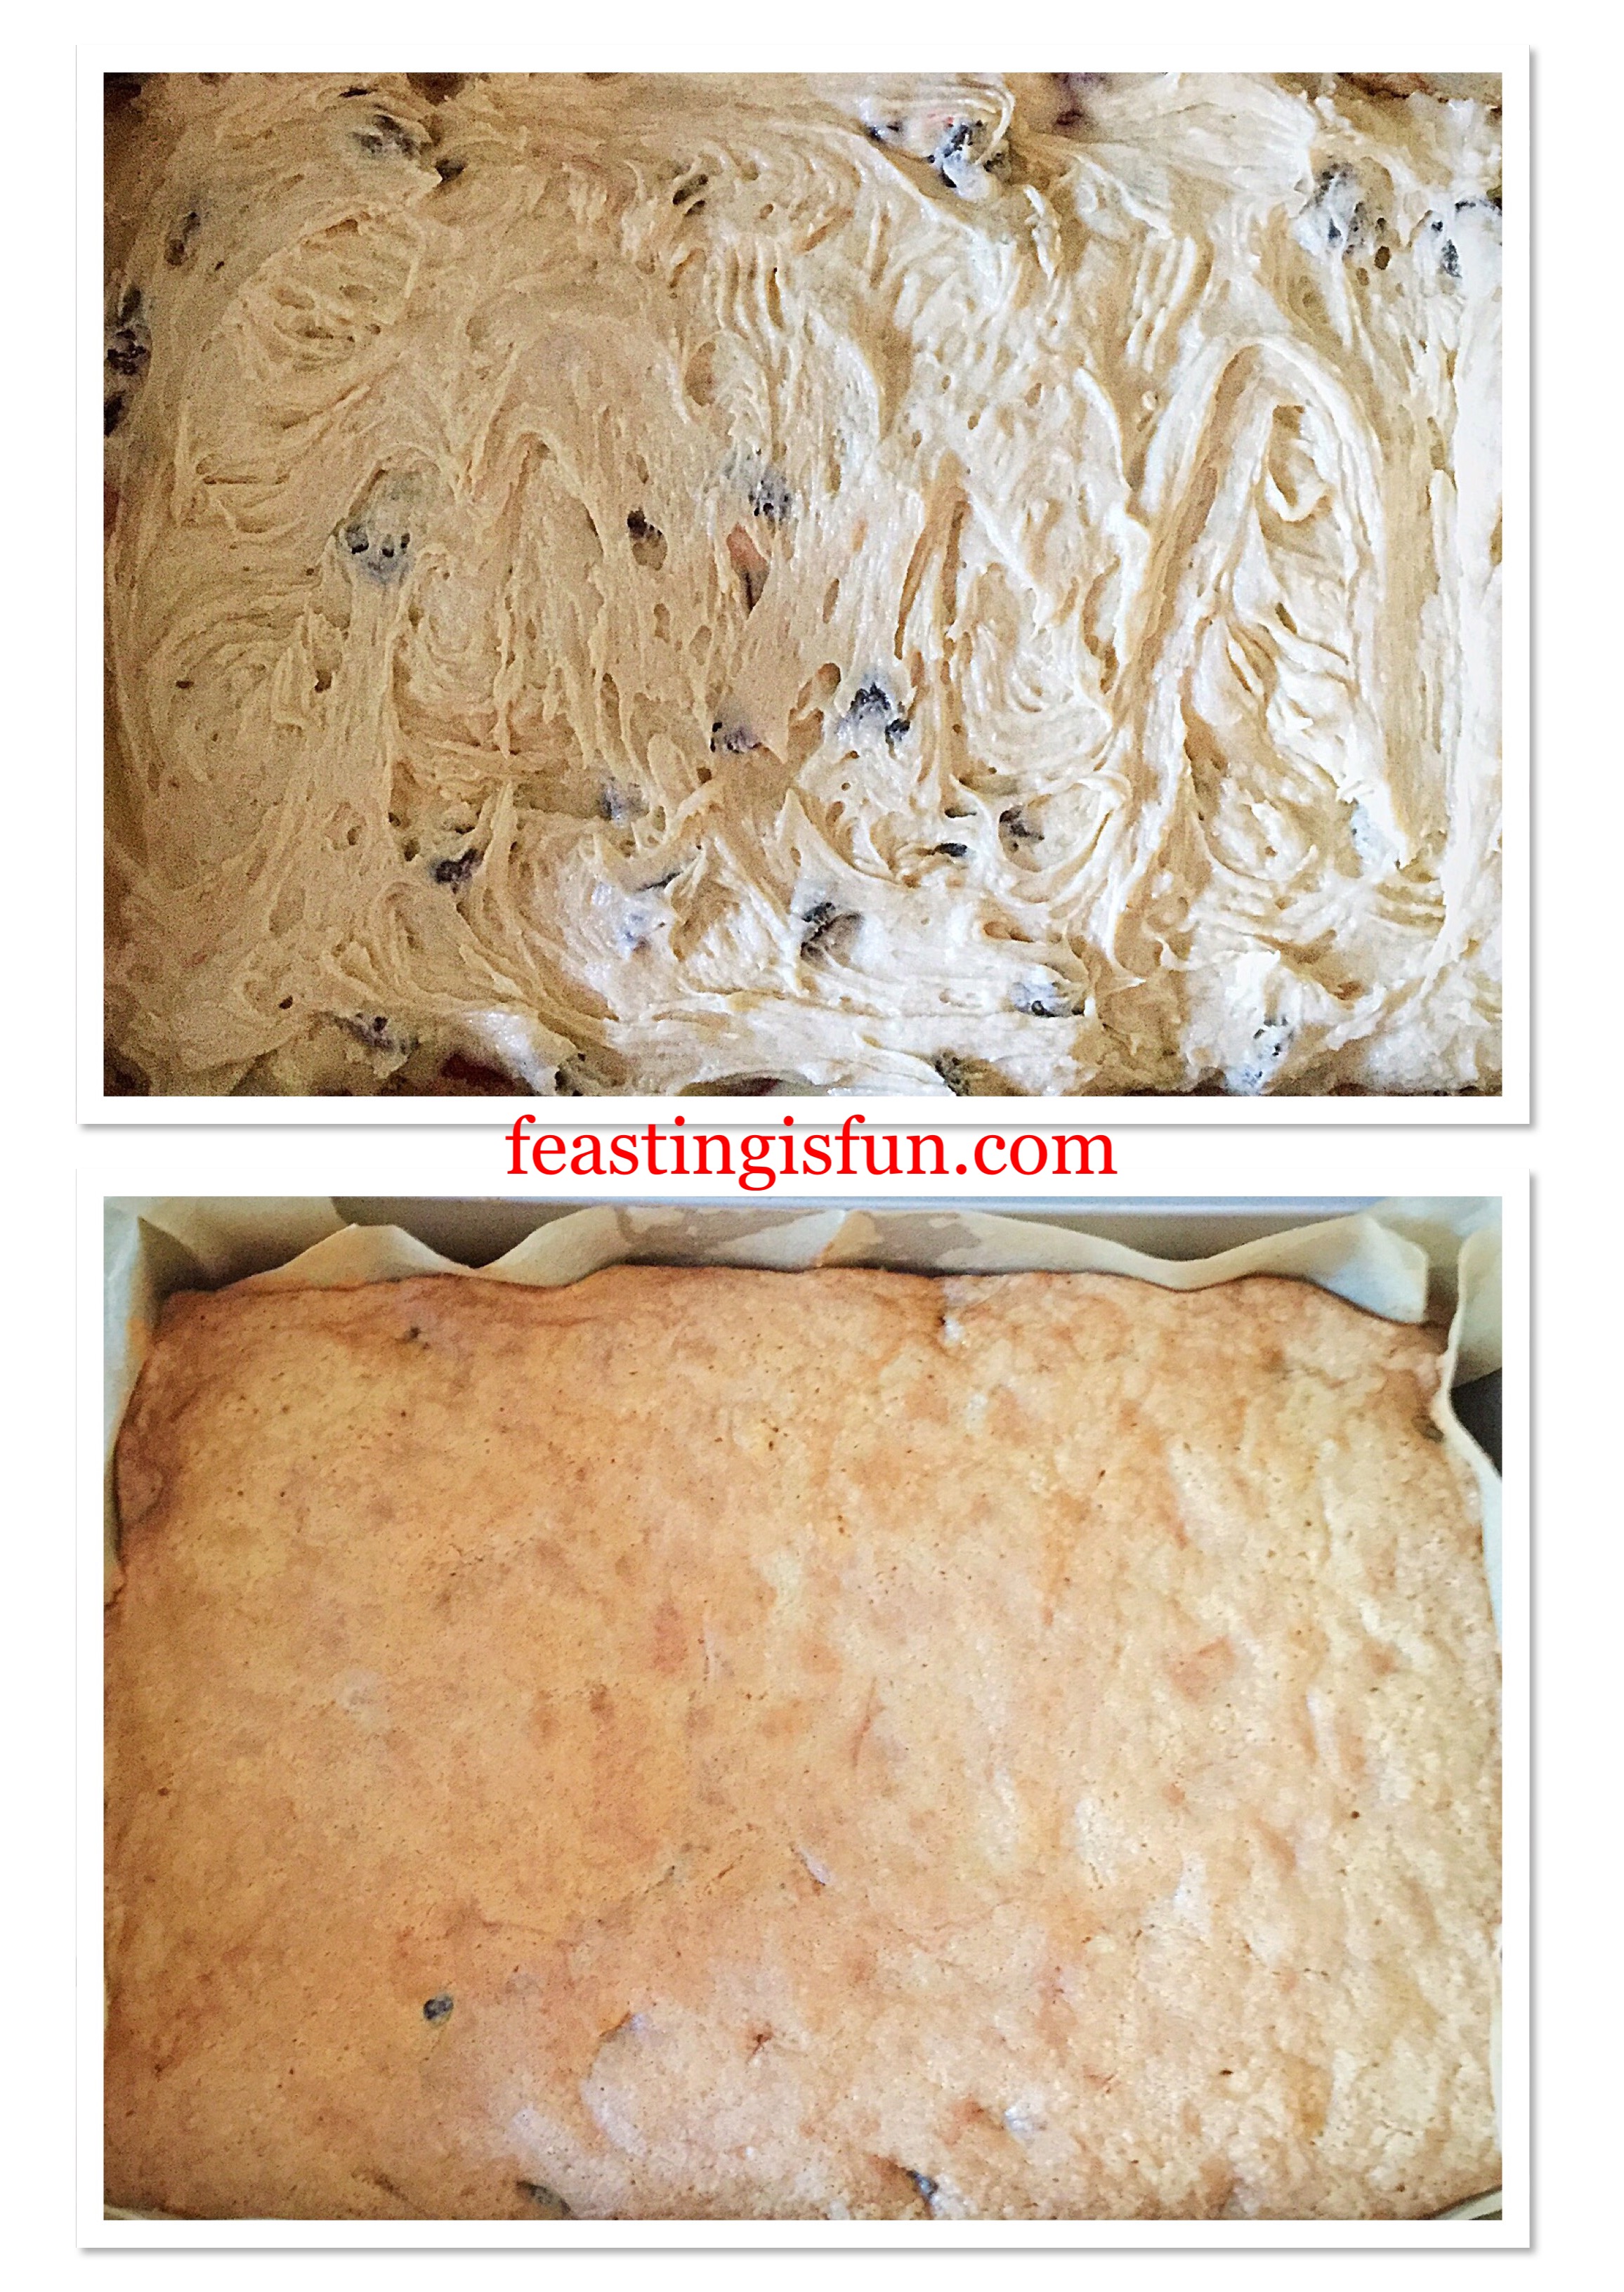
- Next add the softened butter, caster sugar, vanilla extract, egg and salt into a large bowl. Whisk until pale and creamy.
- Then sift in the plain flour and then stir with a spoon until the whole shortbread dough comes together.

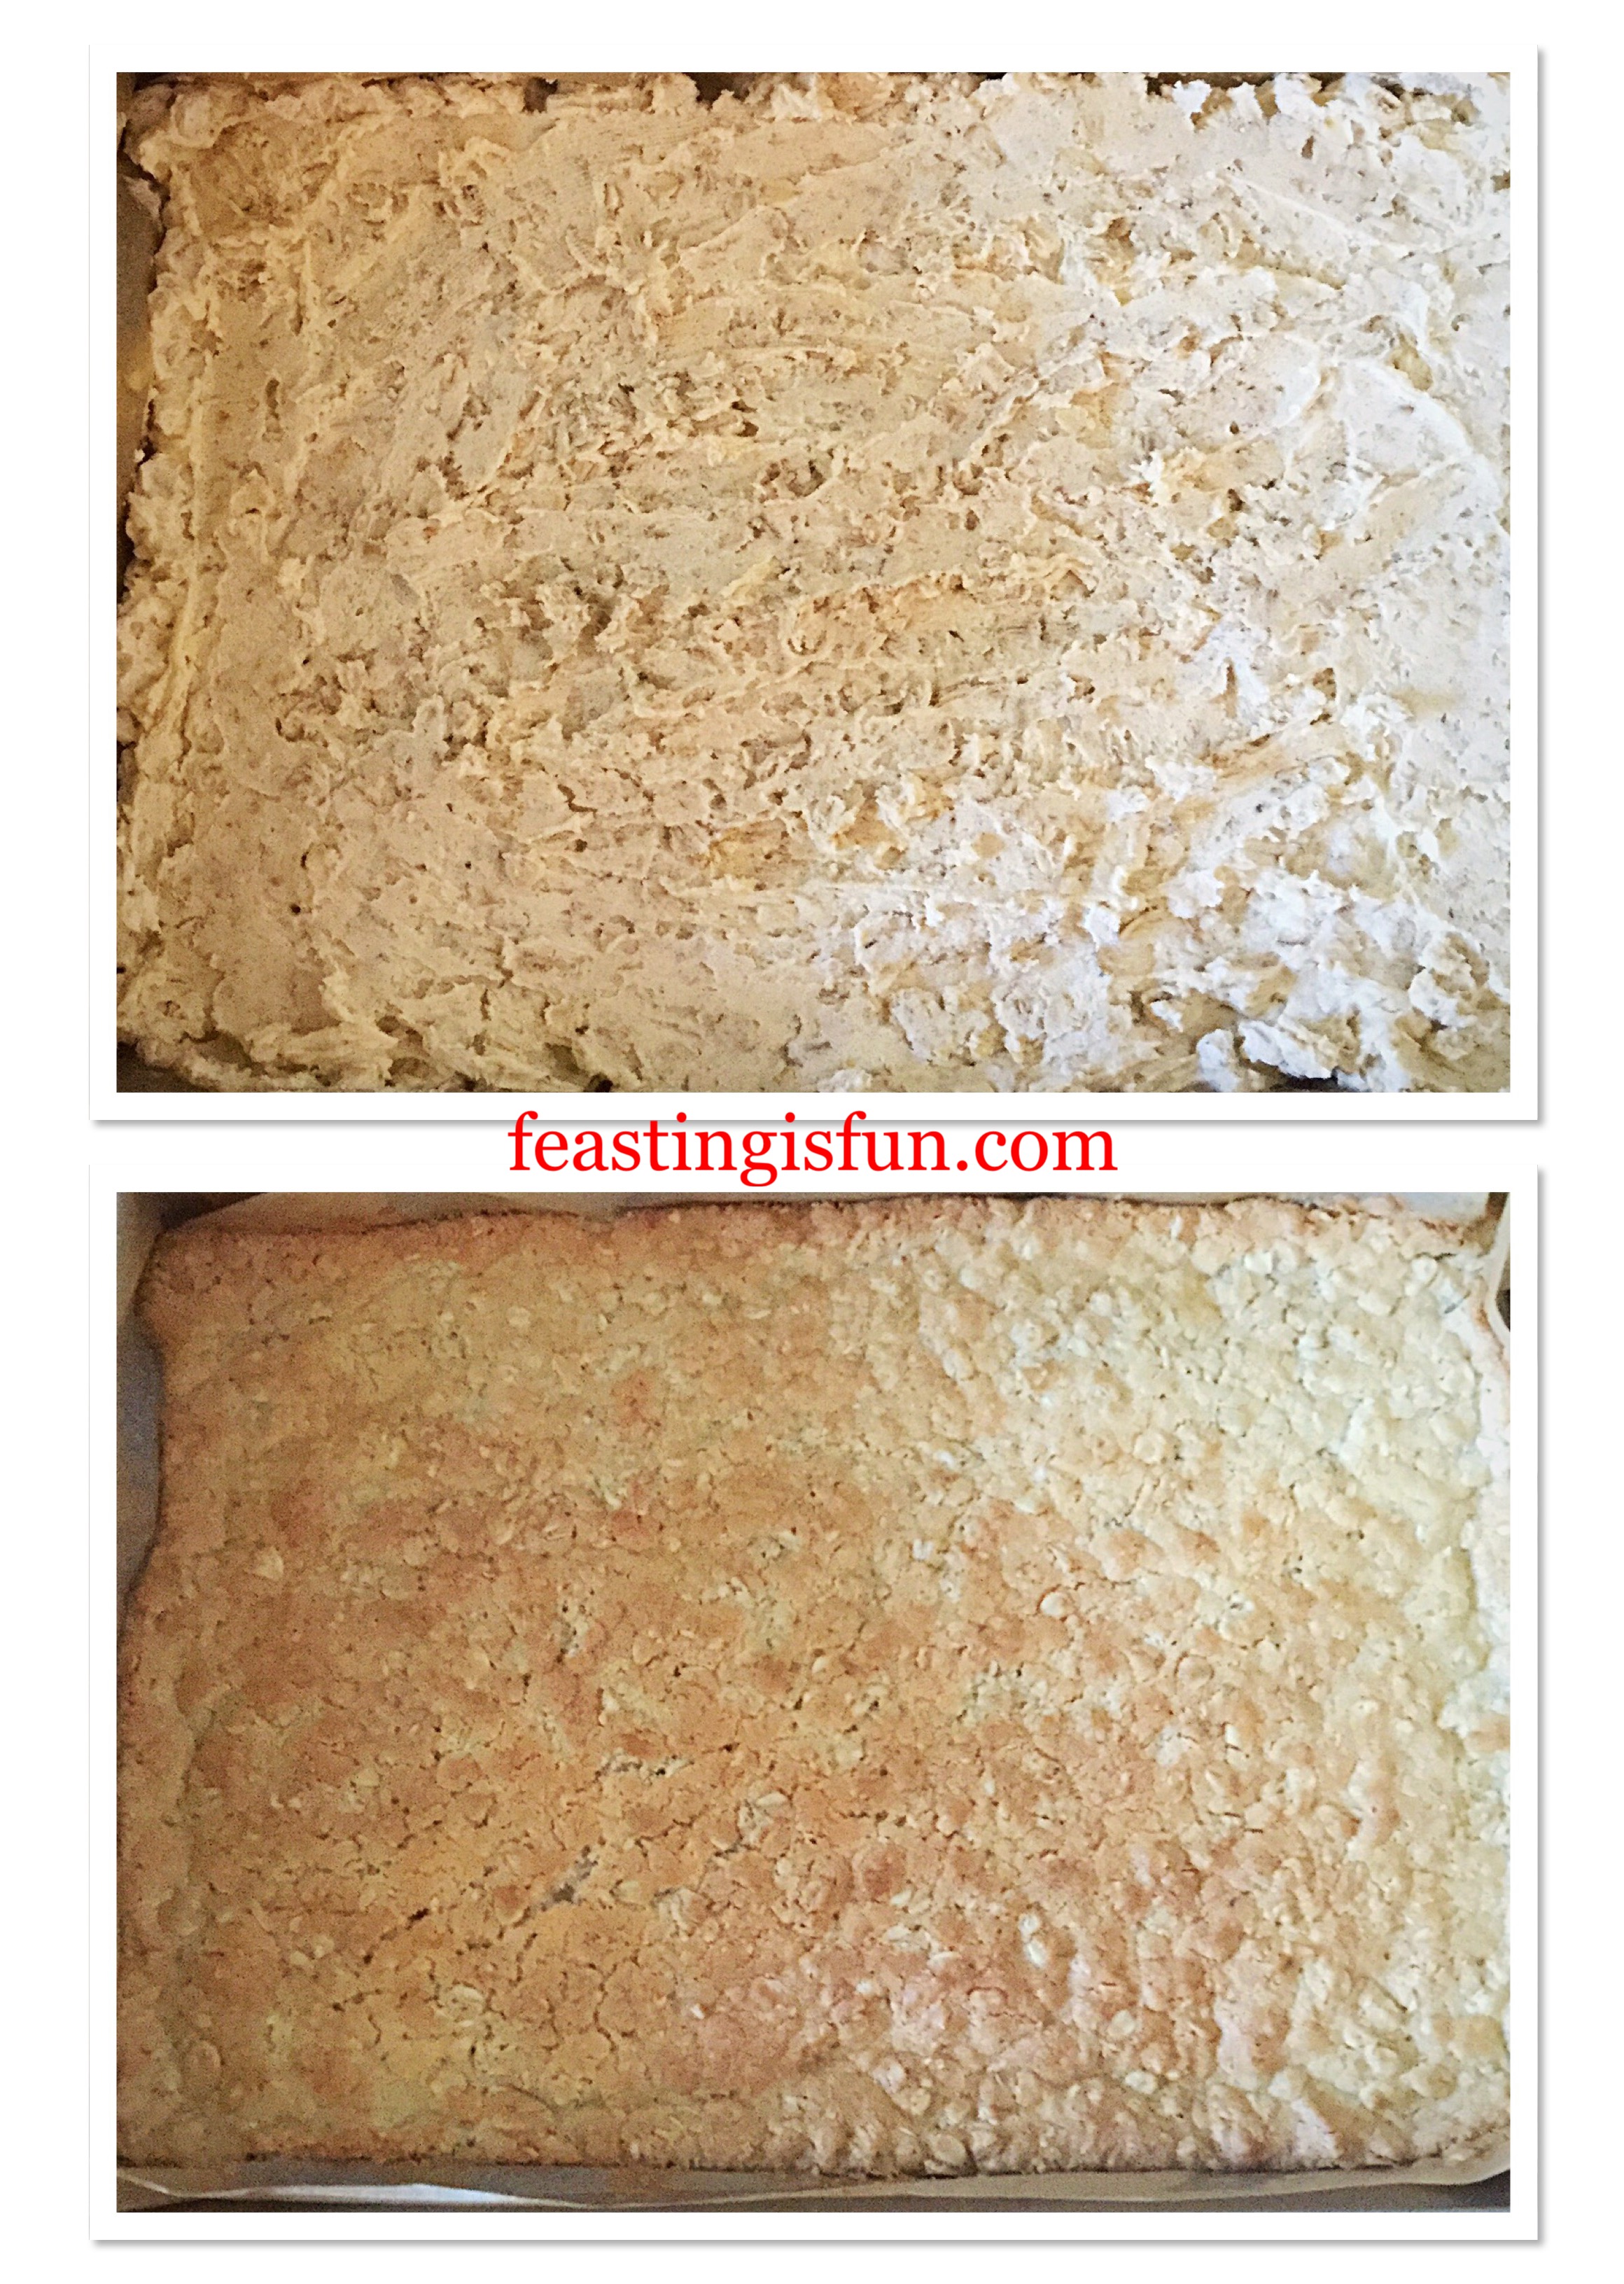
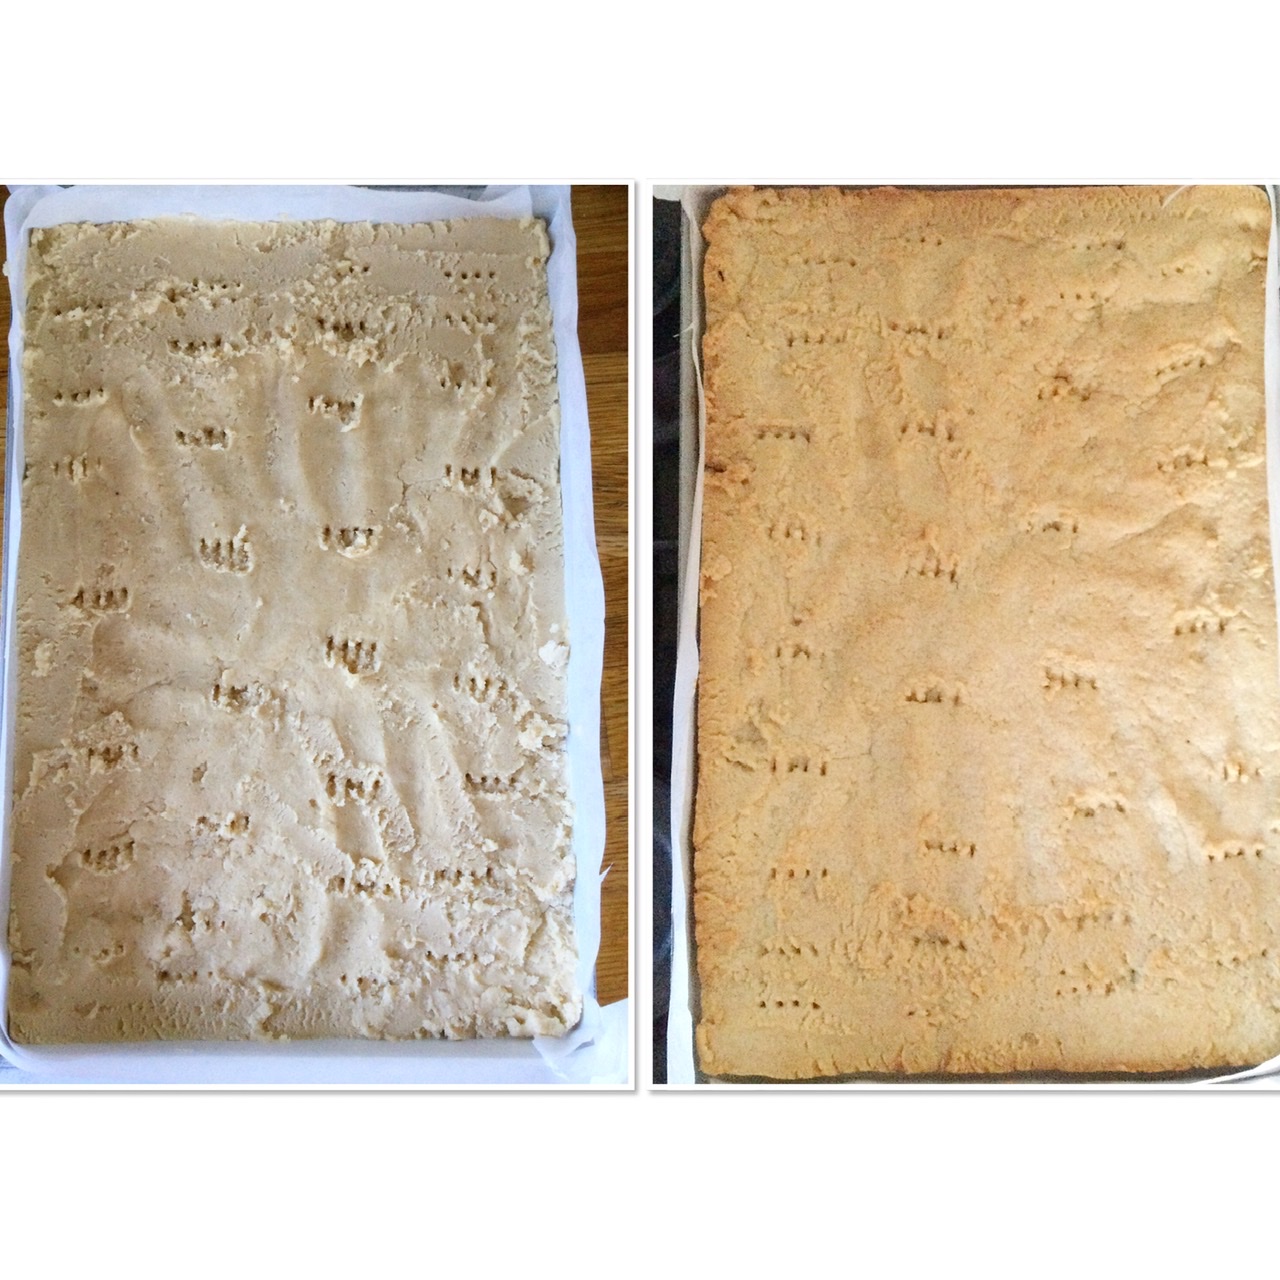
- Tip the shortbread dough into the prepared tin and then using the back of a spoon press the dough evenly into the tin.
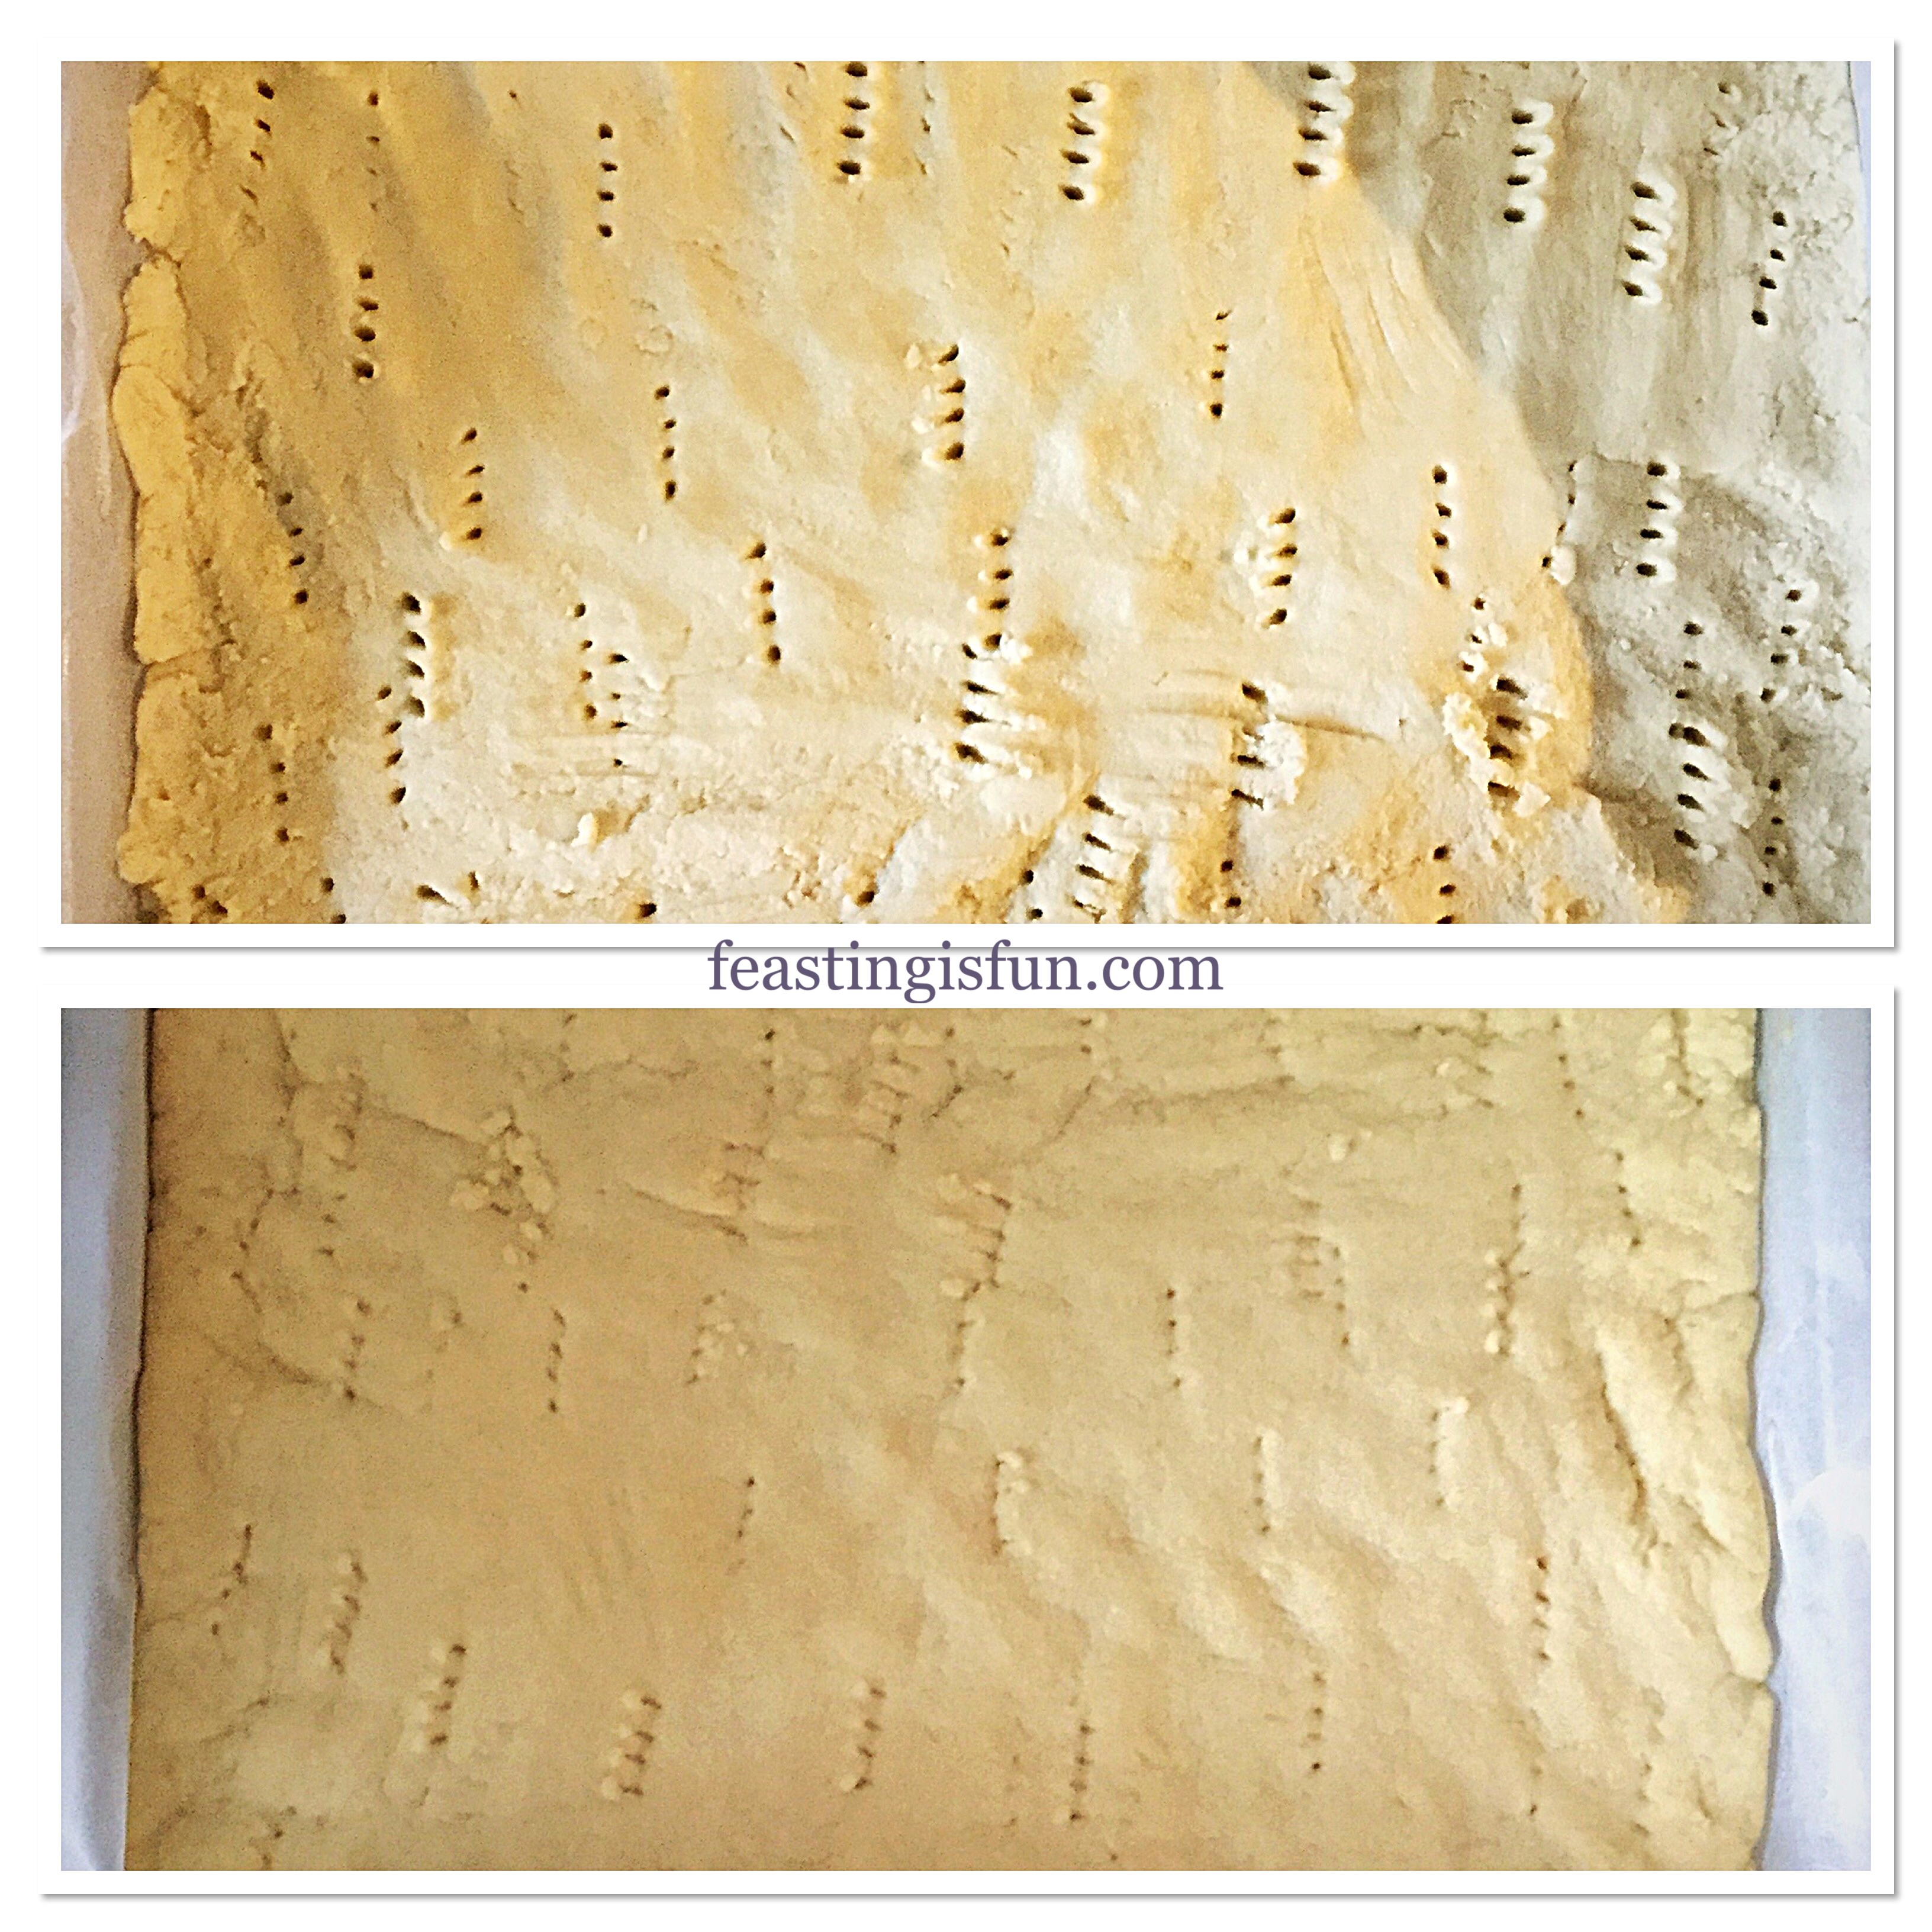
- Prick the shortbread dough all over with a fork. This will stop any air bubbles forming under the cooked shortbread.
Baking The Shortbread
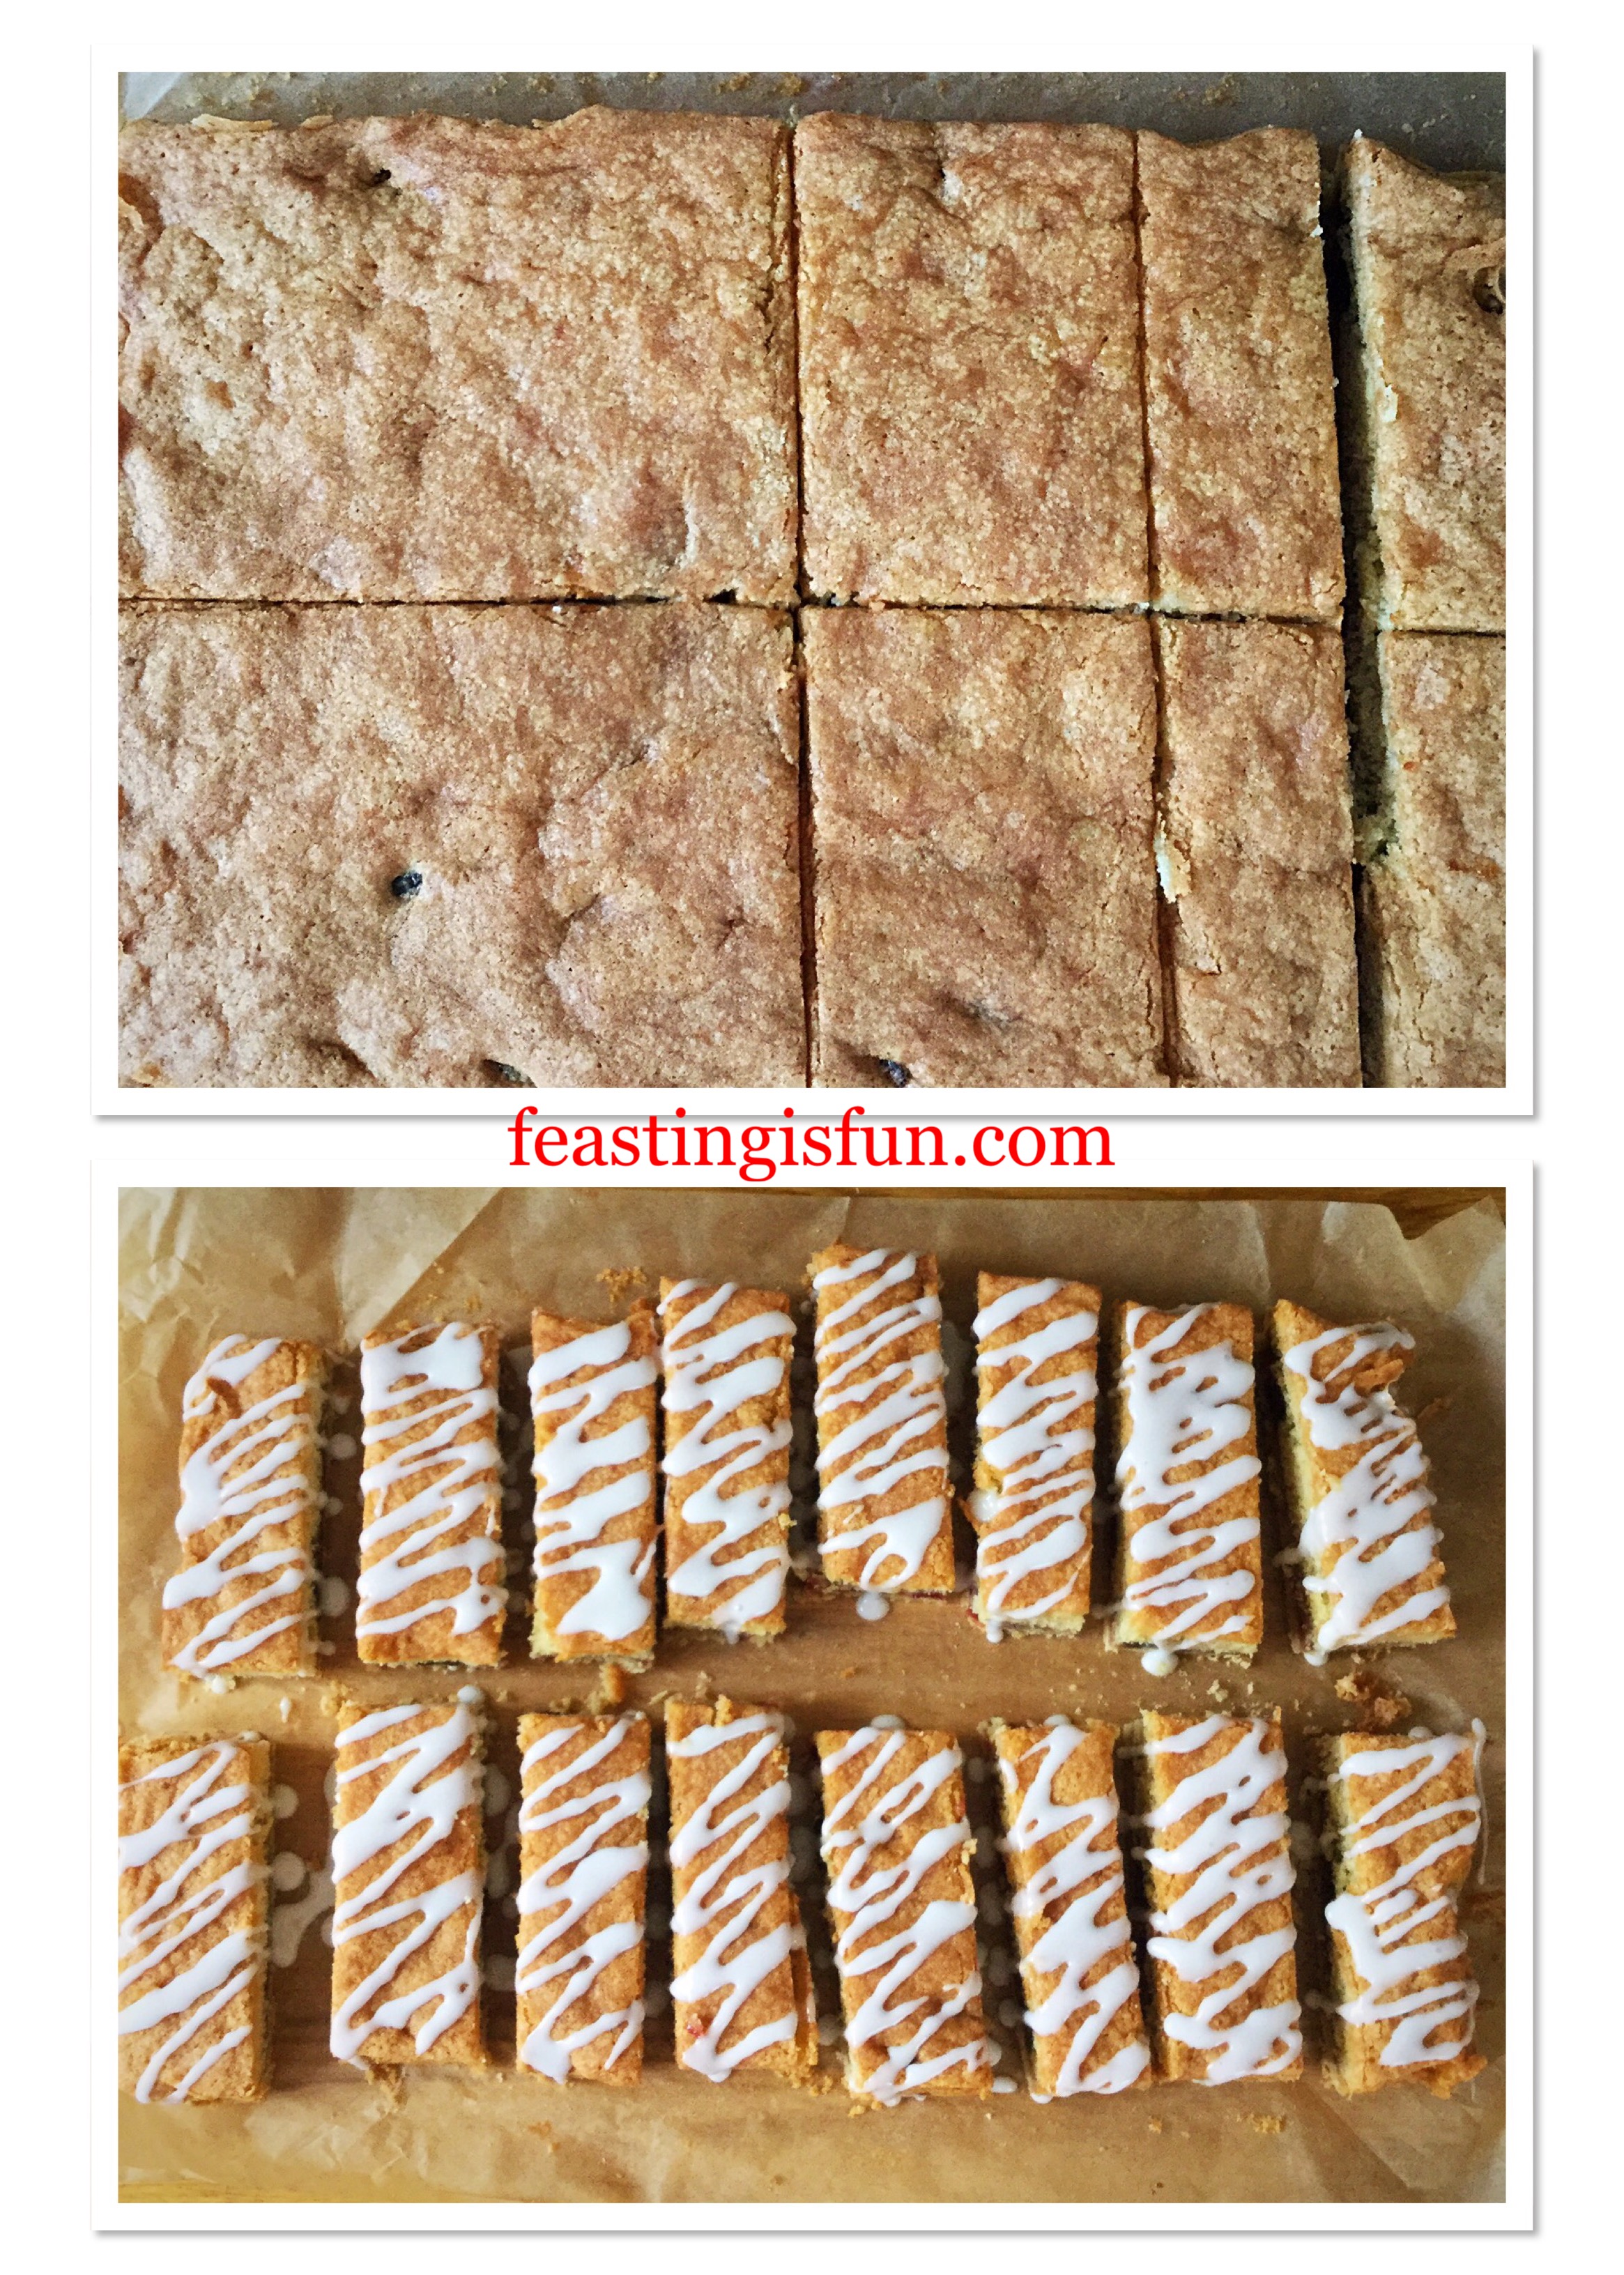
- Now place the tin into the centre of a preheated oven and bake for 40-50 minutes. Turn the tin around halfway through baking, ensuring the shortbread is baked evenly.
- The shortbread is baked when it is a golden colour and firm to touch.
- As soon as the shortbread is baked remove the tin from the oven and set to one side.
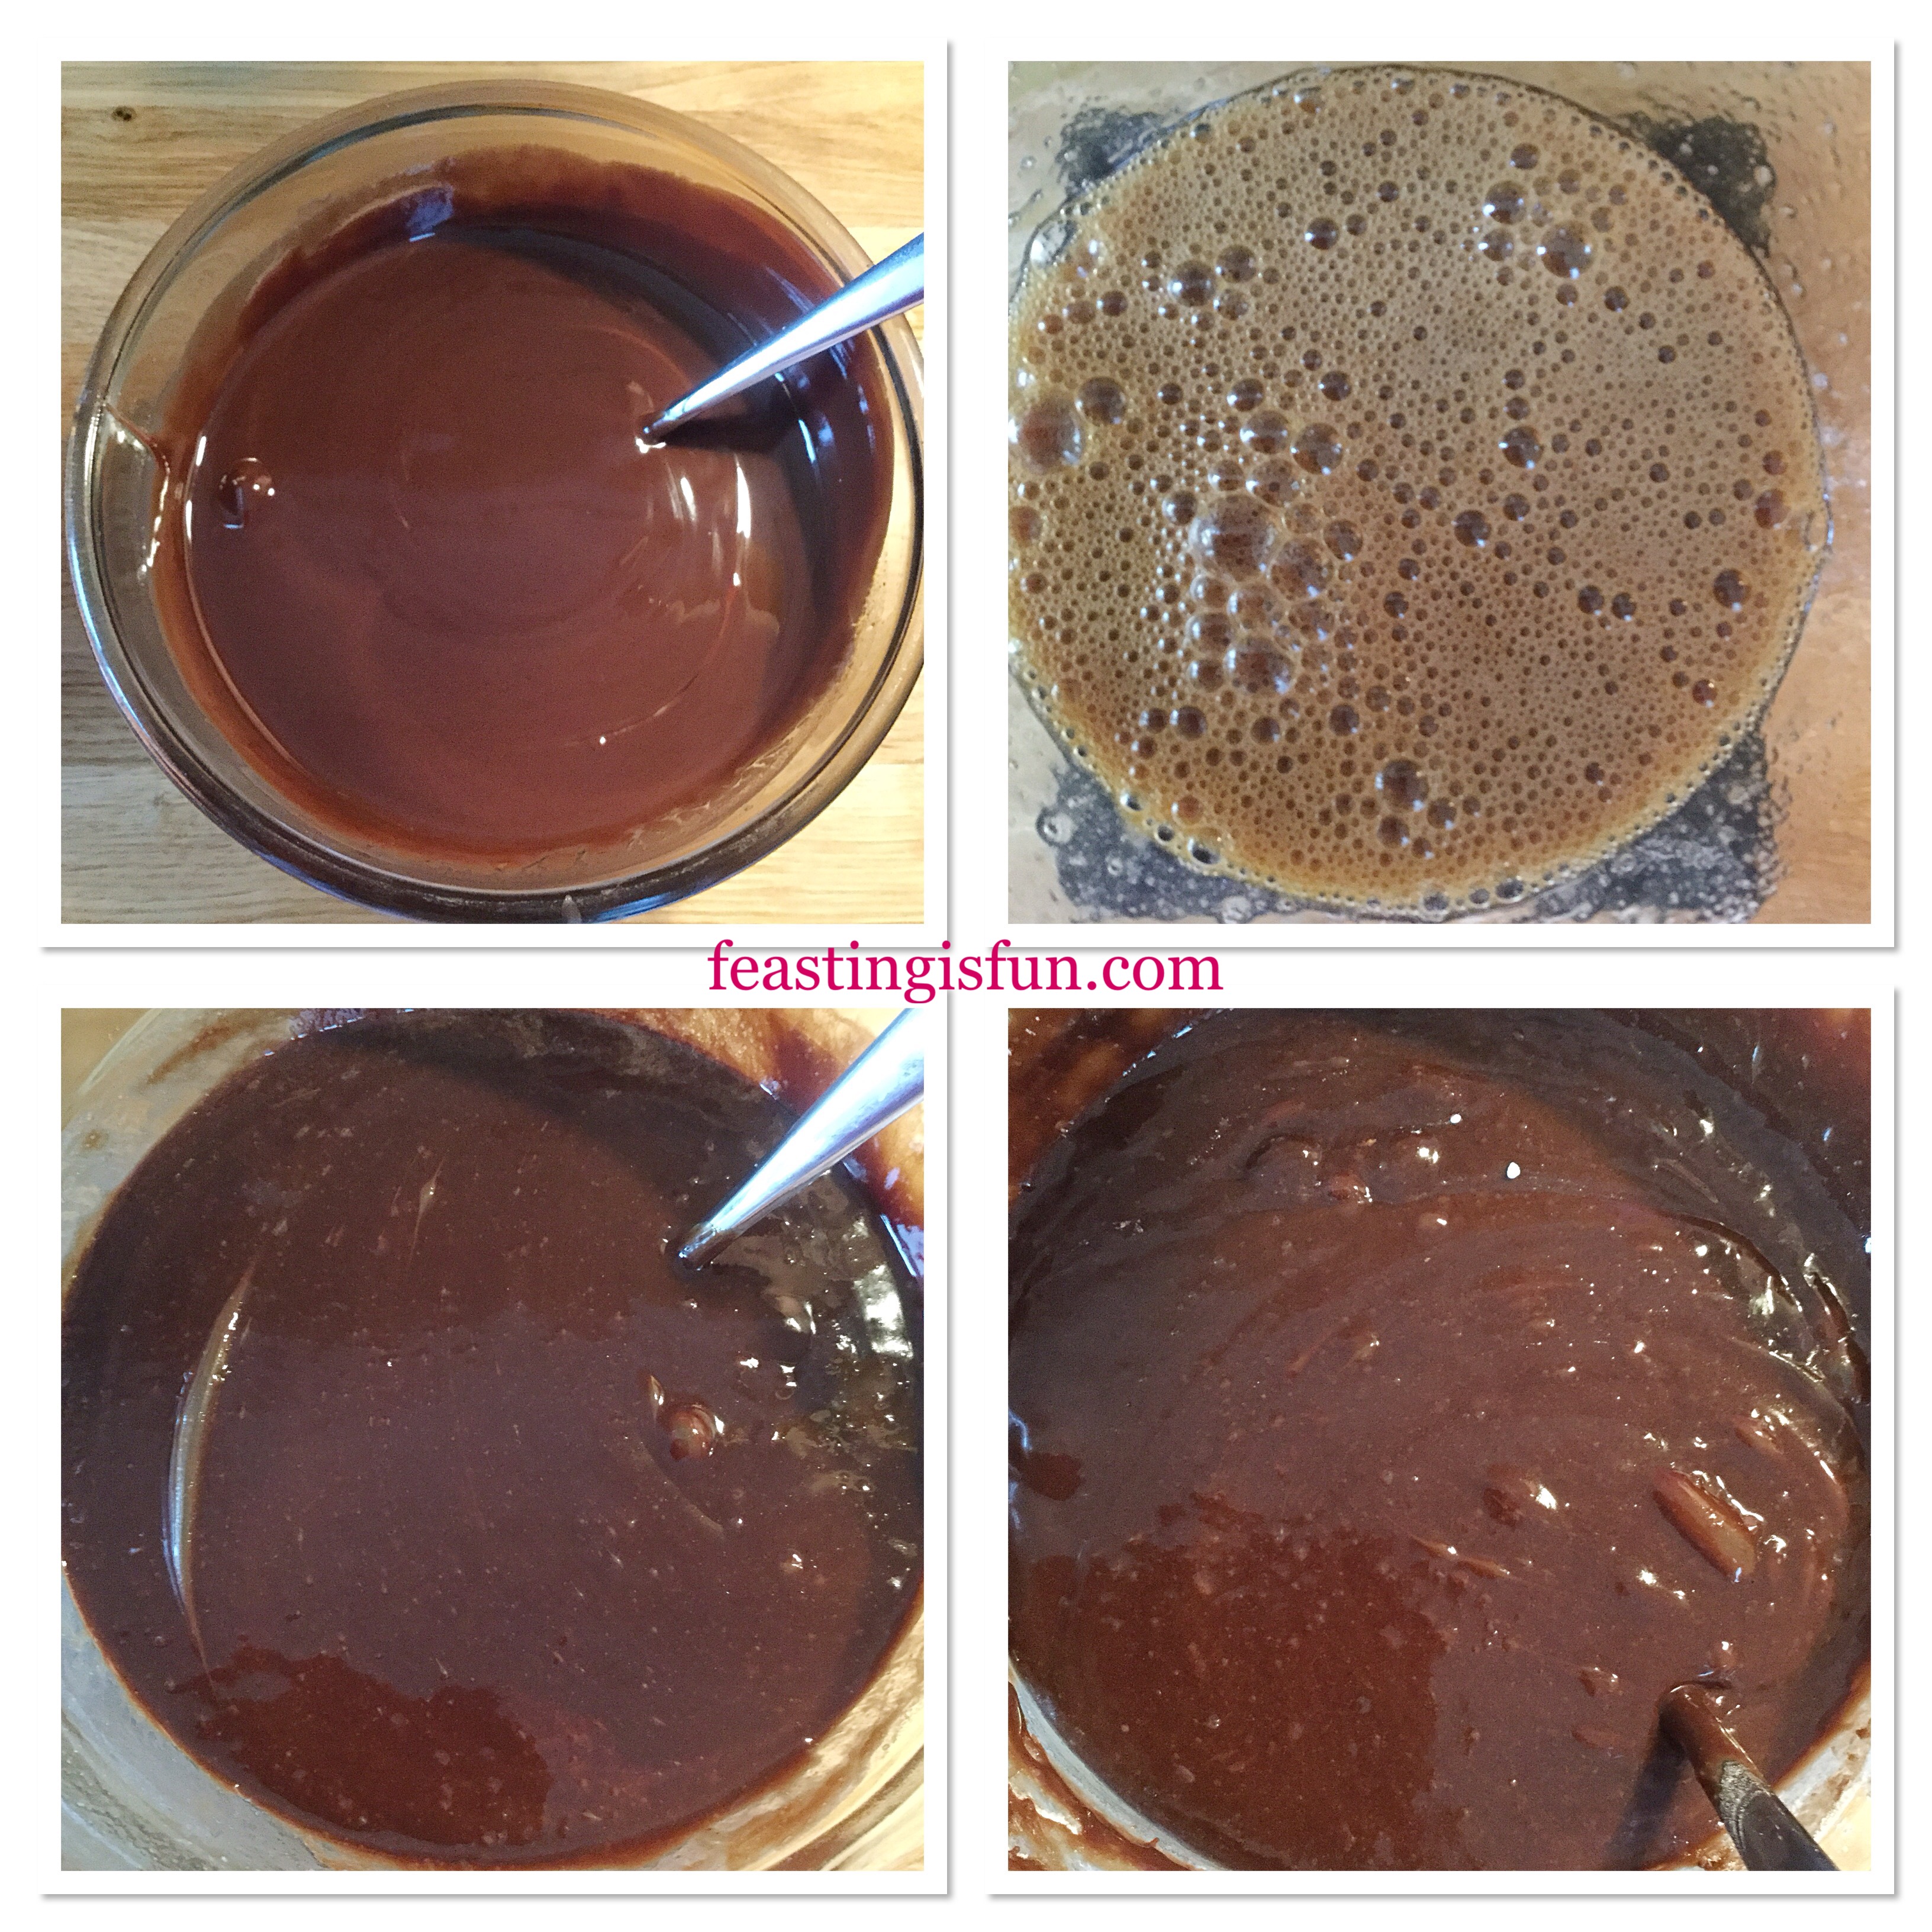
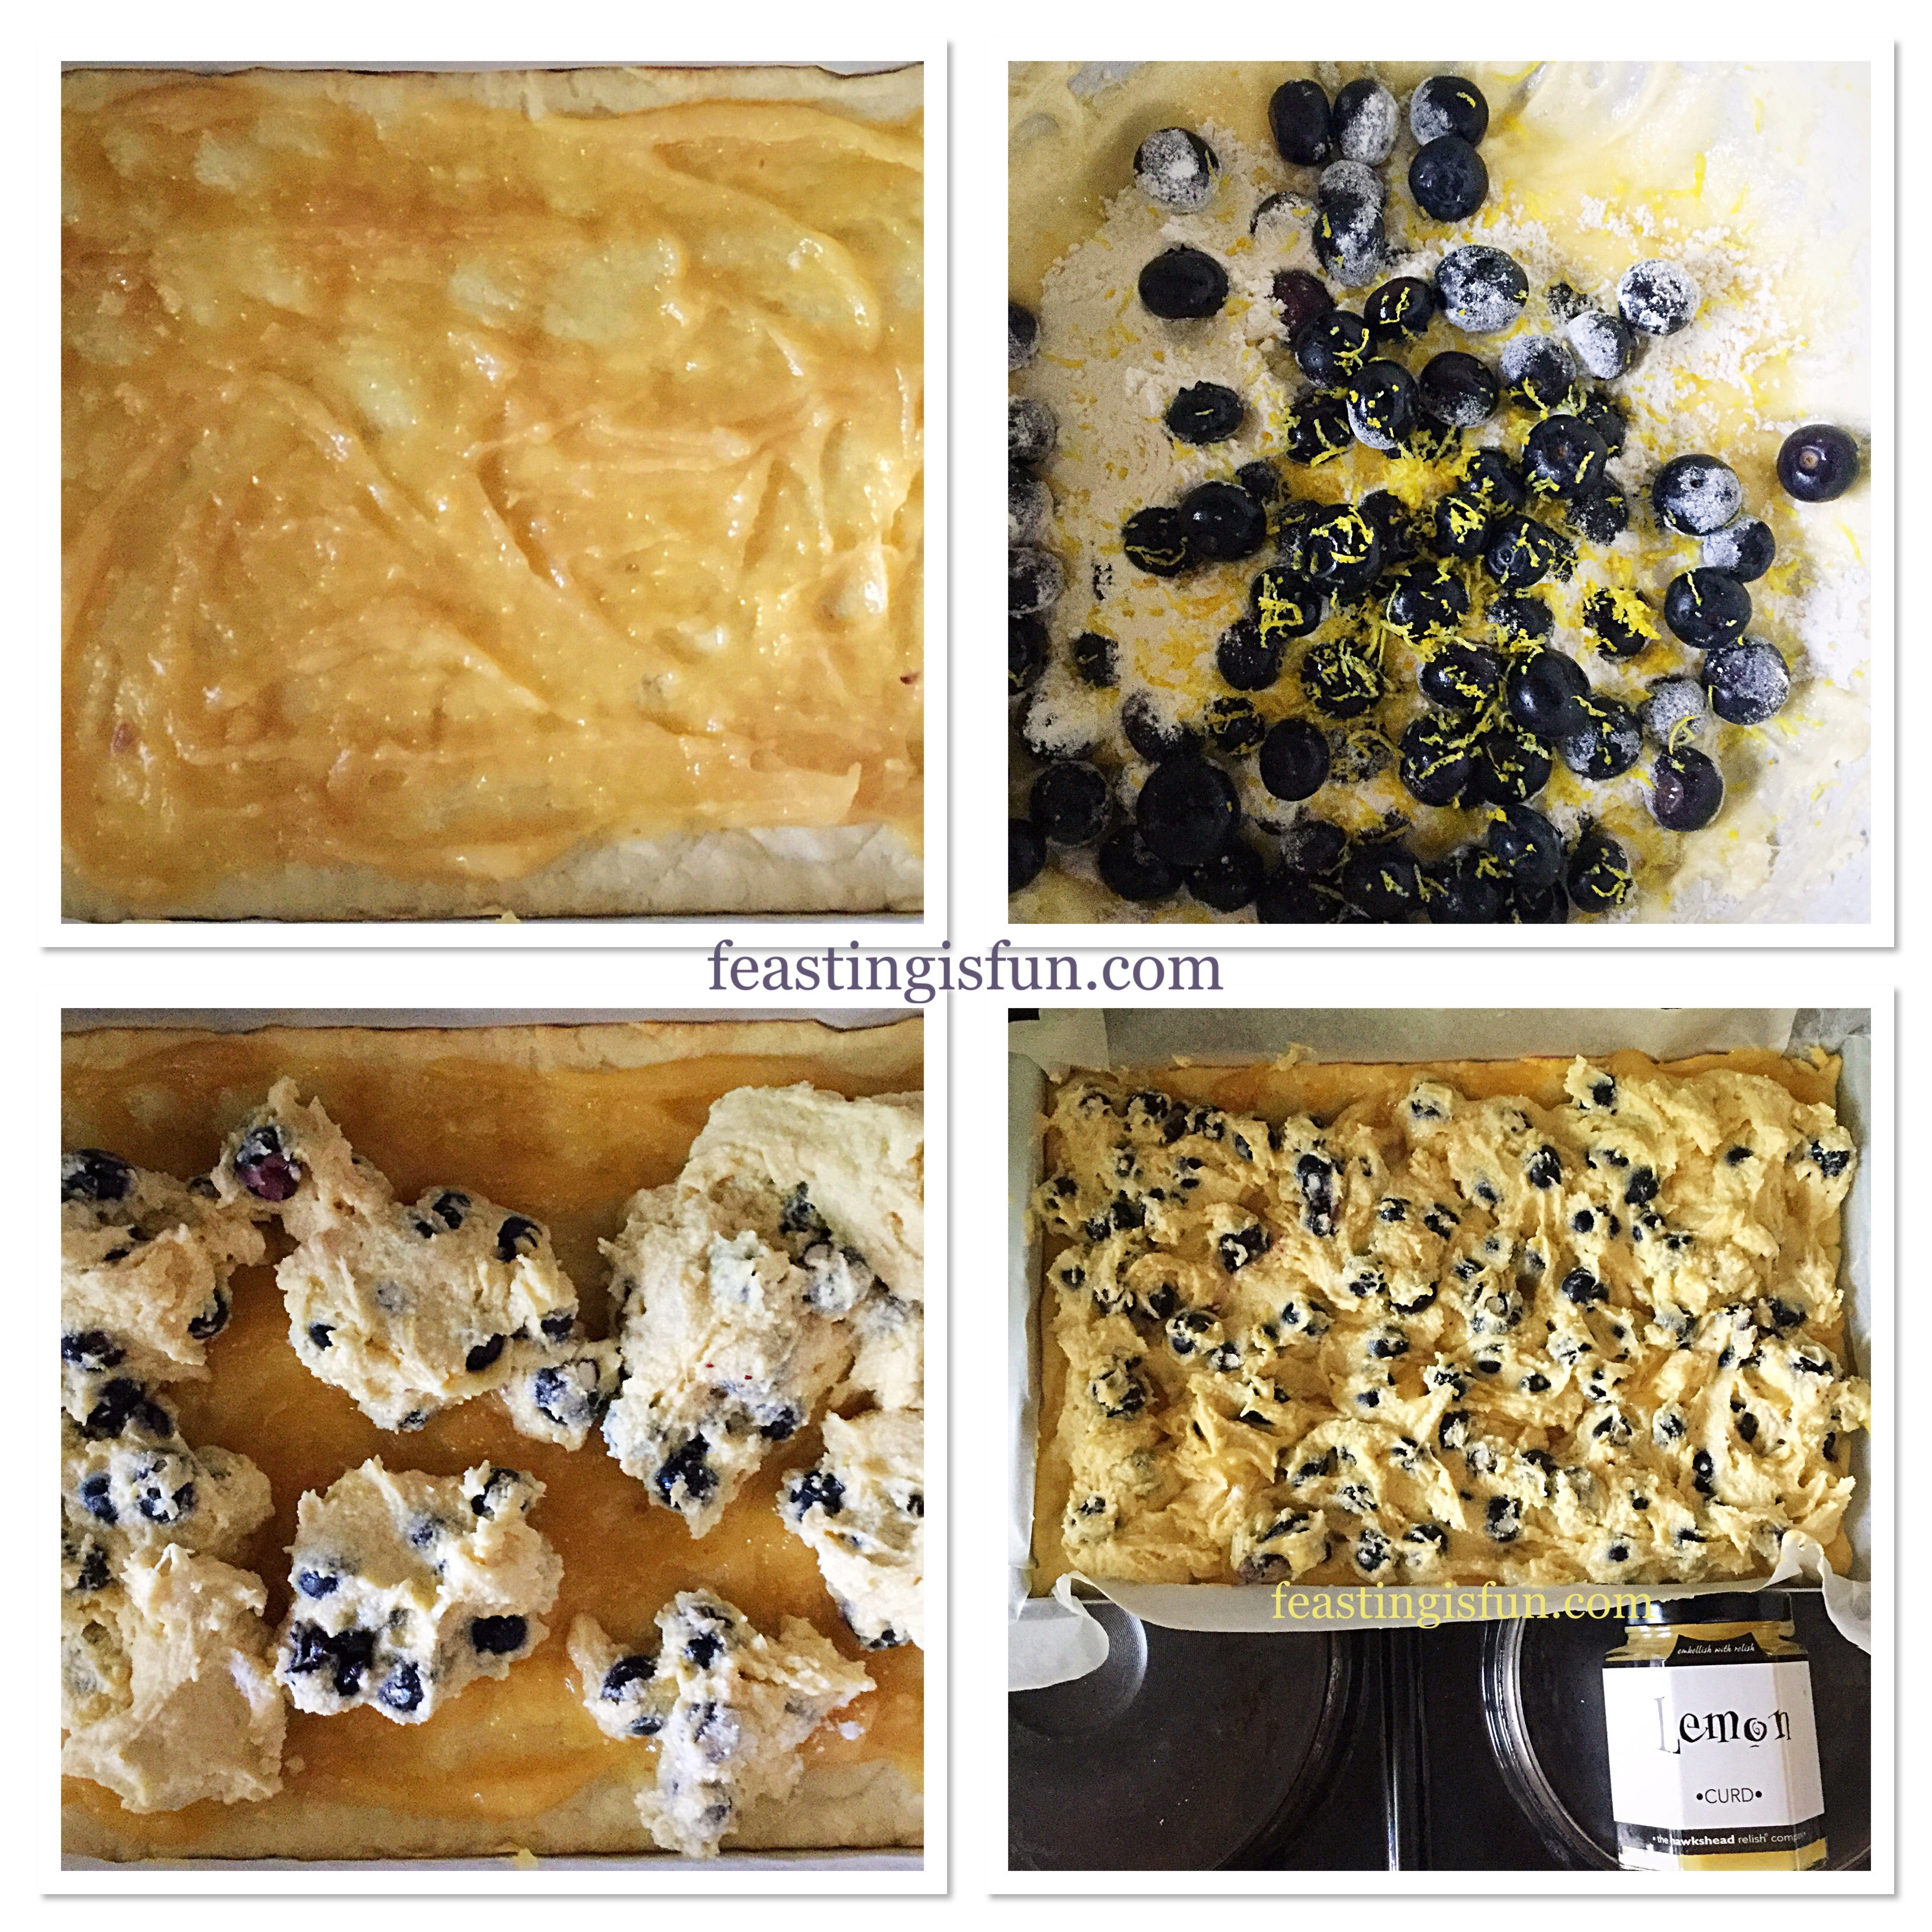
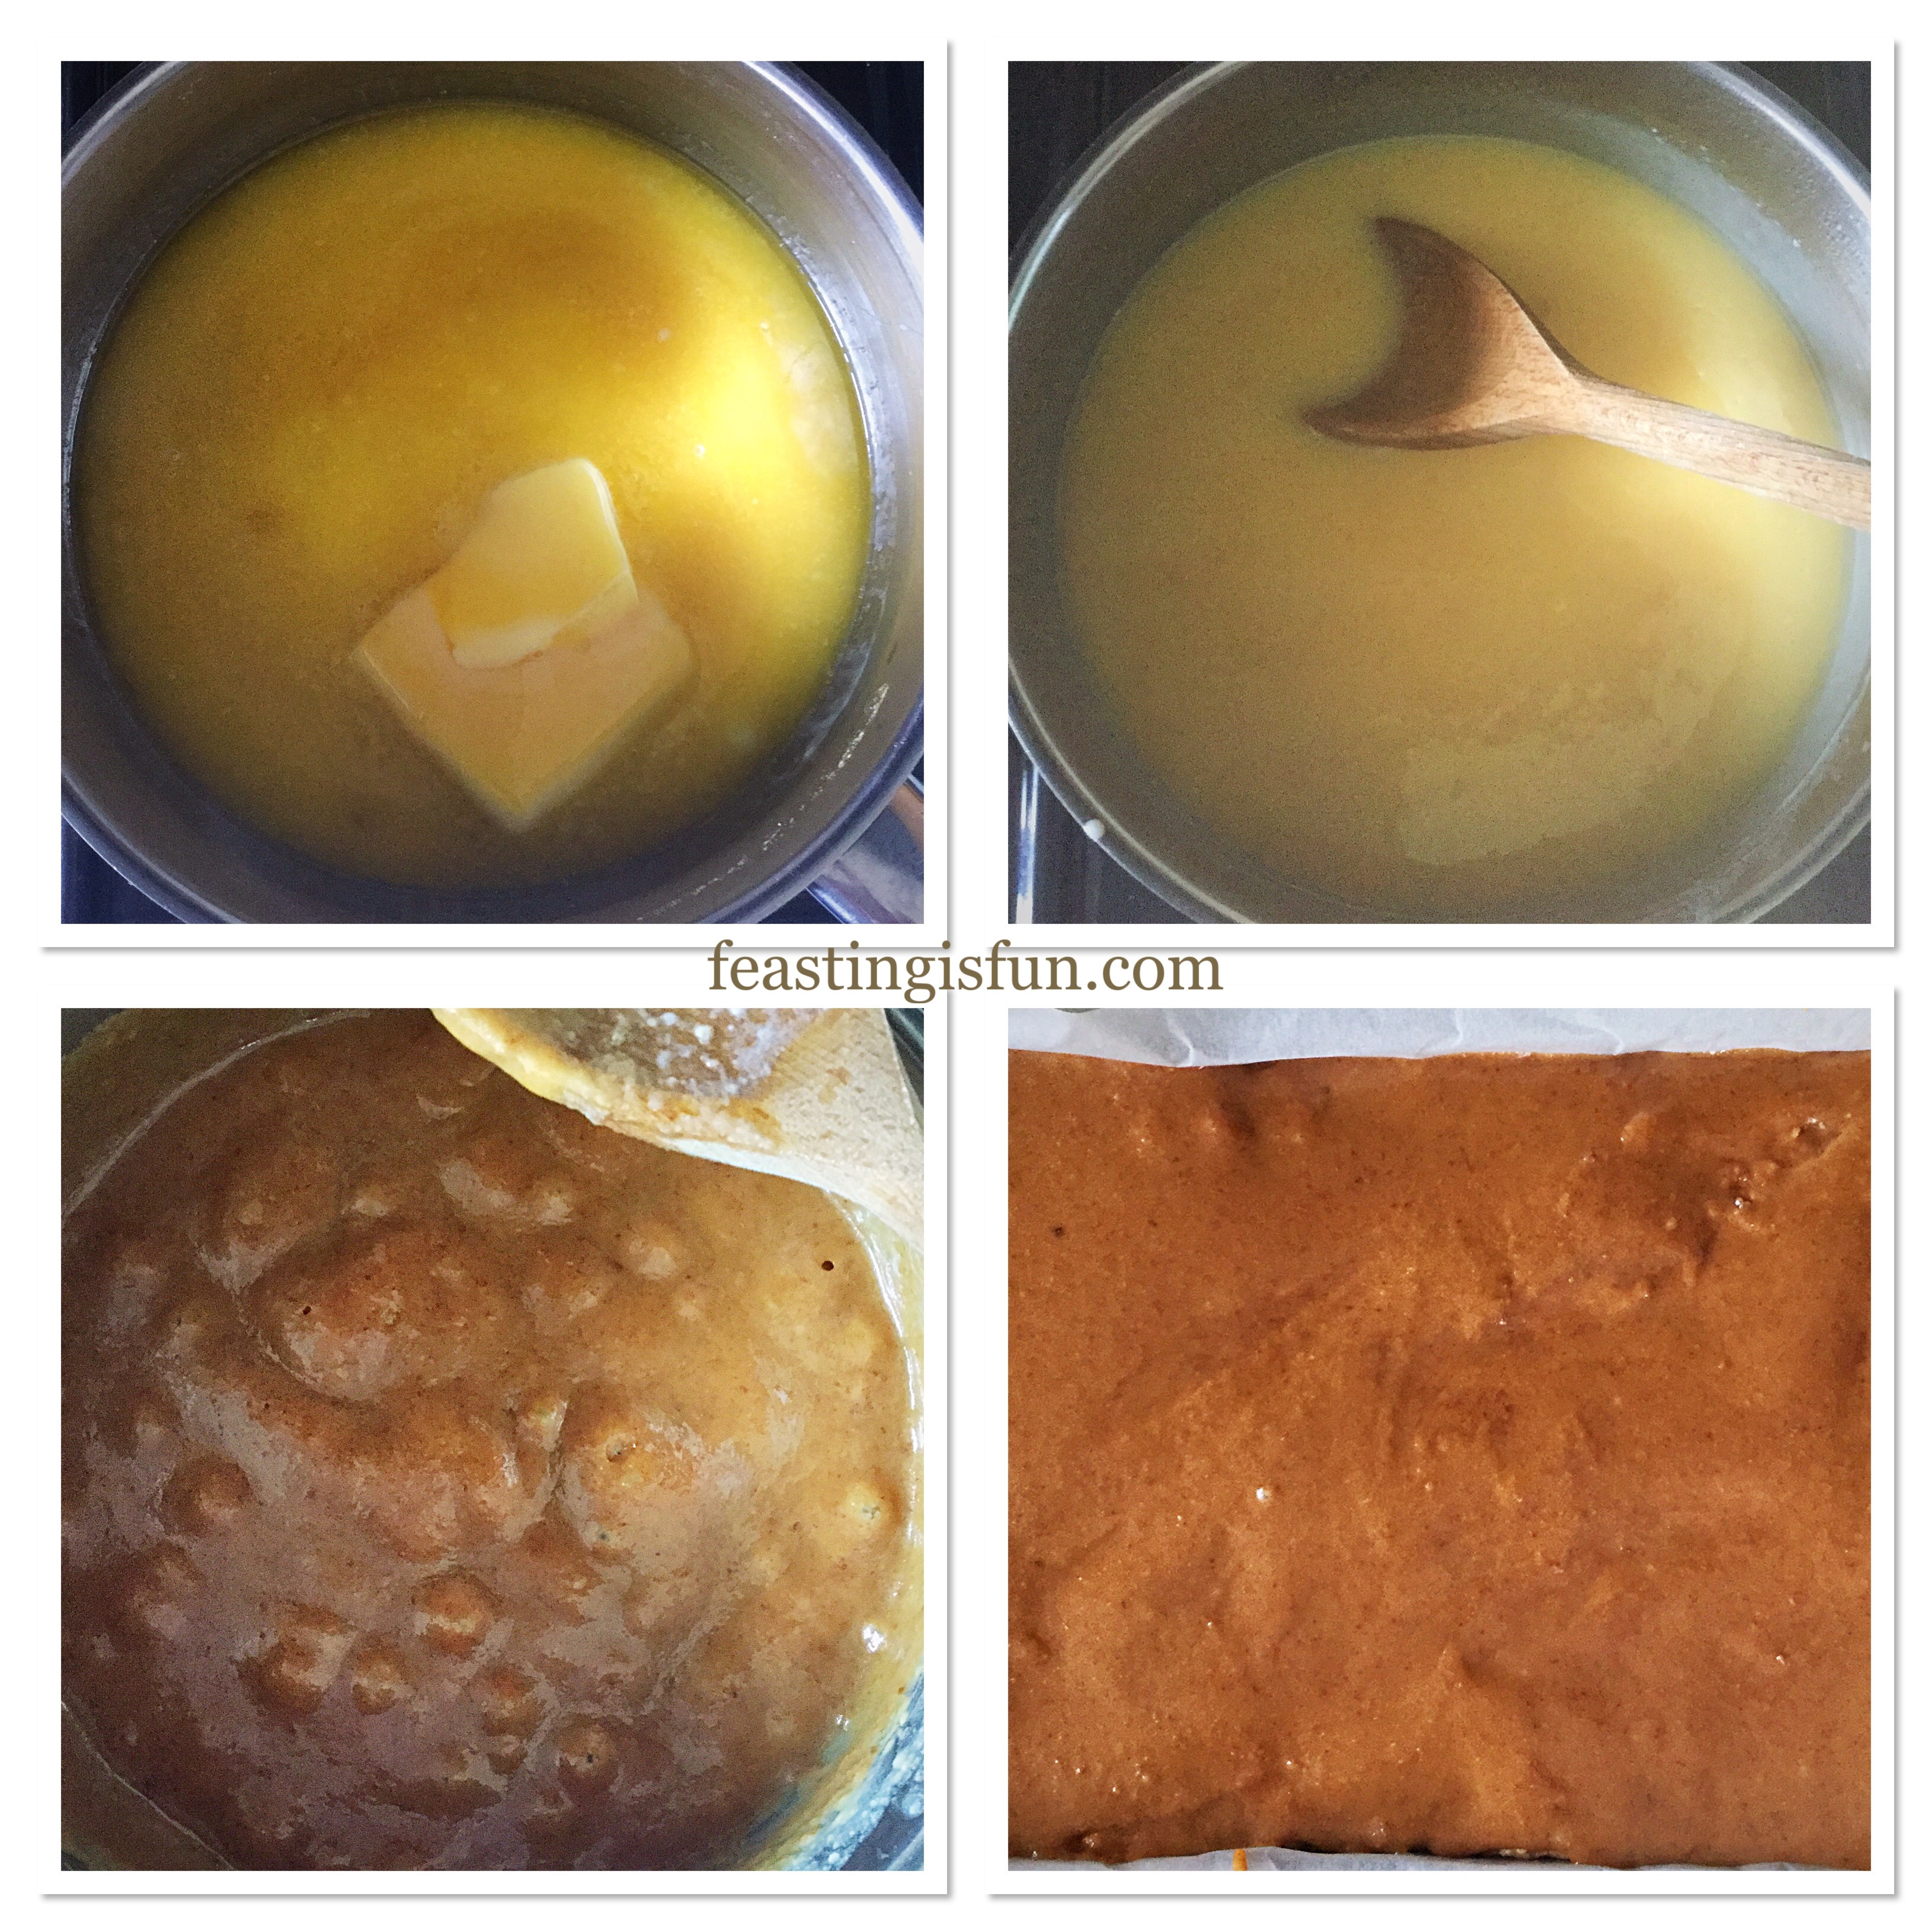
Making The Caramel
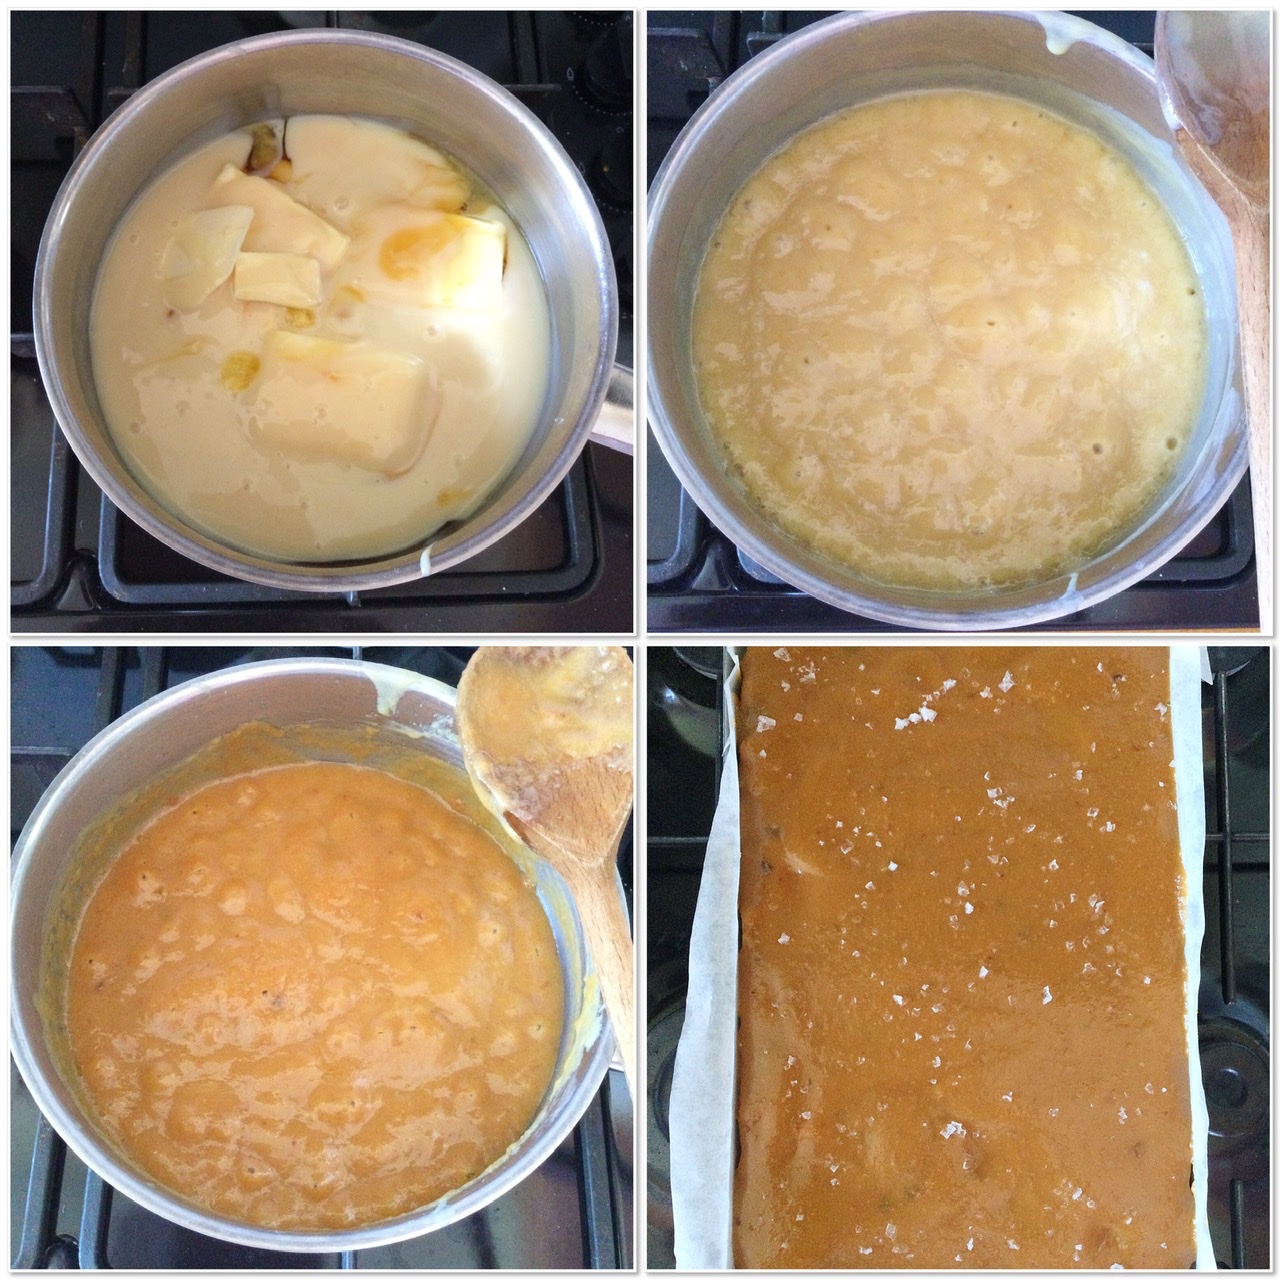
- Add the butter, golden syrup and condensed milk to a medium sized saucepan, over a medium heat.
- Stir continuously until the butter is melted, then increase the heat to bring the liquid up to a bubbling boil. Take care as you continue to stir as the caramel becomes very hot. The caramel gradually becomes thicker and as it does it will darken. This process takes 10-15 minutes, do not rush as the caramel may burn.
- Remove the caramel mixture from the heat and spoon over the cooled shortbread.
- Work quickly, using the back of a metal dessert spoon to smooth the caramel so that it completely covers the shortbread.
- Sprinkle the sea salt flakes evenly over the caramel.
- Set the caramel covered shortbread to one side to cool completely.
Making The Marbled Chocolate Topping And Decorating
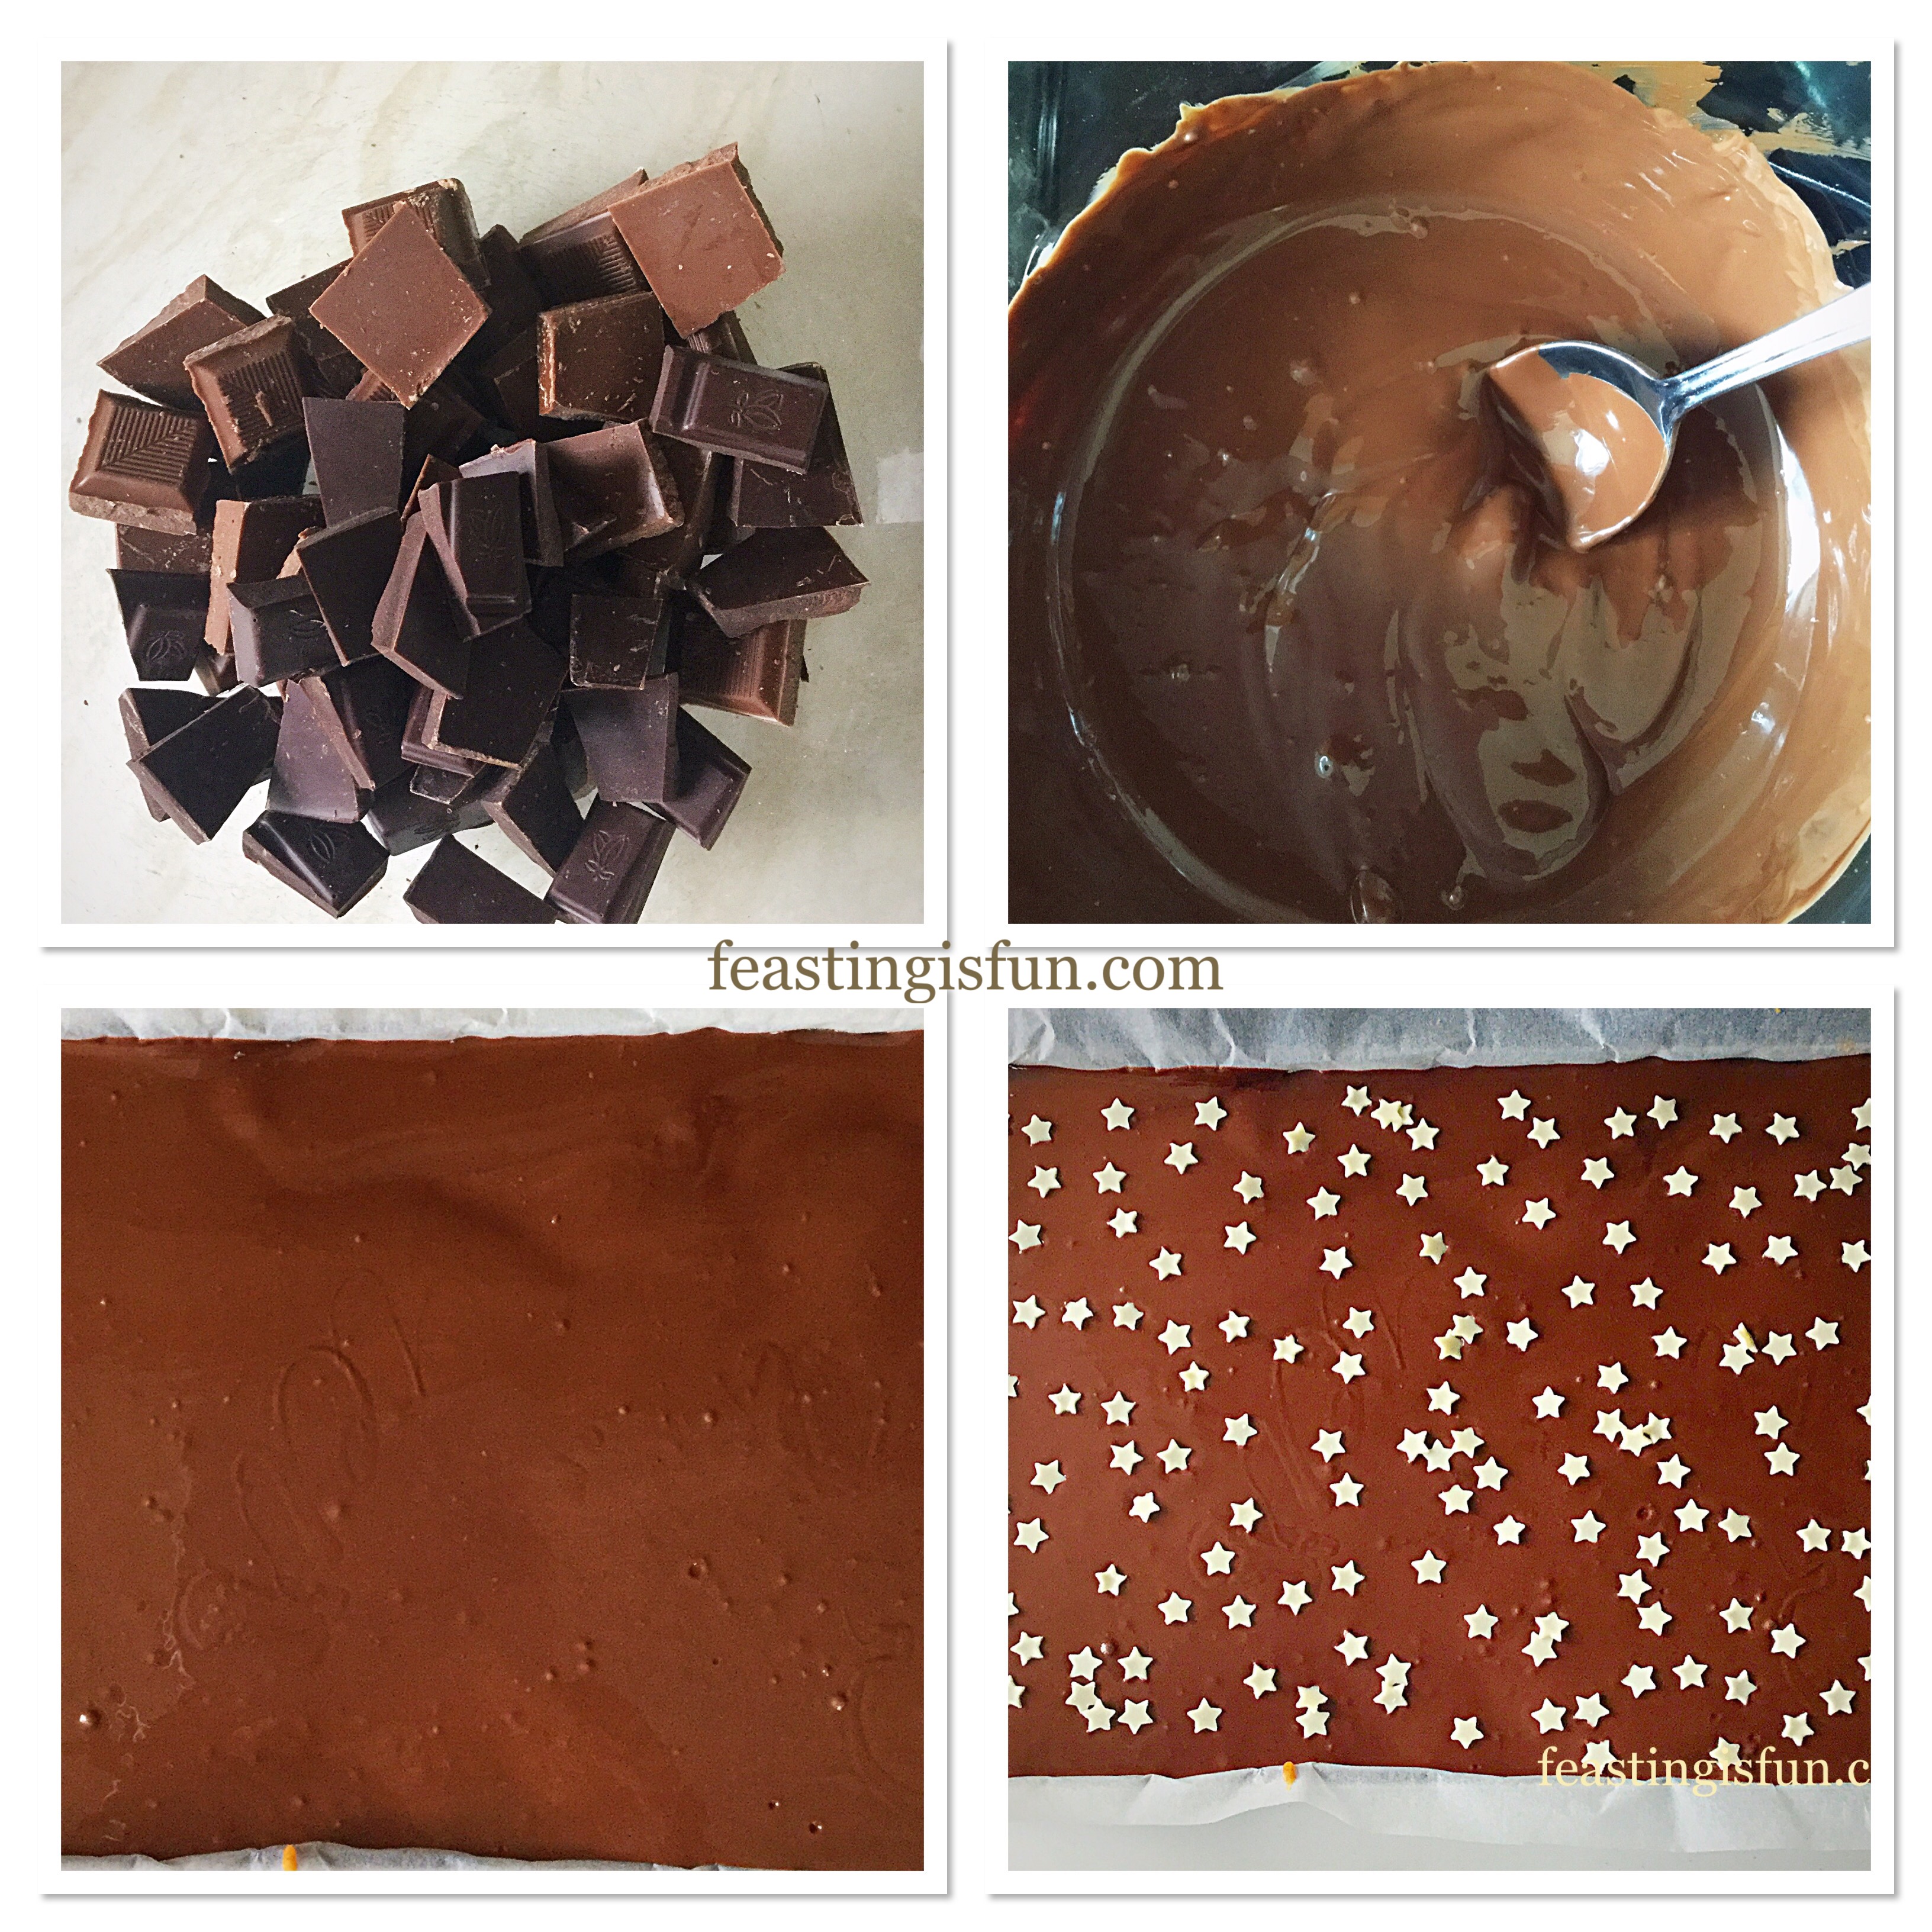
- Break the milk and dark chocolate up and place into a heatproof, microwaveable bowl.
- Heat the chocolate for 30 seconds at a time, stirring in between.
- As soon as the chocolate has started to melt, remove the bowl from the microwave and stir. Continue stirring until the chocolate is completely liquid. If needed, zap the chocolate in the microwave for 10 seconds at a time, until the chocolate is completely melted.
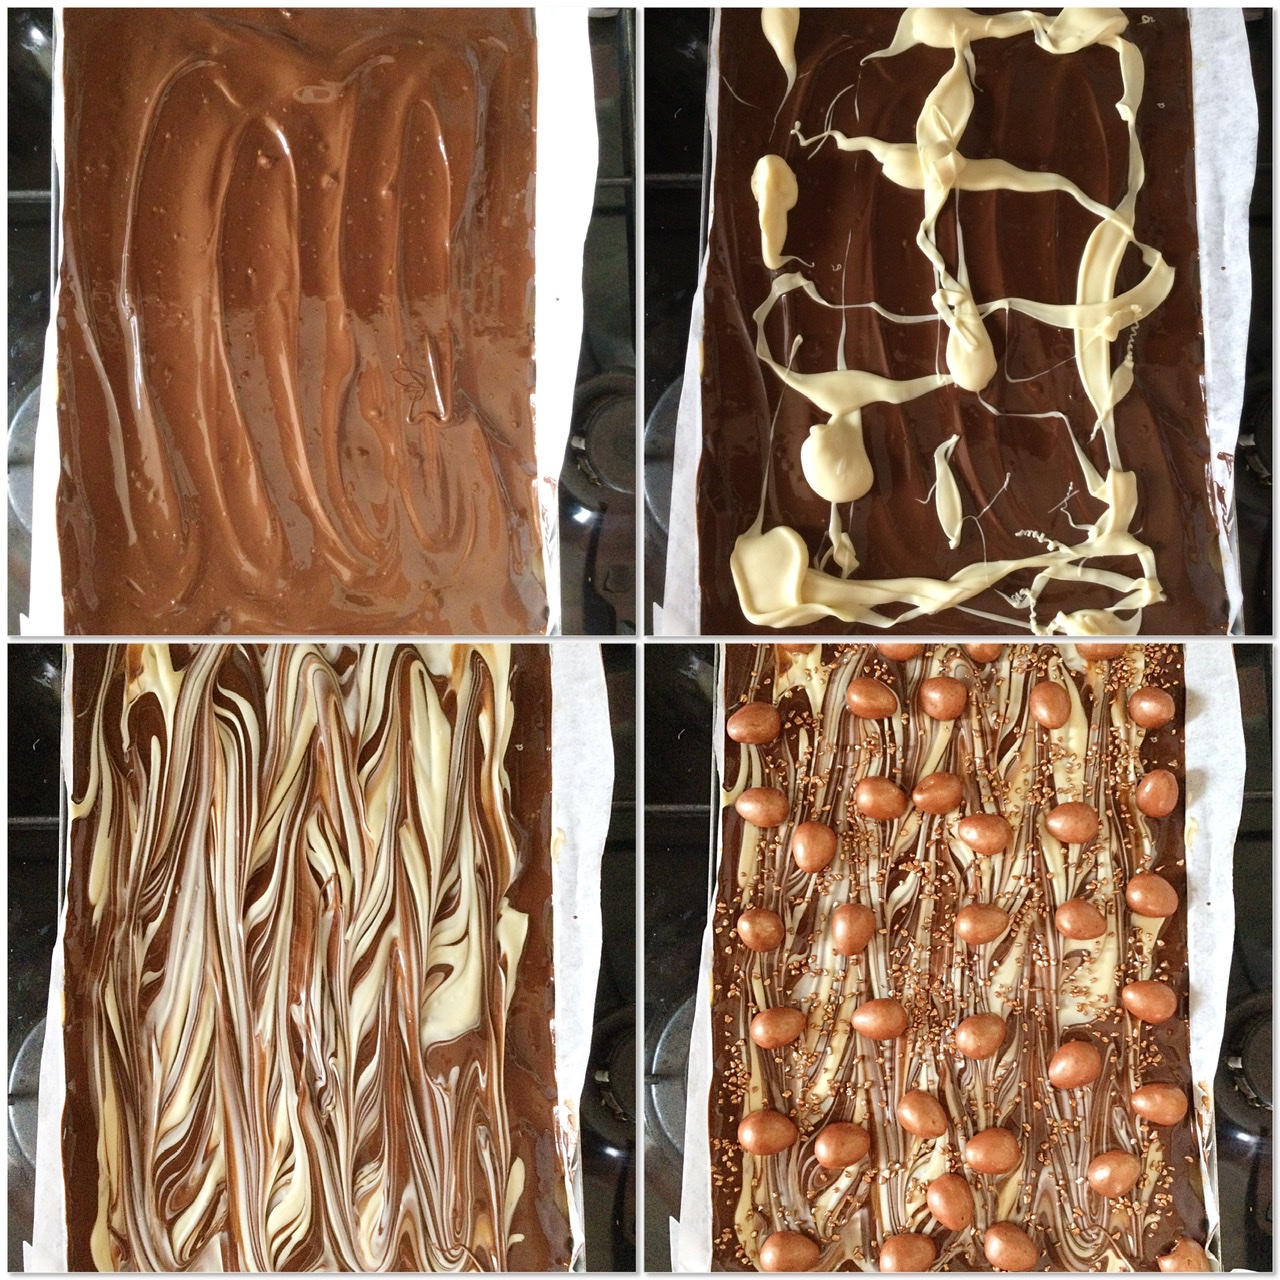
- Pour the melted chocolate over the caramel covered shortbread. Use the back of a clean dessert spoon to spread it evenly.
- Melt the white chocolate as given for the milk/dark chocolate. Because there is a smaller amount it will melt much quicker.
- Spoon the melted white chocolate onto the milk and dark chocolate layer.
- Drag a skewer lightly back and forth through the chocolate to create marble effect.
- Finally, place the burnished, mini eggs onto the melted chocolate and then sprinkle over the bronze crunch.
- Place to one side until just set.
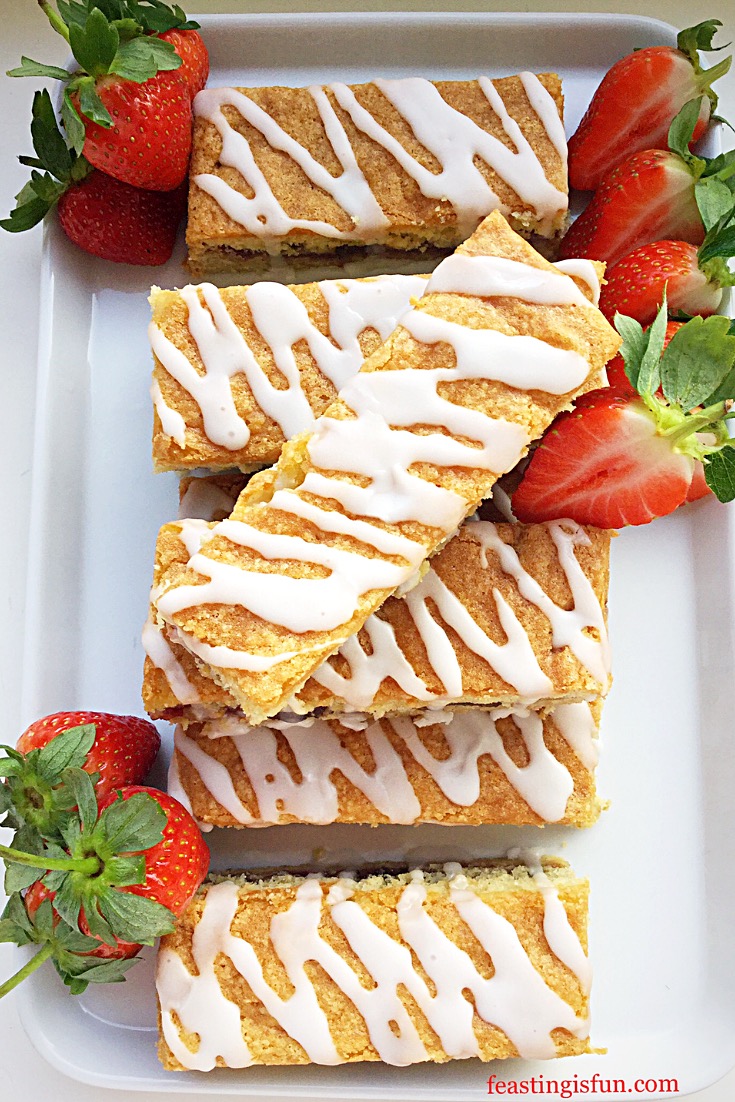
Portioning The Mini Egg Millionaires Shortbread Squares
- As soon as the chocolate has set, but not hard, use a sharp knife to lightly score the chocolate squares. This makes it much easier to cut through the hard, set block without the chocolate cracking.
- Place the tin in the fridge until the chocolate is set hard.
- Once set remove the tin from the fridge. Lift the whole block out of the tin using the baking parchment.
- Peel the parchment away from the sides.
- Use a sharp knife to cut through the entire block along the previously scored lines.
- Tip – make a note of where your scoring lines are, on the excess baking parchment, before adding the eggs and sprinkles. It will make cutting the squares much easier!
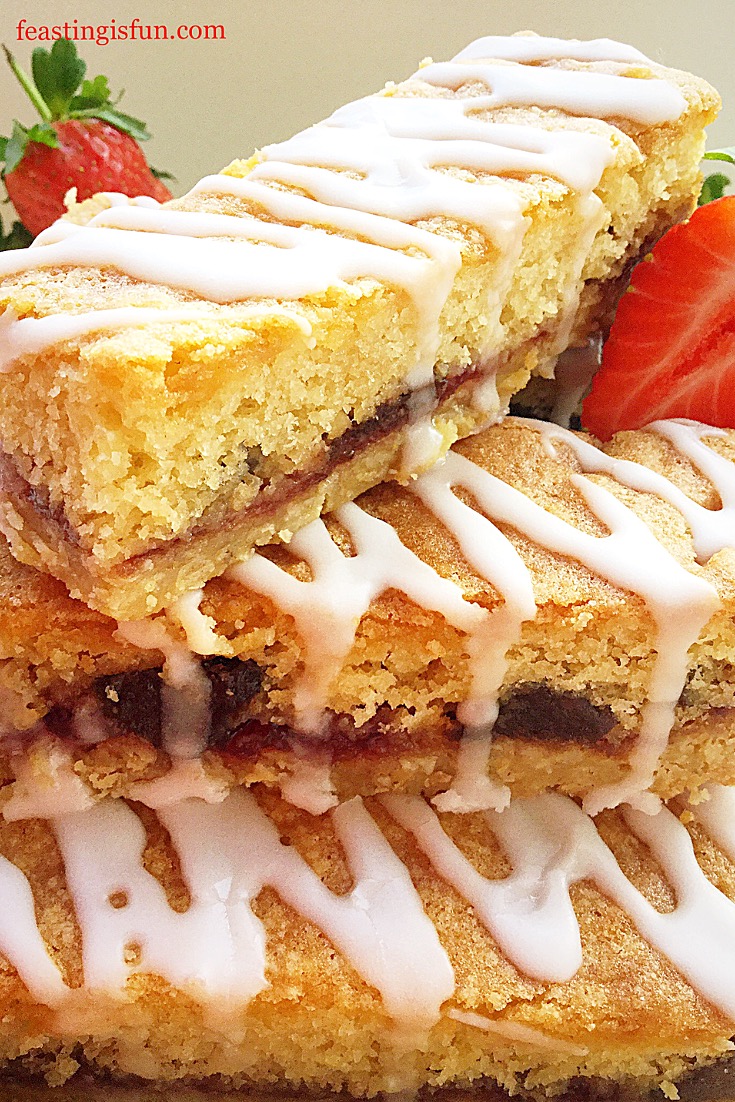
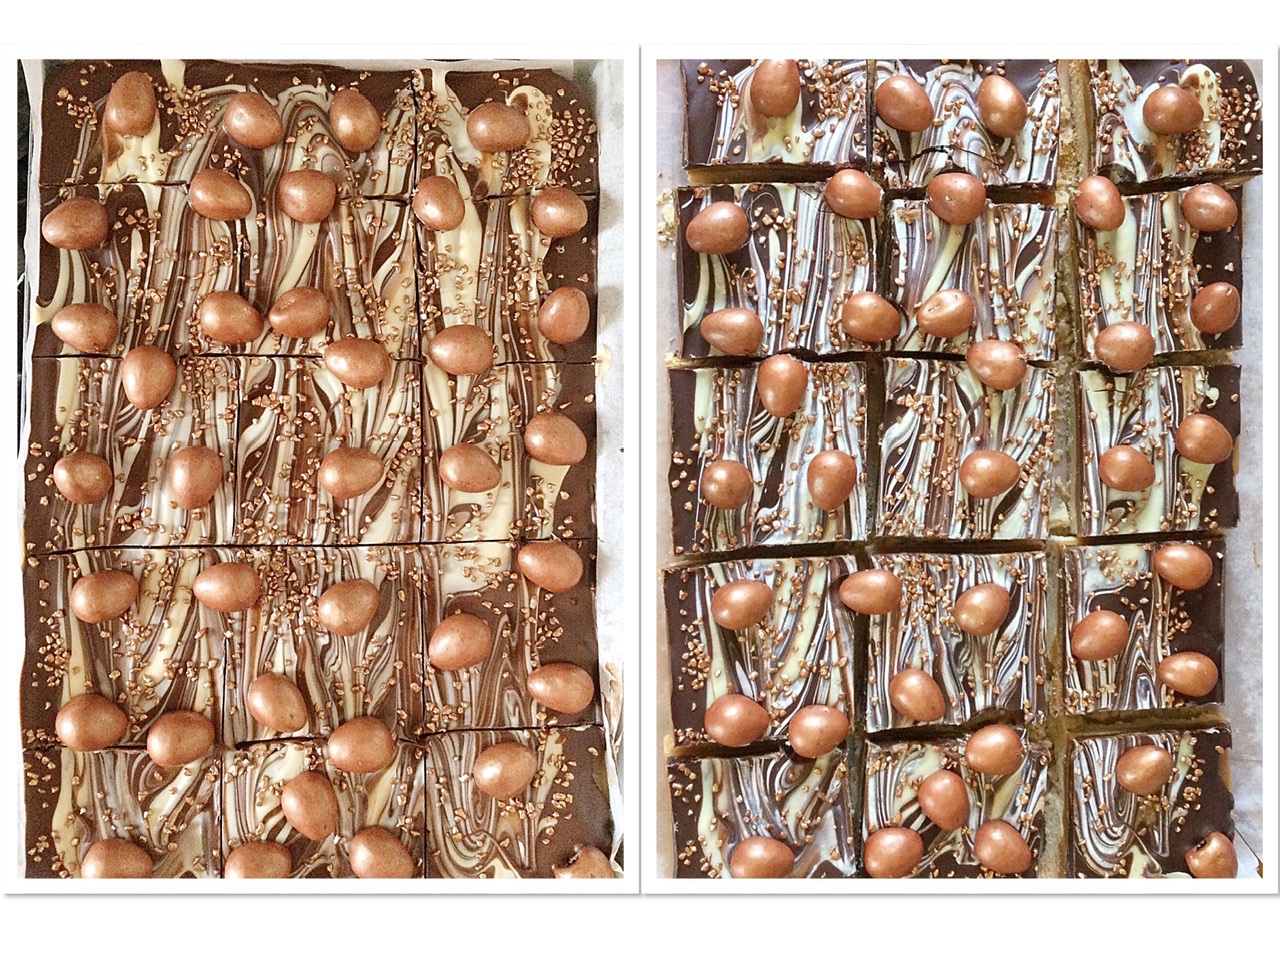 Place the Mini Egg Millionaires Shortbread squares onto a platter and serve cold.
I absolutely love sharing what I bake. Today, I wrapped up a chilled square and gave it to our shopping delivery driver. It’s always a lovely feeling making someone else smile.
To find out why Easter is more than baking to me read
If you have enjoyed these Mini Egg Millionaires Shortbread squares then you may also like these:
Chocolate Mini Egg Sponge Cake

Vanilla Mini Egg Nest Cupcakes


Finally, it is so good to be posting new recipes for you to try again. While the last two years have been undoubtedly difficult for all of us, we are now, hopefully coming out of the shadows of COVID. Although for those of you who lost loved ones and friends to the pandemic, that phrase may still feel a long way off. Most importantly for me, is the need to hold onto hope. And it is with that hope that I wish you all a safe, peaceful and healthy Easter.
Whatever you are making, baking and creating in your kitchens I hope you are now able to share your feast in person, with those you love and care for.
Sammie x
No party of this post may be reproduced or duplicated without the written permission of the owner. Please see my Disclosure Policy.