Mixed Fruit Loaf Cake

Share
Facebooktwitterpinterestlinkedintumblr

Hello to all my lovely readers. How are you during these worrying and confined times? A coping mechanism that I use during chaotic, out of control times, is to do something soothing and familiar. And for me that’s baking. Whether it’s methodically following a recipe or developing a new one, being creative in the kitchen calms me. And there is the added bonus of a delicious bake at the end of the process! My Mixed Fruit Loaf Cake is the result of a personal craving for exactly this cake, light, buttery and packed full of plump vine fruits and cherries.
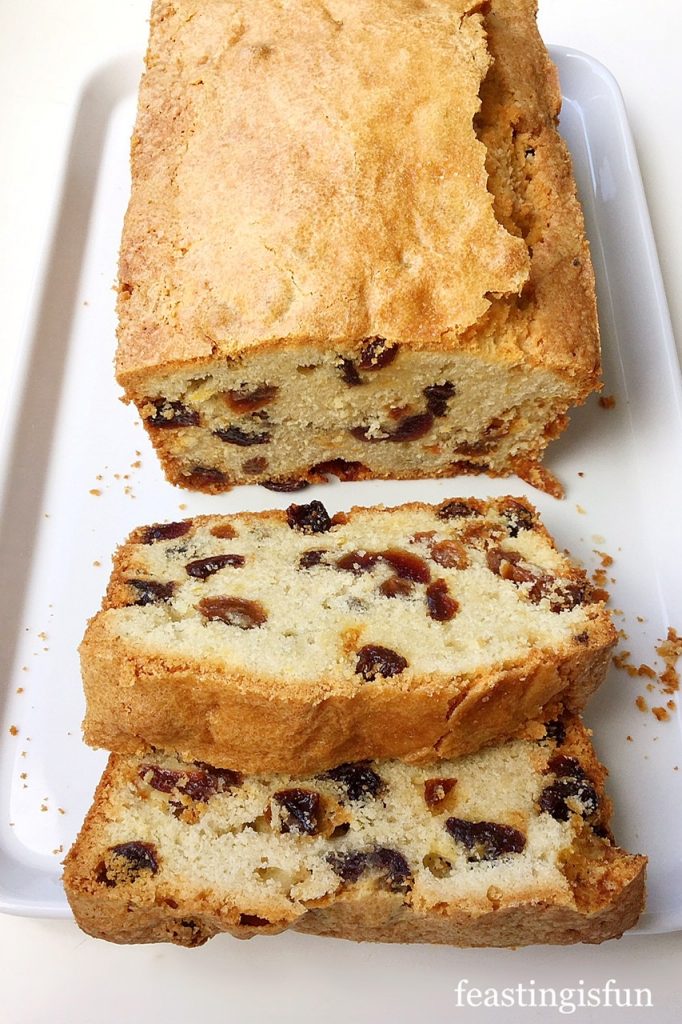
 

Mixed Fruit Loaf Cake

If I’m being completely honest I’m not a big fan of heavily spiced, rich fruit cake. For example Christmas cake. While I make it every year for my hubby and son who adore it, I will only have a tiny piece, primarily out of tradition and also to check the flavour. Yet a lighter, un-spiced fruit cake such as my Dundee Cake, is a completely different story. Pass me a slice, a cup of tea and I’m one happy girlie. And that light, fruit packed, buttery cake is exactly the inspiration behind my Mixed Fruit Loaf Cake.
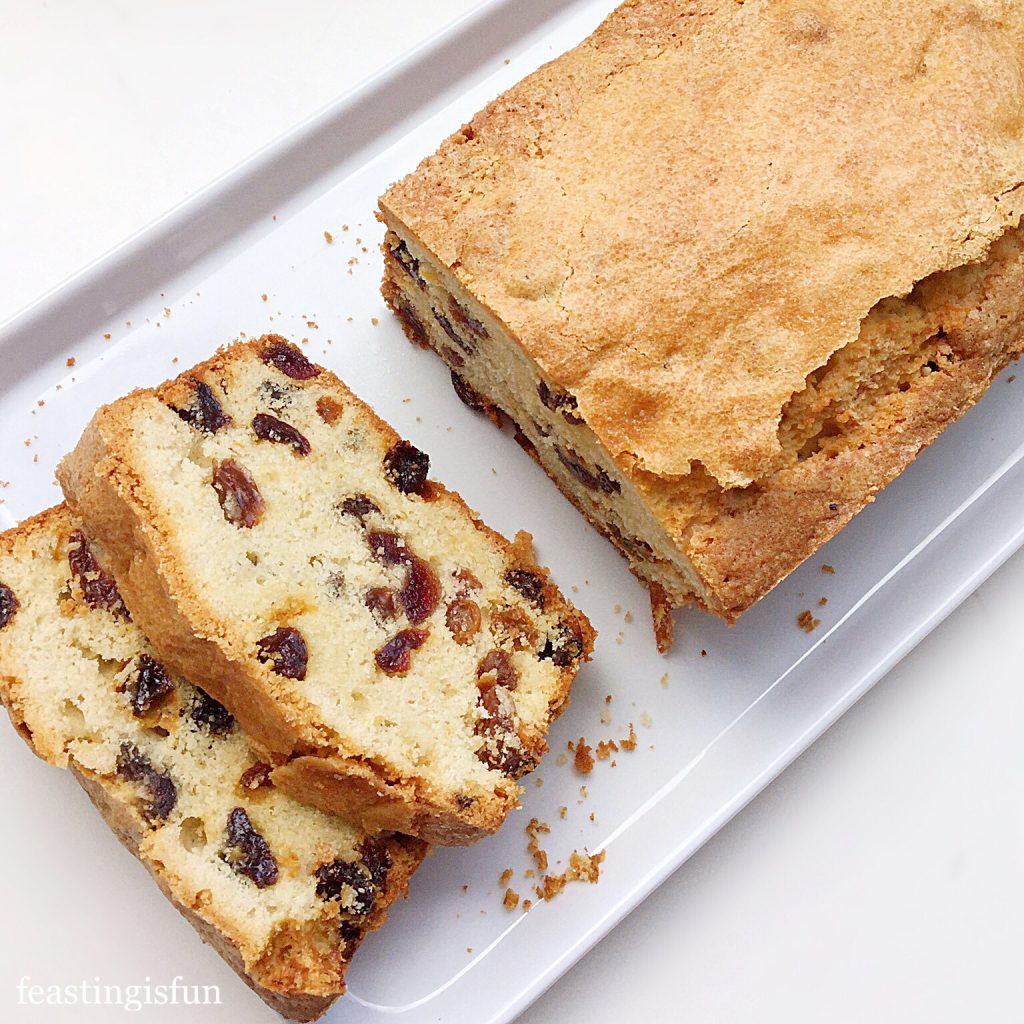
 

Mixed Fruit Loaf Cake

A Spoonful Of Sugar

So, what makes this fruit cake extra special is the crunchy sugar topping. Added as a last minute idea, one teaspoon of Demerara sugar sprinkled onto the cake before it is baked takes this cake to another level. The crunchy texture adds an unexpected contrast to the soft, yielding cake without adding excess sweetness. You may of course leave it off, but I’d encourage you to try it once!
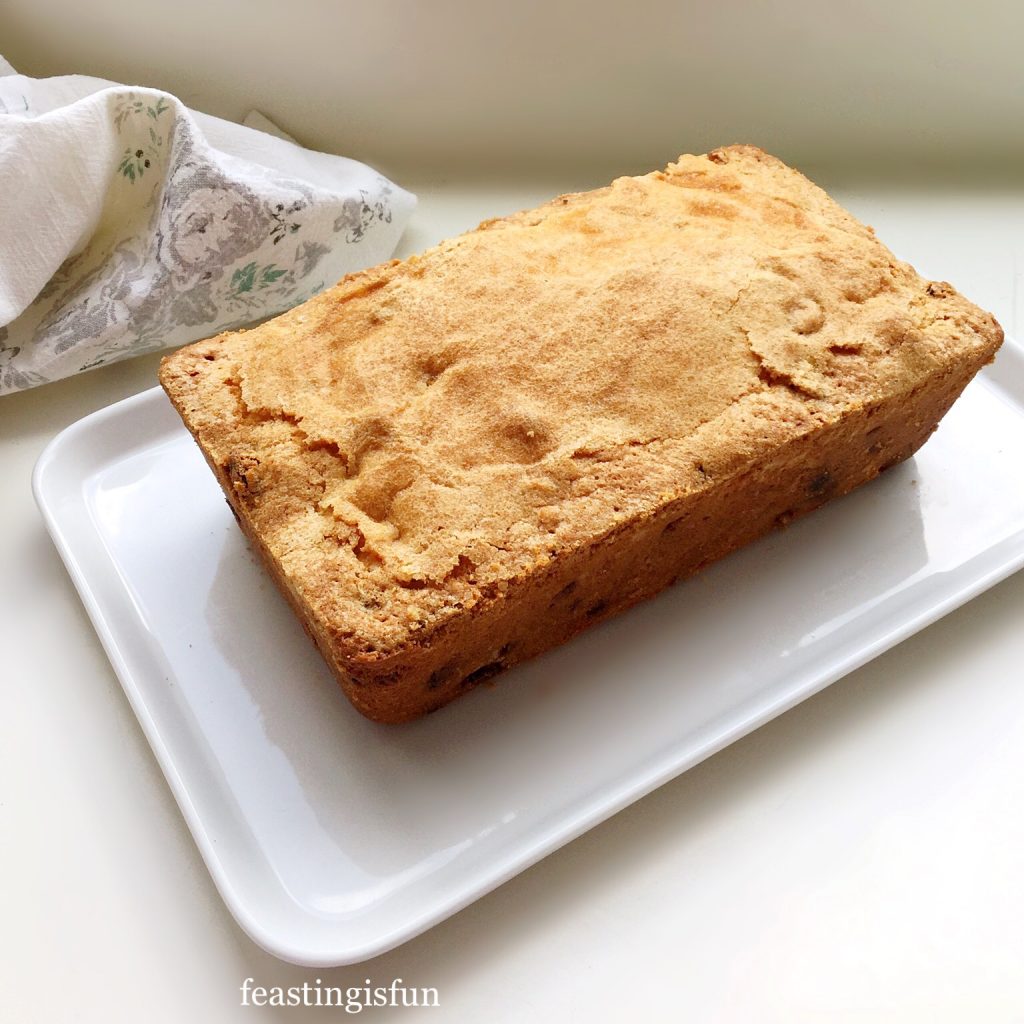
 

Uncut mixed fruit loaf cake.
Mixed Fruit Loaf Cake

Finally, a quick note about making this cake. After baking and cooling wrap the cake, still in its tin, in cling film. The cake firms up and pulls together overnight and, in my opinion, improves in flavour. Although this process isn’t necessary, if you have the time I highly recommend it.


Recipe: Mixed Fruit Loaf Cake serves 8-10

225g/8oz Unsalted Butter at room temperature 

225g/8oz Caster Sugar – can be substituted with granulated sugar

1/4 tsp Salt – I use Maldon

1 tsp Vanilla Extract – I use Nielsen Massey

4 Large Free Range Eggs

275g/9.5oz Self Raising Flour – alternatively use the same weight of plain flour and add 1 teaspoon of baking powder

Zest of 1 Lemon

100g/4oz Glacé Cherries – halved

200g/7oz Mixed Vine Fruits – sultanas, raisins and currants – I use Waitrose  Luxury Vine Fruits. Alternatively use 300g mix of whatever dried fruits you prefer.

1 tsp Demerara Sugar 

Making The Fruit Cake Batter:

Preheat the oven to 170C/150C fan, gas mark 3, 325F.

  • First of all, butter and line the base with baking parchment of a 2lb loaf tin – 24.5cm x 14.5cm x 7cm (10in x 6in x 3in).
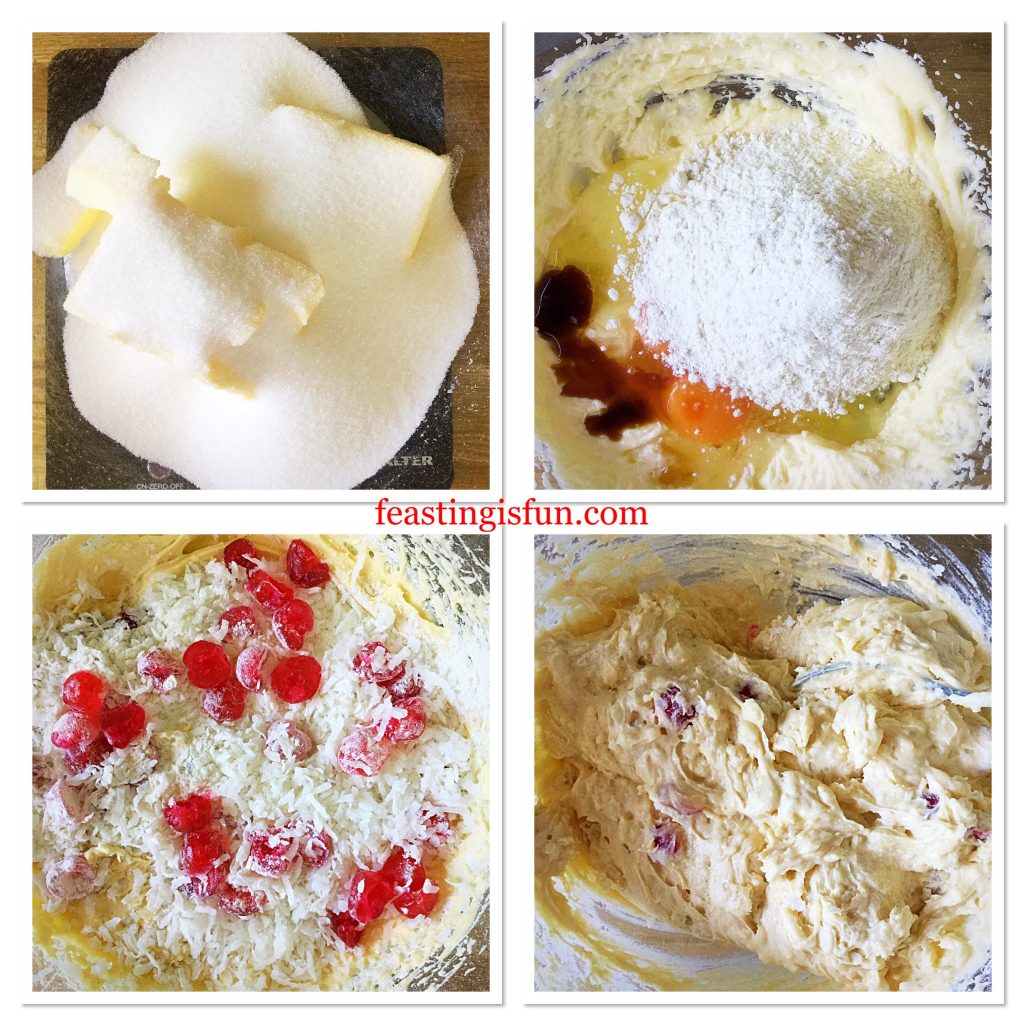
  • Into a large bowl add the sugar, butter, salt and vanilla extract.
  • Whisk or beat the ingredients together until pale and creamy.
  • Add the eggs to the bowl and mix together until combined.
  • Sieve the flour into the bowl.
  • Add the dried fruit to the bowl and then add the lemon zest.
  • Use your hands to lightly toss the fruit in flour, this helps ensure even distribution of fruit through the cake.
  • Using a large spoon fold the fruit into the batter, taking care not to over mix.


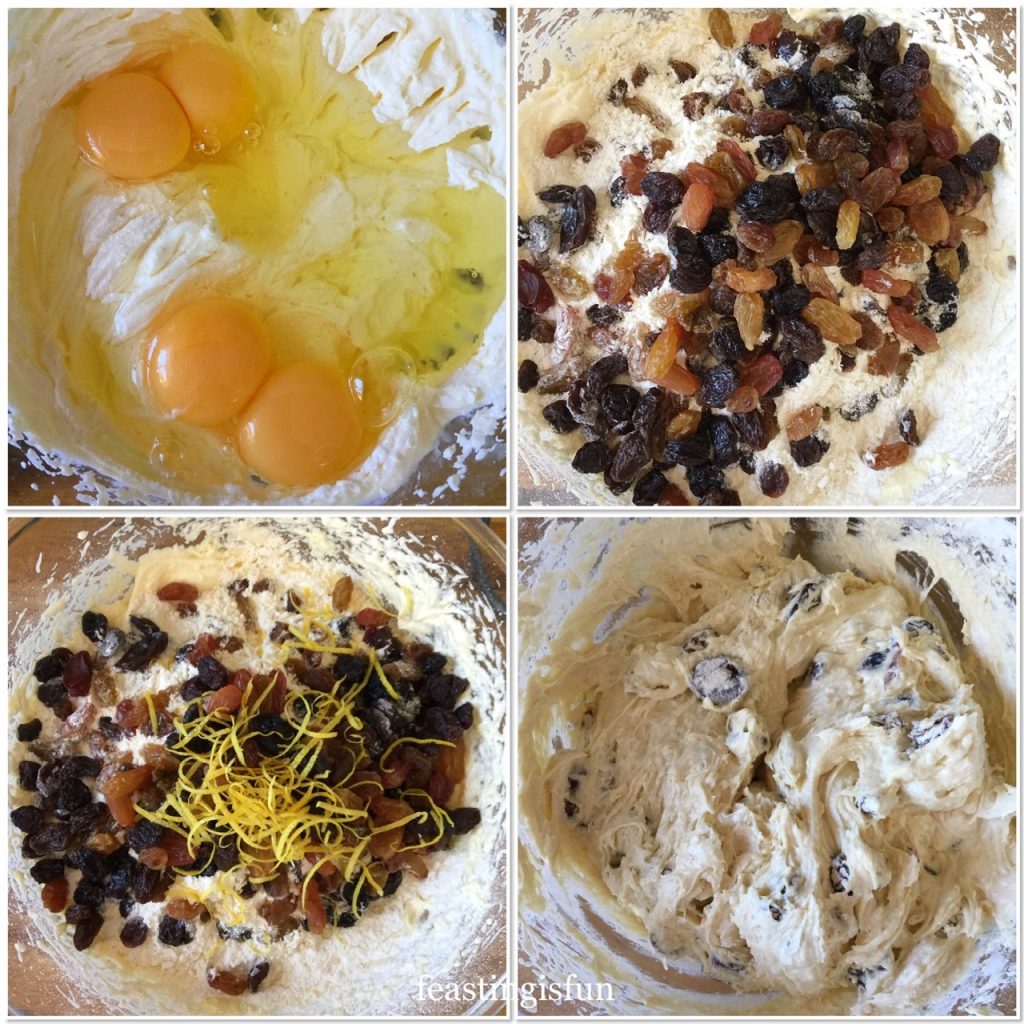
Four images showing the process of making a fruit cake batter.

  • Spoon the cake batter into the loaf tin and smooth the top.
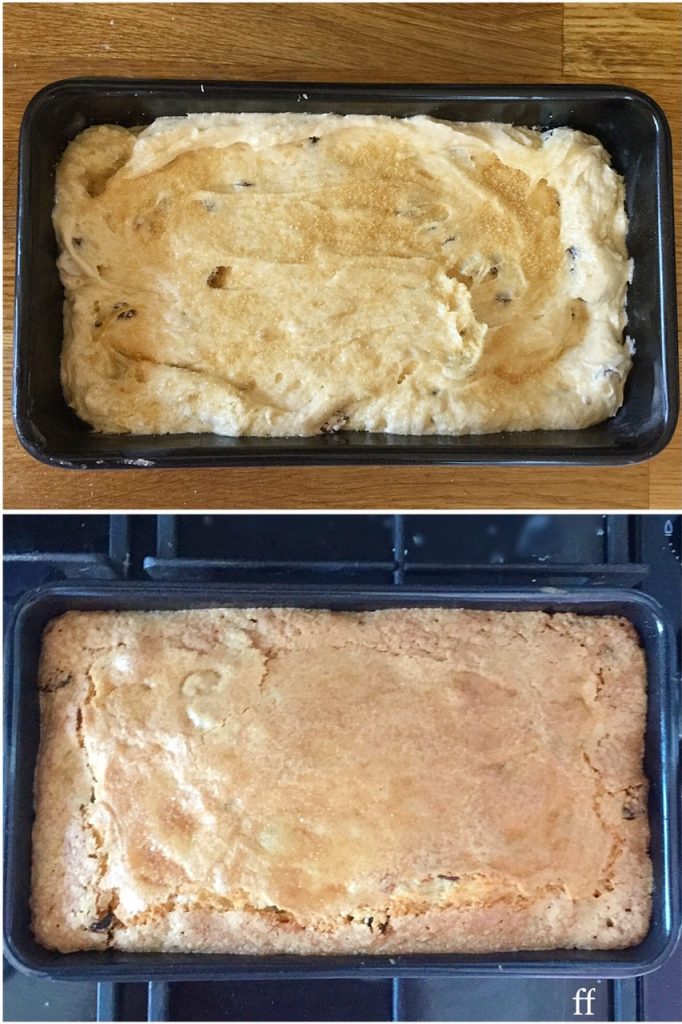
  • Sprinkle one teaspoon of Demerara sugar over the top of the uncooked cake.

Baking The Cake:

  • Place the cake into the centre of a preheated oven and bake for 1 hour 25 minutes.
  • Since all ovens vary baking times may be 10-15 minutes either side of this time.
  • The cake is baked when an inserted skewer comes out clean.
  • As soon as the cake is baked remove from the oven and place the tin on a cooling rack.
  • Leave the cake to cool completely in the tin.

Before and after images showing a sprinkling of Demerara sugar baking to create a crunchy crust on the top of a cake.

  • When the cake is completely cooled run a palette knife around it’s outside edge and turn out of the tin.
  • Remove the baking parchment from the base, place the cake on a plate or board and it is ready to serve.
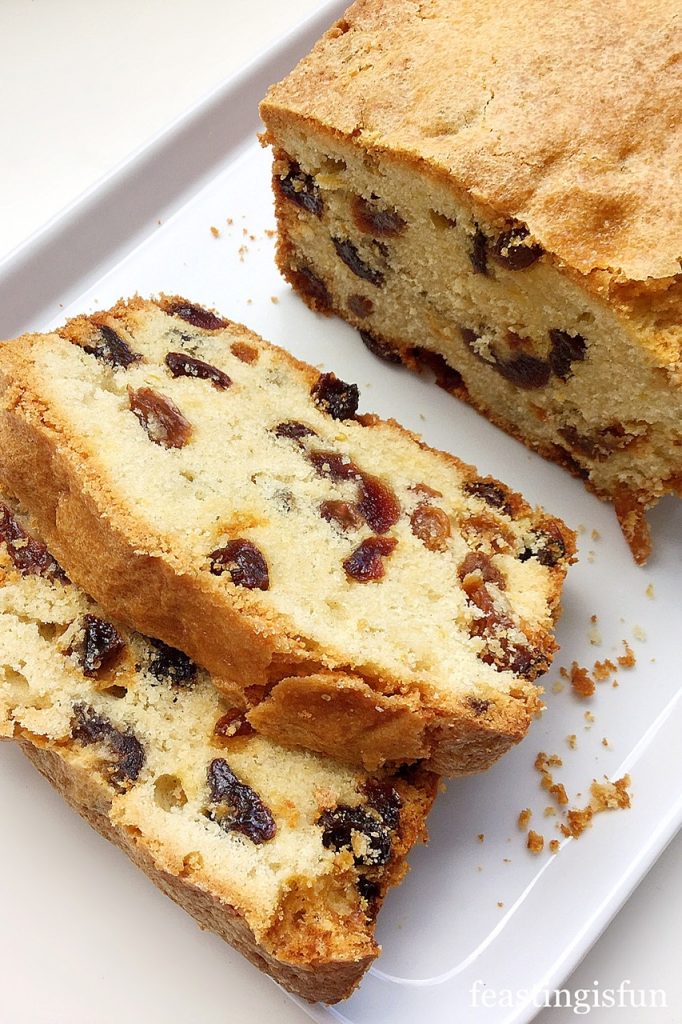
Mixed Fruit Loaf Cake

Don’t you want to reach through the screen a grab a slice right now?
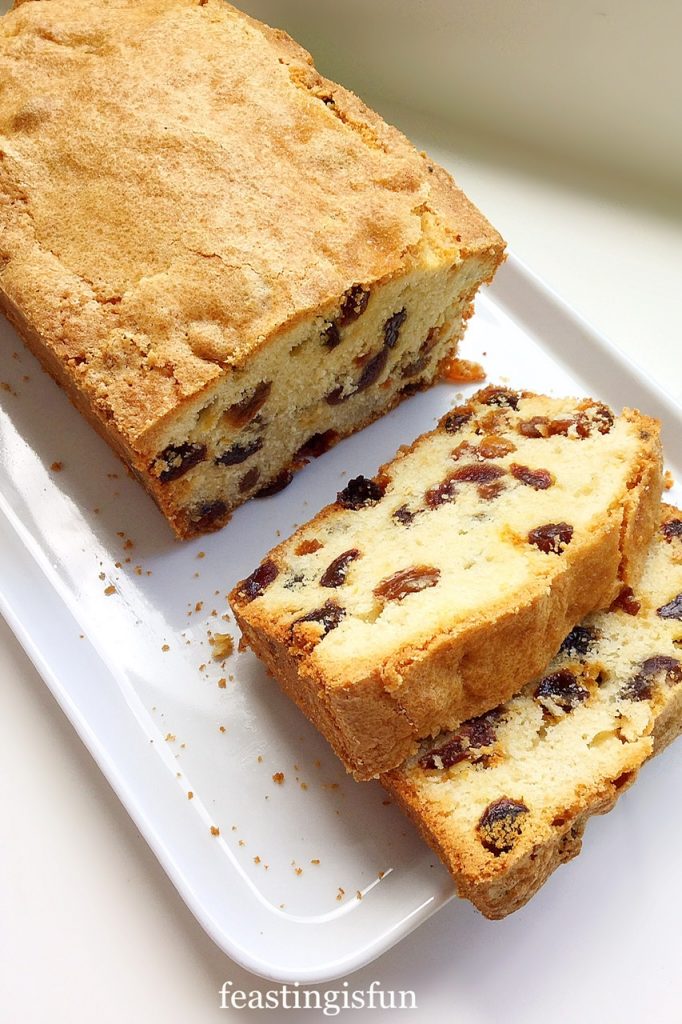
Mixed Fruit Loaf Cake

Slice the cake and serve with a cup of tea. A quintessential way to enjoy afternoon tea, preferably with friends and family.

Keep this cake in an airtight container and eat within 4 days.

If you have enjoyed this recipe for Mixed Fruit Loaf Cake you may also like these:
Amaretto Light Fruit Cake 

Amaretto Light Fruit Cake

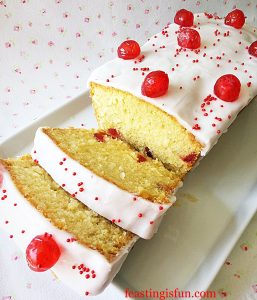
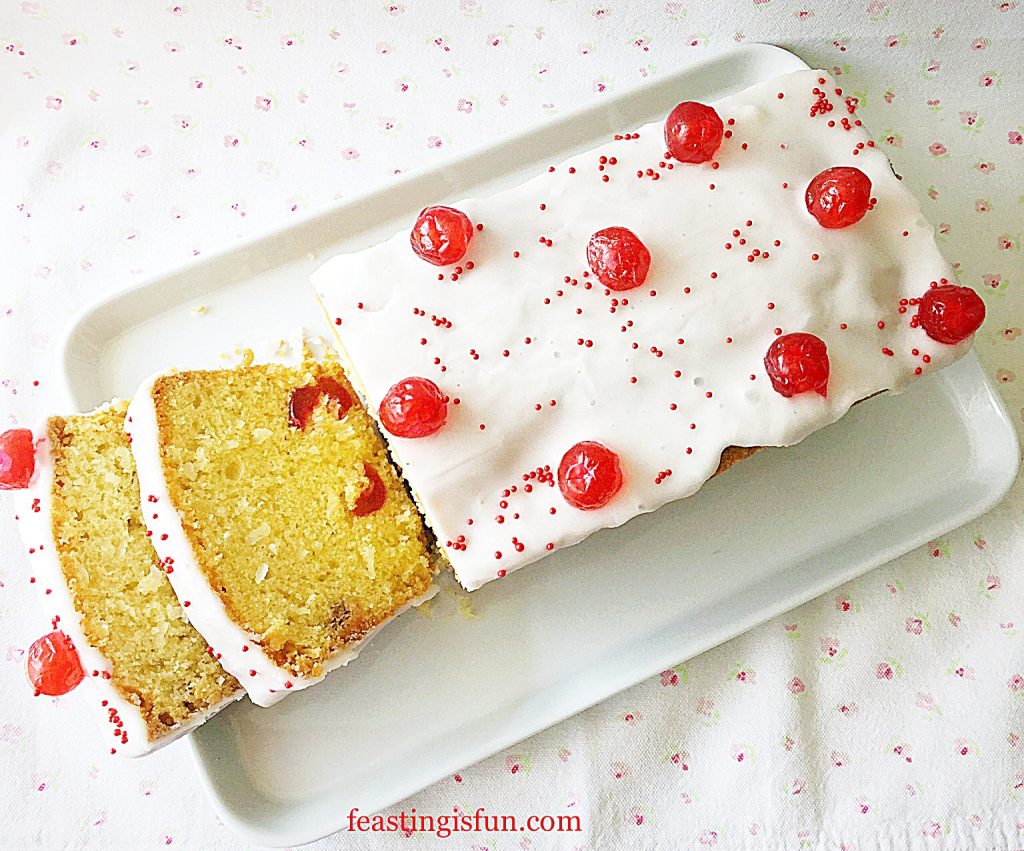
Iced Cherry Coconut Loaf Cake 

Iced Cherry Coconut Fruit Cake
Iced Cherry Coconut Loaf Cake

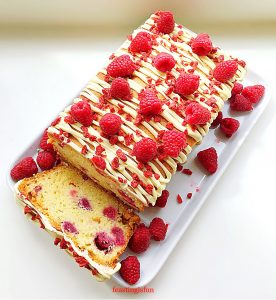
Raspberry White Chocolate Loaf Cake

Raspberry White Chocolate Loaf Cake

Because of their easy to slice and easy package shape I enjoy making loaf cakes to take to other peoples houses. Since that is not possible at present they’re also great cakes to take on picnics. Especially cakes that don’t have a sticky, wasp attracting icing, such as this Mixed Fruit Loaf Cake. Likewise, each slice can be cut into fingers, ideal for little hands to hold and munch on. Also, they are a delicious addition to packed lunches, for when normality returns!

Whatever you are making, baking and creating in your kitchens, have fun preparing and sharing your feast.

Sammie x

No part of this post may be reproduced or duplicated without the written permission of the owner. Please see my Disclosure Policy.

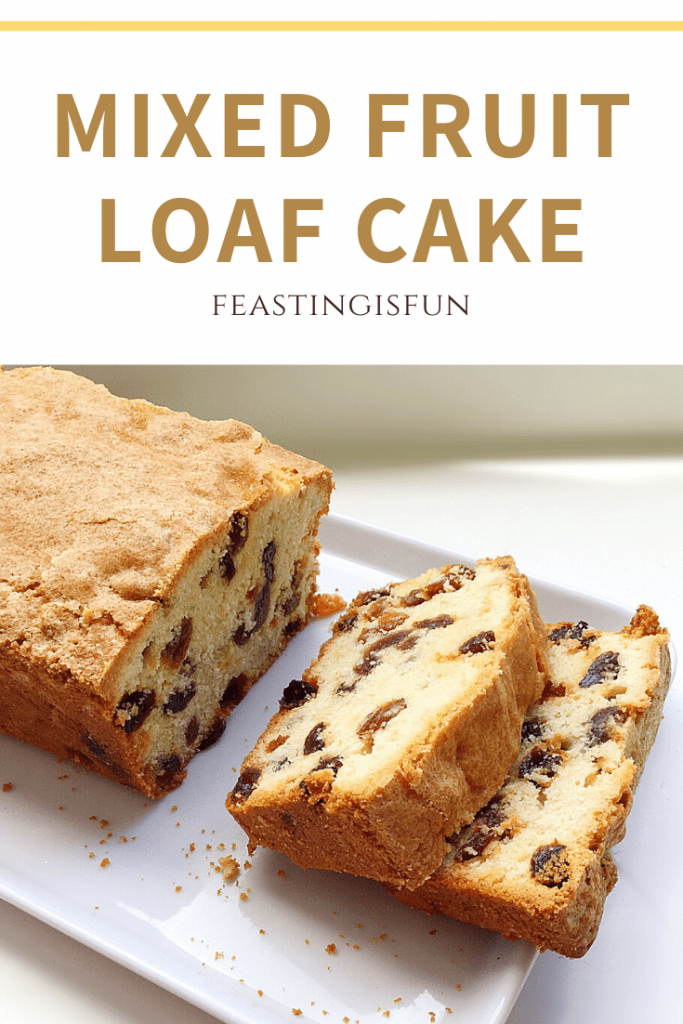
Mixed fruit loaf cake with descriptive graphics.


Share
Facebooktwitterpinterestlinkedintumblr

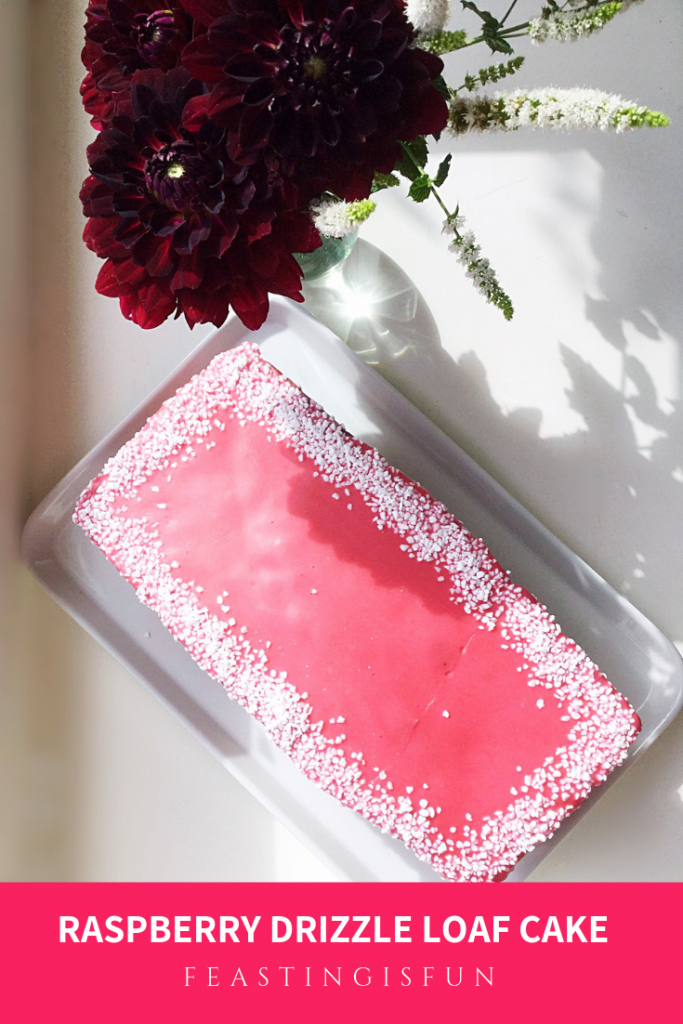
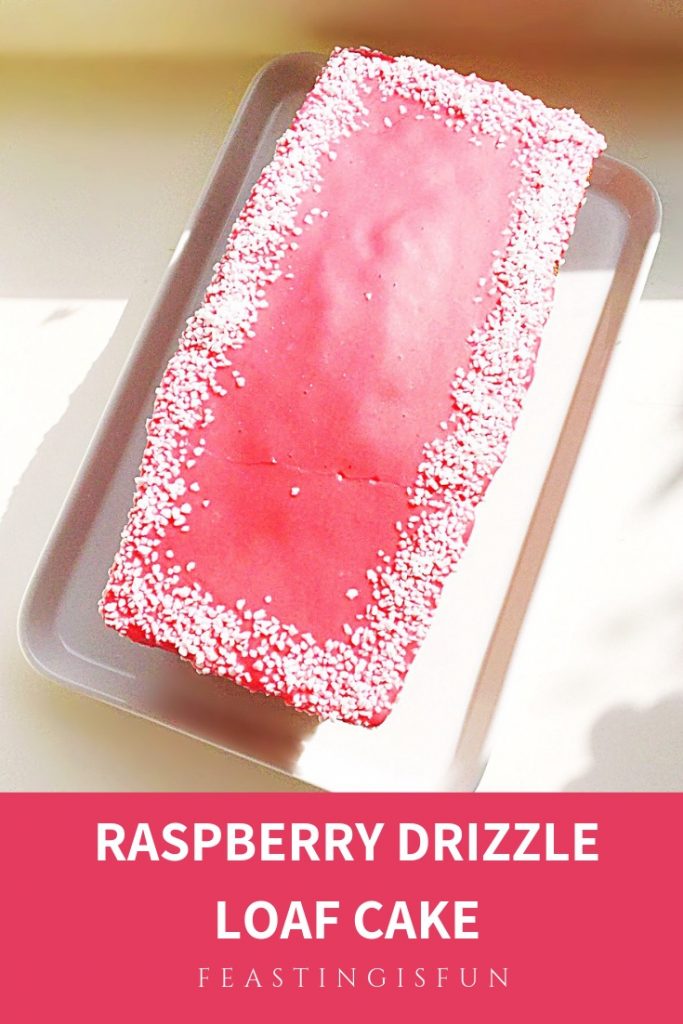
Raspberry Drizzle Loaf Cake

Share
Facebooktwitterpinterestlinkedintumblr

Summer is well and truly here and while enjoying the gorgeous sunshine, here in the Southeast of England I am also indulging myself in all of the delicious soft fruits available at this time of year. My Summer Mixed Berry Sponge Cake is always a big hit using berries in the frosting as well as to decorate. So, drawing inspiration from that cake I set about creating an easier bake. Specifically a loaf cakes as they are very popular with you, the readers of my blog.  Let me introduce my Raspberry Drizzle Loaf Cake.

Raspberry Drizzle Loaf Cake

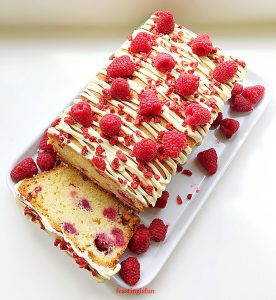
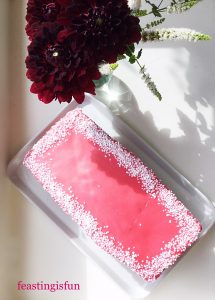
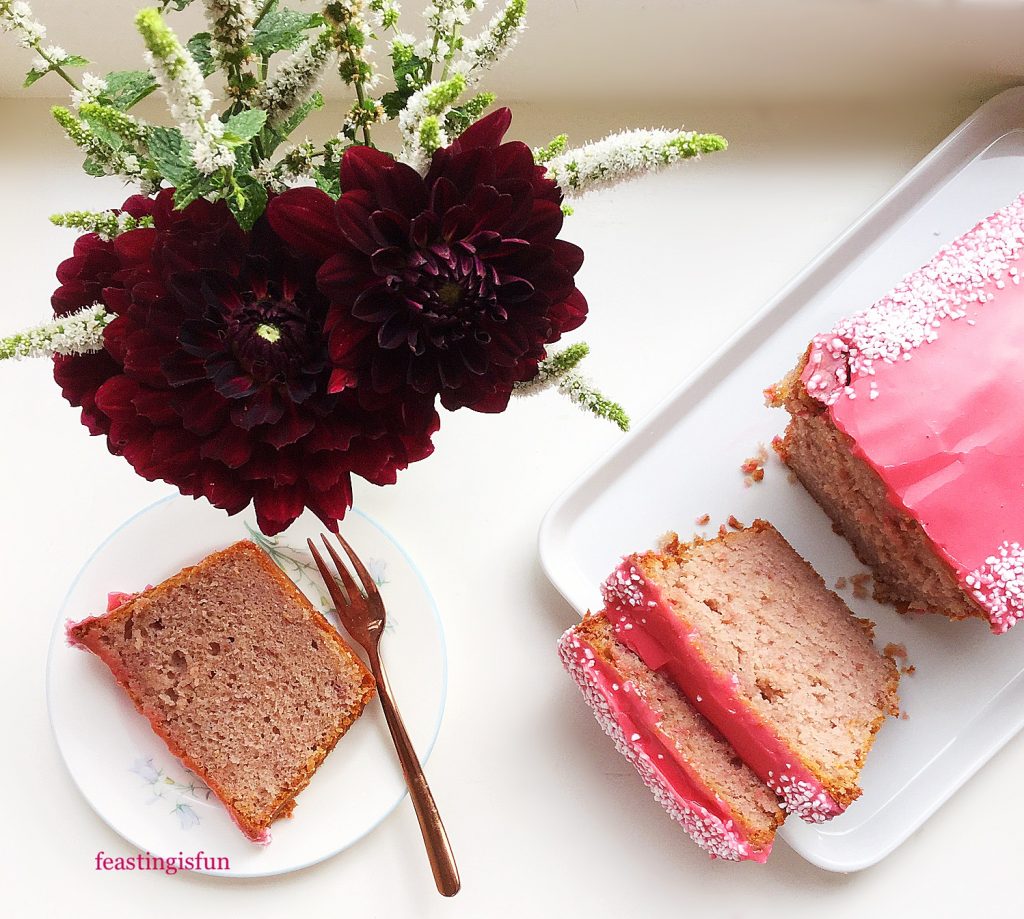
Because this cake has fresh raspberries whipped into the cake batter it naturally turns light pink, keeping the colour while baking. Likewise the coral pink icing, that I use to drizzle over the cake, gets its hue from fresh raspberry pulp. Pushing the raspberries through a sieve ensures that the icing remains silky smooth and without any pips. Sieving the raspberries doesn’t take long to do and really makes a difference to the finished cake. And although the cake has whole raspberries in it, the seeds seem to get lost in the batter, as they are hardly noticeable when eating the cake.

Raspberry Drizzle Loaf Cake

Fresh Raspberry Cake Baked To Share

Raspberries may well be my favourite of the summer berries, although it is hard to choose! Yet, while planning this recipe, a raspberry drizzle cake became an exciting and delicious prospect. And loaf tin bakes always result in a cake that is both easy to transport and slice, making it ideal for sharing with friends, family or colleagues. Taking a cake to anyone’s home or workplace is never a bad idea!

I always recommend reading a recipe through thoroughly before starting and especially so with this cake. Since you will find the lemon whose zest is needed for the cake is also required for its juice in the icing.

Recipe: Raspberry Drizzle Loaf Cake – serves 8-10

For the raspberry cake batter:

225g/8oz  Unsalted Butter at room temperature 

225g/8oz  Caster Sugar

1/4tsp Salt – I use Maldon 

Finely Grated Zest Of 1 Lemon – scrub the lemon under hot water and dry before zesting (the juice will be needed for the icing).

4 Large Free Range Eggs

1tsp Vanilla Extract – I use Nielsen-Massey

250g/9oz Plain White Flour

1tbsp (3tsp) Baking Powder

225g/8oz Raspberries – fresh (when making this cake during the colder months frozen berries are a perfect substitute, I buy 300g frozen punnets of raspberries from Waitrose).

For the raspberry icing:

100g/4oz Raspberries – same as for the cake

1tsp Fresh Lemon Juice

225g/8oz Icing Sugar (confectioners sugar)

2-3tbsp Sugar Nibs – alternatively use edible, small white cake decorations such as balls.

Method: Preheat the oven to 160C/140C fan, gas mark 3, 325F.

For this loaf cake you will need a 2lb loaf tin that is approximately 25cm x 11cm x 7.5cm (10in x 4.5in x 3in). Grease with butter and line the base with baking parchment.

Making And Baking The Raspberry Cake

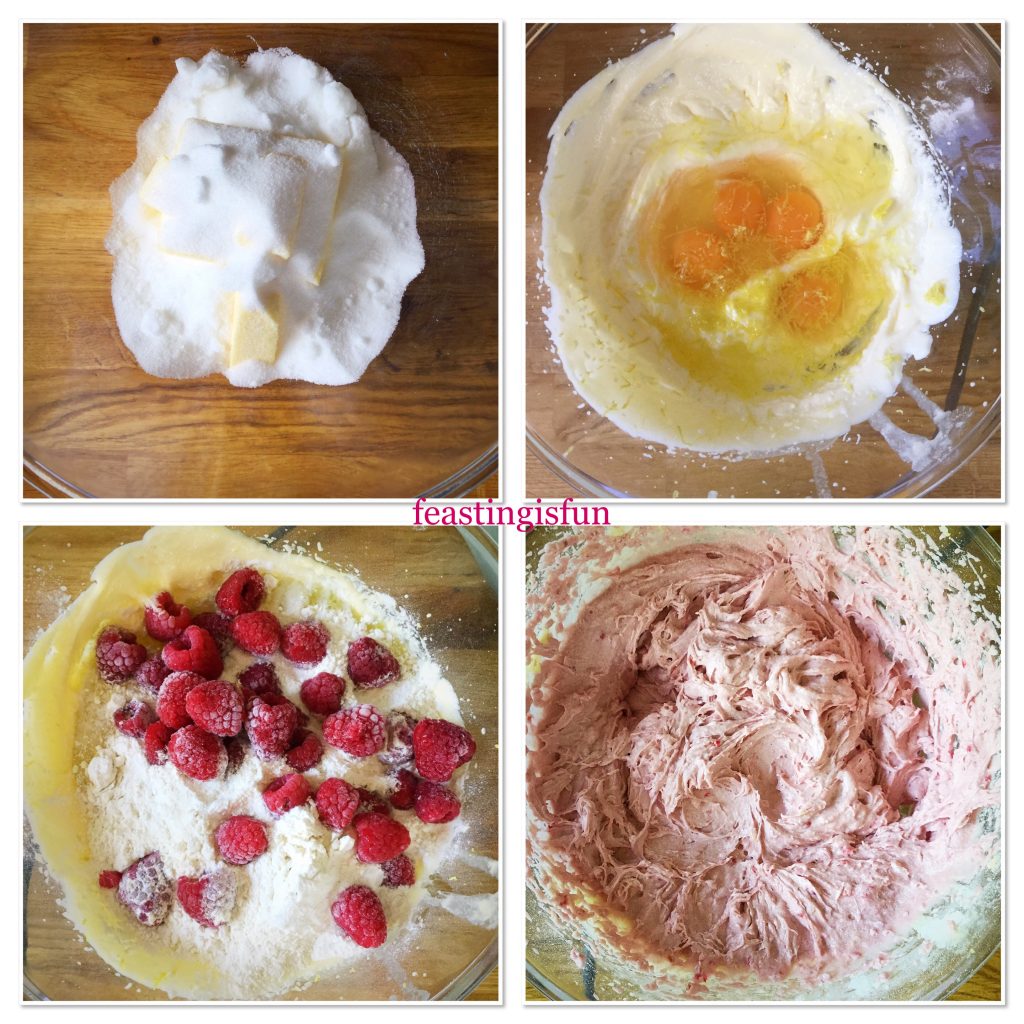
  • First of all, add the butter, sugar and salt to a large mixing bowl.
  • Using an electric hand whisk beat all the ingredients together until pale and fluffy.
  • Next add the zest of a finely grated lemon, four large eggs and the vanilla extract.
  • Sift the flour and baking powder onto the wet mix and then add the fresh raspberries.
  • Now, using the electric hand whisk, beat all of the ingredients together until they are combined and the pink colour is uniform throughout the batter.
Four separate images showing each stage of making a raspberry cake batter.
Making the raspberry cake batter.
  • Spoon the pink cake batter into the prepared loaf tin and smooth the surface.
  • Place the tin into the centre of a preheated oven and bake for approximately 1 hour 30 minutes. Allow 10 minutes either side of this guide due to differences between ovens.
  • To test if the cake is baked insert a skewer (I use a metal one) into the centre of the cake. The cake is baked if the skewer is clean when removed. However, if there is cake batter on the skewer bake the cake for a further 5-10 minutes before retesting.
  • As soon as the inserted skewer comes out of the baked cake clean, remove the cake from the oven and place the cake, in its tin, onto a cooling rack. Leave the cake to cool completely in the tin.
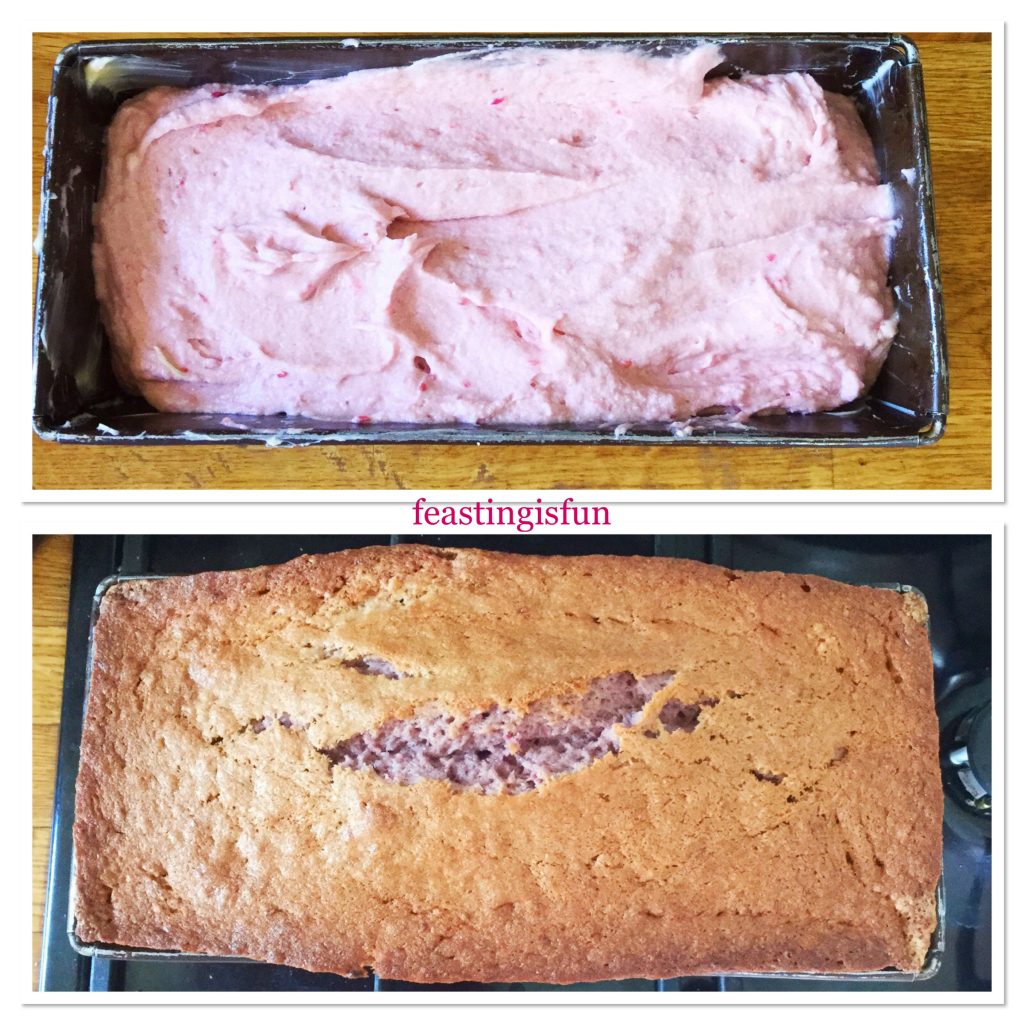
A loaf cake tin showing both the unbaked and baked cake
The unbaked and baked raspberry cake.

Making Fresh Raspberry Drizzle Icing

  • While the cake finishes cooling make the raspberry icing.
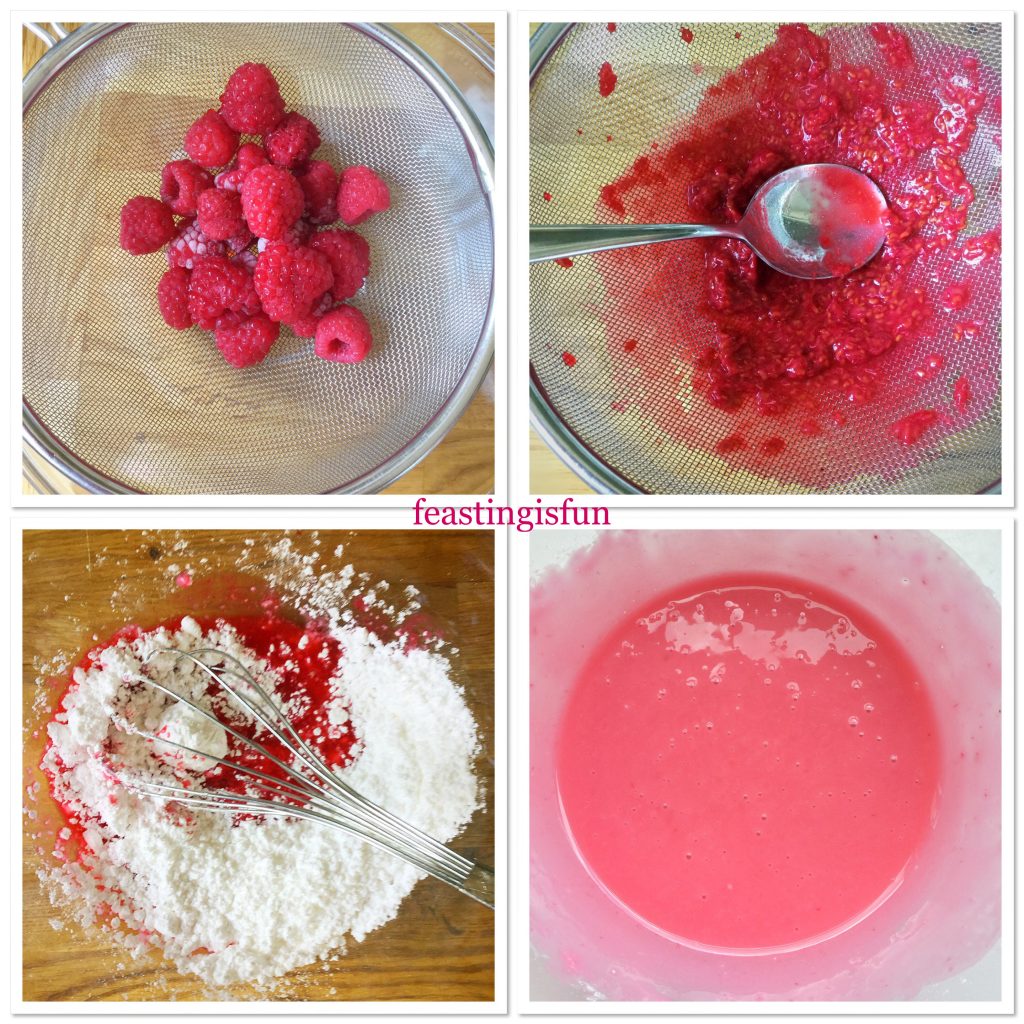
  • Place the raspberries into a fine sieve over a bowl. Note – the sieve needs to be fine enough to stop raspberry seeds from passing through.
  • Use a spoon to push the raspberries against the sieve.
  • Every few minutes, ensure that the spoon is clean, lift up the sieve and scrape the raspberry pulp from underneath into the bowl.
  • Continue until only seeds and a small amount of pulp is left in the sieve.
  • Add one teaspoon of fresh lemon juice to the raspberry pulp in the bowl.
  • Next add the icing sugar to the bowl and mix the ingredients together with a balloon whisk, ensuring the finished icing is smooth and lump free.
  • The finished icing should be thin enough to spoon over the cake and drizzle down the sides, without soaking into the cake. If the icing seems too thin add some more icing sugar.
Four images showing the making of a fresh fruit icing.
Creating fresh raspberry icing.

Decorating The Cake With Raspberry Icing

  • First of all run a palette knife between the outside of the cake and inside of the tin.
  • Turn out the cake and remove any parchment paper stuck to the base.
  • Place the cake on to a cooling rack which has a baking tray underneath.
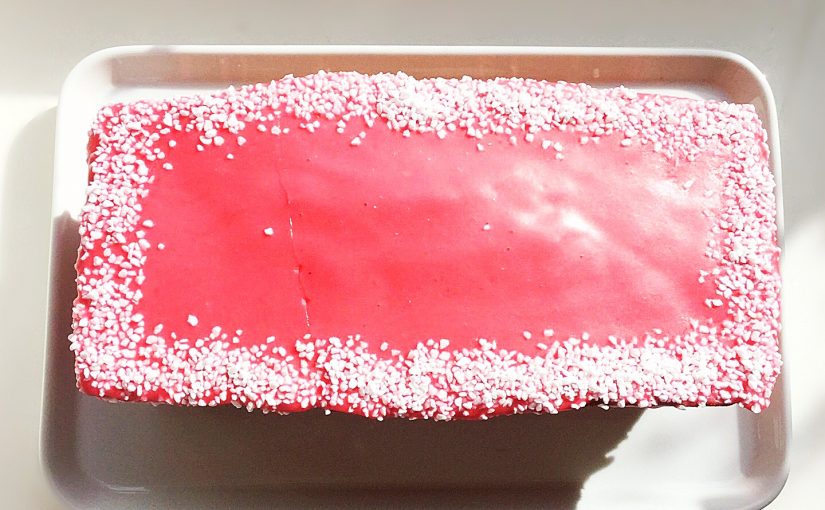
  • Spoon the icing over the top of the cake, encouraging it to drip down the sides.
  • Continue until the top of the cake is completely covered and there are drips on all four sides. Discard any excess icing.
Four separate images showing how to decorate the cake.
Decorating the Raspberry Drizzle Loaf Cake.
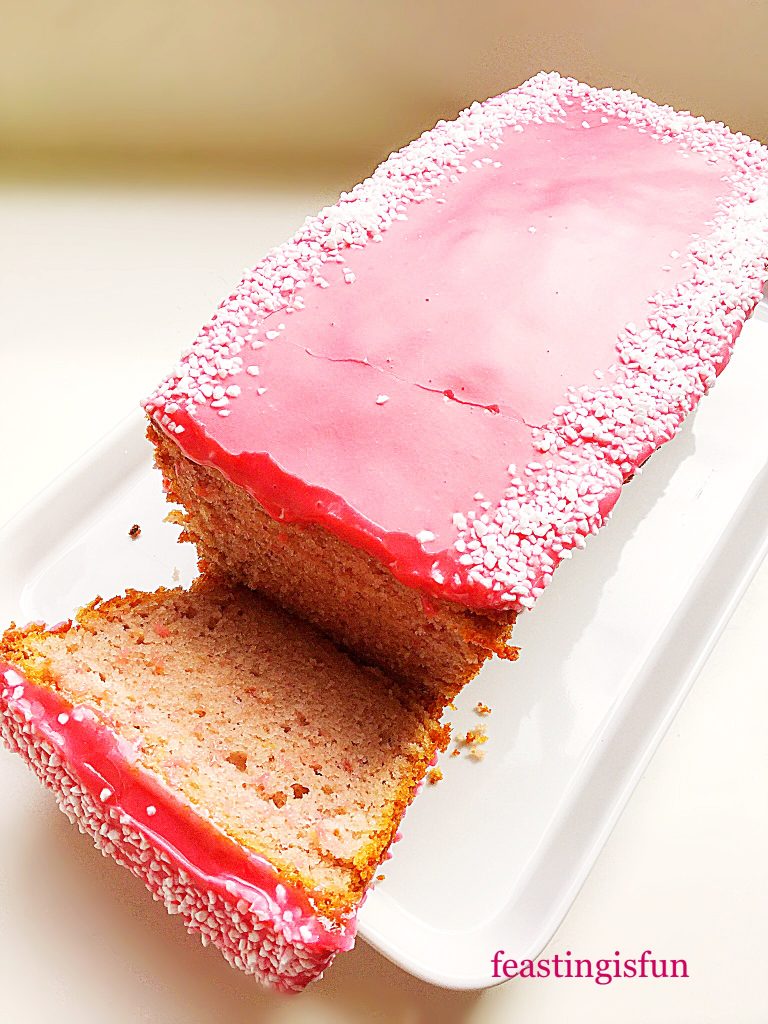
  • Finally, sprinkle around the outside edge of the cake with your chosen decoration. I have used small, white, sugar nibs to contrast with the pink icing.
  • Transfer the cake to a serving plate. I use a fish slice on either end to lift the cake.
  • Leave the cake to set for at least 30 minutes.
  • During very warm weather I suggest putting the cake in the fridge to set.
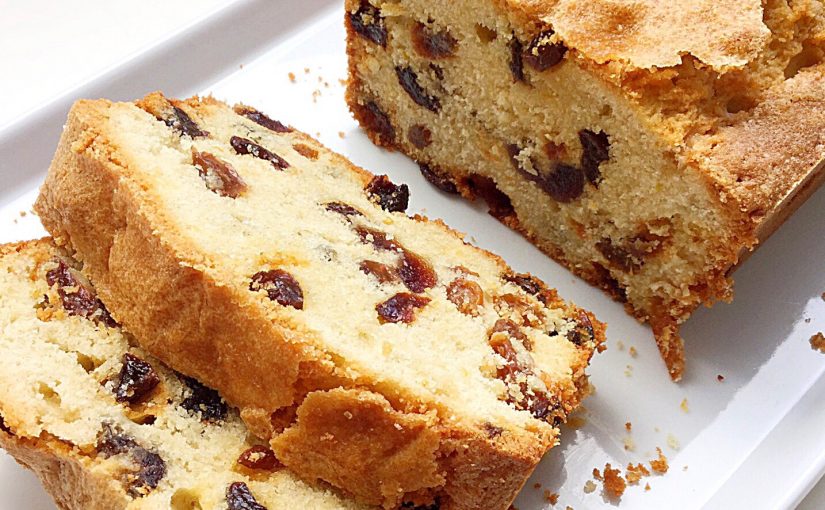
Raspberry Drizzle Loaf Cake
  • Serving before the icing is set may result in the icing dripping from where it has been cut!

For best results bake and ice this cake the day before it is needed. Likewise as the cake cools overnight in the fridge it’s overall flavour and texture improves. Once cut, place the remaining cake in an airtight container and eat within four days. Store in the fridge during warm weather.

If you have enjoyed this recipe for Raspberry Drizzle Loaf Cake you may also like these:

Lemon Drizzle Cake

Lemon Drizzle Cake
Lemon Drizzle Cake

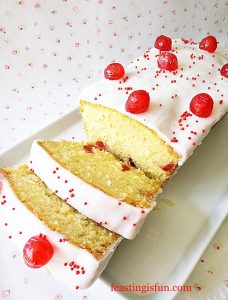
Iced Cherry Coconut Loaf Cake

Sliced iced cherry coconut loaf cake.
Iced Cherry Coconut Loaf Cake

Raspberry White Chocolate Loaf Cake

Raspberry White Chocolate Loaf Cake

Since making this raspberry cake I have received very positive feedback, especially from those who normally prefer ‘chocolate’ cake! Because the fruit in this cake is fresh, tangy and not too sweet, it is fast becoming a firm favourite among friends, family and neighbours. And we know that all food tastes better when it is shared. So who will you share your cake with?

So, whatever you are making, baking and creating in your kitchens, have fun preparing and sharing your feast.

Sammie xx

No part of this post may be reproduced or duplicated without the written permission of the owner. Please see my Disclosure Policy.


Share
Facebooktwitterpinterestlinkedintumblr

Lemon Sultana Buttermilk Scones

Share
Facebooktwitterpinterestlinkedintumblr

Finally, summer is here and I’m so excited. Since this season also makes life easier and more fun! Windows stay open allowing plenty of fresh air to flood our homes, washing dries easily and long, sunlit days allow eating outdoors. Whether it’s an organised picnic, cup of tea in the garden or venturing to an open air concert, Summer is THE season for outdoor fun. And these Lemon Sultana Buttermilk Scones are as ideal for Afternoon Tea as they are easy to pack up for a fun picnic.


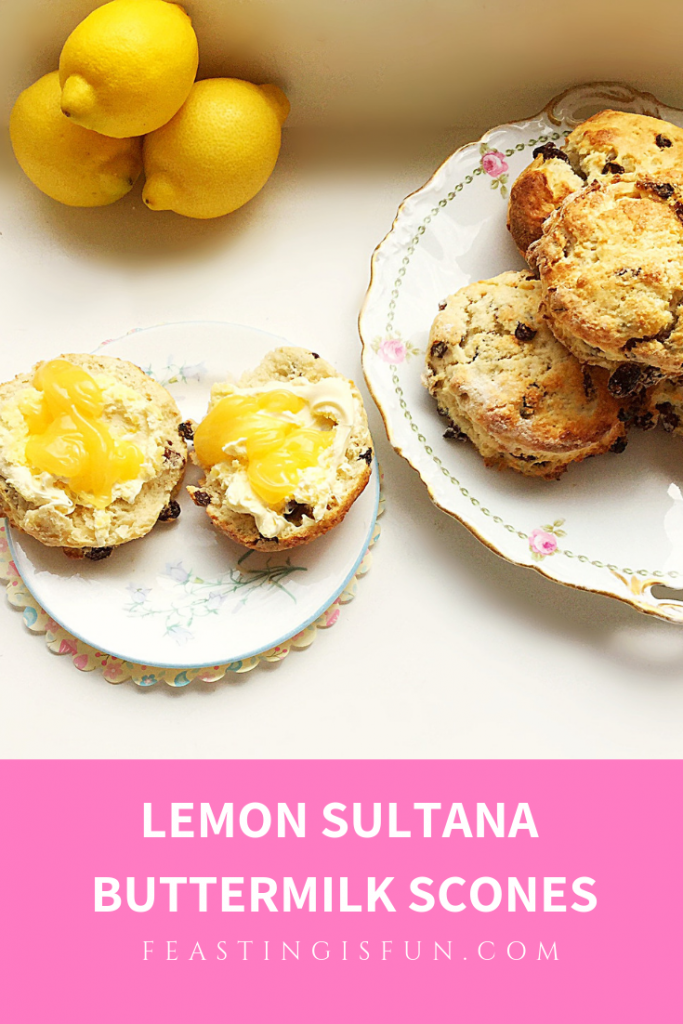
Cut scones topped with clotted cream and lemon curd on a pretty plate.
Lemon Sultana Buttermilk Scones

Picnics are a great way to gather friends and family together, for feasting and fun. Whether you choose to meet at a local park, or trek to the seaside, they are a fantastic way of getting people together without being restricted by space or cost. Also, most people are more than happy to bring food along with them, as well as drinks, blankets and games. And so it’s fun to organise everything in advance. Since delegating spreads the workload, it also ensures that everyone relaxes and has fun making new memories!


Pinterest image of Lemon Sultana Buttermilk Scones with descriptive graphics.

Scones; Such An Easy Bake

Scones are the number one recipe I advise people to try if they are new to baking. Since they are virtually foolproof and nobody minds an occasional, slightly wonky One! A successful bake builds a level of achievement and satisfaction in a newbie baker. As a result, they are more likely to continue baking, while learning new skills, attempting more complex recipes as confidence in the kitchen grows.

Lemon Sultana Buttermilk Scones

And now, back to these delicious. Truthfully, I must say these are my favourite scones to date! A positive result for someone who wouldn’t go near a scone until I started baking them myself! So, it is time for me to stop chatting and make these yummy, cream tea favourites.

Recipe: Lemon Sultana Buttermilk Milk Scones makes 8-10 large scones

450g/1lb Plain White Flour

3tsp Baking Powder

1/4tsp Sea Salt Flakes – I use Maldon

25g/1oz Vegetable Fat such as Trex

50g2oz Unsalted Butter

4tsp Caster Sugar – plus extra for sprinkling on top of the unbaked scones

Zest of 2 medium or 1 very large lemon (scrubbed and washed in hot water before zesting)

225g/8oz Sultanas

284ml/10fl oz Buttermilk – Alternatively, use the same quantity of whole or semi skimmed milk, add 2 teaspoons of fresh lemon juice or 1 teaspoon of white vinegar and stir. Leave for 5 minutes then stir again, the liquid should be thicker and slightly lumpy and is now ready to use.

3-4 Tablespoons of Semi or Whole Milk

Method: Preheat the oven to 220C/200C fan, gas mark 7, 425F

Note – you may notice an American dry cup measure in the photographs. Since we are decorating at the moment I was unable to locate my round cutters. So I improvised. Using a one cup measure worked perfectly for cutting out the scones. Also, if using a smaller cutter for smaller scones, remember to adjust the baking time.

Making The Buttermilk Scone Dough

  • First of all line a large baking tray with baking parchment.
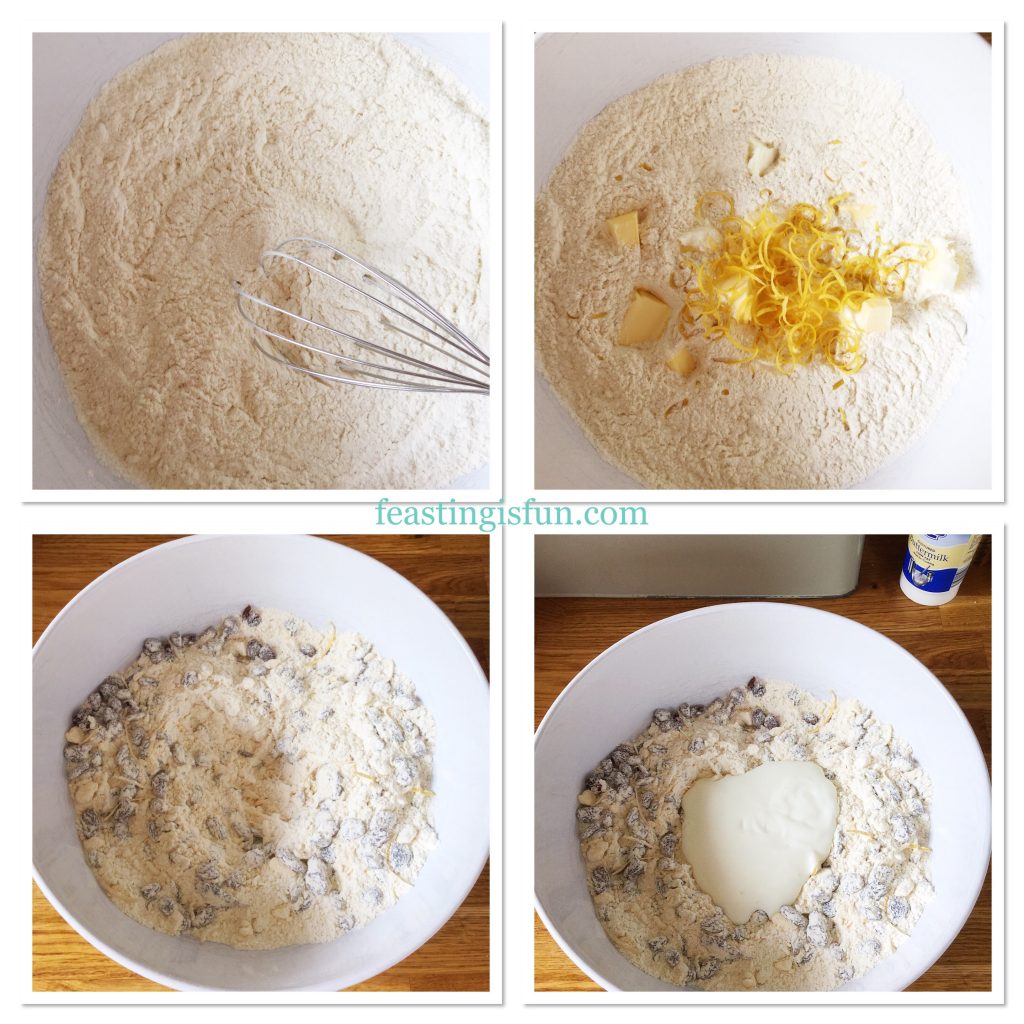
  • Next, tip the flour, baking powder, salt and sugar into a large bowl.
  • Stir all the dry ingredients together with a balloon whisk.
  • Add the vegetable fat and butter in small chunks, then add the lemon zest.
  • Using a pastry cutter work the fats into the flour until it resembles breadcrumbs with some pea sized chunks of fat still visible.
  • Add the sultanas and using your fingers gently lift and drop them into the bowl so they become covered in flour.
  • Make a well in the centre of the flour mix and pour in all of the buttermilk.
Four stages showing how to incorporate fats and fruit with flour for a recipe.
Making the scone dough.
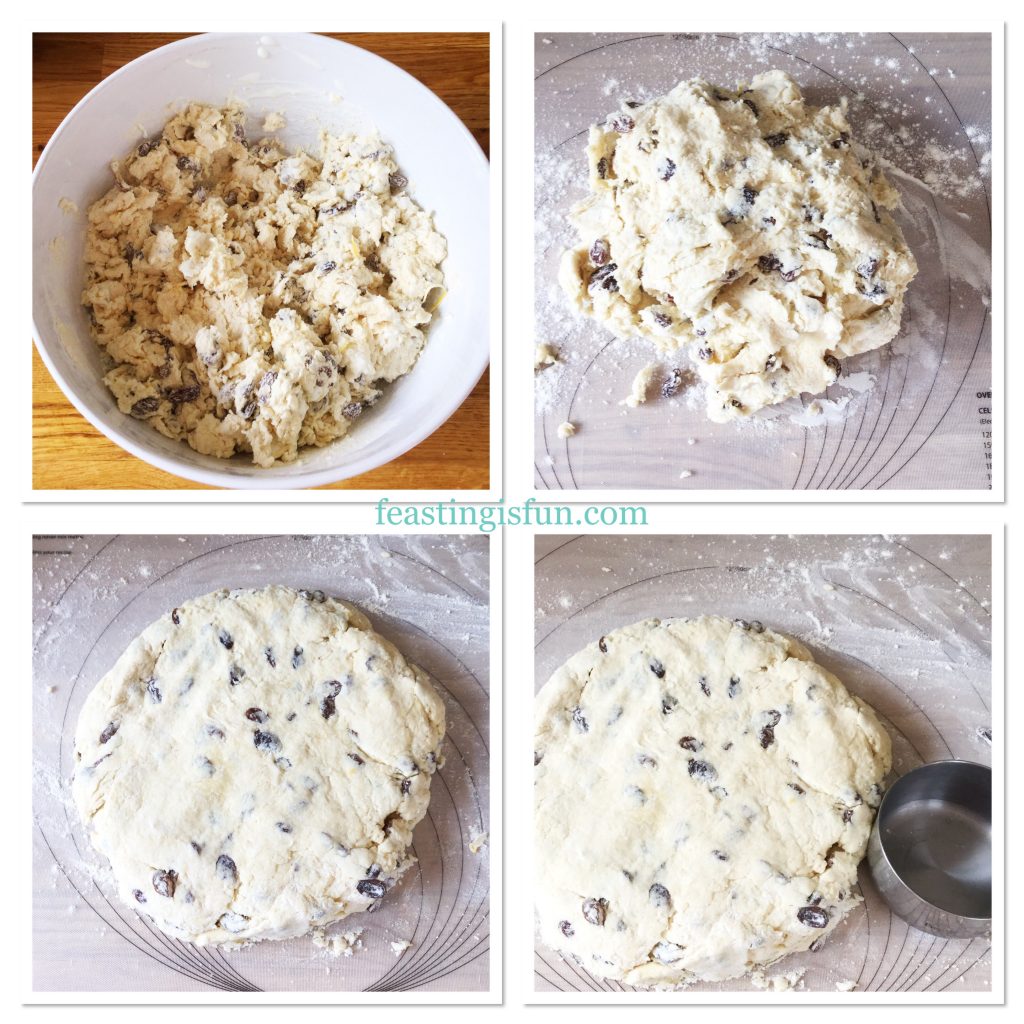
  • Using a butter knife stir all of the ingredients together until large clumps begin to form.

Turning Out And Shaping The Dough And Cutting Out Individual Scones

  • Turn the clumpy dough out onto a floured surface. And note, the dough should be quite wet and sticky.
  • Using floured fingers bring the dough together and pat out to form a round shape that is about 1 inch (2.5cm) deep.
  • Most importantly, check that the disc of dough moves freely across the surface and is not stuck.
  • Flour a round 3 inch (7.5cm) cutter that is also at least 2 inches (5cm) deep and place it on top of the dough.
  • Press the cutter straight down onto the dough taking care not to twist it.
Patting the dough out onto a pastry mat, ready to be cut.
Getting the dough ready.
  • Place each cutout scone onto the baking parchment lined baking tray.
  • Brush fresh milk onto the top of each scone using a pastry brush and then sprinkle a pinch of sugar over the top.

Baking The Lemon Sultana Buttermilk Scones

  • Place the scones into the centre of the oven and bake for 15-20 minutes. Because each oven is different and other variables such as the thickness of scone dough affect the baking time, I have given a range of times. My scones took 18 minutes to bake.
  • The scones are baked when the are risen, golden in colour and sound hollow when rapped on the base with your knuckle. Similar to bread when baked.
  • As soon as the scones are baked remove them from the oven and carefully place them on a cooling rack.
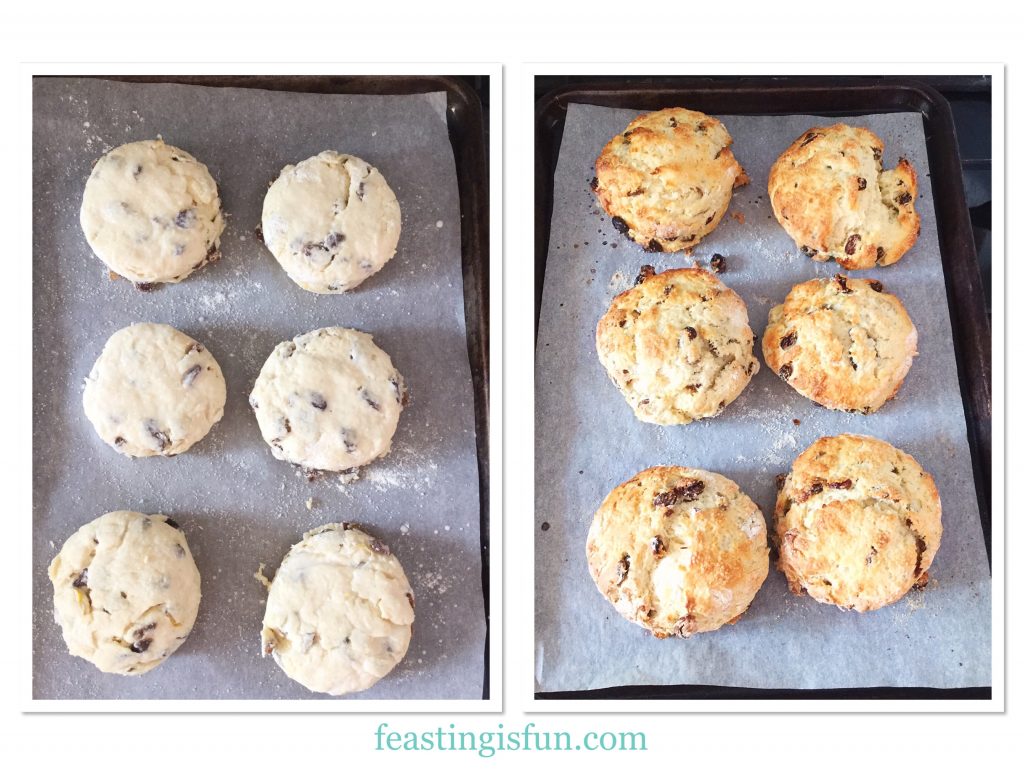
Raw and baked Lemon Sultana Buttermilk Scones
Before and after baking.

Serving And Enjoying The Scones

Eat these scones either warm or cold. Also they can be enjoyed just as they are, or split in two and topped with either clotted cream or butter.

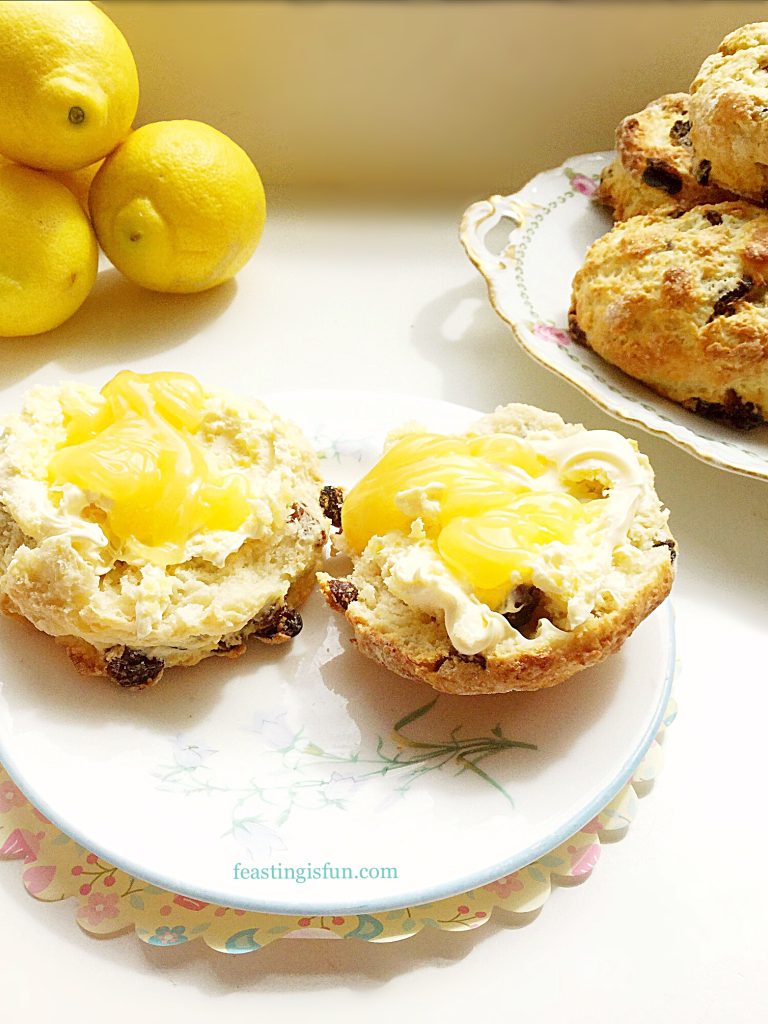
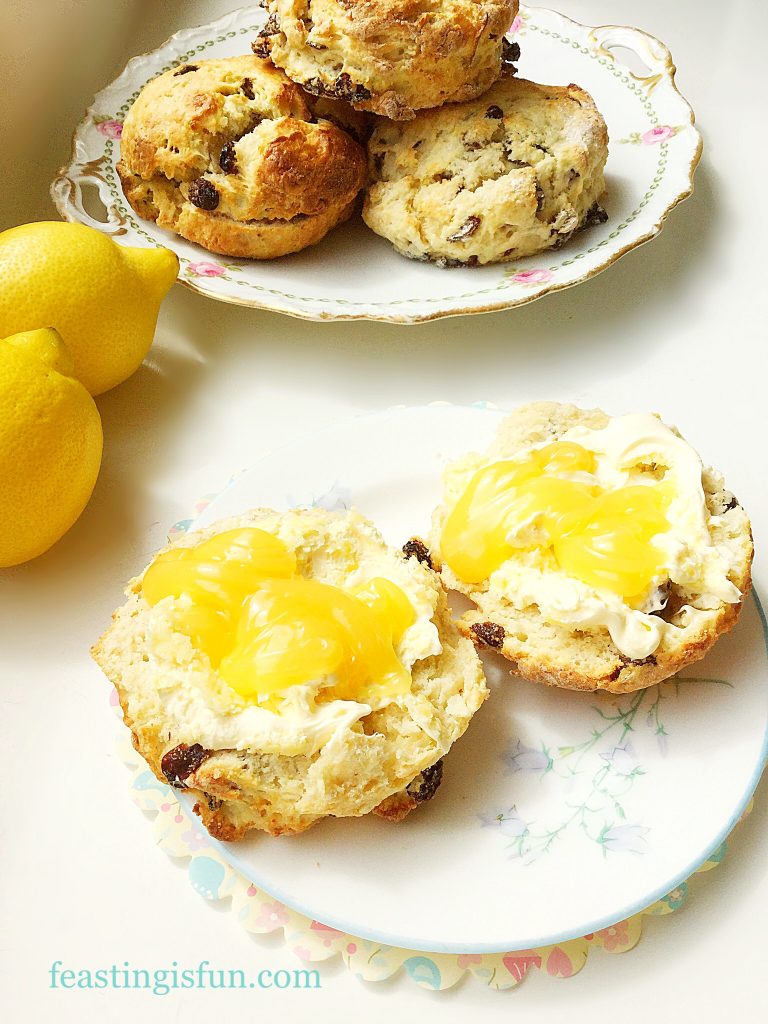
Split scones topped with clotted cream and lemon curd on a pretty plate. Fresh whole scones and lemons are in the background.
Lemon Sultana Buttermilk Scones

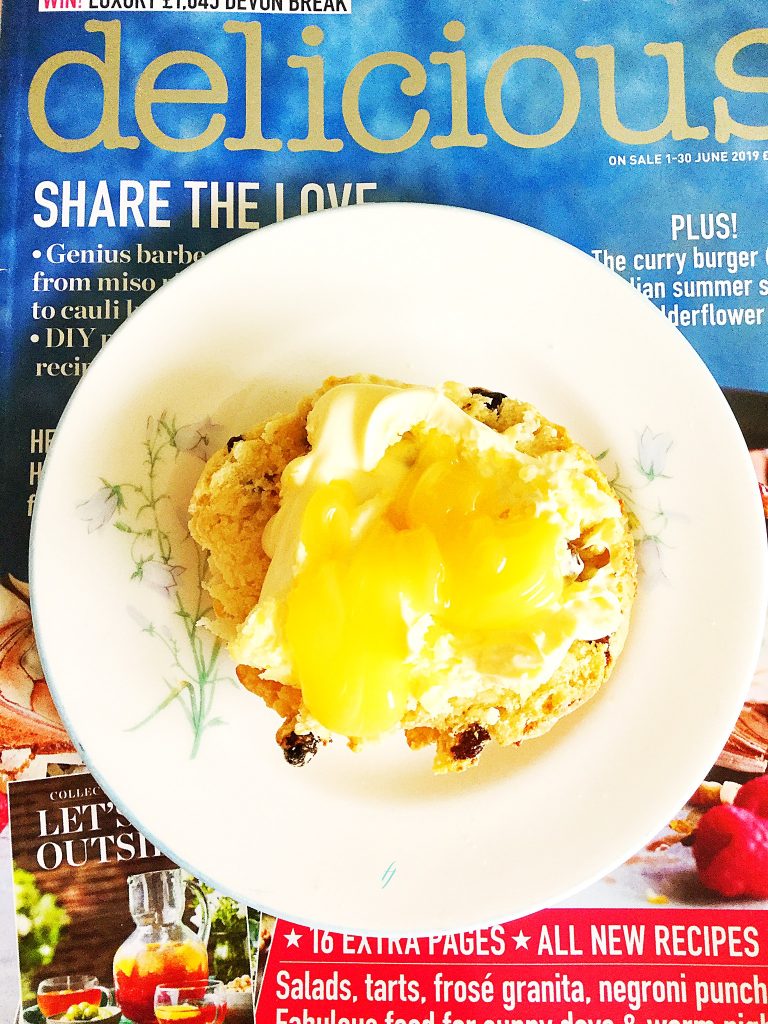
Topping a scone with clotted cream and lemon curd and sitting down with my favourite foodie magazine, a delicious cup of tea, and a relaxing afternoon.

Delicious magazine with a plate on top containing a tasty afternoon sweet treat.
Relax with a great foodie magazine and a clotted cream and lemon curd topped scone.

Homemade scones are usually best eaten on the day they are baked. Yet with this recipe they stayed moist for up to 3 days when kept in an airtight container.

If you have enjoyed this recipe for Lemon Sultana Buttermilk Scones you may also like these:

Super Light Scones

A platter set with small plain scones, fresh strawberries and clotted cream and jam in bowls.
Super Light Scones

Easy Blackberry Oat Muffin Recipe

A lined breakfast tray with muffins, cafetière and mug of coffee and a blush coloured dahlia flower.
Easy Blackberry Oat Muffin Recipe

Cheddar Sun Dried Tomato Scones 

Savoury cheese scones in a lined basket with fresh tomatoes and basil and a wedge of cheddar cheese.
Cheddar Sun Dried Tomato Scones

So, is this recipe tempting you to make scones at home? Doing so is a very rewarding experience, especially when you share your bakes and receive compliments on your baking! And, aside from being a world away in taste and texture from their shop bought counterparts, you know exactly what has gone into your baking. Love cannot be bought, yet these scones were made with an extra large helping of it.

Whatever you are making, baking and creating in your kitchens, have fun preparing and sharing your feast.

Sammie x

No part of this post may be reproduced or duplicated without the written permission of the owner. This post does not contain any sponsored content. Please see my Disclosure Policy.

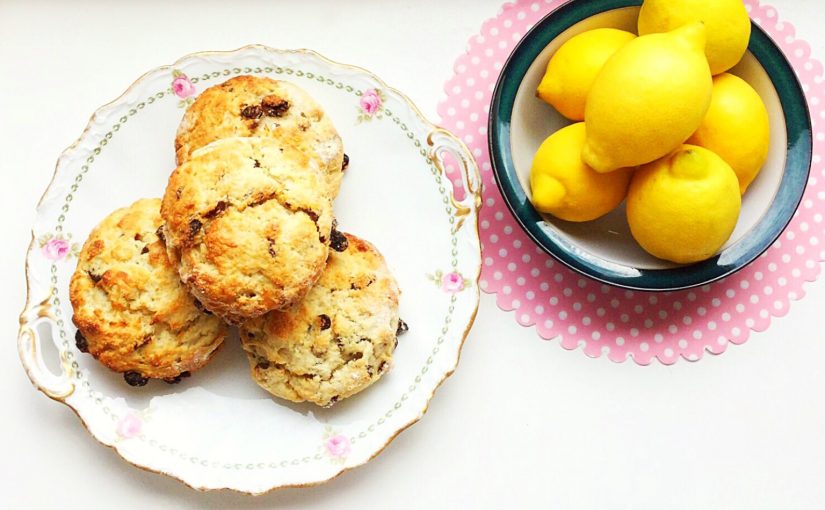
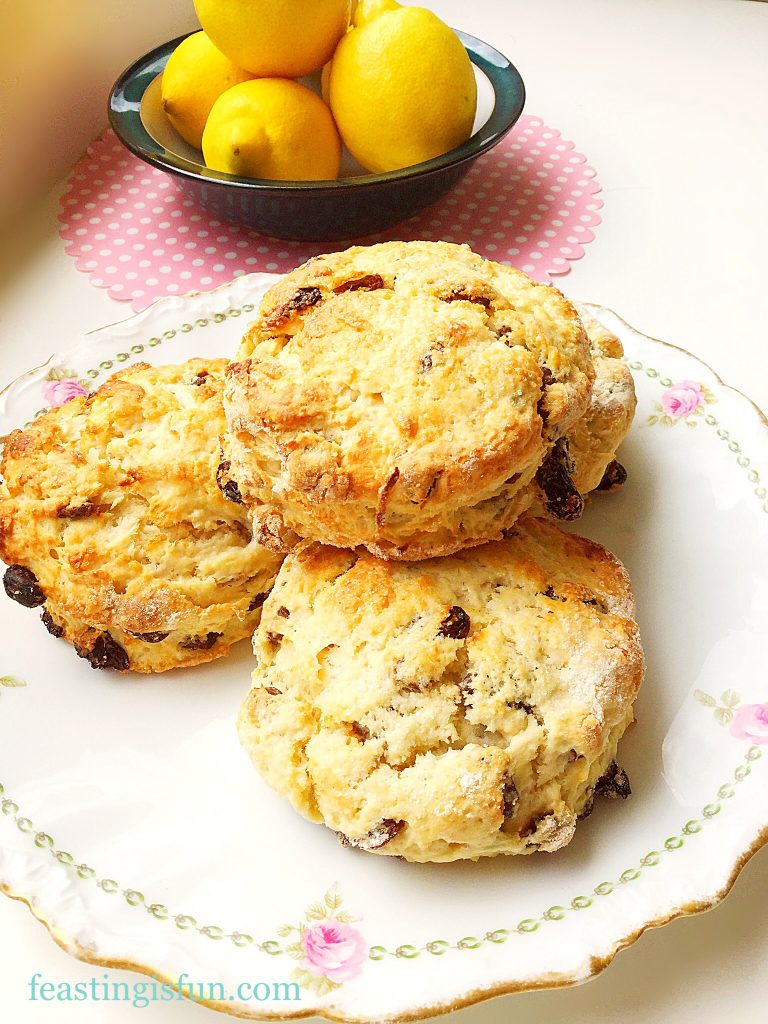
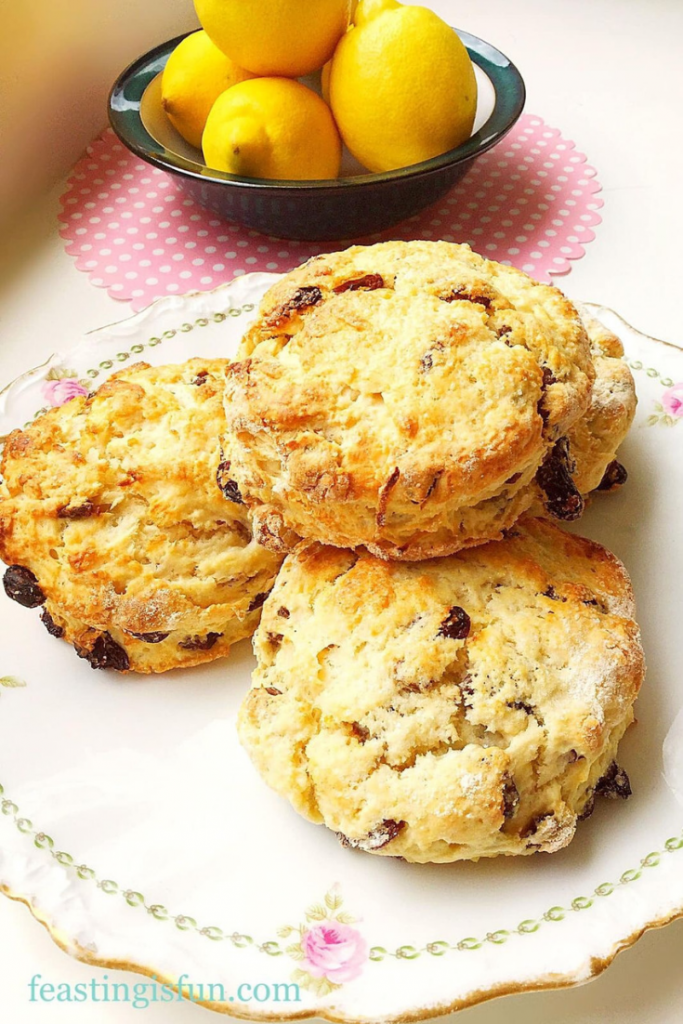
Lemon Sultana Buttermilk Scones piled on a pretty cake plate with a bowl of fresh lemons in the distance.
Lemon Sultana Buttermilk Scones perfect for Afternoon Tea.


Share
Facebooktwitterpinterestlinkedintumblr

Mint Chocolate Chip Drizzle Cake

Share
Facebooktwitterpinterestlinkedintumblr

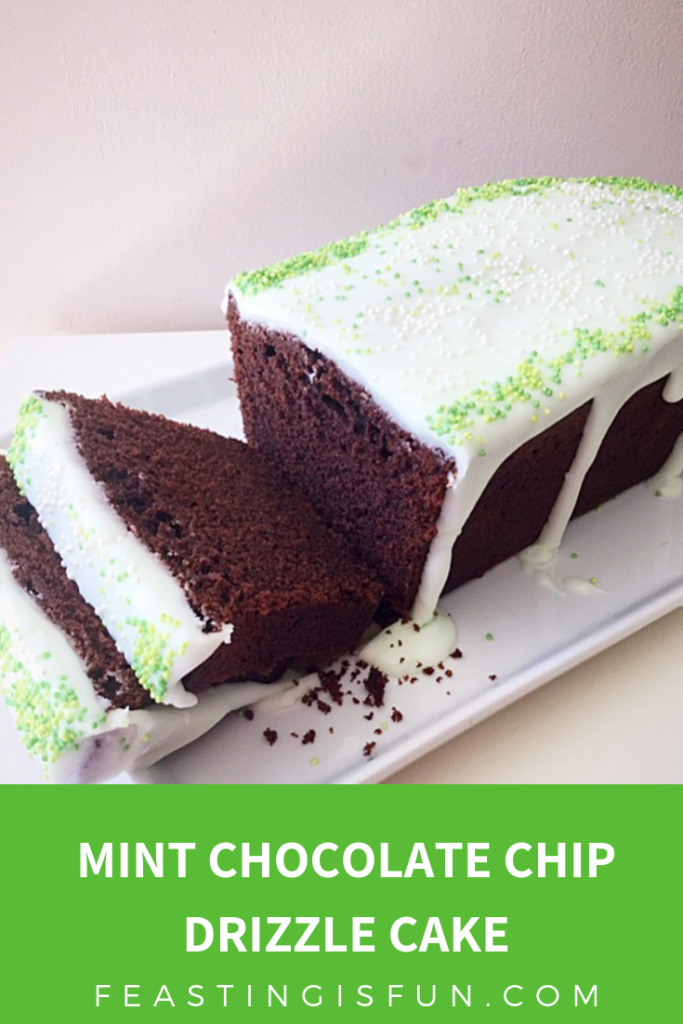
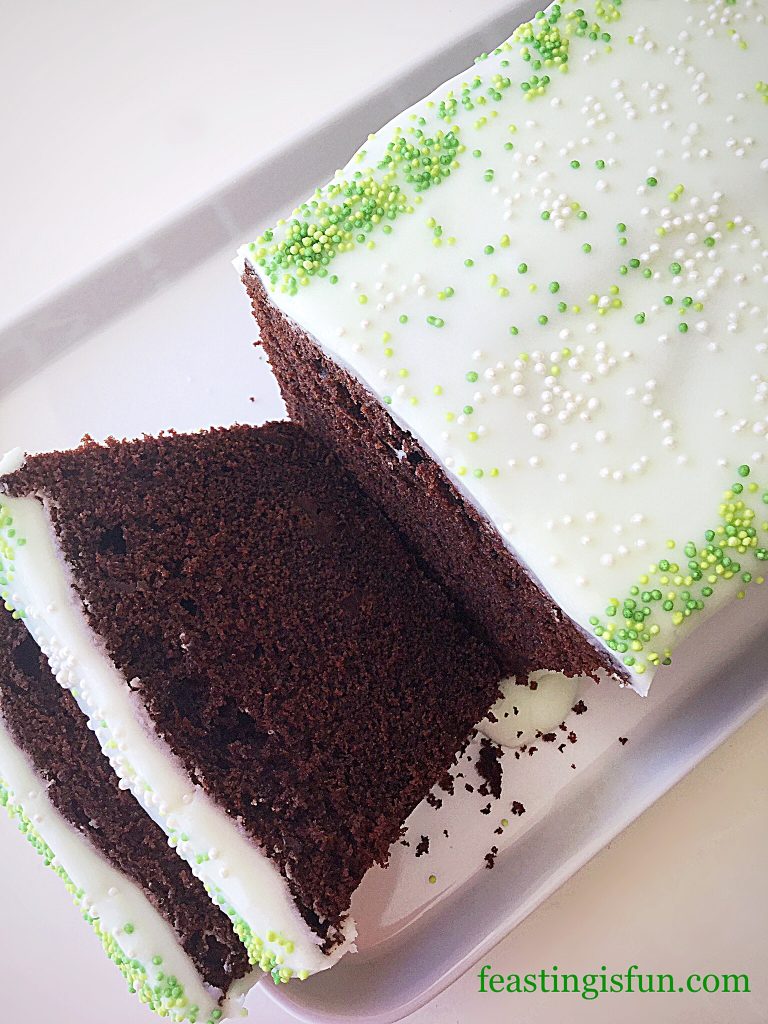
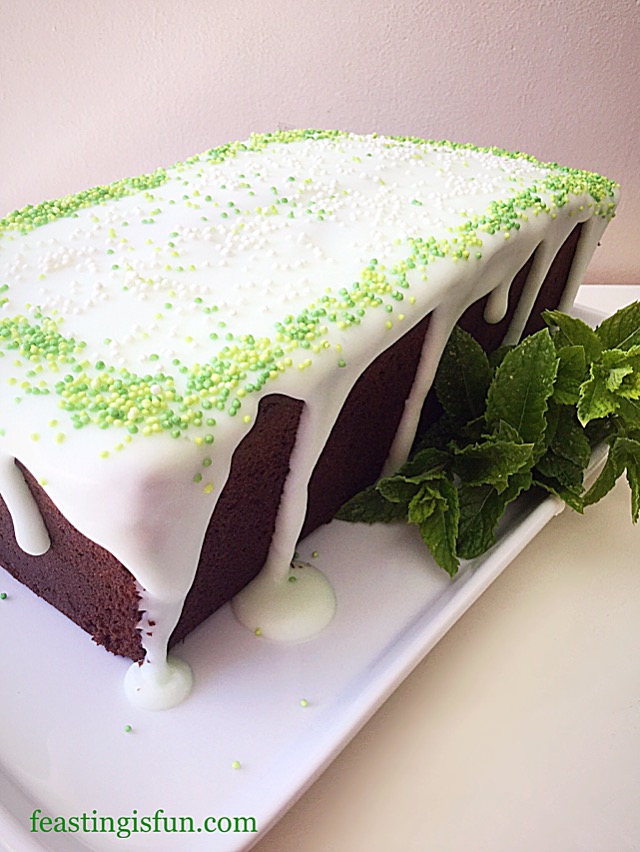
Wow this Summer has been hot so far. So when I was asked to bake a cake I wanted to create something that was not only delicious, but also refreshing. My Mint Chocolate Chip Drizzle Cake ticks both of the boxes. A rich chocolate cake that is full of mint chocolate chips finished with a peppermint drizzle icing. This cake was a big hit with all who tried it!

FF Mint Chocolate Chip Drizzle Cake

Mint Chocolate – which side are you on?

While I love the combination of mint and chocolate together, it appears that opinion is split. While there are those who wholeheartedly agree with me, there are also a group of people who really dislike the flavour combination. Since I love sharing and assume that you do too, check that those you will be sharing with enjoy fresh mint flavour with chocolate. Unless of course you want the whole cake to yourself?

FF Mint Chocolate Chip Drizzle Cake
Mint Chocolate Chip Drizzle Cake

I adore the way that mint is such a refreshing flavour. In this cake it really lifts the deep chocolate flavour of the sponge, with nuggets of mint chocolate bursting in your mouth with every bite. Also, the peppermint hit in the icing merges with the cake to create a party in your mouth. I love the flavours in this cake, especially during the heat of the summer. Because of the mint, I can literally bake my cake AND eat it!

FF Mint Chocolate Chip Drizzle Cake
Mint Chocolate Chip Drizzle Cake

While I have baked this cake in a loaf tin, I’m sure it would also look great baked in a square or round tin. For me the straightforward slicing of a loaf cake makes it easy to pack, ready sliced for picnics. Alternatively, it also is great for packed lunches.

Recipe: Mint Chocolate Chip Drizzle Cake serves 8-10

For the cake:

225g/8oz Unsalted Butter at room temperature

225g/8oz Caster Sugar

1/4tsp Salt – I use Maldon 

5 Large Free Range Eggs 

1tsp Vanilla Extract

75g/3oz cocoa

100g/4oz Dark Mint Chocolate – cut into small chunks

175g/6oz Plain White Flour

3tsp Baking Powder

For the icing:

175g/6oz Icing Sugar

3 drops Peppermint Extract – I use Nielsen-Massey 

Optional – Green Food Colouring – I use Wilton Food Colouring Gel

Green and White small sugar balls

Method: Preheat oven to 180C/160C fan for 1 hour, 350F, gas mark 4

To bake this cake you will need a 25cm x 11.5cm x 7.5cm (10” x 4.5” x 3”) 2lb loaf tin. Grease thoroughly with butter and line the base of the tin with baking parchment.

Making and baking the cake

  • First of all into a large bowl add the butter, sugar and salt. Whisk until pale and creamy and thoroughly combined.
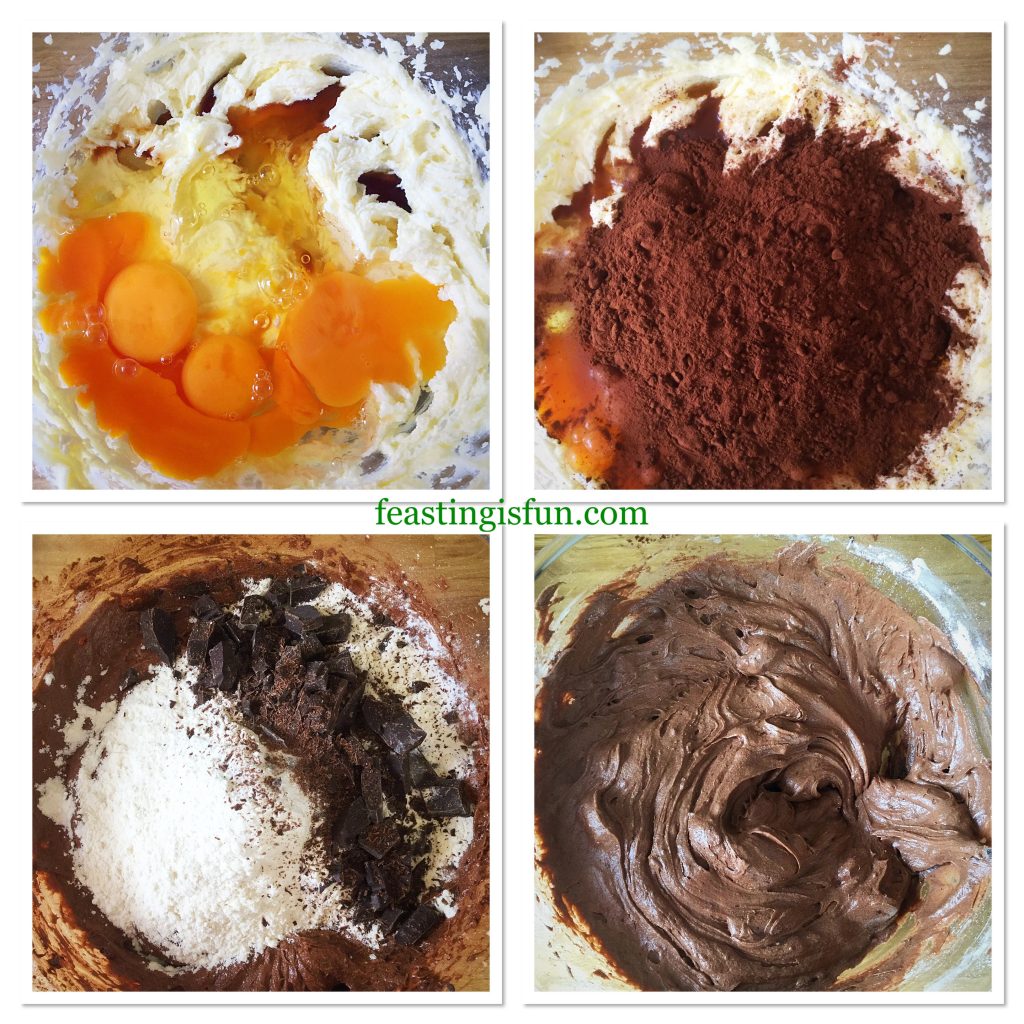
  • Add the eggs, vanilla extract and cocoa powder. Whisk again until the mixture is fully combined with no lumps.
  • Sift the flour and baking powder into the bowl and add the chopped mint chocolate.
  • Finally, using a spoon mix all of the ingredients together until they are just combined. Take care not to overmix the cake batter as this can result in a heavy cake once baked.
FF Mint Chocolate Chip Drizzle Cake
Making the cake batter.
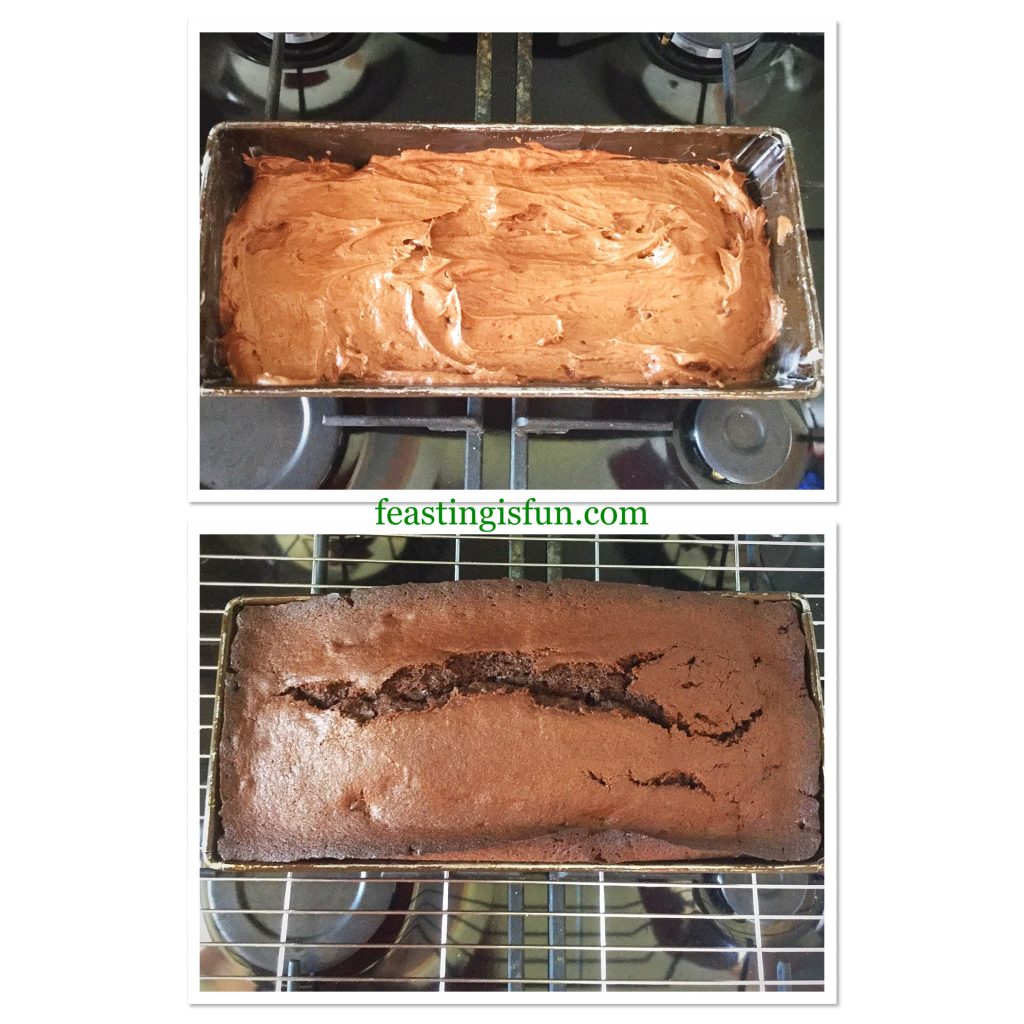
  • Spoon the cake batter into a prepared tin and smooth the surface.
  • Place the cake tin into the centre of the oven and bake for approximately 1 hour. Baking times may vary due to oven differences or using a different size tin.
  • The cake is baked when an inserted skewer comes out clean.
  • As soon as the cake is baked remove from the oven and leave the cake to fully cool in the tin.
FF Mint Chocolate Chip Drizzle Cake
Filling the loaf tin and baking the cake.
  • When the cake is cooled carefully run a palette knife between the cake and the tin.
  • Turn the cake out of it’s tin and remove the baking parchment.
  • Place the cake on to a cake or board ready to be iced.

Making the icing and decorating the cake

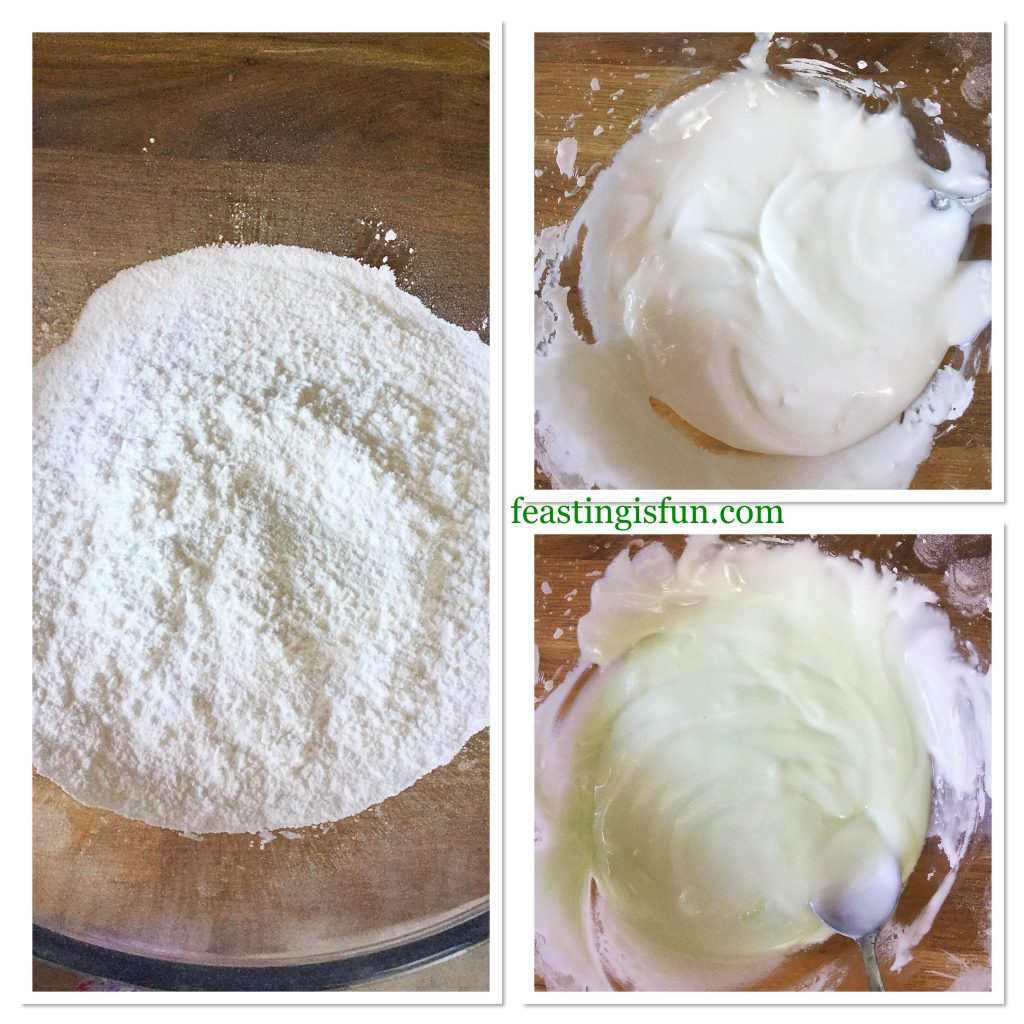
  • First of all add the icing sugar to a bowl. Gently stir with a balloon whisk to remove any lumps. I find this method much easier than sifting the sugar. Especially as sifting results in icing sugar going everywhere!
  • Add the peppermint extract and enough water to for a thick, but still slowly dripping paste.
  • Dip the tip of a cocktail stick into the food colouring gel and then swirl the stick through your icing. I opted for a very subtle mintgreen colour. Stir the icing so that the colour is even throughout.
FF Mint Chocolate Chip Drizzle Cake
Making the mint flavoured drizzle icing.
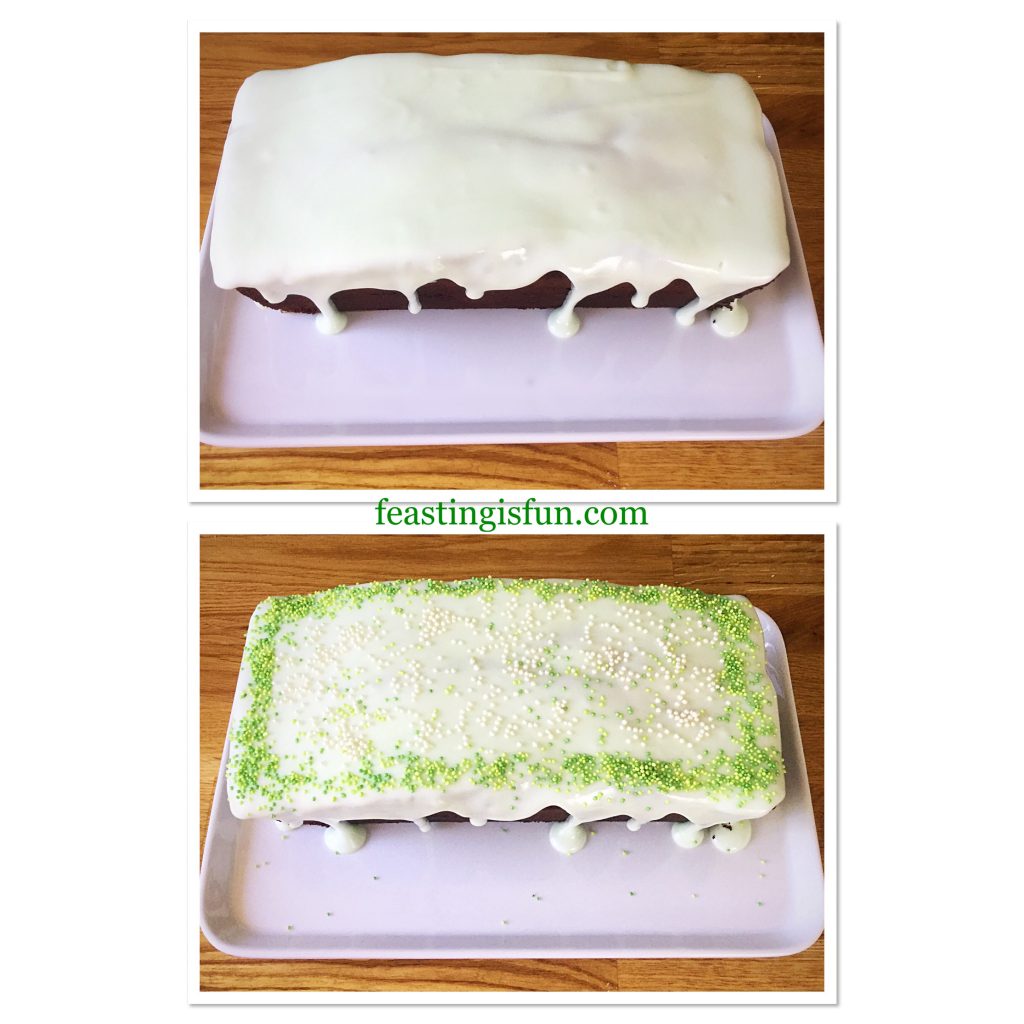
  • Spoon the icing over the cake so that the top is completely covered. Use the spoon to encourage the icing to drip around the sides.
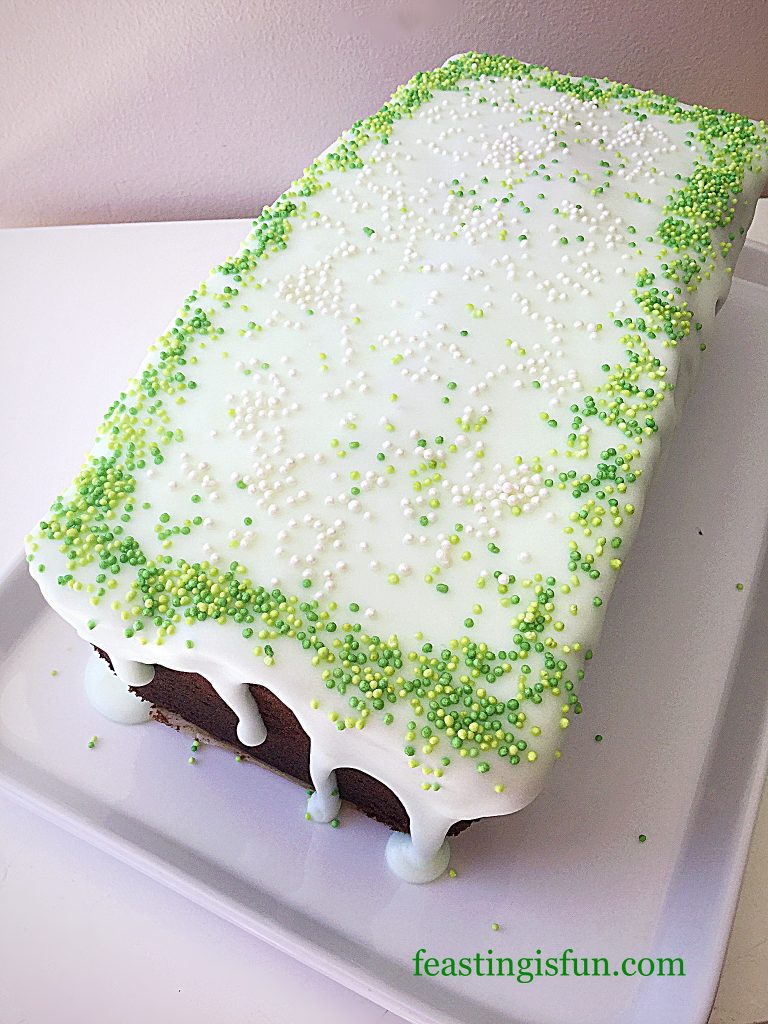
  • Finally, sprinkle the coloured sugar balls around the outside edge of the icing before it sets. And then sprinkle the white balls inside the border.
FF Mint Chocolate Chip Drizzle Cake
Icing and decorating the Mint Chocolate Chip Drizzle Cake

Allow the icing to set before slicing the cake for serving.

FF Mint Chocolate Chip Drizzle Cake
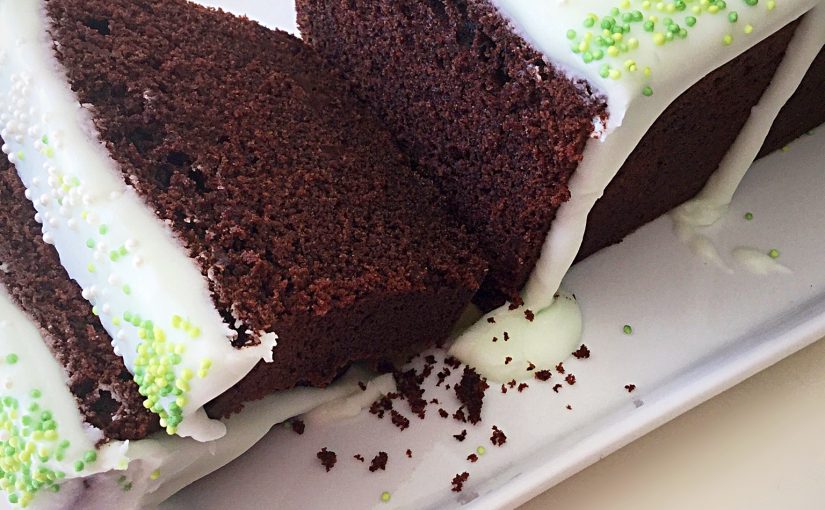
Mint Chocolate Chip Drizzle Cake

Slice and serve with a smile.

Store any leftover cake in an airtight container or wrapped in cling film. Also during warmer weather I keep the cake refrigerated. Eat within 5 days of making.

If you have enjoyed this recipe for Mint Chocolate Chip Drizzle Cake you may also like these:

Iced Cherry Coconut Loaf Cake

FF Mint Chocolate Chip Drizzle Cake
Iced Cherry Coconut Loaf Cake

Lemon Drizzle Cake

FF Mint Chocolate Chip Drizzle Cake
Lemon Drizzle Cake

Raspberry Drizzle Loaf Cake 

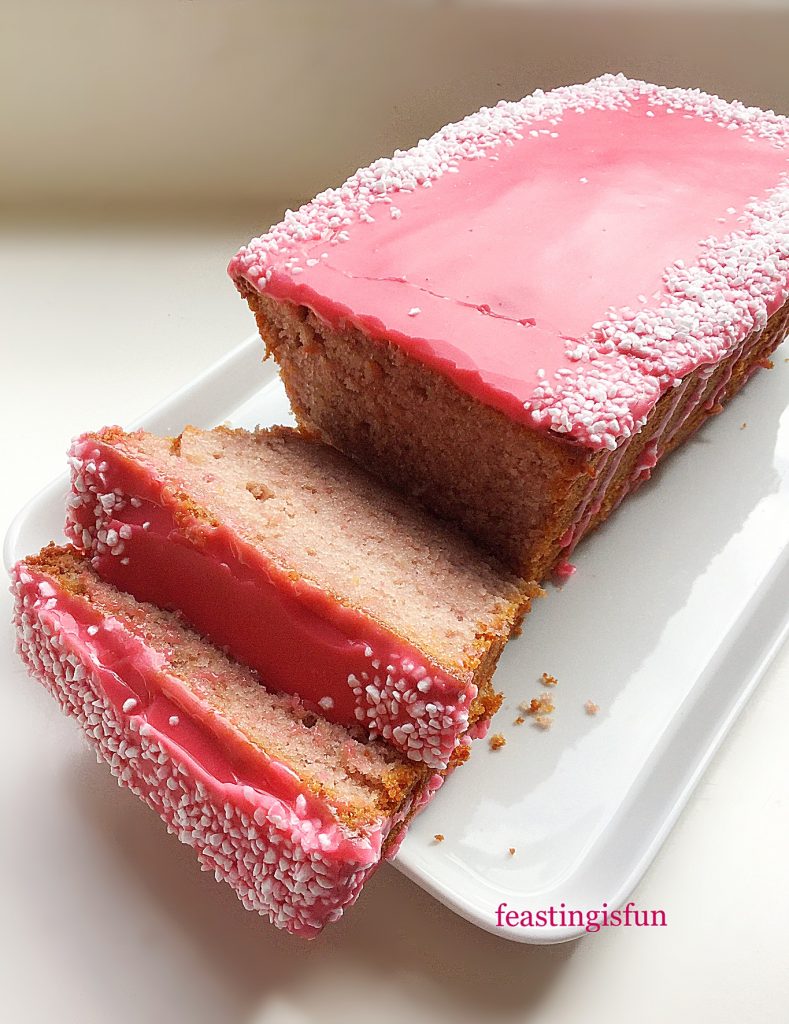
Beautiful natural pink icing coloured using fresh raspberries that Is drizzled over a pink, raspberry, loaf cake.
Raspberry Drizzle Loaf Cake

While I don’t eat cake everyday, I enjoy making them. Although my preference  leans towards more savoury flavours, many of my family and especially my husband do have a sweet tooth. Sharing my bakes is important to me and loaf cakes travel well. Also, they are easy to portion, either as a whole slice or cut in half so that younger ones can have a finger of cake. Most importantly the cakes I bake are always made with love and the minimum of artificial ingredients.

Whatever you are making, baking and creating in your kitchens have fun preparing and sharing your feast.

Sammie xx

No part of this post may be reproduced or duplicated without the written permission of the owner. Please see my Disclosure Policy.


Share
Facebooktwitterpinterestlinkedintumblr

Iced Cherry Coconut Loaf Cake

Share
Facebooktwitterpinterestlinkedintumblr

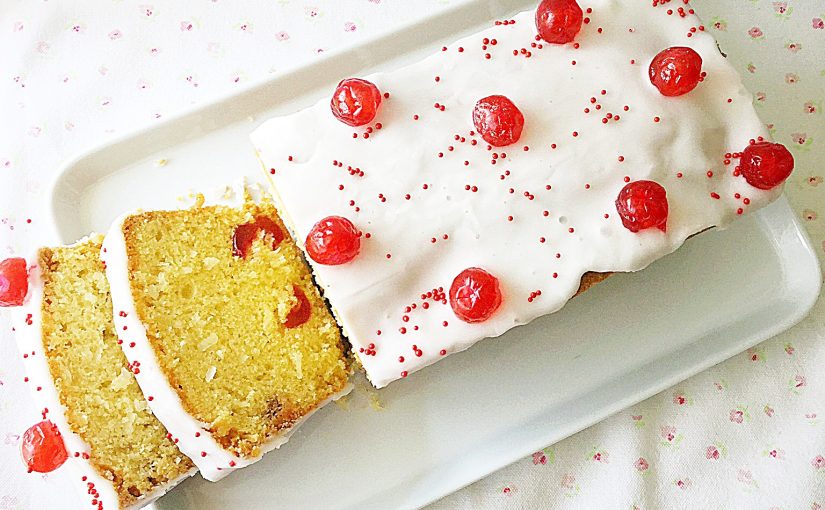
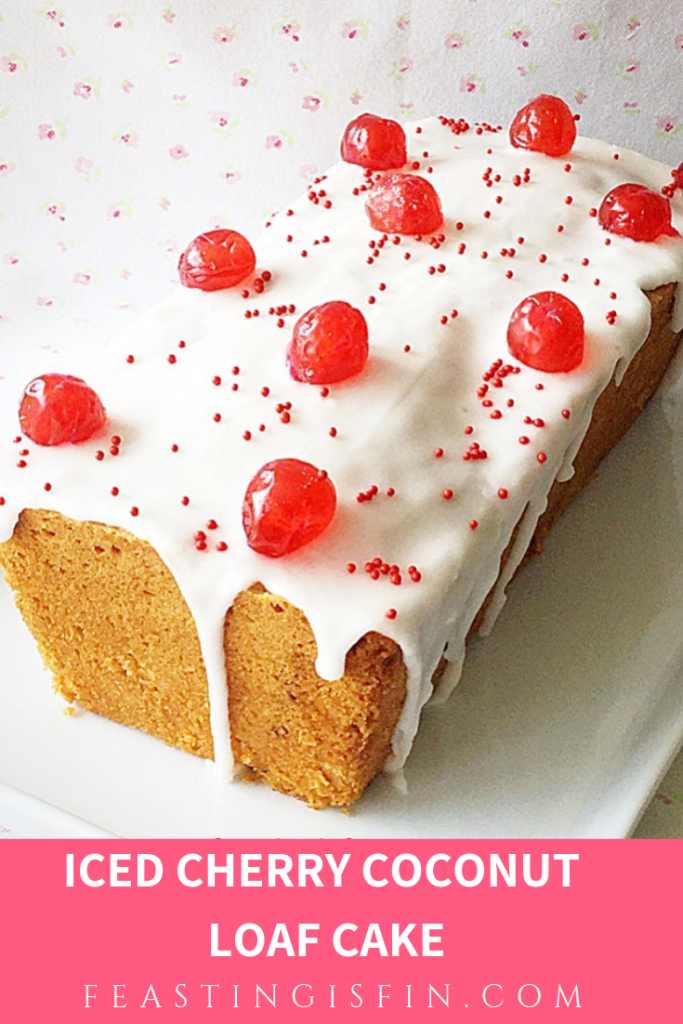
I adore pretty things. Whether it be polka dot plates, wild flowers in a jug, or brushing my hands on cow parsley while out for a walk. And given a choice my garden will always be full of old english roses and rambling honeysuckle, rather than neatly edged borders containing structural plants. Likewise, this relaxed approach is also reflected in my baking. Since a drizzle of icing here and there makes a cake not only beautiful, but shouts that it is homemade. Resulting in this Iced Cherry Coconut Loaf Cake that not only looks pretty but tastes pretty good too!

FF Uncut Iced Cherry Coconut Loaf Cake

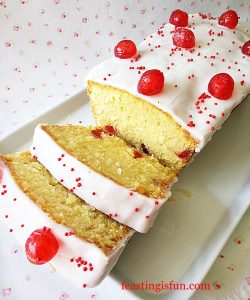
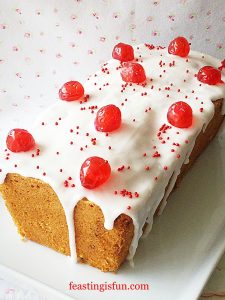
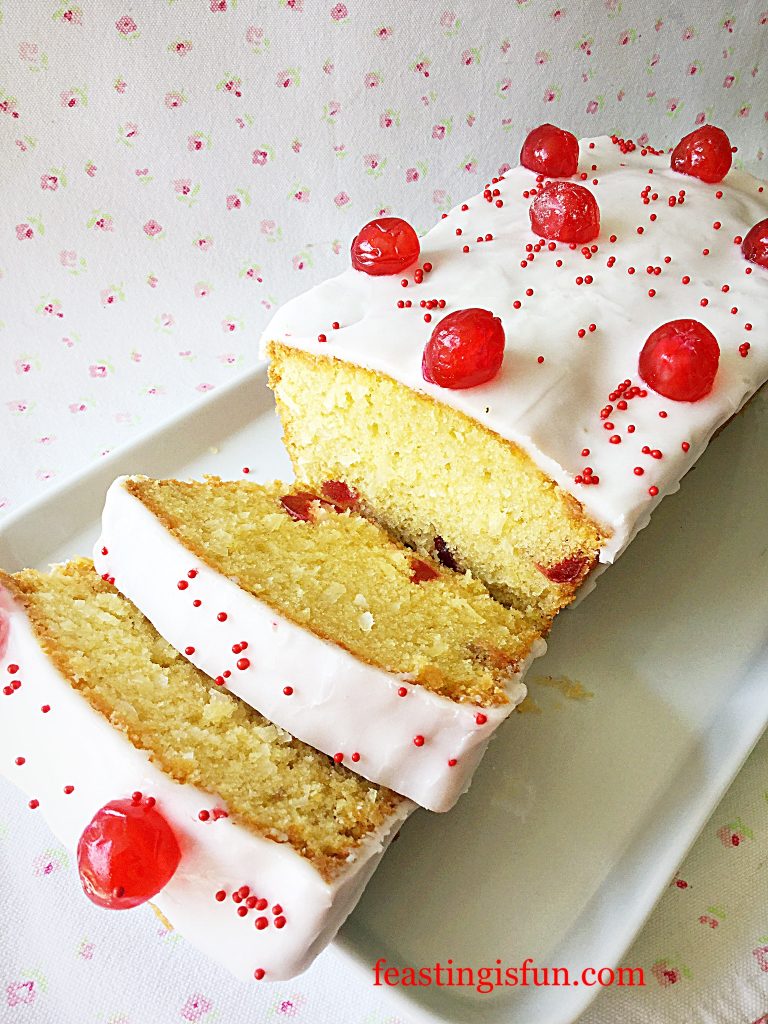
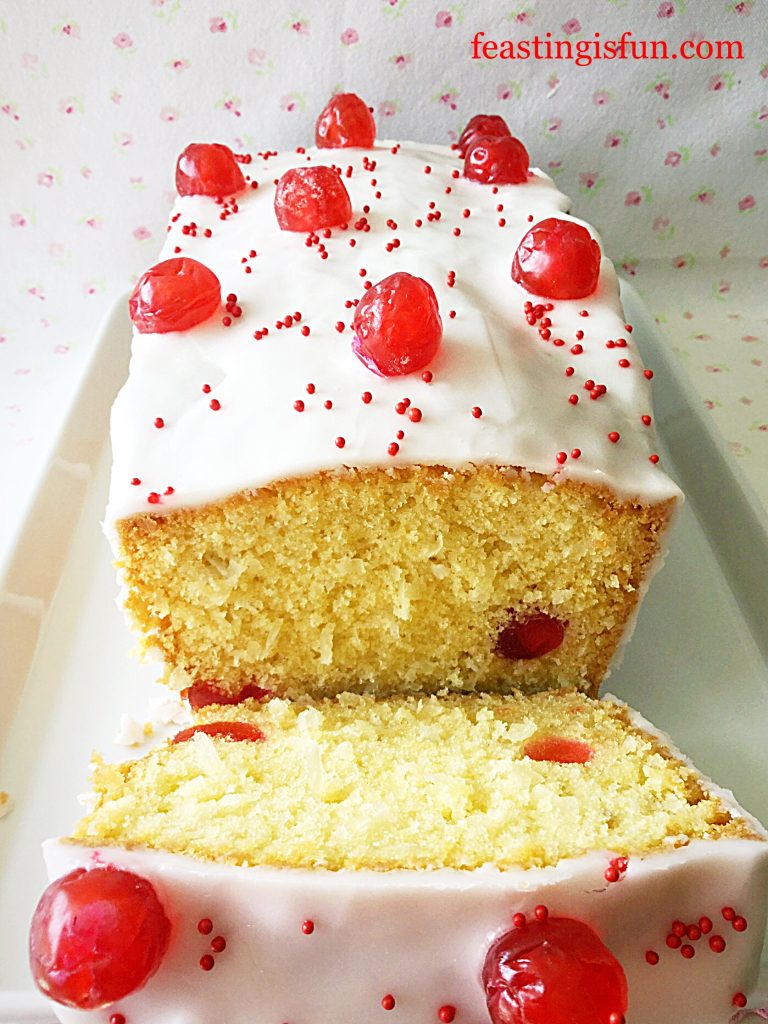
A rich buttery coconut cake, packed full of glacé cherries, simply decorated with glacé icing and more cherries. Yet it looks like an afternoon tea party. In fact this cake makes me want to get out my best china, string bunting everywhere and hold a garden party. Why? Because it is such a cheerful, pretty and delicious cake. Resulting in THE perfect cake to share.

FF Iced Cherry Coconut Loaf Cake
Iced Cherry Coconut Loaf Cake

I rather enjoy baking loaf cakes such as this Mascarpone Topped Carrot Cake. Since the loaf tin makes them easy to slice and perfect for packing up and taking on a picnic. Also, should the cake need to be shared further than anticipated, each slice can easily be cut in half. So, when I look at photographs of this Iced Cherry Coconut Loaf Cake they make me smile. And any cake that does that is a winner in my book.

FF Iced Cherry Coconut Loaf Cake
Iced Cherry Coconut Loaf Cake.

Recipe: Iced Cherry Coconut Loaf Cake serves 8

For the cake:

200g/7oz Unsalted Butter at room temperature

200g/7oz Caster Sugar

1/4 tsp Sea Salt – I use Maldon halve quantity if using free flowing

1 tsp Vanilla Extract – I use Nielsen-Massey

4 Large Free Range Eggs

125/4.5oz Sweetend Shredded Coconut – such as Bakers available from Amazon alternatively use the equivalent weight of desiccated coconut and add 3 tbsp whole milk to the cake batter

100g/4oz Glacé Cherries halved

250g/9oz Plain White Flour

2 tsp Baking Powder

To decorate:

175g/6oz White Icing Sugar (Confectioners sugar)

2 Tbsp Tap Water

10 Whole Glacé Cherries

Small Red Sugar Balls approximately 1 tsp

Method: Preheat oven to 160C/140C fan, 325F, gas mark 3

You will need approximately a 25cm x 11.5cm x 7.5cm (10” x 4.5” x 3”) 2lb loaf tin for this recipe. Grease with butter and line the base with baking parchment.

Making And Baking The Cherry Coconut Cake

  • First of all add the butter, sugar and salt to a large mixing bowl. Whisk together until the ingredients are fully combined, pale and creamy.
  • Now add 2 eggs, half the flour and vanilla extract. Whisk together until just combined.
  • Add the last 2 eggs and whisk to incorporate.
  • Finally add the remaining flour, baking powder, coconut and cherry halves. Toss the cherries in the flour, this will stop them sinking to the bottom of the cake during baking.
  • Fold all of the ingredients together (adding additional milk if using desiccated coconut) until they are combined.
FF Iced Cherry Coconut Loaf Cake
Making the cherry coconut cake batter.
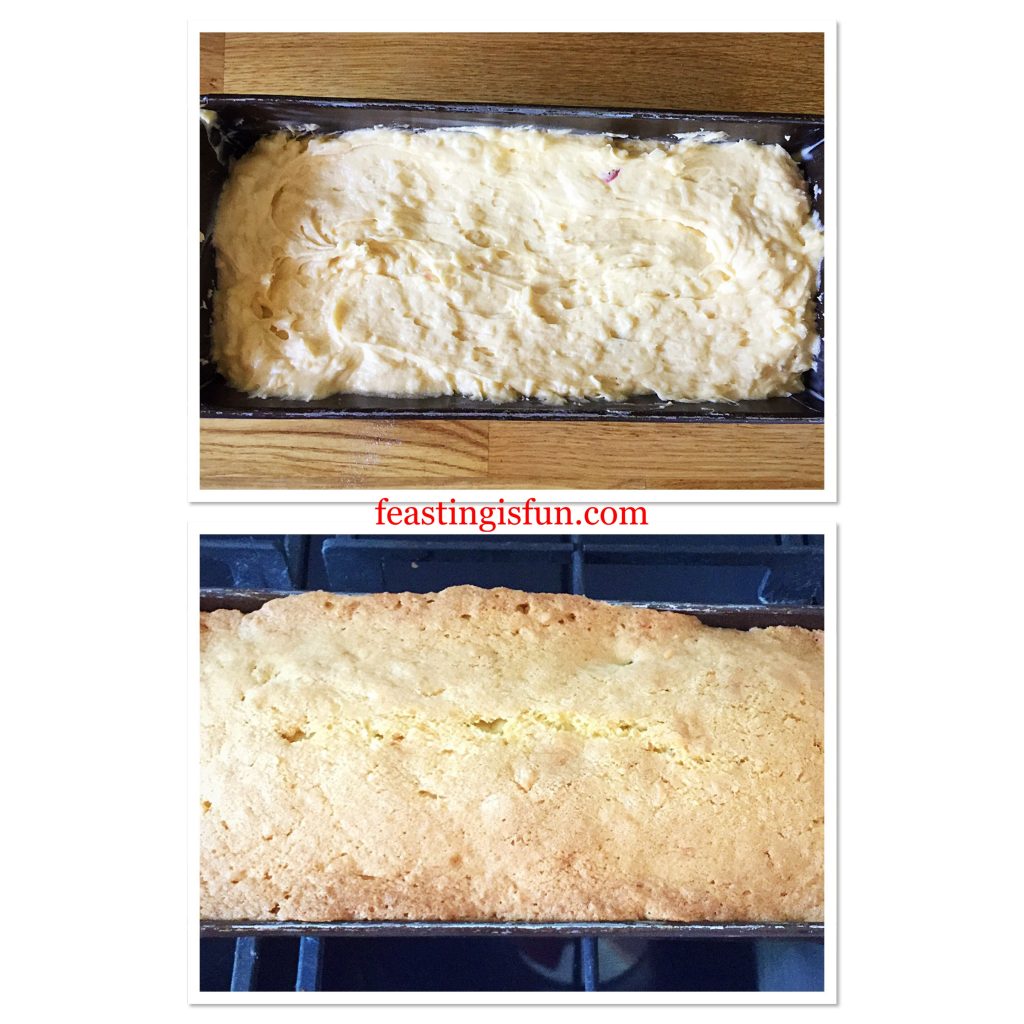
  • Spoon cake batter into the prepared tin making sure the top is level.
  • Place the cake tin into the middle of the oven and bake for 1 hour – 1 hour 15 minutes. My cake took 1 hour and 10 minutes to bake.
  • The cake is baked when golden brown and an inserted skewer comes out clean.
  • As soon as the cake is baked remove from the oven and allow to cool in the tin.
FF Iced Cherry Coconut Loaf Cake
Baking the cherry coconut loaf cake.
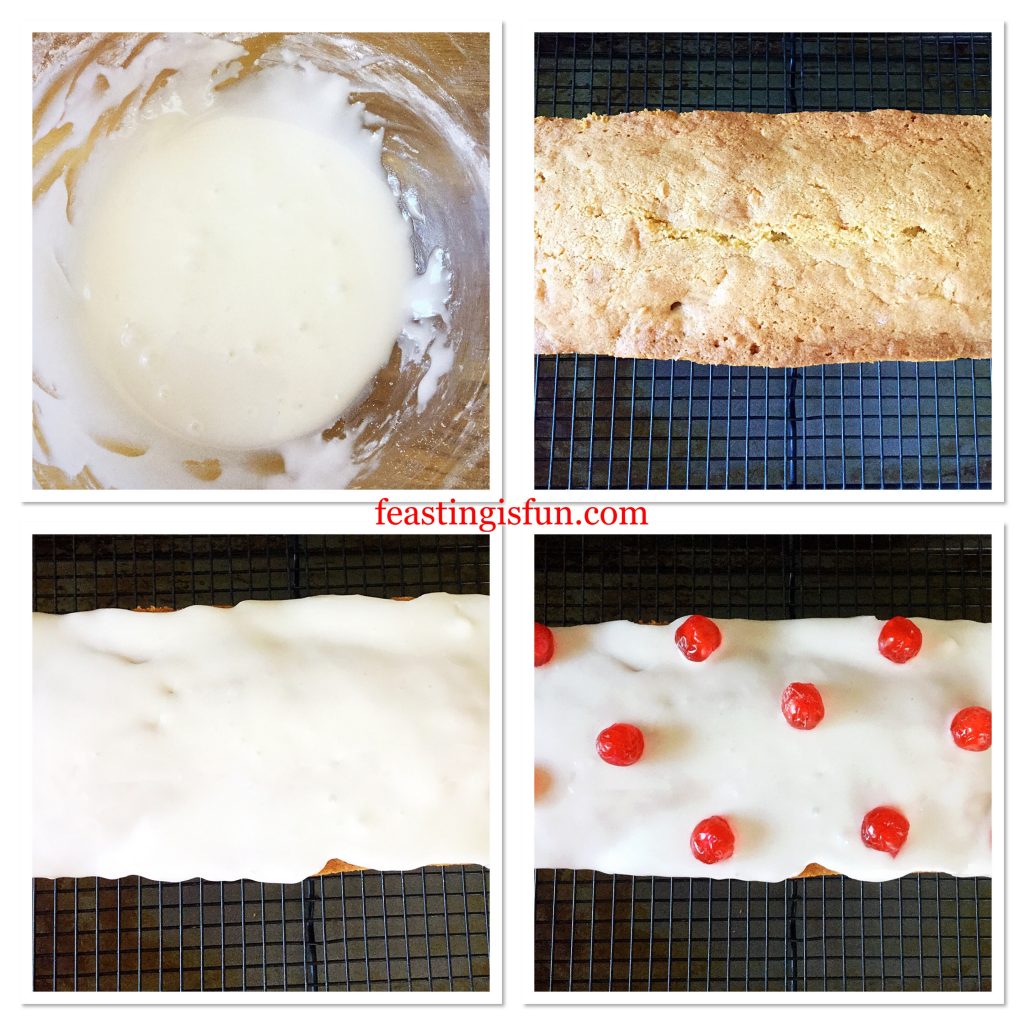
  • Once the cake has cooled run a palette knife around the inside of the tin. Turn out the cake, remove the baking parchment and place on a rack over a baking tray.

Decorating The Loaf Cake

  • Use a whisk to mix the icing sugar and water.
  • Spoon the thick glacé icing on to the top of the cake.
  • Add the glacé cherries to the iced cake.
FF Iced Cherry Coconut Loaf Cake
Decorating the Iced Cherry Coconut Loaf Cake.
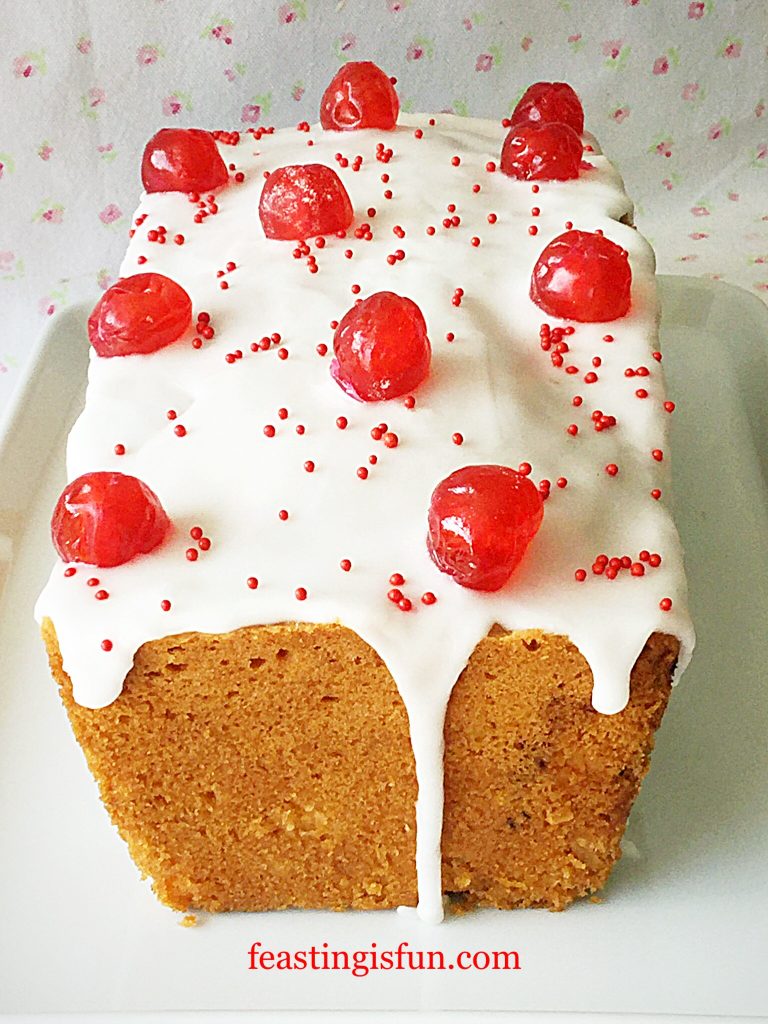
  • Finally sprinkle over red sugar balls before the icing sets.
FF Iced Cherry Coconut Loaf Cake
The finished Iced Cherry Coconut Loaf Cake.
  • Put the cake to one side and leave to set.
FF Iced Cherry Coconut Loaf Cake
Iced Cherry Coconut Loaf Cake

Serve sliced and placed on your very best china, along with a freshly made pot of tea.

Store in an airtight container. Eat within 5 days.

If you have enjoyed this recipe for Iced Cherry Coconut Loaf Cake you may also like these:

Black Forest Cupcakes

FF Iced Cherry Coconut Loaf Cake
Black Forest Cupcakes

Iced Bakewell Tart

FF Iced Cherry Coconut Loaf Cake
Iced Bakewell Tart.

Strawberry Sweetheart Cake

FF Iced Cherry Coconut Loaf Cake
Strawberry Sweetheart Cake

While I am not the world’s best cake decorator, I’ve developed several strategies for making the cakes I bake look presentable. Because we eat with our eyes first AND as I mentioned, I like pretty things, cakes being one of them. So, for inspiration I follow several bakers and cake decorators on Twitter and Instagram. And they are an invaluable source of tips, tricks and ideas. Likewise, Pinterest is also full of inspiration. Most importantly, nature is the greatest source of inspiration for me. None more so than my beautiful back garden.

What inspires you?

So, whatever you are making, baking and creating in your kitchens, have fun preparing and sharing your feast.

Sammie xx

No part of this post may be reproduced or duplicated without the written permission of the owner. Please see my Disclosure Policy.

Share
Facebooktwitterpinterestlinkedintumblr

Fresh Raspberry Frosted Lemon Cupcakes

Share
Facebooktwitterpinterestlinkedintumblr

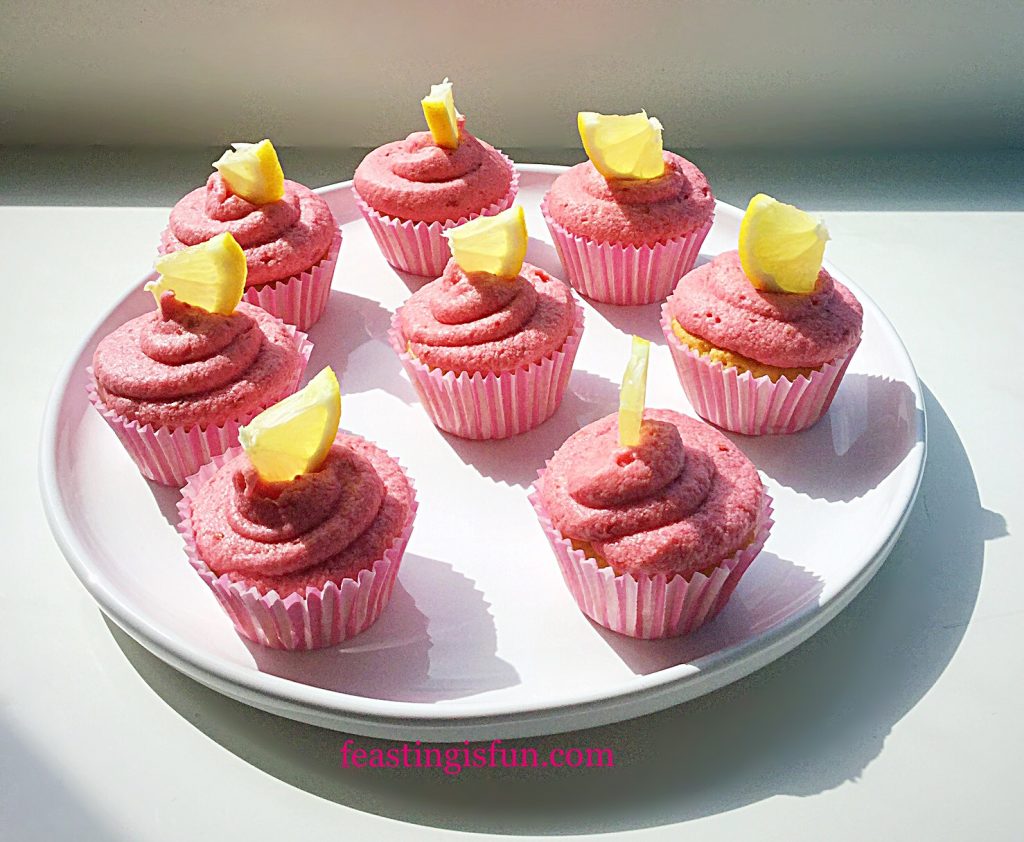
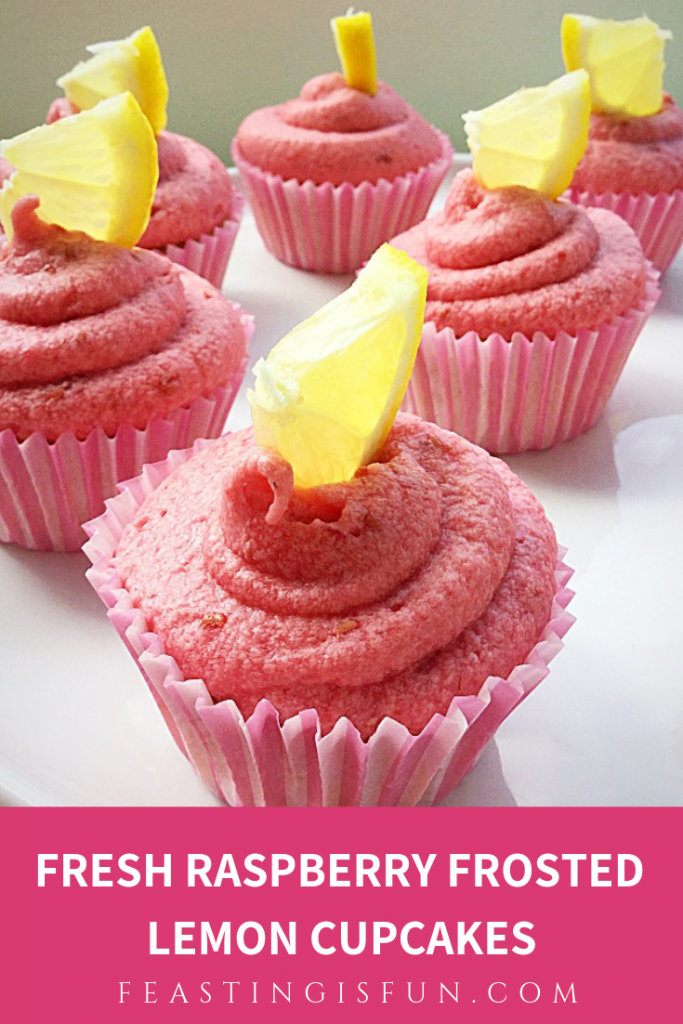
Finally Spring has finally arrived! And following what has seemed a very long, very cold and very dark Winter, daffodils are now lighting up the landscape with their cheery yellow faces.  Bird song is abundant, especially as long shut windows have now been flung open. So in celebration of this beautiful season I have created a fruit packed cupcake that will bring sunshine to your day even when the rain clouds descend. Enjoy these Fresh Raspberry Frosted Lemon Cupcakes at anytime of the year.

FF Fresh Raspberry Frosted Lemon Cupcakes
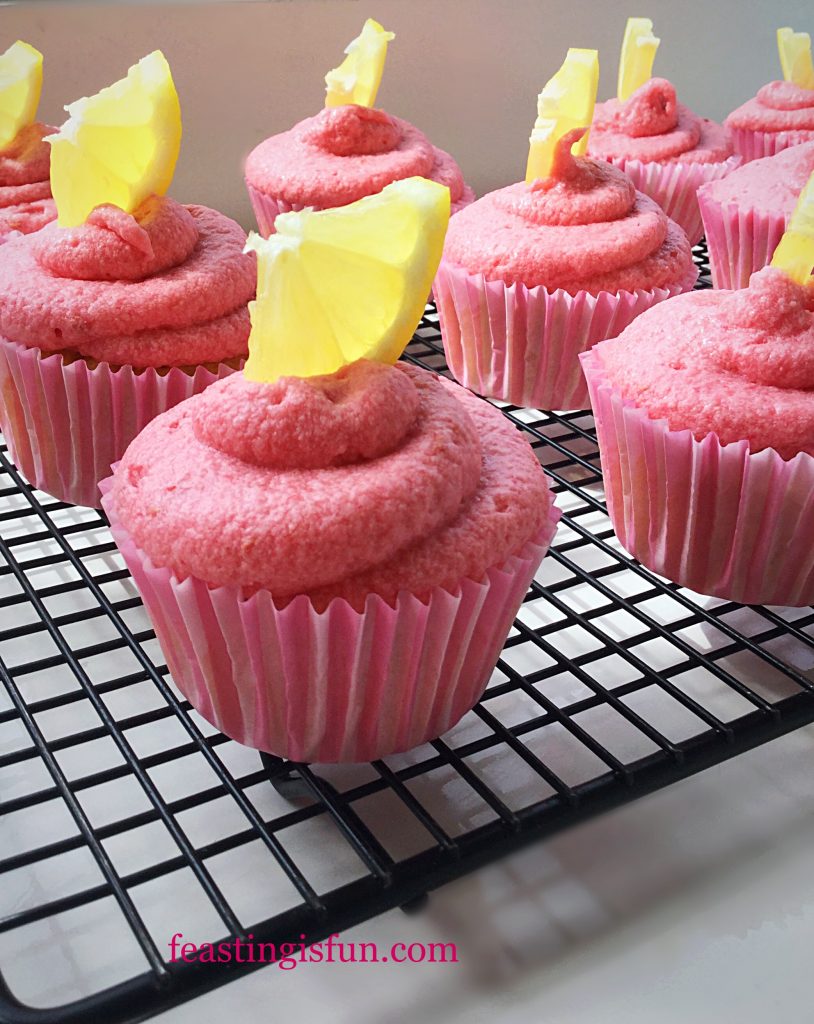
Fresh Raspberry Frosted Lemon Cupcakes

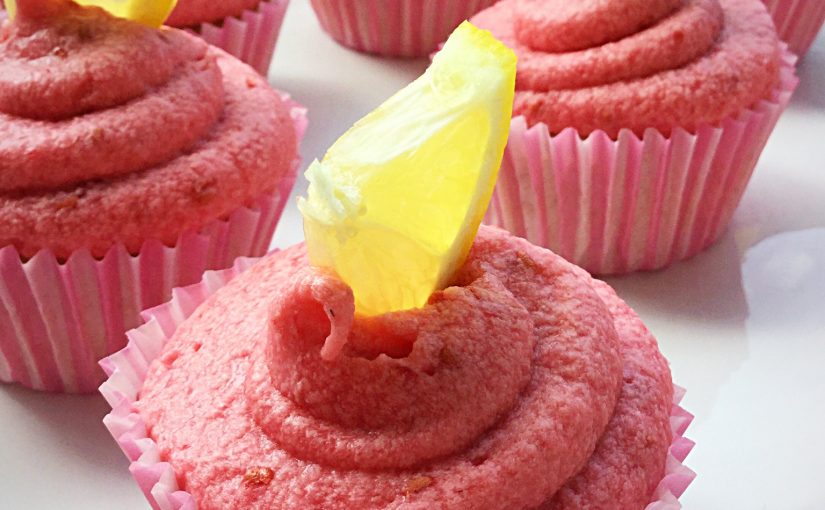
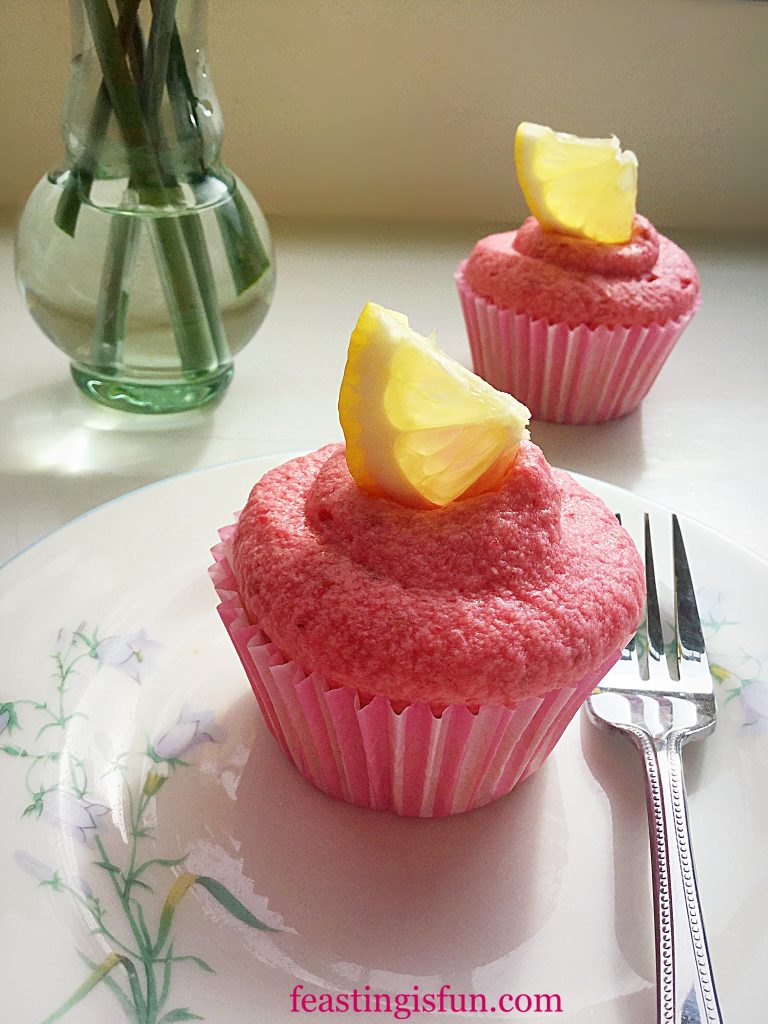
Light, lemon flavoured cupcakes topped with a fresh (frozen out of season), vibrant pink raspberry buttercream. Since both fruits used in this recipe can be tart to the palette, the combination is very refreshing. Also using fresh raspberries, as opposed to raspberry jam, results in the frosting having an almost sherbet like flavour. Resulting in a subtle, yet delicious change from a regular, sweet cupcake.

FF Fresh Raspberry Frosted Lemon Cupcakes
Fresh Raspberry Frosted Lemon Cupcakes

Simply looking at these cupcakes reminds me of sunshine. Something that has been in scant supply these past few months. So I say, when the clouds gather, you simply have to bake the sunshine into your day. While you are making these, why not double up and make some to share among neighbours, friends or work colleagues? And they are certain to cheer anyone’s day as food always tastes better when shared.

FF Fresh Raspberry Frosted Lemon Cupcakes
Fresh Raspberry Lemon Frosted Cupcakes

Note – when making the frosting don’t worry if it looks like it has curdled. It hasn’t! Rather it is the addition of fresh raspberries that give it a slightly mottled appearance.

FF Fresh Raspberry Frosted Lemon Cupcakes

Recipe: Fresh Raspberry Frosted Lemon Cupcakes – makes 12

For the cupcakes:

100g/4oz Unsalted Butter at room temperature

100g/4oz Caster Sugar

1/8 tsp Sea Salt – I use Maldon

2 Large Free Range Eggs

1/2 tsp Vanilla Extract – I use Nielsen-Massey

100g/4oz Plain White Flour

1 tsp Baking Powder

Finely Grated Zest of 1 Large Lemon – approximately 1 tsp

For the frosting:

100g/4oz Raspberries – if using frozen include defrosting juice in weight

150g/5.2oz Unsalted Butter at room temperature

300g/10.5oz White Icing Sugar (confectioners sugar)

To decorate:

3 slices of fresh lemon

Method: preheat oven to 160C/140C fan, 325F, gas mark 3

Making And Baking The Lemon Cupcakes

  • First of all line a muffin tin with 12 pretty cupcake cases.
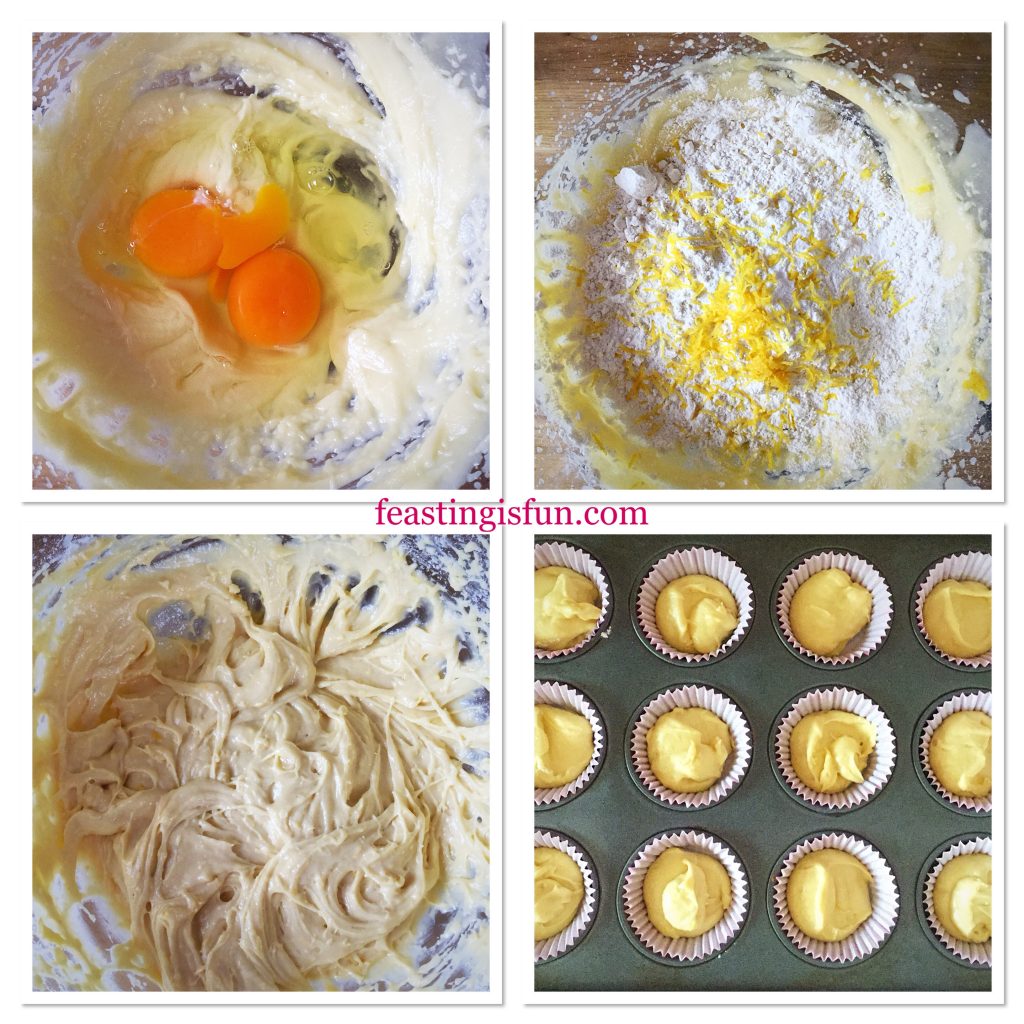
  • Into a bowl add the butter, sugar, salt and vanilla extract. Whisk together until pale and creamy.
  • Next add the two eggs and then sift in the flour and baking powder. Finely add the finely grated zest of a lemon.
  • Whisk all the ingredients together until they are combined. Importantly, avoid over mixing as this can lead to a tough cake when baked.
  • Divide the mixture equally between the 12 cupcake cases .
FF Fresh Raspberry Frosted Lemon Cupcakes
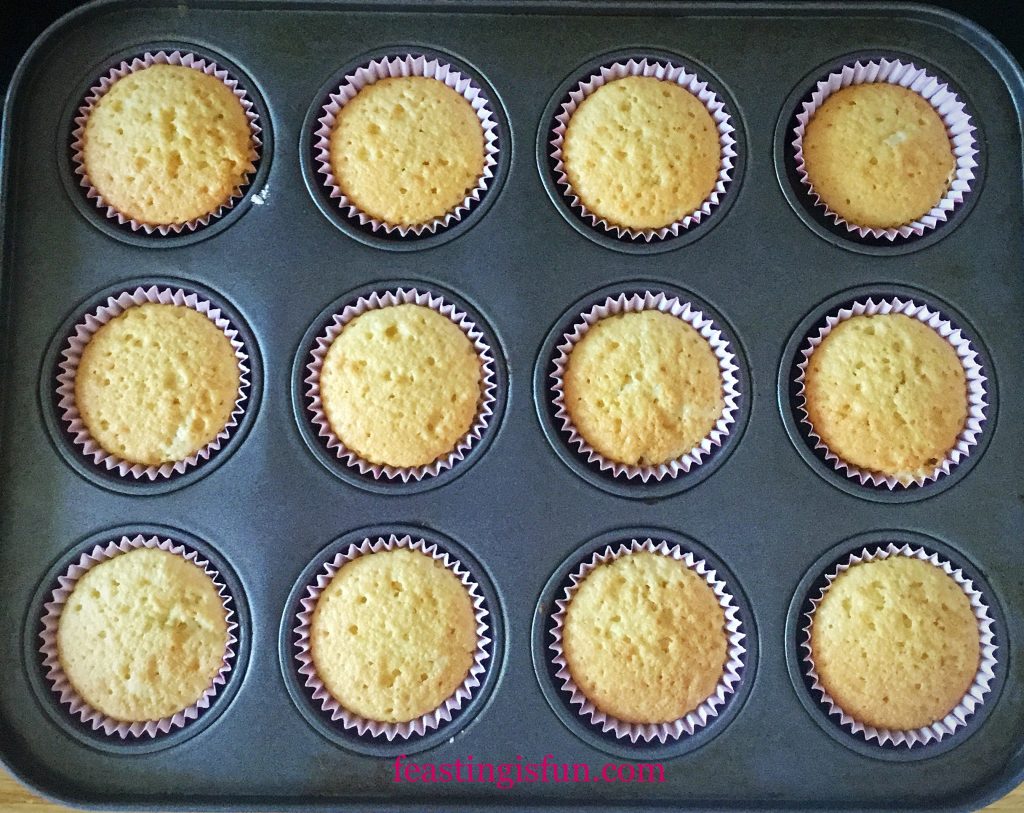
Making the lemon cupcake batter.
  • Place the cupcakes in the centre of the oven and bake for 30 minutes.
  • Additionaly, baking at a low temperature for a longer time results in well risen, flat topped cupcakes.
  • The cupcakes are baked when risen, golden and spring back from a light touch.
  • As soon as the cupcakes are baked remove from the oven.
FF Fresh Raspberry Frosted Lemon Cupcakes
Baked cupcakes.
  • Leave to cool in the tin for 5 minutes then remove and place the cupcakes on a cooling rack to completely cool.
  • While the cupcakes cool make the fresh raspberry frosting.

Making The Fresh Raspberry Buttercream Frosting

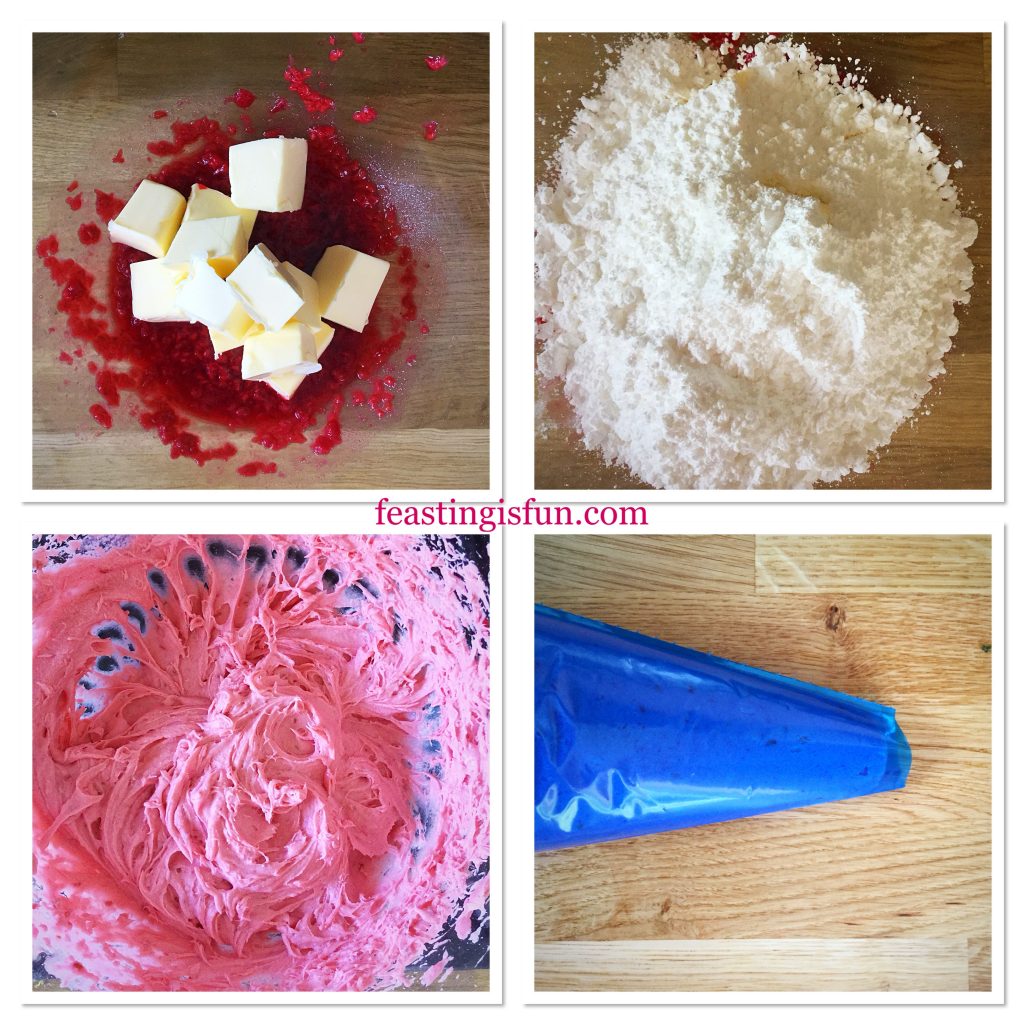
  • Place the raspberries into a bowl and mash using a fork.
  • Add the butter and icing sugar to the mashed raspberries and whisk together – approximately 5 minutes. resulting in a frosting that should be shocking pink in colour and have a light airy texture.
  • Decant the frosting into a piping bag that has not been fitted with a piping nozzle. If using a disposable bag cut the end to leave a 1cm opening.
FF Fresh Raspberry Frosted Lemon Cupcakes
Preparing the pink fresh raspberry frosting.
  • Before piping on to the cupcakes cut 3 slices of lemon. Cut each slice into 4 portions. Each will decorate the top of the frosted cupcakes.
  • To pipe the swirls on to the cupcakes: start at the outside edge of the cupcake, keep an even pressure on the bag and pipe a double swirl.
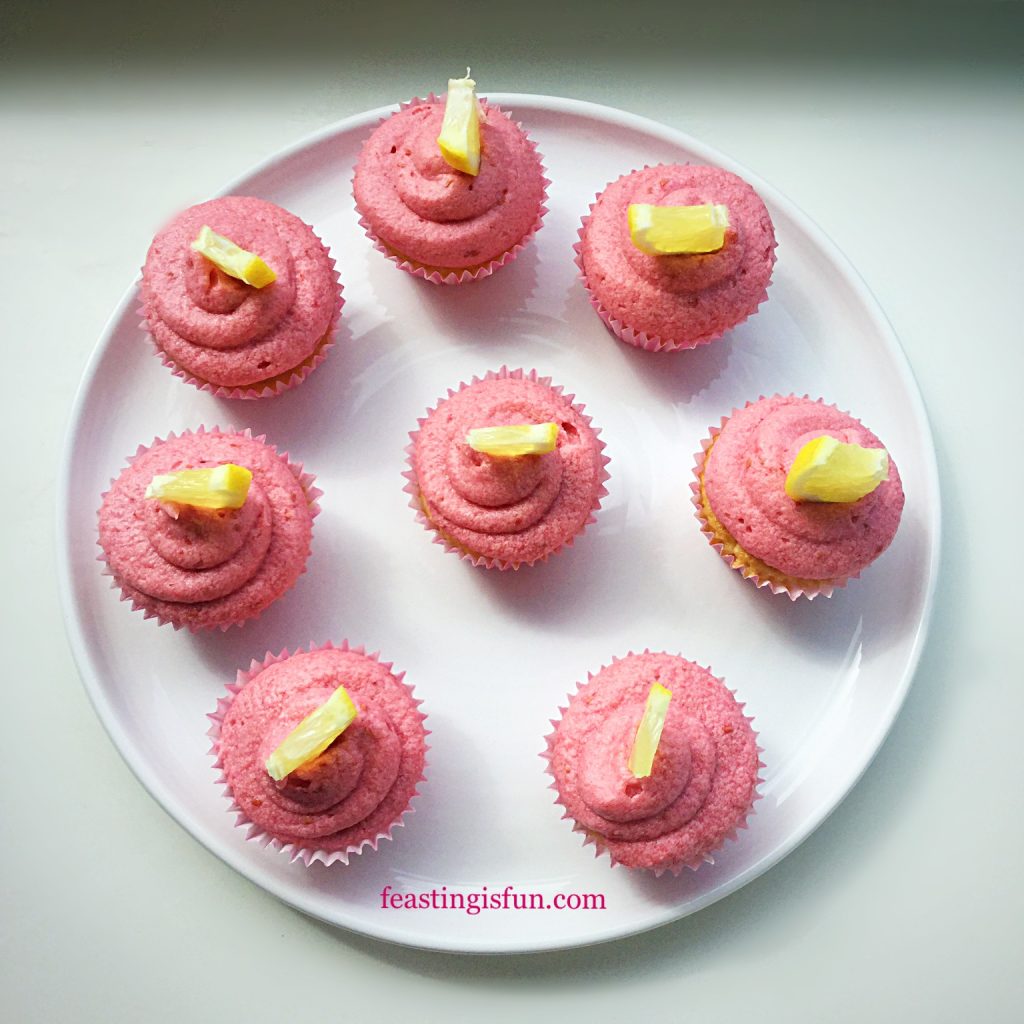
  • Top each frosted cupcake with a lemon segment.
FF Fresh Raspberry Frosted Lemon Cupcakes
Fresh Raspberry Frosted Lemon Cupcakes

Vibrant, fresh raspberry frosting topped with a luminous lemon segment.

FF Fresh Raspberry Frosted Lemon Cupcakes
Fresh Raspberry Frosted Lemon Cupcakes

Serve with lemon tea or freshly made lemonade. And where possible, enjoy sitting outside in the garden listening to the birdsong.

If you have enjoyed this recipe for Fresh Raspberry Frosted Lemon Cupcakes you may also like these:

Marshmmallow Frosted Mango Cupcakes

FF Fresh Raspberry Frosted Lemon Cupcakes
Marshmallow Frosted Mango Cupcakes

Pink Heart Topped White Chocolate Cupcakes

FF Fresh Raspberry Frosted Lemon Cupcakes
Pink Heart Topped White Chocolate Cupcakes

Malteser Popping Candy Cupcakes

FF Fresh Raspberry Frosted Lemon Cupcakes
Maltesers Popping Candy Cupcakes

Baking and sharing are at the very heart of Feasting is Fun. While I thoroughly enjoy creating new recipes to share with you my readers, encouraging you to share what you have made is as important. Especially as there are many lonely people in this world. Because simple gift of a cake, or meal such as this  Chicken and Four Cheese Lasagne, given with a smile can lift an entire day for a stay at home mum with young children. Just one example of how you can help.

So whatever you are making, baking and creating, have fun preparing and sharing your feast.

Sammie xx

No part of this post may be reproduced or duplicated without the written permission of the owner. Please see my Disclosure Policy.

Share
Facebooktwitterpinterestlinkedintumblr

Lemon Coconut Sponge Layer Cake

Share
Facebooktwitterpinterestlinkedintumblr

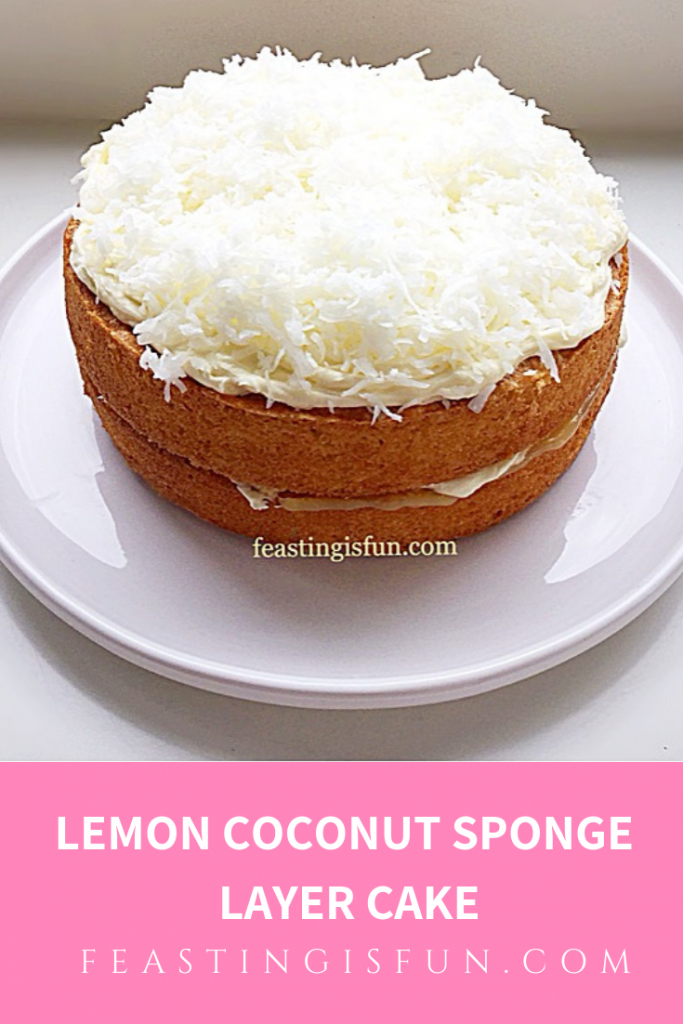
Lemon flavoured anything is always a hit with me. And judging by the number of page views and pins of my recipes, it is the same with you, my readers too. Having made a delicious, gluten free lemon cake for friends, I craved a lemon hit here at home too. Since I very rarely make the same cake twice, adding shredded, sweetened coconut seemed like a good idea. Good it wasn’t, fantastic it was. So welcome to my Lemon Coconut Sponge Layer Cake.

FF Lemon Coconut Sponge Cake

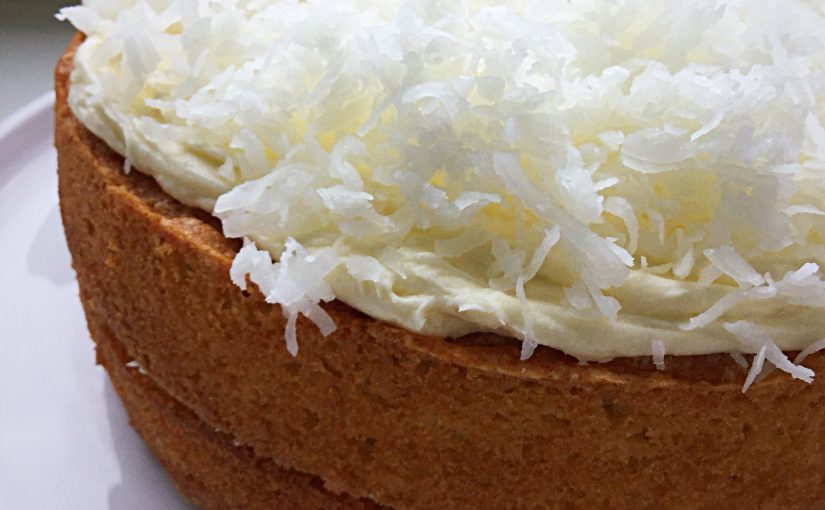
Light, golden, lightly flavoured sponges sandwiched together with tart lemon curd and creamy, lemon buttercream. Additionally, topped with more buttercream and sprinkled with coconut, this cake is a flavour feast in every bite. While the coconut is ordered from Amazon UK, it is never a faff. The moist, sweet bite of every single strand is worth the small extra effort. Alternatively you can, if you must, make this cake using dessicated coconut.

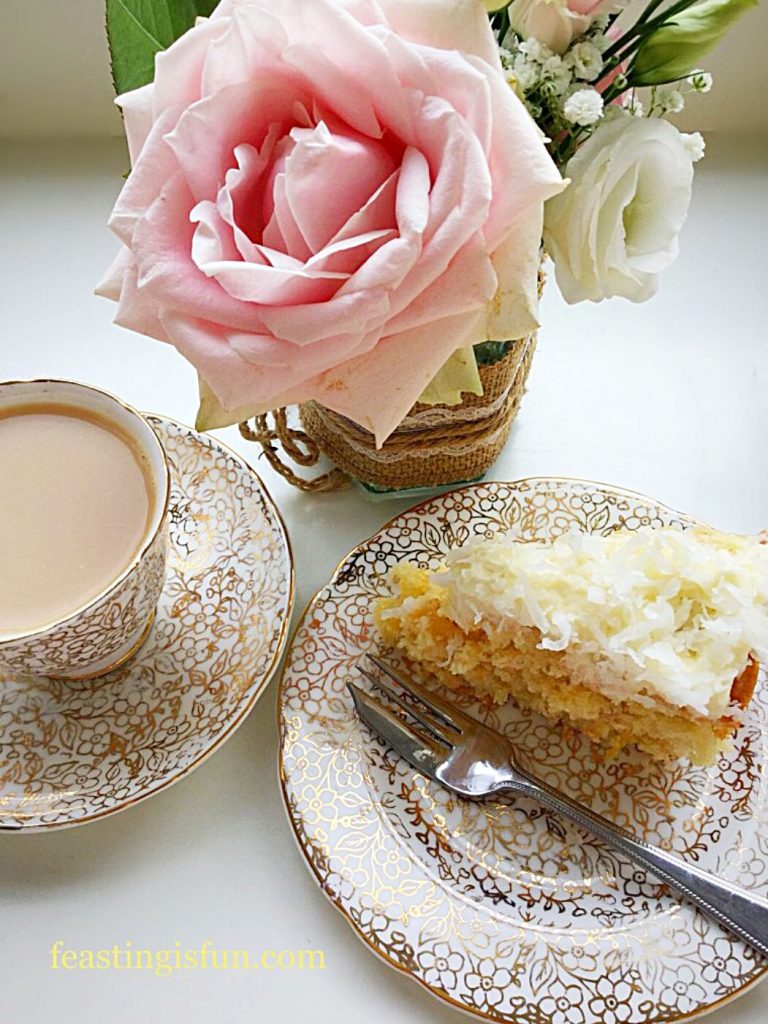
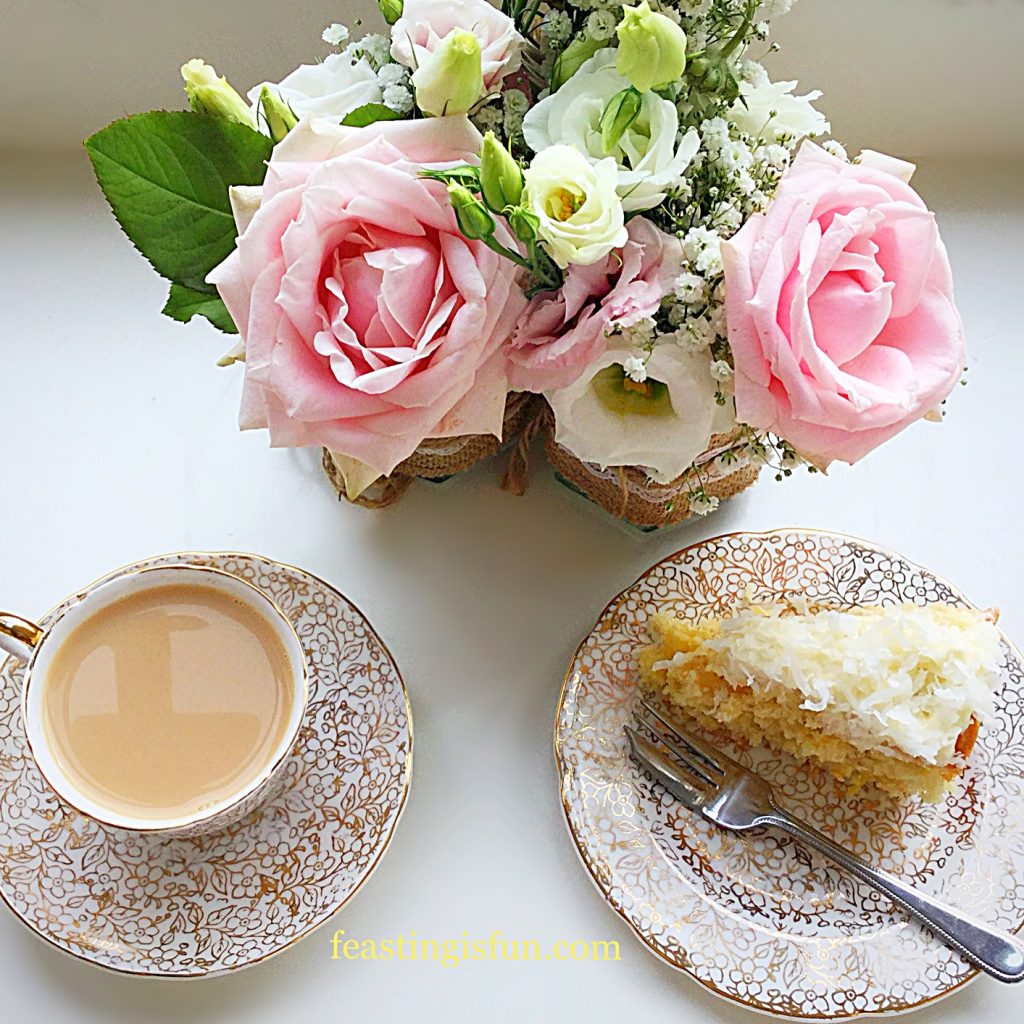
Afternoon tea set up with tea, cake and fresh flowers.
Afternoon tea set up.

Eating And Enjoying A Well Made Cake

While the photograph above shows a slender slice of cake, know that this is near impossible to achieve. And so it should be! Photographic aesthetics aside, please do cut a decent portion when serving. Otherwise you and your guests will be left longing for another slice, or two, such is the more-ish-ness of this sweet treat. Enjoy the satisfaction of not only seeing a decent slice of cake on your plate, but also from eating it.

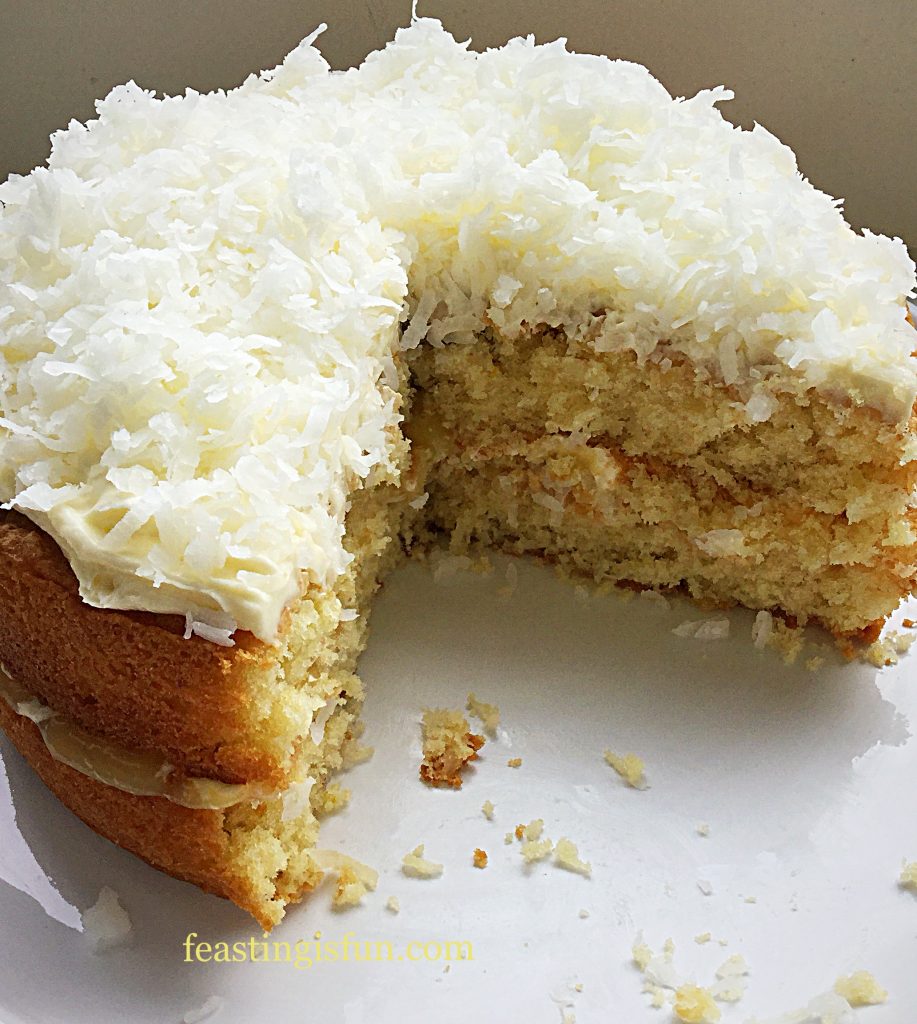
FF Lemon Coconut Sponge Layer Cake
Lemon Coconut Sponge Layer Cake sandwiched with tart lemon curd and creamy buttercream.

Cake is not something that most people eat everyday. Although I cannot think of a single reason why it shouldn’t be, considering the consumption of biscuits and chocolate, we as a population eat our way through. Rather, cake and the eating of it, is a celebration. Perhaps of the moment, days gone by, or memories brought to mind. Eating cake, in itself is a feast. And a feast should never be eaten half heartedly.

Recipe: Lemon Coconut Sponge Layer Cake serves 8-10

For the cake sponge:

225g/8oz Unsalted Butter at room temperature

225g/8oz Caster Sugar

1/4tsp Sea Salt (halve for free flowing) – I use Maldon

4 Large Free Range Eggs

Zest of 2 Lemons

225g/8oz Plain White Flour

2tsp Baking Powder

150g/5oz Sweetened Shredded Coconut – I use Baker’s Angel Flake available from Amazon UK – alternatively use dessicated coconut and add 3 tbsp of milk to the cake batter

For filling, frosting and decorating:

100g/4oz Unsalted Butter at room temperature

200g/7oz Icing Sugar

1/2tsp Lemon Extract (optional) I use Nielsen-Massey

1tbsp Very Hot Water from a recently boiled kettle

3tbsp Good Quality Tart Lemon Curd – I recommend Hawkshead Relish

50g/2oz Sweetened Shredded Coconut

Method: Preheat oven to 160C/140C fan, gas mark 3, 325F

Butter and line with baking parchment, two 20cm/8″ round sandwich tins.

Making And Baking The Lemon Coconut Sponge Cakes

  • First of all, place the butter, caster sugar and salt into a large bowl. Whisk until pale and creamy.
  • Next add all 4 eggs and the zest of two lemons.
  • Sift the flour and baking powder into the same bowl. Now add the sweetened, shredded coconut.
  • Whisk briefly until everything is fully combined.
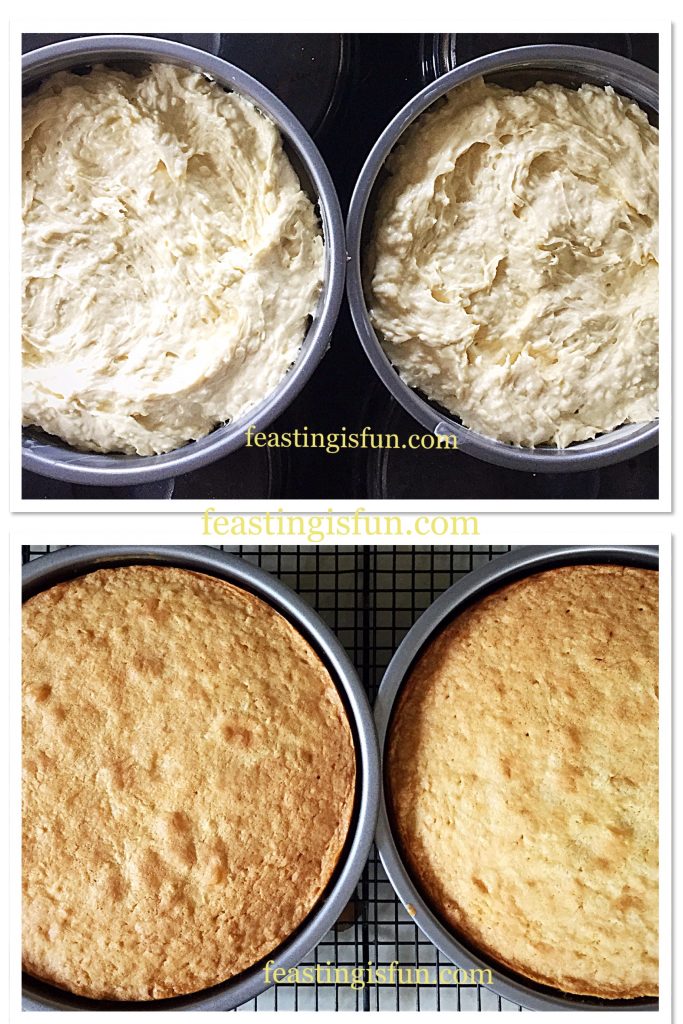
  • Divide the cake batter evenly between the 2 sandwich tins. Smooth the surface of the batter with a spoon.
  • Place the tins into the centre and lower parts of the oven and bake for 35-45 minutes.
  • The cakes are baked once they have turned golden brown and spring back from a light touch.
  • As soon as they are baked, remove the cakes from the oven and allow to cool in the tin for 10 minutes.
FF Lemon Coconut Sponge Layer Cake
Filling the tins and cooling the baked cakes.
  • After cooling in the tin for 10 minutes, turn the cakes out on to a cooling rack.
  • Carefully remove the baking parchment from the base of each cake.
  • Set the cakes aside to cool completely.

Filling And Decorating The Layer Cake

  • While the cakes are cooling make the buttercream.
  • Add the butter, hot water, icing sugar and lemon extract to a large bowl.
  • Starting on a slow speed whisk the ingredients together, increasing the speed until the mixture is very light and creamy.
  • For ease of decorating, fill a piping bag, without a nozzle fitted, with the lemon buttercream.
  • To fill and decorate the cake ensure it is fully cooled before starting.
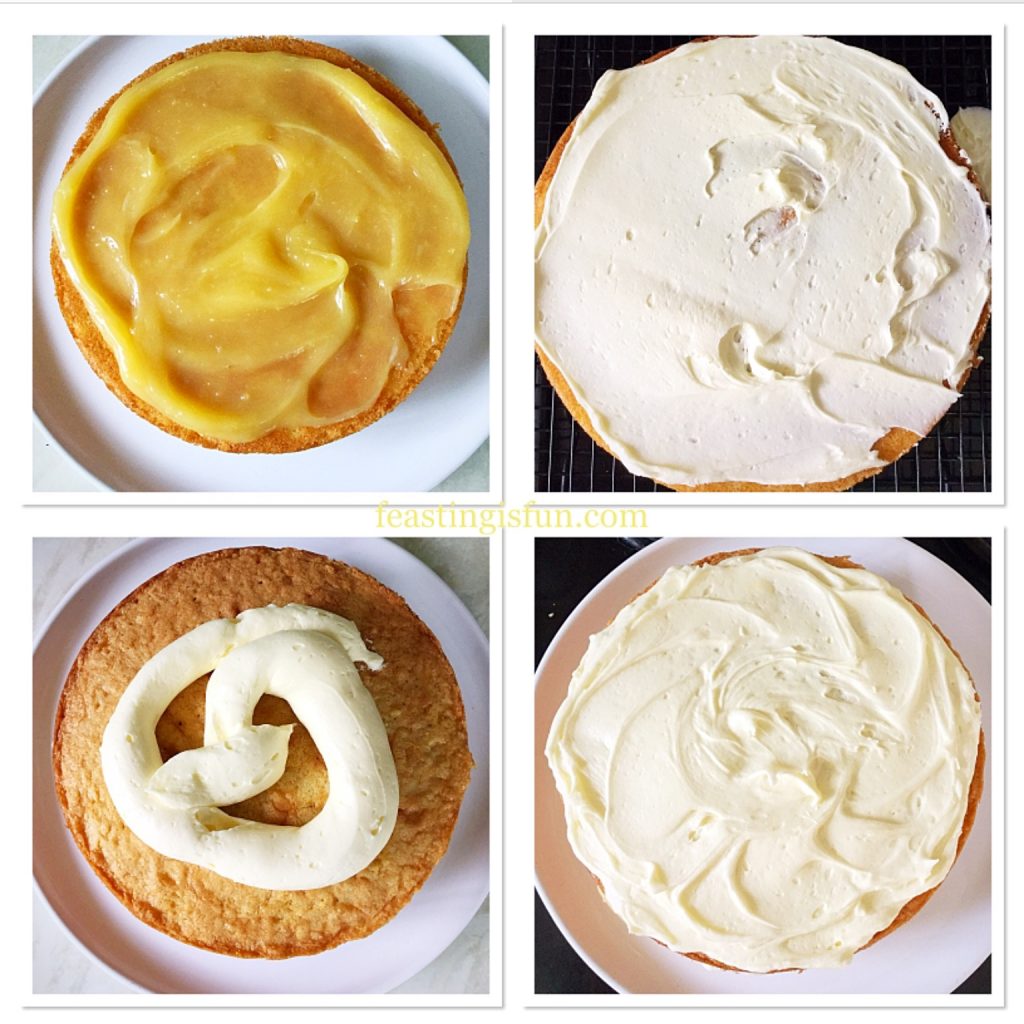
  • Place the bottom sponge flat side up, on to a plate or board.
  • Spoon over the lemon curd and spread to cover the cake just inside the edge.
  • Tun the top sponge so that it is flat side up. Pipe half of the buttercream in a swirl on to the cake. Spread so that the buttercream covers the cake, similar to the lemon curd.
  • Turn the top sponge over and gently place on top of the lemon curd covered bottom Sponge.
  • Pipe the remaining buttercream on to the top of the cake and spread evenly, so that the top of the cake is covered.
Stages of filling and covering a sandwich cake.
Filling, assembling and covering a sponge cake.
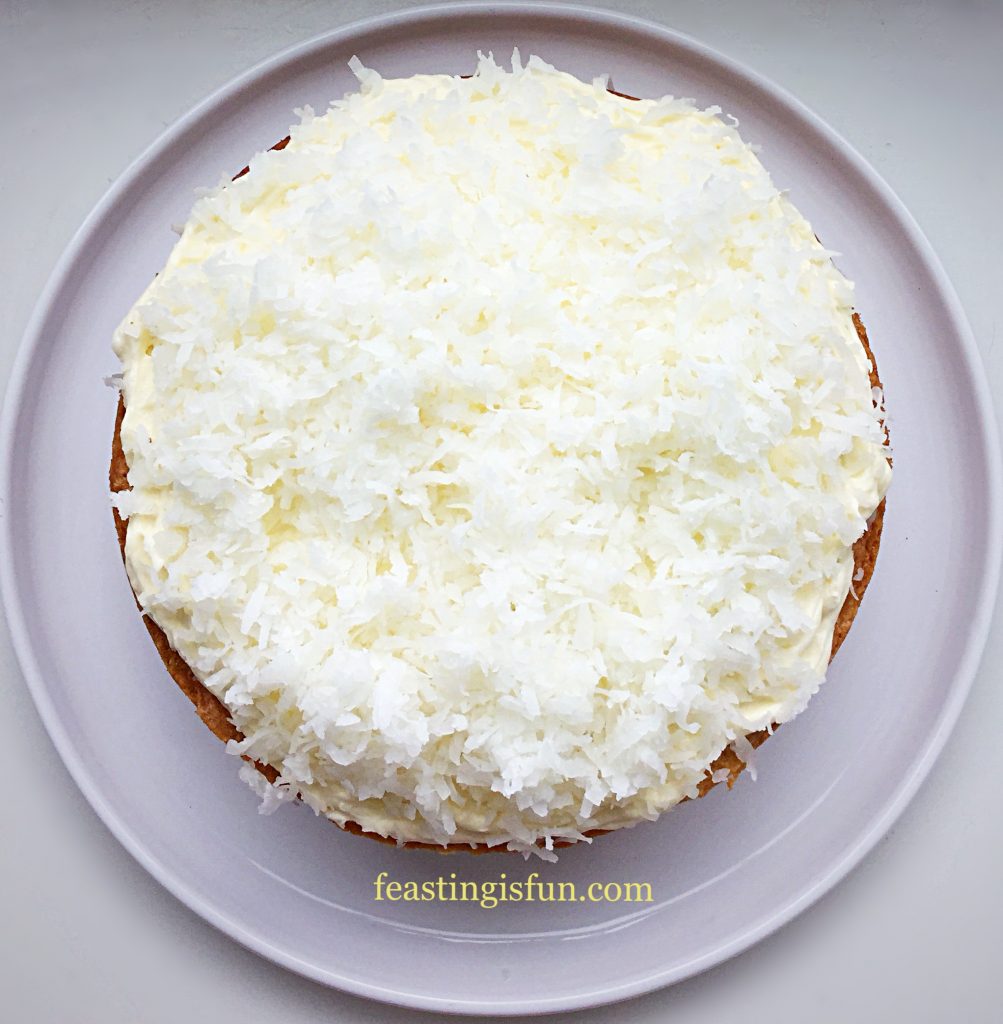
  • Finally sprinkle over the sweetened, shredded coconut, so that it evenly covers the top of the cake.
FF Lemon Coconut Sponge Layer Cake
Lemon Coconut Sponge Layer Cake ready to serve.

Serve generously sliced, to friends, family and neighbours. Likewise, include a fork as this cake is delectably soft, more so on the day of making.

If you know someone who loves the combination of lemon and coconut, why not bake them a cake as a surprise.

Store this cake in an airtight container for up to 5 days. Refrigerate during warm weather.

Afternoon tea set up with tea, cake and flowers.
A slice of cake served with tea.


If you have enjoyed this recipe for Lemon Coconut Sponge Layer Cake you may also like these:

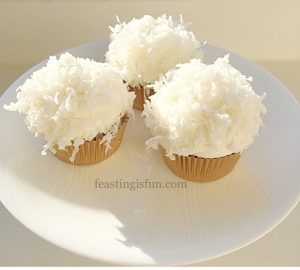
Coconut White Chocolate Snowball Cupcakes 

FF Coconut White Chocolate Snowball Cupcakes
Coconut White Chocolate Snowball Cupcakes

Iced Cherry Coconut Loaf Cake 

FF Iced Cherry Coconut Loaf Cake
Iced Cherry Coconut Loaf Cake

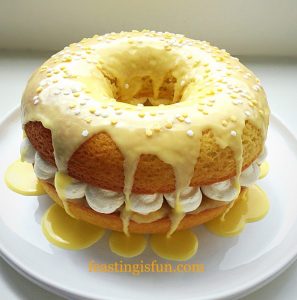
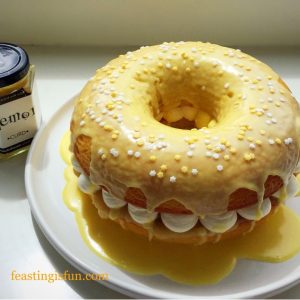
Lemon Drizzle Whipped Cream Filled Giant Doughnut

FF Lemon Coconut Sponge Layer Cake
Lemon Drizzle Whipped Cream Filled Giant Doughnut

Finally, should you want to indulge your love of lemon recipes further, why not visit Pinterest at Sammie | Feasting Is Fun.  All of my recipes are easy to find on one board and I also have one board dedicated to Lemon Love. Whether sweet or savoury, lemon is an ingredient I am never without in my kitchen. And from coleslaw to cakes, there are a myriad of recipes using lemon to inspire you.

So whatever you are making, baking and creating in your kitchens, have fun preparing your feast.

Sammie xx

No part of this post may be reproduced or replicated without the written consent of the owner. Please see my Disclosure Policy.

Share
Facebooktwitterpinterestlinkedintumblr

Raspberry Vanilla Naked Celebration Cake

Share
Facebooktwitterpinterestlinkedintumblr

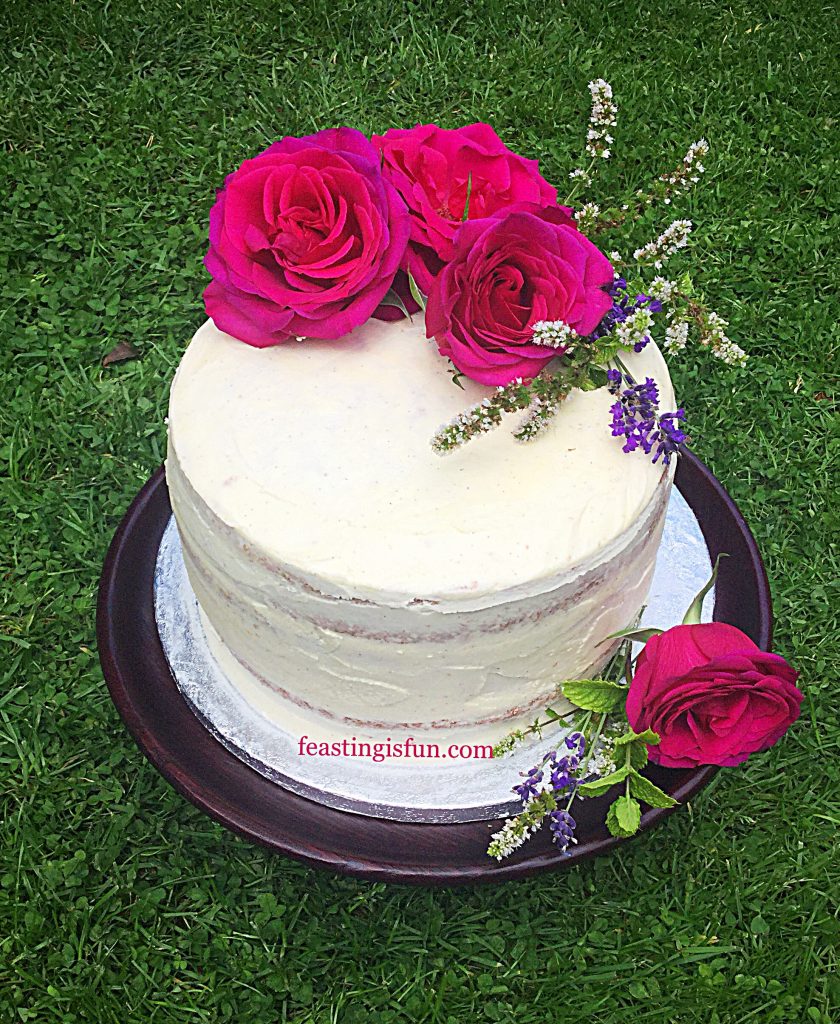
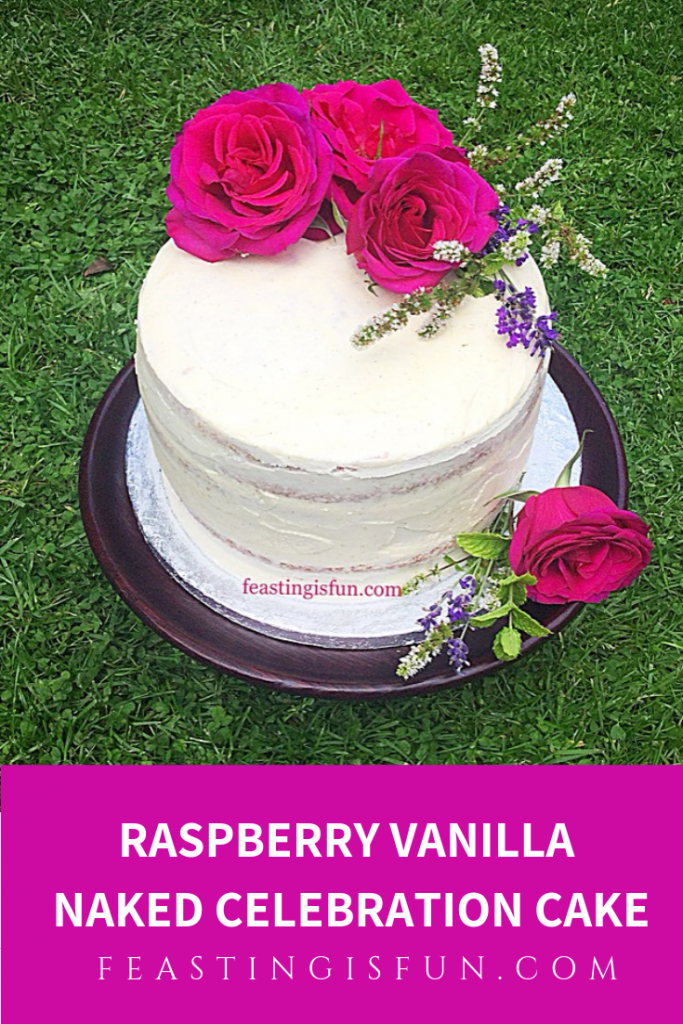
Someone once said “A celebration without cake is just a meeting.” How right they were. Whether it is birthdays, weddings, christenings, or any other form of celebration, cakes almost always feature.  Hawkshead Relish recently won Small Business Of The Year 2017. After reviewing and using their delicious jams, chutneys and more recently spreads, I am absolutely thrilled for them. To celebrate their award I offered to make a cake featuring their best selling Raspberry and Vanilla Jam. Here is the Raspberry Vanilla Naked Celebration Cake made in celebration of such an amazing achievement.

FF Raspberry Vanilla Naked Celebration Cake
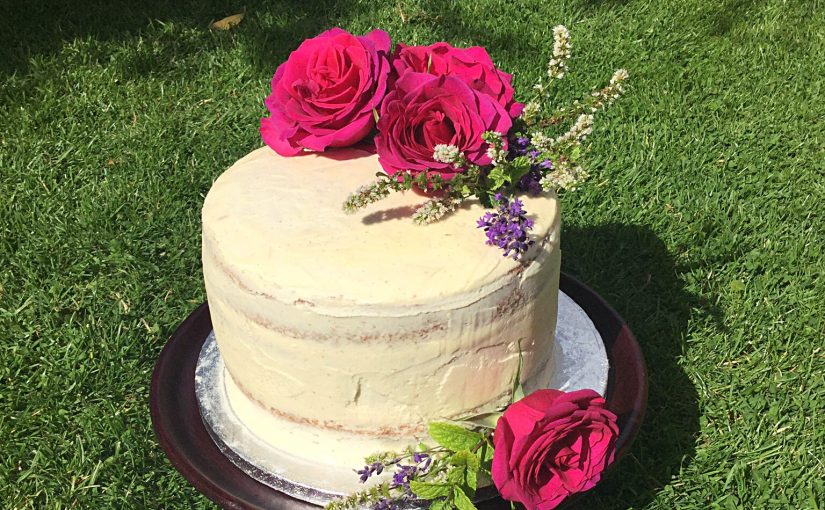
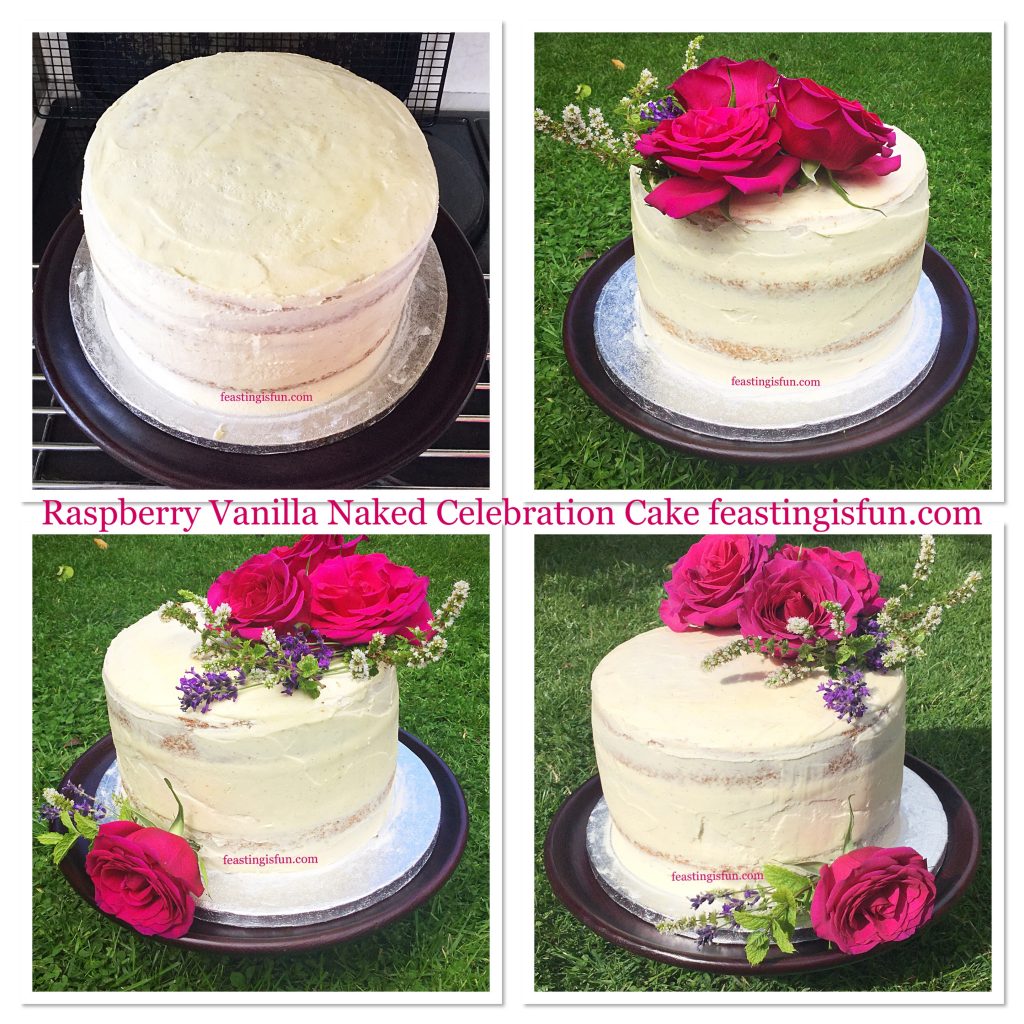
Raspberry Vanilla Naked Celebration Cake.

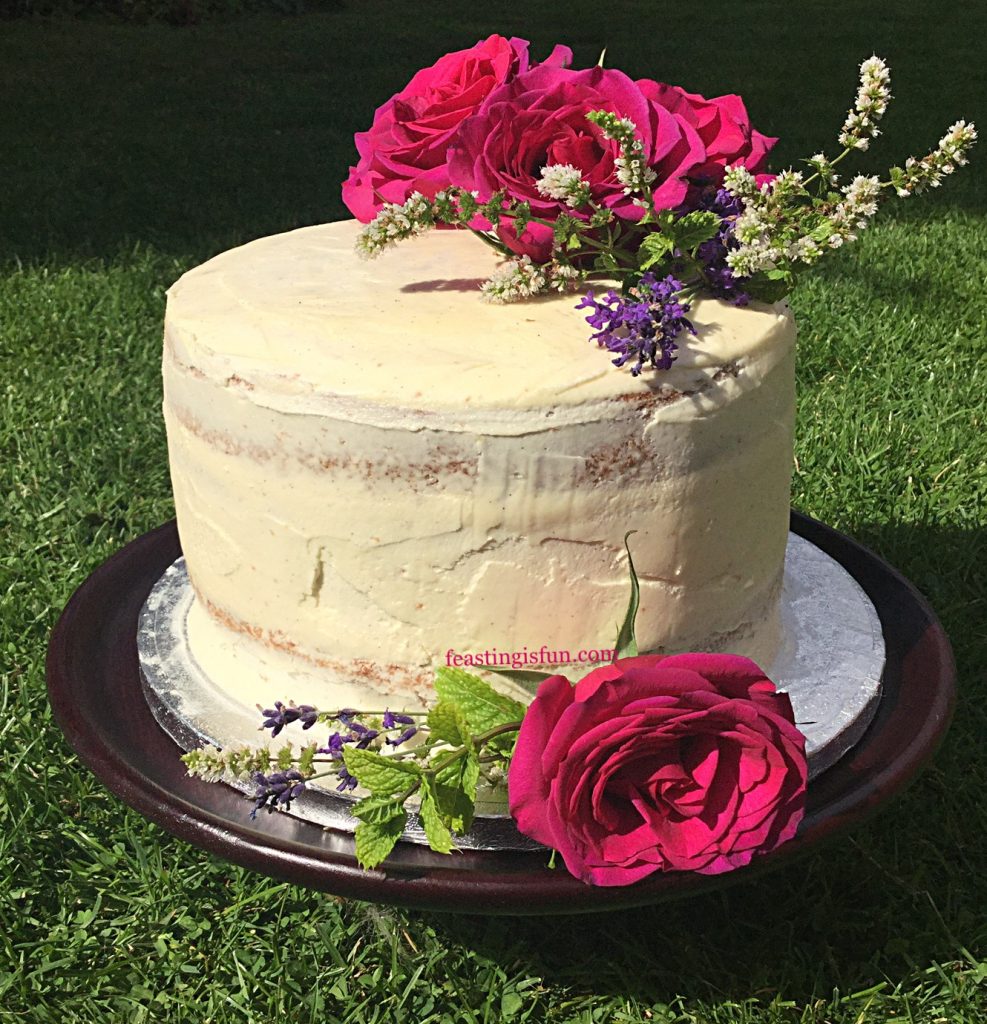
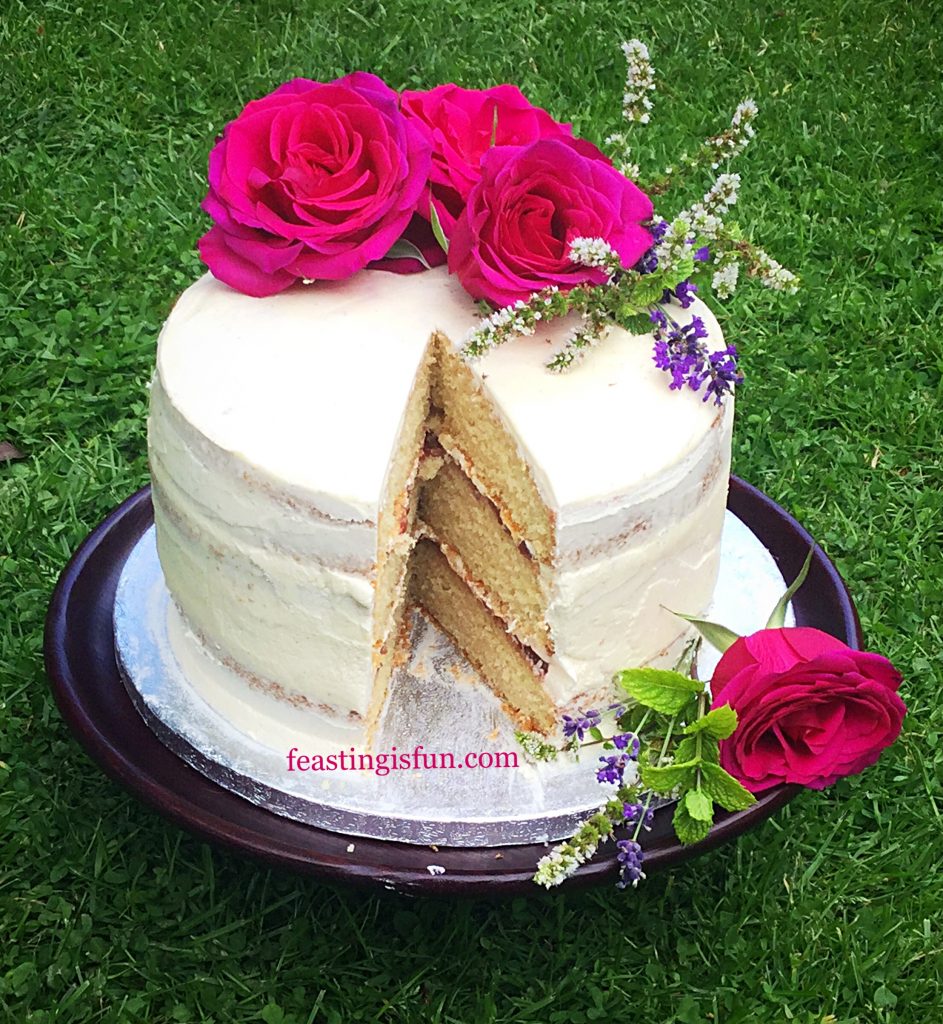
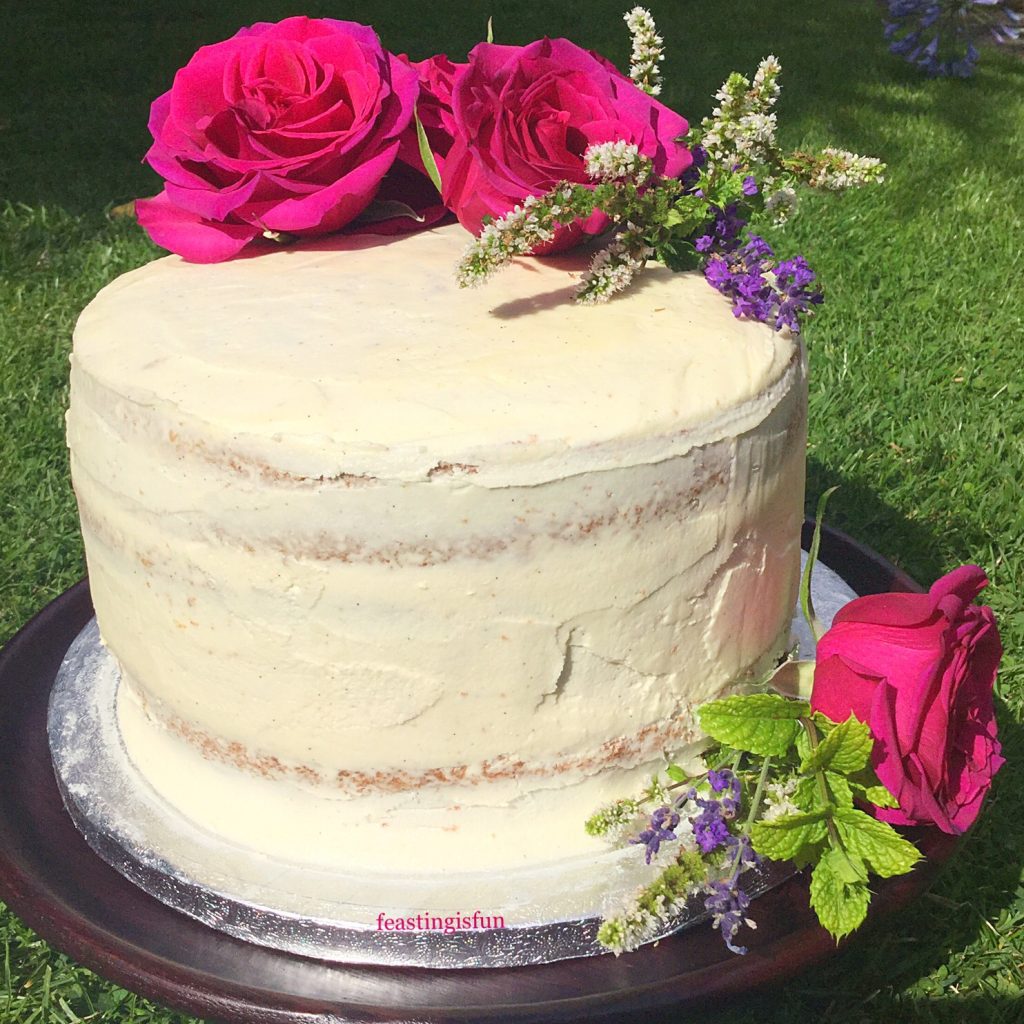
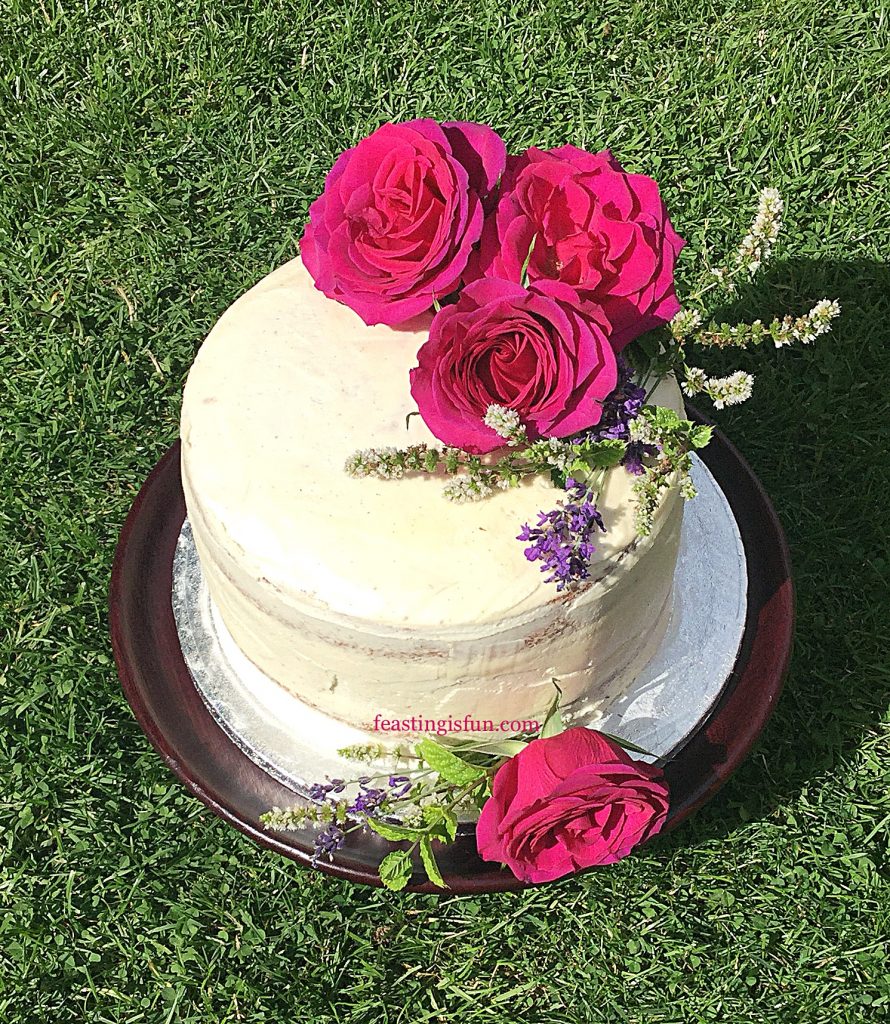
Three layers of light, vanilla sponge, sandwiched together with vanilla bean buttercream and raspberry vanilla jam. Covered lightly, yet incompletely with the same buttercream. Most of all, giving a very ‘on trend’ semi-naked finish to the cake. Finished with edible garden flowers, from my garden, that reflect the geographic location of Hawkshead Relish, situated in the historic village of Hawkshead within the English Lake District.

FF Raspberry Vanilla Naked Celebration Cake
Raspberry Vanilla Naked Celebration Cake in the sunshine.

Embellish with relish

Using locally sourced ingredients Hawkshead Relish do not use any artificial additives or preservatives. Completely free from nuts, their range is also suitable for vegetarians. Holding 50 Great Taste awards, each product is made in small batches using traditional methods. Resulting in outstanding taste and quality, from a family run business.

FF Raspberry Vanilla Naked Celebration Cake
Raspberry Vanilla Naked Celebration Cake layered with buttercream and the very best jam.

Using the Hawkshead Relish motto “Embellish with Relish,” I’ve enjoyed creating recipes using their products. Especially when including them as ingredients in their own right. When creating my Red Onion Sausage Plait, using their Red Onion Marmalade is a vital to the flavour of the finished bake. So unique are the flavours of their chutneys and sauces, they deserve more than to be spooned on to the side of a plate. Since including relish within recipes, a whole world of flavour combinations became unlocked.

Recipe: Raspberry Vanilla Naked Celebration Cake serves 14-16

  • To make the 3 cake sponges:
  • 275g/10oz Unsalted Butter + 100g/4oz both at room temperature
  • 275g/10oz Caster Sugar + 100g/4oz
  • 3tsp Vanilla Extract – I use Nielsen-Massey
  • 1/4tsp + 1/8tsp Sea Salt  – I use Maldon
  • 6 Large Free Range Eggs + an additional 3
  • 275g/10oz Plain White Flour + 100g/4oz
  • 2.5tsp Baking Powder + 1tsp
  • To make the buttercream:
  • 500g/12oz Icing Sugar
  • 250g/9oz Unsalted Butter softened to room temperature
  • 2tsp Vanilla Bean Paste
  • 2  Jars Raspberry and Vanilla Jam from – Hawkshead Relish
  • 2-3tbsp Very Hot Water from a recently boiled kettle
  • To decorate the cake:
  • A selection of organic, pesticide free edible flowers. Both mint and lavender flowers were sourced from our garden.

Method: Preheat the oven to 160C/140C fan, gas mark 3, 325F

Making and baking the cake:

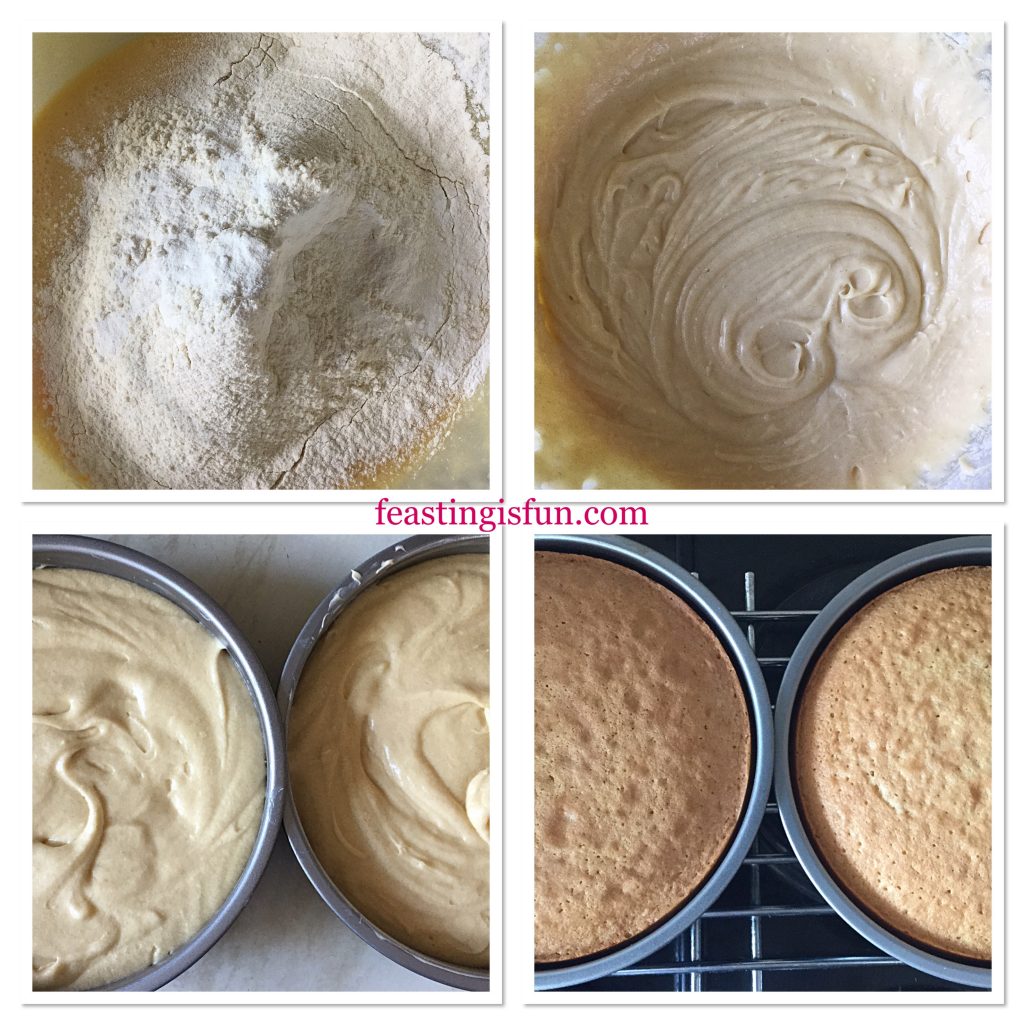
You will need 3 x 18cm/7″ approx 7cm/2.5″ deep, loose bottom sponge tins. Since most people own only 2 tins, this method is written with that taken into account. Therefore, two separate bakes are included. First of all, making the batter and baking two sponges. Followed by making the batter and baking one sponge. Finally, if you own and have oven space for three sponges to be made and baked together, simply follow the steps, using the total ingredients.

  • First of all, lightly butter the baking tins. Cover the base in baking parchment.
  • Into a large bowl add the first amount of sugar, butter and salt.
  • Whisk together until pale and creamy.
  • Next add 2 teaspoons of vanilla extract and 6 whole eggs.
  • Whisk everything together until combined.
  • Follow by sieving in the flour and baking powder.
  • Whisk the ingredients together until combined. Always take care not to over beat, or the resulting cake will be tough.
  • Divide the cake batter equally between 2 greased and lined tins. If using the entire mix divide between 3 tins.
  • Place the tins in the top and centre of the oven and bake for 40-45 minutes.
FF Raspberry Vanilla Naked Celebration Cake
Preparing and baking the cake sponges.
  • When they have turned golden brown and spring back from a light touch the cakes are fully baked.
  • Remove from the oven, allowing each cake to cool in the tin for 10 minutes before turning out on to a cooling rack.
  • Wash up one cake tin and follow the steps given to make a single sponge cake.
  • Make and bake as before. Each of the 3 sponges must be fully cooled before icing.

Building The Raspberry Vanilla Naked Celebration Cake:

During the cake icing process, chilling of the iced cake in a fridge is required. Therefore a cake board, or flat plate is needed for transferring the cake. Also a cake decorating turntable is helpful for ensuring a smooth even finish to the buttercream. Alternatively use a cake stand large enough to accommodate the cake board/plate. A palette knife and large piping bag are also required.

Making the vanilla buttercream:

  • Into a large bowl add the softened butter and vanilla bean paste.
  • Sieve the icing sugar into the same bowl.
  • Add 2 tablespoons of very hot water from the kettle and start whisking the ingredients on a low speed.
  • Continue whisking until the buttercream has turned very pale and has a light, creamy consistency.
  • Place the cake board on to the cake stand.
  • Next, put a small dollop of buttercream on to the centre of the board. Spread the icing so that it is slightly smaller than the diameter of a cake sponge.
  • Lay the first sponge, flat side uppermost on to the board. The buttercream anchors the cake to the board, providing a stable base.
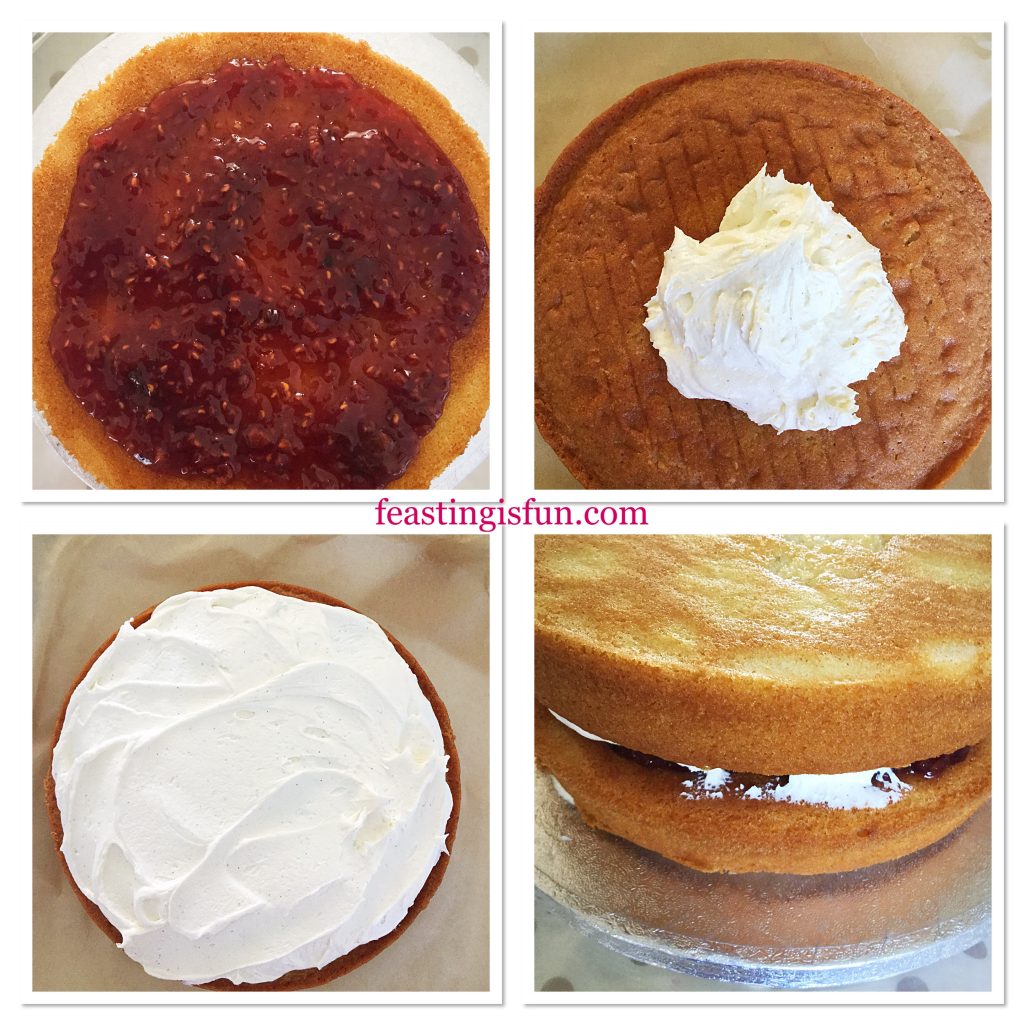
  • Spread 4 generous tablespoons of jam on to the cake. Leave a 2cm gap between the jam and the edge of the cake.
  • Next, take a separate sponge and add a generous dollop/4tbsp of buttercream to the top.
  • Using a palette knife, spread the buttercream evenly so that it covers the sponge.
  • Carefully lift and flip the sponge, placing it on top of the jam sponge, buttercream side facing down. See the photos below for guidance.
FF Raspberry Vanilla Naked Celebration Cake
Layering each sponge with jam and buttercream.
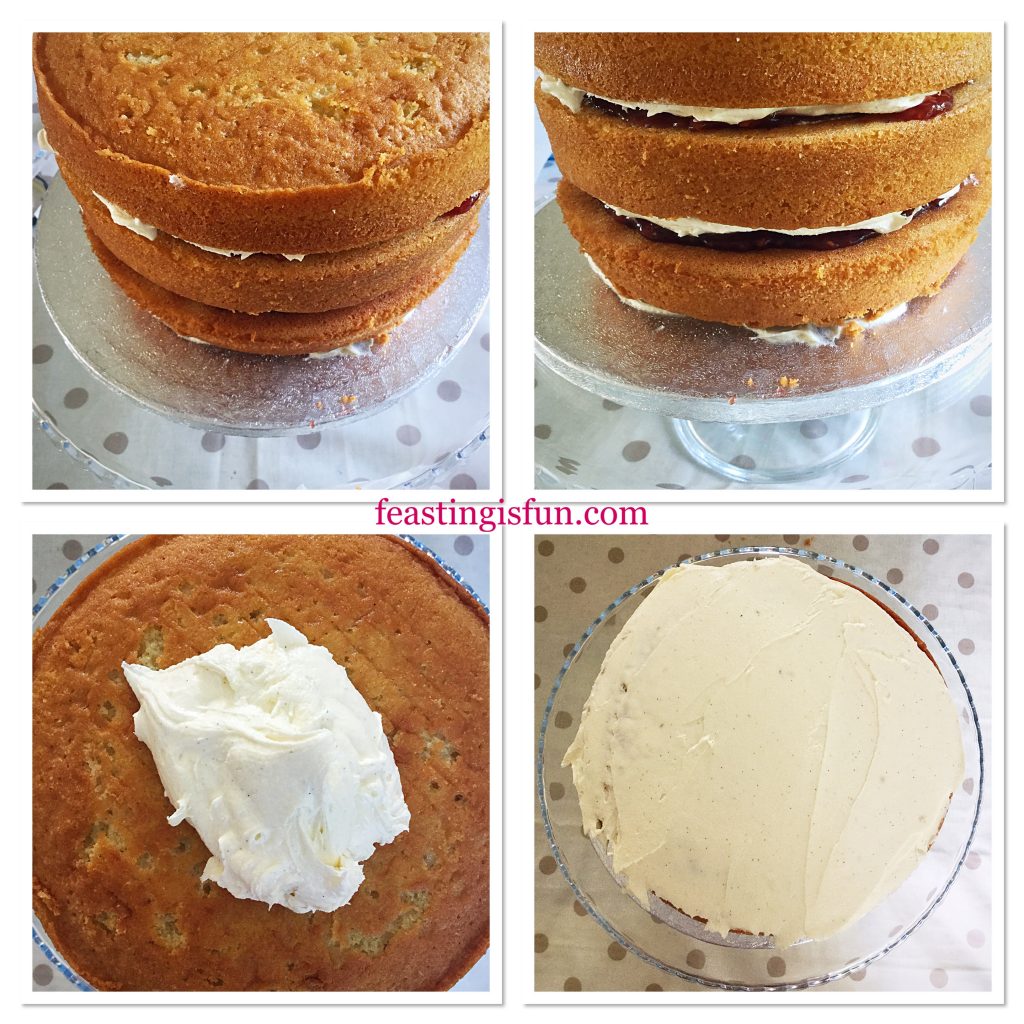
  • Repeat the last steps, with the remaining sponge. However, this time the sponge should be placed flat side down. Hence leaving the finished, stacked cake with a natural top.
FF Raspberry Vanilla Naked Celebration Cake
3 sponge cake layers stacked. Also covering the top in buttercream.

Creating a (semi) naked effect:

  • Spoon a generous amount/5tbsp of buttercream on to the top of the cake.
  • Again, using a palette knife, spread the buttercream so that it covers the top of the cake evenly.
  • Fill a large, disposable piping bag with the remaining buttercream. Snip the end of the bag to give a 1cm opening. A nozzle is not required.
Covering the side of the cake with buttercream.
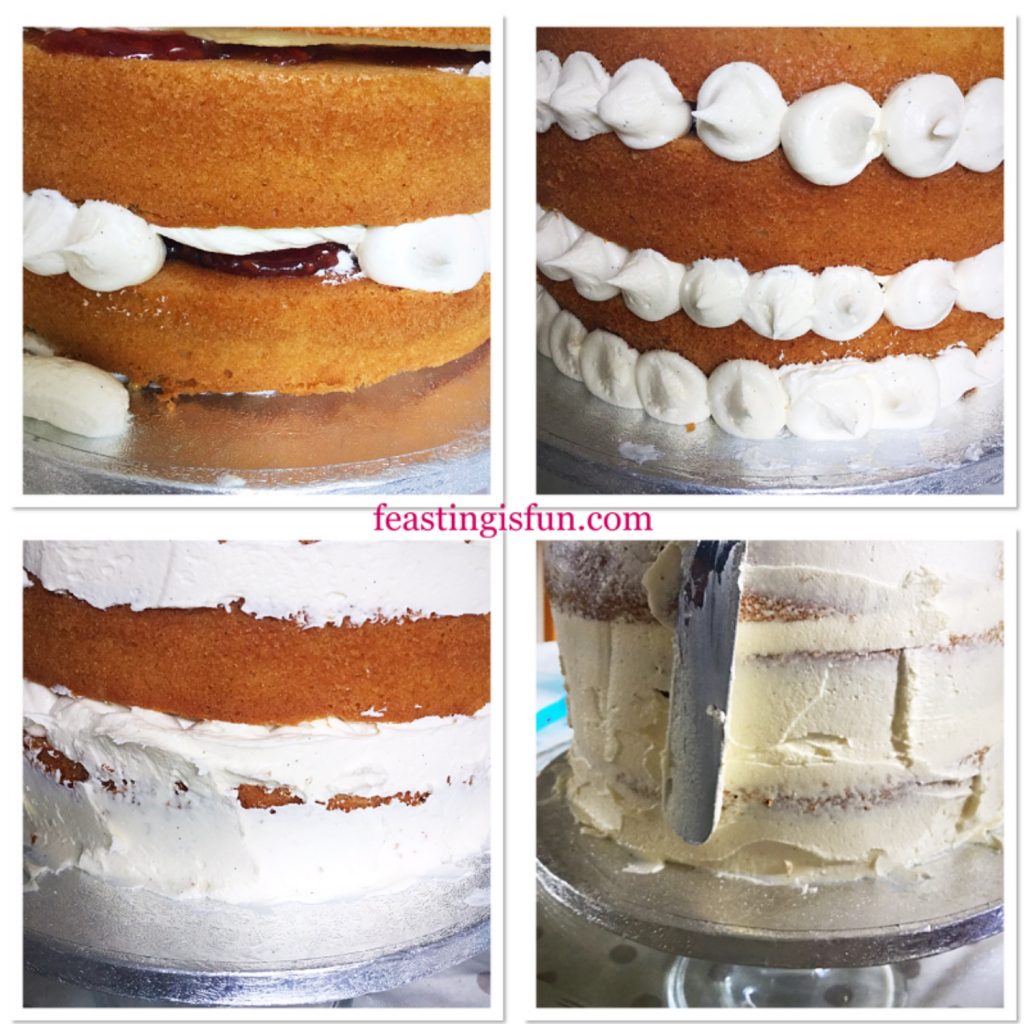
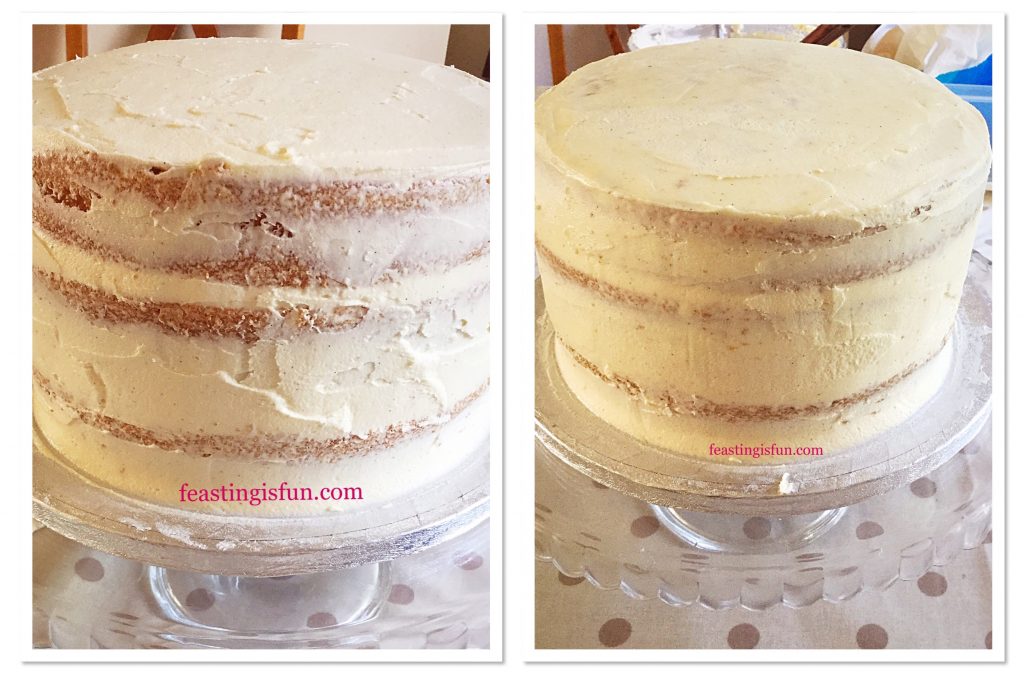
  • The purpose of piping buttercream is to fill in any gaps. Similar to plastering, buttercream is added and then smoothed on to the cake sides. During this process buttercream will be added and then taken off. Resulting in a ‘naked cake’ finish.
  • Pipe the buttercream in between each layer of the cake, including the base and the cake board. Take care not to get jam mixed with the buttercream.
  • Holding a palette knife at a slight angle to the side of the cake, slowly turn the cake stand. As the buttercream spreads across the cake it will also accumulate on the palette knife. Scrape the palette knife against the side of the butter bowl to remove any excess.
  • Continue turning the cake, piping buttercream on to any bare spots, until the sides of the cake are roughly covered. See bottom left photo above.

Creating a smooth finish:

  • The next stage is creating a smooth, even finish across the entire cake.
  • Fill a jug with very hot water. Wipe any buttercream from the palette knife and then place it in the hot water. Since the heat of the knife melts buttercream, it is very helpful in creating the smoothest finish.
  • Remove the palette knife, wipe off any water and then hold it flat against the side of the cake. Rotate the cake slowly. When you start to feel a dragging sensation, turn the knife over and repeat. Creating a completely smooth cake requires a lot of repetition of these steps. Repeat until the sides of the cake are smooth.
  • Now use the same technique for smoothing the cake top. As soon as the cake top is smooth, run a hot palette knife around the outside of the top cake layer. Creating a smooth top and sides is the aim.
  • While it is tempting to keep going, there does come a point at which the cake is satisfactorily smoothed. Part of the beauty of naked cakes, is their imperfect finish.
  • Clean off any buttercream on the cake board.
FF Raspberry Vanilla Naked Celebration Cake
Raspberry Vanilla Naked Celebration Cake before and after smoothing with a hot palette knife.
  • Chill the cake, uncovered, in the fridge for an hour. Chilling sets the buttercream prior to decorating.

Decorating the cake using fresh, edible flowers:

  • If using fresh flowers it is important to decorate the cake on the day it is to be served.
  • While the cake is chilling prepare the flowers for decoration. Remove lower leaves on stalks and trim flowers so that they can sit on top, or to the side of the cake.
  • Decorate using your chosen flowers. It is important to consider the cake from every angle when adding the flowers.
FF Raspberry Vanilla Naked Celebration Cake
Roses and herbs reflect the rural and natural products made by Hawkshead Relish.

Finally the Raspberry Vanilla Naked Celebration Cake is ready to be served.

FF Raspberry Vanilla Naked Celebration Cake
Raspberry Vanilla Naked Celebration Cake.

Store any leftover cake, floral decorations removed, in an airtight container, ideally refrigerated and eat within 3 days.

FF Raspberry Vanilla Cake Decorated With Fresh Flowers

If you have enjoyed this Raspberry Vanilla Naked Celebration Cake recipe, you may also like these:

Lemon Drizzle Whipped Cream Filled Giant Doughnut

Lemon Drizzle Whipped Cream Filled Giant Doughnut

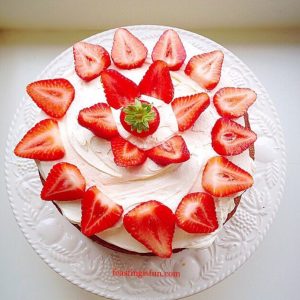
Strawberries And Cream Cake

Strawberries and cream sponge cake
Strawberries And Cream Cake

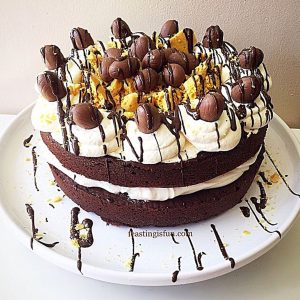
Chocolate Honeycomb Sponge Cake 

Chocolate honeycomb sponge cake decorated with milk chocolate Lindt mini eggs.
Chocolate Honeycomb Sponge Cake

Celebrating a event, such as Hawhead Relish’s achievement, with cake, marks the occasion as special. Also, other desserts such as cheesecakes and pavlova’s can make an impressive alternative. Especially as different dietary requirements may need catering for. All the Pavlova recipes created for Feasting is Fun are specifically gluten free, for that very reason. Because, including as many people as possible in a celebration is so important to me.

Whatever you are making, baking and creating in your kitchens, have fun creating your feast.

Sammie xx

Hawkhead Relish kindly gifted me the jam used in this recipe. All opinions, views, content including photography are my own. No part of this post may be reproduced without the express written permission of its owner. Please see my Disclosure Policy.

Share
Facebooktwitterpinterestlinkedintumblr

Strawberry Rose Ice Cream

Share
Facebooktwitterpinterestlinkedintumblr

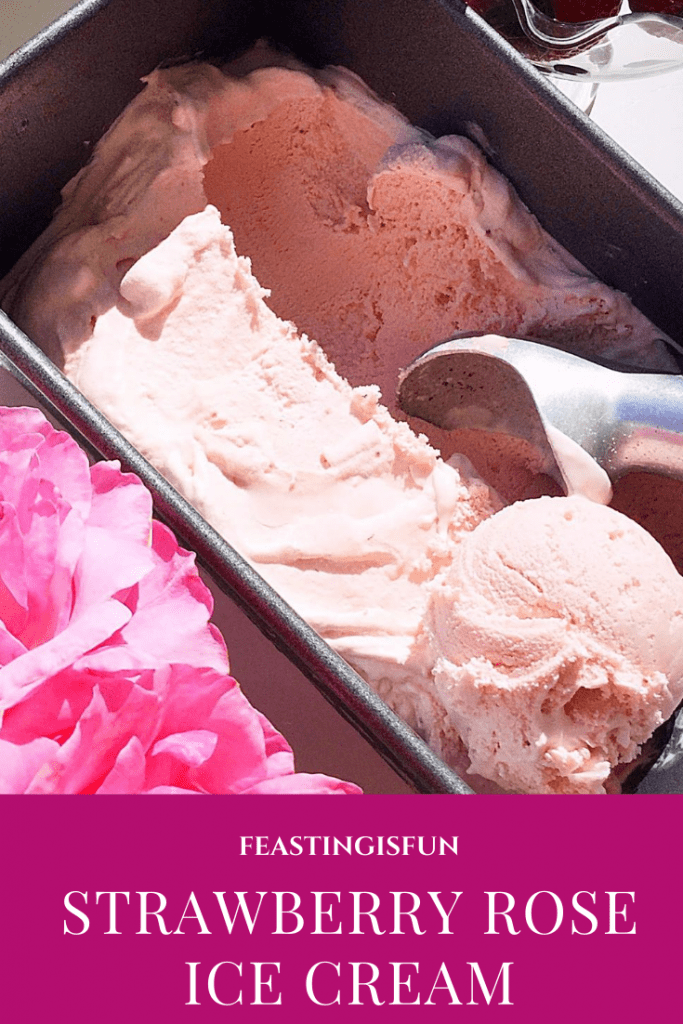
Strawberries are THE taste of Summer. While I love eating strawberries with a tiny sprinkle of sugar and splash of cream, or fresh from the plant warmed by the sun, I also wanted to make a beautiful ice cream with them. Except with a twist! Because summer, is also synonymous with roses blooming in our garden, I decided that would be the additional flavour to compliment the strawberries in this ice cream. And, the addition of rose extract elevates the final flavour to another level. One taste and you are transformed into a bygone era, where life seemed easier, simpler and slower. So, whatever you do this summer, don’t miss out on making this Strawberry Rose Ice Cream.

FF Strawberry Rose Ice Cream
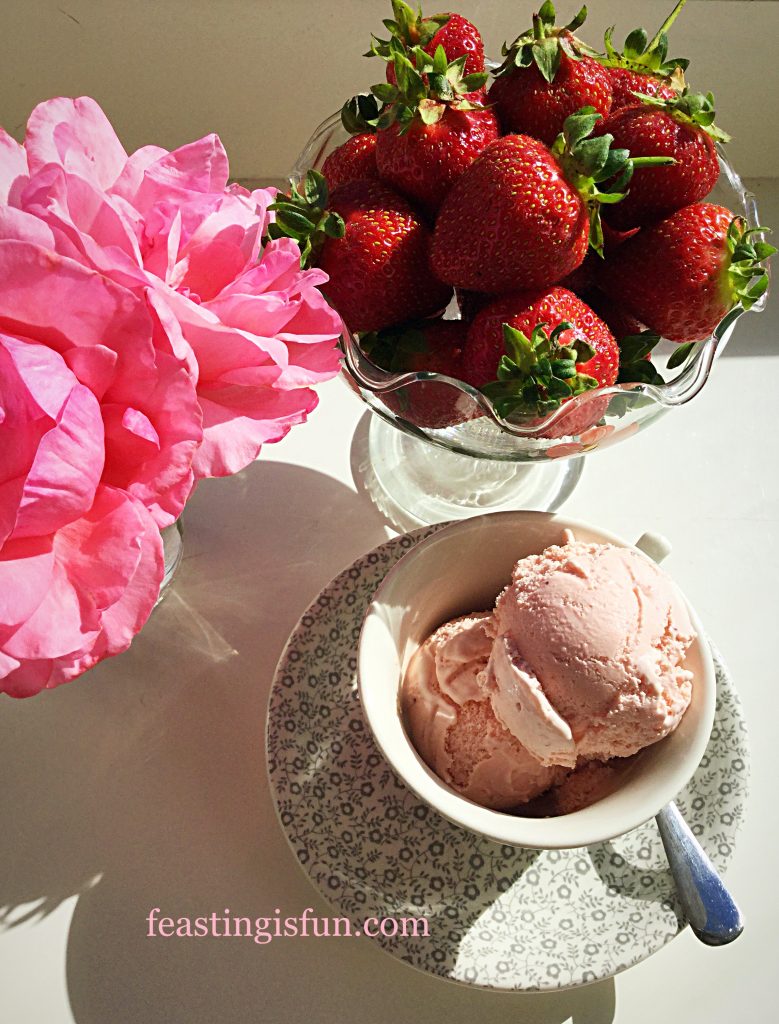
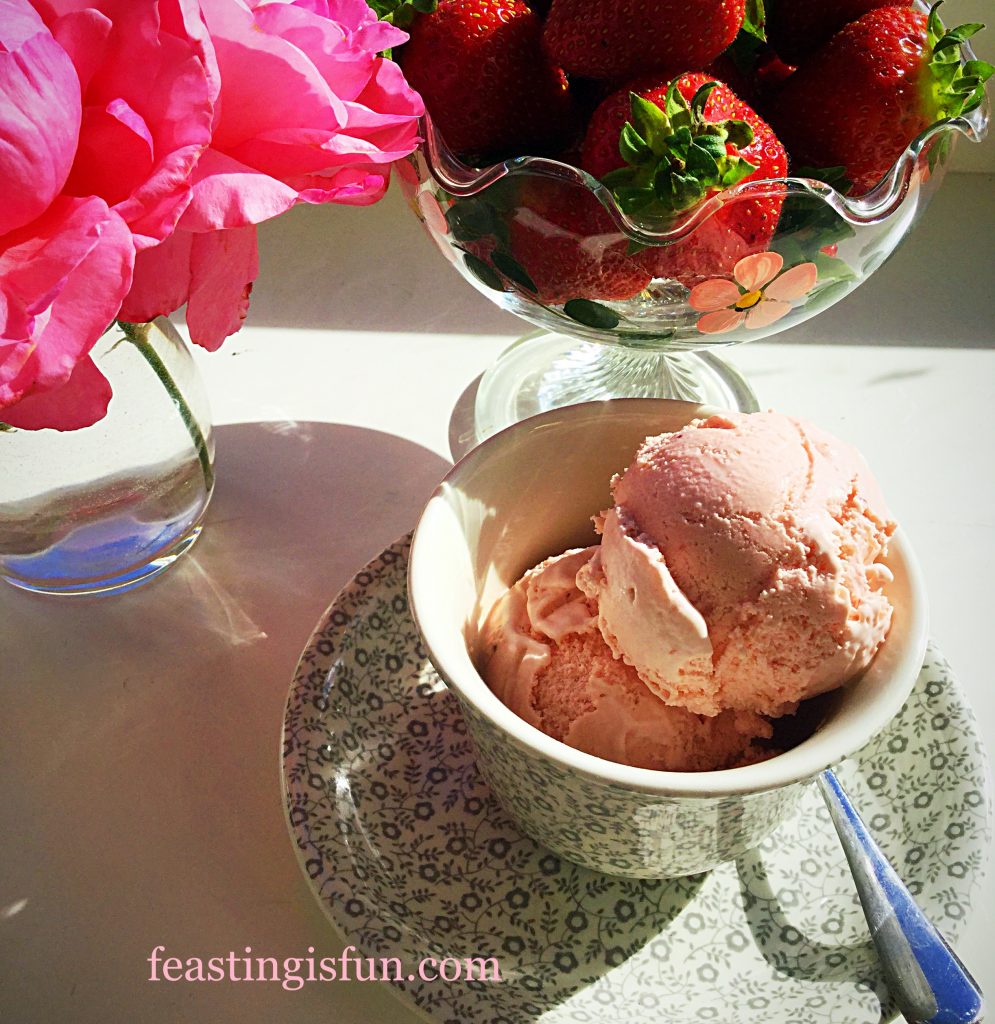
Strawberry Rose Ice Cream served in a tea cup.

A Summer Dessert Of Your Dreams

Removing all the pips are during the making of this dreamy dessert, ensures the ice cream has silky texture that lingers on the tongue. As both fresh strawberry and rose flavours meld together, they create a unique flavour experience. Likewise, this truly is a dream ice cream where the finished recipe is so much more than the addition of its component parts. Sieving the strawberries is very important in creating the smooth, finish.  And as this small, important step only takes a couple of minutes, it is worth it to ensure the final ice cream has the silky, smooth, texture.

FF Strawberry Rose Ice Cream
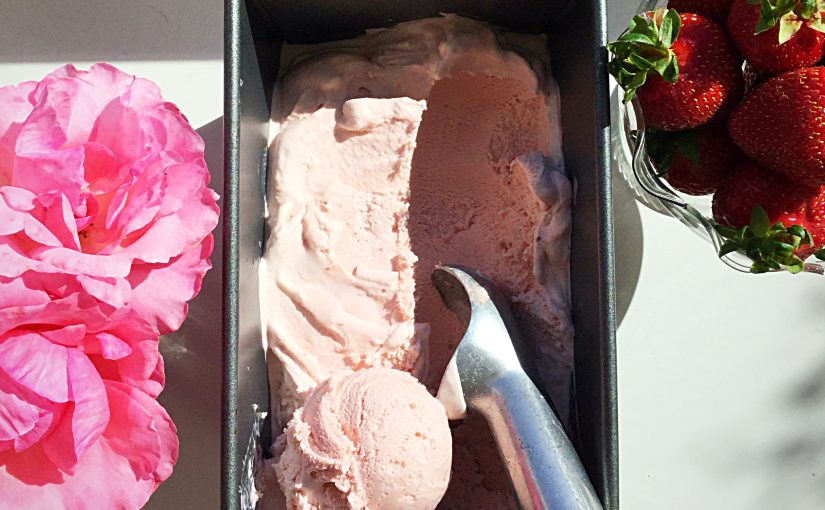
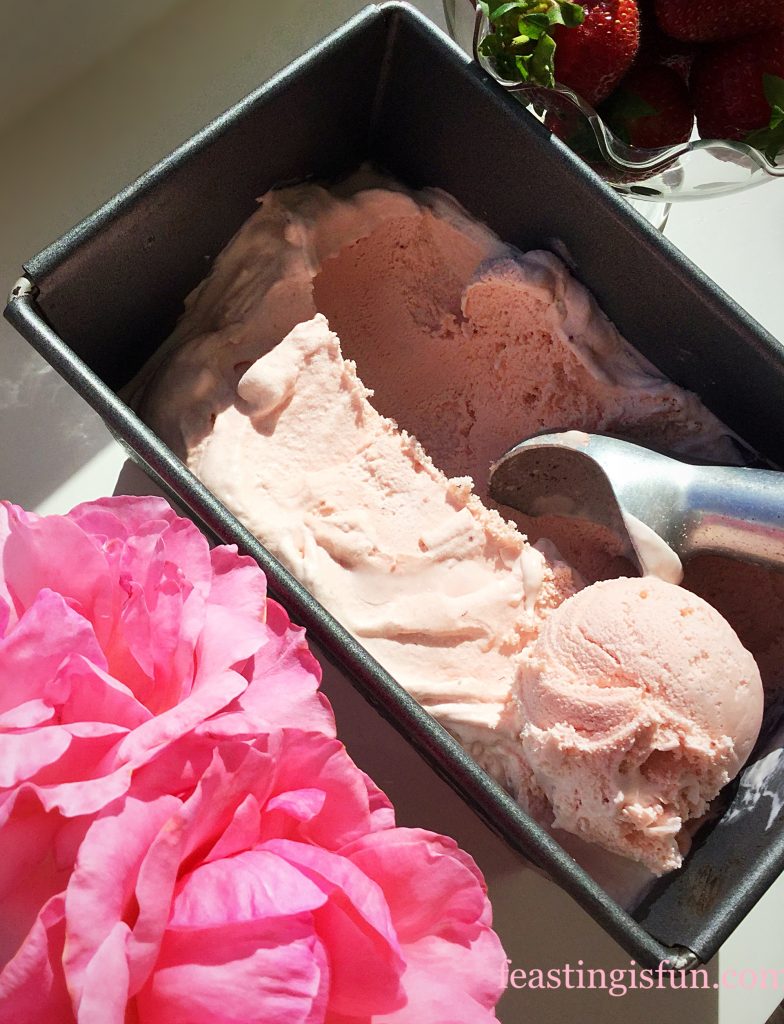
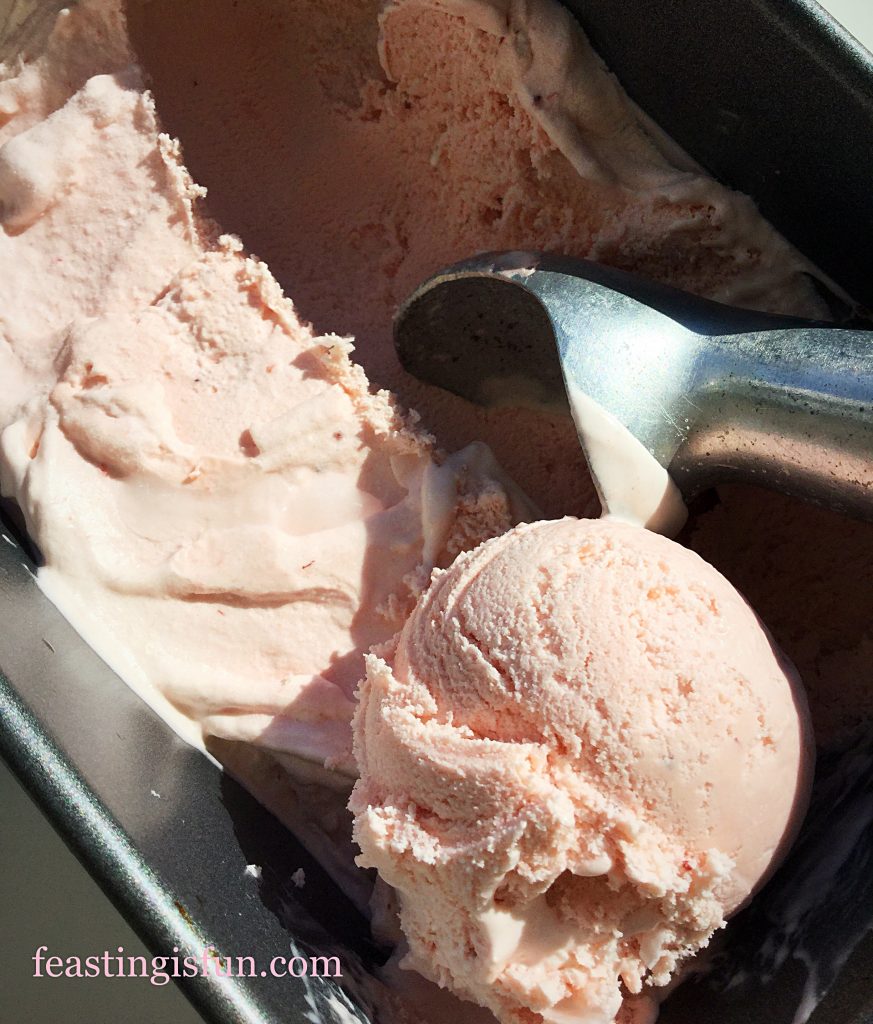
Strawberry Rose Ice Cream exceptionally easy to scoop.

Finally, this ice cream is the epitome of summer in a dessert. And as summer is the season when strawberries and roses are celebrated as being at their best, what better way to celebrate them. While all roses included in the pictures for this post, are from our own garden, I haven’t gone as far as to make my own Rose Extract. That process can safely be left in the hands of Nielsen-Massey , the professionals. Rather, the roses in the photos hint at their presence within the ice cream.

FF Strawberry Rose Ice Cream
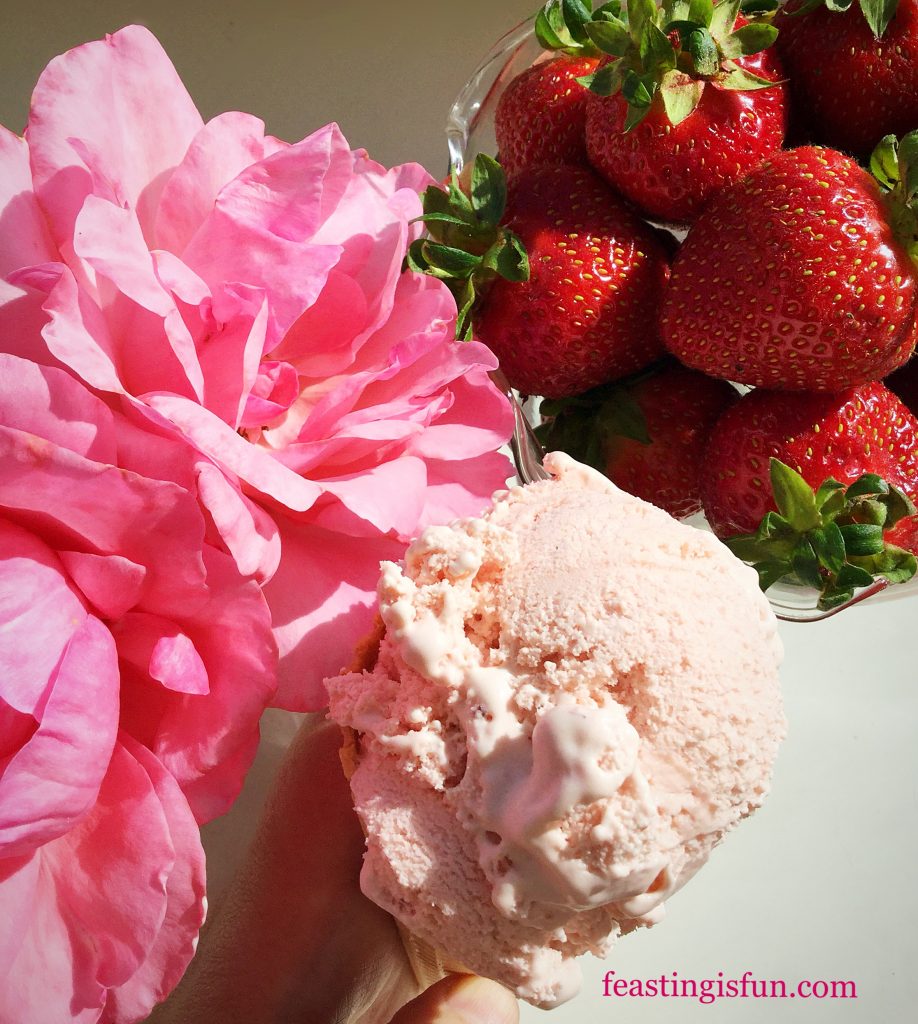
Strawberry Rose Ice Cream delicious in a cone.

Note: Prior to starting this recipe ensure that the frozen bowl of the ice cream maker is placed in the freezer overnight for at least 8 hours. Or as per manufacturer’s instructions.

Recipe: Strawberry Rose Ice Cream makes approx. 1L

400g Punnet of Strawberries hulled and larger ones cut in half

3tbsp Sugar

4tbsp Tap Water

Scant 1/4tsp Rose Extract- I use Nielsen-Massey

20-30mls Freshly Squeezed Lemon Juice

4 Large Free Range Egg Yolks

1tsp Cornflour – I use Doves Farm as this is guarenteed gluten free

5tbsp Caster Sugar

300mls Double Cream

300mls Whole Milk

1tsp Vanilla Extract

Method:

For full step by step instructions with photos on how to make the custard ice cream base, please see Very Vanilla Ice Cream.

Making The Strawberry Puree

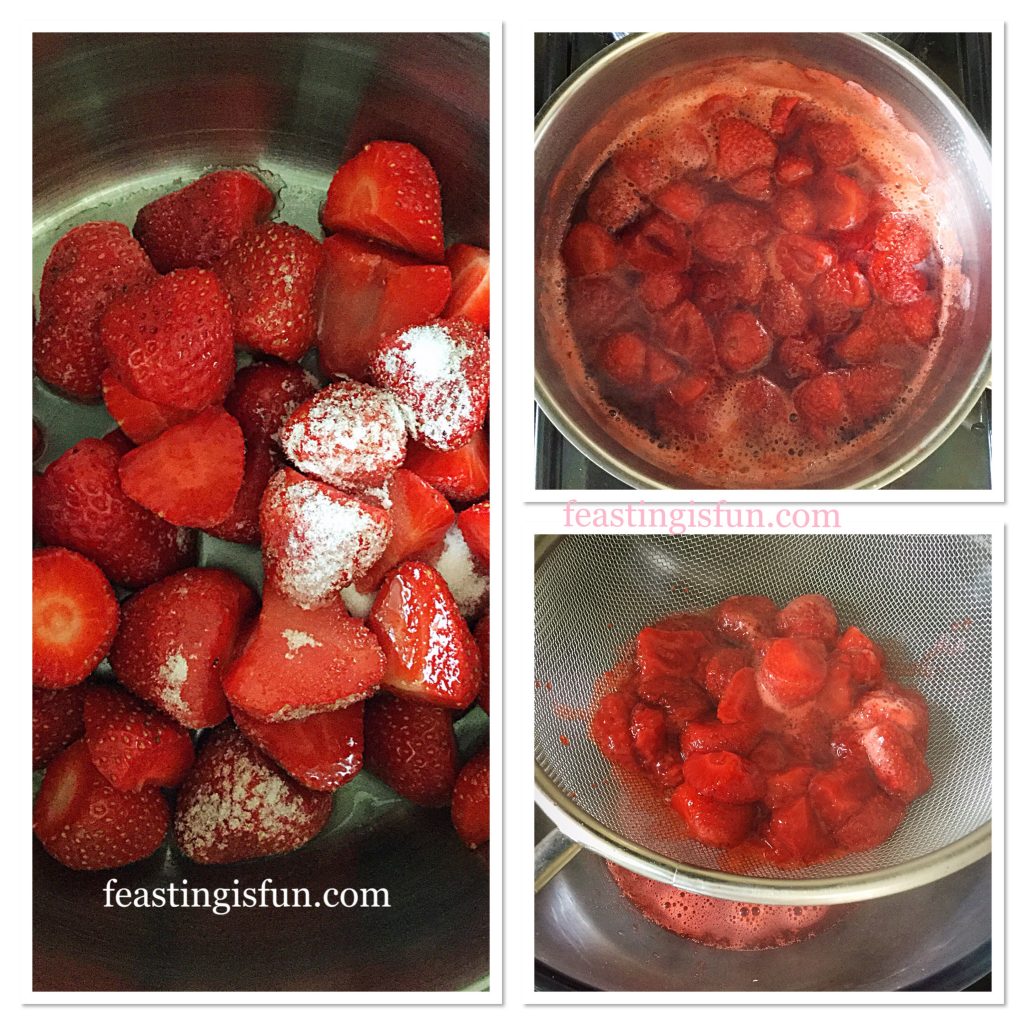
  • First of all place the prepared strawberries into a heavy bottom, medium sized saucepan. Sprinkle over 3 tablespoons of sugar and 4 tablespoons of tap water.
  • Place the pan over a medium heat and cook the strawberries until the liquid starts bubbling.
  • Swirl the pan to ensure that the sugar is dissolved and then let the strawberries cook for a further 5 minutes.
  • While the strawberries are cooking place a sieve over a heatproof bowl.
  • Once cooked pour the strawberries and liquid on to the sieve.
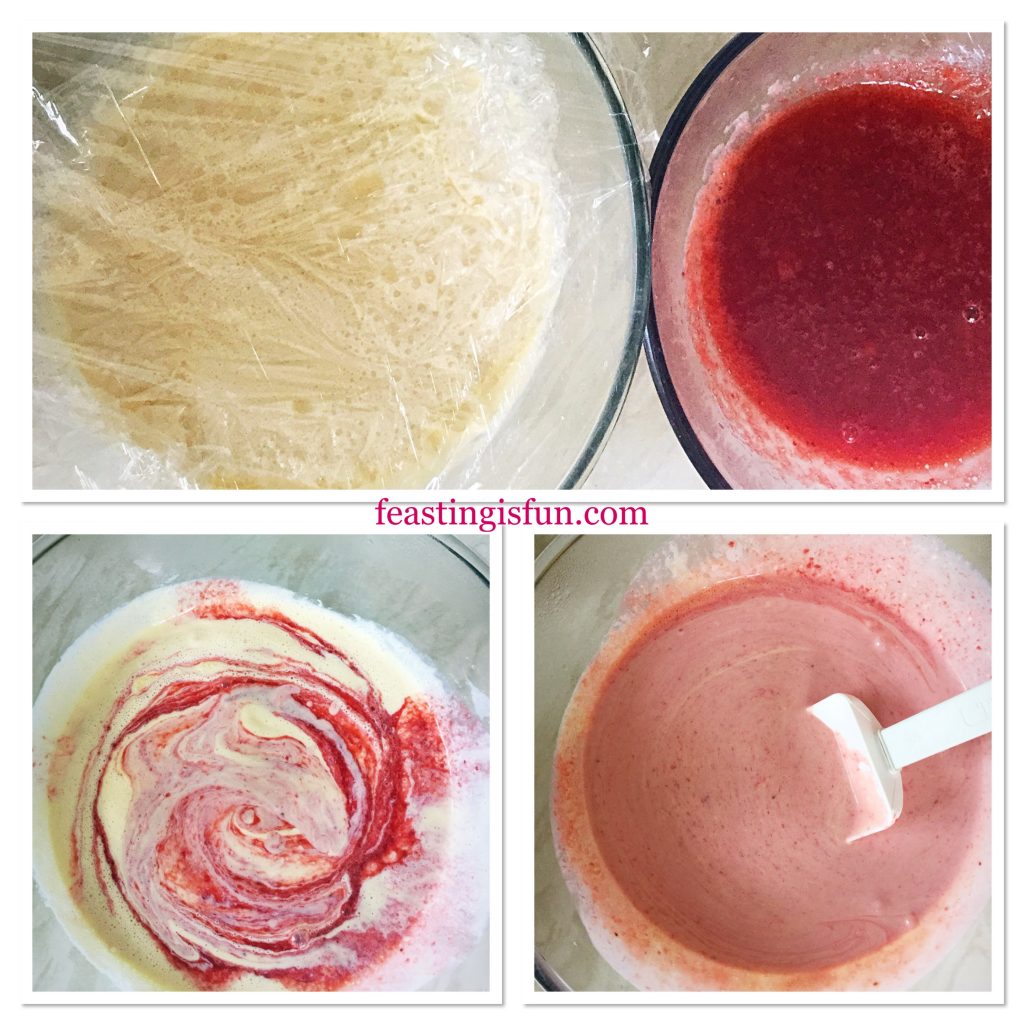
FF Strawberry Rose Ice Cream
Cooking and sieving the strawberries.
  • Use the back of a dessert spoon and gently press the strawberries into the sieve. The juices and flesh will pass through the sieve. Keep running the back of the spoon over the pulp until all that’s left are seeds and the remaining strawberry fibres.
  • Scrape the underneath of the sieve with a clean spoon. This ensures all of the strawberry that’s passed through the sieve goes into the bowl underneath.
  • Discard the seeds and pulp left in the sieve.
  • Cover the bowl with cling film and chill.
FF Strawberry Rose Ice Cream
Preparing the ice cream base prior to churning.

Making The Ice Cream Base

  • To make the ice cream base, first place the cream and milk into a heavy bottom saucepan over a medium heat. Heat to scalding point, where little bubbles form around the rim prior to boiling.
  • While the cream mix is heating place the egg yolks, cornflour, sugar and vanilla extract into a large heatproof bowl. Whisk together until thickened.
  • As soon as the milk and cream have reached scalding point remove from the heat.
  • With the whisk on slow gently pour the hot liquid into the egg mix, increasing the whisk speed to medium.
  • Pour the custard base back into the saucepan over a medium heat. Stir until the custard is thickened and coats the back of a wooden spoon.
  • Once cooked pour the custard through a sieve into a heatproof bowl.
  • Place cling film directly on to the custard to stop a skin from forming.
  • Leave the custard to cool before placing in the fridge to chill.
  • Once the strawberry juice has cooled add the Rose extract. Take care not to add more than the recipe indicates, as the finished result will taste soapy. Also add the juice of a small lemon 20-30mls and stir.
  • As soon as the custard base is chilled, remove the cling film and add the strawberry mix, then stir.

Churning And Freezing The Strawberry Rose Ice Cream

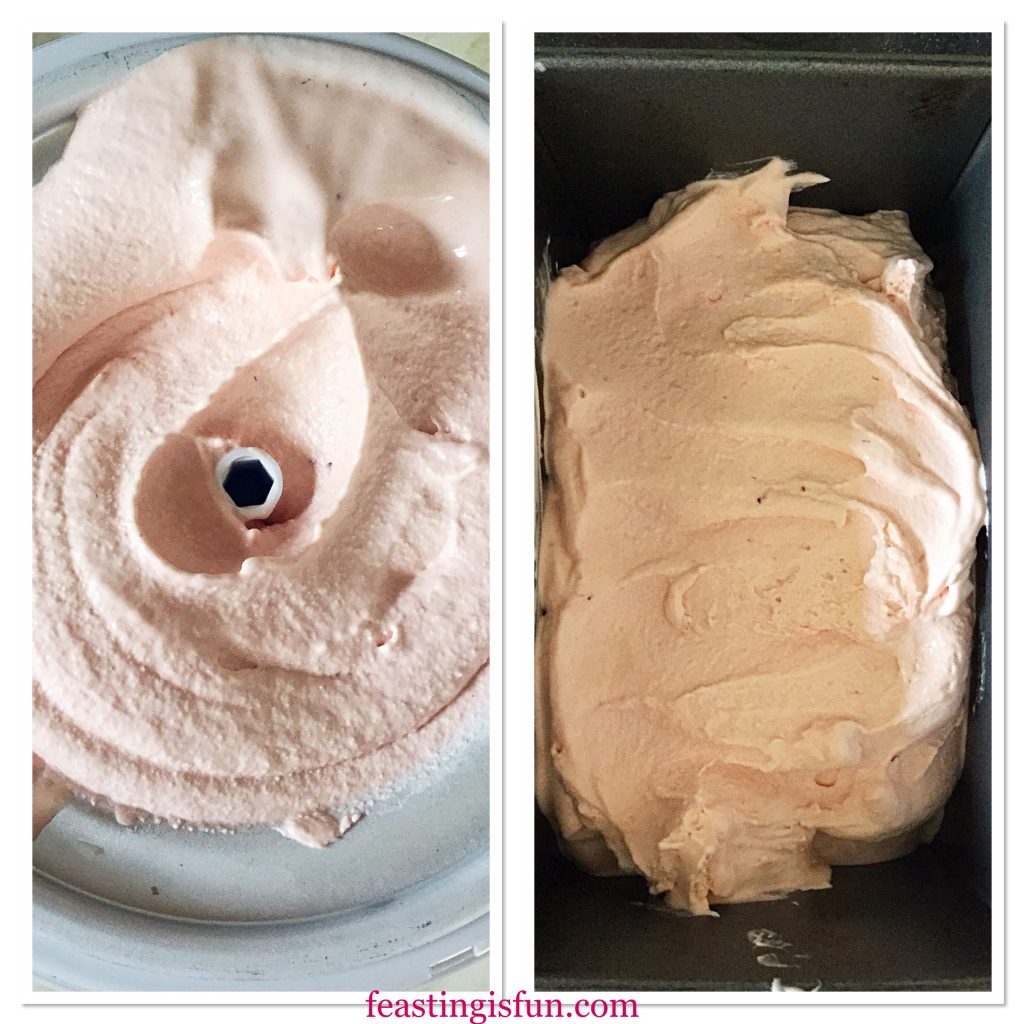
FF Strawberry Rose Ice Cream
Churning and storing the Strawberry Rose Ice Cream
  • Set up the ice cream maker as per manufacturer’s instructions.
  • With the machine switched on pour in the flavoured custard base and churn until softly frozen. Similar in consistency to whipped ice cream in a cone.
  • When the right consistency has been reached switch off the ice cream maker and dismantle.
  • Spoon the churned ice cream into a freezer proof container with an airtight lid. I used a clean loaf tin to store the ice cream. This was purely for the photos, having seen similar images on Pinterest! The tin was then double wrapped in freezer proof cling film.
  • Place the container into the freezer and leave overnight, or for at least 12 hours, to allow the ice cream to fully freeze.
  • To serve, remove the ice cream from the freezer 10-20 minutes prior. As there are no artificial, only natural selection ingredients, this allows the ice cream to soften, so that it can be easily scooped.
FF Strawberry Rose Ice Cream
Strawberry Rose Ice Cream

So easy to scoop!

FF Strawberry Rose Ice Cream
Strawberry Rose Ice Cream served as dessert in a tea cup.

Serve in tea cups for dessert or afternoon tea. Likewise, scoop into cones for a delicious fun treat. Also, by using a certified gluten free cornflour, the ice cream is naturally gluten free.

If you have enjoyed this recipe for Strawberry Rose Ice Cream you may also like these:

Amaretto Creamy Ice Cream

Amaretto Creamy Ice Cream

Lemon Ripple Ice Cream

Lemon Ripple Ice Cream

Triple Chocolate Chunk Ice Cream

Triple Chocolate Chunk Ice Cream

Making ice cream at home, is such a creative and fun process. As you  choose flavour combinations the possibilities become endless. Also by only using certain ingredients, homemade ice cream can easily be made gluten free. Finally, I would not be without an ice cream maker now, using it to make countless different flavours.

Whatever you are making, baking and creating in your kitchens, have fun!

Sammie xx

Please note that no part of this post may be reproduced or replicated without the specific, written permission of the owner. Please see my Disclosure Policy.


Share
Facebooktwitterpinterestlinkedintumblr

Almond Topped Cherry Scones

Share
Facebooktwitterpinterestlinkedintumblr

Almond Topped Cherry Scones plus a review of Andrew James Stainless Steel Set of 5 Bowls with Airtight Lids.

Summer is truly here. Sunshine, Wimbledon, Strawberries and Scones. Except  for today, as it is raining, a welcome relief for the garden. Today I bring you not strawberries, but another seasonal summer treat, cherries. Stunning, deep ruby red jewels, that hang like earrings from the tree. Preserved as glacé cherries meaning these Almond Topped Cherry Scones can be made any time of the year.

FF Almond Topped Cherry Scones
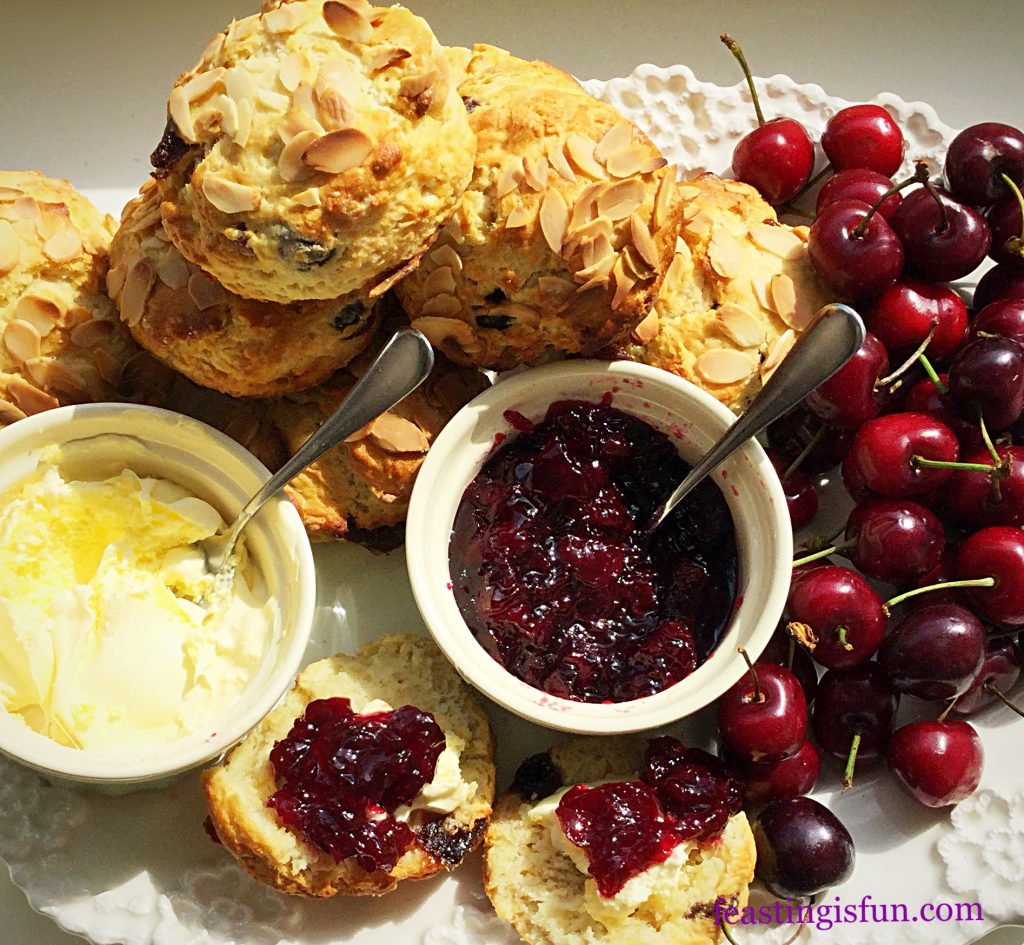
Almond Topped Cherry Scones a classic flavour pairing.

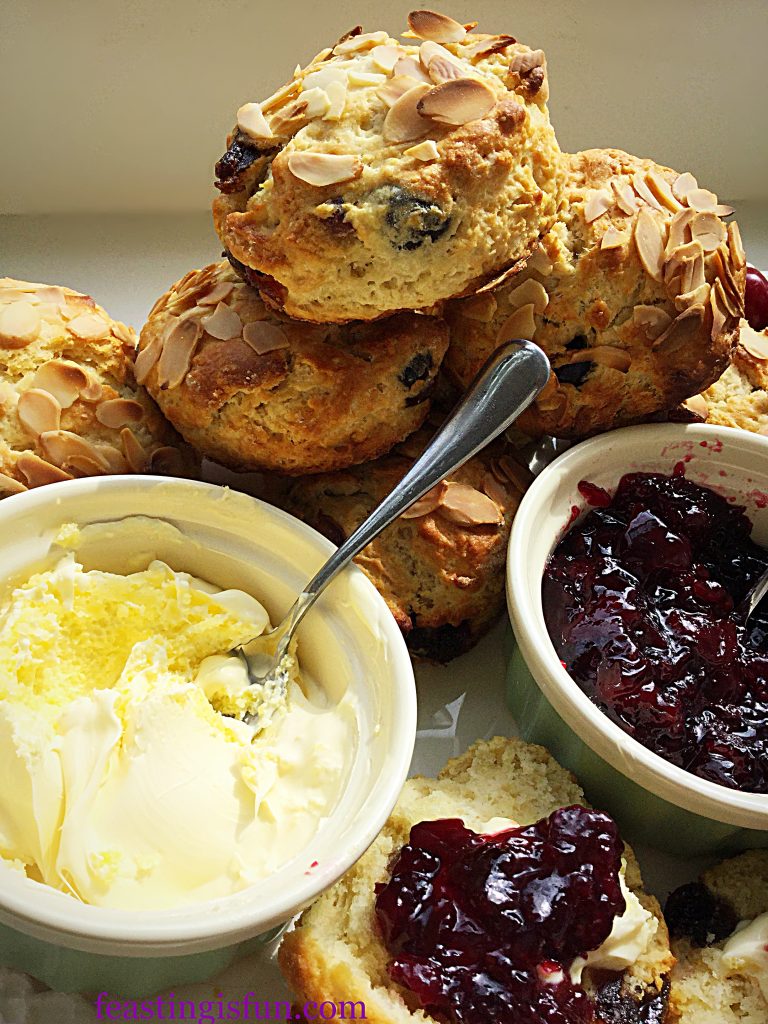
Combining the flavours of cherry and almond in these scones is, I think, game changing. Add clotted cream and dark cherry preserve and you have yourself a delicious scone that is bursting with flavour. Honestly, I wish that I had made these scones a very long time ago, such is the pleasure obtained from the experience of eating one.

FF Almond Topped Cherry Scones
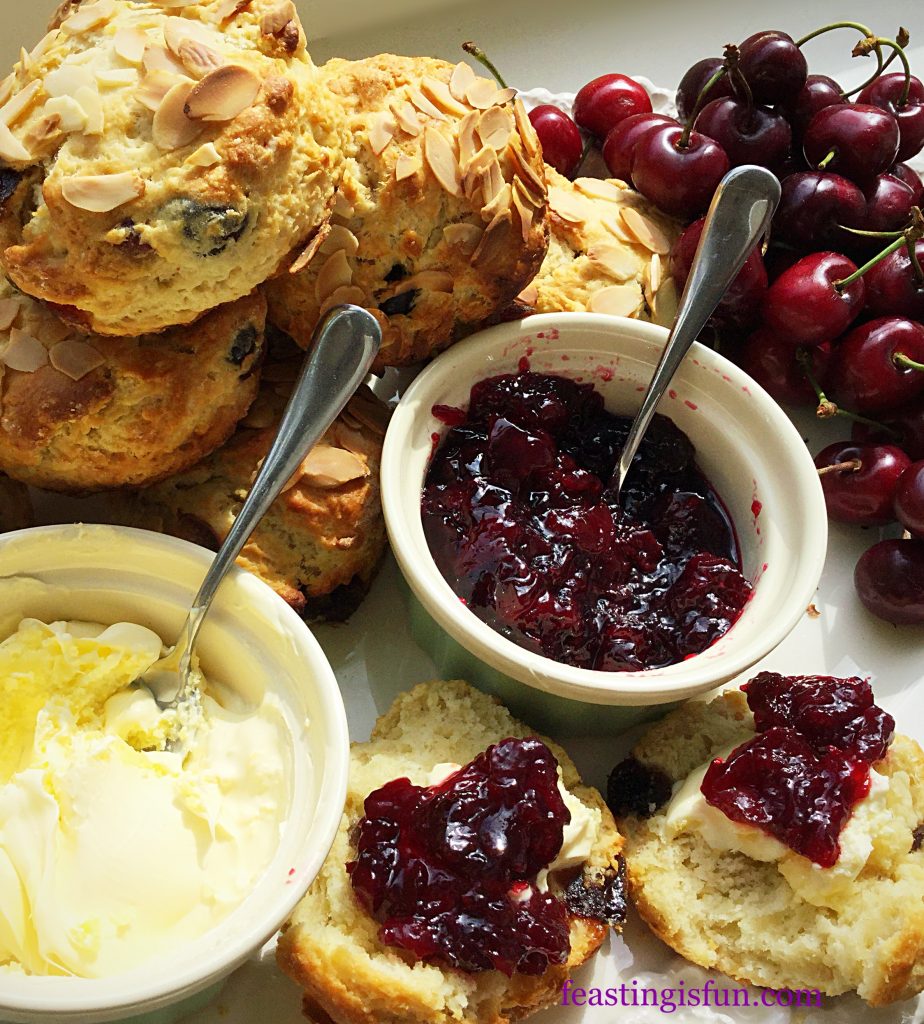
Almond Topped Cherry Scones extra special during cherry season.

Always Honest Reviews

Having been sent a nest of Stainless Steel Bowls with Airtight Lids by Andrew James, I decided to see how much damage I could do to them. Most importantly to me, when reviewing new products, they need to be put through a tough regime. As mentioned before, new or replacement equipment has to earn a place in my kitchen. Since honest reviews are the only ones you will ever read on this blog, your trust is never taken for granted.

FF Almond Topped Cherry Scones
Almond Topped Cherry Scones perfect for Afternoon Tea

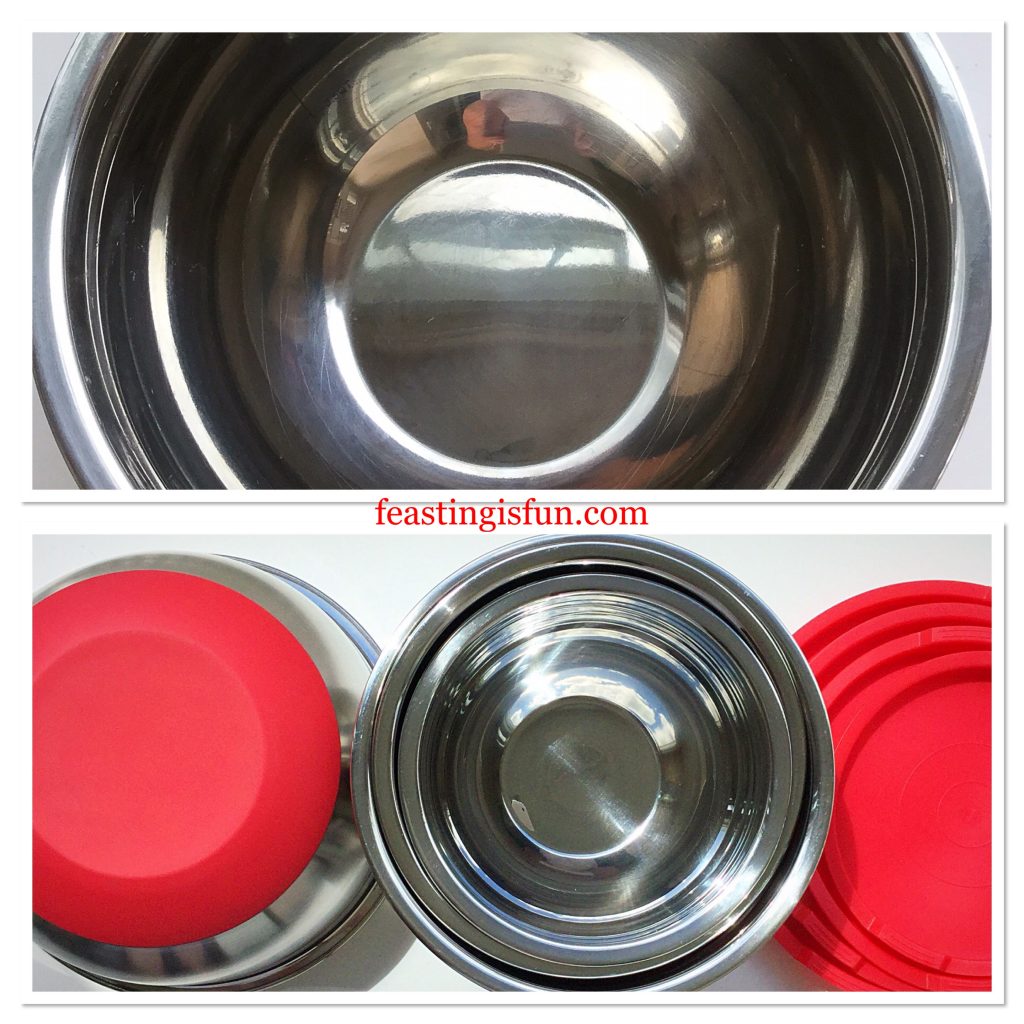
Since first making shortcrust pastry in the 3500ml, the second largest bowl, then proceeding to make the scone dough in the same bowl. Again using a pastry cutter to cut the fats into the flour. I knew if anything could mess up these bowls, the pastry cutter would give them a hard time. Yet, following a full cycle in the dishwasher, the bowl came out virtually untouched.

FF Almond Topped Cherry Scones
Tested bowl on top, nest of bowls bottom.

How Well Did These Stainless Steel Bowls Perform

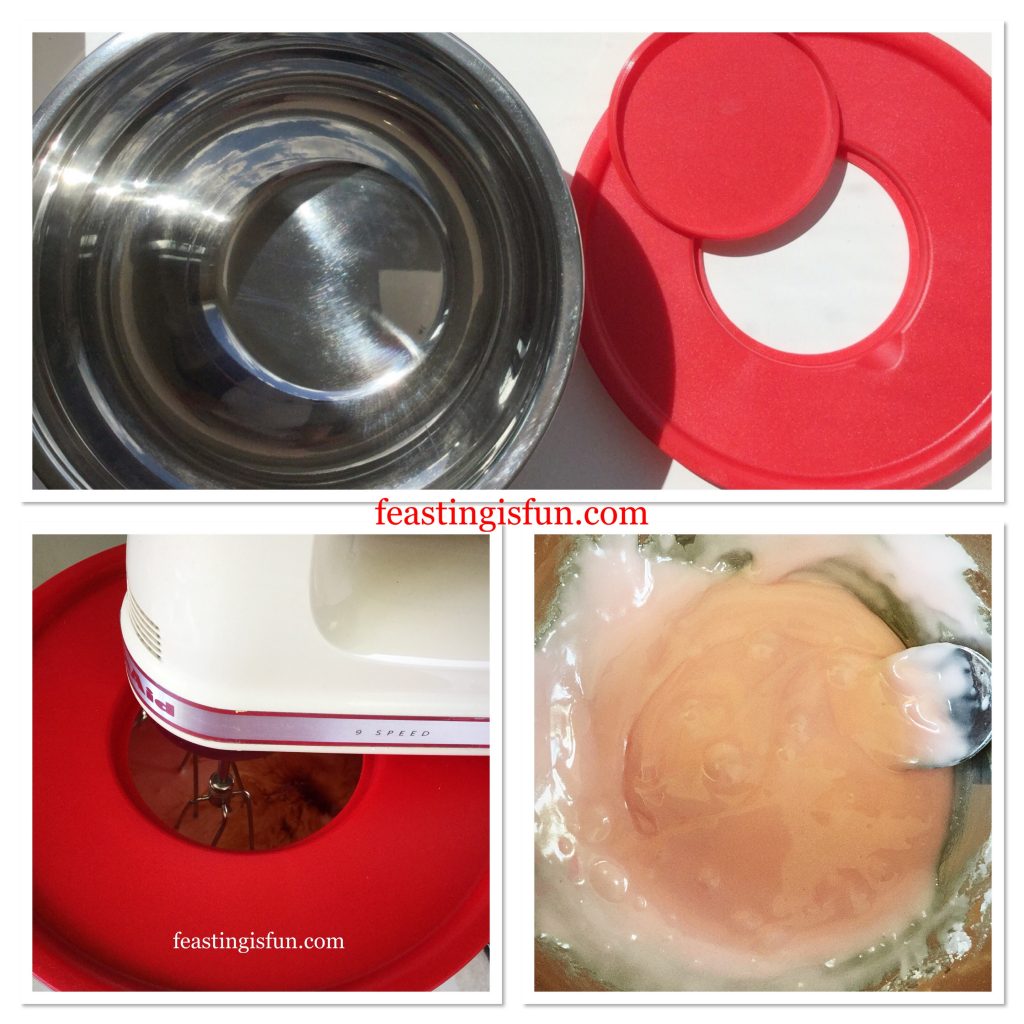
The result of really attacking this bowl with a pastry cutter, a few scratches. In all fairness I was very heavy handed when making the pastry and scones. What I absolutely love about these bowls is the non slip base. Whether whisking up Yorkshire Puddings, Ice Cream, or pouring homemade Tomato Sauce into them, these bowls do not shift on the worktop. Each bowl comes with airtight fitted lids, with the largest bowl having a lid with a removable centre. Perfect for splash control when whisking liquids see Lime Ripple Luxury Ice Cream. Finally, the only minor downside to these bowls is that they cannot be used in the microwave. A small price to pay for the robust Stainless Steel bowl with non slip base and airtight lid.

These bowls come as a nest of 5 in the following sizes:

  • 4500ml capacity – 26cm diameter
  • 3000ml capacity – 24cm diameter
  • 2500ml capacity – 22cm diameter
  • 2000ml capacity – 20cm diameter
  • 1000ml capacity – 18cm diameter


FF Almond Topped Cherry Scones
A whole variety of uses in the kitchen.
FF Almond Topped Cherry Scones
Some of the recipes made using the stainless steel bowls.

While these bowls cannot be used in the microwave, they are versatile, robust and space saving in any kitchen. Since all of the bowls stack conveniently inside each other. They receive a firm 5 out of 5 from me. Therefore, these bowls are a welcome addition to my busy kitchen.

FF Almond Topped Cherry Scones
Almond Topped Cherry Scones

Time to make the scones!

Recipe: Almond Topped Cherry Scones makes 10

450g/1lb Plain White Flour

1/4tsp Salt – I use Maldon

40g/1.75oz Caster Sugar

3tsp Baking Powder

75g/3oz Cold Unsalted Butter cut into cubes

25g/1oz Cold Vegetable Fat – Trex

75g/3oz Natural Glacé Cherries cut into halves

250mls Whole Milk plus a little extra to brush the tops of the scones before baking

2tsp Almond Extract – I use Nielsen-Massey

2-3tbsp Flaked Almonds

Making The Scones

Preheat the oven to 220C/200C fan, gas mark 7, 425F

  • Line a large baking tray with baking parchment.
  • Sieve in the flour and baking powder, then add both of the fats.
  • Using the tips of your fingers, or a pastry cutter, work the fats into the flour until it resembles breadcrumbs with some larger, pea sized pieces of fat visible.
  • Next add the salt and sugar. Mix together using a balloon whisk.
  • Now add half of the glacé cherries. Toss them about in the mixture, this prevents them sticking together. Add the other half and do the same.
  • Make a well in the centre of the mix, pour in the milk and almond extract.
  • Use a butter knife to gently stir the milk into the flour mix. As the dough starts to come together switch to using your hand. Gently bringing the mix to a coherent dough.
  • Tip the dough on to a floured surface and gently knead to form a 5cm/2″ thick disc.
  • Using a well floured 5cm/2″ round cutter, cut out the scones, remembering to press straight down without twisting the cutter. Twisting can cause odd shaped or lopsided scones as they bake. Place each scone on to the lined baking tray.
  • Bring all the bits of scone dough together once the scones are cut, knead lightly and continue to cut out the remaining scones. Repeat the last step until all of the dough is used.
  • Once all of the scones have been cut out brush the tops with milk and sprinkle over flaked almonds.
FF Almond Topped Cherry Scones
Making the Almond Topped Cherry Scones

Baking The Almond Topped Cherry Scones

  • Place the baking tray into the centre of the preheated oven and bake for 25 – 30 minutes.
  • The Almond Topped Cherry Scones are baked when they are risen, golden brown and sound hollow when rapped on the base with a knuckle.
  • As soon as the scones are baked, remove from the oven and place immediately on to a cooling rack to cool.
FF Almond Topped Cherry Scones
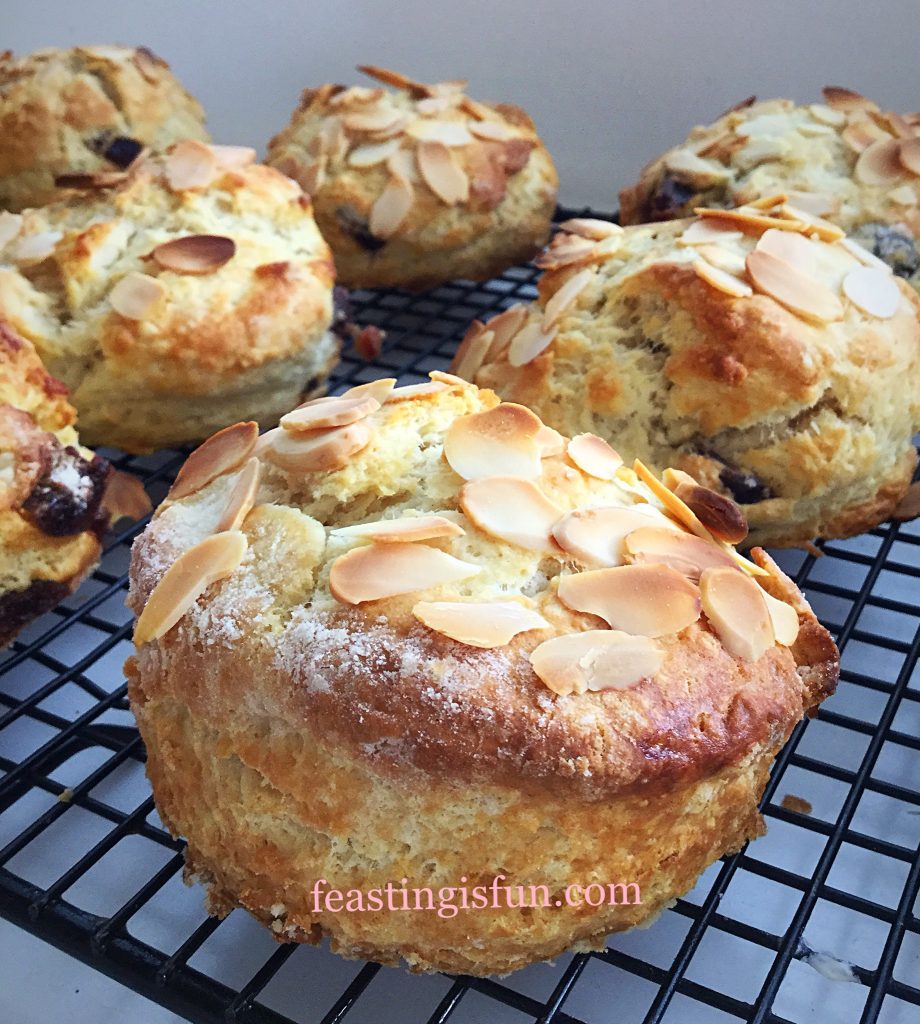
Baked Almond Topped Cherry Scones cooling on a rack.
  • When the scones are cooled, or slightly warm then they are ready to be served.
FF Almond Topped Cherry Scones
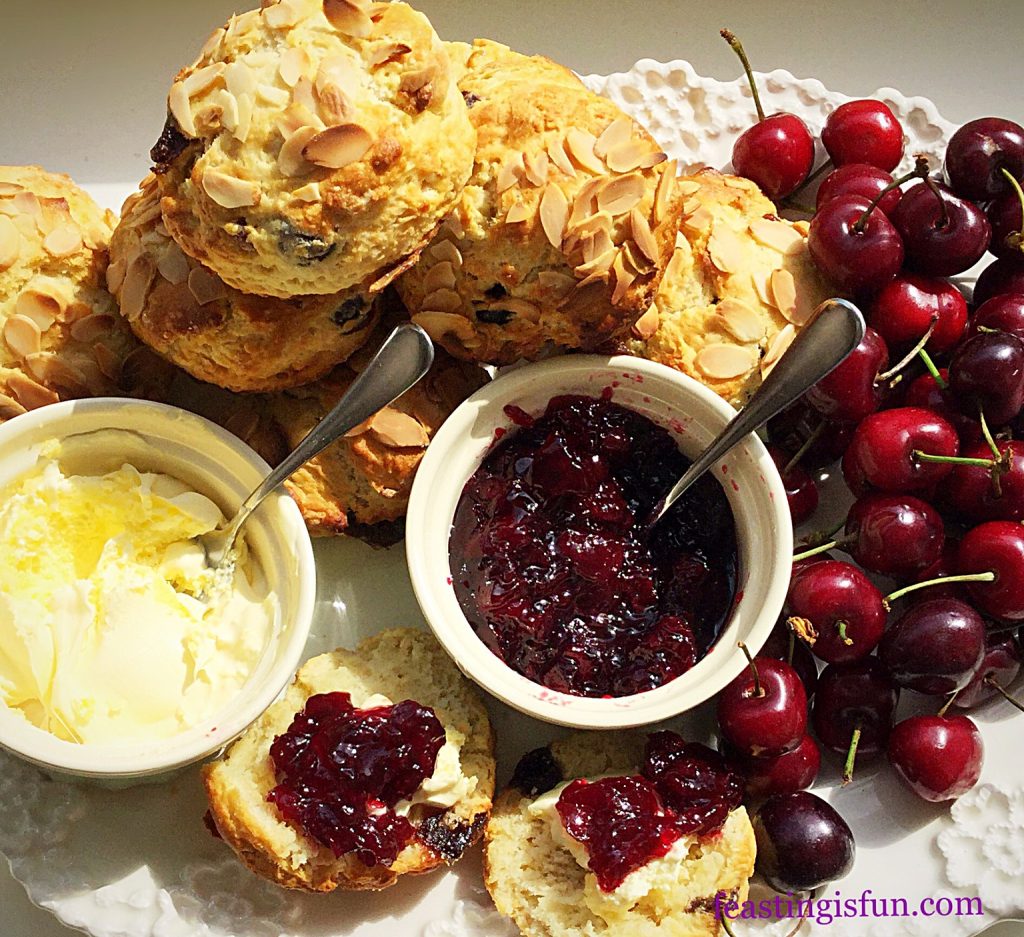
Serve the Almond Topped Cherry Scones on a platter.

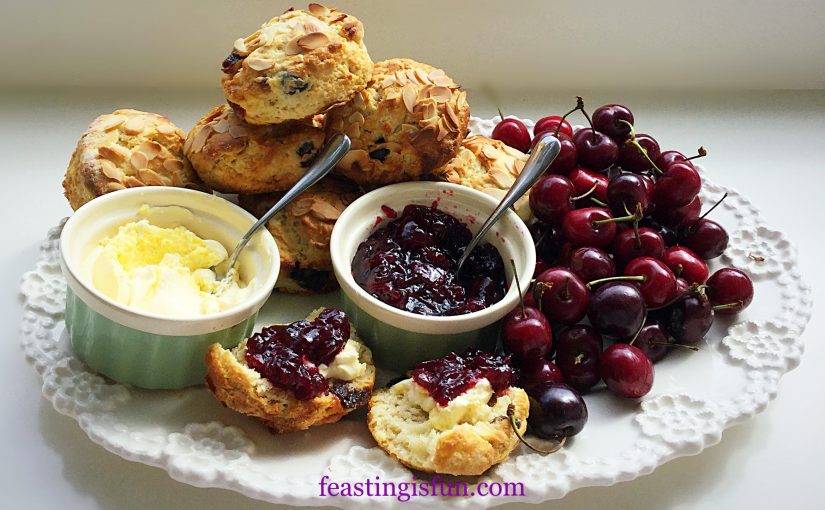
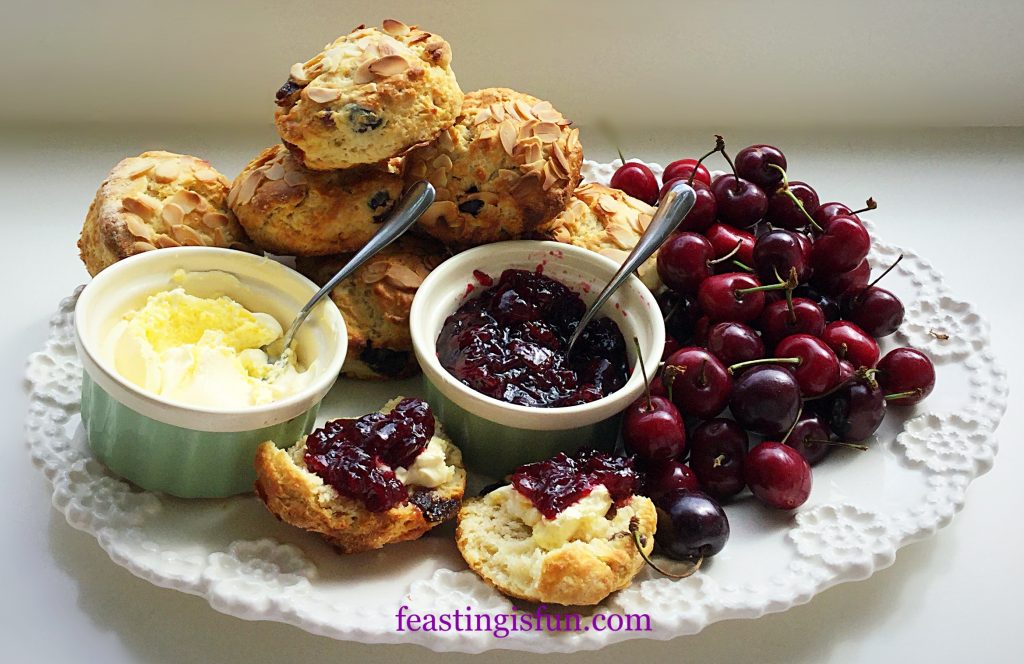
I like to serve the scones on a large platter with ramekins of clotted cream and cherry preserve. Adding fresh cherries when they are in season, finishes the platter beautifully.

Serve with a large pot of tea and the best china you own!

All scones are at their best on the day they are made. If you wish to make ahead, you can do so by one day. Make the scones, cool completely and store in an airtight container, such as the large stainless steel bowls. The next day 20 minutes prior to serving, warm in a preheated oven, at baking temperature for 5-10 minutes. Cool slightly and serve. Rather like bread, the reheating simply refreshes the scones and they taste freshly baked.

If you have enjoyed this recipe for Almond Topped Cherry Scones you may also like these:

Fruit Filled Butter Scones

FF Almond Topped Cherry Scones
Fruit Filled Butter Scones

Afternoon Tea

FF Almond Topped Cherry Scones
Afternoon Tea

Super Light Scones

FF Almond Topped Cherry Scones
Super Light Scones

Homemade scones are a world away from their shop bought counterparts. In fact I never even liked scones before I made them myself. Scones are an important addition to any Afternoon Tea and are simply the easiest treat to quickly make should visitors unexpectedly arrive. Making the scone dough in the Stainless Steel bowl made the process even easier. Especially with the non slip base and dishwasher safe factors.

If you make these Almond Topped Cherry Scones please let me know? I love and really appreciate reading the comments that you take time to leave. Pop a picture on Twitter or Instagram and tag me in. I’ll be sure to give you a shoutout from @sammiefeasting.

So, whatever you are making, baking and creating in you kitchens or indeed caravans, have fun making and sharing your feast.

Sammie xx

Andrew James provided me with the nest of 5 stainless steel bowls with matching airtight lids for the purpose of review. All comments and opinions are my own and are a complete reflection of my experience in using them. I was not paid to write this post and the discount is curtesy of Andrew James. No part of this post may be reproduced in any way without my prior permission. Please see my Disclosure Policy for further details.

Note: Sadly, Andrew James Ltd is no longer trading. This post remains unaltered as a record of my review.

Share
Facebooktwitterpinterestlinkedintumblr