Andrew James Waffle Maker Review

Share
Facebooktwitterpinterestlinkedintumblr

Waffles, I have been wanting to make my own forever – very slight exaggeration there, honestly though for a long time. I was sent an Andrew James Waffle Maker, by Andrew James UK Ltd to review and set myself the challenge of also coming up with a few recipes along the way!

Andrew James Waffle Maker Review
Chocolate Dunking Waffle anyone????

When reviewing a product, especially a non-essential kitchen item, which is what I would have classed the Andrew James Waffle Maker as, I’m pretty tough. If another gadget or electrical appliance is going to take up precious space in my already overcrowded kitchen, well, it’s got to earn its place.

So I look for durability, consistency, versatility, ease of use and the one we all love to hate, how easy is it to clean. I’m a home cook, not a chef, but I still want good quality and a variety of recipes, in order for an appliance to warrant being kept.

Andrew James Waffle Maker Review
This is the Andrew James Waffle Maker that I reviewed.

Firstly I was impressed with how well the Andrew James Waffle Maker was packaged. There wasn’t any excess space in the box and the sides of the waffle maker were protected with polystyrene. Actually after use, once cooled and cleaned, I store it, in it’s protective packaging, back in the box.

I read through the instruction booklet, which was easy to follow, brief and concise. Before use it is recommended to wipe over the waffle maker, including the waffle plates with a clean damp cloth. This I did.

Andrew James Waffle Maker Review
Press the big button and this is what the Andrew James Waffle Maker looks like.

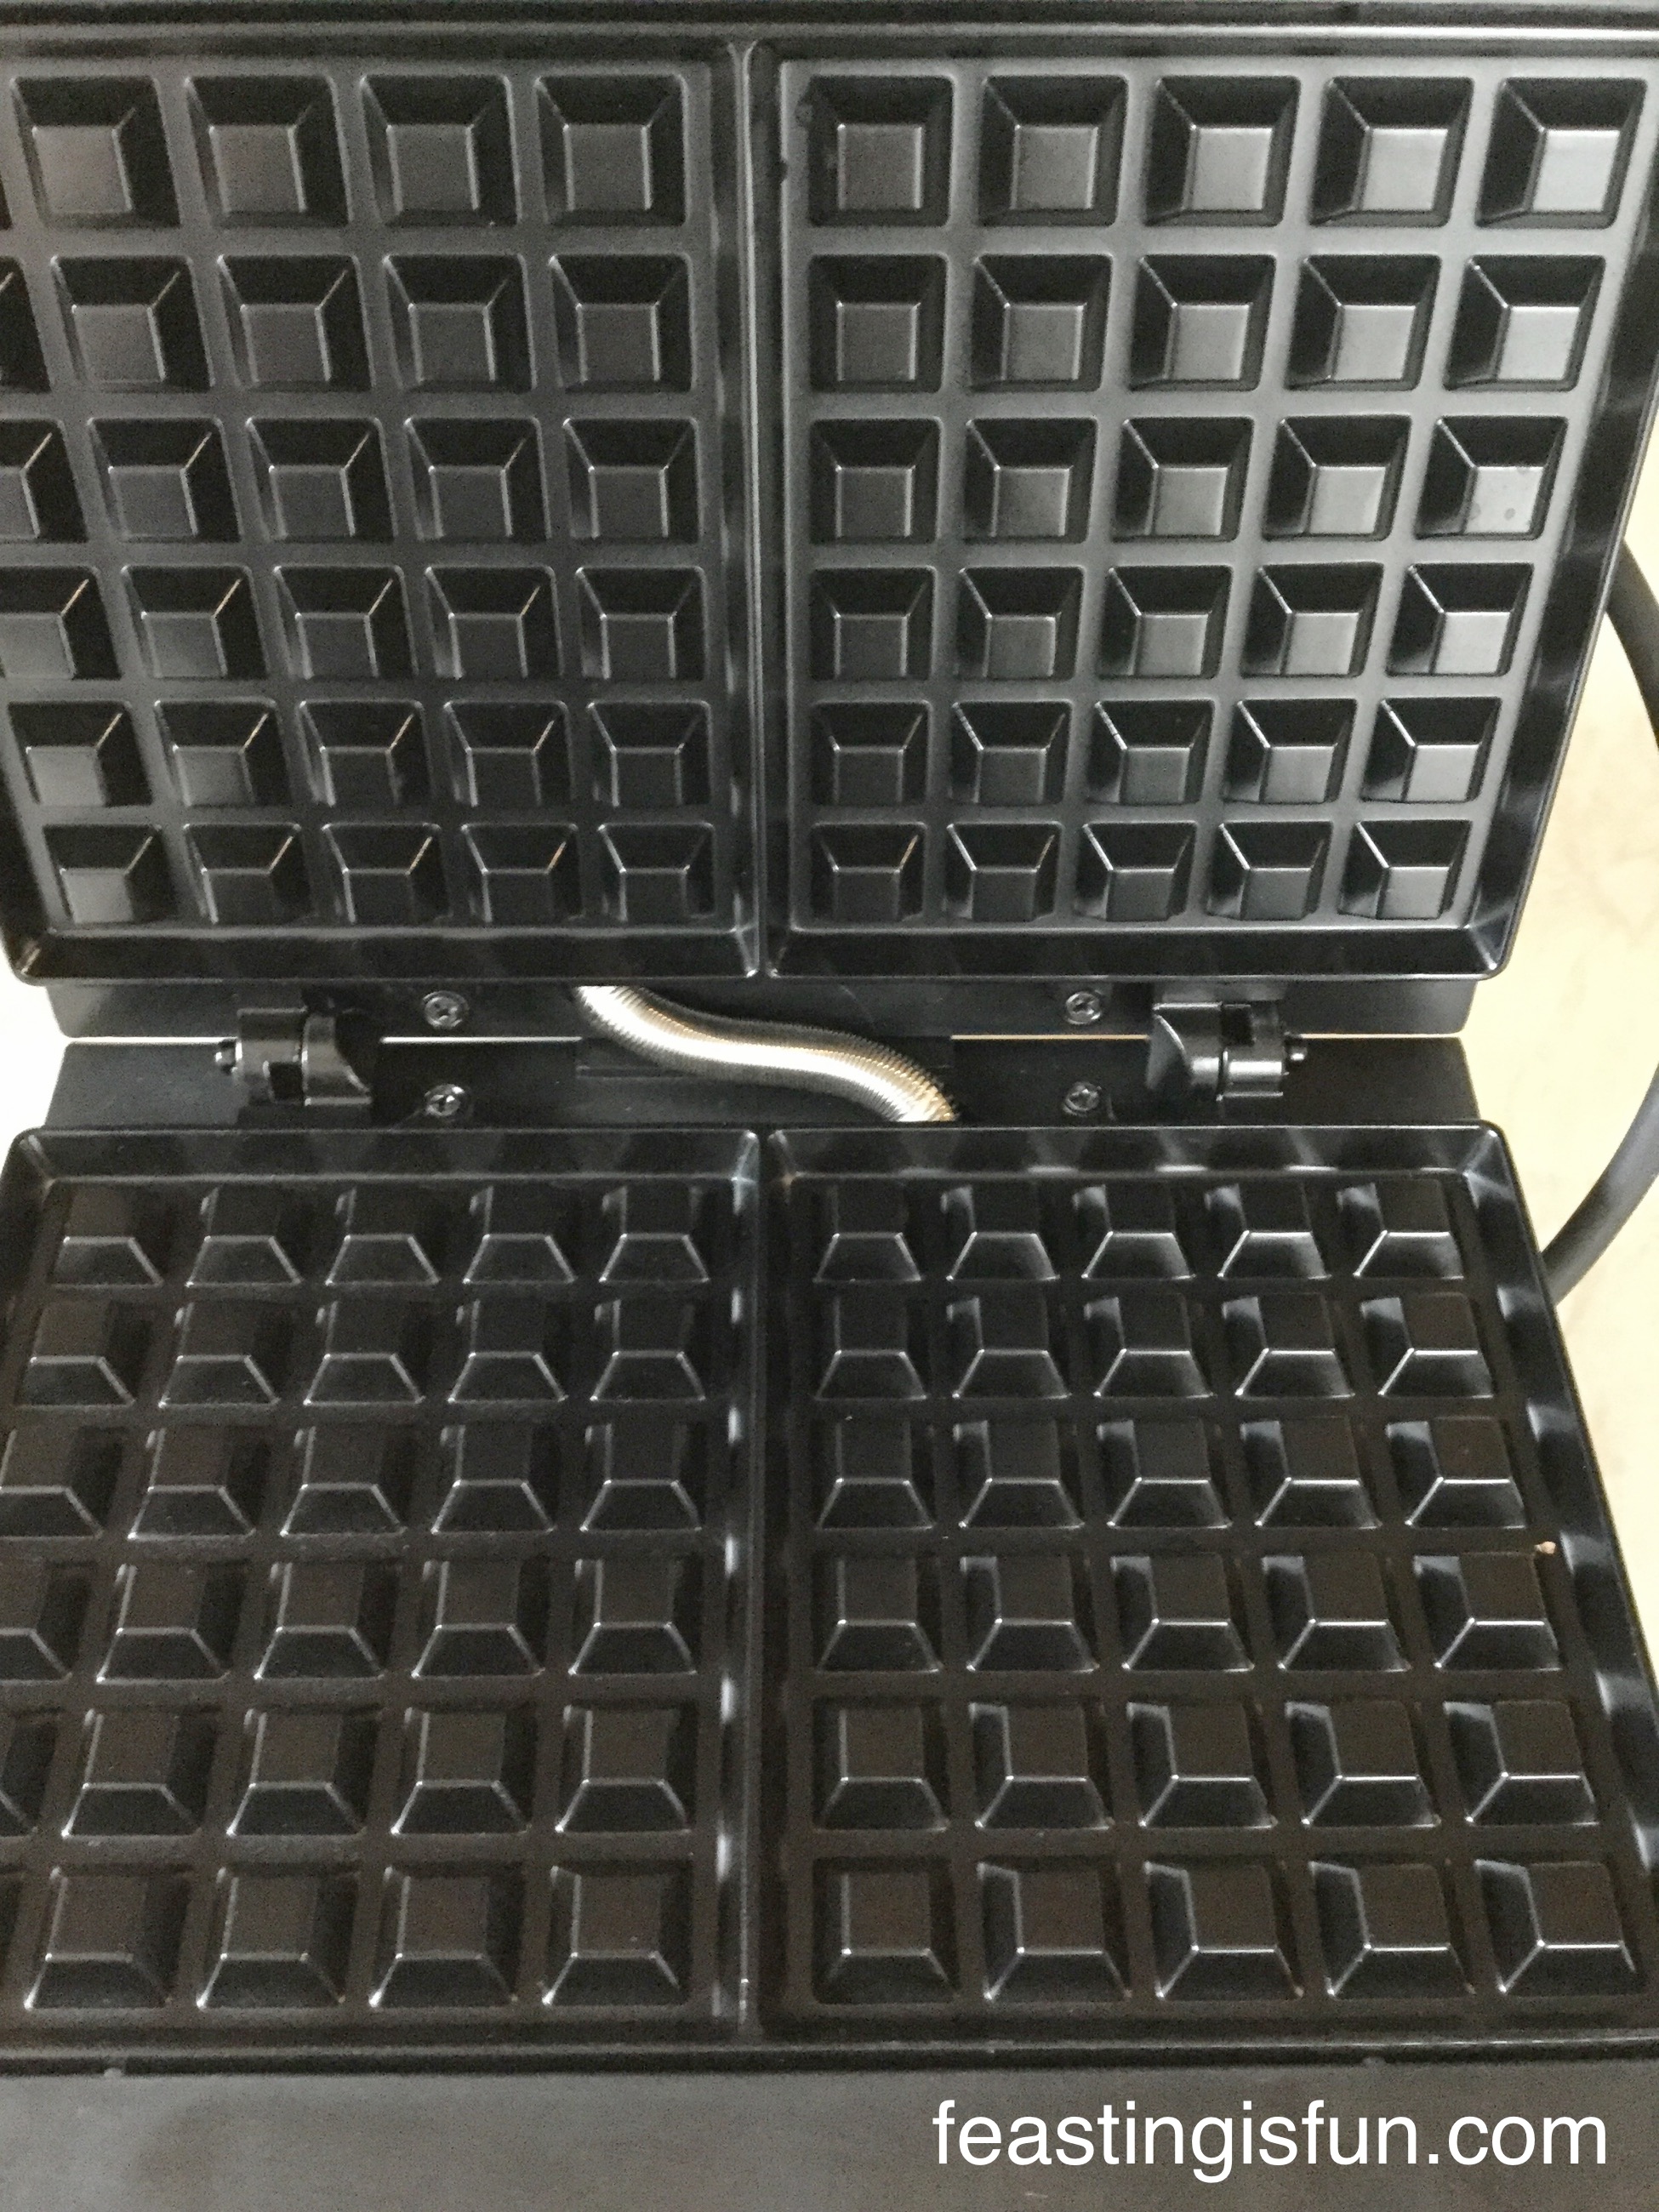
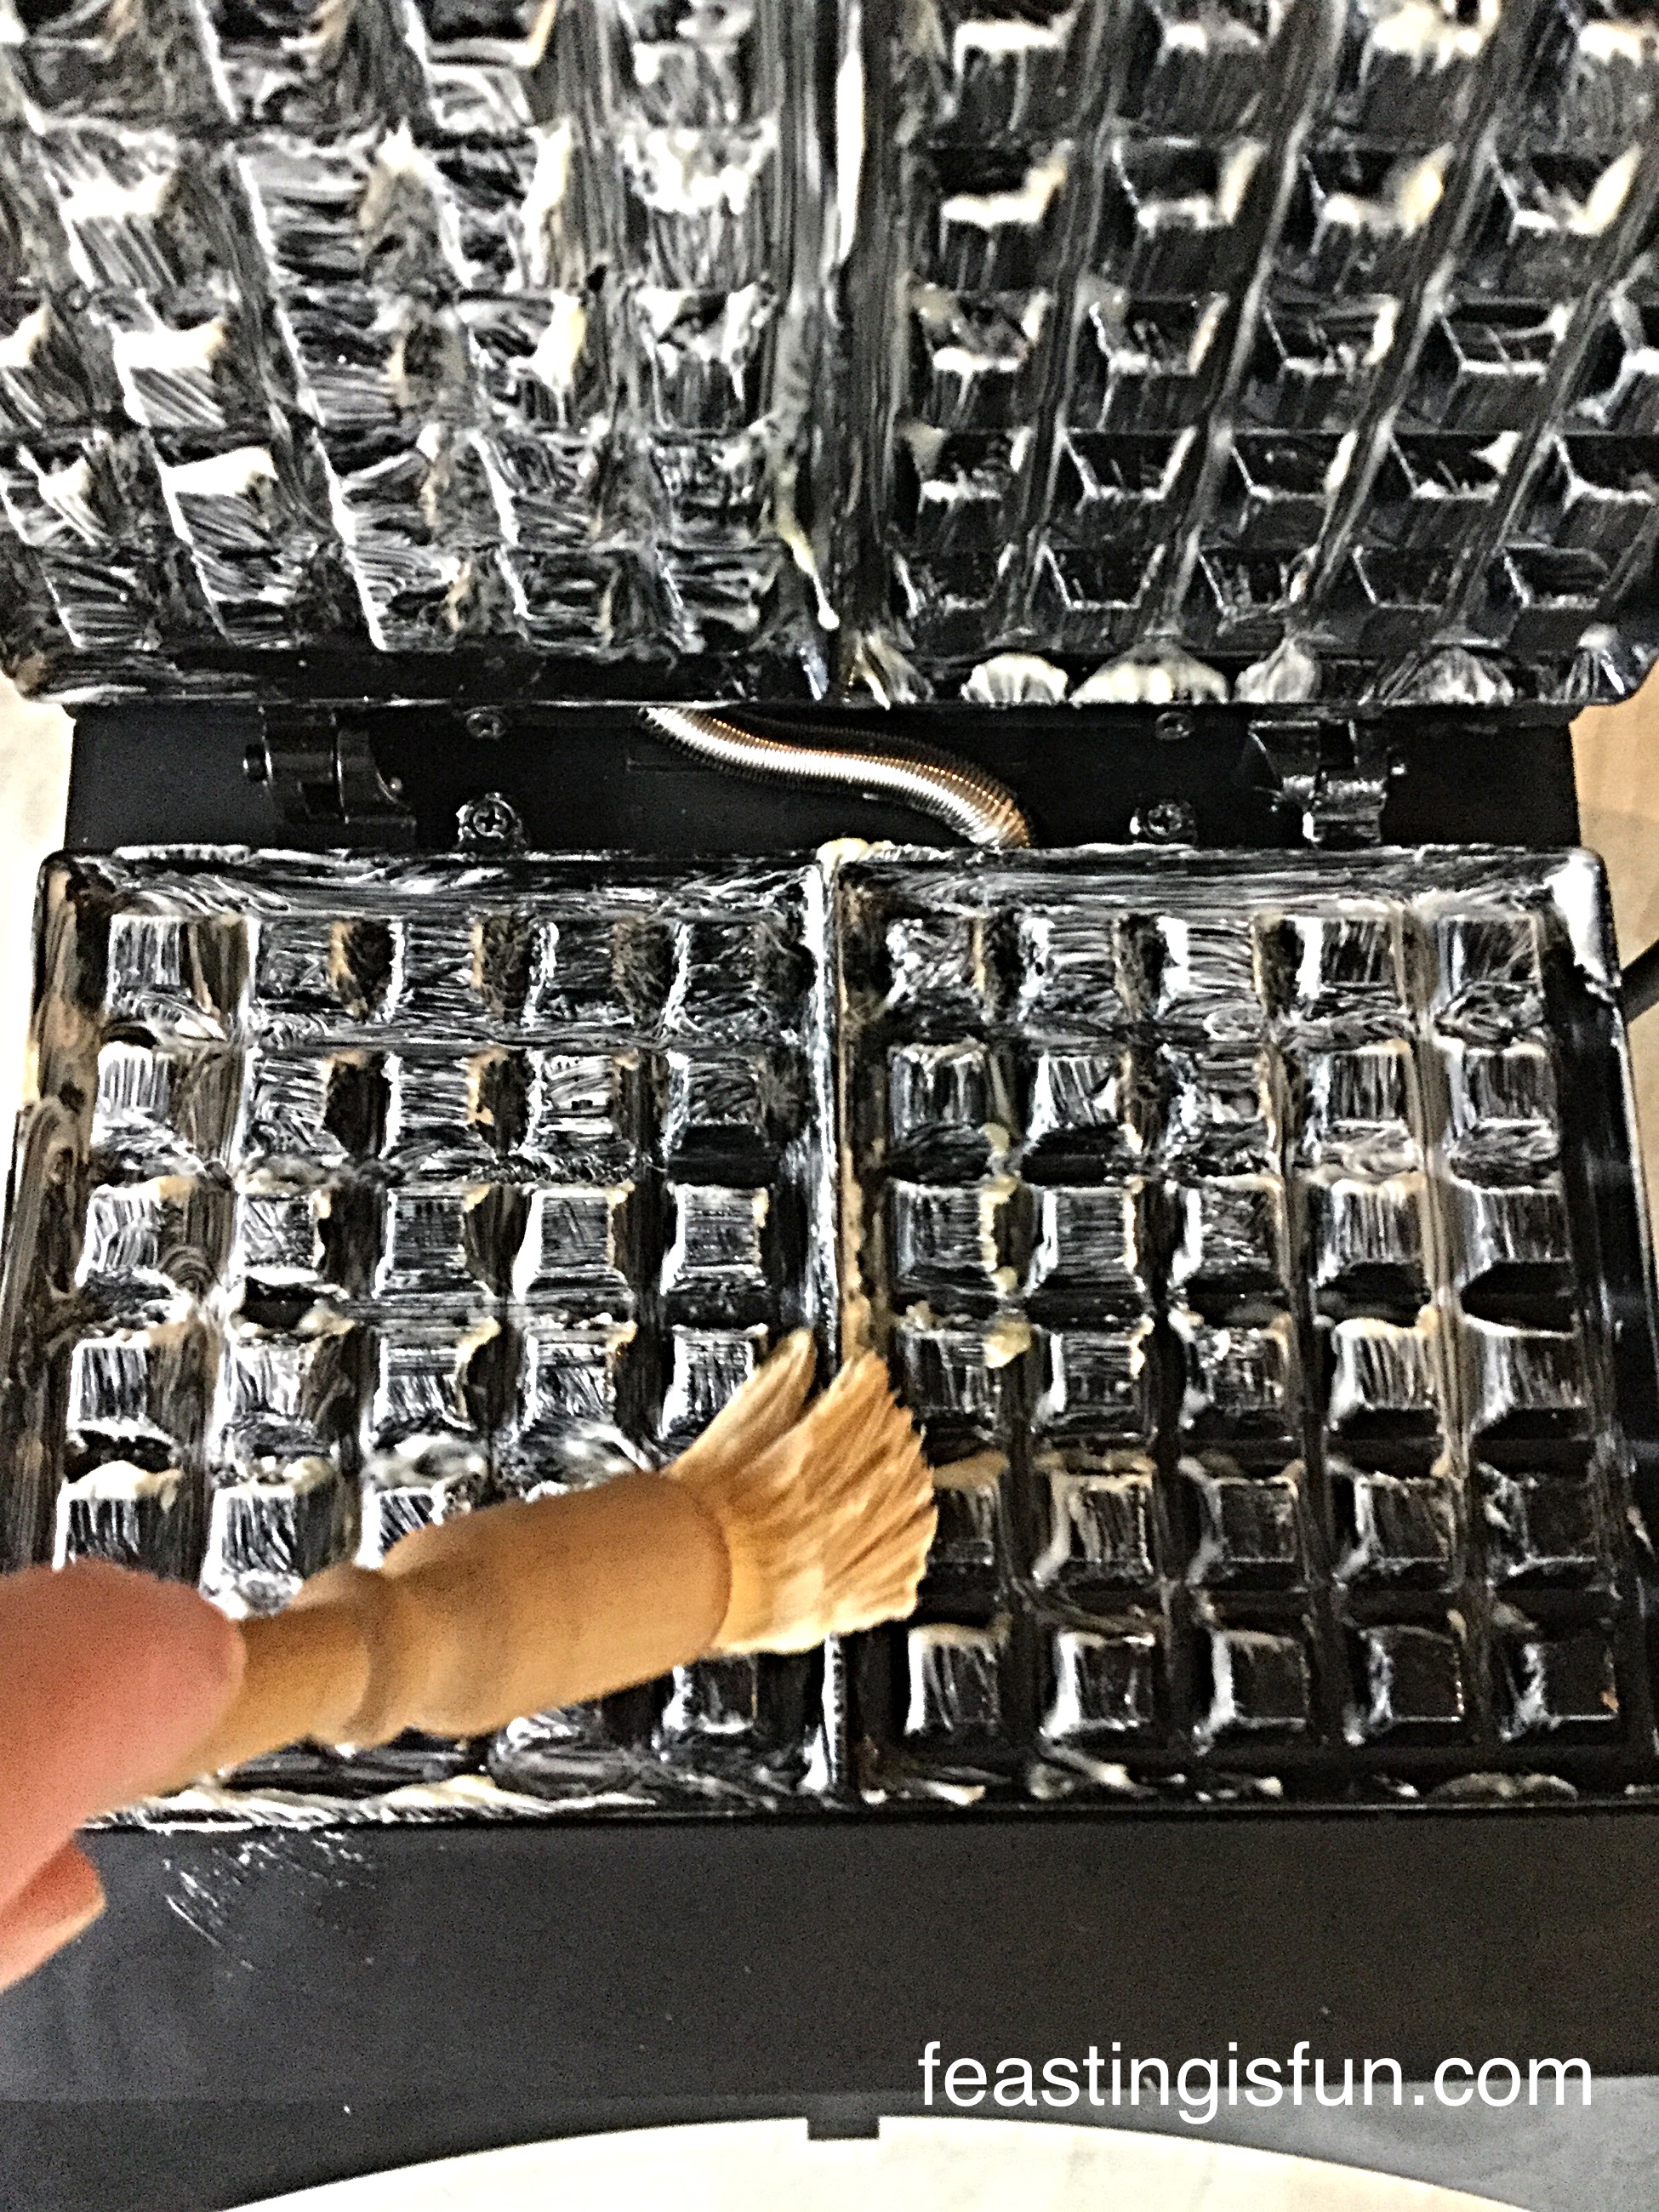
The instruction booklet recommends wiping over the waffle plates with butter/vegetable fat, prior to each use, to maintain the non stick waffle plates. Having square ridges on the waffle plates meant this could potentially be quite tricky. Instead I opted to brush melted butter onto the plates with a soft pastry brush, although a silicone brush would be suitable as well. Using melted butter also ensures, that as it cools on the cold waffle plates, you can see if you have evenly covered the plates.

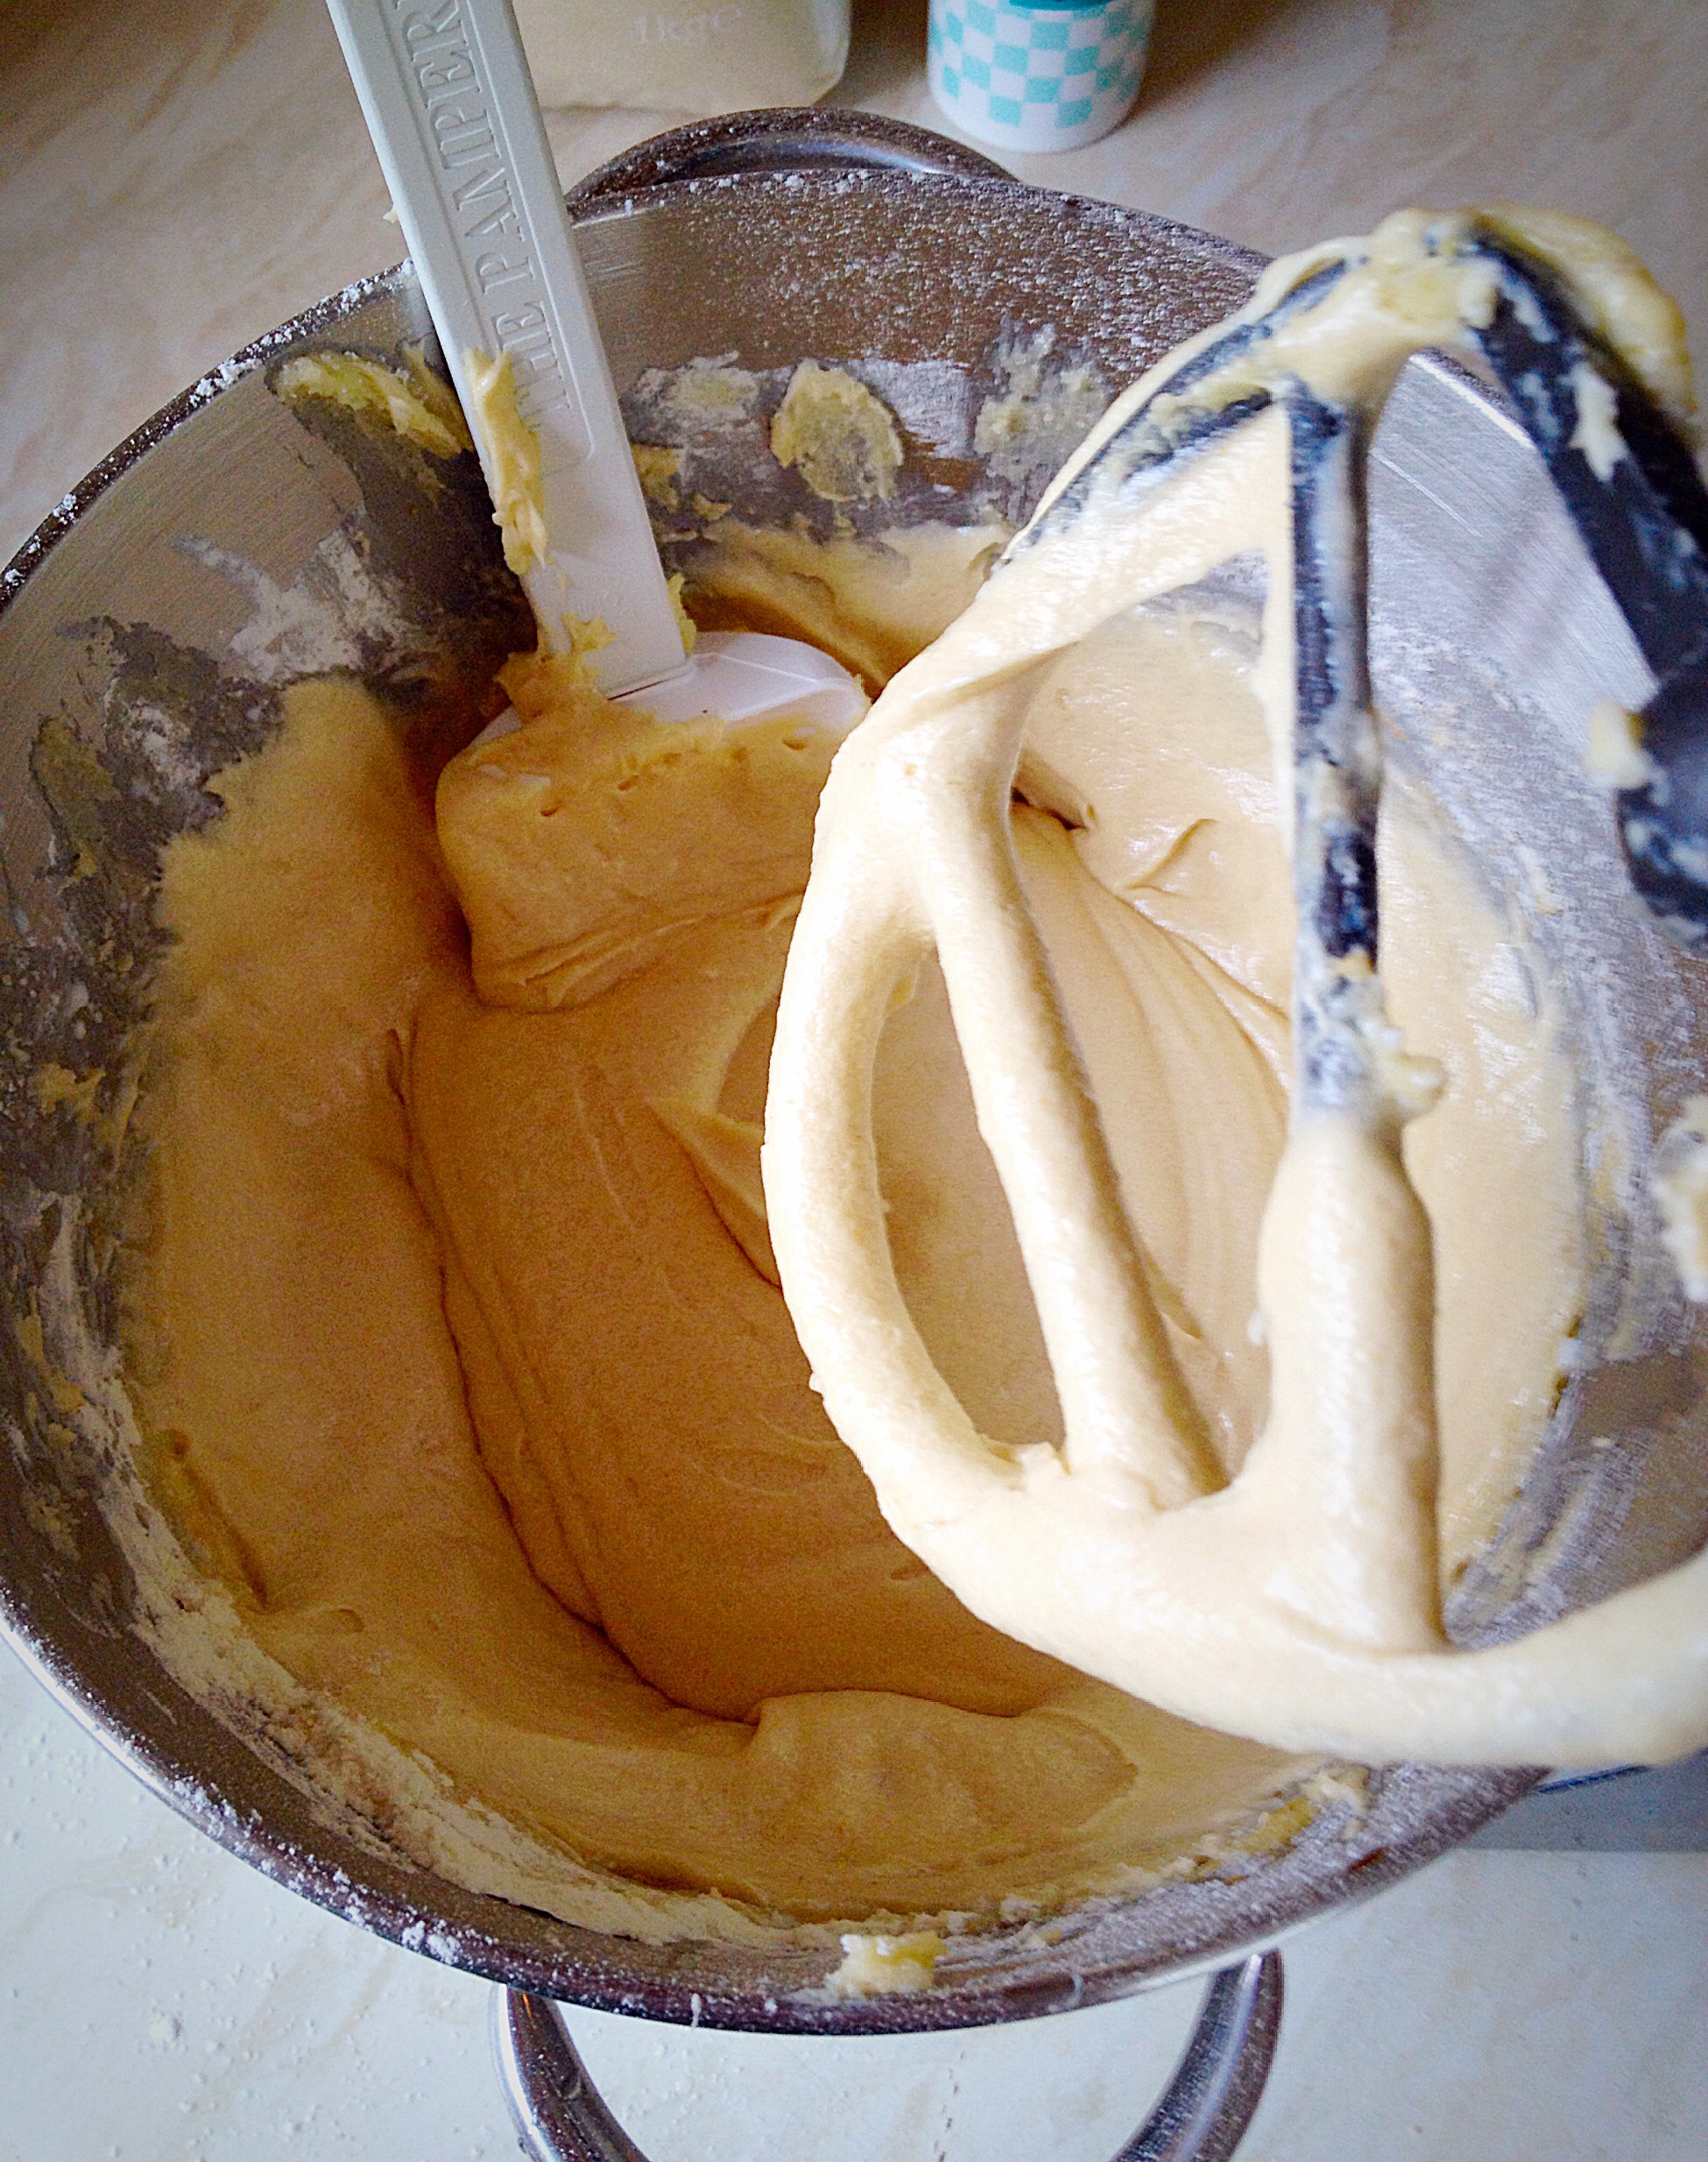
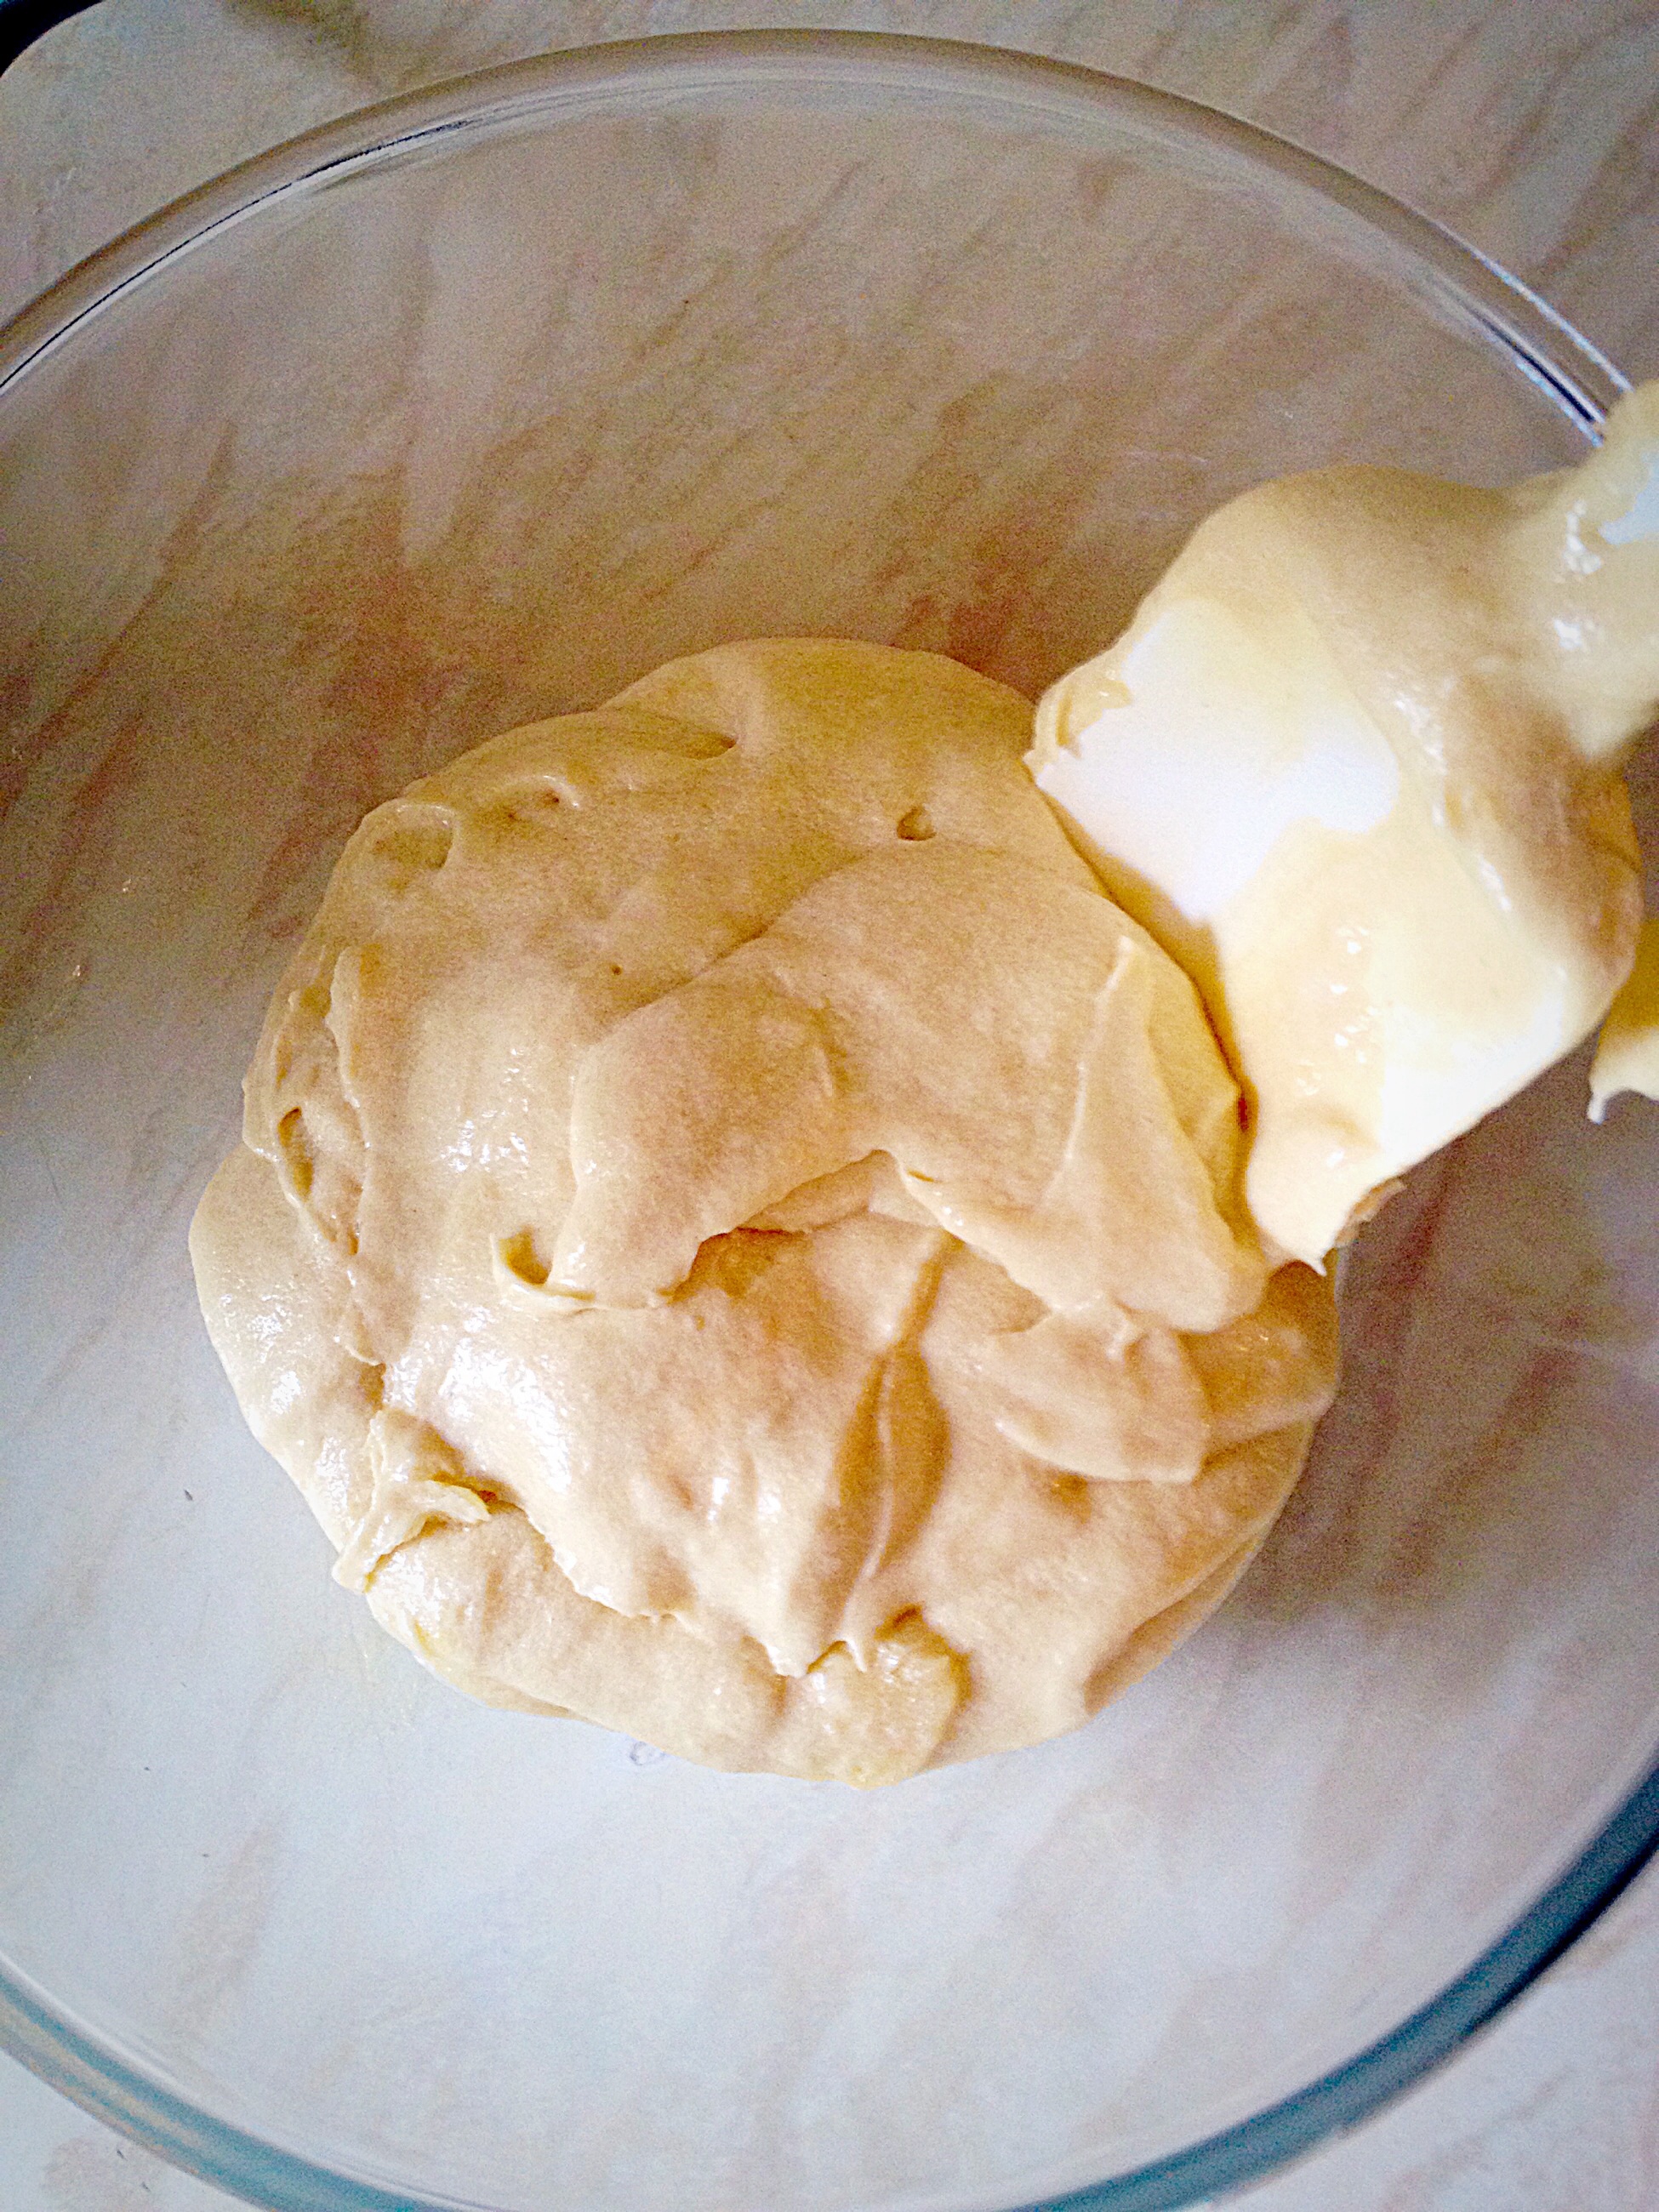
Using the Andrew James Waffle Maker for the first time, I decided to make a batch of Vanilla Bean Waffles.

Andrew James Waffle Maker Review
Vanilla Bean Waffles – ooh so good.

As each waffle recipe calls for melted butter, that has been cooled, I melted an extra 20g of butter (than called for in the recipe), specifically for brushing onto the waffle plates.

Once the waffle plates have been brushed with melted butter, close the waffle maker and switch on via the plug. An orange light illuminates on the top of the waffle maker to show it is switched on. When the green light illuminates, the waffle maker is ready to use.

Andrew James Waffle Maker Review
Andrew James Waffle Maker orange light indicates that it is heating up.

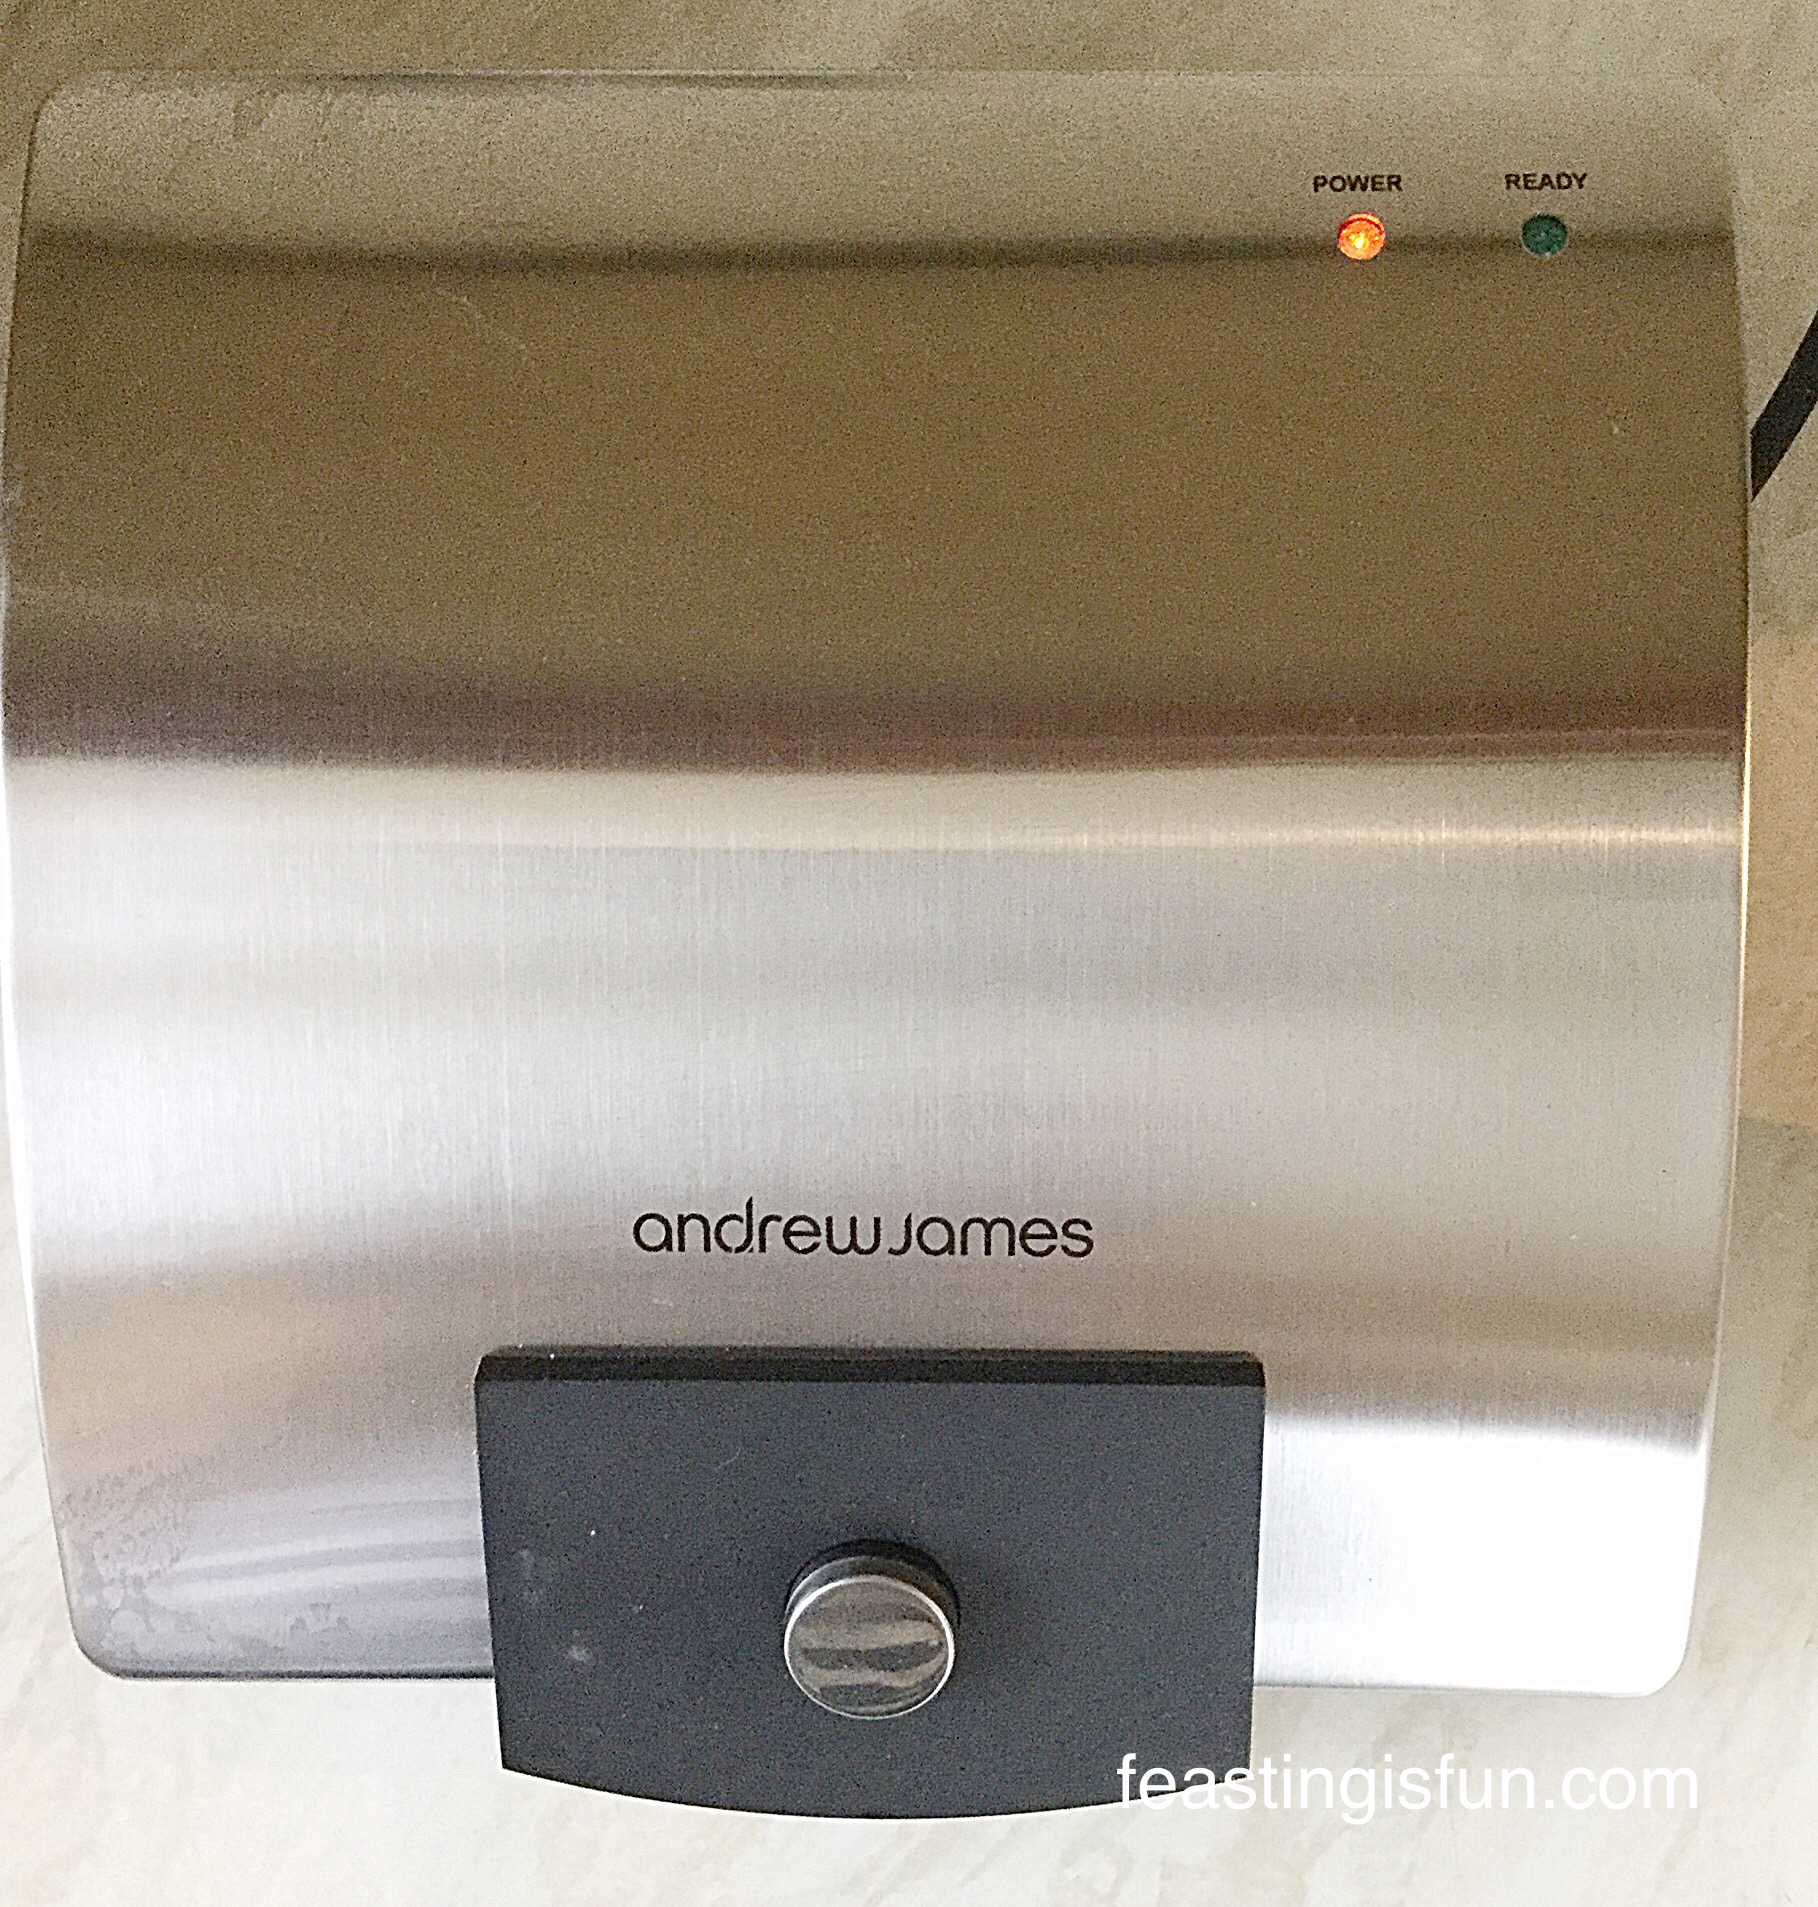
From the time of switching on ALWAYS use suitable heat protection for your hands whilst using.

I found it very easy to open and close the waffle maker whilst wearing oven gloves. Also be aware that the top and sides of the waffle maker get very hot!

Once the green light illuminates you can start cooking your waffles.

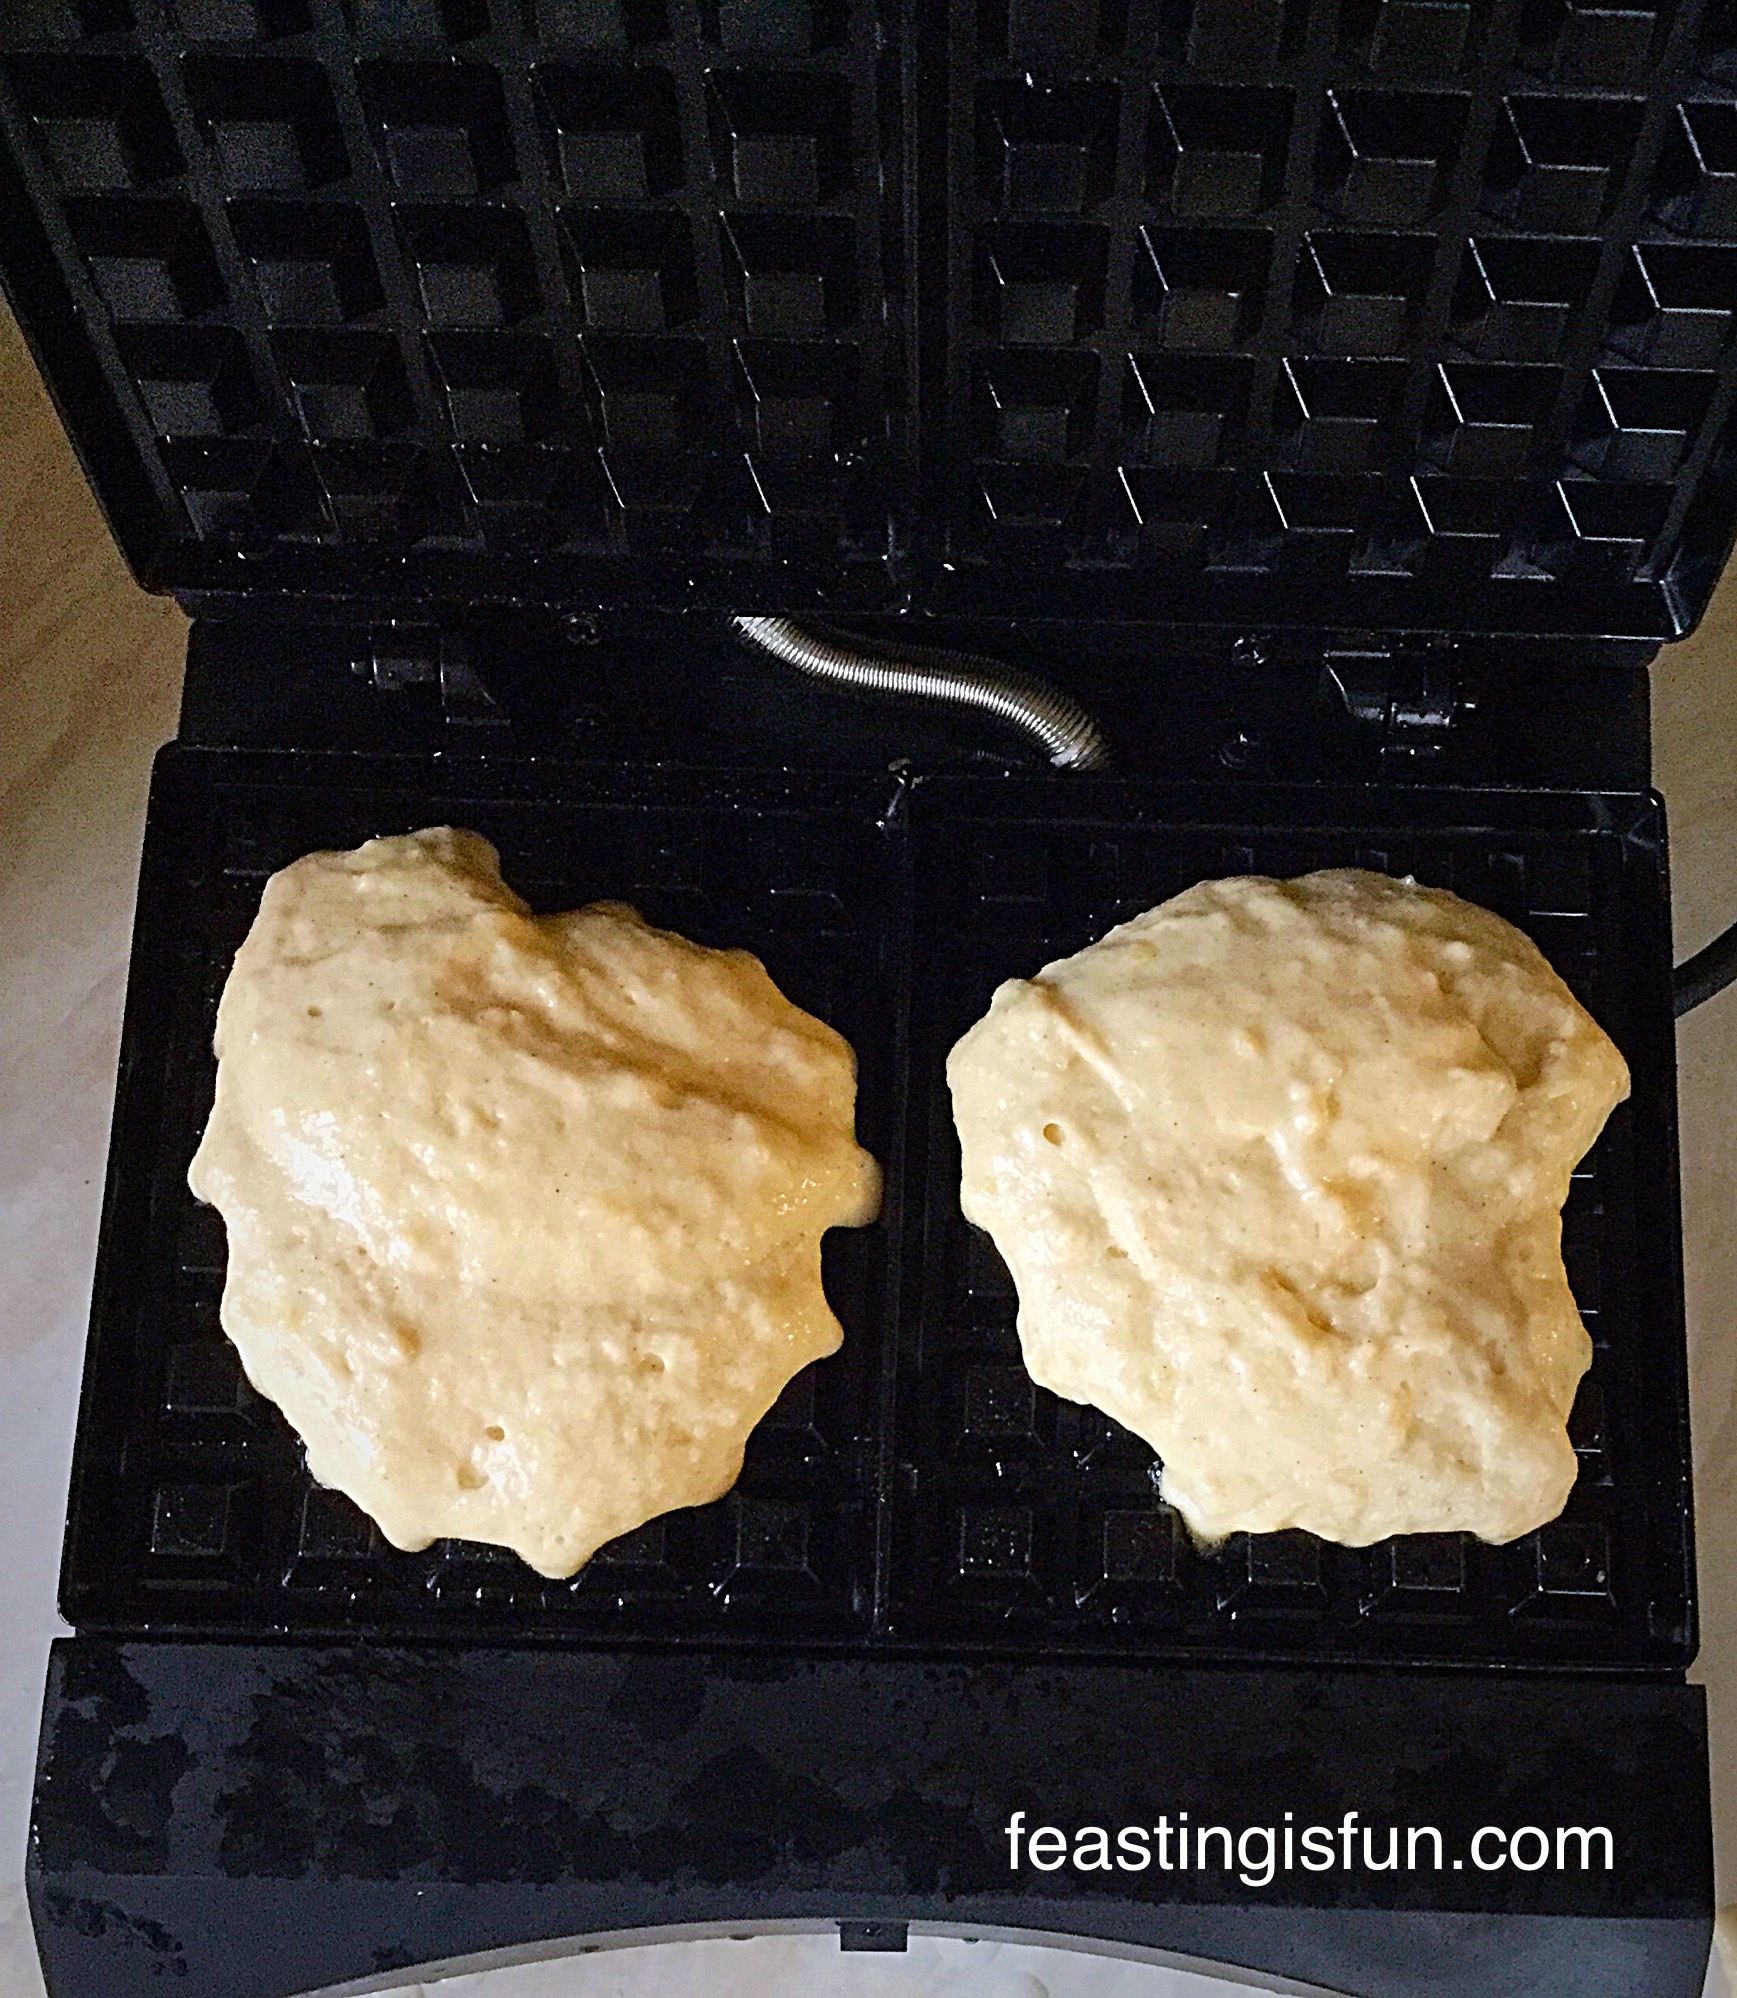
The instruction booklet does not give any guidance as to how much waffle mixture should be added to each plate. I found that for all the recipes I used,  two dessert spoons  of waffle batter was sufficient.

Andrew James Waffle Maker Review
Andrew James Waffle Maker add the waffle batter to the middle of each waffle plate.

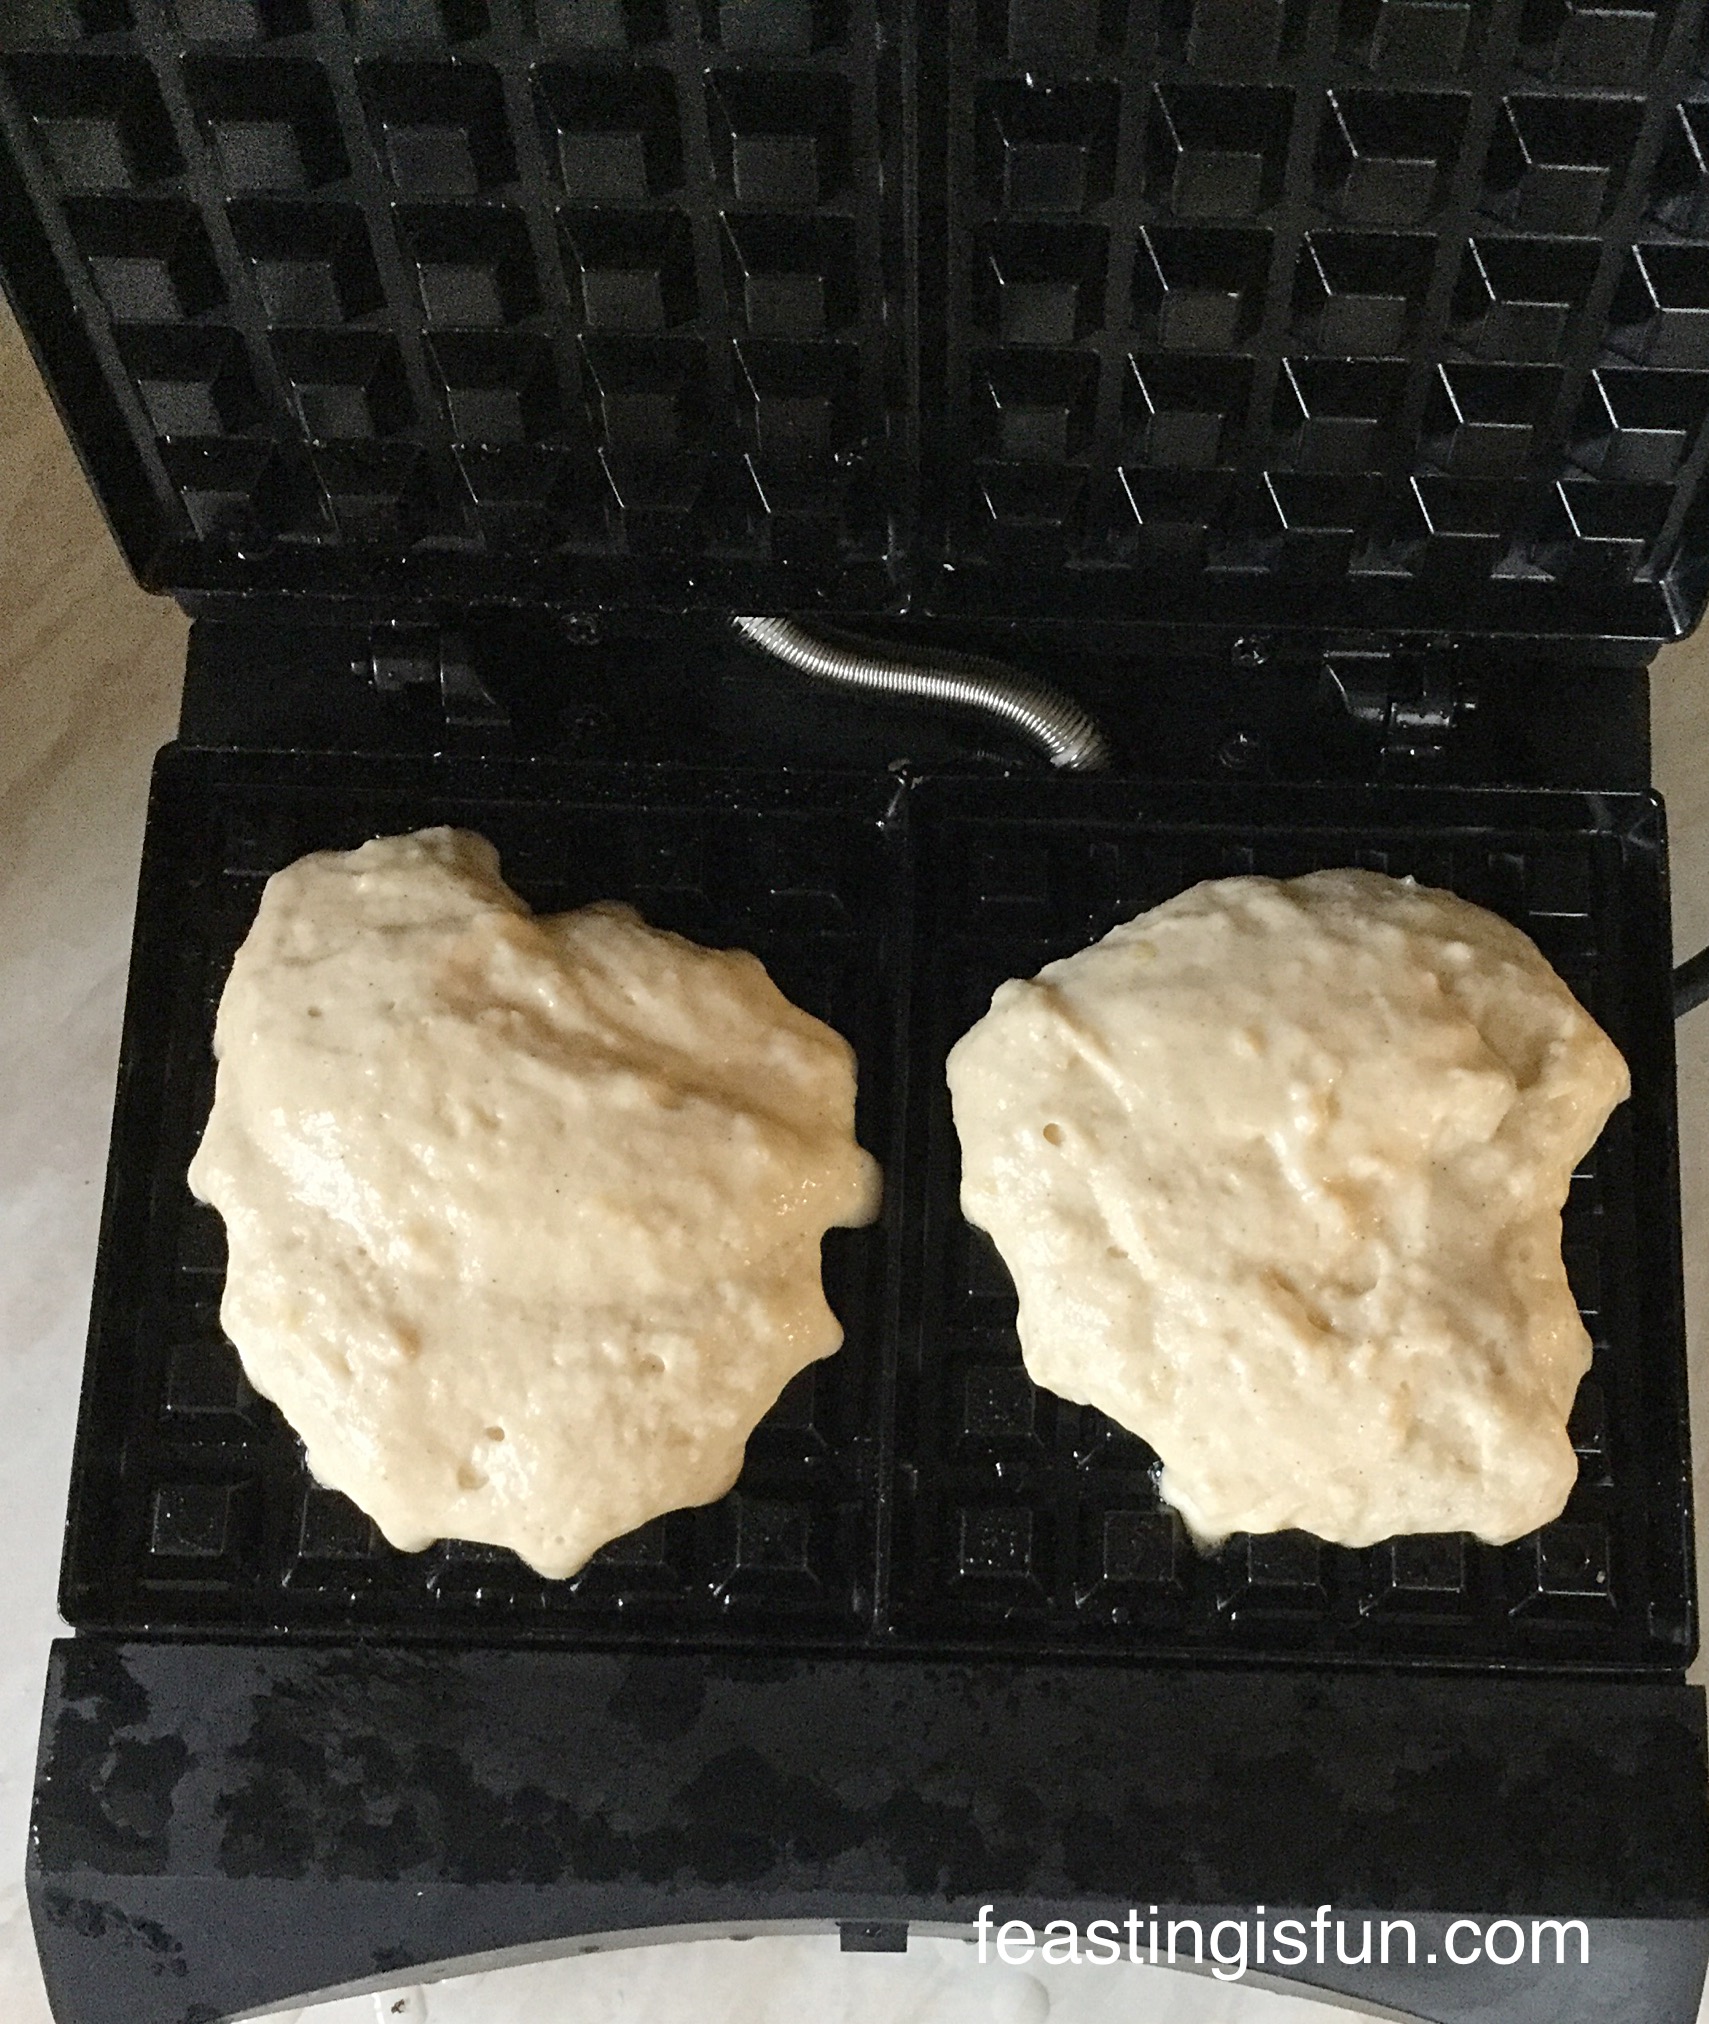
Close the lid of the waffle maker as soon as the batter has been added to the waffle plates. The length of time required for cooking each waffle varies with each recipe. As a guide it is between 4 – 6 minutes.

Whilst cooking, the waffle maker may emit steam. I simply wiped away any condensated water from the worktop after use.

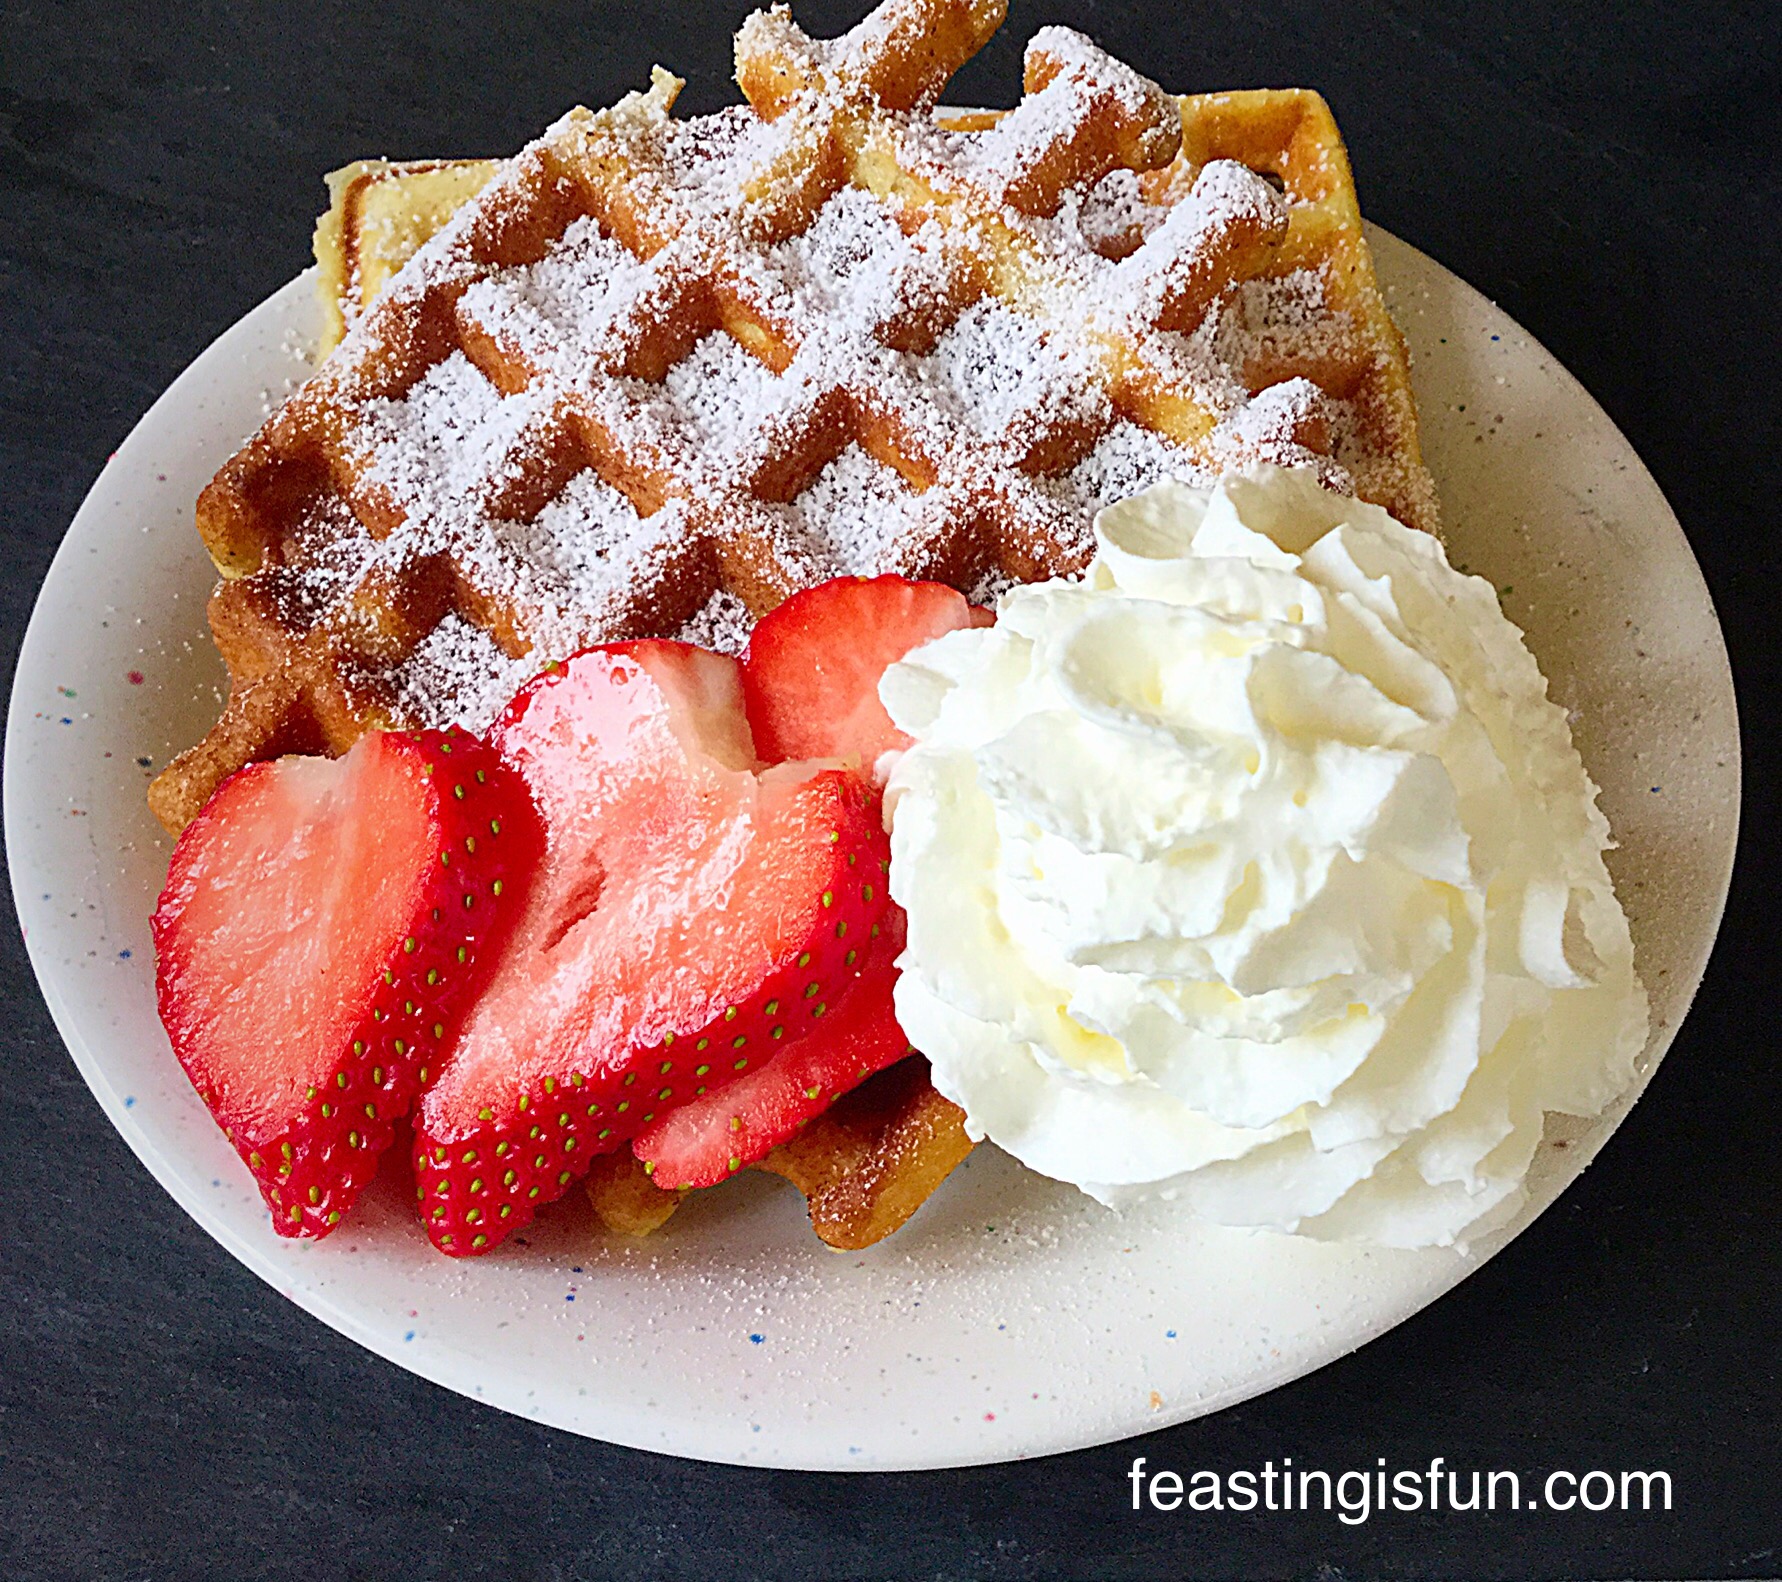
Once the cooking time had elapsed, wearing oven gloves, I pressed the large button, opened the waffle maker and there were my very first, deliciously cooked waffles.

I used a simple wooden spatula to lift each cooked waffle from the waffle plate. Again metal, or anything abrasive should not be used against the waffle plates, as this may damage their non stick surface.

Andrew James Waffle Maker Review
Andrew James Waffle Maker and my first ever waffles!

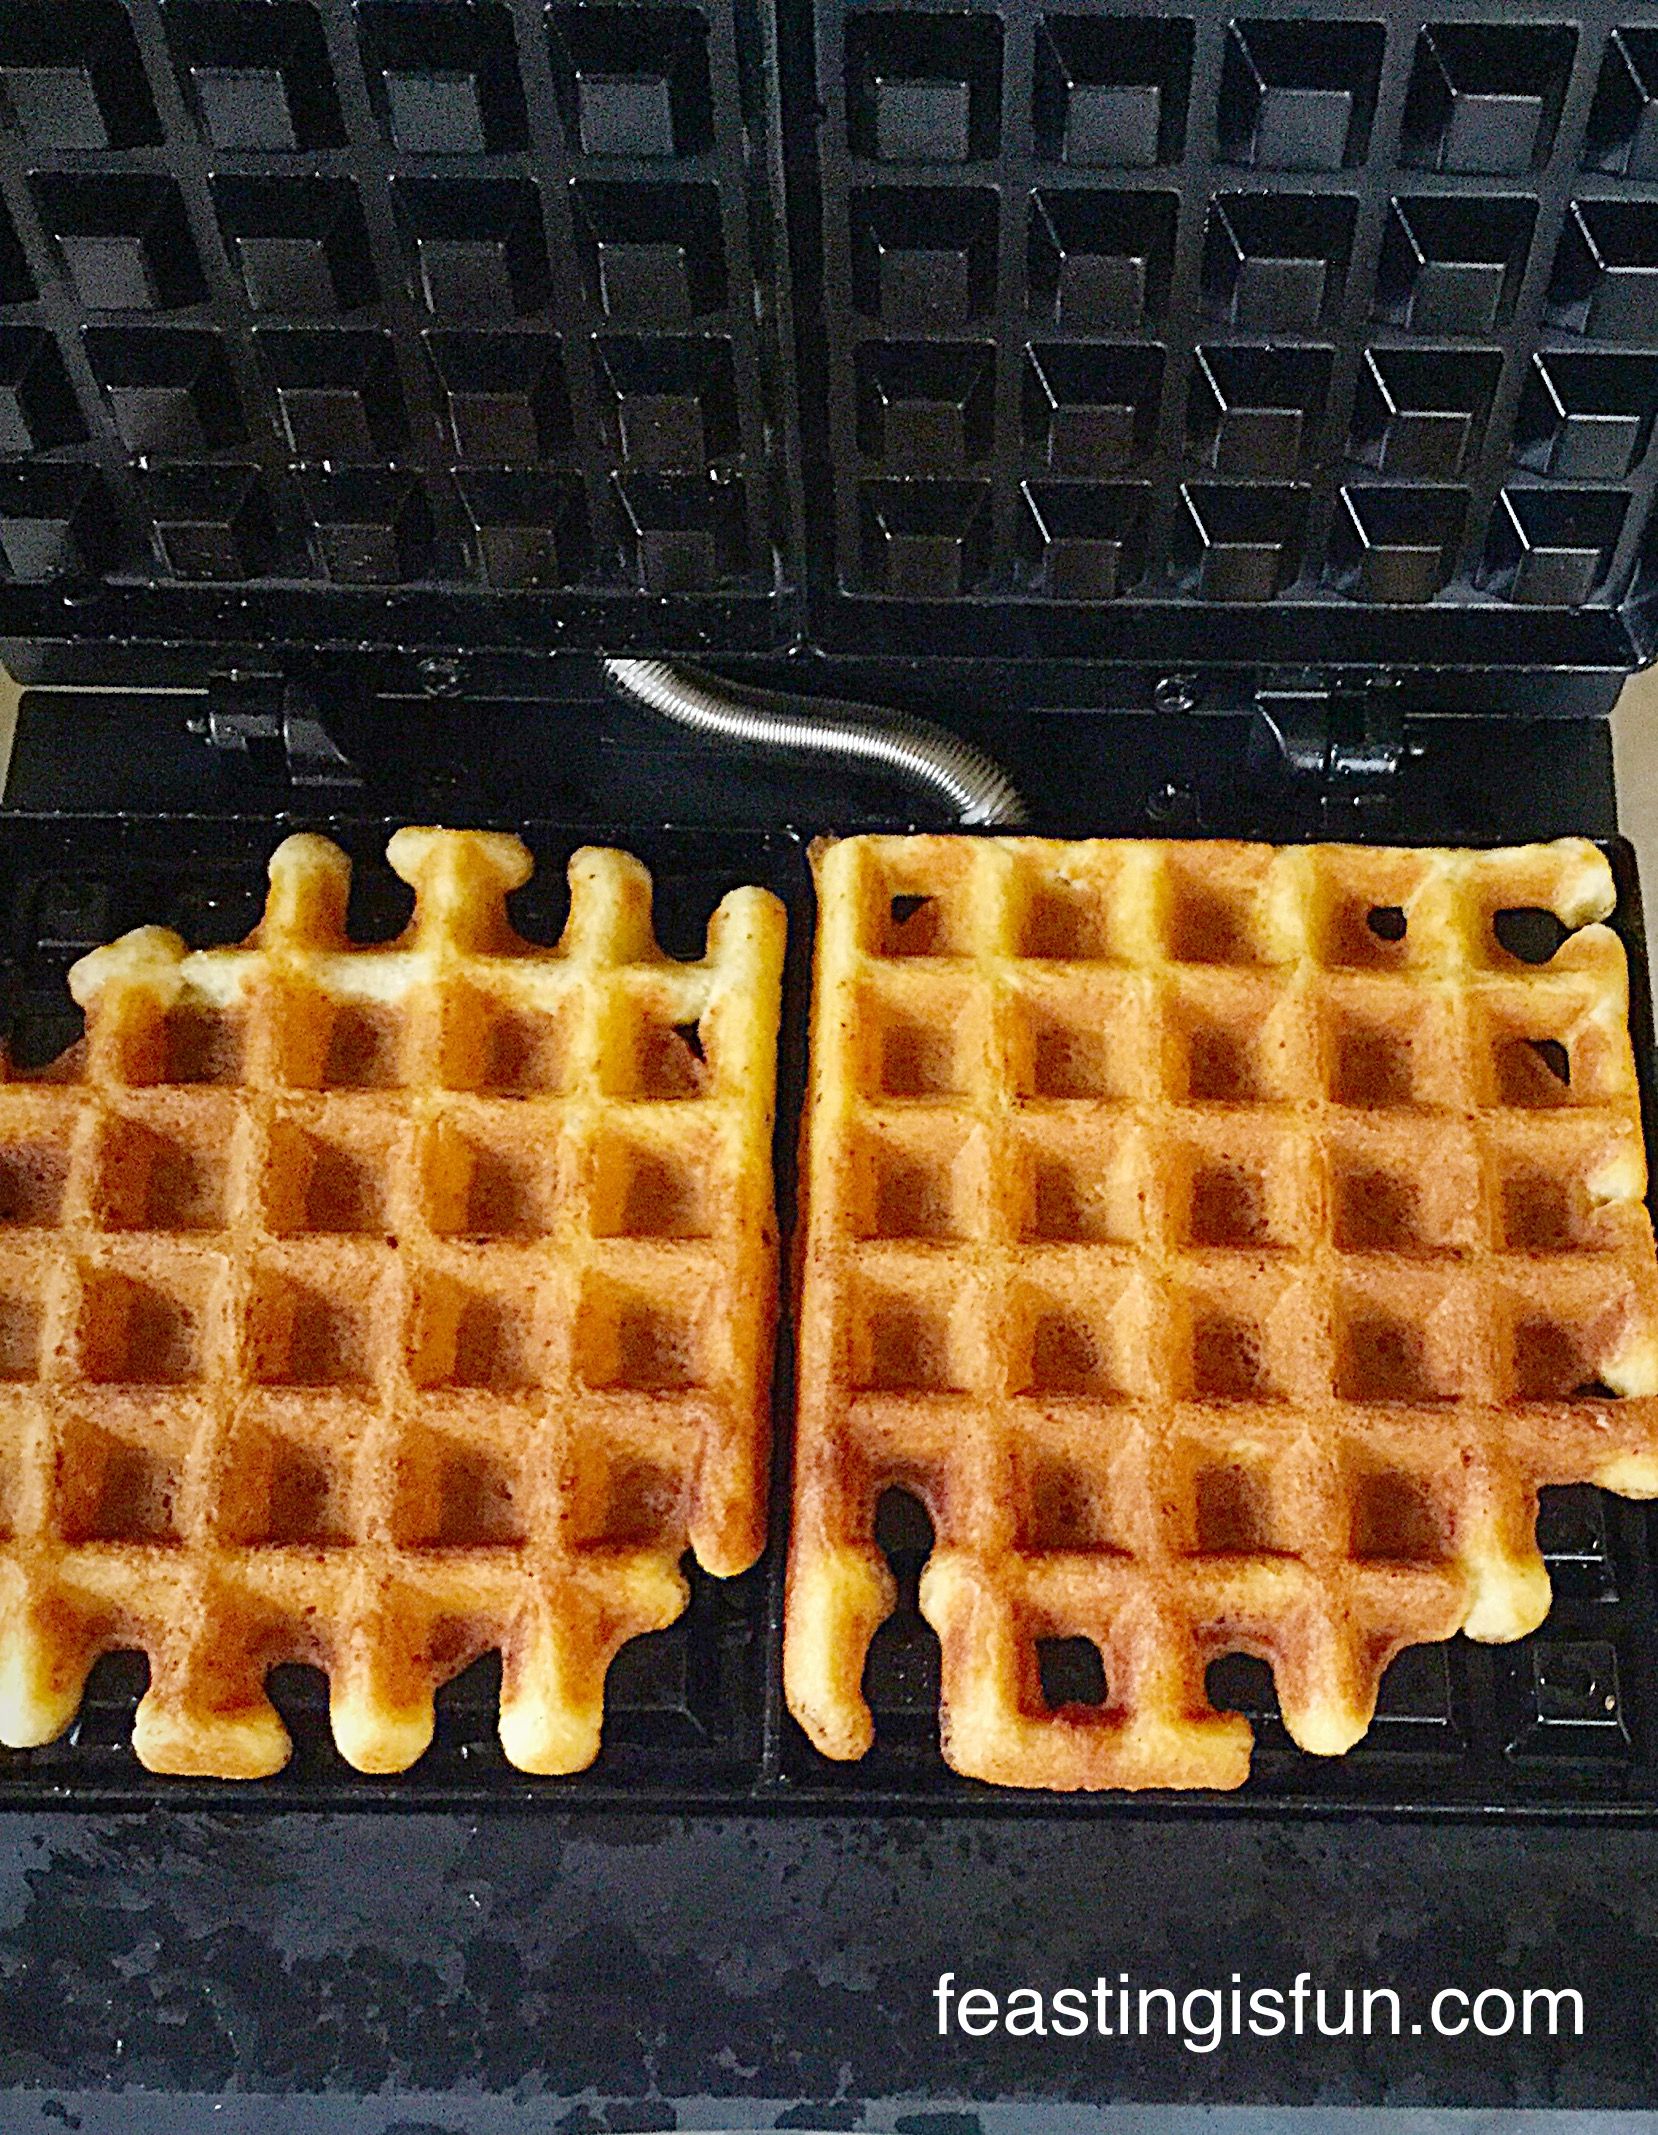
You will notice that the waffles above have slightly irregular edges. This is because not enough waffle batter has been added to the waffle plates. However, from experience, I personally think it is better to slightly under fill the waffle maker. Once you have made your first two waffles you can slightly adjust the amount of batter added to the waffle plates.

If you overload the waffle plates with too much batter, you will still get beautiful waffles, as well as batter oozing out of the sides of the closed waffle maker and excess batter cooking on the hot surround of the waffle plates.

Although I found this relatively easy to clean up, it is a waste of waffle batter. I want all my batter to turn into delicious cooked waffles!

Andrew James Waffle Maker Review
Stacks of waffles cooked two by two with the Andrew James Waffle Maker

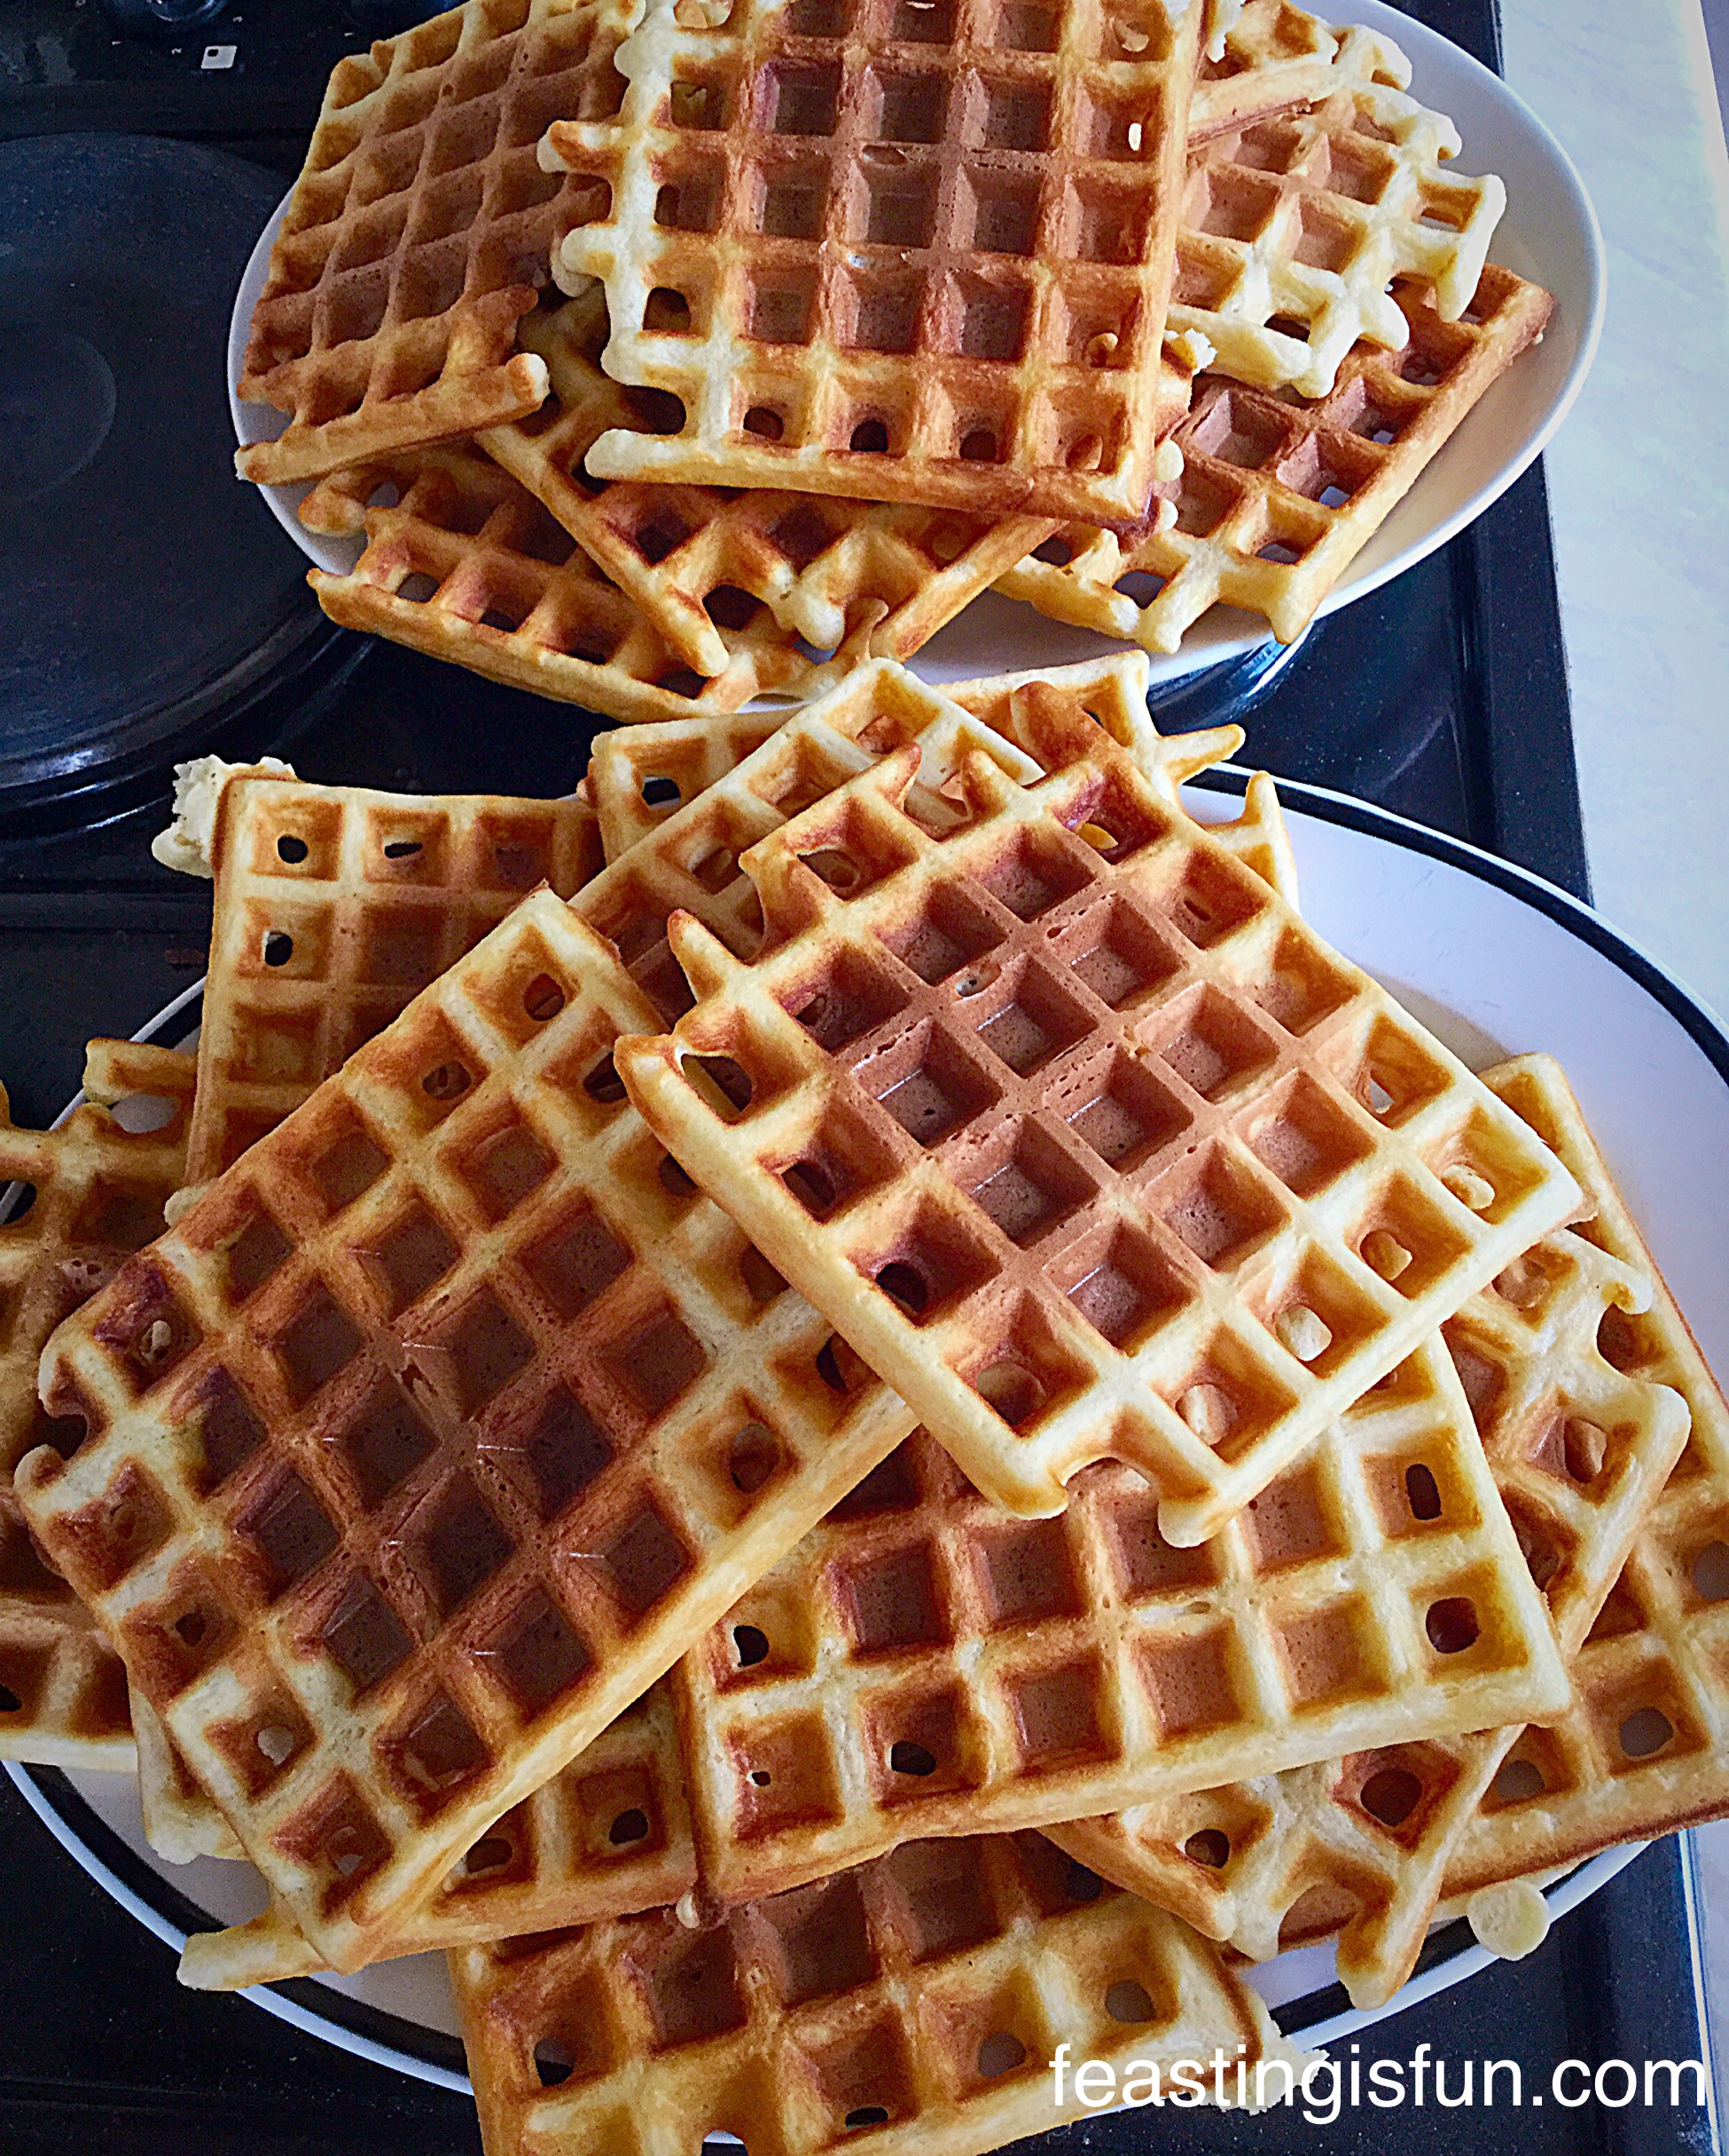
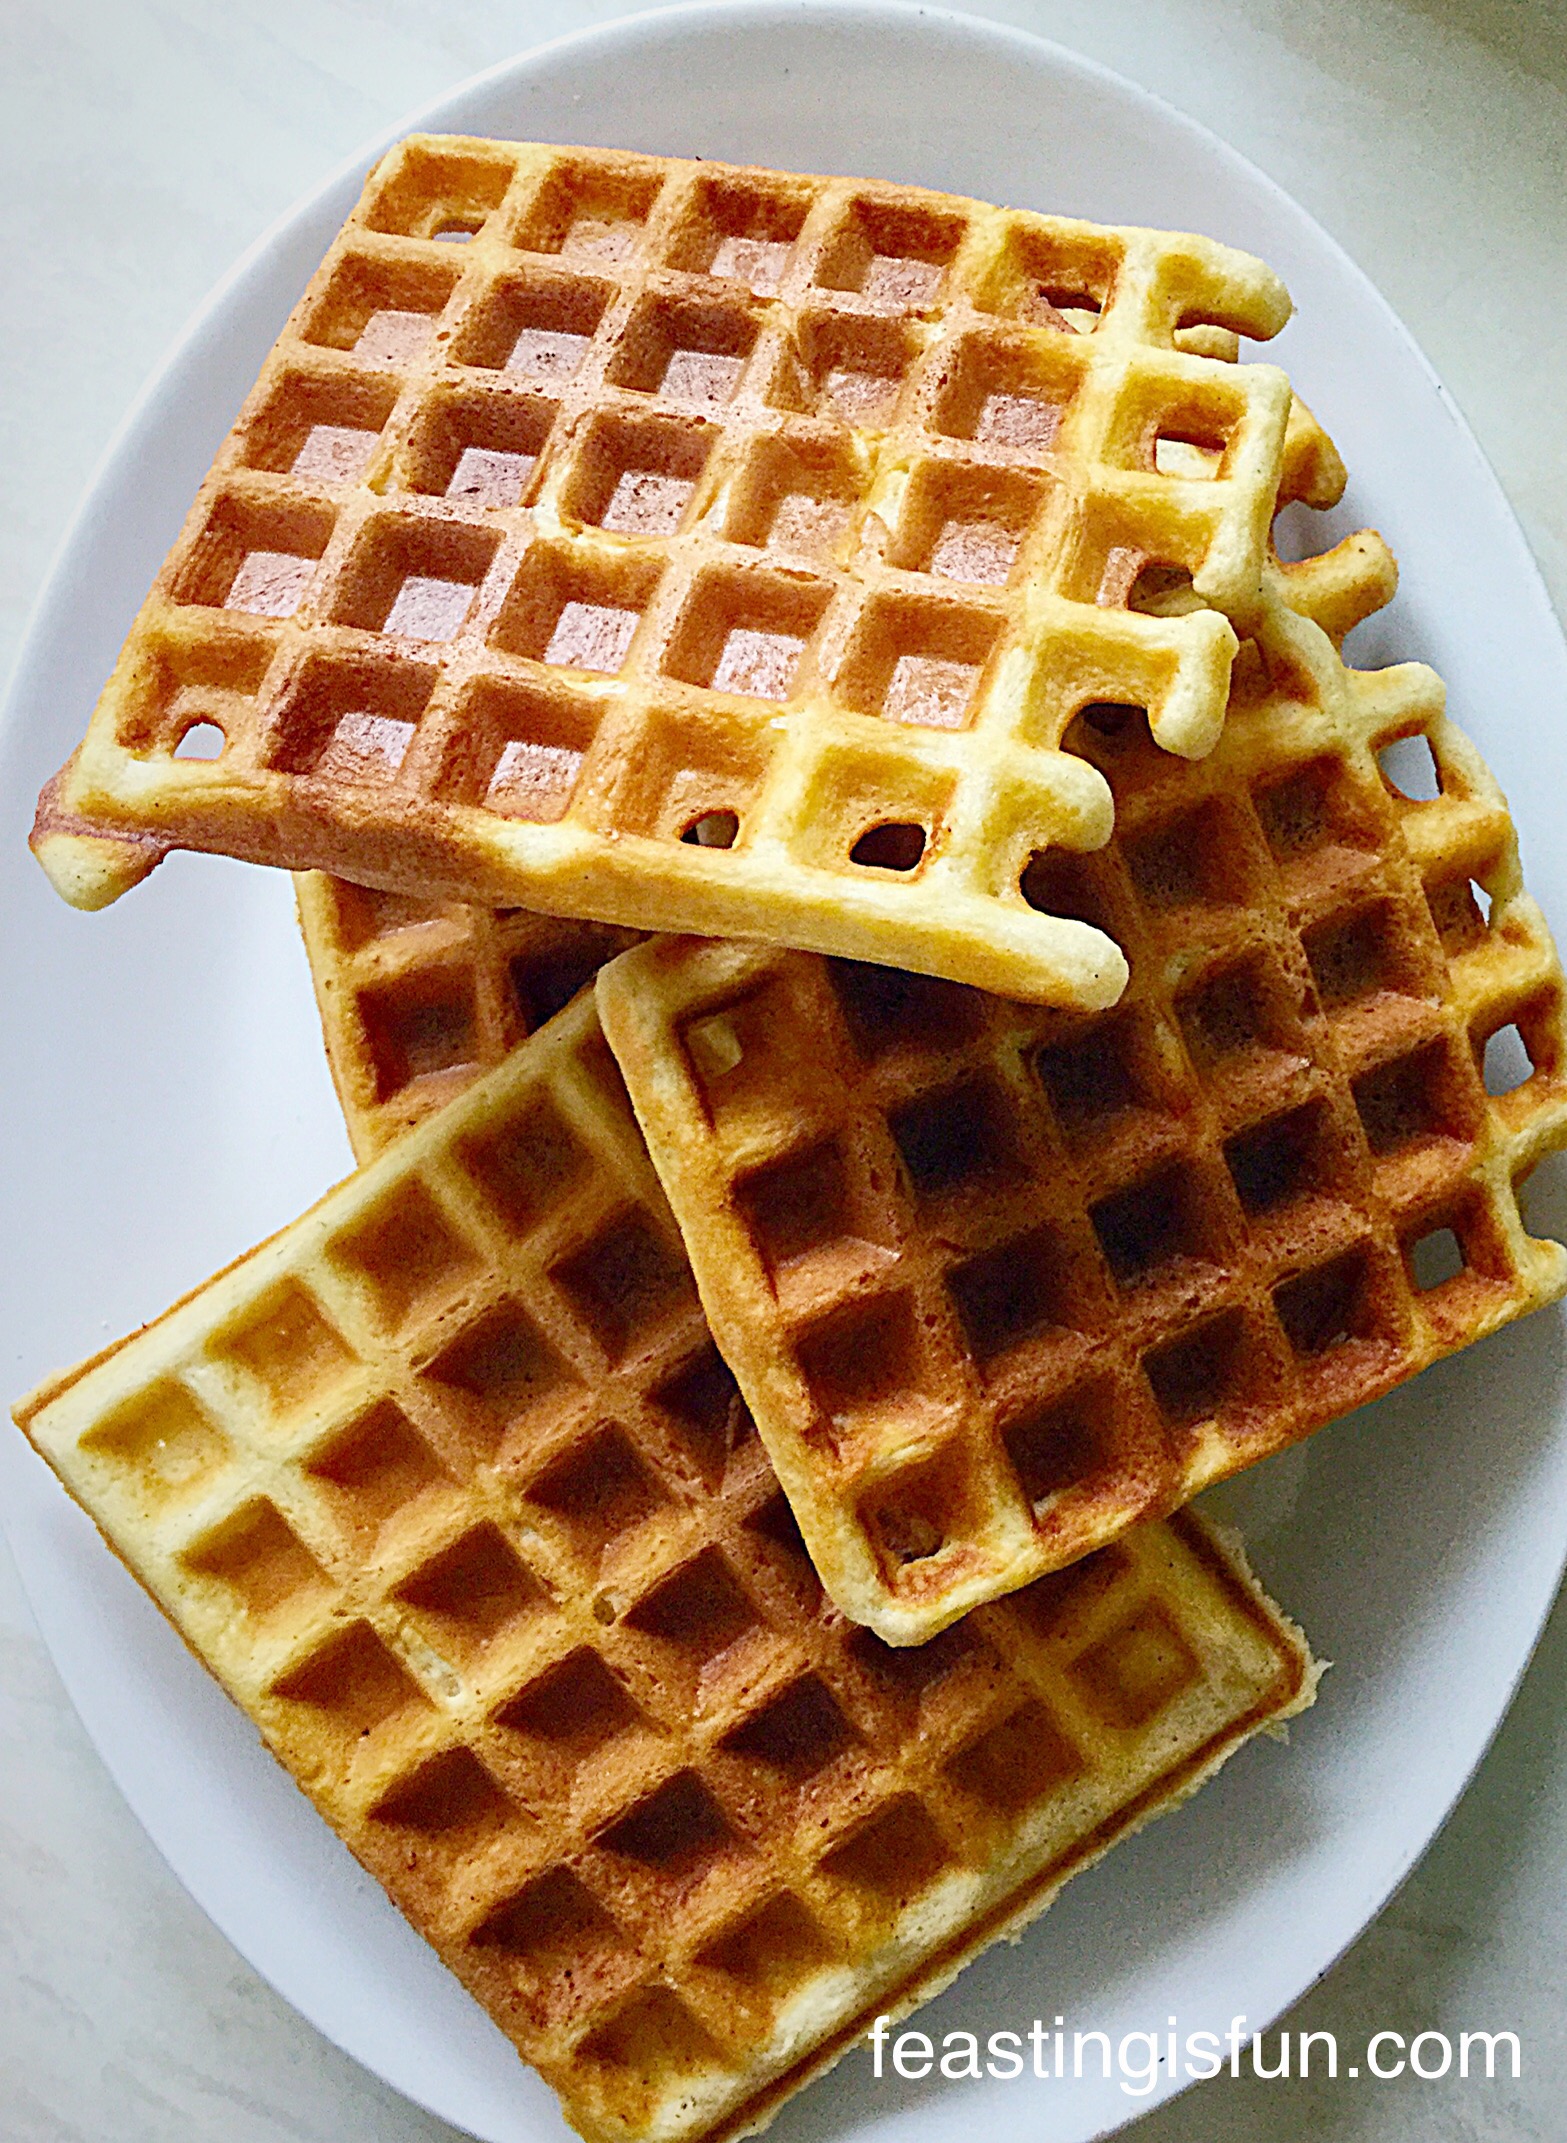
Over the period of 2 weeks I cooked over 60 waffles using the Andrew James Waffle Maker. I tested different recipes and consistency. Above is a picture of 28 waffles cooked one after the other, with the waffle plates having only been greased at the start of the waffle making marathon.

What I found was complete consistency, throughout the process – obviously quantity of batter added to the plates and cooking time were kept the same. Also throughout the whole review period NOT A SINGLE WAFFLE STUCK!

After each cooking session was complete, the waffle maker was switched off and left open to cool before cleaning. To be completely honest this was the part that I was not looking forward to!

Cleaning the Andrew James Waffle Maker

Once cold and unplugged I used the wooden spatula to scrape any excess cooled batter from the waffle plate surround. Then using a cloth rinsed in warm soapy water I wiped over the entire inside of the waffle maker. Certainly on the waffle plate surround, where excess batter had stuck, I had to rub a few times to clean it off. I then wiped around the back of the waffle maker, where the hinges are. Finally I found that the underside of the waffle maker became greasy, so that was then thoroughly wiped. I left the waffle maker open to dry and before packing away gave the top a quick wipe over and then dried with a clean tea towel.

Each time I cleaned the waffle maker it took no longer than 5 minutes.

To conclude, I absolutely love this Andrew James Waffle Maker! It was very easy to operate and use. During the waffle making marathon it proved to be consistent and durable. I was able to create a range of new recipes, both savoury and sweet, so it ticked the versatility box.

The Andrew James Waffle Maker has most certainly earned it’s place in my kitchen and is now classed as an essential kitchen appliance for me. I thoroughly recommend this waffle maker.

If you like waffles, you will love the smell of them freshly cooking, in your own home, using the Andrew James Waffle Maker.

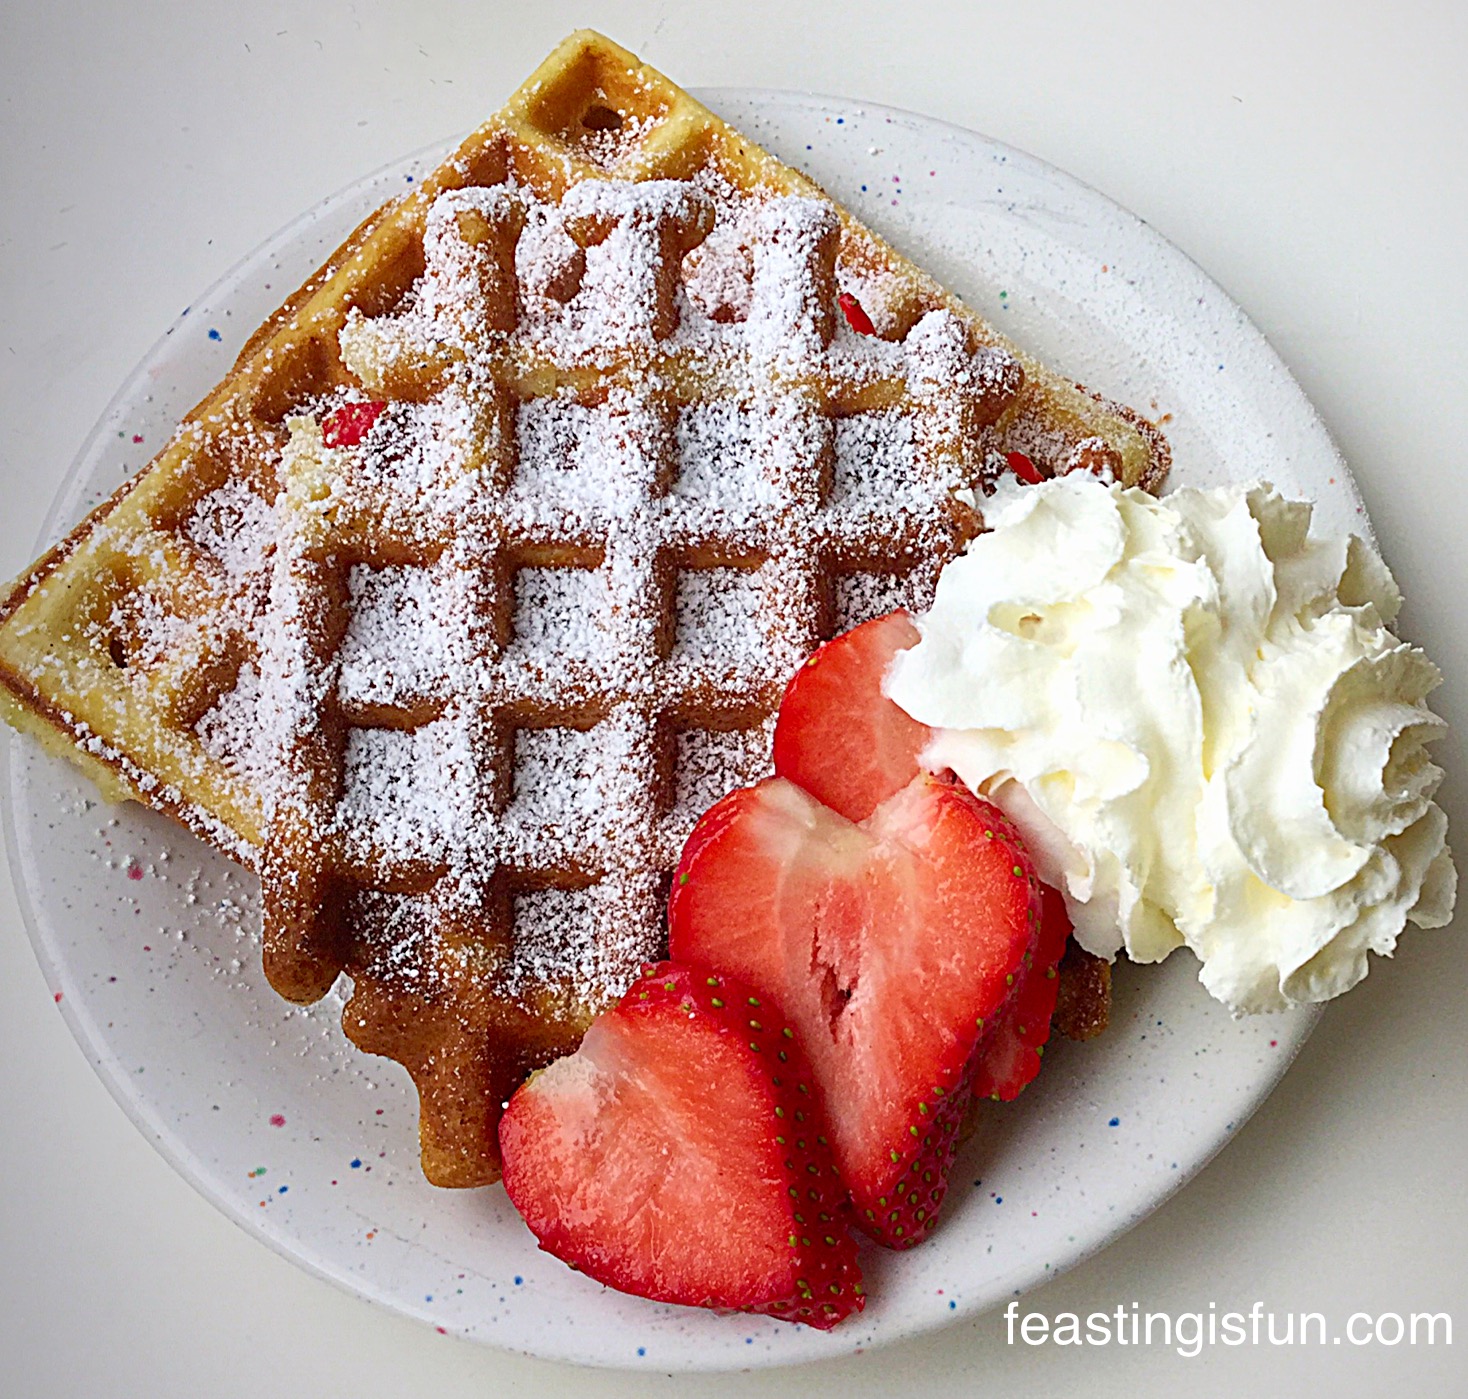
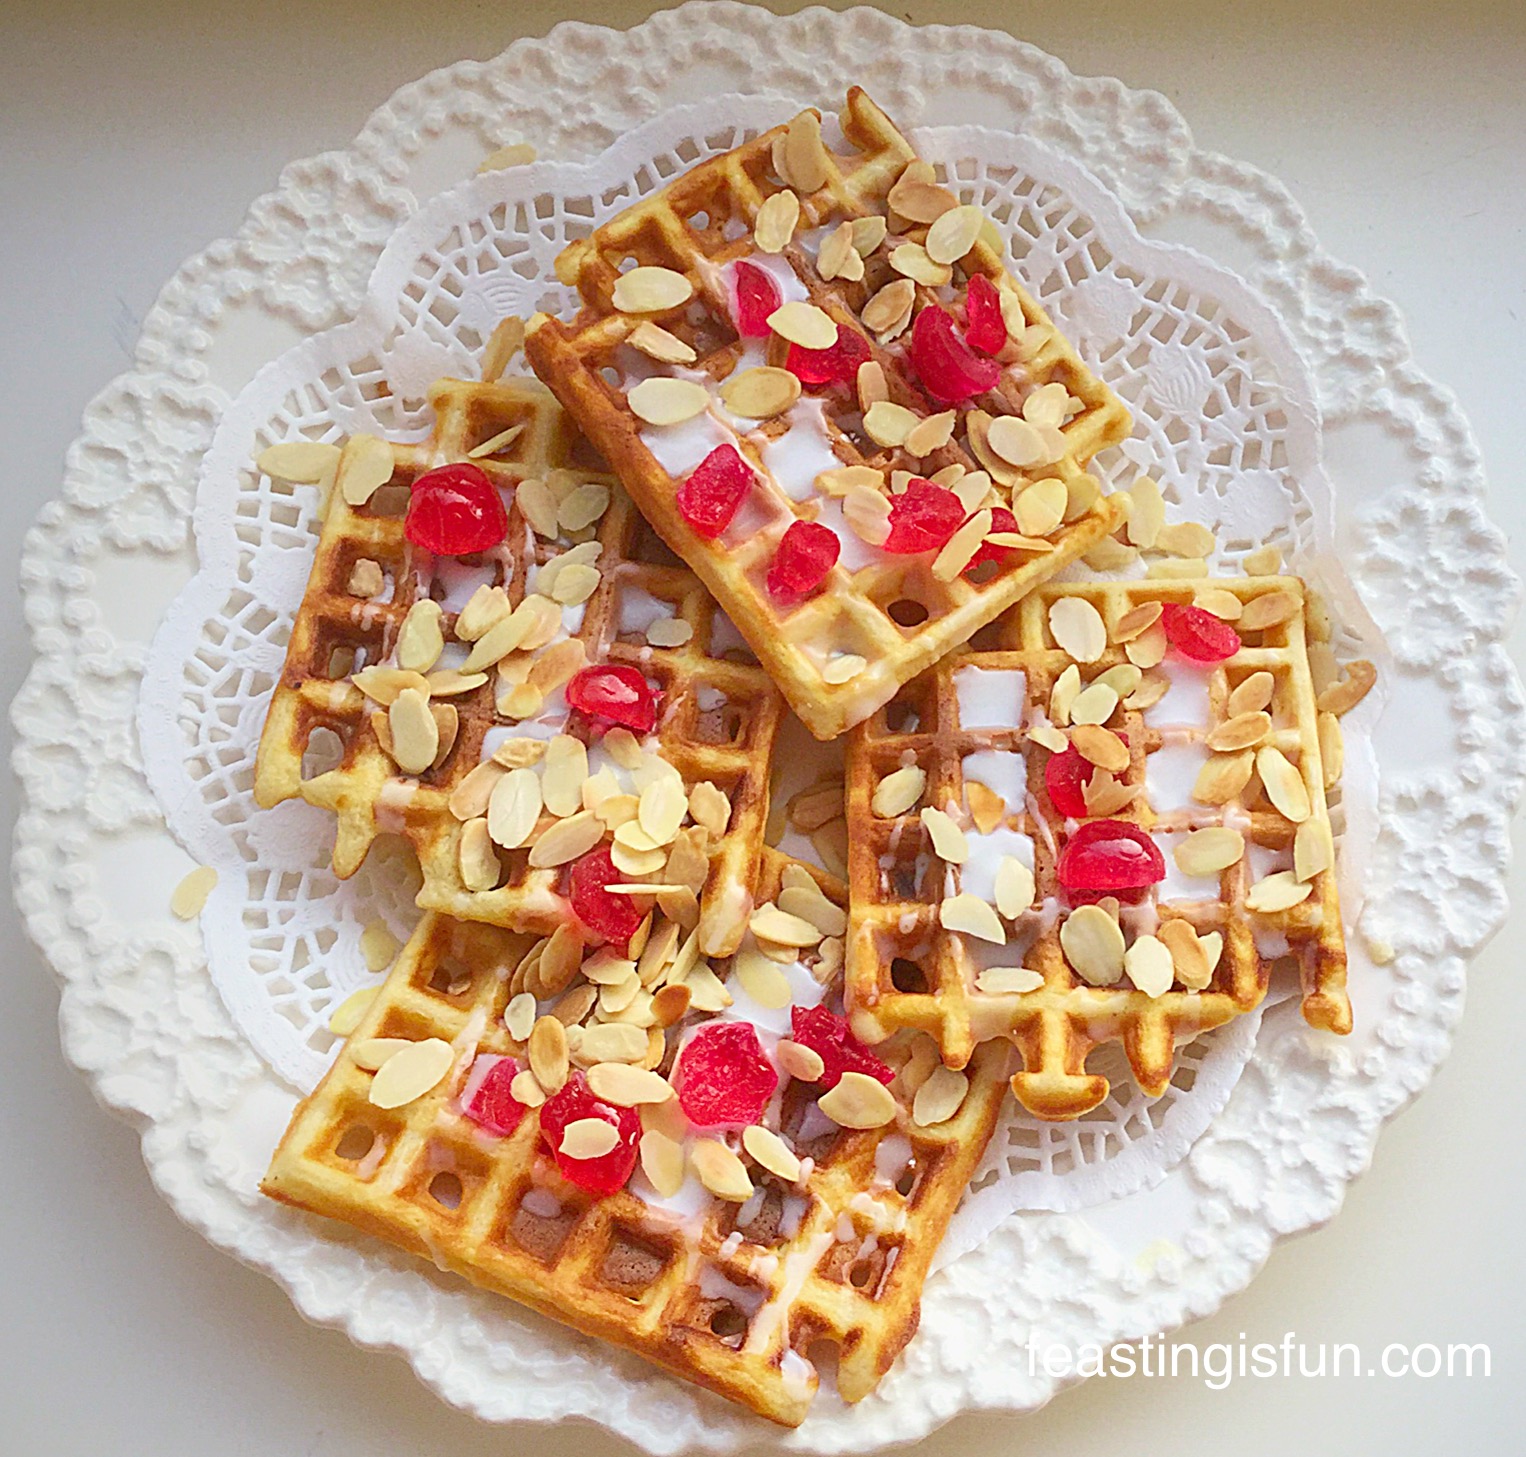
Cherry Bakewell Waffles makes 8

Andrew James Waffle Review
Cherry Bakewell Waffles utterly delicious.

Vanilla Bean Waffles

200g/7oz Sugar and Crumbs Cherry Bakewell flavour icing sugar – alternatively use plain icing sugar with 1/2tsp almond extract added

50g/2oz Flaked Almonds lightly toasted

8 Glacé Cherries chopped into quarters

Sift the icing sugar into a bowl and add enough water to make a light drizzling consistency. Stir well to ensure there aren’t any lumps.

Toast the Vanilla Bean Waffleyou want them very slightly crisp.

Drizzle the flavoured icing over the waffles. Add a few pieces of cherry to each waffle and then scatter over with toasted almond flakes. Serve immediately, or let cool and keep in an airtight container for 3 days.

These are great for afternoon tea, picnics, or with a large latte and a good book!

In fact, these Cherry Bakewell Waffles are perfect any time of the day.

Smoked Salmon Waffle Appetisers makes 16

Andrew James Waffle Maker Review
Smoked Salmon Waffle Appetisers

These Smoked Salmon Waffle Appetisers are a perfect savoury twist for the waffle and they are completely delicious! Perfect for parties.

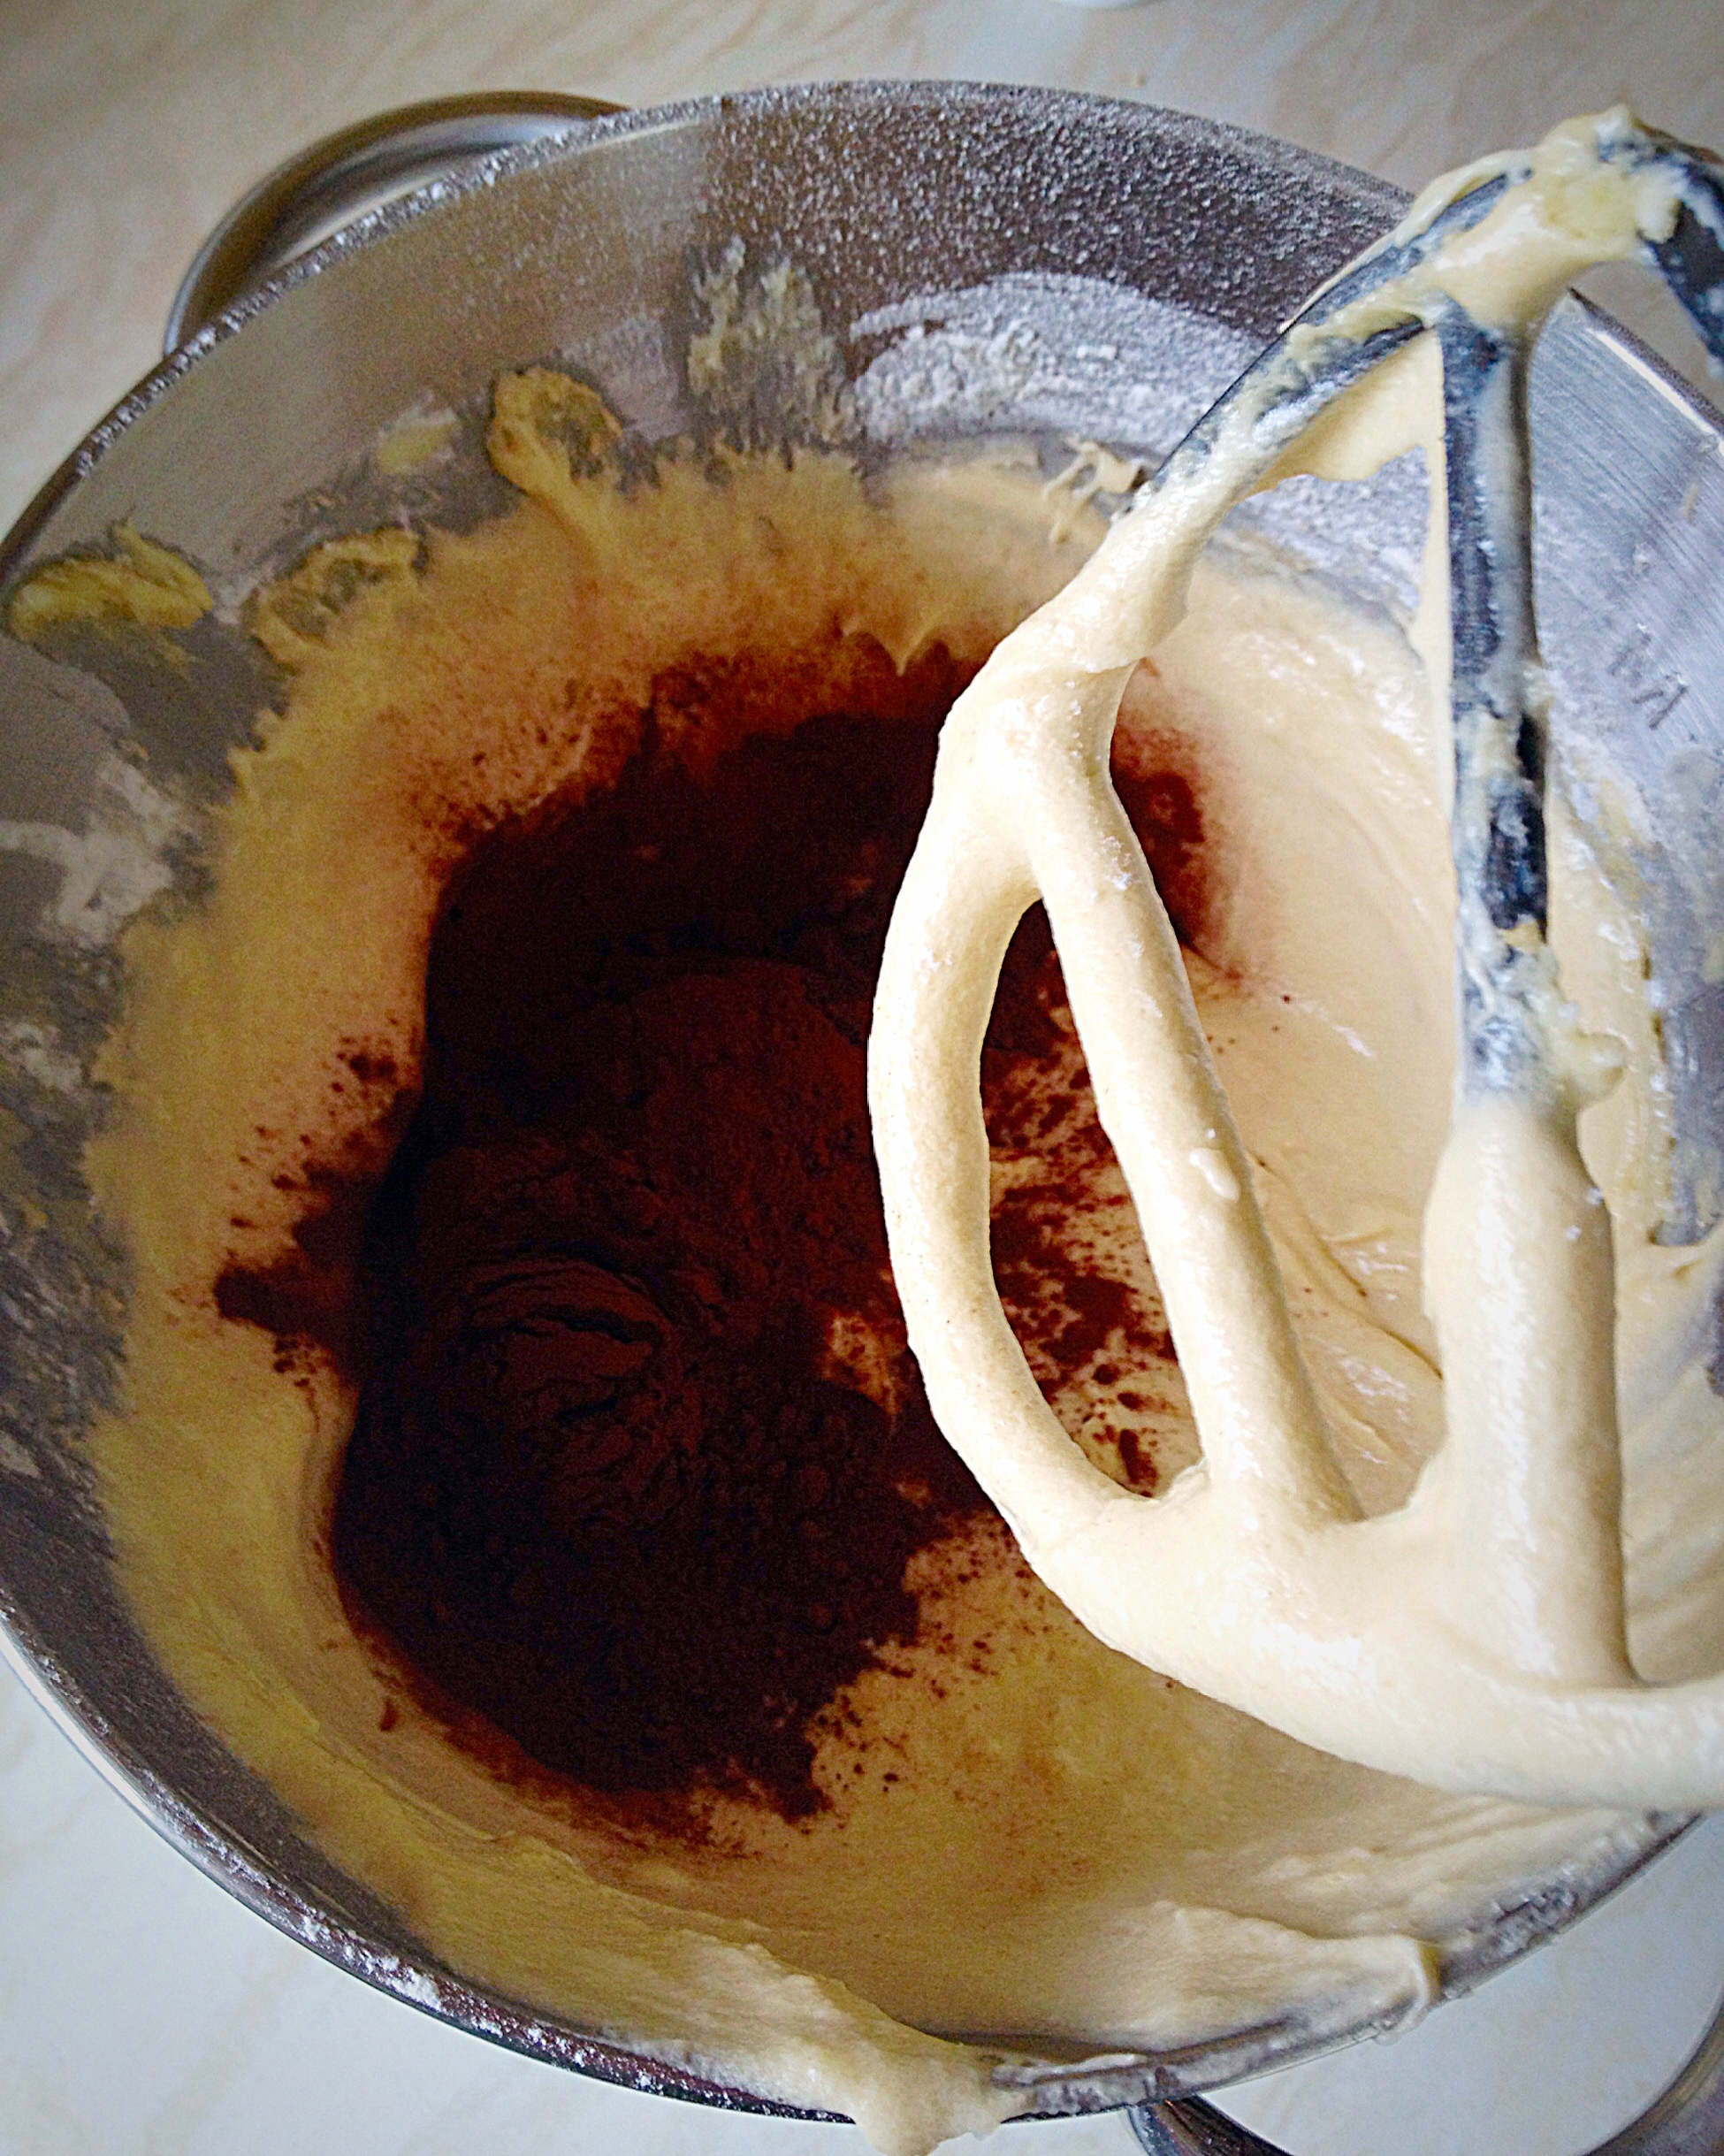
Use the Vanilla Bean Waffle recipe only adding 10g of sugar and leaving out the vanilla bean paste.

You need 4 waffles for this recipe – excess waffles can be frozen in a zip lock freezer bag for up to one month.

Toast each waffle so that it is slightly crisp. Set aside on a rack to cool.

Place 200ml Creme Fraiche into a bowl.

Add 4 heaped teaspoons of creamed horseradish sauce (I used the hot variety).

Stir to combine – add salt and pepper to taste.

Cut each waffle into quarters.

Place a teaspoonful of the horseradish/creme fraiche sauce on top of each waffle quarter.

Top with a slither of smoked salmon.

Sprinkle over chopped chives, or dill and serve on a platter.

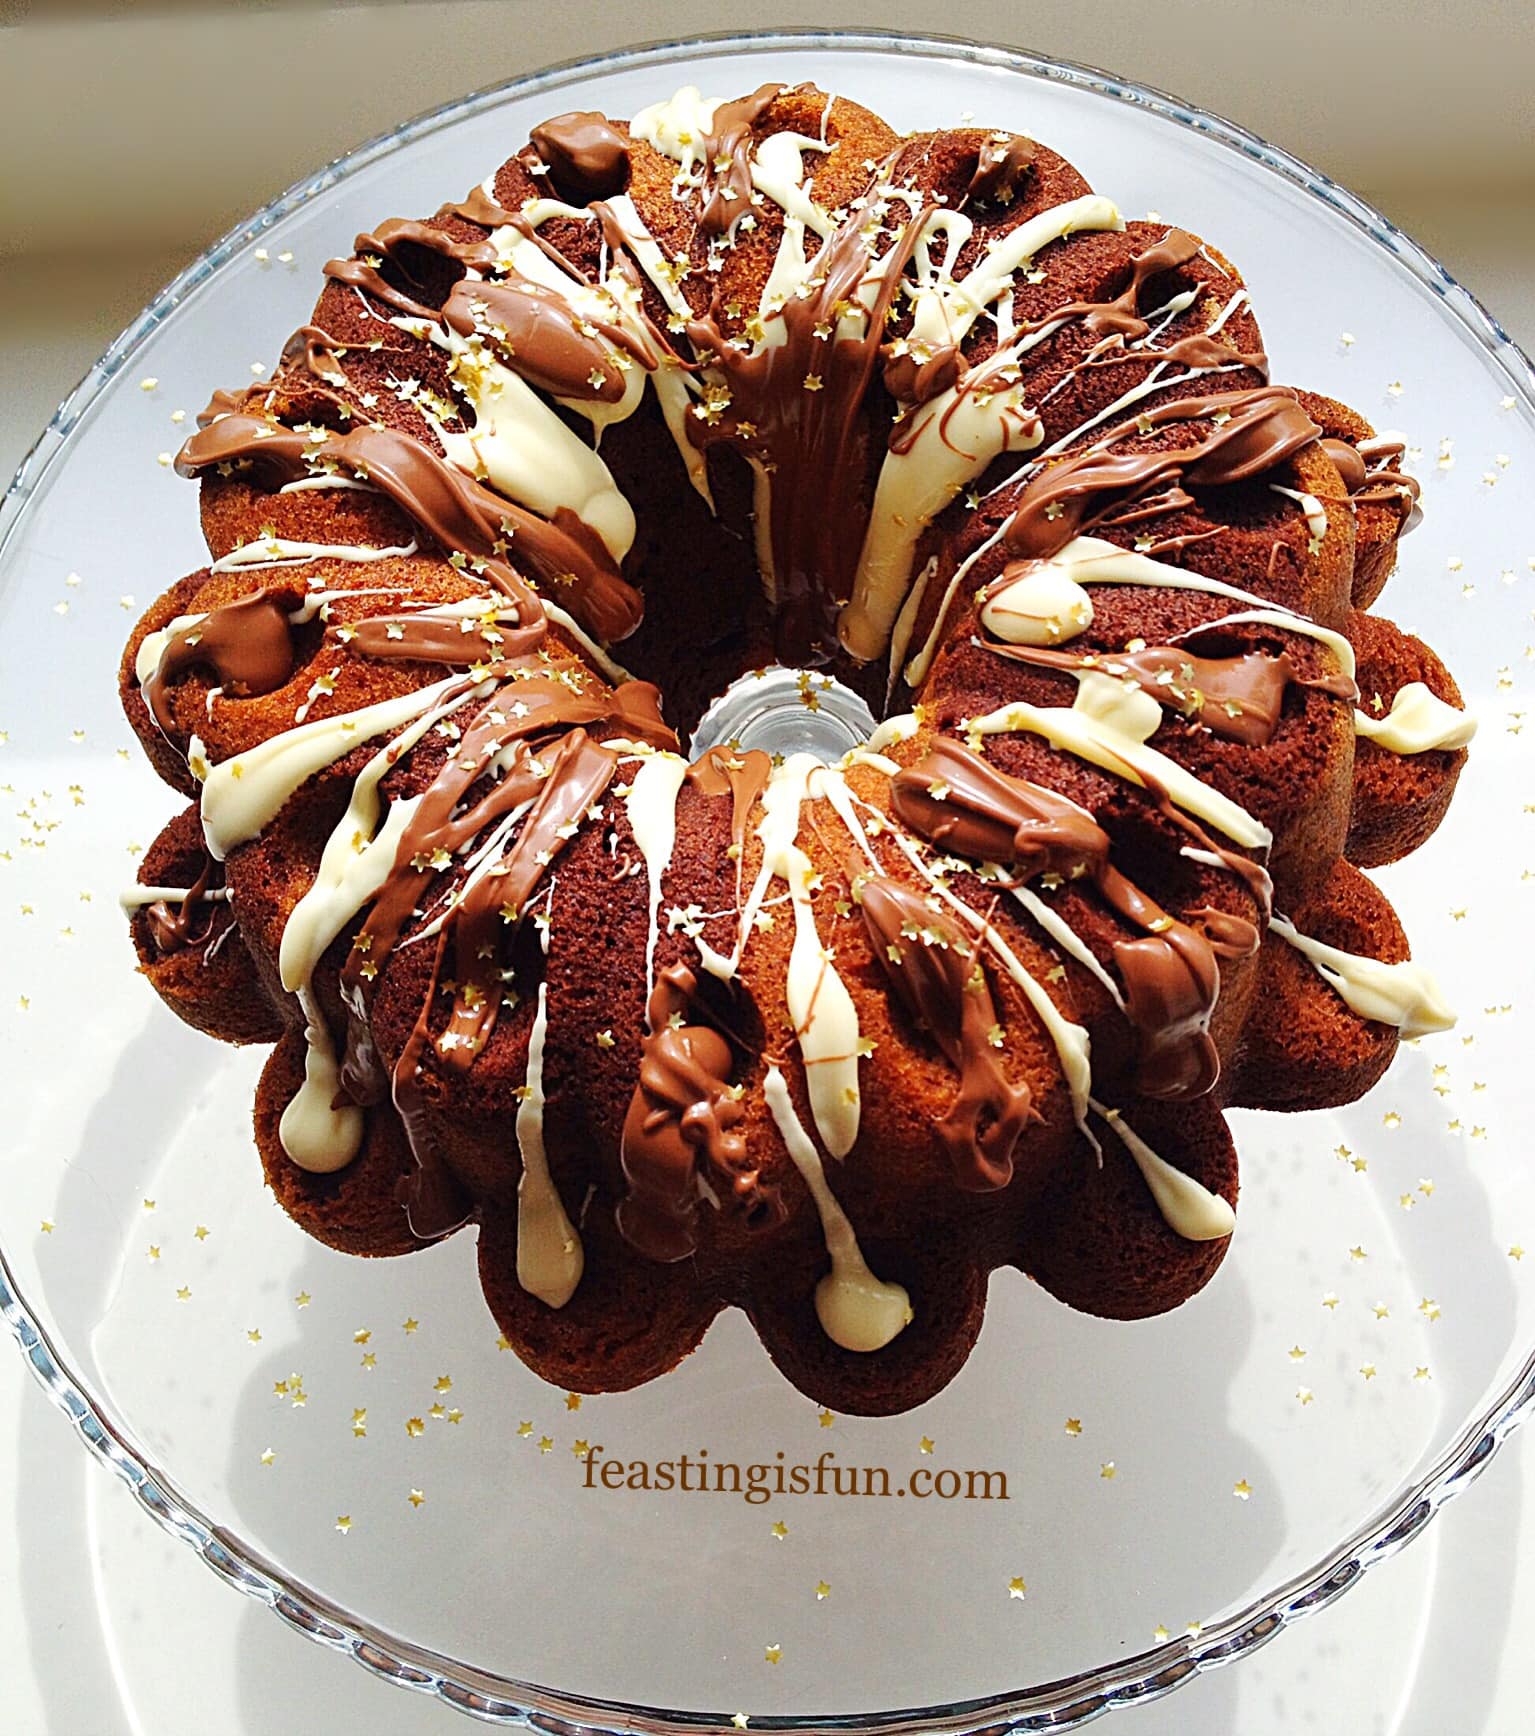
If you have enjoyed the Andrew James Waffle Maker review you are sure to enjoy these recipes too:

Chocolate Dunking Waffles 

Andrew James Waffle Maker Review
Chocolate Dunking Waffles have fun with your waffles!

Vanilla Bean Waffles with Boozy Berry Sauce

Andrew James Waffle Maker Review
Vanilla Bean Waffles with Boozy Berry Sauce a classy dessert.

Do you love waffles?

Would you like to experience the aroma of freshly cooked waffles in your kitchen?

I for one am a complete waffle convert. I have loved seeing how tasty and versatile they are. Most of all, I have realised how much fun they can be. Breaking the ‘rules’ by dunking them in delicious hot chocolate, or serving as a classy appetiser with smoked salmon. Who knew??

As always have fun with your waffle experience. Enjoy the feasts you create and don’t forget to tag me in on Twitter/Instagram, I love seeing your makes and bakes.

Sammie xx

@sammiefeasting Twitter/Instagram/Pinterest

All opinions, recipes and content are my own. I did not receive payment for carrying out this review. Please see my Disclosure Policy.

To see the Andrew James Waffle Maker I reviewed please click here.


Share
Facebooktwitterpinterestlinkedintumblr

Vanilla Bean Waffles

Share
Facebooktwitterpinterestlinkedintumblr

Vanilla Bean Waffles. Just think on that for a while, whilst you gawp stare graciously at this picture.

Waffles on a plate with sliced strawberries and whipped cream.

Light and fluffy inside, crispy and golden outer, these Vanilla Bean Waffles may just about be the best invention for breakfast, since sliced bread got a one-up and became toast!

Two waffles on a plate in the foreground with a stack of waffles and strawberries in the background.
Vanilla Bean Waffles

I have wanted a waffle maker for longer than I care to remember. This in itself is kind of odd, seeing as I’ve never eaten a waffle before in my life! Let alone made one. Yet after watching Diners, Drive-ins and Dives on Food Network UK, where Guy Fieri travels around the U.S. visiting various eating establishments. Since seeing all the incredible waffles sold all over the U.S.A I have been craving them. While I haven’t ever bought them pre-made from the supermarket, or even eaten them at a cafe or restaurant, I wanted to make them.

Homemade Food Tastes Better

It’s a little thing of mine, if I can buy it I want to make it. With only a couple of exceptions, don’t mention the croissants homemade always tastes better than pre-made, packaged, mass produced, supermarket produce.

Please don’t misunderstand me? I really couldn’t manage without the convenience of my weekly online grocery shop, especially as I cannot drive at the moment. Rather, it is simply that, fresh from the Waffle iron, these Vanilla Bean Waffles are a million miles away from their shop bought counterpart. Plus you can switch up what you add to them.

AJ Vanilla Bean Waffles
Vanilla Bean Waffles better than shop bought?

Fortunately our daughter has eaten (and loves) shop bought waffles. Her verdict after eating two Vanilla Bean Waffles was a firm 10 out of 10 and “so much better than any I’ve eaten before” verdict. And that response was thrilling. She can be a tough cookie and 8.5 out of 10 is usually the highest she goes! So I knew I’d struck gold with this recipe.

Served warm with a dusting of icing sugar, super fragrant strawberries and a swirl of cream to seal the deal, the plate you see above was my lunch.

Oh boy. Why have I waited so long? All these years I’ve been missing out on the absolute, utter deliciousness of homemade waffles. Plus I was pretty pleased that I’d managed to nail the recipe on my first attempt!

Back to the waffles. You must try these. Seriously, even if you’re not the worlds greatest cook, with this recipe and a trusted Andrew James Belgian Waffle Maker, you can’t go wrong.

Note: It is always recommended that you read through the entire recipe before proceeding. This applies to all recipes on this site and in general.

Recipe: Makes 10 Vanilla Bean Waffles

This recipe assumes that you have read the waffle maker’s instruction booklet and carried out any pre-treatment required. Mine was simple to wipe over the non stick plates with a clean, damp cloth.

  • 120g Unsalted Butter
  • 3 Large Free Range Eggs
  • 150ml/5fl oz Whole Milk
  • 1tsp Vanilla Bean Paste – I use Nielsen-Massey 
  • 30g/2tbsp Caster Sugar
  • 225g/8oz Plain Flour – Self Raising can be substituted, omit the baking powder
  • 2tsp Baking Powder
  • 1/8tsp Salt – I use Maldon-sea salt

Method:

Making The Waffle Batter

  • First of all place the unsalted butter into a small saucepan on a low – medium heat. Allow the butter to completely melt. Remove from the heat and allow to cool.
  • While the butter is cooling crack the eggs into a large bowl. Give them a quick whisk.
  • Add the milk, sugar and vanilla bean paste to the eggs and lightly whisk to combine.
  • Once cooled weigh 100g of the melted butter into the egg, milk, sugar, vanilla bean paste mixture and whisk briefly to combine (wet ingredients).
  • Weigh the flour and sift along with the baking powder and salt into the bowl containing the wet ingredients.
  • Gently mix both the wet and dry ingredients together until just combined – over mixing will lead to tough waffles.

Prepping The Waffle Maker


AJ Vanilla Bean Waffles

  • While the Waffle Maker is switched off brush the melted butter so that it completely covers each of the waffle plates.
  • Close the waffle maker and switch on. For the Andrew James Belgian Waffle Maker it is ready to cook with when the green ‘ready’ light illuminates.
  • Using oven gloves, to protect your hands, as the top of the waffle make plus the waffle plates get very hot, press the button and open the waffle maker.

AJ Vanilla Bean Waffles

  • Use an American 1/4 cup measure (50ml – 2 heaped tablespoons).
  • Close the lid of the waffle maker and set a timer for 5 minutes.
  • Ensure the room is well ventilated as the cooking process produces steam.
  • I found 5 minutes to be the optimum time for cooking these Vanilla Bean Waffles in this waffle maker. Adjustments to time maybe needed if using a different brand.
  • Really enjoy the smell as the waffles are cooking – don’t be surprised if your neighbours line up at your front door!
  • After 5 minutes, wearing oven gloves, press the button to release the lid of the waffle maker.
AJ Vanilla Bean Waffles
Vanilla Bean Waffles.
  • Use a wooden spatula to help remove the waffles from the plates. They come away really easily. Most importantly do not use anything metallic to remove the waffles as it could scratch the non stick coating on the waffle plates.
  • Repeat adding 1/4 cup (50mls) as before to each plate.
  • Continue until all the waffle batter has been used.
  • As soon as the last waffle has been removed switch the waffle maker off and leave to cool.
AJ Vanilla Bean Waffles
Vanilla Bean Waffles.

What I Added To The Waffles

Enjoy your Vanilla Bean Waffles however you want.

I added sliced strawberries, a dusting of icing sugar and some whipped cream. Our children reheated their waffles in the toaster, before adding various combinations of ice cream, Nutella and strawberries! What you put on yours is up to you. Flavoured fruit or spiced butters work well. Also a drizzle of maple syrup tastes amazing on these golden beauties.

They keep for up to 2 days in an airtight container and can be reheated in the toaster or oven. To freeze, ensure the waffles are completely cold then pack into zip lock bags or containers with an airtight lid. Keep for one month in the freezer.

AJ Vanilla Bean Waffles
Vanilla Bean Waffles

For a first attempt at waffle making I am surprised and pleased with how easy it is. I would happily make these at weekends, invite some friends over for a breakfast party.

Oh wow how much fun would that be?

However you enjoy your waffles, I really hope I have inspired you to have a go and make some at home. They simply taste so unbelievably good.

Vanilla Bean Waffles perfect for feasting, sharing and having fun!

If you have enjoyed making these Vanilla Bean Waffles you may also like these recipes:

Toffee Banoffee Waffles 

FF Vanilla Bean Waffles
Toffee Banoffee Waffles

Chocolate Dunking Waffles

FF Vanilla Bean Waffles
Chocolate Dunking Waffles


Cherry Bakewell Waffles

AJ Cherry Bakewell Waffles
Cherry Bakewell Waffles

Since discovering the deliciousness and versatility of homemade waffles, weekend brunches in our house have become something we all look forward to. And while I have the waffle maker out it makes sense to double up the recipe and freeze some for another day. Also, if you prefer savoury toppings on your waffles, simply leave the vanilla bean paste out of the recipe. Alternatively you could make some plain waffles and then add some vanilla for a sweeter version. Finally, to reheat cold waffles, simply pop them in the toaster.

So, whatever you are making, baking and creating in your kitchens, have fun preparing and sharing your feast.

Sammie xx

The Andrew James Belgian Waffle Maker was provided for the purposes of review. All opinions, recipes and content are my own. Please see my Disclosure Policy.


Share
Facebooktwitterpinterestlinkedintumblr

British Bakeware Product Review

Share
Facebooktwitterpinterestlinkedintumblr

Hello lovely readers. Today I am so thrilled to share with you my British Bakeware Product Review.

British Bakeware produce a wide range of fantastic bakeware that is all manufactured in the UK. If you need a well made, durable piece of baking kit, British Bakeware stock it.

I was sent a Large Baking Tray, 3lb Loaf Tin and 12 Cup Muffin Tray to review. I had so much fun developing recipes and testing each product and am excited to share the final results and my thoughts on their products with you.

Large Baking Tray dimensions 33cm length x 24cm wide x 2.5cm deep

British Bakeware Product Review
Large Baking Tray with a non-stick finish.

This Large Baking Tray has a double non-stick coating and is oven, freezer and dishwasher safe.

Oh, did I mention it comes with a 5 year guarantee – yep a whole 5 years.

I really put this baking tray through it’s paces. From baking sausage rolls, on Christmas Eve, to roasting chicken, making biscuits and baking rolls. This baking tray performed time and time again.

Food cooked evenly and the baking tray was a dream to clean. Although it is non stick I gave it a very light coating of oil prior to using it. Doing so prolongs the life any non stick bakeware.

During my British Bakeware Product Review I developed new recipes. Using this Large Baking Tray I made Roast Chicken Noodle Soup  that is very low in fat and  these Cherry Bakewell Cookies for a little treat!

Cherry Bakewell Cookies
Cherry Bakewell Cookies cooling on the baking tray.

I deliberately did not grease the baking tray, or line with parchment paper. These cookies were very easy to remove, using a palette knife. That for me was the ultimate non-stick test and this large baking tray passed with flying colours.

In future I would line with baking parchment, as it is a great baking tray and I don’t want to scratch it!

Overall I was very impressed with the quality, durability and versatility of this Large Baking Tray.

12 Cup Muffin Tray dimensions 36cm length x 26cm wide x 3cm deep

British Bakeware Product Review
12 Cup Muffin Tray

This Muffin Tray has a double non-stick coating and is oven, freezer and dishwasher safe.

Yes this Muffin Tray also has a whopping 5 year guarantee.

Although this is a Muffin Tray I wanted to bake deep cupcakes in it, to see how it performed.

Vanilla Bean Cupcakes
Baked, golden Vanilla Bean Cupcakes using the 12 Cup Muffin Tray.

With the 12 Cup Muffin Tray I baked a batch of these Vanilla Bean CupcakesThe cupcakes baked evenly across the tray and were easy to remove.

What I particularly like about this Muffin Tray is the lip it has, that runs around the outside, on the top of the tray. This is a fantastic feature when baking any muffin or cupcake with a streusel topping. Inevitably some of the crumbly streusel gets knocked off the top of the muffin whilst moving the tray, this little addition ensures the sticky, crumbly mixture, doesn’t end up on your oven floor!

I do not know anyone who enjoys having to clean the oven!!!

So top marks for that British Bakeware.

This 12 Cup Muffin Tray was easy to clean, baked evenly and can be used for muffins and cupcakes. It is a complete winner all round.

3lb Loaf Pan dimensions 21cm long x 13cm wide x 12cm deep.

British Bakeware Product Review
3lb Loaf Tin

The 3lb Loaf Tin has a non-stick coating and is also oven, freezer and dishwasher safe.

Those of you who know me, know I love baking all sorts of delicious cakes, cookies, pies……

Did you know that I bake almost ALL of our bread?

This 3lb Loaf Tin has been used almost every day, since just before Christmas. I have baked our regular variety of loaves and created 2 new recipes in honour of this loaf tin – if it is possible to love an item of baking equipment, well, let’s just say, don’t try and come between me and this loaf tin. Are we clear???

Time after time it produced fantastic loaves. If you bake bread you NEED this tin. If you don’t and want to start get THIS tin.

I have been baking bread for the best part of 40 years (I started very young!!) and this is, without question, the best non-stick loaf tin I have ever used.

I created a recipe for a Wholemeal Loaf and a Spiced Fruit Loaf

The fruit loaf has a very, very sticky dough, yet it baked perfectly in this Loaf Tin.

British Bakeware Product Review
The 2nd Spiced Fruit Loaf I baked for this British Bakeware Product Review.

The 100% Wholemeal Loaf also baked beautifully in this 3lb Loaf Tin.

British Bakeware Product Review
Delicious and healthy Wholemeal Loaf.

Have I convinced you to start making your own bread yet?

I have thoroughly enjoyed carrying out this British Bakeware Product Review, not least because the products I reviewed were of excellent quality. They withstood the rigours of a normal household kitchen, although, it is probable that I bake more than most.

Whether you are a frequent baker, or not I can thoroughly recommend British Bakeware products. They are very reasonably priced, especially when you consider all three items I reviewed come with a 5 year guarantee and they are made right here in the UK.

Following this British Bakeware Product Review they will now be the first place I turn to when I need baking equipment – in fact I already have a few items on my list!!

As you know I frequently mention sharing on here. First home, wedding, birthday – how about giving a baking gift from British Bakeware? Maybe go one step further, pick a recipe (from feastingisfun of course 😉) buy the ingredients and the bakeware to bake it in and give it as a present?

Here are the links to get you started!

Large Baking Tray

12 Cup Muffin Tray

3lb Deep Farmhouse Loaf Tin

Do you enjoy baking?

Would you like to start baking?

Please let me know. I really enjoy reading your comments. I am not an expert but will always aim to give helpful advice.

Have fun baking, I’m off to do some online shopping at British Bakeware

Sammie xx

British Bakeware provided me with the 3lb loaf pan, large baking tray and 12 cup muffin tray, for me to review. All opinions and content are my own. I did not receive any payment for carrying out this review.


Share
Facebooktwitterpinterestlinkedintumblr

Malted Marbled Chocolate Cake

Share
Facebooktwitterpinterestlinkedintumblr

Hi, thank you for stopping by. While I assume that you like cake, because you’re here on this page, do you also like Maltesers? Delicious chocolate covered balls of malted loveliness that are almost impossible to stop munching on, once the packet/box is opened. So, I’ve come up with a cake  that incorporates all of those lovely flavours. Introducing my Malted Marbled Chocolate Cake.

A cake that tastes of Maltesers

While I started from scratch with this cake recipe I am thrilled with how well the cake has turned out. Aside from adjusting the cooking temperature and time I am pleased to say it was a success!

Since Wilko gave me some products to review (post coming soon) I decided to make this Malted Marbled Chcolate Cake in the square cake tin I had been sent. And, as I already have a  Maltesers Popping Candy Cupcakes  on my site, I knew that switching up the recipe and including the yummy malt flavour would create a winning flavour.

In addition, topping the cake with swirls of milk and white chocolate would not only taste great, but also reflect the marbling pattern within the cake. Also, don’t expect this cake to last very long, if my experience is repeated. Because this large cake only lasted two days, although it was also  shared with Grandparents and friends. Because cake is meant for sharing, don’t you think?

Close up of melted white and milk chocolate cake topping swirled together.
How good does this swirled chocolate topping look?

Recipe :  Malted Marbled Chocolate Cake yields at least 18 slices

For the cake:

350g/12oz Unsalted Butter – plus extra for greasing your cake tin

300g/11oz Caster Sugar

1/4 tsp Salt

2tsp Vanilla Extract – I use Nielsen-Massey

6 Large Eggs – Free Range

350g/12oz Plain White Flour

3tsp Baking Powder

100mls/4floz Whole Milk

5tbsp Powdered Malted Milk Drink – Horlicks/Ovaltine

6tbsp Cocoa Powder – I use Callebaut

For the topping:

200g/7oz Milk Chocolate

100g/4oz White Chocolate

Method : Preheat oven to 180C/160C fan, 350F, gas mark 4

I use a 24cm x 24cm square cake tin (approx 9″ tin).

If using a round cake tin you will need an 20cm/8in with a depth of 10cm/4in. Grease the cake tin (I use butter) and line the base with parchment paper.

Use either a stand mixer – with the beater attachment or alternatively a bowl with a hand held electric whisk.

Making The Two Batters For This Cake

Place the butter and sugar in the bowl.

  • First of all, place the butter, sugar and salt into a bowl.

Whip until light and fluffy.

  • Beat until pale and creamy.
  • Next sieve the flour and baking powder into a separate bowl – dry mix.
  • Crack the eggs into a jug – I actually crack them individually into a small bowl, then transfer them to a jug. Then add the vanilla extract to the eggs. Beat lightly with a fork – wet mix.
  • Add one third of the dry mixture to the bowl, mix in lightly.
  • Now add half of the wet mix and continue mixing until just incorporated.
  • Repeat again, finishing with the final third of dry mixture. Mix until just combined.
  • Add the malted milk powder and milk, mix until combined.

Scrape down the sides of the bowl using a rubber spatula.

  • Scrape down the sides of the bowl with a spatula.
  • As soon as the mixture has been scraped down into the bowl give everything a final mix.
  • Spoon half of the cake batter into a separate bowl.

Remove half of the cake batter to a separate bowl.


  • Add cocoa powder to one half of the cake batter.

Add the cocoa to the mixer bowl.

  • Mix in the cocoa powder.
  • Using a spatula scrape the sides of the bowl ensuring the cocoa is fully combined.

Once the cocoa is completely incorporated, scrape down the sides of the bowl and mix.

Creating The Marbling Effect With The Chocolate And Vanilla Cake Batters

  • To build the Malted Marble Chocolate Cake add the two separate mixes as shown in the photographs below.
  • Add three scoops of chocolate cake batter to the tin.

Add the cocoa batter in three separate dollops to the cake pan.


  • Add the vanilla cake batter on and around the chocolate mix.
Add the vanilla batter on and around the cocoa batter.
  • Finally add the remaining chocolate and vanilla batter in rough layers

Add the rest of the cocoa/vanilla batter in rough layers.


  • Use the handle of a wooden spoon to swirl the two batters together.
Malted Marbled Chocolate Cake - using the handle of a wooden spoon swirl the two batters together, without mixing them into each other.
Malted Marbled Chocolate Cake
  • Resulting in a swirled, marbled cake effect.
Perfectly swirled - Malted Marbled Chocolate Cake!
Perfectly swirled – Malted Marbled Chocolate Cake!

Baking The Malted Marbled Chocolate Cake

  • Place your cake tin into the centre of a preheated oven.
  • Bake for 1hr – 1hr 15 mins, until an inserted skewer comes out clean. Allow two thirds of the cooking time to elapse before checking your cake.
  • As soon as the cake is baked remove from the oven.
Malted Marbled Chocolate Cake - fresh from the oven.
Malted Marbled Chocolate Cake
  • Allow the cake to cool in its tin for 15 minutes.
  • Then run a palette knife around the outside edge of the cake to loosen it.
  • Turn out the cake and allow to completely cool on a rack.
  • As soon as the cake is cool it is time to create the gorgeous, swirly, chocolate topping.

Adding The Chocolate Swirled Topping

  • Break up or chop each chocolate and place in separate bowls. I melt the chocolate using the microwave on medium setting in 30 second bursts. Remove the bowl from the microwave when there are still a few lumps in the melted chocolate and stir continuously until the chocolate is smooth. Be extra careful with white chocolate – it is very easy to overheat in the microwave.
  • Set the bowls of chocolate aside to cool.
Malted Marbled Chocolate Cake - cooled with cooling, melted chocolate, ready for decorating.
Malted Marbled Chocolate Cake
  • Cool the chocolate until it has thickened but is still pourable.
  • First of all pour the melted milk chocolate over the top of the cake.

Malted Marbled Chocolate Cake - pour over the melted milk chocolate.

  • Spread the chocolate so that it covers the top of the cake.

Malted Marbled Chocolate Cake - use a spoon to smooth the melted chocolate over the top of the cake.


  • Drizzle over the melted white chocolate.
Malted Marbled Chocolate Cake - drizzle the white chocolate on top.
Malted Marbled Chocolate Cake
  • Using a skewer or cocktail stick swirl the two chocolates together, creating a marbled effect,

Malted Marbled Chocolate Cake - use a skewer to swirl the two chocolates together.

  • Set the cake to one side, somewhere cool, alternatively refrigerate, to allow the chocolate to set.

The swirled chocolate topping perfects finishes this Malted Marbled Chocolate Cake.


And now you have a delicious Malted Marbled Chocolate Cake to share! Because of its size, this cake is ideal for a celebration, family gathering, a houseful of friends as it feeds a lot of people. Most importantly this bake is perfect for feasting, sharing and having fun.

A cut slice of the cake showing off the hidden marbling.

Serve by slicing the cake in half and then cutting as shown in the photo above.

Store any leftover cake in an airtight container. Refrigerate during warmer weather.

Whole square cake on a clear glass cake stand.
Malted Marbled Chocolate Cake

If you have enjoyed this recipe for Malted Marbled Chocolate Cake you may also like these:

Marbled Chocolate Bundt Cake

Marbled Chocolate Bundt Cake

Maltesers Malted Chocolate Loaf Cake

Maltesers Malted Chocolate Loaf Cake
Maltesers Malted Chocolate Loaf Cake.

Chocolate Marble Celebration Cake

Chocolate celebration cake covered with chocolate fudge ganache, topped with Maltesers and surrounded with chocolate marble pencils.
Chocolate Marble Celebration Cake

Since this cake tastes of Maltesers you could add them as a decoration. Either around the base of the cake, keeping some melted milk chocolate back and using as glue, or on top. And this is the advantage of baking a cake at home. Since you decide how it should be decorated. Resulting in a cake that is unique and tastes a million times better than it’s mass produced alternative.

So, whatever you are making, baking and creating in your kitchens, have fun preparing and sharing your feast.

Sammie x

Wilko sent me some items to review. And most importantly all of opinions are my own. I was not paid to write this post. No part of this post may be reproduced or duplicated without the written permission of the owner. Please see my Disclosure Policy.


Share
Facebooktwitterpinterestlinkedintumblr