Happy holidays to all of my wonderful readers. Since we are all getting in the festive mood here at Feasting headquarters (home!) I have an easy to make and delicious gluten free dessert to share. While you can absolutely make this Snowy Black Forest Roulade with regular wheat flour, using a gluten free alternative ensures this dessert recipe is available to more people. And we are all about inclusivity here at Feasting is Fun.
Making A Genoise Sponge
Since I have never made a gluten free genoise sponge before, I wanted to attempt it. No fat is added when making a Genoise Sponge. Rather, whisking eggs and sugar until light and foamy. And then you carefully fold both the flour and cocoa powder into the mix. Most importantly is to be careful not to knock out the whipped air. Resulting in a baked sponge that is beautifully light.
Because adding cocoa can have a drying effect on the sponge, I worried whether the cake would hold up to being rolled. Since a good roulade sponge should withstand rolling, without cracking. So the possibilities of how wrong this sponge could go, seemed endless. Maybe this bake would fail? Yet the only way to know, was to try.
Gluten Free Genoise Sponge Roulade
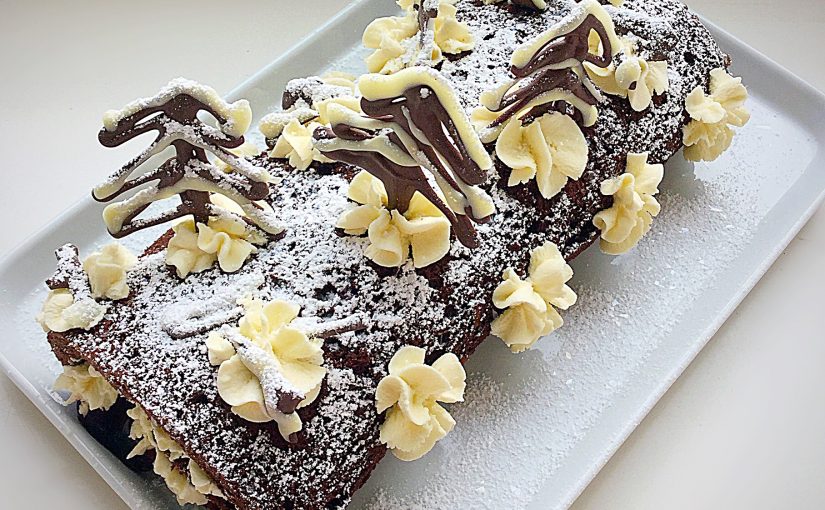
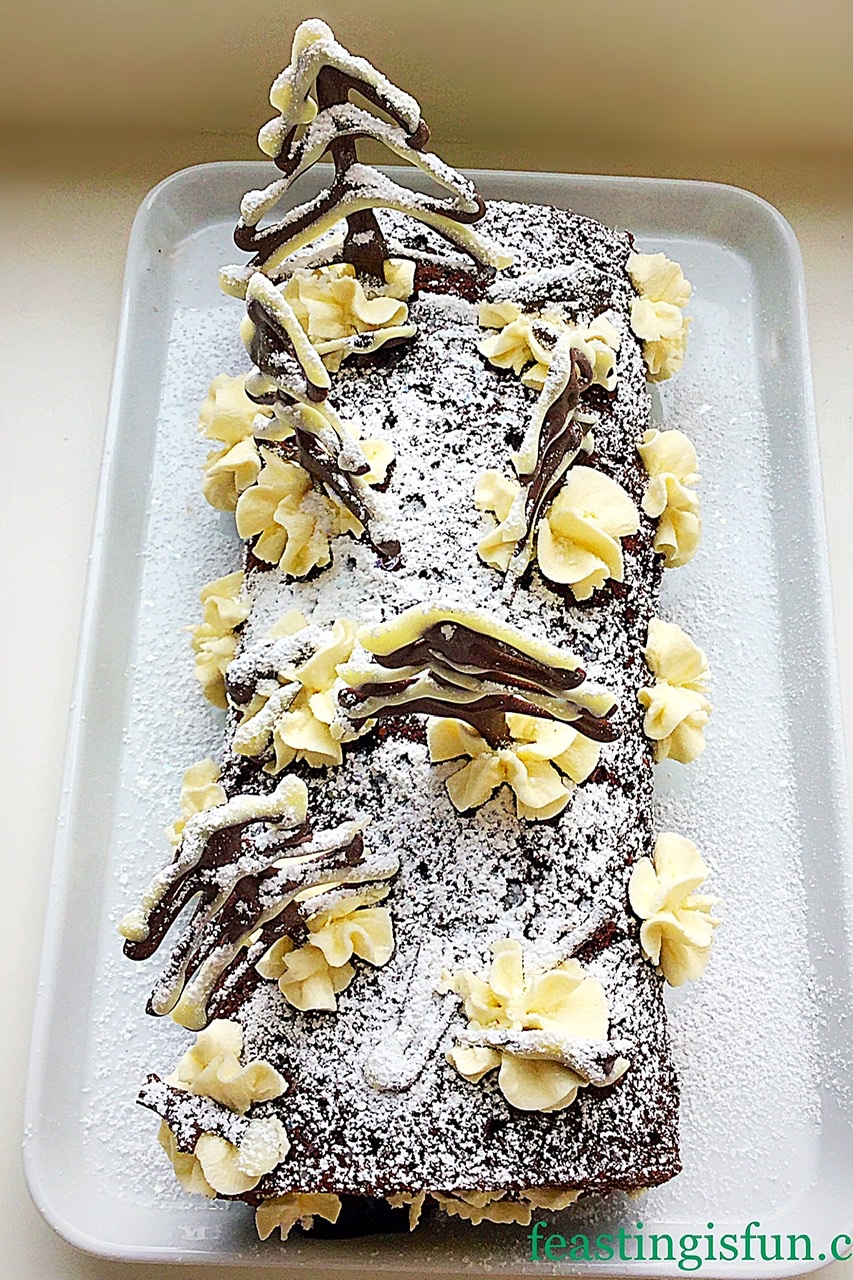
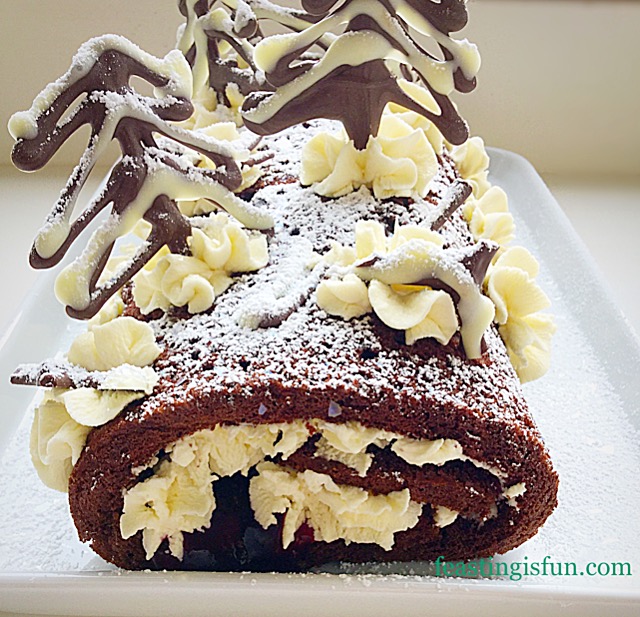
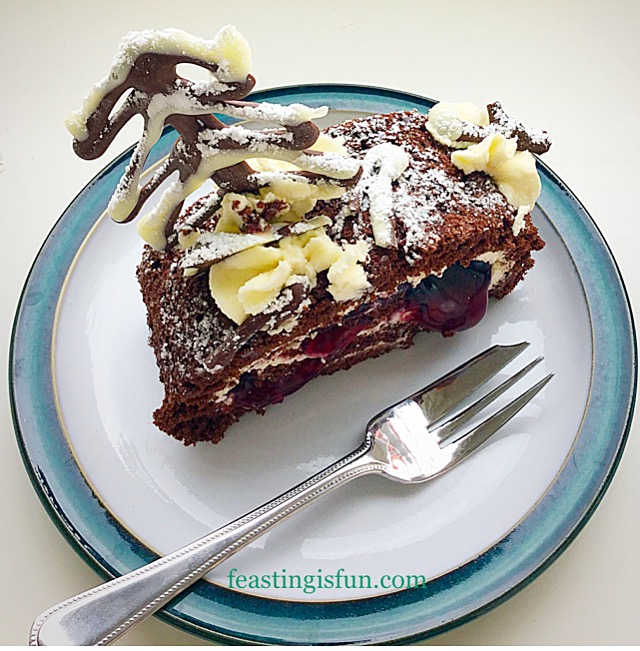
So, the gluten free chocolate genoise sponge was made and baked. And as you can see from the photos, it did indeed roll, without cracking and the flavour is utterly delicious. Light, soft, chocolate sponge, filled with kirsch flavoured whipped cream and soft, sweet cherries. One mouthful of this Snowy Black Forest Rouladand I am completely lost in one of my favourite flavour combinations.
Finally, my taste testers were happily enjoying eatythe roulade, completely unaware it was gluten free. A very positive sign. Since I have baked quite a few gluten free recipes, it’s a thrill when the texture and flavour are spot on. A soft, yielding sponge, that tastes just like a sponge should. As a result of this bake I have plans to make another gluten rolled sponge, that is simply flavoured with vanilla or lemon.
I find that the proof of the pudding is in the eating! And when plates and bowls are left empty, I am satisfied that whatever I have made is a hit. Our children can be brutally honest, especially Snugs, our youngest daughter. She scored this Snowy Black Forest Roulade at 9 out of 10. Another success for the Feasting kitchen.
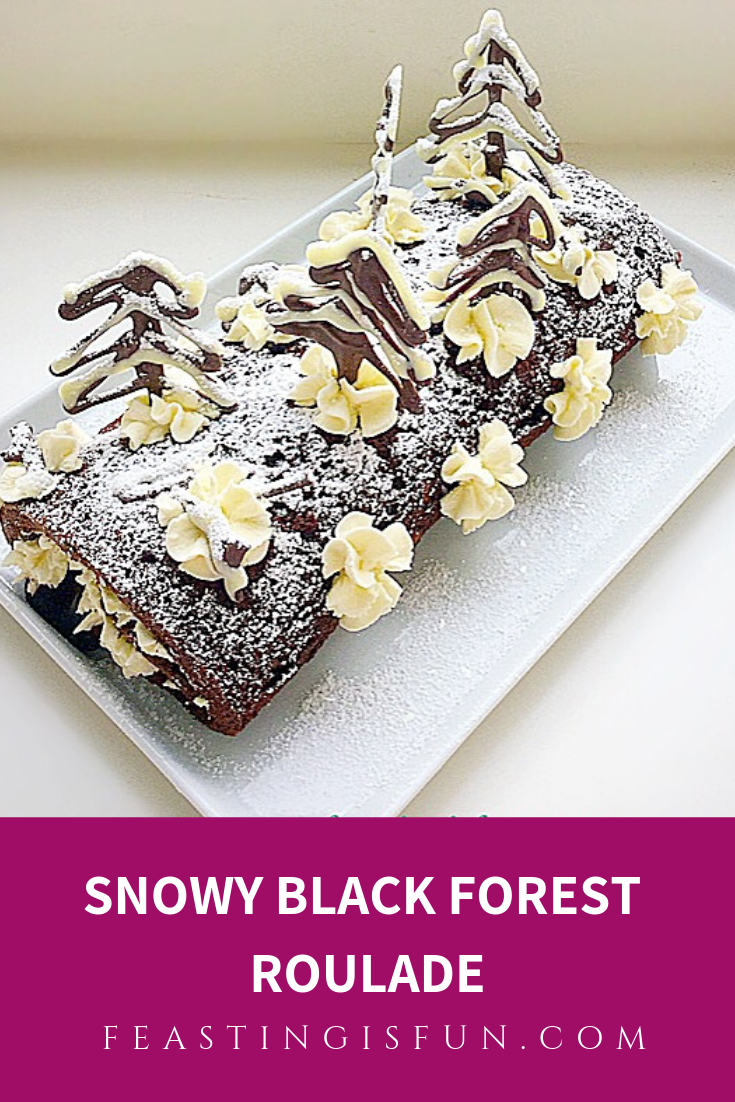
Recipe: Snowy Black Forest Roulade
1tbsp Unsalted Butter
4 Large Free Range Eggs
80g Caster Sugar
50g Gluten Free Plain White Flour – I use Doves Farm alternatively use Plain White Flour (for non gluten free Roulade)
50g Cocoa Powder plus an extra 2tbsp – I use Callebaut
1tsp Baking Powder – I use Waitrose as it is gluten free
Small Pinch of Salt – I use Maldon
300ml Double Cream
1tsp Vanilla Extract – I use Nielsen-Massey
4tsp Icing Sugar
1 Tin Cherry Pie Filling (410g)
Optional 2tbsp Kirsch Liquer
100g Dark Chocolate
50g White Chocolate
Optional – White Edible Glitter
Method: Preheat the oven to 180C/160C fan, gas mark 4
Note: To bake the sponge for this Snowy Black Forest Roulade you will need a baking tray that measures 38cm x 25cm x 3cm (15″ x 10″ x 1″).
Creating the Chocolate Genoise Sponge Batter
- First of all grease the baking tray with butter and line the base with baking parchment.
- Sift the gluten free flour, cocoa, baking powder and salt into a bowl.
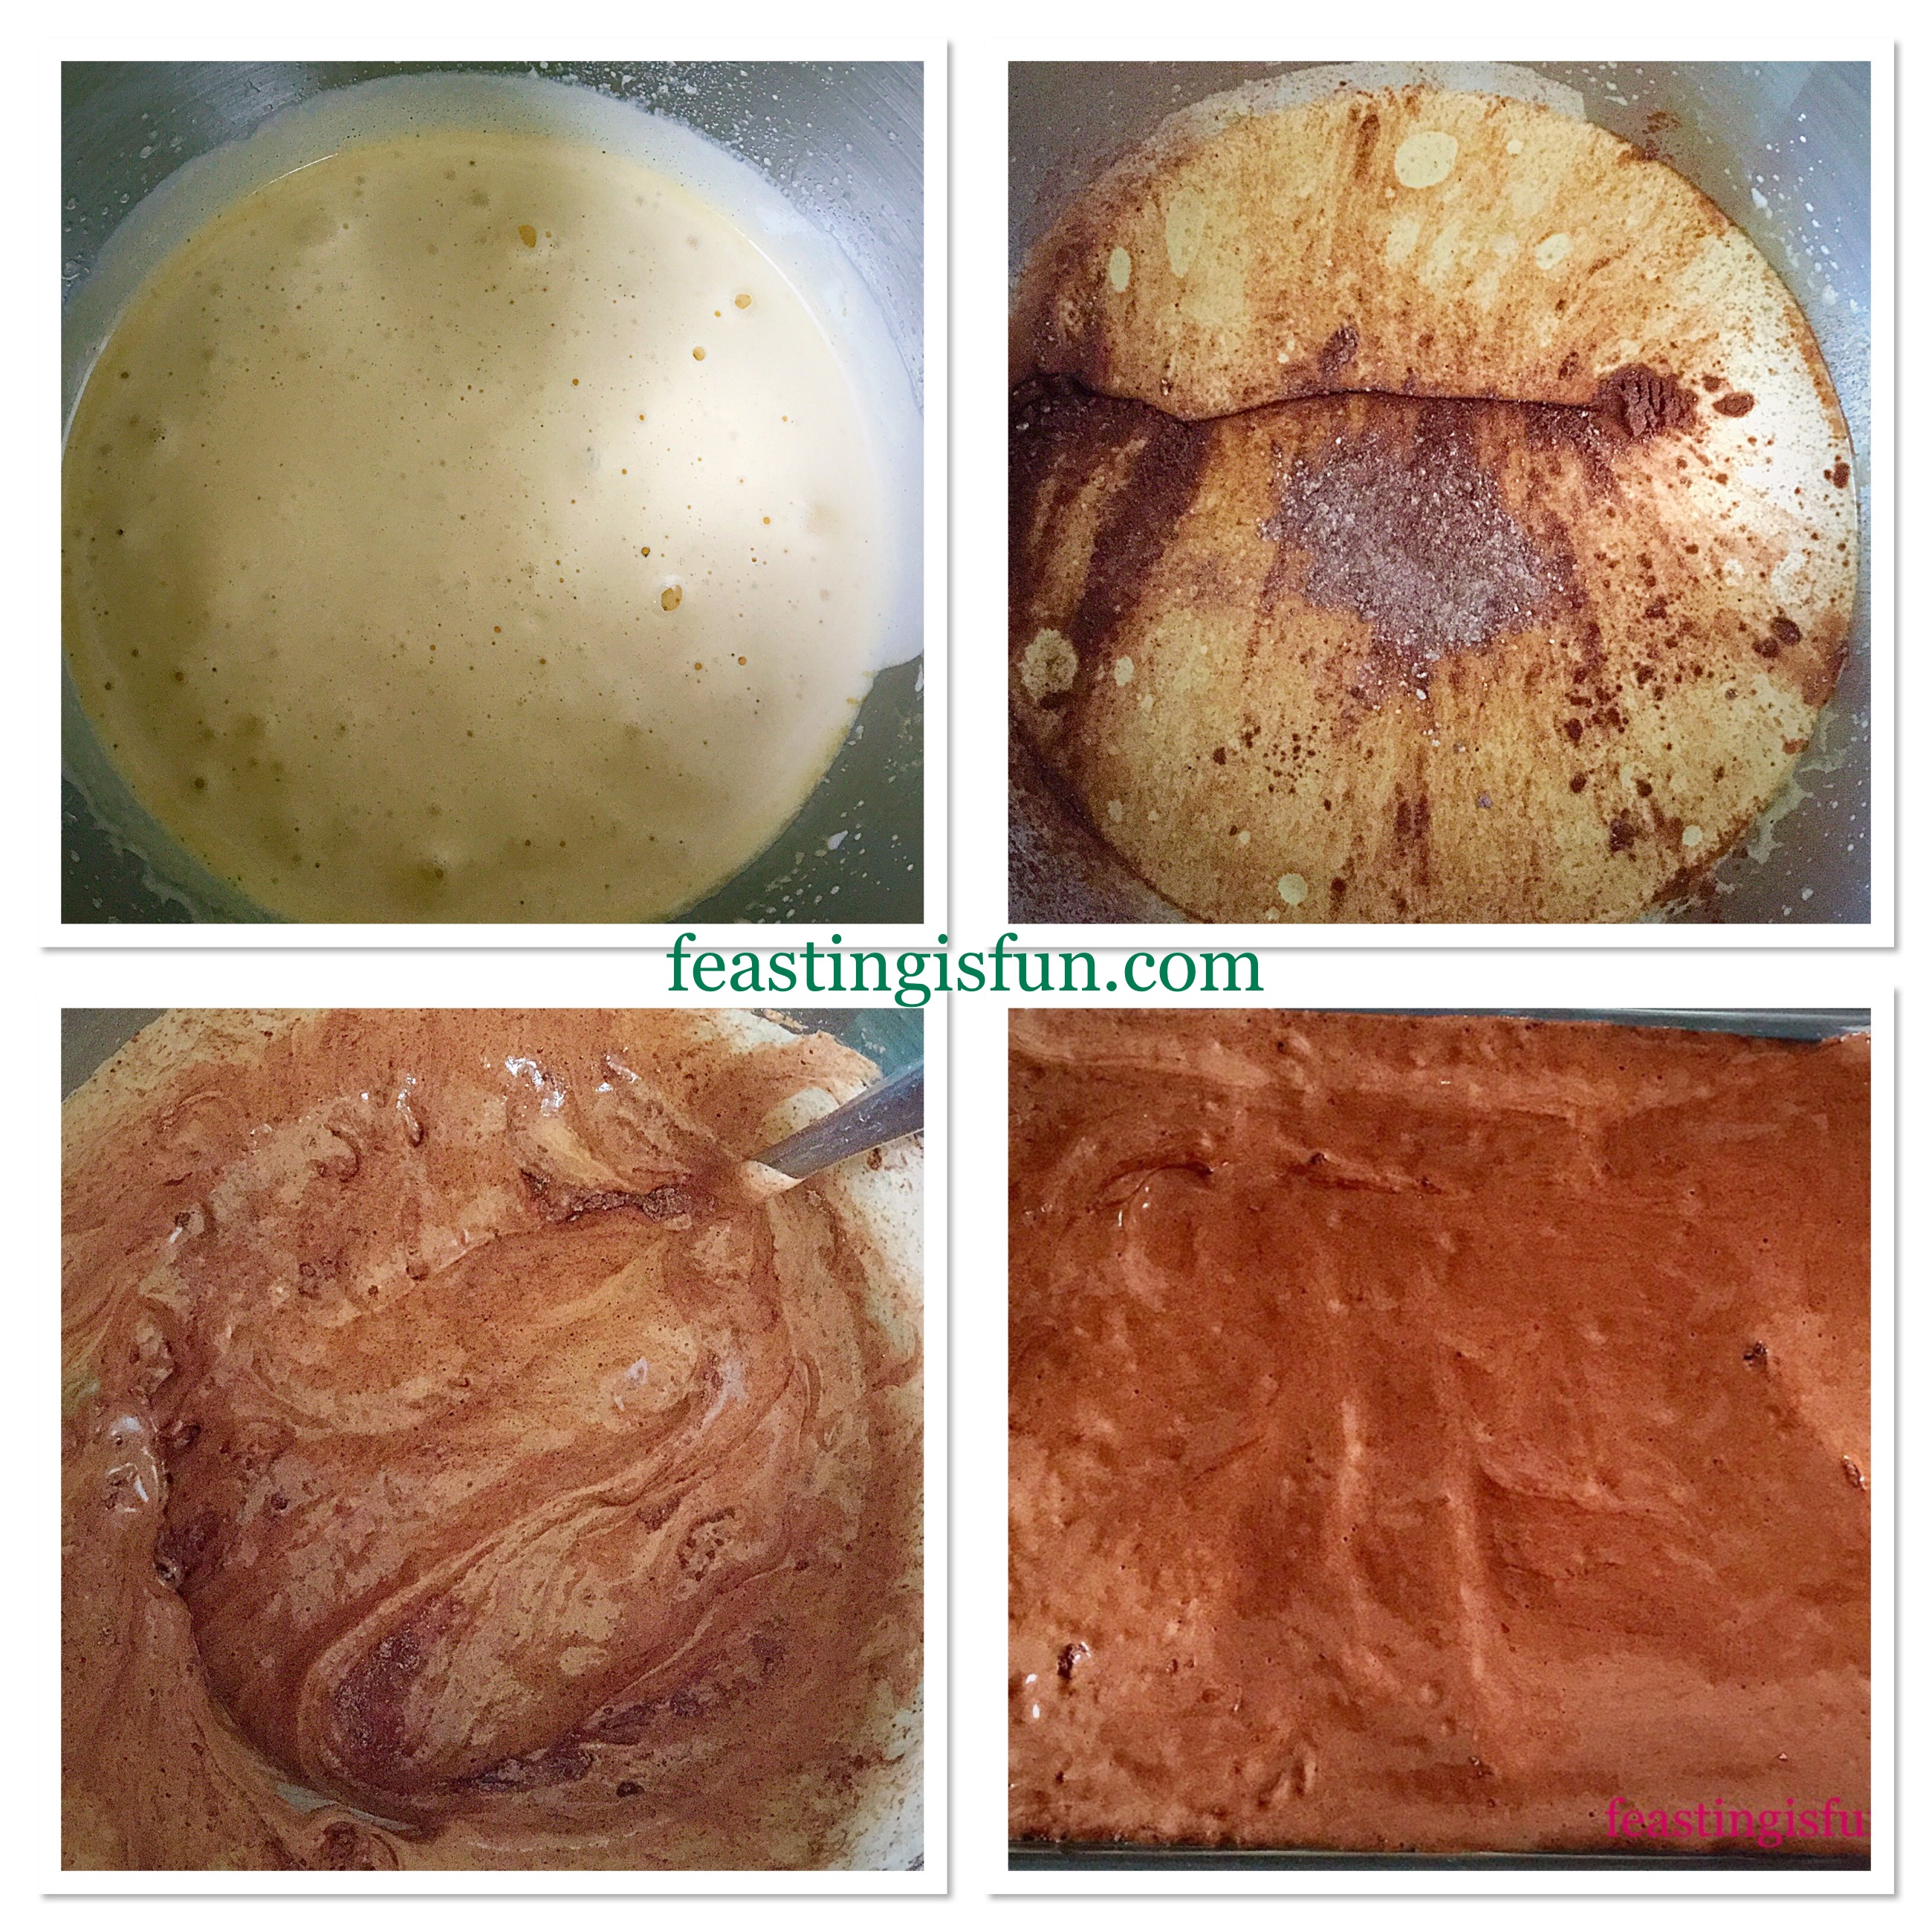
- Next, in a large bowl, or if you have a stand mixer use the bowl with the whisk attachment, add the sugar and eggs. Whisk continuously for at least 5 minutes, until the egg/sugar mixture has more than tripled in size. The mixture will be a pale cream colour that is very light and airy. It should leave a ribbon trail, that lasts a few seconds, after you remove the whisk.
- Tip the sifted ingredients into the whisked egg mixture and using a large metal spoon, carefully fold the sifted ingredients in. The aim is to retain as much air within the finished cake batter as possible.
- Once the ingredients are completely combined pour the mixture in to the prepared baking tray. Use a palette knife to ensure that the cake batter is evenly spread, ensuring that it reaches all of the corners.
Baking and Cooling the Sponge
- Now place the baking tray into the centre of the preheated oven and bake for 15-20 minutes.
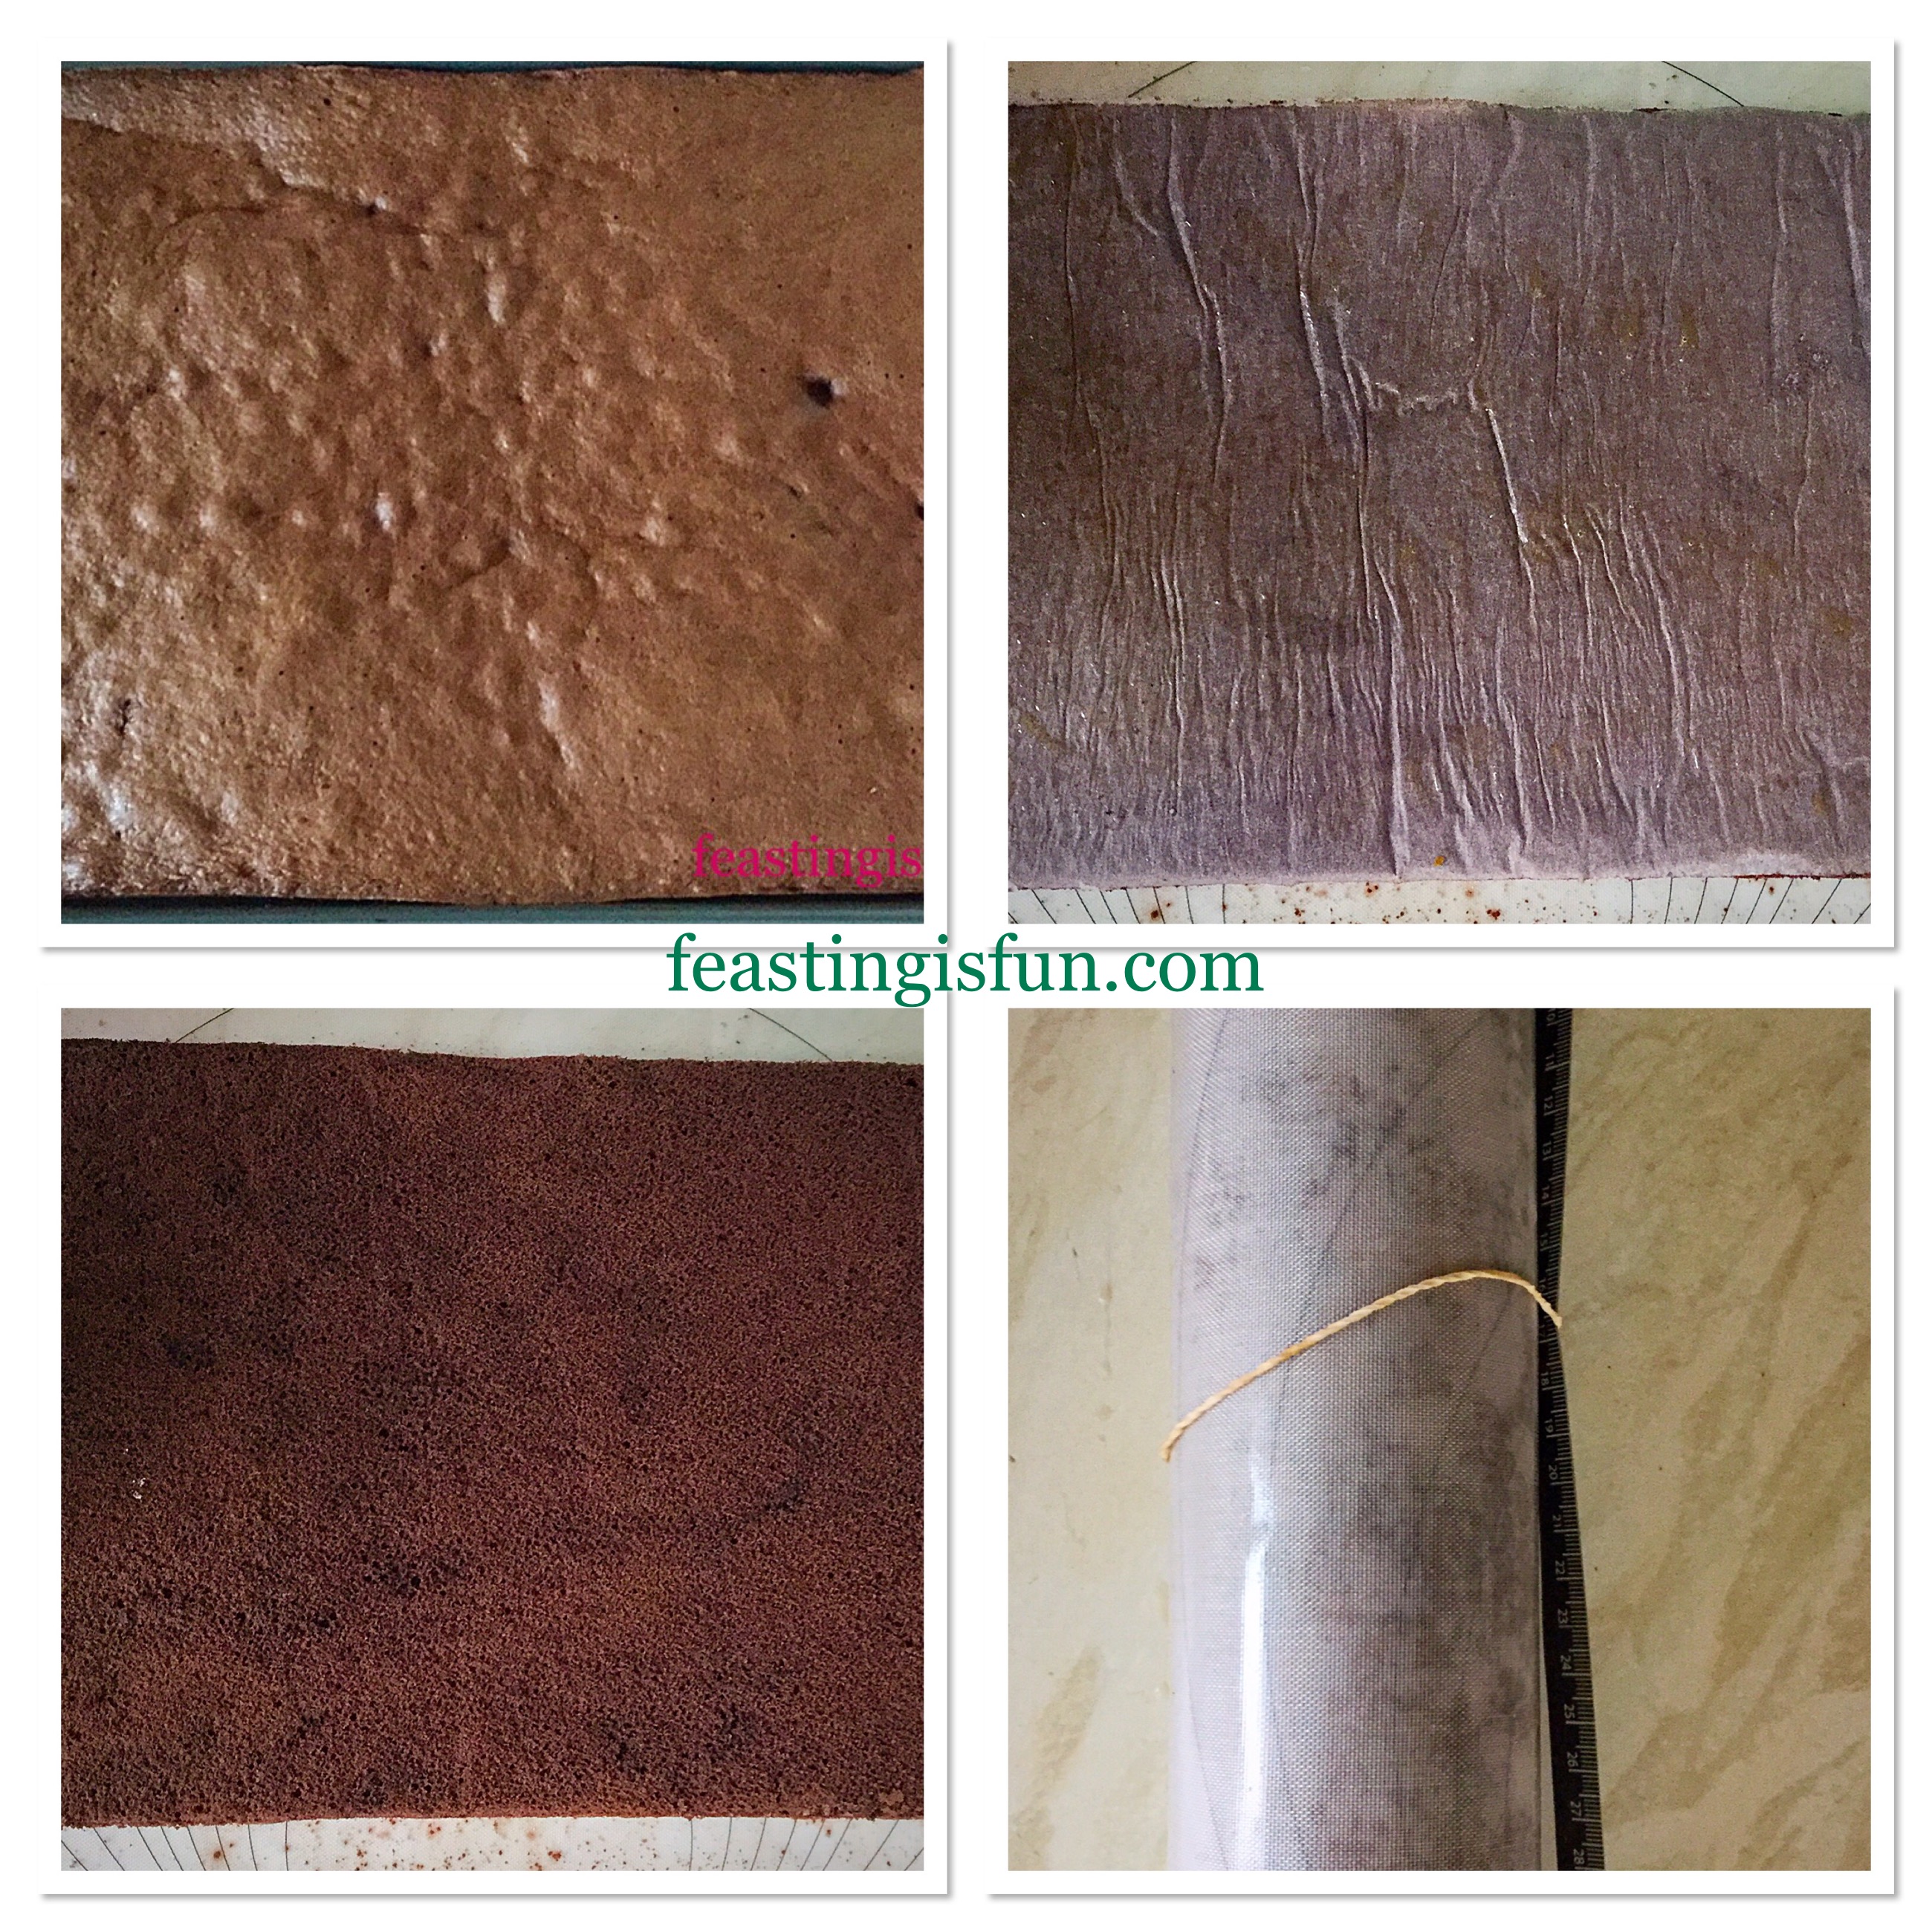
- To test if the sponge is baked press lightly in the centre, when baked the sponge will spring back. Note – be careful not to over bake as this will cause the sponge to be dry and it will then be harder to roll without cracking.
- Finally, when the sponge is baked, remove it from the oven.
- Next, allow the sponge to cool in the tin for 2 minutes.
- While the sponge is cooling, lay a large, just bigger than the sponge, piece of baking parchment on the work top.
- Dust the baking parchment with the extra 2 tablespoons of cocoa, so that it is evenly covered.
- Now run a palette knife around the edge of the sponge and then turn it out on to the baking parchment.
- Very carefully remove the parchment that lined the baking tray.
- Starting at one side and using the baking parchment to help, gently roll the sponge, while it is still warm.
- Once rolled, set to one side until completely cooled.
Making the Chocolate Trees:
- While waiting for the sponge to cool, the chocolate trees can be made.
- First you will need 2 small disposable piping bags to pipe the trees with.
- Next break up both types of chocolate and place in heatproof, microwaveable bowls.
- Heat the chocolate, individually, on medium until it has started to melt.
- Remove the bowl from the microwave and stir until the chocolate has completely melted.
- Now fill each piping bag with melted chocolate. Leave the chocolate to cool, until it is still liquid, yet warm, not hot, in the piping bag. As a result of leaving the chocolate to cool, it will be thicker and easier to control whilst piping the trees.
- Starting with the dark chocolate, pipe tree shapes on to a non stick silicone mat, or baking parchment. The trees should be about 3 inches (7.5cm) high, please see the photo below.
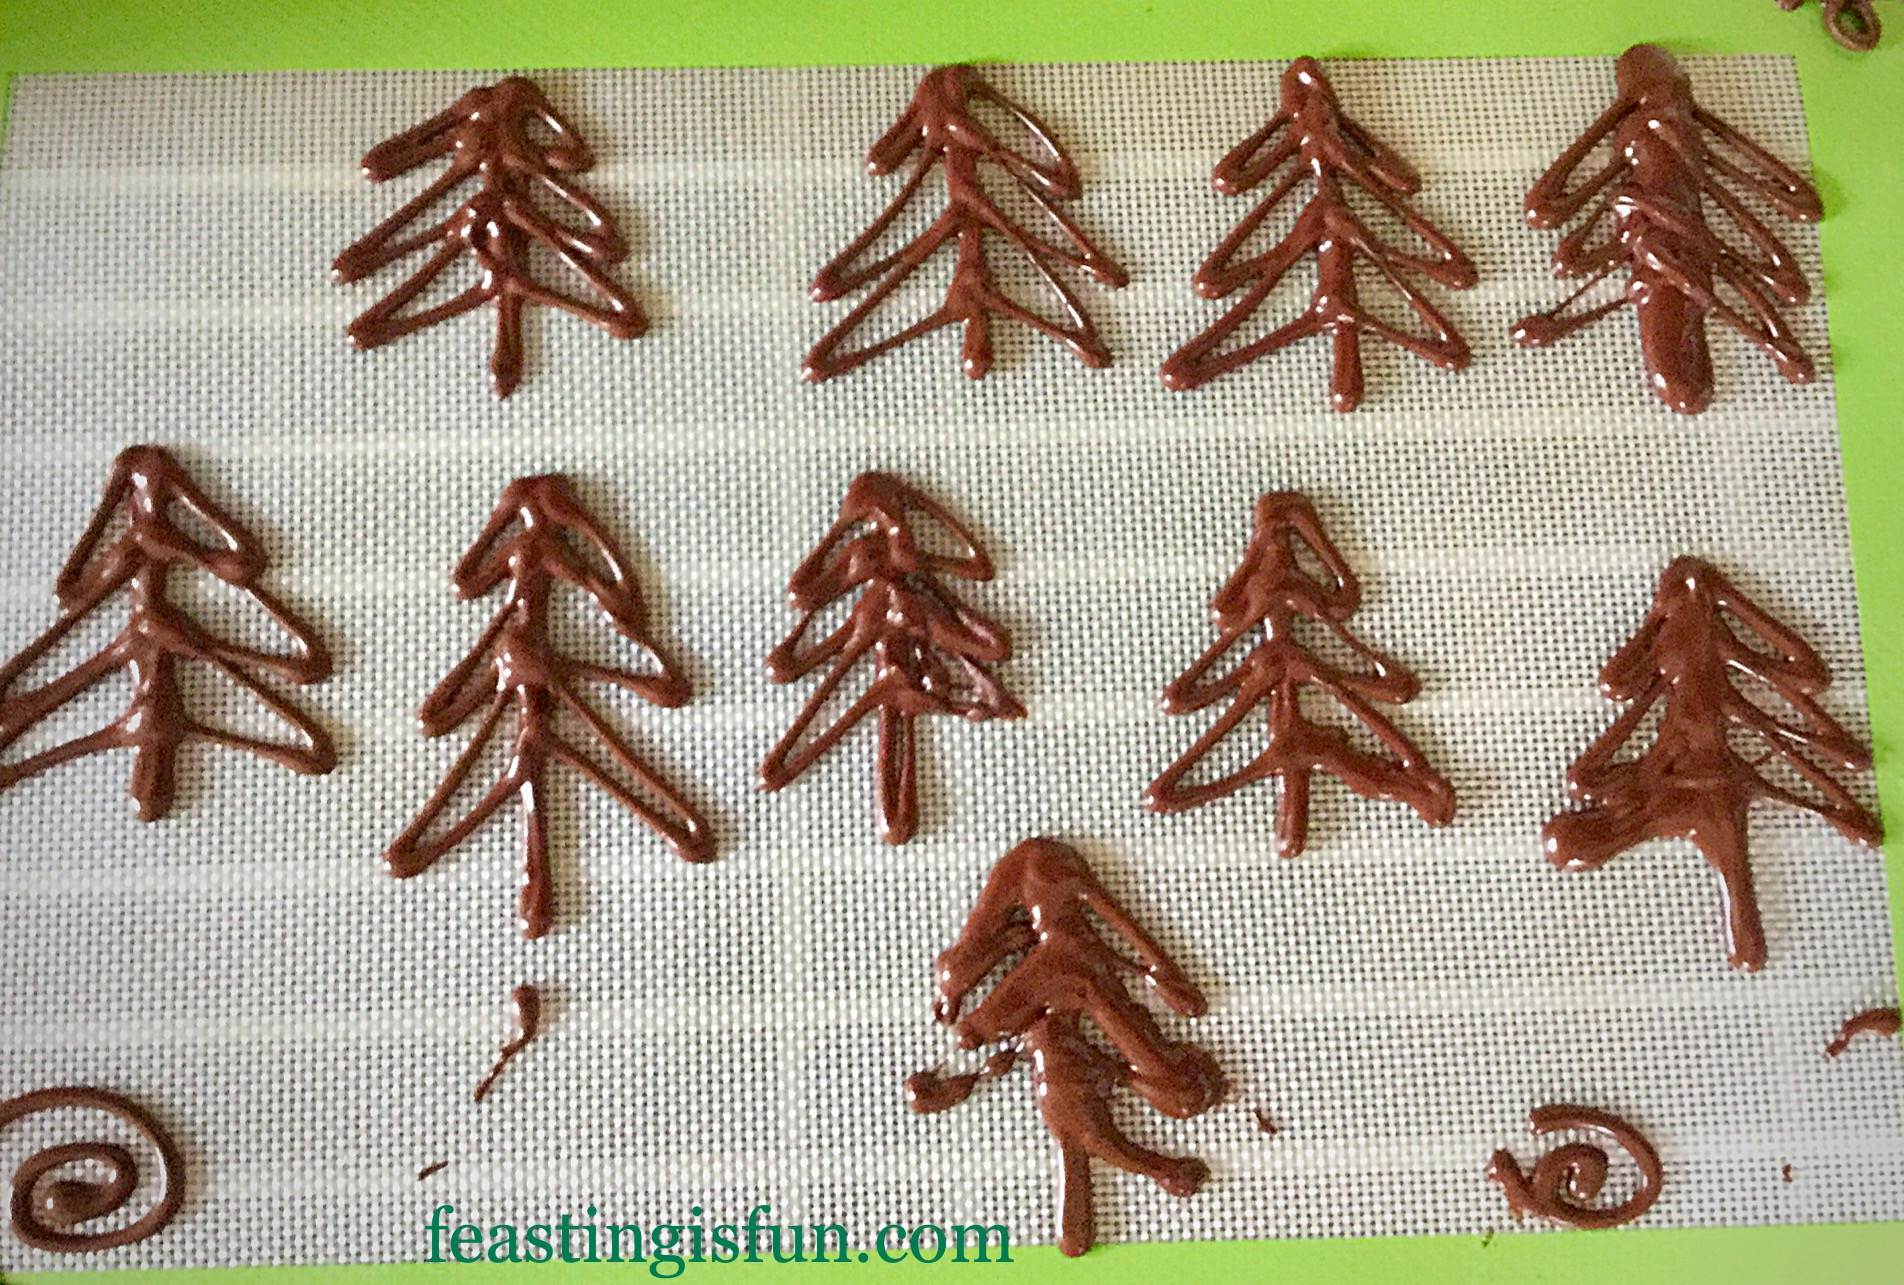
- Allow the dark chocolate to set and then pipe white chocolate on the top of each branch. Leave the trees to completely set before attempting to remove them.
- It is inevitable that some trees will break as they are removed. This is great as most forest floors have fallen/broken branches on them. So they can be used to add further decoration to the roulade.
Filling and decorating the Snowy Black Forest Roulade:
- In a large bowl add the cream, vanilla extract, 1 tablespoon of Kirsch and 2 teaspoons of sifted icing sugar – a tea strainer is handy for sifting small amounts.
- Whisk the cream until it just holds a stiff peak.
- Unroll the chocolate sponge and then, using a palette knife, spread half of the cream over the sponge.
- Decant the cherry pie filling into a bowl. Add 1 tablespoon of kirsch and stir to mix.
- Next, using a spoon, place cherries evenly across the sponge, then spoon the syrup in between the cherries.
- Using the baking parchment roll the sponge into it a log, finishing with the seam underneath.
- Transfer the Roulade to a suitable plate.
- Fit a piping bag fitted with a large star tip, then fill the bag with the remaining whipped cream.
- Pipe single flower stars along the top of the Roulade and then along the sides.

- To finish the decoration, carefully peel the piped chocolate trees away from the non stick surface.
- Place the trees evenly along the top of the Roulade, pushing them into the piped cream.
- Use any broken tree parts as forest floor decorations, anchoring them to the roulade with the piped cream.
- Finally finish the dessert by sifting icing sugar snow over the Roulade, sprinkling edible glitter for added sparkle!
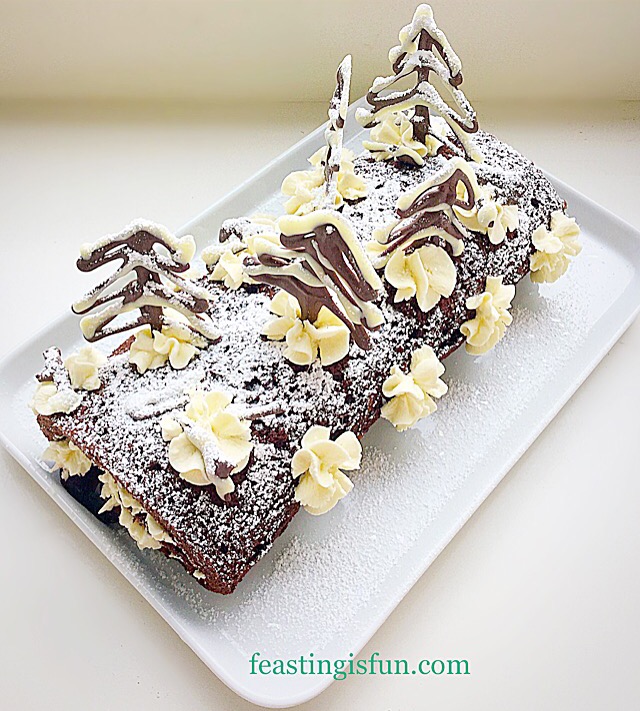
Serve sliced with a smile!
All the flavour of a Black Forest Gateaux rolled into a stunning, Christmassy, Snowy Black Forest Roulade that is completely gluten free. A dessert that can be enjoyed by more people, without any loss of taste, texture or quality.
If you have enjoyed this recipe for this Snowy Black Forest Roulade here are some other gluten free recipes you may enjoy:

Strawberry Whipped Cream Giant Doughnut

Gluten free recipes can taste just as great as their regular, wheat based counterparts. Also, creating recipes that can be made and eaten by people on a restricted diet, is an important part of what I do at Feasting is Fun. So you can look forward to more recipes being added, especially with Christmas not very far away.
Finally, when a recipe tastes as good as this Snowy Black Forest Roulade, there is no need to bake separate desserts. And that has to be a good thing, for both those on a restricted diet and the cook!
So, whatever you are making, baking and creating in your kitchens, have fun preparing and sharing your feast.
Sammie xx
I am submitting this Snowy Black Forest Roulade to October’s We Should Cocoa over at Tin and Thyme