Strawberry Eton Mess

Share
Facebooktwitterpinterestlinkedintumblr

Oh how I love summer fruit. Ruby red strawberries, crimson through to black cherries, tart yet sweet raspberries and the array of different currents. I am definitely a soft fruit fan and love to eat them freshly picked, or use them in delightful, dessert recipes. This Strawberry Eton Mess is a classic English dessert, that is best made with fresh, local strawberries.

FF Strawberry Eton Mess
Strawberry Eton Mess a delicious trio of ingredients.

While homemade pavlova provides a crisp and marshmallow like texture that I’ve enveloped in lightly whipped cream, with sweet luscious strawberries.

FF Strawberry Eton Mess
Strawberry Eton Mess the perfect make ahead dessert.

Since this Strawberry Eton Mess is so easy to assemble, it is also brilliant as a make ahead dessert. The pavlova can be made the same day, or even the day before, strawberries can be hulled, quartered and left covered in a bowl and the cream takes only a couple of minutes to whisk by hand.

Finally, all of the ingredients can be assembled prior to serving, for a stress free delectable dessert!

FF Strawberry Eton MessStrawberry Eton Mess a classic English summer dessert.

True to my word, I am adding more desserts to Feasting is Fun. My family are loving the new-ish aspect to my blog!!

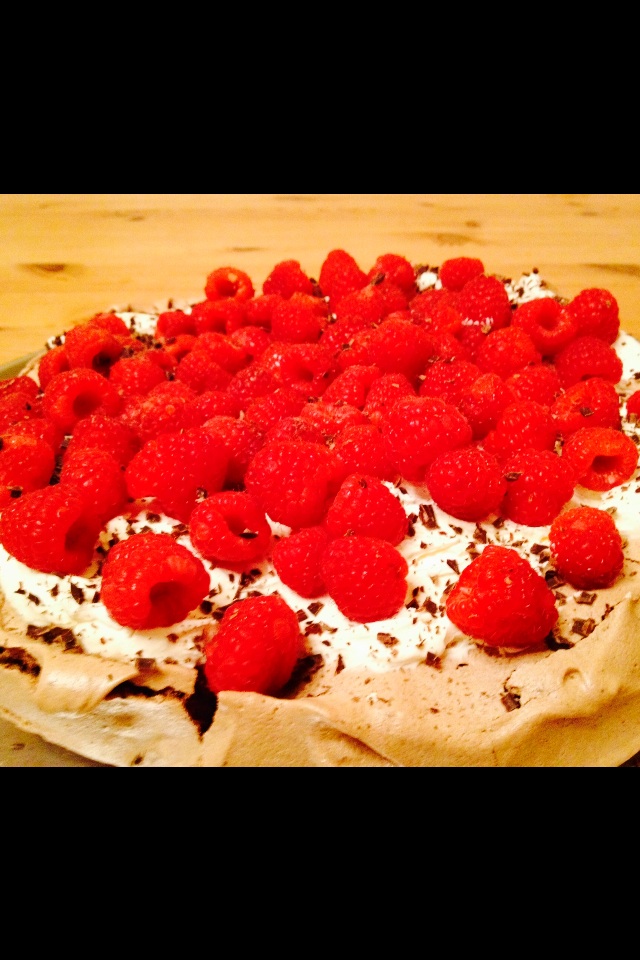
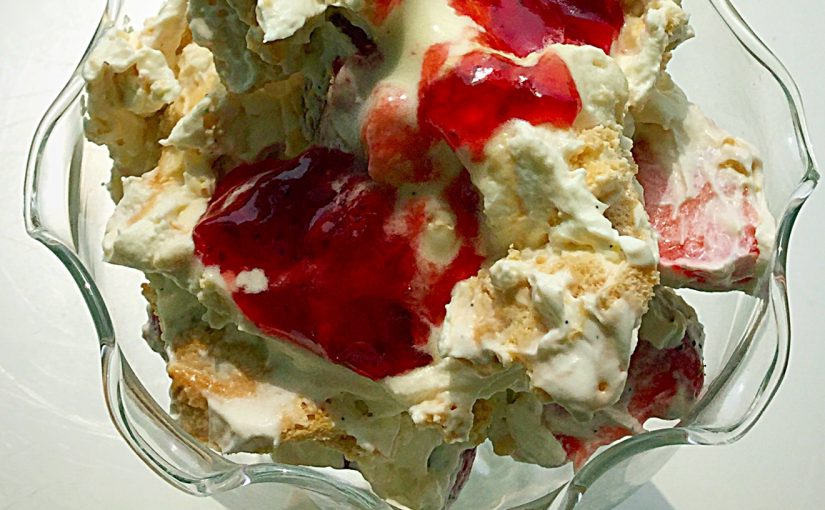
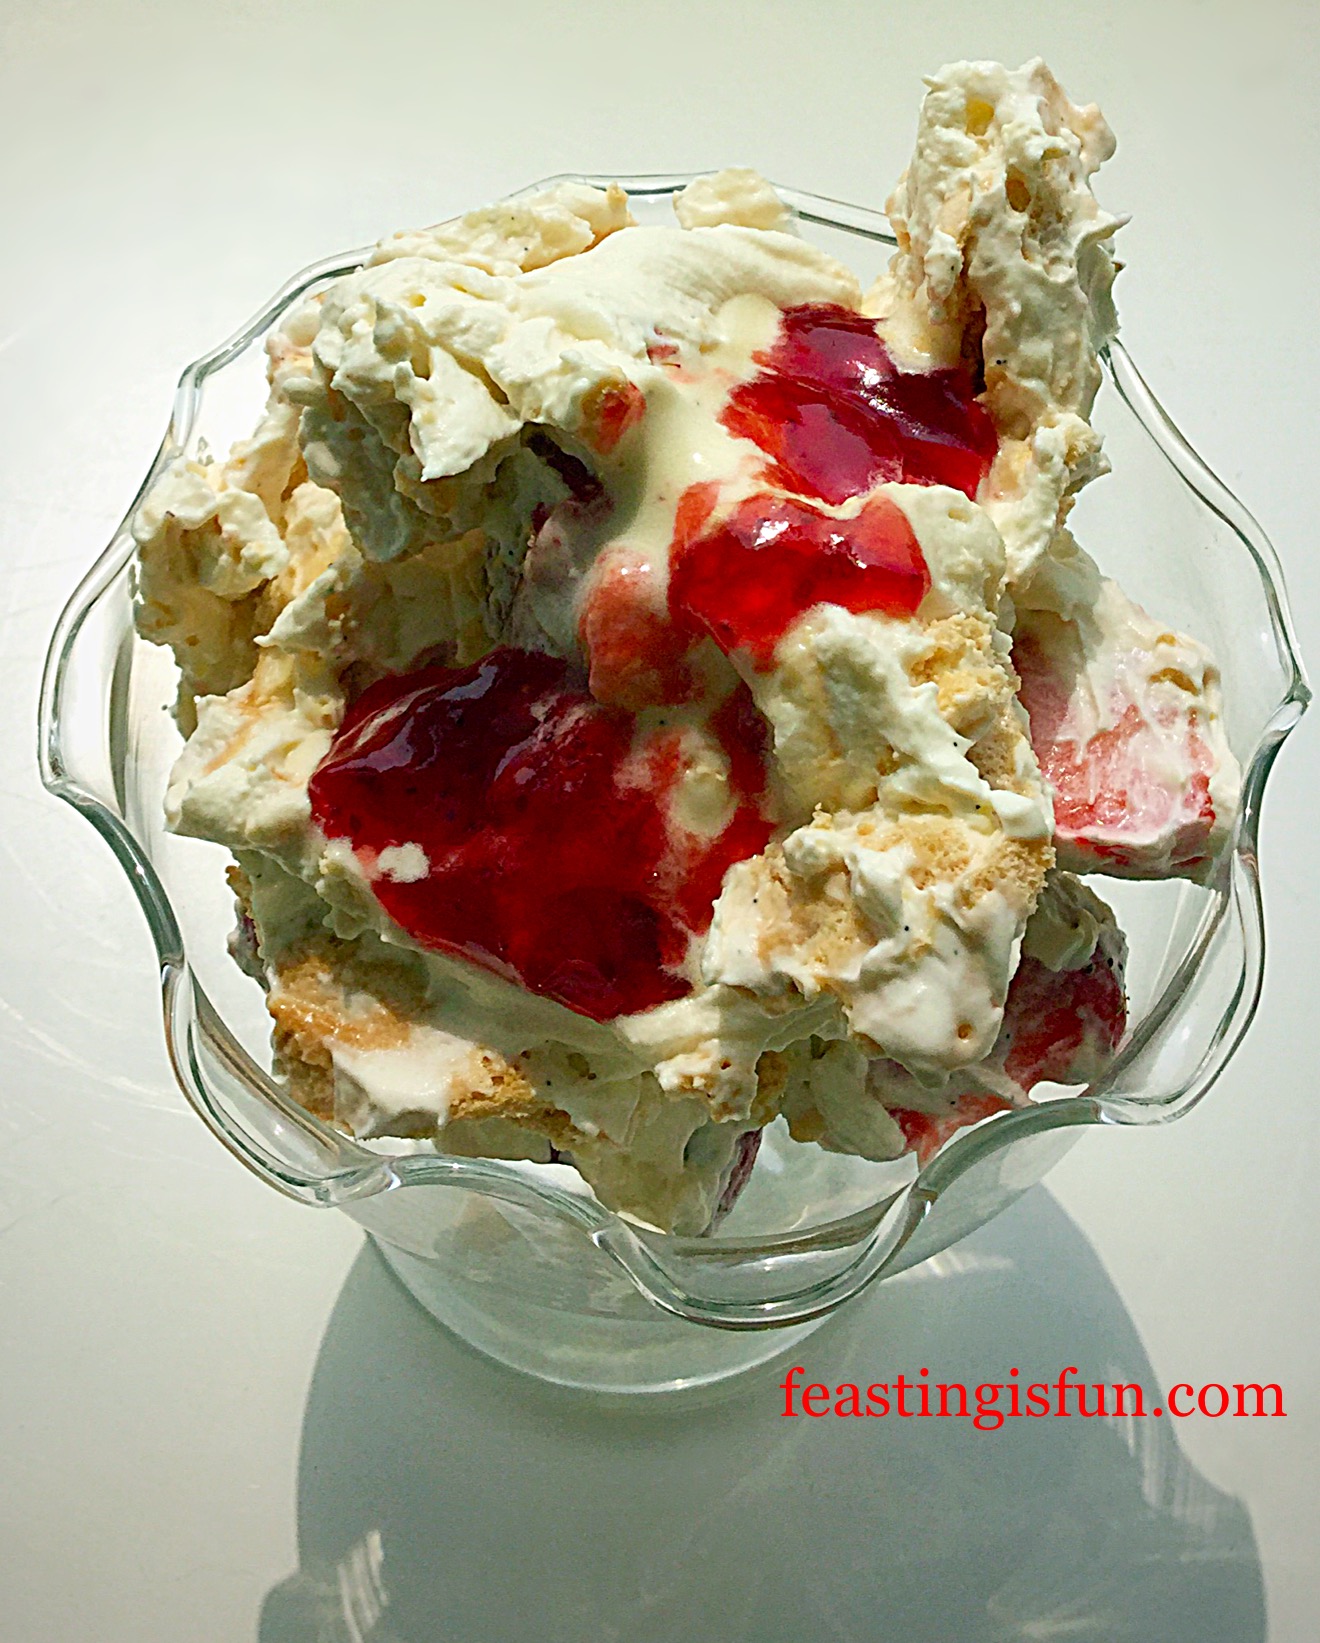
This Strawberry Eton Mess is probably one of my favourite desserts. The differing textures within the pavlova and the fresh local strawberries really make this a stunning dish. As with all recipes, especially those that have few ingredients, it really is worth buying the best that you can afford. Or in the case of this dessert, taking the time to make your own pavlova.

I know ready made meringues are easily available in supermarkets, they won’t give the marshmallow inner softness that a homemade pavlova yields. If you make your own ice cream like my  Strawberry Ripple Ice Cream then you will be left with 4 eggs whites. The exact amount needed for this recipe.

FF Strawberry Eton Mess
Strawberry Eton Mess topped with a drizzle of strawberry jam.

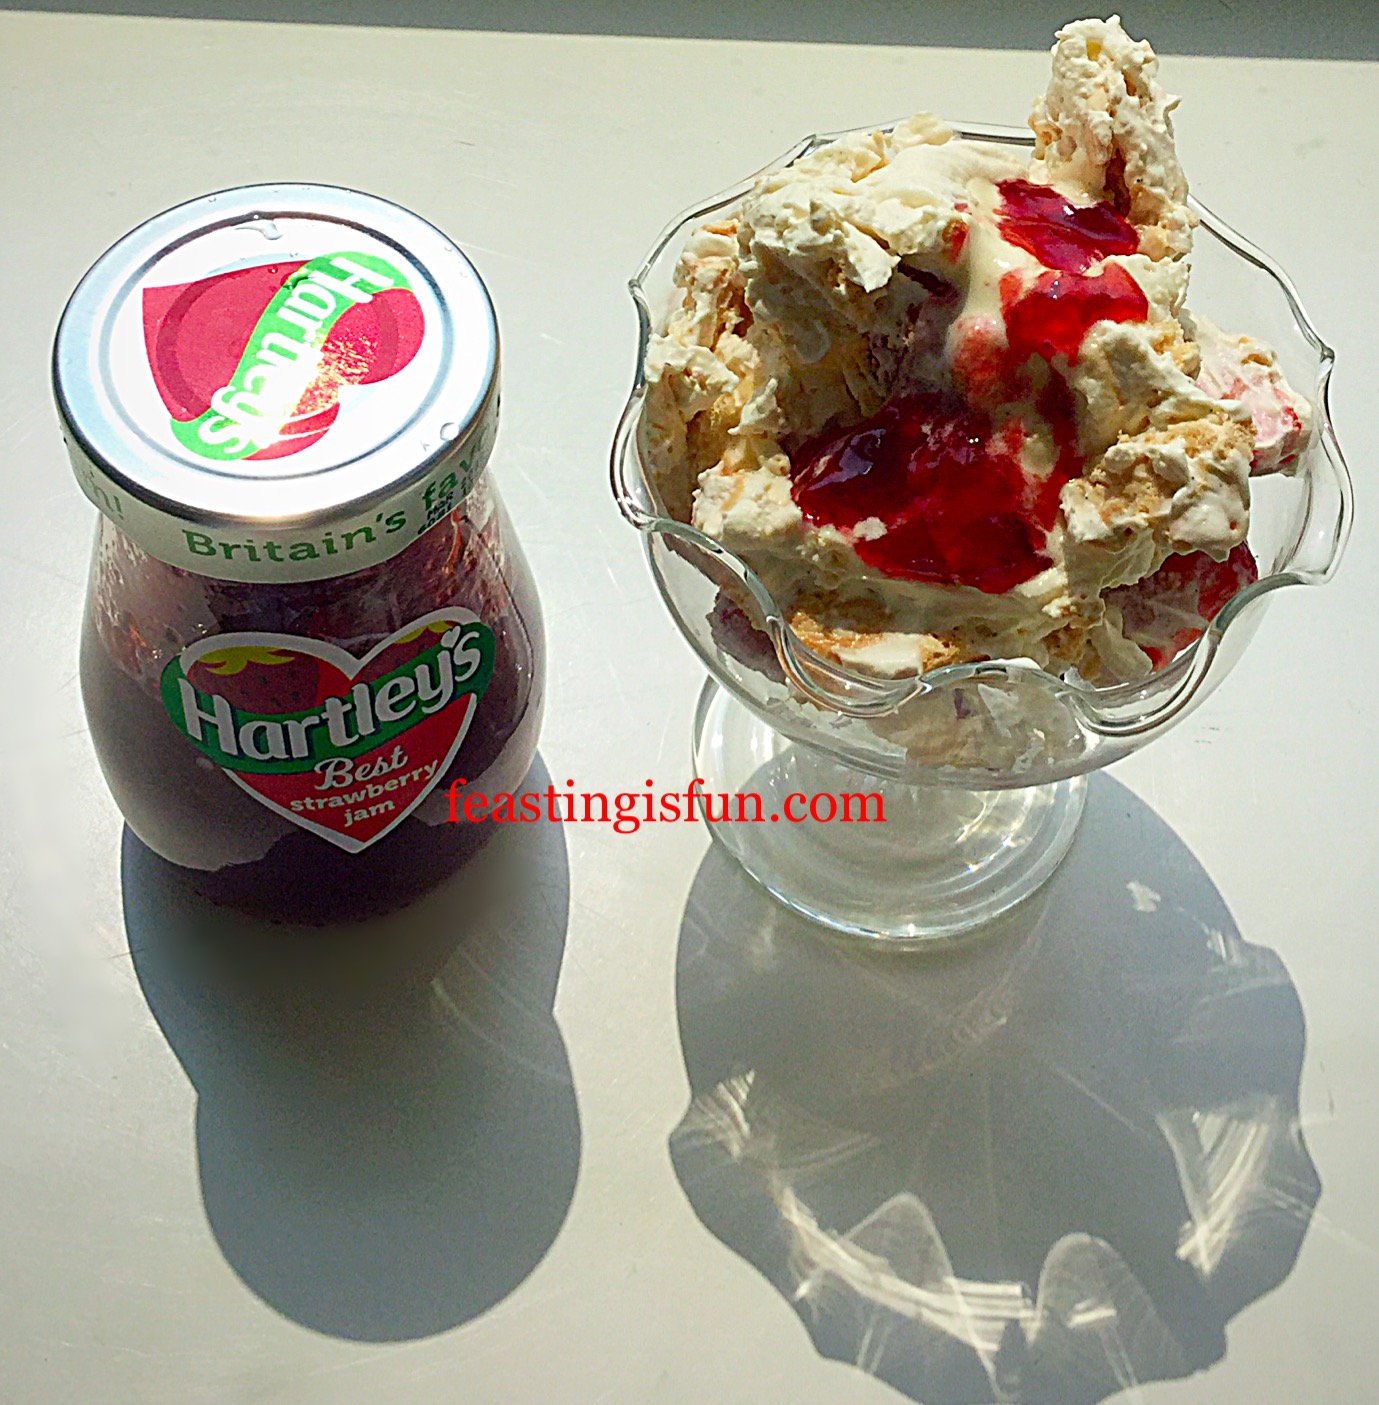
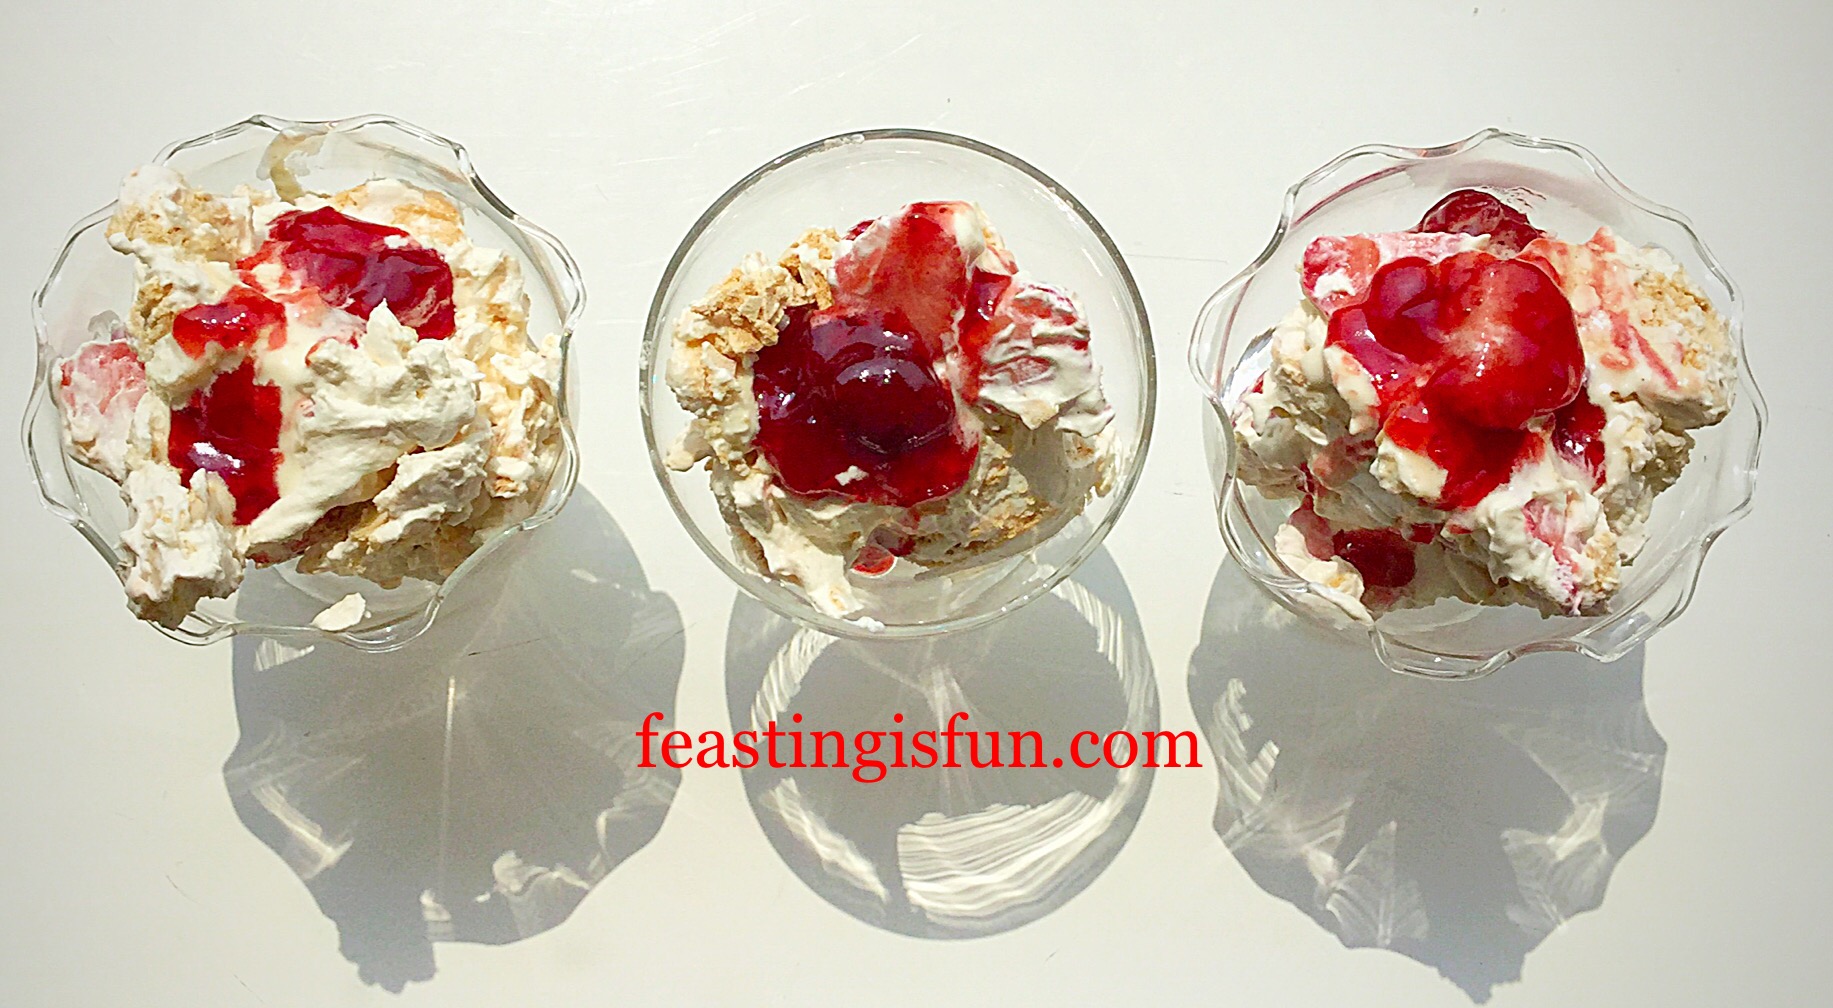
I was fortunate to win some Hartleys strawberry jam on Twitter. Warmed slightly, so that it becomes a sauce, it adds the perfect finishing touch to this dessert. The bright red colour contrasts beautifully with the pale cream meringue and it lends an extra strawberry hit as you take your first mouthful.

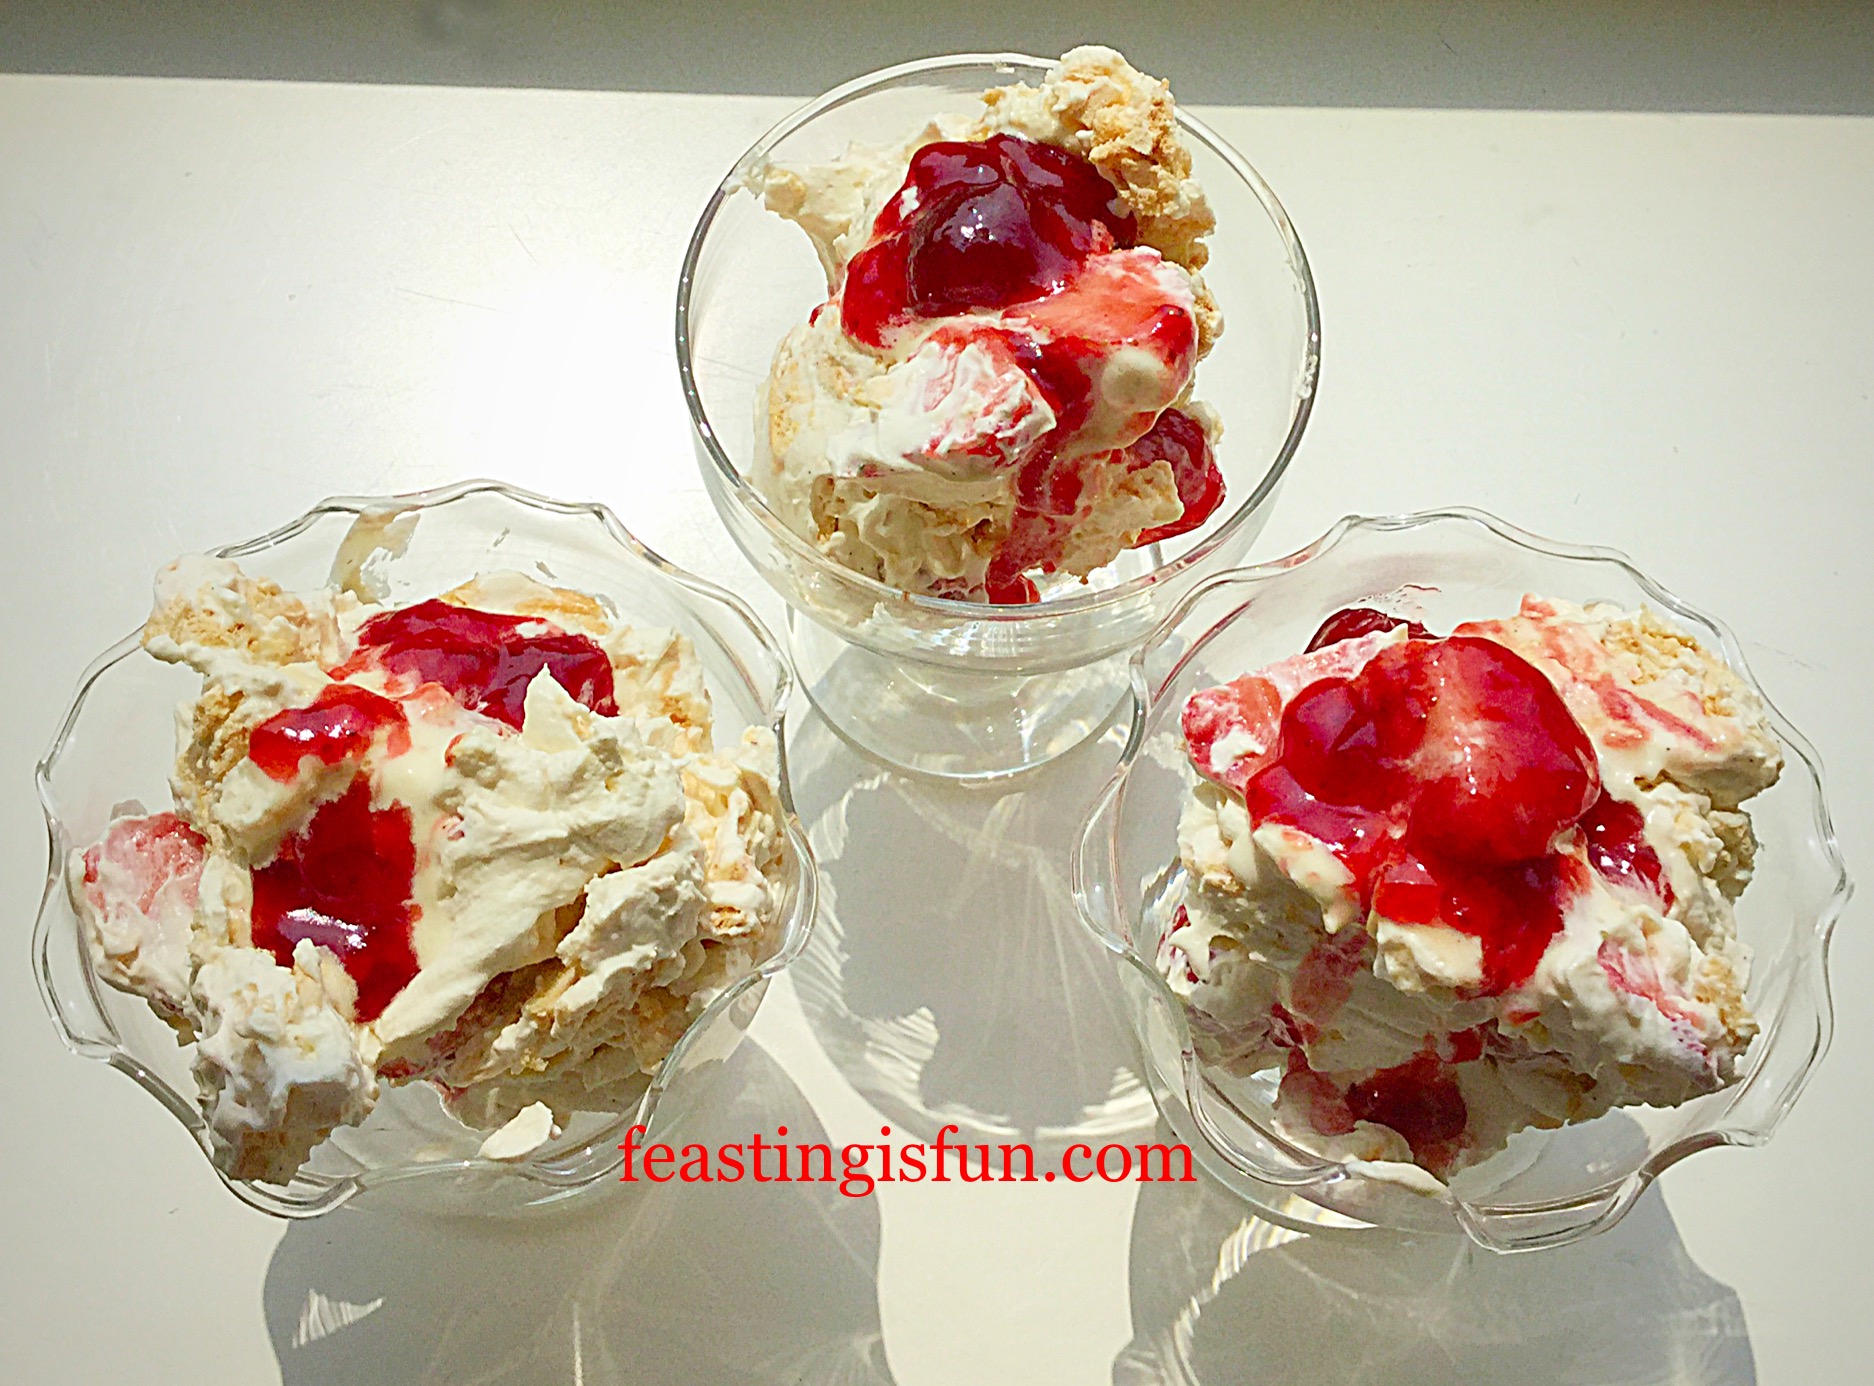
Recipe: Strawberry Eton Mess serves 6

For the pavlova:

4 Large Egg Whites – preferably free range or organic

150g/5oz – 1 US Cup Icing Sugar

2tsp Corn Flour – also known as corn starch

1tsp White Wine or Cider Vinegar

1/2tsp Vanilla Extract – I use –Nielsen-Massey

For the Strawberry Eton Mess:

400g/ Fresh British Strawberries

300ml Double Cream

1tsp Vanilla Bean Paste – again I use Nielsen-Massey

1tbsp Caster Sugar

1tbsp Strawberry Jam – I used Hartley’s Best Strawberry Jam – warm slightly before drizzling onto the Strawberry Eton Mess

Method: Preheat the oven to 200C/180C fan, gas mark 6

  • First of all line a large baking tray with baking parchment that has a 20cm circle, drawn in pencil, on the underside.
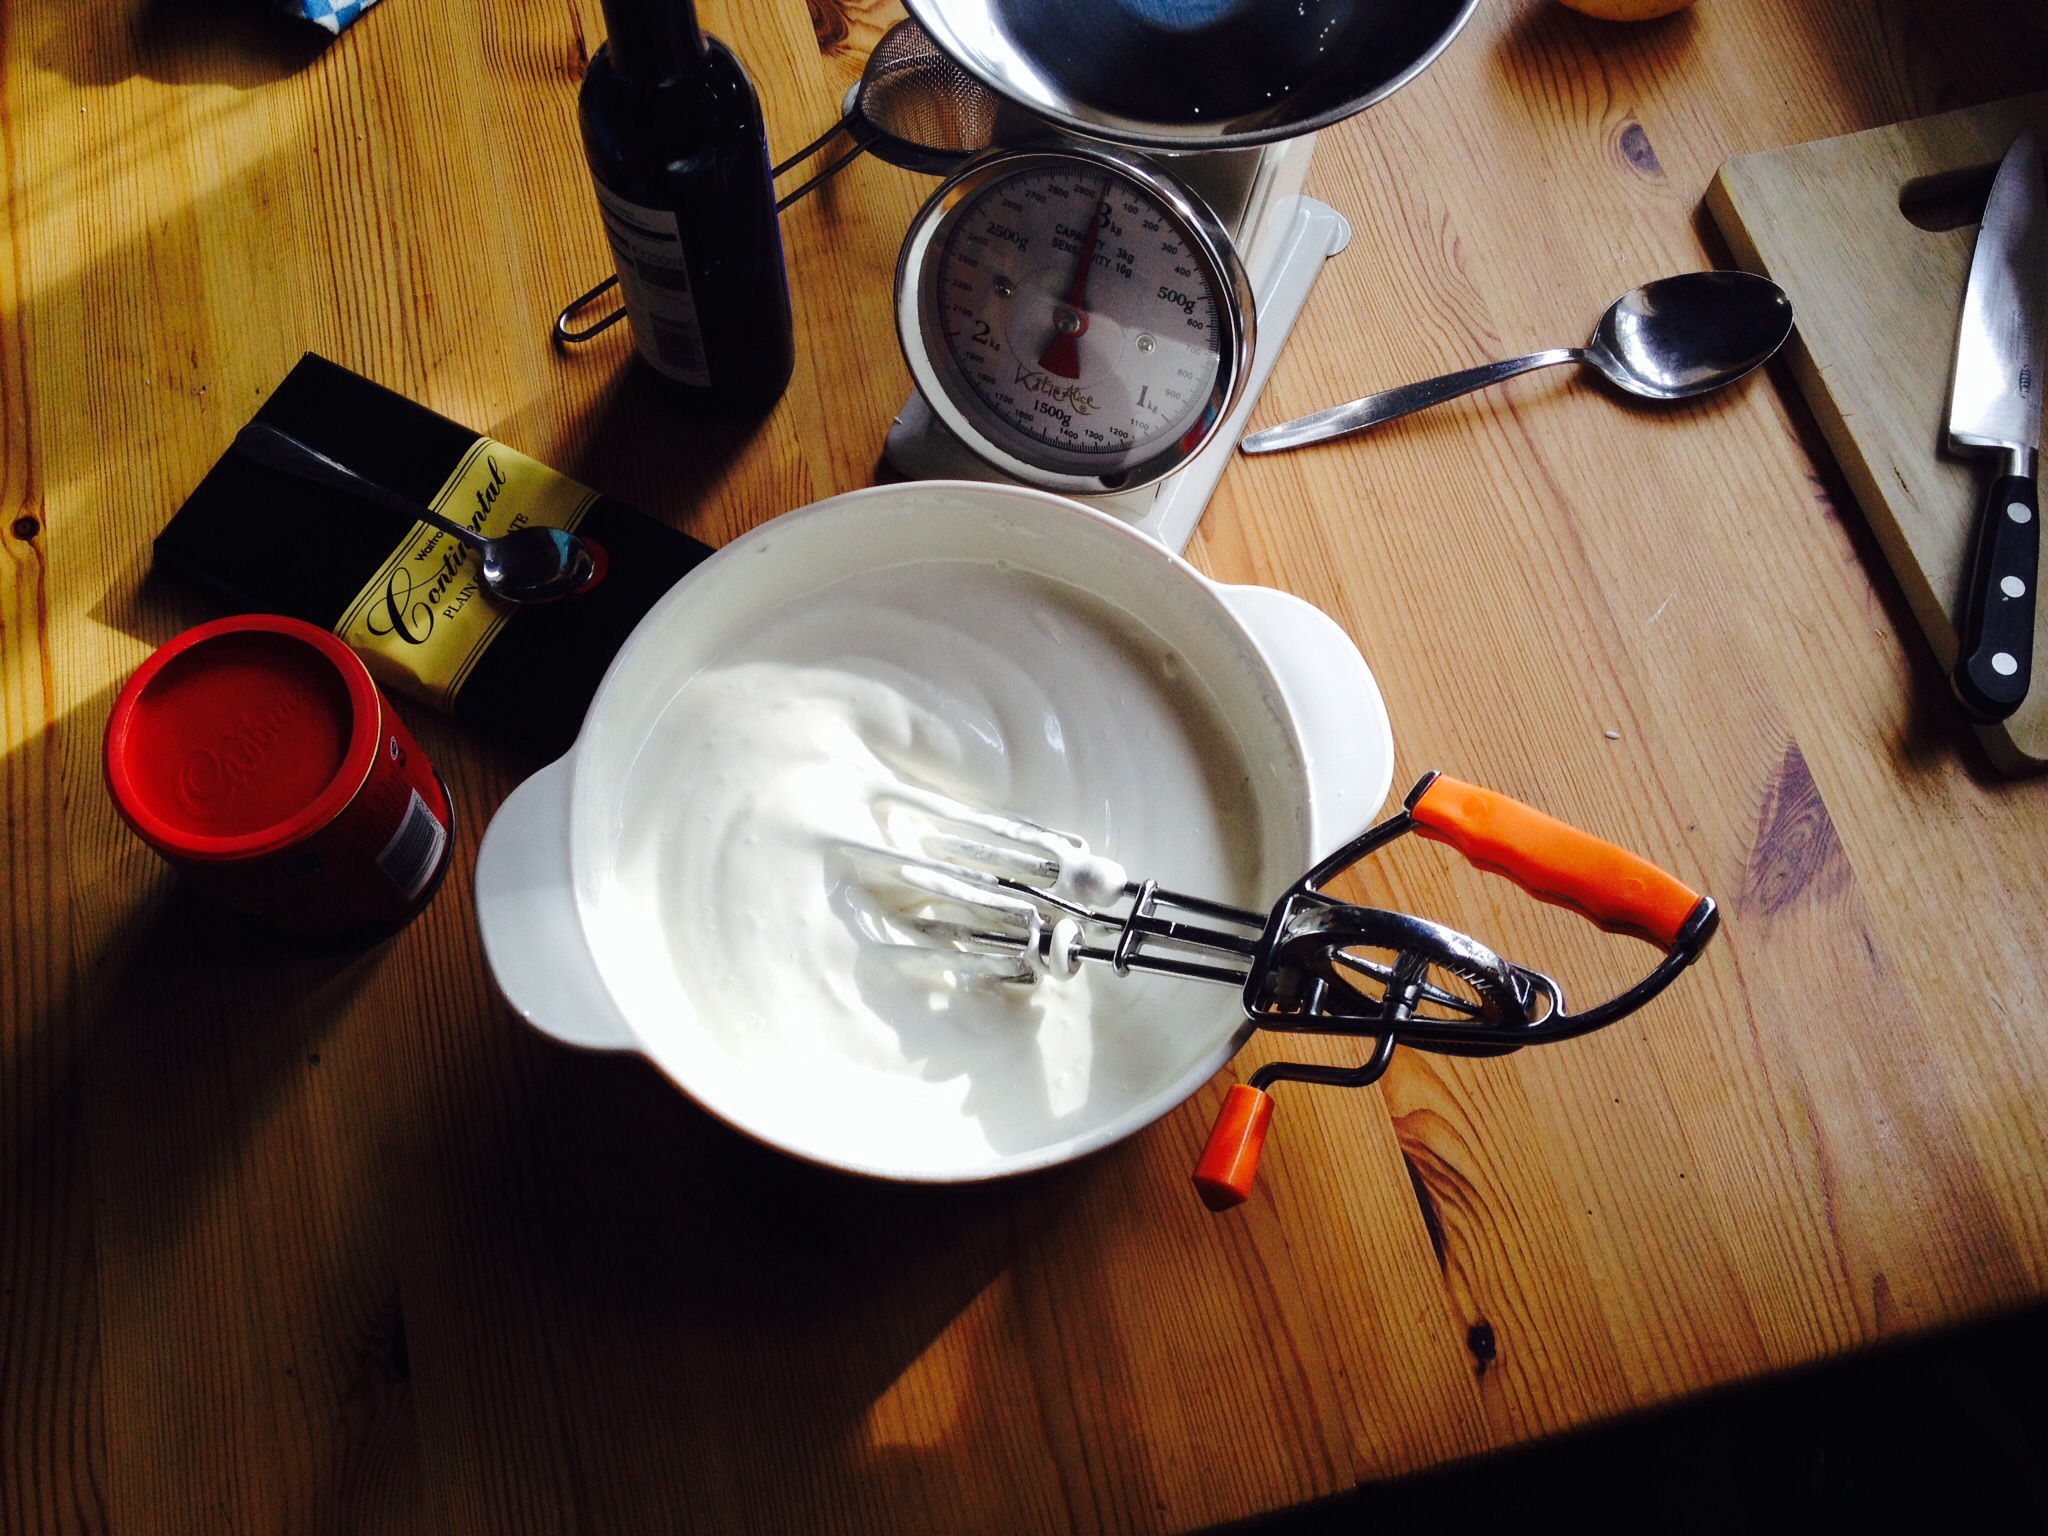
  • Into a spotlessly clean, large bowl place the egg whites.
  • Whisk until the egg white hold a stiff peak.
FF Strawberry Eton Mess
The meringue peaks stand proud.
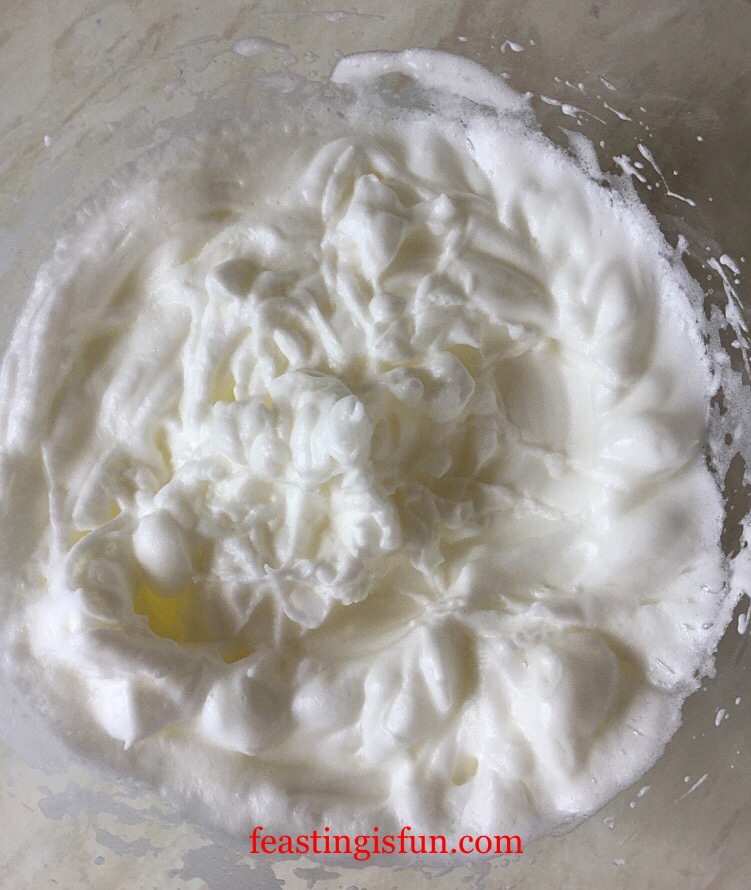
  • While whisking on a medium speed gradually add the sugar. Continue whisking until the meringue is glossy and shiny.
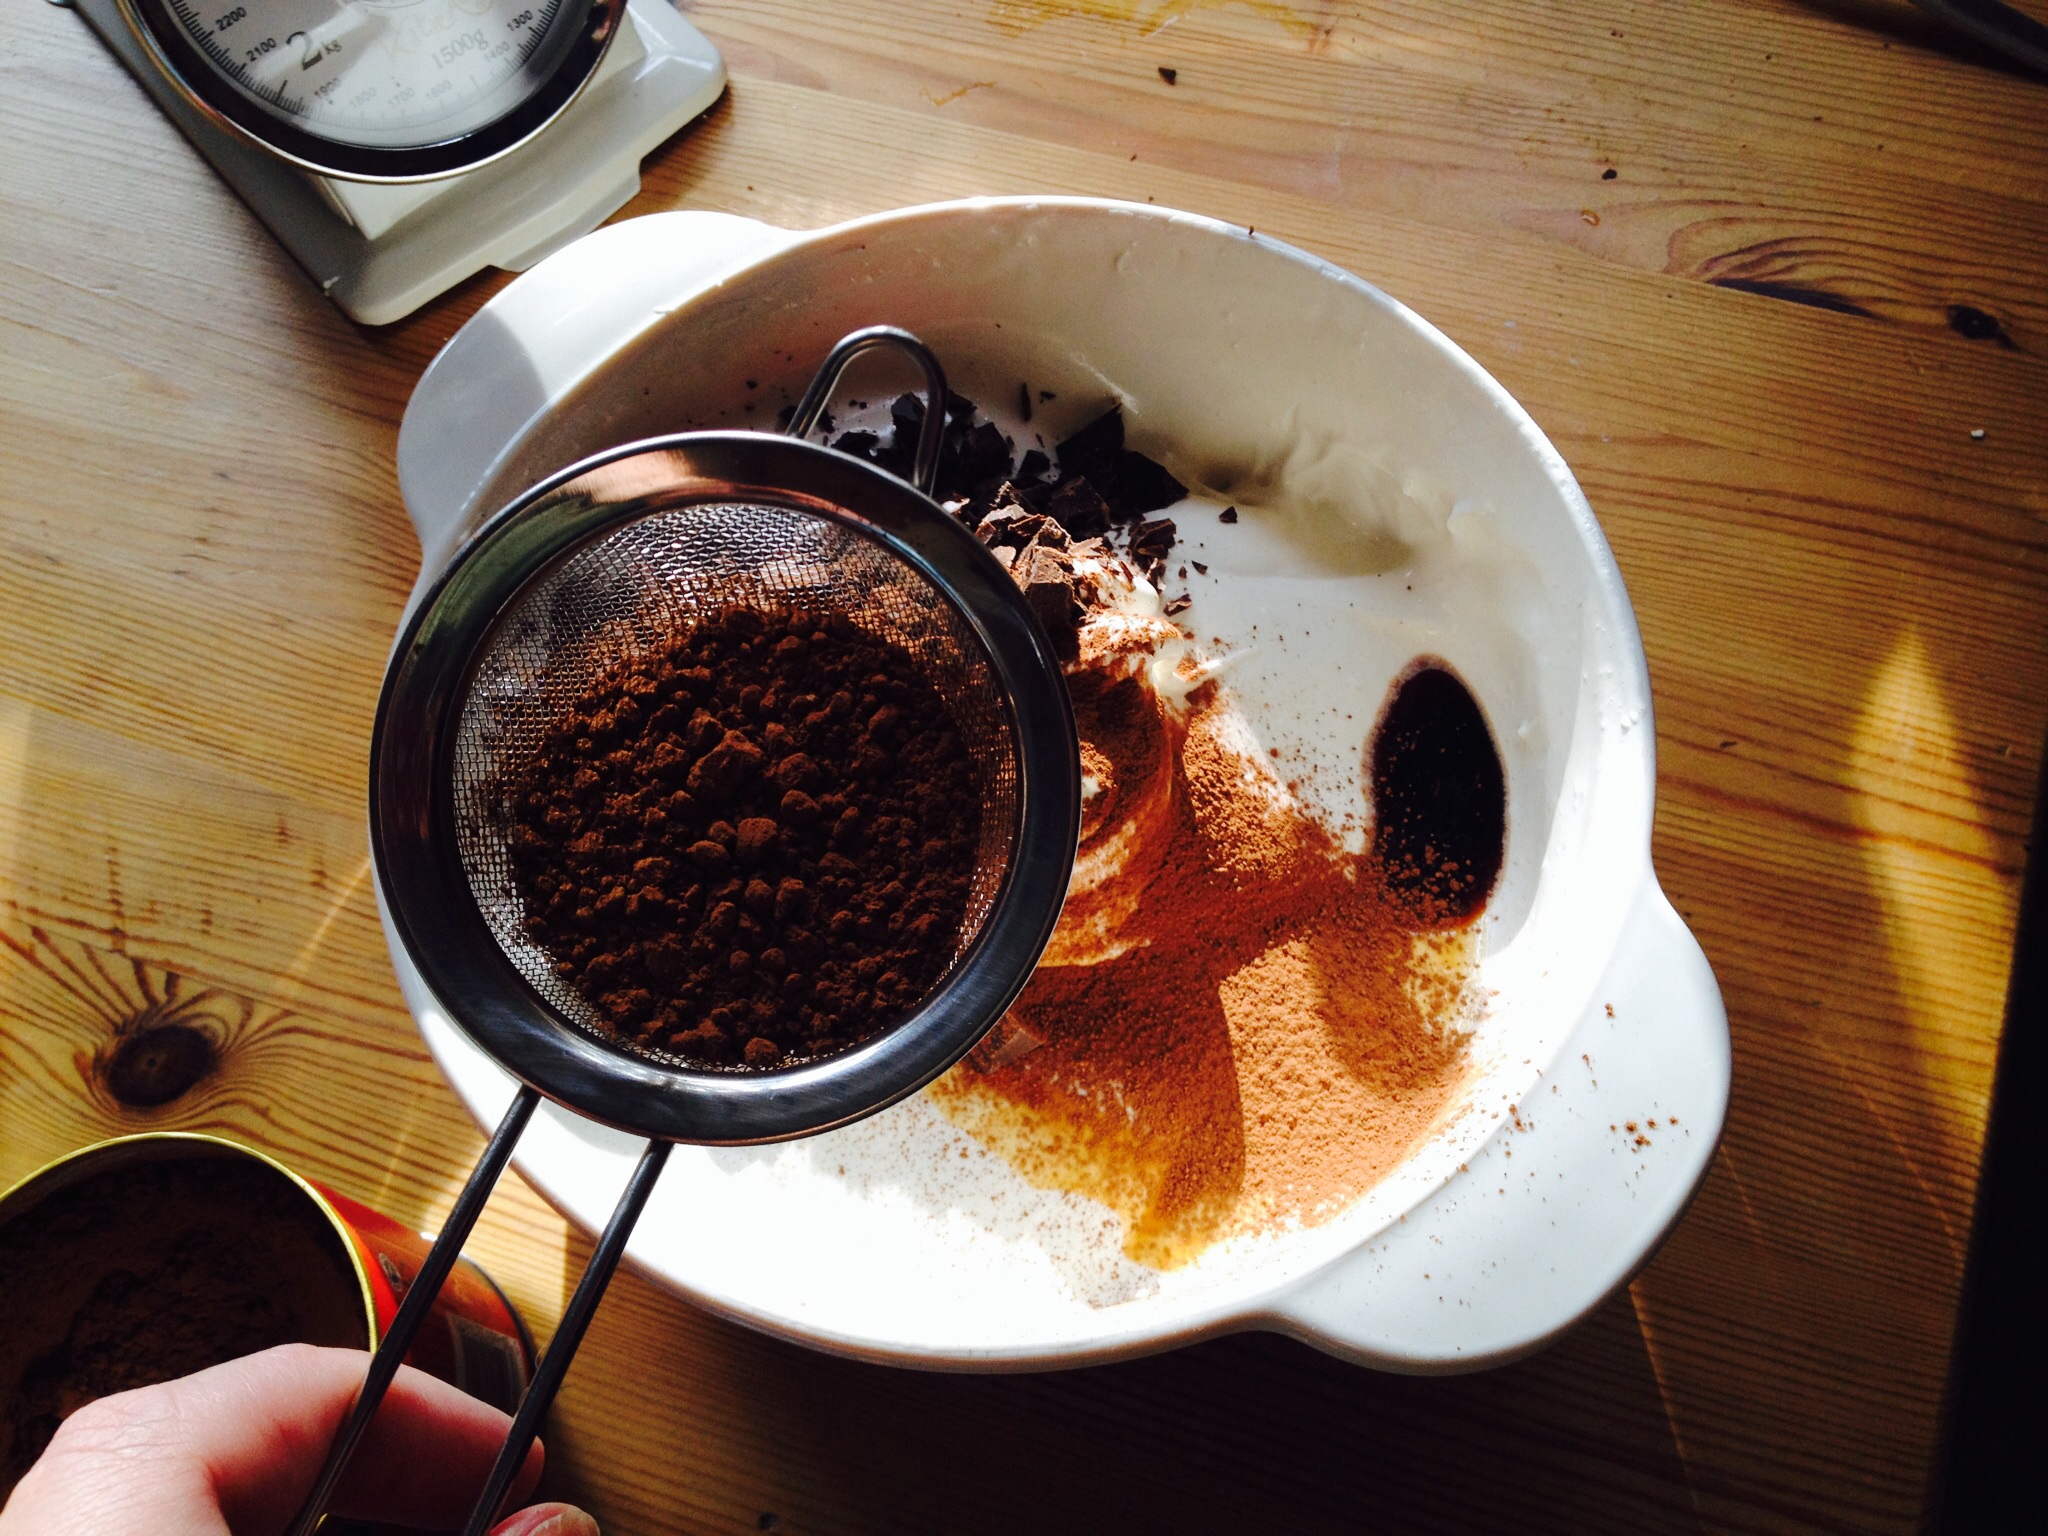
  • Sift in the cornflour and add the vanilla and vinegar.
FF Strawberry Eton Mess
Shiny, glossy meringue, ready to have the extra ingredients folded in.
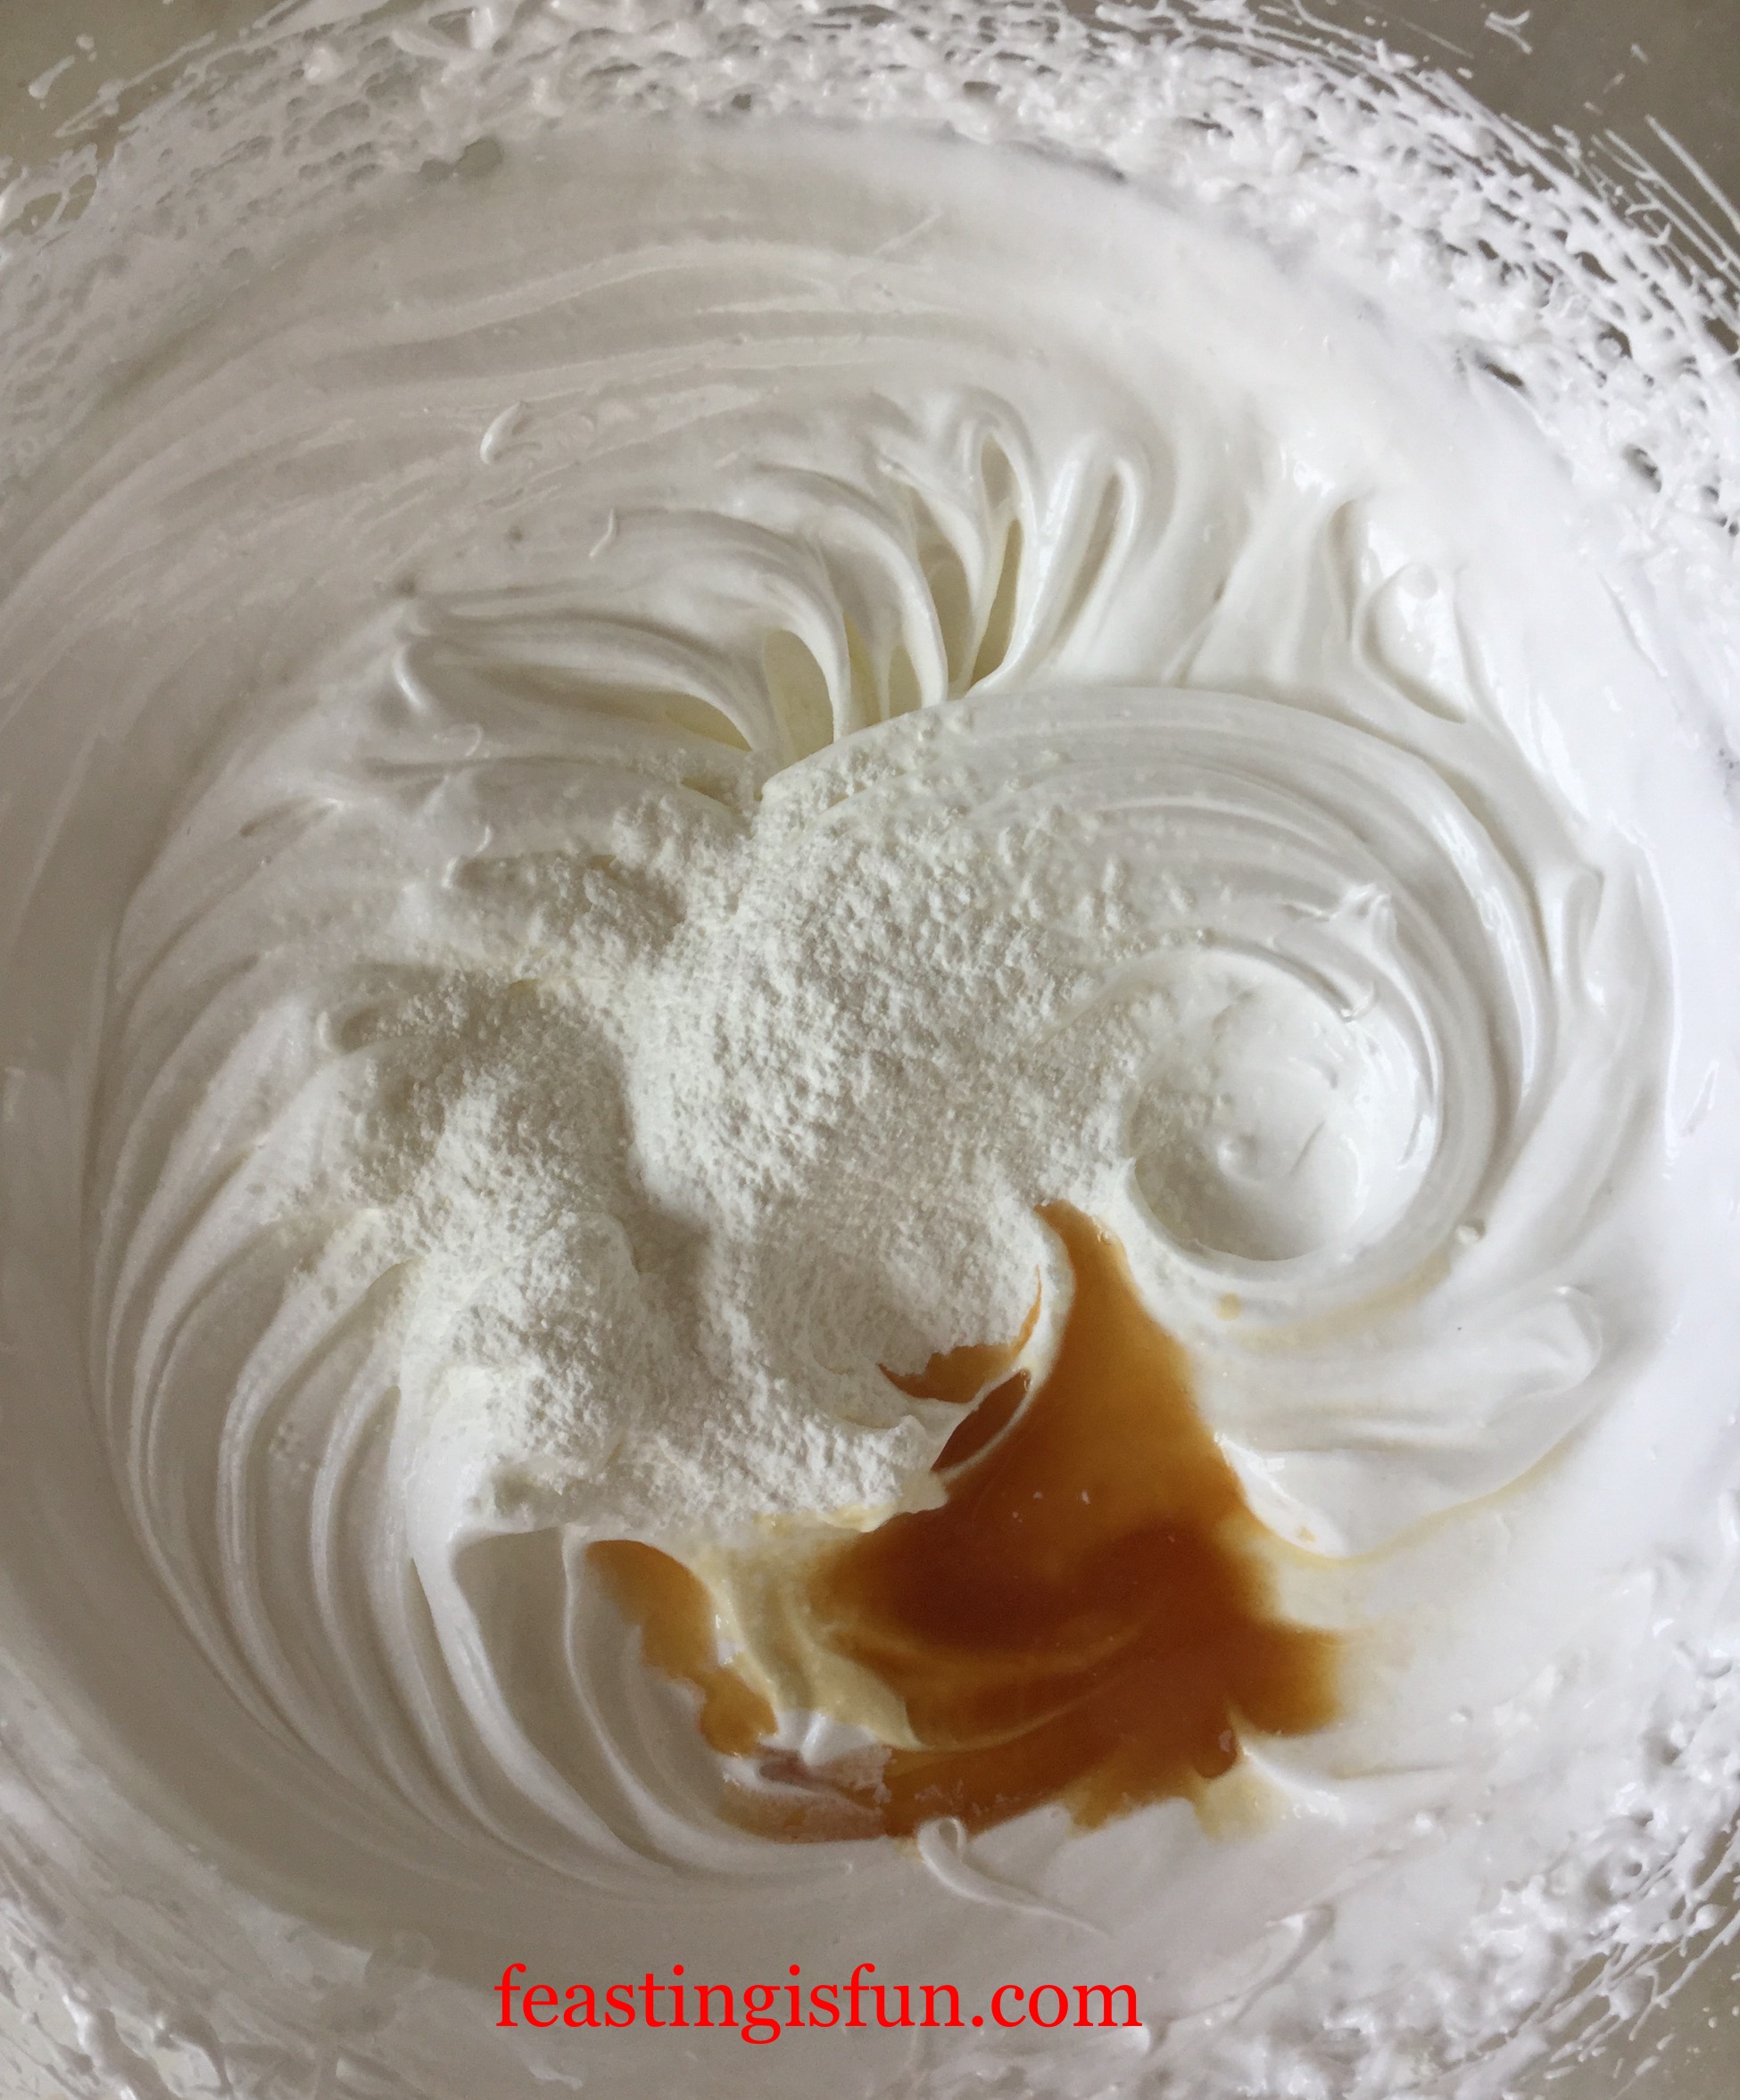
  • Using a large metal spoon gently fold in the added ingredients into the meringue, turning the bowl until they are fully incorporated.
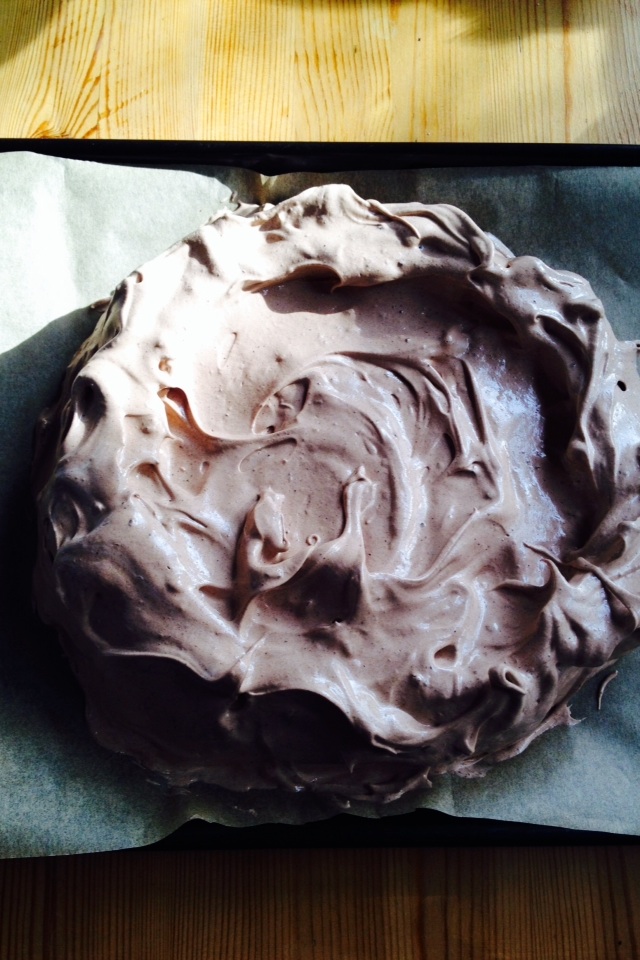
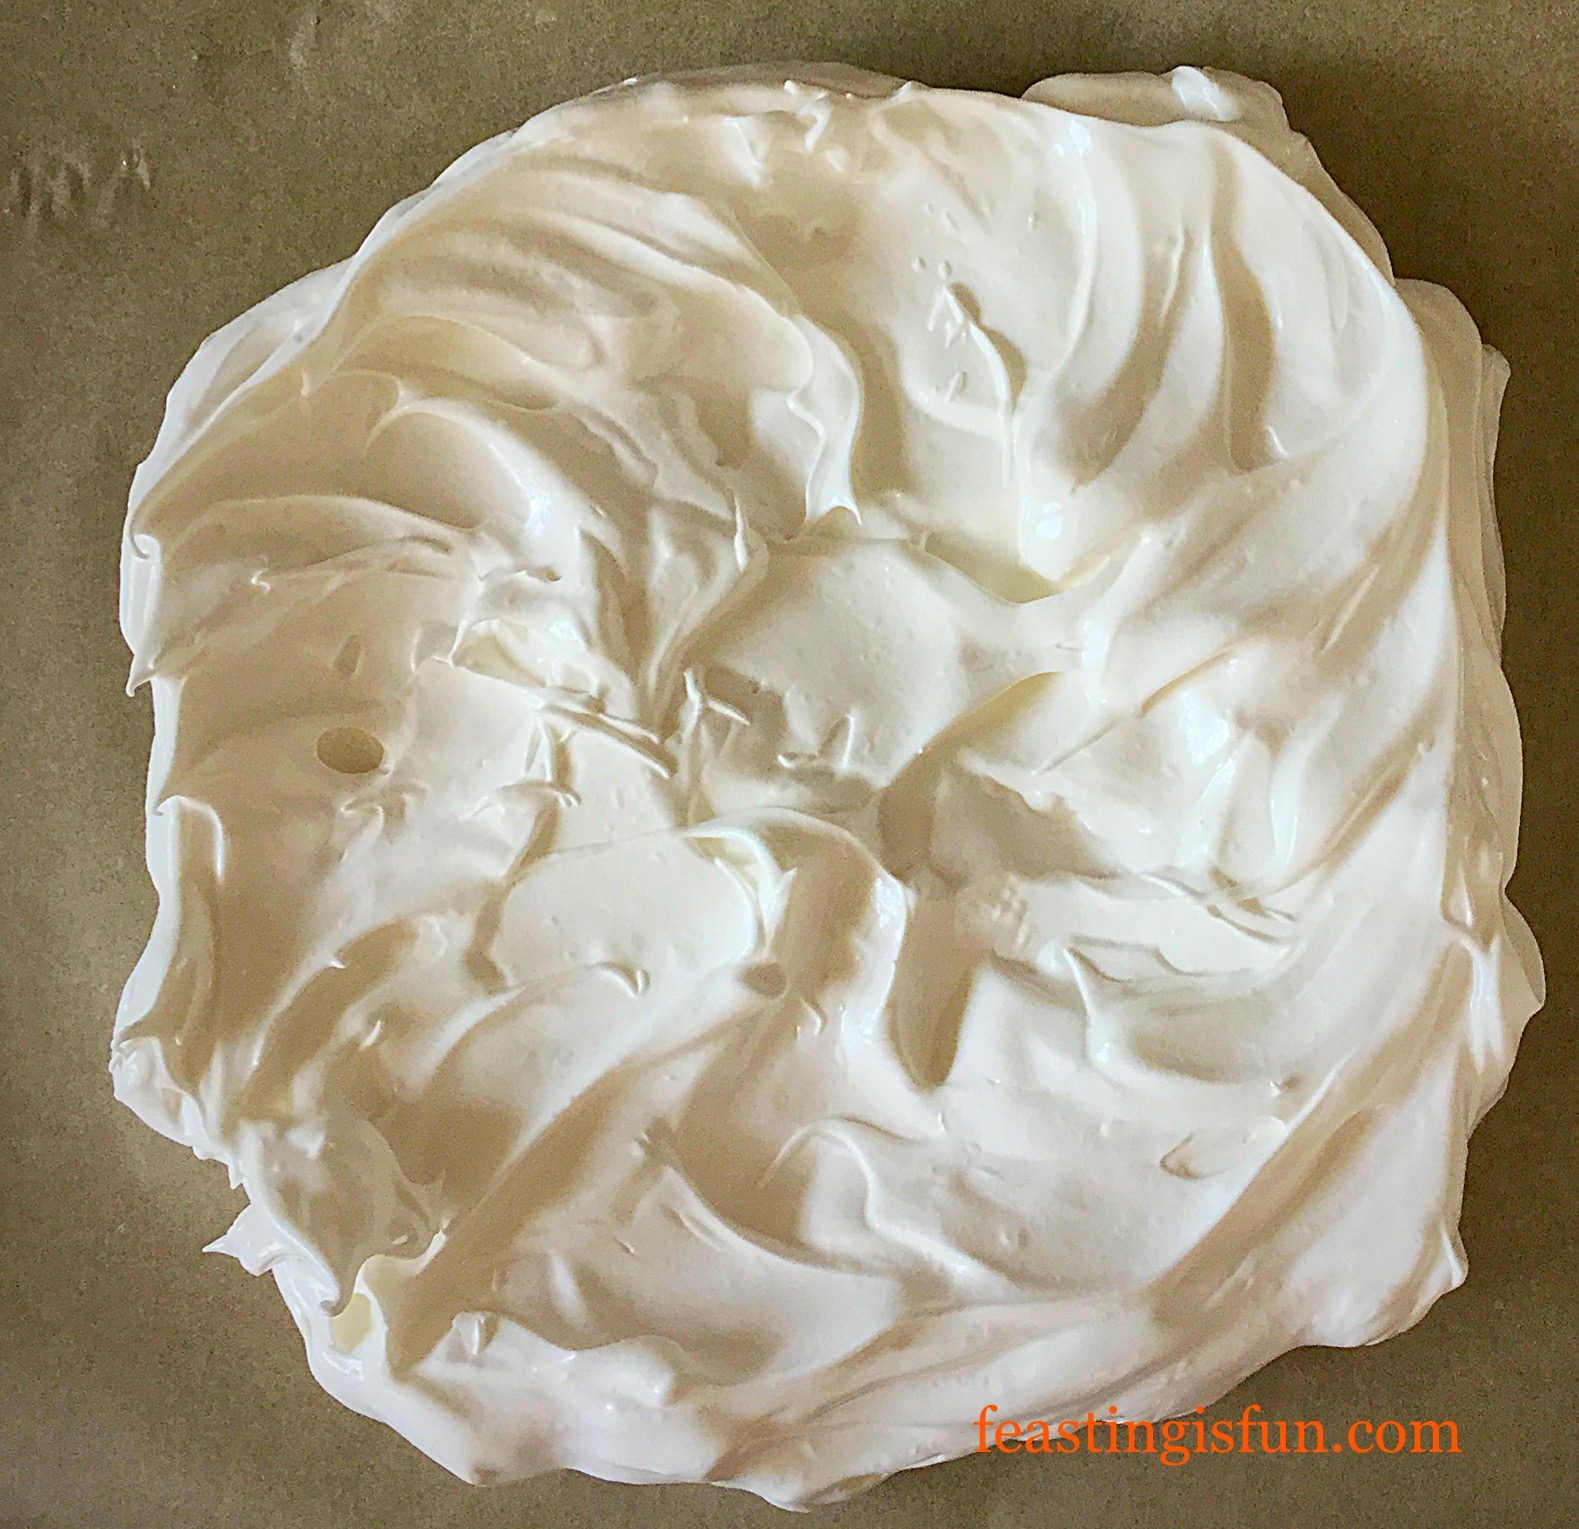
  • Spoon the meringue on to the baking parchment, keeping within the circle marked on the reverse.
  • Spread the meringue out so that it forms a circle and slightly build up the sides so that they are a little higher than the centre.
FF Strawberry Eton Mess
This pavlova is ready for the oven.
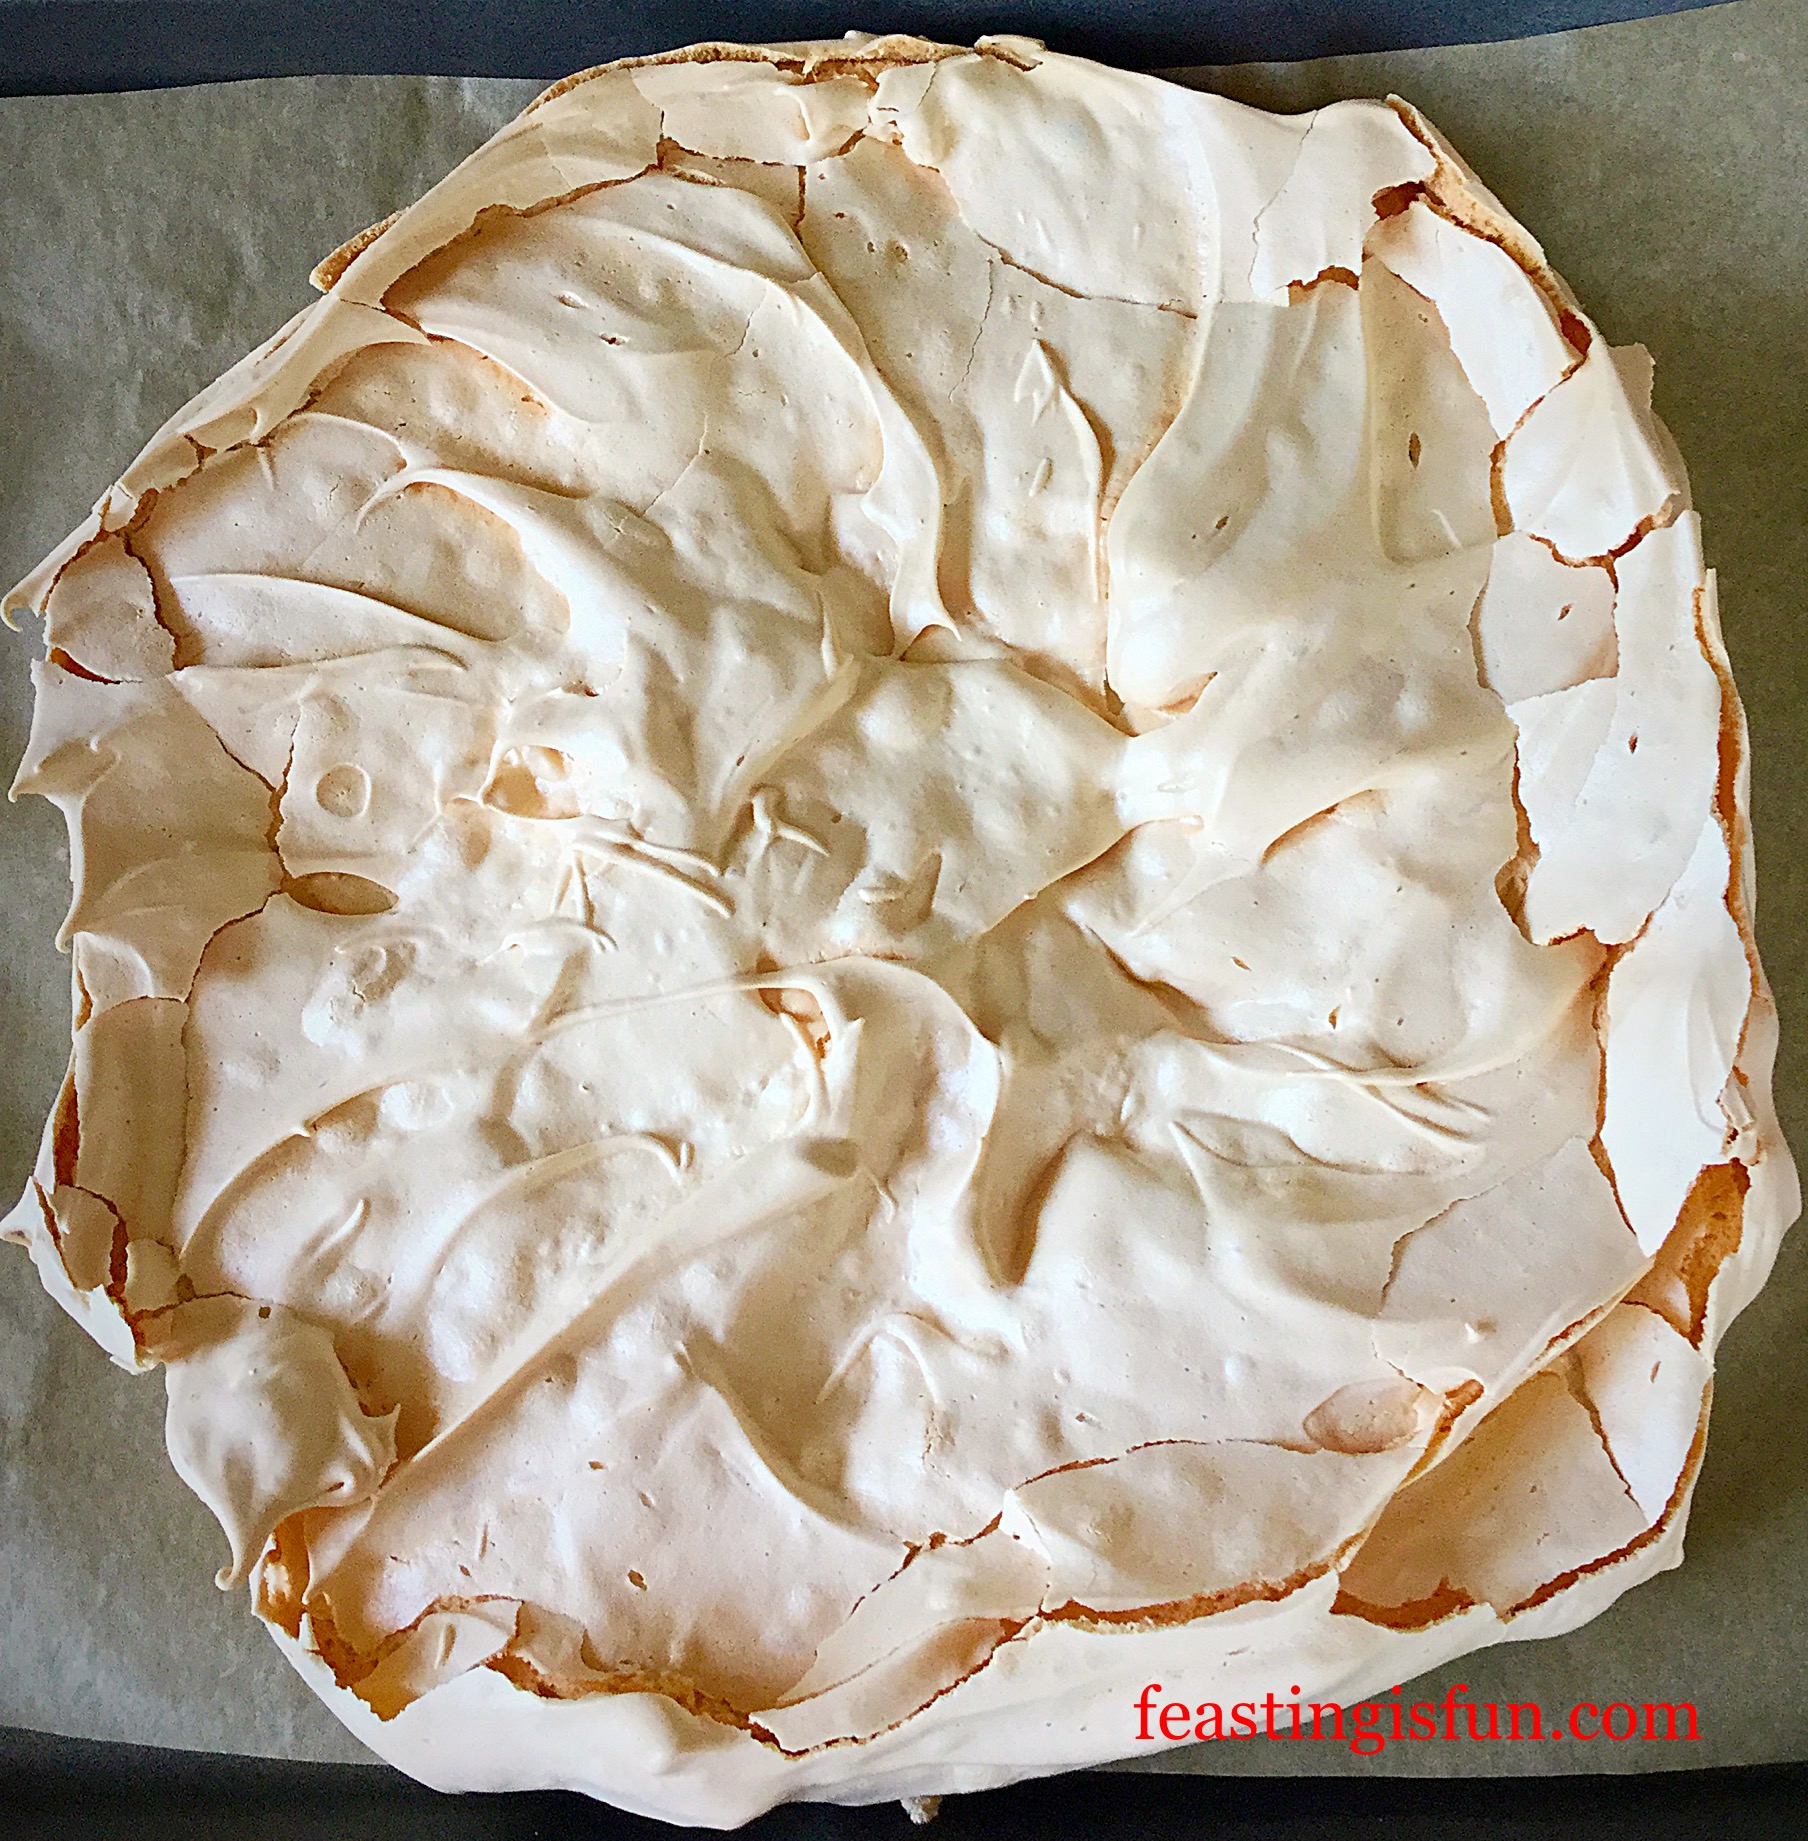
  • Place the pavlova into the centre of the oven and immediately turn the temperature down to 140C/120C fan, gas mark 1.
  • Bake for 1 and 1/4 hours. Then turn off the oven and leave the pavlova to cool inside the oven with the door very slightly ajar.
  • Once cooled removed the pavlova from the oven.
FF Strawberry Eton Mess
The cooked pavlova.
  • Cover the pavlova and baking tray in cling film until ready to use.

Assembling the Strawberry Eton Mess:

  • Hull and cut the strawberries into halves or quarters, depending on their size.
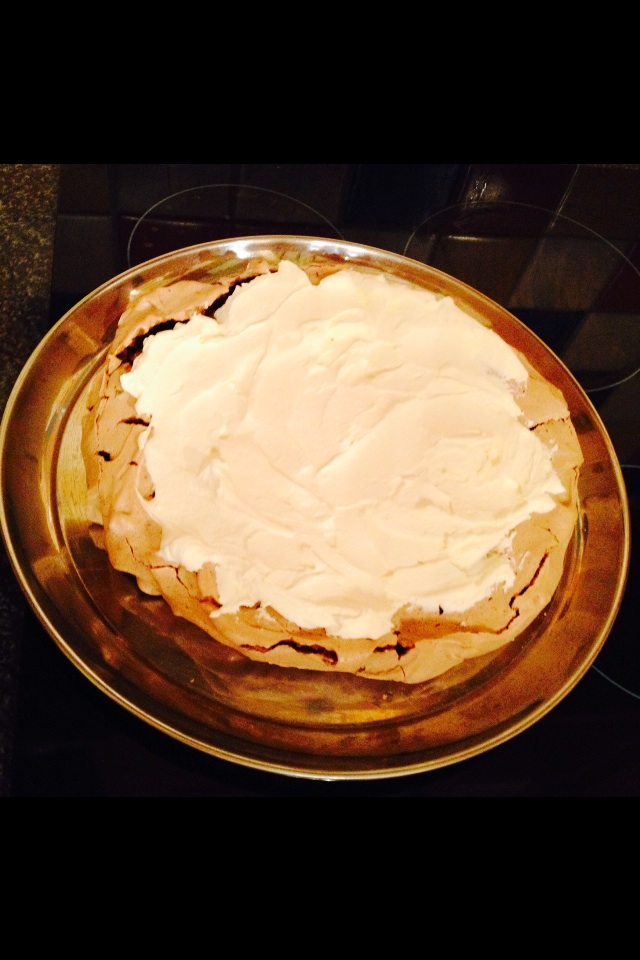
  • Into a large bowl add the cream, vanilla bean paste and caster sugar.
  • Whip the cream until it thickens, but is still floppy – not stiff.
  • Add the strawberries, break the pavlova up into bite size chunks and add those too.
FF Strawberry Eton Mess
Strawberry Eton Mess you can see the marshmallow insides of the pavlova.
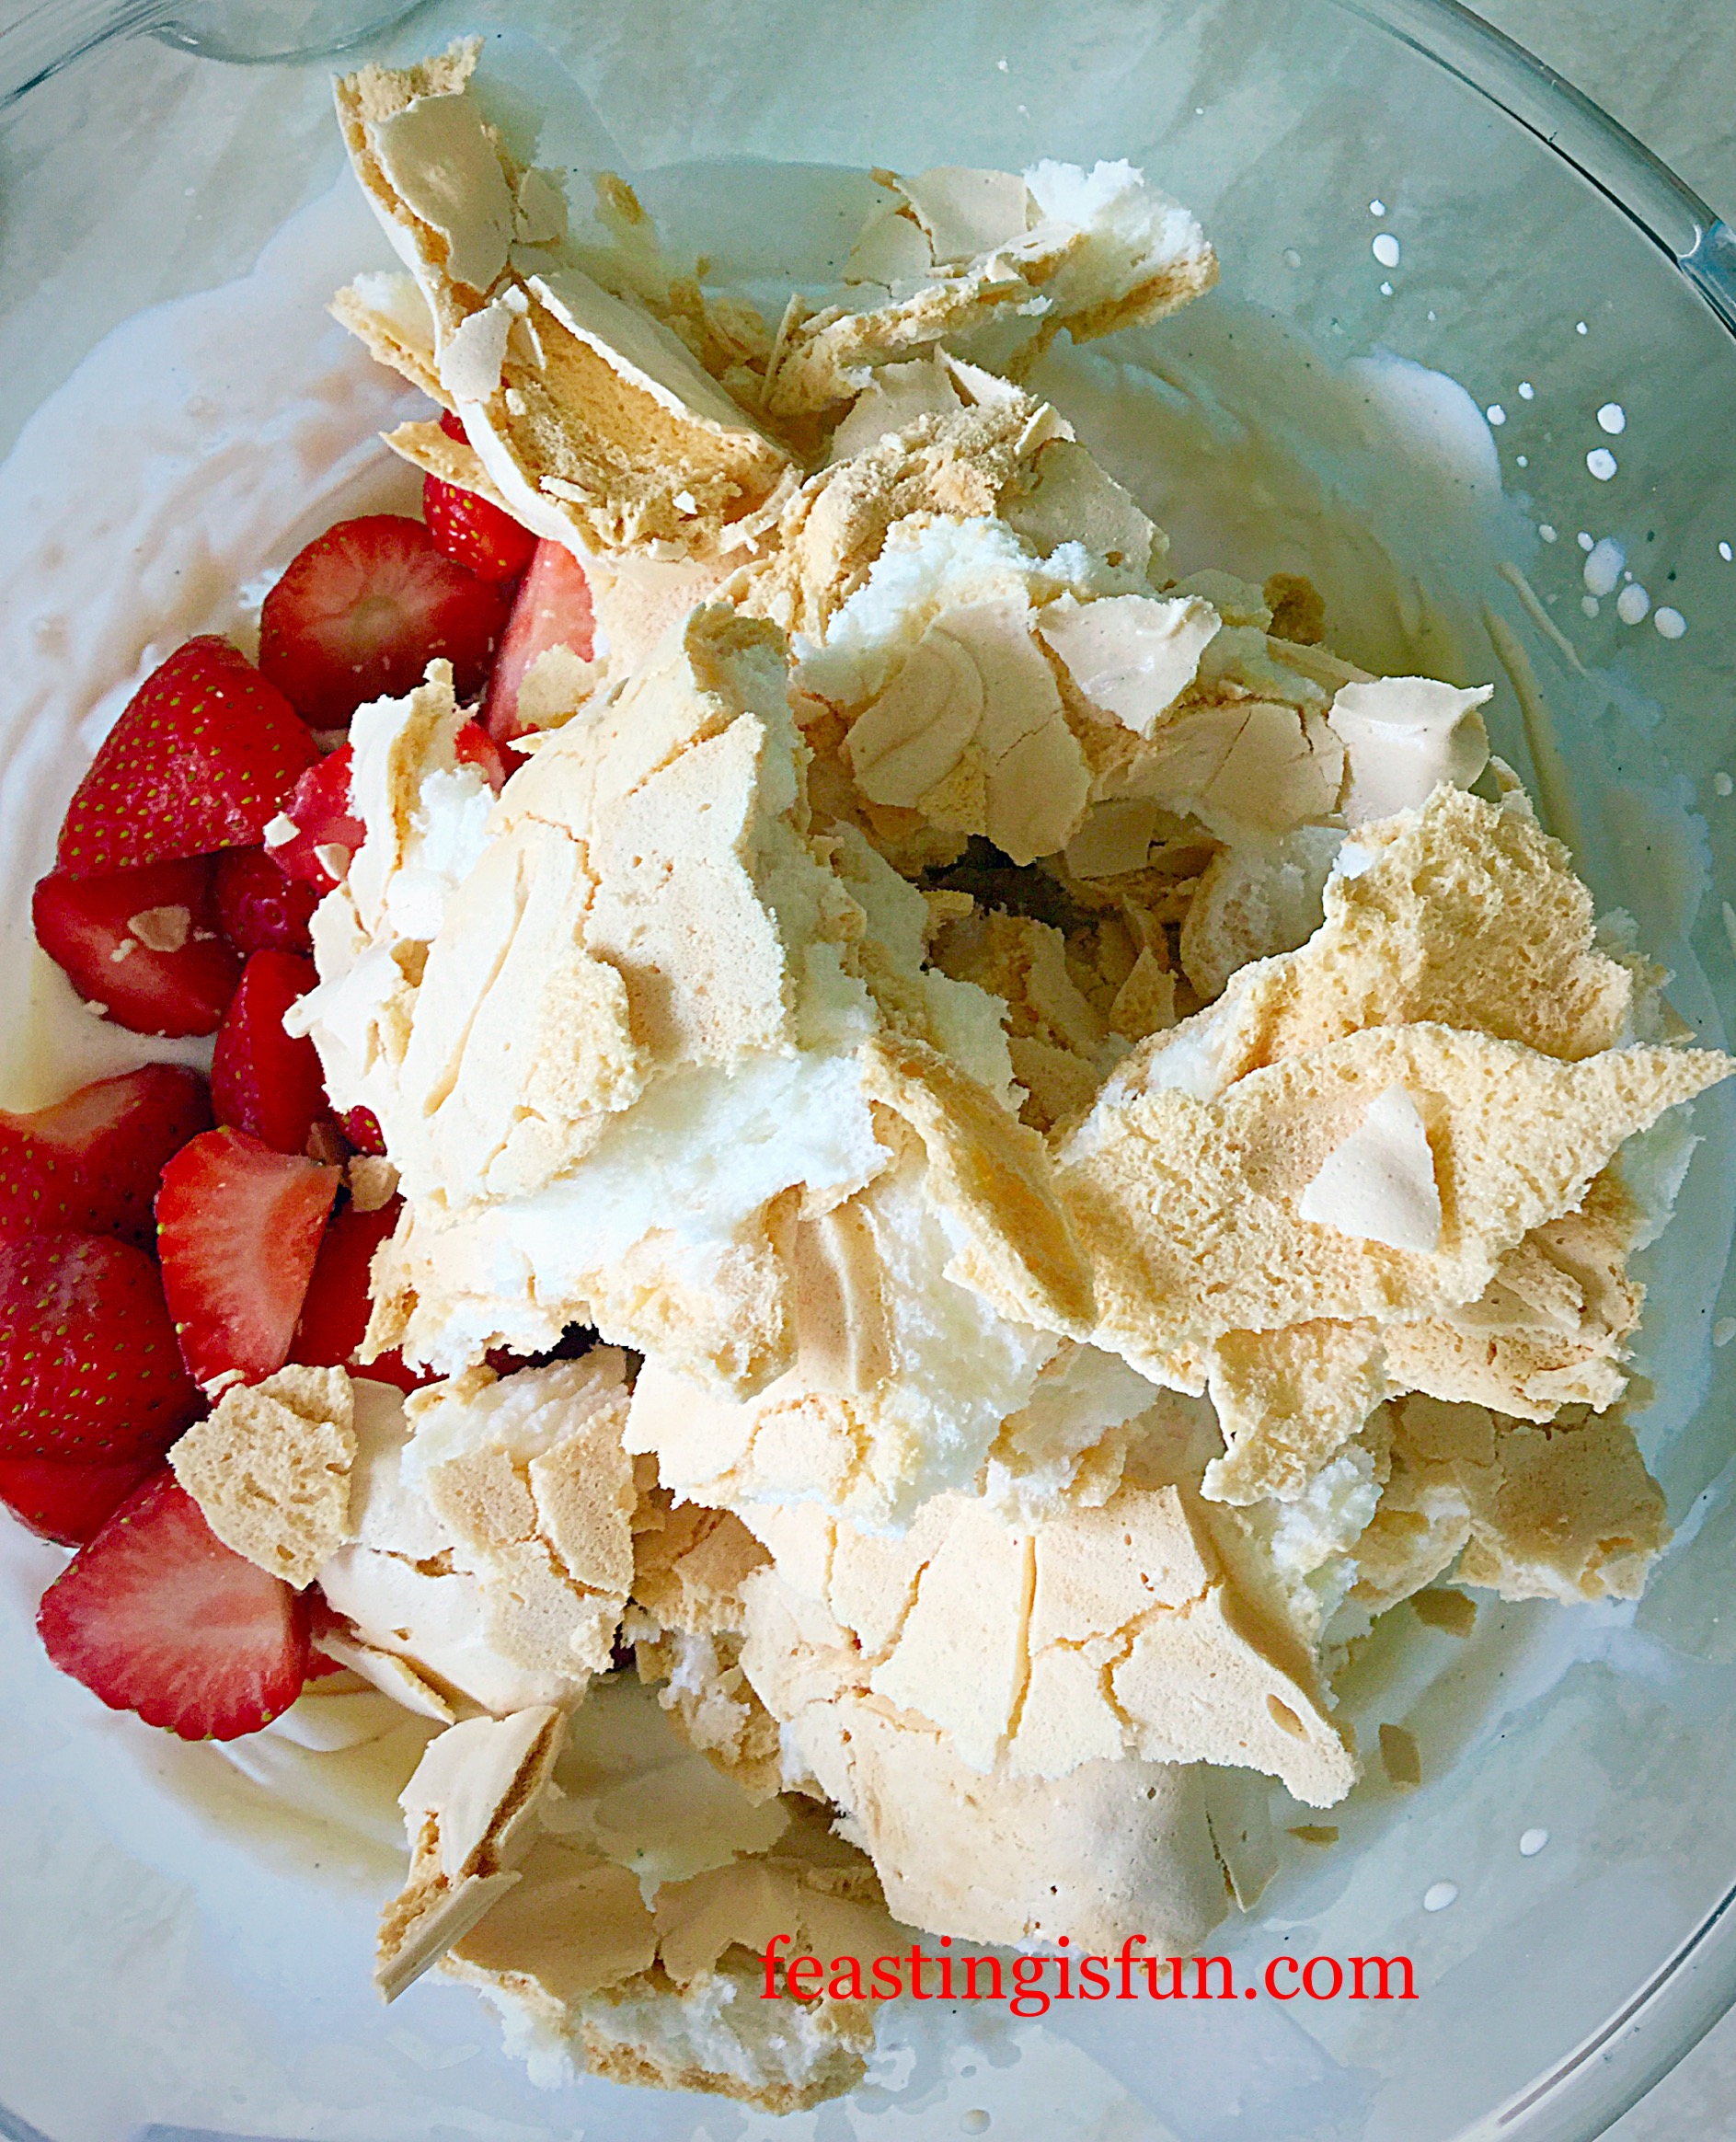
  • Fold all the ingredients together with a large metal spoon.
  • Serve in pretty glass bowls with a drizzle of slightly warmed strawberry jam.
FF Strawberry Eton Mess
Strawberry Eton Mess serve with a spoon and a smile.

Because this is such an easy to assemble dessert, with a little preparation beforehand, you too can sit down and enjoy eating this with family, friends, or whoever you have invited round.

Also, if you wanted to up this Strawberry Eton Mess to the next level, a drizzle of my Boozy Berry Sauce, served cold, on top would be a fantastic idea! That’s one for the adults though.

Strawberries and cream are such a classic combination and here, in this dessert, they are lifted by the presence of amazing, homemade pavlova.

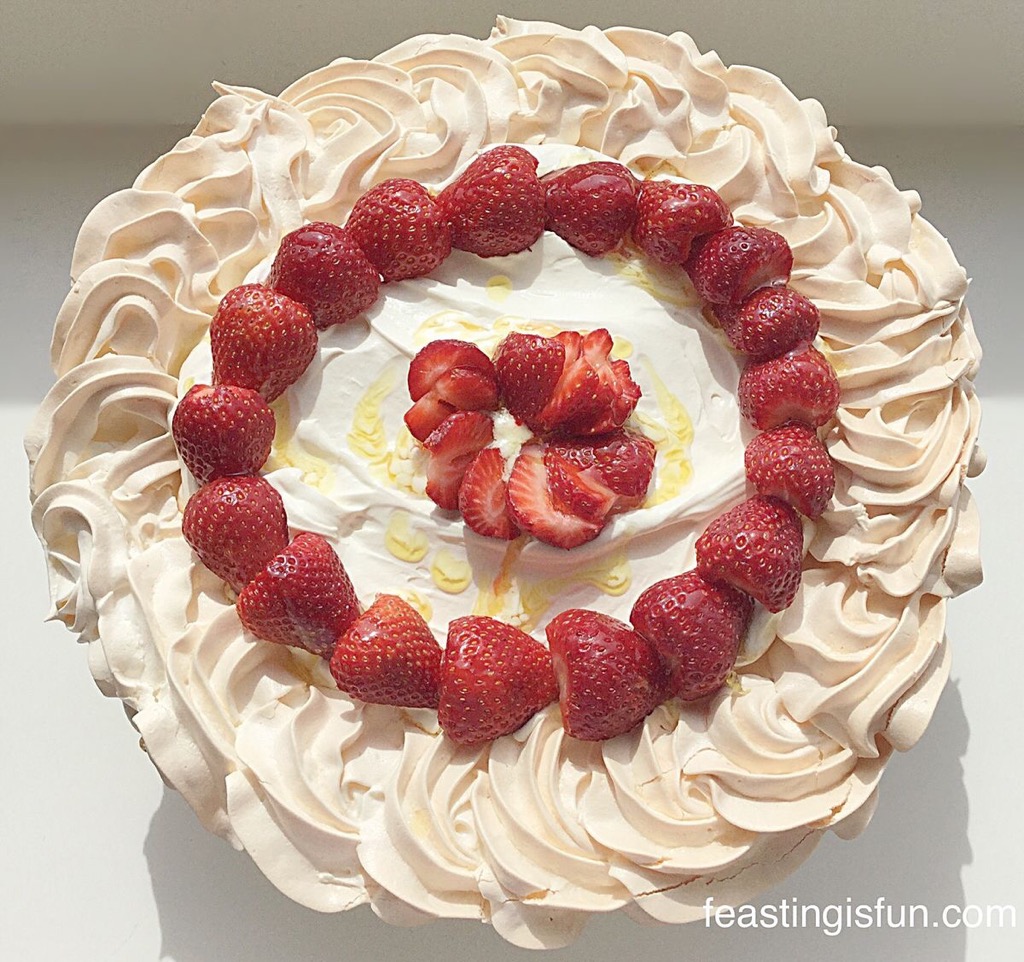
Tip: The pavlova itself can be covered in whipped cream and tart berries (passionfruit is also exceptionally good). One recipe two desserts!

If you have enjoyed the recipe for this Strawberry Eton Mess here are a few others you might like:

Lemony Strawberry Pavlova

FF Straw Eton Mess
Delicious Lemon Pavlova slathered in cream, decorated with strawberries and finished with a limoncello drizzle.

Raspberry Chocolate Ice Cream Sundae

FF Strawberry Eton Mess
Vanilla ice cream layered with chocolate meringue and unbelievably good raspberry sauce.

Chocolate Brownie Raspberry Cheesecake

FF Strawberry Eton Mess
Light Raspberry Cheesecake on a Chocolate Brownie base – so good.

Do you enjoy desserts?

I hope you’ve enjoyed this post and have been encouraged to make and bake a pavlova. It doesn’t matter if they sink, or crack as it can all be covered with cream and fruit, or crumbled into the best Strawberry Eton Mess you have ever eaten!

Have fun making and baking in your kitchens. Keep the photos and comments coming, I’d especially like to see ones of you sharing your delicious feasts?

Sammie xx

This is not a sponsored post, the jam was won in a competition on Twitter.

Share
Facebooktwitterpinterestlinkedintumblr

Raspberry Chocolate Pavlova

Share
Facebooktwitterpinterestlinkedintumblr

Hello, I’m writing this blog with fond memories of our week spent in the heart of Devon during half term. This Raspberry Chocolate Pavlova was made, at the barn, with minimal equipment and only my memory for the recipe! And I’d certainly call that a challenge!!


Fresh fruit dessert embellished with a vase of pink roses to one side.
Raspberry Chocolate Pavlova

Holiday Baking:

Physically it was a bit of a struggle for me, but that was more than compensated by the time we spent as a family. Hanging out together, all 5 of us on a trampoline ( trust me I wasn’t jumping!) that I thought was going to collapse at any second. Taking turns to row around the pond. Discovering semi-wild farm cats and their kittens in the hay barn – sooo cute. And spending time with our Devon families, both in church and on the farm. Yet most of all being together Feasting and Having Fun!!!!!

Fresh fruit topped meringue slice served with a pot of tea and flowers
A slice of Raspberry Chocolate Pavlova.

Firstly I have to give complete credit to Nigella for inspiring this scrumptious Raspberry Chocolate Pavlova.

While staying in our gorgeous Barn in the middle of nowhere Pip had invited us to share a meal with her and her wonderful hubby Sailor Man and their daughter Leggy Lou!

Pip would be cooking Lasagne and I offered to do pudding!!

We’ve been staying on the same farm, in the same barn at least 10 years. I was pretty confident, given the restricted equipment available in the barn, that  I could ‘easily’ whip up a Raspberry Chocolate Pavlova!!

This is one of those puds that not only has the WOW factor visually but tastes even better than it looks. So simple to do then?

FF Raspberry Chocolate Pavlova
Raspberry Chocolate Pavlova a delicious combination of flavours.

While out shopping I remembered ALL the ingredients (I may have made this a few dozen times before!). Although I couldn’t remember the quantities!

Back at the farm, in a rare moment of actually being able to get a signal, I successfully popped onto Nigella’s website  and got the recipe.  Fortunately I had not forgotten anything – boy was I relieved!!

Recipe:  Raspberry Chocolate Pavlova serves 8

You will need a good sized baking sheet that can take a 30cm diameter circle of meringue, lined with parchment paper.

6  Egg whites. (Preferably free range) at room temp

300g  Caster Sugar

Tiny pinch 1/8 tsp Salt – I use Maldon 

3 tbsp Cocoa Powder (not drinking chocolate)

1 tsp Balsamic vinegar (your just gonna have to trust me on this one???!!)

50g  Chopped Dark (70%) Chocolate + an extra 25g Dark (70%) Chocolate chopped very fine, for sprinkling over before serving

450ml Double Cream

300g – 500g Raspberries – Fresh if possible. I have used decent thawed frozen ones in the midst of winter and it worked – Waitrose sell good quality frozen berries

Method:  Preheat the your oven to 200C/180C fan (350F, gas mark 4).

Making The Chocolate Pavlova:

First of all,  if you have any kind of electric whisk PLEASE use it. You can see from the photo below that I did not have one and it was VERY HARD WORK!!!

Oh yes - I whisked 6 egg whites using a rotary whisk!!! Gone are the bingo wings!!!!
Oh yes – I whisked 6 egg whites using a rotary whisk!!! Gone are the bingo wings!!!

Once the egg whites form stiff, satin peaks slowly add the caster sugar and keep whisking. Oh the joy, what was already a hard job became much more difficult as the sugar mixed into the whites. The mixture will become much thicker.

Once all the sugar is fully incorporated whisk until the meringue mixture is glossy, satiny and holds a stiff peak!

Next add the sieved cocoa, chopped chocolate and balsamic vinegar (stay with my guys it’s really worth it in the end!!!)

I'm not a big sifter?(I am a big sister!!!!!), but cocoa really does need a god old sift to remove any lumps!!
I’m not a big sifter?(I am a big sister!!!!!), but cocoa really does need a god old sift to remove any lumps!!

Using a metal spoon gently fold in the chocolate, cocoa and balsamic vinegar until the ingredients are fully combined. This was challenging for me, as you can see from the photos I’d used a straight sided, flat bottomed casserole dish as a mixing bowl!

Still I’m nothing if not adaptable!

Shaping The Pavlova

When at home I draw round a 12″ (30cm) round cake tin, with pencil, on to parchment paper. On holiday I had to ‘guesstimate’!

Flip the paper over, so that the pencil marking is on the underside. At this point, you can attach the parchment to the baking sheet with little dobs of meringue mixture. These act like glue and stop the paper moving around.

Using the drawn circle as a guide, gently pile on the meringue mixture into the centre using a metal spoon. Use a palette knife (or butter knife if on hols!!!) to gently spread the mixture into an even circle shape approx 30cm across.

I’ve found it helps the cooked Pavlova not to crack if you build the sides up slightly so the centre is approx 1-2cm lower than the edge. It doesn’t matter if it does crack as later on you will be smothering it in whipped cream and raspberries! Using your knife smooth out the centre and create swirls around the outside of the Pavlova. Let your creative, fun side run free!! It’s soo much fun and you can swirl to your hearts content!

The lighting was beautiful in the barn and it makes the Pavlova look sooo pretty x

Making The Chocolate Pavlova

Place the beautiful Pavlova on the middle shelf of the preheated oven (180C – 350F or gas mark 4), immediately turn the oven temperature down to 150C (300F gas mark  2) and bake for  1, 1/4 – 1, 1/2 hours.

If you are confident about the eggs you have used, gather the children around the bowl and let them lick the bowl clean. Make sure you have a little taste too. It’s GORGEOUS.  I think it tastes like the lightest chocolate mousse.  You are eating raw egg so please do not taste if you are pregnant, unwell or elderly. Also I wouldn’t let my children taste it when they were very young.  Our youngest is 12 now so he was allowed to try some!

The Pavlova is cooked when the outside looks lovely and crisp and you can see the dark, fudgey inside through the natural small cracks in the surface.

Turn the oven off and leave to cool completely in the oven.

Decorating The Pavlova

As soon as the Pavlova is completely cool remove from the oven and peel off the Parchment paper (I’ve never yet had one stick using Parchment, if you use greaseproof paper I can’t guarantee it will peel off as easily).

Place the Pavlova on a flat cake stand, cake board or metal tray if that’s all you have to hand!

Whip the cream until thickened but still floppy (adding a teaspoon of caster sugar if you prefer to sweeten the cream) and smother the top of the Pavlova with it leaving a cream free edge.

Just waiting to be adorned.

Tumble (or carefully place it’s your choice!) the raspberries over the cream topped Pavlova.

Now finally sprinkle over the remaining 25g (about a tablespoon) of finely chopped dark chocolate.


Soo beautiful, but the proof of the pudding is in the eating!!!
Soo beautiful,Raspberry Chocolate Pavlova. the proof of the pudding is in the eating!!!

Serving Dessert

We shared this with our dinner hosts who were extremely complimentary about the combination of flavours, but mostly the hidden, almost brownie like middle of the Pavlova. The contrast between the crunchy outer layer, the sublime tartness of raspberry enveloped in velvety whipped cream and then the surprise, almost fudgey centre with nubs of chocolate work to create a TASTE SENSATION! Thank you Nigella for inspiring this recipe.

FF Raspberry Chocolate Pavlova
Raspberry Chocolate Pavlova the perfect sweet treat to take to take to someone’s house.

If you have enjoyed this recipe for Raspberry Chocolate Pavlova you may also like these:

Lemon Lime Meringue Pie

FF Raspberry Chocolate Pavlova
Lemon Lime Meringue Pie

Raspberry Topped Lemon Curd Pavlova 

FF Raspberry Chocolate Pavlova
Raspberry Topped Lemon Curd Pavlova

Do certain foods bring back memories of holidays, certain dinner parties or specific dinner guests?

So, whatever you are making, baking and creating in your kitchens, have fun preparing and sharing your feast.

Sammie x

No part of this post may be reproduced or duplicated without the written permission of the owner. Please see my Disclosure Policy. 

Share
Facebooktwitterpinterestlinkedintumblr