Chocolate Cherry Chiffon Bundt Cake

Share
Facebooktwitterpinterestlinkedintumblr

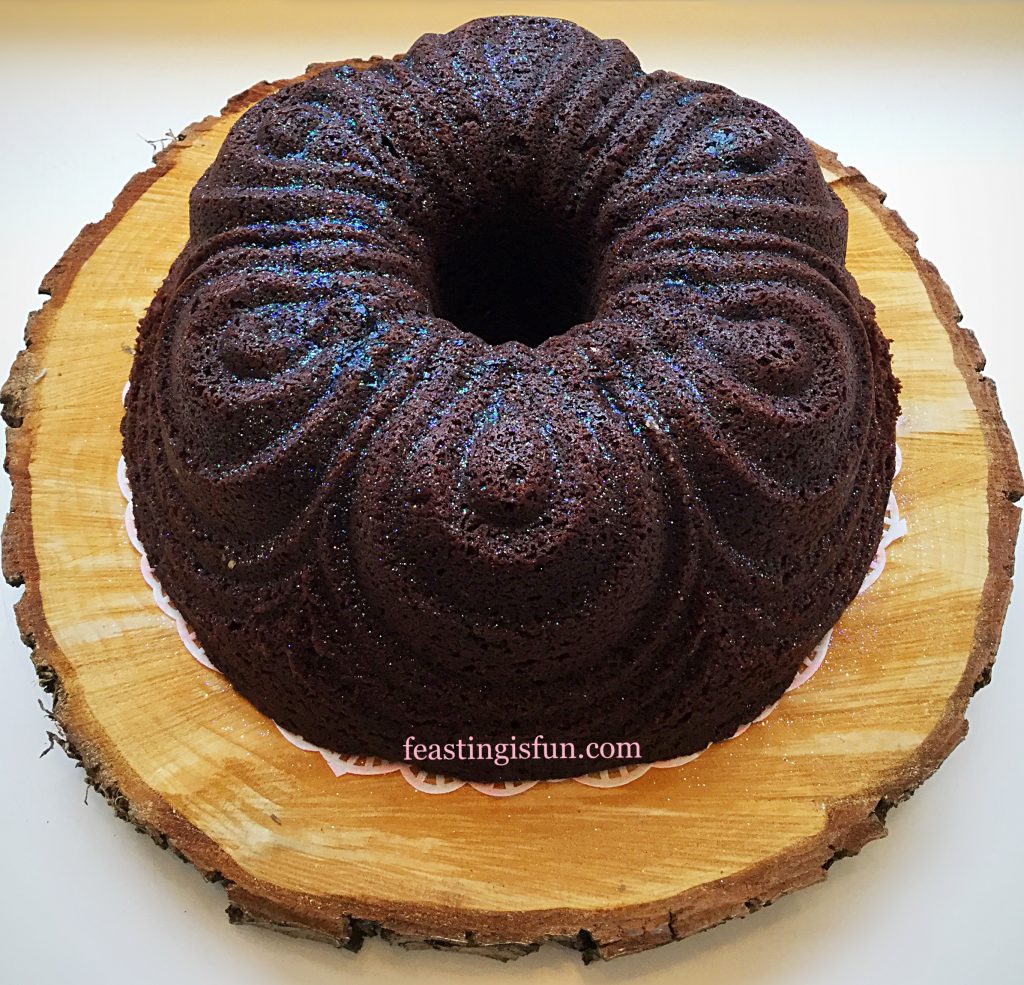
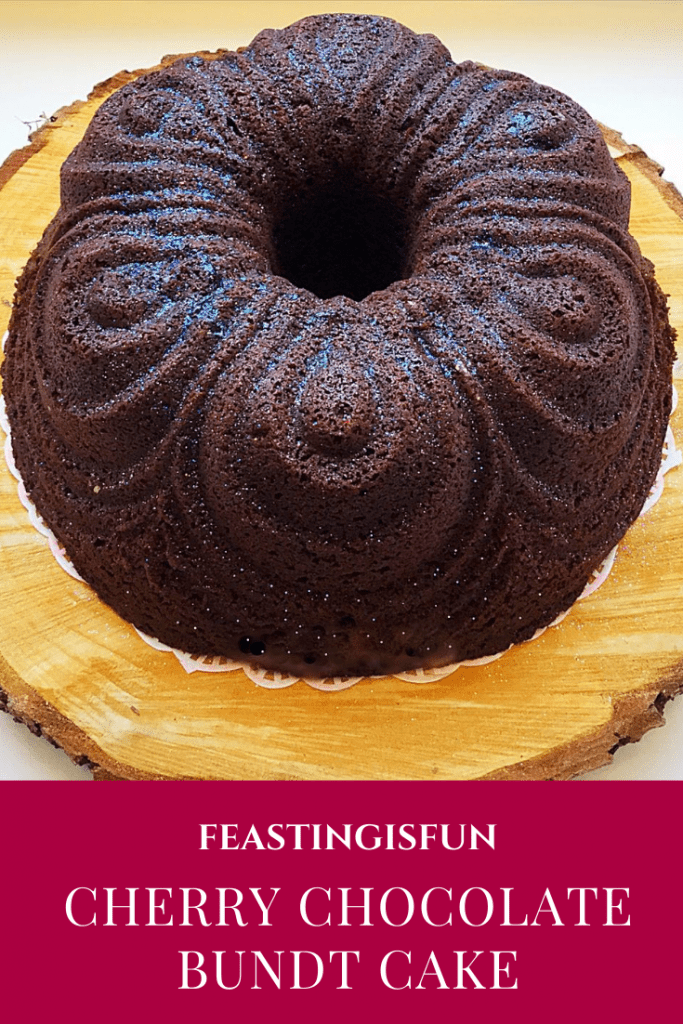
So, it’s another week and there’s another theme. Since #ChocolateWeek is now upon us, chocolate inspired bakes are bringing out the best cocoa creations from Twitter’s imaginative baking community. And, inspired by the theme, I created this beautiful Chocolate Cherry Chiffon Bundt Cake. Since it is always chocolate week here at home, this chocolate cherry cake fits the bill perfectly.
FF Chocolate Cherry Chiffon Bundt Cake
Chocolate Cherry Chiffon Bundt Cake

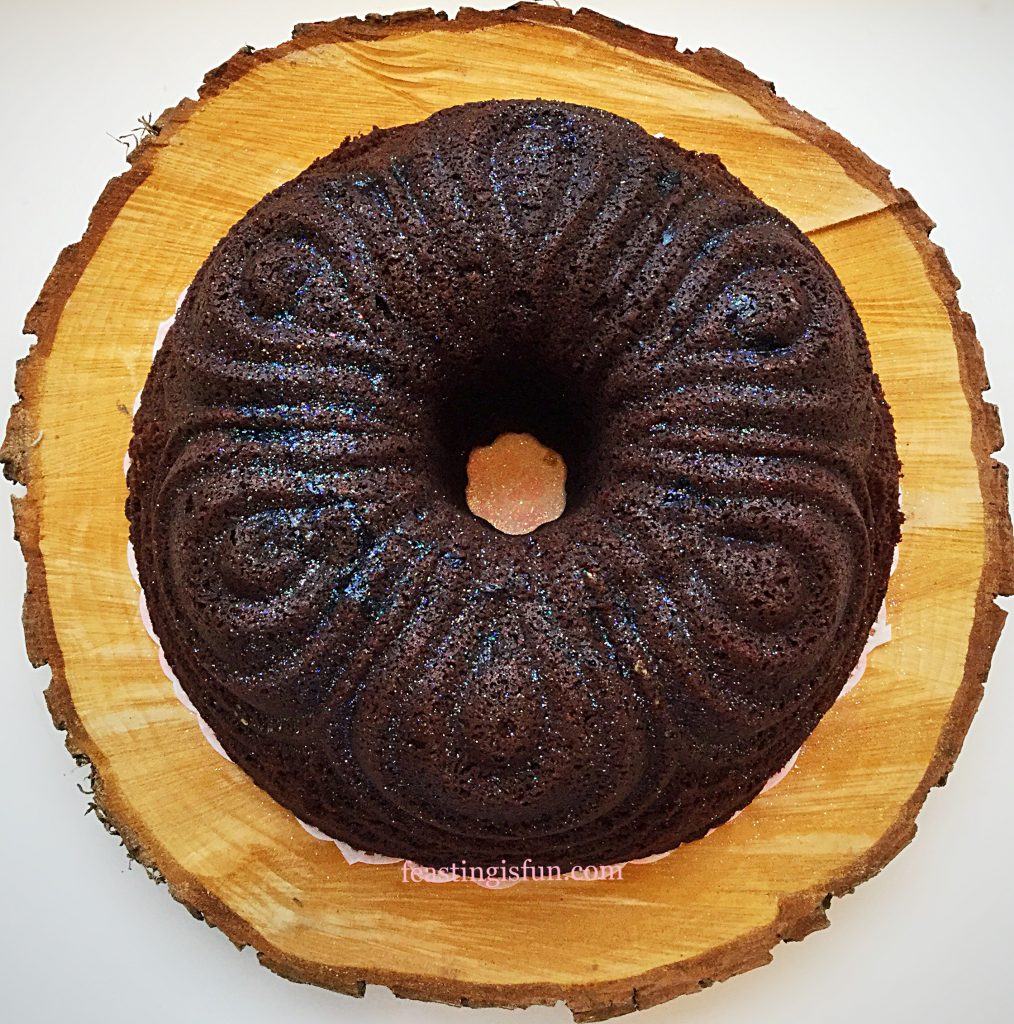
First of all, I absolutely adore Bundt pans. Since their beautiful designs and intricate moulding create the most exceptional looking cakes. While my cake decorating abilities are improving, due to regular practice, using a Bundt pan really does take away the need to decorate. Needing only a simple sprinkle of edible glitter to finish this cake. Alternatively, a light dusting of icing sugar (confectioners sugar) would also work well.
FF Chocolate Cherry Chiffon Bundt Cake
Chocolate Cherry Chiffon Bundt Cake


Chocolate And Cherry – A Flavour Match Made In Food Heaven

Cherry and chocolate are a delicious and classic flavour combination, which also happens to be a favourite of mine. And, using chocolate cherry naturally flavoured cocoa powder gives this cake it’s base flavour. Alternatively, a dash of kirsch (cherry liqueur) would also work well, when using plain cocoa powder. Finally, the addition of cherries and ground almonds creates a moist cake with surprise, hidden cherries inside. During baking the cherries drop to the bottom of the cake, which becomes the top of the cake after turning it out of it’s tin. Resulting in a jammy like topping inside the cake.
FF Chocolate Cherry Chiffon Bundt Cake
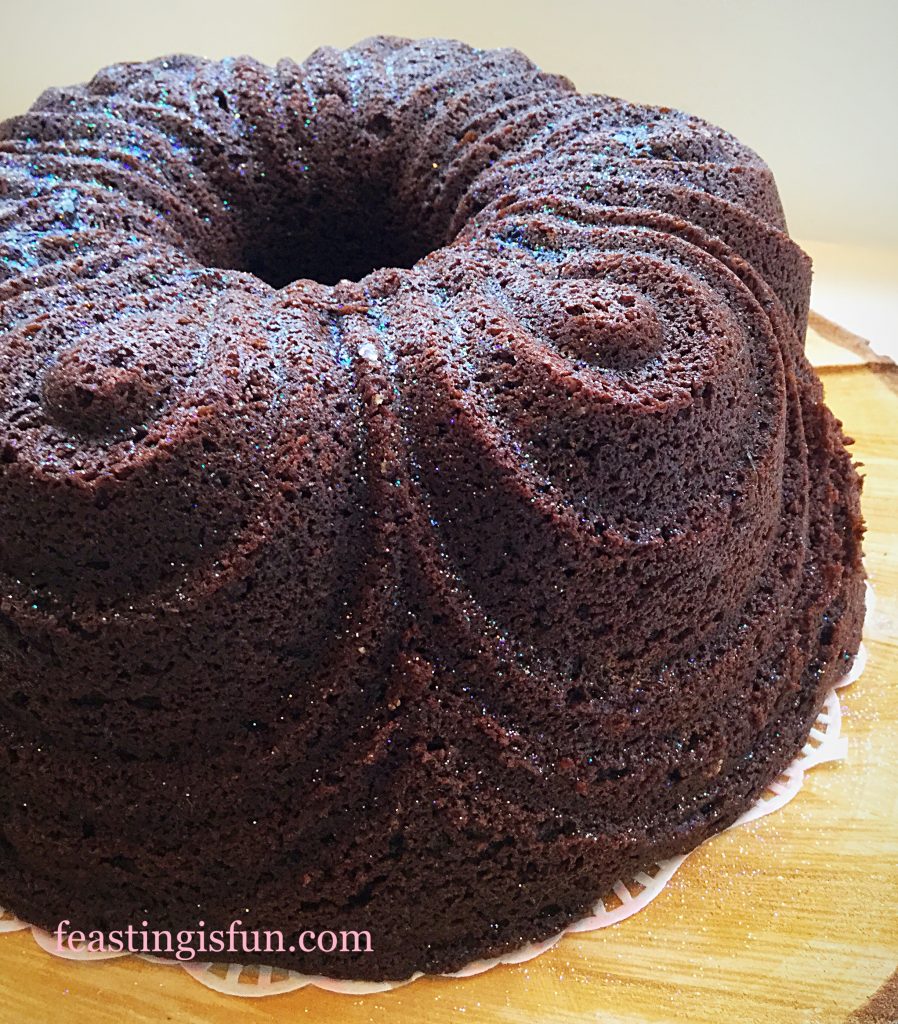
Chocolate Cherry Chiffon Bundt Cake up close.

The looping, scalloped design of the Chiffon Bundt Pan is very elegant. While flickers of light from the edible glitter, sparkle and accentuate the design. Aside from covering in a very thin glaze, as done here, this cake really is best left as is. Indeed, left un-iced, dare I say this would be utterly delicious eaten with hot custard.

Recipe: Chocolate Cherry Chiffon Bundt Cake serves 10-12

275g/10oz Unsalted Butter at room temperature

275g/10oz Light Soft Brown Sugar

1/4 tsp Sea Salt – I use Maldon

2 tsp Vanilla Extract – I use Nielsen-Massey

1/2 tsp Almond Extract

5 Large Free Range Eggs

4 tbsp/60ml Whole Milk

100g/4oz Ground Almonds

75g/3oz Chocolate Cherry Cocoa Powder* – available from Sugar and Crumbs

*If you are unable to obtain chocolate cherry flavour cocoa powder, use plain cocoa and add either cherry flavouring or 3-4 tablespoons of kirsch (cherry liqueur).

125g/4.5oz Plain White Flour

2 tsp Baking Powder

Half a 400g/14oz (200g/7oz) Tin of Cherries or Cherry Pie Filling. Alternatively, use the equivalent weight of fresh, de-stoned cherries.

1/4 tsp Edible Glitter to decorate, alternatively use 1-2 teaspoon of icing sugar (confectioners sugar) to dust the finished cake.

Method: Preheat oven to 160C/140C fan, gas mark 3, 325F.

Tips on using Bundt pans:

This recipe uses a 10 cup Bundt Pan. I have used the Chiffon Bundt Pan available from Nordicware.

Most importantly, to ensure a successful release of the cake from the pan, cake release is highly recommended. Either available as a spray, or a liquid that is brushed on with a soft pastry brush. I recommend and always use Wilton
cake release.

Making And Baking The Bundt Cake

  • First of all add butter, sugar and salt to a large bowl. Whisk until the sugar is fully beaten into the butter.
  • Next add both vanilla and almond extracts. Also add 5 eggs and milk.
  • Now add ground almonds, cocoa powder, flour and baking powder.
  • Whisk everything together until fully combined. Take care not to over whisk as the resulting cake will be tough.
  • Prepare the Bundt pan, spraying, or brushing liberally with cake release.
  • Spoon the prepared cake batter into the pan, pushing the mixture into the base to avoid air pockets.
  • Finally, spoon half of tin of cherries on to the top of the cake batter, making sure that none of the liquid touches the side of the Bundt pan.
  • Place the Bundt pan into the lower middle part of a preheated oven and bake for 1 hour 20-30 minutes. Low, slow baking results in an evenly baked cake.
  • The cake is baked when it feels firm to touch, is coming away from the sides of the tin and an inserted skewer comes outs clean.
  • As soon as the cake is baked remove from the oven and place on a cooling rack.
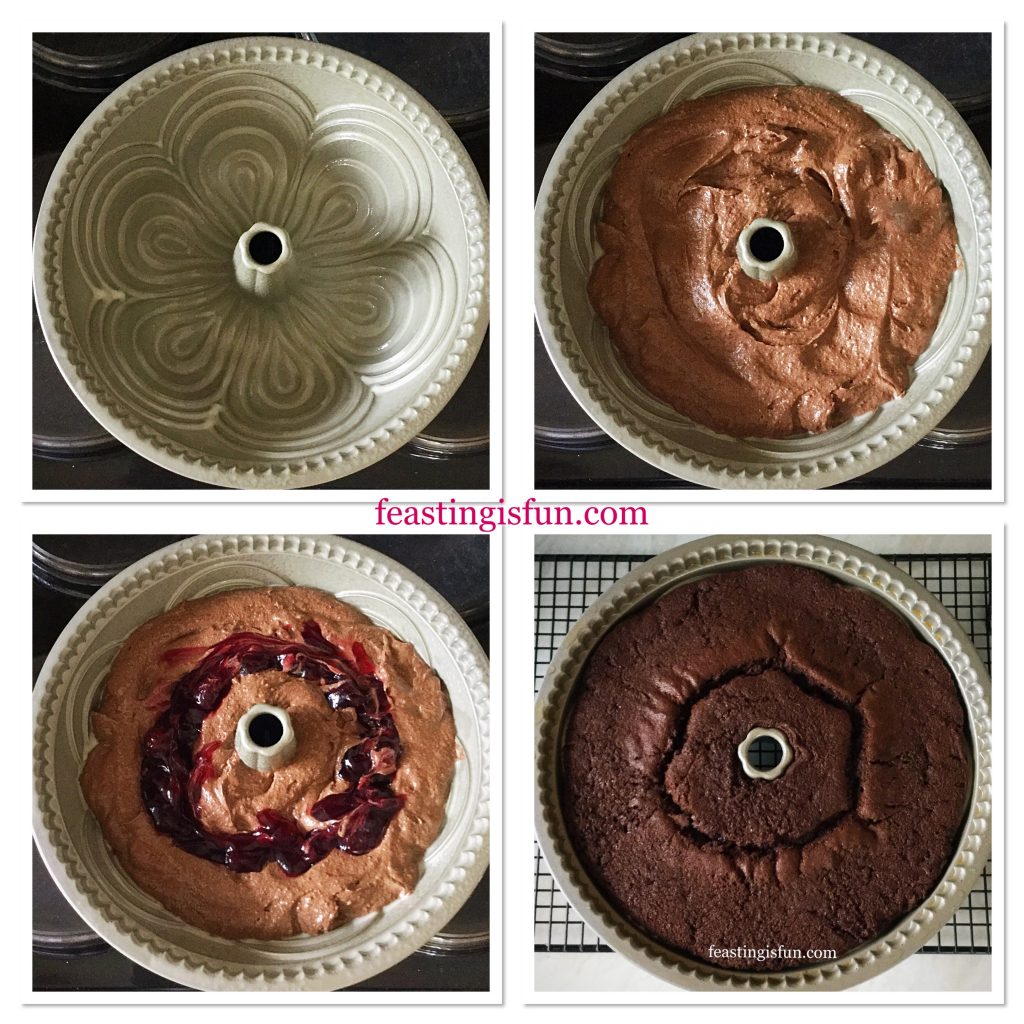
FF Chocolate Cherry Chiffon Bundt Cake
Making and baking the Chocolate Cherry Chiffon Bundt Cake.
  • Allow the cake to cool for 10 minutes, then turn out on to a cooling rack.
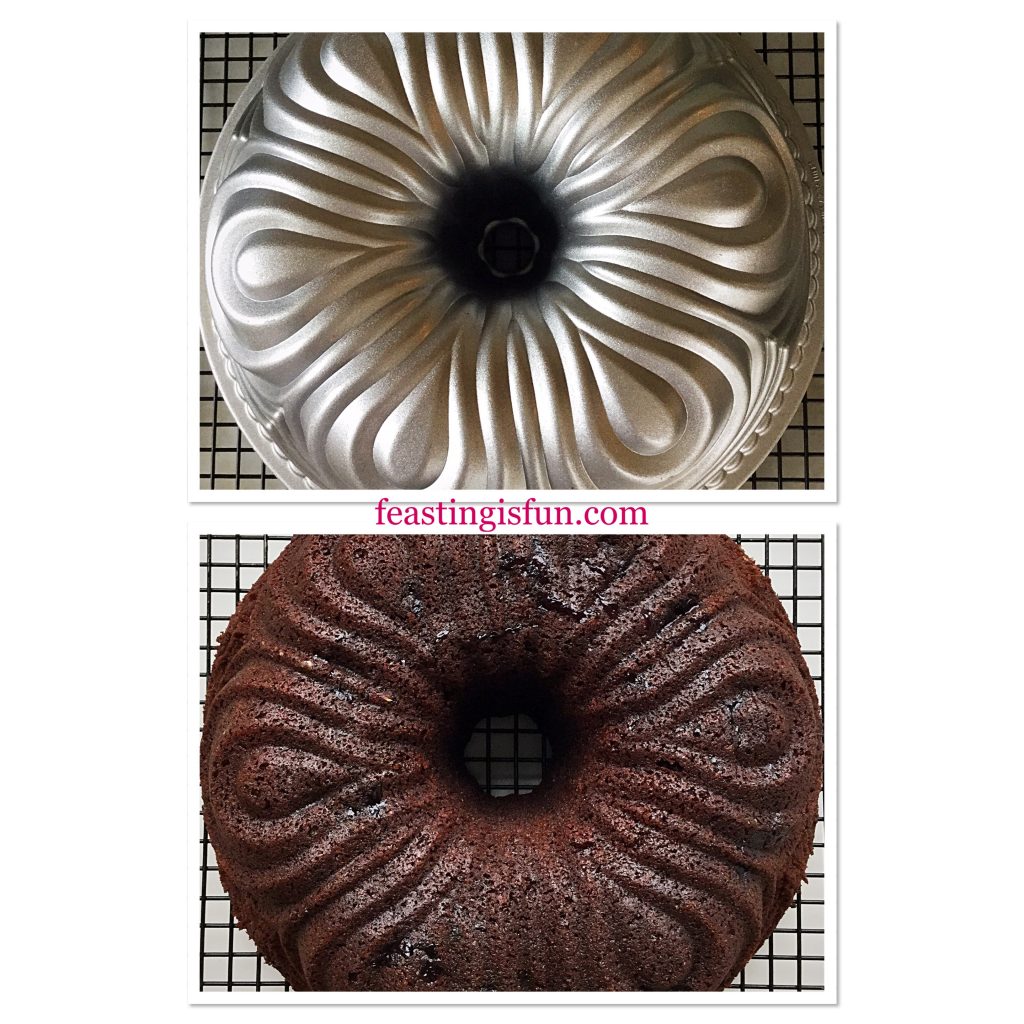
FF Chocolate Cherry Chiffon Bundt Cake
Turning out the baked Chocolate Cherry Chiffon Bundt Cake.
  • Leave the cake to cool completely.
  • Finally, when cooled, place the cake on to a board or stand. Using a teaspoon, carefully sprinkle with glitter from a height.
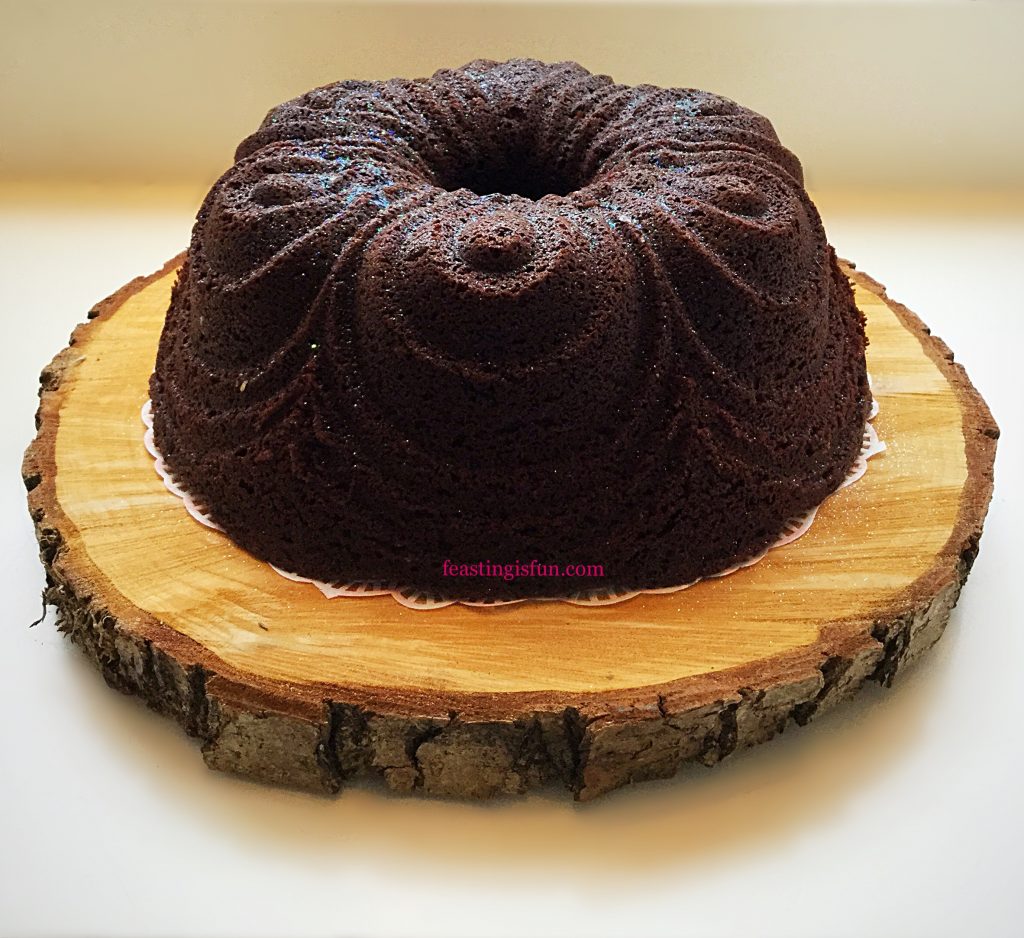
FF Chocolate Cherry Chiffon Bundt Cake
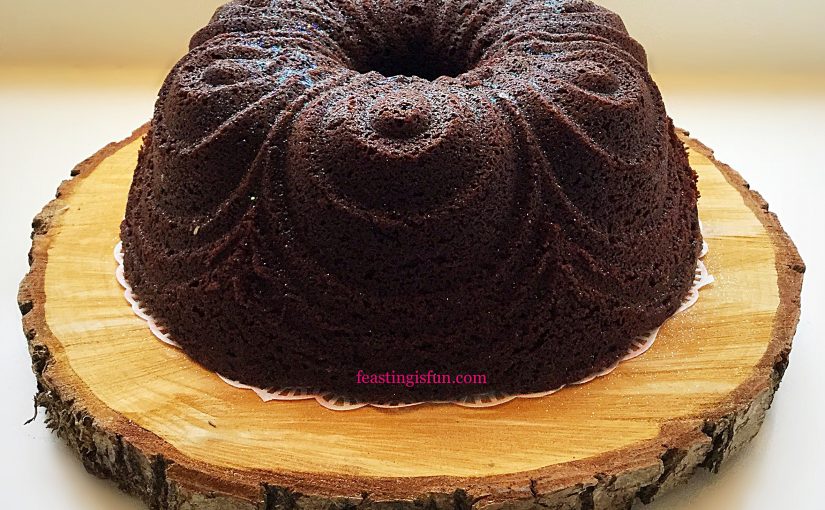
Chocolate Cherry Chiffon Bundt Cake ready to serve.

The Finished Cake

Since this cake is so elegant, it could be used for any celebration, such as Christmas. Alternatively, if someone you know has a birthday, this cake would be a delicious surprise. And the addition of candles would simply make the cake sparkle more.
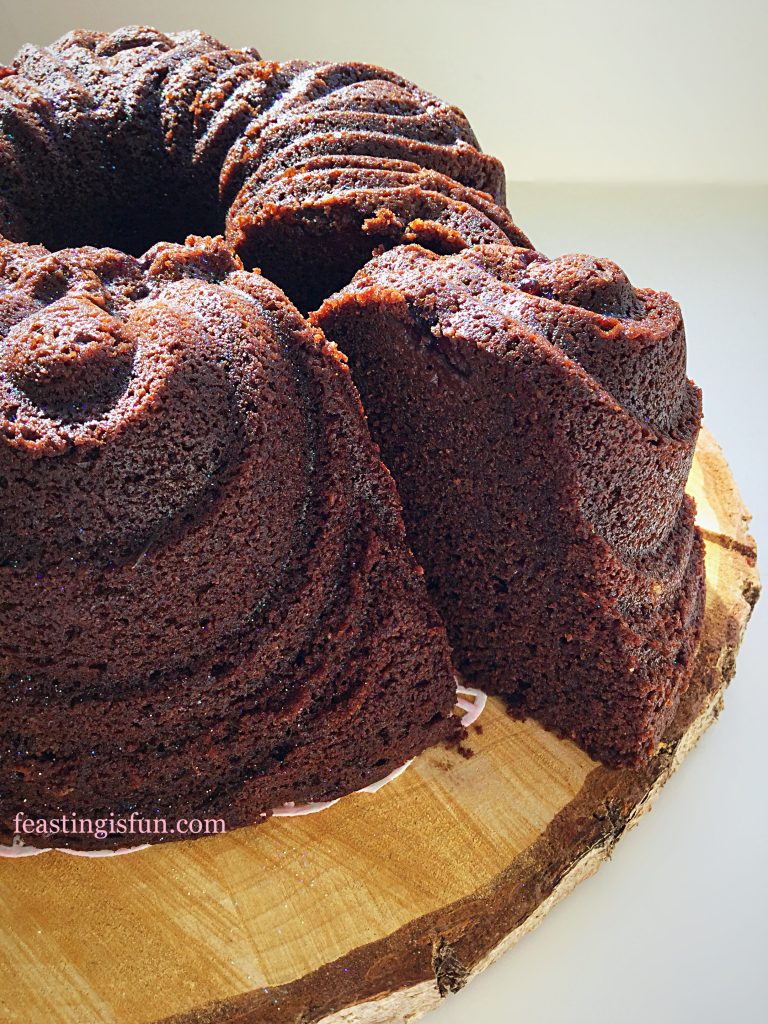
FF Chocolate Cherry Chiffon Bundt Cake
Chocolate Cherry Chiffon Bundt Cake.

Finally, to serve, slice and place on a pretty plate with a cake fork.

Store in an airtight container and eat within 5 days. Also, during warmer weather keep the cake refrigerated.

If you have enjoyed this recipe for Chocolate Cherry Chiffon Bundt Cake you may also like these:
Lemon Blueberry Bundt Cake

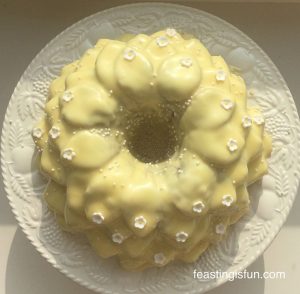
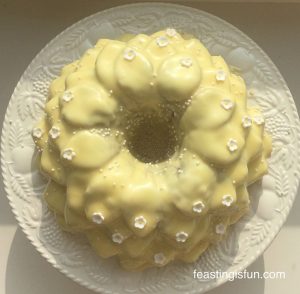
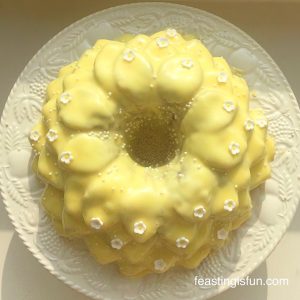
Lemon blueberry Bundt cake covered in a lemon glaze and decorated with small, white sugar flowers.
Lemon Blueberry Bundt Cake

Maple Syrup Iced Coffee Bundt Cake

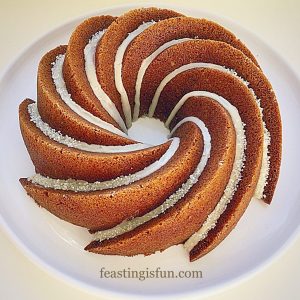
Maple syrup iced coffee Bundt cake
Maple Syrup Iced Coffee Bundt Cake

Lemon Lime Gin Heart Bundt Cake

Lemon Lime Gin Heart Bundt Cake

Bundt pans are available in a wide variety of different shapes and designs. And, each pan creates a beautifully shaped cake without any extra effort required from the baker. While also allowing for creativity when decorating. Either with a simple dusting of icing sugar or glitter, or more precise icing, accentuating the features of each Bundt cake. Resulting in an exceptional, celebration worthy, unique cake every time.

So, whatever er you are making, baking and creating in your kitchens, enjoy preparing and sharing your feast.

Sammie xx

No part of this post may be reproduced or duplicated without the written consent on the owner. Please see my Disclosure Policy.

Share
Facebooktwitterpinterestlinkedintumblr

Lemon Lime Gin Heart Bundt Cake

Share
Facebooktwitterpinterestlinkedintumblr

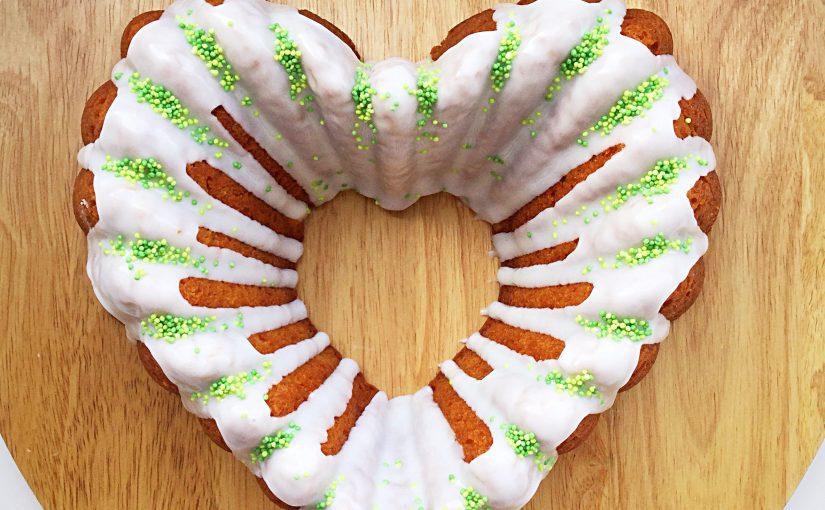
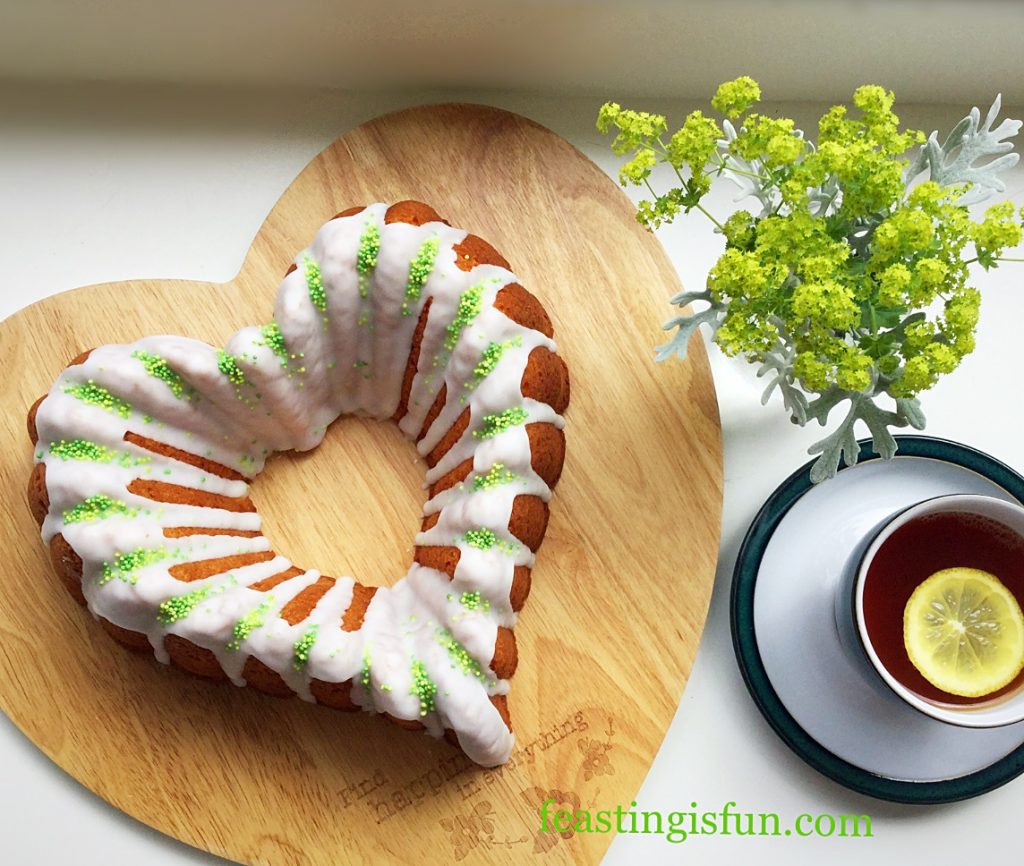
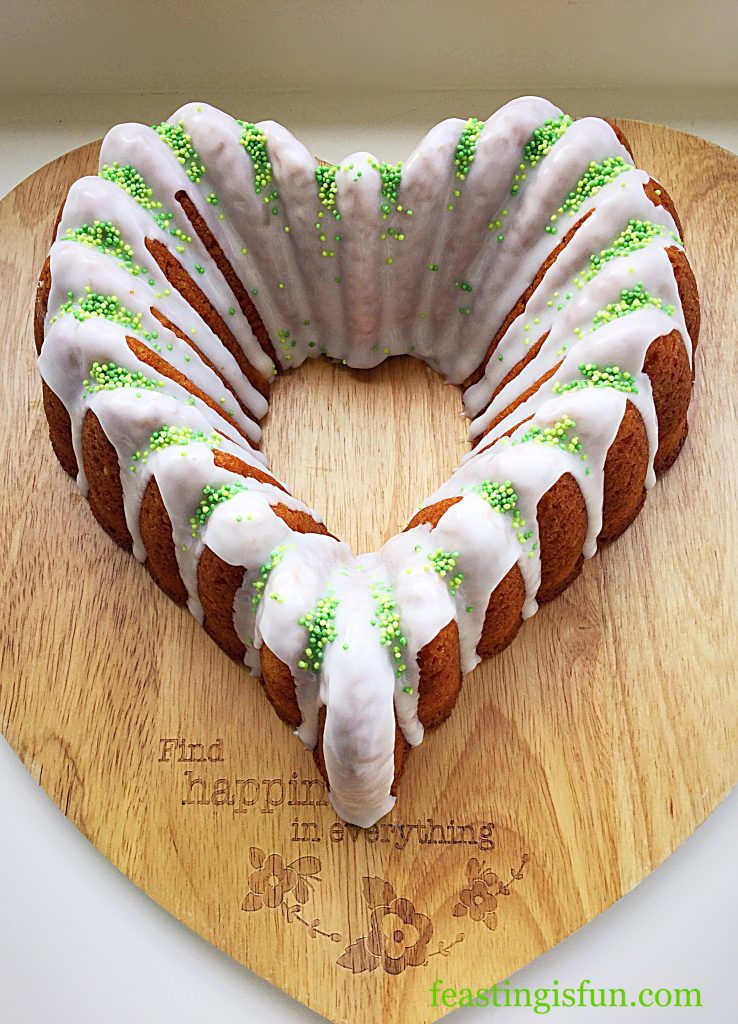
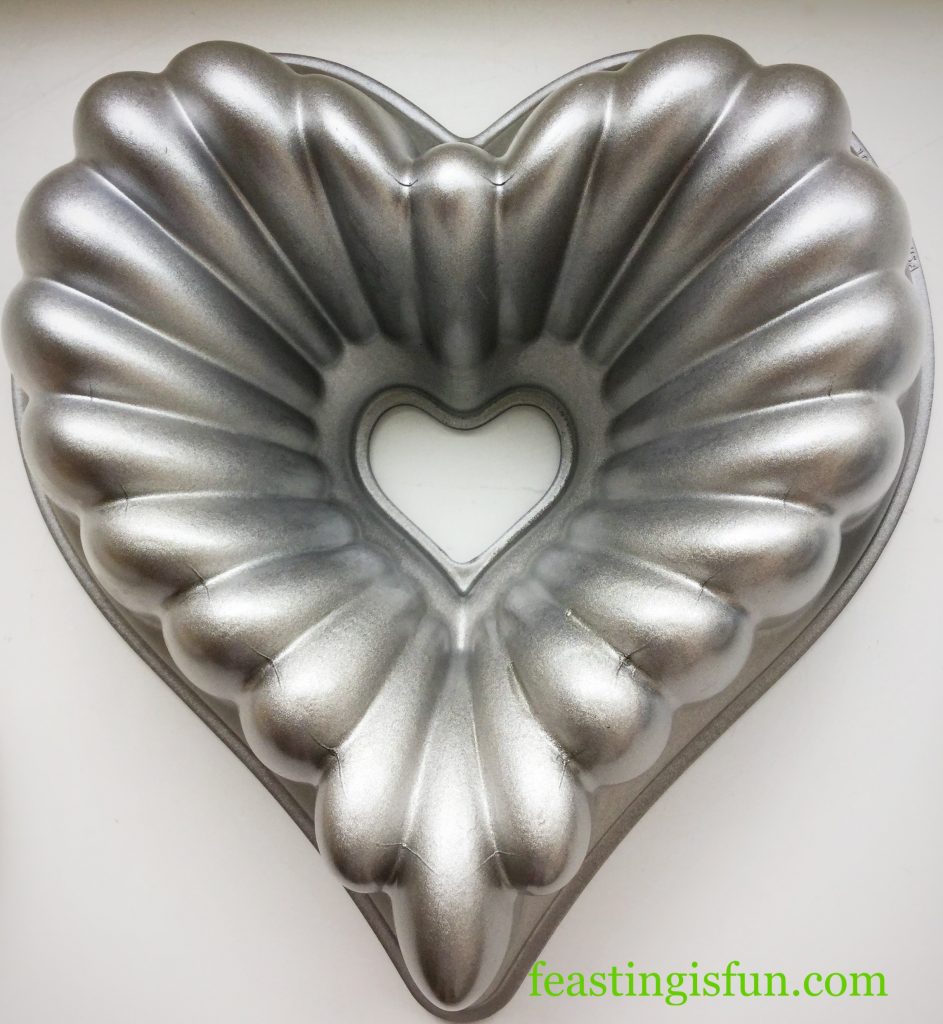
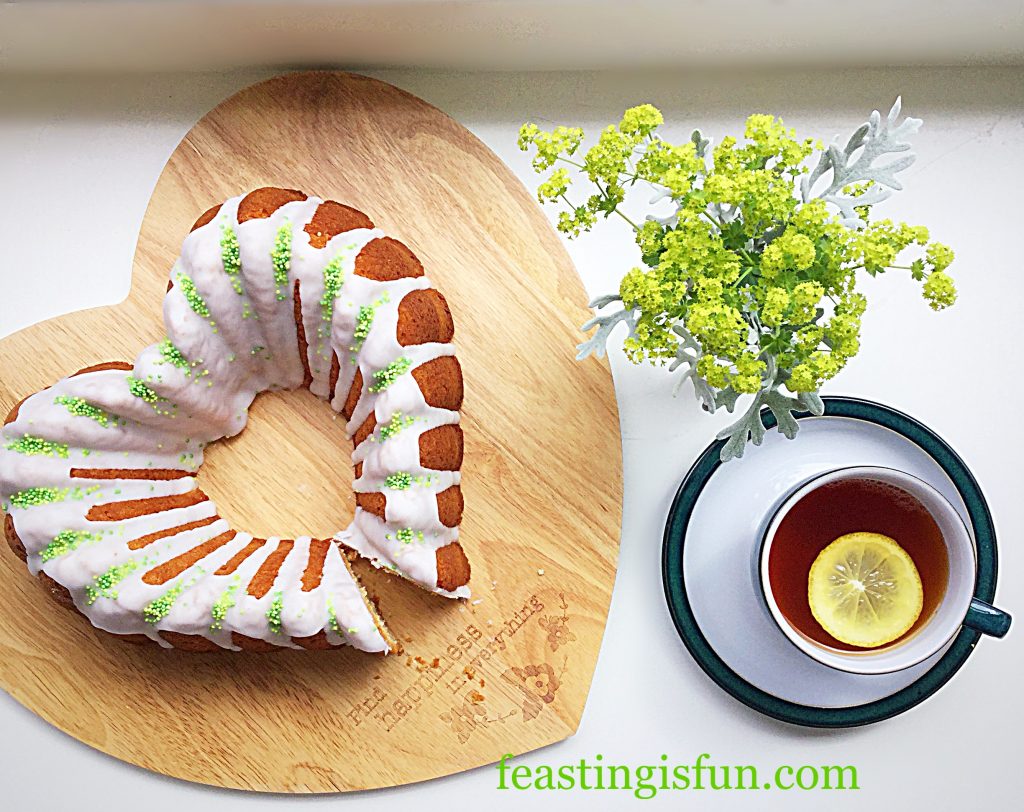
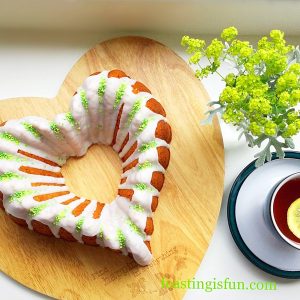
I love Bundt Pans. Their detailed and versatile shape, moulds cakes into edible replicas of the pan. Of course, if you are still at the beginners stage of cake decorating, the finished cake needs no more than a dusting of icing sugar. Since I have baked more than a few Bundt cakes, I have become more adventurous with how they are decorated. This Lemon Lime Gin Heart Bundt Cake is glazed carefully with a thick icing and finished with sprinkles.

FF Lemon Lime Gin Heart Bundt Cake
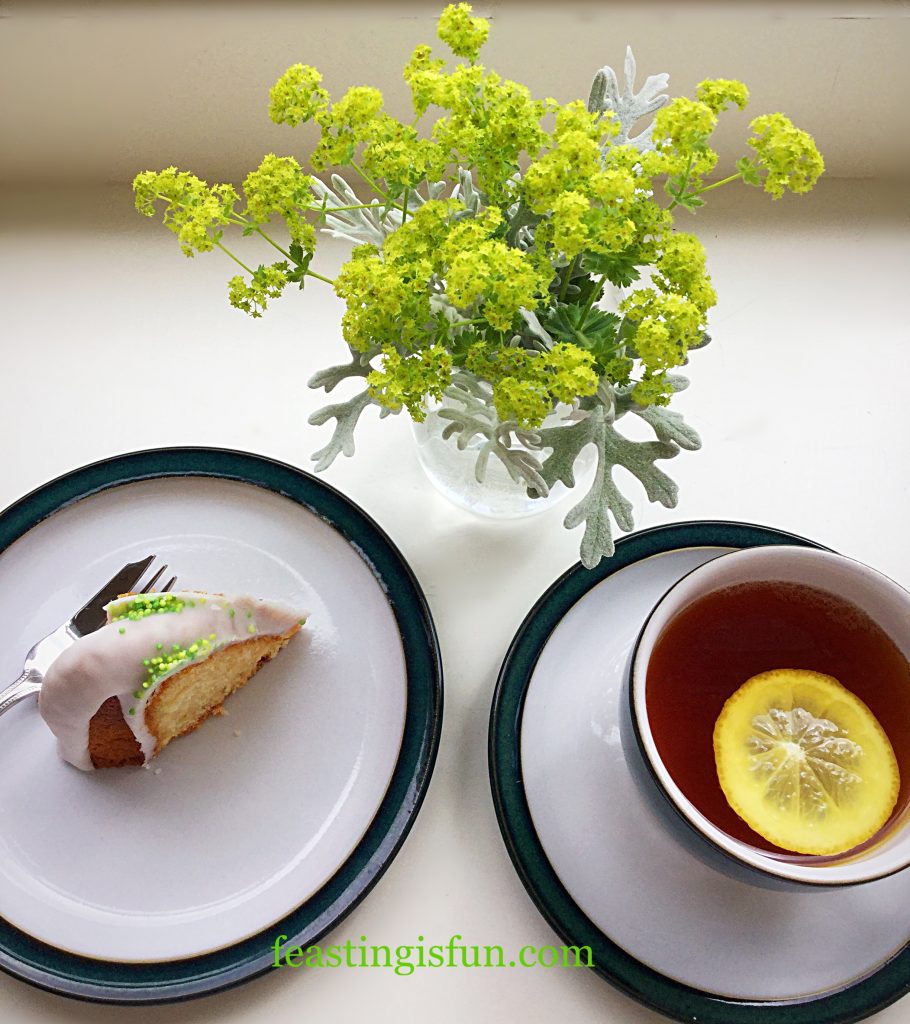
Lemon Lime Gin Heart Bundt Cake perfect with lemon tea.

Bundt pans are available in all shapes and sizes. From small bundtlettes such as Mini Lemon Drizzzle Bundt Cakes to larger sized pans, such as Heart Engagement Bundt Cake. While solid pans are available, Bundts are generally recognised by the hole in the centre. Here in the U.K Nordic Ware own the copyright to name Bundt tin/pan. Therefore only cake’s baked in one of their pans can accurately and legally be called a Bundt cake.

FF Lemon Lime Gin Heart Bundt Cake
Lemon Lime Gin Heart Bundt Cake the icing emphasises the detail of the cake.

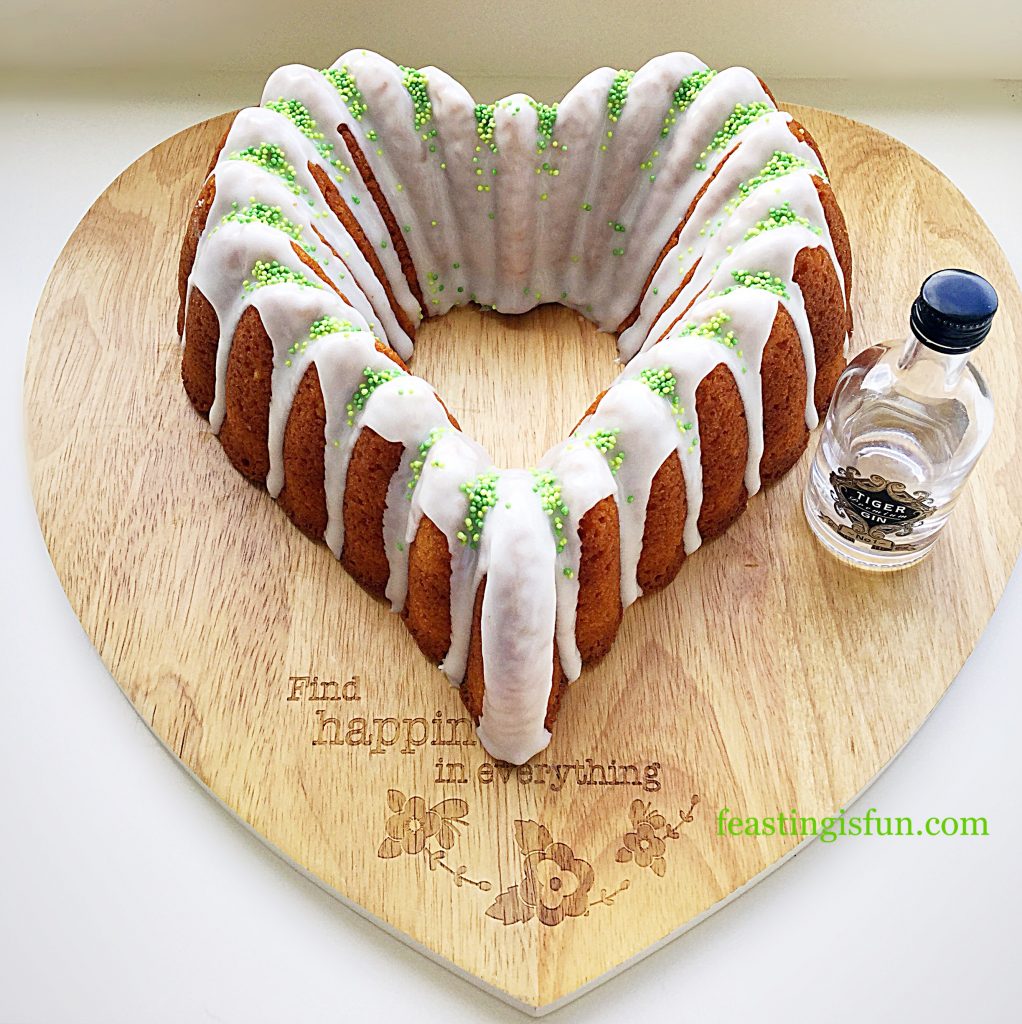
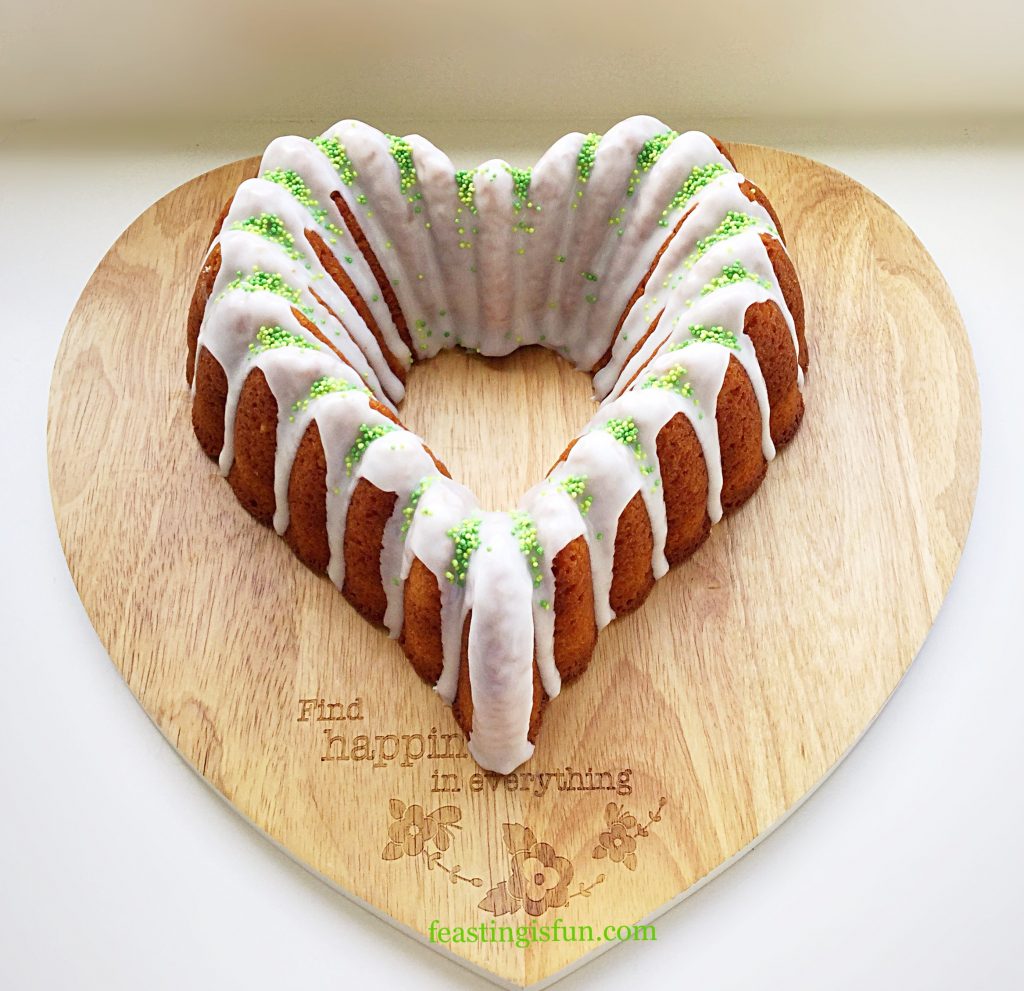
For this cake one whole lemon and lime are used in the recipe. The fragrant zest adds flavour and balance to the gin baked in the cake. While thick, white icing, made using the juice of the zested fruits, provides a sharp, citrus tang. Finally, green and yellow sprinkles hint at the cake’s flavour.

FF Lemon Lime Gin Heart Bundt Cake
Lemon Lime Gin Heart Bundt Cake the perfect flavour combination.

Tiger Gin has underlying orange citrus notes. Incorporating this with the lemon and lime gives this cake a unique citrus flavour. Yet it is the botanicals added in the process of making this gin that really linger on the palette.

FF Lemon Lime Gin Heart Bundt Cake
Elegant Heart Bundt Pan

Recipe: Lemon Lime Gin Heart Bundt Cake serves 10-12

200g/7oz Unsalted Butter at room temperature

200g/7oz Caster Sugar

1/4tsp Salt

30mls/2tbsp Gin plus extra for icing – I use Tiger Gin

5 Large Free Range Eggs

100g/4oz Natural Plain Yoghurt

1tsp Vanilla Extract – I use Nielsen-Massey

250g/5.5oz Plain White Flour

2tsp Baking Powder

1 Lemon – scrubbed

1 Lime – scrubbed

400g/14oz Icing Sugar

Sprinkles in coordinated colours

Method: Preheat the oven to 170C/150C fan, gas mark 3

If new, wash the Bundt Pan in hot soapy water. Do not use anything abrasive to clean it. Dry and prior to use spray with cake release. I use Wilton. ensuring the inside is completely covered.

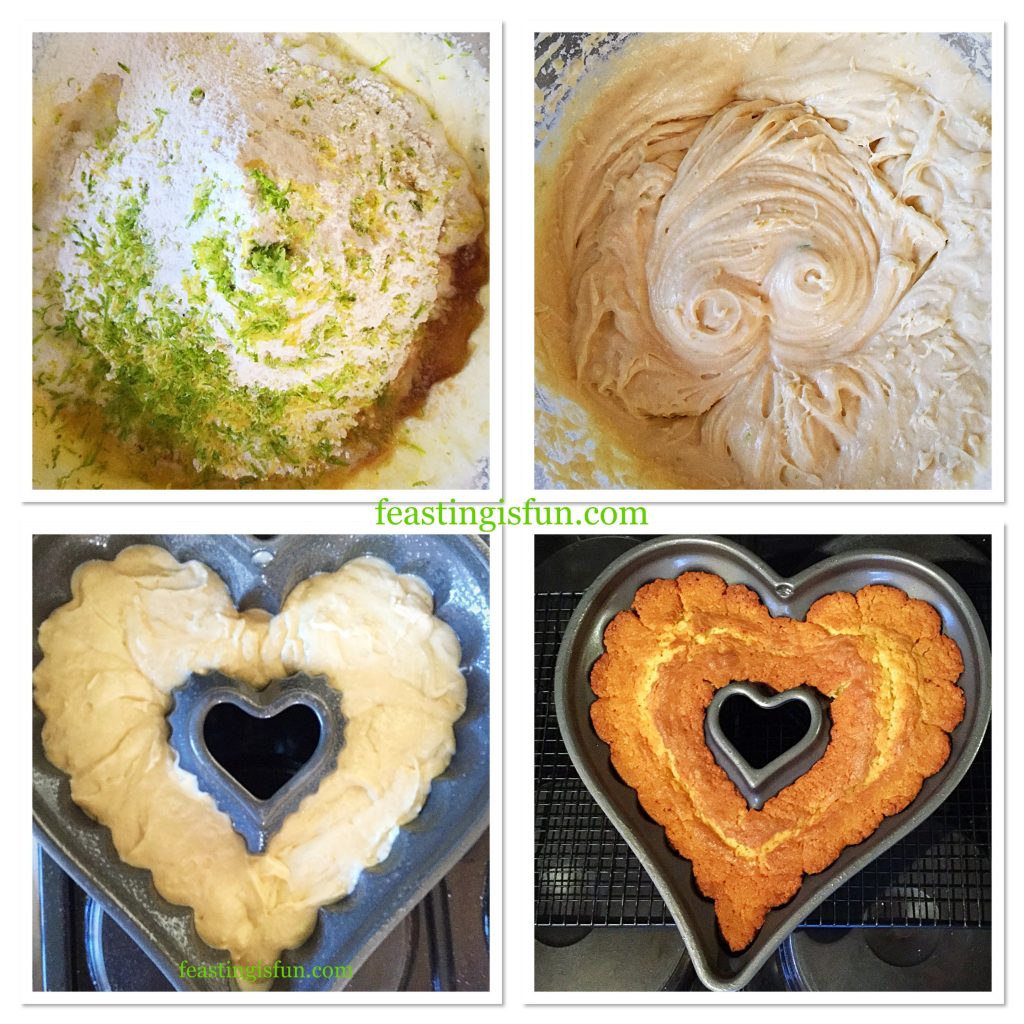
  • Into a large bowl add the butter, sugar and salt. Whisk until pale and creamy.
  • Now add the eggs, yoghurt, gin and vanilla extract – wet ingredients.
  • On top of the wet ingredients sieve the flour and then baking powder.
  • Zest both the lime and lemon. Place the zest into the bowl.
  • This cake uses the all-in-one method. Whisk slowly until all the ingredients are just combined. Give the mixture a final mix with a spoon before carefully pouring into the prepared Bundt Pan.
  • Place the Bundt into the centre of the oven and bake for 50-60 minutes.
  • The cake is baked when it is golden and coming away from the sides of the pan. Also an inserted skewer will come out clean.
  • Remove the cake from the oven and allow to cool for 10 minutes.
FF Lemon Lime Gin Heart Bundt Cake
Preparing the cake batter, filling and baking the Lemon Lime Gin Heart Bundt Cake.
  • After 10 minutes cooling in the tin, turn the cake out on to a cooling rack.
  • Leave the cake to cool completely before decorating.
  • While the cake is cooling prepare the icing.
  • Sift the icing sugar into a medium sized bowl.
  • Next, if using gin in the icing add one tablespoon at first. Now add the juice of both the lemon and lime until it reaches a very thick, yet still drops from the spoon, consistency.
  • As soon as the cake is cooled it can be decorated.
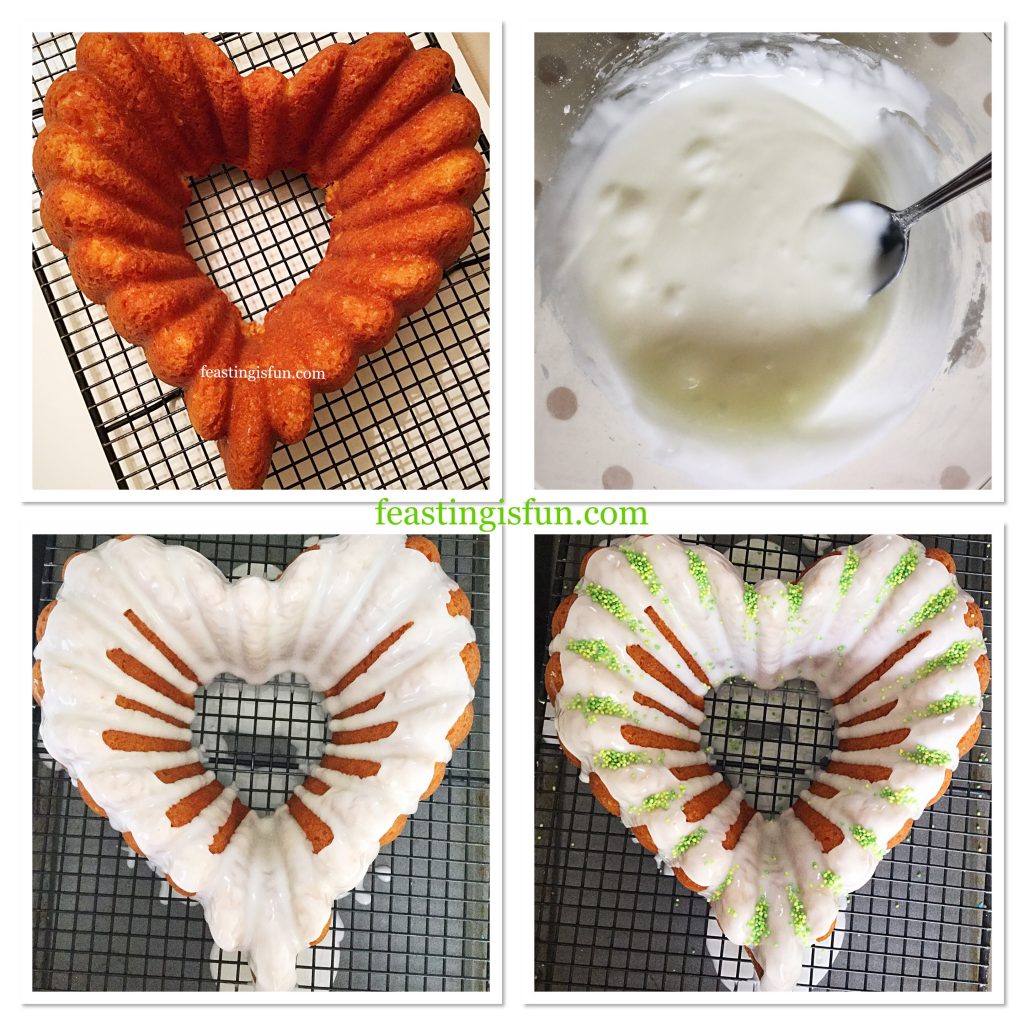
  • Place the cooling rack over, with the cake on it, a larger baking tray. This will catch the drips from the icing.
  • Spoon the icing over the top of the cake, encouraging it to drip down the sides of the cake.
  • Continue to add icing in this way until each of the dips, in the heart pattern, have icing dripped on them.
  • Take care to completely cover the inside of the heart indentation at the top and the outside of the heart point at the bottom – see photos.
  • Carefully place sprinkles across the top of the heart. Again use the photograph for guidance.
  • Allow the cake to set for 5 minutes.
FF Lemon Lime Gin Heart Bundt Cake
Step by step photos showing how to decorate the cake.
  • Gently run a palette knife under the cake, separating any icing that may be stuck to both cake and rack.
  • Transfer the cake to a suitable plate or cake stand and leave to fully set.
FF Lemon Lime Gin Heart Bundt Cake
Lemon Lime Gin Heart Bundt Cake set and ready to serve.

Served sliced with a delicious cup of lemon tea and of course a smile!

FF Lemon Lime Gin Heart Bundt Cake
A tasty, tangy slice of Lemon Lime Gin Heart Bundt Cake.
FF Lemon Lime Gin Heart Bundt Cake
Lemon Lime Gin Heart Bundt Cake eat with your eyes first!

This cake will keep for up to four days in an airtight container. The cake was made the evening prior to icing and stored wrapped in baking parchment. In my opinion the cake is better the day after it is made.

If you have enjoyed this recipe for Lemon Lime Gin Heart Bundt Cake, then you may also like these:

Maple Syrup Iced Coffee Bundt Cake
FF Lemon Lime Gin Heart Bundt Cake
Maple Syrup Iced Coffee Bundt Cake

Chocolate Sunflower Bundt Cake

FF Lemon Lime Gin Heart Bundt Cake
Chocolate Sunflower Bundt Cake

Lemon Blueberry Bundt Cake

Lemon Lime Gin Heart Bundt Cake
Lemon Blueberry Bundt Cake

Baking is fun. Especially when you gain a little experience and confidence. Mixing flavours, experimenting with different cake tins and Bundt Pans. Creating a feast that will surprise people. Making friends, family and neighbours smile. Almost half of this cake has now gone. Slices sent on paper plates, with a pretty napkin, to unsuspecting, yet thoroughly grateful neighbours, this afternoon.

Sharing is so important at Feasting headquarters. Indeed we all believe that food tastes better when it is shared.

Sammie xx

No part of this post may be copied without my express, written permission. Please see my Disclosure Policy for details.

NOTE: If baking with alcohol, you must be at least 18 years old, here in the U.K.

I am entering this cake for Bake of the Week hosted by: Jenny and Helen at

Mummy Mishaps

Casa Costello

FF Lemon Lime Gin Heart Bundt Cake

Share
Facebooktwitterpinterestlinkedintumblr

Boozy Lemon Drizzle Bundt Cake

Share
Facebooktwitterpinterestlinkedintumblr

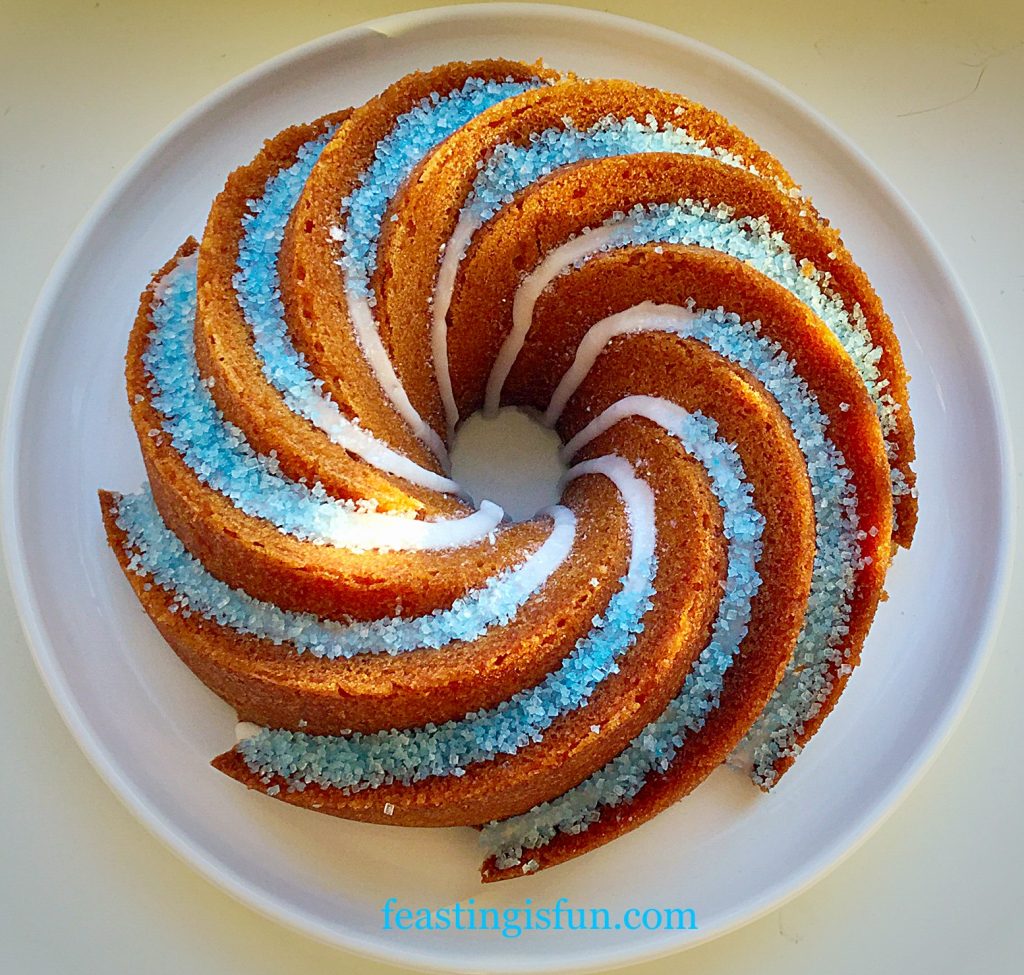
I adore lemons. They are used in both sweet and savoury cooking in my kitchen. So, in honour of our eldest daughter’s birthday and inspired by last week’s first Great British Bake Off episode, I bring you my 100% gluten free Boozy Lemon Drizzle Bundt Cake.

FF Boozy Lemon Drizzle Bundt Cake
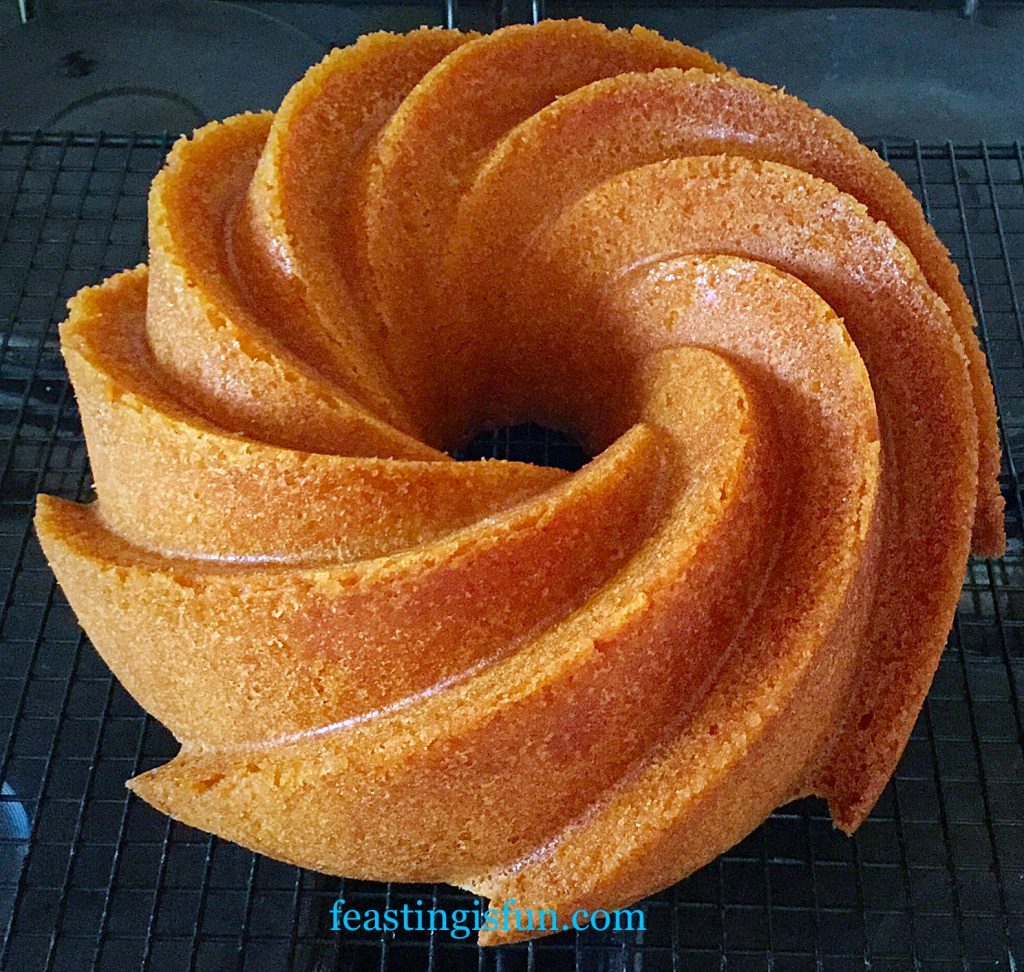
Boozy Lemon Drizzle Bundt Cake moist, light with a great lemon tang.

This gluten free cake tastes no different to a regular cake made with ‘wheat’, which I am really pleased about, as it means more people can make and eat this delicious treat!

That said this Boozy Lemon Drizzle Bundt Cake can be made with regular, plain white flour if you do not need to make it gluten free.

FF Boozy Lemon Drizzle Bundt Cake
Boozy Lemon Drizzle Bundt Cake as beautiful to look at as it is to eat.

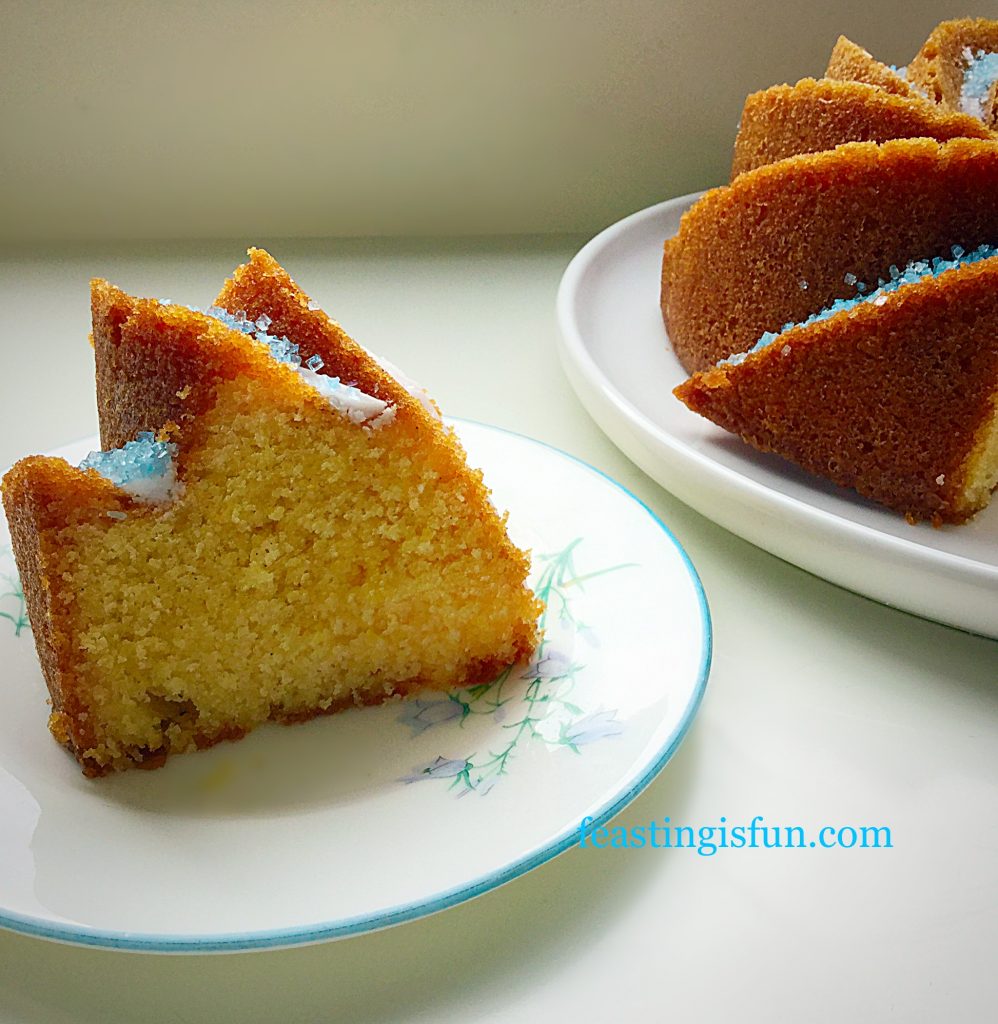
Such a delightfully light, moist cake, with the tang of limoncello spiked drizzle soaked through the entire cake.

My Boozy Lemon Drizzle Bundt Cake, is a true lemon drizzle cake, in the sense that it has hot lemon syrup poured over a skewer spiked cake. Using a Bundt pan means that the syrup soaks from the bottom to the top, creating a fabulously flavoured cake.

FF Boozy Lemon Drizzle Bundt Cake
Boozy Lemon Drizzle Bunt Cake such a stunning design.

As this cake was made for my daughter, to be shared with family and friends, I was very restrained when it came to adding the limoncello. For adults you could easily double, or triple the amount stated. Remember though it is the lemon flavour that needs to hit the palette first. Don’t knock everyone out with too much vodka 😉.

FF Boozy Lemon Drizzle Bundt Cake
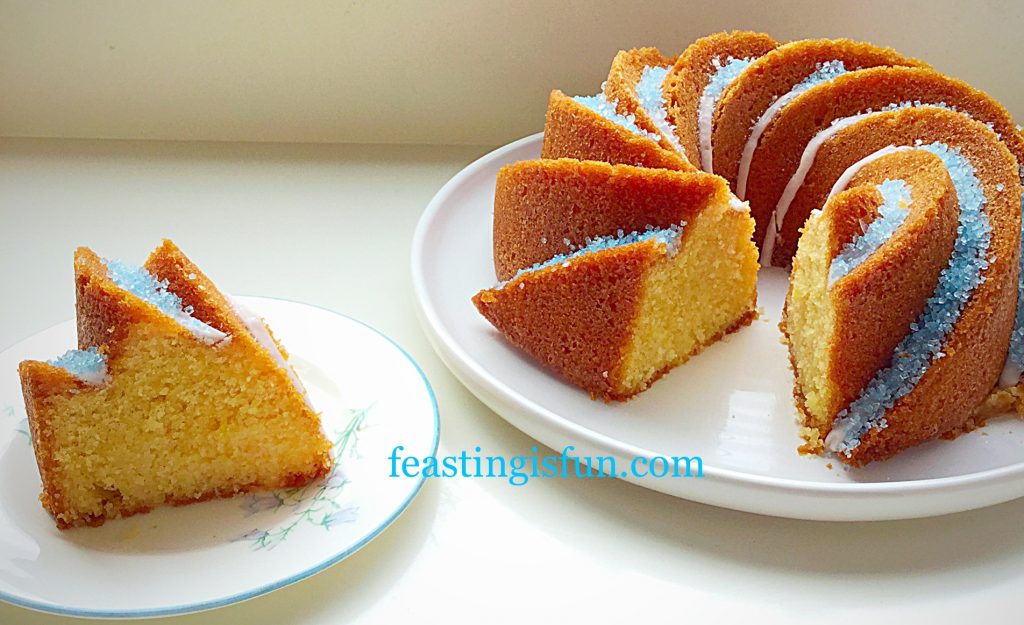
Boozy Lemon Drizzle Bundt Cake with a damp, drizzled crumb.

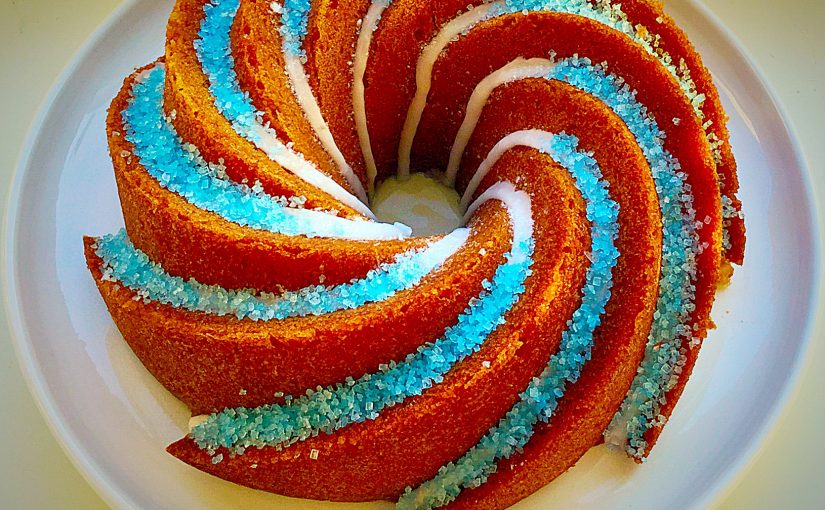
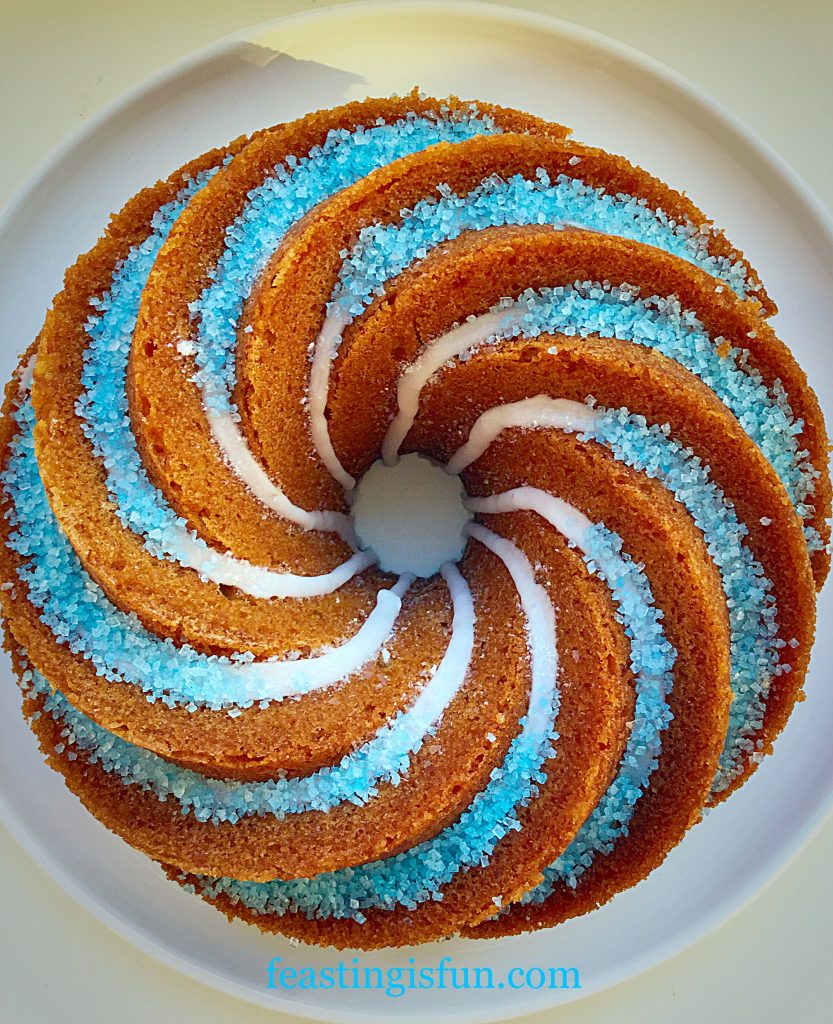
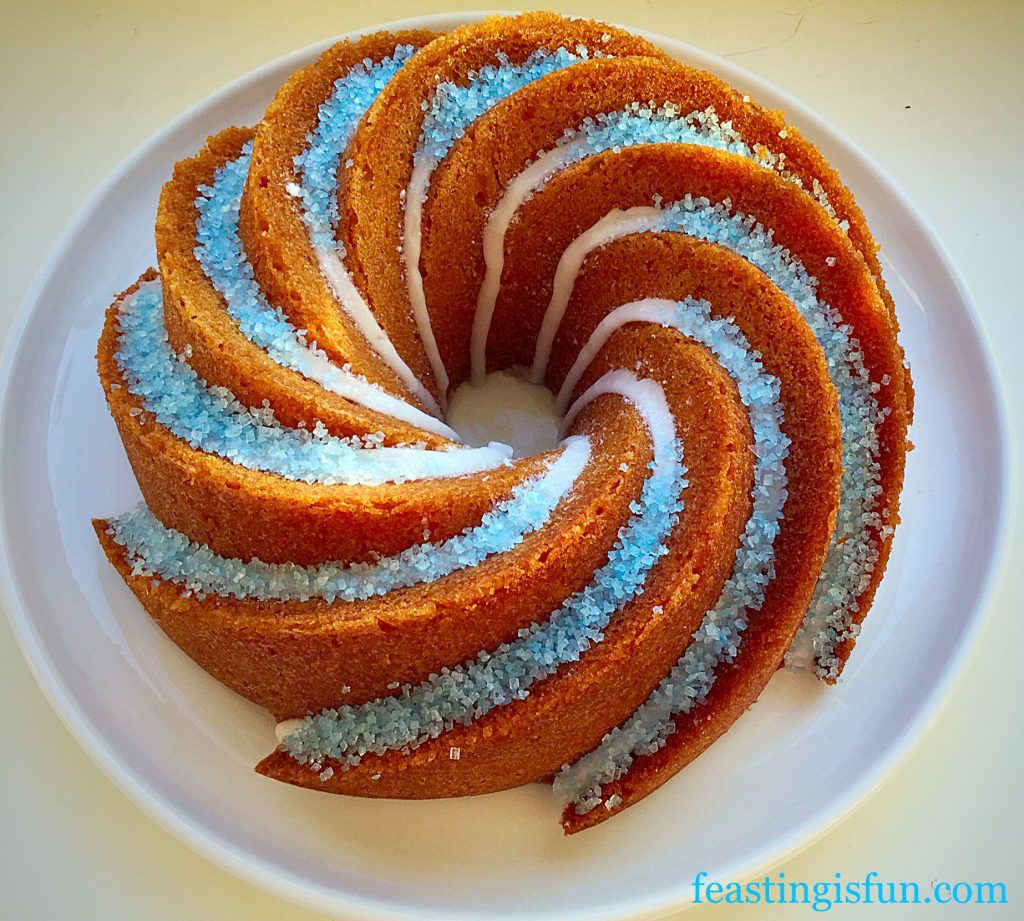
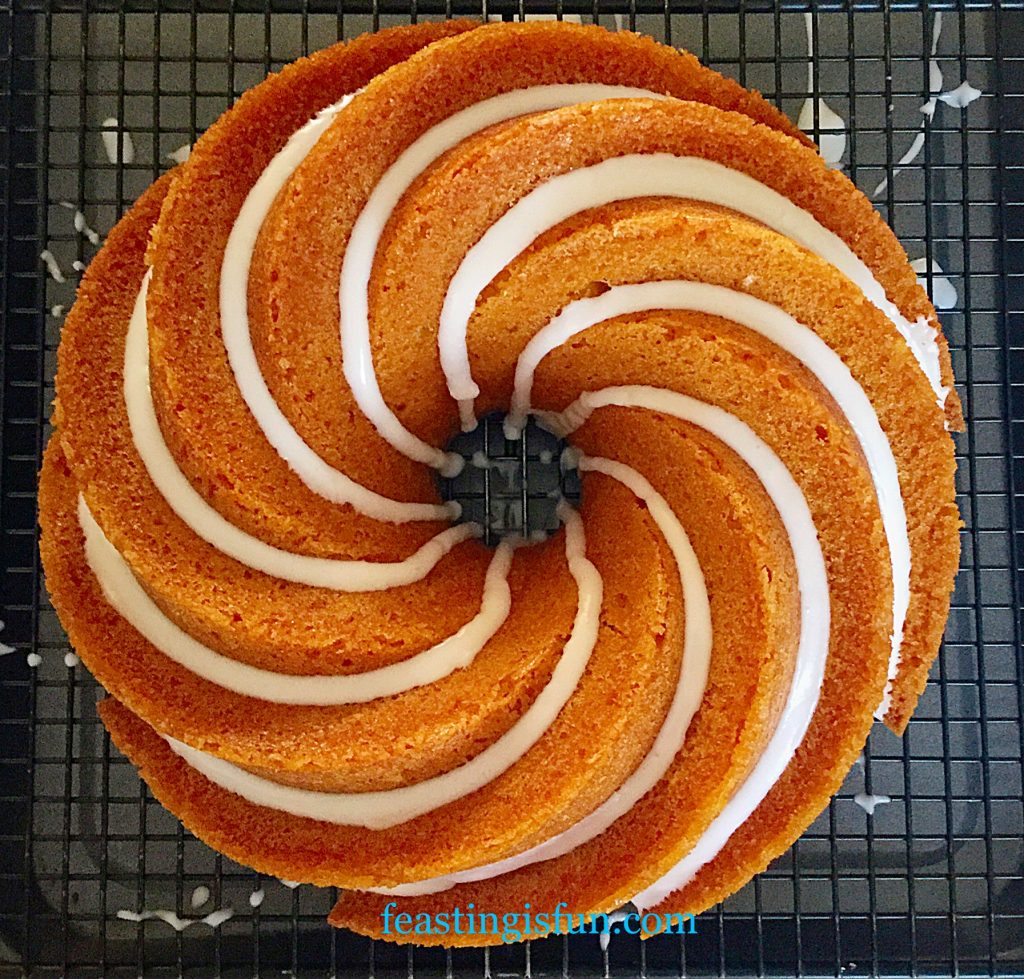
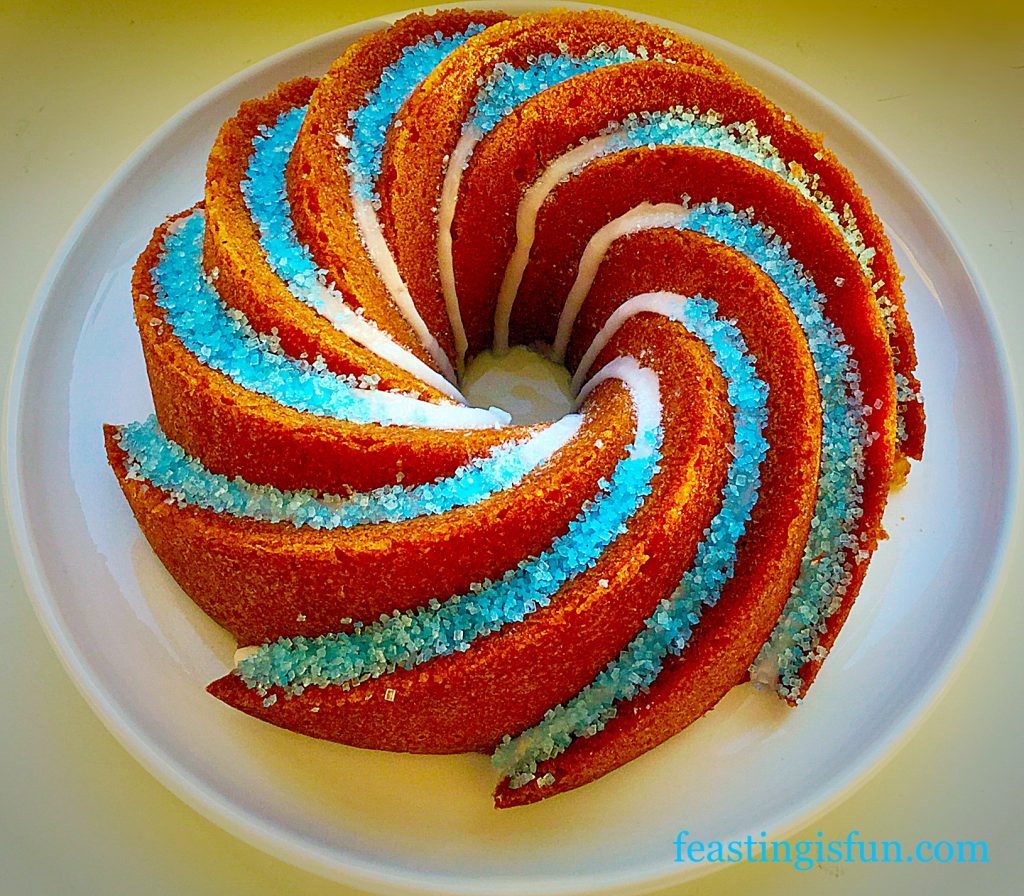
The colours used to decorate this cake are simply her favourite. I piped a line of thick, lemon icing along each ridge of the cake and then added sky blue sugar sparkles, pressing them in gently to the icing so they would stay. A finial dusting of white, edible glitter in the centre adds the necessary sparkle, even if it doesn’t show up in all of the photographs.

I chose to use the Heritage Bundt Pan by Nordicware.

Recipe: Boozy Lemon Drizzle Bundt Cake serves 10-12

I highly recommend Wilton cake release spray to grease the Bundt pan, alternitavely use melted butter and brush every part of the inside of the pan, then add 1 tablespoon of gluten free flour, tip the pan around until it is completely covered and tip out any excess flour – I cannot guarantee the same sharp edges using the butter/flour method.

For the Cake

275g/10oz Unsalted Butter softened to room temperature

275g/10oz  Caster Sugar

1/4tsp Salt – I use Maldon Sea Salt

275g/10oz Certified Gluten Free Flour – I use Doves Farm

2tsp Baking Powder – I use Waitrose as it is gluten free

1tsp Vanilla Extract – I use Nielsen-Massey extracts

1tsp Lemon Extract or juice of half a lemon

Zest of one lemon

6 Large Free Range Eggs

For the Drizzle

Approx 50ml Freshly Squeezed Lemon Juice – juice of 2 lemons

Approx 50ml of tap water to make up to 100ml with the lemon juice

100g/4oz Caster Sugar

2tbsp Limoncello – more can be added for a pronounced flavour if desired

Icing to Decorate the Cake

200g/7oz White Icing Sugar

Juice of one whole lemon – approx 30mls, make up to volume with water if needed

Optional – sprinkles and edible glitter – ensure they are gluten free

Method: Preheat the oven to 170C/150C fan, gas mark 3.5

  • Prepare the Bundt pan by spraying or brushing on cake release, ensuring every part of the inside of the pan is covered.
  • Into a large bowl add the butter, sugar and salt. Whisk/beat until pale and creamy.
  • Weigh the gluten free flour and sift into a separate bowl with the baking powder.
  • Add the 6 eggs to the butter/sugar mixture and 2 tablespoons of the pre weighed, sifted flour – this will stop the mixture from splitting, which can lead to a denser cake. Whisk/beat the eggs into the butter and sugar until you have a fully combined, light mix.
  • Add the rest of the flour/baking powder, the lemon extract, vanilla and lemon zest.
  • Using a metal spoon fold all the ingredients together until they are fully combined.
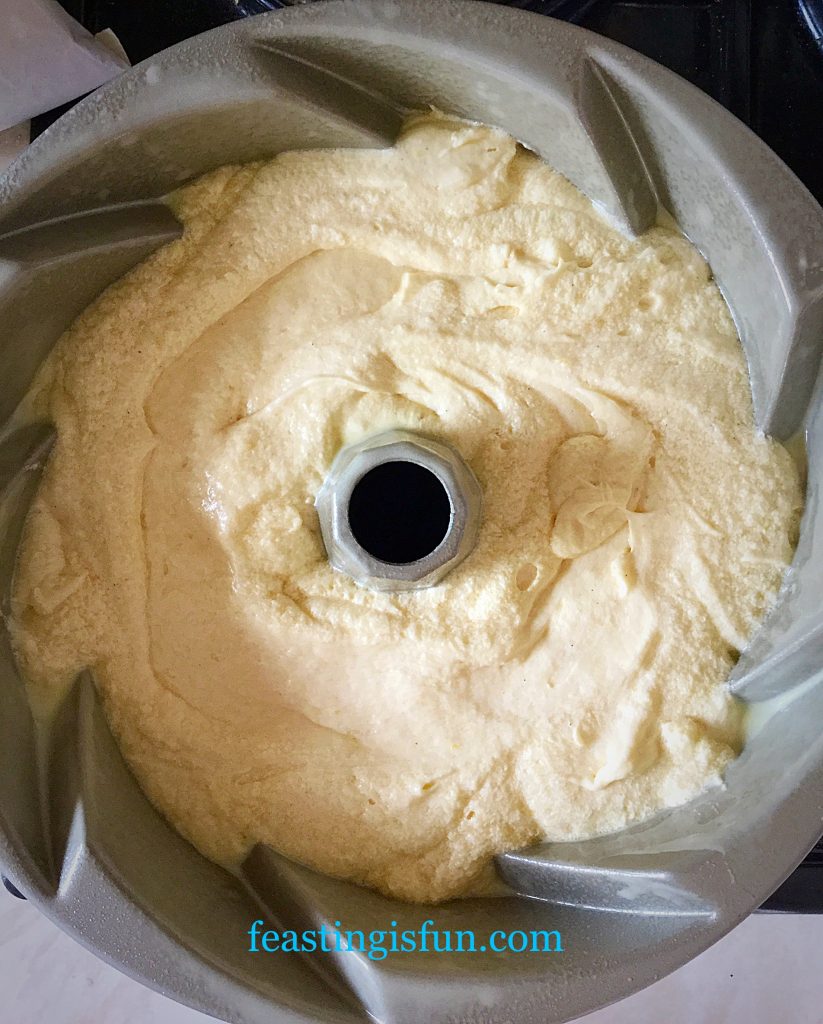
  • Spoon the cake batter into the prepared Bundt pan.
FF Boozy Lemon Drizzle Bundt Cake
Boozy Lemon Drizzle Bundt Cake ready for the oven.
  • Place the Bundt pan in the centre of the preheated oven and bake for 50-60 minutes.
  • Whilst the cake is baking make the drizzle:
  • Squeeze the strained juice of 2 lemons into a measuring jug, make the volume up to 100ml with tap water. Place 100g of sugar into a small saucepan and add the lemon juice liquid to it. Swirl to mix and place over a medium heat. Do not stir! Swirl occasionally, until the sugar is fully dissolved and the liquid starts to bubble. Remove the saucepan from the heat. Add your desired amount of limoncello and place a lid on the saucepan.
  • The cake is cooked when it is golden in colour, coming away from the sides of the pan and an inserted skewer comes out clean.
  • Once baked remove the cake from the oven. Allow the cake to cool for 10 minutes in the Bundt pan.
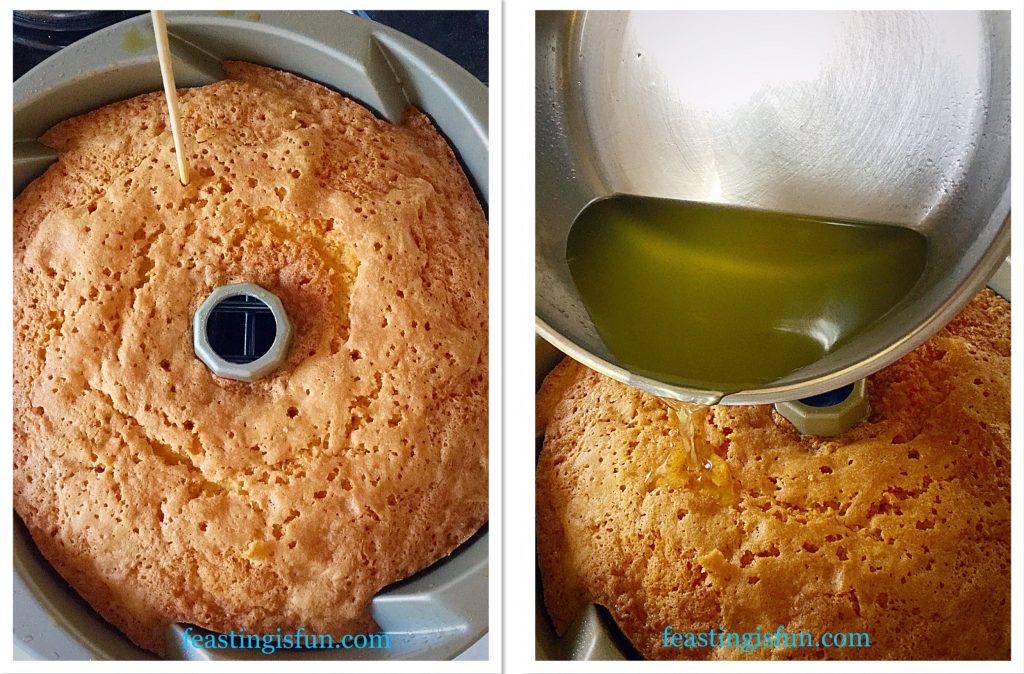
  • After 10 minutes use a wooden skewer to create holes right through the cake. I poked approximately 25 holes in the cake, this will allow the syrup to moisten the entire cake, not just the bottom – remember the Bundt cake is upside down.
  • Drizzle over the warm, boozy, lemon syrup, making sure you cover the entire base of the cake.
FF Boozy Lemon Drizzle Bundt Cake
Piercing holes with a wooden skewer that allow the boozy lemon drizzle to soak through.
  • Leave the cake for a further 5 minutes in the pan, to allow the drizzle to soak right through to the top of the cake.
  • Now turn the Boozy Lemon Drizzle Bundt Cake out on to a cooling rack and allow to cool completely.
FF Boozy Lemon Drizzle Bundt Cake
Beautifully moist cake with clean, deep, swirling lines.

To Decorate the Boozy Lemon Drizzle Bundt Cake:

  • Sift the icing sugar into a bowl. Add 30mls of lemon juice and stir.
  • Add extra water to create a thick icing, that can still be piped.
  • Spoon the thick icing into a disposable piping bag (or piping bag fitted with a 3-4mm piping nozzle). Snip the end off of the disposable bag to leave a 3-4mm opening.
  • Place the cooling rack over a large baking tray – this will catch all the drips.
  • Starting from inside of the Bundt hole pipe the icing, following the lines of the swirl.  Keep the pressure steady and pipe into the groove of the swirl, finishing when you reach the edge. Pull the bag away from the cake and any excess icing will drip through the cooling rack.
  • Continue working around each swirl until the cake is completed.
FF Boozy Lemon Drizzle Bundt Cake
Boozy Lemon Drizzle Bundt Cake looks perfect just like this.
  • If adding sprinkles, either follow my design, adding them just away from the centre of the cake, or let your imagination take over and create your own design!
  • Finally add a dust of (I used) white edible glitter, to give your cake some added sparkle.
  • Carefully transfer the cake to a board/stand/plate.
FF Boozy Lemon Drizzle Bundt Cake
Boozy Lemon Drizzle Bundt Cake simply stunning to look at!

Take photos of your beautiful creation.

Then serve it sliced with a cup of tea or coffee, or if it’s adults only, a shot of limoncello alongside 😉.

FF Boozy Lemon Drizzle Bundt Cake
Boozy Lemon Drizzle Bundt Cake definitely made for sharing.

I am so pleased our daughter chose the light blue sprinkles for this cake. To be honest, it isn’t a colour I would put with a lemon cake and yet it looks so beautiful. She has a brilliant eye for design and I regularly ask her opinion on colour schemes/layouts and photographs for Feasting is Fun.

Thank you Star and very happy birthday.

If you have enjoyed this recipe for Boozy Lemon Drizzle Bundt Cake you may also like these:

Lemon Blueberry Bundt Cake

FF Boozy Lemon Drizzle Bundt Cake
Lemon Blueberry Bundt Cake.

Lemony Strawberry Pavlova

FF Boozy Lemon Drizzle Bundt Cake
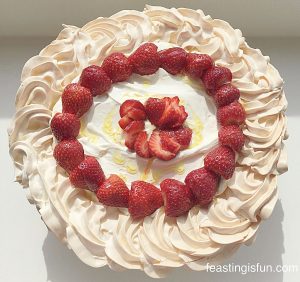
Lemony Strawberry Pavlova also gluten free.

Swirl Lime Drizzle Cake

FF Boozy Lemon Drizzle Bundt Cake
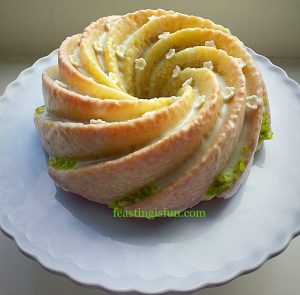
Swirl Lime Drizzle Cake

I have other gluten free cake recipes such as my Marshmallow Frosted Mango Cupcakes and my Strawberry Whipped Cream Giant Doughnut.

My aim is to make as many recipes as possible gluten free. Obviously this is going to take some time to retest recipes and make adjustments as needed.

Next on the agenda is cracking gluten free pastry. I’ve been asked many times for a recipe, so I will be working on that over the coming weeks.

Whatever you are making, baking and creating in your kitchens, remember food always tastes better when it’s shared. So why not invite your neighbours round for a cup of tea and a slice of something delicious?

Sammie xx

My Boozy Lemon Drizzle Bundt Cake has also been submitted for this weeks #GBBOTwitterBakeAlong on Twitter. Click on the hashtag on Twitter and join in the Baking Community fun!


Share
Facebooktwitterpinterestlinkedintumblr

Sparkling Snowflake Cake

Share
Facebooktwitterpinterestlinkedintumblr

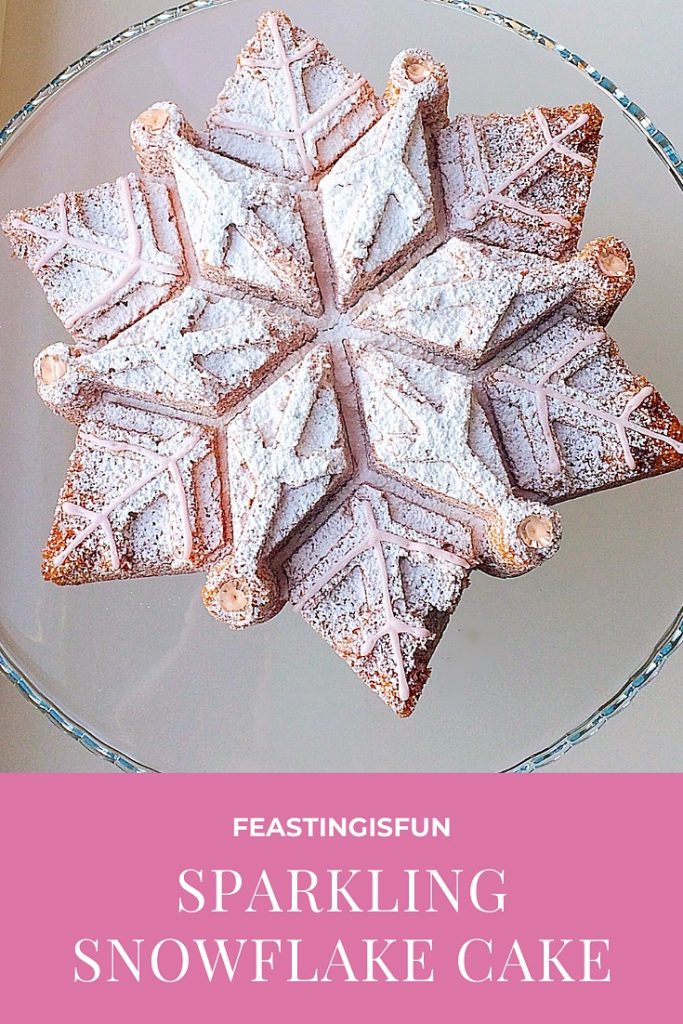
Merry Christmas one and all. So, it is my pleasure to be sharing this beautiful Sparkling Snowflake Cake with you today.

Vanilla Sparkling Snowflake Cake

This Sparkling Snowflake Cake is stunning and I can take no credit for the beautiful detail. Because the cake is baked in a beautiful Bundt tin made by Nordicware . Amazon, ebay and Lakeland UK are all stockists of Bundt tins, it really is worth shopping around as prices vary. While Bundt tins may not be cheap, treated with care and looked after they will last a life time.

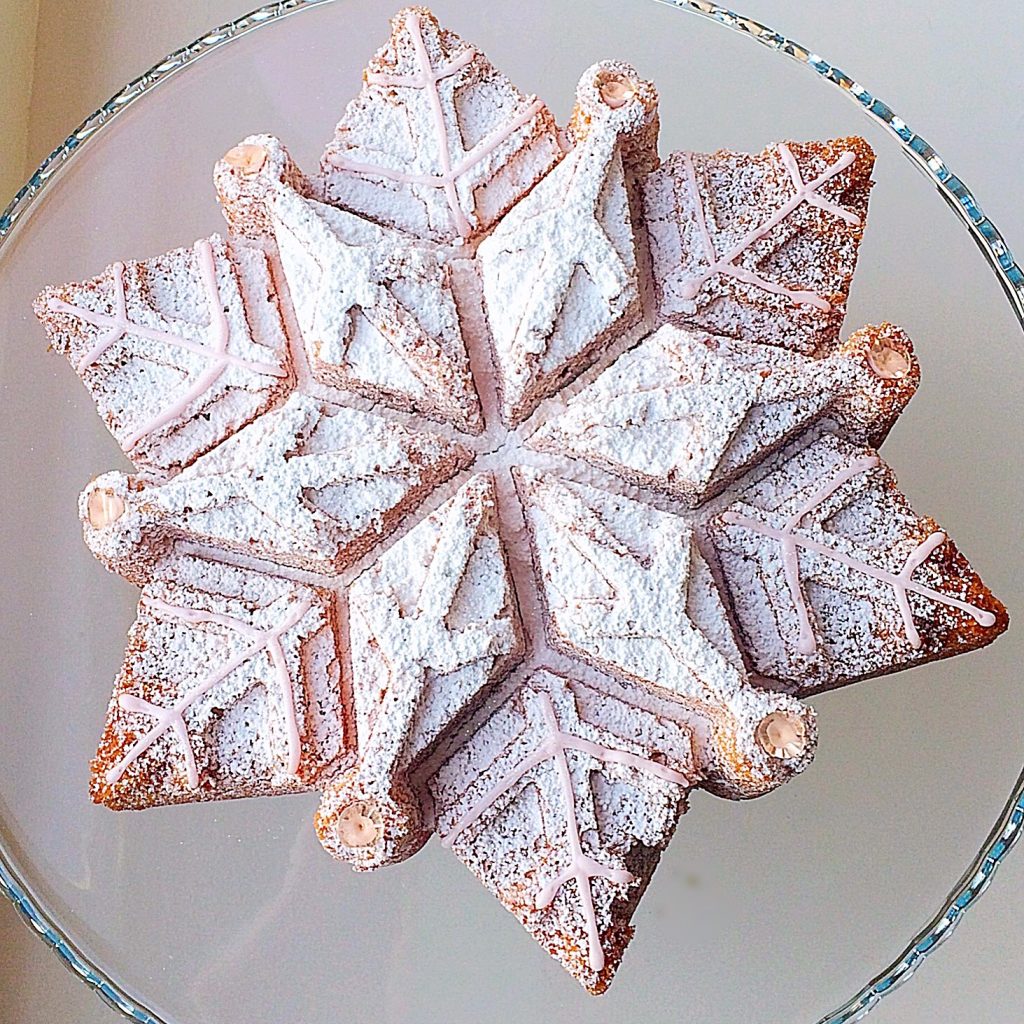
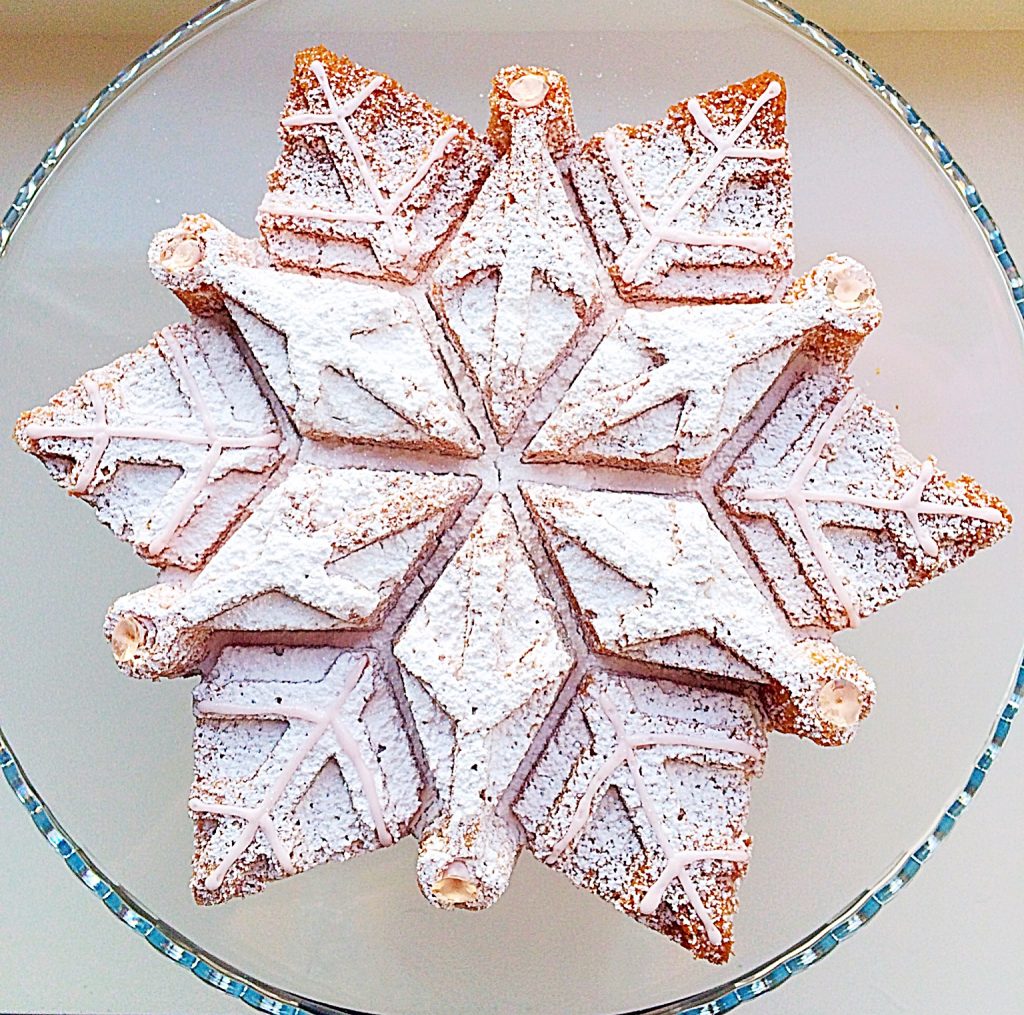
Another beauty of Bundt pans is the beautiful array of delightful shapes available. Although I embellished this Sparkling Snowflake Cake with edible diamonds, a dusting of edible glitter and some piped icing, a dusting of icing sugar would be perfect on it’s own.

Vanilla Sparkling Snowflake Cake

Birthday and Christmas Celebrations

Our youngest daughter should have been a near Christmas baby, however, she obligingly arrived early! So this Sparkling Snowflake Cake was made for her birthday.

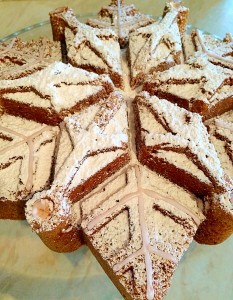
Because she isn’t too keen on icing this cake was perfect for her. Resulting in a deliciously moist, vanilla sponge, dusted with flavoured icing sugar. The flavour I used is called Santa’s Snowball, perfect for this beautiful snowflake.

Sparkling Snowflake Cake vanilla sponge dusted with flavoured icing sugar www.feastingisfun.com
Sparkling Snowflake Cake


Using edible diamonds on this cake adds extra sparkle. White, edible, sparkly glitter was also dusted on top of the icing sugar. It is a real shame that it didn’t photograph well, in any light, trust me I tried. Moving the cake aound the house to catch the small amount of sunlight that we get this time of year, shining through the windows. The lengths I will go to trying to get the perfect shot!

So, you’ll have to trust in me that this cake really, really sparkles. It looks so pretty, twinkling like a real snowflake. Although we may not get snow this Christmas, we can certainly make your own!

Sparkling Snowflake Cake catches the light and sparkles like a real snowflake www.feastingisfun.com
Sparkling Snowflake Cake


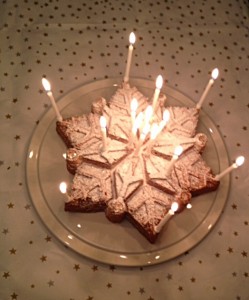
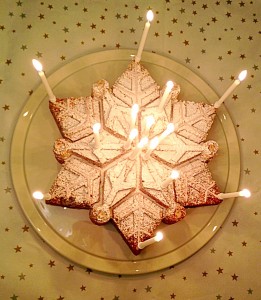
Here is the Sparkling Snowflake Cake lit by candles for our daughter’s special day. Also, it would make a fantastic alternative to the traditional, fruit laden Christmas Cake. Set on a cake stand, or pretty plate, surrounded by tea light candles which add extra sparkle. Resulting in a glittering, festive feast.

Spending Snowflake Cake stunning with candles www.feastingisfun.com
Sparkling Snowflake Cake

Preparing the Bundt Tin

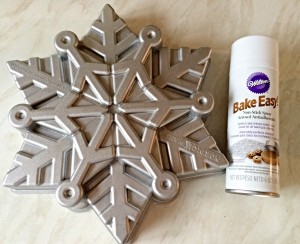
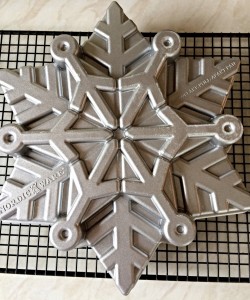
Here is the incredibly detailed snowflake Bundt tin that I used for this cake, alongside is Wilton bake easy, cake release spray. I cannot emphasise enough how important it is to use cake release spray (or the brush on version) for this tin. I tried this recipe, brushing the tin with melted butter, as I have with previous Bundt bakes and the cake stuck. Badly. It was an epic disaster. And I cried, how silly is that? Finally, determined not to be beaten by a cake tin AND with lots of tips and advice from my Bundt baker friends on Twitter, I rebaked the cake and SUCCESS.

Snowflake Bundt tin and cake release spray.


Now time to share how I made this wonder.

Recipe: Makes one Sparkling Snowflake Cake that will serve 12

225g/8oz Unsalted Butter at room temperature

225g/8oz Caster Sugar

4 Large Eggs

1tsp Vanilla Extract – I use Nielsen-Massey 

225g/8oz Self Raising White Flour

1/4tsp Salt

100g/4oz Icing Sugar

Optional – Edible glitter in the colour of your choice and edible diamonds. Both available from cake decorating shops and Amazon.

Method: Preheat oven to 180C/160C fan, 350F, gas mark 4

First of all thoroughly spray or brush the Bundt tin with cake release. I will not judge if you want to give it a double coating (I did!).

Making the Cake Batter

  • Cream the butter and sugar together in a large bowl until light and fluffy.
  • Add the salt, vanilla extract, one third of the flour and 2 eggs. Mix until just incorporated.
  • Next add another third of flour and the last 2 eggs and mix as before.
  • Finally add the remaining flour and gently mix into the cake batter until incorporated, taking care not to over mix.
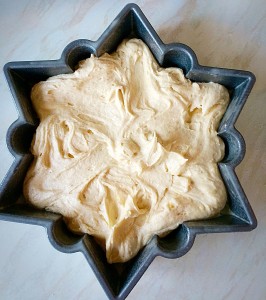
  • Spoon the cake batter into the prepared Bundt tin ensuring it is evenly spread into all the points.
Ready to go into the oven.

Baking the Snowflake Cake

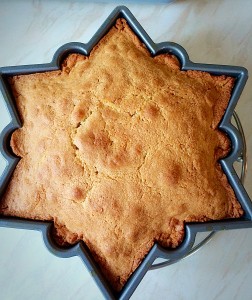
  • Place the tin in the oven and bake for 30-35 minutes.
  • The cake is cooked when pressed lightly in the center and it springs back, or an inserted skewer comes out clean.
  • As soon as the cake is baked remove from the oven and place the tin on a cooling rack or trivet.

Allow to cool for 10 minutes in the tin.

  • Leave the cake to cool in the tin for 10 minutes.
  • Invert the Bundt tin on to a cooling rack.

Invert the tin onto a cooling rack.

  • Leave for a further 5 minutes. If the cake doesn’t turn out immediately gently tap the tin and the cake should release.
  • If the cake still will not turn out, gently go around the ouside of the cake with a small palette knife. Re-invert the tin on to a cooling rack, the cake should release easily.
  • Most importantly, the more you use a Bundt tin the more non stick it becomes.
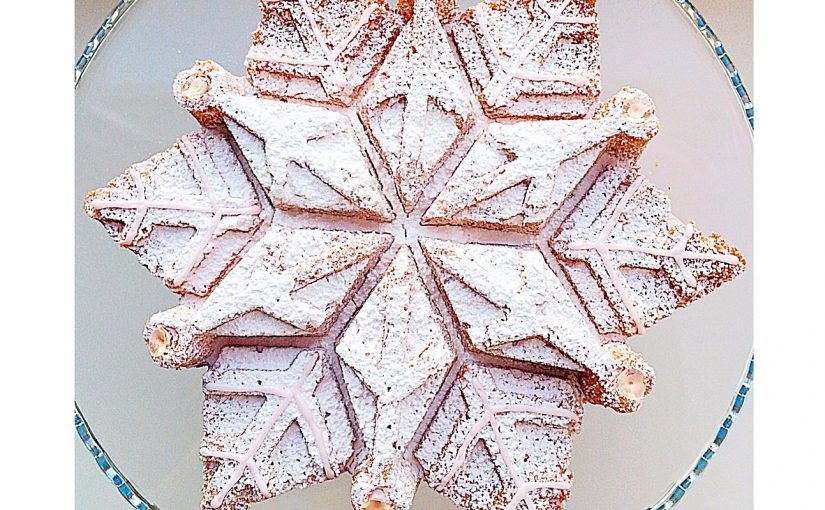
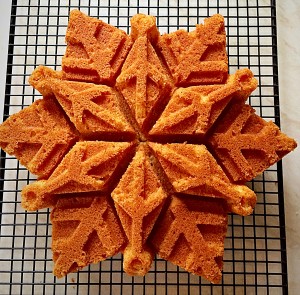
Sparkling Snowflake Cake look at the beautiful detail.
Sparkling Snowflake Cake 

Adding Sparkle to the Snowflake Cake

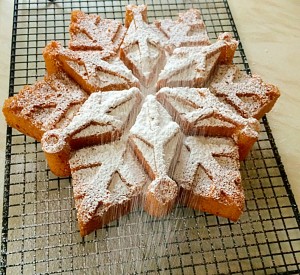
Sparkling Snowflake Cake dusted with flavoured icing sugar.
Sparkling Snowflake Cake
  • First of all, dust the cake liberally with icing sugar and then sprinkle over edible glitter.
  • I made a small batch of royal icing, lightly tinted pink and piped detail on to the outer points.
  • Finally, place edible diamond in the round dips, as seen in the photo below.
Sparkling Snowflake Cake edible diamonds, edible glitter and piping add an extra special touch to this already beautiful cake.
Sparkling Snowflake Cake


My Sparkling Snowflake Cake is as beautiful as it is delicious. It would make the perfect gift as would the tin. A great tip if you know someone who enjoys baking.

Sparkling Snowflake Cake perfect for Christmas and celebrating www.feastingisfun.com
Sparkling Snowflake Cake 

If you have Disney’s Frozen fans in your household, a touch of blue, or all white and this cake will have them singing “Let it snow!”

Store the cooled cake in an airtight container and eat within 5 days.

If you enjoyed the recipe for this Sparkling Snowflake Cake you may also like these:

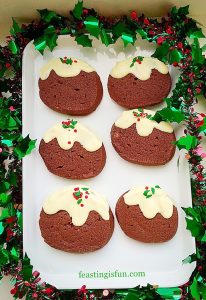
Chocolate Christmas Pudding Cookies

FF Sparkling Snowflake Cake
Chocolate Christmas Pudding Cookies

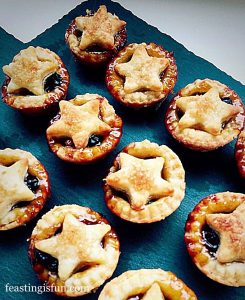
Cream Cheese Pastry Mince Pies

FF Sparkling Snowflake Cake
Cream Cheese Pastry Mince Pies

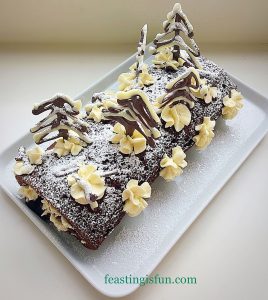
Snowy Black Forest Roulade 

FF Sparkling Snowflake Cake
Snowy Black Forest Roulade

I especially enjoy baking during the festive season. Rather than relying on shop bought, prepared food (although they have their place), spending time in the kitchen relaxes me. While listening to Christmas carols I am lost in a world of delicious aromas and sparkles. And, since it is the season of goodwill, making cookies and mince pies are a great gift for sharing with family, friends and neighbours. Above all, it is a time to give thanks for the baby Jesus.

Sammie xx

No part of this post may be reproduced or duplicated without the written permission of the owner. Please see my Disclosure Policy. 

Share
Facebooktwitterpinterestlinkedintumblr