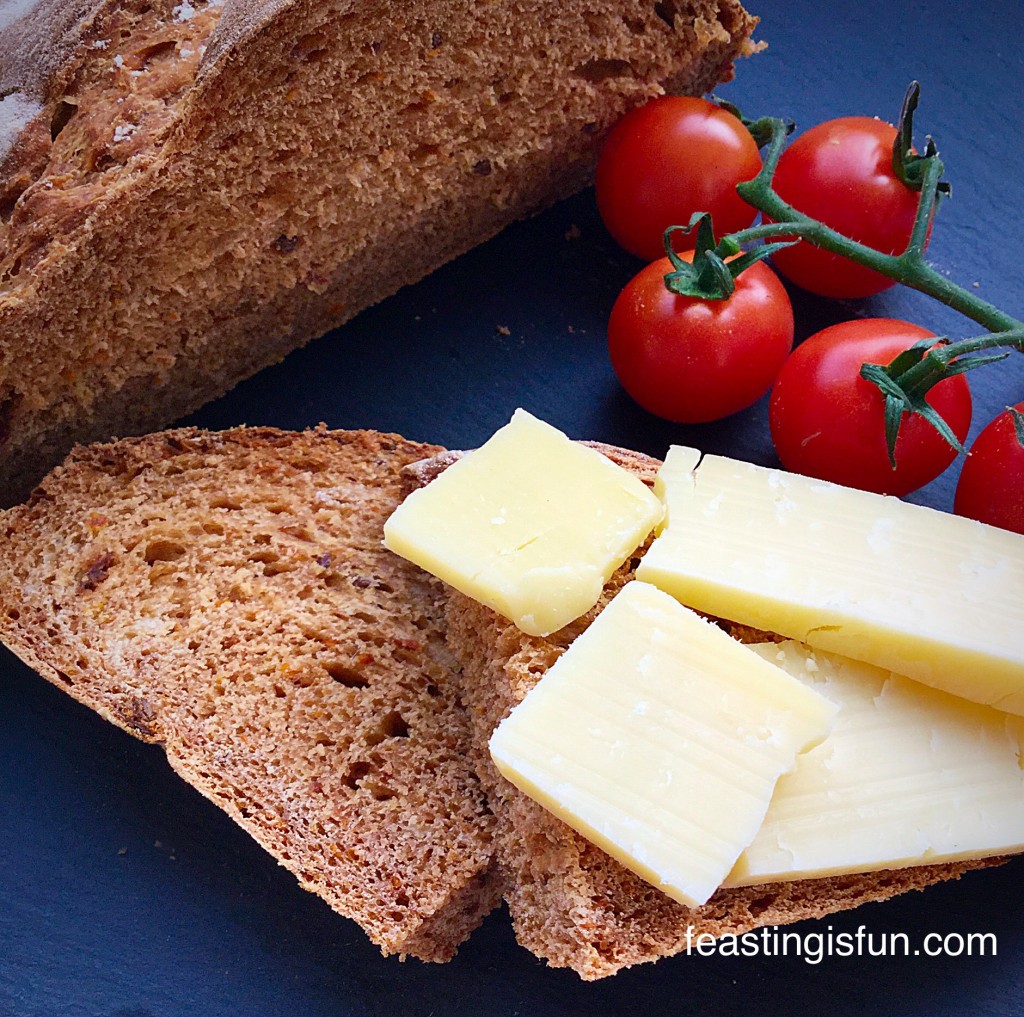
Beauvale Cheese Walnut Scones

Share
Facebooktwitterpinterestlinkedintumblr

For someone who genuinely did not like scones, I have been baking rather a lot of them recently. And I have concluded that homemade, or well made bakery scones, are a million miles away from the prepackaged, heavy, scones of my past. During my recent scone bake-a-thon I adapted my Super Light Scones recipe to create an all butter version, which makes the most delicious savoury scones. Welcome my Beauvale Cheese Walnut Scones.
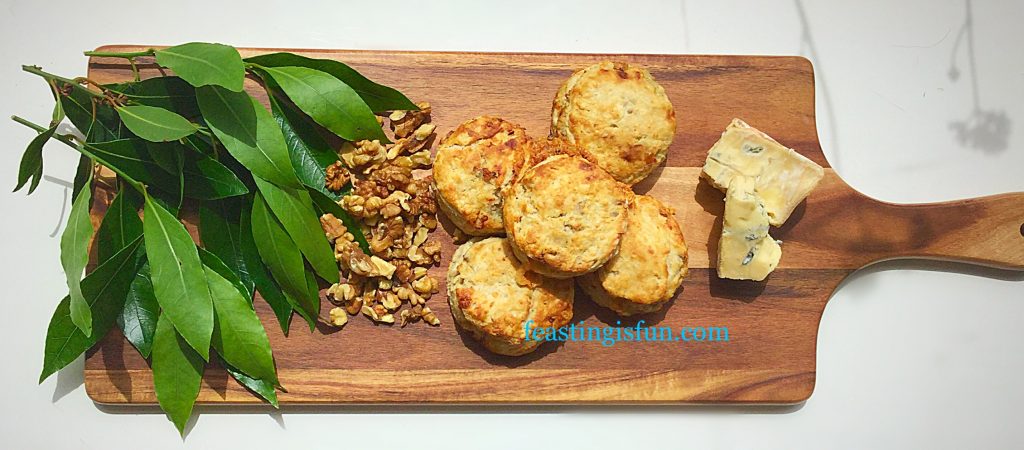
FF Beauvale Cheese Walnut Scones
Beauvale Cheese Walnut Scones fabulous served warm.

These Beauvale Cheese Walnut Scones are incredibly tasty and two out of our three children loved them. Let me add that they would not eat blue cheese on a cracker. A massive win for me as a mum!
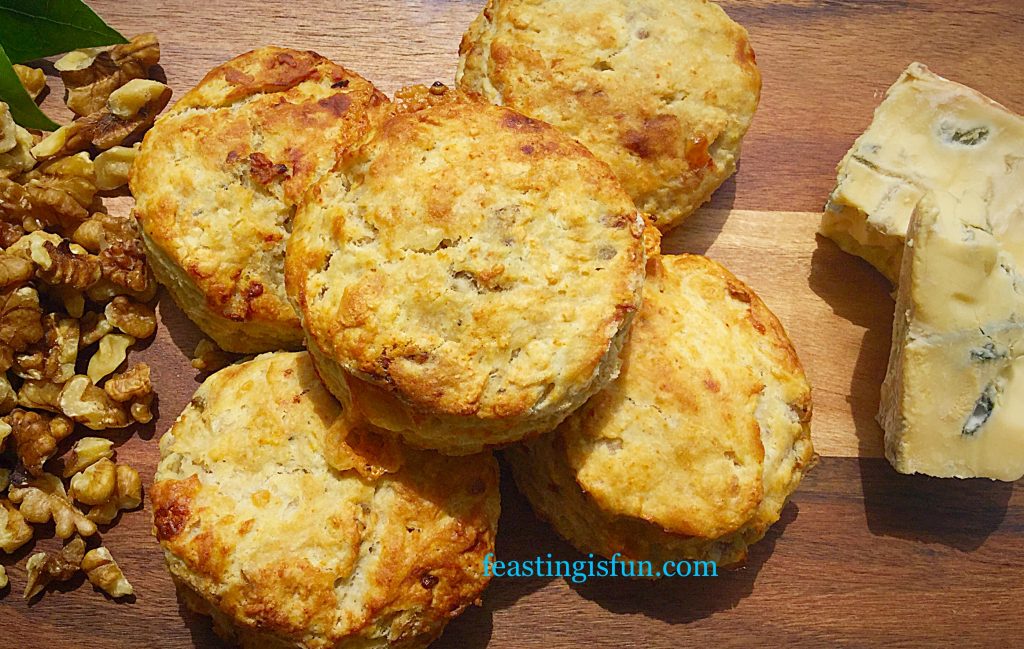
FF Beauvale Cheese Walnut Scones
Beauvale Cheese Walnut Scones perfect for lunch, picnics or just because they are so good!

Flavour Alchemy

Truly though, their taste is a reflection of just how much delicious flavour is packed into these scones. The salty melted Beauvale Cheese, against an all butter scone, with the crunch of toasted walnuts and balanced with just a hint of honey.

And I bet you didn’t see that last ingredient coming?

Because blue cheese and honey pair beautifully together, I was going to caramelise the toasted walnuts in honey. Finally though, I decided that I wanted the sweet honey to be no more than a kiss on our tastebuds.

FF Beauvale Cheese Walnut Scones
Beauvale Cheese Walnut Scones a buttery cheesy scone with added crunch.

Beauvale Cheese is a soft blue cheese, that doesn’t have the intensity of Stilton. Beautiful eaten with bread or crackers and served on a cheese board, this cheese comes alive when baked in the scones. Warm and melted, it has a rounder, salty and buttery flavour that blends nicely with the toasted walnuts and that little hint of honey.

So, I urge you to try these Beauvale Cheese Walnut Scones, they are incredibly simple to make and are perfect for using up leftover cheese.

Recipe: Makes 12-14 Beauvale Cheese Walnut Scones

50g/2oz Walnut Pieces or Halves

450g/1lb Plain White Flour

3tsp Baking Powder

75g/3oz Very Cold Unsalted Butter

125g/4.5oz Beauvale Cheese – mine was from Pong Cheese

250mls/9fl oz Milk – Whole or Semi Skimmed

3tbsp Milk for glazing the tops of the scones

3tsp Runny Honey

1/4tsp Sea Salt – I use Maldon

1/4tsp Freshly Ground Black Pepper

Method: Preheat the oven to 220C/200C fan, gas mark 7

Making The Scone Dough

  • First of all, in a dry iron skillet or frying pan add the walnut pieces and place over a medium until lightly toasted. You will just be able to start smelling the wonderful walnut oils. Remove from the heat and set to one side to cool.
  • Into a large bowl sift the flour and baking powder.
  • Add the sea salt and pepper.
  • Using the large grating side of a box grater, grate the very cold cheese straight onto the flour – I find it easier to have my bowl on digital scales.
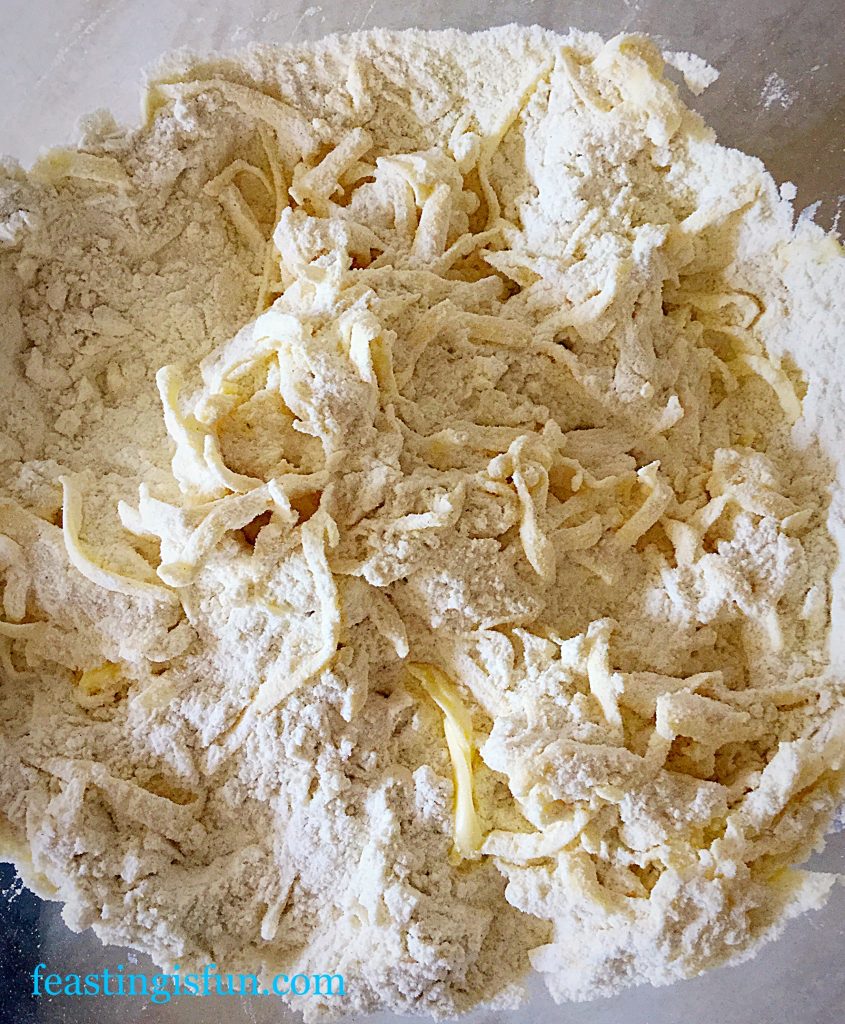
  • Cover the butter with flour, use a butter knife to separate any clumps, so that the butter is evenly distributed.
FF Beauvale Cheese Walnut Scones
Grated cold butter covered in seasoned flour.
  • Next break off chunks of the Beauvale Cheese and drop them into the bowl.
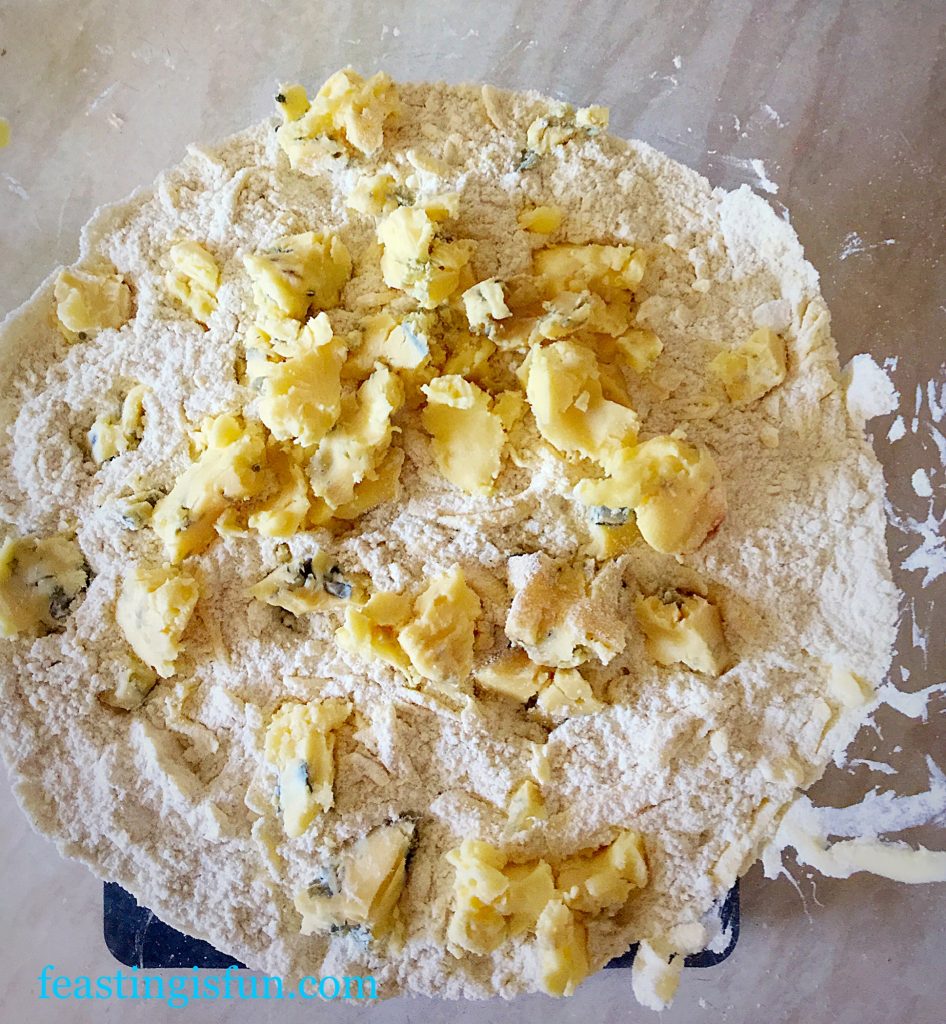
FF Beauvale Cheese Scones
Golden Beauvale Cheese with a ripple of blue.
  • Using a butter knife flick the flour over the cheese so that it is covered. This will stop it from clumping together.
  • Chop the walnuts roughly and add to the bowl. Stir with the butter knife to distribute evenly.
  • In a jug add 2 teaspoons of honey to the milk. Whisk briefly to disolve the honey.
  • Make a well in the centre of the bowl and pour the milk/honey mixture in.
  • Use the butter knife to briefly stir the ingredients and then use your hand to bring them together into a rough dough.
  • The trick to creating the lightest scones is to handle them as little as possible and only very lightly flour the worktop on which you roll and cut them out.

Shaping The Dough And Portioning The Scones

  • On a lightly flour dusted worktop tip out your scone dough and flatten with your hands so that it is 5cm/2″ deep.
  • Use a rolling pin to gently roll the dough to 2.5cm/1″ thickness.
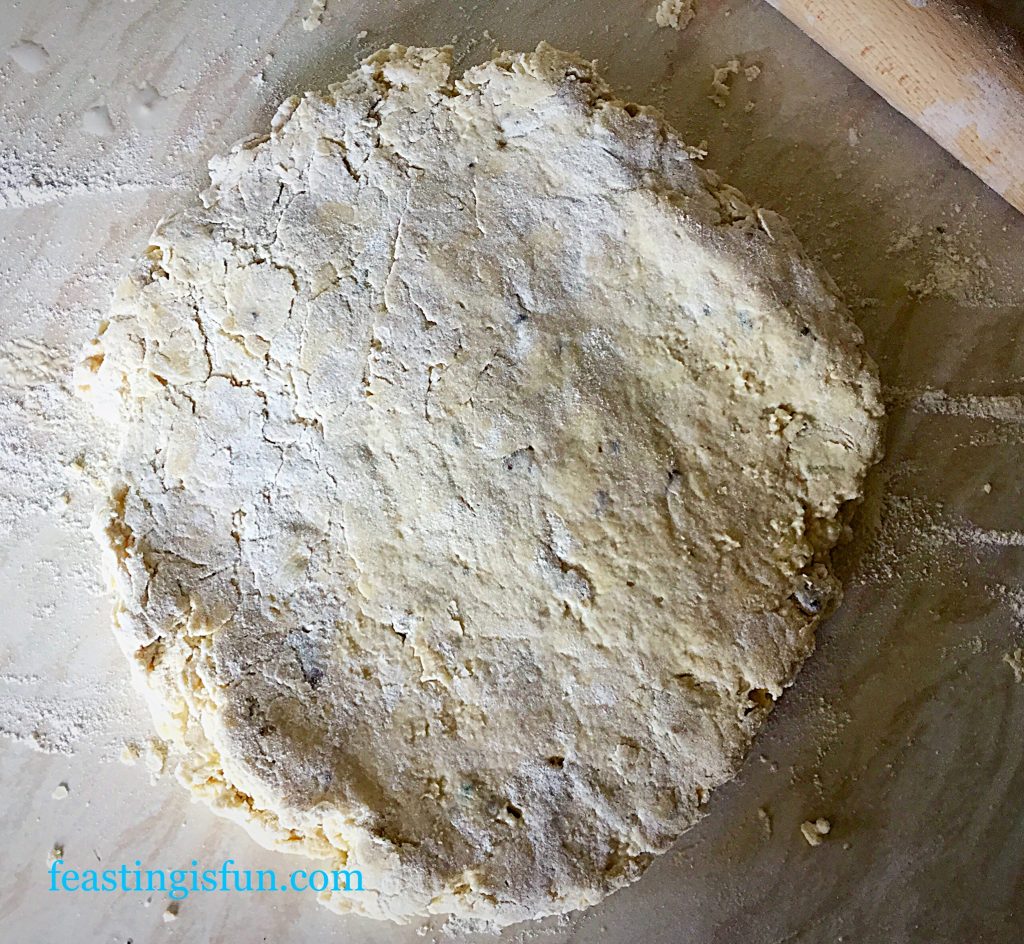
FF Beauvale Cheese Walnut Scones
Gently roll the scone dough out.
  • Line a large baking tray with baking parchment or a silicone baking mat.
  • Using a 7cm/3″ cutter press straight down and cut out the scones. If you twist the cutter as you cut the scones it can cause uneven rising.
  • Add the last teaspoon of honey to the milk, stir and then brush the tops of the scones.
FF Beauvale Cheese Walnut Scones
Beauvale Cheese Walnut Scones ready to be baked.

Baking The Cheese And Nut Scones

  • Place the scones in the top of the preheated oven and bake for 20-25minutes, until they are risen and golden brown in colour.
  • As soon as the scones are baked remove from the oven and place on a cooling rack – be careful as they will be hot!
FF Beauvale Cheese Walnut Scones
Beauvale Cheese Walnut Scones inhale their wonderful aroma as they come out of the oven.

Enjoying These Beauvale Cheese Walnut Scones

These utterly delicious Beauvale Cheese Walnut Scones are perfect served warm, split with butter, a little extra cheese (the contrast between the cold and baked cheese is delicious), or just on their own. Also they taste great cold and so are perfect for packed lunches, picnics and afternoon tea.

Since these scones have higher fat content, they will last 3-4 days in an airtight container. Also, I have successfully frozen similar scones for up to one month. To refresh, defrost and place in a warm oven for 5-10 minutes and they’ll taste as though they’ve been freshly baked.

FF Beauvale Cheese Walnut Scones
Beauvale Cheese Walnut Scones a delicious savoury treat!


If you have enjoyed this Beauvale Cheese Walnut Scones recipe here are some others you may also like:

Asparagus Proscuitto Ham Tart

FF Beauvale Cheese Walnut Scones
Asparagus Prosciutto Ham Tart with Goddess Cheese

Feta Red Onion Marmalade Quiche

FF Beauvale Cheese Walnut Scones
Feta Red Onion Marmalade Quiche

Goddess Cheese Pine Nut Muffins

FF Beauvale Cheese Walnut Scones
Goddess Cheese Pine Nut Muffins

There are so many wonderful ways of using cheese in cooking and baking. And during the next few months we will discover together, wonderful sauces, dinners, recipes and bakes.

Pong Cheese has a wonderful selection of cheeses on their website. I look forward to widening my cheese palette and creating recipes with all the different cheeses.

I hope that you will join me on this creative journey and together we can have fun discovering new ways to make and bake with cheese in our kitchens? Having fun along the way as we cook up some cracking feasts.

Sammie xx

Pong Cheese provided the cheese for this recipe. All opinions, views, content and photographs are my own. This is not a sponsored post. Please see my Disclosure Policy.

Share
Facebooktwitterpinterestlinkedintumblr

Cheddar Tomato Basil Quiche

Share
Facebooktwitterpinterestlinkedintumblr

It would seem that Monday’s have become quiche days. This was not intentional, although I haven’t been cooking Sunday roasts for the last few weeks, so that may explain it. Plus we all love quiche in our house. It’s easy to make and bake in the morning, ready for a quick reheat in the evening for dinner. So today I give you my Cheddar Tomato Basil Quiche.

Pinterest sized image of quiche with descriptive graphics.

Now if you’re a little quirky like I am, you’ll understand why quiche is one of my most favourite pastry dishes. It’s the ratio of pastry to filling that I love. Technically a tart, a quiche has no pastry top. So this Cheddar Tomato Basil Quiche has sides and a base of delicious, homemade, all butter shortcrust pastry and lots of eggy filling.

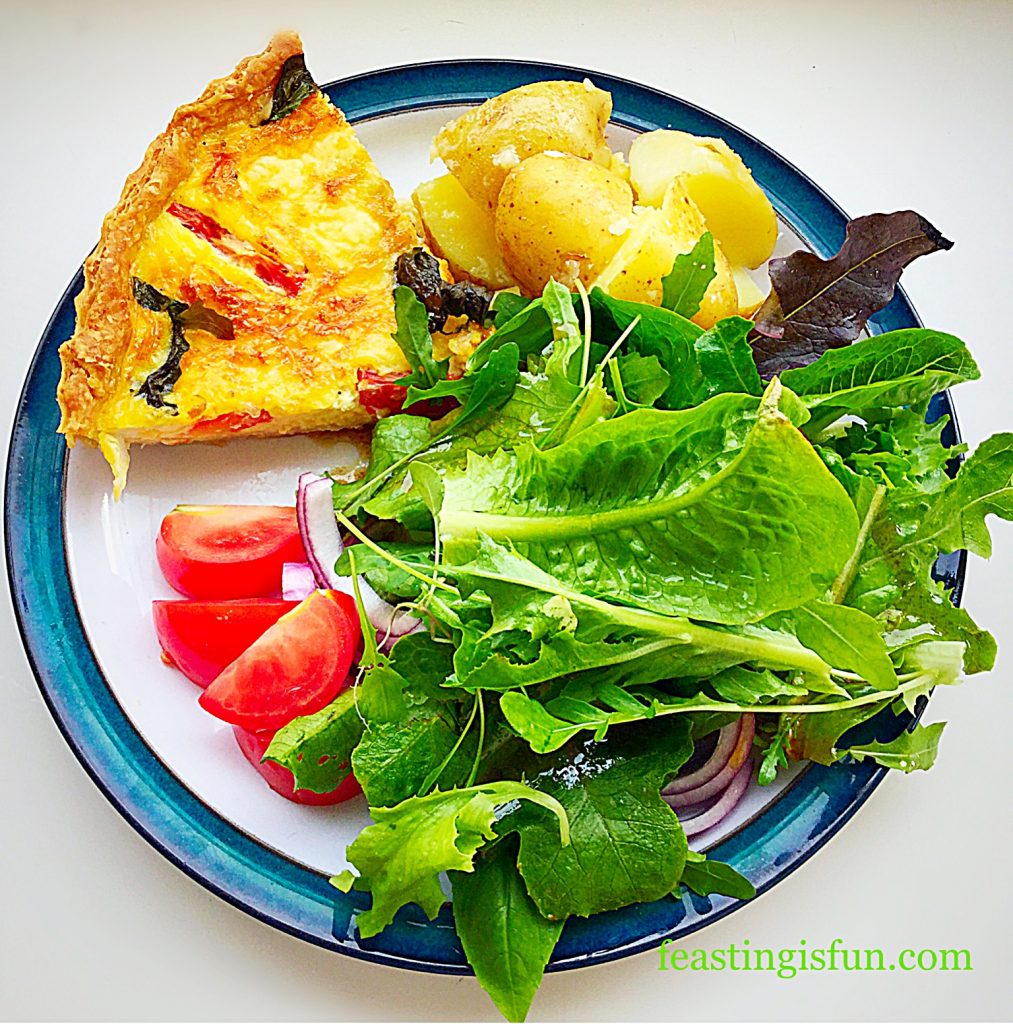
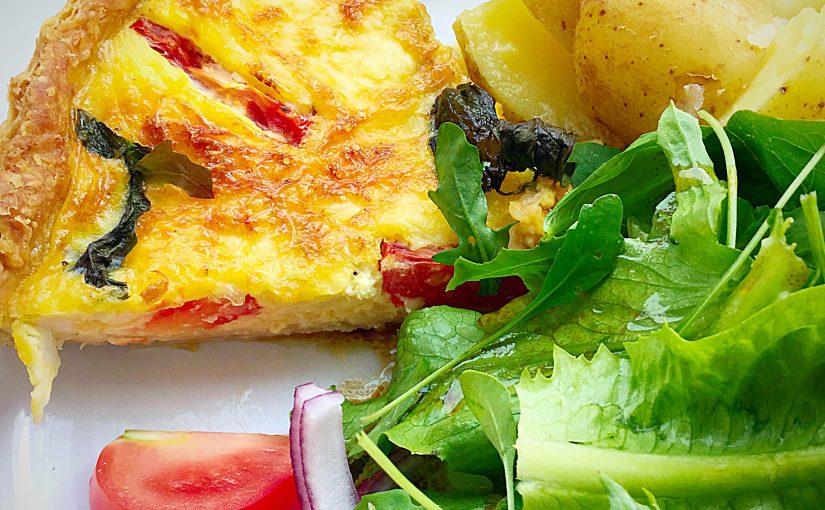
A portion of quiche served with new potatoes and salad leaves.
Cheddar Tomato Basil Quiche served with boiled new potatoes and homegrown salad leaves.

One quick word on eggs – I adore them and only ever buy free range or organic. They are my go to comfort food and also the one thing I can make myself eat when I’m tired or in pain. I still eat my boiled egg out of the chick covered eggcup holder I had when I was little. I love eggs in all guises but a really good dippy boiled egg, or soft fried egg are my favourites!

Quiche appreciation

Back to quiches and this Cheddar Tomato Basil Quiche in particular. I’ve made a few over recent weeks and I’ll link them at the bottom, but now I’m actively trying to make vegetarian ones. Twitter has a #MeatFreeMonday hashtag and so it fits in nicely with that for the time being. Most of my quiche recipes can be switched to veggie versions if you want to.

A dinner serving of quiche on a plate with new potatoes and salad.
Cheddar Tomato Basil Quiche

Pastry! I have written a recipe that is absolutely foolproof for making Perfect All Butter Shortcrust Pastry. Yes I totally get that we’ve all got busy lives and as yet, no I haven’t made my own puff pastry, but, my recipe is quick and simple. It’s also a lot cheaper than buying your own pastry, plus you know exactly what goes in it. So please be encouraged to try making it for this Cheddar Tomato Basil Quiche. You’ll have twice as much as you need and you can easily freeze the other half!

Recipe: Cheddar Tomato Basil Quiche

500g/1lb 2oz – 1/2 quantity of Perfect All Butter Shortcrust Pastry

Spare Plain Flour for dusting the work top and rolling pin

6 Large Free Range Eggs

2 Tablespoons Whole or Semi Skimmed Milk

2 Whole tomatoes – each cut into 6 wedges

150g/5oz Strong Cheddar Cheese Grated – I use Wyke Farms mature cheddar

Handful of Fresh Basil Leaves

Pinch of Salt – I use Maldon Sea Salt

Freshly Ground Pepper

Method: Peheat the oven to 220C/200C fan, gas mark 7, 425F

Making and pre-baking the tart case

  • Dust the work top with flour and rolling pin. Form the pastry into a ball.
  • Roll out from the centre of the pastry, in one direction until you have a circle slightly larger than your quiche tin.
  • Ensure the quiche tin is placed onto a baking tray.
  • Transfer the pastry to the tin by wrapping the rolled out pastry around the rolling pin.
  • Ensure the pastry is pushed, not stretched into position, pressing firmly against the sides of the tin.
  • Roll the rolling pin over the top of the tin. This creates a nice clean edge to the quiche.
  • Cut a piece of baking parchment slightly larger than the filled tin. Scrunch it up and then place on top of the pastry.
  • Fill with ceramic balls or baking beans and place in the top of a preheated oven for 15 minutes.
  • After 15 minutes baking time has elapsed remove the baking tray from the oven.
  • Using the parchment paper lift out the baking balls.
  • Return the pastry case to the oven and bake for a further 5-10 minutes until the pastry has just turned golden.
FF Cheddar Tomato Basil Quiche
Place the tomatoes and half of the basil on the pastry base.

Filling and baking the Quiche

  • Next add the grated cheese in between the tomatoes.
  • Crack all the eggs into a large jug (I always crack mine into a separate bowl first).
  • Add the milk, salt and pepper and whisk lightly with a fork until combined.
  • Pour the egg mixture carefully over the filled quiche.
FF Cheddar Tomato Basil Quiche
Decorate the top of the quiche with the remaining basil leaves.
  • Place the quiche, still on the baking tray, into the centre of the oven and bake for 25-30 minutes.
  • The Cheddar Tomato Basil Quiche is baked when it is golden and there is no wobble to the centre of the quiche.
  • Once baked remove the quiche from the oven and allow to cool for 15 minutes.
FF Cheddar Tomato Basil Quiche
Cheddar Tomato Basil Quiche so easy to make and easy to eat.

To serve slice into 6 portions. Serve warm with salad and new potatoes for a wonderful mid week meal. Likewise this delightful quiche is delicious at room temperature and is perfect for buffets, packed lunches, picnics and food on the go.

Ensure the Cheddar Tomato Basil Quiche is cold before wrapping in cling film or foil and store in the fridge for up to 4 days.

Alternatively, why not swap Red Leicester Cheese for the cheddar and add British cherry tomatoes, for a delicious twist on this recipe!

Red Leicester and Cherry Tomato Quiche

If you have enjoyed the recipe for this Cheddar Tomato Basil Quiche here are some other recipes you may also like:

Feta Red Onion Marmalade Quiche

FF Feta Red Onion Marmalade Quiche
Feta Red Onion Marmalade Quiche delicious layers of flavour.

Smoked Bacon Asparagus Quiche

FF Smoked Bacon Asparagus Quiche
Smoked Bacon Asparagus Quiche a delightful combination of flavours.

Asparagus Proscuitto Ham Tart

FF Cheddar Tomato Basil Quiche
Asparagus Prosciutto Ham Tart made during a silicone baking mat review.


Quiches are so versatile. Layers of flavour can be built inside the egg tart. I’m particularly fond of quiches that use relish or condiments to build flavour. Likewise fresh herbs can really lift the flavour of a quiche. The basil in this Cheddar Tomato Basil Quiche turns a good quiche into a great one.

Play around with fresh herbs and good quality chutneys or relishes in your baking, especially in quiches. Their flavour can really add depth or freshness to the resulting flavour.

Whatever you are making, baking and creating in your kitchens, have fun creating your feast to share with others. Thank you for sharing photos of your amazing creations on Twitter and Instagram and for taking time to leave comments. It really makes my day to see what you come up with and how you interpret my recipes.

Sammie xx

Share
Facebooktwitterpinterestlinkedintumblr

Lemon Drizzle Cake Bars

Share
Facebooktwitterpinterestlinkedintumblr

It is no secret that I love lemon. Whether it be in a glass of Franklin’s tonic water with clinking ice and a slice of lemon, cut into quarters as part of savoury Lemon Thyme Roast Chicken recipe, or even in a sweet bake such as my Lemon Blueberry Bundt Cake. Lemons are very versatile. And they bring sunshine into the kitchen on the dullest day’s. So let me introduce my Lemon Drizzle Cake Bars.

FF Lemon Drizzle Cake Bars

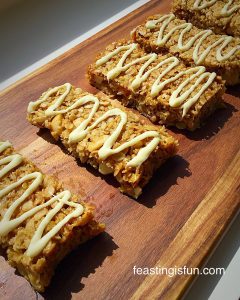
While a sturdy, yet delicious oat biscuit base covered in lemon curd and then topped with the lightest lemon sponge ensures these bars are easy to handle. And a  drizzle of fresh lemon juice icing ensures your tastebuds wake up with a zing. Resulting in a tasty bar that keeps you feeling full for longer because of the oats.

FF Lemon Drizzle Cake Bars
Lemon Drizzle Cake Bars

Especially ideal for picnics, packed lunches, or just as a mid morning or afternoon snack to keep you going until meal time.

Although I really do need to get around to making my own lemon curd, for this recipe I used Waitrose own luxury lemon curd. Because using a good quality lemon curd makes all the difference to the overall flavour.

Lemon Drizzle Cake Bars

Recipe: Makes 16  Lemon Drizzle Cake Bars

For the Oat Biscuit Base:

225g/8oz Unsalted Butter

125g/4.5oz Caster Sugar

1/8tsp Salt – I use Maldon

1tsp Vanilla Extract – I use Nielsen-Massey

1 Large Free Range Egg Yolk

100g/4oz Rolled Oats – not quick cook

125g/4.5oz Plain White Flour

3tbs Lemon Curd – use the best quality one that you can afford

For the Lemon Sponge Layer:

125g/4.5oz Unsalted Butter

100g/4oz Caster Sugar

1/8tsp Salt

1/2tsp Vanilla Extract

2 Large Free Range Eggs

125g/4.5oz Plain White Flour

1tsp Baking Powder

Finely grated zest of 1 Lemon – reserve the juice for the icing

For the Lemon Drizzle Icing:

100g/4oz Icing Sugar

Juice of 1 Lemon

Method: Preheat the oven to 200C/180C fan, gas mark 6, 400F.

Making the Oat Biscuit Base:

  • First of all, line a 28cm x 20cm x 5cm (12″x 8″x 2″) Swiss roll tin with baking parchment. I have found that I am able to line mine without greasing, however, lightly grease the tin if it is easier to keep the parchment in place.
  • In a large bowl beat/whisk together the butter, cream and salt until pale and creamy.
  • Add the vanilla extract and egg yolk and continue to beat/whisk until combined.
  • Add the oats and flour and stir together until combined.
  • Place the biscuit mixture into the lined tin and press into place using clean fingers.
  • Place the tin in the fridge and chill the biscuit mixture for 30 minutes.
  • As soon as it is chilled place the Swiss roll tin in the centre of the oven and bake for 20 minutes.
  • Remove after the 20 minutes has elapsed and turn down the oven temperature to 160C/140C fan, gas mark 3.
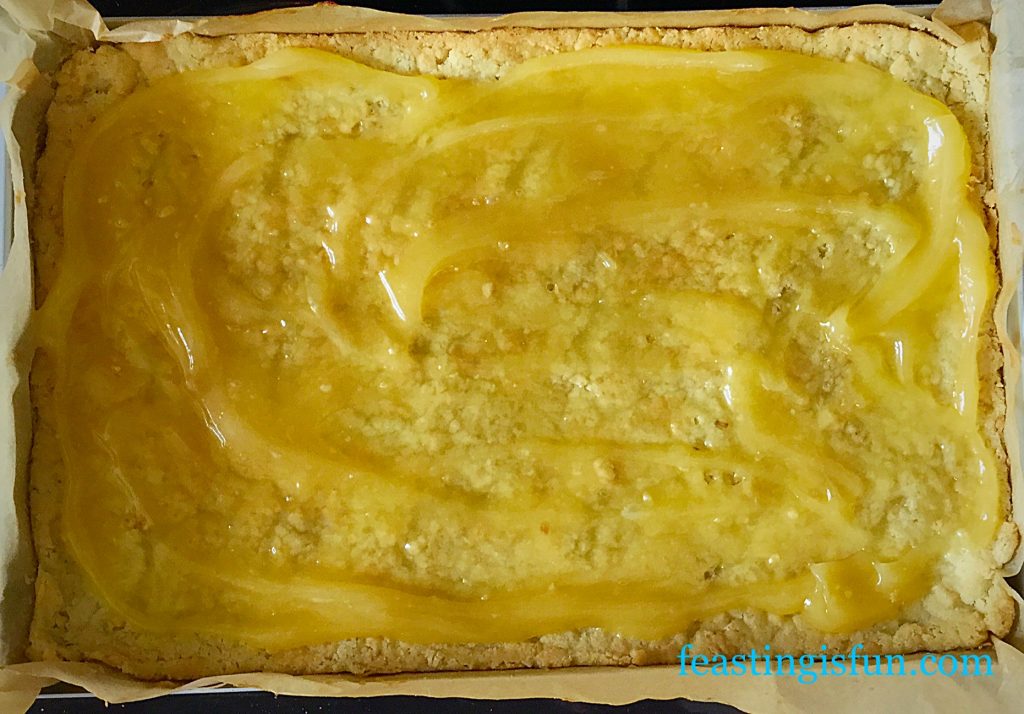
  • Spoon the lemon curd on to the hot biscuit base and spread so that it covers and almost reaches the edges.
FF Lemon Drizzle Cake Bars
This tangy lemon curd layer makes all the difference to the finished bake.

Making the Sponge Layer:

Note: This can easily be made whilst the oat biscuit base is baking.

  • In a large bowl whisk/beat the butter, sugar and salt together until they are pale and creamy.
  • Add the 2 whole eggs and vanilla extract. Whisk/beat until light and foamy.
  • Sift in the flour and baking powder. Add the finely grated zest of 1 lemon.
  • Fold all the ingredients together, using a spoon, until they are just combined.
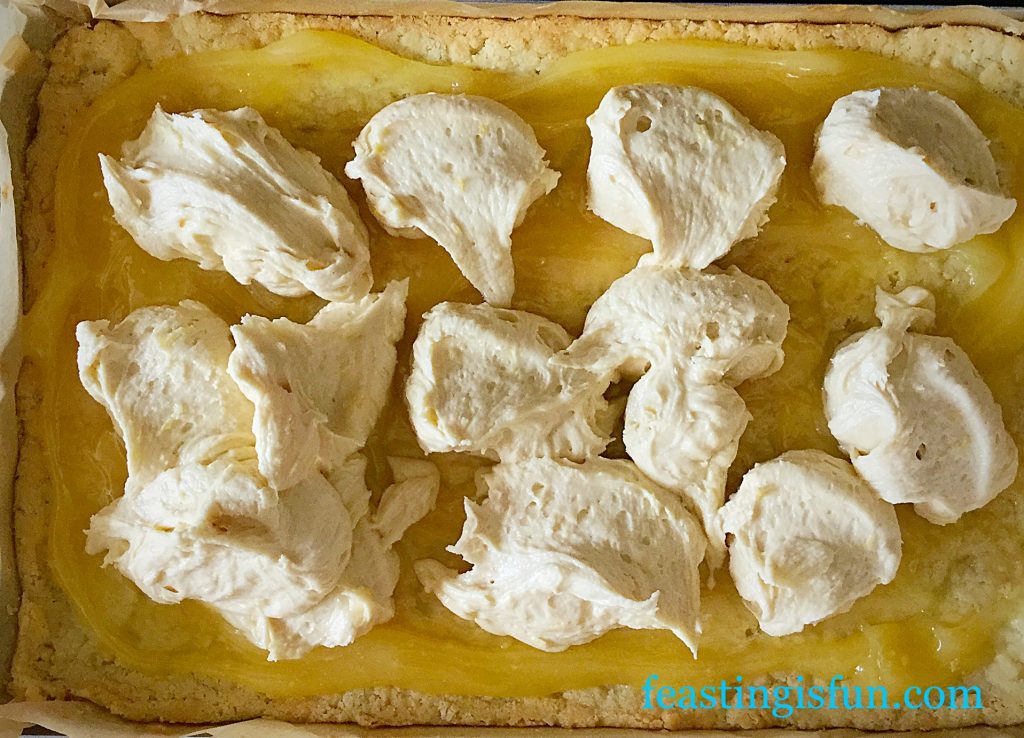
  • Spoon the mixture over the lemon curd coated biscuit base.
FF Lemon Drizzle Cake Bars
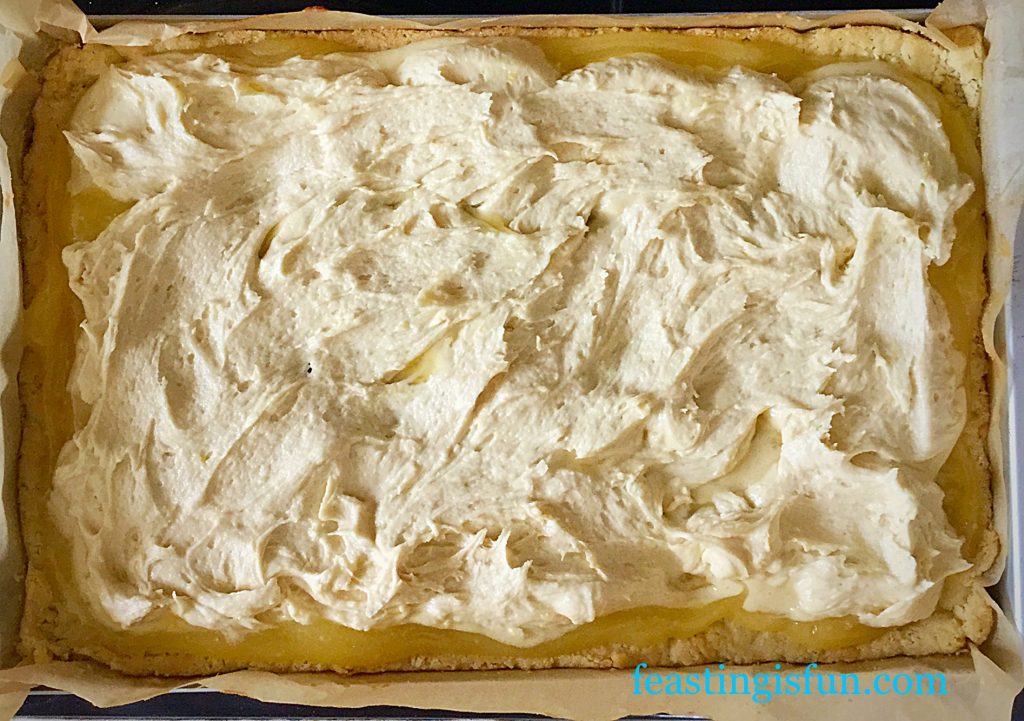
Spoon the cake batter evenly over the base.
  • Spread the cake batter using the back of a spoon, or an offset spatula, until it covers almost all of the biscuit base.
FF Lemon Drizzle Cake Bars
The lemon cake batter will spread to completely cover the biscuit base whilst baking.
  • Place the Swiss roll tin in the centre of the preheated oven and bake for 30 minutes.
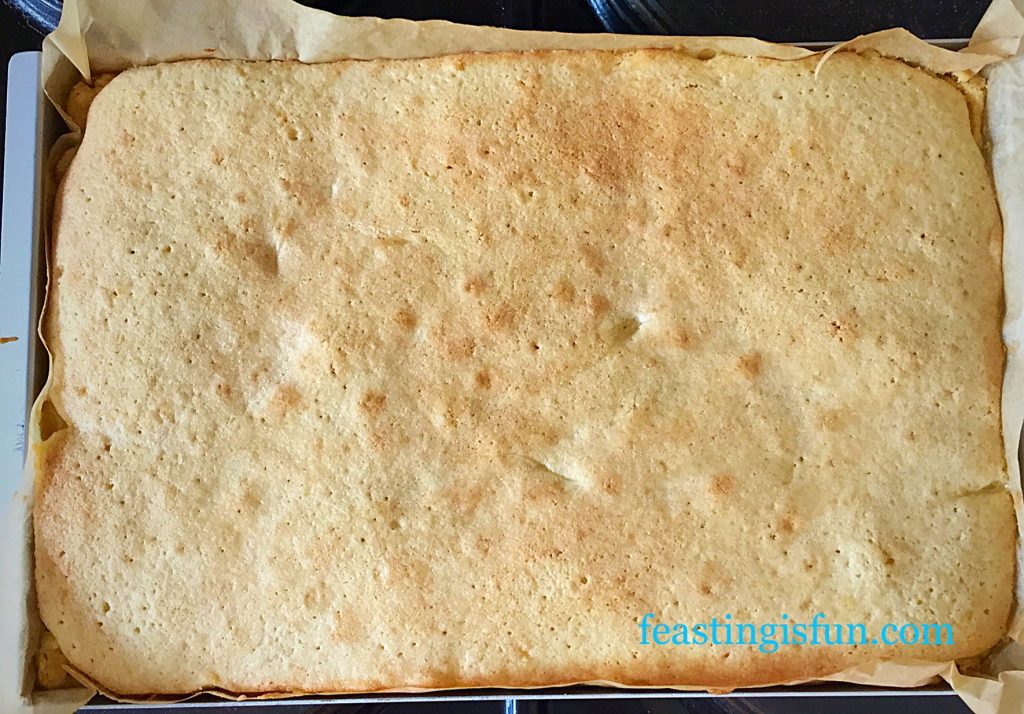
  • The sponge is baked when it springs back from a light touch and is a light golden colour. Don’t worry if it is paler than you expect, the lower baking temperature stops it browning as much as you may be used to.
  • As soon as the sponge is baked remove the tin from the oven, place on a cooling rack and allow the entire bake to cool in the tin.
FF Lemon Drizzle Cake Bars
The entire slab of sponge topped biscuit cooling in it’s tin.
  • When the bake is completely cooled, lift out of the tin, using the baking parchment and a palette knife and place on to a board.
  • Peel back the sides of the baking parchment and tuck them underneath.

Making the Lemon a Drizzle Icing:

  • Sift the icing sugar into a small bowl.
  • Add the juice of one lemon.
  • Mix until you have a smooth, slightly runny paste.
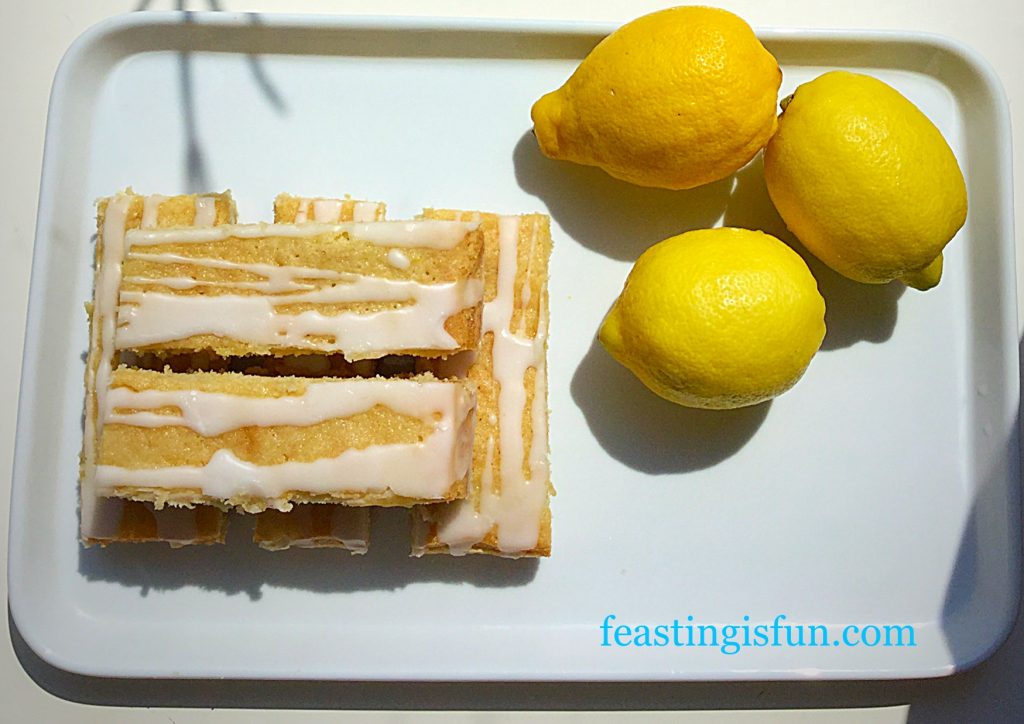
  • Using a spoon, drizzle the lemon icing over the top of the cake/biscuit slab. I prefer a line style drizzle, but you can drizzle your icing however you wish. Let your creative juices flow! Although I do advise against pools of icing gathering on top of the bake.
  • Set your Lemon Drizzle Cake Bars bake to one side to allow the icing to set.
FF Lemon Drizzle Cake Bars
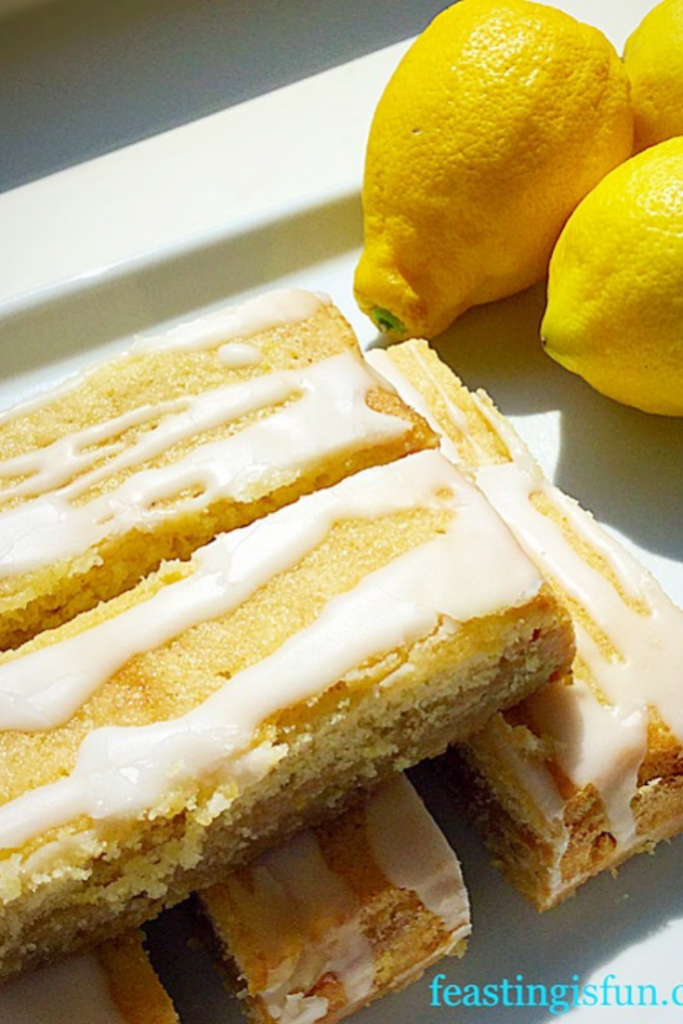
Lemon Drizzle Cake Bars the tart lemon icing gives these a professional finishing touch.
  • Once set you may cut your slab into individual bars.
  • Cut down the length of the bake in the middle.
  • Next cut across the width of the bake, creating four quarters.
  • Cut each quarter into four individual bars.
FF Lemon Drizzle Cake Bars
Lemon Drizzle Cake Bars gloriously tempting in the sunshine.

Because of the sturdy and delicious oat biscuit base, these Lemon Drizzle Cake Bars are the perfect, portable food.

Store in an airtight tin (I use old biscuit tins, usually from Christmas), separating layers with pieces of baking parchment and eat with 5 days.

I had one of the Lemon Drizzle Cake Bars with a cup of tea for a rather late lunch and it was incredibly tasty and refreshing. While using good quality Lemon Curd ensures the right balance of tartness within the bar, as does using fresh lemon juice in the drizzle icing. So I highly recommend these delightfully tangy Lemon Drizzle Cake Bars!

FF Lemon Drizzle Cake Bars
Lemon Drizzle Cake Bars perfect for Afternoon Tea.

If you have enjoyed this recipe for Lemon Drizzle Cake Bars, here are a few more you may like too:

Bakewell Shortbread Bars

FF Lemon Drizzle Cake Bars
Bakewell Shortbread Bars

Macadamia Apricot Flapjacks

FF Lemon Drizzle Cake Bars
Macadamia Apricot Flapjacks

Double Cherry Drizzle Oat Bars

FF Lemon Drizzle Cake Bars
Double Cherry Drizzle Oat Bars

Since my family love having something homemade to take to school or work in their packed lunches these bars are ideal. Also I hope I have inspired you to try these delicious Lemon Drizzle Cake Bars. Alternatively, why not bake a batch and take them into the office as a Friday, or mid-week treat for everyone?

Finally, whatever you are making, baking and creating in your kitchen, have fun preparing and sharing your feast.

Sammie xx

No part of this post may be reproduced or duplicated without the written permission of the owner. Please see my Disclosure Policy.

Share
Facebooktwitterpinterestlinkedintumblr

Sundried Tomato Bread

Share
Facebooktwitterpinterestlinkedintumblr

Sundried Tomato Bread perfect packed up for warm summer picnics, or sliced and toasted with melting cheese on a chilly Winter’s eve.

Sundried Tomato Bread
Flavourful Sundried Tomato Bread

I have been wanting to try my hand at Sundried Tomato Bread for literally ages, somehow though it always seemed to get put off.

Well not this weekend! I set about creating this beautifully coloured and delicious loaf on Saturday morning. I started with my Farmhouse White Loaf recipe and went from there.

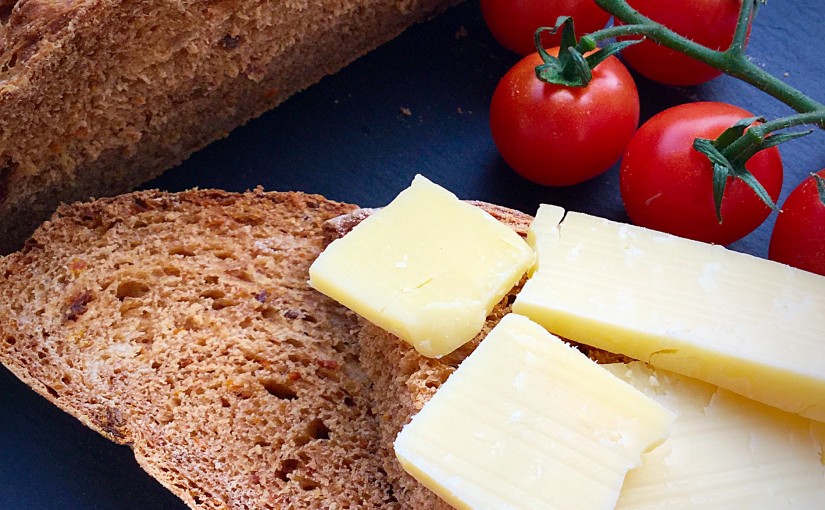
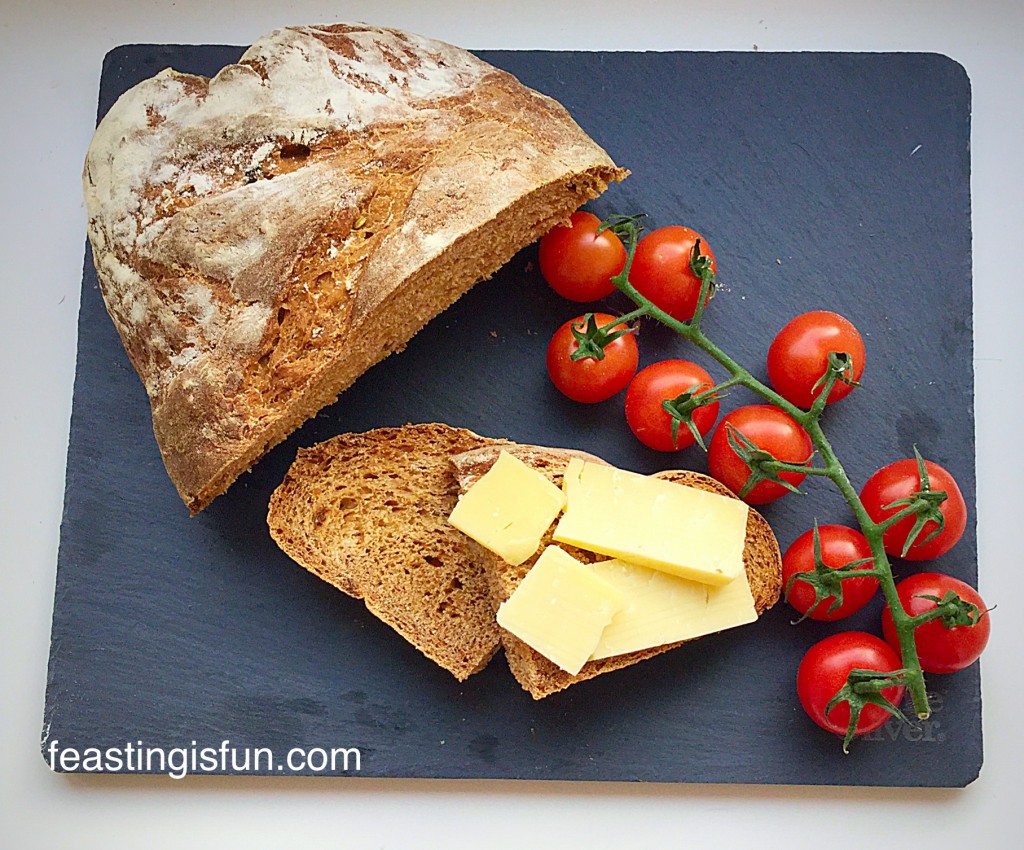
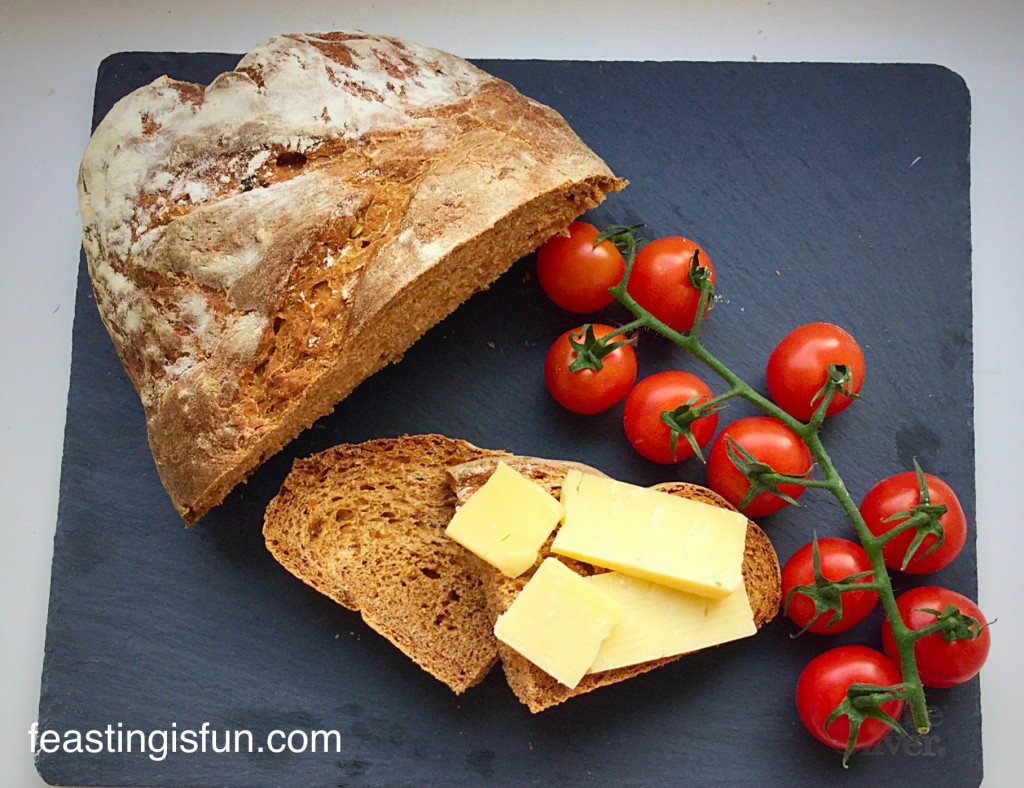
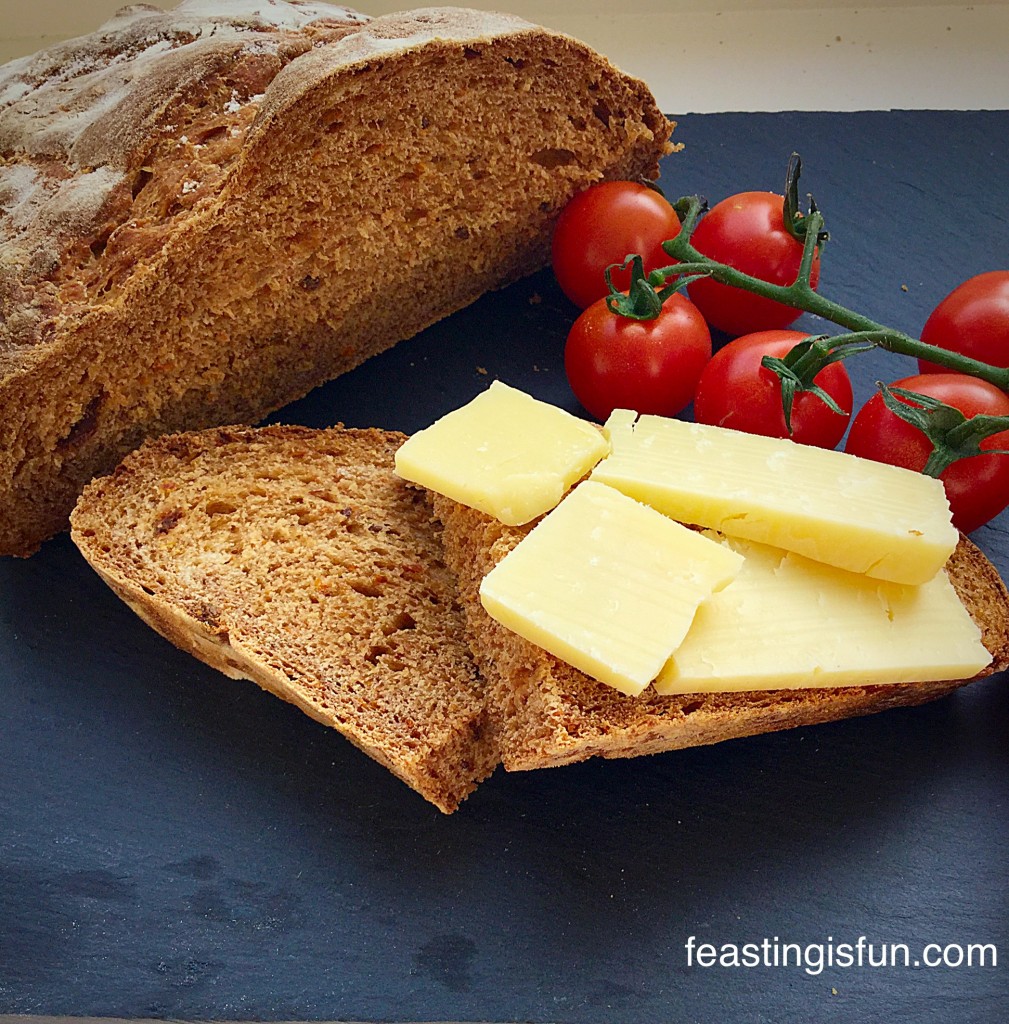
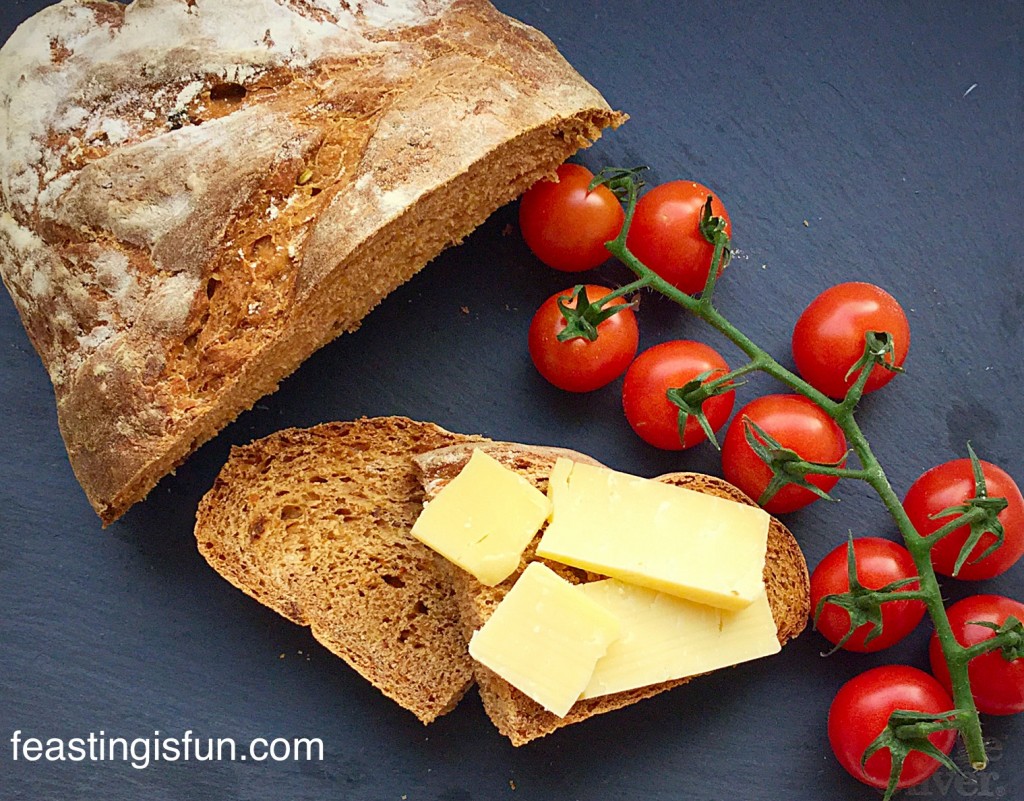
Sundried Tomato Bread with cheese
Good sharp cheddar and vine tomatoes compliment this Sundried Tomato Bread beautifully.

Sundried tomatoes are usually available either stored in oil, or dry packed in a cellophane bag. Mine were the latter and I had a hunch they would be too dry for this recipe. So I chopped them up and warmed them gently in some olive oil. I’m pretty sure this step is what gave the crust a delicious chewy texture, rather than crisp and crunchy,

To add extra flavour some smoked paprika was added to the dough, oh boy this makes such a difference to the flavour. A very subtle, smokey – you know something’s there but you can’t quite put your finger on it – flavour, that compliments the slight sweetness of the sundried tomatoes.

Chewy Crust Sundried Tomato Bread
Sundried Tomato Bread the colour alone is so inviting.

This bread can stand up to strong flavours and would be the perfect accompaniment to game pate, sharp cheddar, or torn into chunks and used to mop up a spicy soup. Ooh mulligatawny soup would pare beautifully with this bread.

I am a firm believer that bread should add to the taste, not just be a carrier of flavour from whatever it is topped with. This Sundried Tomato Bread ticks that box one hundred per cent. Adding another level to a cheese and chutney sandwich. The flavours coming alive when warmed and toasted with melting cheese dripping over the sides.

Flavourful Sundried Tomato Bread
Sundried Tomatoe Bread adding another flavour dimension to sandwiches.

Sundried Tomato Bread is a total knockout on the flavour front.

Recipe: Makes one Sundried Tomato Bread

500g/1lb 2oz Strong White Bread Flour – I use Organic White Bread Flour from Shipton Mill

320ml Tepid Water

7g/1 sachet Fast Action Dried Yeast

1tsp Smoked Paprika

100g/4oz Sundried Tomatoes plus 2 tbsp oil that they come in or 2 tbsp extra virgin olive oil

7g Salt – I use Maldon Sea Salt Flakes

Method:

Chop the sundried tomatoes in to fairly small pieces. If they did not come packaged in oil, add to a small saucepan and pour over 2 tablespoons of olive oil. Warm over a medium heat for 2 minutes, the sundried tomatoes will soak up the oil. Set to one side to cool.

The ‘bowl’ is either the container used for mixing/proving and baking in a bread maker, or the bowl of a stand mixer.

For both methods:

Pour the water into the bowl, then add the yeast.

Add the flour on top of the liquid.

Add the salt and smoked paprika.

If using a bread maker, set to dough cycle and start the program. When prompted by the machine, or 5 minutes prior to the mixing finishing, add the sundried tomatoes and oil.

Once the dough cycle is complete re-start for 2 minutes. This ‘knocks back’ the dough. Remove the dough and place on a lightly floured surface, it will be quite sticky.

Flatten the dough with your hand into a rough rectangular shape. Fold the bottom third upwards and then the top third downwards, like an envelope.

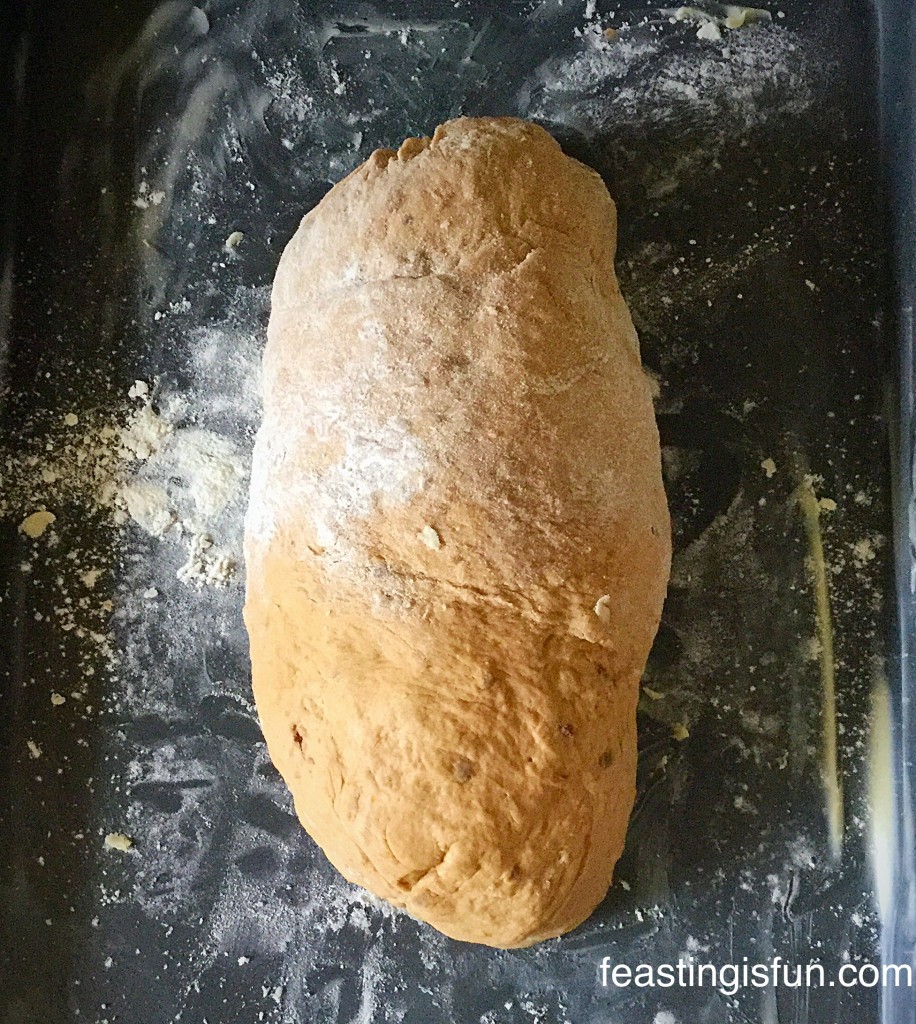
Sundried Tomato Bread dough
Look at the gorgeous colour of the dough.

*Place the log shaped dough onto the baking tray, cut a couple of slashes through the dough diagonally and dust with a little flour. Cover with a clean, dry tea towel and leave in a draught free place until doubled in size – approx 1 hour.

If using a stand mixer, attach the dough hook and mix on medium speed until all the ingredients are combined. Add the sundried tomatoes and oil. Continue to mix for a further 5 minutes, until the dough is smooth and elastic.

Stop mixing. Scrape the dough from the dough hook and combine with the dough in the bowl. Form into a ball, place back into the bowl. Cover with a damp cloth and leave in a draught free place until doubled in size (approx. 1hour).

Once doubled remove the cloth, mix for 2 minutes on medium speed using the dough hook. This ‘knocks back’ the dough.

Flatten the dough with your hand into a rough rectangular shape. Fold the bottom third upwards and then the top third downwards, like an envelope.

*Follow as above.

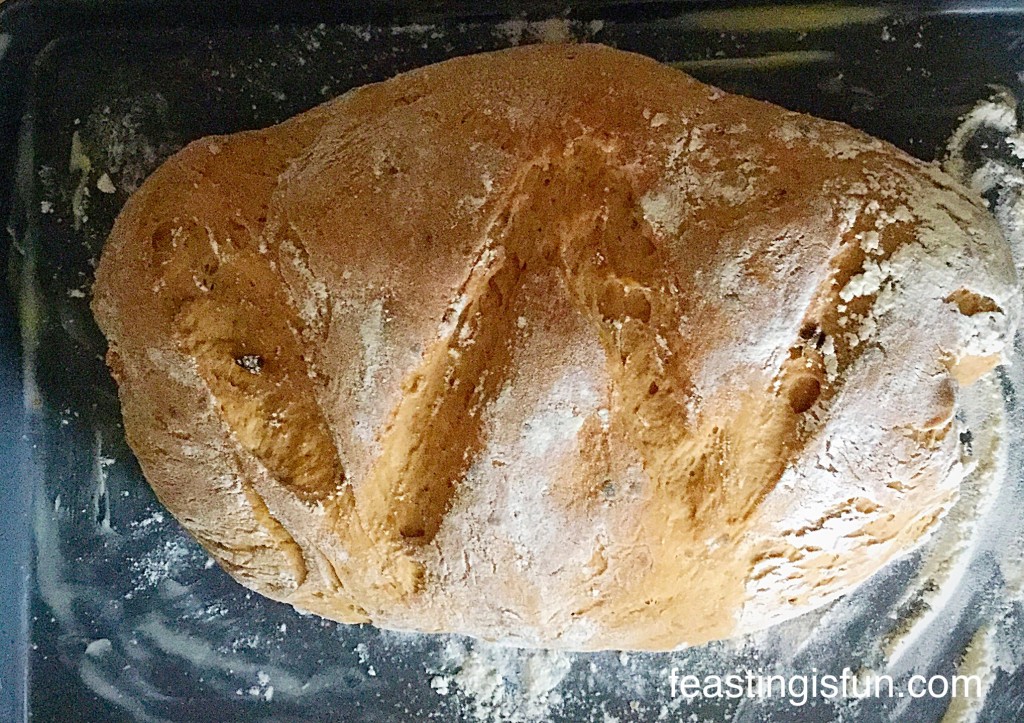
Risen Sundried Tomato Bread
Beautifully risen and ready for the oven – Sundried Tomato Bread.

Approx. 10 minutes before the loaf is ready, preheat the oven to 220C/200C fan.

Once the dough has doubled in size place into the middle of the preheat, hot oven.

Bake for 30 minutes. The bread is baked when it has a good firm crust and sounds hollow when rapped on the bottom with your knuckle.

Once the Sundried Tomato Bread is baked, remove from the oven and place on a cooling rack immediately.

I know you want to tear into this loaf as soon as it is out of the oven, I know you do, cos I do too. Please leave the loaf to cool, ideally until cold, but just warm should be ok too!!

Whole loaf Sundried Tomato Bread
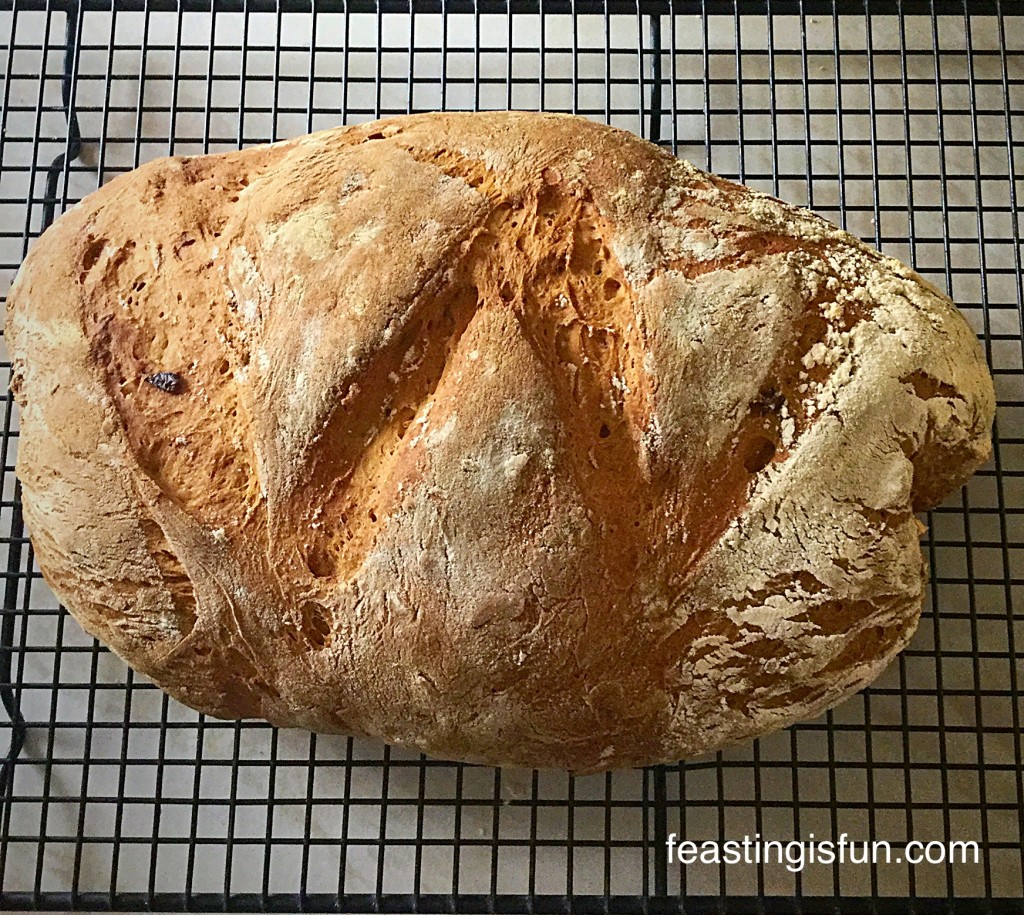
Sundried Tomato Bread there’s a good chewy crust on this loaf.

This bread is made for feasting. Imagine, cheeseboard on the table, steaming bowls of spicy soup and thick chunks of this savoury, slightly malted flavoured bread. Oh and all your friends and/or family sitting around chatting, dunking, eating and having fun. Who said there’s no feast without bread eh?

Yummy Sundried Tomato Bread
Sundried Tomato Bread perfect for an indoors or outdoors picnic.

Actually this bread has a sourdough, chewy quality to it, with a few larger holes throughout the loaf and a hint of that unique soughdough flavour.

If you enjoy bread packed with flavour, then this Sundried Tomato Bread is definitely a loaf you should try. Please let me know if you do bake it? I love hearing how your bakes turn out,

If you have enjoyed this Sundried Tomato Bread recipe then you are going to love these other bread recipes:

Large White Bloomer

Wholemeal Cob Loaf

Knotted Popyseed Rolls

Whatever you bake and whoever you bake for, have fun!

Sammie xx

Any questions? You can leave a comment or contact me via Twitter @sammiefeasting (also Pinterest and Intagram handles).


Share
Facebooktwitterpinterestlinkedintumblr