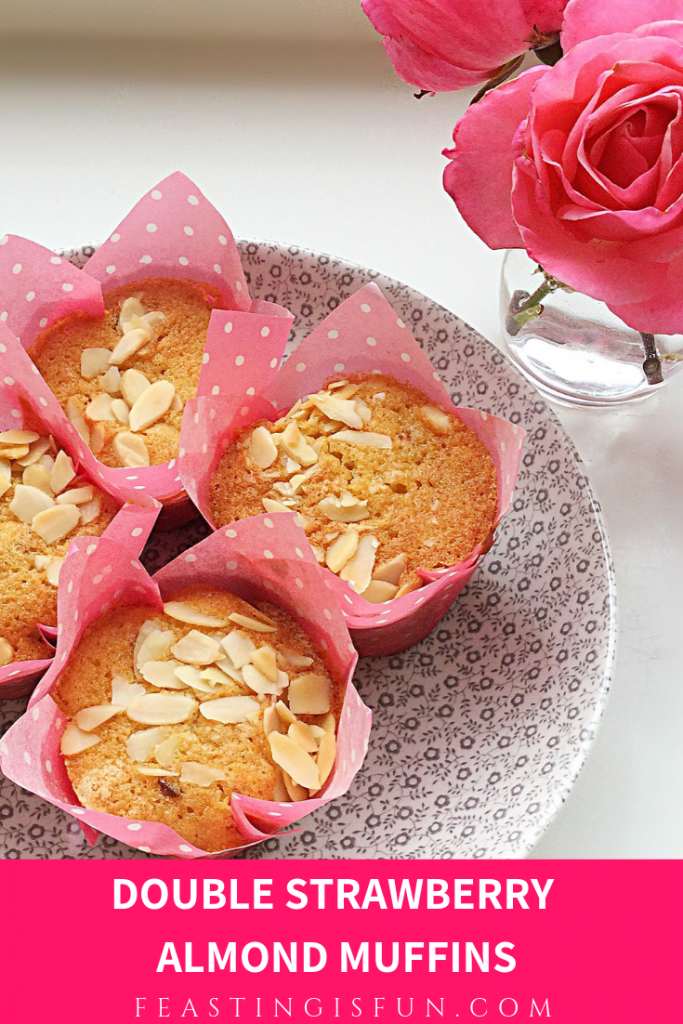
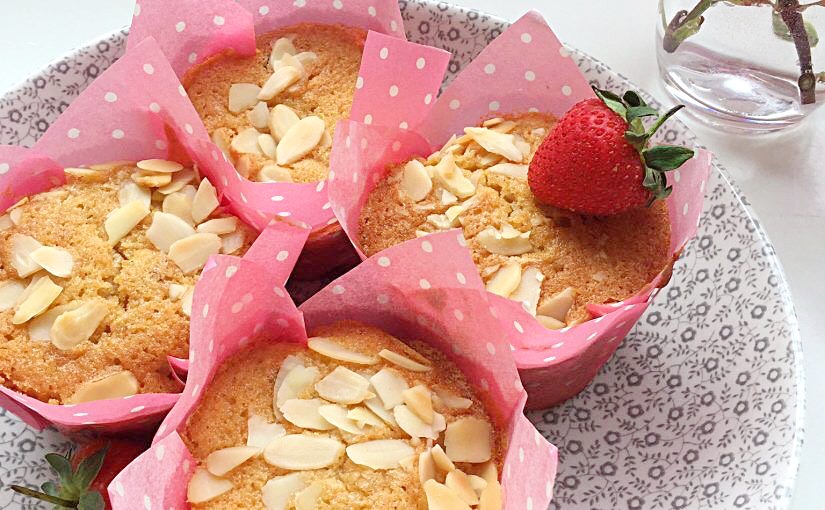
Double Strawberry Almond Muffins

Share
Facebooktwitterpinterestlinkedintumblr

As you may have noticed from recent posts, I am having a full blown love affair with strawberries this Summer.  Whether it’s eating them warmed by the sun, just as they are, or, creating new recipes such as Strawberry Rose Ice Cream, I cannot seem to get enough of them. While looking for inspiring ingredients on Amazon U.K., I found some baked strawberries for sale. Imagine a more intense strawberry flavour with a chewy texture. Sourcing fresh strawberries locally, finally resulted in the creation of my Double Strawberry Almond Muffins.

Pinterest image of strawberry muffins with descriptive graphics.

Since the name ‘baked’ strawberries seems, a little misleading, they will be referred to as dried strawberries. Not freeze dried strawberries, which are an entirely different product altogether.  Similar to dried apricots in texture, dried strawberries are chewy, rather like gummy bears, with a more intense, strawberry flavour. While also free from other added ingredients. Resulting in a perfect snack size strawberry, untainted by additives.
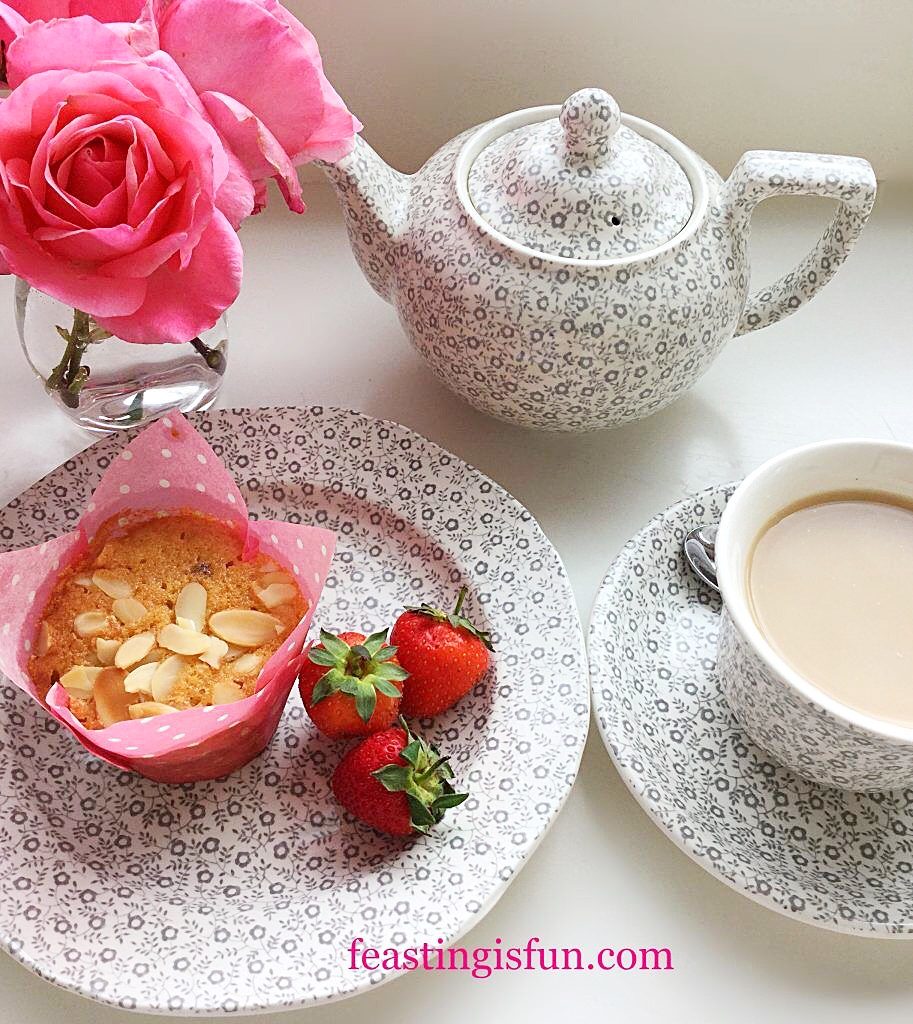
Teapot, cup of tea, muffin on a plate and pink roses in a small vase.
Double Strawberry Almond Muffins

While the muffins bake the fresh strawberries become absorbed into the batter.  Yet dried strawberries absorb moisture from the cake batter. During the baking process they lose their chewy texture. Resulting in gooey, jam like, pools of delicious strawberry within each muffin.
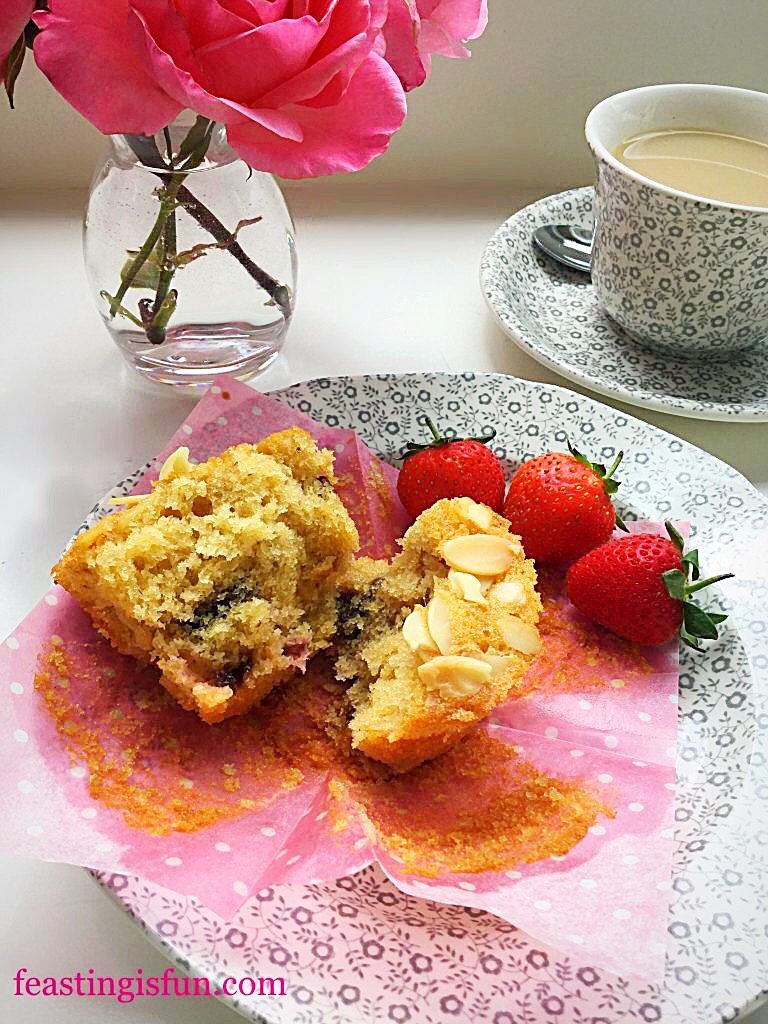
Muffin pulled in half to show even distribution of fruit.
Strawberries evenly distributed throughout the muffin.

A light open texture of each muffin is visible in the photo above. Having checked a few muffins, the strawberries are dispersed evenly throughout. Since previously having difficulty including fresh strawberries into a bake, I didn’t want to weigh the batter down with their water content. That said, extra chopped, dried strawberries could be added to the top, with the flaked almonds, prior to baking.

Recipe: Makes 12 Double Strawberry Almond Muffins

200g/7oz Unsalted Butter at room temperature

200g/7oz Caster Sugar

1tsp Vanilla Extract – for all extracts I use Nielsen-Massey

1/2tsp Almond Extract

4 Large Free Range Eggs

1/4tsp Sea Salt – I use Maldon

100g/4oz Ground Almonds

150g/5oz Plain White Flour

1.5tsp Baking Powder

100g/4oz Fresh Strawberries hulled and diced

50g/2oz Dried or Baked Strawberries roughly chopped – I use Urban Fruit

50g/2oz Flaked Almonds

Method: Preheat the oven to 160C/140C fan, gas mark 3, 325F.

Note: Tulip wrappers must be used in a deep muffin, or cupcake tin. When using regular cupcake cases, fill two thirds full and expect to make 18 muffins from this recipe. Also, the length of time baking will also need to be adjusted, please see guidelines in the method.

Making The Strawberry Muffin Batter

  • First of all, line a deep muffin tin with 12 tulip wrappers.
  • Whisk together the butter, sugar and salt in a large bowl, until pale and creamy.
  • Add the eggs, vanilla and almond extract and the chopped fresh strawberries to the bowl. Whisk together.
  • Next add the ground almonds, flour, baking powder and chopped dried strawberries. Tossing the strawberries in the flour will help stop them from sinking to the bottom of the muffin.
  • Mix all of the ingredients together so that they are fully combined. Over mixing will cause the muffins to become tough.
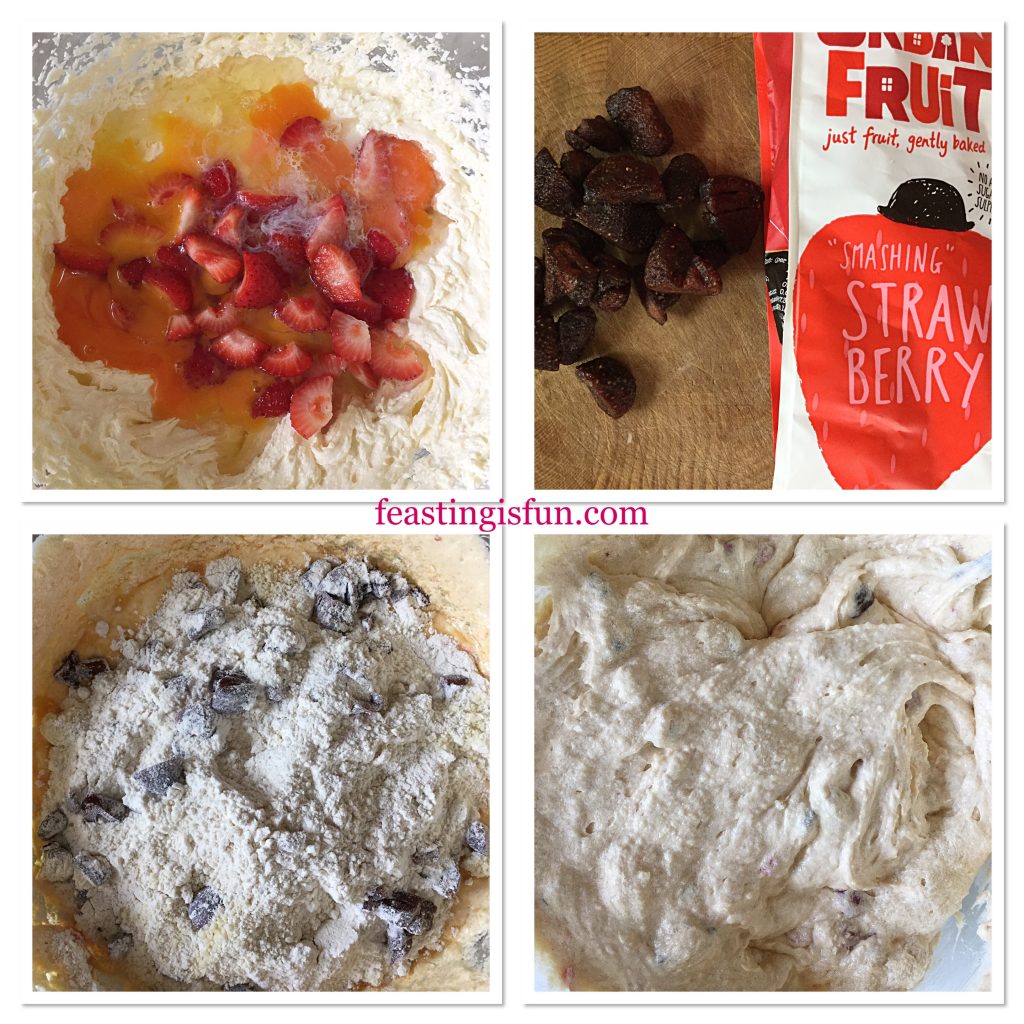
FF Double Strawberry Almond Muffins
Making the muffin batter.

Filling The Tulip Muffin Cases

  • Using a large, 5cm/2″ ice cream scoop, add one scoop of batter to each tulip case. Divide any remaining batte evenly between the 12 cases.
  • Sprinkle some flaked almonds on top of each unbaked muffin. Again dividing the almond flakes, so each muffin has an equal amount.
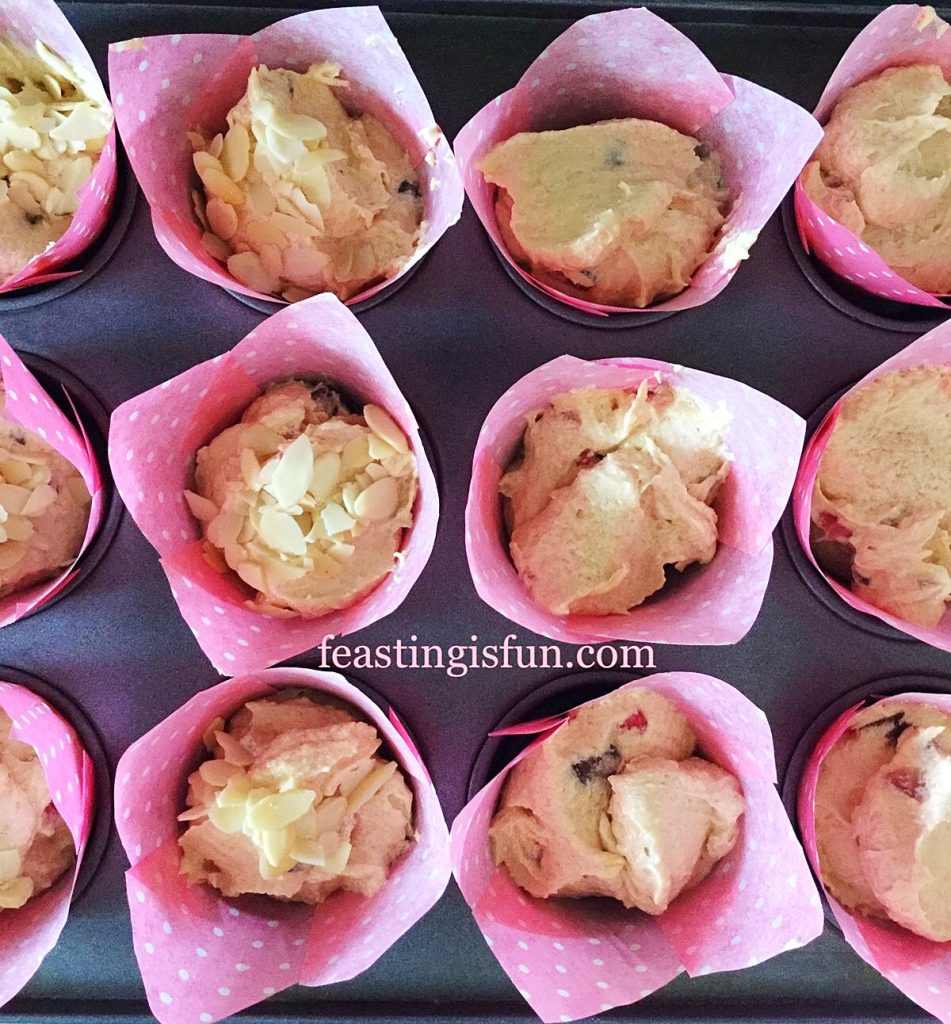
Adding flaked almonds to the top of the muffins before baking.
Adding flaked almonds to the top before baking.

Baking The Muffins

  • Place the muffin tin into the centre of the oven and bake for 40-45 minutes.
  • The muffins are baked when they turn golden brown and are firm to a light touch. Over cooked muffins will be dry so start checking at 35 minutes.
  • Note: if baking using smaller cases, the baking time will need to be reduced.
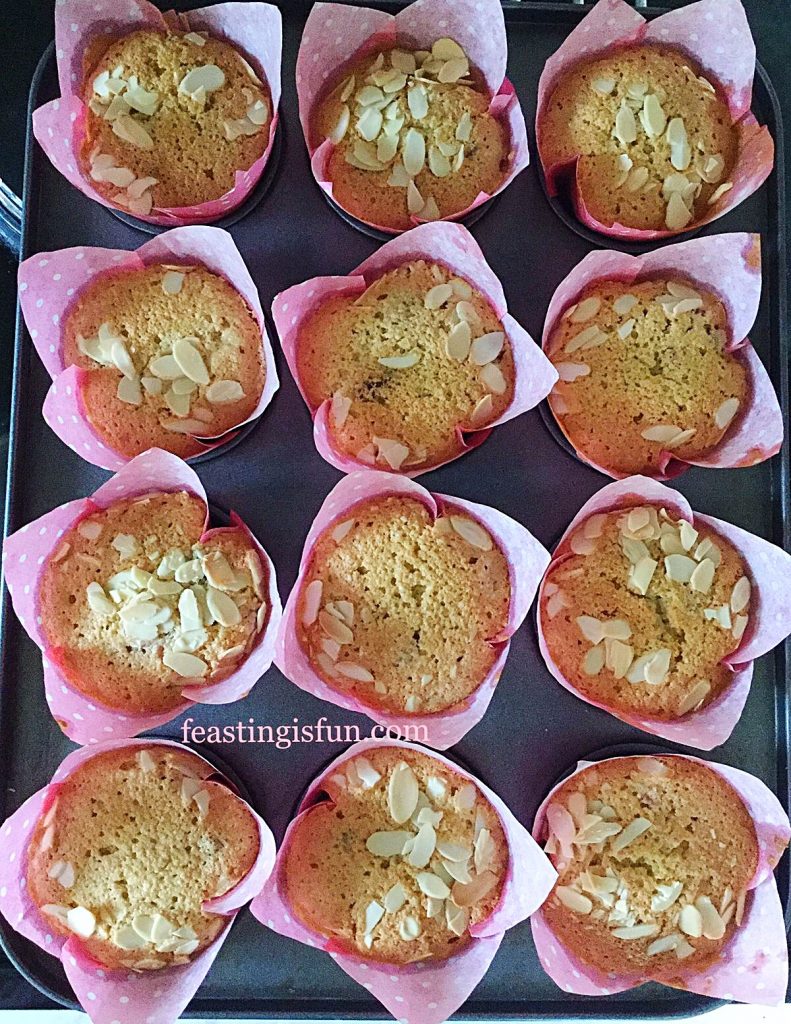
Muffins in tulip wrappers cooling in the tin.
Freshly baked muffins cooling in the tin.
  • When using tulip cases leave the muffins to cool completely in the tin. For muffin/cupcake cases, leave to cool for 10 minutes in the tin and then transfer to a cooling rack.
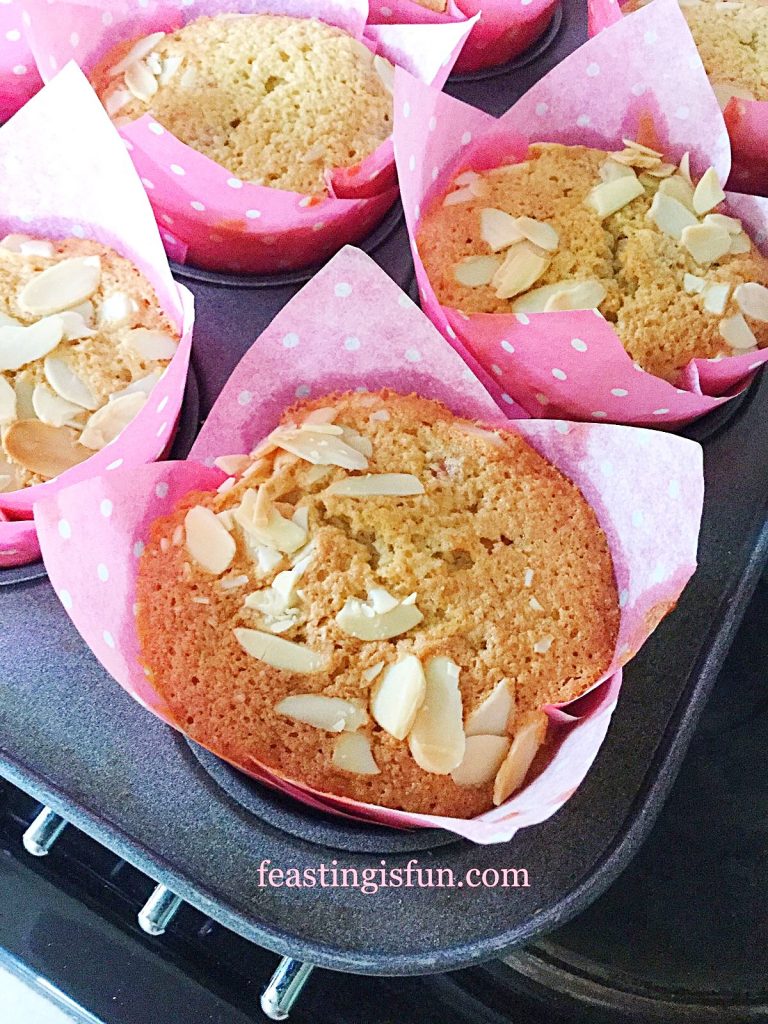
Muffins baked in a muffin tin.
Double Strawberry Almond Muffins

Double Strawberry Almond Muffins are best served slightly warm, or cold. Also serve with a cup of tea, or fresh fruit juice.
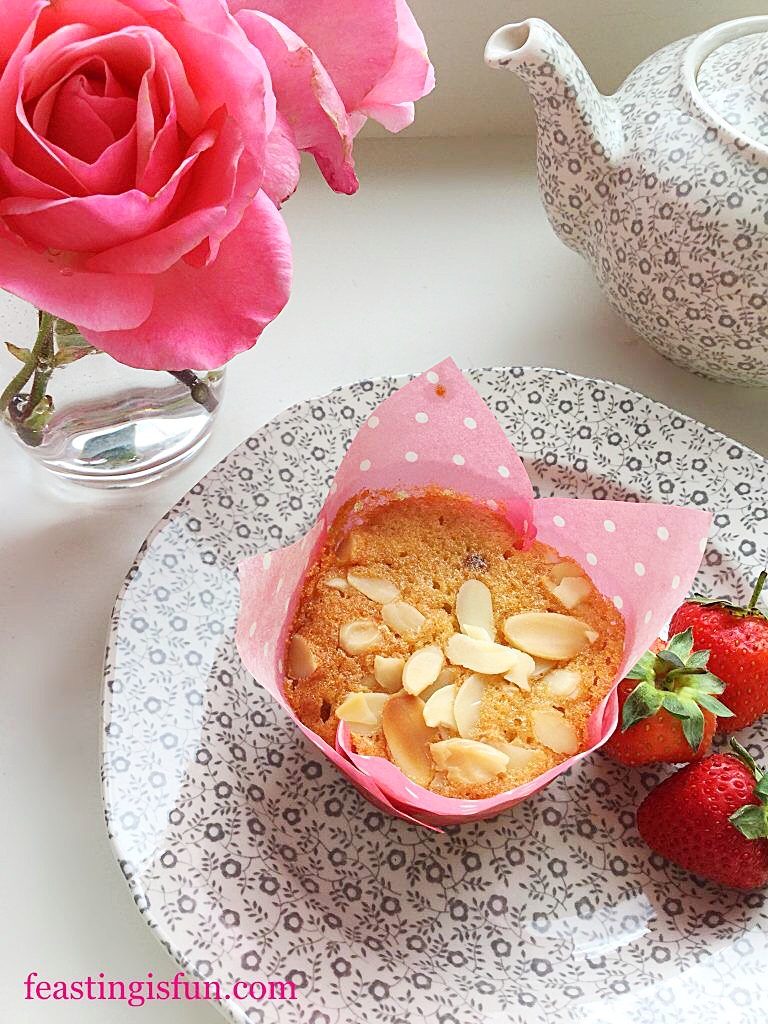
Muffin served with fresh strawberries.
Double Strawberry Almond Muffins

Muffins are great for breakfast, packed lunches and beating late afternoon hunger pangs.

Muffins containing fresh fruit are best eaten within 3 days of making. Store in an airtight container, placed in the fridge during hot weather.

If you have enjoyed this recipe for Double Strawberry Almond Muffins you may also like these:

Blueberry Lemon Shortbread Cake Bars
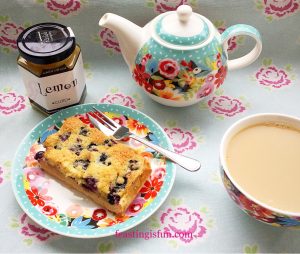
Blueberry Lemon Shortbread Cake Bars

Cheese Bacon Breakfast Muffins

Cheese Bacon Breakfast Muffins

Cherry Bakewell Cookies

Cherry Bakewell Cookies

Because these muffins take less than ten minutes to make, they really are a quick, delicious, breakfast treat. Knowing that, whilst at school, college or work, my family has good, wholesome food is important to me.

Dried strawberries are widely available from supermarkets, including Ocado, Waitrose and Amazon U.K.

So, whatever r you are making, baking and creating in your kitchens have fun preparing your feast.

Sammie xx

No part of this post may be reproduced without the explicit, written consent of the owner. For more details please see my Disclosure Policy.


Share
Facebooktwitterpinterestlinkedintumblr

Princess Sparkle Peach Melba Iced Cake

Share
Facebooktwitterpinterestlinkedintumblr

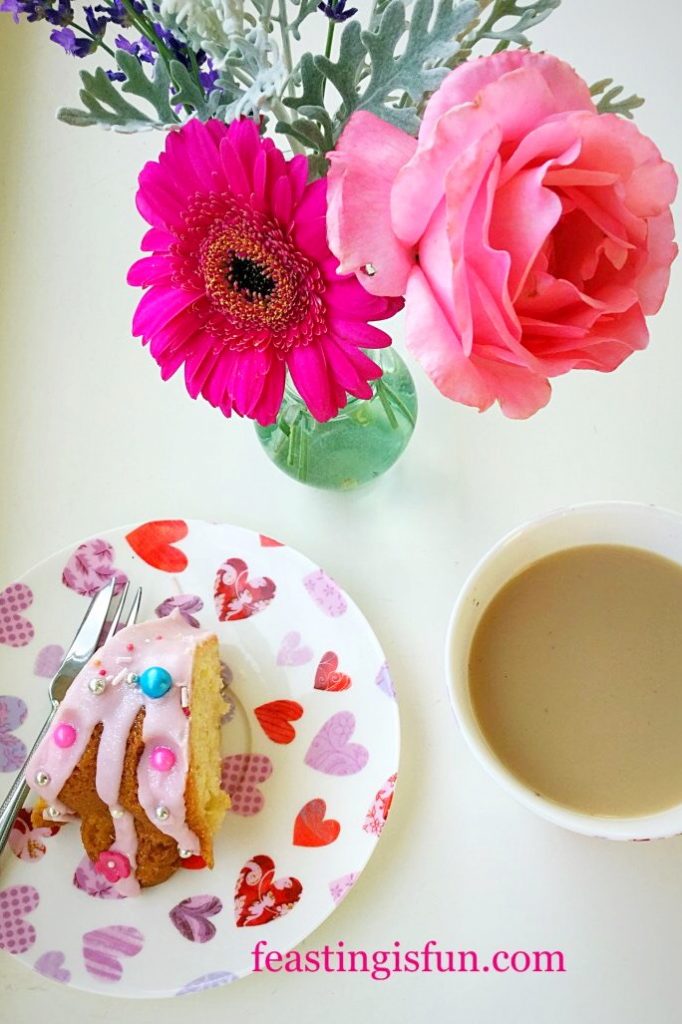
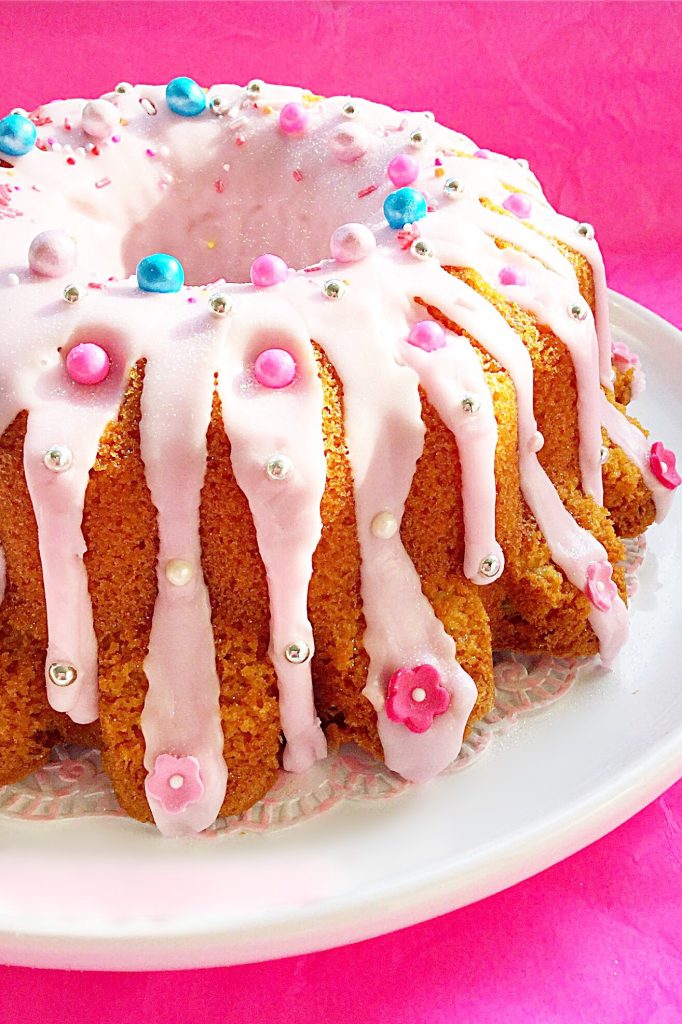
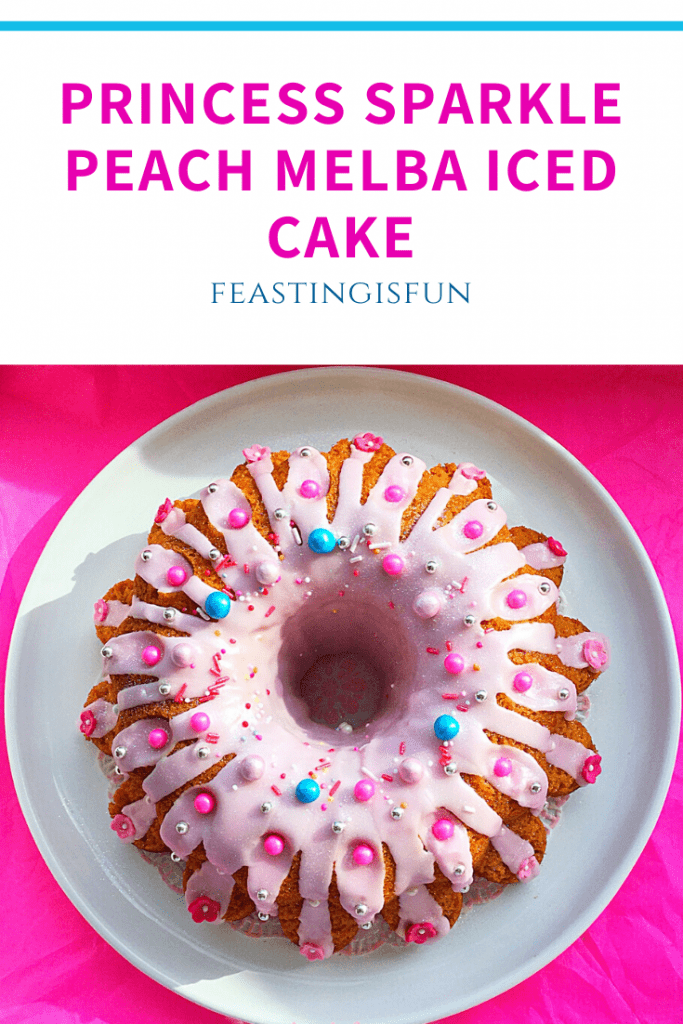
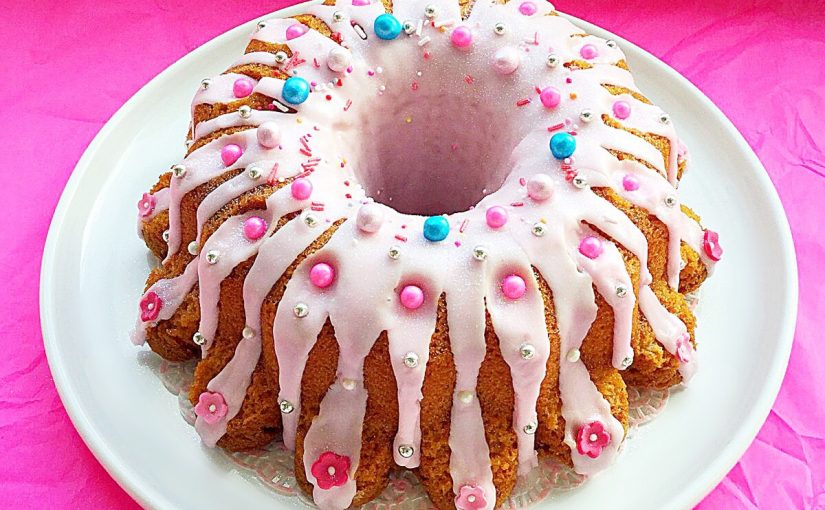
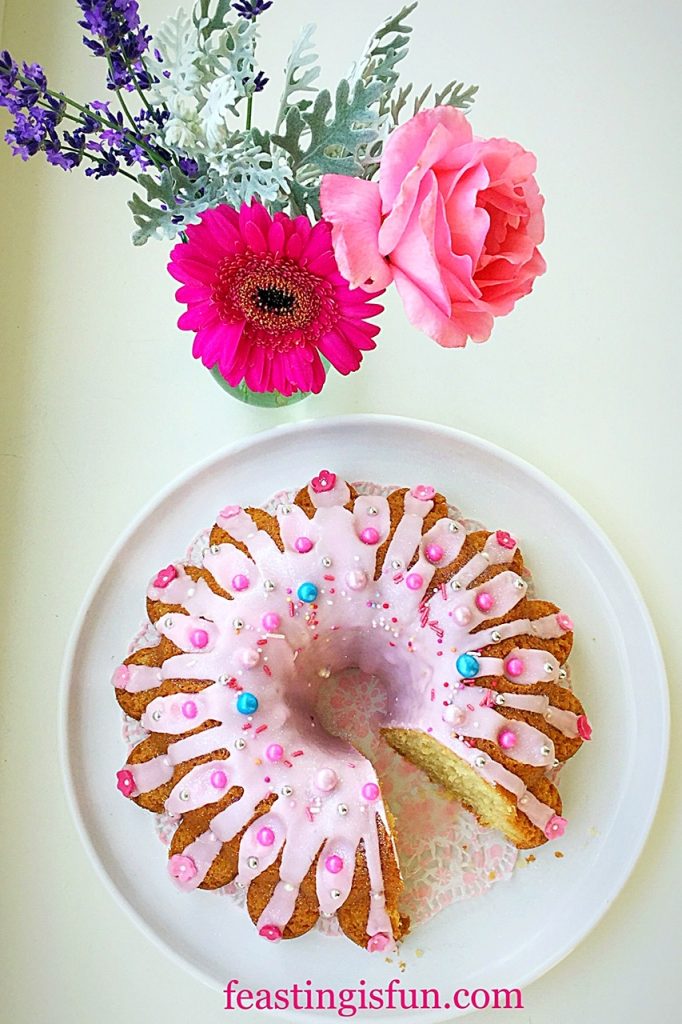
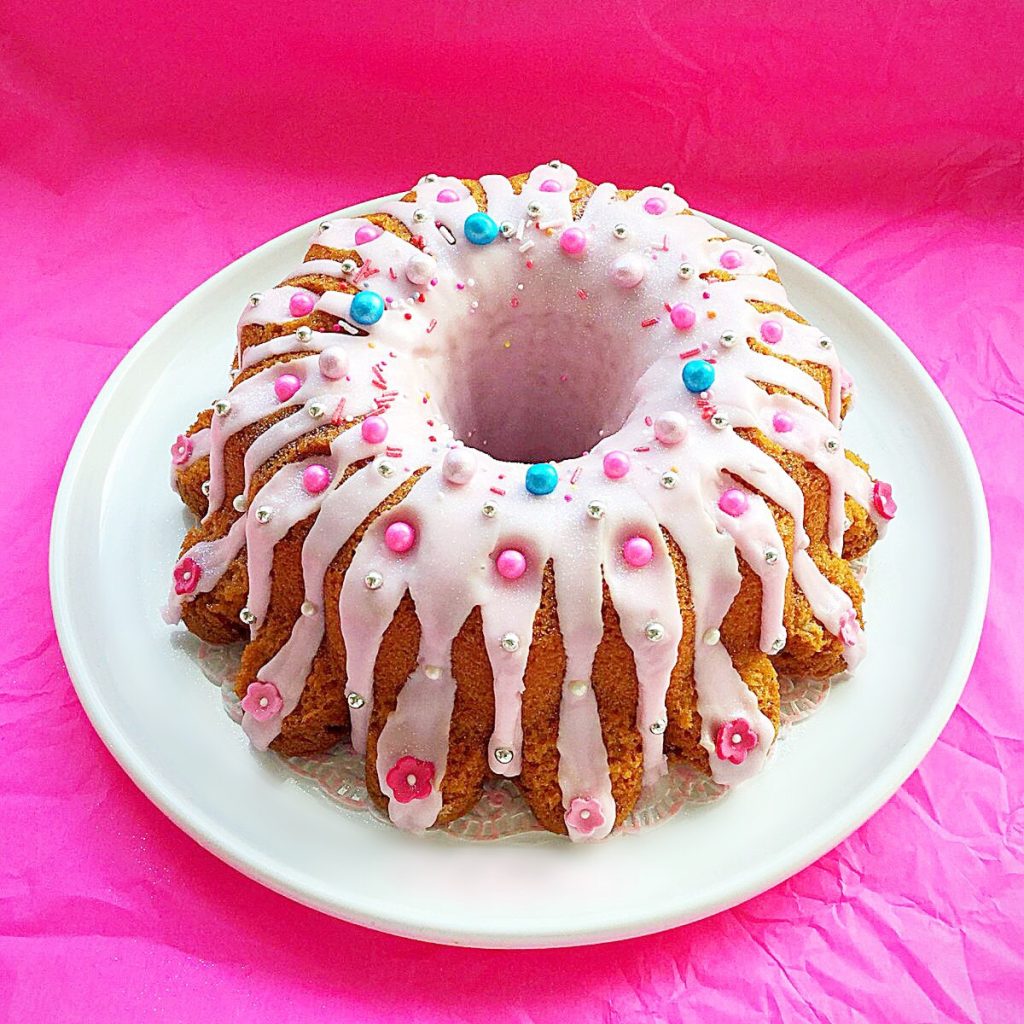
Today we celebrate National Pink Day.  It can seem as though there is a national day for just about anything. Whoever thinks these things up? Yet, as our girls have grown, passing through the ‘pink’ stage, I have grown to love the colour pink. Rather than the sickly pink birthday cakes of their toddler years this Princess Sparkle Peach Melba Iced Cake provides an elegant update. Tastefully decorated and delicious to eat.

While raspberry subtly flavours the cake itself, peach bellini icing creates the overall peach melba flavour. And, having a light,  fruity flavour, this cake really suits warm summer celebrations. Yet, you get to decide. If a fruity, glittering cake is needed, this cake fits the bill perfectly. A splash of colour and a sprinkle of sparkle may be what is needed at anytime of the year!

Princess Sparkle Peach Melba Iced Cake

Since this cake is both pretty and tasty it deserves to be shared. Fun and perfectly pretty, anyone who loves the colour pink will be thrilled with this cake. Also, this is the perfect cake for those who prefer fruity flavours, rather than chocolate ones. Or, for those of us who enjoy both, the combination of raspberry and peach is a refreshing change.

Perfect party cake.

Recipe: Princess Sparkle Peach Melba Iced Cake serves 10-12

250g/9oz Unsalted Butter

250g/9oz Caster Sugar

1/4tsp Salt – I use Maldon

1tsp Vanilla Extract – I use Nielsen-Massey

5 Large Free Range Eggs

2.5ml/ approx 1/2tsp or 50 drops of Natural Raspberry Flavour – I use Foodie Flavours natural flavouring drops

275g/10oz Plain White Flour

2tsp Baking Powder

400g Peach Bellini Flavoured icing sugar from Sugar and Crumbs

Food Colouring Gel – I used Wilton pink.

Assorted different sprinkles and dragee balls.

Preheat oven to 160C/140C fan, gas mark 3, 325F.

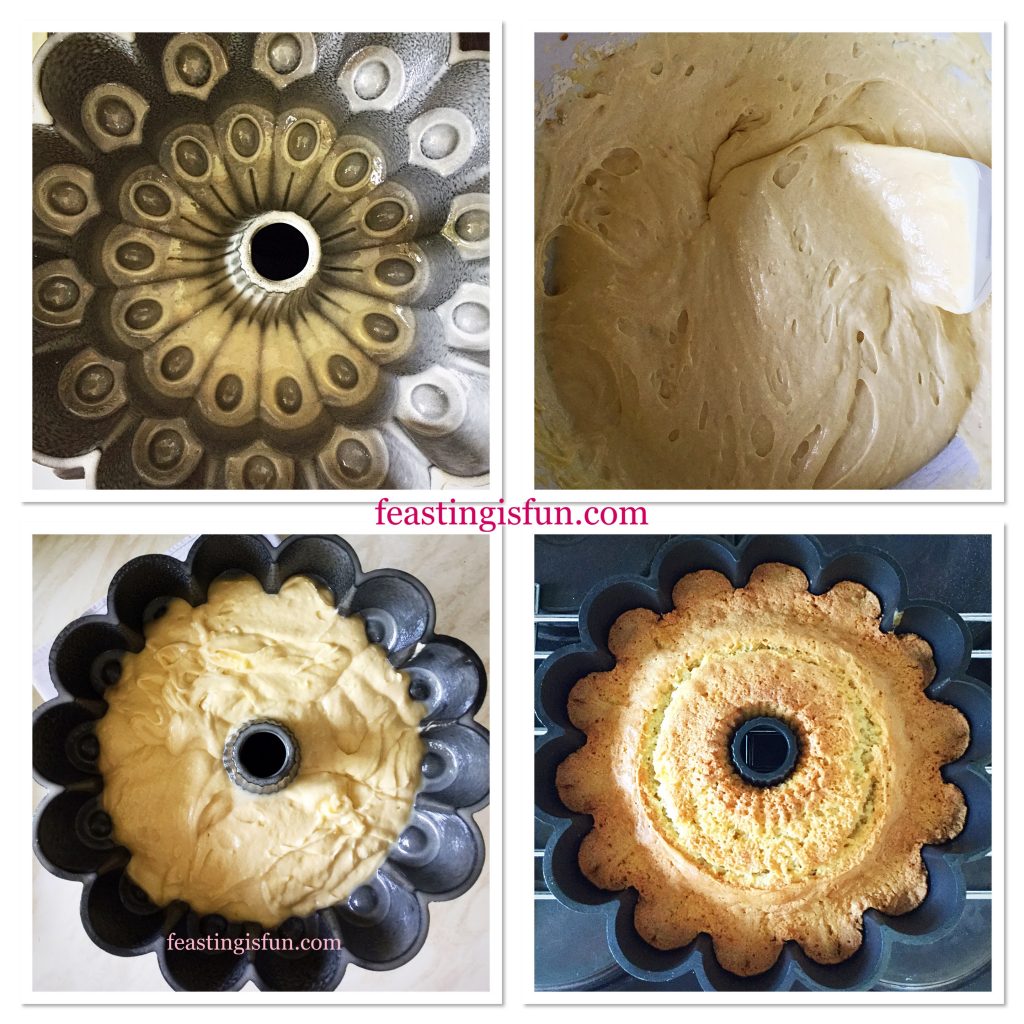
Note: This cake is baked in a 10 cup ring mould cake tin. If using a Bundt pan, a 10 cup size will also be needed.

Prepare the tin by spraying cake release spray thoroughly to the inside of the tin, using a pastry brush to ensure the cake release fully covers the inside of the tin. I recommend Wilton.

Making And Baking The Moulded Cake

  • Place the softened butter, salt and sugar into a large bowl. Whisk until pale, creamy and no grittiness can be detected, by rubbing a little of the mixture between your forefinger and thumb.
  • Next add the vanilla, raspberry flavour and all five eggs.
  • Finally sieve the flour and baking powder into the bowl.
  • Whisk slowly, until all of the ingredients have come together to form a cake batter.
  • Stir the cake batter with a spatula to fully combine.
  • Spoon the cake batter into the prepared tin. Ensure the top of the cake is level.
  • Place the cake tin into the centre of a preheated oven and bake for 55-65 minutes.
  • The cake is baked when it is a golden colour, starts to shrink away from the sides and an inserted skewer comes out clean.

FF Princess Sparkle Peach Melba Iced Cake

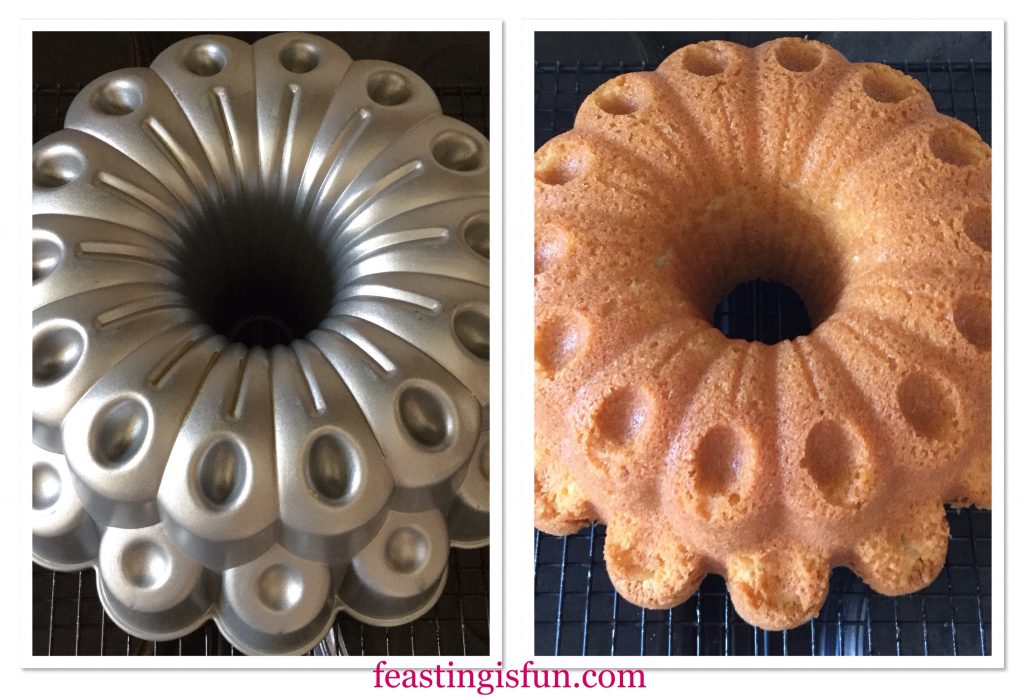
  • As soon as the cake is baked remove from the oven and leave to cool for ten minutes in the tin before turning it out.
FF Princess Sparkle Peach Melba Iced Cake
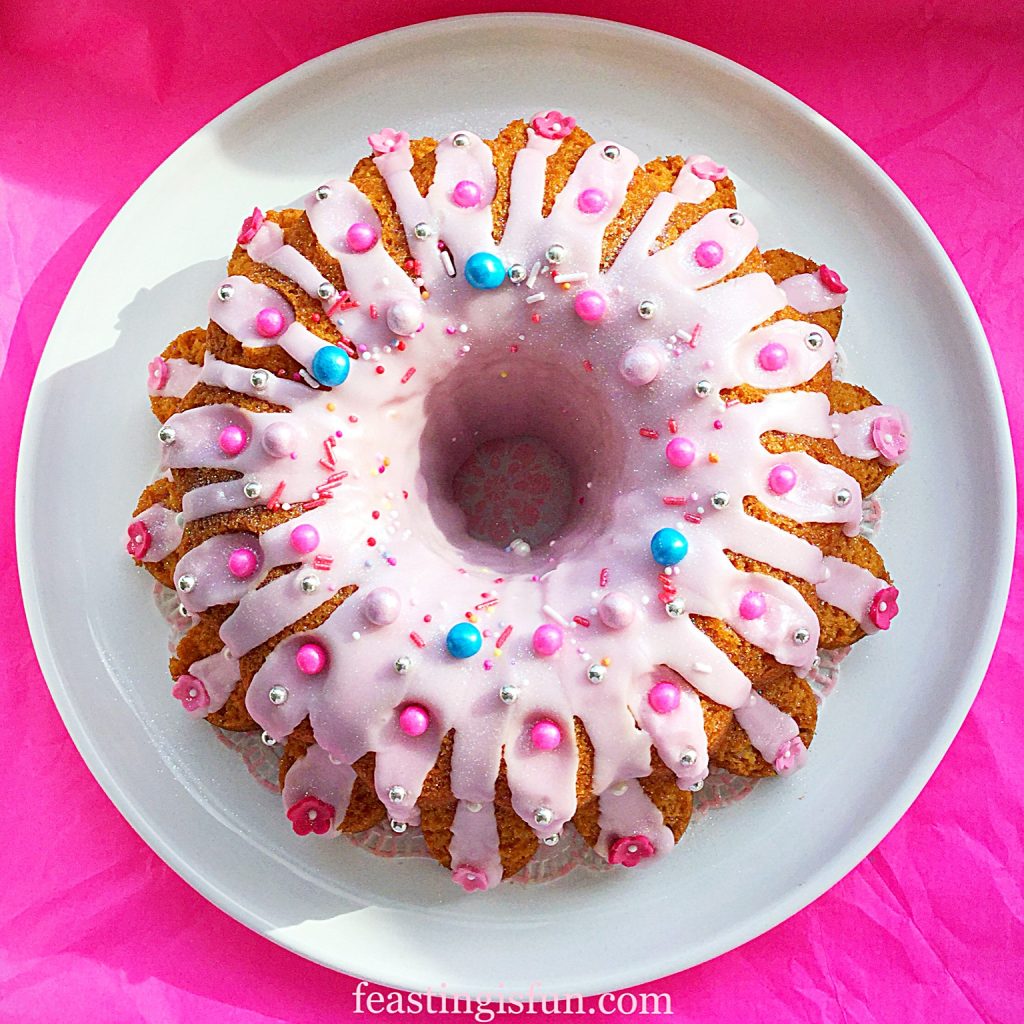
The detail of a ring mould or Bundt pan instantly gives this cake the wow factor.
  • Allow the turned out cake to fully cool before decorating.

Decorating The Princess Sparkle Cake

  • While the cake cools, assemble everything needed to decorate the cake.
  • Likewise the icing can be made.
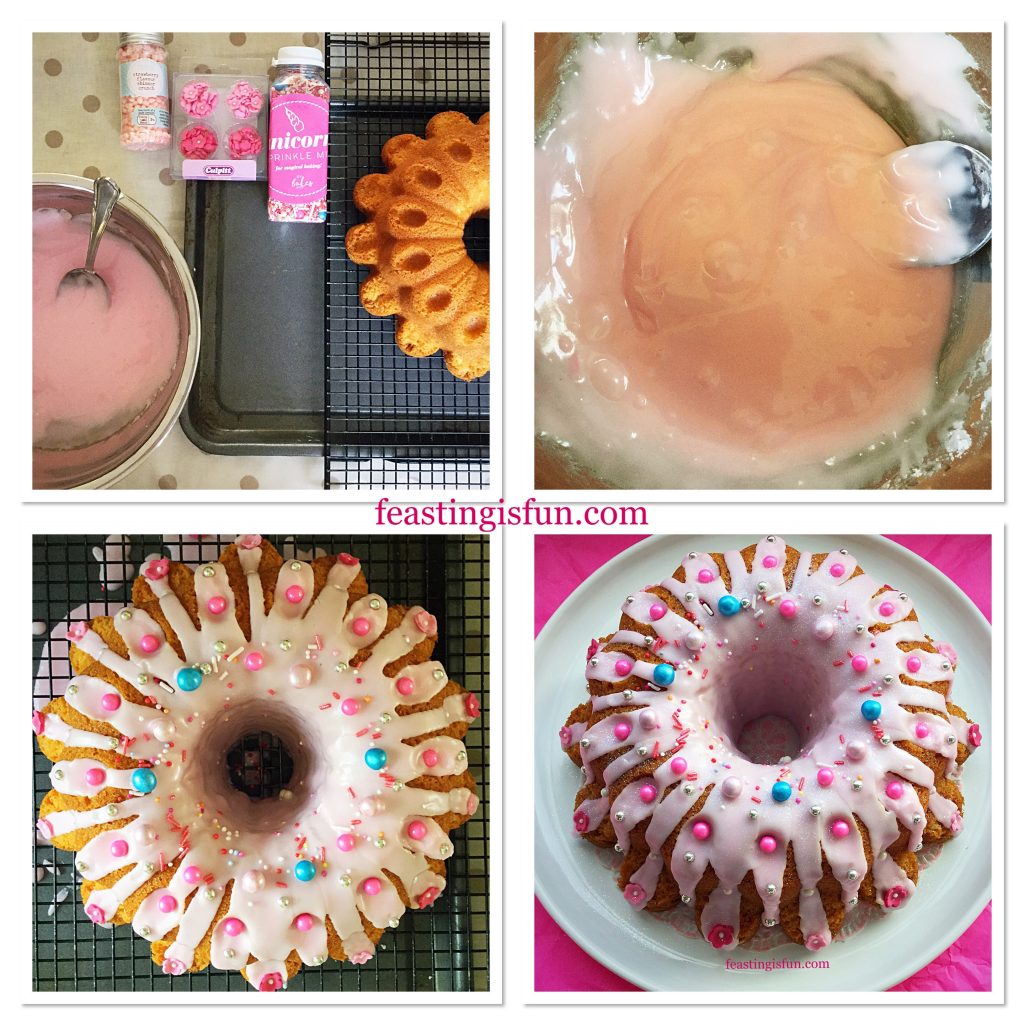
  • Sieve the flavoured icing sugar into a bowl.
  • Add a few drops of water to the bowl and then, using a cocktail stick add a little of the coloured gel.
  • Stir, adding drops of water to reach the desired thick, yet just dripping, consistency.
  • Add extra colour now if required.
  • Mix thoroughly to ensure even colouring.
  • As soon as the cake is cooled place the cooling rack across a clean, large, baking tray.
  • Starting at the top of the cake, use a spoon to drizzle the icing.
  • Work with the shape of the cake. Using the icing is to enhance, and emphasise. Also it aids the addition of sprinkles.
  • As soon as the icing is finished decorate with sprinkles. Press the larger balls and flowers into the icing as it sets.
  • Finally, place the fully decorated cake on to a plate, board or cake stand and leave to fully set.
FF Princess Sparkle Peach Melba Iced Cake
Bringing the Princess Sparkle Peach Melba Iced Cake to life.

Take a moment to look at your outstanding creation. Made by you. However the cake that you’ve designed turns out, it will be unique. Because, no other cake can impart the love and flair given while making this.

Princess Sparkle Peach Melba Iced Cake

Serve this cake as party centre piece, for your princess or at a beautiful afternoon tea.

If you have enjoyed this recipe for Princess Sparkle Peach Melba Iced Cake you may also like these:

Strawberry Chocolate Vanilla Drip Cake

Strawberry Chocolate Vanilla Drip Cake

Lemon Lime Gin Heart Bundt Cake

Lemon Lime Gin Heart Bundt Cake

Chocolate Heart Topped Rose Bundt Cake

Chocolate Heart Topped Rose Bundt Cake

Finally, I highly recommend investing in a ring cake tin or a Bundt pan. Since they create a unique, baked cake canvas on which to decorate. While there are many ways to decorate a cake, the shape of moulded tins and Bundts create an instant beautiful shape. Most importantly, if you are not a confident cake decorator, they are a wise investment.

So, whatever you are making, baking and creating in your kitchen, have fun preparing and sharing your feast.

Sammie xx

No part of this post may be reproduced or duplicated without the written permission of the owner. Please see my Disclosure Policy.

Share
Facebooktwitterpinterestlinkedintumblr

Baked Whole Epoisses De Bourgogne

Share
Facebooktwitterpinterestlinkedintumblr

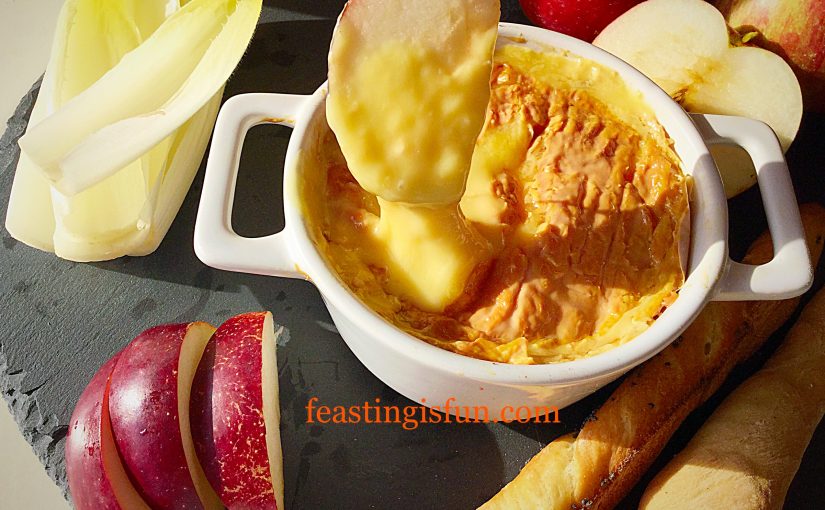
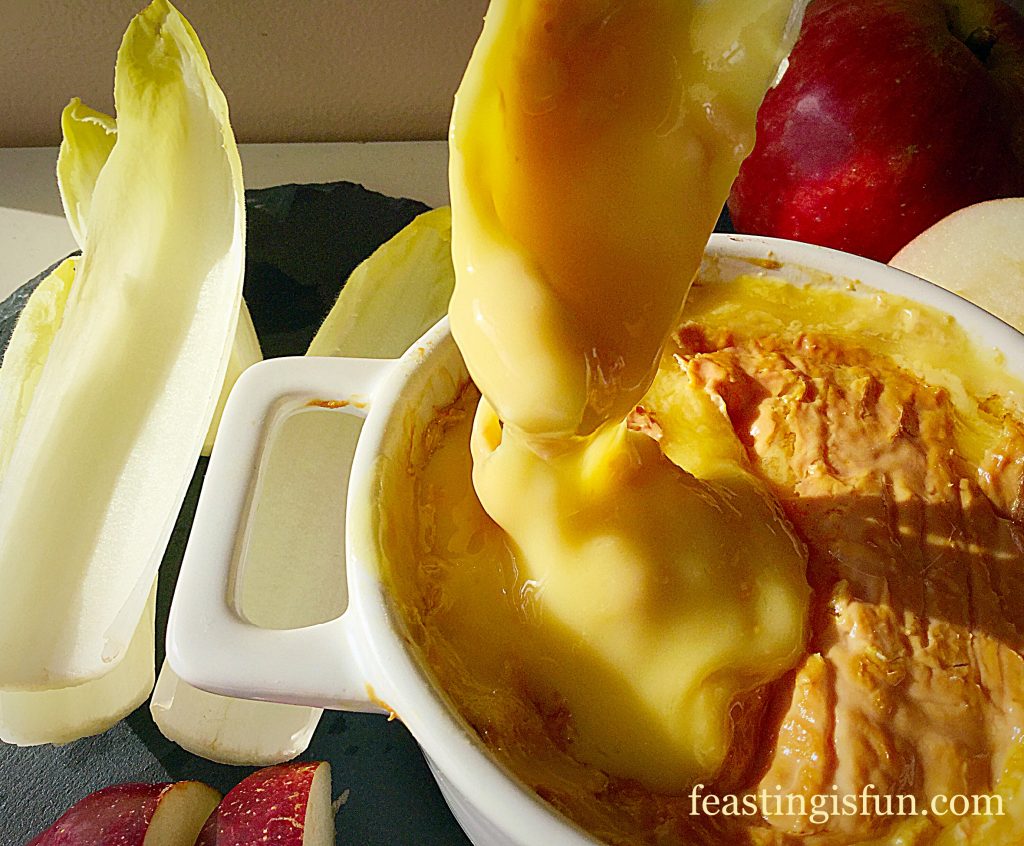
Baked Whole Epoisses De Bourgogne bubbling, gooey, pungent cheese.

Do you like cheese? Then you will love this rich, melted Baked Whole Epoisses De Bourgogne, perfect for dipping, dunking and feasting on.

FF Baked Whole Epoisses De Bourgogne
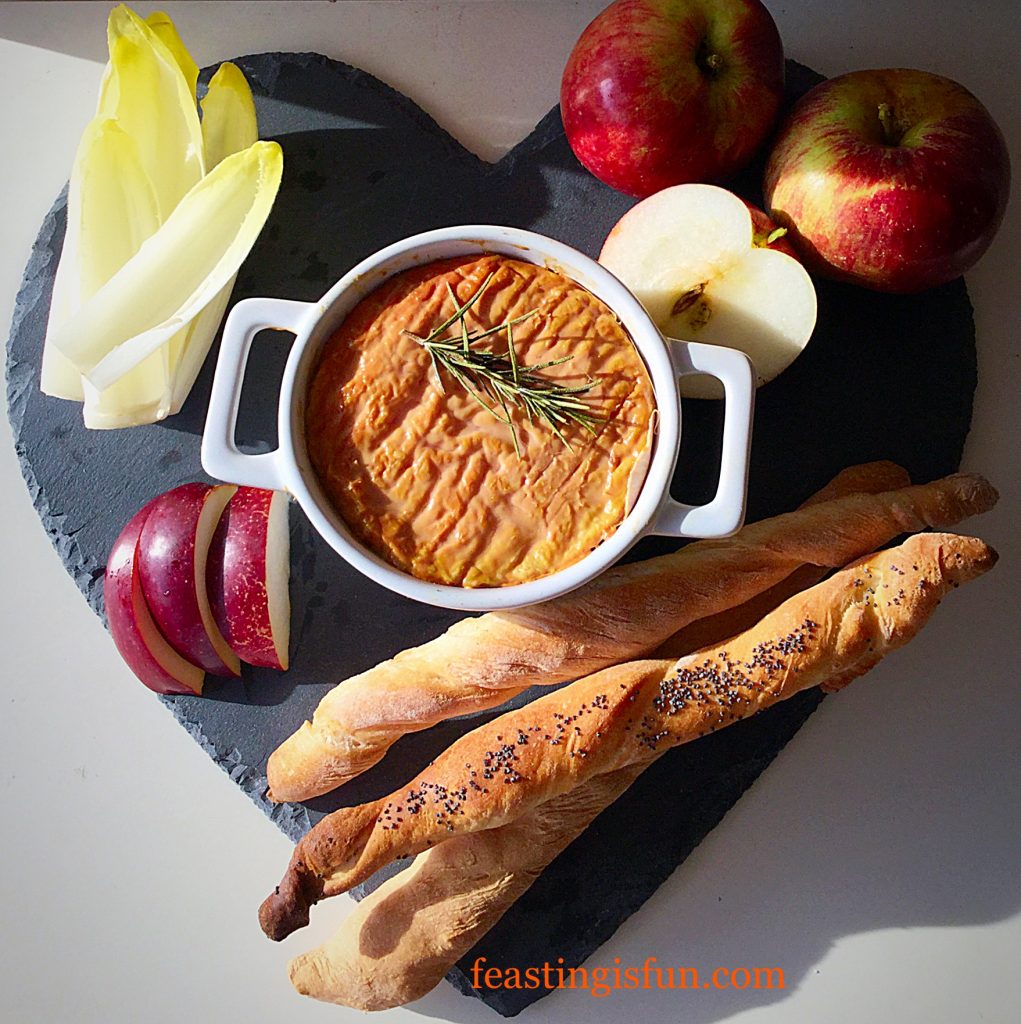
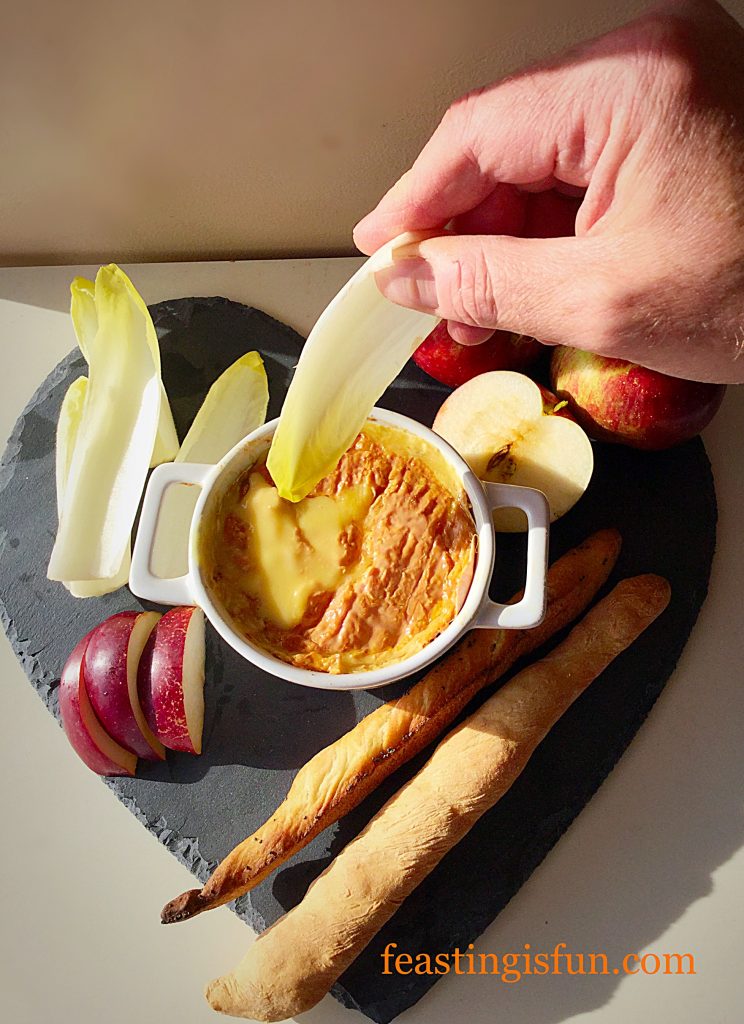
Baked Whole Epoisses De Bourgogne with homemade breadsticks, apple and chicory.

When asked by Pong Cheese to bake this heady Epoisses De Bourgogne, I knew that I would need my hubby’s help. First, I needed a hand model and also I absolutely knew he would relish the taste of this incredible cheese. A semi-soft to soft, pasteurised cow’s cheese, washed in Marc De Bourgogne, creating a spicy, pungent cheese. Most importantly, this incredible cheese is only made in the Burgundy region of France and therefore has an AOC – authentication of origin certificate.

FF Baked Whole Epoisses De Bourgogne
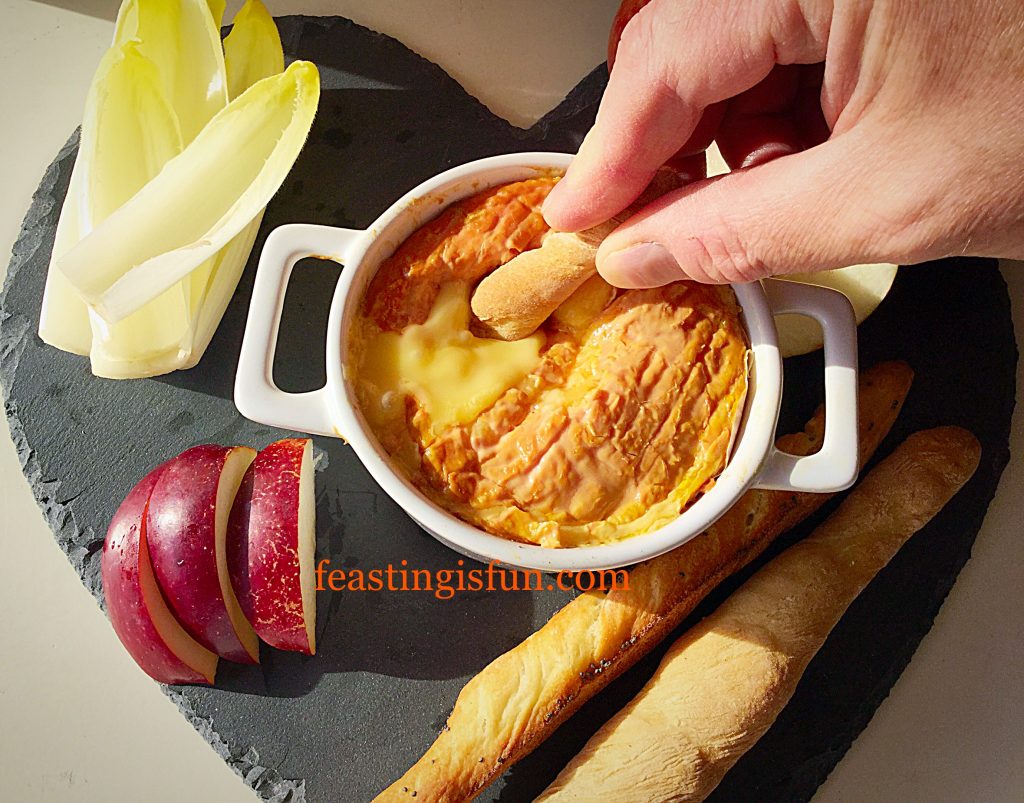
Baked Whole Epoisses De Bourgogne breaking through into the molten cheese.

Homemade breadsticks break through the crust to reveal the warm, bubbling, unctuous cheese below. The full taste is revealed when eaten with bread. Salty, spicy and pungent, any cheese lovers dream.

FF Baked Whole Epoisses De Bourgogne

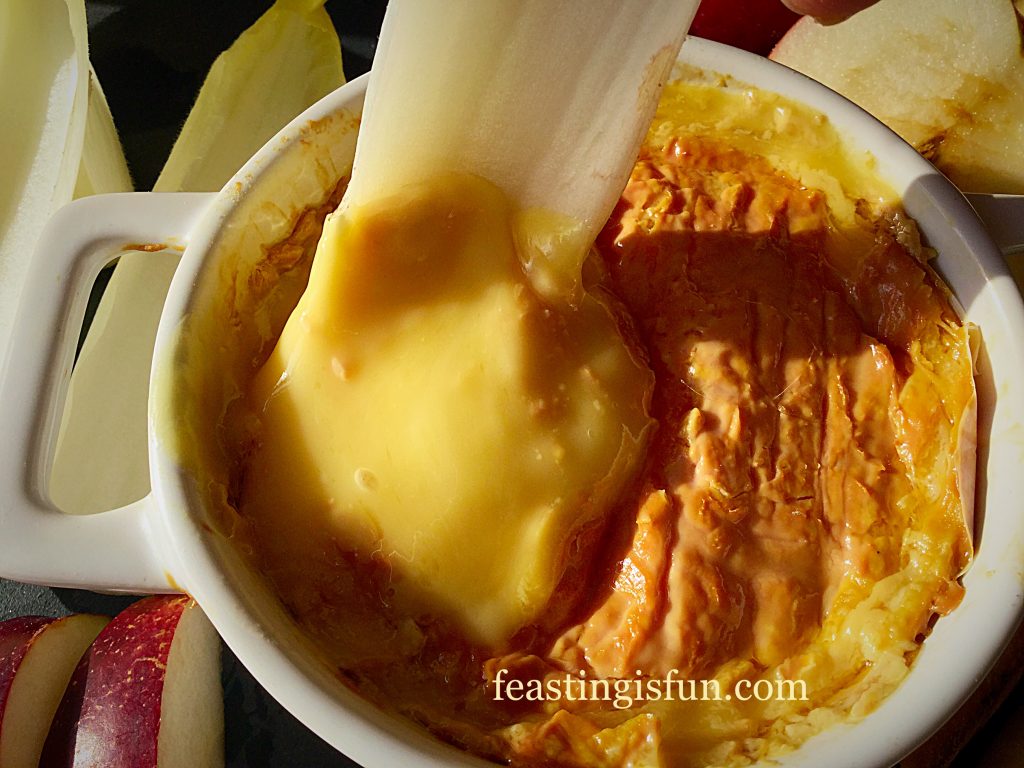
Chicory, with it’s crunch and slightly bitter flavour is a perfect accompaniment to the melted cheese. While sweet, red apple provides contrast to the saltiness of the cheese. This for me was my favourite flavour pairing, my husband preferring the full flavour of the cheese, unhindered by the breadsticks.

FF Baked Whole Epoisses De Bourgogne

While, this is hardly a recipe, the method and increased flavour of the cheese, means it is extremely worthwhile taking the extra step to bake it.

Recipe: Baked Whole Epoisses De Bourgogne

250g Whole Epoisses De Bourgogne available from Pong Cheese

Sprig of rosemary  – either fresh from the garden or order a plant from most supermarkets such as Waitrose

Breadsticks, chicory, apple, pear, crackers for dunking

Method: Preheat the oven to 180C/160C fan, gas mark 4, 350F.

Baking The Cheese

You will need an ovenproof dish that is about the same size as the Epoisses. A Camembert dish will be fine, any bigger and the cheese will spread as it bakes.

  • First, remove all of the packaging from the Epoisses.
  • Next place the whole cheese into the ovenproof dish, laying a sprig of rosemary on the top.
  • Now place the ovenproof dish on to a baking tray and place in the middle of the preheated oven.
  • Bake the cheese for 15 minutes, or until you can see it bubbling around the side of the dish.
  • Once baked remove the baking tray, with the bubbling cheese in its dish, from the oven.
  • Allow the cheese to sit for a couple of minutes as it will be extremely hot.

Serve the cheese in its dish with a selection of fresh fruit, vegetables and bread or crackers. Most of all share with good company and an excellent glass of wine!

FF Baked Whole Epoisses De Bourgogne
Baked and ready for enjoying.

Sharing this baked cheese, either with a group of friends, or with the one that you love, infinitely improves the whole experience of eating it. Since memories are created and observations exchanged, whilst feasting together.

If you have enjoyed this recipe you may also like these:

Bath Soft Cheese Chilli Tarts

FF Baked Whole Epoisses De Bourgogne
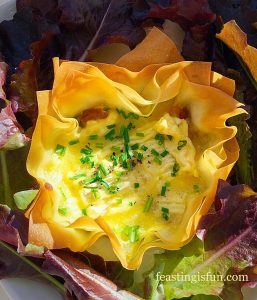
Bath Soft Cheese Chilli Tarts an ideal appetiser or light lunch.

Goddess Cheese Pine Nut Muffins

FF Baked Whole Epoisses De Bourgogne
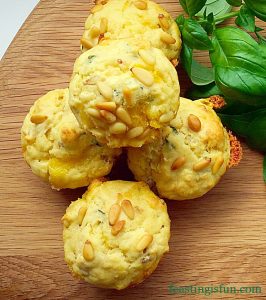
Goddess Cheese Pine Nut Muffins glorious flavour & texture.

Mini Sparkenhoe Red Leicester Tarts

FF Baked Whole Epoisses De Bourgogne
Mini Sparkenhoe Red Leicester Tarts a delicious canapé.

Cheese is such a versatile ingredient. Whether baked and eaten as is, piled on top of chilli pickle in a crunchy filo tart, or simply eaten cold with crackers, it remains one of my favourite ingredients. As with most things that have a relatively high fat content, their flavour truly comes alive when heated. Baking the Epoisses De Bourgogne certainly brought all of its delicious and interesting flavours to the fore.

Do you enjoy using cheese as an ingredient?

Have fun baking, making and creating in your kitchens, preparing a feast.

Sammie xx

Pong Cheese supplied me with the Epoisses De Bourgogne for this recipe. All opinions, views, photographs and content are my own. Please see my Disclosure Policy.

Share
Facebooktwitterpinterestlinkedintumblr

Orange Lemon Ombre Piped Rose Cake

Share
Facebooktwitterpinterestlinkedintumblr

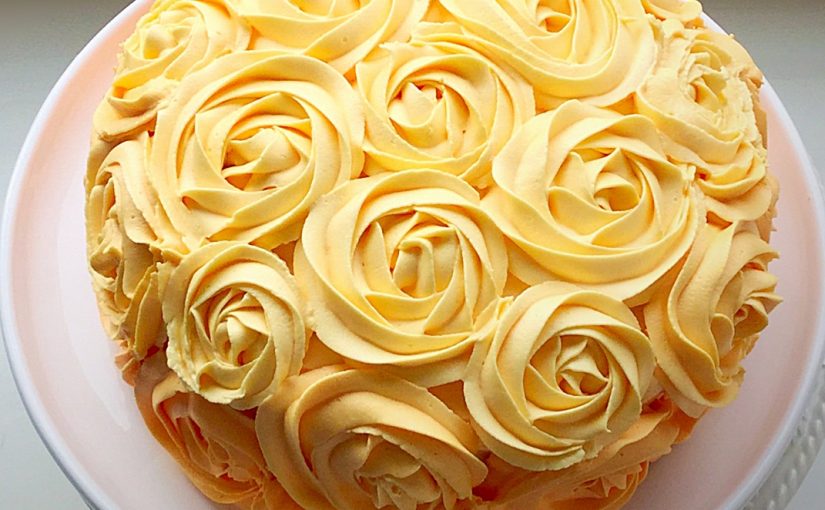
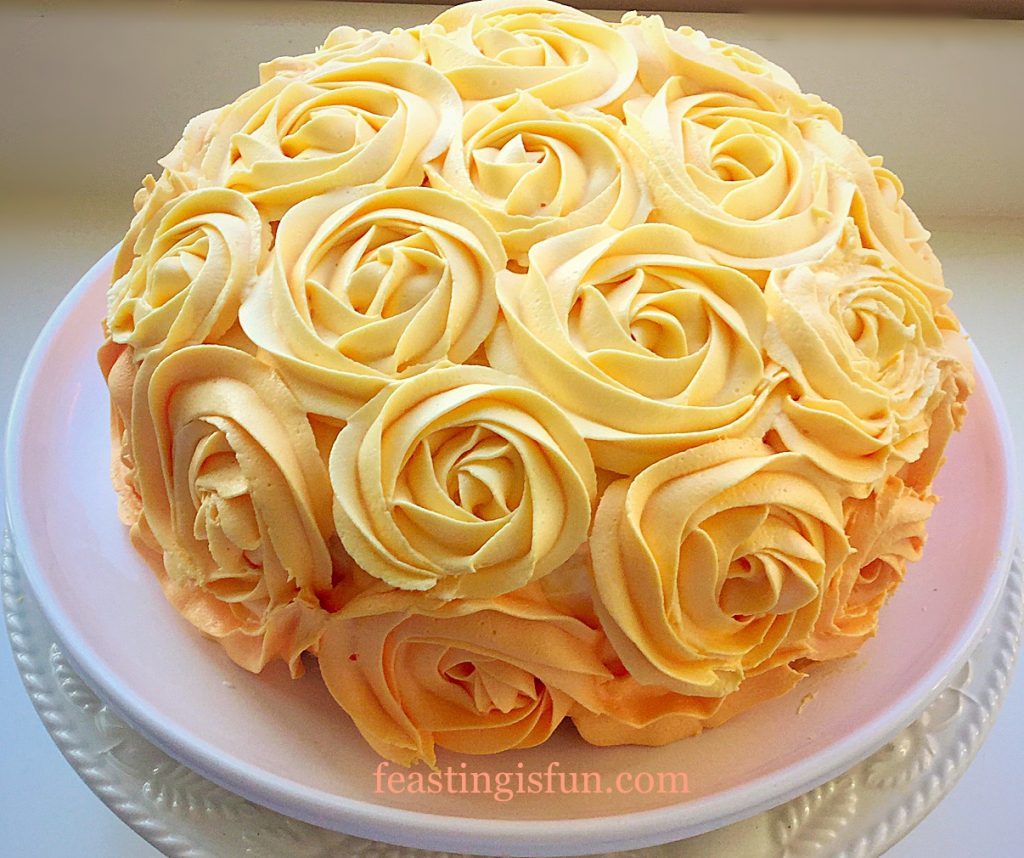
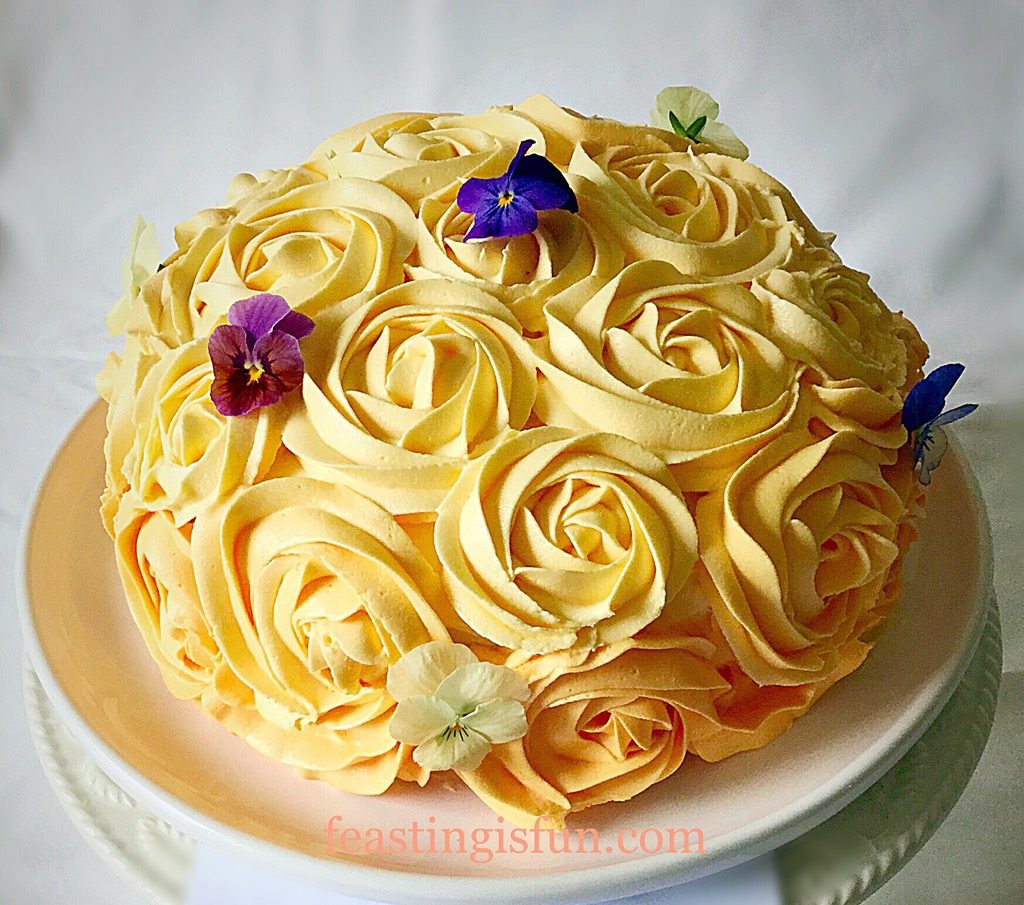
Birthday season is upon us in the Feasting family. Cakes, bakes, canapés and celebration continue from now, right through to the New Year. Therefore, making this Orange Lemon Ombre Piped Rose Cake with family in mind, resulted in a beautifully decorated, delicious cake, perfect for guys and girls of all ages.

FF Orange Lemon Ombre Piped Rose Cake
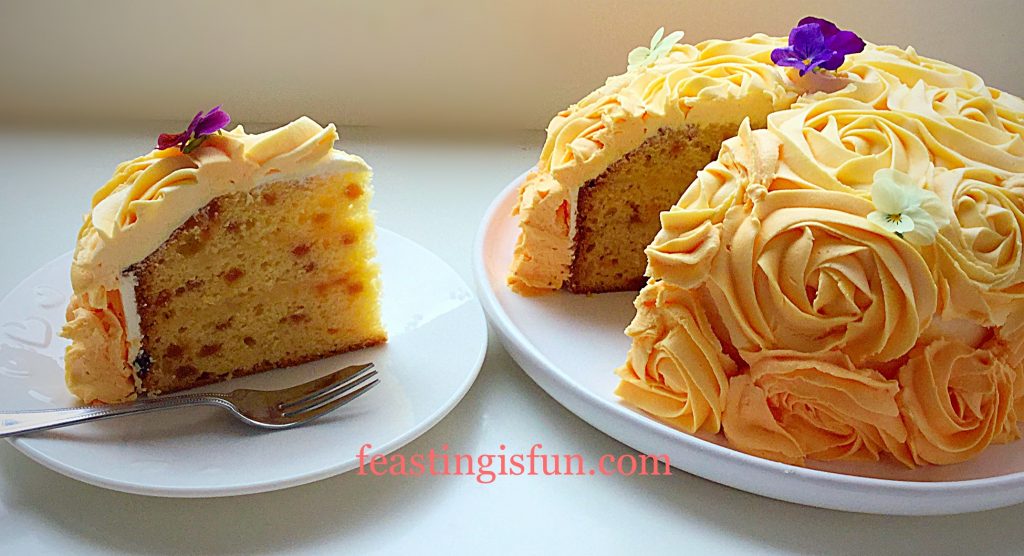
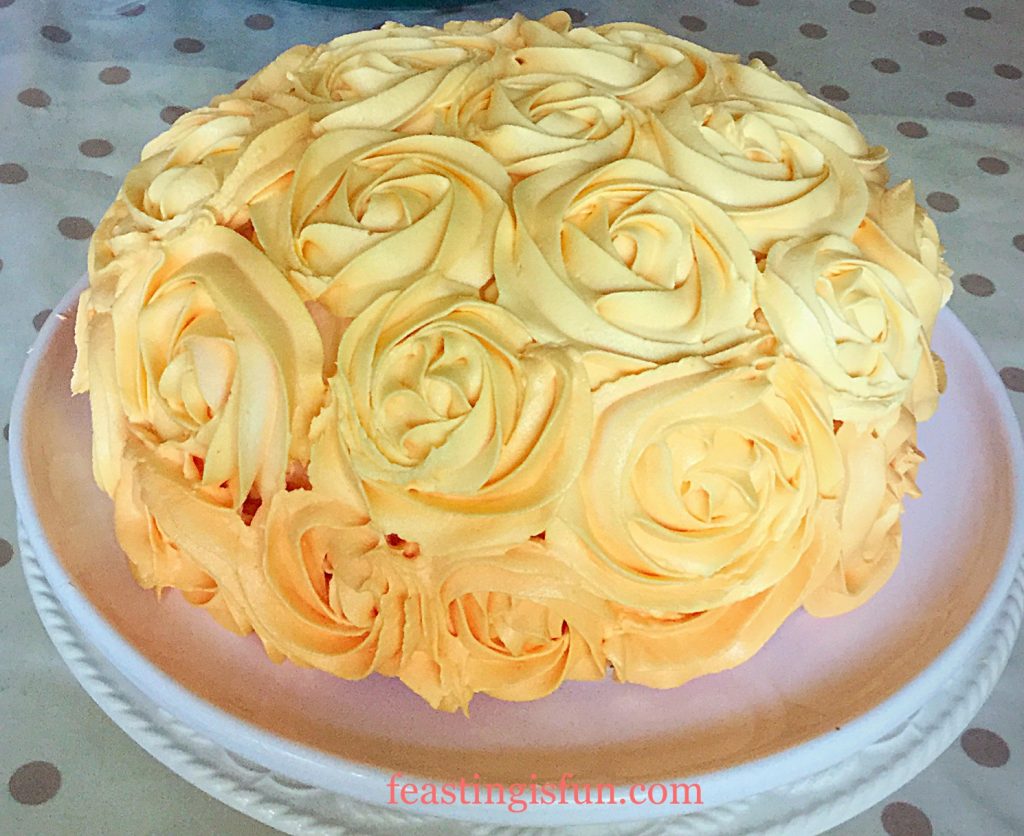
Orange Lemon Ombre Piped Rose Cake delicious citrus flavours all the way through.

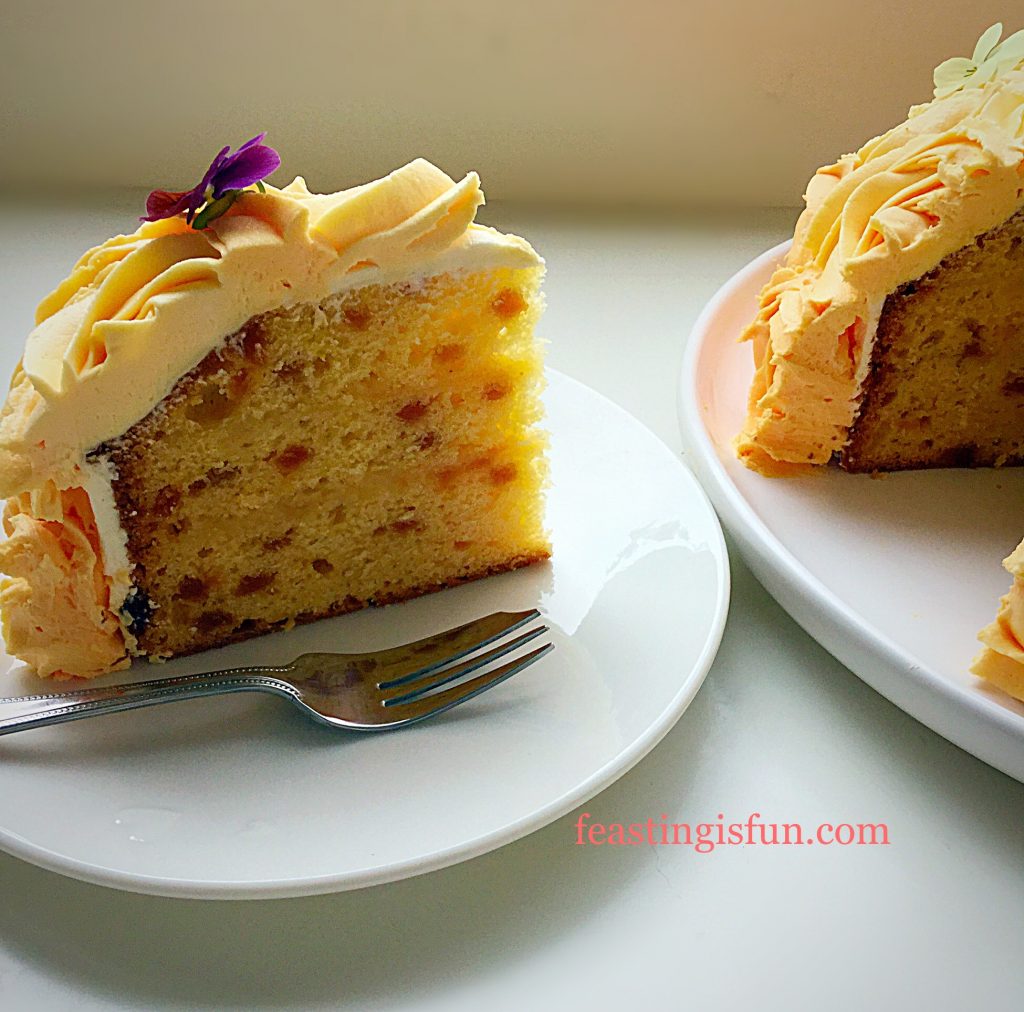
So the cake itself is made using Wright’s Baking Orange Cake Mix, to which lemon zest is added. Baked as a single cake, it is then sliced into three layers which are sandwiched back together using tart lemon curd. The result, a balanced citrus flavoured cake, that wakes up your tastebuds ready to party!

FF Orange Lemon Ombre Piped Rose Cake
Orange Lemon Ombre Piped Rose Cake full of hidden fruit.

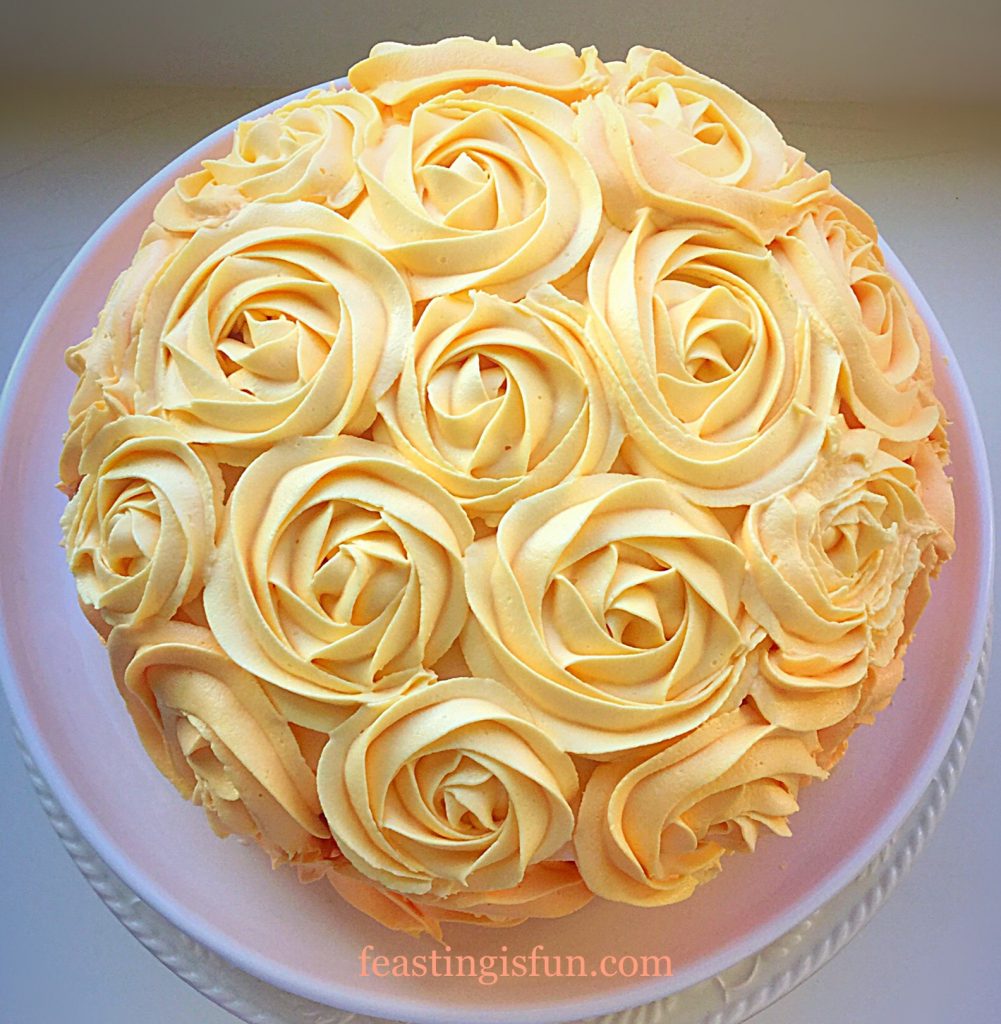
In addition, the decision to decorate the cake with piped buttercream roses, shows an increase in confidence with regard to piping. Creating an ombré effect, from pale lemon swirls to deeper tangerine lends a modern finish to this cake.

FF Orange Lemon Ombre Piped Rose Cake
Orange Lemon Ombre Piped Rose Cake a stunning centrepiece perfect for celebrating.

Since piping this Heart Engagement Bundt Cake, crumb coating, covering the whole cake in a thin layer of buttercream, was not an option, it was a must. Resulting in a cake that looks much cleaner, more professional, as well as any gaps between the roses are already covered.

FF Orange Lemon Ombre Piped Rose Cake
Orange Lemon Ombre Piped Rose Cake my entry for #GBBOTwitterBakeAlong

While not absolutely necessary, the added edible violas give the finished cake an elegant, yet natural touch. Their presence hints at the floral, citrus flavoured cake hidden by the piped roses.

Recipe: Orange Lemon Ombre Piped Rose Cake serves 12-14

2 Packets Orange Cake Mix available from Wright’s Baking online shop you will need 1 1/2 packets of mix for this recipe

90ml Vegetable Oil – I use sunflower oil plus a little extra for greasing the cake tin

300ml Water

1 Large Free Range Egg

1tsp Lemon Zest – the zest of one regular lemon

Approx 1/2 jar Lemon Curd

For the ombre buttercream:

700g White Icing Sugar

350g Unsalted Butter – softened to room temperature

2tbsp Very Hot Water

Gel Food Colouring – Red and Yellow, or Orange – I use Wilton

1tsp Lemon Extract – I use Nielsen-Massey

Optional – pesticide free viola flowers

Method: Preheat the oven to 170C/150C fan, gas mark 3.5

You will need a 20cm/8″ diameter 8.5cm/3.5″ deep tin to bake this cake.

  • Starting with the cake tin, grease the entire tin and also line the base with parchment paper.
  • Into a large bowl add the water, egg, oil and one packet of the orange cake mix. Weigh the other packet of cake mix and divide in half. Add half of the packet contents to the bowl – it was approximately 260g. Please check the weight for yourself.
  • Whisk the ingredients together according to the instructions on the packet.
  • Finally add the finely grated zest of 1 lemon, approximately 1tsp, to the bowl. Whisk to distribute and combine.
  • Pour the citrus cake batter into the prepared tin.
FF Orange Lemon Ombre Piped Rose Cake
Cake batter in the tin and ready for the oven.
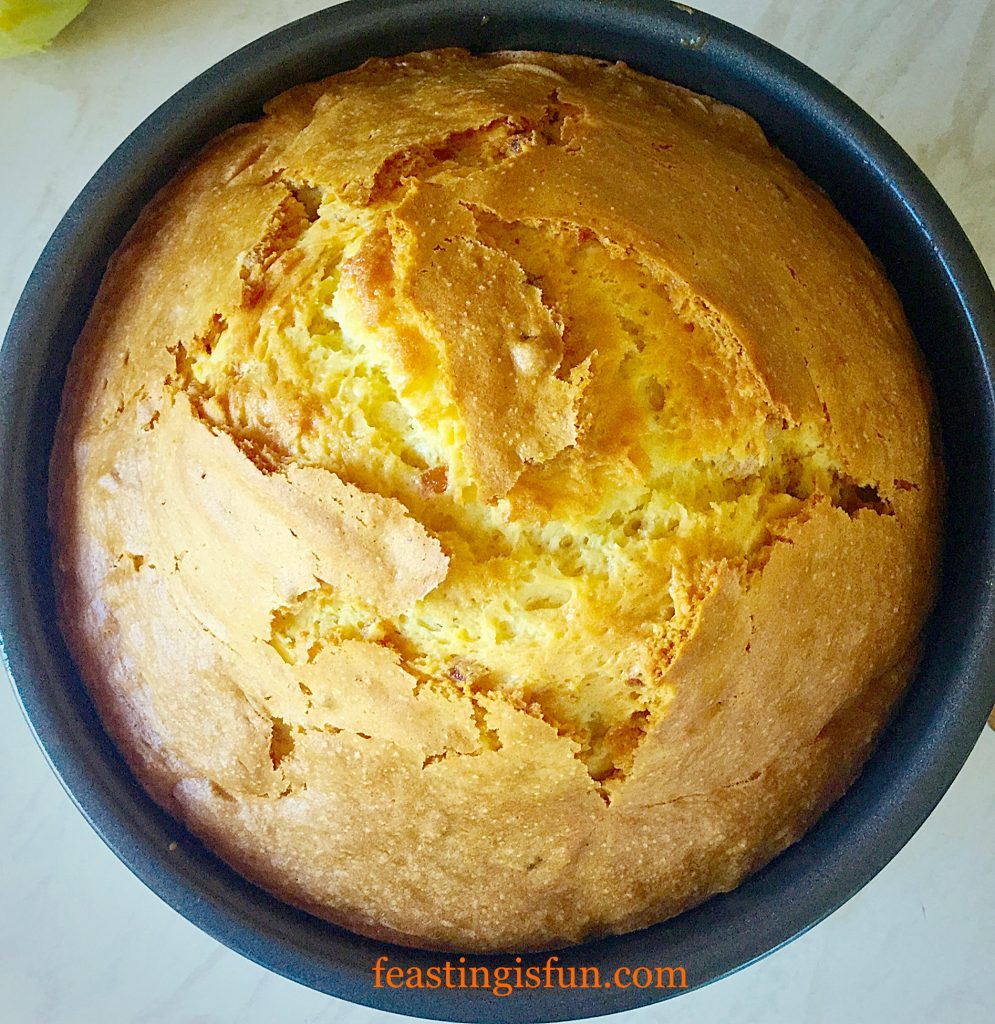
  • Place the cake tin in the centre of the oven and bake for 1 hour 30 minutes. Test the cake at 1 hour 20 minutes with a skewer. The cake is baked when an inserted skewer comes out clean.
  • As soon as the cake is baked remov from the oven, place on a rack and allow the cake to cool completely in the tin.

FF Orange Lemon Ombre Piped Rose Cake

    Breath in the rich, citrus, homebaked aroma.
  • When the cake has cooled turn it out of the tin. Also if necessary, run around the outer rim of the cake with a palette knife. Doing this will loosen any slight sticking, that said Wright’s cake mixes are excellent and always turn out of the tin easily.

Preparing the cake for decoration:

  • During baking the cake rose slightly more in the centre. The cause may have been the addition of an  egg to the cake mixture, or, baking at a slightly higher temperature.
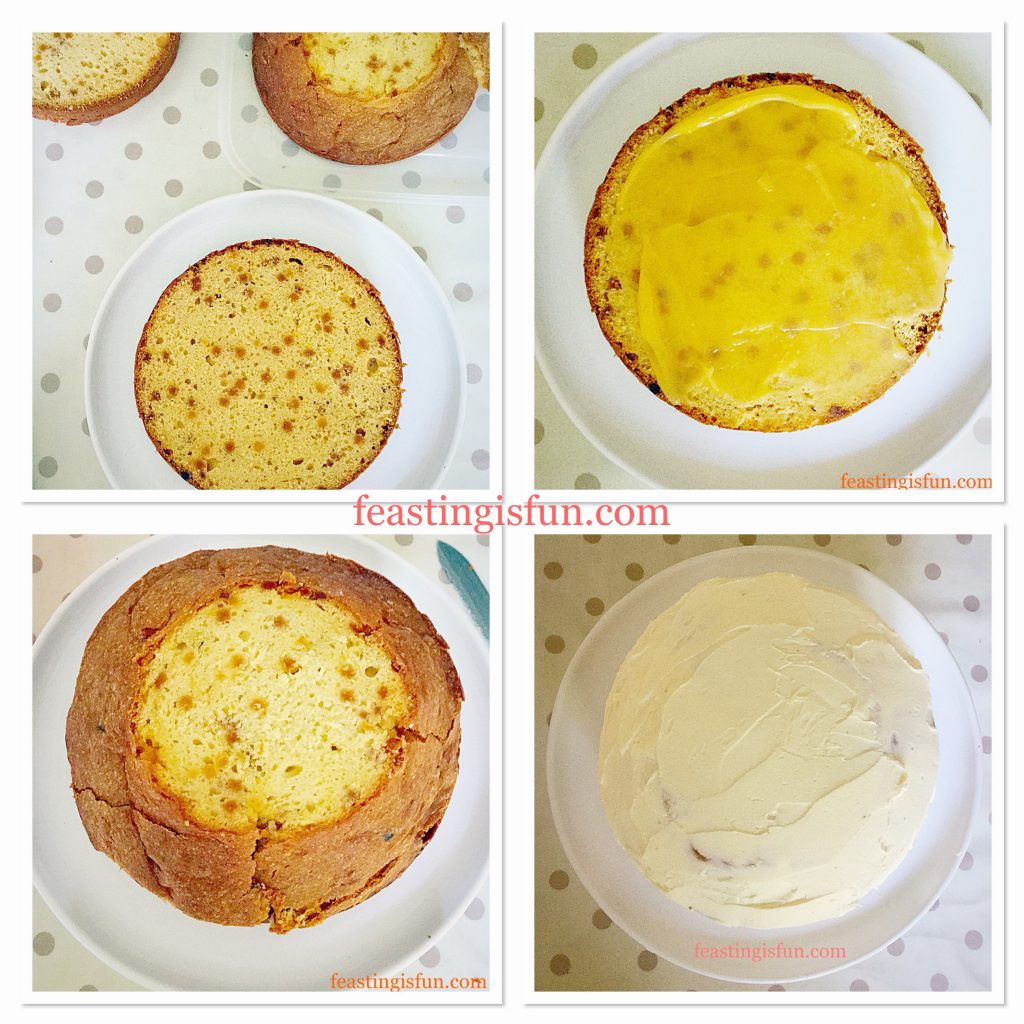
  • First cut off any dome on the top of the cake. Having a small rise in the centre is an advantage with the finished cake.
  • Slice the cake evenly into 3 layers. A serrated knife cuts cleanly through the cake, minimising crumbs.
  • Place the bottom layer, cut side up, on a board or cake stand.
  • Spread the bottom layer with an even, thin layer of lemon curd, so that it almost reaches the edges.
  • Next, place the middle layer on top of the bottom layer, matching up the sides.
  • Again, spread a thin, even layer of lemon curd on to the cake, keeping just inside the edges.
  • Finally place the top of the cake on to the middle layer.
FF Orange Lemon Ombre Piped Rose Cake
Shaping, slicing and then reassembling the cake.

Preparing the cake:

  • Place the softened butter into a large bowl.
  • Sift the icing sugar into the same bowl.
  • Next add the very hot water and lemon extract.
  • Finally whisk the ingredients together, starting on a slow speed and increasing the speed, until you have a pale, fluffy, lump free, buttercream.
  • Remove 3 heaped tablespoons of the buttercream and set aside to crumb coat the cake. First place the buttercream on the top of the cake. Use an offset spatula to spread the icing across the top of the cake, gently pushing it over the sides. Rotating the stand, or board, gradually cover the sides of the cake with a thin layer of buttercream. Finish by dipping a palette knife into hot water, drying and running the hot knife over the cake, this will produce a smooth finish. Place the cake in the fridge for 30 minutes to allow the crumb coat to set slightly.

Colouring the buttercream:

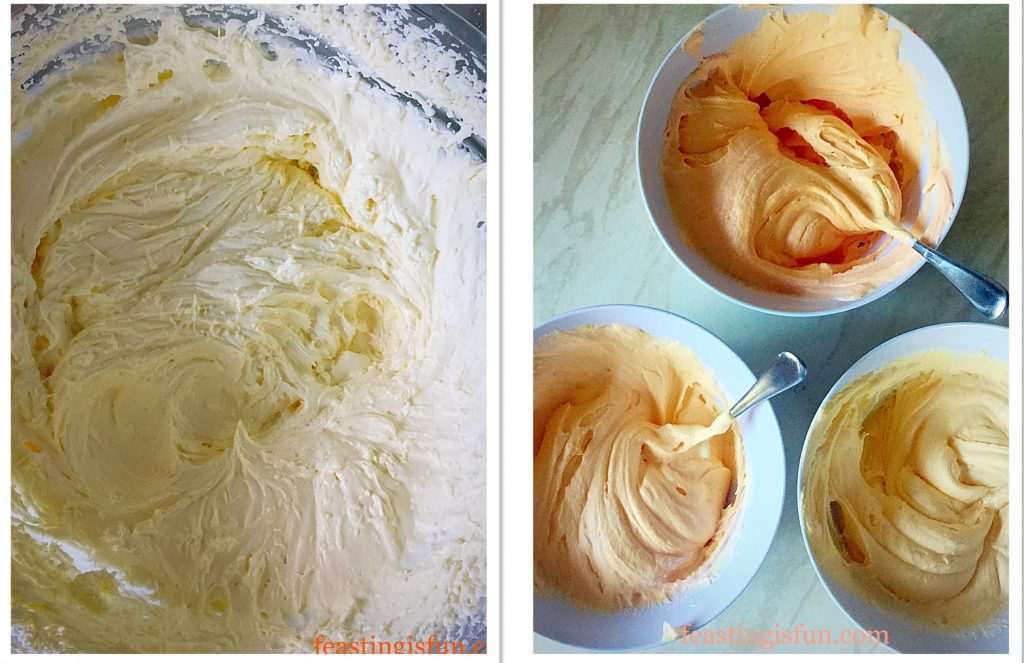
  • Divide the remaining buttercream equally, between 3 bowls.
  • Use cocktail sticks, gel food colouring and a teaspoon to stir, start colouring the icing. It is easier to achieve the lightest colour, which is piped on to the top of the cake, first. Doing so sets the shade and tint of the icing.
  • Following on, add more colouring to the next bowl, until the shade is correct. Finishing with the last bowl and deepest colour, add extra red and yellow gel until the desired deeper colour is obtained.
  • To pipe the buutercream, fit 3 large, disposable piping bags with large star piping nozzles – Wilton #1M. Fill each bag with a separate shade of buttercream. Label the piping bags light, medium, dark, so they are distinguishable.
FF Orange Lemon Ombre Piped Rose Cake
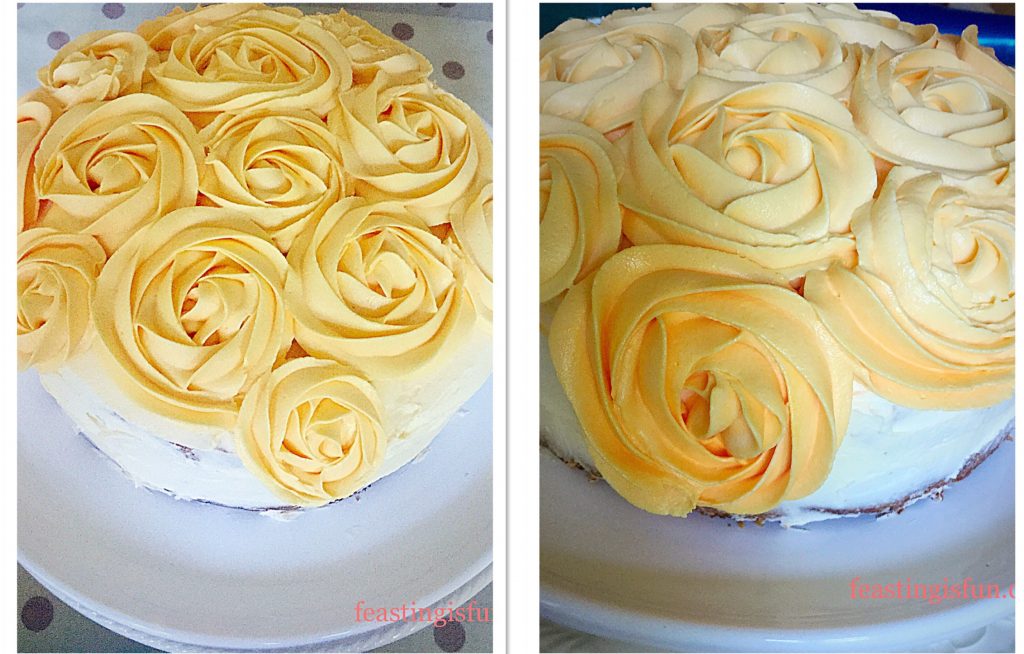
Natural lemon flavoured buttercream and the 3 shades created for the ombré effect.

Decorating the Cake:

  • Starting right in the centre, on top of the cake, using the lightest shade, pipe the first rose. Begin in the centre of the rose, keeping pressure steady on the bag pipe a star, continuing into an e shape, then continuing round to form a rose swirl.
  • Continue working evenly around the centrally piped rose, piping more rose swirls. Carry on until the top of the cake is covered, or almost covered, in evenly piped rose swirls.
  • Following on, use the next shade darker, pipe rose swirls around and inbetween the lighter shade, then pipe evenly around the side of the cake.
FF Orange Lemon Ombre Piped Rose Cake
The image on the right shows the colour difference.
  • Complete the cake by piping the darkest shade around the base of the cake. The full ombré effect is then complete.
FF Orange Lemon Ombre Piped Rose Cake
Orange Lemon Ombre Piped Rose Cake very effective.
  • For the very best results place the piped cake into the fridge, or somewhere cold, for 30 minutes.
  • Just prior to serving add the edible violas.
FF Orange Lemon Ombre Piped Rose Cake
Orange Lemon Ombre Piped Rose Cake perfect with a Buck’s Fizz!

Beautifully baked, evenly distributed fruit, decorated with rose swirls, this Orange Lemon Ombre Piped Rose Cake demonstrates how easy it is to create a sensational cake using a mix.

Because of my health limitations, creating this cake from scratch would be too much for me. Of most importance, my aim, to show how the ombré piping effect is achievable, at home, with a little practice. Secure in the knowledge that the cake underneath is reliably good. A couple of badly piped roses were removed, using a butter knife and re-piped. Practice and making mistakes is how we learn to improve our skills.

If you have enjoyed the recipe for this Orange Lemon Ombre Piped Rose Cake you may also like these:

Strawberry Chocolate Vanilla Drip Cake

FF Orange Lemon Ombre Piped Rose Cake
Strawberry Chocolate Vanilla Drip Cake also uses Wright’s cake mixes.

Fluted Chocolate Lemon Marble Cak

FF Orange Lemon Ombre Piped Rose Cake
Fluted Chocolate Lemon Marble Cake.

Strawberry Sweetheart Cake

FF Orange Lemon Ombre Piped Rose Cake
Strawberry Sweetheart Cake

Beautiful cakes do not have to be difficult to create. Since I am most definitely not an accomplished cake decorator, I have learned a few decorating techniques that enable me to finish a cake to a good standard.

Most of all I hope you have been inspired to try out a new technique? Also homemade cakes taste infinitely better than their supermarket counterparts. While they are convenient, no amount of love, has, at any stage been added to the cake. Whereas baking at home creates a unique, delicious cake that will prompt huge smiles from the recipient and those who share in the celebration and cake!

Sammie xx


Share
Facebooktwitterpinterestlinkedintumblr

Homemade Cauliflower Cheese

Share
Facebooktwitterpinterestlinkedintumblr

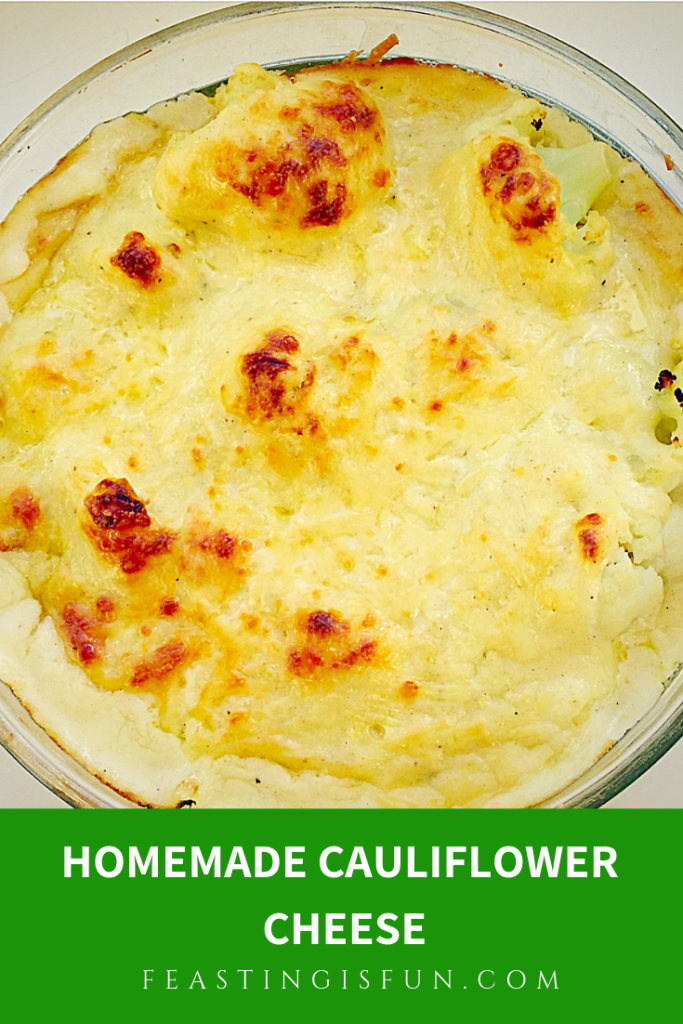
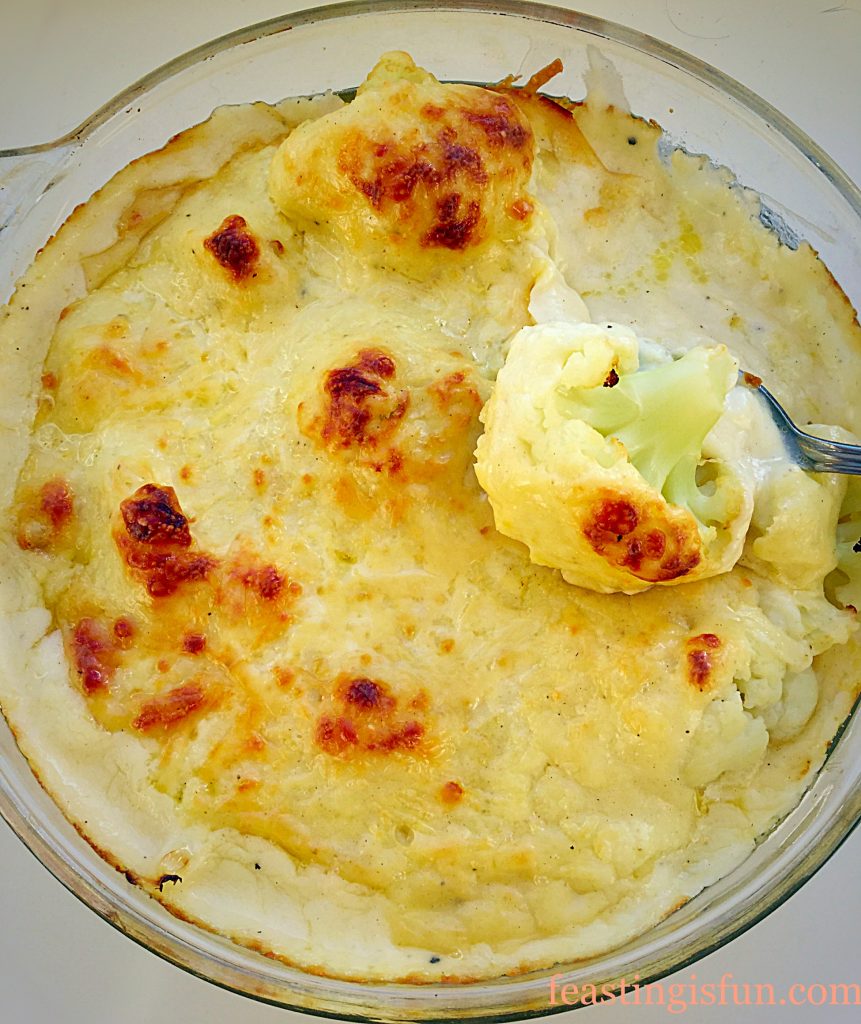
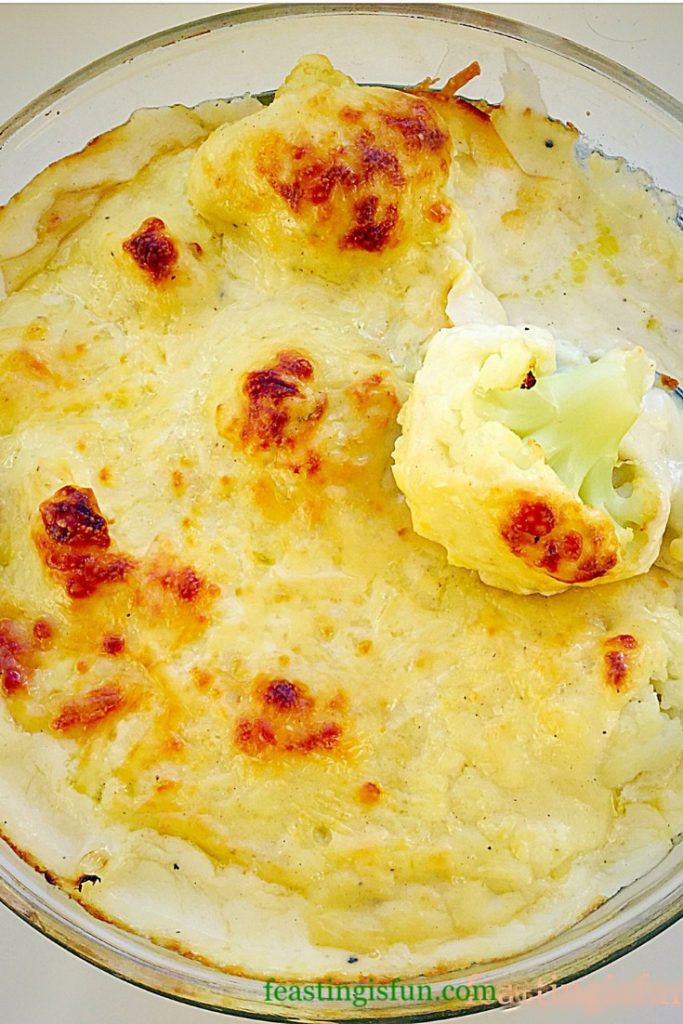
Homemade Cauliflower Cheese has to be right up there on the list of all time comfort foods. Am I right? Because this is such an easy dish to prepare it makes it even more comforting. Rather than stressing in the kitchen using a gazillion ingredients with a complex recipe, you can relax while slowly steaming cauliflower and stirring the cheese sauce. Resulting in a dish that is as good on it’s own or as a side dish.

Homemade Cauliflower Cheese

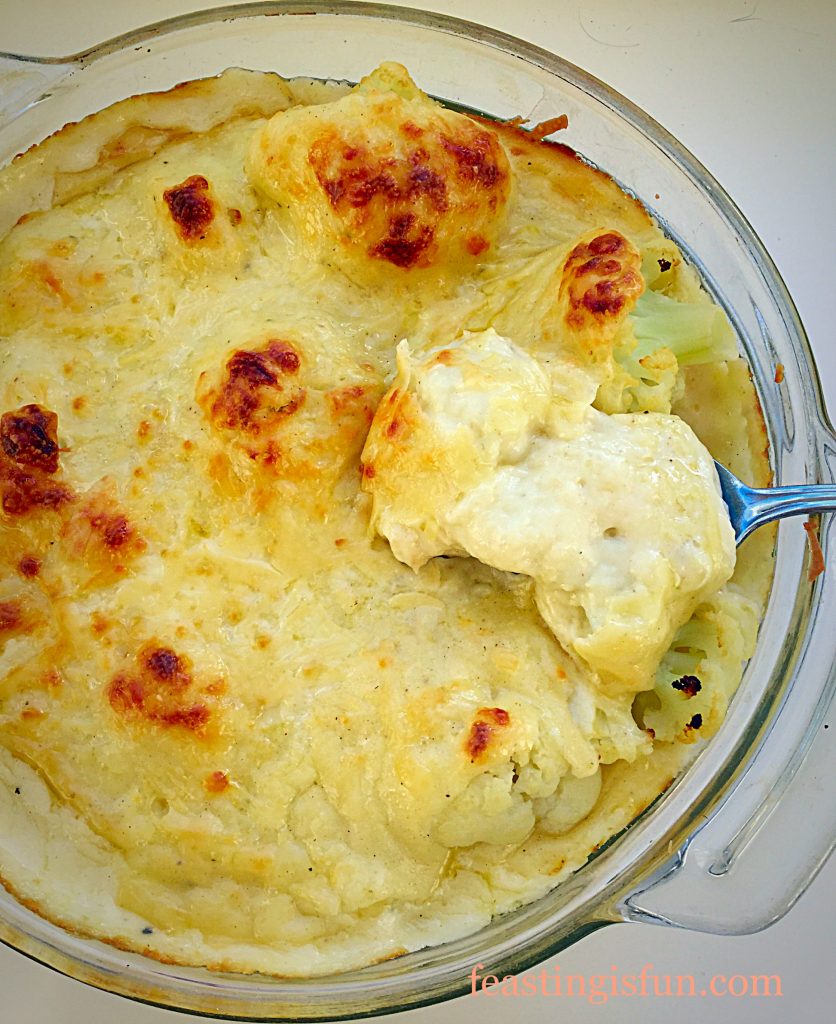
Fresh, creamy white florets of seasonal cauliflower, lightly steamed and smothered in a thick, nutmeg scented, cheese sauce. And like a fluffy duvet, or wood burning fire, it wraps you in its warm embrace and brings you home.

Friends and family recall that Homemade Cauliflower Cheese reminds them of comfort food from their childhood. Perhaps back to a time when life seemed simpler? And while it isn’t something I make, or eat that often, when the gooey cheese sauce spreads slowly over my plate I am in comfort food heaven.

FF Homemade Cauliflower Cheese
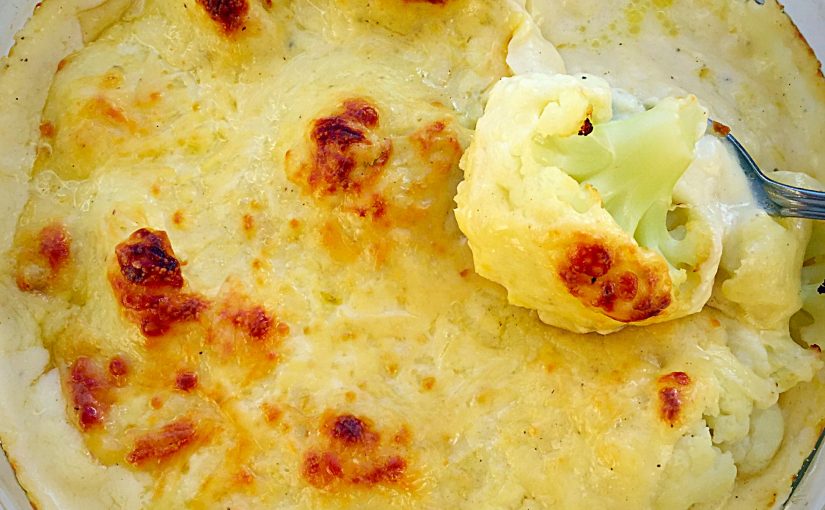
Homemade Cauliflower Cheese golden and bubbling comfort food.

The World Has Gone Crazy For Cauliflower

Since the humble cauliflower has been discovered as a carbohydrate substitute it is now used as a replacement for rice, pizza base, potato salad and other culinary substitutes. A quick look on Pinterest yields a variety of recipes. My Homemade Cauliflower Cheese recipe celebrates the humble cauliflower rather than trying to disguise it!

Tender, baked cauliflower, covered in a homemade cheese sauce, is for me one of the best ways to eat this delicious vegetable. While part of the brassica family, where cabbages, broccoli and brussel sprouts are its cousins, cauliflower has a slightly sweet flavour, not dissimilar to the thick leaves of white cabbage. And, cooked properly its texture is dense and meaty, making it a filling vegetarian dish when serving on its own.

FF Homemade Cauliflower Cheese
Homemade Cauliflower Cheese so temptingly delicious.

I enjoy eating Homemade Cauliflower Cheese with a roast dinner, or sausage and mash. While the bubbling cheese sauce goes so well with proper gravy dinners, it is also unbelievably good with Yorkshire puddings. Likewise, it pairs extremely well when served alongside thick slices of home cooked gammon.

Recipe: Homemade Cauliflower Cheese serves 4-6 as a side dish

1 large head of Cauliflower or 2 smaller ones

75g/3oz Unsalted Butter

75g/3oz Plain White Flour

150g/5.5oz Mature Cheddar Cheese – grated – hold back 2 tablespoons from adding to the sauce, for sprinkling over the assembled dish – I use Wyke Farms

500ml Milk Whole or Semi Skimmed

1/4tsp Freshly Grated Nutmeg – I buy Barts whole nutmegs and grate them myself on the coarse side of a box grater. Freshly grated nutmeg lifts the cheese sauce, subtly adding another level of flavour.

1/2tsp Freshly Ground Black Pepper

Method:

Making The Cheese Sauce

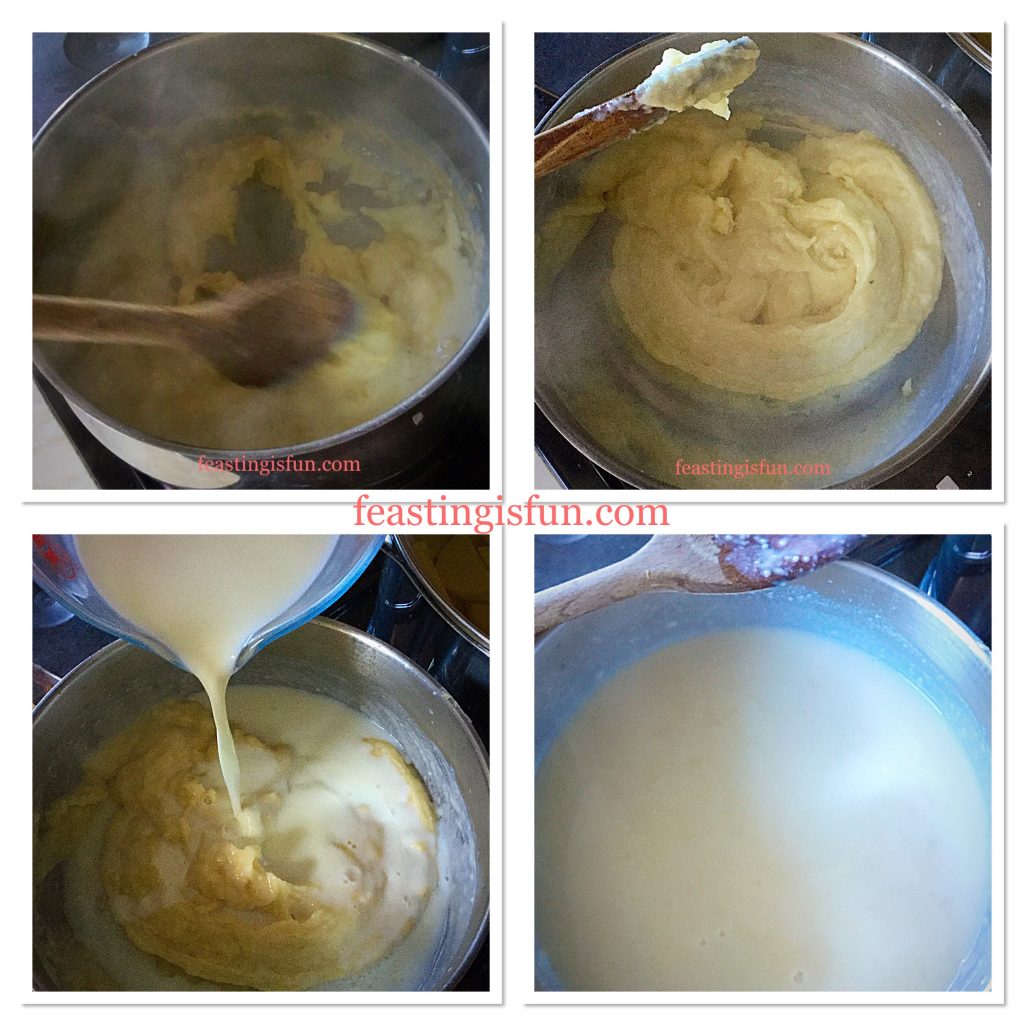
  • First of all place the butter into a heavy bottomed saucepan and melt over a medium heat.
  • Add in all the flour, stir for a couple of minutes so that the flour and butter become a bubbling paste (roux).
  • Pour in roughly 100ml of the milk and stir vigorously. The flour, butter and milk will come together to form a thick clump.
  • Add another 100mls of milk and keep stirring until all the milk is incorporated.
  • Continue as before, adding the milk in 100ml quantities, stirring thoroughly. If you are worried that some lumps will not disappear simple switch to a balloon whisk.
  • After adding all the milk, you will have a smooth, thick-ish white sauce.
FF Homemade Cauliflower Cheese
Showing the stages of making the white sauce.
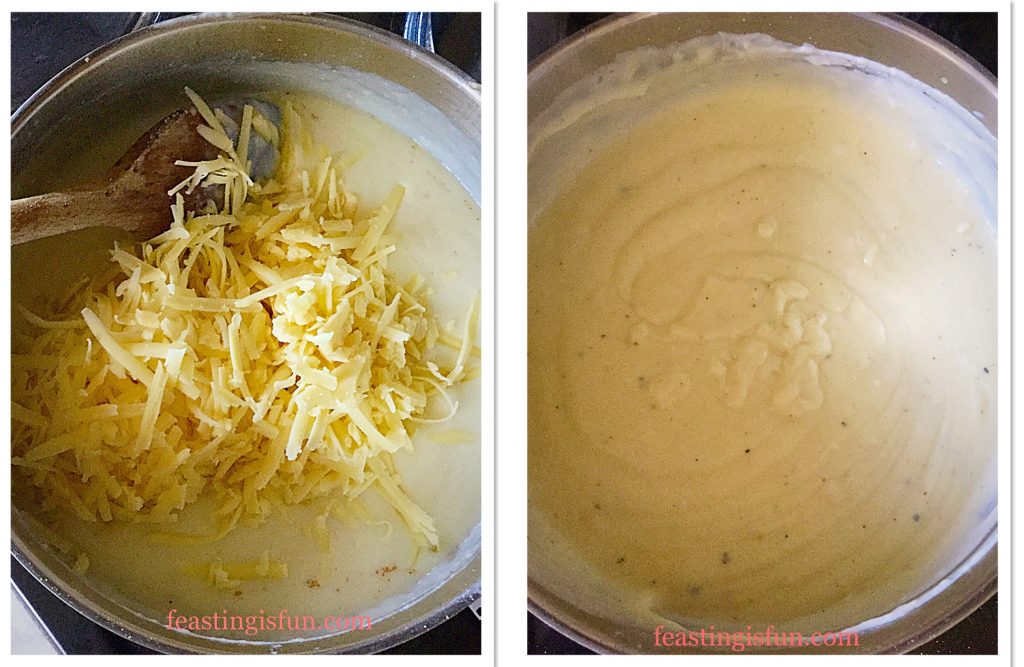
  • Add the pepper and nutmeg to the bechemel (white sauce) and stir thoroughly. I generally don’t add salt as the cheese tends to lend its saltiness to the final flavour, however, a quick taste check once the cheese has melted will allow you to adjust the seasonings.
  • Take the saucepan off the heat and tip in the grated cheese. Stir until it is melted and you have a smooth cheese sauce.
FF Homemade Cauliflower Cheese
Delicious Cheese Sauce ready for pouring over Cauliflower and baking.

Preparing The Cauliflower And Assembling The Dish For Baking

  • Prepare the cauliflower by cutting off most of the green leaves, breaking into florets, rinsing under a tap a and then steaming for no longer than 5 minutes.
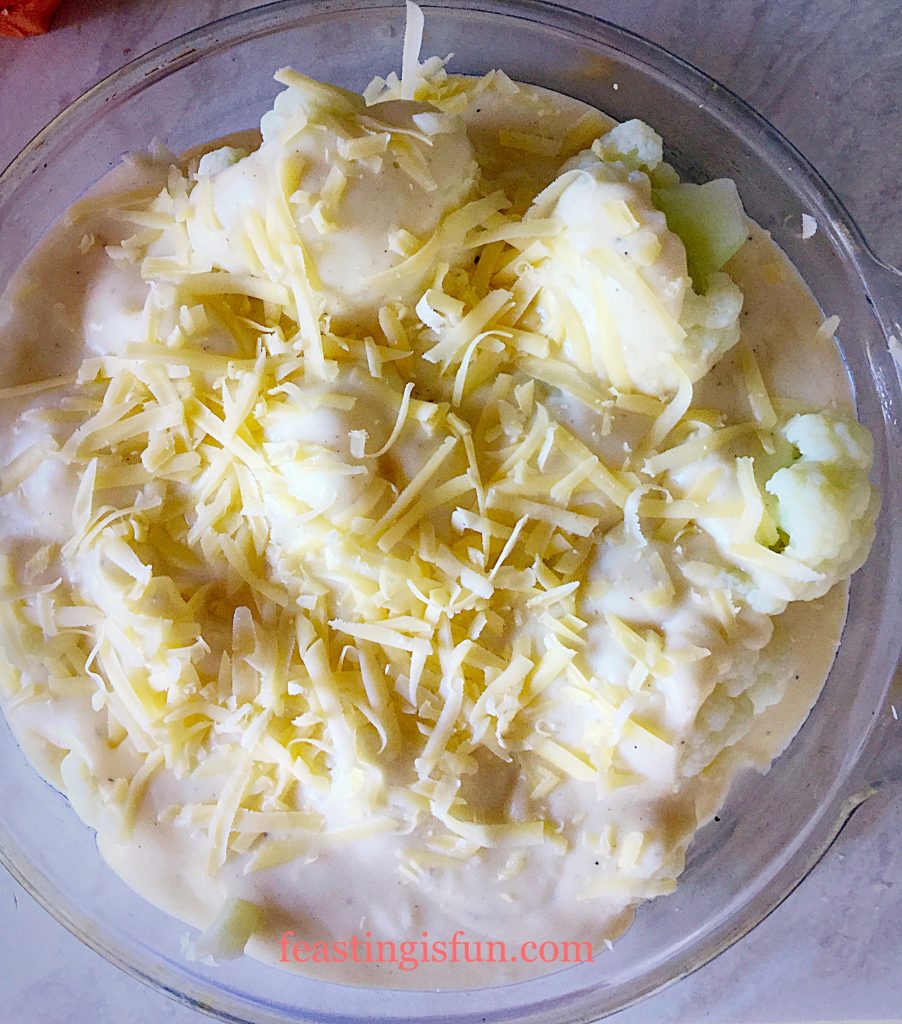
  • Place the steamed cauliflower florets into an oven proof dish and pour over the cheese sauce.
  • Sprinkle over the reserved cheese, this gives the topping extra colour and gooey cheese!
FF Homemade Cauliflower Cheese
Homemade Cauliflower Cheese ready for the oven.
  • When making ahead, allow to cool, cover in tented foil, so that the topping doesn’t stick to it. The dish can be left on the side for a couple of hours. Alternatively place in the fridge, where it will keep for up to 2 days.
  • Bake the Homemade Cauliflower Cheese in an oven, preheated to 200C/180C fan, gas mark 6, 400F, for 30-40 minutes. When the top is golden and bubbling and a fork can pierce the base of a cauliflower floret the dish is baked.
  • Once baked, remove from the oven and serve.
Homemade Cauliflower Cheese

Homemade Cauliflower Cheese also goes well with fish dishes, such as smoked haddock, or any firm, white fish, especially when served with mashed potatoes!

If you have enjoyed this recipe for Homemade Cauliflower Cheese you may also like these:

Leek Colcannon

FF Homemade Cauliflower Cheese
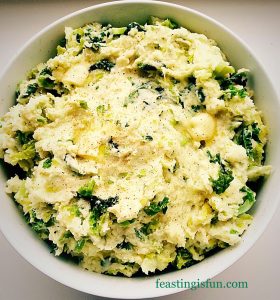
Leek Colcannon.

Perfectly Mashed Potatoes

FF Homemade Cauliflower Cheese
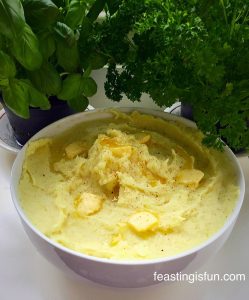
Perfectly Mashed Potatoes

Garlic Rosemary Roast Potatoes

FF Homemade Cauliflower Cheese
Garlic Rosemary Roast Potatoes

As the nights draw in, I find comfort in warming, hearty food. That isn’t to say I don’t believe in balance, I absolutely do. So, on a day when we indulge in Homemade Cauliflower Cheese, we wouldn’t have dessert. That said we rarely do eat pudding, except perhaps on a Sunday, something I am working on! When it’s hot in the summer, my body craves salads and cold food. Yet as soon as the annual September chill hits the air I long for warming meals like Steak Leek and Ale Pie or Chunky Chilli.

So, whatever you are making, baking and creating in the kitchen, enjoy preparing and sharing your feast.

Sammie xx

No part of this post may be reproduced or duplicated without the written permission of the owner. Please see my Disclosure Policy.

Share
Facebooktwitterpinterestlinkedintumblr

Cheddar Tomato Basil Quiche

Share
Facebooktwitterpinterestlinkedintumblr

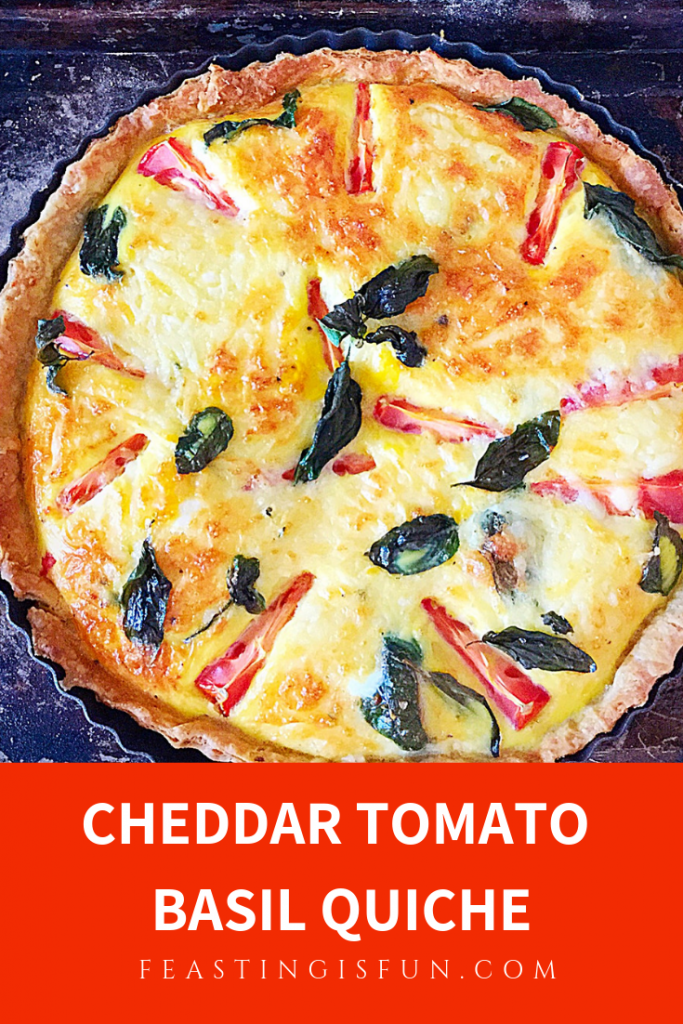
It would seem that Monday’s have become quiche days. This was not intentional, although I haven’t been cooking Sunday roasts for the last few weeks, so that may explain it. Plus we all love quiche in our house. It’s easy to make and bake in the morning, ready for a quick reheat in the evening for dinner. So today I give you my Cheddar Tomato Basil Quiche.

Pinterest sized image of quiche with descriptive graphics.

Now if you’re a little quirky like I am, you’ll understand why quiche is one of my most favourite pastry dishes. It’s the ratio of pastry to filling that I love. Technically a tart, a quiche has no pastry top. So this Cheddar Tomato Basil Quiche has sides and a base of delicious, homemade, all butter shortcrust pastry and lots of eggy filling.

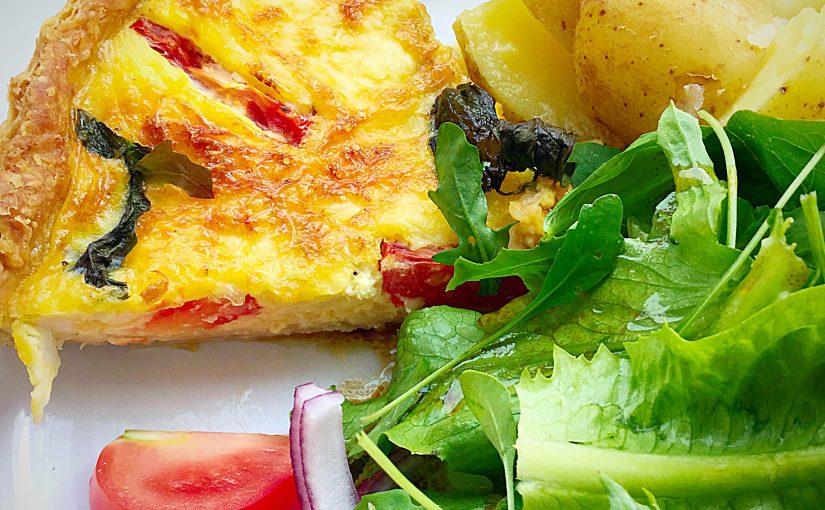
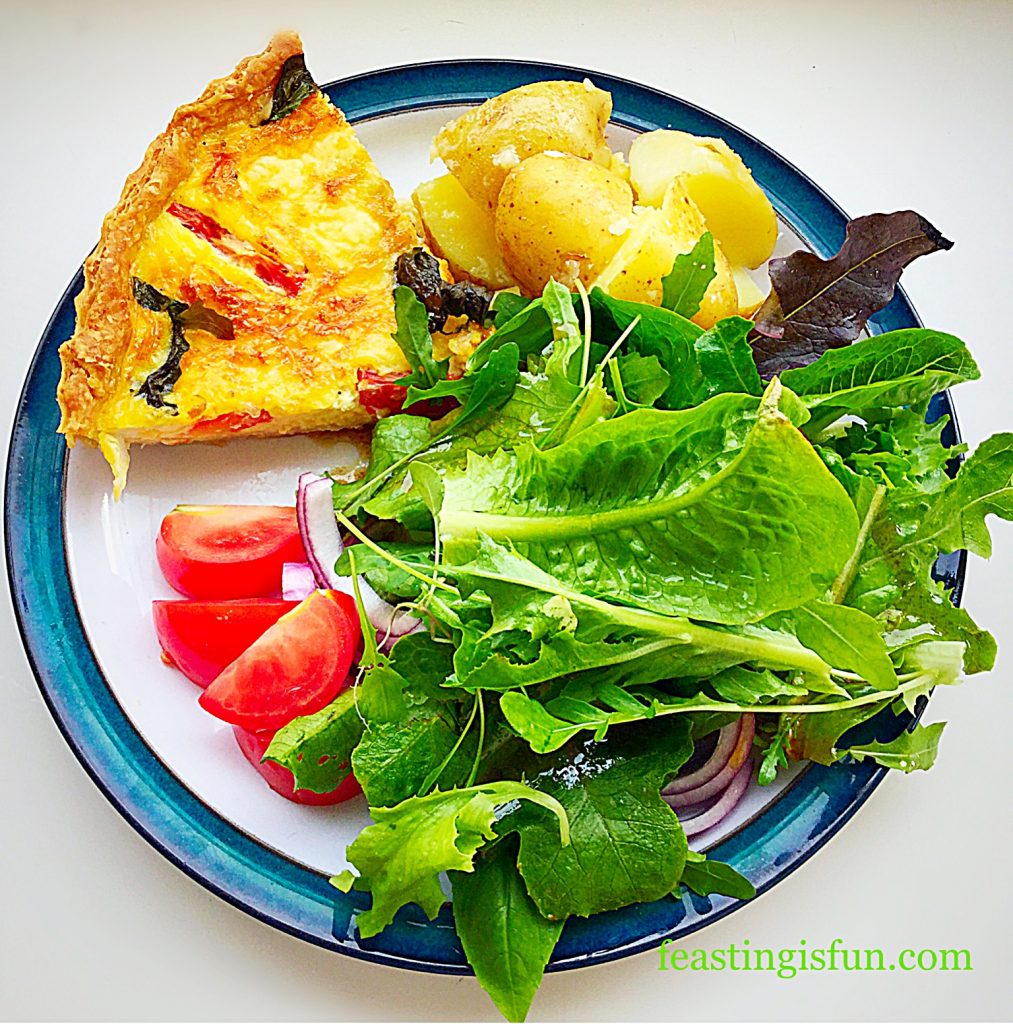
A portion of quiche served with new potatoes and salad leaves.
Cheddar Tomato Basil Quiche served with boiled new potatoes and homegrown salad leaves.

One quick word on eggs – I adore them and only ever buy free range or organic. They are my go to comfort food and also the one thing I can make myself eat when I’m tired or in pain. I still eat my boiled egg out of the chick covered eggcup holder I had when I was little. I love eggs in all guises but a really good dippy boiled egg, or soft fried egg are my favourites!

Quiche appreciation

Back to quiches and this Cheddar Tomato Basil Quiche in particular. I’ve made a few over recent weeks and I’ll link them at the bottom, but now I’m actively trying to make vegetarian ones. Twitter has a #MeatFreeMonday hashtag and so it fits in nicely with that for the time being. Most of my quiche recipes can be switched to veggie versions if you want to.

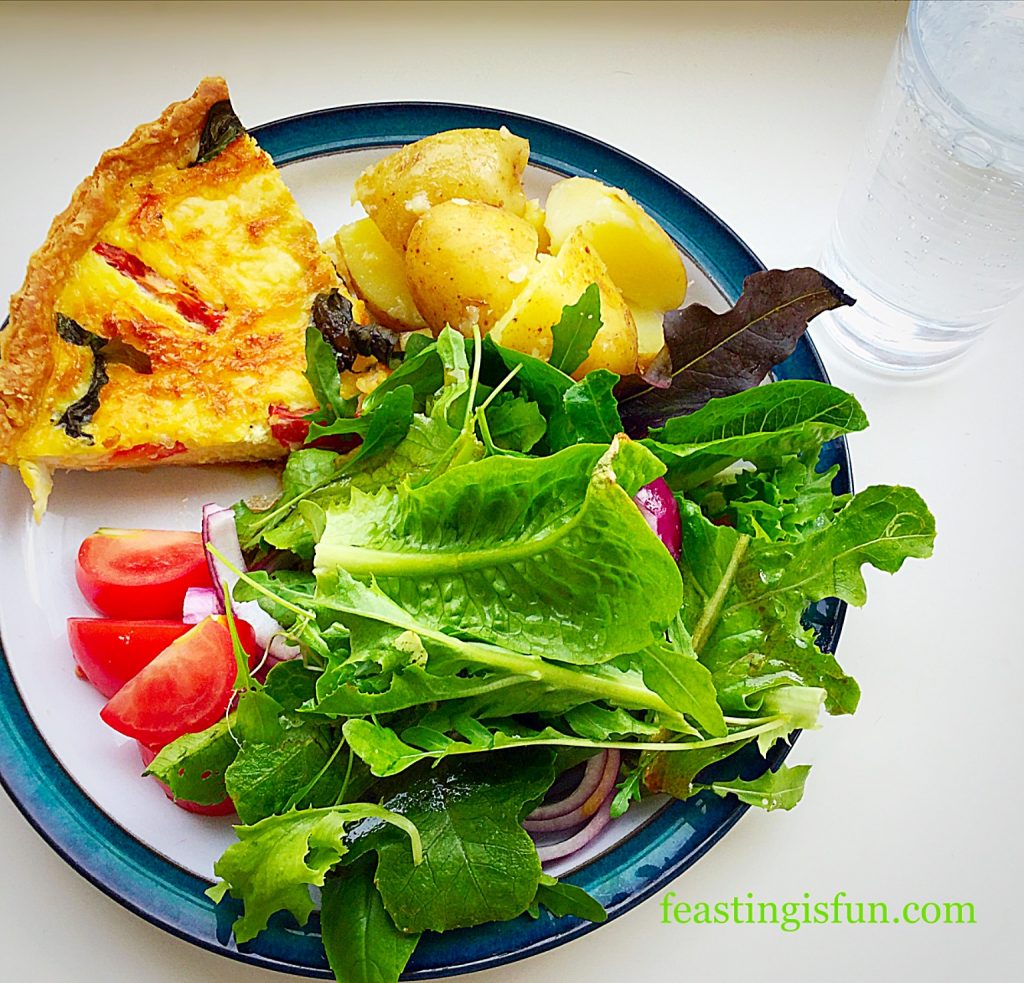
A dinner serving of quiche on a plate with new potatoes and salad.
Cheddar Tomato Basil Quiche

Pastry! I have written a recipe that is absolutely foolproof for making Perfect All Butter Shortcrust Pastry. Yes I totally get that we’ve all got busy lives and as yet, no I haven’t made my own puff pastry, but, my recipe is quick and simple. It’s also a lot cheaper than buying your own pastry, plus you know exactly what goes in it. So please be encouraged to try making it for this Cheddar Tomato Basil Quiche. You’ll have twice as much as you need and you can easily freeze the other half!

Recipe: Cheddar Tomato Basil Quiche

500g/1lb 2oz – 1/2 quantity of Perfect All Butter Shortcrust Pastry

Spare Plain Flour for dusting the work top and rolling pin

6 Large Free Range Eggs

2 Tablespoons Whole or Semi Skimmed Milk

2 Whole tomatoes – each cut into 6 wedges

150g/5oz Strong Cheddar Cheese Grated – I use Wyke Farms mature cheddar

Handful of Fresh Basil Leaves

Pinch of Salt – I use Maldon Sea Salt

Freshly Ground Pepper

Method: Peheat the oven to 220C/200C fan, gas mark 7, 425F

Making and pre-baking the tart case

  • Dust the work top with flour and rolling pin. Form the pastry into a ball.
  • Roll out from the centre of the pastry, in one direction until you have a circle slightly larger than your quiche tin.
  • Ensure the quiche tin is placed onto a baking tray.
  • Transfer the pastry to the tin by wrapping the rolled out pastry around the rolling pin.
  • Ensure the pastry is pushed, not stretched into position, pressing firmly against the sides of the tin.
  • Roll the rolling pin over the top of the tin. This creates a nice clean edge to the quiche.
  • Cut a piece of baking parchment slightly larger than the filled tin. Scrunch it up and then place on top of the pastry.
  • Fill with ceramic balls or baking beans and place in the top of a preheated oven for 15 minutes.
  • After 15 minutes baking time has elapsed remove the baking tray from the oven.
  • Using the parchment paper lift out the baking balls.
  • Return the pastry case to the oven and bake for a further 5-10 minutes until the pastry has just turned golden.
FF Cheddar Tomato Basil Quiche
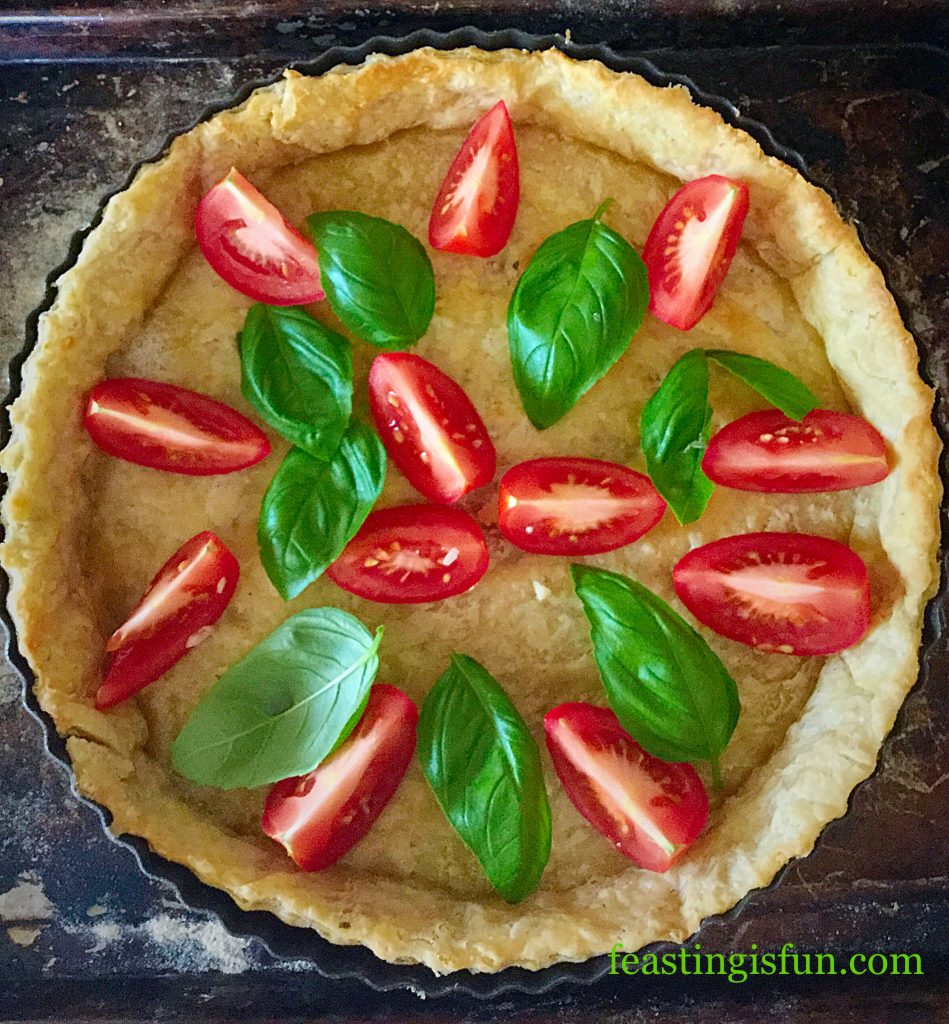
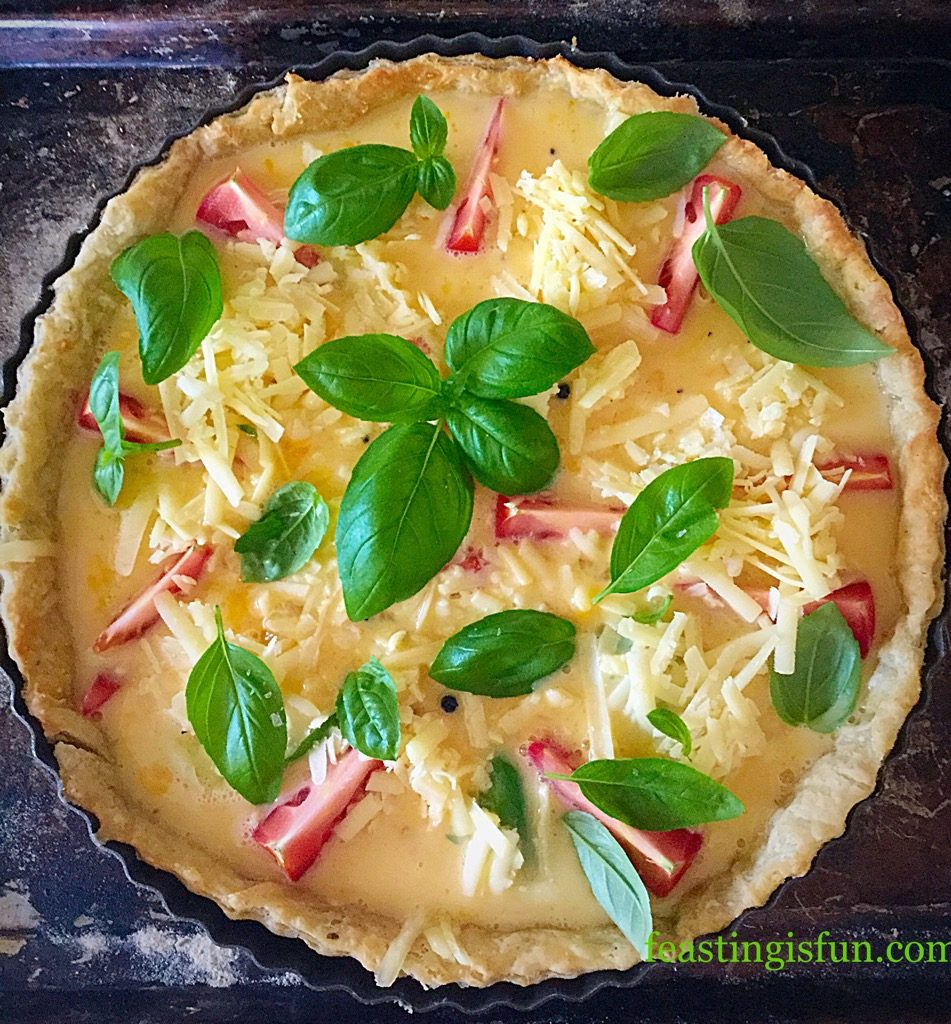
Place the tomatoes and half of the basil on the pastry base.

Filling and baking the Quiche

  • Next add the grated cheese in between the tomatoes.
  • Crack all the eggs into a large jug (I always crack mine into a separate bowl first).
  • Add the milk, salt and pepper and whisk lightly with a fork until combined.
  • Pour the egg mixture carefully over the filled quiche.
FF Cheddar Tomato Basil Quiche
Decorate the top of the quiche with the remaining basil leaves.
  • Place the quiche, still on the baking tray, into the centre of the oven and bake for 25-30 minutes.
  • The Cheddar Tomato Basil Quiche is baked when it is golden and there is no wobble to the centre of the quiche.
  • Once baked remove the quiche from the oven and allow to cool for 15 minutes.
FF Cheddar Tomato Basil Quiche
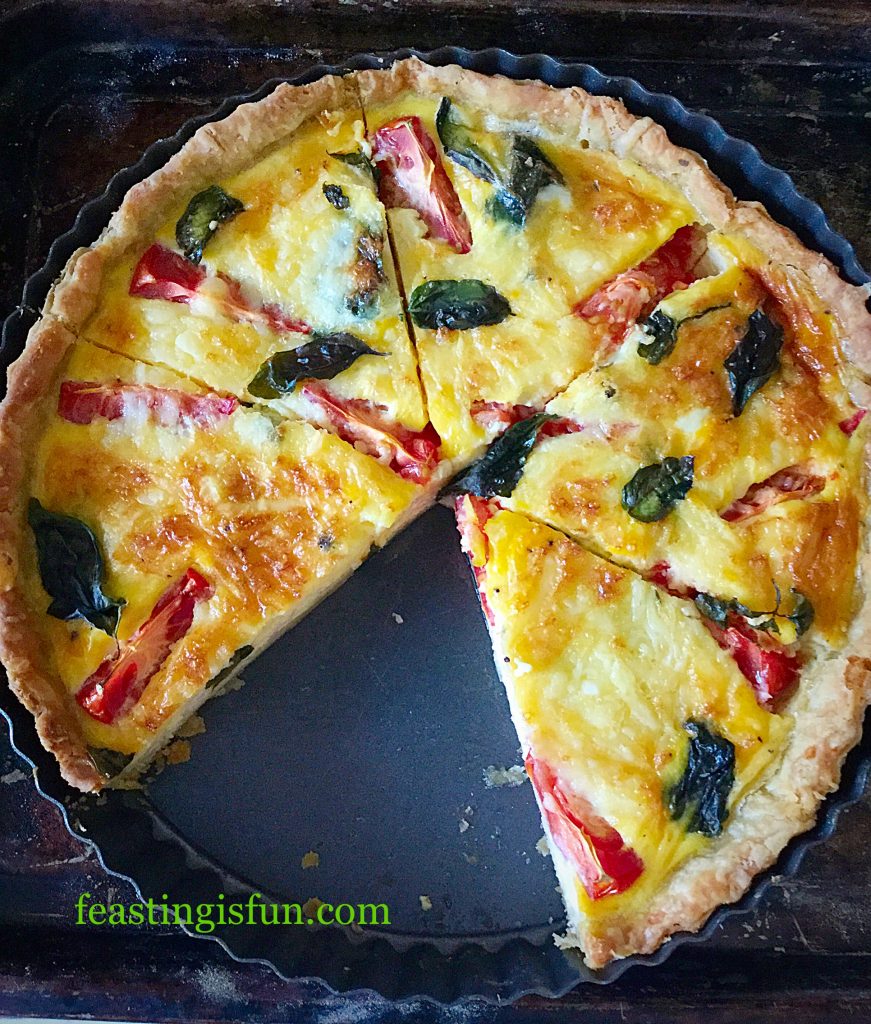
Cheddar Tomato Basil Quiche so easy to make and easy to eat.

To serve slice into 6 portions. Serve warm with salad and new potatoes for a wonderful mid week meal. Likewise this delightful quiche is delicious at room temperature and is perfect for buffets, packed lunches, picnics and food on the go.

Ensure the Cheddar Tomato Basil Quiche is cold before wrapping in cling film or foil and store in the fridge for up to 4 days.

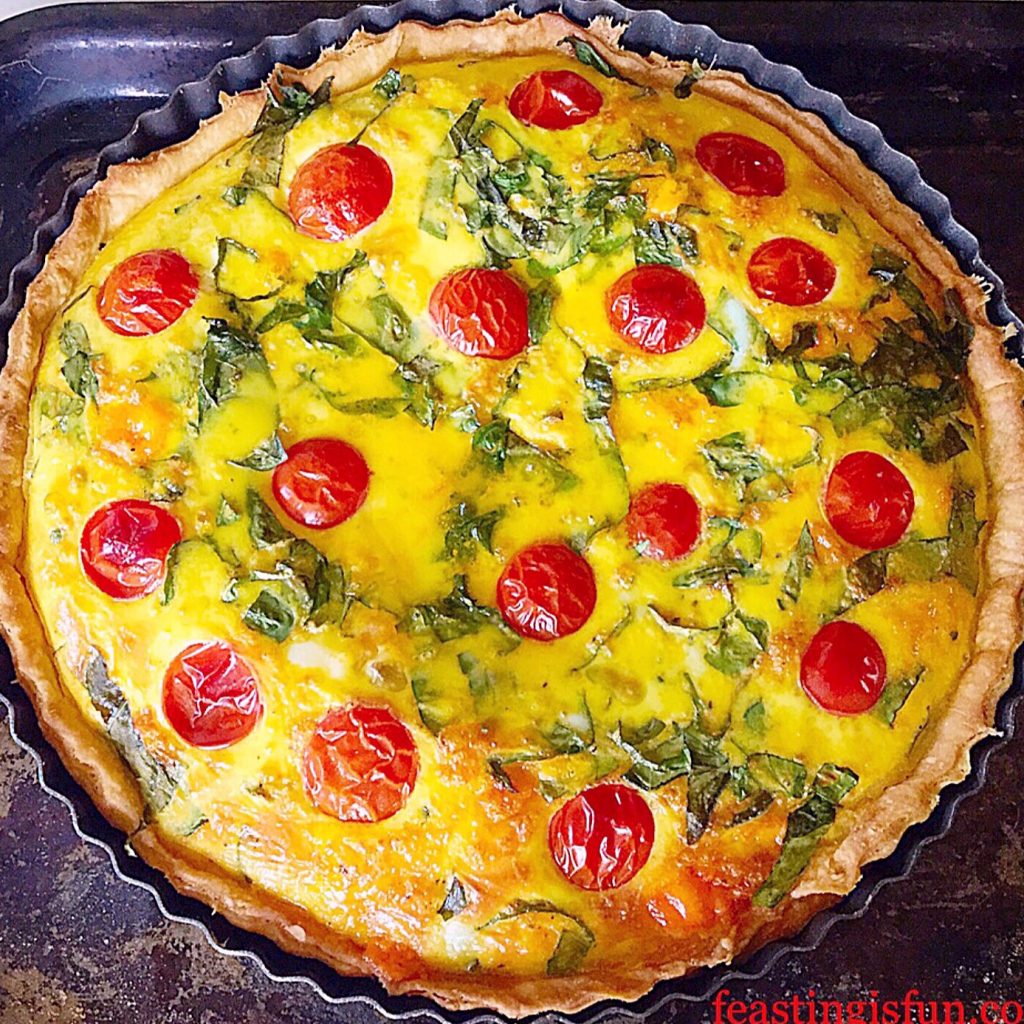
Alternatively, why not swap Red Leicester Cheese for the cheddar and add British cherry tomatoes, for a delicious twist on this recipe!

Red Leicester and Cherry Tomato Quiche

If you have enjoyed the recipe for this Cheddar Tomato Basil Quiche here are some other recipes you may also like:

Feta Red Onion Marmalade Quiche

FF Feta Red Onion Marmalade Quiche
Feta Red Onion Marmalade Quiche delicious layers of flavour.

Smoked Bacon Asparagus Quiche

FF Smoked Bacon Asparagus Quiche
Smoked Bacon Asparagus Quiche a delightful combination of flavours.

Asparagus Proscuitto Ham Tart

FF Cheddar Tomato Basil Quiche
Asparagus Prosciutto Ham Tart made during a silicone baking mat review.


Quiches are so versatile. Layers of flavour can be built inside the egg tart. I’m particularly fond of quiches that use relish or condiments to build flavour. Likewise fresh herbs can really lift the flavour of a quiche. The basil in this Cheddar Tomato Basil Quiche turns a good quiche into a great one.

Play around with fresh herbs and good quality chutneys or relishes in your baking, especially in quiches. Their flavour can really add depth or freshness to the resulting flavour.

Whatever you are making, baking and creating in your kitchens, have fun creating your feast to share with others. Thank you for sharing photos of your amazing creations on Twitter and Instagram and for taking time to leave comments. It really makes my day to see what you come up with and how you interpret my recipes.

Sammie xx

Share
Facebooktwitterpinterestlinkedintumblr

Muesli Flapjack Squares

Share
Facebooktwitterpinterestlinkedintumblr

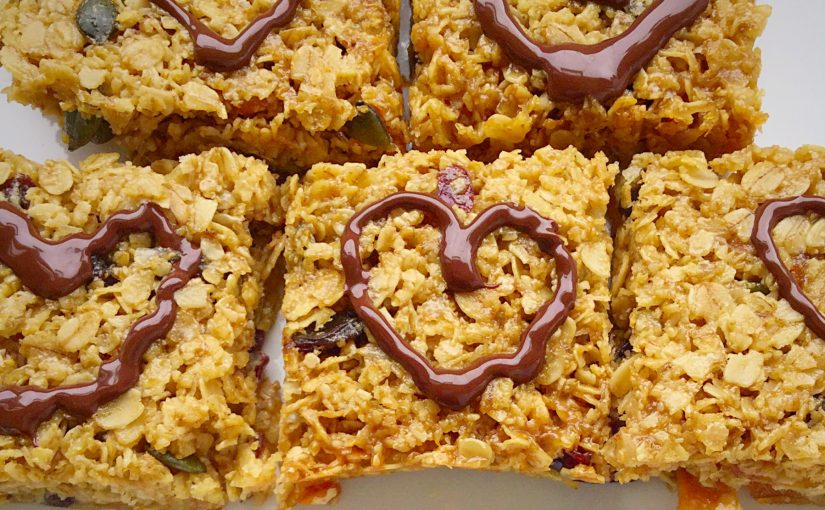
Muesli Flapjack Squares are THE answer to rushed mornings and missed breakfasts. Make these at the weekend and you’ve got brekkie covered for the whole week. Ooh and did I mention they’re gluten free too!

Muesli Flapjack Squares

Most people I know don’t have hours of time to spare in the mornings, during the week. They know breakfast is THE most important meal of the day, so in a bid to give their body something they grab a latte and coffee shop choccie muffin on the way to work. Then wonder why they are starving again by 10am if not sooner.

One of these Muesli Flapjack Squares will keep you going until lunchtime!

Breakfast – The Most Important Meal

Now eating one of these delicious Muesli Flapjack Squares isn’t the same as sitting down with a bowl of muesli, or a plate of wholemeal toast and homemade jam and a cup of coffee. But, they are a whole lot better both for your body and you wallet, than the take out option.

Muesli Flapjack Squares

Flapjacks do contain both sugar and butter, as do the take out muffins. I have tried to reduce both and even tried to switch to honey, but, unfortunately I haven’t cracked that recipe code yet.

What I have done is taken a fabulous gluten free, muesli mix made by Delicious Alchemy and turned it into the gluten free Muesli Flapjack Squares. So yes you’ll get the initial sugar hit and a wee bit of caffeine from the dark chocolate, but instead of the post sugar slump, the oats, seeds and dried fruit will start slowly releasing their energy – sustaining you until lunch.

Too good not to take a bite!

With everything made in one bowl, a little mixing, 20 minutes in the oven, cool then swirl on some chocolate, these can easily made by anyone.

If buying a different muesli from the one suggested ensure that it has no added sugar, salt or fat and of course, that it’s gluten free if you have dietary intolerances.

Recipe: Makes 12 Muesli Flapjack Squares

225g/8oz Unsalted Butter

100g/4oz Light Soft Brown Sugar

1/4tsp Sea Salt – I use Maldon

100g/4oz Golden Syrup – light corn syrup

425g/15oz Muesli – I used Delicious Alchemy

100g/4oz Chopped Dried Fruit – I used mango and apricots (dried)

Method: Preheat the oven to 180C/160C fan, gas mark 4, 350F

Making The Muesli Flapjack Mixture

  • First of all, line a 8″ x 11″  20cm x 28cm Swiss roll, or 2″ deep baking tin with baking parchment. I have found it unnecessary to grease my tin prior to lining, however, using a little butter in the corners, should help the parchment to stick without fully greasing the tin.
  • In a large heatproof and microwaveable bowl add the butter and then sugar.
  • Place in the microwave a heat on low until the butter is just melted.
  • Once melted remove from the microwave and add the golden syrup. Stir with a wooden spoon until everything is well mixed.
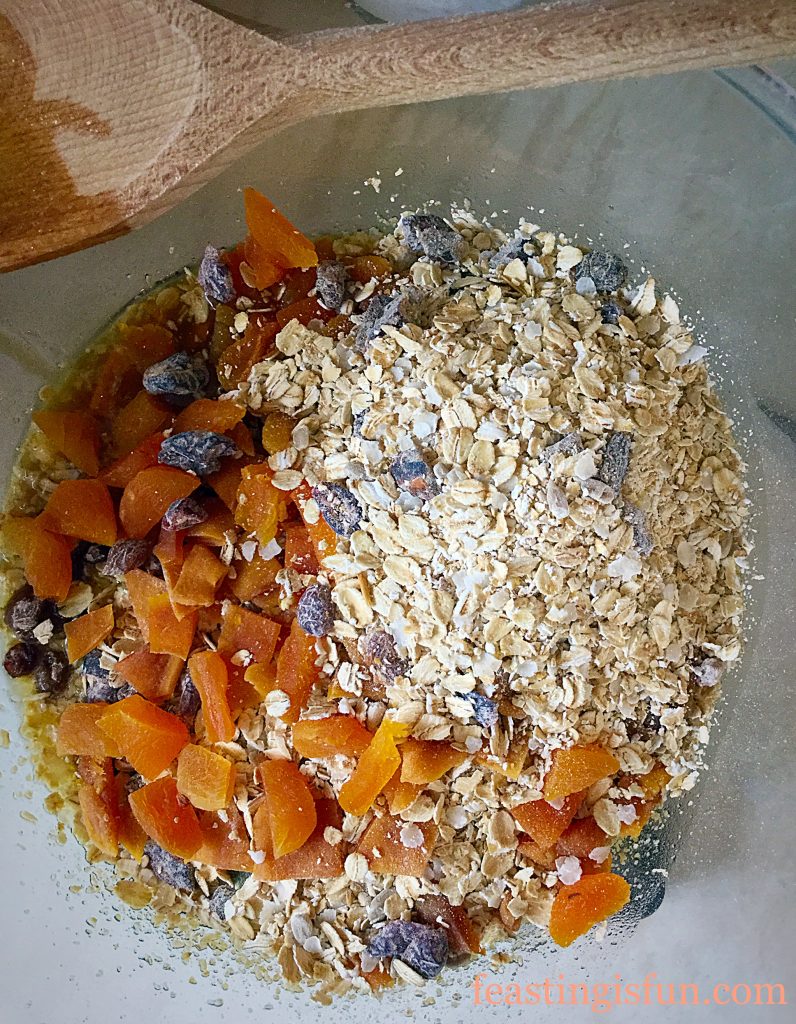
  • Add the muesli, salt and chopped, dried fruit.
FF Muesli Flapjack Squares
Now to get mixing!
  • Next stir everything together until it is all covered in the glossy butter mixture.
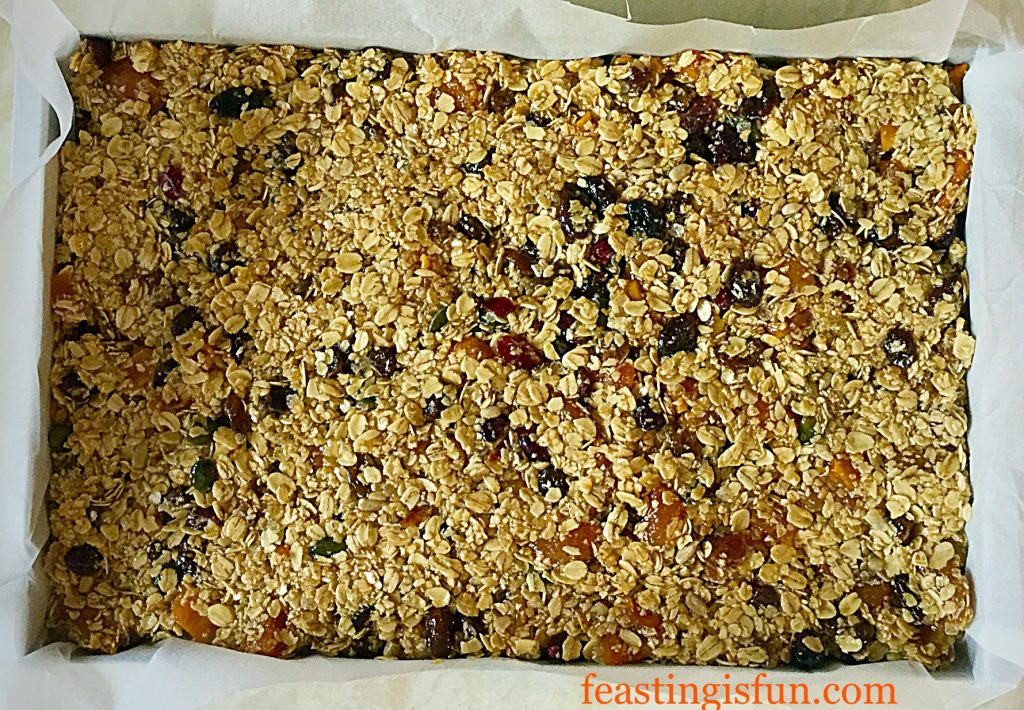
  • Tip the mixture into the prepared pan and press flat and even using the back of a dessert spoon.
FF Muesli Flapjack Squares
Pressed evenly into the tin, ready for the oven.

Baking The Flapjacks

  • Place in the centre of the oven and bake for exactly 20 minutes.
  • As soon as the baking time is up remove from the oven and allow to cool completely in the tin.
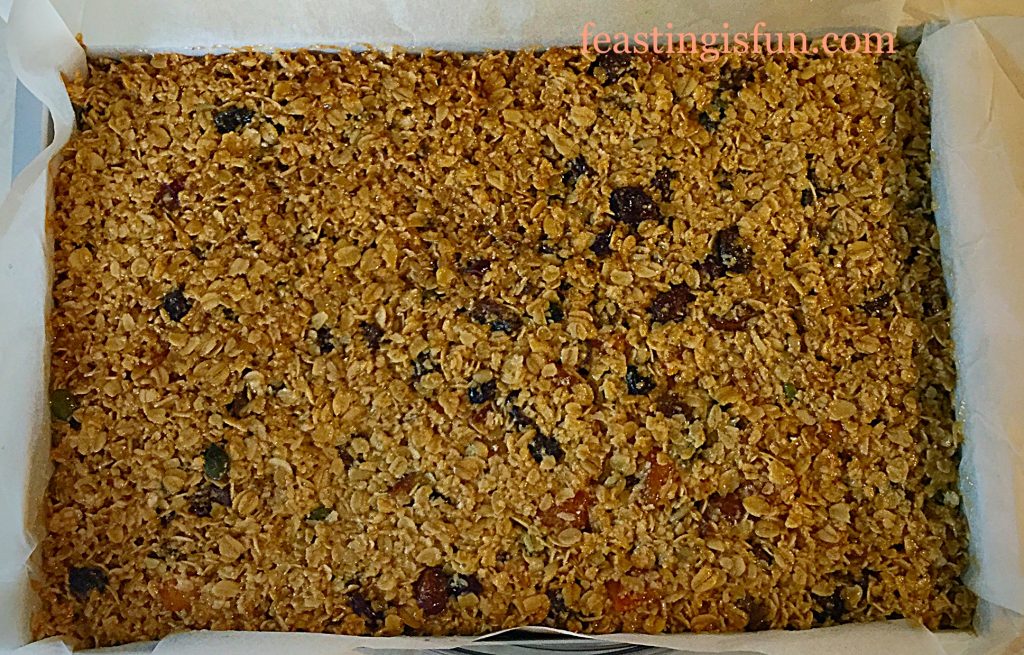
FF Muesli Flapjack Squares
Muesli Flapjack Squares beautifully baked and golden.
  • When cooled lift the flapjack slab from the tin on to a board.
  • Cut into 12 even squares (if you look mine aren’t that even – oops)!
  • Melt the dark chocolate in a heatproof, microwaveable bowl until almost melted. Remove and stir until completely melted.
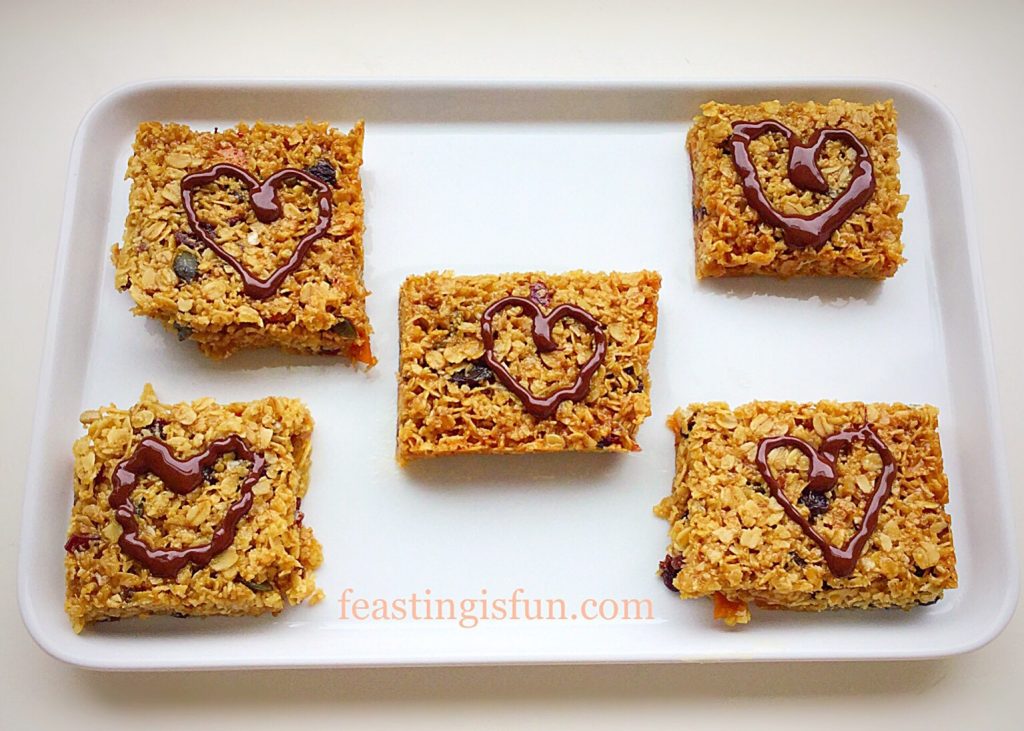
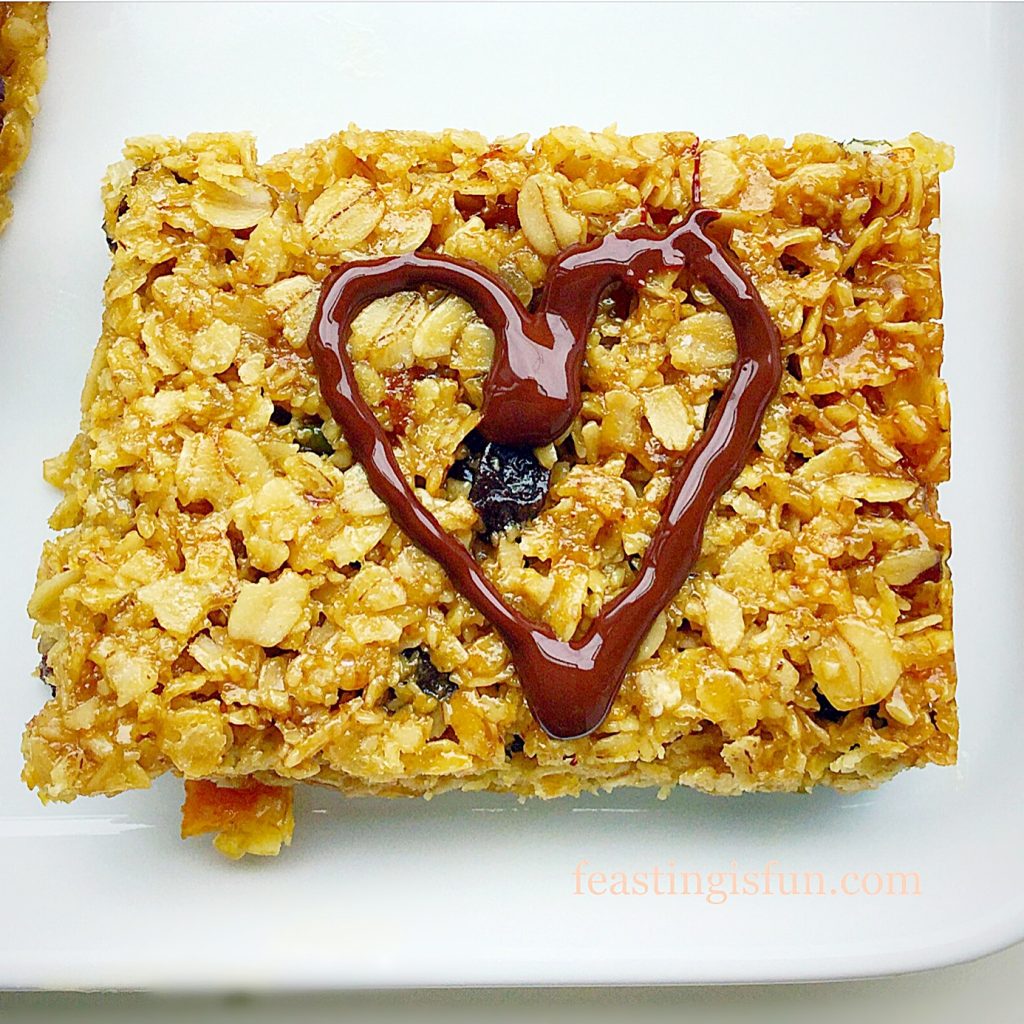
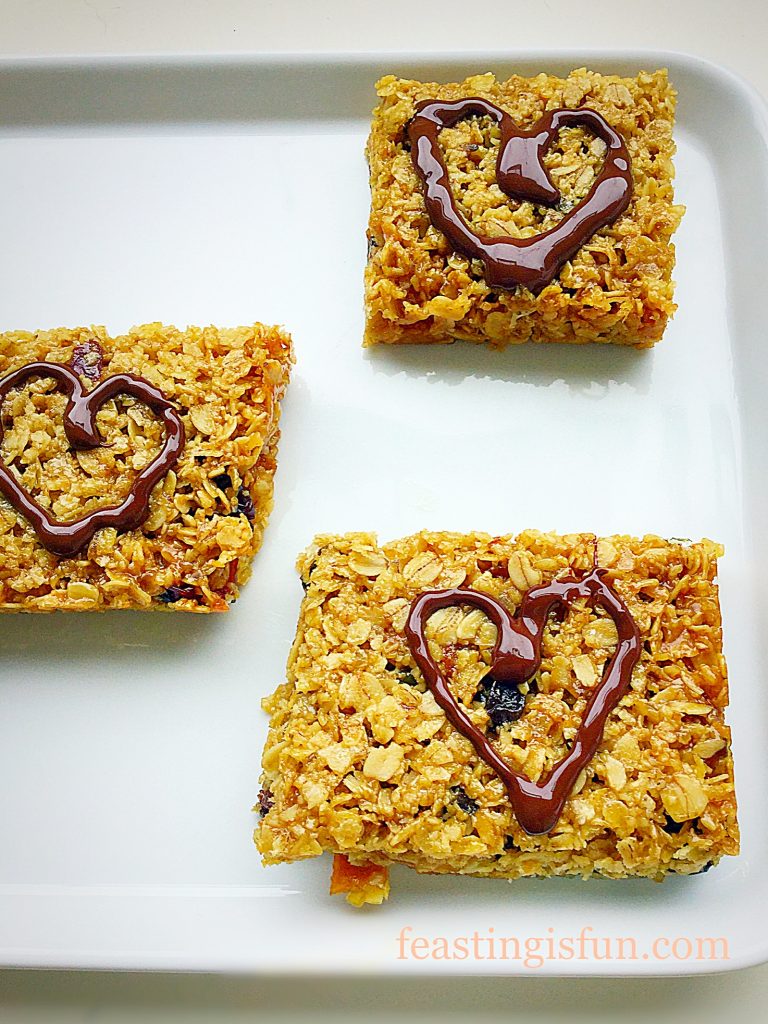
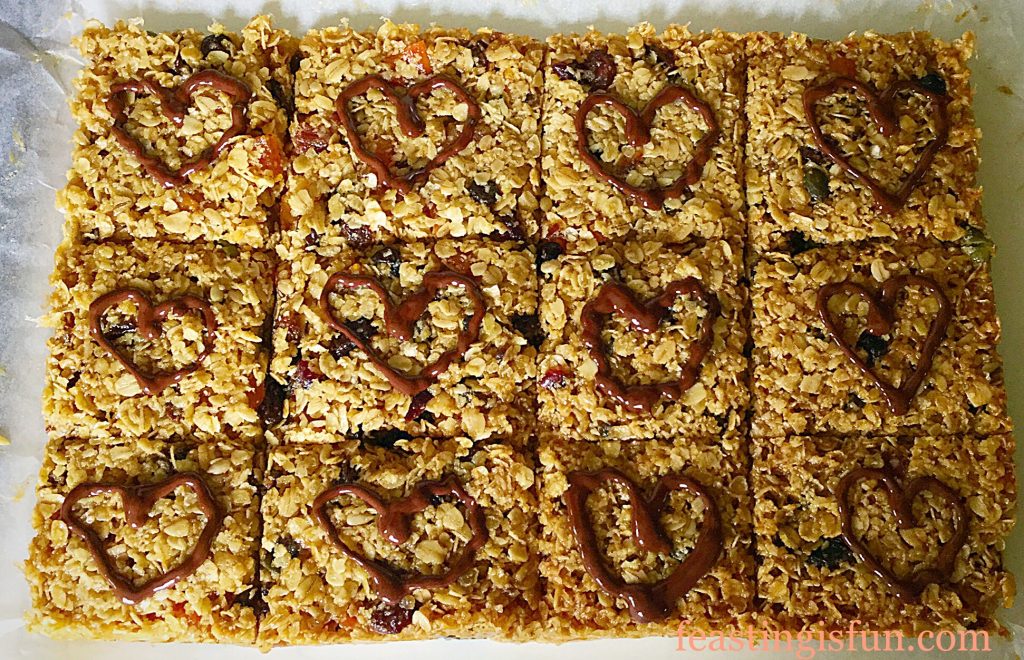
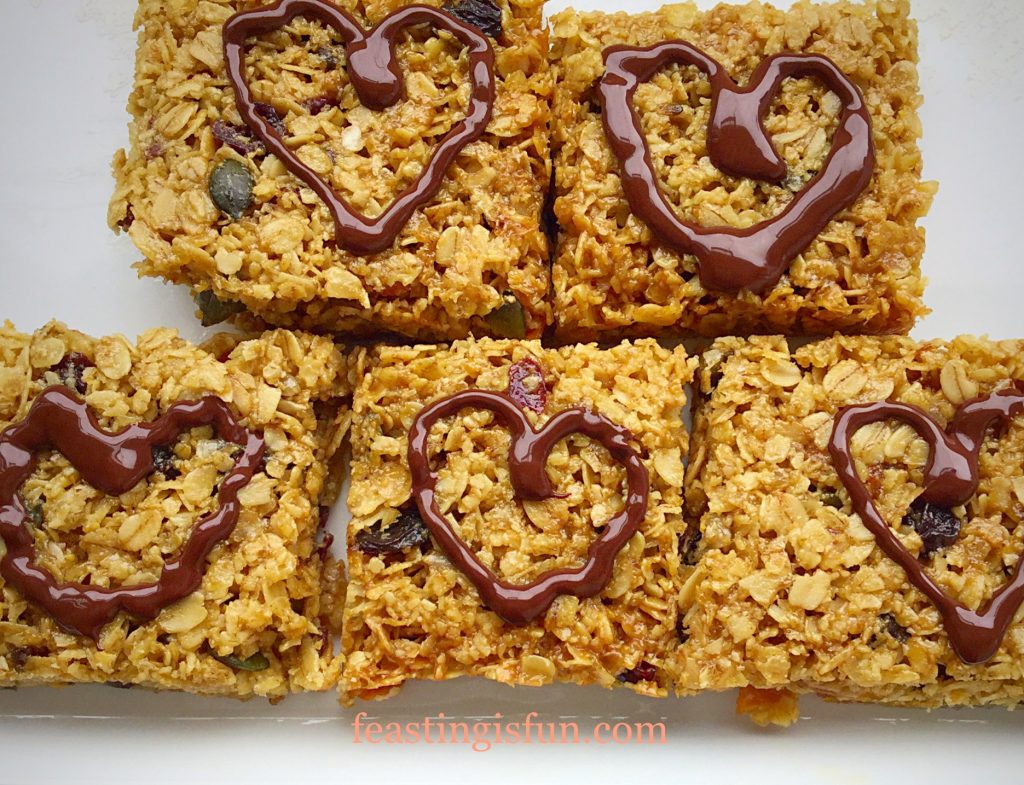
  • Drizzle over the squares, or fill a small piping bag and pipe hearts on each square.
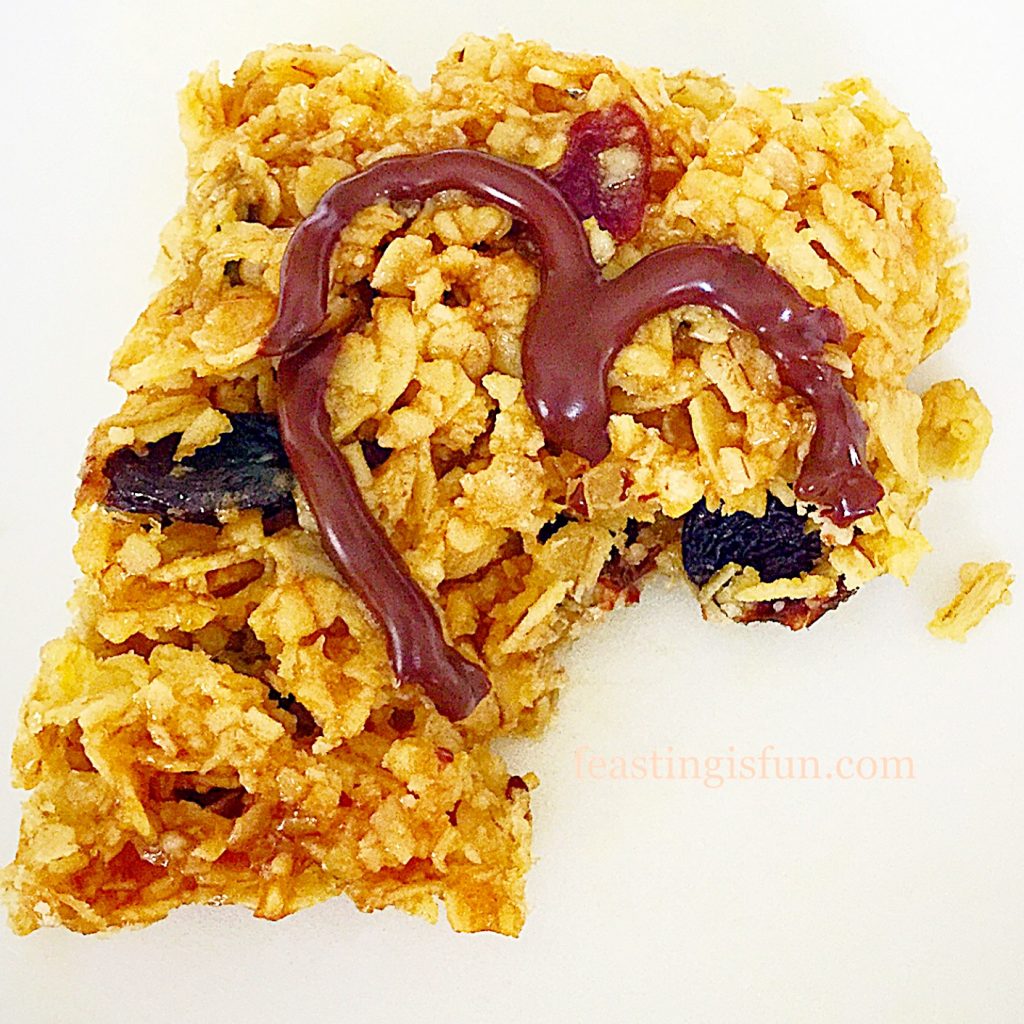
Muesli Flapjack Squares
Beautifully decorated with a heart.

During hot weather it might be worth popping the Muesli Flapjack Squares into the fridge for an hour. This will set the chocolate and really firm up the bars.

I like to wrap them in baking parchment for packed lunches, cling film and foil work well too.

Store them in an airtight container. I use an old biscuit tin and separate layers with baking parchment.

FF Muesli Flapjack Squares
Muesli Flapjack Squares a great solution to breakfast.

Give yourself a pat on the back knowing you have breakfast sorted for the week!!

If you have enjoyed these Muesli Flapjack Squares you may also like these:

Double Cherry Drizzle Oat Bars

FF Muesli Flapjack Squares
Double Cherry Drizzle Oat Bars a delicious oat biscuit base topped with cherry sponge.

Macacdamia Apricot Flapjacks

FF Muesli Flapjack Squares
Macadamia Apricot Flapjacks another delicious flapjack bar.

Lemon Drizzle Cake Bars

FF Muesli Flapjack Squares
Lemon Drizzle Cake Bars with a layer of lemon curd on top of an oat biscuit base.

All of the recipes above are easy to make and are fabulous food on the go. Ideal for packed lunches, picnics, or simply having something on hand at home that easily fits in a tin.

I deliberately left nuts out of this recipe so that more people on a restricted diet can enjoy it. I’ve also successfully switched butter for coconut oil in my Coconut Almond Date Flapjacks, which would make this recipe suitable for those with lactose intolerance.

It is my intention to make as many recipes as possible versatile, so that those with dietary restrictions can also have fun feasting!

Sammie xx

Delicious Alchemy provided the muesli mix for me to try. All opinions, views, content and photographs are my own. Please see my Disclosure Policy.

Share
Facebooktwitterpinterestlinkedintumblr