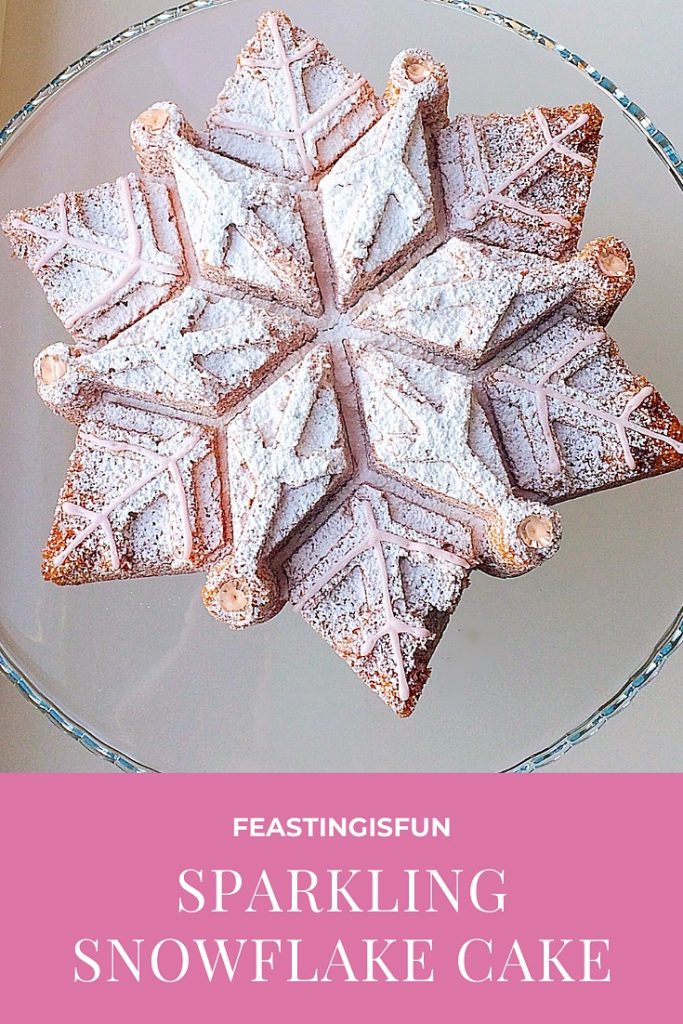
Sparkling Snowflake Cake

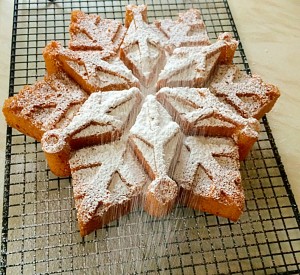
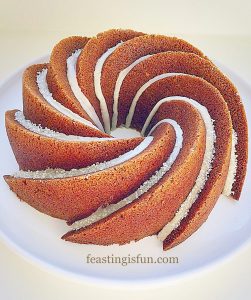
Merry Christmas one and all. So, it is my pleasure to be sharing this beautiful Sparkling Snowflake Cake with you today.
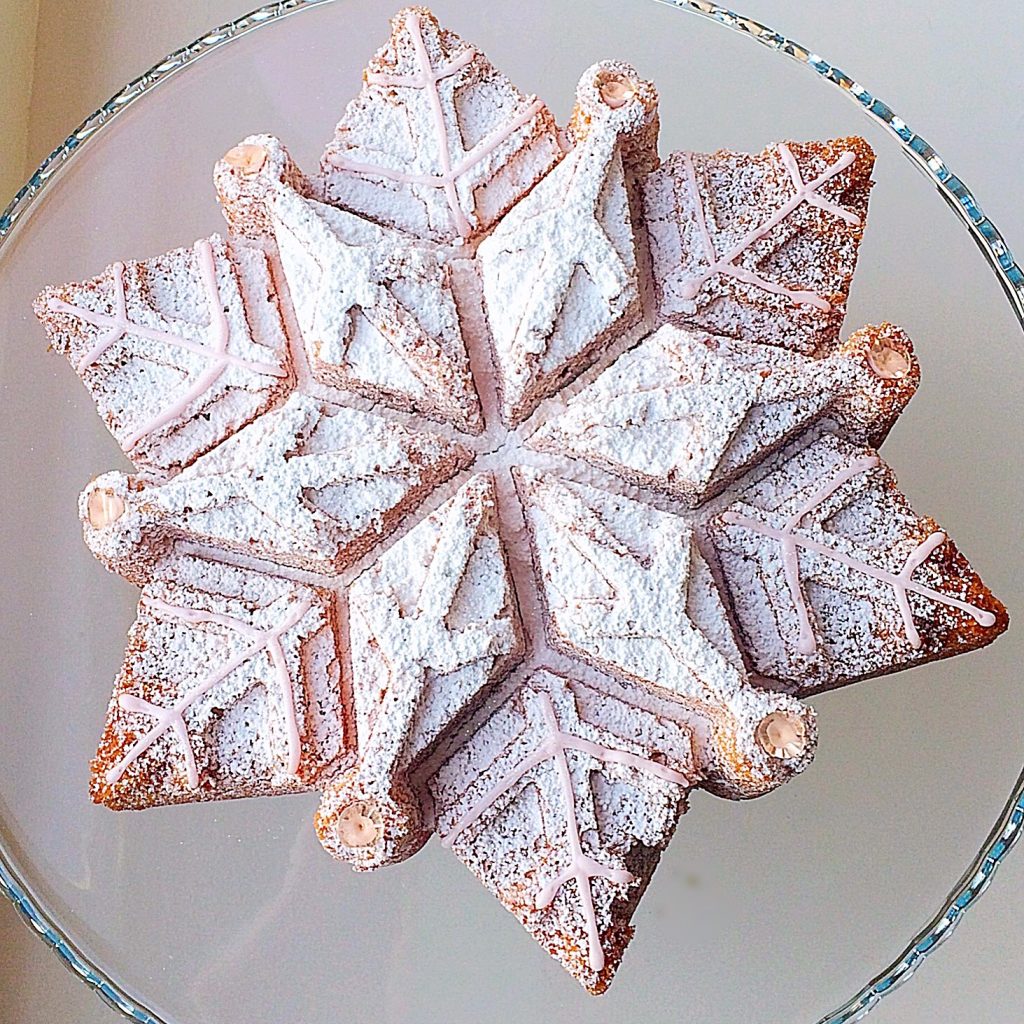
Vanilla Sparkling Snowflake Cake

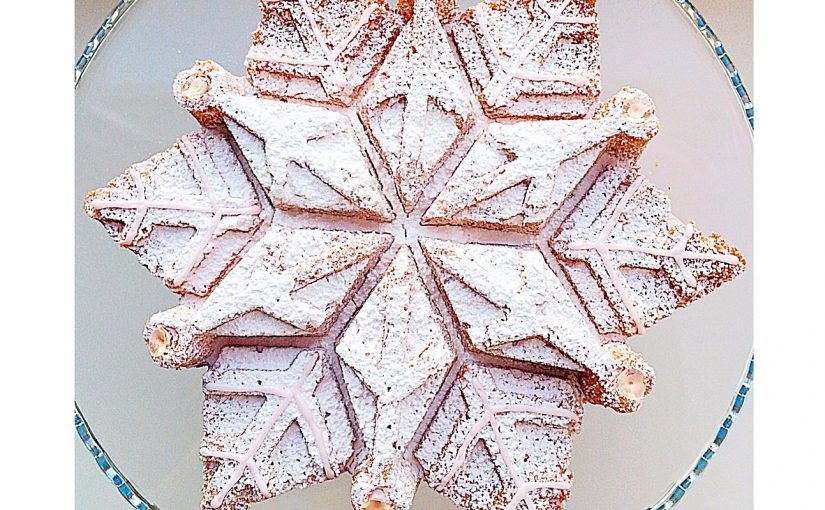
This Sparkling Snowflake Cake is stunning and I can take no credit for the beautiful detail. Because the cake is baked in a beautiful Bundt tin made by Nordicware . Amazon, ebay and Lakeland UK are all stockists of Bundt tins, it really is worth shopping around as prices vary. While Bundt tins may not be cheap, treated with care and looked after they will last a life time.

Another beauty of Bundt pans is the beautiful array of delightful shapes available. Although I embellished this Sparkling Snowflake Cake with edible diamonds, a dusting of edible glitter and some piped icing, a dusting of icing sugar would be perfect on it’s own.
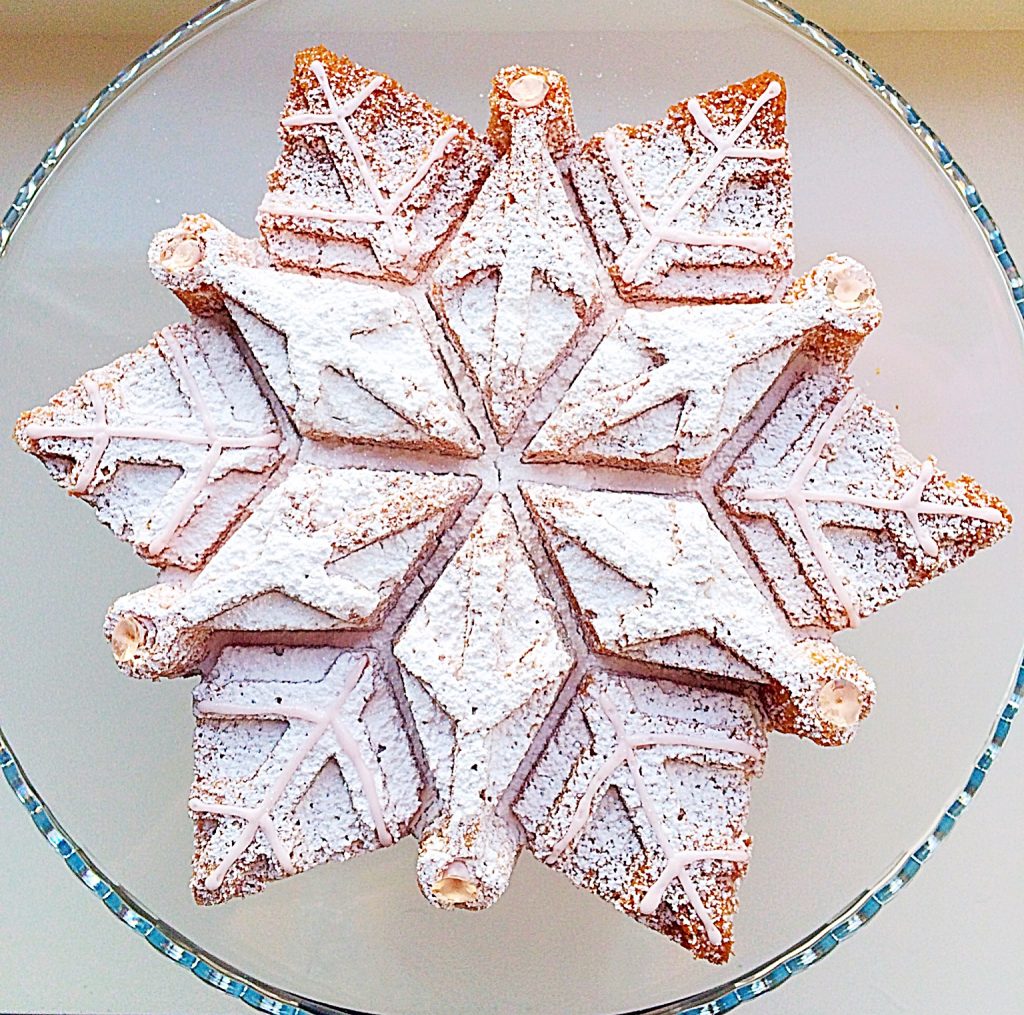
Vanilla Sparkling Snowflake Cake

Birthday and Christmas Celebrations

Our youngest daughter should have been a near Christmas baby, however, she obligingly arrived early! So this Sparkling Snowflake Cake was made for her birthday.

Because she isn’t too keen on icing this cake was perfect for her. Resulting in a deliciously moist, vanilla sponge, dusted with flavoured icing sugar. The flavour I used is called Santa’s Snowball, perfect for this beautiful snowflake.
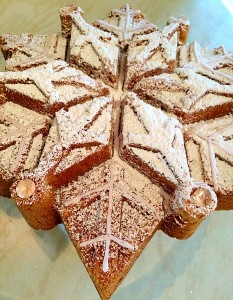
Sparkling Snowflake Cake vanilla sponge dusted with flavoured icing sugar www.feastingisfun.com
Sparkling Snowflake Cake


Using edible diamonds on this cake adds extra sparkle. White, edible, sparkly glitter was also dusted on top of the icing sugar. It is a real shame that it didn’t photograph well, in any light, trust me I tried. Moving the cake aound the house to catch the small amount of sunlight that we get this time of year, shining through the windows. The lengths I will go to trying to get the perfect shot!

So, you’ll have to trust in me that this cake really, really sparkles. It looks so pretty, twinkling like a real snowflake. Although we may not get snow this Christmas, we can certainly make your own!
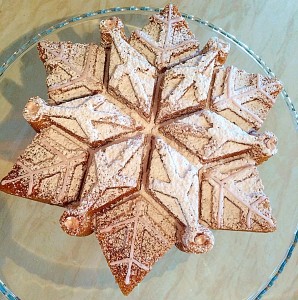
Sparkling Snowflake Cake catches the light and sparkles like a real snowflake www.feastingisfun.com
Sparkling Snowflake Cake


Here is the Sparkling Snowflake Cake lit by candles for our daughter’s special day. Also, it would make a fantastic alternative to the traditional, fruit laden Christmas Cake. Set on a cake stand, or pretty plate, surrounded by tea light candles which add extra sparkle. Resulting in a glittering, festive feast.
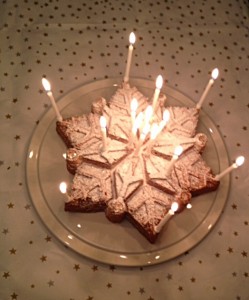
Spending Snowflake Cake stunning with candles www.feastingisfun.com
Sparkling Snowflake Cake

Preparing the Bundt Tin

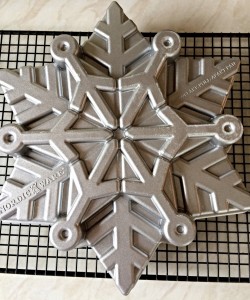
Here is the incredibly detailed snowflake Bundt tin that I used for this cake, alongside is Wilton bake easy, cake release spray. I cannot emphasise enough how important it is to use cake release spray (or the brush on version) for this tin. I tried this recipe, brushing the tin with melted butter, as I have with previous Bundt bakes and the cake stuck. Badly. It was an epic disaster. And I cried, how silly is that? Finally, determined not to be beaten by a cake tin AND with lots of tips and advice from my Bundt baker friends on Twitter, I rebaked the cake and SUCCESS.
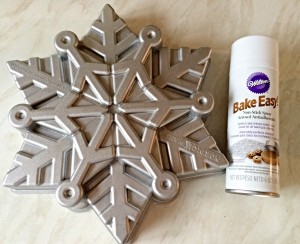
Snowflake Bundt tin and cake release spray.


Now time to share how I made this wonder.

Recipe: Makes one Sparkling Snowflake Cake that will serve 12

225g/8oz Unsalted Butter at room temperature

225g/8oz Caster Sugar

4 Large Eggs

1tsp Vanilla Extract – I use Nielsen-Massey 

225g/8oz Self Raising White Flour

1/4tsp Salt

100g/4oz Icing Sugar

Optional – Edible glitter in the colour of your choice and edible diamonds. Both available from cake decorating shops and Amazon.

Method: Preheat oven to 180C/160C fan, 350F, gas mark 4

First of all thoroughly spray or brush the Bundt tin with cake release. I will not judge if you want to give it a double coating (I did!).

Making the Cake Batter

  • Cream the butter and sugar together in a large bowl until light and fluffy.
  • Add the salt, vanilla extract, one third of the flour and 2 eggs. Mix until just incorporated.
  • Next add another third of flour and the last 2 eggs and mix as before.
  • Finally add the remaining flour and gently mix into the cake batter until incorporated, taking care not to over mix.
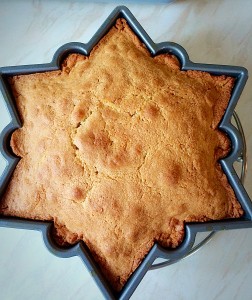
  • Spoon the cake batter into the prepared Bundt tin ensuring it is evenly spread into all the points.
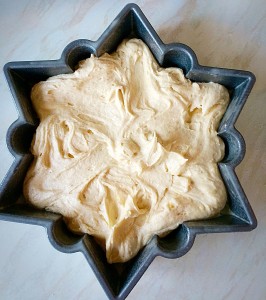
Ready to go into the oven.

Baking the Snowflake Cake

  • Place the tin in the oven and bake for 30-35 minutes.
  • The cake is cooked when pressed lightly in the center and it springs back, or an inserted skewer comes out clean.
  • As soon as the cake is baked remove from the oven and place the tin on a cooling rack or trivet.

Allow to cool for 10 minutes in the tin.

  • Leave the cake to cool in the tin for 10 minutes.
  • Invert the Bundt tin on to a cooling rack.

Invert the tin onto a cooling rack.

  • Leave for a further 5 minutes. If the cake doesn’t turn out immediately gently tap the tin and the cake should release.
  • If the cake still will not turn out, gently go around the ouside of the cake with a small palette knife. Re-invert the tin on to a cooling rack, the cake should release easily.
  • Most importantly, the more you use a Bundt tin the more non stick it becomes.
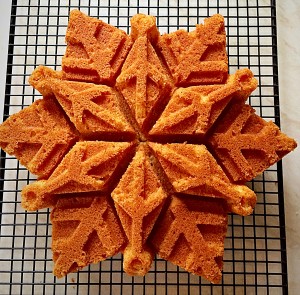
Sparkling Snowflake Cake look at the beautiful detail.
Sparkling Snowflake Cake 

Adding Sparkle to the Snowflake Cake

Sparkling Snowflake Cake dusted with flavoured icing sugar.
Sparkling Snowflake Cake
  • First of all, dust the cake liberally with icing sugar and then sprinkle over edible glitter.
  • I made a small batch of royal icing, lightly tinted pink and piped detail on to the outer points.
  • Finally, place edible diamond in the round dips, as seen in the photo below.
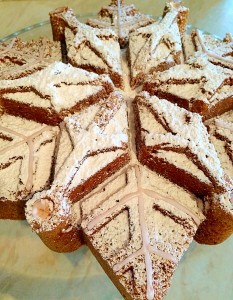
Sparkling Snowflake Cake edible diamonds, edible glitter and piping add an extra special touch to this already beautiful cake.
Sparkling Snowflake Cake


My Sparkling Snowflake Cake is as beautiful as it is delicious. It would make the perfect gift as would the tin. A great tip if you know someone who enjoys baking.
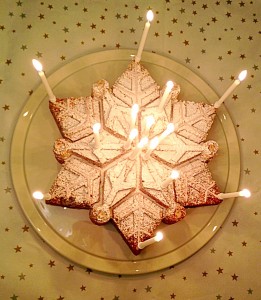
Sparkling Snowflake Cake perfect for Christmas and celebrating www.feastingisfun.com
Sparkling Snowflake Cake 

If you have Disney’s Frozen fans in your household, a touch of blue, or all white and this cake will have them singing “Let it snow!”

Store the cooled cake in an airtight container and eat within 5 days.

If you enjoyed the recipe for this Sparkling Snowflake Cake you may also like these:

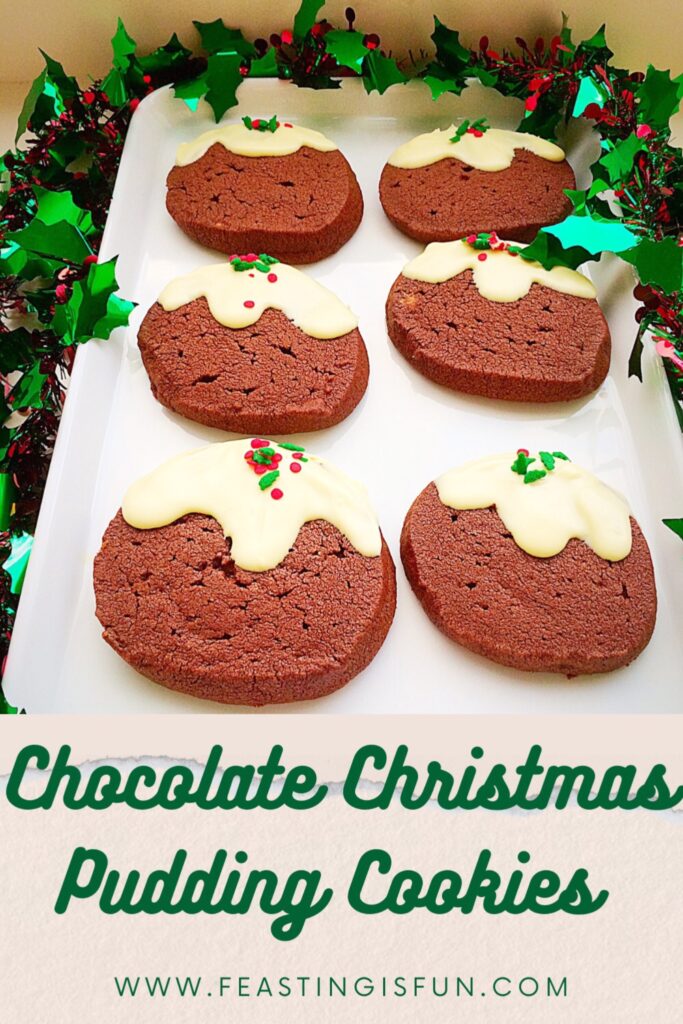
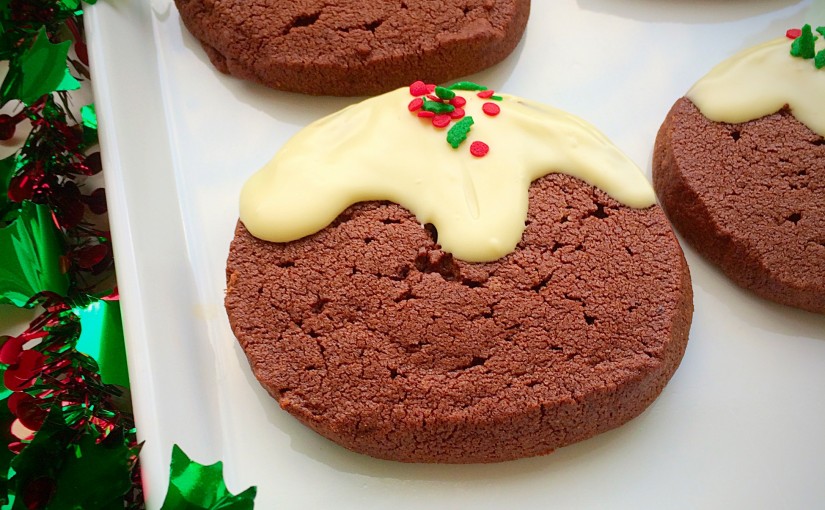
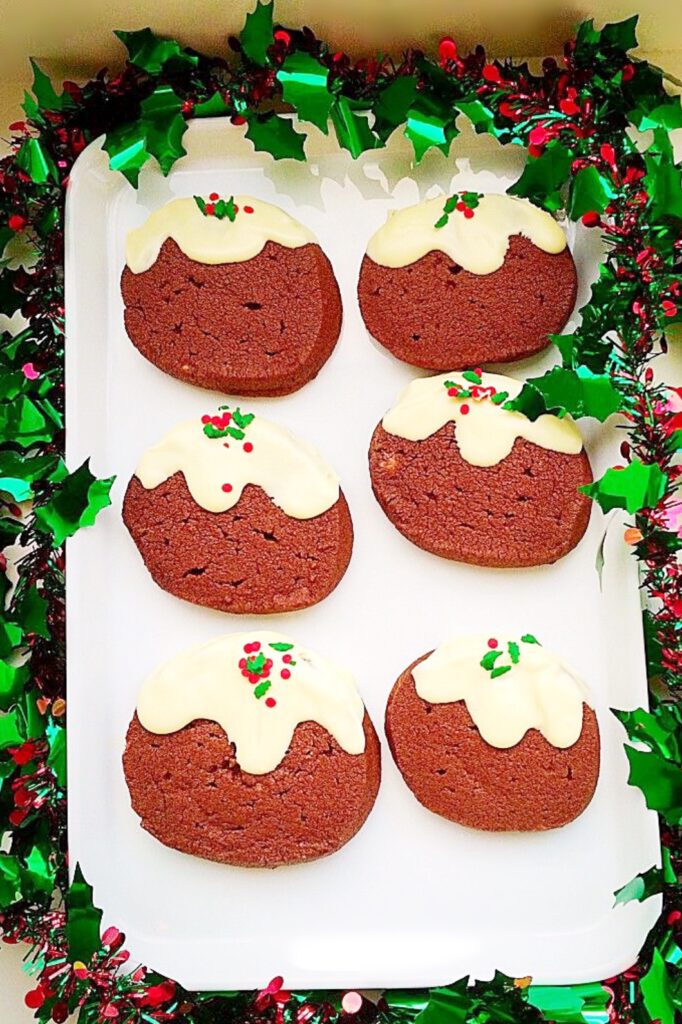
Chocolate Christmas Pudding Cookies
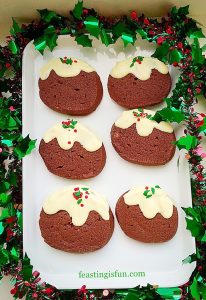
FF Sparkling Snowflake Cake
Chocolate Christmas Pudding Cookies

Cream Cheese Pastry Mince Pies

FF Sparkling Snowflake Cake
Cream Cheese Pastry Mince Pies

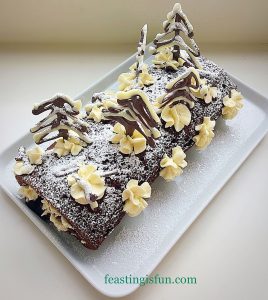
Snowy Black Forest Roulade 

FF Sparkling Snowflake Cake
Snowy Black Forest Roulade

I especially enjoy baking during the festive season. Rather than relying on shop bought, prepared food (although they have their place), spending time in the kitchen relaxes me. While listening to Christmas carols I am lost in a world of delicious aromas and sparkles. And, since it is the season of goodwill, making cookies and mince pies are a great gift for sharing with family, friends and neighbours. Above all, it is a time to give thanks for the baby Jesus.

Sammie xx

No part of this post may be reproduced or duplicated without the written permission of the owner. Please see my Disclosure Policy. 

Chocolate Christmas Pudding Cookies

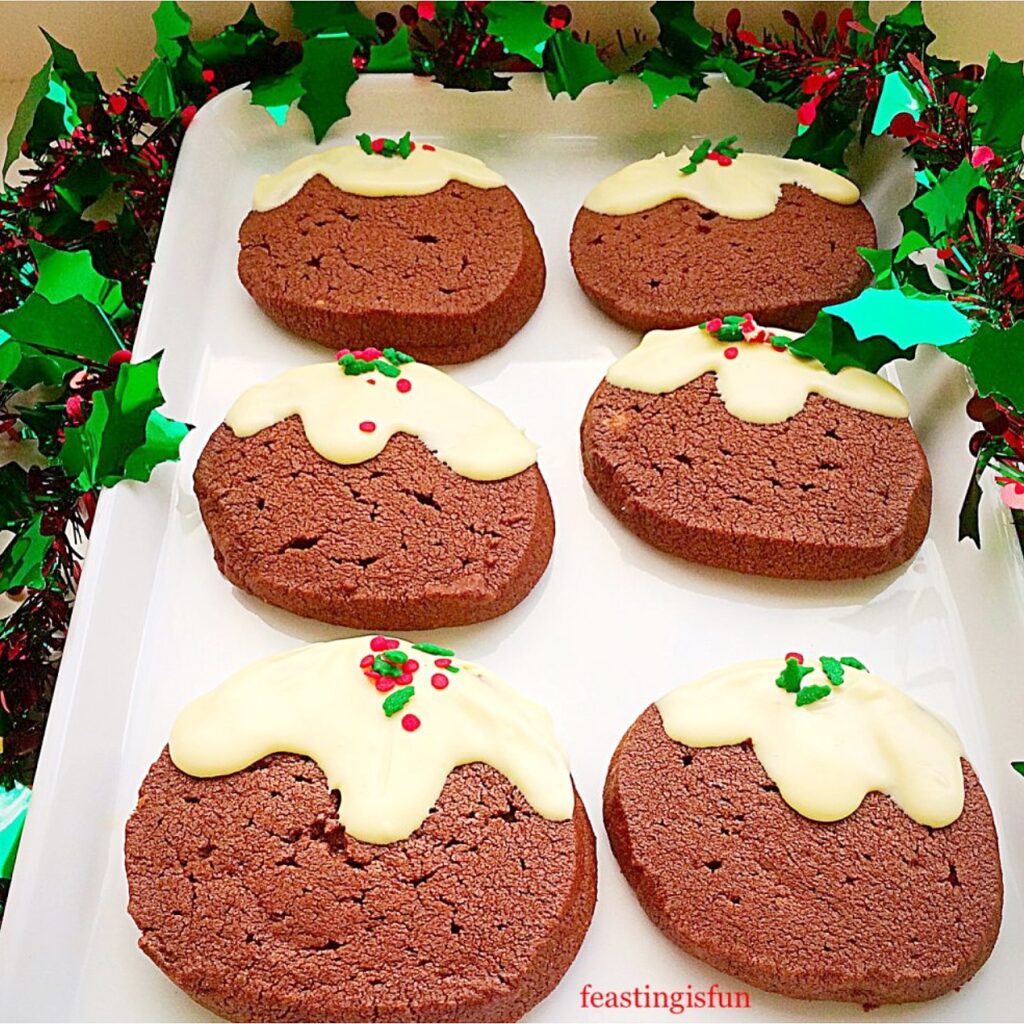
Chocolate Christmas Pudding Cookies. The only Christmas cookie recipe you need as it is so easy to follow, make and bake. Actually, they are the ideal bake to get the whole family involved in, especially children. Also, think about the chocolate deliciousness that are these festive, fun cookies that are perfect to share.

Christmas cookies decorated to look like Christmas puddings.

Hello everyone, how is the run up to Christmas going for you?

This time of year can be completely manic and overwhelming for me and strange as it may seem, a day spent baking and creating, although a luxury, is a great way for me to chill out and really enjoy the festive season.

I have baked these Chocolate Christmas Pudding Cookies twice now, the second batch was larger because they disappeared so quickly the first time! Quick note, since originally posting this recipe these cookies have become a must have Christmas tradition in our home. While certain friends and family also look forward to their cellophane bag of fresh Chocolate Christmas Pudding Cookies neatly tied with a festive bow!

A single Christmas chocolate pudding cookie surrounded by sparkling festive decorations.
Chocolate Christmas Pudding Cookies

Giving Cookies As Christmas Gifts

Ah the look on our little (teenagers but still my babies) cherubs face as I give these cookies away is priceless! I thought I’d done a pretty good job as a mum, teaching them to share. Apparently not!!! Because I’m sure these cookies would be kept in a locked safe if our children had their way.

Rich chocolate cookies, with a hint of brownie flavour, topped with melted white chocolate and sprinkles. Utterly divine, decadent and delicious and perfect for Christmas baking.

The chocolate smell as these cookies bake will have people knocking at your front door, drawn by the aroma. If it could be bottled, the chocolate smell would be a hit. As it is, we get to bake the cookies and then eat them – sharing of course!

Due to their popularity, I would highly recommend making a double batch of the cookie dough. Since it’s hardly any extra effort and you can choose to bake all the cookies in one hit, or leave half of the dough in the fridge for up to a week.

A plate of festive cocoa biscuits.
Chocolate Christmas Pudding Cookies.

My Chocolate Christmas Pudding Cookies make perfect presents. Pop a few in a cellophane bag, tie with pretty ribbon and hand out to friends, family, neighbours, the postman. I honestly don’t think a gift made with love by ourselves can be beaten.

Making these cookies is a whizz! Since the cookie dough comes together in moments, then rolled into a log, wrapped in cling  film and refrigerated until it is firm. The chocolate, dough log is then sliced and the slices are baked. As soon as the cookies have cooled spoon on white chocolate, add sprinkles and wait to set.

Festive cocoa flavoured biscuits that resemble a traditional Christmas dessert on a white plate. Image sized for Pinterest with descriptive graphics.

Recipe : Makes approx 25 Chocolate Christmas Pudding Cookies

225g/8oz Unsalted Butter – at room temperature

150g/5oz Light Soft Brown Sugar

1 Large Egg Yolk

1tsp Vanilla Extract – I use Nielsen-Massey 

1/4tsp Salt

225g/8oz Plain White Flour

50g/2oz Cocoa Powder – I use Callebaut 

100g/4oz White Chocolate

Sprinkles for the top of the cookies, I’ve used holly leaves and berries which I found on Amazon. Alternatively, you can also make the decorations from coloured fondant icing.

Method:

Making the Chocolate Cookie Batter

Place the butter and sugar into a large bowl. Whisk until light and fluffy.
Add the egg yolk, vanilla extract and salt. Whisk until fully incorporated.
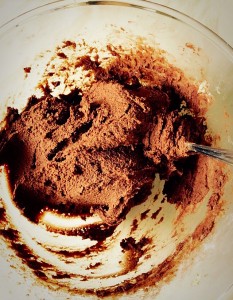
Sift the flour and cocoa powder into the bowl. Mix slowly until you have all the ingredients are combined.
Sift the flour and cocoa powder into the bowl. Mix slowly until you have all the ingredients combined.
You now have a bowl of the most delicious chocolate cookie dough!

Wipe your work surface with a clean, damp, cloth. Lay a good length of cling film onto the damp surface – the water ‘sticks’ the cling film in place so that it stays flat and doesn’t move.

Shaping the Cookie Dough

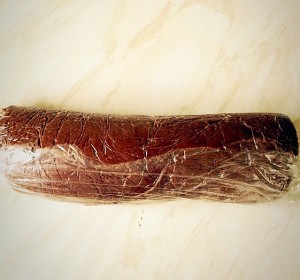
Place the dough onto the cling film in a rough sausage shape.
Wrap the dough up and roll the dough into a sausage shape approx 1.5"/3.5cm diameter.
Wrap the dough up and roll the dough into a sausage shape approx 1.5″/3.5cm diameter.

Place the dough log into the fridge for at least 2 hours (it will keep for a week, well wrapped). The dough log needs to be cold and firm before you can slice the cookies.

Preheat the oven to 180/160C fan, gas mark 4, 350F.

Line 2 large baking sheets with parchment paper (you may need to cook the cookies in batches). Remove the chocolate dough log from the fridge. Dont worry if the bottom of the log has flatted slightly, it just adds to the christmas pudding look.

Slicing And Baking The Chocolate Christmas Pudding Cookies

Unwrap the cookie dough and slice into individual cookies approx 1cm/0.5" thick.
Unwrap the cookie dough and slice into individual cookies approx 1cm/0.5″ thick.
Place the uncooked cookies onto a parchment paper lined baking sheet, allowing room for expansion between each cookie.

Place the baking trays into the oven and bake for 15-20 minutes, depending how thick/big your cookies are. My cookies took 20 minutes to bake.

It is difficult to tell when the cookies are cooked, due to their colour! They are baked when the surface looks dull however, they don’t set hard until cooled.

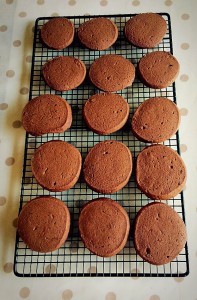
As soon as the cookies are baked remove from the oven and allow to cool for at least 15 minutes on the baking tray (it is fine to leave them to cool completely on the tray) you can then move them, using a palette knife to a cooling rack. If after 10 minutes cooling they break  when trying to transfer them, pop them back into the oven for another 5 minutes.

Chocolate Christmas Pudding Cookies place onto a cooling rack to cool completely before icing. www.feastingisfun.com

Once the cookies have completely cooled it’s time to get creative and frost them WITH CHOCOLATE!

Decorating the Cookies – Childs Play!

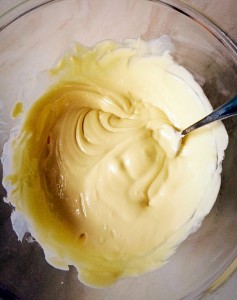
Chop or break up your white chocolate and place into a heat proof bowl. Either place the bowl on top of a saucepan as I did here  Chocolate Sparkle Cake , or melt the chocolate using a microwave, on medium setting, in short 20 second bursts, stirring after each zap! Remove the bowl just before the chocolate is completely melted and stir continuosly, the heat already in the bowl will melt the remaining chocolate.

Note: When making these cookies with children, if the bowl is hot, decant the melted chocolate into a cool bowl before decorating the cookies.

Melt the white chocolate.

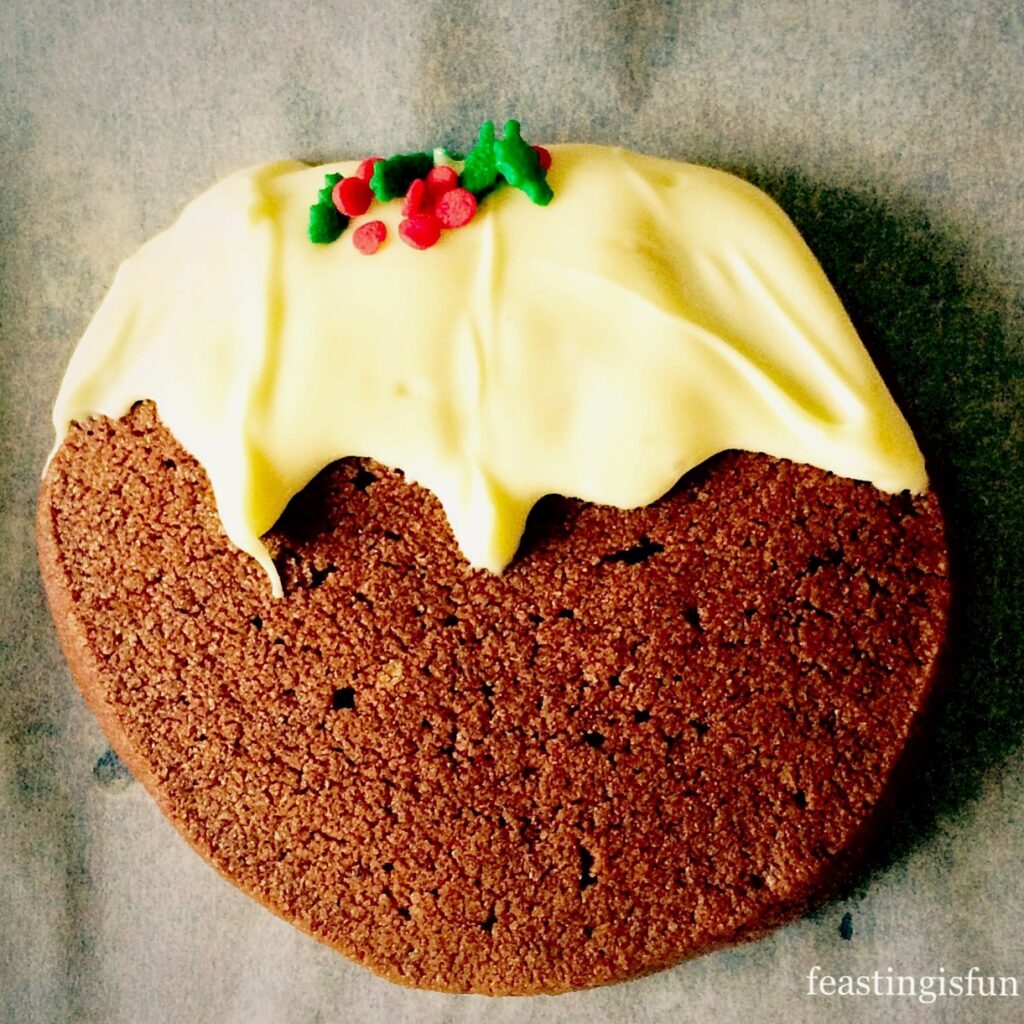
Using a teaspoon, place the melted chocolate on the top of the cookie, encouraging it to ‘drip’ down the ‘christmas pudding’ with the back of the spoon.

Chocolate Christmas Pudding Cookies decorated with white chocolate and sprinkles.

The effect is so easy, yet incredible. These Chocolate Christmas Pudding Cookies really do look like the real thing with cream dripping down from the top.

A large batch of festive biscuits freshly decorated and left to set on baking parchment.
Chocolate Christmas Pudding Cookies

Storing and Packaging the Cookies

Chocolate Christmas Pudding Cookies last for a week in an air tight container. I used a tin to store ours in and placed a piece of parchment paper between each layer, to keep the cookie’s presentation perfect. This is good advice if you are cooking alone and making these ahead of time.

When baking and decorating these with children, to be completely honest, you will be very lucky to even see the chocolate set!! So it’s rather a nice idea to have some already made and packaged in small cellophane bags, tied with ribbon. This way the children can take home extra cookies to share with their families.

I’m assuming everyone bakes with their children and their friends, when they come round for tea?

If you are a teacher/teaching assistant/child minder or Sunday school teacher, making the undecorated biscuits ahead of time and then letting little and big kids alike decorate their own, is a wonderful pre-Christmas activity.

Christmas cookies decorated to look like Christmas puddings.

As well as these Chocolate Christmas Pudding Cookies you may like these other Christmas Bakes:

Cream Cheese Pastry Mince Pies

FF Cream Cheese Pastry Mince Pies
Cream Cheese Pastry Mince Pies can you stop at one?

Sparkling Snowflake Cake

FF Sparkling Snowflake Cake
Sparkling Snowflake Cake edible diamonds and a dusting of flavoured icing sugar set this cake off www.feastingisfun.com

Peppermint Candy Cane Topped Brownies 

FF Chocolate Christmas Pudding Cookies
Peppermint Candy Cane Topped Brownies

Please post photos of your cookies on Twitter/Instagram and tag me in @sammiefeasting. I would love to see what fantastic decorations and creations you bake?

Do you enjoy the build up to Christmas or dread it?

Whatever you do and whoever you bake the with and for, I hope you have lots of fun and these Chocolate Christmas Pudding Cookies bring smiles from all who eat them!

Have a happy Christmas.

Sammie xx

No part of this post may be reproduced or duplicated without the written permission of the owner. Please see my Disclosure Policy.
Chocolate Christmas Pudding Cookies on a platter and descriptive graphics.

Cyber Babies and Real Life

Hi, meet Cody. The hard, plastic, computerised baby that threw me back into a life long past and taught me a few things about myself, Cyber Babies and Real Life.

Cody, the Cyber Baby from another world!

So, a few months ago, our youngest daughter, who turns 15 this week, mooted the idea of bringing a Cyber Baby home.

The school she attends, in what I can only assume is a desperate attempt at preventing teenage pregnancies, has Cyber Babies. These computerised dolls are intended to show ‘girls’ what living with a newborn baby is like.

In today’s modern, blended family, society, it really is a wonder that they see this as a valid exercise – my point being, a larger number of children than ever before, are currently brought up with a variety of siblings, be they whole, half or step, that vary in age from Daddy’s new baby, to Mummy’s eldest child already ripe to yield their own offspring.

I digress. Our daughter was very, very keen about bringing home a Cyber Baby and taking full responsibility for it. A point which was fully emphasised by her elder sister, who told her, and I quote, “You’re not sleeping in our room with a noisy baby, you can sleep downstairs!”

As parents we agreed and triple signed a form (basically signing the value of our house away, should Cyber Baby sustain damage whilst in our home!), agreeing to allow our daughter to bring little bubba home.

Daughter was excited about matching accessories, blanket and car seat for baby and cheerfully counted down the days until Cody (Cyber Babie’s name?) came home.

Cody was sent home, midweek and would be ‘activated’ at 6pm on the Friday evening. Super. Lovely.

On the very next day (Thursday) daughter had very high temperature and came down with a really grotty cold and cough. I prayed hard she would be fine by Friday!

You see, at this point daughter was still blissfully looking forward to Cody’s activation and determined to look after him, without help.

Friday came and Cyber Baby activated. Daughter was still very unwell but thrilled (she had missed 2 days at school, not something she ever does lightly, so when I say she was poorly I mean, that poorly!).

Nobody was allowed near Cody, except for a quick hold and to her credit our daughter took care of him for the entire first night.

Taking care of Cody involved wearing a wrist band that was then swiped across his tummy the moment he cried (left crying for more than 2 minutes and you would be penalised for neglect!). Then he would need either feeding with a bottle, winding or changing. At all other times he slept. Whilst sleeping he made breathing sounds.

Cyber Baby was not woken by loud noises, nor was he comforted by human contact. He was a robot baby!!!

At approximately 11am on Saturday morning our daughter came upstairs, where I, in bed( The Pain Pay Off), Living With Seizures, Migraines)

“Mummy, I feel so ill and I am so tired”. My poor real life baby looked exhausted. My heart broke.

Immediately I took Cyber Baby from her, gave her some medicine and tucked her into bed. She fell asleep almost instantly.

Her elder sister turned out not to have a heart of stone and took Cody from me and looked after him for the rest of the day whilst her mum and sister rested. She even took her mattress downstairs, determined to look after Cyber Baby during the night so her sister could rest.

Then I heard it cry. And it didn’t stop. The crying tore at my heart. I tried to ignore the crying as I found myself walking downstairs to find our eldest daughter doing everything she could to shut the thing up!

I immediately took control, said to our eldest to tuck down, I would settle the baby and look after him for a bit so she could sleep.

Now here’s something you should know, although we have 3 beautiful children, I don’t like babies, or even toddlers really. I have loved and cared for my own with a passion and dedication I didn’t know I possessed. I loved and cherished my sisters children in the same way. But if I am out and a baby is crying 99% of the time it irritates me and I have no desire, whatsoever to calm or soothe the screaming baby/toddler. It’s just how I am.

Except for Cody. Even though I slept with him cuddled on my shoulder, which still bare the bruises from rocking, to burp him. I did care. I cared because he was important to my daughter. When he cried, my heart tugged. I couldn’t ignore a plastic, robot doll when it cried, because that was what it had been programmed to do.

So that night I cared for Cody like he was a real baby. It was hard because physical contact wouldn’t settle him in the way it did my own babies, yet he was still cuddled. He barely whimpered and I’d swiped the thing across his tummy and held a bottle to his mouth. Also alien to me as I breast feed all 3 of our babies.

I looked after him Saturday and Sunday night, as well as helping out through the day on Sunday. I didn’t enjoy the experience, but I didn’t hate it either. Because I was doing it for my daughter and that was enough for me.

Cody deactivated at 6am on Monday morning. I felt relief that our daughter didn’t have the pressure of looking after a Cyber Baby anymore.

He is gone and upon her return from school later that day I reminded our daughter of a saying that many African villages have “It takes a village to raise a child”.

I reassured our beautiful girl that when the time comes, it will be as a family that we help to raise our children’s, children.

I read a blog recently about how to ensure you get a good following on your blog, only positive, happy posts would grab readers attention. That leaving ‘space’ was key to not overwhelming your reader.

I would just like to say, I think that’s a load of rubbish. In other posts where I’ve mentioned about pain, Real Life, migraines, I’ve always, always had more comments, as people find they can identify with what I’ve written. I have too much respect for you, my readers, to write a load of happy, crappy flannel, complete with Instagram perfect, white, stylised photos to match.

The picture of Cody was taken at 6am after he had deactivated on the Monday morning of what had been a hellsh, but eye opening weekend. That is Real Life, well the Cyber Baby wasn’t alive but the experience was very real.

If I can’t be honest and share the good with the bad on this, my blog, then I’m not being real. For those of you that have got this far and realise you prefer the shiny, perfect blogs, that’s your choice. To all the rest of you lovely, wonderful readers and honest fellow bloggers, thank you for allowing me to be me, supporting me and sharing in the love that is Real Life. I really appreciate each and every one of you.

Sammie xxx

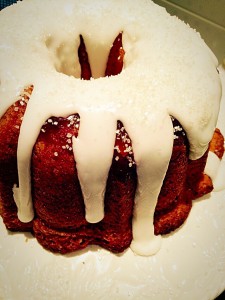
Luscious Lemon Bundt Cake

Hello lovely readers. I have a confession to make. A big one. This Luscious Lemon Bundt Cake is definitely not perfect! However it is delicious.

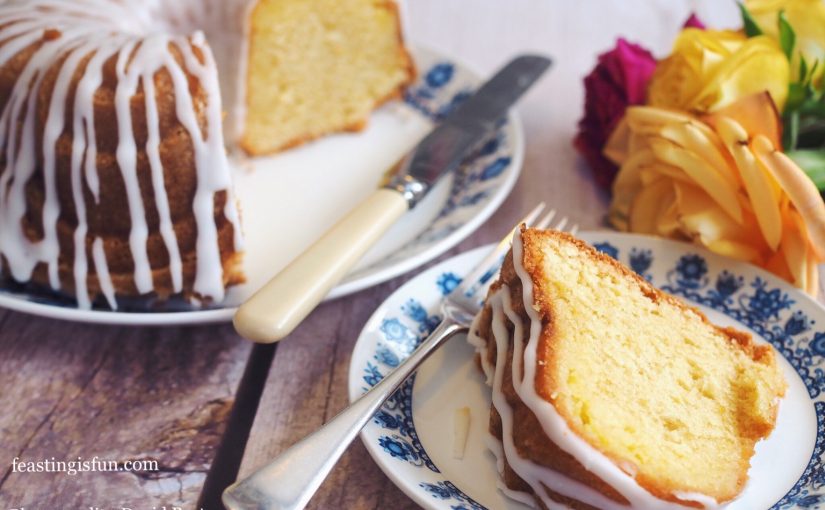
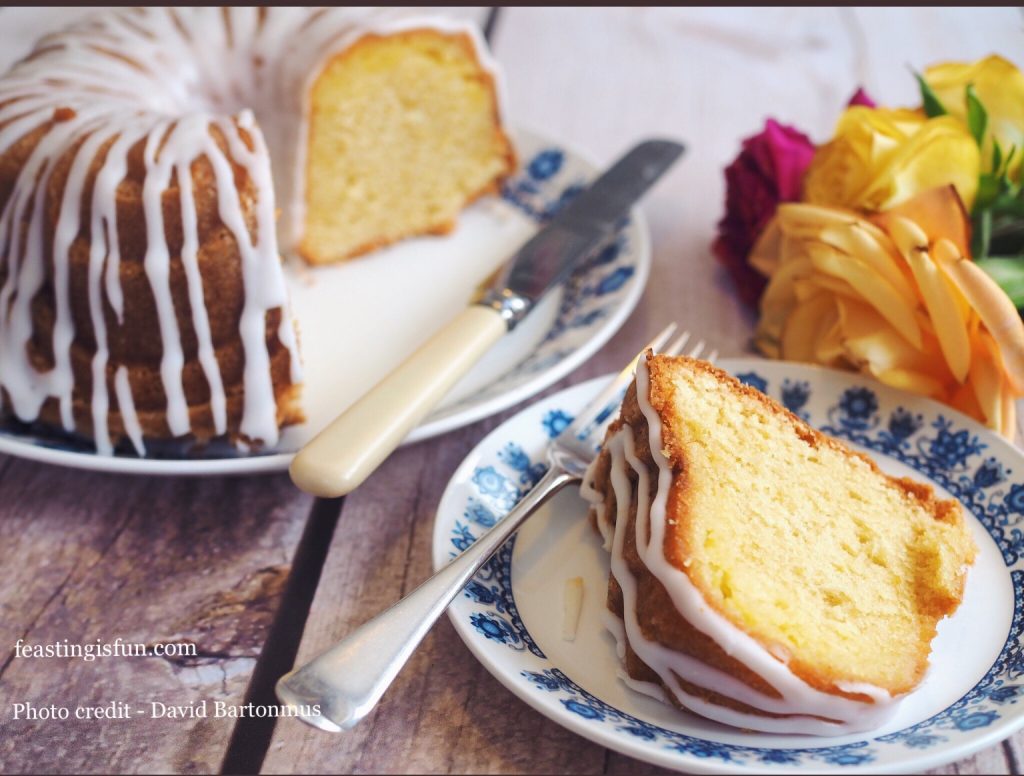
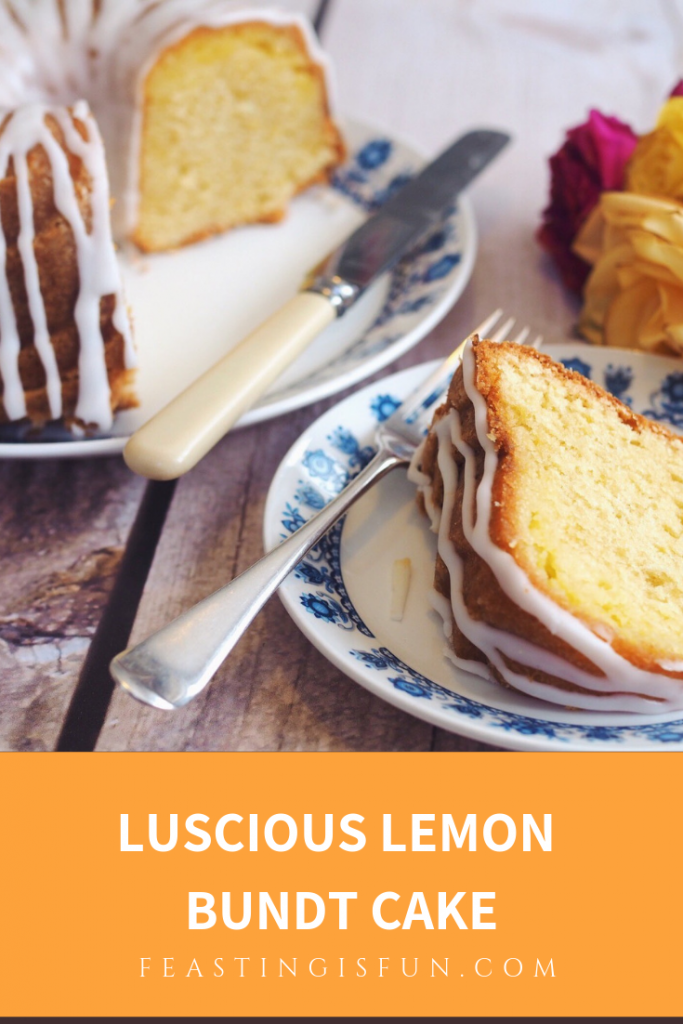
Image showing a cut slice of the Bundt Cake.
Luscious Lemon Bundt Cake perfectly baked by my friend David.

Look at this Bundt beauty. Doesn’t it look lovely, all snowy white? Perfect yes? Now look at the photo below. Oops nope! Well, it stuck – a bit. Just a little bit. Although you would never know from looking at it though, would you? So I’m here today to tell you that us Food Bloggers get things wrong sometimes too. I know exactly what I did wrong with this cake, I’ll explain that to you later.

Luscious Lemon Bundt Cake

Imperfect Is Okay

Most importantly, in our sleek, perfect, Instagram age, I do think it’s important to be real and honest. So my cake stuck, but I fixed it. And I am so glad I did as this Luscious Lemon Bundt Cake is absolutely beautiful and tastes amazing. I have had more serious disasters than this before and I tend to post them on Twitter as ‘Epic Fails’. Like the adaptation on my Sticky Pecan Sultana Buns!

Wanting to use up some of the many apples that we have had from our two trees this year, I decided to incorporate some freshly grated apple into the bun recipe. Firstly, even with the addition of lemon juice, the apples turned a murky brown colour – not great for blog photos. Still I carried on. The buns were very far from sticky. Soggy more like! They were an ‘Epic Fail’!

Luscious Lemon Bundt Cake moist and definitely more-ish. www.feastingisfun.com
Luscious Lemon Bundt Cake

Icing That Covers Any Imperfections

Not all failures are un-mendable though. Only a small part of the bottom (top when turned out) of this cake stuck. This was because I had put the hidden lemon curd layer too near the bottom and it sank through the batter and adhered to the tin.

I have addressed this in the method, so although the photos show exactly how this cake was made, the method corrects the mistakes I made. This also includes over-fillng the Bundt tin! I should have used a bigger tin or left some of the cake batter out, instead of using it all. Bundt tins should never be filled more than three quarters full.

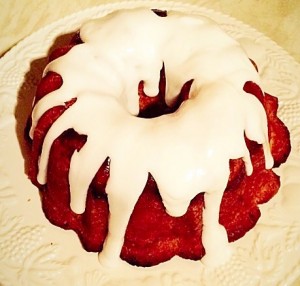
So I hid the stuck bit of cake the best way I could – with icing!!

Thick, luscious, lemon icing, draped over a moist lemon cake with a hidden lemon layer inside. If you like lemon flavours, you will go Bonkers over this Bundt!!

With the new method this cake bakes perfectly, however, whenever you are baking, sometimes things don’t always go to plan. So if there are any hitches that can be covered or concealed, go ahead. Sometimes though, if it’s cooked through but wont hold together, make a big jug of custard and have it for pudding!

Recipe : Makes one 10″ Luscious Lemon Bundt Cake

225g/8oz Caster Sugar

225g/8oz Unsalted Butter (plus 4tbsp extra for greasing the bundt pan)

4 Large Free Range Eggs

225g/8oz Plain White Flour

2tsp Baking Powder

1/4tsp Salt

5tbsp Lemon Curd – I use Waitrose own brand

1 Whole Lemon – scrubbed with a brush under running hot water

225g/8oz Icing Sugar

Method : Preheat oven to 180C/160C fan oven, 350F, gas mark 4

You can use an 8″ Bundt tin (as I did) just don’t use all of the batter – or use a 10″ Bundt tin. (Alternatively called a 6 cup and 10 cup bundt pan from Nordicware).

Making The Lemon Cake Batter And Filling The Bundt Pan

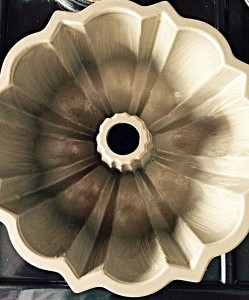
  • First of all melt 4tbsp of butter and thoroughly grease the Bundt tin, using a brush. Alternatively use Wilton cake release/bake easy, taking care to brush the inside of the bundt tin thoroughly so that it is completely covered.
Ensure the Bundt pan is well buttered.
  • Place the caster sugar and butter into a large bowl and beat until light and fluffy.
  • Sift all of the flour, baking powder and salt into the bowl.
  • Add the 4 eggs.
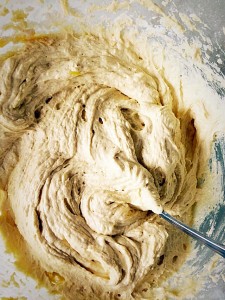
  • Whisk the ingredients together until you have a smooth batter. This is known as the ‘All-in-one method’.
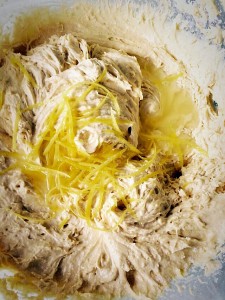
  • Zest the lemon, either using a fine grater or lemon zester (which is what I used), the latter gives delicious long strands of zest, visible in the cake. Squeeze one half of the lemon.
Add the zest of the whole lemon and half of its juice to the batter.
Mix the zest and juice into the cake batter.
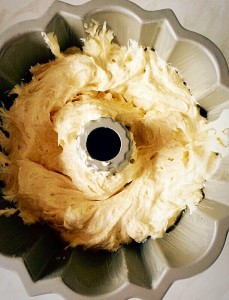
Half full the Bundt pan with the cake batter.
Half fill the Bundt pan with the cake batter.
  • As you can see my tin is not half full so just pretend it is.
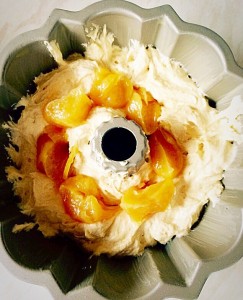
Spoon the lemon curd on top of the batter, ensuring that it does not touch the side or centre of the Bundt pan.
  • Use a teaspoon to add the lemon curd into the centre of the cake batter.
Cover the lemon curd with the other half of the cake batter, ensuring you do not fill the Bundt ton more than 3/4 full.
Cover the lemon curd with the other half of the cake batter, ensuring you do not fill the Bundt tin more than 3/4 full.
  • As you can see my tin is almost full. This resulted in me having to slice off about 1″ of cake, once it was cooked, to be able to remove the cake from the tin. Don’t overfill the tin.

Baking The Lemon Bundt Cake

  • Place the Bundt tin into the centre of the oven and bake for 50 minutes.
  • Note – a skewer cannot be used to test if the cake is baked because of the lemon curd layer.
  • The cake is baked when it is golden brown, slightly coming away from the sides and with no visable wobble. If you are unsure, return the tin to the oven for a further 5 minutes.
  • As soon as the cake is baked remove from the oven and leave to cool in its tin for 15 minutes and then turn out onto a cooling rack.
Luscious Lemon Bundt Cake allow to cool for 15 minutes before turning out.
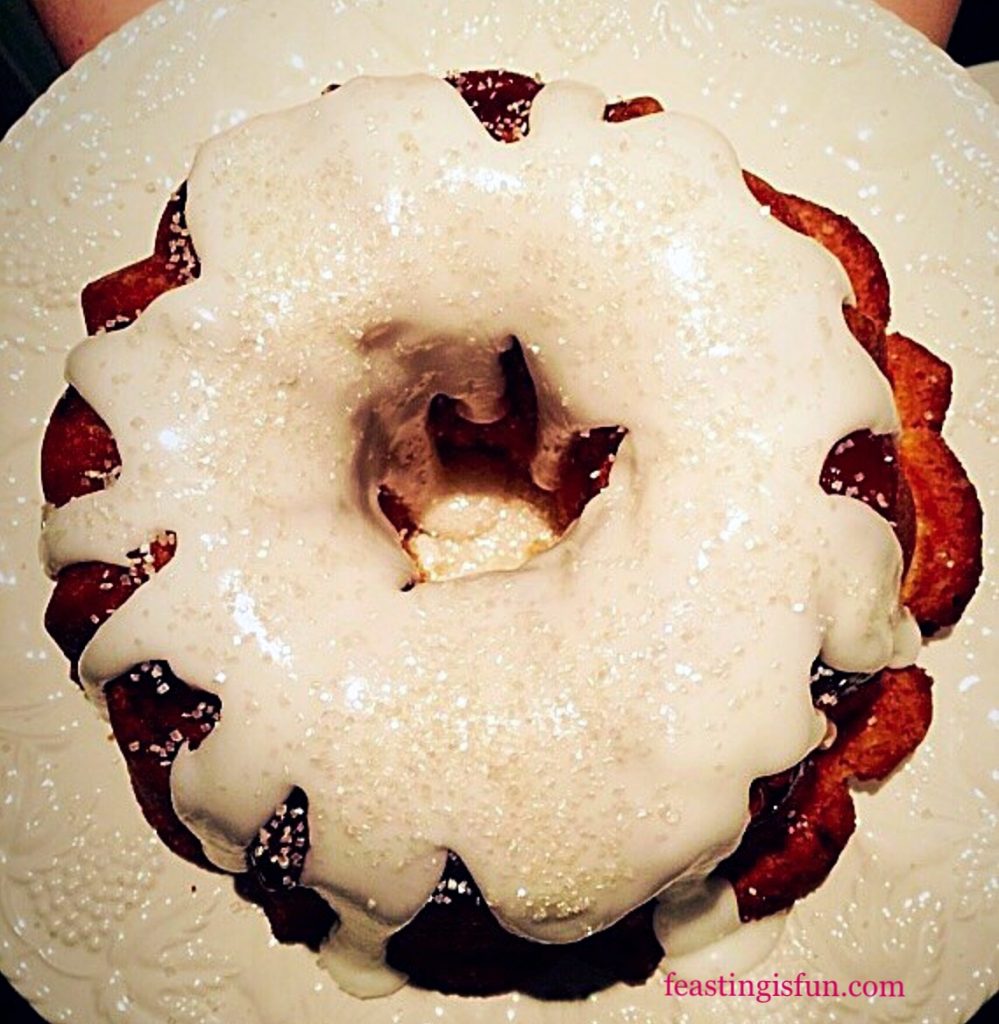
Luscious Lemon Bundt Cake you can see where the cake stuck.
  • You can see the area at the top of the photo where the cake stuck. Fortunately I was able to remove the stuck piece of cake and press it back onto the top of the Bundt.
Luscious Lemon Bundt Cake the icing will hide the small area that stuck!!
Luscious Lemon Bundt Cake the icing will cover the area that stuck.

Making The Icing And Decorating The Cake

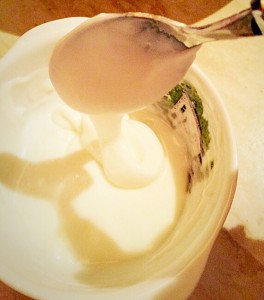
Add enough icing powder to the lemon juice to create a thick, lump free glaze.

Place the juice of the other half of the lemon into a small bowl. Add 200g of the icing sugar and stir thoroughly. The icing should be very thick and need encouragement to drip. If the icing is not thick enough add the rest of the icing sugar.

Drizzle and drape the thick, lemon icing over the cake. I used 2 teaspoons, one to add the icing and the other to start/stop the drape effect.

Drizzle and drape the thick icing over the cake in an uneven pattern.

Looking at the cake above, nobody would ever guess at the minor mishaps that had taken place!

Luscious Lemon Bundt Cake add some white sprinkles and you have the perfect cake! www.feastingisfun.com

I’m a sucker for sprinkles and sparkles. I finished this cake with some white sugar sprinkles.

Luscious Lemon Bundt Cake absolutely perfect for sharing. www.feastingisfun.com

The taste of this cake was amazing. Very lemony without being over tart, or over sweet. A beautifully moist cake that, as a family, we all loved and needless to say it didn’t last long!

Have you ever had any memorable baking disasters? Have you managed to fix a mishap, without anyone knowing? Do you have any to ‘fix’ tips? Please share them?

If you like the recipe for this Luscious Lemon Bundt Cake then you will may also enjoy these:

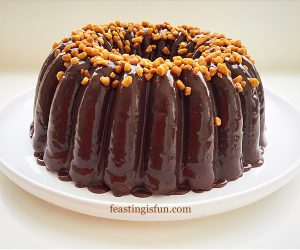
Caramel Crunch Chocolate Bundt Cake

A chocolate Bundt Cake covered in chocolate ganache and topped with pieces of crunchy caramel.
Caramel Crunch Chocolate Bundt Cake

Maple Syrup Iced Coffee Bundt Cake

A coffee and walnut Bundt Cake baked in the Heritage pan from Nordicware decorated with a maple syrup drizzle
Maple Syrup Iced Coffee Bundt Cake

Lemon Blueberry Bundt Cake

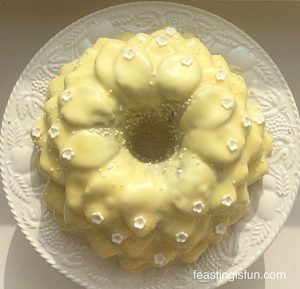
Lemon and blueberry cake baked in the blossom bundt pan from Nordicware. Covered in a fresh lemon glaze and decorated with small white sugar paste flowers.
Lemon Blueberry Bundt Cake

Baking Bundt cakes is so easy as the bundt pan creates the cake shape as it bakes. So if you are like me and not very confident at decorating cakes, bundt pans are the answer! While the cakes included in this post all have some form of icing or drizzle, they don’t have to be. Because a light dusting of icing sugar, or edible glitter, such as this Chocolate Cherry Chiffon Bundt Cake, is all that is needed to accent the baked cake. So you can be confident of creating a show stopper without the stress of cake decorating!

So, whatever you are making, baking and creating in your kitchens, have fun preparing and sharing your feast.

Sammie xx

No part of this post may be reproduced or duplicated without the written permission of the owner. Please see my Disclosure Policy.
The header and first photograph are curtesy of my friend David Bartonmus, a talented baker among his other talents. Why not take a look at his blog.

Pinterest image with graphics.


Homemade Chelsea Buns

Hi, so it’s mid November and the excitement for Christmas in our house is definitely building. We all love Christmas, even though we still have our daughter’s and my birthday to celebrate in December, before Christmas. These amazing Homemade Chelsea Buns are perfect for baking any time of the year, but especially in the run up to Christmas. The scent of cinnamon and bread, fills the house as these buns bake in the oven.

FF Homemade Chelsea Buns

I love the build up to Christmas. Stir up Sunday when we make our Christmas cake, advent calenders, present shopping, decorations. Spending time with friends and family, getting excited together.

As a family we all love each single thread that pulls together and makes a complete Christmas. The spicy scents, wafting from the kitchen, that evoke memories and shared experiences.

FF Homemade Chelsea Buns
Homemade Chelsea Buns

Creating a surprise

Our children and their parents, love these Homemade Chelsea Buns with a big mug of steaming coffee, or hot chocolate, for breakfast. Unravelling the light, spiced dough and uncovering juicy, plump, sweet, fruits. Sticky and sweet. Traditionally Chelsea Buns are finished with a sprinkle of sugar, however since discovering how good they taste with a lemon drizzle on top I wouldn’t want to make them any other way.

One of my favourite things to do at the weekend is to sneak downstairs, whilst everyone else is still asleep and make something scrumptious for breakfast. and that is exactly what I did a couple of weeks ago. I couldn’t sleep, so I snuck into the kitchen, fuelled by hot cups of tea and baked these Homemade Chelsea Buns.

Everyone was so happy when they awoke to the scent of home cooking and found a big plate of warm buns, waiting to be devoured, on the table.

Unfortunately, due to the early morning light, the photos weren’t great. Shame eh? So I made these again during the day and they were gone by the following afternoon! Happily I had snapped some photos, before they were all munched.

FF Homemade Chelsea Buns
Homemade Chelsea Buns

I wouldn’t want you to limit making these only over the festive season. They are however, a wonderful warm up to full on Christmas cooking and baking.

Recipe: Makes 12 Homemade Chelsea Buns

For the buns

500g/1lb 2oz  Strong White Bread Flour I use Shipton Mill (organic white bread flour)

10g Fast Action Dried Yeas – I use Allinson Dried Yeast in the green tub or sachets

250ml/8fl oz Whole Milk – at room temperature

2 Large Free Range Eggs

25g/1oz Caster Sugar

50g/2oz Unsalted Butter

10g Salt

225g/8oz Dried Mixed Fruits – alternatively, if you are not a fan of vine fruits, dried figs, dates, apricots and cranberries all work extremely well in this recipe.

100g/4oz Soft Light Brown Sugar

4tsp Cinnamon

For the glaze

150g/5oz Icing Sugar

Juice of 1 Lemon

Method: You will need a buttered or baking parchment lined 10″ x 12″ baking tin at least 2” deep (25cm x 30cm x 5cm).

Making the bun dough

In the bowl of a bread maker or a stand mixer, with a dough hook attached, add the milk, lightly beaten egg, caster sugar and yeast.

Add the flour, salt and butter.

Switch the bread maker cycle to dough and press start.

With a stand mixer, lower the dough hook and mix on medium speed until all the ingredients are combined. Continue mixing for a further 10 minutes. Turn the mixer off. Place all the dough into the bowl, cover with a clean cloth and leave until doubled in size – approximately 1-2 hours.

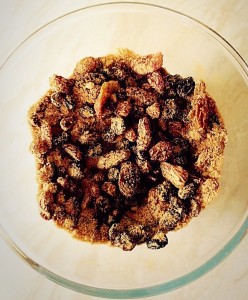
While the dough is proving mix the dried fruit, sugar and cinnamon together in a bowl. Set to one side.

Mix the dried fruit, sugar and cinnamon together.

When the bread maker has completed its dough cycle, restart for 2 minutes, to mix and knock back the dough.

With the stand mixer, once the dough has doubled in size, remove the cloth and turn out the dough on to a floured surface.

Shaping and filling the buns

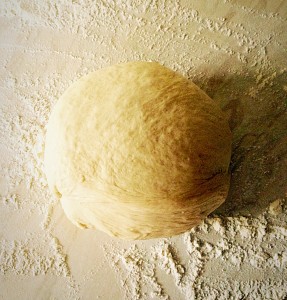
  • Turn the bread out on to a floured surface and form into a ball.

Turn the dough out onto a floured surface.


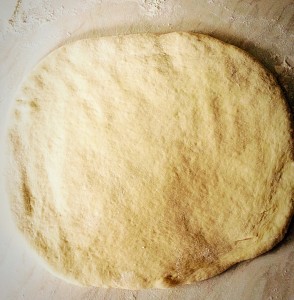
  • Roll the dough out into a rectangle 12” x 9” (30cm x 22.5cm)

Roll the dough out into a rectangle.


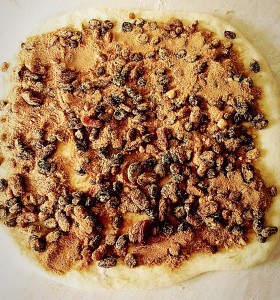
  • Spinkle over the spiced fruit and sugar mixture so that it evenly covers the dough.

Sprinkle over the fruit/sugar mixture.

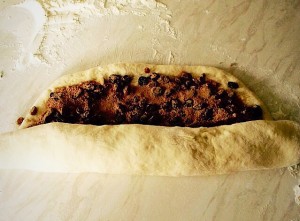
  • Roll the dough up as tightly as possible.

Roll up the dough as tightly as possible.

  • Ensure that the seam is underneath.

Ensure the dough seam is underneath.

  • Cut the rolled dough into 12 even portions. I find the easiest way is to cut the dough in half, cut each half in half and then cut each portion into 3.

Slice the rolled dough into 12 even portions.

  • Place the buns into the buttered/lined baking tin.

Pack the Chelsea Buns into a buttered pan.

Cover with a clean cloth, leave in a draught free place until doubled in size – approximately 30-45 minutes.

FF Homemade Chelsea Buns

Baking the buns and adding the lemon drizzle

  • Preheat the oven to 190C/170C fan, 10 minutes before the buns are ready
  • Place the tin in the middle of the oven and bake for 25-30 minutes.
  • The buns are cooked when they are golden and well risen.
  • As soon as the buns are baked remove from the oven.
  • Lift the baked buns out of the tin or use a pallet knife to loosen and lift the buns from the tin.
  • Place on to a cooling rack.
FF Homemade Chelsea Buns
Homemade Chelsea Buns
  • Weigh the icing sugar into a medium bowl. Stir briefly with a balloon whisk to break up any lumps.
  • Add the juice from one lemon.
  • Whisk the mixture together until it is smooth.
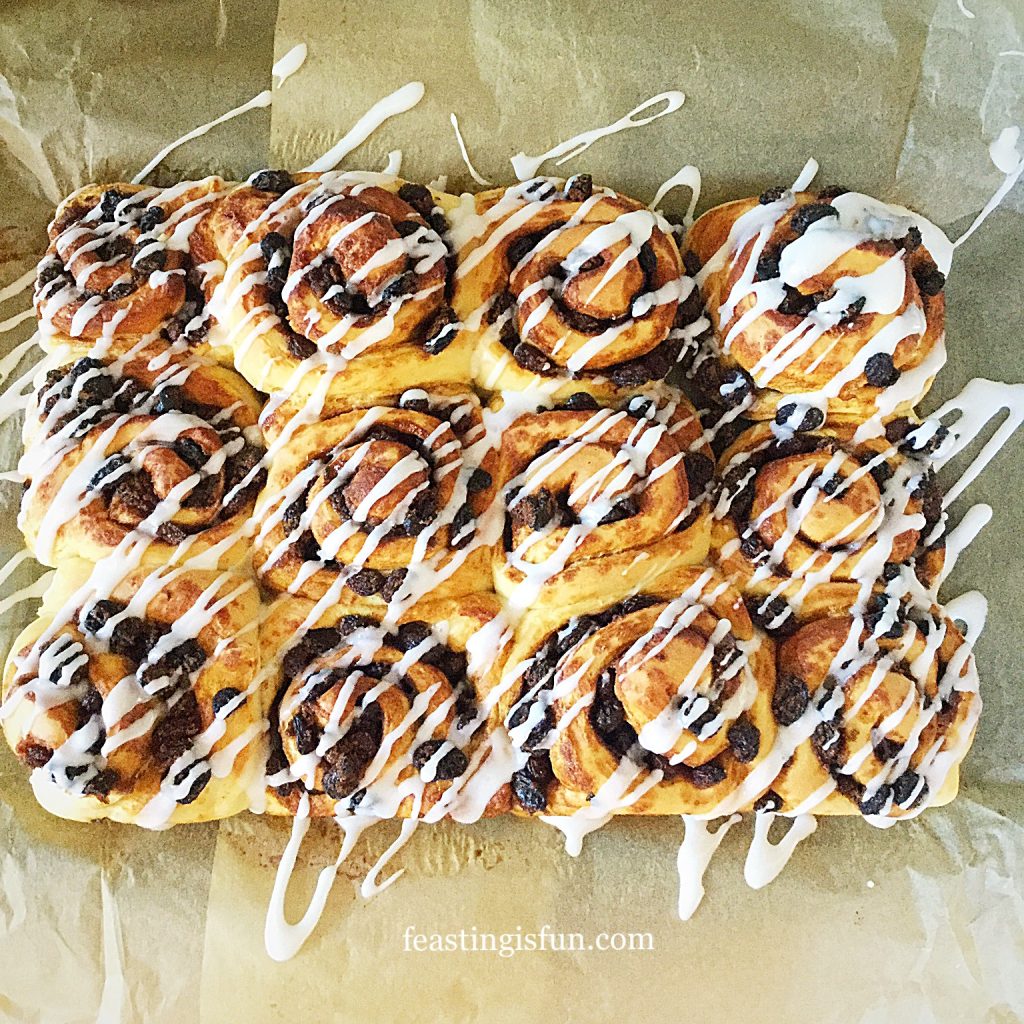
  • Either fill a small piping bag with the lemon icing, snip a small hole and pipe the drizzle diagonally across the buns, or use a spoon to drizzle over the icing.
FF Homemade Chelsea Buns
Homemade Chelsea Buns with a lemon icing drizzle.

Time to delve in and devour a bun. They are absolutely delicious warm. Whether it’s a family breakfast around the table, or after a long afternoon walk, these Homemade Chelsea Buns are perfect at any time!

These buns are at their best the day they are made. However a quick and I mean less than 10 seconds, ping in the microwave refreshes them the following day.

If you enjoyed baking these Homemade Chelsea Buns, you may also like:

Knotted Poppyseed Rolls

FF Knotted Poppyseed Rolls
Knotted Poppyseed Rolls

English Muffins

FF English Muffins
English Muffins

Sticky Pecan Sultana Buns

FF Homemade Chelsea Buns
Sticky Pecan Sultana Buns

Creating memories and new traditions is important to me. Food plays a crucial part in that. As we sit round the table for dinner, in front of the telly with snacks, or at the beach with a well packed picnic I am always aware that these will be the times we remember. One special memory, is of a bonfire night, spent with my sister and her family, toasting s’mores around the fire and laughing. That is when feasting truly is fun!

Whatever you are making, baking and creating in your kitchens, have fun preparing and sharing your feast.

Sammie xx

No part of this post may be reproduced or duplicated without the written permission of the owner. Please see my Disclosure Policy.
Sweat yeasted rolls filled with spices and dried vine fruits, overlaid with descriptive text

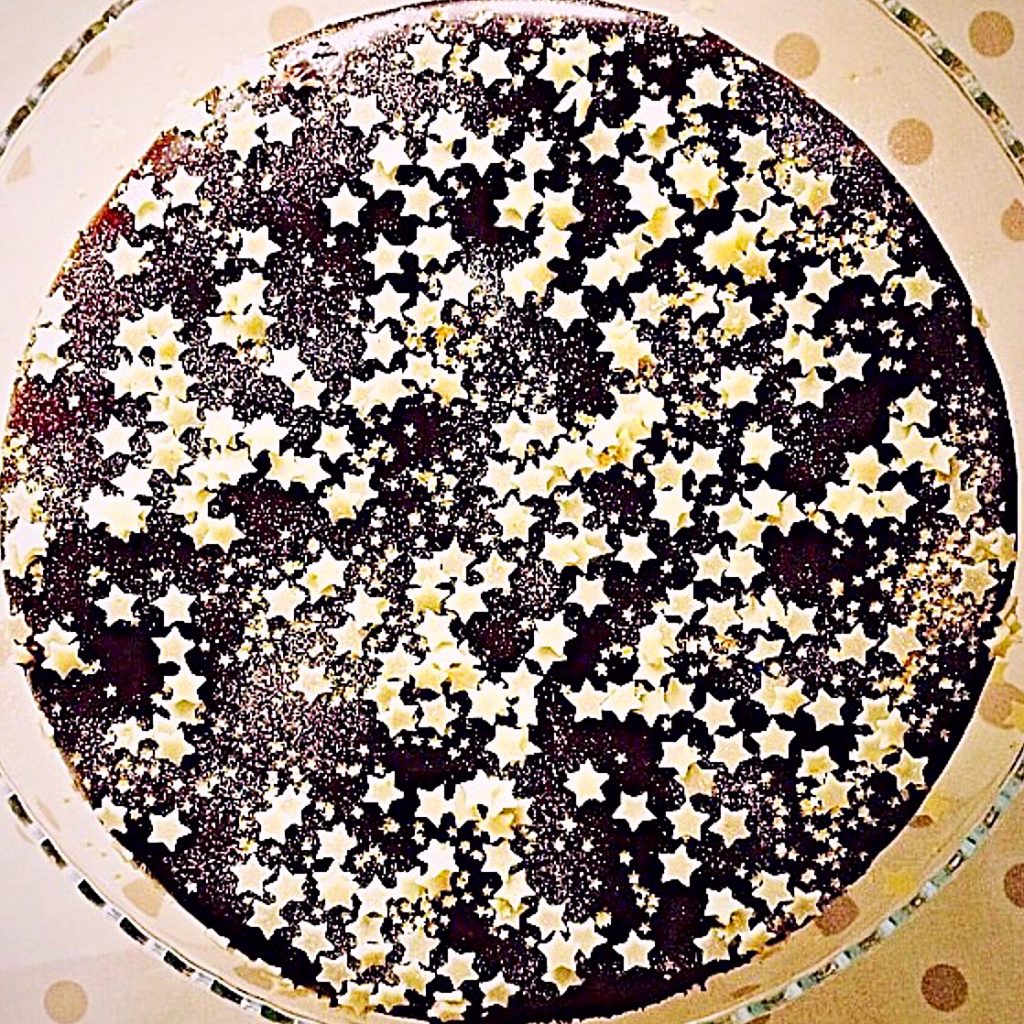
Chocolate Sparkle Cake

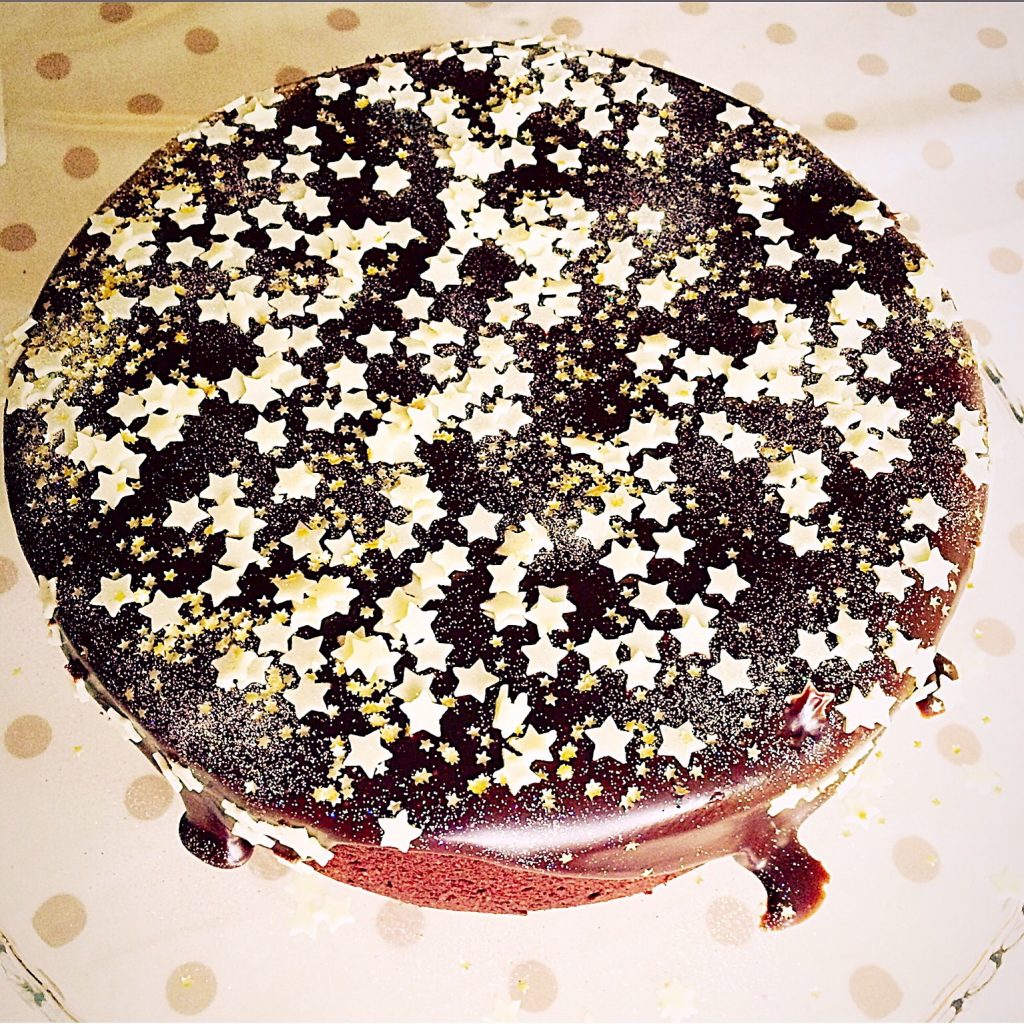
Ooh hello my lovelies, have I got a treat for you today? Yes of course I have and a dazzling one at that. Welcome to my Chocolate Sparkle Cake!

A sparkling star covered celebration bake perfect for bonfire night, New Year’s Eve and Halloween.
Chocolate Sparkle Cake

It’s ok you can read through once you’ve looked at all the photo’s – I would!!!

So, this cake was inspired by Bonfire Night ( November 5th if you’re not from the UK). Our children were being taken to an amazing fireworks party by my wonderful sister and brother-in-law, along with their cousins.

While they were out I wanted to make a cake, that on their return would make them say “Wow” and remind them of the fun they’d had.

Chocolate Sparkle Cake

It has to be chocolate:

So being our children meant this had to be a Chocolate Cake. I wanted a deep, chocolatey, moist cake, smothered in thick, glossy, chocolate ganache and then topped with as many sprinkles I could get my hands on.

Thus the Chocolate Sparkle Cake idea was formed in my head.

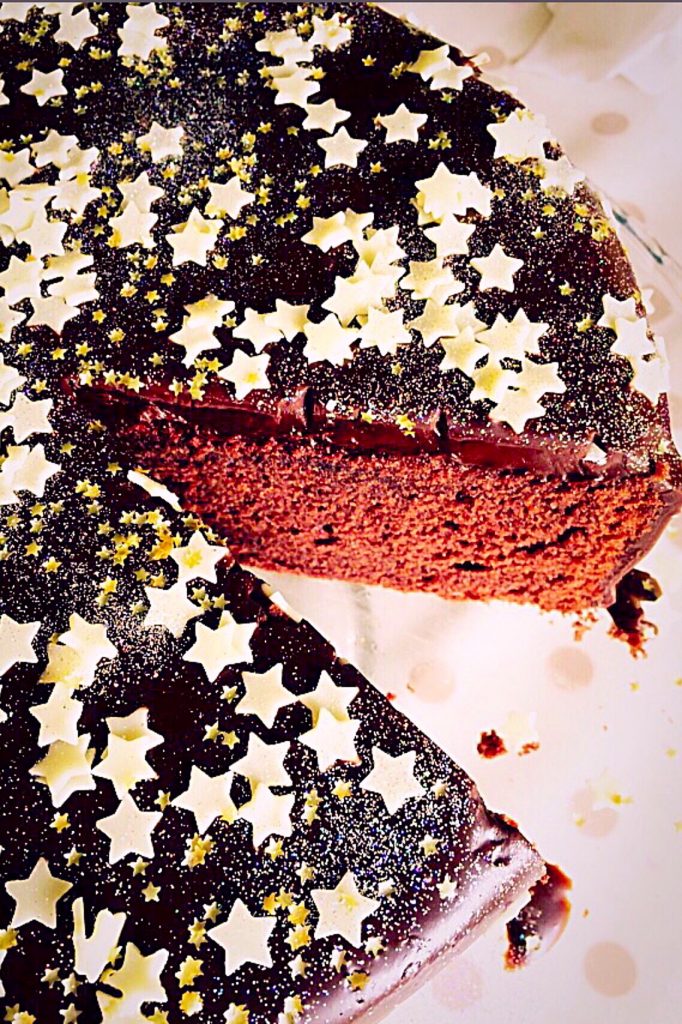
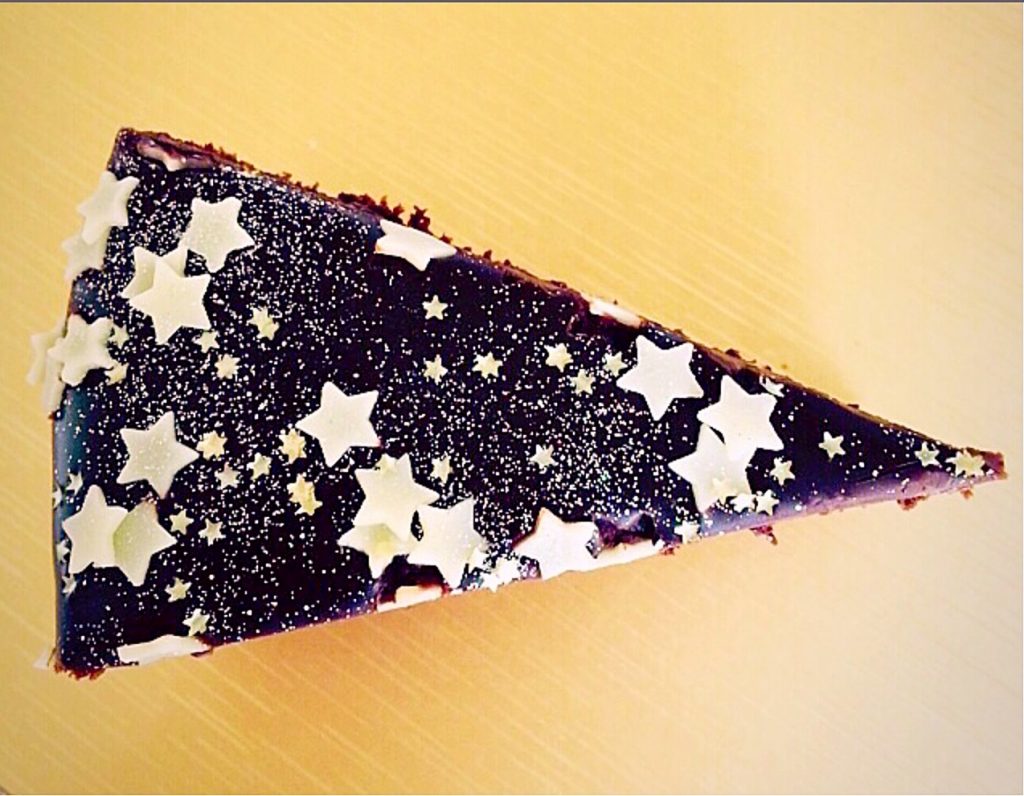
A slice of dreamy Chocolate Sparkle Cake.

And, knowing that I didn’t want a layer cake, it was important to ensure the cake itself was as moist as possible. Since adding cocoa to any batter has a drying effect, so to counter that I added sour cream.

I’d seen Ina Garten add it to many of her bakes and figured it was worth a try. Yep I was winging it yet again!

Oh my. I soo made the right decision. Because you cannot taste the sour cream in the baked cake, however, the baked cake has such a moist, tender crumb. This is one ingredient I will be experimenting with more, that’s for sure.

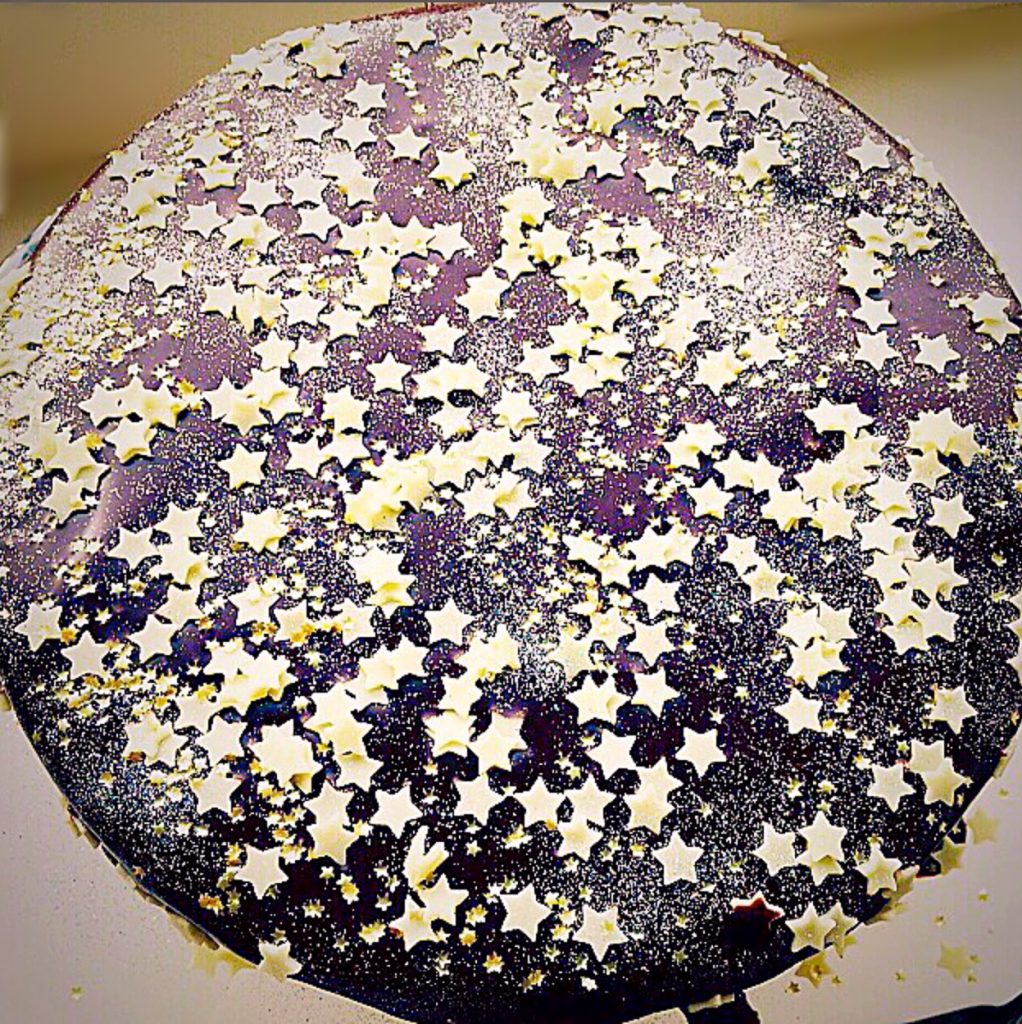
A chocolate cake decorated to look like a galaxy of stars.
Chocolate Sparkle Cake

What really sends this cake over the top flavour-wise is the addition of liqueur to the chocolate ganache. I happened to have an unopened bottle of Chocolate Bailey’s Luxe. So I added some. Mmm another brilliant decision, I was truly on a roll!

I only used a small amount and it is totally fine to leave it out altogether. Our youngest is 13 years old so I was happy for him to have a very small, diluted amount.

I would say that this cake is both decadant and rich. All three of our children and all the adults loved it. I’m not sure if it’s richness would be enjoyed by younger children, even with the absence of liqueur?

Recipe : Makes 1 x 10″ Chocolate Sparkle Cake

For the cake:

275g/10oz Unsalted Butter at room temp.

150g/5oz Soft Light Brown Sugar

150g/5oz Caster Sugar

5 Large Eggs – I always use free range

1tsp Vanilla Extract – I use Nielsen-Massey 

225g/8oz Plain White Flour

100g/4oz Cocoa Powder

2.5tsp Baking Powder

1/4tsp Salt – I use Maldon

200ml/7fl oz Full Fat Sour Cream

Alternatively – Wright’s Baking Chocolate Fudge Cake Mix would also work really well for this cake if you haven’t the time or energy to bake from scratch. Follow the packet instructions for baking and then decorate as given below.

For the topping:

100g/4oz Dark Chocolate minimum 70% Cocoa

200g/7oz Milk Chocolate minimum 35% Cocoa

300ml/ 1/2 pint Double Cream

Optional – 2Tbsp Bailey’s Chocolate or Bailey’s liqueur

Assorted sprinkles, stars and ebible glitter dust

Method : Preheat the oven 170C/150C fan, gas mark 3, 325F

Making the Cake:

First of all, butter the base and sides of a 10″ Springform cake tin. Line the base of the tin with baking parchment paper.

Sift the flour, cocoa, baking powder and salt together. These are your dry ingredients.

Crack all the eggs into a jug, add the vanilla extract and lightly beat with a fork to break up.

In a large bowl cream together the butter and sugars until light and fluffy.

Add one third of your dry ingredients and mix slowly, as they start to incorporate add half of your eggs. Continue mixing until all the ingredients are almost incorporated.

Repeat this step again.

Add the last of the dry ingredients until thoroughly mixed. Be careful not to overmix, as the cake will be heavy.

Fold in the sour cream to the chocolate cake batter.

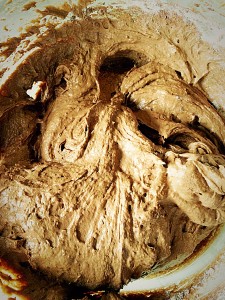
Delicious, moist, chocolate cake batter.
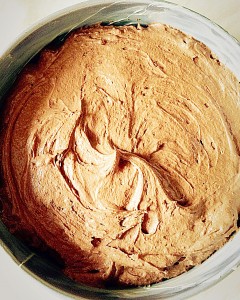
Fill the cake tin with batter and smooth the top.

Place the cake tin in the middle of the oven and bake for 50 minutes.

The cake is baked when an inserted skewer comes out clean. If after 50 minutes the cake is still not fully baked, place back in the oven and re-check at 5 minute intervals.

As soon as the cake is baked remove the oven.

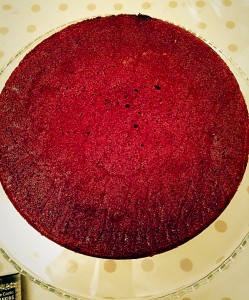
Don't worry about the small crack it will reduce and we are turning the cake over to frost!!
Don’t worry about the small crack it will reduce and we are turning the cake over to frost!!

Allow the cake to cool for 15 minutes before removing from the tin.

To remove, release the springform lever, remove the outer ring of the tin.

Place a cooling rack on top of the cake and invert.

The cake is now bottom side up on the cooling rack. Remove the tin base and gently peel off the baking parchment paper.

Place to one side and allow the cake to cool completely.

Making the topping:

Break or chop the chocolate into small chunks. Place in a heat proof bowl over a saucepan of barely simmering water (double boiler), ensuring the base of the bowl does not touch the water.

Add the cream. And stir. The more you stir the glossier the ganache will be.

Keep stirring the chocolate/cream until the chocolate has completely melted.
Remove from the double boiler, add the liqueur and stir well. Set aside to cool and thicken.

The ganache is ready to use when it is thickened but still pourable (but not runny).

Chocolate Sparkle Cake - have your frosting and decorations ready and to hand before you start icing the cake. www.feastingisfun.com
Chocolate Sparkle Cake – have your frosting and decorations ready and to hand before you start icing the cake. www.feastingisfun.com
Once completely cool place the cake on a stand or board.
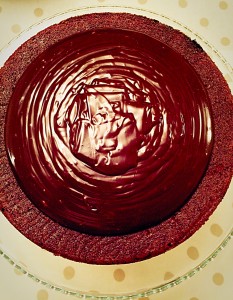
Chocolate Sparkle Cake pour the thickened ganache onto the top of the cake. www.feastingisfun.com
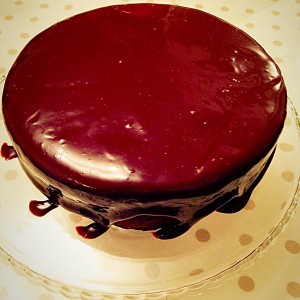
Chocolate Sparkle Cake gently smooth the ganache over the entire top of the cake and push over the sides so it drapes over the edge of the cake. www.feastingisfun.com

I tapped the cake stand a couple of times against the table, to release any air bubbles trapped in the ganache. As a result, the swirled effect at the bottom of the cake was a result of my tapping!

Decorating the Cake:

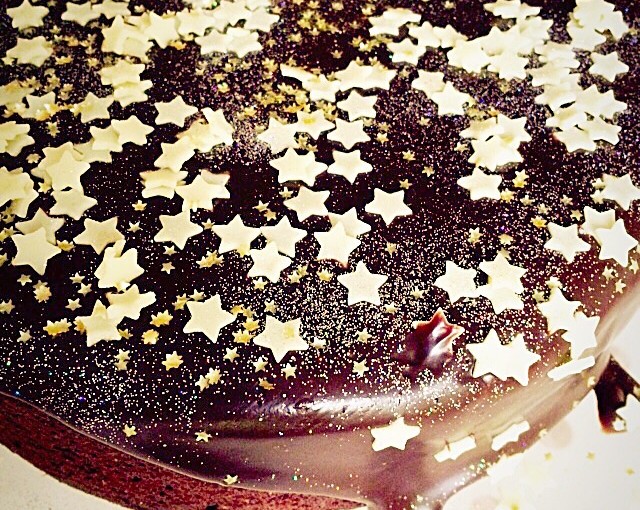
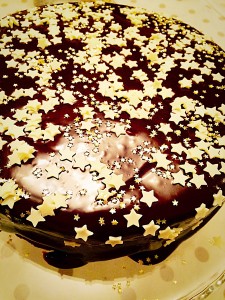
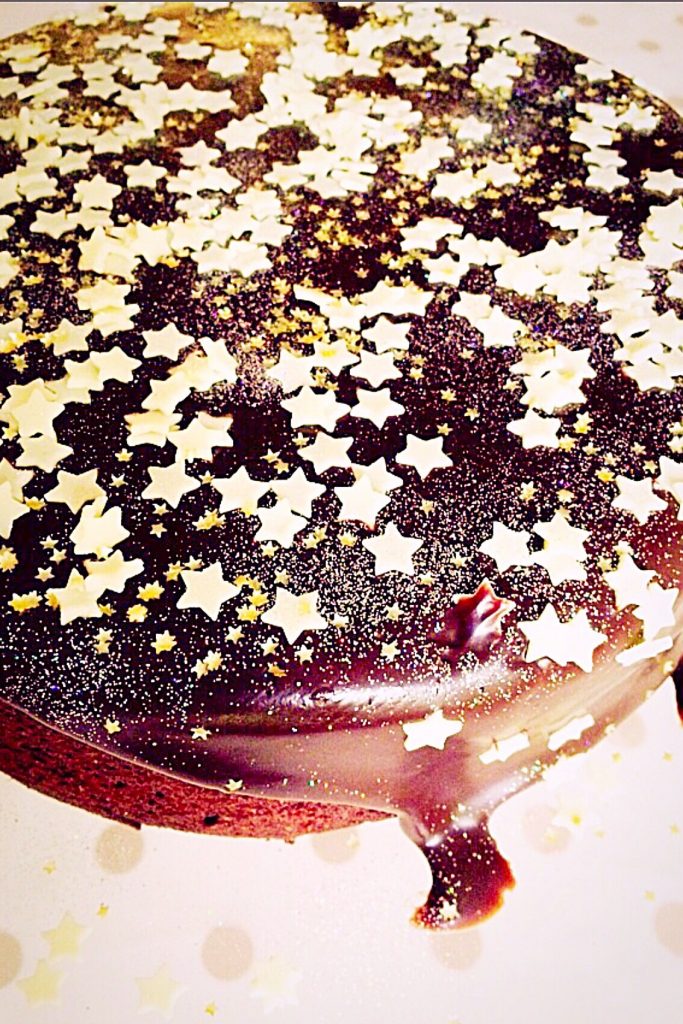
Chocolate Sparkle Cake now get sprinkling! I started with white chocolate stars and the smaller edible gold stars. www.feastingisfun.com
Chocolate Sparkle Cake now get sprinkling! I started with white chocolate stars and the smaller edible gold stars.

Get creative, use whatever decorations you like. Because the chocolate ganache is so gloriously glossy, it provides the perfect canvas.

I finished the cake with a dusting of holographic edible glitter.

Because more is more. Right??

Chocolate Sparkle Cake with a galaxy of edible stars.

I almost called this Chocoale Sparkle Cake ‘Starry, starry night’ (Vincent), after one of my very favourite songs by Don McLean!

Because of the glossy, sparkly nature of this cake, as well as the moist, deep chocolate flavour, with a lingering background hit of Bailey’s, this could easily make a beautiful alternative to traditional Christmas cake.

When I look at this Chocolate Sparkle Cake it just screams ‘Party’! The perfect chocolate, celebration cake.

Chocolate Sparkle Cake

Everyone loved this cake and we also celebrated the safe arrival of a friend’s baby with a slice. Because it is a rich cake, a little goes a long way, meaning there is more to share.

Also, it keeps really well in a cake tin for 5 days. And yes it did last that long!!

If you have enjoyed this recipe for Chocolate Sparkle Cake you may also like these:

Black Forest Cupcakes 

FF Chocolate Sparkle Cake
Black Forest Cupcakes

Caramac Drizzle Rolo Caramel Brownies 

FF Chocolate Sparkle Cake
Caramac Drizzle Rolo Caramel Brownies

Chocolate Honeycomb Sponge Cake

FF Chocolate Sparkle Cake
Chocolate Honeycomb Sponge Cake

I love to celebrate special occasions with a cake. Do you?

So, whatever you are making, baking and creating in your kitchens, have fun preparing and sharing your feast.

Sammie x

No part of this post may be reproduced or duplicated without the written permission of the owner. Please see my Disclosure Policy.
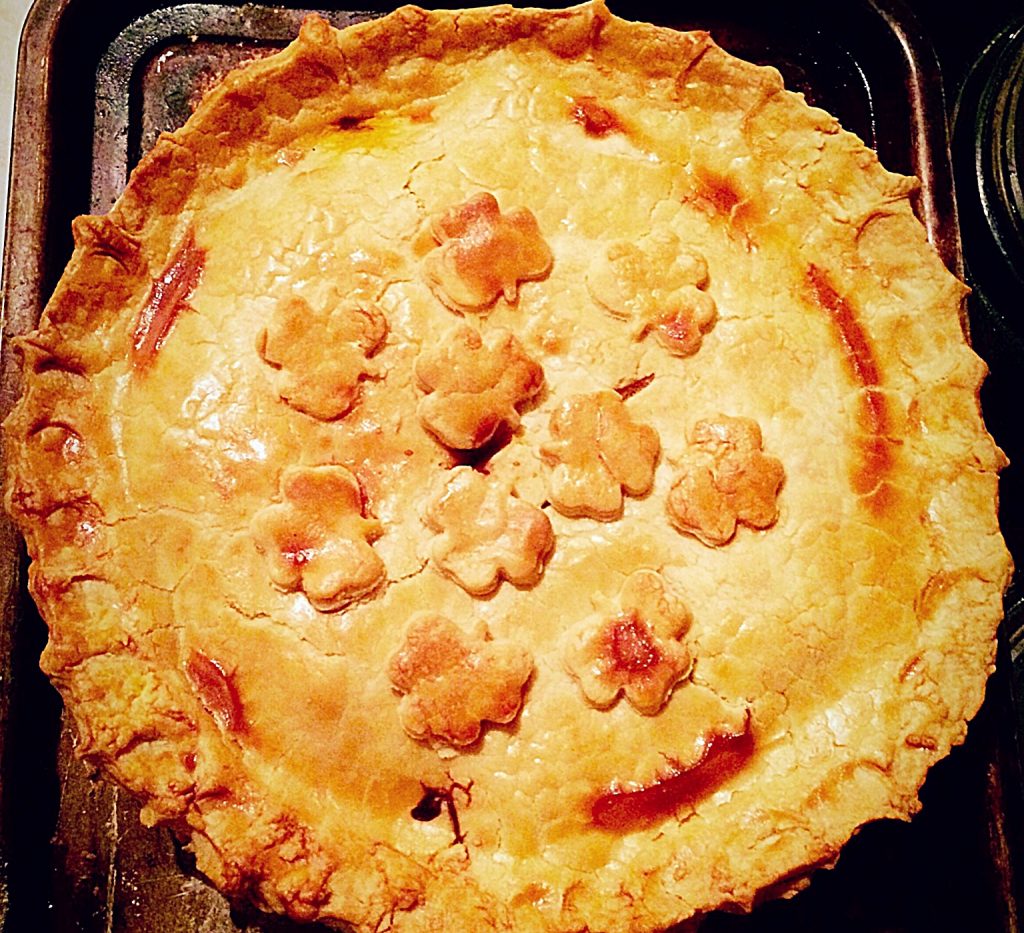
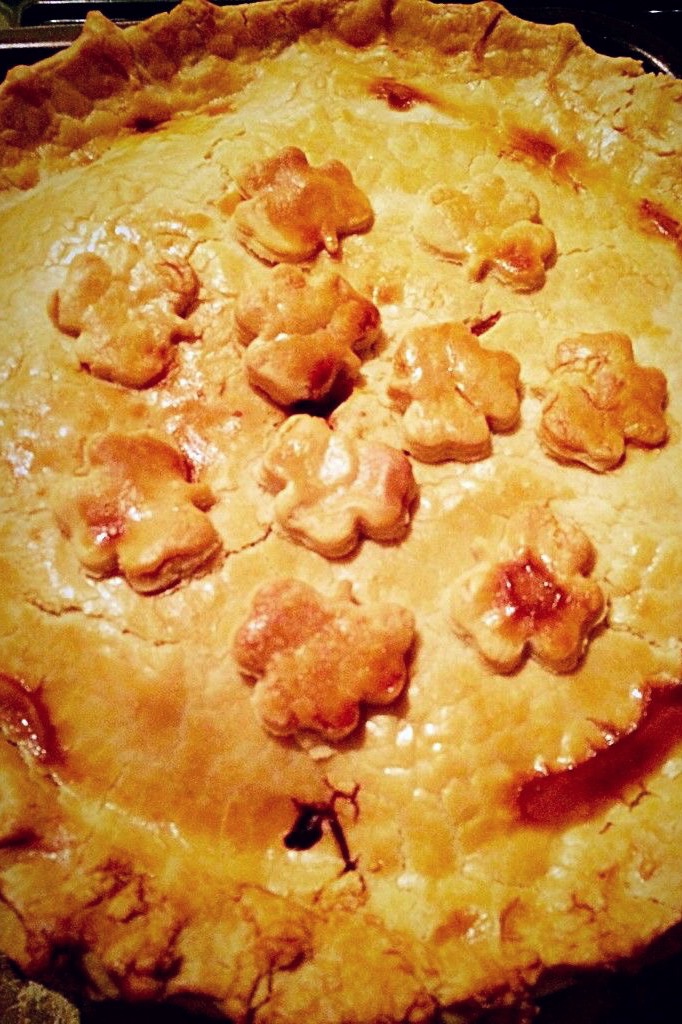
Steak Leek and Ale Pie

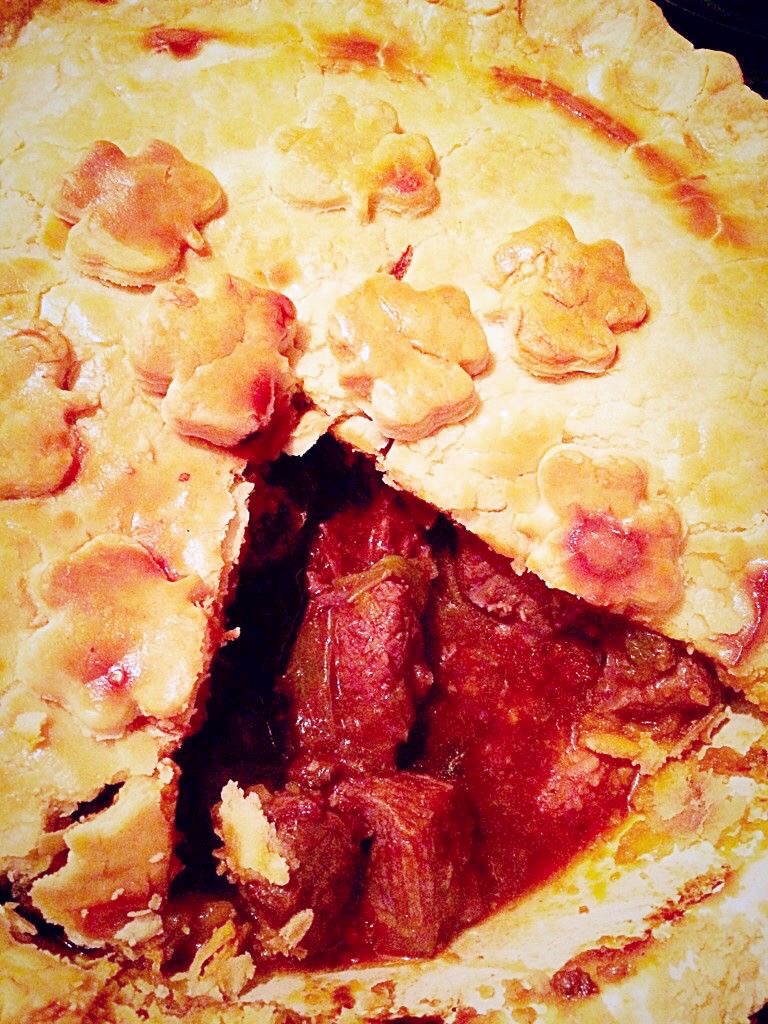
Hi, this Steak Leek and Ale Pie has a golden pastry crust, under which are chunks of melting steak and leek sitting in a thick ale gravy. Homemade pie has to be at the top of my comfort food list. While the light, fresh salads of summer have now passed. As soon as Autumn arrives, with it’s blustery gales I want proper, nourishing, hearty food.

And I want, I need, this Steak Leek and Ale Pie.

Steak Leek And Ale Pie

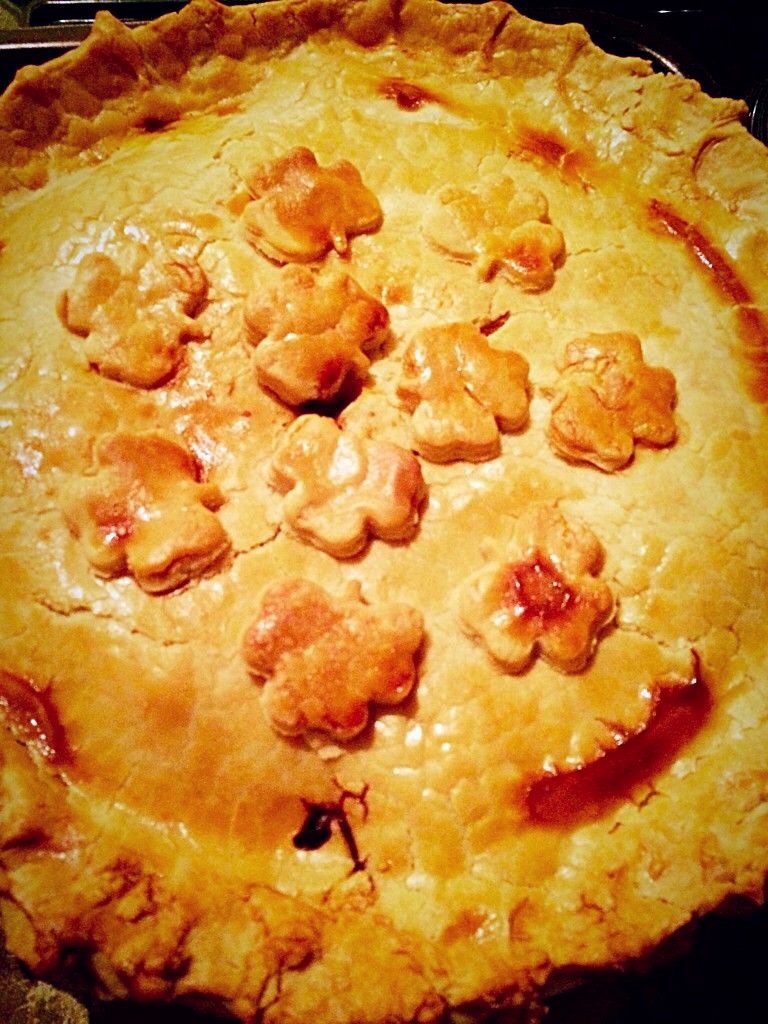
Take a look at that golden crust. It is so inviting, willing you to cut in and discover the melting chunks of steak and leek beneath, sitting in a pool of thick gravy made with the ale. While I know making pastry completely freaks some people out, it really is worth having a go. Also, you can find a recipe for the pastry here.

As soon as you have a little time, maybe at the weekend, I really encourage you to make your own pastry. While it really isn’t as difficult as some believe, the rewards are very gratifying. Yet, if you cannot bring yourself to make your own pastry, then good quality, shop bought shortcrust or puff pastry will also work very well.

Steak Leek And Ale Pie

Celebrating British Leeks

Although I made this Steak Leek and Ale Pie for a mid-week meal, it will be replacing the occaisional roast on a Sunday too. Because, it really is that good.

Likewise, I have to mention the Leek Colcannon a fantastic dish of creamy mashed potatoes, steamed cabbage and sauteed leeks that I made to serve alongside this pie. Amazing!

And, if you are wondering why leeks feature in both dishes, November heralds the start of the British leek growing season. So keen to use seasonal produce, I came up with these two recipes for the British Leek Growers Association.

Recipe : Makes one Steak Leek and Ale Pie, serves 6

450g/1lb Shortcrust Pastry – to make your own you will need 350g/12oz Plain White Flour, 75g/3oz Butter and 75g/3oz Vegetable shortening – I use Trex

1kg/2lb Good Quality Beef Steak – I used rump, chuck or braising steak would work well

2 Tbsp Butter

3 Leeks

500ml/1 pint Light Ale

2 Bay Leaves

1 tsp Fresh Thyme – halve if using dried

1 Clove of Garlic

2 Tbsp Tomato Puree

1/4 tsp Nutmeg – I always use freshly grated

1 Beef Stock Cube – or I used 1 Knorr beef stockpot

2 Tbsp Flour plus extra for rolling out pastry

Sea Salt – I use Maldon

Freshly Ground Black Pepper

1 Medium Egg whisked with a little water for the egg wash

Method : Please read through before starting

Making The Pastry

For instructions on how to make the shortcrust pastry please see here.

If making your own pastry, make, cover in cling film and place in the fridge to chill.

Preparing The Steak

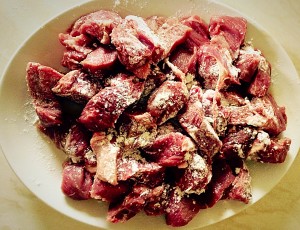
First of all, cut the steak into generous, one inch/2.5cm chunks.

Cut the steak into good sized chunks - 1.5"

Mix 2 tablespoons of flour with 1 teaspoon of sea salt and 1 teaspoon of freshly ground pepper.

Toss the steak in seasoned flour.

Toss the steak in the seasoned flour.

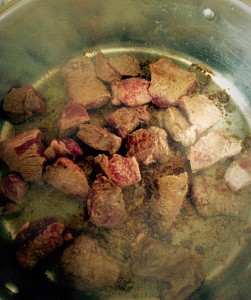
Place 2 tablespoons of butter into a large pan and melt over a high heat.

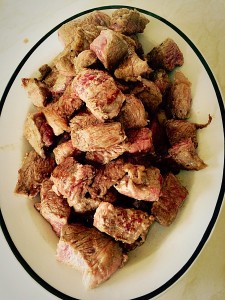
Brown the steak in batches.

Brown the steak in batches in a hot pan.

Place the browned steak onto a plate and set to one side.

Place the browned steak in a bowl and set to one side.


Making The Slow Cooked Pie Filling

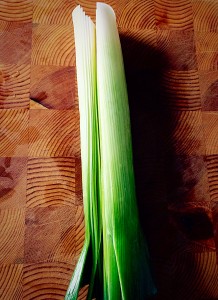
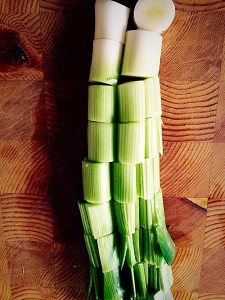
First of all, prepare all 3 leeks by cutting off the tough, dark green tops and root. Starting at the top of the leek cut almost through and down two thirds. Wash the leeks under cold, running water to remove any dirt trapped between the leaves. Shake off any excess water.

Tip : I wash the leeks and leave them to drain upside down, before prepping other meat or vegetables.

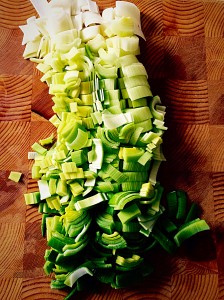
Take one, large washed leek and finely dice it.

Take one large leek.

Finely dice the leek.

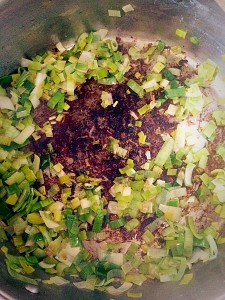
Add the diced leek to the same pan used for browning the steak.

Saute for 2-3 minutes over a medium heat until softened.

Add the diced leek to the pan used for browning the steak. Sauté for 2-3 minutes over a medium heat.

Pour in the ale and use a wooden spoon to scrape the crusty, tasty brown bits from the bottom of the pan.

Pour in the Ale and then, using a wooden spoon scrape all the crusty, tasty brown bits from the bottom of the pan.

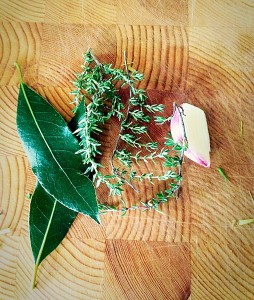
Strip the thyme from its stalk and mince the garlic.

Strip the time from its stalk and mince the garlic.

Add the steak, herbs and garlic back to the pan. Then add an additional 500ml of water.

Add the steak, herbs and garlic back to the pan. Add an additional 500ml of water.

Slice the remains two leeks into one inch/2.5cm chunks and add to the pan.

Slice the other 2 leeks into 1" chunks and add to the pan.

Now add the tomato purée, stock cube and nutmeg.

Now add the tomato purée, stock cube and nutmeg.

Finally, bring everything up to a simmer and leave to cook on a medium/low heat, uncovered for 2-3 hours, stirring occaisionally.

At the end of the cooking time the beef should be meltingly tender and the ale gravy reduced by half. Check the sauce for seasoning and adjust if necessary.

Assembling The Pie

First of all, remove the steak and leeks from the pan, using a slotted spoon. Place into a pie dish.

Remove the steak and leeks, using a slotted spoon and place into a pie dish.

Increase the heat under the pan and boil the ale gravy until it is reduced by half.

Reduce the ale gravy in the pan by half.

Pour the thickened gravy over the pie piffling.

Pour the thickened gravy over the pie filling.

Brush the egg wash around the rim of the pie dish, as this enableS the pastry to stick to the dish.

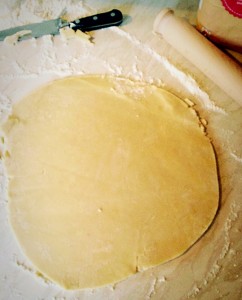
Roll out the pastry into a circle that is one inch/2.5cm wider than the top of the pie dish. Trim the pastry so that it has a neat edge.

Roll out the pastry so that it is 1" wider that the top of the pie dish. Trim the pastry so it has a neat edge.

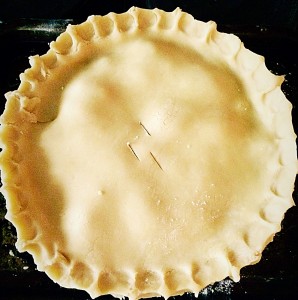
Place the pastry on top of the pie dish and crimp.

Steak Leek and Ale Pie place the pastry on top of the pie dish and crimp.

To crimp I simply pinch between my forefinger and thumb all around the pastry edge.

Make 3 slits in the pastry to allow steam to escape.

Brush the pastry with egg wash.

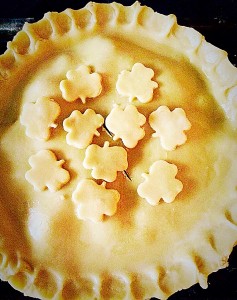
Cut out decorations from the leftover pastry and add place on the pie.

Finally, brush the pie crust again with egg wash.


Steak Leek and Ale Pie brush the pastry with egg wash and cut out decorations from the leftover pastry. Place on the pie and brush with egg wash.

Baking The Steak Leek And Ale Pie

Place the Steak Leek and Ale Pie on a baking sheet and place in a preheated oven, 200C/180C fan, gas mark 6, 400F. Bake for approximately 1 hour. The pie is baked when the pastry is golden brown and little bubbles of hot gravy or steam are bursting through the slits in the pie.

Steak Leek And Ale Pie

As soon as the pie is baked remove from the oven. Serve immediately.

Steak Leek And Ale Pie

While the leek in this pie lends a delicate onion flavour, it perfectly compliments the steak and ale. And, this Steak Leek and Ale Pie was thoroughly enjoyed by all in our house, including my very good friend and chief taste tester, who lives 2 doors away!

Also it would make perfect sense to double the quantities and make two pies. Since an uncooked pie will freeze beautifully, ensure it is absolutely cool before double wrapping in cling film and freezing for up to 2 months. So, why not pass the second pie onto a busy family, new mum, or friends. Because, the gift of a meal, even if there is no ‘special’ reason shows that you care.

If you have enjoyed this recipe for Steak Leek And Ale Pie you may also like these:

Cream Cheese Pastry Mince Pies

FF Steak Leek and Ale Pie
Cream Cheese Pastry Mince Pies

Quiche Lorraine

FF Steak Leek and Ale Pie
Quiche Lorraine

Amazing Apple Pie

FF Steak Leek and Ale Pie
Amazing Apple Pie

While I enjoy coming up with new recipes and seeing successful results, nothing beats sharing the food I make with others. Seeing the smile on my neighbours face as I pass a slice of cake over the fence fills my heart with joy. Since I know not everyone enjoys baking, it’s rare to find someone who refuses a slice of something tasty. Sharing builds friendships and breaks down boundaries. Also, it can make someone feel thought about and special. And so I will continue to share. Since it brings happiness to both parties.

So, whatever you are making, baking and creating in your kitchens have fun preparing and sharing your feast.

Sammie x

While I was gifted with most of the ingredients for this recipe, all content and opinions are my own. I did not receive payment for this post. No part of this post may be reproduced or duplicated without the written consent of the owner. Please see my Disclosure Policy.


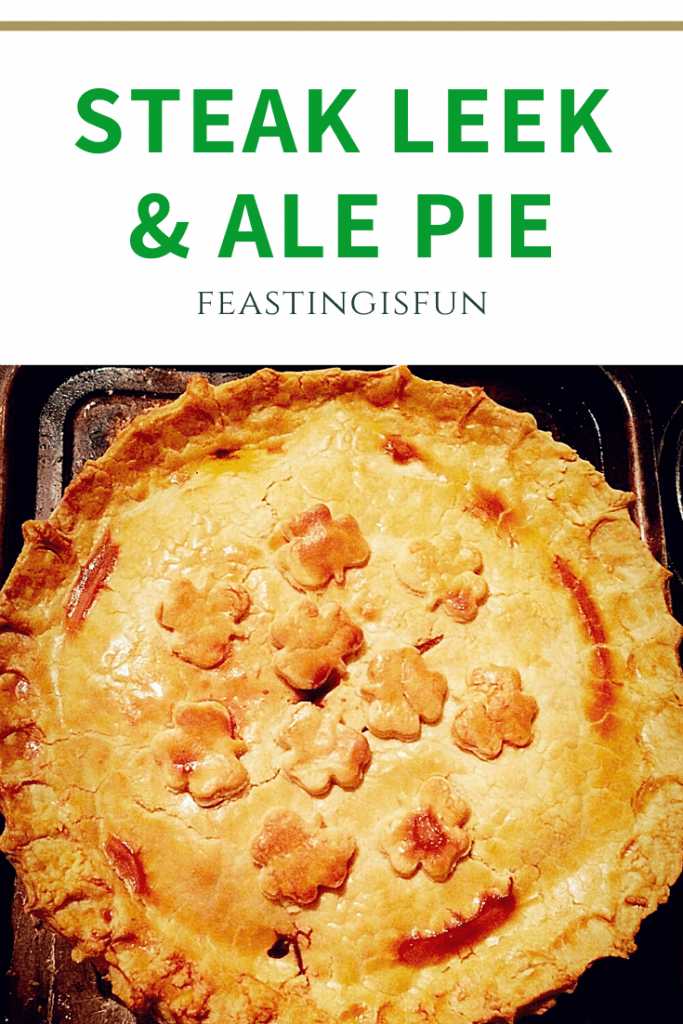
Steak Leek And Ale Pie sized for Pinterest with descriptive graphics.


Leek Colcannon

Hello to all my lovely readers. Since it is now officially Spring I’d hoped to be outside gardening. Instead it is wet and windy, so I am staying indoors. Retreating to the earth of our kitchen and making a big bowl of Leek Colcannon.

FF Leek Colcannon

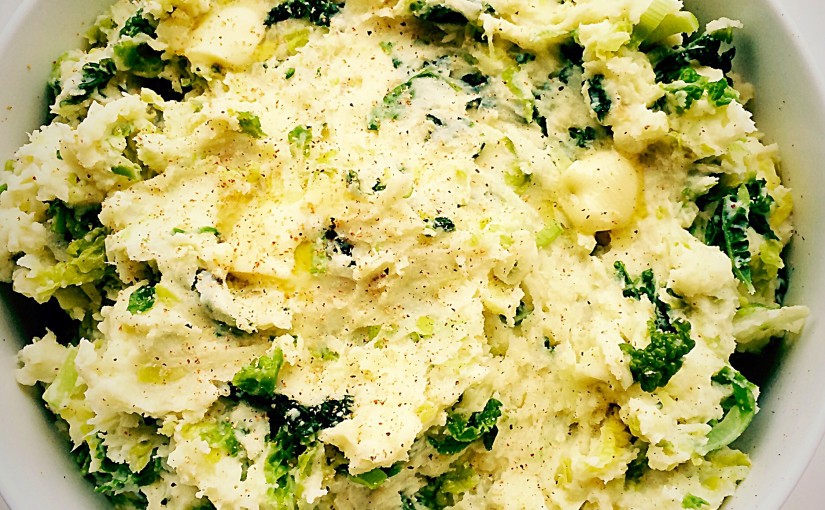
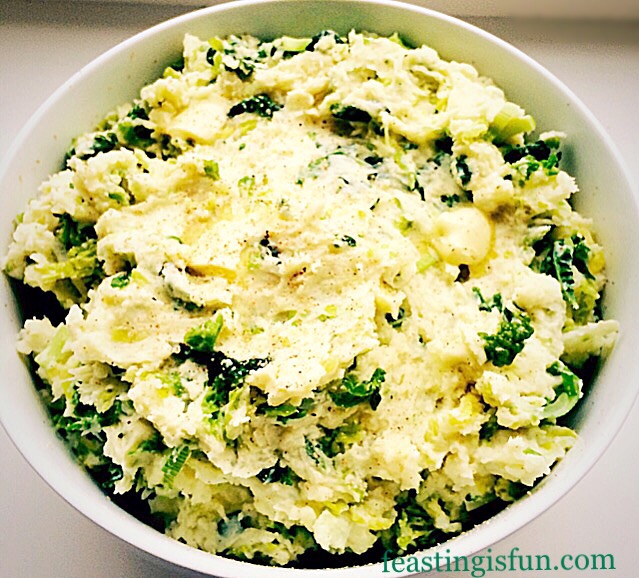
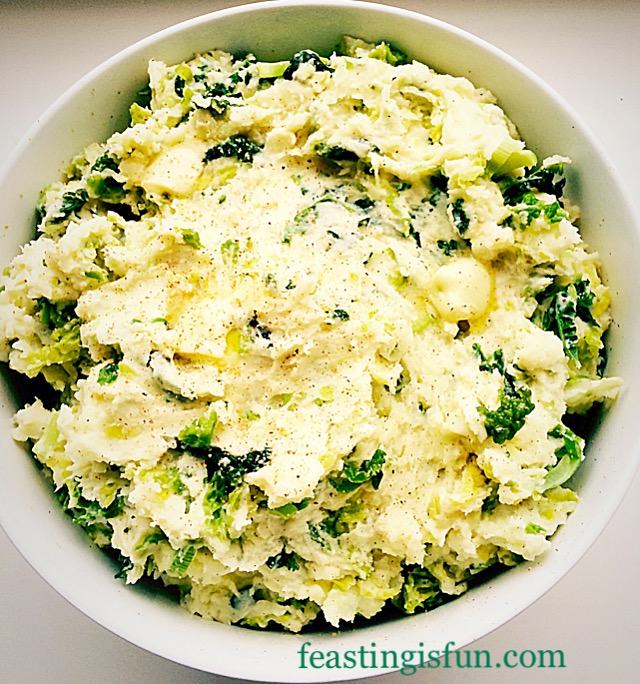
An incredible side dish made with ultra creamy, mashed potatoes that are mixed with gorgeously green, savoy cabbage. Finally the addition sautéed leeks creates a flavour filled side dish.

This has fast become a family favourite. Since it is so versatile, an ideal accompaniment to sausages, homemade pie, chops, roast chicken. Alternatively serve on its own topped with an egg. Ultimately you have endless possibilities as to what you could pair this dish with.

FF Leek Colcannon
Leek Colcannon

Celebrating The Humble Leek

Did you know that the beginning of November heralds the start of the British leek growing season? Nope neither did I!!

I absolutely love leeks, with their delicate onion flavour and that is exactly what makes them perfect in this dish.

Colcannon is a traditional Irish dish made using mashed potatoes and cabbage or kale. While I challenged myself to come up with some recipes to celebrate the British leek, I knew it’s delicate flavour would perfectly compliment the traditional Colcannon dish.

Also using seasonal fruit and vegetables in my cooking is important to me and savoy cabbage is in season now, so my choice of brassica was decided.

Nutmeg also pairs beautifully with leeks and so I knew I had to incorporate that into the dish – thus the Leek Colcannon idea was born. Whoops there I go, having ideas again – fortunately this one turned out to be absolutely delicious.

Recipe : Serves 6 generous portions of Leek Colcannon

1.75kg/4lb Pre-peeled weight Desiree Red or potatoes suitable for mashing.

50g/2oz Butter plus 1Tbsp extra

300ml/10fl Double Cream or whole milk

1/4tsp Freshly Grated Nutmeg

Salt and Pepper to taste

1 Medium Savoy Cabbage

1 Large Leek

Method : Important please read through the whole method before starting.

Preparing And Making The Mashed Potatoes

  • First of all, peel and dice the potatoes into 1″/2.5cm chunks and place in a large pan, cover with water. If you wish to add salt to the water that’s fine, I left the seasoning to the end.
  • Bring the potatoes to the boil and the simmer until a fork easily pierces the potato chunks – it’s worth checking a couple.
  • Drain the potatoes and place back into the saucepan. Allow to steam dry for a couple of minutes.
  • Add the butter, 250mls of the cream, salt, pepper and nutmeg.

Nutmeg is the secret to delicious tasting mashed potatoes www.feastingisfun.com

  • Nutmeg adds a subtle flavour that adds to the Leek Colcannon’s flavour.

Mash the potatoes, cream and butter until completely smooth.

  • Mash the potatoes, cream and butter together until completely smooth.
  • Add the rest of the cream if needed – the potatoes should be creamy, not dry. Check for seasoning and adjust as necessary.

Preparing And Cooking The Savoy Cabbage

  • While the potatoes are cooking you can prepare the cabbage and leeks.

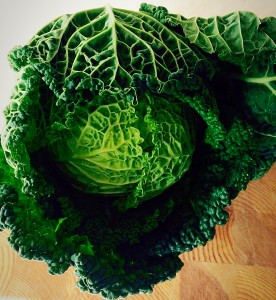
Look how gorgeously green this beautiful Savoy cabbage is.

  • Vibrant, deep green leaves from the cabbage.

Remove 5 leaves from the cabbage and stack them.

  • Remove five leaves from the cabbage and stack them on top of each other.

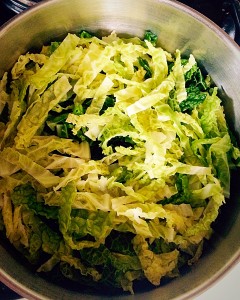
Slice the leaves in half and then finely shred each half.

  • Slice the leaves in half and then finally shred each half.
  • Continue peeling off the leaves, stacking and shredding. I used almost all of the savoy cabbage. I left the very few inner, yellow leaves. If you have a large cabbage cut in half and use one half.
  • Place the shredded cabbage into a large saucepan, pour over an inch of boiling water from the kettle, clamp on the lid and cook on a high heat for no longer than 5 minutes.

Drain the cooked cabbage.

  • Drain the cooked cabbage.
  • Place the cabbage back into its pan and allow to steam dry for a couple of minutes.

Preparing And Cooking The Leeks

  • First of all trim the tough dark green top from the leek and also the root end.
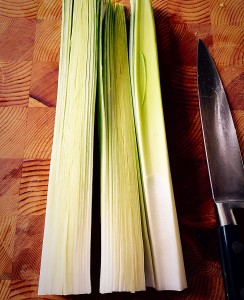
  • Make a slit cutting almost through from the top of the leek to two thirds down.
  • Wash the leek under running cold water ensuring any dirt, trapped between the leaves is washed away.
  • Shake the leek over the sink to remove any excess water.

Tip : I wash my leeks, shake them and leave them upside down on the draining board to drain, before prepping other vegetables.

Cut the washed leek in half.

  • Cut the washed leek in half.

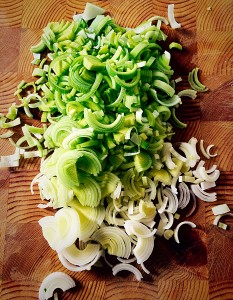
Finely shred the leek.


  • Finely shred the leek.
  • Place a tablespoon of butter into a shallow pan and gently saute the leeks until tender, over a medium heat.

Sauté the shredded leek for 5 minutes until tender and cooked.

  • Sauté the shredded leek for 5 minutes until tender and cooked.

Add the cabbage and leek to the mashed potato.

  • Add both cabbage and leek to the mashed potato.

Stir all the ingredients together until well combined.

  • Stir all the ingredients together until combined.
FF Leek Colcannon
Leek Colcannon
  • Finally, decant the leek colcannon into a heatproof dish. Adding dots of butter and a final grating of nutmeg.

The Leek Comes was served with Steak Leek And Ale PieSteak Leek And Ale Pie alongside steamed carrots. Fortunately there was enough left over to make bubble and squeak patties for lunch the next day!

If you have enjoyed this recipe for Leek Colcannon you may also like these:

Walnut Pastry Crust Leek Stilton Tart 

FF Leek Colcannon
Walnut Pastry Crust Leek Stilton Tart

Homemade Cauliflower Cheese 

FF Leek Colcannon
Homemade Cauliflower Cheese

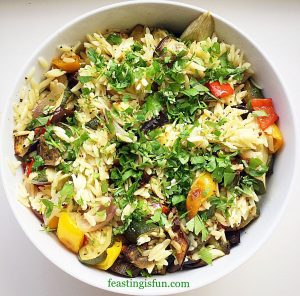
Roasted Summer Vegetable Orzo Salad 

FF Leek Colcannon
Roasted Summer Vegetable Orzo Salad

I do hope that I’ve inspired you to try this delightful dish. Although I used double cream – well we were celebrating the start of the British leek growing season – milk is a perfectly fine substitute. Switching up the greens to Kale or Spring Greens through the growing season will be fine, just make sure they are cooked until just tender – I haven’t found a fan of overcooked, soggy cabbage yet!

Sammie x

The British Leek Association provided me with some of the ingredients for this recipe. All content and opinions are my own. I did not receive payment for creating this recipe. Please see my Disclosure Policy.

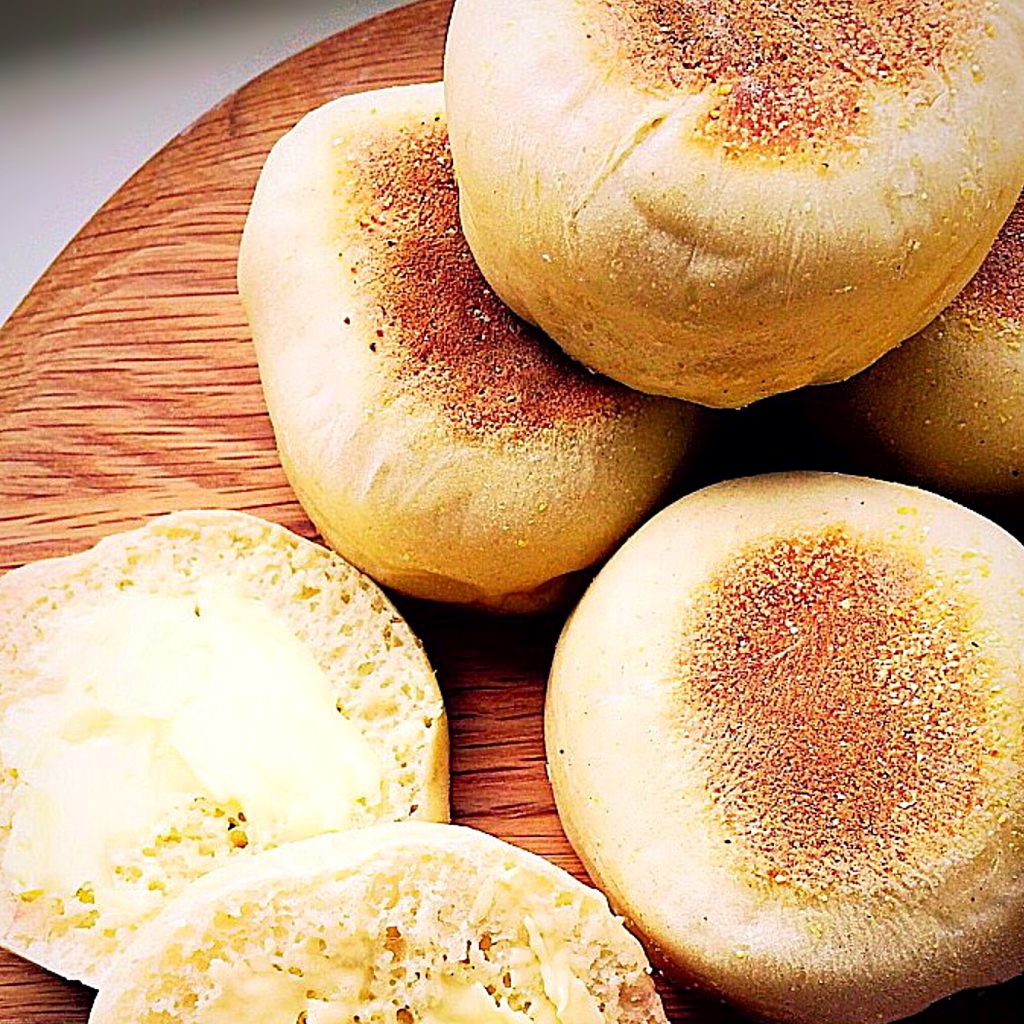
English Muffins

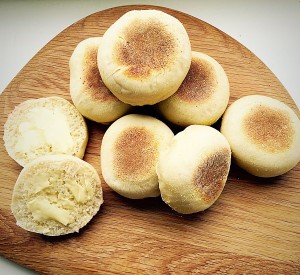
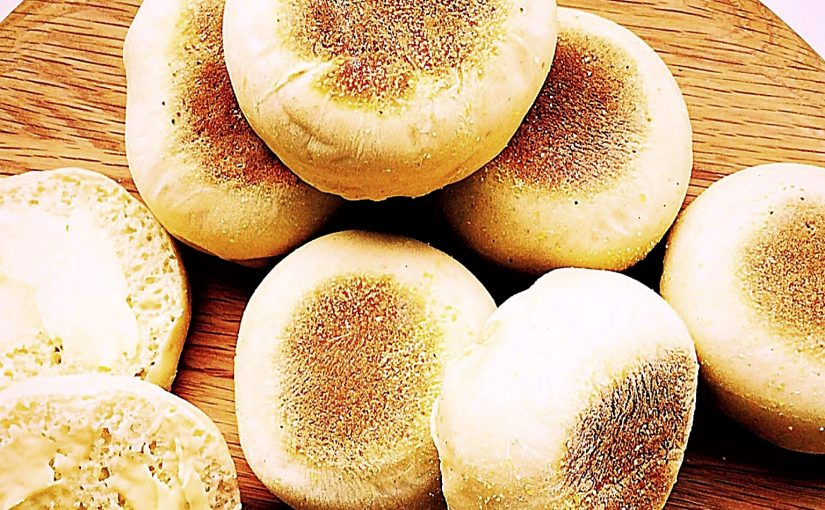
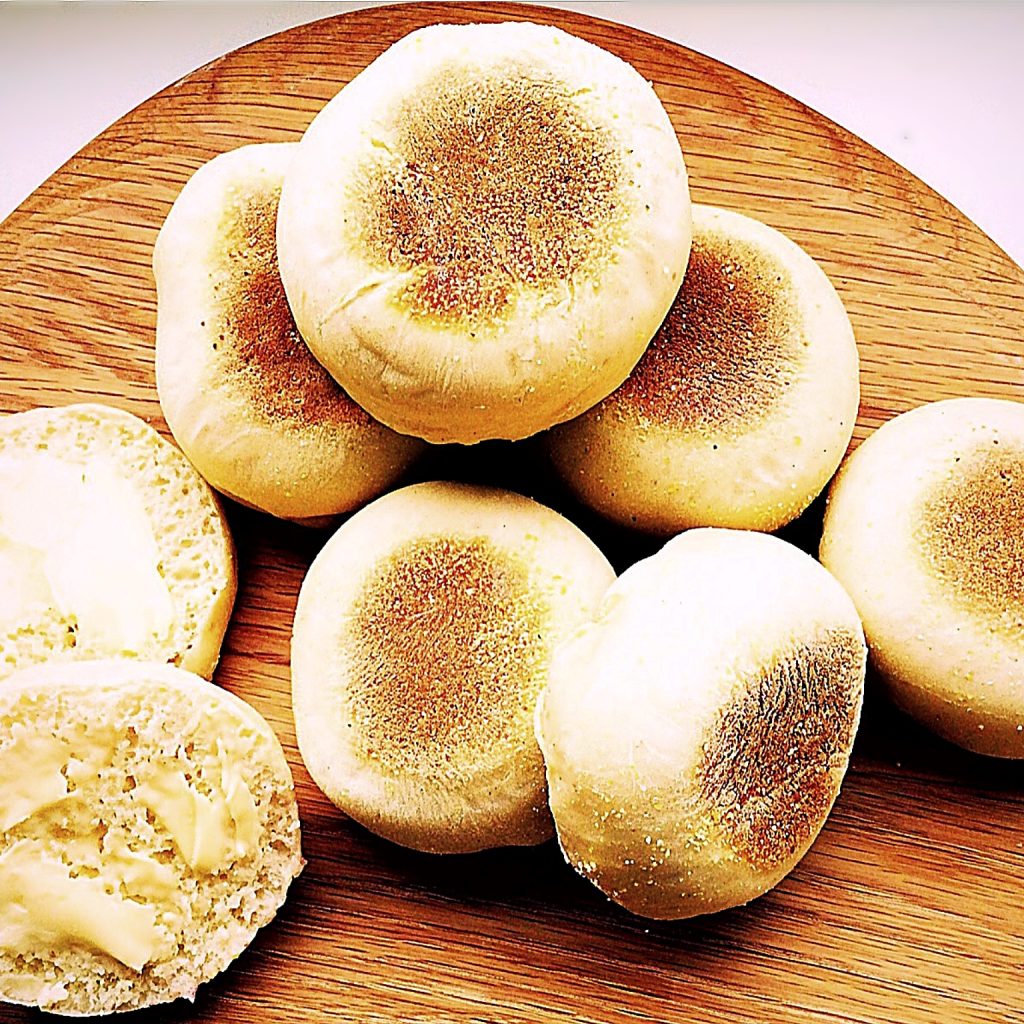
So today I have one of my greatest accomplishments to share with you. Welcome to my delicious, homemade, English Muffins.

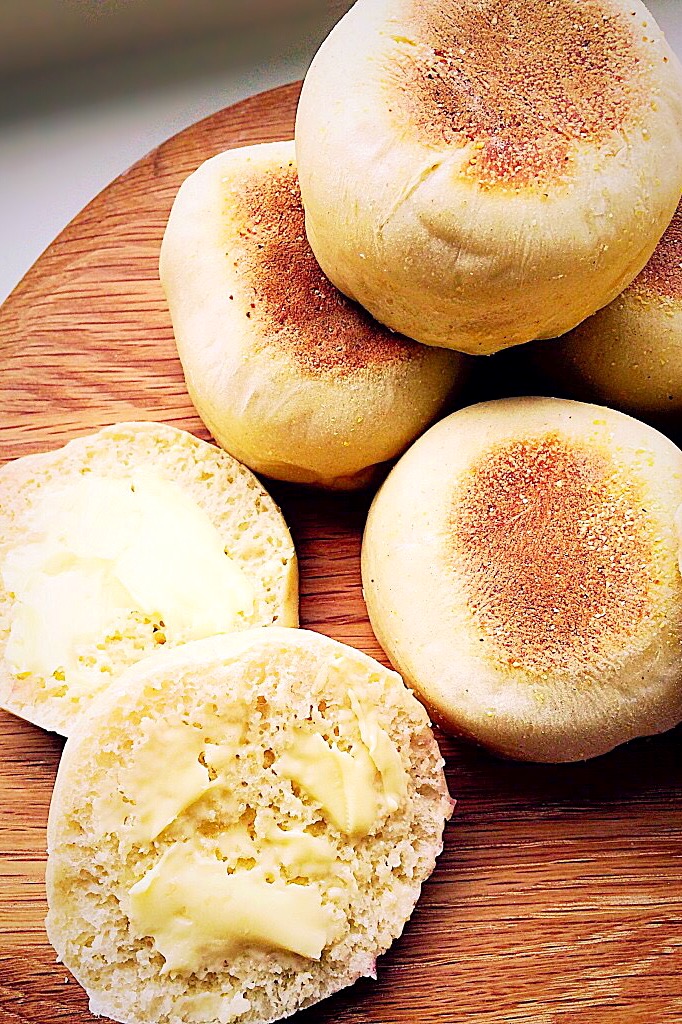
English muffins
English Muffins

Honestly speaking, I am not really sure why I have hesitated so long before making these, all I can say is that I wish I hadn’t. Since these homemade English Muffins are a world away from their shop bought counterparts.

While I have eaten plenty of supermarket muffins in the past, I have always found them a bit heavy and dense and although they’ve been eaten and enjoyed I honestly couldn’t go back now, homemade is the way to go!

Homemade English Muffins
English Muffins

They say that Breakfast is THE most important meal of the day, a couple of these English Muffins will certainly keep you going until lunchtime.

Although we very rarely have tea as a meal anymore, these would be absolutely perfect. A plate piled high with warm, homemade English Muffins, butter, pots of jam, sliced bananas and a large glasses of milk. A scene straight out of an Enid Blyton book!

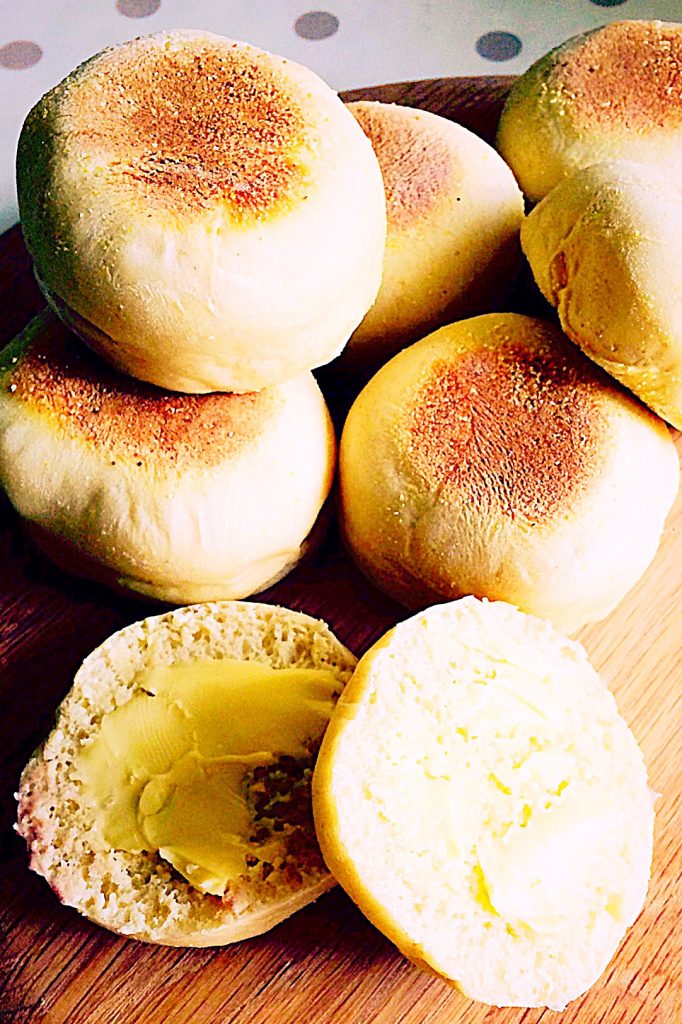
Freshly made English Muffins.
English Muffins.

I honestly cannot encourage you enough to make these English Muffins. The reward for effort put in is ridiculously good. These don’t require baking either. Just an iron skillet/griddle, if you own one, otherwise a heavy based frying pan will be fine.

A couple of tips:

The dough is quite sticky, but not unmanageable, as long as you dust your working surface well, with flour and polenta (cornmeal) and keep the dough moving whilst rolling out.

No fat needs to be added to the griddle. Simply follow the method and your English Muffins will be fantastic!

Recipe : Makes 12-14 English Muffins

350g/12oz Plain White Flour plus extra for dusting  – I use Shipton Mill 

7g/1 sachet Active Dried Yeast

1/2tsp Honey – the runny kind

7g Salt – I use Maldon 

1 Large Free Range Egg

200ml/7 fl oz Milk – whole or semi skimmed

7g/ 1/4oz Unsalted Butter

2-3 Tbsp Cornmeal/Polenta for dusting

Method :

Making The Muffin Dough

Using a stand mixer with a dough hook attachment or a bread maker,

Lightly whisk the egg into the milk. Pour into the bowl of your chosen machine.

Add the yeast and honey. Mix using clean fingers.

Then add the flour on top of the liquid.

Add the salt and butter.

If using a bread maker set the machine to dough cycle. Press start.

If using a stand mixer, mix on a low speed until all the ingredients have combined, then continue mixing for 5 minutes on a medium speed. Stop the machine, remove any dough from the dough hook and place back into the bowl. Cover the bowl with a clean, damp cloth and leave until the dough has doubled in size – approx. 1 hour.

When the dough cycle has finished, re-start your bread maker on the dough cycle and allow to mix for 2 minutes.

With a stand mixer, remove the cloth, mix with the dough hook for 2 minutes.

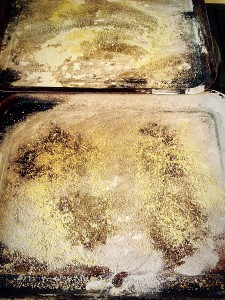
While the dough is proving dust 2 baking sheets with a 50/50 mix of flour and cornmeal (polenta is the same thing!).

Prepare the baking sheets by sprinkling with flour and polenta.


Cutting Out The English Muffins

First of all, prepare the work top by dusting with the same flour/cornmeal mixture. Keep some to the side to use whilst working/rolling the dough.

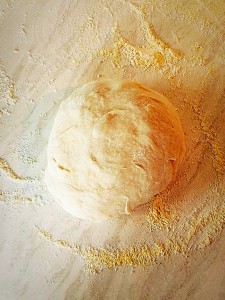
Place the dough onto the prepared worktop
Place the dough onto the prepared worktop.
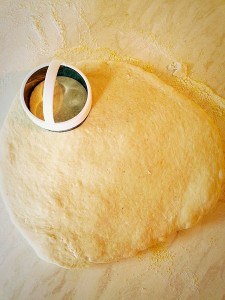
Roll out the dough, moving it regularly so it doesn't stick, until it is about 1/2 inch thick.
Roll out the dough, moving it regularly so it doesn’t stick, until it is about 1/2 inch thick.

Use a 2.5in (6 and 3/4cm) diameter, plain round cutter to cut the muffin dough.

Place the cutout discs onto the prepared baking sheets.

Bring together the remnants of dough, left from cutting out the discs, knead back together and re-roll. Cut out the muffins as before.

Cover the baking sheets with a dry tea towel and leave the dough to rise, until doubled in size.

After 30-45 minutes proving the dough will have risen and have rounded edges.

Cooking The Muffins

Preheat your griddle/heavy based pan on the hob, over a medium heat.

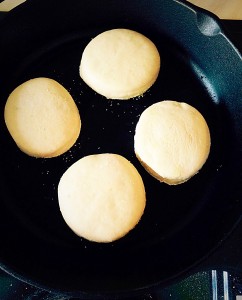
Place the discs onto a preheated skillet/griddle.
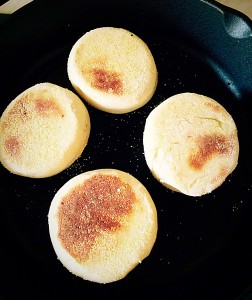
English Muffins cook for 5 minutes and then flip over.

The English Muffins rise in the pan, as the cook before your very eyes. Our children were captivated! Either use a palette knife or fish slice to flip the muffins over.

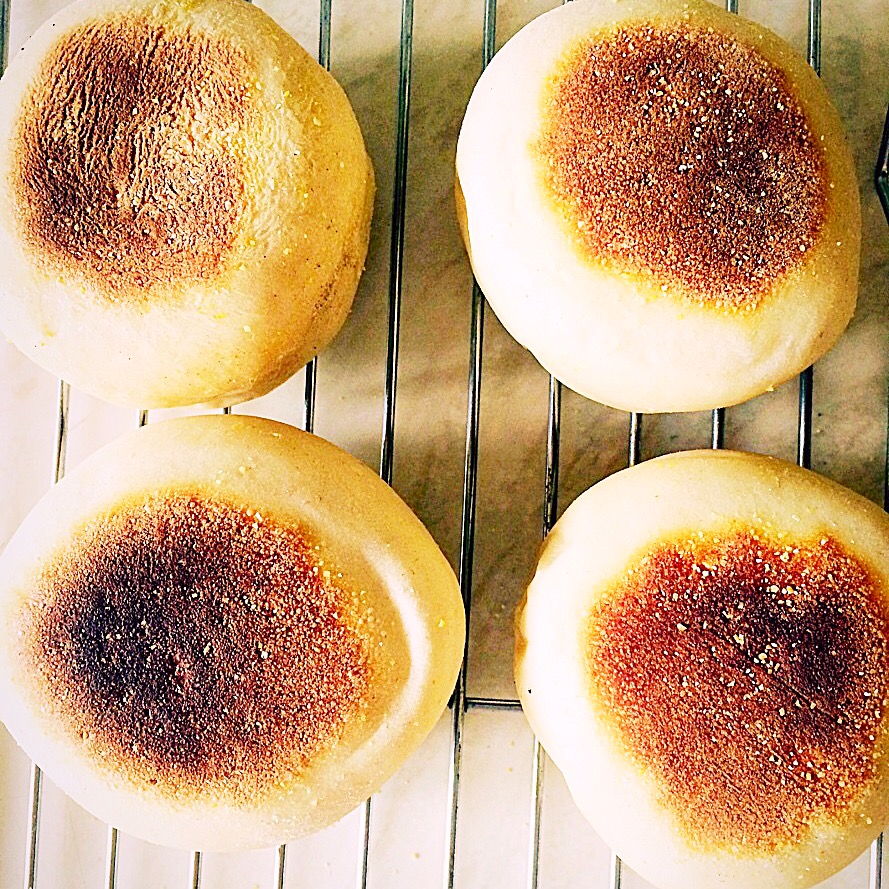
They are cooked when they are well risen and set (you can pick one up and the sides hold their shape), both top and bottom should be golden brown and they will sound hollow when rapped with you knuckle.

Remove from the griddle.

English Muffins

Place the cooked English Muffins on a cooling rack.

These first 4 English Muffins were cooled for 5 minutes and then eaten straight away. Unbelieveably good.

Continue to cook the remaining muffins in the same way.


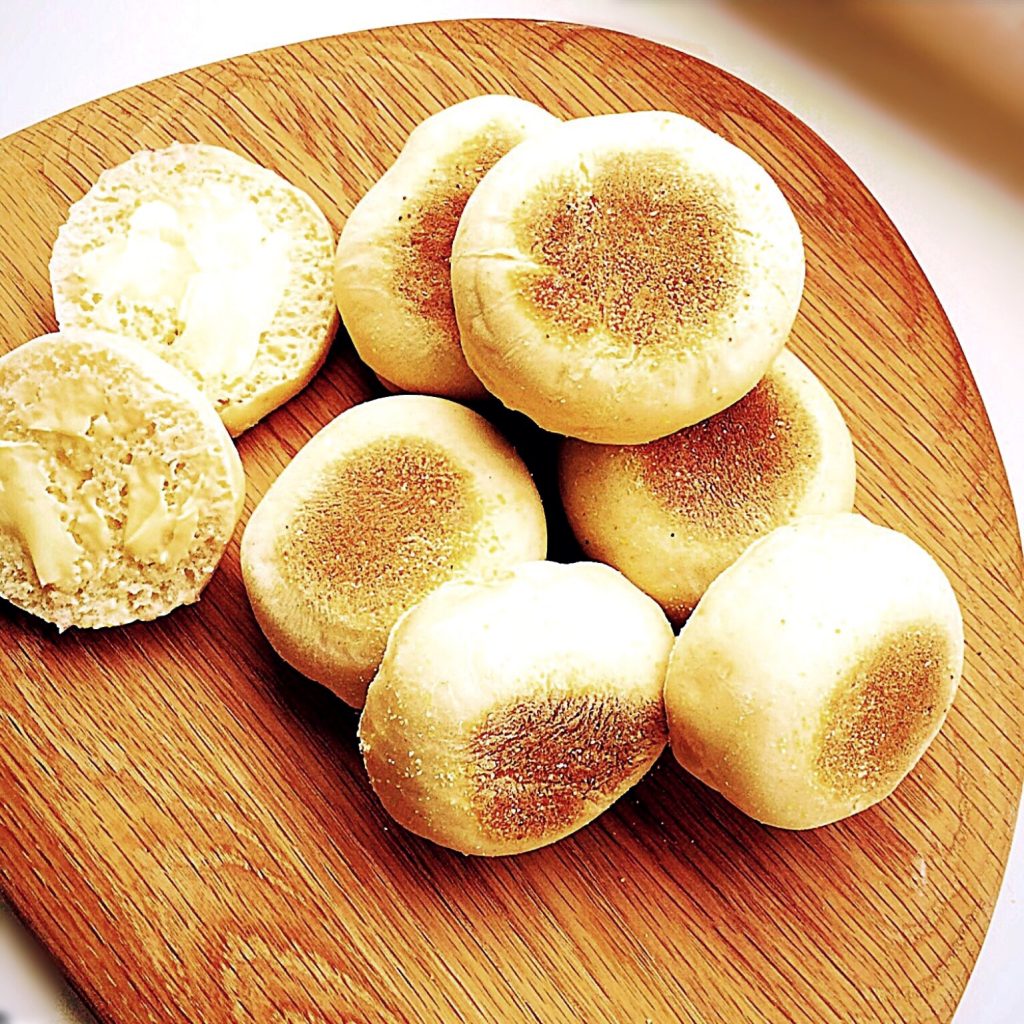
English muffins freshly baked on a wooden board.


Tasty Homemade Food

Finally and most importantly, these muffins lasted 5 minutes after I’d photographed them and then they were snaffled away to be eaten! Now that is definitely a sign of a great recipe.

Also, if you’ve never baked bread or cooked with yeast before, these English Muffins are the perfect starting point. No worrying if it is too early to open the oven door and take a peek, the cooking happens right before your very eyes. And if you are unsure if they are cooked through, remove one, cut through with a bread knife and check. What could be easier and more tasty?

And I can guarantee massive smiles all round when you serve up a big plate of these warm, delicious, English Muffins.

The muffins will keep for a couple of days in a bread bin and are delicious, split and toasted. Also, they be placed in a freezer bag, once absolutely cold and kept in the freezer for a month.

The gorgeous board that I’ve displayed the English Muffins on is from House of Frazer, that I picked up in the sale!

Have you put off making something, presuming it will be really hard, only to be surprised when you’ve taken the plunge and made it??

If you enjoyed making these English Muffins recipe you may also want to try other easy bread recipes:

Knotted Poppyseed Rolls

Knotted poppyseed rolls.
Knotted Poppyseed Rolls

Large White Bloomer

Large White Bloomer loaf
Large White Bloomer

Farmhouse White Loaf

Farmhouse style white bread loaf.
Farmhouse White Loaf

Please let me know if you make these, I love hearing from you?

Sammie x

No part of this post may be reproduced or duplicated without the written permission of the owner. Please see my Disclosure Policy.
 

Lime Coconut Blossom Bundt Cake

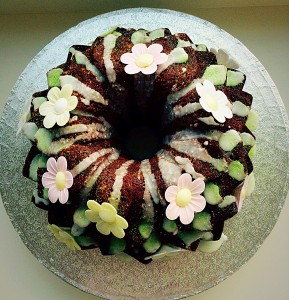
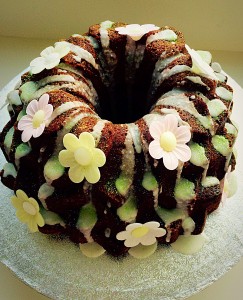
Hi, I hope you’ll agree, this Lime Coconut Blossom Bundt Cake is so pretty?

One of my very best friends has recently celebrated her birthday. While she was away, I decided to bake her a cake upon her return.

Now this wonderful lady loves coconut and lime and most importantly cake!! So I knew what flavour to bake, I just had another, BIG decision to make.

And I have a confession.

Since I have fallen in love with Bundt tins.

Finally, I’ve said it!!

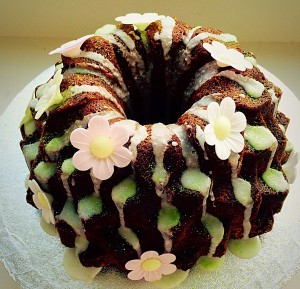
Lime Coconut Blossom Bundt Cake a beautiful birthday cake www.feastingisfun.com


They give such amazing beauty and detail to cakes, without any extra effort from the baker. That’s got to be a good thing. Right??

Such is my admiration for them, I am now the proud owner of 6 new Bundt tins – as well as the 3 I already owned. Some may call it an obsession, I prefer – variety!!

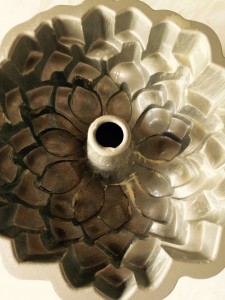
Each tin is different. One is heart shaped, another square and the one I chose for my friend is called Blossom.

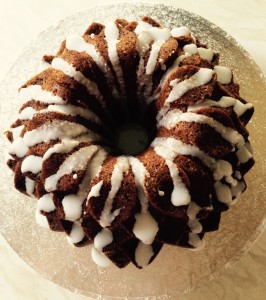
Lime Coconut Blossom Bundt Cake the lime drizzle perfectly compliments the coconut based cake www.feastingisfun.com


Depending on how you look at it, the tin has layers of petals or leaves. I’m not really fussed wht they are (petals I think – I know I’ve just contradicted myself!!), just that the tin itself is beautiful.

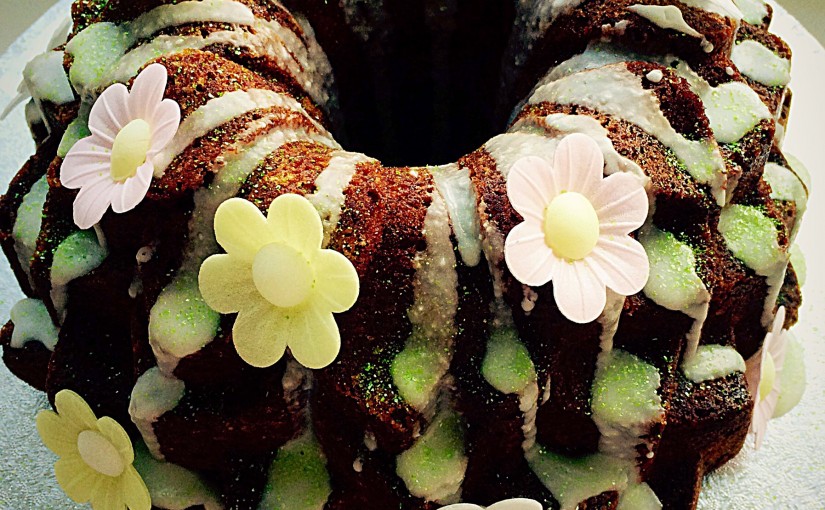
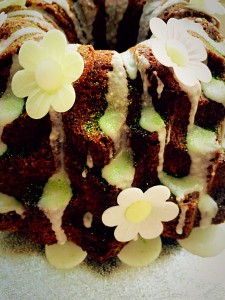
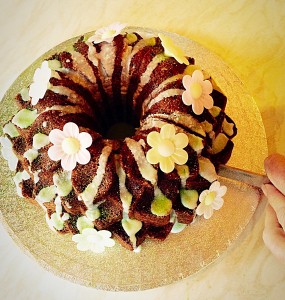
I had these gorgeous, rice paper flowers and simply knew they were going on the cake. That and green glitter. My friend’s favourite colour. A gorgeous lime green that totally complemented the lime drizzle I used to decorate the cake.

You, of course can use whatever decorations you like. The drizzle on it’s own looked absolutely beautiful on this Lime Coconut Blossom Bundt Cake. Or tiny little sugar paste flowers on each of the petals.

Yes I’ve decided they are petals!!

Lime Coconut Blossom Bundt Cake it tastes as good as it looks www.feastingisfun.com


For a child, firstly I would definitely leave out the Malibu, then I would love to put little fairies, peeking out from under the flowers. Ooh let your creative imagination run wild!!


Recipe : Makes one Lime Coconut Blossom Bundt Cake

275g/10oz Unsalted Butter at room temperature (plus a little extra for greasing the tin)

275g/10oz Caster Sugar

5 Large Eggs – I use free range

275g/10oz Plain White Flour

2 1/2 tsp Baking Powder

1/4 tsp Salt

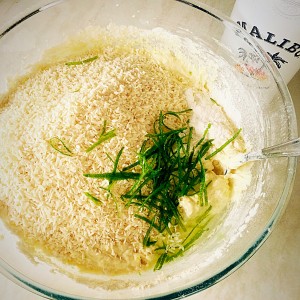
100g/4oz Dessicated Coconut

3Tbsp Malibu – coconut flavoured rum (can substitute with milk)

2 Limes

200g/7oz Icing Sugar

Rice paper flowers, green edible glitter, or decorations of your choice.

Method : Preheat the oven to 180C/160C fan

If not using a 10 cup Nordicware Bundt tin, grease and line a 10″ springform cake tin.

This is the Nordicware Blossom Bundt Tin
This is the Nordicware Blossom Bundt Tin which I used.


Using a pastry brush and some melted butter completely grease the inside of the Bundt tin.


Cream the butter and sugar together, until pale and fluffy.

 

Starting and finishing with the sifted dry ingredients (flour, baking powder and salt), add one third of the dry ingredients, whilst slowly mixing.

Next add half of the eggs (I pop them in a small jug and lightly mix them first), continuing to mix on a low speed.

Repeat again and then add the last third of the dry ingredients and mix in.

Zest 2 limes. Either using a zester, which gives long, thin, green strips, or by finely grating the zest.

Add the Malibu or milk to the bowl and mix in.

Add the coconut and lime zest. Fold into the cake batter.


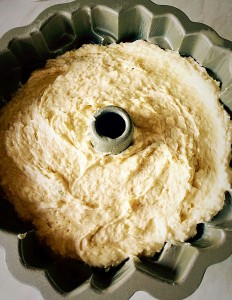
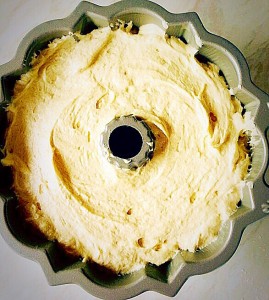
Spoon the cake batter into the Bundt tin. Rap the tin on the work surface a couple of times, this will release any trapped air bubbles
Spoon the cake batter into the Bundt tin. Rap the tin on the work surface a couple of times, this will release any trapped air bubbles.


Place the tin into te preheated oven and bake for an hour, or until a skewer, inserted into the deepest part of the cake, comes out clean.

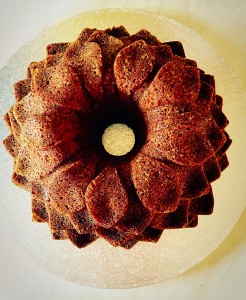
As soon as the cake is baked remove from the oven and allow to cool completely in the tin.

Lime Coconut Blossom Bundt Cake turn the cake out onto a baking rack.


Lime Coconut Blossom Bundt Cake place the cake on a board or cake stand.


Place the icing sugar into a bowl. Juice the limes and then add enough juice to the icing sugar to form a glaze that just drips from a spoon – I needed all the juice from both limes.

Lime Coconut Blossom Bundt Cake drizzle the lime glaze over the cake. www.feastingisfun.com


Lime Coconut Blossom Bundt Cake place the flowers onto the cake, dabbing the base of each one with glaze to hold it. Then get sprinkling with glitter! www.feastingisfun.com


This cake, just on it’s own, straight out of the Bundt pan, is stunning. Just a few extra decorations sends it completely over the top.

I hope that you agree?


Lime Coconut Blossom Bundt Cake sing Happy Birthday and cut into this beautiful cake. www.feastingisfun.com


I hope I’ve encouraged you to give Bundt pans a try?

The general rules are, make sure the pan is properly greased and never fill it more than 3/4 full of cake batter.

I would love to know if you are a Bundt cake baker?

If you have enjoyed this recipe for Lime Coconut Blossom Bundt Cake you may also like these:

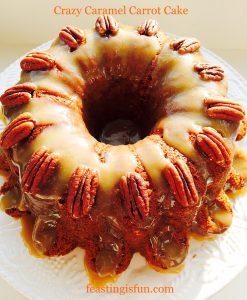
Crazy Caramel Carrot Cake

FF Lime Coconut Blossom Bundt Cake
Crazy Caramel Carrot Cake

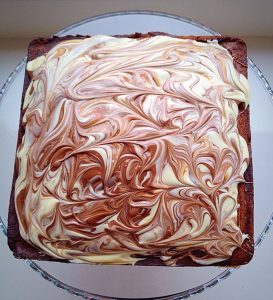
Malted Marbled Chocolate Cake

FF Lime Coconut Blossom Bundt Cake
Malted Marbled Chocolate Cake

Lemon Blueberry Bundt Cake 

FF Lime Coconut Blossom Bundt Cake
Lemon Blueberry Bundt Cake

I really enjoy reading your comments and would love to hear what you think of this Lime Coconut Blossom Bundt Cake?

Sammie x