Cheese Bacon Breakfast Muffins

Are mornings busy in your house? Because they certainly are here. So, I always ensure there is a good breakfast on offer, as it is the most important meal of the day and today I am able to share these delicious Cheese Bacon Breakfast Muffins with you, my lovely readers.

FF Cheese Bacon Breakfast Muffins

The recipe for these Cheese Bacon Breakfast Muffins was given to me Jackie Heaton, she is known as The Baking Nanna.

Most importantly, these delicious muffins take under 30 minutes from start to baked. Especially good for weekend and holiday breakfast baking, or as I did today, make a batch, 5 minutes in the oven to warm through the next morning and breakfast is ready.

BN Cheese Bacon Breakfast Muffins
Cheese Bacon Breakfast Muffins

The Twitter Baking Community

I met Jackie through Twitter and she is now one half of #TwitterBakeAlong, a group baking challenge run on Twitter.

And, this morning, as I baked these muffins, within the hour people on Twitter were also baking these delicious, savoury treats. While some had a slight variations, others were coming up with ideas for future bakes. It was honestly so much fun. We laughed, smiled, shared and most of all enjoyed the fact that these Cheese Bacon Breakfast Muffins brought us all together.

BN Cheese Bacon Breakfast Muffins
Cheese Bacon Breakfast Muffins 

I baked these muffins without cases (I couldn’t lay my hands on any white ones – it was early!), I was confident a quick spray with Wilton cake release and my British Bakeware muffin pan would be more than up to the non stick job in hand.

By all means use muffin cases, I probably will next time, just as soon as I can find my plain white ones!

As well as eating these warm, for breakfast, they also make a great addition to packed lunches and picnics. The Baking Nanna also puts them on the top of stews and casseroles aren’t they the same thing wrappers removed, in place of dumplings.

Recipe: Makes 12 Cheese Bacon Breakfast Muffins

4 Rashers Streaky Bacon – I used unsmoked. Use whatever bacon you prefer.

300g/11oz Plain White Flour

1tsp Baking Powder

100g/4oz Mature Cheddar – I use Wyke Farms

2 Large Free Range Eggs

200ml Whole or Semi Skimmed Milk

3tbsp Vegetable Oil

Pinch of freshly ground black pepper

Method: Preheat the oven to 200C/180C fan, gas mark 6, 400F

Making The Muffin Batter

  • First of all cook the bacon until it is just crispy. I used a skillet on the hob but you can grill or bake the bacon. Place on a plate to cool then chop into pieces.
  • Sift the flour and baking powder into a large bowl.
  • Add the chopped bacon, grated cheese and pinch of black pepper to the flour and stir through – dry ingredients.
  • In a jug measure the milk. Add the 2 eggs and vegetable oil and stir with a fork to combine – wet ingredients.
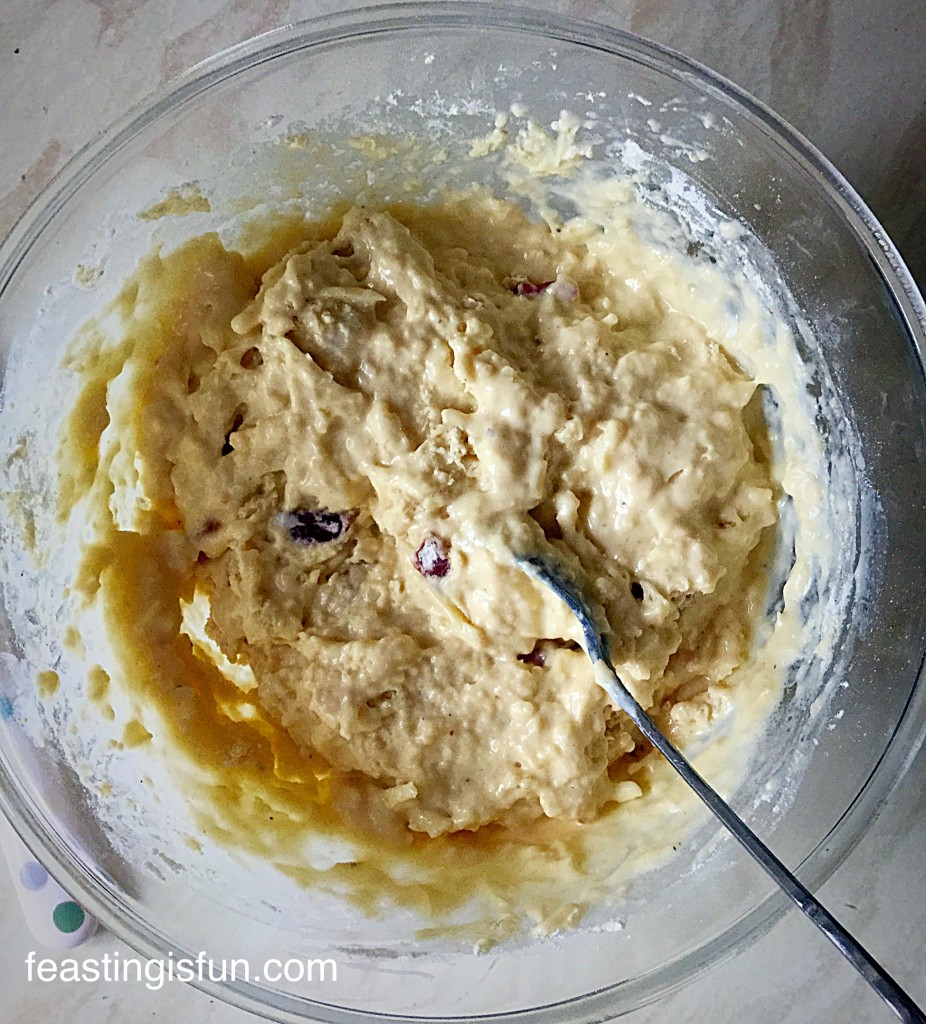
  • Pour the wet ingredients into the dry ingredients and stir until everything just comes together.
  • Muffin batter is meant to be lumpy, if you over mix you will have tough muffins.

BN Cheese Bacon Breakfast Muffins

Portioning And Baking The Muffins

  • Scoop the muffin mixture into the cases/pan.

BN Cheese Bacon Breakfast Muffins
These muffins are ready for the oven.
  • Bake for 15-20 minutes until they are golden brown and firm to touch.
  • As soon as they are baked remove the muffins from the pan and place on a cooling rack.
BN Cheese Bacon Breakfast Muffins
Cheese Bacon Breakfast Muffins 

Since this is such an easy recipe, producing light and tasty muffins – you’ve got nuffin to lose, by giving them a try!

Most importantly, these muffins are best eaten within 24 hours of being made, store in an airtight container. Alternatively, they can be frozen for up to one month. Defrost fully and reheat before eating.

BN Cheese Bacon Breakfast Muffins
Cheese Bacon Breakfast Muffins perfect for feasting on in the morning.

Are your mornings hectic?

And do you have a strategy for getting everyone up, feed and on their way?

If you love the idea of these Cheese Bacon Breakfast Muffins being a great way to grab breakfast on the go, take a look at these other ideas:
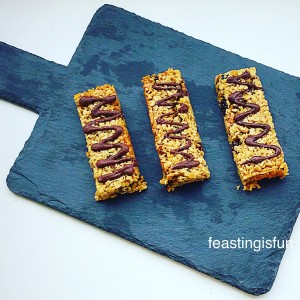
Cranberry Walnut Flapjacks 

BN Cranberry Walnut Flapjacks
Cranberry Walnut Flapjacks – perfect for sustained energy release.

Hot Cross Buns 

BN Hot Cross Buns
Hot Cross Buns – good to grab and go.

Cherry Bakewell Waffles

AJ Cherry Bakewell Waffles
Cherry Bakewell Waffles

I hope I’ve given you some ideas to take some of the stress out of busy mornings.

Please tag me in on Twitter/Instagram? I love to see what you are baking and making.

Sammie xx

@sammiefeasting Twitter/Instagram/Pinterest

Steak Leek and Ale Pie

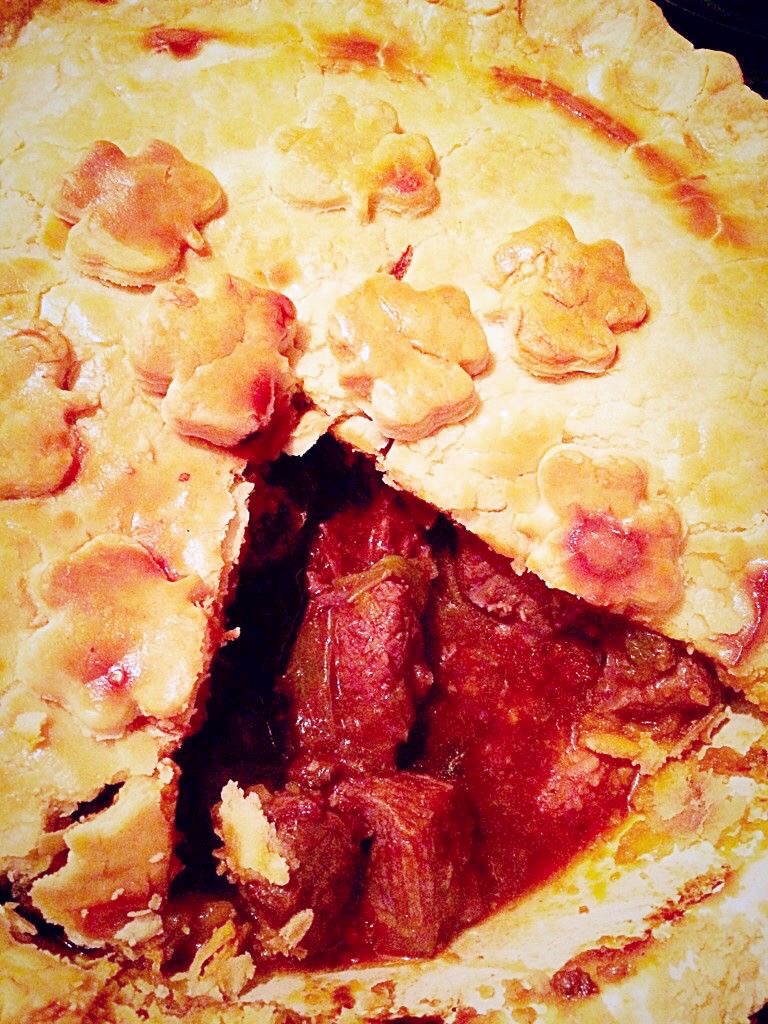
Hi, this Steak Leek and Ale Pie has a golden pastry crust, under which are chunks of melting steak and leek sitting in a thick ale gravy. Homemade pie has to be at the top of my comfort food list. While the light, fresh salads of summer have now passed. As soon as Autumn arrives, with it’s blustery gales I want proper, nourishing, hearty food.

And I want, I need, this Steak Leek and Ale Pie.

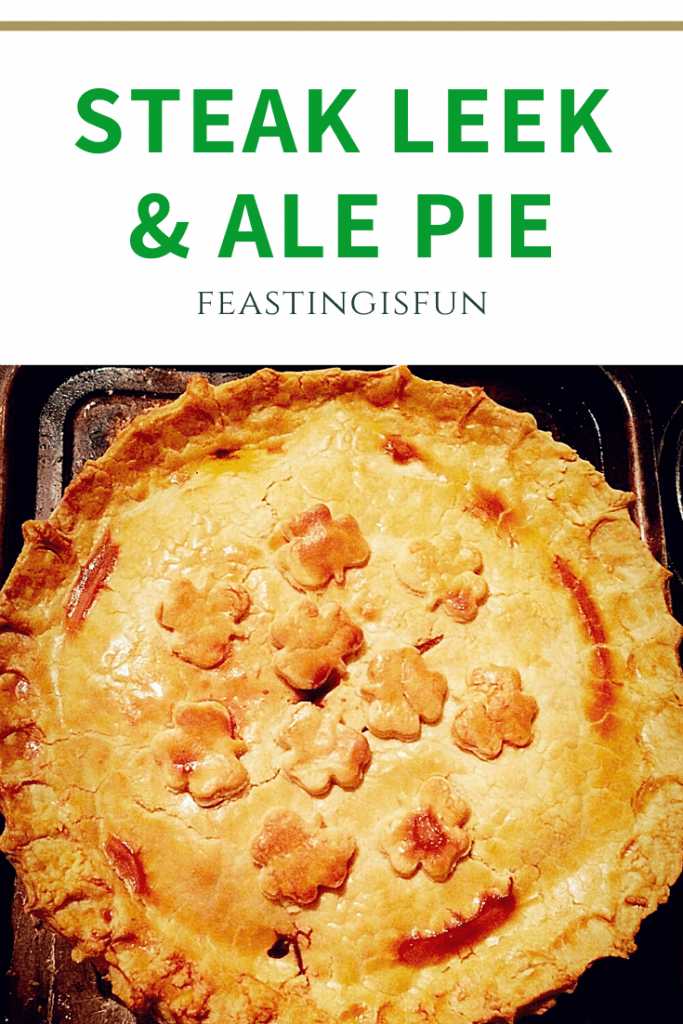
Steak Leek And Ale Pie

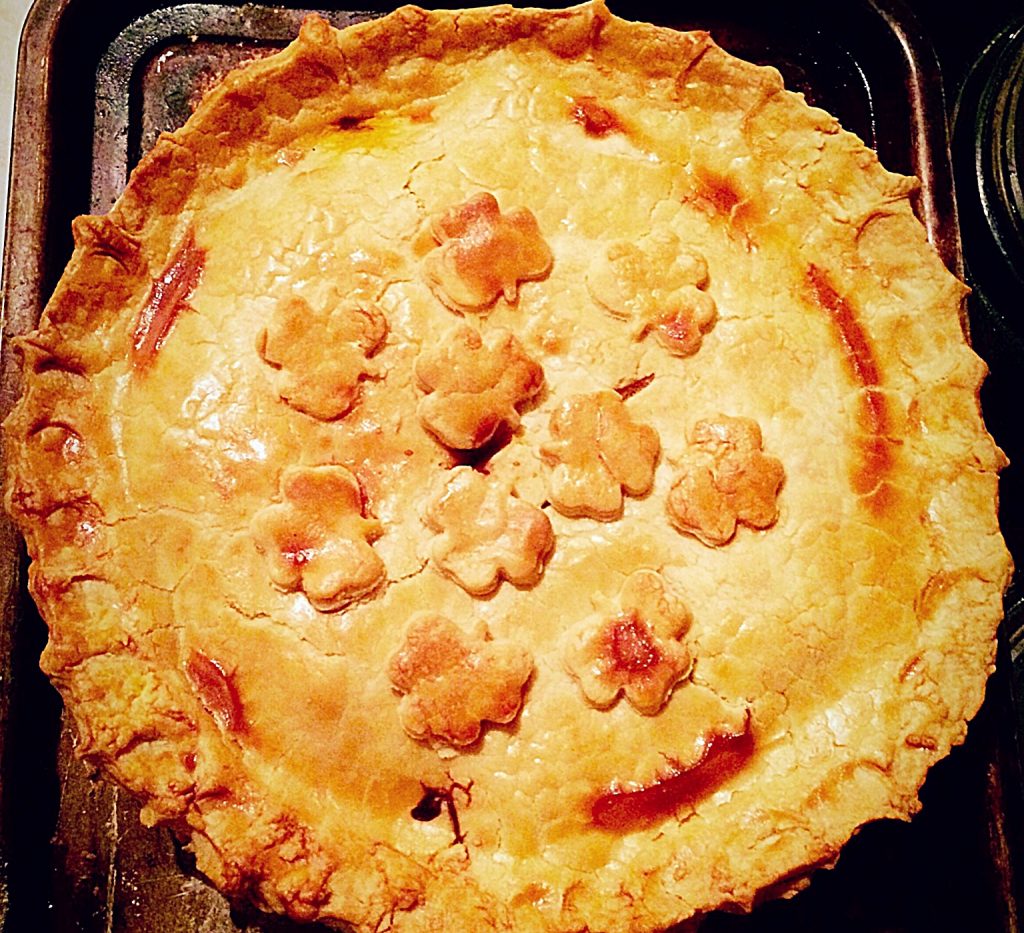
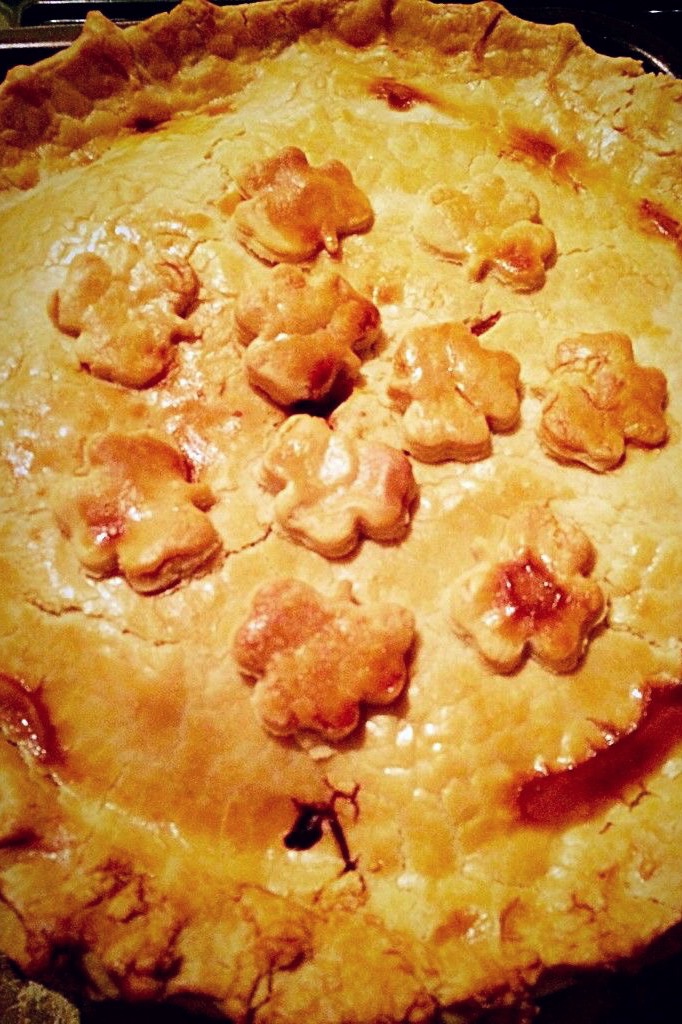
Take a look at that golden crust. It is so inviting, willing you to cut in and discover the melting chunks of steak and leek beneath, sitting in a pool of thick gravy made with the ale. While I know making pastry completely freaks some people out, it really is worth having a go. Also, you can find a recipe for the pastry here.

As soon as you have a little time, maybe at the weekend, I really encourage you to make your own pastry. While it really isn’t as difficult as some believe, the rewards are very gratifying. Yet, if you cannot bring yourself to make your own pastry, then good quality, shop bought shortcrust or puff pastry will also work very well.

Steak Leek And Ale Pie

Celebrating British Leeks

Although I made this Steak Leek and Ale Pie for a mid-week meal, it will be replacing the occaisional roast on a Sunday too. Because, it really is that good.

Likewise, I have to mention the Leek Colcannon a fantastic dish of creamy mashed potatoes, steamed cabbage and sauteed leeks that I made to serve alongside this pie. Amazing!

And, if you are wondering why leeks feature in both dishes, November heralds the start of the British leek growing season. So keen to use seasonal produce, I came up with these two recipes for the British Leek Growers Association.

Recipe : Makes one Steak Leek and Ale Pie, serves 6

450g/1lb Shortcrust Pastry – to make your own you will need 350g/12oz Plain White Flour, 75g/3oz Butter and 75g/3oz Vegetable shortening – I use Trex

1kg/2lb Good Quality Beef Steak – I used rump, chuck or braising steak would work well

2 Tbsp Butter

3 Leeks

500ml/1 pint Light Ale

2 Bay Leaves

1 tsp Fresh Thyme – halve if using dried

1 Clove of Garlic

2 Tbsp Tomato Puree

1/4 tsp Nutmeg – I always use freshly grated

1 Beef Stock Cube – or I used 1 Knorr beef stockpot

2 Tbsp Flour plus extra for rolling out pastry

Sea Salt – I use Maldon

Freshly Ground Black Pepper

1 Medium Egg whisked with a little water for the egg wash

Method : Please read through before starting

Making The Pastry

For instructions on how to make the shortcrust pastry please see here.

If making your own pastry, make, cover in cling film and place in the fridge to chill.

Preparing The Steak

First of all, cut the steak into generous, one inch/2.5cm chunks.

Cut the steak into good sized chunks - 1.5"

Mix 2 tablespoons of flour with 1 teaspoon of sea salt and 1 teaspoon of freshly ground pepper.

Toss the steak in seasoned flour.

Toss the steak in the seasoned flour.

Place 2 tablespoons of butter into a large pan and melt over a high heat.

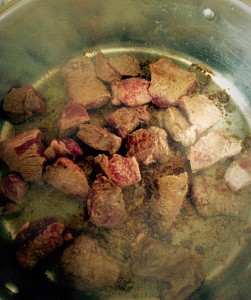
Brown the steak in batches.

Brown the steak in batches in a hot pan.

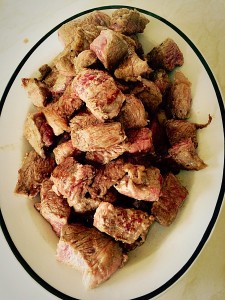
Place the browned steak onto a plate and set to one side.

Place the browned steak in a bowl and set to one side.


Making The Slow Cooked Pie Filling

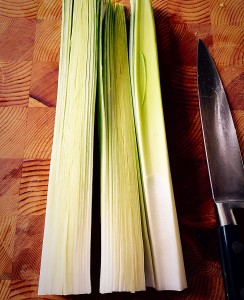
First of all, prepare all 3 leeks by cutting off the tough, dark green tops and root. Starting at the top of the leek cut almost through and down two thirds. Wash the leeks under cold, running water to remove any dirt trapped between the leaves. Shake off any excess water.

Tip : I wash the leeks and leave them to drain upside down, before prepping other meat or vegetables.

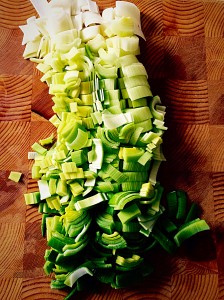
Take one, large washed leek and finely dice it.

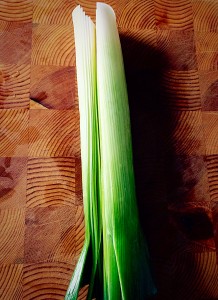
Take one large leek.

Finely dice the leek.

Add the diced leek to the same pan used for browning the steak.

Saute for 2-3 minutes over a medium heat until softened.

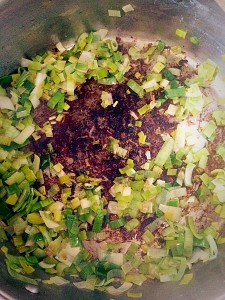
Add the diced leek to the pan used for browning the steak. Sauté for 2-3 minutes over a medium heat.

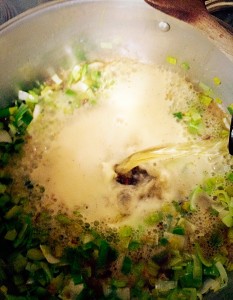
Pour in the ale and use a wooden spoon to scrape the crusty, tasty brown bits from the bottom of the pan.

Pour in the Ale and then, using a wooden spoon scrape all the crusty, tasty brown bits from the bottom of the pan.

Strip the thyme from its stalk and mince the garlic.

Strip the time from its stalk and mince the garlic.

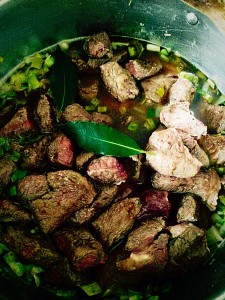
Add the steak, herbs and garlic back to the pan. Then add an additional 500ml of water.

Add the steak, herbs and garlic back to the pan. Add an additional 500ml of water.

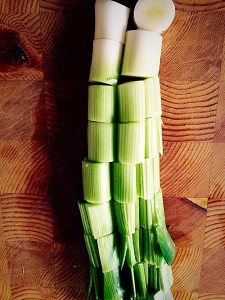
Slice the remains two leeks into one inch/2.5cm chunks and add to the pan.

Slice the other 2 leeks into 1" chunks and add to the pan.

Now add the tomato purée, stock cube and nutmeg.

Now add the tomato purée, stock cube and nutmeg.

Finally, bring everything up to a simmer and leave to cook on a medium/low heat, uncovered for 2-3 hours, stirring occaisionally.

At the end of the cooking time the beef should be meltingly tender and the ale gravy reduced by half. Check the sauce for seasoning and adjust if necessary.

Assembling The Pie

First of all, remove the steak and leeks from the pan, using a slotted spoon. Place into a pie dish.

Remove the steak and leeks, using a slotted spoon and place into a pie dish.

Increase the heat under the pan and boil the ale gravy until it is reduced by half.

Reduce the ale gravy in the pan by half.

Pour the thickened gravy over the pie piffling.

Pour the thickened gravy over the pie filling.

Brush the egg wash around the rim of the pie dish, as this enableS the pastry to stick to the dish.

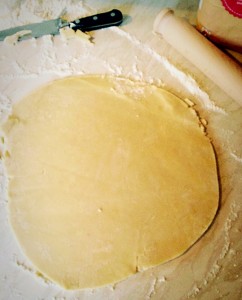
Roll out the pastry into a circle that is one inch/2.5cm wider than the top of the pie dish. Trim the pastry so that it has a neat edge.

Roll out the pastry so that it is 1" wider that the top of the pie dish. Trim the pastry so it has a neat edge.

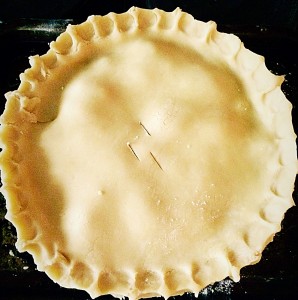
Place the pastry on top of the pie dish and crimp.

Steak Leek and Ale Pie place the pastry on top of the pie dish and crimp.

To crimp I simply pinch between my forefinger and thumb all around the pastry edge.

Make 3 slits in the pastry to allow steam to escape.

Brush the pastry with egg wash.

Cut out decorations from the leftover pastry and add place on the pie.

Finally, brush the pie crust again with egg wash.


Steak Leek and Ale Pie brush the pastry with egg wash and cut out decorations from the leftover pastry. Place on the pie and brush with egg wash.

Baking The Steak Leek And Ale Pie

Place the Steak Leek and Ale Pie on a baking sheet and place in a preheated oven, 200C/180C fan, gas mark 6, 400F. Bake for approximately 1 hour. The pie is baked when the pastry is golden brown and little bubbles of hot gravy or steam are bursting through the slits in the pie.

Steak Leek And Ale Pie

As soon as the pie is baked remove from the oven. Serve immediately.

Steak Leek And Ale Pie

While the leek in this pie lends a delicate onion flavour, it perfectly compliments the steak and ale. And, this Steak Leek and Ale Pie was thoroughly enjoyed by all in our house, including my very good friend and chief taste tester, who lives 2 doors away!

Also it would make perfect sense to double the quantities and make two pies. Since an uncooked pie will freeze beautifully, ensure it is absolutely cool before double wrapping in cling film and freezing for up to 2 months. So, why not pass the second pie onto a busy family, new mum, or friends. Because, the gift of a meal, even if there is no ‘special’ reason shows that you care.

If you have enjoyed this recipe for Steak Leek And Ale Pie you may also like these:

Cream Cheese Pastry Mince Pies

FF Steak Leek and Ale Pie
Cream Cheese Pastry Mince Pies

Quiche Lorraine

FF Steak Leek and Ale Pie
Quiche Lorraine

Amazing Apple Pie

FF Steak Leek and Ale Pie
Amazing Apple Pie

While I enjoy coming up with new recipes and seeing successful results, nothing beats sharing the food I make with others. Seeing the smile on my neighbours face as I pass a slice of cake over the fence fills my heart with joy. Since I know not everyone enjoys baking, it’s rare to find someone who refuses a slice of something tasty. Sharing builds friendships and breaks down boundaries. Also, it can make someone feel thought about and special. And so I will continue to share. Since it brings happiness to both parties.

So, whatever you are making, baking and creating in your kitchens have fun preparing and sharing your feast.

Sammie x

While I was gifted with most of the ingredients for this recipe, all content and opinions are my own. I did not receive payment for this post. No part of this post may be reproduced or duplicated without the written consent of the owner. Please see my Disclosure Policy.


Steak Leek And Ale Pie sized for Pinterest with descriptive graphics.
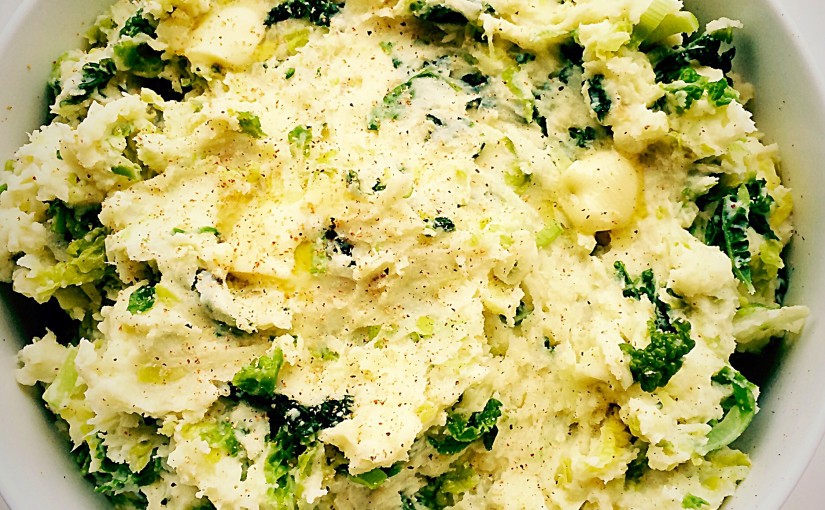


Leek Colcannon

Hello to all my lovely readers. Since it is now officially Spring I’d hoped to be outside gardening. Instead it is wet and windy, so I am staying indoors. Retreating to the earth of our kitchen and making a big bowl of Leek Colcannon.

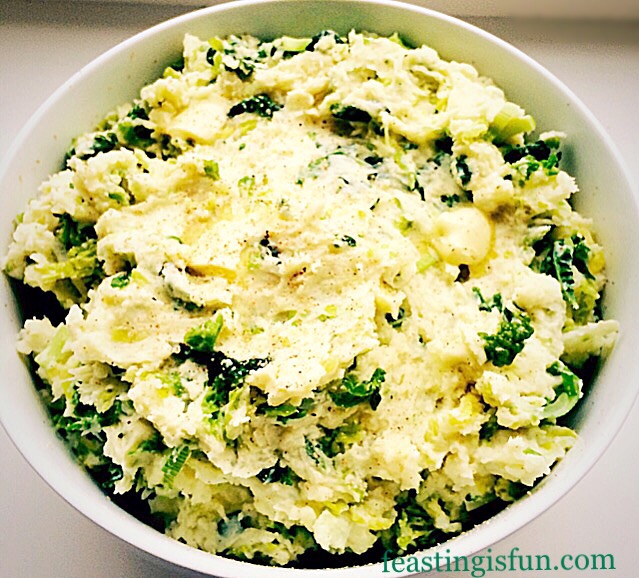
FF Leek Colcannon

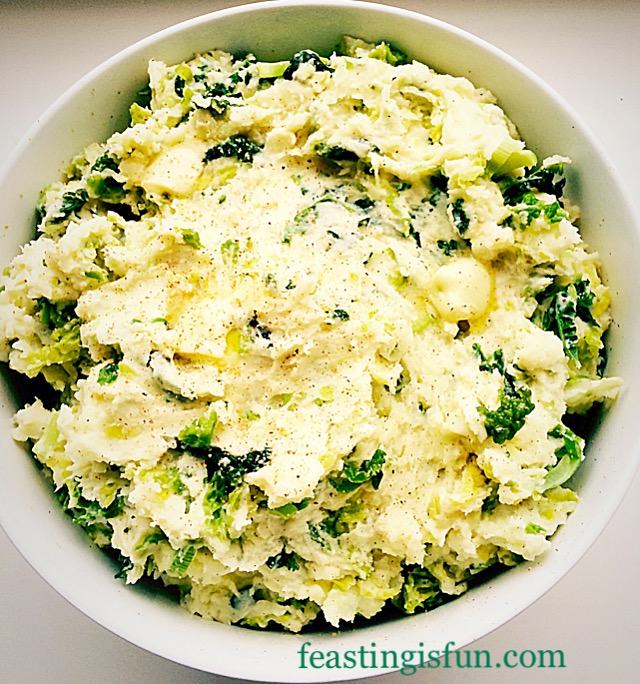
An incredible side dish made with ultra creamy, mashed potatoes that are mixed with gorgeously green, savoy cabbage. Finally the addition sautéed leeks creates a flavour filled side dish.

This has fast become a family favourite. Since it is so versatile, an ideal accompaniment to sausages, homemade pie, chops, roast chicken. Alternatively serve on its own topped with an egg. Ultimately you have endless possibilities as to what you could pair this dish with.

FF Leek Colcannon
Leek Colcannon

Celebrating The Humble Leek

Did you know that the beginning of November heralds the start of the British leek growing season? Nope neither did I!!

I absolutely love leeks, with their delicate onion flavour and that is exactly what makes them perfect in this dish.

Colcannon is a traditional Irish dish made using mashed potatoes and cabbage or kale. While I challenged myself to come up with some recipes to celebrate the British leek, I knew it’s delicate flavour would perfectly compliment the traditional Colcannon dish.

Also using seasonal fruit and vegetables in my cooking is important to me and savoy cabbage is in season now, so my choice of brassica was decided.

Nutmeg also pairs beautifully with leeks and so I knew I had to incorporate that into the dish – thus the Leek Colcannon idea was born. Whoops there I go, having ideas again – fortunately this one turned out to be absolutely delicious.

Recipe : Serves 6 generous portions of Leek Colcannon

1.75kg/4lb Pre-peeled weight Desiree Red or potatoes suitable for mashing.

50g/2oz Butter plus 1Tbsp extra

300ml/10fl Double Cream or whole milk

1/4tsp Freshly Grated Nutmeg

Salt and Pepper to taste

1 Medium Savoy Cabbage

1 Large Leek

Method : Important please read through the whole method before starting.

Preparing And Making The Mashed Potatoes

  • First of all, peel and dice the potatoes into 1″/2.5cm chunks and place in a large pan, cover with water. If you wish to add salt to the water that’s fine, I left the seasoning to the end.
  • Bring the potatoes to the boil and the simmer until a fork easily pierces the potato chunks – it’s worth checking a couple.
  • Drain the potatoes and place back into the saucepan. Allow to steam dry for a couple of minutes.
  • Add the butter, 250mls of the cream, salt, pepper and nutmeg.

Nutmeg is the secret to delicious tasting mashed potatoes www.feastingisfun.com

  • Nutmeg adds a subtle flavour that adds to the Leek Colcannon’s flavour.

Mash the potatoes, cream and butter until completely smooth.

  • Mash the potatoes, cream and butter together until completely smooth.
  • Add the rest of the cream if needed – the potatoes should be creamy, not dry. Check for seasoning and adjust as necessary.

Preparing And Cooking The Savoy Cabbage

  • While the potatoes are cooking you can prepare the cabbage and leeks.

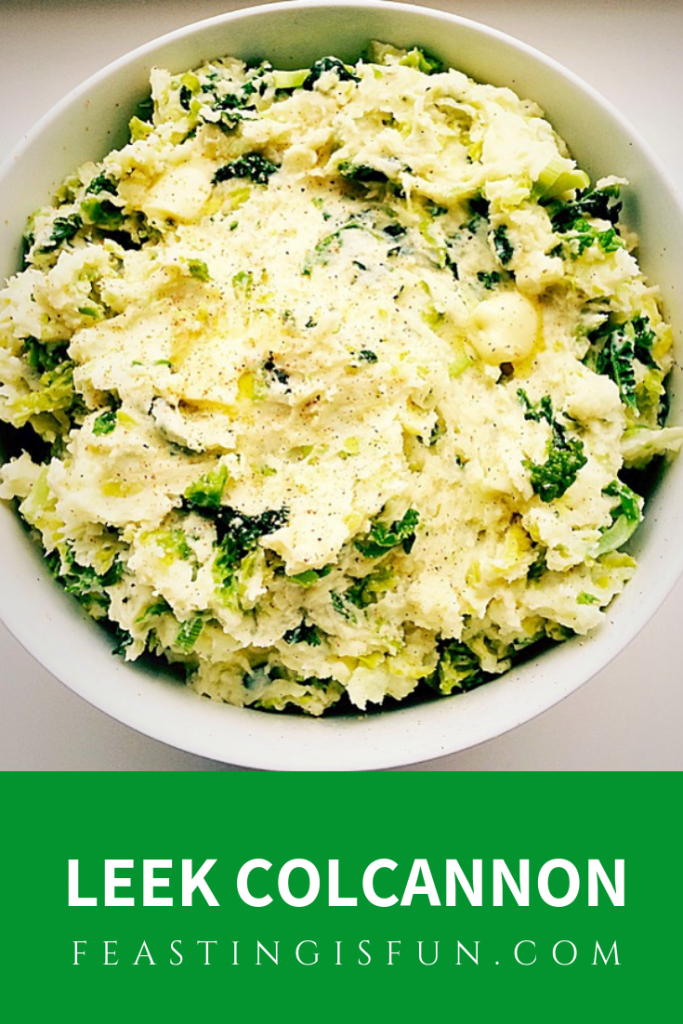
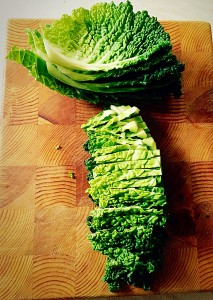
Look how gorgeously green this beautiful Savoy cabbage is.

  • Vibrant, deep green leaves from the cabbage.

Remove 5 leaves from the cabbage and stack them.

  • Remove five leaves from the cabbage and stack them on top of each other.

Slice the leaves in half and then finely shred each half.

  • Slice the leaves in half and then finally shred each half.
  • Continue peeling off the leaves, stacking and shredding. I used almost all of the savoy cabbage. I left the very few inner, yellow leaves. If you have a large cabbage cut in half and use one half.
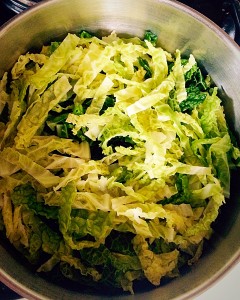
  • Place the shredded cabbage into a large saucepan, pour over an inch of boiling water from the kettle, clamp on the lid and cook on a high heat for no longer than 5 minutes.

Drain the cooked cabbage.

  • Drain the cooked cabbage.
  • Place the cabbage back into its pan and allow to steam dry for a couple of minutes.

Preparing And Cooking The Leeks

  • First of all trim the tough dark green top from the leek and also the root end.
  • Make a slit cutting almost through from the top of the leek to two thirds down.
  • Wash the leek under running cold water ensuring any dirt, trapped between the leaves is washed away.
  • Shake the leek over the sink to remove any excess water.

Tip : I wash my leeks, shake them and leave them upside down on the draining board to drain, before prepping other vegetables.

Cut the washed leek in half.

  • Cut the washed leek in half.

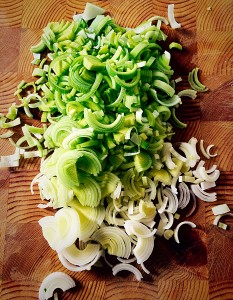
Finely shred the leek.


  • Finely shred the leek.
  • Place a tablespoon of butter into a shallow pan and gently saute the leeks until tender, over a medium heat.

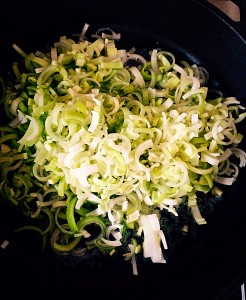
Sauté the shredded leek for 5 minutes until tender and cooked.

  • Sauté the shredded leek for 5 minutes until tender and cooked.

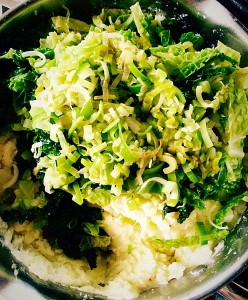
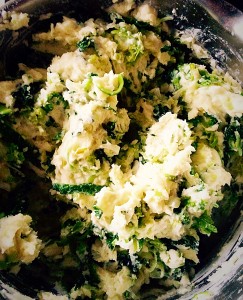
Add the cabbage and leek to the mashed potato.

  • Add both cabbage and leek to the mashed potato.

Stir all the ingredients together until well combined.

  • Stir all the ingredients together until combined.
FF Leek Colcannon
Leek Colcannon
  • Finally, decant the leek colcannon into a heatproof dish. Adding dots of butter and a final grating of nutmeg.

The Leek Comes was served with Steak Leek And Ale PieSteak Leek And Ale Pie alongside steamed carrots. Fortunately there was enough left over to make bubble and squeak patties for lunch the next day!

If you have enjoyed this recipe for Leek Colcannon you may also like these:

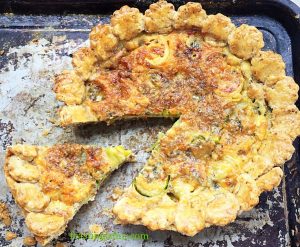
Walnut Pastry Crust Leek Stilton Tart 

FF Leek Colcannon
Walnut Pastry Crust Leek Stilton Tart

Homemade Cauliflower Cheese 

FF Leek Colcannon
Homemade Cauliflower Cheese

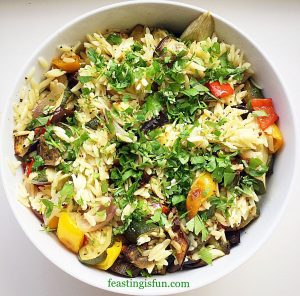
Roasted Summer Vegetable Orzo Salad 

FF Leek Colcannon
Roasted Summer Vegetable Orzo Salad

I do hope that I’ve inspired you to try this delightful dish. Although I used double cream – well we were celebrating the start of the British leek growing season – milk is a perfectly fine substitute. Switching up the greens to Kale or Spring Greens through the growing season will be fine, just make sure they are cooked until just tender – I haven’t found a fan of overcooked, soggy cabbage yet!

Sammie x

The British Leek Association provided me with some of the ingredients for this recipe. All content and opinions are my own. I did not receive payment for creating this recipe. Please see my Disclosure Policy.

Tangy Lemon Potato Salad

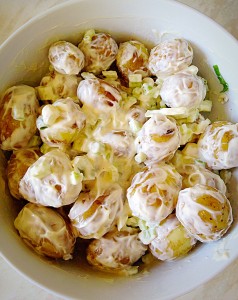
When the sun is shining and the temperature gauge keeps going up, cool, refreshing food is what we need. So my Tangy Lemon Potato Salad is perfect, cool and refreshing with a hint of crunch. Also this is the perfect side dish to, well, just about anything! We’re having this with fish tonight.

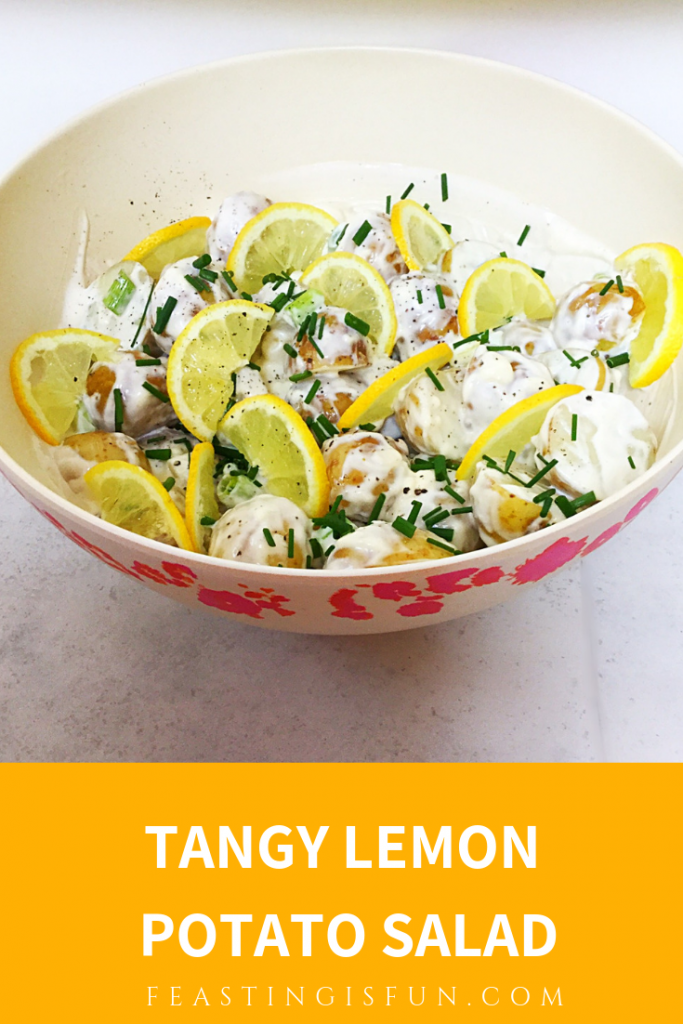
Pinterest image with descriptive graphics
 

While my Tangy Lemon Potato Salad does have mayonnaise in the sauce, you can easily substitute a light/lower fat mayo. The mayonnaise is thinned down with the juice of a whole lemon. And it’s this zesty juice that permeates the warm potatoes so that once chilled they take on a tongue tingling tang. Also at the same time it stops the mayonnaise from becoming gloopy.

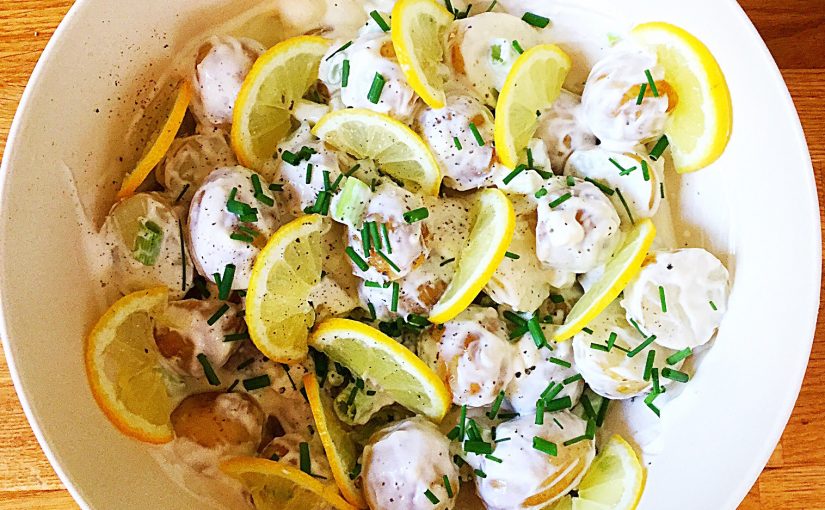
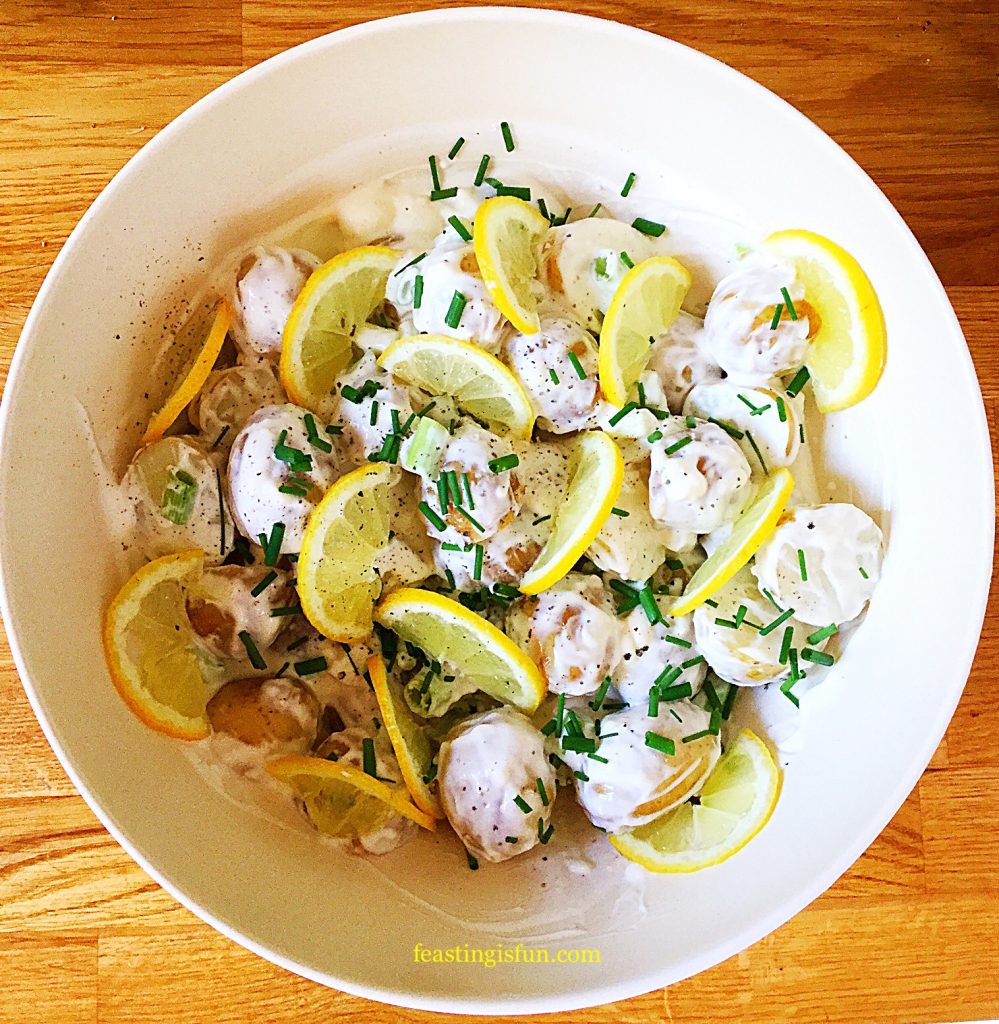
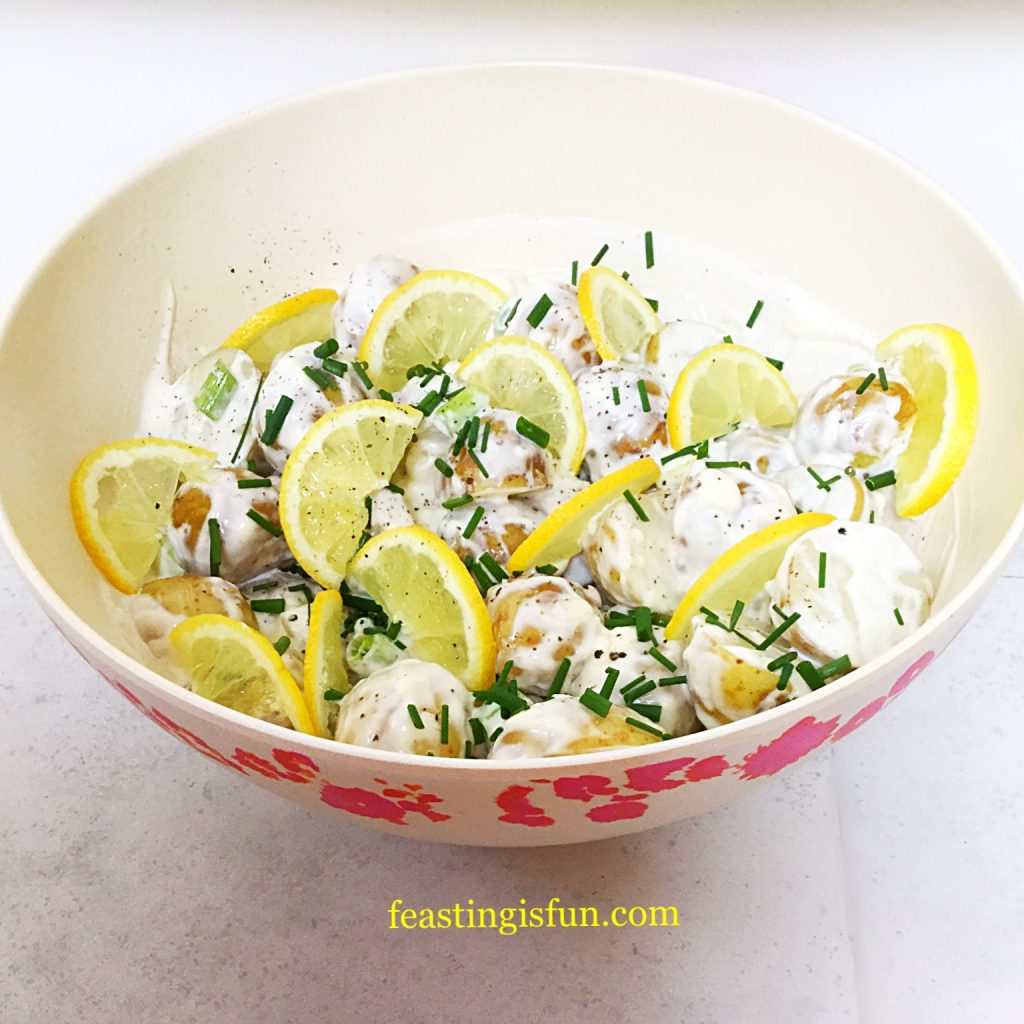
Overhead image of freshly made potato salad with lemon slices and chopped chives.
Tangy Lemon Potato Salad

If, like me you’re organised, cooking the potatoes and getting this salad made first thing in the morning, or even the night before, not only allows all the flavours to merge together, but you are also guaranteed a cold salad. Resulting in a side dish that works well with hot fish, quiche and any number of dishes including barbecues. Also it is ideal as part of a cold meal, buffet and picnic.

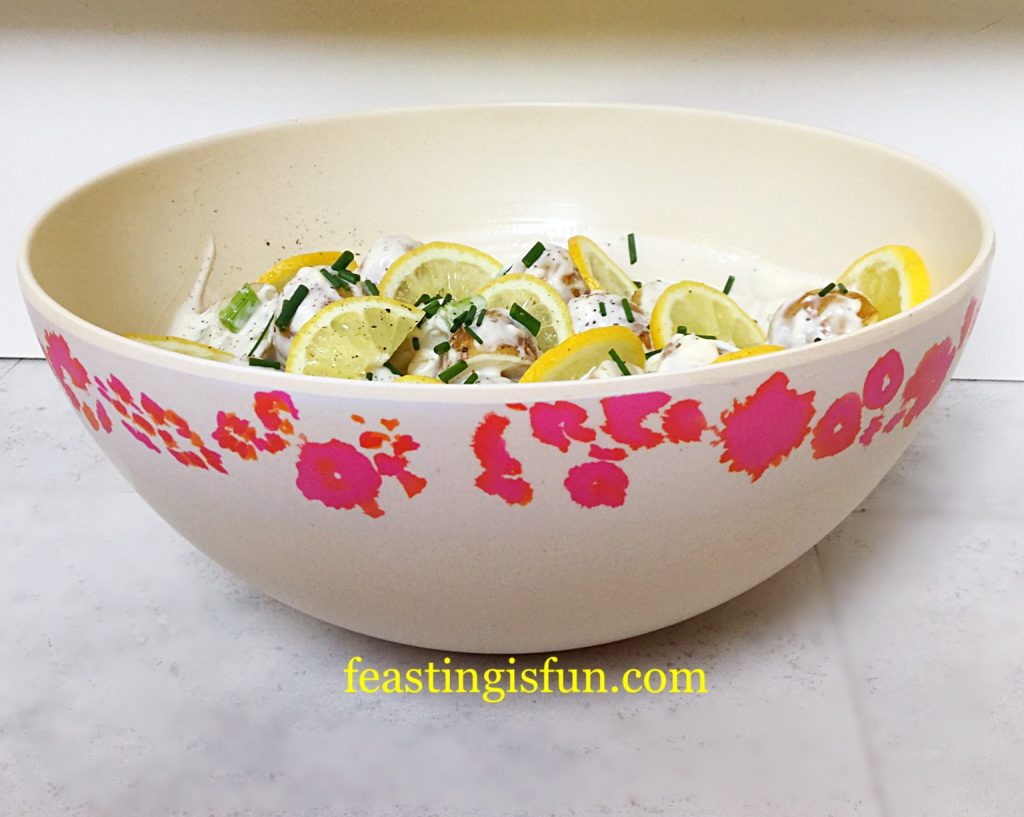
Close up of the pretty bowl, which has flowers around the outside rim.
Tangy Lemon Potato Salad

So I can guarantee that once you have made this Tangy Lemon Potato Salad you will want to keep making it. Especially if you take it to friends and family to share. Easy to make and perfectly portable!

Recipe : Tangy Lemon Potato Salad, serves 6 as a side dish.

1kg/2.2lb Baby New Potatoes I like Charlotte as they are available all year roundfrom most supermarkets including Waitrose and Sainsbury’s

Juice of 1 Whole Lemon

1 Lemon – for slicing

4 Heaped Tablespoons Mayonnaise

1/2tsp Sea Salt – I use Maldon, halve the quantity if using free flowing

1/2tsp Ground Black Pepper

2 Celery Sticks

3 Spring Onions

2 tbsp Chives

Making The Potato Salad

First of all, scub the potatoes to remove any dirt. Cut any larger potatoes in half so that all the potatoes are roughly the same size.

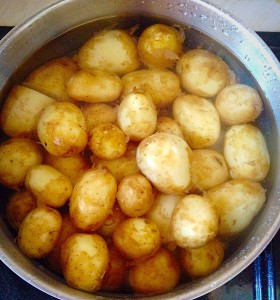
Place the potatoes in a saucepan, cover with water and bring to the boil.

Simmer the potatoes until just tender, drain, return to the pan and leave with the lid on, to finish steaming for 20-30mins.

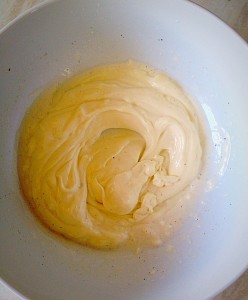
In a bowl add the juice of one lemon, mayonnaise, salt and pepper.

Stir until thoroughly combined.

Drain the potatoes and leave to steam dry in a colander for 5 minutes.

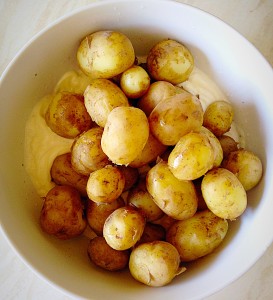
Add the potatoes to the bowl.

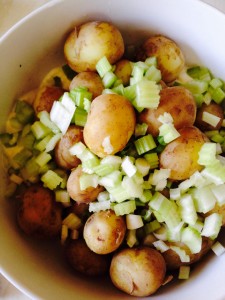
Chop the spring onions and celery into small dice.

Add the chopped celery and spring onions to the bowl.
Give everything a gentle mix.
Snip the fresh chives over the top of your Tangy Potato Salad.
Snip the fresh chives over the top, taste and adjust the seasoning as necessary.

Finally, if you prefer you can serve the Tangy Lemon Potato Salad as it is. Although I like to jazz it up with a few, very finely sliced lemon halves. Because they are perfectly edible (although if you just want to use them for garnish that’s fine) and taste delicious. Also the sliced lemon let’s people know that there is lemon juice in the potato salad.

Salad bowl from Emilie OConnor Home Store.

Make this Tangy Lemon Potato Salad up to a day ahead. Store in a bowl wrapped in cling film and keep refrigerated. Eat within 3 days.

If you like the bowl featured in this post, it is available from Emilie OConnor  home store. It is made using bamboo fibre and comes with a fitted chopping board lid and inset salad servers. I was very fortunate to win this eco-friendly bowl in a competition on Instagram. Check out her website, as her items are practical, beautiful and kind to the environment.

If you have enjoyed this recipe for Tangy Lemon Potato Salad then you may also like these:

Lemon Garlic Roast Chicken

FF Tangy Lemon Potato Salad
Lemon Garlic Vegetable Orzo

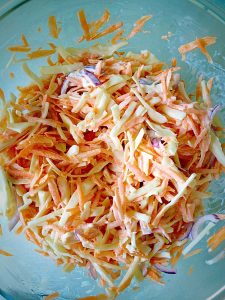
Crunchy Homemade Coleslaw

FF Tangy Lemon Potato Salad
Crunchy Homemade Coleslaw

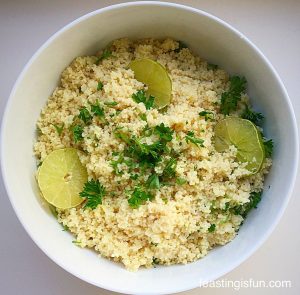
Lime Couscous

FF Tangy Lemon Potato Salad
Lime Couscous

Lemons give a fresh, zesty, citrus burst to any dish they are used in, whether sweet or savoury. And a particular favourite of ours, here at home is Lemon Thyme Roast Chicken followed by Lemon Ripple Ice Cream for dessert. Sharing a feast around the table as a family is an important part of our lives.

So, whatever you are making, baking and creating in your kitchens, have fun preparing and sharing your feast.

Sammie xx

No part of this post may be reproduced or duplicated without the written permission of the owner. Please see my Disclosure Policy.


Easy Tex Mex Chicken

Hi, have I got the easiest, quickest meal for you? Yep, I have – Easy Tex Mex Chicken!

Easy Tex Mex Chicken tipped into a pan, ready for the oven.

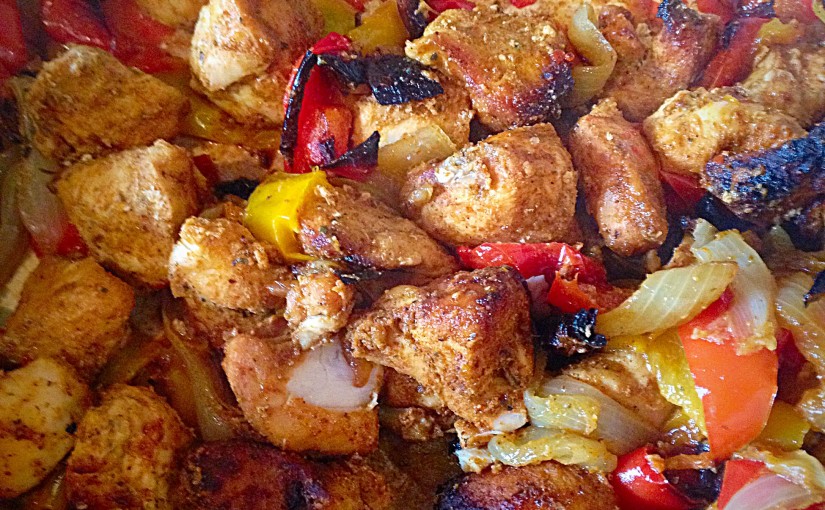
I am talking 5 minutes prep in the morning. Leave in the fridge all day and then throw in the oven for 45 mins before you want to eat. I told you it was Easy!! This delicious dish is fab served in Tortilla Wraps Fajita style, or alternatively, as I have, with potato wedges – well if you’ve got the oven already on…..

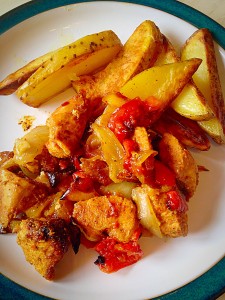
Oh my, this Easy Tex Mex Chicken served with wedges - delish!
Oh my, this Easy Tex Mex Chicken served with wedges – delish!


Recipe : Easy Tex Mex Chicken serves 5-6

750g/1.5lb Boned Chicken Breasts (approx 5)

1 Large Spanish Onion

3 Peppers – the colours are up to you!

1 Packet Fajita Seasoning – alternatively use 3 tsp Fajita seasoning

2 tbs Olive Oil or Rapeseed Oil – I use Kentish Oils

Method :

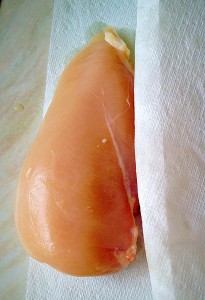
Pat dry the chicken breasts using kitchen paper.

Drying the chicken makes a real difference to the cooked dish.


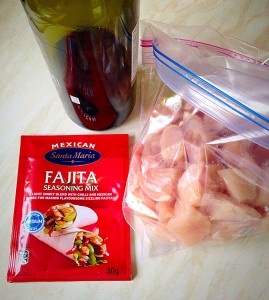
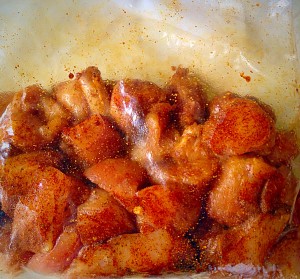
Cut up the chicken into bite sized chunks (I used scissors) and place in a large, freezer bag.

With these 3 ingredients Easy Tex Mex Chicken is just that, EASY!


Pour a couple of glugs of Olive Oil over the diced chicken then tip in the contents of a Fajita mix.

Massage the seasoning into the chicken.

Next it’s time to get chopping!

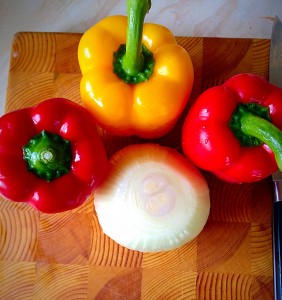
Ooh so pretty. Choose whichever colour peppers are your favourite and...
Ooh so pretty. Choose whichever colour peppers are your favourite and…


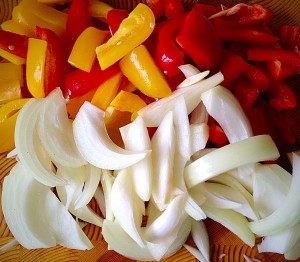
Chop the Peppers and Onion so they are about the same size.

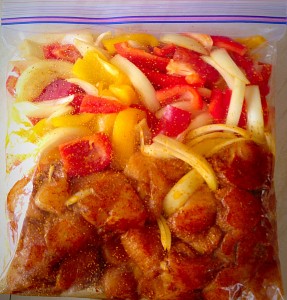
Pop the chopped veggies into the freezer bag with the seasoned chicken and smoosh about a bit so they are covered in the spicy oil.

Easy Tex Mex Chicken in a bag!!


I prepared the Easy Tex Mex Chicken in the morning and then stashed it in the fridge until dinner time.

To cook, tip the contents of the freezer bag into a shallow oven proof dish. Place in a preheated oven 200C/185C fan and cook for 45 minutes.

Easy Tex Mex Chicken with softened peppers and caramelised onions - delish!
Easy Tex Mex Chicken with softened peppers and caramelised onions – delish!


To serve either warm some soft tortillas and load up fajita style, or, as I did tonight simply popped in some Baked Garlic Herb Potato Wedges . Since the oven is on it makes sense.

Well that’s dinner sorted!!

Enjoy how easy this feast is!

Sammie x


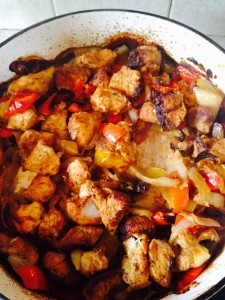
Bacon Cheese Pasta Bake

Hello there, thank you for stopping by to read my blog.  I hope it inspires you to make this delicious, very economical, Bacon Cheese Pasta Bake – covered in a scrummy Cheese Sauce!

FF Bacon Cheese Pasta Bake
Bacon Cheese Pasta Bake

I’m sorry that I haven’t posted anything for a few days, unfortunately my body has been very uncooperative and I’ve been struggling with a lot of pain.  Not looking for sympathy, just explaining.

Anyhow this morning, once I was up and dressed I was determined to make the Christmas cakes ( I know this blog is about the Bacon Cheese Pasta Bake – but I have to tell you the whole story, so bare with please??!!).  One cake for us and a smaller cake for my lovely hubby’s Ma and Pa.  They love Christmas cake like no other people I have ever met and since I love them and making cakes I thought I’d bake them a cake as well!

Once the cakes were happily baking away in the oven I turned my attention to dinner.  I happened to have 8 rashers of streaky bacon in the fridge and thought ‘You know what, I’ll make Bacon Cheese Pasta Bake’.  Not only that, but as I have tended to be a bit lazy with my savoury recipes, I also made a note of exactly what I used and took some photos to show you how to make it yourself!!

Recipe:  Bacon Cheese Pasta Bake serves 6

For the bacon and tomato sauce you will need –

1tbsp  Olive oil

1tbsp  Butter

8 x rashers streaky bacon (smoked or not the choice is yours) – any rind removed

1  Large White Onion

2  Sticks of Celery

1  Green Pepper

6 – 8  Chestnut or Button Mushrooms

3  Bulbs of Garlic

2  Tins Chopped Tomatoes and their juice

1tbsp  Tomato puree

1tsp  Mixed Dry Herbs

1/2tsp  Sea Salt (1/4tsp free flowing salt)

1/4  tsp Nutmeg – freshly grated

1/2tsp  Black Pepper – freshly ground

1/2tsp  Sugar

For the Cheese Sauce :

2tbsp Unsalted Butter

2tbsp Plain White Flour

500ml/1.25 pints Whole Milk

175g/6oz Strong Cheddar

1/4tsp Freshly Grated Nutmeg

Salt and Freshly Ground Black Pepper

Method

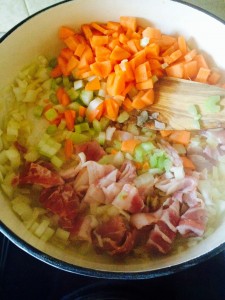
In a large saute pan (or shallow casserole dish) melt the Olive oil and Butter together over a medium heat.  Add the finely chopped Onion and Saute until translucent (approx 5-8 mins).  Add in the Bacon – I usually snip this into approx 1/2″ pieces, directly into the pan, however you can chip up the Bacon with a knife and then add it.

Let the bacon sizzle until it had rendered out some of it’s fat, but not so much that it goes crispy.  Add in the Celery and Carrot ( which have both been finely chopped and cook for another 5 mins.

Sautéing the bacon, onions, carrots and celery.

After 5 mins add in the finely chopped Green Pepper and the Mushroom ( I slice the mushrooms fairly thinly, then cut the slices in half – it just looks nice in the dish!).  Add the crushed (or finely chopped) garlic and continue cooking for another 5-10 mins, until all the vegetables are slightly softened.

Green Pepper and Sliced Mushrooms added. How chunky or fine you chop your veg is entirely up to you!!!).
Green Pepper and Sliced Mushrooms added. How chunky or fine you chop your veg is entirely up to you!!


Once the vegetables have started to soften add the tinned, chopped tomatoes.  Rinse each tin out with cold water (fill the tin to just over half with water and swish the tin to dilute any tomato juice left, into the water) and add the tomato purée.  Add the seasonings next: salt, pepper, sugar, nutmeg and mixed herbs.  The sugar balances out the tartness of tinned tomatoes and makes a very real difference to the finished dish.

Allow the bacon, vegetables and tomatoes to bubble away, uncovered, on a low-medium heat for at least an hour.

Cheese Sauce:

Melt 2tbsp butter on a medium heat in a saucepan.  Once melted add 2tbsp of plain white flour and mix thoroughly, lowering the heat very slightly.

Cook the flour and butter together for a couple of minutes to get rid of the 'raw flour' taste.
Cook the flour and butter together for a couple of minutes to get rid of the ‘raw flour’ taste.

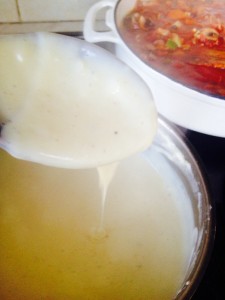
This flour/butter mixture is now called a roux.  Now gradually add (50ml at a time at the beginning) whole milk to the flour/butter mixture, stirring constantly.  As the milk warms it will gradually become incorporated into the flour/butter. In the beginning, for the first few milk additions, the mixture will be very thick and stiff to stir.  If you find the milk is not incorporating into the mixture, or it is very lumpy, it’s fine to switch to a whisk, this will ensure a beautiful, lump free, smooth sauce. Add 450-500ml of milk until your sauce has the consistency similar to custard.

Lump free, smooth white sauce!! Easy!!

Add a pinch of salt, a good grinding of black pepper, 1/4 tsp freshly grated nutmeg and mix thoroughly.  Off of the heat add a good 2 handfuls (4-6oz) of grated mature cheddar cheese.  Mix thoroughly until the cheese has melted into the sauce.

The Pasta

I have used penne rigate pasta for this dish.  Basically pasta tubes, cut on a slant with ridges in the outside!  I like penne rigate as it holds firm, the sauce not only goes into the pasta tubes, but also the sauce clings to the outside ridges of the pasta.  I cooked about 3/4 of a 500g packet (350g if my maths is correct??).

I said earlier, this is such an economical dish – 8 bacon rashers, bits of veg you have in the fridge, a couple of handfuls of mature cheddar and not even a whole packet of pasta!!  Not only that but it tastes fab and is easily transportable, so ideal to give individual  portions to friends/family or pop in the freezer!!

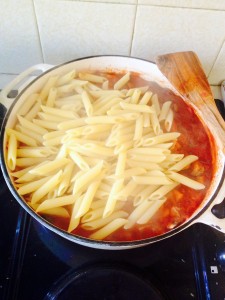
Once the pasta is almost cooked (not quite al dente) drain and add to the bacon sauce.

The pasta dumped on top of the bacon sauce.

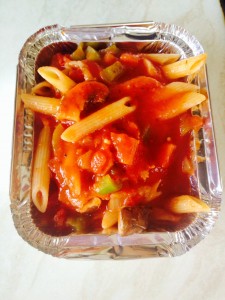
Mix the sauce and pasta together.  If serving a separate portion to give away, remove a generous portion of the pasta/bacon mix, ensuring you get a good mix of the sauce, bacon, veg and of course pasta.

Not the most elegant container, but foil containers make transporting, or freezing the individual portions sooooo easy!!

Spread the rest of the bacon pasta evenly into an ovenproof container.  Tap the individual portions to settle the pasta and remove any air bubbles.
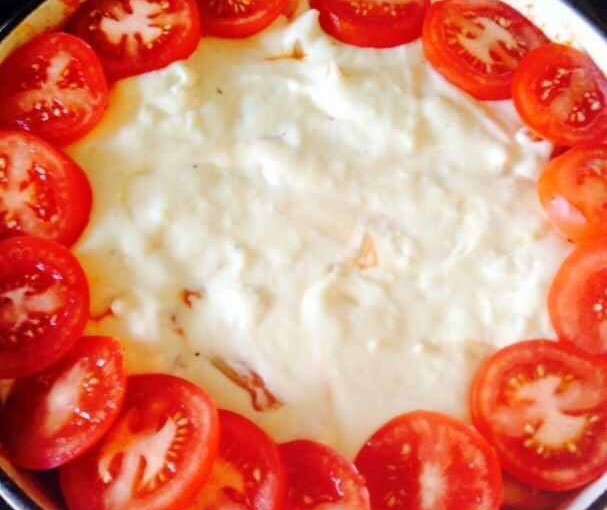
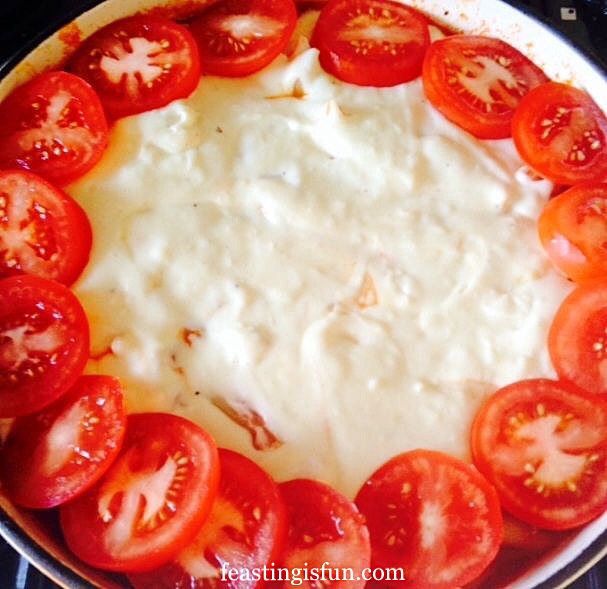
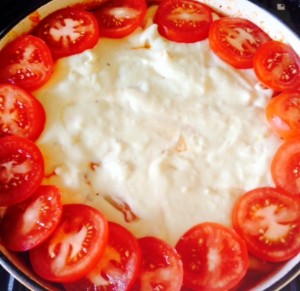
Cover your pasta dishes with a good dollop of the cheese sauce.  For added prettiness (and because the cheese sauce didn’t reach the edges!!) I sliced ripe, ruby red tomatoes and placed them around the outside edge of the pasta.

Beautifully decorated - and no one knew my secret!!!!
Beautifully decorated Bacon Cheese Pasta Bake
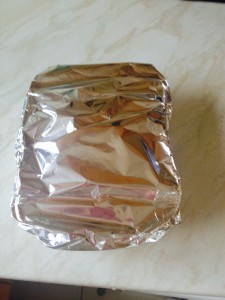
Slightly overstuffed, once the cheese sauce was added, so just wrapped in foil. One individual portion ready to go!!!
So a super tasty, super economical meal to eat and share!

For a bubbly,scrumptious meal, ready for the table:  Cook the large Bacon Cheese Pasta Bake at 180C for an hour until thoroughly heated through, 1/2 hour at the same temp for the individual portion.

An amazingly tasty, versatile dish that’s easy on your wallet and tasty on your tongue.

Have fun, feasting and enjoy sharing your meal!!

Sammie x


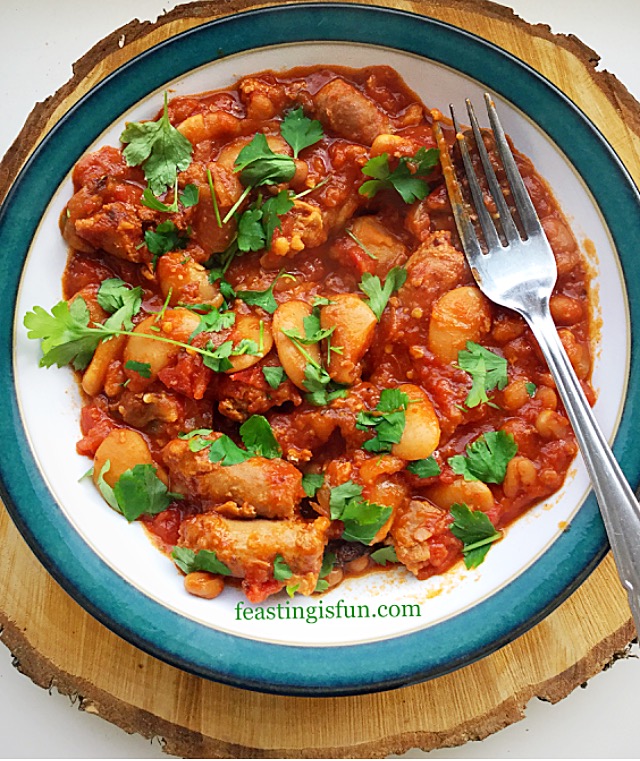
Spicy Sausage Bean Casserole

As a family of five, make ahead meals are really helpful when life gets busy. And, if the recipe can be made in one pot that makes the cooking experience easier and more fun. My Spicy Sausage Bean Casserole ticks both boxes. Whether it is bubbling away on the hob, or in the oven, it’s aroma fills the house with a warm spicy scent. Almost like a warm hug welcoming you home.

FF Spicy Sausage Bean Casserole

Why I love Autumn

Before we get on with the recipe, I’d like to share my thoughts with you. Since Autumn, or Fall as it’s called in the States is my favourite season. Don’t get me wrong, I enjoy Summer, in fact, I like all of the seasons. Much as the glorious, unending sunshine places like California offer, I simply love the change in seasons we enjoy here in England. You may enjoy reading Autumn The Most Beautiful Season.

There is something enchanting about the subtle change in weather, usually towards the end of August, or beginning of September where I live. Whether it’s the deep, deep green of the leaves on the trees, or the rustle as the wind blows through the drying out leaves. As their colour changes, from deepest red to fiery orange, with an almost last nod to the low hanging sun in the sky, they finally turn yellow. Some days bring fluttering, confetti like leaves, dancing through the air on a breeze. While other days see trees, ripped overnight of their leafy covering, by violent storms and gale force winds.

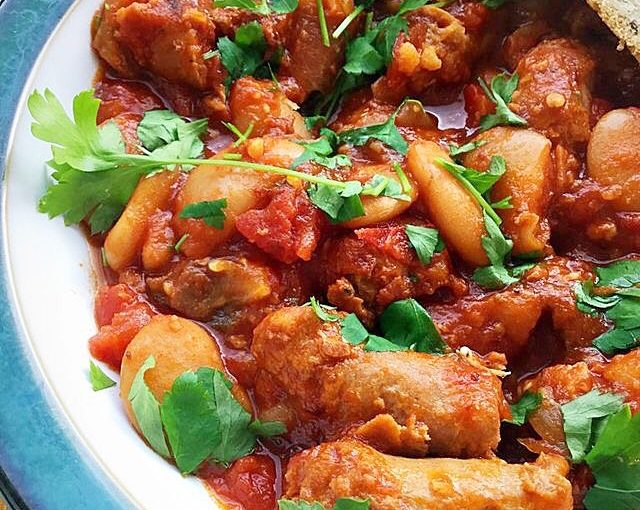
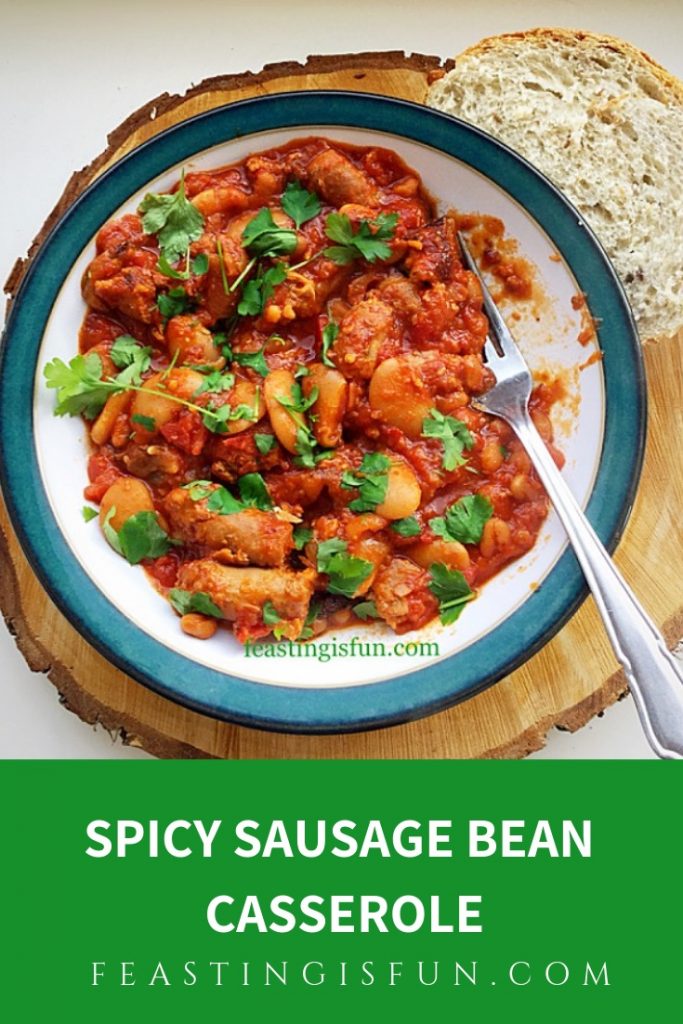
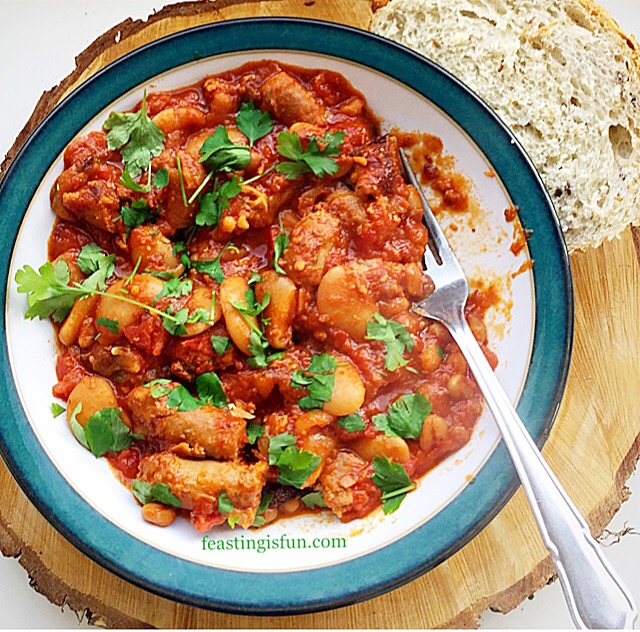
Spicy Sausage Bean Casserole served with crusty bread.

There is a welcoming warmth of sunshine. Especially on a clear, frosty, day. Although, there is something to be said for darker, rain and wind filled days, snuggled up on the sofa, the smell of a spicy casserole, gently bubbling away in the oven. And puddings! A must, some may say essential,  during the colder months.

Creating a cheap meal using quality  products

Since first making this dish it has evolved to the final recipe given here. While most of the ingredients are relatively cheap, it is essential to use good quality sausages. Pale, flabby, pink sausages will simply disintegrate during the long cooking process. So adding good quality pork sausages, while more expensive, will enhance the overall flavour of the dish. Especially as one packet will feed up to six people, or more!

Also, when making this dish, you can adjust the amount of chilli, or even leave it out. Although, it is worth noting that the heat from the chilli lessens during the cooking process. I like the amount given in the recipe as the final dish has a warmth to it without being noticeably spicy.

FF Spicy Sausage Bean Casserole
Spicy Sausage Bean Casserole an easy one pan meal.

You will need a large ( 4 litre) ovenproof casserole dish, or bigger if doubling the recipe to feed a crowd.

Note: You can make this recipe using a Slow Cooker, the cooking time will be longer.

Recipe: Spicy Sausage Bean Casserole serves 4 – 6

1 Large Onion – chopped into small dice

1 Aubergine – chopped into 1/2″ cubes

450g/1lb Good Quality Sausages each sausage chopped into 4 pieces – I use Graig Farm Sausages

2 x 400g tin of chopped tomatoes ( plus 1 extra tin if not adding wine)

1 x 400g tin of baked beans

2 x 400g butter beans – strained and rinsed with cold water

4 individual bulbs of garlic – minced

1 chilli (or 1tsp chilli flakes) finely chopped

200mls of red wine I use Claret (or 100ml Port – any type except Tawny) – optional – add extra tin of tomatoes when leaving out alcohol.

2 tbsp tomato puree

1/2tsp Celery Seeds

3/4tsp Fennel Seeds – I use Bart spices

Handful of fresh parsley chopped and added after serving

Freshly Ground Black Pepper to season.

Note: Having made this dish many times, it has never needed the addition of salt.

Preheat oven to 180C/160C fan, gas mark 4, 350F.

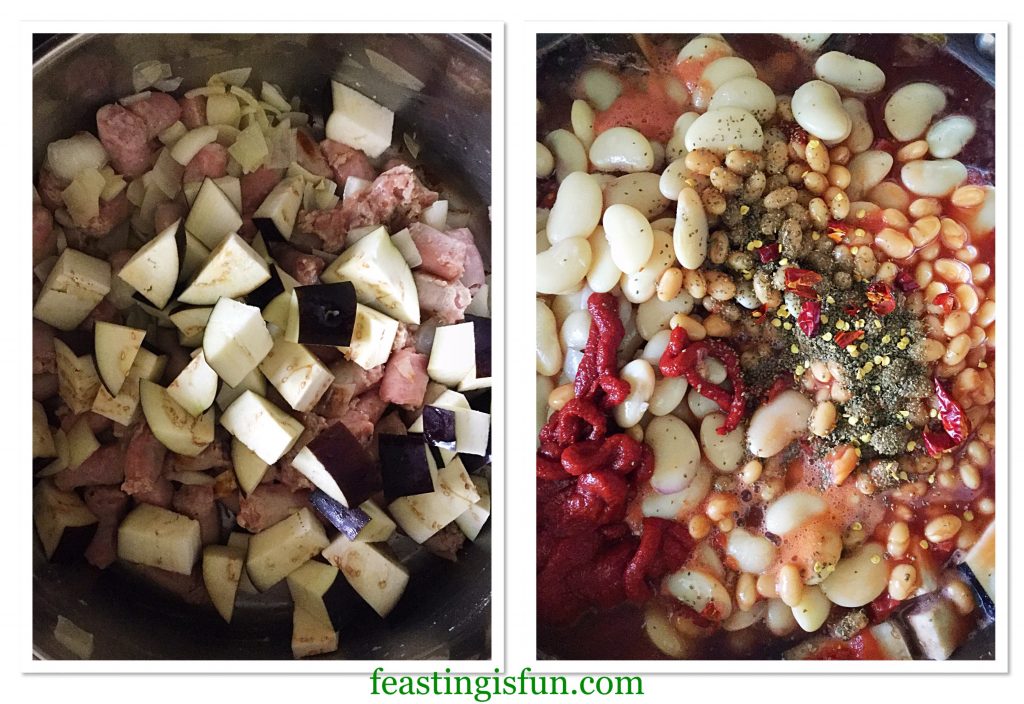
Assembling the casserole

  • First of all place the onion, aubergine and sausages in the casserole dish and pour over the red wine or Port.
  • Add both tins of tomatoes, then half fill each tin with cold water, swirl around so that you get all of the tomato juices left inside the tin and pour over the casserole.
  • Next tip in the baked beans and swirl the tin with water as before, pouring into the dish, then add the rinsed butter beans.
  • Add the tomato purée, minced garlic, chilli, celery seeds, fennel seeds and a good grinding of black pepper
  • Add more cold water until all the ingredients are just covered with liquid. Making sure there is still a good inch between the liquid and the top of the casserole dish.
FF Spicy Sausage Bean Casserole
Making the casserole.
  • Place the lid (or cover tightly with tin foil) on to the dish and place in the oven.
  • Cook at 180C for 1/2 hour then reduce the heat to 140C/120C fan, gas mark 1, 275F, or a very low oven temperature.
  • Continue to cook for 3 hours. Check and top up with recently boiled water so that the ingredients are just covered with liquid again.
  • Clamp on the lid (or foil) and return to the oven for 2 more hours. You can repeat the liquid adding throughout the day, the longer this casserole cooks the better it tastes!
  • The Spicy Sausage Bean Casserole will be cooked after 5 1/2 hours.
  • Serve in bowls, sprinkled with freshly chopped parsley for a fresh, grassy, Vitamin C filled flavour.
FF Spicy Sausage Bean Casserole
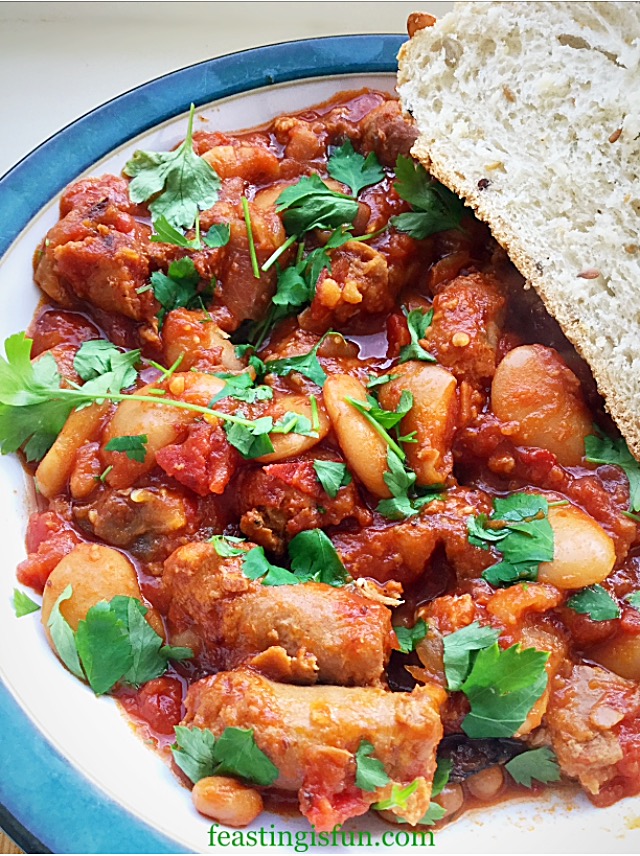
Spicy Sausage Bean Casserole

Finally, ladle into bowls and serve with fresh crusty bread such as my Large White Bloomer for dunking in the spicy juices.

Leftovers can be chilled, portioned into individual freezer bags and frozen for up to 3 months.

If you have enjoyed this recipe for Spicy Sausage Bean Casserole you may also like these:

Slow Roasted Cider Pork

Slow Roasted Cider Pork


Creamy Tomato Spinach Chicken Pasta

Creamy Tomato Spinach Chicken Pasta

Chunky Chilli

Chunky chilli con carne
Chunky Chilli


I love the wonderful memories evoked when making this meal. While on holiday in Devon I began making a meal to share with our hosts and friends. During the cooking process the number of diners coming for dinner began increasing. So, ever resourceful, I began adding extra beans, tomatoes and wine to the casserole, bubbling away. Our larger group sat happily around a big oak table, enjoying good food and most importantly, great company. Friendships were forged as the conversation flowed. And, it became a feast to remember.

So, whatever you are making, baking and creating in your kitchens, have fun preparing and sharing your feast.

Sammie xx

No part of this post may be reproduced or duplicated without the written permission of the owner. Please see my Disclosure Policy.