Rolo Chocolate Cookies

Share
Facebooktwitterpinterestlinkedintumblr

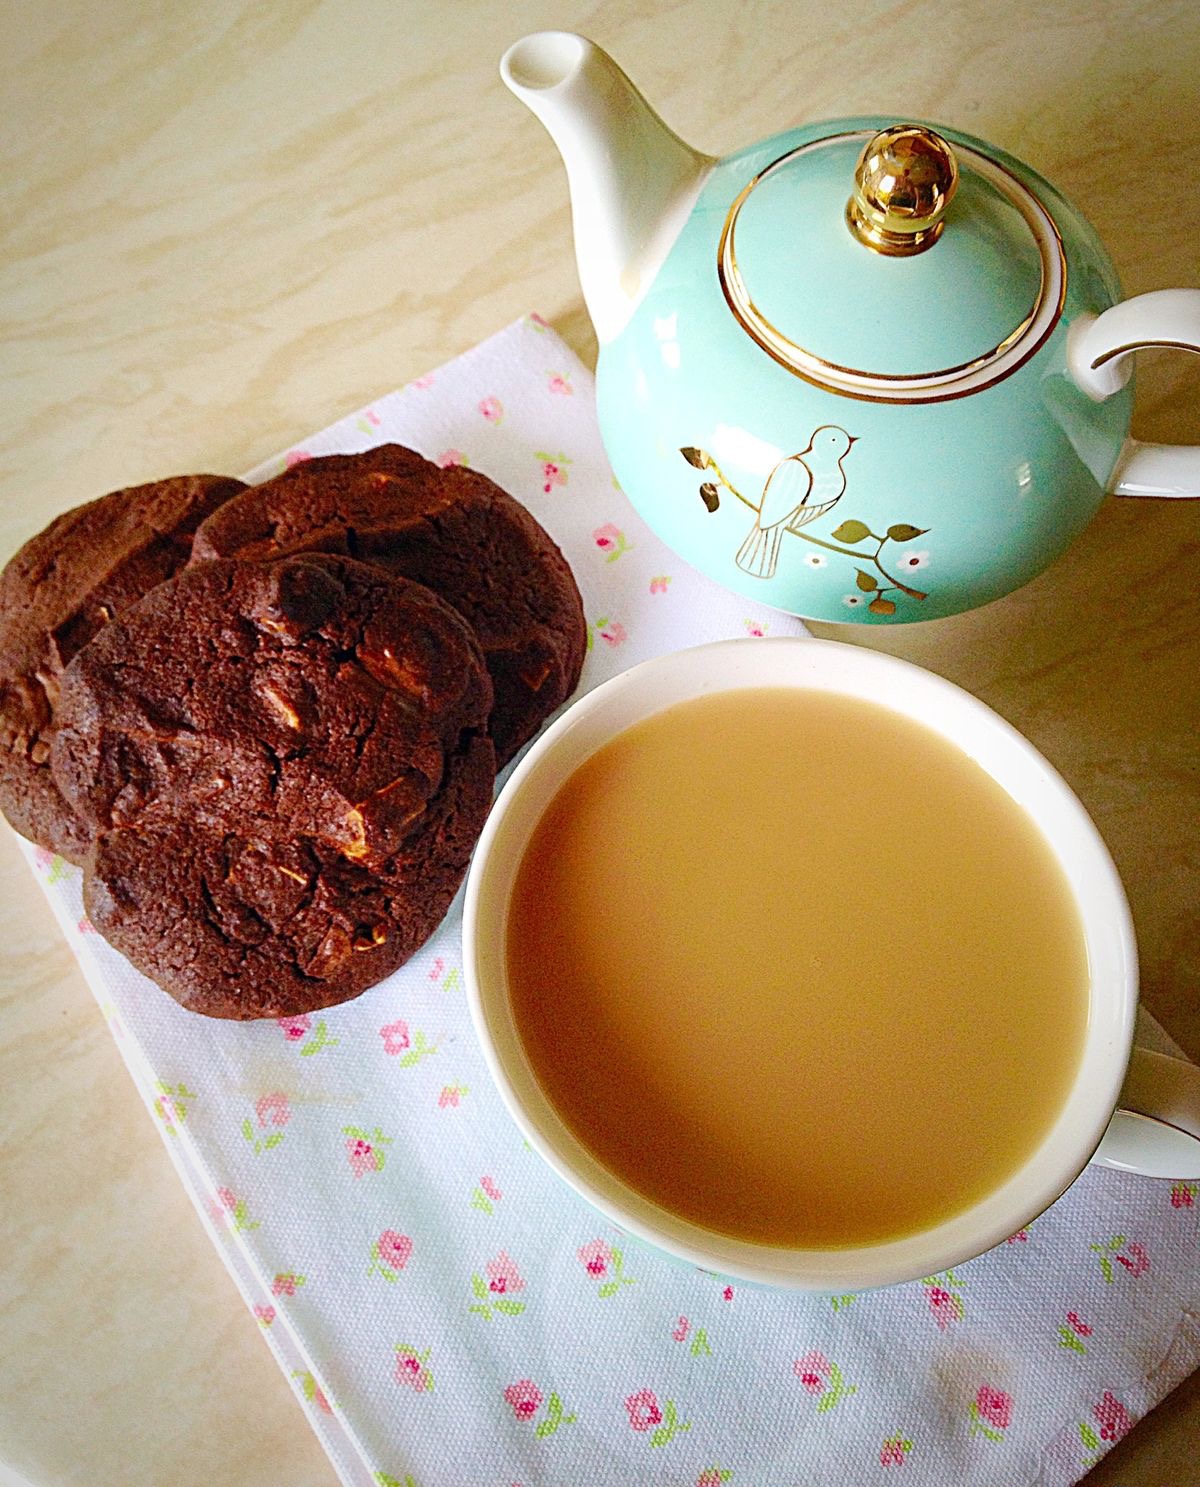
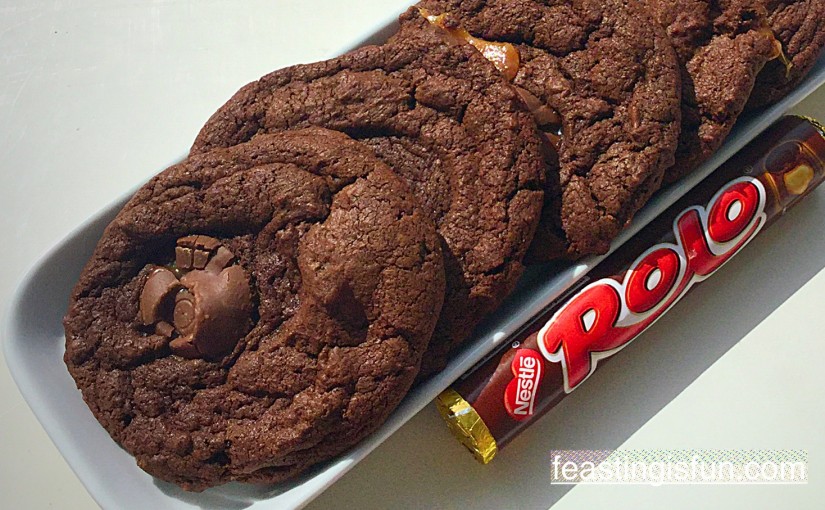
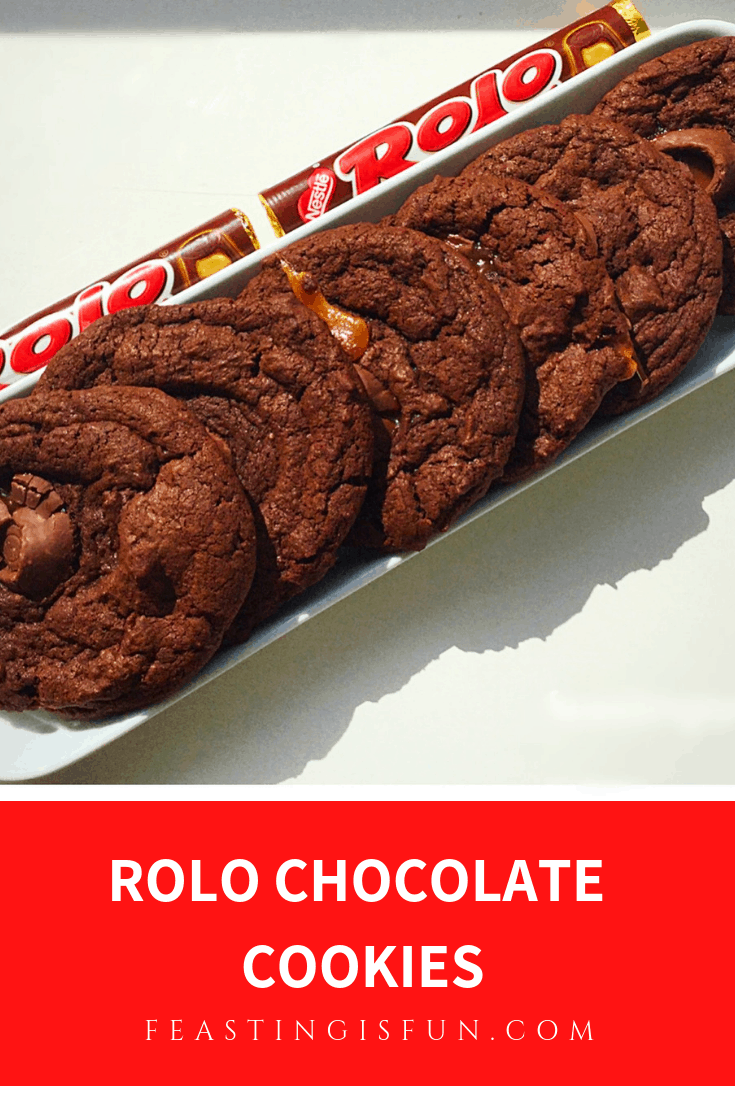
Ooh I am so excited to share this recipe with you. And, I may have just found the perfect chocolate/caramel cookie! Meet my Rolo Chocolate Cookies.

Since I have been wanting to make these cookies for absolutely ages, I  finally got round to it yesterday, while I was also baking my Chocolate Orange Citrus Bundt Cake.
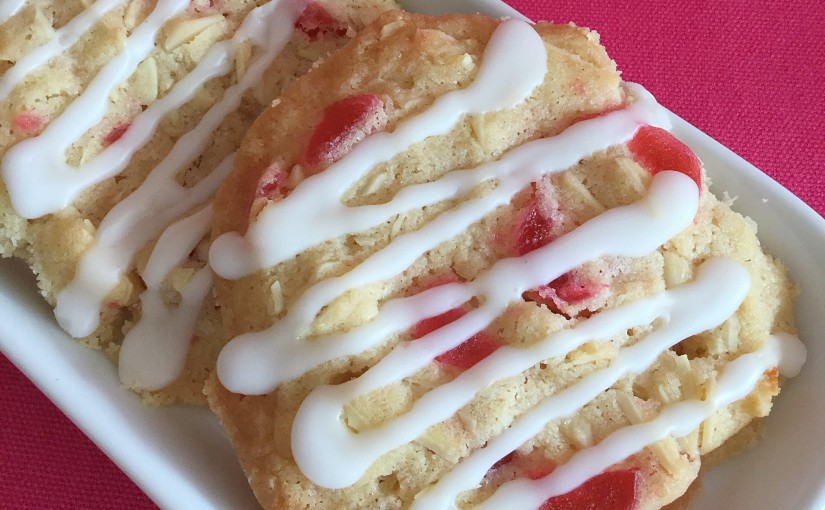
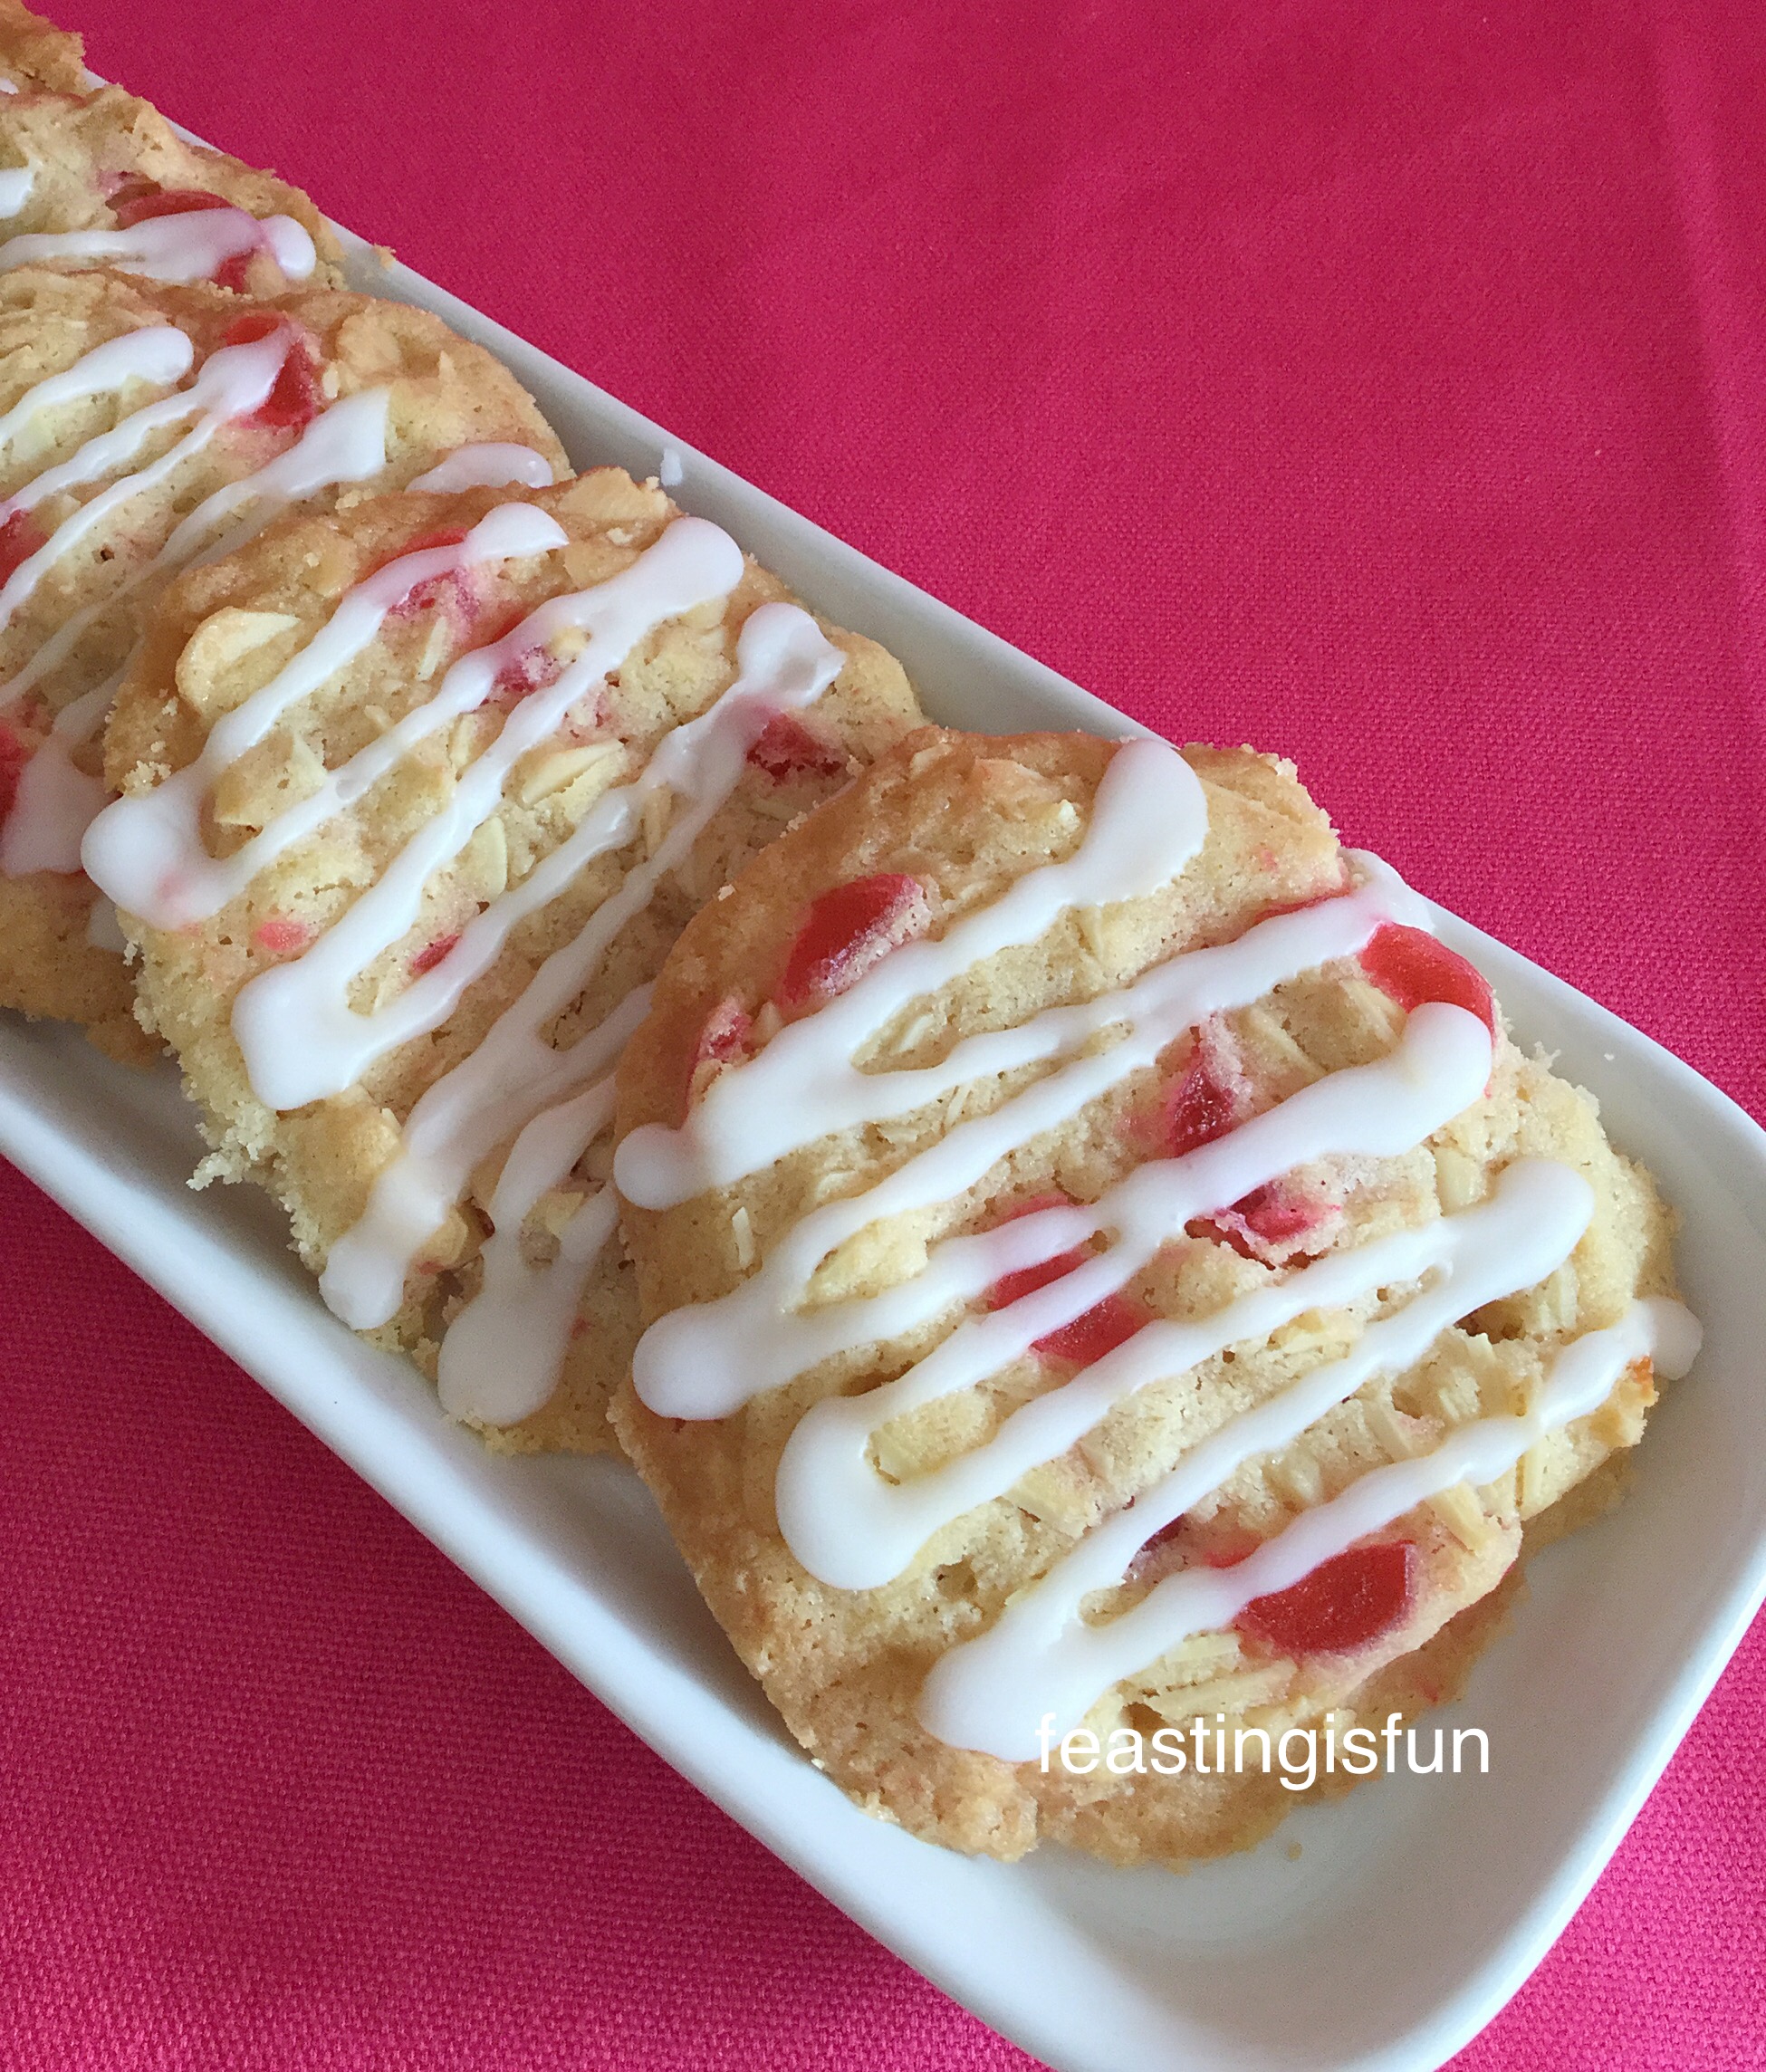
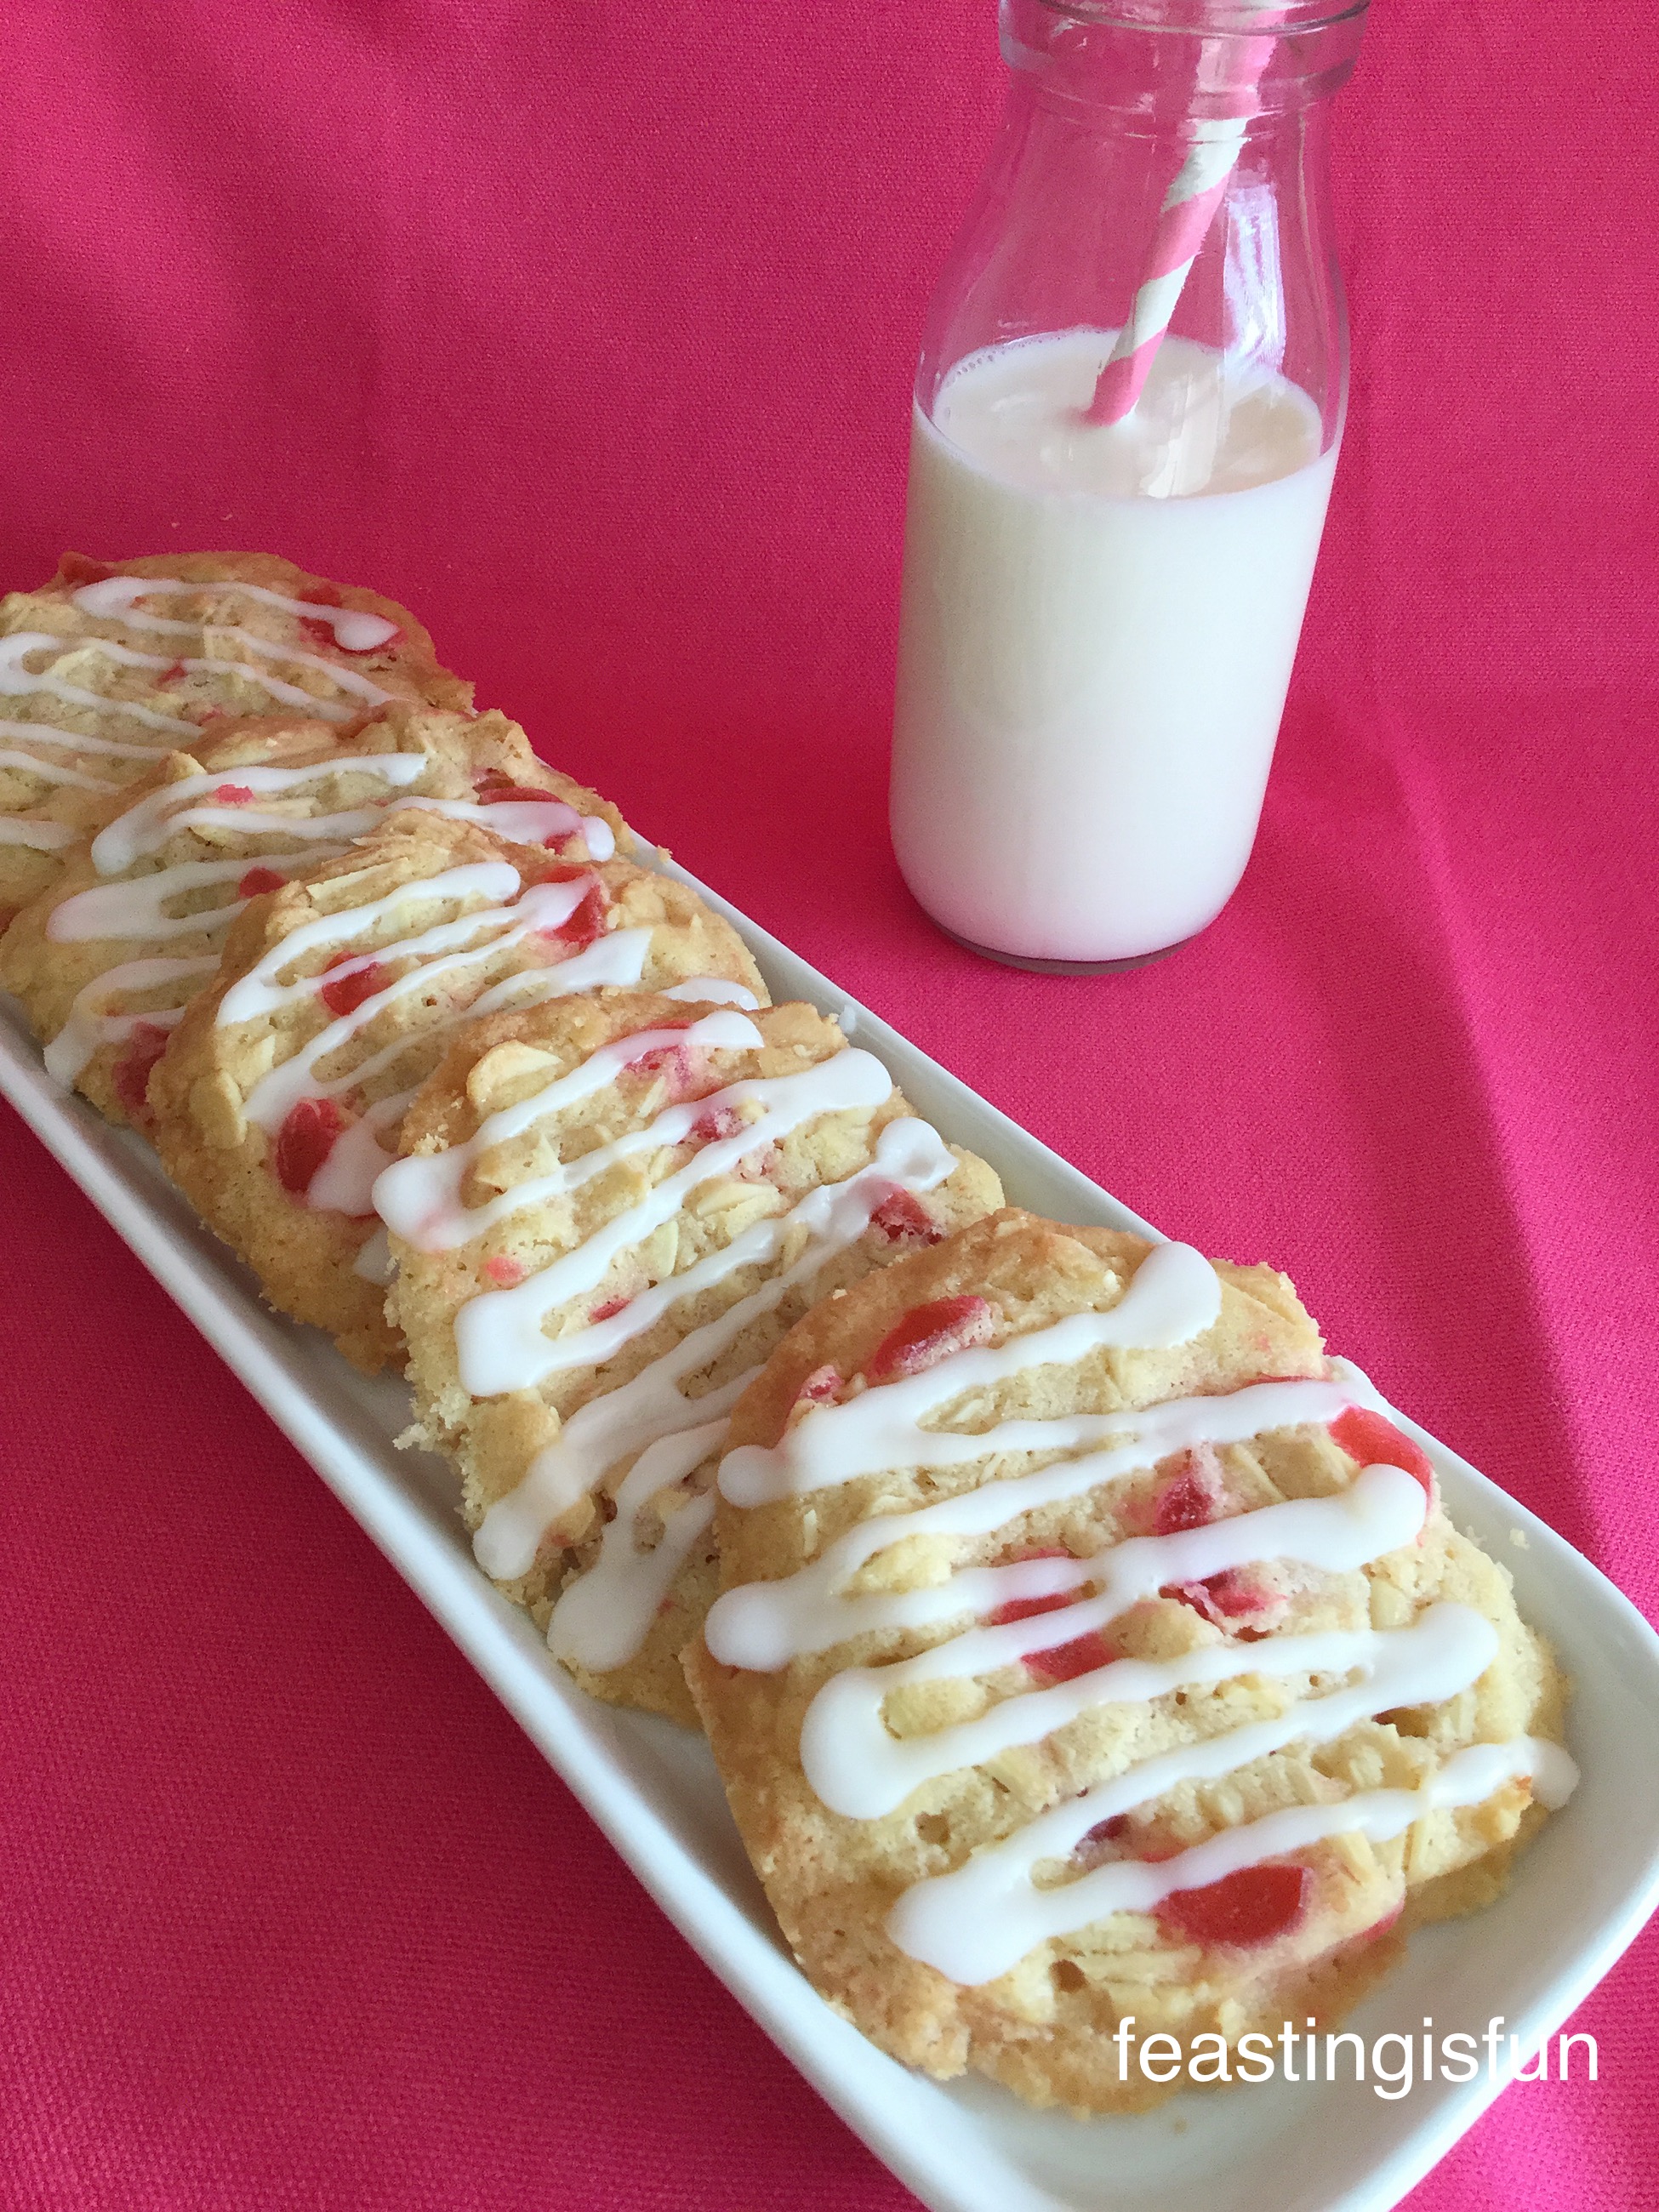
Homebaked Cookies

While using the recipe from my Monster Mini Egg Cookies as a starting point, I jiggled things about a bit. Especially changing from light brown sugar to dark muscavado sugar and adding some cocoa, amongst other things. Resulting in my humble opinion, the best soft chocolate cookie that I’ve made so far!

R Rolo Chocolate Cookies
Rolo Chocolate Cookies unbelievably good.

Oh my, these Rolo Chocolate Cookies are the stuff of dreams. Or to put it in the words of our children, like the ones you get at Sainsbury’s!

Instead, the difference is that I know exactly what has gone into these cookies and their smell as they are baking. And as you may know, I adore the smell of fresh bread baking in the oven, chocolate cookies are right up there with the bread, in terms of deliciously teasing aromas.

R Rolo Chocolate Cookies
Rolo Chocolate Cookies they really are as good as they look!

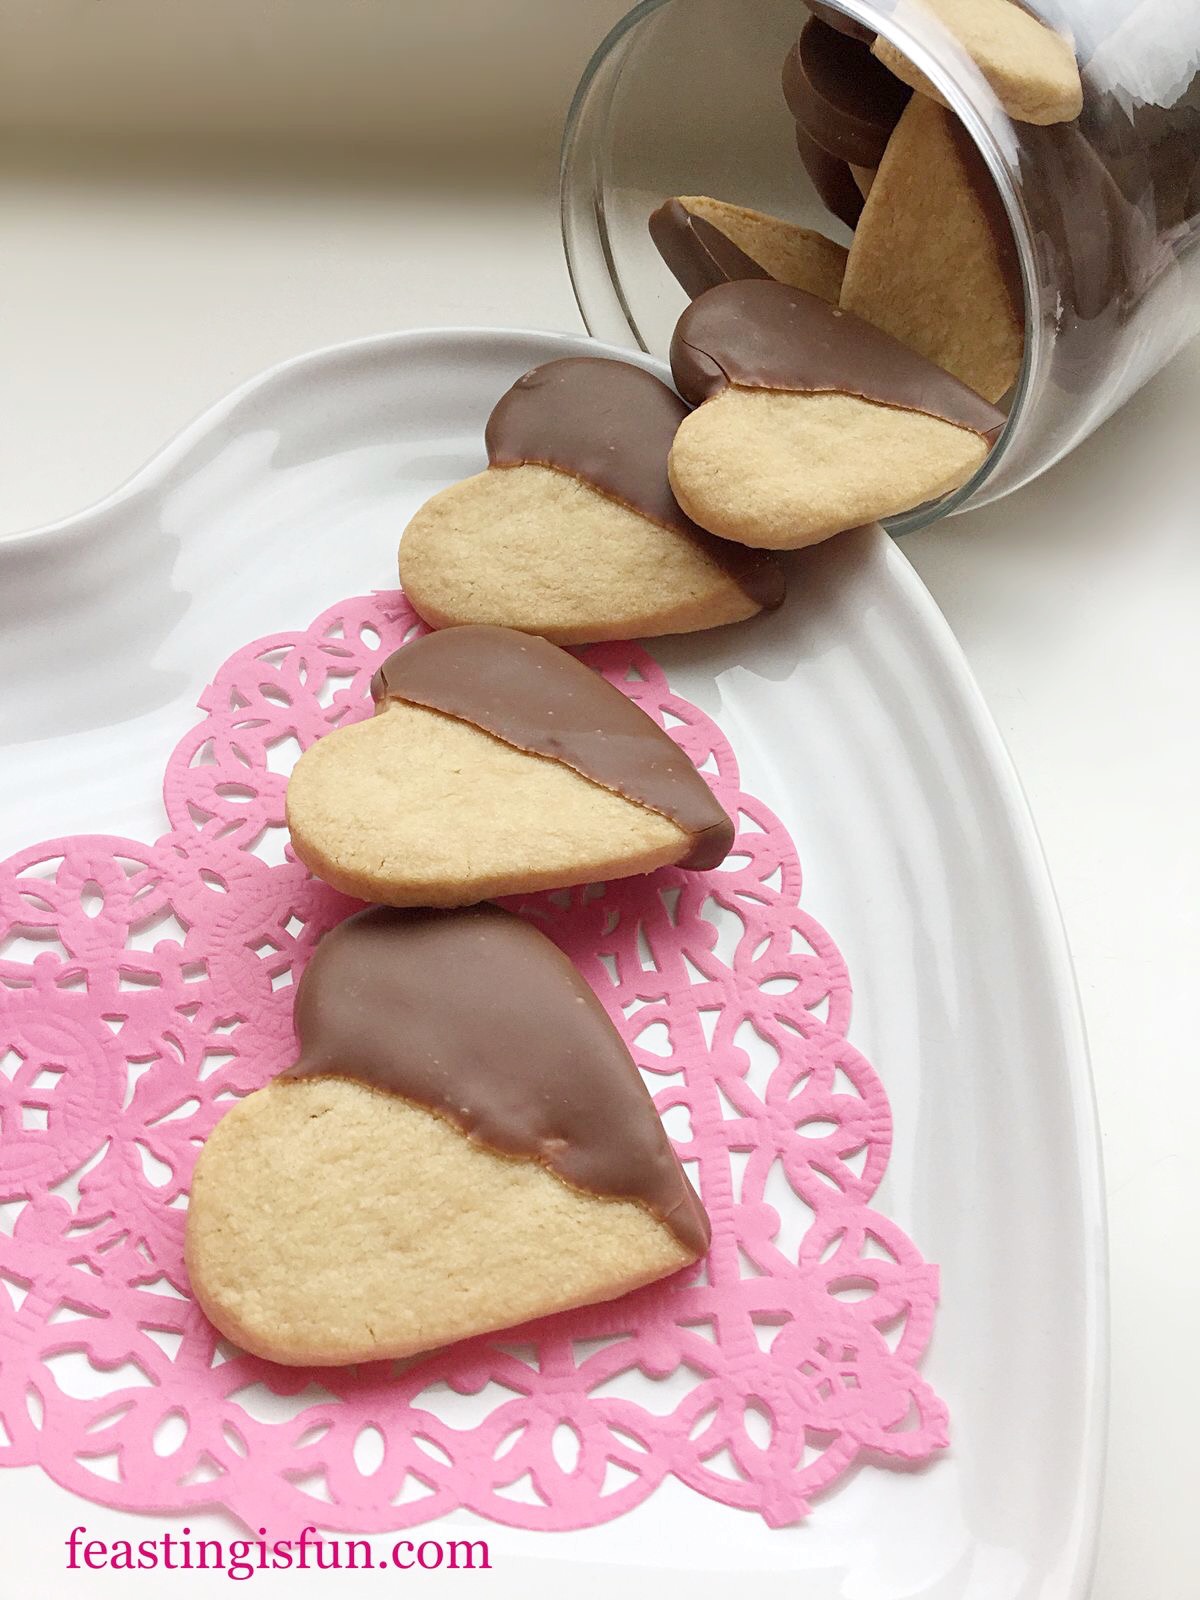
Because I am a self proclaimed Cookie Monster, sometimes I want a nice crisp biscuit that I can dunk in my cup of tea like my Lemon Shortbread Cookies and other times I want to bite into a soft, yielding cookie. Exactly the type of cookie that goes really well with a glass of ice cold milk – these Rolo Chocolate Cookies are it.

Chewy, ooey and gooey.

Yep I know that sounds like cartoon characters 😉.

So, if you like chocolate cookies, you’ll love these Rolo Chocolate Cookies.

Recipe: Rolo Chocolate Cookies makes 18-20

225g/8oz Soft Dark Brown Muscavado Sugar

150g/5oz Unsalted Butter- at room temperature

1Tsp Vanilla Bean Paste – I use Nielsen-Massey if you don’t have any paste you can substitute 2tsp of vanilla extract

1 Large Free Range Egg – plus 1 Large Free Range Egg Yolk

50g/2oz Cocoa Powder – I use Callebaut

225g/8oz Plain White Flour

1/2tsp Bicarbonate of Soda

1/4tsp of Sea Salt – I use Maldon 

4-6 packs of Nestle Rolos – depending on how decadent you want your cookies – I’m not going to lie, I went for the full 6 packets!!!

Making The Rolo Chocolate Cookie Batter

Preheat the oven to 170C/150C fan, gas mark 3, 325F

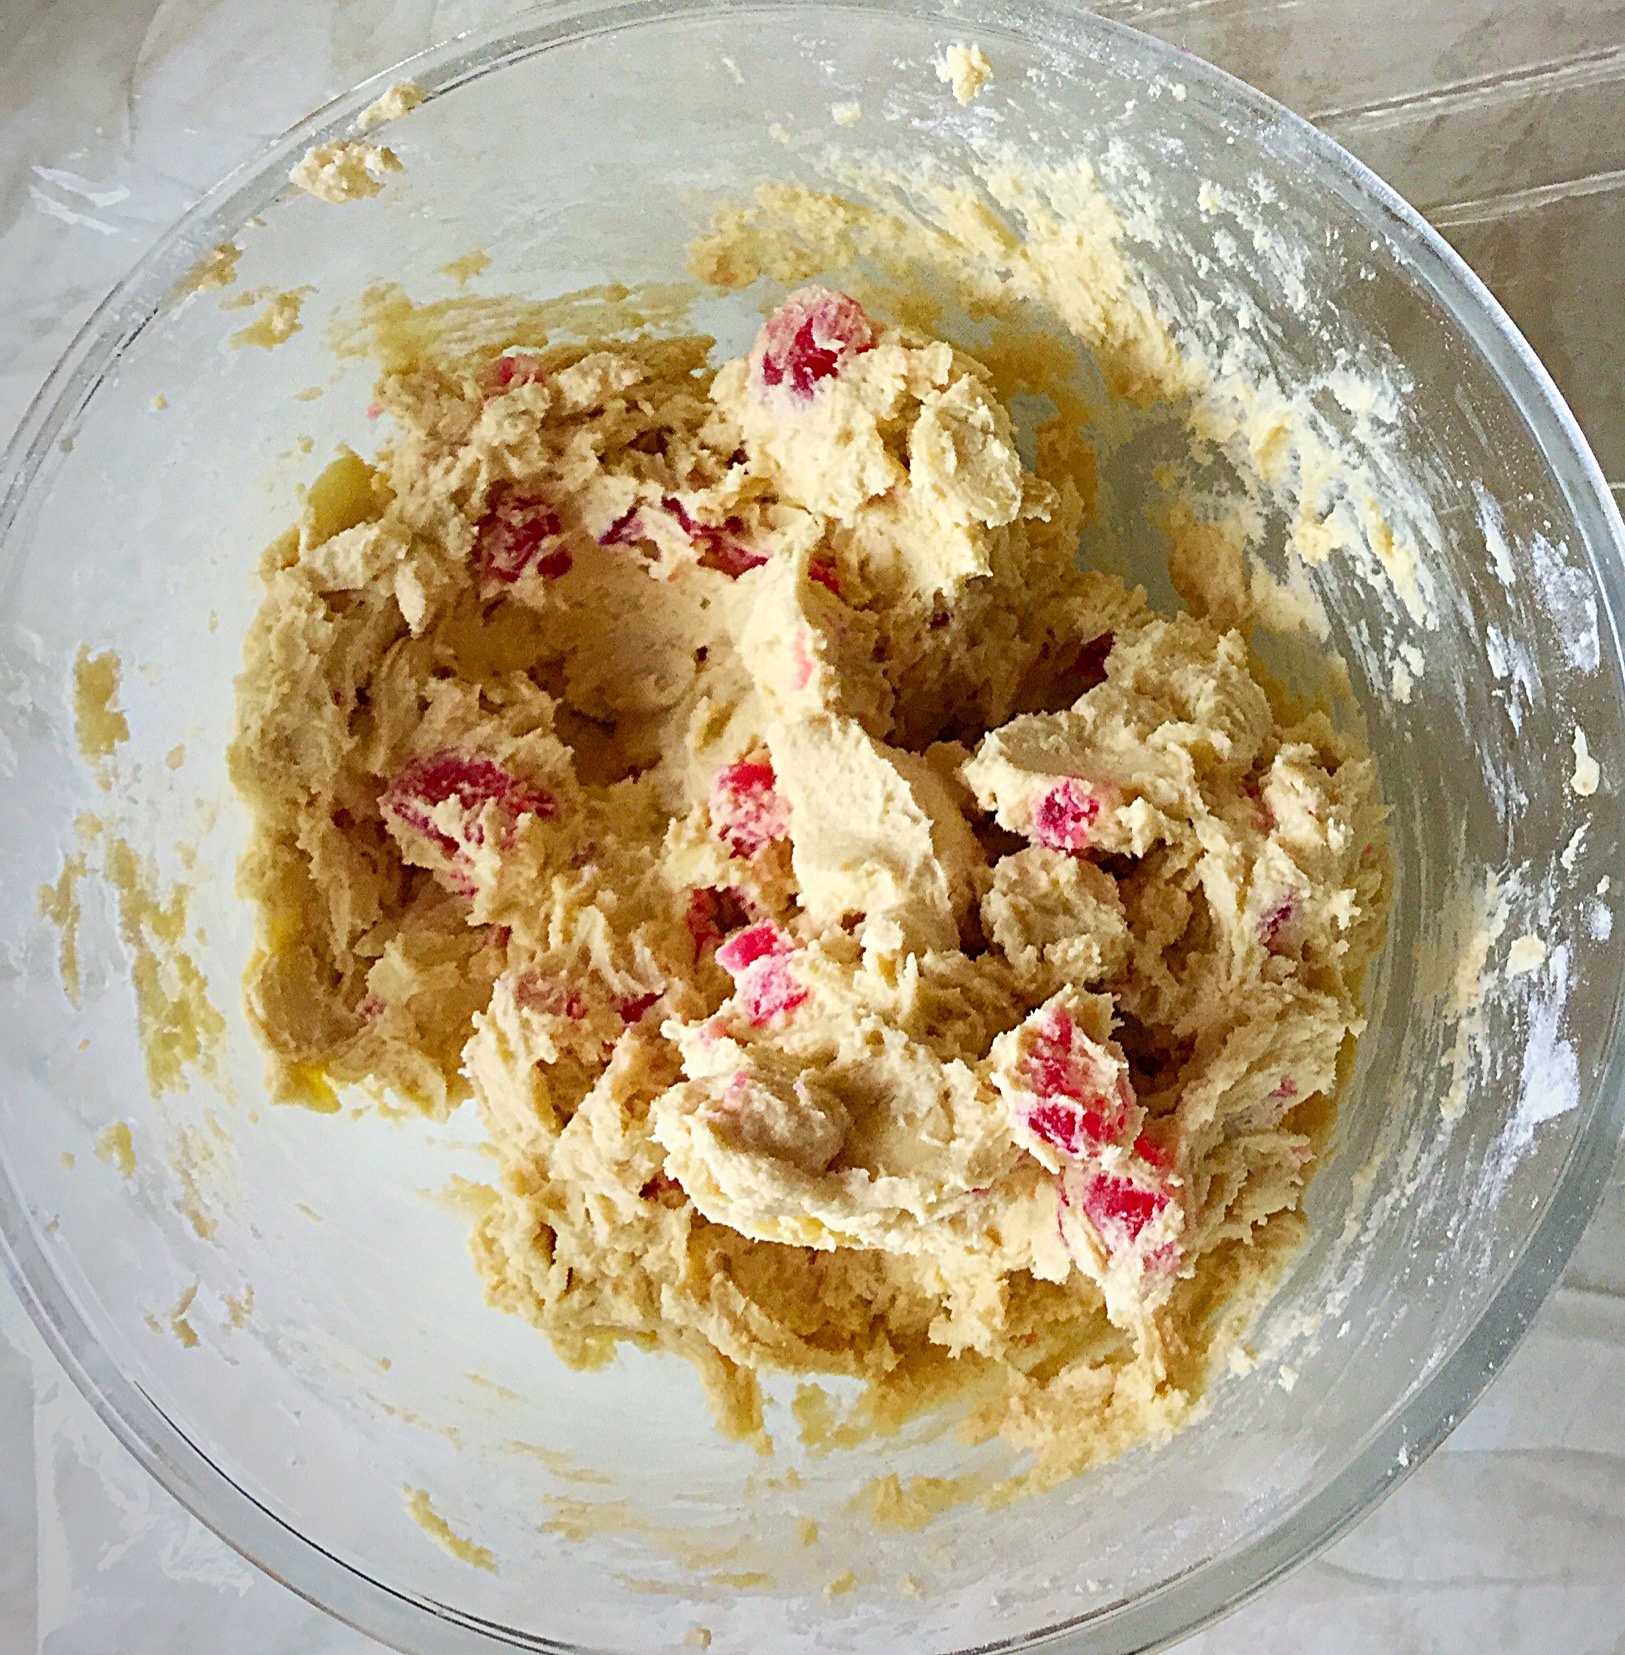
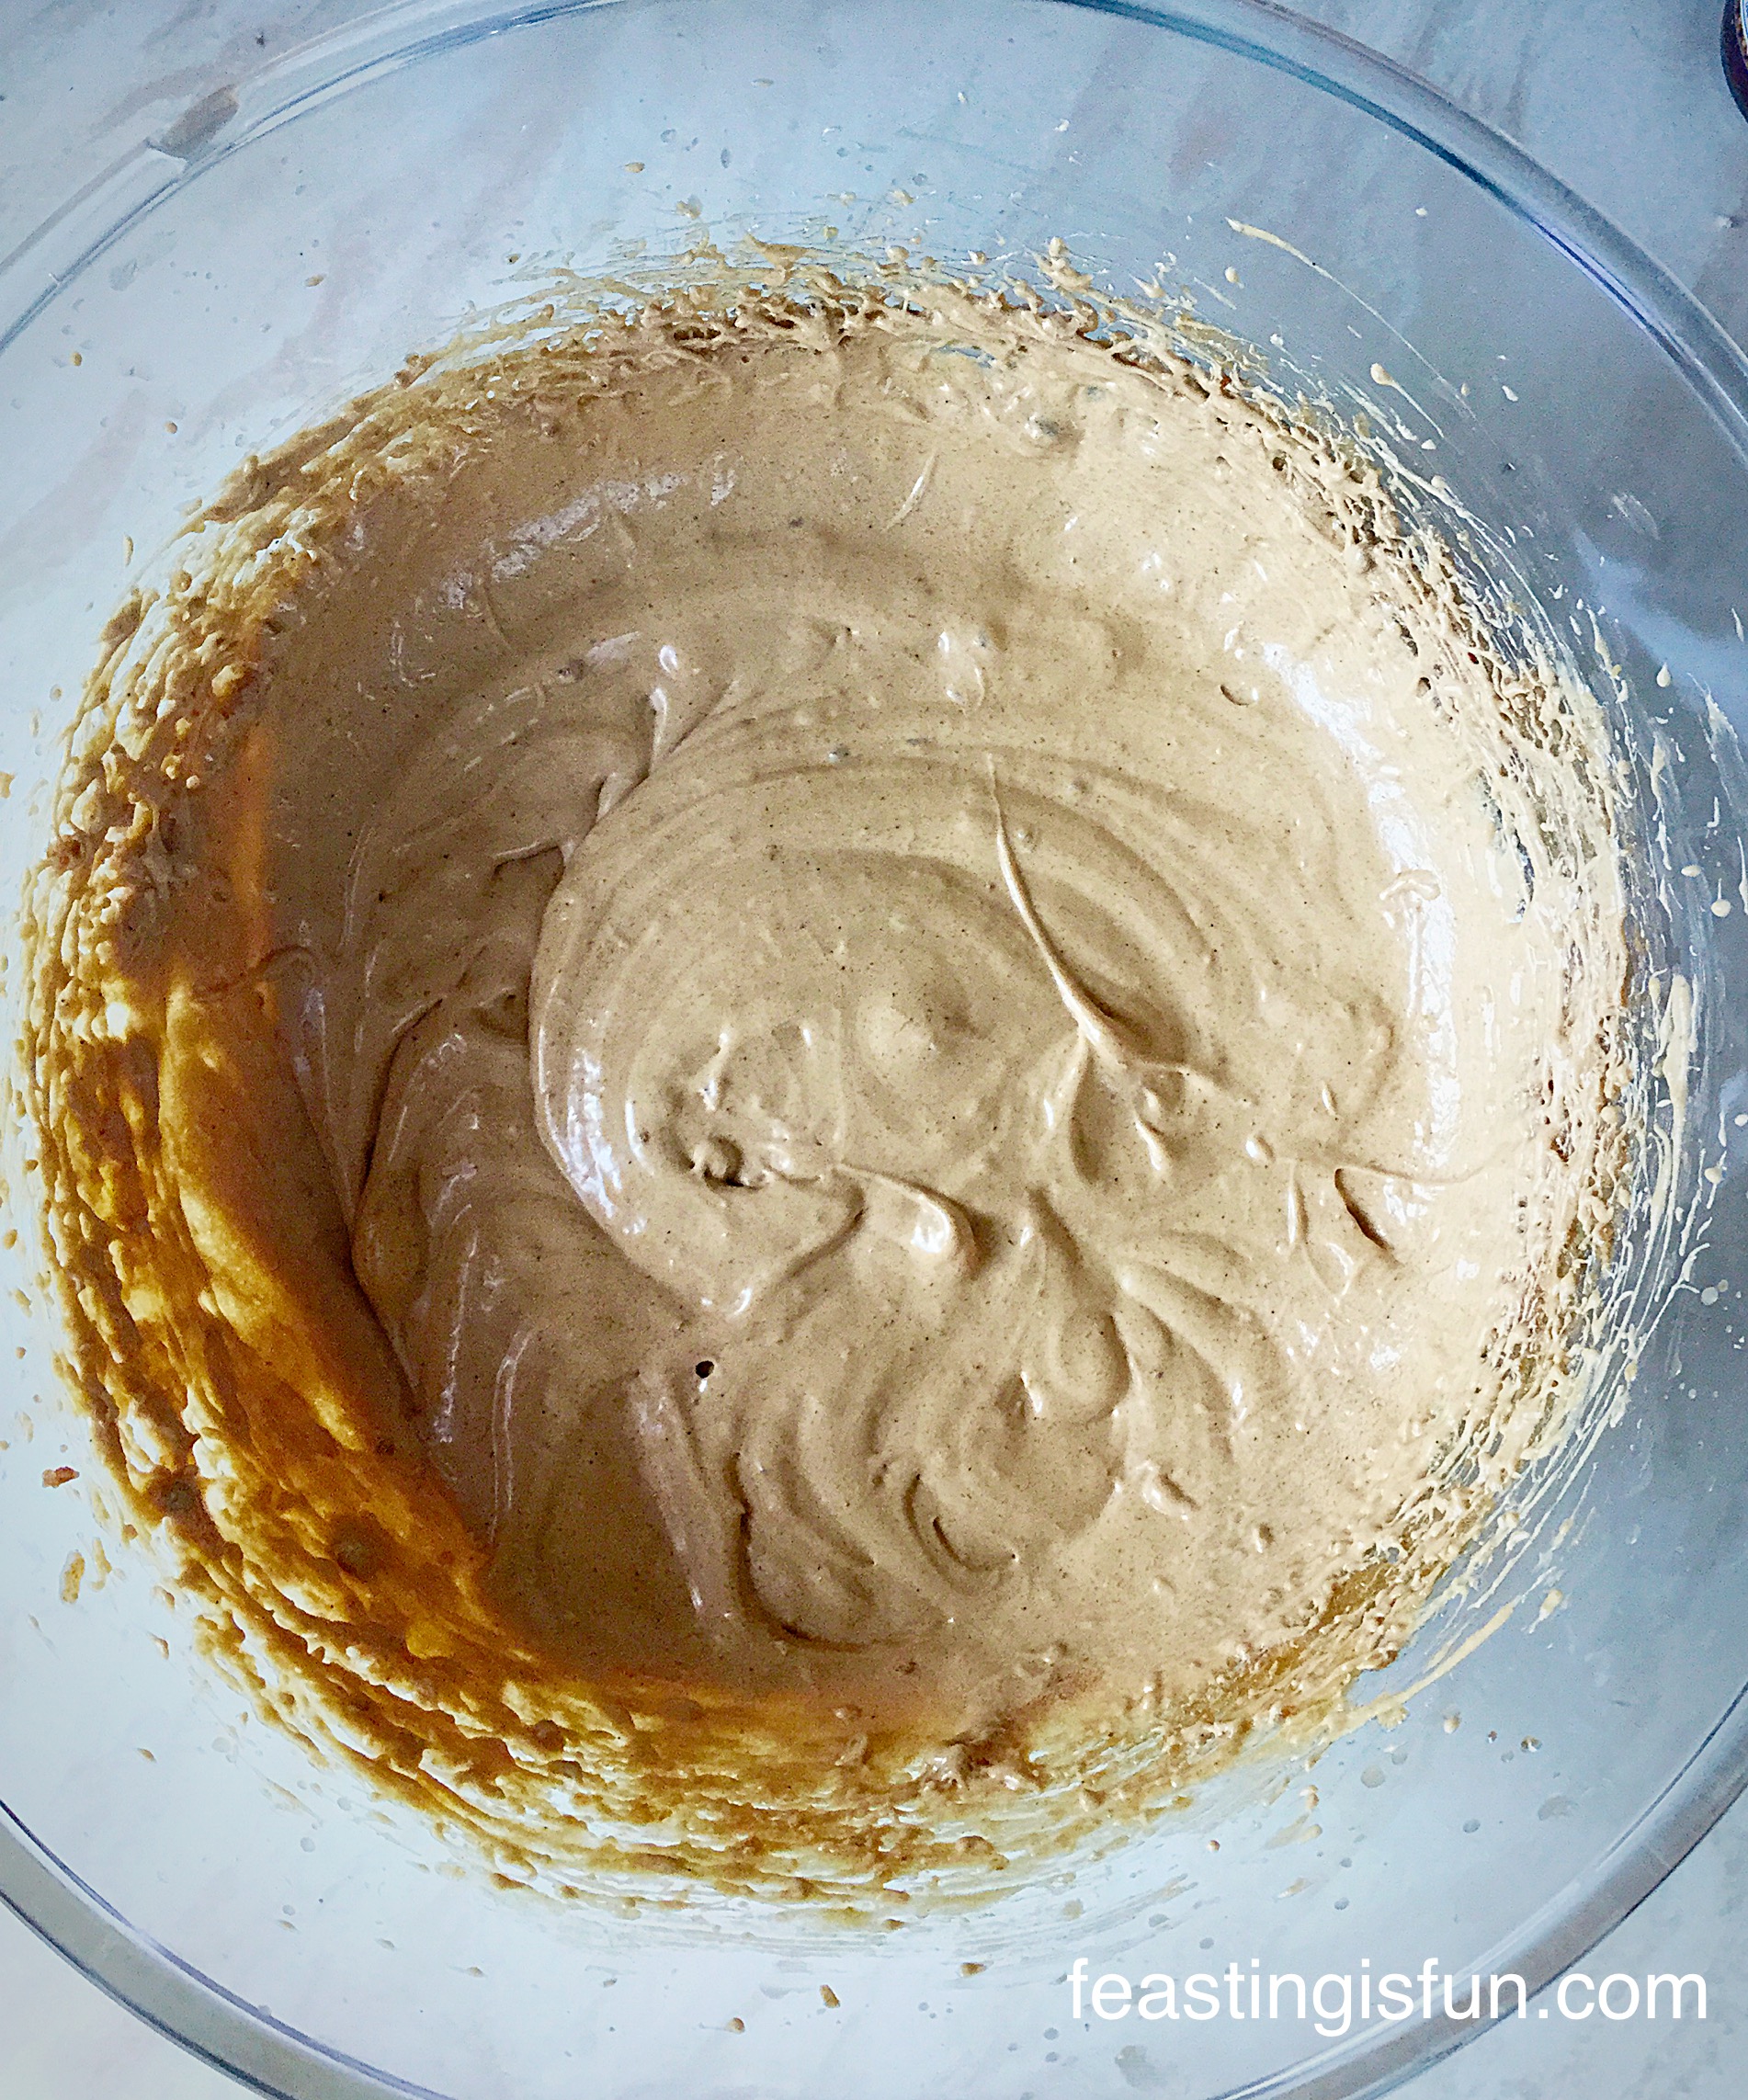
  • First of all, place the sugar and butter in a large bowl and whisk for 5 minutes until pale and creamy. Importantly whisking for 5 minutes and then again after adding the eggs is very important to the finished texture of the cookie.
  • Add the vanilla bean paste and the eggs and continue whisking for a further 5 minutes.
R Rolo Chocolate Cookies
This is how pale you need the whipped eggs, butter and sugar to be.
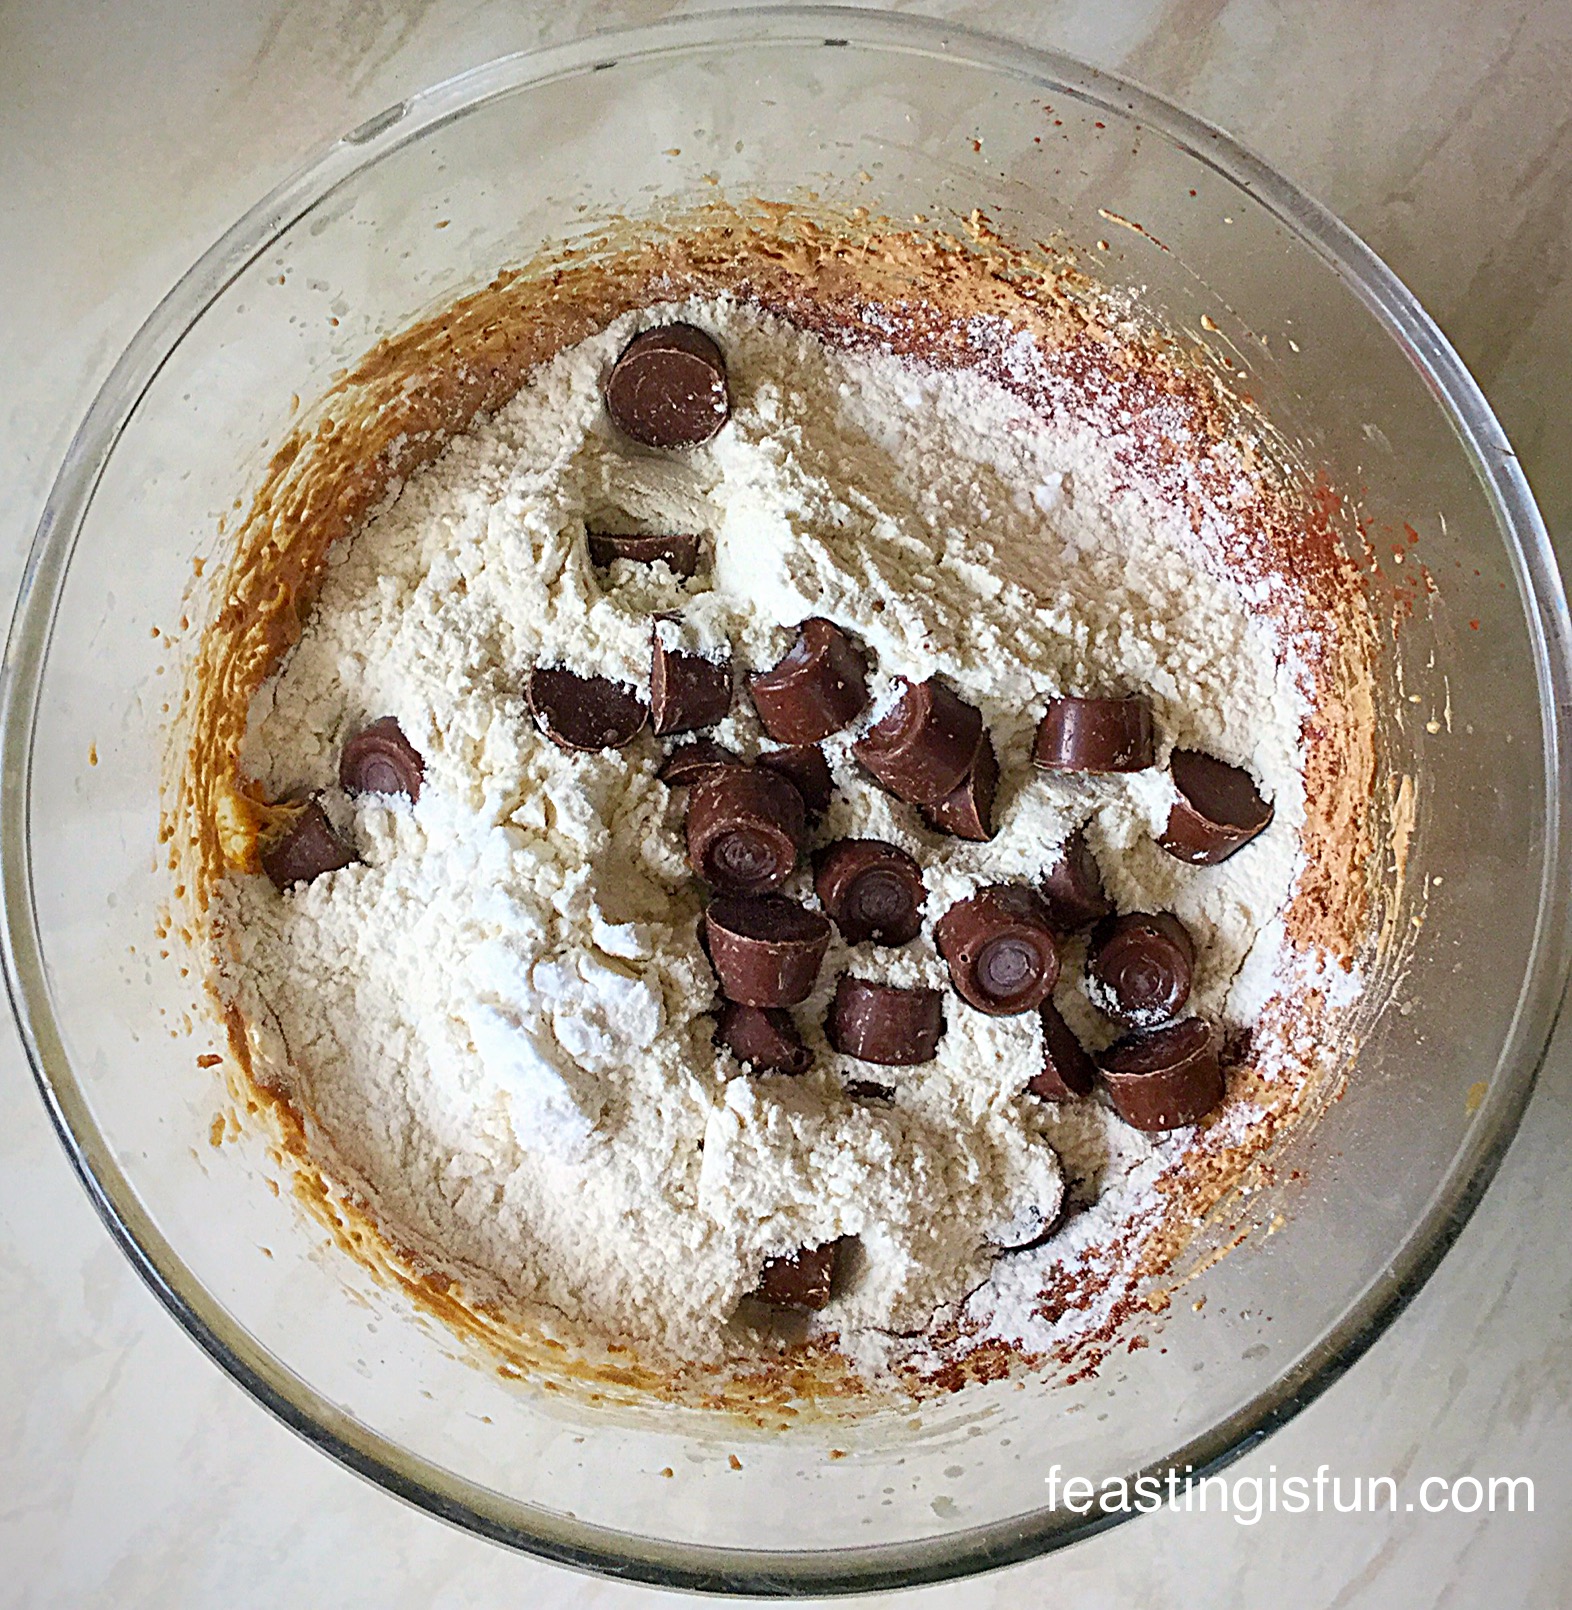
  • Sift in the cocoa, flour and sodium bicarbonate into the bowl.
  • Add 4 packets of Rolos.
R Rolo Chocolate Cookies
Everything in the bowl ready to become Rolo Chocolate Cookies!!

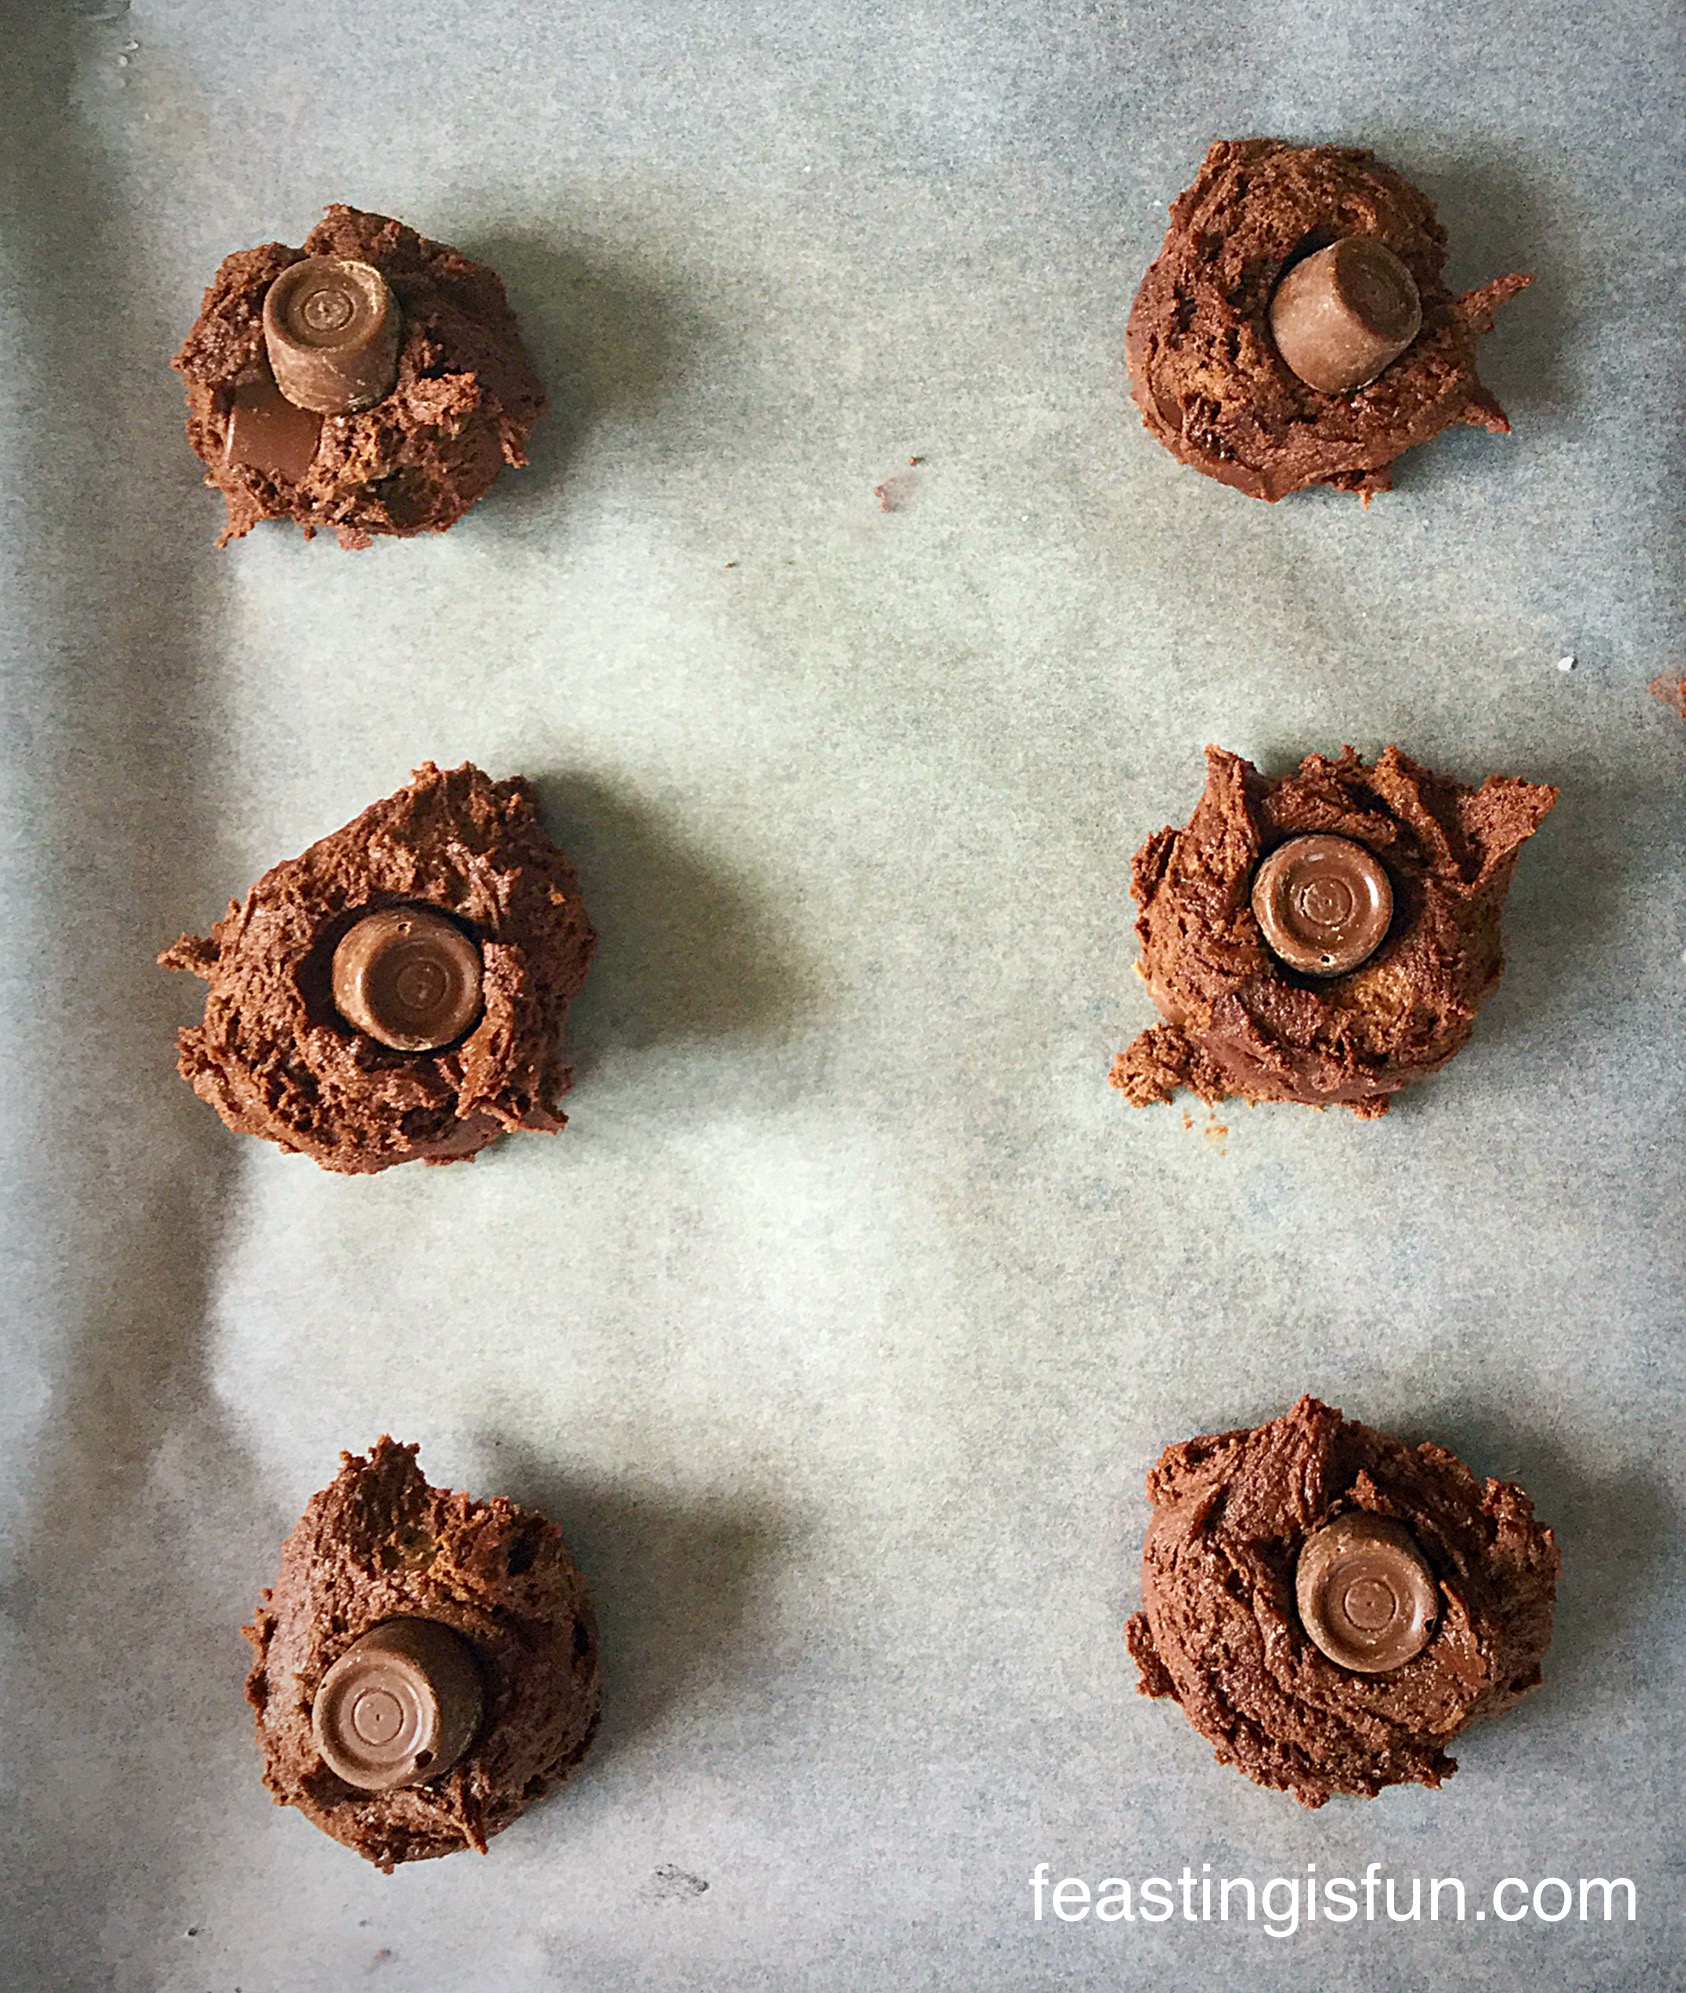
Portioning The Cookies On The Baking Sheet

  • Using a metal spoon, gently stir all of the ingredients together, trying not to bash the Rolos too much.
  • Line 3 baking trays with baking parchment.
  • Using a medium sized ice cream scoop, scoop mounds of cookie dough onto the baking trays. Leave a decent gap between each mound as these cookies spread.
  • Top each cookie with a single Rolo.
R Rolo Chocolate Cookies
Top each mound of cookie dough with an extra Rolo.

Baking The Rolo Topped Cookies

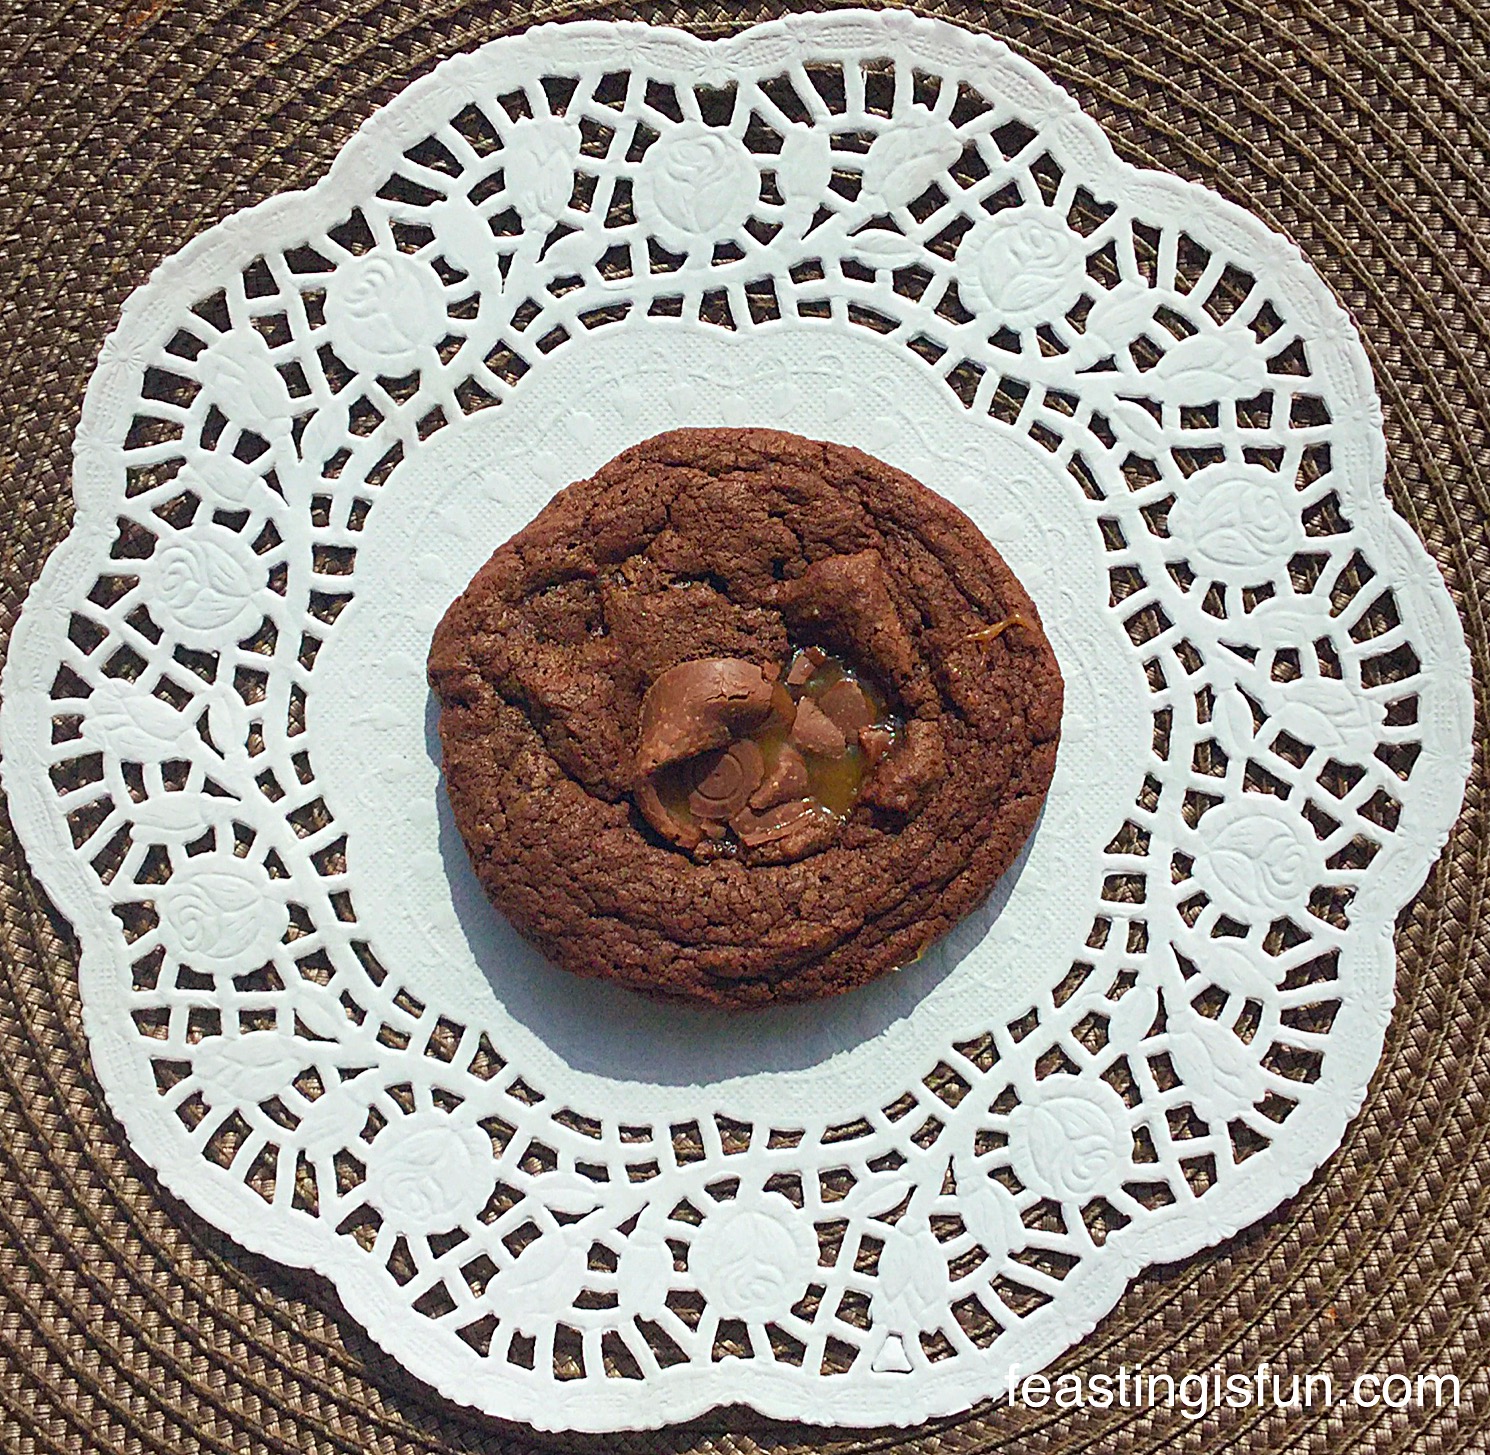
  • Bake the cookies in the centre of the oven for exactly 15 minutes.
  • The cookies will still be very soft after the baking time has elapsed.
  • As soon as the cookies are baked remove from the oven and allow to cool completely on the baking tray.
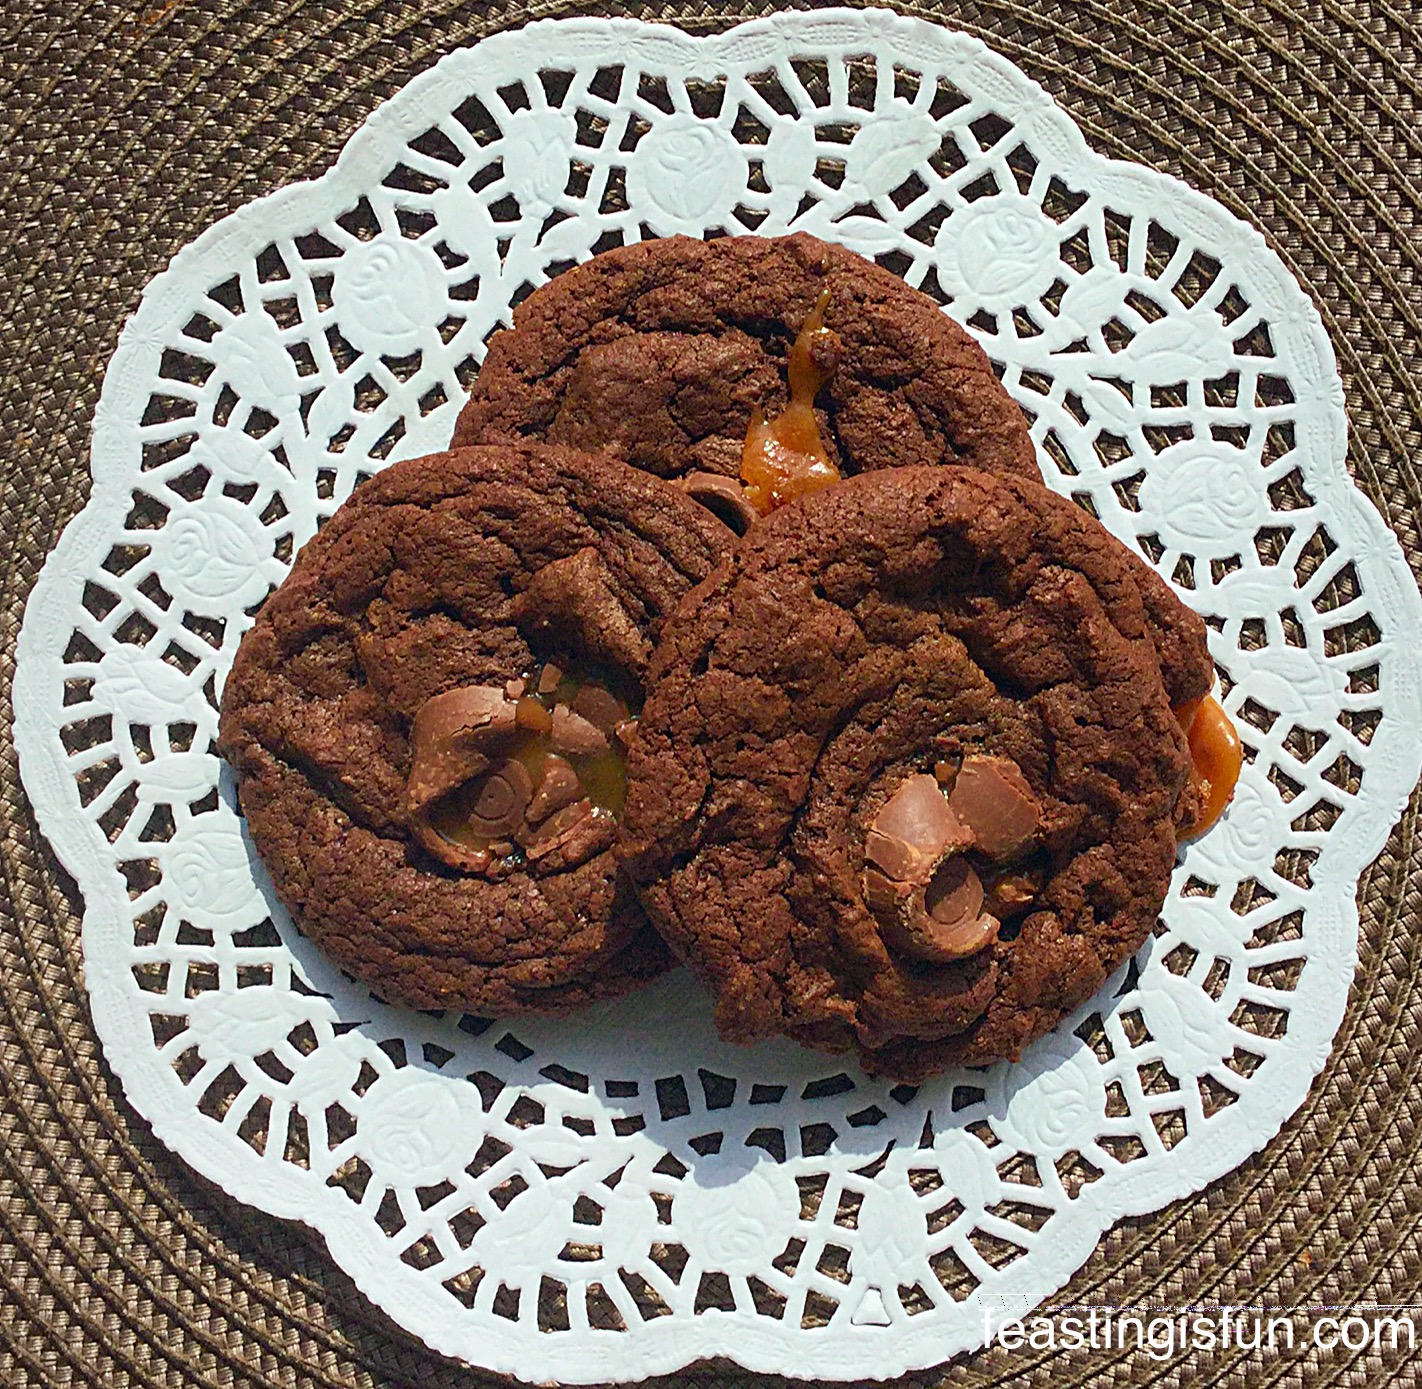
R Rolo Chocolate Cookies
Rolo Chocolate Cookies cooling on the baking parchment lined trays.

Cookie Love

Once cooled store the Rolo Chocolate Cookies in an airtight container. It is important to separate each layer of cookies with baking parchment. Because these cookies can get very sticky where the caramel oozes out and like to hang on to each other in the tin.

I tell you this from experience 😉.

R Rolo Chocolate Cookies
Rolo Chocolate Cookies a delicious combination of chocolate and caramel in a cookie.

Also, if you have any Easter chocolate left, you could break it up and add it to these cookies instead of the Rolos, or melt it and use it in my Chocolate Fudge Brownie Bites.

If you had a look of horror on your face when I suggested ‘leftover chocolate’ fear not I happily bought the Rolos for these yummy Rolo Chocolate Cookies!!

In our home we have have an ‘eating chocolate’ stash and a completely separate ‘cooking/blogging chocolate’ stash. Although sometimes the lines are blurred – when the need arises, either way!

So, can you keep chocolate in the house without it constantly ‘calling to you’?

If you’ve enjoyed these Rolo Chocolate Cookies here are some other cookie recipes that you may also like:

Chocolate Monster Mini Egg Cookies

Smartie Chocolate Monster Mini Egg Cookies
Chocolate Monster Mini Egg Cookies a delicious treat.

Cherry Bakewell Cookies

R Cherry Bakewell Cookies
Cherry Bakewell Cookies if you fancy a change from chocolate?

Bakery Style Soft Triple Chocolate Cookies 

FF Rolo Chocolate Cookies
Bakery Style Soft Triple Chocolate Cookies

I love reading your comments so please keep them coming. Also if you are on Twitter or Instagram please pop up a photo of your bakes and kitchen creations and tag me in. Since I really enjoy seeing what you’ve made and will be sure to retweet or give you a shoutout.

So, whatever you are making, baking and creating in your kitchens, have fun preparing and sharing your feast.

Sammie xx

@sammiefeasting Twitter/Instagram/Pinterest

No part of this post may be reproduced or duplicated without the written permission of the owner. Please see my Disclosure Policy

Share
Facebooktwitterpinterestlinkedintumblr

Cherry Bakewell Cookies

Share
Facebooktwitterpinterestlinkedintumblr

This post is Pink. Very Pink. And I make no apology for its pinkness, for one simple reason – Cherry Bakewell Cookies. Buttery, almond and cherry cookies, drizzled with almond flavoured icing. If you like Bakewell Tart you will love these cookies.

FF Cherry Bakewell Cookies

Because I have been testing some baking equipment for British BakewareI knew I couldn’t pass up the opportunity to bake cookies, using their large baking tray. Since those of you who regularly pop round here for a chat I mean read, will know I LOVE COOKIES. I really, really love cookies – and – please don’t hate me, I prefer nutty, fruity cookies over chocolate ones. If you love choccie cookies there’s a link at the bottom of the post. I’m so good to you 😉.

Cherry Bakewell Cookies:

But before you click the link to the Chocolate Cookies, just have a peek at these delicious Cherry Bakewell Cookies.

Cherry Bakewell Cookies

Can you imagine biting into this crunchy, buttery, cookie that is filled with flaked almonds, cherries and drizzled with a perfect, not-too-sweet icing?

So have I tempted you to try these scrumptious Cherry Bakewell Cookies? Perfect with milk, or a cup of tea/coffee, especially as it is frrreeeezzzing outside today!

Cherry Bakewell Cookies

One of the reasons I enjoy baking, so much, is that I can whip up a batch of cookies or loaf of bread and I know exactly what has gone into making them. Also I  really enjoy sharing what I bake, beyond our home. By that I mean, surprising our neighbours with a gift of cupcakes, baking a gift to say thank you, or just because.

And these cookies are incredibly easy to make. Once the cookie dough is made, it is rolled into logs, wrapped and chilled in the fridge and then sliced and baked when needed. Alternatively, you could dispense with the almond drizzle, just add the almond extract to the creamed butter and sugar part of the recipe, so that these  retain that proper Bakewell taste and once baked these babies are ready to eat!

Recipe: Makes Approximately 20 Cherry Bakewell Cookies

225g/8oz Unsalted Butter at room temperature

150g/5oz Caster Sugar

275g/10oz Plain White Flour

1/4tsp Salt I use Maldon Salt

1 Large Egg Yolk – I always use free range

1tsp Vanilla Extract

100g/4oz Flaked Almonds

100g/4oz Glacé Cherries roughly chopped

For the drizzle

200g/7oz Icing Sugar

1tsp Almond Extract – available from Nielsen-Massey 

Tap water

Method:

Making the cookie dough:

In a large bowl add the butter, sugar and salt. Whisk until pale and creamy.

Add the egg yolk and vanilla extract (and the almond extract, if not making the drizzle). Whisk together until all the ingredients are combined.

Add the flaked almonds to one side of the bowl, then add the flour to the other side. Put the cherries on top of the flour and gently mix them in the flour with your fingers – this will stop the cherries sticking together and ensure they are distributed evenly throughout the cookie dough.

Cherry Bakewell Cookies

Mix all the ingredients together until they are thoroughly combined.

Cherry Bakewell Cookies
Yummy cookie dough!

Wipe the worktop with a clean damp cloth. Lay some cling film over the damp surface – it should stay in place.

Place half of the cookie dough onto the cling film and roll into a log shape approx 4cm/1.5″ diameter. Repeat with the other half of the cookie dough.

Cherry Bakewell Cookies
Cherry Bakewell Cookie dough log.

Place both cookie logs into the fridge to chill until firm – approx 1 hour.

Baking the cookies:

When the cookie logs are firm enough to slice, preheat the oven to 180C/160C fan, gas mark 4, 350F

Remove the cookie logs from the fridge and slice into 1.5 cm discs.

Cherry Bakewell Cookies
Cherry Bakewell Cookies sliced and ready to bake.

I was testing this Large Baking Tray for British Bakeware however, I would advise lining any baking tray used with baking parchment.

Place the Cherry Bakewell Cookies onto the baking tray, allowing room between each cookie, as they do spread whilst baking.

Place into the oven and bake for 15 minutes. Do not bake for longer as the cookies will become too brittle once cooled.

As soon as the cookies are baked remove from the oven.

Cherry Bakewell Cookies
Cherry Bakewell Cookies allow to cool on the baking tray for 15 minutes.

After 15 minutes cooling transfer the cookies to a cooling rack. I needed to use a palette knife to lift the cookies away from the tray. Lining with baking parchment will avoid scratching your trays.

When completely cooled the cookies are ready to be iced.

Icing the cookies:

First of all, place the icing sugar and almond extract into a bowl. Add tap water, a little at a time (I use a teaspoon to add the water), mixing thoroughly after each addition.

The icing is at the correct thickness when it can hold a figure of eight shape for a moment, when drizzled onto itself with a spoon.

Cherry Bakewell Cookies
Almond flavoured icing, ready for drizzling over the cookies.

You can drizzle the icing over the cookies with a spoon, or fill a disposable piping bag (or plastic freezer bag) with the icing. Snip the end (or corner of the bag), so that there is a small hole. Drizzle a pattern over each of the cookies.

Cherry Bakewell Cookies

Leave the icing to set on the cookies before storing in an airtight container.

Cherry Bakewell Cookies
Do you think you can stop at one?

Now invite some friends round for a cup of tea and a catch up and share these delicious Cherry Bakewell Cookies.

Alternatively pop some in a clear cellphone bag, tie with pretty ribbon and give away as gifts.

I am always hungrier when the weather turns cold. Are you?

If you have enjoyed this recipe for Cherry Bakewell Cookies you may also like these:

Chocolate Dipped Shortbread Heart Cookies 

FF Cherry Bakewell Cookies
Chocolate Dipped Shortbread Heart Cookies

Bakewell Shortbread Bars

FF Cherry Bakewell Cookies
Bakewell Shortbread Bars

Extreme Chocolate Cookies 

FF Cherry Bakewell Cookies
Extreme Chocolate Cookies

So, whatever you are making, baking and creating in your kitchens, have fun preparing and sharing your feast.

Sammie xx

No part of this post may be reproduced or duplicated without the written permission of the owner. Please see my Disclosure Policy.

Share
Facebooktwitterpinterestlinkedintumblr

Cream Cheese Pastry Mince Pies

Share
Facebooktwitterpinterestlinkedintumblr

Ok, please don’t hate me? I know it’s only October and yes I am posting a recipe for mince pies. Just hear me out for a sec please? Because these Cream Cheese Pastry Mince Pies are totally, out of this world amazing and it would be completely unfair for me to have waited any longer to share these with you.

Phew! I said it.

Christmas mini mince pies made using a tangy cream cheese pastry recipe. Covered with a festive flurry of icing sugar snow.

Just look at them. They are so cute and little and perfectly bite size. They’ve even got a dusting of snow.Tell me you’re not interested now – thought so!!

Star topped Christmas mini mincemeat bakes.
Cream Cheese Pastry Mince Pies

Cream Cheese Pastry – the easiest pastry you will ever make:

So, who would have thought of putting Cream Cheese in pastry? Yet, this recipe is based on a Pampered Chef recipe I jotted down years ago at one of their parties. Since they, (the Pampered Chef’s) are masters of quick, delicious, recipes and whilst their cooking and bakeware may be a little on the pricey side, it lasts forever. Also, this is not a sponsored post, I genuinely love their stuff.

Anyway, back to the pastry. I first saw this made and demonstarted at a Pampered Chef Party (if you host one you get great discounts – just saying!). The Cream Cheese Pastry was used to make some mini Pecan Pies and delicious they were too.

With me being me, I like to fiddle around with recipes. Because the pastry has a subtle, yet beautiful tang to it, I was sure that it would pair beautifully with sweet mincemeat. Resulting in these Cream Cheese Pastry Mince Pies.

Making a recipe work

So, with recipes I tend to be a bit of a rebel. Because if someone tells me something isn’t going to work, I want to know why and then try to figure out a way to make it work.

It was heavily stressed, during the cooking demonstration, that this pastry could not be rolled out. Well I just had to take that as a challenge and prove them wrong. And so I did.

The Cream Cheese Pastry is unbelivably soft, which is why it produces such a tender crumb. Yet, if you chill it for long enough and work quickly and methodically with it, then my lovelies, you sure can roll it out. And this little tip transforms a one recipe pastry into a whole new realm of possibilities, including my Cream Cheese Pastry Mince Pies!

Cream Cheese Pastry Mince Pies

Since I haven’t ever made anything bigger than a regular sized mince pie, using this pastry, I am doubtful it woud have the strength to hold together for a large tart. But I am willing to be corrected. And now I’ve written that, I may have set myself a challenge!!!

Aside from the deliciousness that this pastry brings to the mince pies, it is so easy to make. No mixer, food processor, just a bowl and a fork – really it’s that simple. Here I’ll show you how.

Recipe : Makes 36 mini Cream Cheese Pastry Mince Pies (approx 18 regular sized ones)

225g/8oz Very Soft Unsalted Butter

200g/7oz Cream Cheese – I used Philadelphia I really do think that it is the best cream cheese to use in this recipe

275g/10oz Plain White Flour

Sweet Mincement – I use Waitrose 

Jam any flavour

Method :

Making the Cream Cheese Pastry

Add the butter and cream cheese to the flour in a large bowl.
Using a fork gently mix the 3 ingredients together to form a dough.
Form the pastry dough into a disc, wrap tightly in cling film and refrigerate for 1 hour.

Keep chilled and make your tart cases

A good tip, as this dough warms up very easily, is to have everything you need to make the pies, ready before you start rolling the dough.

Also preheat the oven to 200C/180C fan, gas mark 6, 400F.

On a well floured surface, break off 2/3 of the dough and roll out to 1/2cm.
Ensure you have plenty of flour, cutters and a palette knife handy.


Due to the high fat content I never grease my tin. Feel free to do so if you are unsure of it’s non stick ability.

Line your tin with pastry cups.


Gather up the pastry and re-roll if needed to cut all of your pie bases out. Make sure you have plenty of flour on the work top, otherwise this pastry will stick.

And if the pastry does start to get too sticky, wrap up in cling film and pop back in the fridge for 20 minutes to chill it.

Adding the filling

Fill your pastry cups with mincemeat or alternatively jam.


Importantly, do not overfill your pastry cups, you will literally just end up with a heated mess.

I used a scant 1/2 teaspoon of filling in each of my mini pies.

You can see the 2 vertical lines on the left are filled with blackberry jam – youngest daughter not keen on mince pies!

Cream Cheese Pastry Mince Pies - use a cutter that just fits the top of your pies.
Cream Cheese Pastry Mince Pies – use a cutter that just fits the top of your pies.


Use the reserved third of pastry for rolling out the lids.

Top each pie with a cutout pastry shape. I used stars for mince pies and mini flowers for jam pies.

Sprinkle a little demerera sugar on the star topped mince pies for added sparkle.

Time to bake

Place into a preheated oven and bake for 15-20 minutes, until puffed and golden.

As soon as they are baked, remove from the oven and immediately remove the pies from the tin and place on a cooling rack. Be careful the filling is extremely hot.

A snowy, icing sugar dusted platter of mince pies.
Cream Cheese Pastry Mince Pies

These Cream Cheese Pastry Mince Pies are delicious warm just as they are, or drizzled with cream, or a scoop of vanilla ice cream……

They can be kept at room temperature for 3 days in an airtight container, or frozen, once cold for one month. Perfect to make before Christmas and stash in the deep freeze.

The last mince pie on an icing sugar snow dusted platter being pinched.
Watch out for the last mince pie!

Cream Cheese Pastry Mince Pies are a revelation on your taste buds.

If you have enjoyed this recipe recipe for Cream Cheese Pastry Mince Pies you may also like these:

Chocolate Christmas Pudding Cookies 

FF Cream Cheese Pastry Mince Pies
Chocolate Christmas Pudding Cookies

Snowy Black Forest Roulade 

FF Cream Cheese Pastry Mince Pies
Snowy Black Forest Roulade – with a gluten free option.

Peppermint Candy Cane Topped Brownies 

FF Cream Cheese Pastry Mince Pies
Peppermint Candy Cane Topped Brownies

While Christmas is first and foremost about celebrating the birth of Jesus, it is also a time for meeting up with friends and family. Almost every shelf in the shops are laden with edible Christmas treats and they do have a place. Yet making and baking homemade goodies is also fun too. Above all, homemade treats are made with love, something that cannot be bought. And they taste a million times better than their shop bought counterparts!

So, whatever you are making, baking and creating in your kitchens have fun preparing and sharing your feast.

Sammie x

No part of this post may be reproduced or duplicated without the written permission of the owner. Please see my Disclosure Policy.

Christmas baked mince pies using an easy cream cheese pastry recipe. Dusted with festive icing sugar snow.


Share
Facebooktwitterpinterestlinkedintumblr