Cheddar Cheese Thyme Soft Breadsticks

Share
Facebooktwitterpinterestlinkedintumblr

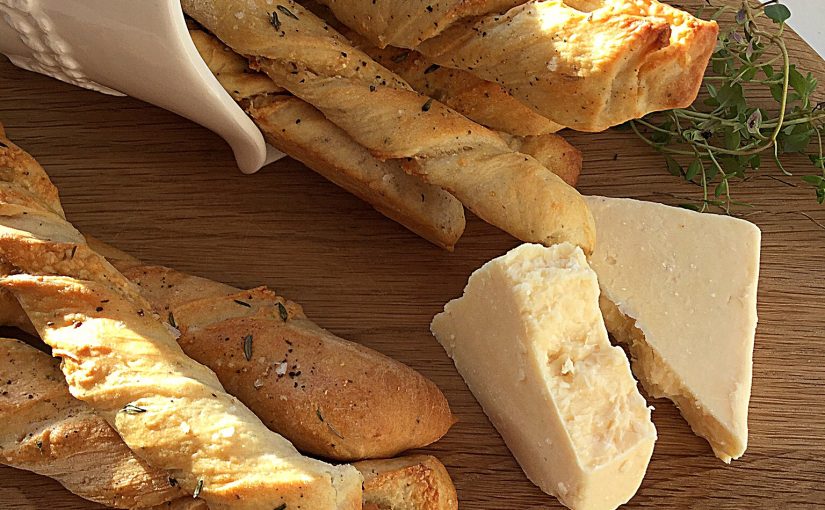
Cheddar cheese is loved by so many, me included and is such a versatile ingredient. Something magical happens to the flavour when it is heated. Becoming more savoury, salty and intense on the palette. Even when eaten with crackers it benefits vastly when left out of the fridge to come up to room temperature. Since winning some Vintage Cheddar in a Twitter competition I wanted to create a new, delicious snack recipe. These Cheddar Cheese Thyme Soft Breadsticks tick every, single, box.

FF Cheddar Cheese Thyme Soft Breadsticks

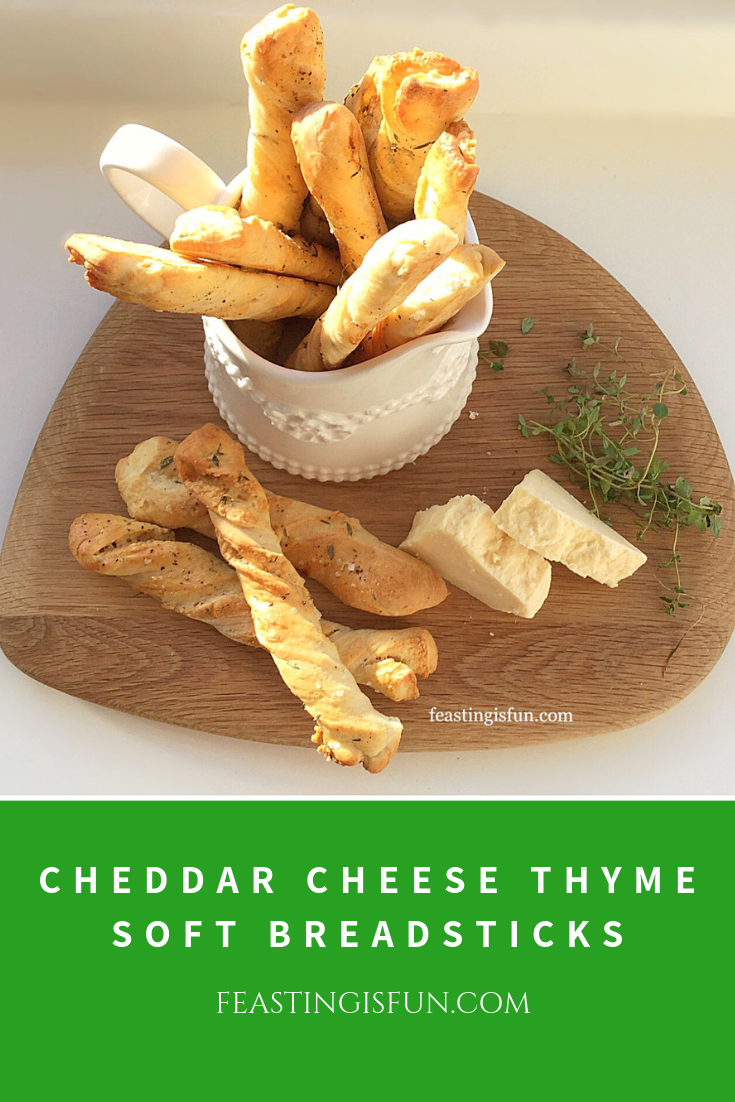
Cheesy Breadsticks – Delicious And Versatile

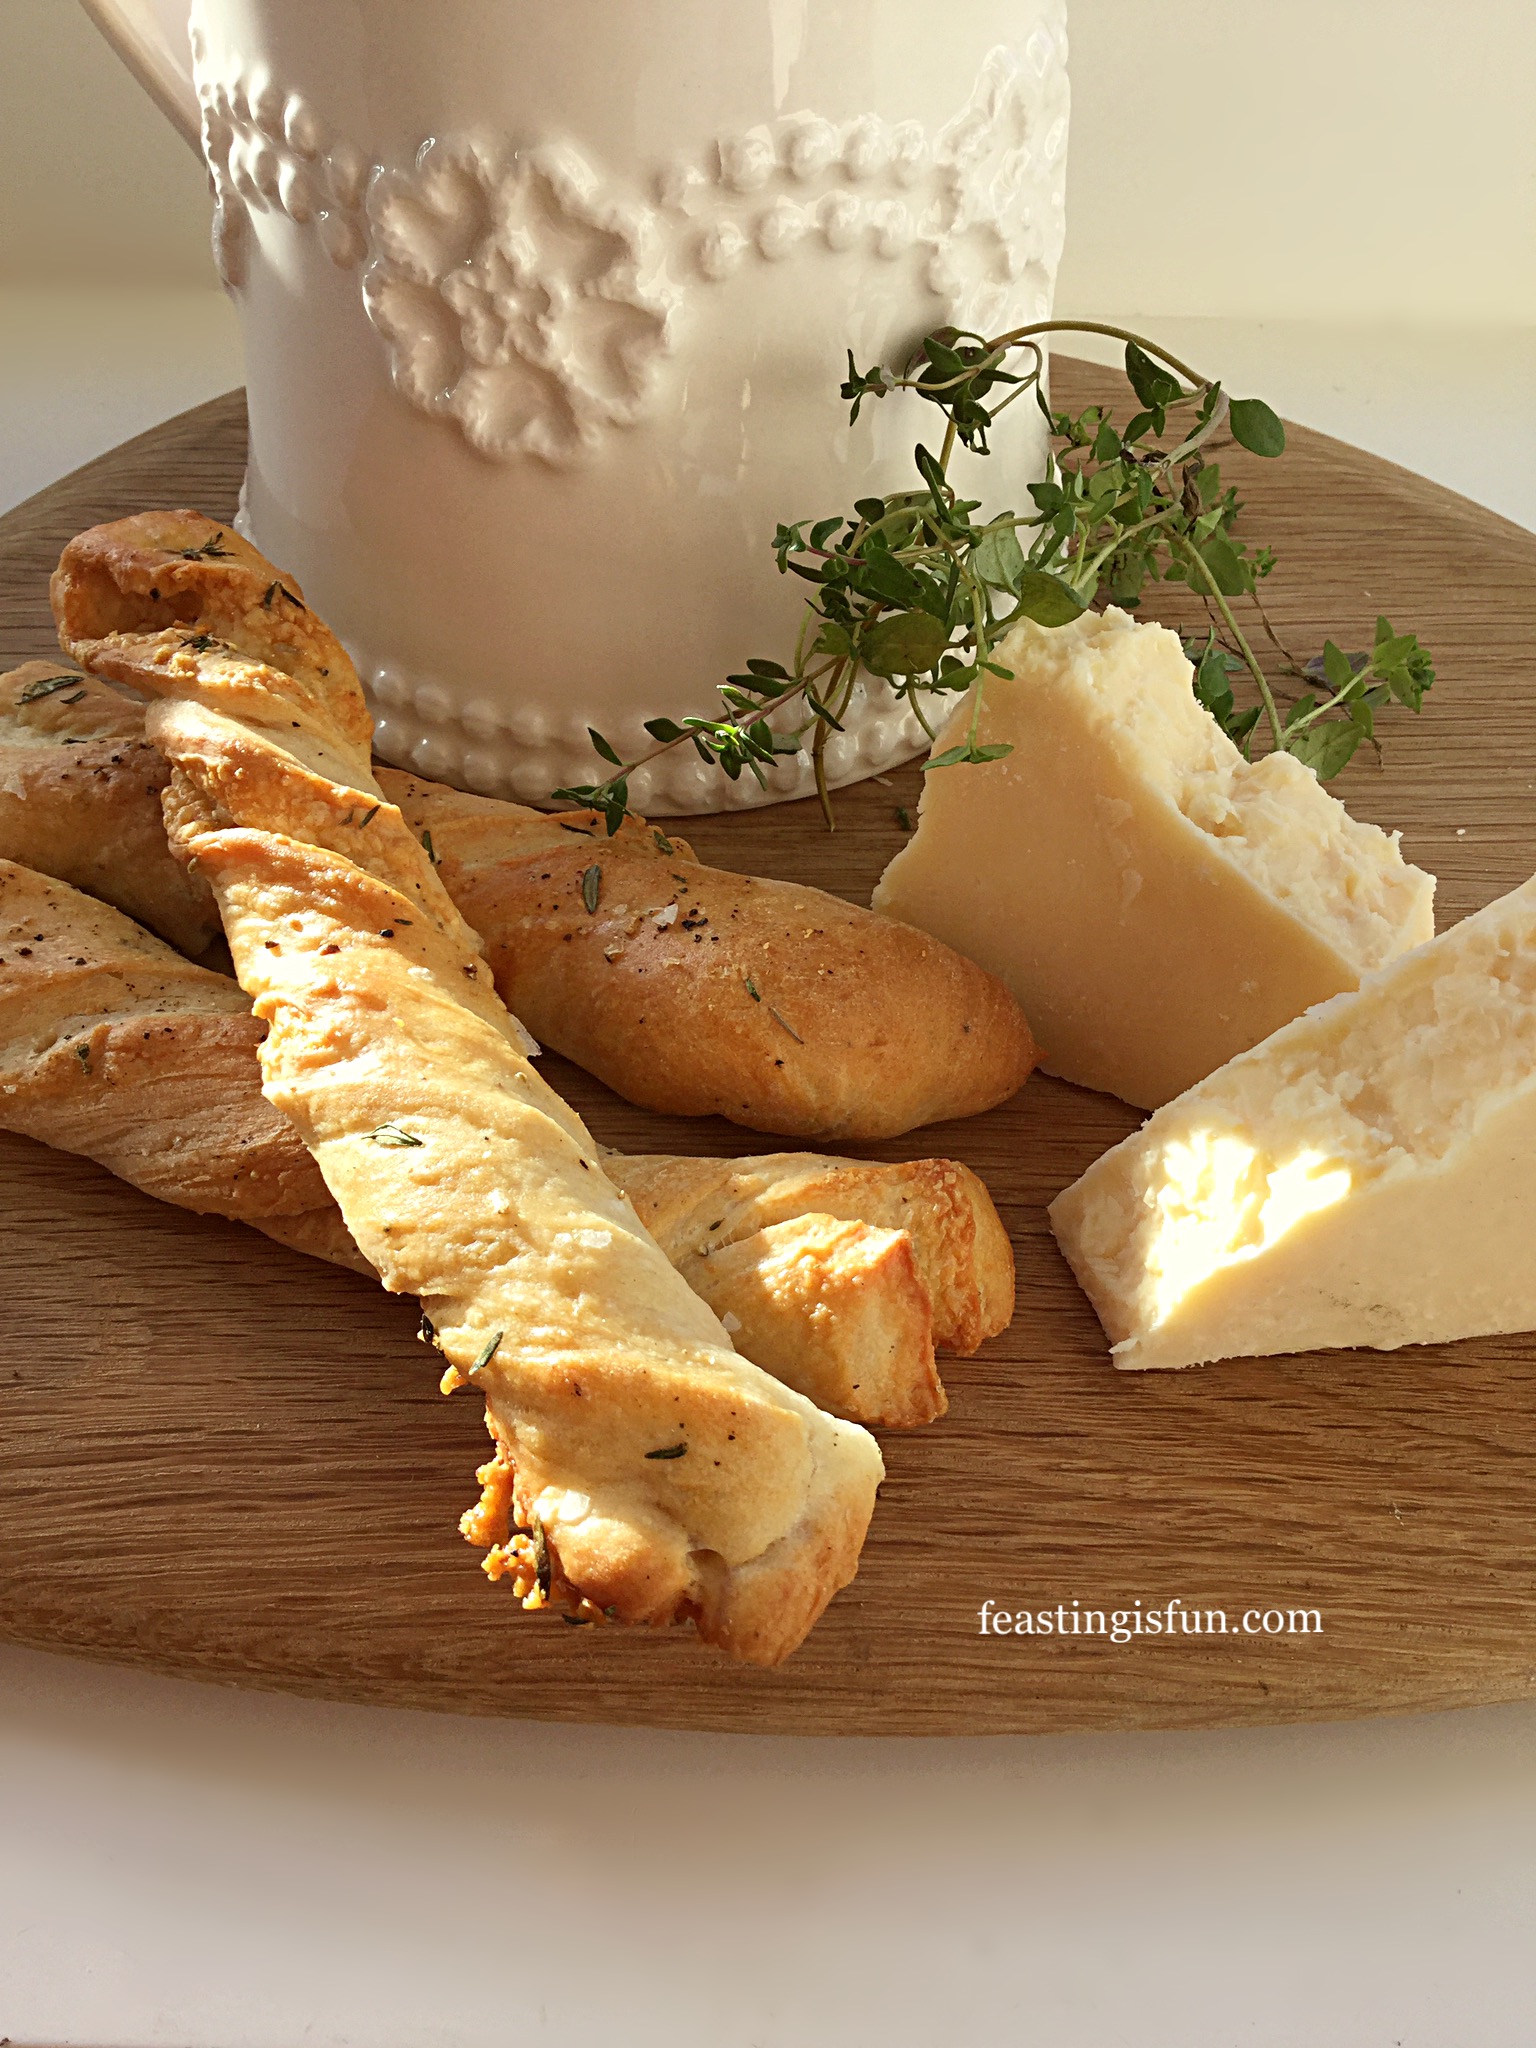
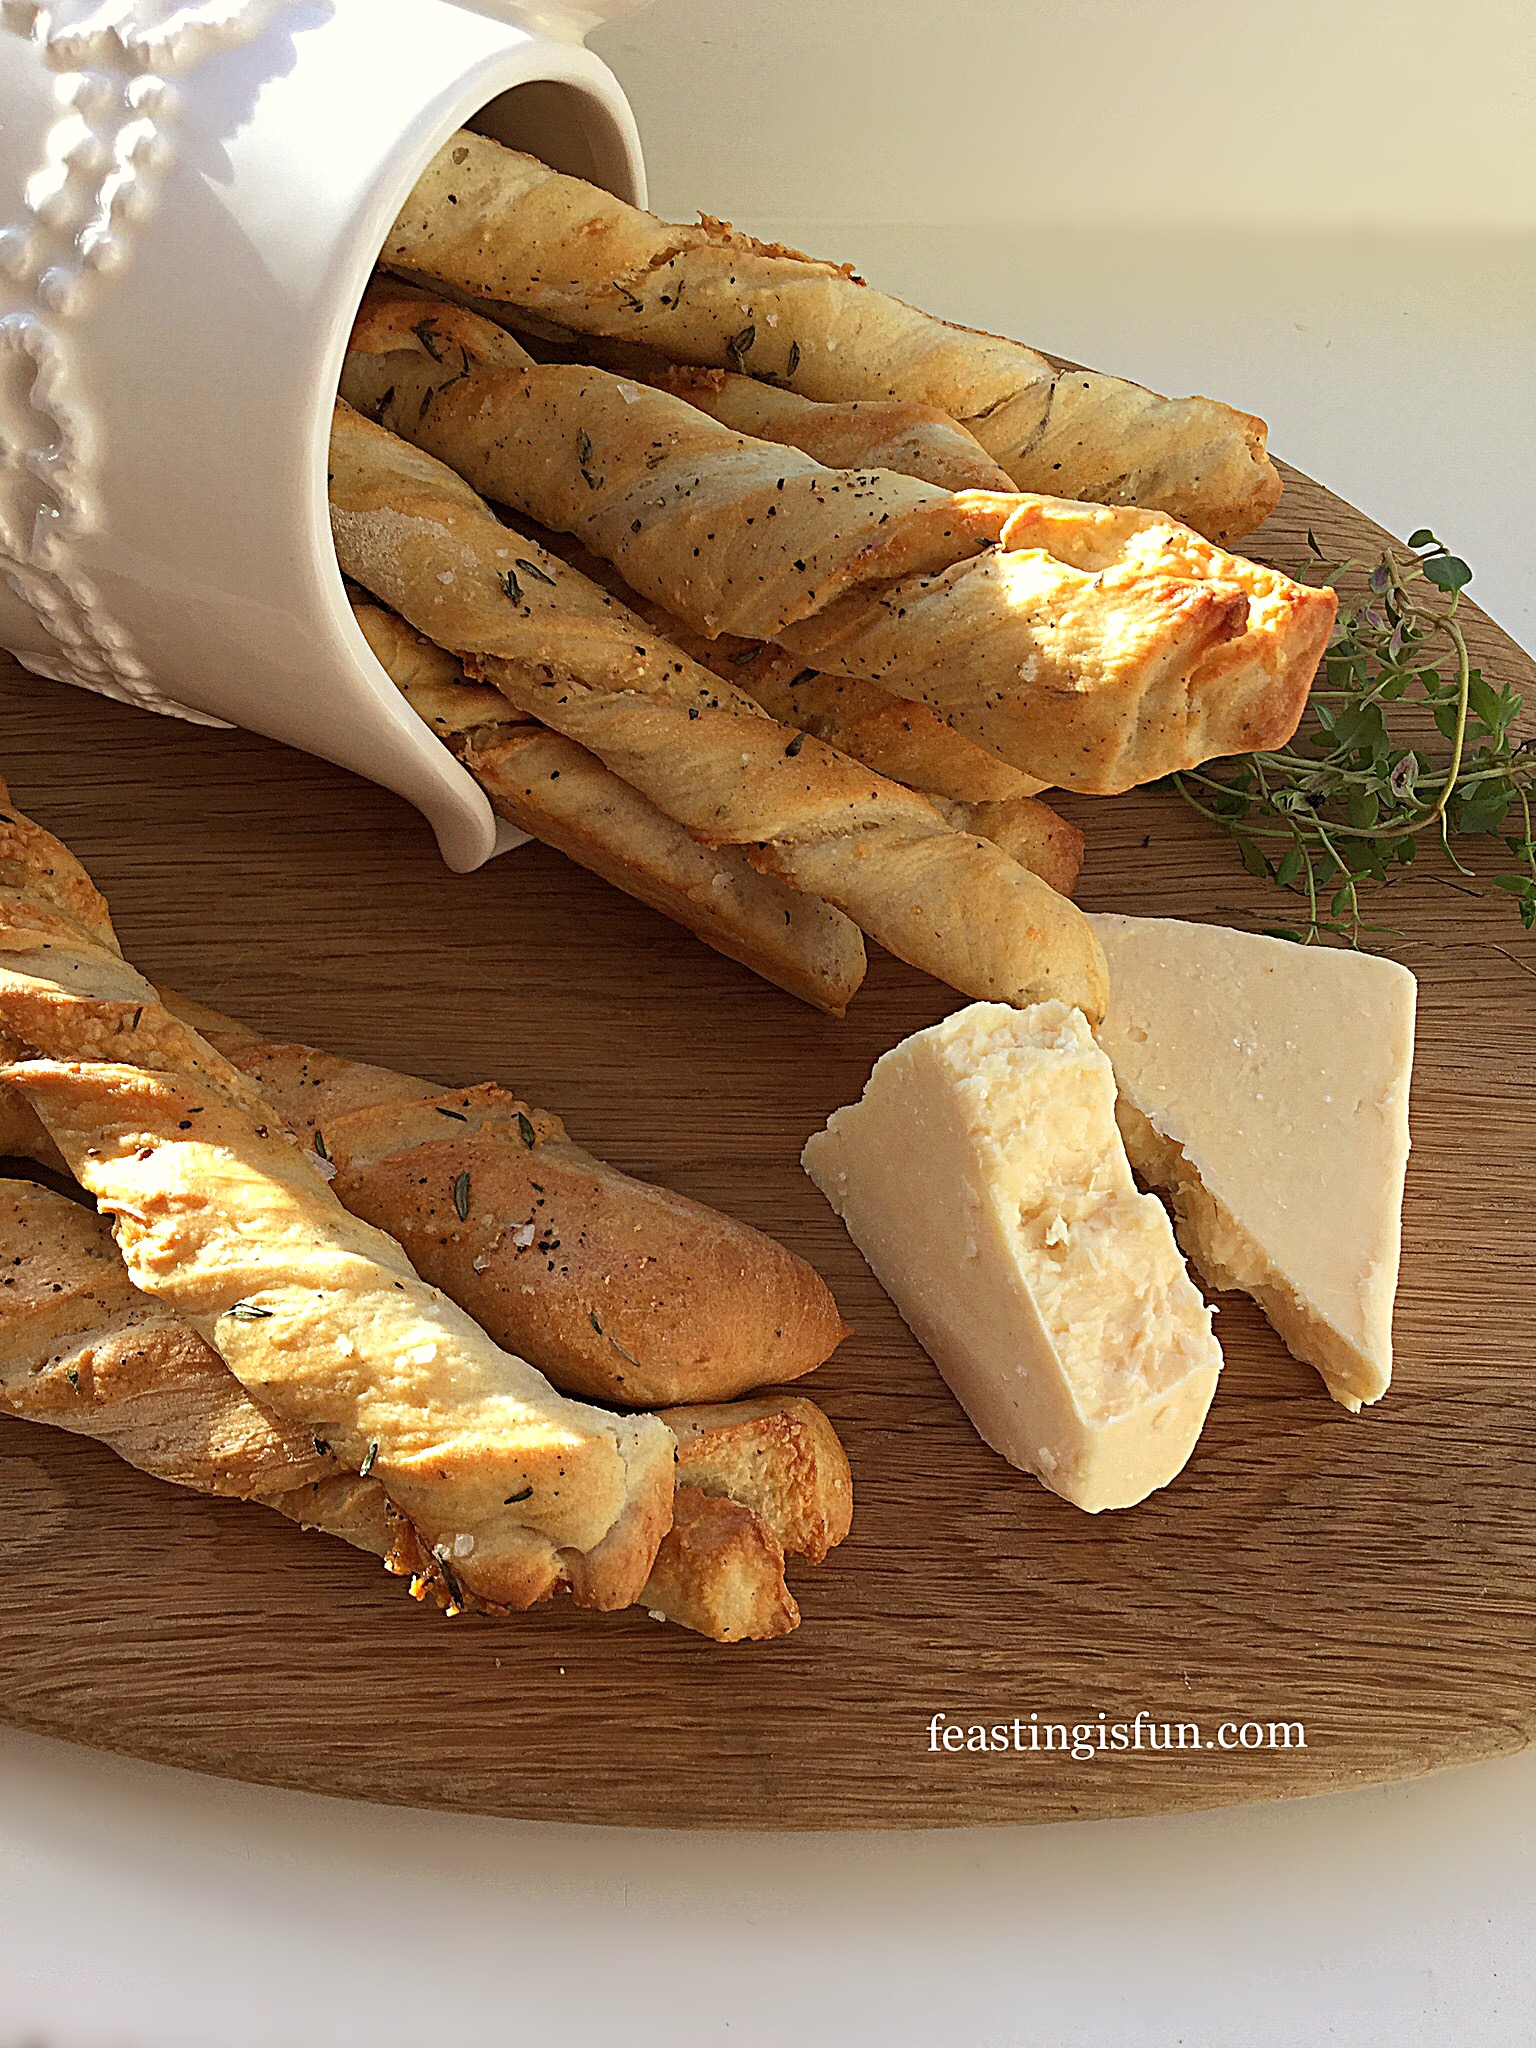
The combination of good quality mature, or vintage cheddar with fresh thyme gives a distinctly savoury flavour to these breadsticks. Also, the addition of Parmesan cheese to the bread dough enhances and reaffirms their cheesy flavour. While pastry cheese straws can be oily at times, that is not the case here. No greasy fingers whilst munching on these!

FF Cheddar Cheese Thyme Soft Breadsticks
Cheddar Cheese Thyme Soft Breadsticks

As well as tasting delicious on their own, these cheesy breadsticks also make a perfect accompaniment to soup, such as Hearty Minestrone Soup. While sounding an unlikely combination, we ate these with a simple beef casserole that had been bubbling away on the hob all day. Not so surprising when Cheddar is often used in the pastry of beef pies.

FF Cheddar Cheese Thyme Soft Breadsticks
Cheddar Cheese Thyme Soft Breadsticks

Recipe: Cheddar Cheese Thyme Soft Breadsticks makes 32

320ml Tap Water at room temperature

7g Dried Yeast – I use Allinson easy bake yeast action

500g Strong White Bread Flour

2 tbsp Olive Oil plus extra for oiling the baking trays

7g Sea Salt plus extra for sprinkling – I use Maldon

50g Parmesan Cheese finely grated

3 tsp Fresh Thyme Leaves plus an add 2 tsp for sprinkling – halve the amount if using dried

1/2 tsp Freshly Ground Black Pepper plus extra for sprinkling on to breadsticks

50g plus an additional 75g Mature Cheddar Cheese – I used Vintage Cheddar from Wyke Farms

1 Free Range Egg beaten with 2 tsp cold water to use as an egg wash

Method:

The method given uses a stand mixer with dough hook attachment to make the dough. Of course this may be made by hand.

Making The Breadstick Dough

  • First of all, weigh the water into the bowl of the stand mixer.
  • Add the dried yeast and flour.
  • Next add the olive oil and salt.
  • Lower the dough hook and mix on low speed for 10 minutes, increasing to medium speed for a further 3 minutes.
  • While the dough is mixing lightly oil 4 large baking trays. Also preheat the oven to 200C/180C fan, 400F, gas mark 6.
  • Stop mixing and check the dough. It should be able to stretch so that light can be seen through it. This is called the windowpane test. If the dough does not pass this test lower the dough hook and continue to mix on medium, stopping and checking every two minutes until it finally passes the test.
  • As soon as the dough is ready stop mixing. Add both the finely grated Parmesan cheese and 50g of the cheddar. Also add 2 teaspoons of fresh Thyme leaves and half a teaspoon of freshly ground black pepper.
  • Lower the dough hook and mix on a low speed for two minutes.
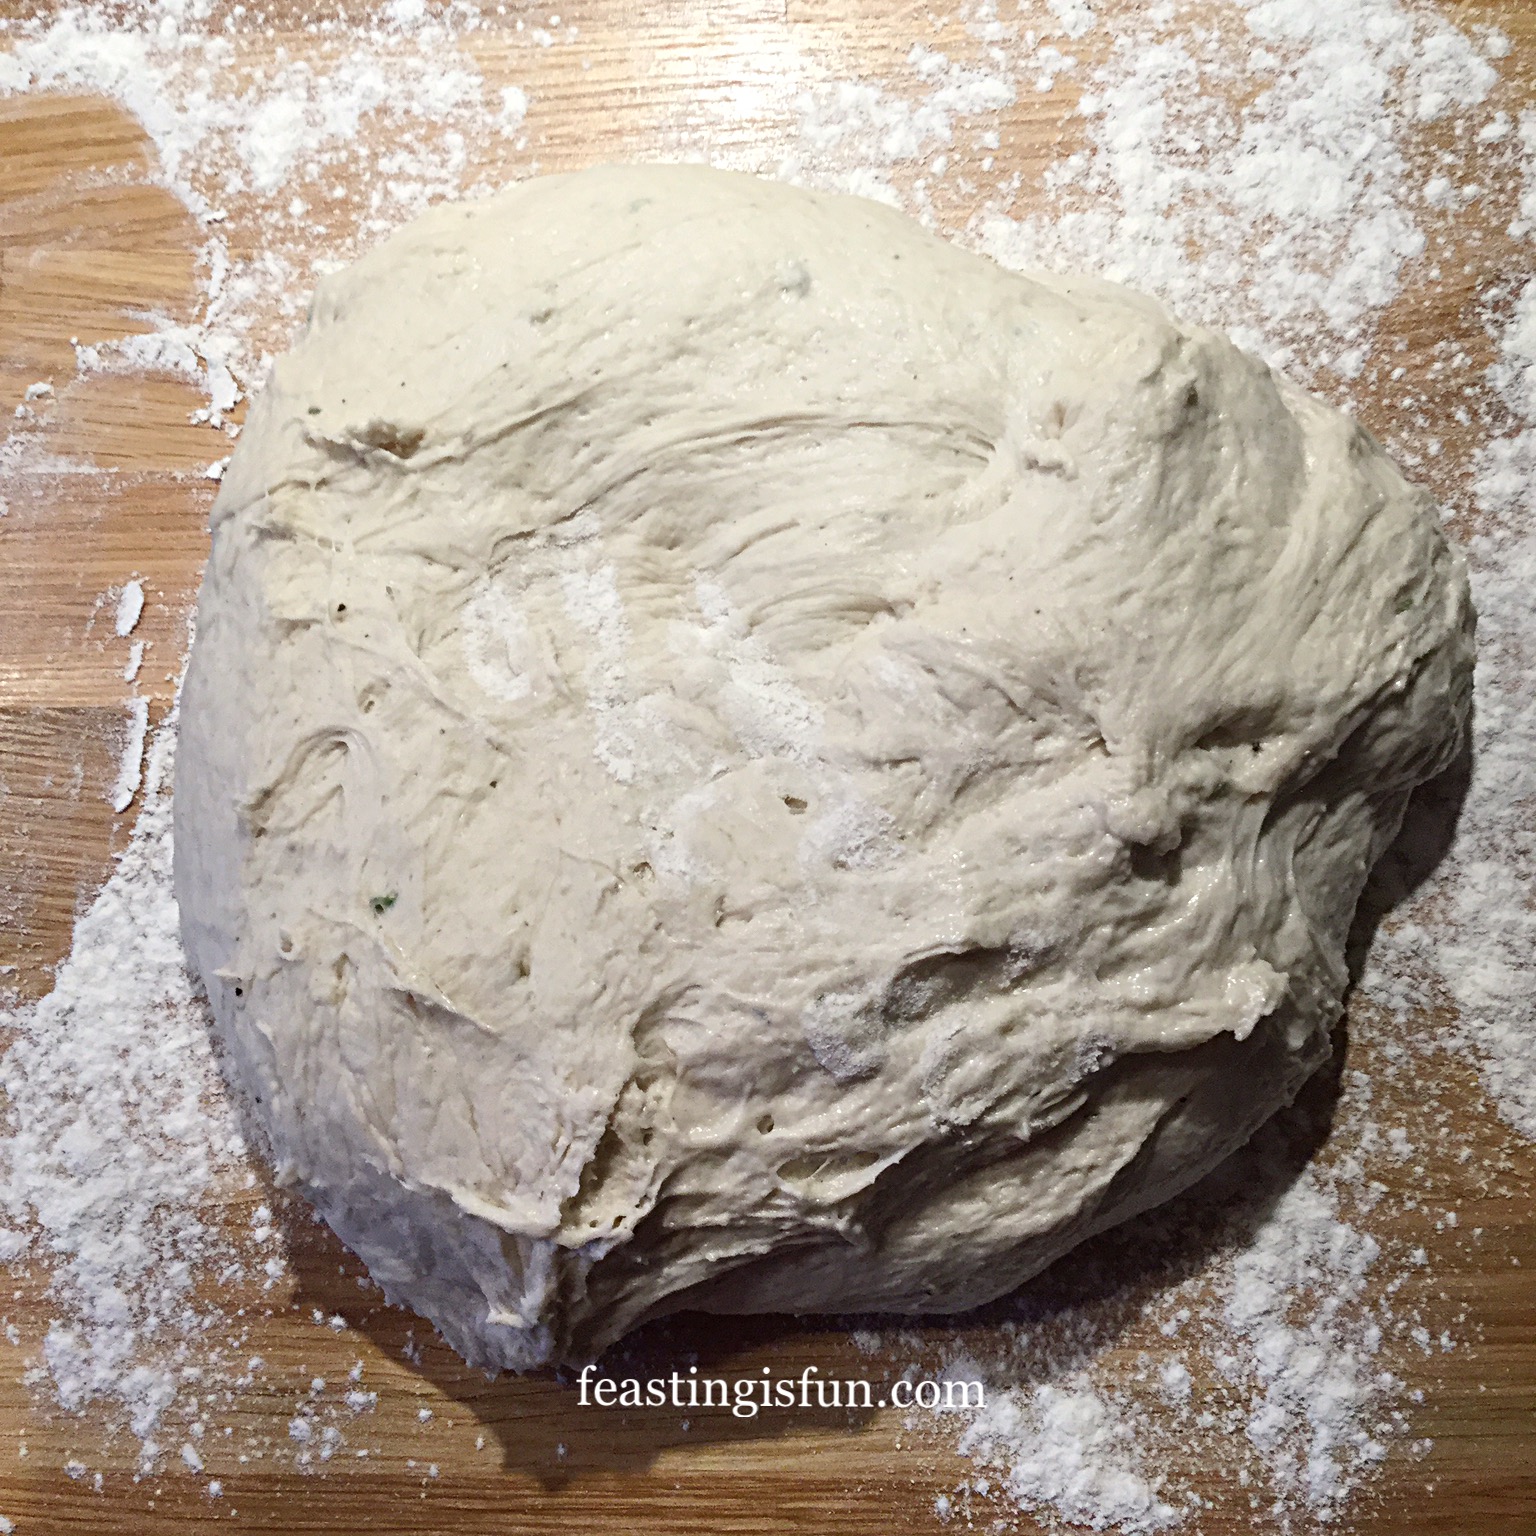
  • Stop the mixer, scrape any dough from the dough hook into the bowl, cover with a cloth and leave in a draft free place until doubled in size.

Flavouring And Shaping The Cheedar Cheese Thyme Breadsticks:

  • Lightly flour the worktop and tip out the dough, so that the top of the risen dough is in contact with the worktop.
FF Cheddar Cheese Thyme Soft Breadsticks
The Cheddar Cheese Thyme Soft Breadsticks Dough
  • Dust the dough with flour and roll out to 50cm x 30cm (20in x 12in).
FF Cheddar Cheese Thyme Soft Breadsticks
Preparing the dough to become breadsticks.
  • Sprinkle over the rolled out dough, 75g finely grated cheddar and 1 teaspoon of fresh thyme leaves.
  • Fold the dough in half.
FF Cheddar Cheese Thyme Soft Breadsticks
Folding and cutting the dough into breadsticks.
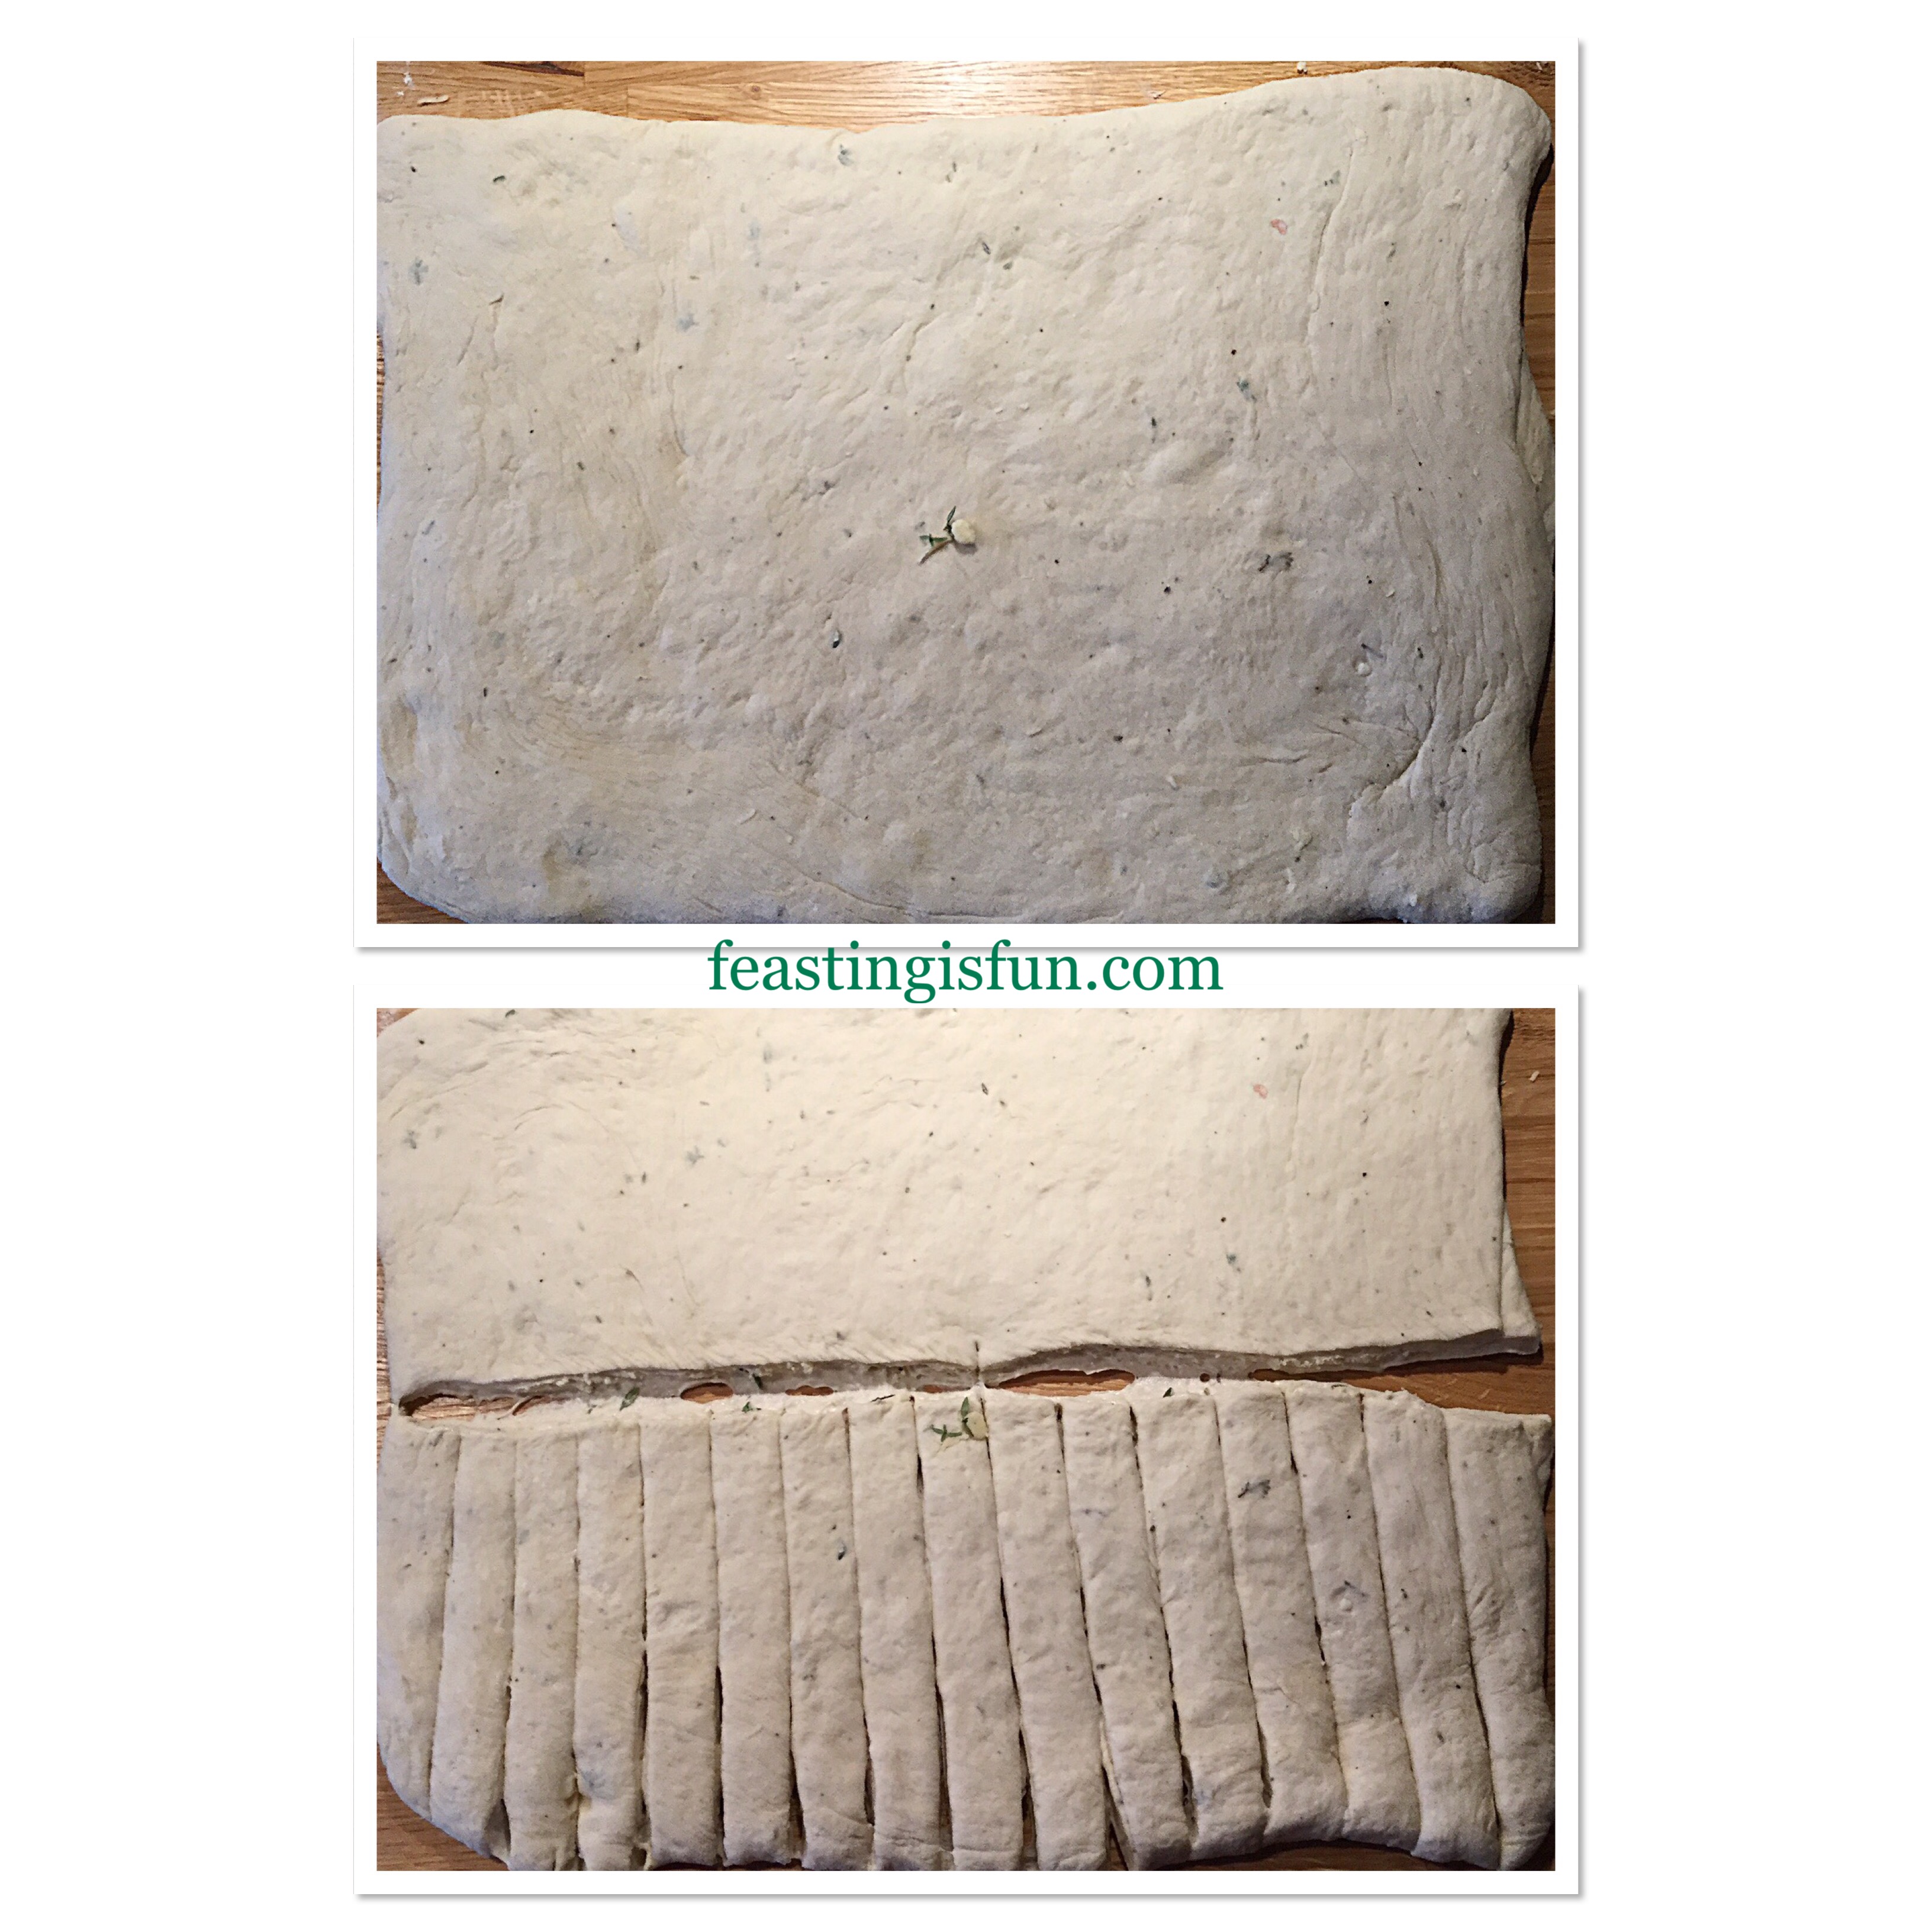
  • Gently roll over the folded dough with a rolling pin, sealing the cheese inside.
  • Cut the dough in half across the middle. Next cut 1cm (1/2in) strips in the dough.
FF Cheddar Cheese Thyme Soft Breadsticks
Preparing the breadsticks for baking.
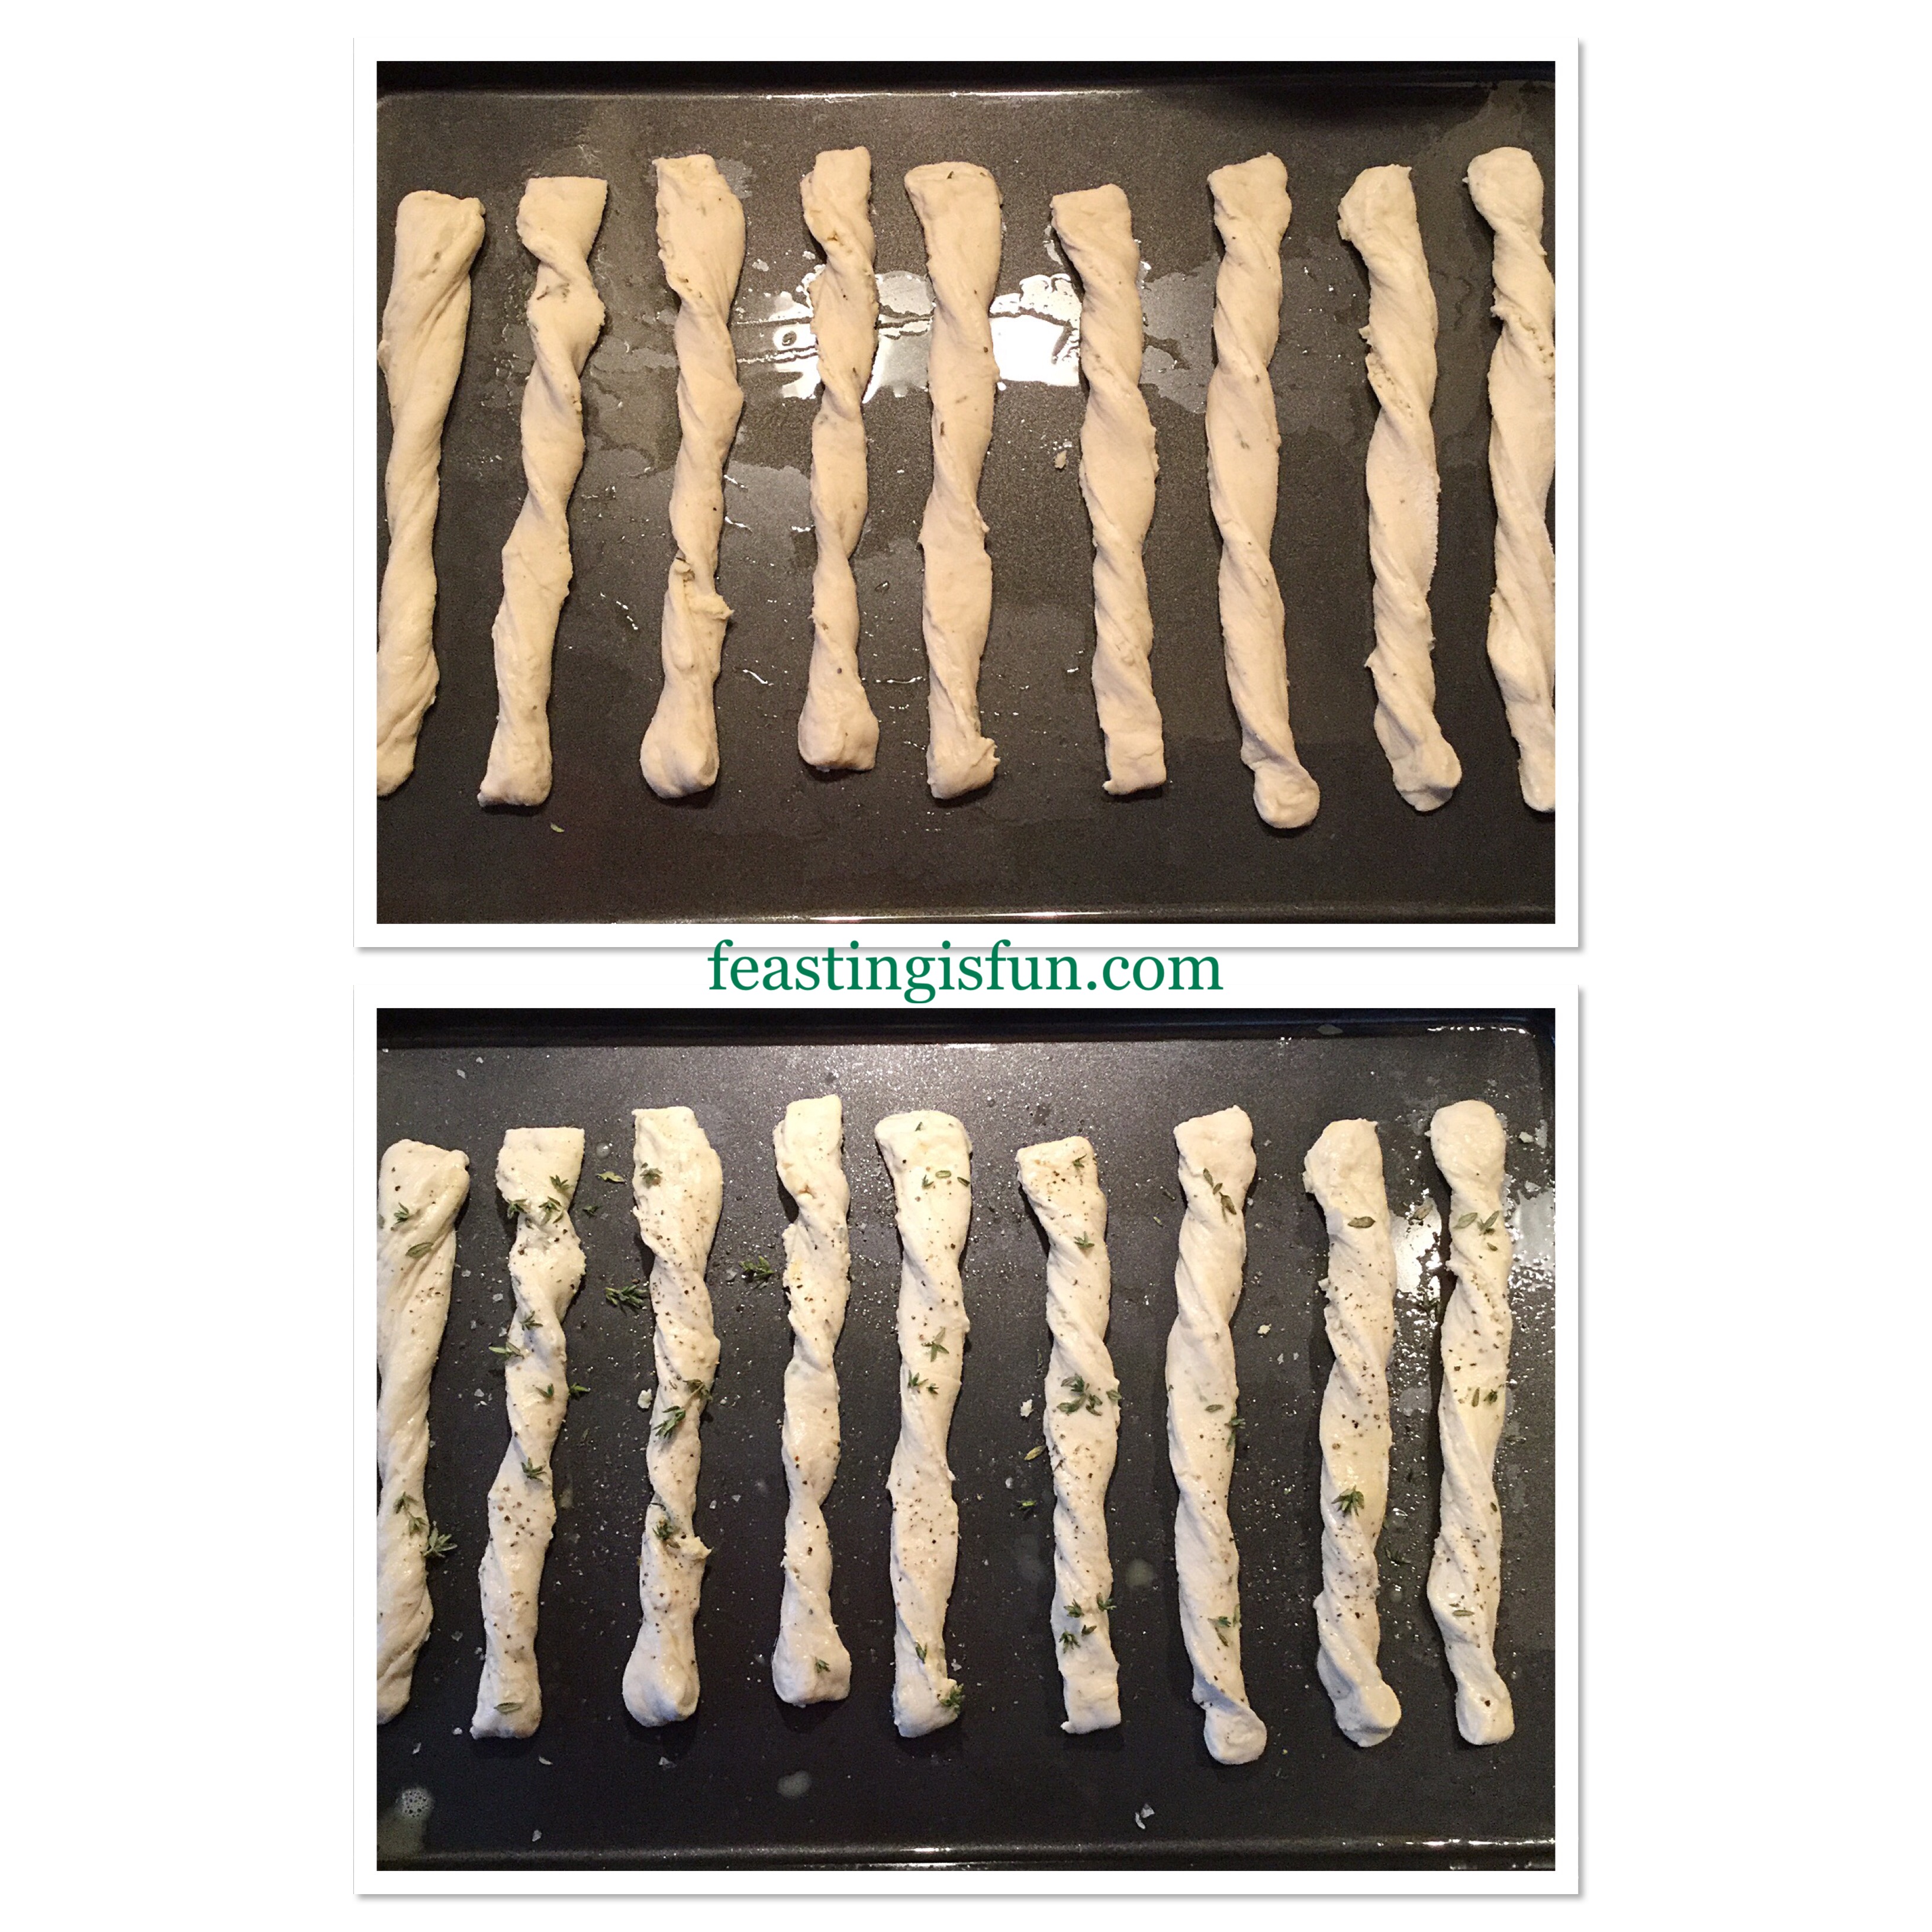
  • Remove one dough strip at a time, stretch and twist it before placing on a prepared baking tray. Press the dough on to the tray to stick, this will hold the twist in place. Place eight breadsticks on each tray.
  • Brush each breadstick lightly with egg wash and sprinkle over 1/2 teaspoon of thyme (for each eight breadsticks). Also grind black pepper and sprinkle a pinch of sea salt over the tray.
  • Place two baking sheets in the preheated oven on separate shelves and bake for 15-20 minutes.
FF Cheddar Cheese Thyme Soft Breadsticks
Freshly baked, golden, Cheddar Cheese Thyme Soft Breadsticks
  • The breadsticks are baked when they are a light golden brown.
  • As soon as the breadsticks are baked remove from the oven and place on a cooling rack.
  • Continue with the other half of the dough, cutting, twisting, egg washing and sprinkling and finally baking as before.
FF Cheddar Cheese Thyme Soft Breadsticks
The soft inner crumb of these Cheddar Cheese Thyme Soft Breadsticks.
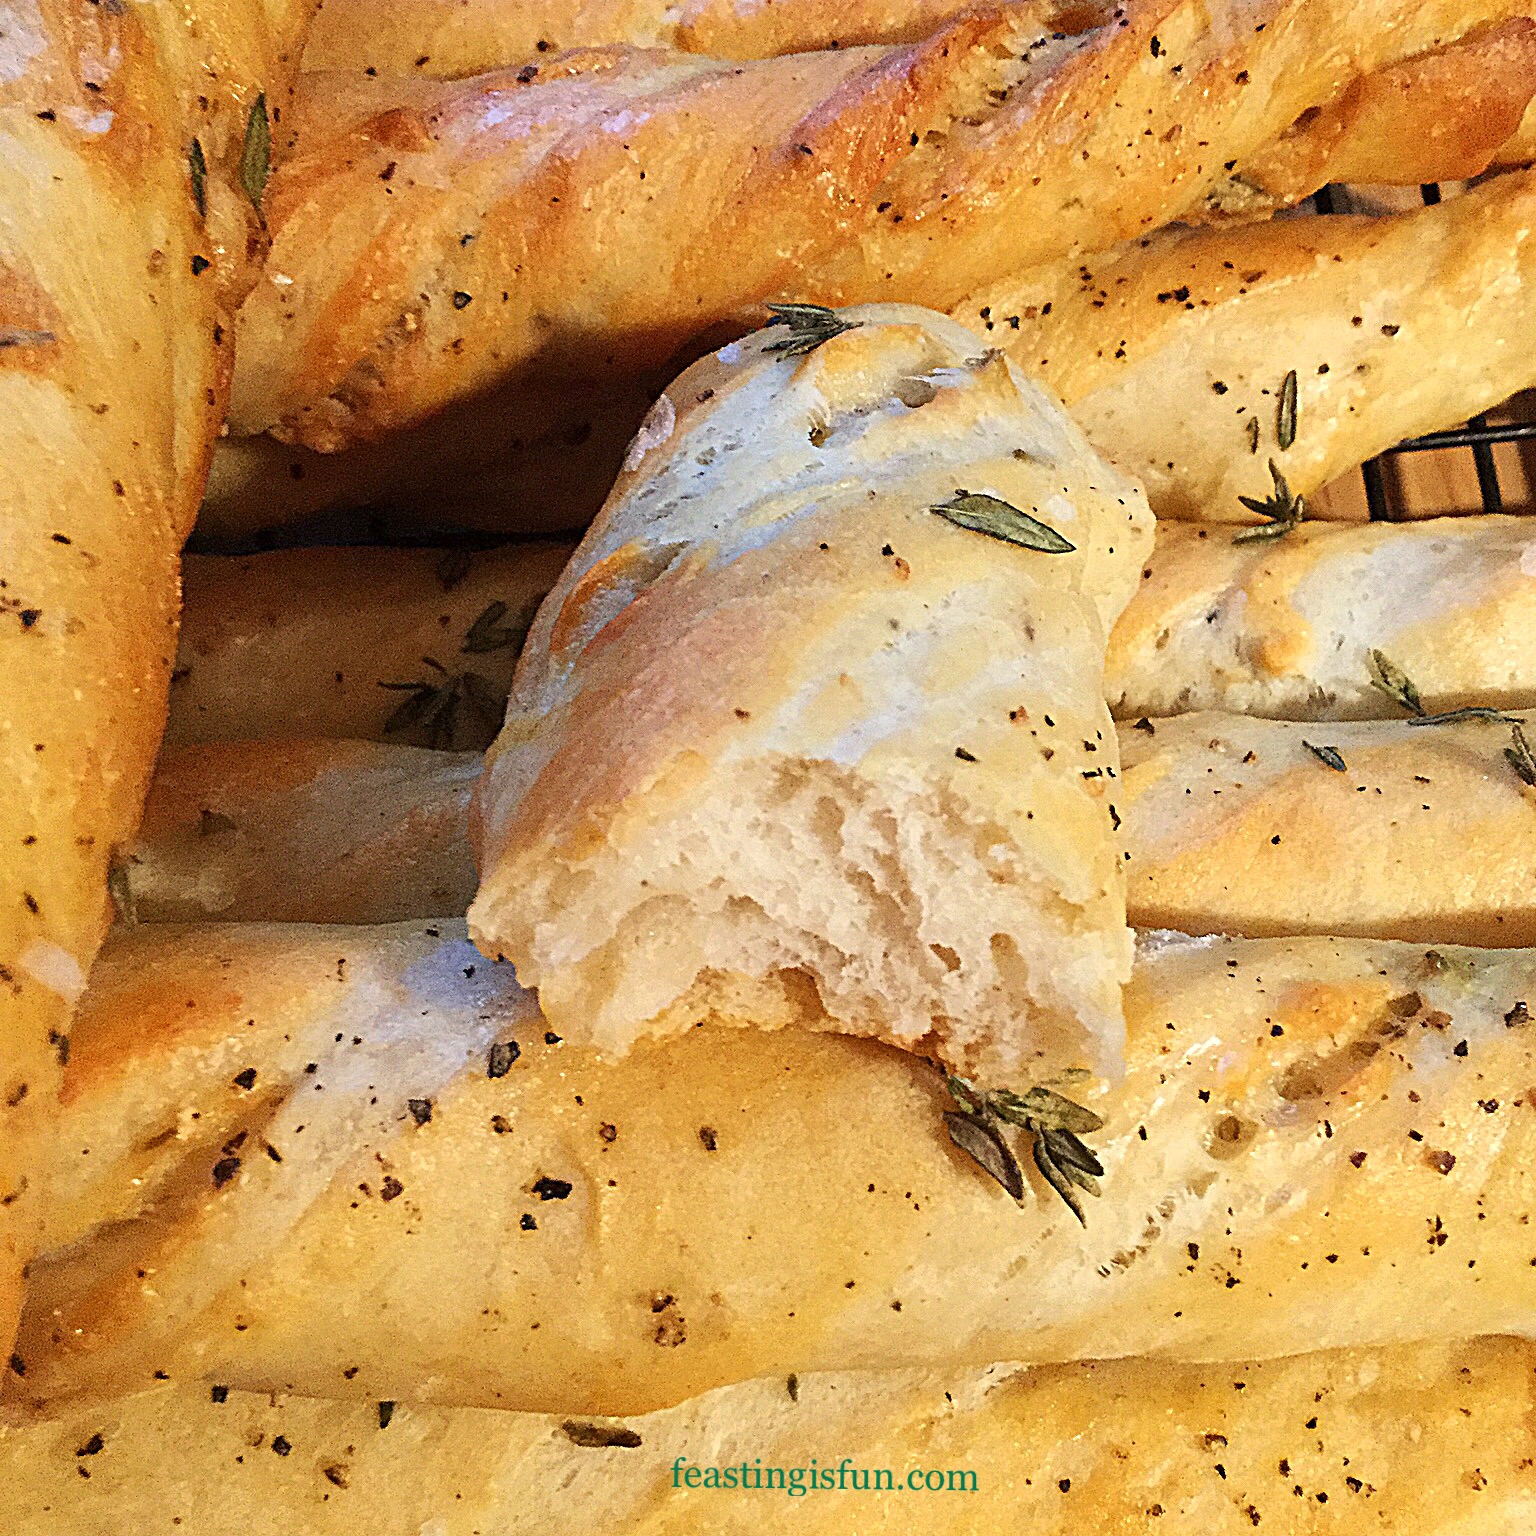
  • Wait until slightly cooled before biting into one of these deliciously cheesy breadsticks, with its soft, fluffy inner.
FF Cheddar Cheese Thyme Soft Breadsticks
Cheddar Cheese Thyme Soft Breadsticks

Serving And Storing The Breadsticks

Serve slightly warm to allow for the best possible taste experience. At there best enjoyed on the day these are made.

Since this recipe makes a big batch of Cheddar Cheese Thyme Soft Breadsticks, they can be enjoyed at larger gatherings and are ideal for adding to a buffet table.

To make ahead, bake as usual, cool and freeze for up to two weeks. Remove from the freezer when needed, place on a baking tray in a warm oven for 10 minutes to defrost and warm through.

If you have enjoyed this recipe for Cheddar Cheese Thyme Soft Breadsticks you may also like these:

Seeded Multigrain Baguettes

FF Cheddar Cheese Thyme Soft Breadsticks
Seeded Multigrain Baguettes

Baked Cheese Olive Ciabatta Bread

FF Cheddar Cheese Thyme Soft Breadsticks
Baked Cheese Olive Ciabatta Bread

Cheddar Sun Dried Tomato Scones

FF Cheddar Cheese Thyme Soft Breadsticks
Cheddar Sun Dried Tomato Scones

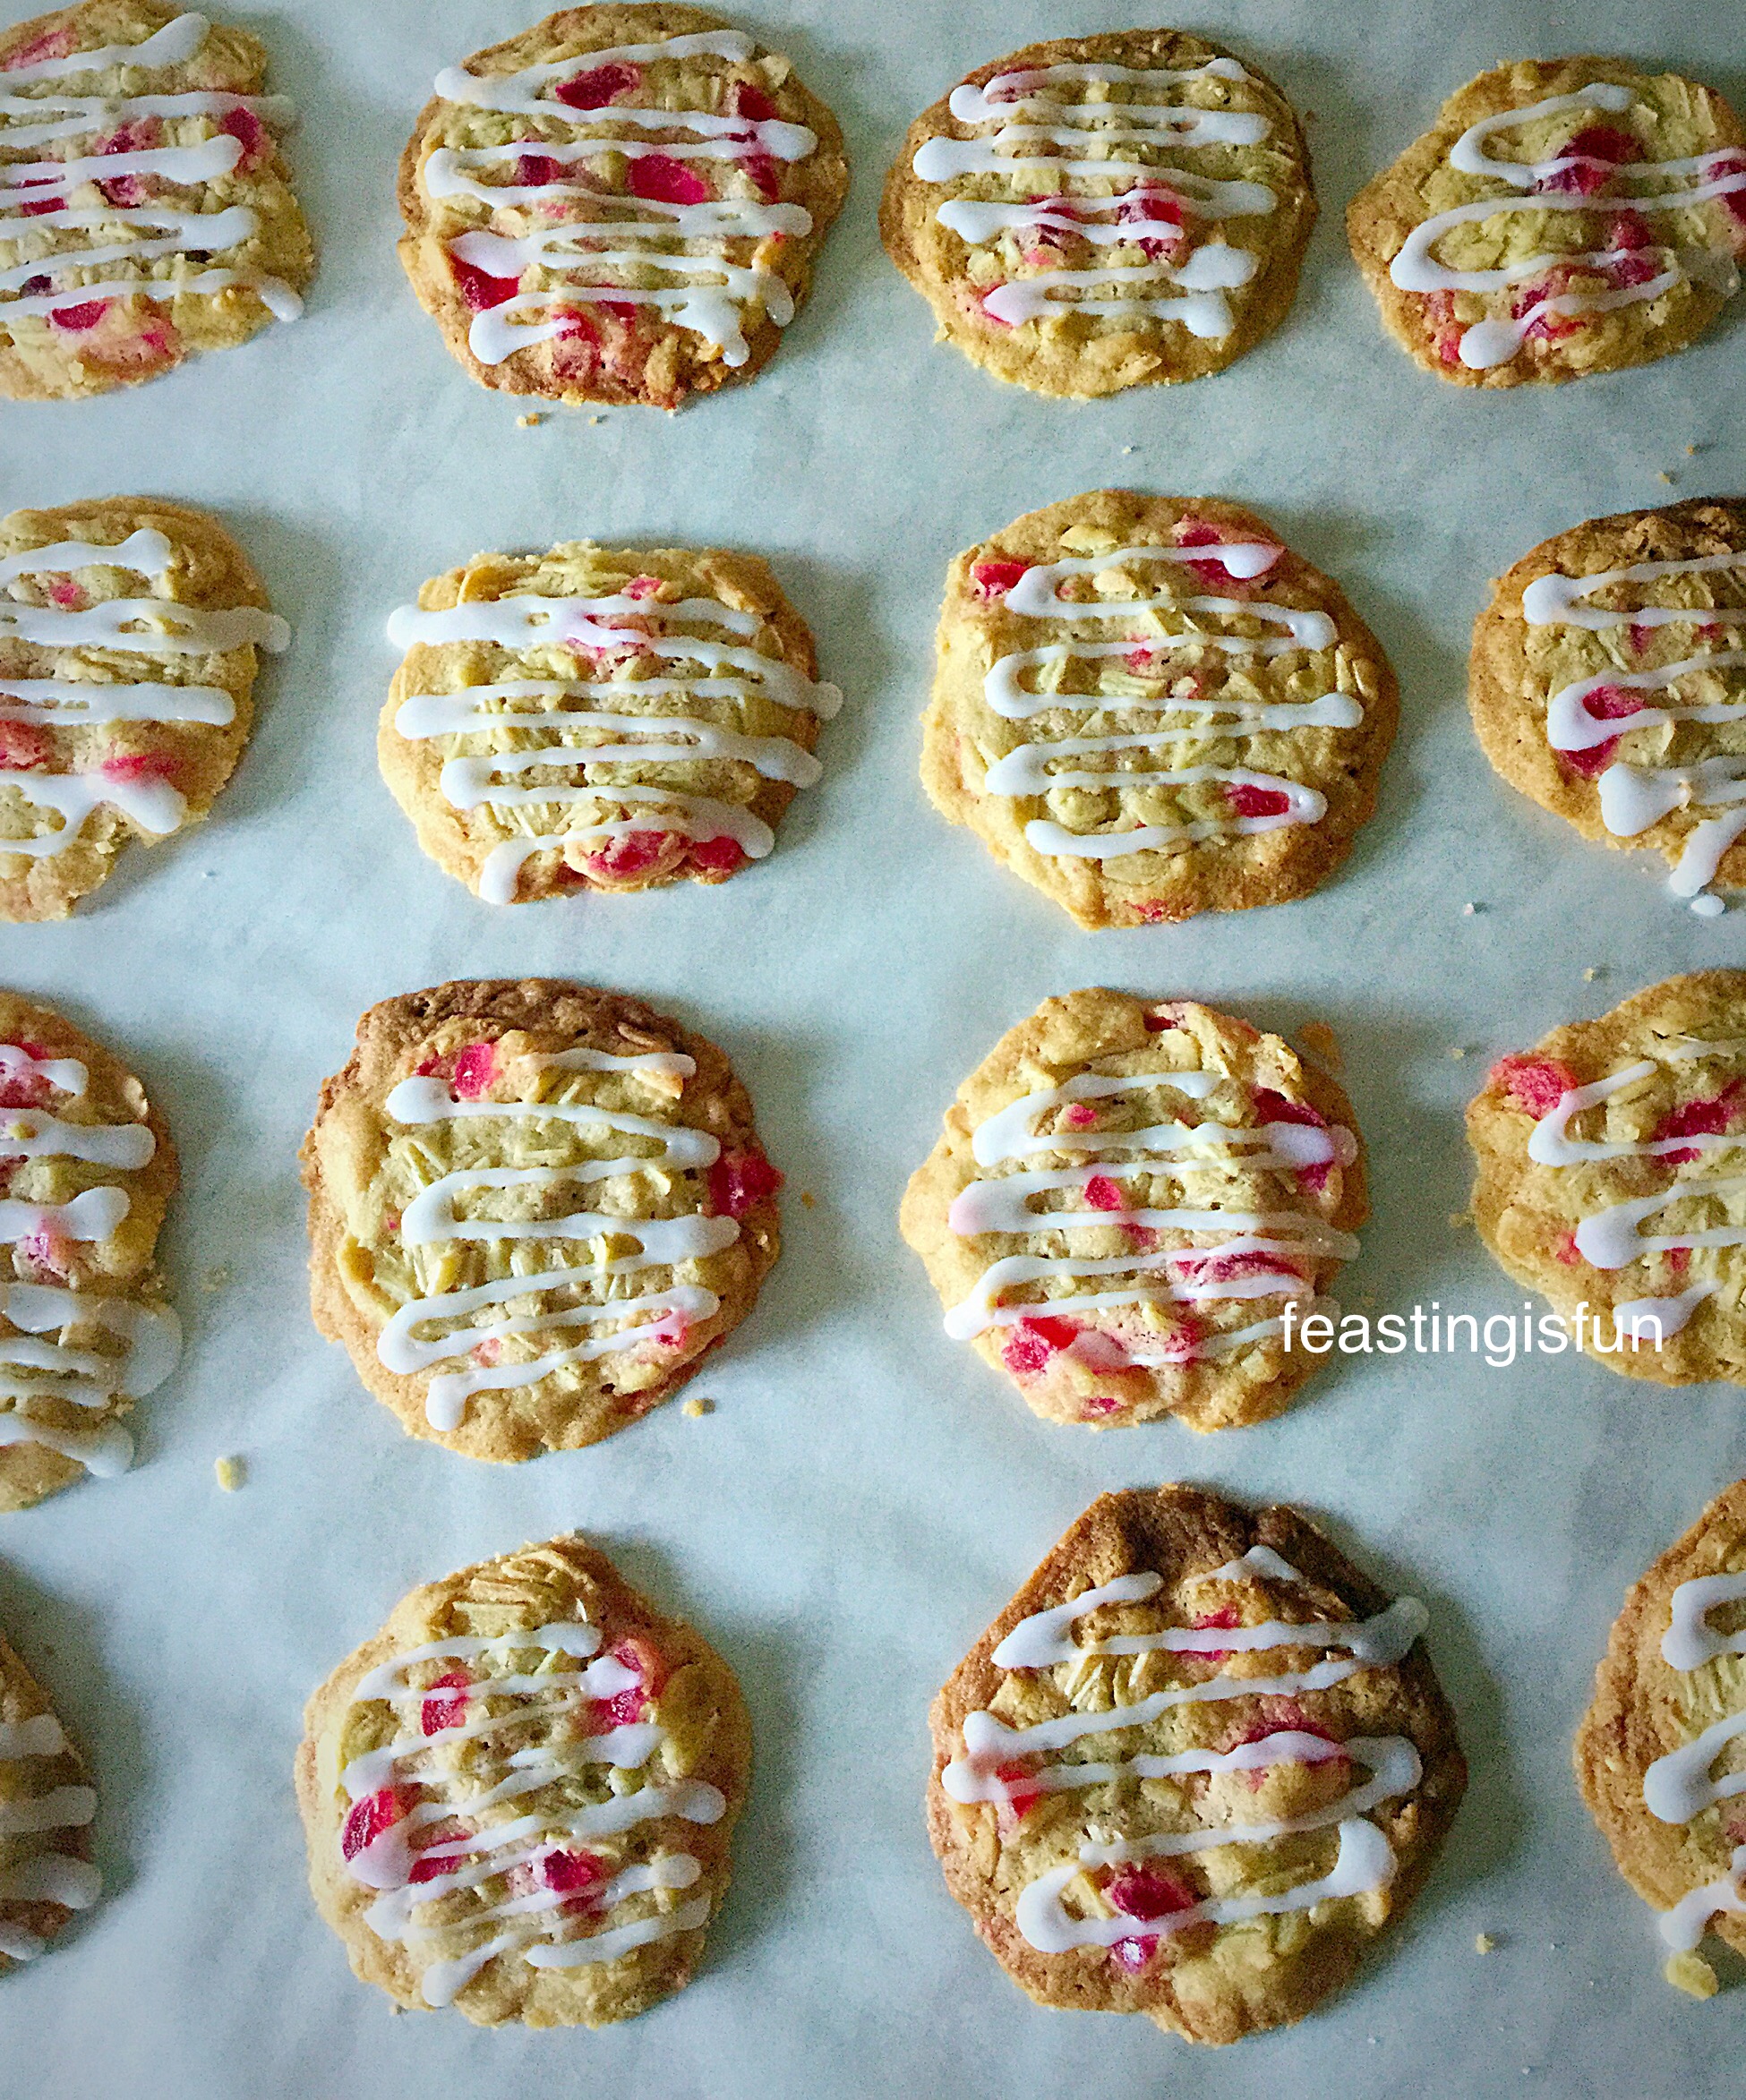
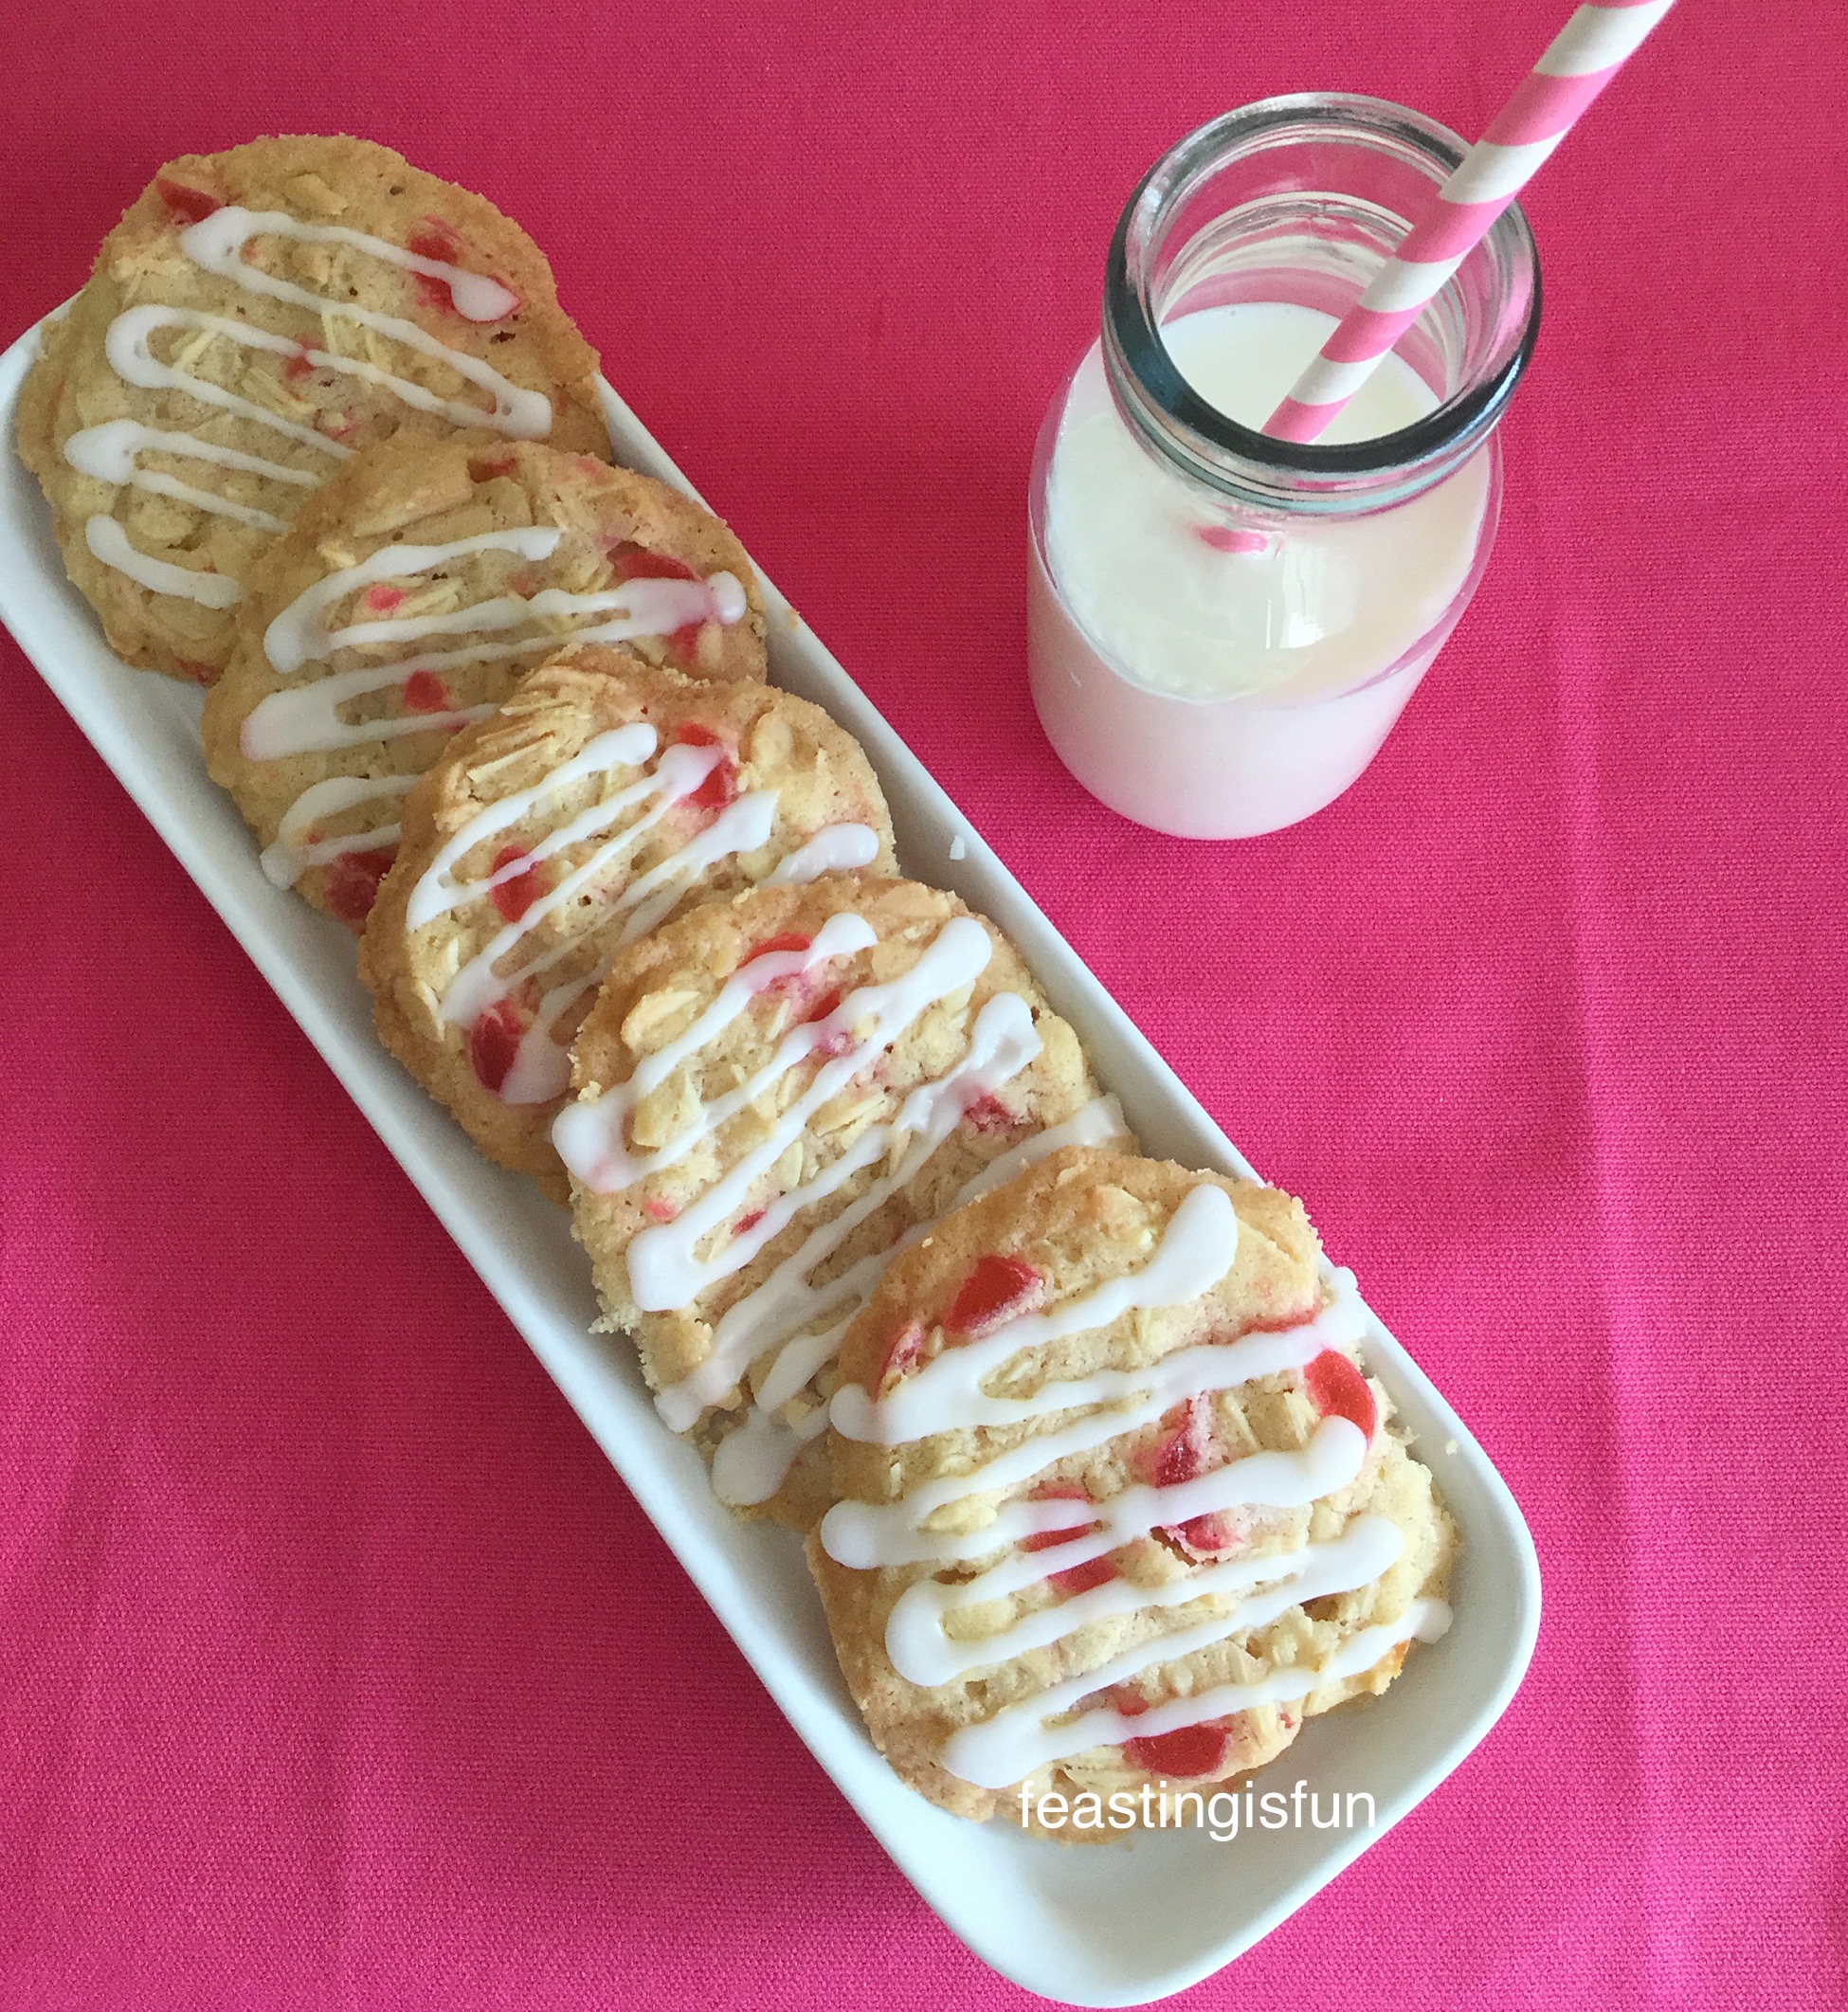
Creating recipes using ingredients that compliment and enhance each other is at the heart of Feasting is Fun. As well as encouraging people to share their bakes. Baking extra to give away, to an elderly neighbour or new family, is easy. Especially when you are in the kitchen already, whipping up a batch of breadsticks, cookies or cupcakes.

Who will you share with?

Whatever you are making, baking or creating in your kitchens, enable fun preparing your feast.

Sammie xx

No part of this post may be reproduced or duplicated without the written permission of the owner. Please see my Disclosure Policy.


Cheddar and fresh thyme on a wooden board with breadsticks in a cream jug. Sized for Pinterest with descriptive graphics.
Cheddar Cheese Thyme Soft Breadsticks.
Share
Facebooktwitterpinterestlinkedintumblr

Peppermint Sparkling Snowflake Cookies

Share
Facebooktwitterpinterestlinkedintumblr

Regardless of presents, food and glittering tinsel, only one thing makes Christmas Day itself perfect for me. Snow! Beautiful thick white flakes, falling from the sky, erasing the landscape and brightening our days. In mere hours, falling snow turns our environment into a Winter Wonderland. Alas, it is rare that we experience a White Christmas. So, to ensure some Sparkling, I have made these Peppermint Sparkling Snowflake Cookies.

FF Peppermint Sparkling Snowflake Cookies
Peppermint Sparkling Snowflake Cookies refreshingly beautiful.

While these cookies do not taste of snow, they are cooling and refreshing, due to the peppermint flavour. Added to both the cookie and icing, the taste is balanced by the buttery flavour of the cookies. Perfect for serving after a large meal, these sparkling wonders are not at all heavy.

FF Peppermint Sparkling Snowflake Cookies
Peppermint Sparkling Snowflake Cookies each as individual as real snowflakes.

Cookie swaps are a common tradition in the U.S. and Canada. Everyone bakes up batches of their festive, Holiday cookies and then shares them with neighbours, friends and work colleagues. What a brilliant idea! Not only is there a whole lotta love baked into each cookie, new recipes and different flavours are swapped and shared.

Now that’s a tradition I’d happily see start over here!

FF Peppermint Sparkling Snowflake Cookies
Peppermint Sparkling Snowflake Cookies perfect for sharing.

Snowflake Cookies – the ideal edible gift

Baking and icing these cookies is really so much fun. Since no two snowflakes are the same, you can really let your creative juices flow whilst decorating them. The semi-hard royal icing won’t break any teeth, yet it will set hard enough for these cookies to be stacked together. Perfect for packing into festive cellophane bags, tied with ribbon. Resulting in a beautiful edible gift, that anyone would be happy to receive.

FF Peppermint Sparkling Snowflake Cookies
Peppermint Sparkling Snowflake Cookies simply stunning.

My friend Liz, over at Teta Lizza’s Kitchen, baked a huge batch of cookies last year to take into work. She presented them so beautifully in a gorgeous basket. The overall effect was not only amazing to look at, but also incredibly enticing. I wanted to put my hand through the screen and grab a handful one, of her fantastic bakes. Why not pop over to her beautiful website, where you’ll find her love of sweet things inspires some incredible cookies?

Recipe: Peppermint Sparkling Snowflake Cookies makes 15-20

225g/8oz Unsalted Butter softened

150g/5oz Caster Sugar

1/4tsp Salt – I use Maldon

1tsp Vanilla Extract – I only use Nielsen-Massey extracts

1tsp Peppermint Extract

1 Whole Large Free Range Egg

275g/10oz Plain White Flour

For the icing:

200g/7oz Sifted White Icing Sugar – or royal icing sugar

2tsp Meringue Powder (omit if using royal icing sugar)

2tsp Peppermint Extract

Silver balls and edible white glitter

You will also need a snowflake shaped cookie cutter approximately 10cm wide from tip to tip. A star cutter would also be effective.

Making And Chilling The Cookie Dough

Preheat the oven to 170C/150C fan, gas mark 3.5
  • First of all, line 3 large baking trays with baking parchment.
  • Next, in a large bowl whisk together the butter, sugar and salt until pale and creamy.
  • Now add the whole egg, vanilla and peppermint extracts and whisk to fully combine.
  • Sift the flour into the bowl and then stir with a spoon until the mixture comes together in large clumps.
  • Wipe the worktop with a clean, wet cloth and then lay over a good sized piece of cling film. The wet worktop will cause the cling film to ‘stick’ and stay in place.
  • Using your hand, bring the dough together and tip out on to the cling film.
  • Form the dough into a disc shape and then wrap in the cling film.
  • Now place the dough into the fridge and chill for at least an hour.

Cutting Out And Baking The Snowflake Cookies

  • On a lightly floured worktop, roll out the chilled cookie dough to approximately 1/4 inch/7mm thick. Note – the dough gets stickier the warmer it becomes. Use a dusting of flour to keep it moving, whilst rolling out.
  • Cut out the cookies, placing them on the lined baking trays, spaced well apart. I placed 3 cookies on each tray.
  • Place the baking trays into the preheated oven and bake for 15-20 minutes. Rotate the baking trays halfway through baking. This ensures an even bake.
  • While the first batch of cookies are baking, pull together the leftover cookie dough, wrap and place back into the fridge.
  • The cookies are baked when they are golden in colour.
  • Remove the cookies from the oven and allow to firm up for a couple of minutes, before transferring to a cooling rack.
FF Peppermint Sparkling Snowflake Cookies
Cutting, baking and cooling the Peppermint Sparkling Snowflake Cookies
  • Allow the baking trays to cool completely then, flip over the baking parchment.
  • Remove the cookie dough from the fridge, roll out and cut out the remaining cookies. Bringing the pieces of cookie dough together and re-rolling, until it is all used up.
  • Bake the cookies as before.
  • Allow the cookies to cool completely before icing.

Preparing The Peppermint Icing

  • While the cookies are cooling prepare the icing to decorate with.
  • Into the bowl containing the sifted icing sugar, add the meringue powder (not neccesary if using royal icing).
  • Next add 2 teaspoons of peppermint extract and enough cold water 2-3 tablespoons to form a thick paste.
  • Transfer the icing to an icing bag fitted with a small, round writing nozzle. Alternatively, use a disposable icing bag, just prior to icing snip the very end off to leave a small hole.

Icing And Decorating The Sparkling Snowflake Cookies

  • Important  – have a butter knife, cocktail stick, kitchen roll and decorations to hand prior to starting.
  • Touch the tip of the icing bag to the cookie, keeping even pressure on the bag, pipe a line across the cookie. Effectively drawing a line from one point to its opposite. Repeat, until you have a criss-cross design. Place a silver ball in the centre and the cookie is decorated. To continue decorating, starting at a smaller point on the edge, touch the tip of the piping bag to the cookie and pipe a star shape. Joining to the already piped criss-cross lines. Finish by adding final detail to the points of the cookie. Add silver balls to create different finishes on each snowflake cookie. Please see the photos for reference.
FF Peppermint Sparkling Snowflake Cookies
Making the icing and decorating the Peppermint Sparkling Snowflake Cookies
  • Decorating tips – use a butter knife to remove accidental/dripped/wobbly icing. Ensure the silver balls are added before the icing sets, so that they stick. To fill in a piped star, pipe icing inside the already piped lines, then use a cocktail stick to spread it to the edges.
  • Finally, dust the iced cookies with edible glitter and allow to set.
FF Peppermint Sparkling Snowflake Cookies
Sparkling Cookies under the spotlights in the kitchen.

These Peppermint Sparkling Snowflake Cookies are almost hypnotic, with their beautiful sparkle, under the spotlights in our kitchen!

Store the cookies for up to one week in an airtight container.

Serve with a smile and for an indulgent treat a whipped cream topped hot chocolate 😉.

If you have enjoyed the recipe for these Peppermint Sparkling Snowflake Cookies you may also like these:

Chocolate Christmas Pudding Cookies

FF Peppermint Sparkling Snowflake Cookies
Chocolate Christmas Pudding Cookies

Cream Cheese Pastry Mince Pies

FF Peppermint Sparkling Snowflake Cookies
Cream Cheese Pastry Mince Pies

Sparkling Snowflake Cake

FF Peppermint Sparkling Snowflake Cookies
Sparkling Snowflake Cake

Christmas is such a special time of the year. I’m fairly sure that it didn’t snow when the baby Jesus was born. Similarly I cannot imagine Mary and Joseph wishing for snow! Yet for me, snow on Christmas Day, really is the icing on top of the cookie!

I wish you all a very Happy Christmas and hope that you will take time, during the exciting festivities, to remember the real reason we celebrate it.

Sammie xx

Share
Facebooktwitterpinterestlinkedintumblr

Mini Chocolate Fudge Bundt Cakes

Share
Facebooktwitterpinterestlinkedintumblr

Do you ever get the craving for chocolate cake? Well I did yesterday. So I whipped up these beautifully perfect, Mini Chocolate Fudge Bundt Cakes. Exact replicas of a large Bundt cake, in single portion size!

FF Mini Chocolate Fudge Bundt Cakes
Mini Chocolate Fudge Bundt Cakes pretty delicious!

How cool is it that you get to eat a whole mini Bundt cake to yourself?

Yep, that’s what I thought.

FF Mini Chocolate Fudge Bundt Cakes
Mini Chocolate Fudge Bundt Cakes with their crown of fudge.

These beautiful cakes are baked in Nordic Ware’s 65th Anniversary Bundlette Pan. The correct term for these perfect, mini Bundt cakes is Bundtlette.

Bundt cakes have started to become very popular in this country, in part to celebrity chef endorsement and following bakes seen on the television programme The Great British Bake Off. However, only those baked in Nordic Ware Bundt/Bundtlette pans can be called Bundt cakes in this country, as Nordic Ware own the copywrite to the word Bundt.

You may see other tins, silicone moulds available, but please beware of cheap imitations. I have got on fine with some silicone ‘Bundt style’ ring moulds and created a lovely swirl ice cream cake for our daughter’s birthday. While the genuine, heavy duty, Nordic Ware tins may be more expensive, they will last you a lifetime, if properly looked after.

FF Mini Chocolate Fudge Undt Cakes
Mini Chocolate Fudge Bundt Cakes – yes I used a cake mix!

I have made no secret of my belief, that every good kitchen should have a couple of great cake mixes stashed away in the cupboard, for those times when, for whatever reason, you are unable to bake from scratch.

Yesterday was one of those days for me. It’s been a difficult couple of weeks see here and yet I wanted to bake. Wright’s Baking came to the rescue with ther excellent Chocolate Fudge Cake Mix. I baked six Mini Chocolate Fudge Bundt Cakes and some cupcakes, however, the mix should yield between 12-15 Bundtlettes. Just ensure the Bundlette pan is cooled, washed, dried and re greased between batches.

FF Mini Chocolate Fudge Bundt Cakes
Mini Chocolate Fudge Bundt Cakes couldn’t you just pick one up and take a bite right now 😉

While one of these cakes perfectly hit the spot yesterday, with a nice, hot cup of tea, I can’t help thinking that they’d make a great dessert. Hot, chocolate custard poured over, so the central hole is filled. Yes I am definitely going to try that!

Cute little Bundlettes make a pretty and interesting change from cupcakes. Don’t get me wrong I love cupcakes, with their myriad of frostings, these mini Bundts simply make an elegant change.

Change is good, right?

For those who are unable to get hold of the cake mix, use the recipe from here Chocolate Heart Cake.

Recipe: Mini Chocolate Fudge Bundt Cakes – makes 12-15

1 Packet Chocolate Fudge Cake Mix by Wright’s Baking – available from most major supermarkets and via Wright’s online shop

60ml Vegetable Oil

200ml Water

200g Milk Chocolate

Mini Fudge Pieces – mine came from Asda

Method: Preheat the oven to 170C/150C fan, gas mark 3.5

Note:

I use Wilton cake release for all my Bundt bakes (ensure the inside of each Bundt is covered with cake release, using a pastry brush), alternatively melt butter and brush the inside of the Bundlette tin, remembering the central pole and then lightly dust with flour, tipping out any excess.

  • Measure the oil and water into a large mixing bowl, add the contents of the cake mix and proceed according to the instructions on the packet.
  • Spoon the mixture into each mould in the Bundtlette pan, so that it fills if by half. Continue until all 6 moulds have equal amounts of cake batter in them.
  • Wipe any spilt batter from the top of the Bundlette pan.
  • Place the Bundlette pan in the middle of the oven and bake for 25-30 minutes. The mini Bundts are baked when they spring bake from a light touch and a visibly coming away from the sides of the moulds.
  • Once baked remove the pan from the oven and allow the cakes to cool for 10 minutes in the pan.
FF Mini Chocolate Fudge Bundt Cakes
Before and after baking.
  • After 10 minutes cooling, turn the Bundlettes out on to a cooling rack.
  • Allow the cakes to cool completely before decorating.
FF Mini Chocolate Fudge Bundt Cakes
Mini Chocolate Fudge Bundt Cakes ready to decorate.
  • Break or chop up the chocolate and place in a heatproof, microwaveable bowl.
  • Zap on medium for 1 minute in the microwave, stir and then continue heating, for 30 seconds at a a time, until when stirred, the chocolate has completely melted.
  • Pour the melted chocolate into a disposable piping bag and snip off the very end leaving a small piping hole.
  • Pipe vertically, starting at the top of each cake and following the lines down to the bottom. You can be exact or as free form as you choose. I was very tired when I piped these cakes, so some, the ones in the final photos, turned out neater than others.
  • Once all the cakes have been piped with chocolate, top with mini pieces of fudge.
FF Mini Chocolate Fudge Bundt Cakes
Piping the chocolate on to the cakes and then topping with chocolate.
  • Leave the cakes so that the chocolate sets and then they are ready to serve!
FF Mini Chocolate Fudge Bundt Cakes
Mini Chocolate Fudge Bundt Cakes perfect for Afternoon Tea.

Serve your cakes on a pretty plate, with a hot drink and shared with good company.

I actually think these would be perfect for someone’s birthday, maybe at work, who doesn’t want a ‘big cake’ and lots of fuss. They are pretty and unique enough to let someone know they are special, without going over the top!

If you have enjoyed the recipe for these Mini Chocolate Fudge Bundt Cakes you may also like these:

Mini Lemon Drizzle Bundt Cakes

FF Mini Chocolate Fudge Bundt Cakes
Mini Lemon Drizzle Bundt Cakes

Chocolate Chunk Cupcakes

FF Mini Chocolate Fudge Bundt Cakes
Chocolate Chunk Cupcakes

Marshmallow Frosted Mango Cupcakes

FF Mini Chocolate Fudge Bundt Cakes
Marshmallow Frosted Mango Cupcakes – Gluten Free

While it is great to bake cakes for someone’s birthday, or a special celebration, sometimes it’s nice to bake them just because it’s Friday, or Monday and everyone at work could do with a boost to get them motivated.

Baking for others is something I absolutely love. Seeing the smile on their faces, knowing that you’ve thought about them, remembered that they’ve got ‘stuff’ going on. Although a mini Bundt cake, cupcake, or even great big grand gesture cake won’t make their problems disappear, it shows people that they’re loved and supported, no matter what.

I firmly believe a cake, baked for someone with love, when given, can say more than a thousand words.

Sammie xx

 Wright’s Baking provided me with the cake mix to create this recipe. All content, photographs, options and view are my own. Please see my Disclosure Policy.

Share
Facebooktwitterpinterestlinkedintumblr

Flower Vanilla Bundt Cake

Share
Facebooktwitterpinterestlinkedintumblr

I have some wonderful news to share. One of my very best friends had her beautiful daughter Florrie, a little early, but mum and baby are doing so well. I am an adopted Auntie again! So, I simply had to make something to celebrate this gorgeous bundle of joy that has been brought into our lives. Resulting in Florrie’s Flower Vanilla Bundt Cake.

Flower Vanilla Bundt Cake

As the new mum is nursing her wonderful baby daughter, I kept everything in this cake as natural as possible. As whatever mummy eats, Florrie will have too and I want her to learn to love Auntie Sammie’s cakes, right from the start.

New babies bring such joy and pleasure into our lives. Since we have three wonderful children, I absolutely knew my friend would very much appreciate a little food hamper. A freshly baked Farmhouse White Loafsimple dinners, pre-portioned so that mummy just has to pop them in the oven, like my Best Beef Casserole and of course a little something sweet, Florrie’s Flower Vanilla Bundt Cake.

Flower Vanilla Bundt Cake

A New Mum And I Need Cake

I remember clearly when I became a new mum for the first time. While I had a safe delivery and the maternity suite at the hospital was brand new, there was one thing I craved – food! Although, all that seemed to be on offer was salad.

And salad alone, is not what a nursing mother needs!

This mummy needed carbs and lots of them. Had the salad been in a thick, carb rich sandwich I would have been fine. Fortunately I wasn’t in hospital for very long and I remember my husband making me the most unbelievably satisfying, bacon muffin with tomato ketchup, the first morning waking up in our own home, with our new baby girl. And to this day it is one of my favourite treats. Although now that I am no longer nursing, it has to remain just that, a treat.

Flower Vanilla Bundt Cake

I have alway been called ‘practical and sensible’ by my lovely Mother-in-law. I consider this to be a huge compliment and a true reflection of how I see myself. So when a new baby comes along, I’m not the type of person to go baby clothes shopping, or to send flowers. Both of which are wonderful gifts to receive, I may add.

Rather than gifts, my first thought is, how can I help?

How We Can Help New Mums

If you have spent time reading this blog, you will be aware that I have various health issues (see Living With Seizures). As a result this limits how I can help out with an adorable new baby, in a practical way. Usually, for me that means food! Since I can make bread easily, I had been cooking slightly extra, so that a single portion of Sausage and Bean Casserole (made without the addition of any alcohol), could be frozen for when it was needed. This is my way of helping.

When I am making a Chicken Lasagne it is so easy for me to pop a couple of individual portions, in foil containers and place them in the deep freeze. And this way I gradually build up enough meals for a food hamper, that can be delivered and make my friend’s life a little easier.

Being a new mum is hard enough, but when you are on your own you need all the support you can get! Plus my lovely friend is a big fan of my cooking and has been an ‘unofficial’ taste tester for many years now. So, let’s hope Florrie will grow to love good, homemade meals and delicious cake, like her Flower Vanilla Bundt Cake.

Recipe: Makes 1 Flower Vanilla Bundt Cake 

Cake release spray – I use Wilton’s perfect for Bundt cakes

225g/8oz Unsalted Butter – at room temperature

225g/8oz Caster Sugar

1tsp Vanilla Bean Paste – I use Nielsen-Massey

1/4tsp Salt – I use Maldon

5 Large Free Range Eggs

225g/8oz Plain White Flour

2tsp Baking Power

For the glaze:

400g/14oz Icing Sugar

1/2tsp Almond Extract – I use Nielsen-Massey

Pink gel food colouring

Flower decorations

Making And Baking The Bundt Cake

Preheat the oven to 170C/150C fan, gas mark 3, 325F.

  • First of all, place  the butter and caster sugar into a large bowl and whisk, or beat for 5 minutes until pale and creamy.
  • Add the Vanilla Bean Paste and whisk/beat to incorporate.
  • Sift in 1/3 of the flour, baking powder and salt.
  • Add 2 eggs.
  • Whisk gently until just combined.
  • Repeat the last 2 steps twice more, adding only 1 egg on the last time.
  • Spray, or brush the Bundt tin liberally with cake release over the sink.
  • Spoon the cake batter into the Bundt tin pressing down on the batter as you fill the tin.
  • Ensure the cake batter fills the Bundt tin no more than two thirds full.
  • Place the Bundt tin in the middle of a preheated oven and bake for 50-55 minutes.
  • The cake is baked when it is golden in colour, is coming away from the sides of the Bundt tin and an inserted skewer comes out clean.
  • As soon as the cake is baked remove from the oven.
  • Place the tin on a cooling rack and allow the cake to cool for 10 minutes in the Bundt tin.
Florries Flower Vanilla Bundt Cake
Flower Vanilla Bundt Cake leave to cool for 10 minutes.
  • After cooling for 10 minutes turn the cake out onto a cooling rack. Wear oven gloves as the Bundt tin will still be very hot.
  • Allow the cake to cool completely before decorating.
Florries Flower Vanilla Bundt Cake
This Flower Vanilla Bundt Cake turned out beautifully.

Decorating The Cake

To make the glaze, sift the icing sugar into a large bowl. Add enough water to make a thick paste, that still slightly drips. Add a tiny amount of pink food gel colouring to the icing and mix thoroughly.

Flurries Flower Vanilla Bundt Cake
Beautiful baby pink, almond flavoured icing.

Place a tray underneath the cooling rack on which the Bundt cake sits. Since, this tray will catch any icing that drips through.

Using a dessert spoon thickly drizzle the top of the cake with the icing. Ensure the entire top and the internal hole of the cake of the cake are completely covered in icing. Any leftover icing can be used to add to the drizzle effect on the cake.

Decorating a Bundt cake with glacé icing.
The excess icing drips into the tray beneath the cake.
Using sugar flowers to decorate a cake.
Add sugar flowers to your Flower Vanilla Bundt Cake.

Allow the cake to set before serving and eating.

Flower Vanilla Bundt Cake

The observant among you may have noticed that this beautiful Flower Vanilla Bundt Cake has been photographed on the lid of a plastic box. So, being practical (and in all honesty completely out of cake boxes!) as this cake is not very large or heavy, placing on the inside lid of a large box keeps the cake fresh.

Finally, once safely transported to my friend, the cake can be moved to an airtight container of her own. Most importantly, I only advise using this technique for very light cakes and definitely do not cut the cake whilst it is sitting on the lid.

So, do you like the idea of making someone a food hamper?

If you have enjoyed making this Flower Vanilla Bundt Cake you may like these recipes:

Glazed Lemon Bundt Cake 

Florries Glazed Lemon Bundt Cake
Glazed Lemon Bundt Cake – I used a thinner glacé icing to completely gaze this cake.

Chocolate Fudge Bundt Cake 

Flurries Chocolate Fudge Bundt Cake
Put the kettle on and enjoy every single bite of this Chocolate Fudge Bundt Cake.

Lime Coconut Blossom Bundt Cake 

Florries Coconut Lime Blossom Bundt
Coconut Lime Blossom Bundt Cake

Crazy Caramel Carrot Cake 

Florries Crazy Caramel Carrot Cake
Crazy Caramel Carrot Cake utterly delicious.

Since I absolutely love seeing photographs of your bakes, please tag me in on your Twitter and Instagram posts? Also, I’m available throughout the day on Twitter, most days, to answer any ‘mid-bake’ questions or worries. While not an expert, I am part of group of bakers on Twitter and between us there’s not usually a question that goes unanswered! Likewise, you can also leave a question in the comment section of this post. Either way, it’s a great way to interact and get to know my lovely readers.

So, whatever you are making, baking and creating in your kitchens, have fun preparing and sharing your feast.

Sammie xx

No part of this post may be reproduced or duplicated without the written permission of the owner. Please see my Disclosure Policy.


Share
Facebooktwitterpinterestlinkedintumblr

Chocolate Heart Cookies

Share
Facebooktwitterpinterestlinkedintumblr

Valentine’s Day is fast approaching. So what better way to show our family and friends, how much they are loved and appreciated by baking a big batch of these Chocolate Heart Cookies.

Although it is nice to take one day out of the year, such as Valentine’s Day, to let people know we love them, I think it is far more important to tell those we love every day. To ‘love’ is a verb, a doing word and so the act of loving people, should be part of our daily lives.

I love baking for my loved ones and seeing their faces as they bite into something delicious, made by me for them. Because it shows them that they are important to me and loved very much.

These Chocolate Heart Cookies can be made for a fraction of the cost of buying Valentine’s Day gifts and they are so personal. When they are made you make them with love. And there is also an added bonus, you can make these all year round and believe me, these cookies are so utterly delicious, your loved ones will keep coming back for more!!

Biscuits packaged in cellophane and ribbon to give as gifts.
Chocolate Heart Cookies as edible gifts.

Great Quality Ingredients Produce The Best Results

The reason for the outstandingly, melt in the mouth flavour of these cookies, is, because they contain cream cheese.

Didn’t see that one coming – hey? 😉

Yep, good old Philly makes a real difference to the soft, almost, truffle like, texture of the cookies and they taste amazing too!

Chocolate Heart Cookies

If you are going to make these cookies, it’s worth using a good quality cocoa powder, as that directly affects the chocolate flavour of these hearts. You only use 50g per batch, so it works out pretty cost effective, overall. I use Callebaut as it gives consistently great results.

I used a fluted heart cutter and was happily surprised that each cookie kept the definition during baking.

Pretty packaged biscuits to give as edible gifts.
Chocolate Heart Cookies

Recipe: Makes 20-30 Chocolate Heart Cookies, depending on cutter size.

150g/5oz Soft Light Brown Sugar

100g/4oz Unsalted Butter at room temperature

100g/4oz Full Fat Soft Cheese – I use Full Fat Philadelphia Cream left out of the fridge to come up to room temperature

1/4tsp Salt

1 Large Egg Yolk

1/2tsp Vanilla Bean Paste – alternatively 1tsp Vanilla Extract – I use Nielsen-Massey 

50g/2oz Cocoa Powder – I use Callebaut 

225g/8oz Plain White Flour – plus extra for dusting the worktop

100g/4oz White Chocolate

Method:

Making The Cream Cheese Chocolate Cookie Dough

  • First of all add the softened cream cheese, butter, salt and sugar to a large bowl.
  • Whisk together until fully combined.
  • Now add the egg yolk, vanilla and whisk in.
  • Sift the flour and cocoa into the bowl.
  • Mix together until uniform in colour and texture.
  • Wipe the work surface with a clean, damp cloth.
  • Lay cling film over the damp worktop, it will stick and not move.
  • Place the cookie dough onto the cling film, form into a disc a wrap tightly.
  • Place the wrapped cookie dough into the fridge to chill for one hour.

When you are ready to bake the Chocolate Heart Cookies preheat the oven to 170C/150C fan, has mark 3, 325F.

Cutting Out And Baking The Heart Shaped Cookies

  • Line 2-3 large baking trays with baking parchment.
Chocolate Heart Cookies
Remove the dough from the fridge.
  • If the cookie dough has been in the fridge for more than a few hours (I made the dough on Sunday and baked on Monday), remove and leave to warm slightly for 30 minutes. This will prevent the dough from cracking.
  • Divide the dough in two and wrap one half in the cling film.
  • Lightly dust the worktop with flour.
  • Roll the dough out to approx 1/4 inch thickness (6mm).
  • Ensure you are constantly moving the dough and lightly dusting the worktop with flour – as this dough can get quite sticky.
Chocolate Heart Cookies
Don’t worry about a very light dusting of flour on top of the dough.
  • Using a 2 inch (5cm) heart cutter, cut out the cookies.
  • Re-rolling the cookie dough so you can get the maximum number of cookies from it.
  • Roll the second half of cookie dough and continue as before.
  • I cut out 27 cookies.
Chocolate Heart Cookies
Place the cut out cookies onto the baking tray.
  • Place the baking trays into the oven and bake for exactly 10 minutes.
  • The cookies will have a slightly matt appearance when baked.
  • As soon as cookies are baked remove the trays from the oven and allow the cookies to cool on the tray.

Decorating The Chocolate Heart Cookies.

Chocolate Heart Cookies
When the cookies are completely cooled move them and the baking parchment to the worktop.
  • First of all lay the cookies out in a uniform manner. This makes it easier to pipe the melted chocolate on.
  • Into a heatproof and microwaveable bowl add the chopped up white chocolate.
  • Heat on 20 second bursts – remembering that white chocolate keeps its shape when melted.
  • Stir after every 20 seconds and remove just before all the white chocolate has completely melted.
  • Continue stirring until all the chocolate has melted.
  • Spoon the warm, melted chocolate into a disposable piping bag – alternatively, use a fork to drizzle the chocolate over the cookies.
  • Snip the very end off of the piping bag so that there is only a small hole.
  • Pipe a squiggle pattern over the heart cookies, I find it easier to pipe them in vertical lines (from top to bottom) without stopping, lifting the bag tip upwards after the last heart in each line is drizzled.
Chocolate Heart Cookies
Pipe squiggles of white chocolate across the hearts.
  • Allow to cool completely. This can take a little while and during hotter weather (it is Winter here now) they may need to go into the fridge to set completely.
Chocolate Heart Cookies
Chocolate Heart Cookies ready to be shared with your loved ones.

These are the perfect ‘I Love You’ gift anytime of the year!

Keep the cookies in an airtight container and eat within 5 day. Refrigerate during warmer weather.

If you have enjoyed this recipe for Chocolate Heart Cookies, then you might also like to try these:

Chocolate Dipped Shortbread Heart Cookies

Chocolate heat cookies half coated in milk chocolate spilling out of a glass jar onto a pink heart doily.
Chocolate Dipped Shortbread Heart Cookies

Strawberry Topped Chocolate Heart Pavlova

Chocolate heart shaped meringue covered in whipped cream and chocolate dipped strawberries.
Strawberry Topped Chocolate Heart Pavlova

Chocolate Fudge Brownie Bites

Small brownie squares decorated with a piped white chocolate heart.
Chocolate Fudge Brownie Bites

While I am a romantic at heart and also very sentimental, I do enjoy showing those people that are close to me how much I care about them. And also how much certain people mean to me. Rather than always telling them, it is fun to bake a delicious treat and share it with those I love. There are definite benefits to having a keen baker in the family!

So, whatever you are making, baking and creating in your kitchens, have fun preparing and sharing your feast, especially with those you love.

Sammie x

No part of this post may be reproduced or duplicated without the written permission of the owner. Please see my Disclosure Policy.


Share
Facebooktwitterpinterestlinkedintumblr

Cherry Bakewell Cookies

Share
Facebooktwitterpinterestlinkedintumblr

This post is Pink. Very Pink. And I make no apology for its pinkness, for one simple reason – Cherry Bakewell Cookies. Buttery, almond and cherry cookies, drizzled with almond flavoured icing. If you like Bakewell Tart you will love these cookies.

FF Cherry Bakewell Cookies

Because I have been testing some baking equipment for British BakewareI knew I couldn’t pass up the opportunity to bake cookies, using their large baking tray. Since those of you who regularly pop round here for a chat I mean read, will know I LOVE COOKIES. I really, really love cookies – and – please don’t hate me, I prefer nutty, fruity cookies over chocolate ones. If you love choccie cookies there’s a link at the bottom of the post. I’m so good to you 😉.

Cherry Bakewell Cookies:

But before you click the link to the Chocolate Cookies, just have a peek at these delicious Cherry Bakewell Cookies.

Cherry Bakewell Cookies

Can you imagine biting into this crunchy, buttery, cookie that is filled with flaked almonds, cherries and drizzled with a perfect, not-too-sweet icing?

So have I tempted you to try these scrumptious Cherry Bakewell Cookies? Perfect with milk, or a cup of tea/coffee, especially as it is frrreeeezzzing outside today!

Cherry Bakewell Cookies

One of the reasons I enjoy baking, so much, is that I can whip up a batch of cookies or loaf of bread and I know exactly what has gone into making them. Also I  really enjoy sharing what I bake, beyond our home. By that I mean, surprising our neighbours with a gift of cupcakes, baking a gift to say thank you, or just because.

And these cookies are incredibly easy to make. Once the cookie dough is made, it is rolled into logs, wrapped and chilled in the fridge and then sliced and baked when needed. Alternatively, you could dispense with the almond drizzle, just add the almond extract to the creamed butter and sugar part of the recipe, so that these  retain that proper Bakewell taste and once baked these babies are ready to eat!

Recipe: Makes Approximately 20 Cherry Bakewell Cookies

225g/8oz Unsalted Butter at room temperature

150g/5oz Caster Sugar

275g/10oz Plain White Flour

1/4tsp Salt I use Maldon Salt

1 Large Egg Yolk – I always use free range

1tsp Vanilla Extract

100g/4oz Flaked Almonds

100g/4oz Glacé Cherries roughly chopped

For the drizzle

200g/7oz Icing Sugar

1tsp Almond Extract – available from Nielsen-Massey 

Tap water

Method:

Making the cookie dough:

In a large bowl add the butter, sugar and salt. Whisk until pale and creamy.

Add the egg yolk and vanilla extract (and the almond extract, if not making the drizzle). Whisk together until all the ingredients are combined.

Add the flaked almonds to one side of the bowl, then add the flour to the other side. Put the cherries on top of the flour and gently mix them in the flour with your fingers – this will stop the cherries sticking together and ensure they are distributed evenly throughout the cookie dough.

Cherry Bakewell Cookies

Mix all the ingredients together until they are thoroughly combined.

Cherry Bakewell Cookies
Yummy cookie dough!

Wipe the worktop with a clean damp cloth. Lay some cling film over the damp surface – it should stay in place.

Place half of the cookie dough onto the cling film and roll into a log shape approx 4cm/1.5″ diameter. Repeat with the other half of the cookie dough.

Cherry Bakewell Cookies
Cherry Bakewell Cookie dough log.

Place both cookie logs into the fridge to chill until firm – approx 1 hour.

Baking the cookies:

When the cookie logs are firm enough to slice, preheat the oven to 180C/160C fan, gas mark 4, 350F

Remove the cookie logs from the fridge and slice into 1.5 cm discs.

Cherry Bakewell Cookies
Cherry Bakewell Cookies sliced and ready to bake.

I was testing this Large Baking Tray for British Bakeware however, I would advise lining any baking tray used with baking parchment.

Place the Cherry Bakewell Cookies onto the baking tray, allowing room between each cookie, as they do spread whilst baking.

Place into the oven and bake for 15 minutes. Do not bake for longer as the cookies will become too brittle once cooled.

As soon as the cookies are baked remove from the oven.

Cherry Bakewell Cookies
Cherry Bakewell Cookies allow to cool on the baking tray for 15 minutes.

After 15 minutes cooling transfer the cookies to a cooling rack. I needed to use a palette knife to lift the cookies away from the tray. Lining with baking parchment will avoid scratching your trays.

When completely cooled the cookies are ready to be iced.

Icing the cookies:

First of all, place the icing sugar and almond extract into a bowl. Add tap water, a little at a time (I use a teaspoon to add the water), mixing thoroughly after each addition.

The icing is at the correct thickness when it can hold a figure of eight shape for a moment, when drizzled onto itself with a spoon.

Cherry Bakewell Cookies
Almond flavoured icing, ready for drizzling over the cookies.

You can drizzle the icing over the cookies with a spoon, or fill a disposable piping bag (or plastic freezer bag) with the icing. Snip the end (or corner of the bag), so that there is a small hole. Drizzle a pattern over each of the cookies.

Cherry Bakewell Cookies

Leave the icing to set on the cookies before storing in an airtight container.

Cherry Bakewell Cookies
Do you think you can stop at one?

Now invite some friends round for a cup of tea and a catch up and share these delicious Cherry Bakewell Cookies.

Alternatively pop some in a clear cellphone bag, tie with pretty ribbon and give away as gifts.

I am always hungrier when the weather turns cold. Are you?

If you have enjoyed this recipe for Cherry Bakewell Cookies you may also like these:

Chocolate Dipped Shortbread Heart Cookies 

FF Cherry Bakewell Cookies
Chocolate Dipped Shortbread Heart Cookies

Bakewell Shortbread Bars

FF Cherry Bakewell Cookies
Bakewell Shortbread Bars

Extreme Chocolate Cookies 

FF Cherry Bakewell Cookies
Extreme Chocolate Cookies

So, whatever you are making, baking and creating in your kitchens, have fun preparing and sharing your feast.

Sammie xx

No part of this post may be reproduced or duplicated without the written permission of the owner. Please see my Disclosure Policy.

Share
Facebooktwitterpinterestlinkedintumblr

Vanilla Bean Cupcakes

Share
Facebooktwitterpinterestlinkedintumblr

It’s Sunday, time for a little treat?? So how about these Vanilla Bean Cupcakes? Moist, vanilla flavoured sponge, topped with the lightest, most dreamy vanilla buttercream and a pearl, because you are special.

FF Vanilla Bean Cupcakes

Look how pretty these cupcakes are. So beautiful, that I almost called them antique Vanilla Bean Cupcakes, although I thought better of it. Since I’m pretty sure everyone would have imagined them as hard, mouldy, relics of the past – yep not conjuring up the image I’d like!!!

Especially stunning are these cupcake cases. A wonderful Christmas present from a much loved friend.

FF Vanilla Bean Cupcakes
Vanilla Bean Cupcakes


Thank You For The Presents:

Because I received quite a few cooking and baking related presents last year, for both Christmas and my birthday, using them feel extra extra special. Especially the little, cute, individual cupcake stand , present from my hubby.

Also I was very excited to receive four cookbooks, which I enjoy reading, as if they are novels. Although I very rarely follow a recipe religiously, I gather inspiration and ideas from my ever increasing cookbook collection.

Am I alone in my cookbook obsession collection?  Thought not!!!

Vanilla Bean Cupcakes perfect for afternoon tea.
Vanilla Bean Cupcakes

These Vanilla Bean Cupcakes were the final bake for a review I have been carrying out. So after much discussion with my daughter, regarding flavour combinations, we decided to settle on a classic vanilla sponge, with the addition of vanilla bean paste instead of extract. Yet I kept to vanilla extract for the best buttercream icing ever!

Look at that delicious swirl of buttercream.

The result being, the best cupcakes I have made, this year!

Recipe: Makes 12 deep filled Vanilla Bean Cupcakes or 18-20 standard ones.

For the cupcakes

150g/6oz Caster Sugar

150g/6oz Unsalted Butter at room temperature

1/4tsp Salt – I use Maldon 

150g/6oz Plain White Flour

1.5 tsp Baking powder – I use Waitrose 

1tsp Vanilla Bean Paste – I use Nielsen-Massey 

3 Large Eggs – I always use free range

25ml/1fl oz Whole Milk

Cupcake cases

For the buttercream

400g/14oz Icing Sugar -sieved

200g/7oz Unsalted Butter – very soft

1/8tsp Salt

1tsp Vanilla Extract – I use Nielsen-Massey

3tbsp Boiling Water

Edible pearls or sprinkles for decoration

Method: Preheat the oven to 180C/160C fan oven, gas mark 4, 350F

Making And Baking The Vanilla Bean Cupcakes

  • First of all, into a large bowl add the butter and caster sugar.
  • Whisk the ingredients together until pale and creamy.

Whisk the sugar and butter together until pale and creamy.

  • Add the eggs, milk, vanilla bean extract and salt to the bowl and whisk until fully combined.

Add the eggs, milk, vanilla bean paste and salt to the bowl. Mix to combine be.

  • Sift the flour and baking powder into the bowl.

Sift the flour, baking powder and salt into the bowl.

  • Fold all of the ingredients together.

Fold all the ingredients together until combined. This will ensure the Vanilla Bean Cupcakes are light and fluffy.

  • Spoon the cake batter into each cupcake case so that they are half full.

Fill each cupcake case half way with cake batter.

  • Place the cupcake tray into the middle of the preheated oven and bake for 20 – 25 minutes (a shorter time will be required for smaller cupcakes).
  • The cupcakes are baked when golden brown and spring back when pressed lightly in the centre.
  • As soon as the cupcakes are baked remove the from the oven.
Baked, golden Vanilla Bean Cupcakes.
Vanilla Bean Cupcakes.
  • Allow the cupcakes to cool in the pan for 10 minutes and then place them on to a cooling rack to cool completely.

The Key To Making The Lightest Buttercream Frosting:

  • Place the butter, salt, vanilla extract and butter into a large bowl.

Place the butter, salt, vanilla extract, sifted icing sugar and boiling water into a large bowl.

  • Starting on a low speed whisk all of the ingredients together.

Starting on a low speed, mix all the buttercream ingredients together, gradually increasing the mixer speed.

  • For the very lightest, creamiest buttercream, continue mixing for 10 minutes. The result will be the dreamiest buttercream icing you will ever have tasted.
  • The addition of very hot water to the buttercream mix, stops it from forming a hard crust.

Decorating The Cupcakes:

  • Fit a large piping bag with the tip of your choice – I used a large French star tip.
  • Fill the bag with buttercream and fold over the top of the bag.
  • Using a circular motion, pipe buttercream in a swirl effect, onto the top of each cupcake.
Vanilla Bean Cupcakes swirling, light buttercream, adorns the tops.
Vanilla Bean Cupcakes
  • Finally top each cupcake with an edible pearl, or edible decoration of your choice.
Vanilla Bean Cupcakes an edible pearl provides the finishing touch to these edible treats.
Vanilla Bean Cupcakes

I hope you’ll agree with me, that these cupcakes are elegantly beautiful ?

Usually I cannot wait to sprinkle edible glitter on, well pretty much anything I bake, but these Vanilla Bean Cupcakes looked so perfect after the addition of the pearl, that I managed to restrain myself.

Resulting in a spectacularly elegant cupcake, that tastes every bit as good as it looks.

Vanilla Bean Cupcakes timeless elegance, in cake form.
Vanilla Bean Cupcakes

While carrying out a review of a cupcake tin for British Bakeware, I was impressed with how evenly the cupcakes baked. Also the tin washed clean easily in hot soapy water.

These Vanilla Bean Cupcakes did not last very long in our home, although I did give our neighbours a couple. I believe food tastes better when shared. While I only spent 10 minutes with them, we had a lovely catch up chat and they were thrilled with the cupcakes I gave to them.

If you enjoyed this recipe for Vanilla Bean Cupcakes, then I hope you’ll like these too:

Black Forest Cupcakes

V Black Forest Cupcakes
Black Forest Cupcakes chocolate, cherries and dreamy topping.

Lemon Blueberry Cupcakes 

FF Vanilla Bean Cupcakes
Lemon Blueberry Cupcakes

Pink Heart Topped White Chocolate Cupcakes 

FF Vanilla Bean Cupcakes
Pink Heart Topped White Chocolate Cupcakes

During the winter months especially, weeks, indeed months can easily pass without people living in close proximity, exchanging a word. Furthermore it really is worth taking a few minutes out of each day, once a week, or so, to make the effort to talk to those who live close by.

Are you friendly with your neighbours?

Do you keep a check on elderly or infirm neighbours, especially during the cold, winter months?

Whatever you are making, baking and creating have fun preparing and sharing your feast.

Sammie xx

@sammiefeasting Twitter/Instagram

Share
Facebooktwitterpinterestlinkedintumblr

Rocky Road Petit Fours

Share
Facebooktwitterpinterestlinkedintumblr

Today’s treat is a fantastic way to use up any leftover chocolate that you may have in the house following Easter or Christmas. Alternatively, these treats look so festive you absolutely can buy the chocolate to make them. Finally I get to share my Rocky Road Petit Fours, individual portions of the delicious, well know classic recipe.

Rocky Road Petit Foursp

Ooh hello!!!

Because I am pretty certain ours is not the only home with an excess of Christmas chocolate, silently hiding behind over stuffed cupboard doors, waiting to wreck havoc on New Year eating resolutions.

So I thought I’d come up with a recipe that makes best use of all that lovely chocolate and portions it into more diet, I mean healthier sized morsels.

And with only four ingredients, these Rocky Road Petit Fours are a great treat to make for parties and as gifts, whatever time of year it is.

Miniature edible gold star topped rocky road petit fours.
Rocky Road Petit Fours

Giving Edible Gifts:

So, why not pop a few in a cellophane bag, tie with pretty ribbon and you have a great gift. Teachers, co-workers, shopping delivery drivers. The opportunities to say thank you, I really appreciate what you do, are limitless.

Rocky road petit fours wrapped in a cellophane bag and tied with gold raffia to give as a gift.
Beautifully wrapped Rocky Road Petit Fours

And that is who I made these for, my Waitrose delivery drivers. Because they always go above and beyond when it comes to delivering my shopping and I really, really appreciate that.

Since I started having seizures, see here , I have tried having our shopping delivered at the weekend. The problem was, it took a big chunk out of the day whilst hubby sorted and put all the shopping away. Also, I was losing track of what we needed etc. so I switched to a mid week delivery and with the delivery driver’s help, the shopping is unloaded, put away and weekends are way more relaxing for my hardworking hubby.

So, as a thank you, I filled a tin with these delicious treats and sent them back with the driver after he had helped with my shopping today.

I do think it is important to thank people. Especially when they go out of their way to help.

And edible gifts are a great way of saying a special thank you.

Also, making these chocolate delights is childs play. Literally!!

With a little supervision, they are perfect for making with children. Although whether they are then given as gifts, directly depends on the chocolate ‘evidence’ around the little cherubs face! So it might be an idea to have some prepared in advance to give away and let the children eat the fruits of their labour.

Recipe: Makes approx. 45 Rocky Road Petit Fours

150g/6oz Good Quality Milk Chocolate – I used Waitrose Seriously Intense Milk Chocolate with 49% Cocoa (or use a mix of milk and dark chocolate)

100g/4oz Mini Marshmallows

100g/4oz Shortbread  – cut into small chunks. Alternatively use mixed, unsalted, shelled nuts.

10 Glace Cherries – finely chopped

Petit Fours Cases

Edible glitter or stars for decoration – they are easily found on Amazon.

Making The Rocky Road Petit Fours

First of all, break or chop the chocolate into small pieces and place into a large heatproof bowl.

Melt, in the microwave, using the medium heat setting and 30 second bursts.

Remove before all the chocolate is melted and stir continuously until smooth and lump free.

Add into the melted chocolate the shortbread, mini marshmallows and chopped glace cherries. Thoroughly mix until all the ingredients are coated in chocolate.

Using two spoons carefully fill each petit fours case generously.

Set aside to cool and set. During warmer months, pop the Rocky Road Petit Fours into the fridge for a couple of minutes to set.

Sprinkle over edible glitter, or gold stars to add a finishing touch to these treats.

And there you have delicious gifts, sweet part canapés, or simply share with friends and family.

Rocky road petit fours in mini cake cases.
Rocky Road Petit Fours

If you have enjoyed this recipe for Rocky Road Petit Fours you may also like these:

Chocolate Fudge Brownie Bites

Chocolate fudge brownie bites served on a slate platter.
Chocolate Fudge Brownie Bites


Cream Cheese Pastry Mince Pies

Mini mince pies made with cream cheese pastry.
Cream Cheese Pastry Mince Pies


Chocolate Heart Cookies

Chocolate heart shaped cookies decorated with a white chocolate drizzle.
Chocolate Heart Cookies

Do you enjoy making edible gifts?

Let me know what you think of these. I really appreciate you taking the time to write a comment. Thank you.

So, whatever you are making, baking and creating in your kitchens, have fun preparing and sharing your feast.

Sammie xx

No part of this post may be reproduced or duplicated without the written permission of the owner. Please see my Disclosure Policy.

Rocky road petit fours with overplayed descriptive text and sized for Pinterest.


Share
Facebooktwitterpinterestlinkedintumblr

Extreme Chocolate Cookies

Share
Facebooktwitterpinterestlinkedintumblr

Hi, have I got a treat for you today – Extreme Chocolate Cookies. Also if you love cookies and need a chocolate fix then these babies are definitely for you!

Extreme Chocolate Cookies


I’ve been unwell lately, including a 2 week stay in hospital (I’ll save that for another post). Since having been home for 2-3 weeks now, today was the first day I really had the energy to bake. So, unashamedly I decided to make these Extreme Chocolate Cookies for our gorgeous children and my wonderful hubby, who has taken THE BEST care of me. I really do love that man.

Rows of Extreme Chocolate Cookies. Is there a better sight?

I know that I’ve said it before, but baking or cooking for others, especially my family, is one of the ways I like to show my love for them. While chocolate is not my go-to favourite Cookie. Since I favour nutty, fruity, oat cookies. Yet I obviously had to try one of these and they are my favourite chocolate cookies to date!

Extreme Chocolate Cookies


Recipe : Makes 18 Extreme Chocolate Cookies

225g/8oz Unsalted Butter softened

150g/5oz Dark Soft Brown Sugar

1 Large Egg at room temperature

1 1/2 tsp Vanilla Extract – I use Nielsen-Massey

1/4 tsp Sea Salt -I use Maldon

225g/8oz Plain White Flour

50g/2oz Cocoa Powder – I use Callebaut

1/4 tsp Bicarbonate of Soda

100g/4oz White Chocolate Chunks

150g/5oz Milk Chocolate Chunks

Preheat oven to 170C/150C fan, gas mark 3, 325F

Making the cookie dough

  • First of all, in a large bowl add the butter, sugar and salt. Whisk until well combined and fluffy.
Add in the egg and vanilla extract to the whisked butter/sugar.
  • Add the egg and vanilla extract and whisk until combined.
  • Next, chop up the white and milk chocolate into chunks.
These chocolate chunks are what make the cookies EXTREME!!!
  • Add the flour, cocoa, bicarbonate of soda and chocolate chunks to the bowl.
Once combined these ingredients make Extreme Chocolate Cookies!
  • Mix all of the ingredients together until just combined.

Shaping and baking the cookies

  • Take approximately a tablespoon of mixture, roll into a ball shape and place onto a parchment lined baking sheet.
  • Repeat until all the mixture is used.
These cookie dough balls are about to be squished!!!


  • Wash your hands, they WILL look like you’ve been making mud pies! Now using your fingers squish the cookie balls, they will still spread a bit whilst cooking.
The finger marks leave a pretty pattern even once baked!
  • Finally place the baking sheets in the oven and bake for 15-20 mins. I rotated my baking sheets halfway through the cooking process so that the cookies baked evenly. This is fine with cookies NOT cupcakes!
  • As soon as the cookies are baked remove from the oven and allow the Extreme Chocolate Cookies to cool on the trays for 5 mins, then transfer the cookies to a cooling rack.
Extreme Chocolate Cookies

While the cookies cooled I sent the children a text (at school – rebel mummy!!!) and put the kettle on for a lovely cuppa!!

Finally I can’t tell you how good it feels knowing I’m getting back to being me. Sooo good.

If you have enjoyed this recipe for Extreme Chocolate Cookies you may also like these:

Bakery Style Soft Triple Chocolate Cookies

FF Extreme Chocolate Cookies
Bakery Style Soft Triple Chocolate Cookies

Sour Cherry Chocolate Chip Cookies

FF Extreme Chocolate Cookies
Sour Cherry Chocolate Chip Cookies

Caramac Caramel Cookies

FF Extreme Chocolate Cookies
Caramac Caramel Cookies

Am I alone? Why do you bake? I’d love to hear what motivates you?

Whatever you are making, baking and creating in your kitchens, have fun preparing and sharing your feast.

Sammie xx

No part of this post may be reproduced or replicated without the written permission of the owner. Please see my Disclosure Policy.


Share
Facebooktwitterpinterestlinkedintumblr