Lemon Curd Sponge Tart

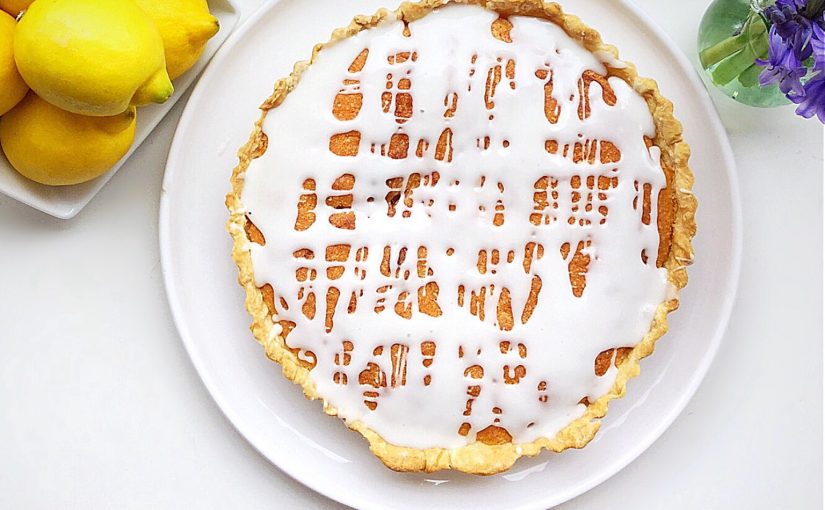
Anyone who has visited this blog before will probably have picked up on my love of lemons. Bright yellow citrus fruits that instantly transport my kitchen and my mood into a sunny day. Whether I use them I sweet or savoury recipes, their impact on flavour is the same. Fresh, juicy, tangy, this fruit knows how to treat your tastebuds to a flavour party! Today I am sharing my new recipe for Lemon Curd Sponge Tart. A sweet celebration of all things lemon.


FF Lemon Curd Sponge Tart

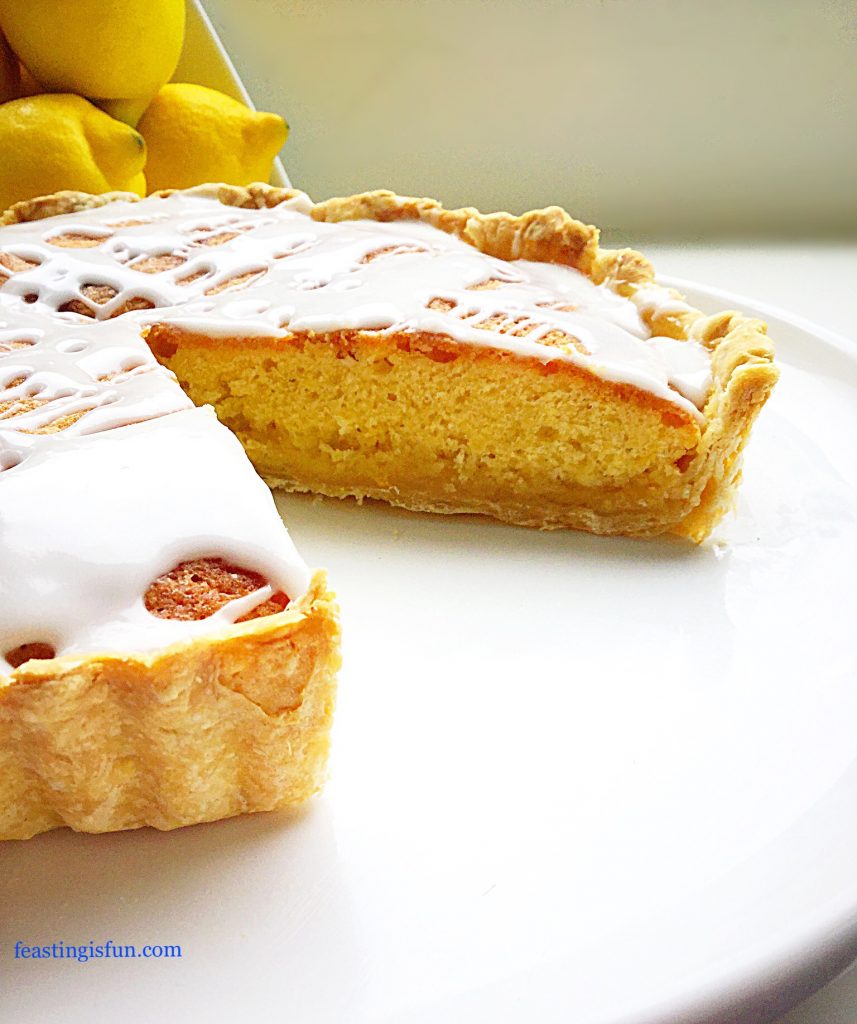
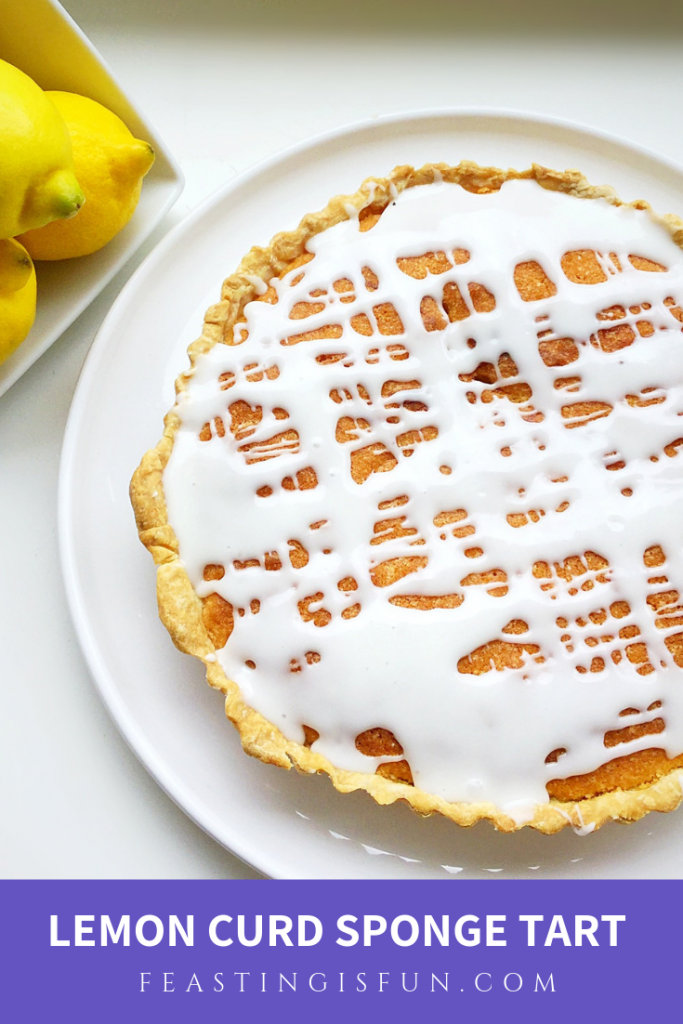
Since I love  Bakewell Tart I wanted to create a similar style dessert with lemon as the foremost flavour. And I have been completely successful. While homemade, buttery, shortcrust pastry provides a crisp base for this dessert, it really is all about the layers. So, on top of the pastry is a generous layer of tart lemon curd, followed by a light, lemony sponge and finally topped with a fresh lemon drizzle icing. The resulting tart is more than the sum of each individual layer.
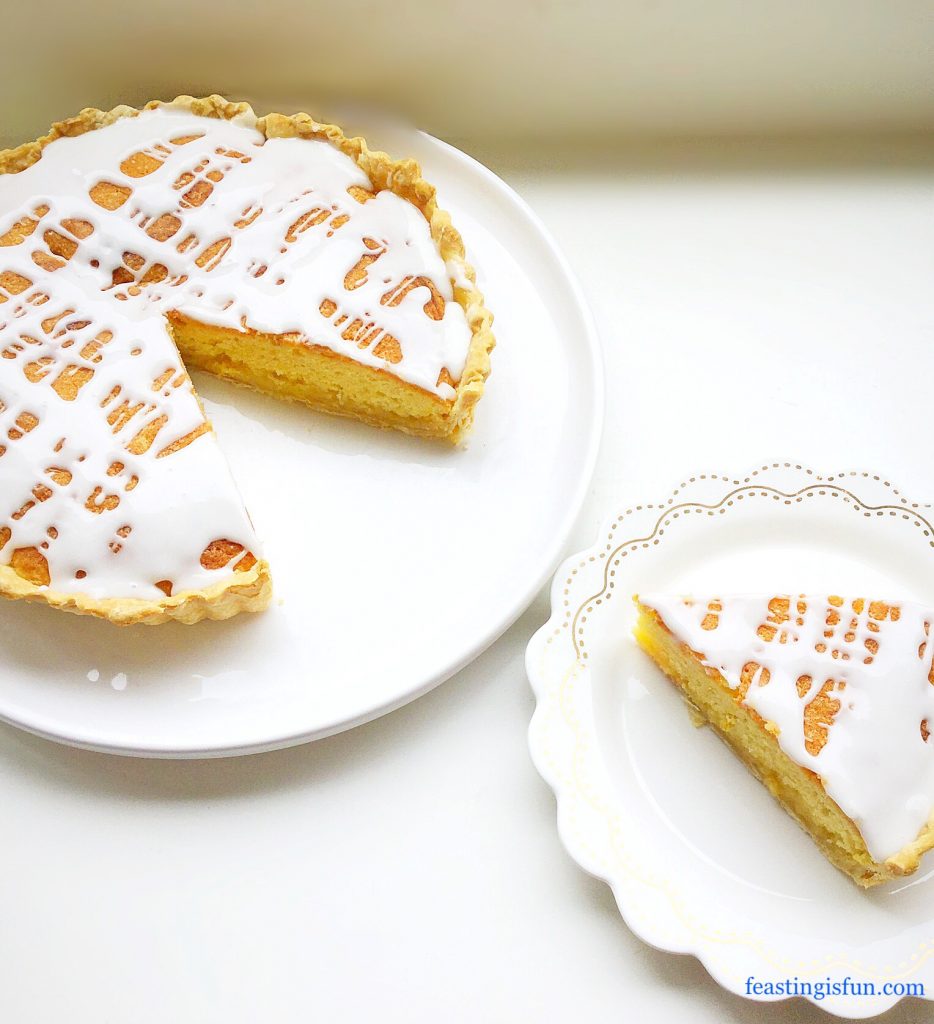
 

Lemon Curd Sponge Tart

To Drizzle Or Not To Drizzle?

While originally I wanted to create a dessert that could be served with custard, I’m so glad I opted for the lemon drizzle instead. If you do want to serve this warm with delicious Custard that is totally possible too. Simply allow the tart to cool for at least 20 minutes after baking, leave off the drizzle, slice and serve in a bowl with lashings of creamy custard. Also as mentioned previously serving a slightly chilled slice of this tart with a hot cup of tea really allows you to experience all the separate layers as they come together in one mouthful.
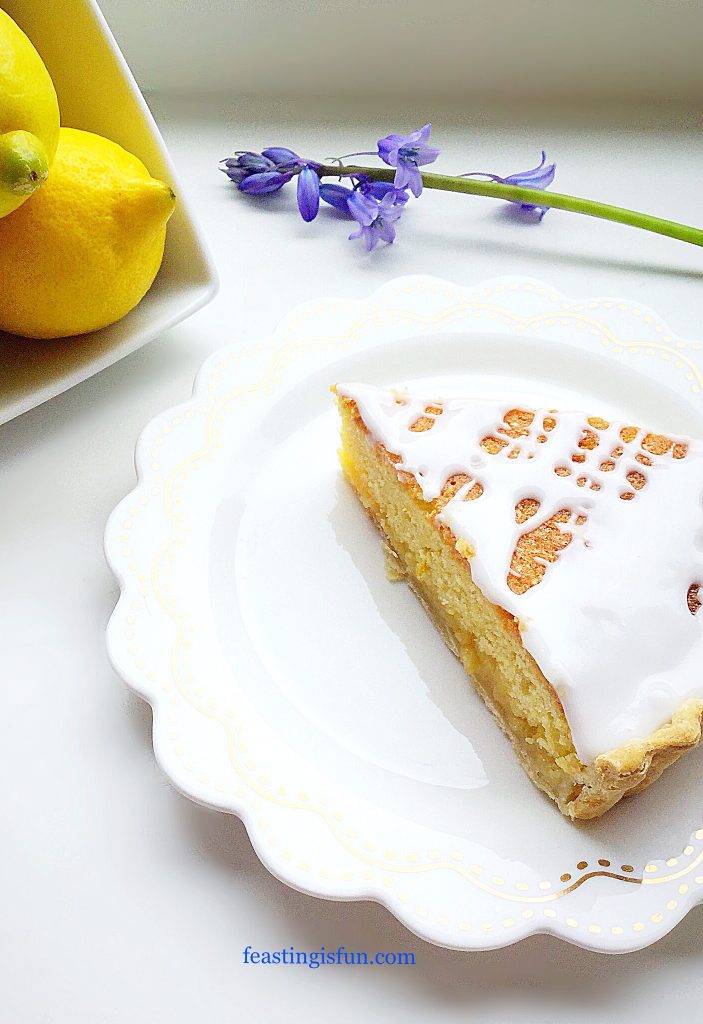
 

Lemon Curd Sponge Tart

Although I do sometimes have to leave labels on things I’ve made, saying they need to be photographed before eating, this doesn’t guarantee that my family will play by the rules! Fortunately I had finished the photography of this Lemon Curd Sponge Tart before they descended upon it. Nothing makes me happier than to see a bake on the worktop gradually reducing in size as people help themselves to a slice. That tells me more than anything that could be said.

Recipe: Lemon Curd Sponge Tart Serves 6-8

350g/ All Butter Shortcrust Pastry – see my recipe here

4 Heaped Tablespoons Lemon Curd – I use Waitrose own label

For the sponge

100g/4oz Unsalted Butter at room temperature

100g/4oz Caster Sugar

Zest of 2 Lemons – scrub with nail brush under hot water before zesting

1/8tsp Salt

2 Large Free Range Eggs

100g/4oz Plain White Flour – I use Wright’s Baking

1tsp Baking Powder

For the drizzle 

75g/3oz Icing Sugar (confectioners sugar)

Juice of 1-2 lemons

Method: Preheat the oven to 200C/180C fan, 400F, gas mark 6.

For this tart you will need a 20cm x 5cm (8in x 2in) round, fluted tart tin with loose bottom.

Note: For full step by step instructions with accompanying photographs for rolling out pastry, filling a tart case and blind baking, please see my recipe for Perfect Butter Shortcrust Pastry.

Making The Pastry Tart Case

  • First of all ensure that the pastry has been chilled in the fridge for at least one hour.
  • Lightly dust the worktop with flour and roll the pastry out to a circle that is slightly wider than the tart tin.
  • Loop the pastry over the rolling pin and allow it to fall gently into the tart tin.
  • Carefully press the pastry into the sides and base of the tin.
  • Trim away any excess pastry.
  • Dock the pastry base with a fork to stop it rising during baking.
  • Scrunch up some baking parchment and line the pastry case with it. And then fill with baking beans/ceramic balls.
  • Place the tin into the centre of a preheated oven and bake for 15 minutes.
  • As soon as the baking time is finished remove the tart from the oven.
  • Carefully use the baking parchment to lift the beans out of the partly baked tart shell.
  • Return the tart to the oven for a further 5 minutes.
  • And then remove the blind baked pastry from the oven and allow to cool.
  • Reduce the oven temperature to 180C/160C fan, 350F, gas mark 4.
  • While the pastry is cooling make the lemon sponge.

Making The Lemon Sponge And Filling The Tart Shell

  • Into a medium sized bowl add the butter, caster sugar and salt. Whisk the ingredients together until pale and creamy.
  • Add 2 eggs and sift in the plain flour and baking powder. Whisk until just combined.
  • Now add the zest of 2 whole lemons. Stir with a large spoon to mix.
  • Spoon the lemon curd into the cooled tart shell and spread to form an even layer.
  • Next, spoon the cake batter on top of the curd in small amounts. And then use a fork to spread the cake batter, forming an even layer.
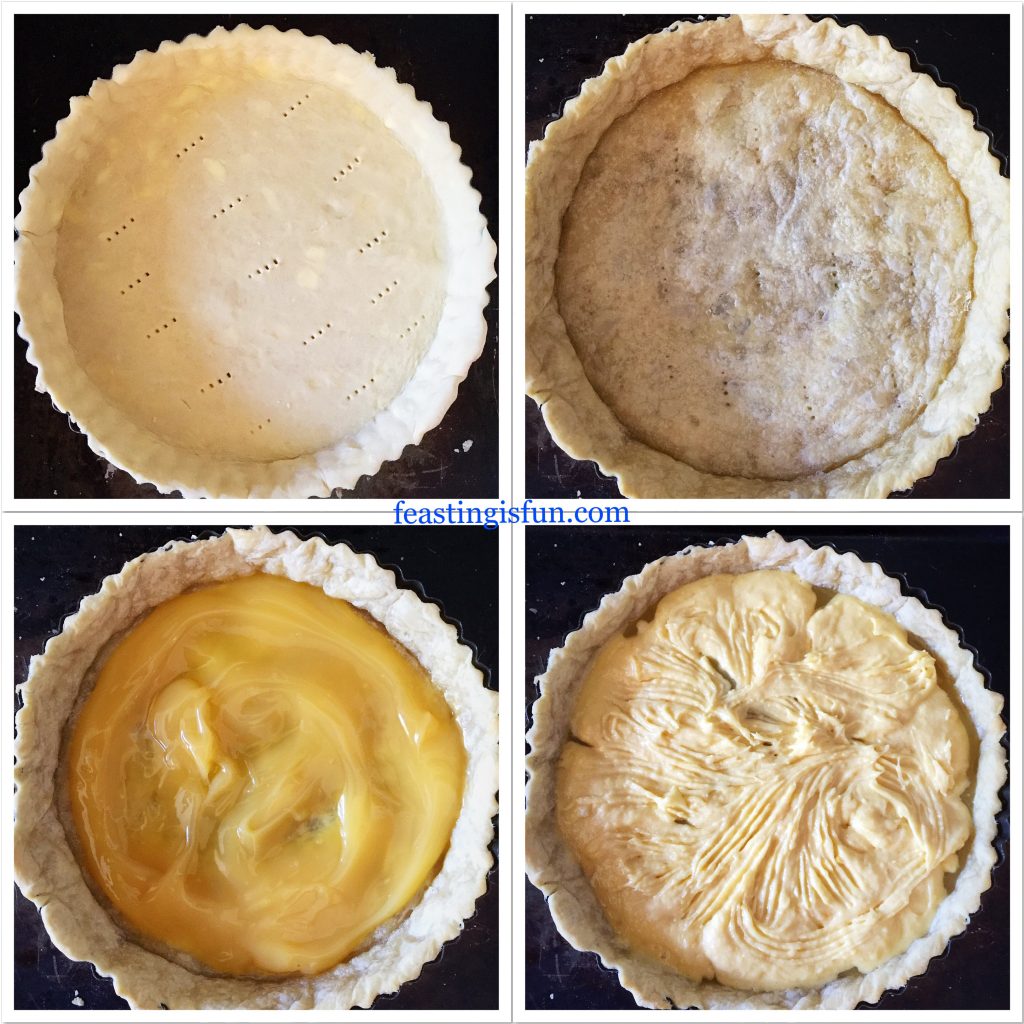
 

Making the sponge filled tart case.
  • Place the filled tart back into the centre of the oven and bake for 35-40 minutes.
  • The sponge layer is baked when it is golden in colour and springs back when lightly pressed in the centre.
  • As soon as the tart is baked remove from the oven and leave to cool completely.
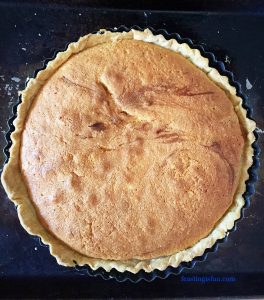
The baked Lemon Curd Sponge Tart
  • Once the tart is cool remove from the loose bottom tart tin and place on to a plate.

Making The Lemon Drizzle And Finishing The Tart

  • Sift the icing sugar into a bowl.
  • Stir as you add the lemon juice until you have a consistency that can be drizzled from a spoon.
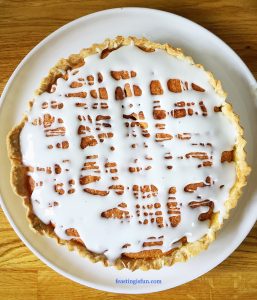
  • Spoon the lemon drizzle over the top of the sponge, stopping at the pastry edge.
  • Leave to set. In warm weather, or to speed up the process refrigerate the tart.
FF Lemon Curd Sponge Tart
Adding the fresh lemon drizzle to the cooled tart.

Finally, slice the cooled tart and serve on a plate with a drink of your choice.

Store any leftover tart for up to 5 days in an airtight container in the fridge.
Lemon Curd Sponge Tart

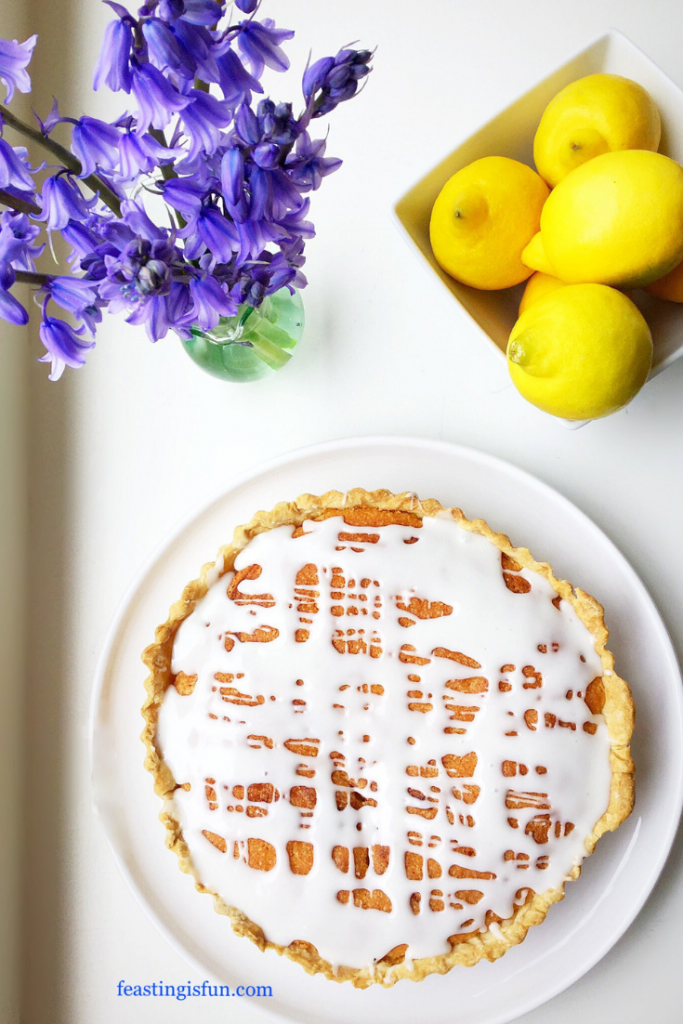
Golden lemon layers set this dessert apart from anything you might buy in the supermarket.
FF Lemon Curd Sponge Tart
Lemon Curd Sponge Tart each district separate layer.

If you have enjoyed this recipe for Lemon Curd Sponge Tart you may also like these:
Lemon Blueberry Bundt Cake

FF Lemon Blueberry Bundt Cake
Lemon Blueberry Bundt Cake

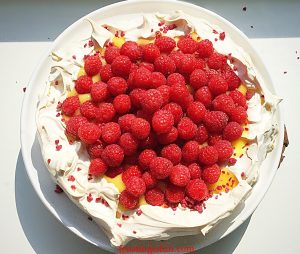
Raspberry Topped Lemon Curd Pavlova 

FF Raspberry Topped Lemon Curd Pavlova
Raspberry Topped Lemon Curd Pavlova

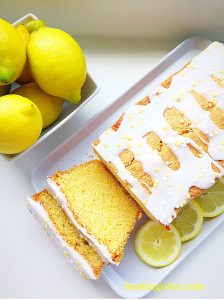
Lemon Drizzle Loaf Cake

FF Lemon Drizzle Loaf Cake
Lemon Drizzle Loaf Cake

As well as enjoying baking to feed my family, friends and neighbours, I also find the process relaxing. Even with the health constraints of my body, which can be very frustrating, I am still able to make a beautiful dessert such as this lemon creation. Since I break down the process over 2 days, making and baking the filled tart one day and then decorating and photographing it the next, I am able to still carry out an activity I enjoy and also achieve a sense of satisfaction. Both of which are important in maintaining a sense of independence and uplifting metal well being. Baking is a form of therapy for me.

Whatever you are making, baking and creating in your kitchens, have fun preparing and sharing your feast.

Sammie xx

No part of this post may be reproduced or duplicated without the written permission of the owner. Please see my Disclosure Policy.

Additionally, the bluebells featured in the photos are from our garden, yet THEY ARE NOT EDIBLE. All parts are toxic, do not use to decorate your bakes.
Prosciutto Wrapped Cheese Puff Pastry Straws

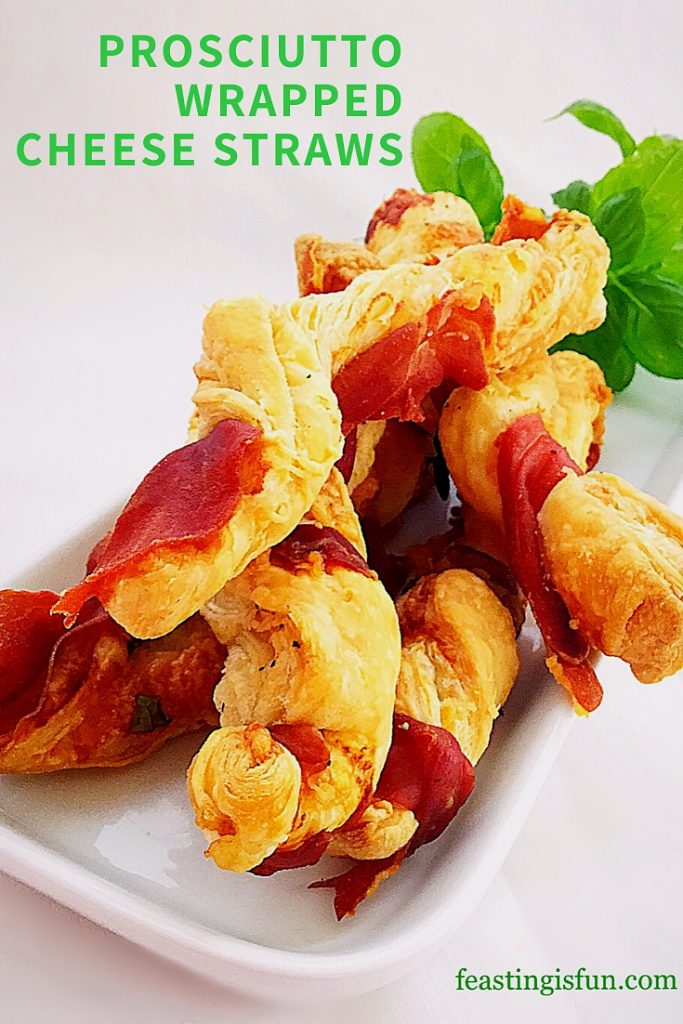
So, who is ready for a super easy, party food recipe? While there are plenty of sweet recipes here on the blog, I prefer food that is more savoury. Given a choice, I will usually choose a cheese board over dessert. While my family always pick a delicious, sweet treat. Also, at parties I much prefer something salty and savoury to compliment my glass of wine or sparkling water. My Prosciutto Wrapped Cheese Puff Pastry Straws tick all of my preferred flavour boxes. So much so, I ate three as soon as they were cool enough!
Easy Party Food Recipes:

Creating easy recipes is a top priority for me. These straws can be made ahead and kept refrigerated or frozen. Since party food can involve lots of little morsels, keeping the recipe simple reduces stress and leaves more room for fun. Because that’s what parties should be, fun! Whether it’s drinks with friends or a full on family bash, these straws are a perfect addition to any occasion.

FF Prosciutto Wrapped Cheese Puff Pastry Straws
Prosciutto Wrapped Cheese Puff Pastry Straws

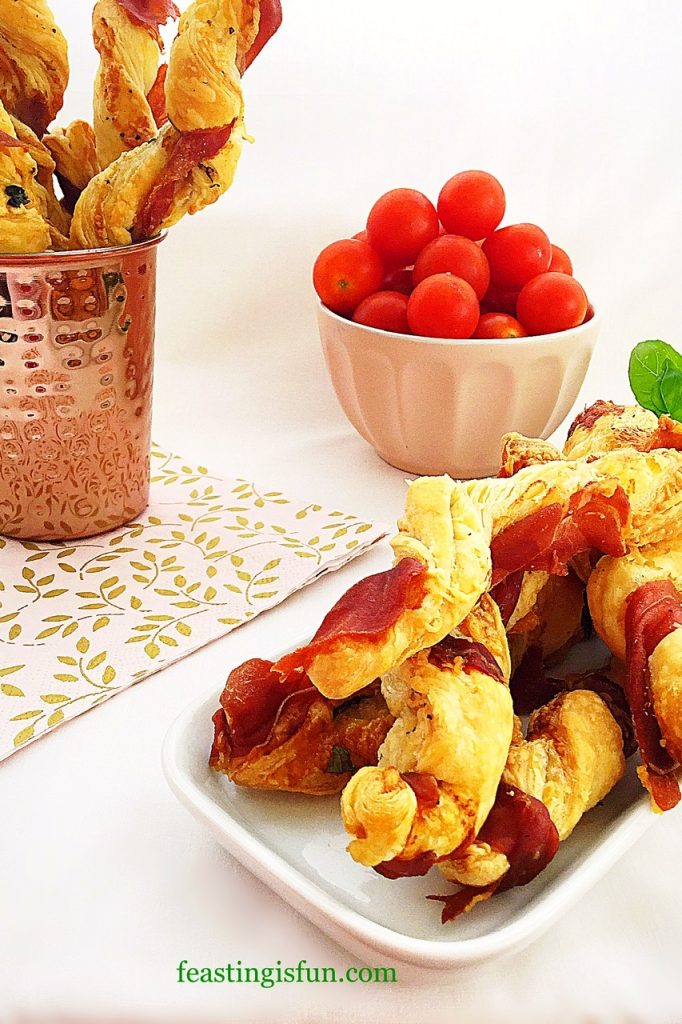
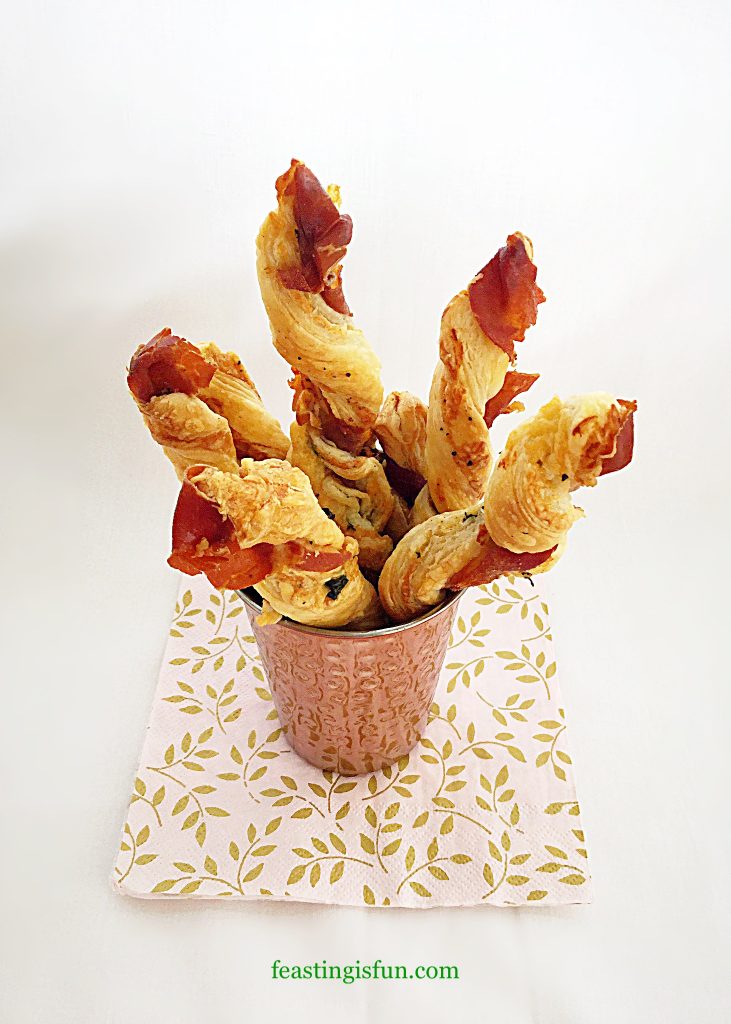
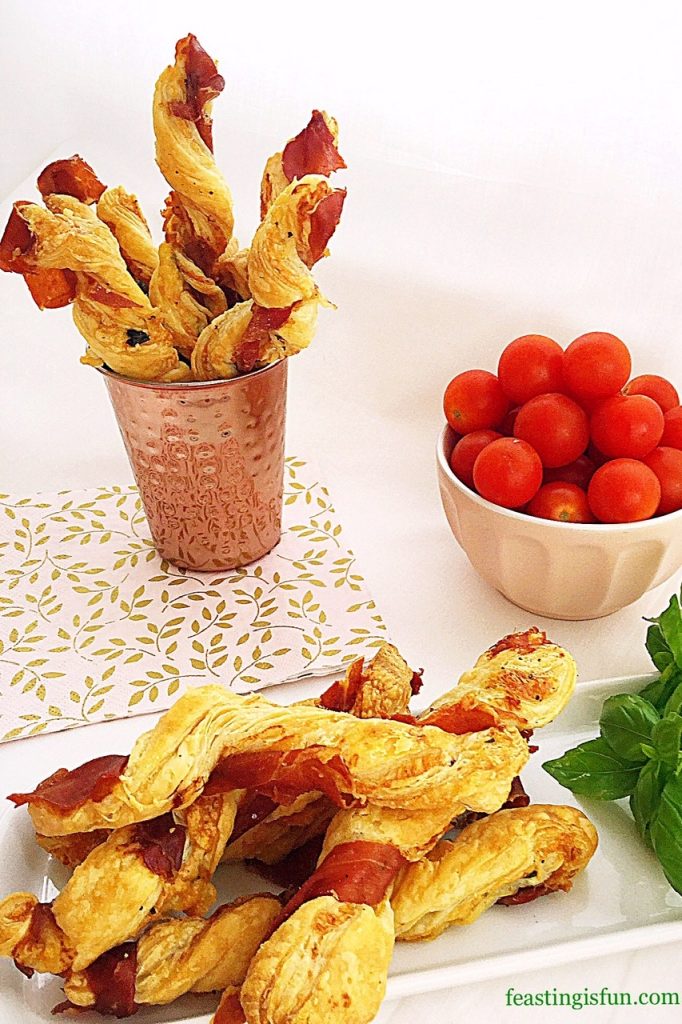
So incredibly easy to make and bake, these straws are filled with grated cheddar and fresh basil. A strip of Prosciutto ham is then twisted around the straw and then baked. As they bake the Prosciutto becomes crisp and salty on the outside with melting cheddar and fresh Basil inside.

Savoury food snacks displayed on a platter and in a copper cup.

Recipe: Prosciutto Wrapped Cheese Puff Pastry Straws – makes 24

2 x 250g/14oz All Butter Puff Pastry – I use Waitrose own brand. Alternatively use ready rolled pastry, however you may need to adjust the cheese/basil/prosciutto quantities.
100g/4oz Finely Grated Mature (Sharp) Cheddar Cheese – I use Wyke Farms

A Handful of Fresh Basil Leaves – approximately 20 leaves. Alternatively when Basil is unavailable use 1tsp finely chopped thyme or rosemary

12 Slices Prosciutto Ham

Freshly Ground Black Pepper

Making The Cheese Straws:
Preheat the oven to 200C/180C fan, 400F, gas mark 6

  • First of all line 2 large baking trays with baking parchment.
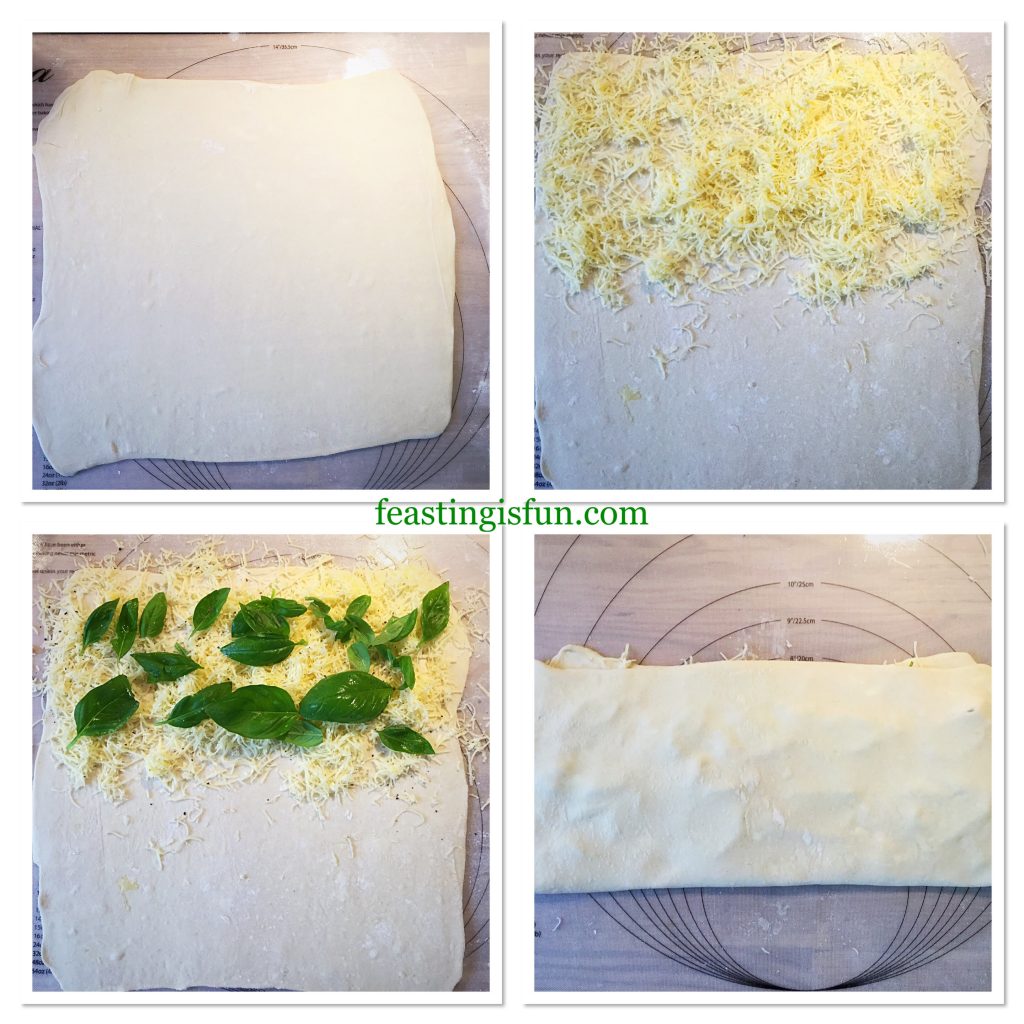
  • Roll the first block of puff pastry into a square, approximately 30cm x 30cm (12in x 12in).
  • Sprinkle half the grated cheddar over the top half of the square.
  • Place half of the fresh basil leaves on top of the cheese.
  • Add some freshly ground black pepper.
  • Fold the bottom half of the pastry up over the cheese and basil.
FF Prosciutto Wrapped Cheese Puff Pastry Straws
Filling the pastry with cheese and basil.
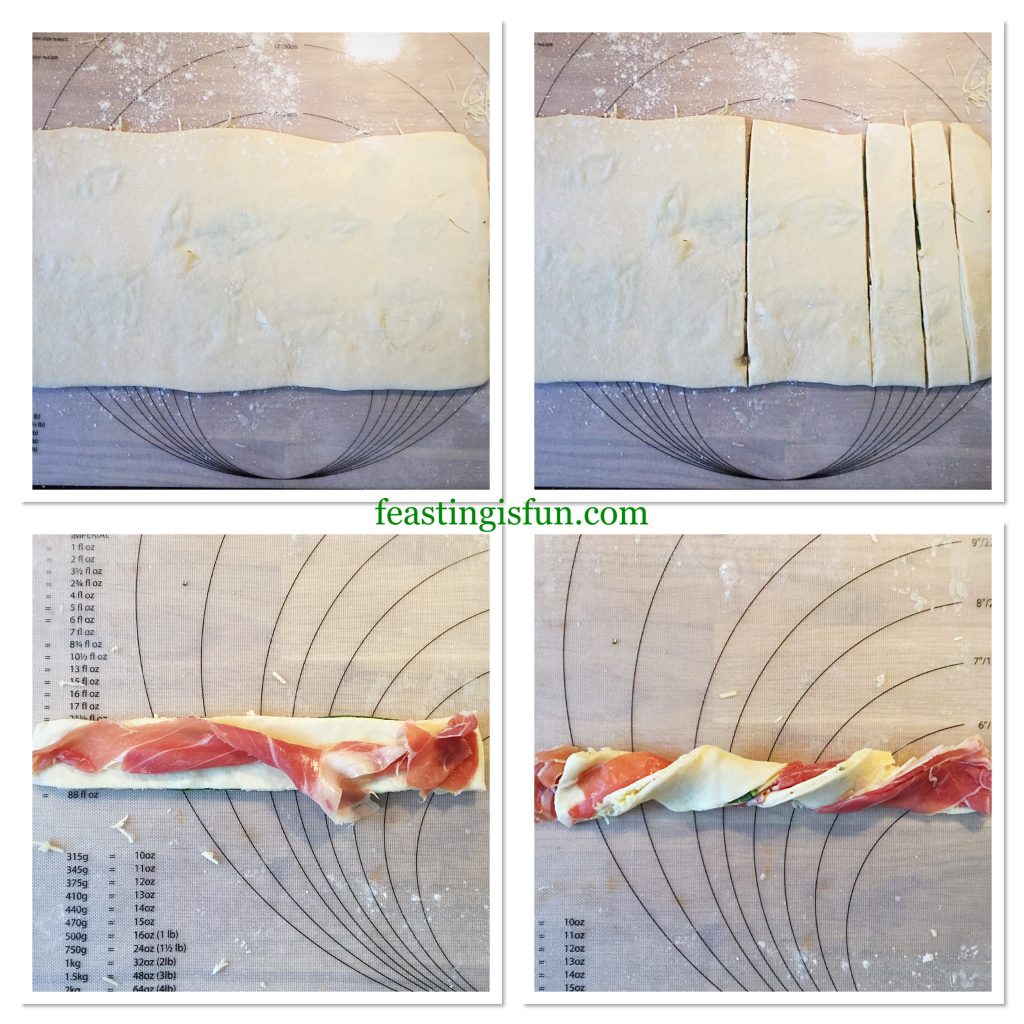
  • Use a rolling pin to roll the pastry so that it flattens and becomes smooth.

Portioning The Straws And Wrapping With Prosciutto:

  • Divide the pastry in half using a sharp knife. Then cut each half in half again, you will have four separate pieces.
  • Cut each quarter into 3 strips. Resulting in 12 straws.
  • Tear a piece of prosciutto ham in two lengthways.
  • Place the ham on top of a straw and press at both ends so it sticks.
  • Using both hands twist the pastry so that the prosciutto wraps around.
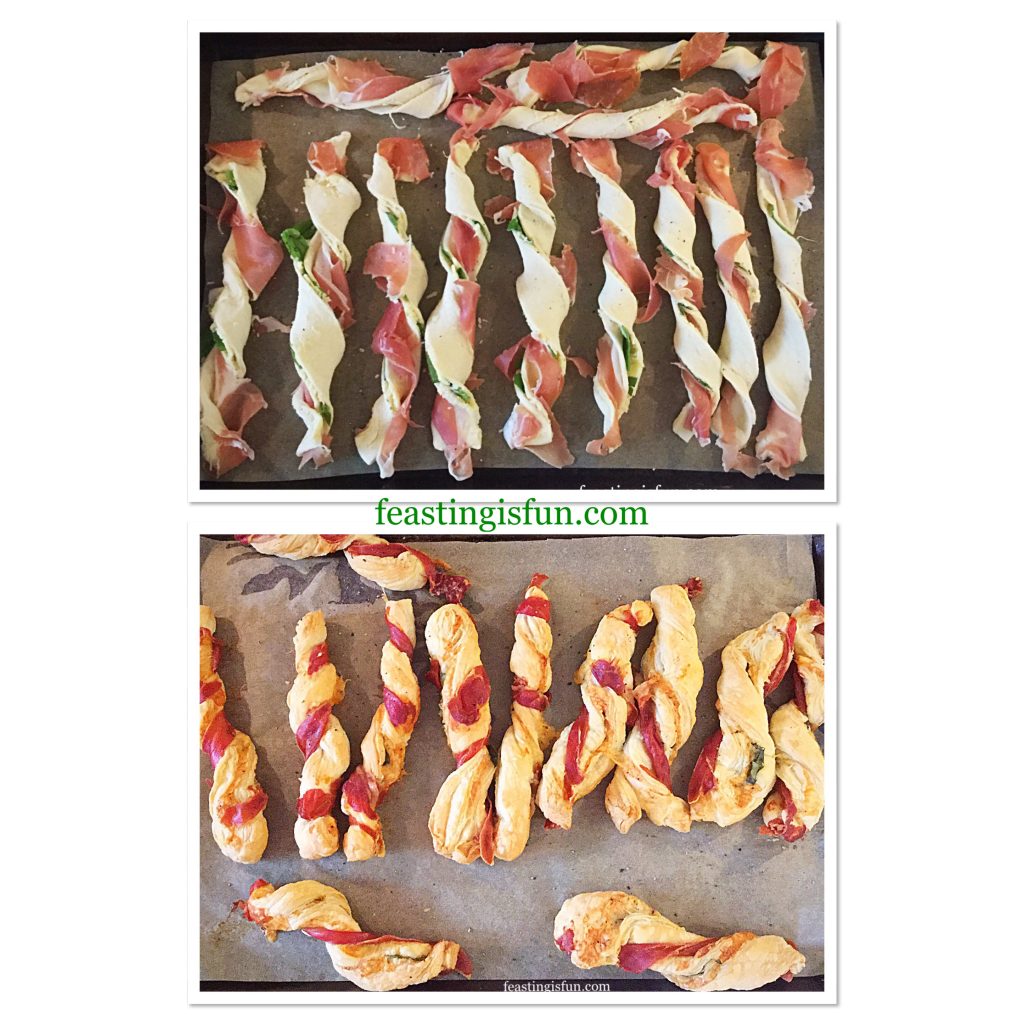
  • Place the twisted pastry on to a baking sheet.
  • Repeat with the rest of the straws.
  • Roll out the second block of pastry and repeat the process again.
FF Prosciutto Wrapped Cheese Puff Pastry Straws
Cutting the straws and wrapping with Prosciutto.

Baking The Prosciutto Wrapped Puff Pastry Straws:

  • Place the baking trays into a preheated oven and bake for 20-25 minutes until the pastry is golden and the prosciutto is crisp.
  • As soon as the straws are baked remove from the oven and place on a serving plate.
  • Note – if you are planning to freeze the straws, remove from the oven 5 minutes early when the straws are baked, yet not golden..
FF Prosciutto Wrapped Cheese Puff Pastry Straws
Baking the Prosciutto Wrapped Cheese Puff Pastry Straws
  • Allow the straws to cool slightly before serving.

Cool, place in an airtight container and refrigerate for up to 2 days. To freeze place in freezer bags or boxes for up to 2 months. To reheat from frozen place in a medium oven for 5-10 minutes.

If you have enjoyed this recipe for Prosciutto Wrapped Cheese Puff Pastry Straws you may also like these:

Mini Sparkenhoe Red Leicester Tarts

FF Prosciutto Wrapped Cheese Puff Pastry Straws
Mini Sparkenhoe Red Leicester Tarts

Spicy Sausage Rolls

FF Prosciutto Wrapped Cheese Puff Pastry Straws
Spicy Sausage Rolls

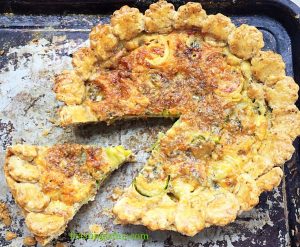
Cheddar Tomato Basil Quiche 

FF Prosciutto Wrapped Cheese Puff Pastry Straws
Cheddar Tomato Basil Quiche

Whether I’m hosting or going out, parties are fun and a great way to catch up with friends and make new ones. Recipes that are easy and also travel well make life easier. These Prosciutto Wrapped Cheese Puff Pastry Straws are ideal for making and taking to parties. Also, as they can be frozen I plan on making a big batch prior to Christmas. Bake the frozen straws into a moderate oven for ten minutes and you have a delicious snack to share with unexpected visitors.

So, whatever you are making, baking and creating in your kitchens have fun preparing and sharing your feast.

Sammie xx

No part of this post may be reproduced or duplicated without the written permission of the owner. Please see my Disclosure Policy.

Creamy Garlic Lemon Chicken Pasta Salad

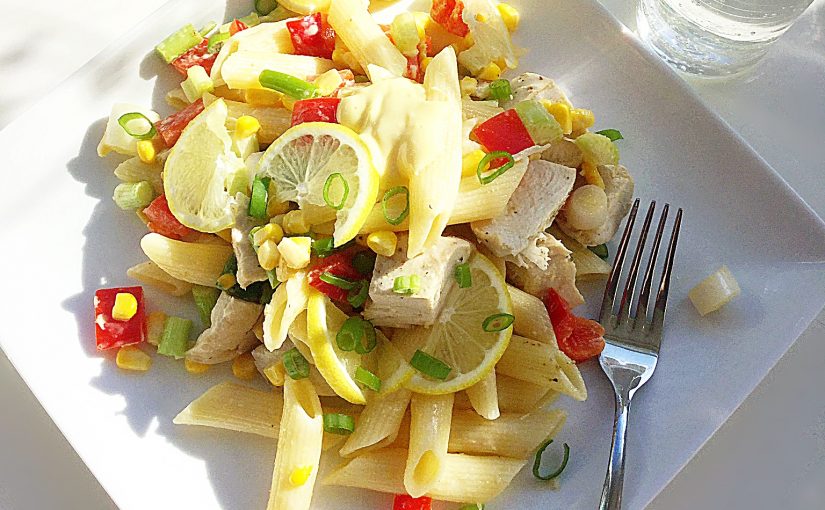
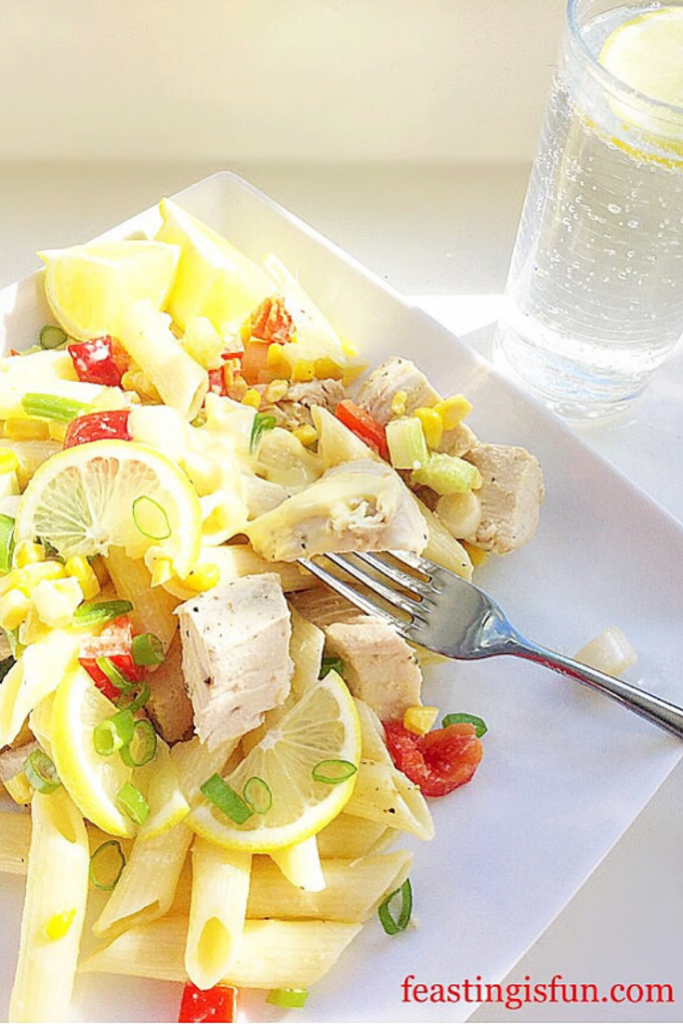
Phew this Summer has been hot, hot, hot so far. And for me that means super easy dinners that can be prepared early in the day before the heat builds. Also, as a family we are wanting cool meals in the evening. Especially meals that don’t leave a lot of washing up! Because everyone is just too hot and tired. So I created this recipe for Creamy Garlic Lemon Chicken Pasta Salad. Not only does it taste good, the bulk of washing up is done earlier in the day.

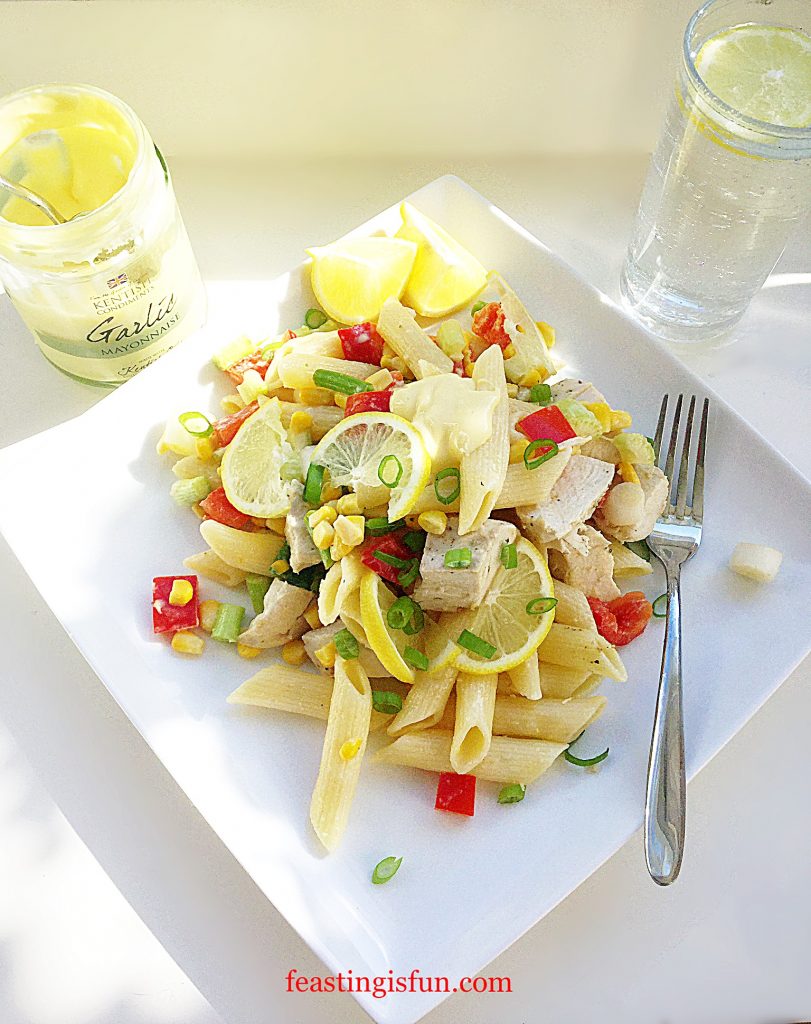
FF Creamy Garlic Lemon Chicken Pasta Salad
Creamy Garlic Lemon Chicken Pasta Salad

Since receiving a jar of Garlic Mayonnaise from Kentish Oils I wanted to use it almost as a sauce for a pasta dish. While sunny, daily temperatures are in excess of 30C  I decided on a cold pasta dish. Although the mayonnaise has garlic in it, it is not an overwhelming, raw, hot garlic flavour. Also it blends beautifully with the lemon chicken and crunchy vegetables in this dish.

FF Creamy Garlic Lemon Chicken Pasta Salad
Creamy Garlic Lemon Chicken Pasta Salad

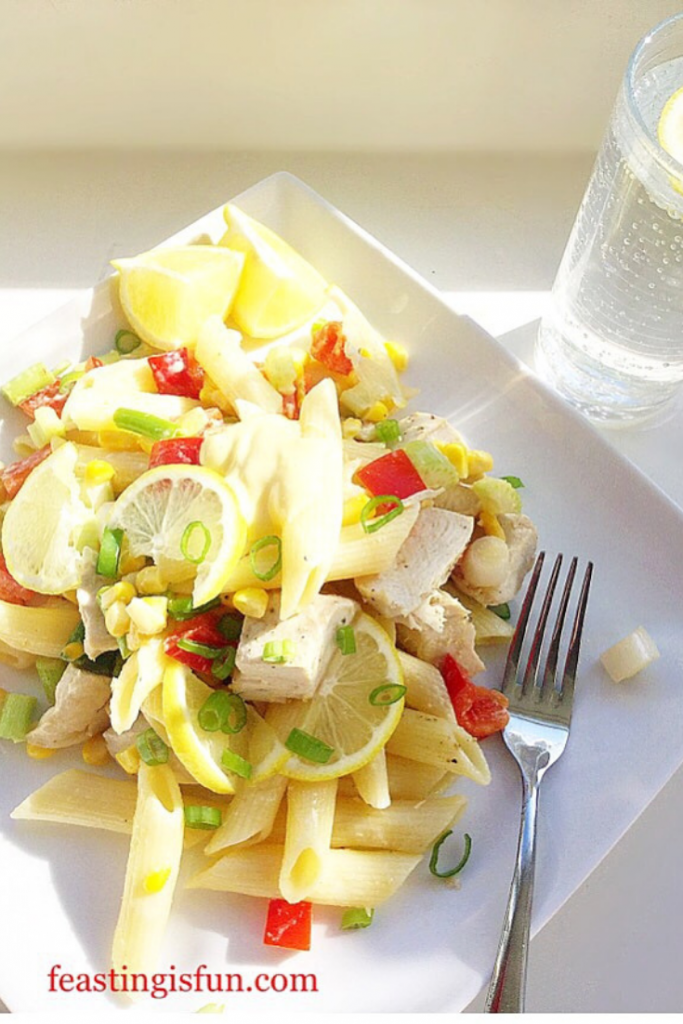
Because the chicken is baked in lemon juice it has a juicy, light lemon flavour. Also, when serving this dish I added very thinly sliced lemons. They are tangy to eat and add an extra punch to this cool, Summer meal. Likewise, an additional teaspoon of the garlic mayonnaise on top of the plated salad gives a tasty finishing touch.

FF Creamy Garlic Lemon Chicken Pasta Salad

Recipe: Creamy Garlic Lemon Chicken Pasta Salad serves 6

450g/1lb – Four Chicken Breasts skin and bone removed

3-4 Whole Lemons – washed and dried

2 Sweetcorn Cobs – approximately 275g/10oz or the equivalent tinned sweetcorn – drained

450g/1lb Pasta – I use rigatoni

8 Spring Onions (scallions)

2 Red Bell Peppers

2 Sticks of Celery

125g/4.5oz – approximately 5 tablespoons of Garlic Mayonnaise (plus extra to garnish) – I use Kentish Oils alternatively use the equivalent amount of mayonnaise and add one clove of minced/crushed garlic

Sea salt I use Maldon and freshly ground black pepper to season

Method: Preheat the oven to 180C/160C fan, 325F, gas mark 3.

Preparing the chicken

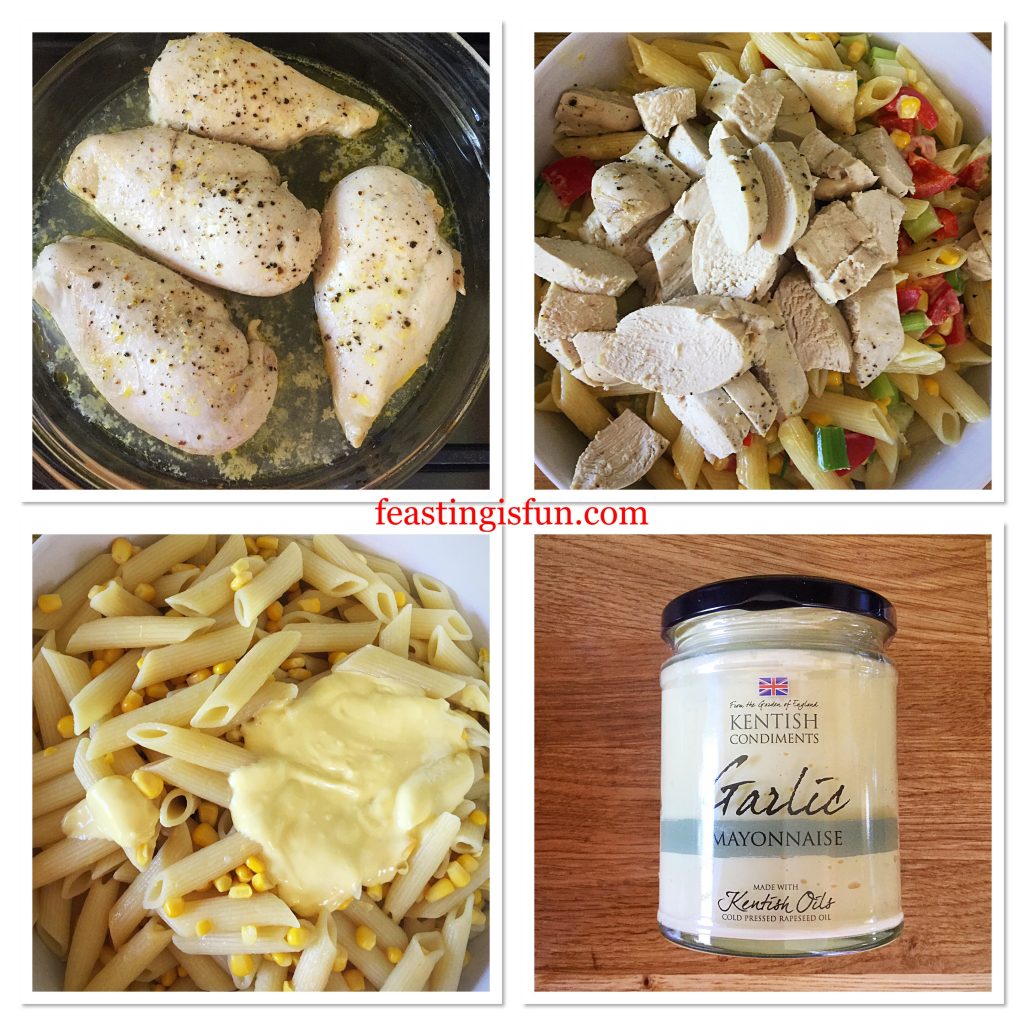
  • First of all, place the chicken breasts in an ovenproof dish. Season with sea salt, freshly ground black pepper and the juice from two whole lemons.
  • Cover the dish with aluminium foil and bake in the centre of the oven for 45 minutes.

Cooking the pasta and preparing the vegetables

  • While the chicken is cooking place a large pan of water on a high heat. As soon as the water is boiling add 1 teaspoon of sea salt and then add the pasta. Cook the pasta according to the packet instructions.
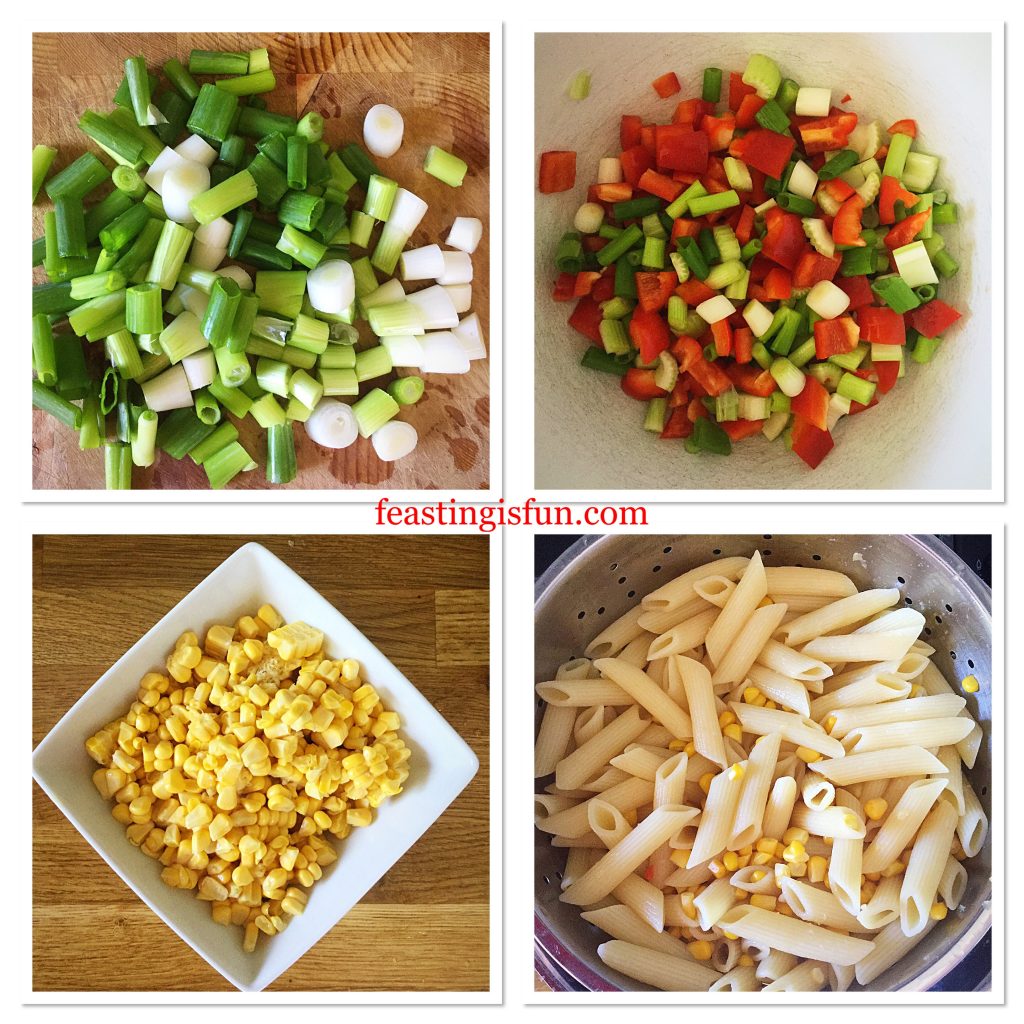
  • Chop the spring onions, red peppers and celery to about the same size and place in a large bowl. If using tinned sweetcorn add it to the bowl.
  • Stand a sweetcorn cob on one end and carefully cut down between the husk and the corn. Turn the cob and repeat until all of the corn is removed. Repeat for the second cob.
  • 3 minutes before the pasta has finished cooking add the fresh sweetcorn to the pan.
  • Once cooked drain the pasta and sweetcorn.
FF Creamy Garlic Lemon Chicken Pasta Salad
Preparing the vegetables and pasta.

Assembling the salad

  • After 45 minutes check that the chicken is thoroughly cooked. Cut through the thickest part of the biggest chicken breast, there should not be any pink colour, this shows the chicken is cooked. If there is even a hint of pink return the chicken to the oven for a further 10 minutes and check again.
  • As soon as the chicken is cooked remove from the oven and place the chicken breasts on a plate for 10 minutes to rest.
  • Cut the chicken into slices.
  • Add the cooked pasta and sweetcorn to the bowl and the add the garlic mayonnaise. Mix using a large spoon.
  • Now add the sliced chicken to the bowl and mix again.
  • Taste and check for seasoning, adjust if needed.
FF Creamy Garlic Lemon Chicken Pasta Salad
Assembling the Creamy Garlic Lemon Chicken Pasta Salad

The finished Creamy Garlic Lemon Chicken Pasta Salad.

Creamy Garlic Lemon Chicken Pasta Salad

Cover the bowl with cling film and refrigerate until ready to eat. This dish tastes best when it is fridge cold.

Serve the salad with very thin slices of lemon, extra wedges of lemon to squeeze over and a drizzle of garlic mayonnaise.

Creamy Garlic Lemon Chicken Pasta Salad

Keep any leftovers refrigerated in an airtight container and eat within two days.

If you have enjoyed this recipe for Creamy Garlic Lemon Chicken Pasta Salad you may also like these:

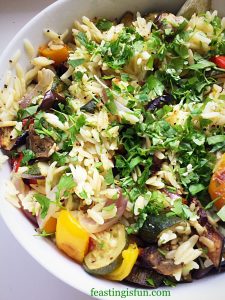
Roasted Summer Vegetable Orzo Salad 

FF Creamy Garlic Lemon Chicken Pasta Salad
Roasted Summer Vegetable Orzo Salad

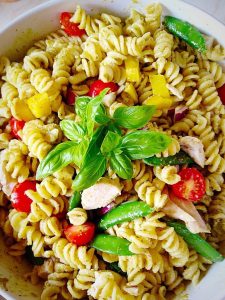
Chicken Pasta Pesto Salad

FF Creamy Garlic Lemon Chicken Pasta Salad
Chicken Pasta Pesto Salad

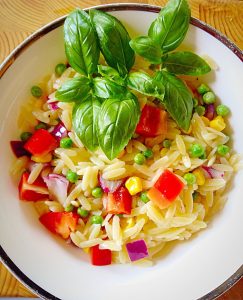
Lemon Garlic Vegetable Orzo 

FF Creamy Garlic Lemon Chicken Pasta Salad
Lemon Garlic Vegetable Orzo

The versatility of pasta is why it is one of my favourite staples to have in the kitchen. Since all I need are a few crunchy vegetables and this yummy garlic mayonnaise I am set now for the heatwave! Because we all need a stash of easy, light, quick recipes for when we are busy and especially when the weather is hot. Now is not the time for slow cooked casseroles! I say cool, quick and easy saves the day.

Whatever you are making, baking and creating in your kitchens have fun preparing and sharing your feast.

Sammie xx

No part of this post may be reproduced or duplicated without the written permission of the owner. Please see my Disclosure Policy.

Kentish Oils sent me the Garlic Mayonnaise to try. All opinions and views are my own and this is NOT a sponsored post.

Cherry Tomato Mozzarella Basil Quiche

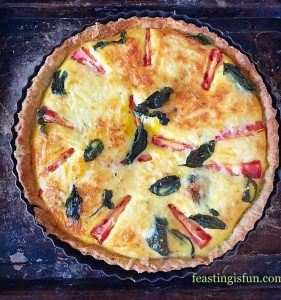
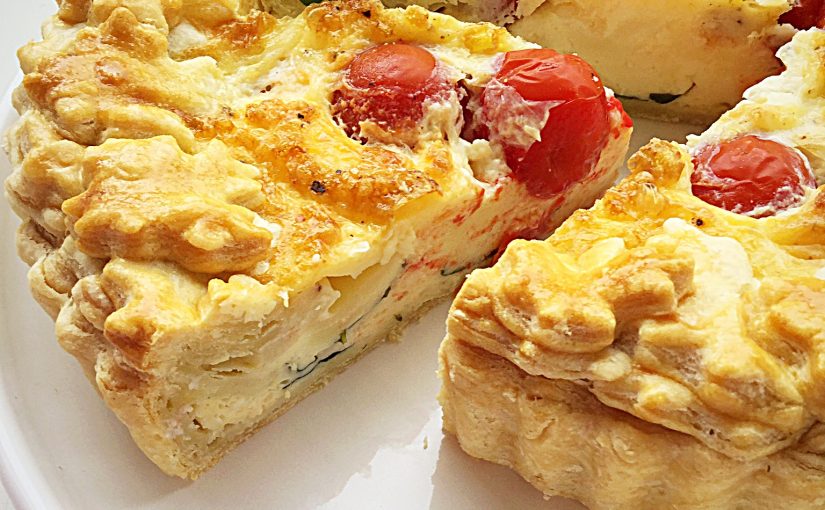
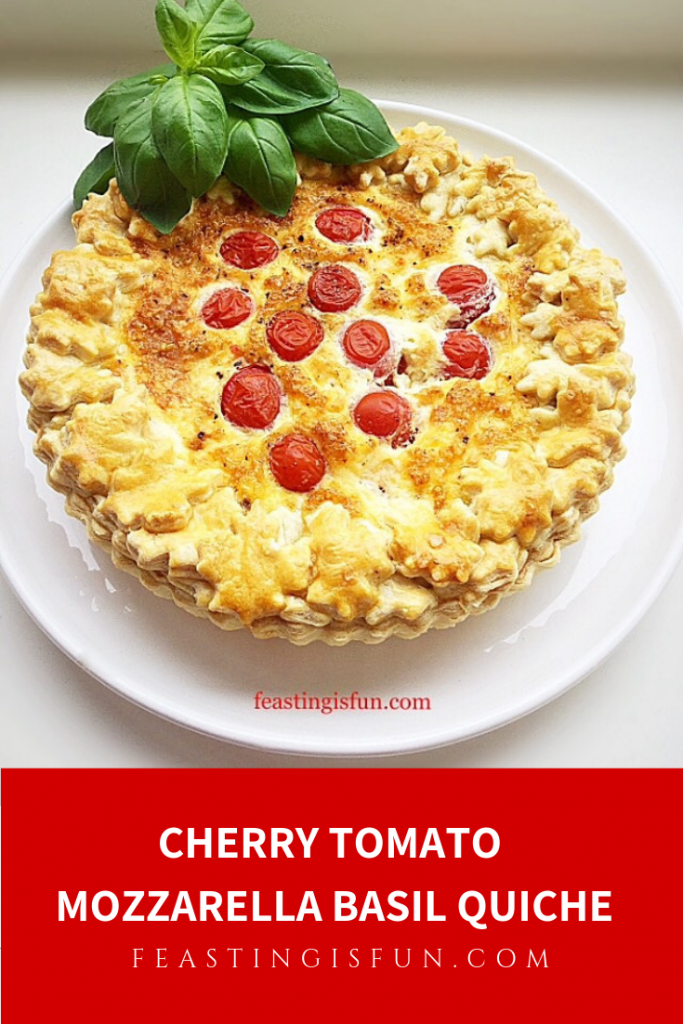
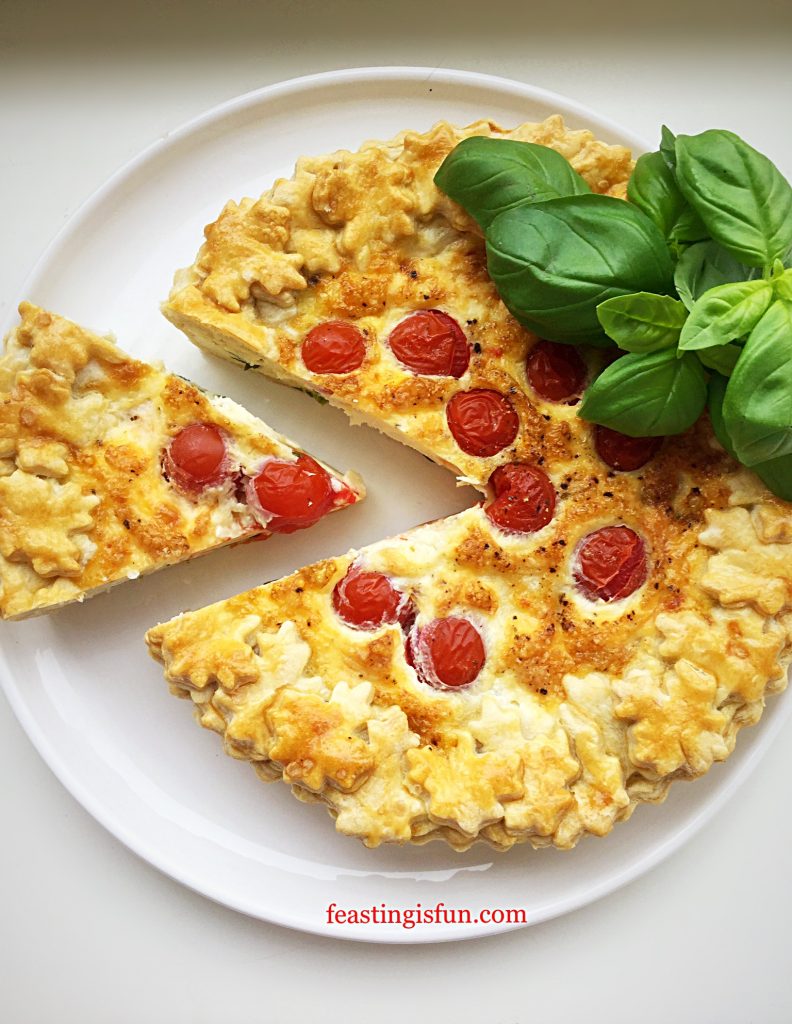
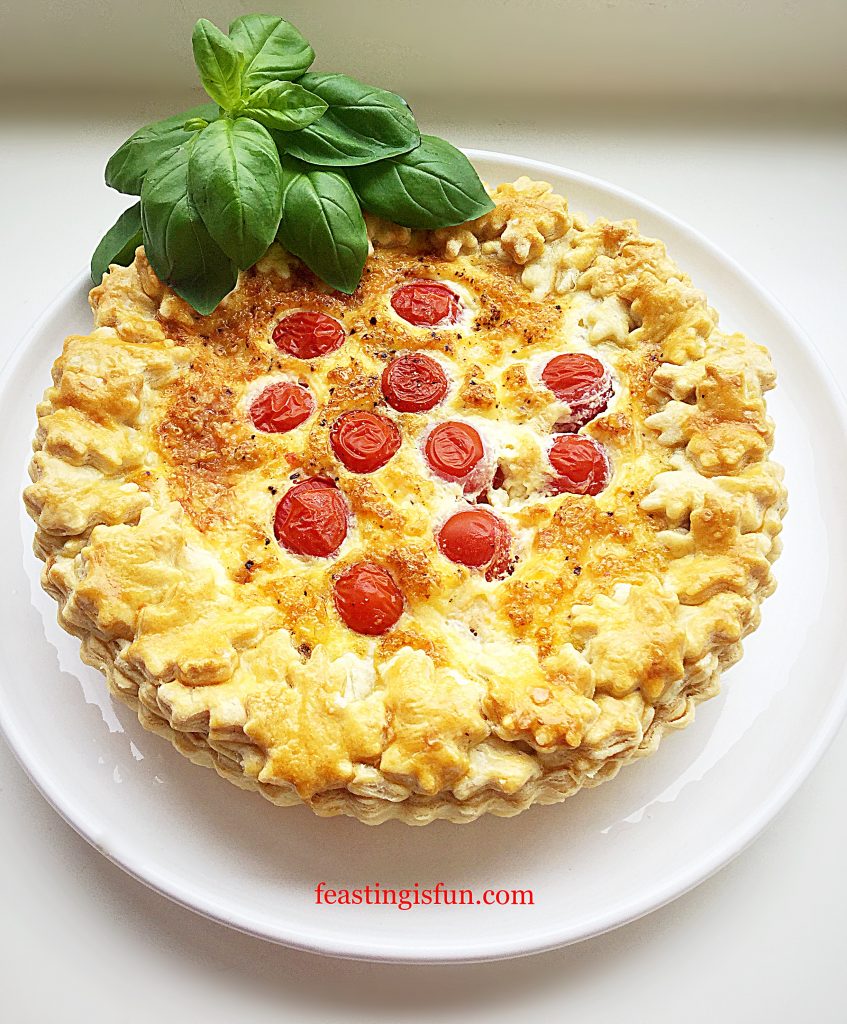
In case you missed my previous post Fresh Basil Topped Slow Roasted Tomatoes I’ll mention again that I love tomatoes. Especially locally grown, British tomatoes that are ripened on the vine and left on the worktop, not in the fridge. Sweet and savoury bursts of Summer on my tongue. Here I have baked them into a layered quiche with fresh basil and two types of cheese. So I am thrilled to bring you my Cherry Tomato Mozzarella Basil Quiche.

FF Cherry Tomato Mozzarella Basil Quiche

I was inspired by the classic caprese salad of fresh tomatoes, mozzarella cheese and fragrant basil to make this savoury tart. Since each element compliments the others so well as a salad the same can be said of this quiche. Also, layering the separate ingredients within an all butter pastry tart creates a delicious dish. Perfect for lunch, dinner, picnics, packed lunches and buffets. And that is how delicious this quiche is!

FF Cherry Tomato Mozzarella Basil Quiche
Cherry Tomato Mozzarella Basil Quiche

Choosing Local Produce

Because using local, seasonal produce is important to me, as a home cook and Food Blogger, I was delighted when I was offered a box of Sophie Jane cherry tomatoes. Locally grown by Eric Wall a local, specialist grower. The tomatoes I received are ripened on the vine and are grown without the use of pesticides. Most importantly they taste incredible. In fact just like a tomato should taste. Eaten warmed by the sun, after being left on the windowsill, they are sweet with a deeper savoury flavour. Also they weren’t very acidic as some tomatoes can be, especially tinned ones.

FF Cherry Tomato Mozzarella Basil Quiche
Cherry Tomato Mozzarella Basil Quiche

While British Tomato Fortnight has finished I firmly believe that we should all be eating flavoursome British tomatoes for as long as they are available. Because they taste so good. It really is as simple as that. I have been popping these ruby beauties into my mouth like sweeties. Eating them alongside crackers and cheese and I plan to make more recipes to share with you. All in aid of celebrating the humble tomato.

Recipe: Cherry Tomato Mozzarella Basil Quiche:

You will need a 20cm x 5cm (8” x 2”) tart tin, ideally with a loose bottom, to make this recipe.

A quick note – I successfully doubled all of the quantities and made this quiche in a deeper, wider dish. Baking times need to be adjusted, aside from the initial blind baking. The larger quiche turned out perfectly and would be ideal for feeding a crowd, or a buffet.

500g/1lb 2oz Shortcrust Pastry – I use my recipe for Perfect Butter Shortcrust Pastry freezing the leftovers

225g/8oz Mozzarella Cheese – drained and with excess water squeezed out

50g/2oz Vintage or Very Mature/Sharp Cheddar – I use Wyke Farms

6 Large Free Range Eggs

225g/8oz Fresh Cherry Tomatoes

12-14 Fresh Basil Leaves – alternatively out of season use 1/2 tsp dried Thyme

1/2 tsp Freshly Ground Black Pepper

Pinch of Sea Salt Flakes – I use Maldon

Method: Preheat oven to 220C/200C fan, 425F, gas mark 7

Making And Baking The Shortcrust Pastry Tart Case

  • First of all make the pastry, wrap in cling film and chill for one hour.
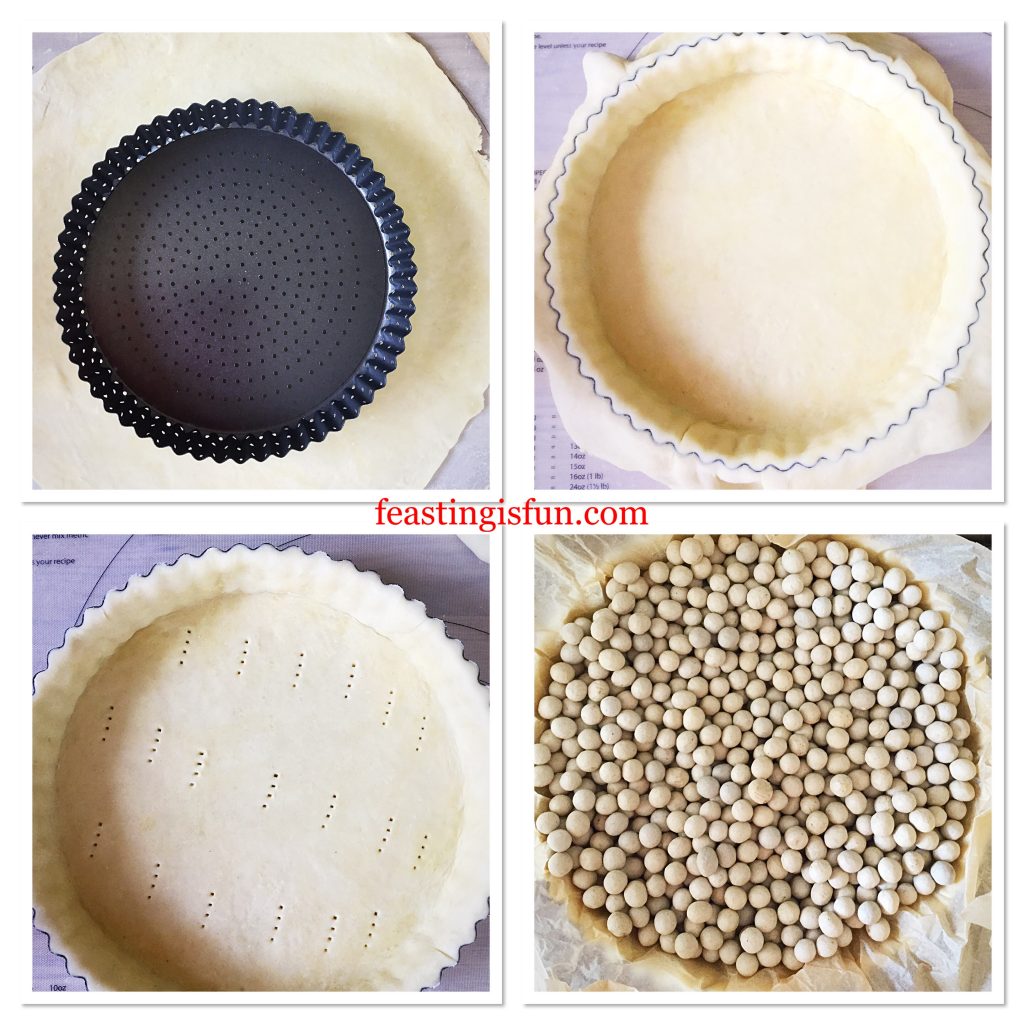
  • Remove the chilled pastry from the fridge, unwrap and roll out on a lightly floured surface, so that it will fit the tart tin. See photo top left below.
  • Fold the pastry over the rolling pin, making it easier to transfer.
  • Lower the pastry into the tin, making sure that you don’t stretch it as you do.
  • Press the pastry into the tin so that it fits securely.
  • Run your rolling pin over the tart tin, this will give a clean edge to the pastry.
  • Place the tart tin on to a baking sheet and dock the base with a fork.
  • Now scrunch up some baking parchment and line the pastry tart with it.
  • Next fill with baking beans.
FF Cherry Tomato Mozzarella Basil Quiche
Making the pastry shell for the quiche.
  • Place in the centre of a preheated oven and bake for 15 minutes.
  • Carefully lift out the baking parchment and baking beans.
  • Return the tart to the oven for 5 minutes further baking.

Layering The Quiche Ingredients

  • Remove the tart and reduce the oven temperature to 190C/170C fan, 375F, gas mark 5.
  • Line the tart base with basil leaves.
  • Place torn chunks of mozzarella directly on to the basil.
  • Sprinkle over finely grated cheddar and then top with cherry tomatoes.
  • Reserve one egg, whisk the other five adding the black pepper. Pour the eggs into the tart.
FF Cherry Tomato Mozzarella Basil Quiche
Creating layers within the Cherry Tomato Mozzarella Basil Quiche
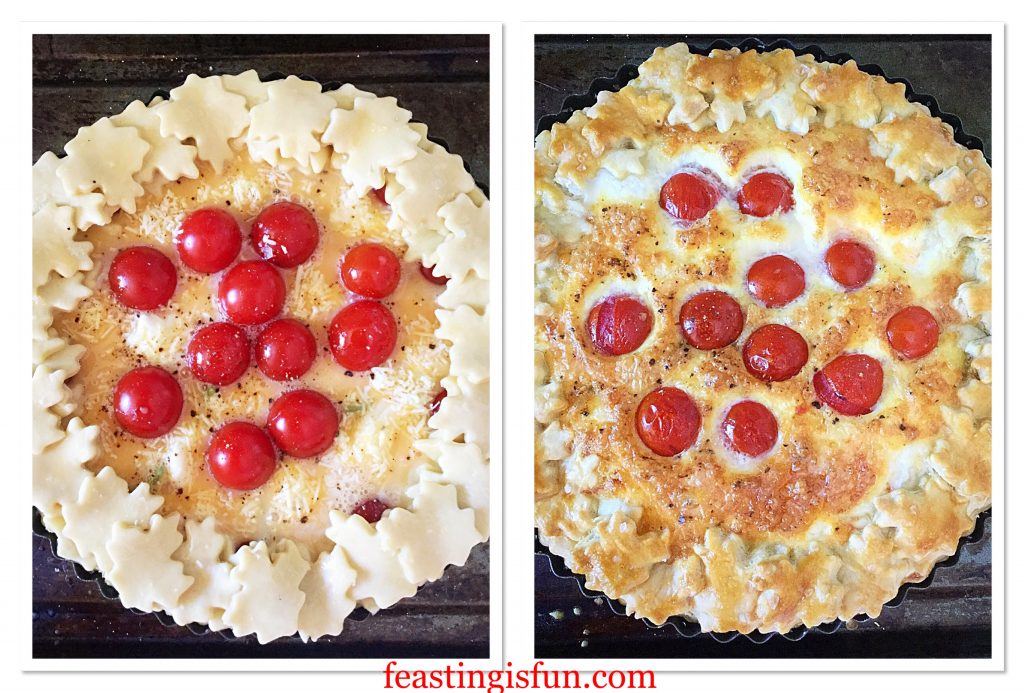
  • Roll out the remaining pastry and cut out small shapes to edge the tart. I used a oak leaf cutter which gives the edge of the quiche a frilly finish.
  • Whisk the remaining egg and brush the underside of each cutout. Stick the pastry cutouts to the edge of the pastry case. You can create a single layer or add extra cutouts to create a layered effect.
  • Brush the pastry edge with egg so that it turns golden when baked.
  • Finally sprinkle a pinch of sea salt over the top.

Baking The Cherry Tomato Mozzarella Basil Quiche

FF Cherry Tomato Mozzarella Basil Quiche
Before and after baking the Cherry Tomato Mozzarella Basil Quiche
  • Carefully place the filled quiche into the centre of the oven – remember to check that the heat has been reduced.
  • Bake for 40-45 minutes. The quiche is baked when it is a golden colour and there is no wobble in the centre.
  • As soon as the quiche is baked remove from the oven. Place on a cooling rack for at least 30 minutes before removing from the tin. Take care as the tomatoes will be very hot and juicy.
FF Cherry Tomato Mozzarella Basil Quiche
Cherry Tomato Mozzarella Basil Quiche

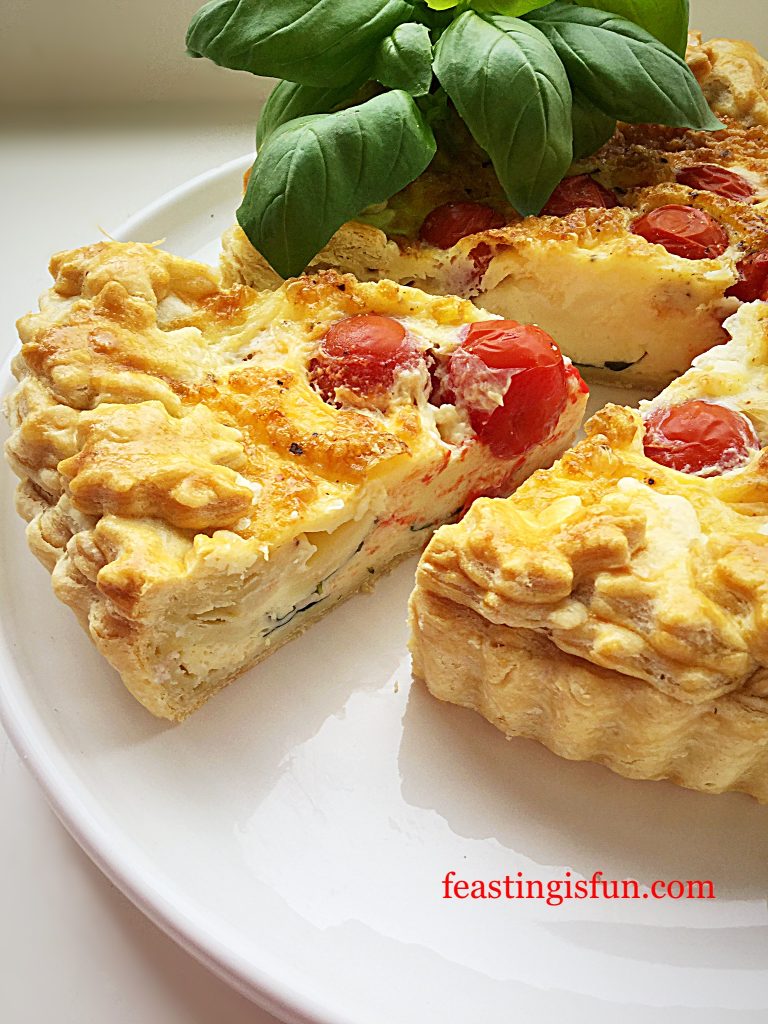
The beauty of this quiche is that it can be served warm, at room temperature or cold, straight from the fridge!

FF Cherry Tomato Mozzarella Basil Quiche
Cherry Tomato Mozzarella Basil Quiche

Because this quiche does not contain meat it is also suitable for vegetarians. Since I have made this twice it really holds it’s shape well when cold and would be perfect for taking on picnics. Most of all, when you bake this quiche make sure you share it. Especially as it is so pretty and absolutely yummy!

Make up to 2 days ahead, cool completely, double wrap in cling film and refrigerate. Due to the moisture content of the tomatoes I would not recommend freezing, unlike my Smoked Bacon Asparagus Quiche which freezes well. Although the pastry case can be made in advance and frozen.

If you have enjoyed this recipe for Cherry Tomato Mozzarella Basil Quiche you may also like these:

Quiche Lorraine 

FF Cherry Tomato Mozzarella Basil Quiche
Quiche Lorraine, smoked bacon and cheddar cheese savoury tart.

Walnut Pastry Crust Leek Stilton Tart

FF Cherry Tomato Mozzarella Basil Quiche
Walnut Pastry Crust Leek Stilton Tart

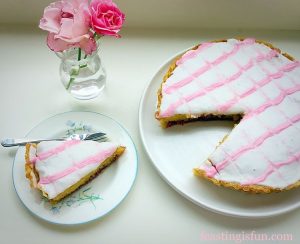
Iced Bakewell Tart

FF Cherry Tomato Mozzarella Basil Quiche
Iced Bakewell Tart

During this Summer, which I am hoping will be long and warm, I’m looking forward to creating recipes to share with you. Especially focusing on seasonal, local produce and products. Whether you live here, in Australia, Europe or the United States, I do feel that it’s important to support our local farmers. While some of you may get to visit farmers markets, if like me, it’s difficult for you to get out, take a look online. Since spending a little time researching I’ve found the equivalent of farmers markets online and they deliver! Most of all, if you remember one thing from this post – please keep your tomatoes out of the fridge, it kills their flavour!

Whatever you are making, baking and creating in your kitchens, have fun preparing you feast.

Also a huge thank you to everyone who follows me on social media and shares their creations with me.

Sammie xx

No part of this post may be reproduced or duplicated without the written permission of the owner. Please see my Disclosure Policy.

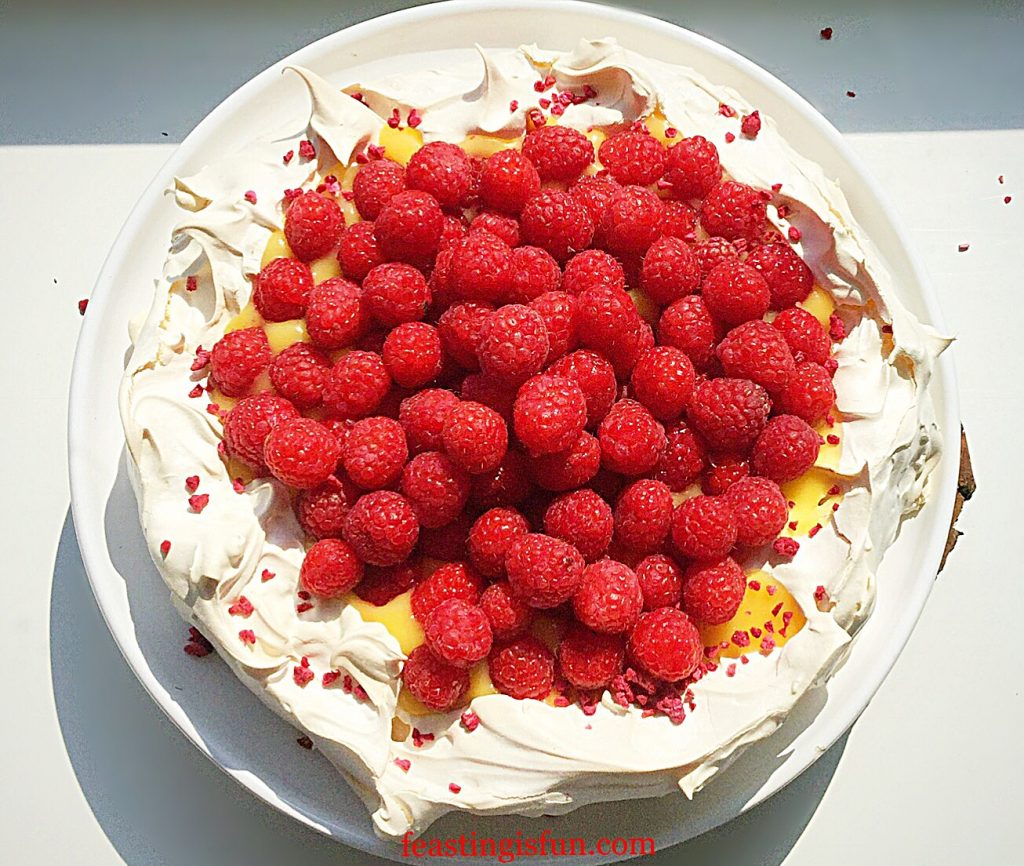
Raspberry Topped Lemon Curd Pavlova

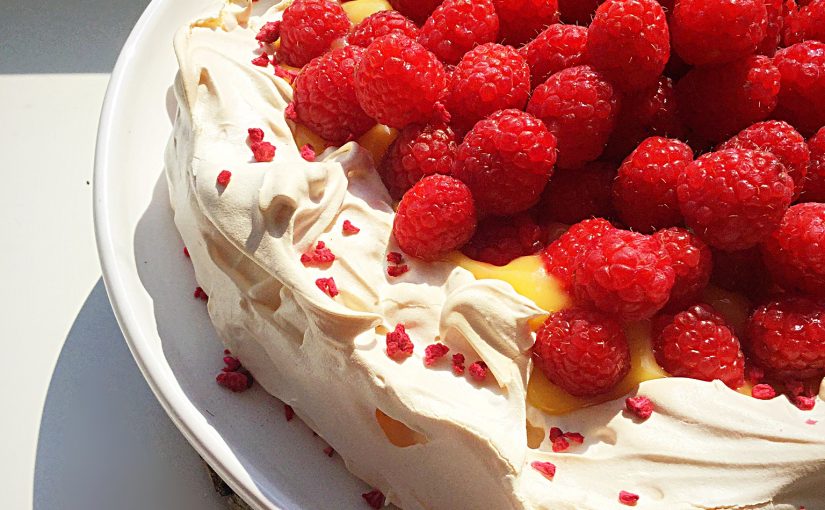
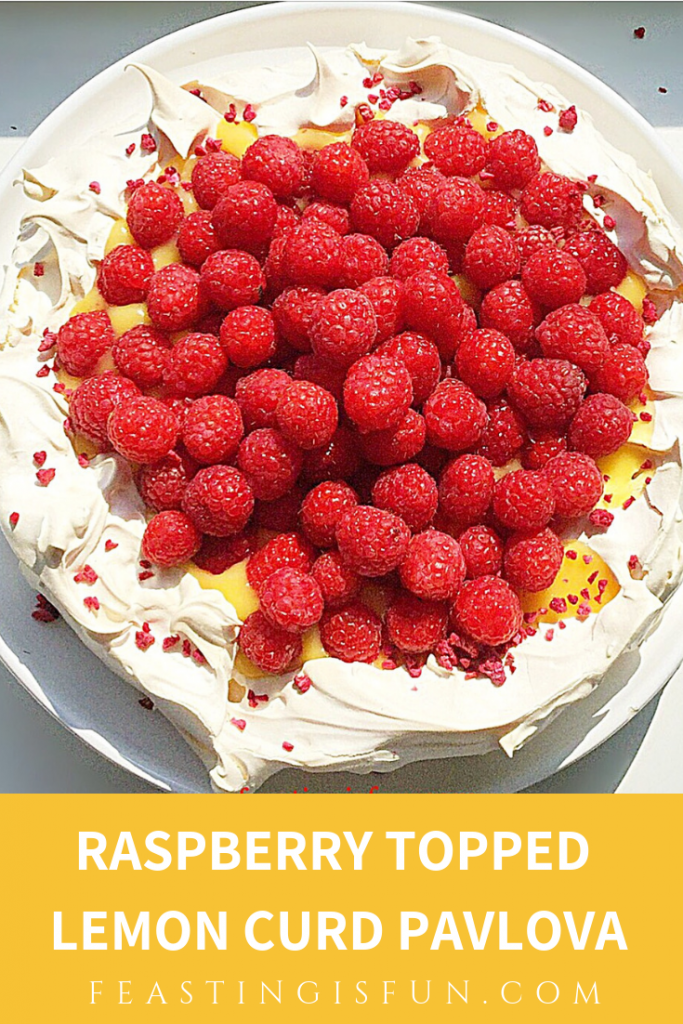
Spring and Summer for me are all about fresh berries. While, there is little that compares to a ripe, sun warmed, freshly picked Strawberry, their shop bought counterparts can be a disappointment. Whereas raspberries, have a more intense flavour that is rarely dulled, even when frozen. Being both tart and sweet, they add extra fruit intensity to this Raspberry Topped Lemon Curd Pavlova.

FF Raspberry Topped Lemon Curd Pavlova

After receiving some Raspberry Vinegar to try, my immediate thought was to include it in a Pavlova. Since white wine or balsamic vinegar are used in my other Pavlova recipes such as this Raspberry Chocolate Pavlova, it seemed ideal. And with the addition of freeze dried raspberries it adds a subtle raspberry flavour to the baked meringue. While also creating the marshmallow inner to this meringue’s crispy, outer shell.

FF Meringue With Lemon Curd And Raspberries
Raspberry Topped Lemon Curd Pavlova

Since I personally do not have a very sweet tooth the tart raspberries, along with the golden lemon curd balance perfectly with the Pavlovas sweetness. And as the meringue whites are used for the Pavlova I wanted to come up with a fresh lemon curd recipe that only needed yolks. Following research online I cobbled together half a dozen different recipes and came up with my own. Resulting in a tart lemon curd that just holds it’s shape.


FF Raspberry Topped Lemon Curd Pavlova
Raspberry Topped Lemon Curd Pavlova

I have made this Pavlova four times. Because of the fresh raspberries in the vinegar it colours very quickly if baked at the usual fan oven temperature of 140C. So, you will find in the method that this Pavlova is baked at a much lower temperature than you might normally expect. Since baking at a lower temperature results in a crispy outer and marshmallow inner for this Pavlova, without it browning on the outside.

Recipe: Gluten Free Raspberry Topped Lemon Curd Pavlova serves 6-8

For the Pavlova Base:

4 Large Free Range Eggs – yolks separated from whites

200g/7oz Caster Sugar

1 tsp Raspberry Vinegar – I use Womersley Foods alternatively use 1 tsp White Wine Vinegar

1 tsp Cornflour (corn starch) – I use  Doves Farm it is certified gluten free

Optional – 3 tbsp Freeze Dried Raspberries – available online and from Waitrose

For the Lemon Curd:

4 – 6 Large Unwaxed Lemons – if waxed scrub with brush in hot soapy water, rinse and dry – finely zested and then squeezed to yield 200mls fresh lemon juice

200ml Tap Water

125g/4.5oz Caster Sugar

100g/4oz Unsalted Butter cut into cubes

3tbsp Cornflour dissolved in 2tbsp Tap water

4 Egg Yolks from separated eggs

Topping:

400-500g/1lb Fresh Raspberries

Optional – 2tbsp Freeze Dried Raspberries

Method: preheat oven to 140C/120C, 275F, gas mark 1

Making The Pavlova

  • First of all, make sure the mixing bowl is scrupulously clean. I always wipe around the inside with half a cut lemon.
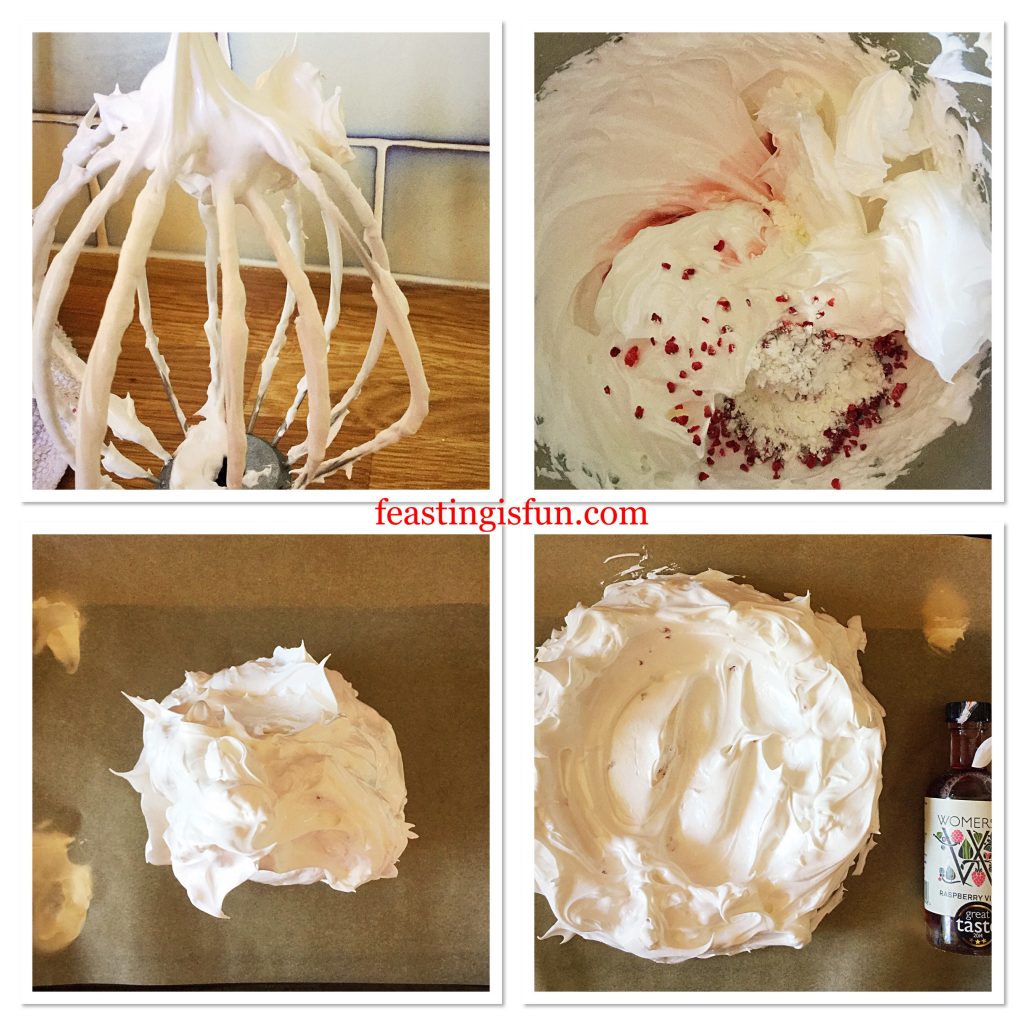
  • Pour the egg whites into the bowl and whisk at high speed until they hold a stiff peak. See the first image below.
  • While the whisk is still running add sugar slowly, one tablespoon at a time. Continue until all the sugar is added. Stop the whisk and rub a little of the meringue mixture between your finger and thumb. It should feel smooth not gritty. Continue whisking until the mixture is smooth and glossy.
  • Line a baking sheet with baking parchment. Draw a 20cm/8in circle on the reverse of the paper. Use small dollops of meringue to stick the parchment to the baking sheet.
  • As soon as the meringue is ready stop the whisk. Add the raspberry vinegar, cornflour and freeze dried raspberries. Fold the ingredients carefully into the meringue using a large metal spoon.
  • Scoop all of the meringue on to the baking sheet. Use a palette knife to create a disc that is slightly higher around the edge than the centre.
FF Raspberry Topped Lemon Curd Pavlova
Making the Pavlova with added raspberry flavour.

Baking And Cooling The Pavlova

  • Place the Pavlova into the lower part of the oven and bake for 10 minutes.
  • Reduce the oven temperature to 120C/100C fan, 250F, gas mark 1/2. Continue to bake for a further 1 hour 50 minutes. Switch the oven off and leave the Pavlova to cool in the oven.
  • While the Pavlova is baking make the lemon curd.

Making The Lemon Curd

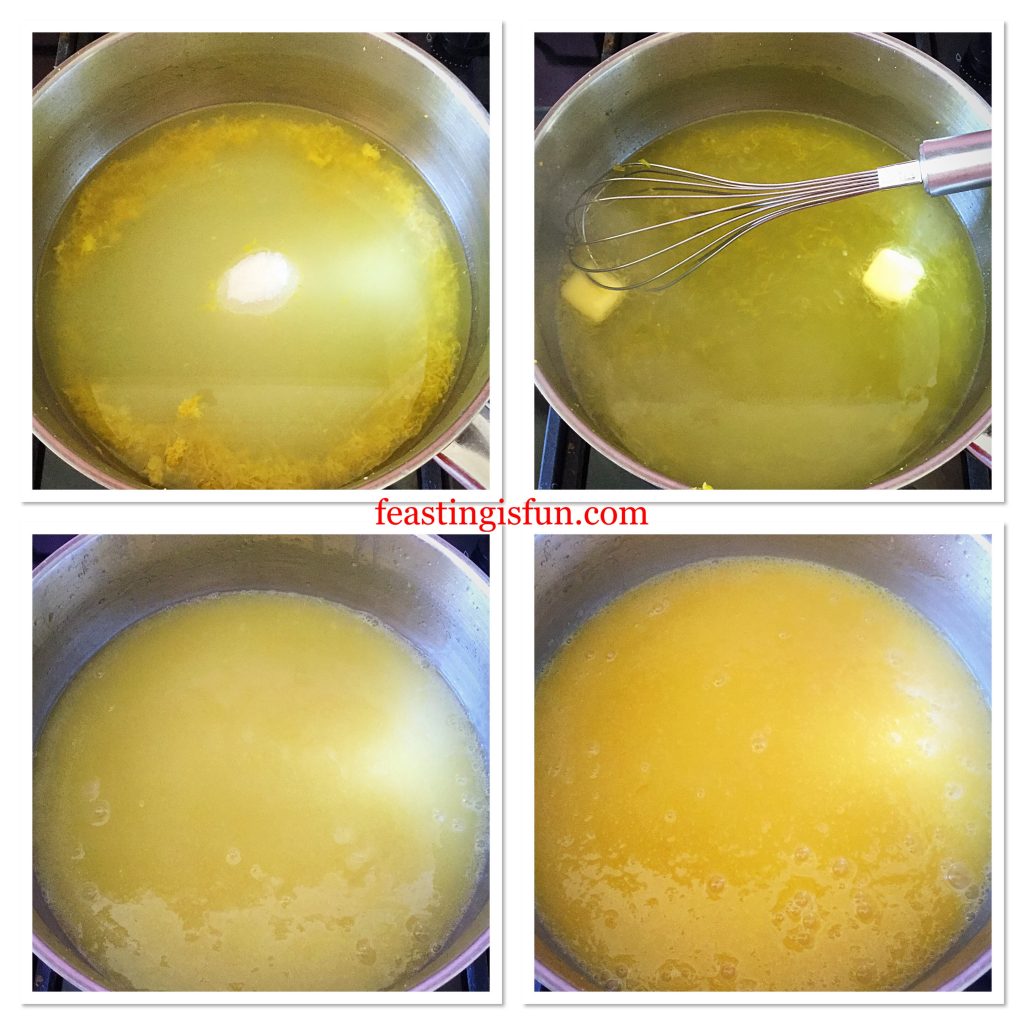
  • Place the lemon zest, juice and sugar into a heavy bottom saucepan over a medium heat. Stir until the sugar is dissolved.
  • Next add two cubes of butter to the pan, whisking gently until dissolved. Repeat as before until all of the butter has been used.
  • Pour the cornflour slurry into the pan and whisk to incorporate. Cook until the mixture is thickened and starts to bubble gently.
  • Remove the pan from the heat. Whisking continuously add one egg yolk at a time. Heat from the pan will cook the yolks.
FF Raspberry Topped Lemon Curd Pavlova
Preparing the fresh Lemon Curd.m
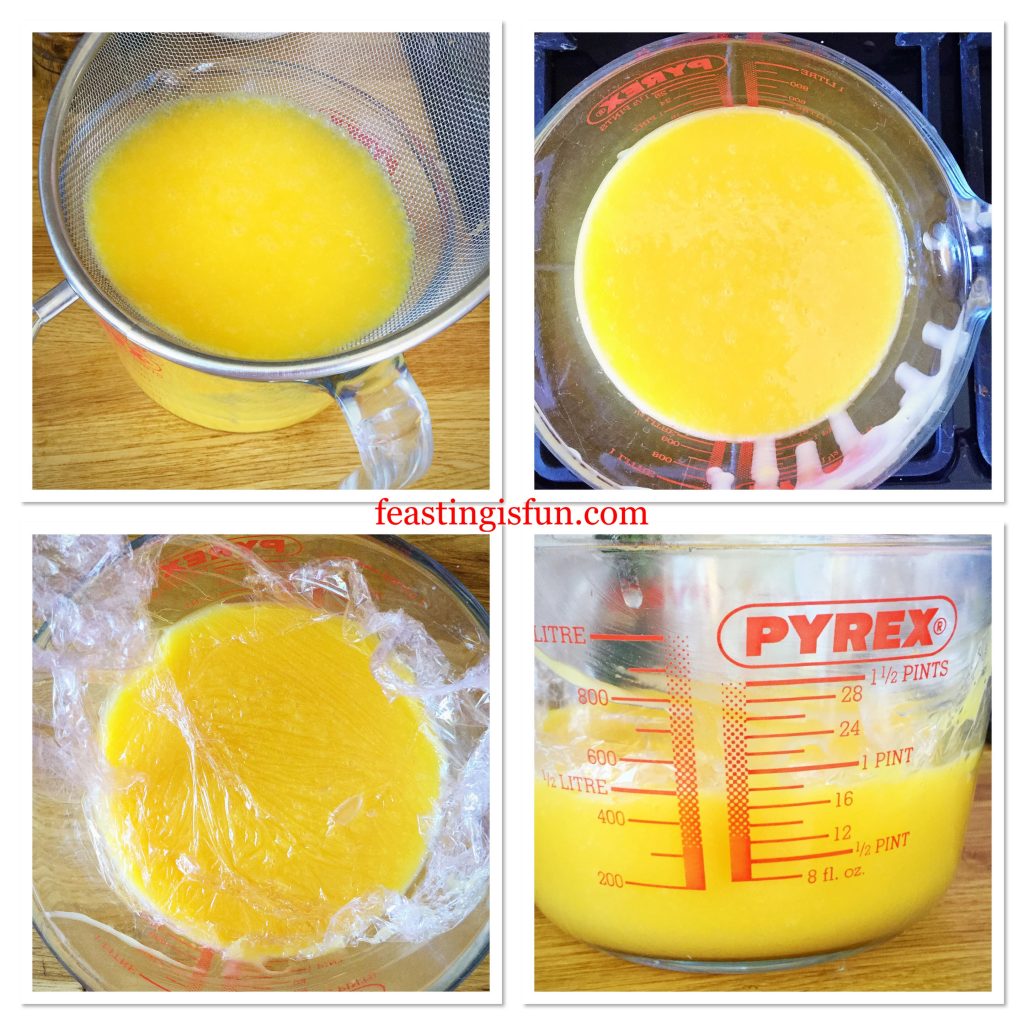
  • Place a sieve over a jug or bowl and pour the lemon curd through the sieve. Any lumps or remnants of egg white will be removed leaving a velvety, smooth curd.
  • Put cling film direct on top of the curd to stop a skin from forming as it cools.
  • Place the lemon curd in a cold place to cool. Refrigerate
FF Raspberry Topped Lemon Curd Pavlova
Straining and cooling the Lemon Curd.

Assembling The Raspberry Topped Lemon Curd Pavlova

  • As soon as the Pavlova is cooled remove from the oven.
  • Do not attempt to assemble the Pavlova until the lemon curd is cold.
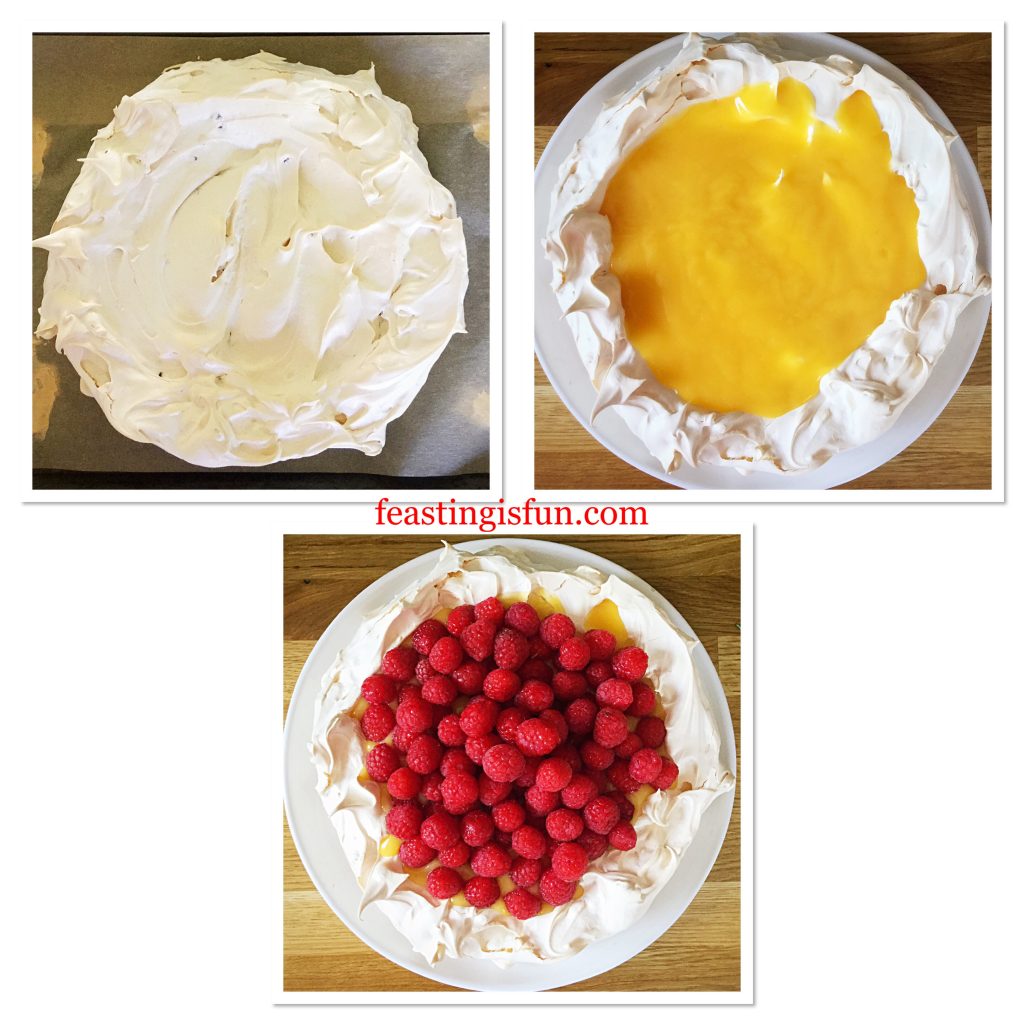
  • Pour the cold lemon curd on to the centre of the Pavlova. Not all of the curd may be needed. Pour any excess into a clean jar and store in the fridge for up to two weeks.
  • Place raspberries on top of the lemon curd so that it is covered generously.
FF Raspberry Topped Lemon Curd Pavlova
Assembling the Raspberry Topped Lemon Curd Pavlova.
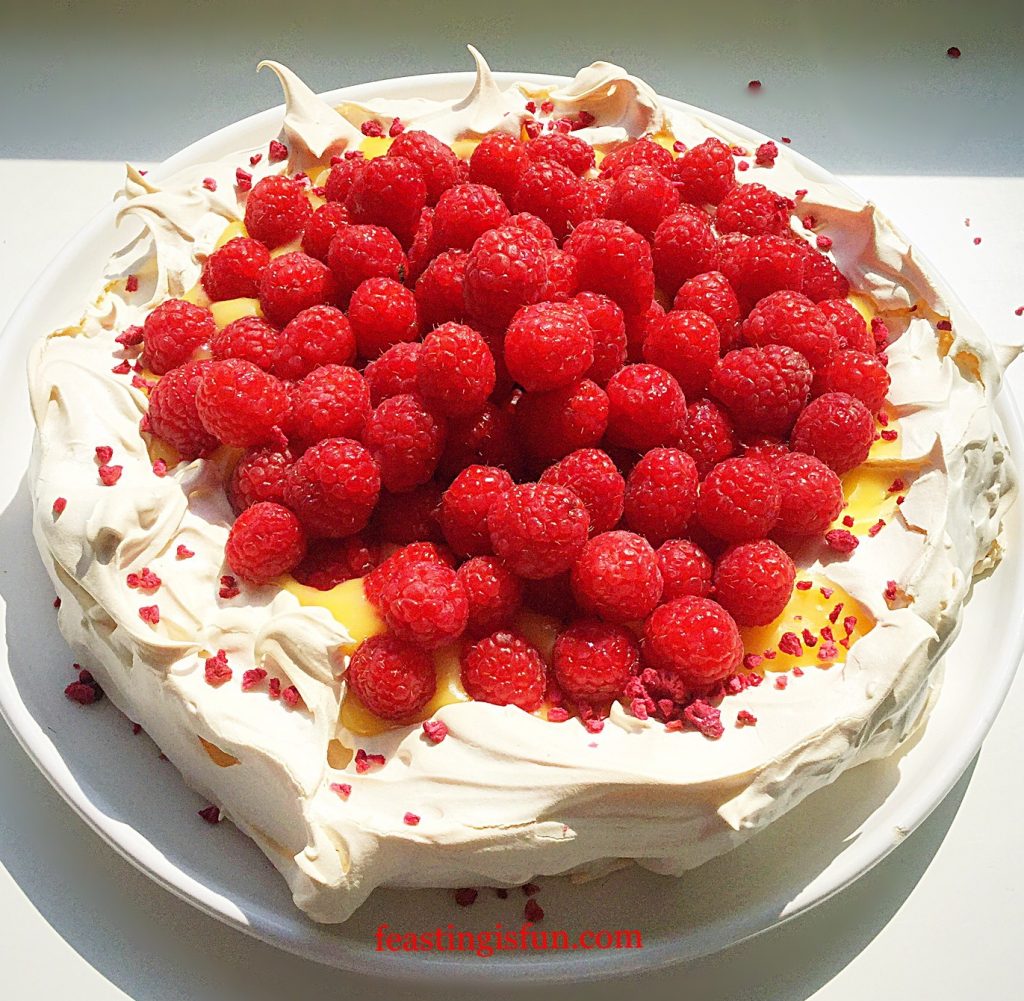
  • Finally sprinkle freeze dried raspberries around the edge of the Pavlova.
FF Raspberry Topped Lemon Curd Pavlova
Raspberry Topped Lemon Curd Pavlova

Refrigerate the Pavlova for at least 30 minutes prior to serving. Unusually this Pavlova will sit in the fridge for a day and be perfect to serve. Making this an ideal make ahead dessert. Both Pavlova and lemon curd can be made the day before.

Slice to serve with a jug of pouring cream.

Alternatively, you can whip 300ml double cream, fold half the lemon through the cream and then use this to top the meringue. Keep the remaining lemon curd refrigerated in an airtight container for up to 2 weeks.

If you have enjoyed this recipe for Raspberry Topped Lemon Curd Pavlova you may also enjoy these:

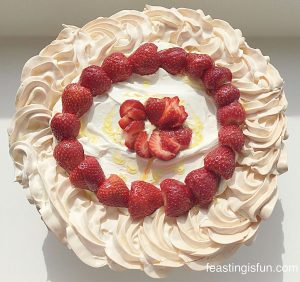
Lemony Strawberry Pavlova

FF Raspberry Topped Lemon Curd Pavlova
Lemony Strawberry Pavlova

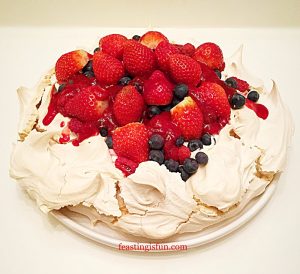
Raspberry Coulis Drizzled Mixed Berry Pavlova

FF Raspberry Topped Lemon Curd Pavlova
Raspberry Coulis Drizzled Mixed Berry Pavlova

Strawberry Topped Chocolate Heart Pavlova

FF Raspberry Topped Lemon Curd Pavlova
Strawberry Topped Chocolate Heart Pavlova

I find that making and baking a Pavlova is easier than it may seem. And, as with anything, practice will improve technique and confidence. Since Pavlovas are incredibly easy to transport, they make an ideal dessert to take to friends or family. I take all the separate components, baked Pavlova, cream and fruit and then assemble on site. Because Pavlovas have an undeserved reputation for being tricky to make, sharing them with friends simply adds to the wow factor. Additionally this meringue is completely gluten free, enabling more people to enjoy this dessert.

So, whatever you are making, baking and creating in your kitchens, have fun preparing and sharing your feast.

Sammie xx

No part of this post may be reproduced or duplicated without the written permission of the owner. Please see my Disclosure Policy.

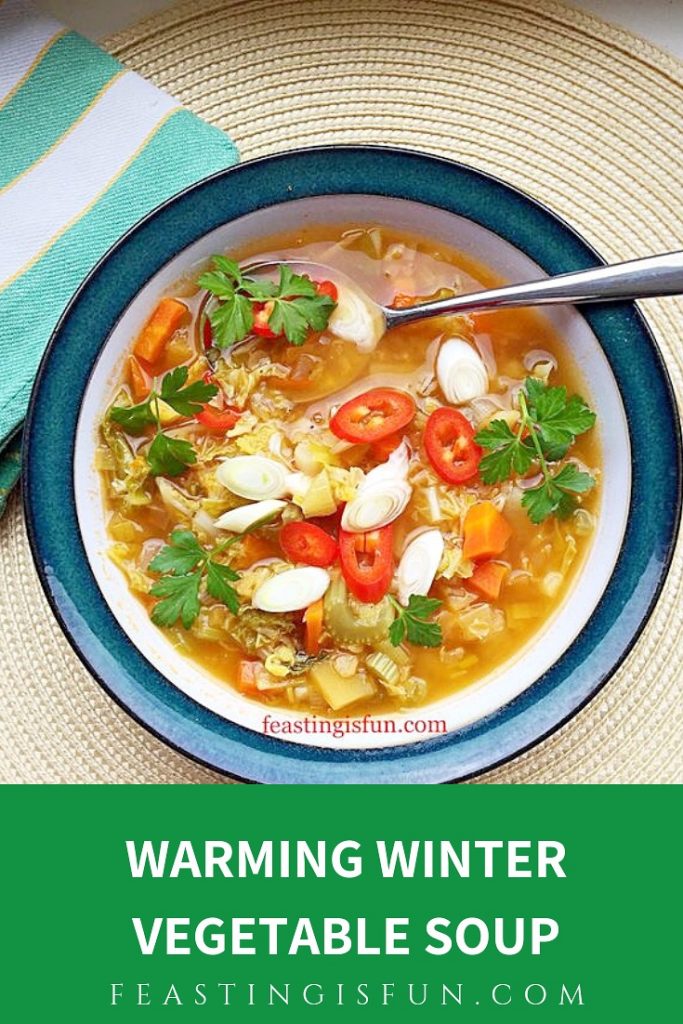
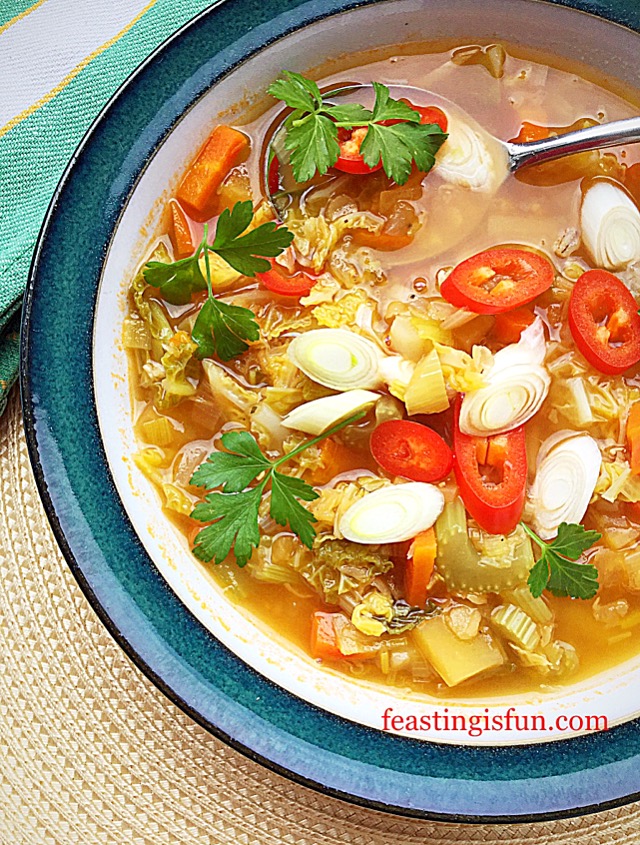
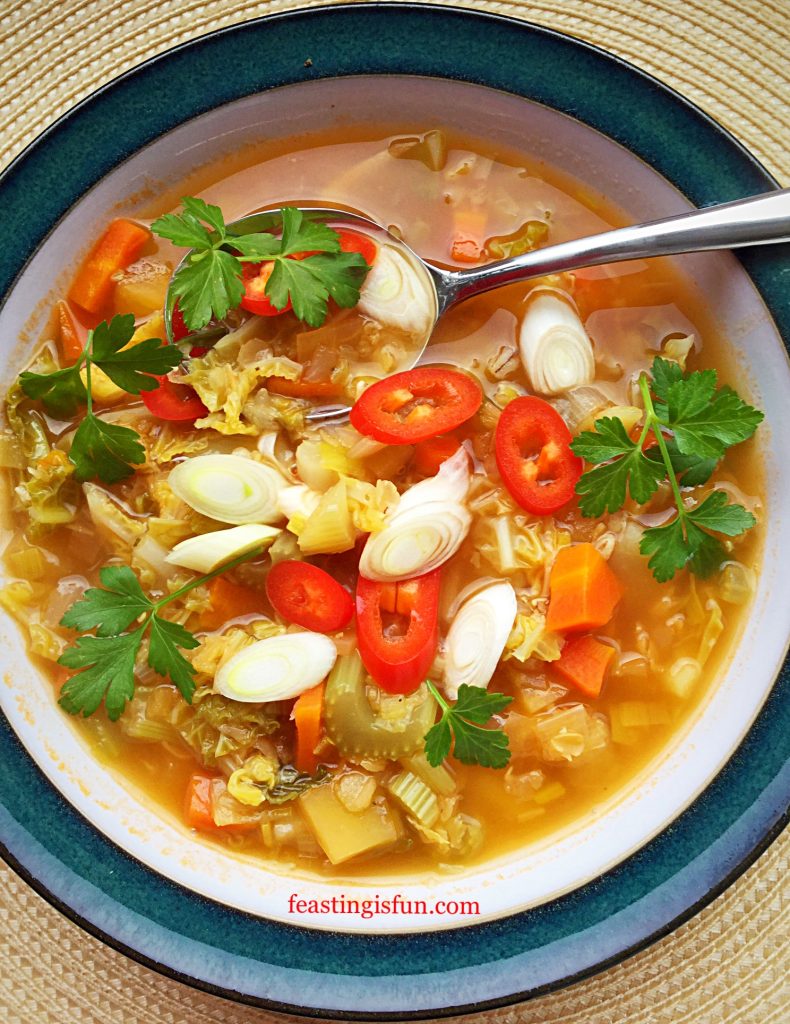
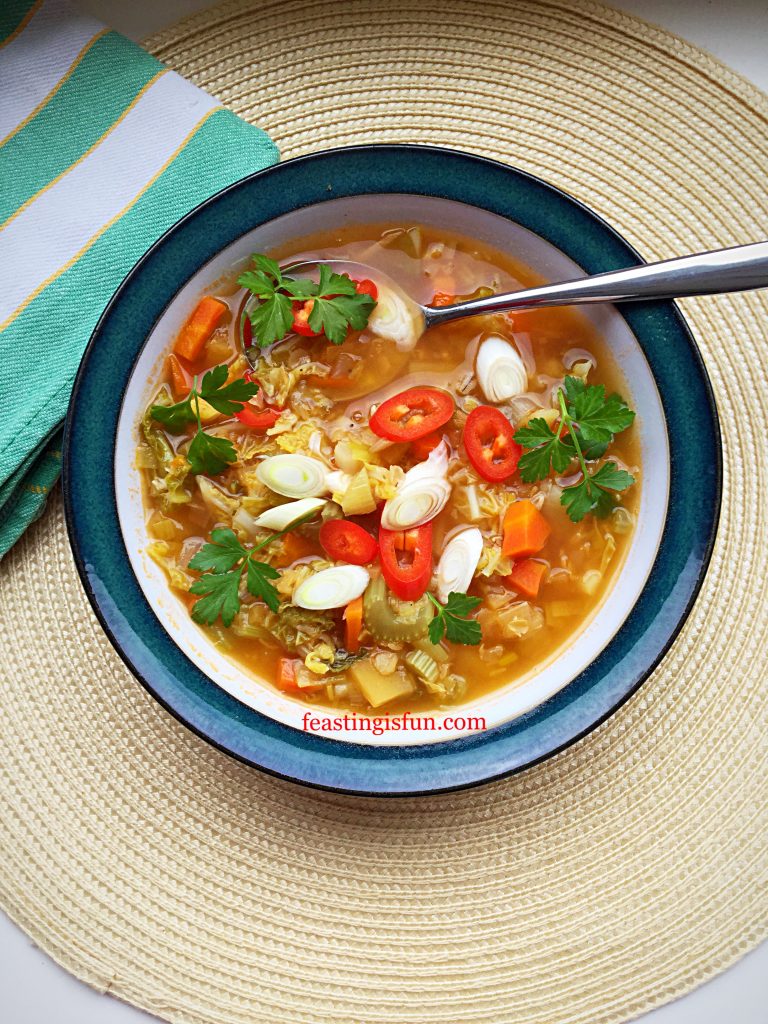
Warming Winter Vegetable Soup

As soon as Winter hits, there is one thing I crave. Soup. It’s warming, almost insulating properties feel like a hug on the inside. Whether it be a smooth, blitzed soup or a chunky textured version, it is my food of choice, seeing me through the short, wind blown days of our coldest season. Today I share with you my Warming Winter Vegetable Soup.

FF Warming Winter Vegetable Soup

While, if needed to ease sore throats, this soup can be blitzed, the soft, gently cooked vegetables are easily swallowed. Although I prefer to use fresh vegetables, using frozen vegetables is a good way to bulk out this dish. Especially adding any that will work with the slightly sweet, spicy flavour.

FF Warming Winter Vegetable Soup
Warming Winter Vegetable Soup

Seasonal Winter Vegetable Flavours

Winter root vegetables have a natural sweetness, more so after the first frosts. While deep green, leafy brassica’s, rich in iron, provide a more meaty, sometimes slightly bitter taste. And in this Warming Winter Vegetable soup, the flavours come together and perfectly compliment each other. Finishing with the warmth from the chili.

FF Warming Winter Vegetable Soup
Warming Winter Vegetable Soup

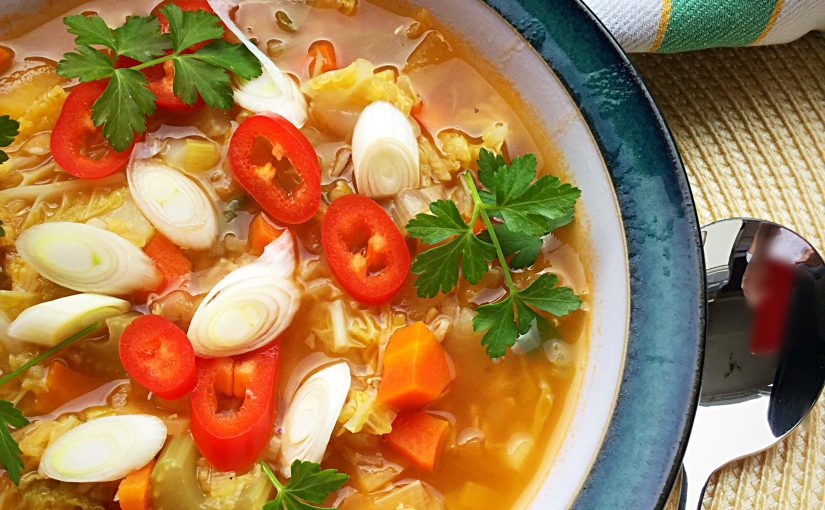
Since this soup is a comforting and warming, adding freshly sliced mild red chili and spring onions to the top provides a burst of freshness. Almost a zesty burst hits the tongue when warming and cold hits. Not only does the addition of fresh parsley look good, it also provides extra Vitamin C!

Recipe: Winter Warming Vegetable Soup serves 6-8

1tbsp Olive Oil

1 Large Onion

3 Celery Sticks washed and trimmed

1/2tsp Sea Salt – I use Maldon

2 Leeks trimmed and washed

1 Large Potato

2-3 Large Carrots

100g/4oz Green Beans trimmed (frozen is fine)

1/2 Savoy Cabbage – Kale, sprout tops, other cabbage (except red or white) can be used

Small Swede/Turnip

2tbsp Pearl Barley

4tbsp Lentils – I used orange

2 Garlic Cloves

1tbsp Tomato Puree

Fresh Thyme – approx 1tsp chopped

Vegetable Stock Cube – I use Knorr

Pinch Chili Flakes – depending on preference

1tsp Black Pepper – to taste

Cold Water

Fresh Mild Red Chili and Spring Onions finely sliced to top

Fresh Parsley

Preparing The Vegetables And Cooking The Soup

A large, heavy bottomed pan is needed for this recipe.

  • First of all, place the pan on the hob and add the oil.
  • All of the vegetables in this recipe should be cut into small dice, starting with the onions and leeks.
  • Turn the heat to medium, allow the oil to warm, add the chopped leeks and onion. Also add 1/4tsp salt, sauté until softened but not browned.
  • Next add the carrots and celery, again cook until softened.
  • Now add the garlic and fresh thyme. Pour over enough water to cover the vegetables.
  • Cut the cabbage into thin strips and chop the beans into thirds, then add these to the pan. Also prepare both the potato and swede and add to the soup.
  • Finally add the lentils and pearl barley, top the pan up with water so the vegetables are just covered. Crumble in a stock cube and add a good grinding of black pepper. And also add chili flakes to your preference.
  • Bring the soup up to a simmer, place a lid on the pan.
  • Simmer until the root vegetables are tender – approximately 30 minutes.
FF Warming Winter Vegetable Soup
Warming Winter Vegetable Soup topped with fresh chilli, parsley and spring onion.

Serve in warmed bowls with freshly sliced mild chili’s, spring onion and sprigs of parsley. Also serve thick slices of warm, crusty bread such as Seeded Cob Loaf to create a hearty meal.

To store, cool the soup completely. Spoon into sealable containers and refrigerate for up to 4 days. Alternatively, place in the freezer and eat within one month.

If you have enjoyed this recipe for Warming Winter Vegetable Soup you may also like these:

Roasted Garlic Butternut Squash Soup

FF Warming Winter Vegetable Soup
Roasted Garlic Butternut Squash Soup

Creamy Low Fat Mushroom Soup

FF Warming Winter Vegetable Soup
Creamy Low Fat Mushroom Soup

Carrot Soup

FF Warming Winter Vegetable Soup
Carrot Soup

Since this soup is so easily made, making a big pot of it and then stashing it in the freezer gives me real satisfaction. Knowing that a warm, tasty meal is only moments away relaxes me. And, as there is always fresh, homemade bread in the kitchen, I can ensure a hearty meal for all.

Whatever you are making, baking and creating in your kitchens, have fun preparing your feast.

Sammie xx

No part of this post may be reproduced or duplicated without the written permission of the owner. Please see my Disclosure Policy.

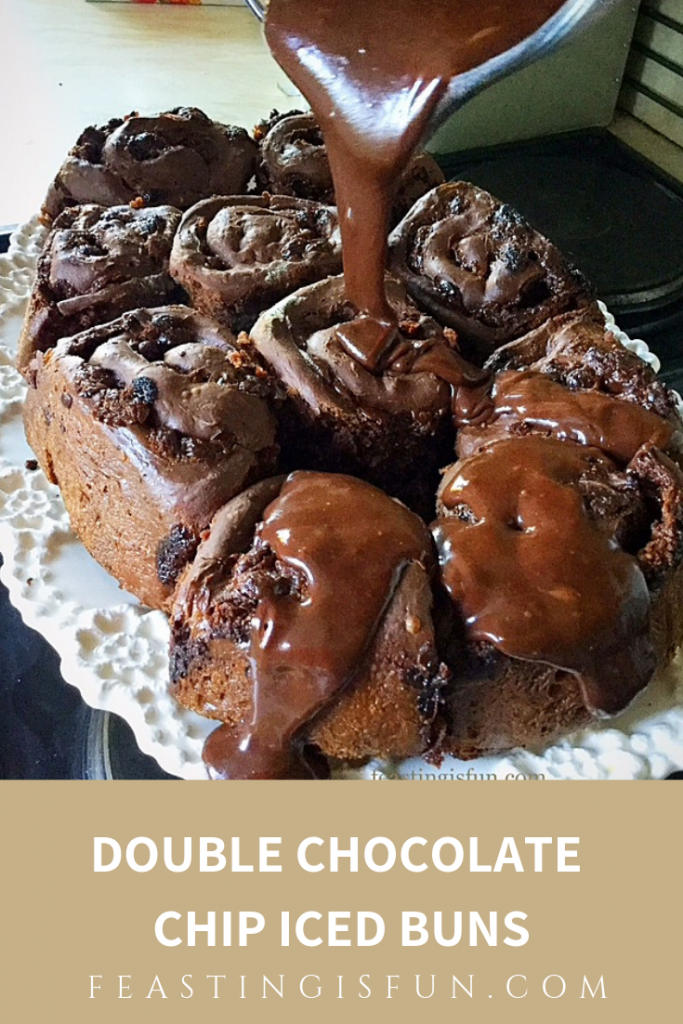
Double Chocolate Chip Iced Buns

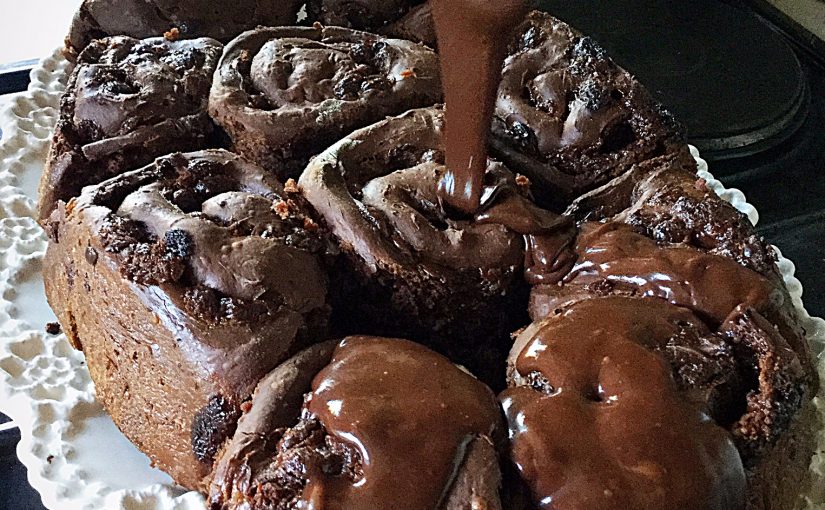
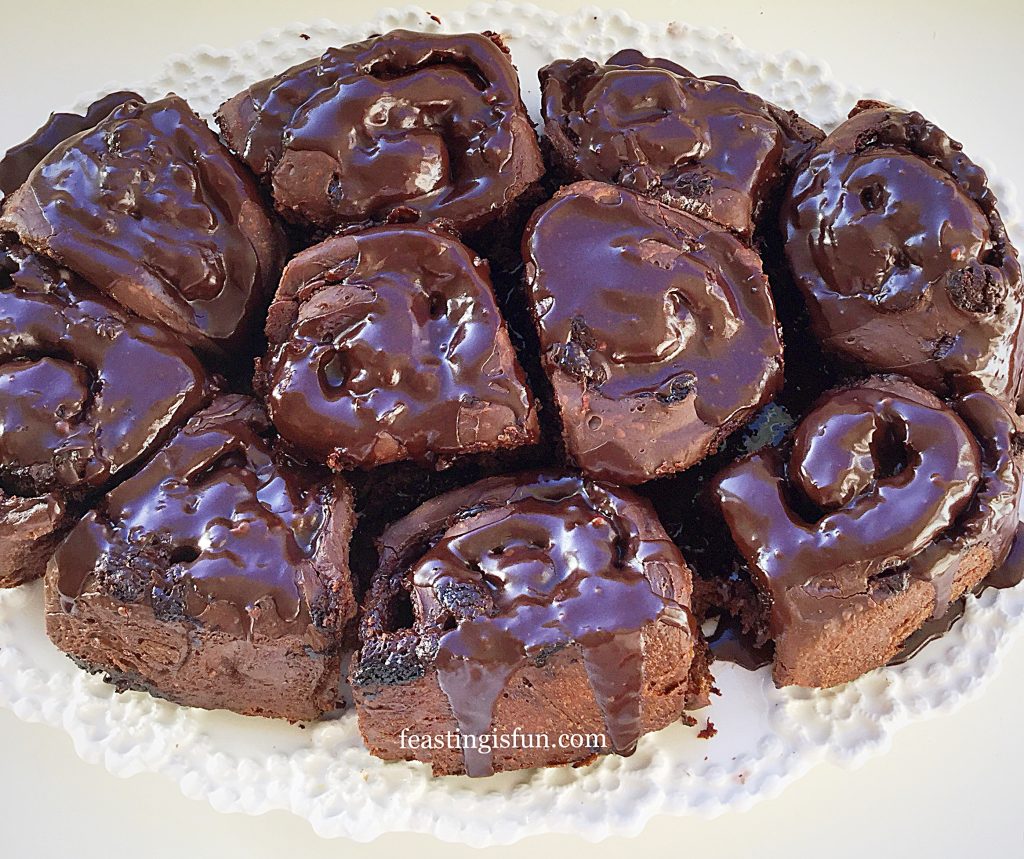
Christmas will soon be upon us and among the festive food chocolate plays a prominent role.  Whether in advent calendars, selection packs, gold coins or the many foil wrapped, boxed and displayed chocolate treats, it is central to celebration feasting.  Therefore these Double Chocolate Chip Iced Buns are the perfect treat to share and enjoy over the holiday season, or any special occasion.

FF Double Chocolate Chip Iced Buns
Double Chocolate Chip Iced Buns

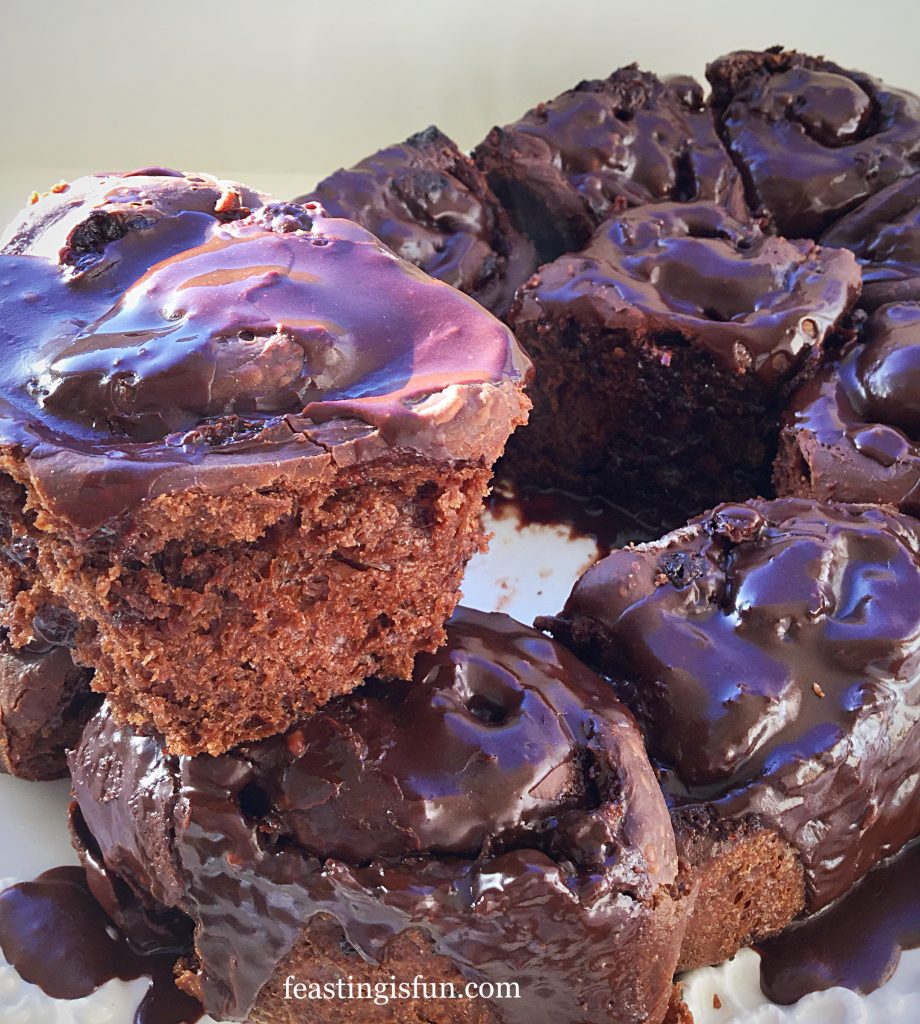
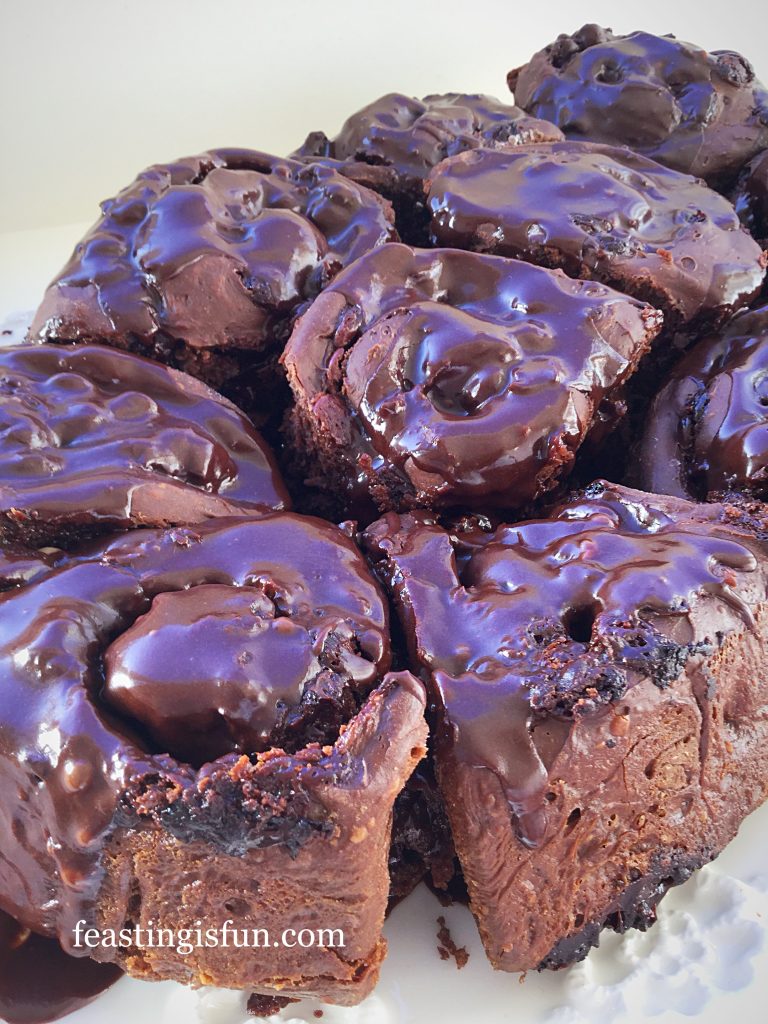
Since, if you’re going to make a chocolate bun it really should be THE BEST tasting chocolate bun ever.  While light and fluffy these buns are packed with chocolate chips and finished with a thick chocolate icing.  Also these buns tick every box , not too sweet, not too rich, simply the perfect balance of flavour and texture baked into the very best tasting breakfast bun.  Alternatively eaten with coffee as an afternoon treat, these buns need no excuse to be eaten!

FF Double Chocolate Chip Iced Buns
Double Chocolate Chip Iced Buns

Chocolate Buns – the ultimate breakfast – dessert

While these incredible tasting, chocolate packed buns were made with Christmas in mind, there really is no reason at all to stop you baking them at other times.  Any chocolate lover would appreciate a birthday breakfast of Double Chocolate Chip Iced Buns.  Especially if you have friends staying, sleepovers, special occasions, all the perfect excuse to bake.  Finally, they are made and left to prove overnight, so all that’s left to do is bake and glaze in the morning.  Easy.

FF Double Chocolate Chip Iced Buns
Double Chocolate Chip Iced Buns

As soon as my chief taste testers, here at Feasting headquarters had tasted these buns, success was proclaimed.  Even from the harshest of my critics.  Yummy, mmm are there more, escaped from messy chocolate mouths.  As for me, the harshest judge of all, well, I am impressed.  All of the attempts at making the perfect chocolate swirl bread have paid off.  Flavour and texture in perfect chocolate swirled harmony.

FF Double Chocolate Chip Iced Buns

Recipe: Double Chocolate Iced Buns makes 10

300ml/10.5fl oz Whole Milk

75g/3oz Unsalted Butter

7g Dried Yeast

2tsp Vanilla Extract – I use Nielsen-Massey

1tsp Caster Sugar

2 Large Free Range Eggs

50g/2oz Cocoa Powder – I use Callebaut

500g/1lb 2oz Strong White Flour

7g Salt – I use Maldon

250g/9oz Milk Chocolate Chips or chopped chocolate – do not use stabilised chocolate chips, as you would for chocolate chip cookies, the chocolate should melt when baked.

Glaze:

250g/9oz Icing Sugar

50g/2oz Cocoa Powder

Method:

Note: I strongly recommend using a stand mixer with dough hook attachment for mixing the dough.  The chocolate dough has a high butter content and is extremely sticky.  Using a stand mixer ensures thorough mixing of the dough.

Making the chocolate brioche dough

  • Measure the milk into a microwaveable jug and then add the butter broken into small pieces.  Zap in the microwave until the milk is slightly warmed.  It should feel the same as body temperature.  Also the butter will soften and start to melt.
  • Pour the warmed milk/butter into the bowl of the stand mixer.
  • Add the yeast, sugar, vanilla extract and both eggs to the bowl.
  • Next add the flour, cocoa powder and salt.
  • With the dough hook attached mix slowly until the ingredients are combined into a dough.  Continue mixing on medium speed for a further 20 minutes.
  • Stop the mixer, lift the dough hook and scrape any dough back into the bowl. Cover the bowl with cling film and leave in a draft free place until doubled in size.  This first prove may take up to 2 hours.

Shaping the chocolate dough into rolls

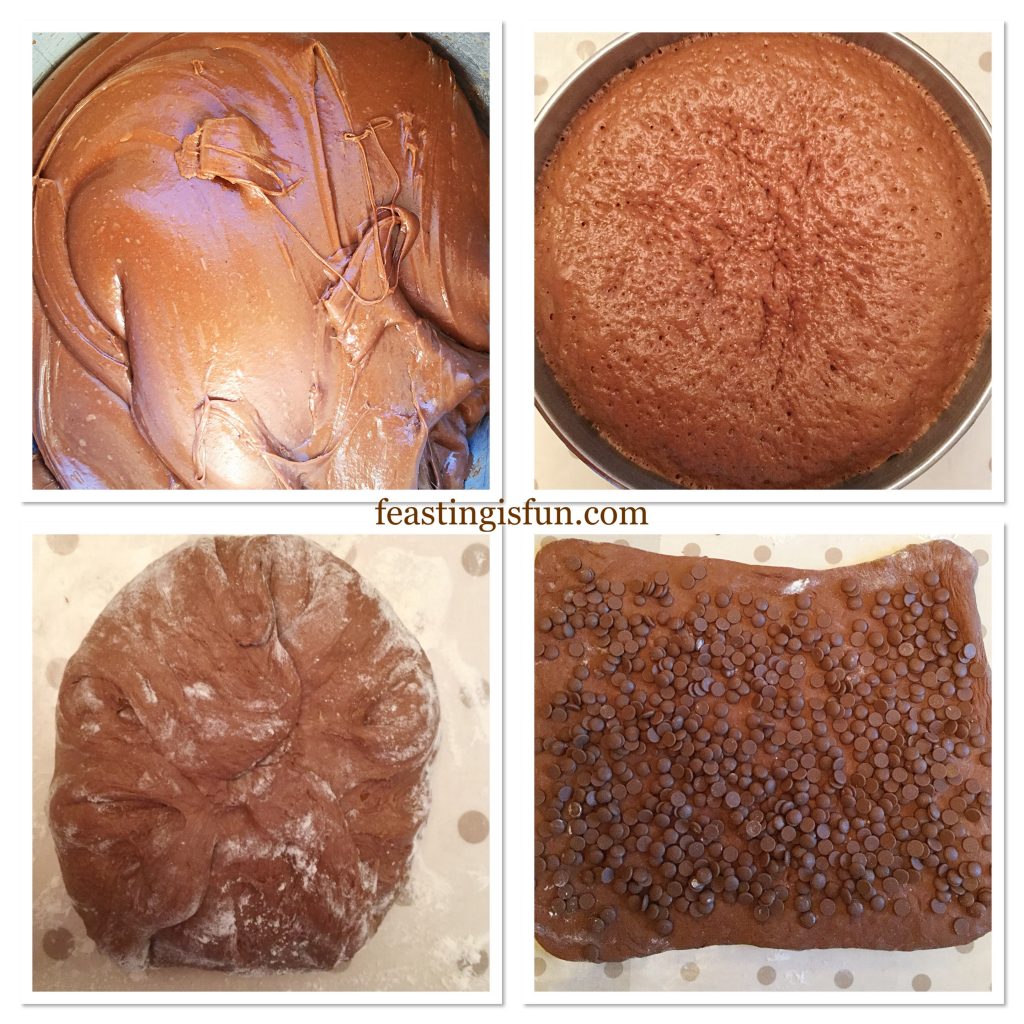
  • As soon as the dough is ready, turn out on to a lightly floured worktop.  A plastic scraper will help release all of the dough from the bowl.
  • Using the technique shown in Easy Homemade Cottage Loaf, pull out the dough and press into the centre. Continue around the edge until the dough is neat and smooth.
  • Roll the dough out until it is 30.5cm D x 35.5cm W (12” x 14”) rectangle.
  • Sprinkle the chocolate chips/chopped chocolate evenly over the dough.
FF Double Chocolate Chip Iced Buns
Making the dough and preparing the chocolate buns.
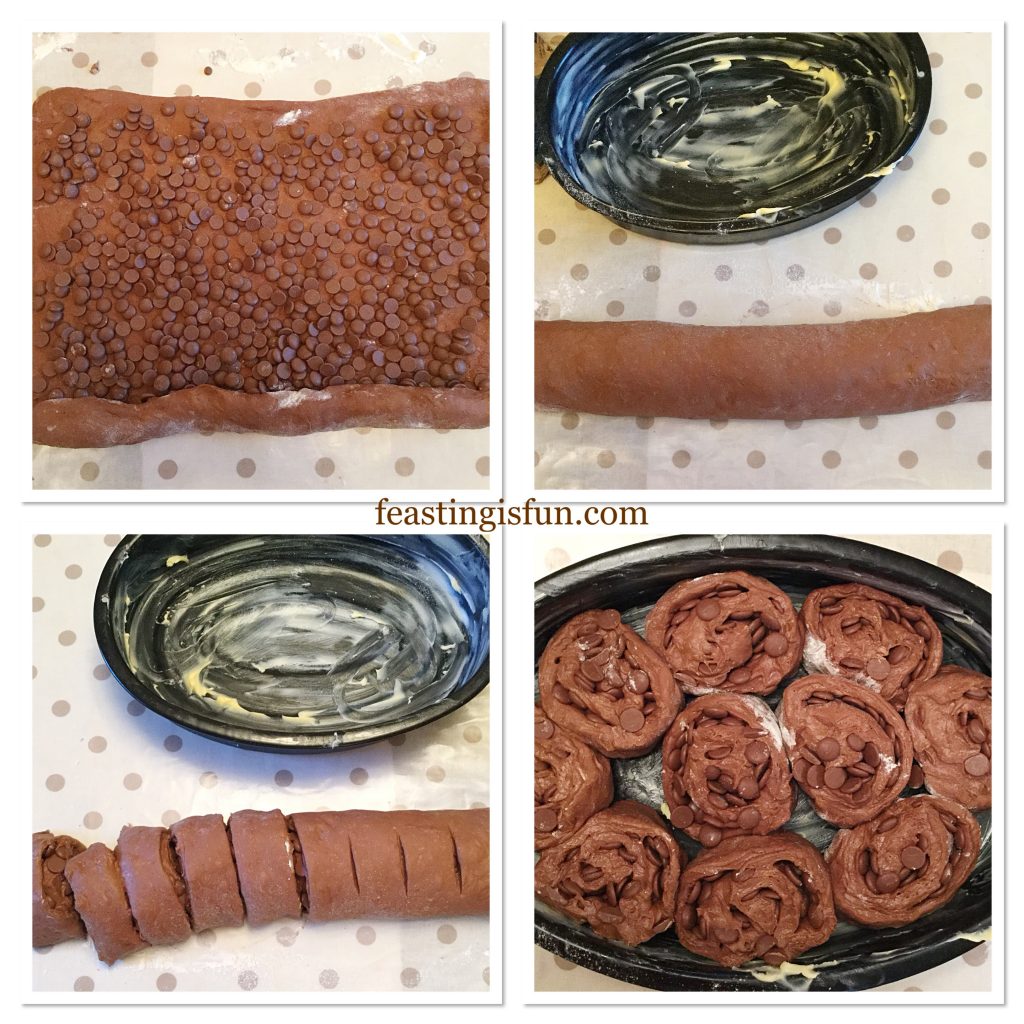
  • Rolling from the wide side of the dough, take the front edge, starting at one side, roll and tuck the chocolate and dough.  Continue across the front edge of the dough until you have formed the beginning of a roll.  Evenly roll the entire dough, tucking and ensuring it is even.  Finish with the seam underneath the finished roll.
  • Using a sharp knife cut off the uneven sides.  Divide the roll in half and then cut 5 even potions from each half.  Saw through the dough, using the blade to cut through.
  • Place the buns into a large, well buttered baking tin with deep sides. Alternatively  butter 2 deep 8 inch cake tins and place 5 chocolate buns into each.  Cover with cling film and refrigerate overnight.  The dough will prove very slowly in the cold fridge.
Creating the perfect chocolate swirl.

Baking The Double Chocolate Chip Buns

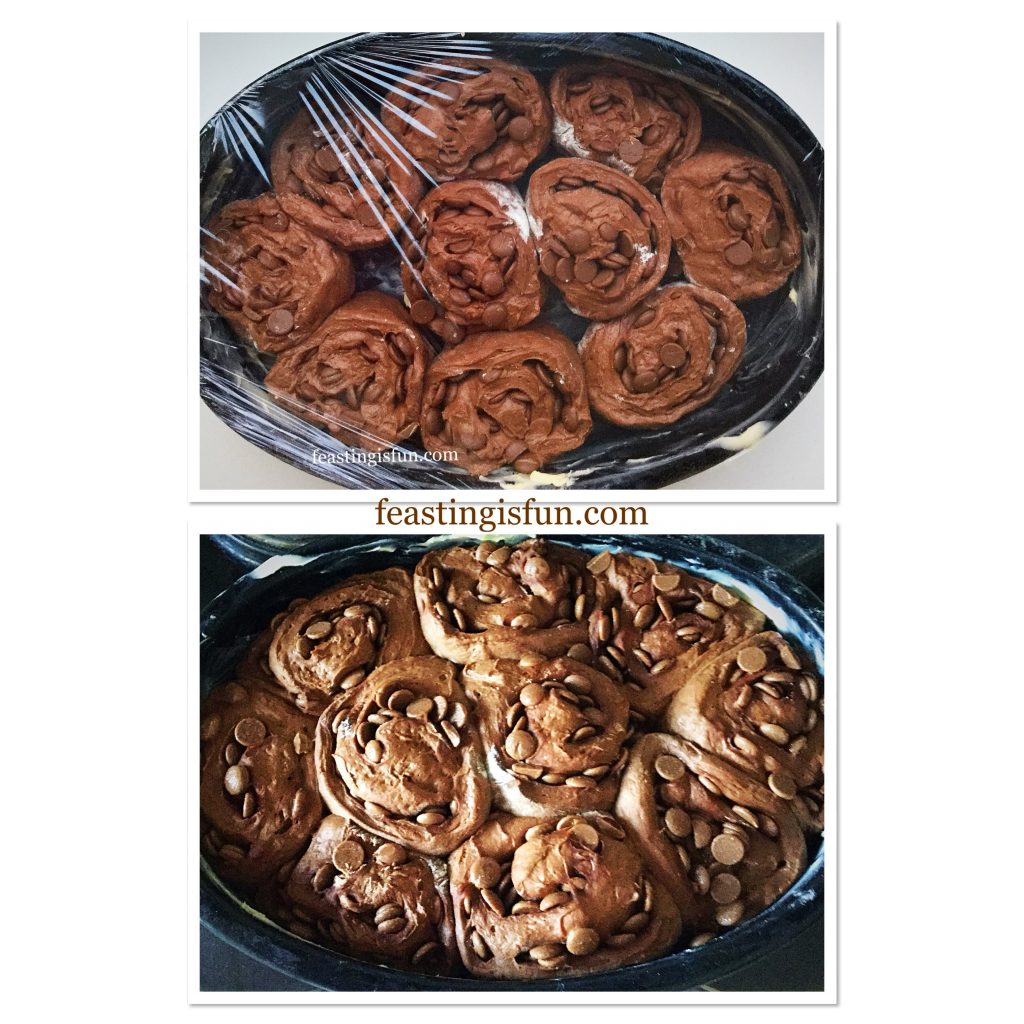
  • The next morning remove the chocolate buns from the fridge and allow to come up to room temperature, approximately 30 minutes.
  • While the buns are warming preheat the oven 200C/180C fan, 400F, gas mark 6.
FF Double Chocolate Chip Iced Buns
Double Chocolate Chip Iced Buns before and after an overnight prove.
  • As soon as the buns have warmed place in to the centre of the oven and bake for 30-35 minutes.
  • While the buns are baking make the chocolate icing glaze.  Weigh the icing sugar and cocoa into a large jug.  Add approximately 6 tablespoons of hot water and stir to mix. The icing should be thick yet still able to pour.  If needed add extra hot water one tablespoon at a time.  Note – the icing will thicken on cooling.
  • Check the buns after 30 minutes.  They are baked when the top of the buns are firm and sounds hollow when tapped.
  • Once baked remove from the oven.
  • Run a palette knife around the outside edge of the buns, carefully lifting the edge of the buns as you do so.
  • Place a large board, (I use a chopping board) over the top of the baking tin. Using oven gloves to protect from the heat turn the buns out of the tin.
  • Again place a serving dish over the board flip over and the chocolate buns will be right side up, ready to be glazed.
  • Use a knife to gently cut through where each bun joins the next.  Move the buns so there is a small gap between them, this ensures the glaze can drip down the sides.
FF Double Chocolate Chip Iced Buns
Baking and turning out the buns.

Pouring on the icing

  • While the buns are still hot pour over the thick, glossy, chocolate icing.
FF Double Chocolate Chip Iced Buns
Glazing the Double Chocolate Chip Iced Buns

Serve the buns warm for breakfast as an extra special treat.  While these buns are best eaten on the day they are baked they will keep for 2 days in an airtight container.  A quick 10 second zap in the microwave warms cold buns ready to eat.

If you have enjoyed this recipe for Double Chocolate Chip Iced Buns you may also like these:

Homemade Chelsea Buns

FF Homemade Chelsea Buns
Homemade Chelsea Buns

Cinnamon Plaited Brioche Bread

FF Double Chocolate Chip Iced Buns
Cinnamon Plaited Brioche Bread

Christmas Spiced Fruit Loaf

FF Double Chocolate Chip Iced Buns
Christmas Spiced Fruit Loaf

Make ahead recipes  are a great way to enjoy incredible feasts without having to get up early or spend all day in the kitchen. Because spending time with family and friends enjoying food together is always more important than being stuck in the kitchen, away from the fun. While it is fun to bake and cook together, not everyone has large, open plan kitchens that make this possible. Therefore having this recipe enables you to serve freshly baked buns with minimal effort.

Would you like more make ahead recipes, here on Feasting is Fun?

Whatever you are making, baking and creating in your kitchens, have fun preparing your feast

Sammie xx

No part of this post may be reproduced or duplicated without the written permission of the owner. Please see my Disclosure Policy.

Double Chocolate Nut Spelt Cookies

Here, at Feasting headquarters, cookies and biscuits are a food group all of there own. Since, I start everyday with a cup of tea and a cookie. A tradition started by my Grandad ever since I was a little girl. And something that has been carried on with our children. While each of us have our personal favourites, we all agree that these Double Chocolate Nut Spelt Cookies are perfectly delicious.

Double Chocolate Nut Spelt Cookies

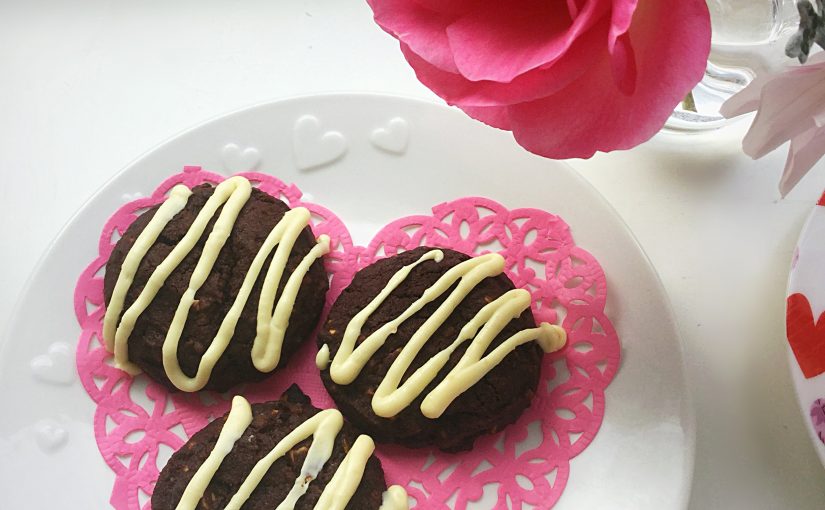
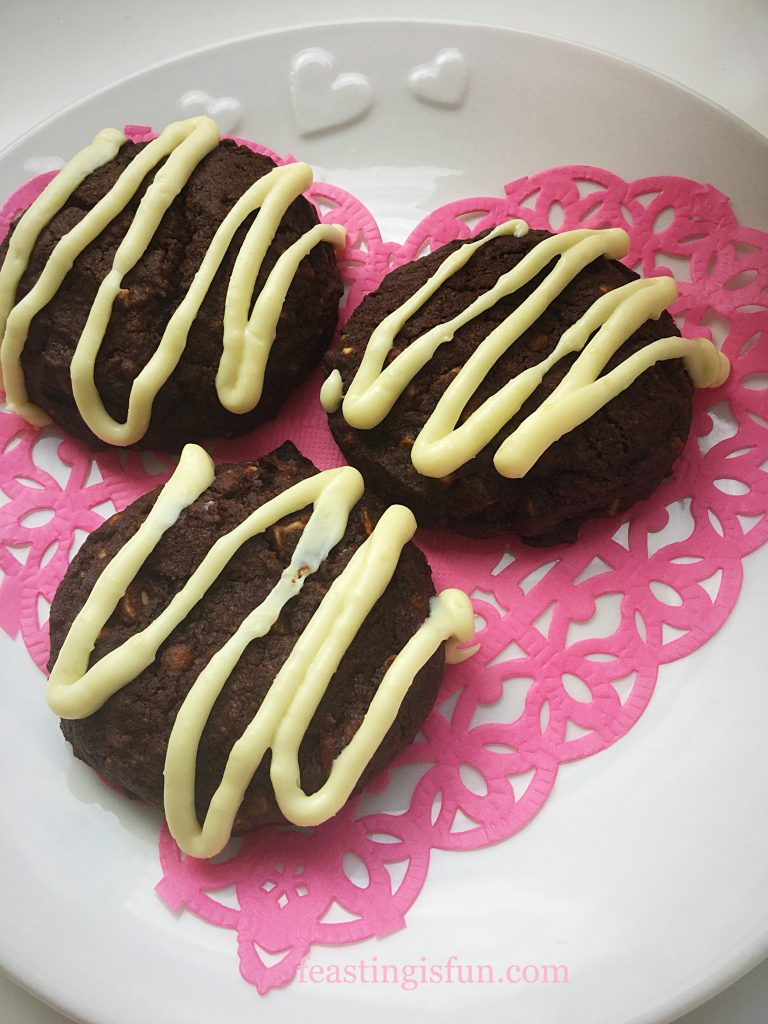
White spelt flour has a slight nutty flavour to it that is accented in these cookies with the addition of toasted hazelnuts. While white chocolate chunks provide pockets of sweetness in the dark chocolate. Also finished with a white chocolate drizzle, giving each cookie that extra special touch. Resulting in a perfectly flavoured, nutty chocolate cookie that satisfies any Cookie Monster craving.

FF Double Chocolate Nut Spelt Cookies
Double Chocolate Nut Spelt Cookies

Since these cookies are not only delicious but also easy to make, why not bake a double batch and give some away? Also, a gift of freshly baked cookies would surely be very welcome. A new mum and dad, sleep deprived with their first baby, or elderly neighbours that don’t get out very often. And it isn’t hard to find people that would love to receive a surprise cookie hamper.

FF Double Chocolate Nut Spelt Cookies
Double Chocolate Nut Spelt Cookies

Recipe: Double Chocolate Nut Spelt Cookies makes 24-28

150g/5oz Unsalted Butter at room temperature

1/4tsp Sea Salt – I use Maldon

225g/8oz Dark Brown Sugar

1 Large Free Range Egg

1tsp Vanilla Extract – I use Nielsen-Massey

50g/2oz Cocoa Powder – I use Callebaut

225g/8oz White Spelt Flour – I use Craggs and Co. – alternatively you can use the equivalent weight of plain white flour, the cookies will have a slightly subdued nutty flavour yet will still taste good.

1/2tsp Bicarbonate of Soda

100g/4oz White Chocolate Chunks

200g/7oz White Chocolate for melting

100g/4oz Chopped Toasted Hazelnuts

Method: Preheat the oven to 160C/140C fan, 325F gas mark 3

Making The Spelt Cookie Dough

  • First of all, line 2 or 3 large baking trays with baking parchment.
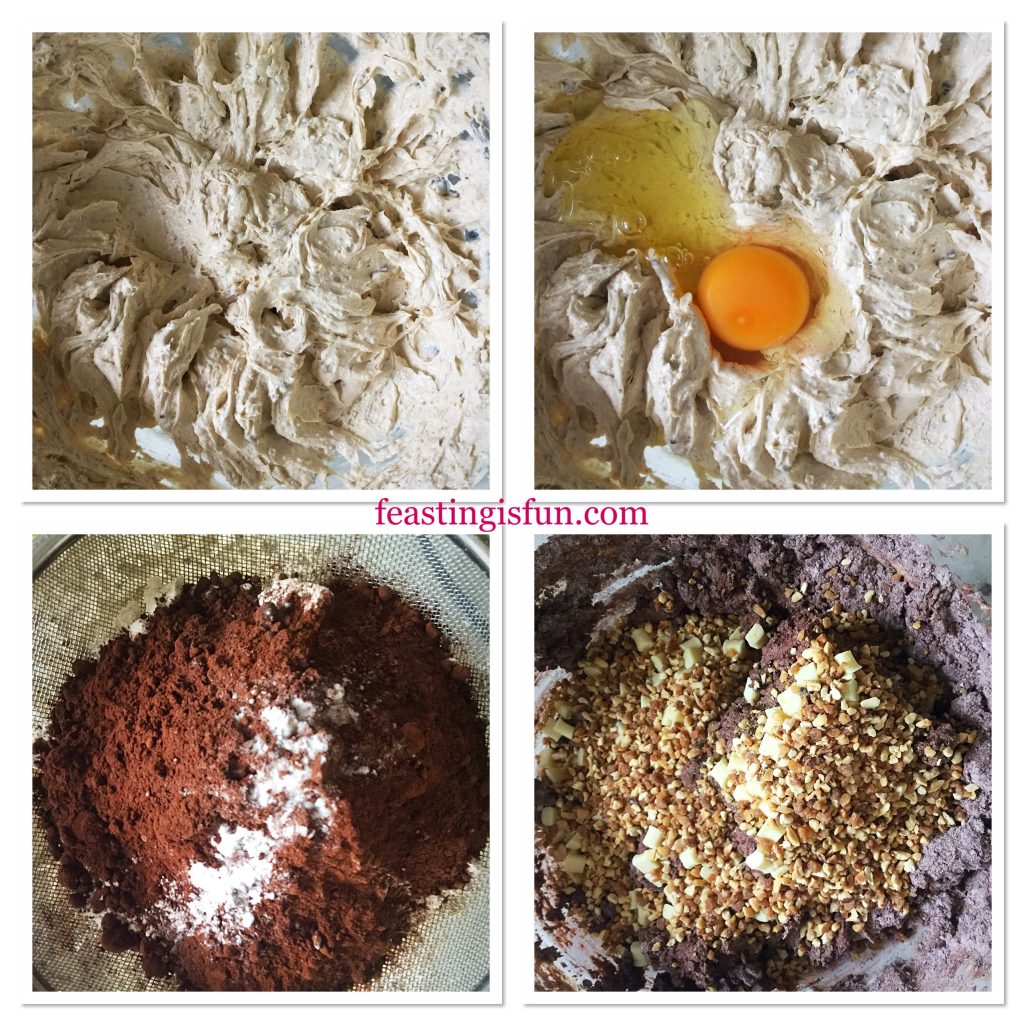
  • Place the butter, sugar and salt into a bowl and whisk together until pale and creamy.
  • Next add the egg and vanilla extract. Whisk together until combined.
  • Sift the spelt flour, cocoa and bicarbonate of soda into the same bowl.
  • Add in the chopped, roasted hazelnuts and white chocolate chunks.
  • Mix everything together until just combined.
FF Double Chocolate Nut Spelt Cookies
Preparing the cookie batter.
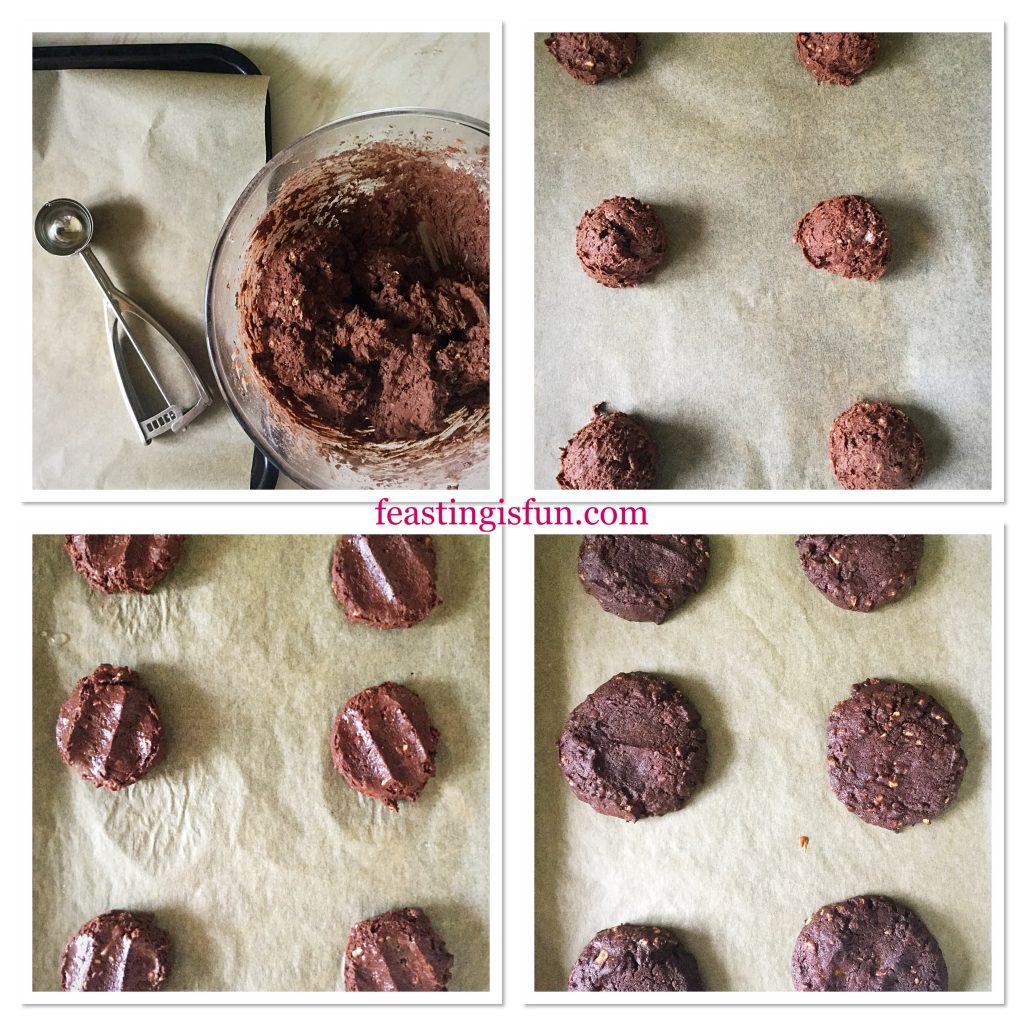
  • Use a one inch/5cm ice cream scoop or a dessert spoon, scoop a portion of cookie dough and place on to a parchment lined tray.
  • Space each cookie well apart. Finally, lightly press down with clean hands to slightly flatten each cookie.

Baking The Cookies

  • Place the baking trays into the oven and bake for 20 minutes exactly.
FF Double Chocolate Nut Spelt Cookies
Portioning, shaping and baking the cookies.
  • As soon as the 20 minutes has elapsed remove the cookies from the oven.
  • Leave the cookies to cool for 5 minutes on the trays before transferring to a cooling rack.
  • While the first batch of cookies are cooling, scoop and bake the rest.

Adding The White Chocolate Drizzle

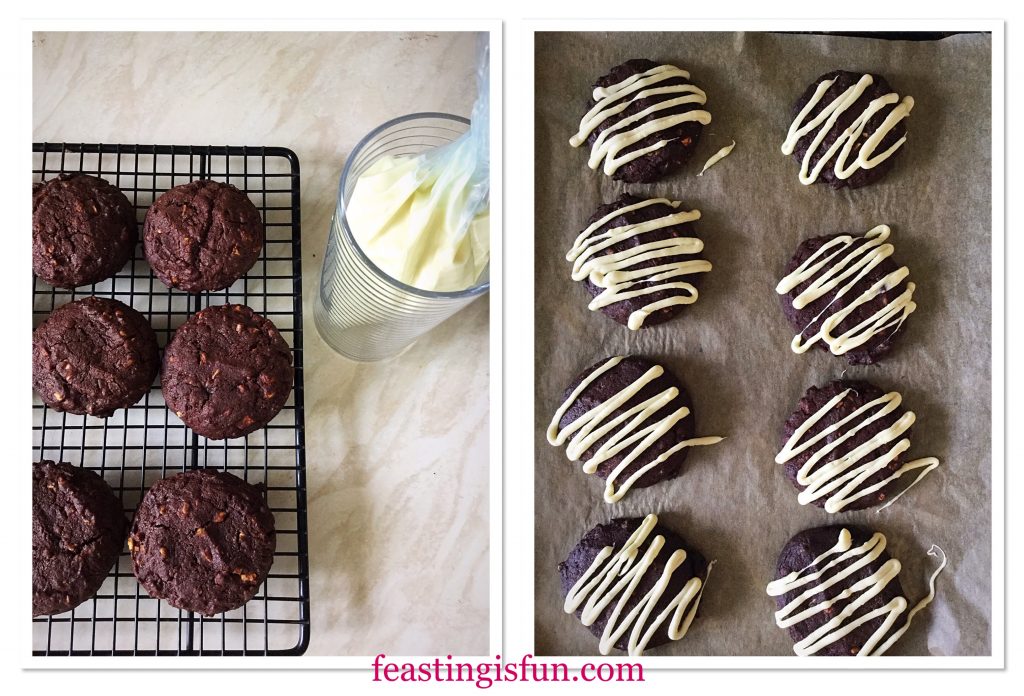
  • Chop the white chocolate into small pieces and place into a heatproof, microwaveable bowl. Heat on medium power for 30 second bursts, stirring after each heating session. As soon as the chocolate starts to melt remove the bowl from the microwave and stir until completely melted.
  • Spoon the melted chocolate into a small piping bag.
  • Snip off the end, leaving a small hole. Pipe white chocolate zig zags across each cookie.
FF Double Chocolate Nut Spelt Cookies
Decorating the Double Chocolate Nut Spelt Cookies.
  • Once all of the cookies have been decorated, set them aside to allow the chocolate to set.
FF Double Chocolate Nut Spelt Cookies
Double Chocolate Nut Spelt Cookies

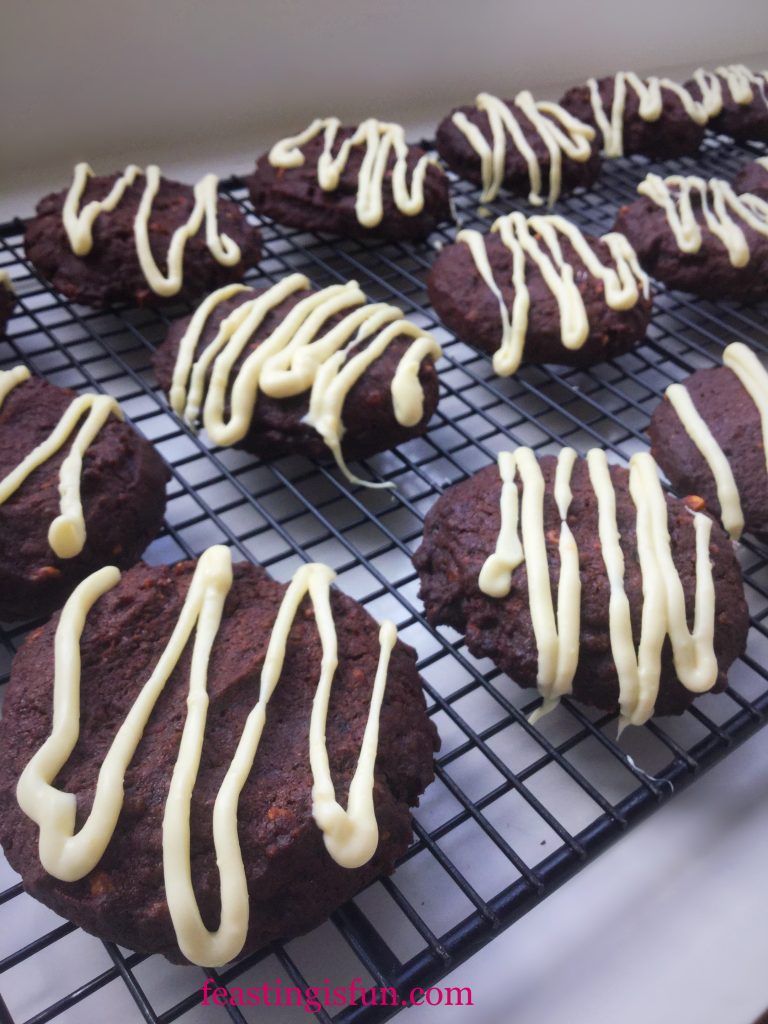
As soon as the white chocolate drizzle has set these cookies are ready to be served.

Store in an airtight container for up to 5 days. Refrigerate during warmer weather.

Cookies served on a plate.
Double Chocolate Nut Spelt Cookies

If you have enjoyed this recipe for Double Chocolate Nut Spelt Cookies then you may also like these:

Almond Cacao Nib Shortbread Bars

FF Double Chocolate Nut Spelt Cookies
Almond Cacao Nib Shortbread Bars

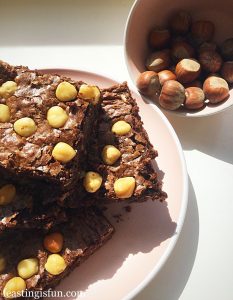
Chocolate Fudge Double Hazelnut Brownies

FF Double Chocolate Nut Spelt Cookies
Chocolate Fudge Double Hazelnut Brownies

Cherry Bakewell Cookies

FF Double Chocolate Nut Spelt Cookies
Cherry Bakewell Cookies


Baking for others is such a rewarding experience. Especially when you know that the gift will be lovingly received. Although some people may be too proud to ask for help, stopping by, having a chat and handing over a food gift can break down many barriers. Because simply knowing that they have been thought about may brighten someone’s day more than you or I could ever know. And thing I am sure of is that I have never had a well intended food gift turned down.

So, whatever you are making, baking and creating, have fun prepping your feast and remember, food always tastes better when shared.

Sammie xx

No part of this post may be reproduced or duplicated without the written permission of the owner. Please see my Disclosure Policy.

Luxury Homemade Vanilla Bean Custard

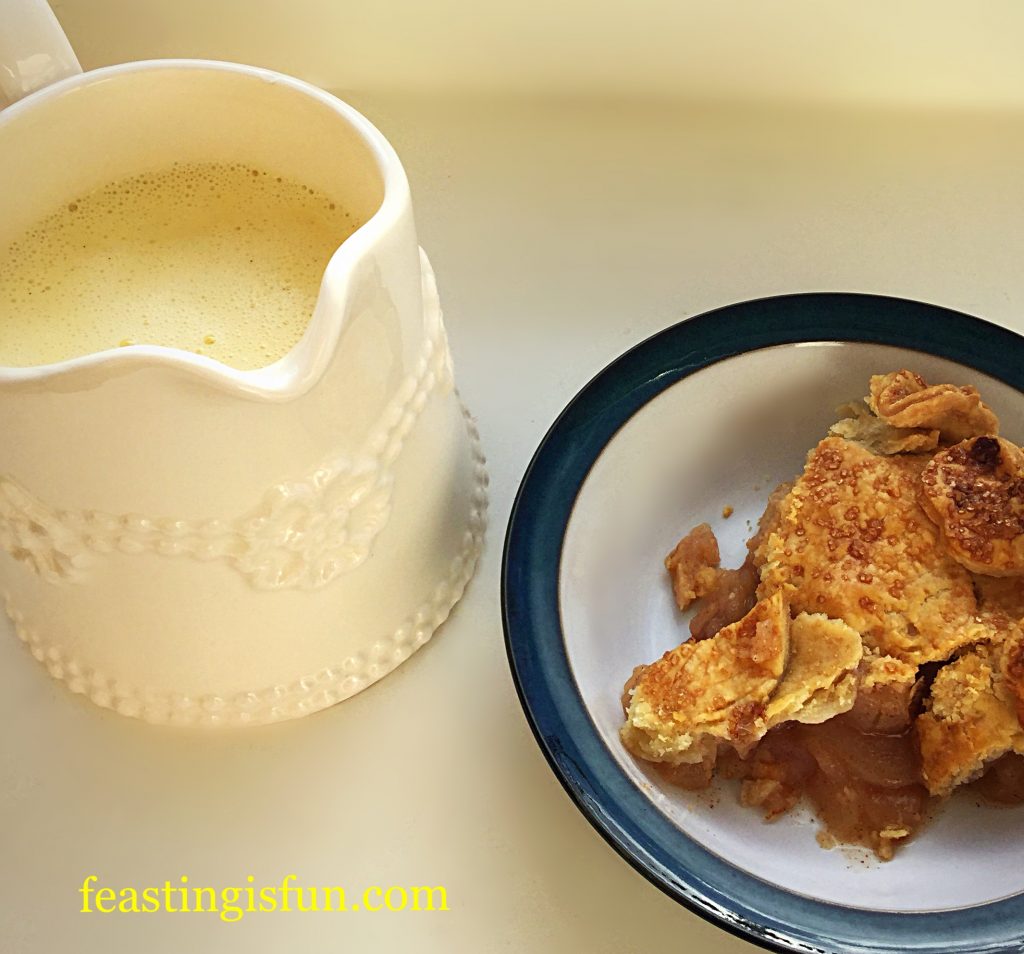
Custard, we British adore it. I adore it. Pour over hot fruit pies, or puddle around steaming puds. We simply cannot get enough of this delicious dessert accompaniment. So easily bought, ready made in cartons, or from the chilled cabinet in supermarkets. Also deliciously made using ‘Birds’ custard powder. While all of these are good options, the very best is to make your own, from scratch, at home. Let me show you my simple, yet Luxury Homemade Vanilla Bean Custard.

FF Luxury Homemade Vanilla Bean Custard


Since this recipe uses fresh egg yolks and cornflour, it is virtually foolproof. And also gluten free! Indeed, it takes no longer to create this fresh custard from scratch, than it does to make a jug of ‘Birds’ custard by hand. Yet the taste is far superior in every single imaginable way. Creamy, with a distinct vanilla flavour. Also known as Creme Anglaise, this is THE custard to serve alongside a hot dessert.

FF Luxury Homemade Vanilla Bean Custard
Luxury Homemade Vanilla Bean Custard

As egg yolks are essential to a great custard, it really does make sense to buy free range or organic eggs. While you are rewarded with deeply golden yolks, it’s handy to know that the whites can be frozen for up to one month. Simply defrost, bring up to room temperature and bake a Pavlova, such as my Mixed Berry Pavlova.

FF Luxury Homemade Vanilla Bean Custard
Luxury Homemade Vanilla Bean Custard

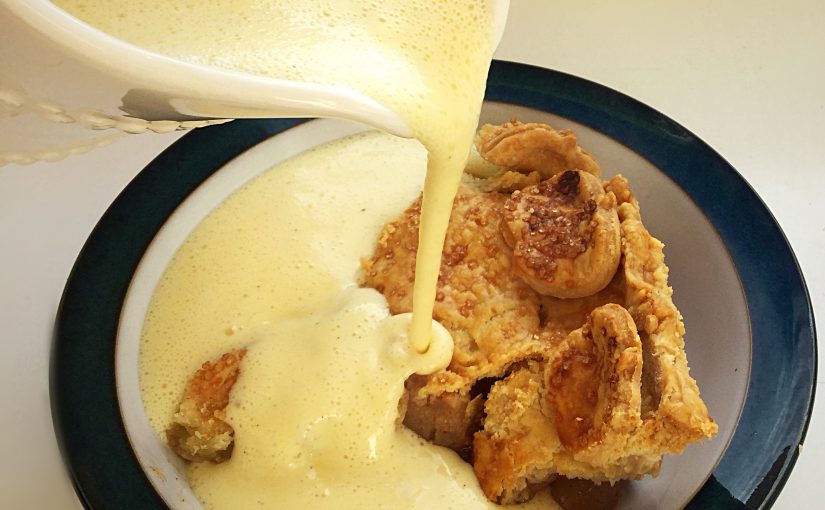
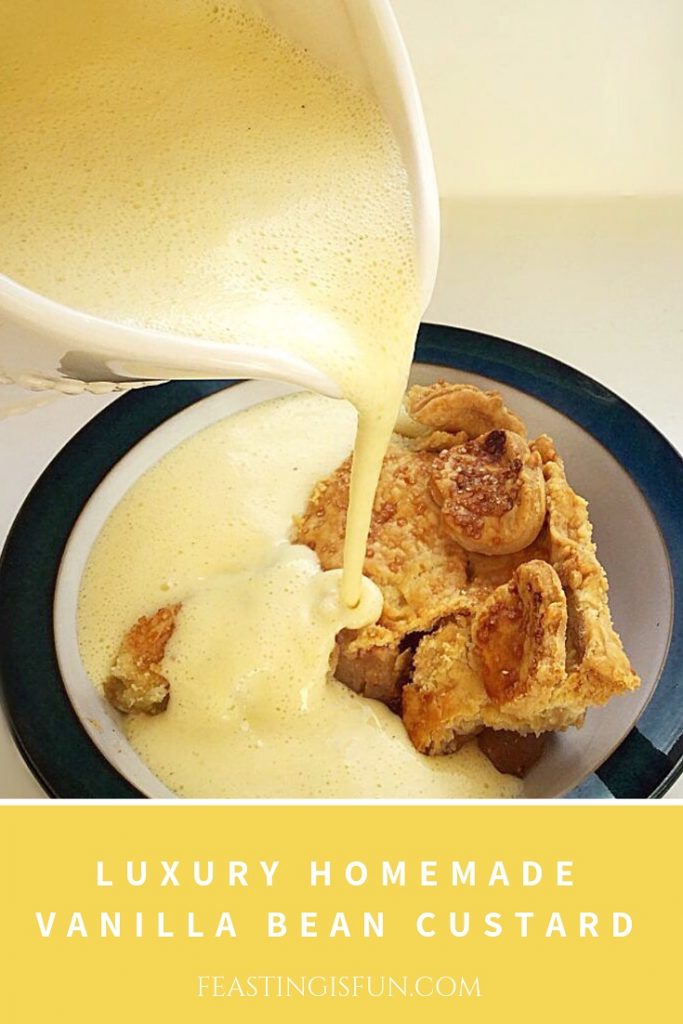
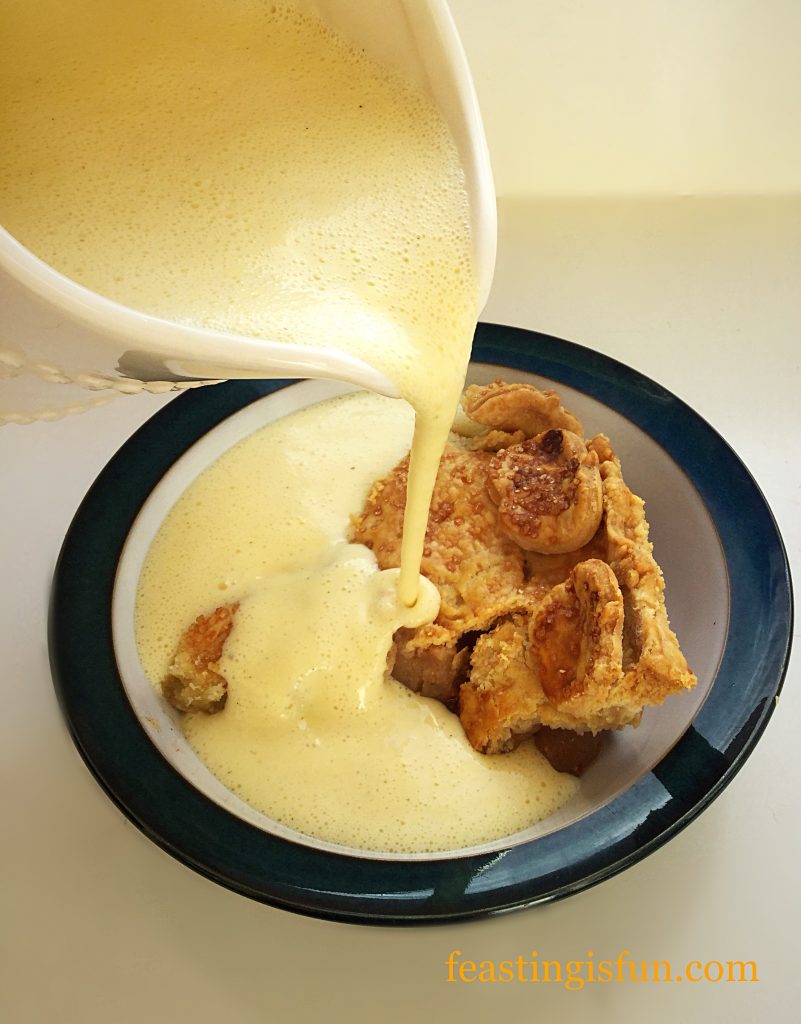
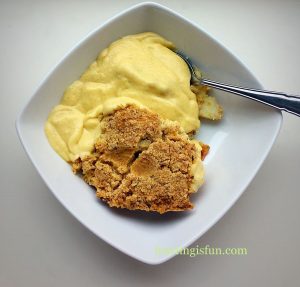
Homemade Amazing Apple Pie cries out to be covered in creamy, delicious, Luxury Homemade Vanilla Bean Custard. Also, if you, like me, enjoy the hot/cold combination of custard and vanilla ice cream. Well, let’s just say I’m absolutely not going to judge. If you haven’t tried it, you are seriously missing out!

Note: To make a thicker custard for trifles, increase the cornflour to 3 teaspoons.

Recipe: Luxury Homemade Vanilla Bean Custard makes 500ml

300ml Double Cream

200ml Whole Milk

4 Large Free Range Egg Yolks – the whites can be frozen for up to one month

1 Vanilla Pod or 1 tsp Vanilla Bean Extract

1 tsp Cornflour also known as corn starch – I use Doves Farm as this is certified gluten free

4 tbsp Caster Sugar

Scant 1/4tsp Salt – I use Maldon

Method:

Making The Custard

  • First of all, pour the milk and cream into a heavy bottomed saucepan. Place over a medium heat. Heat until bubbles appear around the edge of this liquid. This is known as the scalding point. Once scalding point is reached, remove the saucepan from the heat.
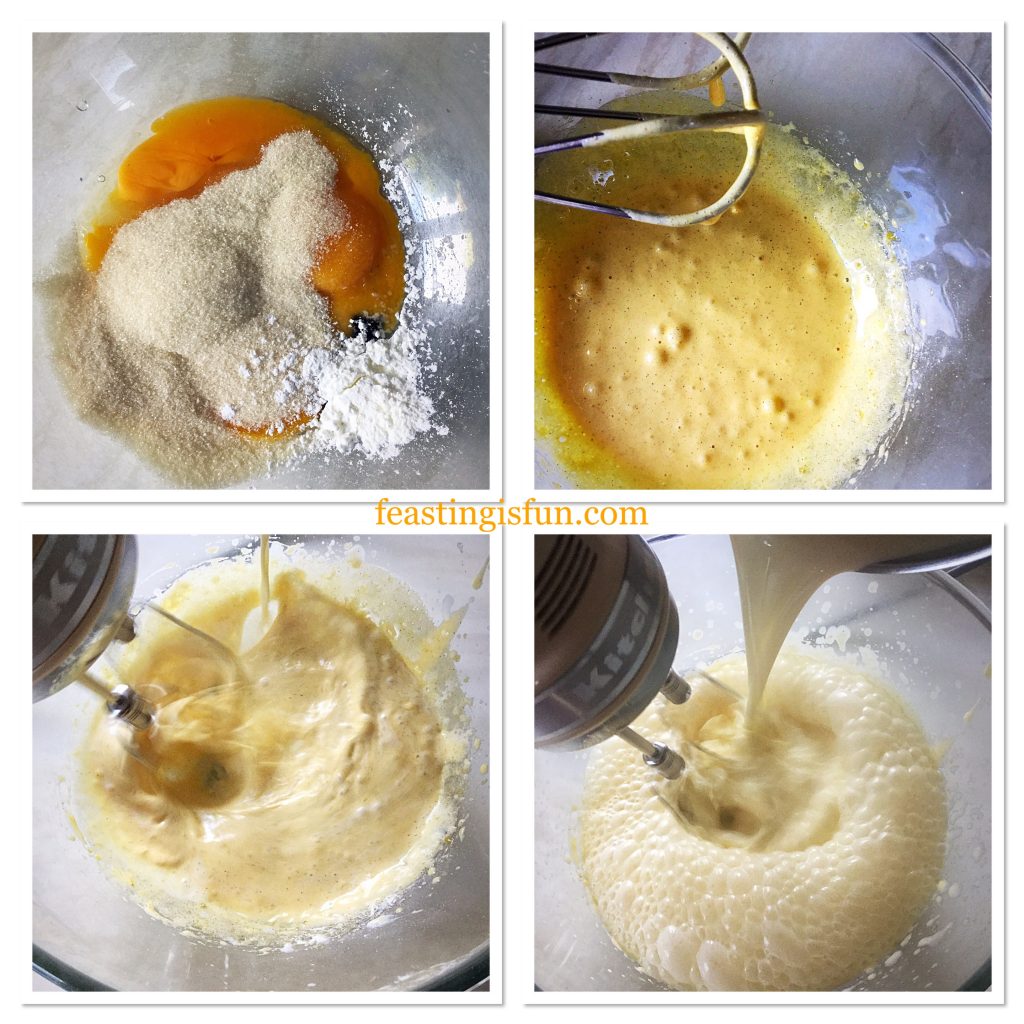
  • While the cream mixture is heating, make the egg base. Separate 4 eggs, placing the yolks into a large, heatproof bowl.
  • Next, add the cornflour, sugar and seeds from a vanilla pod, or vanilla bean extract.
  • Whisk the ingredients in the bowl together until fully combined.
  • With the whisk on slow, pour the scalded cream mixture slowly into the bowl, increasing whisking speed at the end.
FF Luxury Homemade Vanilla Bean Custard
Creating the Luxury Homemade Vanilla Bean Custard
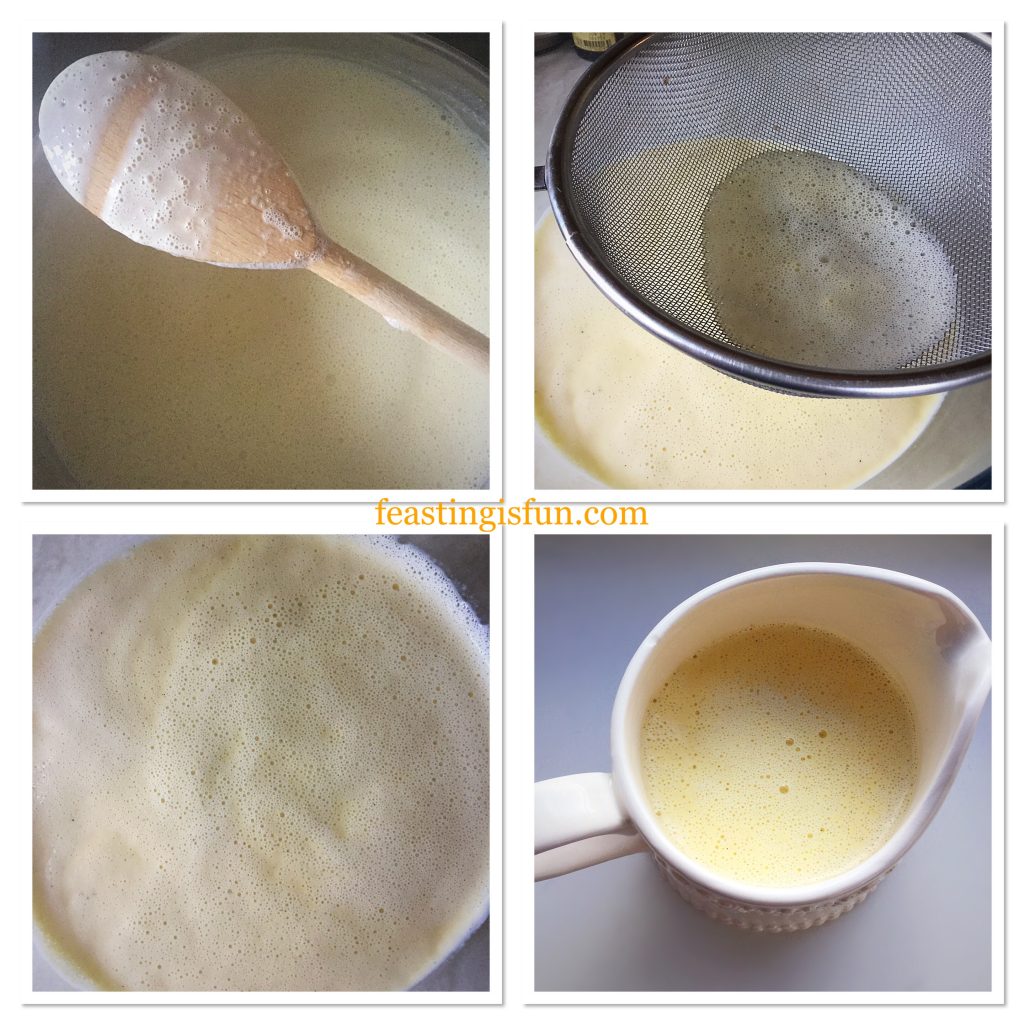
  • Pour the hot, liquid back into the saucepan and place back over a medium/low heat.
  • Stir continuously and the custard will start to thicken. DO NOT heat the custard until it bubbles vigorously, as could will result in a burnt, scrambled egg like mixture.
  • When the custard has thickened and coats the back of a wooden spoon remove from the heat.
  • Pour the custard through a sieve into a heatproof bowl. If making ahead, place cling film directly on top of the custard, to stop a skin from forming. Allow to cool and then refrigerate. To reheat, pour the custard back into a saucepan and heat over a low/medium temperature, stirrring continuously until it is hot. Don’t reheat in a microwave, as the custard may scramble.
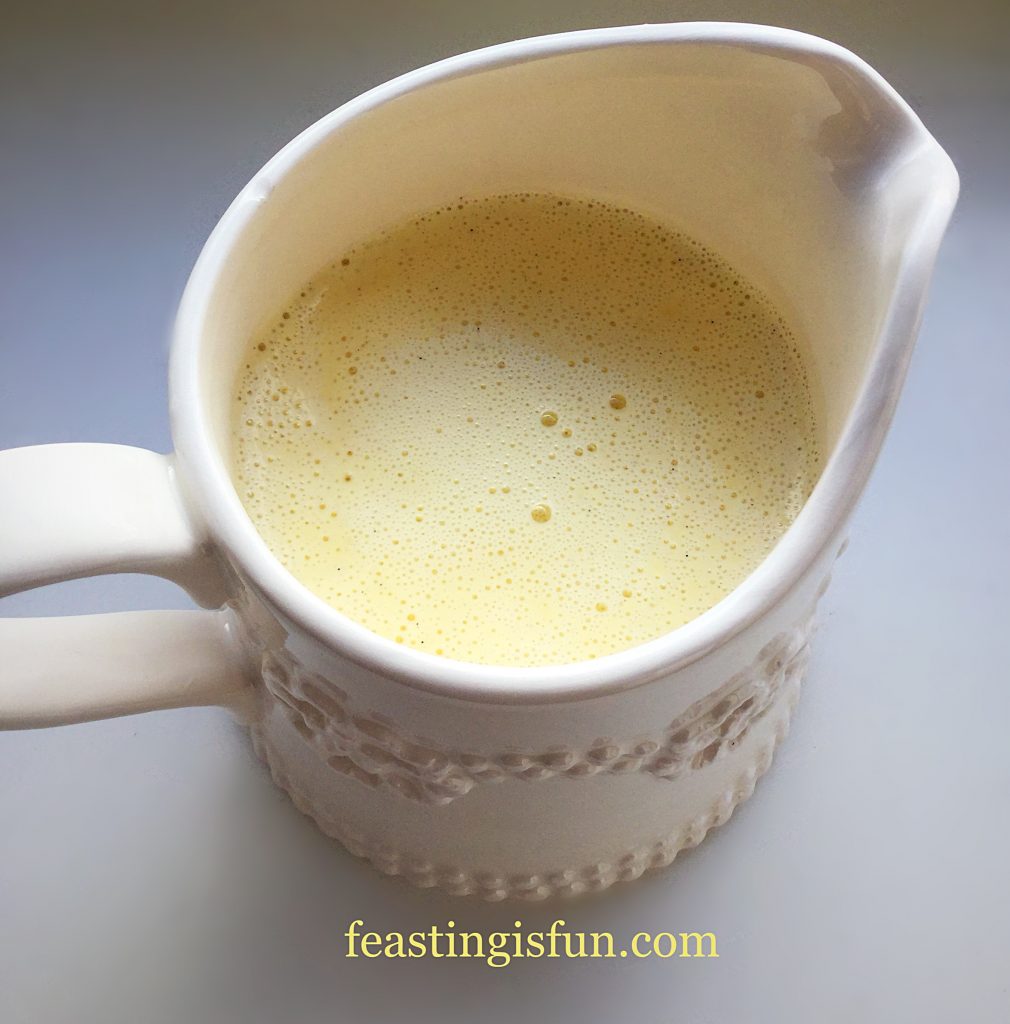
  • To use immediately, pour the hot custard into a jug.
FF Luxury Homemade Vanilla Bean Custard
Cooking, sieving and preparing the custard to serve.

To serve, simply pour the custard over, or around your favourite dessert.

FF Luxury Homemade Vanilla Bean Custard
Luxury Homemade Vanilla Bean Custard

Store freshly made custard, cling filmed as above, in the fridge for up to 2 days.

If you have enjoyed this recipe for Luxury Homemade Vanilla Bean Custard then you may also like these:

Boozy Berry Sauce

FF Luxury Homemade Vanilla Bean Custard
Boozy Berry Sauce

Lemon Ripple Ice Cream

FF Luxury Homemade Vanilla Bean Custard
Lemon Ripple Ice Cream

Toffee Apple Crumble

FF Luxury Homemade Vanilla Bean Custard
Toffee Apple Crumble

Since I use cornflour that is guaranteed to be gluten free, people with certain dietary restrictions can also enjoy this custard. Hot, homemade desserts are made more delicious when accompanied by this easy to make custard. There will always be a time when it’s pre-made alternative is necessary. Yet special occasions, such as Christmas are the perfect opportunity to treat your tastebuds to the very best.

Whatever you are baking, making and creating in your kitchens, have fun preparing your feast.

Sammie xx

No part of this post may be reproduced or duplicated without the written permission of its owner. Please see my Disclosure Policy.

Creamy Tomato Spinach Chicken Pasta

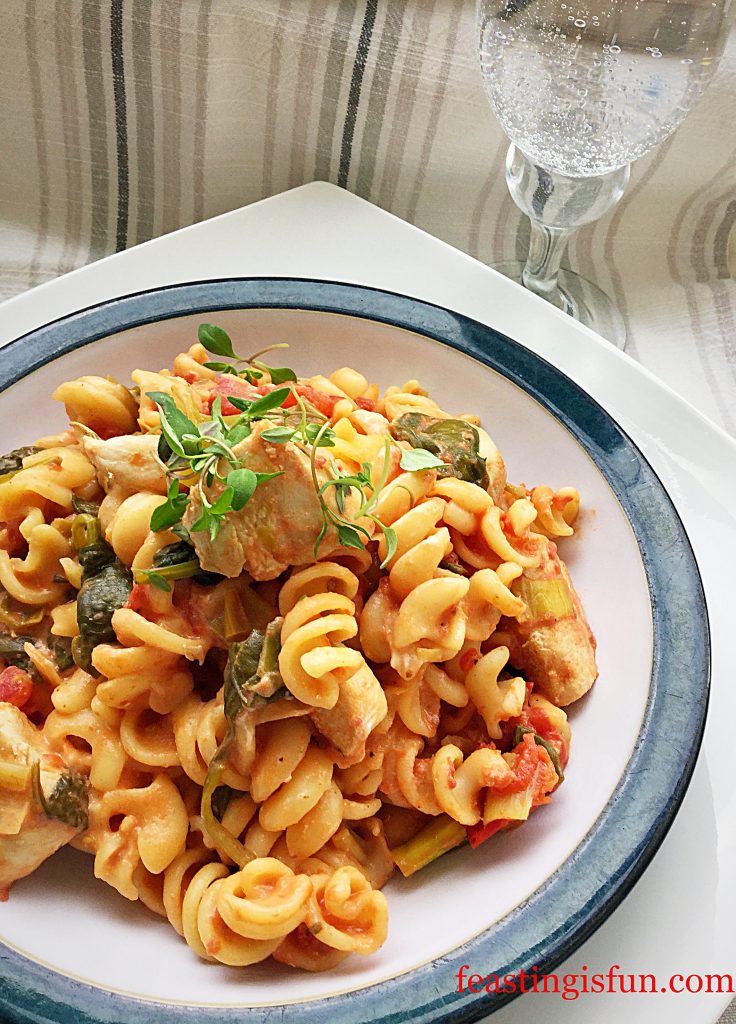
I love easy, quick to make, healthy meal recipes. How about you? Pasta is quick to cook, versatile, economical and tasty, ticking all of these boxes. With so many varieties of pasta, there’s also an endless number of different sauce possibilities to suit any diet. I cannot imagine my kitchen without it! My culinary creativity would be far less fun and frankly, boring! So, thank you Italy, you may have invaded Britain, however it’s time to let things go, as you have given us pasta. More specifically the fusilli bronze die pasta used in this Creamy Tomato Spinach Chicken Pasta.

FF Creamy Tomato Spinach Chicken Pasta

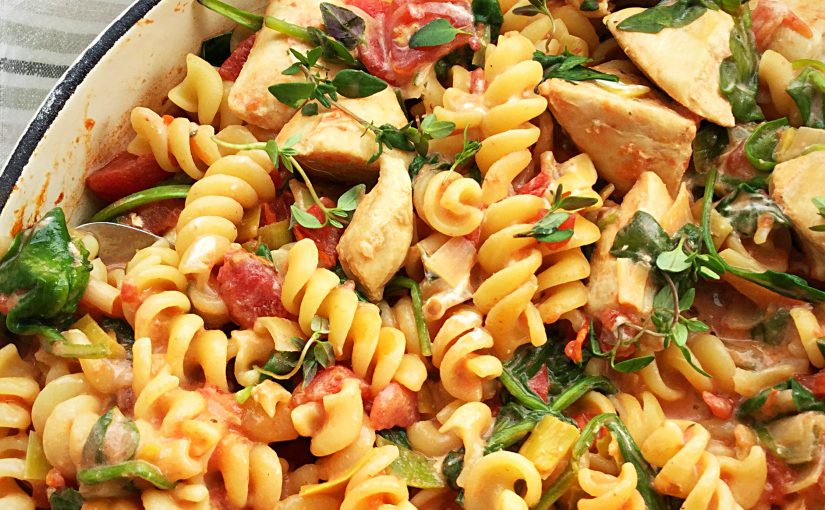
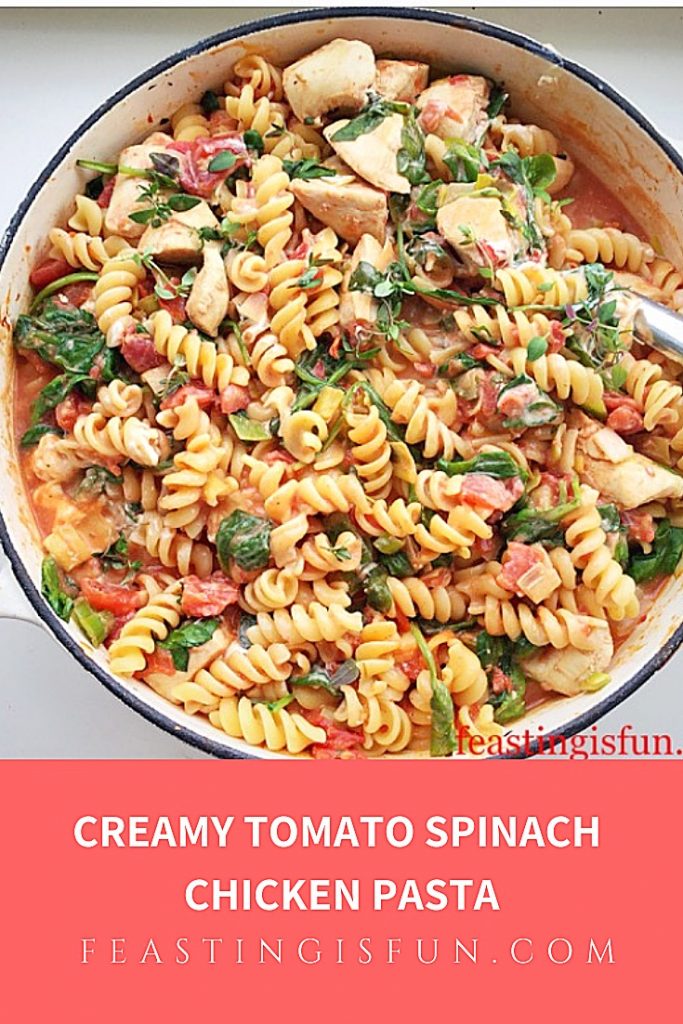
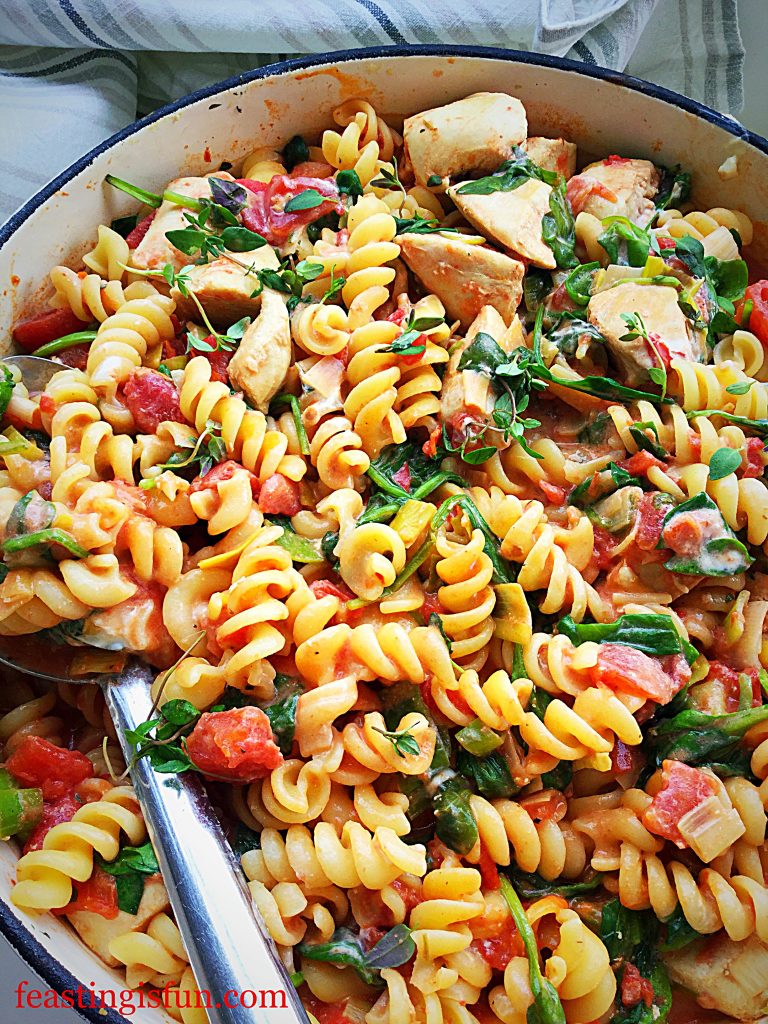
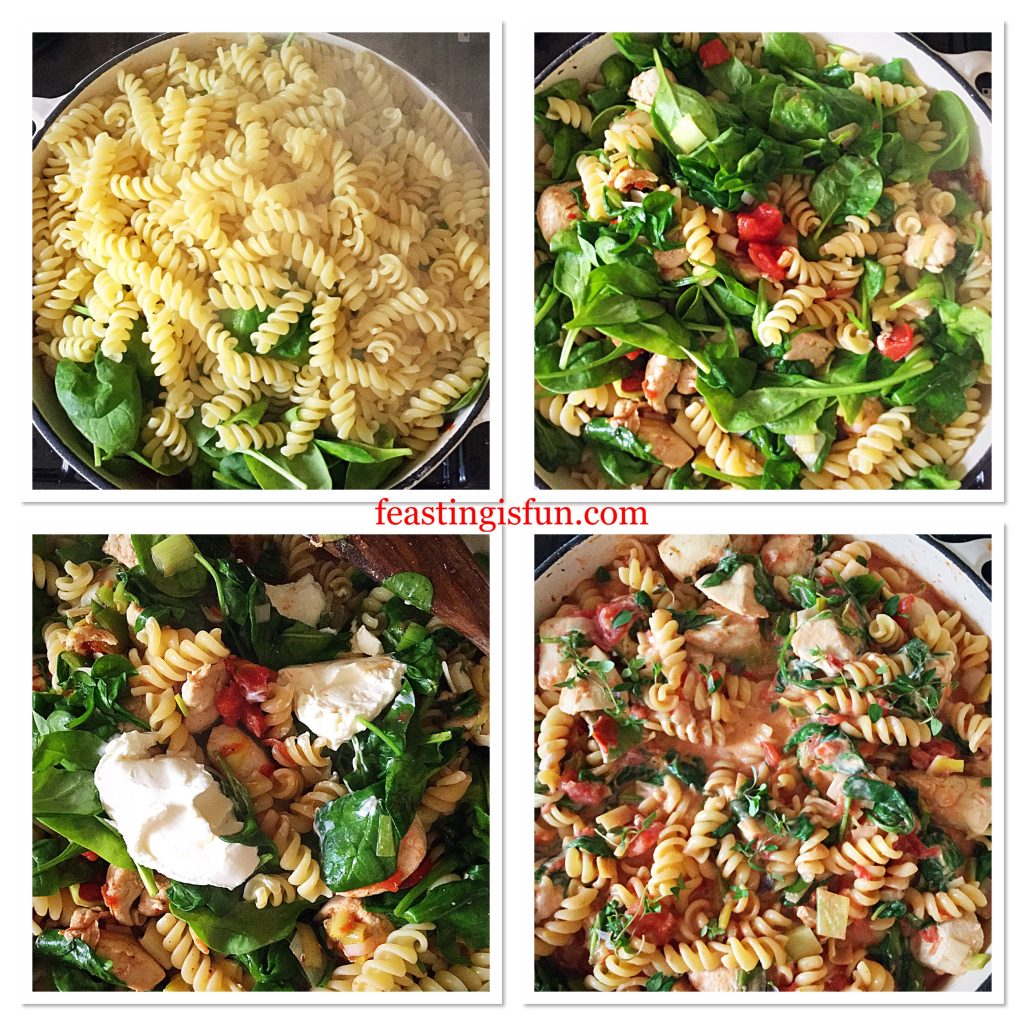
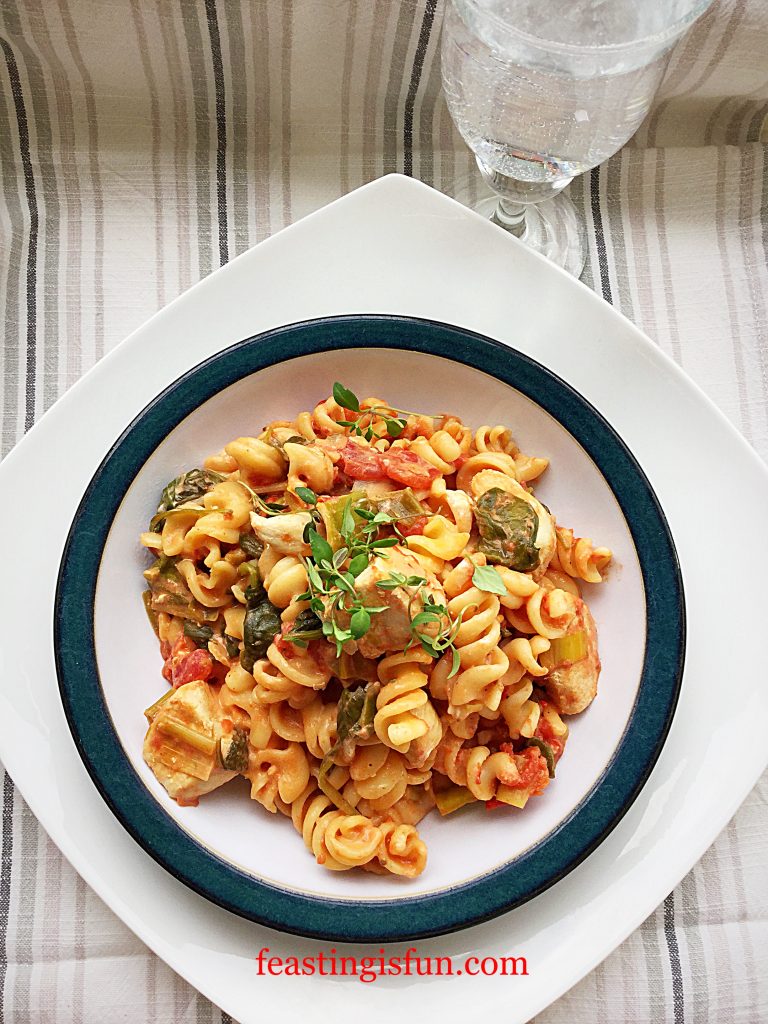
So, next time you think of tossing a jar of pesto into pasta for dinner, think again. As this dish only takes 30 minutes to make, barely more than the time it takes to cook pasta. Not only do you get a balanced healthy meal, it is filling, like all proper meals should be. Tender, bite sized pieces of succulent chicken breast, fresh baby spinach wilted into the tomato and cream cheese sauce that wraps itself around the fusilli pasta.

FF Creamy Tomato Spinach Chicken Pasta
Creamy Tomato Spinach Chicken Pasta

Feasting Food

If you are cutting down on carbs you may wish to skip this paragraph. Which is, to serve this tasty bowl of goodness with a chunk of baguette, or any of my homemade focaccia bread  recipes. While this dish not swimming in sauce, there is always some pooled on your plate or bowl. And this is where the bread is important. To dunk with! Using the bread to absorb every last drop of the luscious, creamy sauce. Also, keeping with the low fat theme, why not leave the bread unbuttered. As well as reducing calories, the bread is more absorbent without butter.

FF Creamy Tomato Spinach Chicken Pasta
Creamy Tomato Spinach Chicken Pasta

Eating should be an enjoyable experience. Indeed it should be a feast. It should feed more than our tummies, it should feed our soul. Giving thanks before eating is a custom here at home. Yet stopping for a moment to look and smell the food in front of you is also important. Too much food is literally shoved down throats while watching television. I wonder too if the taste and texture, even has time to register with the brain. Eating with family and friends, sitting at a table, not only slows down the rate at which we eat, it can also regulate how much we eat. Resulting in an altogether, more pleasurable experience. My opinion is that all food tastes better when it is shared.

In addition, if you live on your own and cook for yourself, as I did for many years, being mindful while eating is still beneficial. Taking time to really enjoy the experience of eating, really is one of life’s simplest pleasures.

Time to make this delicious dish.

Recipe: Creamy Tomato Spinach Chicken Pasta serves 4-6 people

500g Diced Chicken Breast skin off and cut into bite size pieces – I use Graig Farm

1tbsp Olive Oil – I use Filippo Berio

1 Large Leek – washed and cut into small dice

2 x 400g Chopped Tin Tomatoes plus 1 tin of pasta cooking water. Alternatively use the same weight of chopped, fresh tomatoes and approximately 400mls of pasta cooking water.

200g Washed Baby Spinach – use frozen if out of season

1tbsp Fresh Thyme finely chopped – plus additional Thyme for garnishing the finished dish

140g Philadelphia Cream Cheese – use the full fat version

1tsp Sea Salt  – I use Maldon

Good Grinding of Fresh Black Pepper to taste

450g Fusilli Pasta – bronze die pasta has rougher edges and so absorbs more sauce

Method: Making the Creamy Tomato Spinach Chicken Pasta

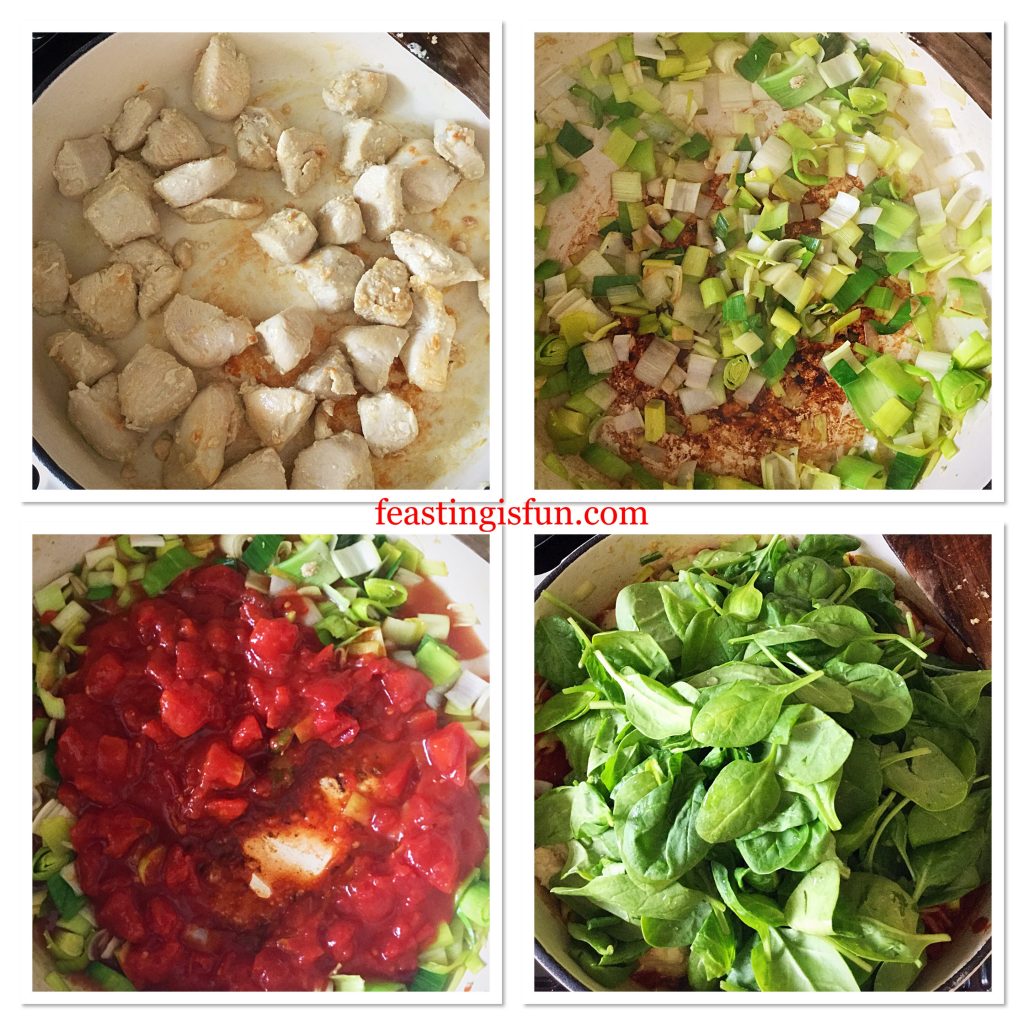
  • First of all, place a heavy bottomed pan on to the hob over a medium heat. Add the olive oil and allow to heat.
  • At the same time place a large pan of water on a high heat, ready to cook the pasta. When the water is boiling add a teaspoon of sea salt and then the pasta and cook for 8 minutes.
  • Into the other pan add the chopped chicken breast and cook until lightly browned.
  • Remove the cooked chicken to a plate and then add the chopped leek to the pan.
  • Saute the leek until it is softened and then add the cooked chicken back to the pan.
  • Immediately add the 2 tins of chopped tomatoes and use a wooden spatula to scrape the base of the pan clean. Follow by adding the chopped fresh thyme.
  • Now tip the baby spinach into the pan. Don’t worry if it is piled high it will wilt down.
FF Creamy Tomato Spinach Chicken Pasta
Creamy Tomato Spinach Chicken Pasta
  • Remove a can full/2-3 ladles (approximately 400ml) of hot pasta water and pour on to the spinach. Take extra care as it will be hot.
  • Drain the pasta and tip on to the spinach. Allow the spinach to wilt down, it will release it’s water and make the sauce thinner.
  • Next add the cream cheese to the pan and stir so that it melts into the sauce.
  • Most importantly, taste the sauce. Add a good grinding of fresh black pepper to taste. Additional salt shouldn’t be needed, but do check and adjust the seasoning as necessary.
  • Sprinkle over fresh Thyme and the dish is ready to be served.
FF Creamy Tomato Spinach Chicken Pasta
Creamy Tomato Spinach Chicken Pasta

Time to eat

Serve this delicious Creamy Tomato Spinach Chicken Pasta in bowls.

FF Creamy Tomato Spinach Chicken Pasta
Creamy Tomato Spinach Chicken Pasta

Not only is this recipe perfect for making ahead, it’s also easy to transport. Which makes it an easy dish to gift to a new family, friend who is unwell, or anyone who really needs a break from cooking. Resulting in a great meal that is as perfect to share outside the home, as well as with family and friends around the dinner table.

To freeze leftovers, cool completely and then spoon the cold pasta into freezer bags, or freezer proof containers, removing as much air as possible. Label, including the date and freeze for up to 3 months. Remove from the freezer, place on a plate or bowl and defrost in the fridge overnight. Reheat until piping hot, serve as previously suggested and enjoy!

If you have enjoyed this recipe for Creamy Tomato Spinach Chicken Pasta then you may also like these:

Cheesy Vegetable Pasta Bake

Cheesy Vegetable Pasta Bake

Lemon Garlic Vegetable Orzo

Lemon garlic vegetable orzo.
Lemon Garlic Vegetable Orzo

Roasted Summer Vegetable Orzo Salad

Roasted summer vegetable orzo pasta salad served in a white bowl and garnished with fresh, flat leaf parsley.
Roasted Summer Vegetable Orzo Salad.

Pasta is one of the most important ingredients in my kitchen. A go-to staple when I need to whip up something super tasty, super quick. Another bonus it that after cooking and cooling, it can usually be frozen, such as this Creamy Tomato Spinach Chicken Pasta, Chicken Four Cheese Lasagne and Cheesy Vegetable Pasta Bake all can be. Serving with bread and salad enables this dish to feed more people, ideal when last minute dinner guests appear (a necessity when a house full of teenagers and their friends lose track of time!). Although cooking pasta from scratch takes barely more than 10 minutes and even though there are countless ready made sauces to available to buy, homemade pasta dishes can be just as quick and easy. And here at home, easy meals are a busy household’s must.

So, whatever you are making, baking and creating in your kitchens, have fun preparing and sharing your feast.

Sammie xx

No part of this post may be reproduced or duplicated without the written permission of the owner. See my Disclosure Policy for full details.