Cherry Tomato Mozzarella Basil Quiche

Share
Facebooktwitterpinterestlinkedintumblr

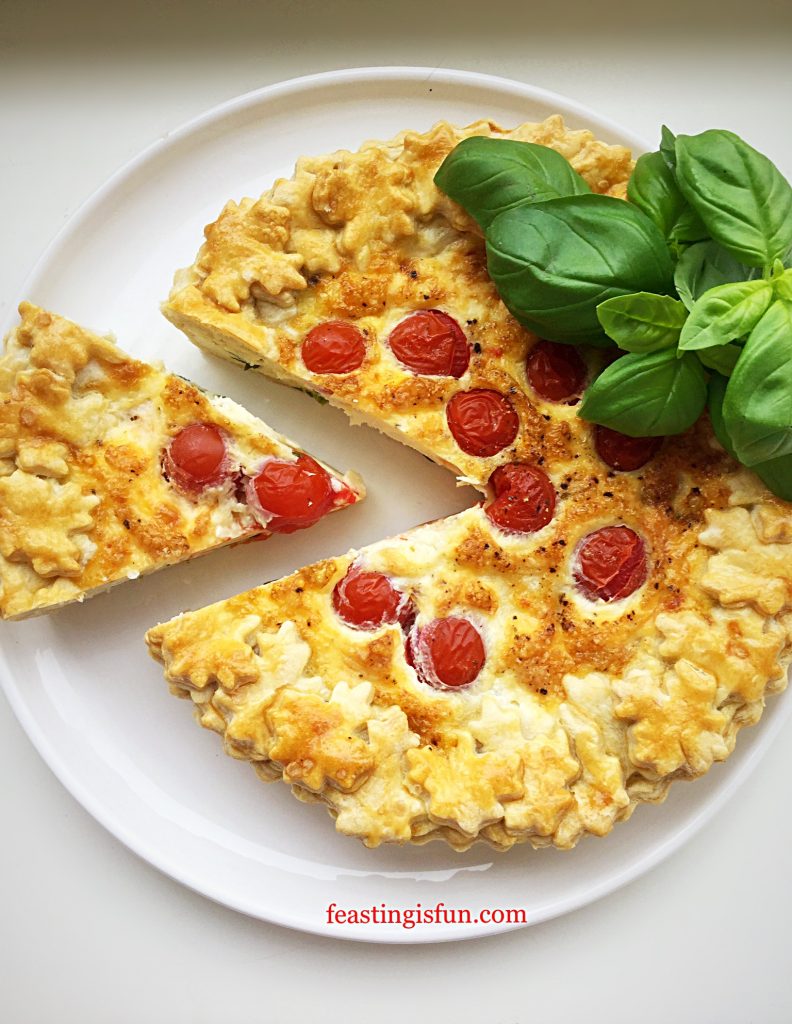
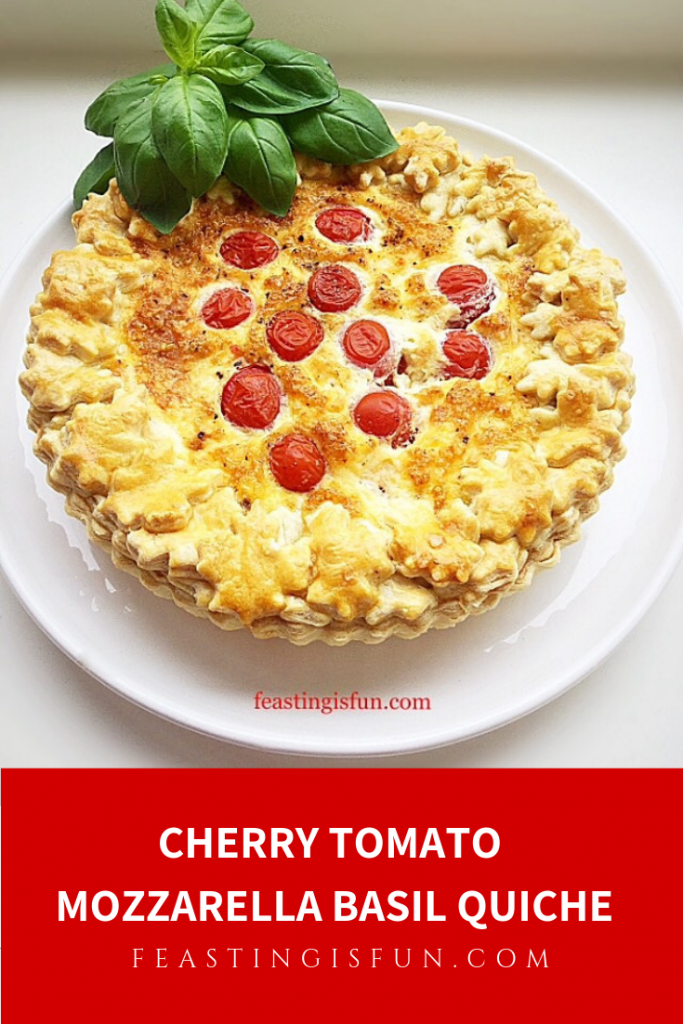
In case you missed my previous post Fresh Basil Topped Slow Roasted Tomatoes I’ll mention again that I love tomatoes. Especially locally grown, British tomatoes that are ripened on the vine and left on the worktop, not in the fridge. Sweet and savoury bursts of Summer on my tongue. Here I have baked them into a layered quiche with fresh basil and two types of cheese. So I am thrilled to bring you my Cherry Tomato Mozzarella Basil Quiche.

FF Cherry Tomato Mozzarella Basil Quiche

I was inspired by the classic caprese salad of fresh tomatoes, mozzarella cheese and fragrant basil to make this savoury tart. Since each element compliments the others so well as a salad the same can be said of this quiche. Also, layering the separate ingredients within an all butter pastry tart creates a delicious dish. Perfect for lunch, dinner, picnics, packed lunches and buffets. And that is how delicious this quiche is!
FF Cherry Tomato Mozzarella Basil Quiche
Cherry Tomato Mozzarella Basil Quiche

Choosing Local Produce

Because using local, seasonal produce is important to me, as a home cook and Food Blogger, I was delighted when I was offered a box of Sophie Jane cherry tomatoes. Locally grown by Eric Wall a local, specialist grower. The tomatoes I received are ripened on the vine and are grown without the use of pesticides. Most importantly they taste incredible. In fact just like a tomato should taste. Eaten warmed by the sun, after being left on the windowsill, they are sweet with a deeper savoury flavour. Also they weren’t very acidic as some tomatoes can be, especially tinned ones.
FF Cherry Tomato Mozzarella Basil Quiche
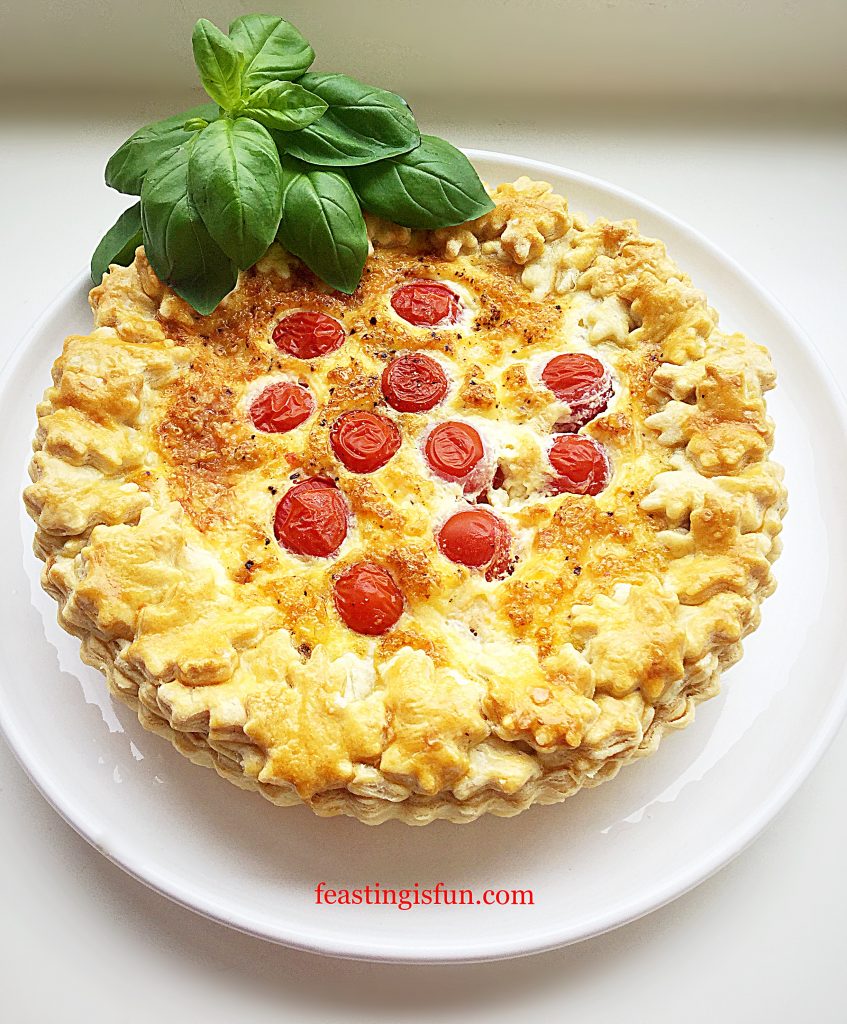
Cherry Tomato Mozzarella Basil Quiche

While British Tomato Fortnight has finished I firmly believe that we should all be eating flavoursome British tomatoes for as long as they are available. Because they taste so good. It really is as simple as that. I have been popping these ruby beauties into my mouth like sweeties. Eating them alongside crackers and cheese and I plan to make more recipes to share with you. All in aid of celebrating the humble tomato.

Recipe: Cherry Tomato Mozzarella Basil Quiche:

You will need a 20cm x 5cm (8” x 2”) tart tin, ideally with a loose bottom, to make this recipe.

A quick note – I successfully doubled all of the quantities and made this quiche in a deeper, wider dish. Baking times need to be adjusted, aside from the initial blind baking. The larger quiche turned out perfectly and would be ideal for feeding a crowd, or a buffet.

500g/1lb 2oz Shortcrust Pastry – I use my recipe for Perfect Butter Shortcrust Pastry freezing the leftovers

225g/8oz Mozzarella Cheese – drained and with excess water squeezed out

50g/2oz Vintage or Very Mature/Sharp Cheddar – I use Wyke Farms

6 Large Free Range Eggs

225g/8oz Fresh Cherry Tomatoes

12-14 Fresh Basil Leaves – alternatively out of season use 1/2 tsp dried Thyme

1/2 tsp Freshly Ground Black Pepper

Pinch of Sea Salt Flakes – I use Maldon

Method: Preheat oven to 220C/200C fan, 425F, gas mark 7

Making And Baking The Shortcrust Pastry Tart Case

  • First of all make the pastry, wrap in cling film and chill for one hour.
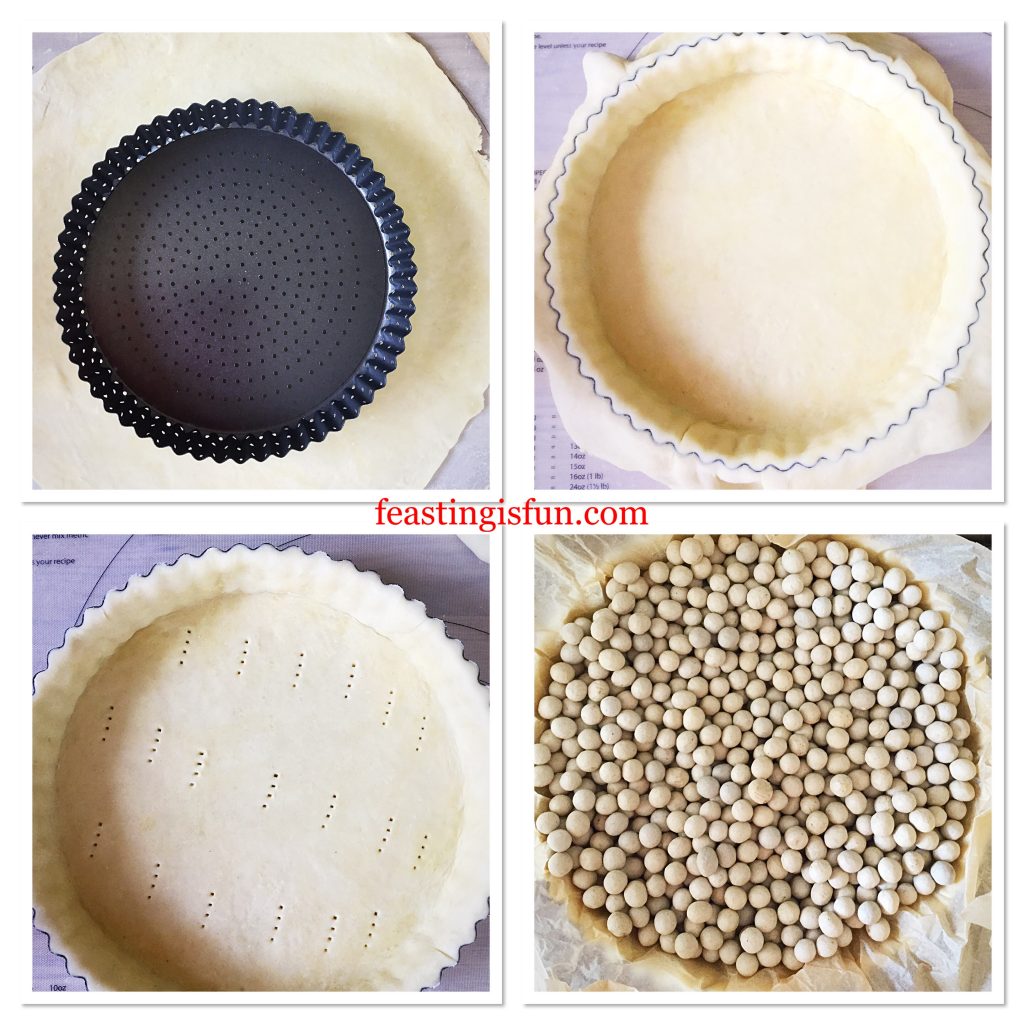
  • Remove the chilled pastry from the fridge, unwrap and roll out on a lightly floured surface, so that it will fit the tart tin. See photo top left below.
  • Fold the pastry over the rolling pin, making it easier to transfer.
  • Lower the pastry into the tin, making sure that you don’t stretch it as you do.
  • Press the pastry into the tin so that it fits securely.
  • Run your rolling pin over the tart tin, this will give a clean edge to the pastry.
  • Place the tart tin on to a baking sheet and dock the base with a fork.
  • Now scrunch up some baking parchment and line the pastry tart with it.
  • Next fill with baking beans.
FF Cherry Tomato Mozzarella Basil Quiche
Making the pastry shell for the quiche.
  • Place in the centre of a preheated oven and bake for 15 minutes.
  • Carefully lift out the baking parchment and baking beans.
  • Return the tart to the oven for 5 minutes further baking.

Layering The Quiche Ingredients

  • Remove the tart and reduce the oven temperature to 190C/170C fan, 375F, gas mark 5.
  • Line the tart base with basil leaves.
  • Place torn chunks of mozzarella directly on to the basil.
  • Sprinkle over finely grated cheddar and then top with cherry tomatoes.
  • Reserve one egg, whisk the other five adding the black pepper. Pour the eggs into the tart.
FF Cherry Tomato Mozzarella Basil Quiche
Creating layers within the Cherry Tomato Mozzarella Basil Quiche
  • Roll out the remaining pastry and cut out small shapes to edge the tart. I used a oak leaf cutter which gives the edge of the quiche a frilly finish.
  • Whisk the remaining egg and brush the underside of each cutout. Stick the pastry cutouts to the edge of the pastry case. You can create a single layer or add extra cutouts to create a layered effect.
  • Brush the pastry edge with egg so that it turns golden when baked.
  • Finally sprinkle a pinch of sea salt over the top.

Baking The Cherry Tomato Mozzarella Basil Quiche

FF Cherry Tomato Mozzarella Basil Quiche
Before and after baking the Cherry Tomato Mozzarella Basil Quiche
  • Carefully place the filled quiche into the centre of the oven – remember to check that the heat has been reduced.
  • Bake for 40-45 minutes. The quiche is baked when it is a golden colour and there is no wobble in the centre.
  • As soon as the quiche is baked remove from the oven. Place on a cooling rack for at least 30 minutes before removing from the tin. Take care as the tomatoes will be very hot and juicy.
FF Cherry Tomato Mozzarella Basil Quiche
Cherry Tomato Mozzarella Basil Quiche

The beauty of this quiche is that it can be served warm, at room temperature or cold, straight from the fridge!

FF Cherry Tomato Mozzarella Basil Quiche
Cherry Tomato Mozzarella Basil Quiche

Because this quiche does not contain meat it is also suitable for vegetarians. Since I have made this twice it really holds it’s shape well when cold and would be perfect for taking on picnics. Most of all, when you bake this quiche make sure you share it. Especially as it is so pretty and absolutely yummy!

Make up to 2 days ahead, cool completely, double wrap in cling film and refrigerate. Due to the moisture content of the tomatoes I would not recommend freezing, unlike my Smoked Bacon Asparagus Quiche which freezes well. Although the pastry case can be made in advance and frozen.

If you have enjoyed this recipe for Cherry Tomato Mozzarella Basil Quiche you may also like these:

Quiche Lorraine 

FF Cherry Tomato Mozzarella Basil Quiche
Quiche Lorraine, smoked bacon and cheddar cheese savoury tart.

Walnut Pastry Crust Leek Stilton Tart
FF Cherry Tomato Mozzarella Basil Quiche
Walnut Pastry Crust Leek Stilton Tart

Iced Bakewell Tart

FF Cherry Tomato Mozzarella Basil Quiche
Iced Bakewell Tart

During this Summer, which I am hoping will be long and warm, I’m looking forward to creating recipes to share with you. Especially focusing on seasonal, local produce and products. Whether you live here, in Australia, Europe or the United States, I do feel that it’s important to support our local farmers. While some of you may get to visit farmers markets, if like me, it’s difficult for you to get out, take a look online. Since spending a little time researching I’ve found the equivalent of farmers markets online and they deliver! Most of all, if you remember one thing from this post – please keep your tomatoes out of the fridge, it kills their flavour!

Whatever you are making, baking and creating in your kitchens, have fun preparing you feast.

Also a huge thank you to everyone who follows me on social media and shares their creations with me.

Sammie xx

No part of this post may be reproduced or duplicated without the written permission of the owner. Please see my Disclosure Policy.

Share
Facebooktwitterpinterestlinkedintumblr

Cheddar Cheese Thyme Soft Breadsticks

Share
Facebooktwitterpinterestlinkedintumblr

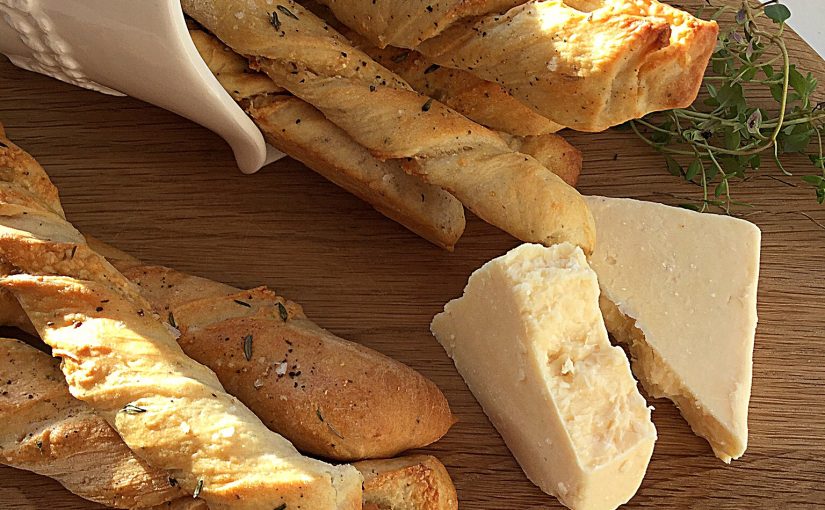
Cheddar cheese is loved by so many, me included and is such a versatile ingredient. Something magical happens to the flavour when it is heated. Becoming more savoury, salty and intense on the palette. Even when eaten with crackers it benefits vastly when left out of the fridge to come up to room temperature. Since winning some Vintage Cheddar in a Twitter competition I wanted to create a new, delicious snack recipe. These Cheddar Cheese Thyme Soft Breadsticks tick every, single, box.

FF Cheddar Cheese Thyme Soft Breadsticks

Cheesy Breadsticks – Delicious And Versatile

The combination of good quality mature, or vintage cheddar with fresh thyme gives a distinctly savoury flavour to these breadsticks. Also, the addition of Parmesan cheese to the bread dough enhances and reaffirms their cheesy flavour. While pastry cheese straws can be oily at times, that is not the case here. No greasy fingers whilst munching on these!

FF Cheddar Cheese Thyme Soft Breadsticks
Cheddar Cheese Thyme Soft Breadsticks

As well as tasting delicious on their own, these cheesy breadsticks also make a perfect accompaniment to soup, such as Hearty Minestrone Soup. While sounding an unlikely combination, we ate these with a simple beef casserole that had been bubbling away on the hob all day. Not so surprising when Cheddar is often used in the pastry of beef pies.

FF Cheddar Cheese Thyme Soft Breadsticks
Cheddar Cheese Thyme Soft Breadsticks

Recipe: Cheddar Cheese Thyme Soft Breadsticks makes 32

320ml Tap Water at room temperature

7g Dried Yeast – I use Allinson easy bake yeast action

500g Strong White Bread Flour

2 tbsp Olive Oil plus extra for oiling the baking trays

7g Sea Salt plus extra for sprinkling – I use Maldon

50g Parmesan Cheese finely grated

3 tsp Fresh Thyme Leaves plus an add 2 tsp for sprinkling – halve the amount if using dried

1/2 tsp Freshly Ground Black Pepper plus extra for sprinkling on to breadsticks

50g plus an additional 75g Mature Cheddar Cheese – I used Vintage Cheddar from Wyke Farms

1 Free Range Egg beaten with 2 tsp cold water to use as an egg wash

Method:

The method given uses a stand mixer with dough hook attachment to make the dough. Of course this may be made by hand.

Making The Breadstick Dough

  • First of all, weigh the water into the bowl of the stand mixer.
  • Add the dried yeast and flour.
  • Next add the olive oil and salt.
  • Lower the dough hook and mix on low speed for 10 minutes, increasing to medium speed for a further 3 minutes.
  • While the dough is mixing lightly oil 4 large baking trays. Also preheat the oven to 200C/180C fan, 400F, gas mark 6.
  • Stop mixing and check the dough. It should be able to stretch so that light can be seen through it. This is called the windowpane test. If the dough does not pass this test lower the dough hook and continue to mix on medium, stopping and checking every two minutes until it finally passes the test.
  • As soon as the dough is ready stop mixing. Add both the finely grated Parmesan cheese and 50g of the cheddar. Also add 2 teaspoons of fresh Thyme leaves and half a teaspoon of freshly ground black pepper.
  • Lower the dough hook and mix on a low speed for two minutes.
  • Stop the mixer, scrape any dough from the dough hook into the bowl, cover with a cloth and leave in a draft free place until doubled in size.

Flavouring And Shaping The Cheedar Cheese Thyme Breadsticks:

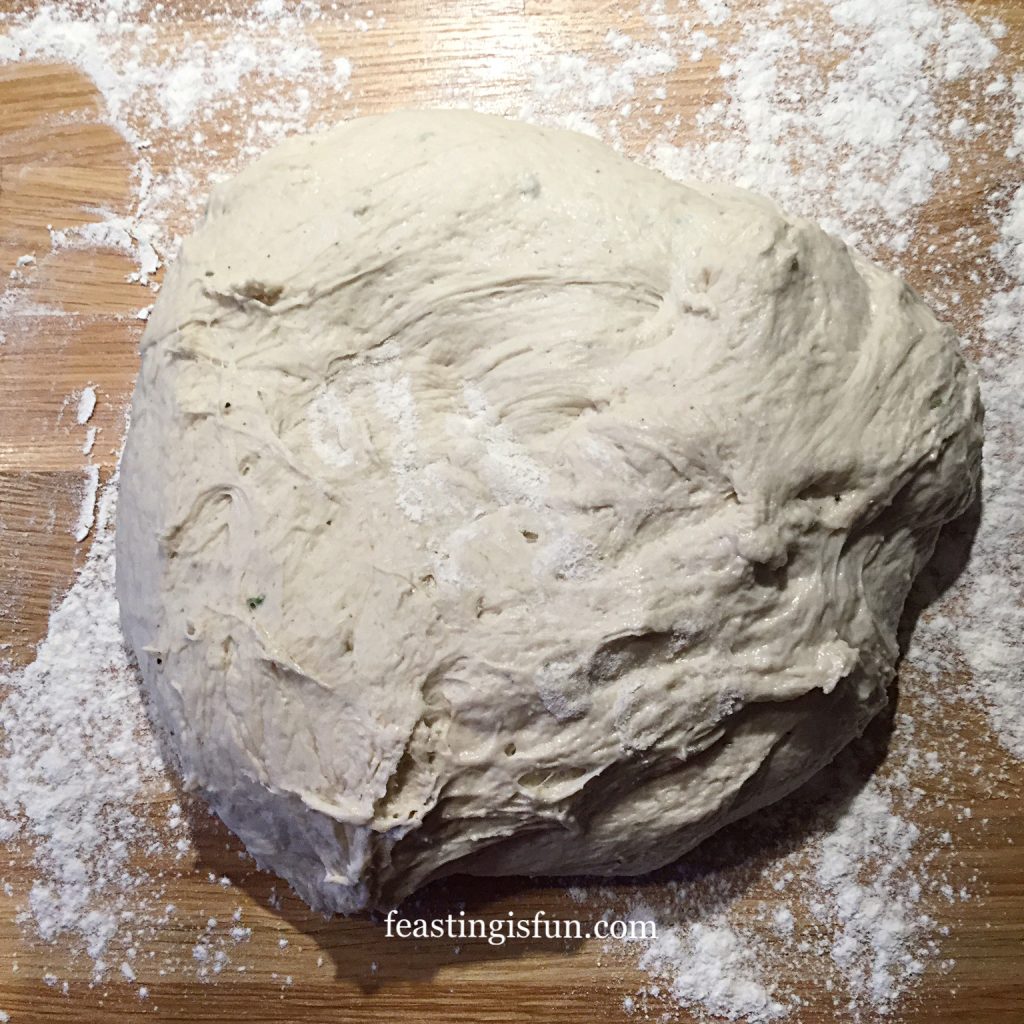
  • Lightly flour the worktop and tip out the dough, so that the top of the risen dough is in contact with the worktop.
FF Cheddar Cheese Thyme Soft Breadsticks
The Cheddar Cheese Thyme Soft Breadsticks Dough
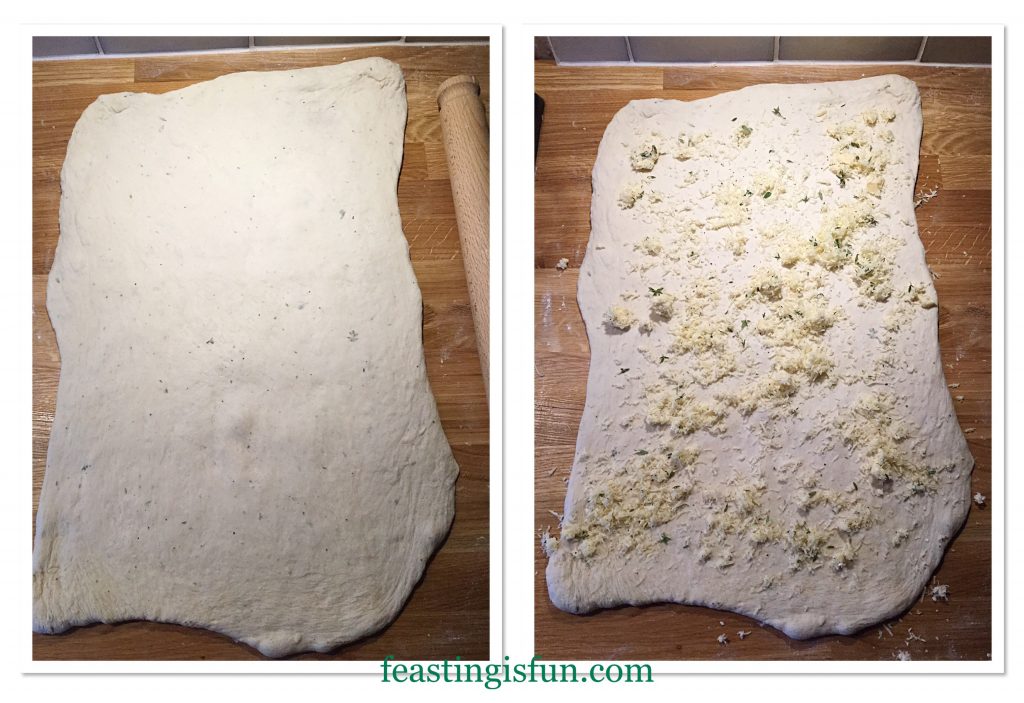
  • Dust the dough with flour and roll out to 50cm x 30cm (20in x 12in).
FF Cheddar Cheese Thyme Soft Breadsticks
Preparing the dough to become breadsticks.
  • Sprinkle over the rolled out dough, 75g finely grated cheddar and 1 teaspoon of fresh thyme leaves.
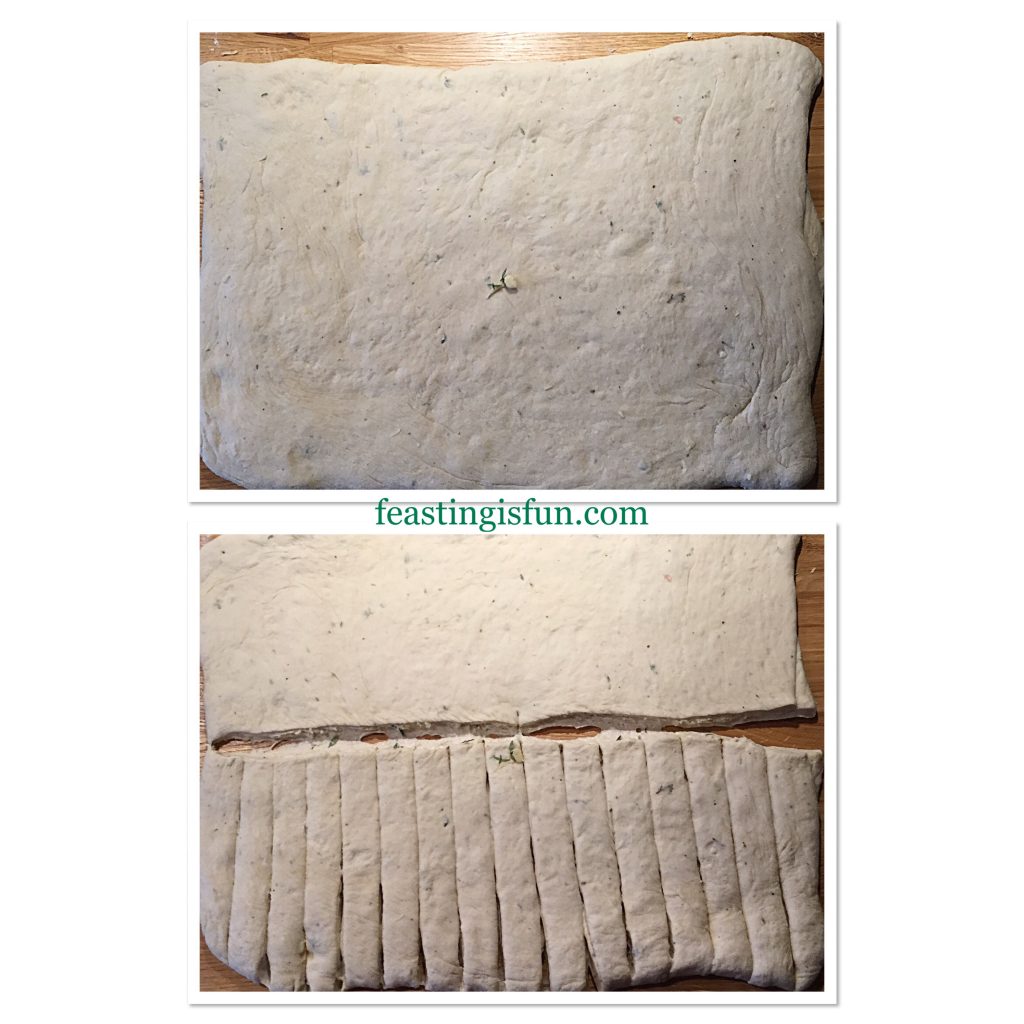
  • Fold the dough in half.
FF Cheddar Cheese Thyme Soft Breadsticks
Folding and cutting the dough into breadsticks.
  • Gently roll over the folded dough with a rolling pin, sealing the cheese inside.
  • Cut the dough in half across the middle. Next cut 1cm (1/2in) strips in the dough.
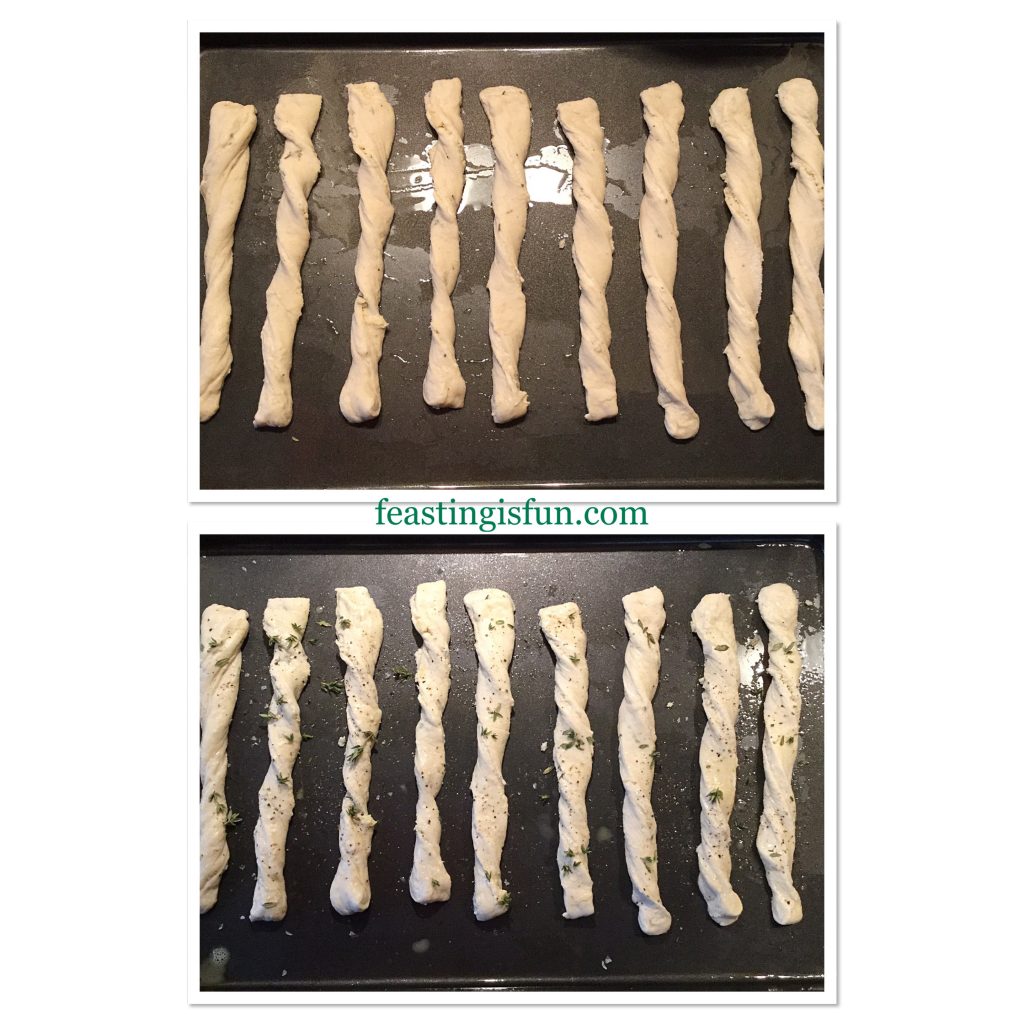
FF Cheddar Cheese Thyme Soft Breadsticks
Preparing the breadsticks for baking.
  • Remove one dough strip at a time, stretch and twist it before placing on a prepared baking tray. Press the dough on to the tray to stick, this will hold the twist in place. Place eight breadsticks on each tray.
  • Brush each breadstick lightly with egg wash and sprinkle over 1/2 teaspoon of thyme (for each eight breadsticks). Also grind black pepper and sprinkle a pinch of sea salt over the tray.
  • Place two baking sheets in the preheated oven on separate shelves and bake for 15-20 minutes.
FF Cheddar Cheese Thyme Soft Breadsticks
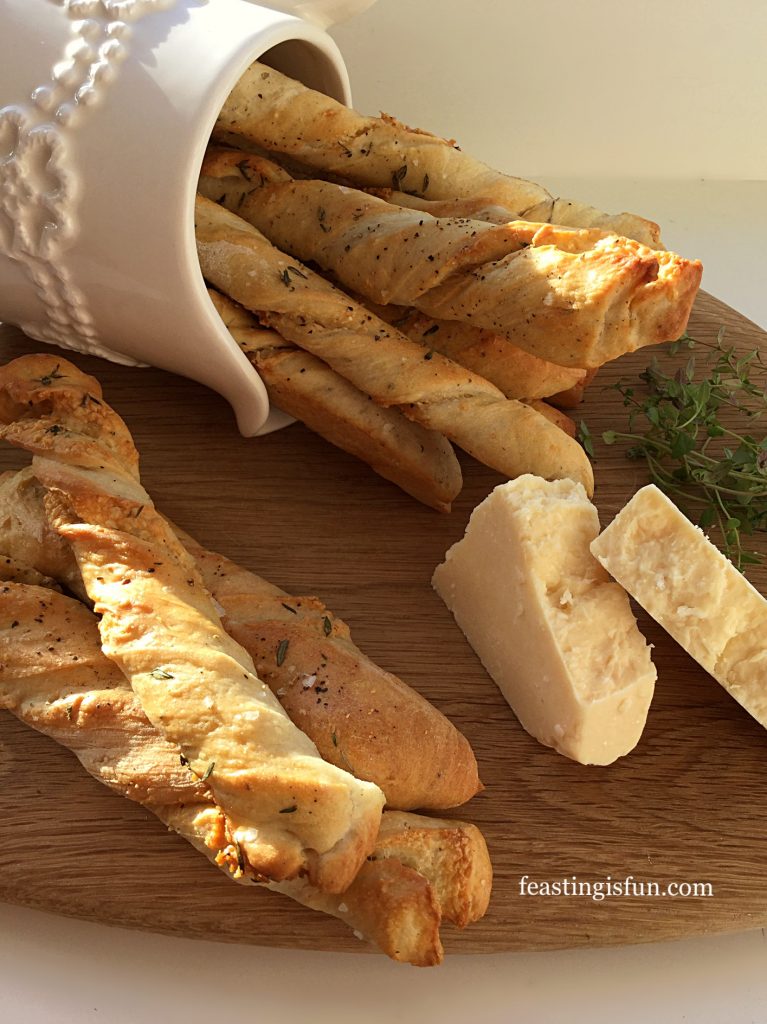
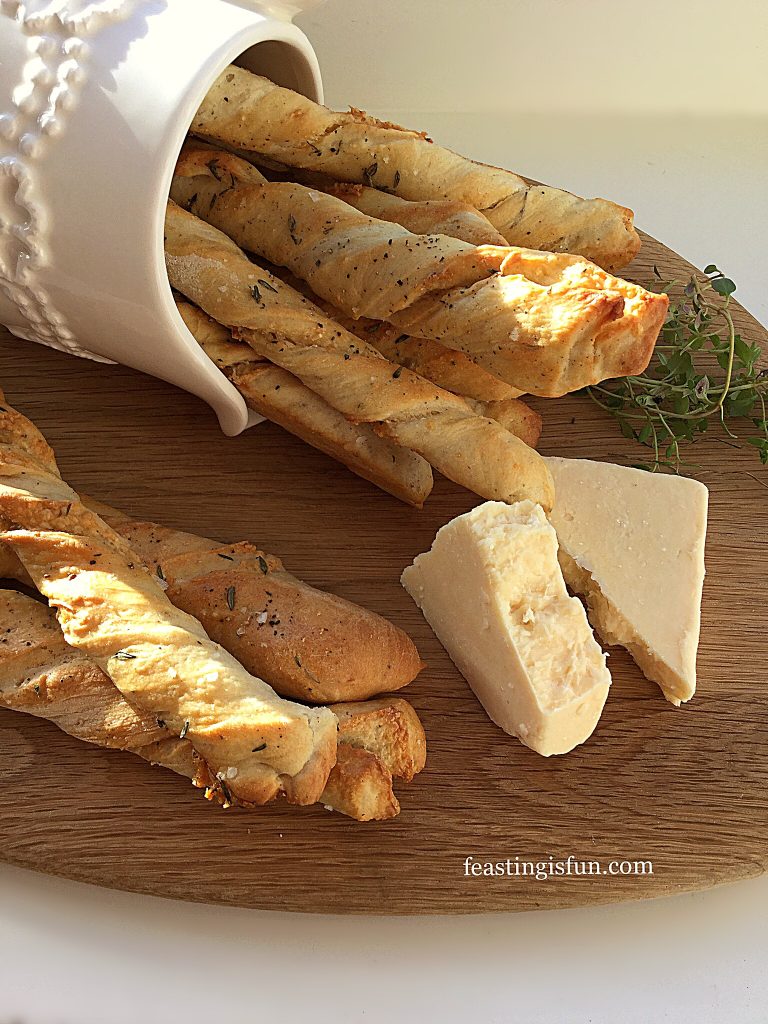
Freshly baked, golden, Cheddar Cheese Thyme Soft Breadsticks
  • The breadsticks are baked when they are a light golden brown.
  • As soon as the breadsticks are baked remove from the oven and place on a cooling rack.
  • Continue with the other half of the dough, cutting, twisting, egg washing and sprinkling and finally baking as before.
FF Cheddar Cheese Thyme Soft Breadsticks
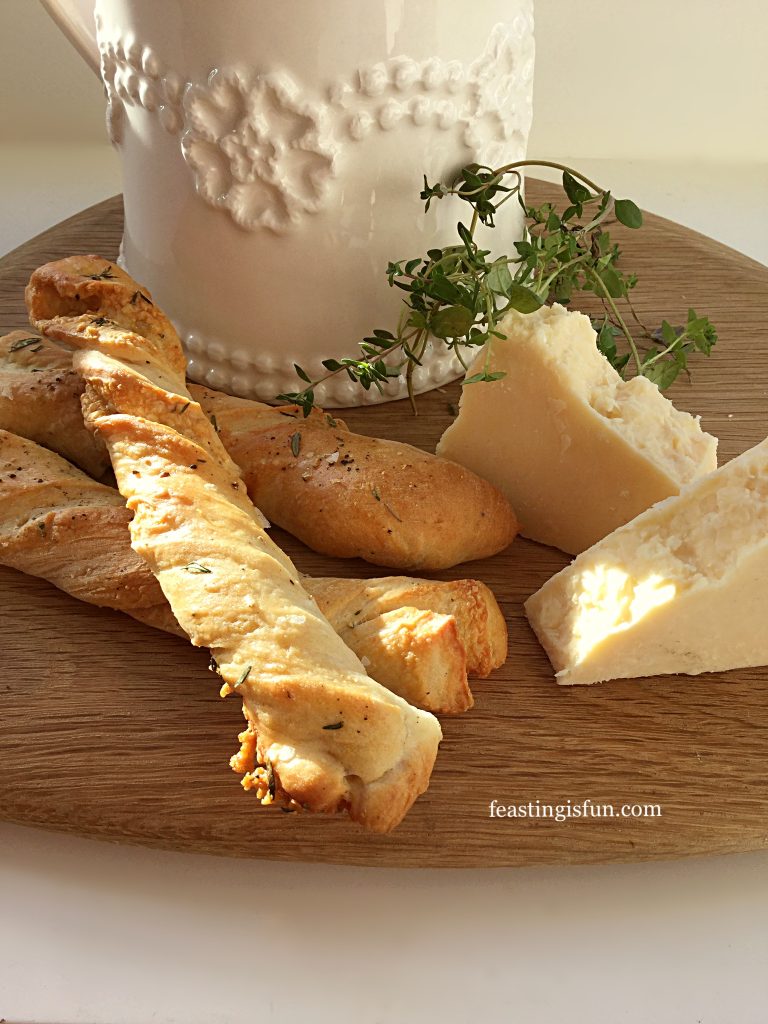
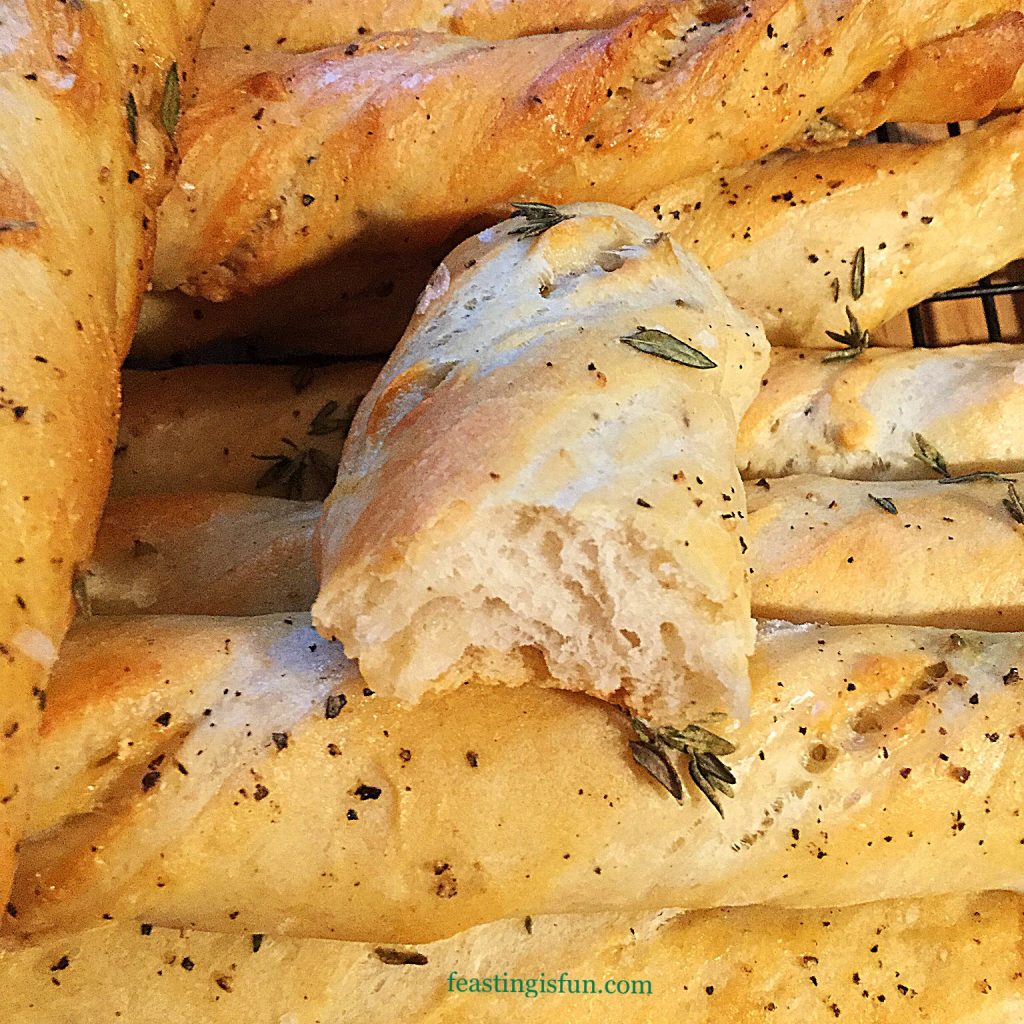
The soft inner crumb of these Cheddar Cheese Thyme Soft Breadsticks.
  • Wait until slightly cooled before biting into one of these deliciously cheesy breadsticks, with its soft, fluffy inner.
FF Cheddar Cheese Thyme Soft Breadsticks
Cheddar Cheese Thyme Soft Breadsticks

Serving And Storing The Breadsticks

Serve slightly warm to allow for the best possible taste experience. At there best enjoyed on the day these are made.

Since this recipe makes a big batch of Cheddar Cheese Thyme Soft Breadsticks, they can be enjoyed at larger gatherings and are ideal for adding to a buffet table.

To make ahead, bake as usual, cool and freeze for up to two weeks. Remove from the freezer when needed, place on a baking tray in a warm oven for 10 minutes to defrost and warm through.

If you have enjoyed this recipe for Cheddar Cheese Thyme Soft Breadsticks you may also like these:

Seeded Multigrain Baguettes

FF Cheddar Cheese Thyme Soft Breadsticks
Seeded Multigrain Baguettes

Baked Cheese Olive Ciabatta Bread

FF Cheddar Cheese Thyme Soft Breadsticks
Baked Cheese Olive Ciabatta Bread

Cheddar Sun Dried Tomato Scones

FF Cheddar Cheese Thyme Soft Breadsticks
Cheddar Sun Dried Tomato Scones

Creating recipes using ingredients that compliment and enhance each other is at the heart of Feasting is Fun. As well as encouraging people to share their bakes. Baking extra to give away, to an elderly neighbour or new family, is easy. Especially when you are in the kitchen already, whipping up a batch of breadsticks, cookies or cupcakes.

Who will you share with?

Whatever you are making, baking or creating in your kitchens, enable fun preparing your feast.

Sammie xx

No part of this post may be reproduced or duplicated without the written permission of the owner. Please see my Disclosure Policy.


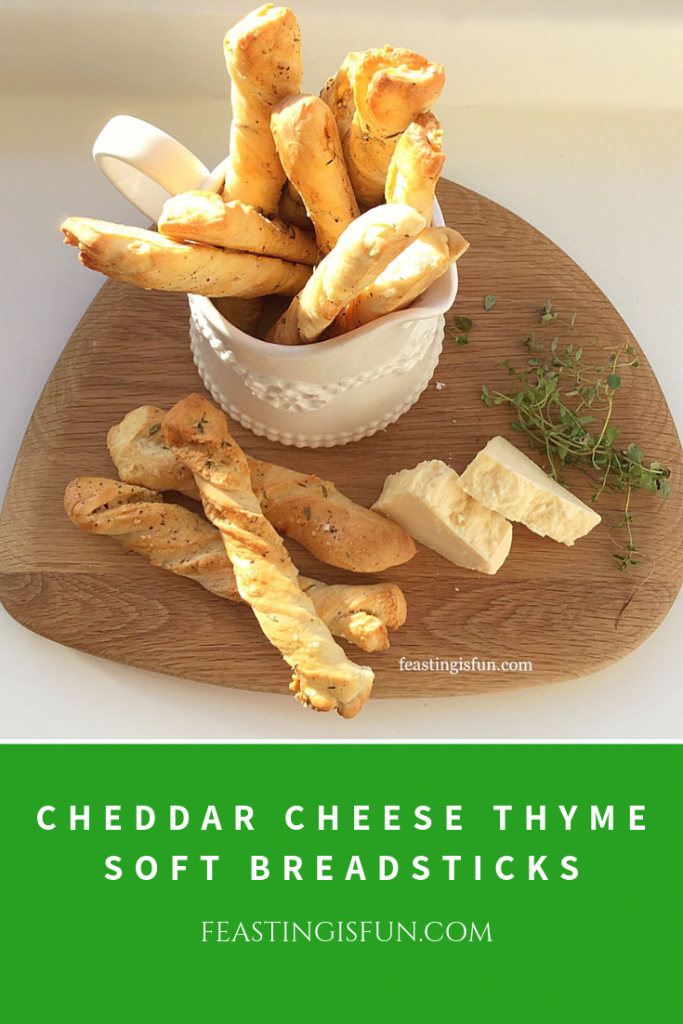
Cheddar and fresh thyme on a wooden board with breadsticks in a cream jug. Sized for Pinterest with descriptive graphics.
Cheddar Cheese Thyme Soft Breadsticks.
Share
Facebooktwitterpinterestlinkedintumblr

Slow Roasted Cider Pork

Share
Facebooktwitterpinterestlinkedintumblr

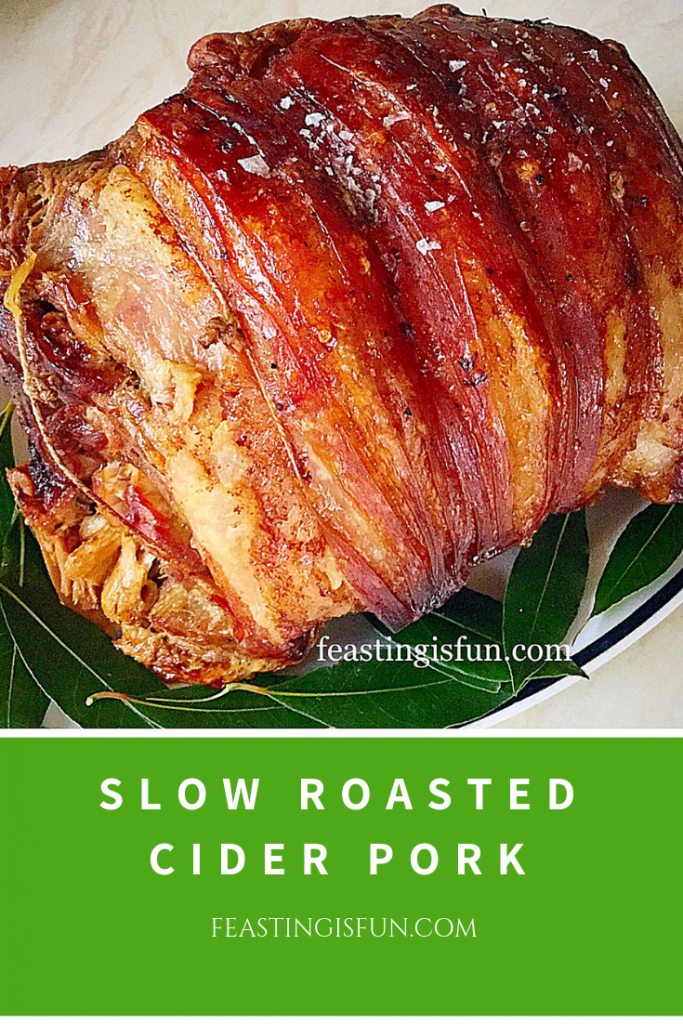
I really enjoy roasting a large joint of meat. Especially as it really feels as though I am preparing a feast, it also is difficult to over cook the meat. And this Slow Roasted Cider Pork is so easy to cook, with incredible flavour!

FF Slow Roasted Cider Pork

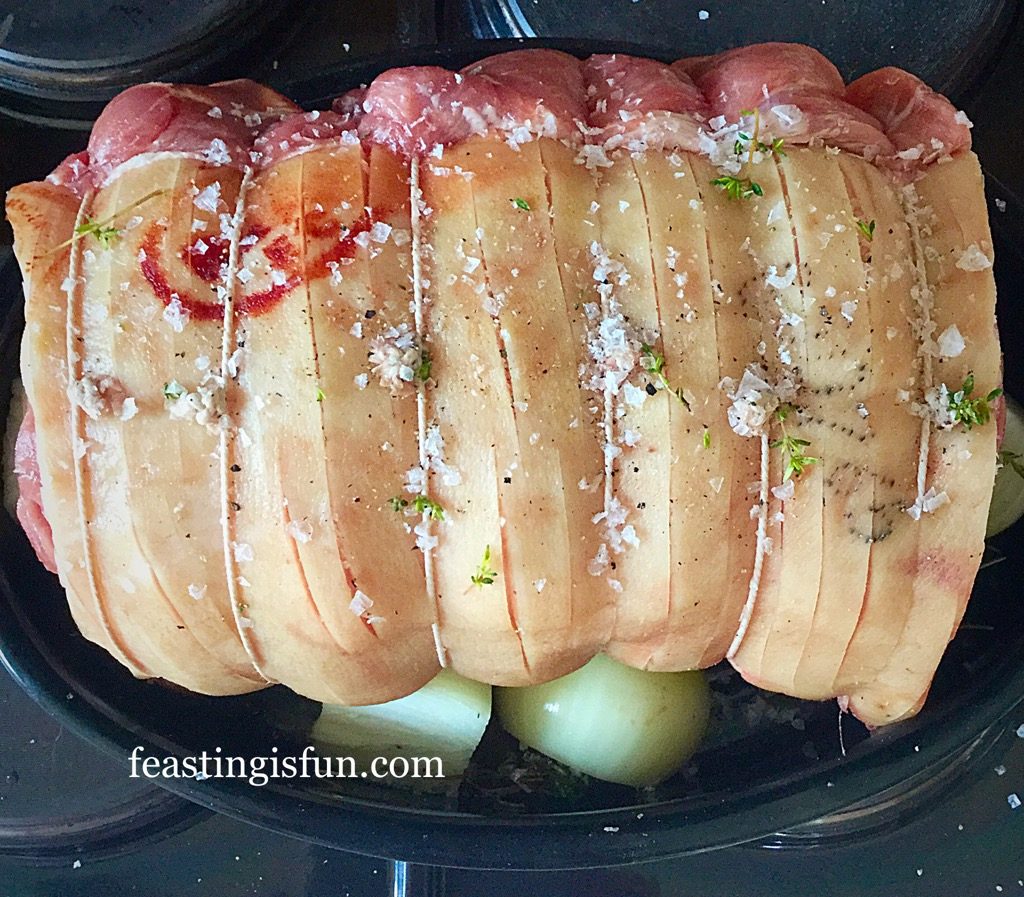
This beautiful, bone in, tied shoulder of Pork came from  Graig Farm . While it weighed 4kg and was a whopper of a joint, it can be used in so many ways.

Cooked on a bed of fresh herbs and onions, with a bottle of Thatcher’s Gold Cider poured under it, the Pork, tightly wrapped in aluminium foil, cooks slowly and steams in the herby, apple cider.

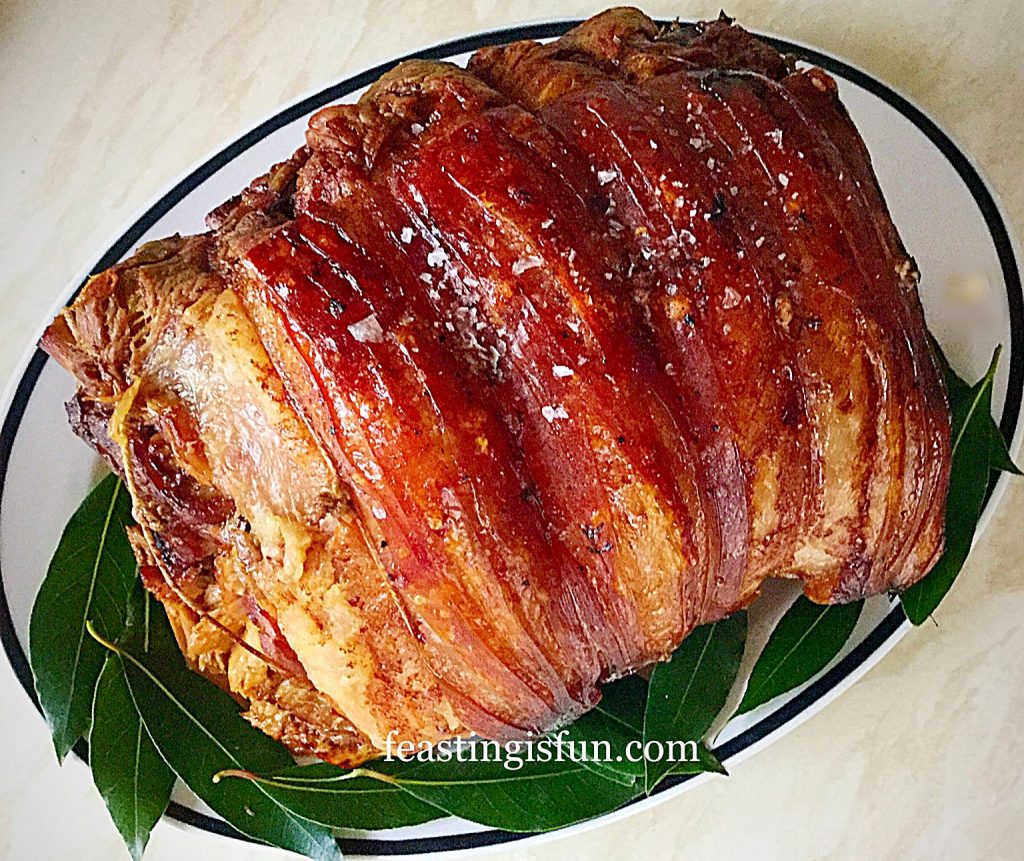
FF Slow Roasted Cider Pork
Slow Roasted Cider Pork such a delicious way to roast pork shoulder.

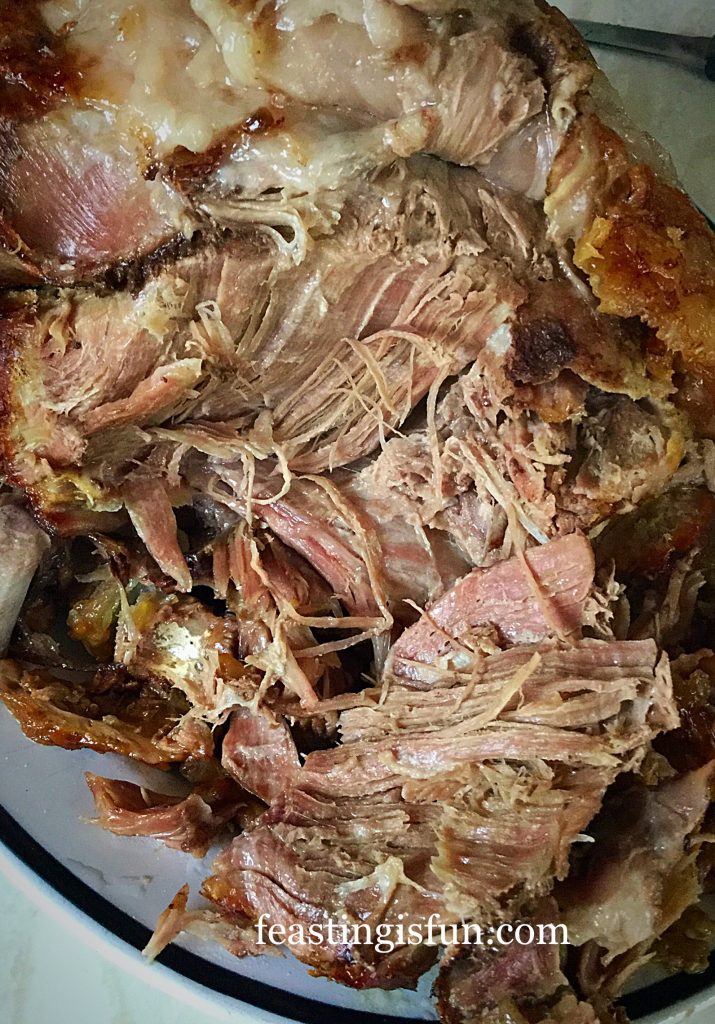
Pork shoulder is used here in this recipe. As the joint comes from the front shoulder of the pig, it needs long, slow cooking, to break down the the muscle. The result is effectively pulled Pork. Don’t expect to carve this joint, as it literally falls apart once cooked.

Oh and have I mentioned how easy it is to cook this Slow Roasted Cider Pork?

Slow Roasted Pork For Sunday Dinner

Also once prepped you pop it in the oven and just let it do it’s gloriously tasty, deliciously melting, cooking. A great dish if you’ve got a busy day ahead.

FF Slow Roasted Cider Pork
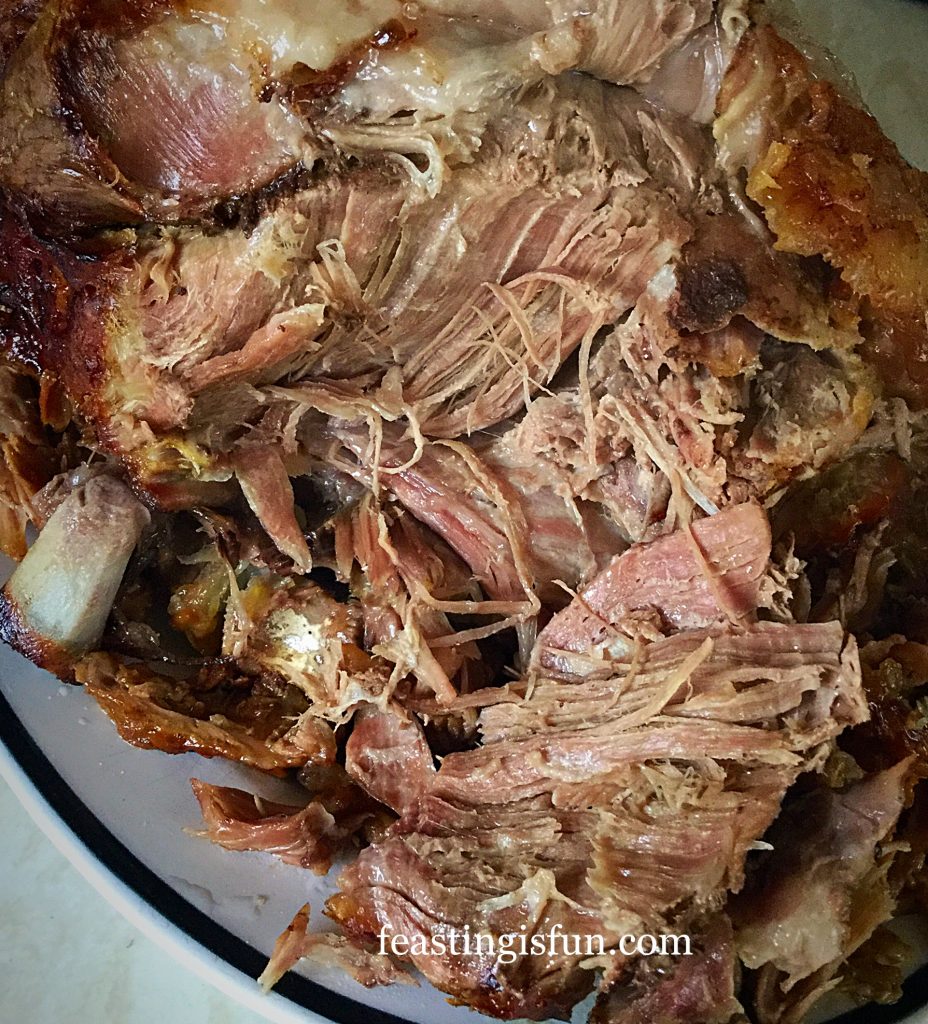
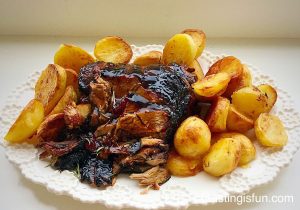
Slow Roasted Cider Pork look how tender this delicious meat is?

The bones literally pulled  clean out from the pork.

From this one joint you can go on to make other dishes in the week – watch out for my Chipotle Pulled Pork Fajita’s coming soon 😉

Some people can’t be bothered with the hassle of cooking a Sunday Roast. For our family it is not only tradition, but also provides leftovers for meals during the week such as my Roast Chicken Noodle Soup.

Slow Roasted Cider Pork can be served with the traditional Sunday sides of roast potatoes and vegetables, or Mashed Potatoes for the ultimate comfort meal. Since there are dozens of ways to serve pulled pork, I intend to add plenty more recipes to this blog!

FF Slow Roasted Cider Pork
Slow Roasted Cider Pork

Feeding a crowd

This one joint would easily feed 15-20 people, depending on how you were serving it. Also the pork I used for this joint was organic. I can honestly say that the flavour is far superior to the pale, mass produced alternative. Economically, this meal made four dinners for a family of 5. With 3 growing teenagers, that counts as 5 adults in my book.

Because this Slow Roasted Cider Pork goes such a long way,  that certainly helps with the economics of buying such a large joint. As I’ve said before we are not a big meat eating family, so the meat we do eat goes further. Take a look at Graig Farm’s website, there is 10% off for new customers and they always have special offers on. They are a family run farm who genuinely care for the animals that they rear.

Also, I have been buying meat from them for the last few years and I have never had a bad meal, cooked with their meat.

This is not a sponsored post. I paid fair and square for the Pork Shoulder, I just really like their farming ethos, they are very nice people and their meat is outstanding!

Recipe: Slow Roasted Pork Shoulder

3-4Kg Bone in Pork Shoulder Joint – if cooking a smaller joint reduce the temperature to 120C

Fresh Herbs – I used Bay leaves, Sage, Thyme and Rosemary – woody herbs work best

1 Large Onion – peeled and cut into quarters (or 2 small onions halved)

1 Bottle Cider 500ml I used – Thatcher’s Gold

Sea Salt – I use Maldon

Freshly Ground Black Pepper

Method: Preheat the oven to 200C/180C fan, gas mark 6, 400F

Preparing the pork joint

  • First of all, remove the pork from the fridge 1 hour before cooking. Remove all packaging set on a large plate and pat dry with kitchen roll.
  • In the base of your roasting tin add the fresh herbs and onions quarters.
  • Pour in the bottle of cider.
  • Sit the pork joint on top of the onions and herbs.
  • Sprinkle over freshly ground pepper, rub sea salt and a little fresh thyme into the skin.

FF Slow Roasted Cider PorkSlow Roasted Cider Pork

    I know you can’t see the cider I poured it under the pork after it was placed in the tin!
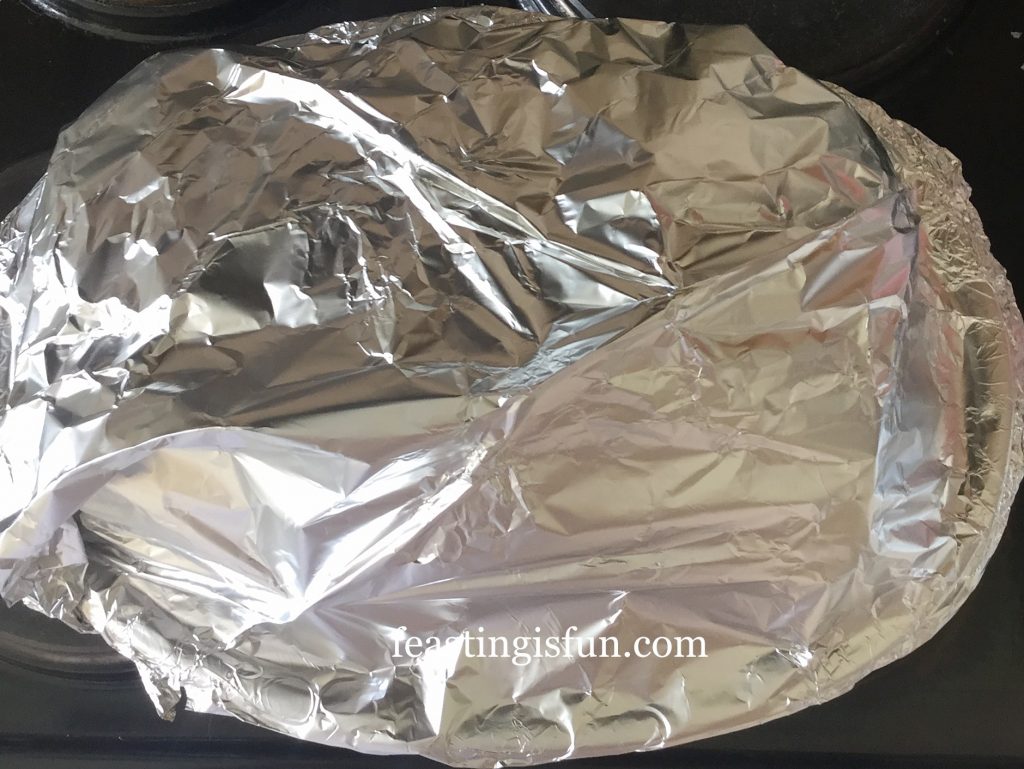
  • Cover the pork with aluminium foil, making sure that it does not touch the actual joint. Crimp the foil tightly around the edge of the tin so that it seals in the pork and cider.
FF Slow Roasted Cider Pork
Slow Roasted Cider Pork ready for it’s low and slow roasting.

Slow roasting the pork

  • Place the roasting tin into the lower part of the oven and allow to cook at the preheated temperature for 30 minutes.
  • After 30 minutes has passed reduce the oven temperature to 150C/130C fan, gas mark 2 and cook for a further 6 hours.
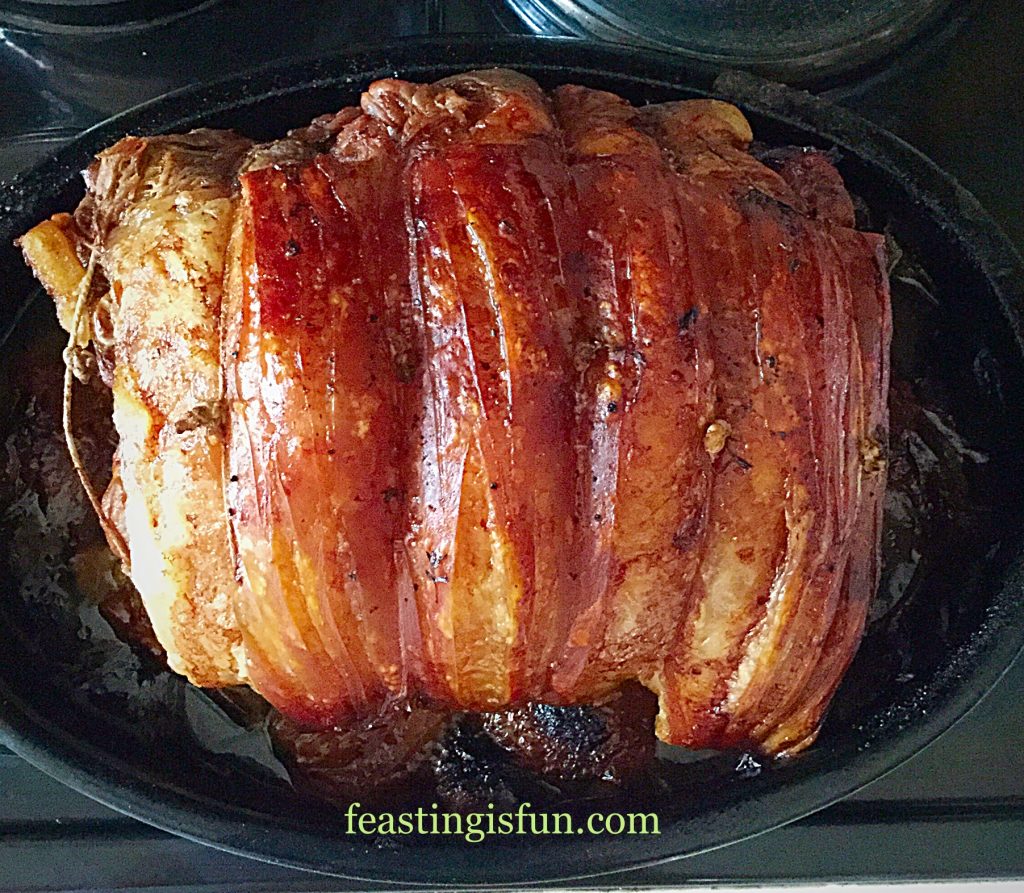
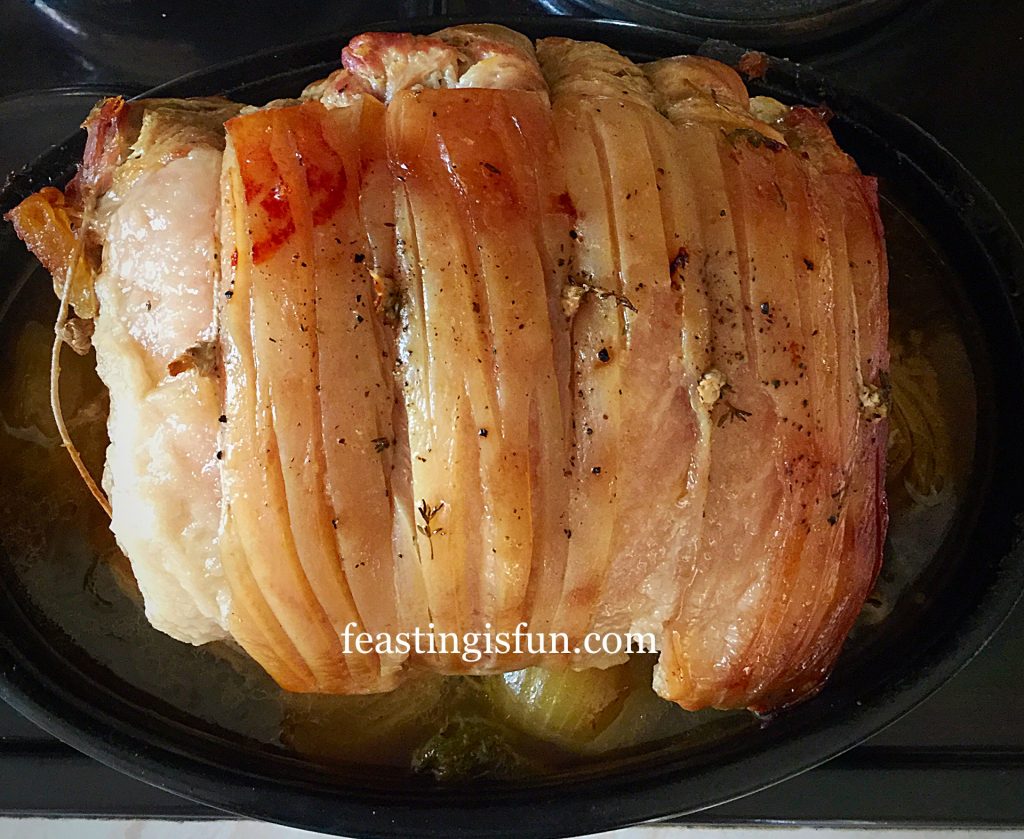
  • You can take the joint out after 3 hours and baste with the herby cider juices as I did. Remember to tightly cover with foil before putting back into the oven.
FF Slow Roasted Cider Pork.
Slow Roasted Cider Pork basted with the cider halfway through cooking.
  • Yet if you want to go out for the day, please don’t worry about the basting. The steamy, herb infused, cider atmosphere in which the pork cooks will still be deliciously full of flavour.
  • After 6 hours has elapsed remove the joint from the oven and check how tender it is. I simply pull at the meat with a fork, if it comes away easily the park is cooked.
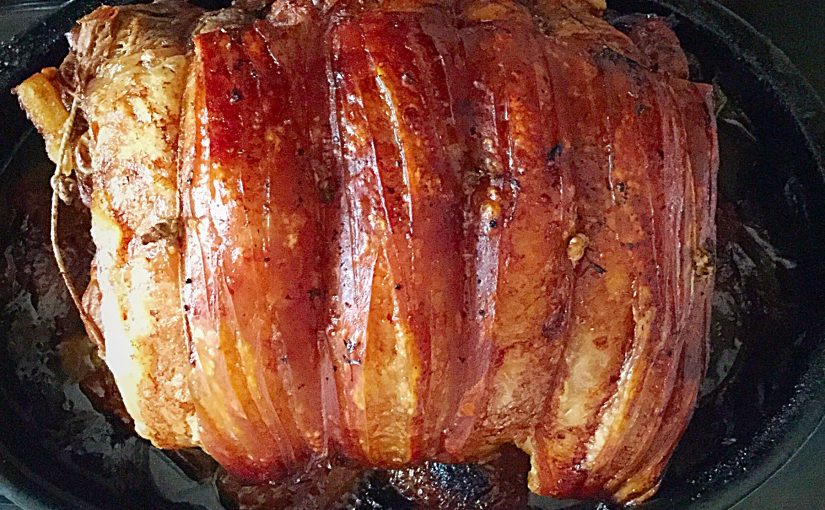
  • Increase the oven temperature up to it’s original preheated level and place the pork back in the oven for 20-30 minutes to crisp up the crackling and create the crusty pork ‘bark’ at each end of the joint.
  • When the skin has crisped up and you have crunchy crackling remove the pork from the oven.
  • Remove the pork joint from the tin and place on a platter or carving board.

Resting and serving the pork

  • Being extra careful as it is very hot, I then snip and remove any string, before using scissors to cut away the crackling, which I then pop back in the oven whilst the roast potatoes cook.
  • Cover the pork with foil and allow to rest for at least 30 minutes.
  • Using two forks pull the pork apart and pull out the bones, they will come out cleanly.
  • FF Slow Roasted Cider PorkYou can see how cleanly the bone came out on the left.

Serve the Slow Roasted Cider Pork with roast potatoes and seasonal vegetables and enjoy the soft, tender meat and crunchy, tasty cracking.

Also, this melt in the mouth pork is perfect to roast a crowd. So invite all your family round, get everyone to pitch in with a dish and enjoy fun, feasting, friendship and laughter together. Since there is nothing like a good meal and great company to help people relax and unwind.

If you have enjoyed this recipe for Slow Roasted Cider Pork you may also like these:

Redcurrant Jelly Glazed Roast Lamb

FF Redburrant Jelly Glazed Roast Lamb
Redcurrant Jelly Glazed Roast Lamb

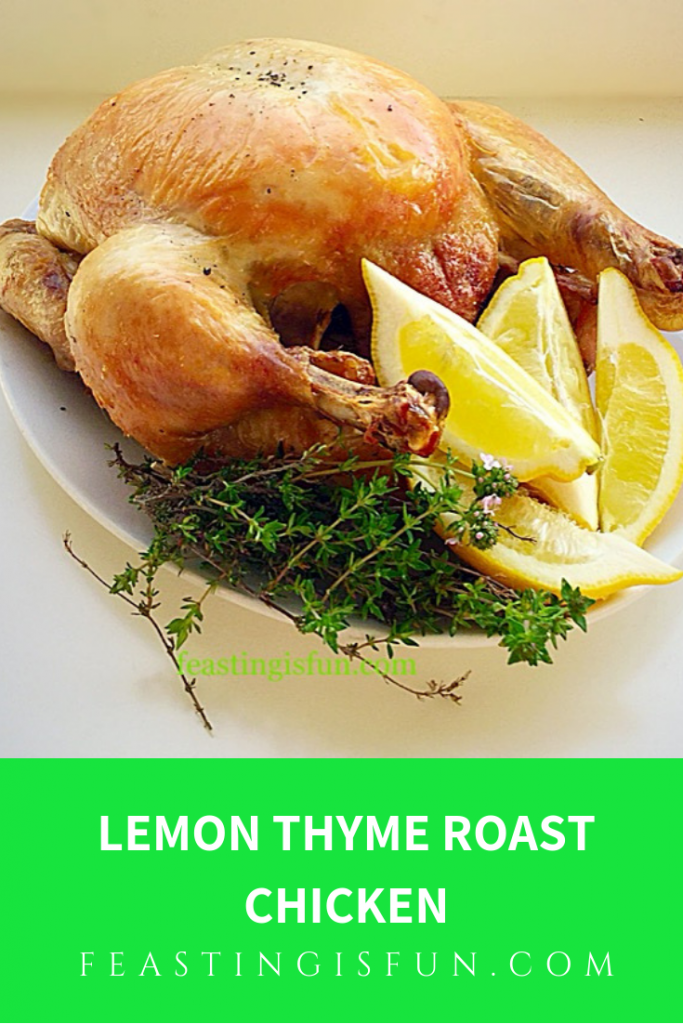
Lemon Thyme Roast Chicken

FF Lemon Thyme Roast Chicken
Lemon Thyme Roast Chicken

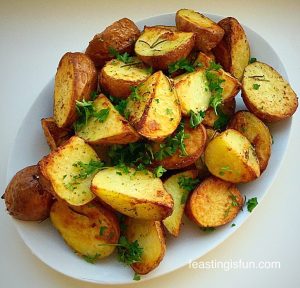
Garlic Rosemary Roast Potatoes

FF Slow Roasted Cider Pork
Garlic Rosemary Roast Potatoes


Do you enjoy cooking a roast for all the family, or is it too much hassle?

Thank you for all your photos and feedback via the comments section, Instagram and Twitter. I really do appreciate you making and baking my recipes and love to see how they turn out, so please keep the pictures and comments coming.

Whatever you are making and baking the Bank Holiday Monday, I hope you have fun creating your delicious feasts and sharing your wonderful bakes with lots of smiles.

Sammie xx

Share
Facebooktwitterpinterestlinkedintumblr

Lemon Thyme Roast Chicken

Share
Facebooktwitterpinterestlinkedintumblr

In every cook book I own and there are a lot of them, roast chicken features as an easy, everyday roast. While I completely agree that it is easy, I want to take my roast to the next level. First of all I start with a great, free range bird, fresh herbs and tangy lemon and what you get is my Lemon Thyme Roast Chicken.

FF Lemon Thyme Roast Chicken

A cook’s view on animal welfare:

Now don’t get me wrong, I love roast chicken, as long as it’s a good bird. By that I mean free range or organic. Not only am I concerned for the welfare of the chicken during its life, the additional antibiotics and fast growing make me shudder. Buying well bred, slow growing birds not only ensures a better quality of life for the chicken, the resulting taste, when cooked, couldn’t be more different to a standard, supermarket chicken.

I have mentioned before our decision, as a family, to eat less meat, but what we do eat must be of good quality. And yes that means paying more. Making the meat go further helps with the cost, but ultimately it is our personal choice. Especially with less additives/antibiotics and a happier lifetime, each chicken we eat is cooked with respect for the bird and I aim to waste nothing.

FF Lemon Thyme Roast Chicken
Lemon Thyme Roast Chicken

Grow your own herbs:

I grow a lot of our own herbs in tubs and in the garden. While rosemary and thyme are probably my most frequently used herbs. Also being hardy I can still pick them in the winter, along with bay and sage. Most supermarkets sell freshly potted herbs at a great price. Next time you are doing your weekly shop, grab a couple of pots, plant them into larger tubs, or the ground (only plant mint in a pot – it’s a thug in the ground!).

As you can see from the photo above, my thyme is just starting to flower. Pretty, tiny pink flowers that are fine to leave on the stalks and add extra interest when used as a garnish.

Roast Chicken – start with the right bird:

So let me encourage you to buy, or should I say invest in a slower growing free range/organic bird and a pot of fresh herbs. I buy all of our meet from Graig Farm in Wales and have done so for the last few years. Chicken used for this recipe came from them and the taste was noticeably better than a mass produced, supermarket bird. The only way you’ll know is by tasting the roasted chicken.

With free delivery on all orders over £100 and a new customer discount, it is well worth taking at look at their website here. I generally buy our meat in bulk and then fill the freezer. Since I find buying larger joints of meat works out more economical and bigger cuts of meat, especially on the bone, taste so much better. I realise there are 5 of us in our house, so let me reassure you that they sell a wide range of meats, in different cuts and sizes. Also if there’s something you’d like and they don’t list it, give them a ring. Especially as Graig Farm’s customer service is excellent and they always try to accommodate each individual customer’s requests.

Recipe: Make one 2.2kg/5lb Lemon Thyme Roast Chicken, serves 8

2.2kg/5lb Chicken – preferably organic or free range – ours was from Graig Farm

1 Fresh Unwaxed Lemon – scrub in hot water if waxed

Approx 10 Sprigs of Fresh Thyme

1tbsp Olive Oil

Sea salt – I use Maldon and Freshly Ground Pepper to season

Optional – 6 rashers smoked streaky bacon – again preferably organic or free range

Method: Preheat the oven to 200C/180C fan, gas mark 6, 400F

Preparing the chicken for roasting:

  • Remove the chicken from the fridge 1 hour prior to roasting.
  • Take the giblets out of the cavity and pat the outside dry with kitchen roll.
  • Sprinkle a generous pinch of sea salt and freshly ground pepper into the chicken’s cavity.
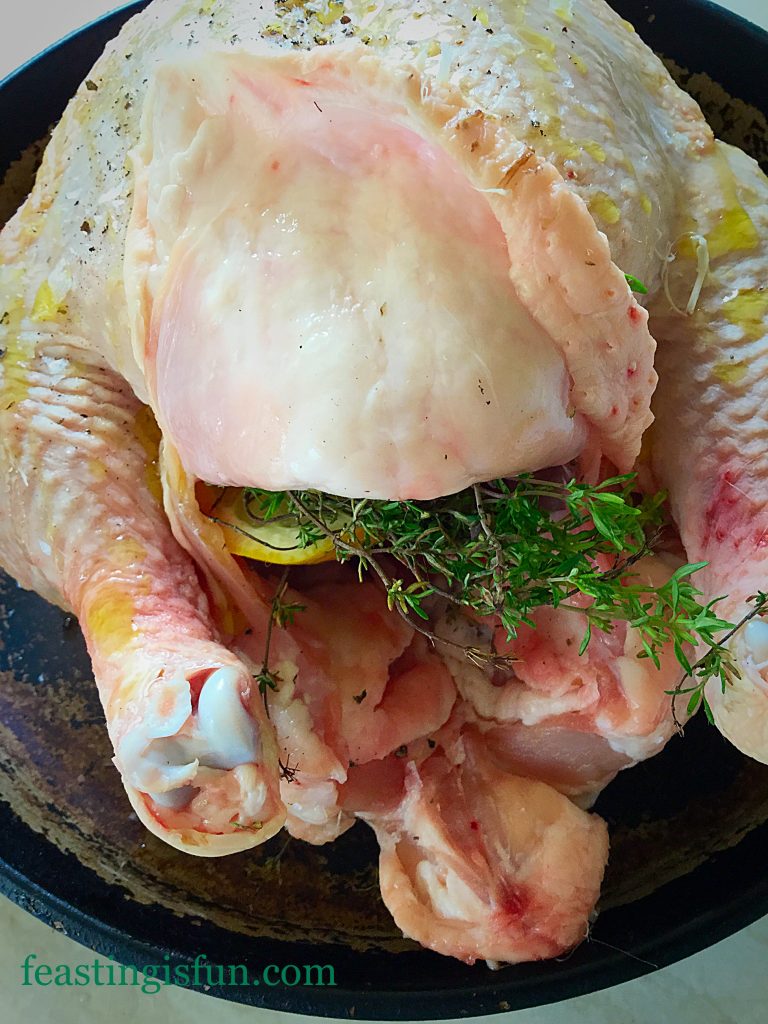
FF Lemon Thyme Roast Chicken
As the chicken cooks the lemon and thyme flavours gently permeate throughout the meat.
  • Cut a lemon in half and insert into the chicken cavity.
  • Push the fresh thyme into the cavity with the lemon.
  • Place the chicken in a roasting dish that is just big enough to hold the bird.
  • Rub 1 tablespoon of olive oil all over the outside of the chicken.
  • Sprinkle sea salt and freshly ground black pepper all over the chicken’s outside.
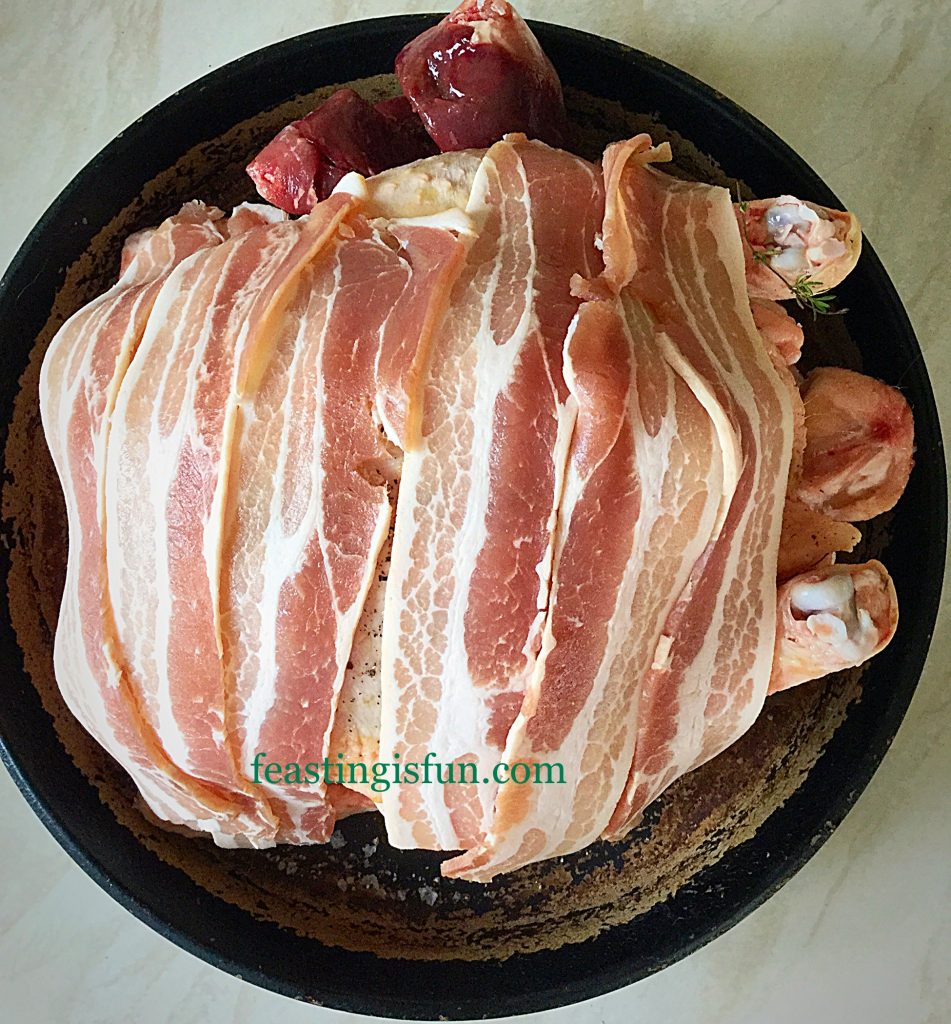
  • Lay strips of streaky bacon across the bird.
  • Also tuck the giblets down the side of the bird. Because when roasted these will add massive flavour to any gravy or stock.
FF Lemon Thyme Roast Chicken
Covered in streaky bacon that will baste the bird as it is cooking adding extra flavour.
  • Next tightly cover the chicken in aluminium foil.

Roasting the chicken:

  • Place the chicken into the middle of the oven and roast for 1 hour 40 minutes.
  • After the roasting time has elapsed remove the chicken from the oven.
  • Remove the aluminium foil and cooked bacon rashers – cook’s perk!
  • Baste with the juices and place back into the oven for a further 20 minutes to crisp up the skin.
  • IMPORTANT NOTE: the cooking times are based on 20 minutes per pound of meat, plus an extra twenty minutes. For a 5lb chicken like this one, the roasting time is 1 hour 40 minutes, plus an extra 20 minutes – adjust your timings to fit the weight of your bird.
  • Remove the chicken from the oven at the end of it’s cooking time.
  • Press a sharp knife into the thickest part of the chicken’s thigh. The chicken is cooked if the juices are clear. If there is ANY hint of pink pop the chicken back into the oven and retest after 15 minutes.
  • As soon as the chicken cooked remove from it’s roasting tin and place on a board or serving platter. Use the leftover juices in the tin to make a lemon and thyme flavoured gravy.
  • Cover the chicken loosely with aluminium foil and allow to rest for 20 minutes (or up to an hour).
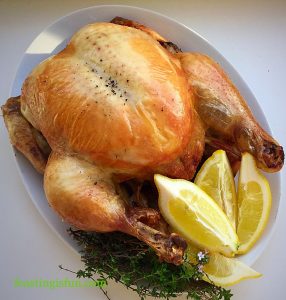
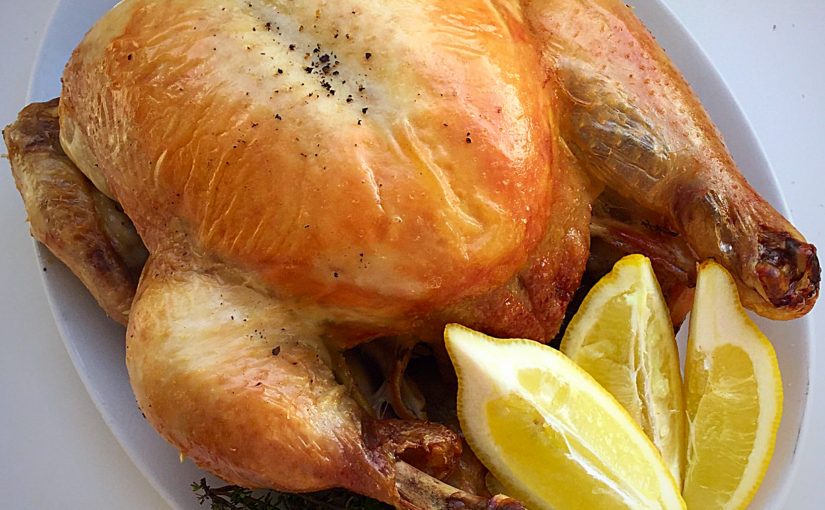
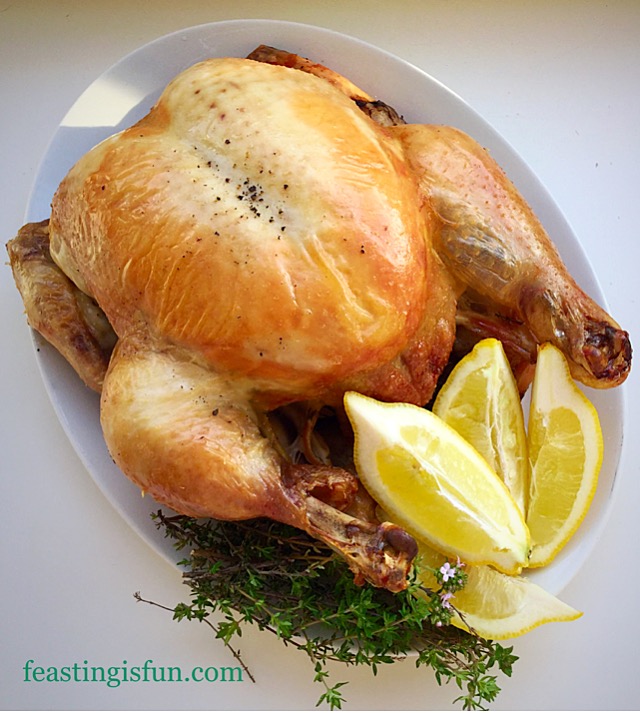
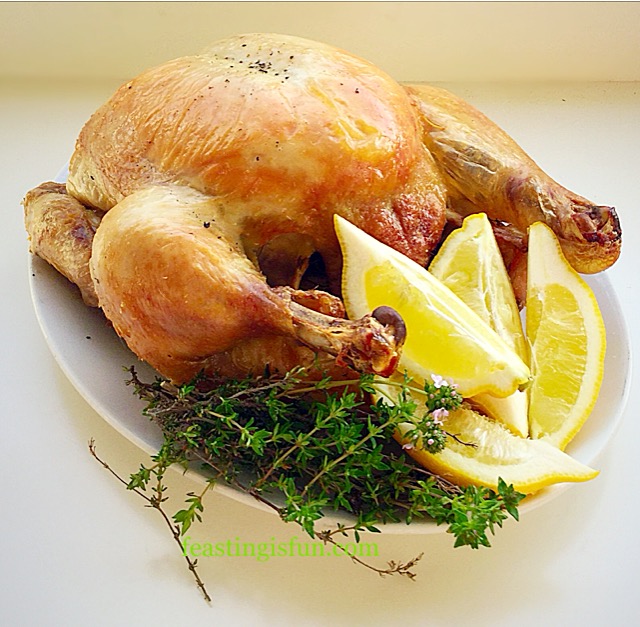
FF Lemon Thyme Roast Chicken with fresh herbs and lemon
Lemon Thyme Roast Chicken

Serving the Lemon Thyme Roast Chicken:

Serve the Lemon Thyme Roast Chicken with traditional roast potatoes and seasonal vegetables, or in the summer with hunks of good, homemade fresh bread like this Farmhouse White Loaf  and a crisp green salad.

A delicious twist on a favourite roast, this Lemon Thyme Roast Chicken will awaken your taste buds and leave you wanting more!

If you’ve enjoyed the recipe for this Lemon Thyme Roast Chicken, here are few few more you might like:

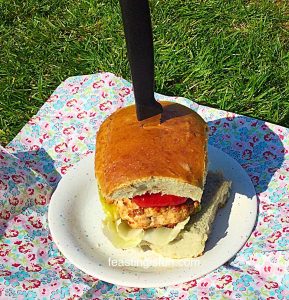
Chicken Herb Burgers

FF Lemon Thyme Roast Chicken
Chicken Herb Burgers ultimate summer barbecue food!

Chilli Lime Chicken Kebabs 

FF Lemon Thyme Roast Chicken
Chilli Lime Chicken Kebabs

Chicken and Four Cheese Lasagne

FF Lemon Thyme Roast Chicken
Chicken and Four Cheese Lasagne delicious comfort food.

Do you love Roast Chicken?

What is your opinion on organic versus standard?

It has been amazing to see so many of you putting up photos on Twitter and Instagram where you have made my recipes. Honestly I cannot express the gratitude I feel, when you place your trust in me. Ingredients cost money, which is why I test each recipe thoroughly to ensure you have the best possible chance of success when following them.

Seeing your makes and bakes keeps Feasting is Fun at the heart of what this blog is all about. Having fun whilst making and baking in your kitchens and then feasting and sharing with family, friends and neighbours.

That makes me smile!

Sammie xx

This is not a sponsored post. Please see my Disclosure Policy.

Share
Facebooktwitterpinterestlinkedintumblr

Sausage Plait With A Twist

Share
Facebooktwitterpinterestlinkedintumblr

So today I have another super easy, recipe for you, my Sausage Plait With A Twist. What’s the twist? Sun-dried tomatoes and fresh thyme that lift the flavours of this savoury pastry to the next level.

Pinterest sized image of sliced sausage plait with descriptive graphics.


The addition of sundried tomatoes and thyme to pork sausage meat gives this sausage plait a deep savoury flavour. Ideal for a mid week meal, perfect for a buffet and portable for picnics!!

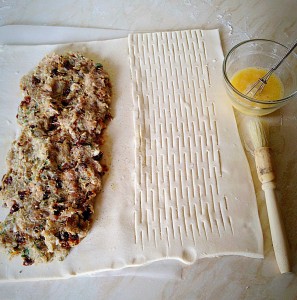
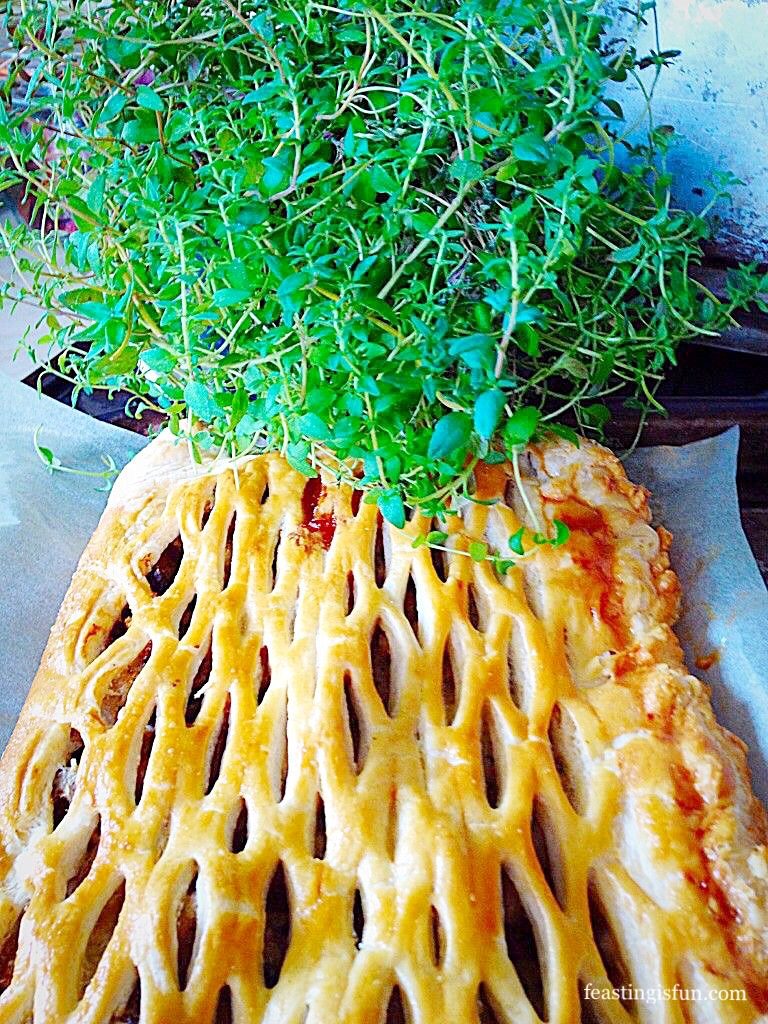
Lattice puff pastry topped savoury sausage meat pastry.
Sausage Plait With A Twist

I have used a special roller to create the lattice pattern on the top of the Sausage Plait. I bought it 20+ years ago. I’ve just had a quick peek on Amazon and they sell them for about £5. Which is probably about what I paid all those years ago!

Pastry Lattice Cutter


So, if you bake a lot of pies and tarts then I would say this is a good buy. Likewise, the diamond effect on the pastry below was achieved by lightly scoring the uncooked pastry, on a slant, one way and then the other. When baked it produced a pretty, diamond effect pattern and I didn’t need a Lattice Roller. And this technique also works for any Sausage Plait.

Diamond effect puff pastry sausage plait.
Diamond effect on the puff pastry is very effective.


So, whichever method you use, your Sausage Plait With A Twist is sure to go down well with everyone who tries it. Served hot or cold, it is completely delicious. Why not bake my  Tomato Thyme Garlic Focaccia Bread? It is the perfect, picnic accompaniment. As is my Tangy Lemon Potato Salad. While these Blueberry Lemon Shortbread Cake Bars are a delicious sweet treat that won’t attract every bug in a 10 mile radius.

Recipe: Sausage Plait With A Twist serves 6

500g/1lb Block Puff Pastry – defrosted if frozen – I use  Just Rol not the all butter version.

500g/1lb Pork Sausage meat – use the best quality sausage meat

15 Sundried Tomatoes (drained if in oil)

1 tbsp Fresh Thyme Leaves – simply strip from the stems, or chop if very new green growth

1/2 tsp Black Pepper – freshly ground

1 Egg – for egg wash

Method : Preheat the oven to 190C/170C fan, gas mark 5, 375F

Making The Filling

  • First of all, chop the sun-dried tomatoes roughly, so there are no big pieces.
  • Place the chopped tomatoes into a bowl and add the thyme, sausage meat and black pepper.
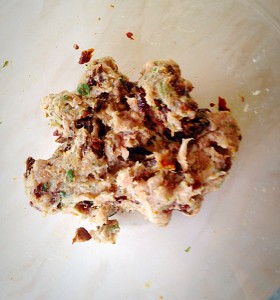
  • Using your hand, squish (technical term) all the ingredients together until well combined.


Dark red pieces of sundried tomato and flecks of green thyme are spread throughout the sausagemeat.
Dark red pieces of sundried tomato and flecks of green thyme are spread throughout the sausage meat.

Assembling And Baking The Sausage Plait

  • On a floured worktop roll out the puff pastry so that it measures 30cm x 35cm (10″x12″). Trim to neaten the edges.
  • Now place the pastry onto a piece of parchment paper that is the same size as your baking sheet. Since this will make transferring the sausage plait MUCH easier. MUCH! I speak from experience!!
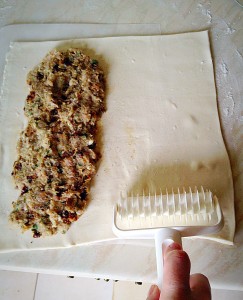
  • Place the sausage meat mixture evenly down one side of the pastry, leaving a 1 inch (2.5cm) border.
Pat the sausage mixture so that it is spread evenly. Then get ready to roll.....
Pat the sausage mixture so that it is spread evenly. Then get ready to roll…..
Place the Lattice Roller just inside the bottom edge of the pastry and roll to the top!
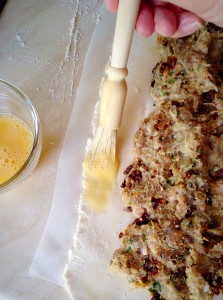
Brush the beaten egg around the border of the sausage mixture.
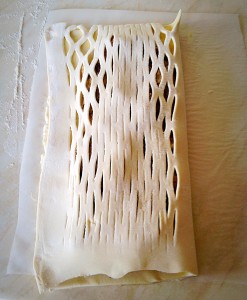
Fold the lattice cut side over the sausage meat, so the edges meet.
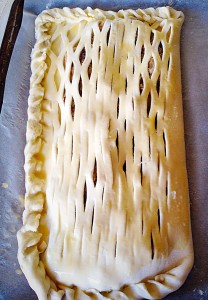
I have crimped the pastry edges by twisting them together, then brushed egg wash over the top of the Sausage Plait.

Finally you can see how much easier it is to assemble the sausage plait on the baking parchment.

  • Place the sausage plait into the centre of a preheated oven and bake for 40 – 50 minutes, until golden brown.
  • The sausage plait is baked when golden in colour and any juices run clear.
  • As soon as it is baked remove from the oven and leave to cool on the baking tray.
Sausage Plait With A Twist

Such an easy dish to make, yet super impressive to look at and eat! It can be served hot or cold and is ideal for picnics and buffets as well as dinner time.

Cool completely and refrigerate for up to 3 days.

If you have enjoyed this recipe for Sausage Plait With A Twist you may also like these:

Spicy Sausage Rolls

Spicy sausage rolls freshly baked and cooling on a rack.
Spicy Sausage Rolls

Smoked Bacon Asparagus Quiche 

Baked quiche on a baking tray.
Smoked Bacon Asparagus Quiche

Red Onion Sausage Plait 

Sausage plait on a baking tray with fresh tomatoes and a jar of red onion marmalade from Hawkshead Relish.
Red Onion Sausage Plait

I really enjoy creating recipes for my family and for you to try on this blog. Especially recipes that are diverse. While this sausage plait is tasty served with salad and new potatoes for dinner, it also is great to slice and pack up for a picnic too. Because, in my opinion, diversity in recipes allows me to have more options for both mealtimes and buffets, when entertaining a crowd of people. Most importantly it’s easy. And we all love an easy recipe, right?

Whatever you are making, baking and creating in your kitchens, have fun preparing and sharing your feast.

Sammie x

No part of this post may be reproduced or duplicated without the written permission of the owner. Please see my Disclosure Policy.

Share
Facebooktwitterpinterestlinkedintumblr